A Green and Pleasant Land – Creating a Gaming Table for Barons War


Recommendations: 76
About the Project
This is my Barons War table creation journey, in which I will present my approach and detail, along the way, terrain painting techniques, table composition and my attempt at modularity. Warning: I am not a competitive player and only care about two things when gaming, having fun and creating a great story. Every thing I say comes from these two priorities.
Related Game: The Barons' War
Related Company: Wargames Atlantic
Related Genre: Historical
Related Contest: TerrainFest 2025
This Project is Active
Stables and Beehives
It became clear that what was now missing from the village was the ability to stable horses and that to produce honey, hence my decision to create a (rather large) stable as well as bee hives and honey processing stations. These can be used in Dark Ages scenarii as well and expand far into history, which could encompass scenarii set as far as Napoleonic wars. As such, these pieces are very versatile and worthy of your adding them to your collection.
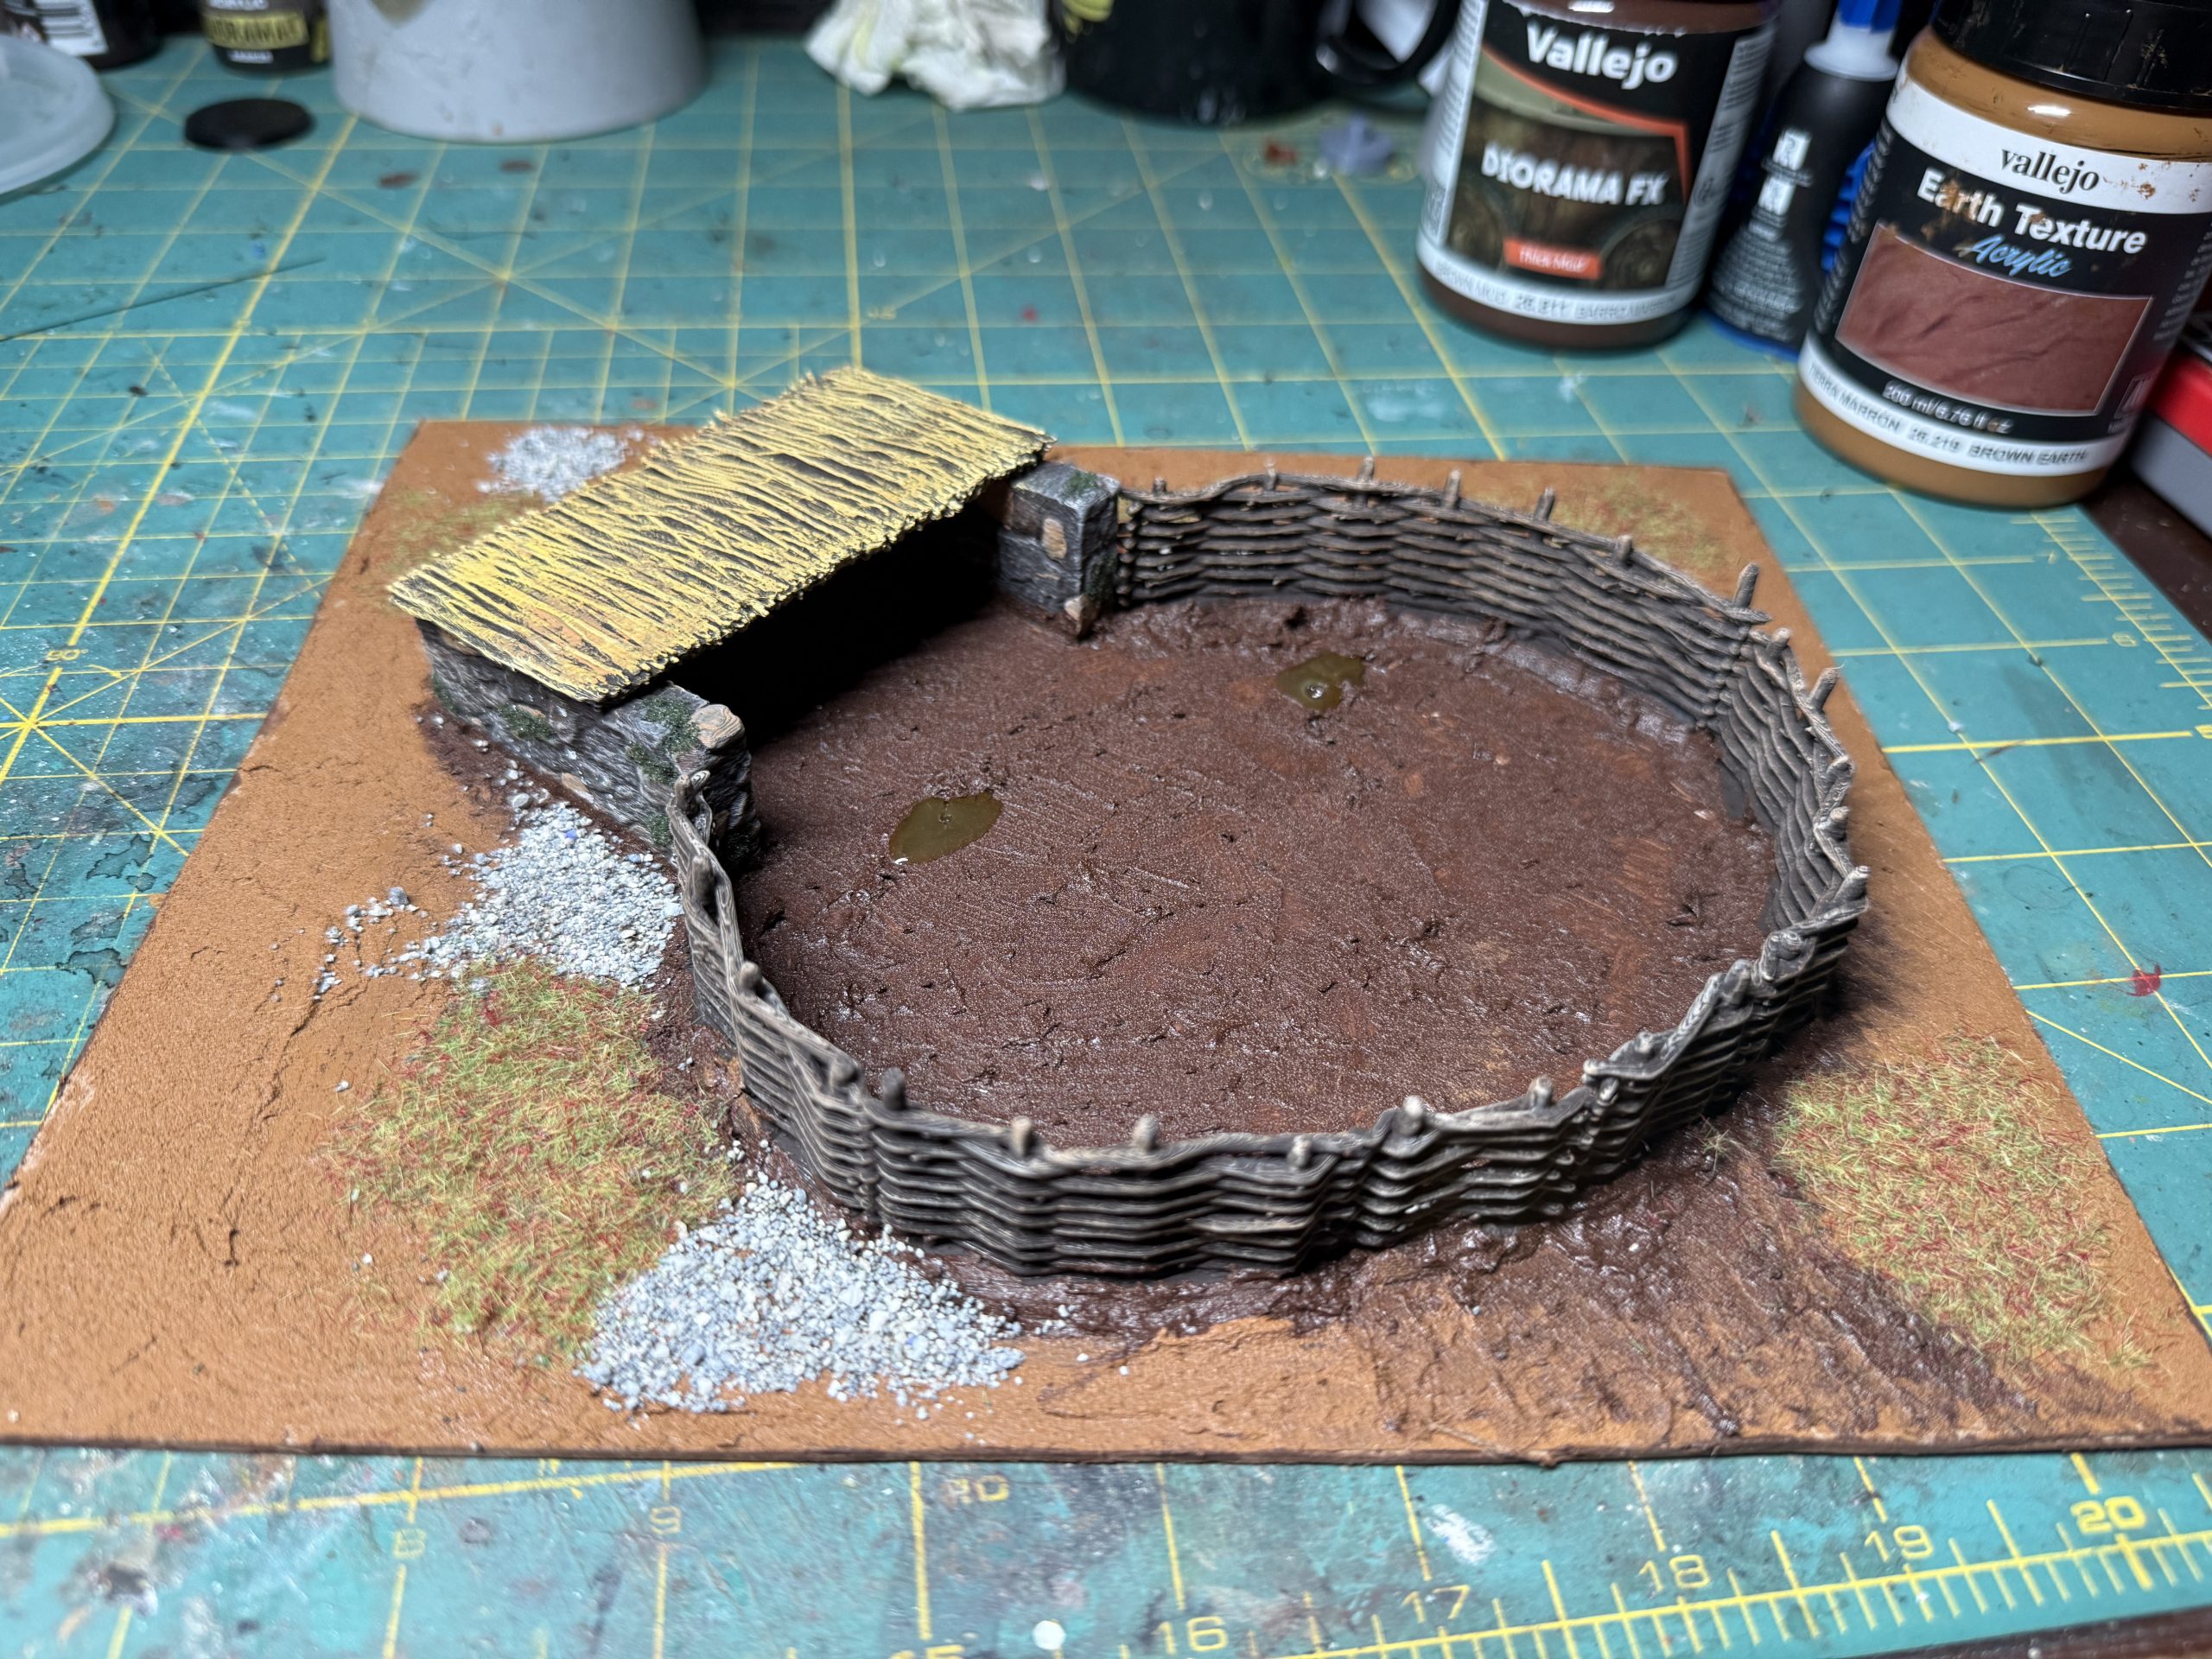
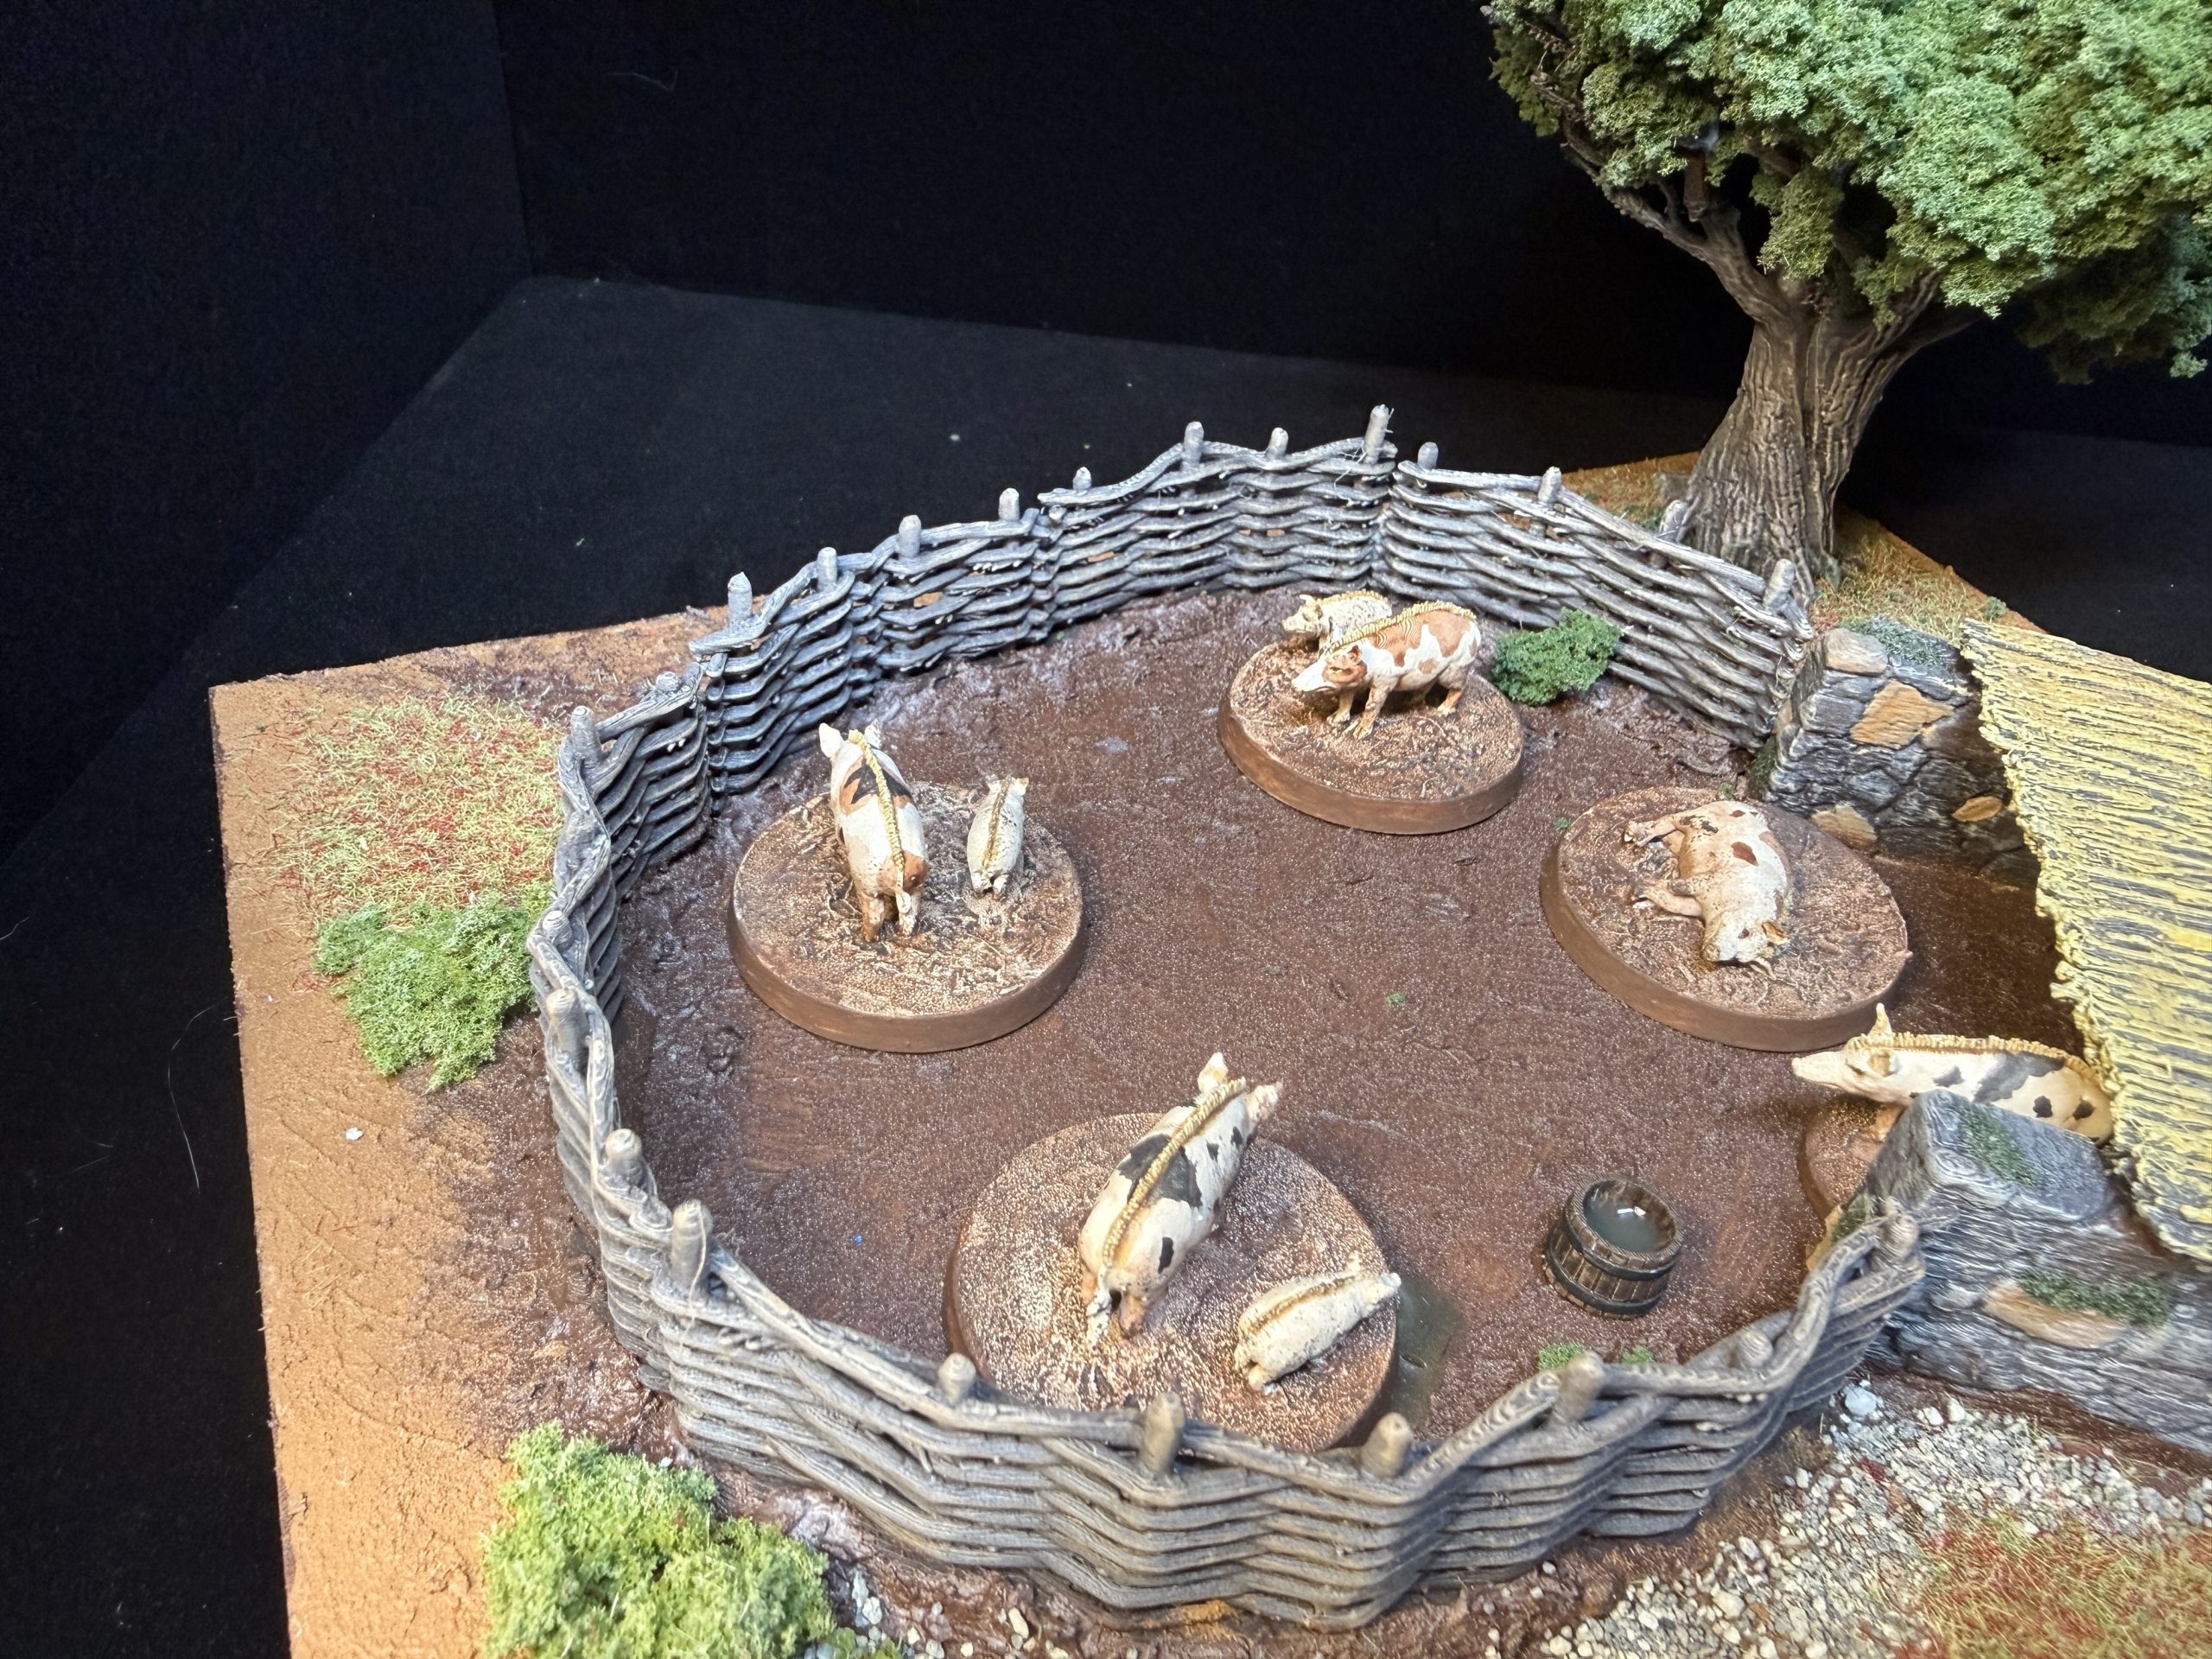
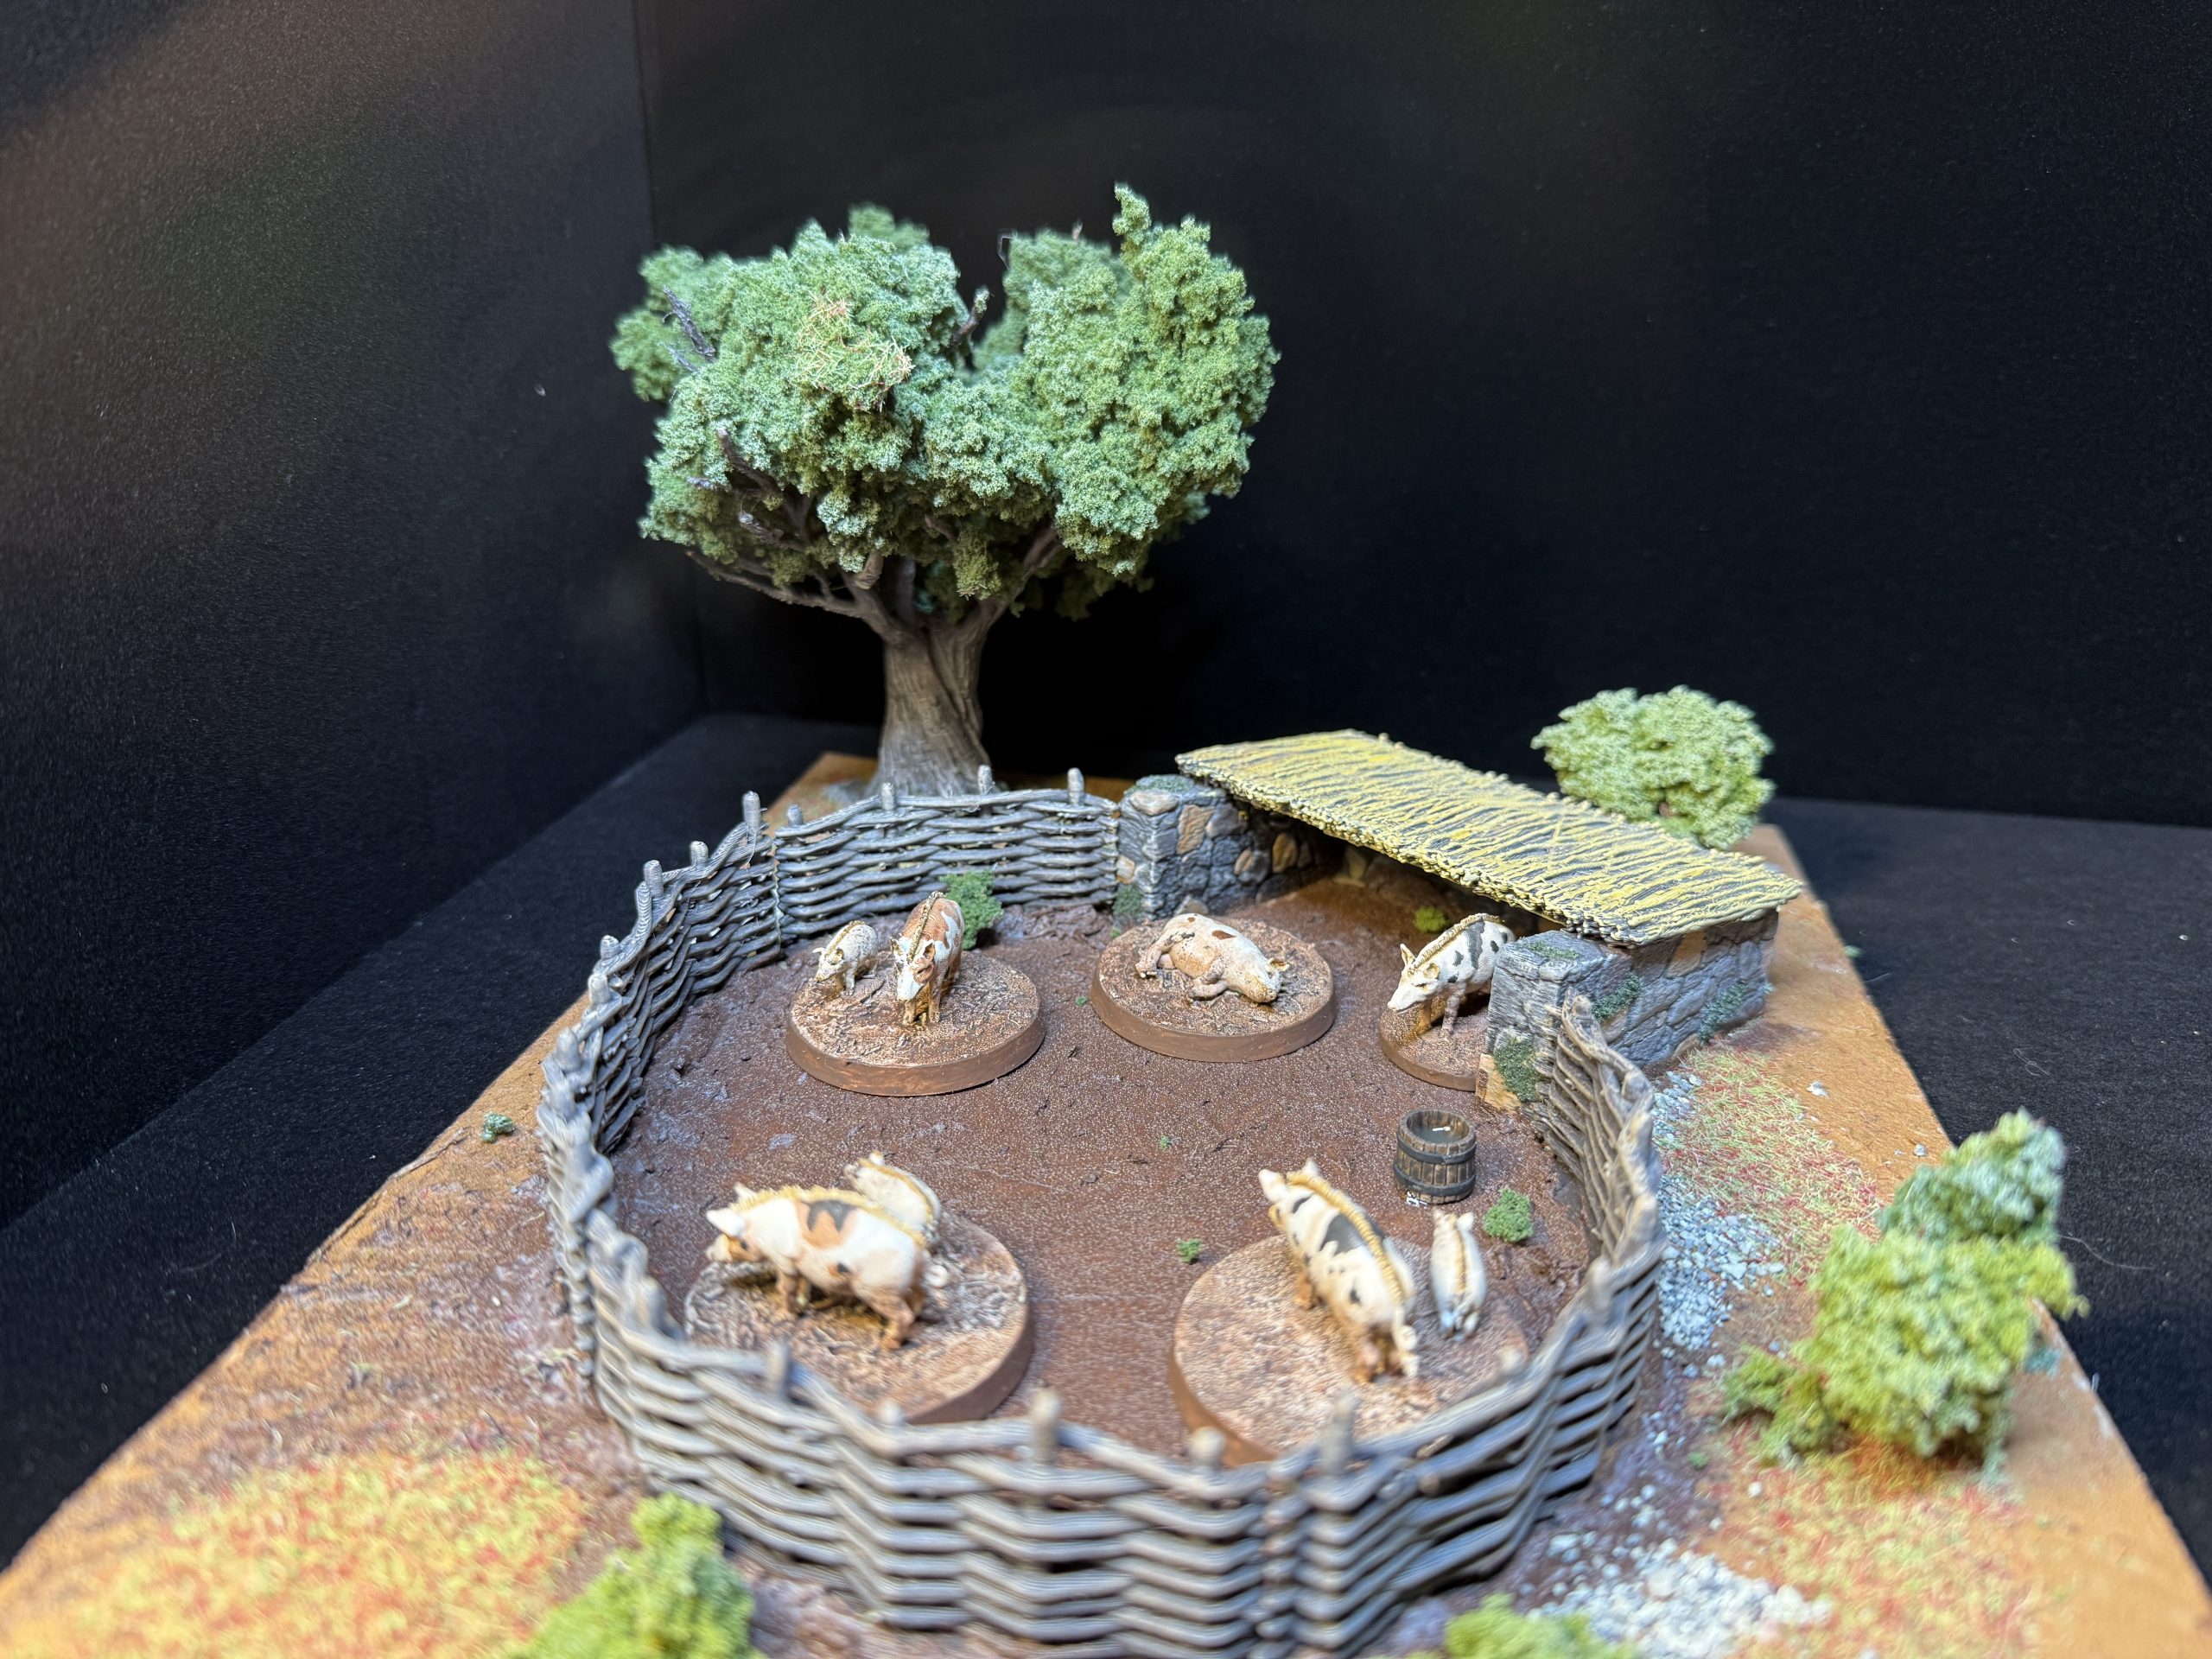
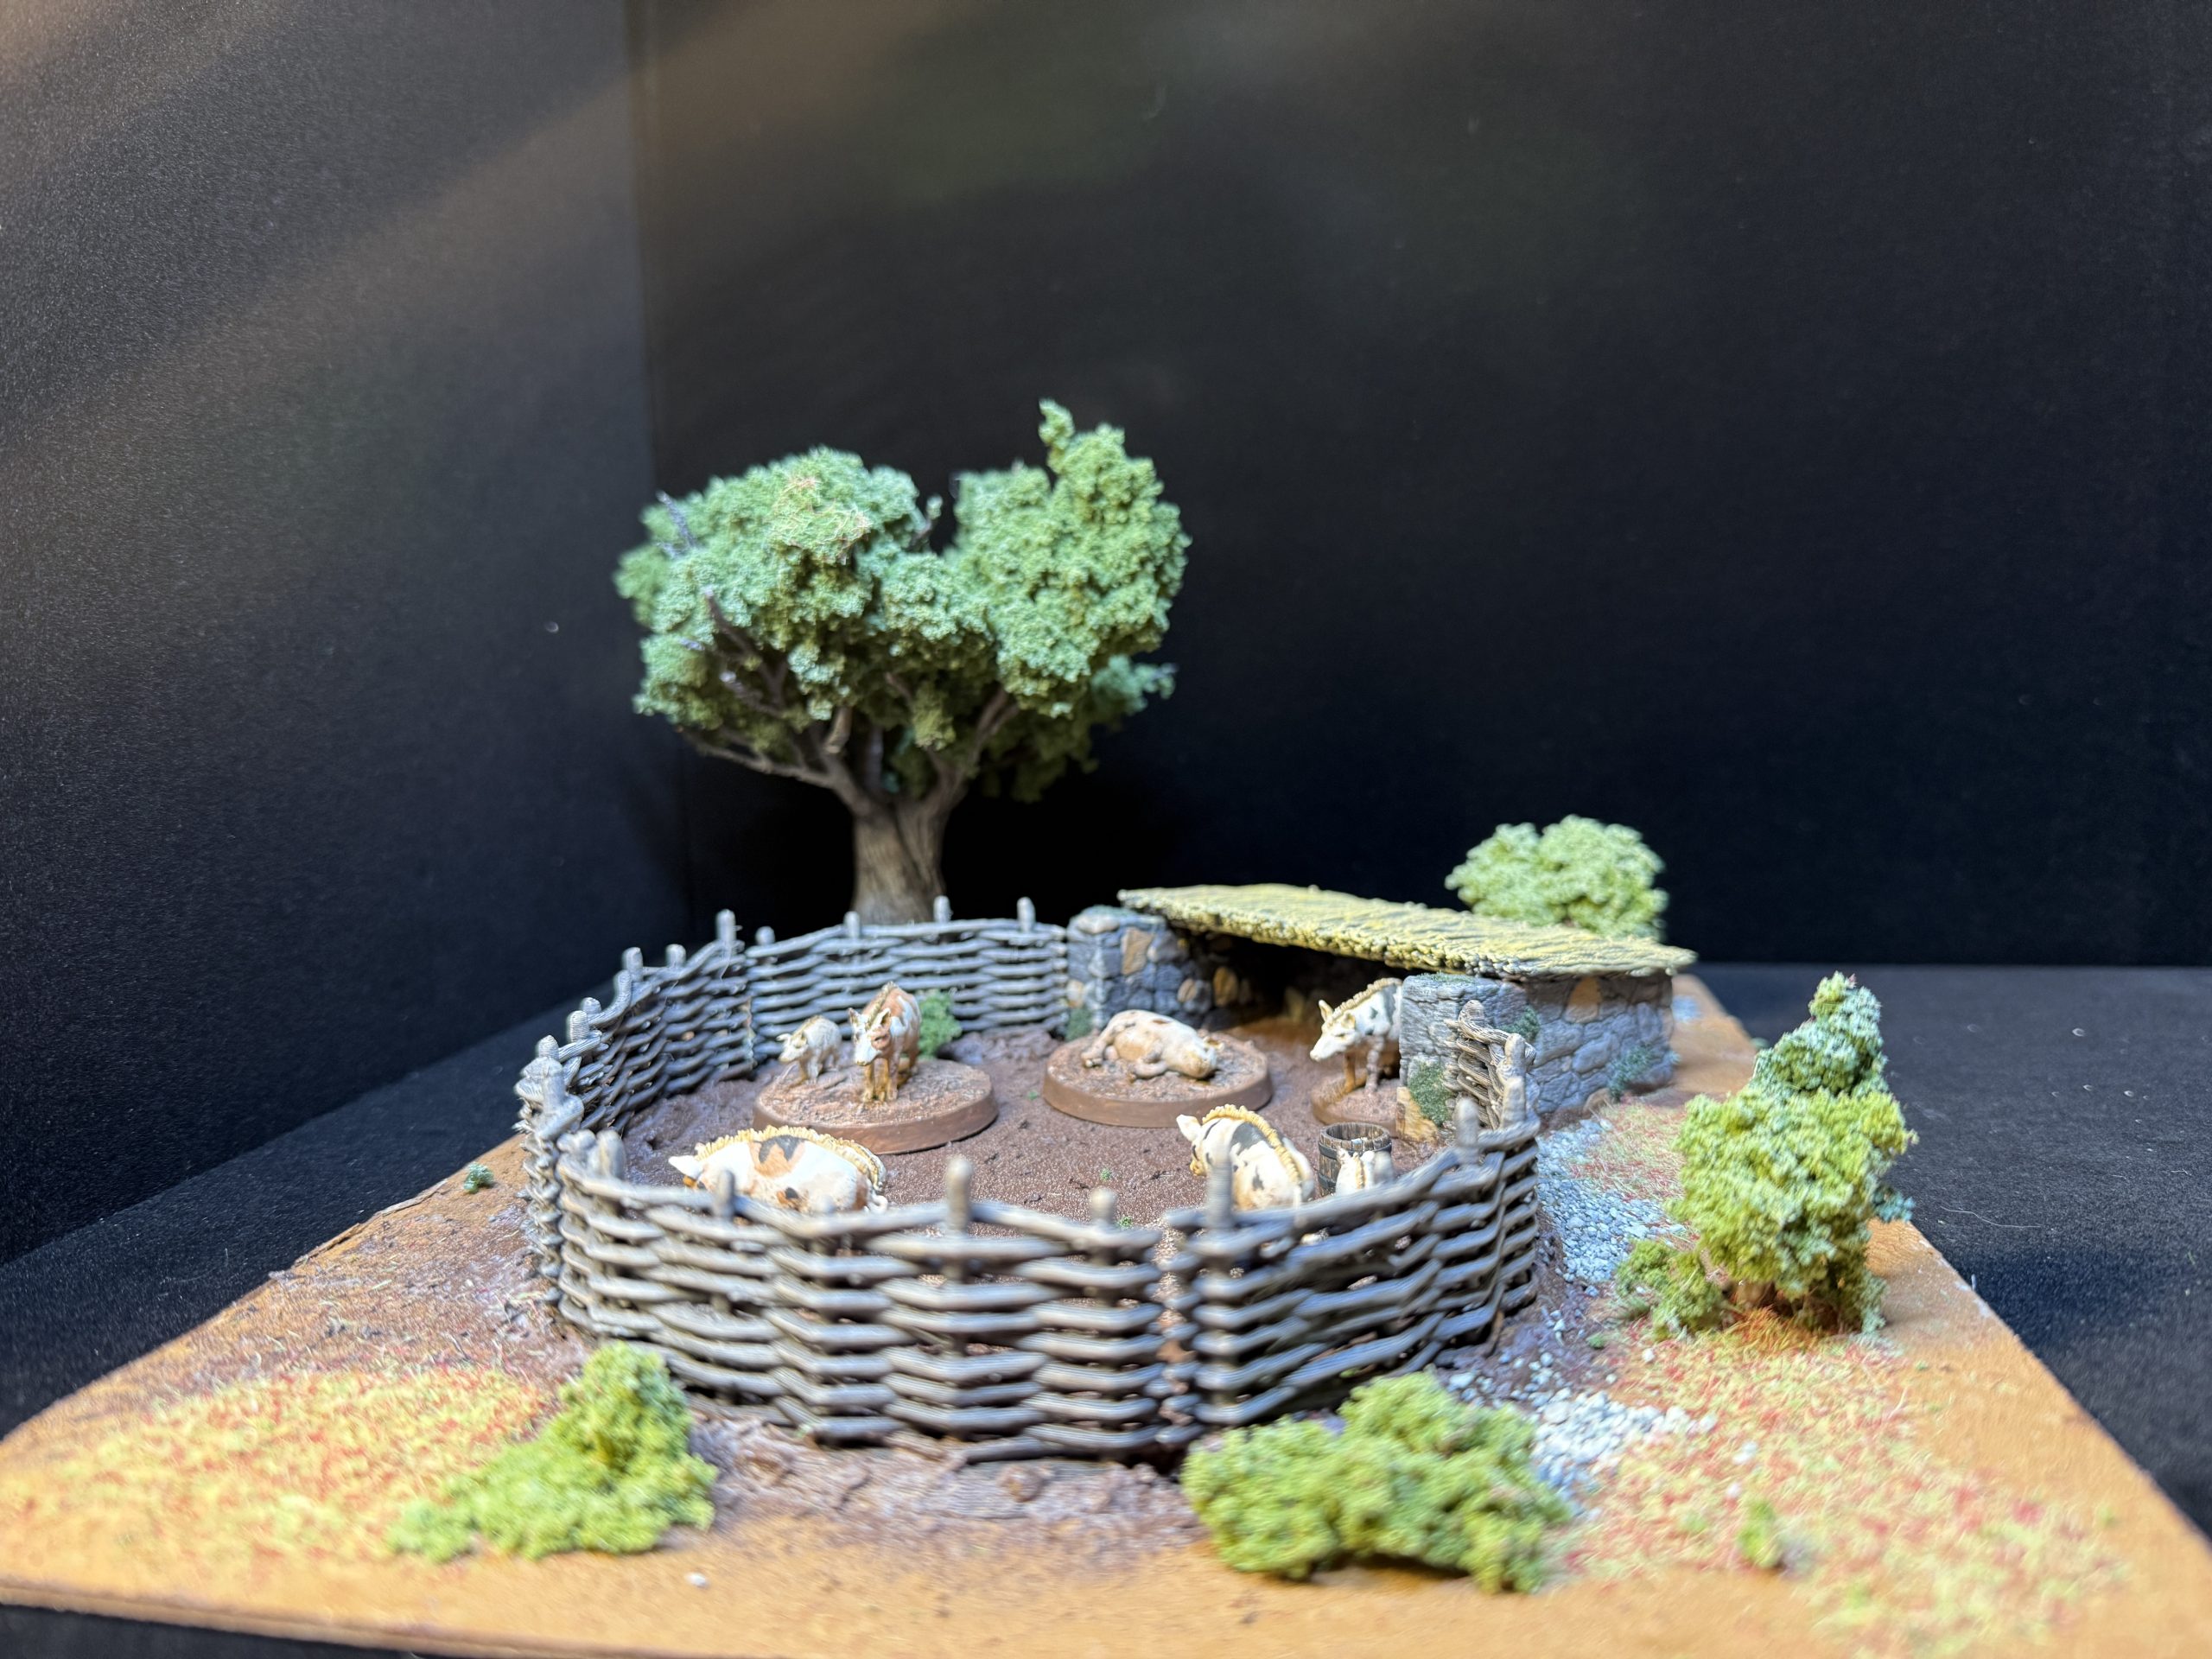
Pig Pen and Chicken Coop
It struck me that a village needs livestock to subsist and I then decided to create an environment in which said livestock could be kept. these elements will also serve as great obje3ctive markers, for Barons War and Pillage.
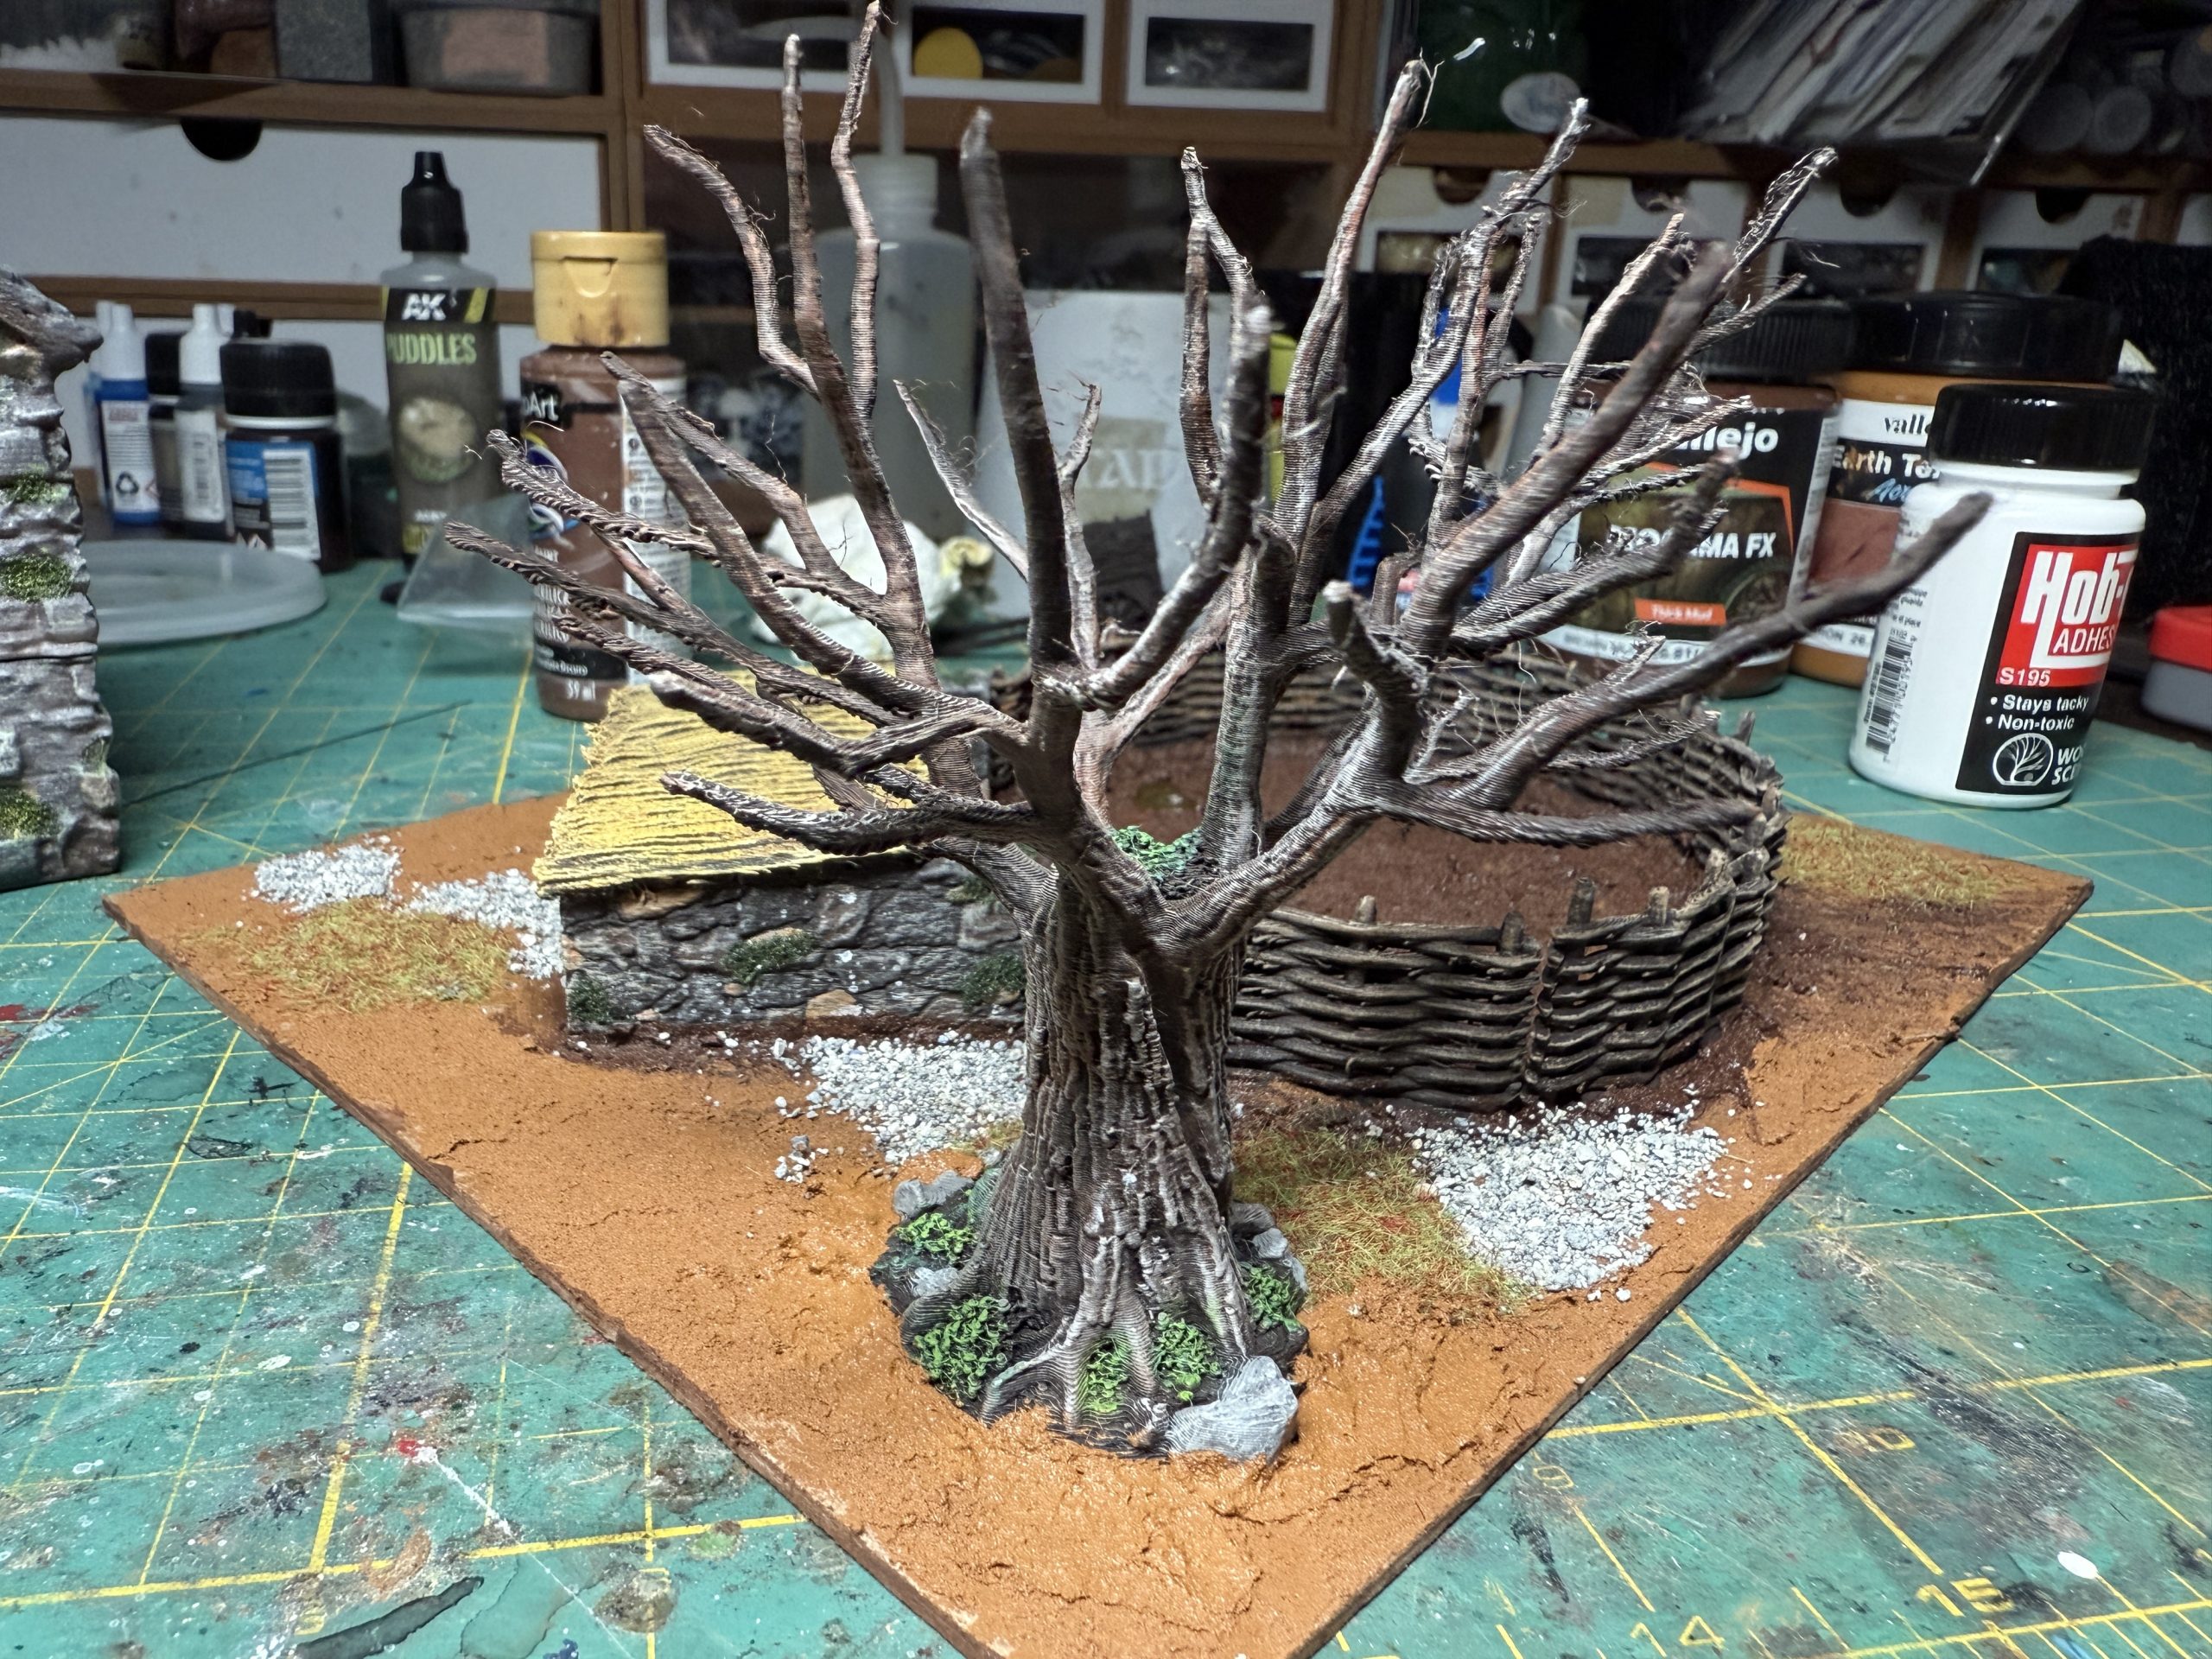
The pig pen was attached to a thin harboard piece which was then textured with Vallejo earth texture for the outside of the pen and Vallejo brown mud texture for the inside of it. The pen and fence are STLs from Vesna – https://www.myminifactory.com/object/3d-print-pig-pen-240863
The pen, roof and fencing were painted using previously detailed methods.
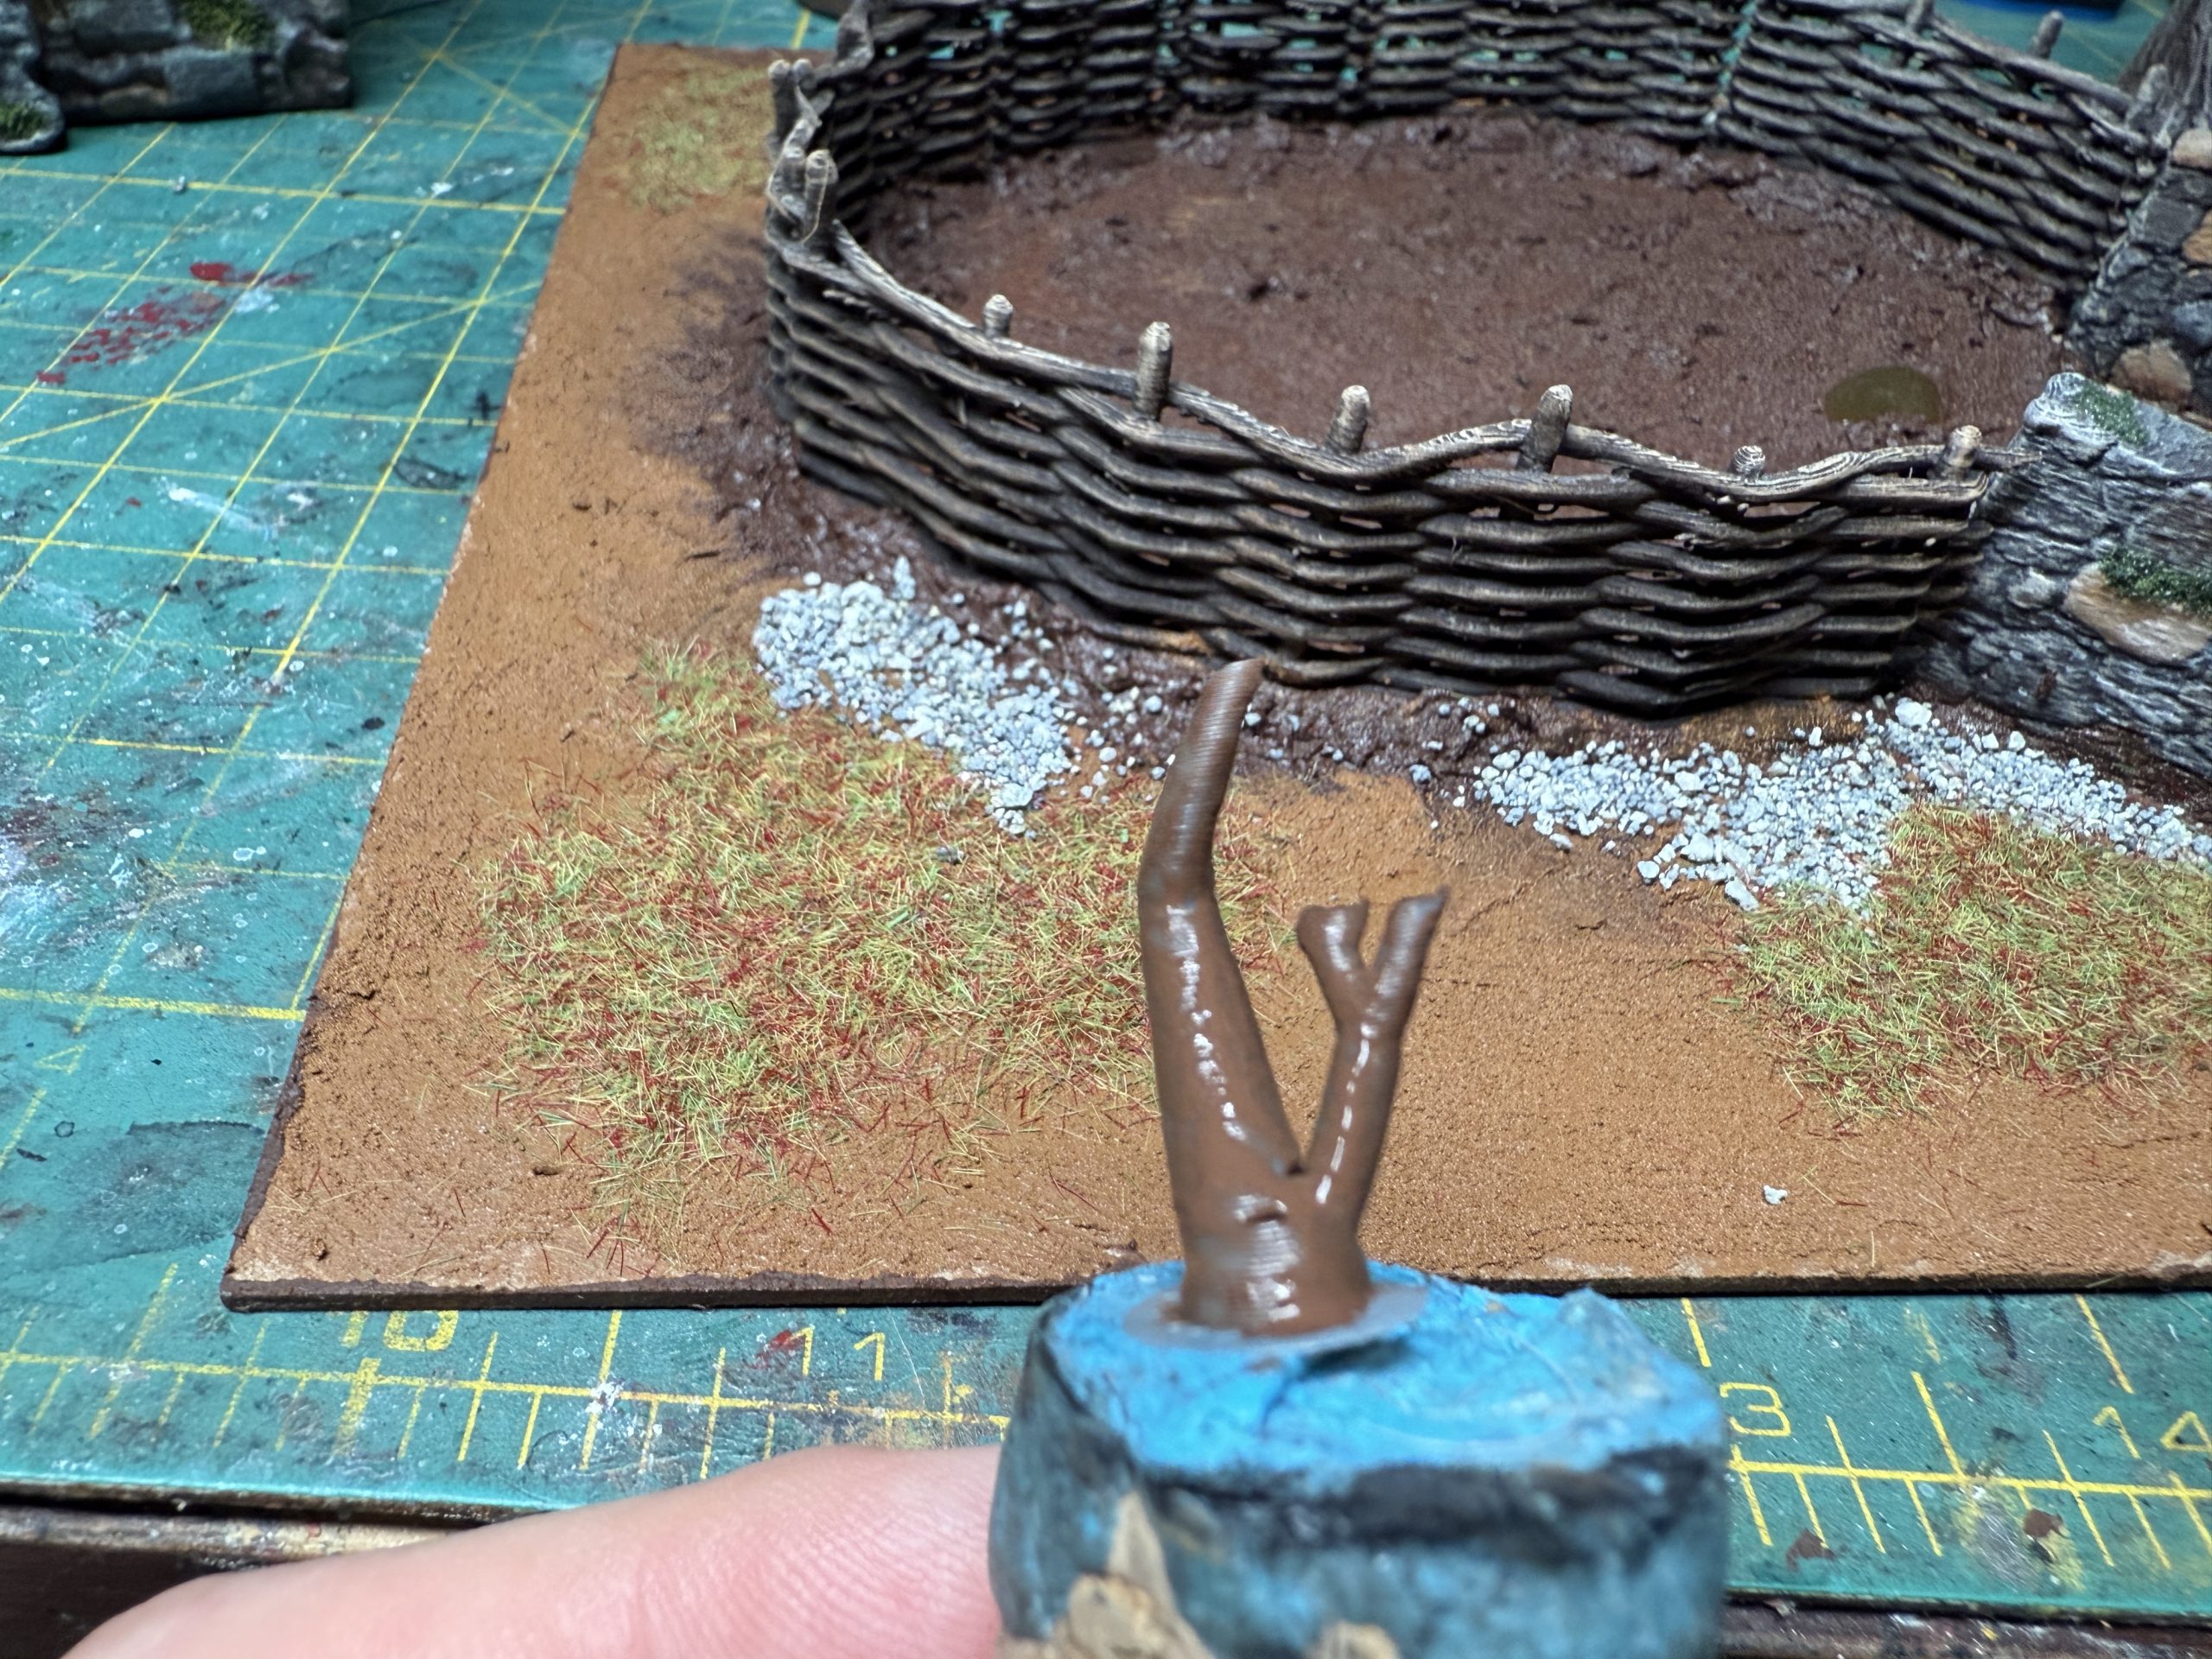
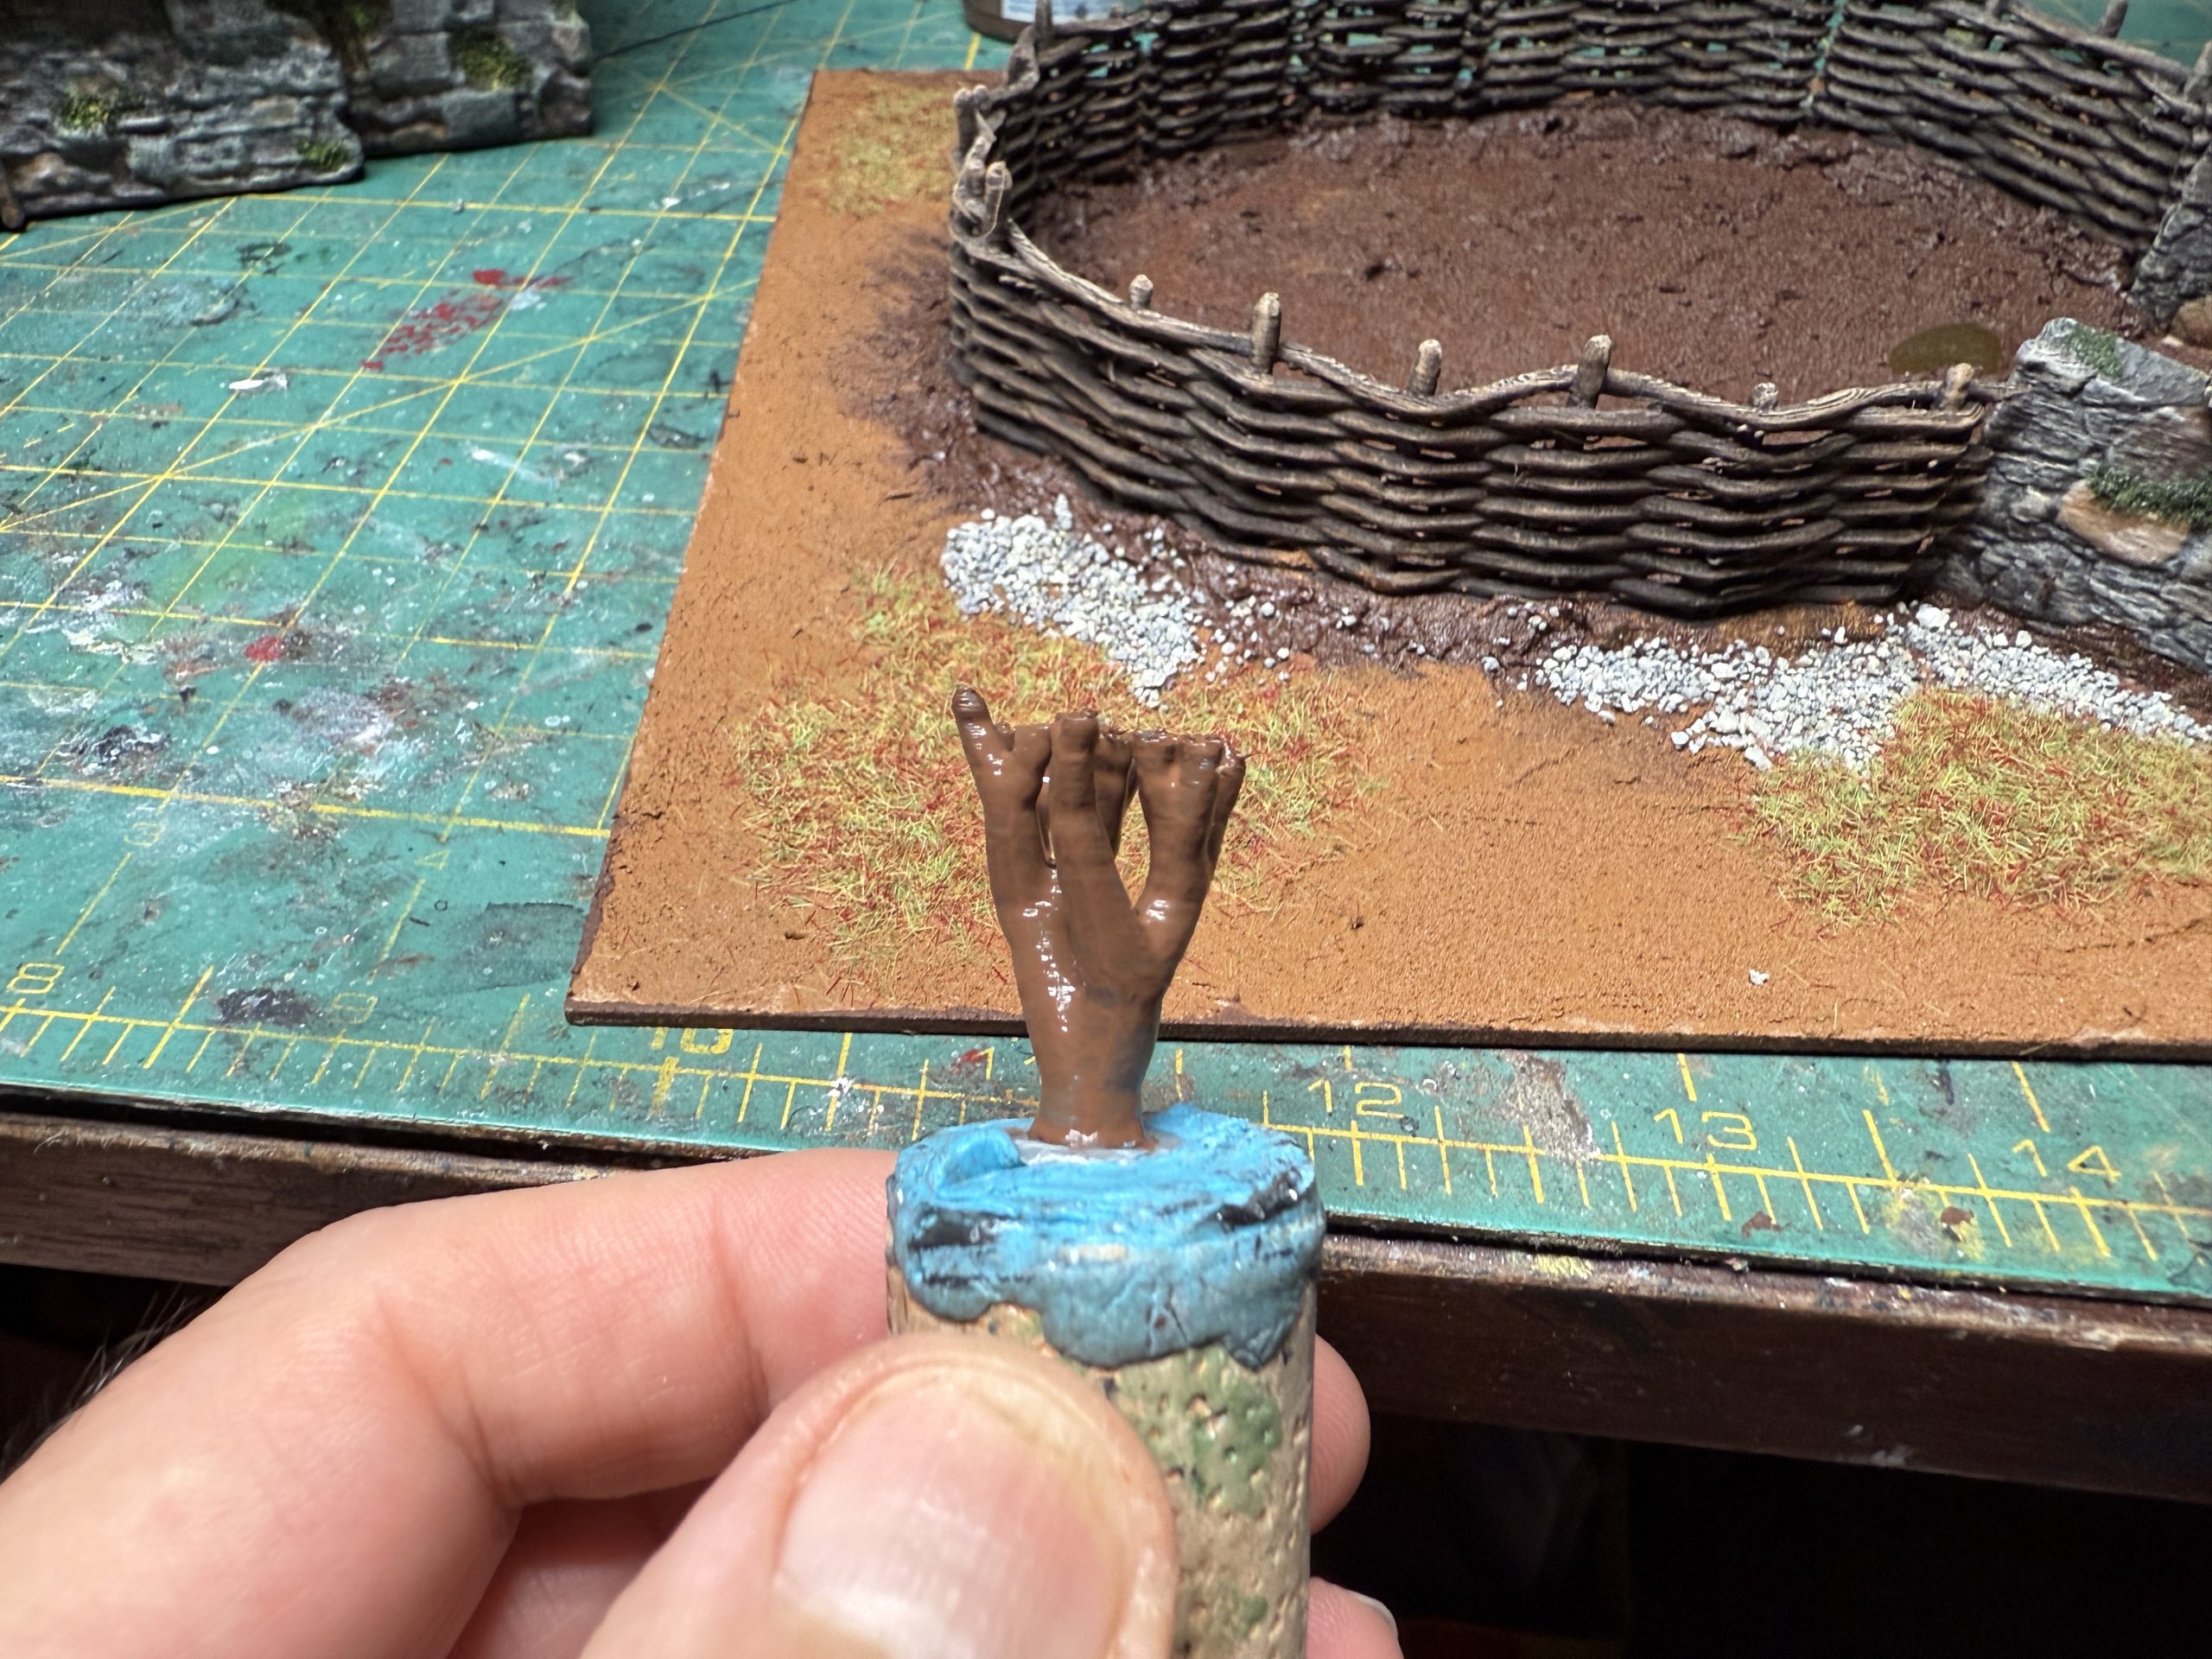
I then printed a tree (probably from Printable Scenery) which was painted then glued on on corner of the pen, then covered with foliage clumps. The bushes were achieved by either gluing foliage clumps to the ground or using 3D printing support (which look astonishingly similar to branches) and gluing foliage clumops to them.
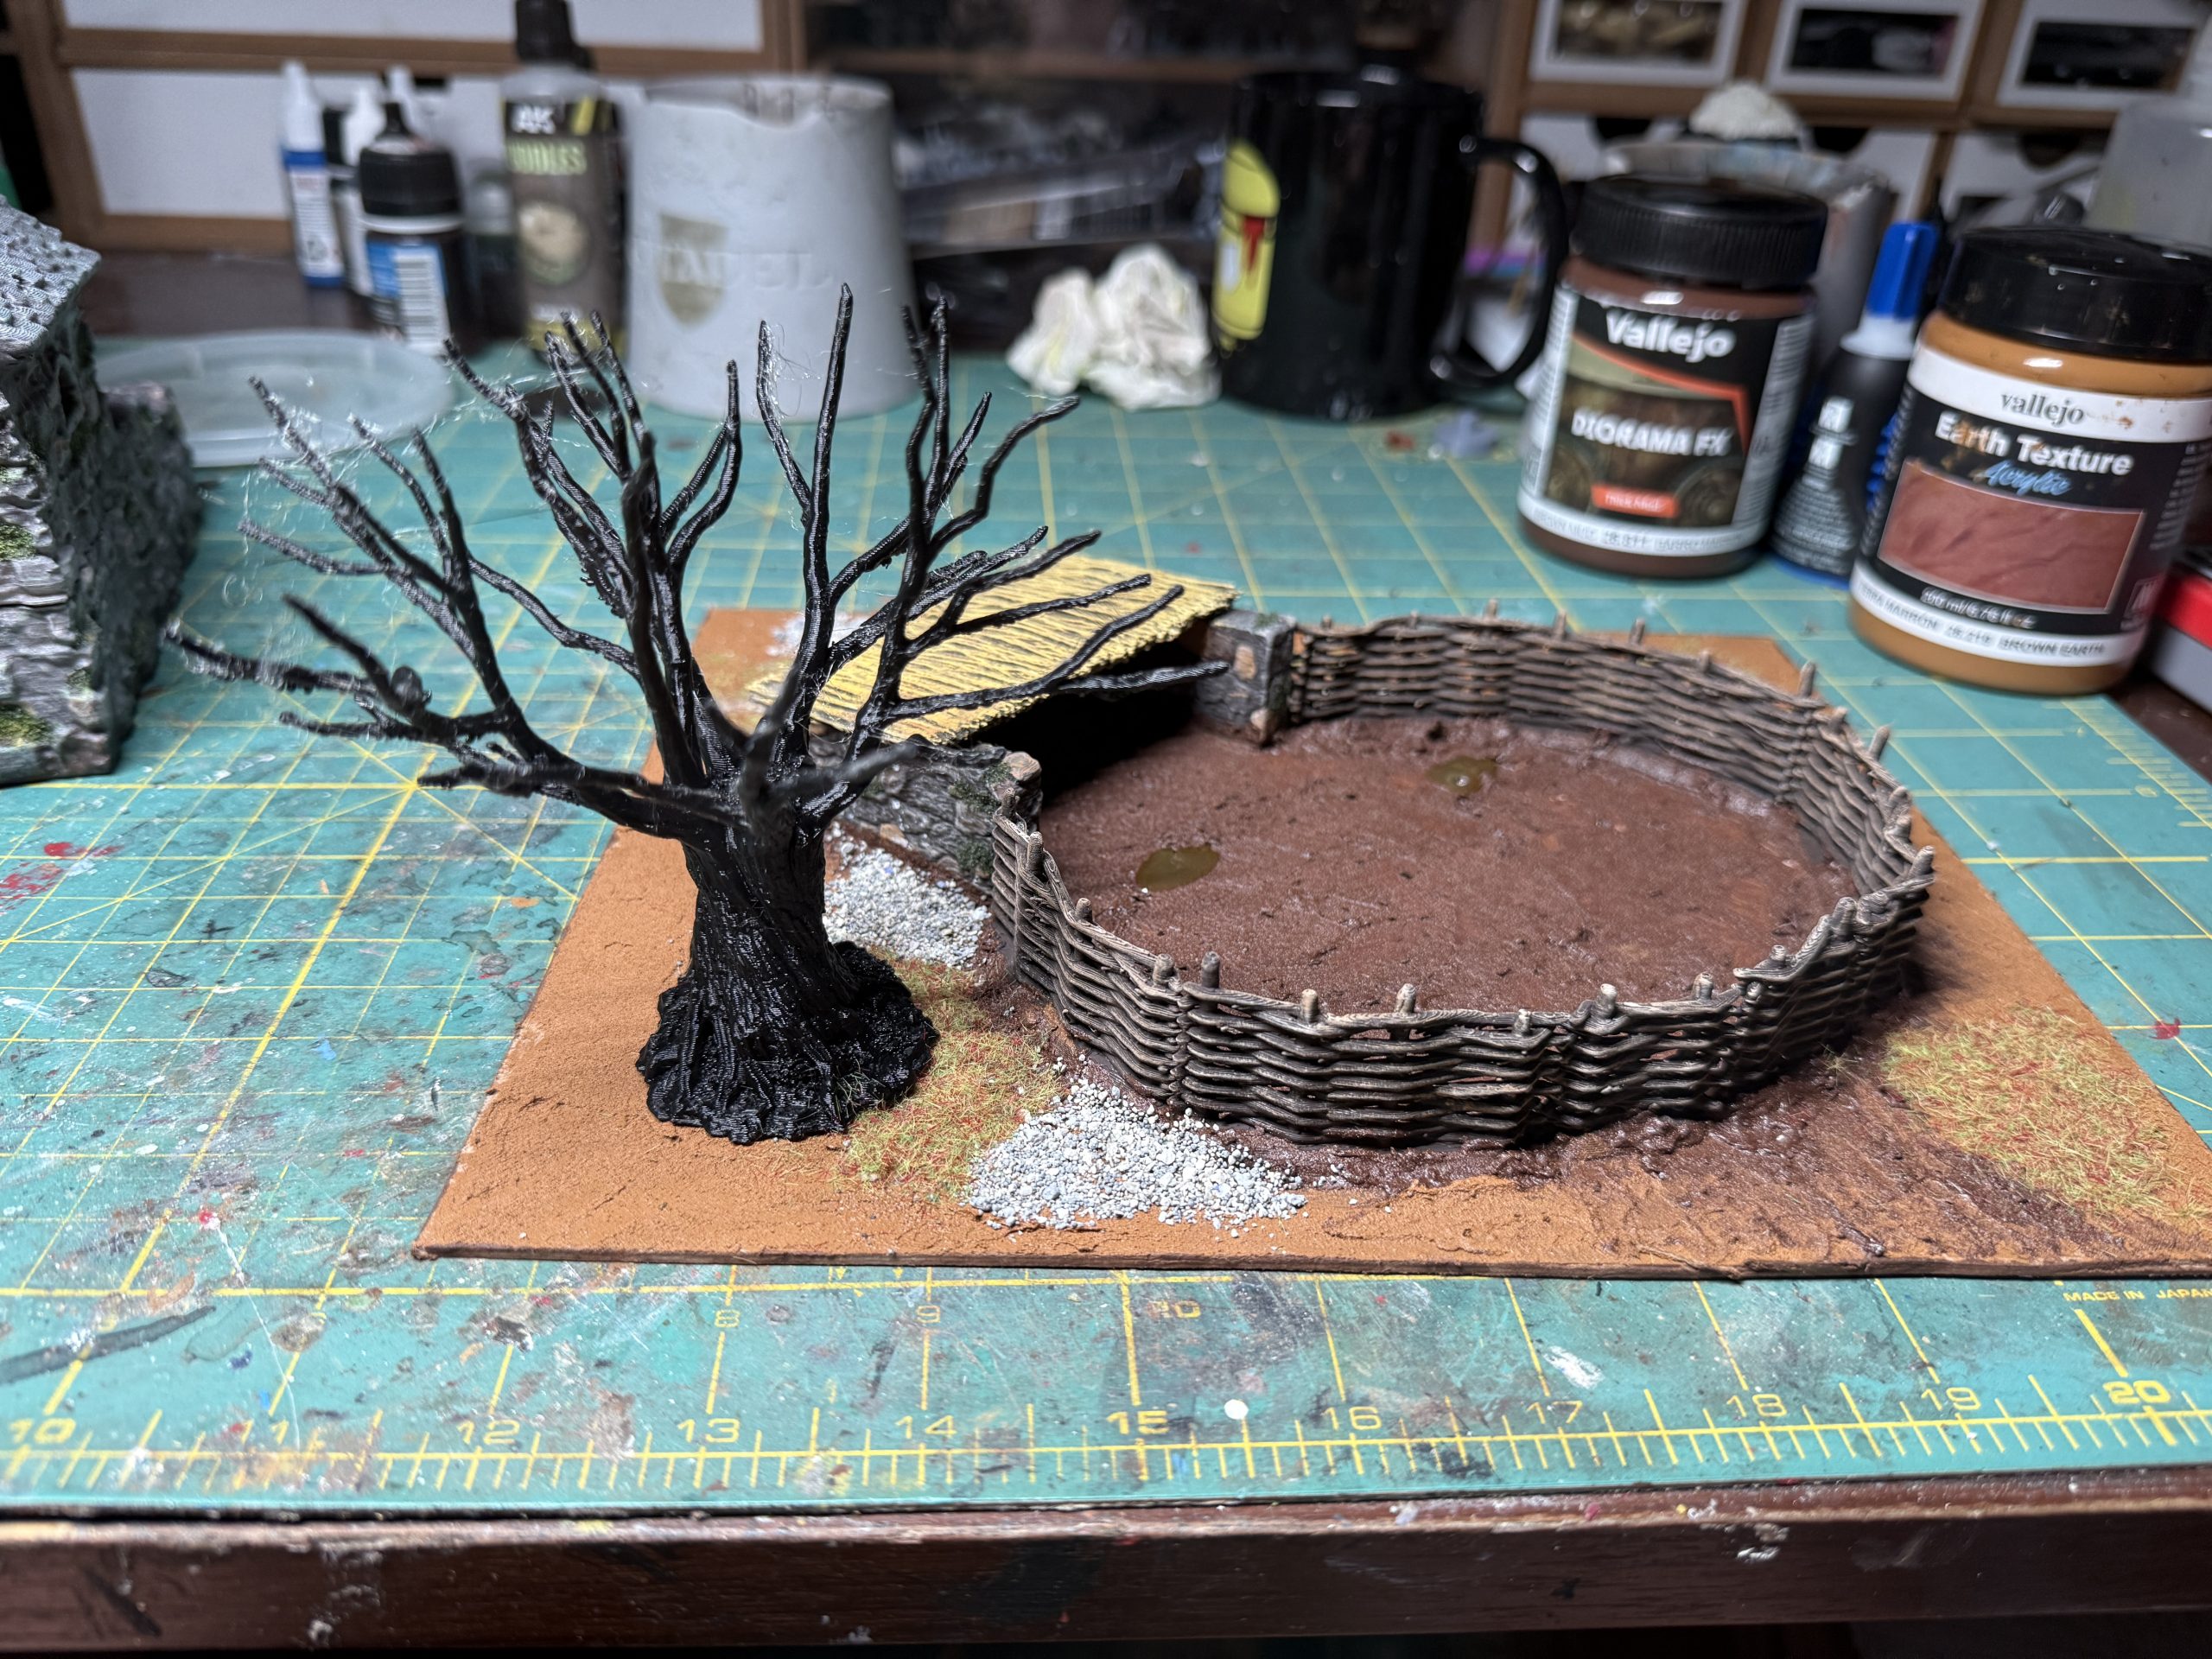
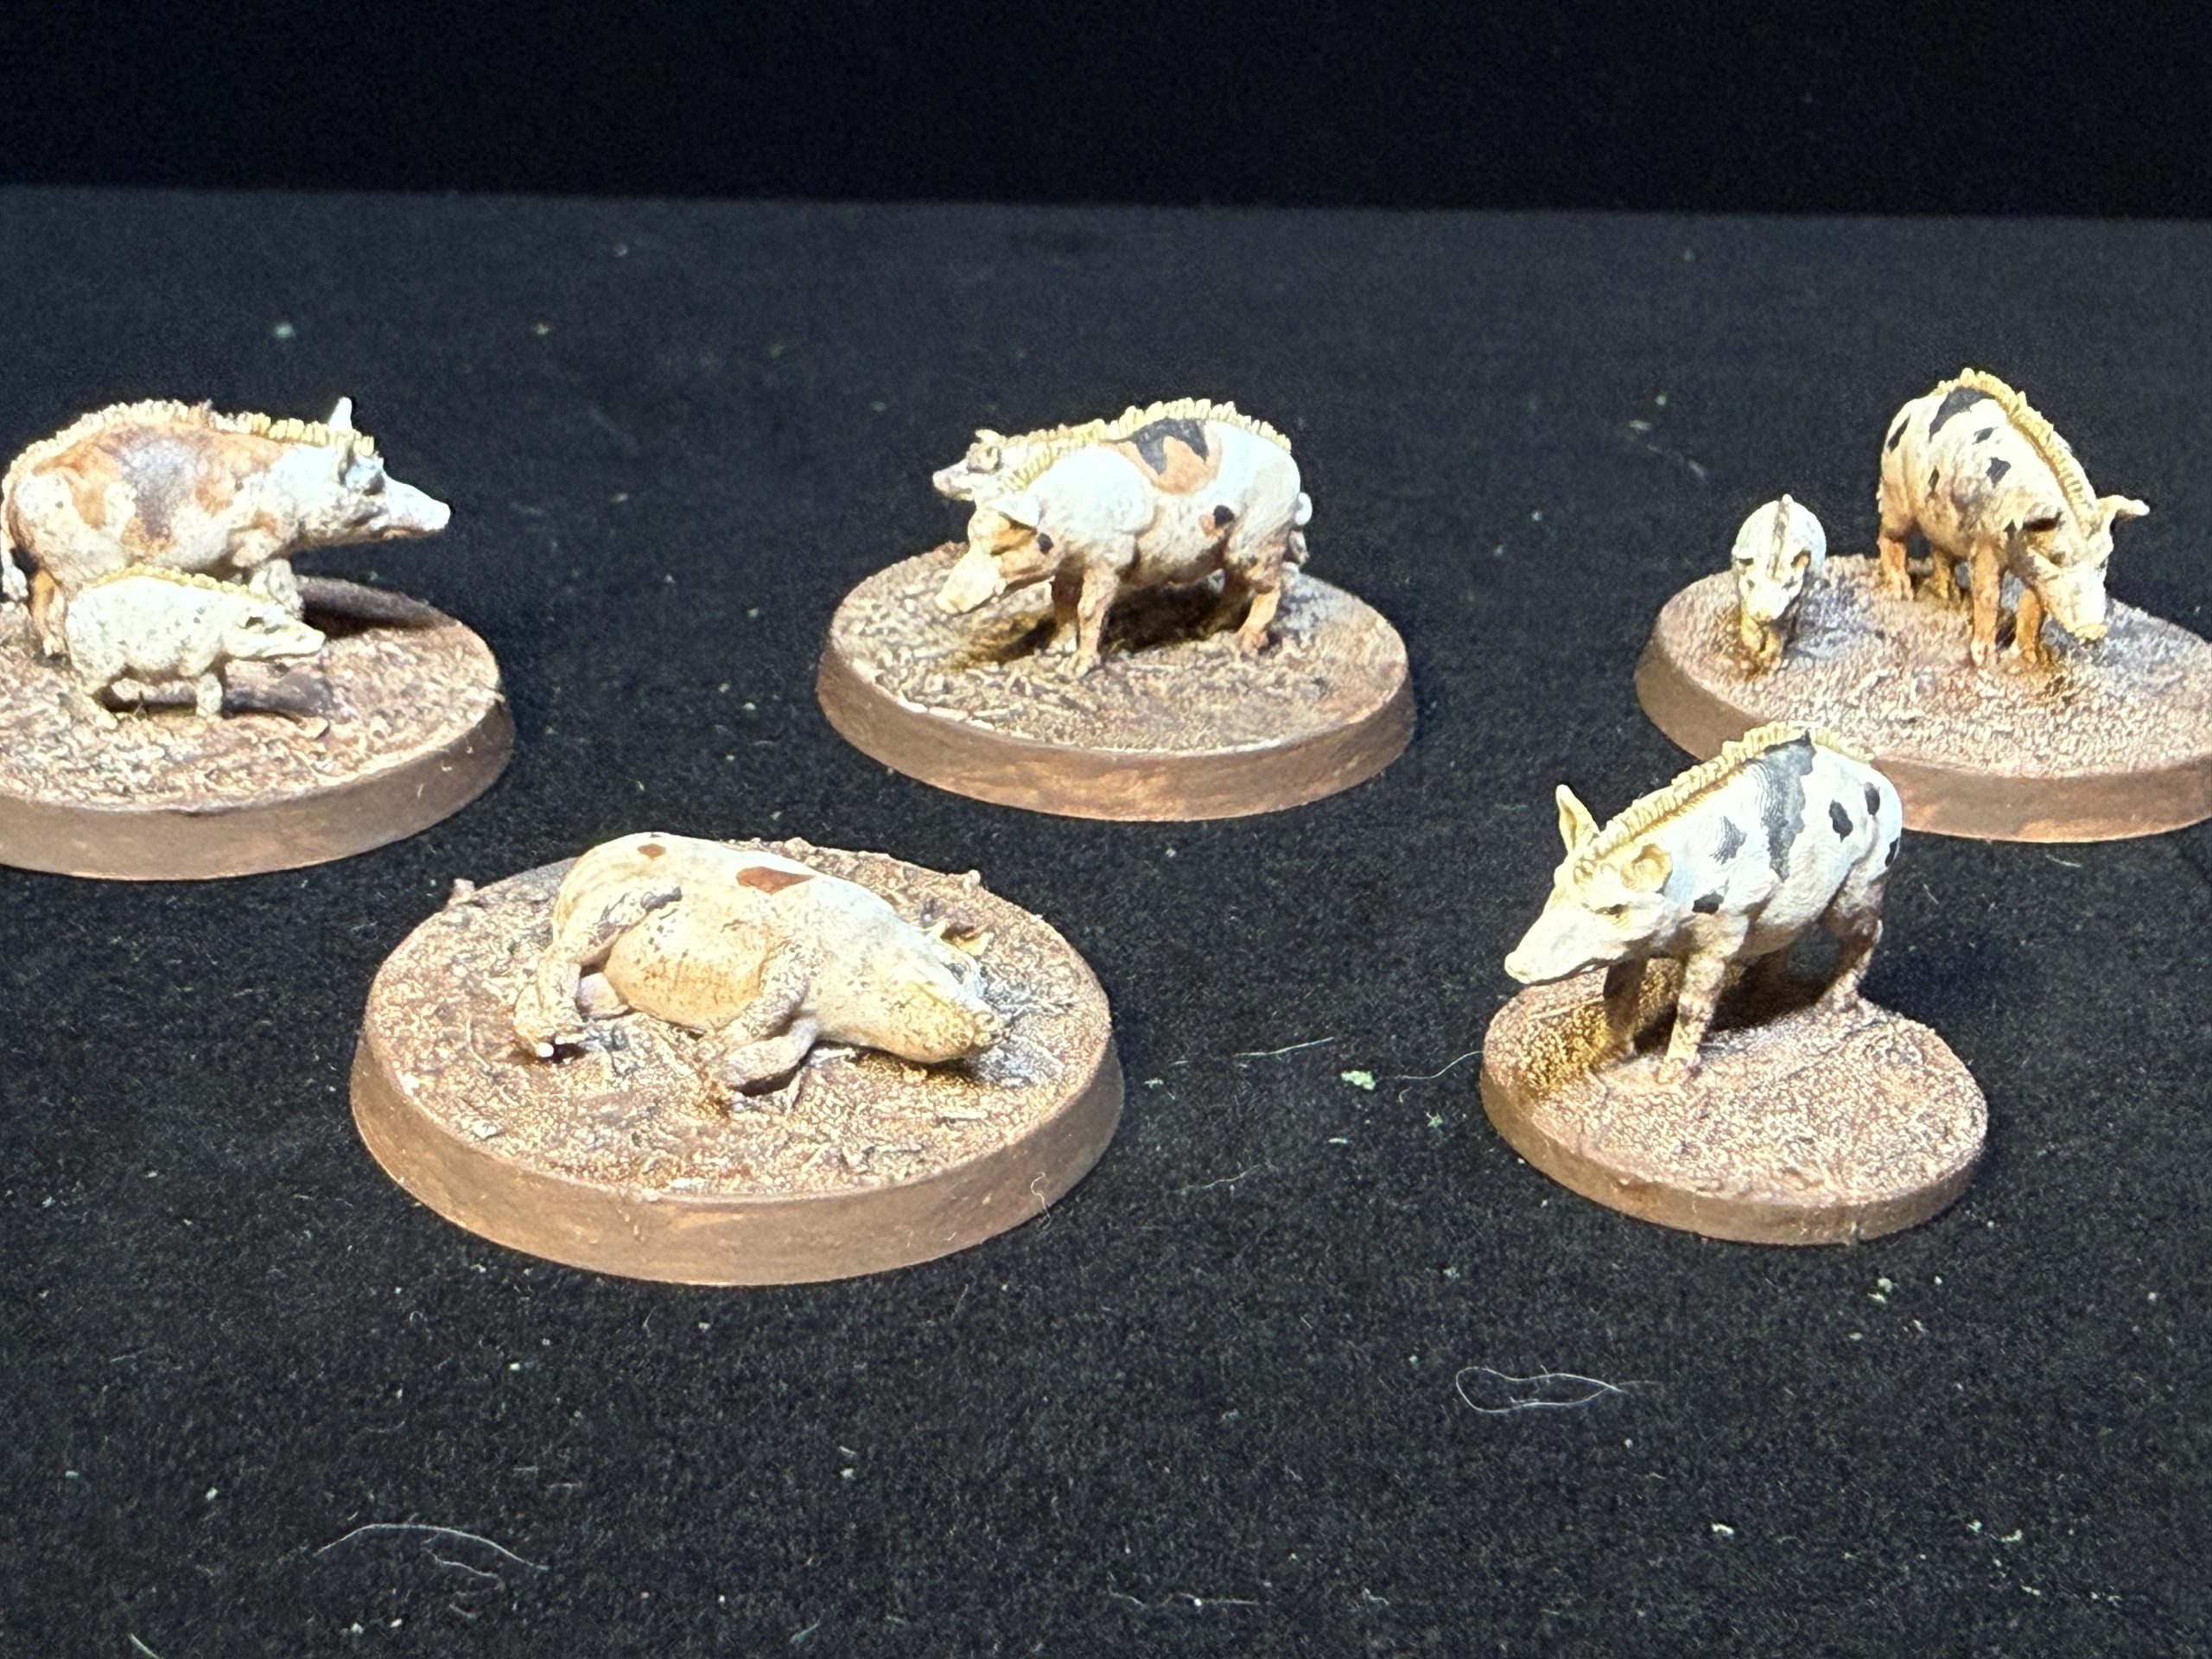
I finished by painting groups of 3D printed medieval pigs (from Vesna – https://www.myminifactory.com/object/3d-print-medieval-pigs-pack-251581 ) and mounting them on round bases so that they can be used as objective markers/loot. Please be aware that medieval pigs looked different from our current porcines and thus should be painted accordingly. The pis then found their place within the pen.
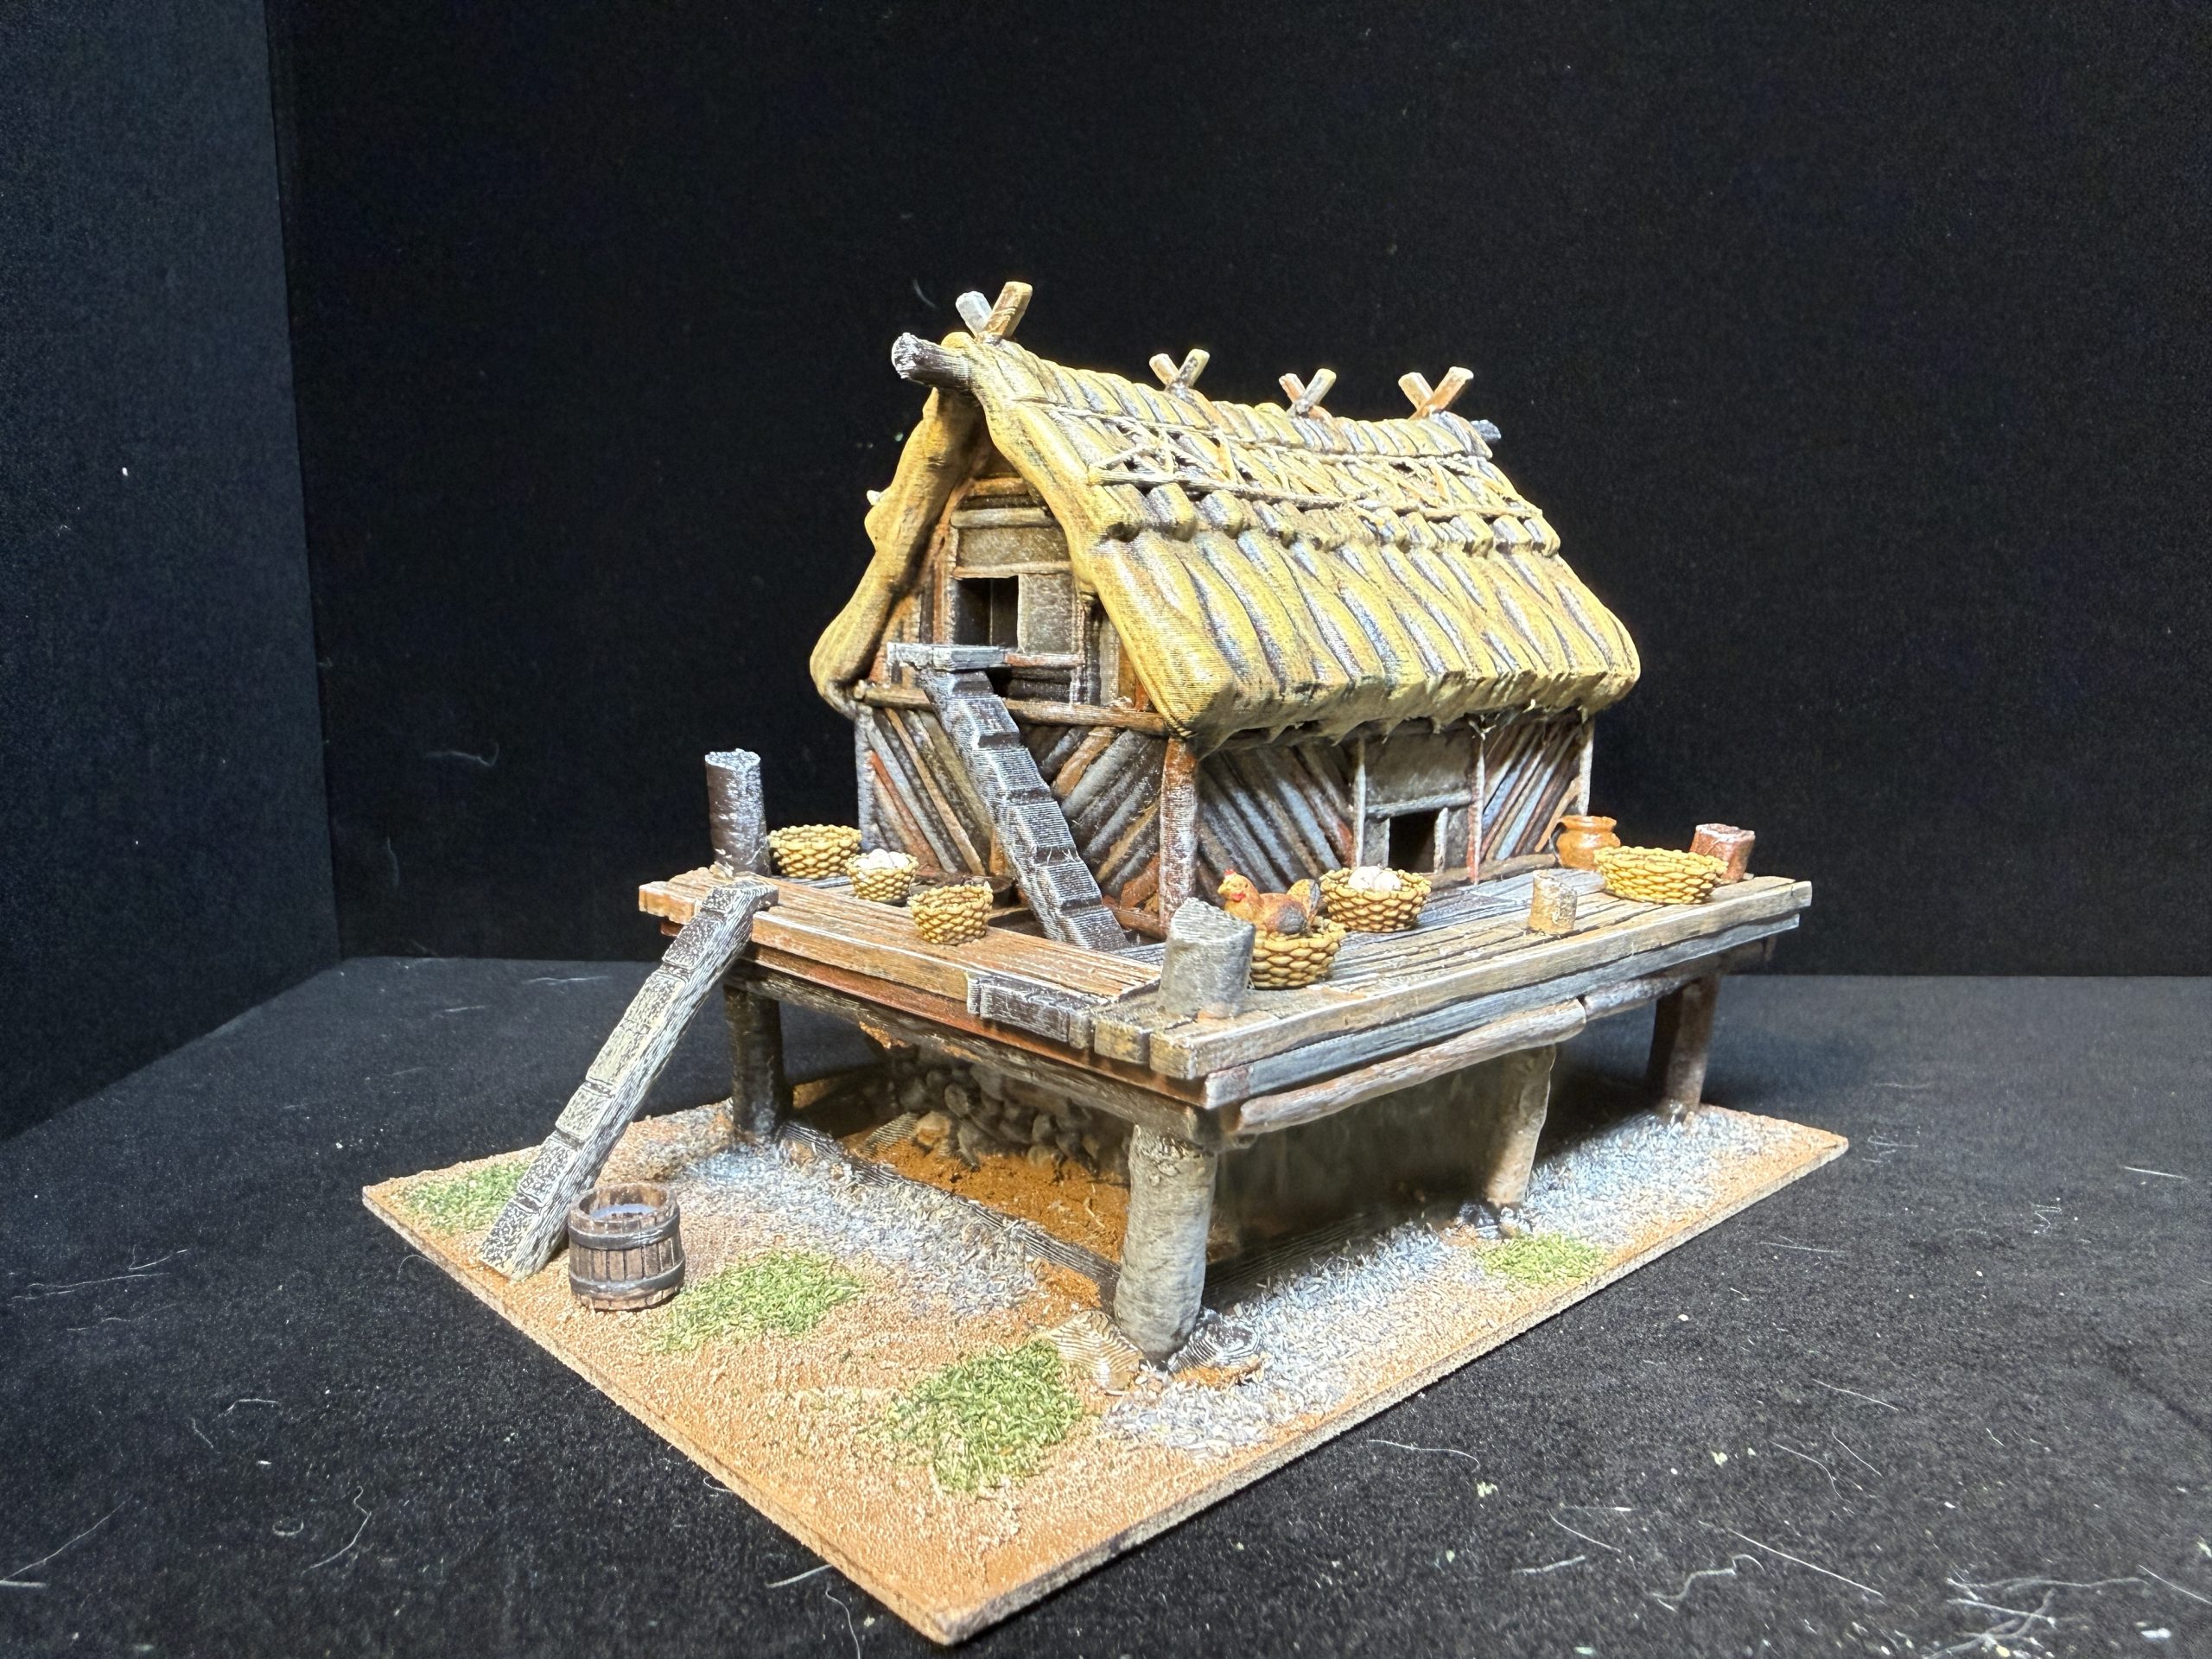
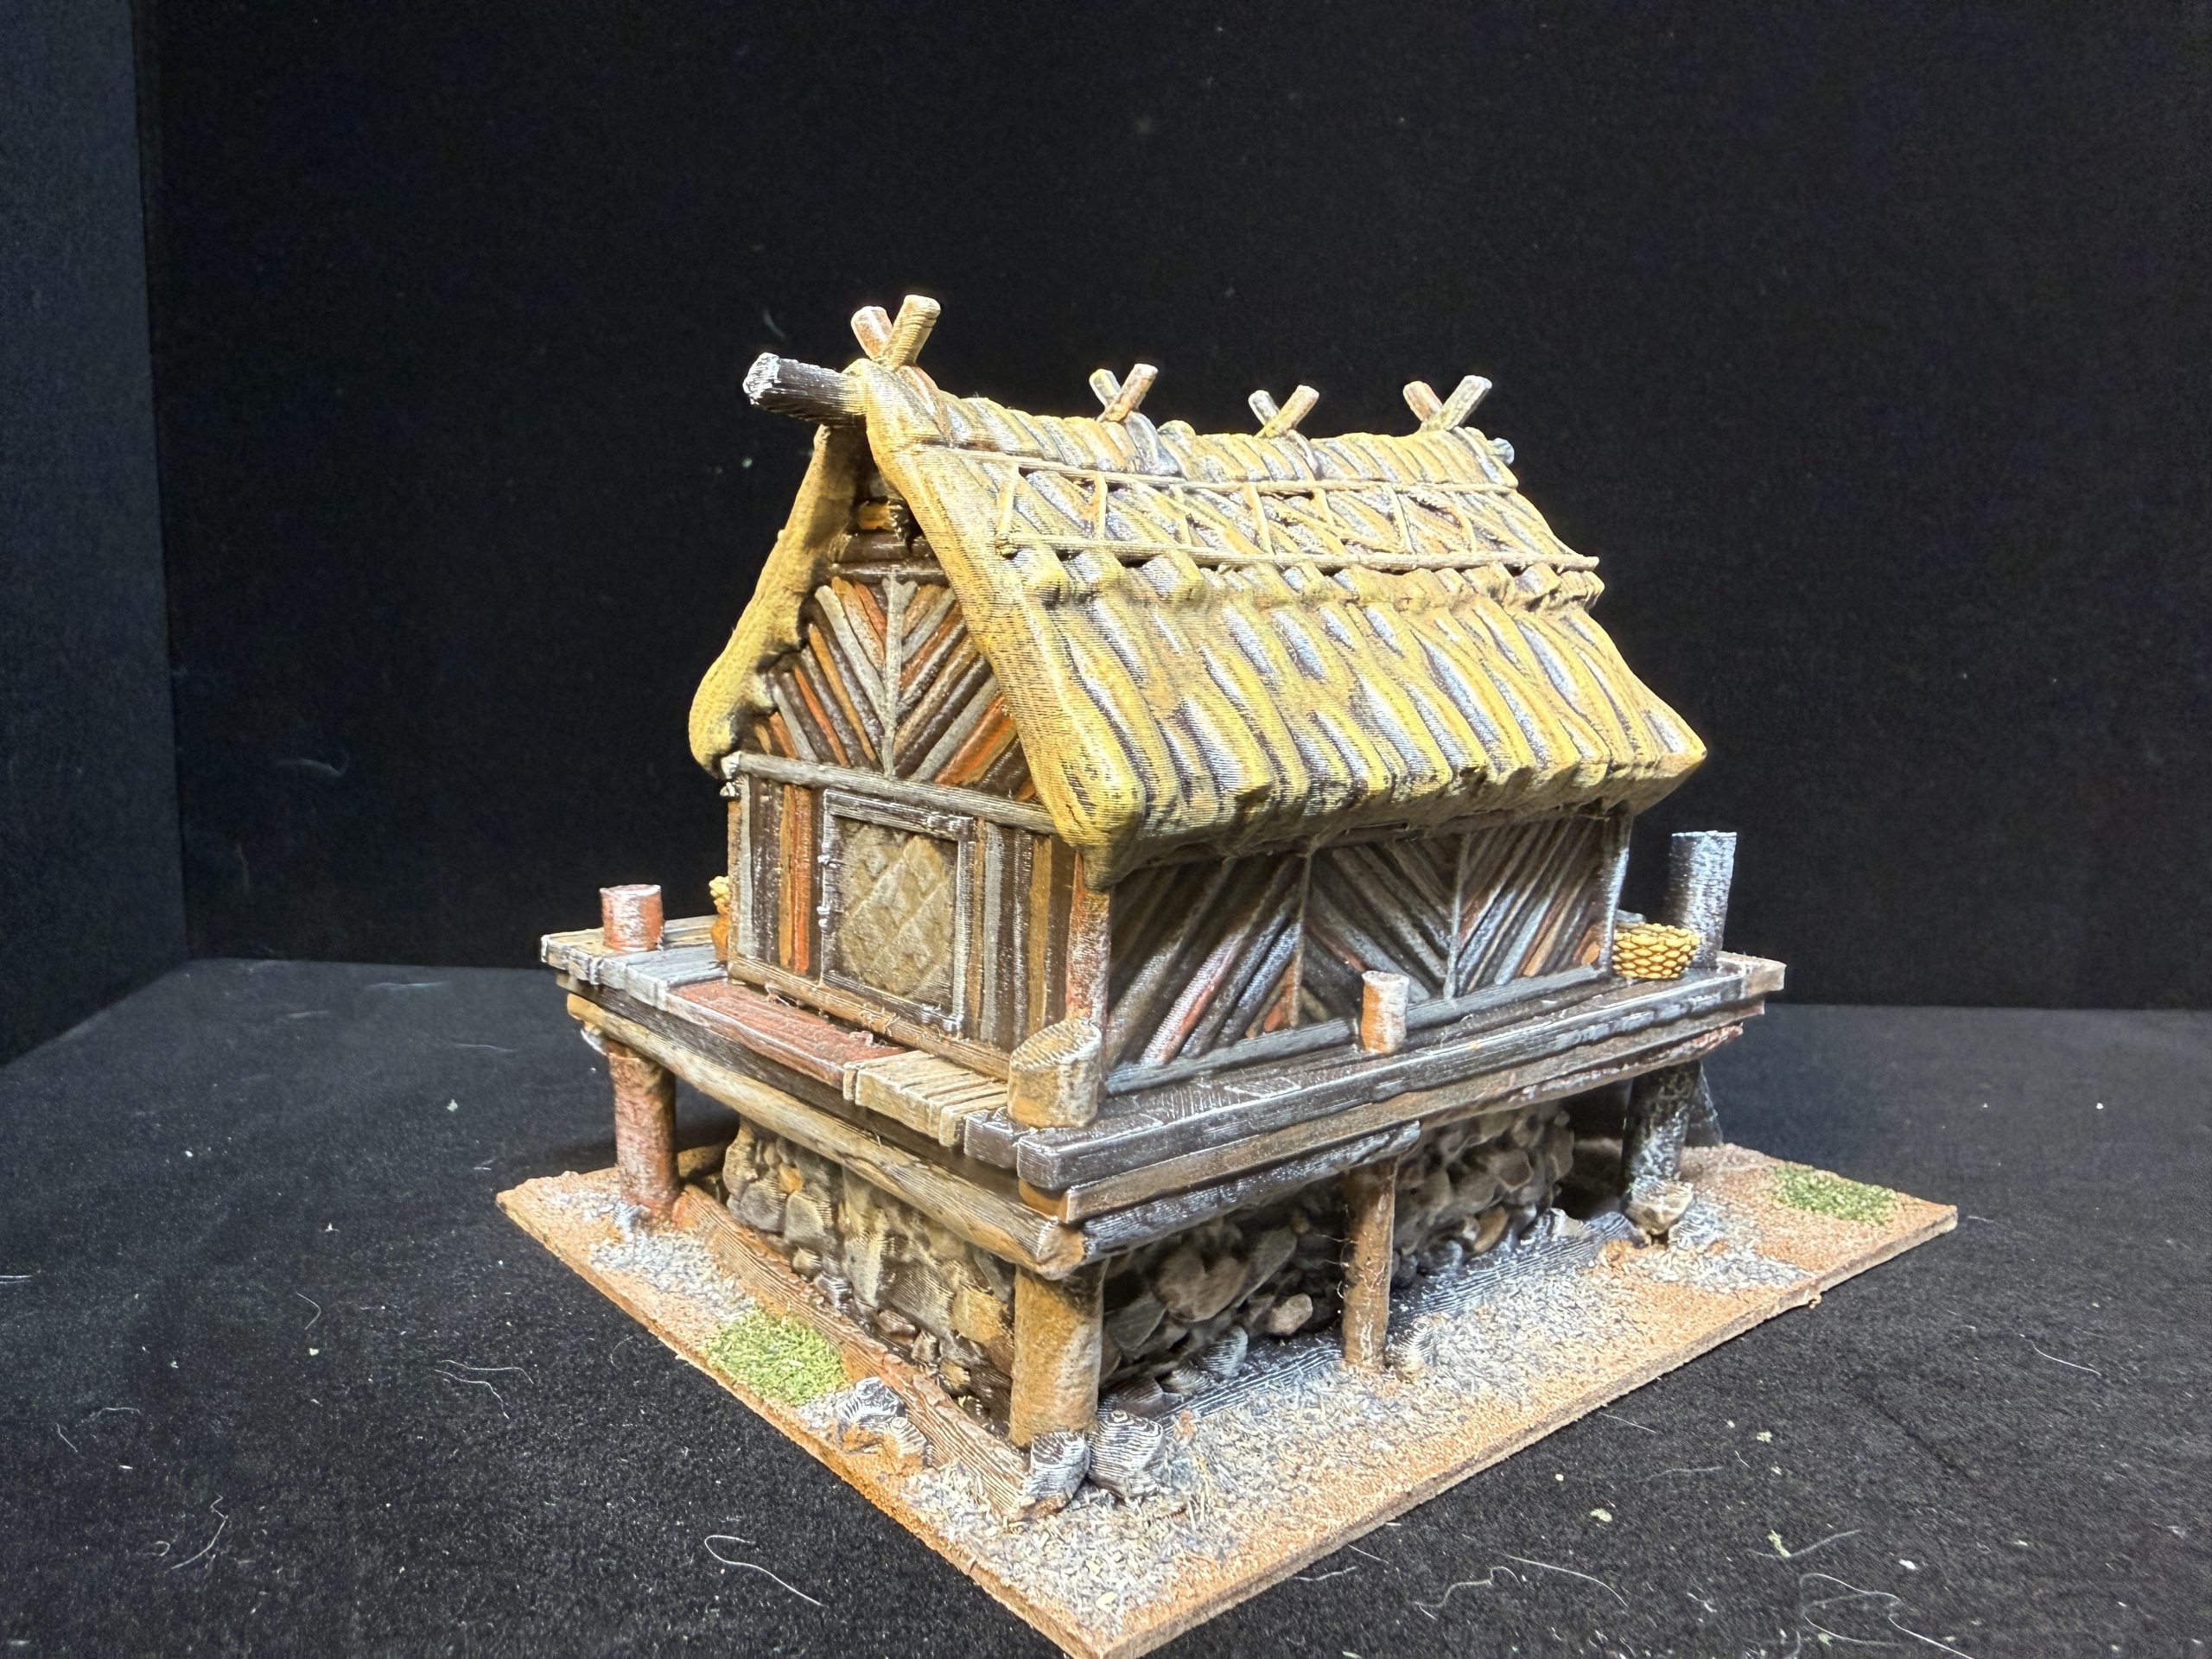
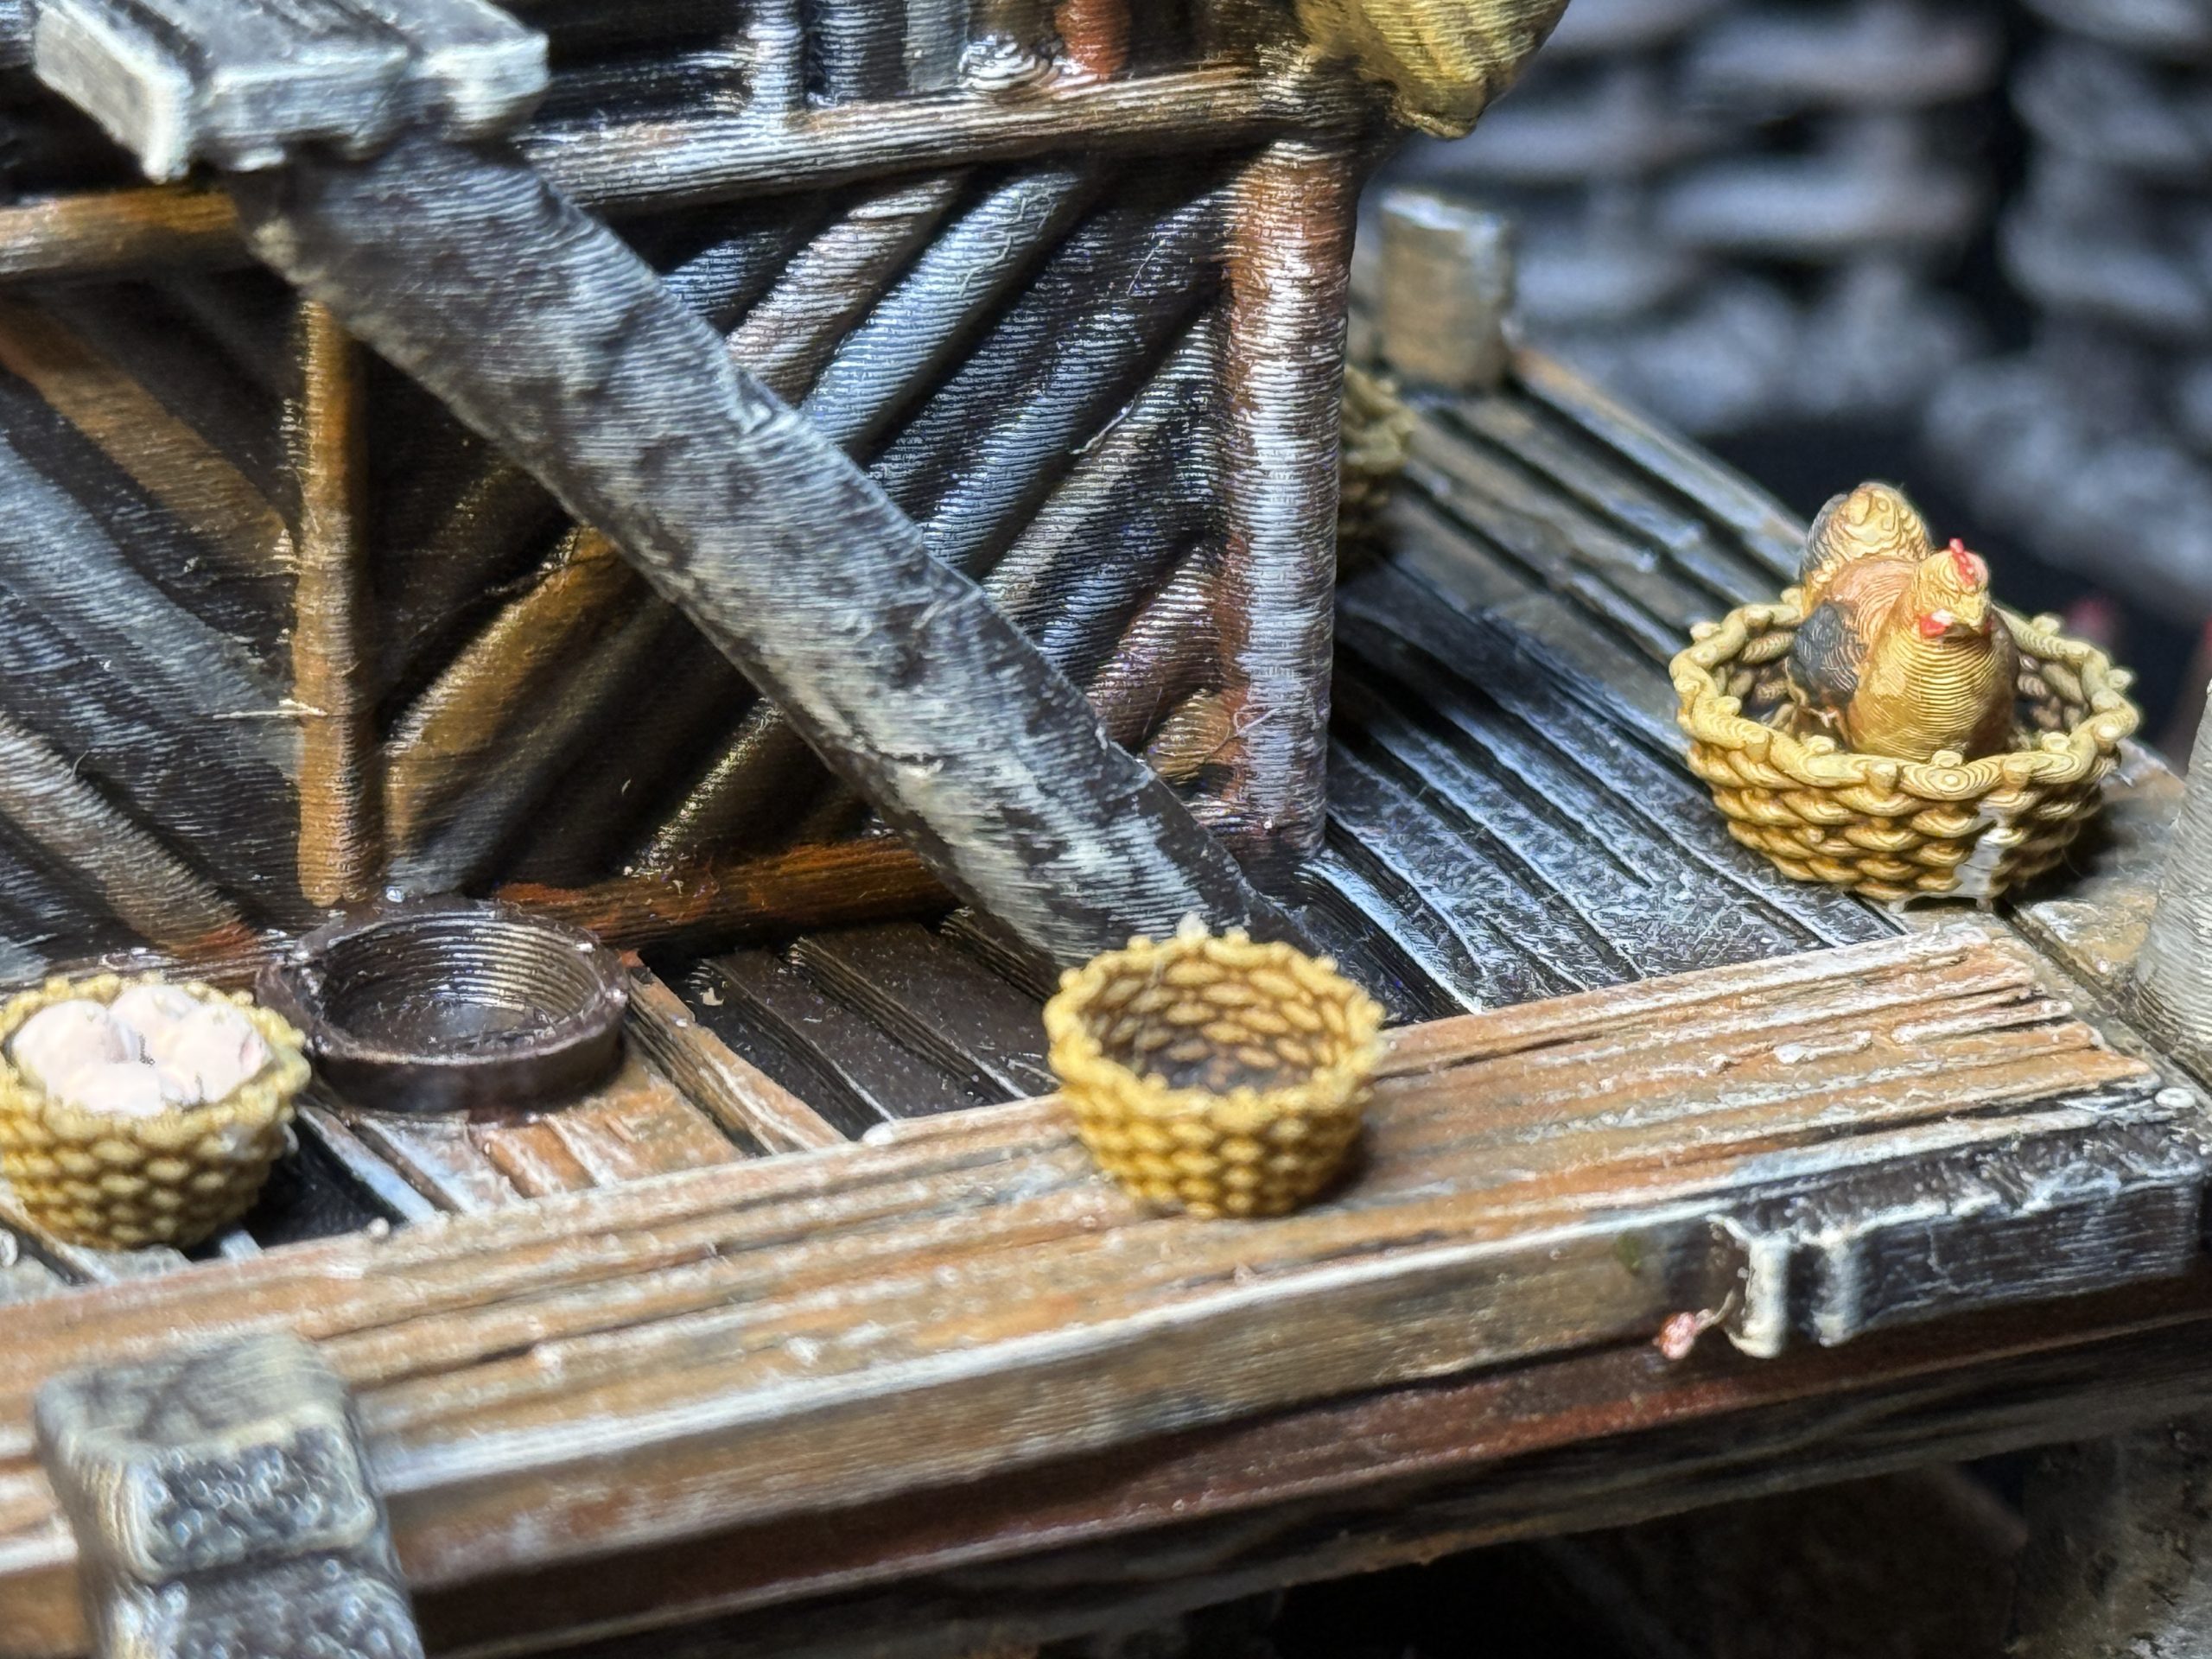
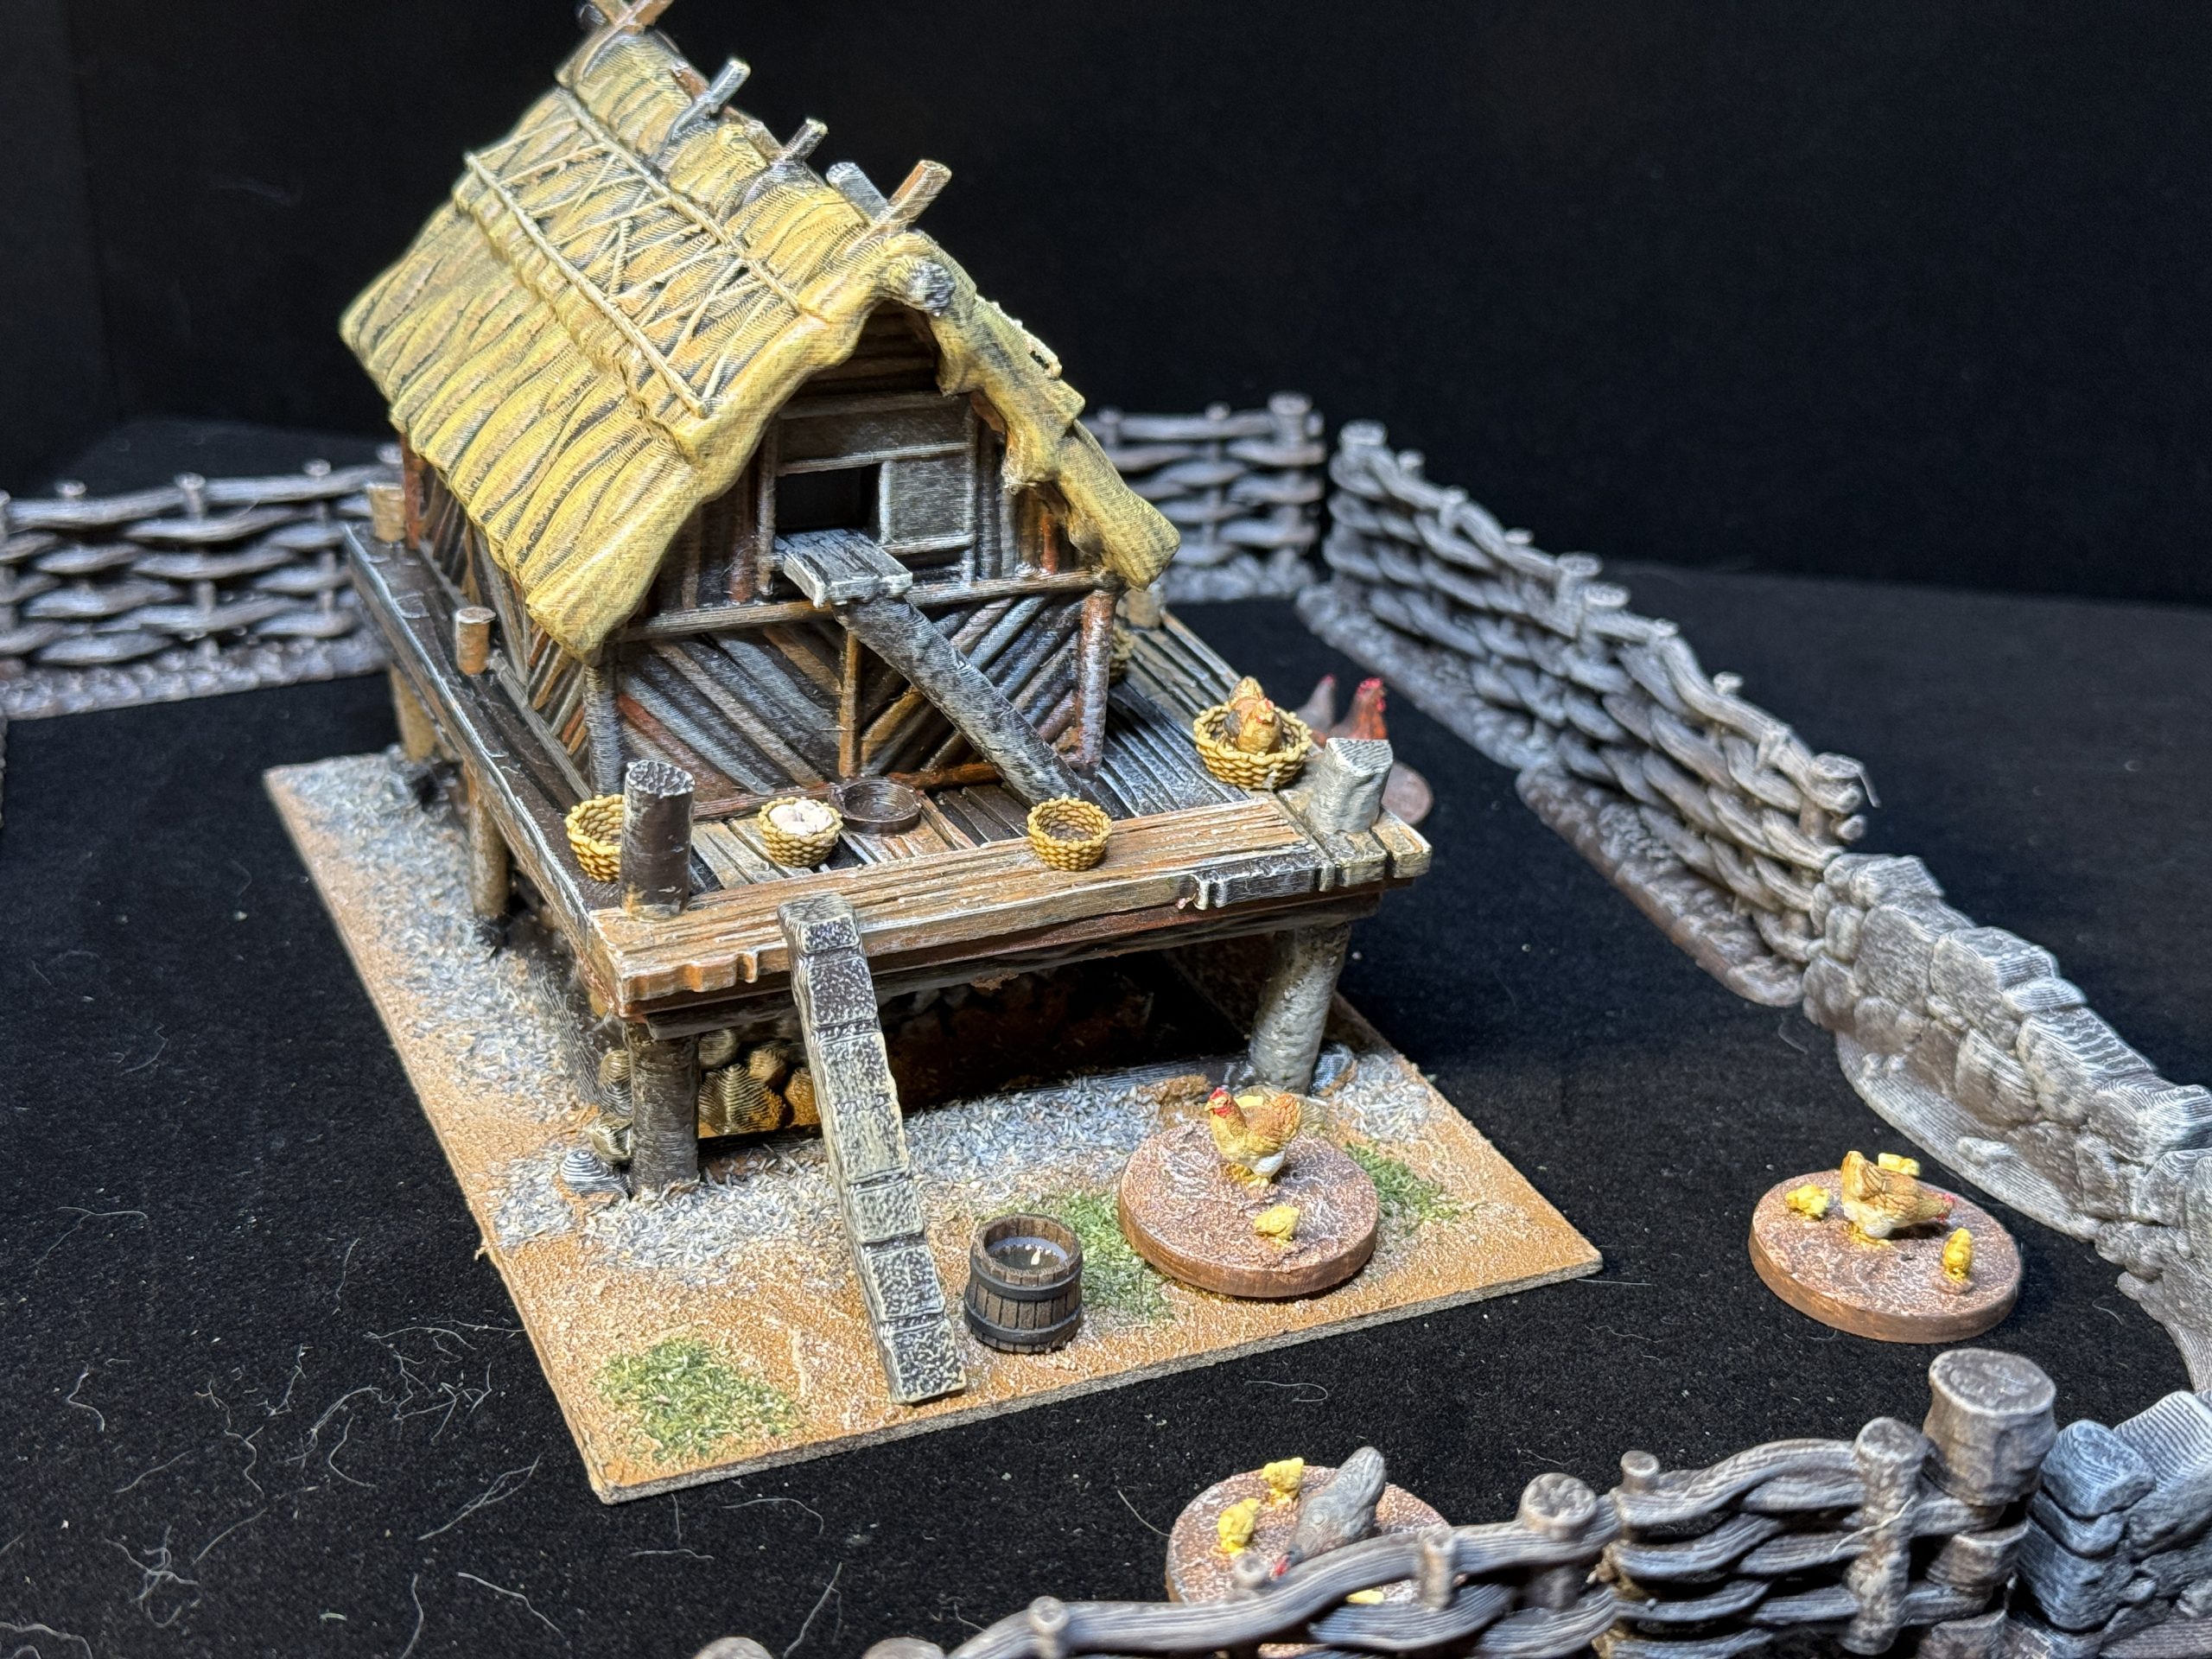
The chicken coop proved to be a little more difficult than originally expected as the density and details of the models required quite a bit of effort, to as to give the wood some variety. Also, the base of the model did not align perfectly with the platform, requiring some putty work to integrate the wooden pillars. I used some bits from Vesna Sculpts (see below) to add to the platform.
Chicken coop: Infinite Dimensions – https://www.infinitedimensions.ca/product/3d-printable-chicken-coop/
Wattle fences: Timescape Miniatures – https://www.myminifactory.com/object/3d-print-medieval-fences-graves-and-haystacks-482995
Chicken and baskets: Vesna Sculpts = https://www.myminifactory.com/object/3d-print-chicken-pack-245009

A Church, a Cross a Field and a Well
To complete the first version of the village, I decided to add a small church along with a traditional cross and a well.
I already had printed the church model and was nt happy it could not have a playable interior, However, my only other curent option being a gigantic Norman church I had printed and could not be bothered to paint at the moment, I went with it and was quite happy with the end result.
Name: Church
Publisher: Warhost – https://warhost.online/products/church
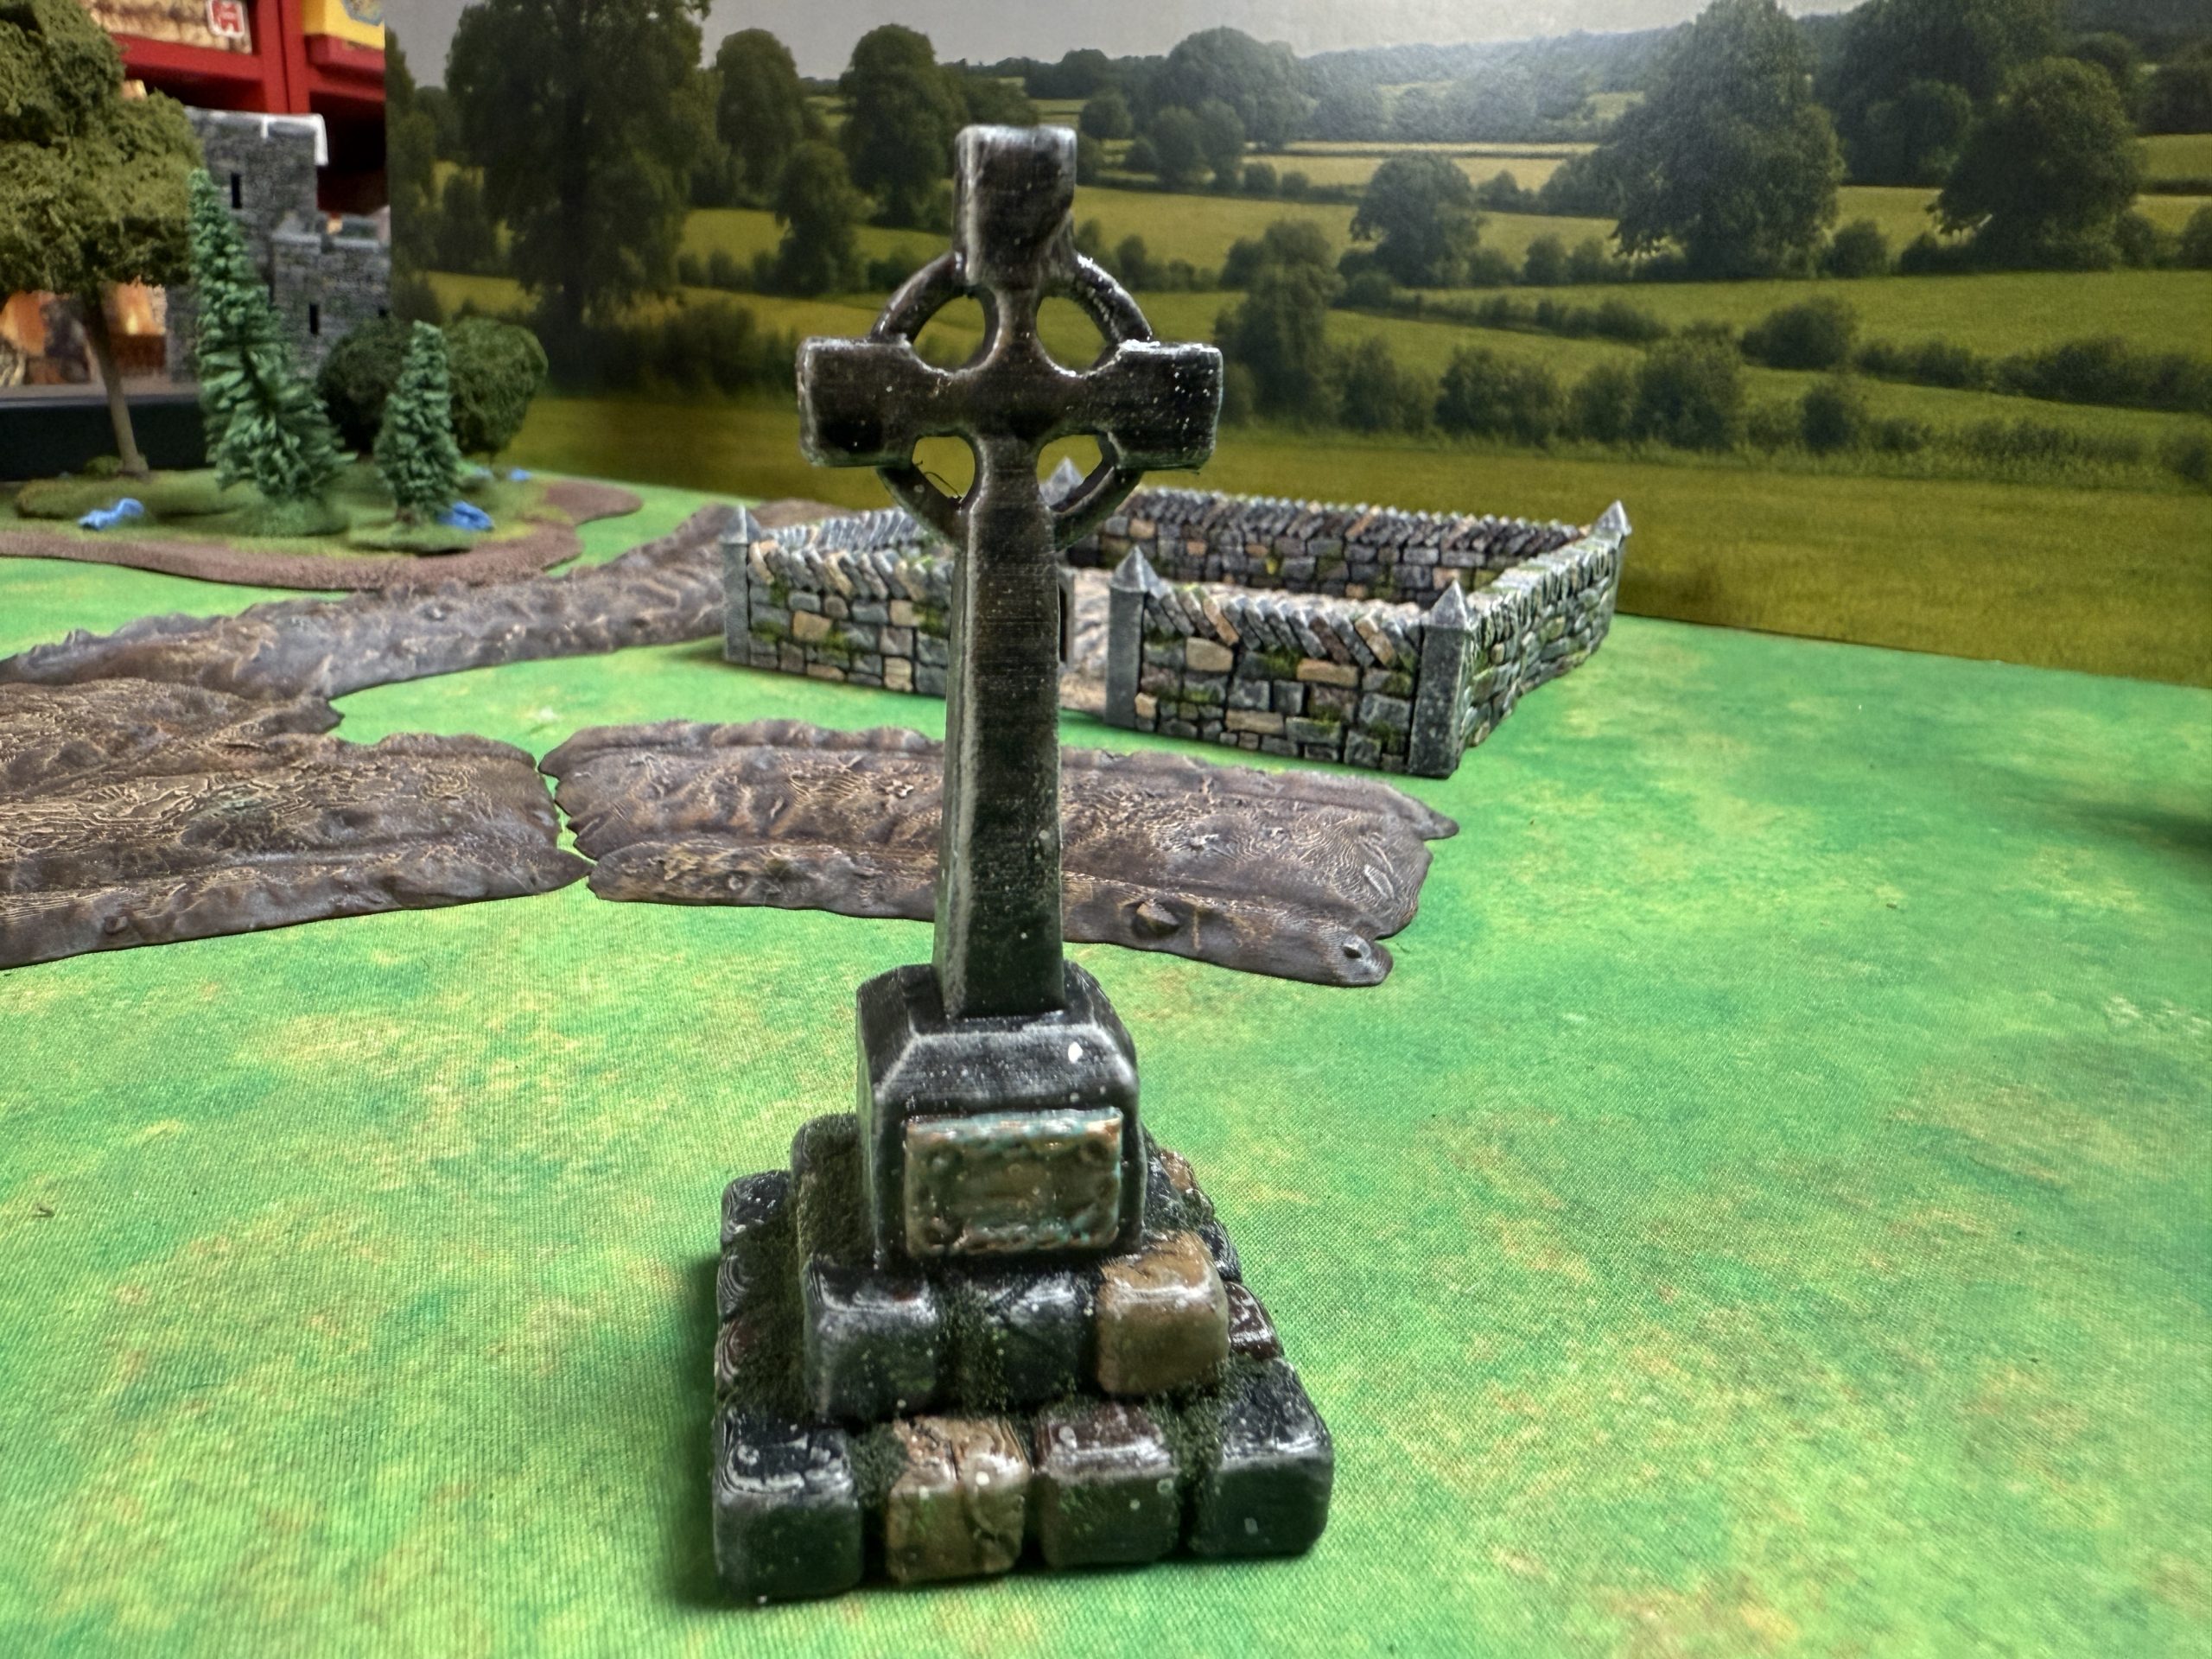
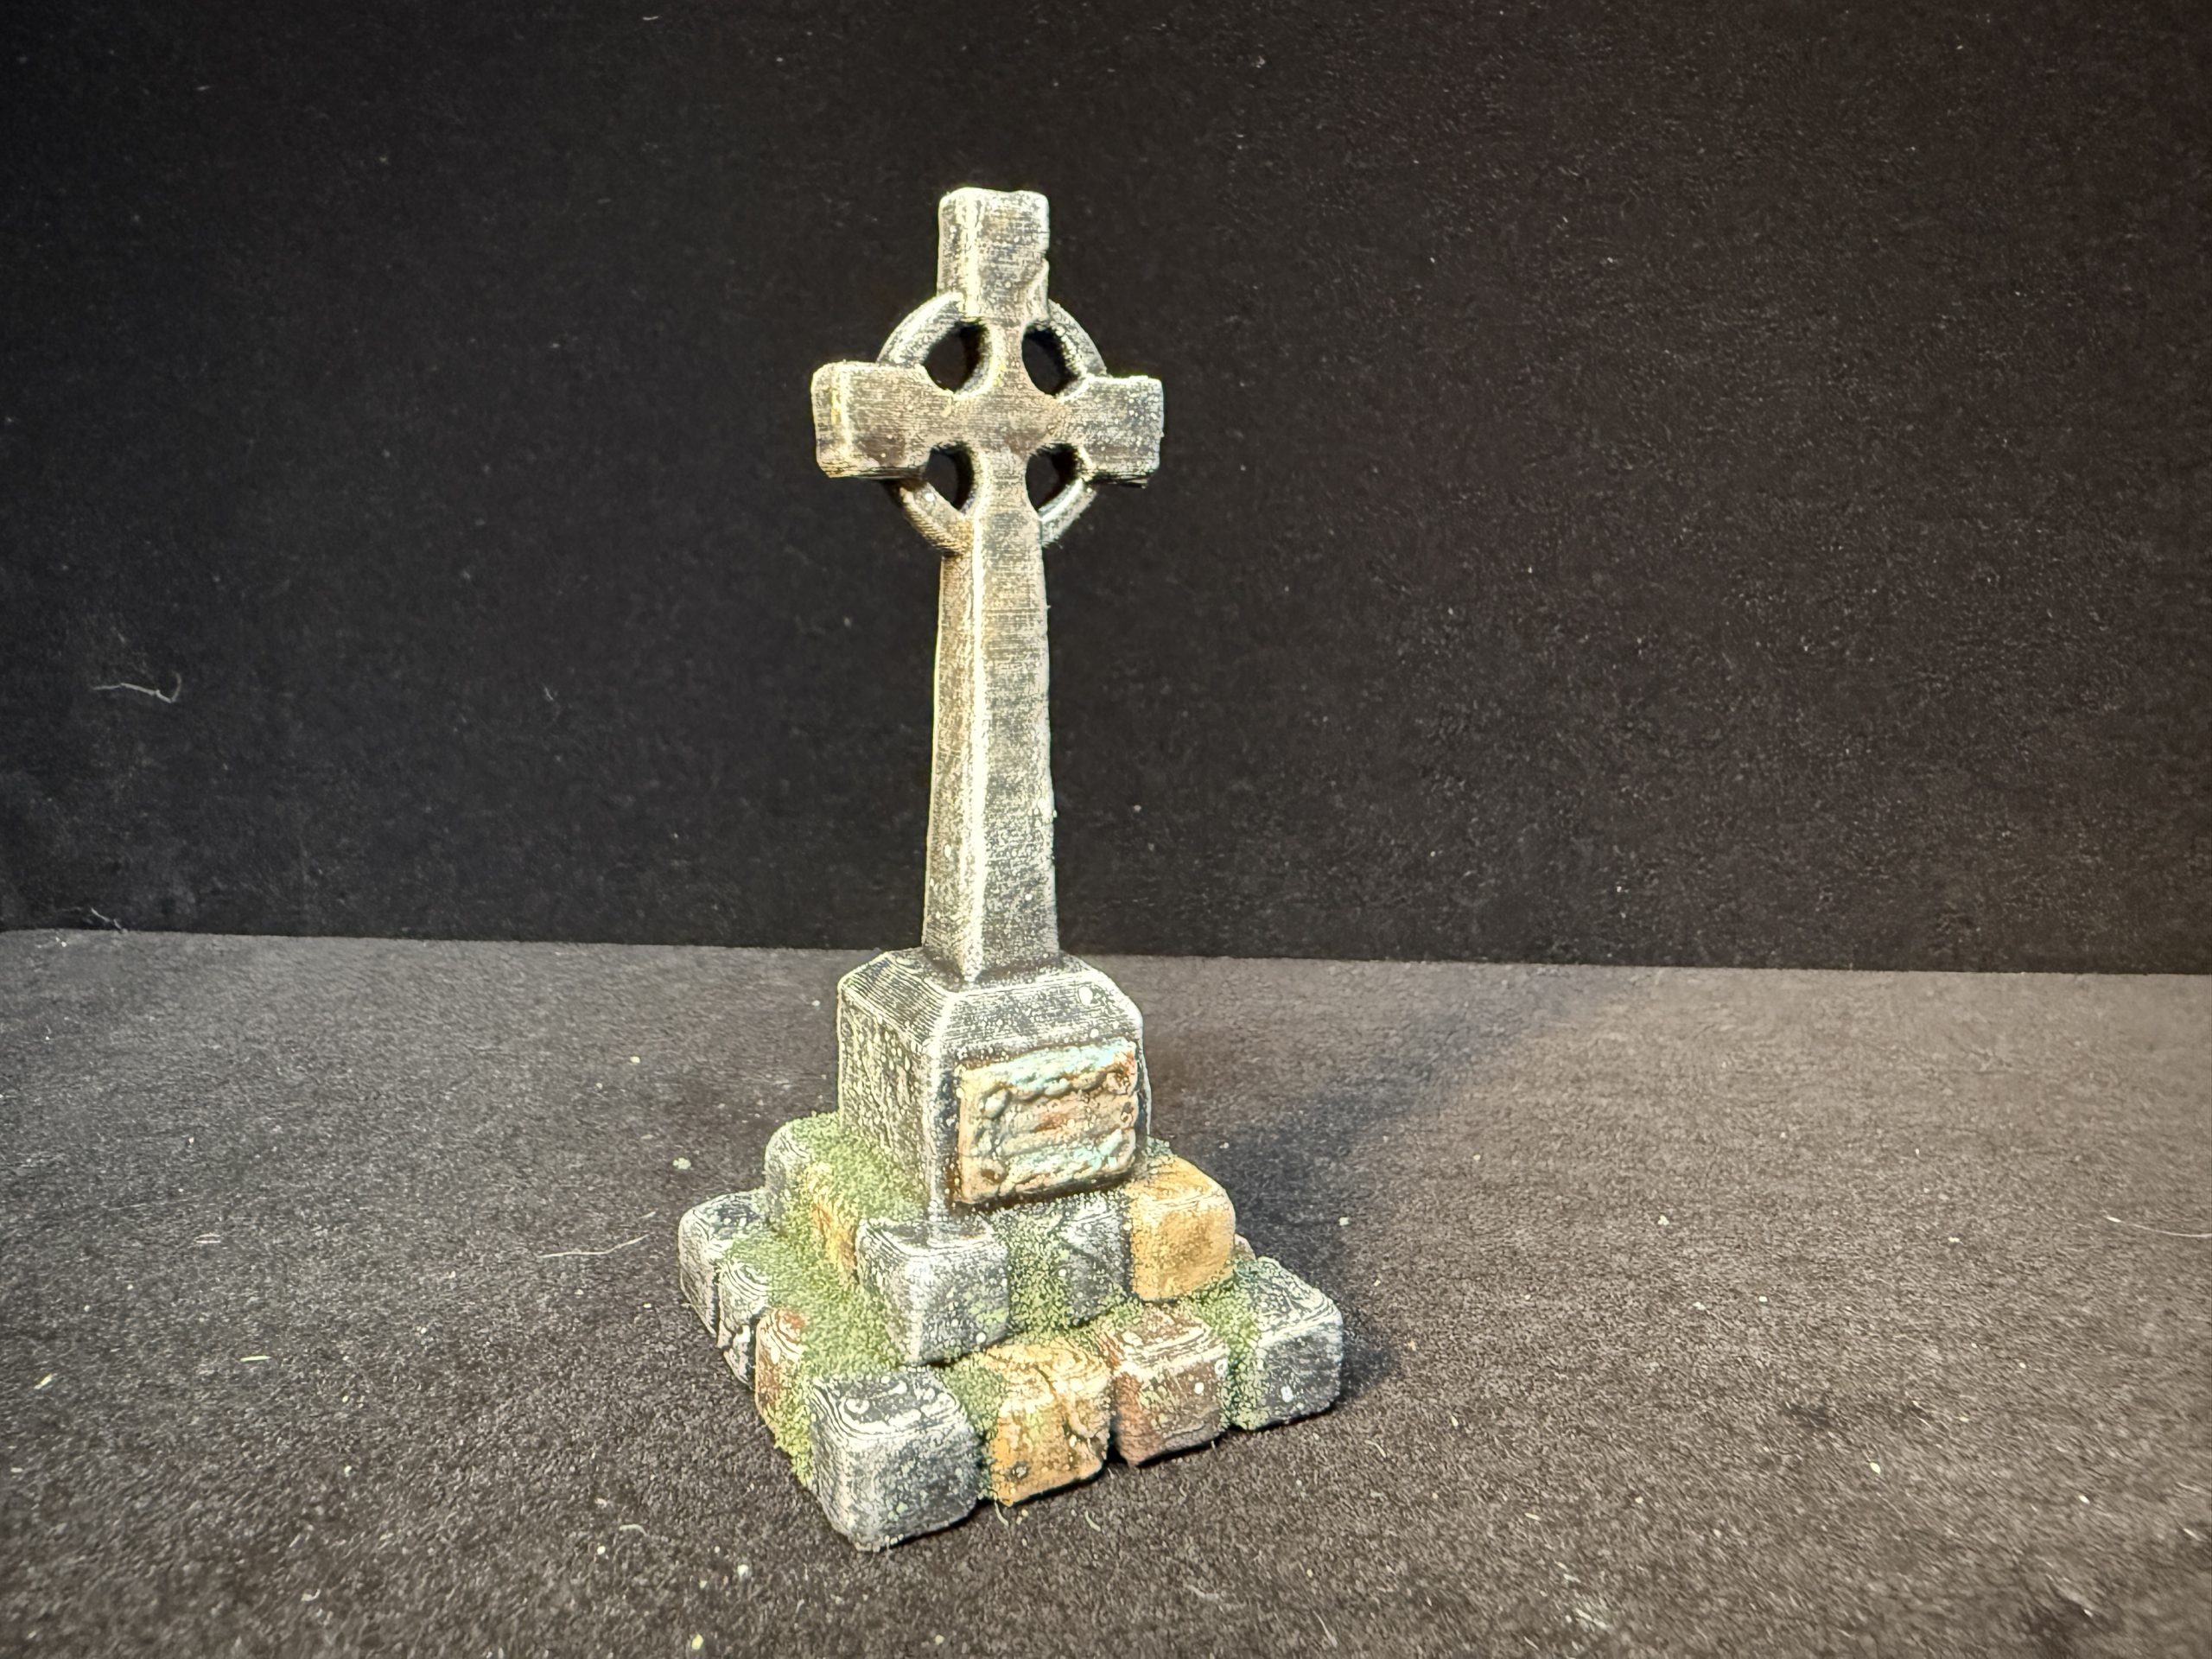
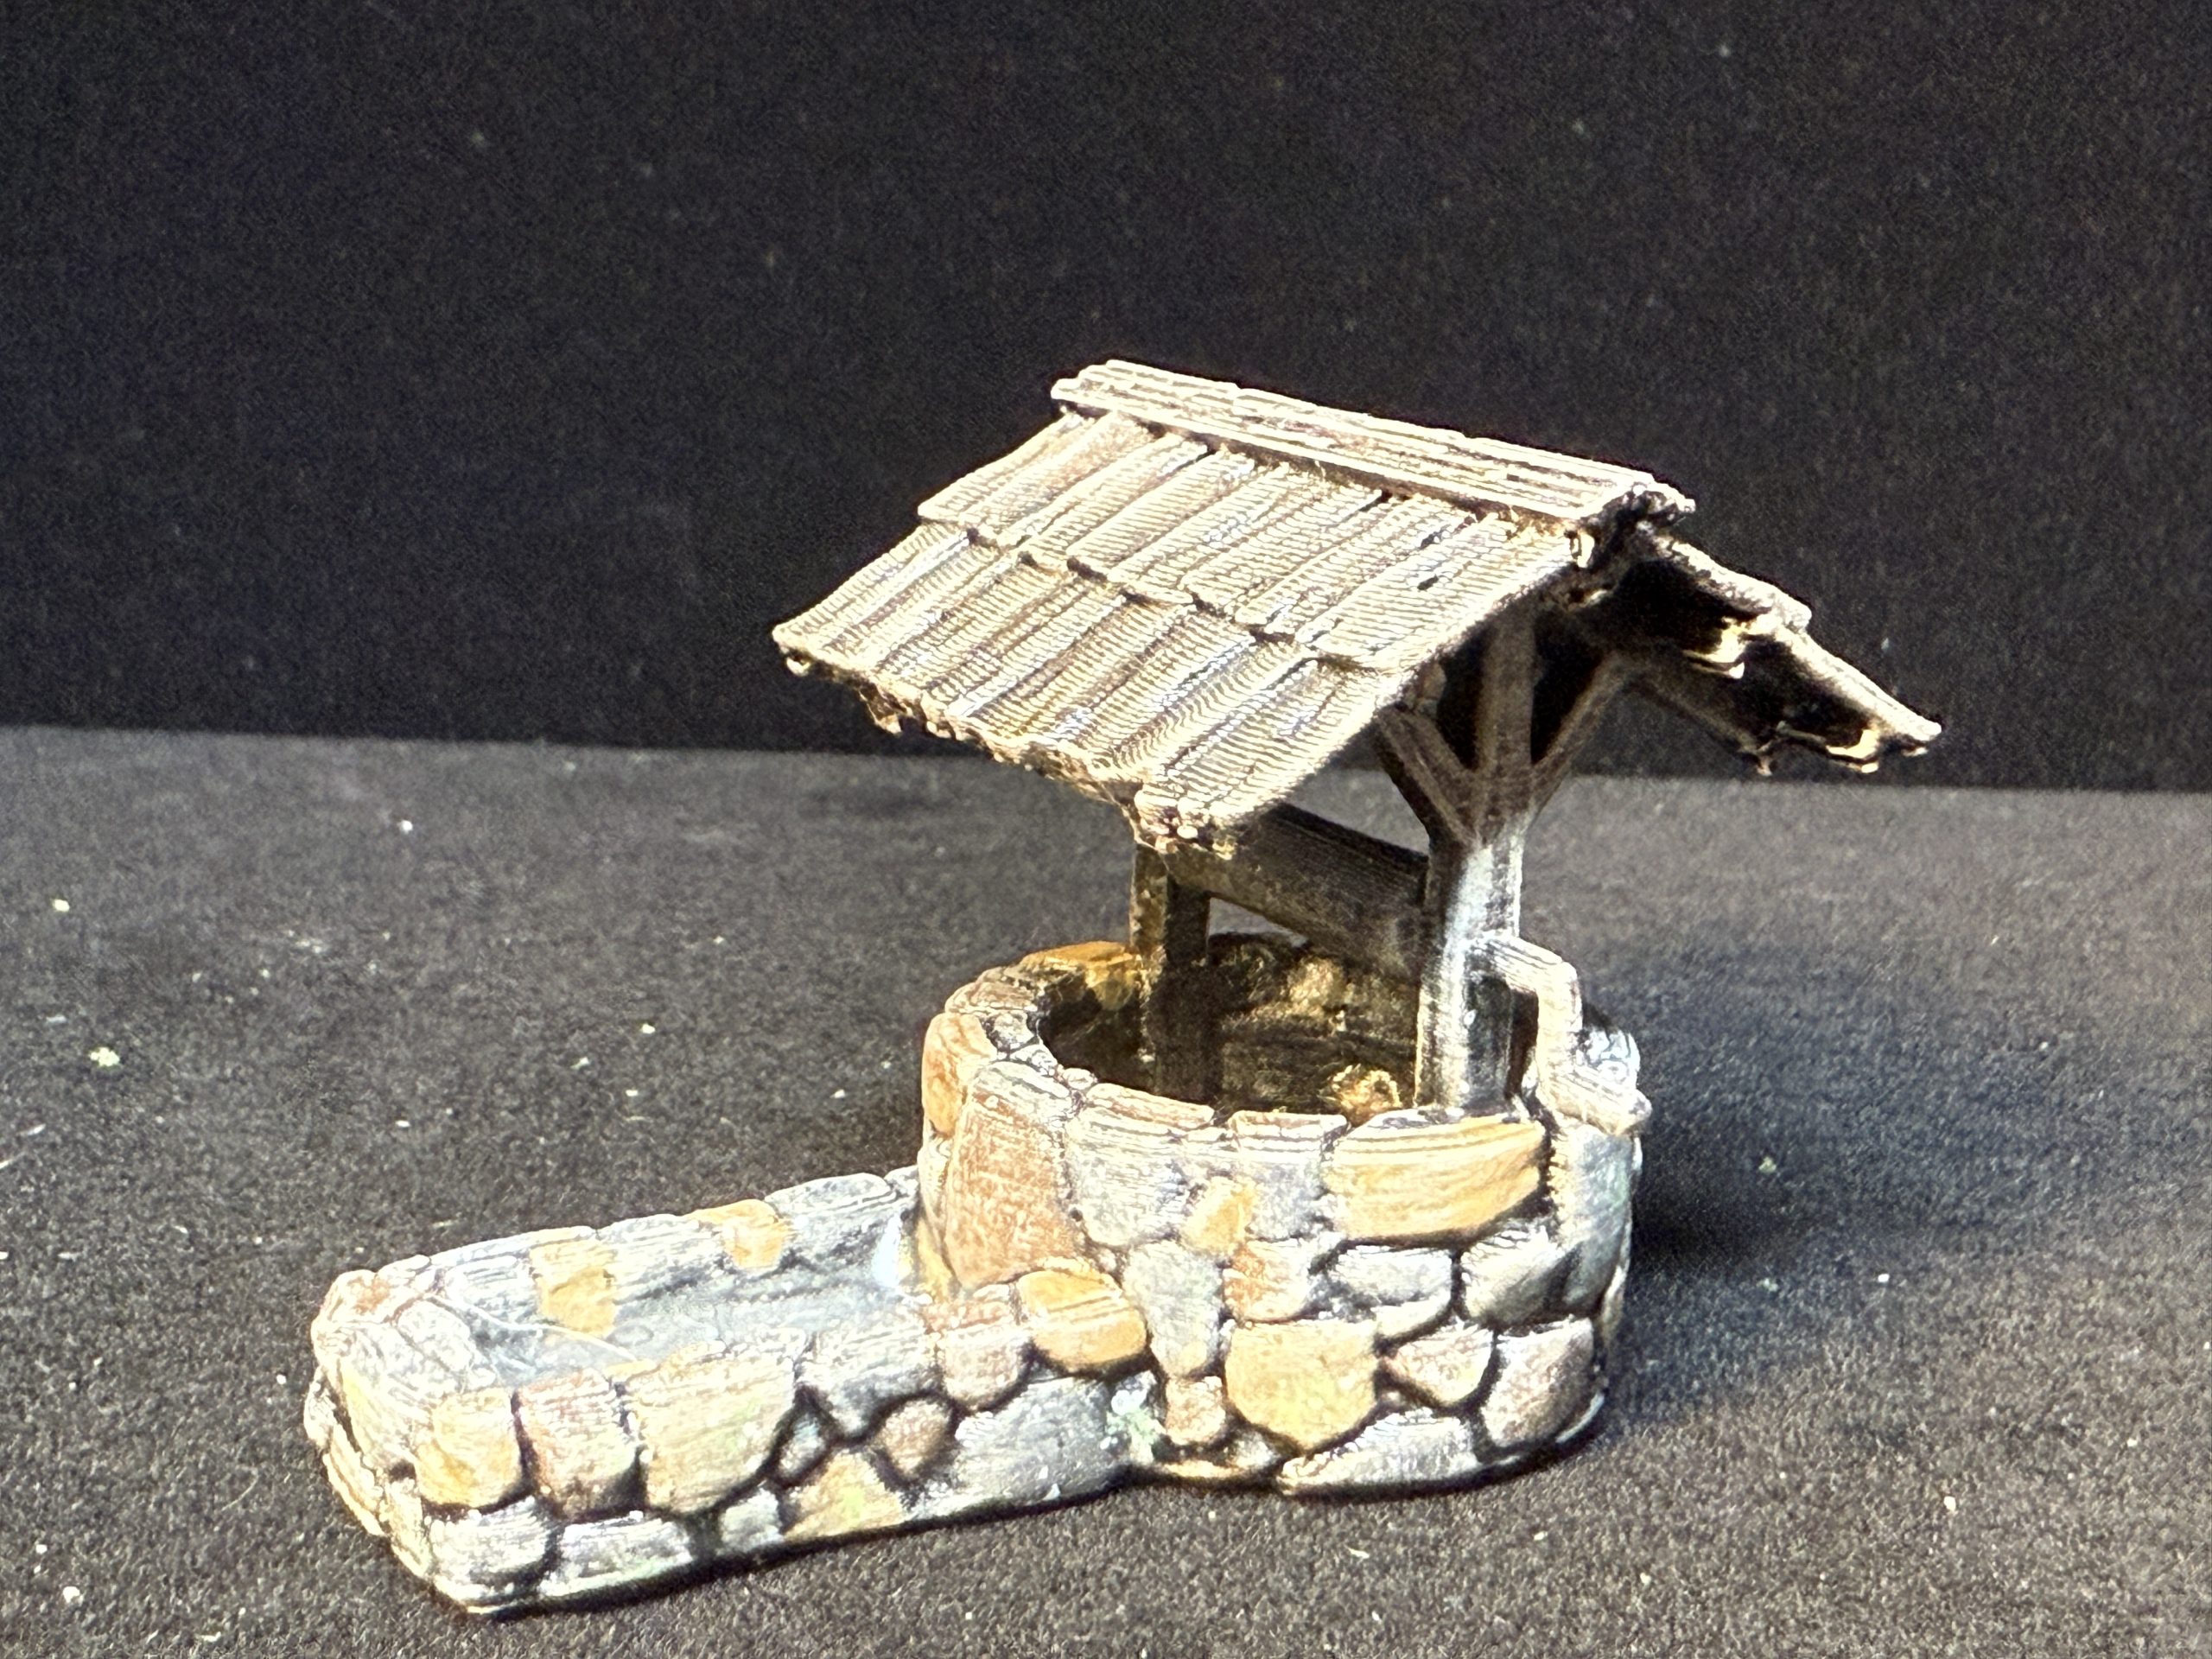
The village cross and the well originate from the same publisher as the church and they were easy to paint and rather nice looking. Of course, they can be used for a laundry list of games, making them some of the most versatile scatter terrain you will ever have.
Name: Covered Well
Publisher: Warhost – https://warhost.online/products/covered-well
Name: Village Cross
Publisher: Warhost – https://warhost.online/products/village-cross
Note that the metal plate on the cross was painted with some brass paint, washed with GW Reickland Flesh shade and then partially covered with a verdigris effect paint )GW Nihilakh Oxide).
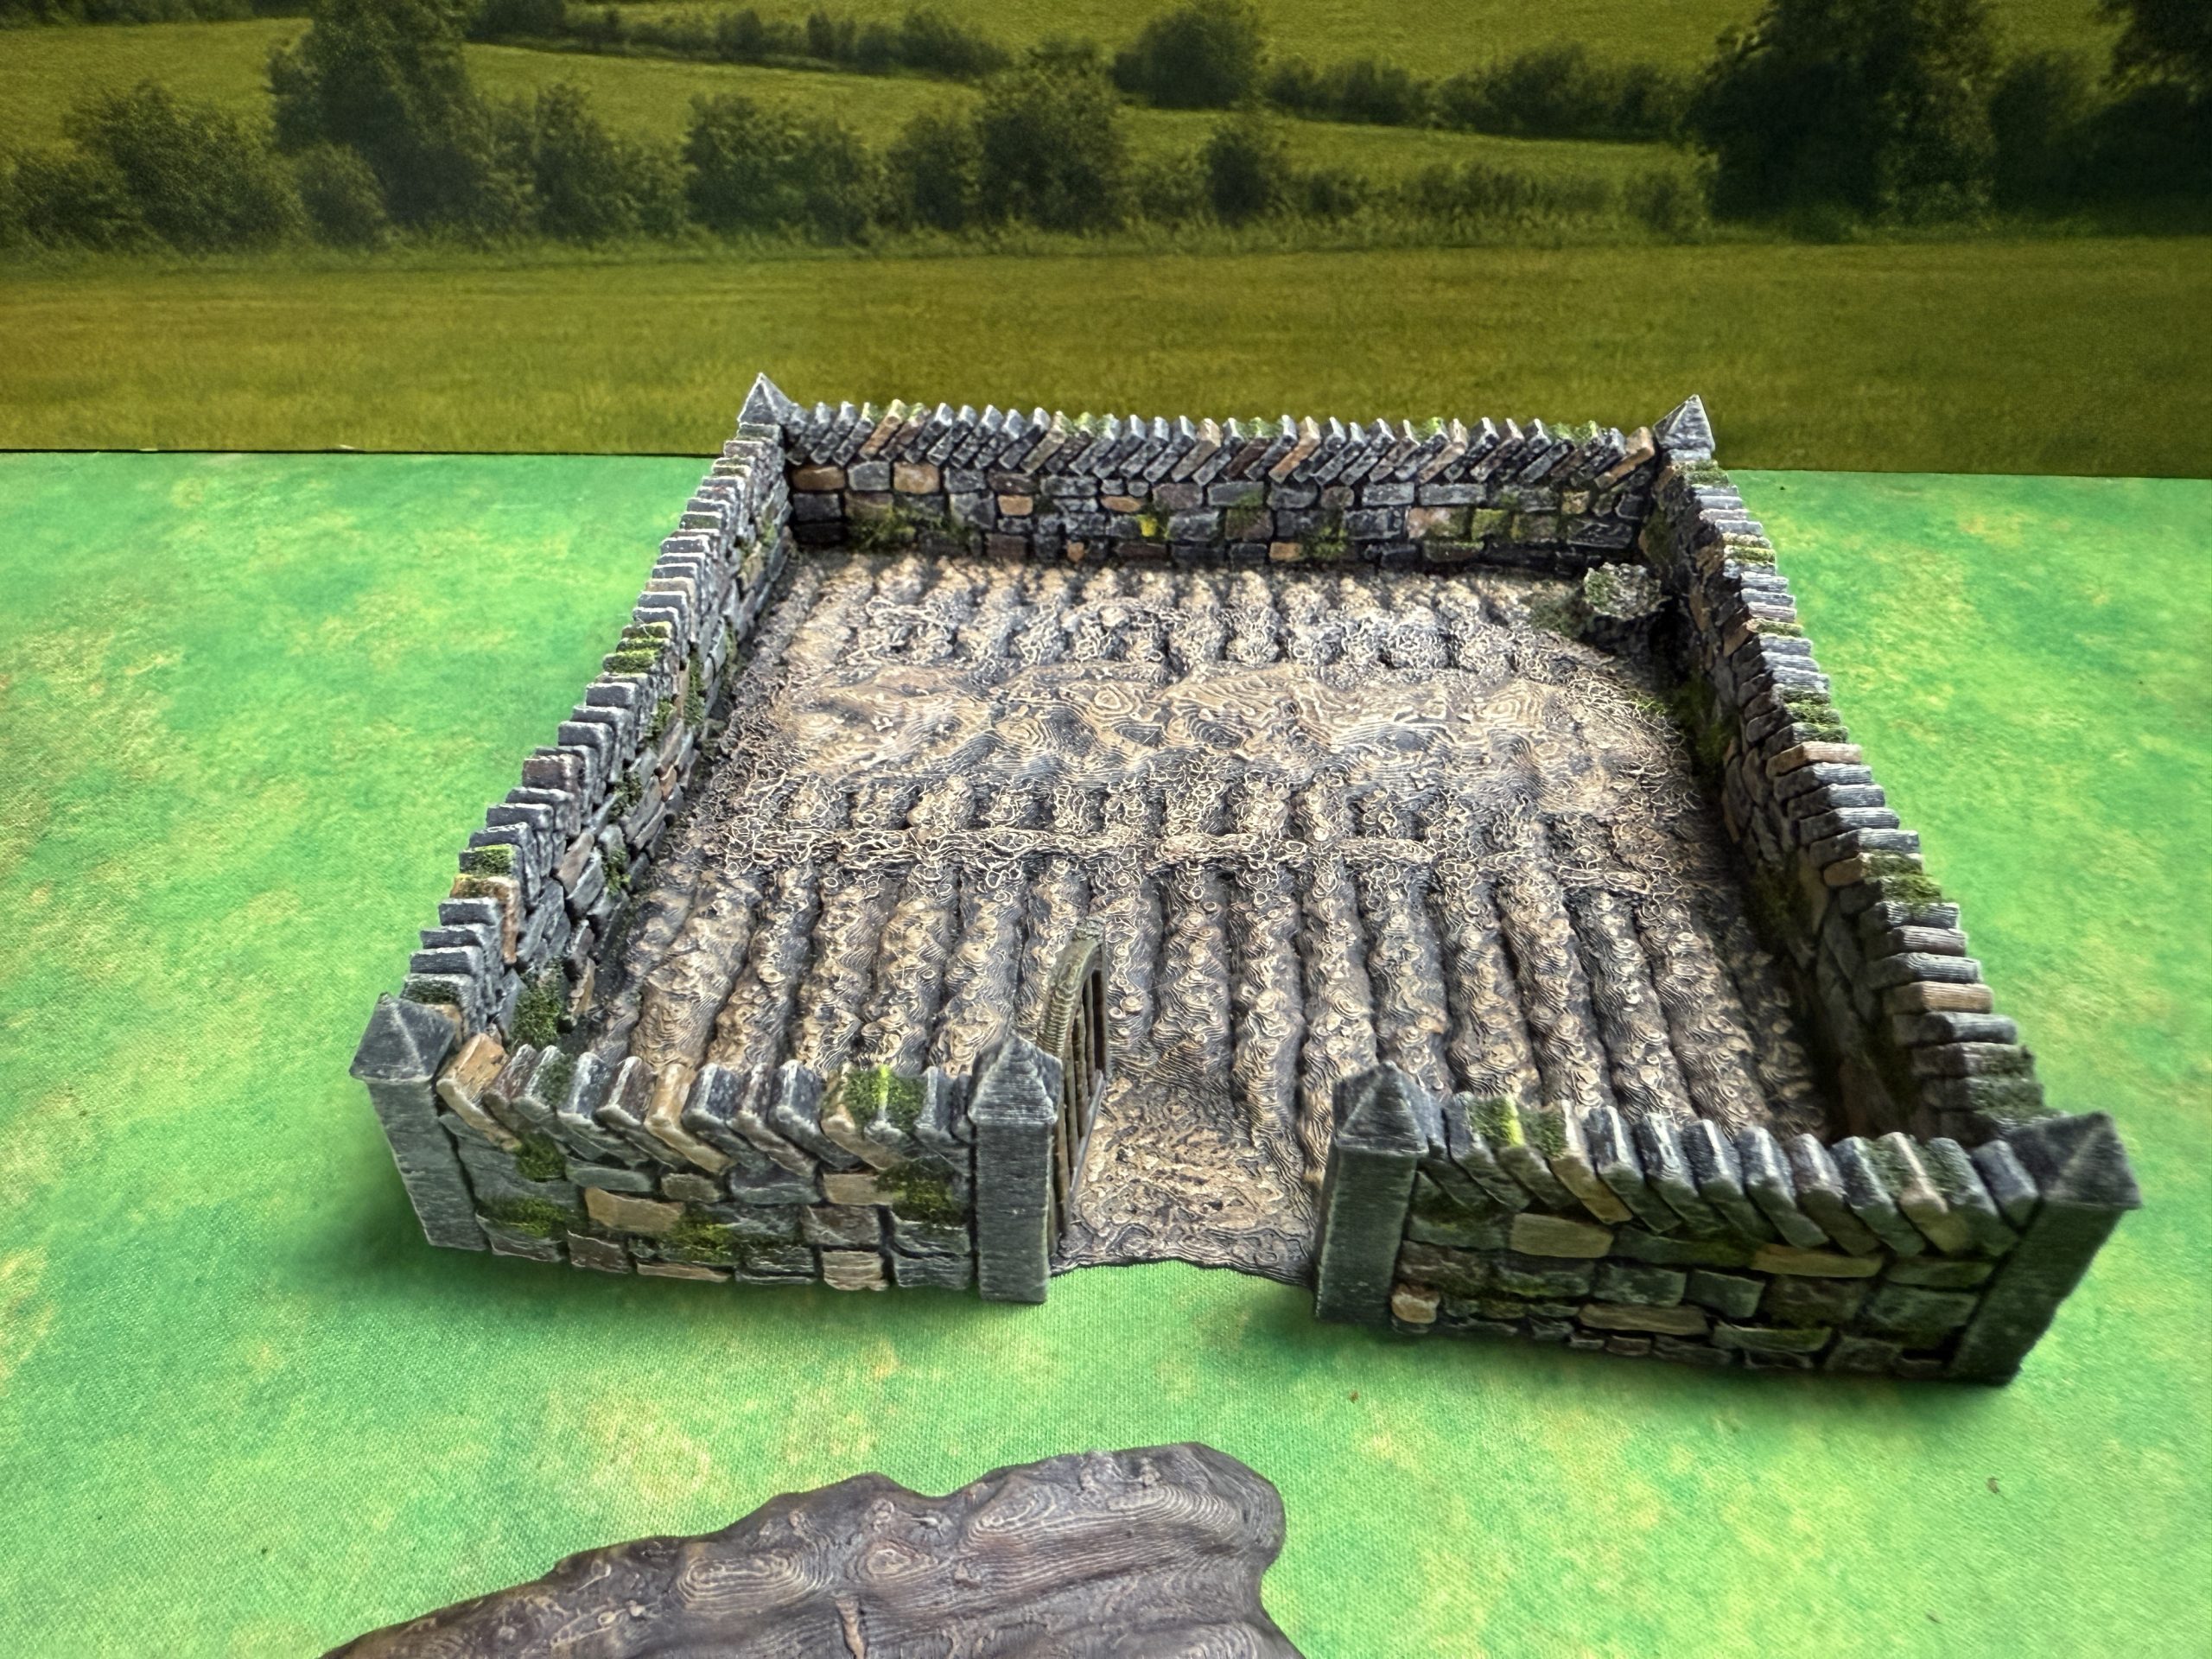
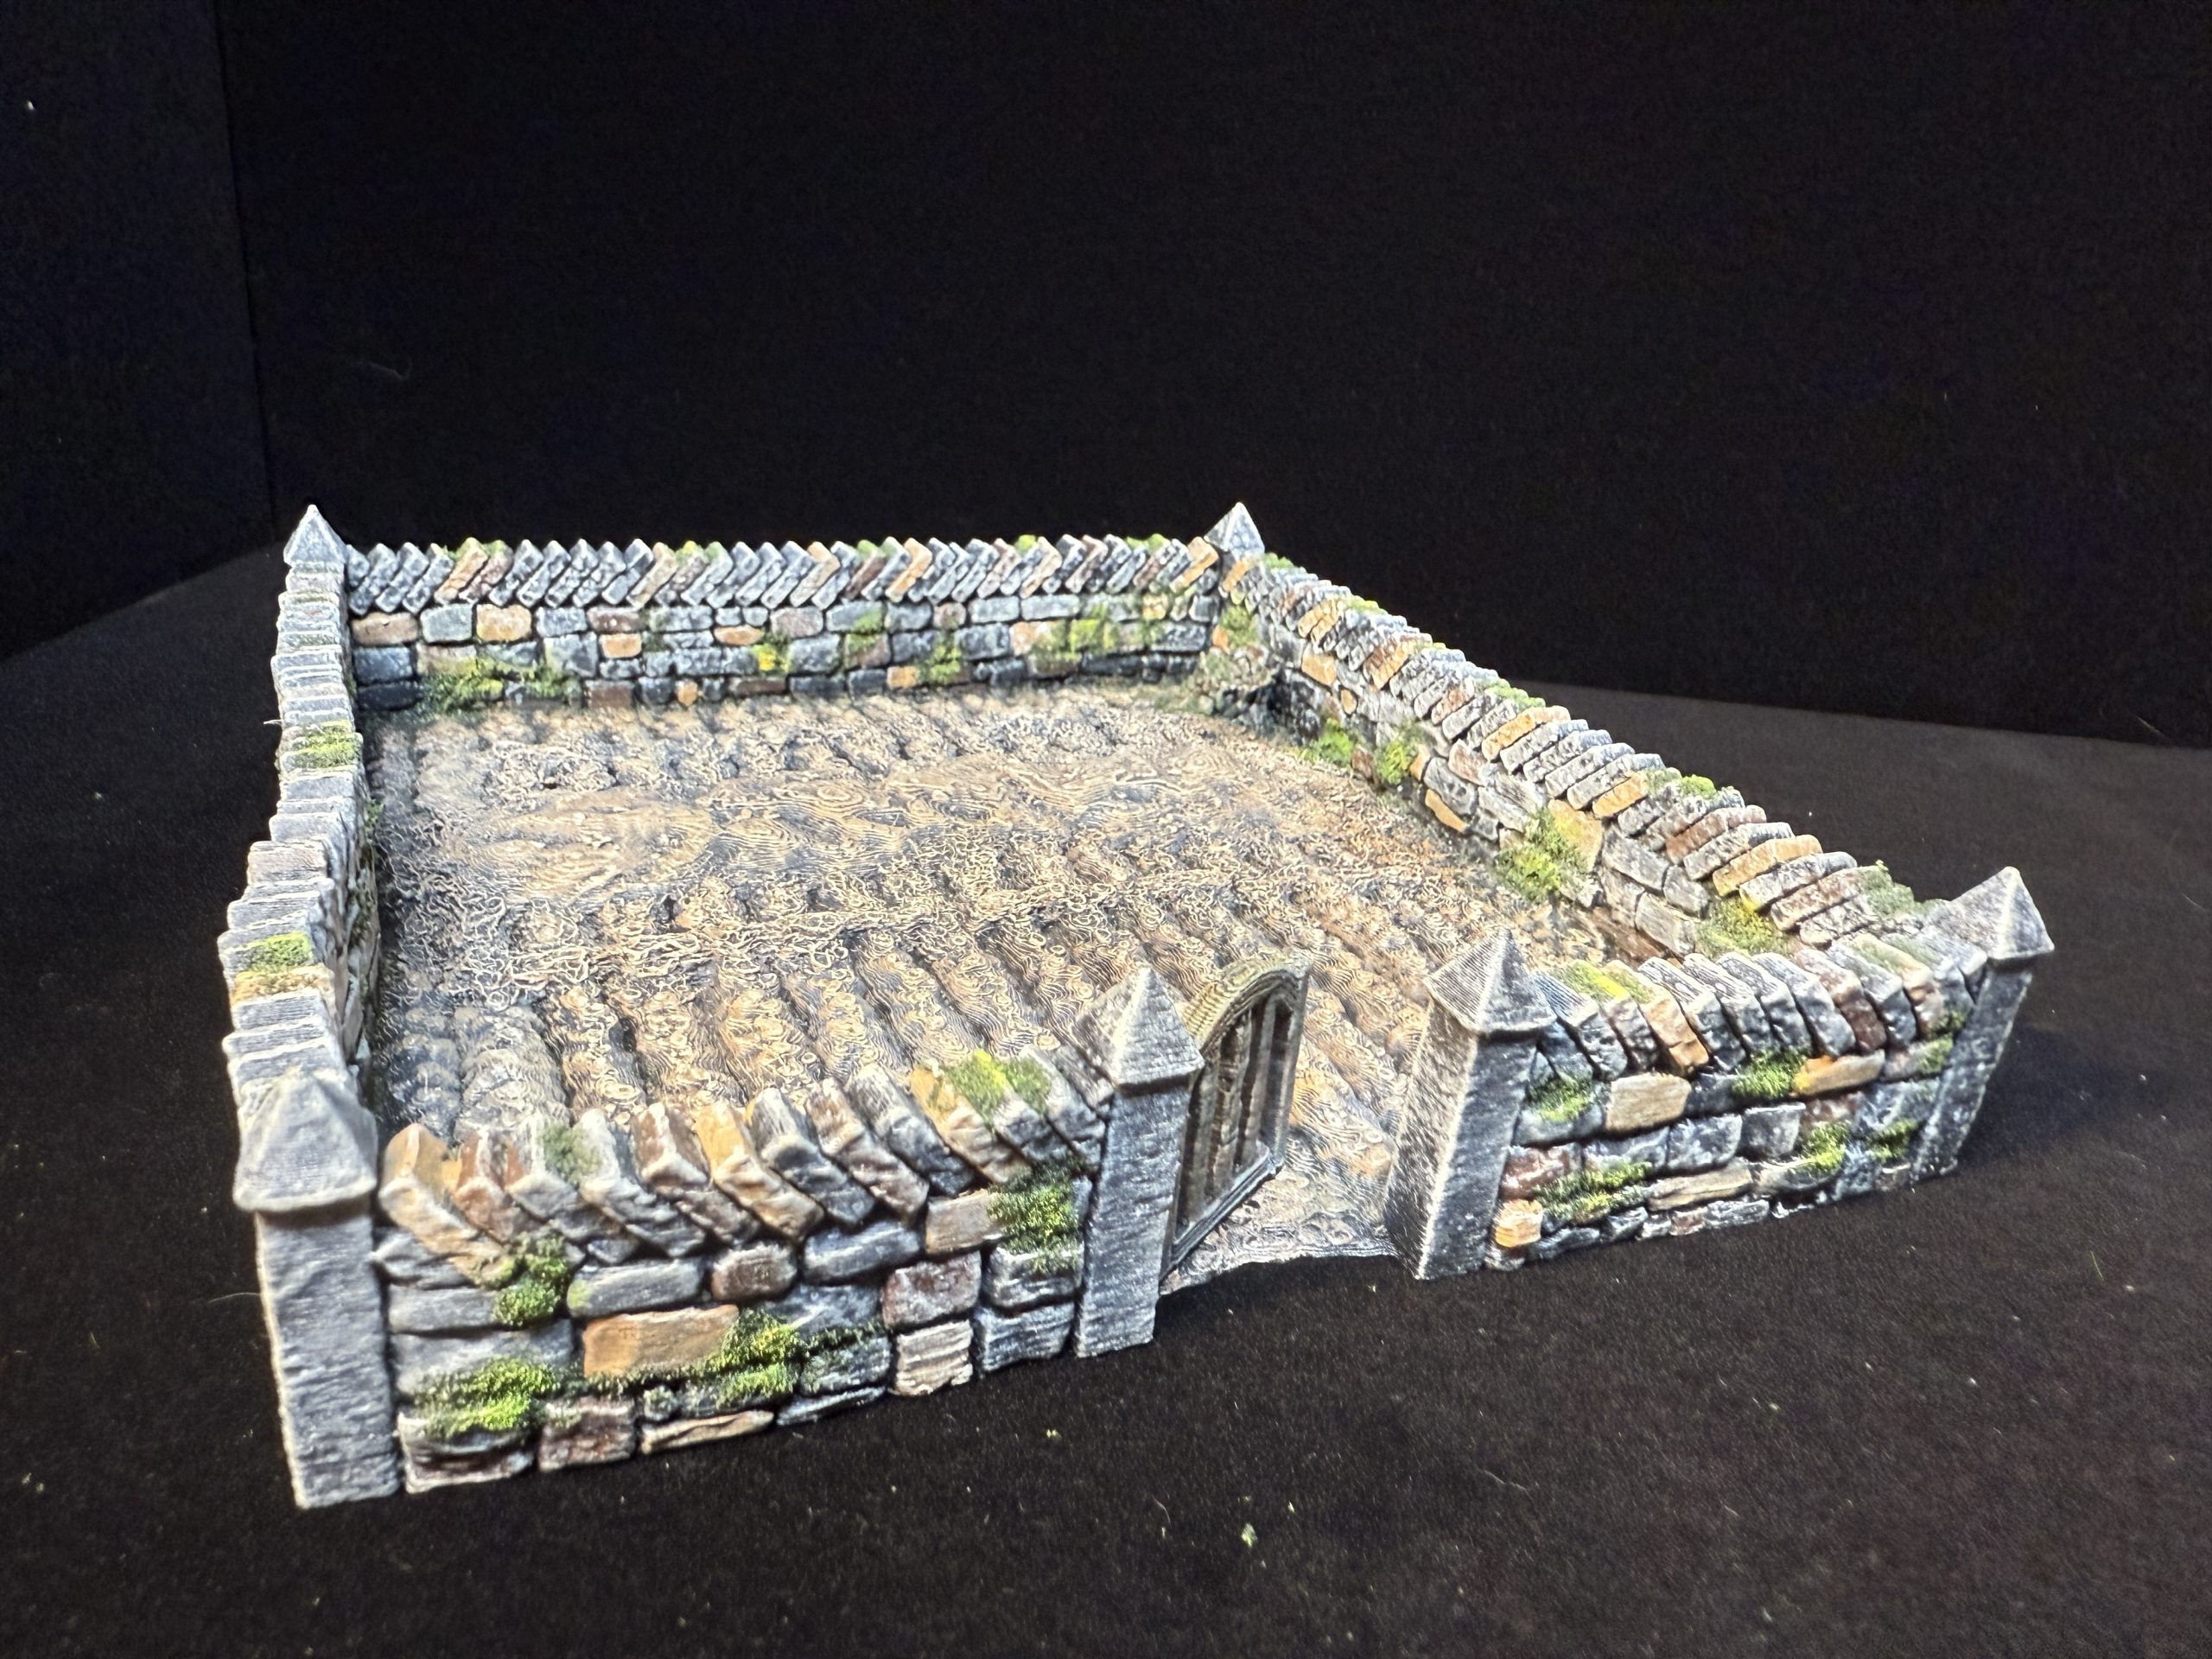
Finally the field was added, along with another one that I will not present here as it contains pumpkins and I do not want to receive comments that pumpkins were not part of Medieval agriculture 🙂
Name: Farm Fields
Publisher: Printable Scenery – https://www.printablescenery.com/product/farm-fields/
Barn and Granary
I wanted to provide a few utilitarian bâtiments to the village and thus decided to start with a barn and a granary, keeping in mind they could be used for Dark Ages games.
The barn is a simple rectangular building but comes with a nice wood stack on the side, that can be used separately.
Name: Norma Stone Barn
Publisher: Printable Scenery – https://www.printablescenery.com/product/norman-stone-barn/
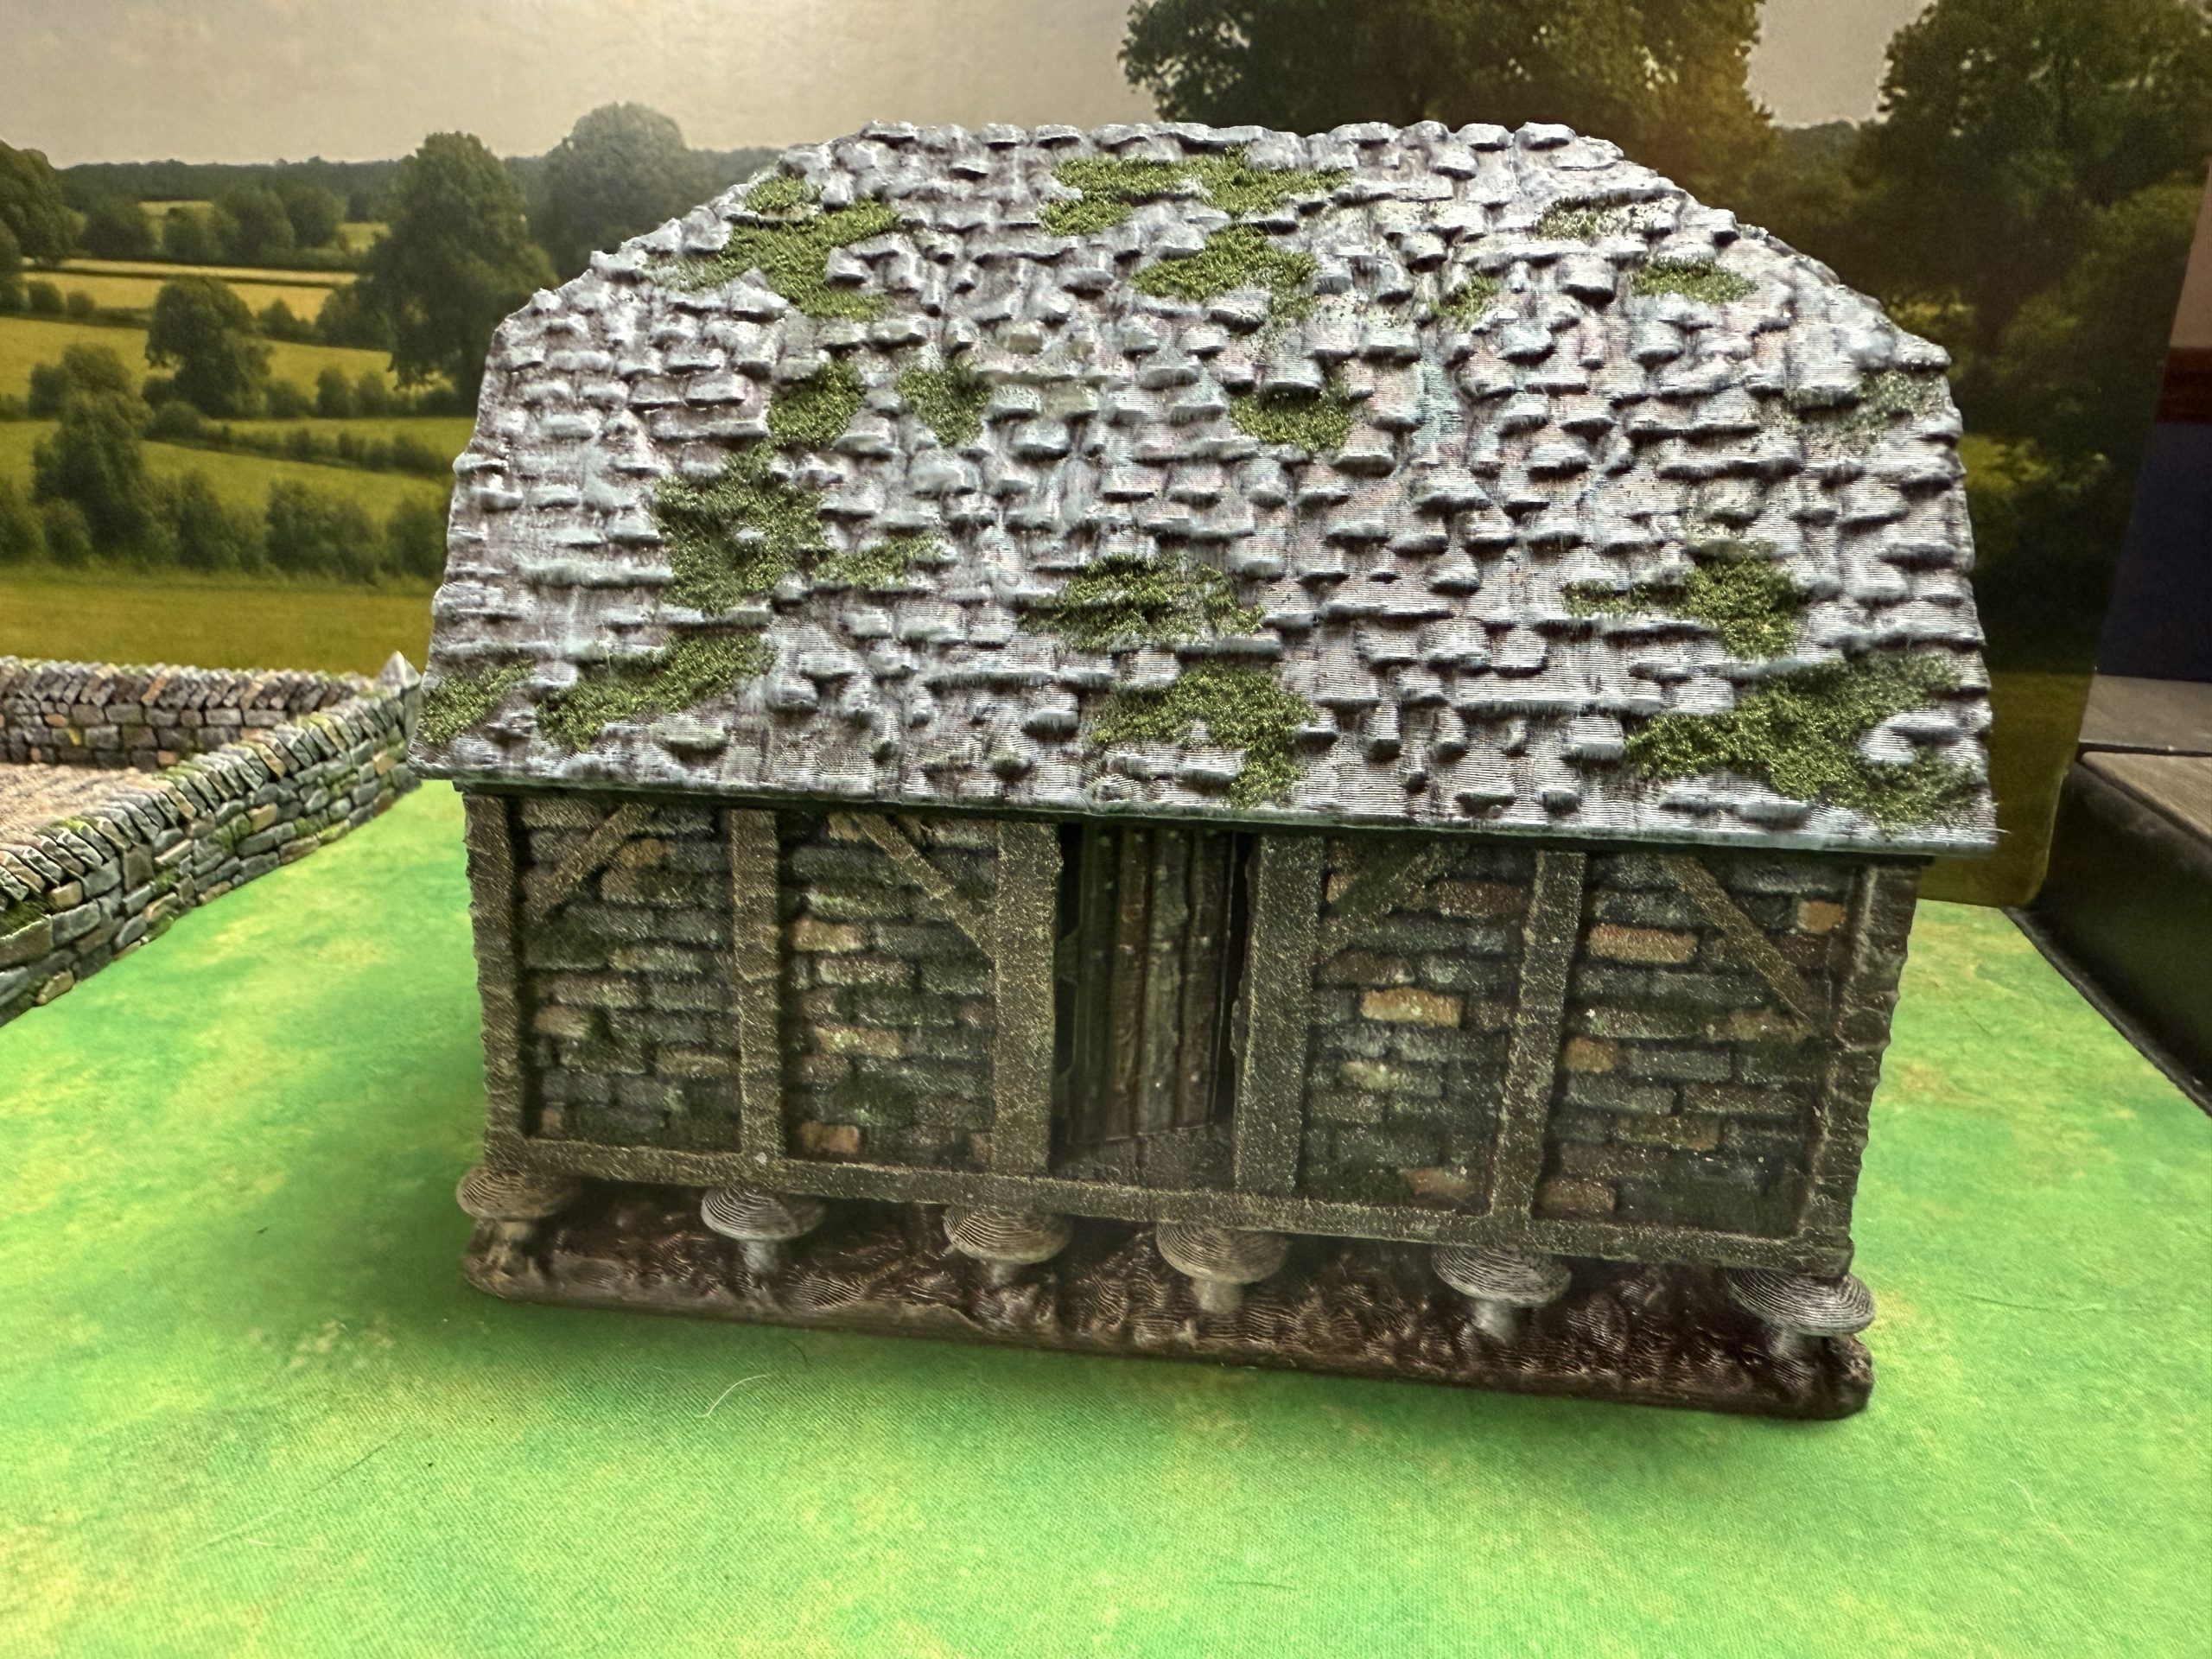
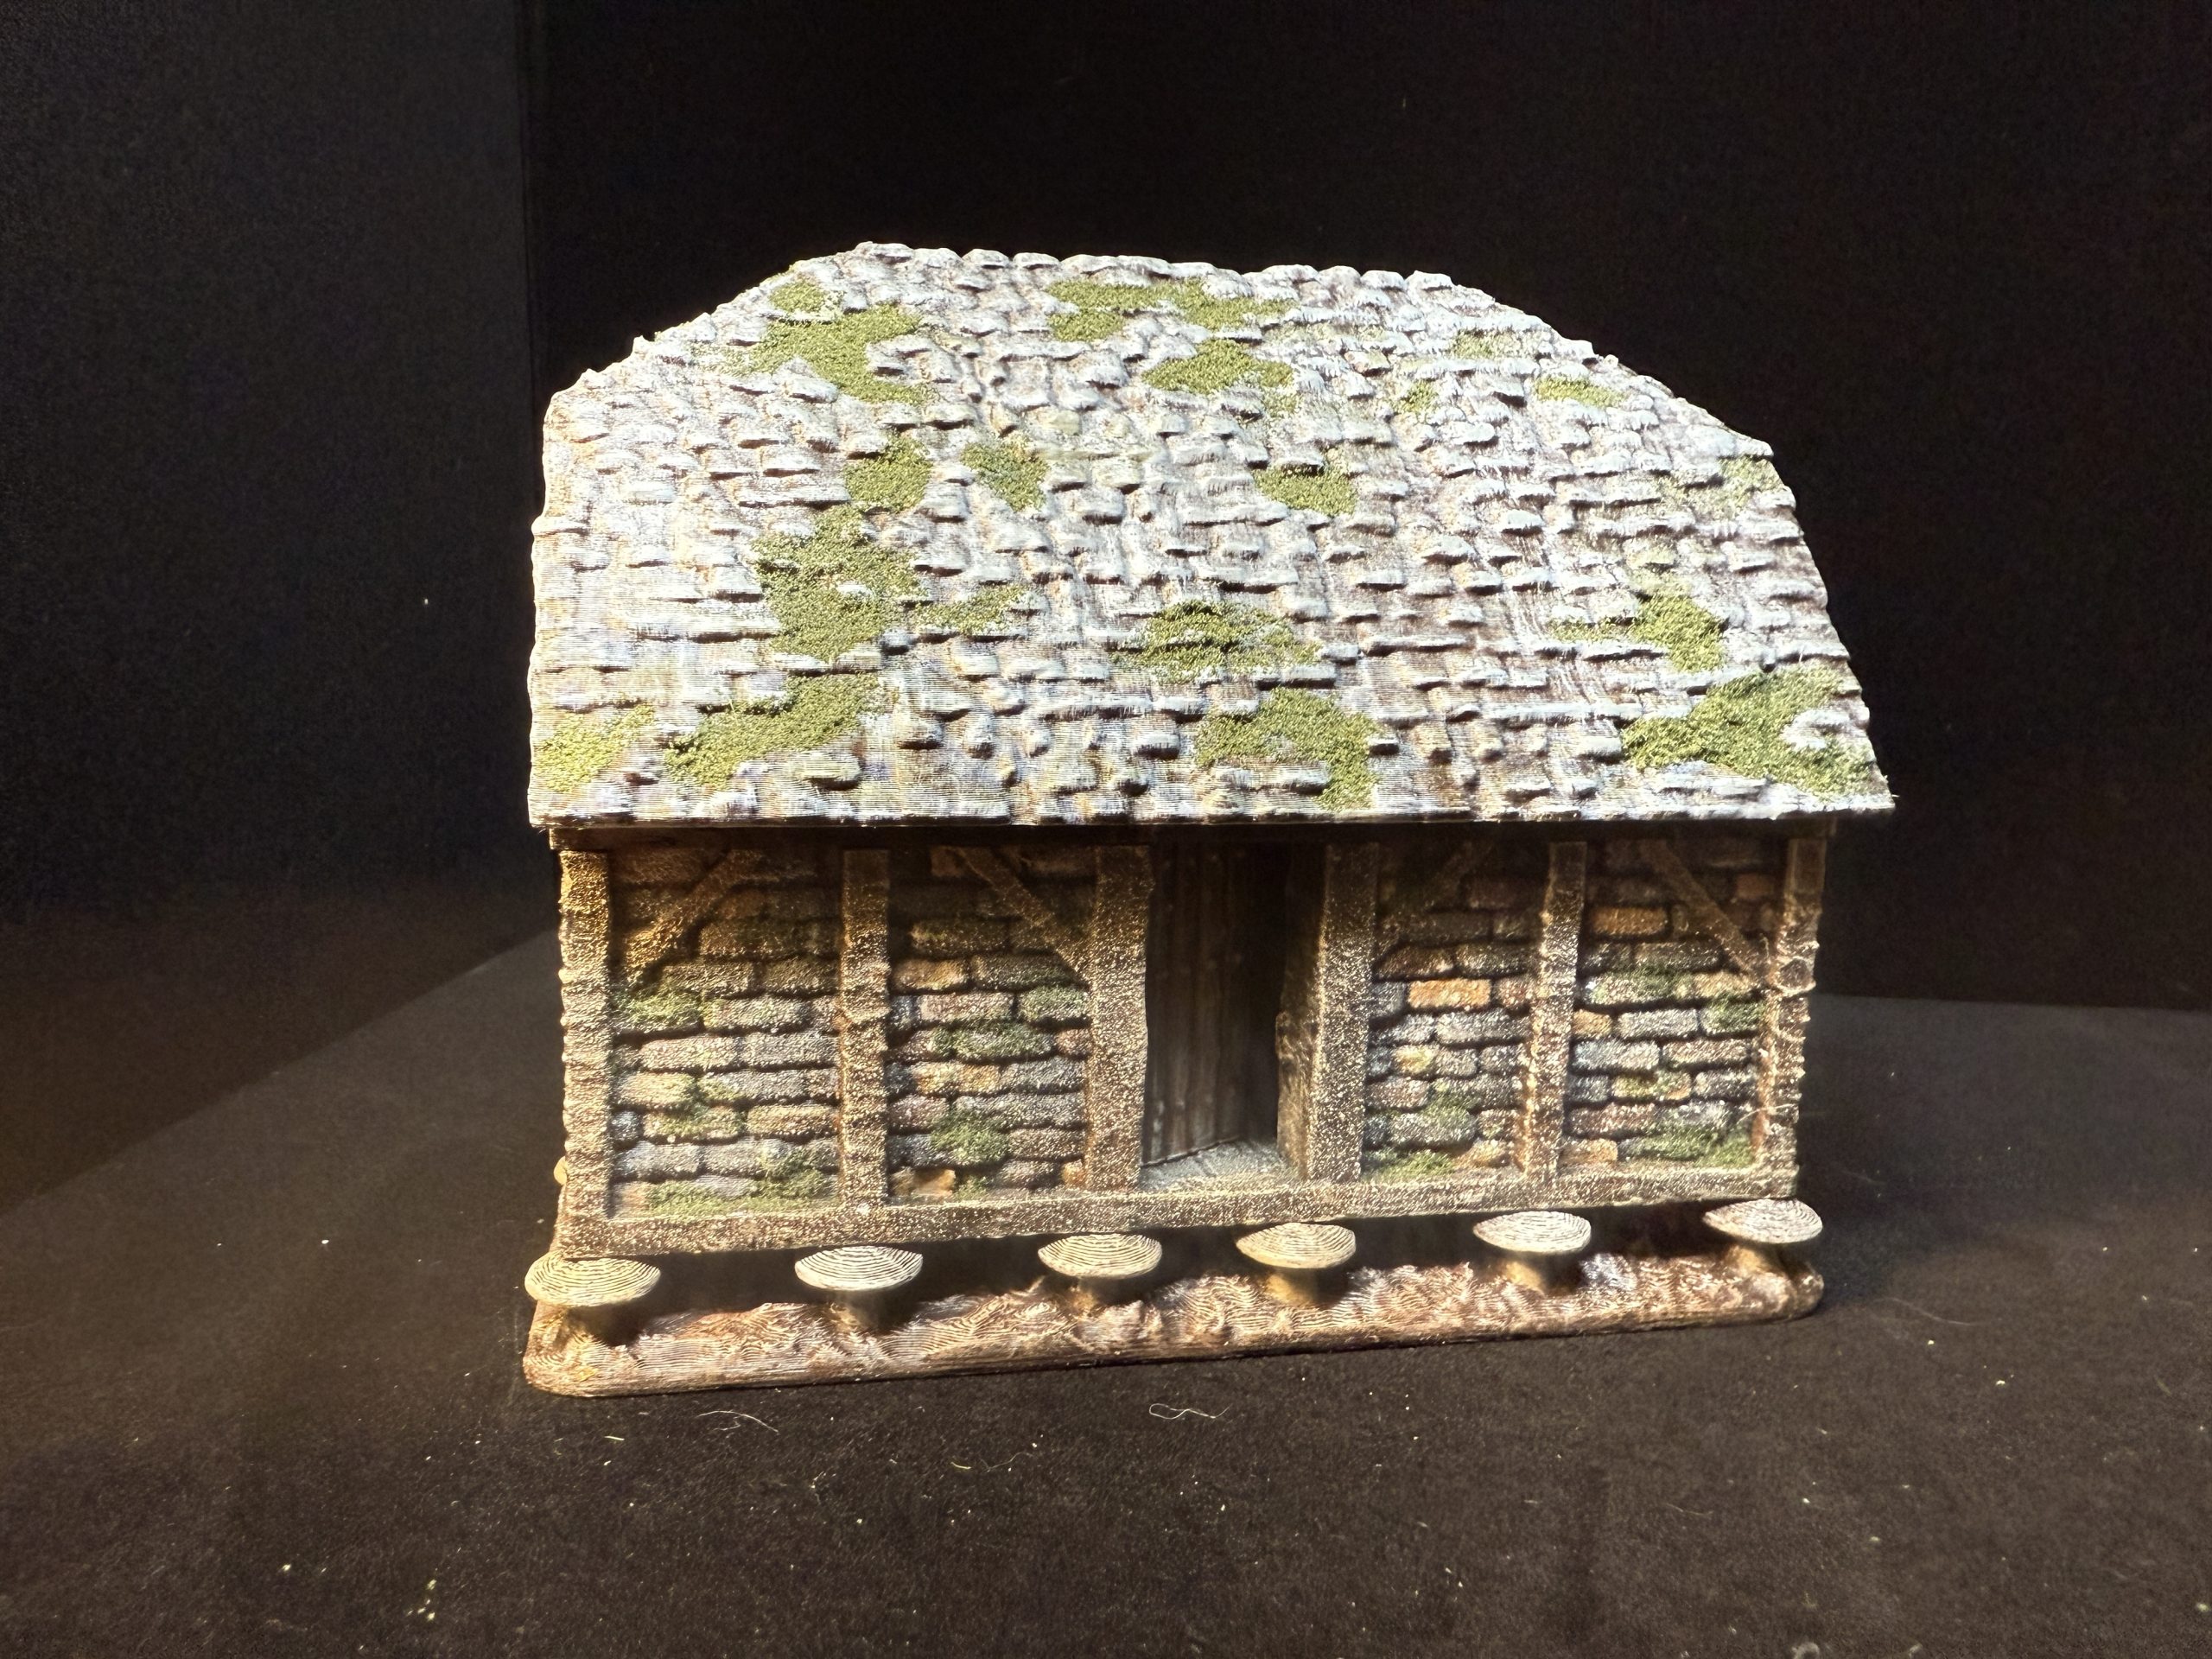
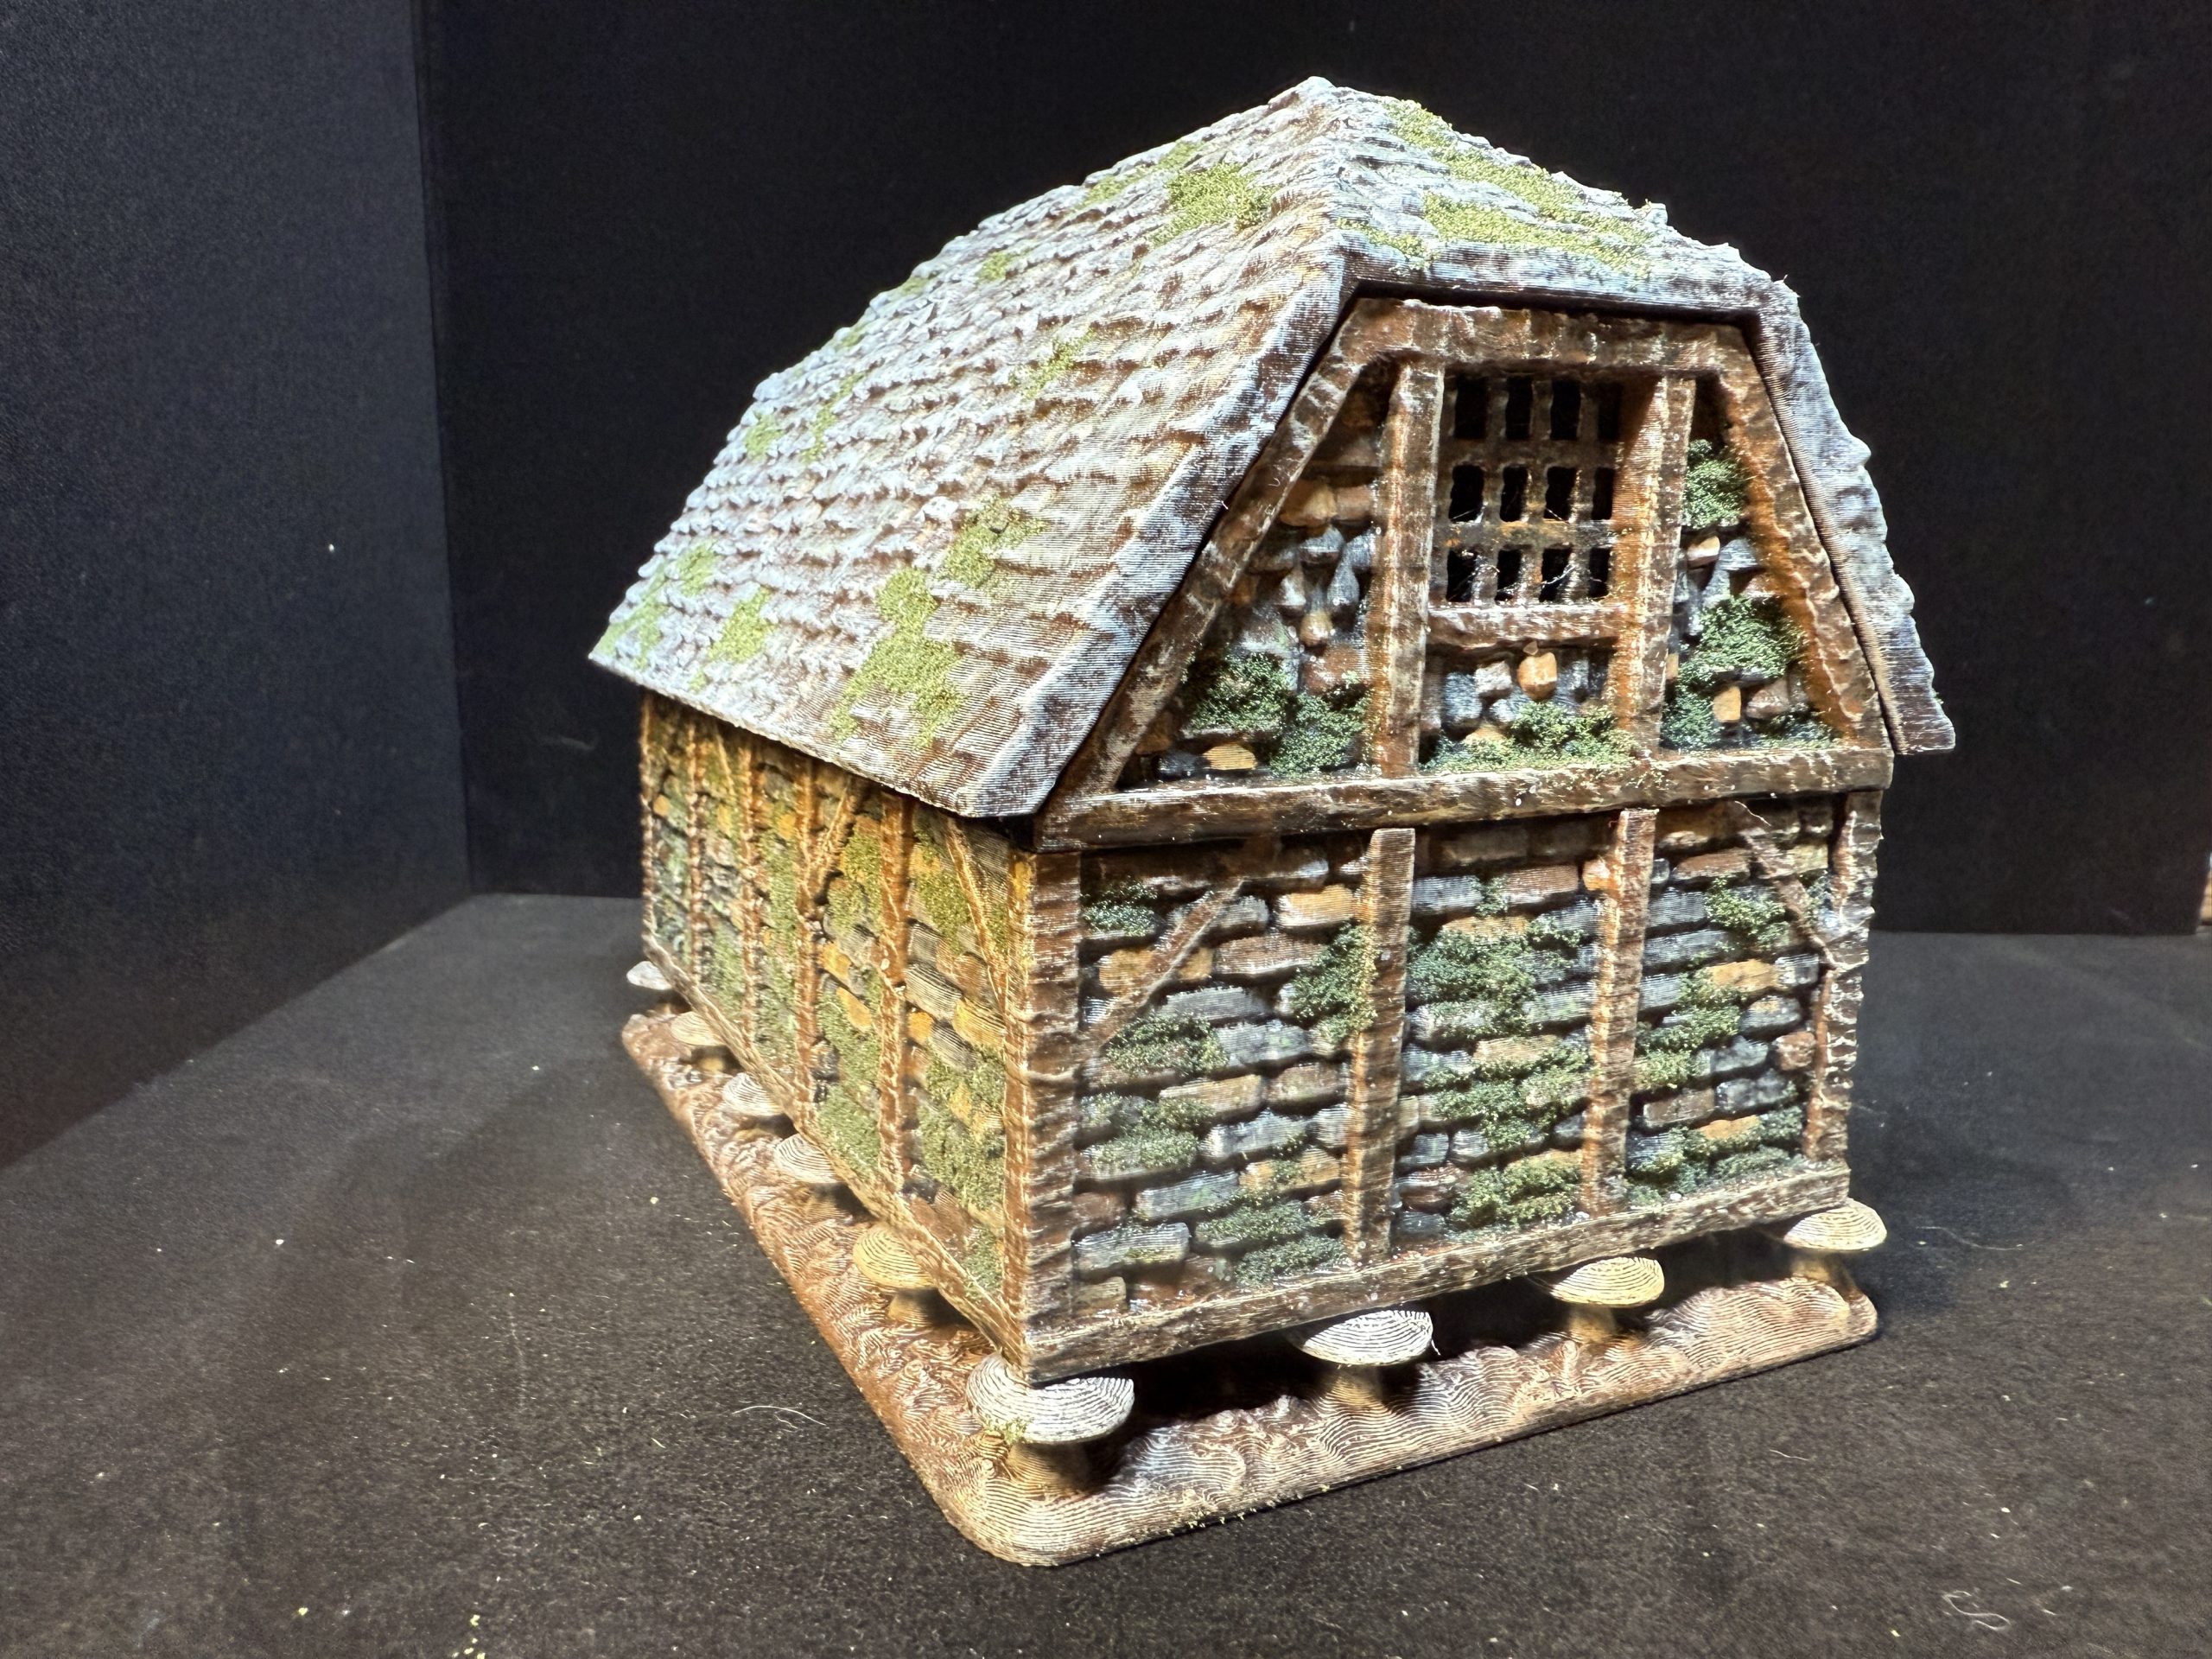
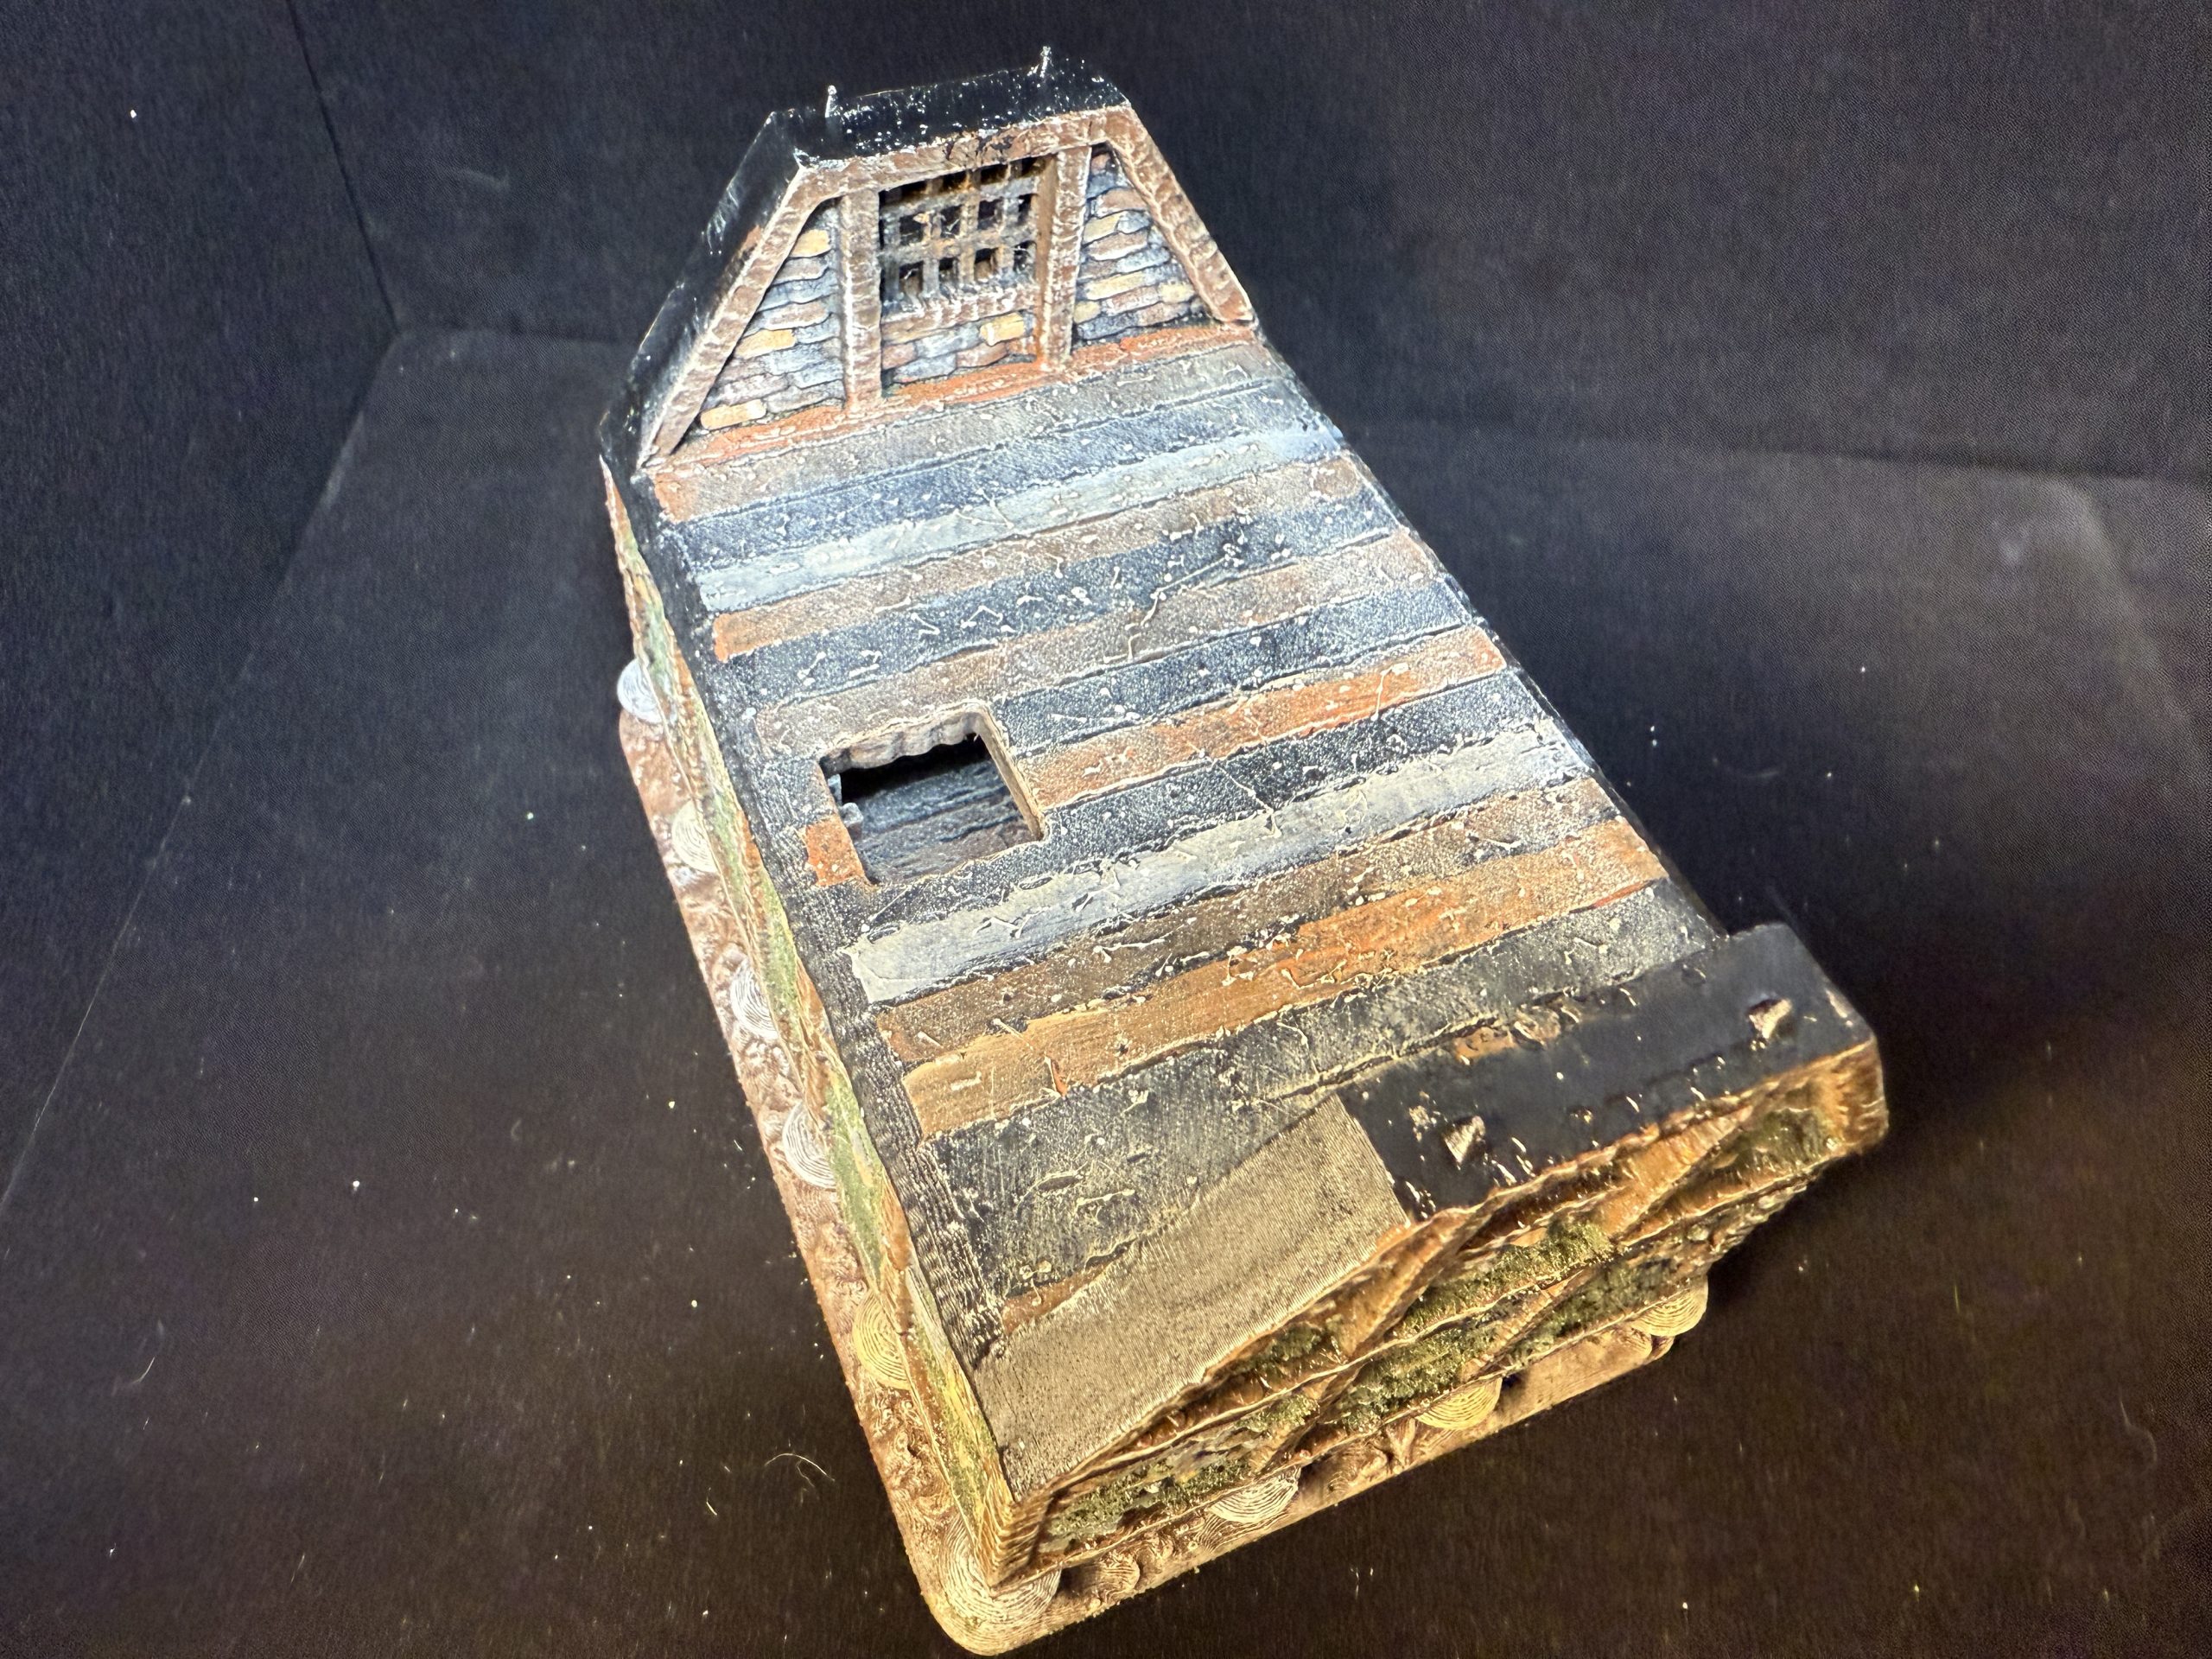
The granary is a more complex model which provide an opportunity to apply all the techniques described priorly in this project. It can also be used to store objective markers if needed.
Name: Medieval Granary
Publisher: Miniature Land – https://www.myminifactory.com/object/3d-print-medieval-granary-tabletop-terrain-28-mm-296433

Houses
I would like to first go through the three different types of houses I printed and painted for this table, starting with the humble small round house, which I feel I will print several off. IT can also be easily used for Dark Ages games such as Pillage.
Name: Small Round House
Publisher: Printable Scenery – https://www.printablescenery.com/product/small-round-house/
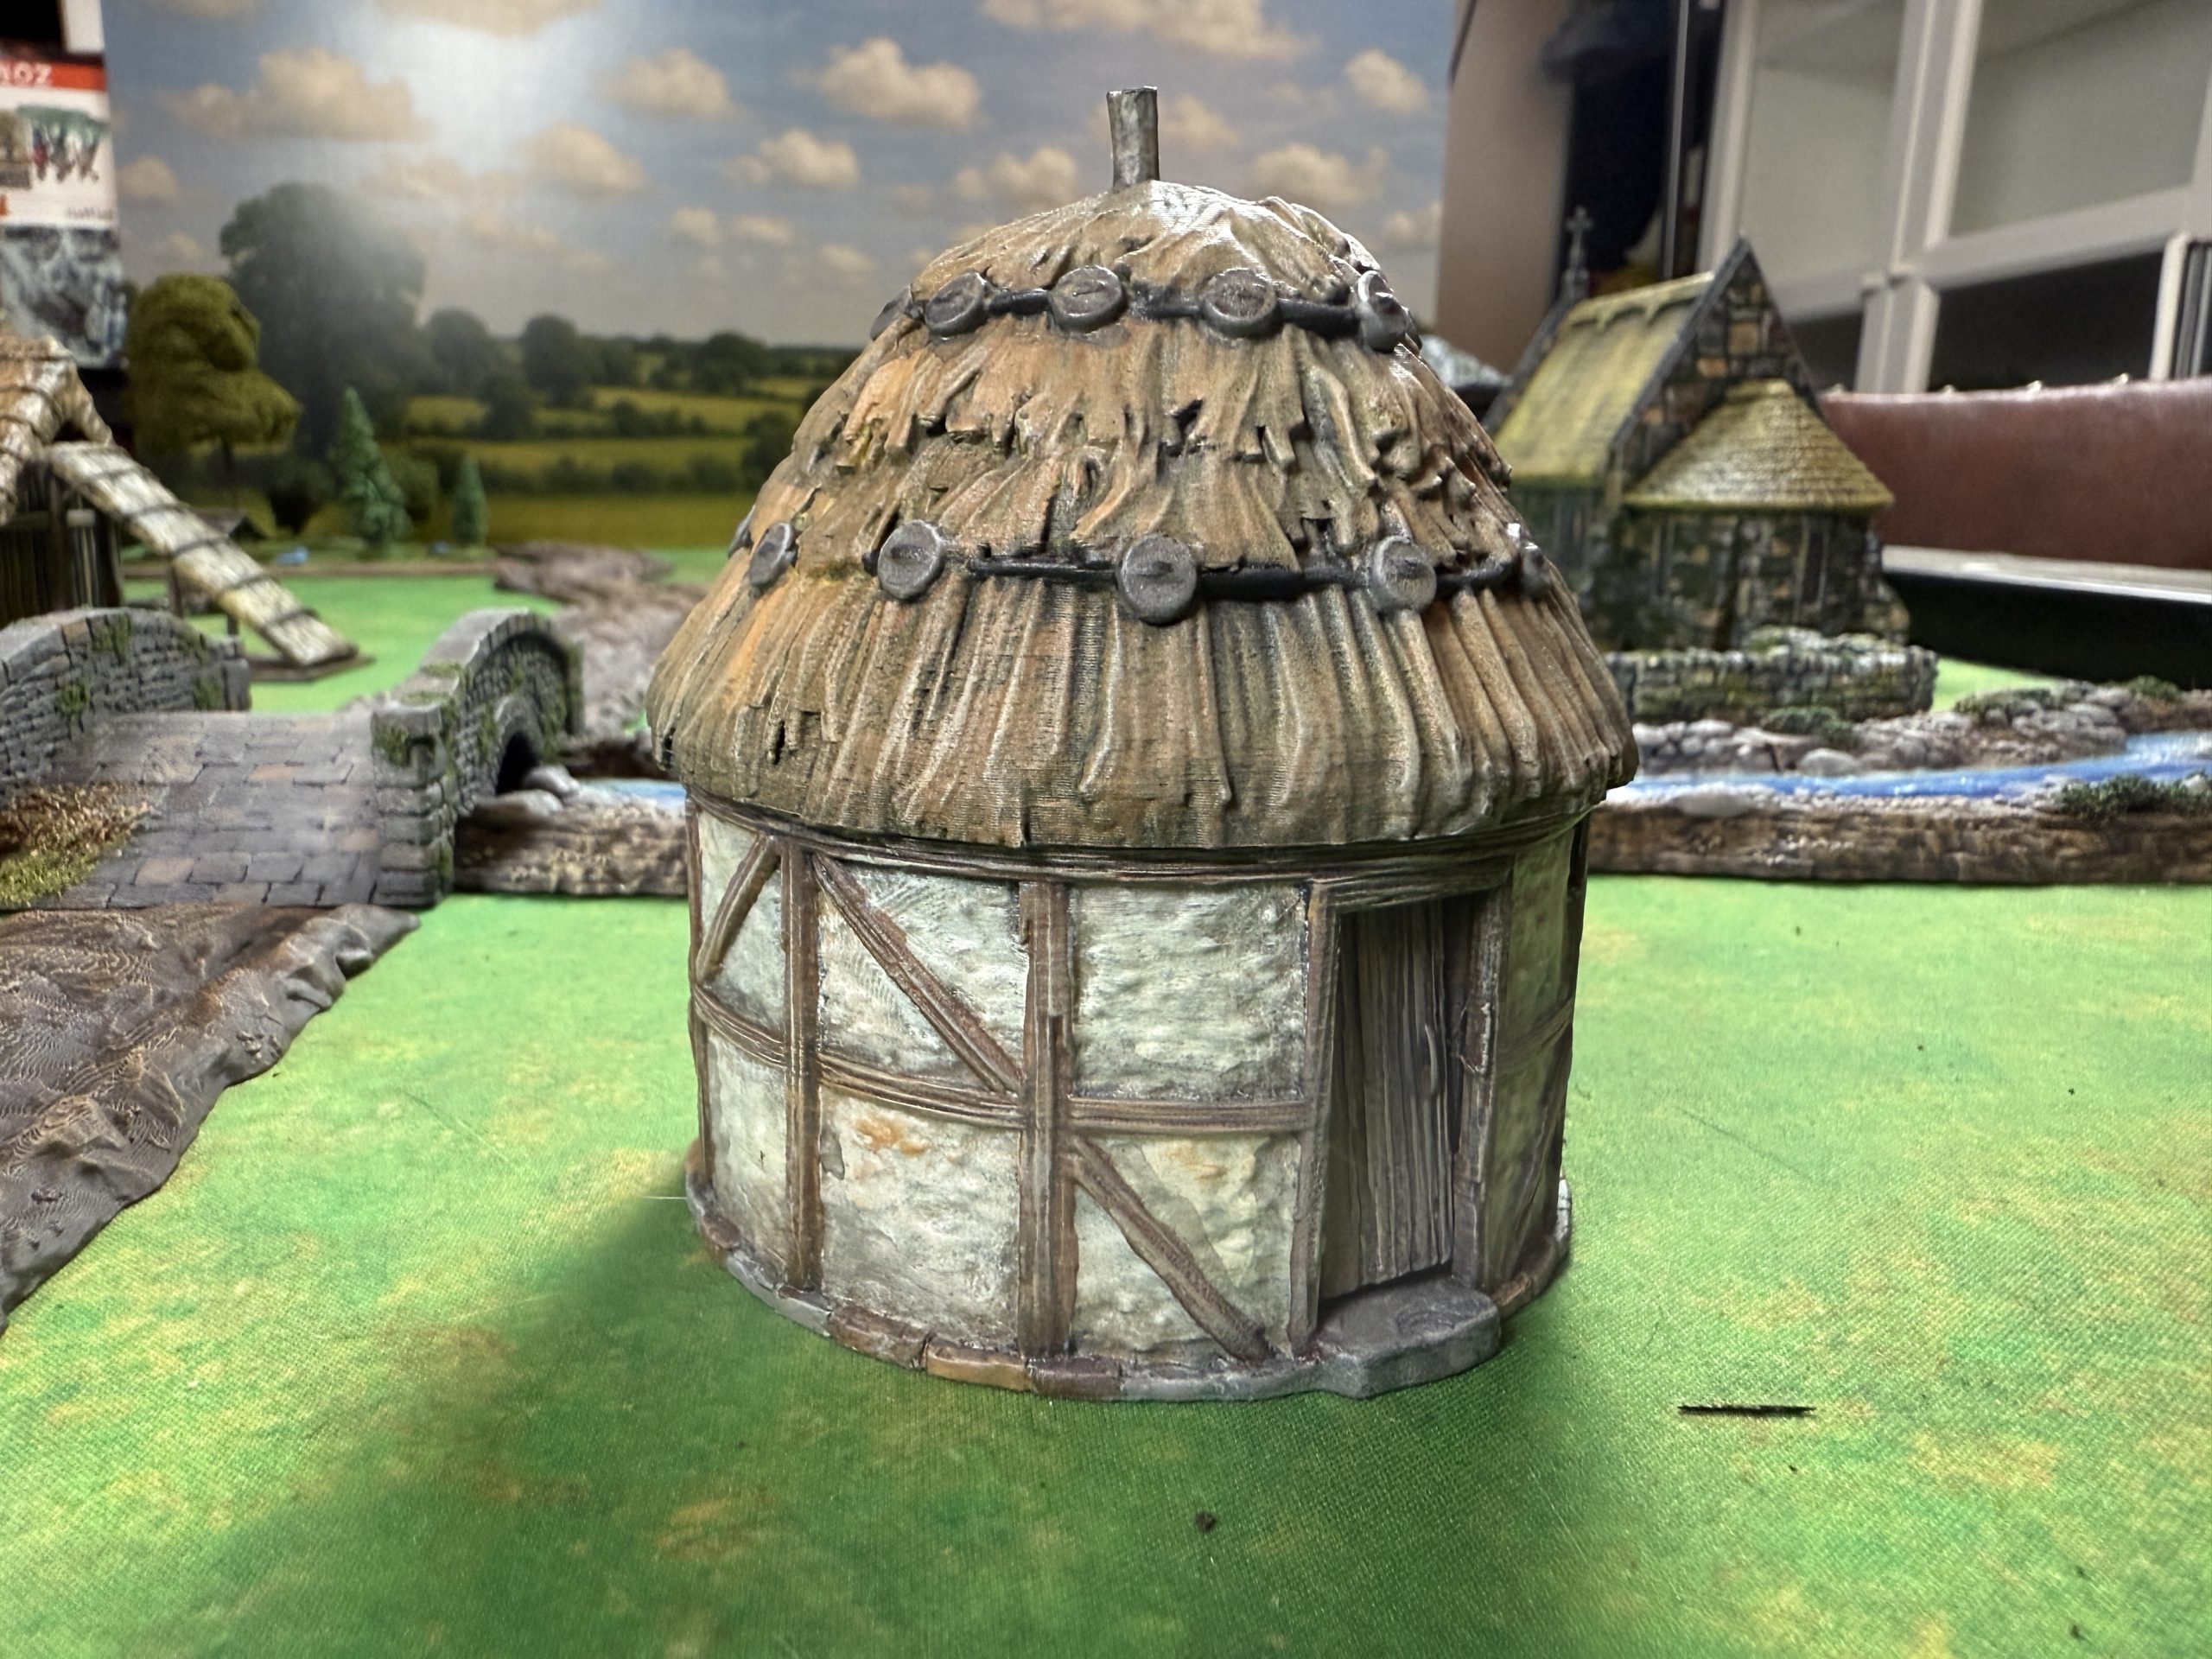 Printable Scenery also offers a ruined version of this house, as they most often do.
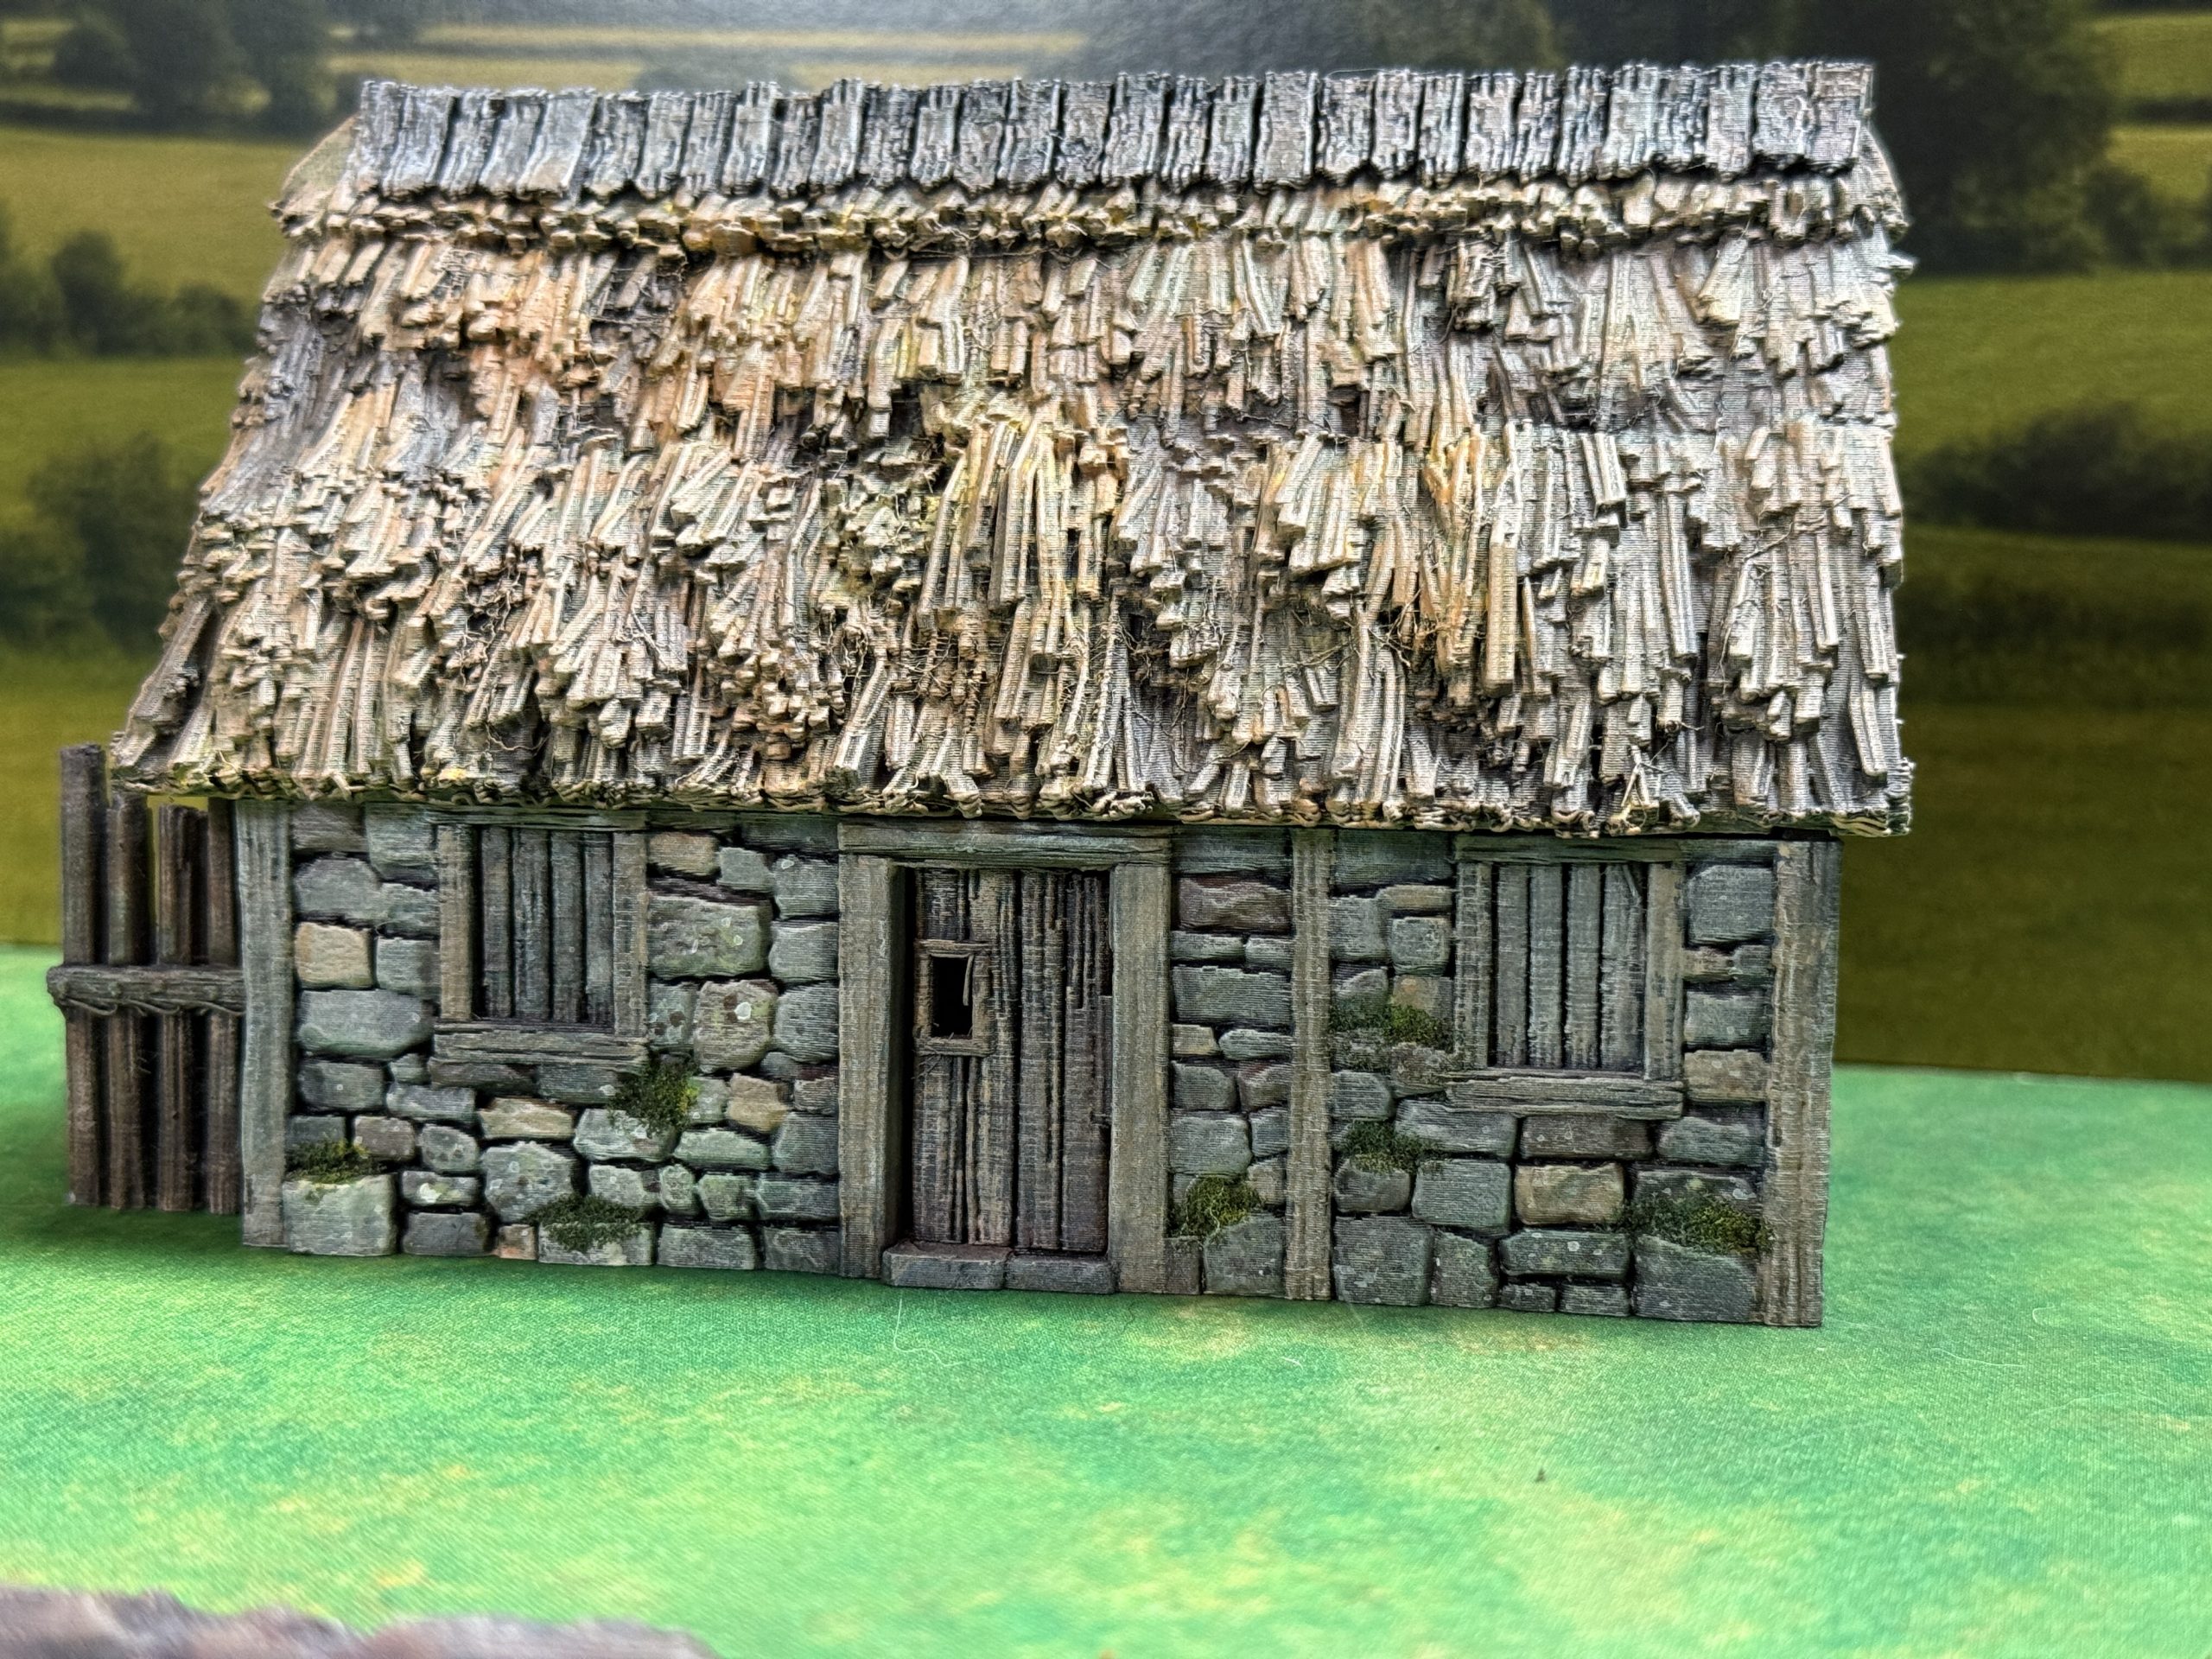
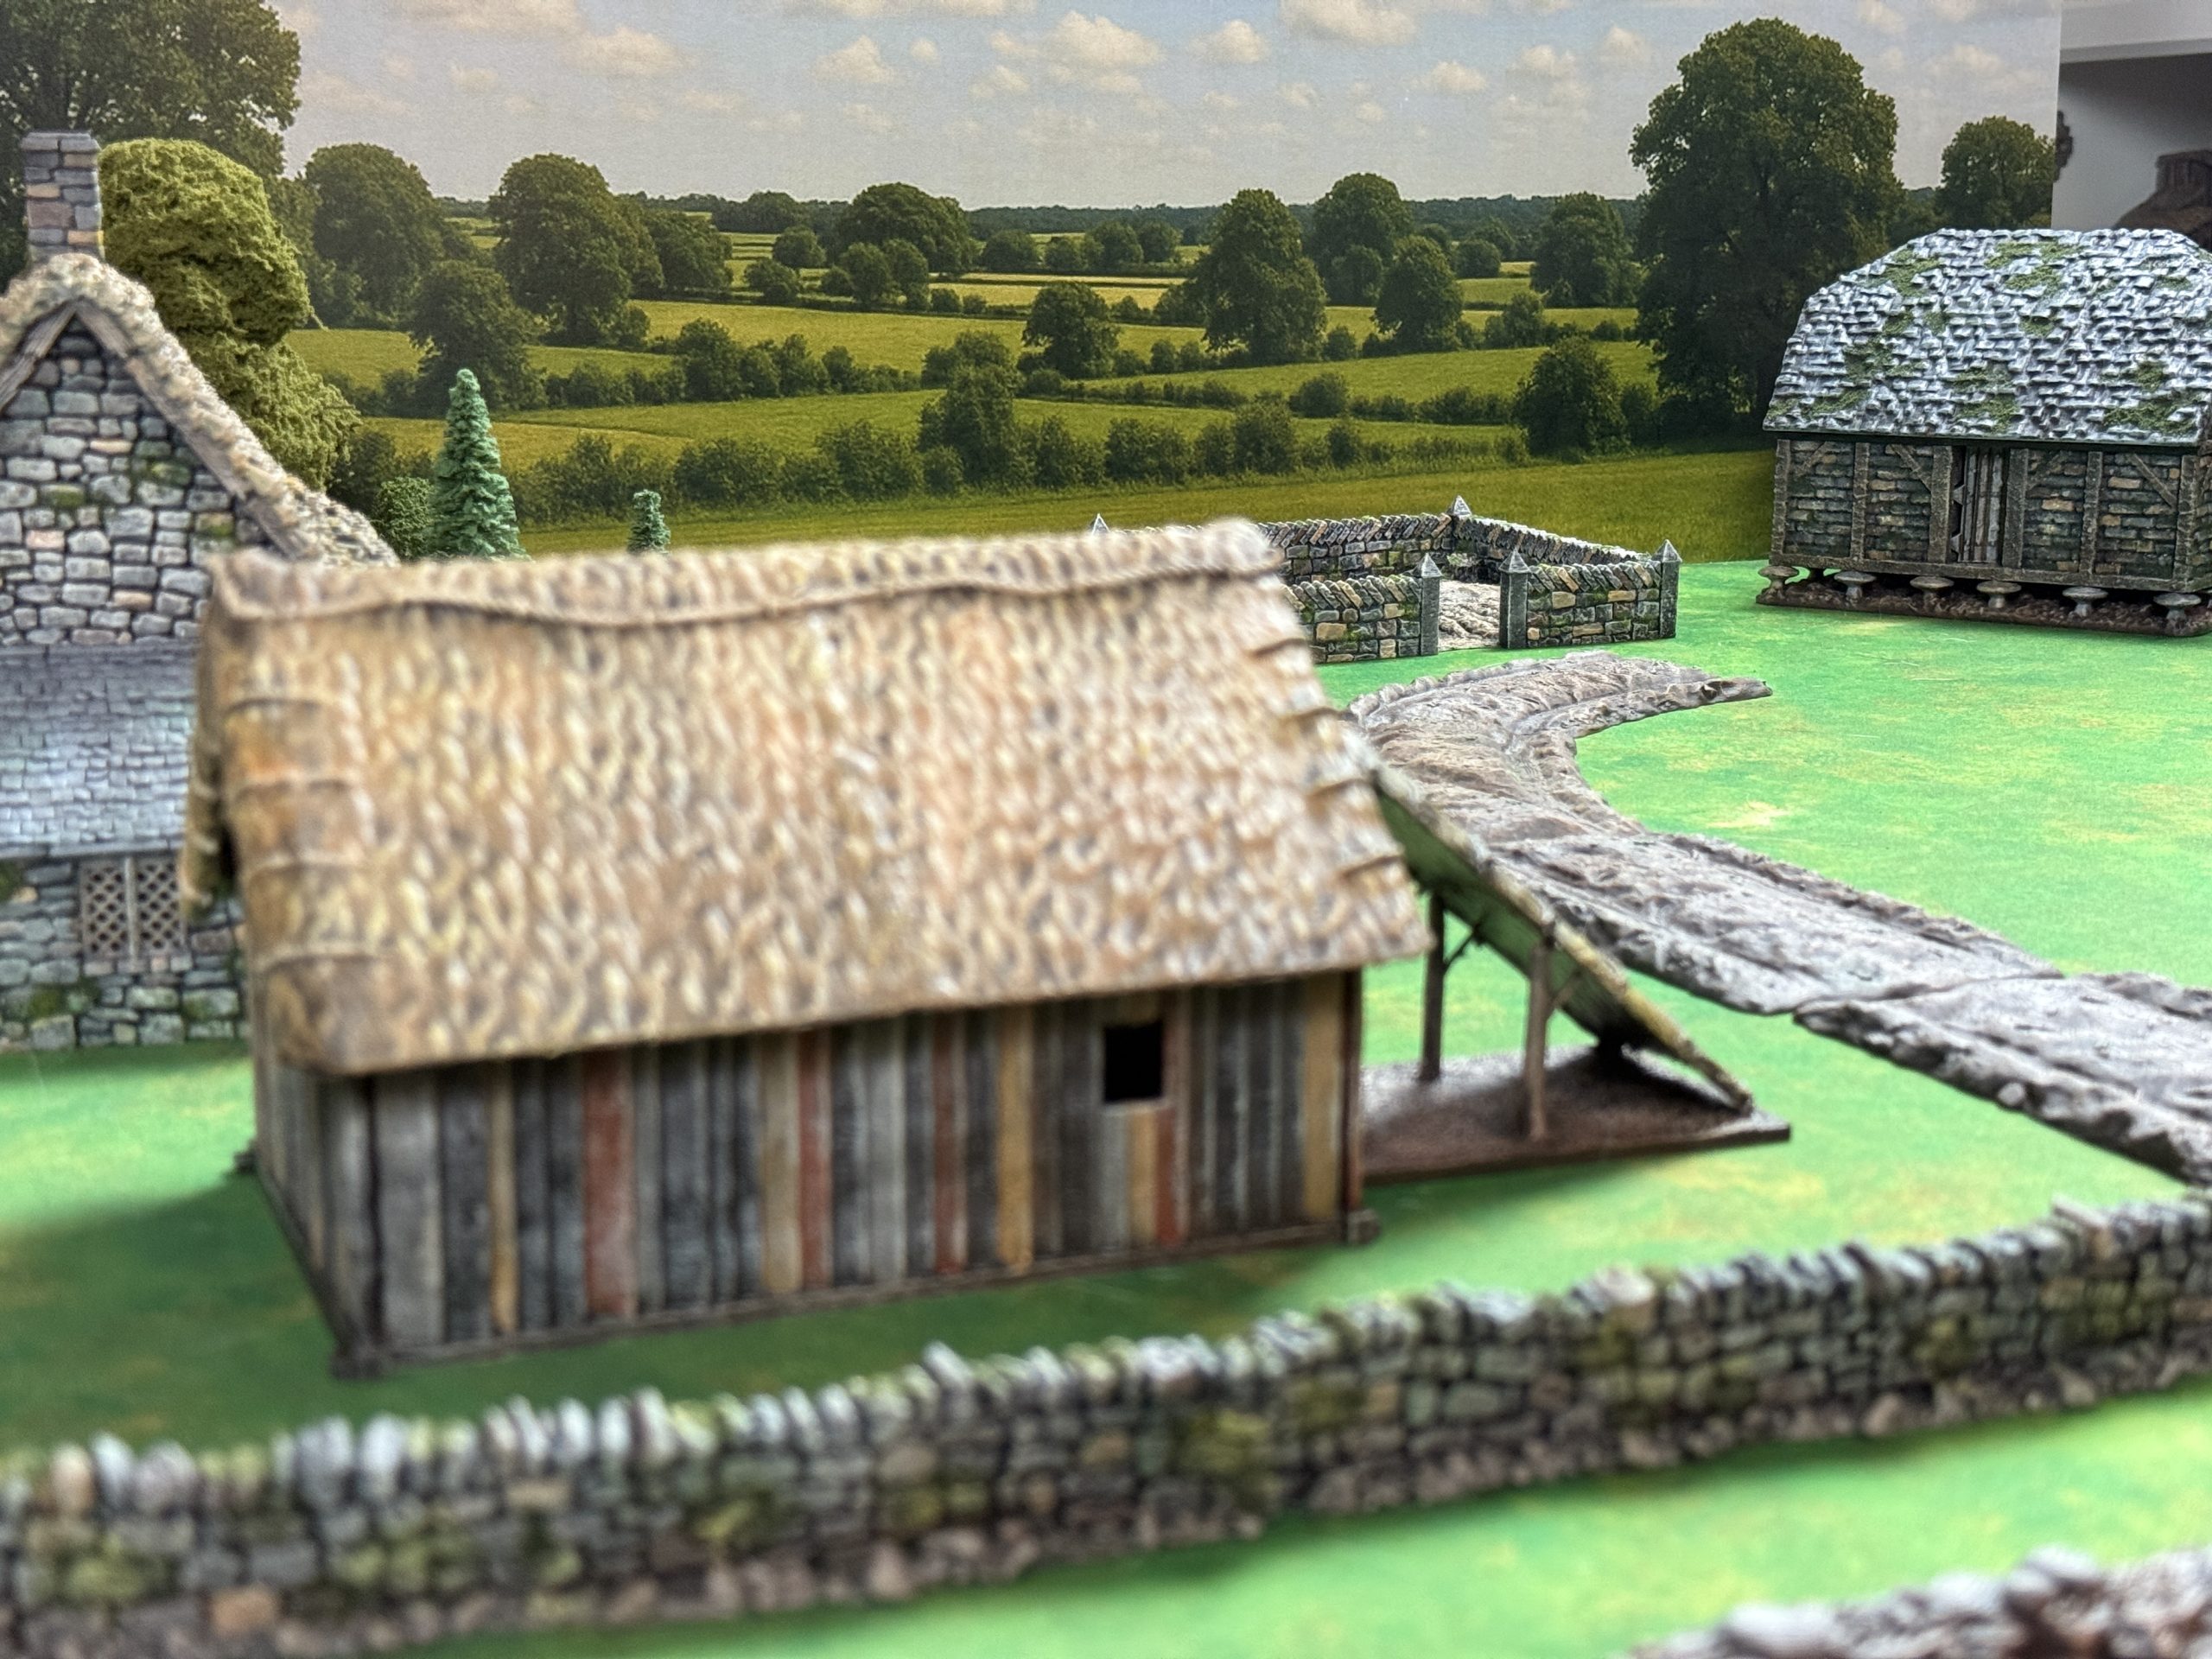
Next is a wooden house which offered a good opportunity to experiment with wood.
Name: Anglo-Saxon house B + annex
Publisher: Timescape Miniatures – https://www.myminifactory.com/object/3d-print-anglo-saxon-house-b-annex-657825
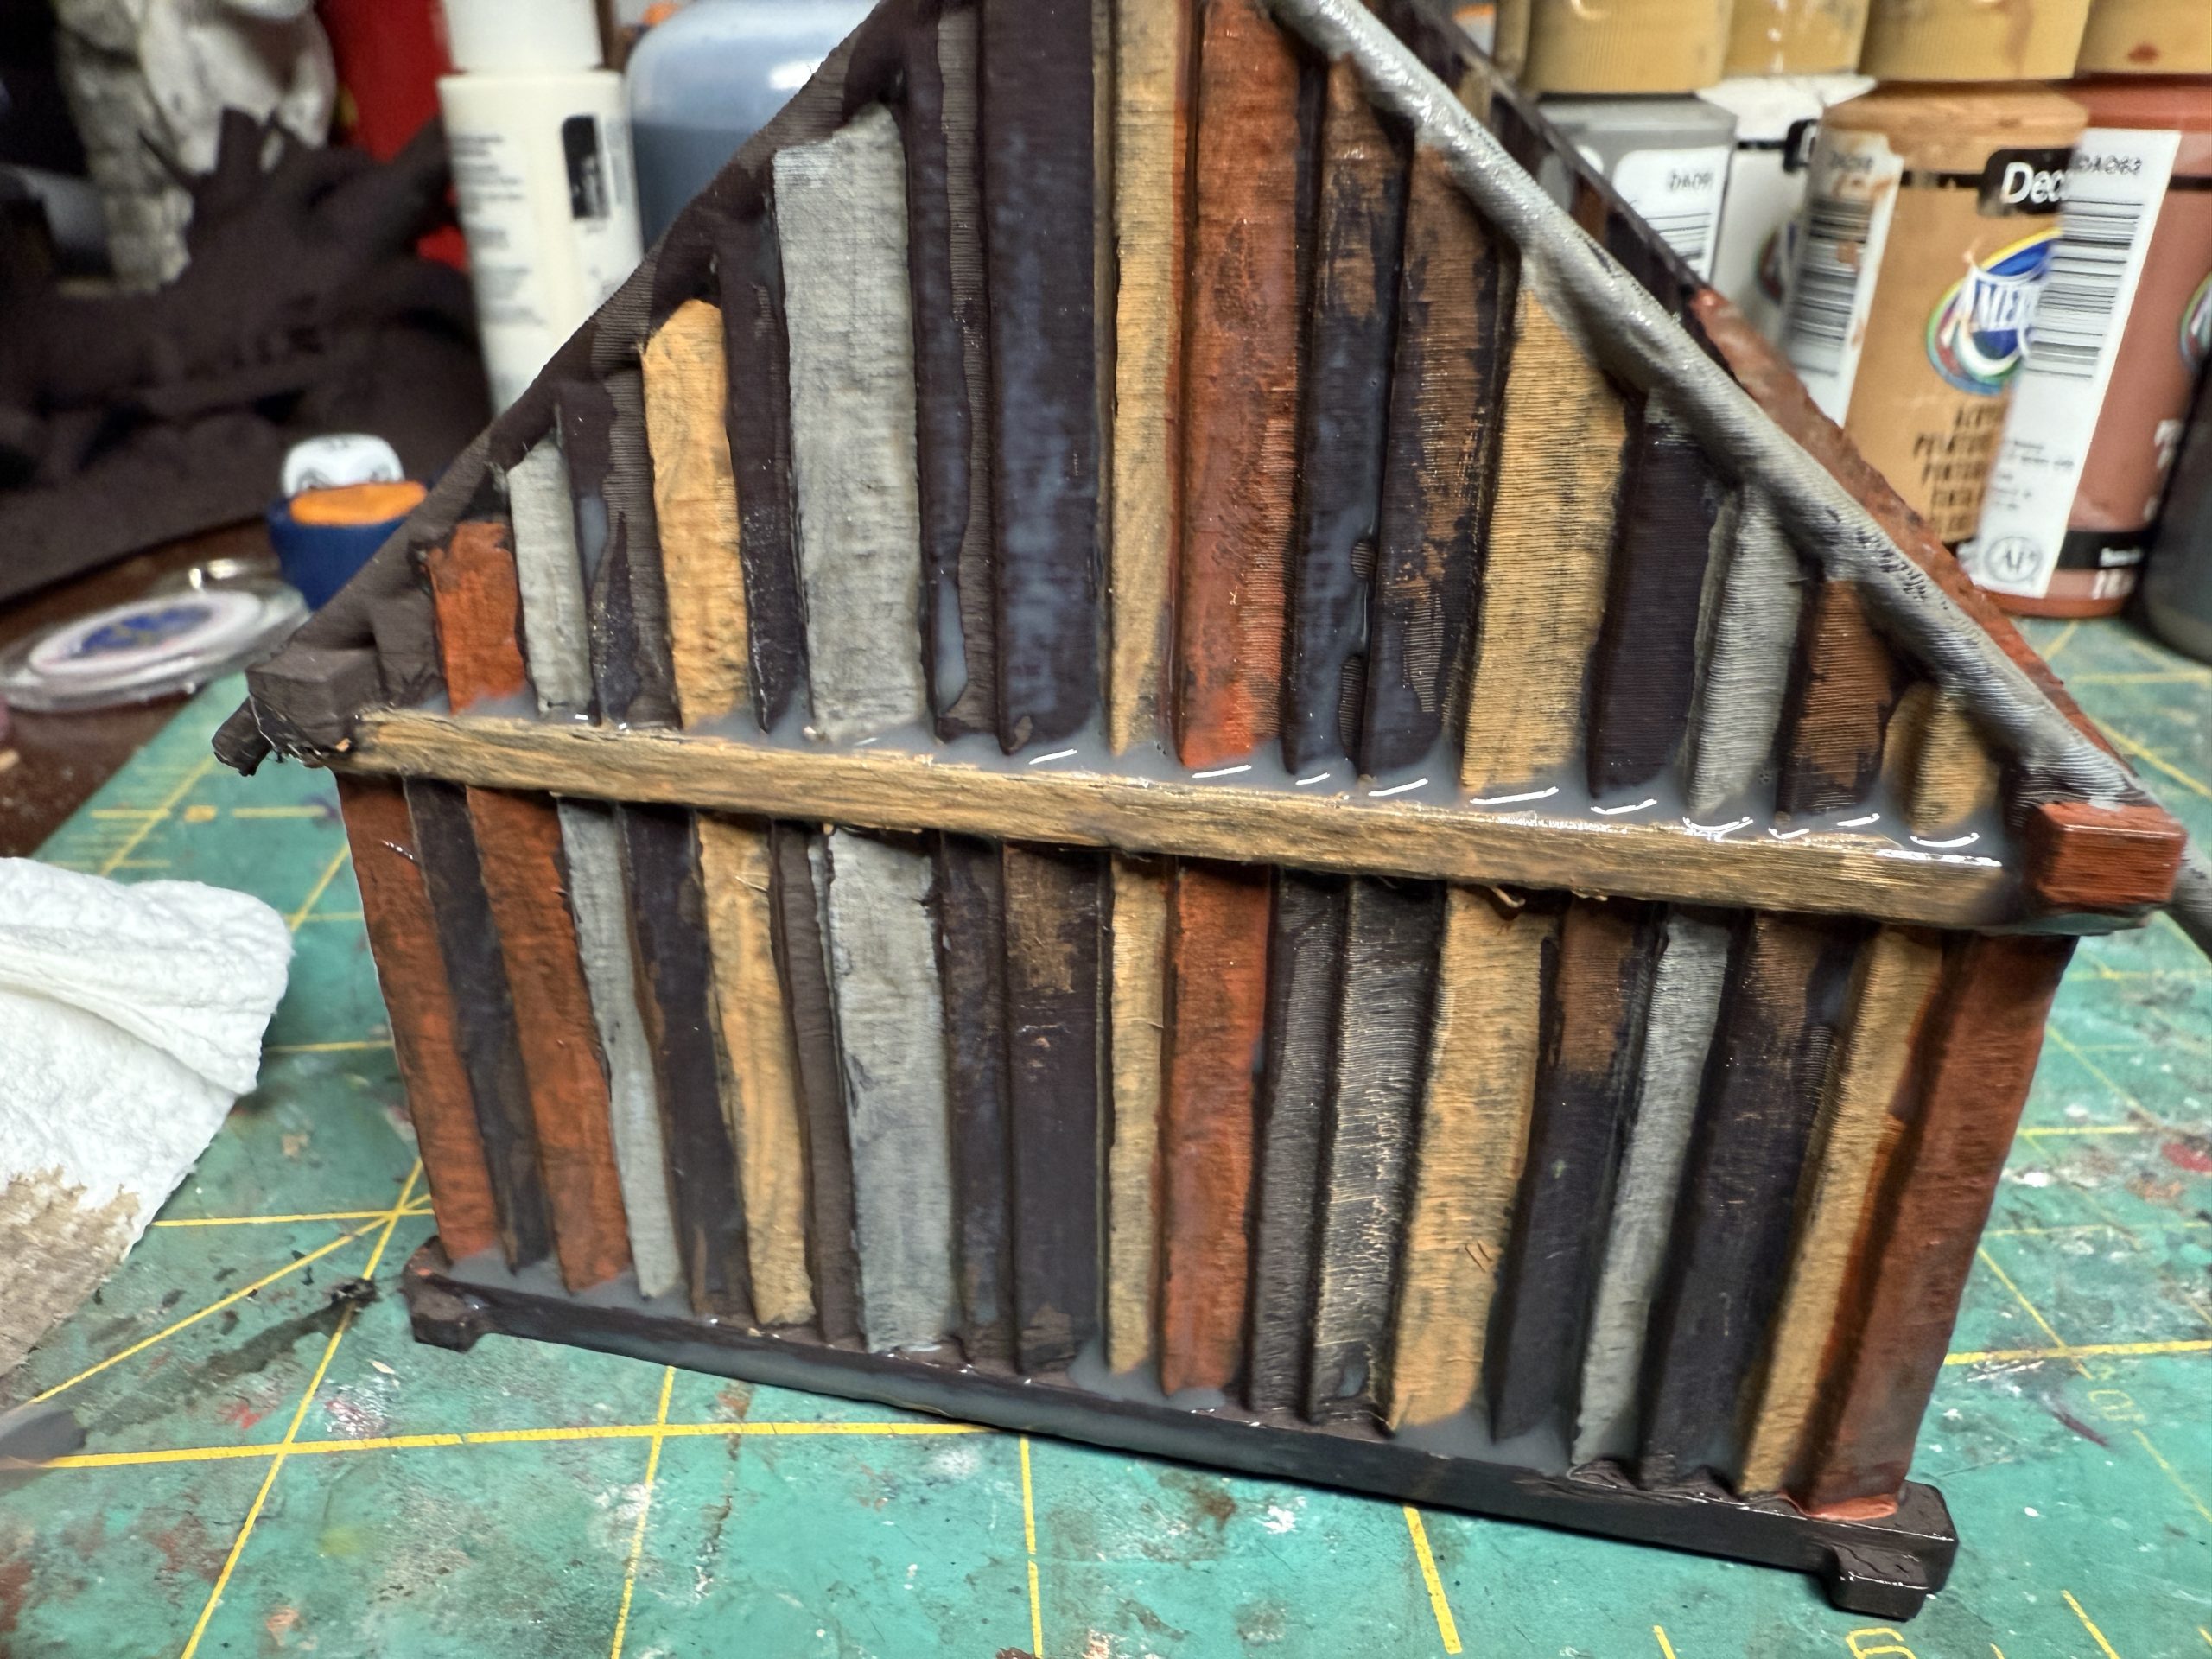
The wood was painted as follow:
- Prime dark brown camo
- Once dry, come back with a brush and alternate several colors of wood ,both on the inside and the outside.
- Cover with home made brown wash (you do not want to use pricey hobby miniature washes on terrain).
- Drybrush lightly with lighter gray or burlap color to unify the wood.
- Apply fine dark green flock to some areas of the wall using PVA glue (optional).
- Diversify the moss applied above with stippling yellowish or light green paint over it.
For the thatch roof (not the best thatch effect but it works for me)
- Prime dark brown camo (with the rest of the house).
- Drybrush honey brown
- Wash with home made brown wash.
- Drybrush yellow and grey

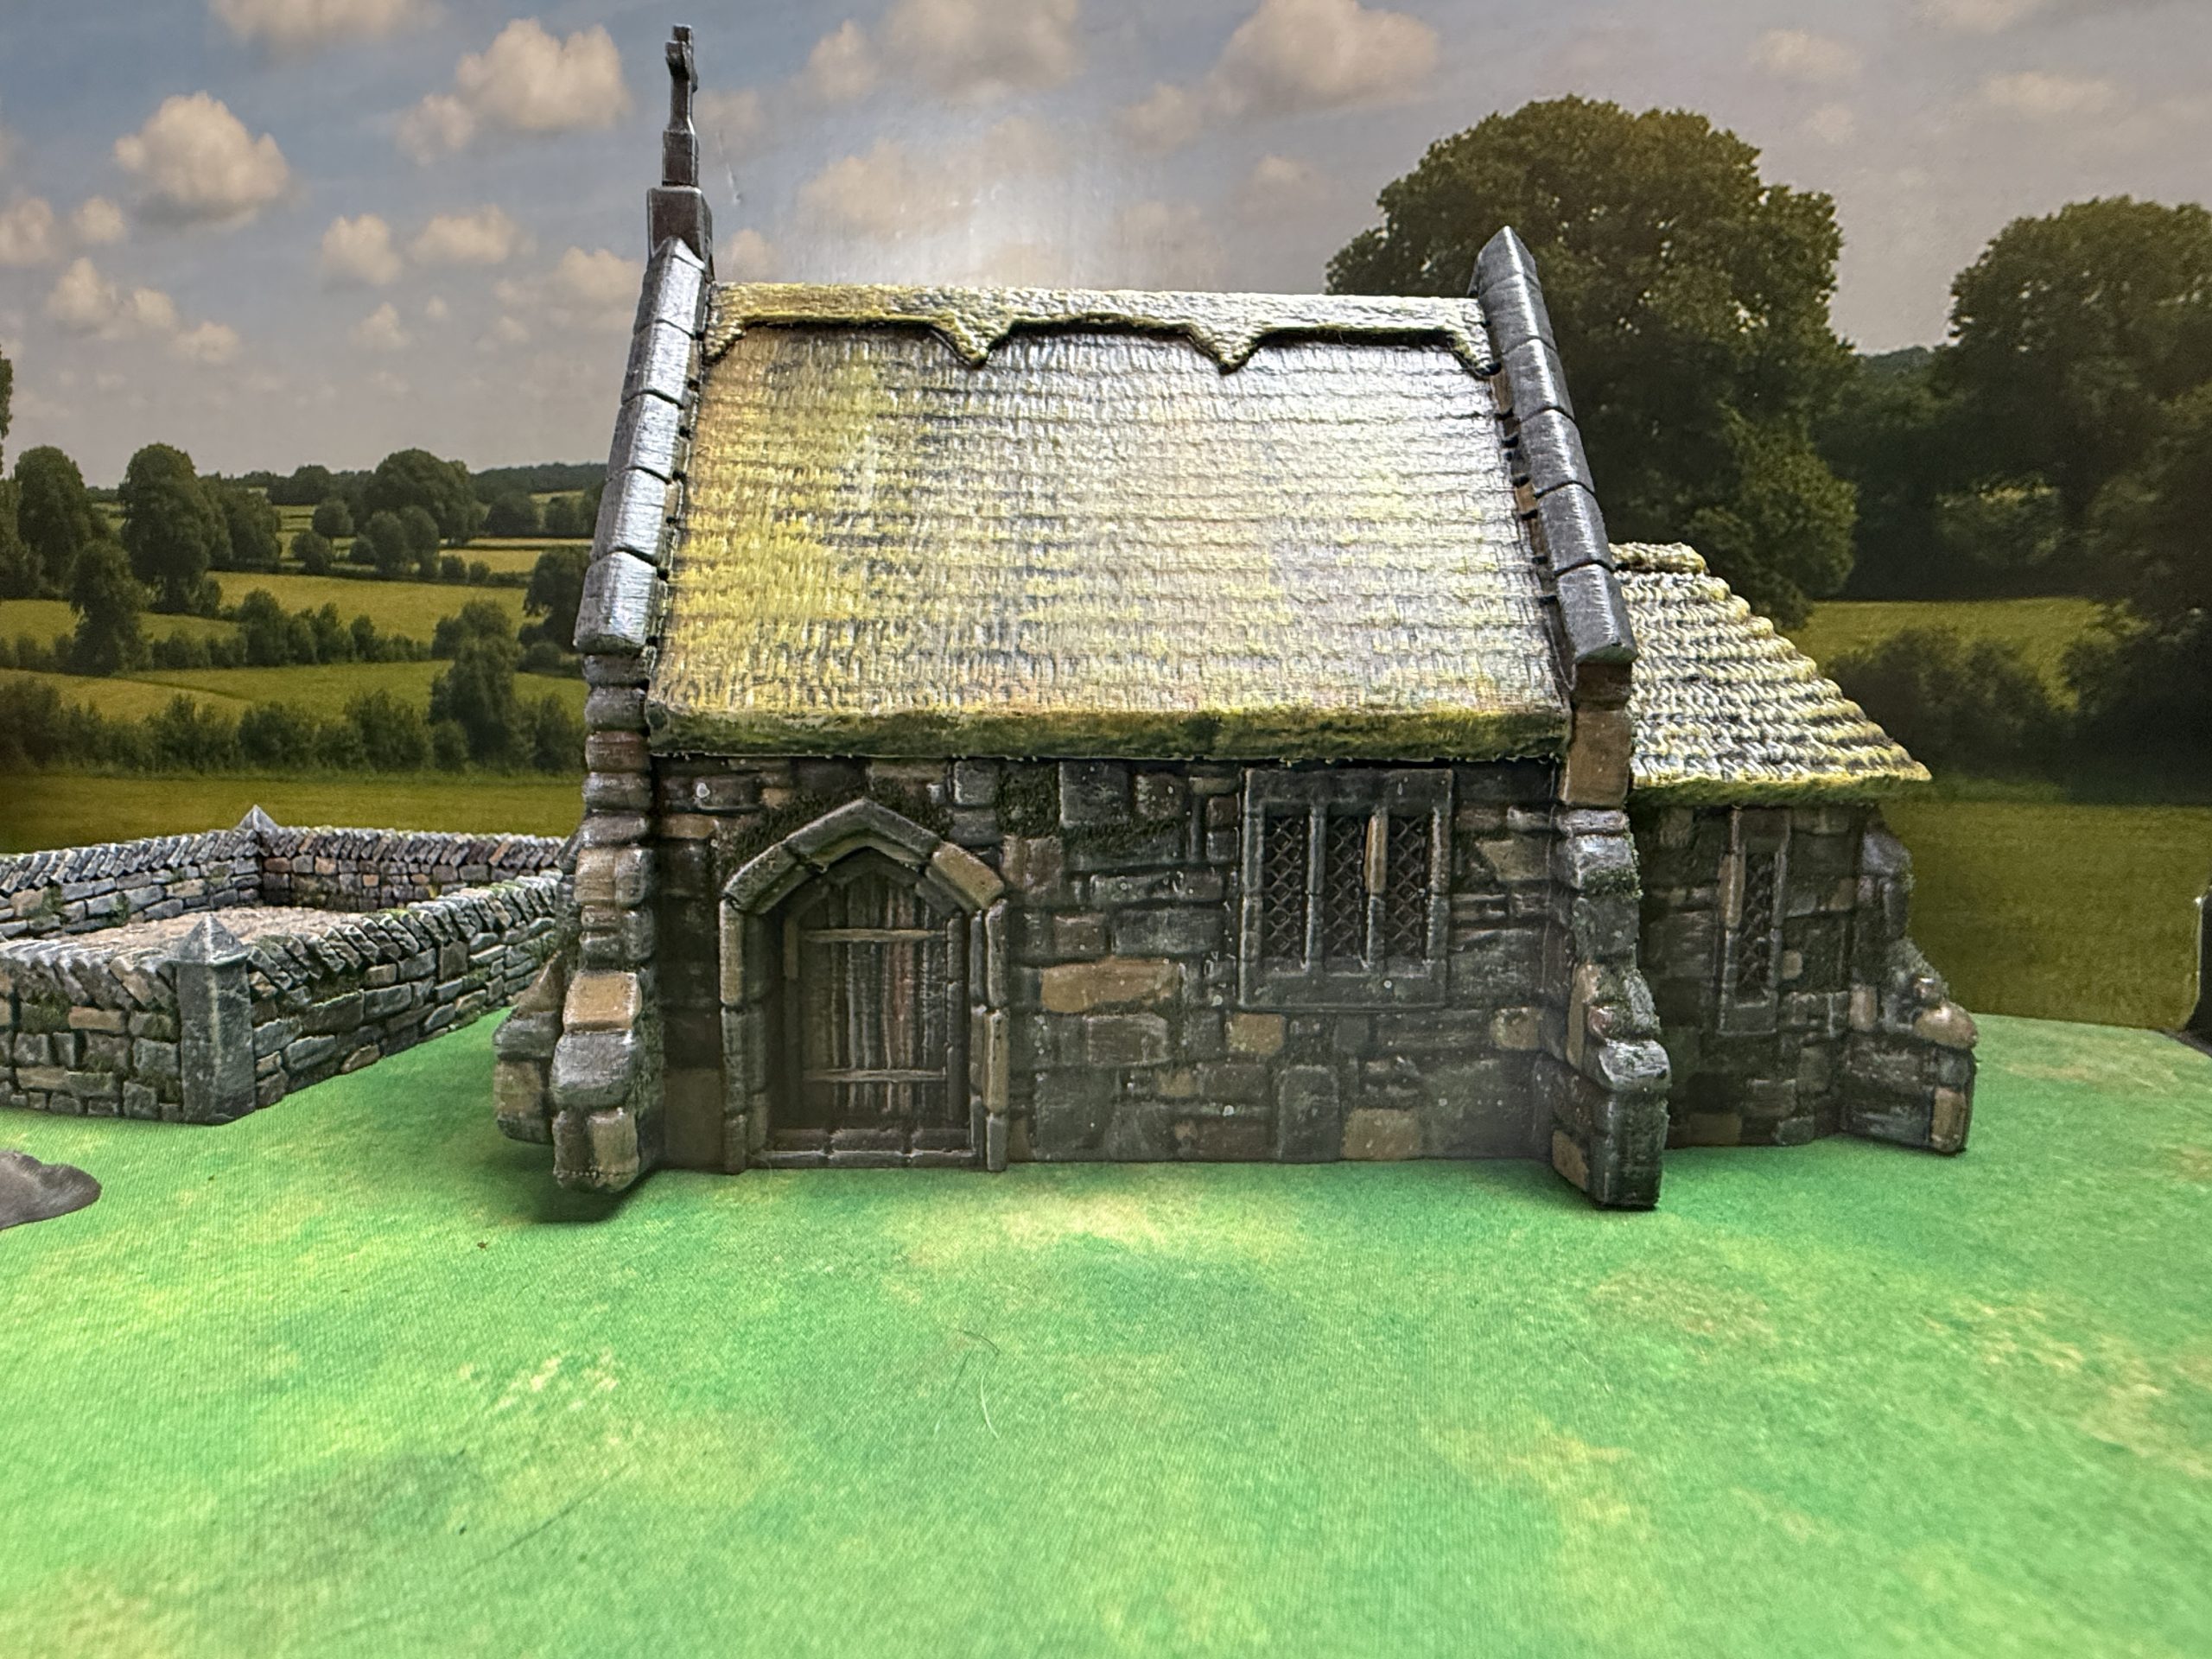
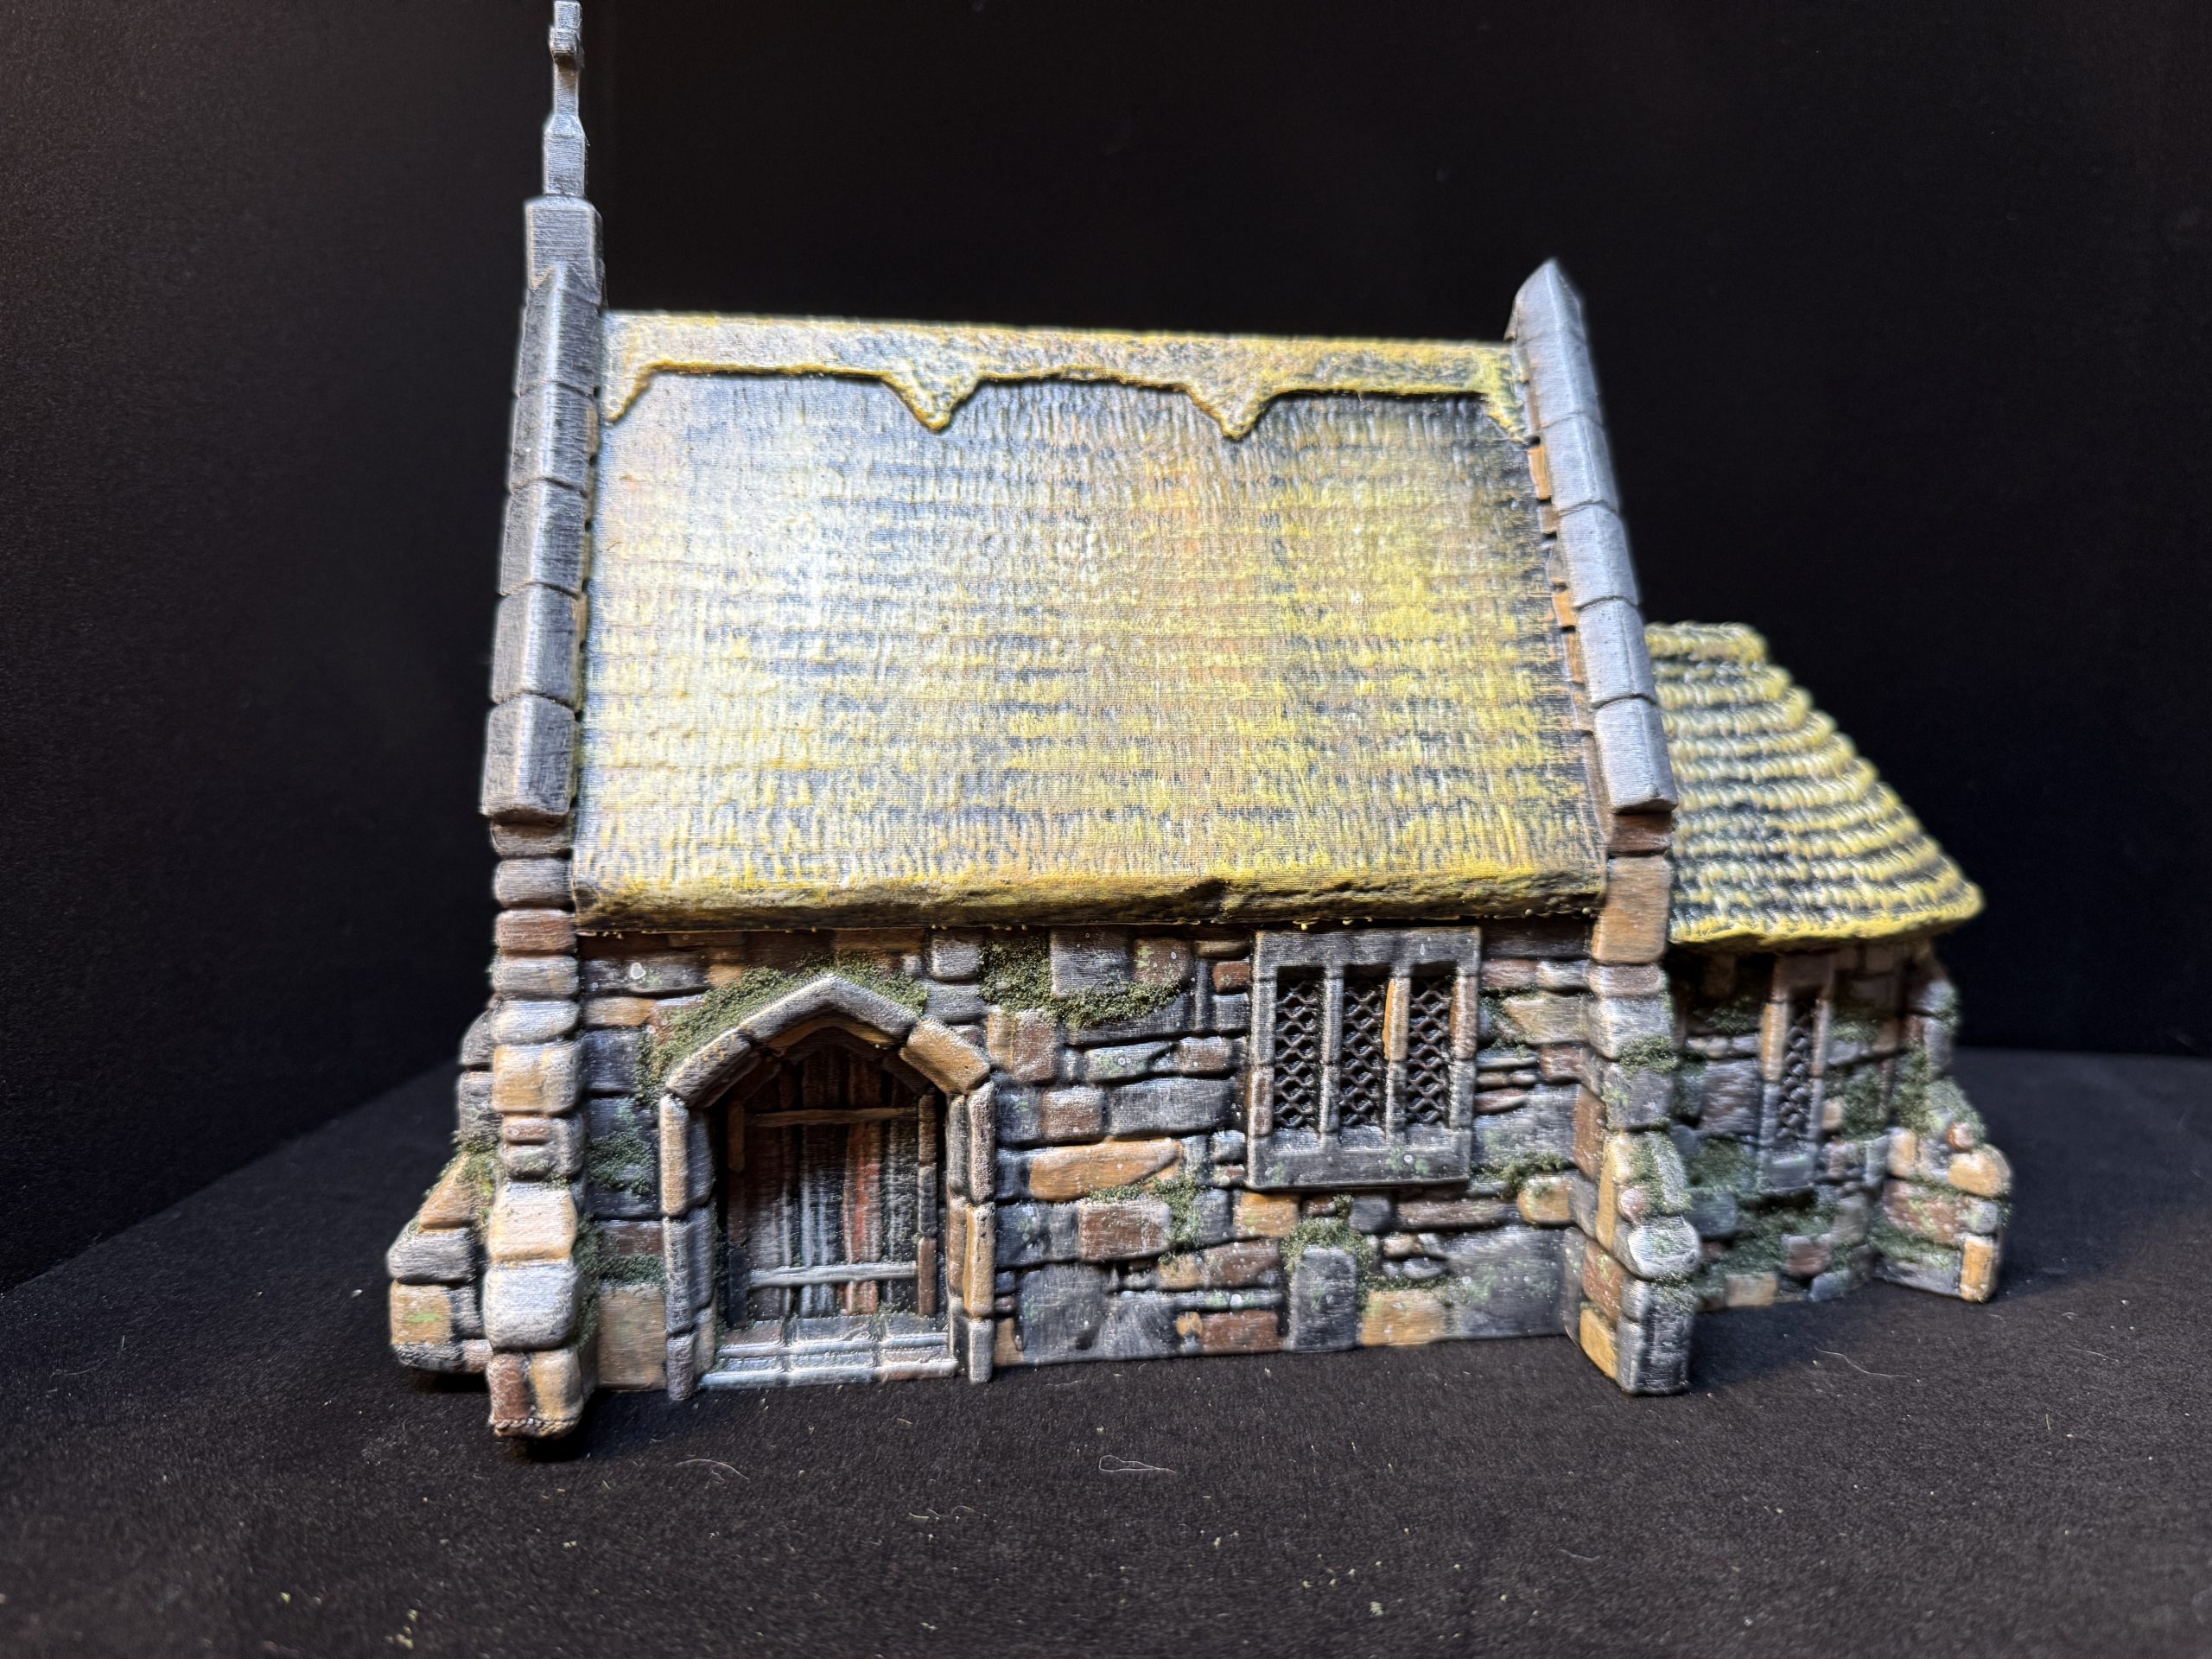
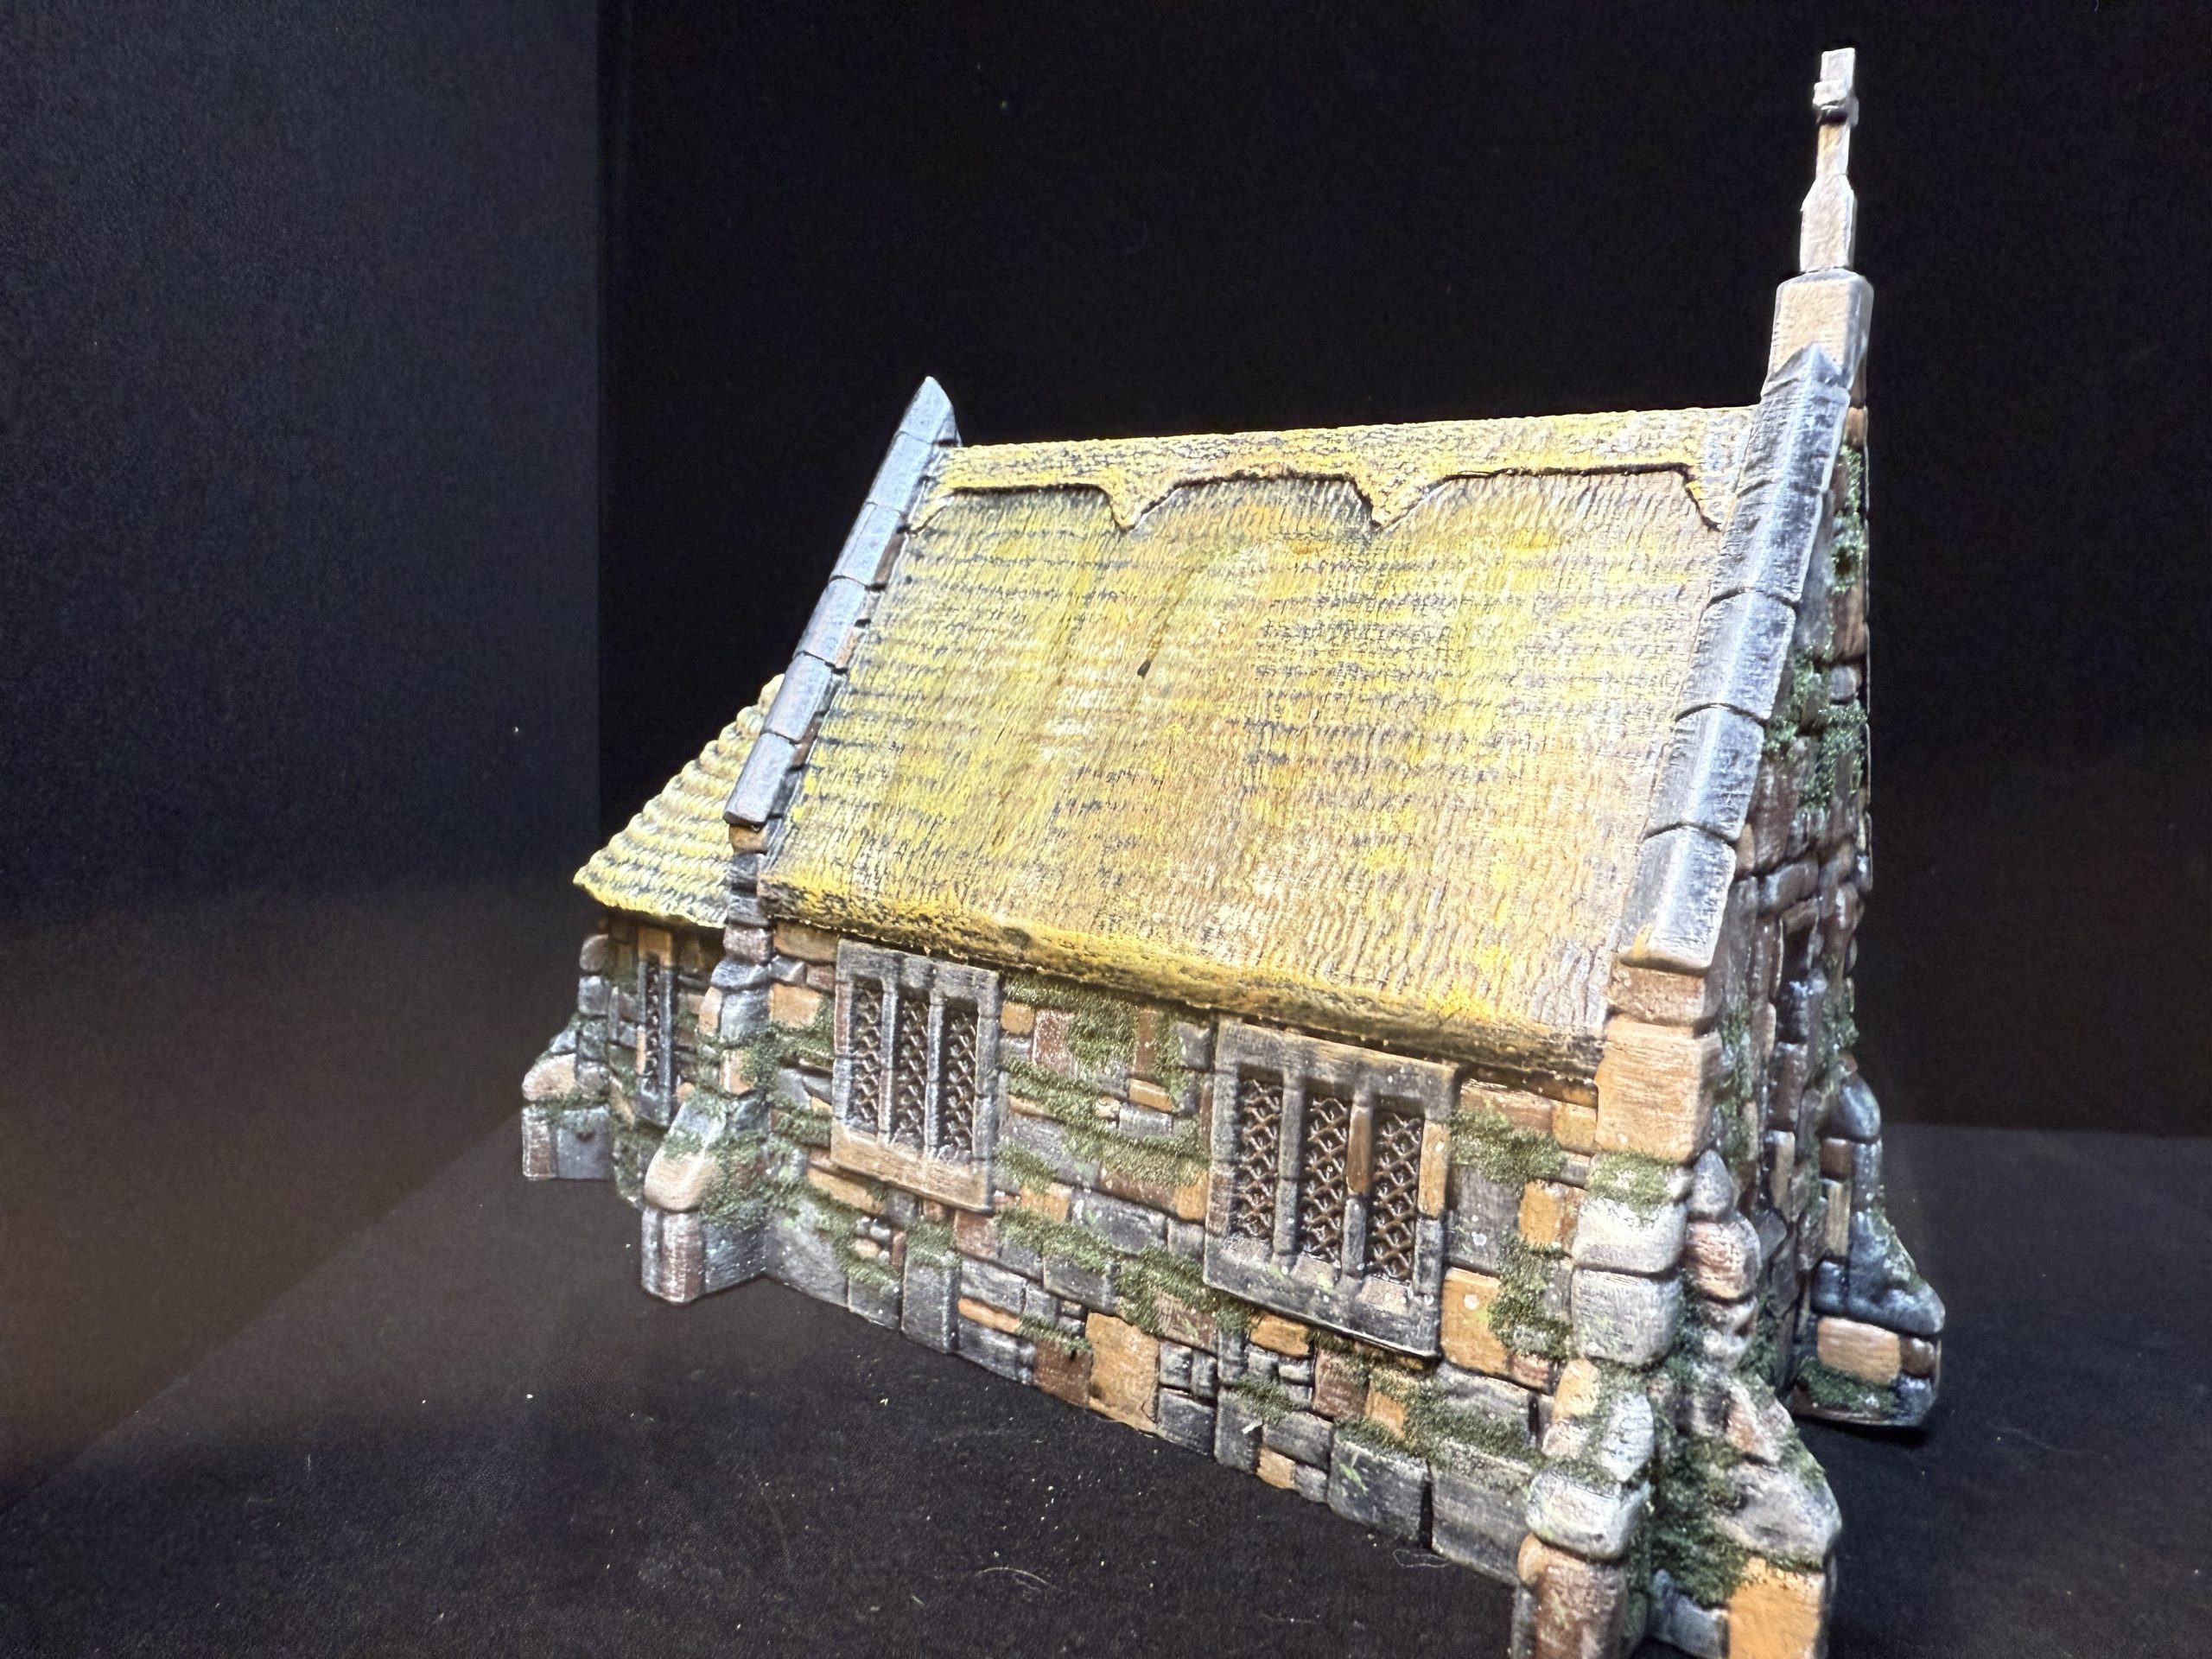
Finally the stone house was added, to give some diversity and provide an impression of different social standing s in the village.
Name: Crow Cottage
Publisher: Printable Scenery – https://www.printablescenery.com/product/crow-cottage/

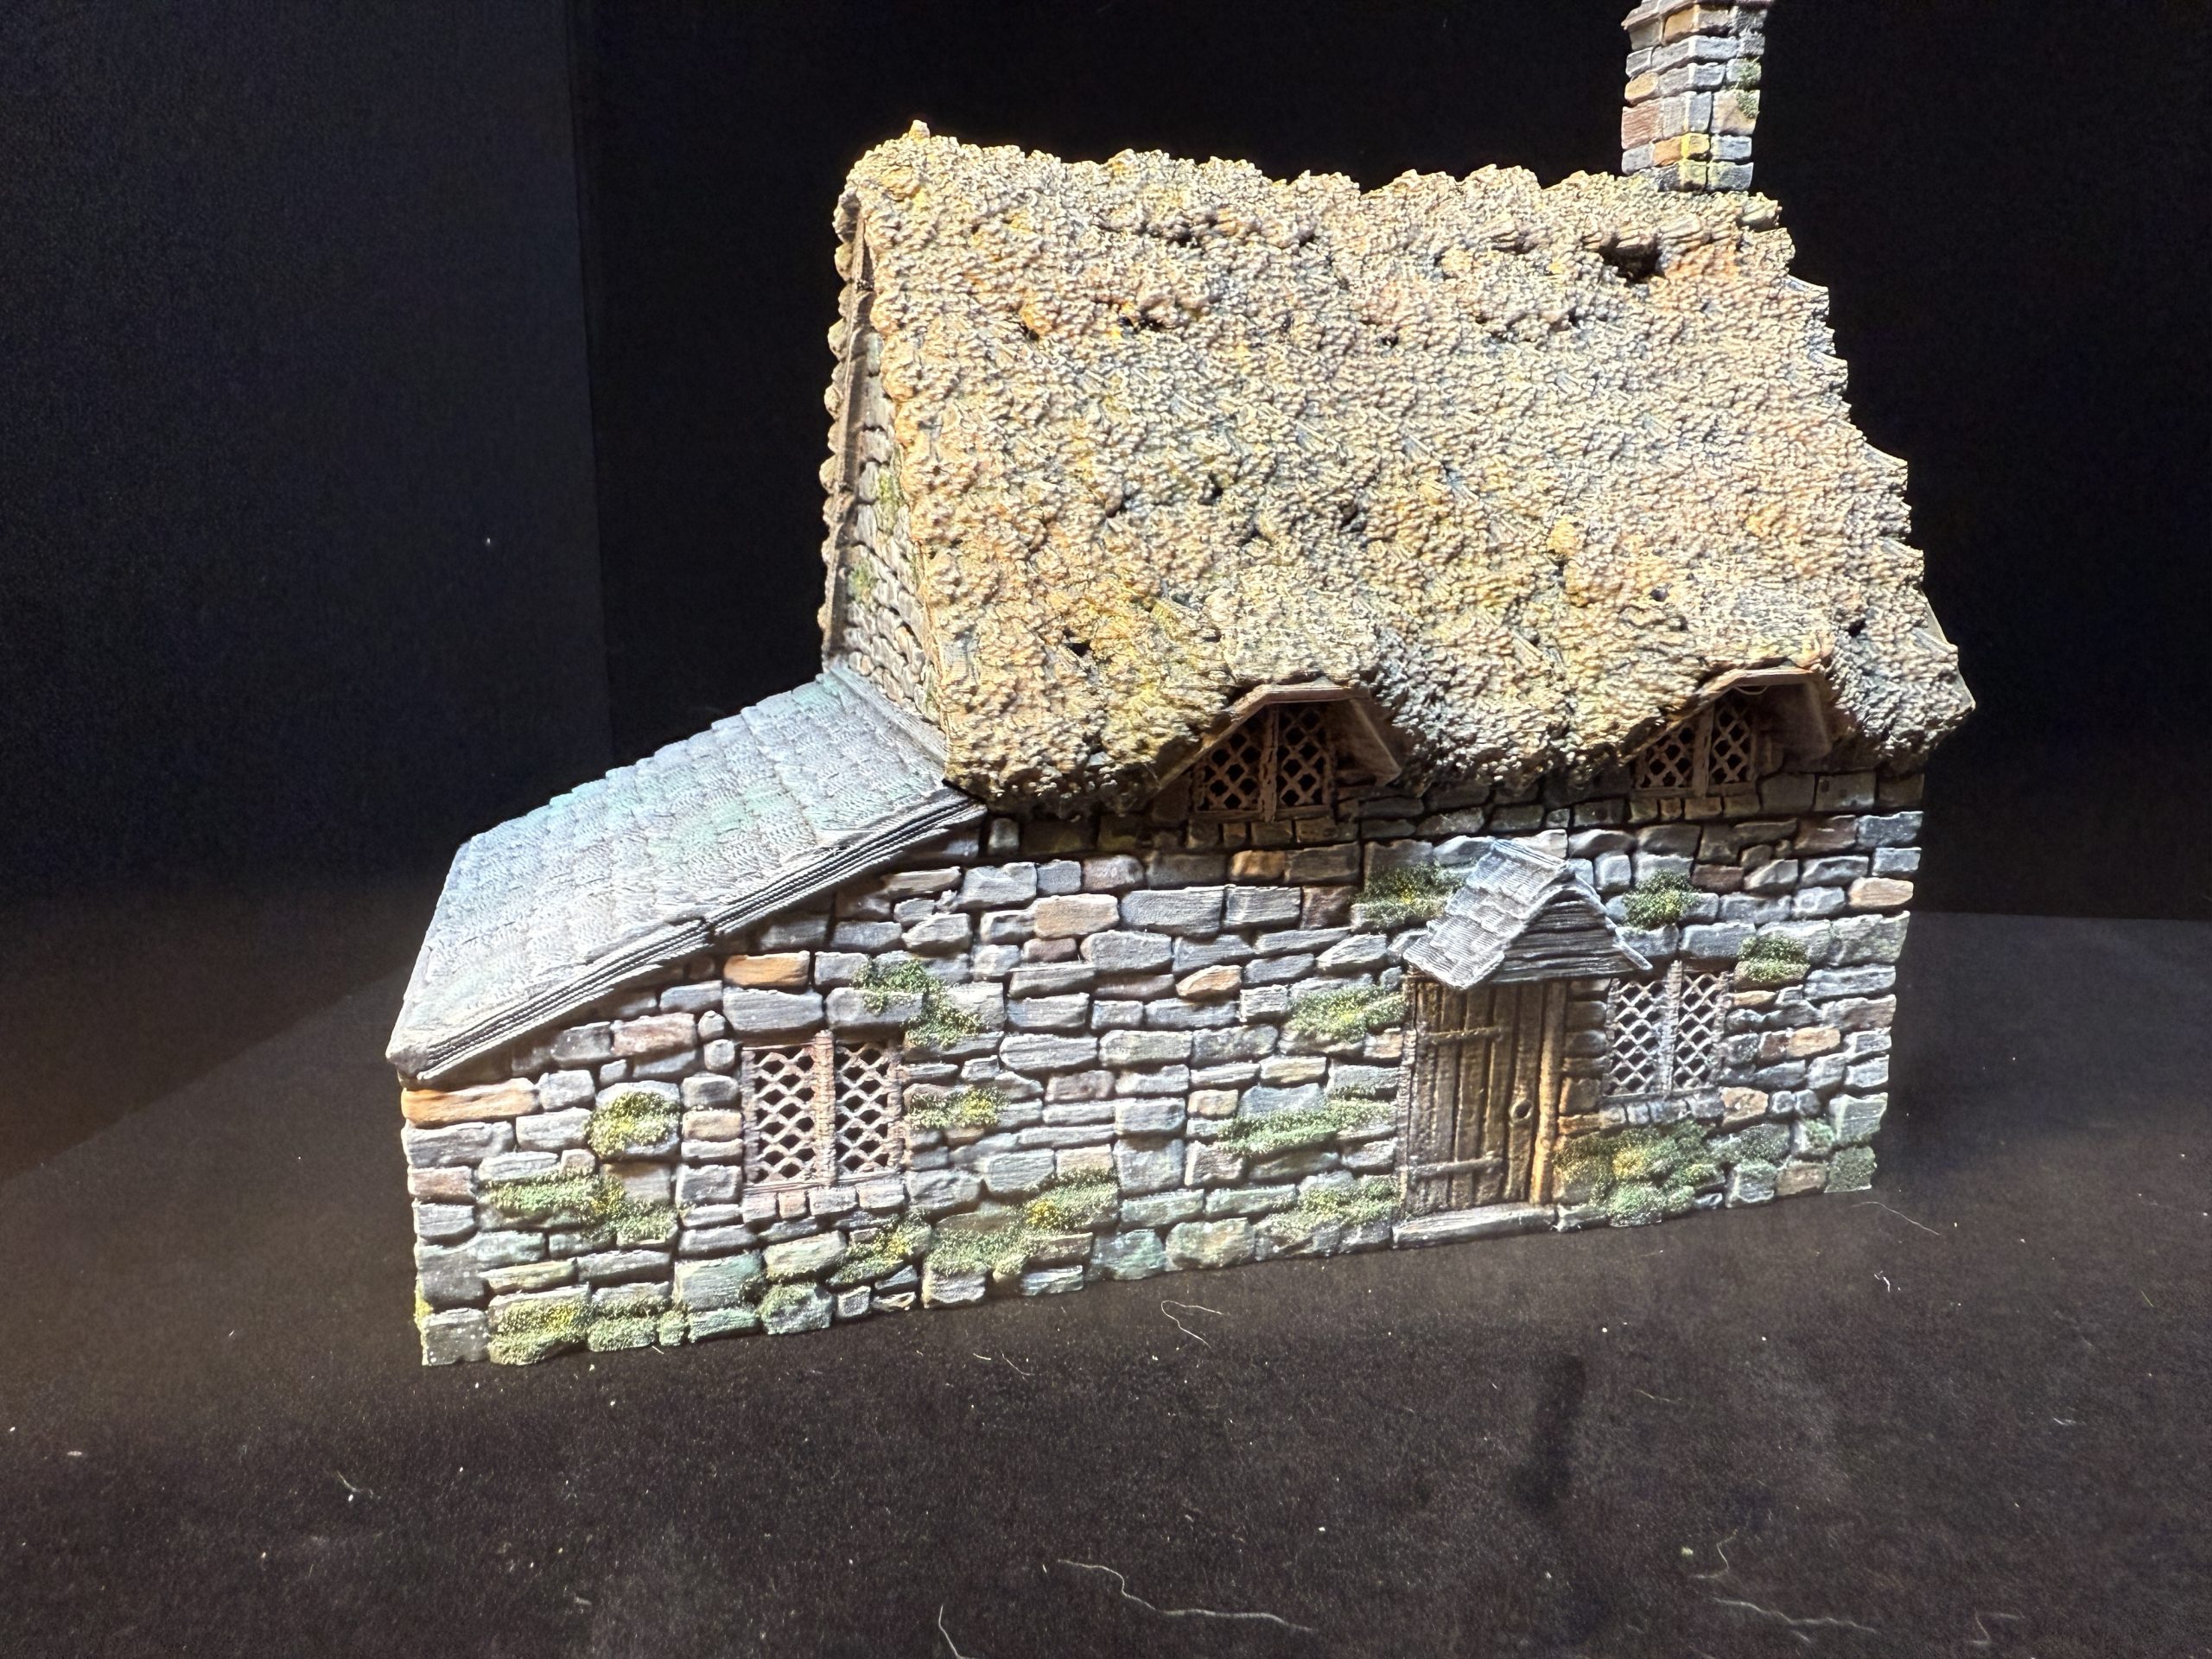
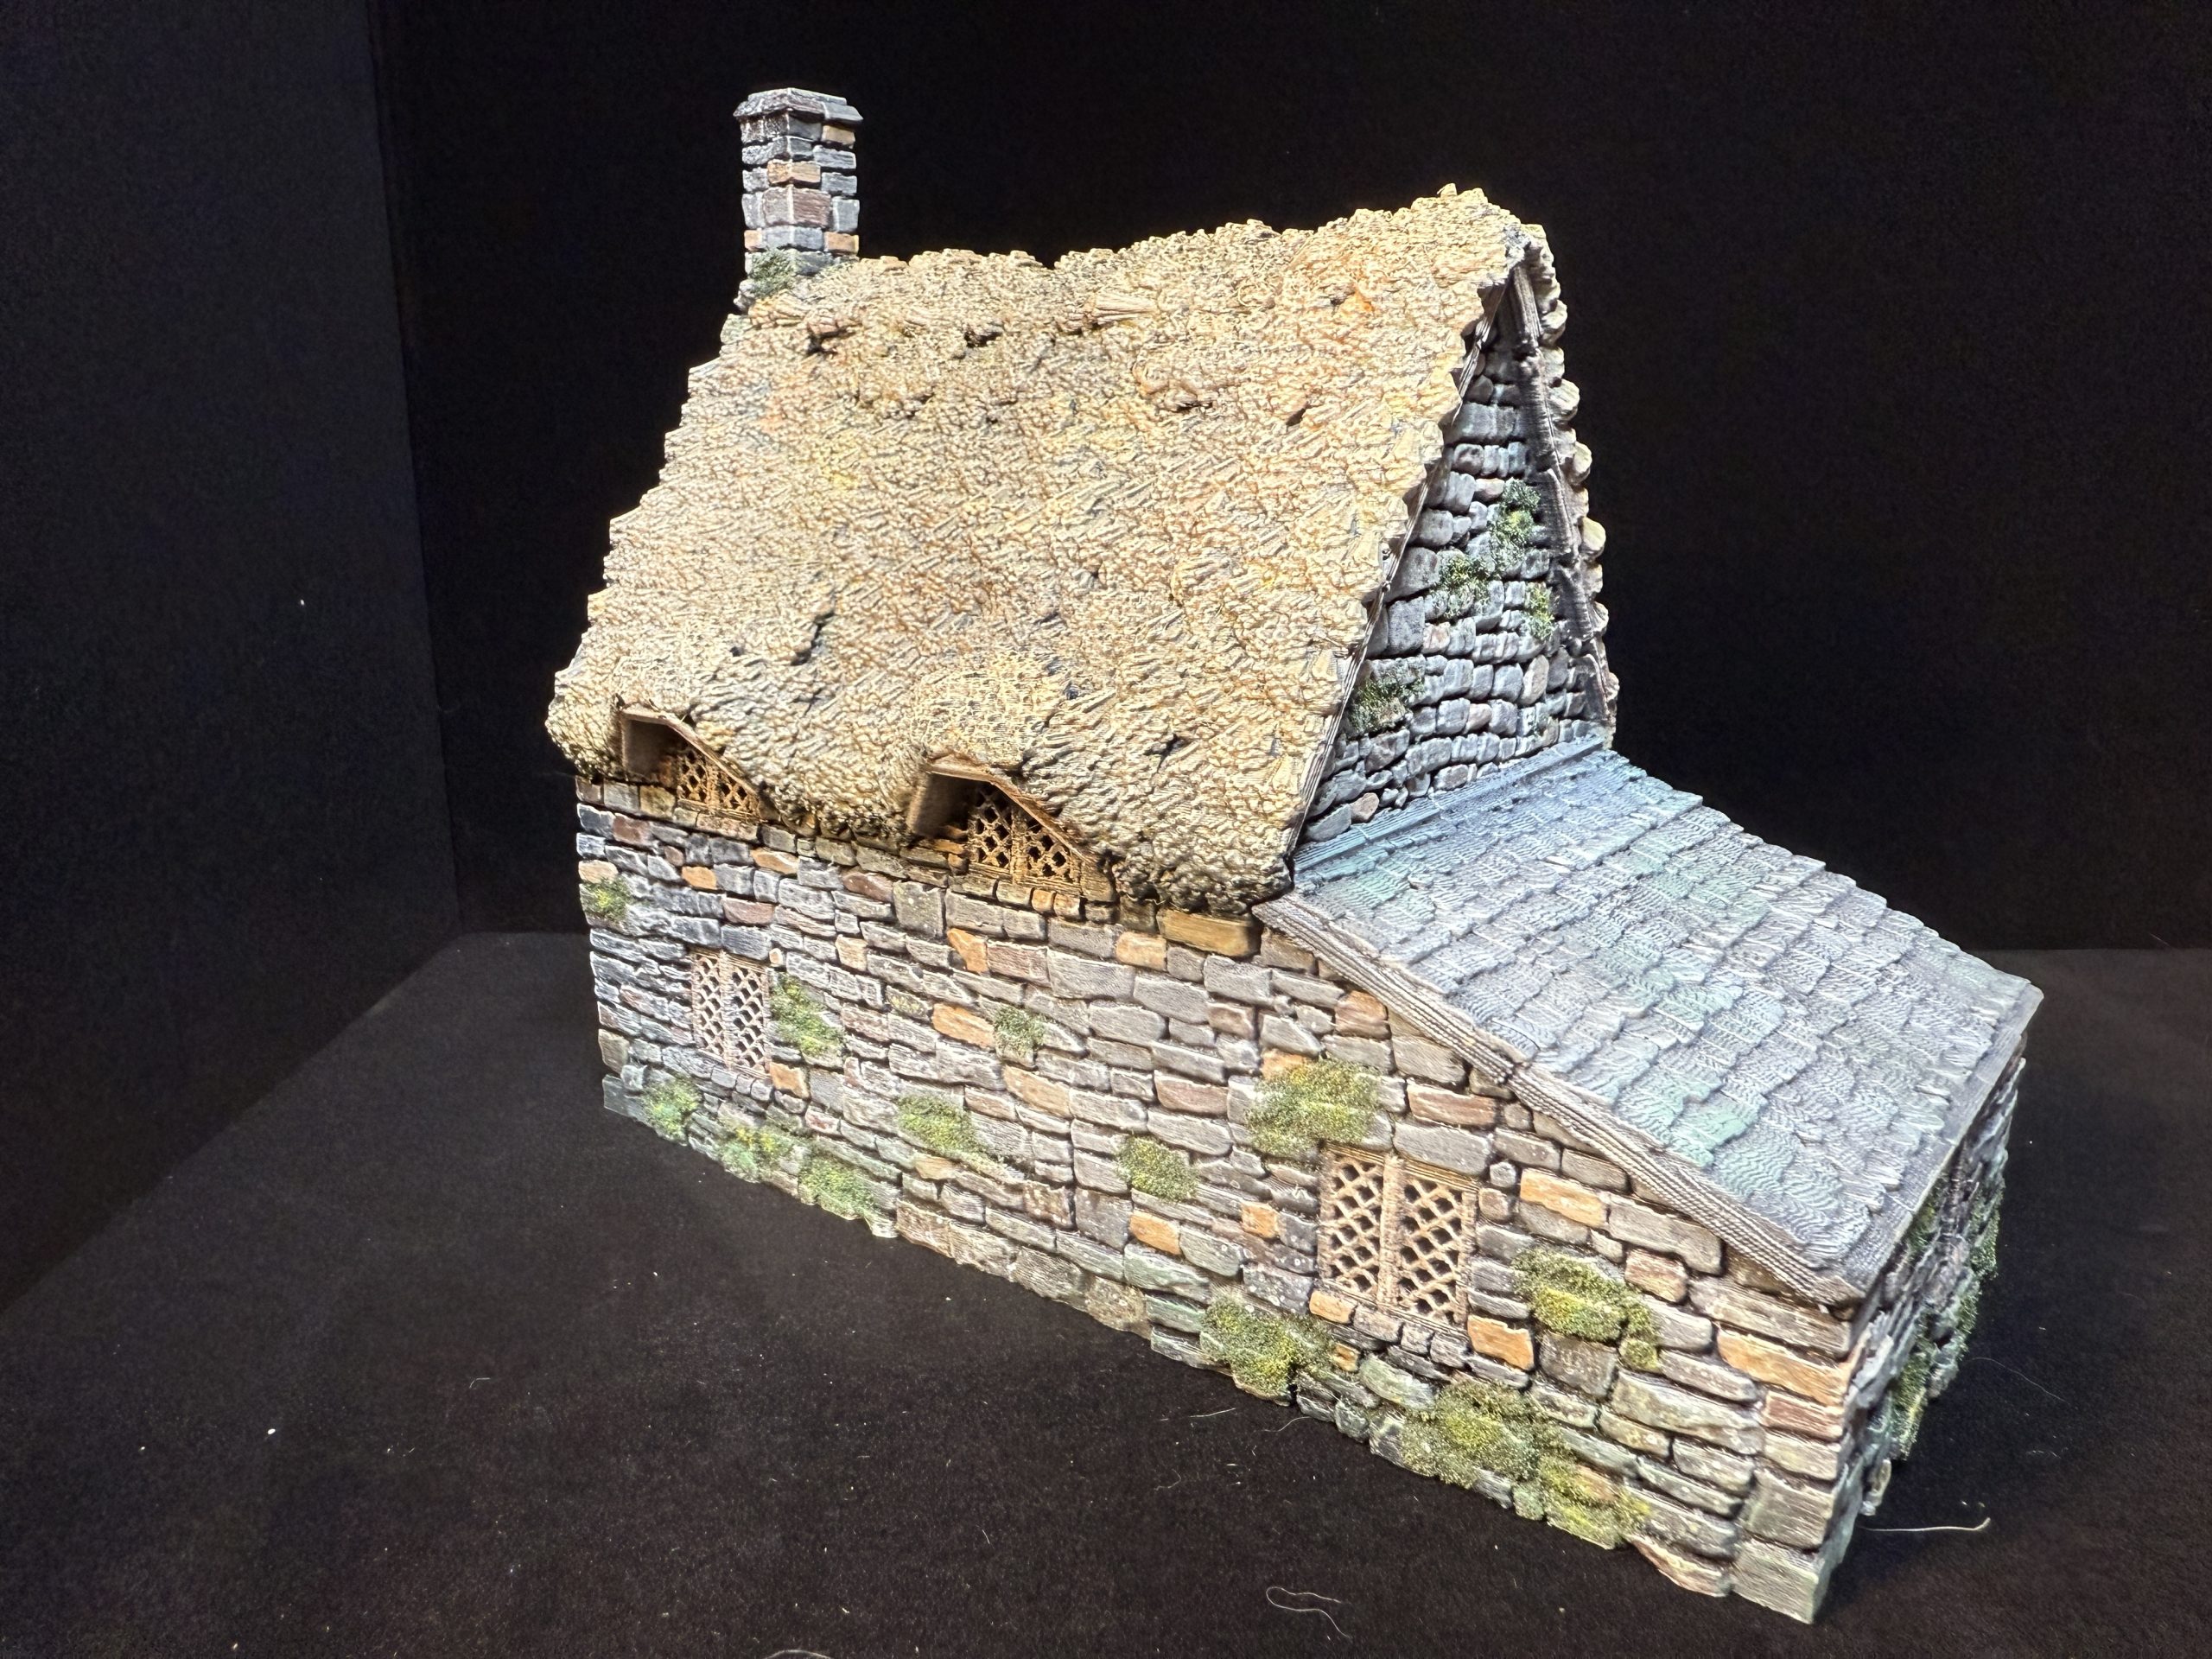
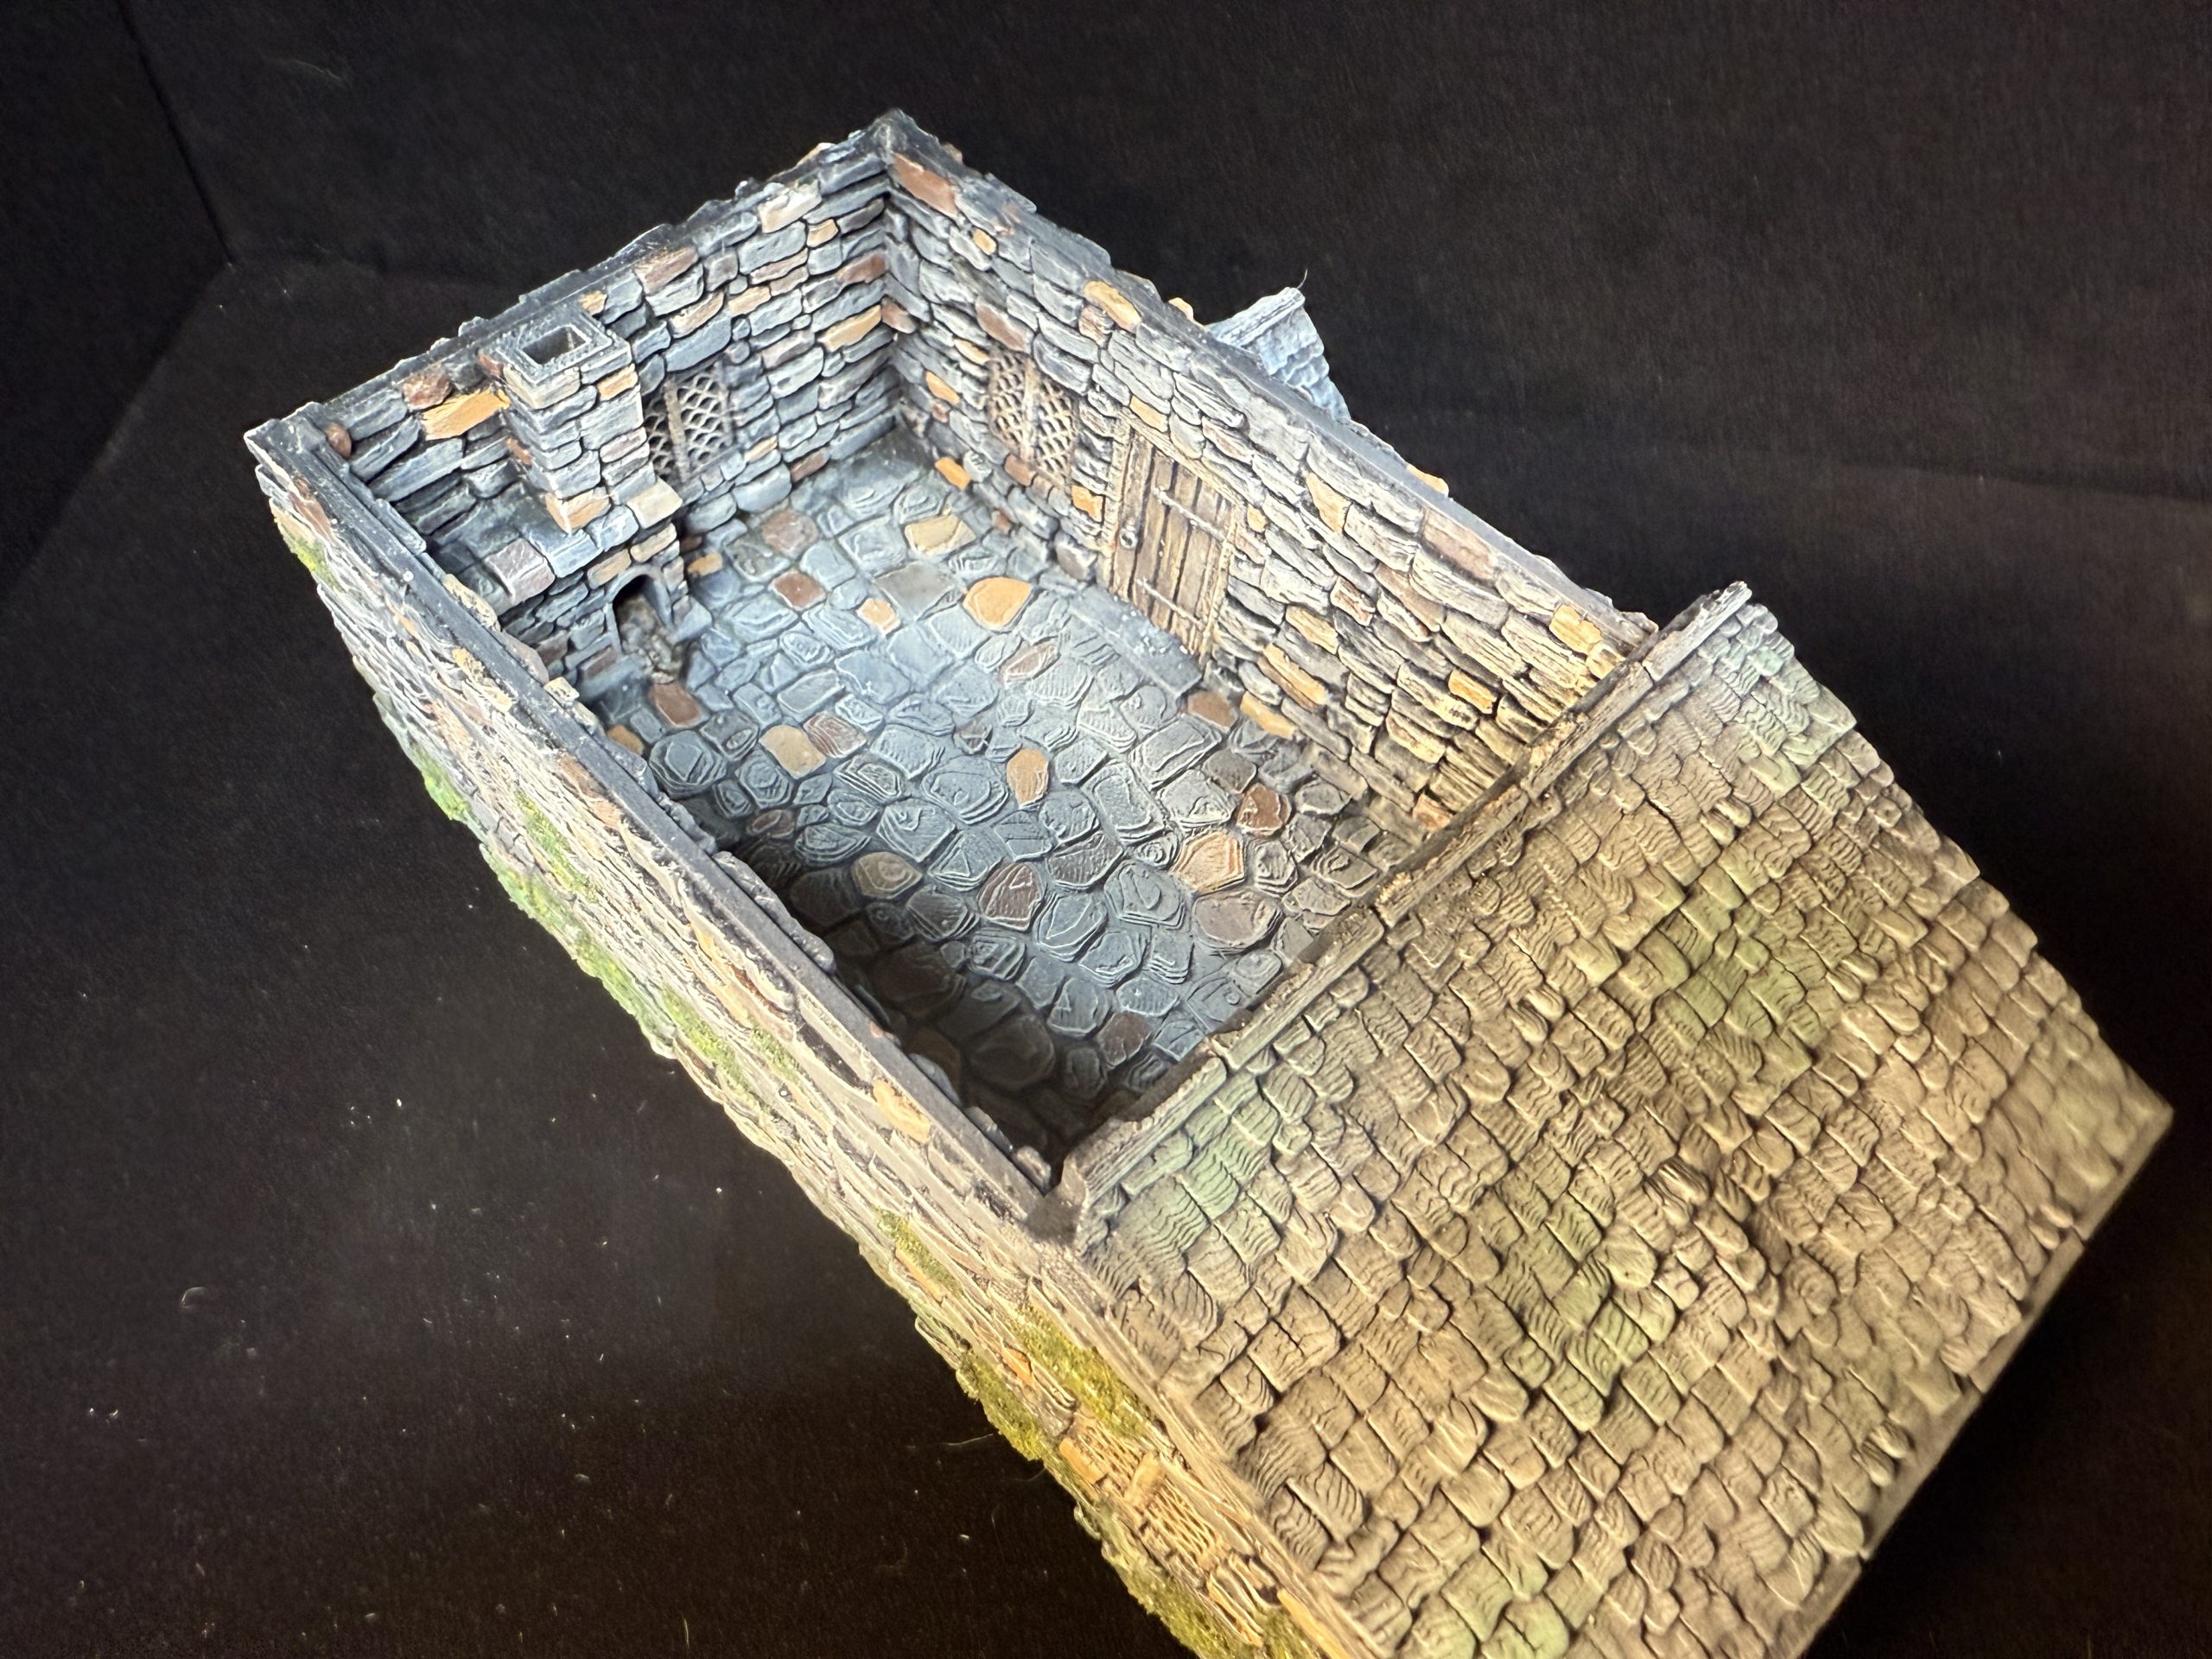
Painting was achieved as a combination of the three techniques represented above (stone wall, wood and thatch roof), with the addition of shingles:
- Primed black like the rests of the house.
- Dry brush dark grey
- Dry brush blue light grey
- Apply wash all over with home made brown wash
- Apply sparingly green wash (I used GW Camo wash as it was available)
- Apply fine dark green flock to some areas of the wall using PVA glue (optional).
Welcome to Stockton!
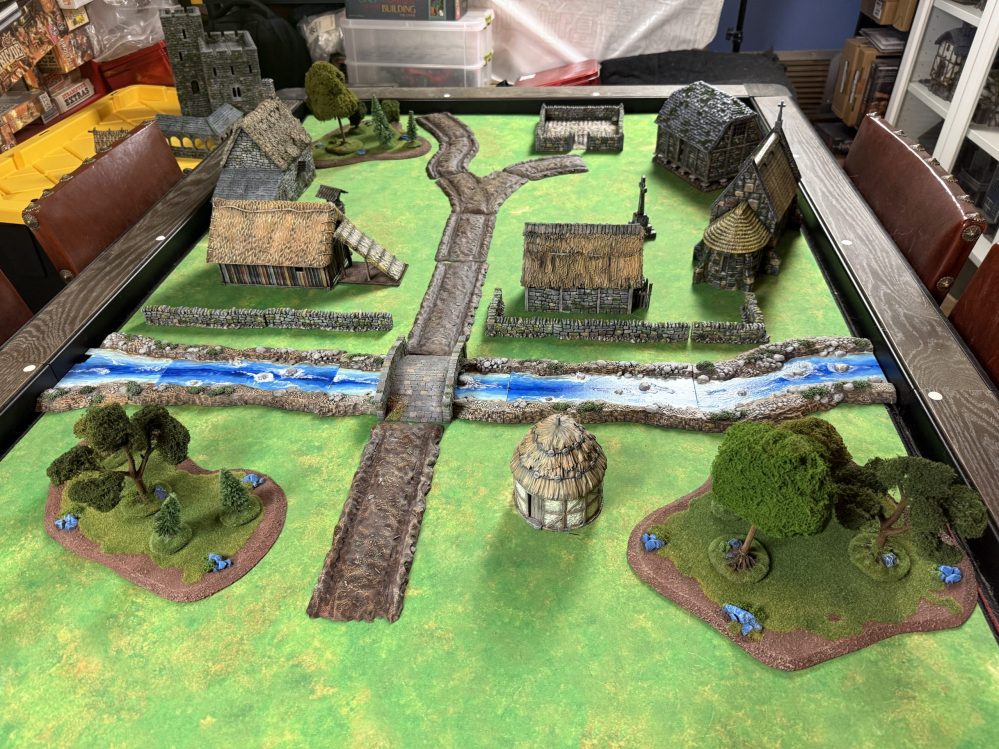
I am naming the village Stockton, in homage to my favorite medieval novel series from Griff Hosker (Border Knight, try it, you will not regret it). The village, in its curent state, is quite small but we will soo expand upon it.
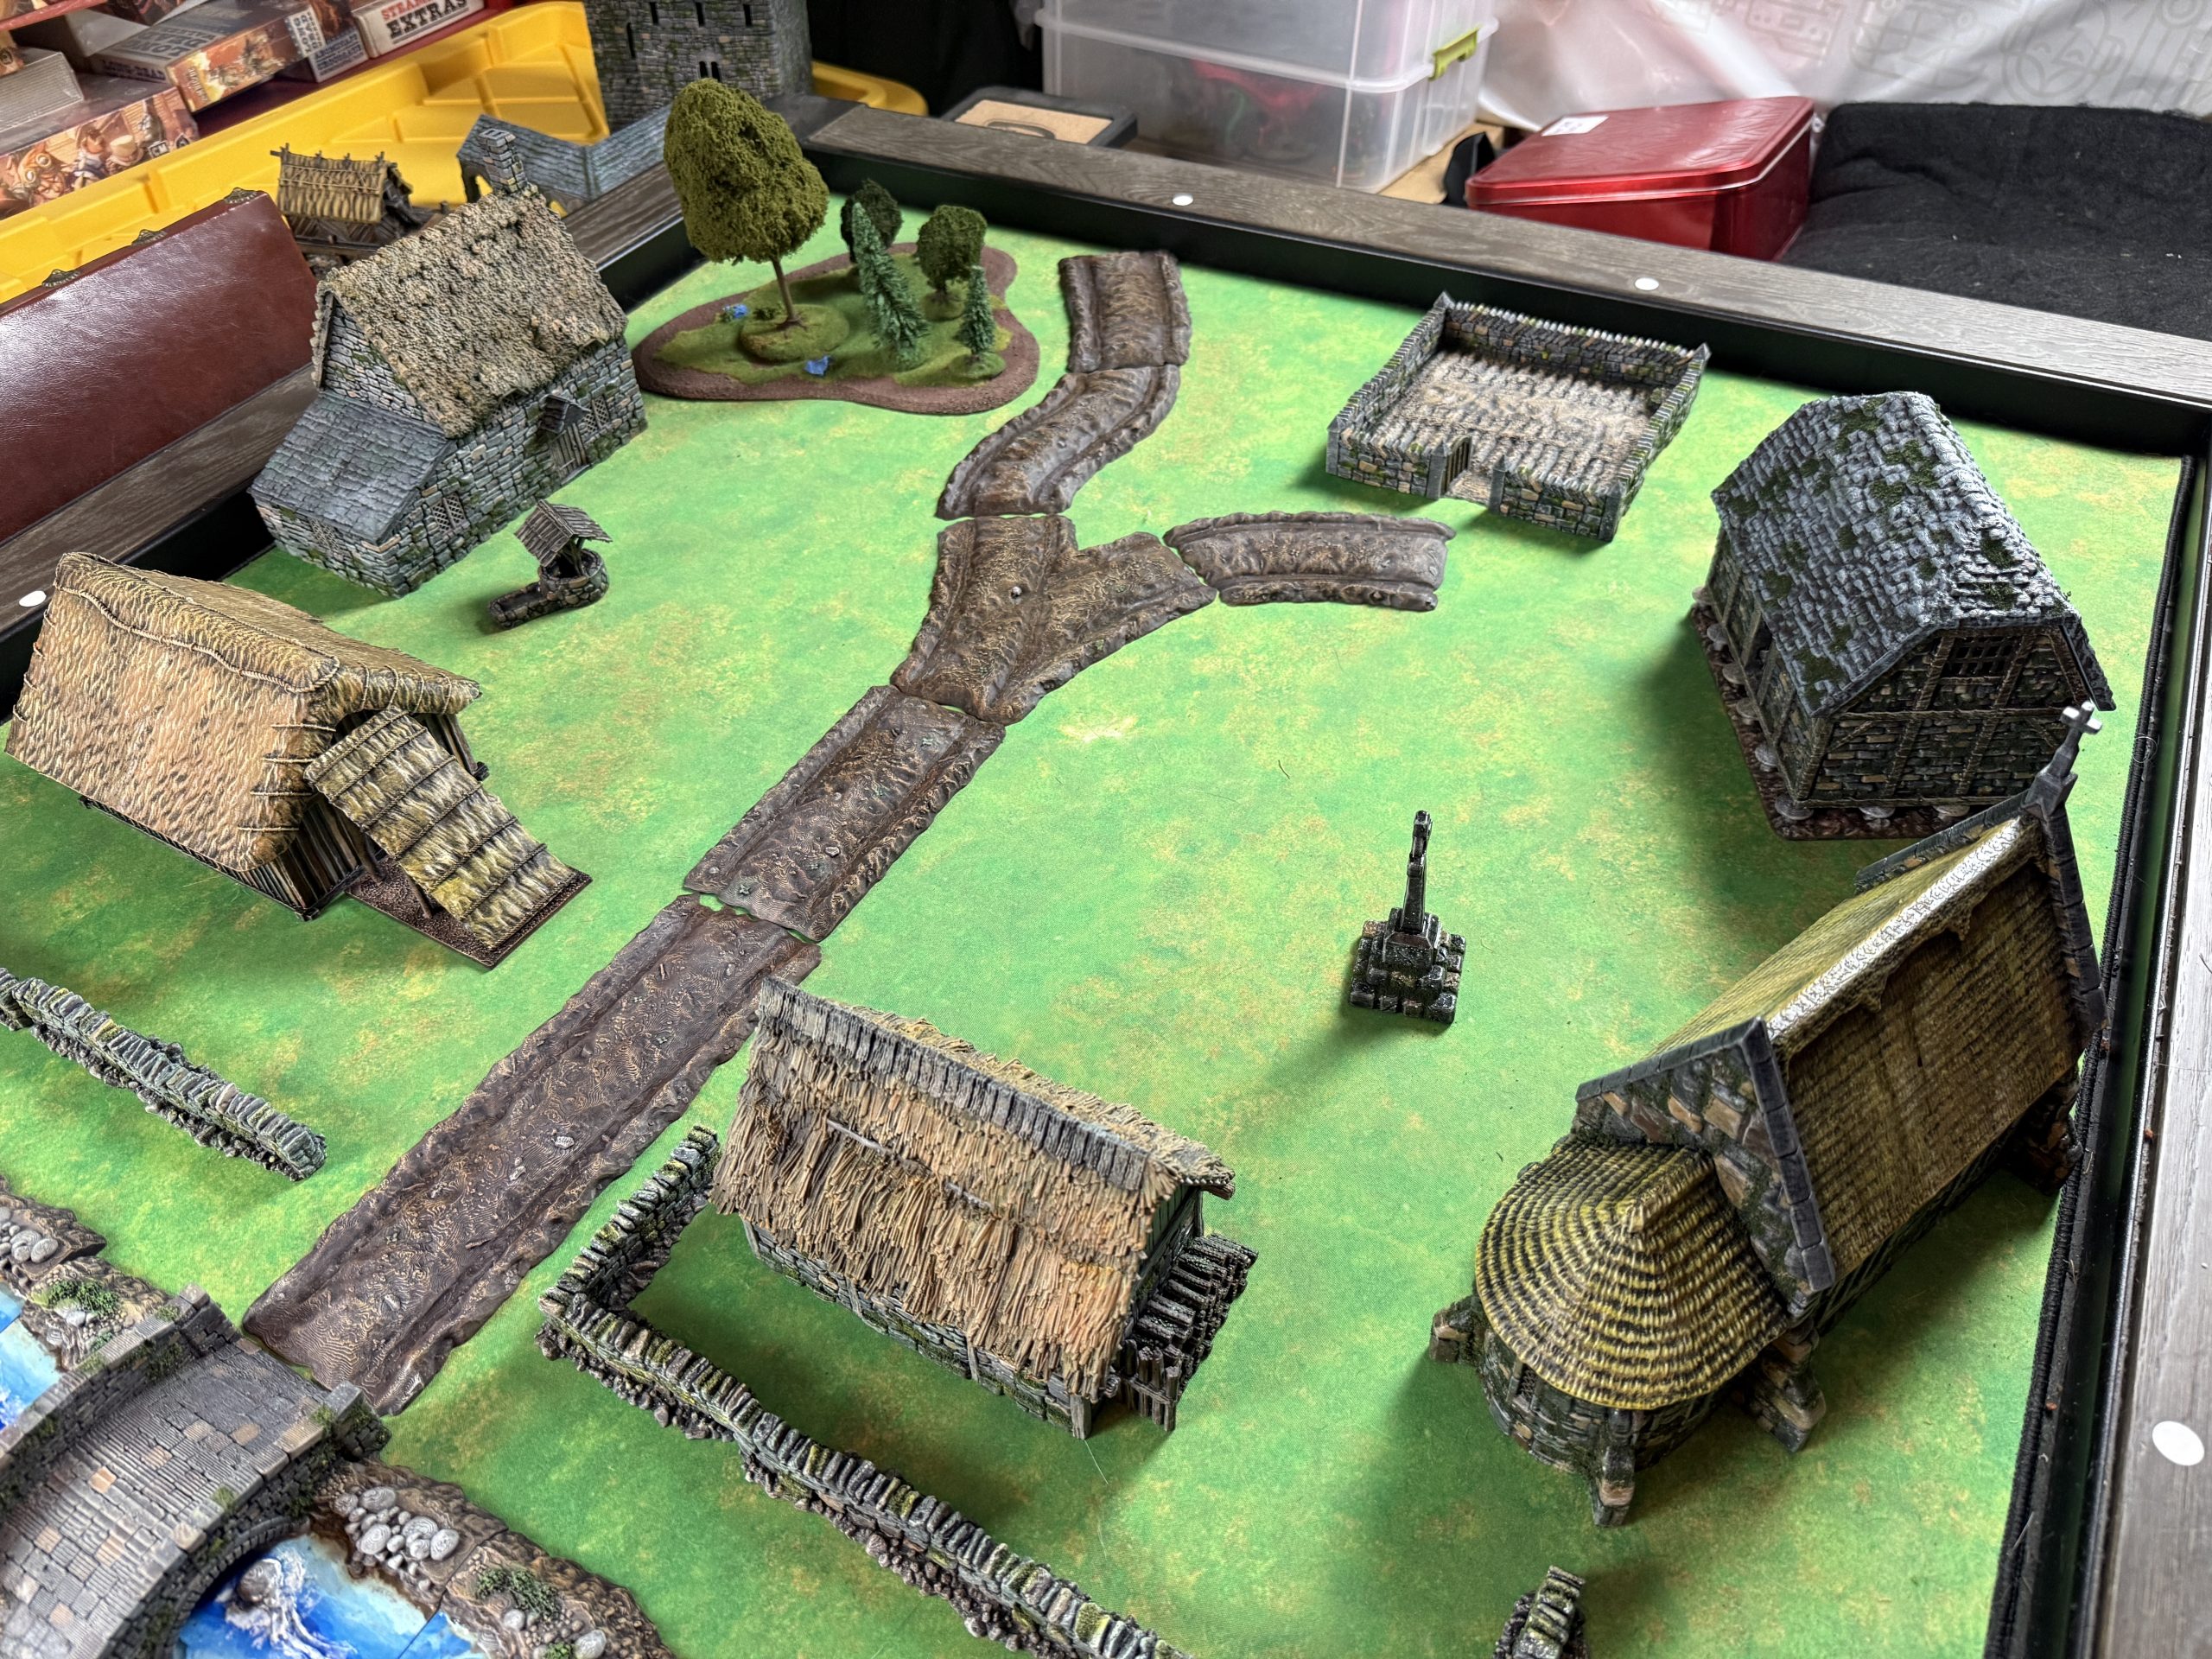 The small hamlet of Stockton
Let us take a look at the various elements of the village, starting with the walls, which will give me an opportunity to share how I paint stone walls for this project. I encourage you to build/print/craft many stone wall sections (low, high, broken, etc…) as they will be useful to add around your terrain to limit line of sight (LOS), impeded movement and provide cover. Also, such walls can be used for a variety of gaming periods and worlds.
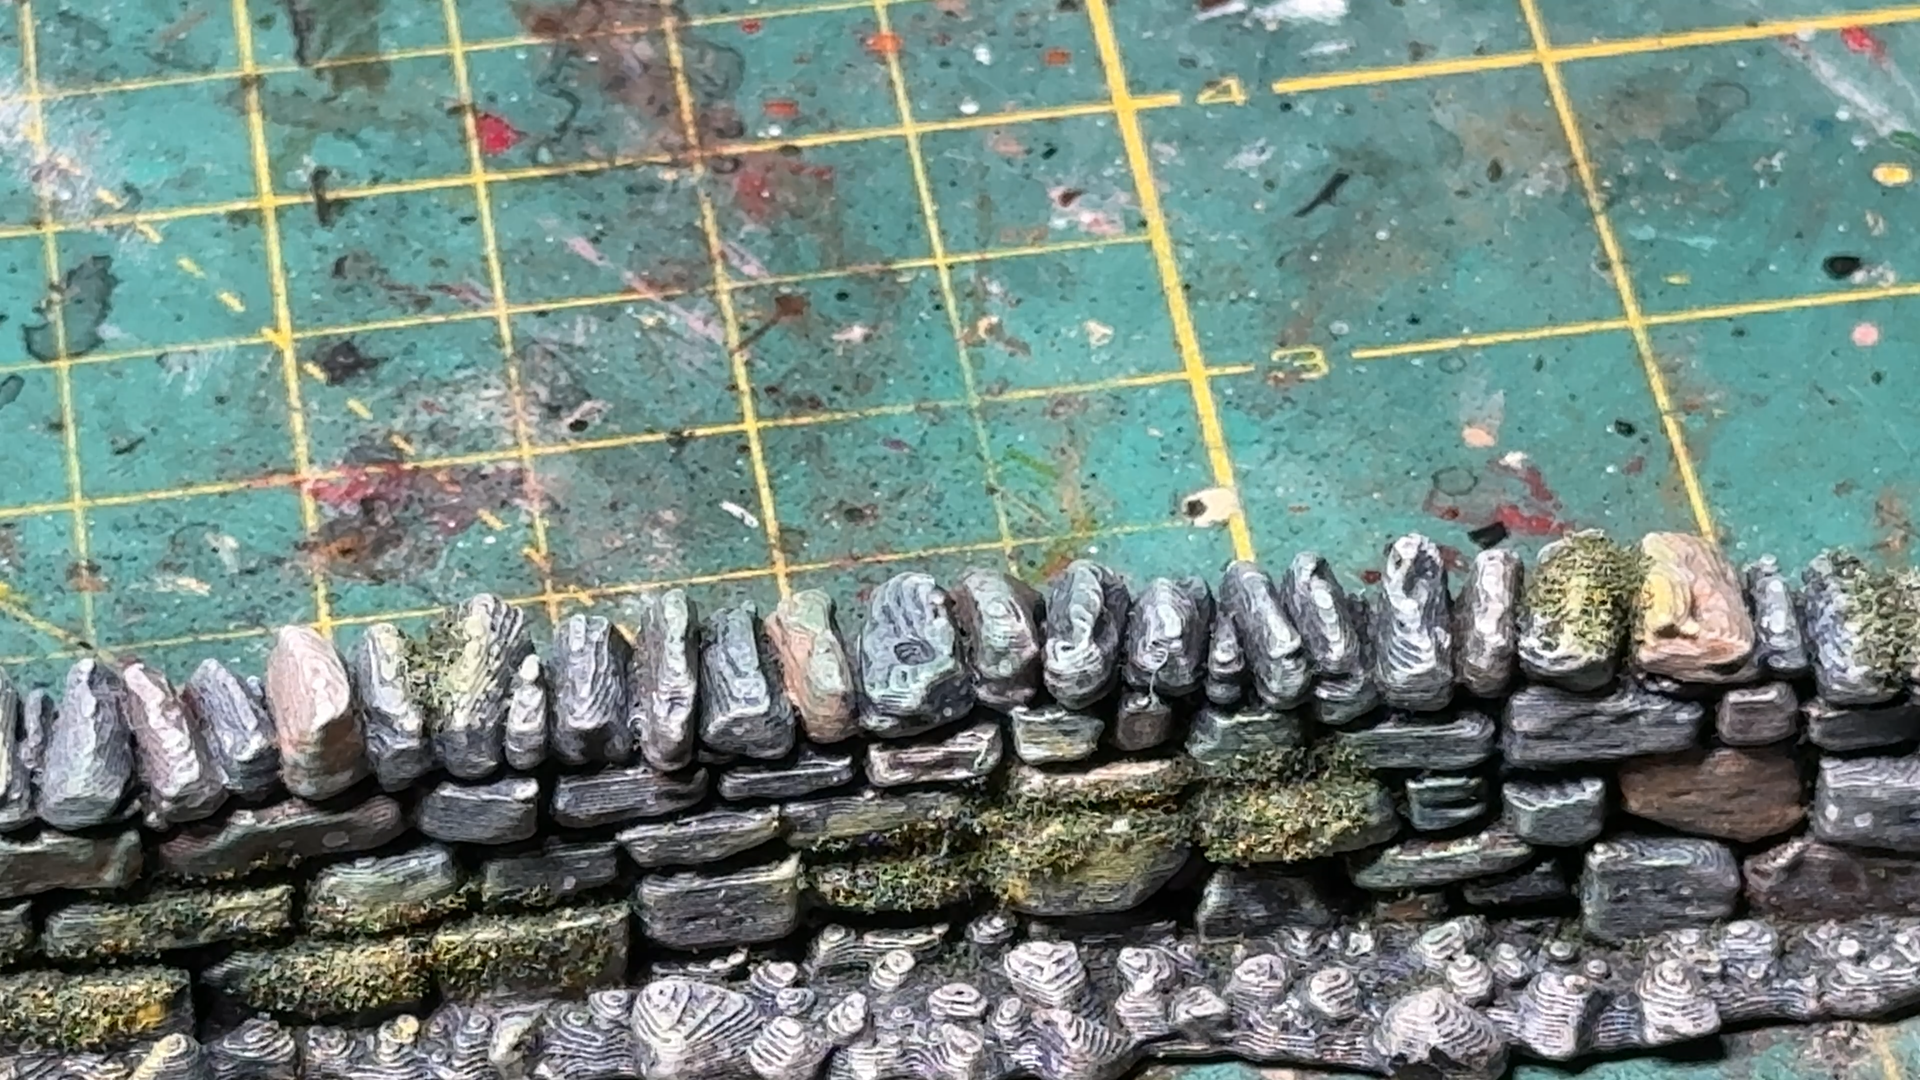 Country wall from Printable Scenery - https://www.printablescenery.com/product/country-low-walls/
- Prime black
- Dry brush medium gray (I usually use American Medium Gray)
- Spot paint individual stones using different shades of brown (I use American Dark Chocolate and Cocoa). Vary the intensity for realism. Use whatever colors fit your environment and your fancy.
- Dry-brush with lighter shades of brown (I used American Burlap and Bleached Sand). make certain the lighter paint stays away from recesses.
- Wash with home made wash. Avoid using hobby washes as they cost a fortune, especially in the quantity needed for terrain. Search online for a home made recipe. I use dish soap (a few drops) with acrylic medium and ink, either black, brown or green. Get a few large dropper bottles as they will make your life so much easier.
- If needed, and once the wash is dry, apply another light dry-brish of light brown (I use American Bleached Sand).
- Use additional black or green washes in some areas of the stone wall to show dirt or humidity.
- If you want to show moss discoloration, you may even dry-brtush SPARSELY some areas with dark or medium green paint (Americana Forest Green is a good one).
- I desired, create lichen with a tooth brush dipped in white or light green paint which bristles you pull back then release against the wall. LESS IS MORE. You can alternately sponge the wall with white or light green color.
- Add moss by spreading PVA glue in some areas(corners and recesses are a good start). Then apply dark flocking to the glue and press on it to incrase adhesion. Brush lightly off after 1/2 hour to remove extra. Again, LESS IS MORE.
Your wall is done…
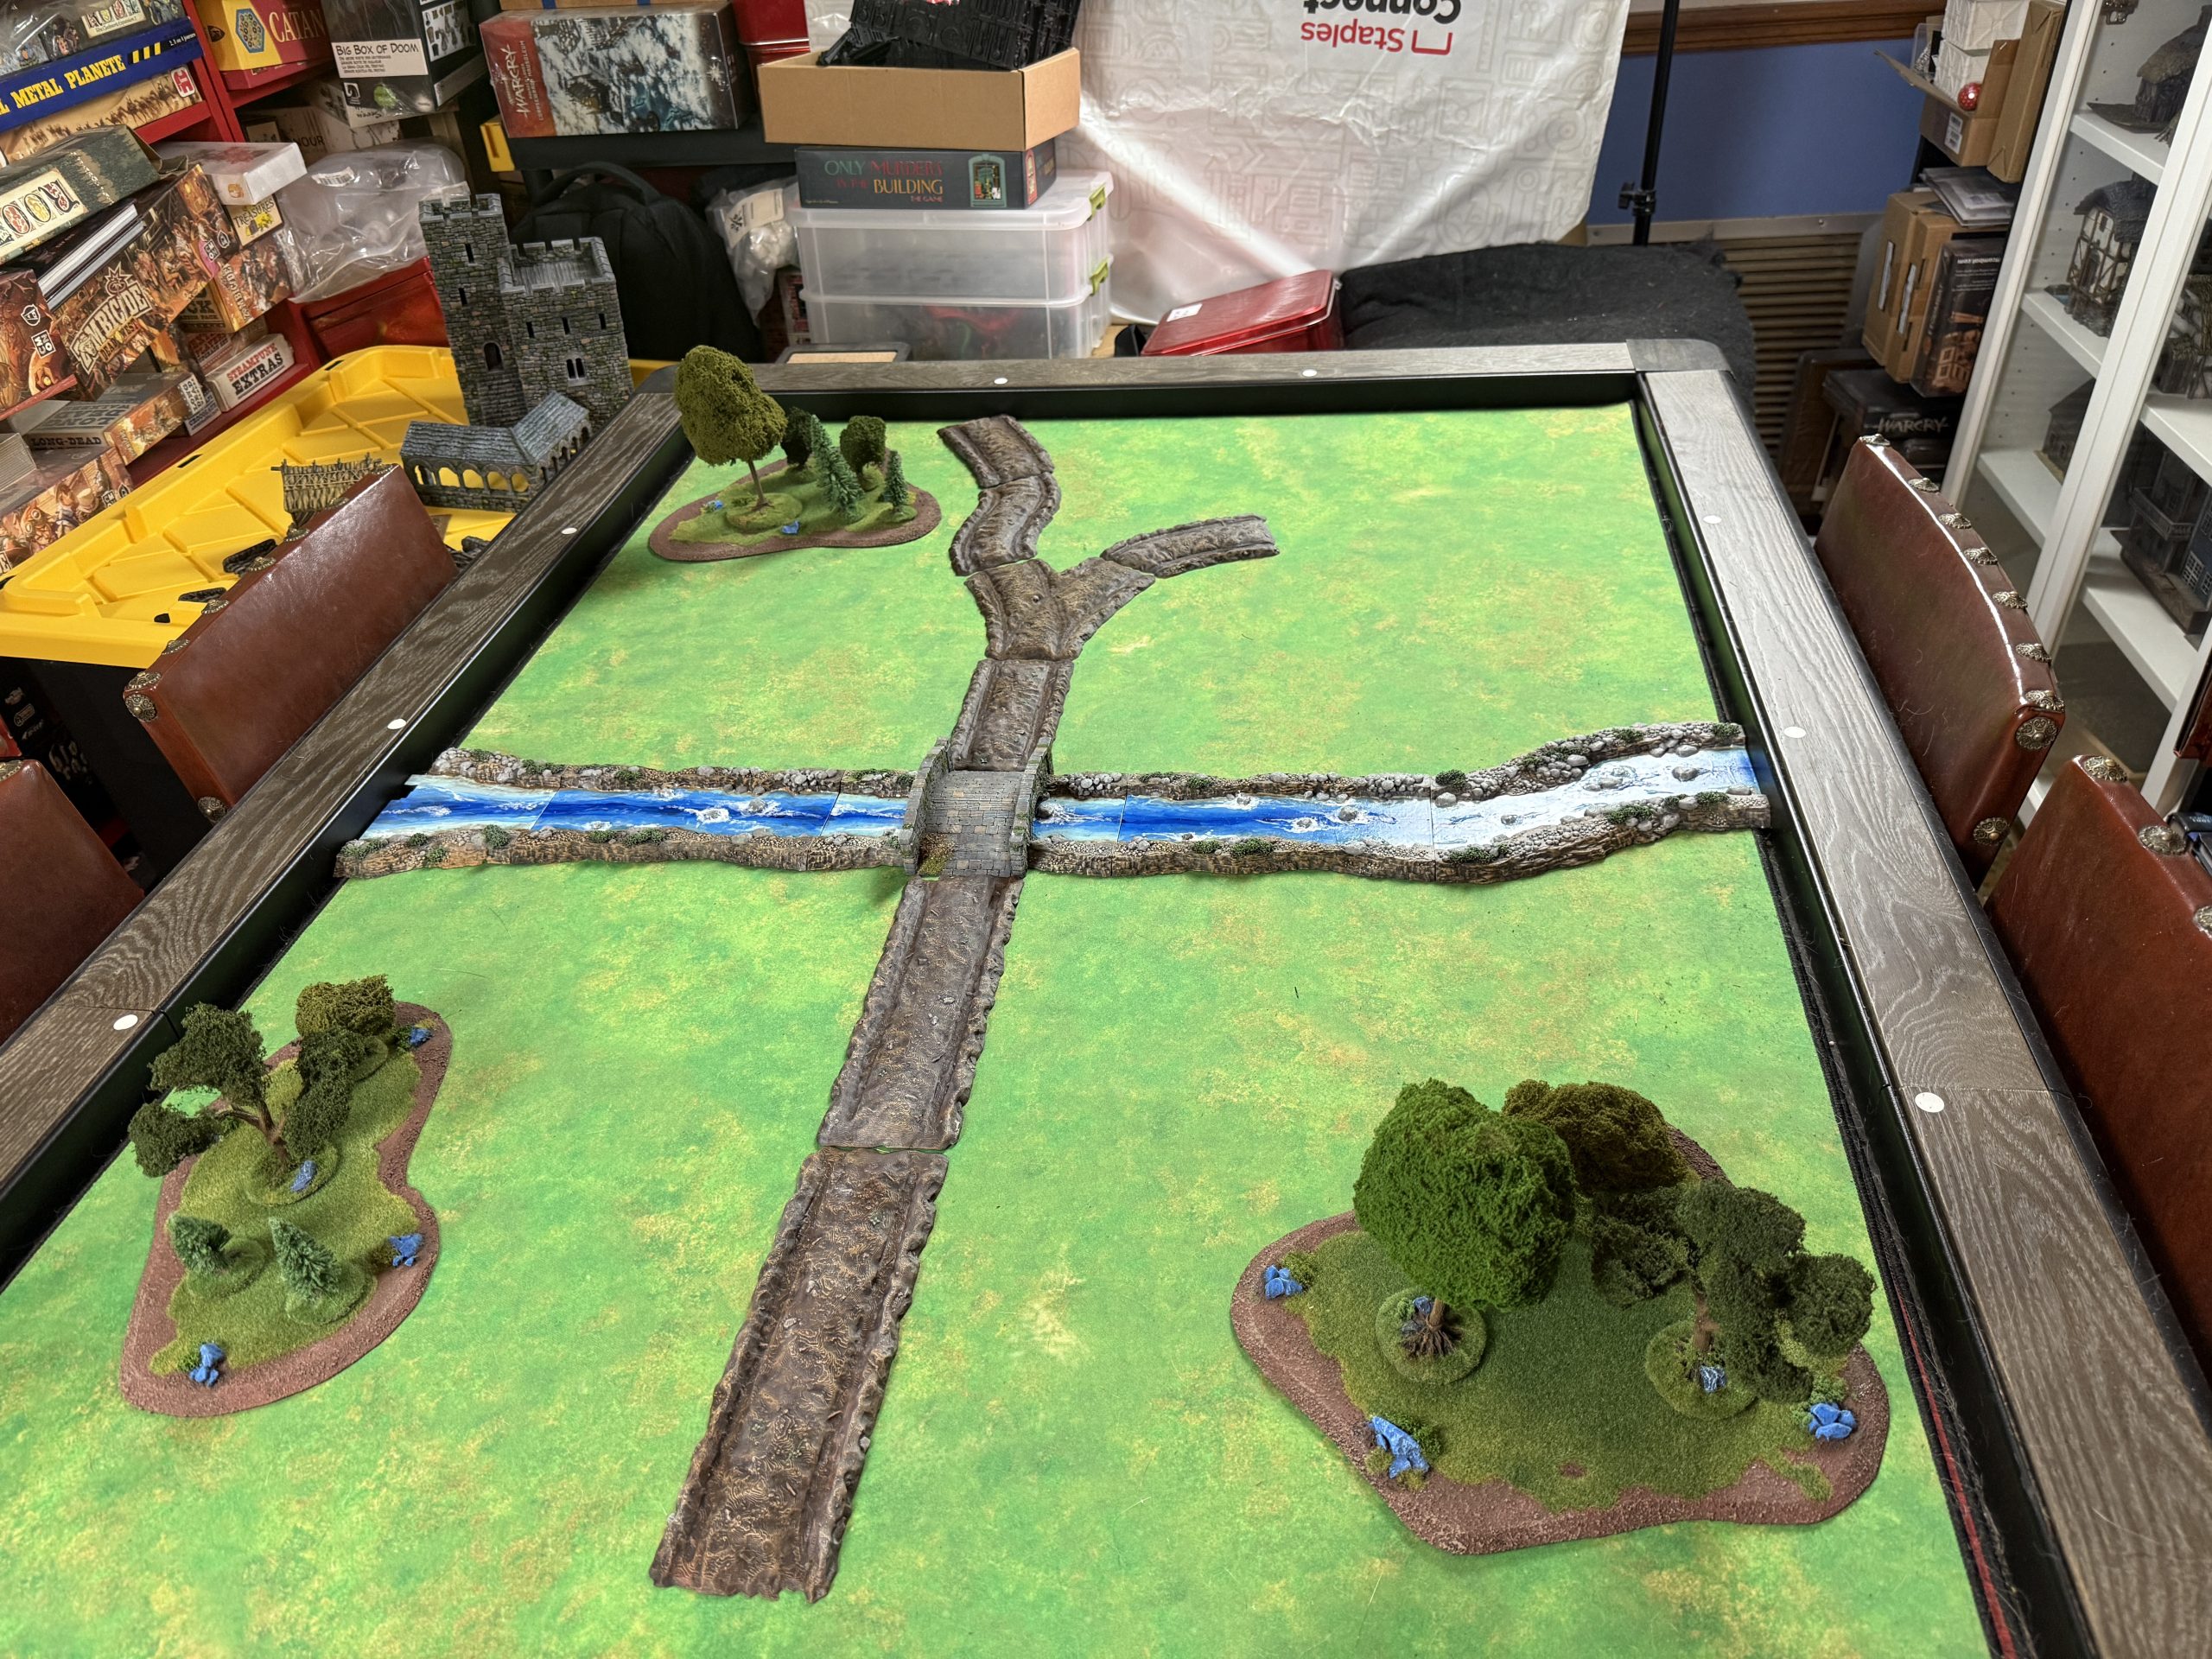
A Path Among the Trees
Now that we have a river, and a bridge to cross it, it seems natural to place vegetation as well as a path that will use that bridge.
The trees were purchased years ago from Terrain For Games (https://terrains4games.com/113-landscape-terrain ). The trees are hand made and thus they only produce them in the Summer months. Any tree you ahve is fine, really, but I strongly suggest you place them on a ‘forest’ base that will delineate the forested area and allow you to clearly define parameters affecting troops movement, LOS (line of sight) and cover. Always try to use tree clumps to break LOS and movement, so as to make the table more interesting.
For the road, I selected Forest Cart Tracks from Printable Scenery ( https://www.printablescenery.com/product/forest-cart-tracks/ ). Some people will object to the tracks on the path and some will dislike the none contiguous aspect of the files. I chose these files as I felt they offered a solid road for forested and country roads. Once I establish urban setups, i will print paved roads but feel they have no place in the woods.
 From the brown mud road...
Painting the road was quite easy as it consisted in:
Prime camo brown
- Dry-brush progressively lighter shades of brown
- I chose to not adorn the tiles with tuffs so as to be able to use them in various areas and also for storage practicality.
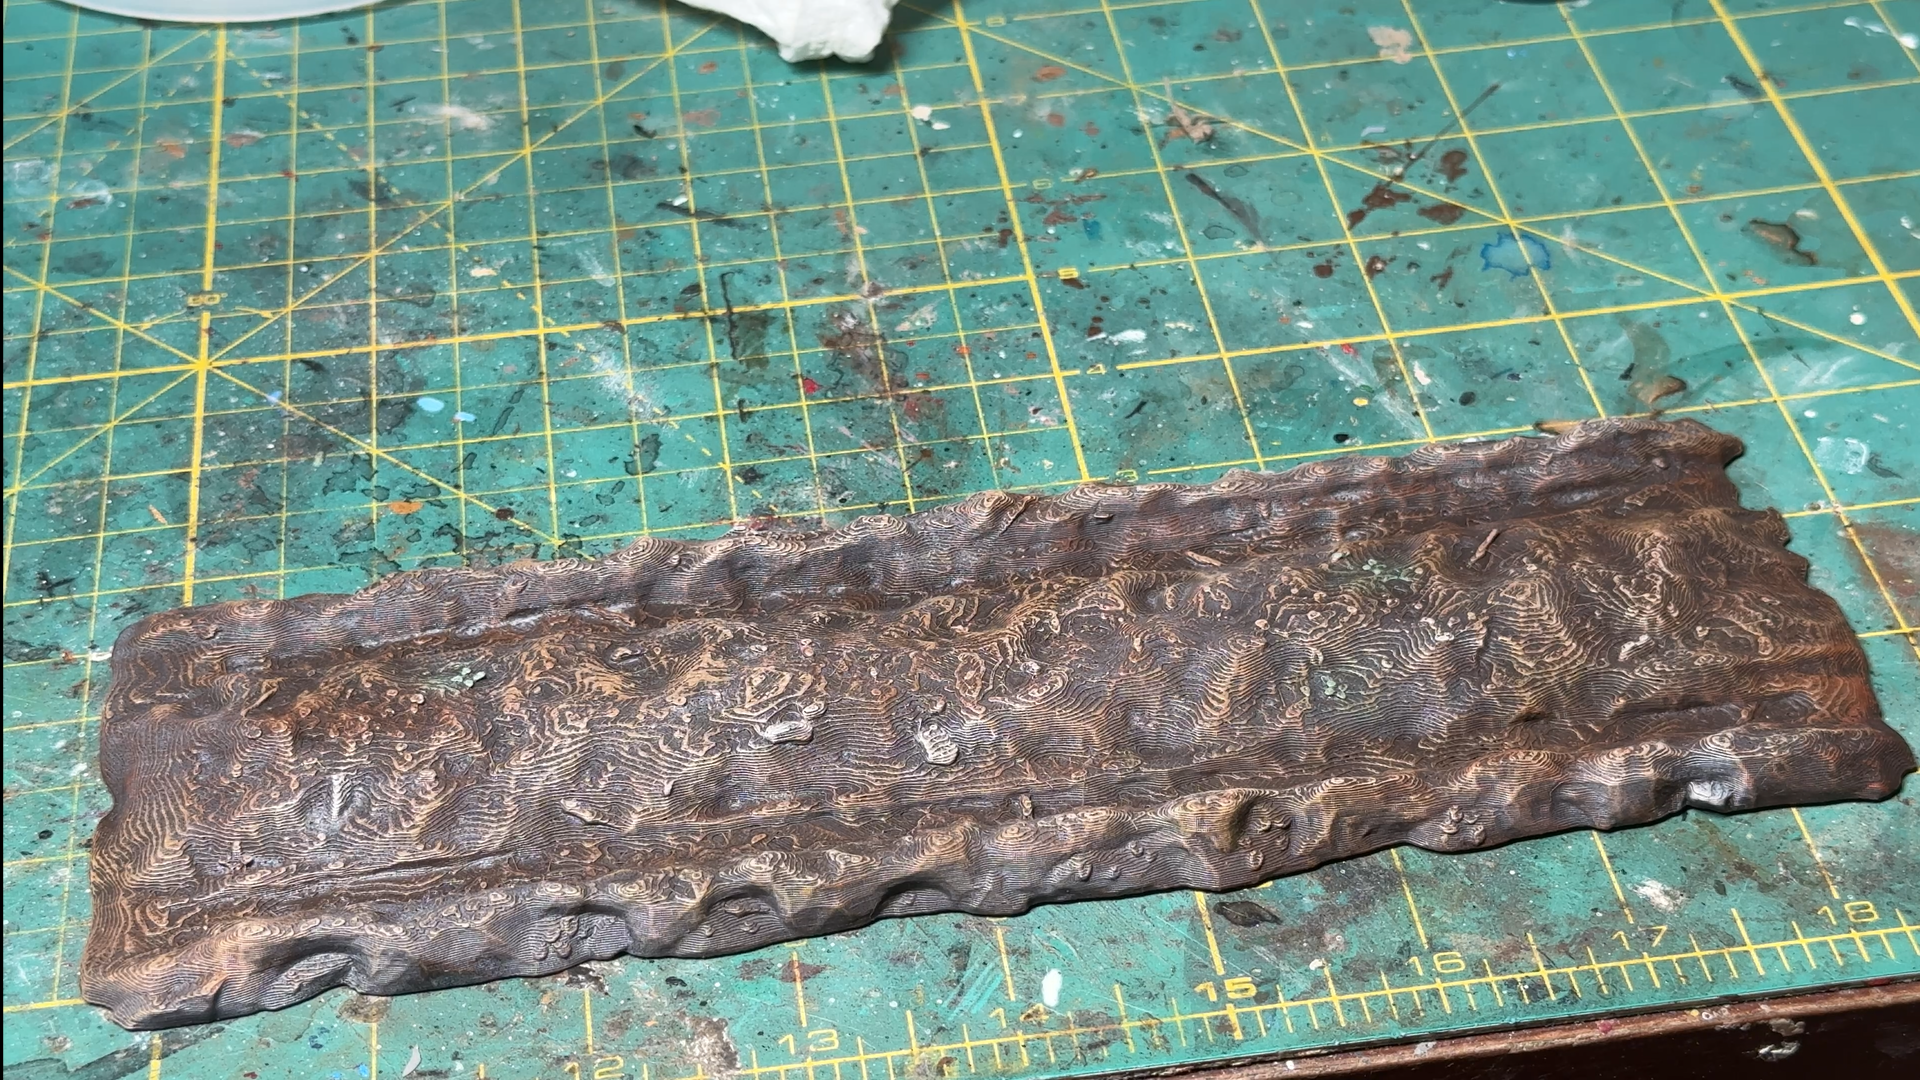 Road tile detail.
A river runs through...
Now that we have a general idea of where table elements should be, it is time to place them down on the table one at a time and see how they interact. As a rule, i try to start with natural elements first. If I was planning on adding hills, I would start with them, but as I am trying to keep this table simple and flat, I will start with the river.
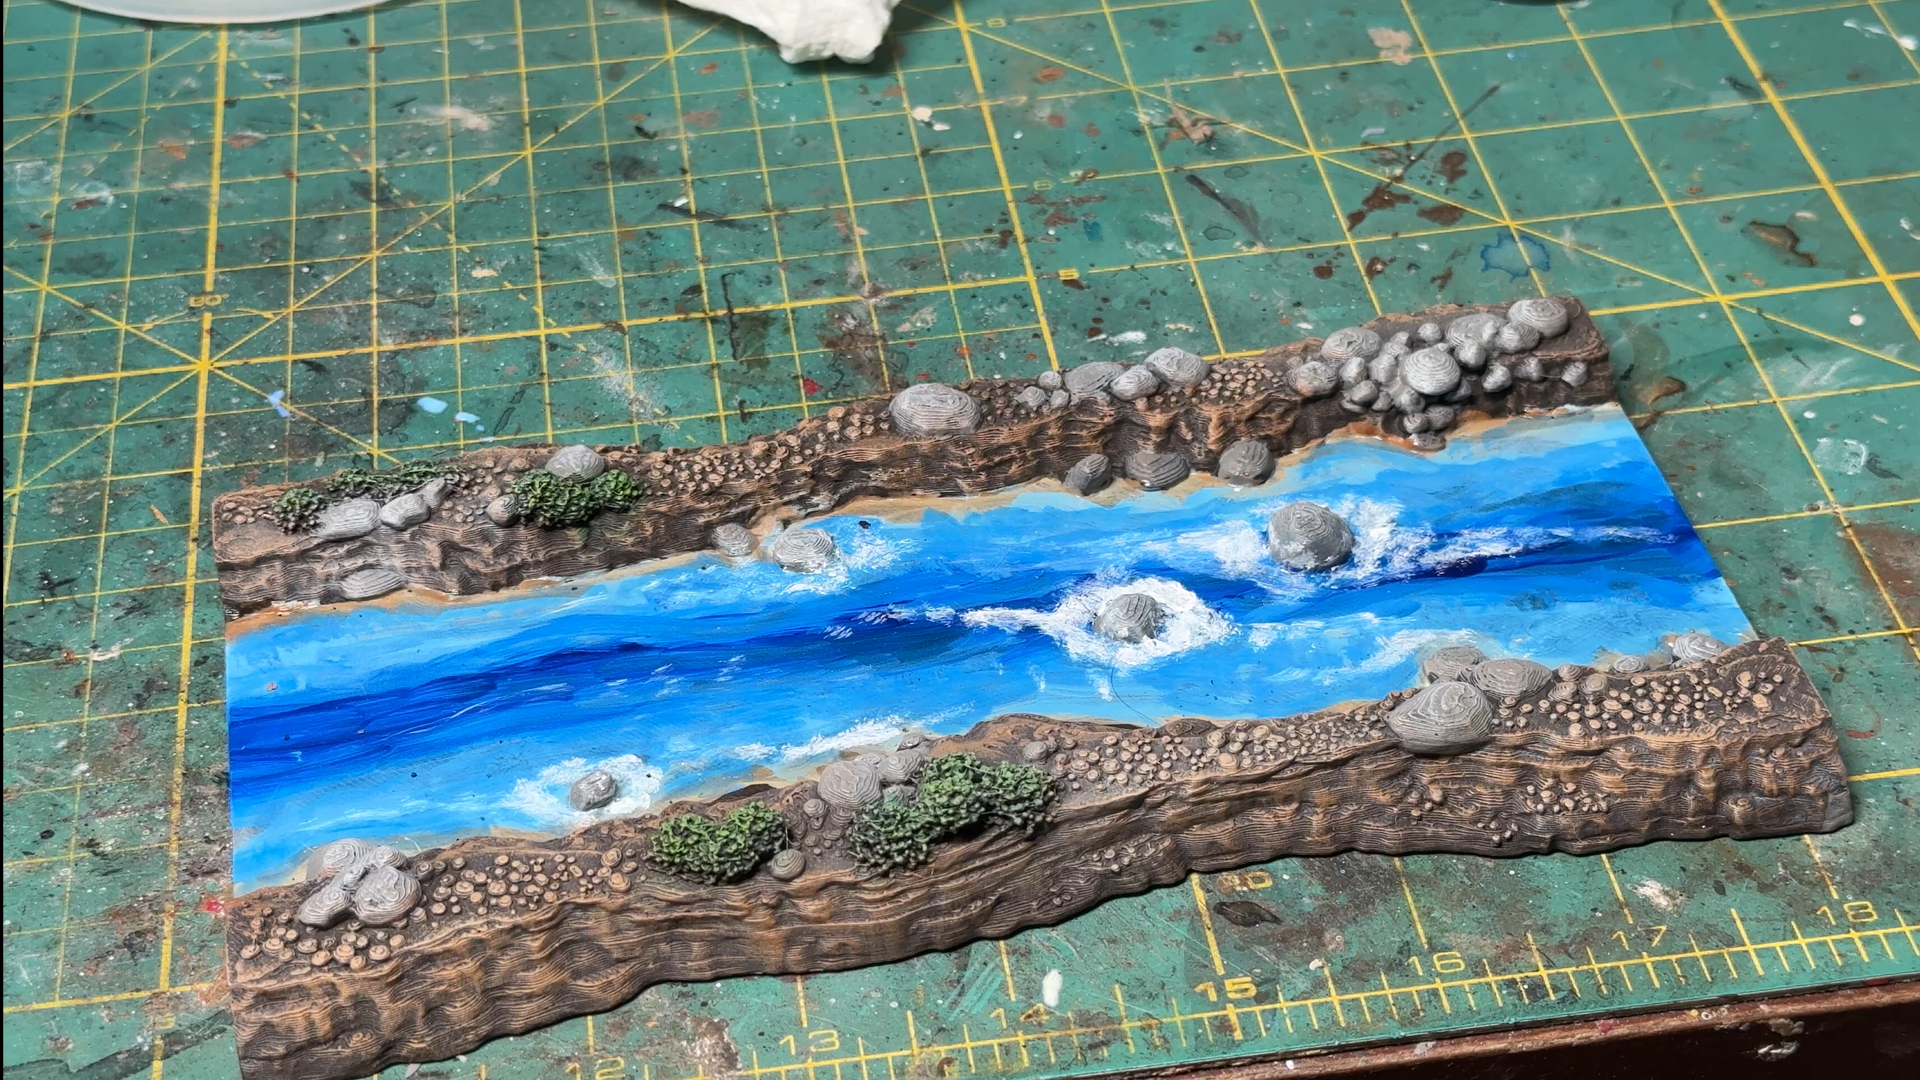
The modular river files I chose are from the printable scenery range – Wild River – https://www.printablescenery.com/product/wild-rivers/ I picked this set as it offers decent flexibility and could be used in a wide range of tables over wide variety of historical periods/fantasy settings. It is a little narrow but offers options for fordable spaces as well as integration with a water mill. Sadly, it dow not ahve a bridge and I created one by adding a bridge file to the river tile on my 3D slicing software (an easy 2 mn job, just make certain the rocks from the river edge do not protrude from the bridge…)
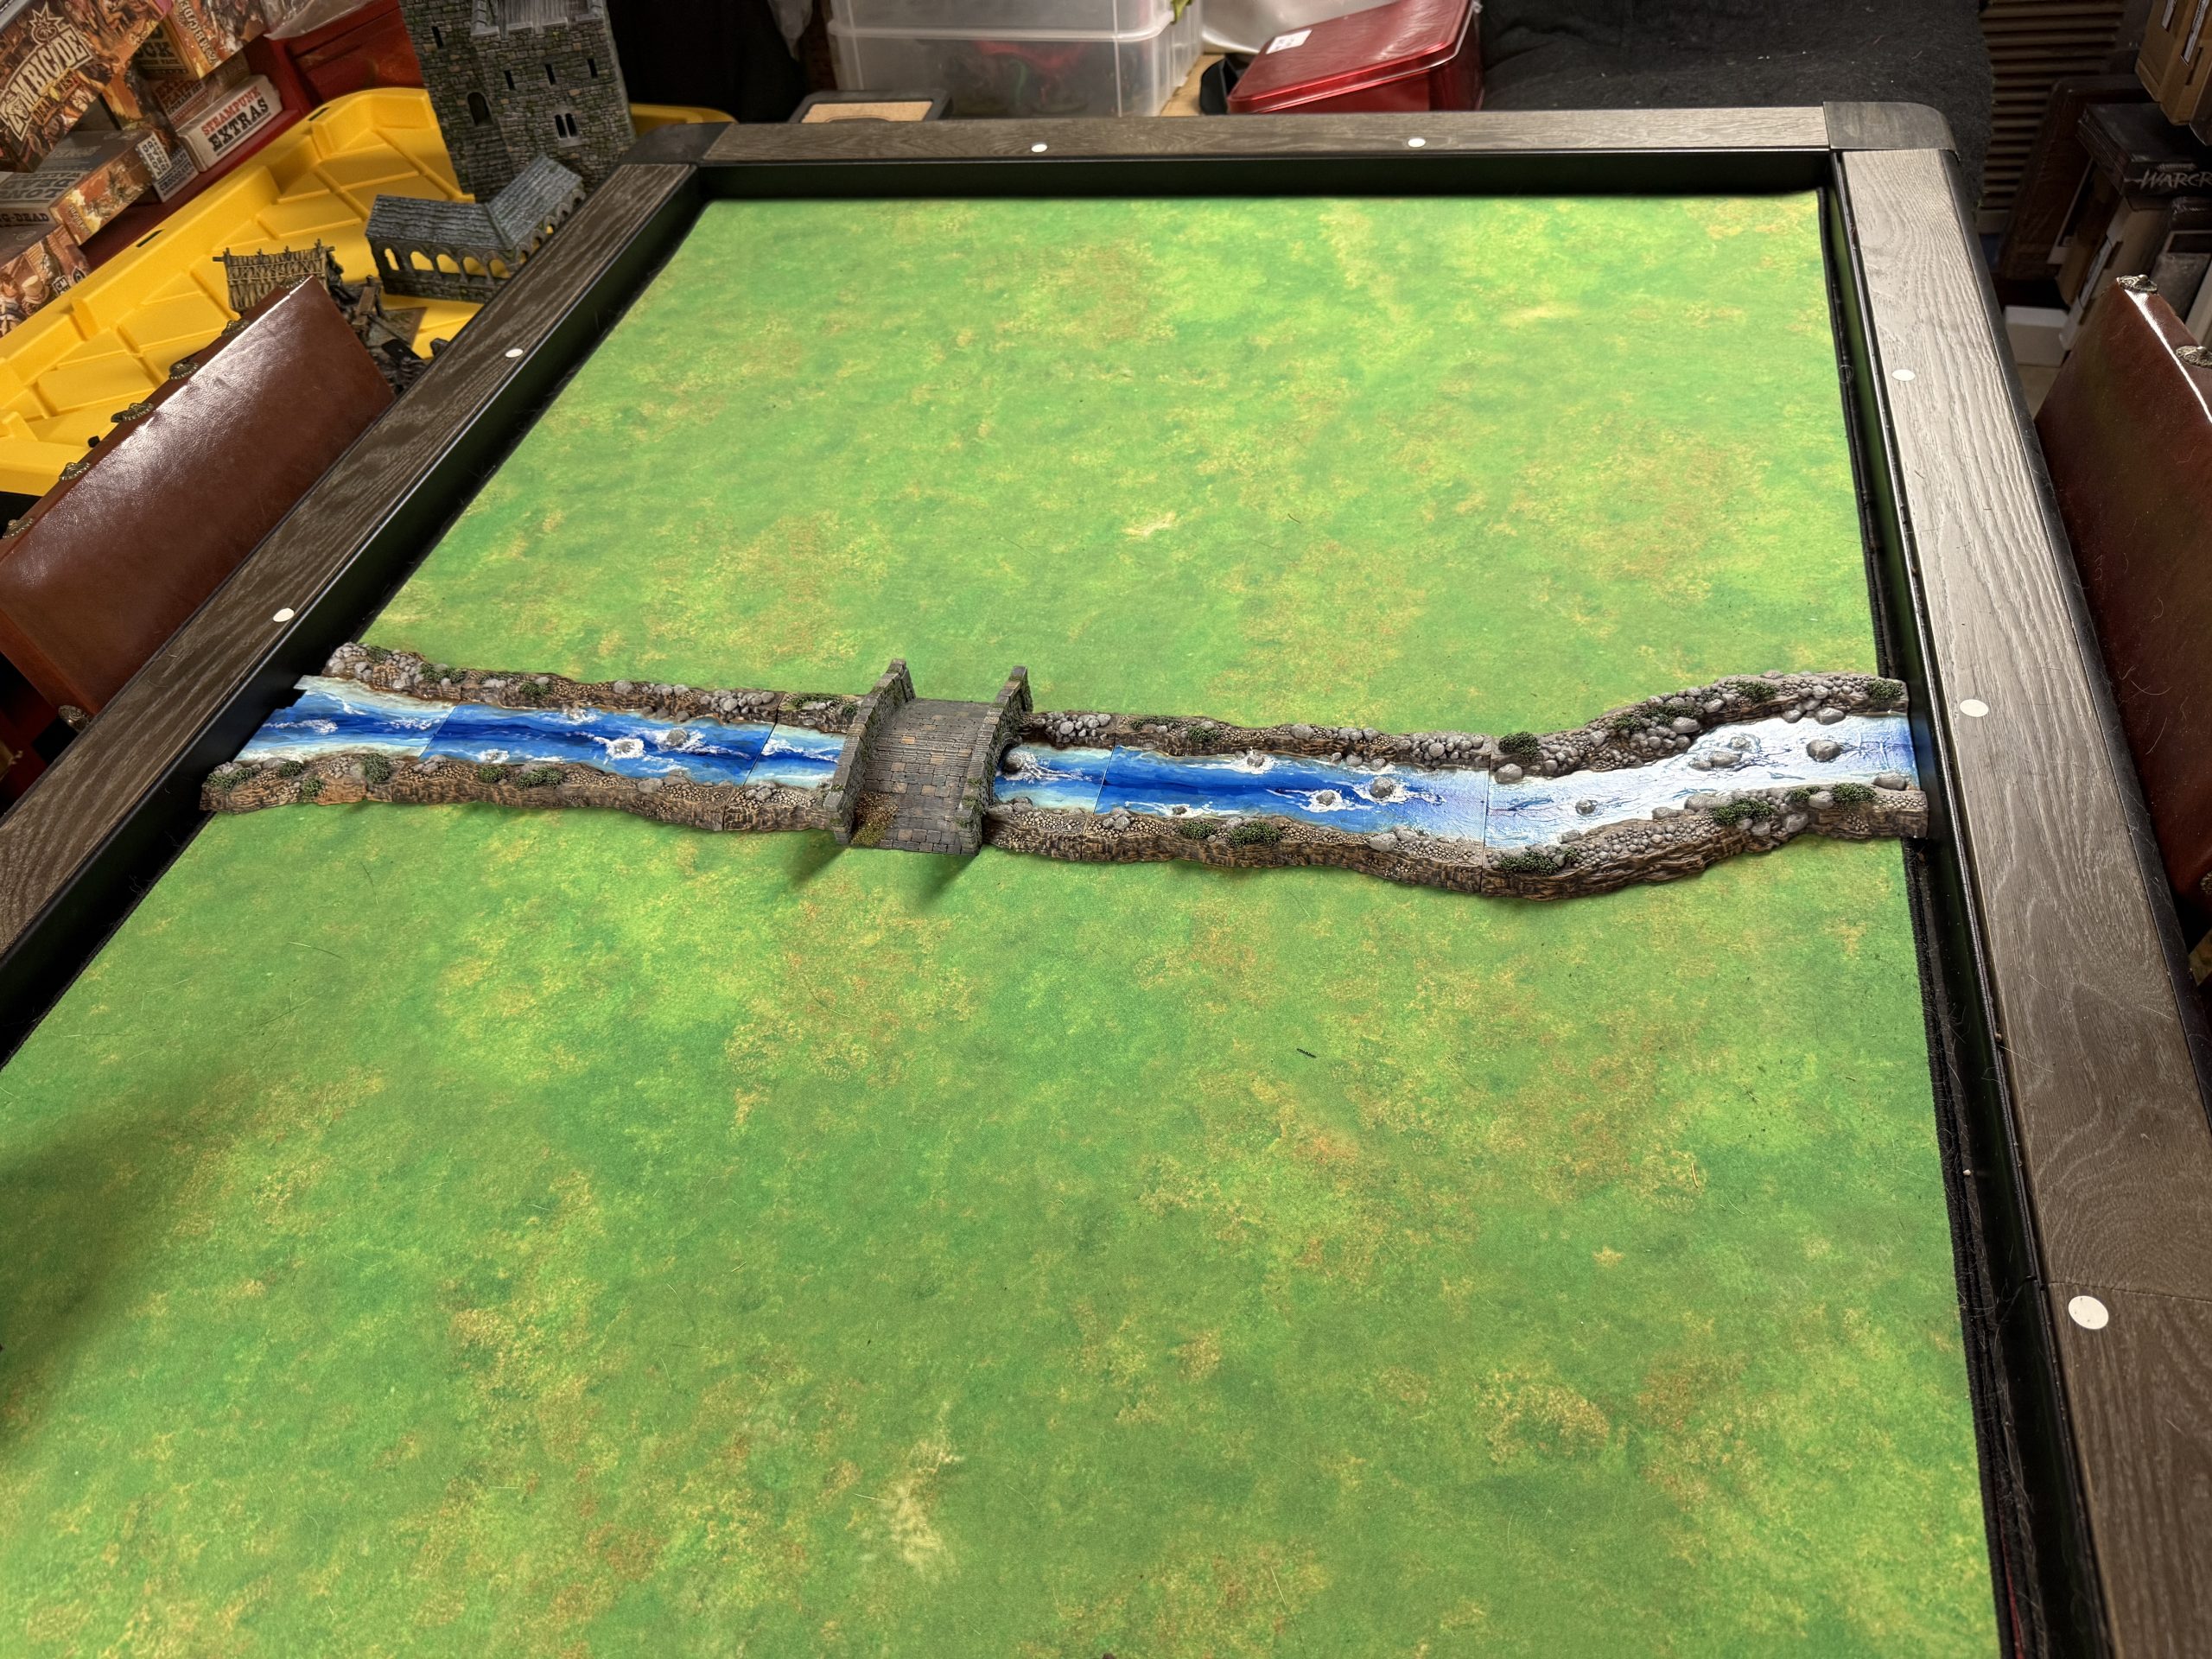 The river crosses the map on the second 'row' of the grid.
Let us take a look in more details at a river tile.
I painted it following these steps:
- Primed camo brown
- Dry brushed the banks in progressively lighter brown tones using craft paints
- Finished by painting the larger rocks in medium grey and dry brushed them light gray. The bushes were painted medium green and drybrush light green.
- For the water, I started with a craft paint dark blue at the center and added progressively lighter ‘bands’ on each side till I reached the banks with whitish blue color. I then wet blended roughly the blue’ bands’.
- I then used clear modge podge on the water and, once dry, applied Woodland Scenics water effect around the rocks, which dried clear. Once the effect was dry, I added white paint on and around it to reinforce the effect.