


Frostgrave terrain for local club campaign April 2026


Recommendations: 141
About the Project
I am trying to stoke the flames of My small local club by increasing participation. I have been working on for six months plenty of miniatures for the frostgrave campaign I've pencilled in for April 2026 using the blood legacy supplement and a few house rules. I came across this competition so it's going to give me motivation to build up the table to a satisfactory level. I'm hoping for roughly 12 players across 3 tables (hence house rules because frostgrave is meant to be played 1v1) For the Terrain I'm going to be using mostly official kromlech stuff simply because I have been collecting a tonne of official north star miniatures, so id like to keep to the same theme. With the new frostgrave ten year anniversary book also I am going to paint the terrain like the artwork (almost a ruddy red brick) rather than what has been used on the painted blue stone for the stock sale art (as lovely as it is). The only exception is the pathways and ground as I think icy blue flagstones look exceptional. I'll update with pictures along the way but please wish me luck on this journey 🙏 Enjoy my walrus until I actually upload some terrain for this project for a thumbnail 😂
Related Game: Frostgrave
Related Company: North Star Military Figures
Related Genre: Fantasy
Related Contest: TerrainFest 2025
This Project is Completed
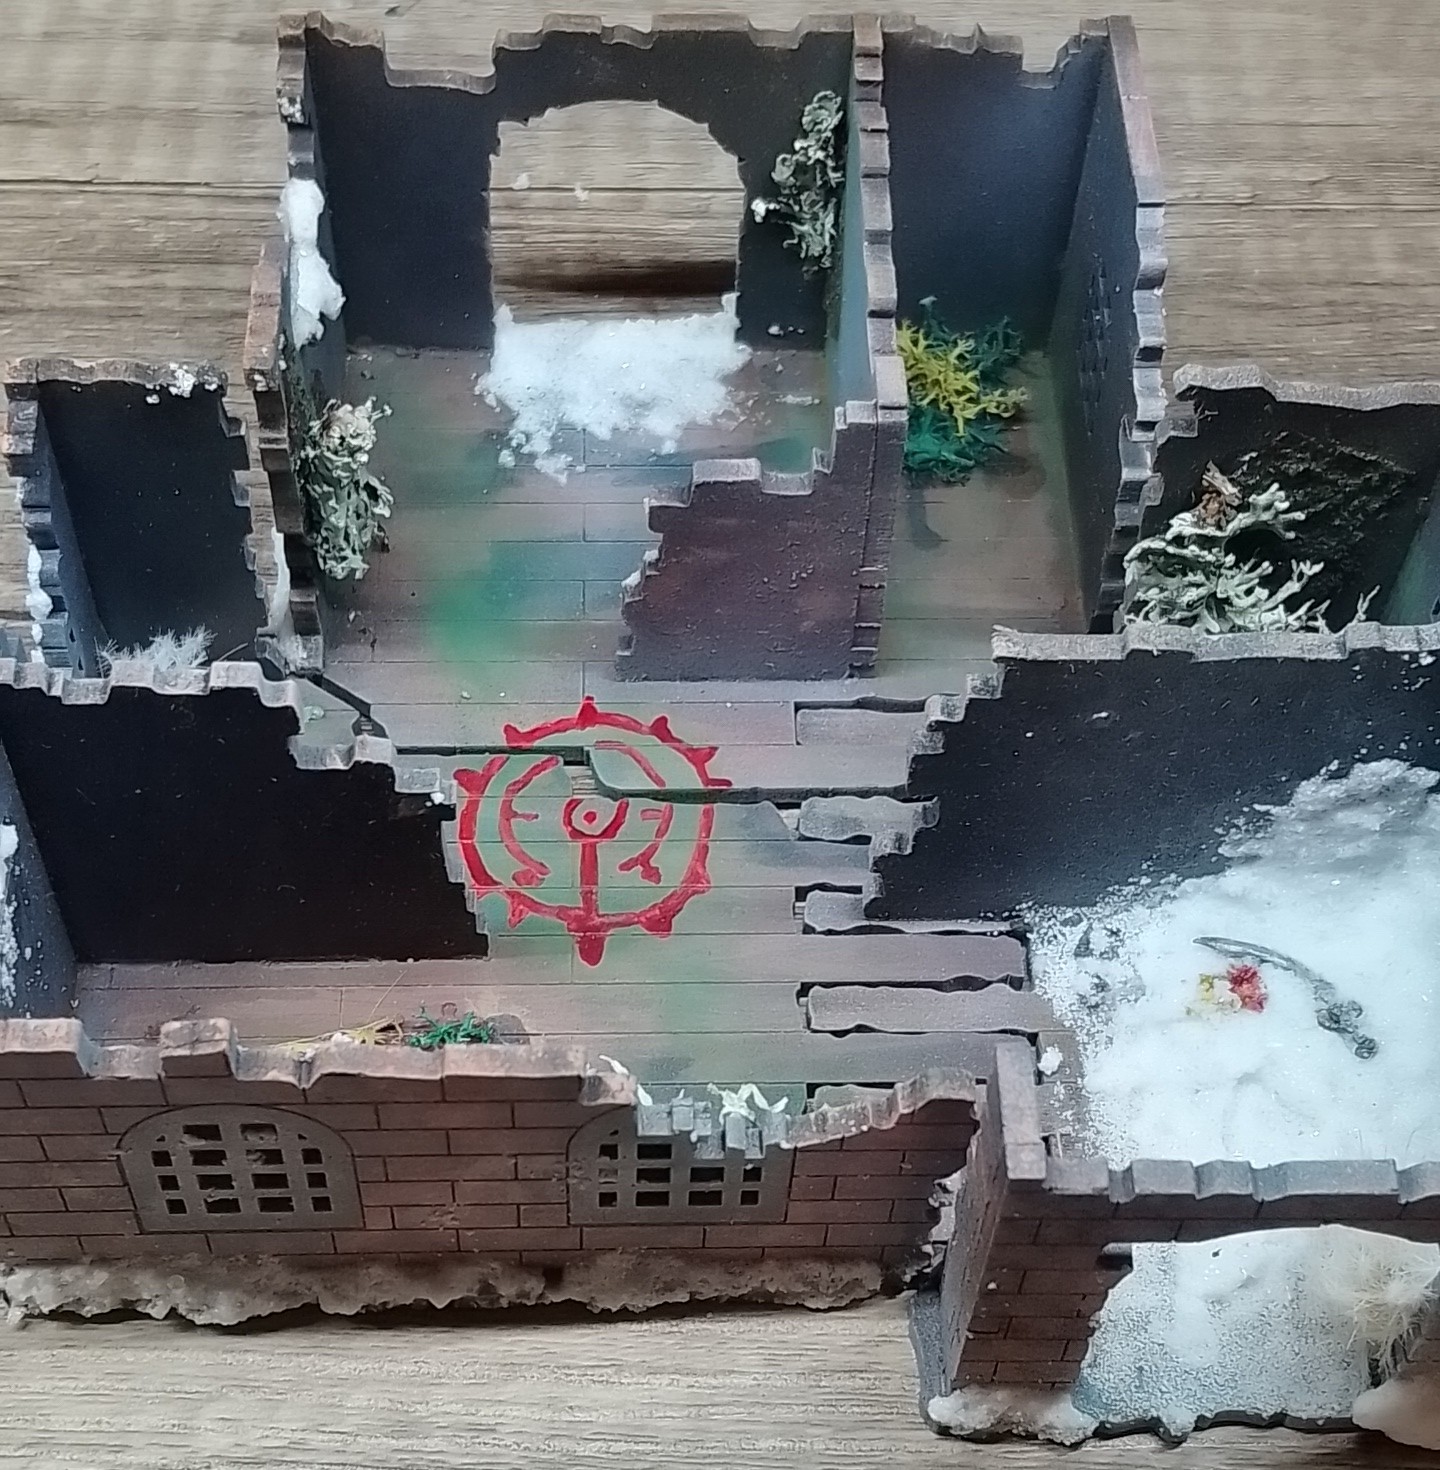
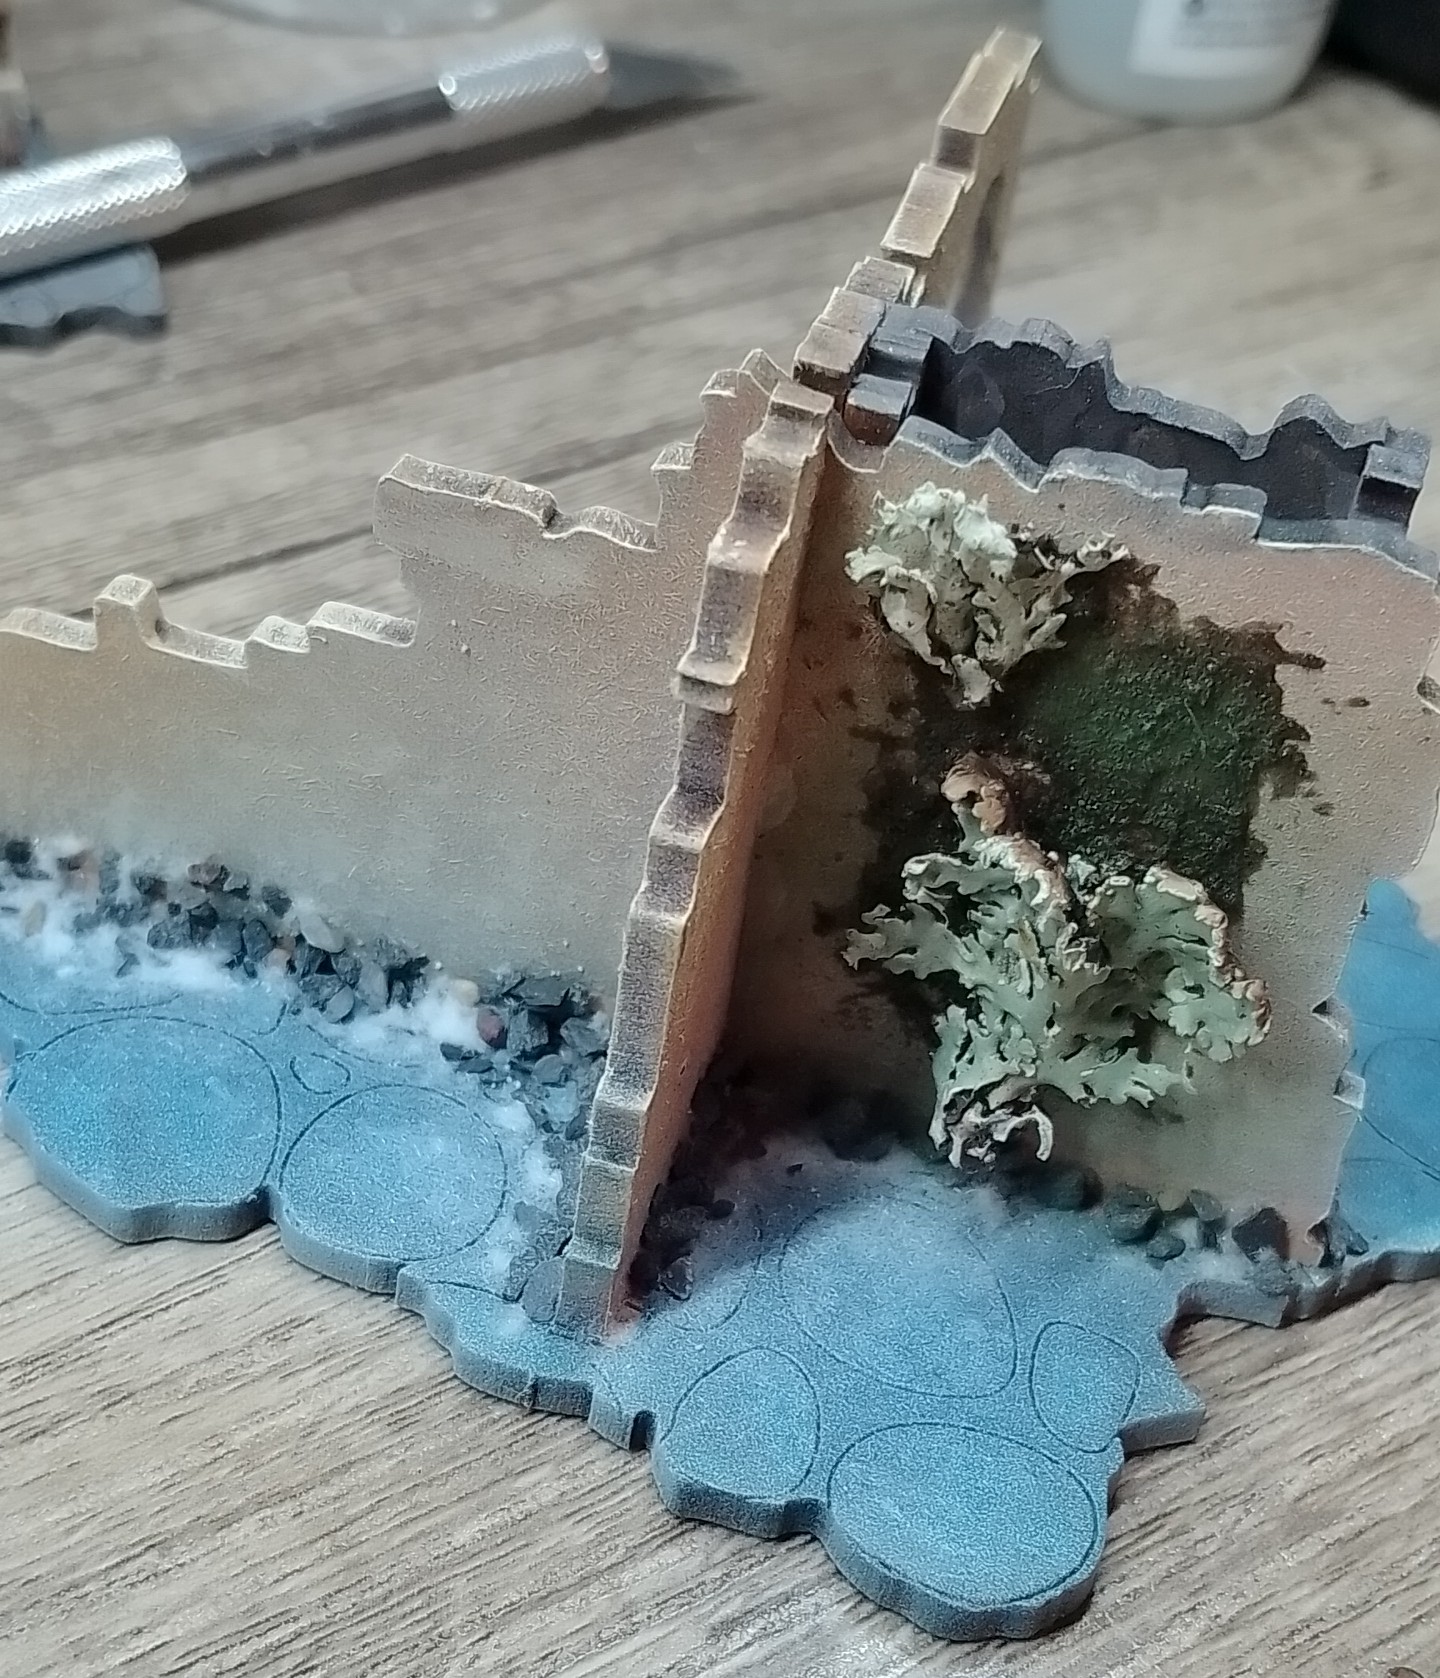
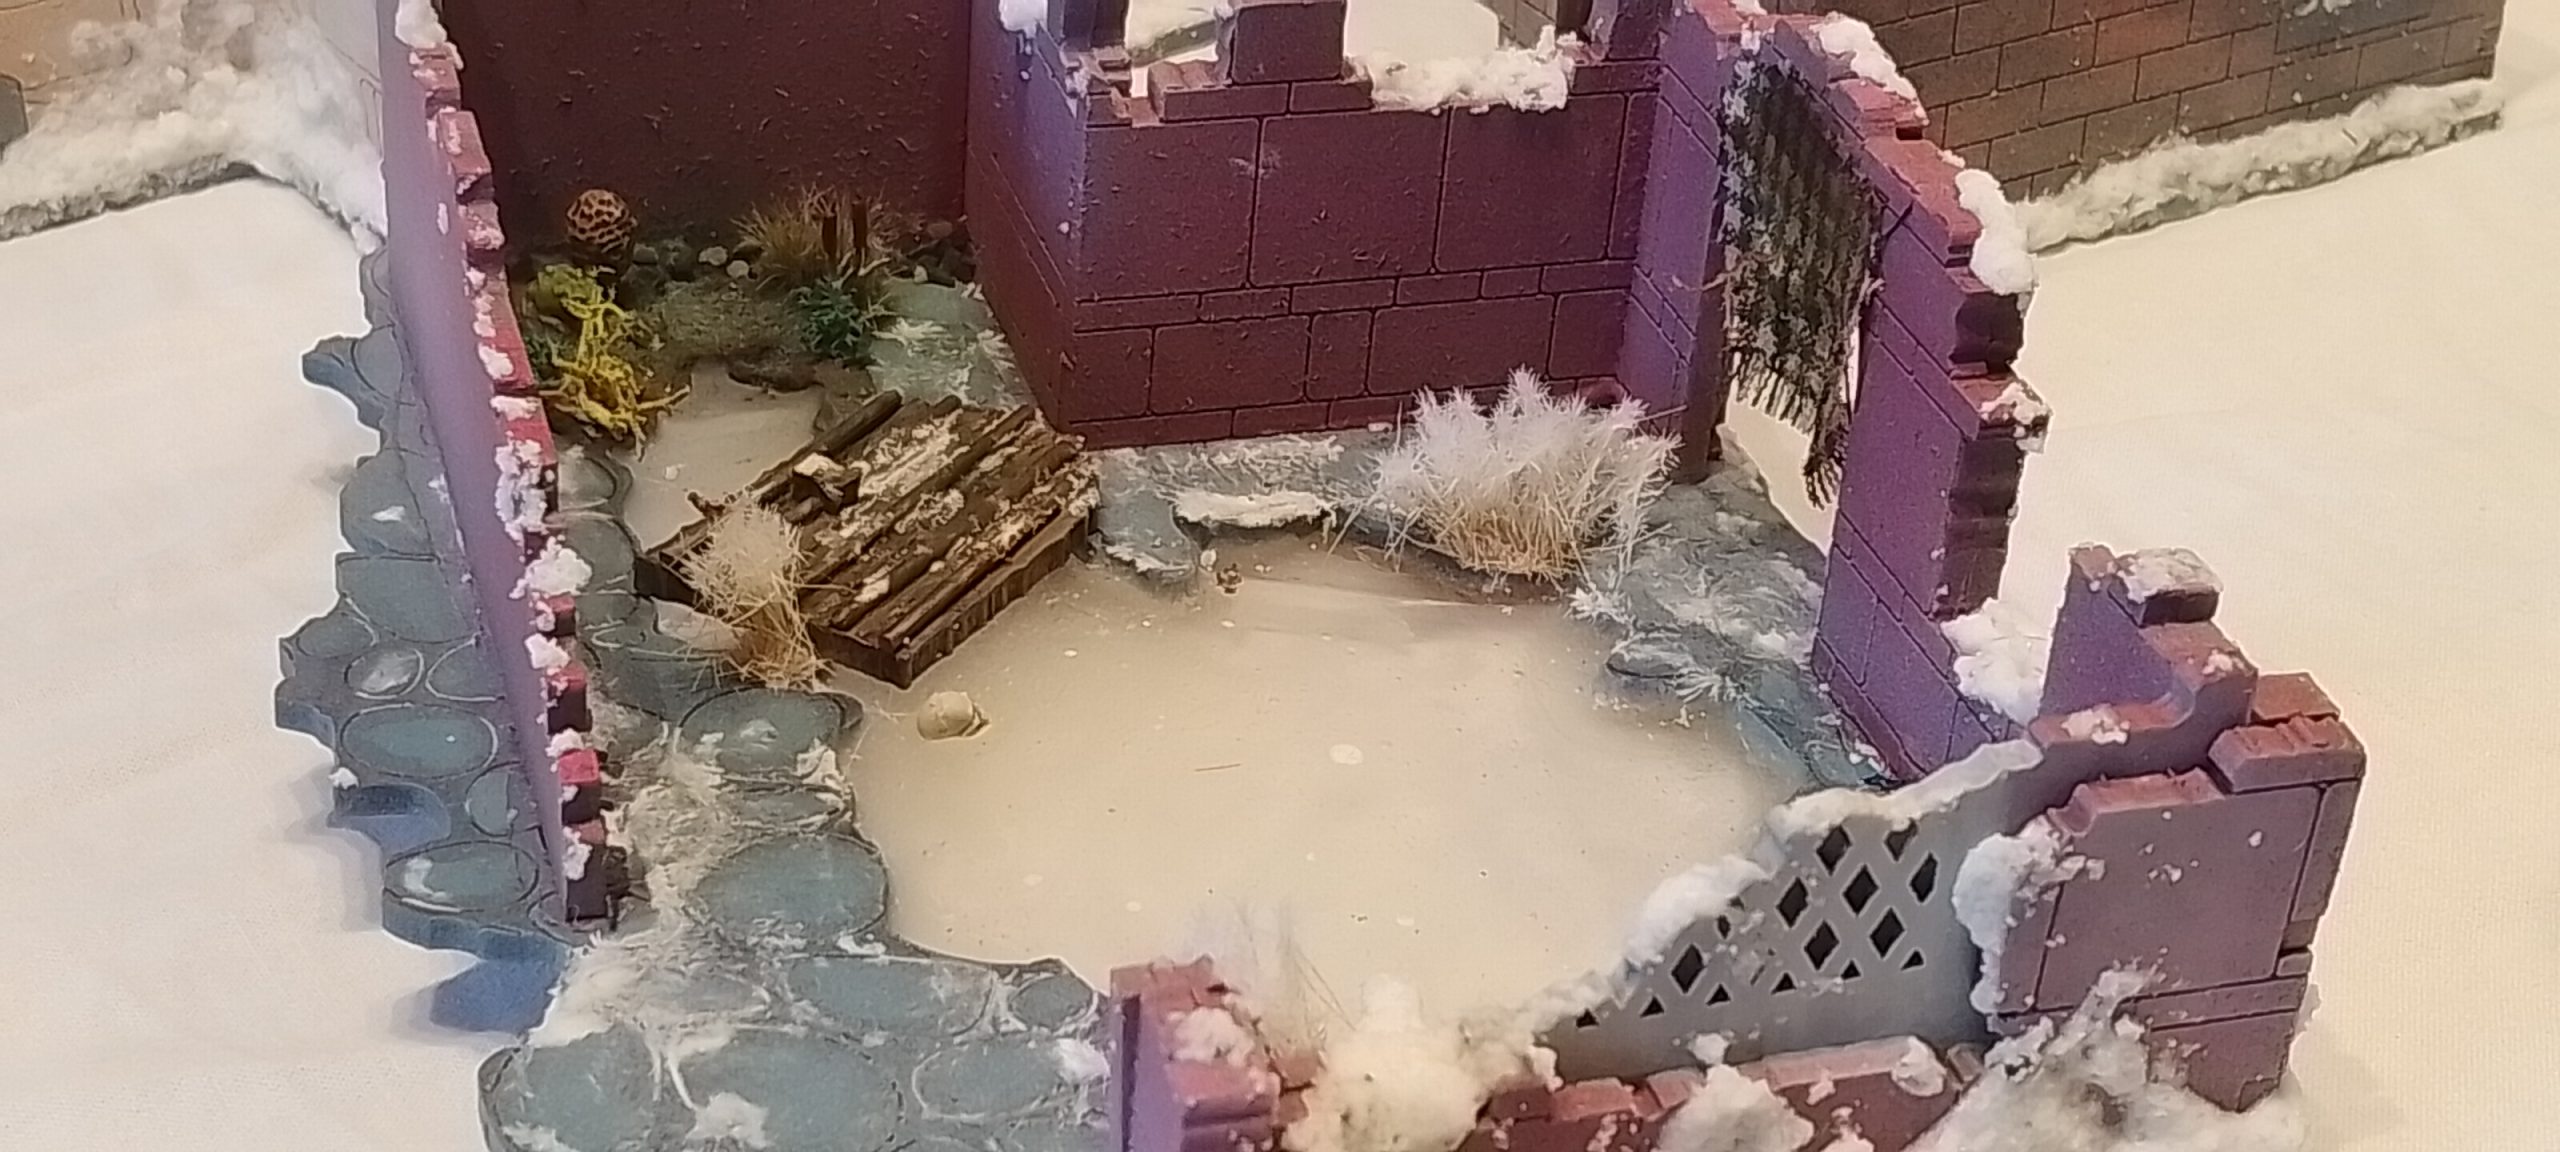
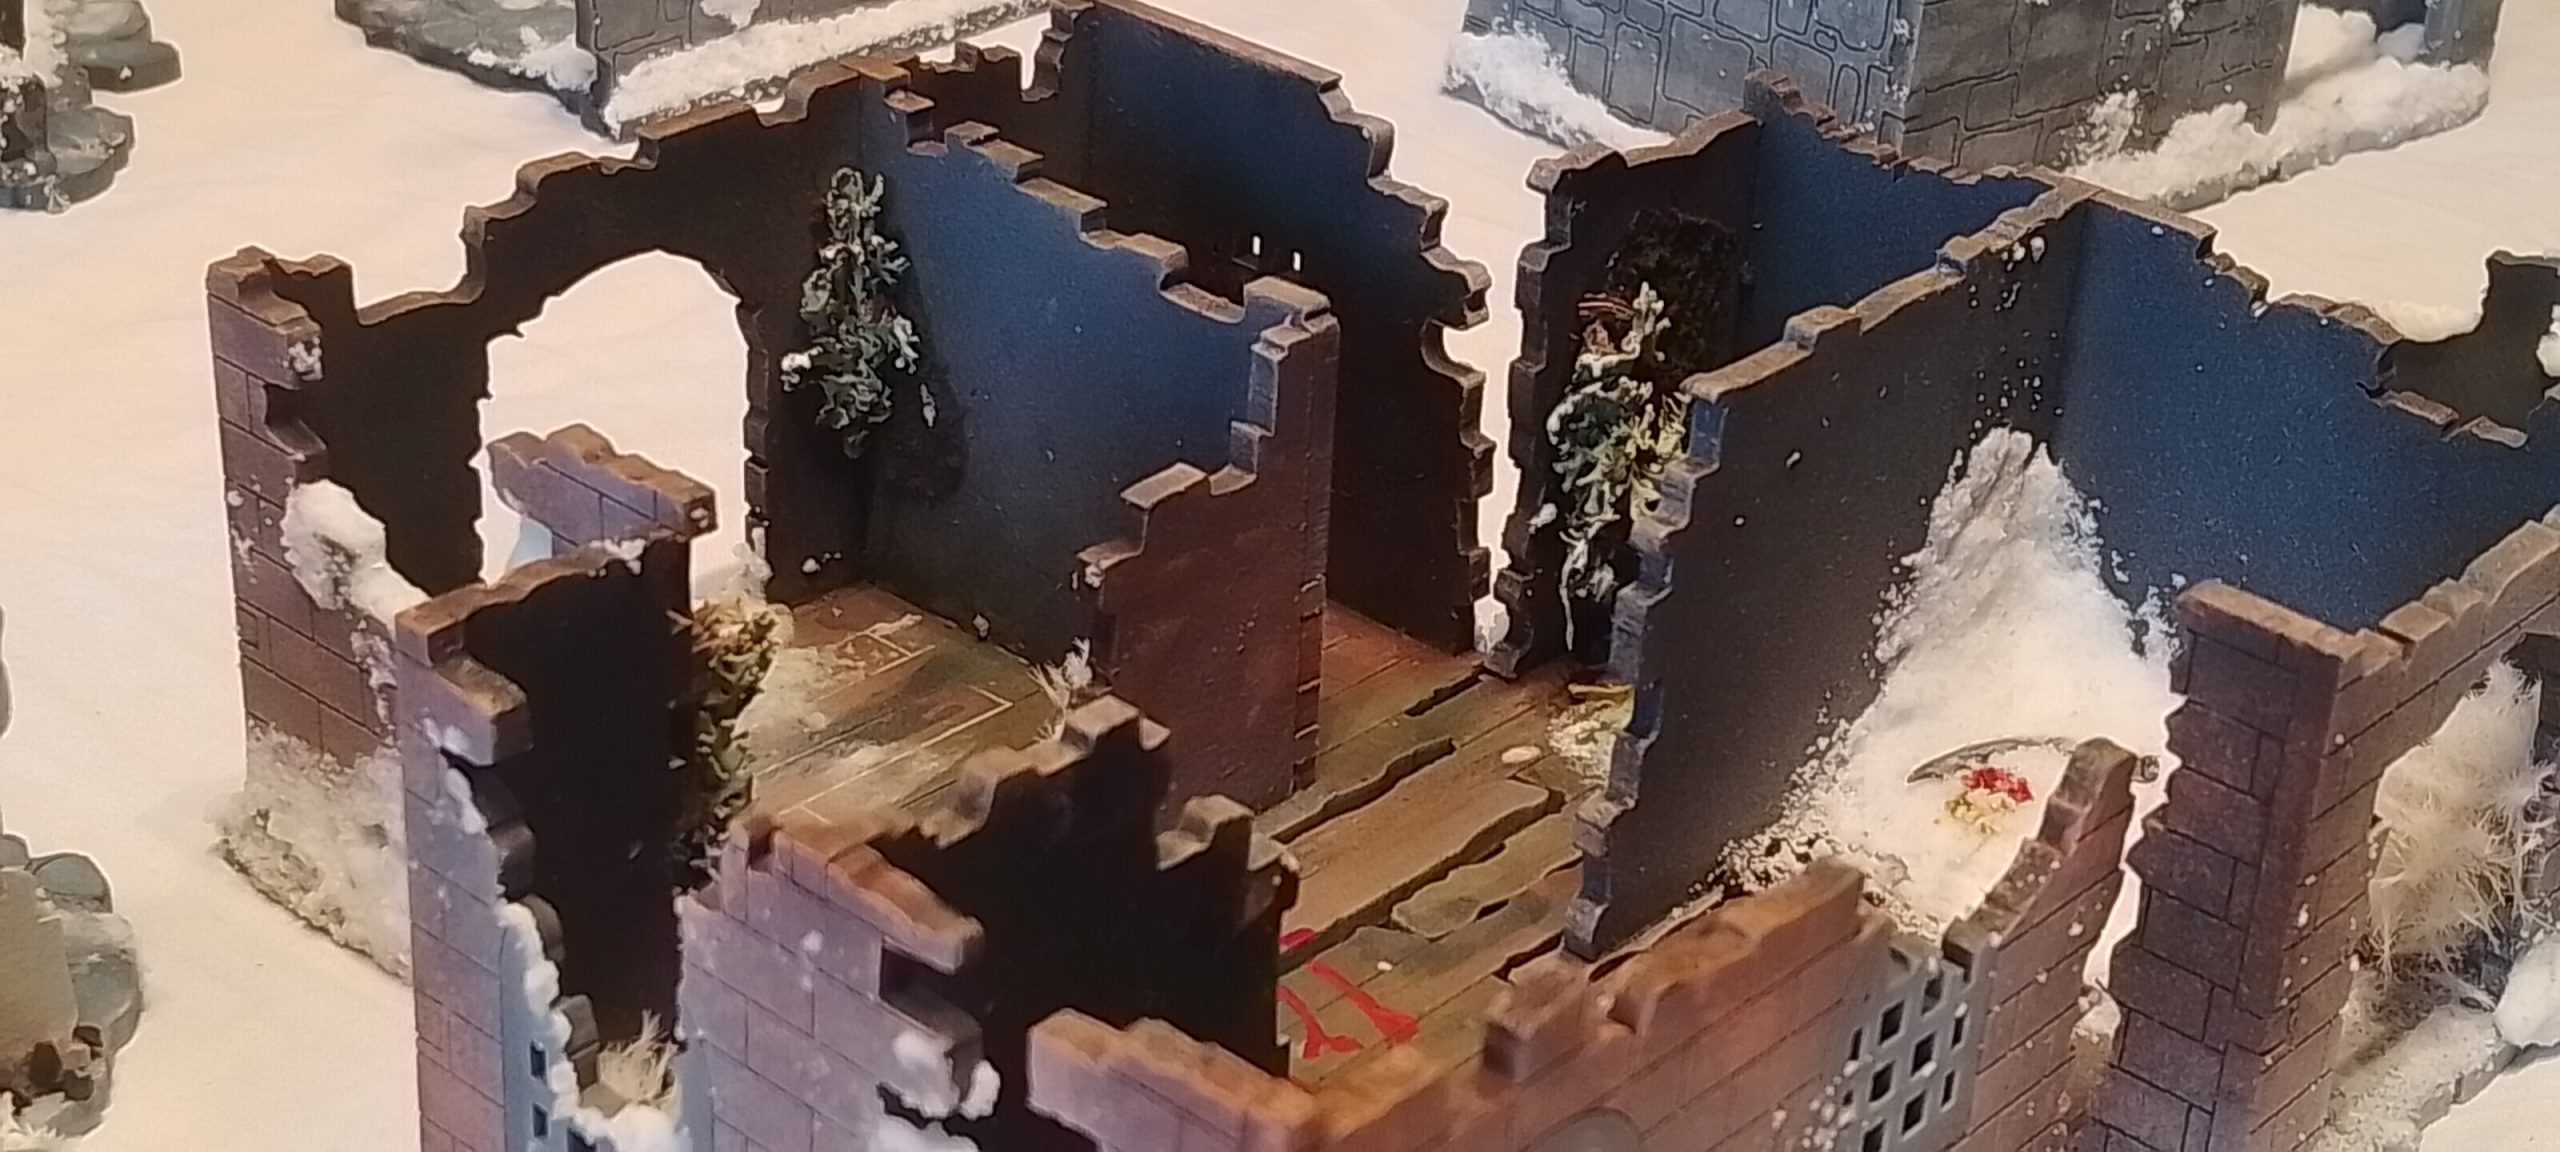
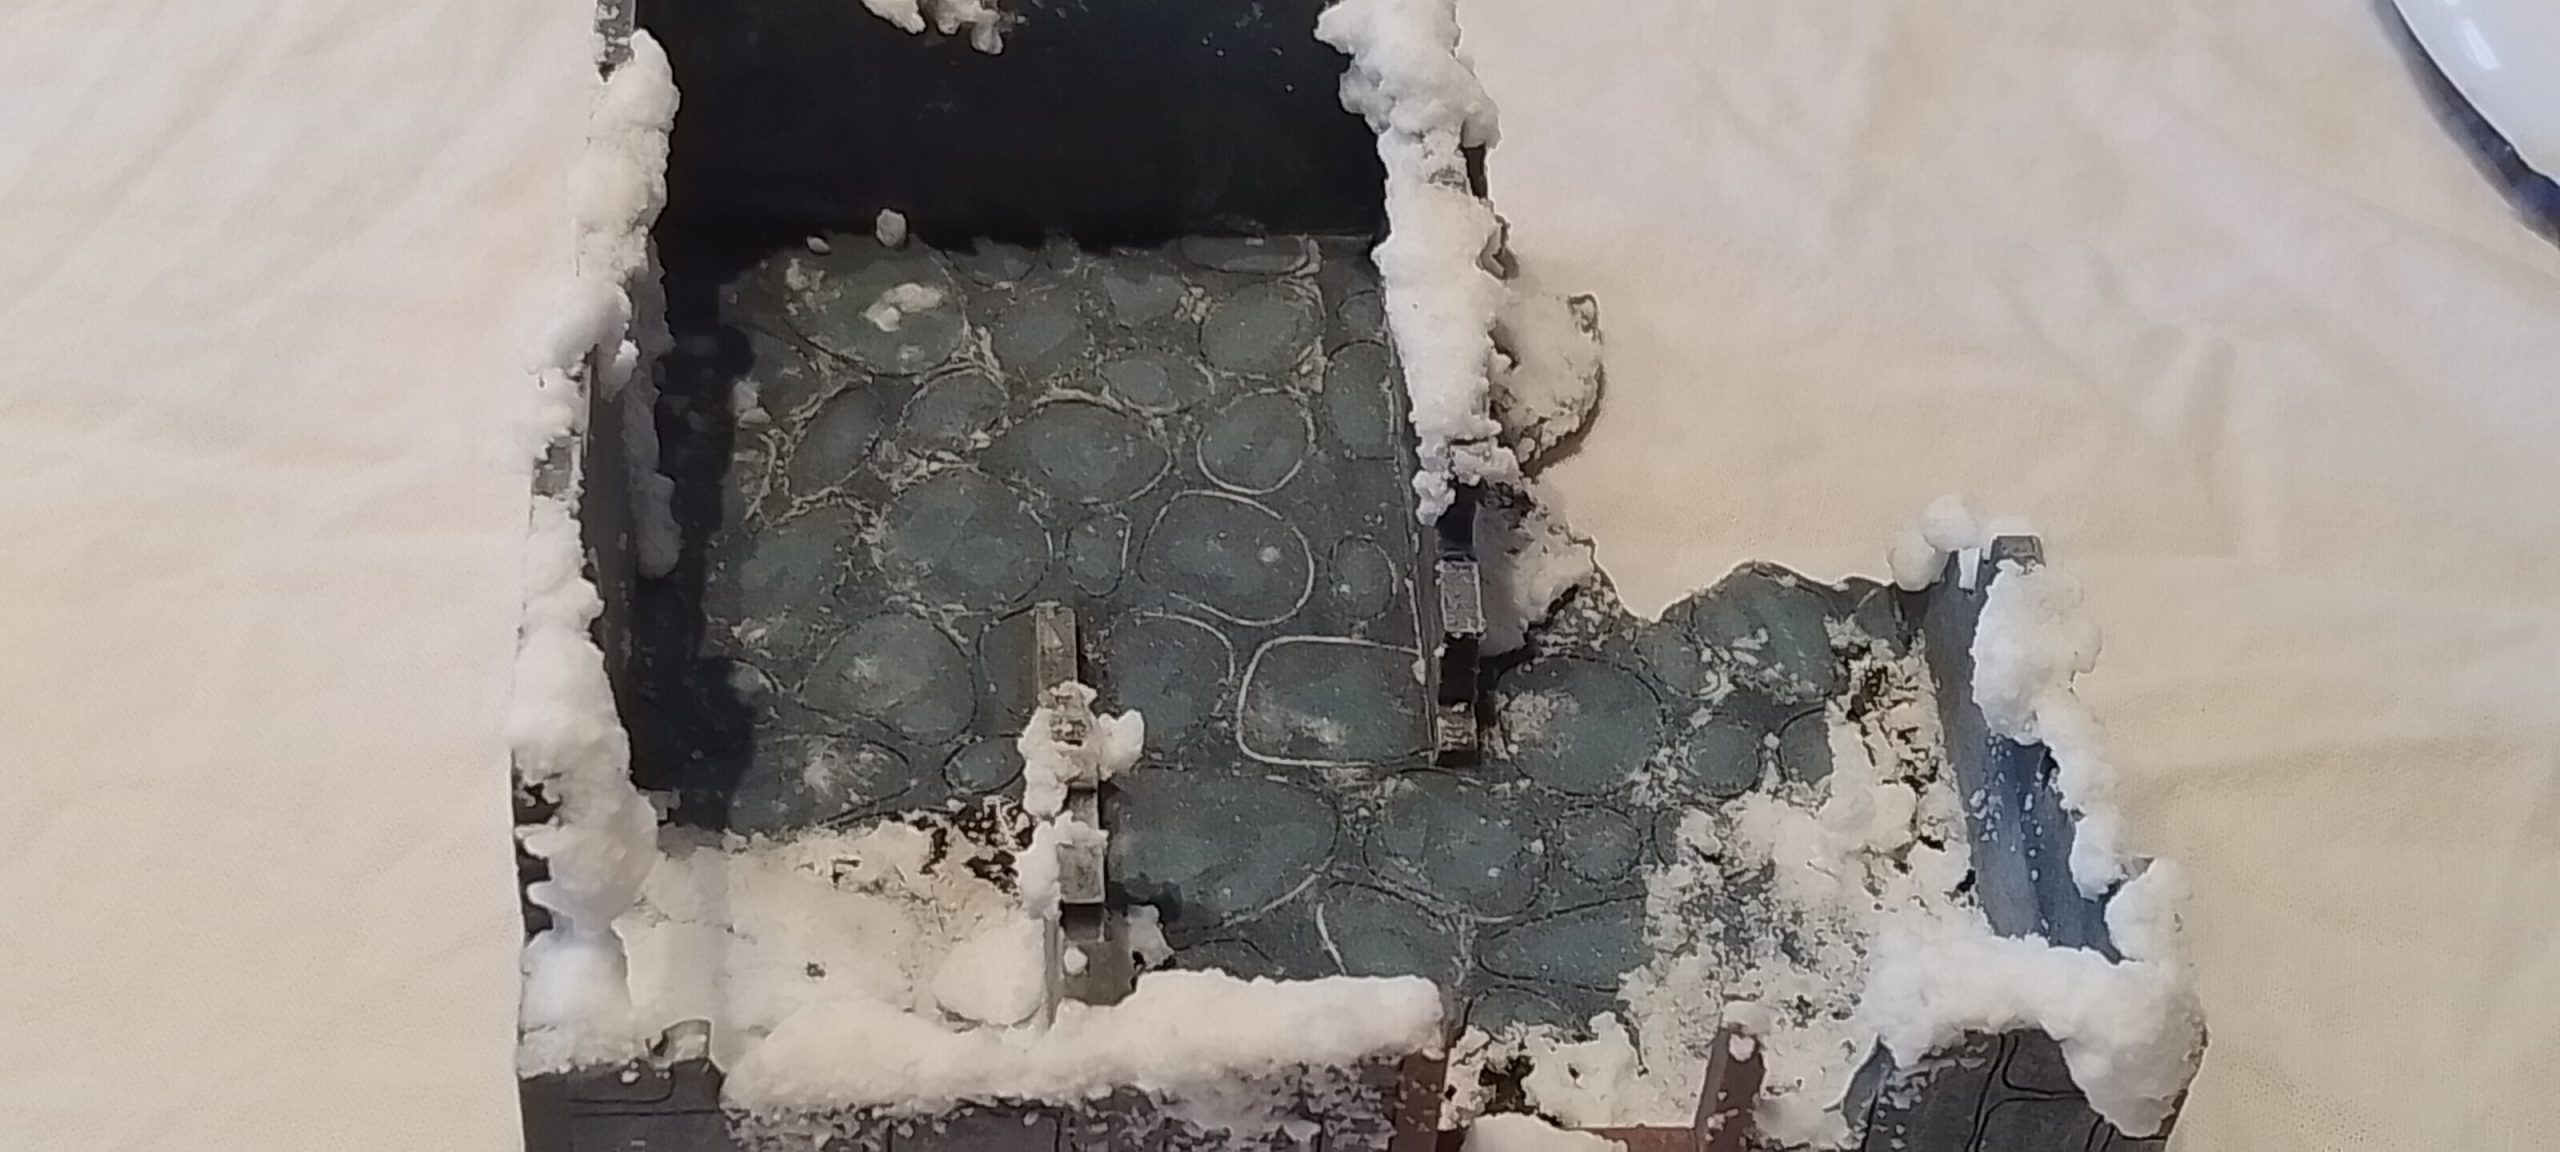
Project update Wood Floor Ruin 14/01/2026
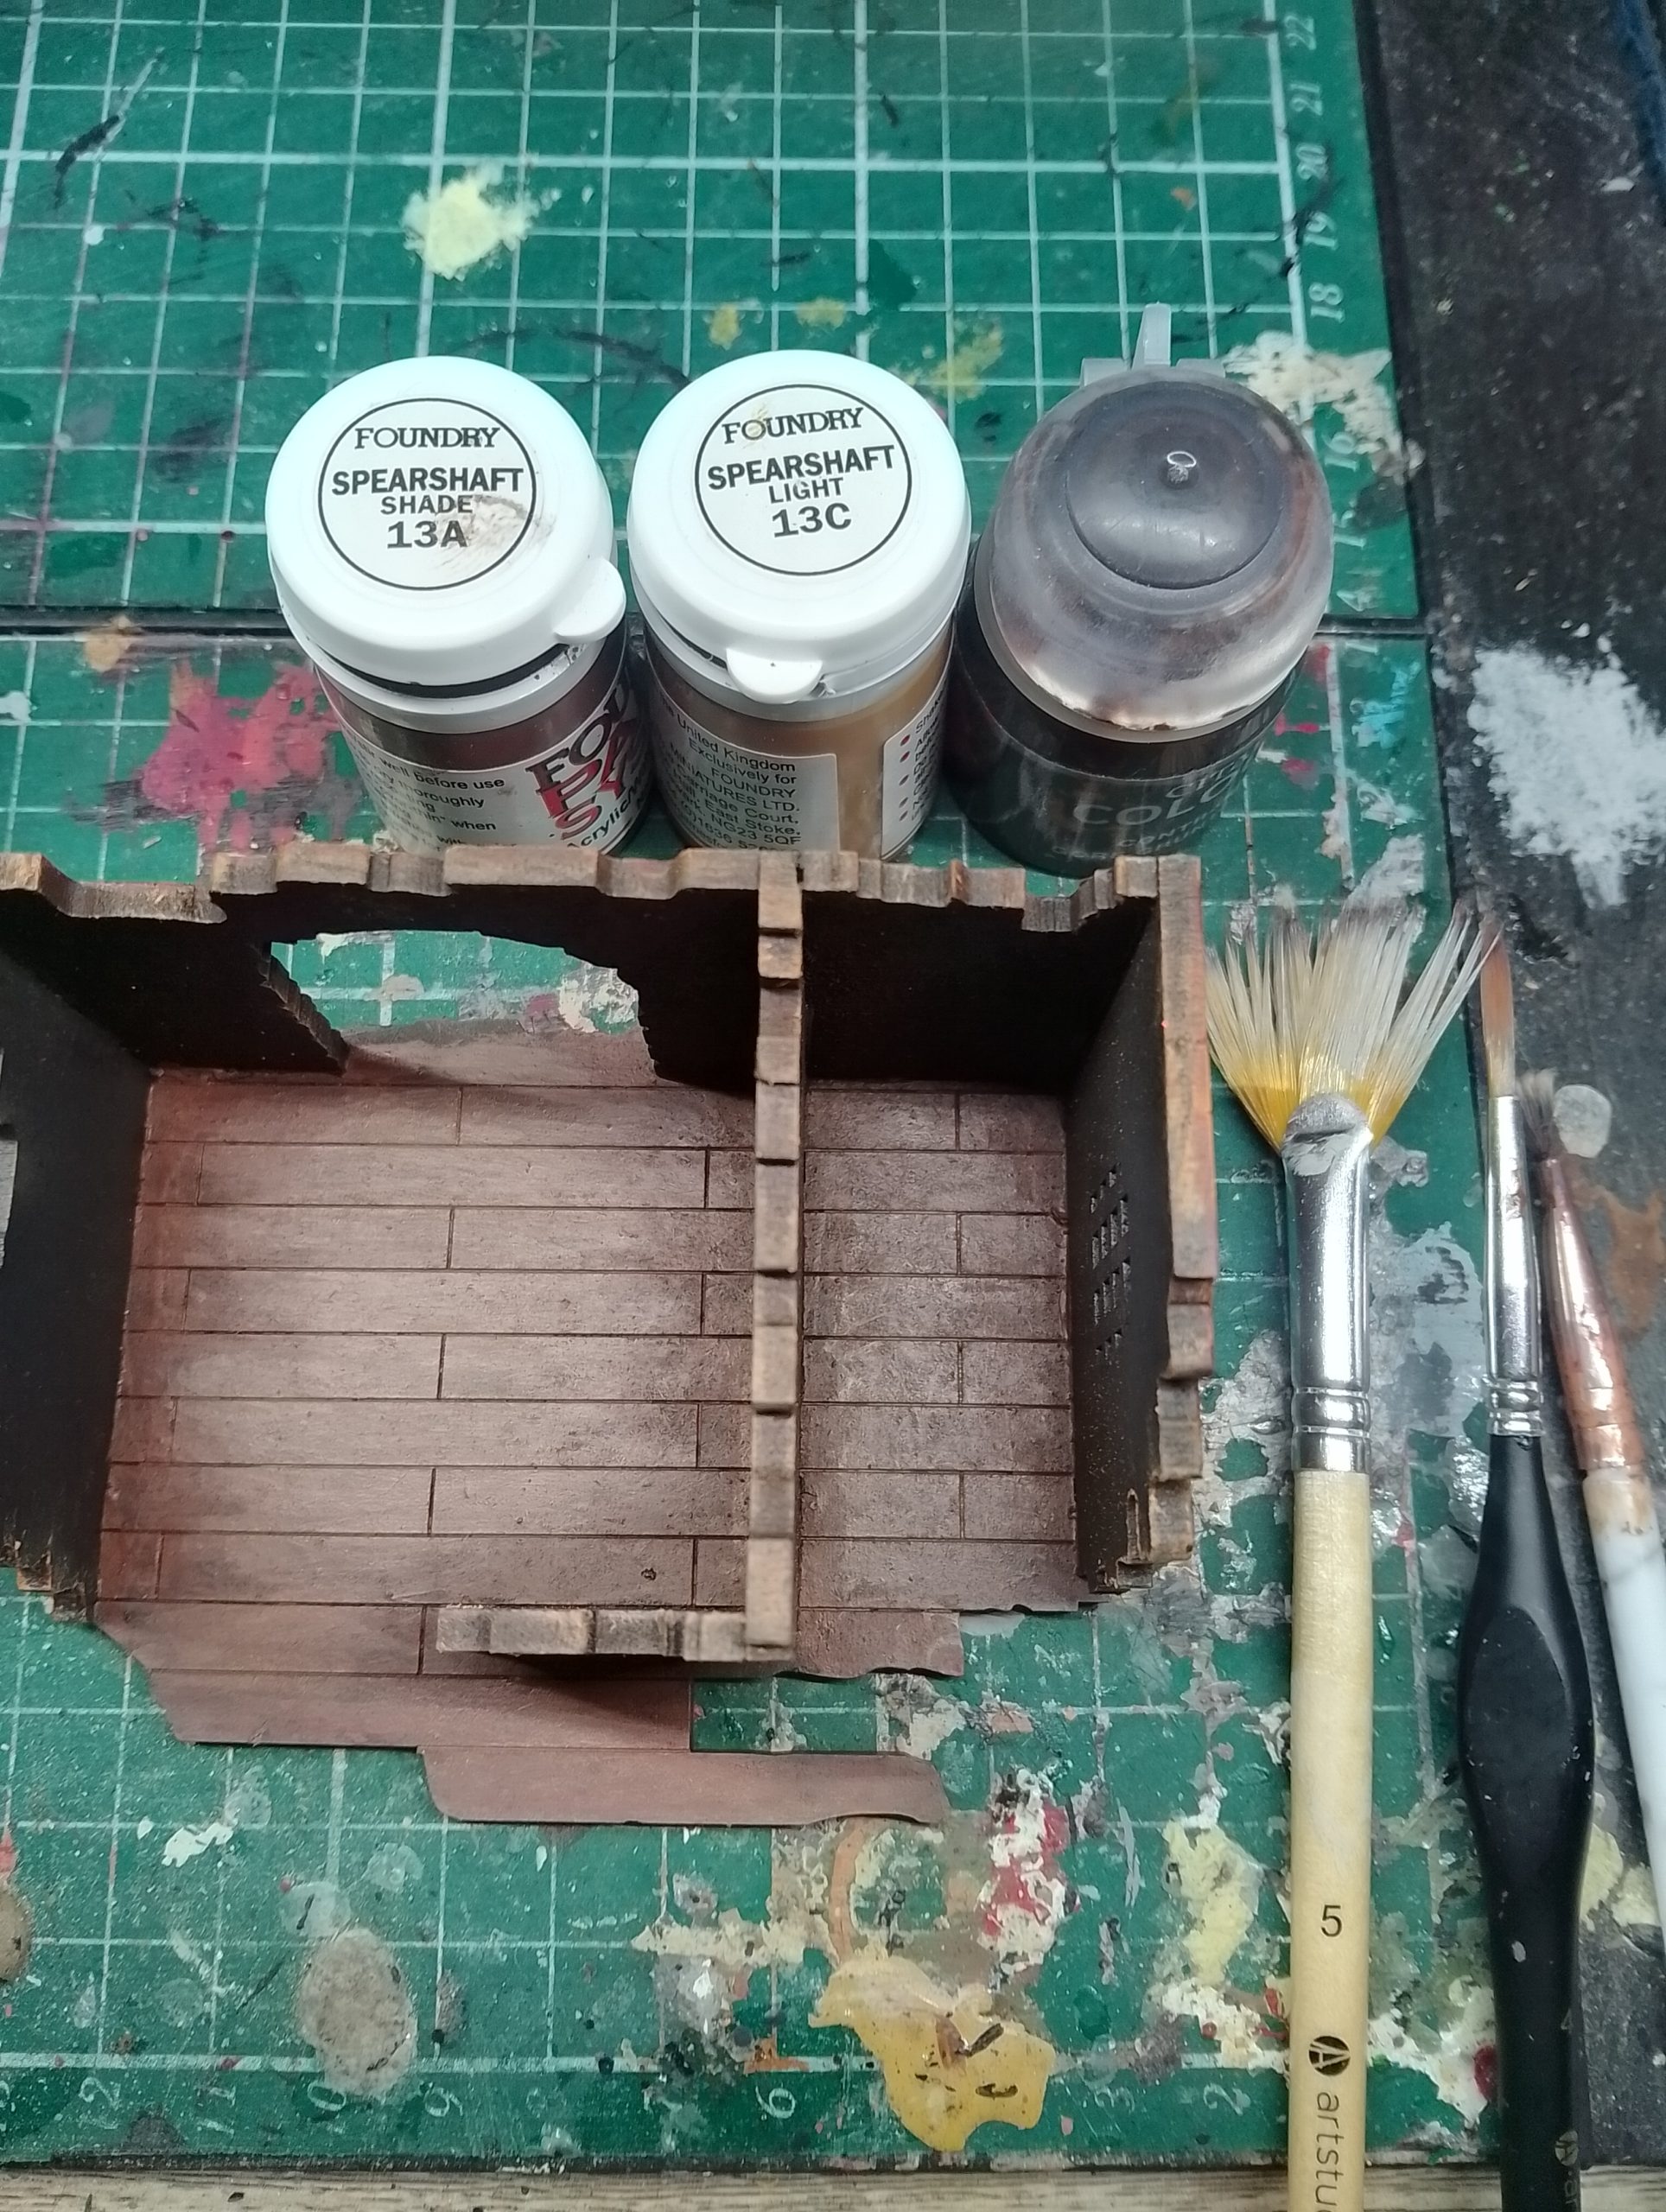
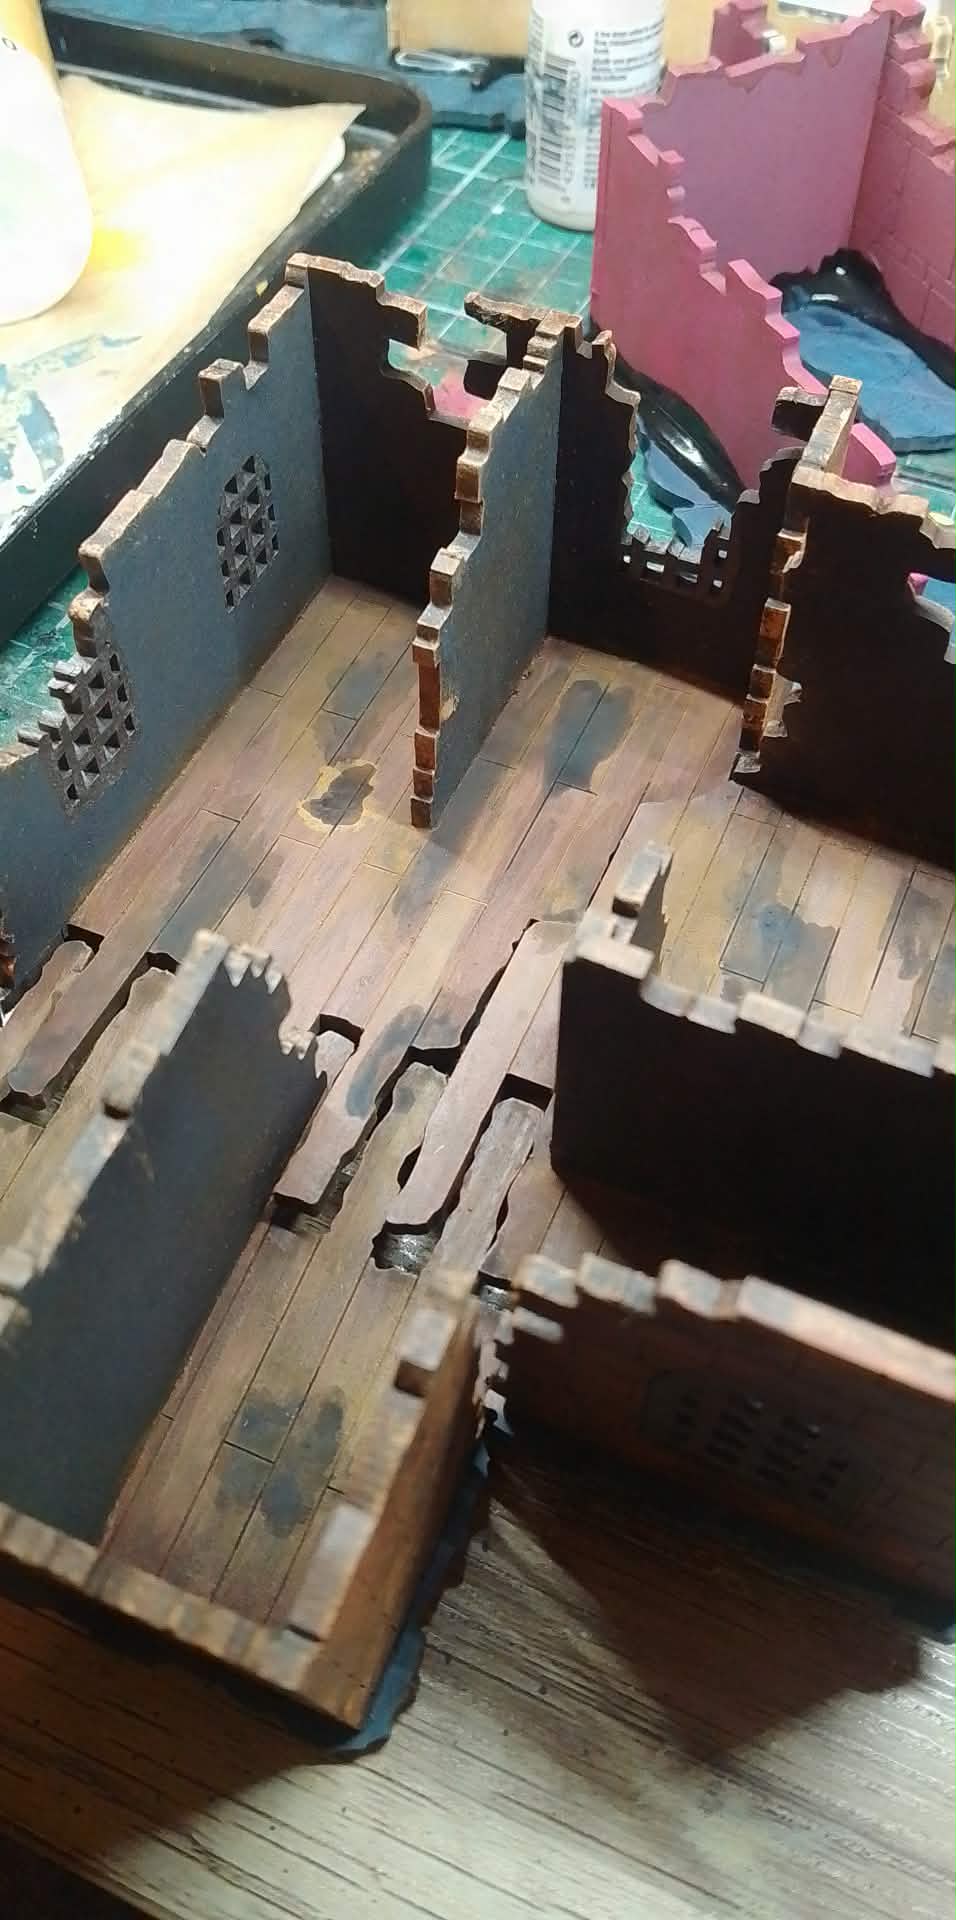
The wooden floorboards were painted, contrasted and then drybrushed using the paints shown.
I then also drybrushed raw sepia pigment to simulate foot traffic, as well as staining with dark green and brown washes to give the look of damp and sodden wood.
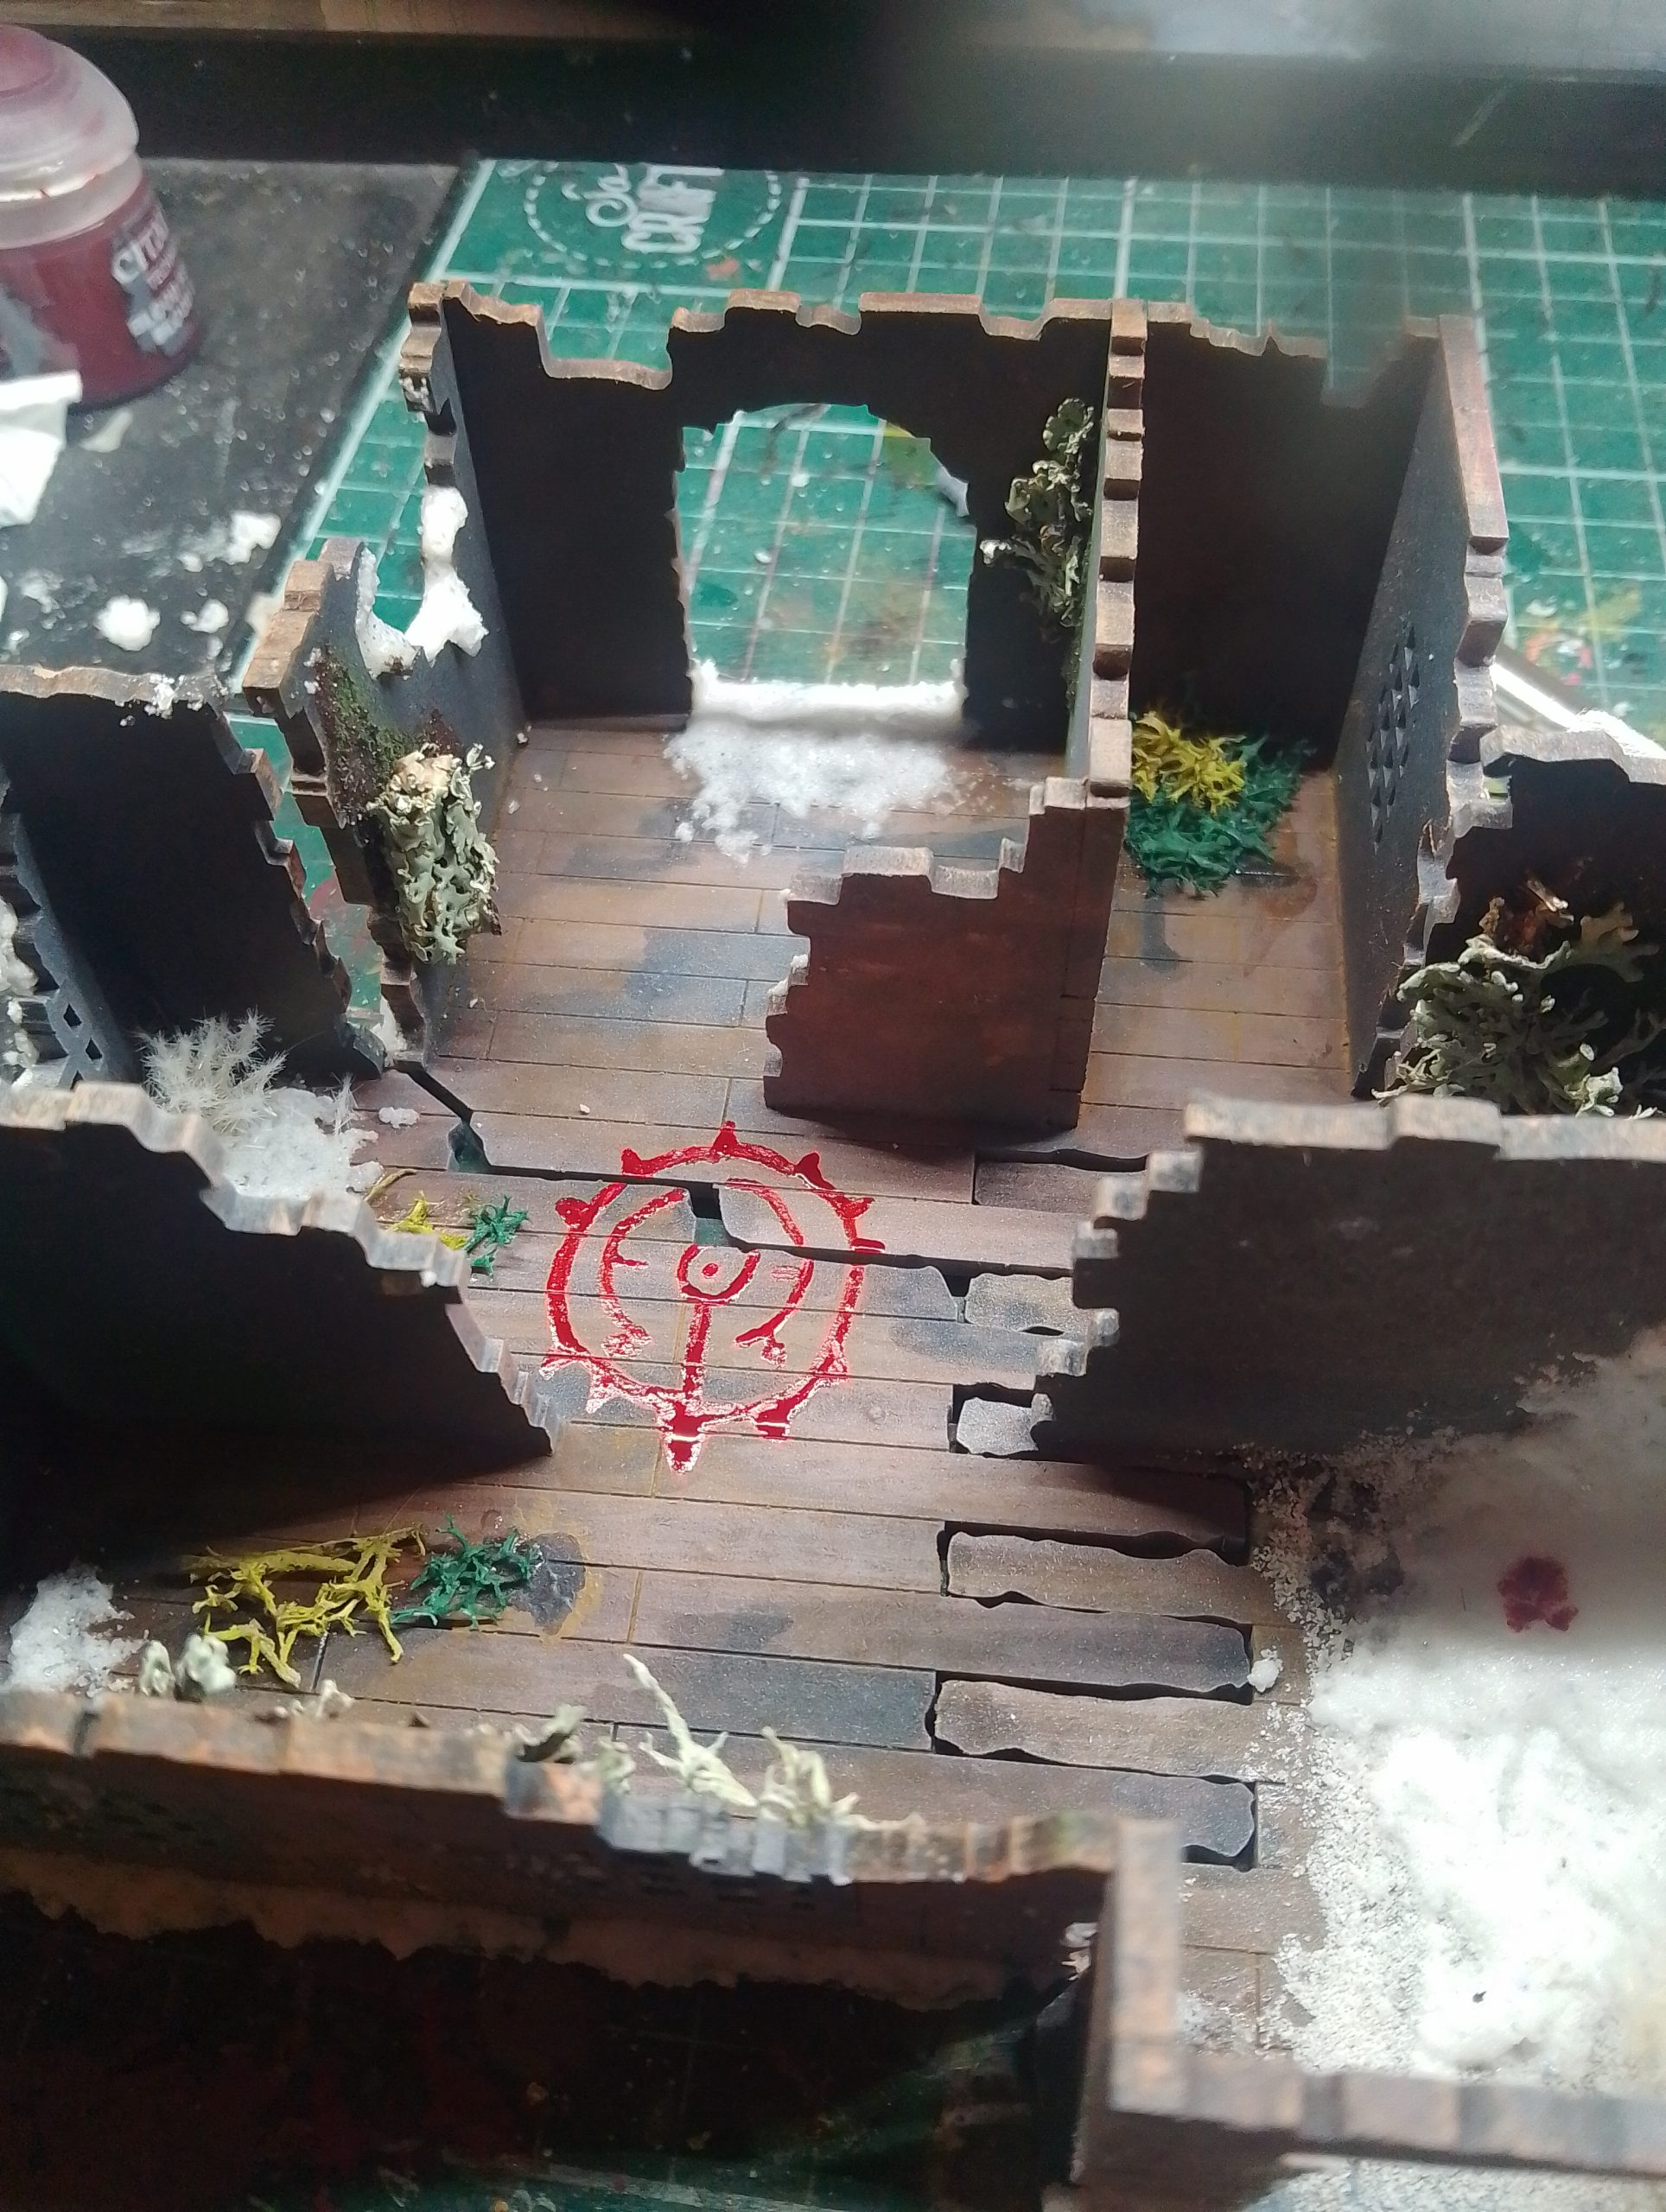
After I then added snow effects and some lichen from the gsw swamp box and some of the lichen I collected. I decided to make the wall lichen the stuff I collected and the others floor lichen as well as some green pigments.
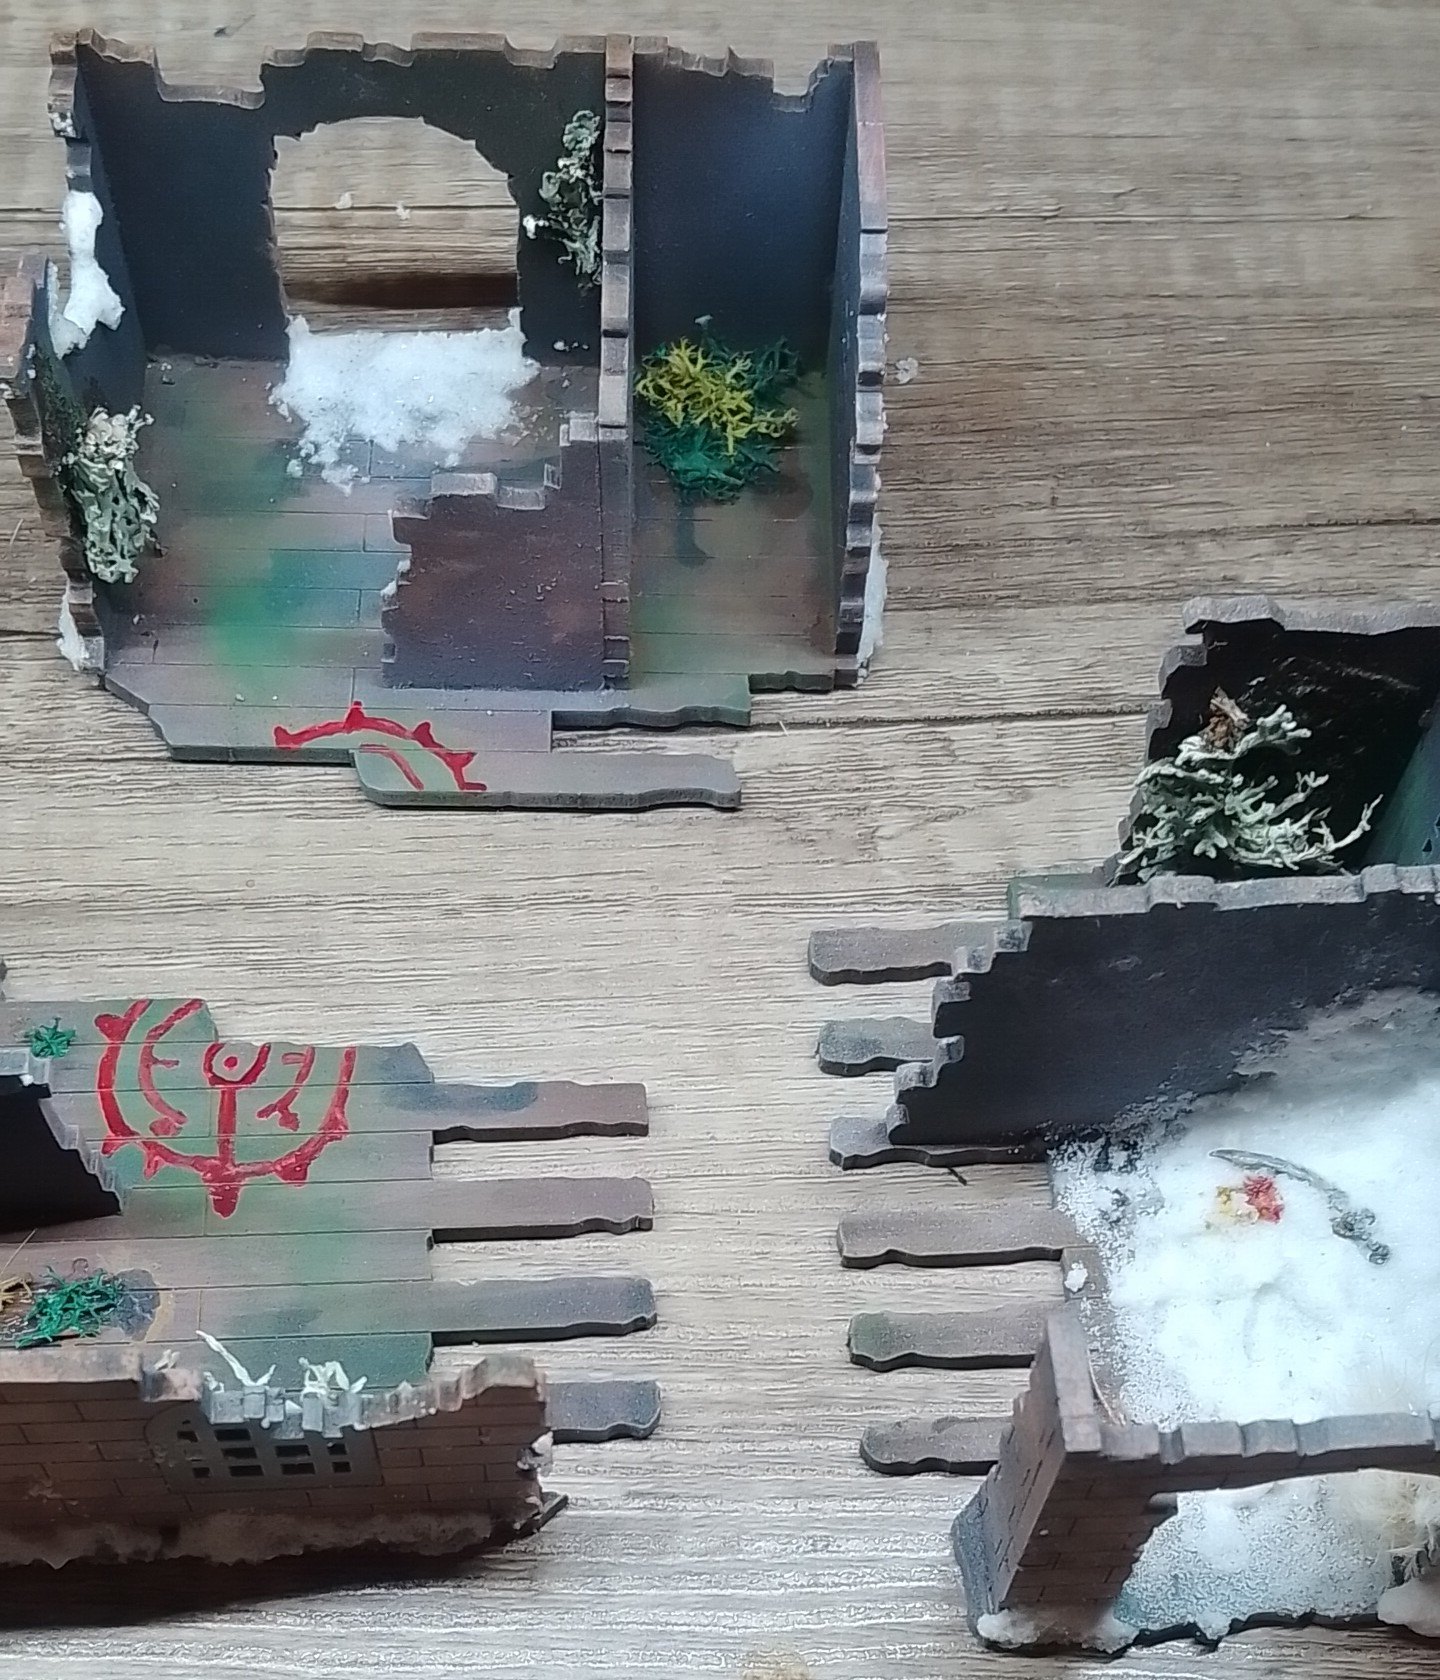
I also added a bit of a summoning circle blood painted tattoo with blood for blood good effect and some red painted prior, that can only be seen in its entirety if the terrain pieces are joint. It also has a little bloodied blade stuck in the snow to tell the forgotten story.
Again, the moss and circle don’t obstruct the players but give atmosphere and are quite able to have bases put on them.
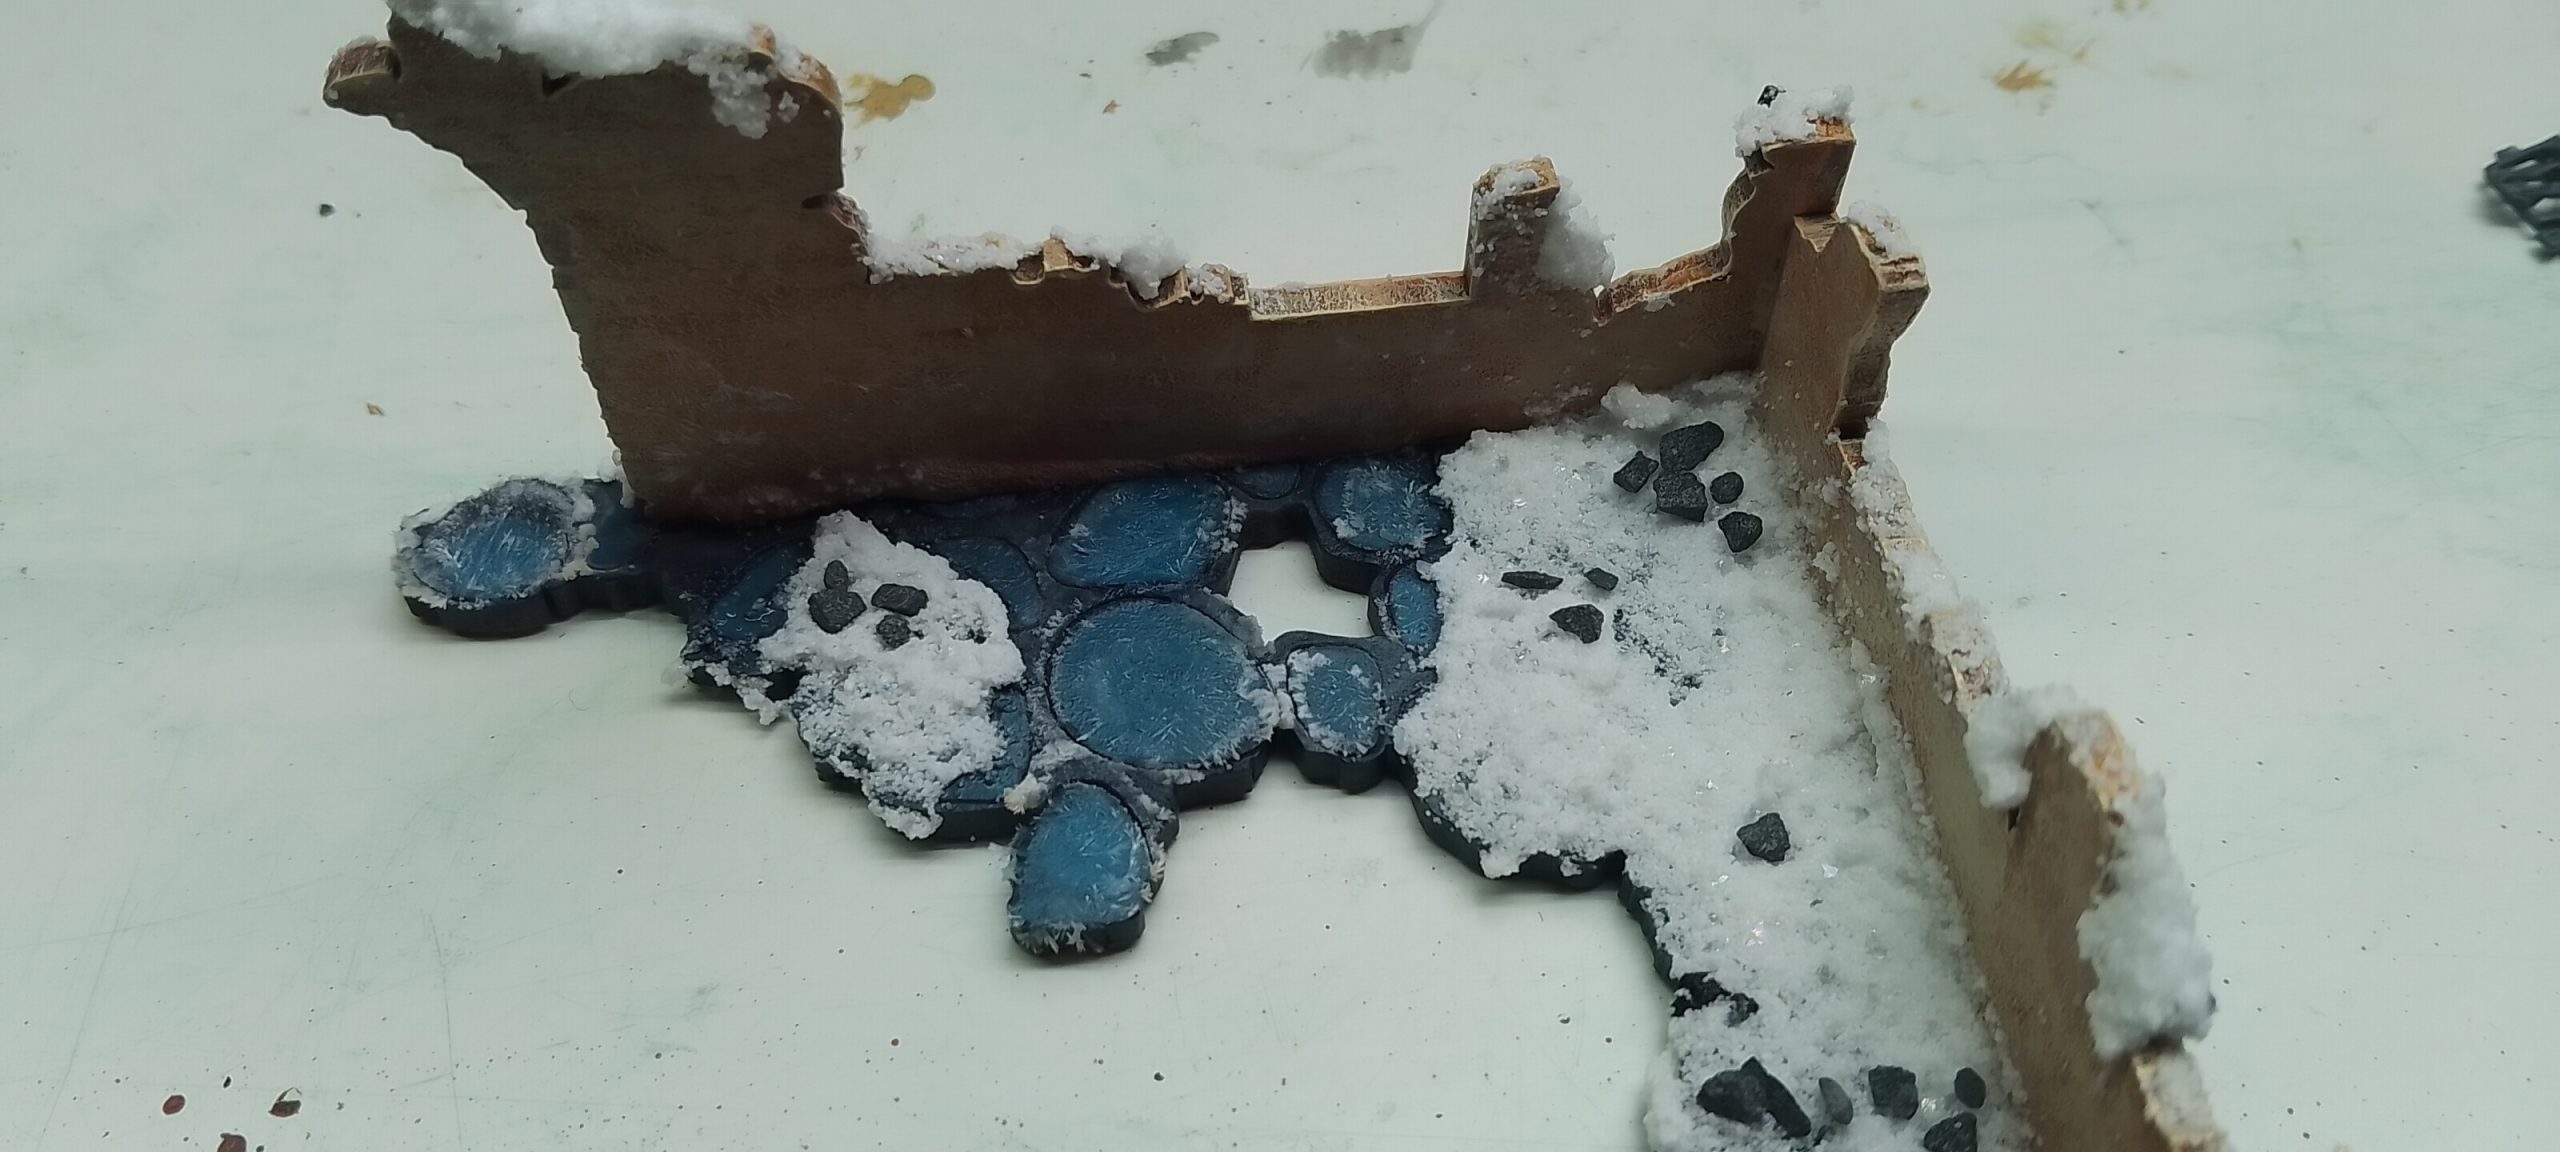
Boat 22/01/2026
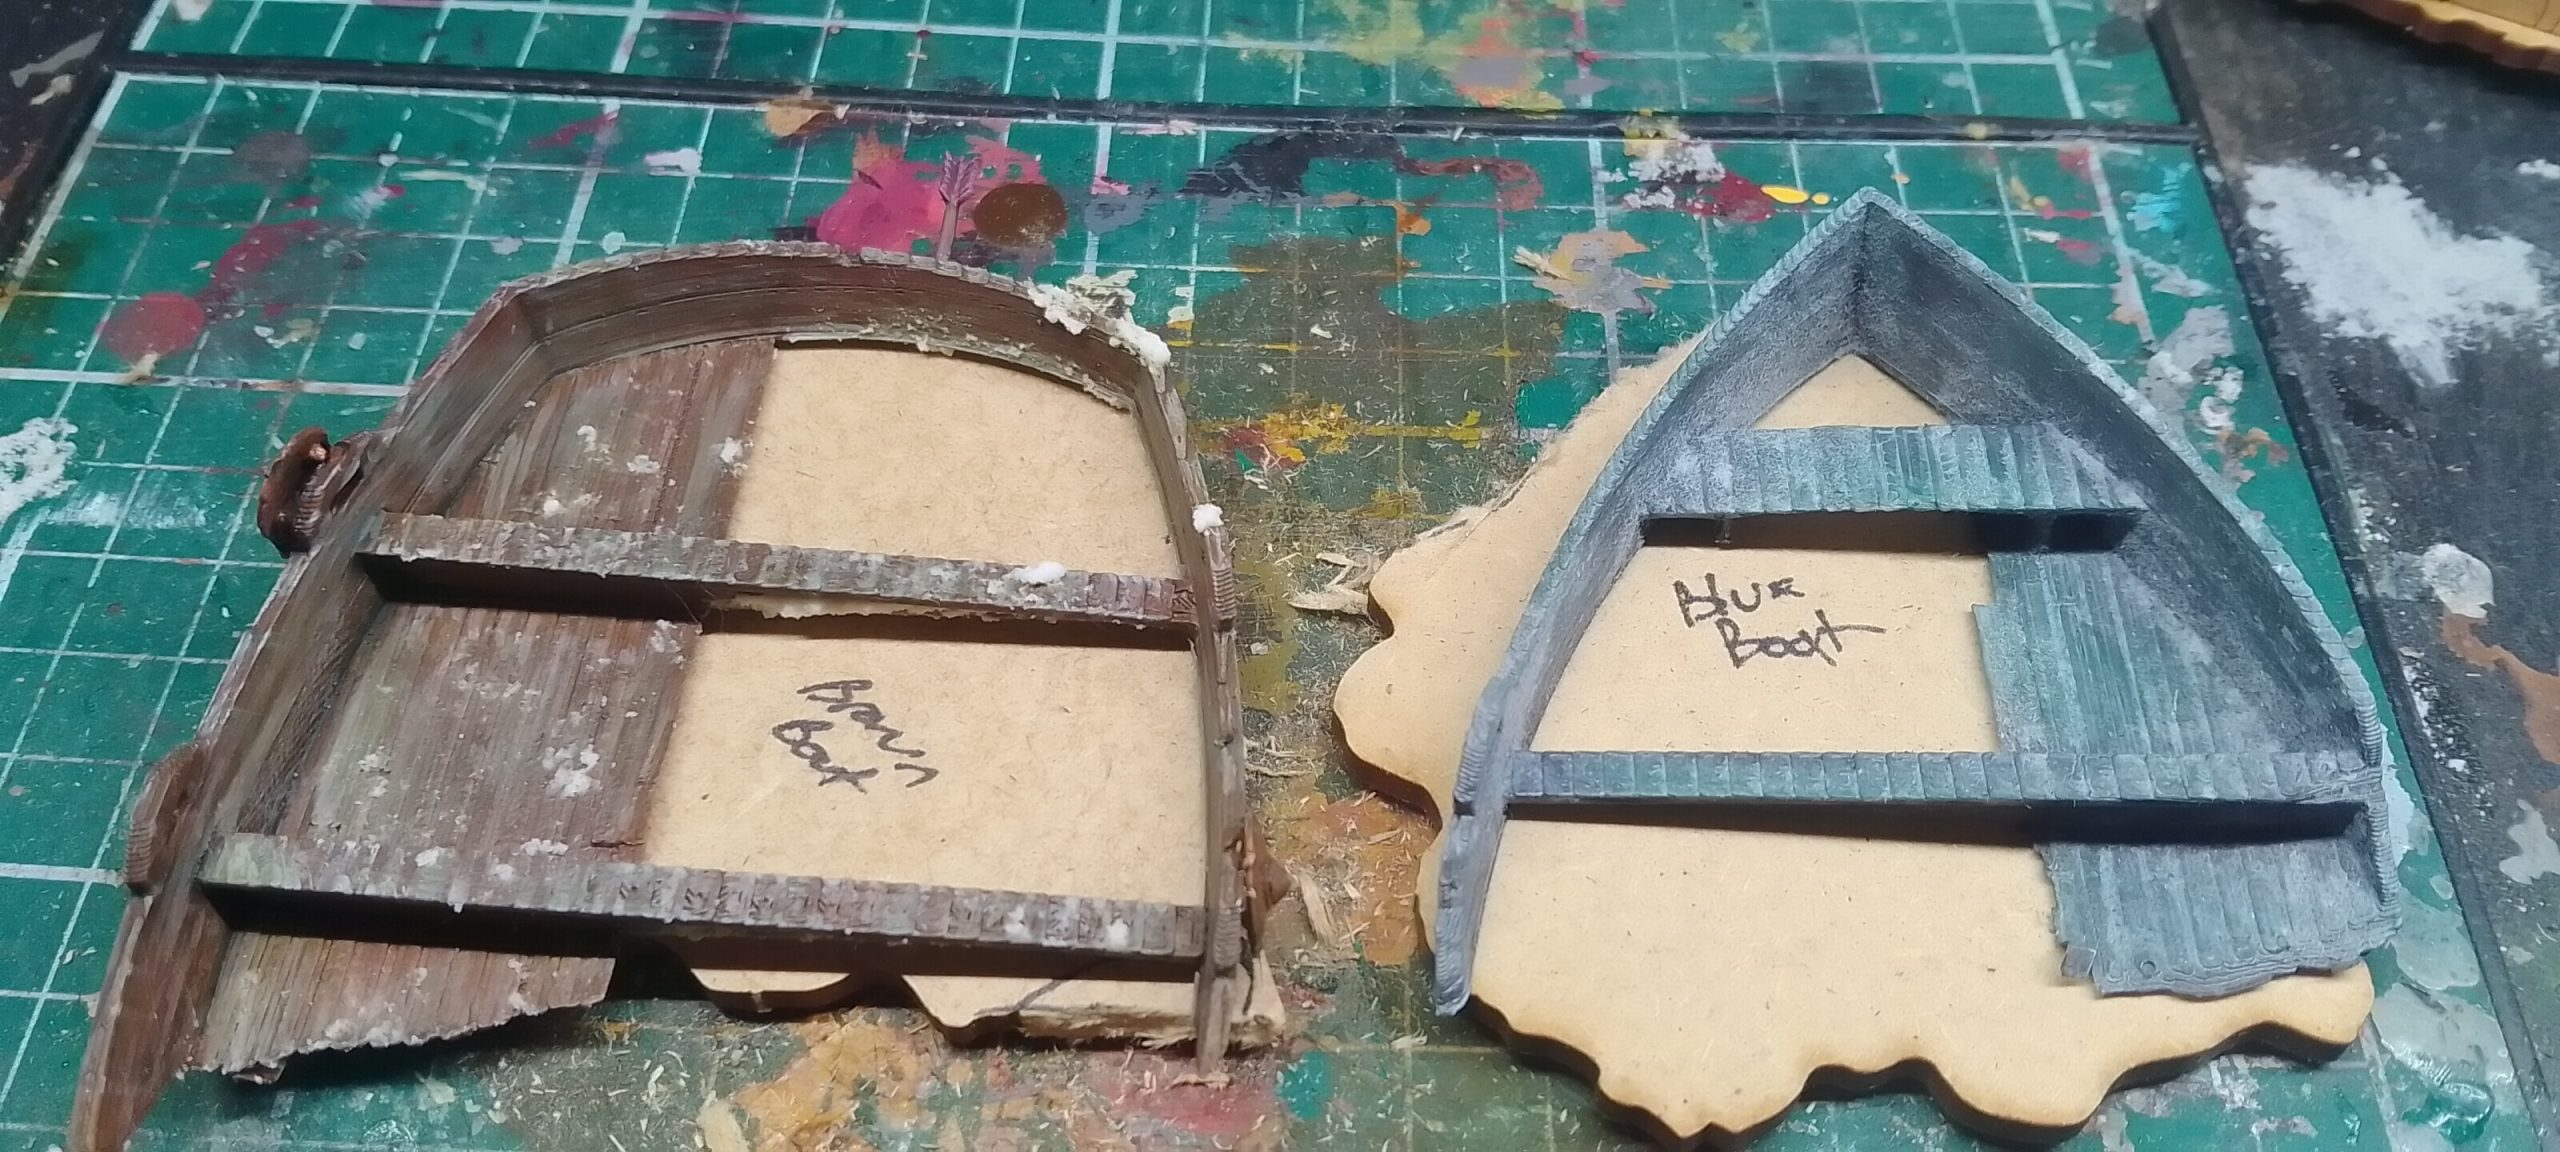
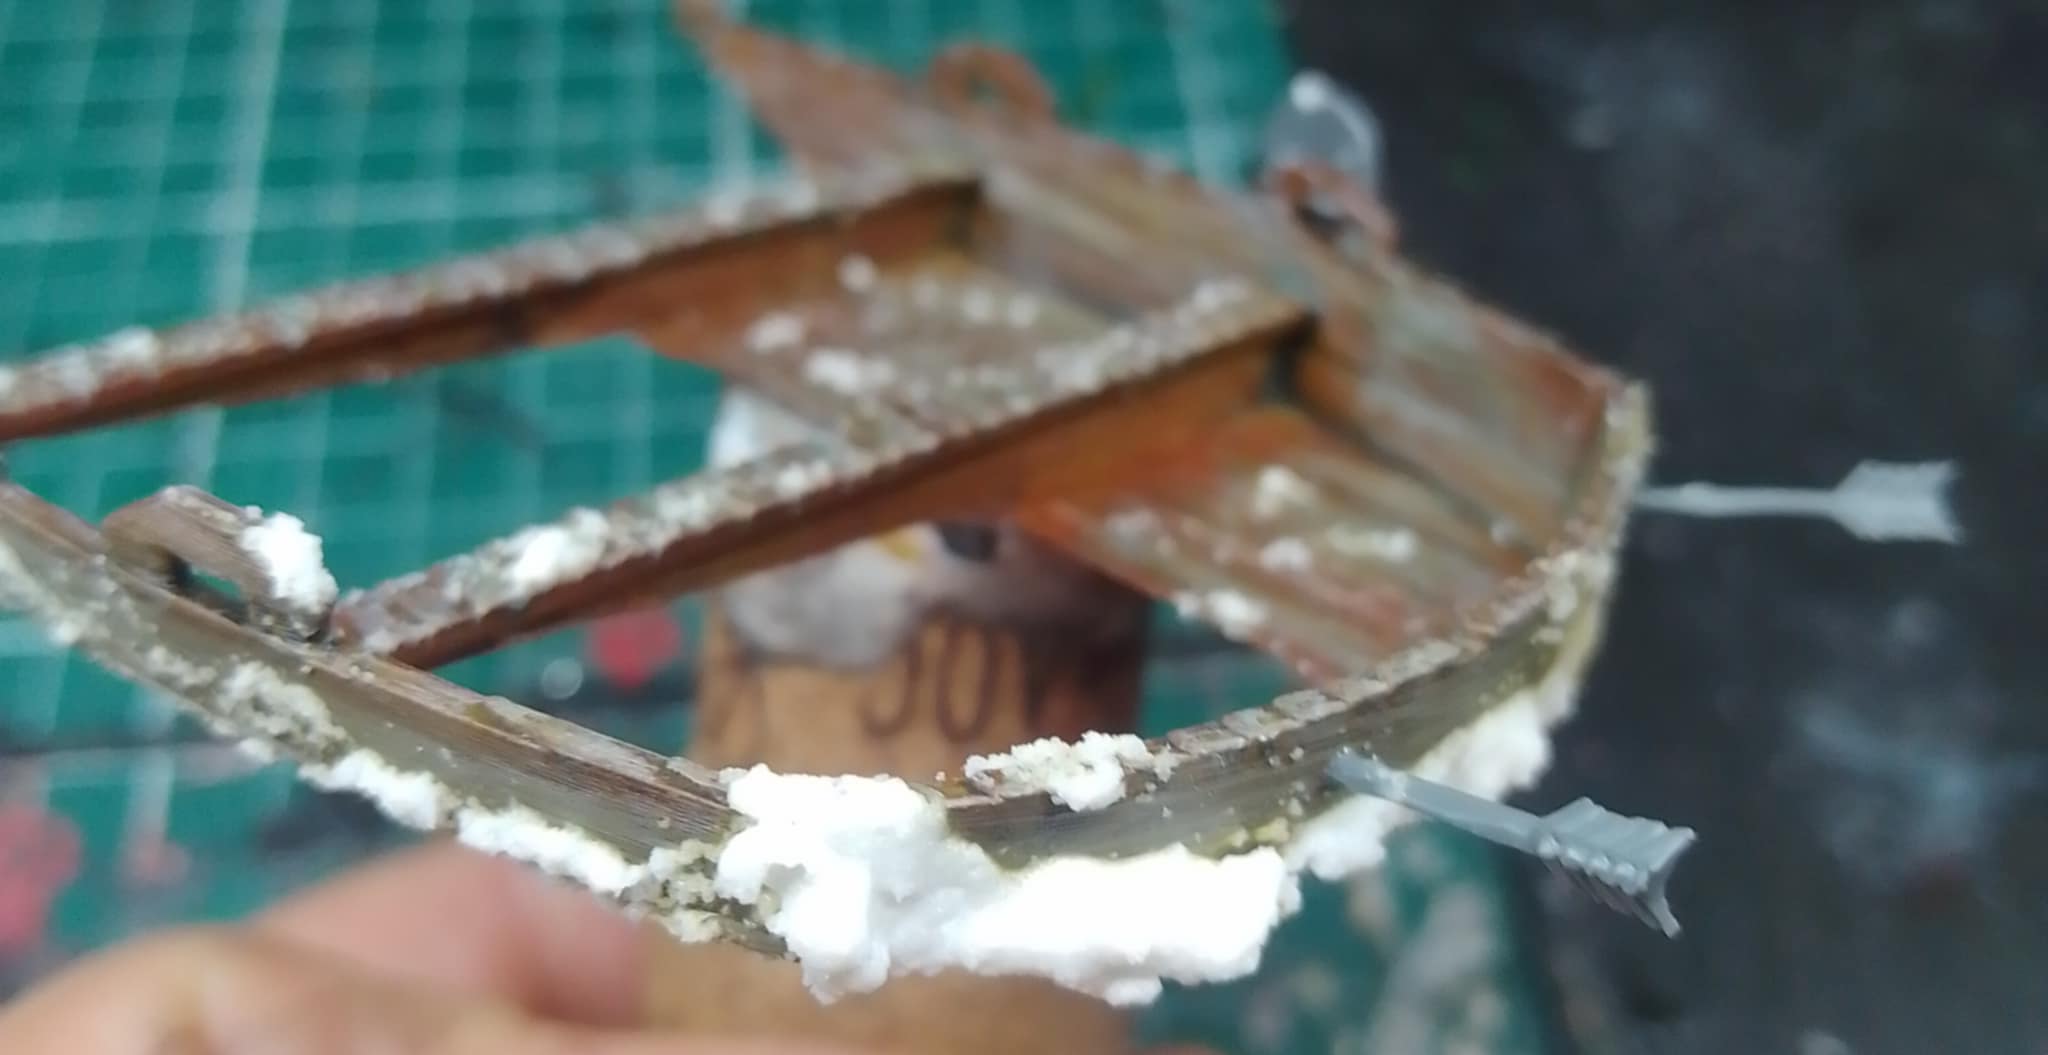 most of the mdf was not needing touched just a few trims to make it nice.
Remember all those extra wood bits, and the bonus terrain I was working on? No? I wouldn’t either 😀
I got these prints years ago from a convention in my area and I felt guilty for not supporting my local sellers and so was a pity purchase (i’m sure if you been to one you know that same feeling).
The quality is really not that great on the prints and you can tell with the fountain on the other post with its layer lines. However this is totally fine for filler ruins!
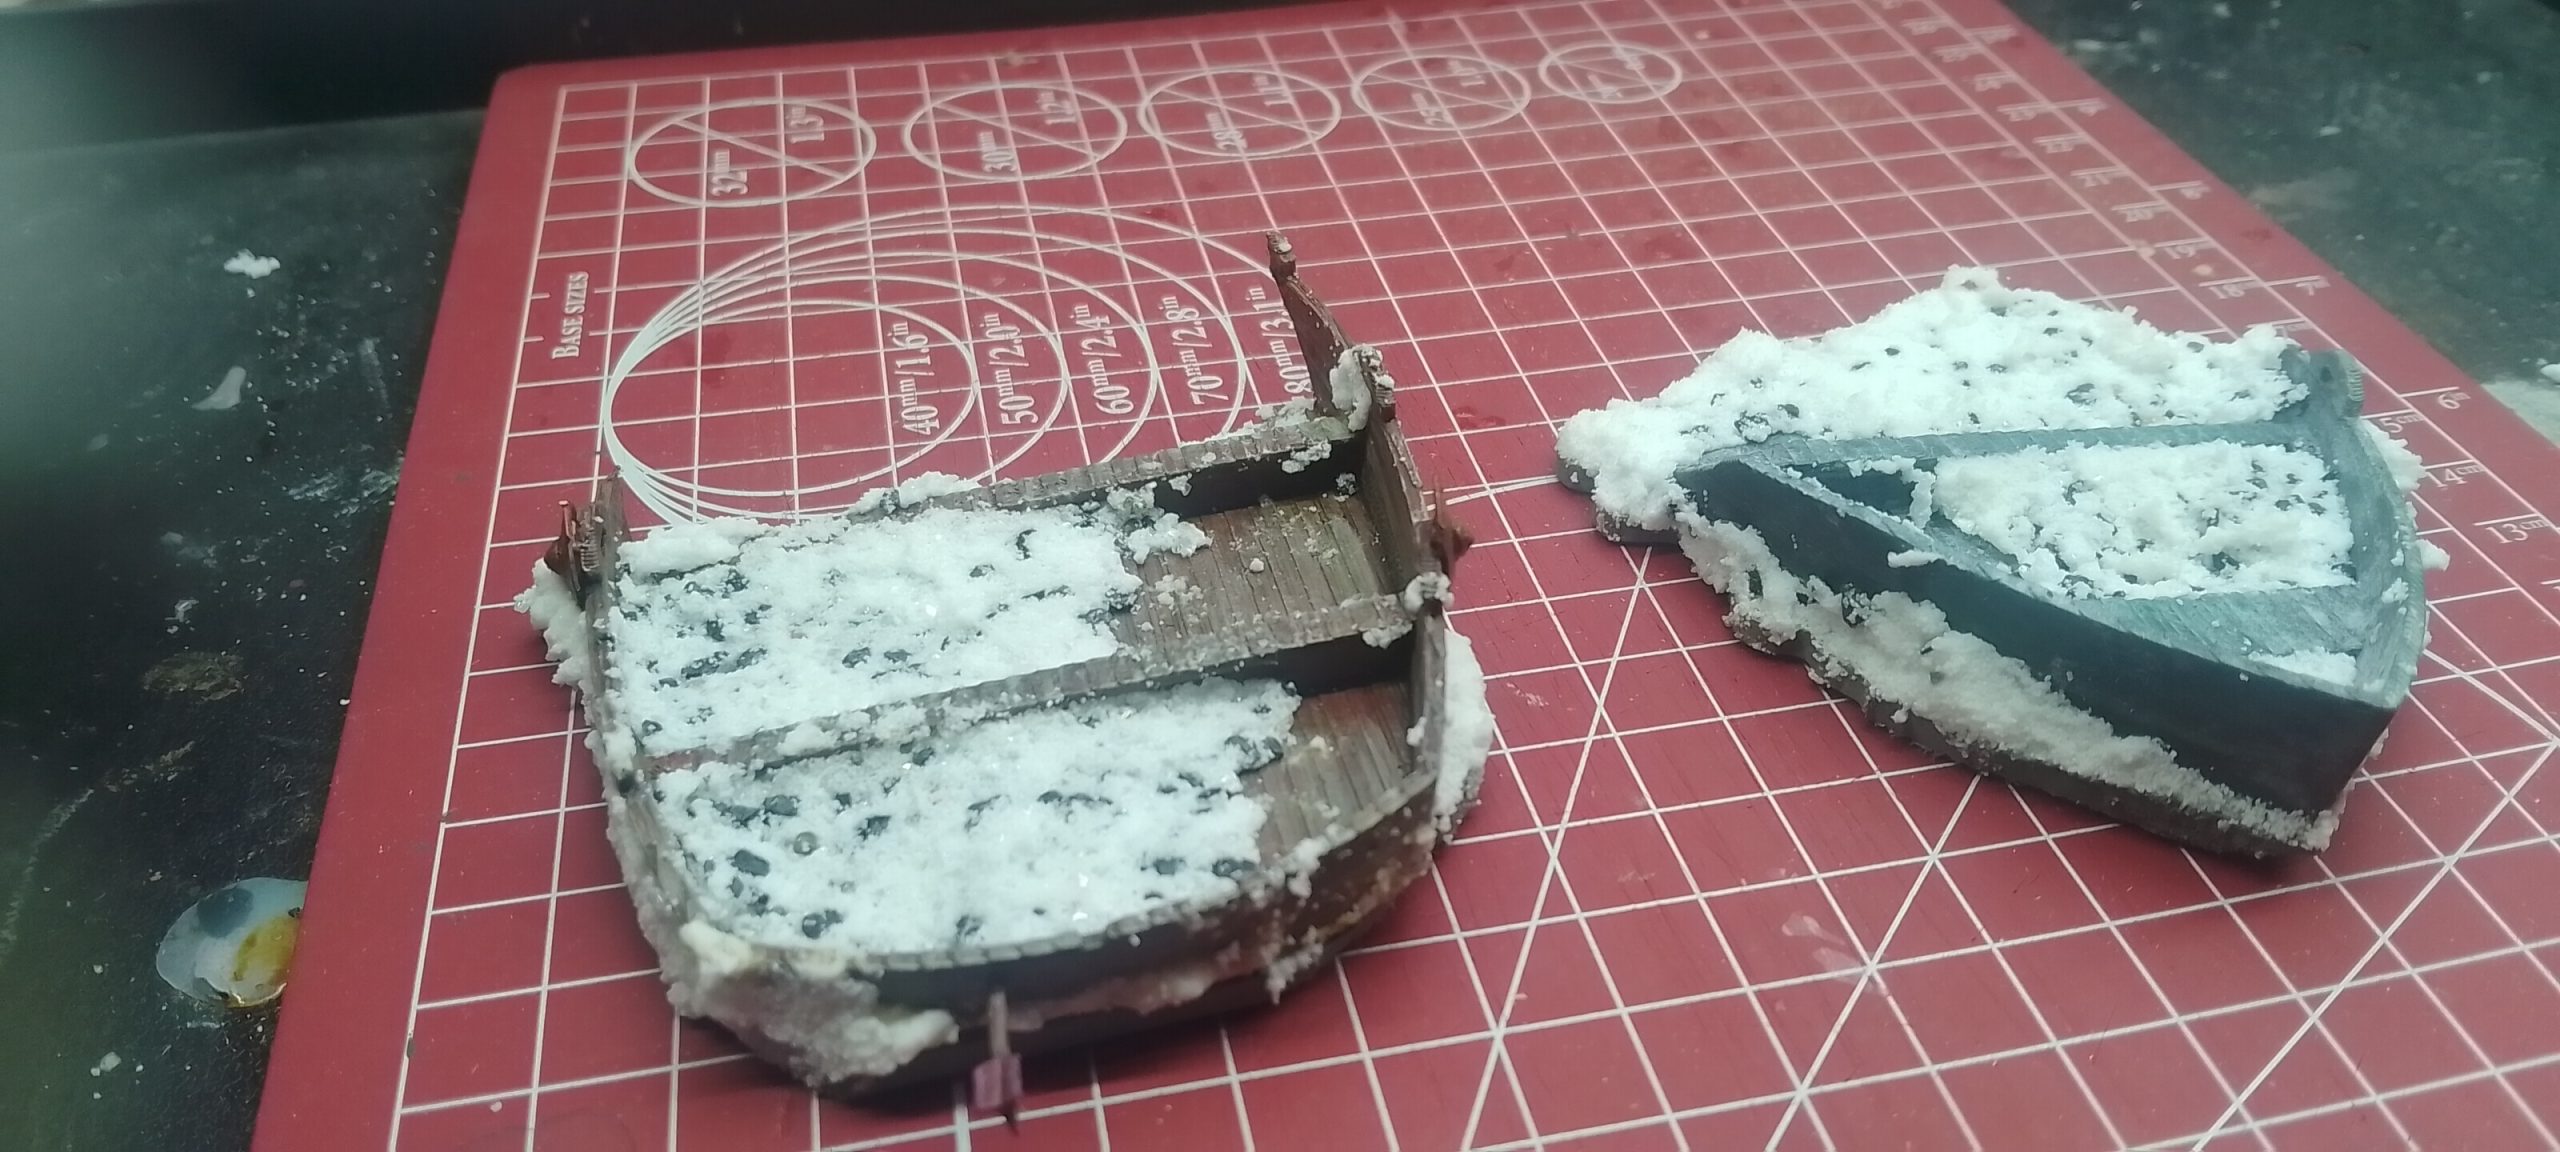
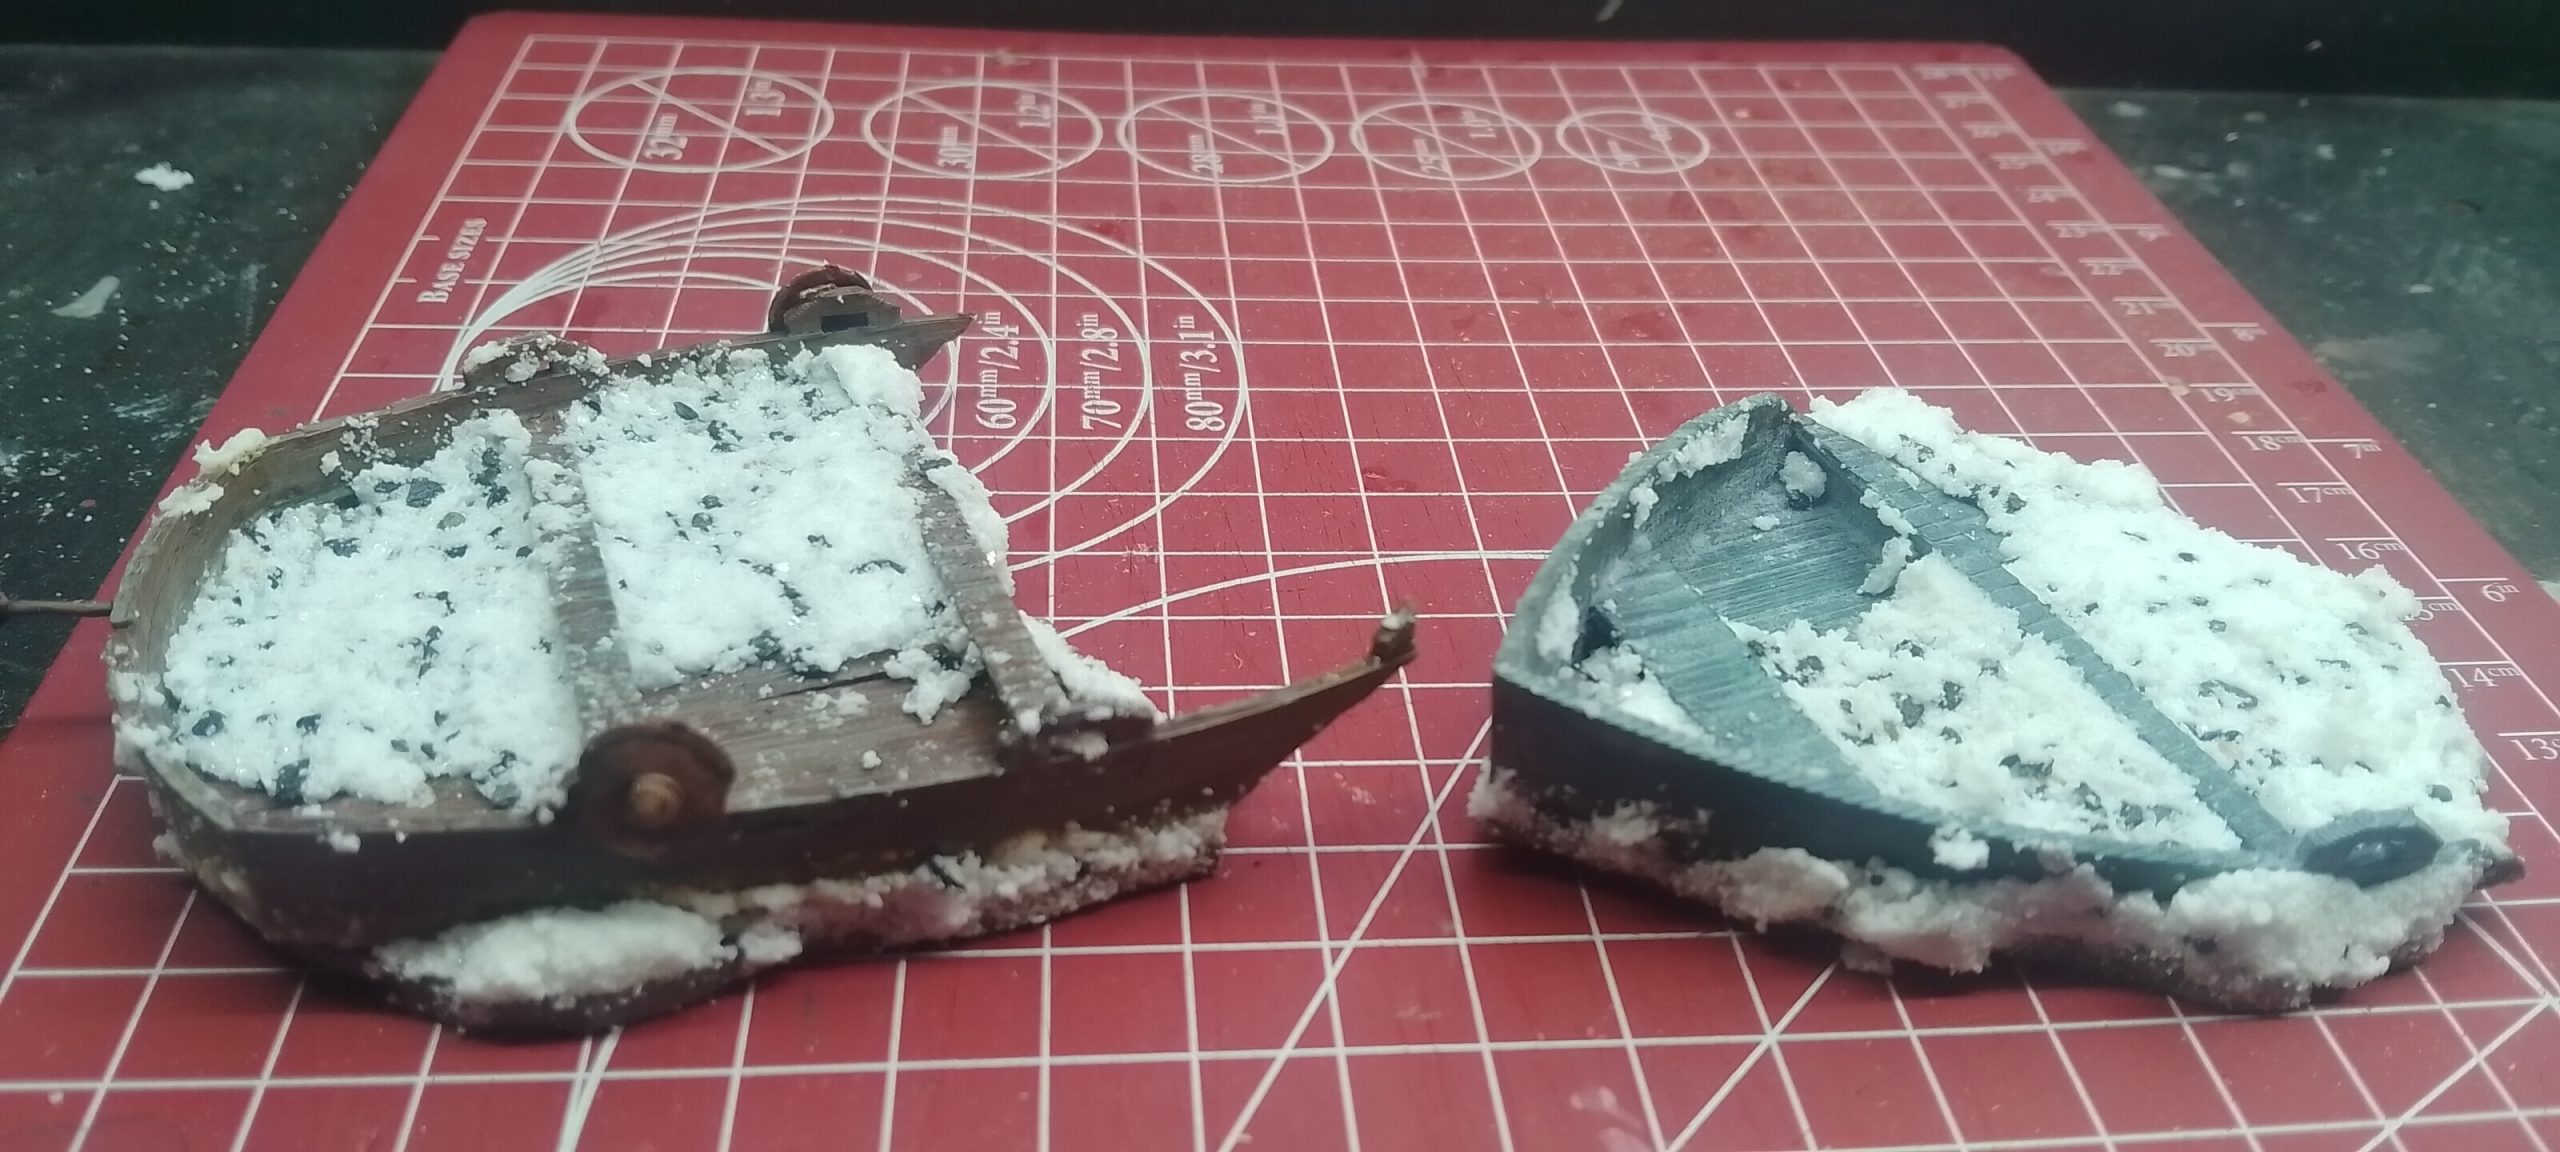
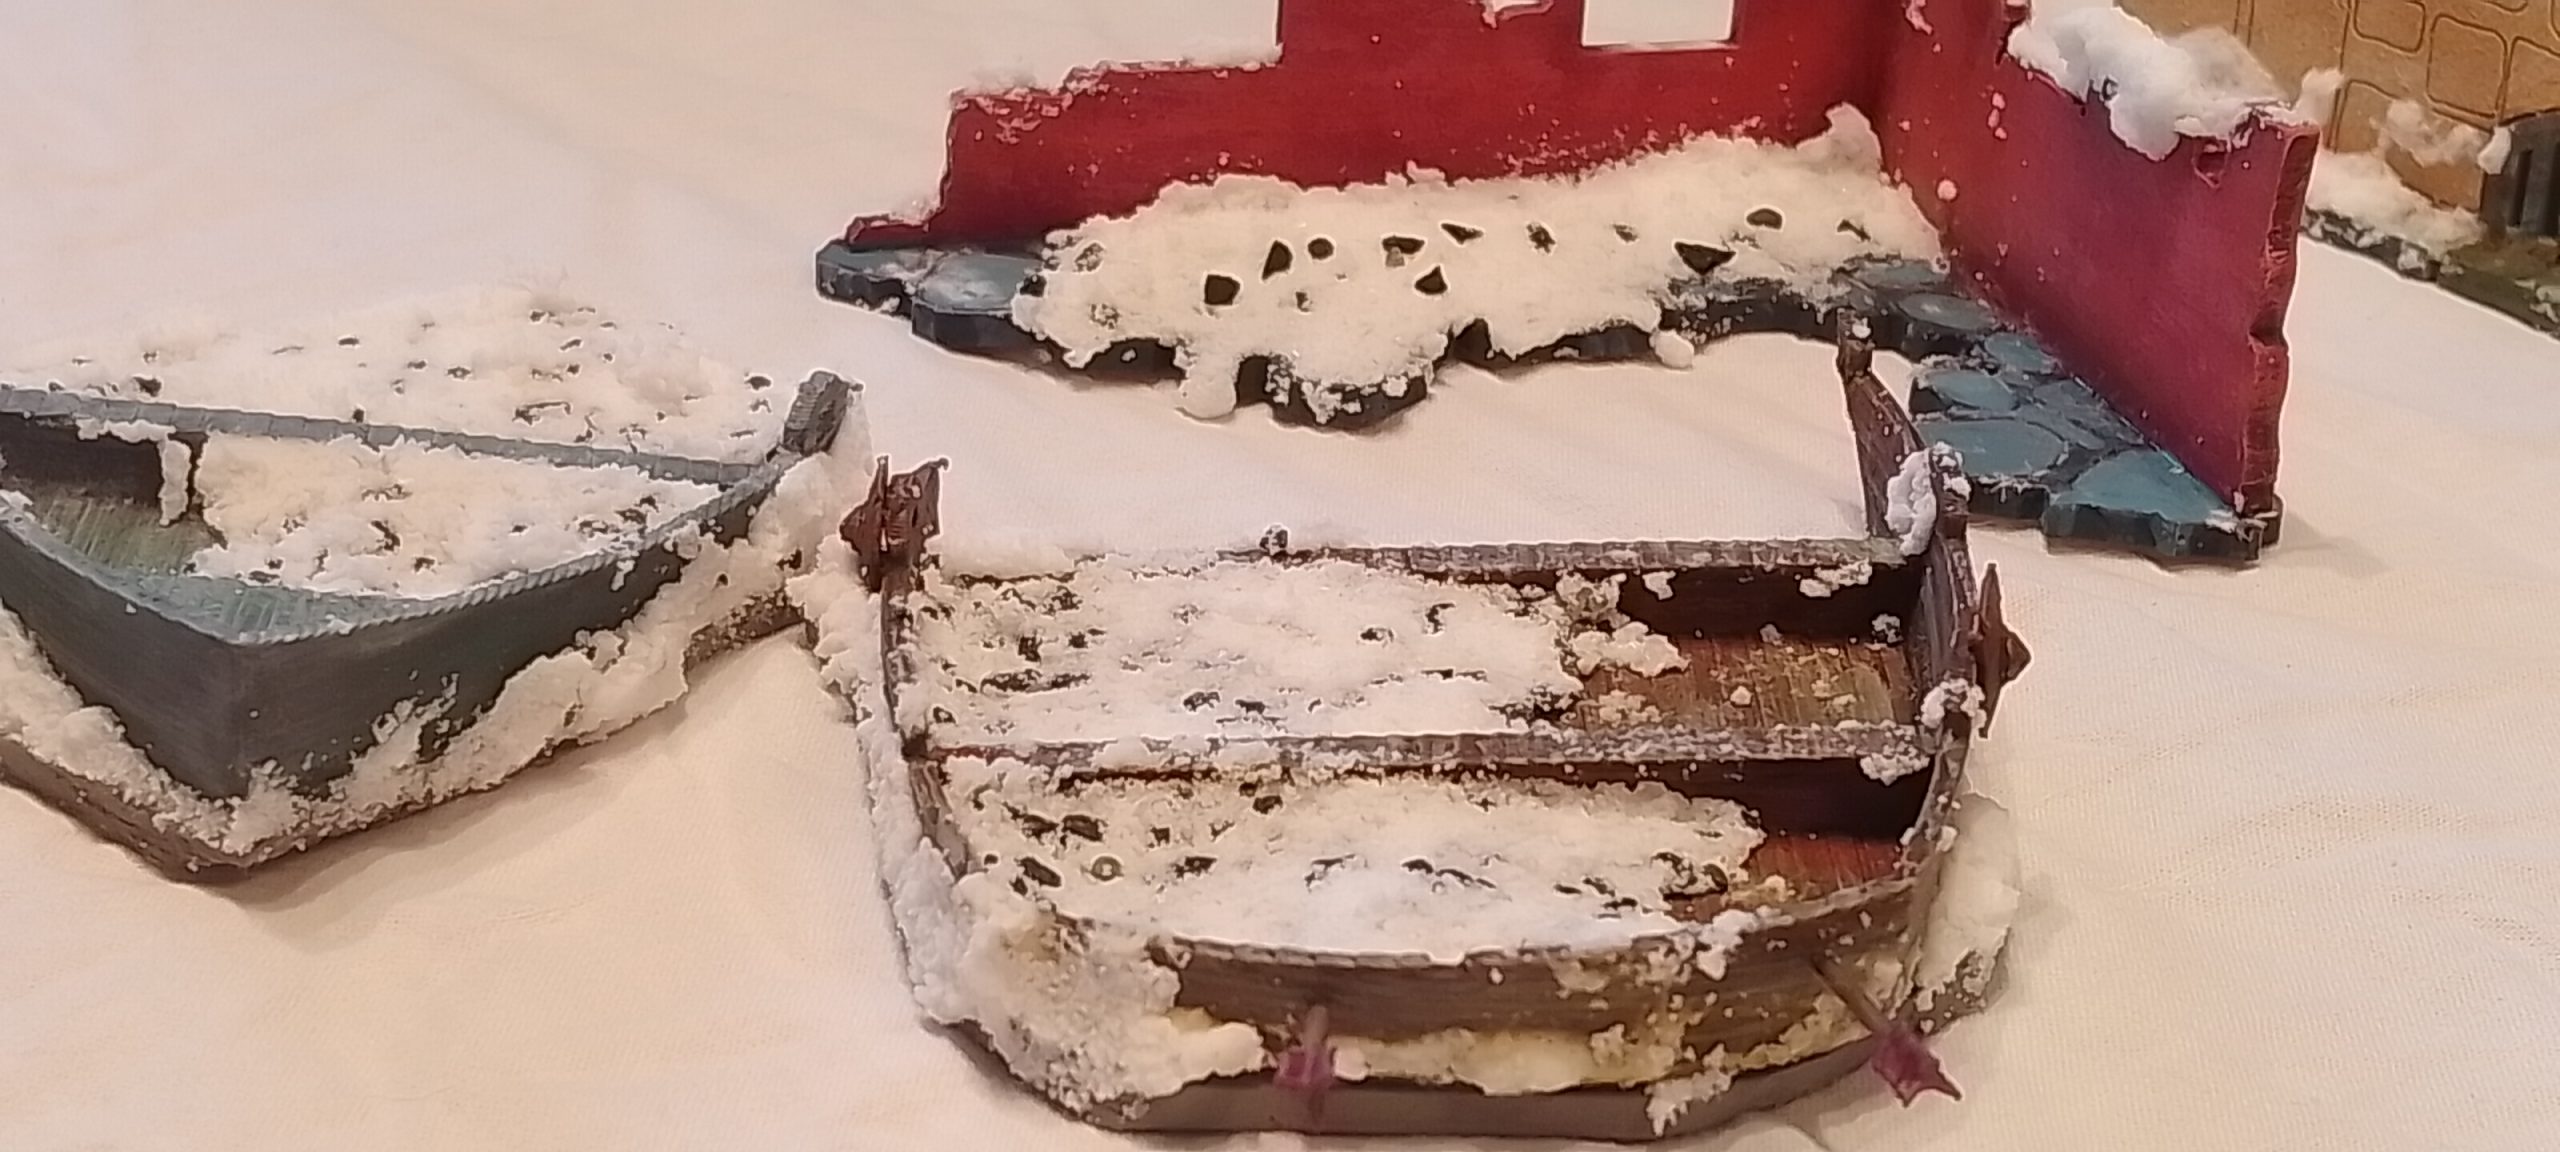
To begin with I painted the boat, put some washes and drilled a few holes and threw a few shields to make it look like it has been used in the past as a fortified position. I also threw on some rust effects with the dirty down.
I have sourced two nice bits of mdf from the gatehouse kit to go on the boats halves. I did two separate looks one really Frosted and a creaky brown one to spread out the boat love on the tabletop.
After I just added some snow on the primed mdf and made it quite flat deliberately so miniatures can walk and combat each other inside. I am sure it wouldn’t be so flat, but there is nothing more annoying than a wobbly positional combat.
Fountain 22/01/2026
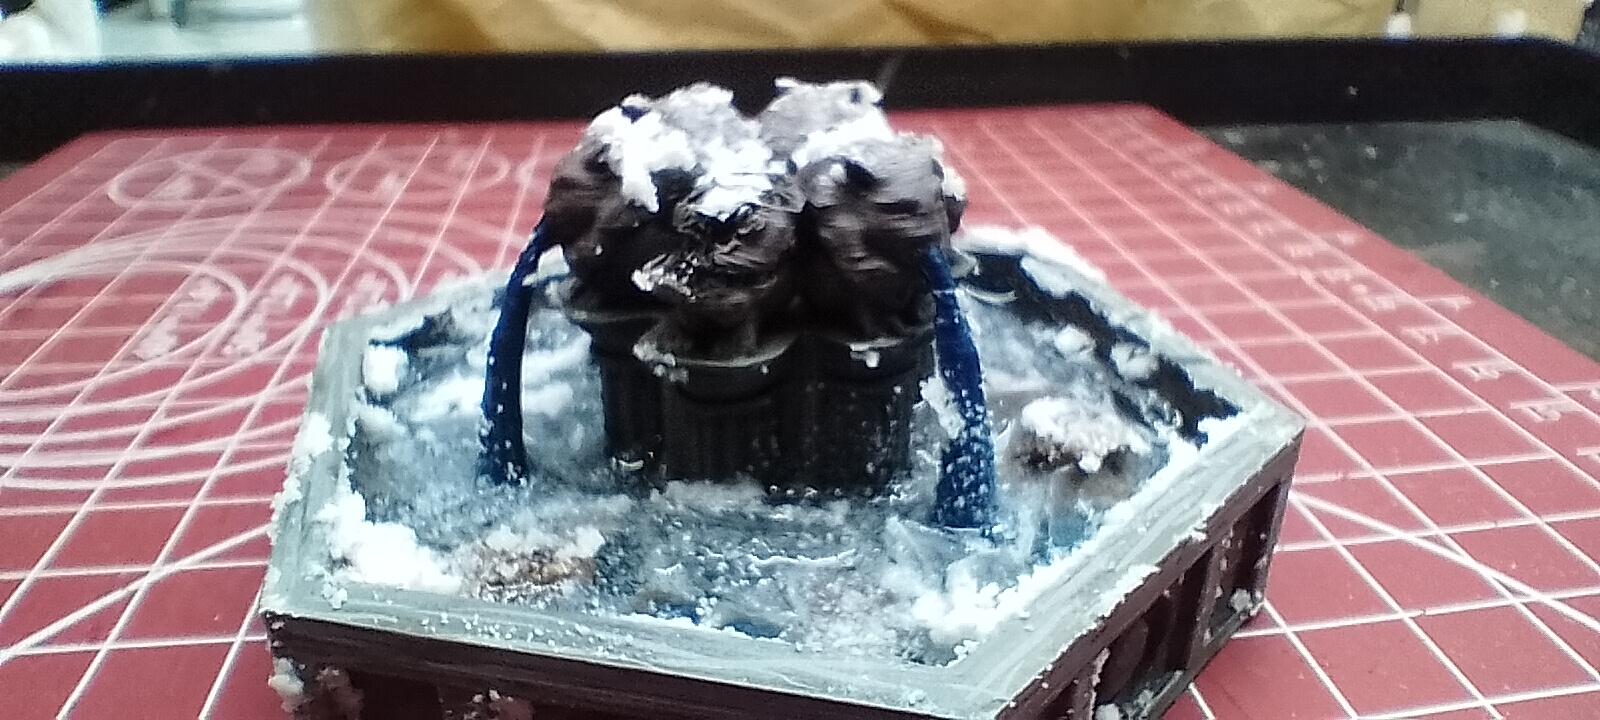
 primed with base coats
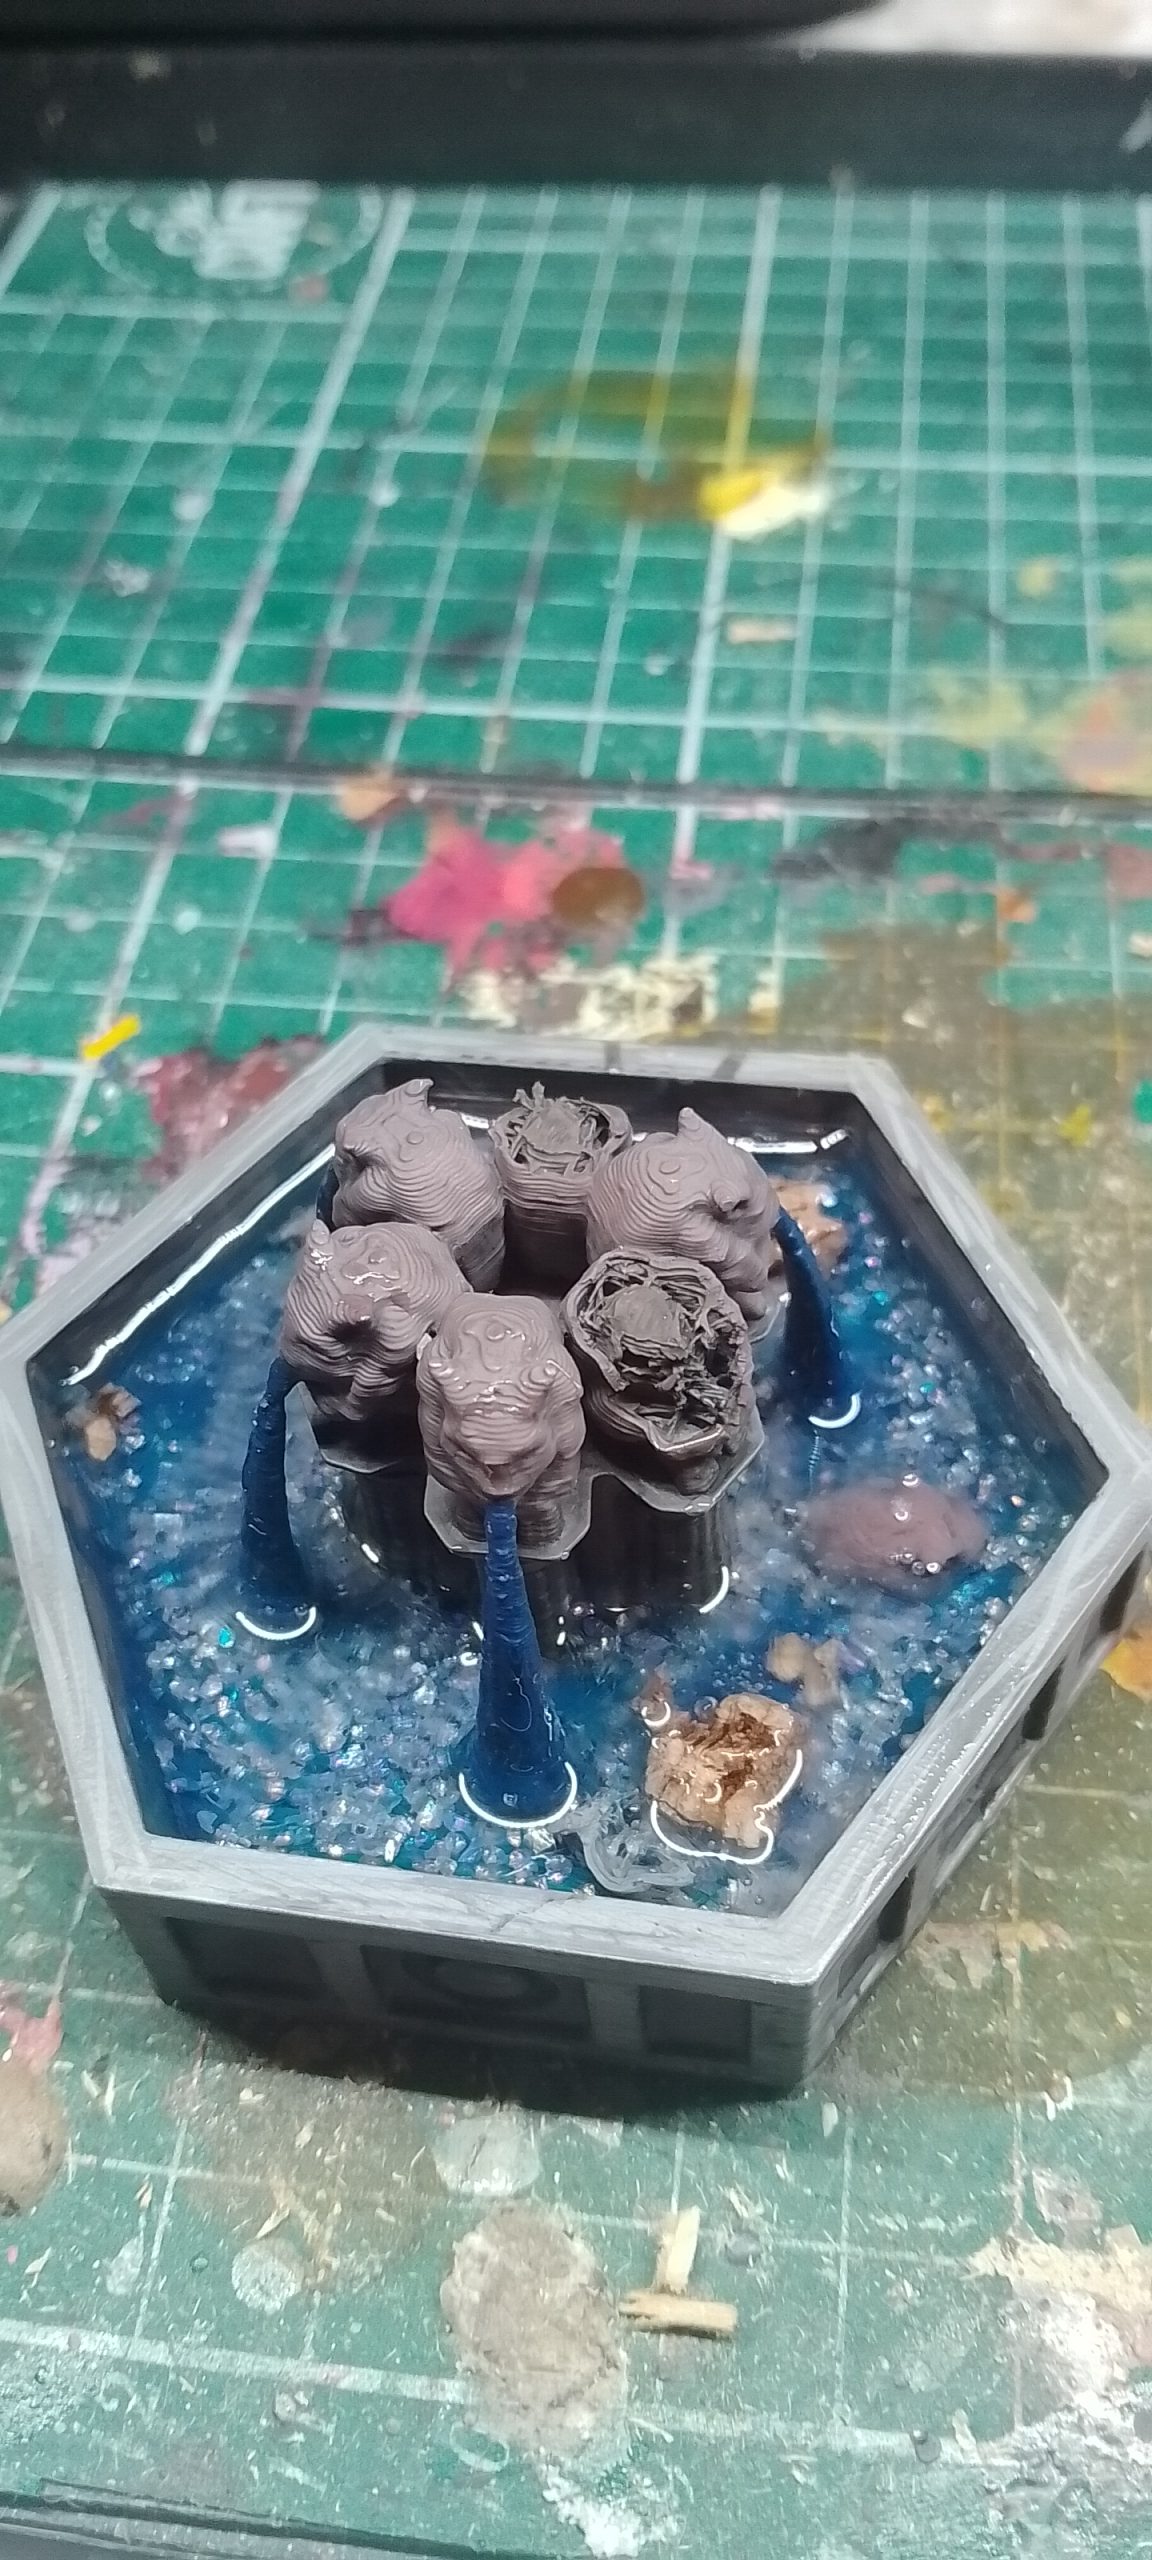 The fountain was then painted all over, ready for the treatment and chunks taken off the top
For the final part, I used the last of the epoxy and some crushed glass to give it a sparkly effect. I also filled it with debris including some of the painted chopped bits and then layered on top some snow and bits of perspex to give that look of disturbed ice from the fountain agitating the water.
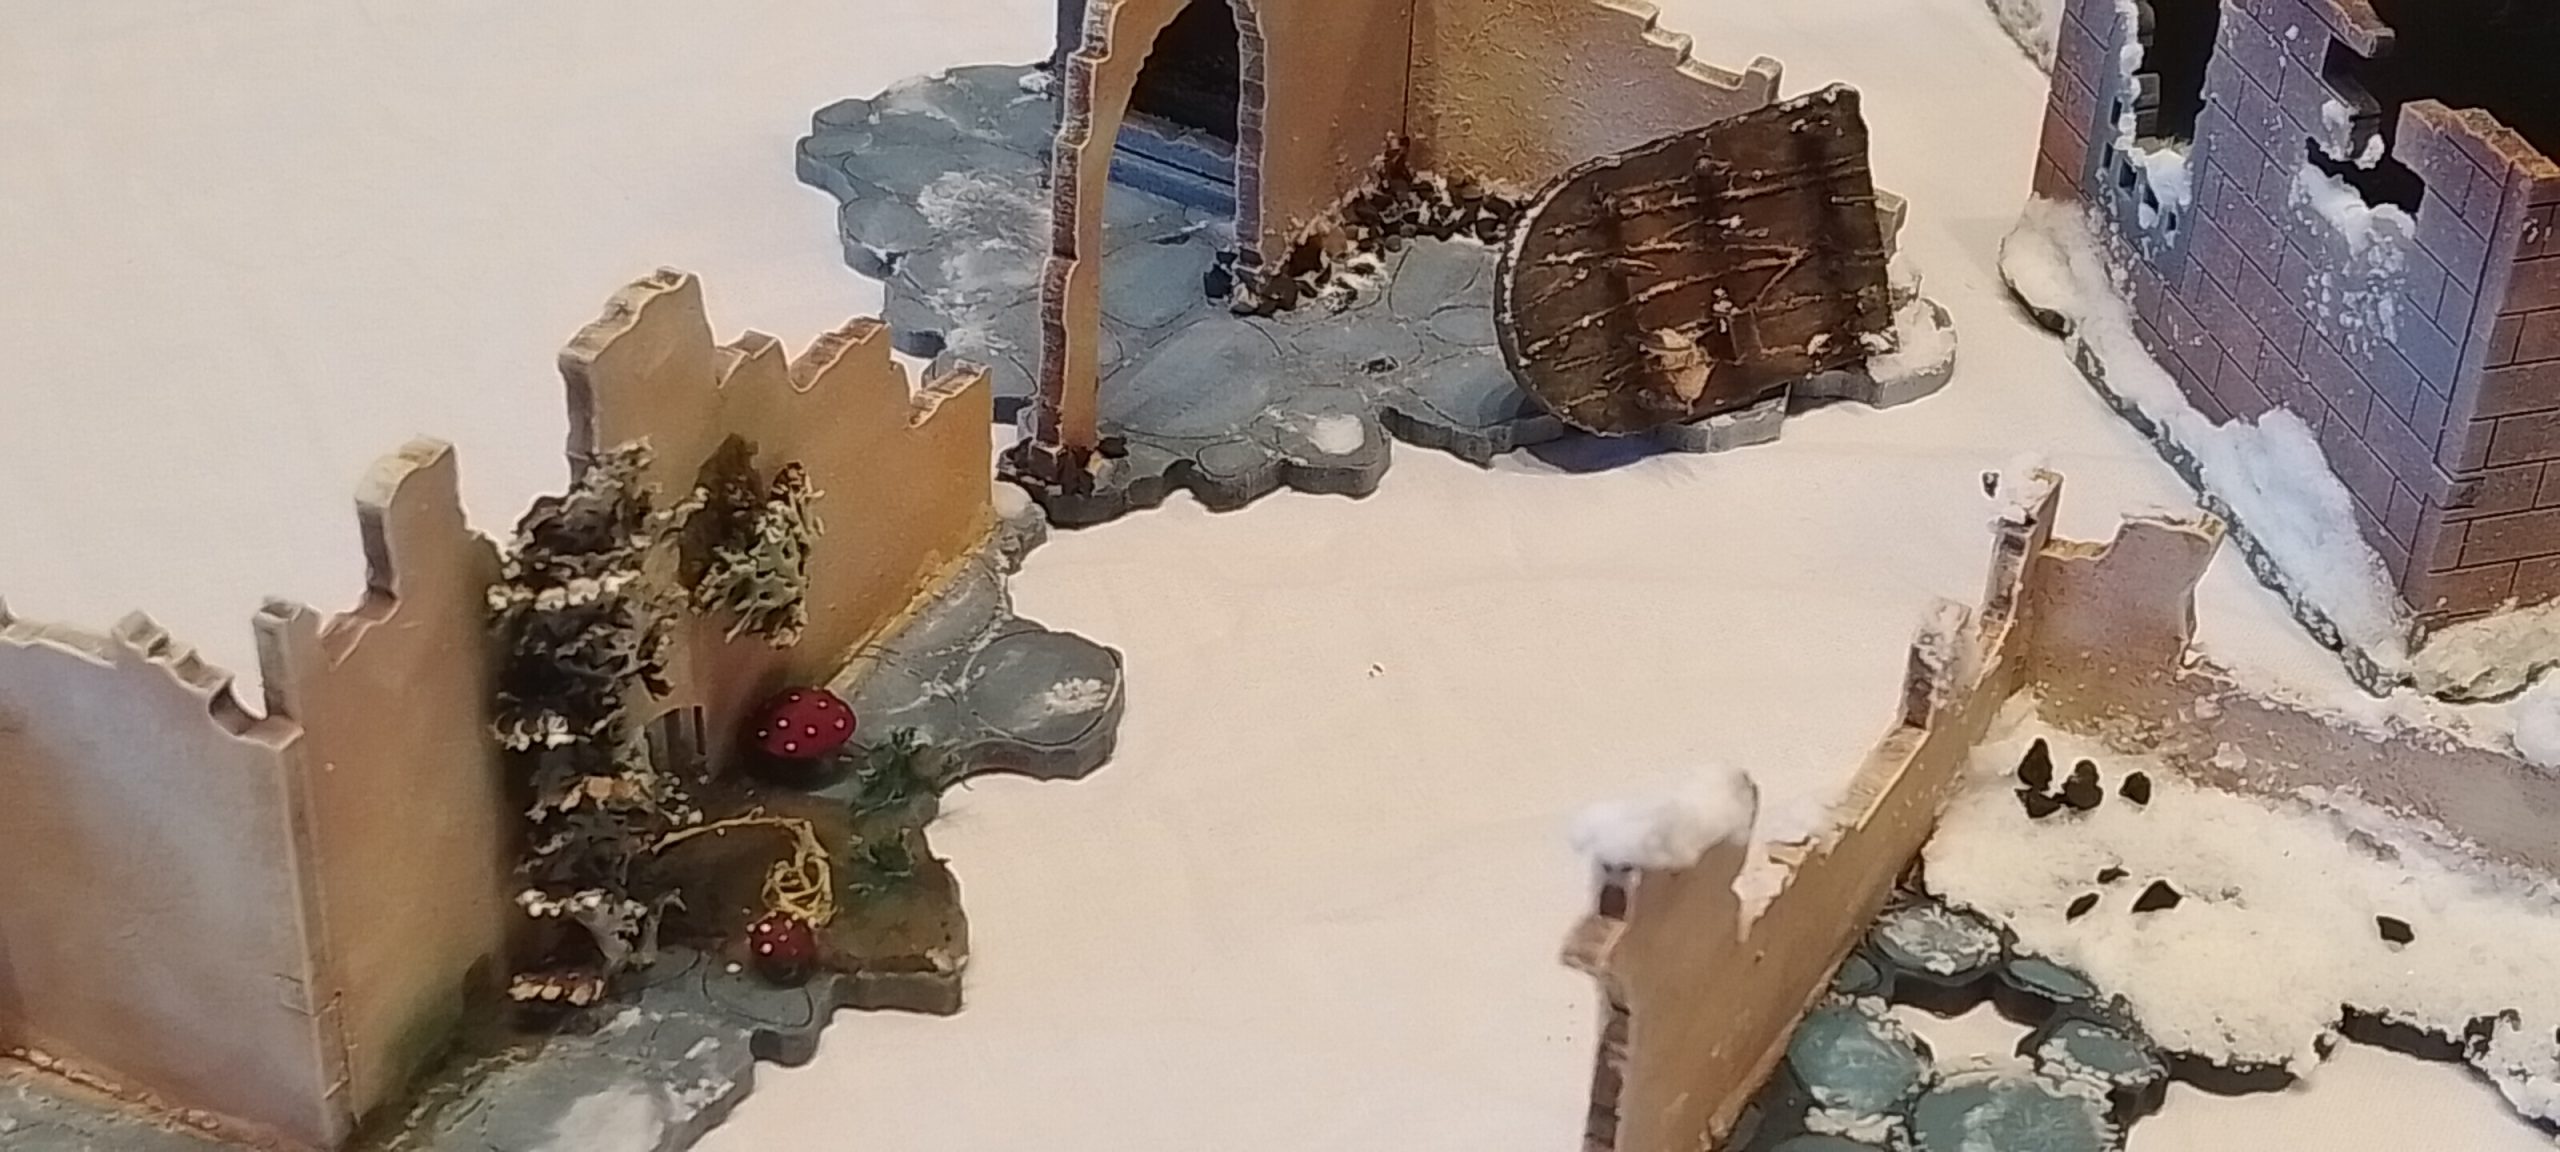
Doors 22/1/2026
With the gatehouse I got a whole bunch of doors that I punched out, that could be used for it. Instead they are better for the ruins from information that tells me that doors just get in the road when they swing.
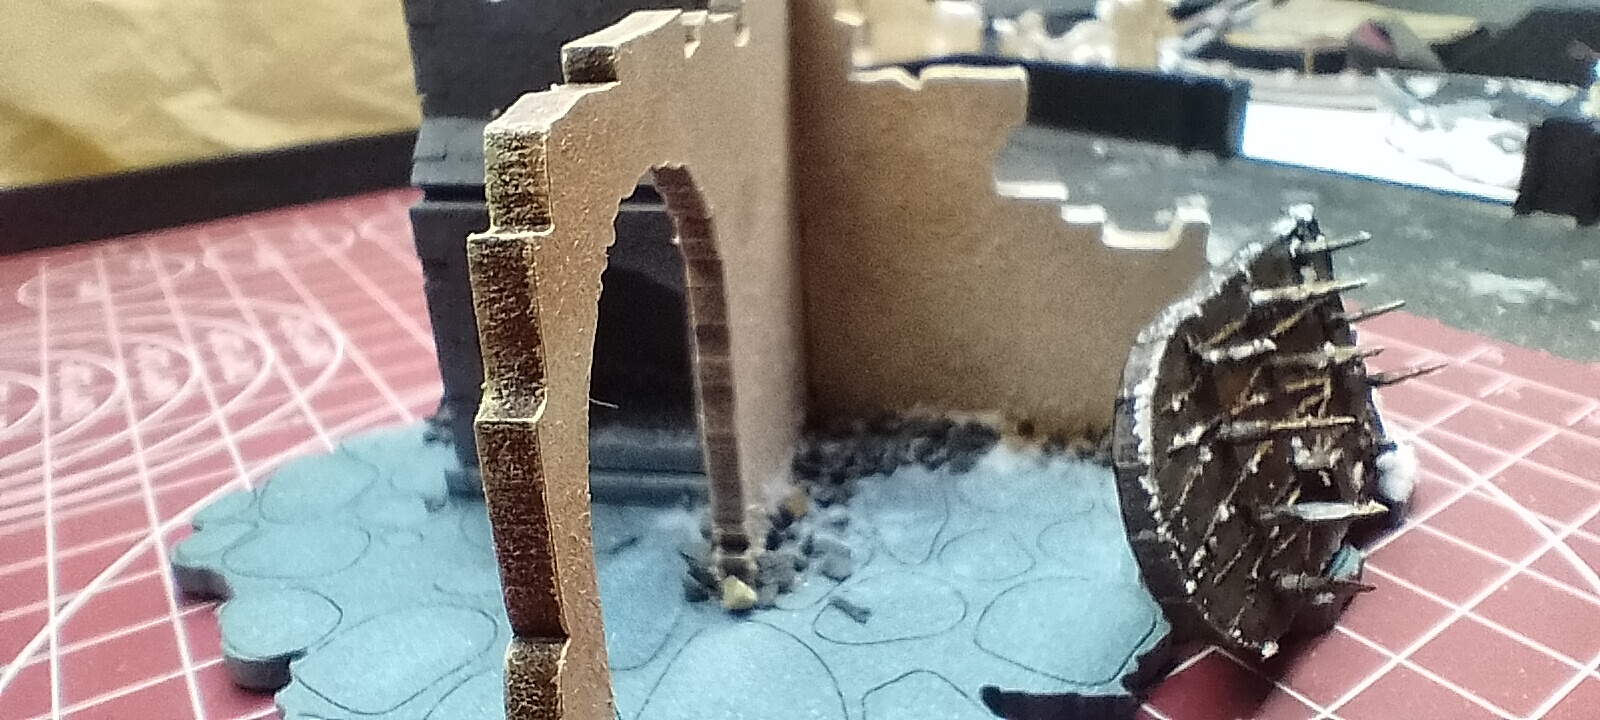
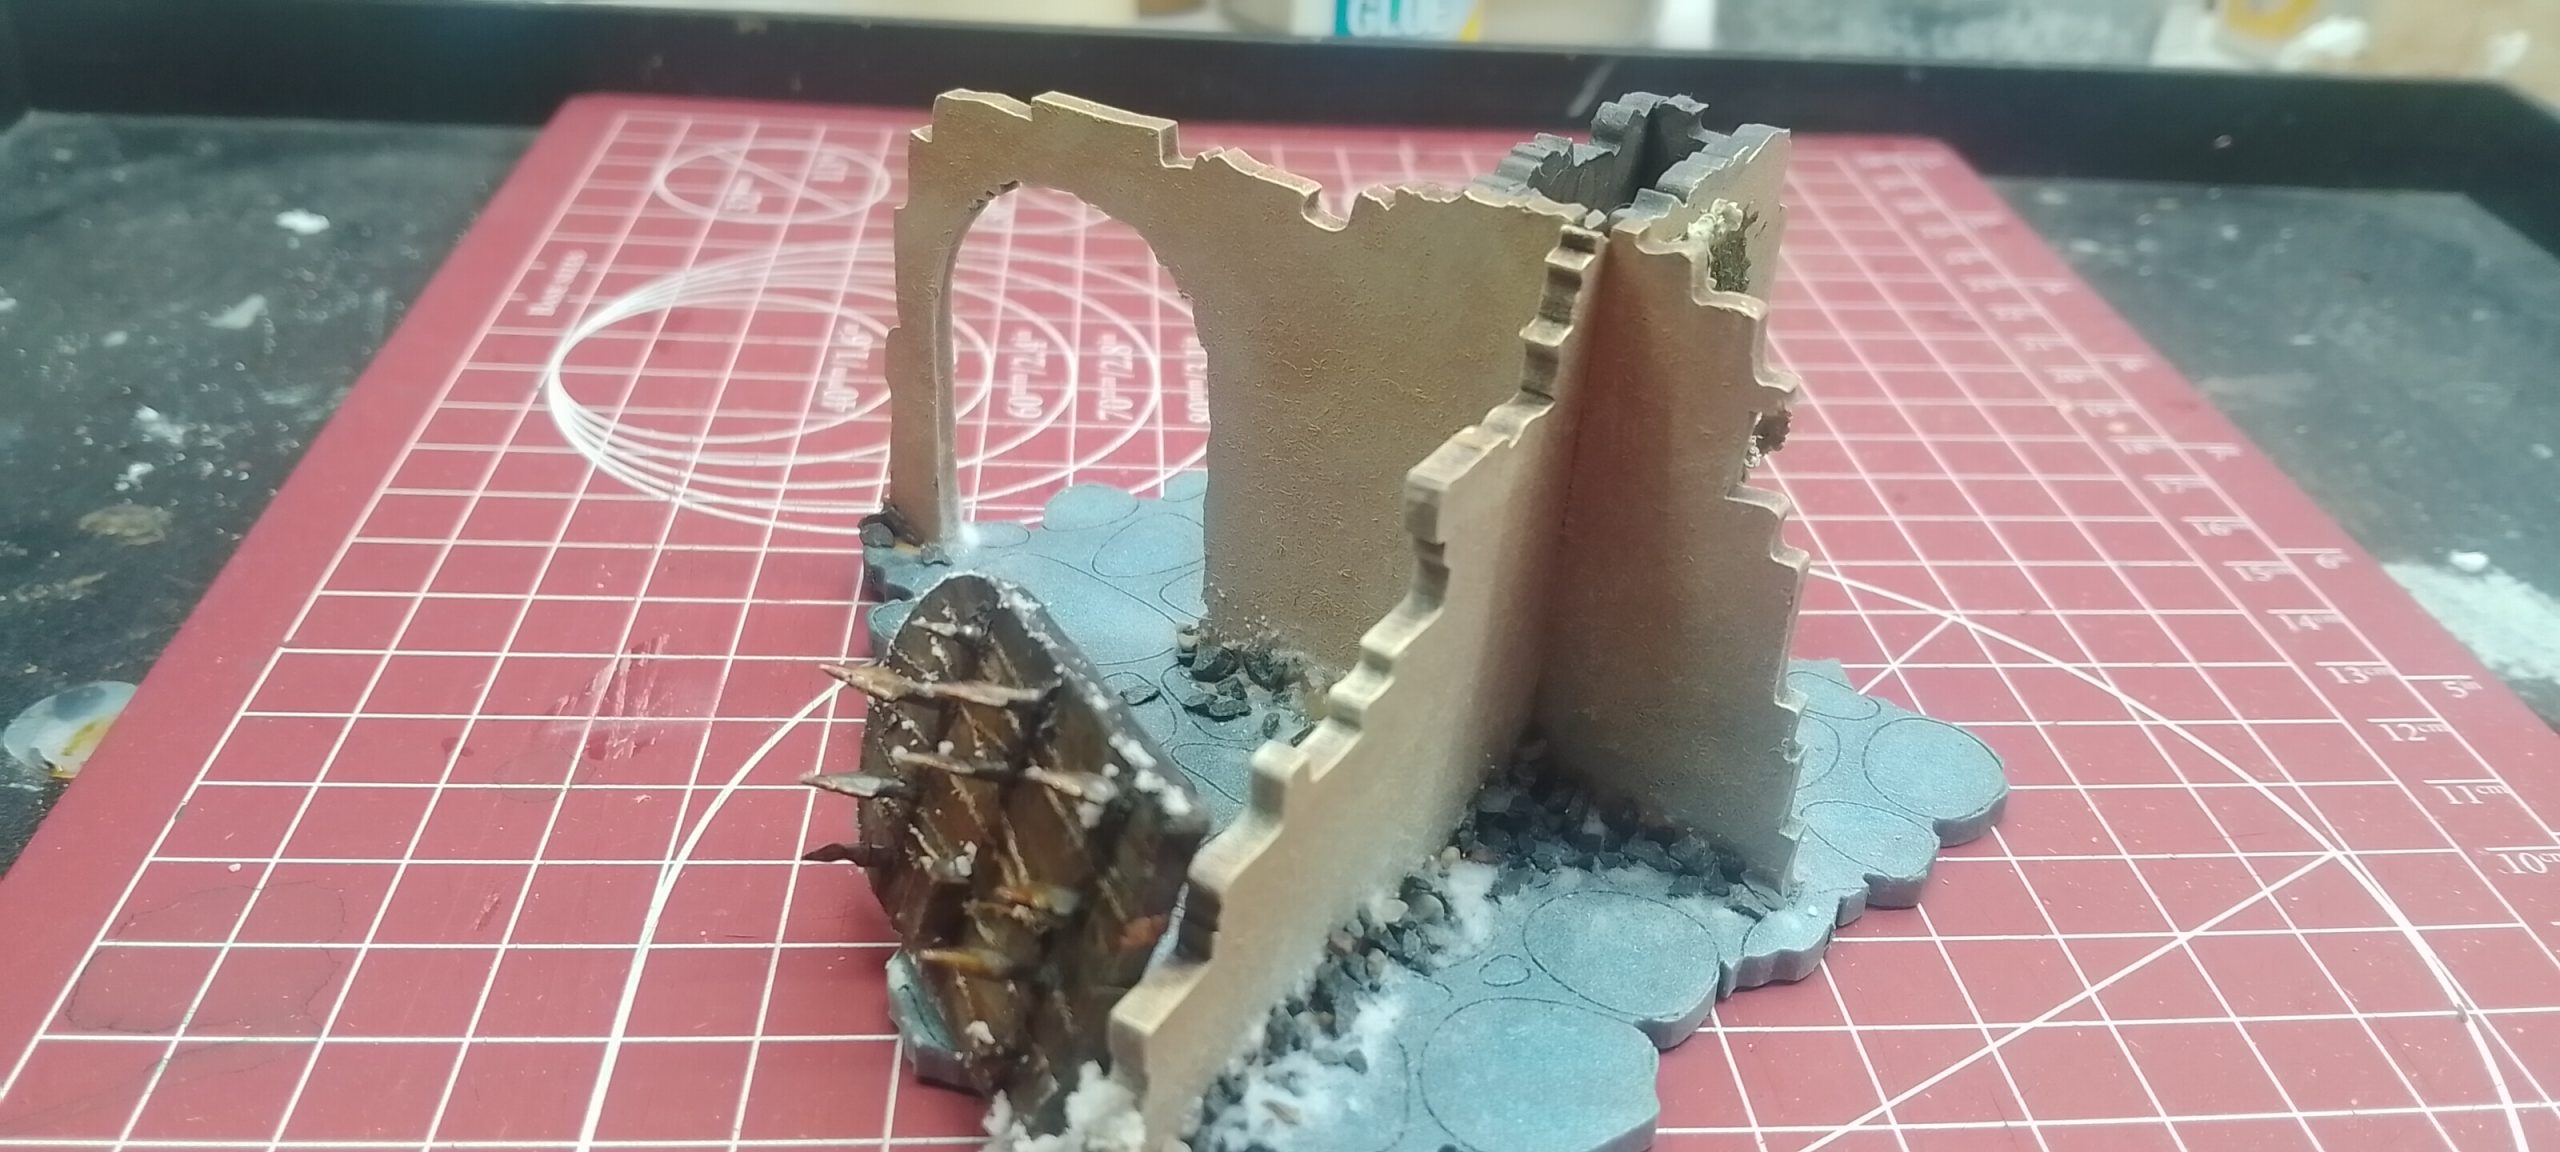
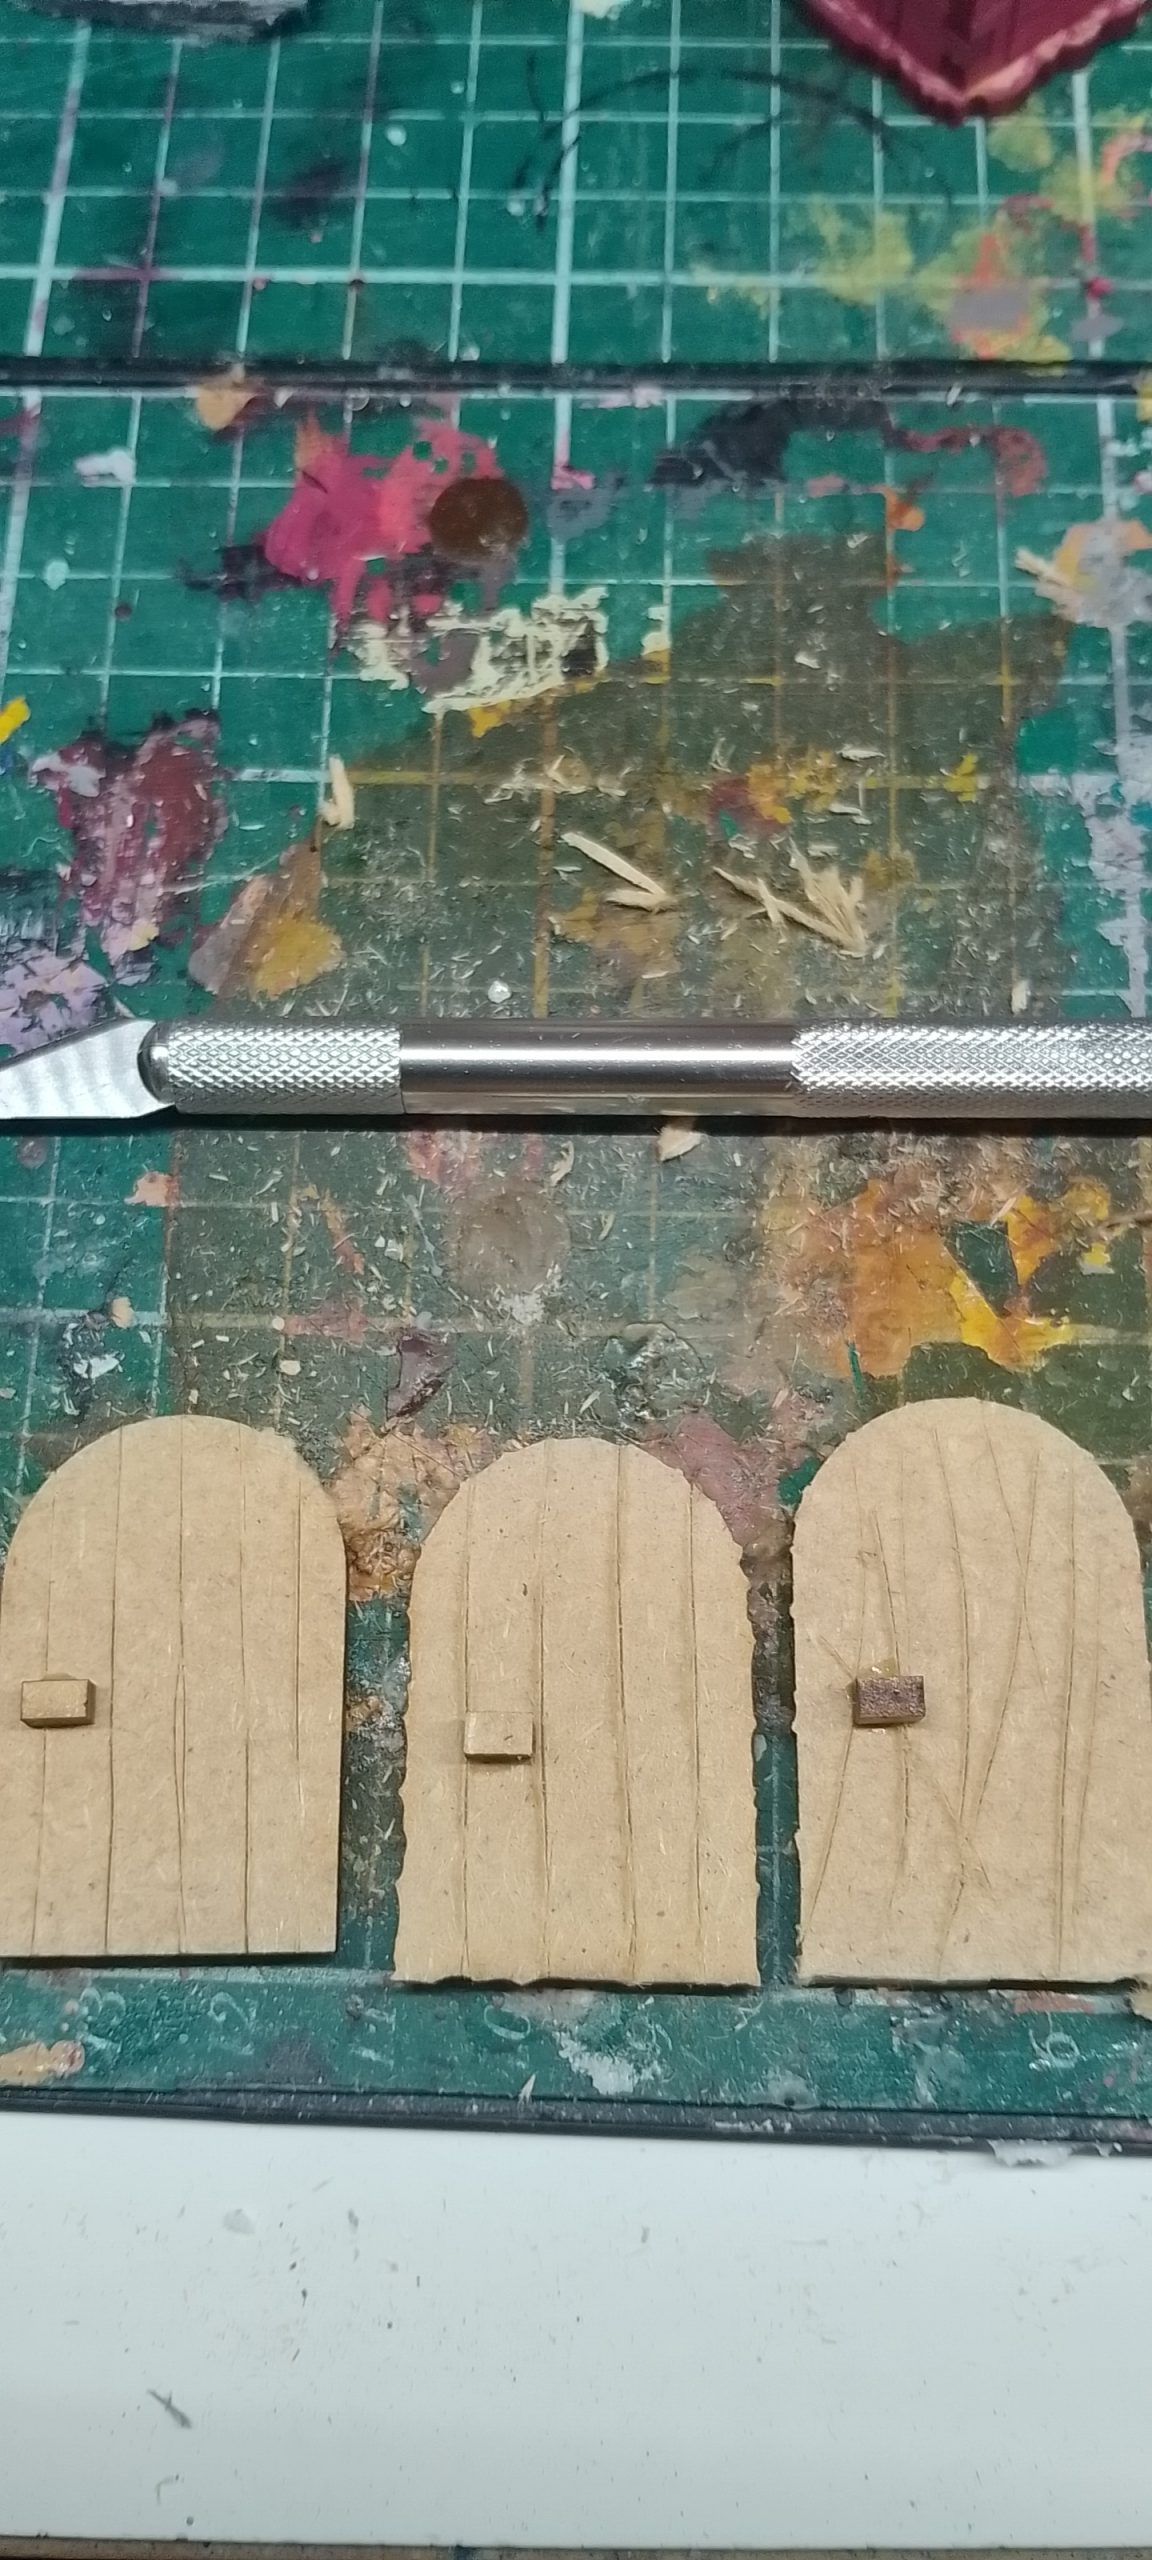 Added a few knobs and knife marks to give some texture
I then used a few bits to add some flavour to the doors. One of them have a bunch of drill holes and chopped up goblin spears (you get hundreds extras of them if you collect Oathmark goblins). I think its also a gallows from the flagellant warhammer kit for the barred door.
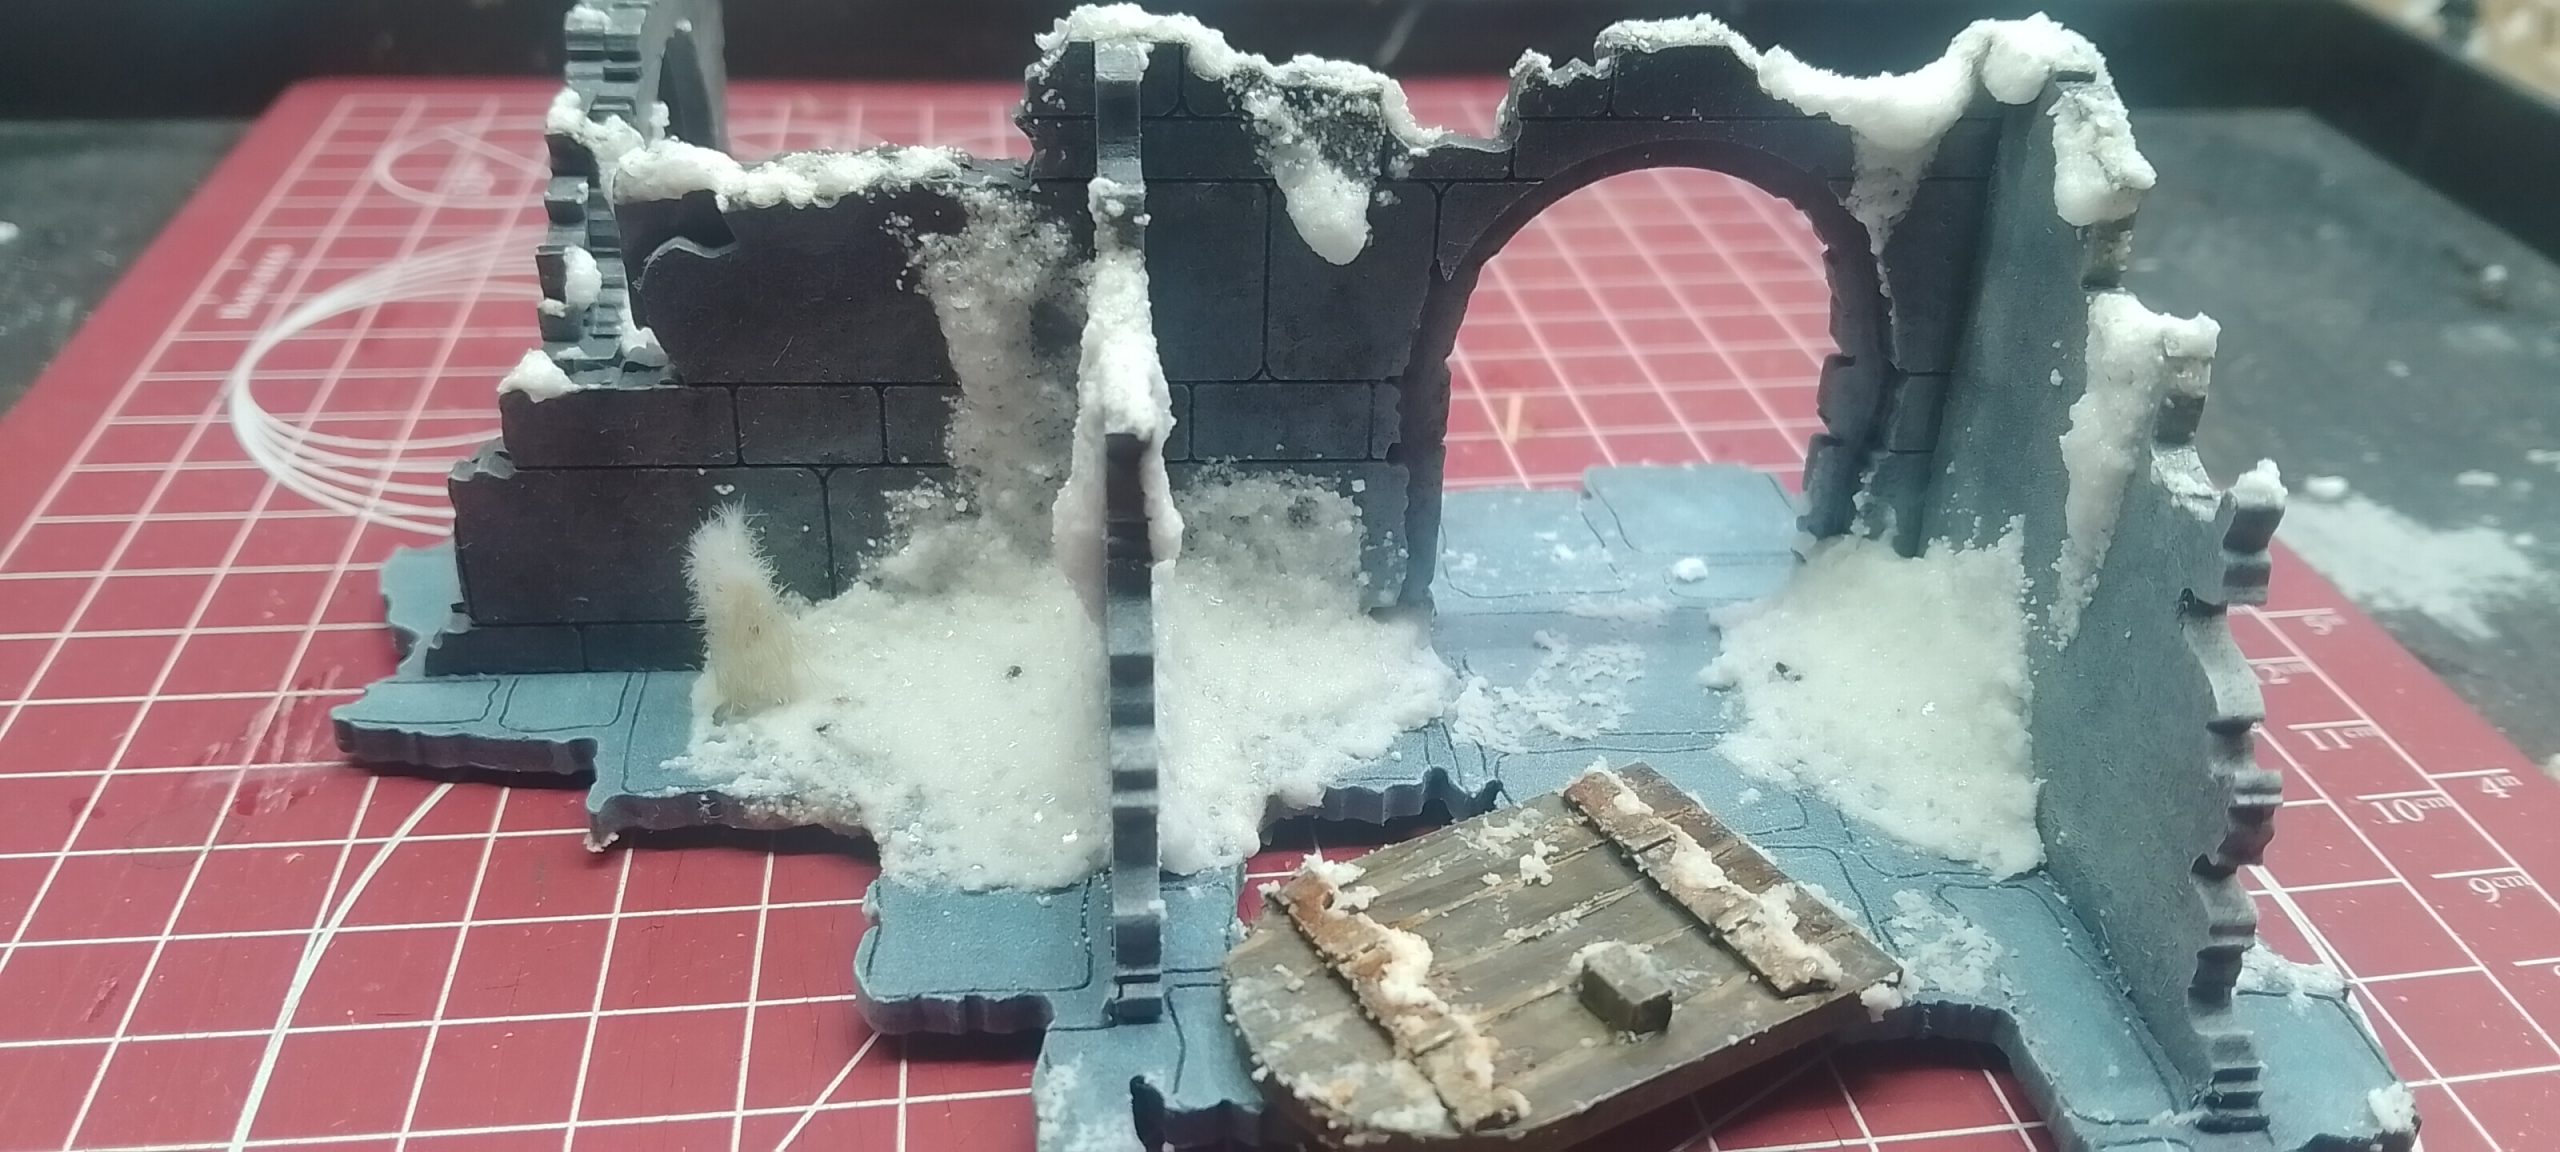
I then strategically placed these doors in the ruins to make them almost like a bridge to fight on.
 some variation to give you all some ideas
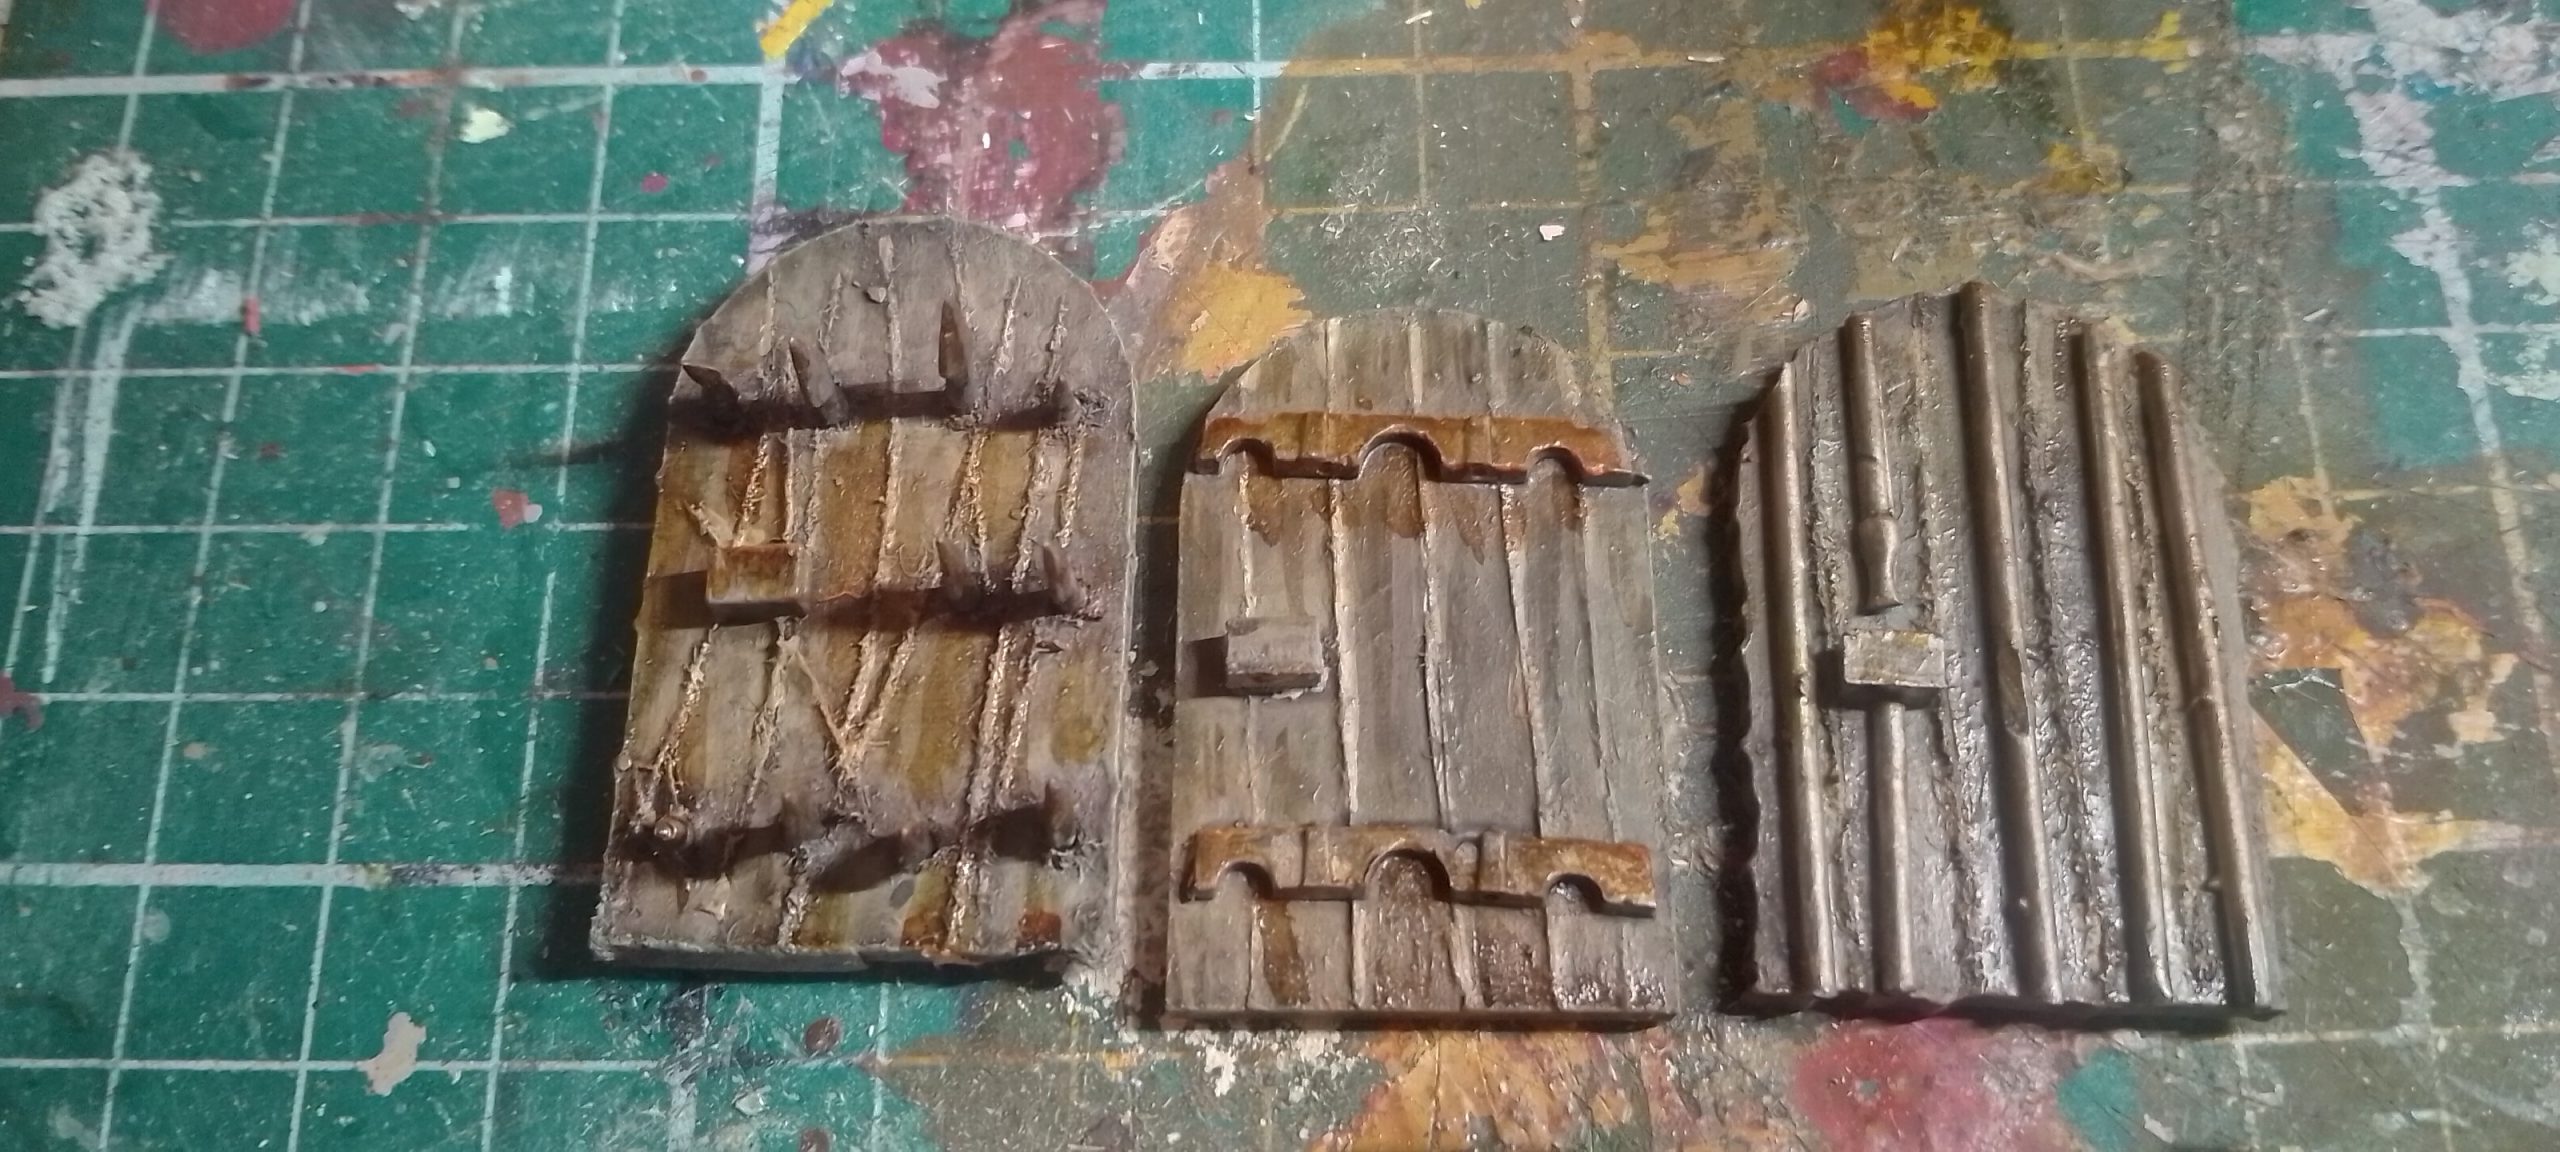
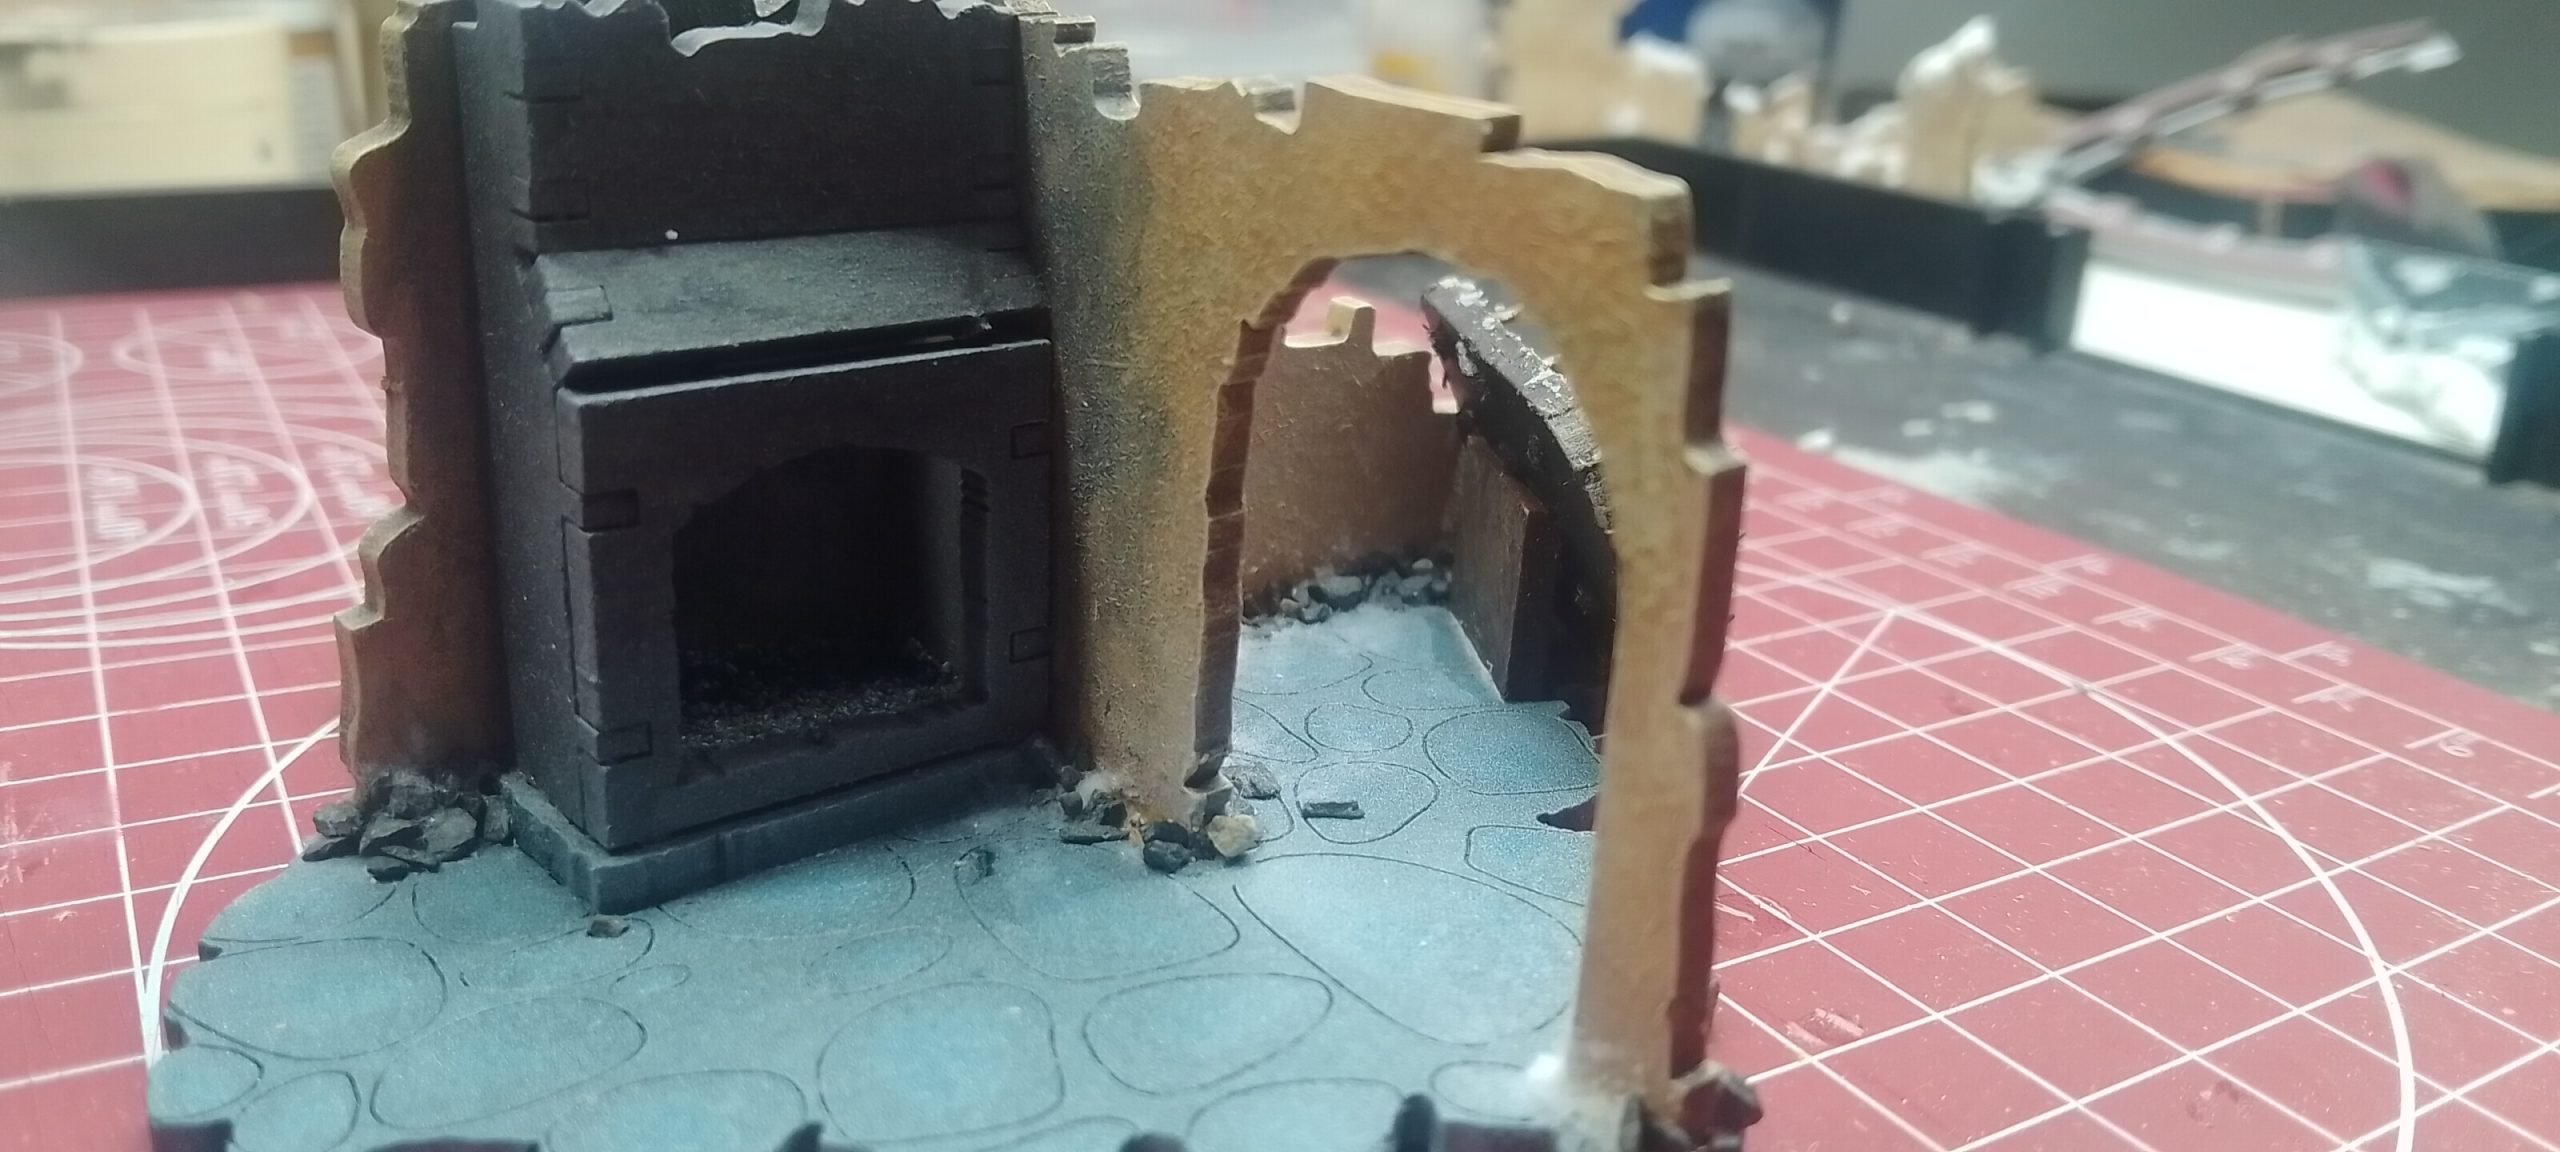
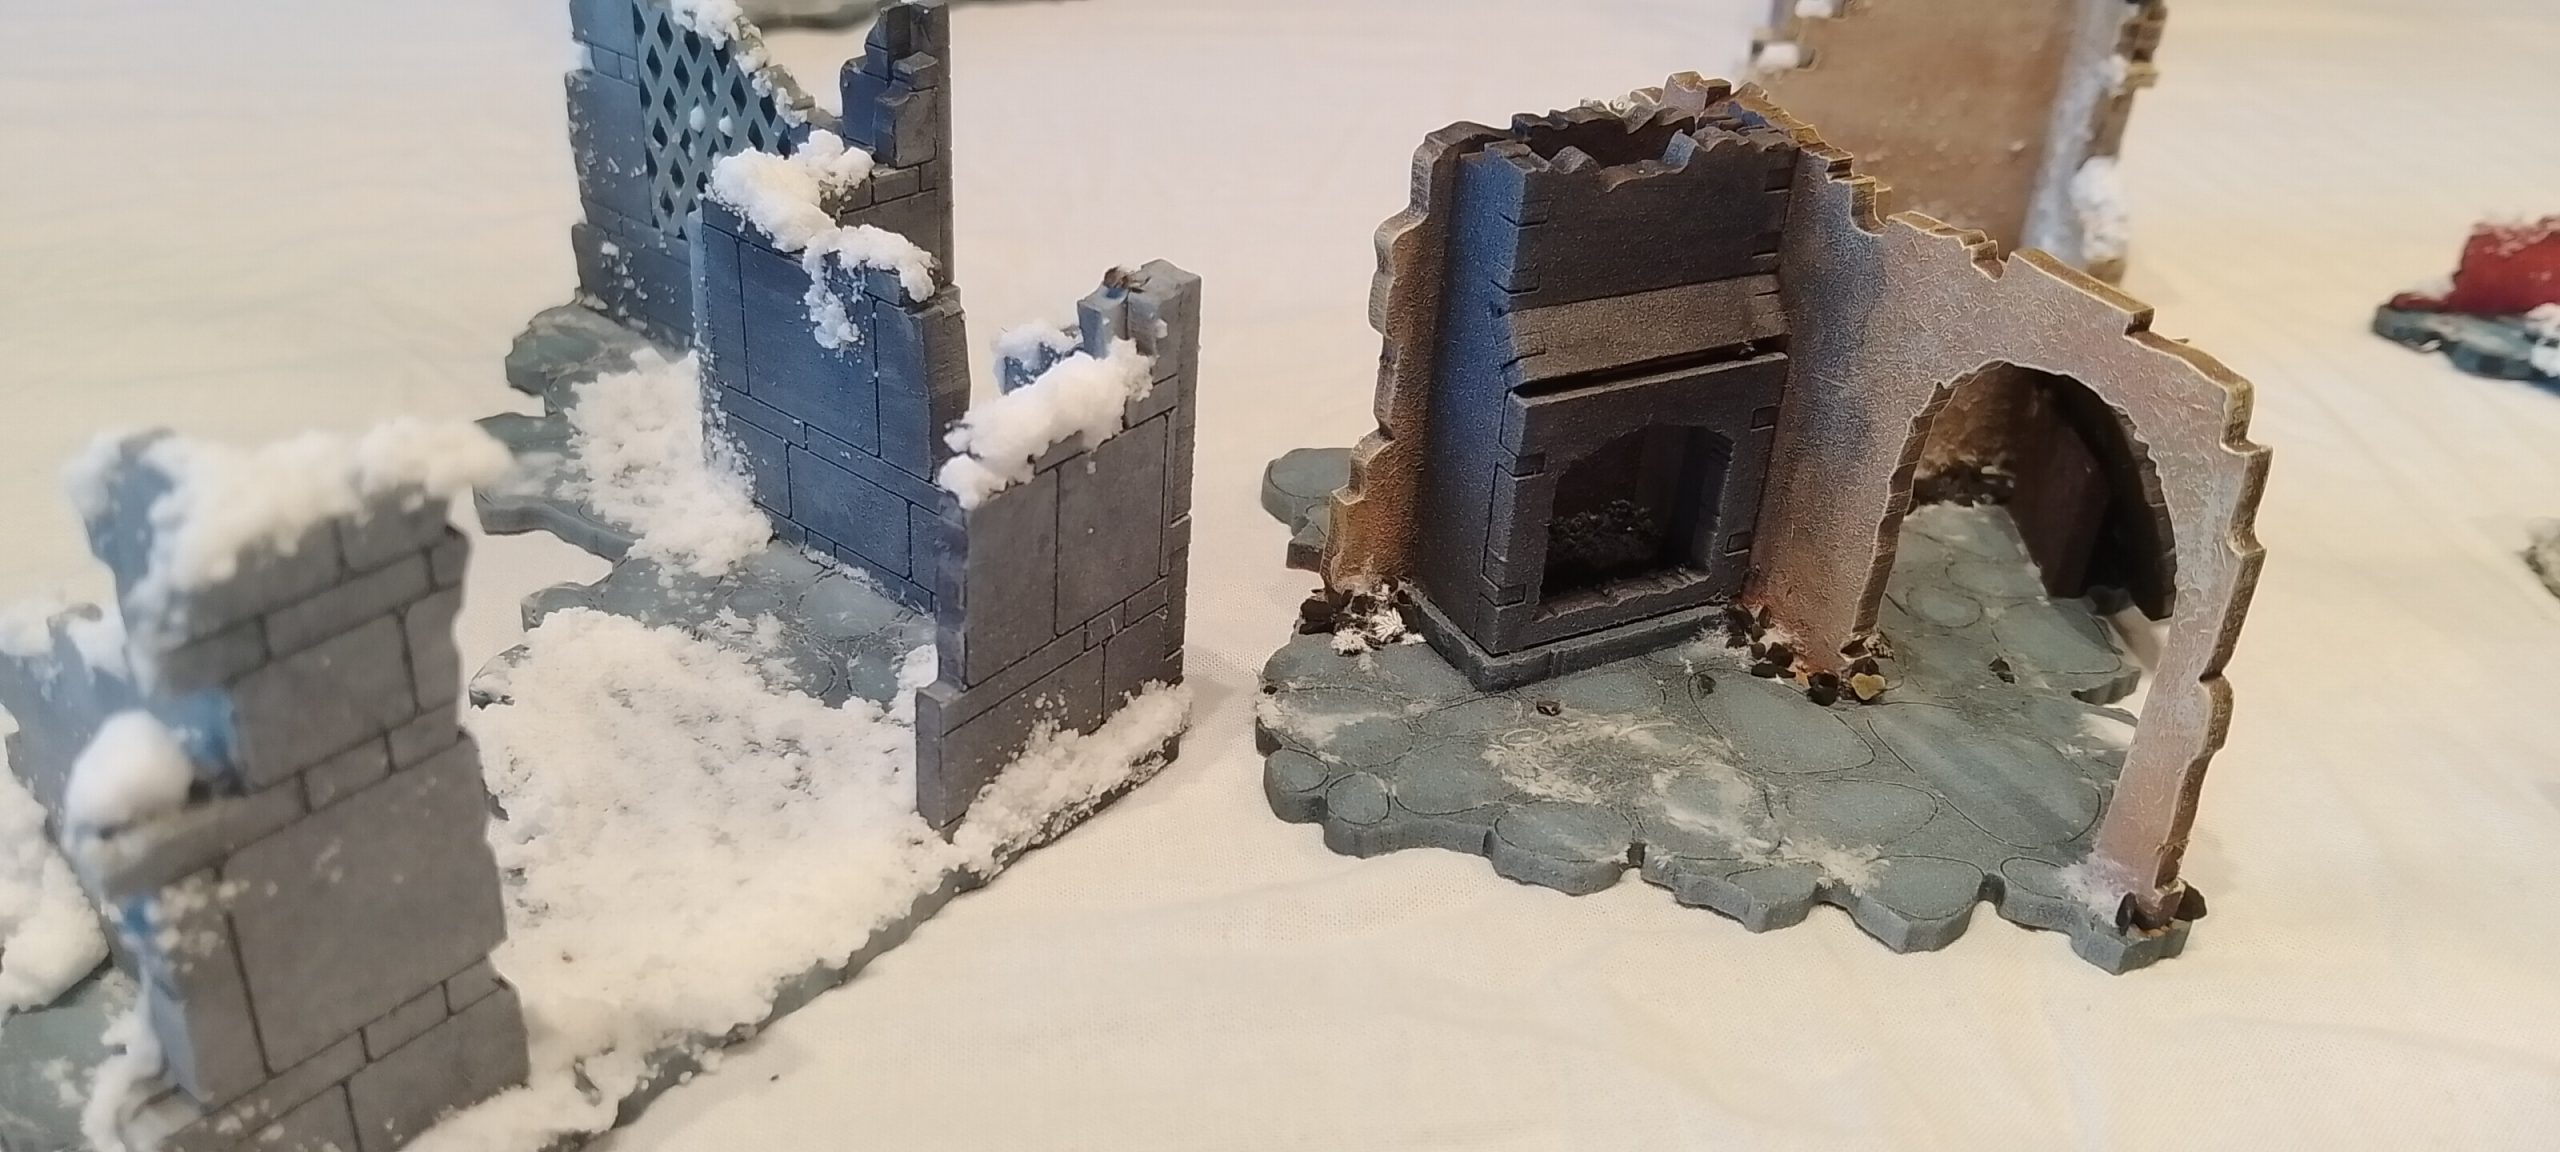
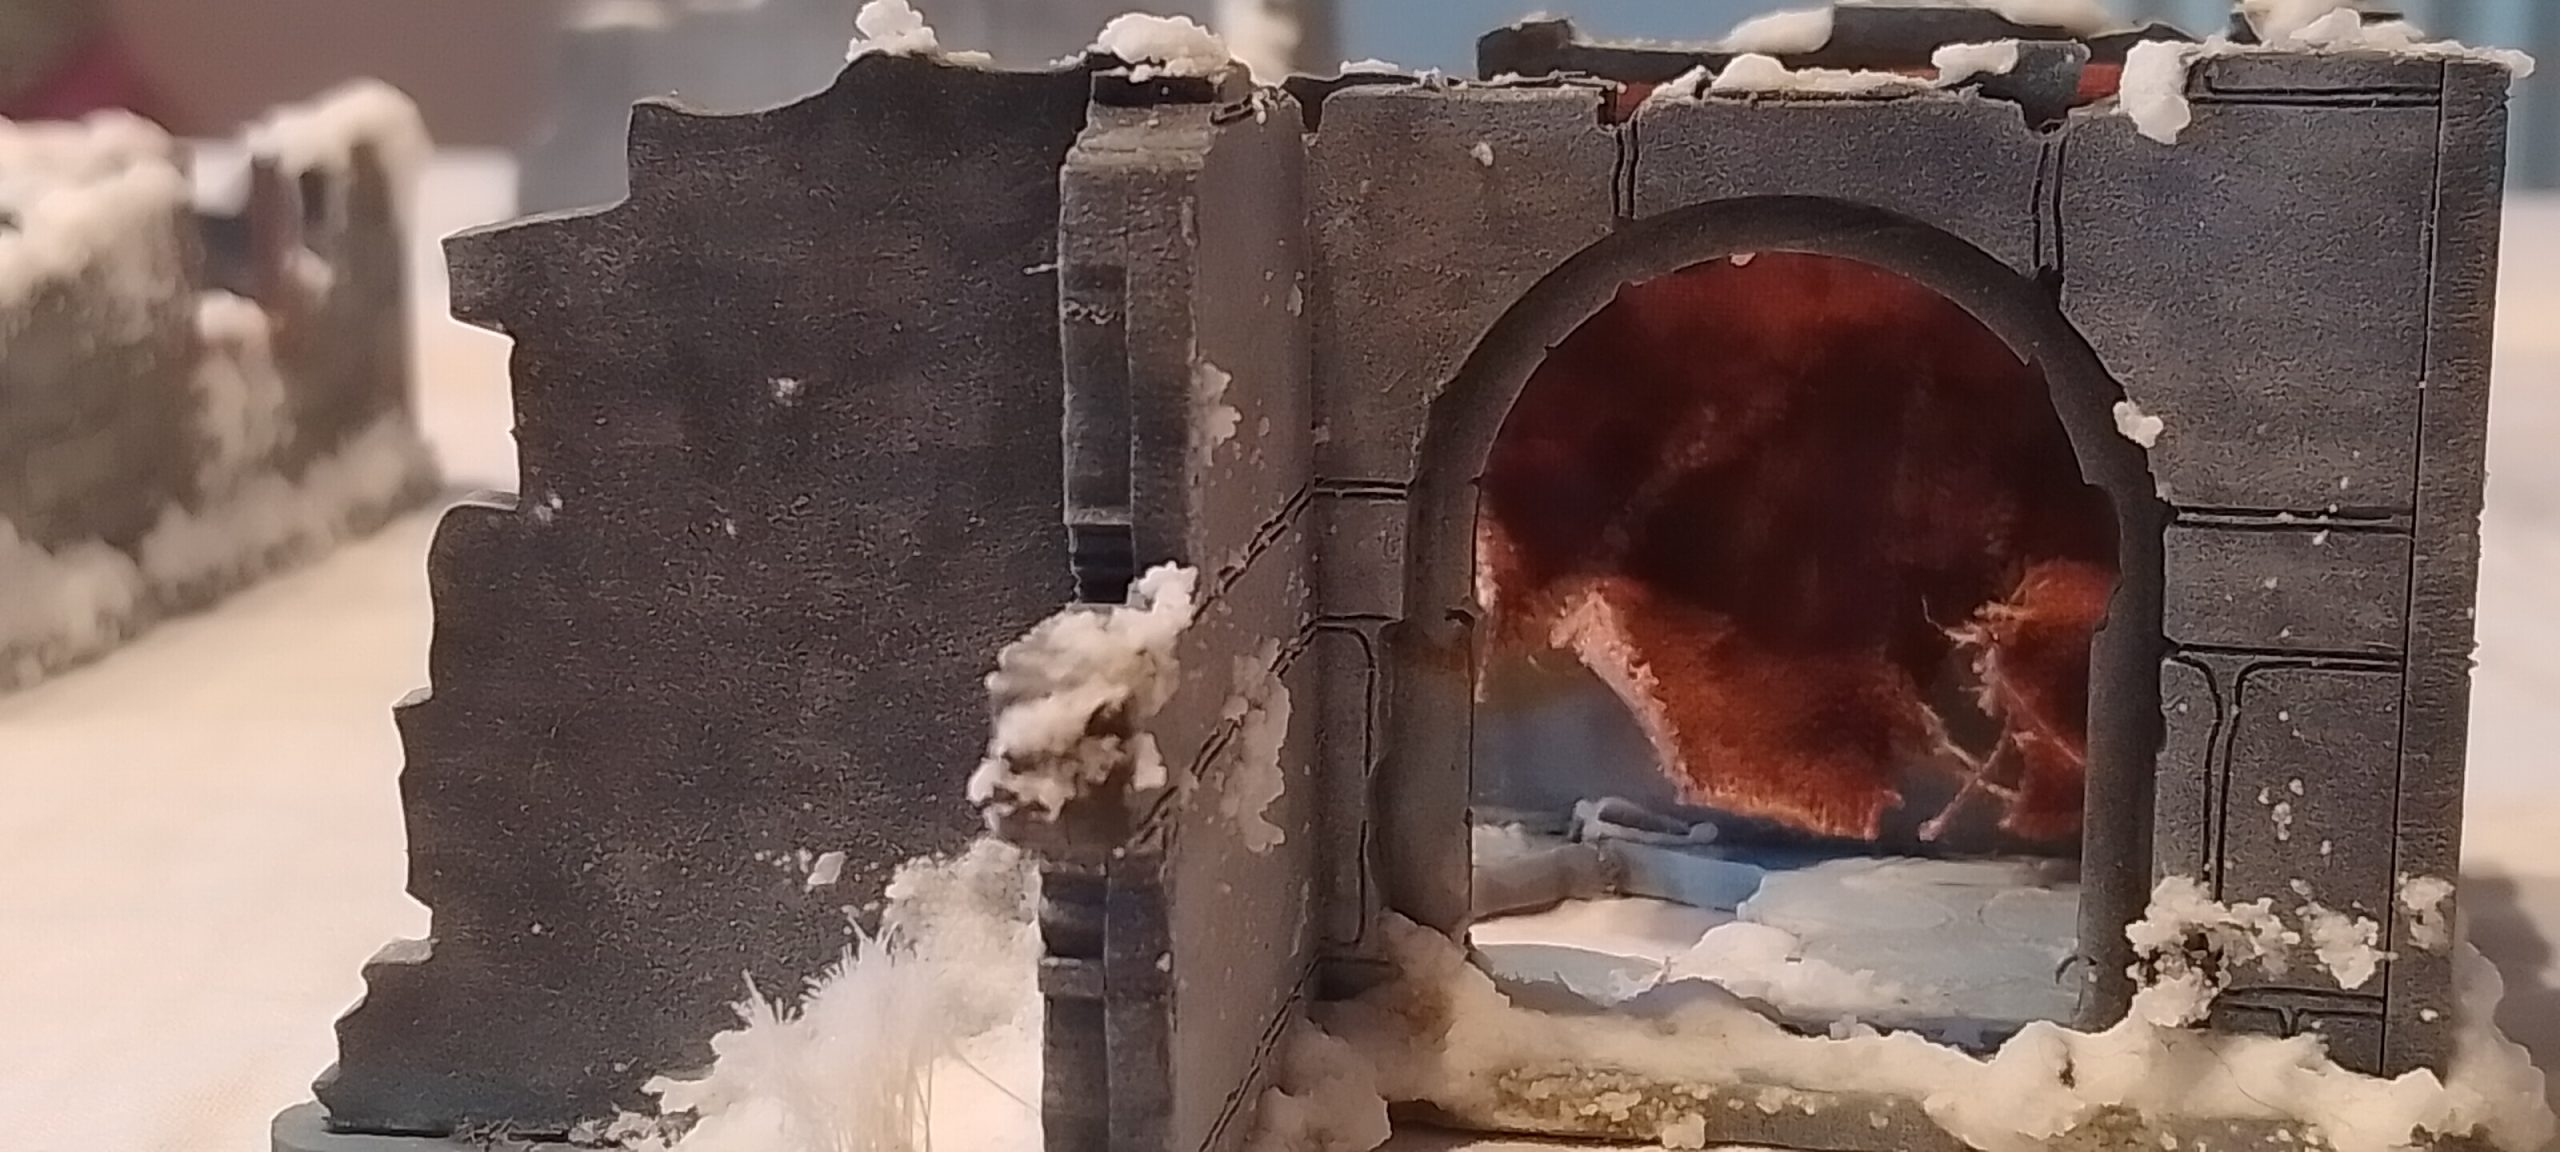
The Fireplace 22/1/2026
With the fireplace ruin, usual paintwork required. After I have added some ballast inside and used black pigment to create smoke stainmarks
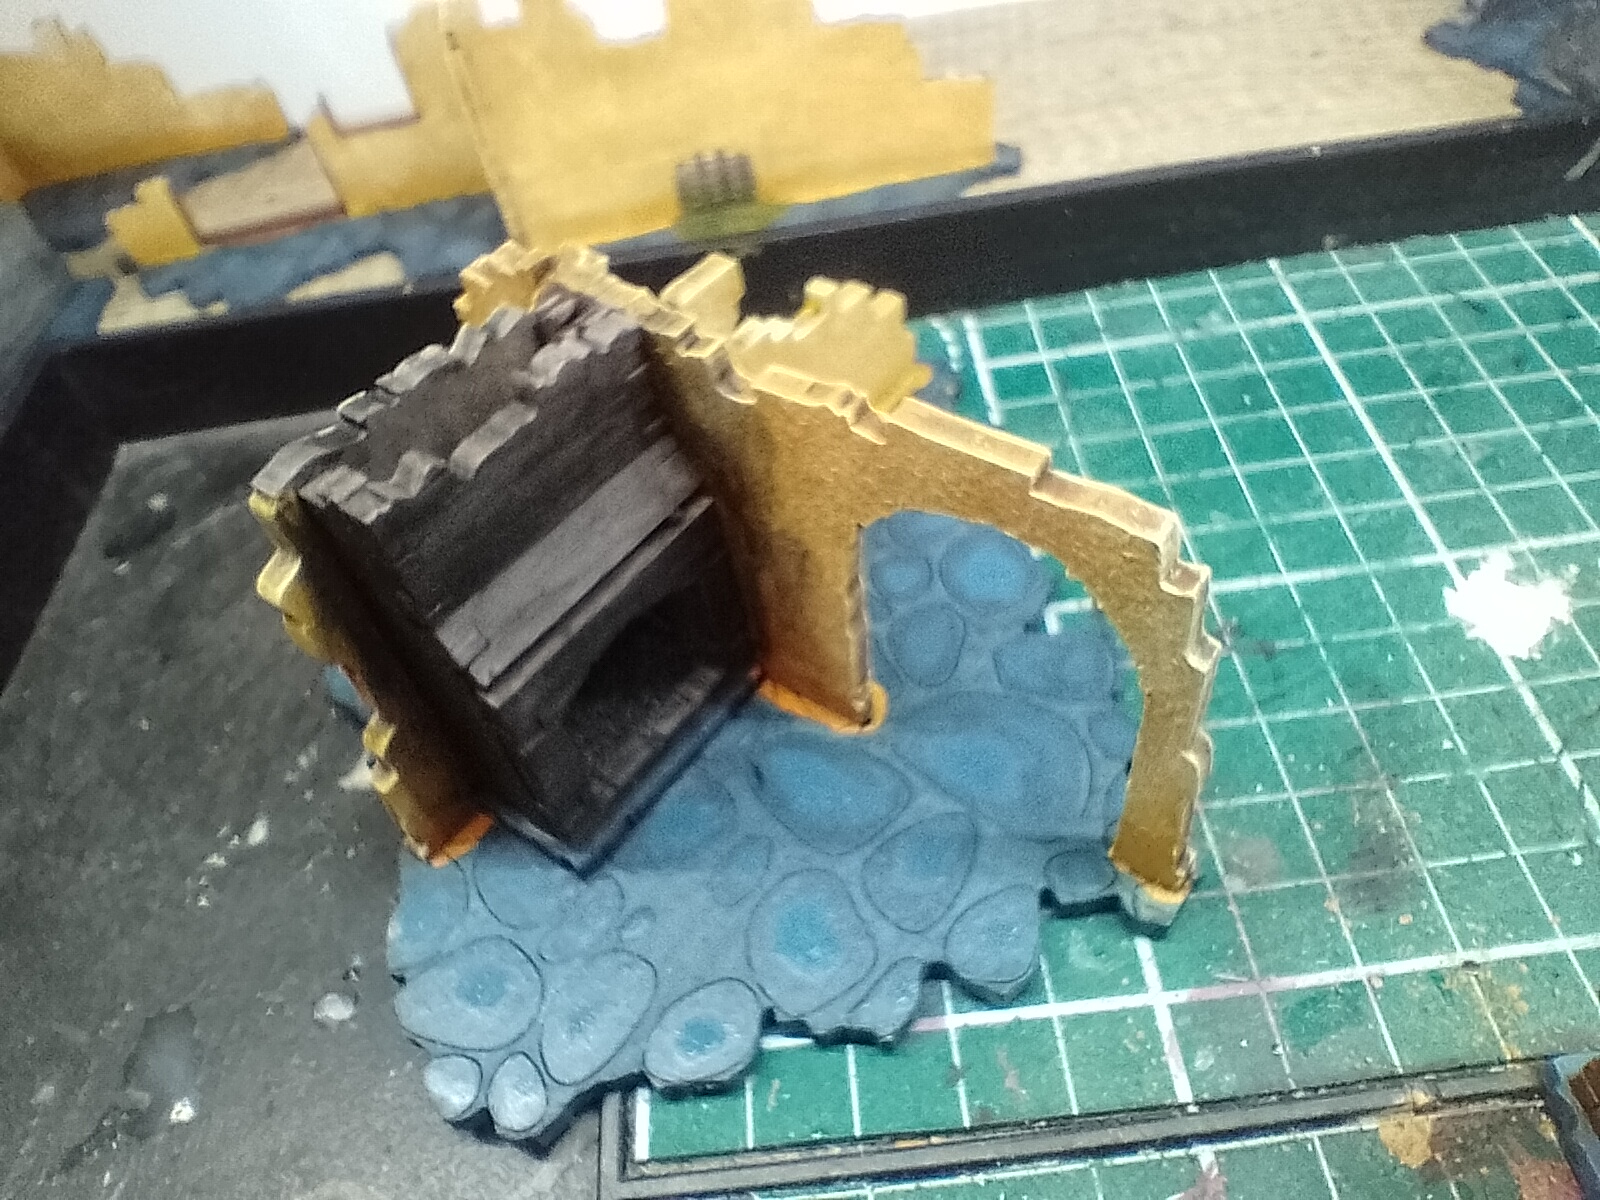
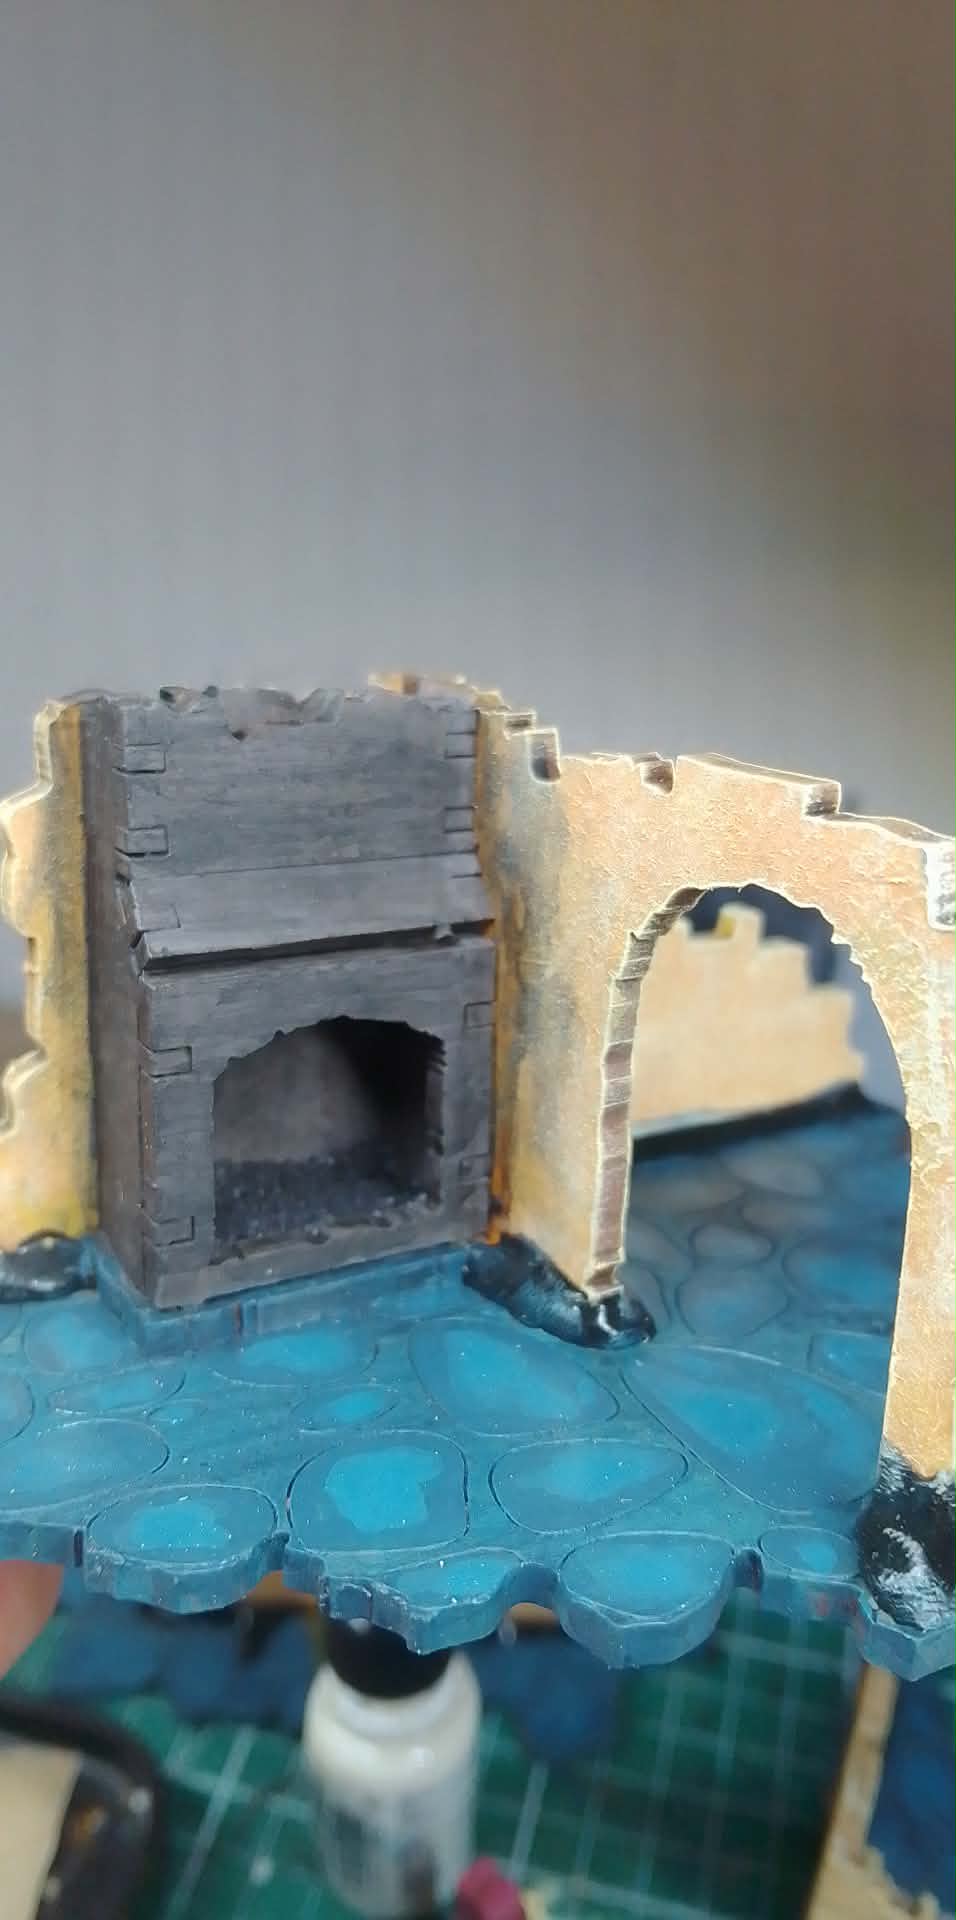
Afterwards I added snow effects, and a defensible door as well as some lichen on the other side
Haunted Gatehouse update 22/01/2026
 Disaster struck, It has without doubt delayed and taken this out of the completed timeline
So I have to unfortunately confess that the gatehouse will not be finished for Terrainfest 2025. I Could paint it by hand like the roof tiling but it would go against my idea of finishing the terrain to the best of my ability. I would rather wait for the component needed to airbrush the upper house. It has been ordered but wont arrive until next week probably.
If you ever get this issue where I was screwing the nozzle in and it snaps inside the airbrush. With extreme care use your scalpel knife to insert gently and twist out the broken half. It was simply just worn out from use.
Rather than sit idle, I have been painting away. Stippling and dry brushing areas and ideas to get the most done with it. I have also put most of my focus on the ruins and will for the purpose of this project put that forward as complete (very soon pictures will come.)
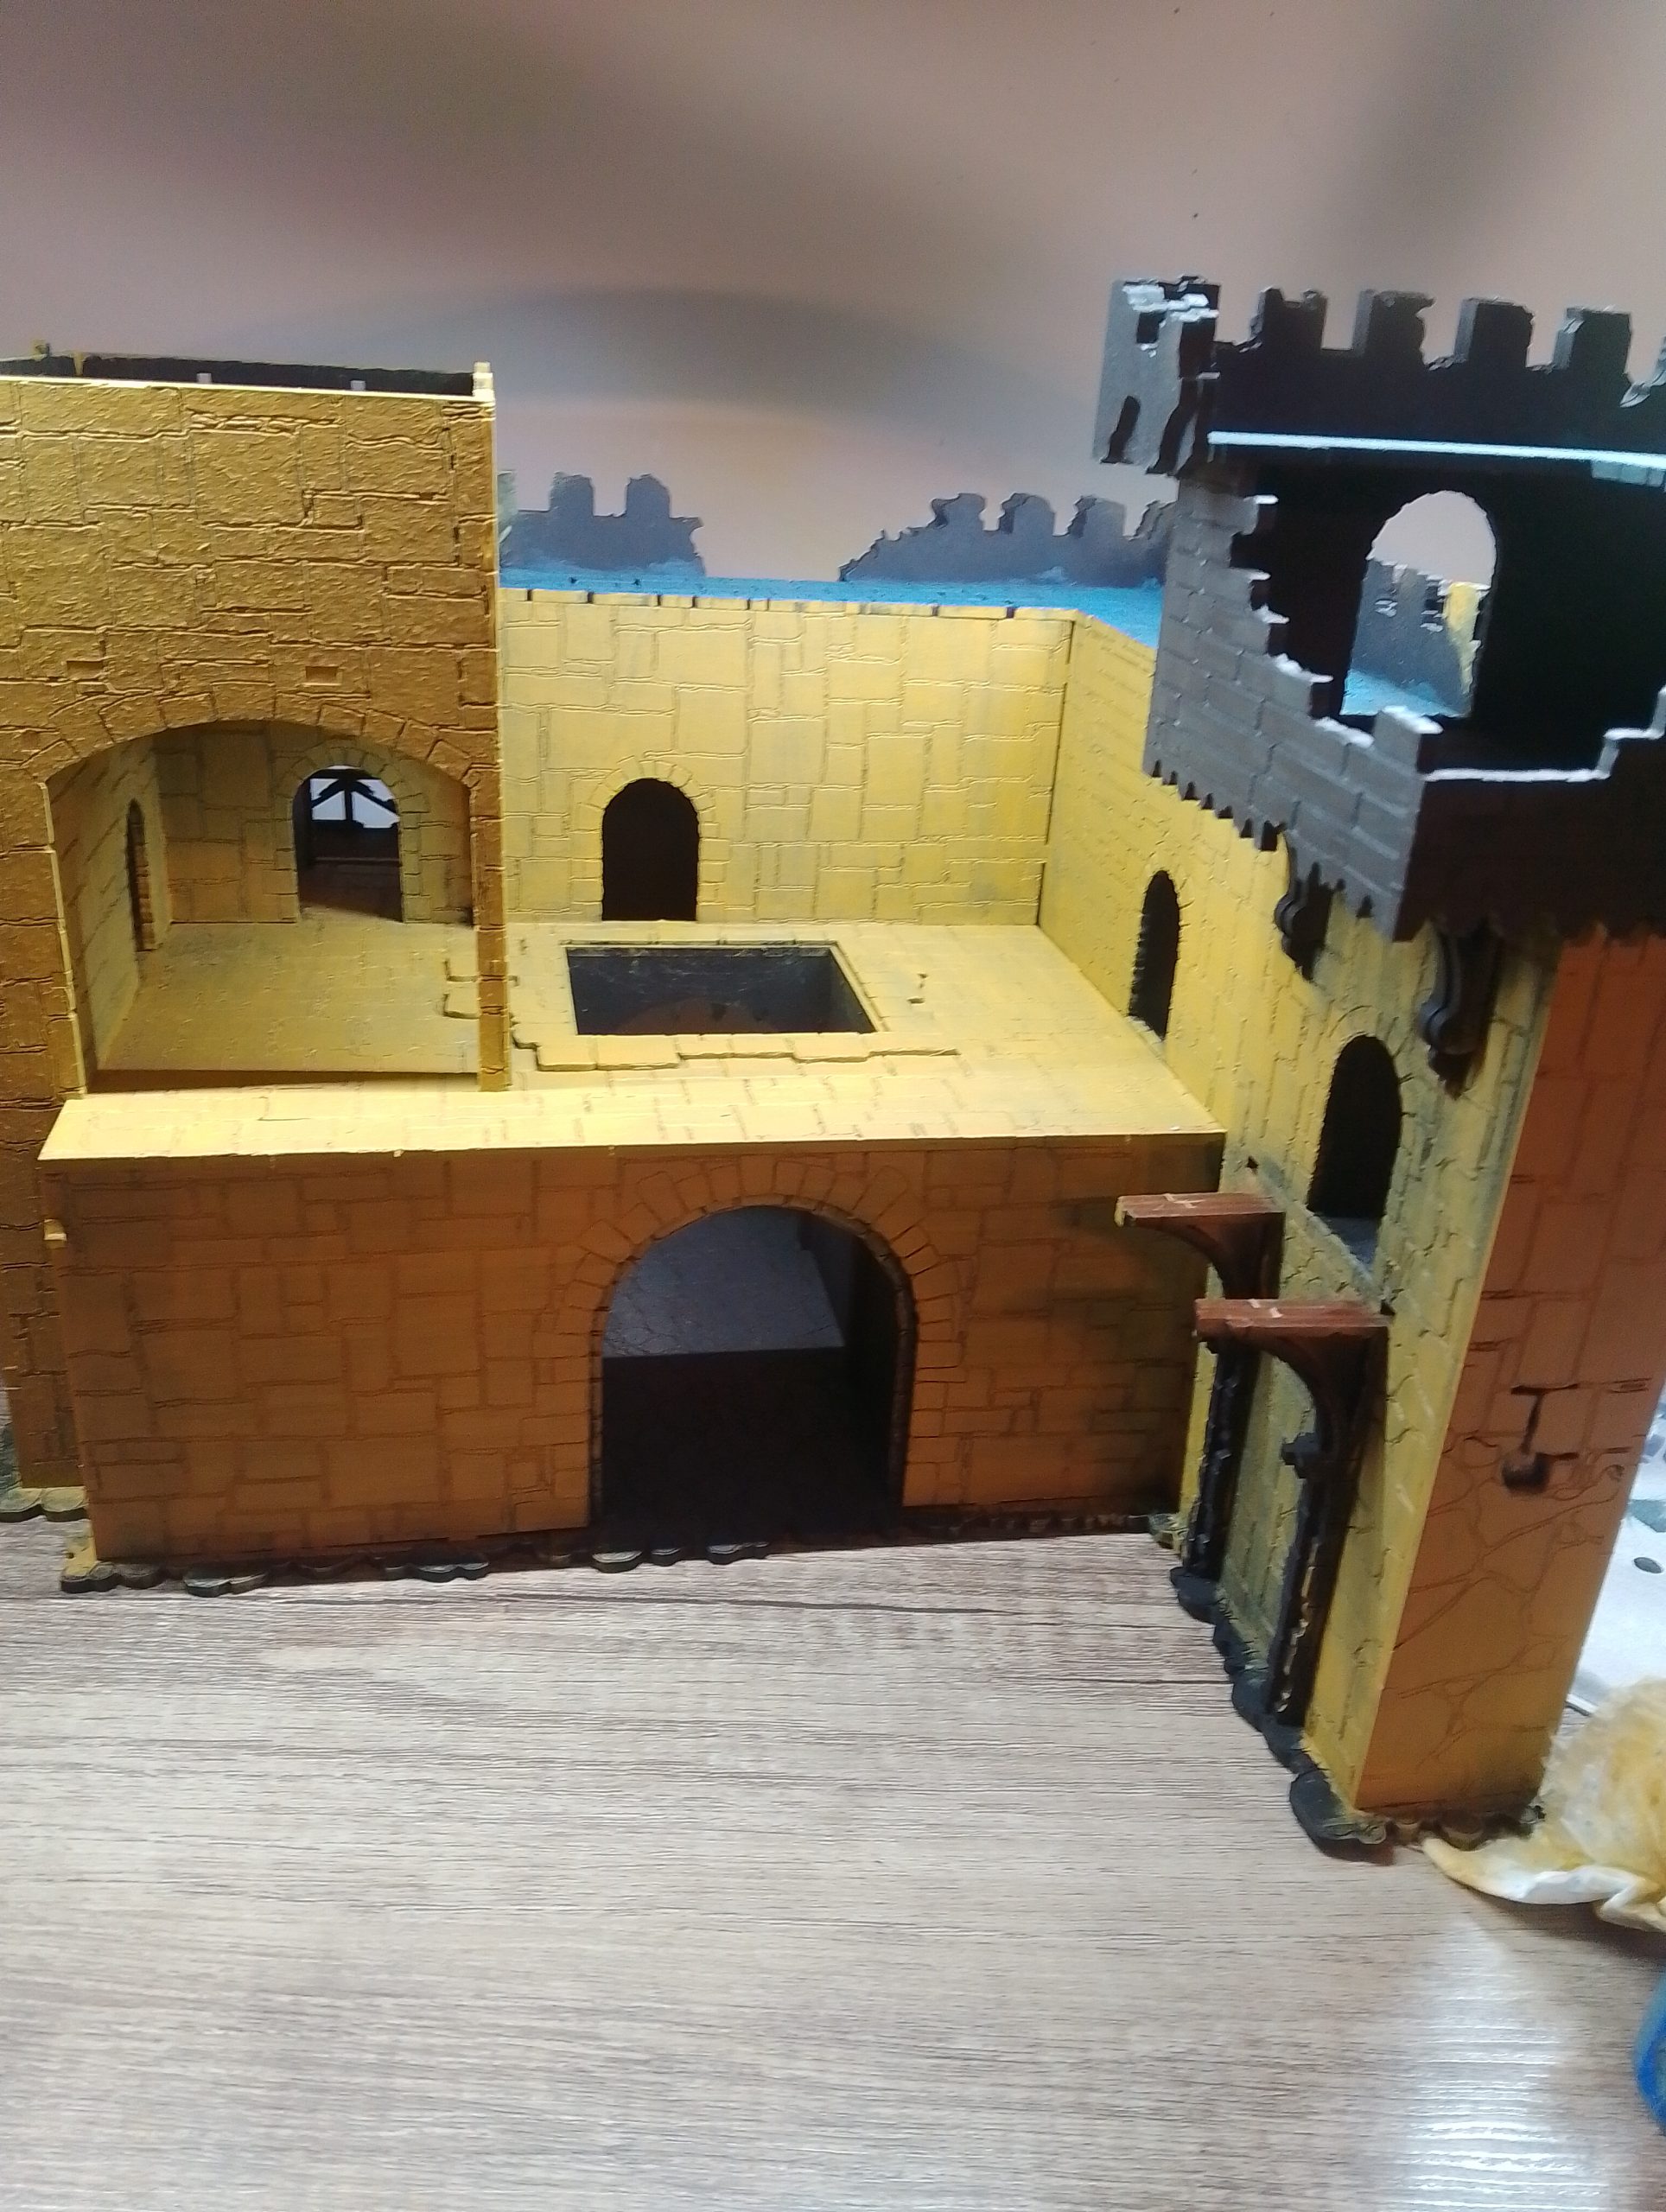
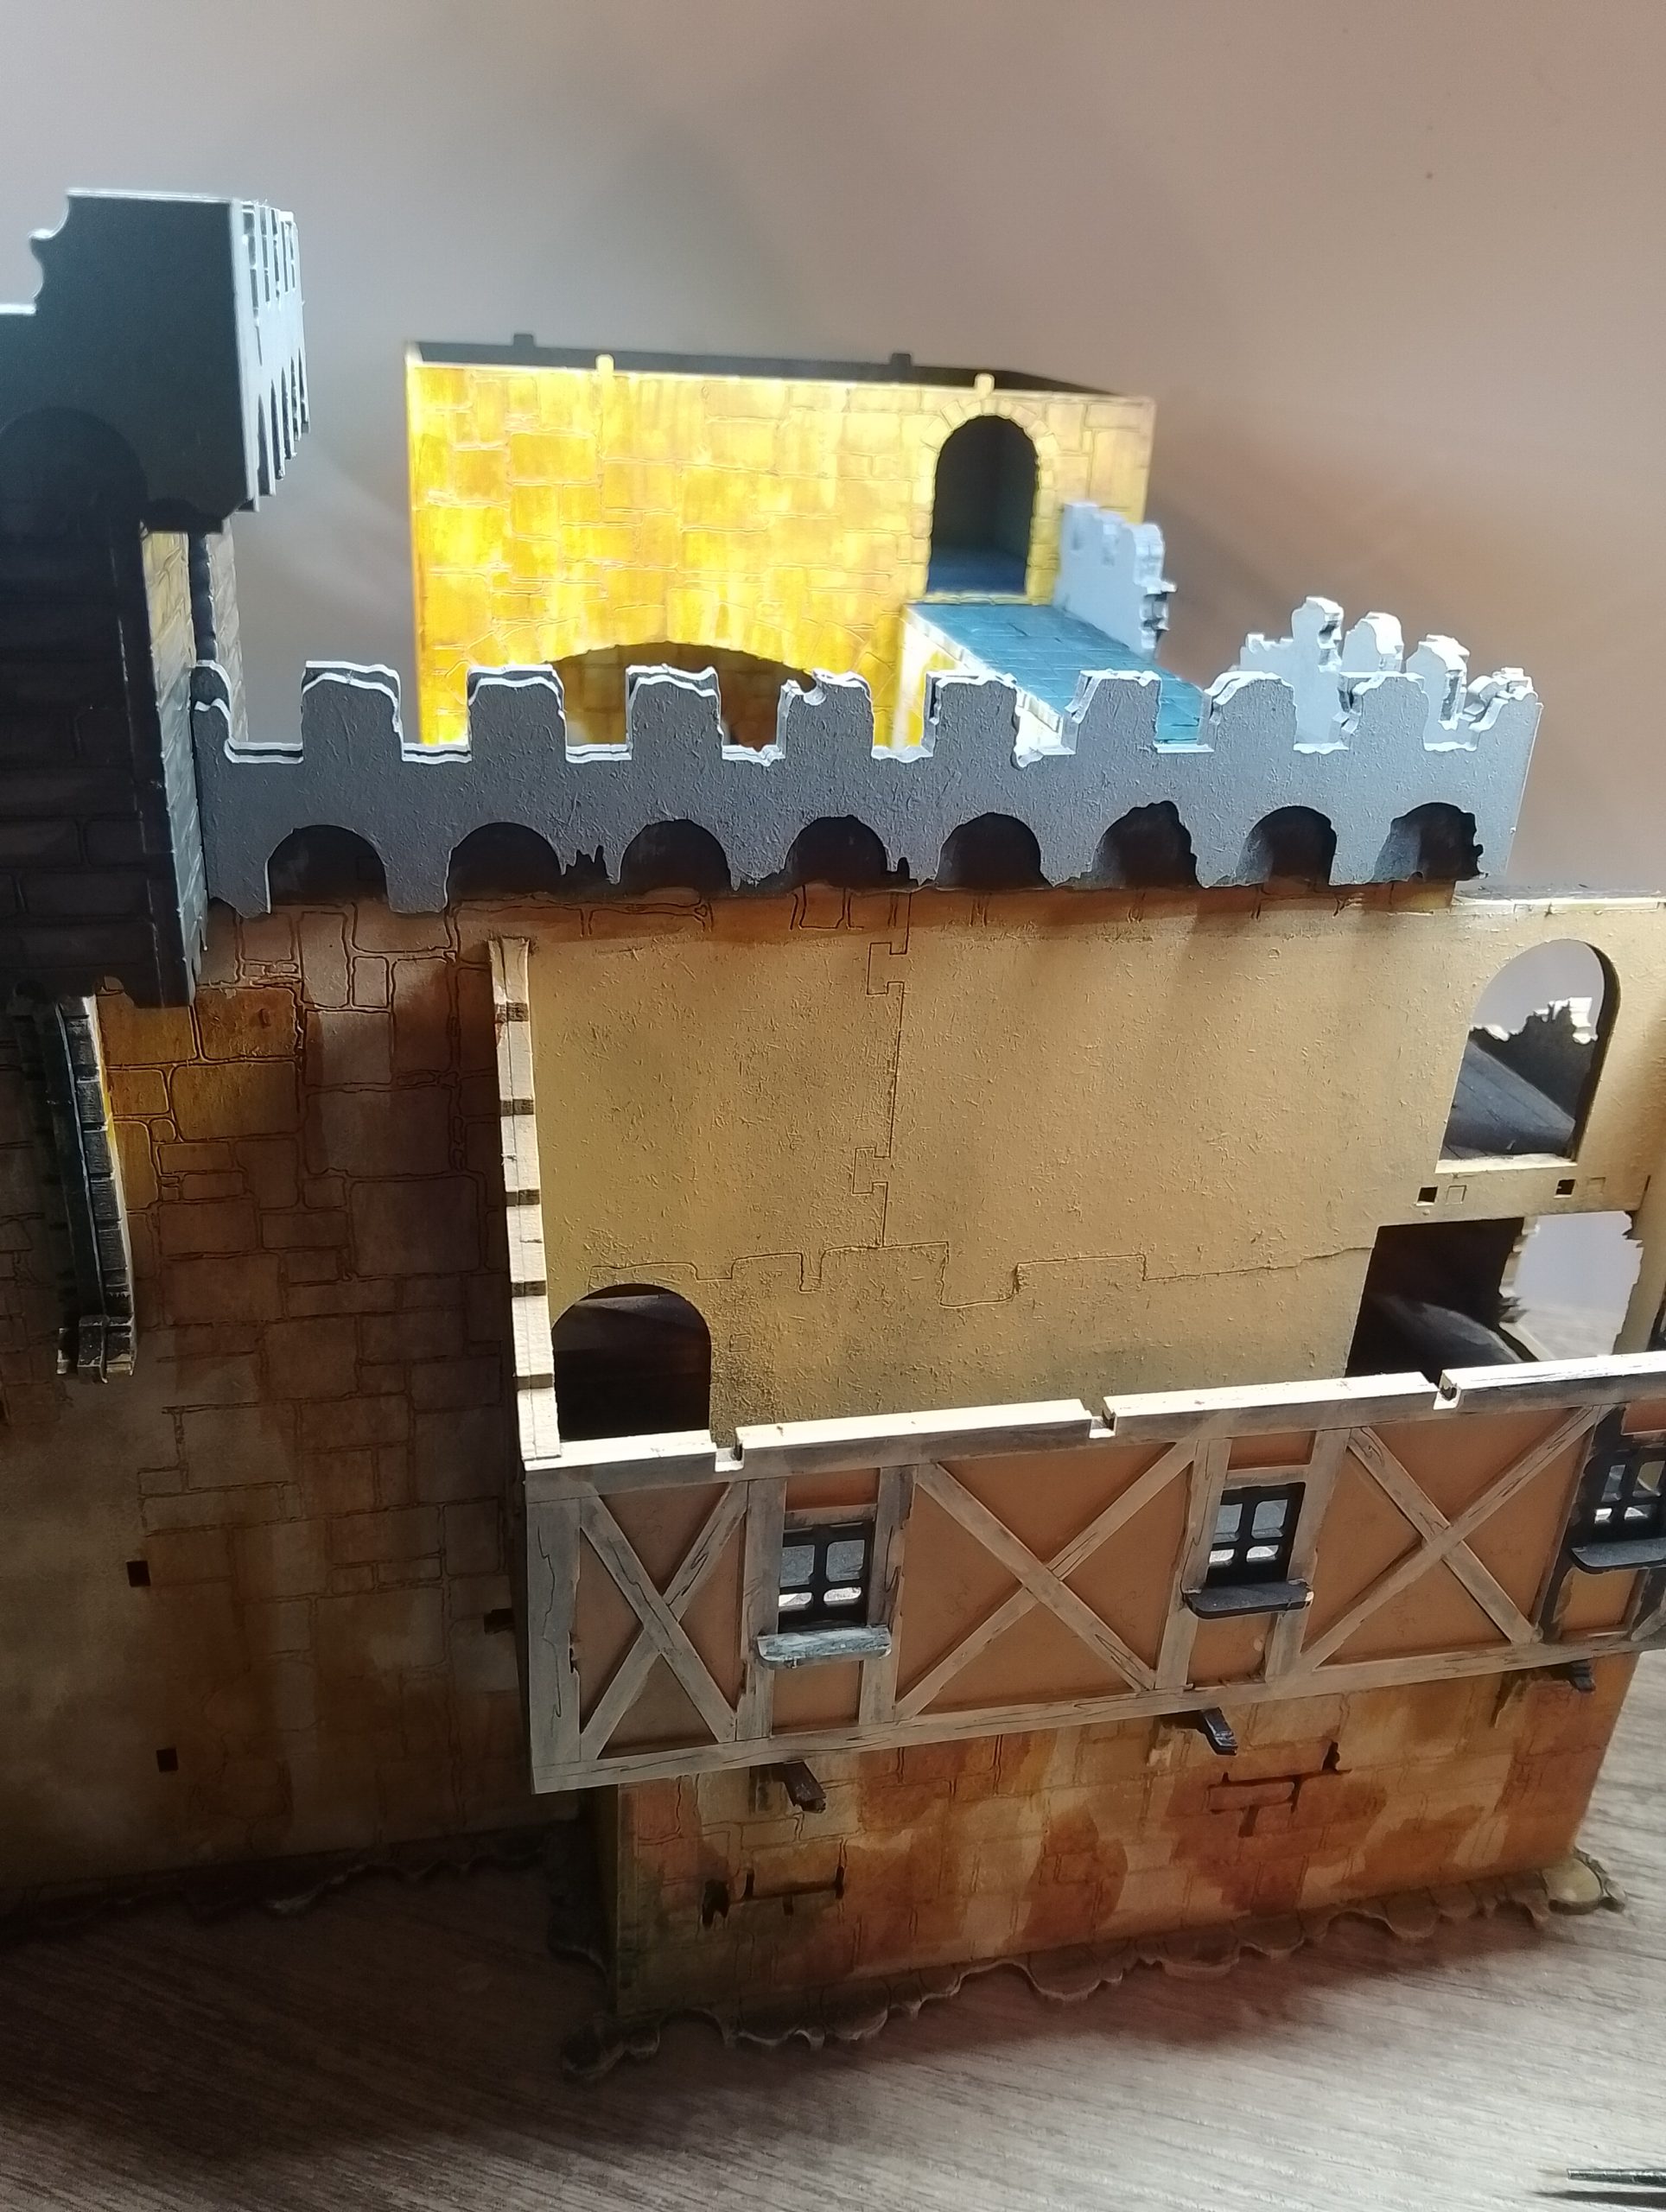
The first images show the gatehouse like a Lego brick in base colours. I then went around and drybrushed, contrasted with Nazdreg yellow in random spots and then after came back with wet blending stippling.
I swear the wife was getting worried all the dum dum dum stipple sounds I was making from so much stippling but the end result was a lovely sandy stone.
The idea is that I want to make the gatehouse look like it was originally a hot climate, and then make it frozen afterwards (from the magic).
Ive used dark blue for the interior walls and a brown grey for the bottom stonework also.
Ive also used a gloss varnish (more pics will be later) on all the blue tiling similar to the ruins. This is then highlighted to make it look newer and less damaged.
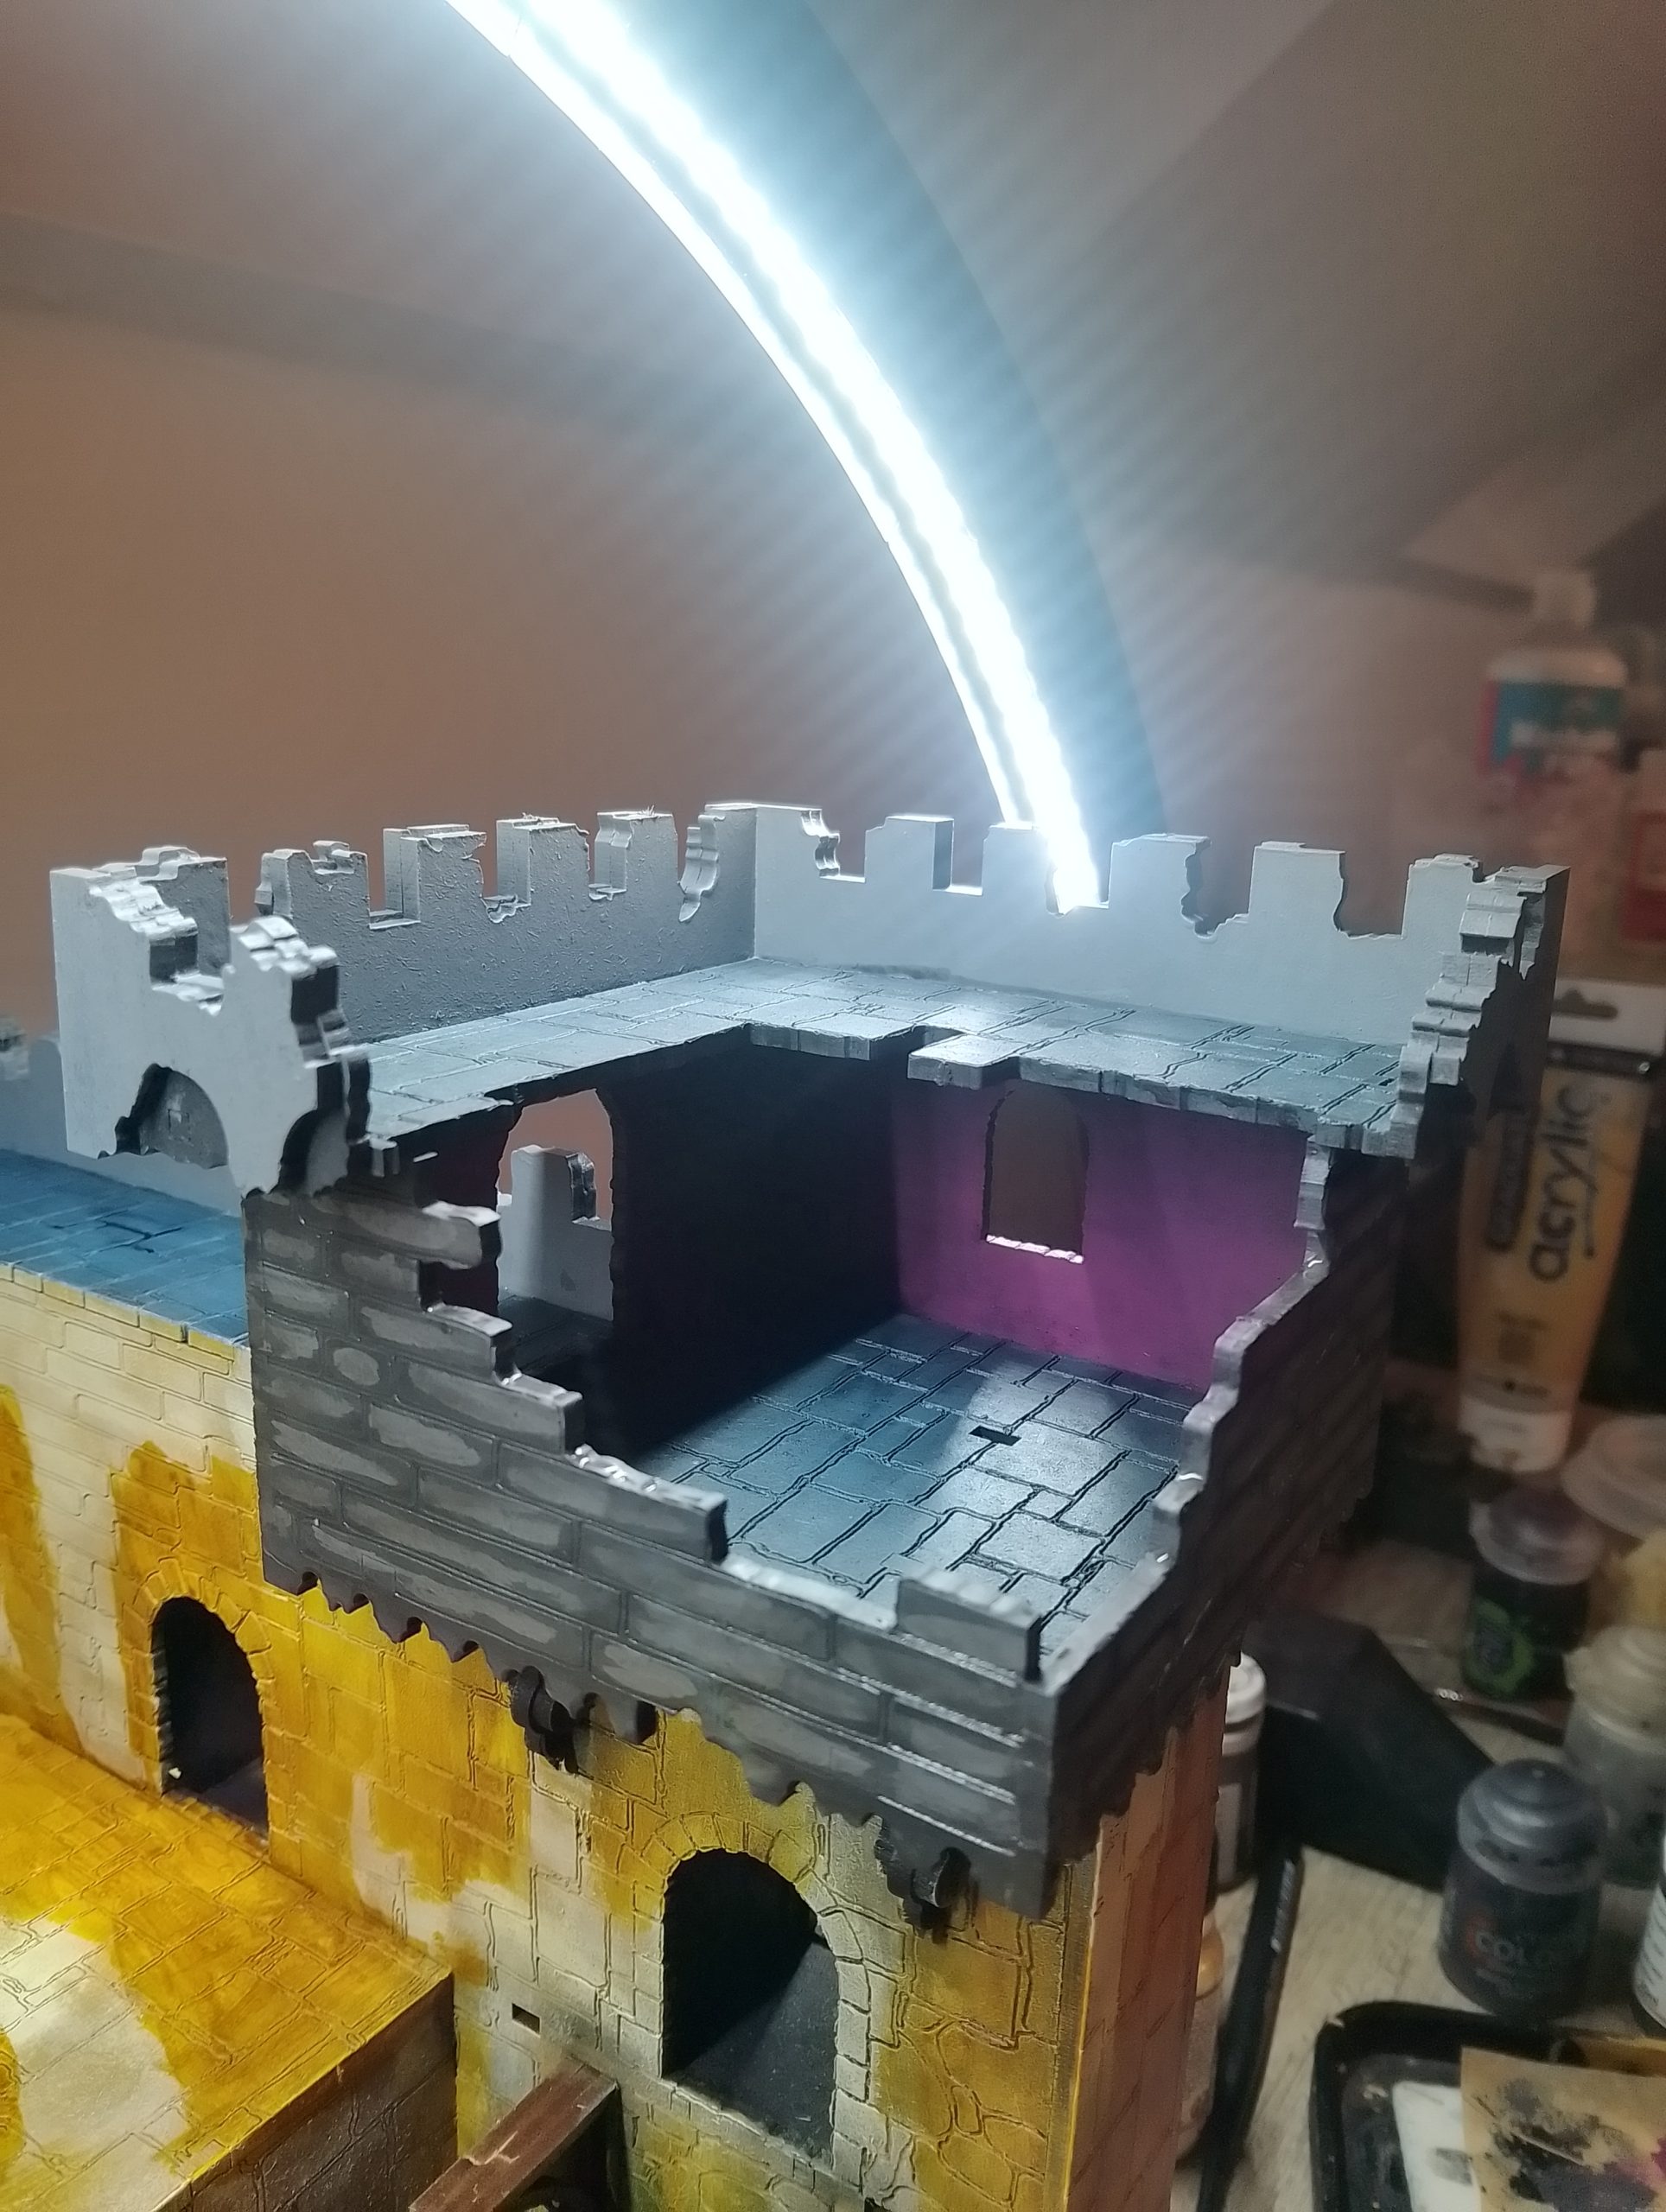
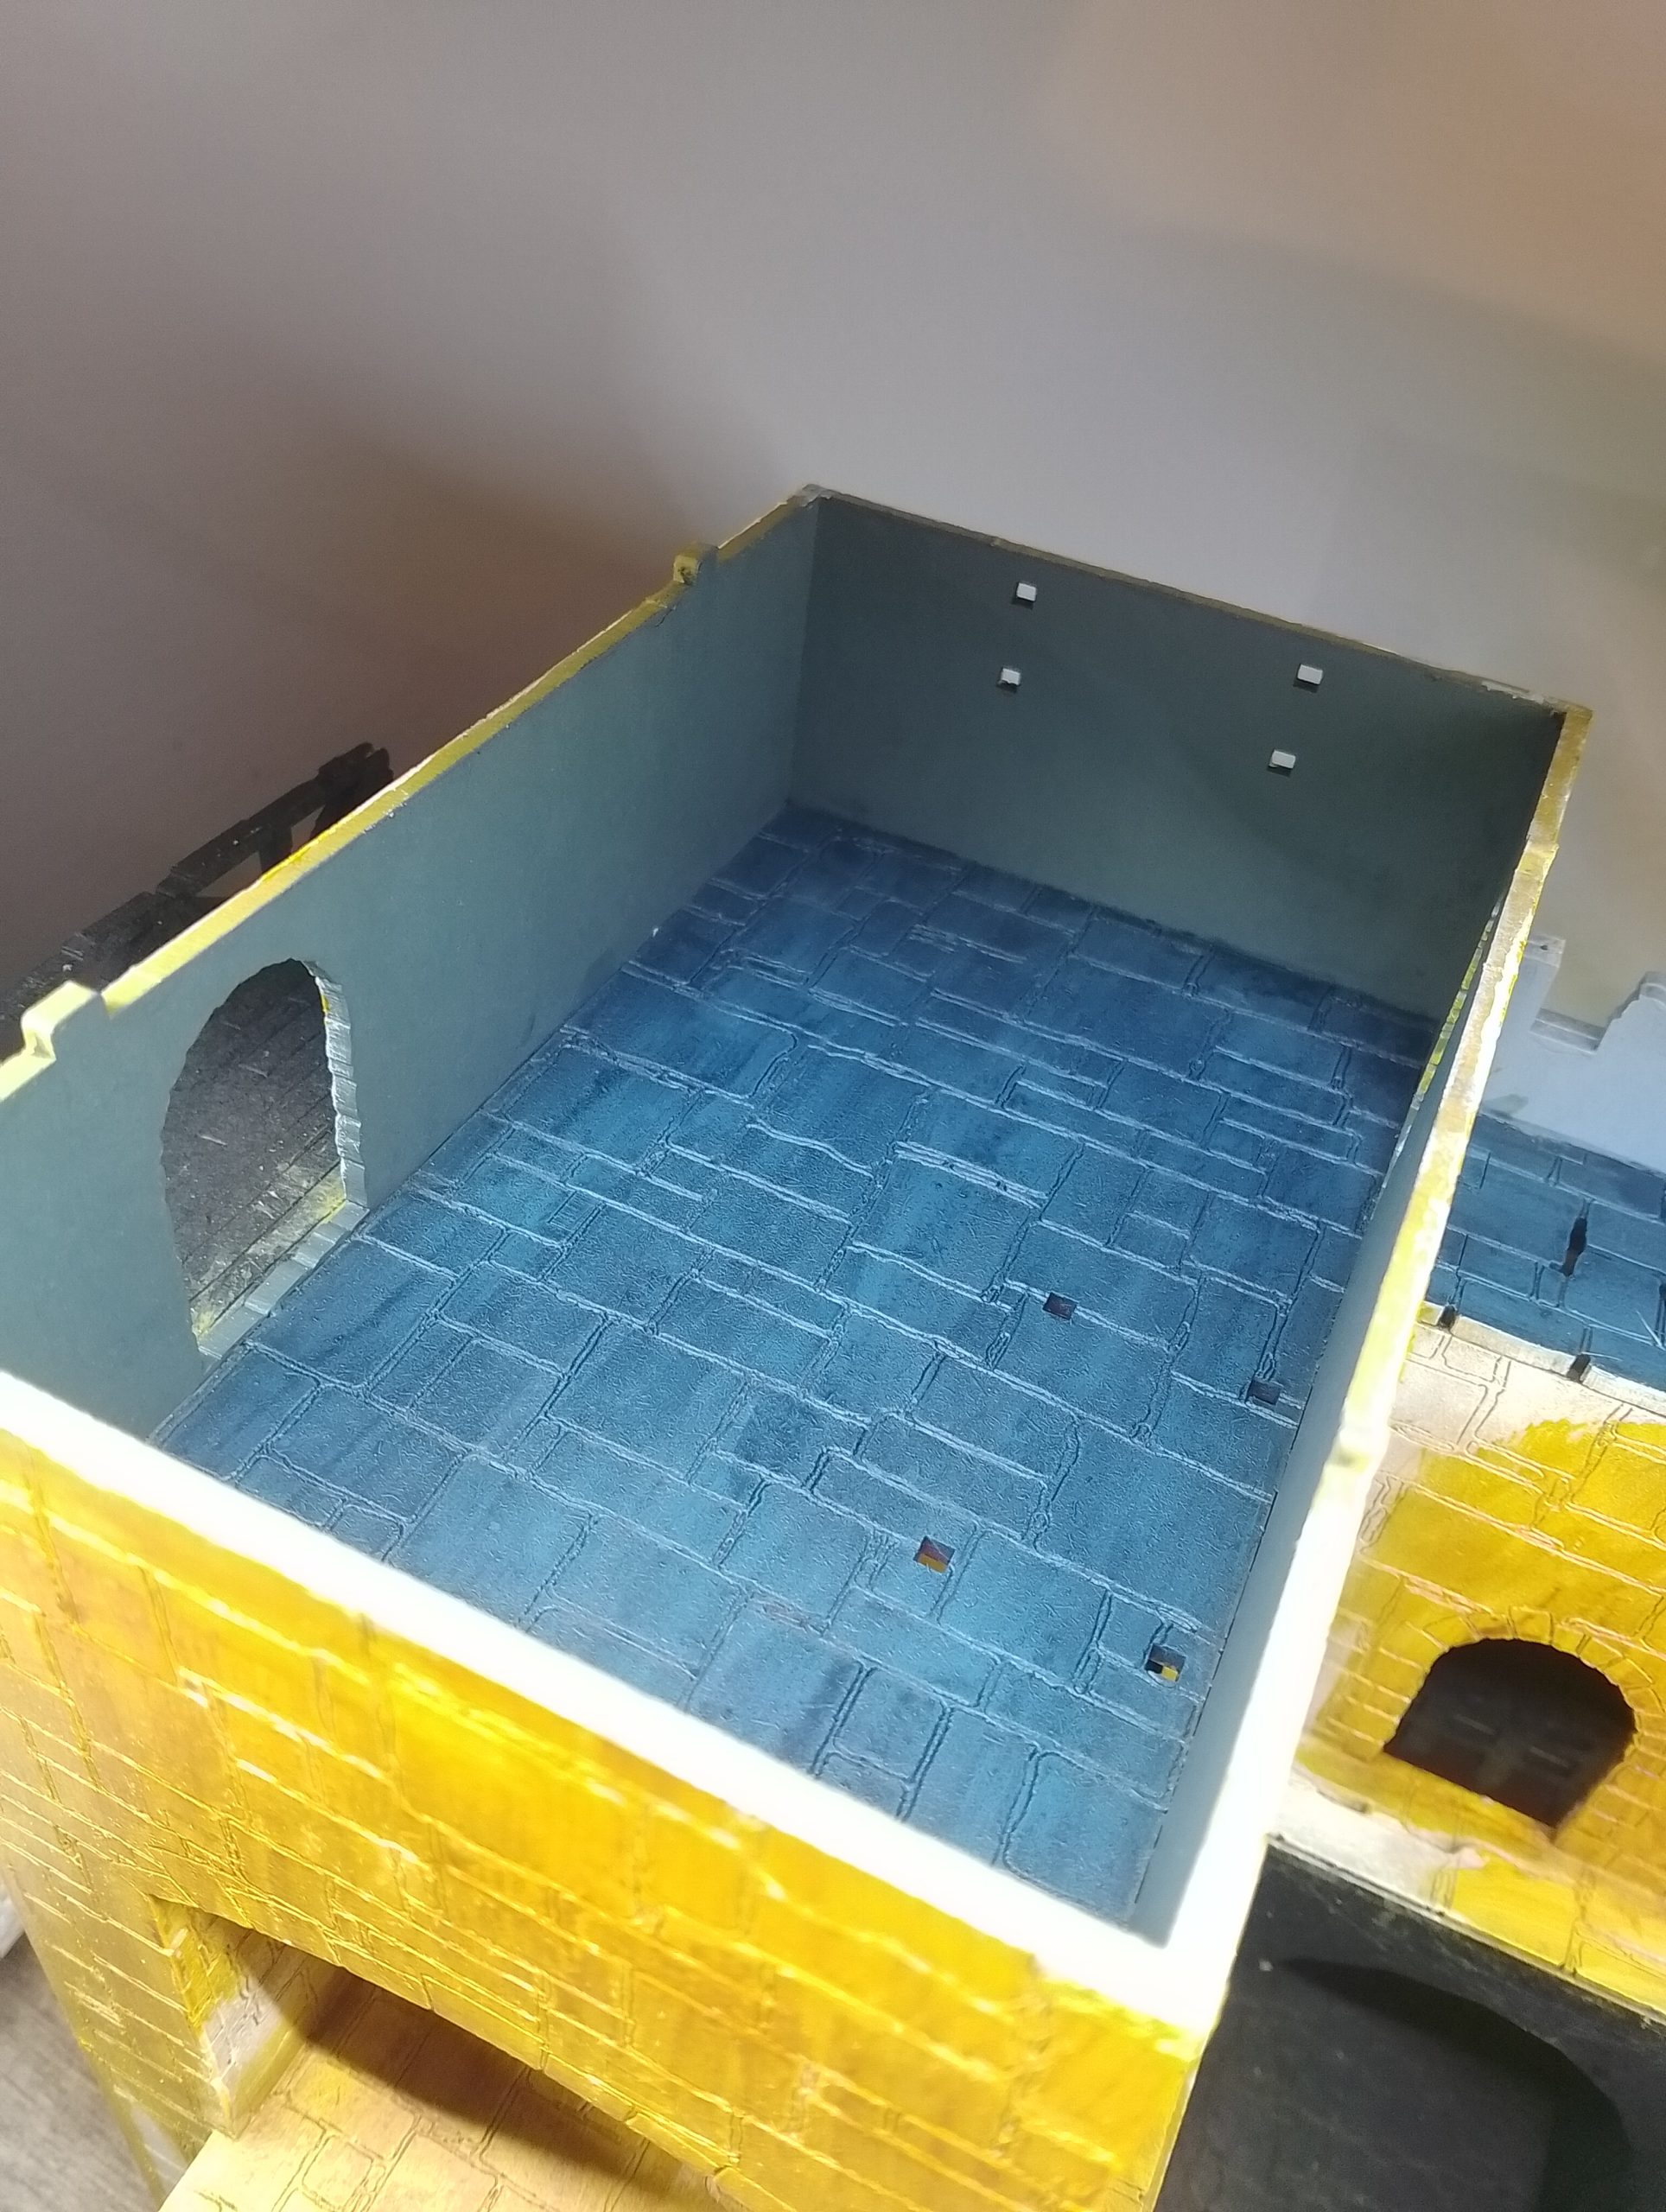
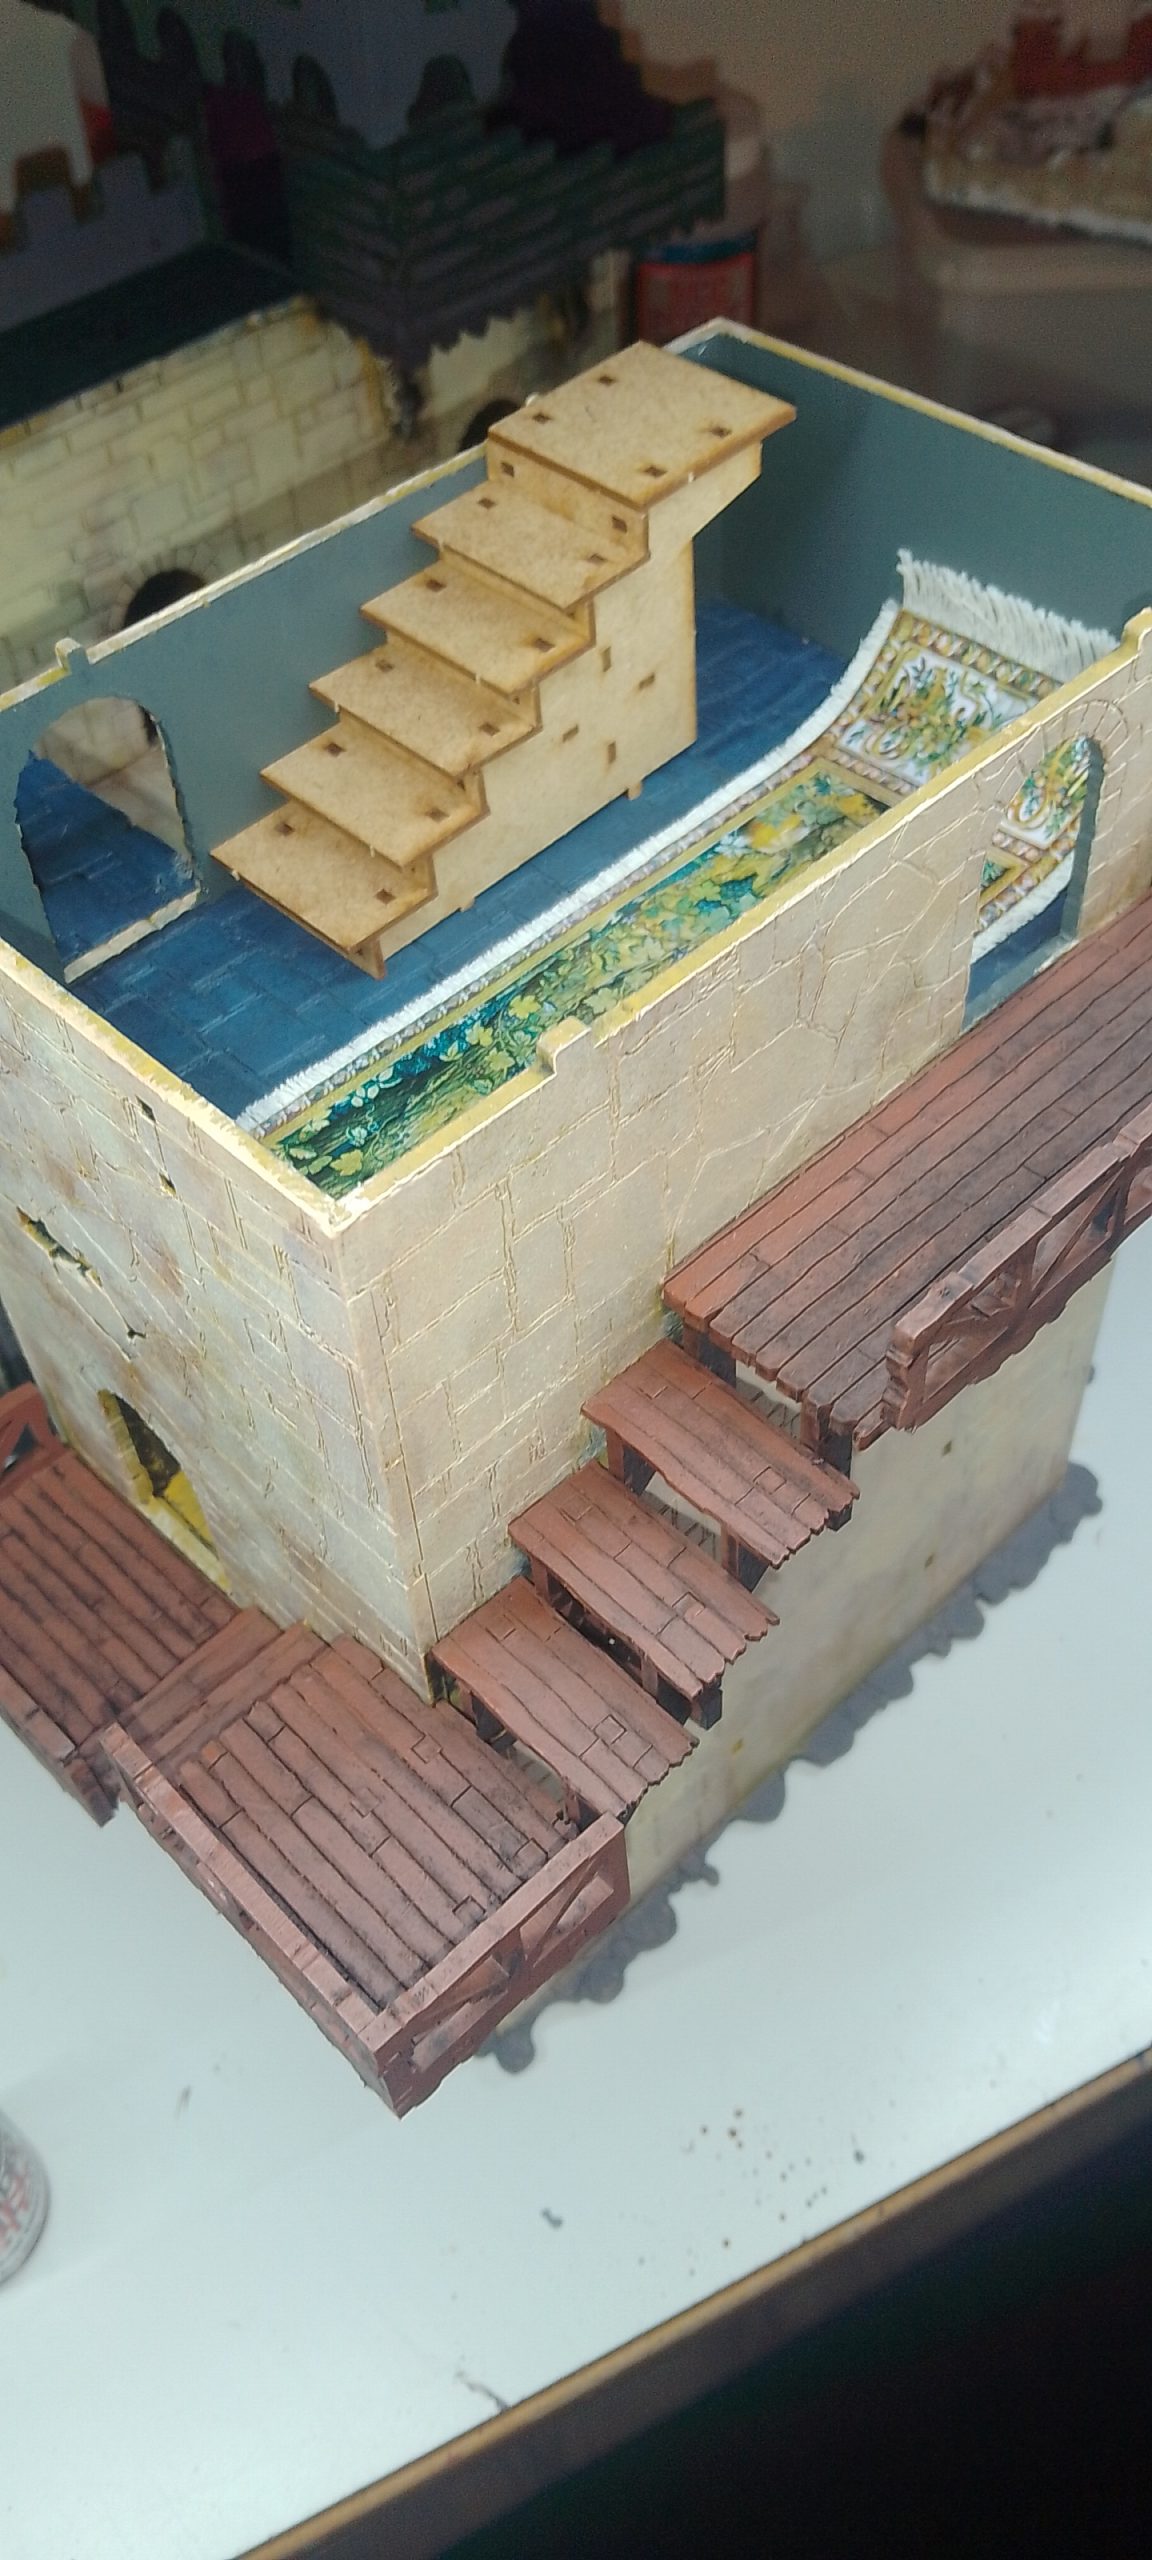 some carpet I intend to put inside, a spear rack at the back is on the cards also.
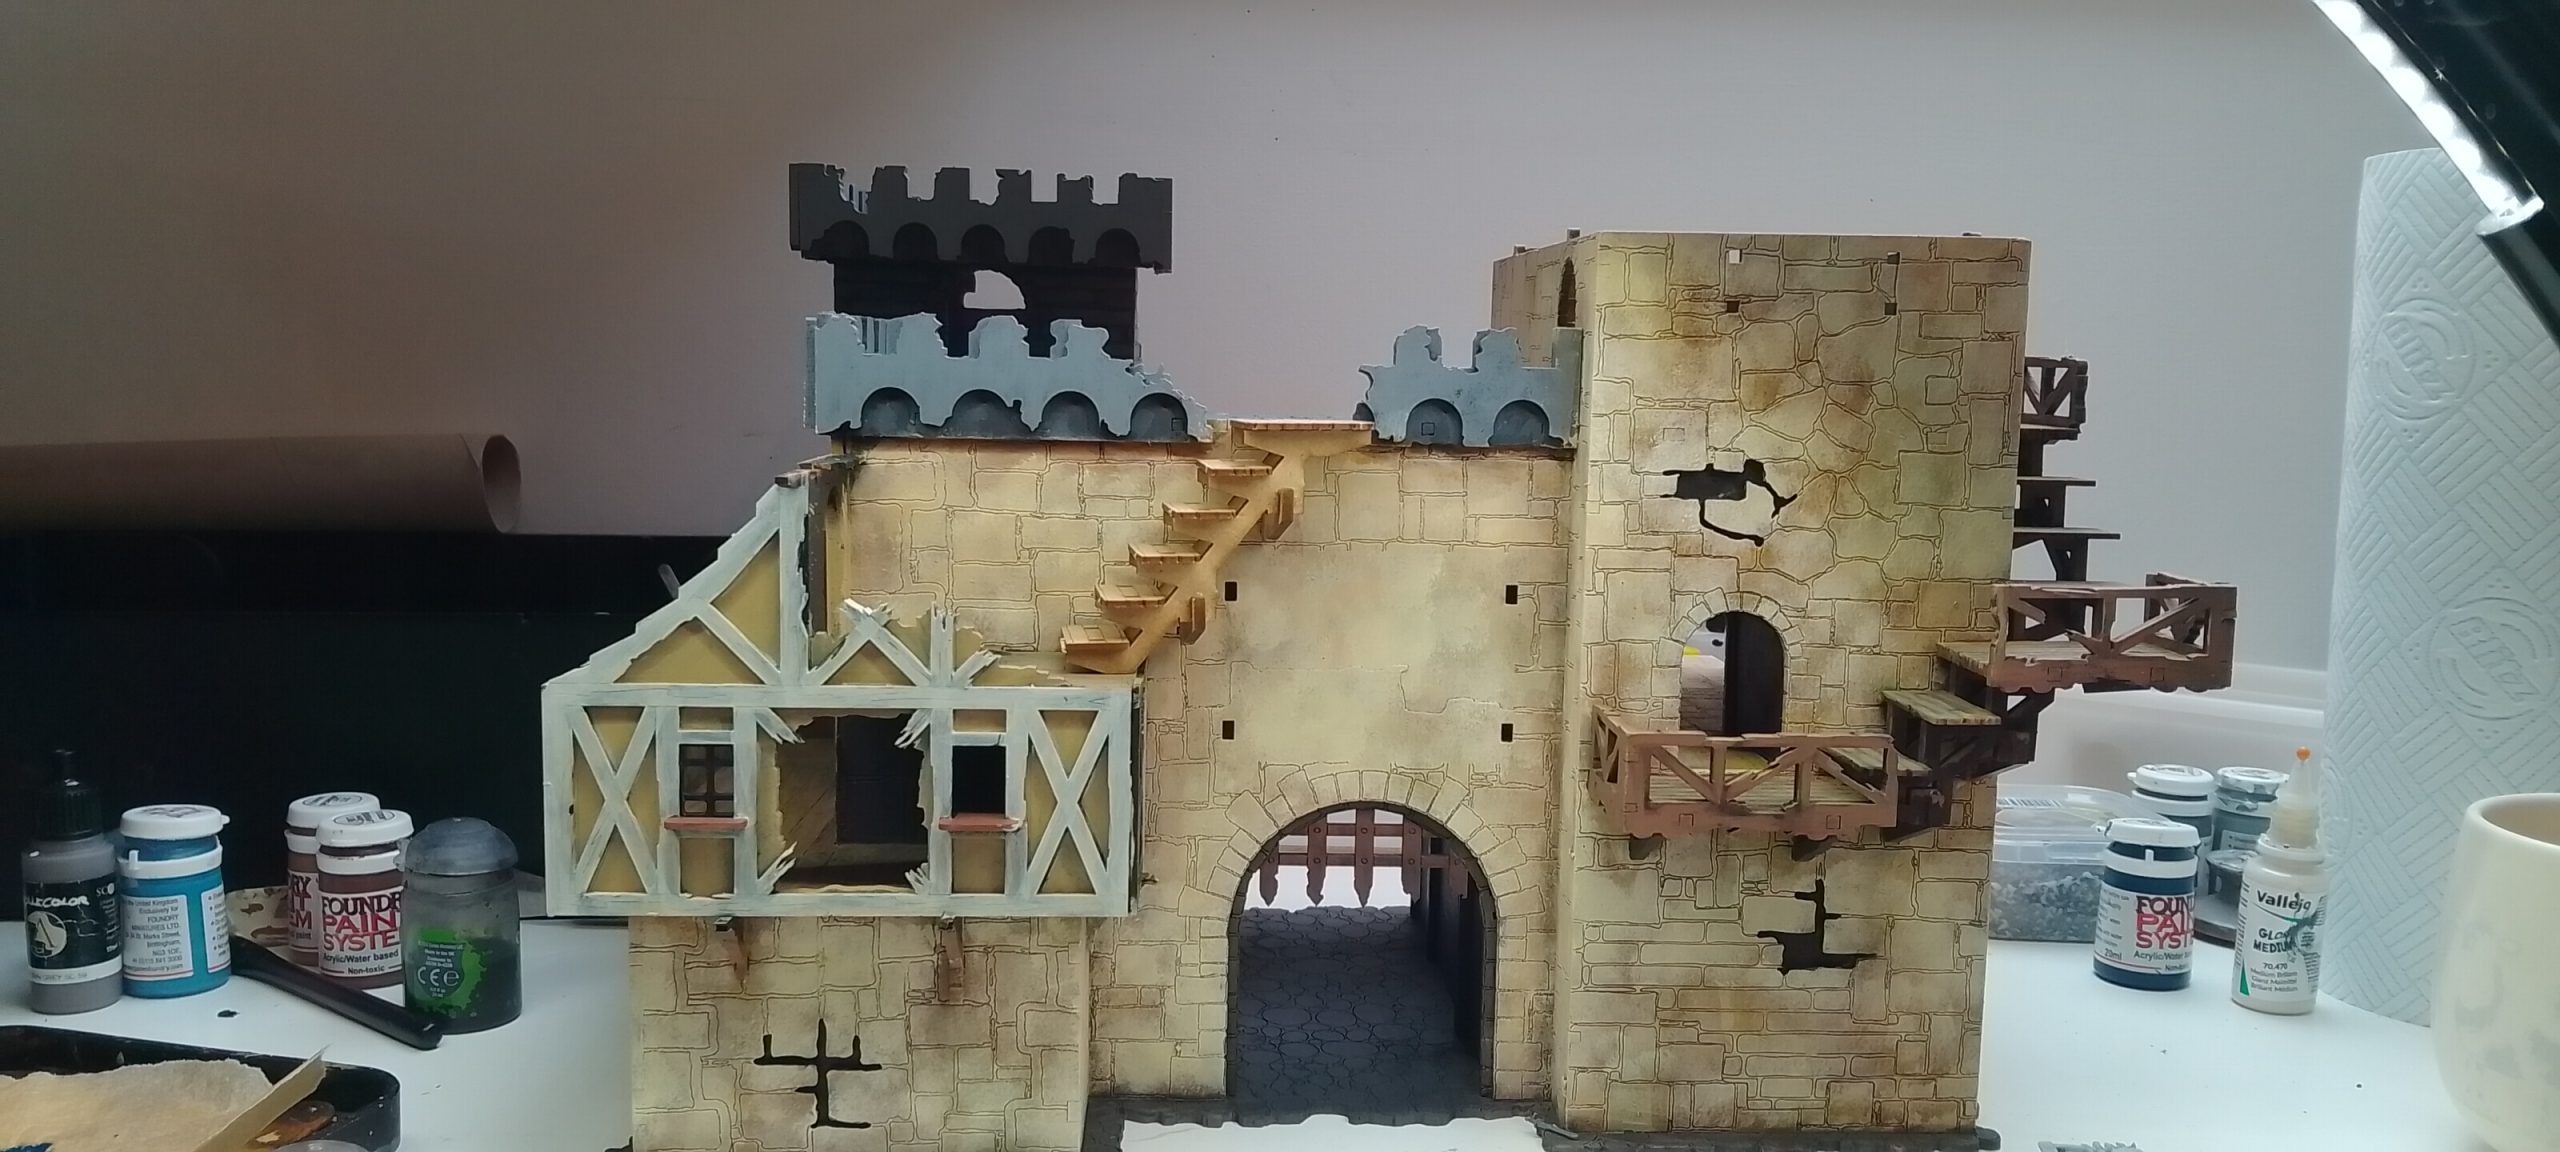 Main shot of how far ive gotten
A final note I will be putting up some final posts of the completed frostgrave ruins project and the semi completed gatehouse.
I will then open up a gatehouse part II later and close this as completed . There is only one thing I am doing now to the ruins and that is adding some Greenstuff worlds liquid ice to the ruins on the flooring that blends in with the ice and makes it look slippery. With the final matt varnish spray and then a gloss varnish painted on the flooring.
I think ive roughly spent £150 on this project, and that is including the terrain purchases. I was not really caring because a lot of the components you have extra for other projects. It was also expensive because I am starting new with no extra materials.
 a test piece, it takes 4 hours to dry and three coats (little puddles like a wash not spread to make)
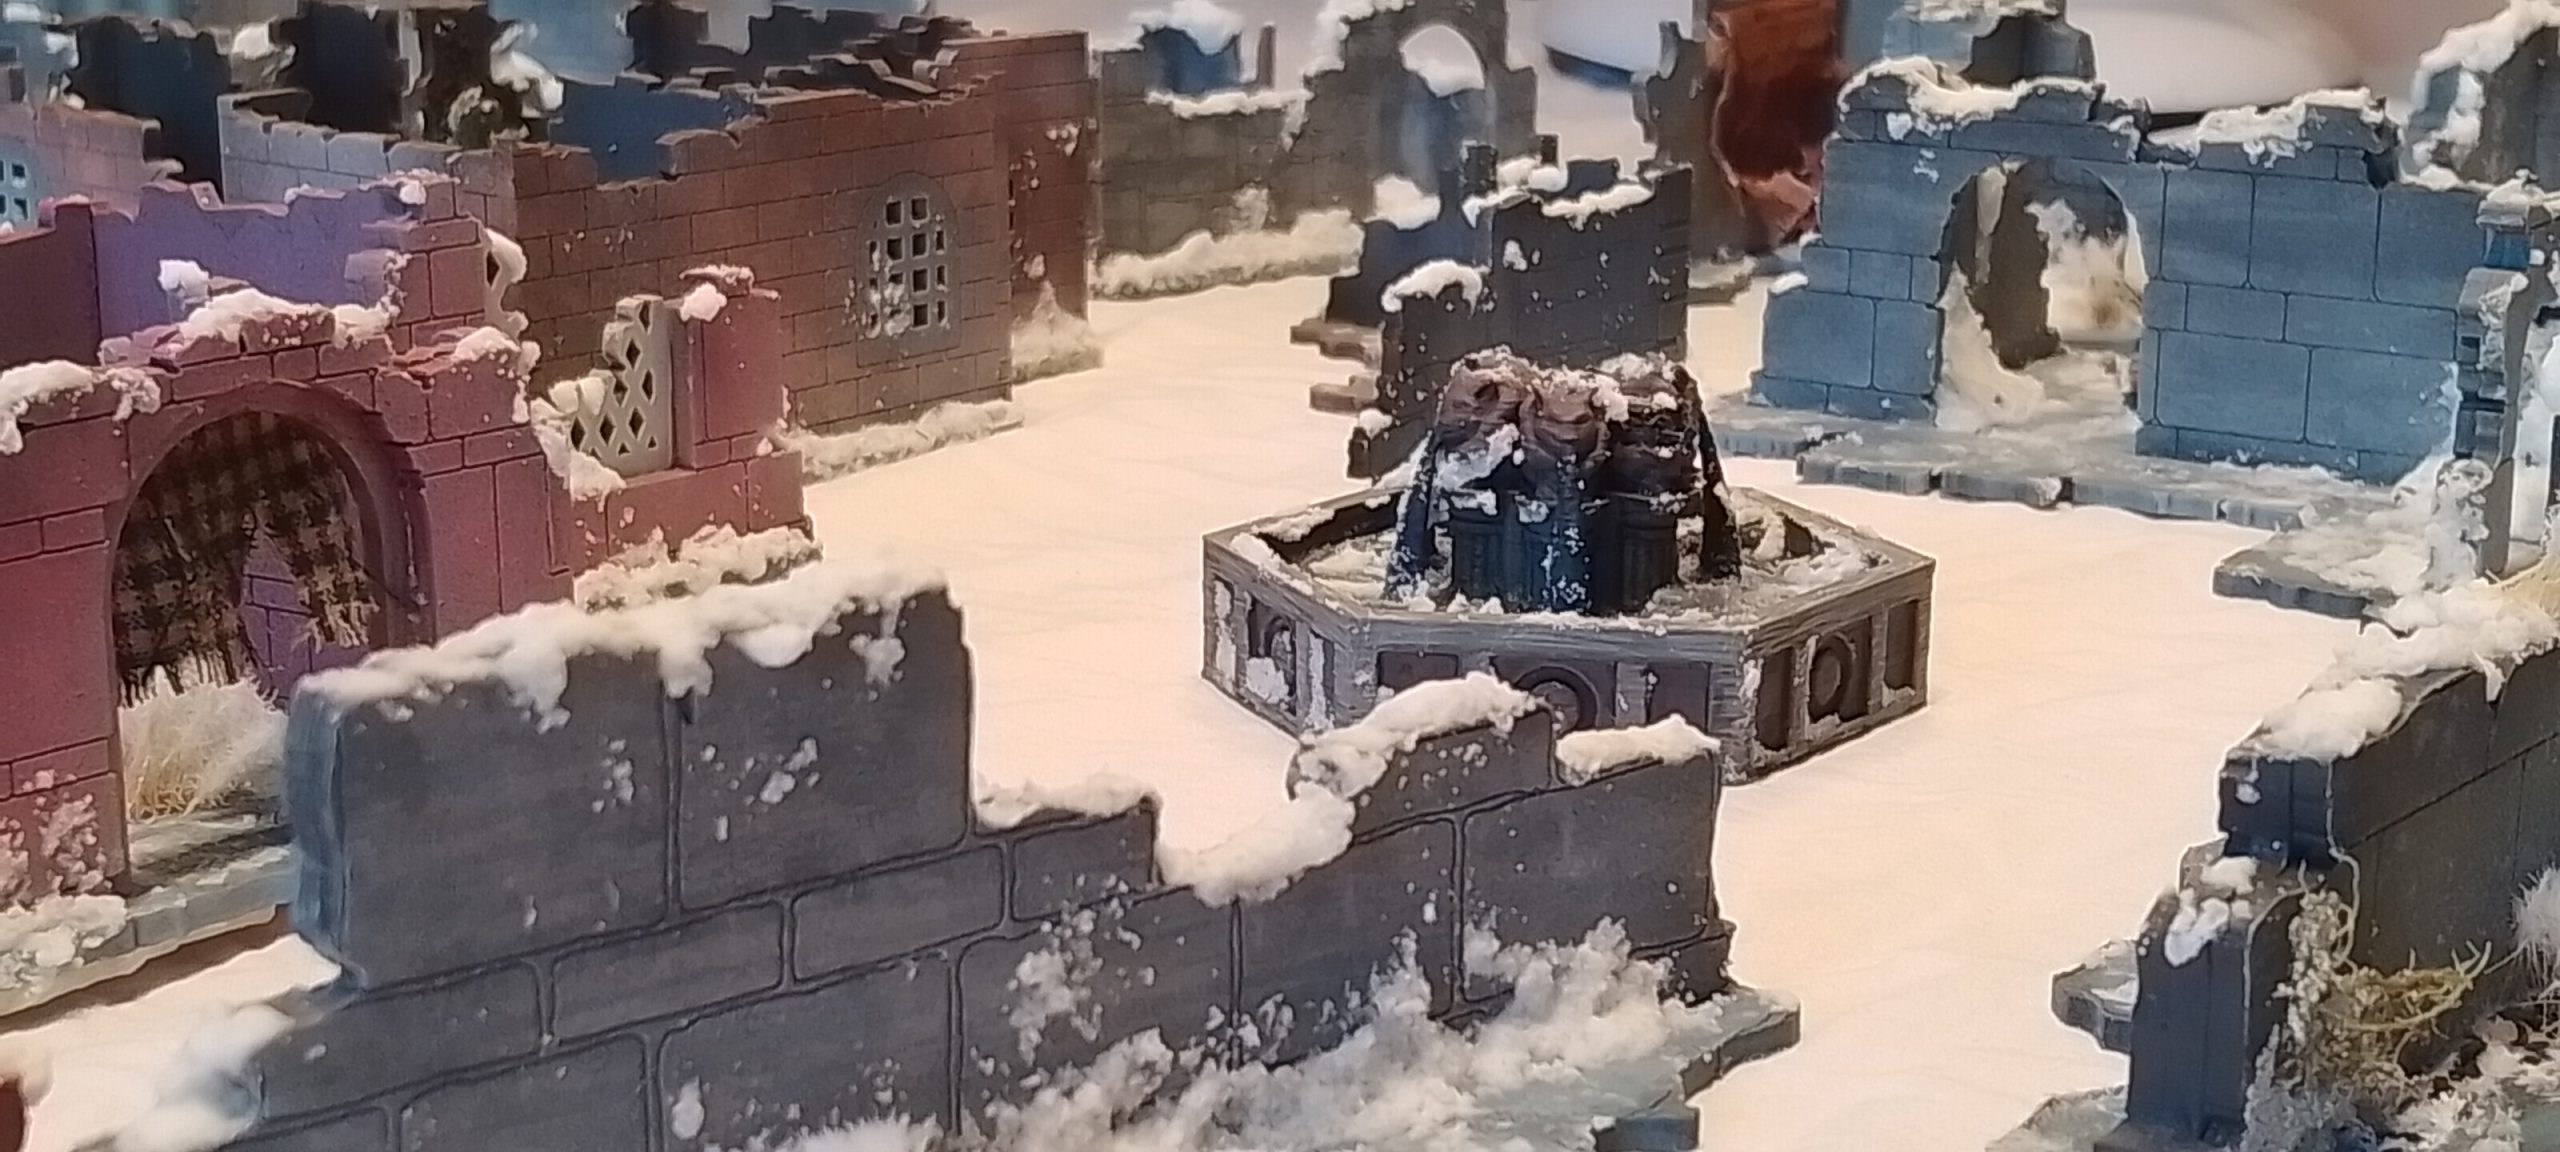
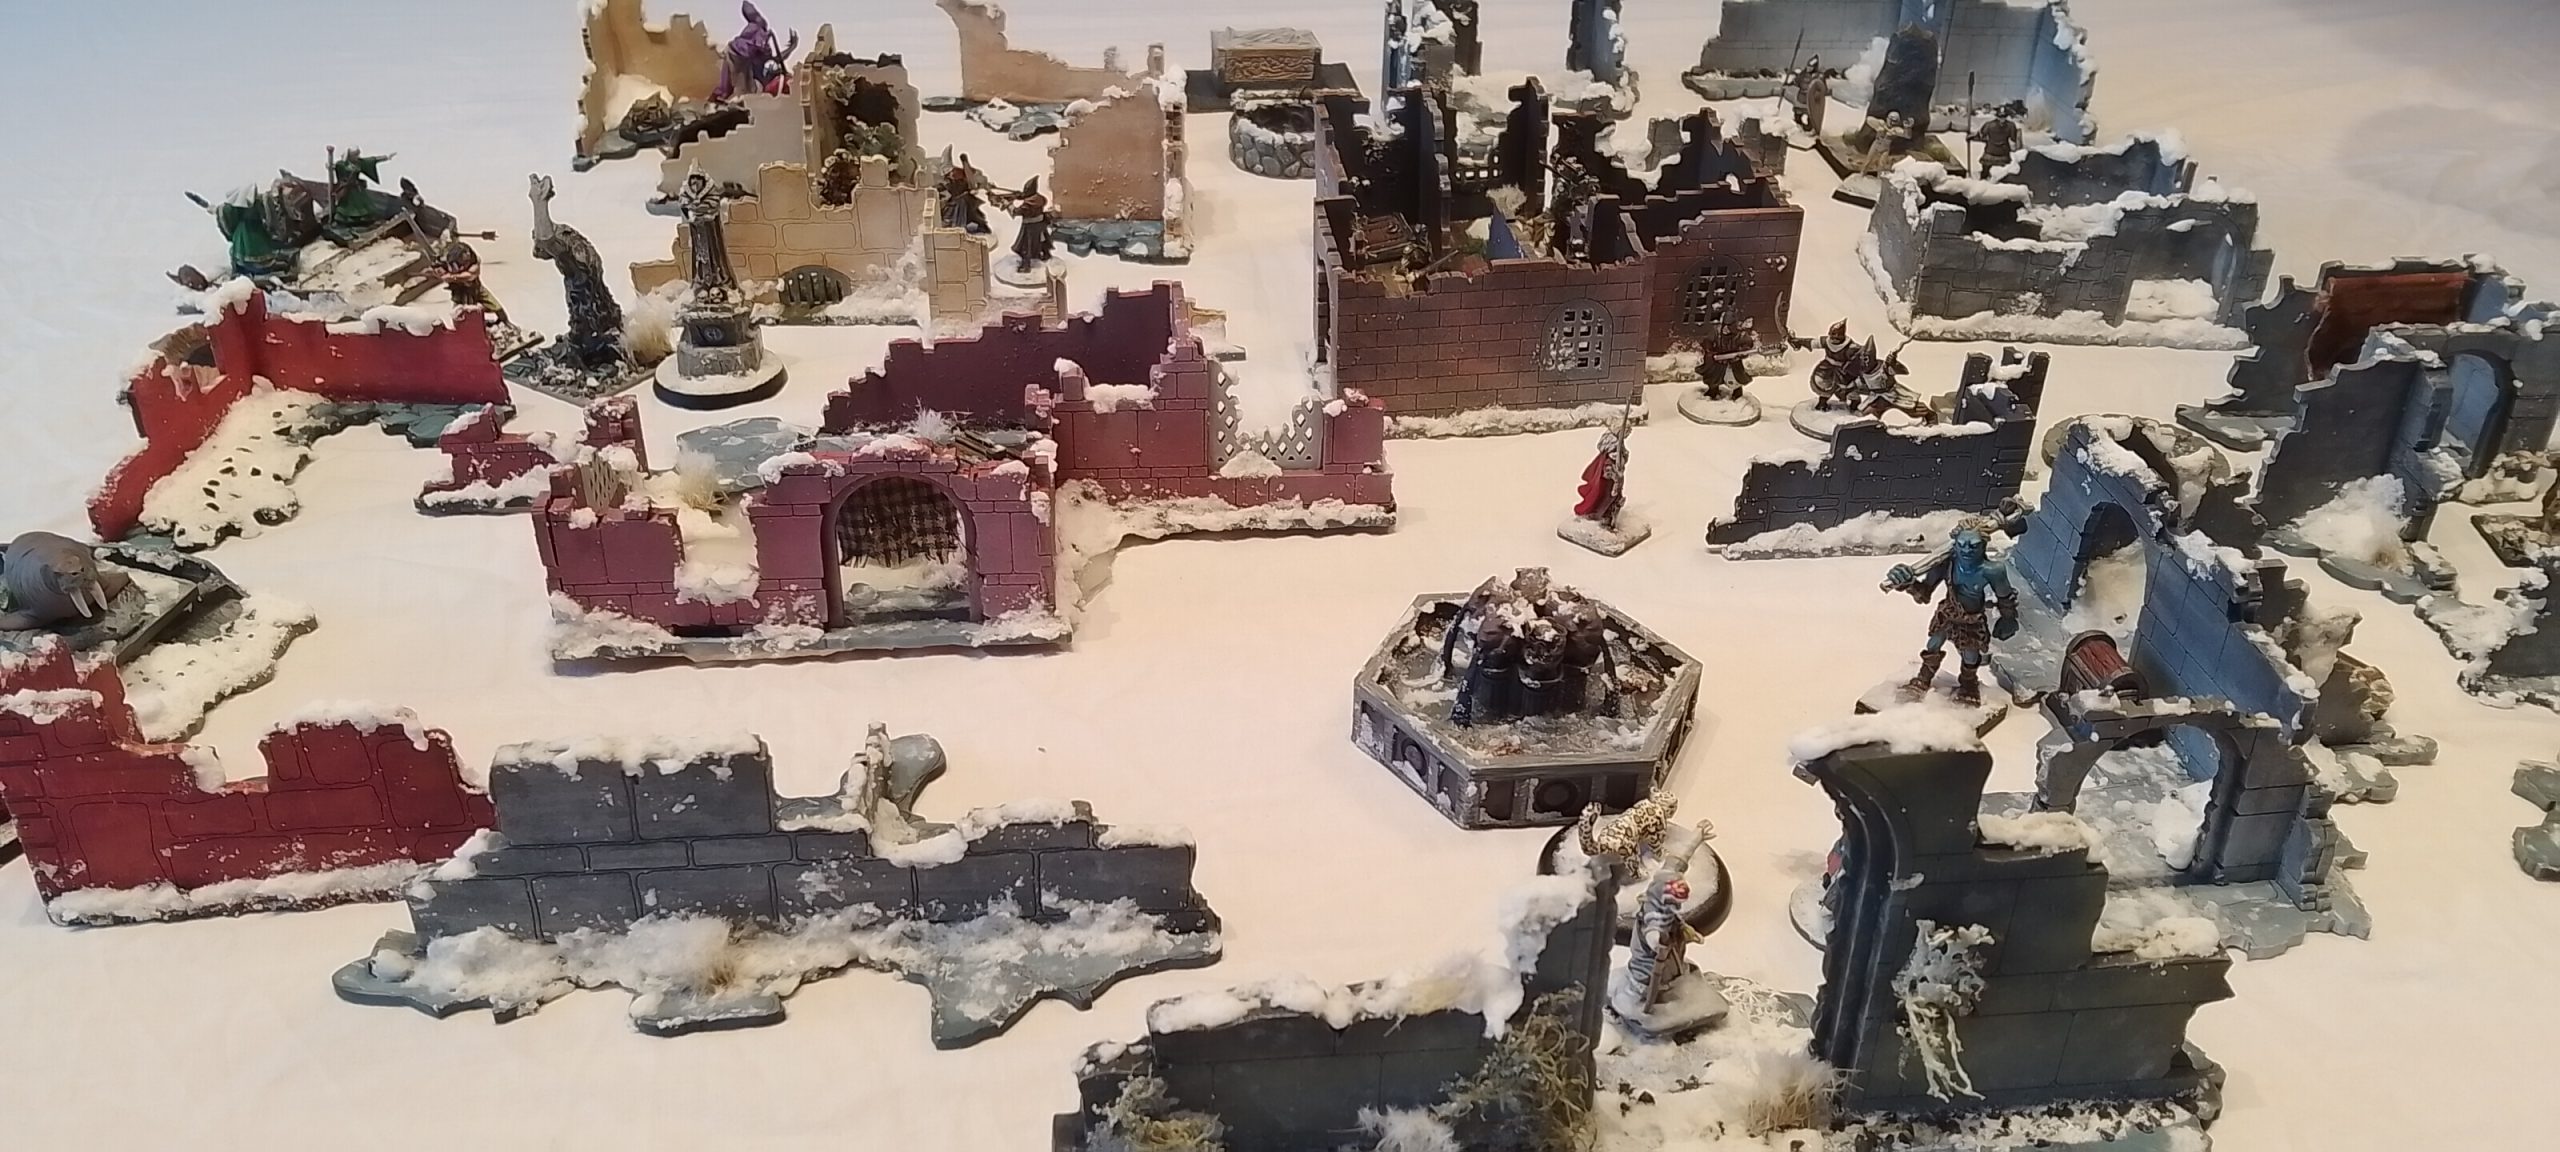
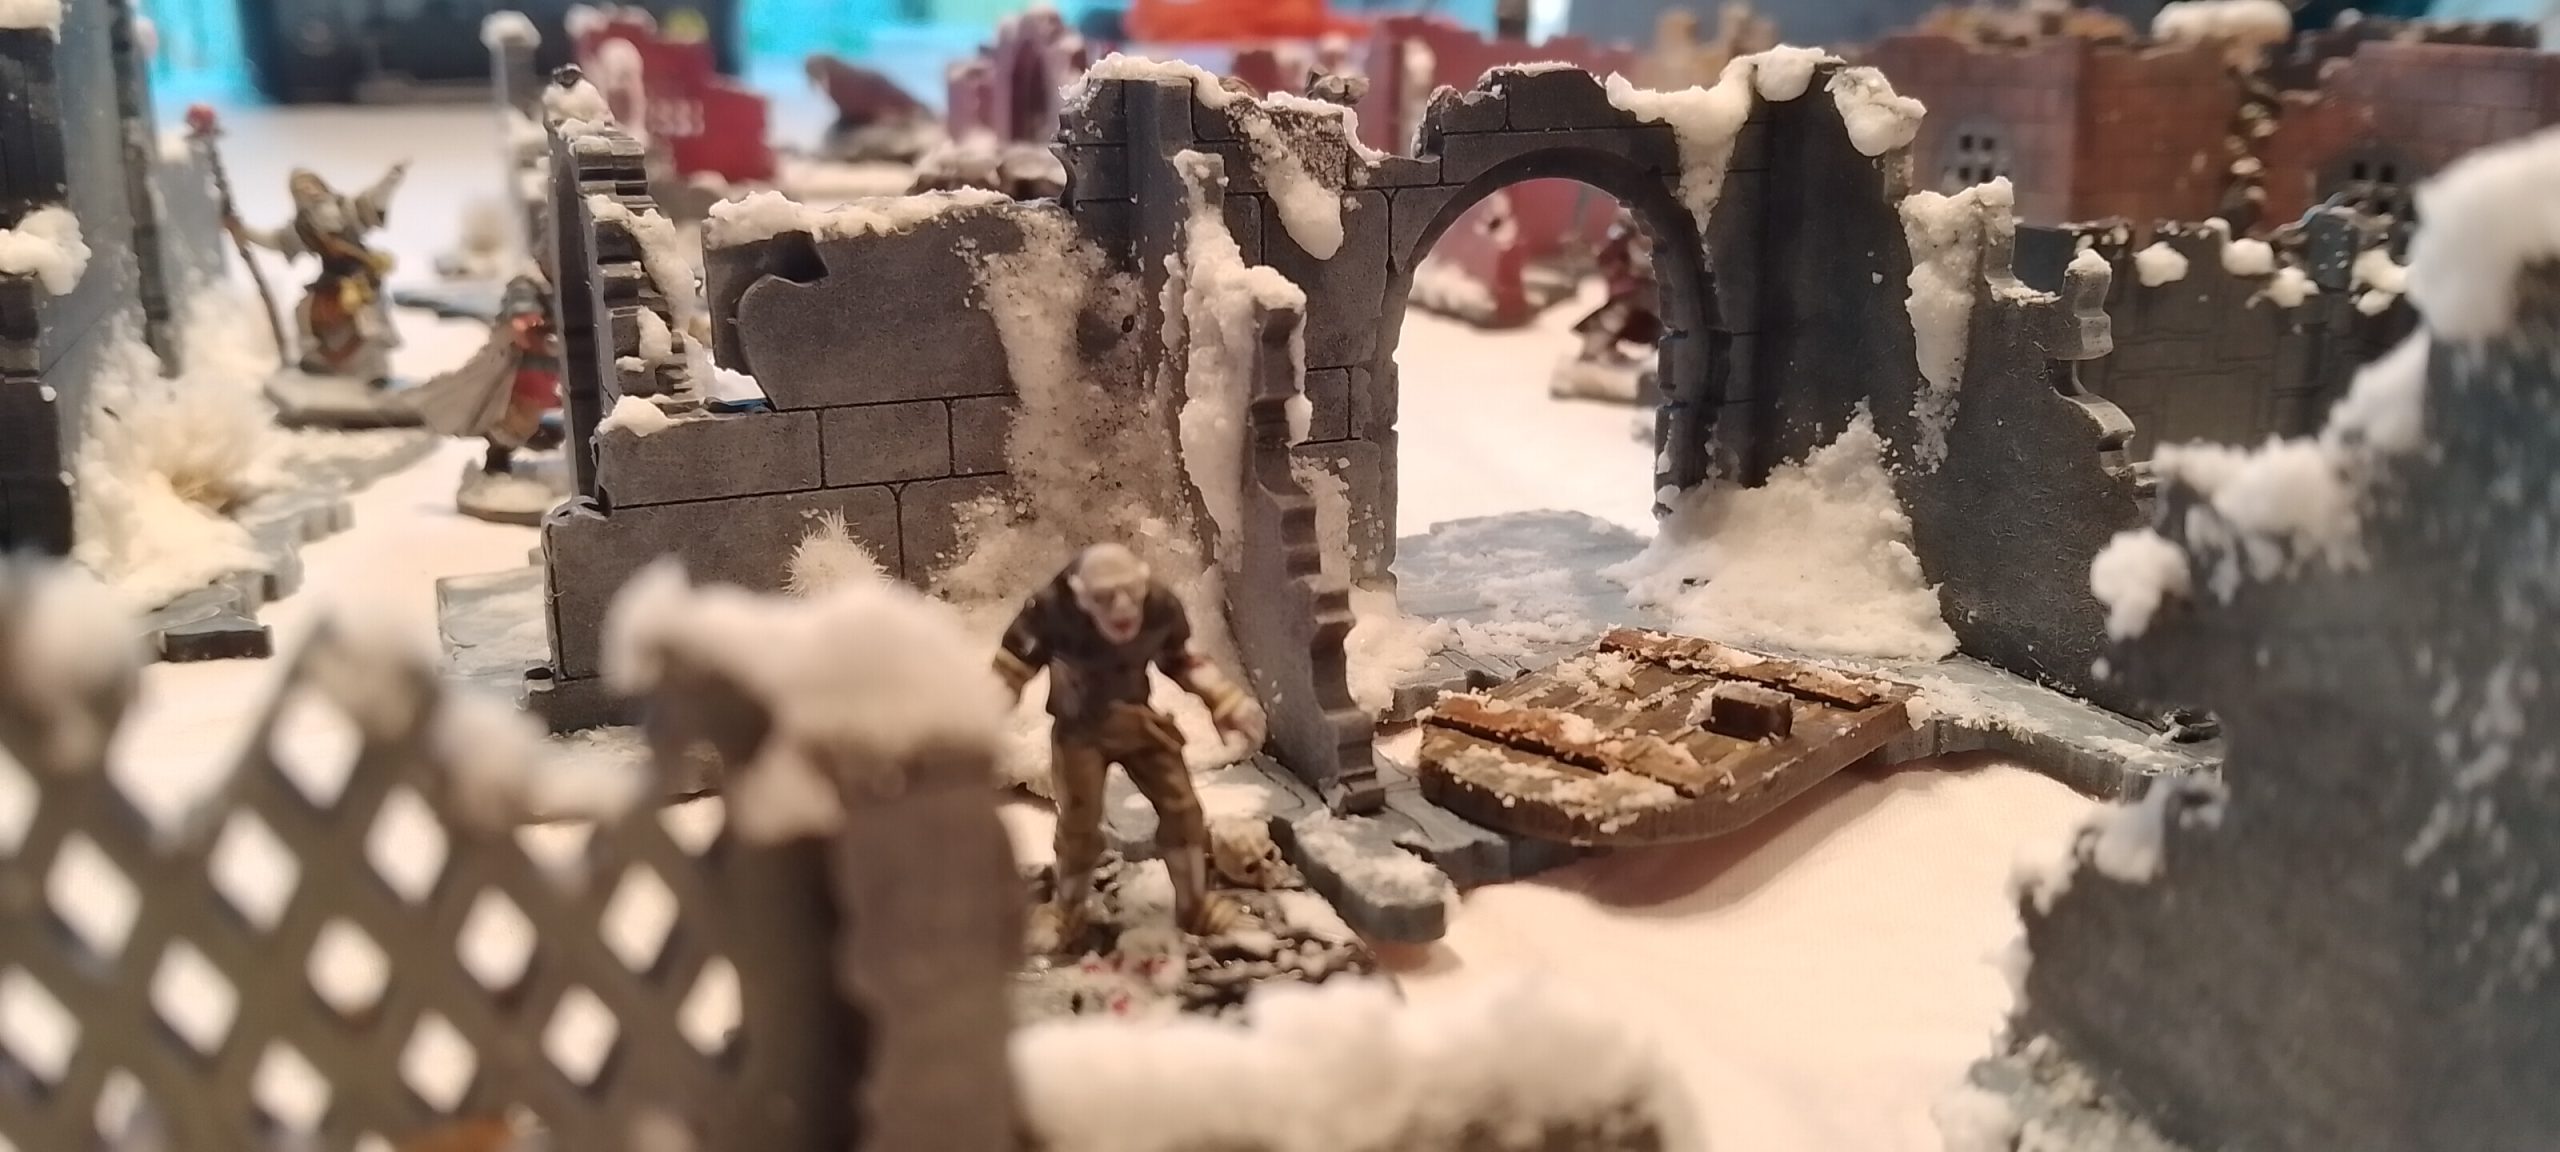
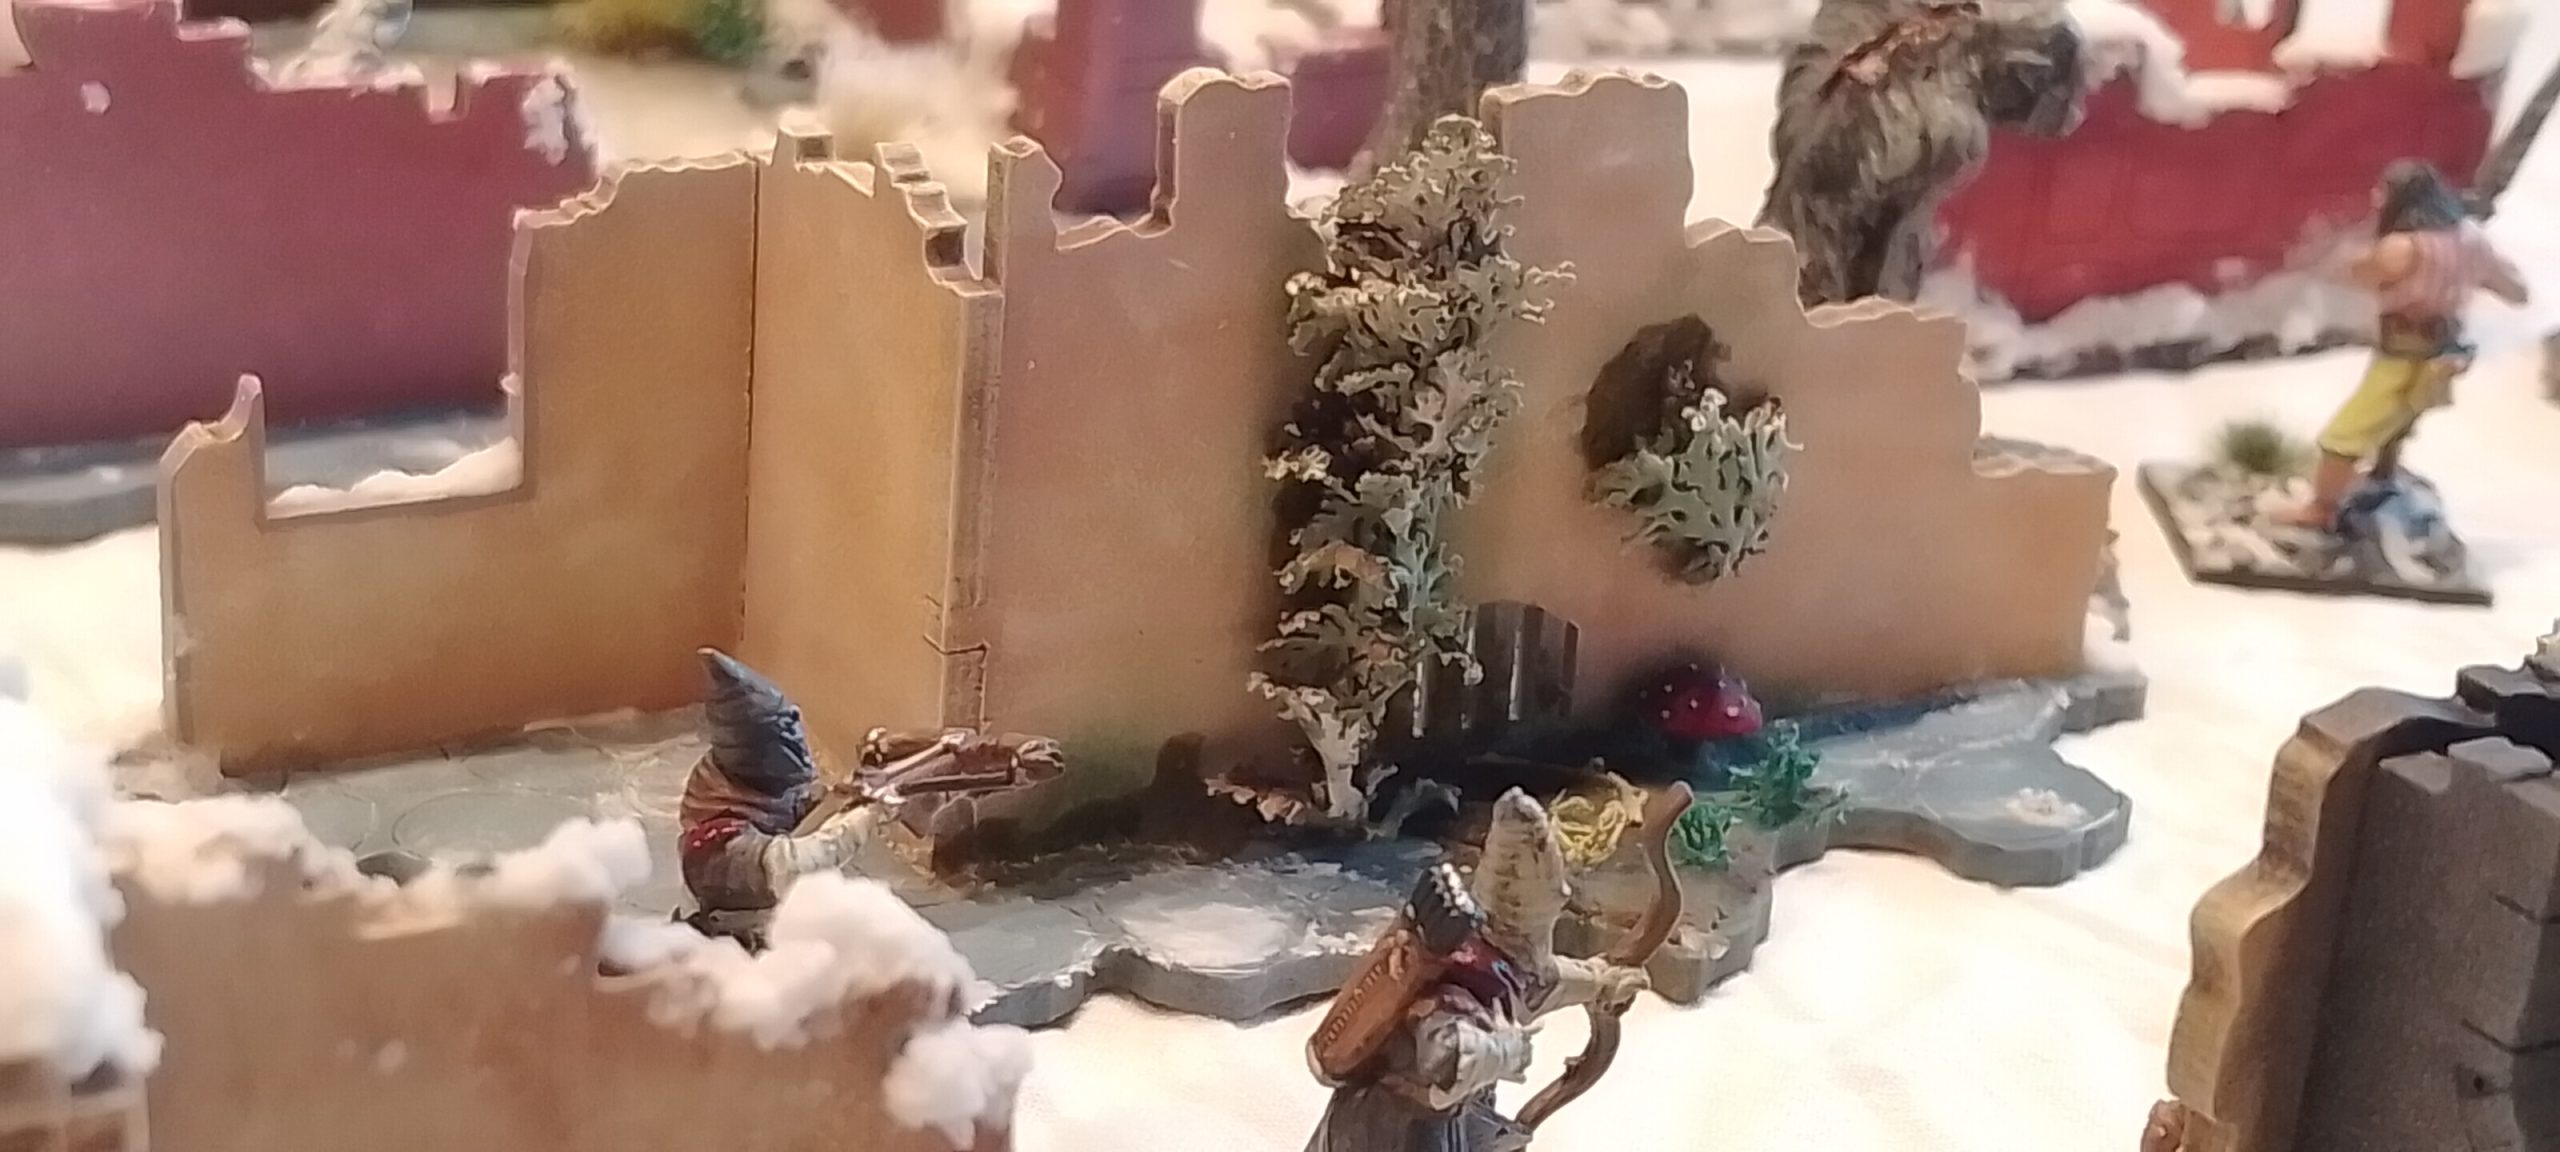
Finished Town Ruins 28/01/26 (without miniature's)

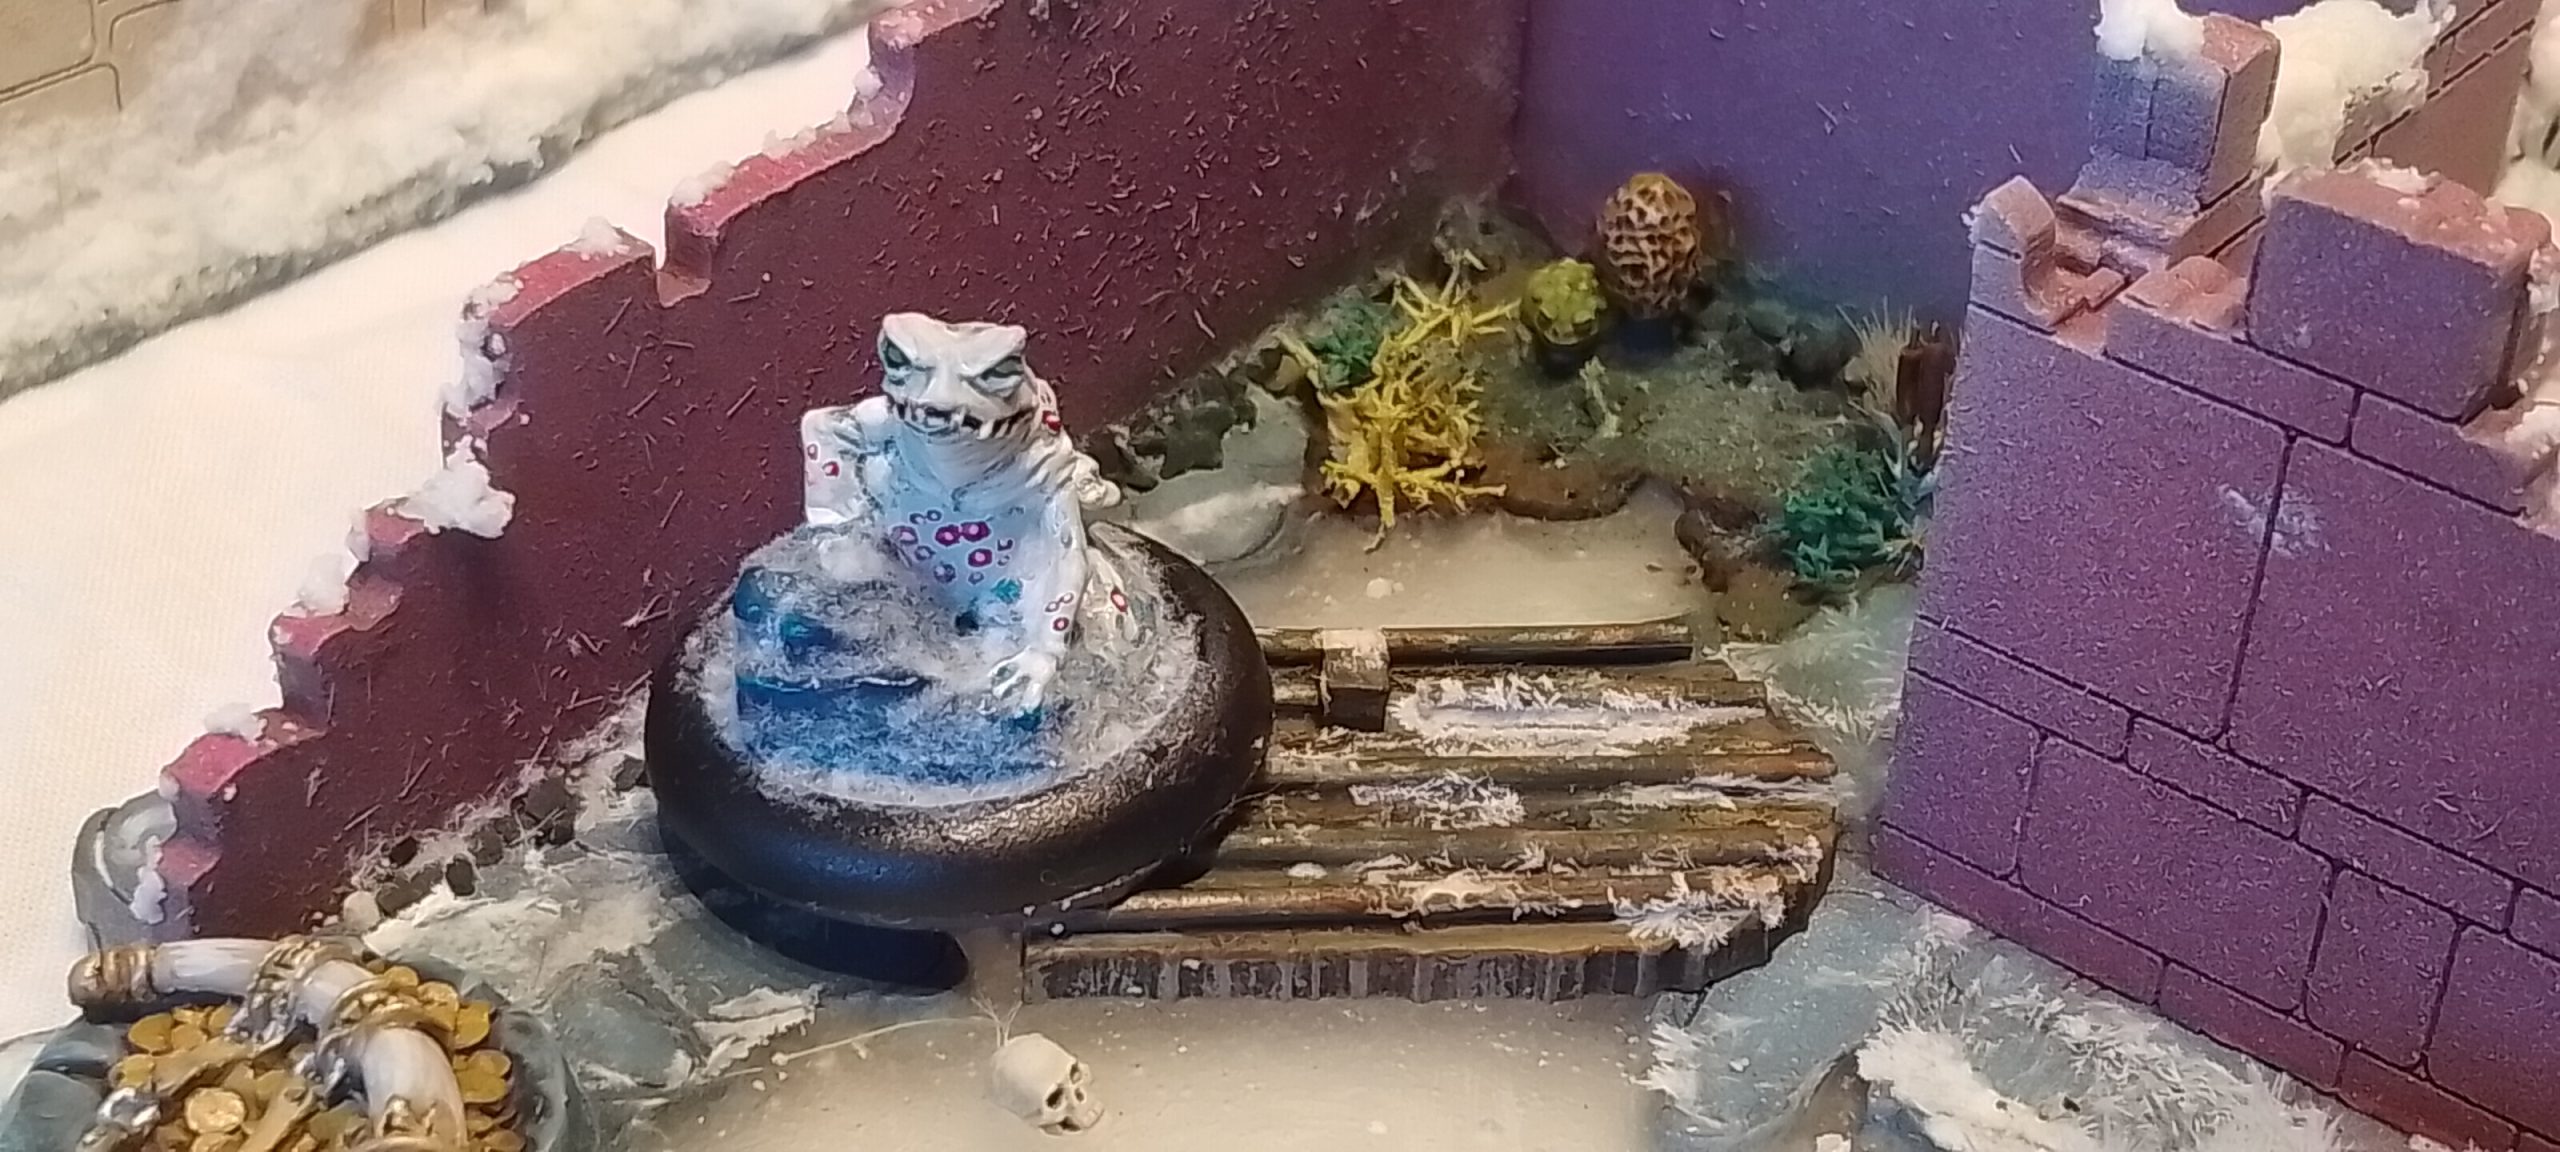
 frost toad found his friend
The wet weather had finally stopped and I was able to get the matt varnish down and take some nice photos.
In conclusion to this project, I think these pieces really work together with the colour palette chosen to create variation and the ability to shuffle the ruins to make no two sets of scenario’s feel the same.
I could easily do a 4×4 table with four players just using these ruins, given the tightness of corridors and line of sight during gameplay. It would make for several good skirmish tales in the future.
The only thing I may add later, is using UHU glue to make a spider web for inside the brown wooden building and I also possess a nice little spider for it and some transfer sheet of bugs caught.
Given that I work full time, have a big Christmas and have a child to look after as well as the daily grind. I am amazed by what I have archived. I also am starting as I have said before my terrain because I have been traveling between Australia and the UK for several years and unable to settle down until recently.
My biggest suggestion for any project is to plan and proceed to what you have on the paper. Give plenty of time and be prepared for hiccups (like broken parts and overdue orders!).
A final note that the gatehouse is still not finished. I was hoping the components would of arrived to get to the point of ‘tabletop ready’ however the wood ladders and rooves are still all mdf and I would rather keep that for a new part 2 project entry. When that is complete it would further expand the Frostgrave table to even greater lengths.
Finished Town Ruins 28/01/26 (with miniature's)
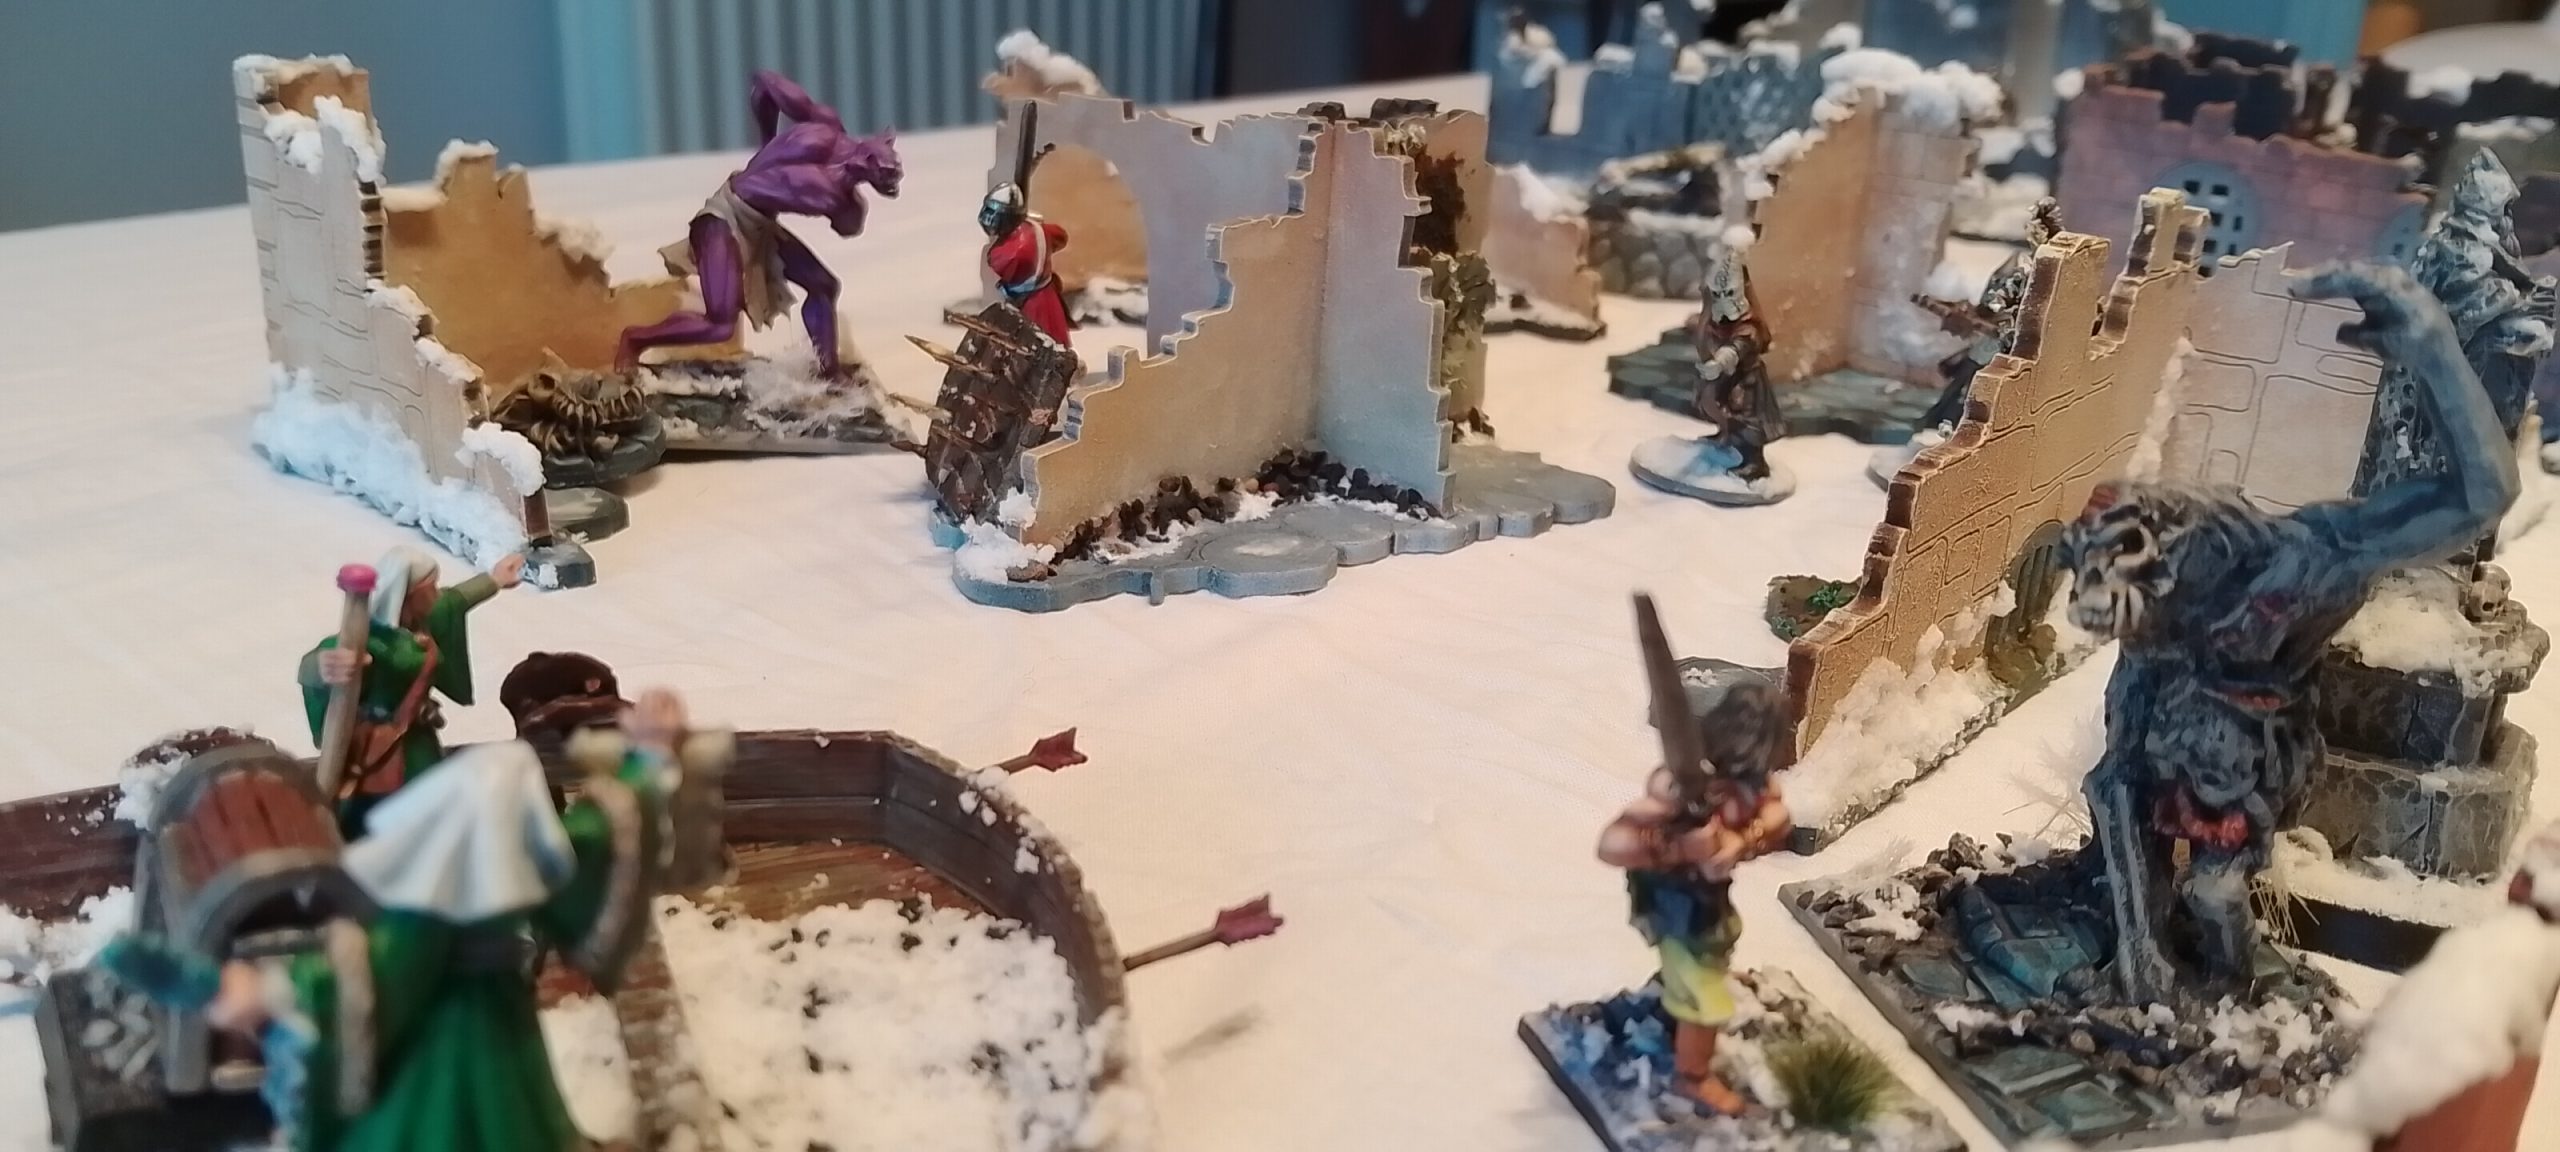
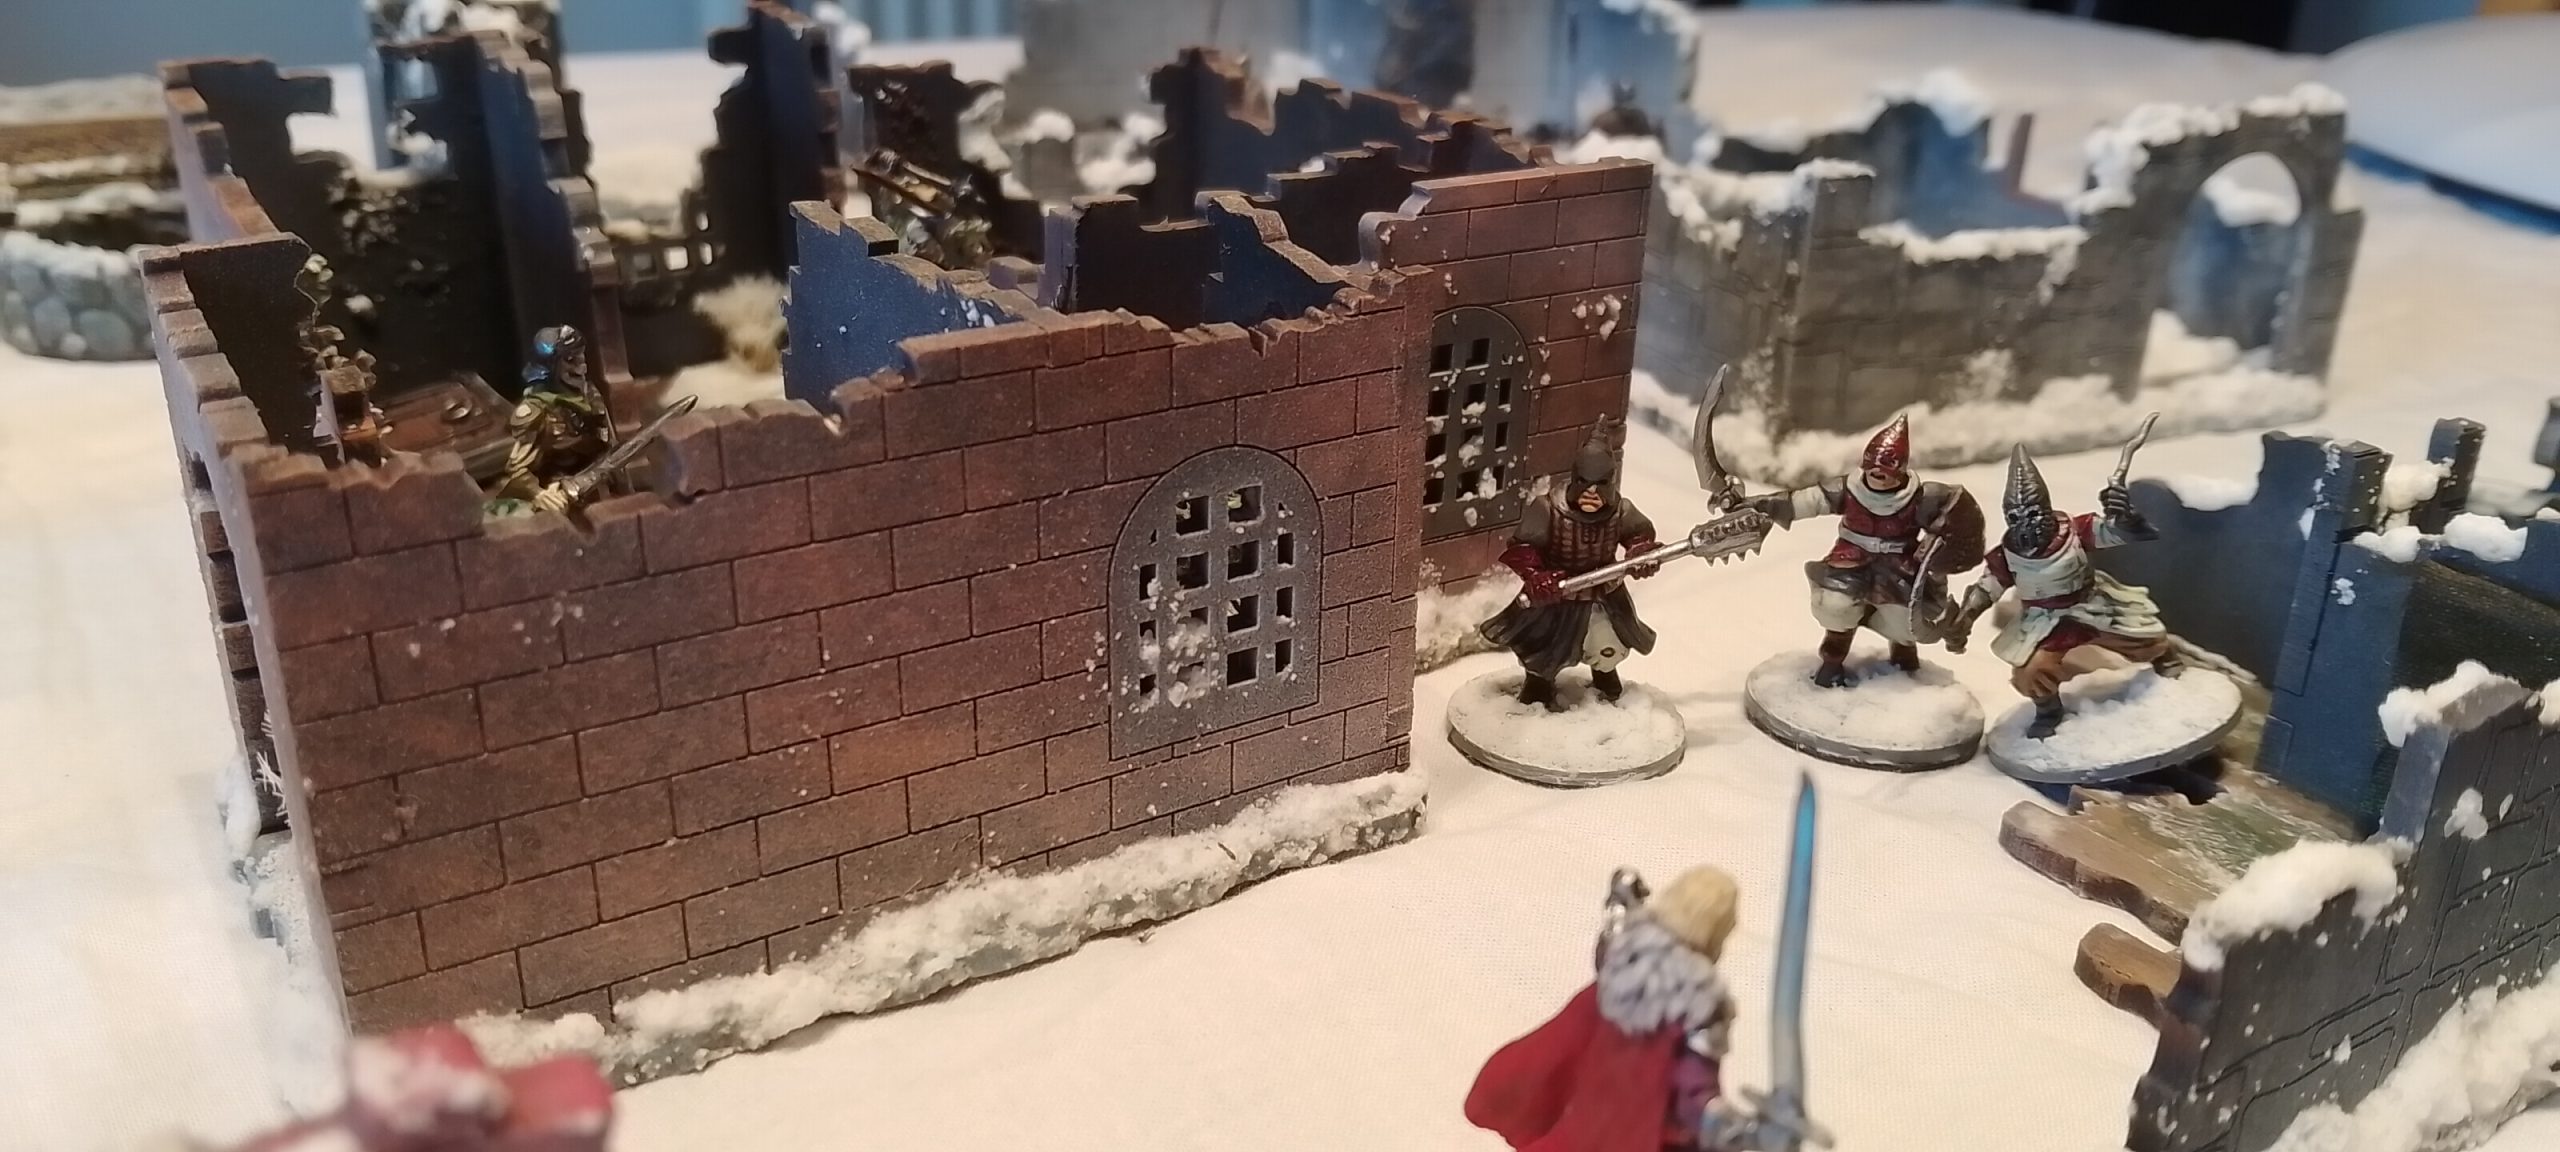
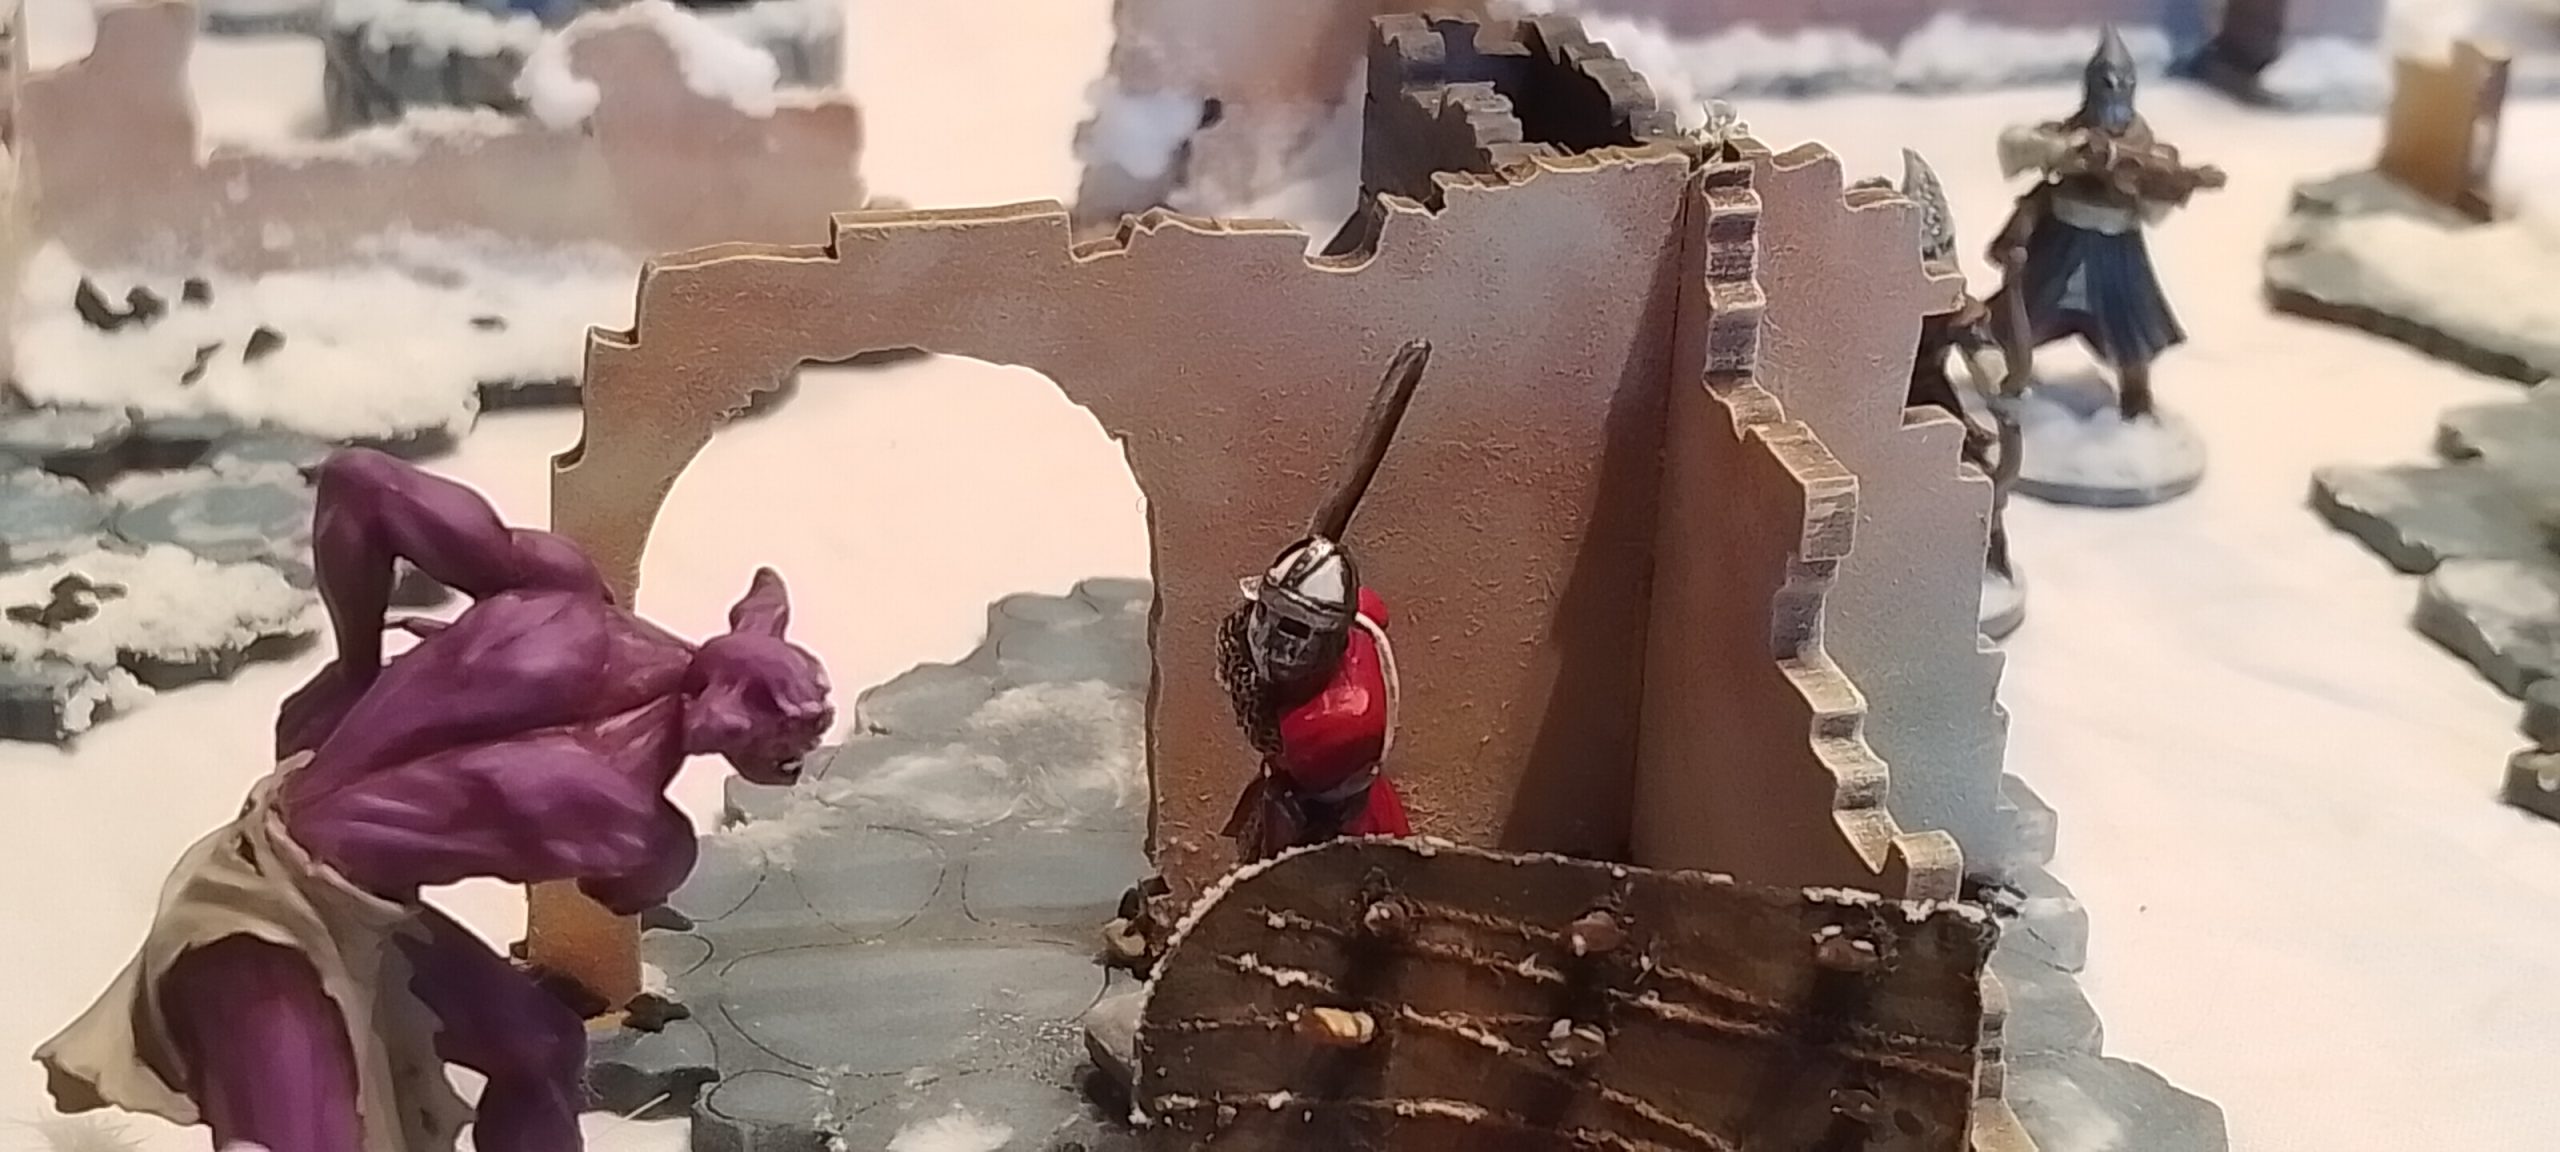
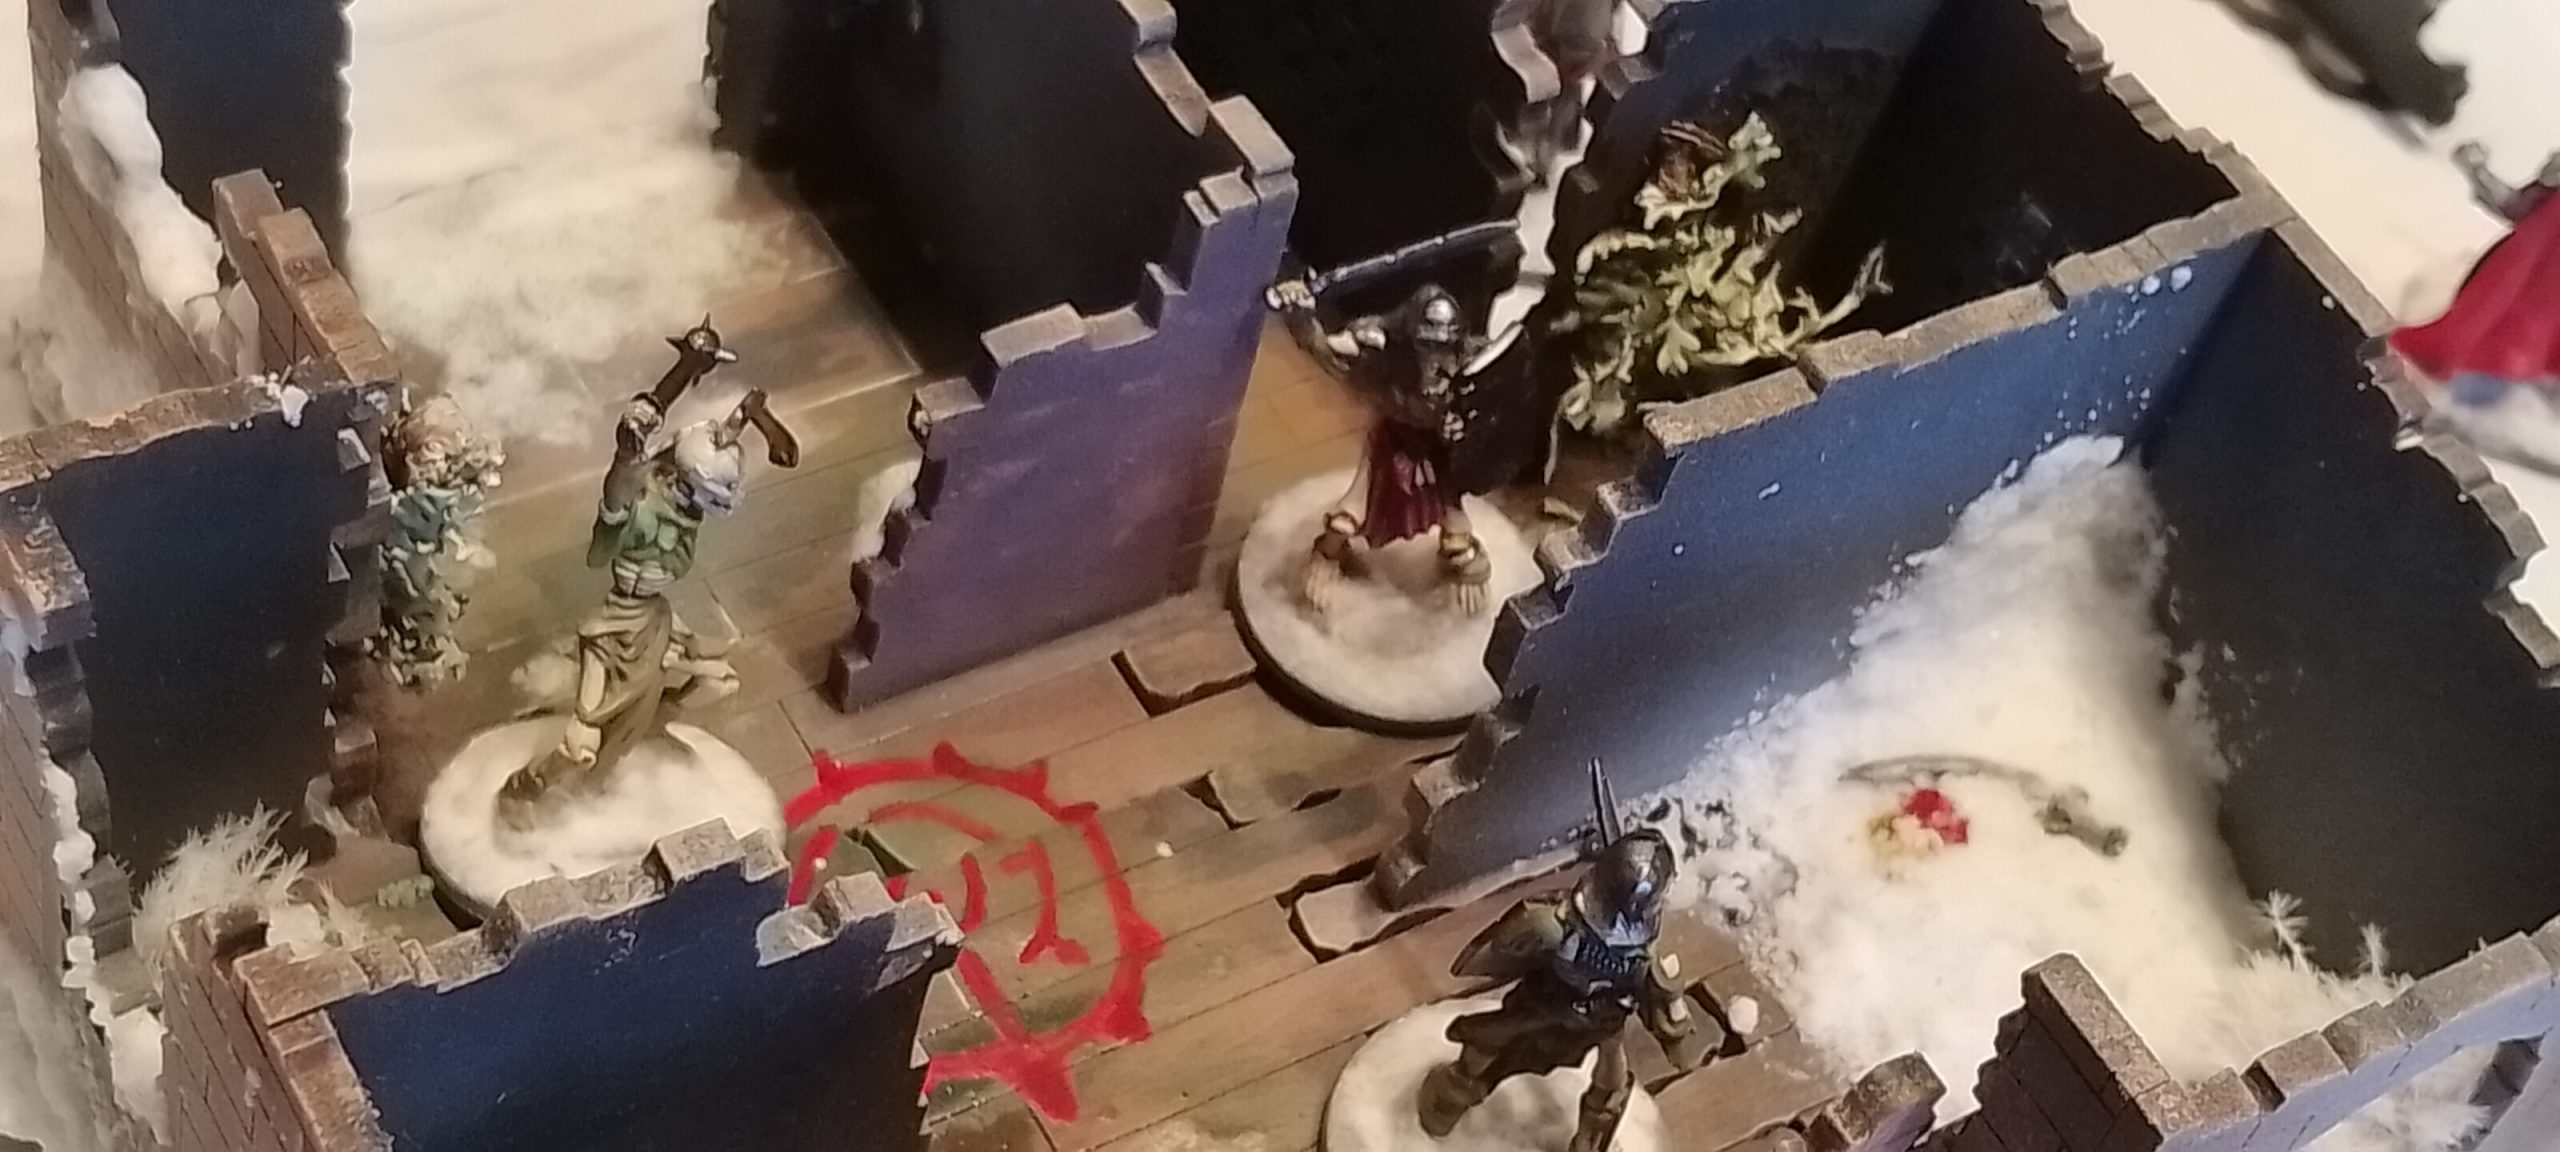
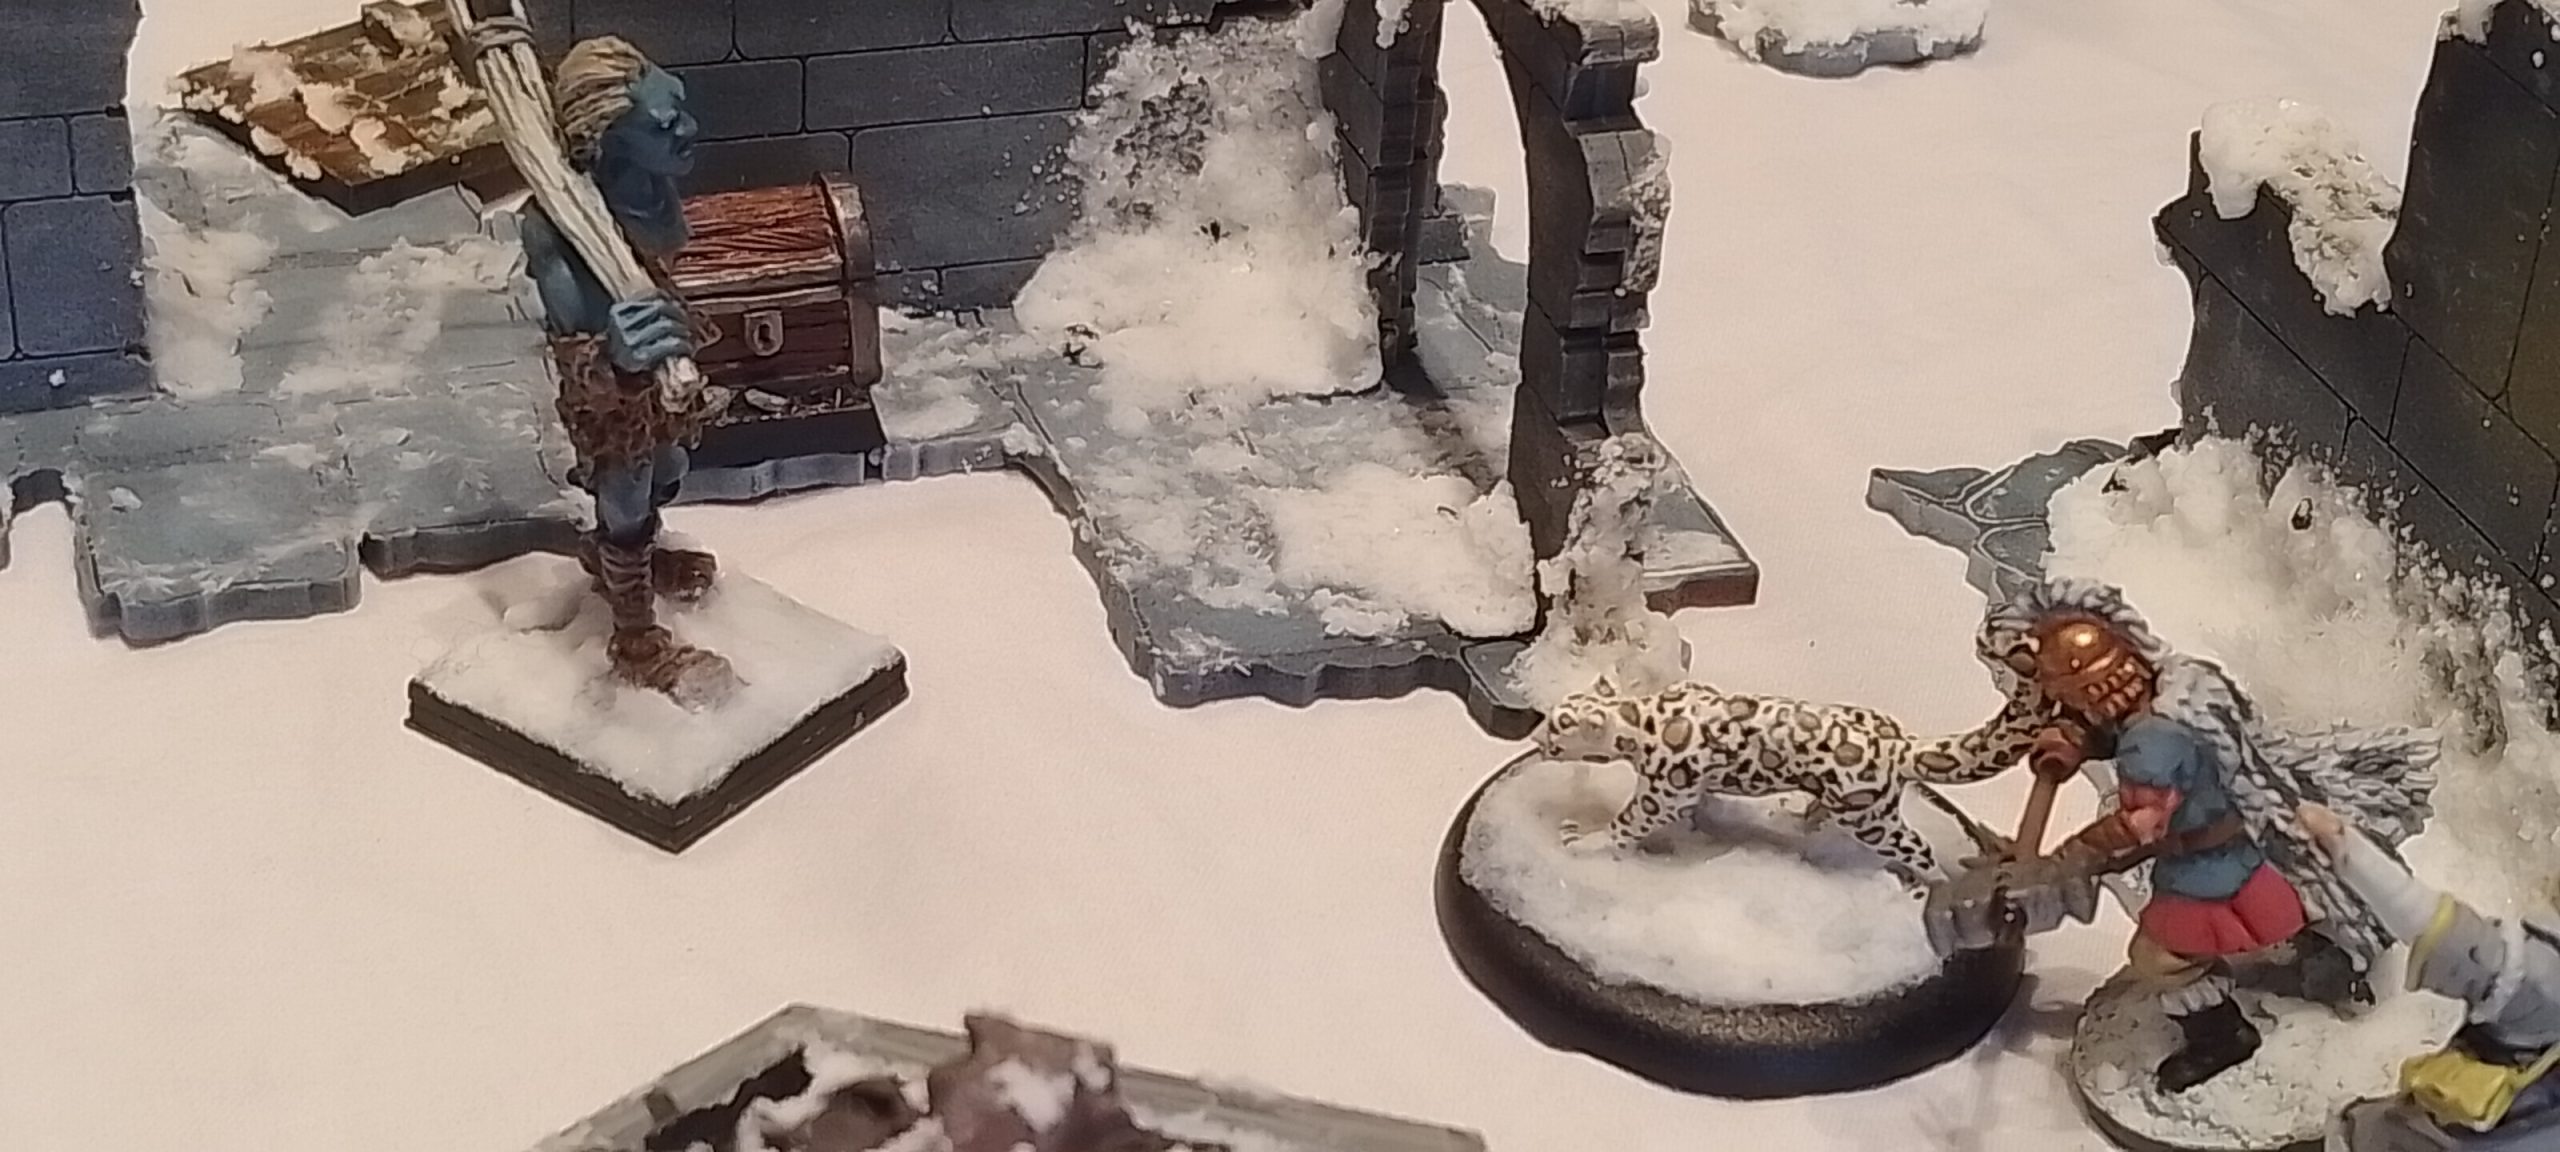 Frost Giant takes on the barbarian and Snow Leopard
The table really does come alive when you put a few posed miniature’s around. The walls and gaps really do fill when you add treasures. Ive also added the Red herrings terrain pieces like the pit and cairn stone that are optional (secondary missions) for the game.
Some future ideas when the gatehouse is complete is to work on the wildwoods terrain and the sewers of Felstad for these supplement books. I probably would like to add more greenery in the future and I hope this doesn’t work against my entry. This is the core and I need to start somewhere.
As a competitive person I hope my entry is not going to brushed aside as ‘Yet another snowy ruin’. I even have below my favourite’s I have been scoping at to see for ideas and what people have been doing. Also if you are one of the people listed, please continue as I know a lot have had a lot of issues reading their projects!
Forests and Rivers– I think this just looks nice and not too cluttered of foliage for gameplay
Dinosaur park– The toilet and the goat is easily my favourite entry idea
Saloon 2 Boogaloo– I love wild west and although I dont own any ww minis. I really enjoyed a few years back a demo game I played in this setting
Honourable mention to the nukacola world. I own all the minutemen and characters. Good inspirational juices for when I get back to the wasteland.
I wish everyone the best of luck, I only use this as positive motivation as its good for the blood!


