


![Pure Sci-Fi Nostalgia! War Rocket Review | Hydra Miniatures [7 Days Early Access]](https://images.beastsofwar.com/2026/02/unboxing-hydra-miniatures-war-rocket-coverimage-225-127.jpg)


Creepy Forest – TerrainFest 2025 entry


Recommendations: 161
About the Project
The goal is to build a creepy forest to use for fantasy games like Burrows & Badgers and Middle Earth Strategy Battle Game and The Silver Bayonet. My inspiration is Alan Lee's illustrations of Mirkwood in the Hobbit. To build the tree armatures, I'm using pipe-cleaners. I found the idea here: https://www.youtube.com/watch?v=OuoHw0CL9l4. Essentially, I've twisted pipe-cleaners together into trees, then melted the fuzz with a heat gun. I've then painted/coated the trees with a mix of tile grout, paint and glue. The base foliage for the flocking will be made from pieces of a cheap, furnace filter that's been teased apart. The stones are made of carved xps foam. The bases for the tree/stone pieces are hardboard aka mdf.
Related Game: Burrows & Badgers
Related Genre: Fantasy
This Project is Active
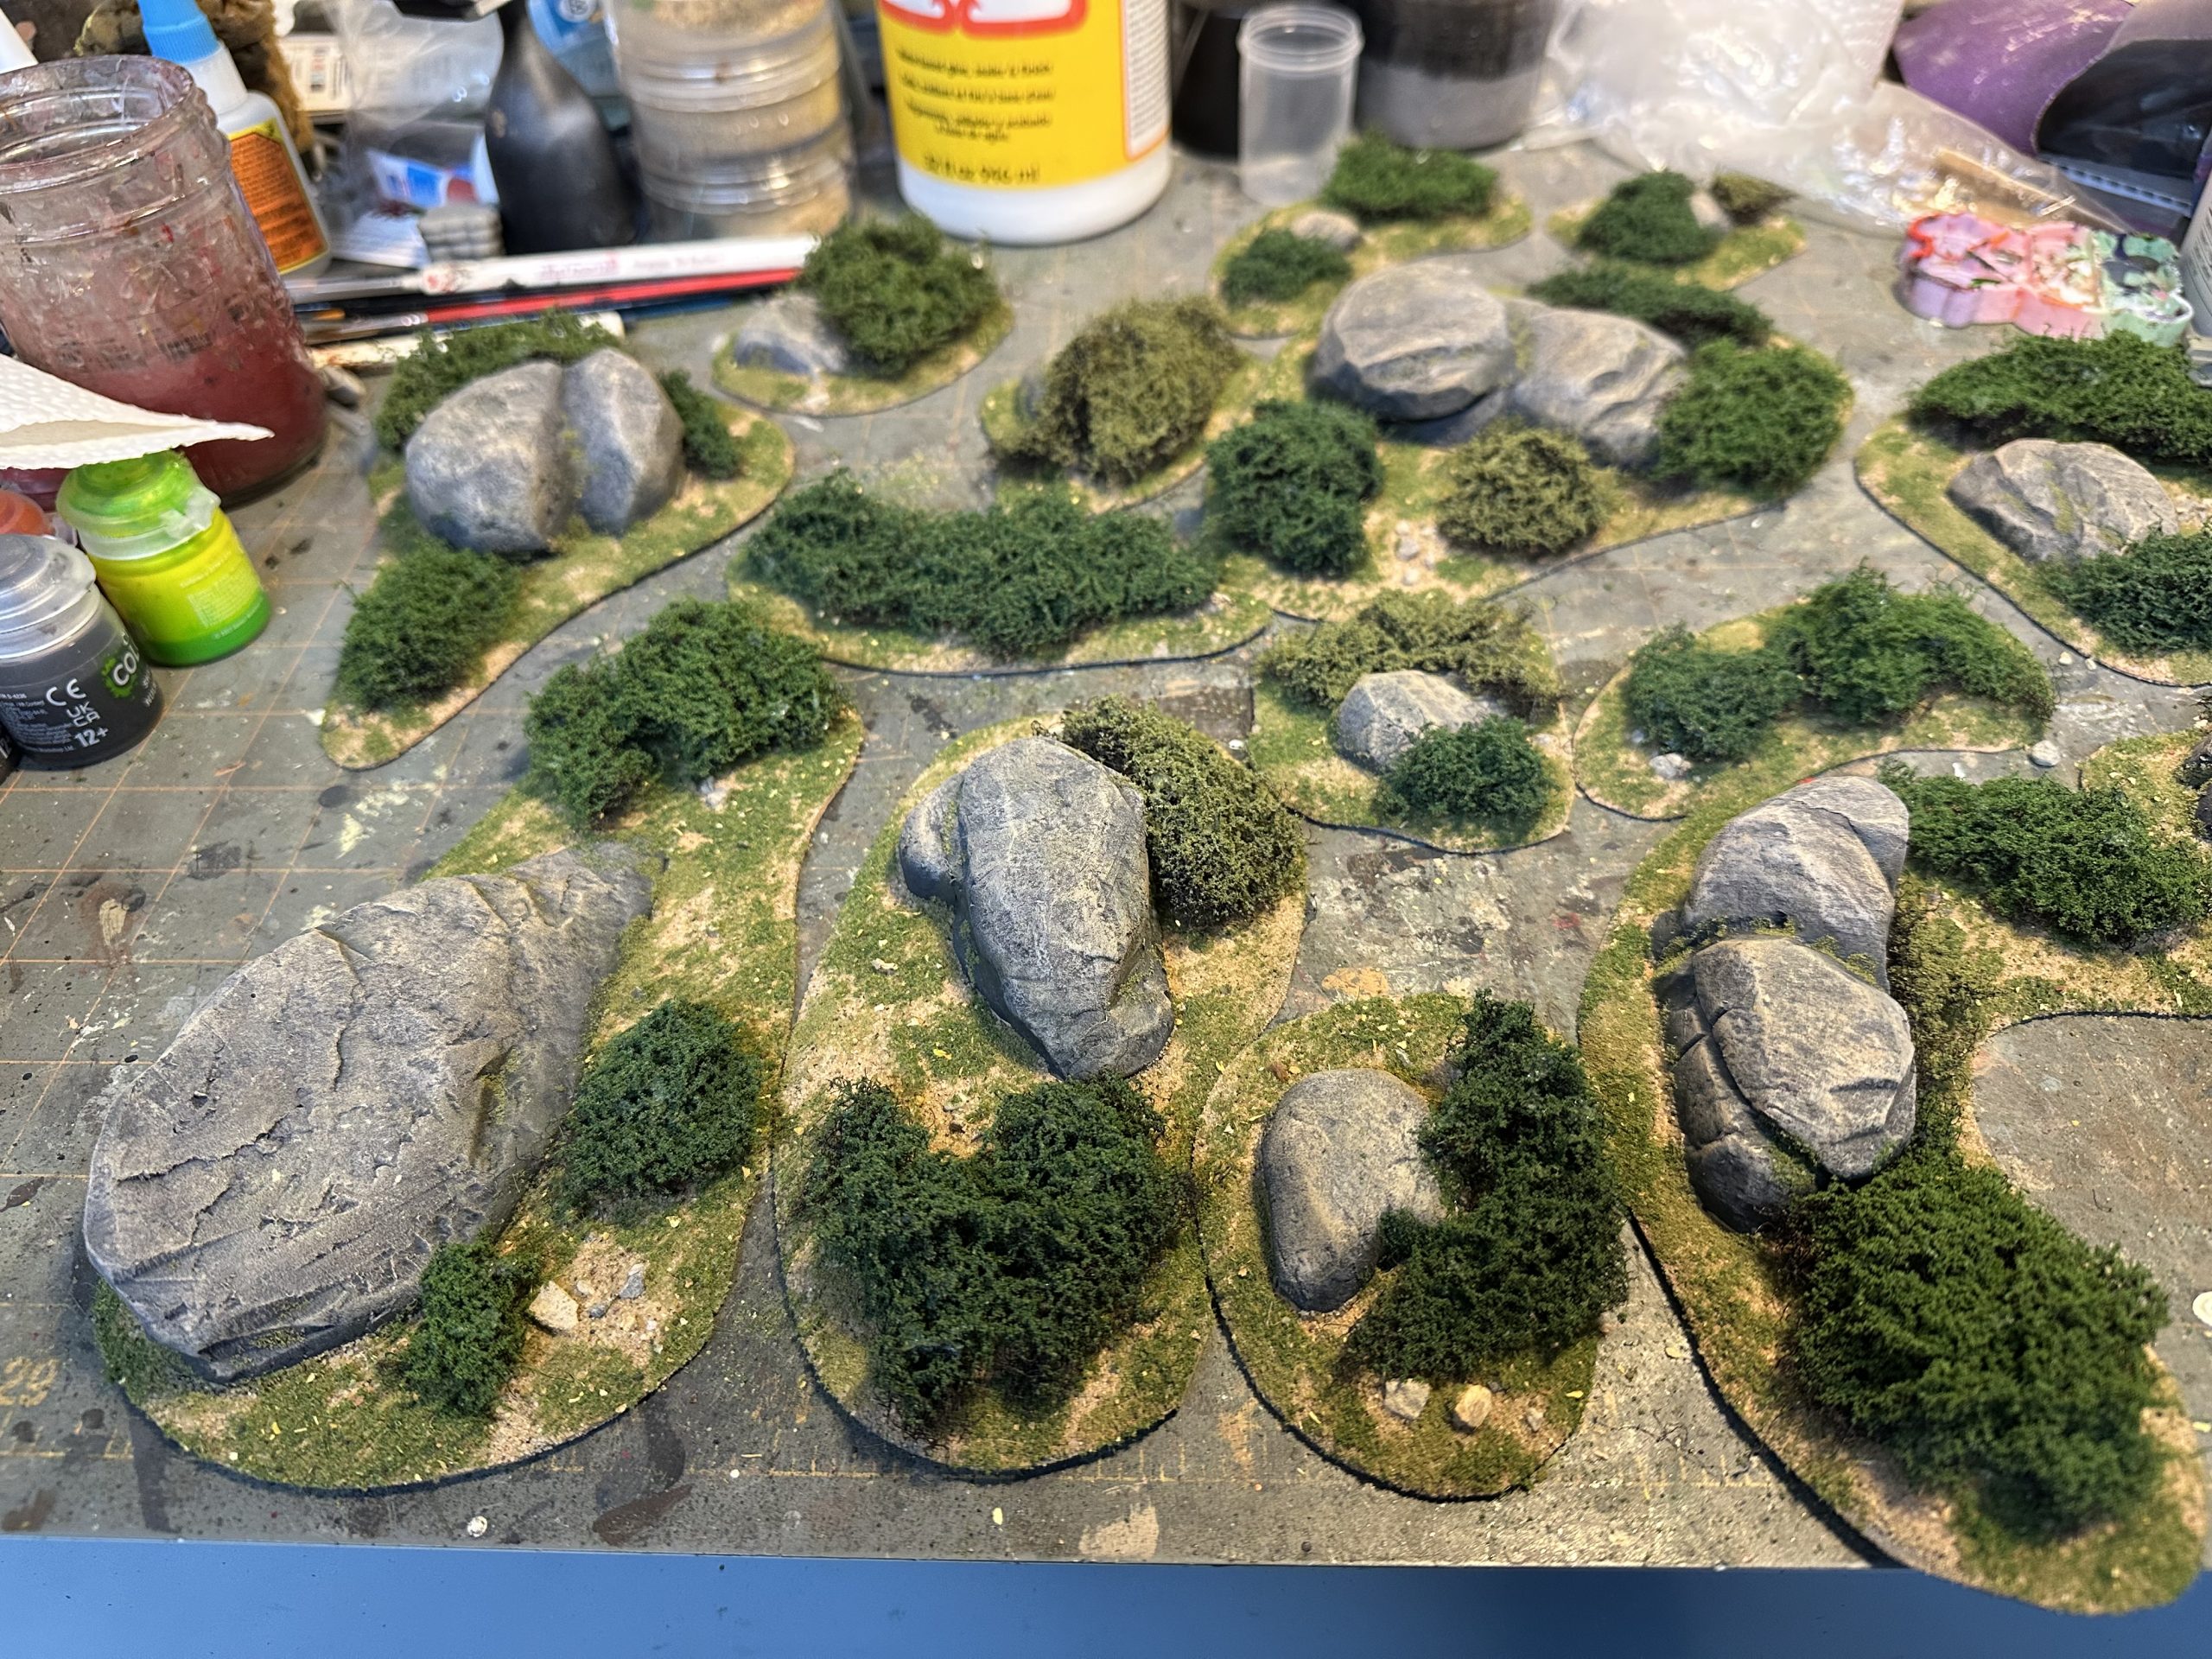
Bushes & Boulder & Badgers in Battle
And here are the bushes and boulder pieces in action along with the trees in a Burrows & Badgers game.

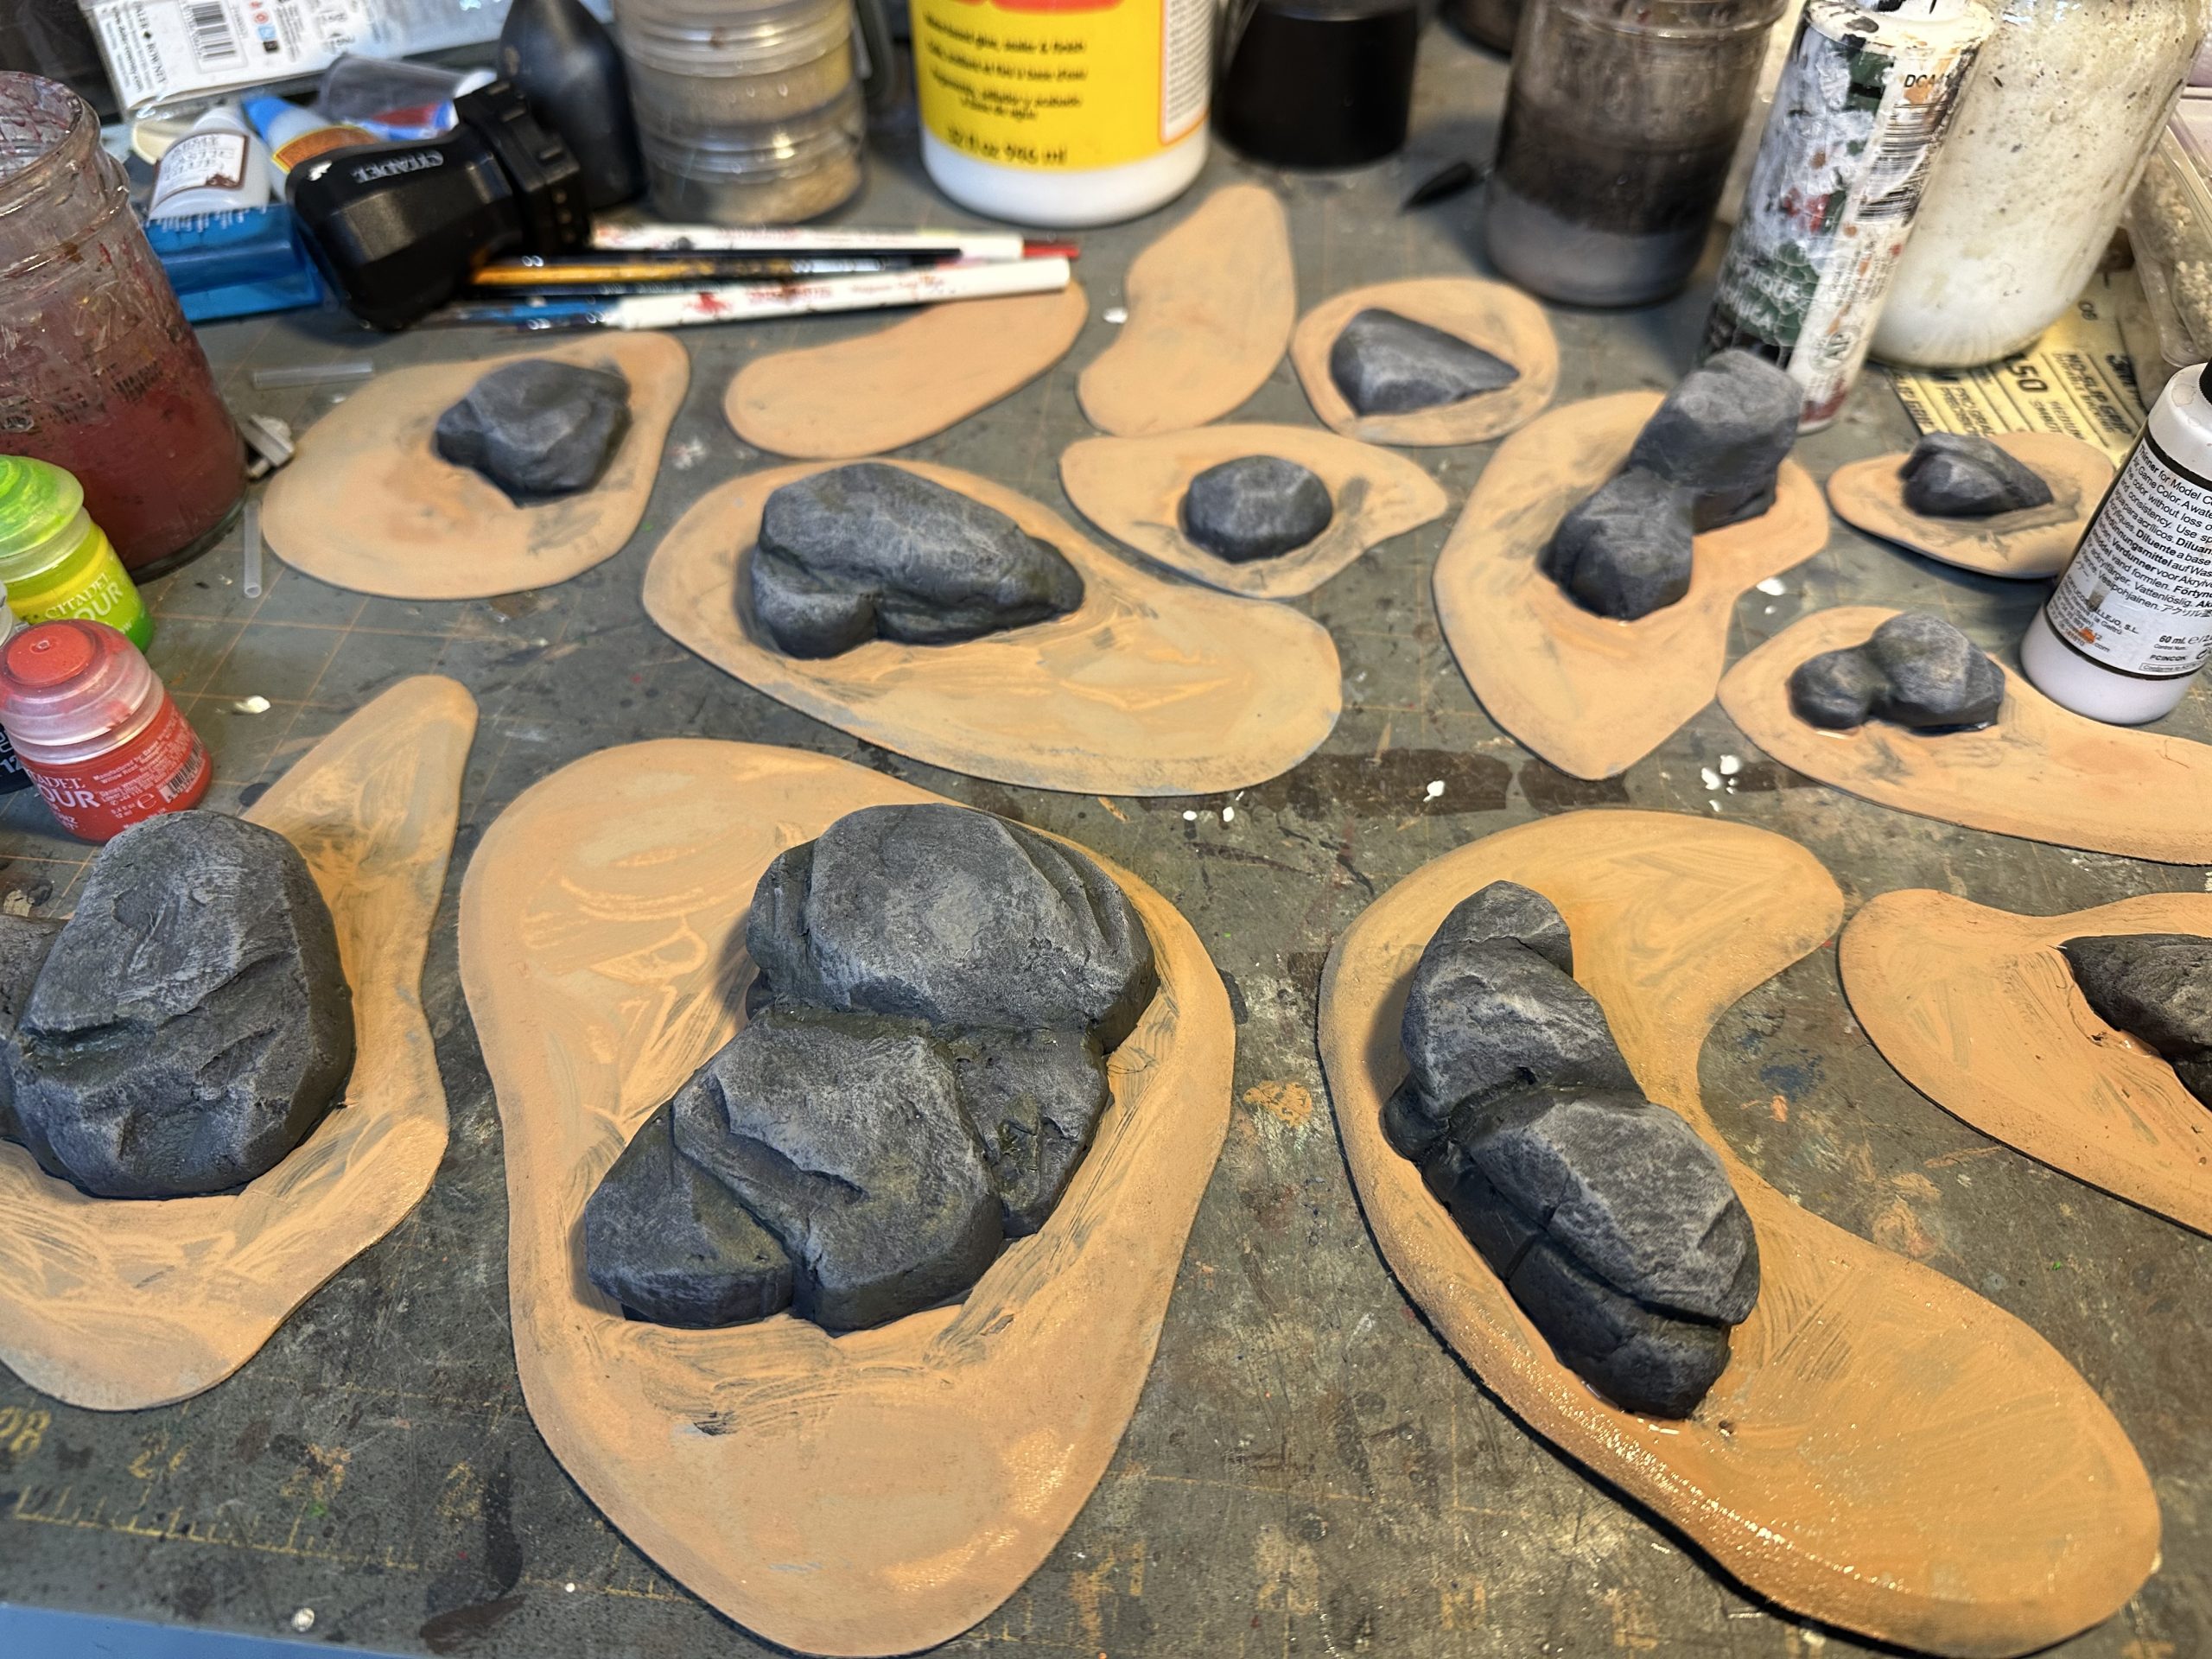
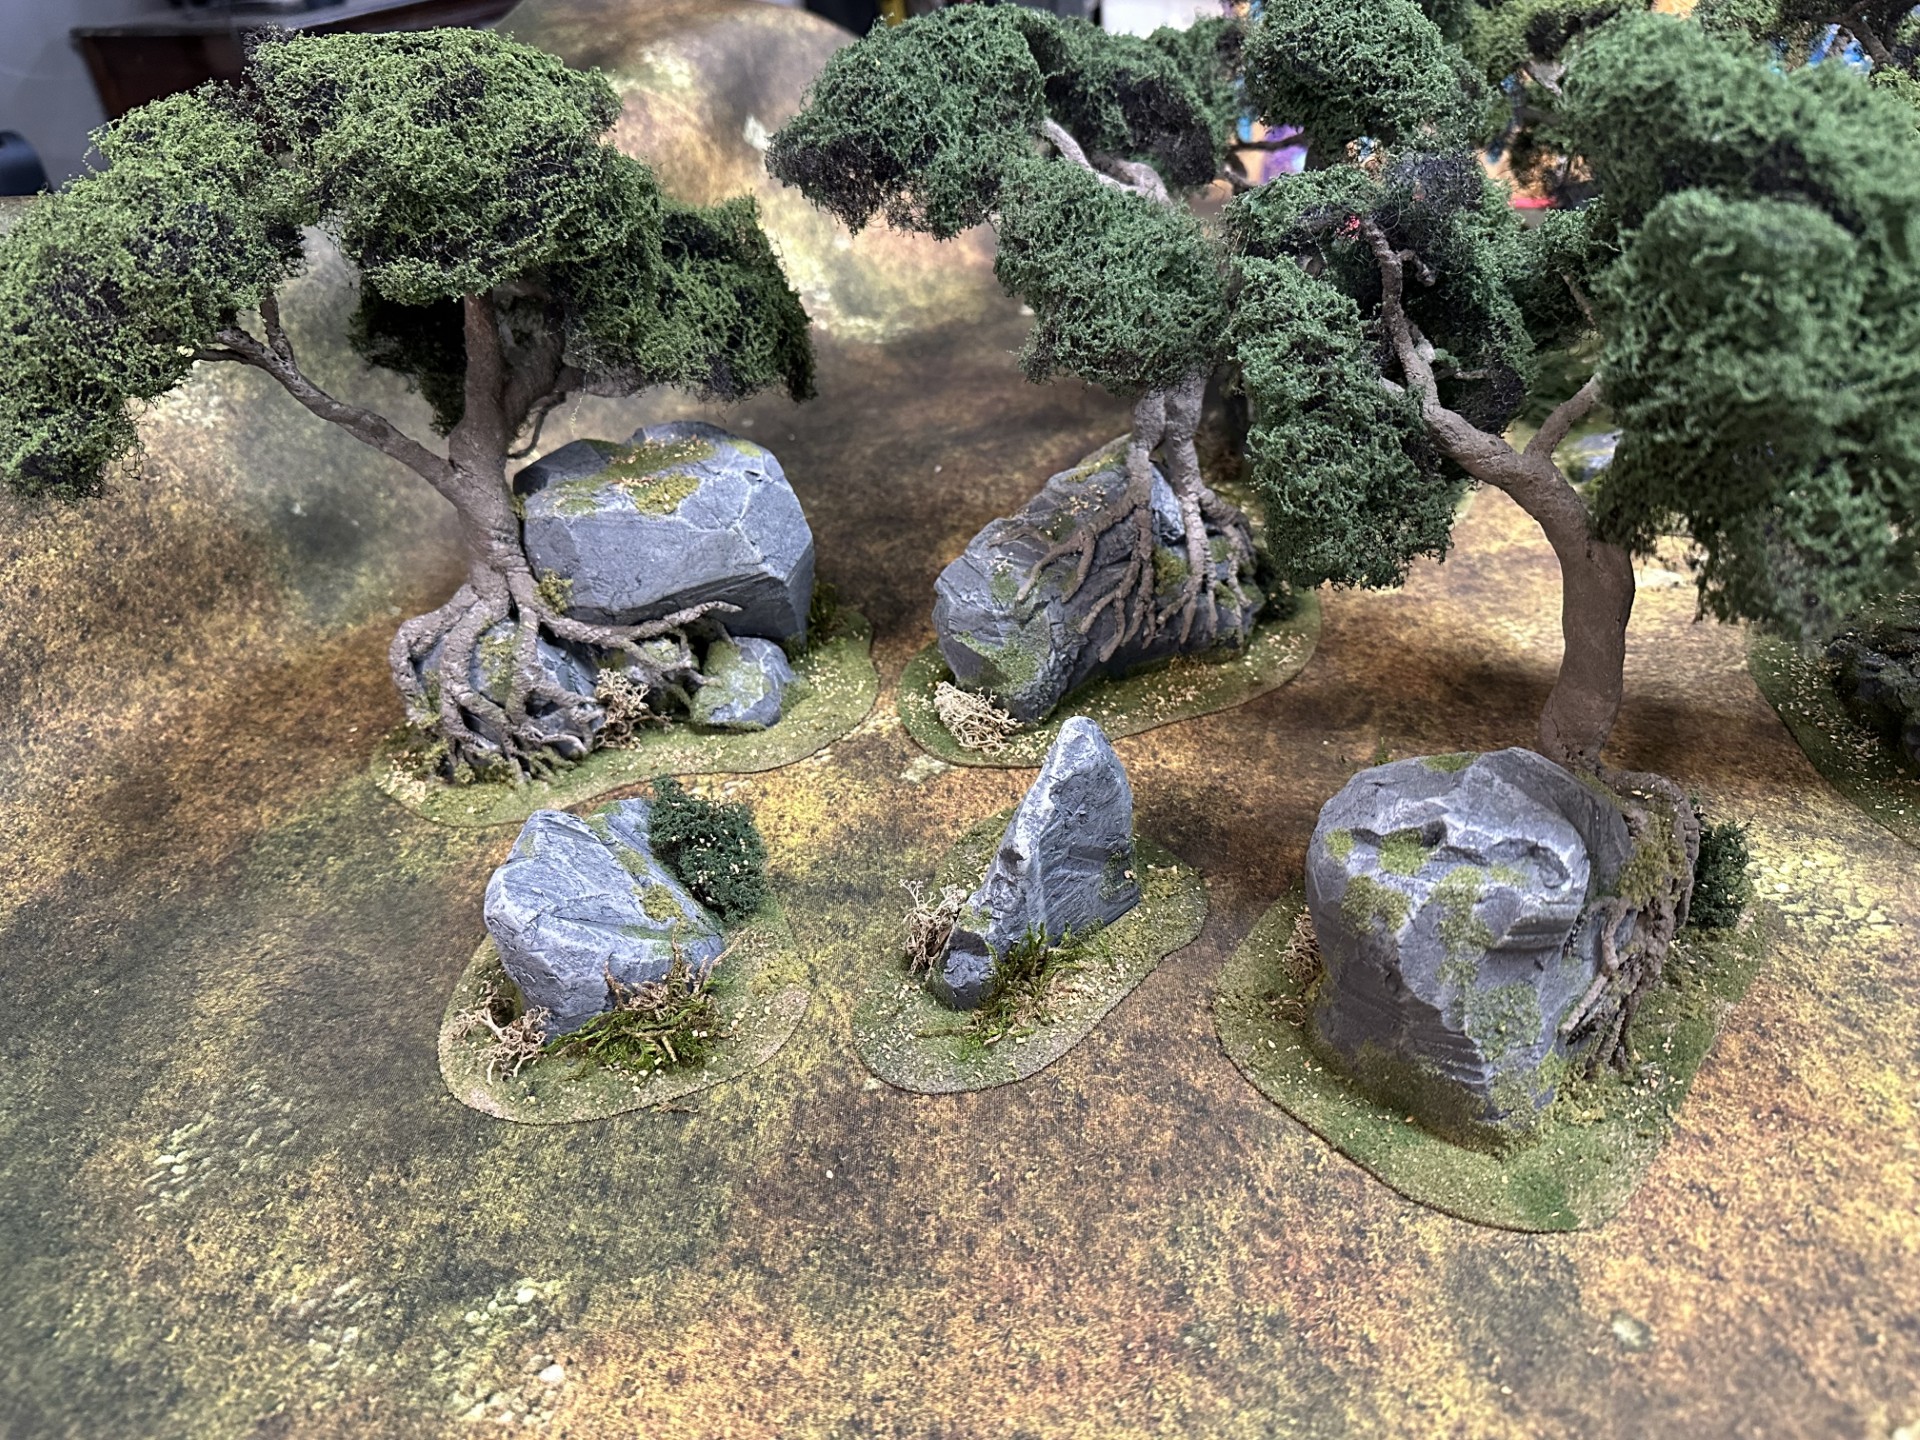
Boulder & Bushes pt 4
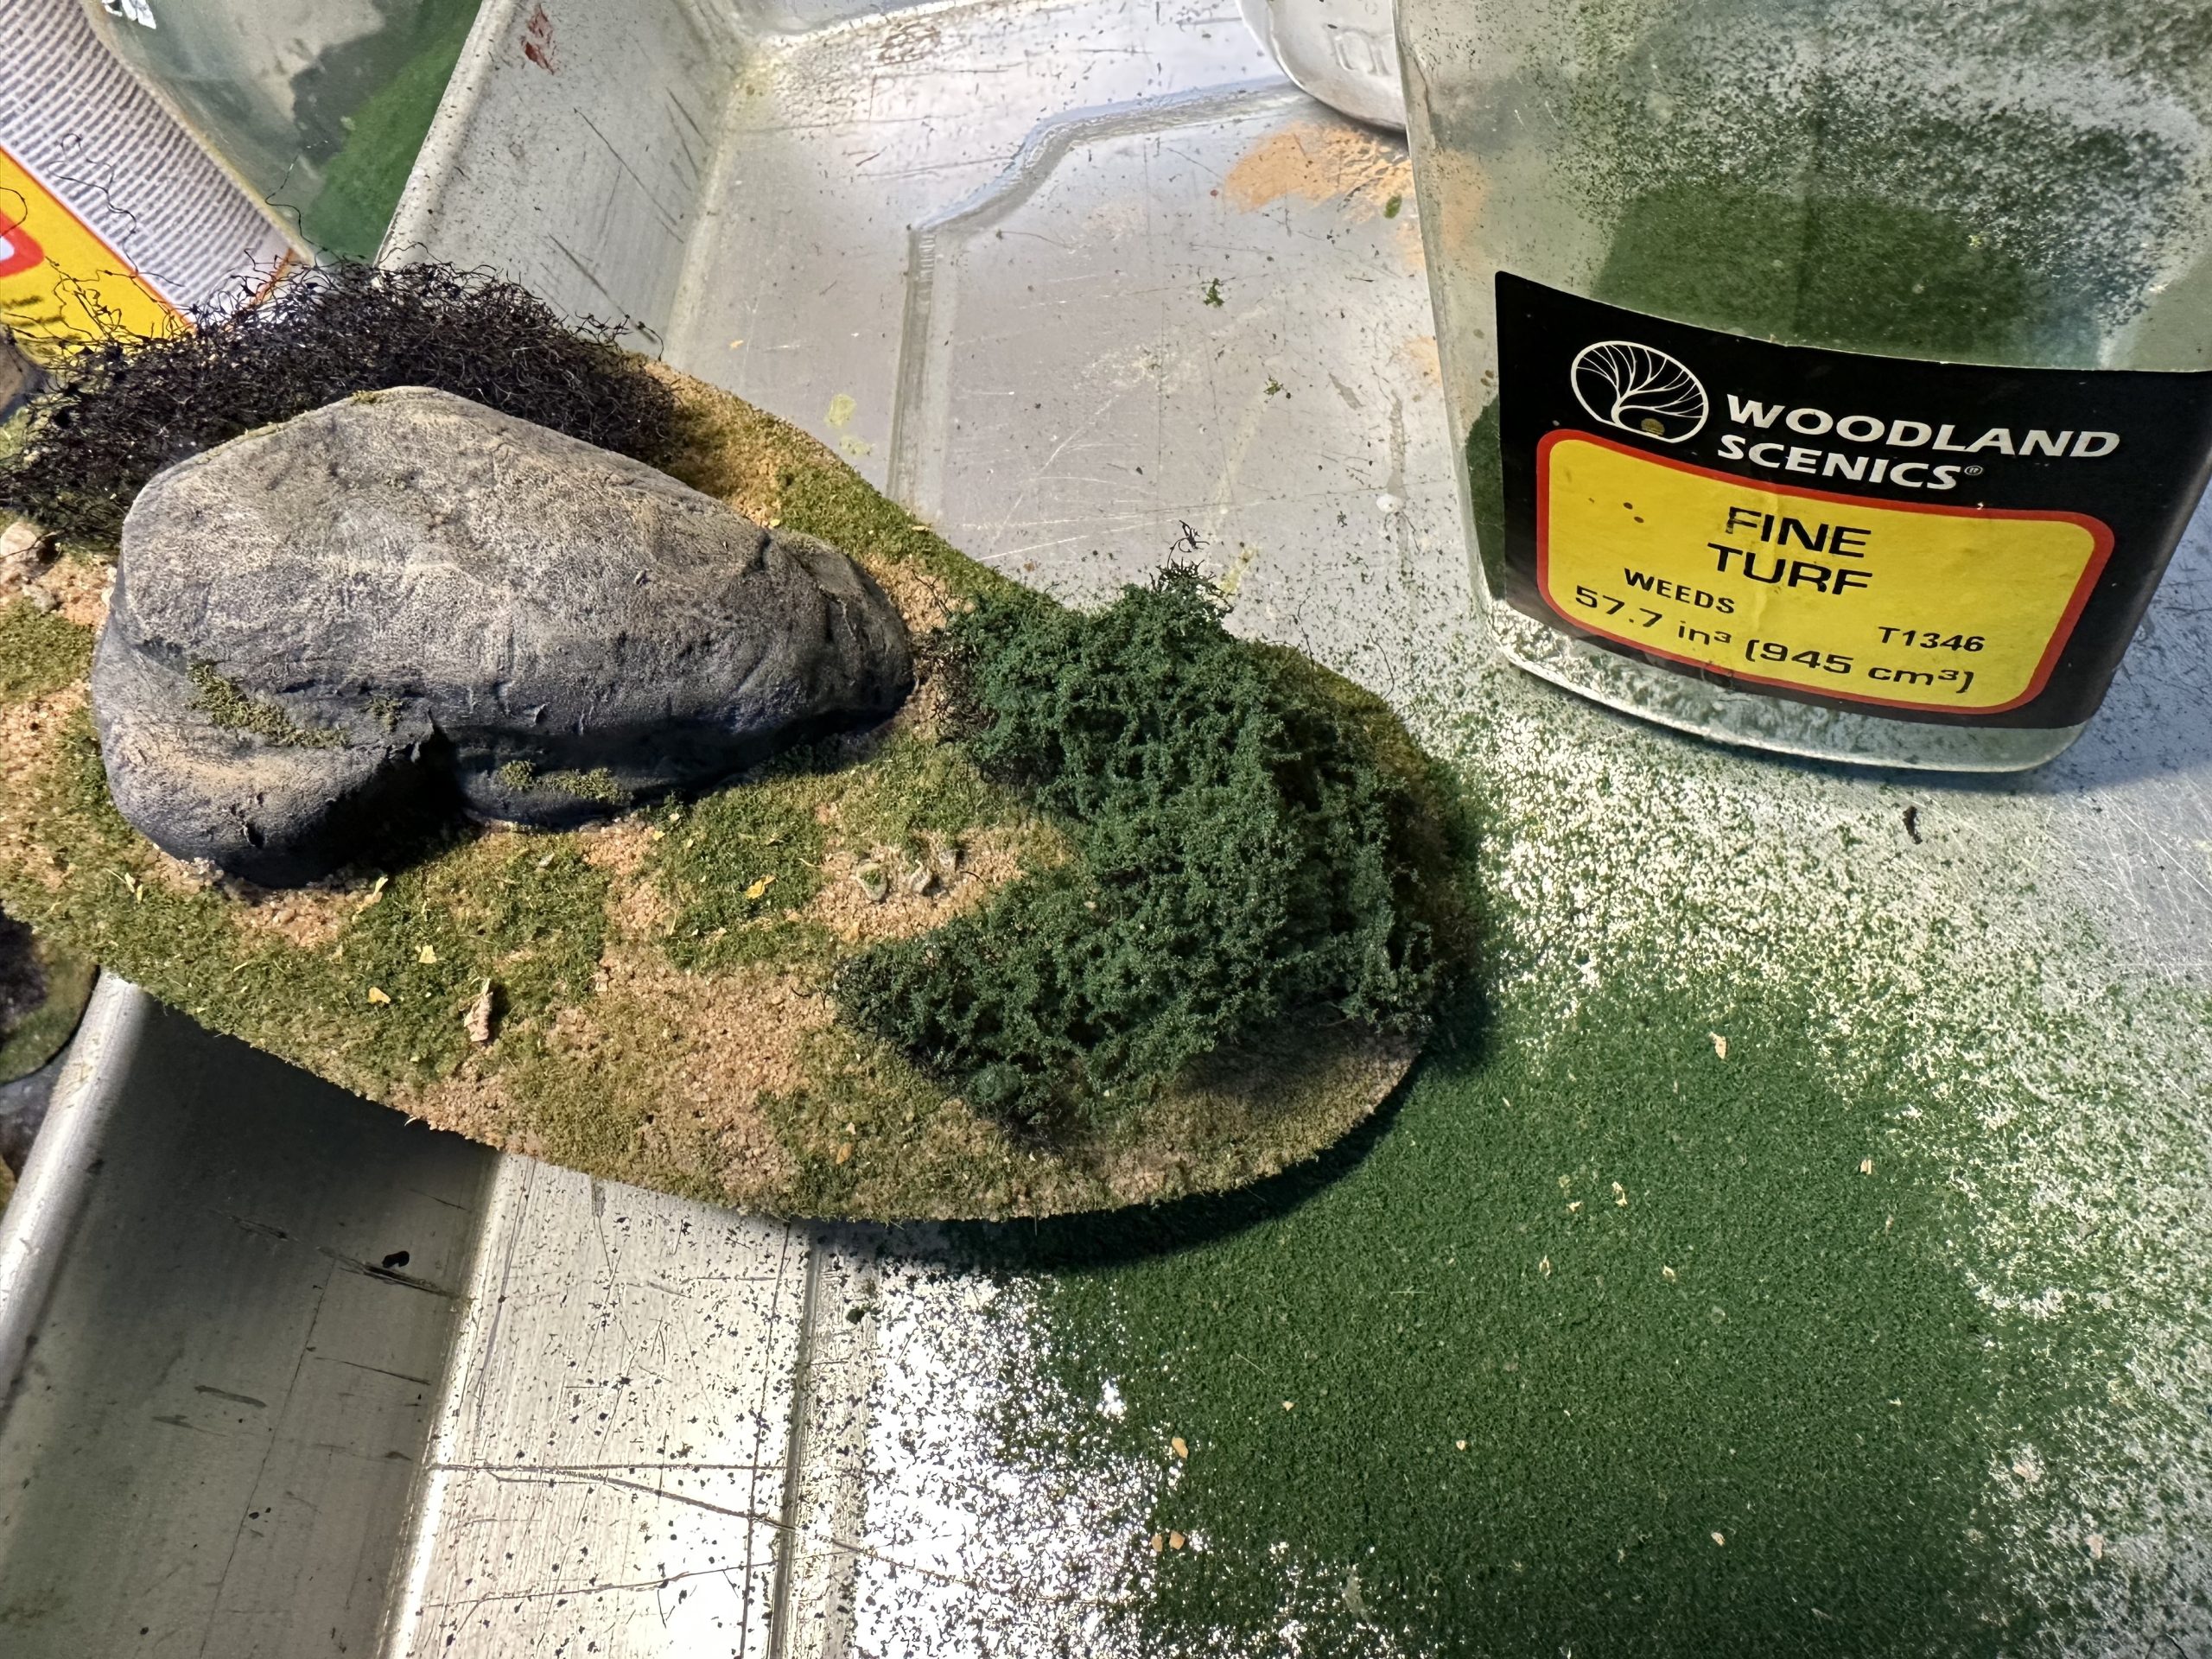
Once the flocking on the bases was dry, I added some small bits of clump foliage. Finally, I painted on more PVA and sprinkled on some medium grass 2mm static grass. This unified things nicely.
Finally, I sprayed the pieces with very watered-down matte Modge Podge (1/5) to fix the flocking in place and prevent shedding. I’m pretty pleased with the results.
Boulder & Bushes pt 3
Next is the bushes. Once again I used the cheap spun plastic furnace filters. I cut small pieces, teased them apart (see the tree tutorials), and then primed them in dark brown with a rattle can. I pulled apart the bushes into the shapes I wanted and glued them down Using hot-glue.
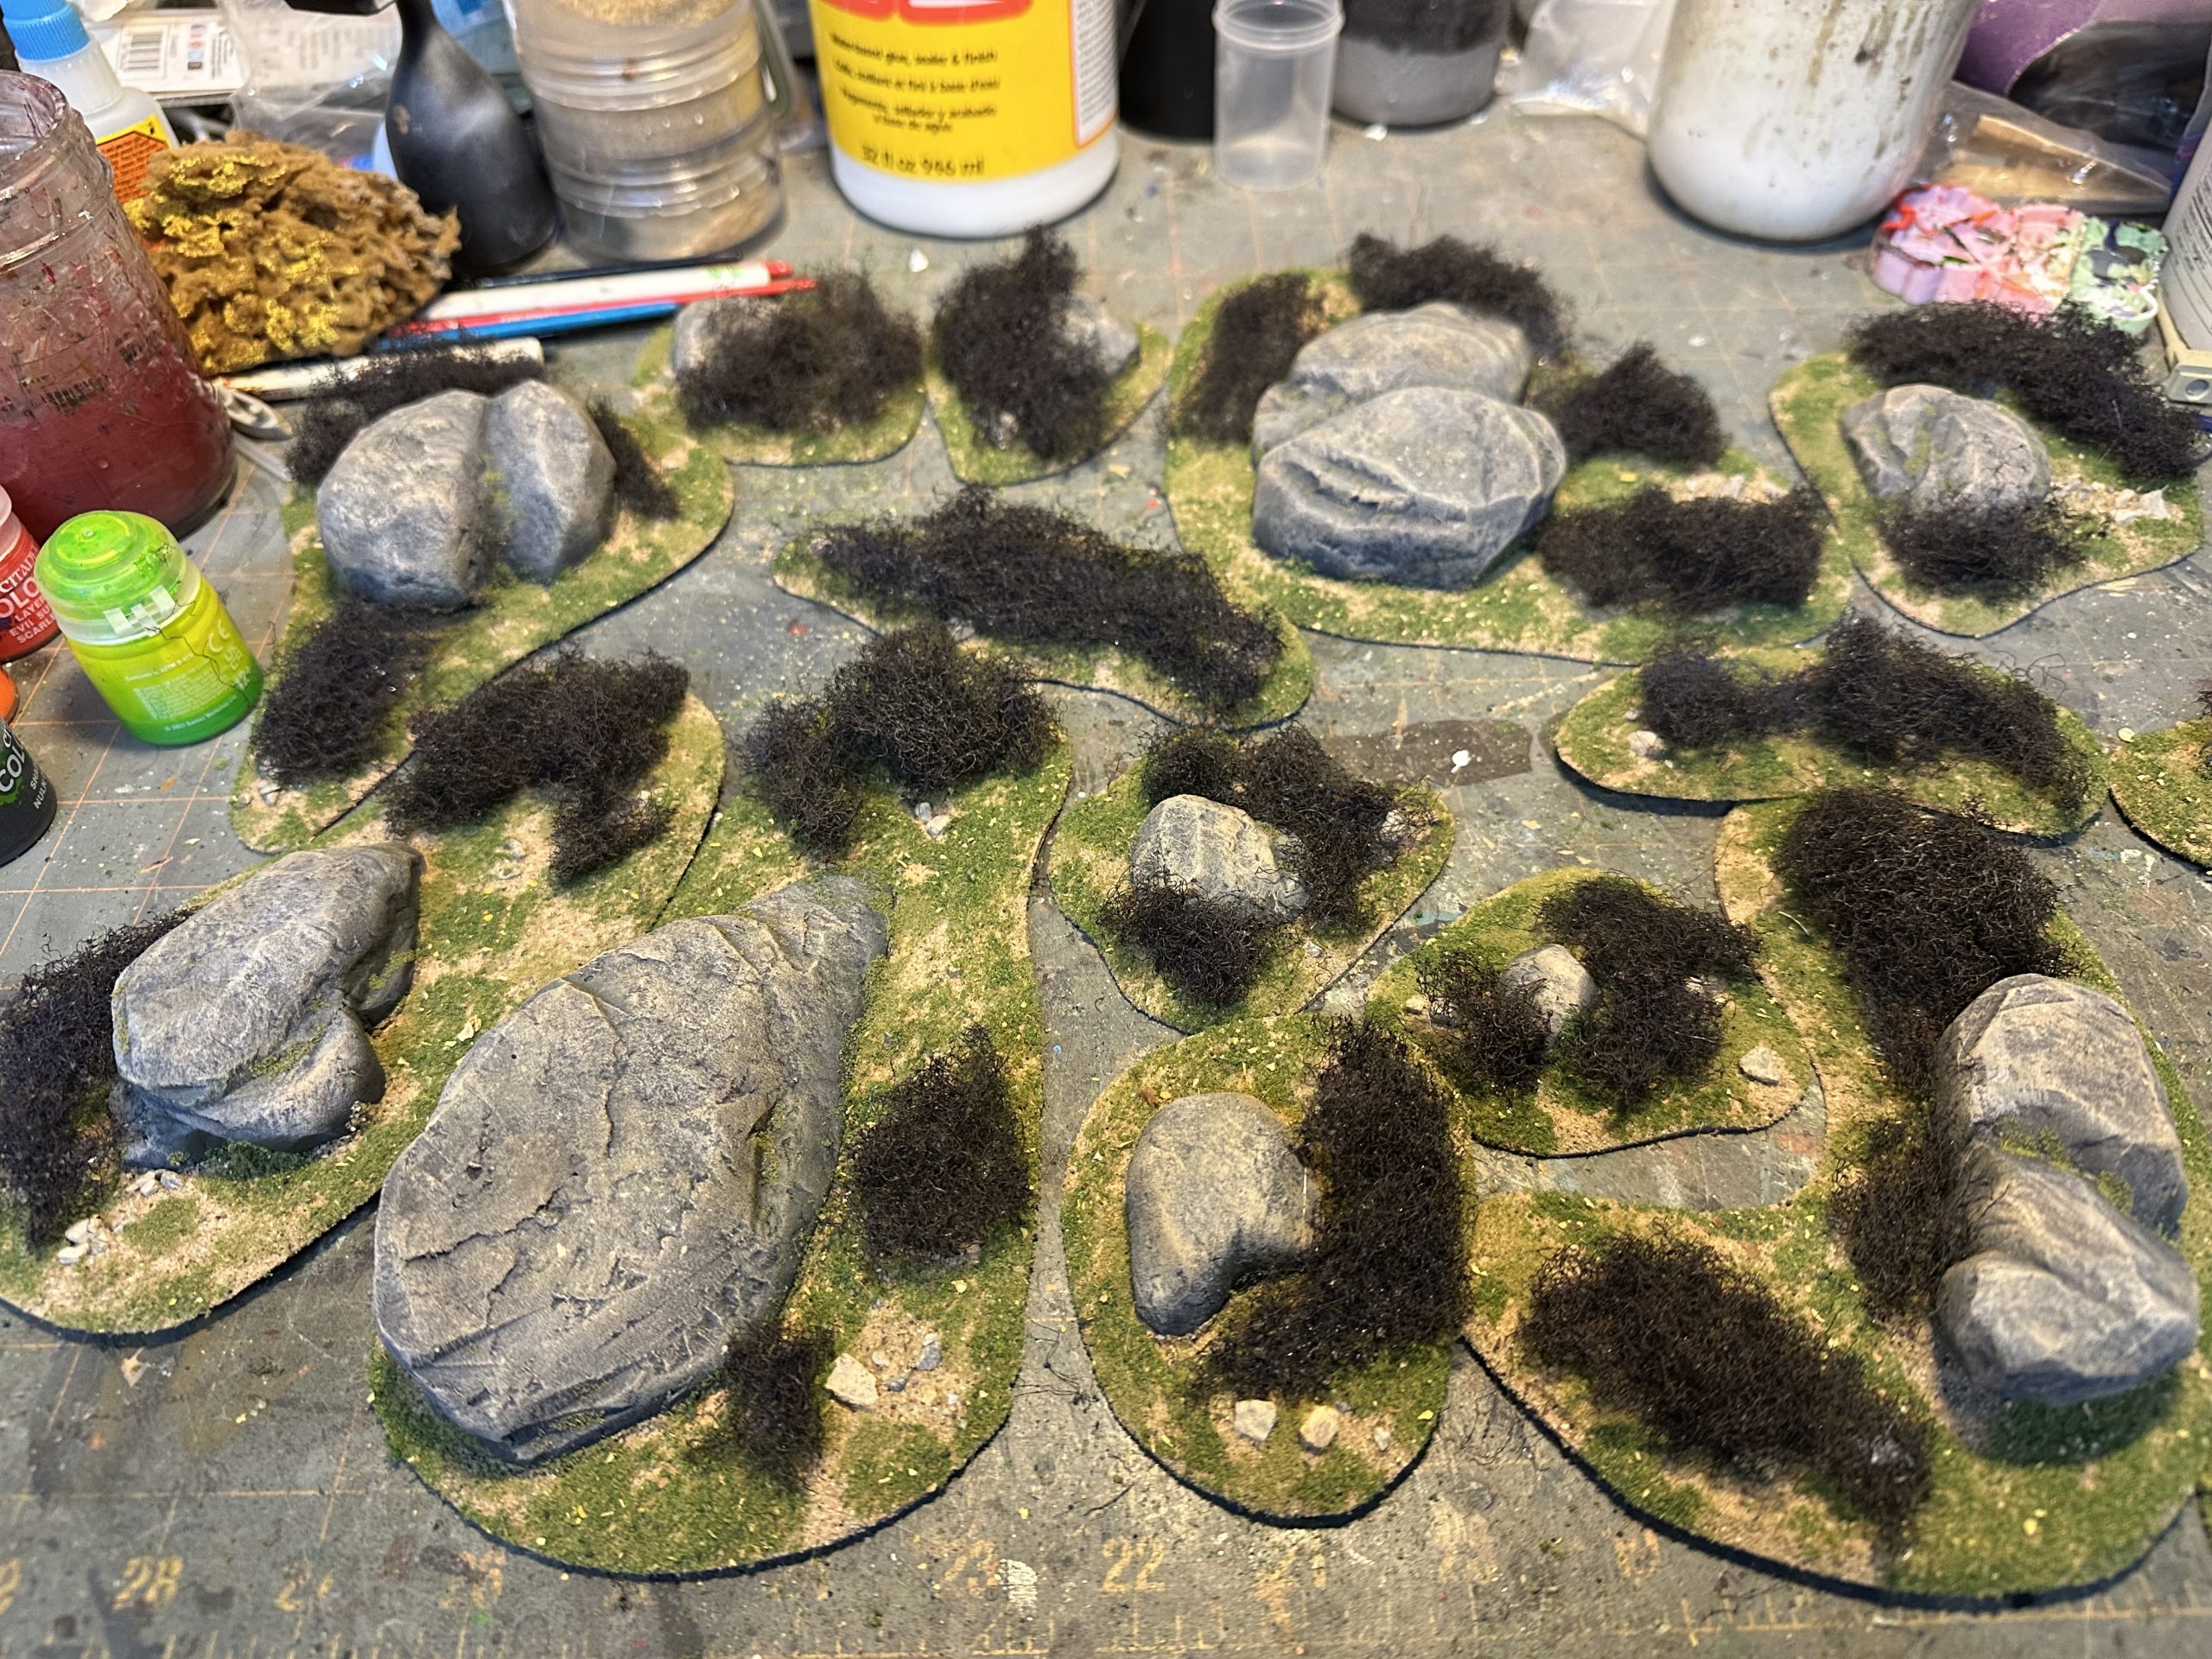
Then I brushed the 50/50 watered-down PVA onto the bushes and sprinkled flocking on them. I used three different colours of flocking for variety..
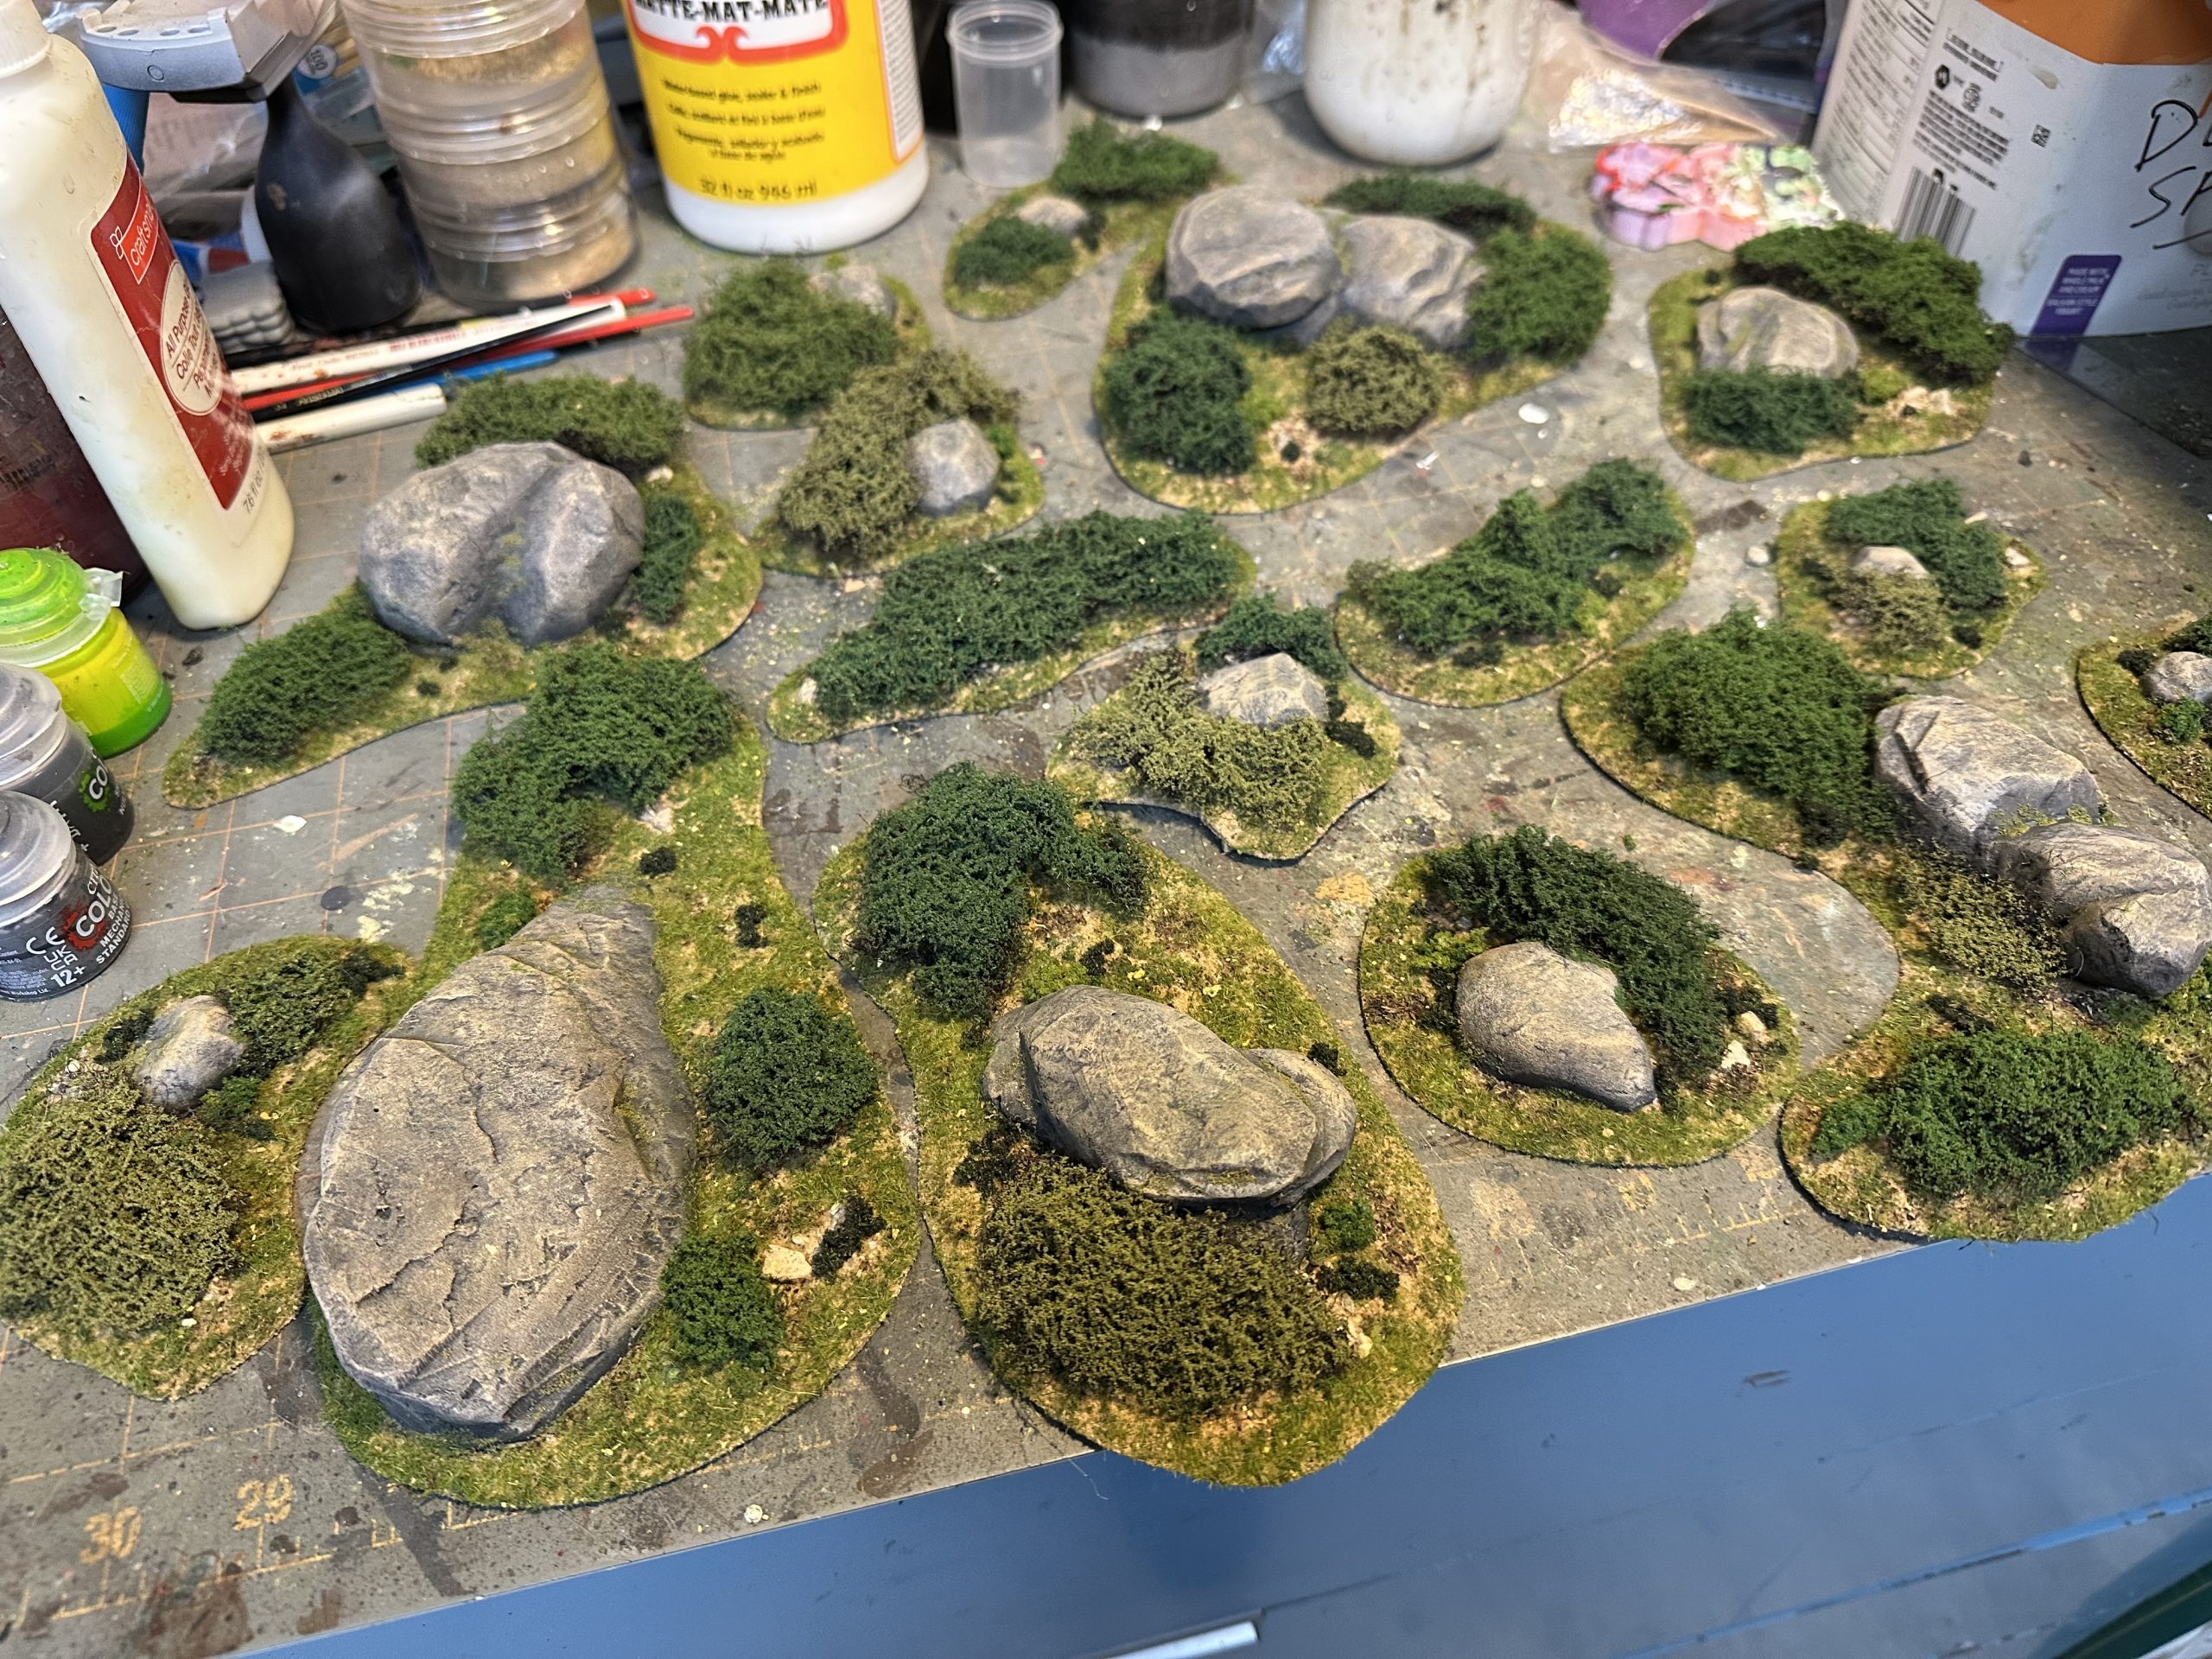
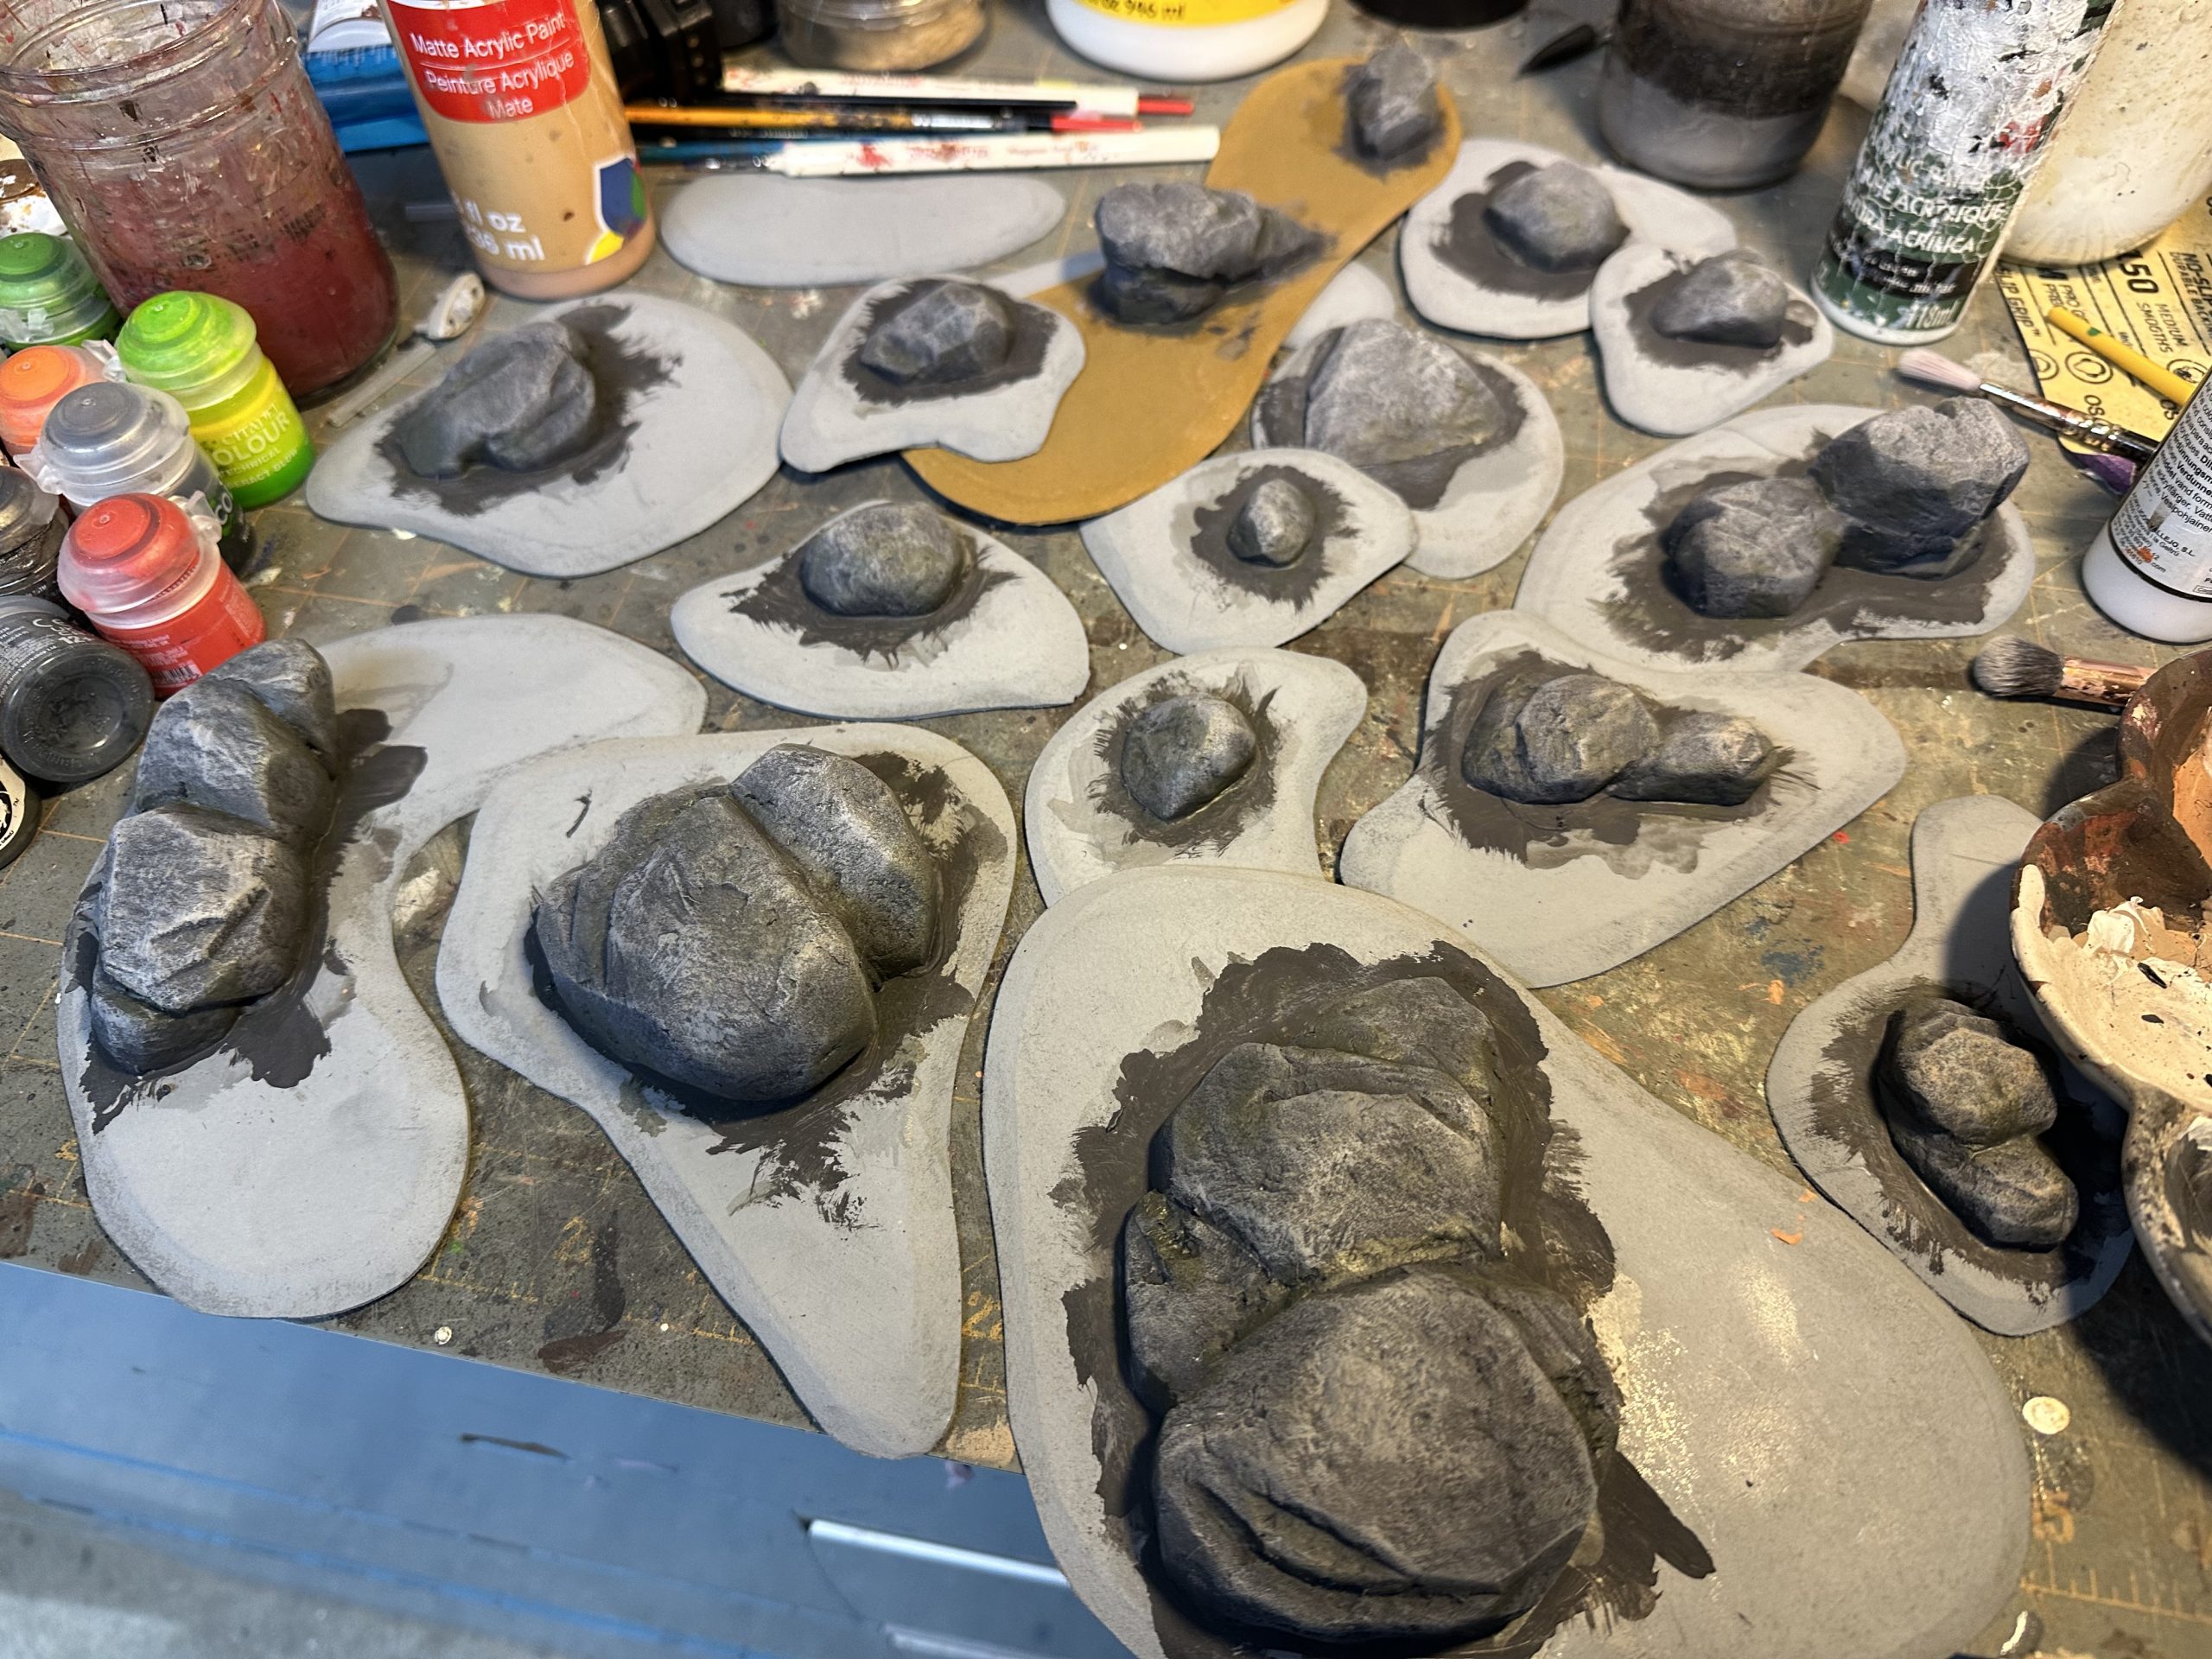
Boulder & Bushes pt2
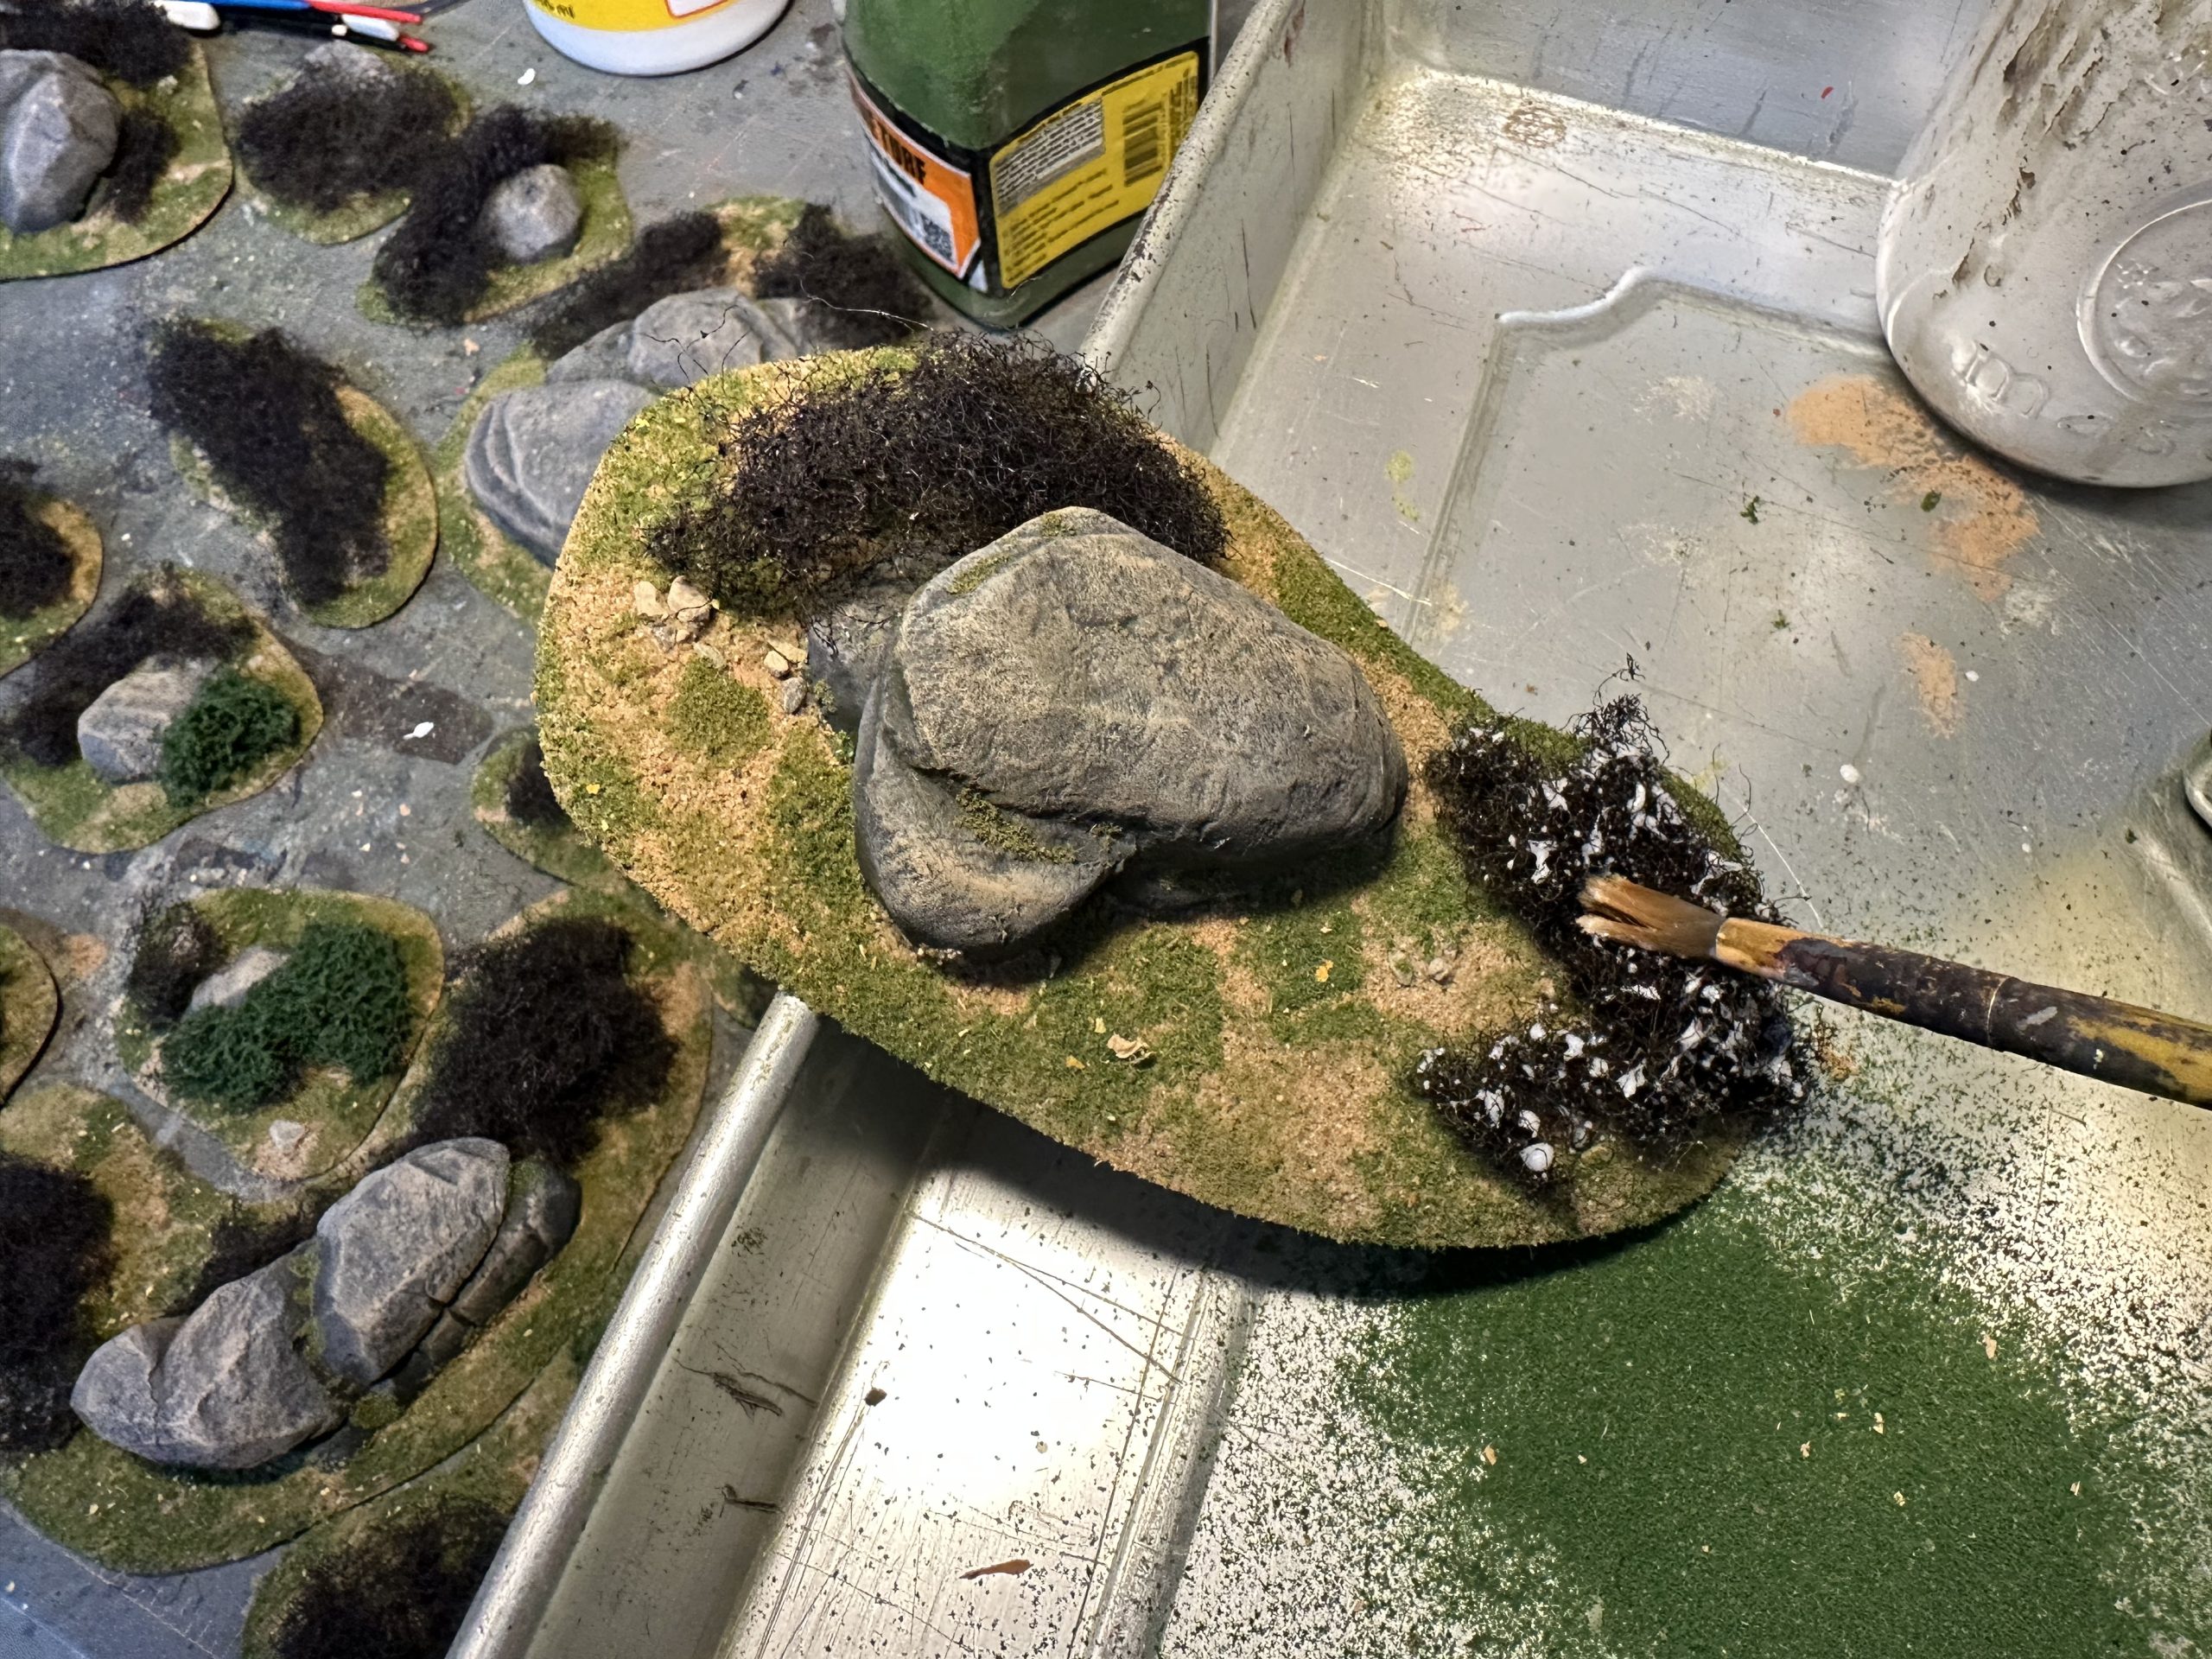
The next step was to add sand and gravel to the bases. I painted on water-down PVA (50/50) sprinkled on the bits of gravel first, then the sand.
Then, on to the flocking.
I find that the key to selling natural looking terrain is have lots of variance in colours and textures.
I started with a Woodland Scenics – Burnt Grass fine flocking. Using watered-down (50/50) PVA, I added the flocking to cracks and crevasses in the rocks and then in uneven patches on the base.
At this point, I realized that the rocks were still too monochrome gray. So I dry-brushed on some browns and tans. And then I used a sponge to dab on some light tan spots.
Next I used the watered down PVA to add patches of my ‘dirty mix’. Basically, it’s a tub containing the leftovers of flocking, static grass, herbs, crushed leaves, etc. It introduces some nice variety.

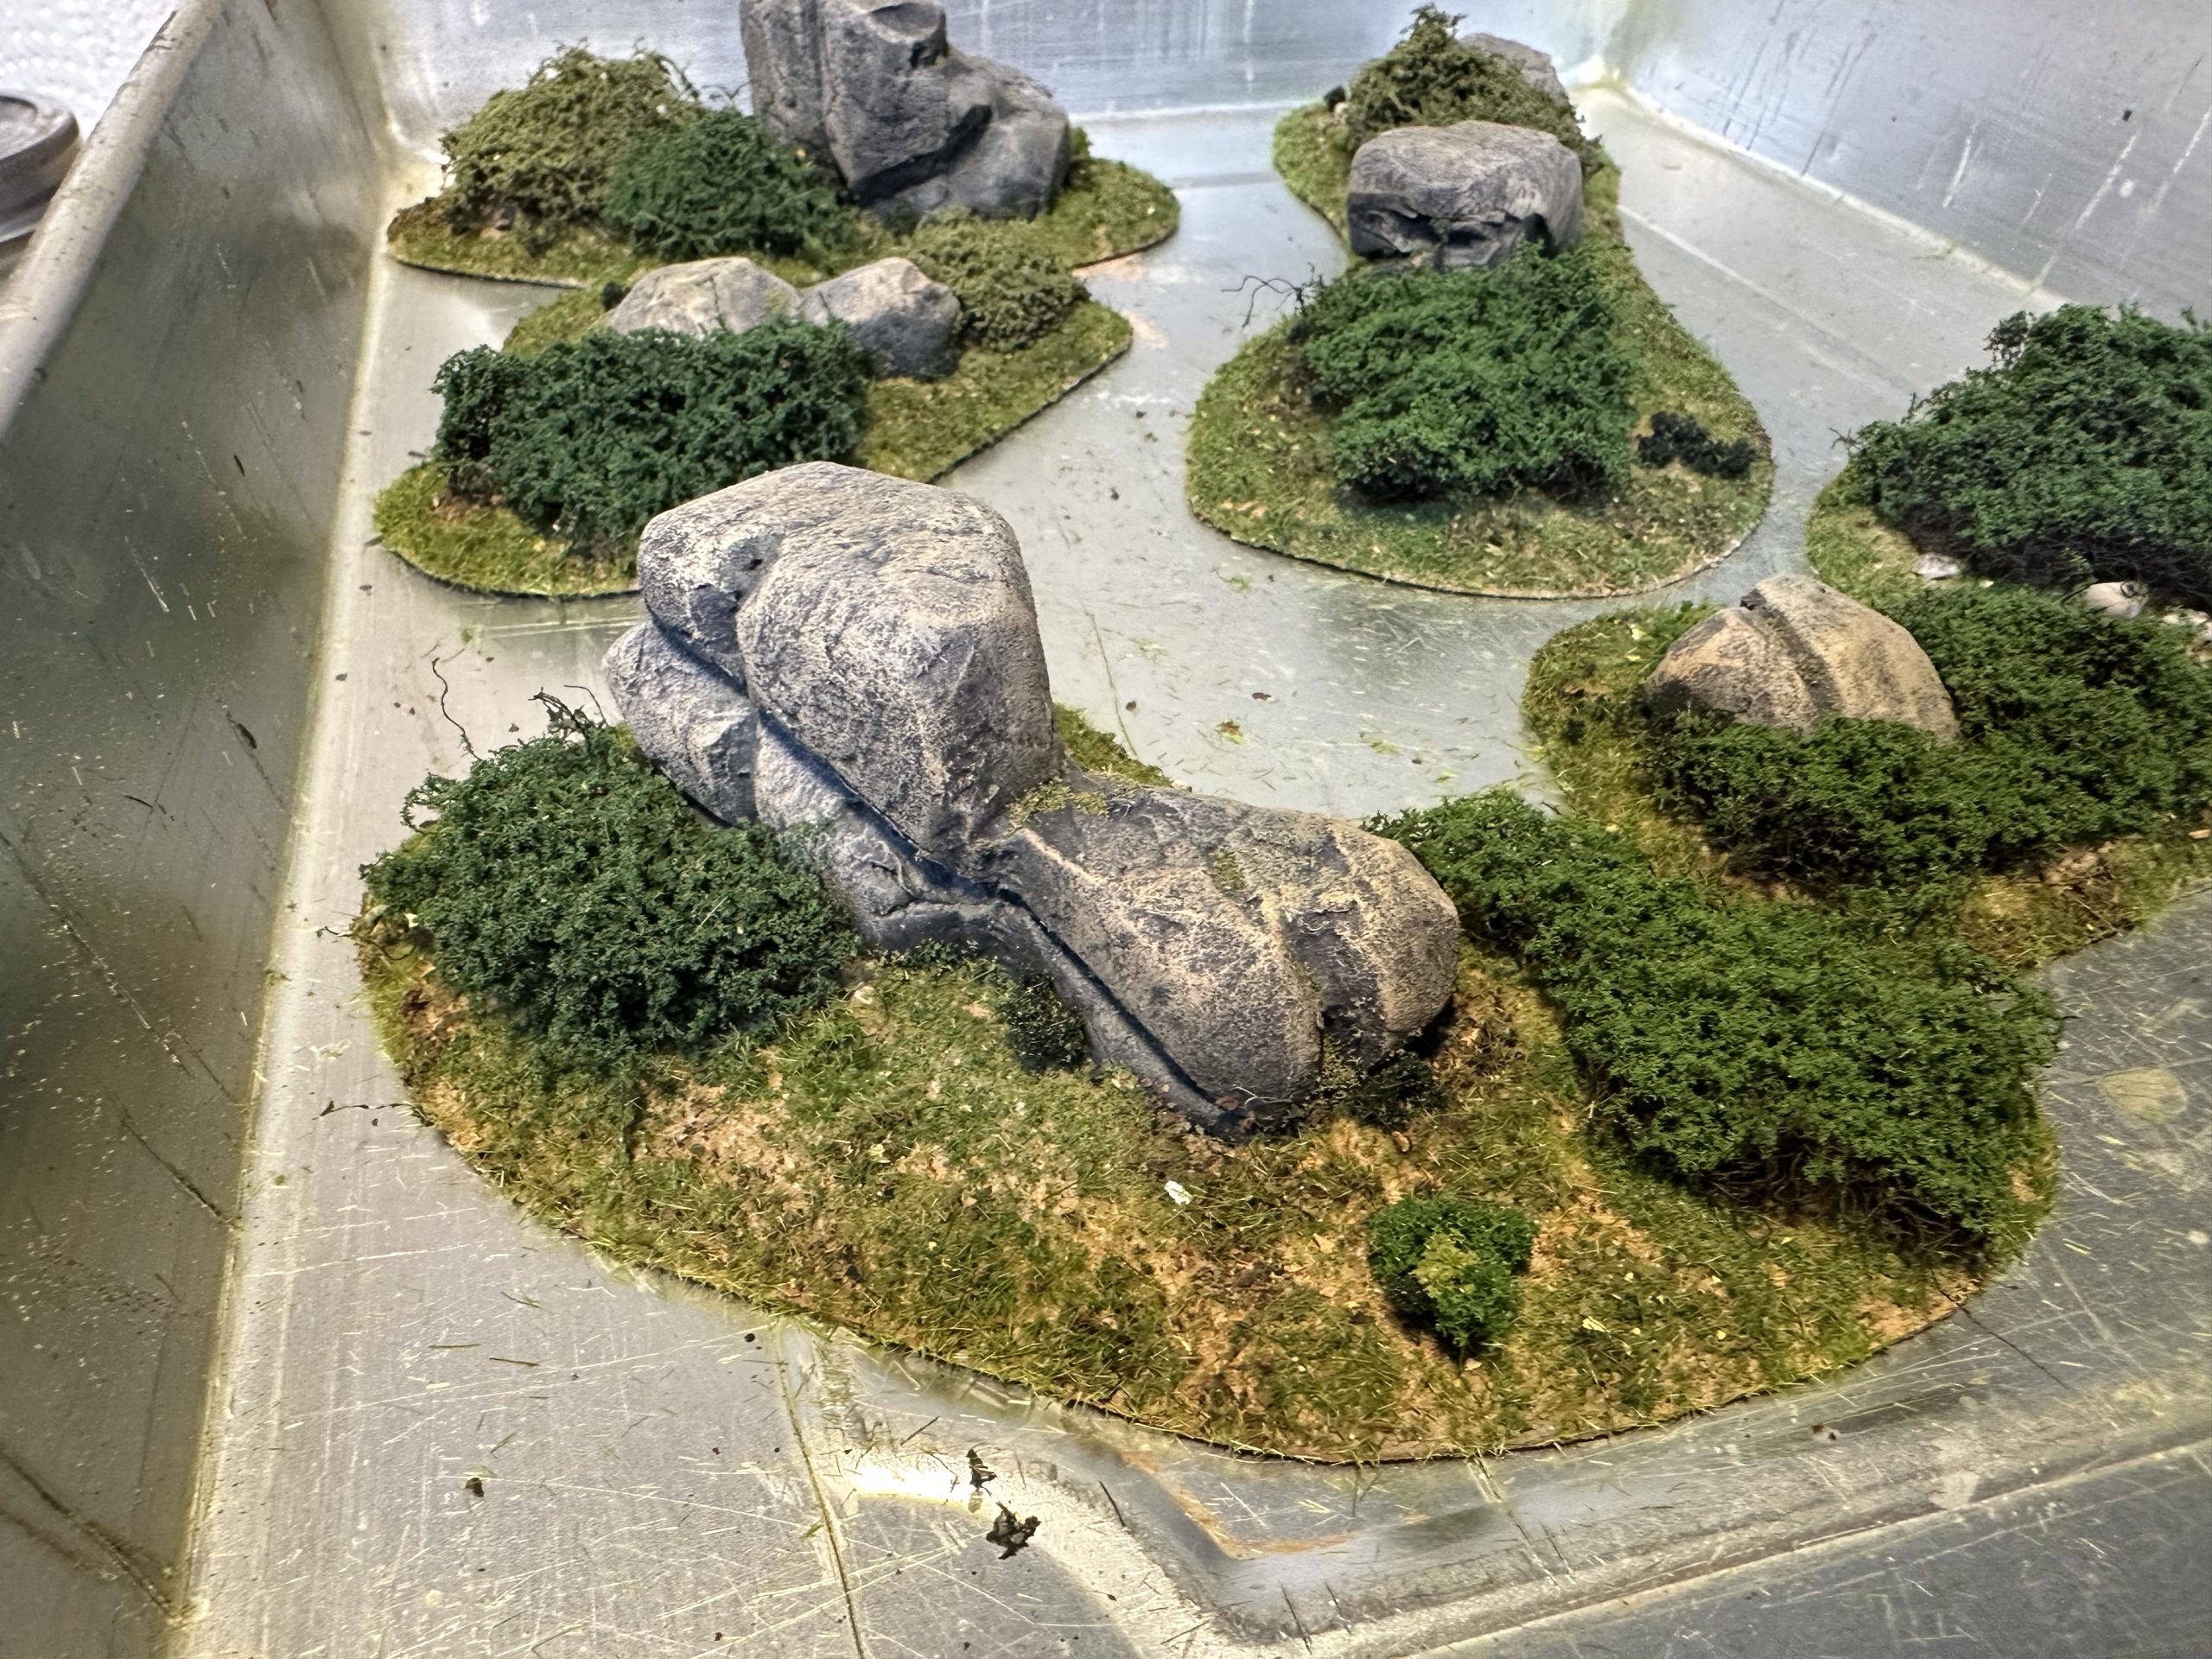
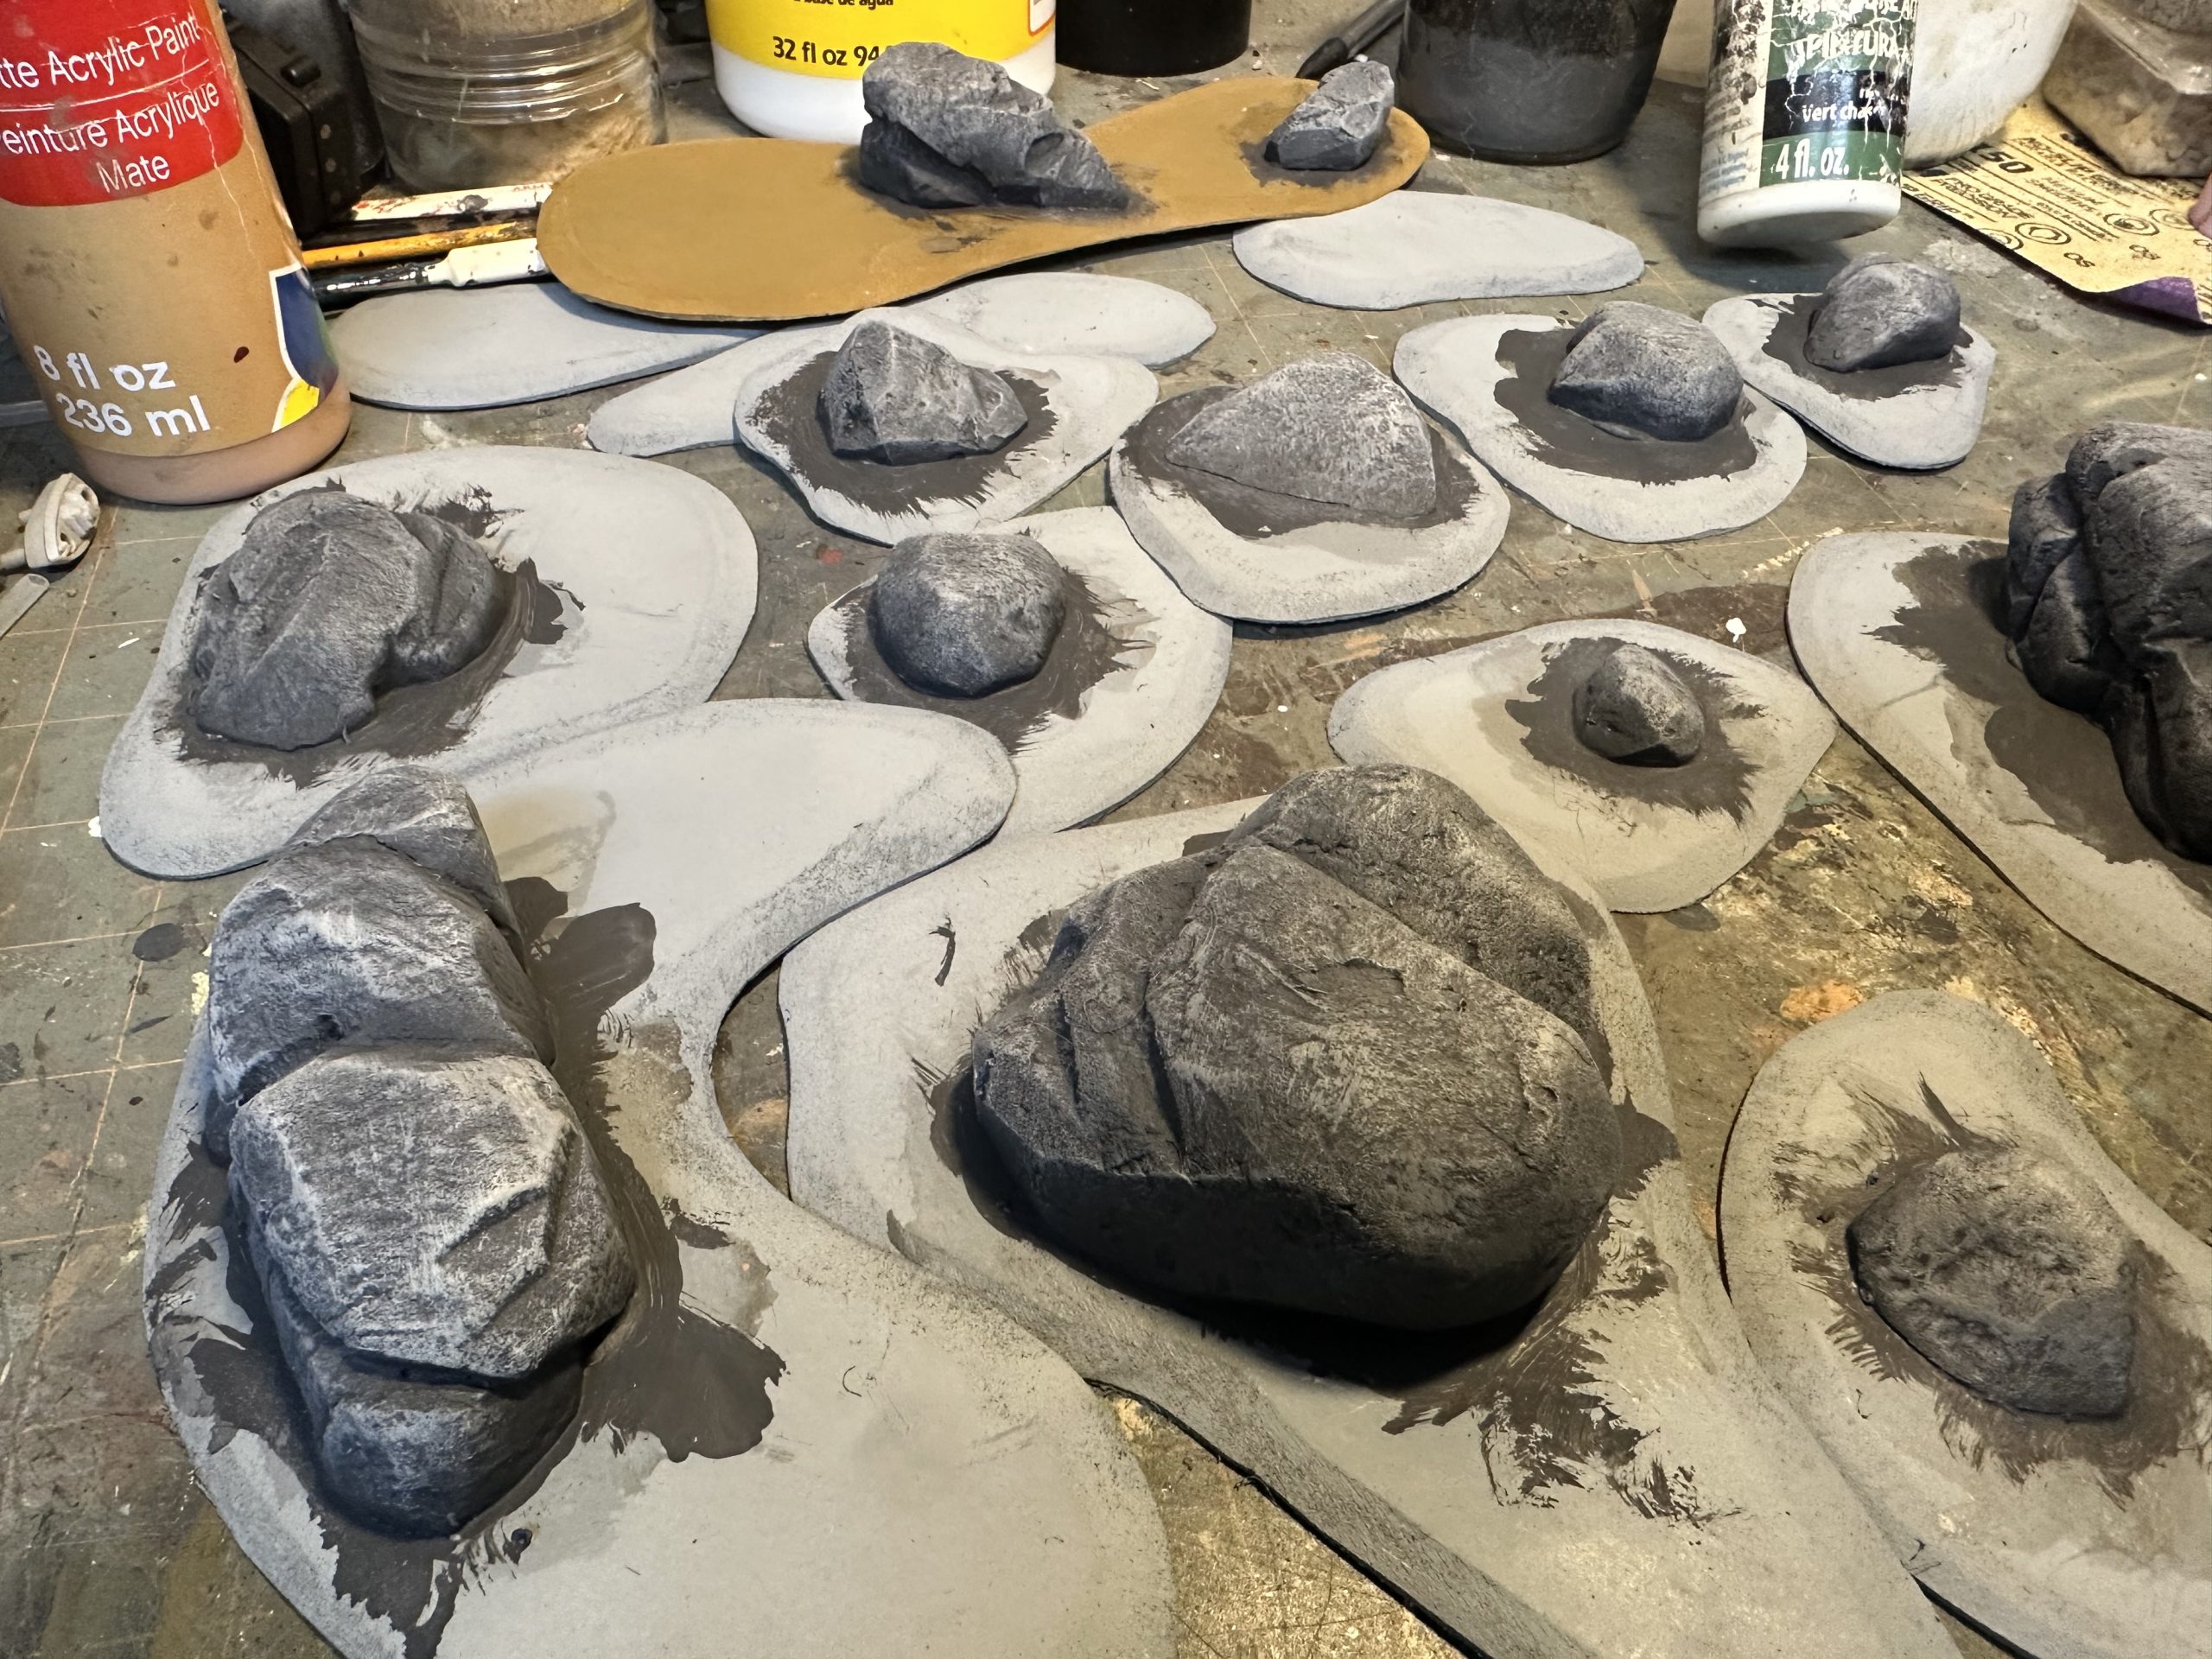
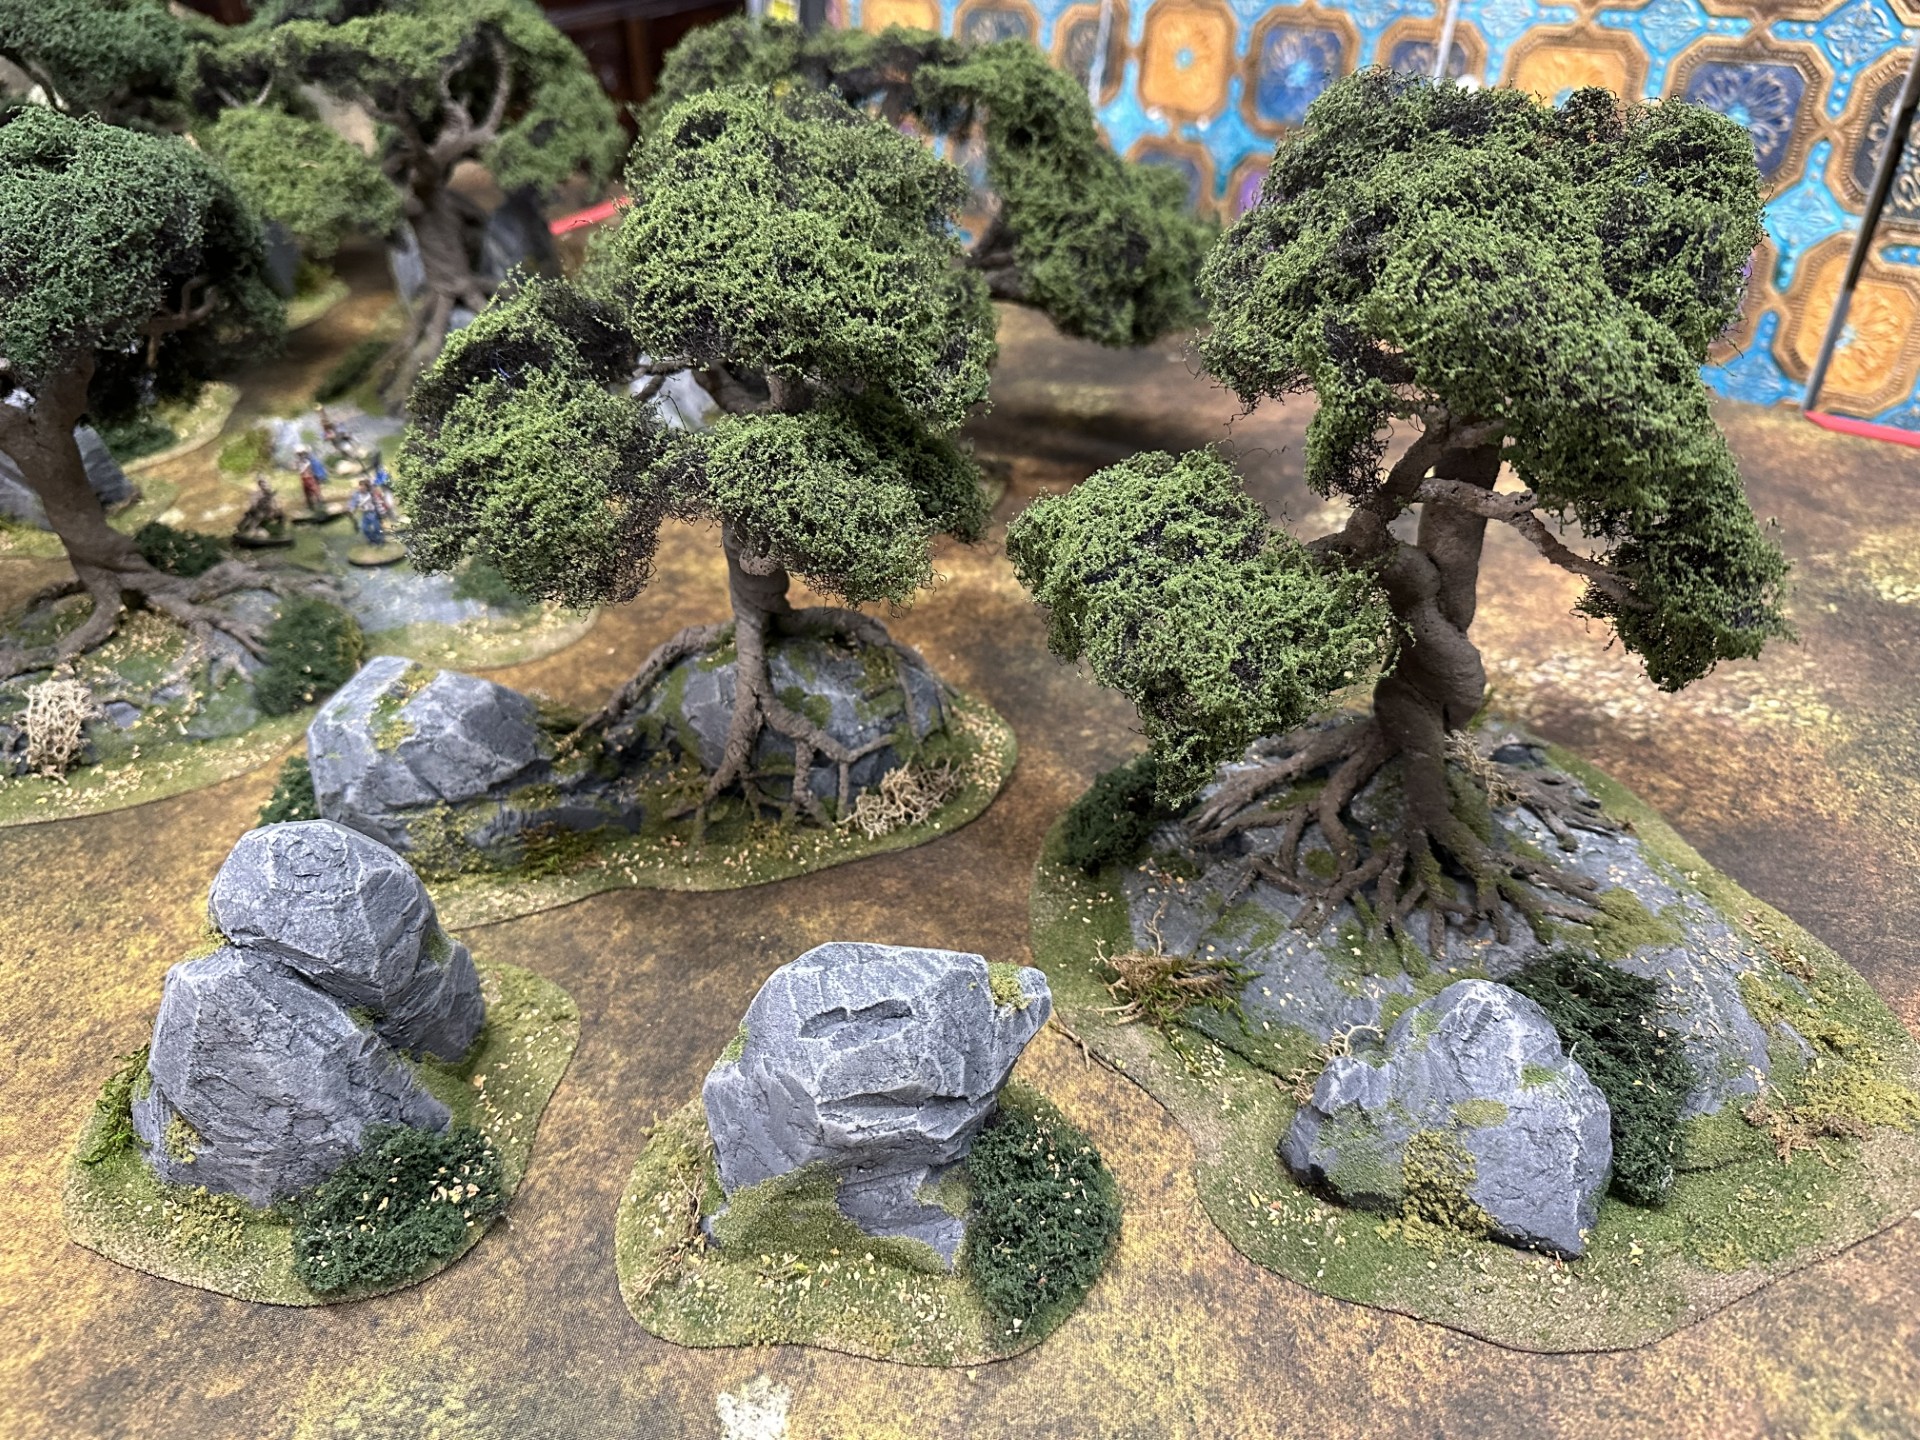
Boulders & Bushes for Burrows & Badgers
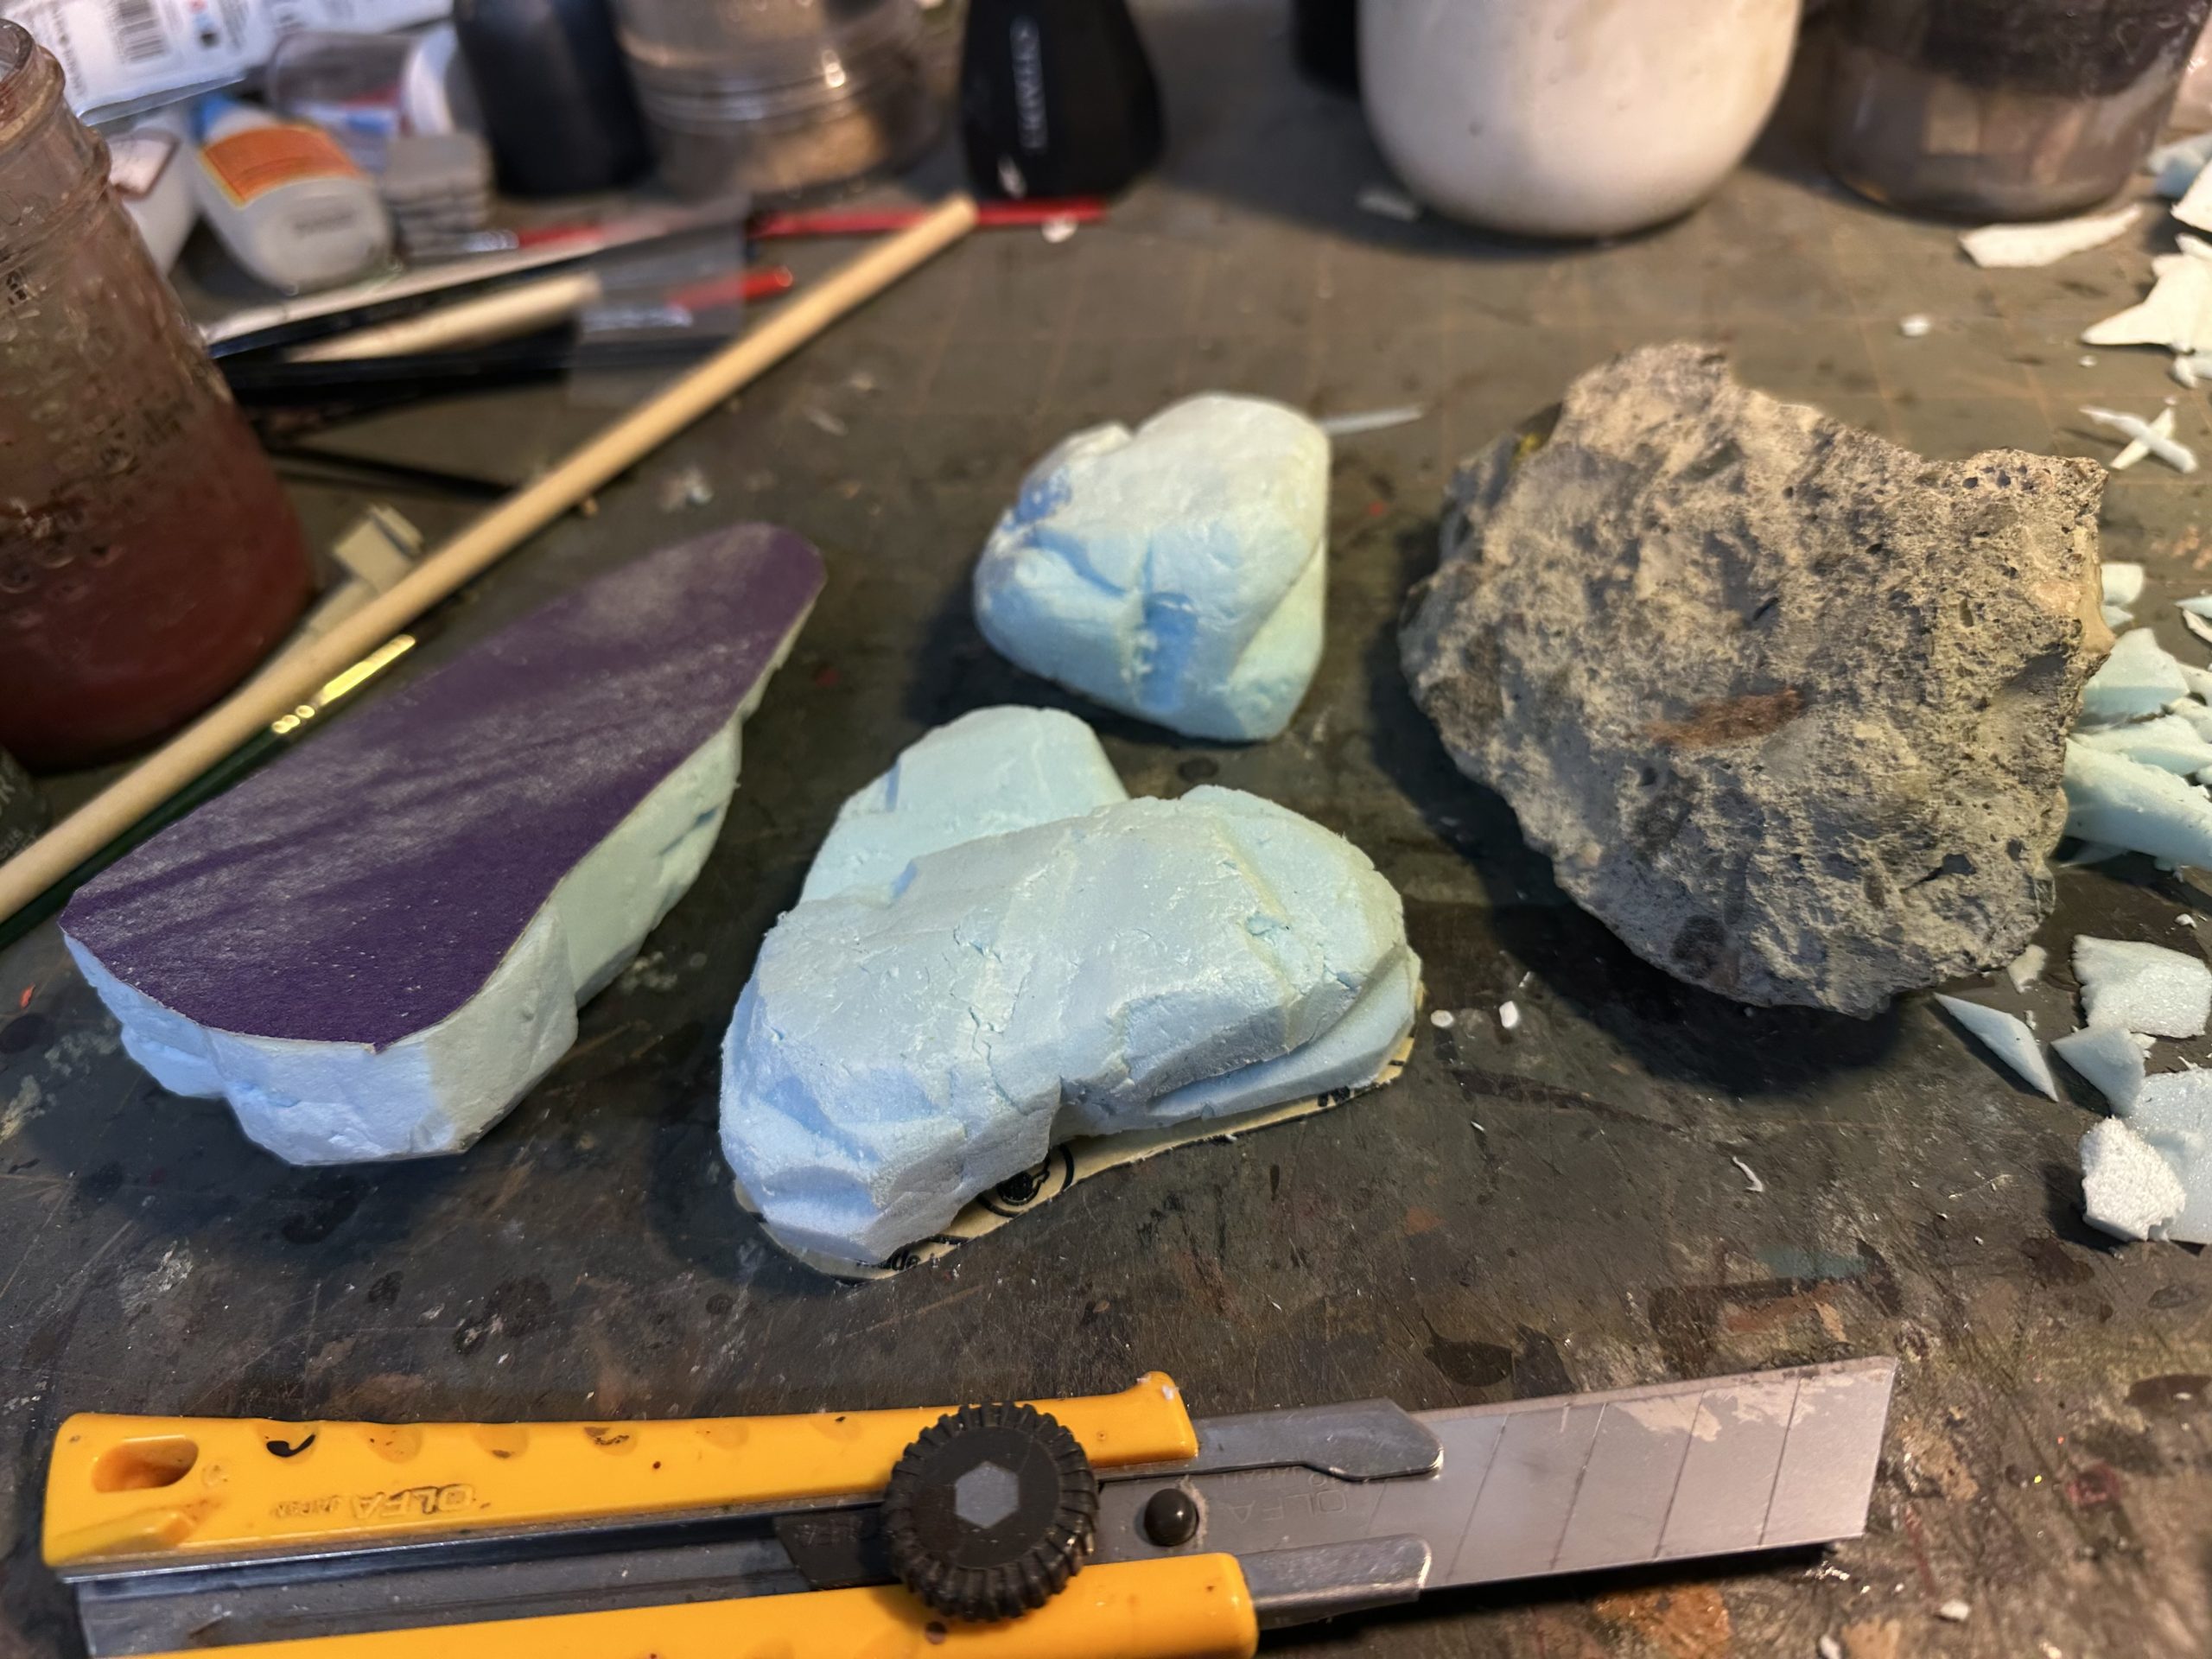
I decided that I need some more smaller, scatter terrain to go with the large rock/tree pieces.
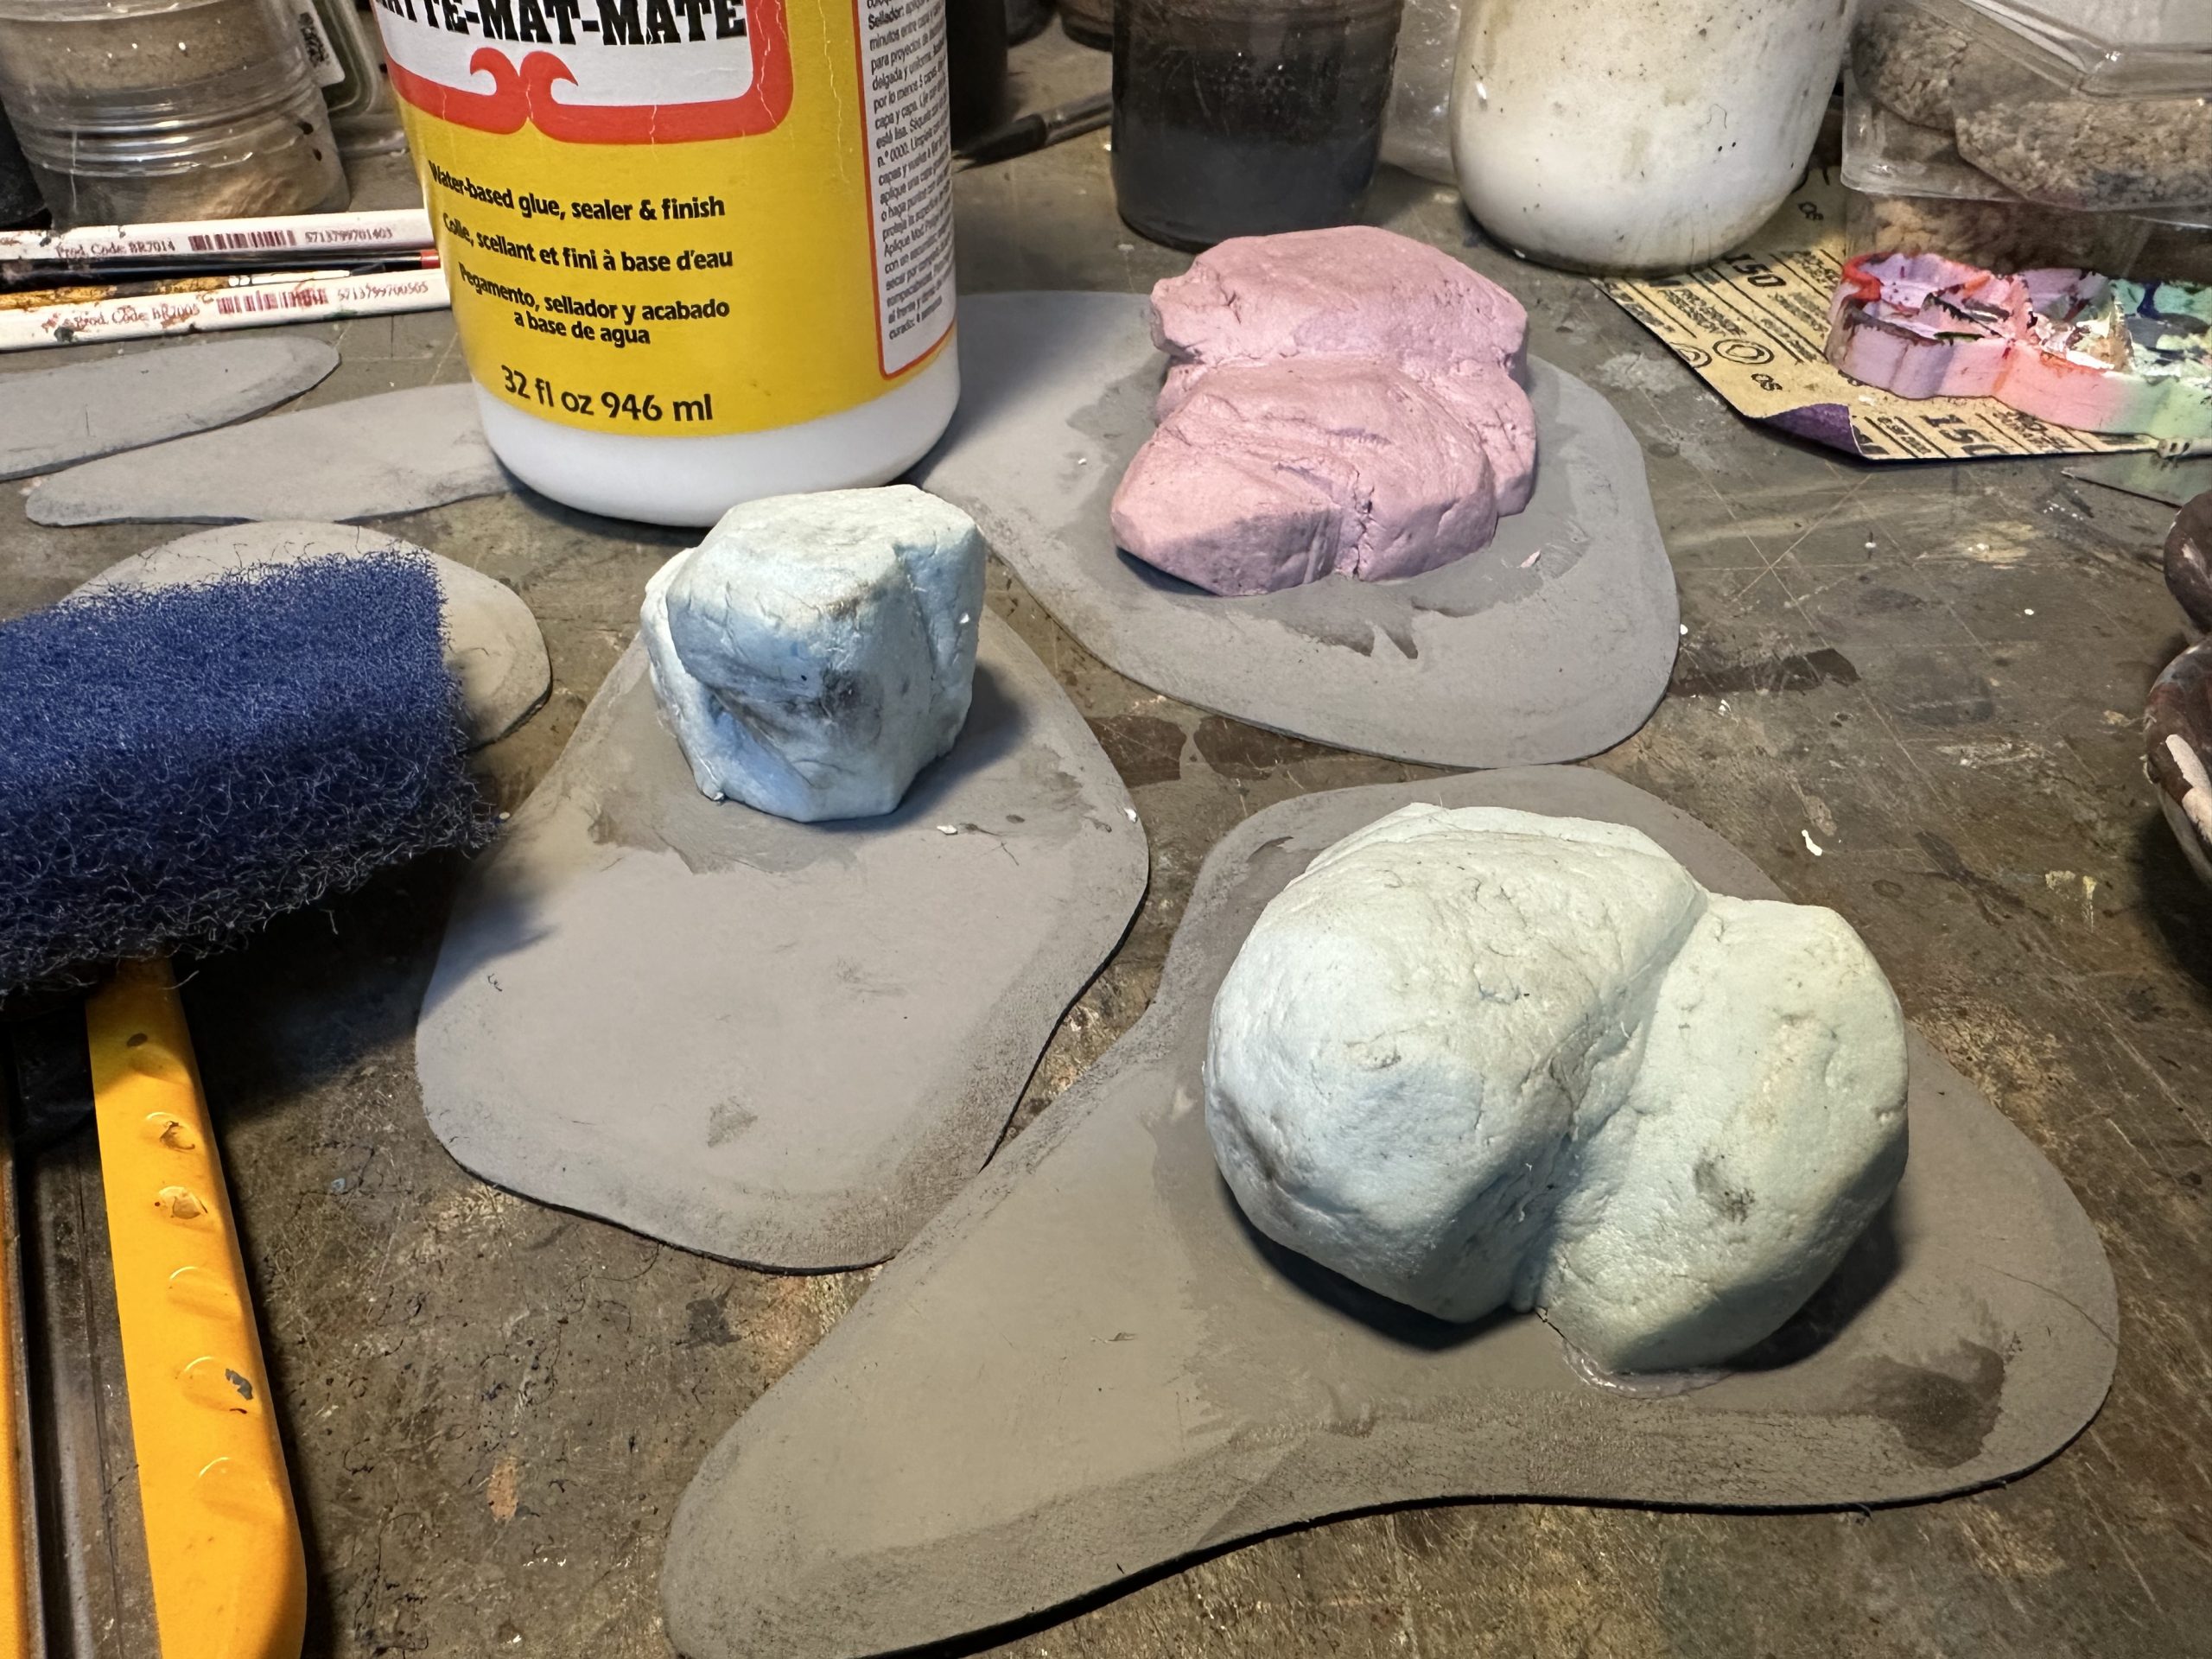
The first step was to cut a bunch of small, irregularly shaped pieces of 1/8″ mdf/hardboard with a jigsaw. I then tapered the edges with a belt sander. To prevent the mdf for warping when I add glue and water-based paint, I primed these pieces grey with a rattle can.
Next, I carved a bunch of rocks/boulders of various sizes and shapes out of xps foam, and then textured them by pressing into them with a piece of broken concrete. I hot-glued them to the bases and primed/sealed them with matte Modge Podge. This makes the paint stick well, but also makes them more resistant to handling and the bumping and scraping that inevitably happens when taking them in and out of storage.
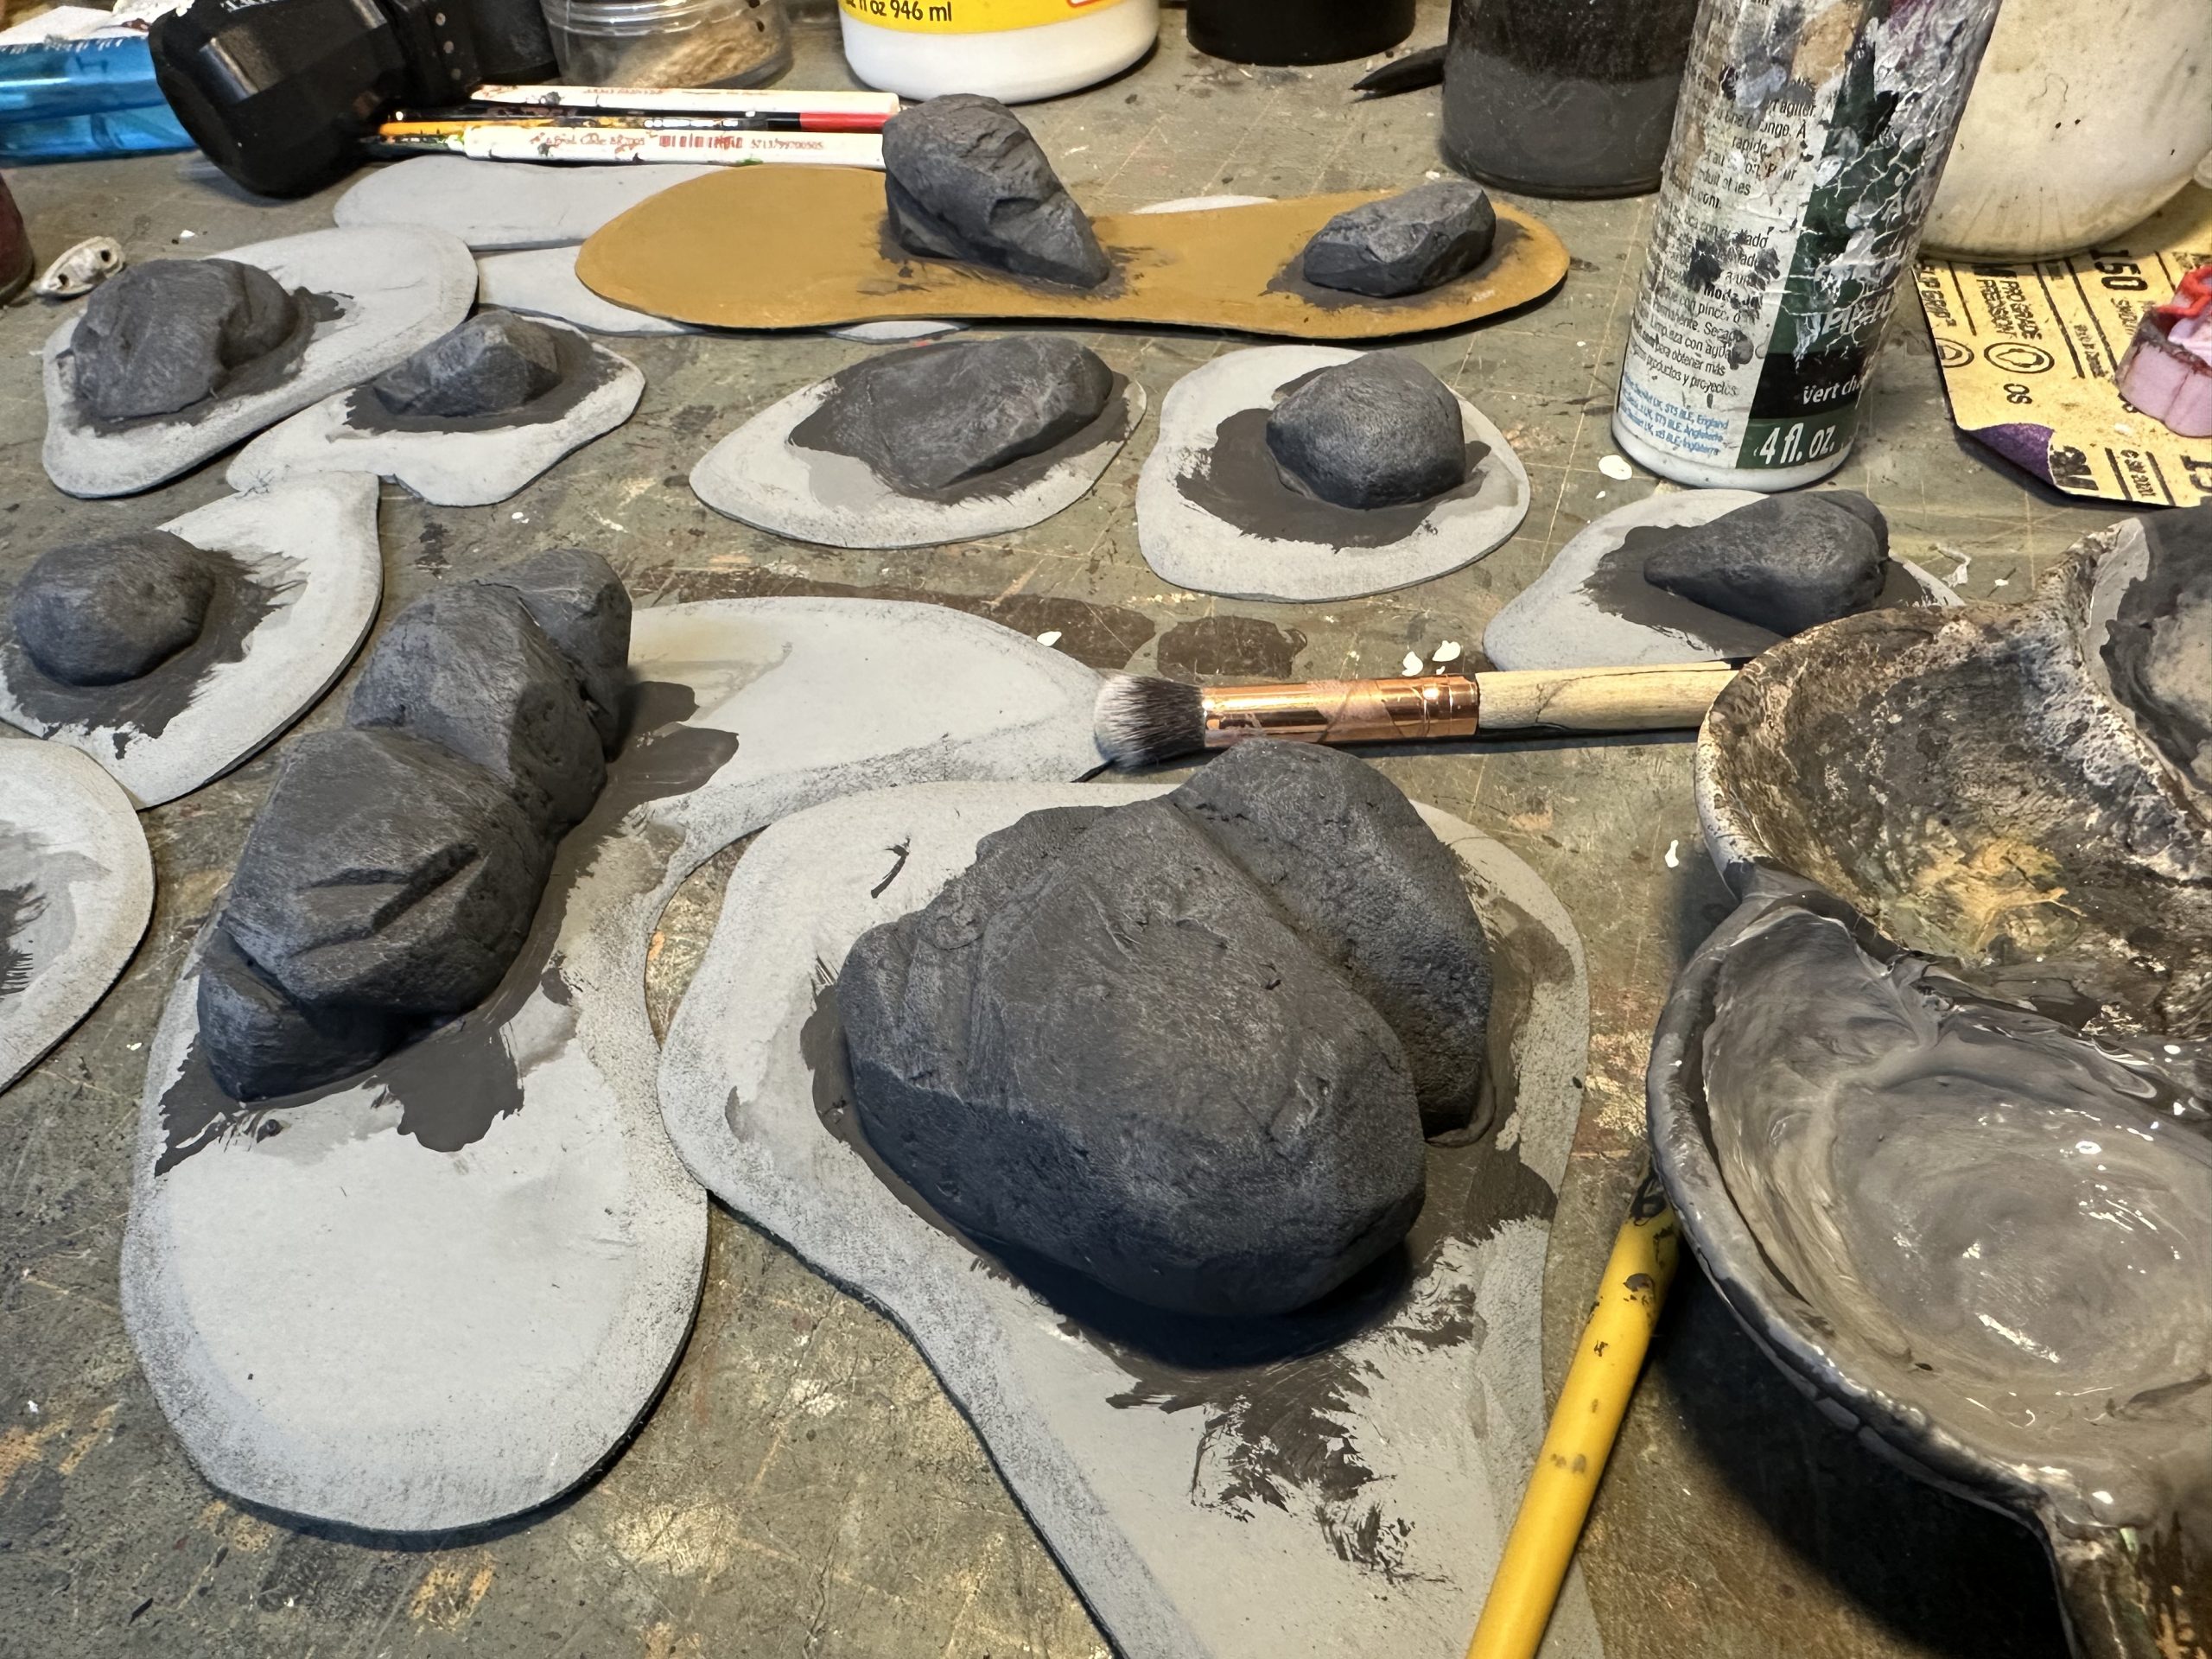
The next step was to paint the rocks.
I started with a dark gray with some brown mixed in. Then I began to lighten the gray and add layers of dry-brushing. The goal is to work up towards lighter and lighter grays in progressively dryer brushes until you´re catching just the edges and creases. I´m aiming for a contrasty look.
I also added some watered down mossy green in the crevasses and some in blotchy patches on the larger surfaces. This ended up being subtle, but added variation.
Finally, I painted the bases in a tan-brown.
More posts coming as the boulders progress.
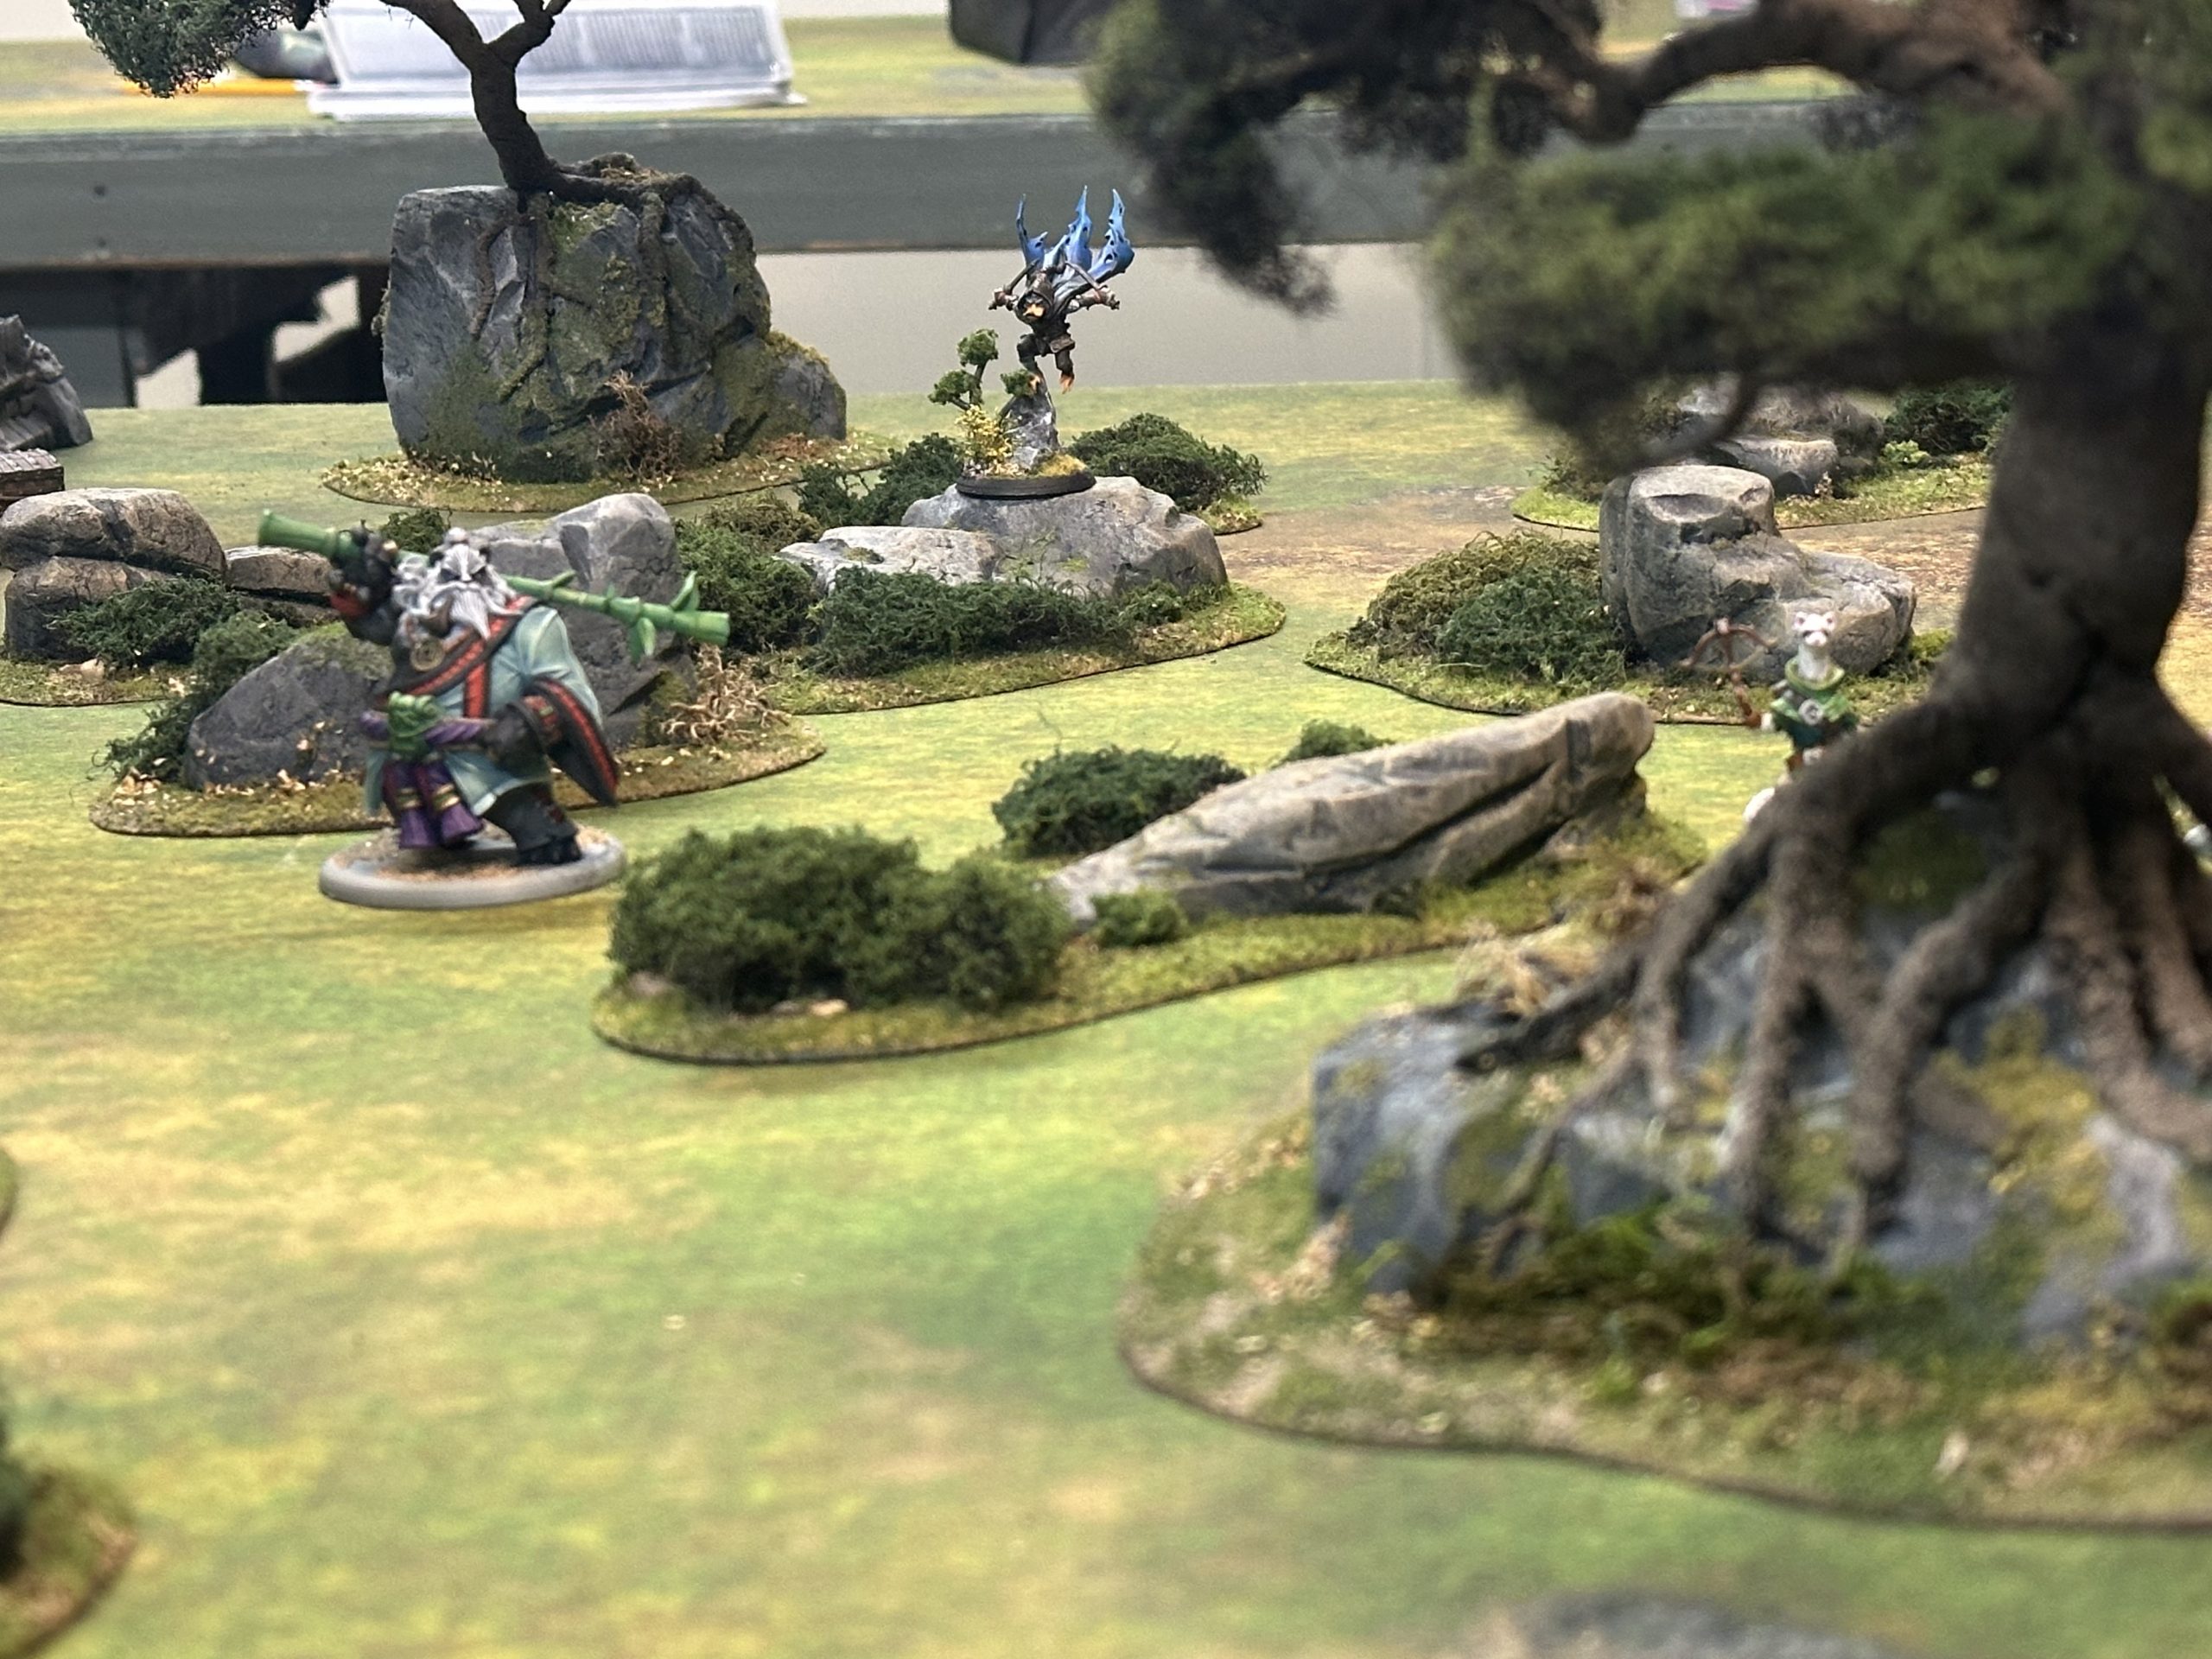
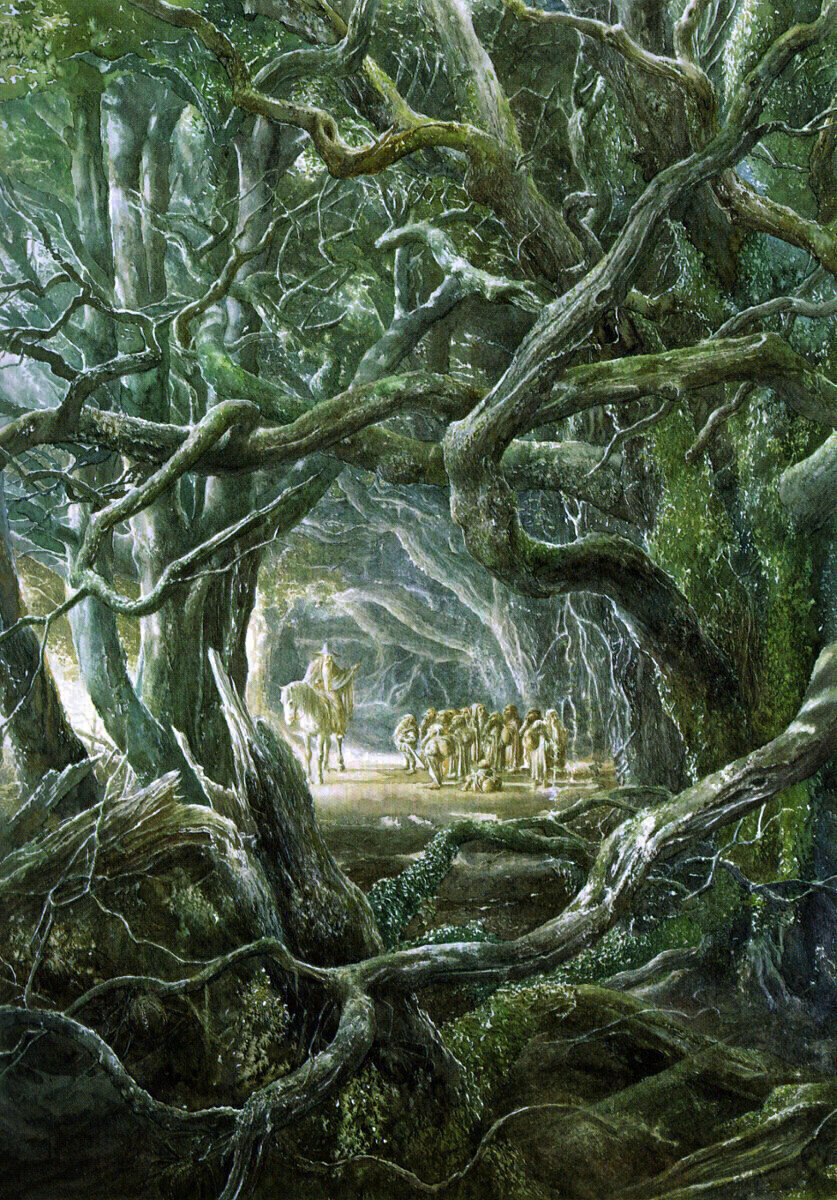
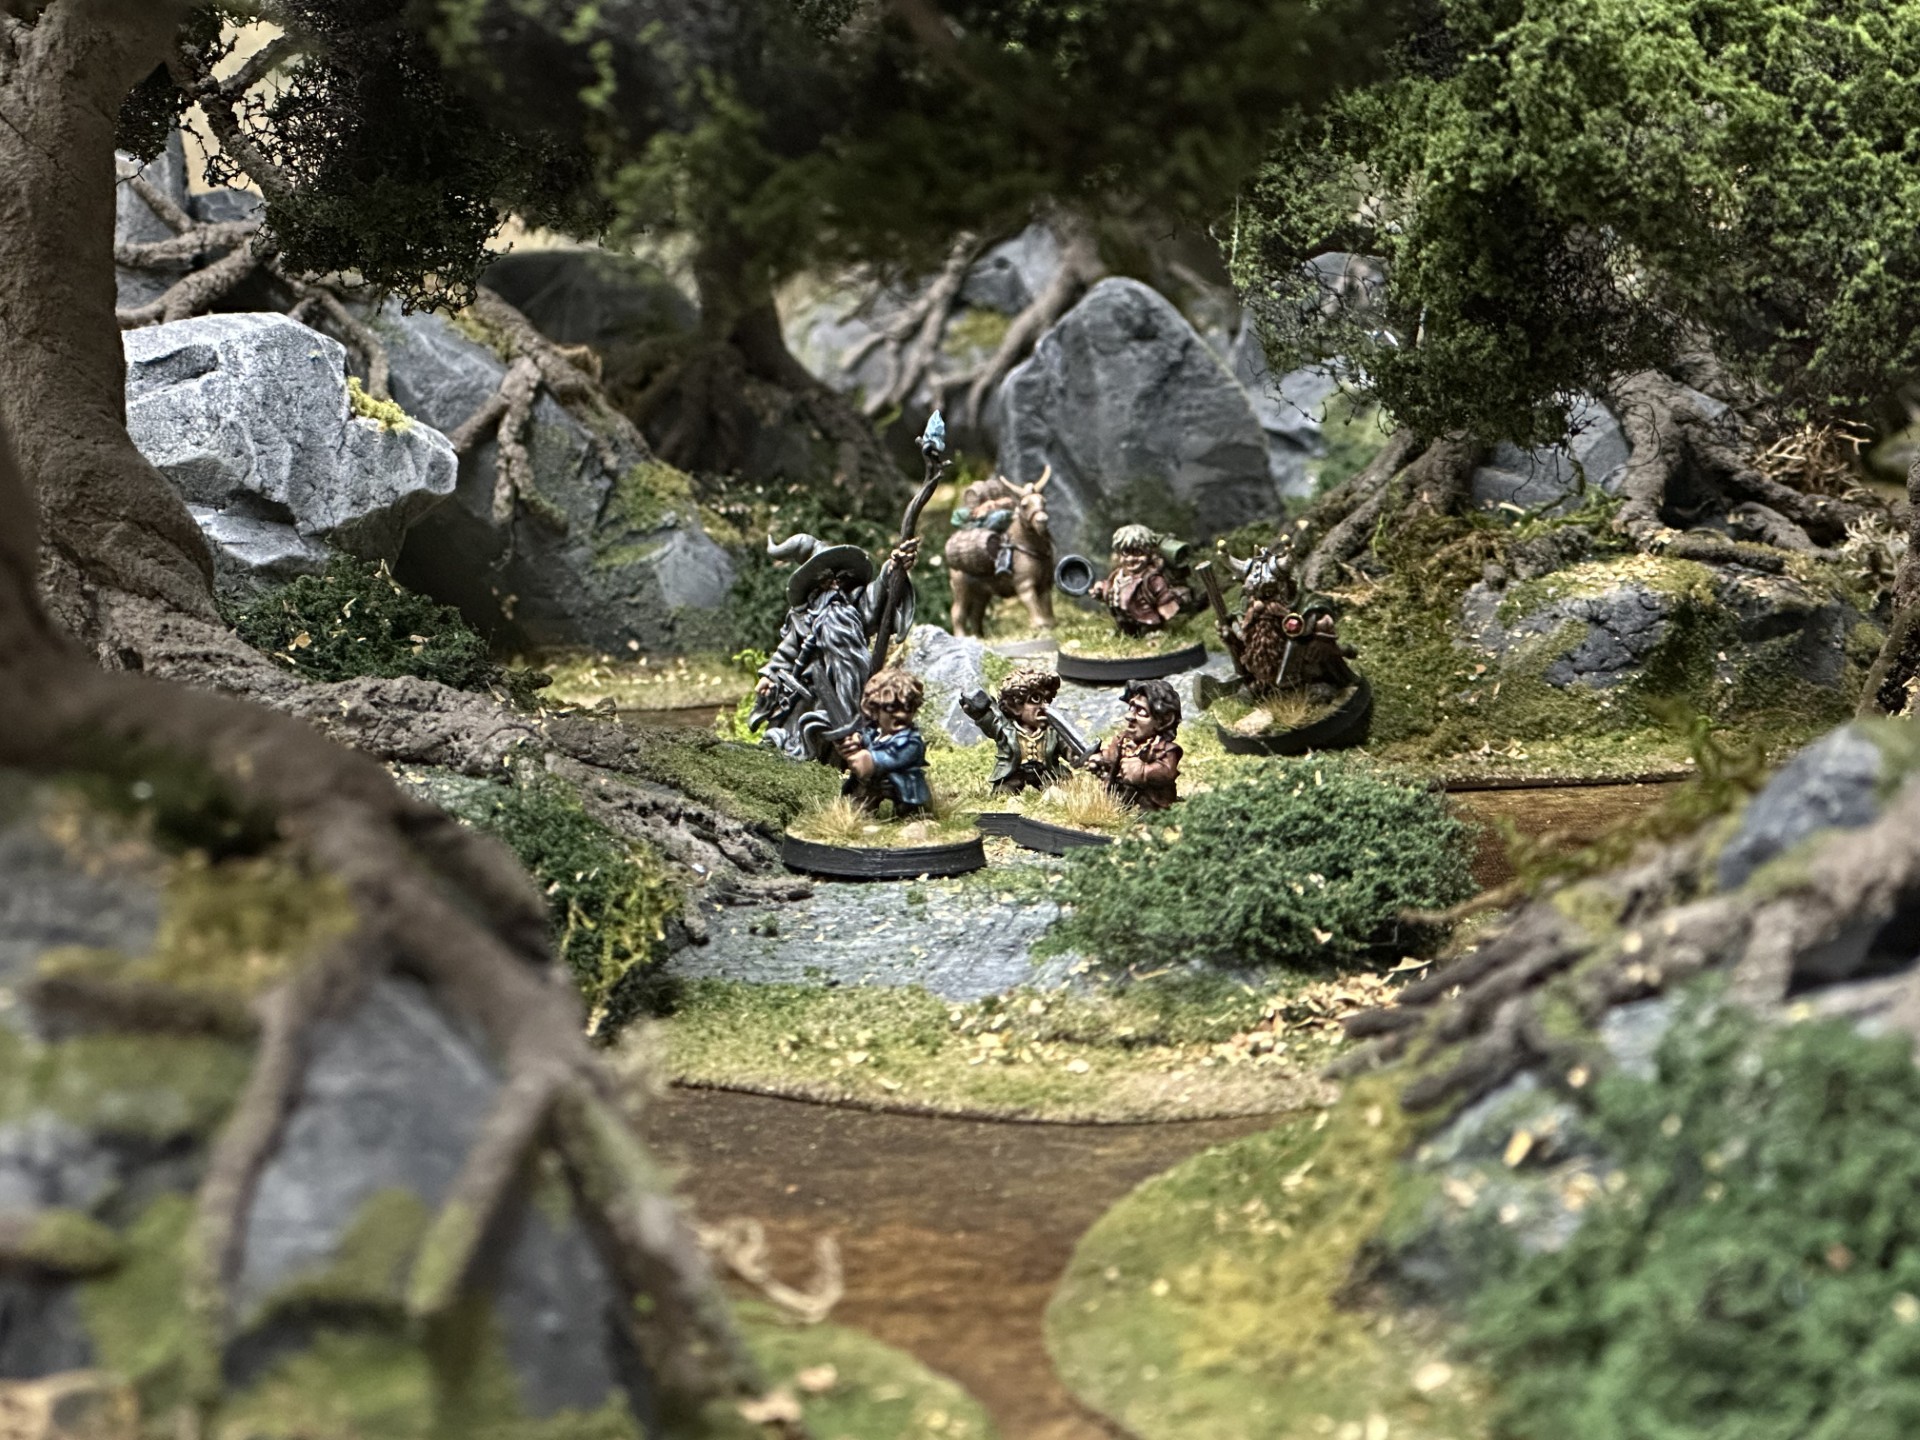
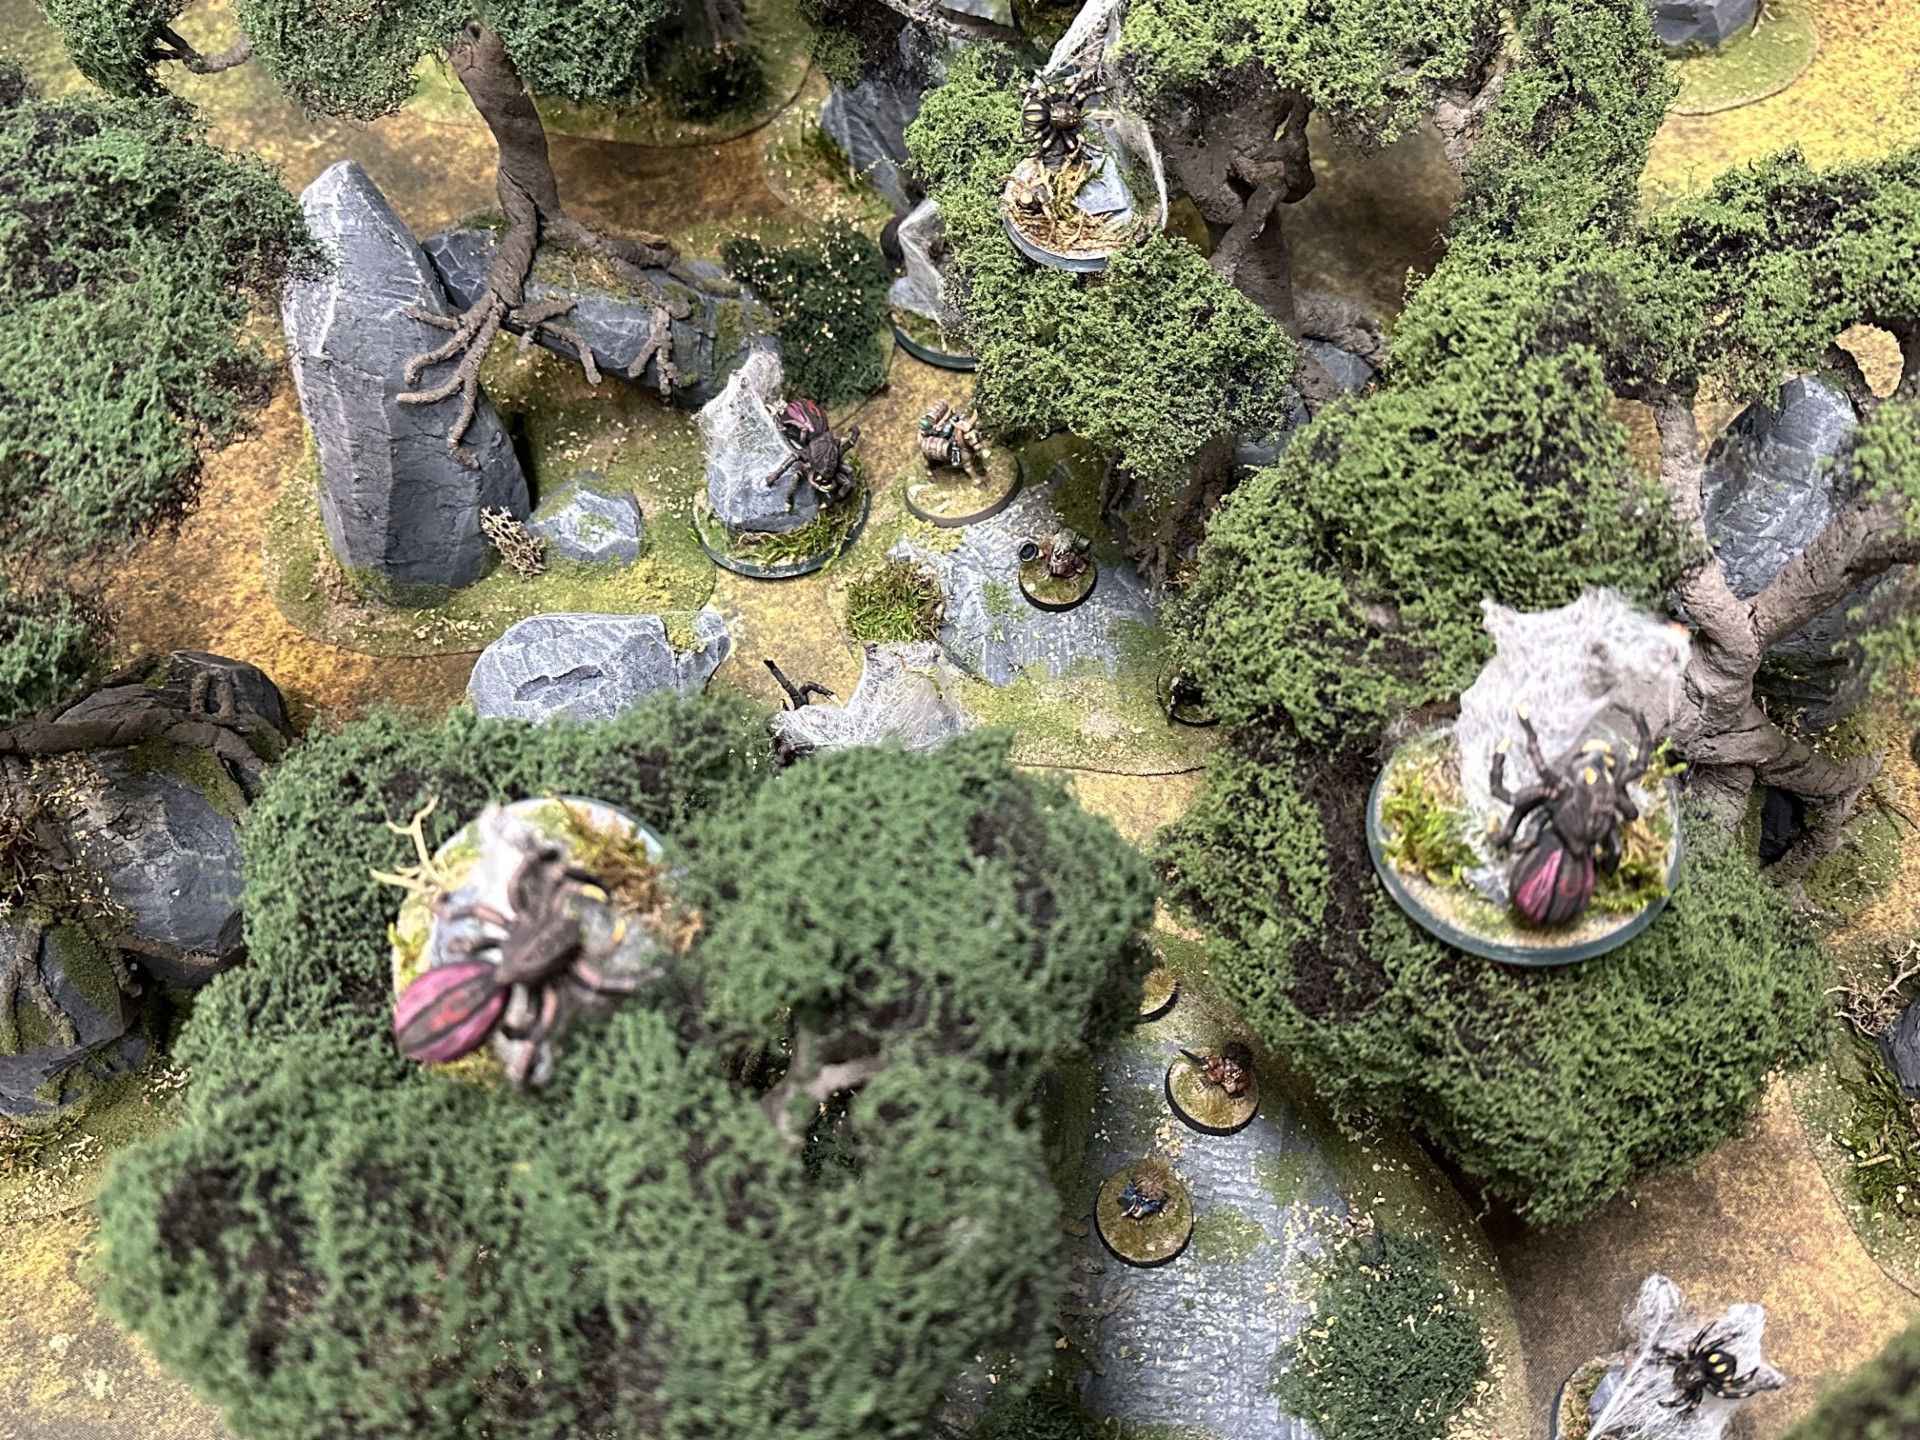
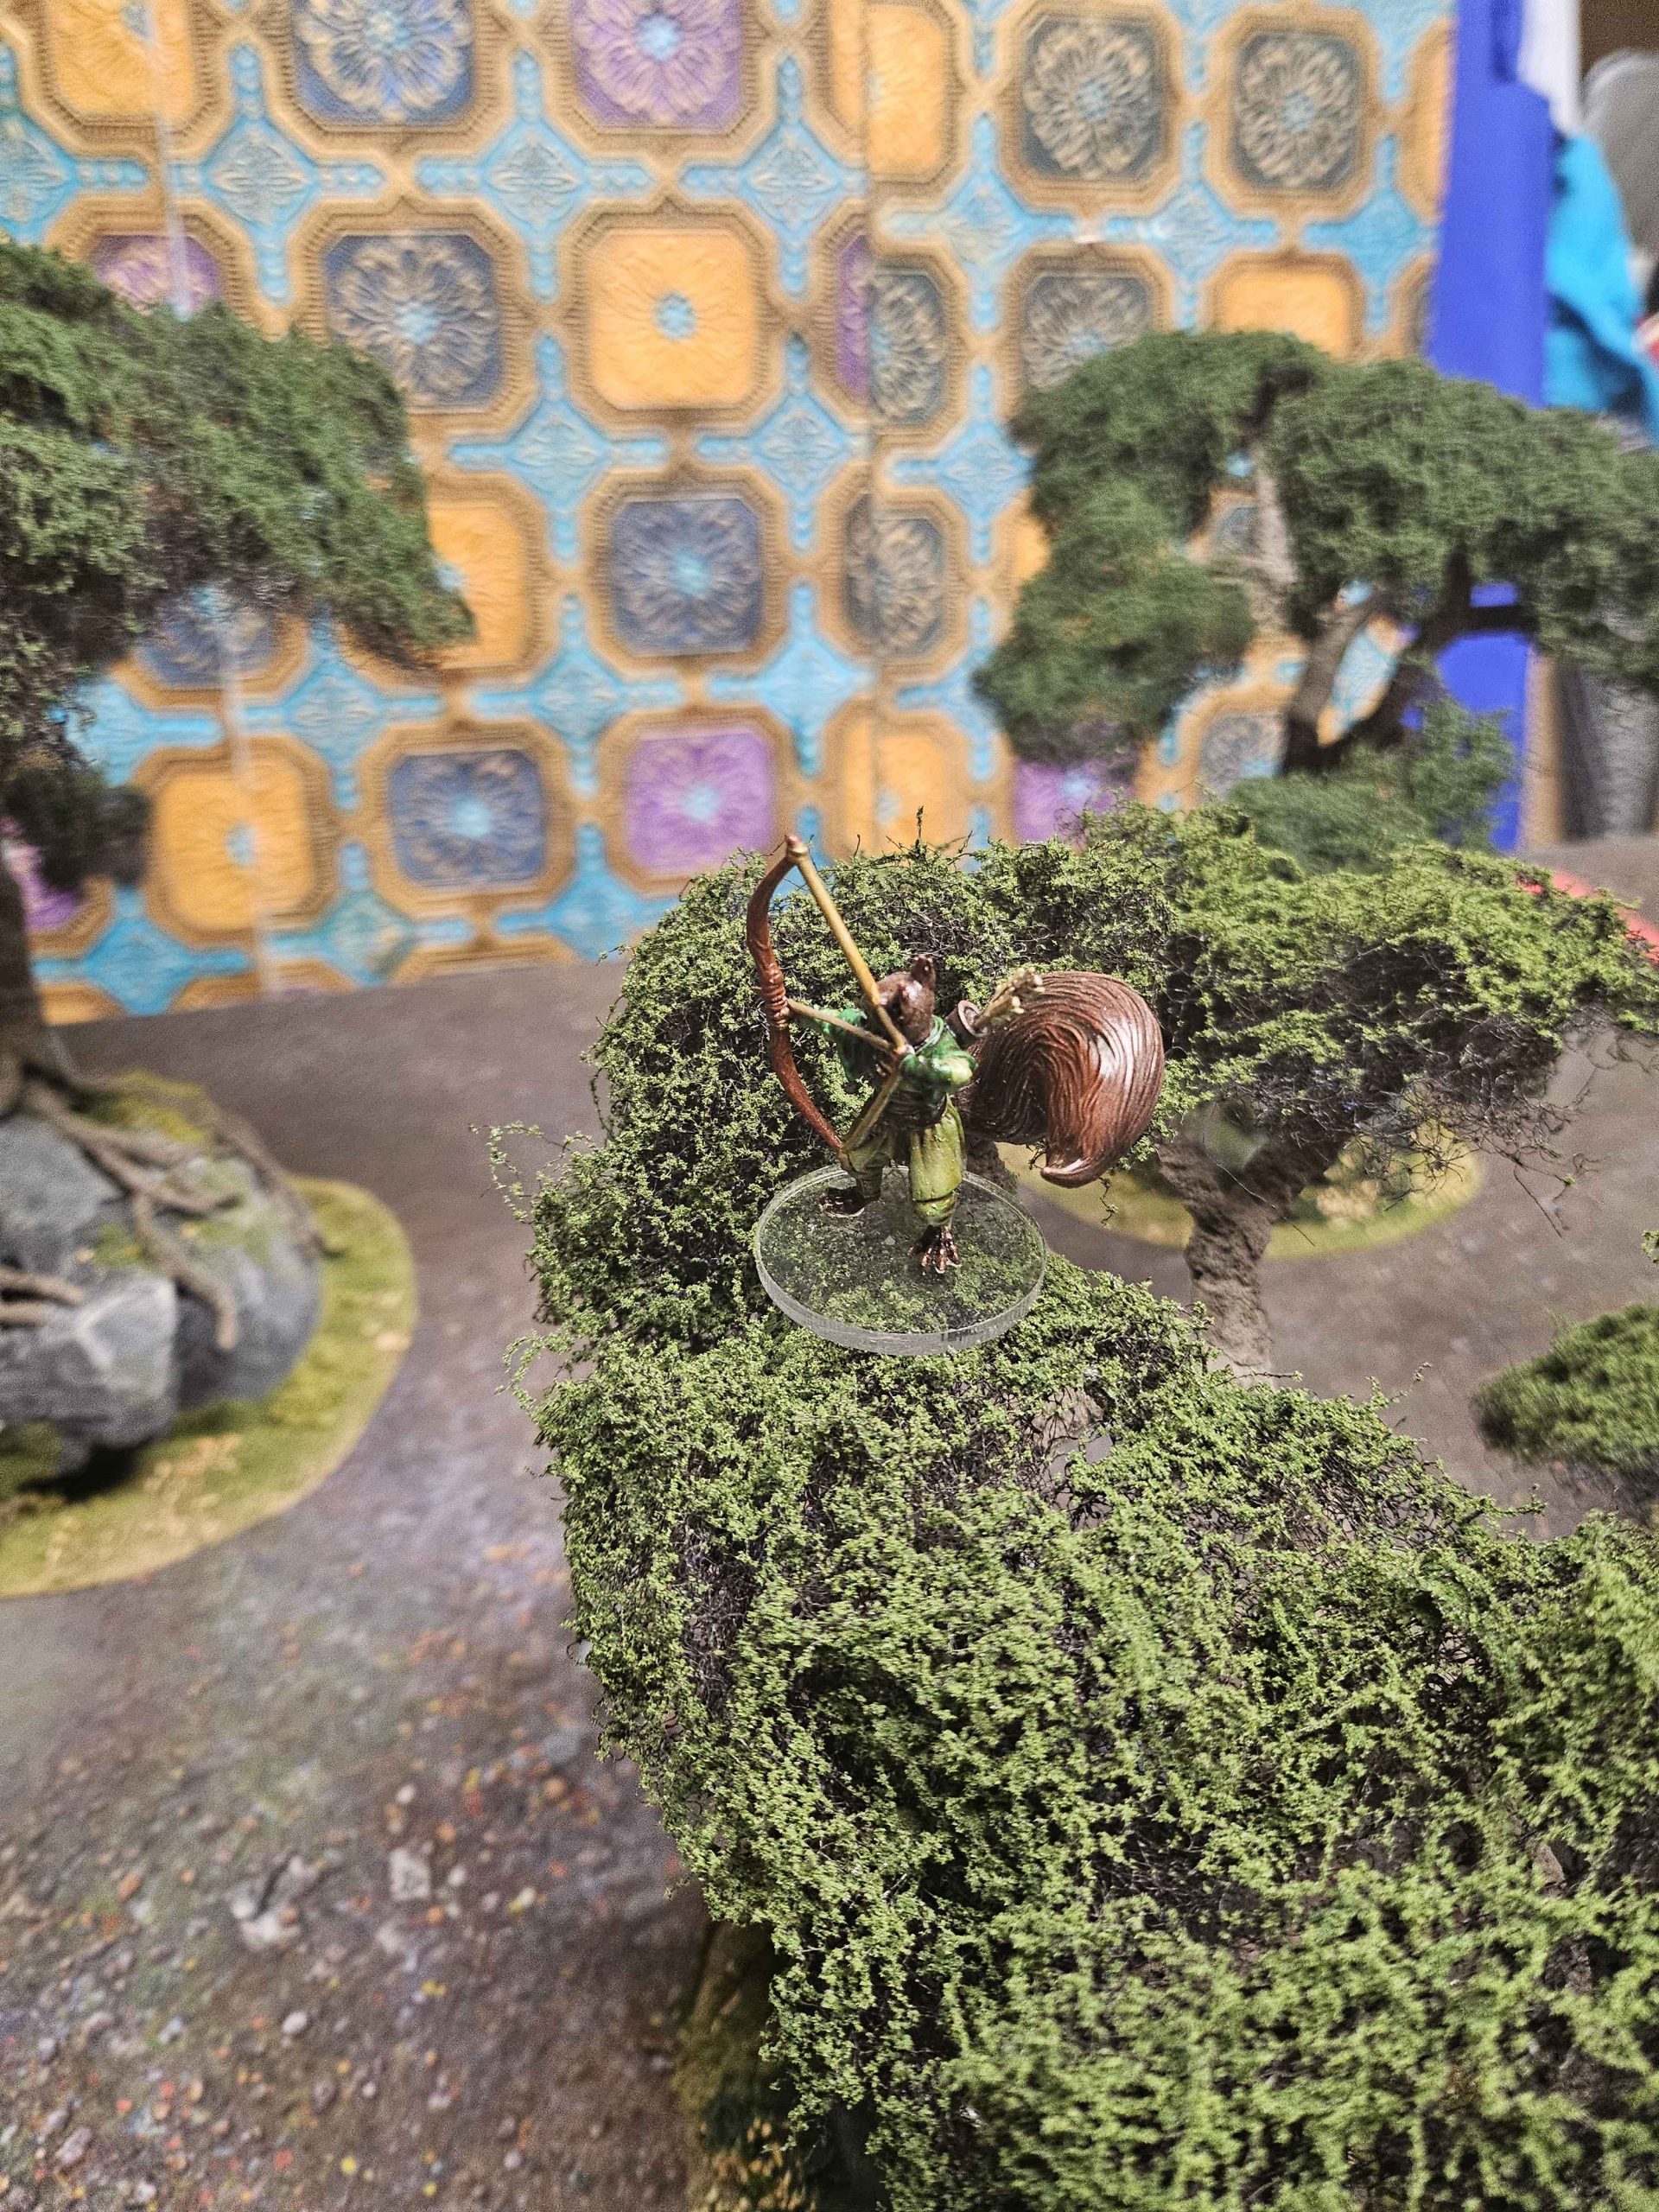
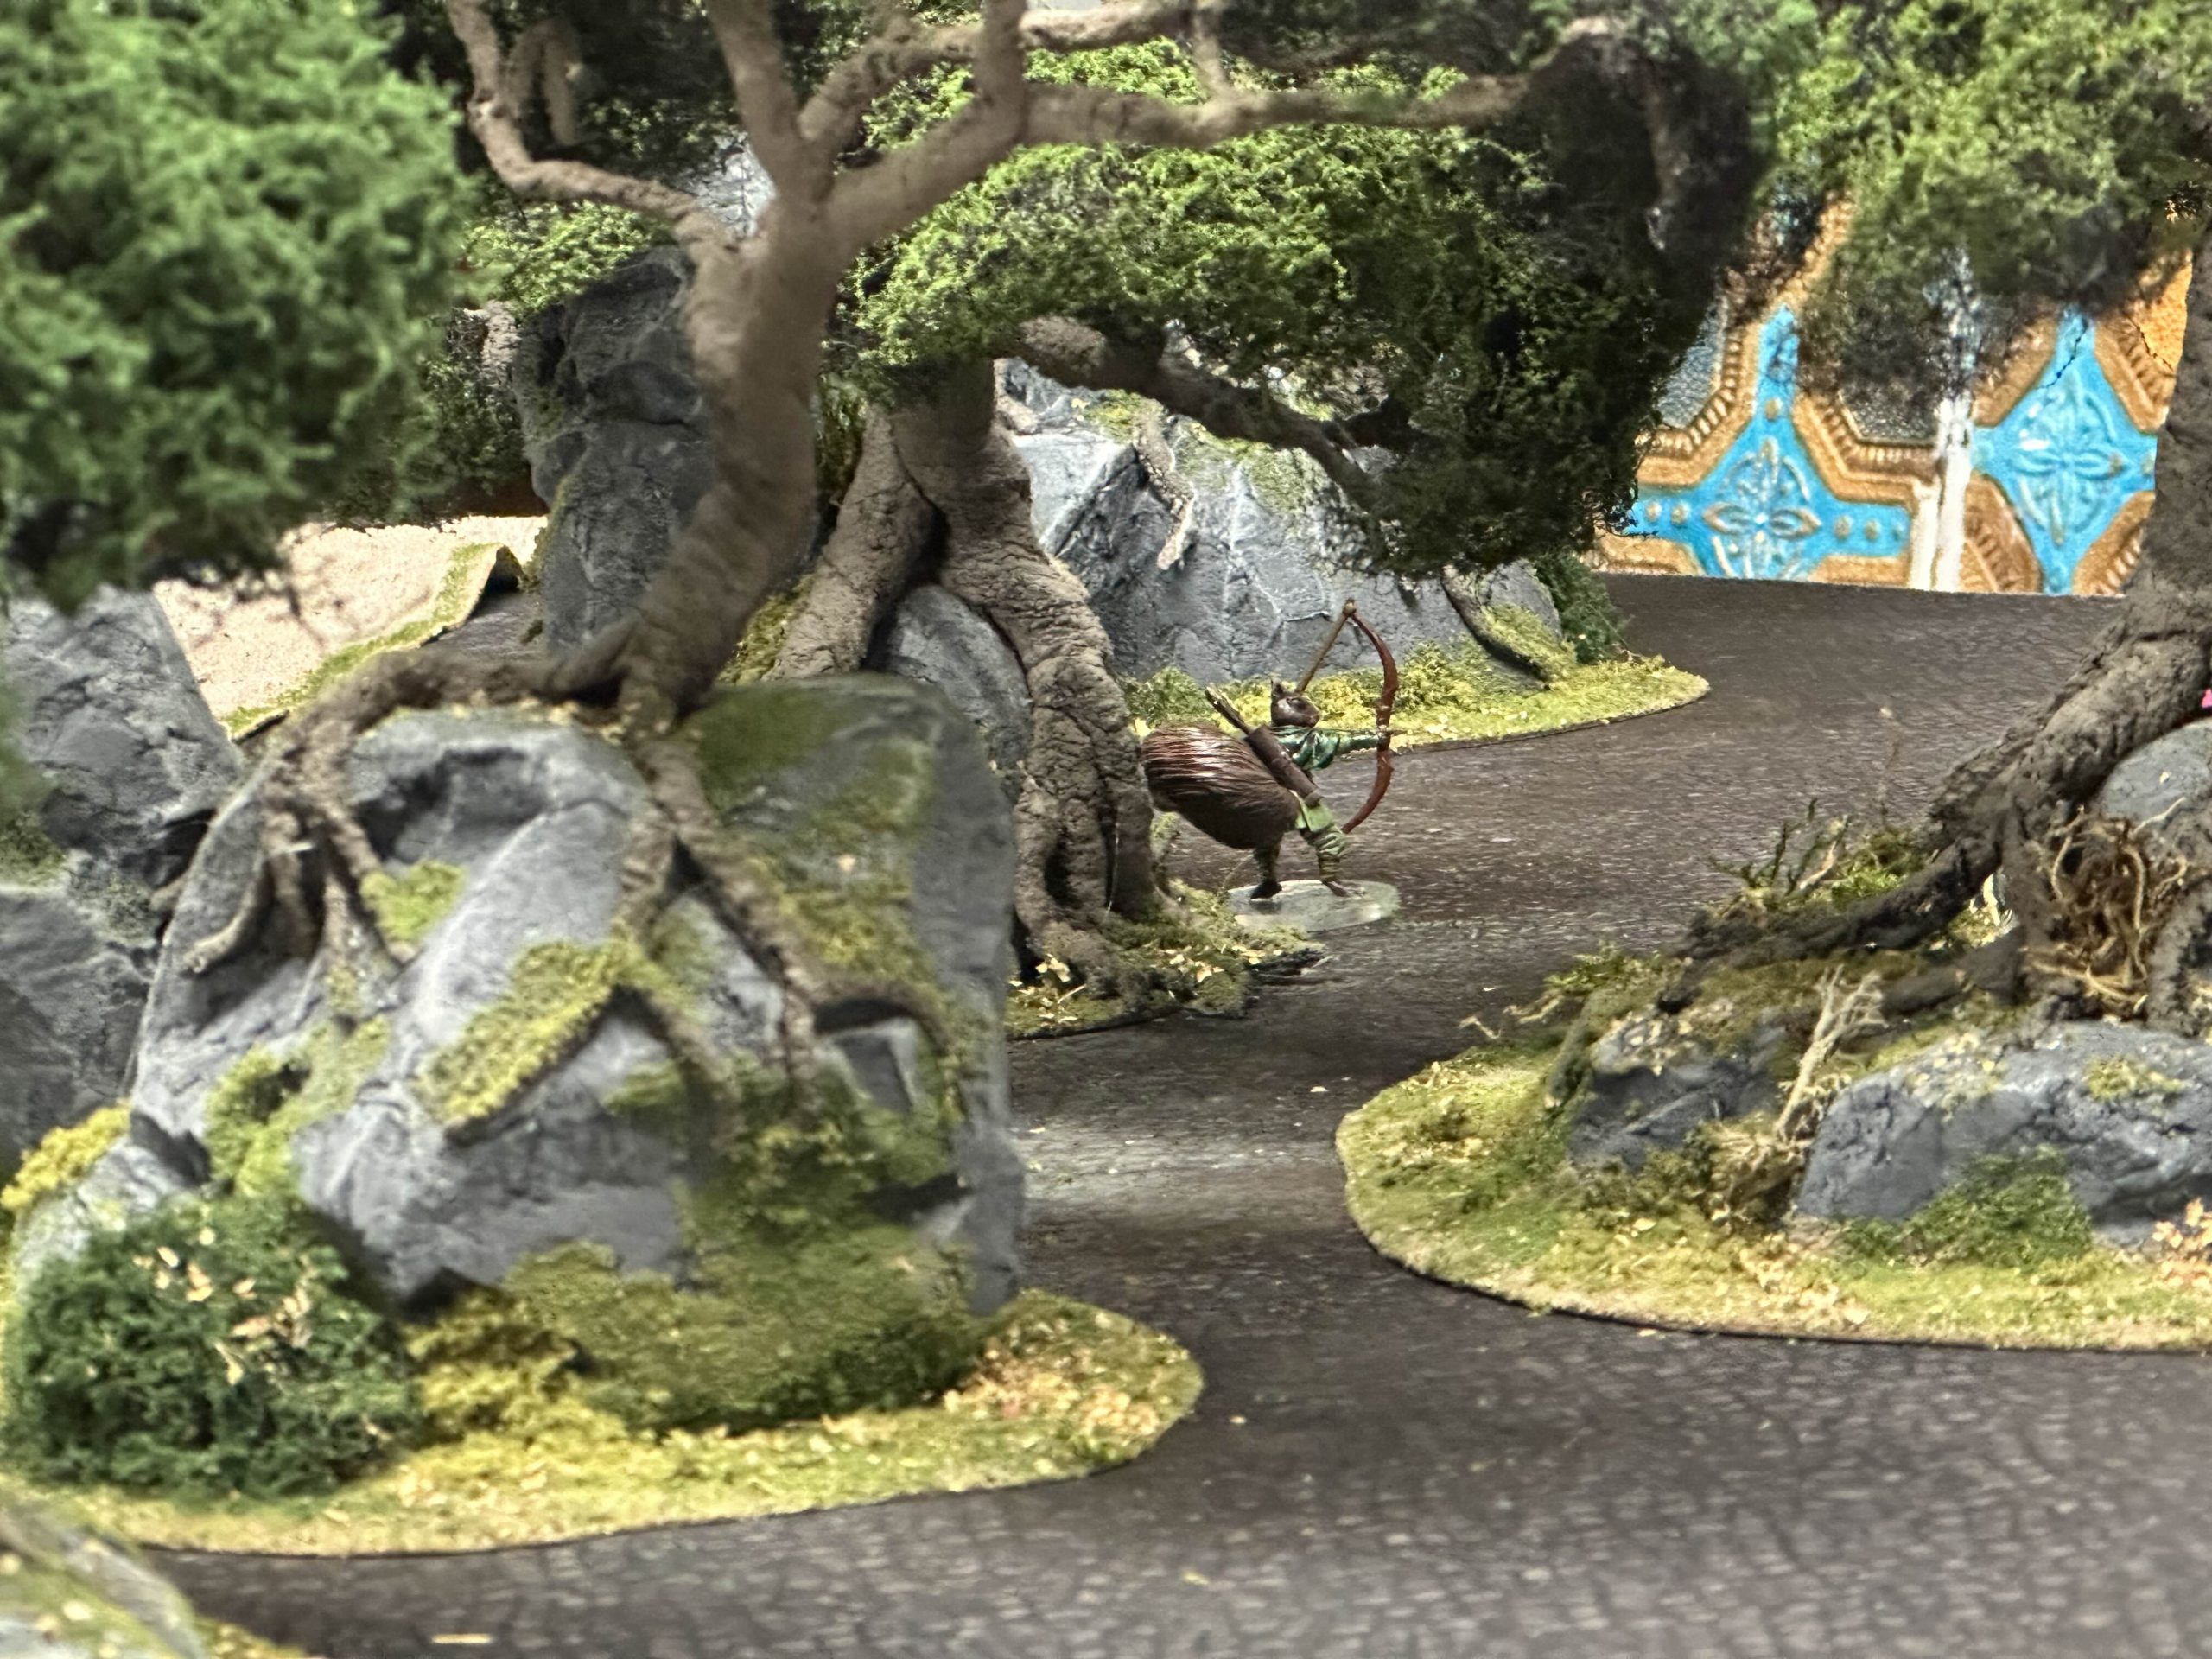
The Ring Bearer enters the Forest
Here are some pictures of Frodo and his companions as they navigate the forest, which works great as Mirkwood or Fangorn Forest. There´s also a shot from a game in which the Garrison of Dale took on the Spiders of Mirkwood.
The spiders of Mirkwood worked beautifully on the terrain. It was easy to perch them in the trees and to move them about. The overgrown path pieces looked great for the Mirkwood context.


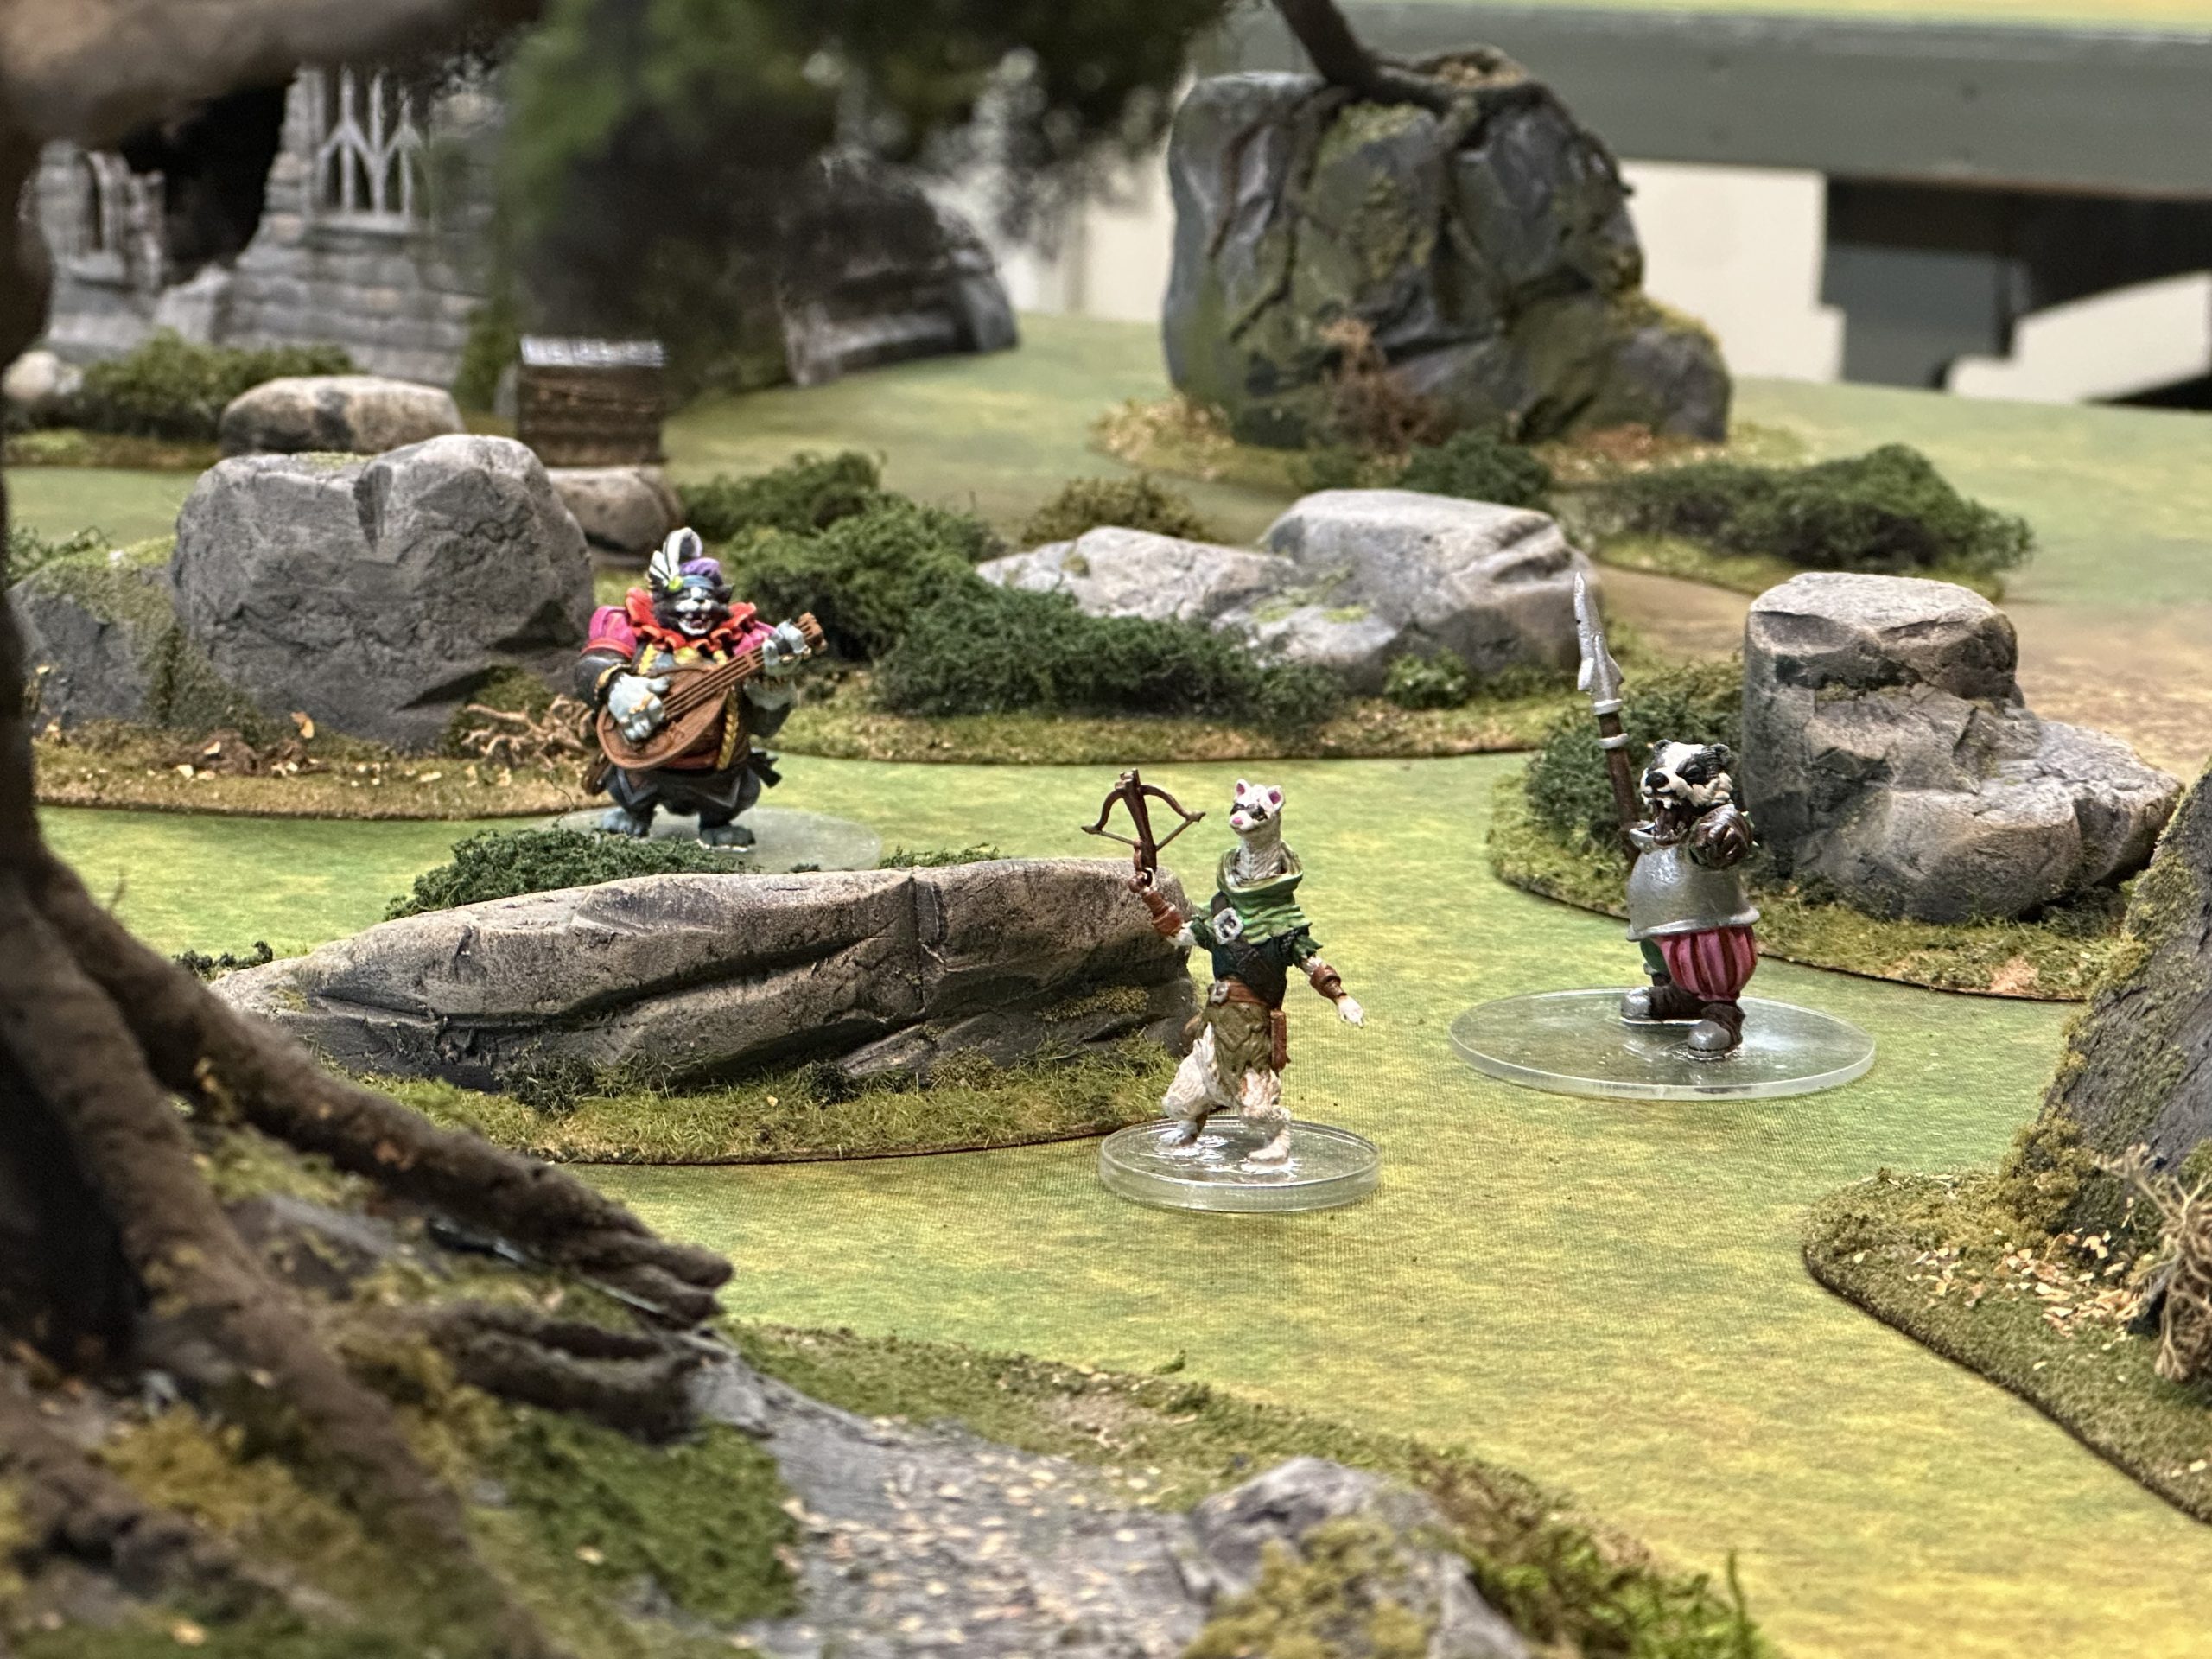
Burrows and Badgers enter the Forest.
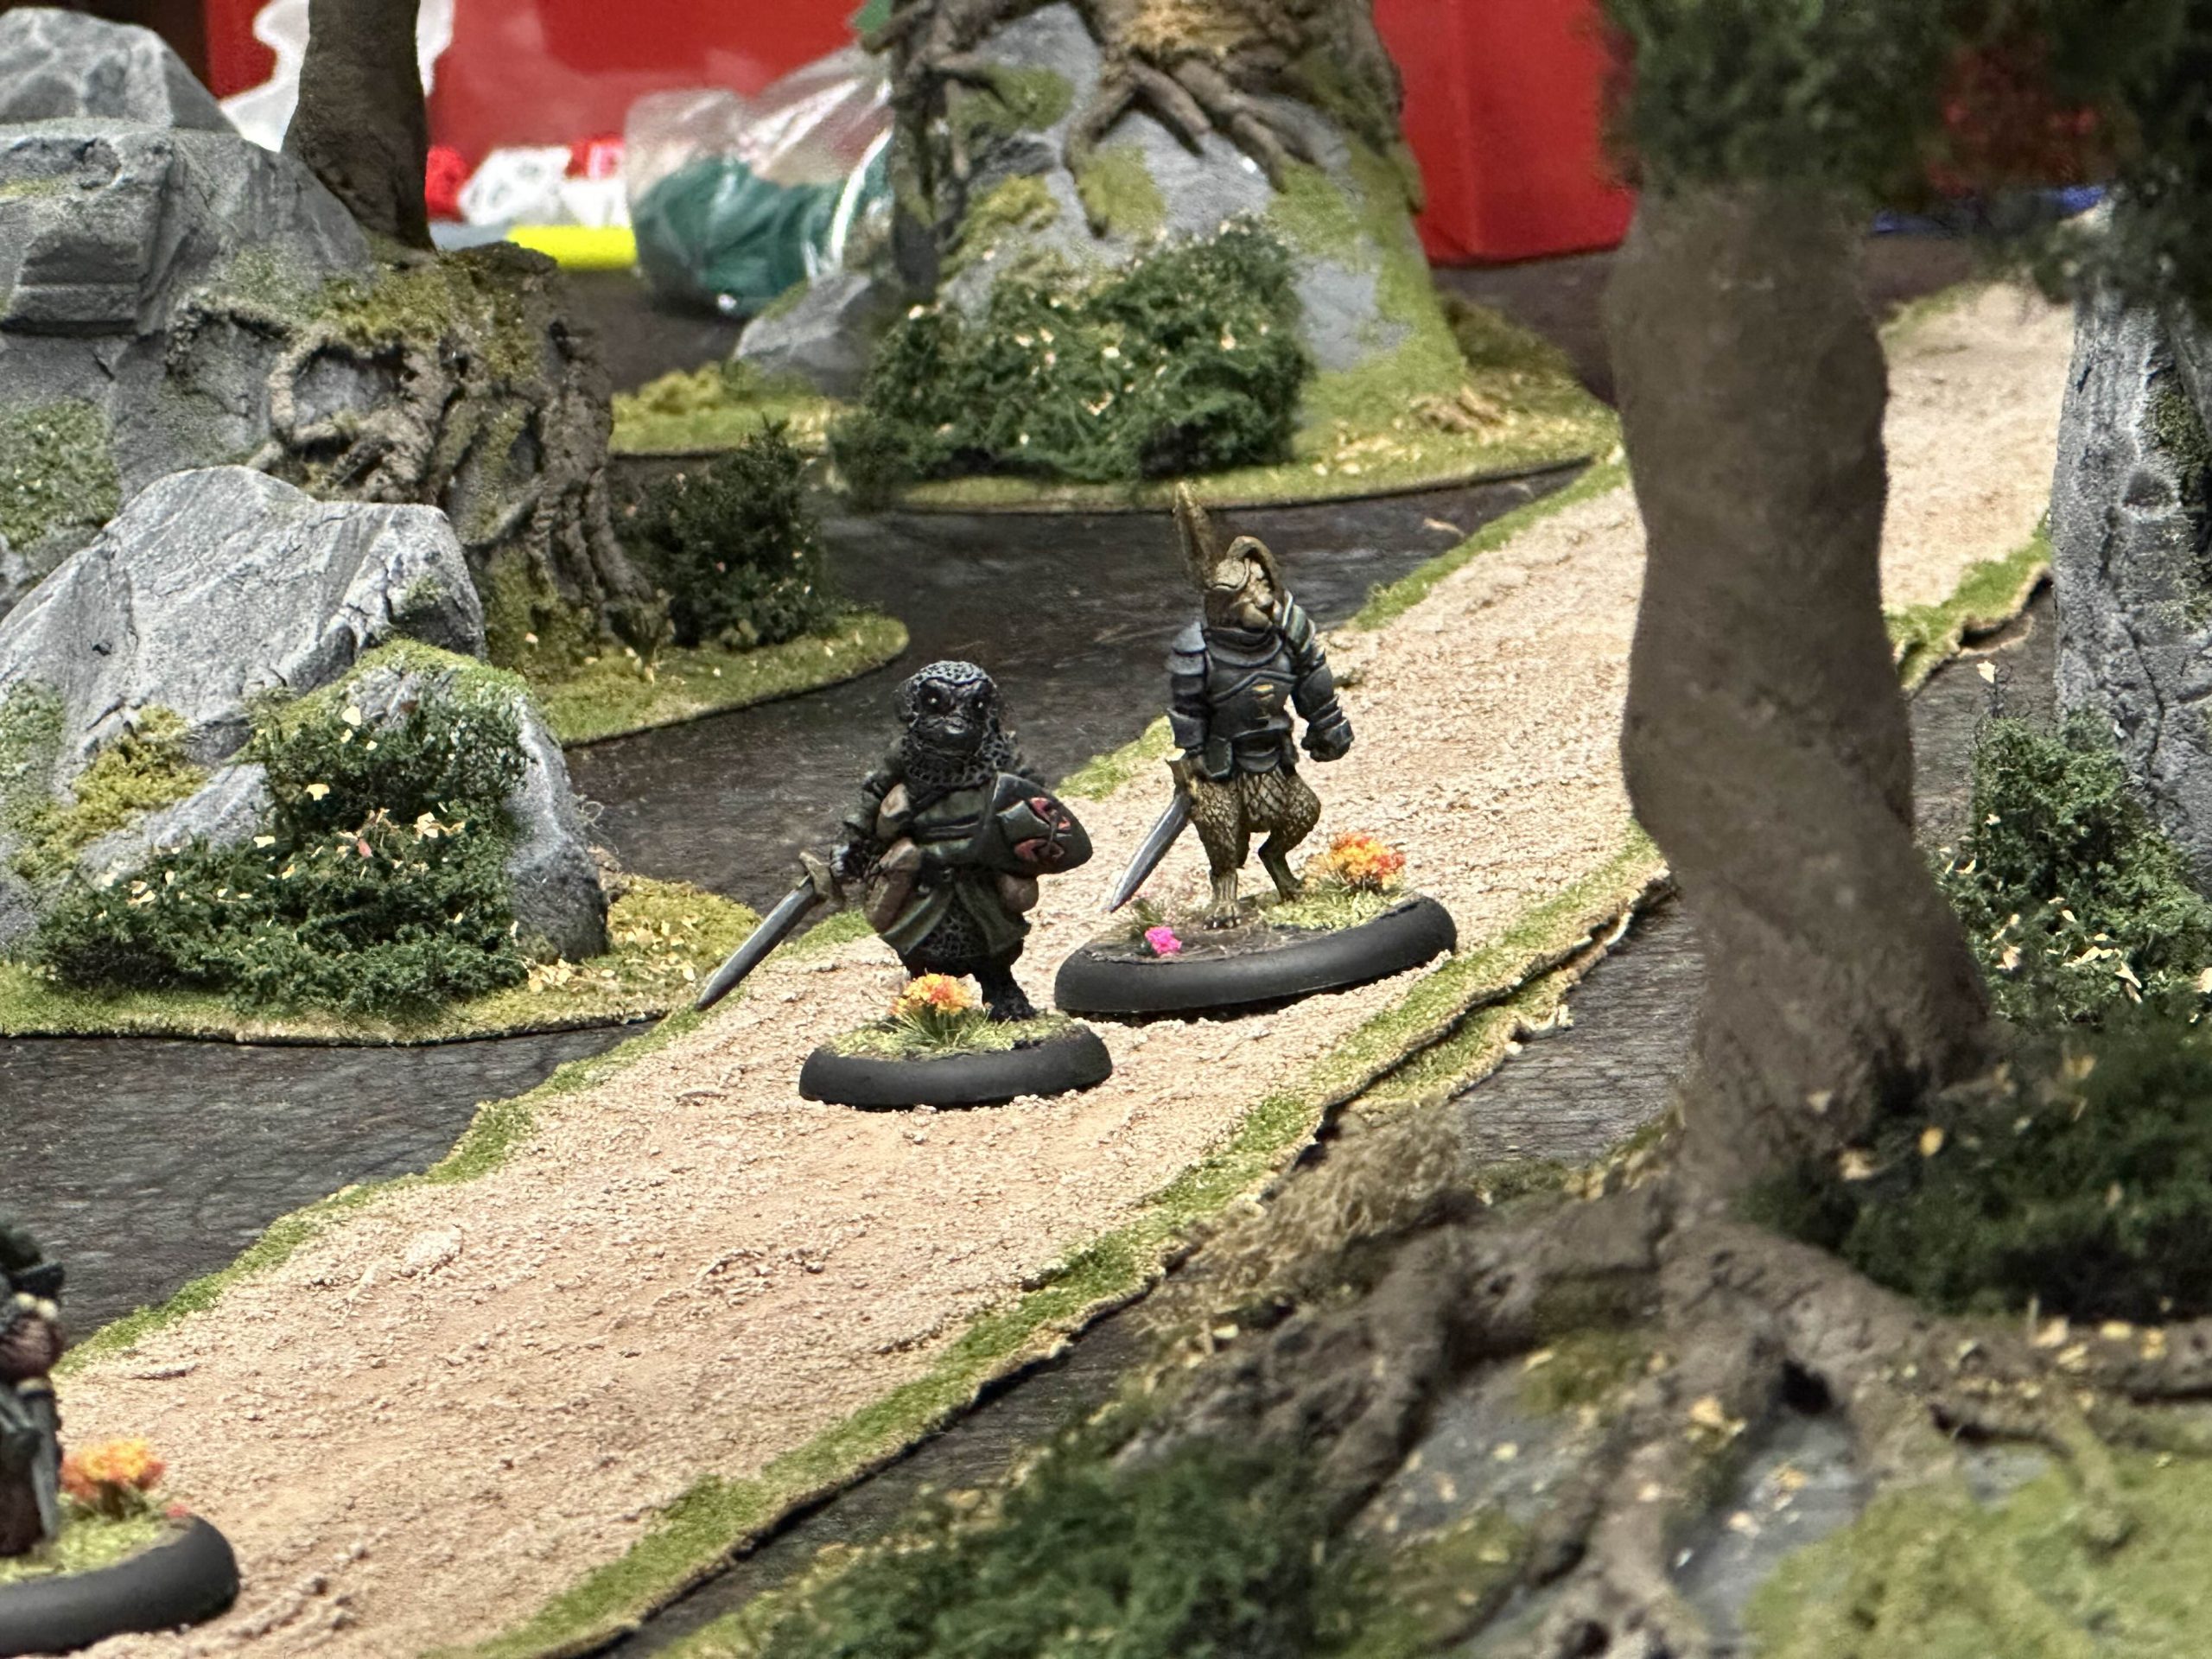

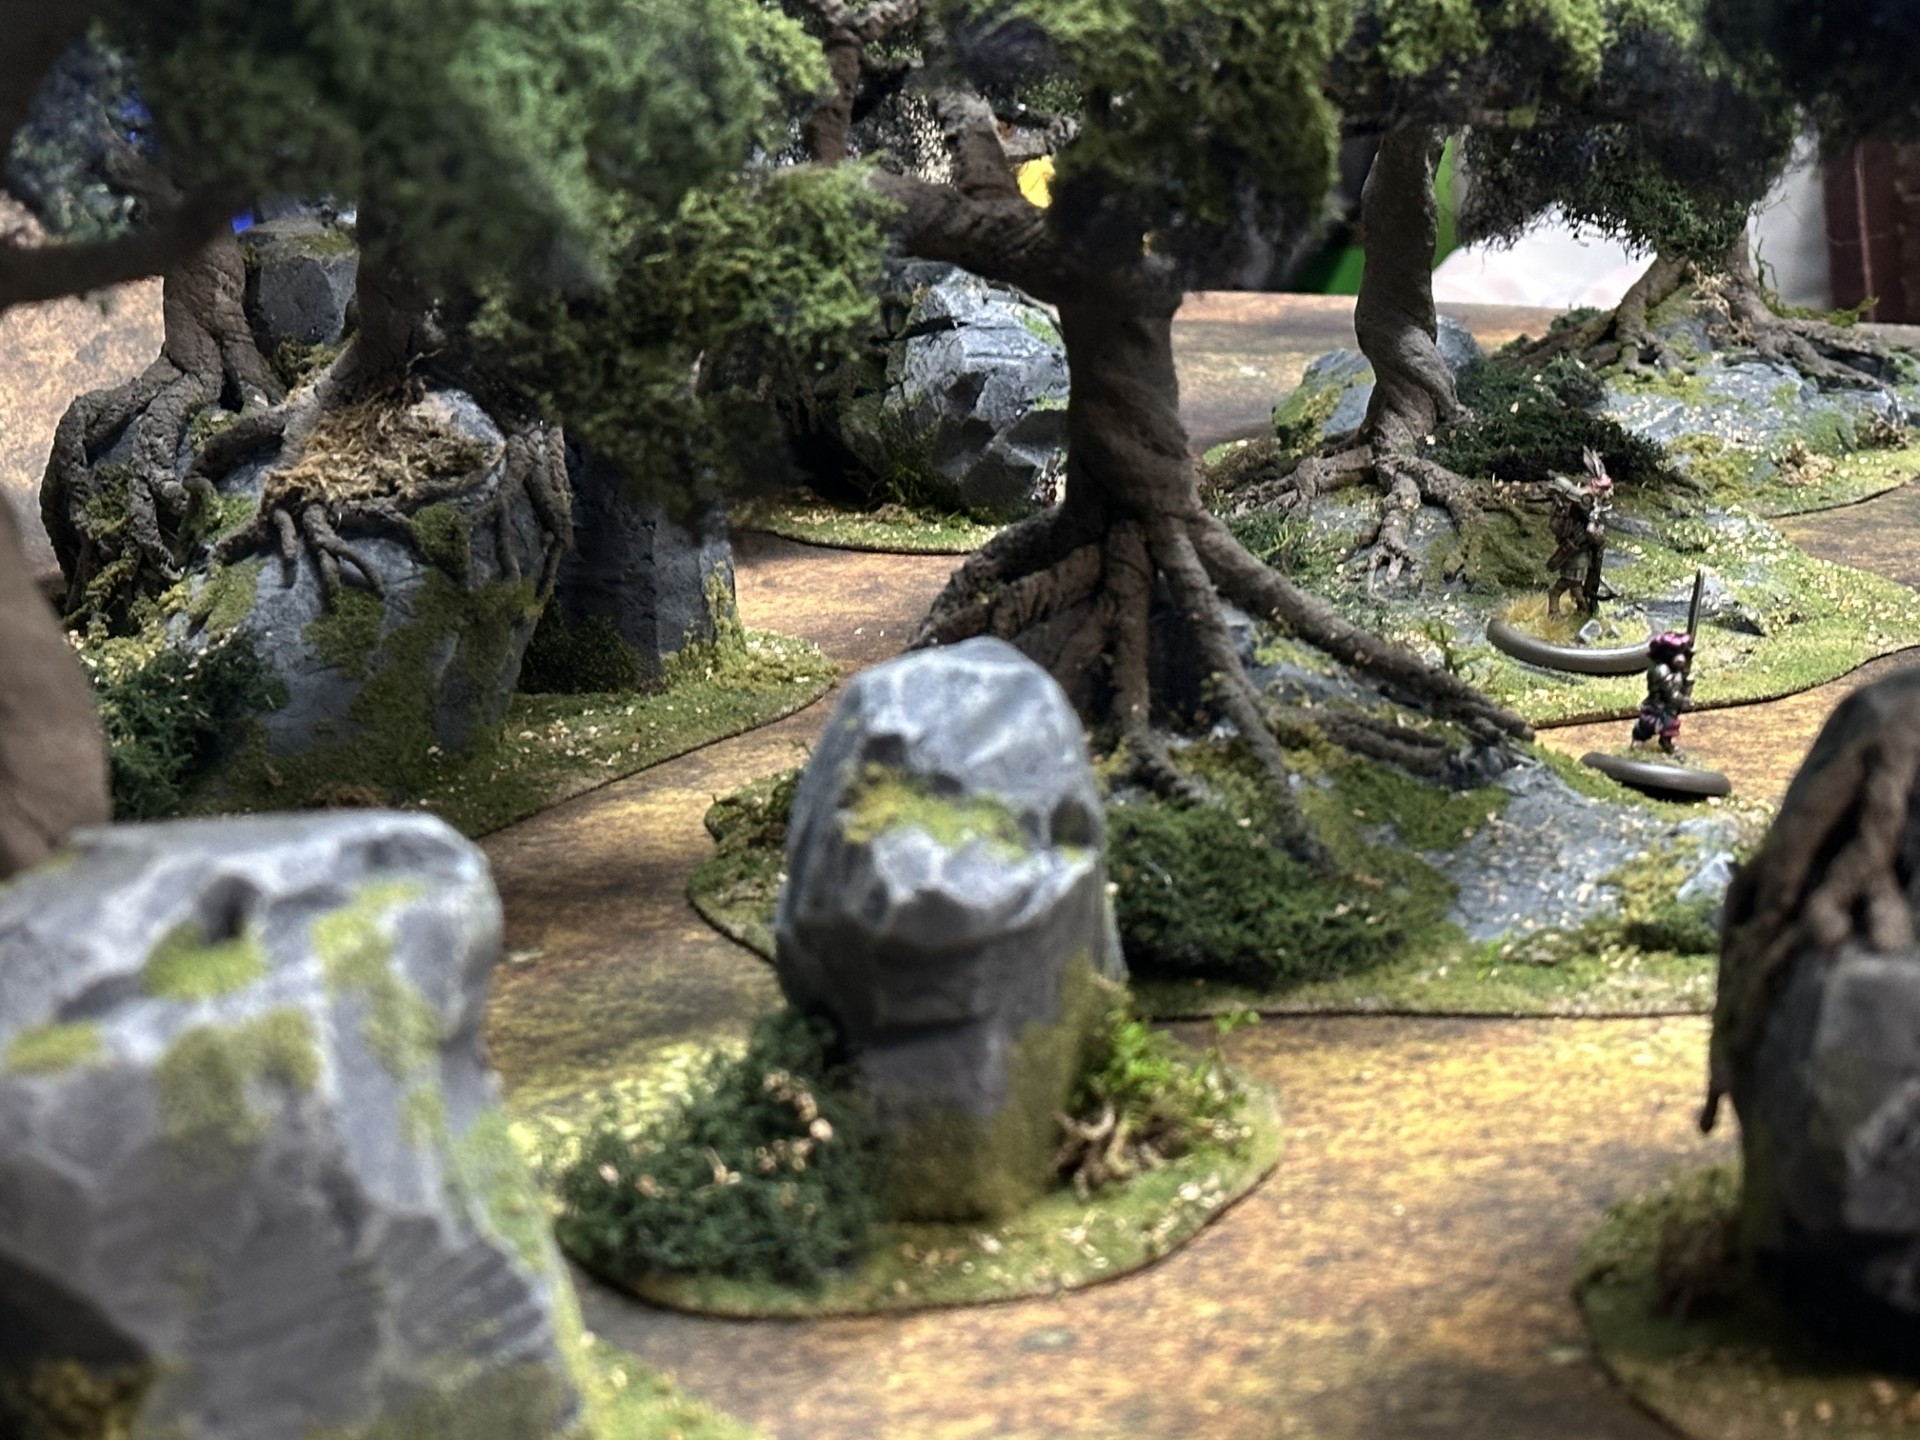
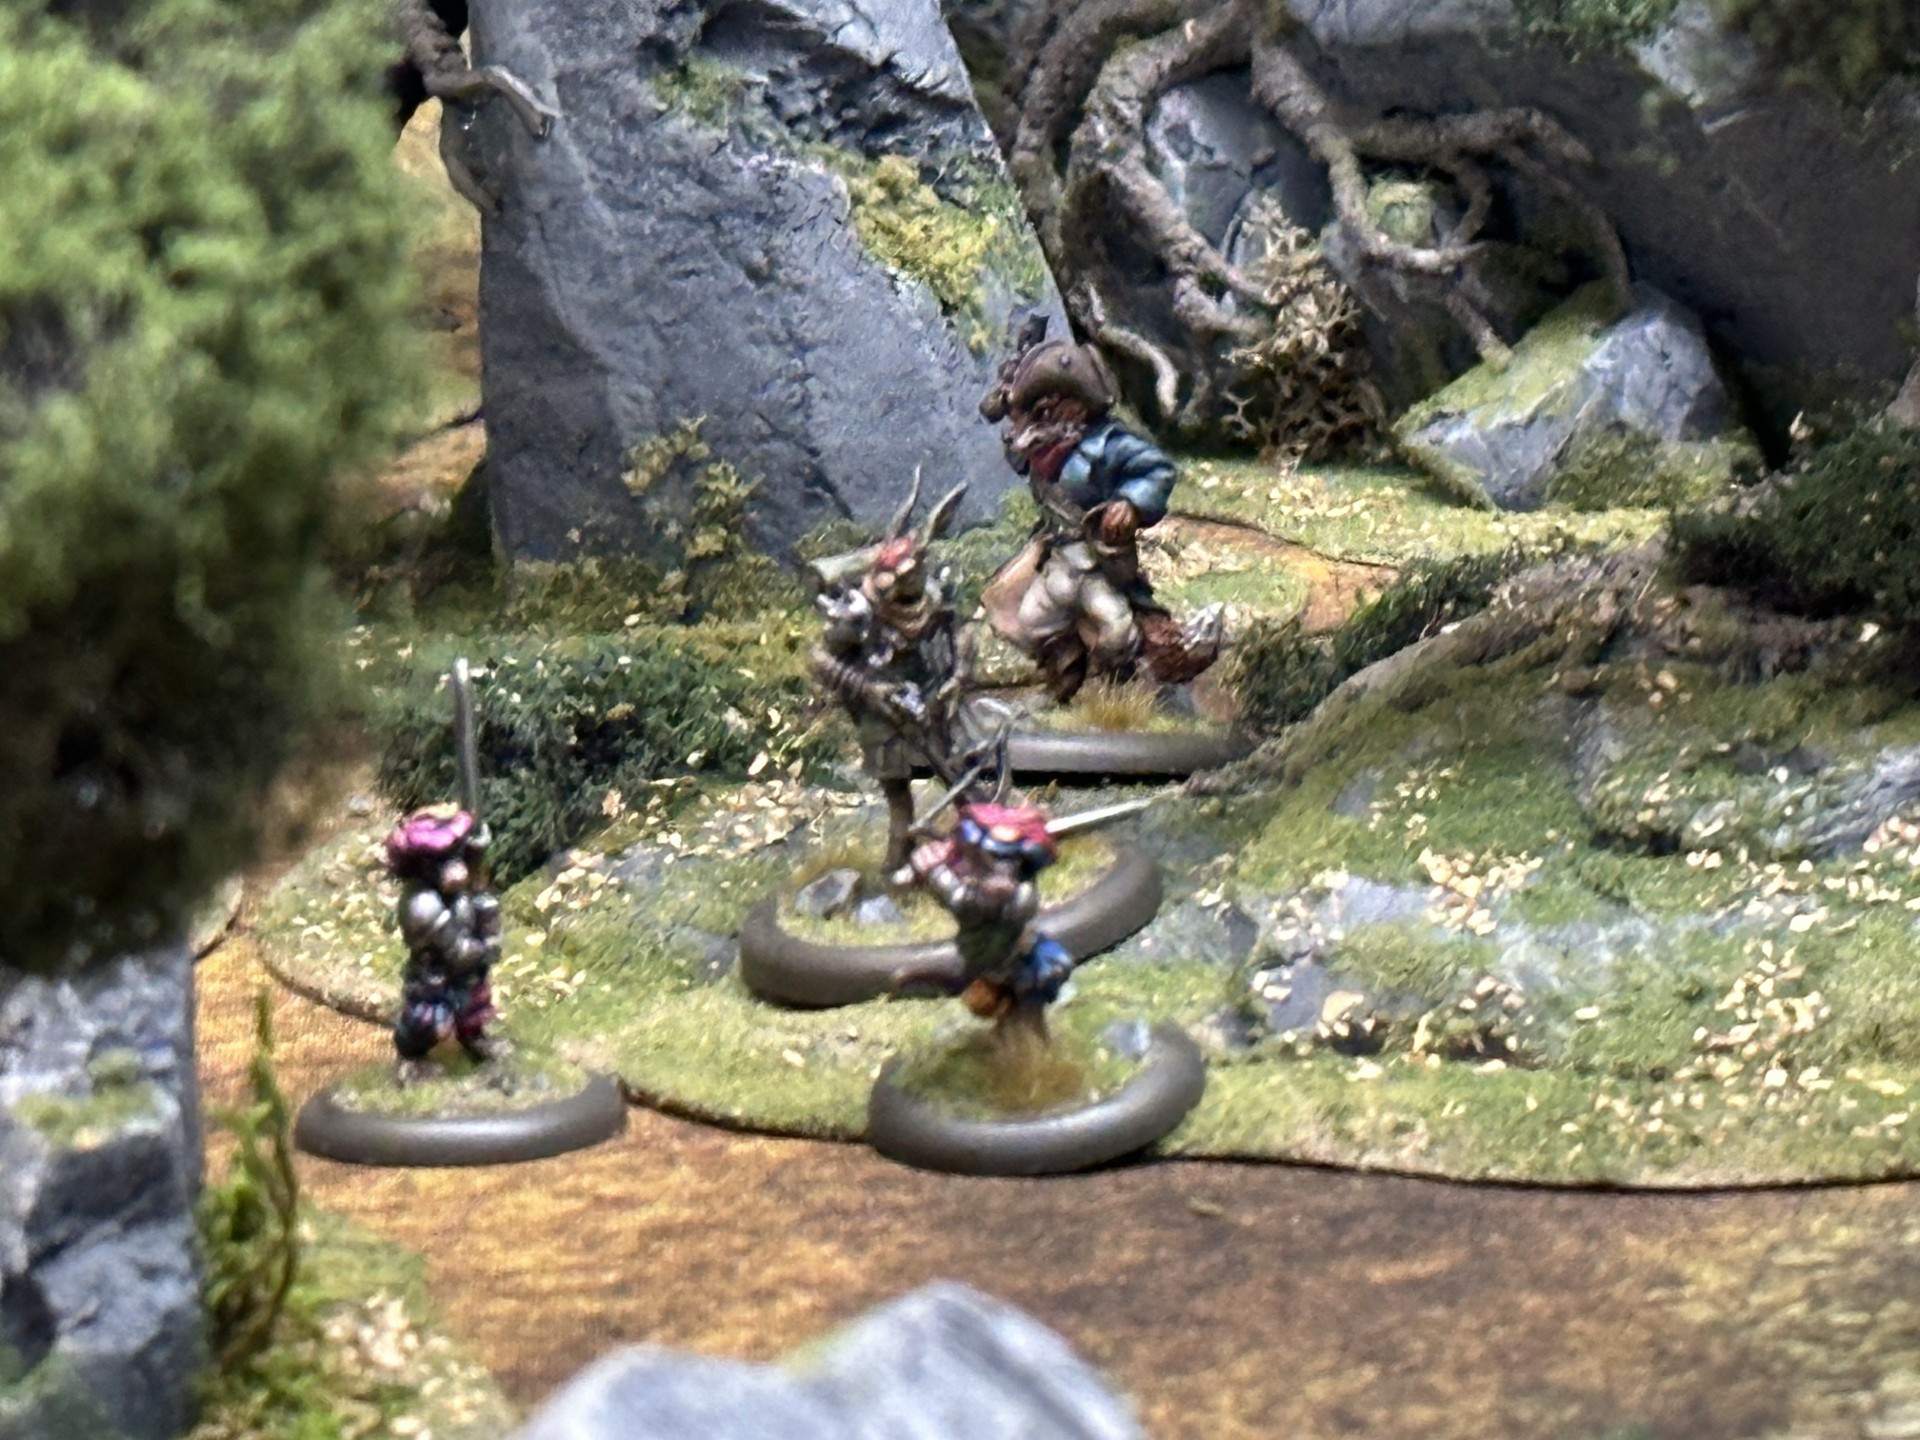
Here, at last, is the Creepy Forest in game. I’m super pleased with the playability and the how the forest served to add both visual appeal and opportunities for blocking line of sight and difficult terrain. It was also easy to perch the figures up in the trees.
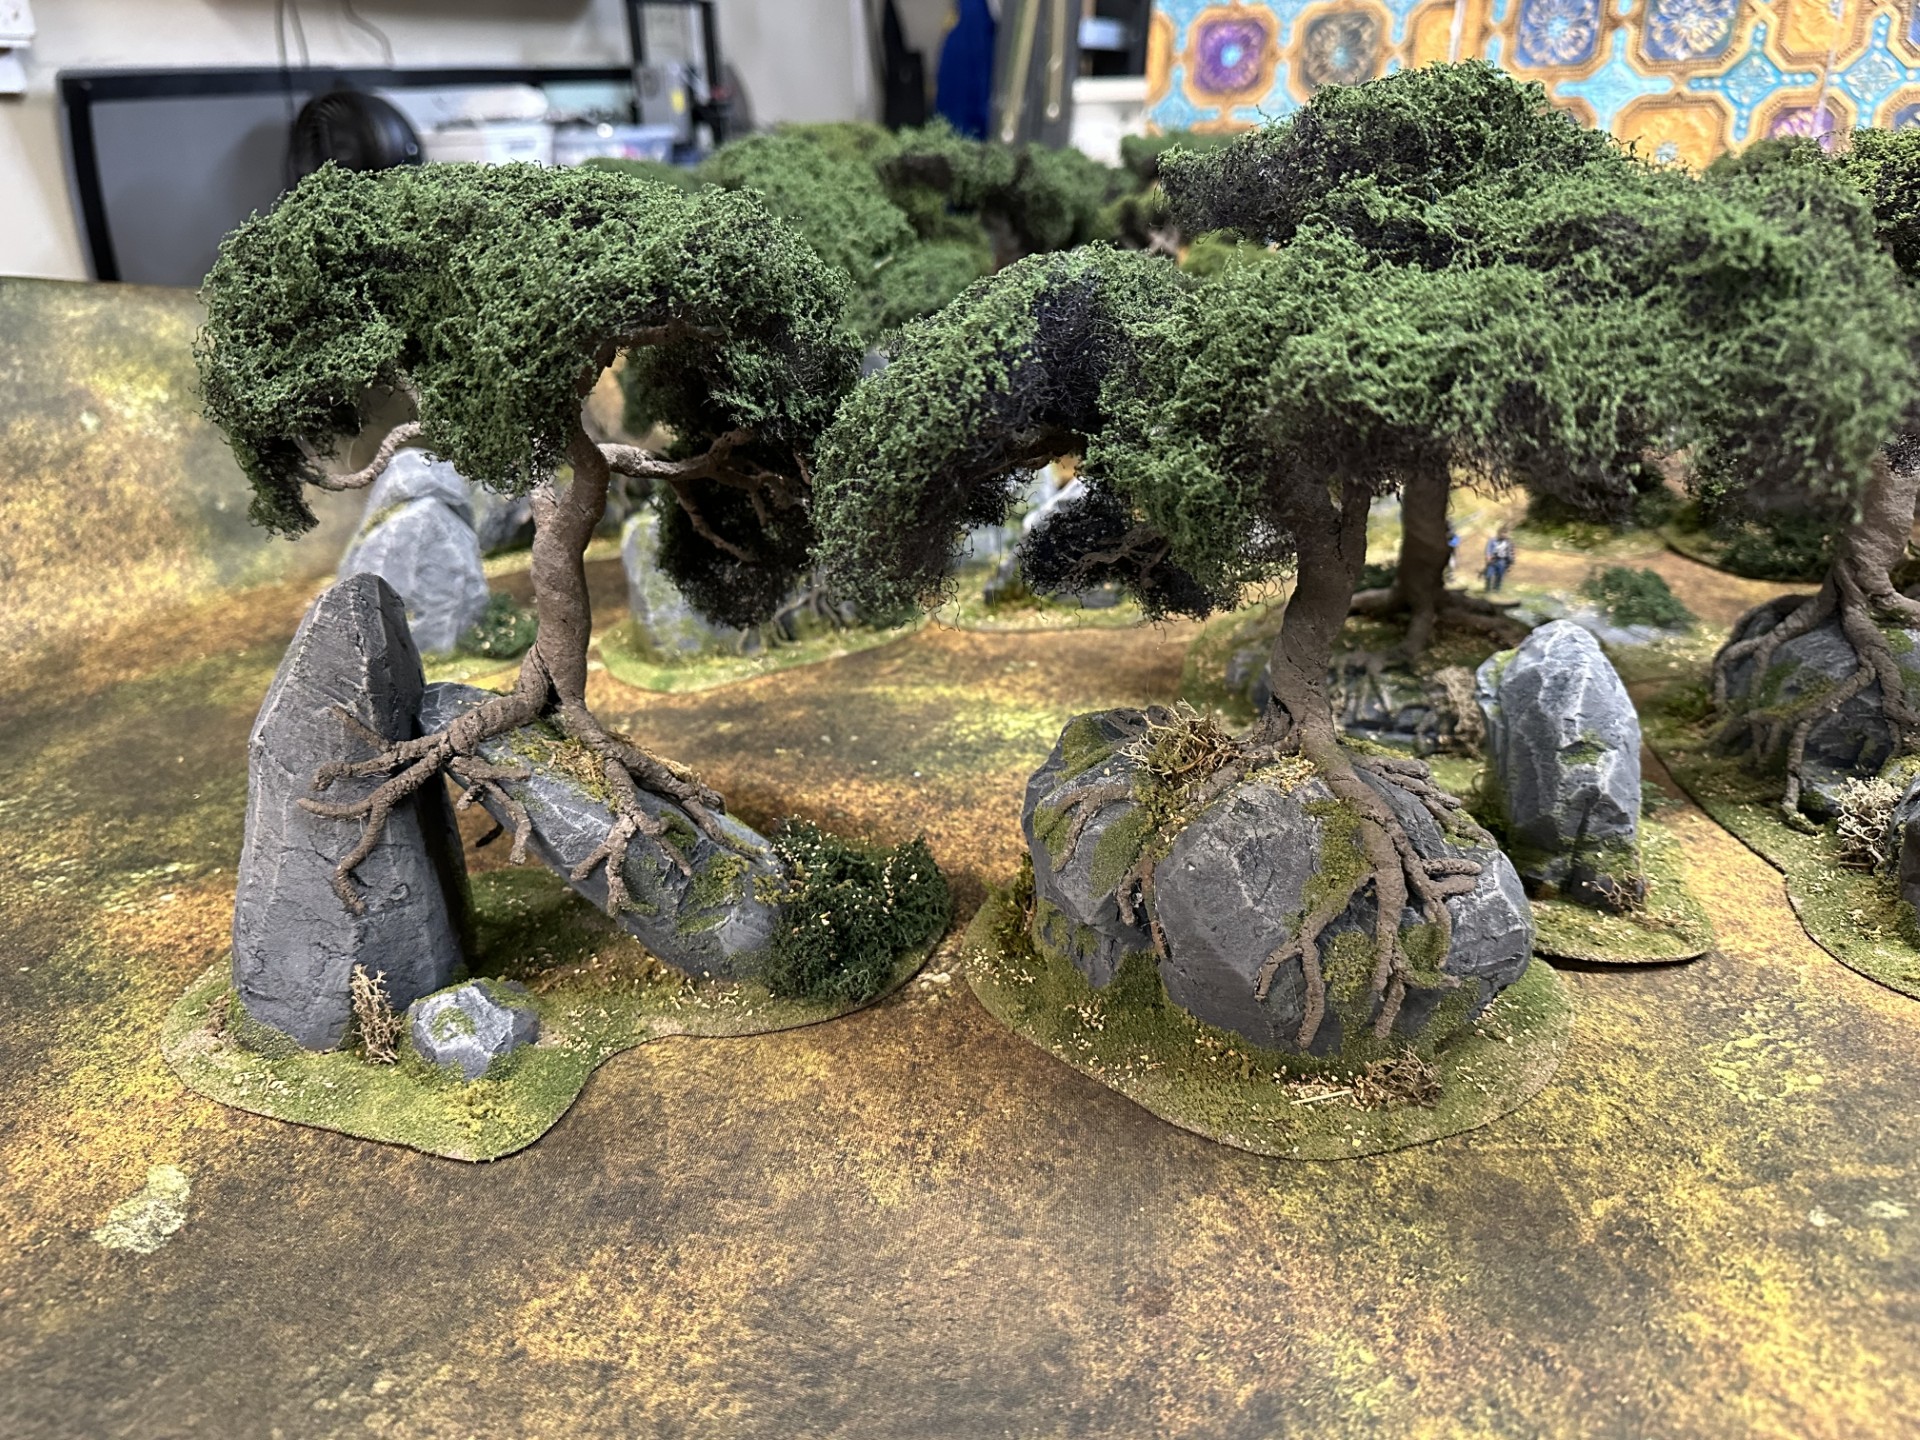
Some finished trees
Here are a few examples of the finished trees. There are 12 full trees and 5 boulders; plenty for very dense 4’x4′ table and a slightly less dense 4’x6′.
I’ll post some in play pics soon.


![Zenit Miniatures’ Samurai Warlords Now Live On Kickstarter [Updated]](https://images.beastsofwar.com/2026/02/samurai-warlords-launch-main-600-338.jpg)