


![NO Weekender Or Cult Of Games XLBS This Weekend [Updated]](https://images.beastsofwar.com/2026/03/No_Weekender_and_XLBS_this_Weekend-225-127.jpg)


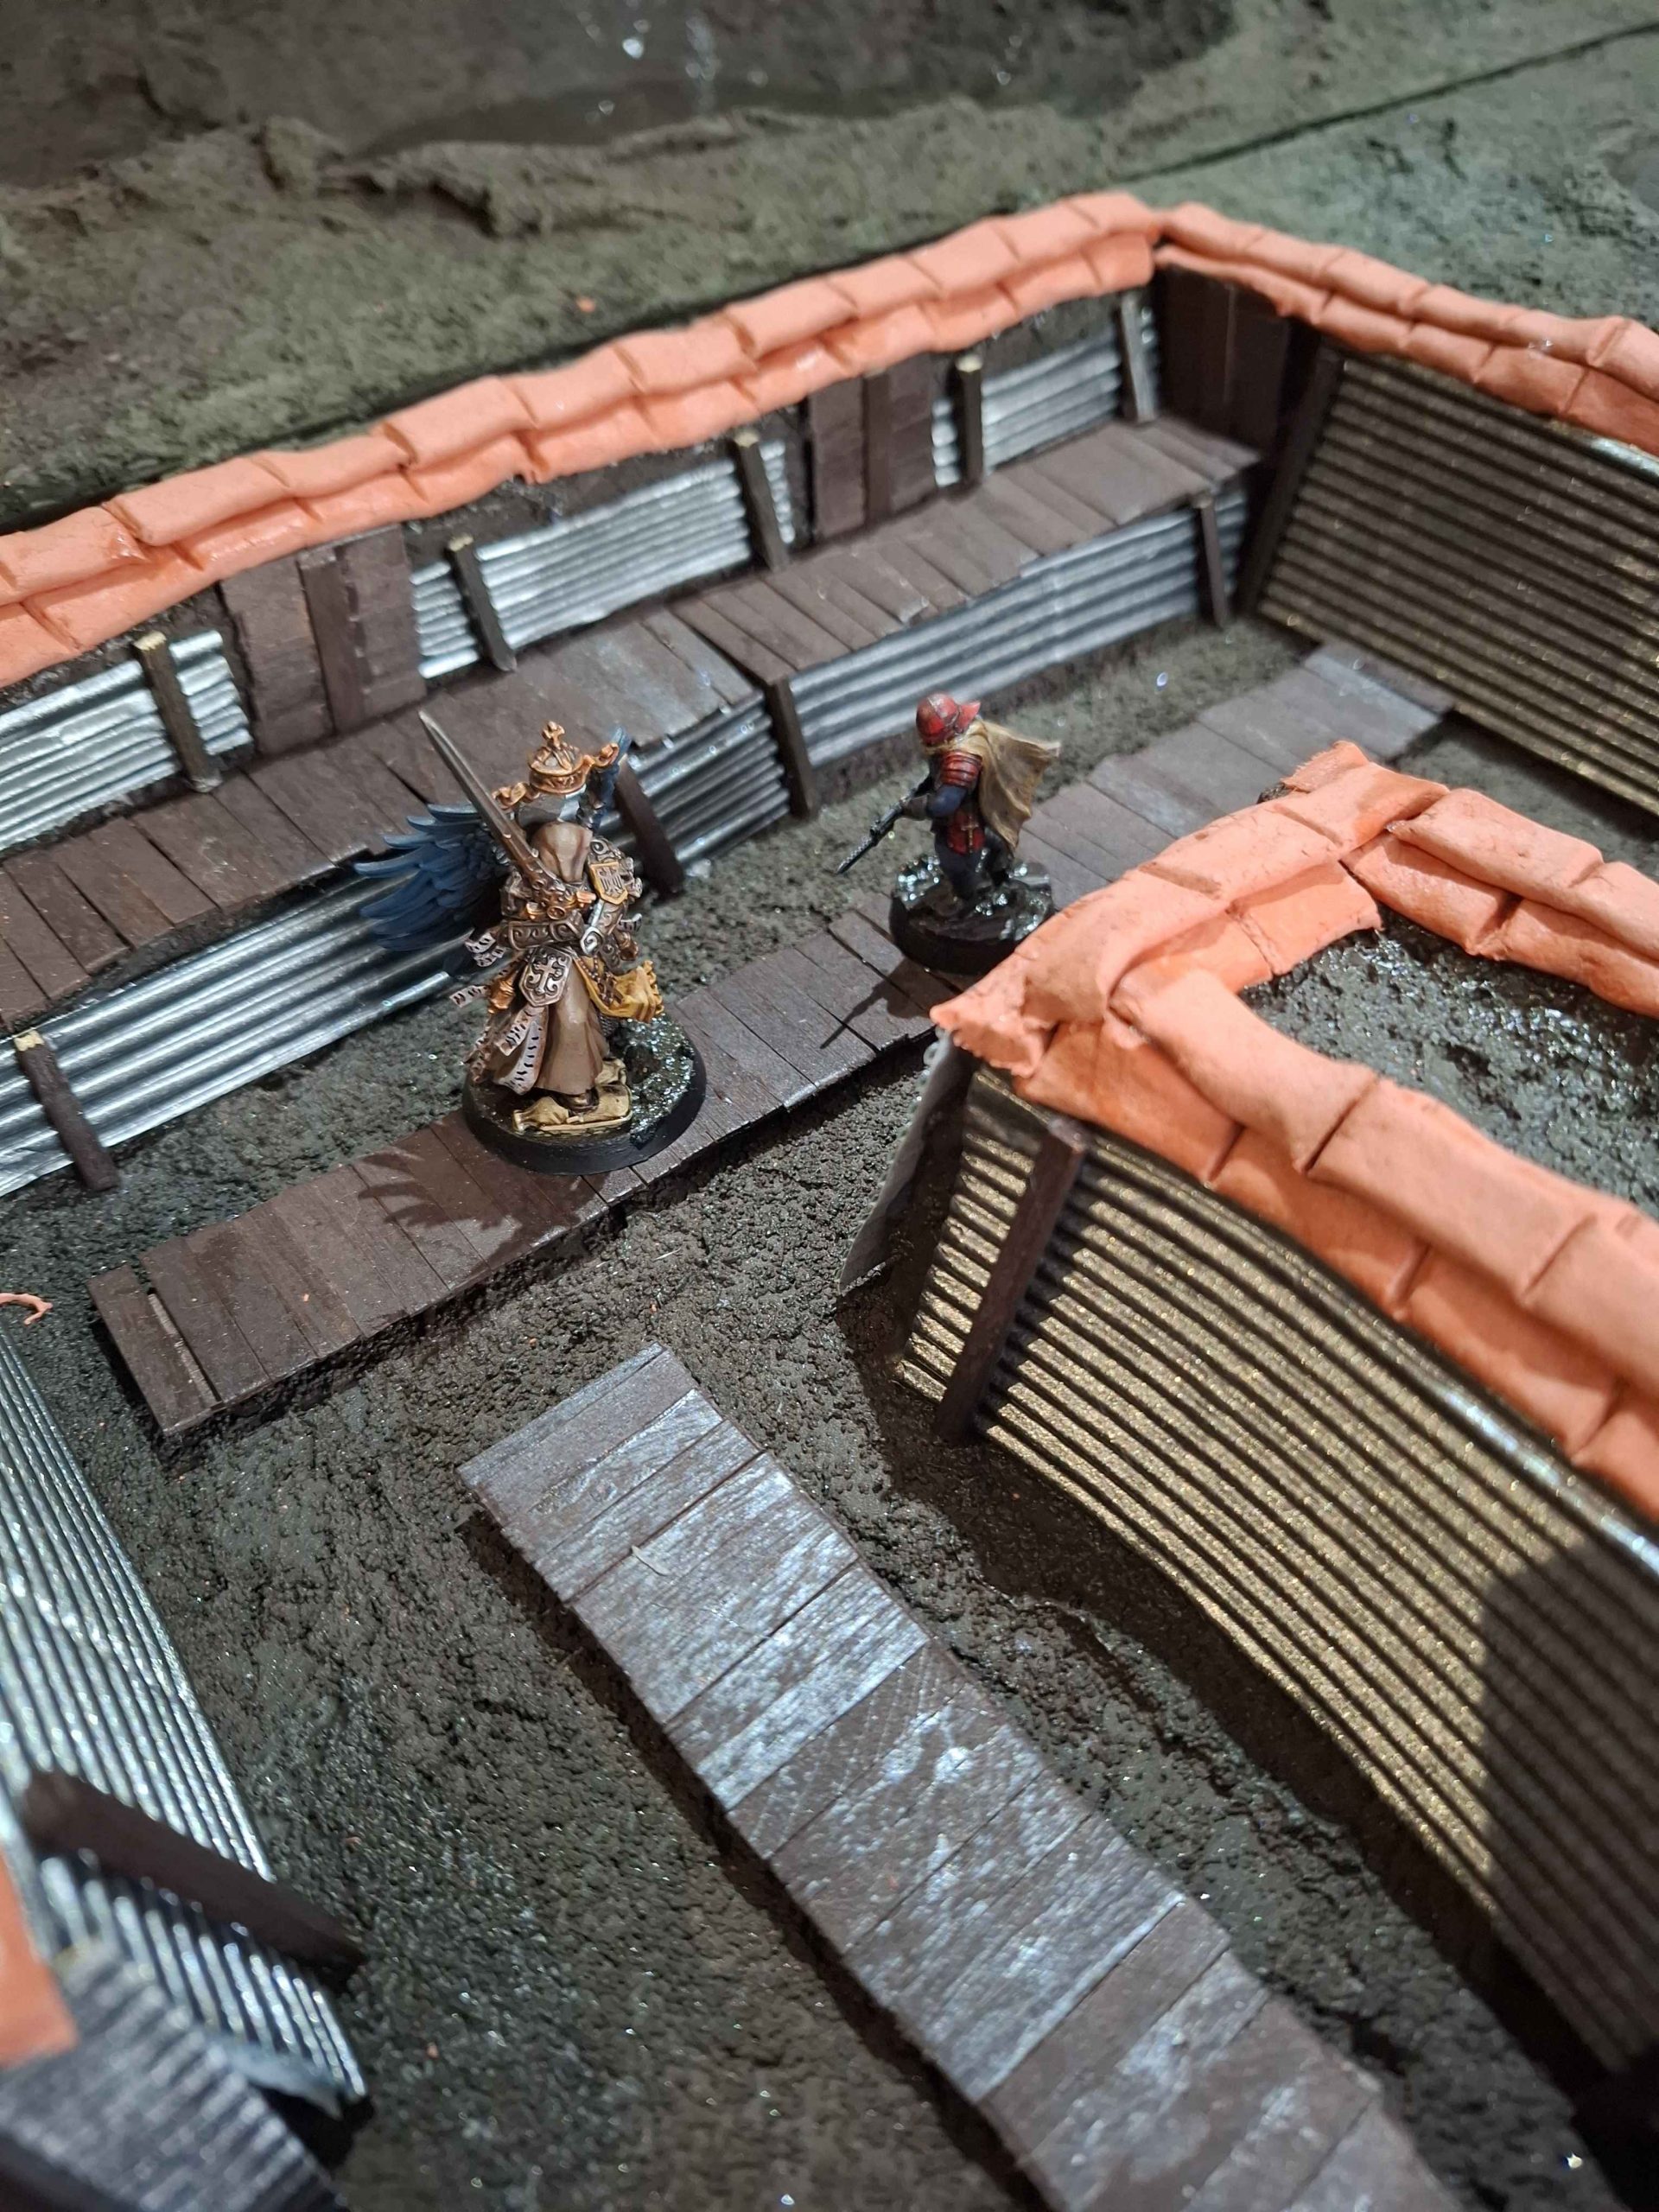
Terrainfest 2025 – Crusading in the Trenches


Recommendations: 66
About the Project
My entry for Terrainfest 2025, a trench gaming table for primarily for Trench Crusade, but eventually WW1 and other games
Related Game: Trench Crusade
Related Genre: Fantasy
Related Contest: TerrainFest 2025
This Project is Active
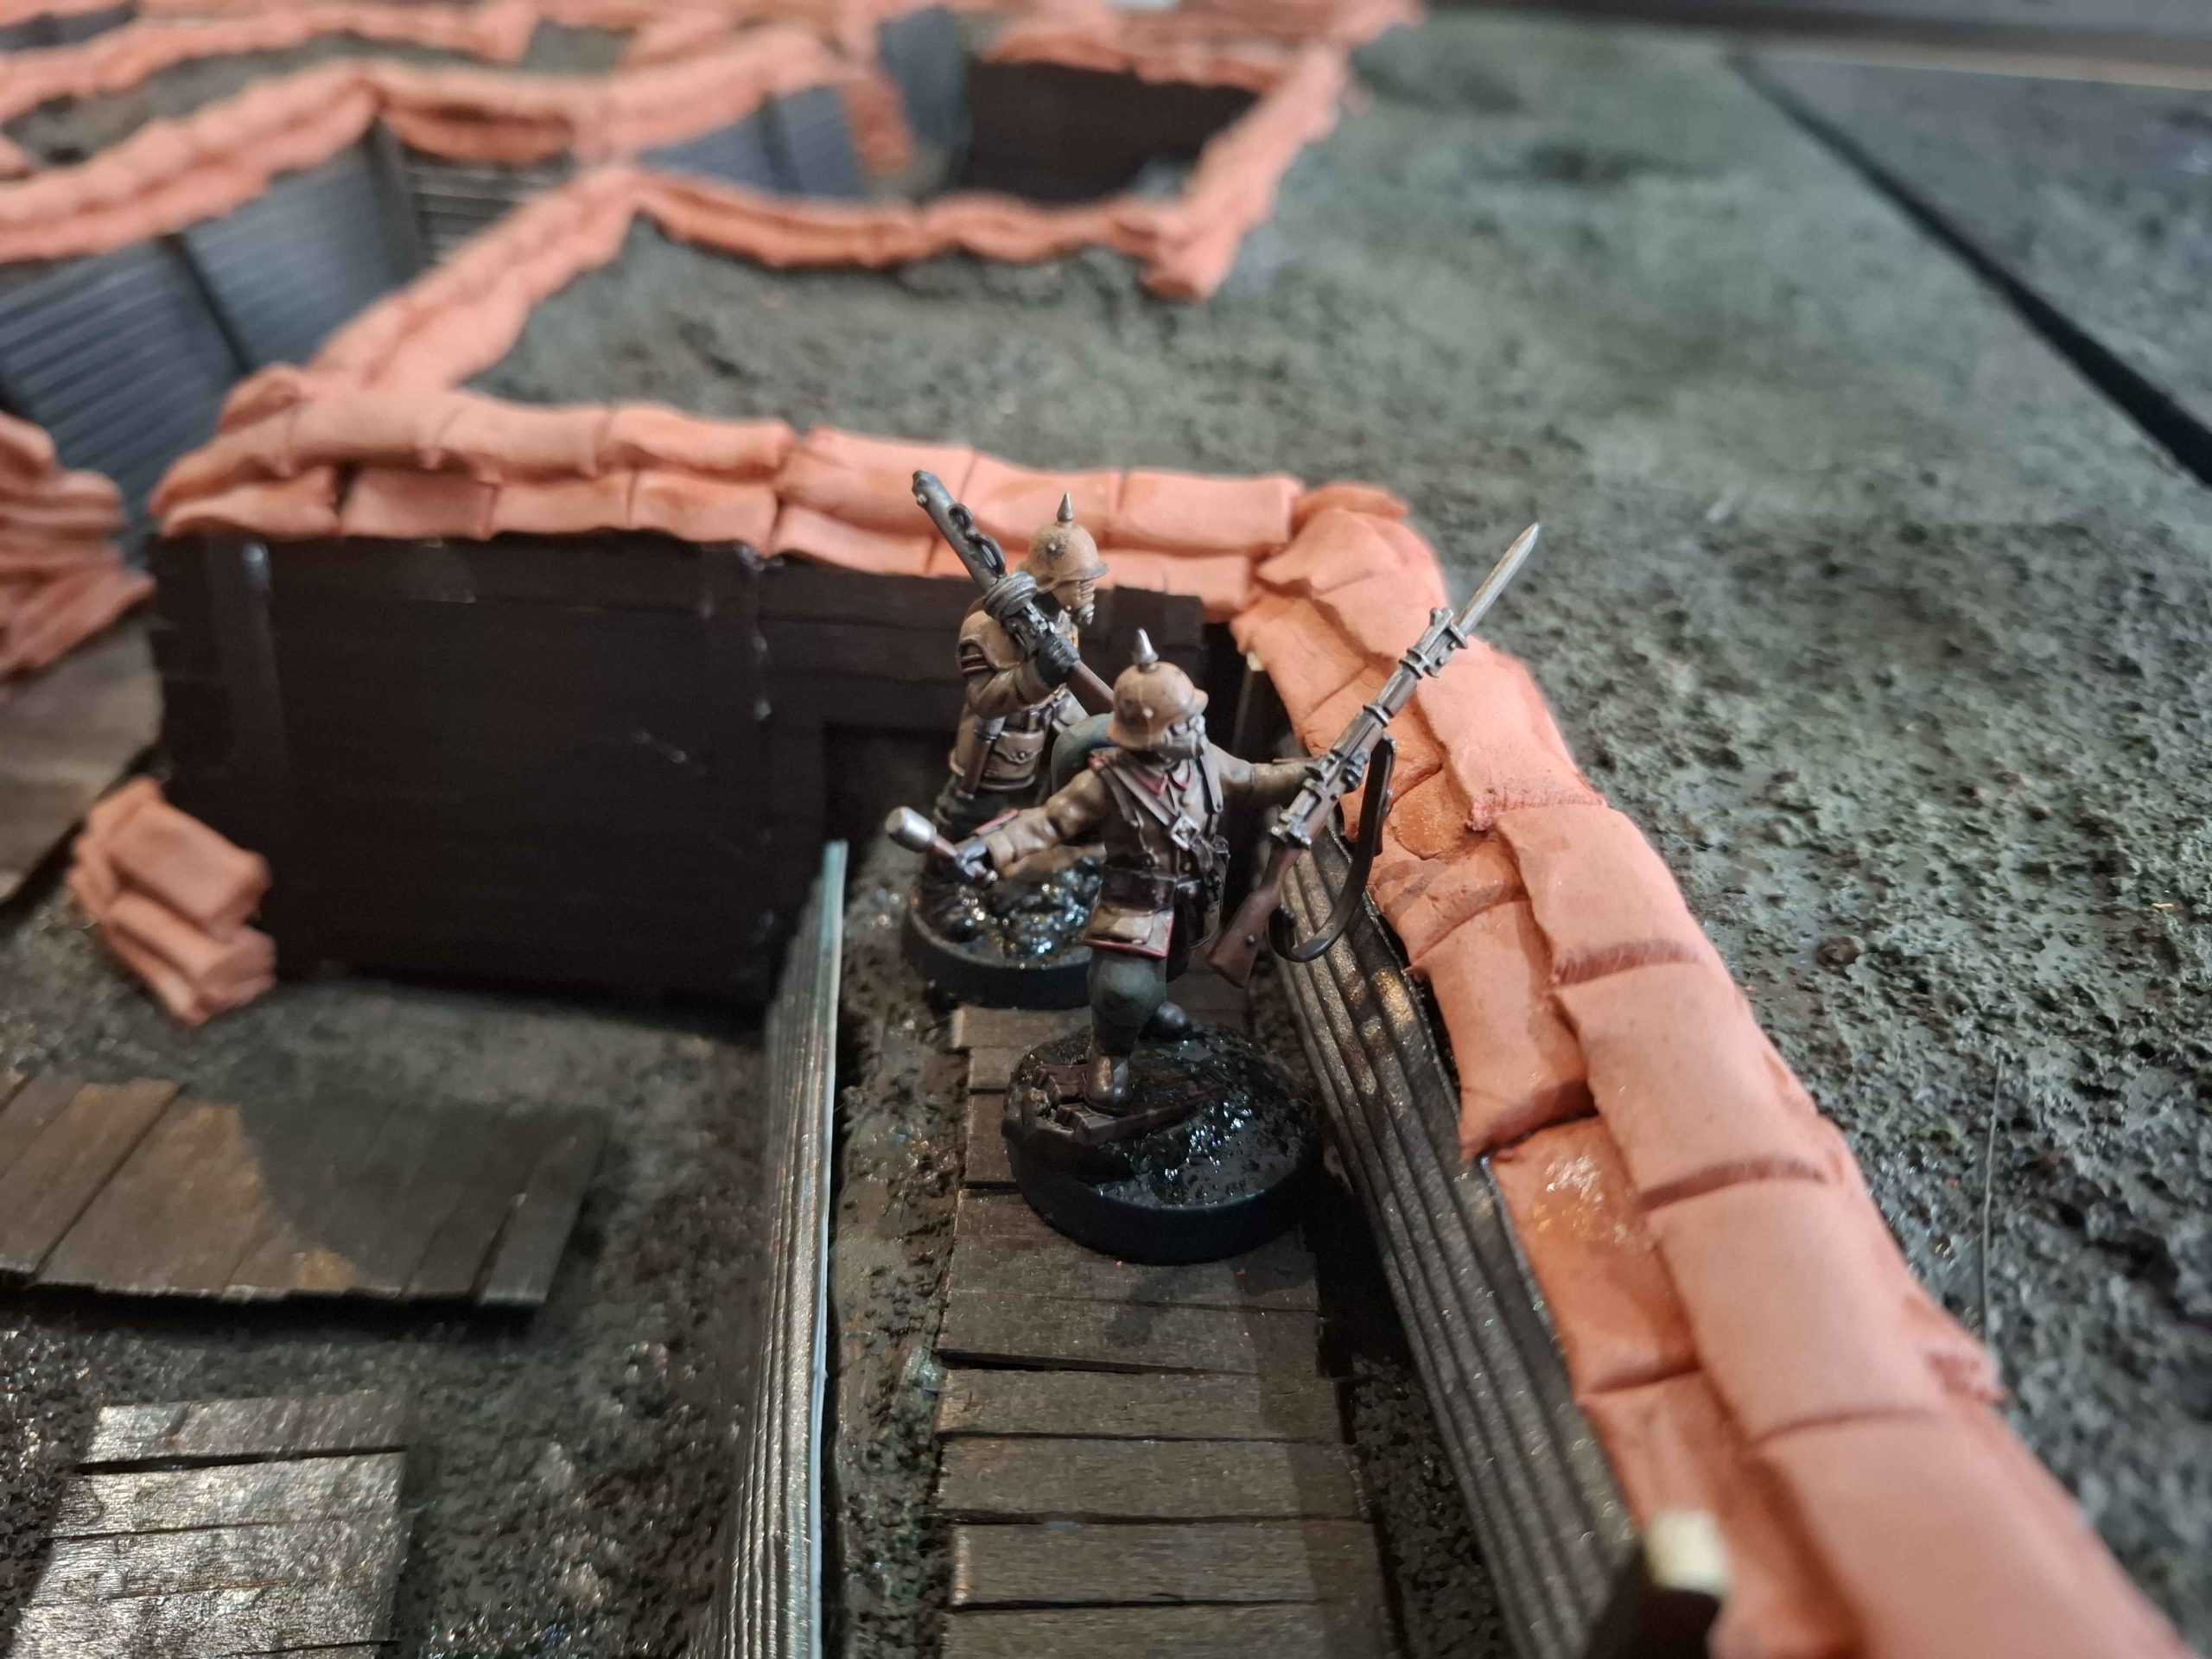
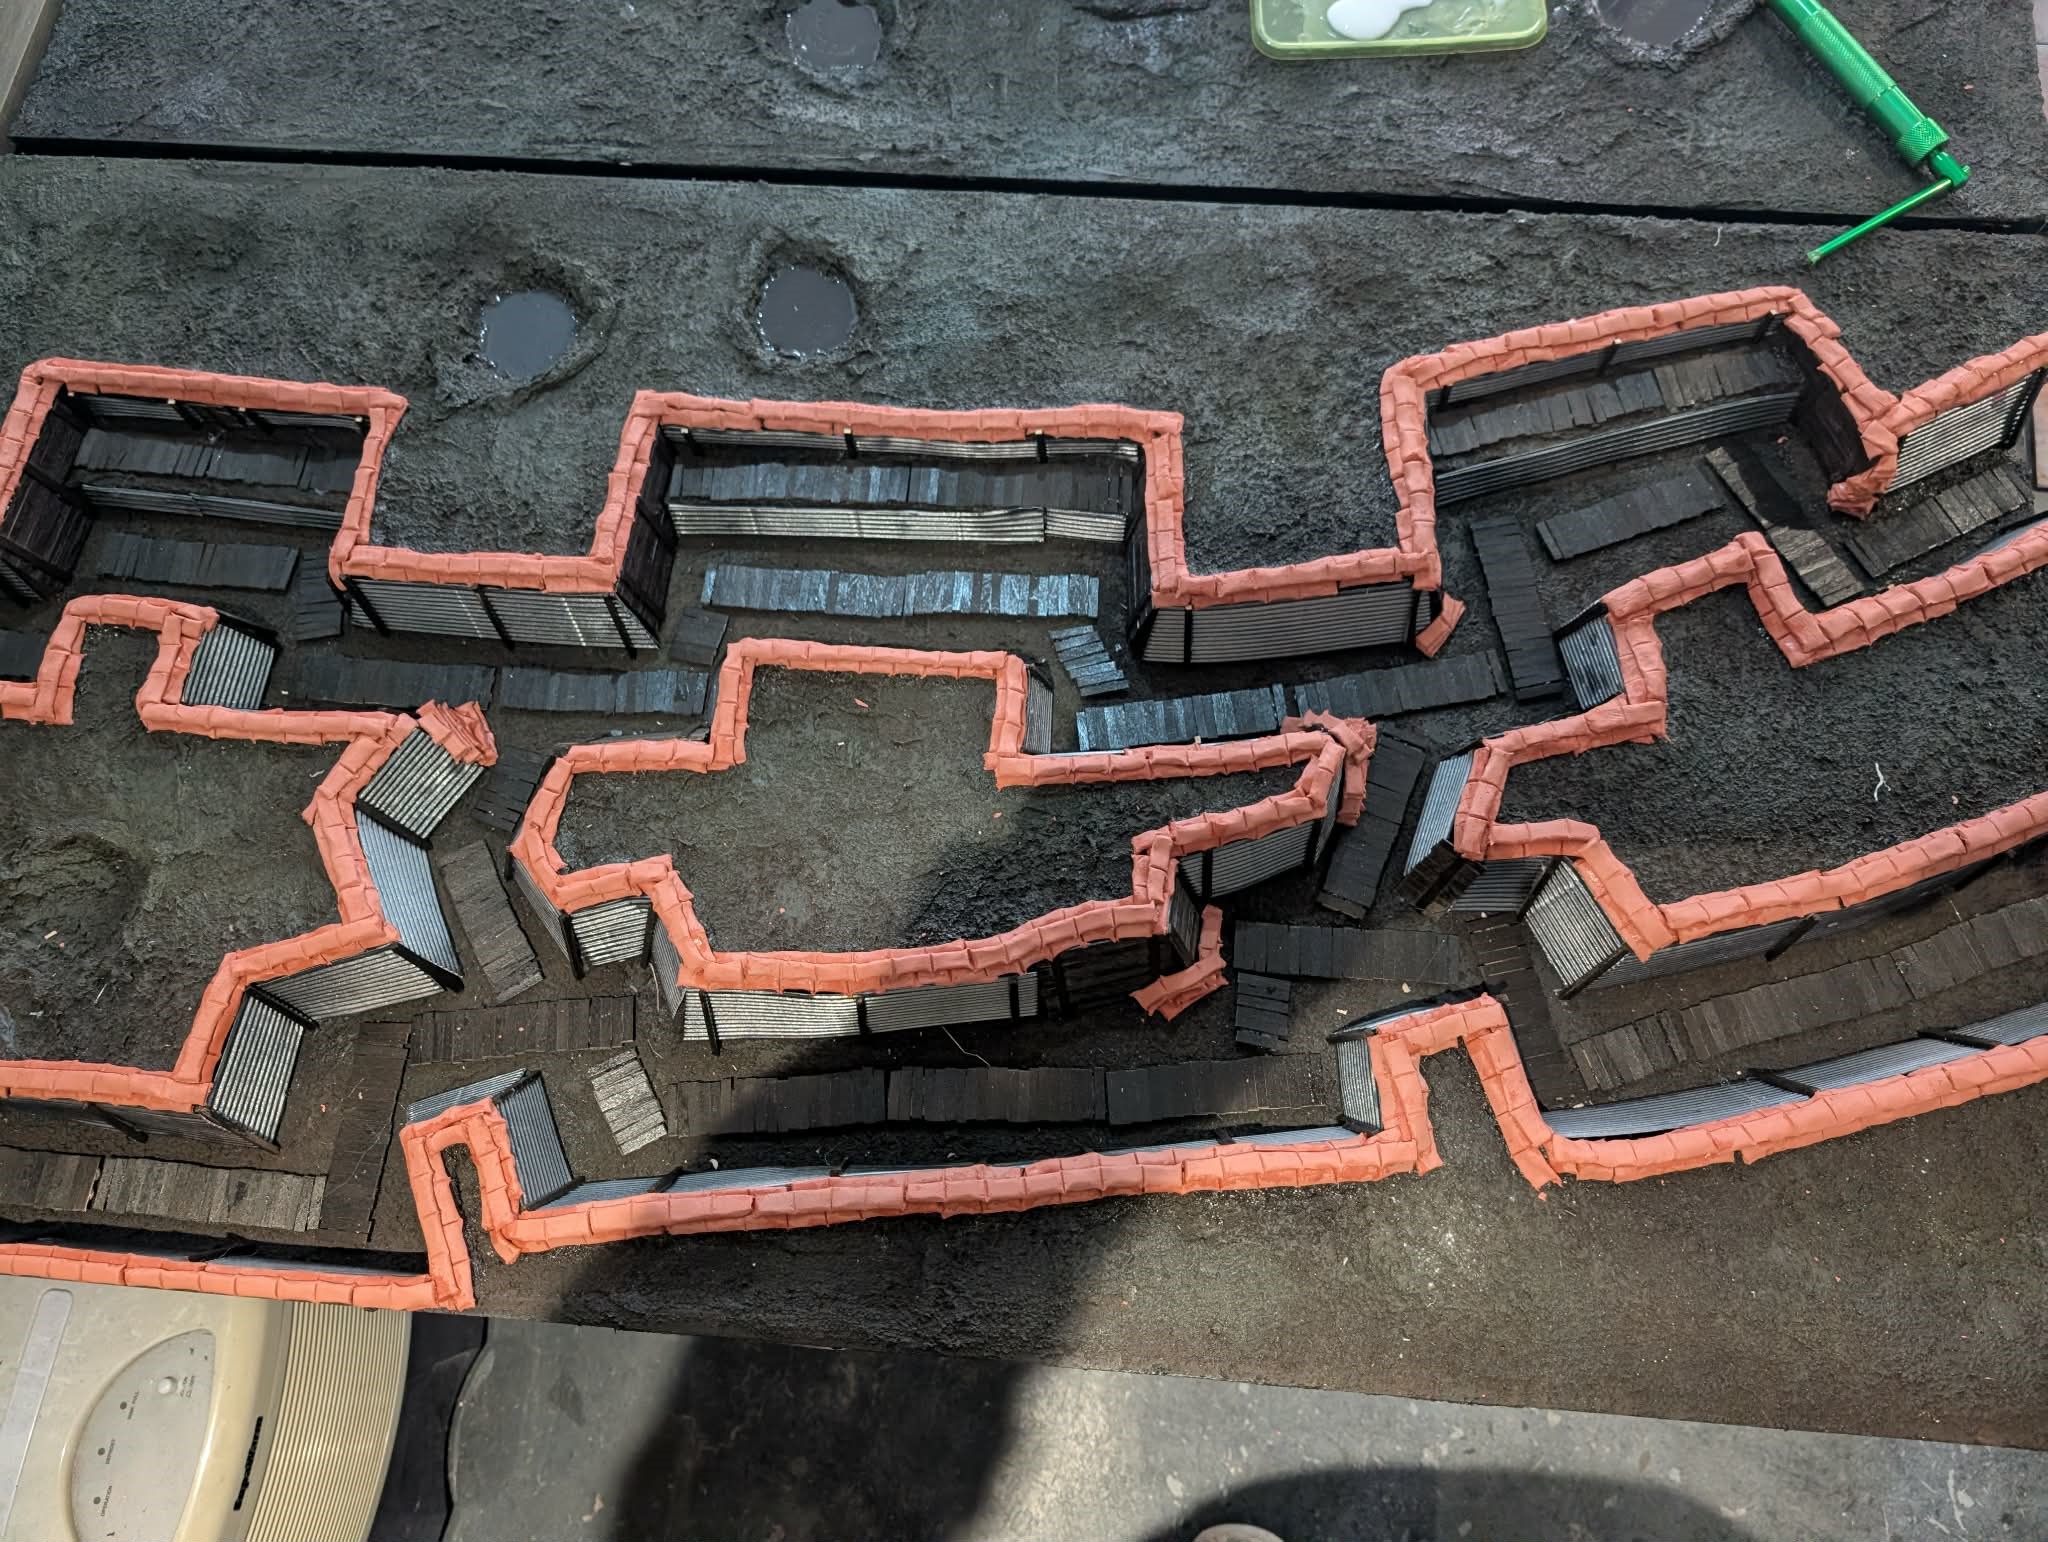
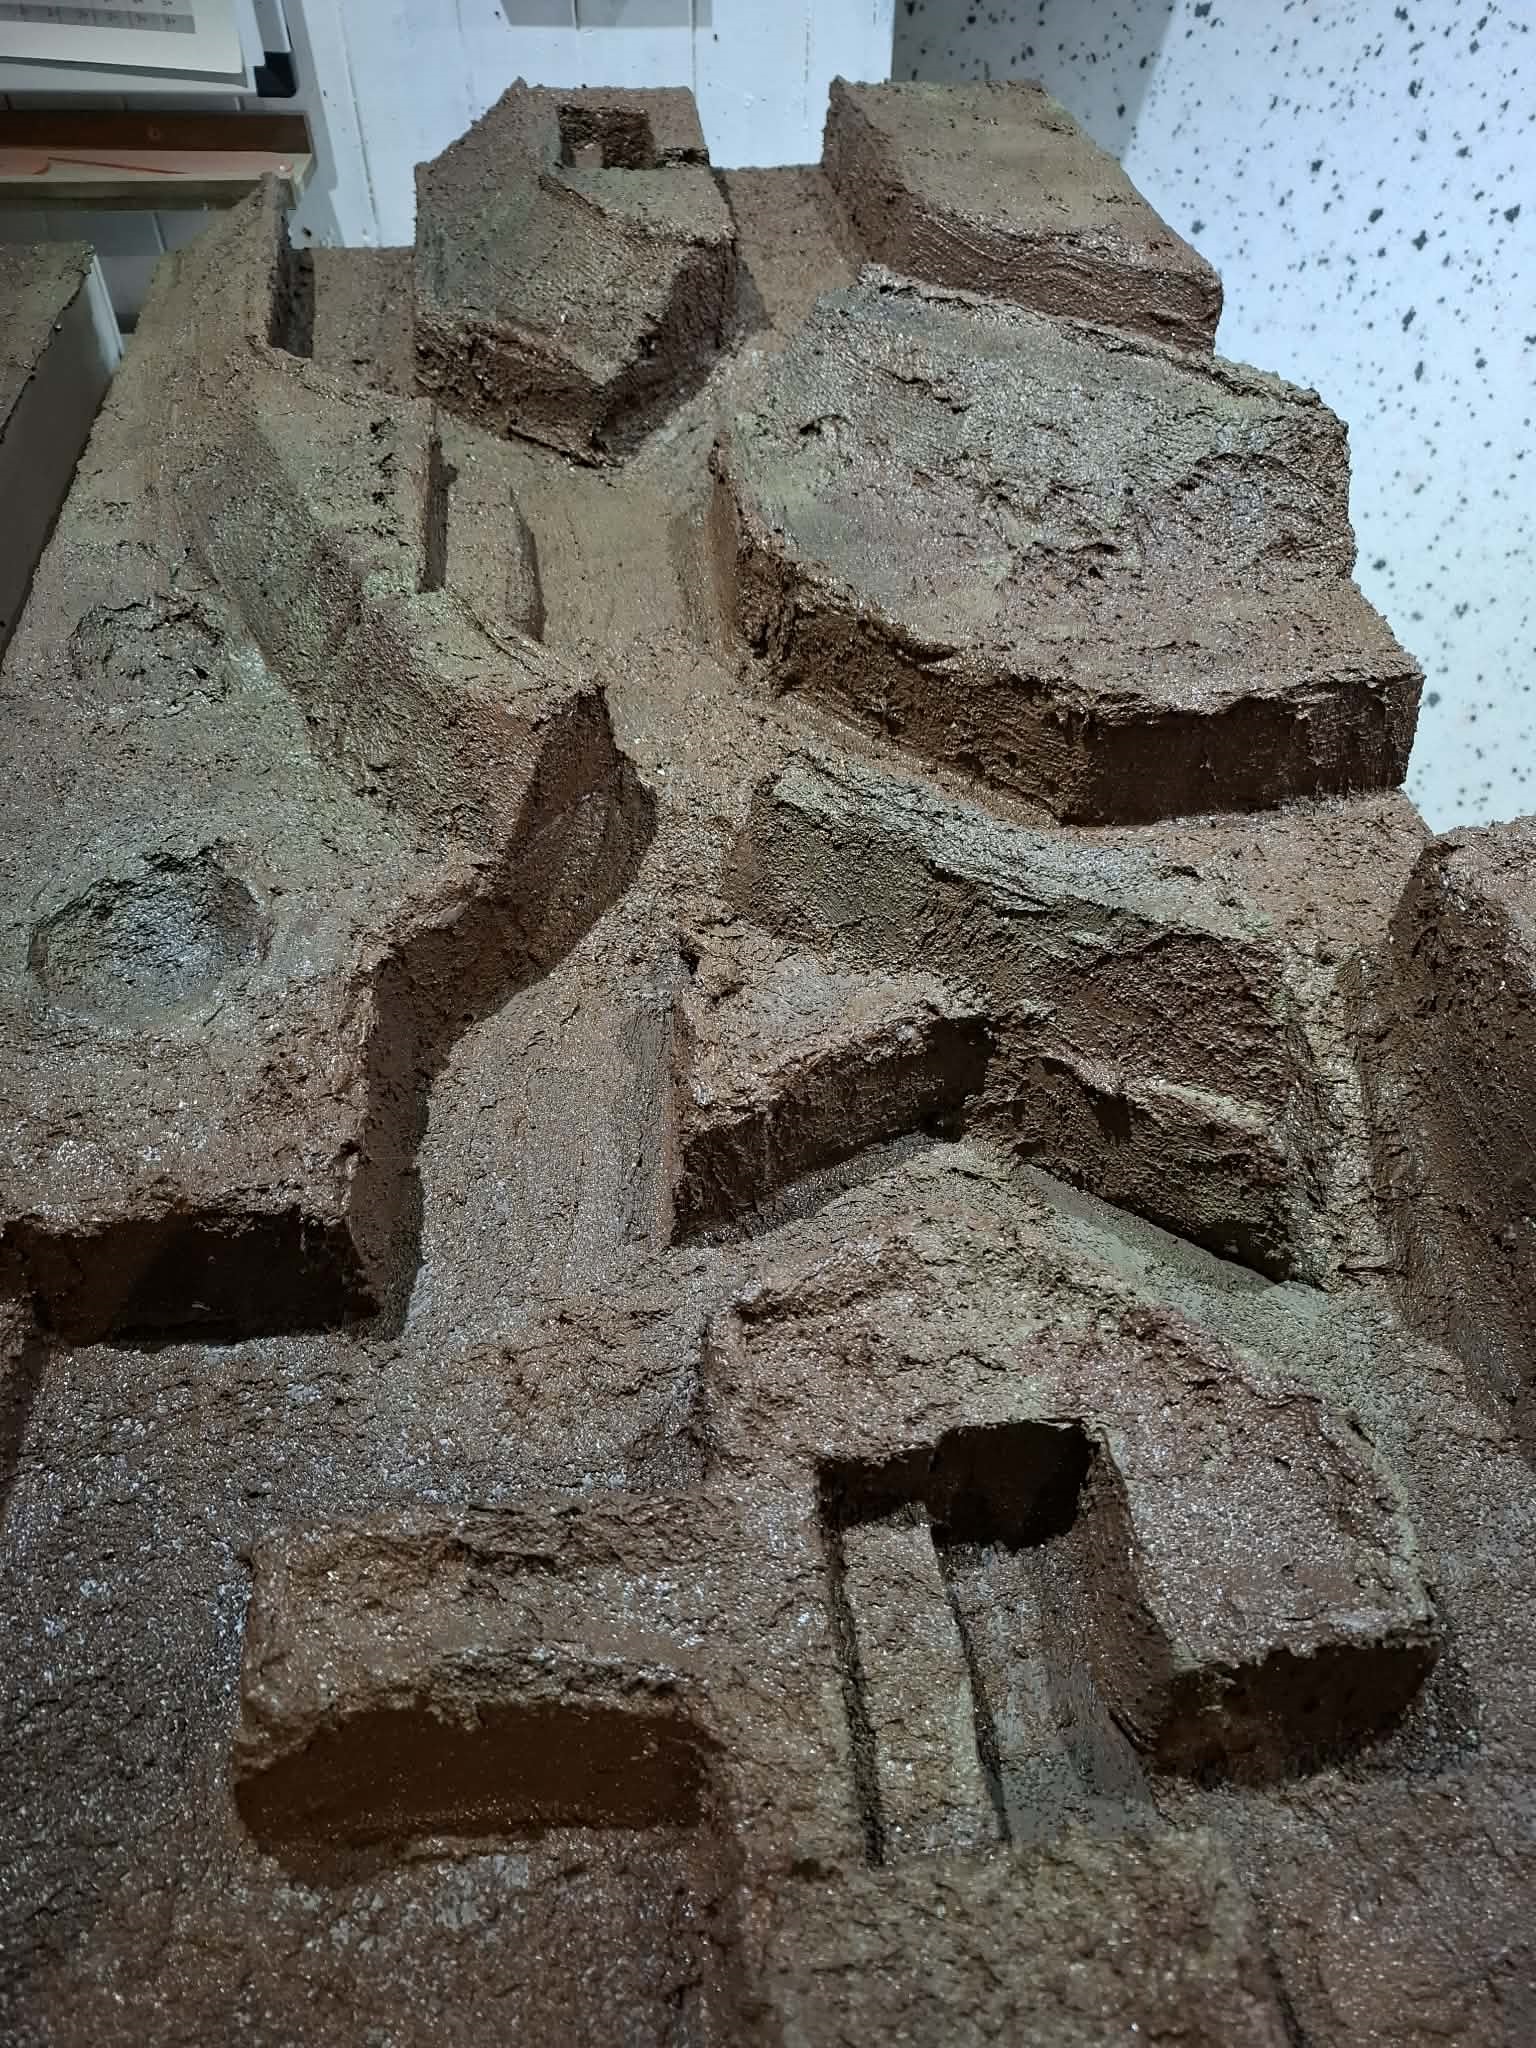
Sooo close.....
So it’s the end of february… didn’t quite manage to get it finished, but to be fair, i think i have a decent enough reason….

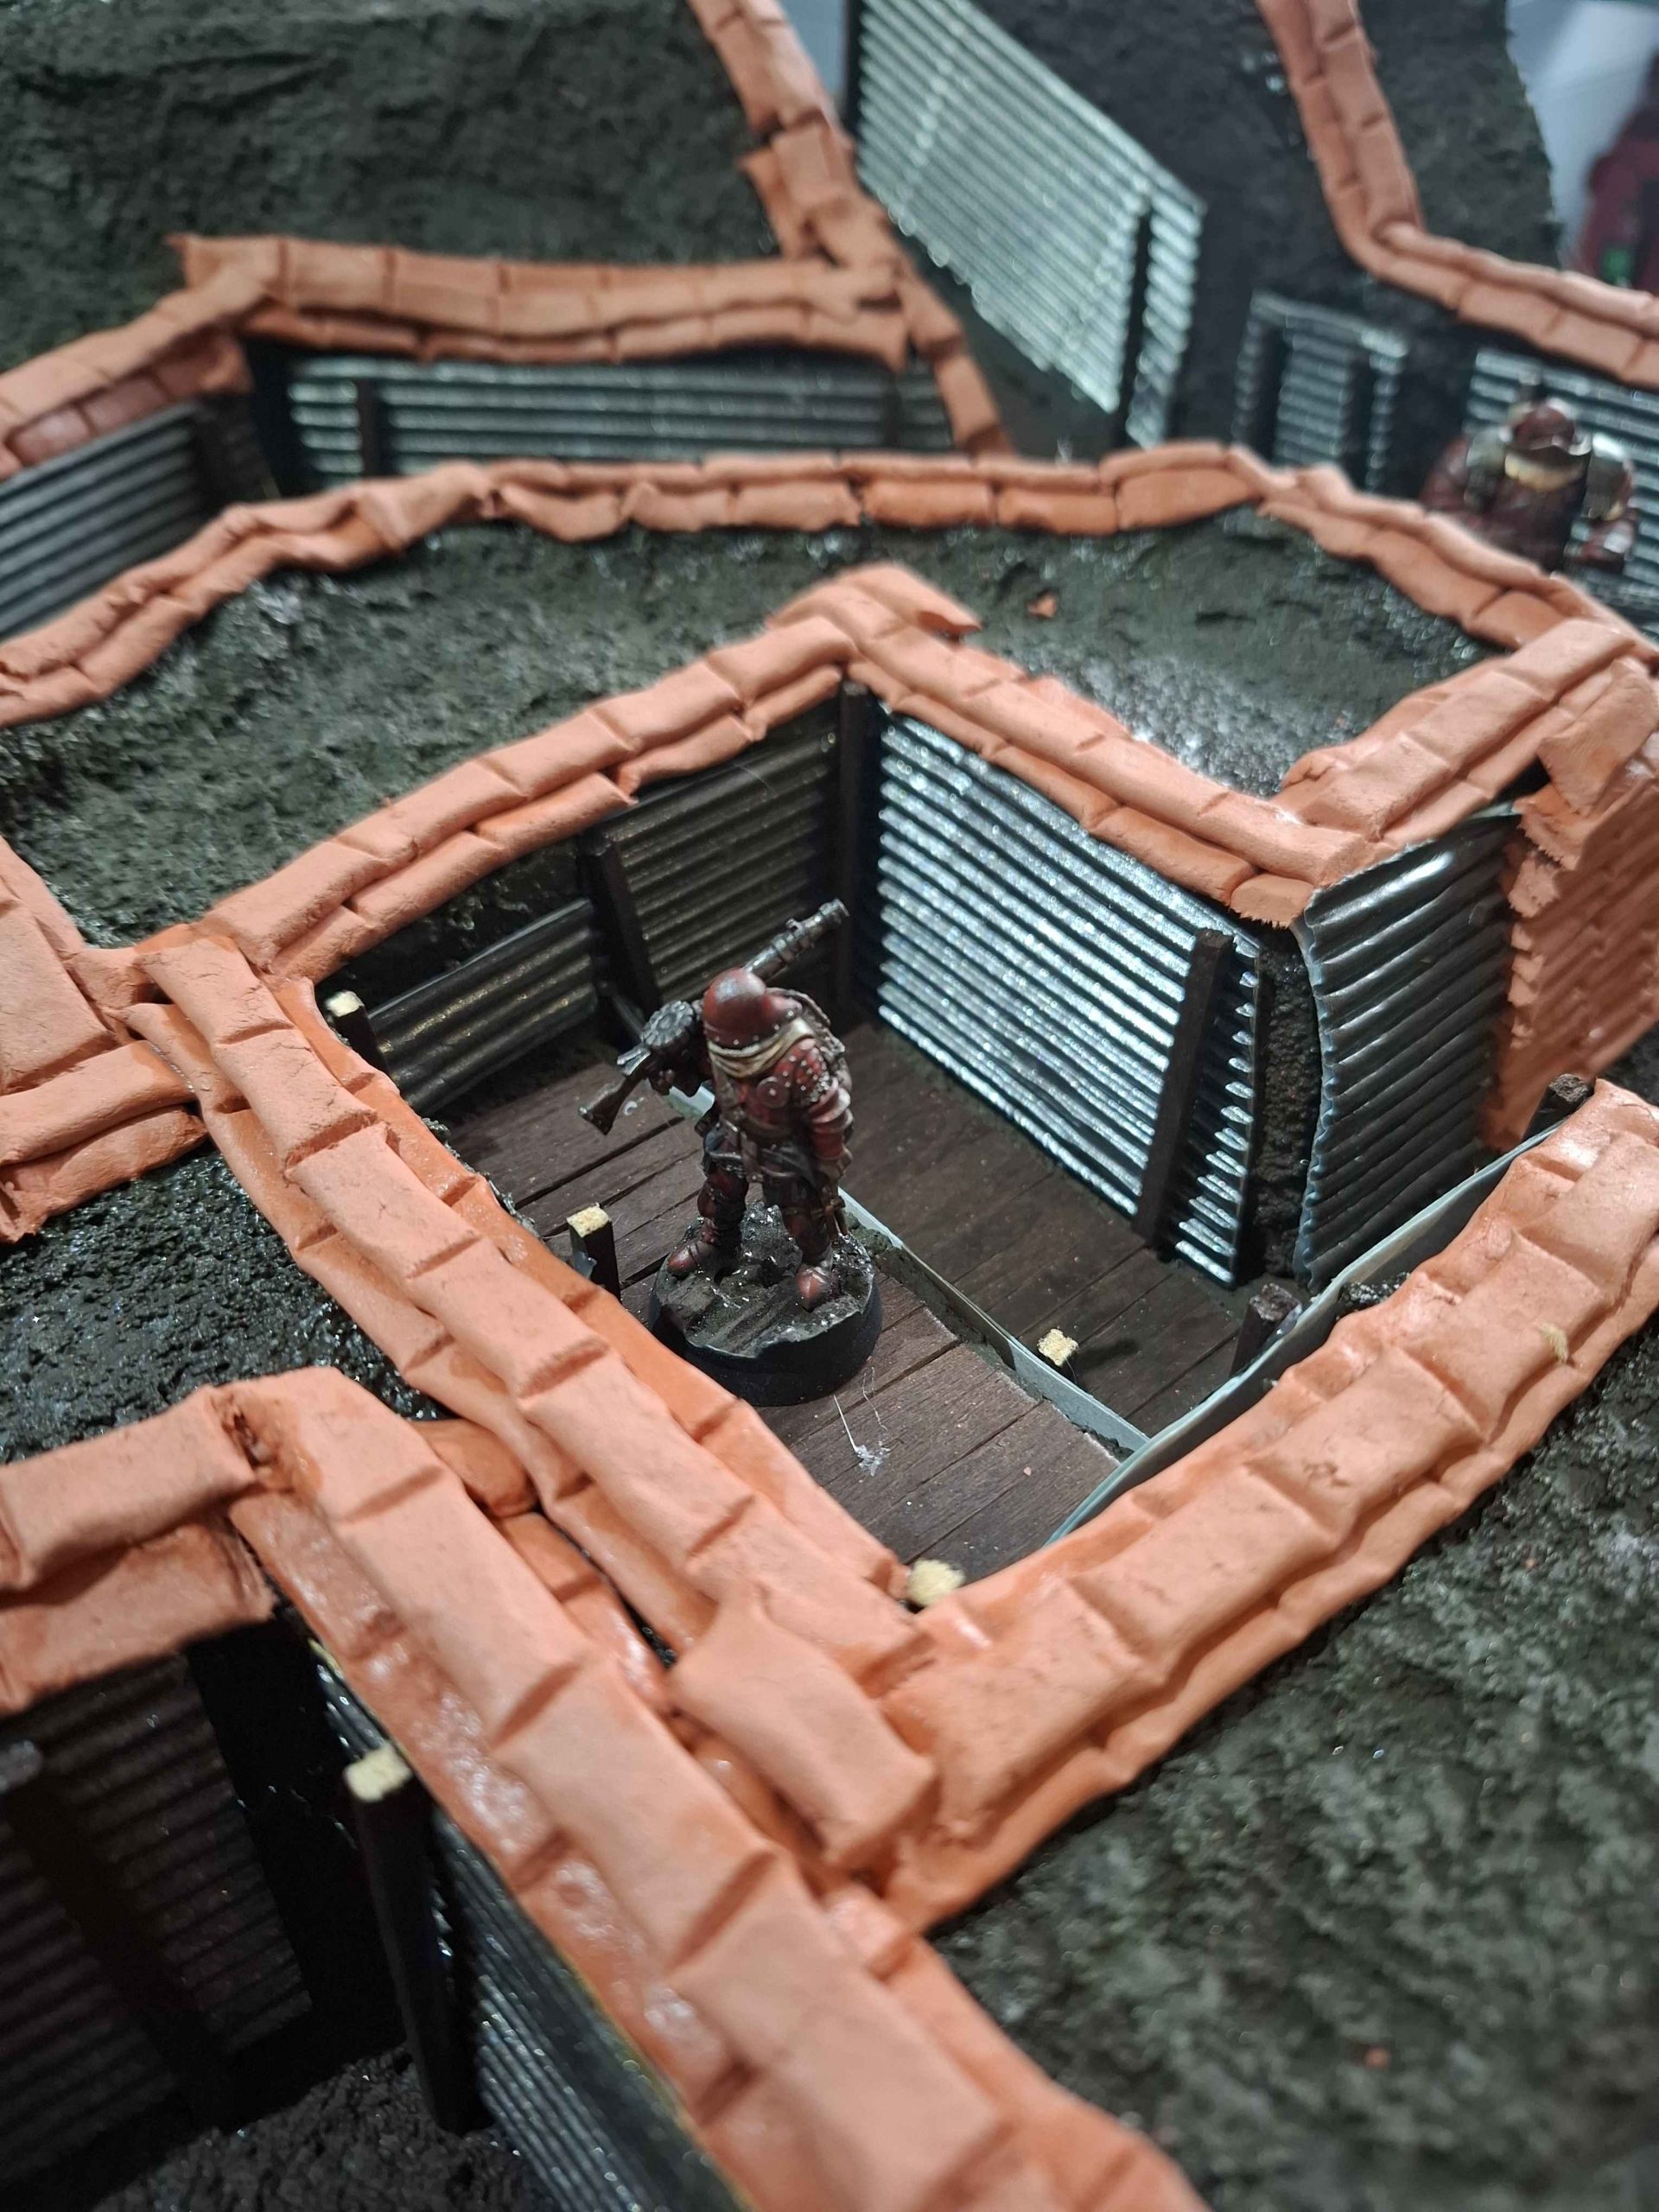
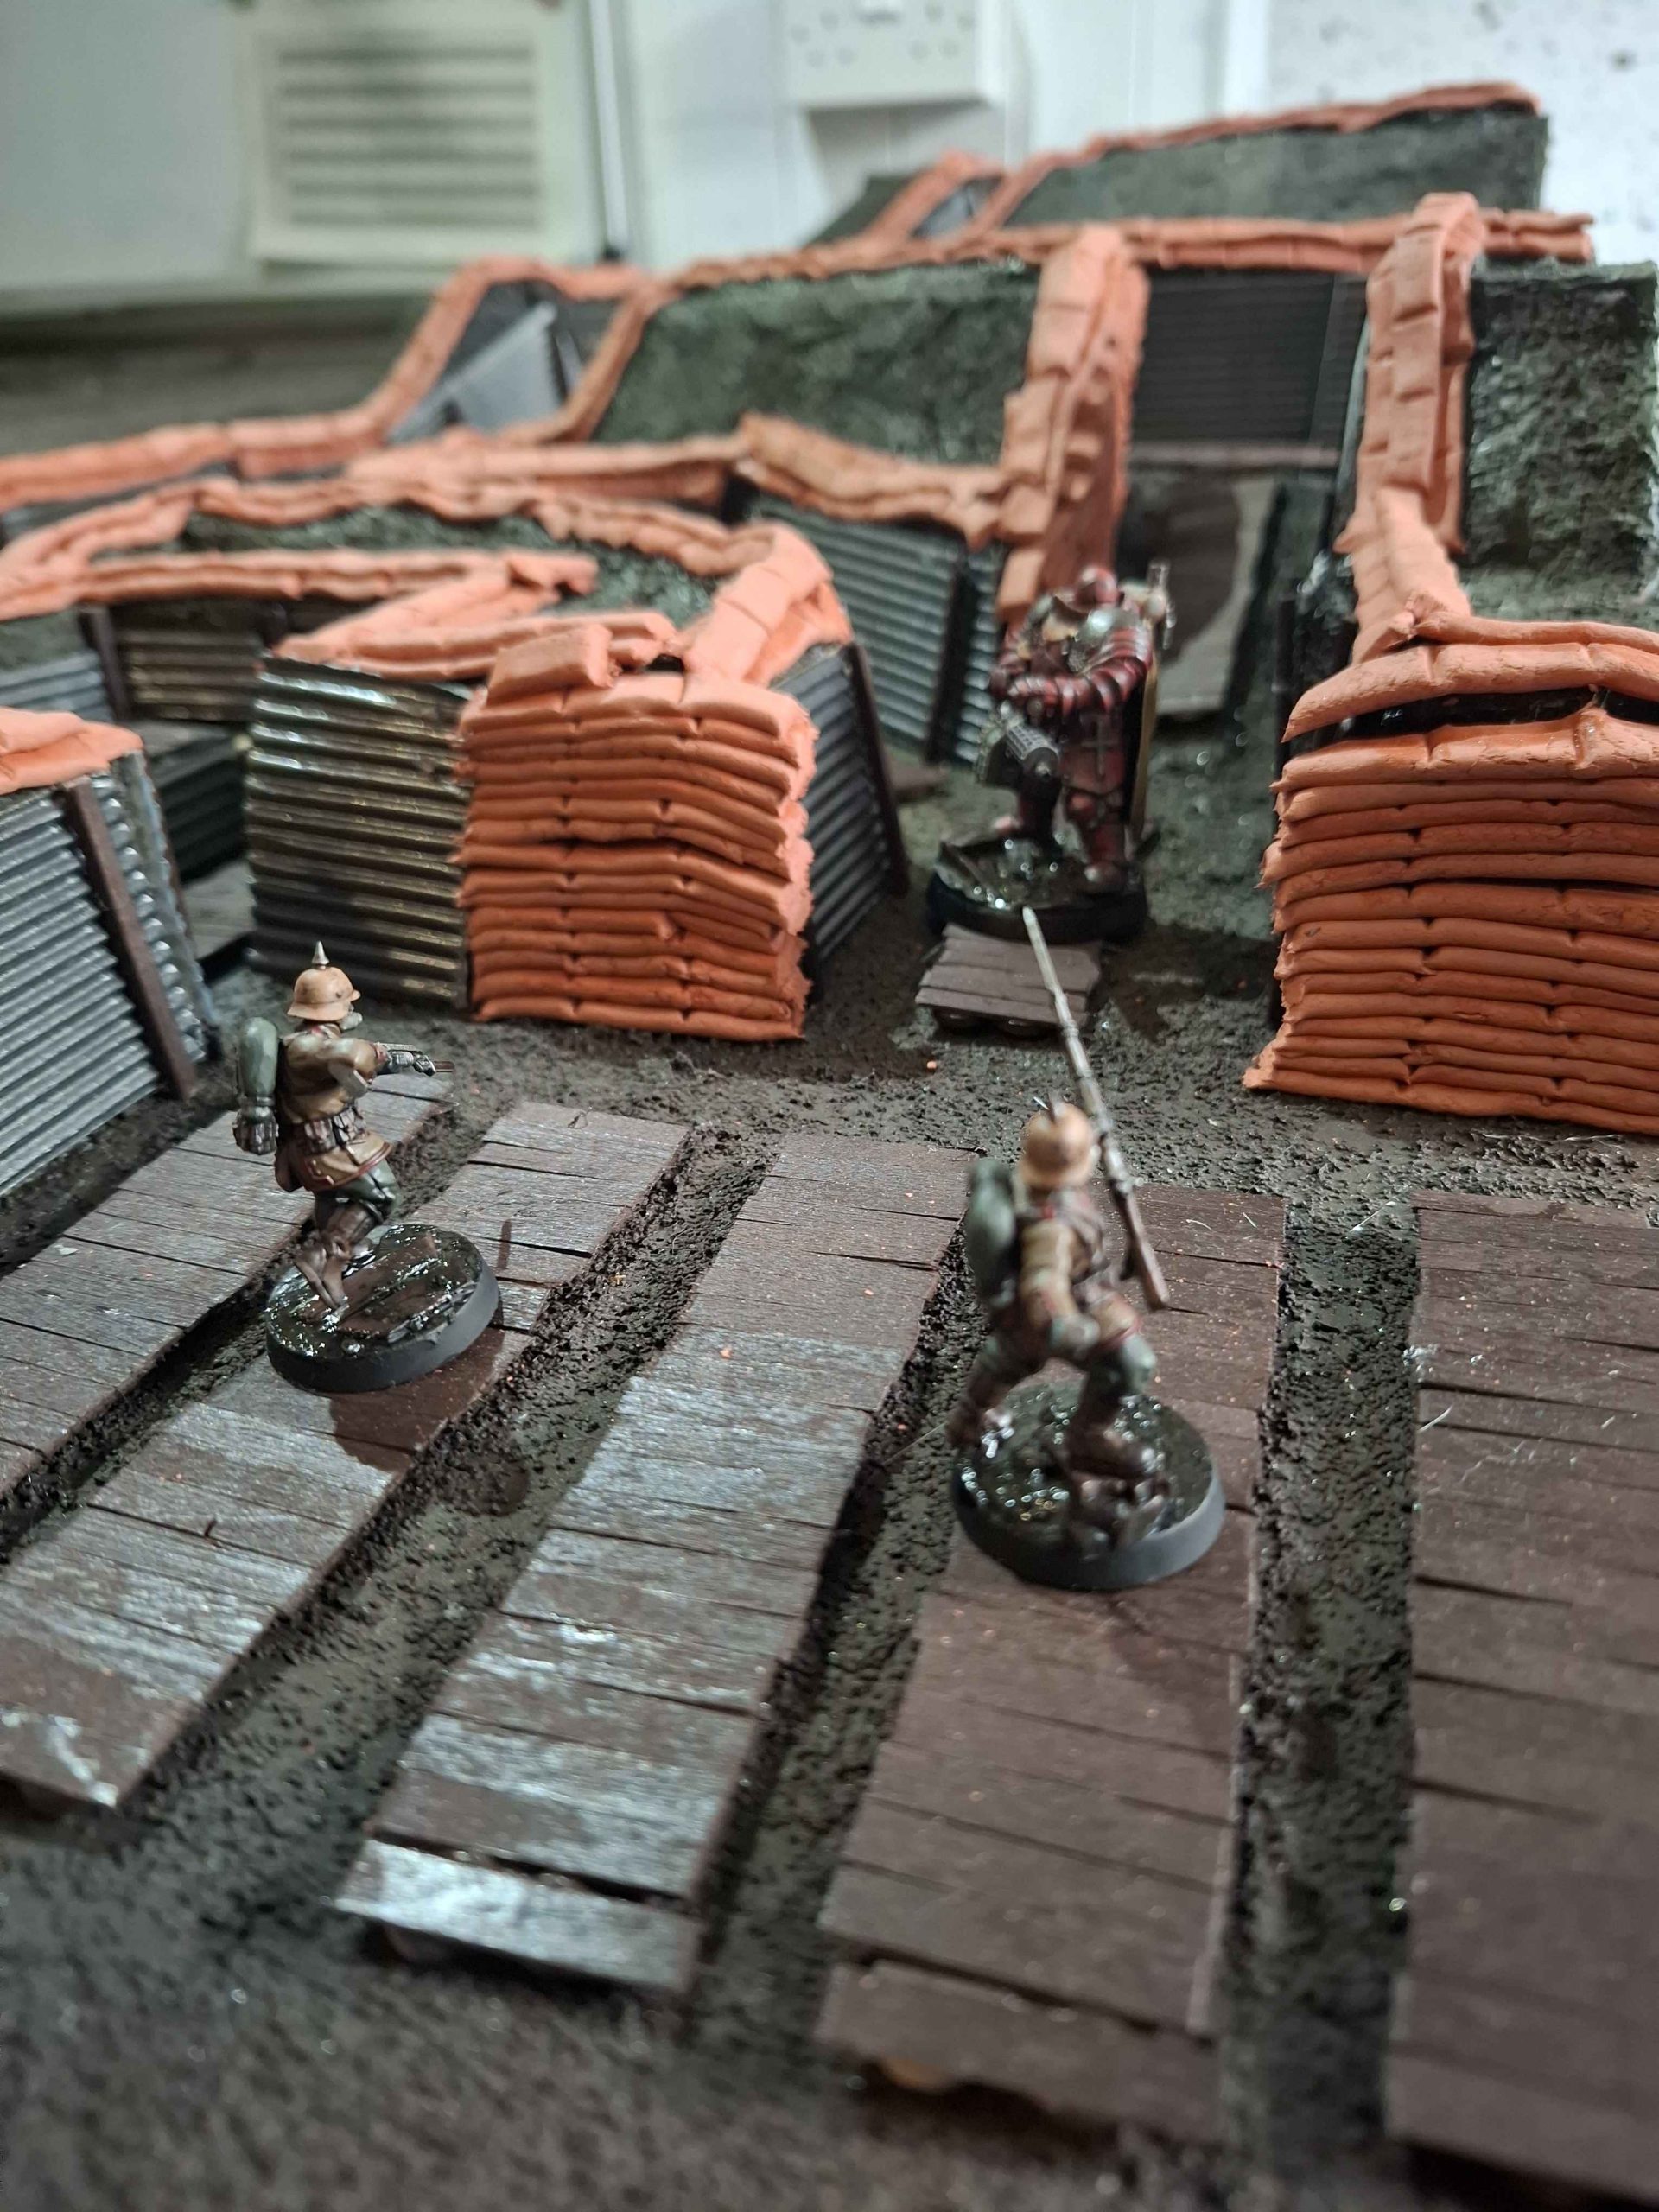
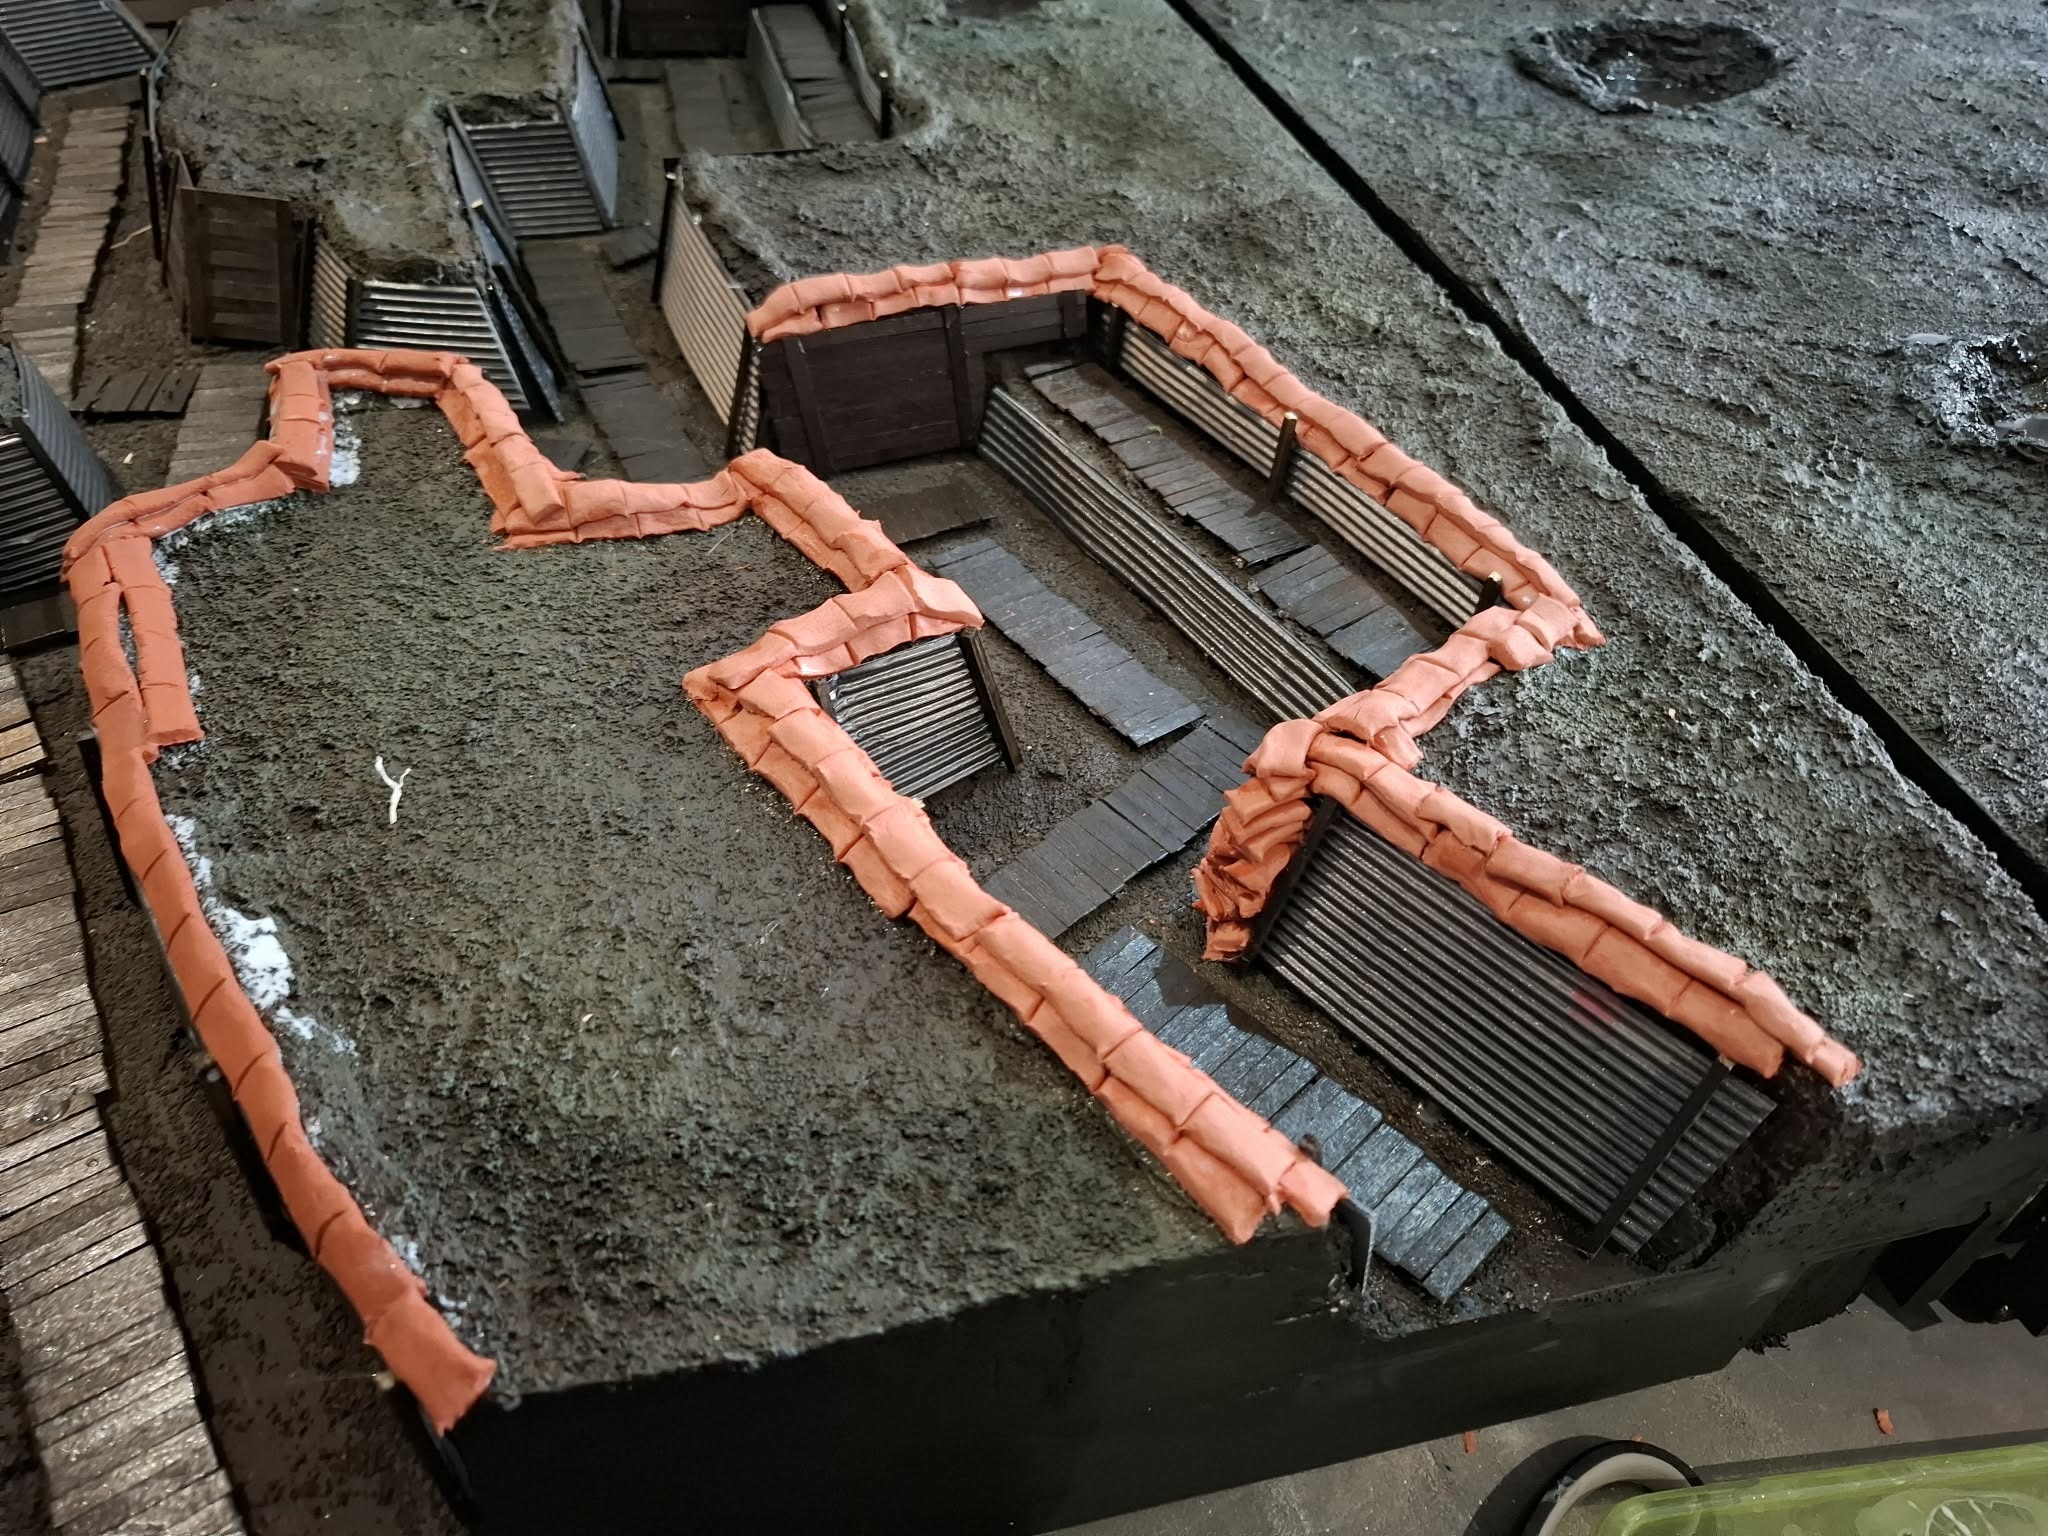
I did manage to get all the sandbags made though, I did have a crack at painting them, unfortunately the paint i had picked up was so thin i barely needed to clean my brush after the attempt…so i need to go back to the drawing board and get a better paint as i’de rather not use my expensive GW paints for the job.
Anyway here are the pics of the board in it’s almost finished state
Slow progress...
So I haven’t got as far as I would have liked with the sandbags, but still, a decent amount of progress has been made. So in the meantime I thought I’de post a kind of tutorial on how I’ve made my sandbags, using the clay extruder mentioned in the previous post.
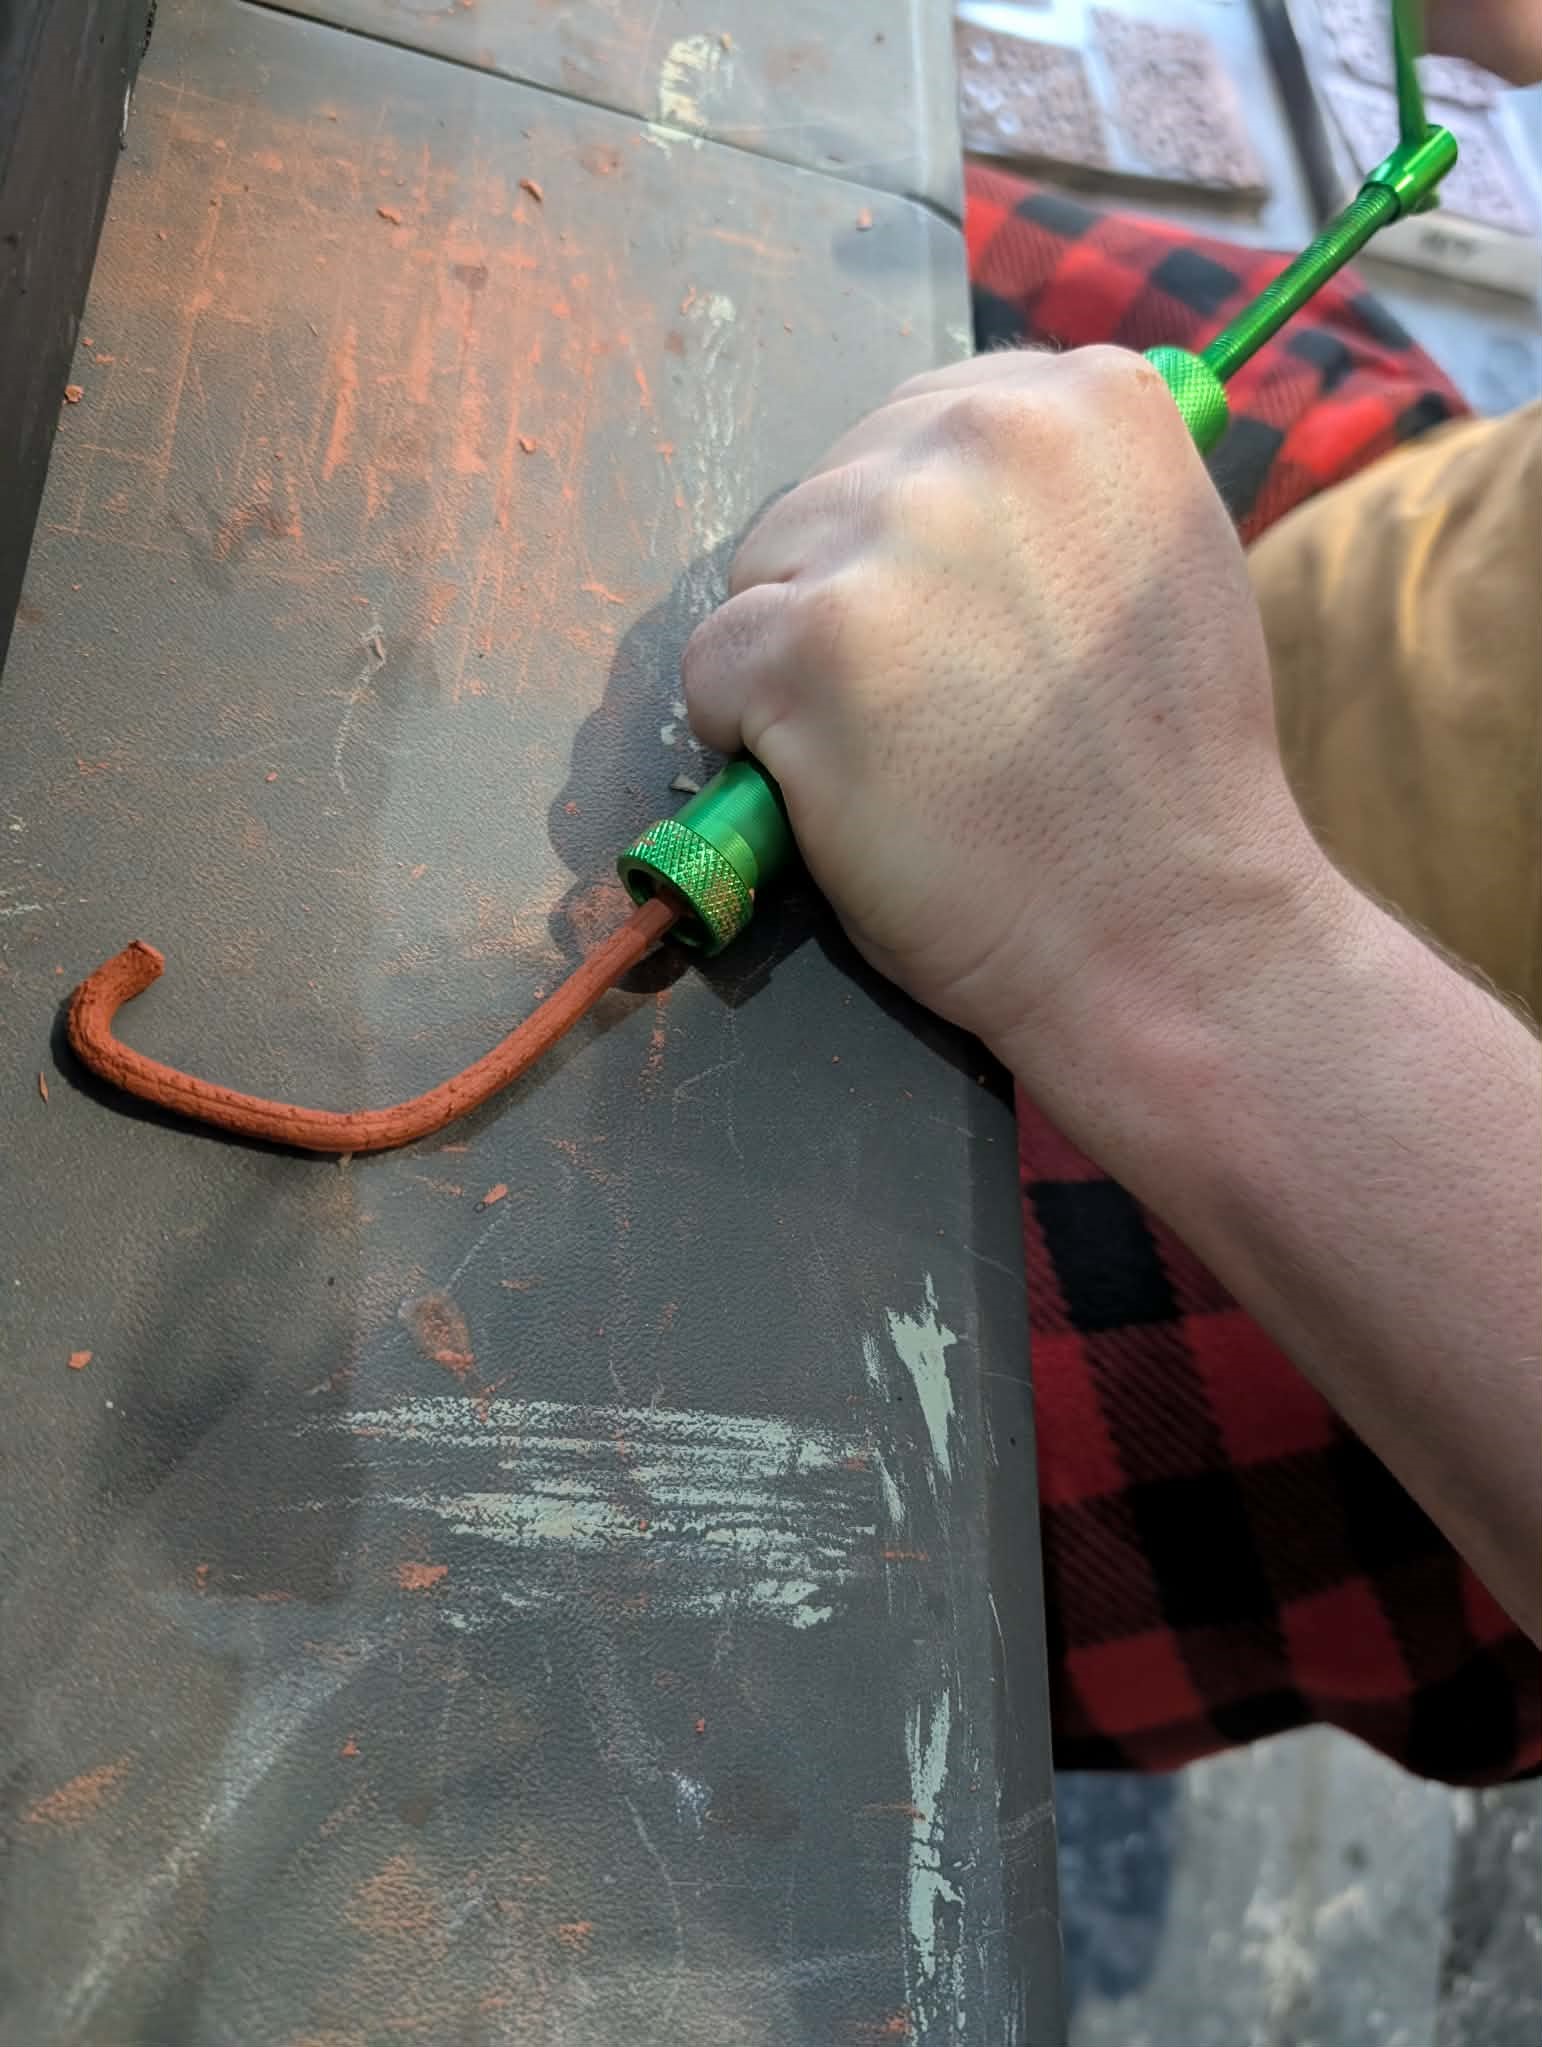 Load the extruder with as much clay as you can
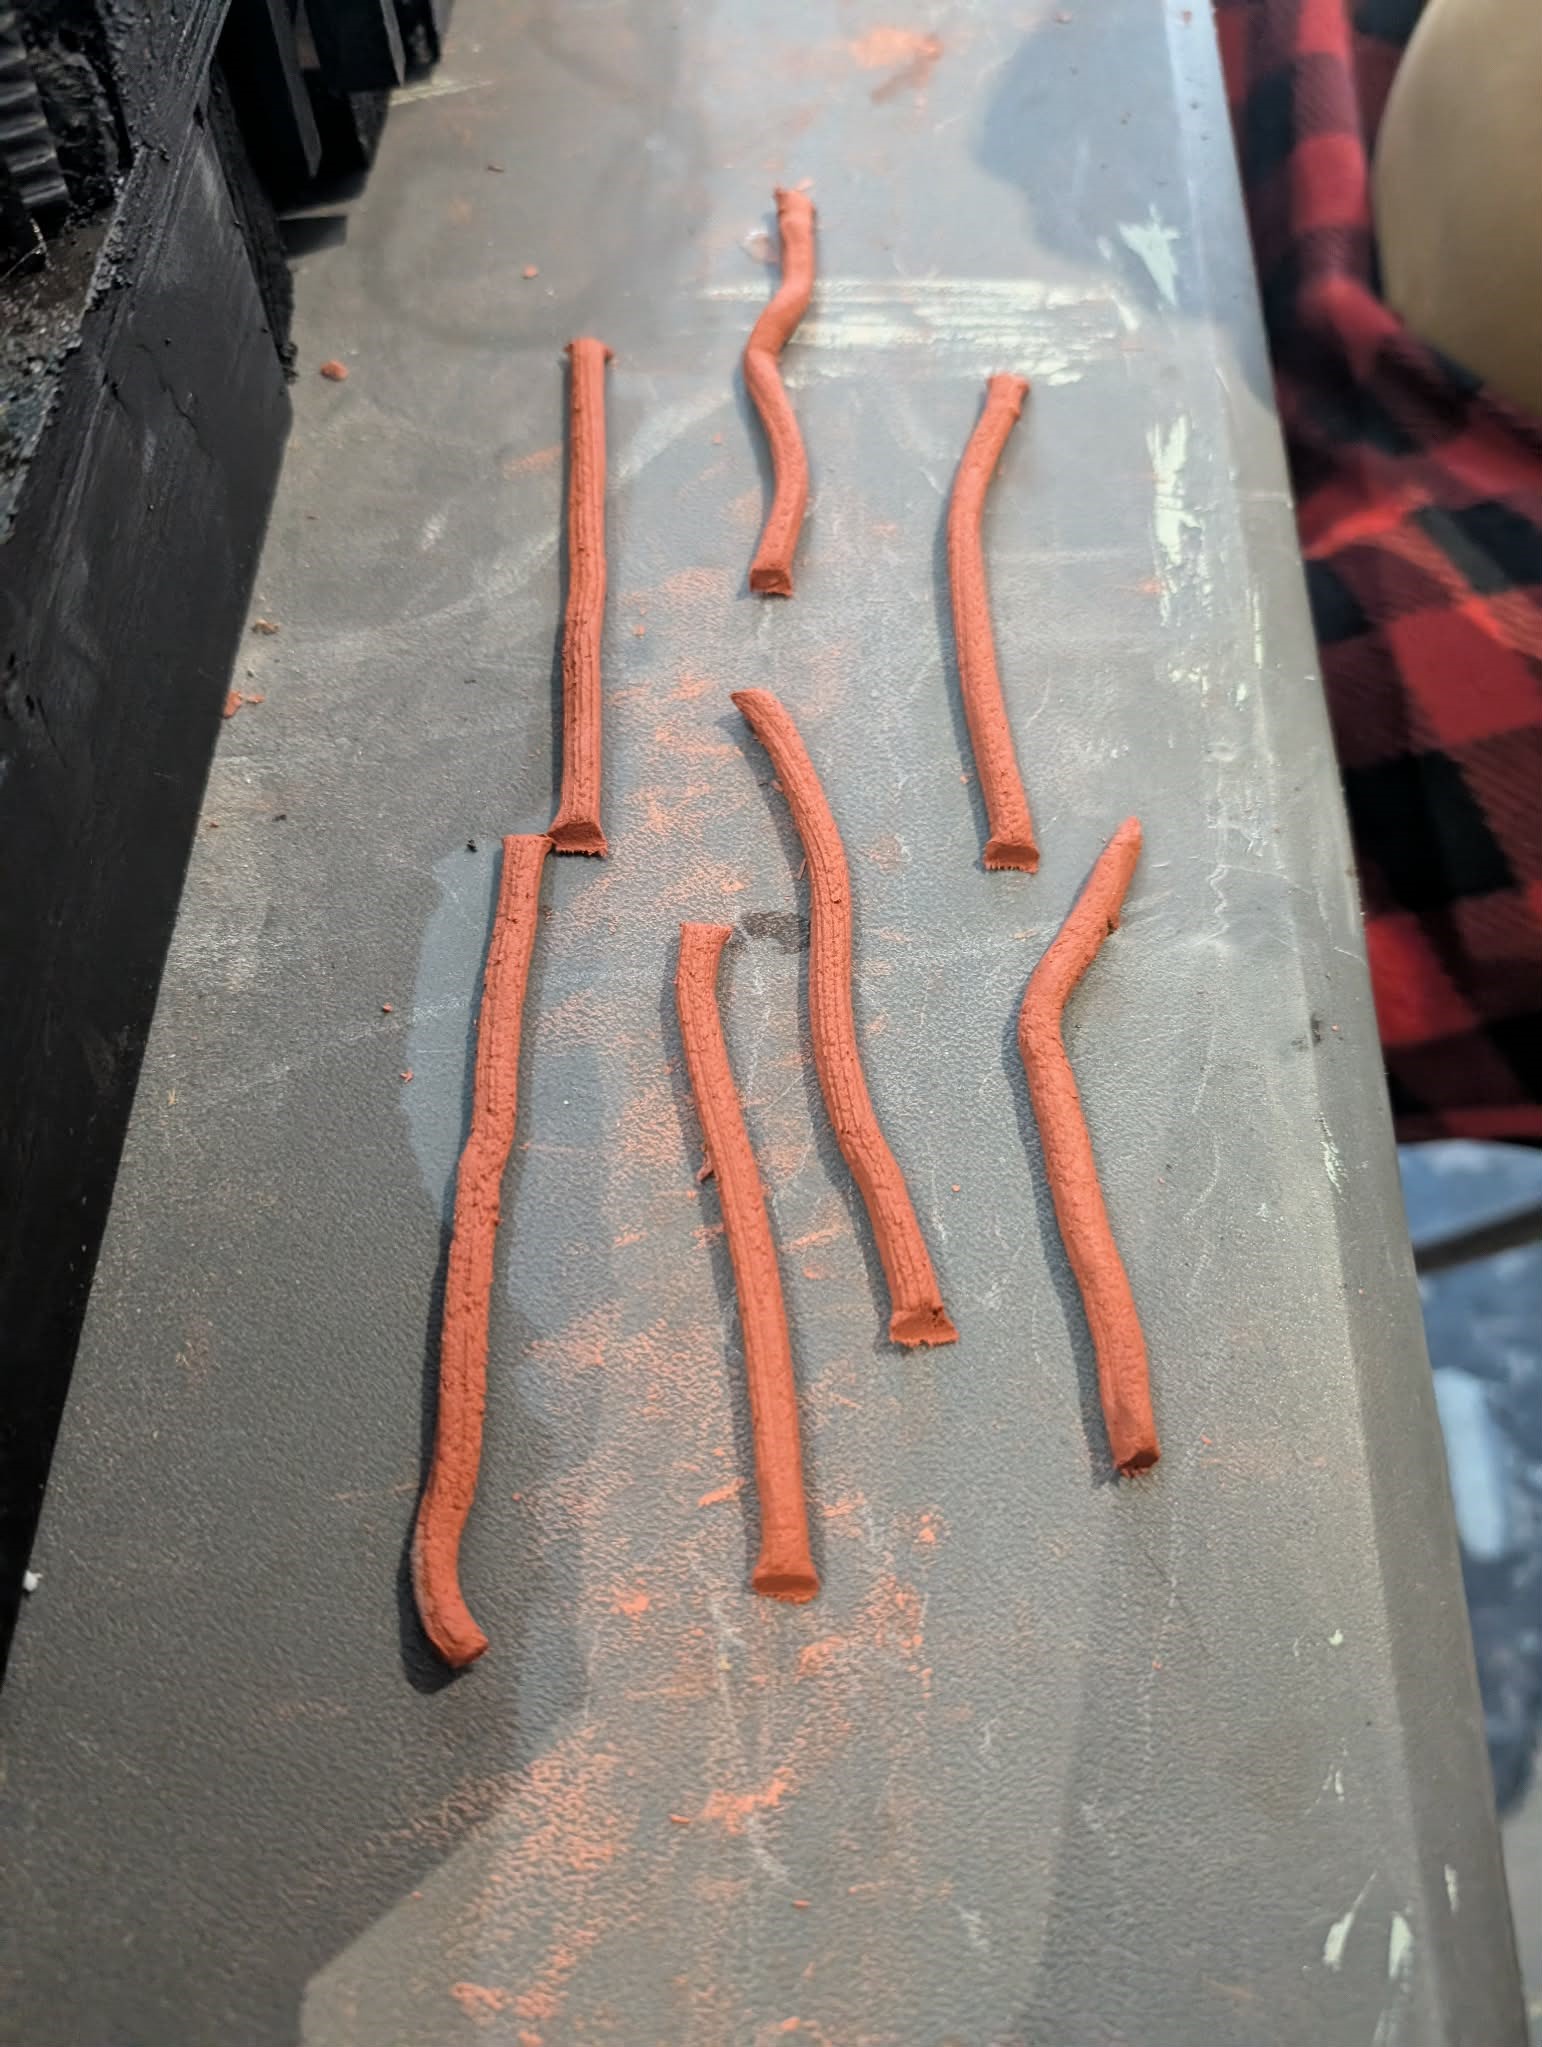 Either make several small lengths, or one long one emptying the extruder and cut into smaller lengths, I prefer the second option.
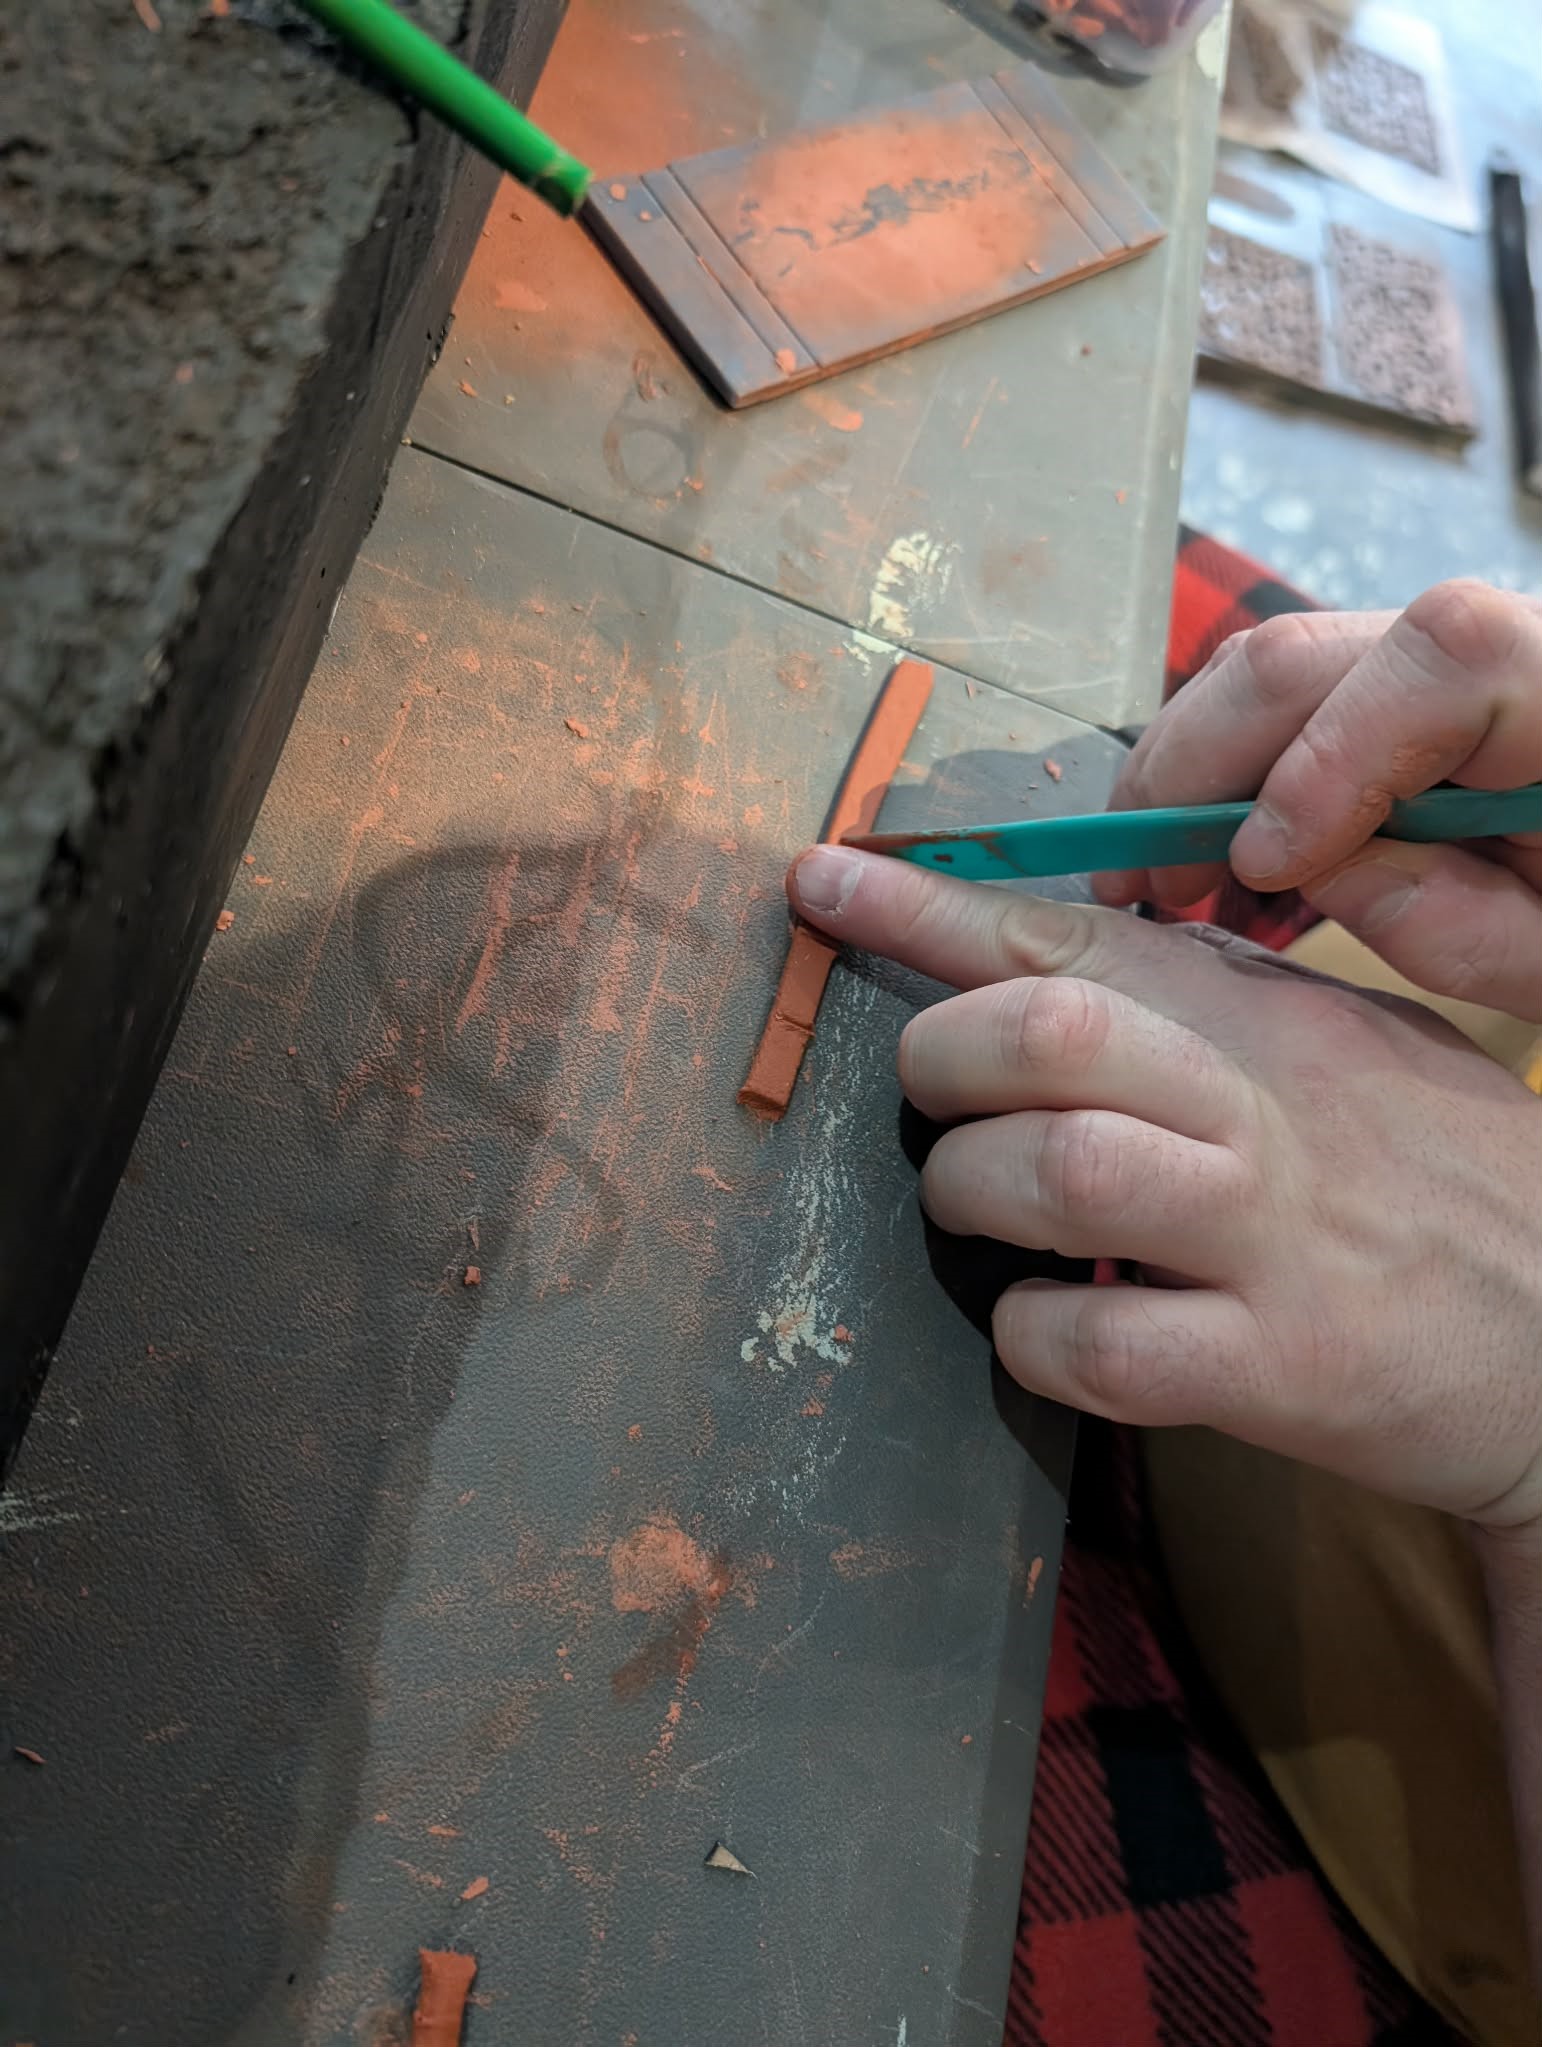 The clay will come out a little rough, so use a small flat surface to give it a quick roll to smooth it out, then, using a standard size, I used my finger, mark out the sandbags
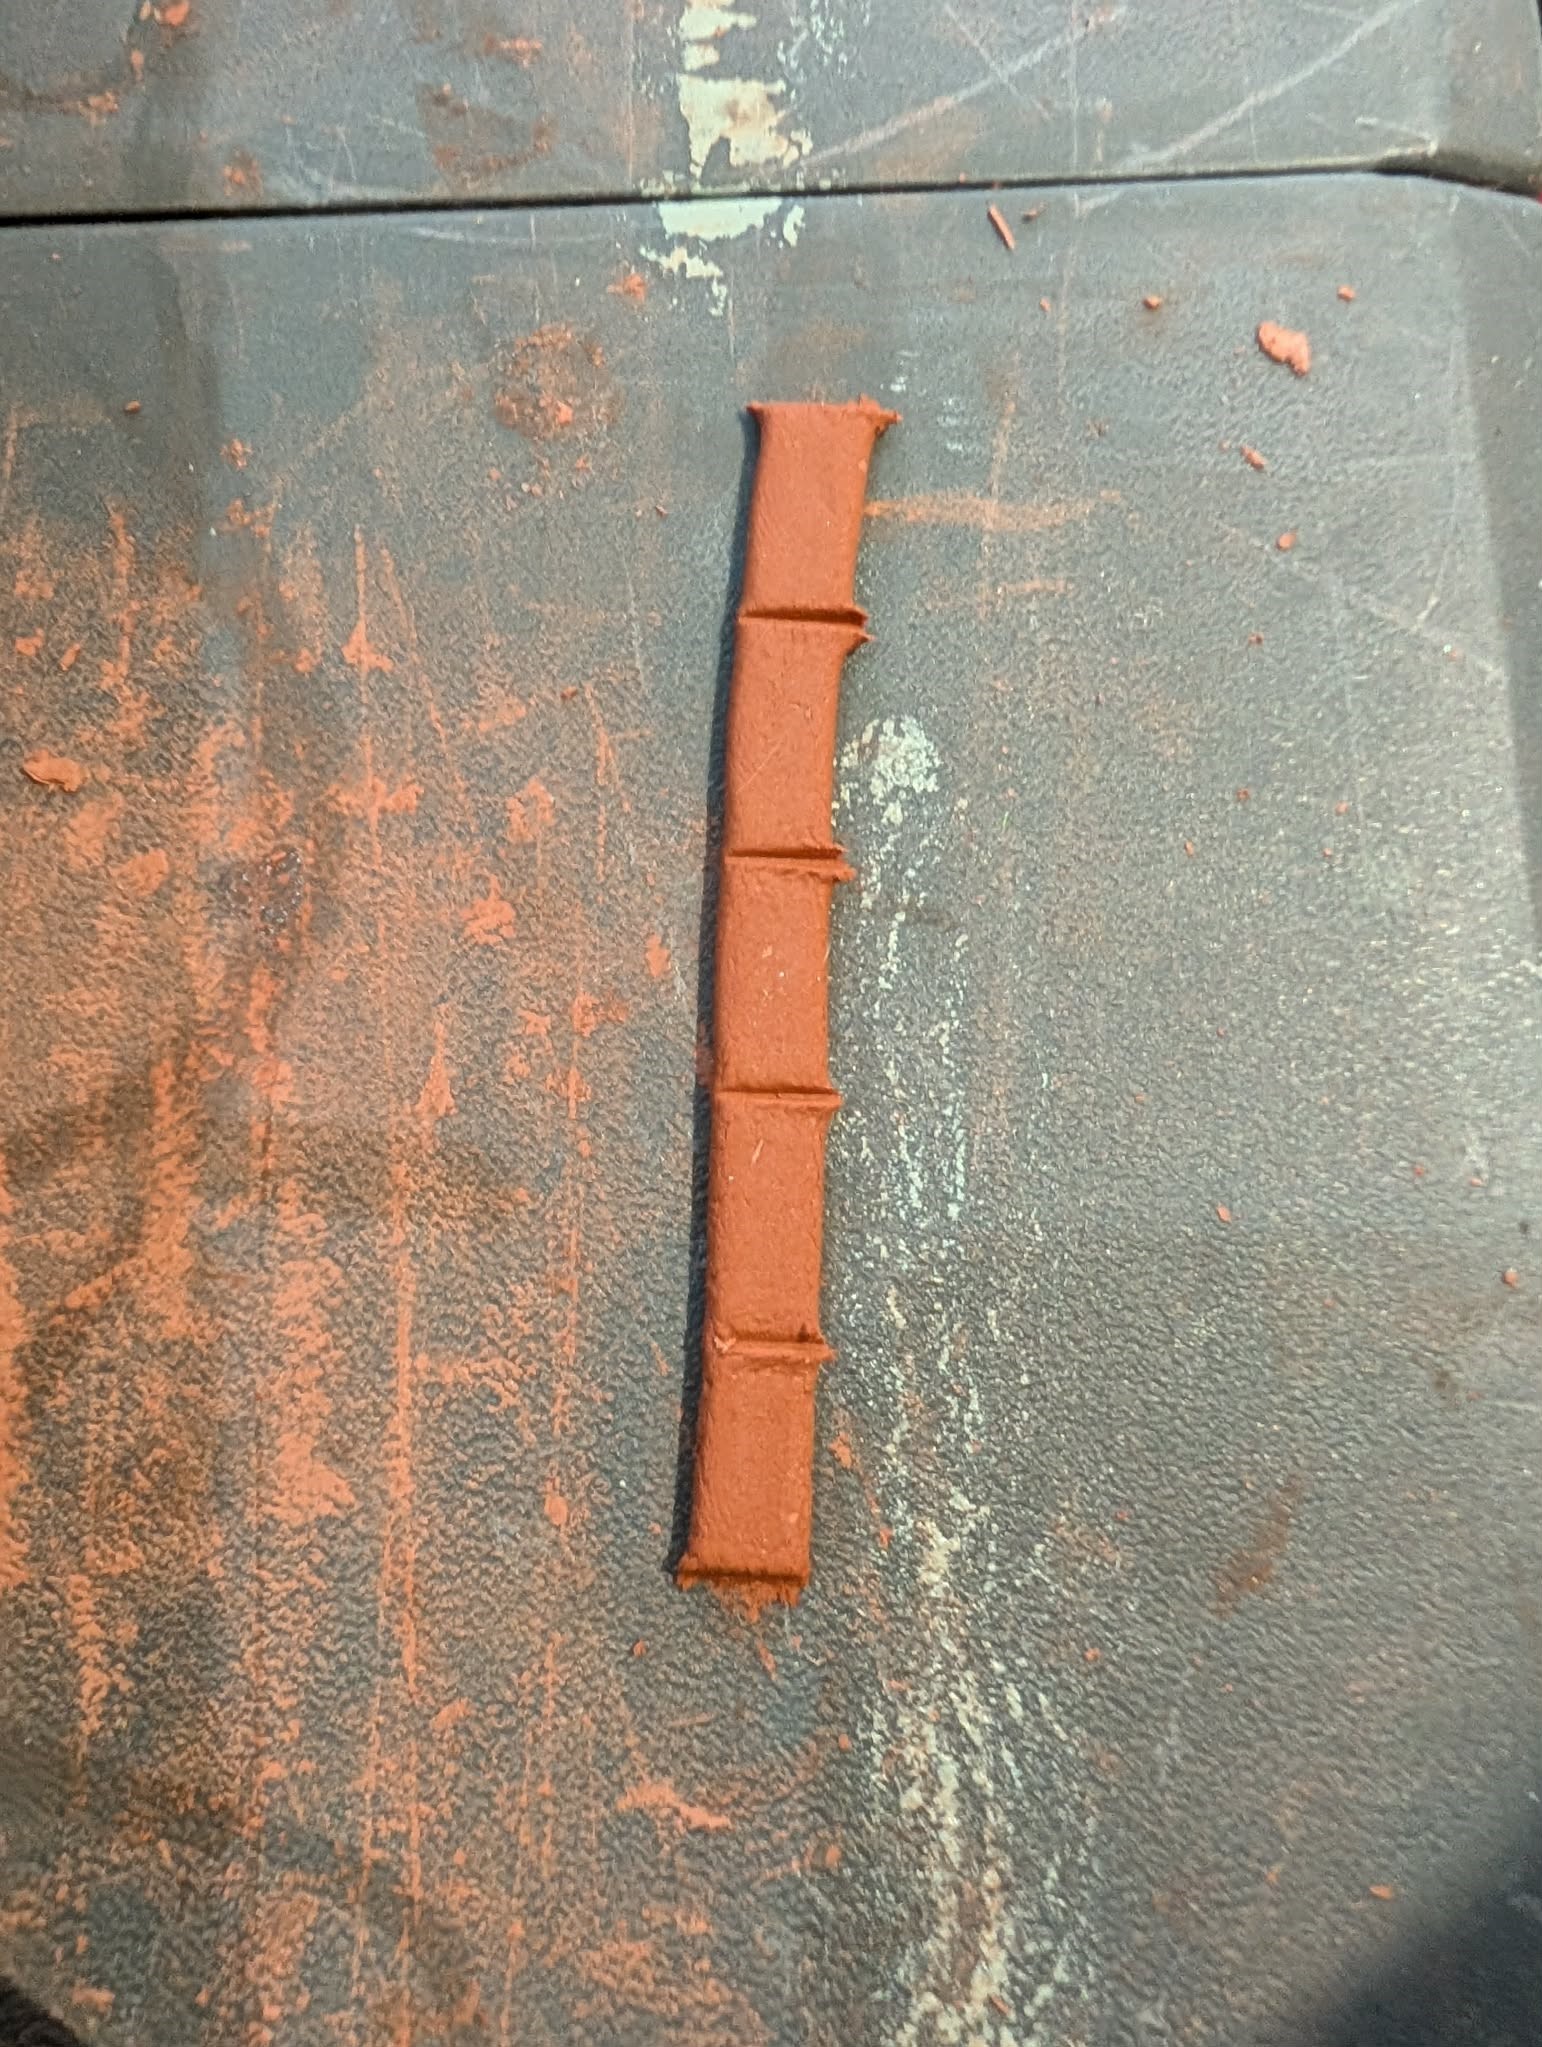
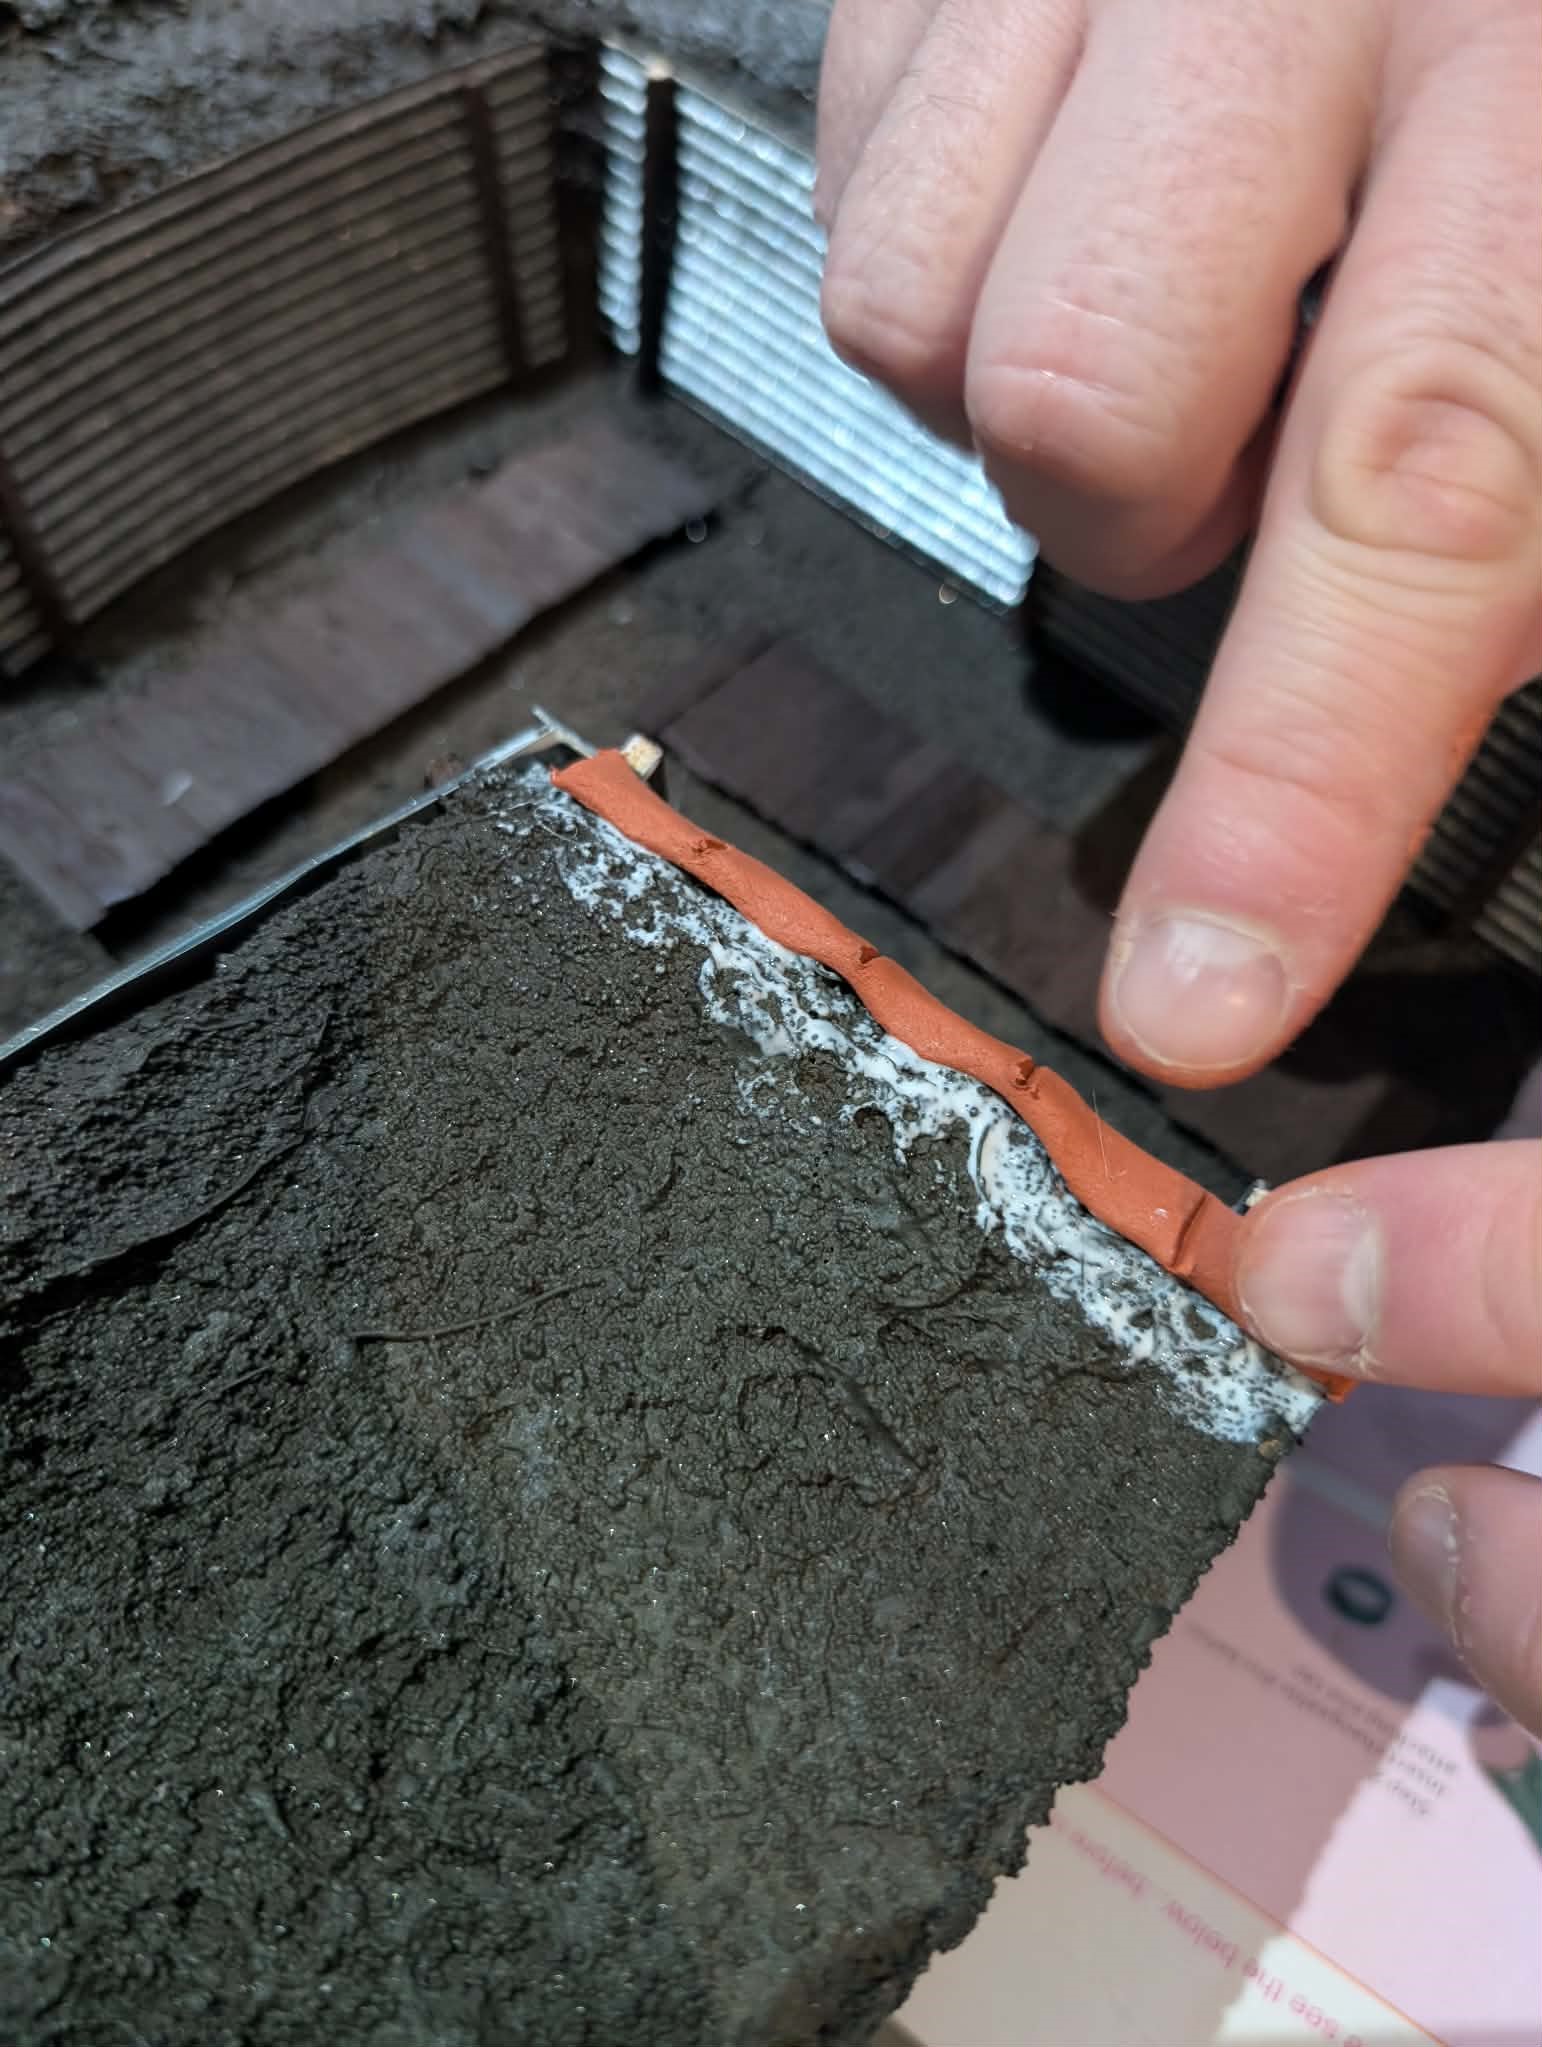 Using pva, fix the sandbags down.
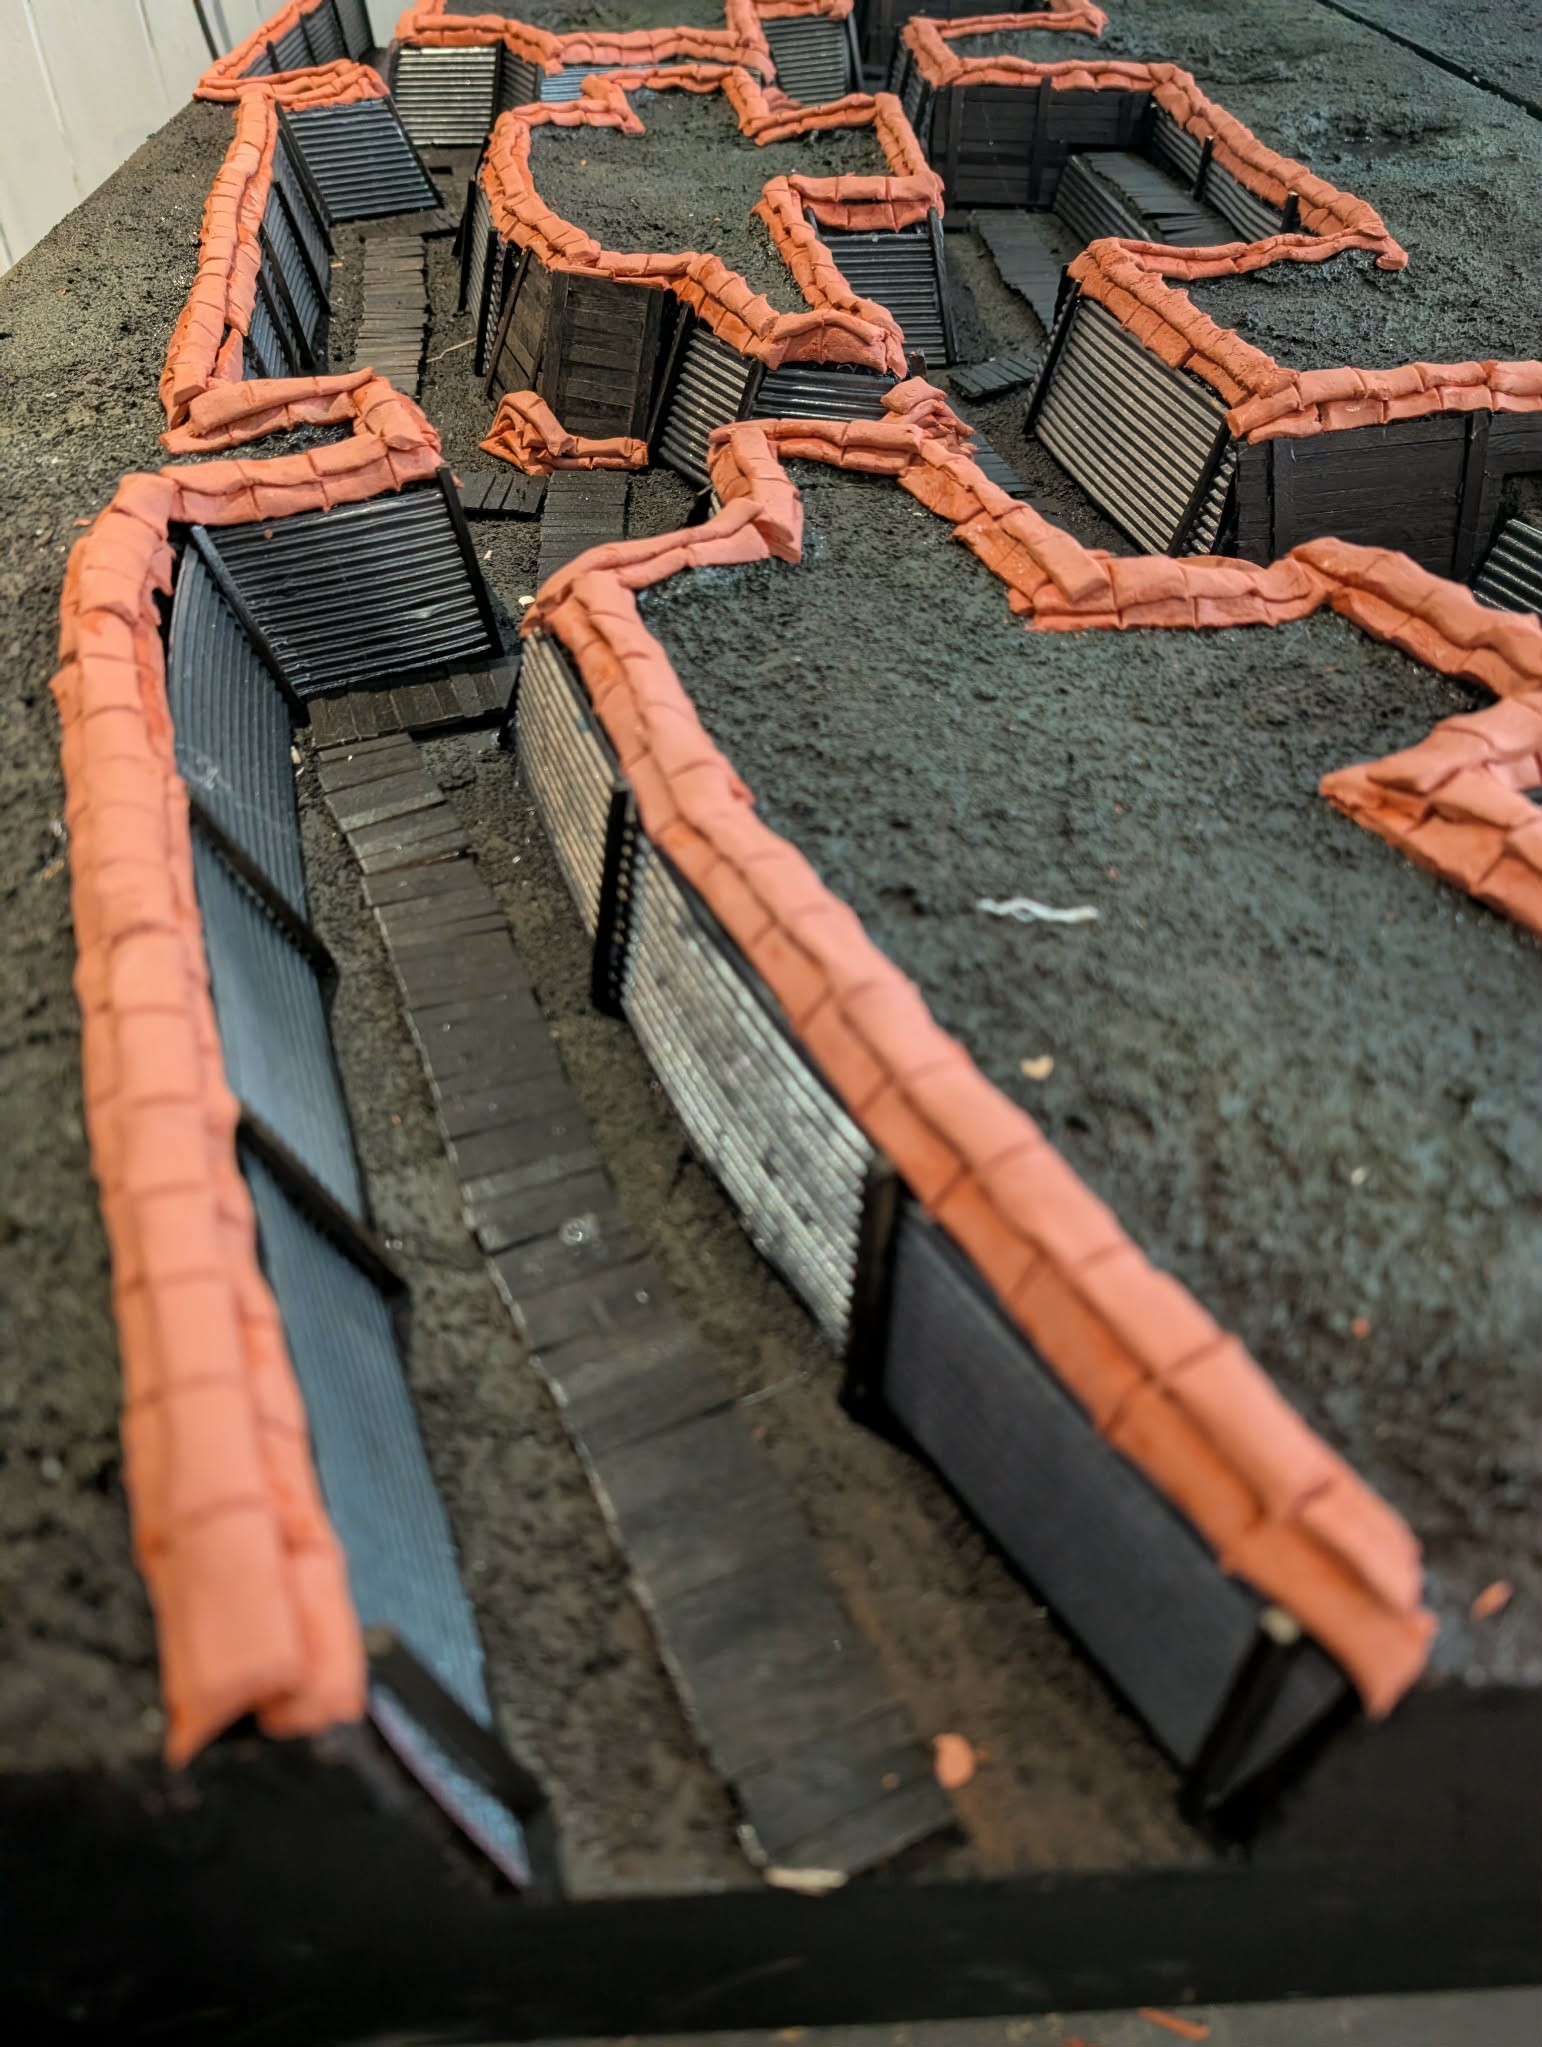
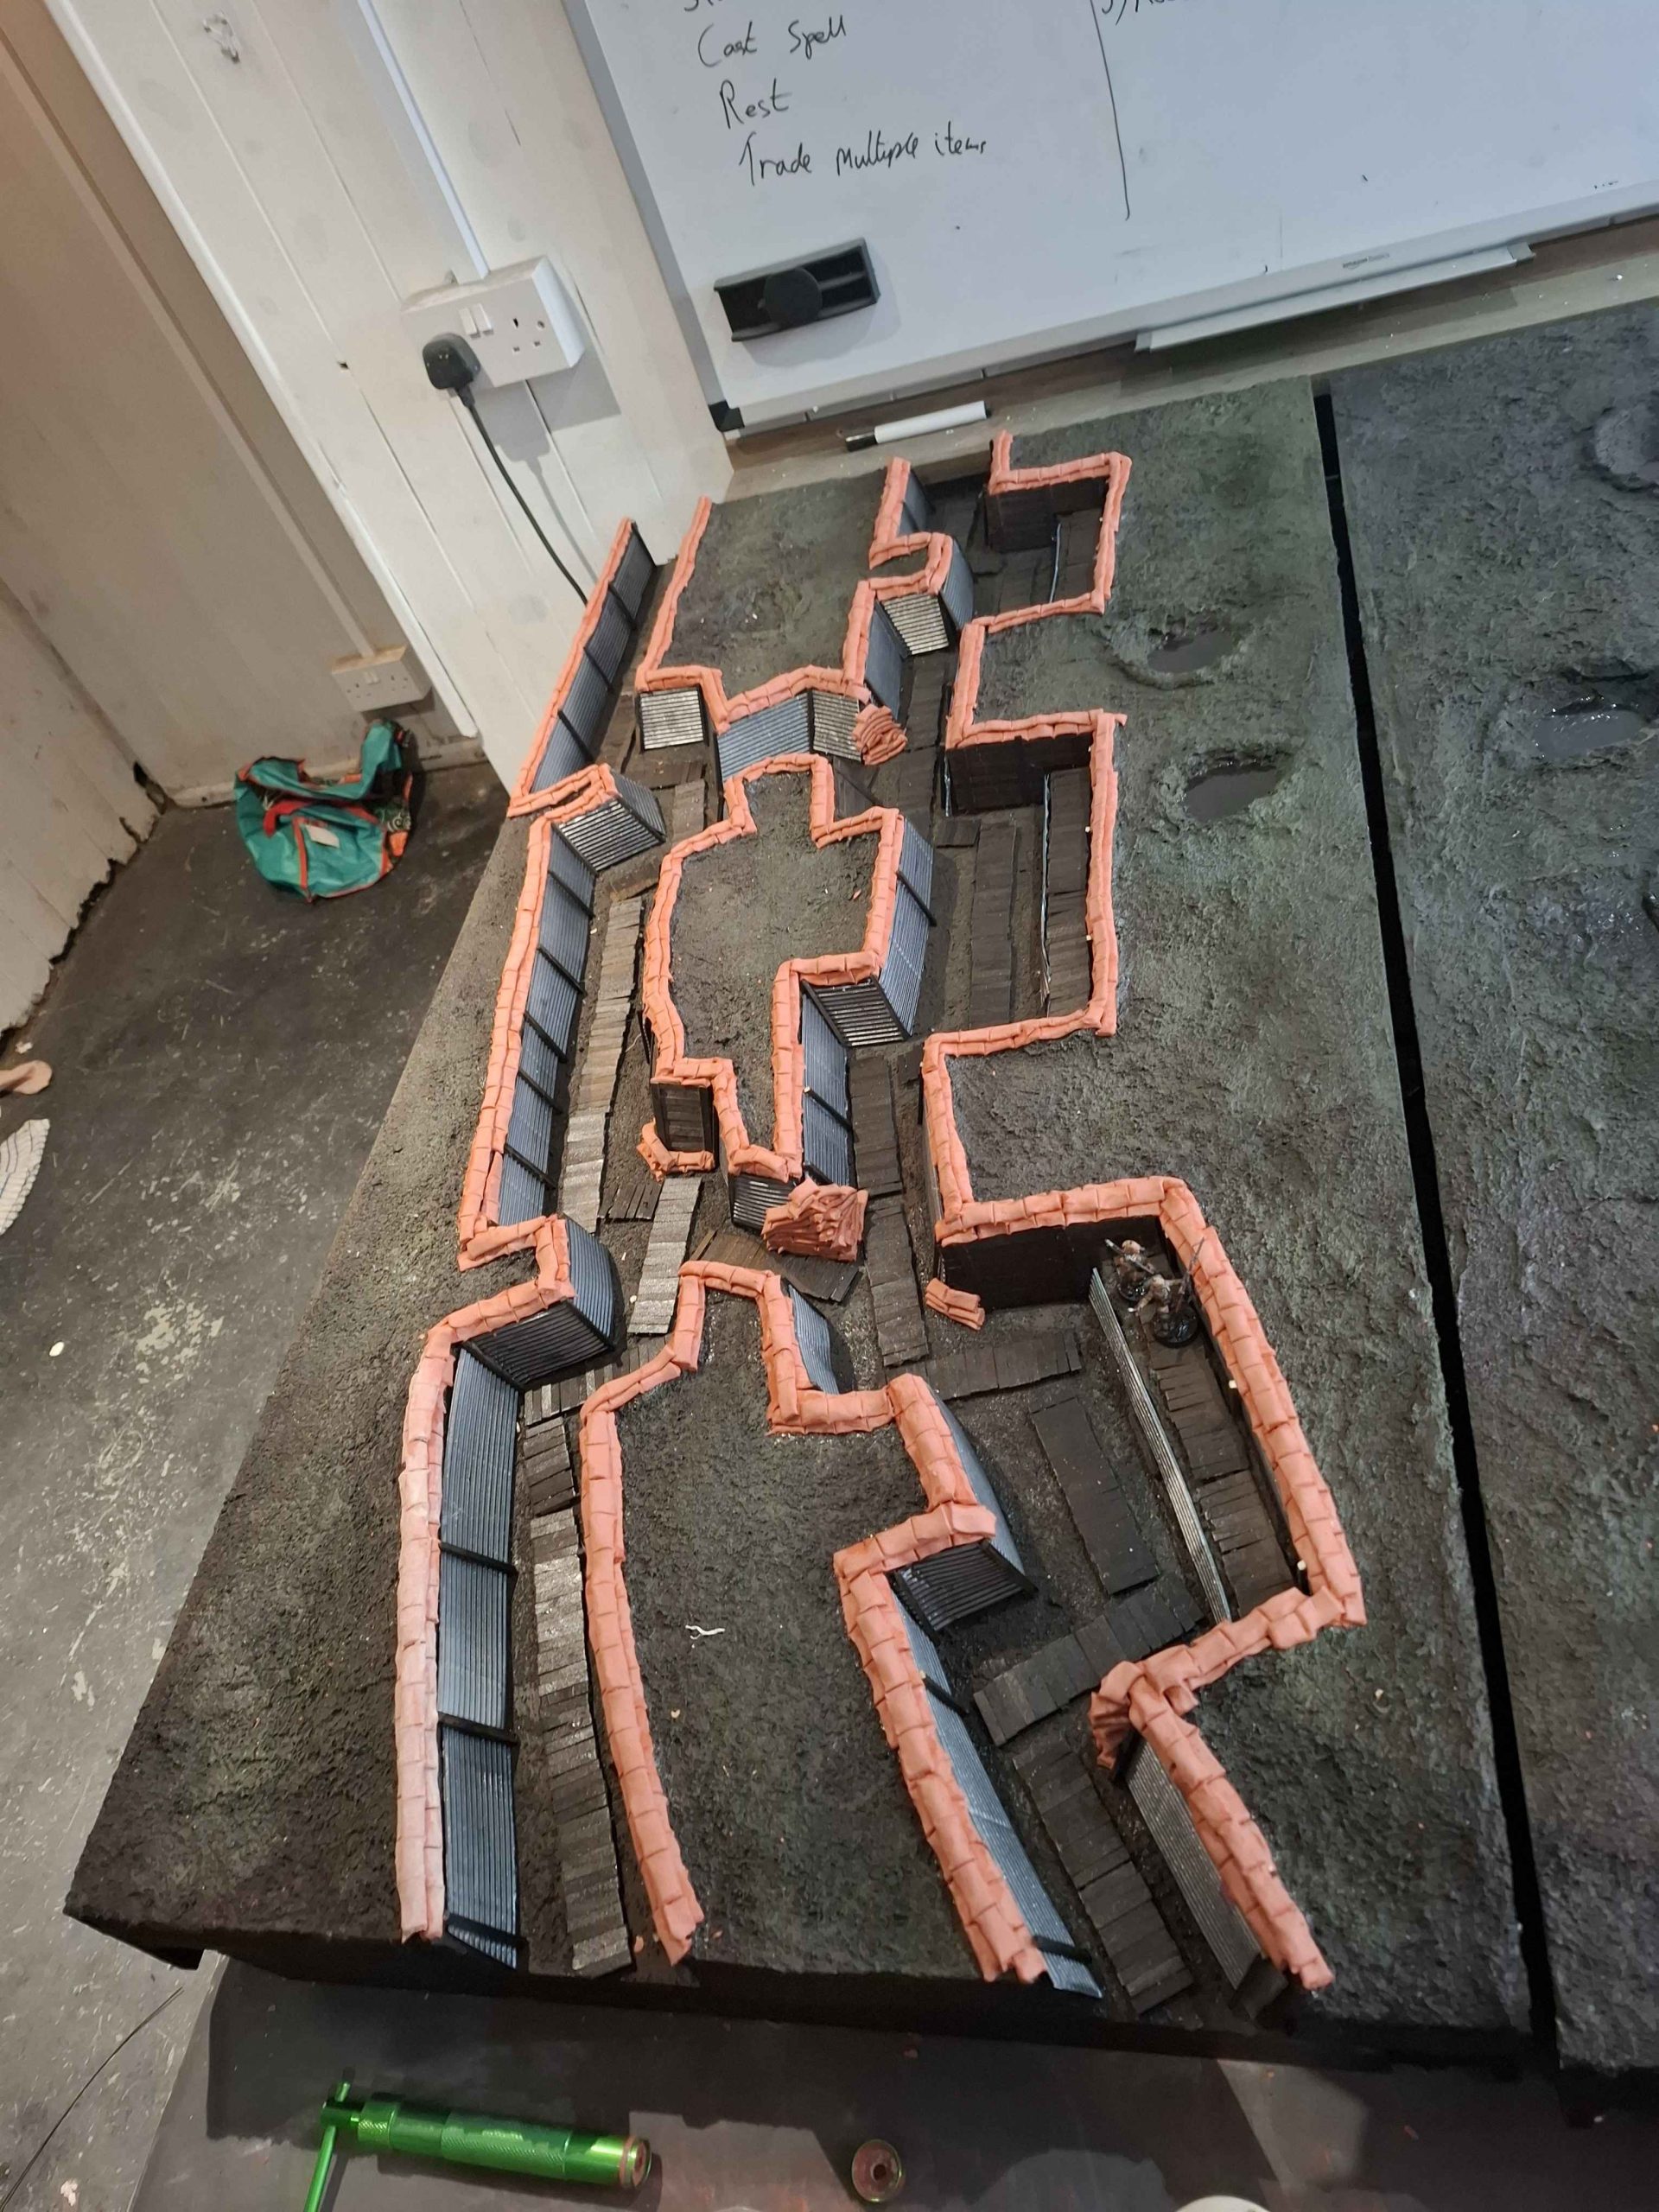
And thats pretty much it. I’ve managed to fully sandbag one board, and I’ve slowly been working my way through the second…I’ll get there, its just about time…
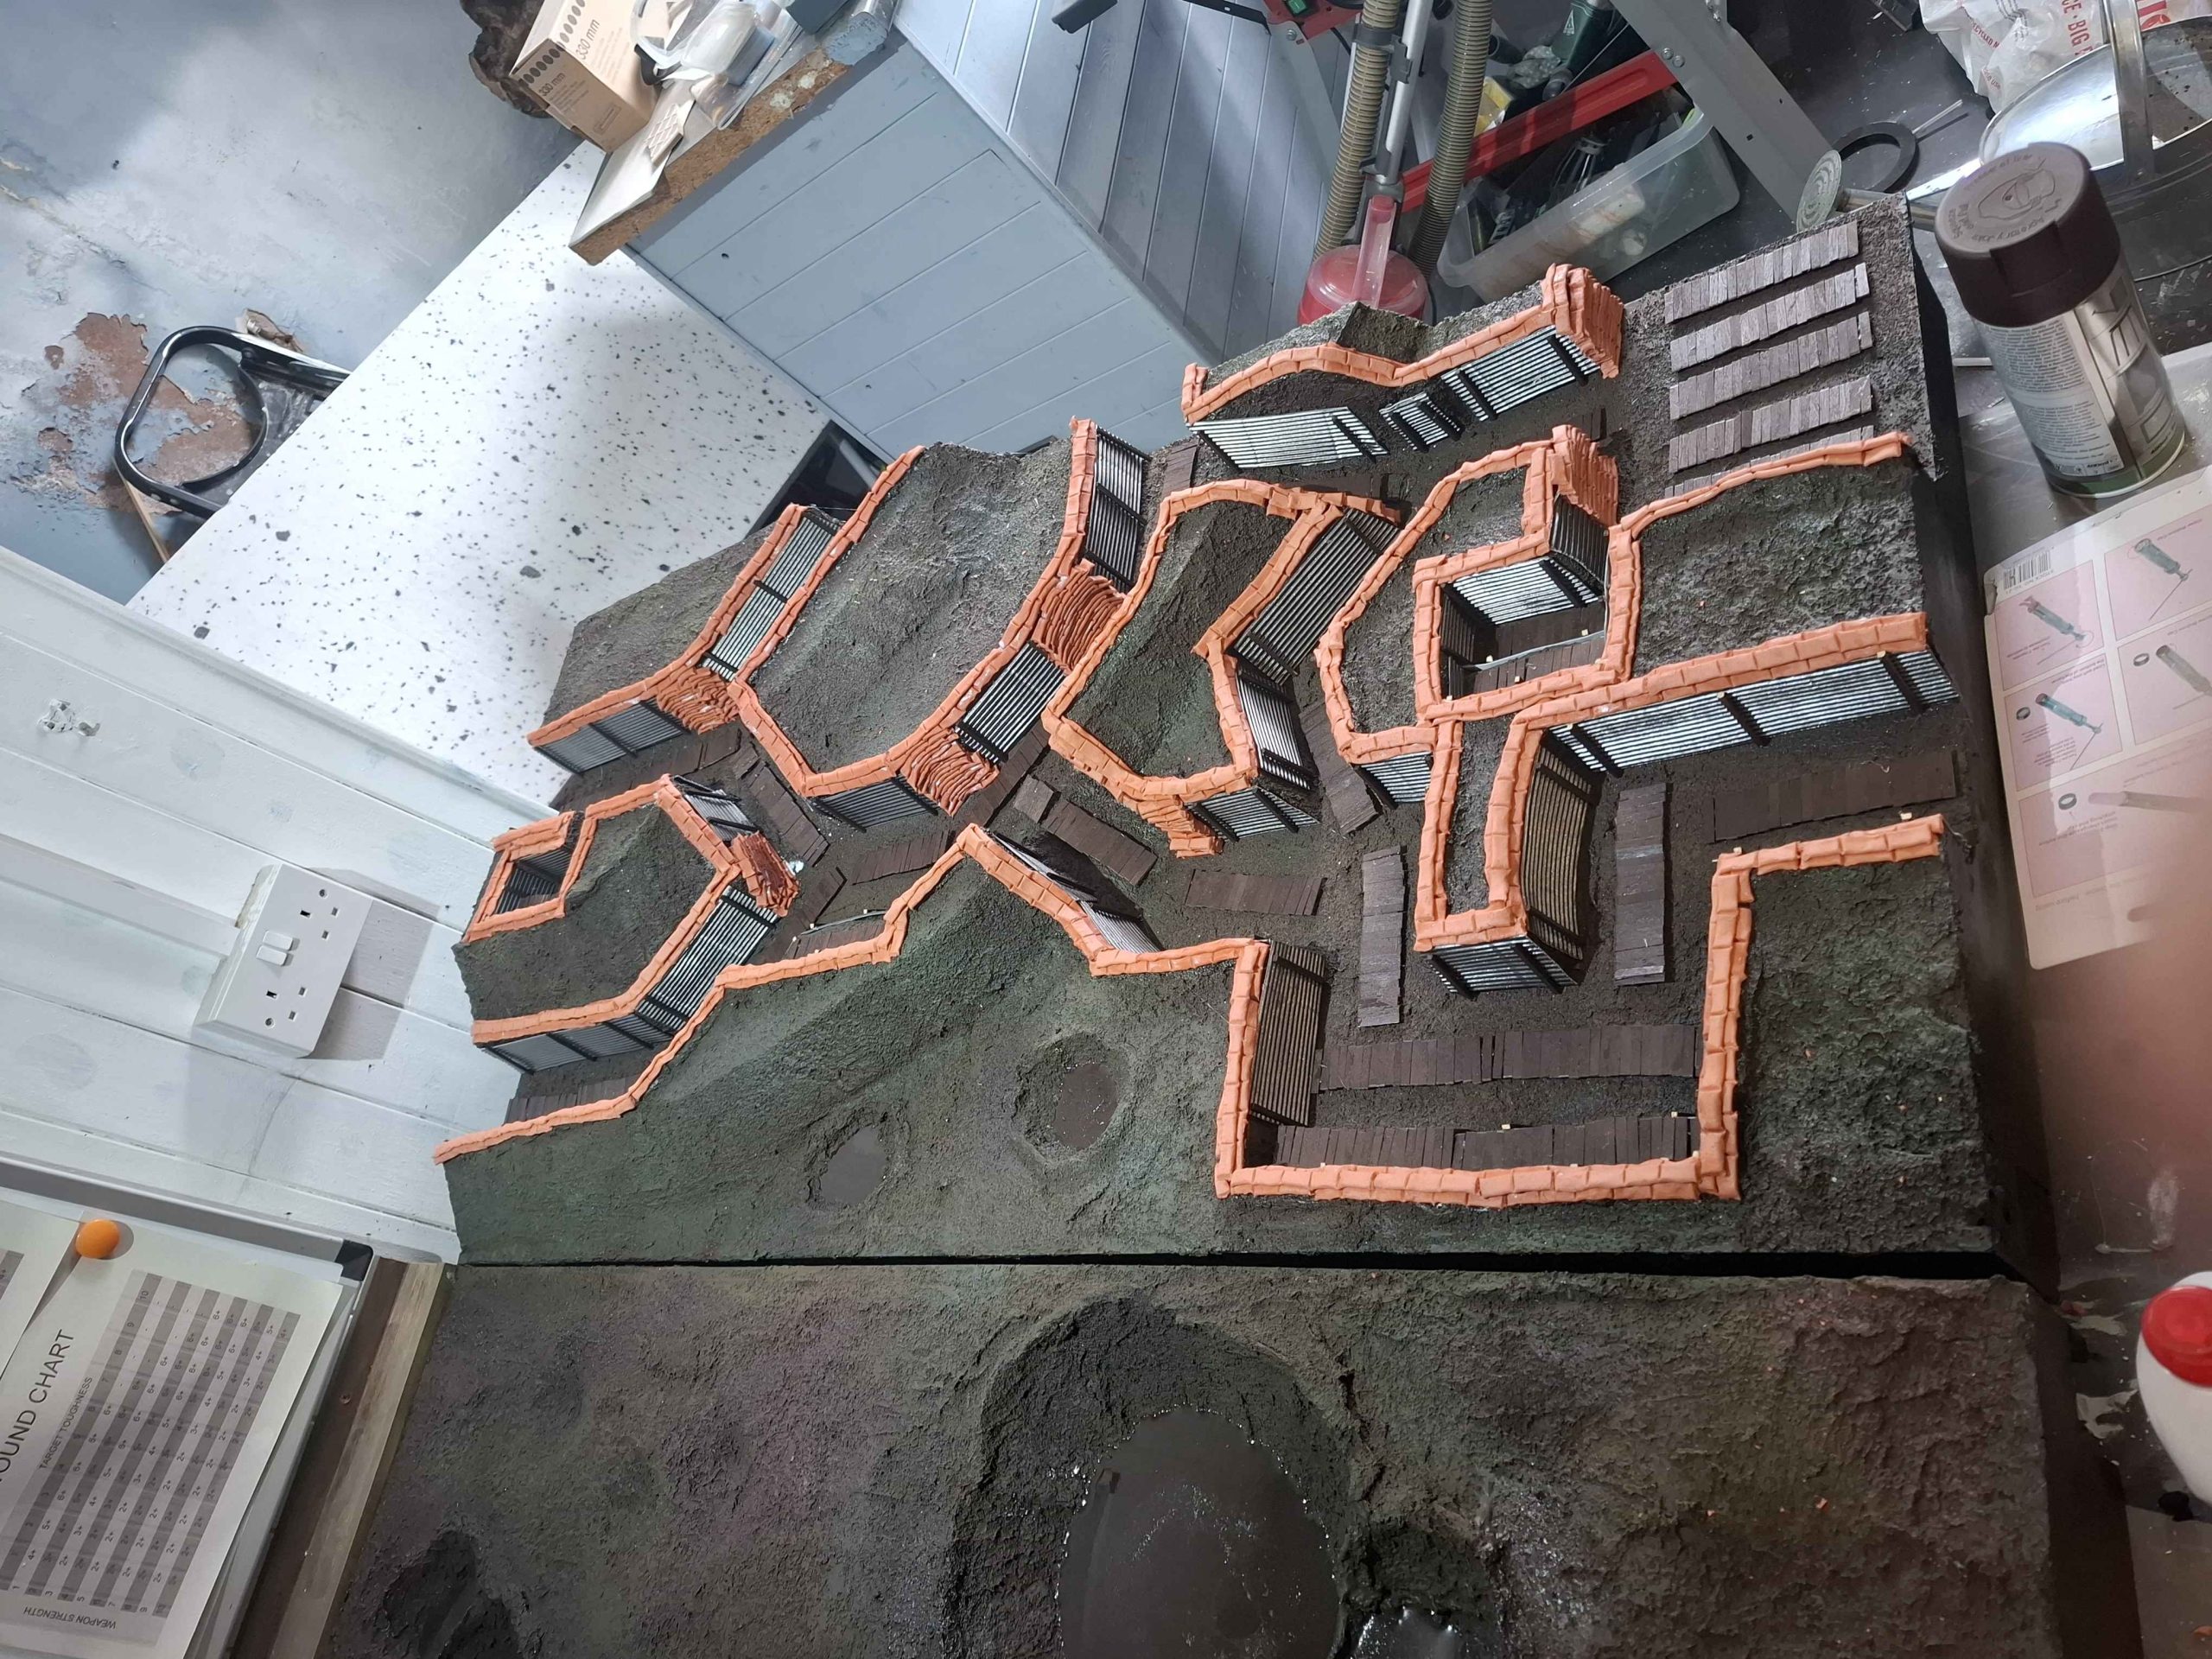
Long time, no update
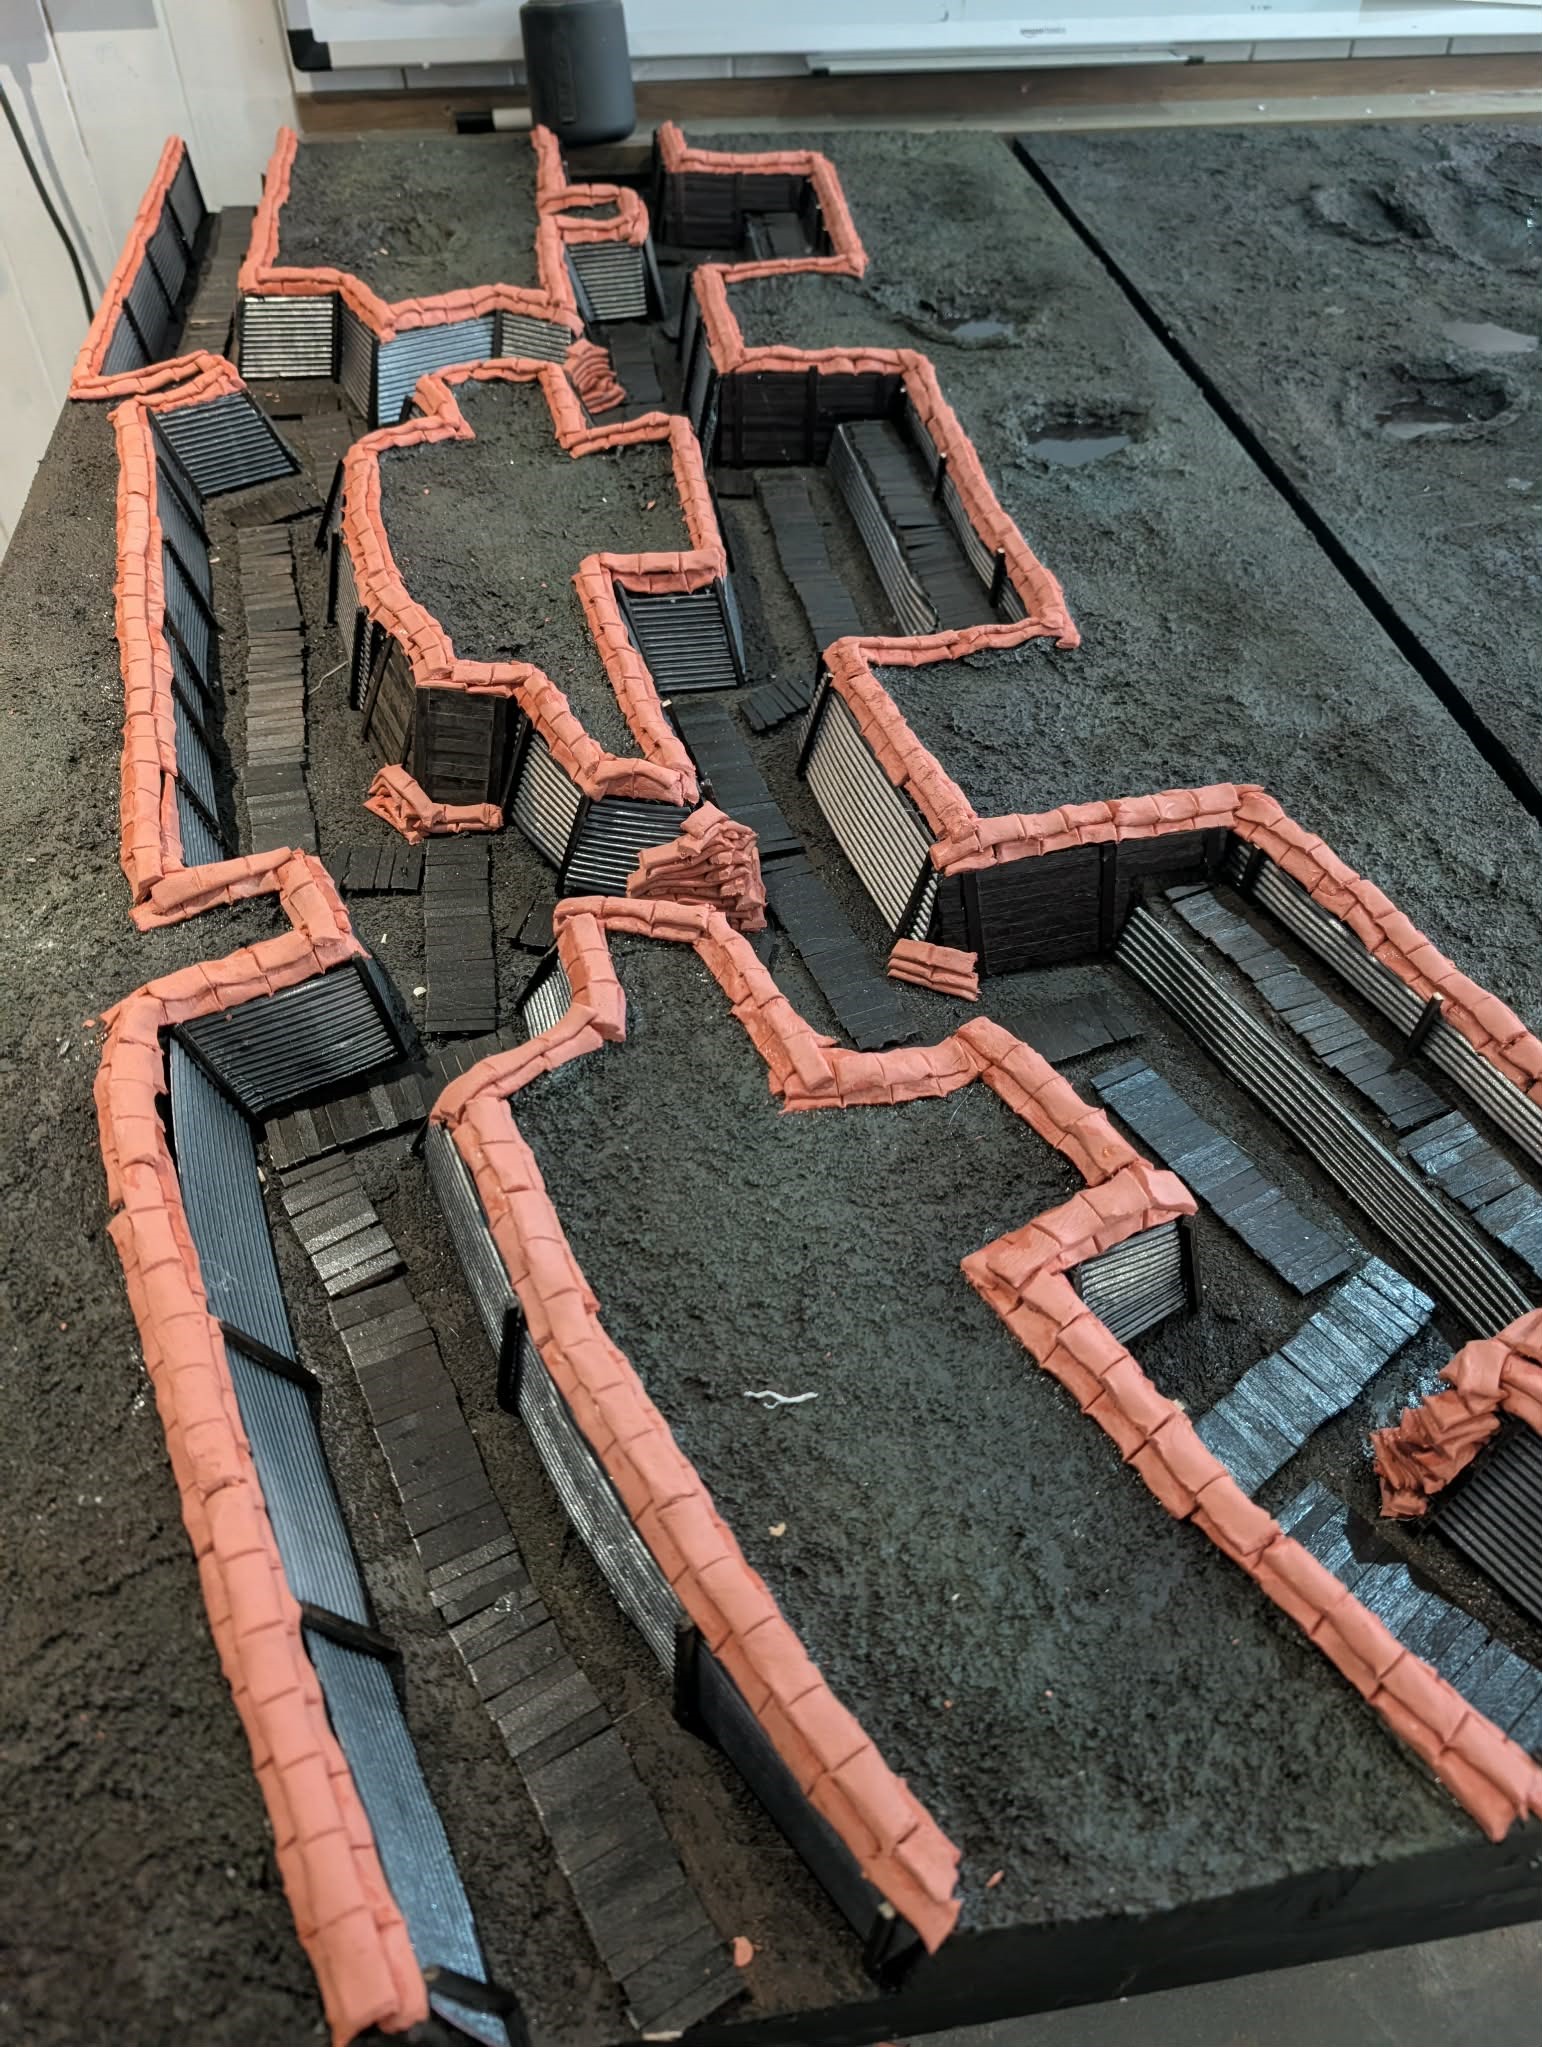
Happy New year all! A bit late to the party but its been a pretty busy start to the year, mostly sorting wedding stuff for next month. But i have been working away at the board!
I’m happy to say that all the woodwork is done! apart from a bit of touching up with paint, but the board is on the final stretch now.
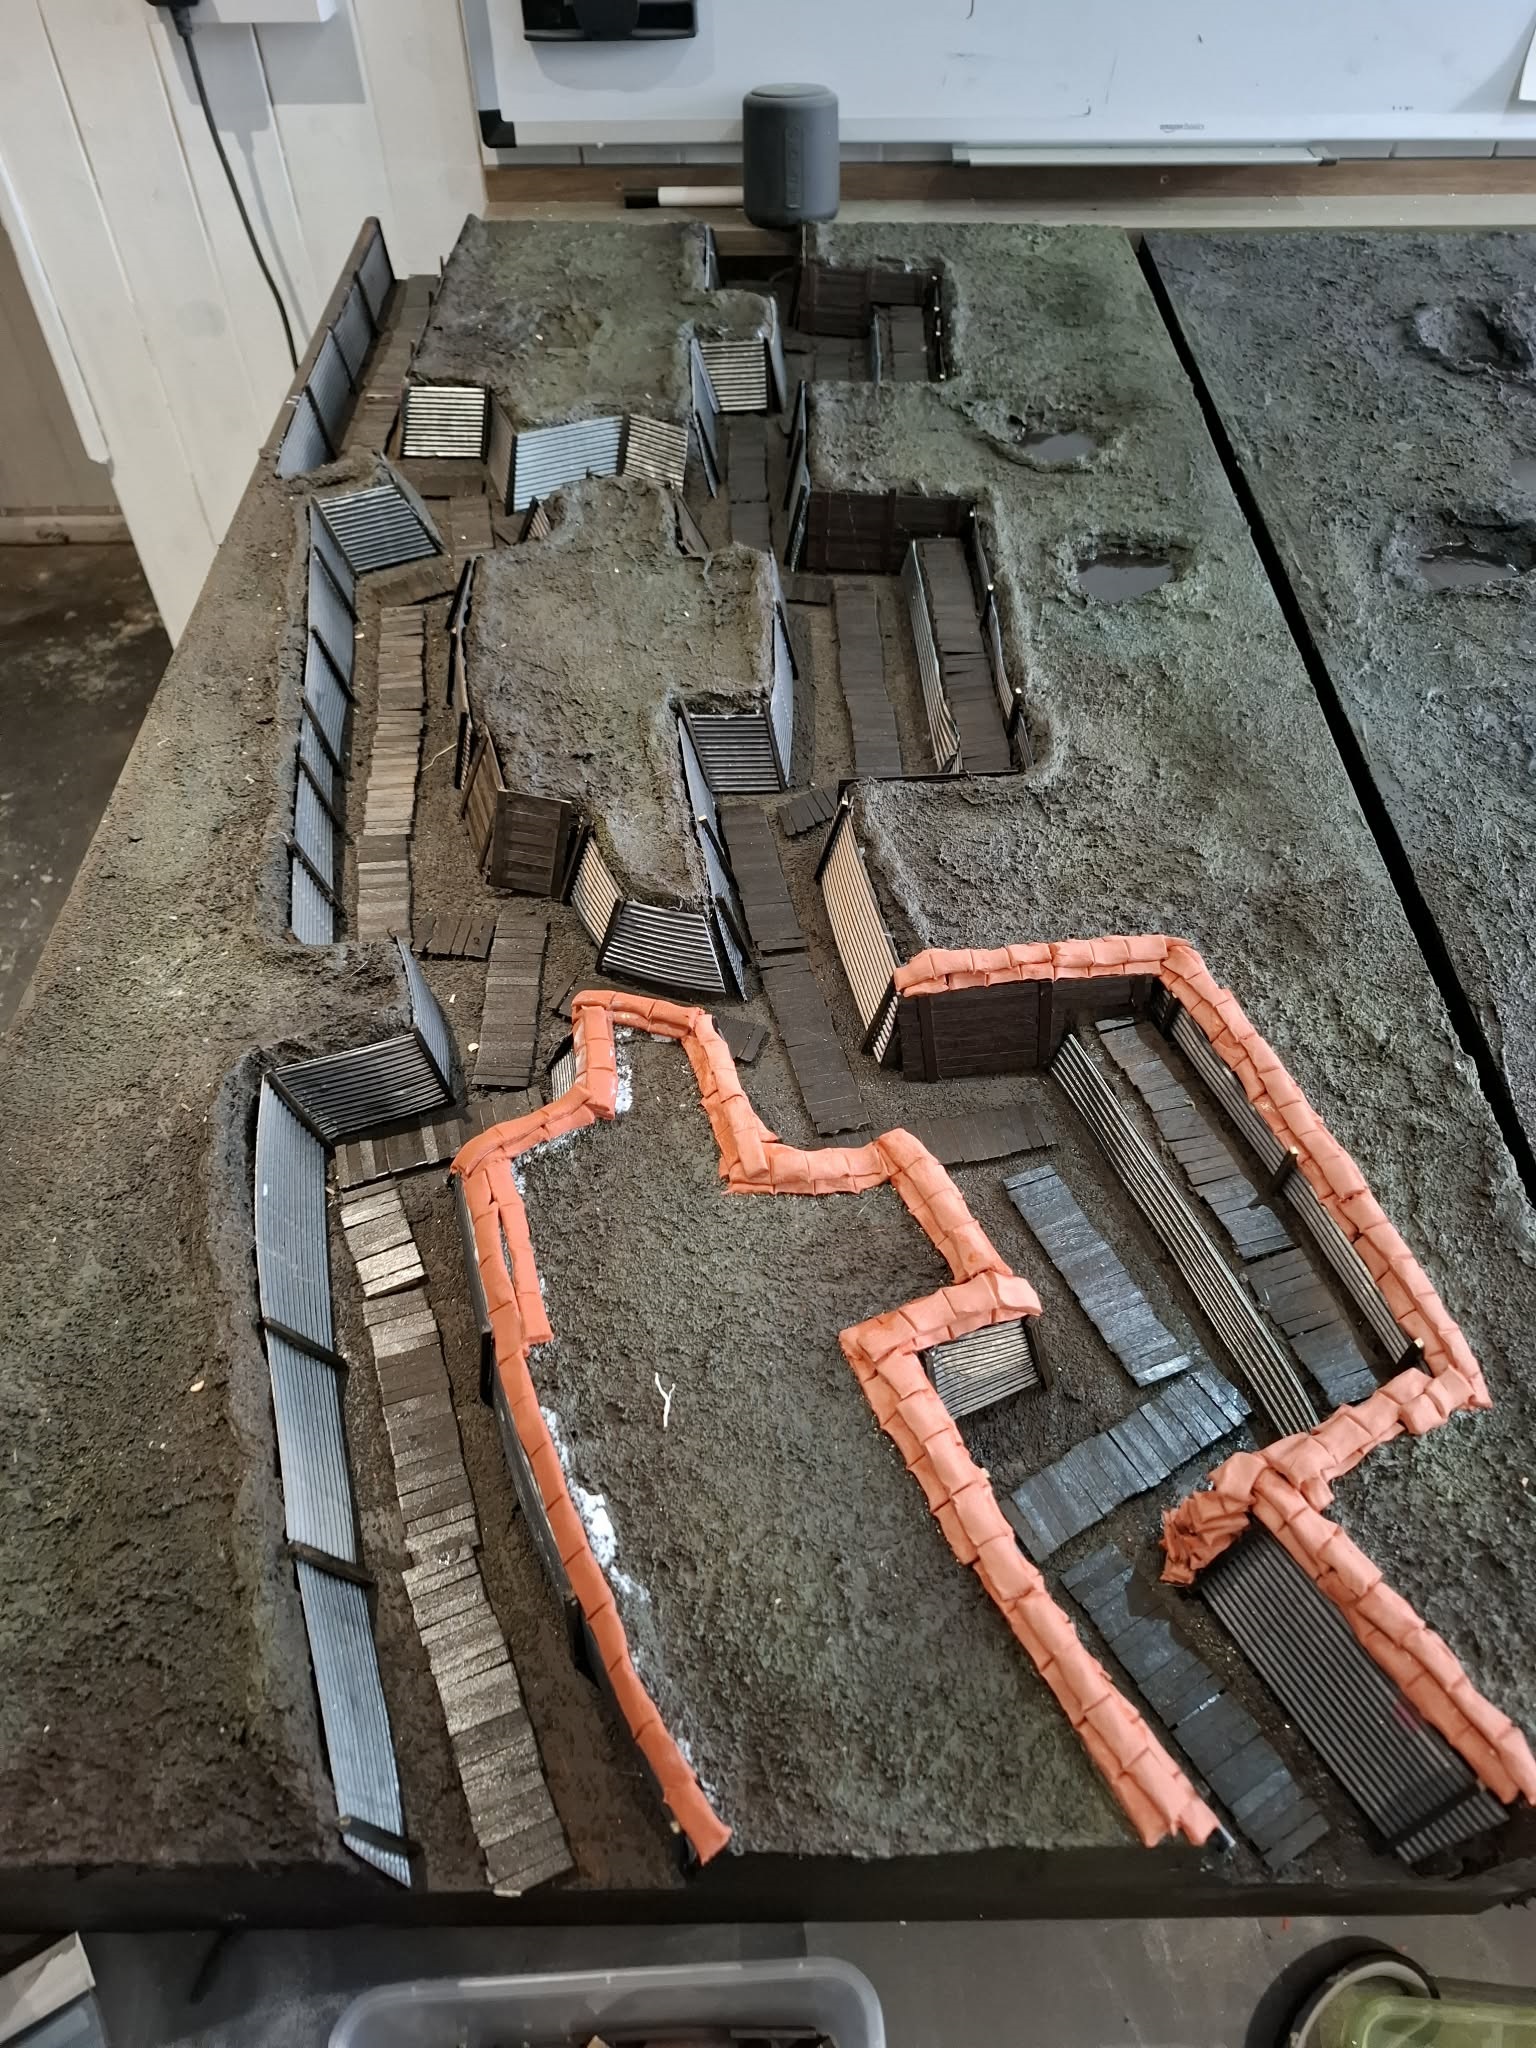
A large part of way I haven’t updated in a while is because the sandbags have bogged me down a little. Turns out i don’t have thee patience to hand roll the clay and would get easily frustrated.
Now, I don’t have genius ideas often…but the one I had to solve this issue, is, if i do say so myself…genius!
Whilst trying to think about what i could do, my mind strayed to playdough extruders, and whilst doing some research, I found this…
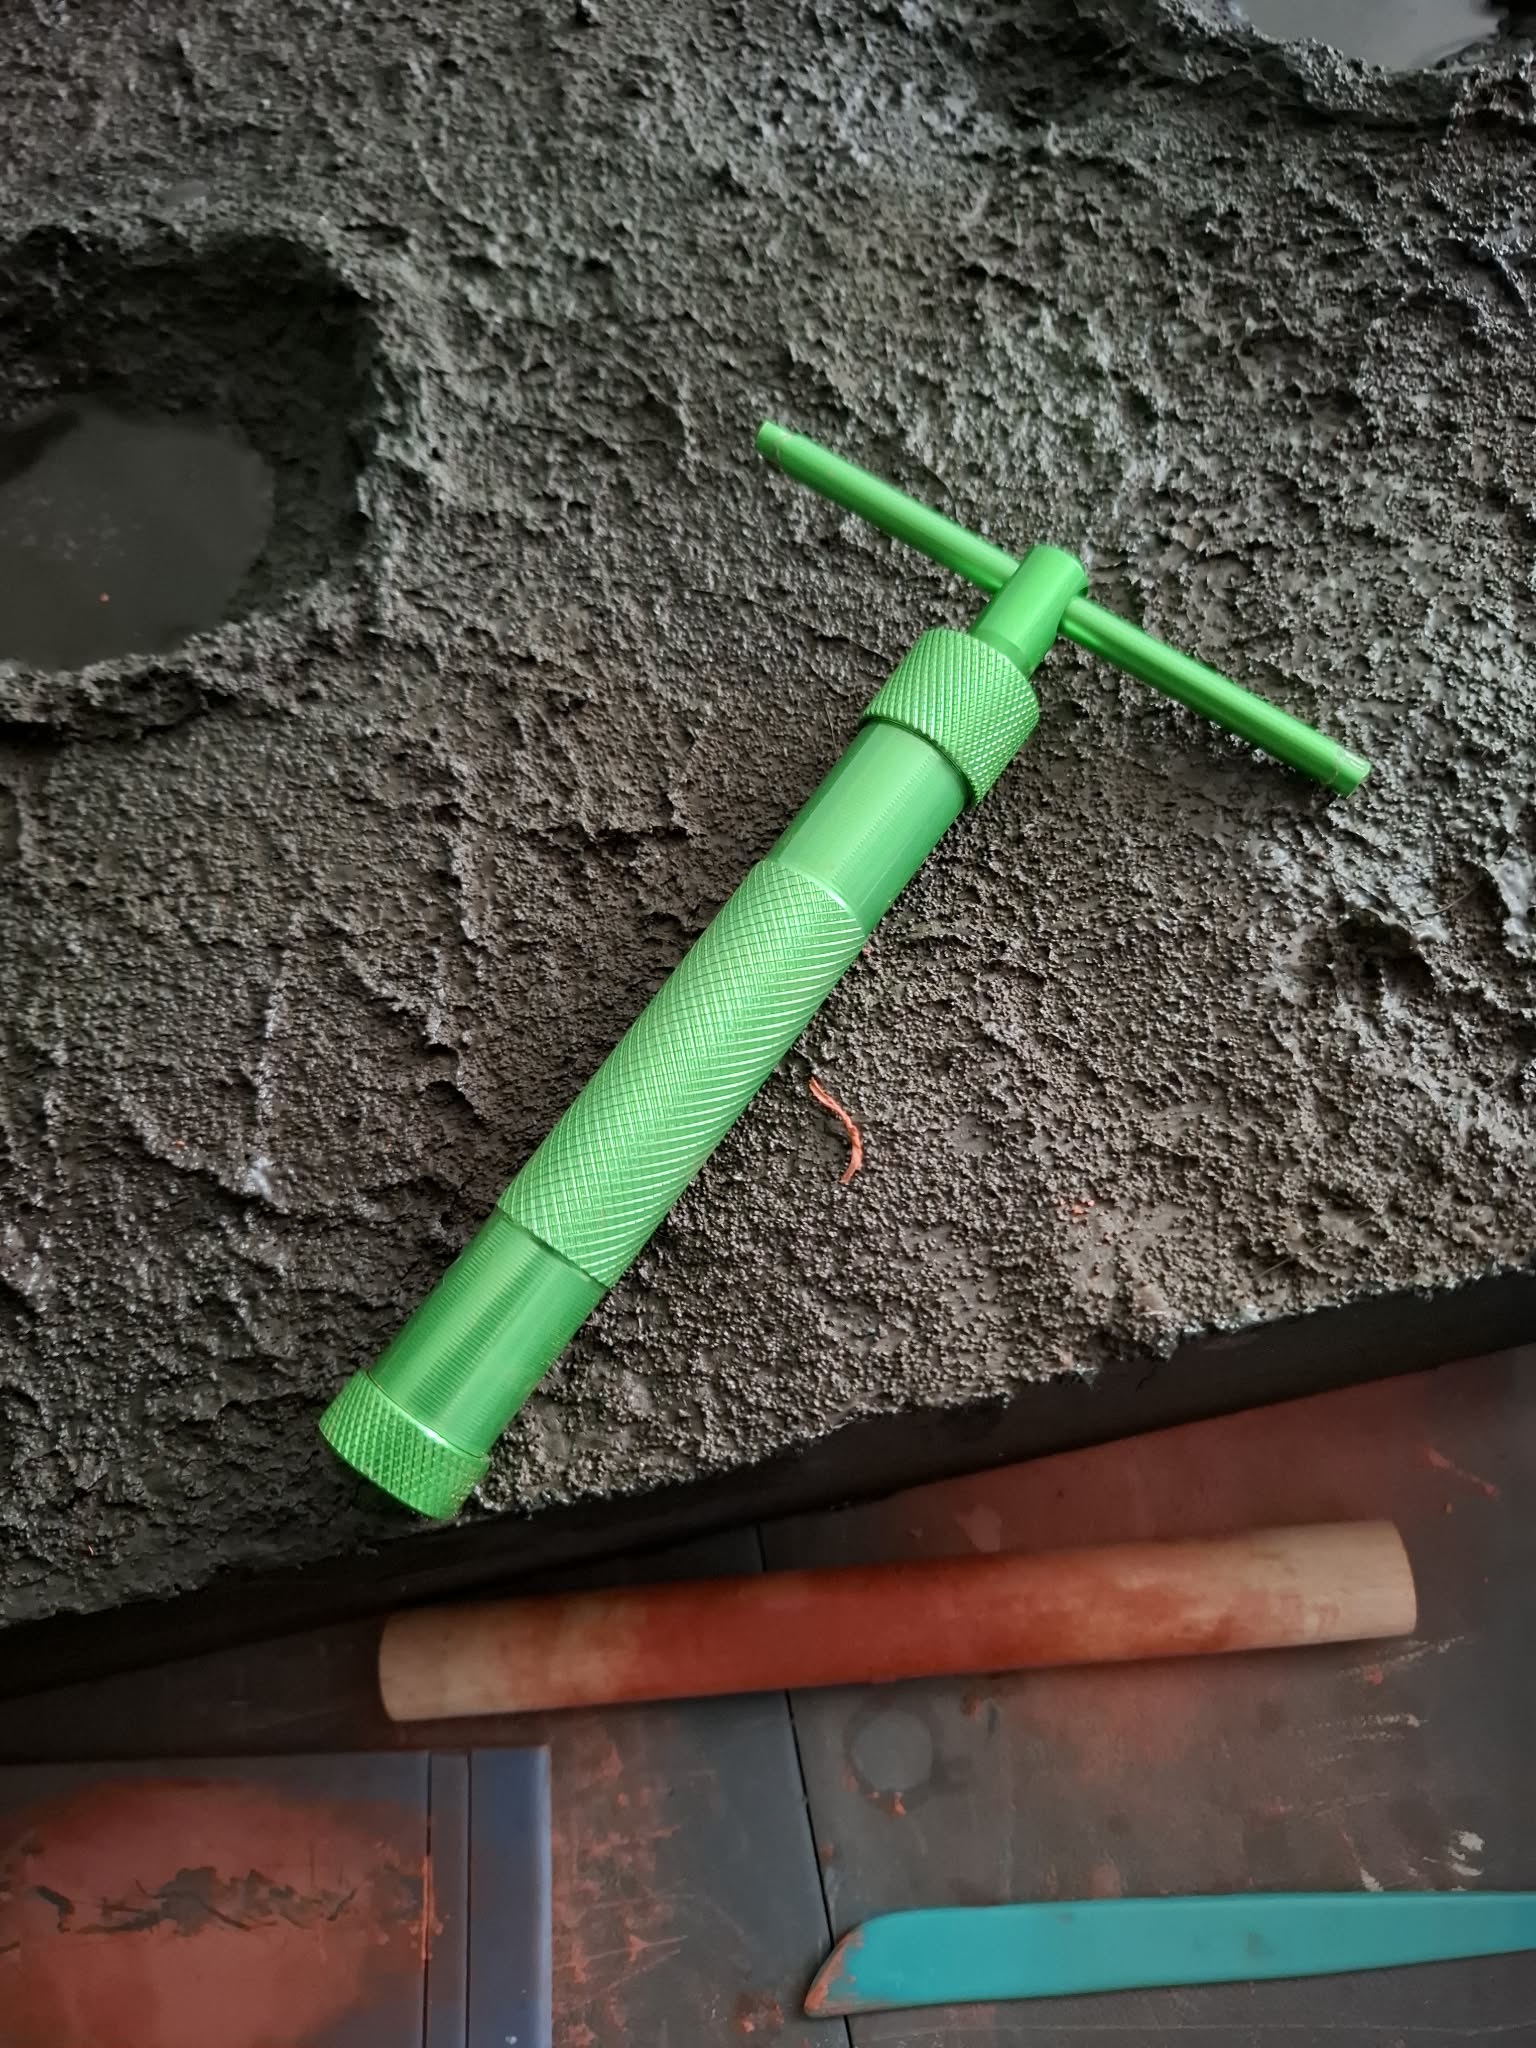
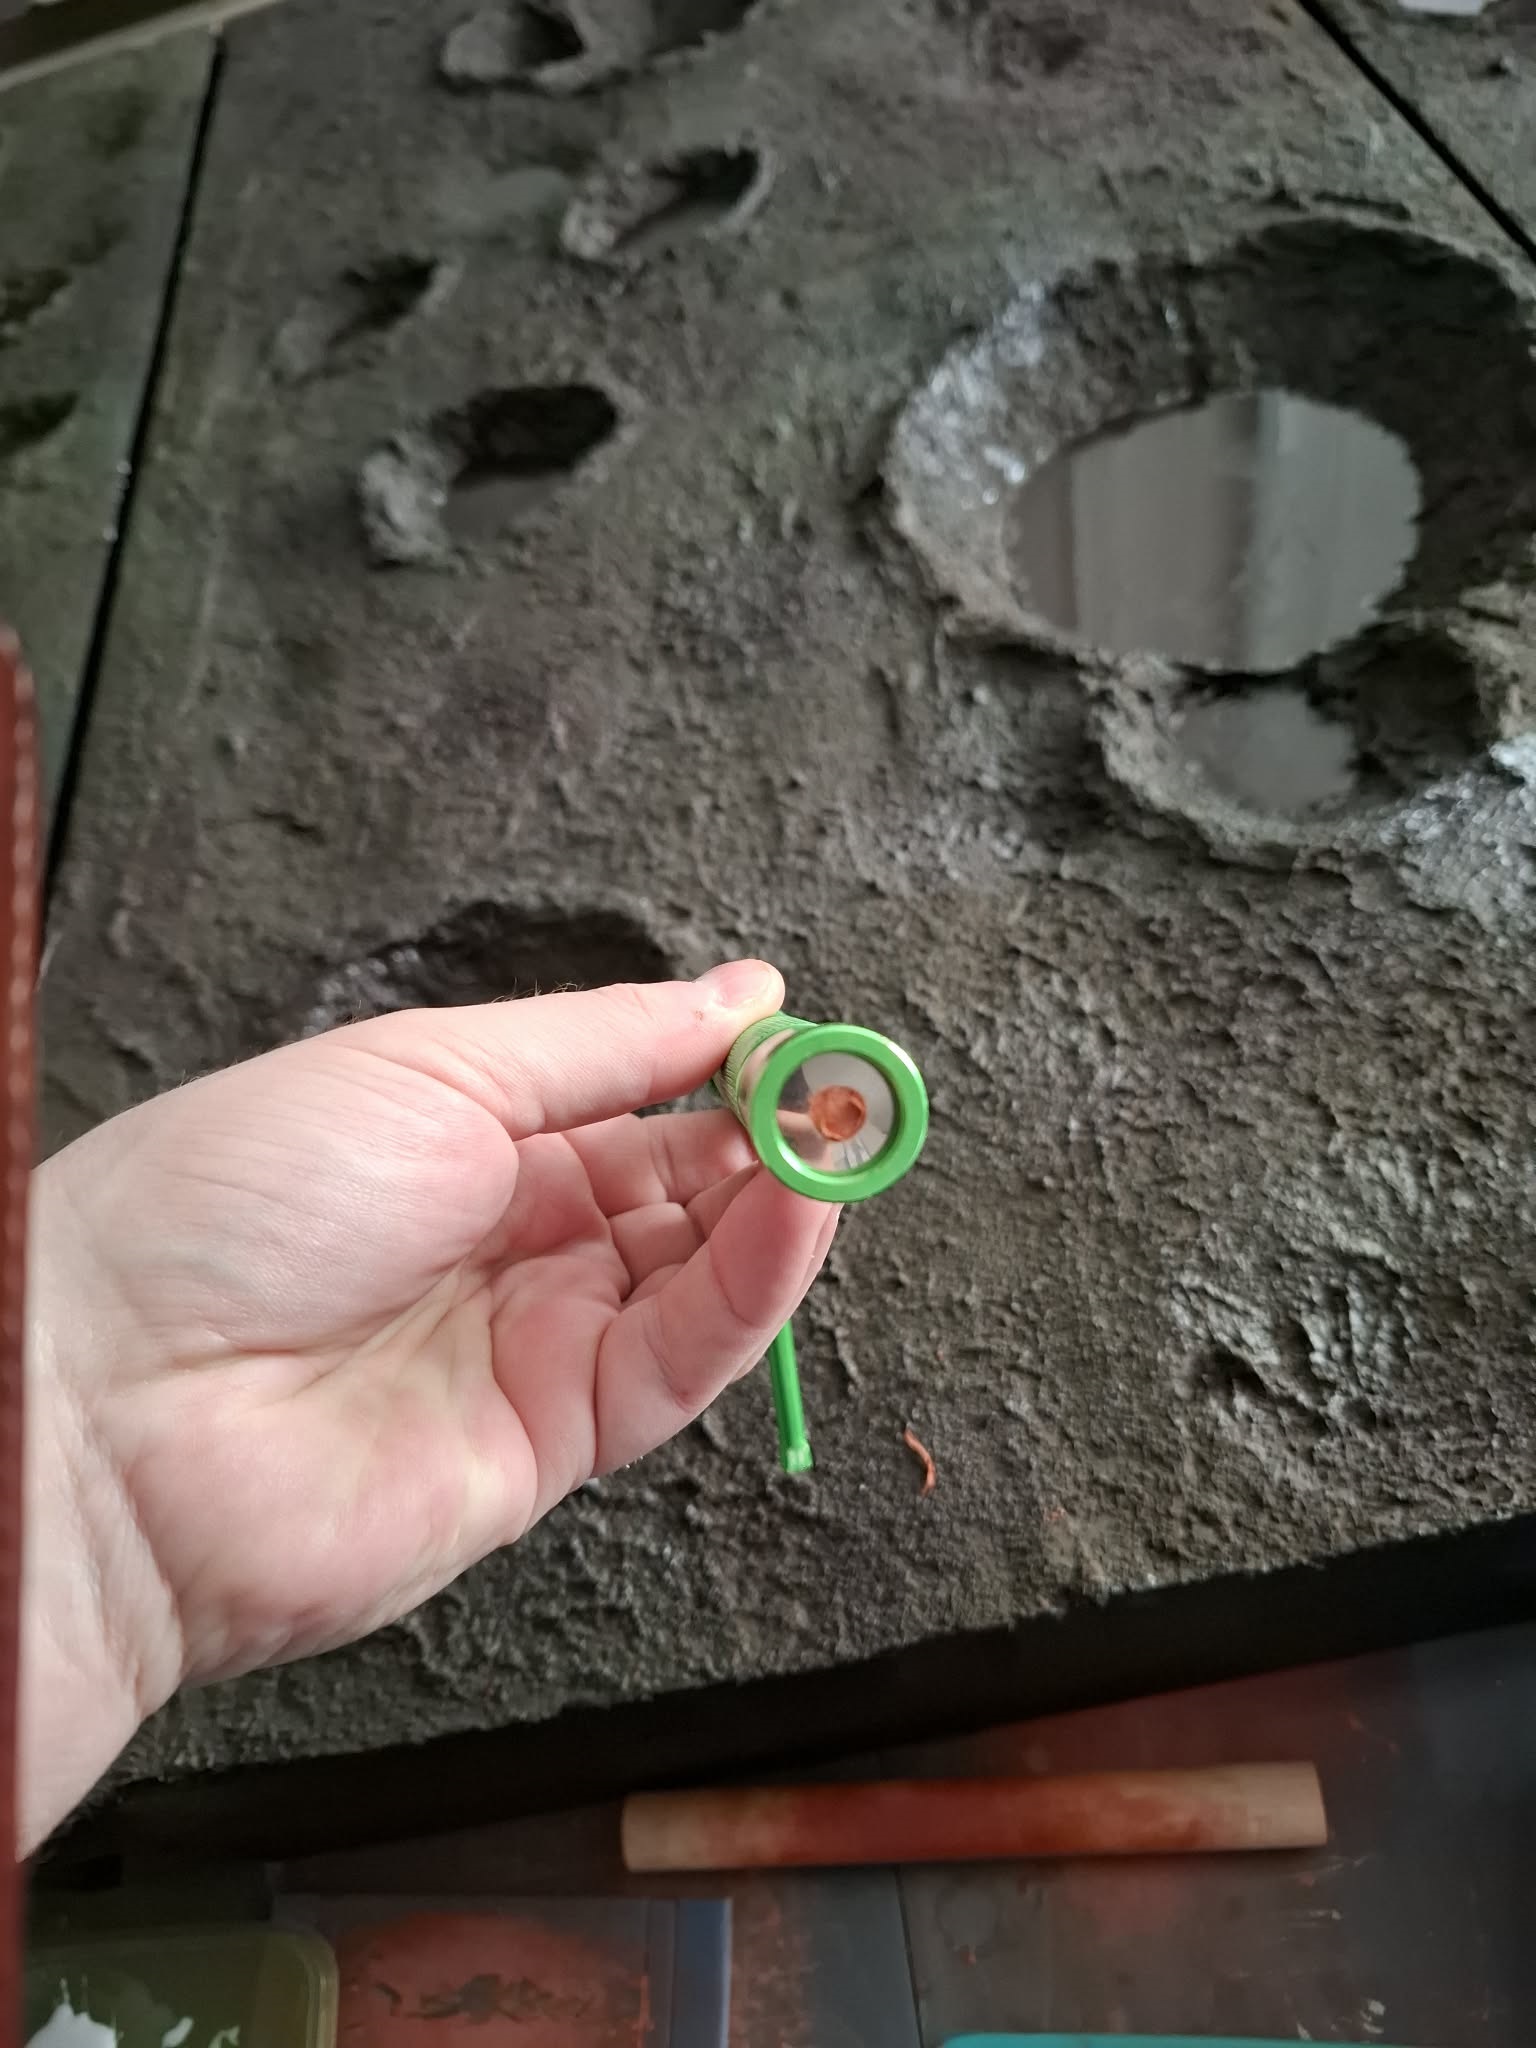
… a clay extruder!!!
Just stuff the tube with clay, twist the end and boom! a tube clay the diameter i wanted! It came with multiple profiles so i put in the one i found most suitable. It allows me to quickly make consistent clay sausages, all i need to do then is flatten it down, mark out each bag and then glue them down. Has massively sped up my sandbag production, so that will be my task this week. Not bad for a £7 find on amazon!!!
I will be aiming to finish the board itself this week. All that’s needed is the sandbags to be made and painted, and to touch up any bits of woodwork. In theory it should be achievable.
I haven’t put any barbed wire on the board as i was planning to do those as scatter terrain, I was also planning some groupings of blown trees as well, and i still plan to do those! But for the purposes of terrainfest, my aim is to just get the board done.
Hopefully see you at the end of the week with pictures of a finished board!
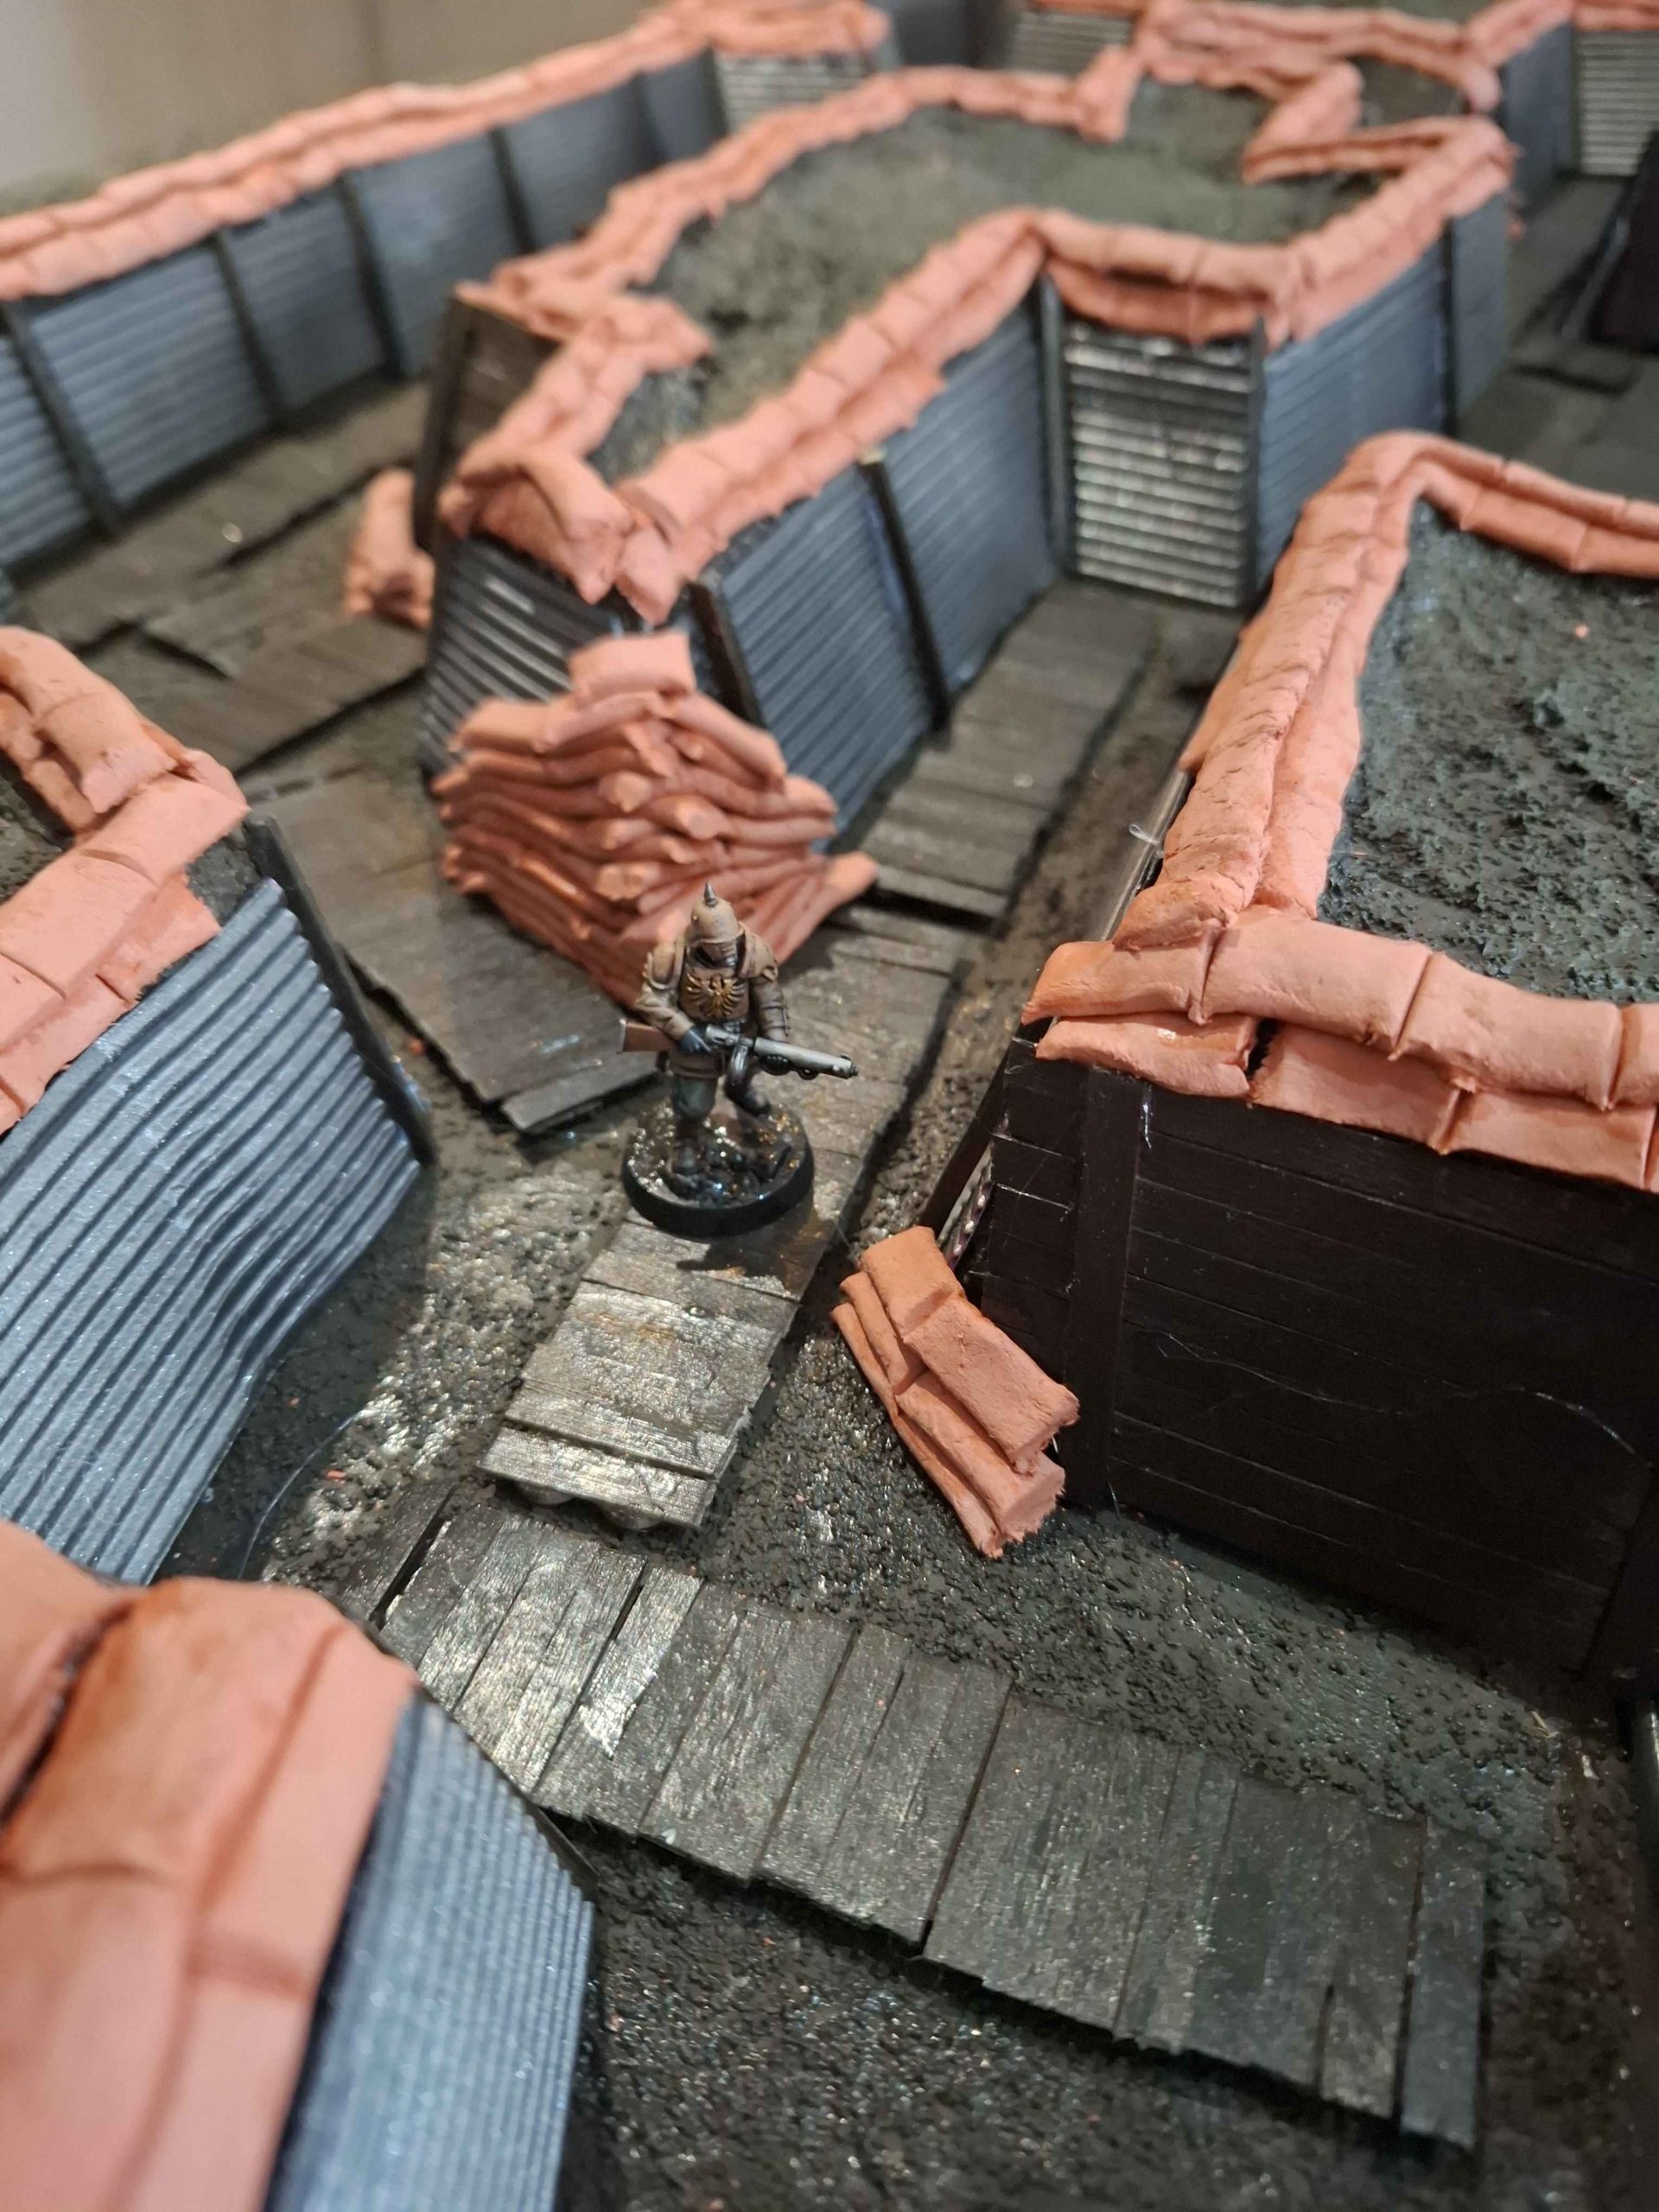
Detailing the Trenches
Time for another update! Didn’t do one last weekend, but boy I’ve been busy working on this board.
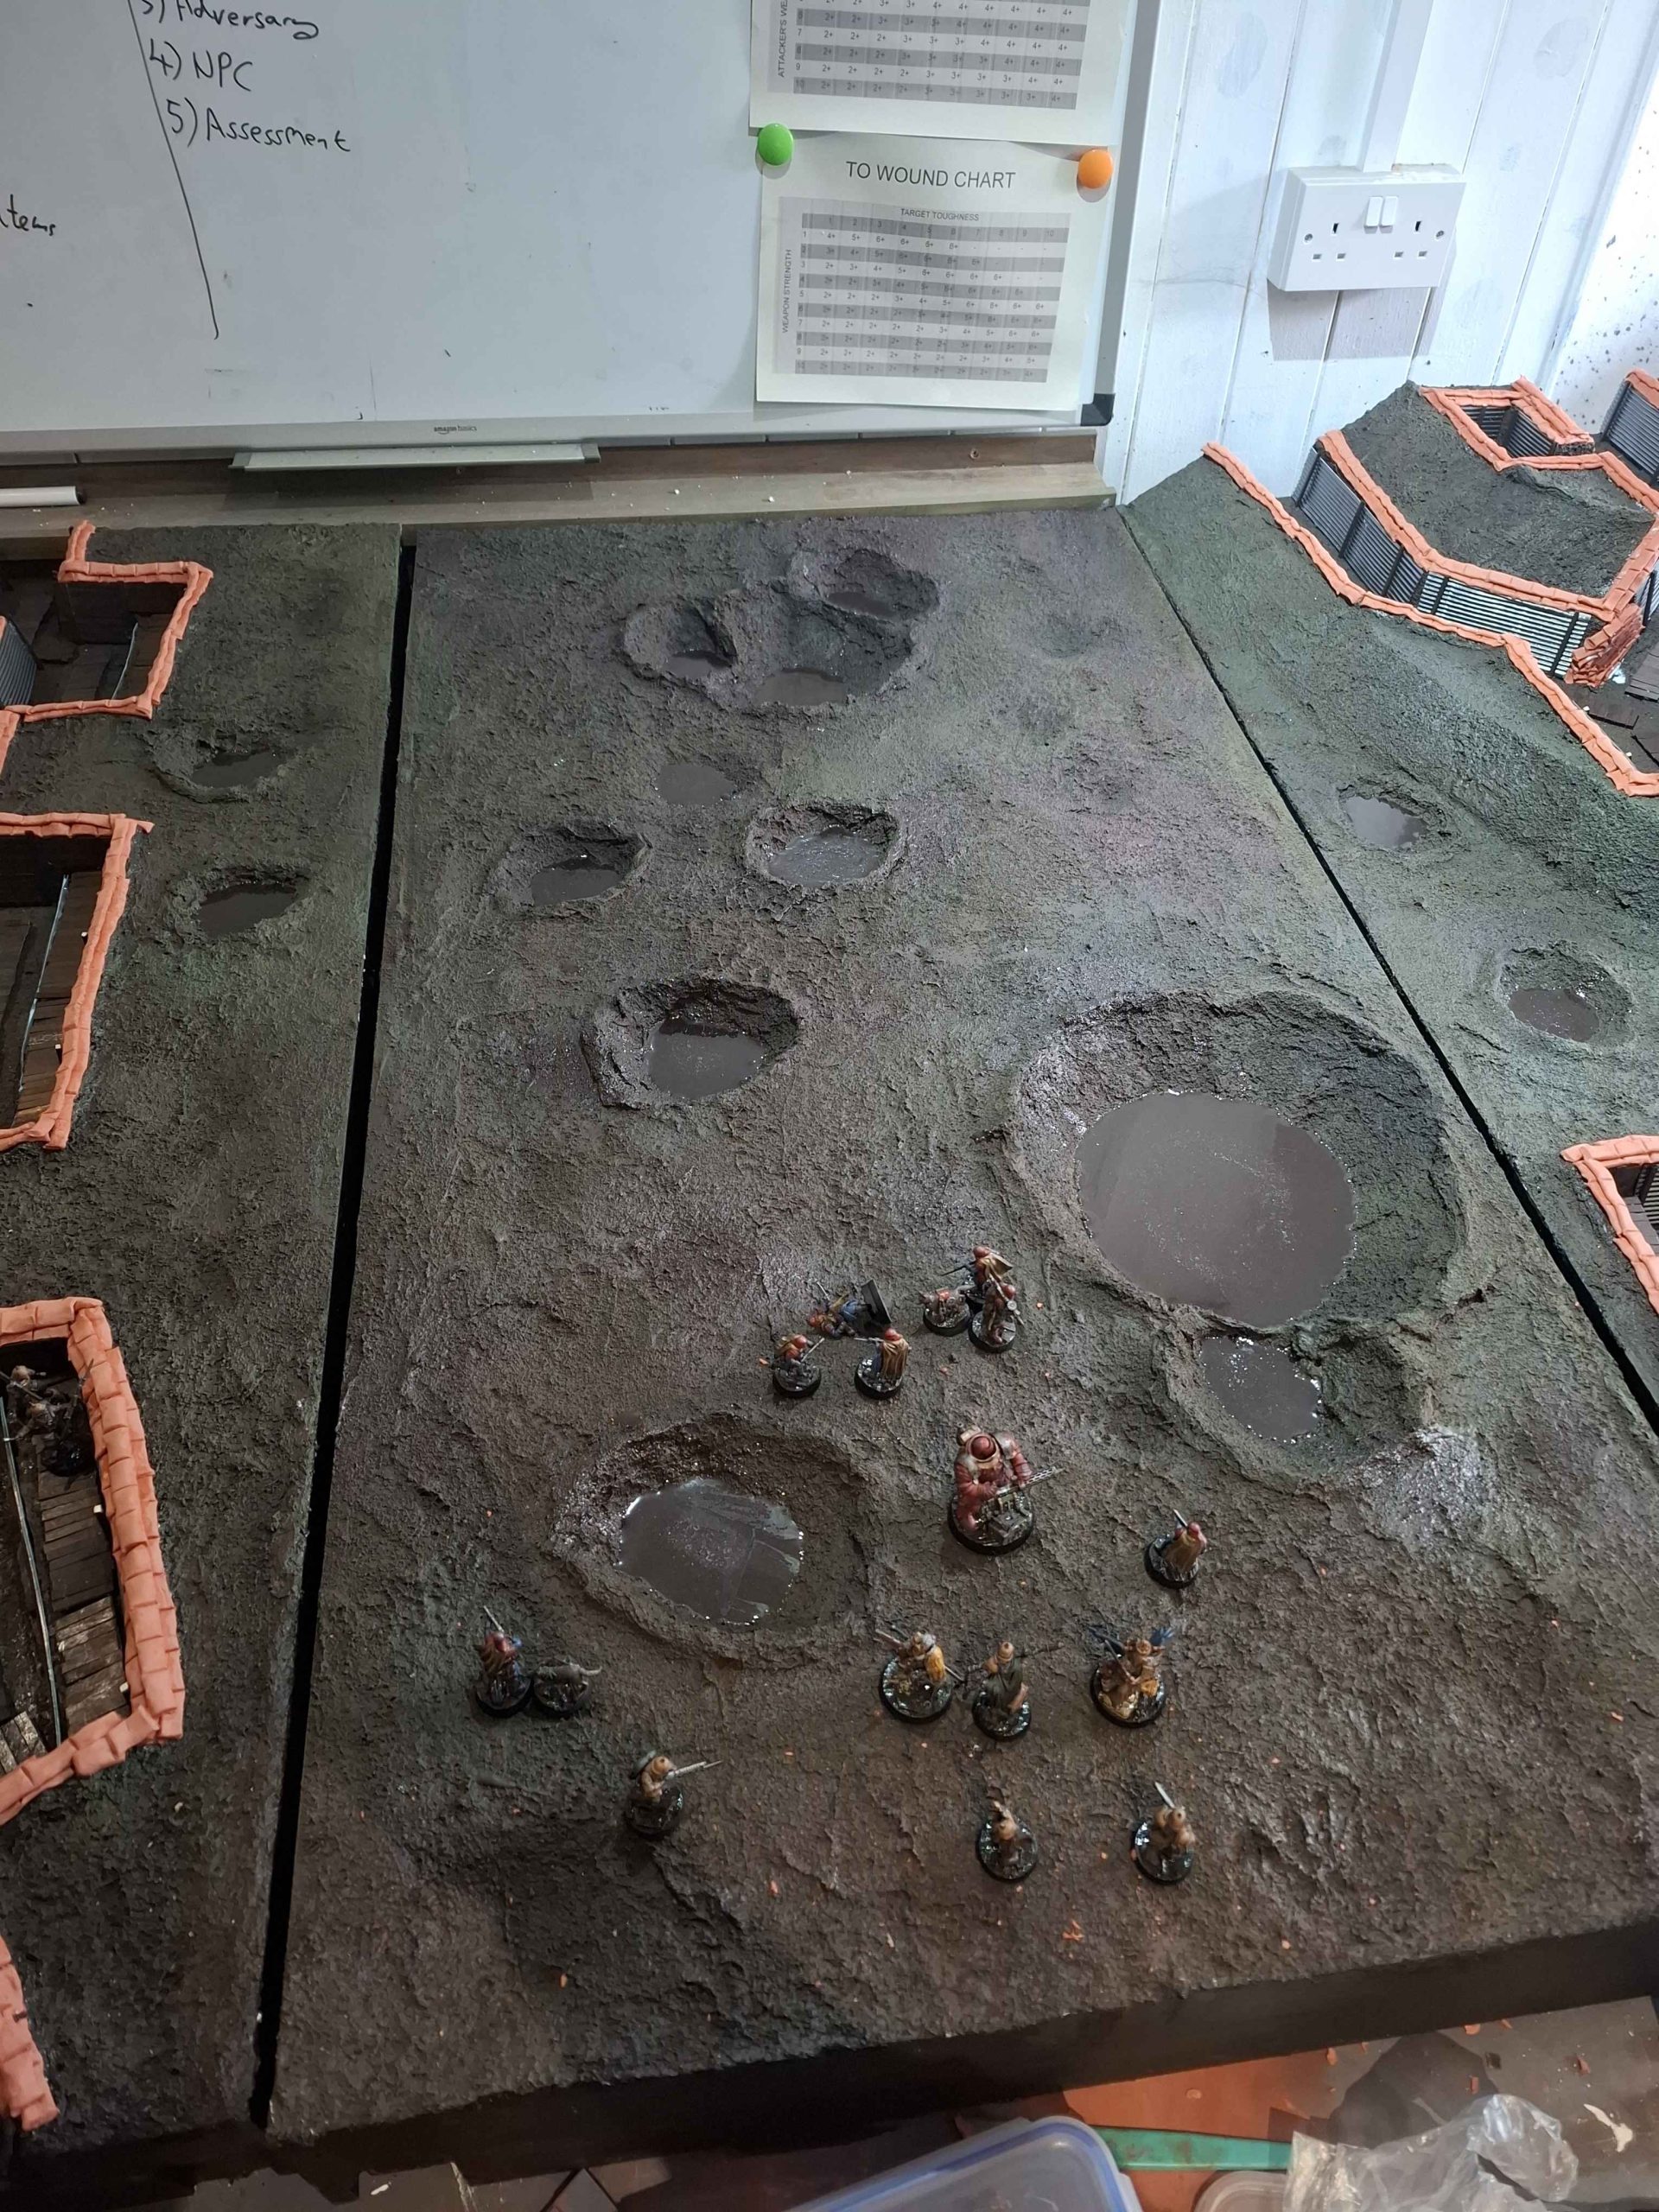
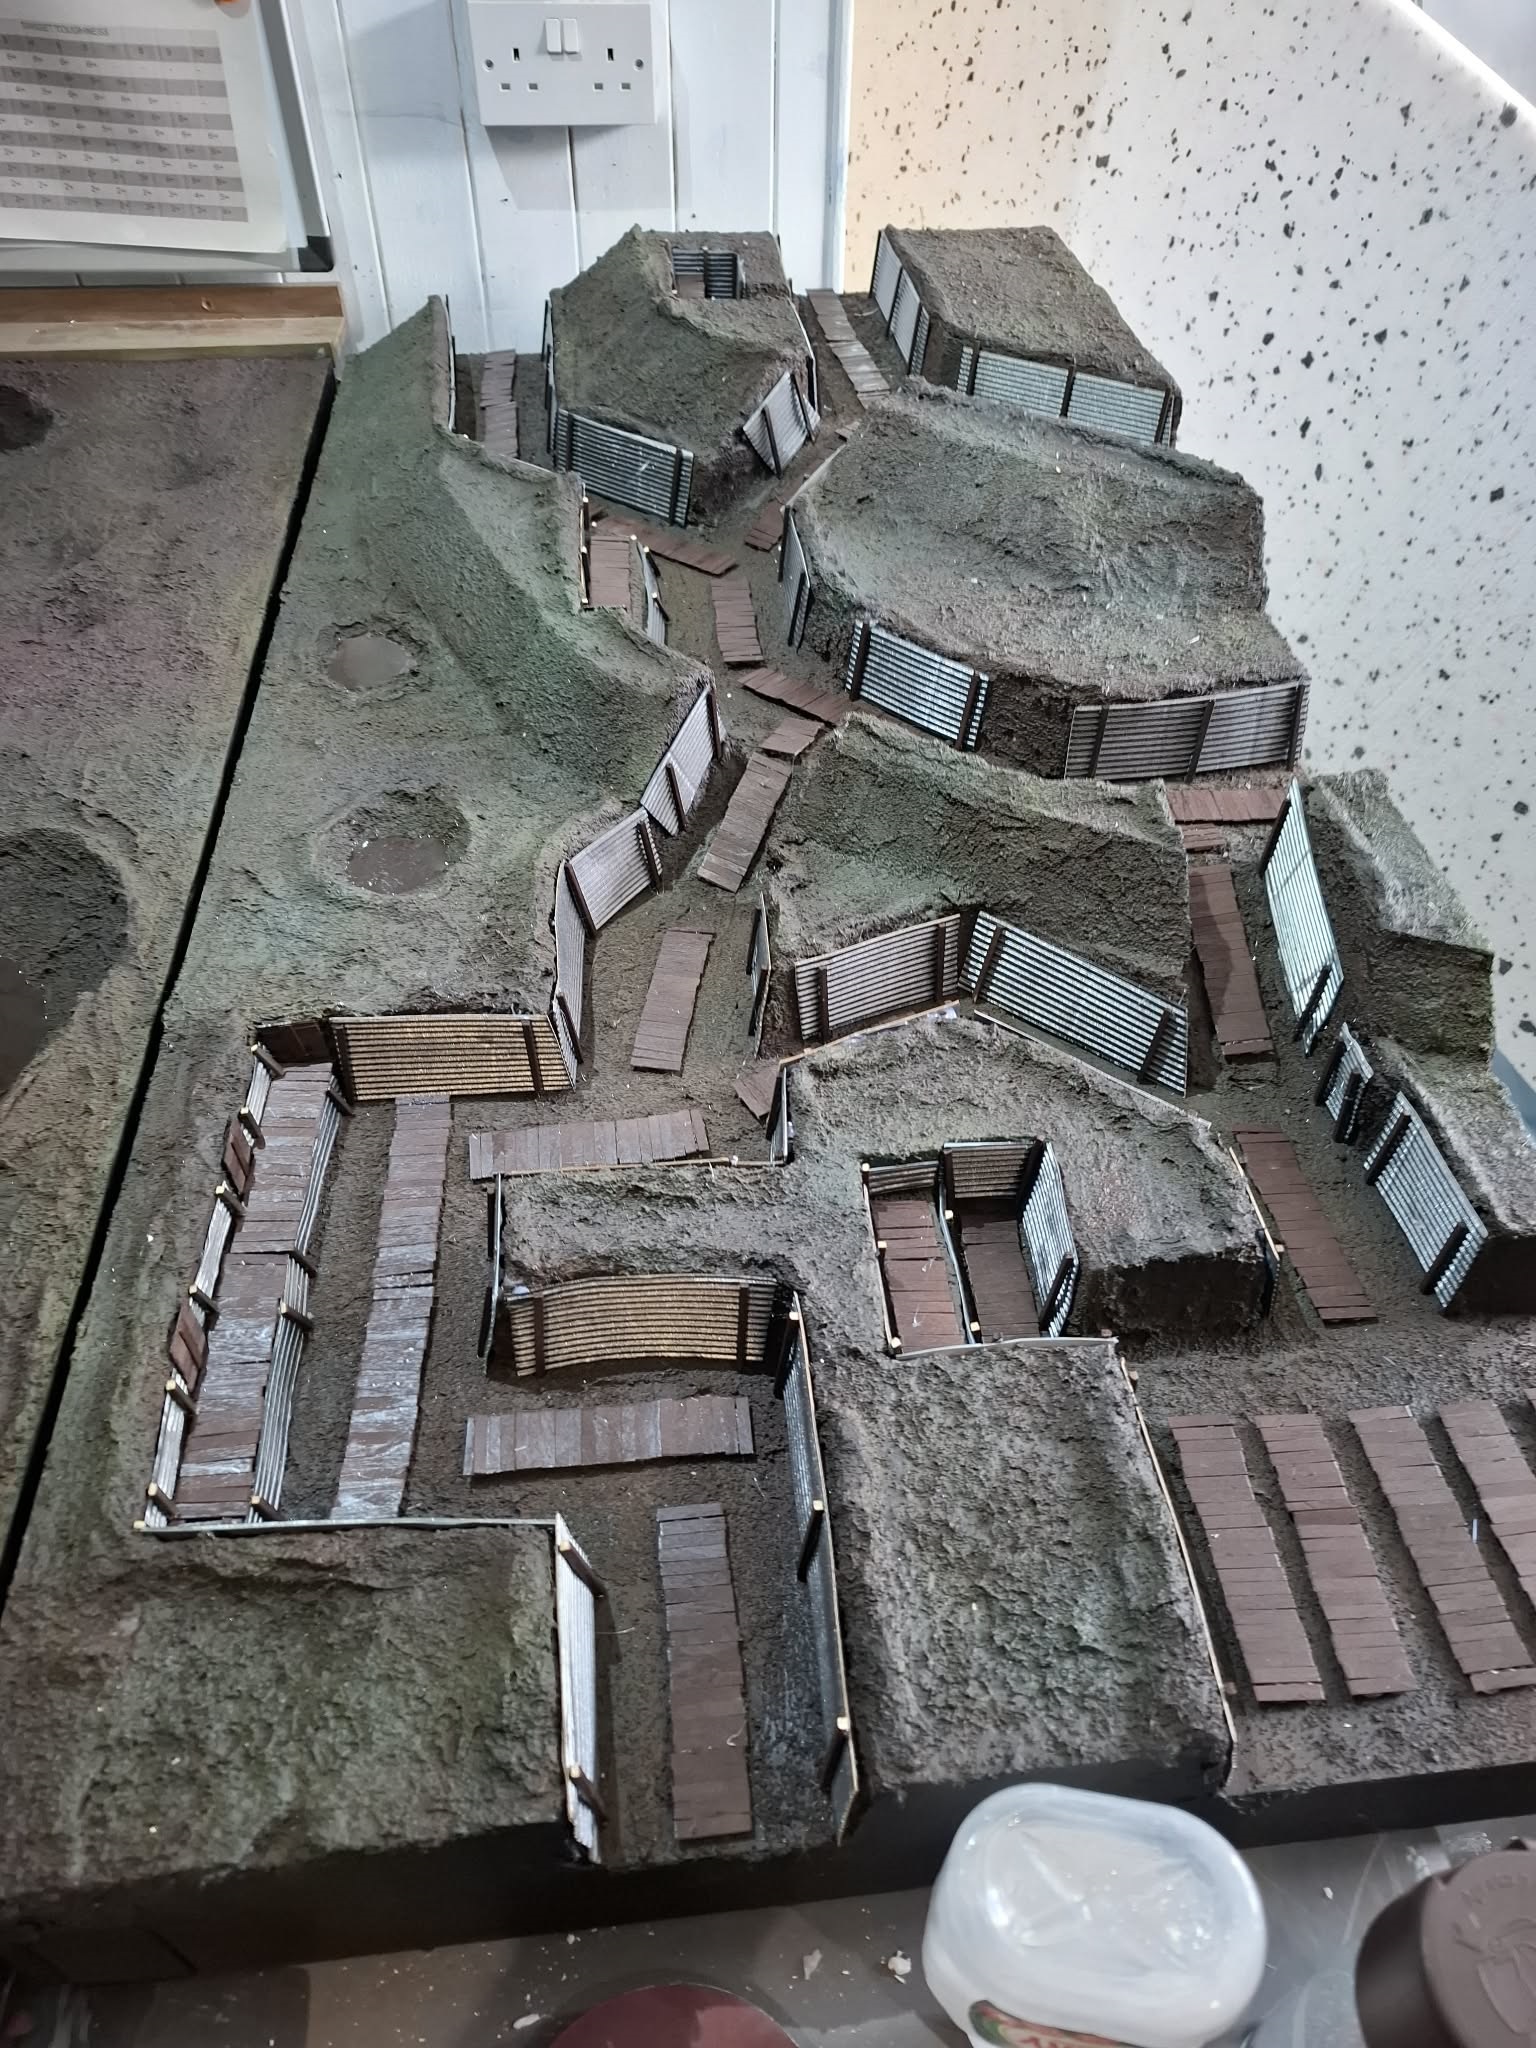
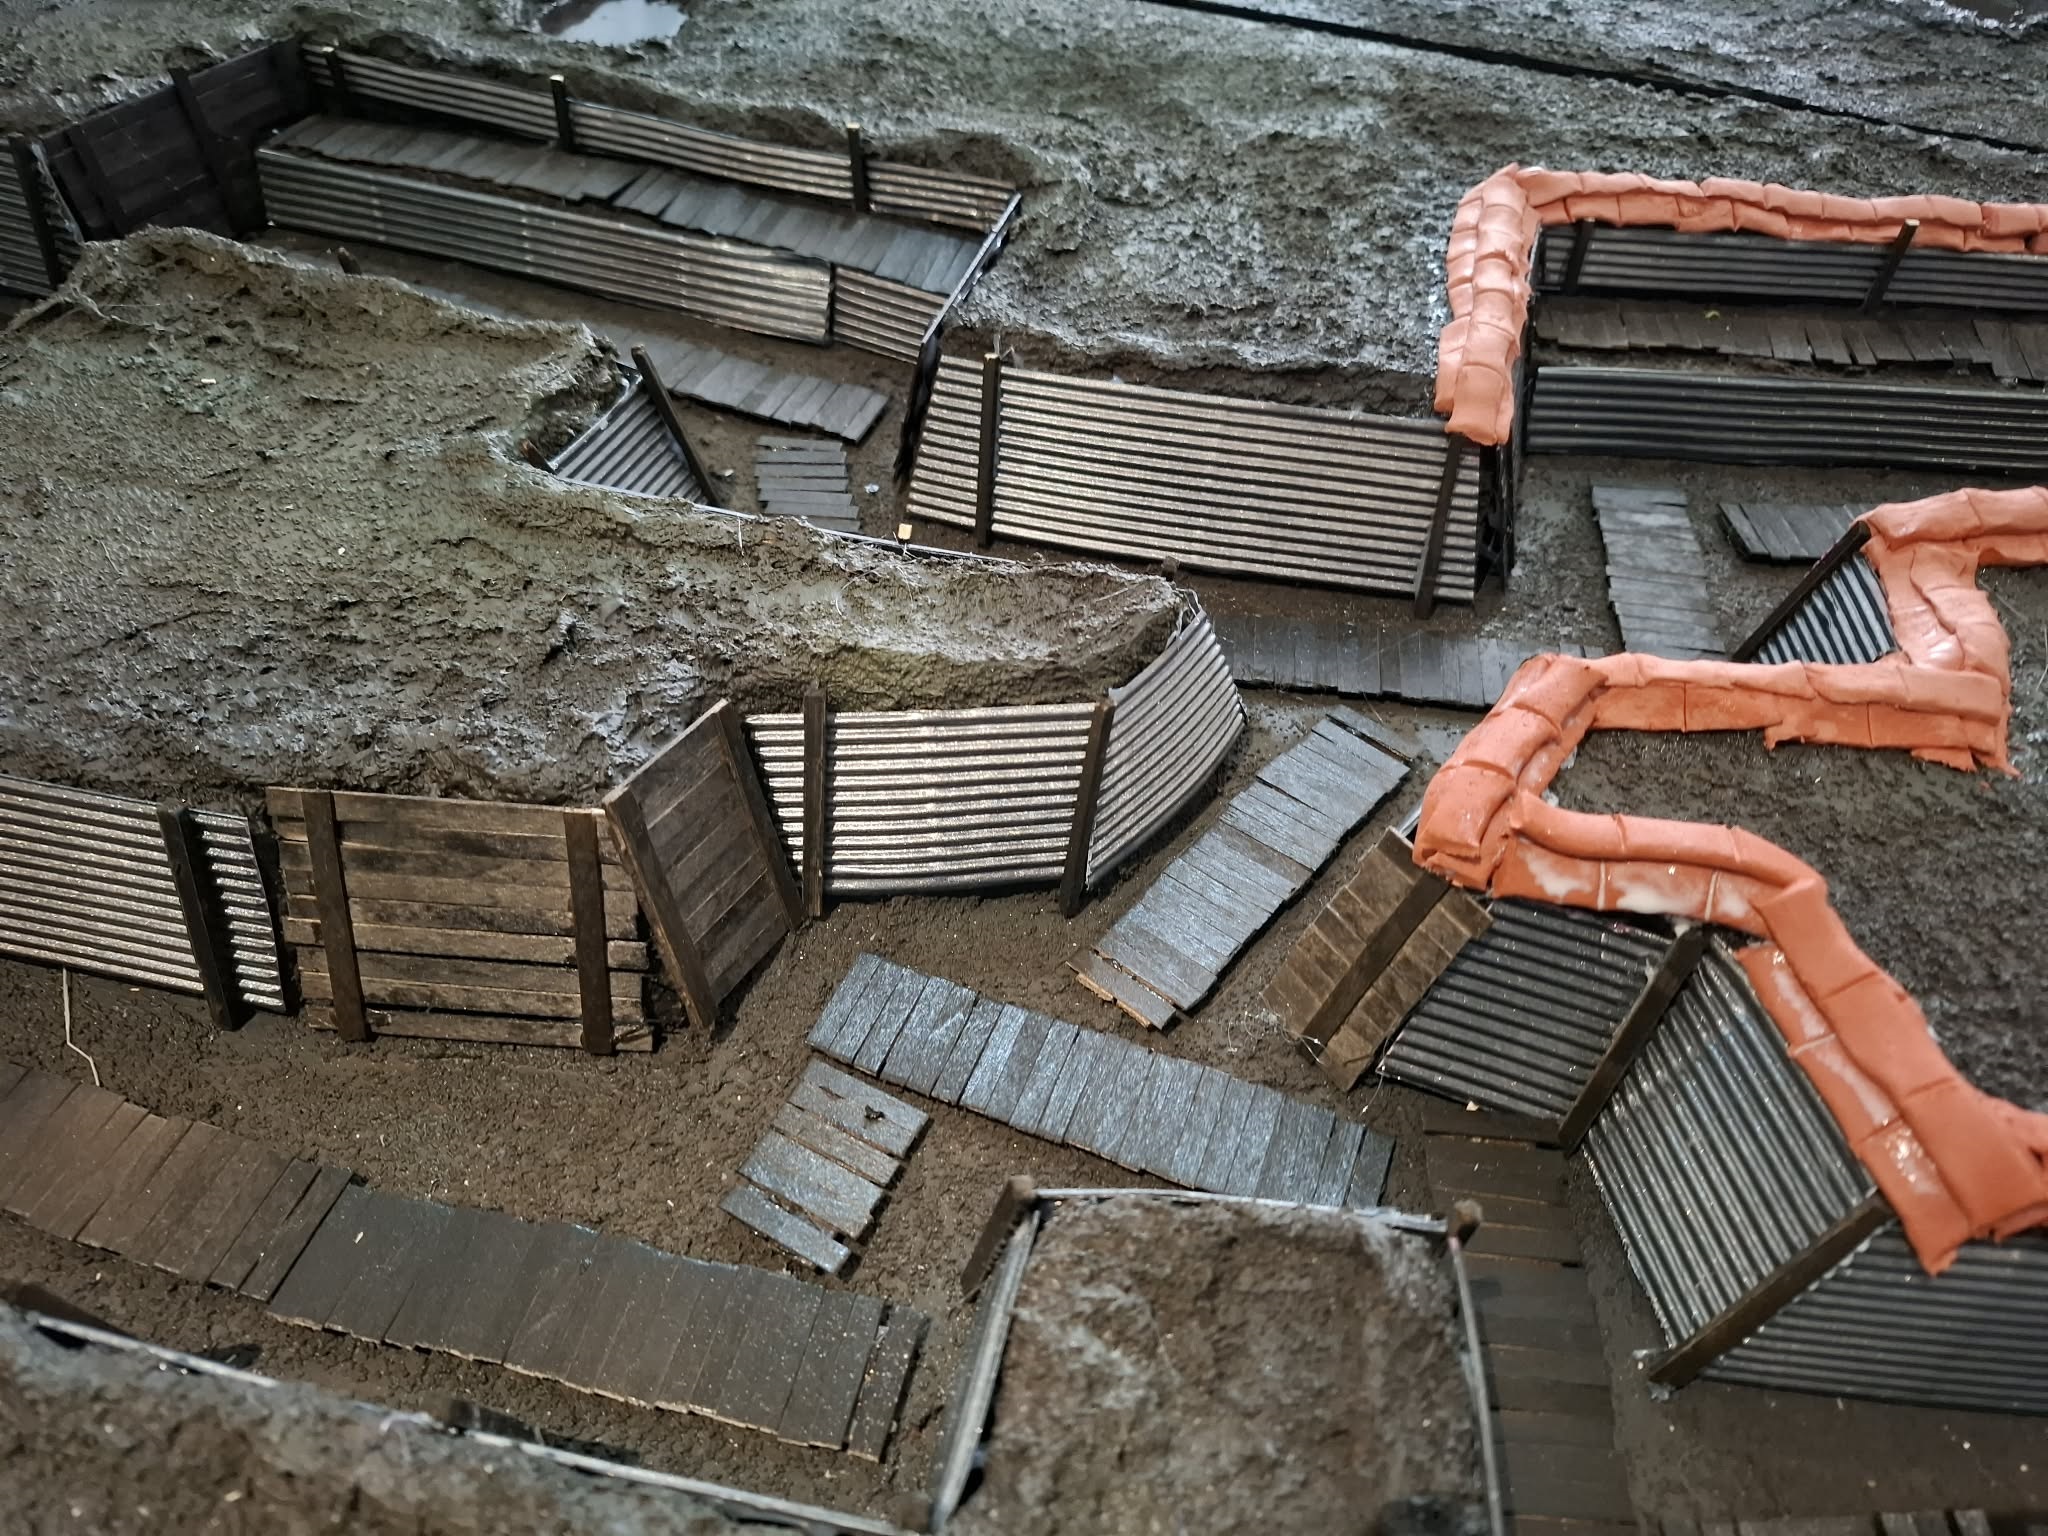
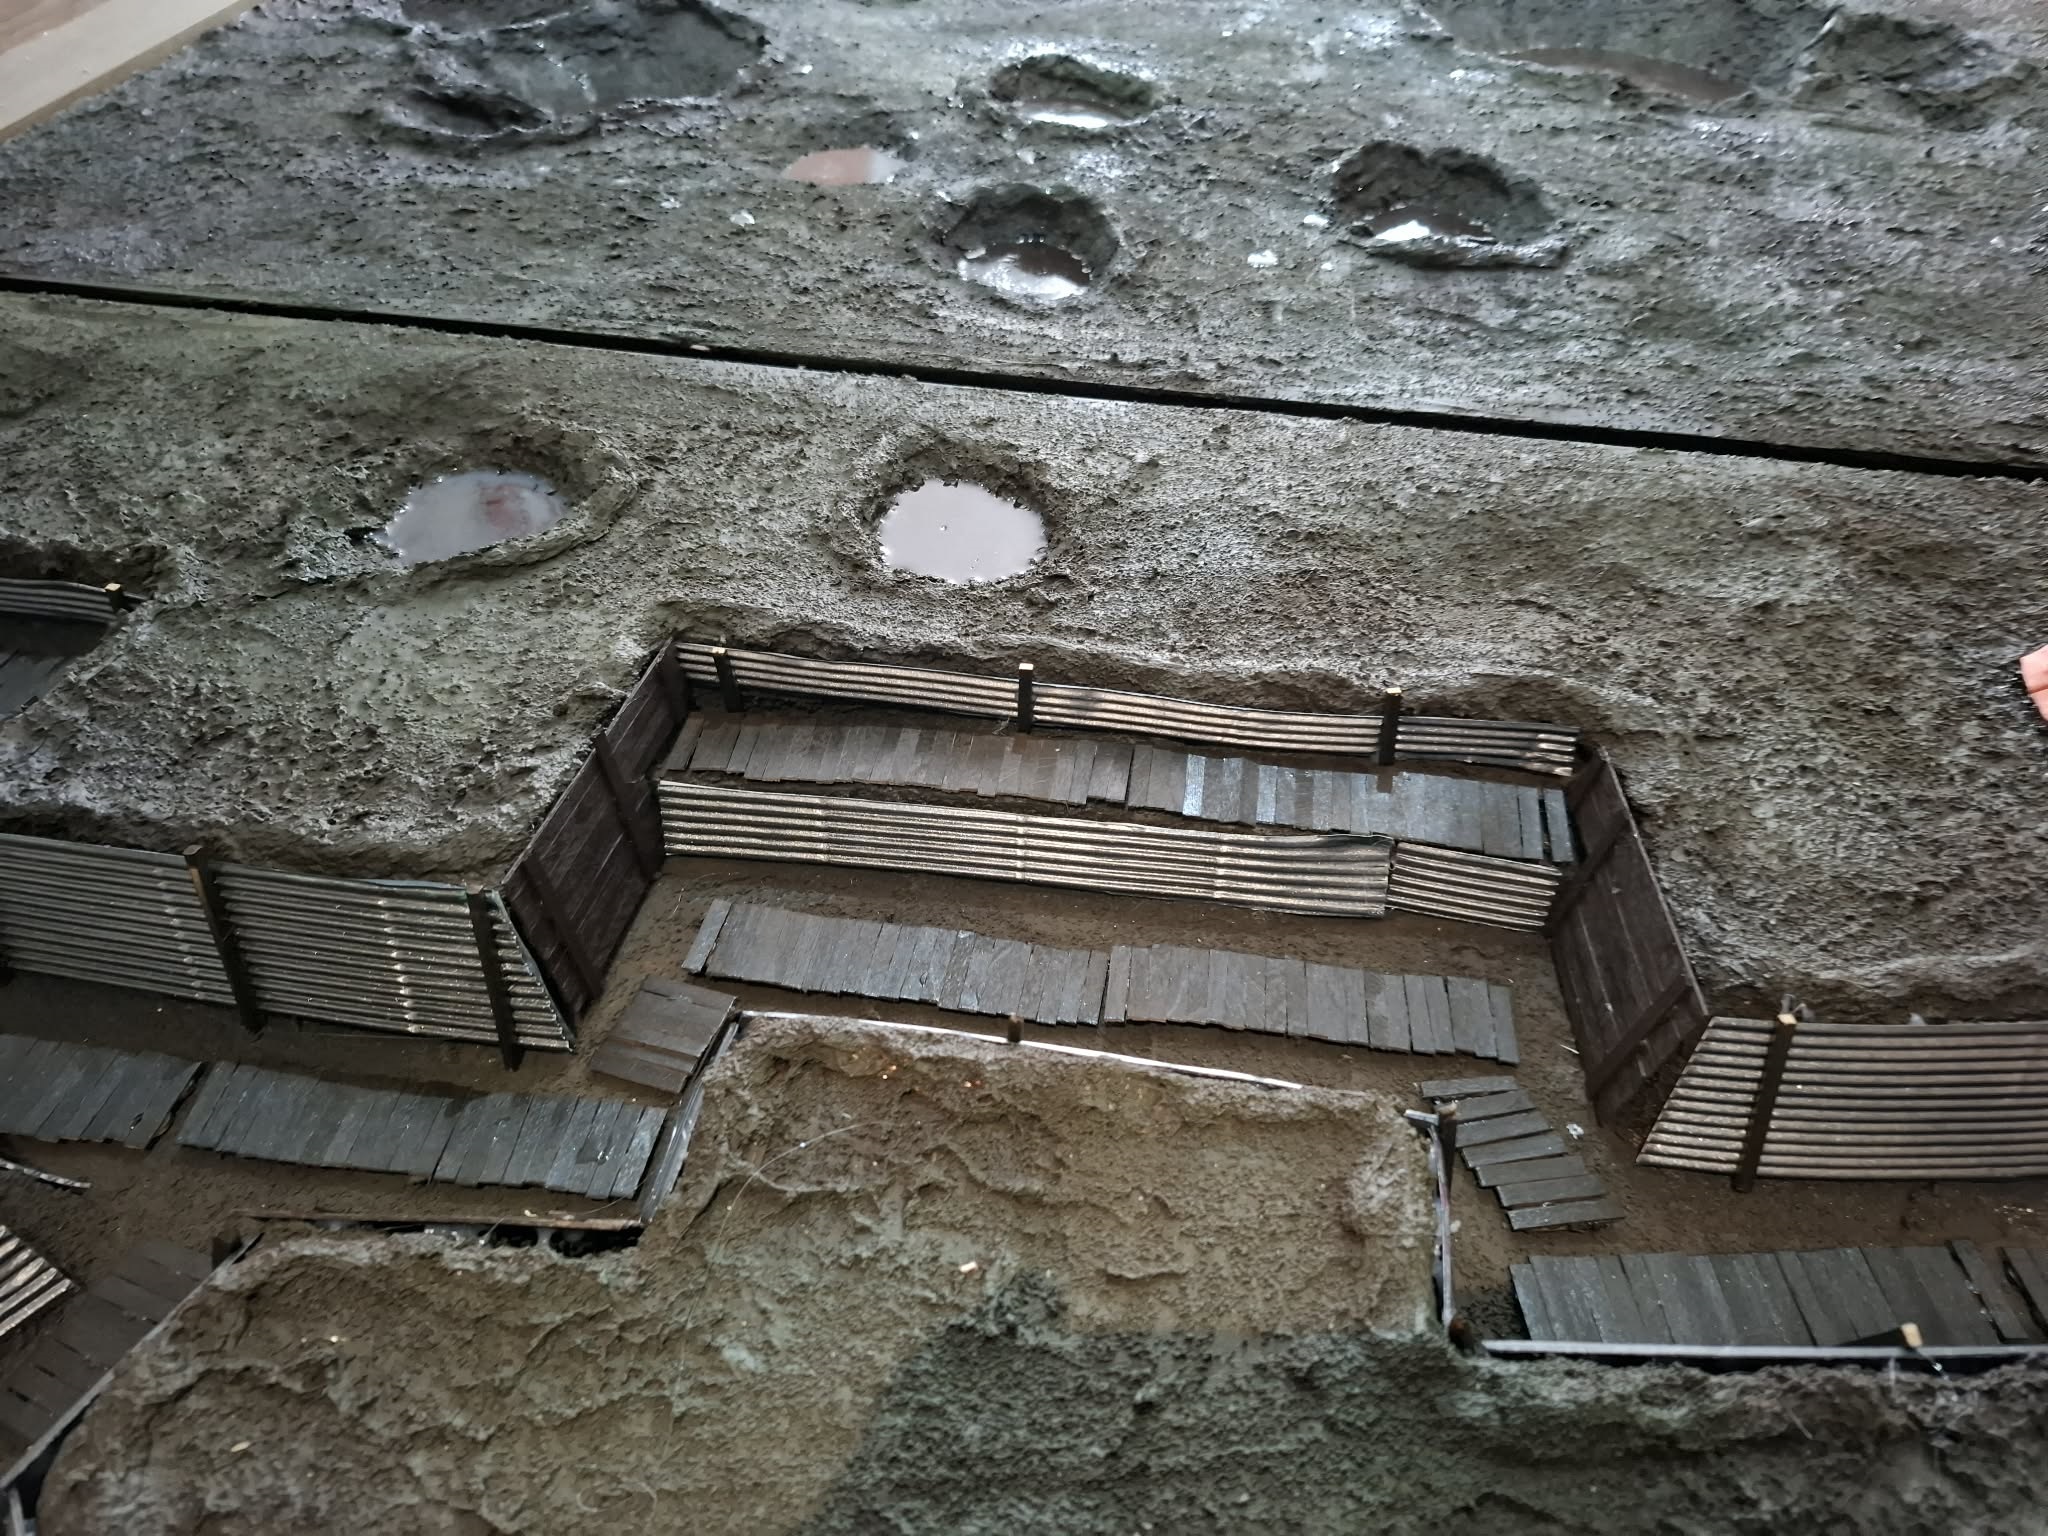
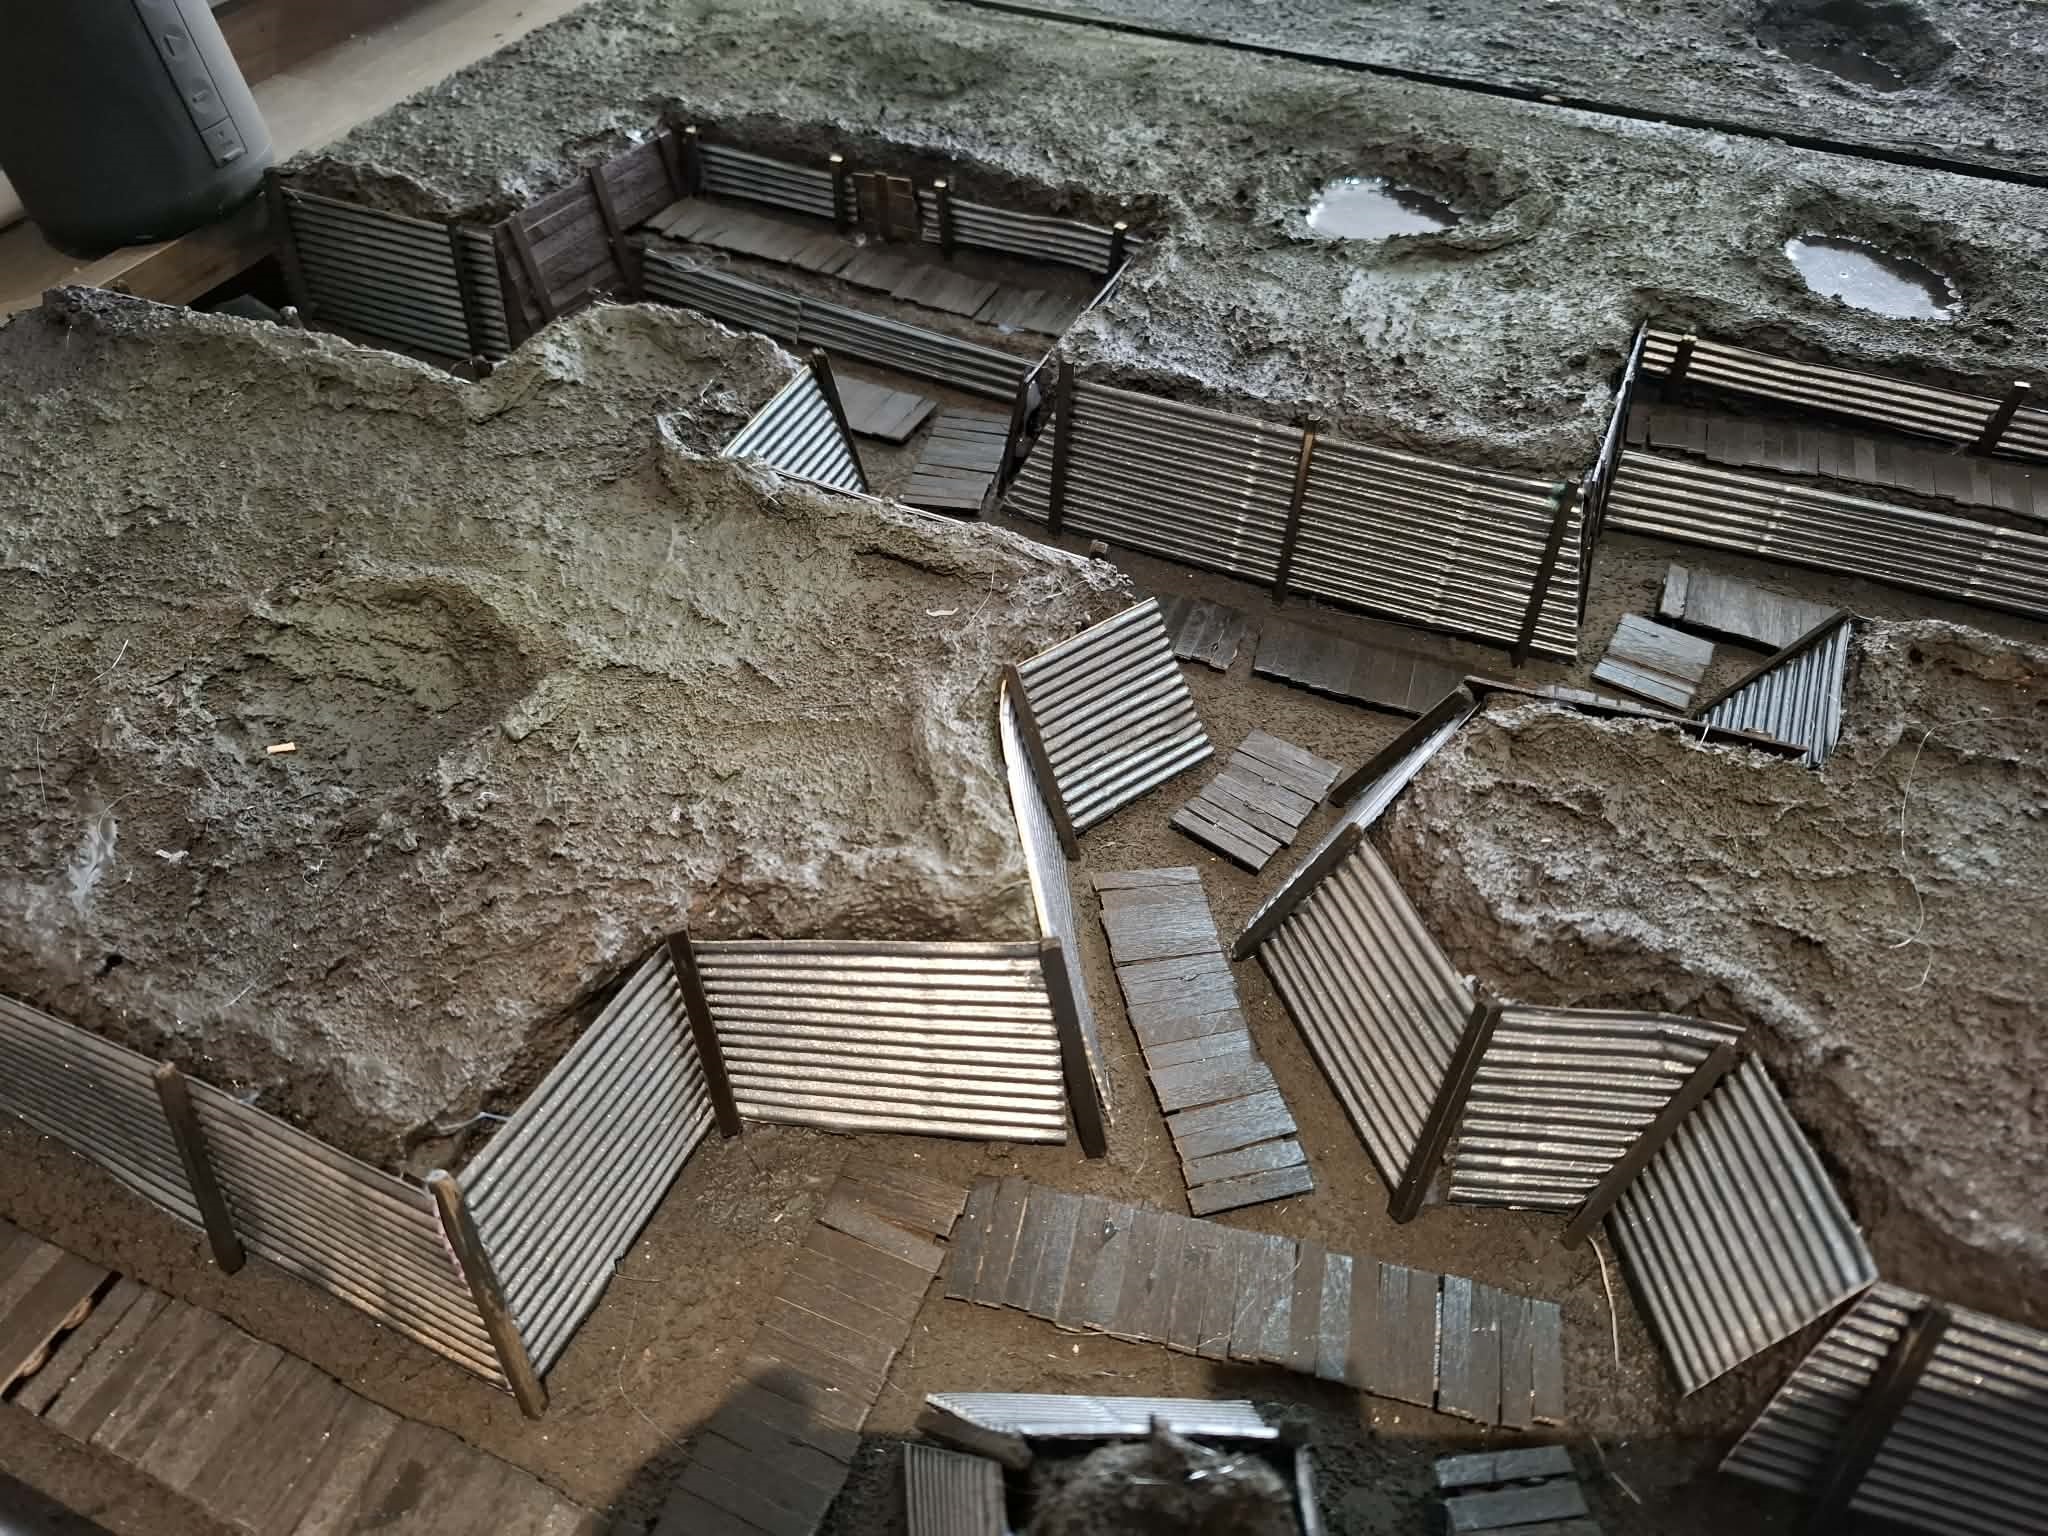
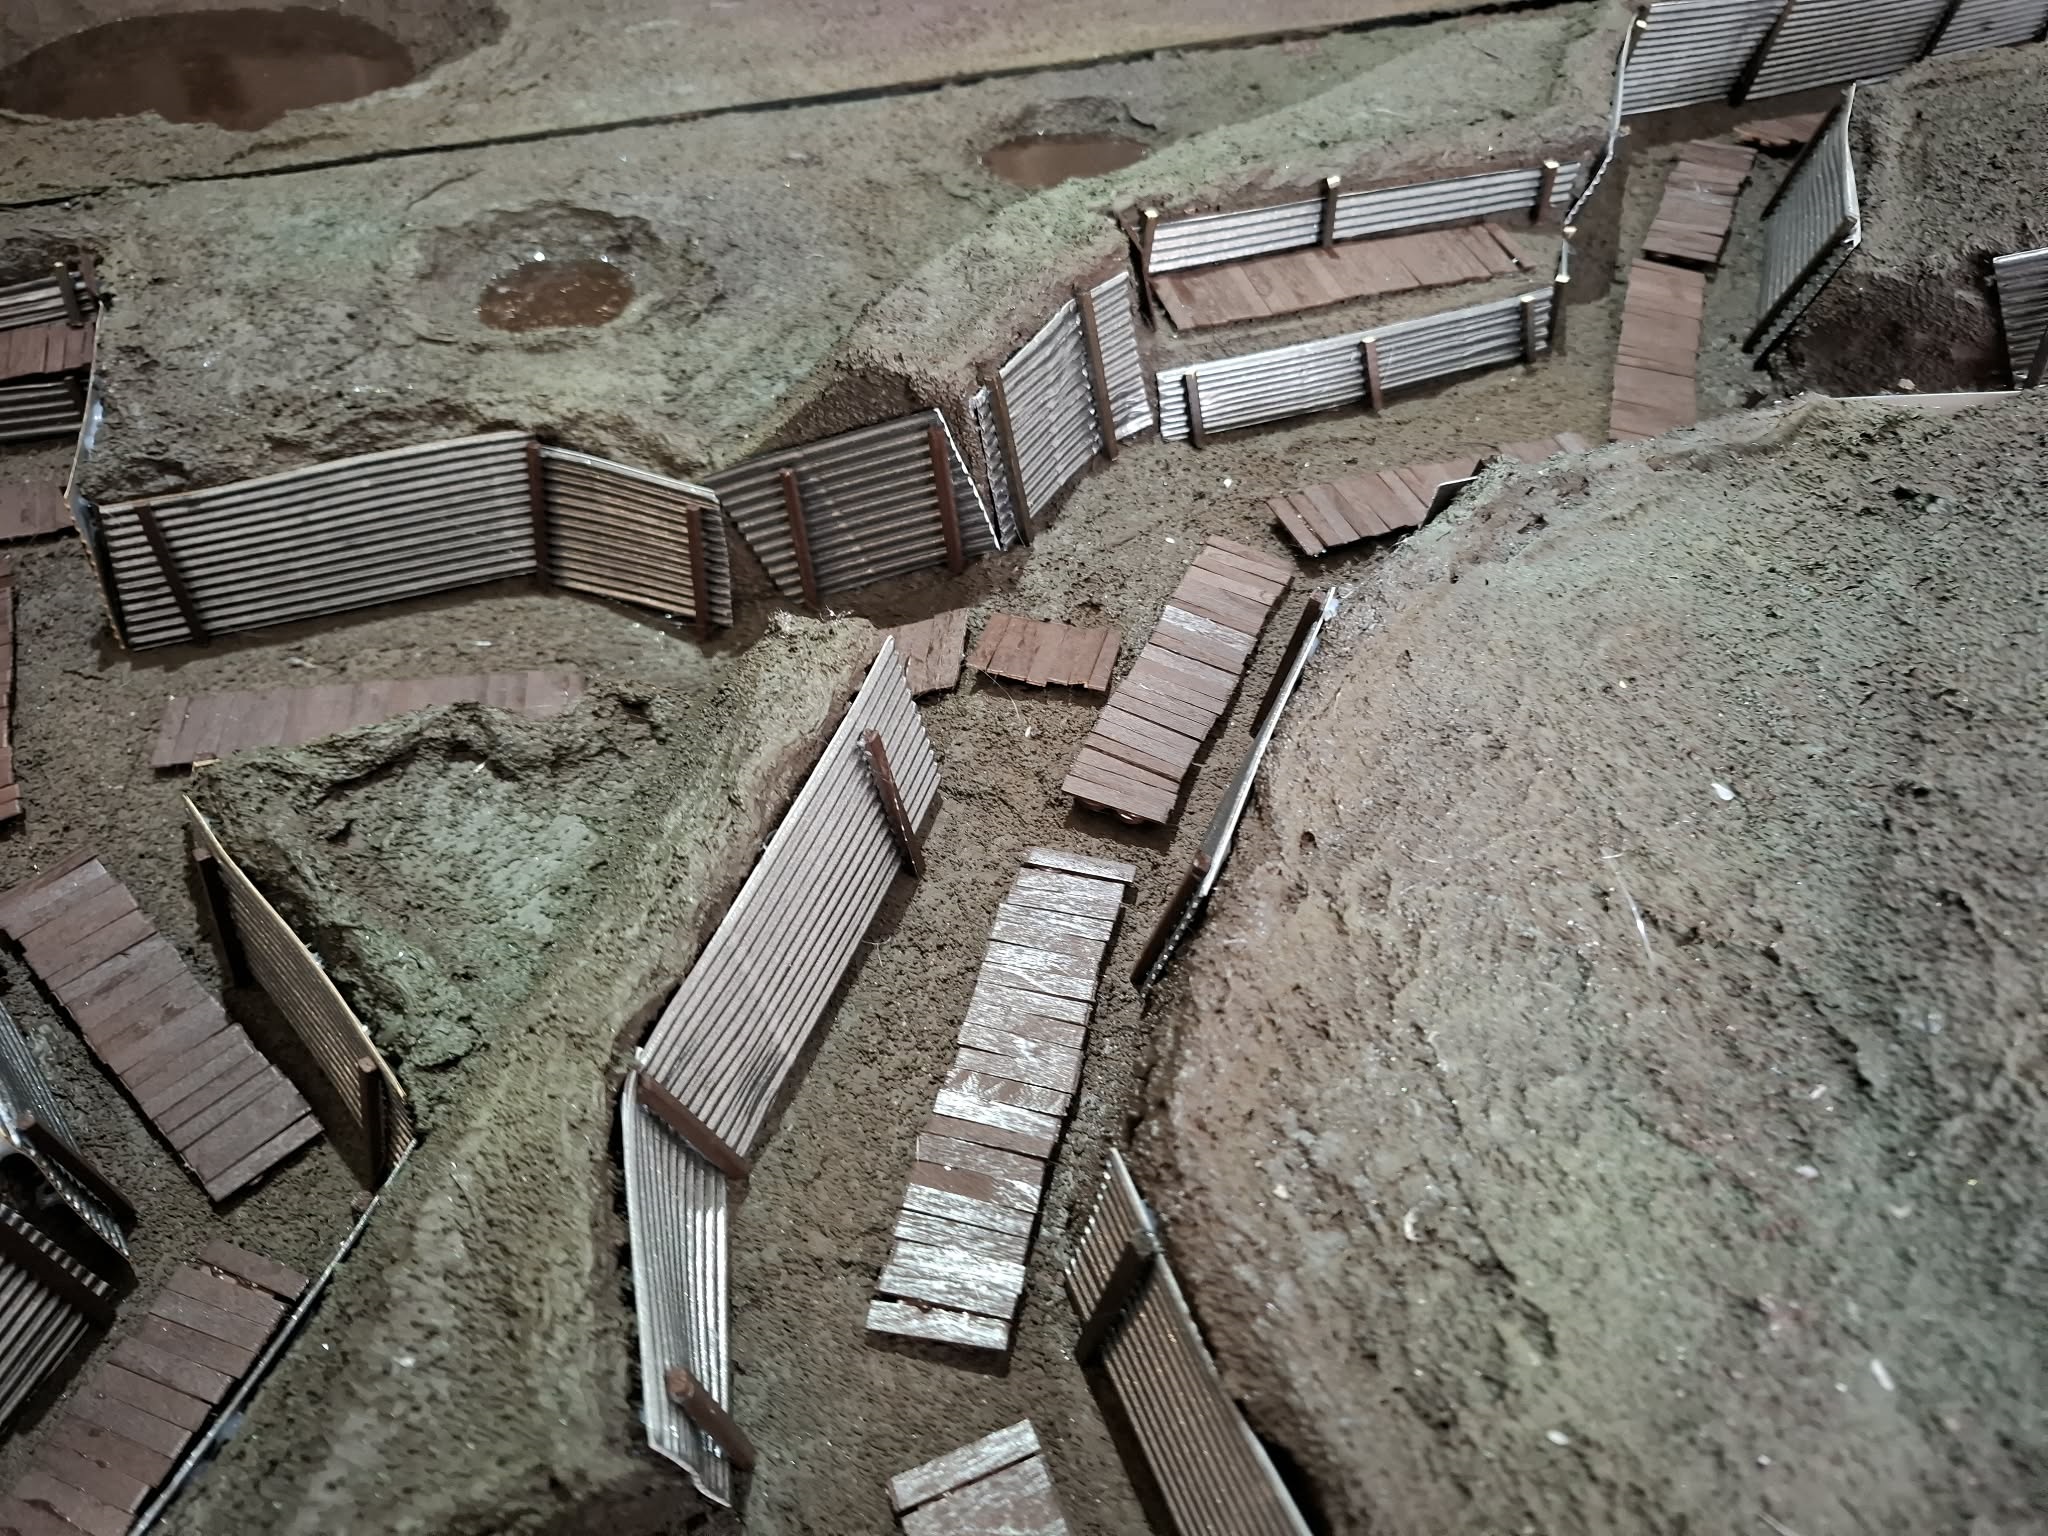
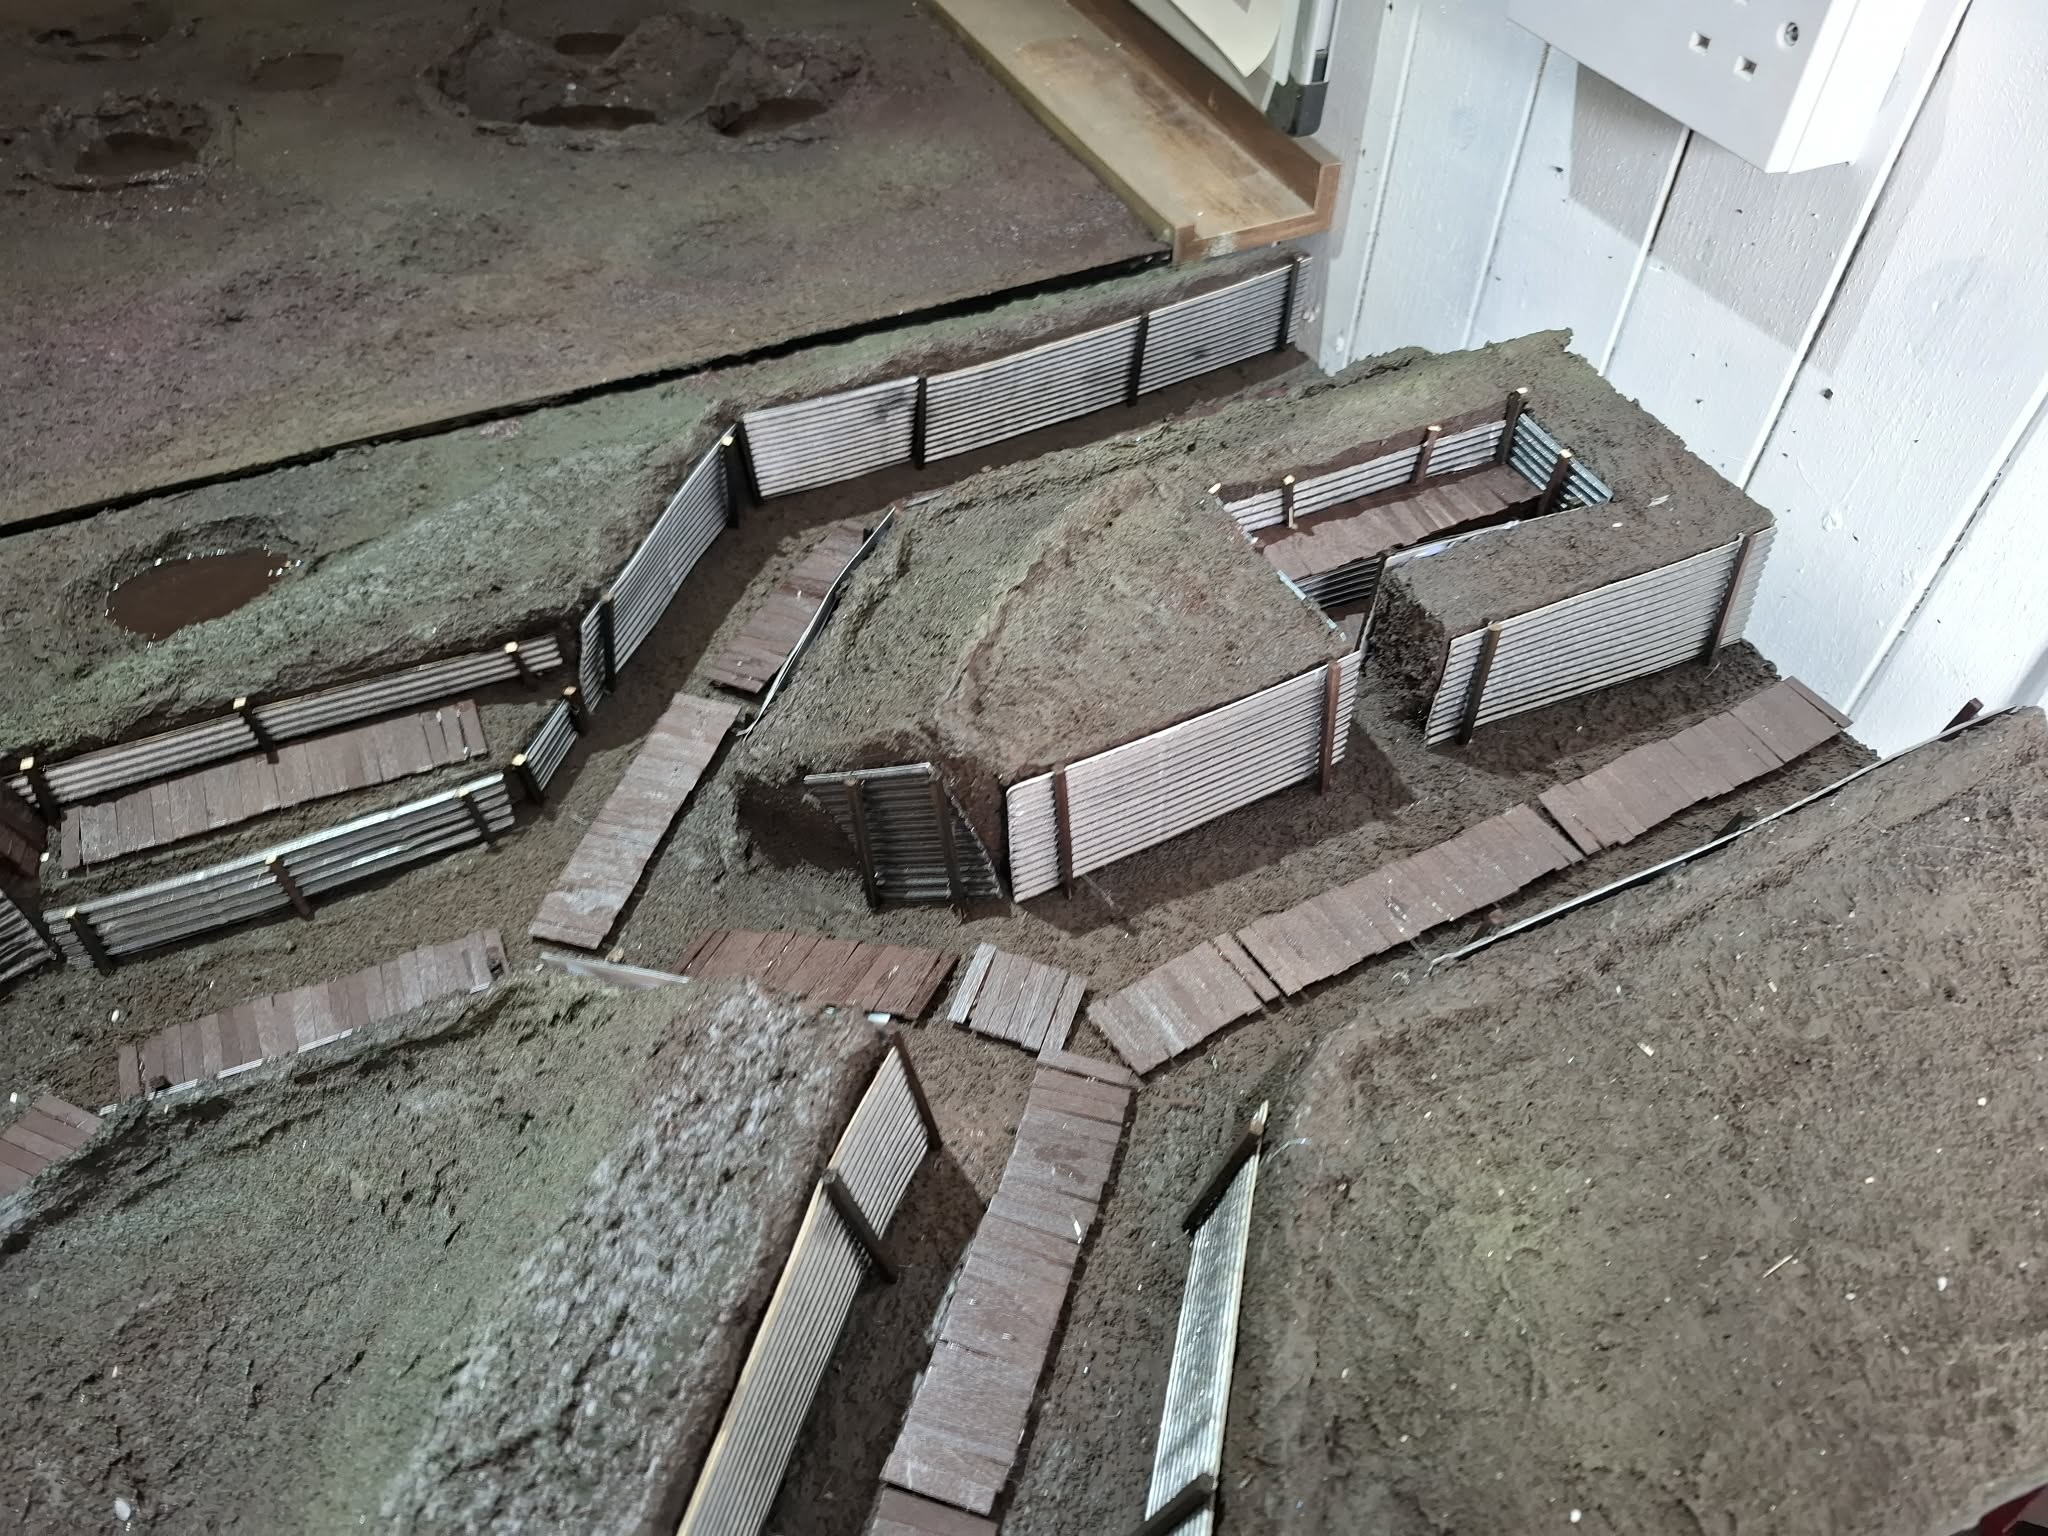
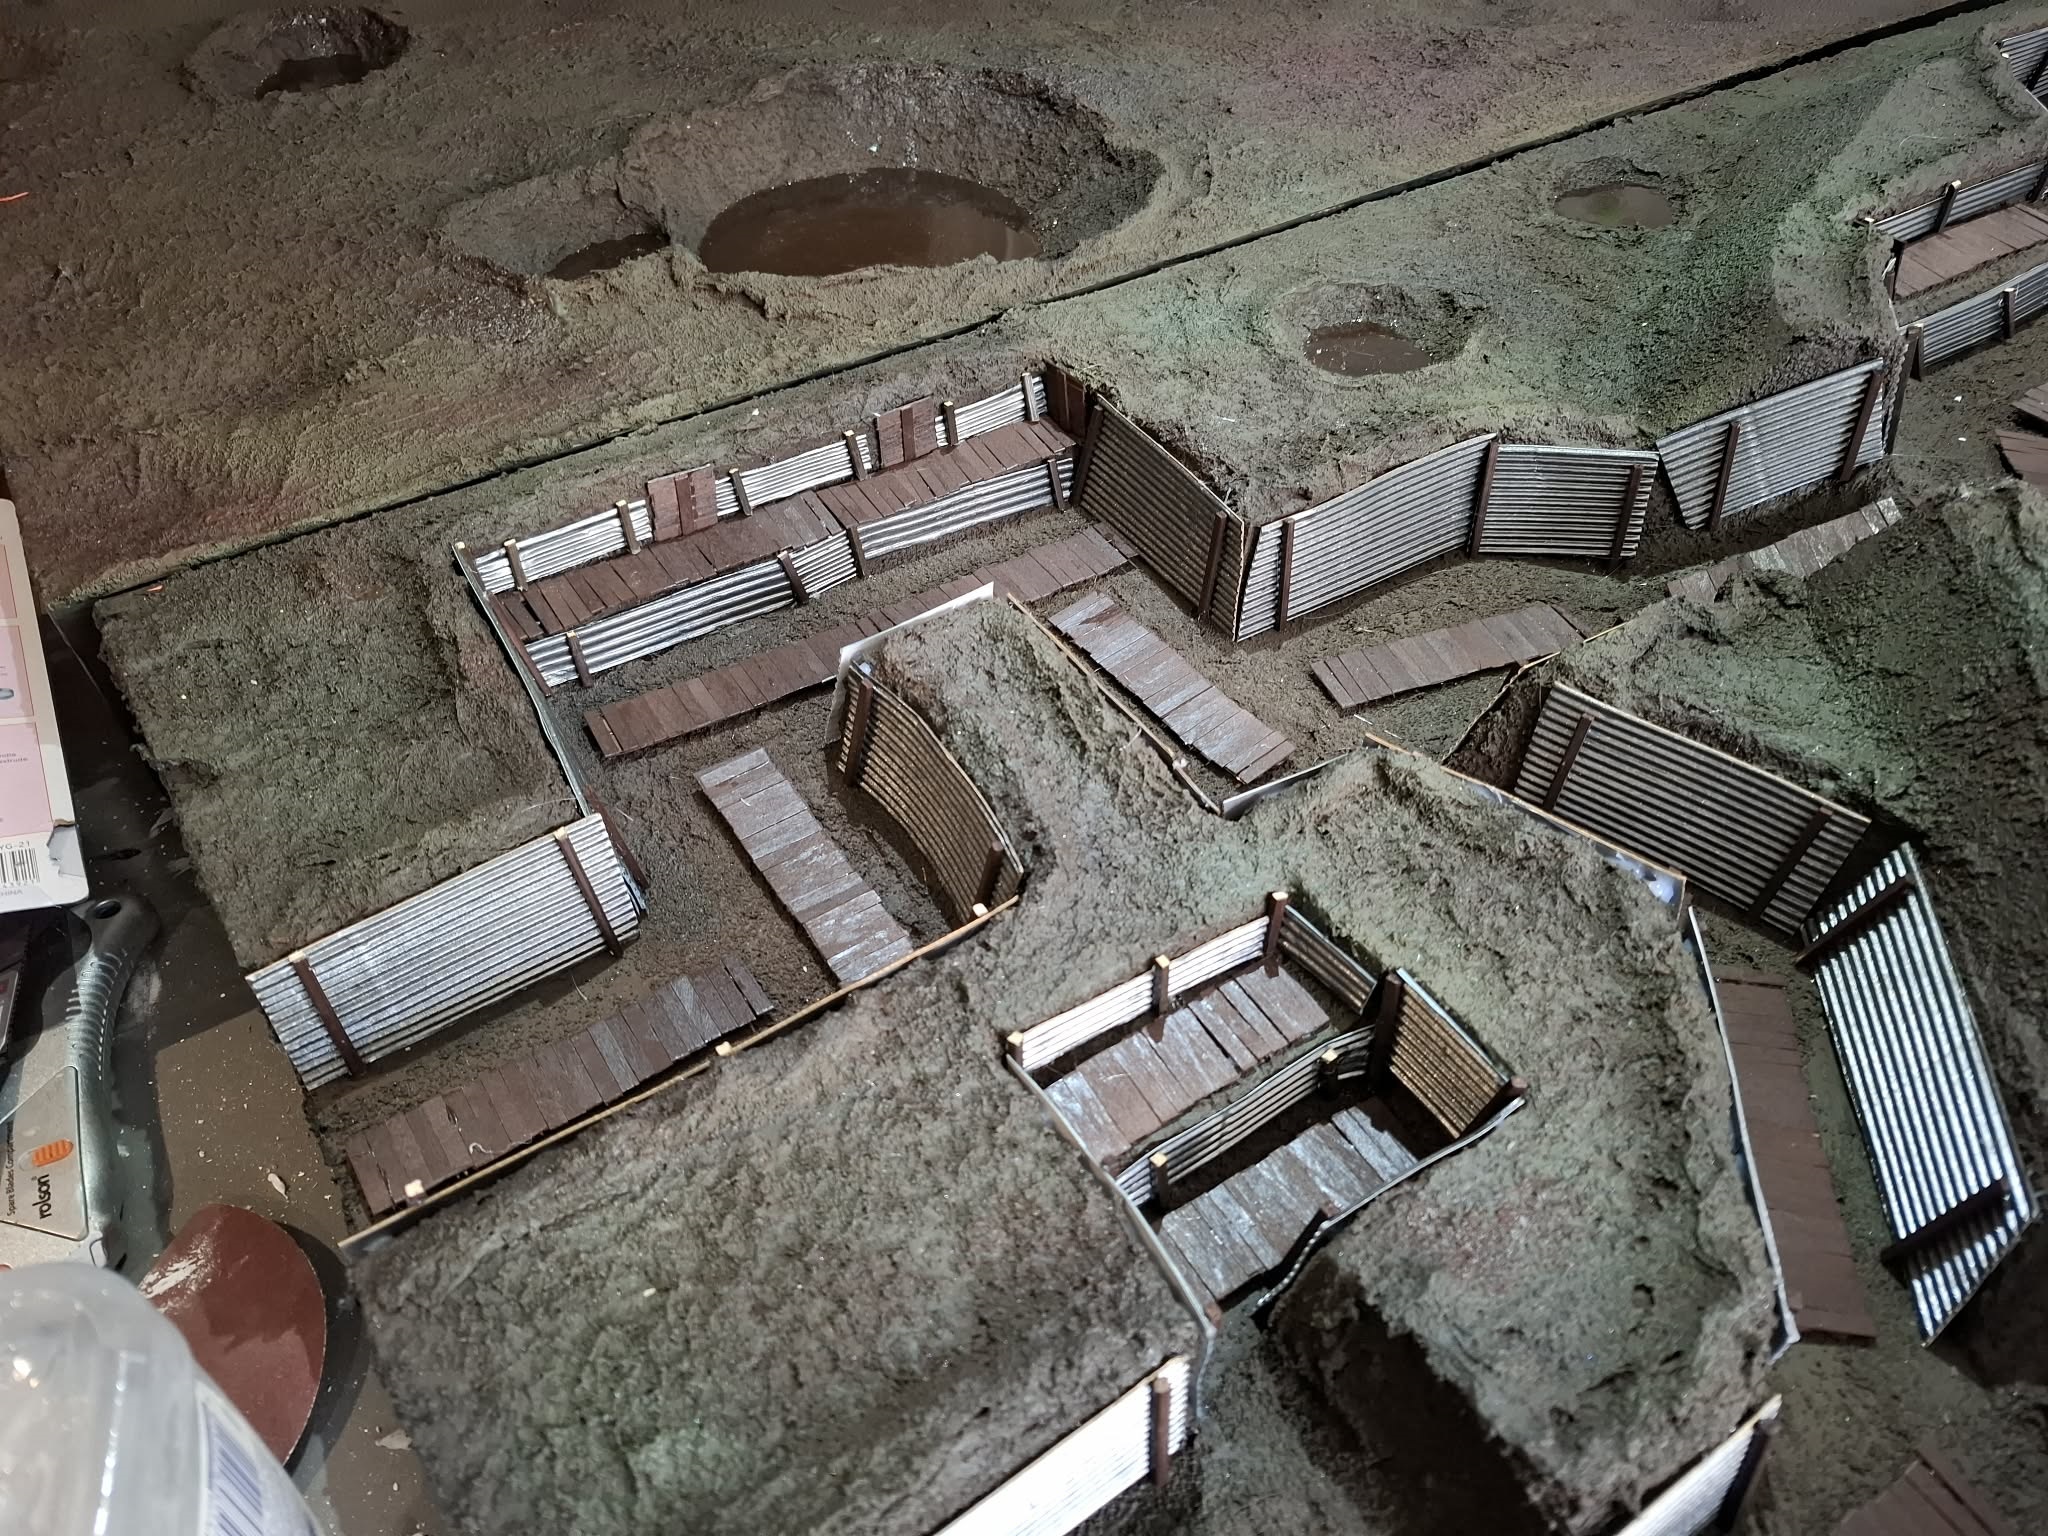
I’ve been spending the past couple weeks working on adding details to the trenches, taking them from muddy ditches, to something that actually resembles man-made fortifications.
Essentially there are 3 things i have been working on.
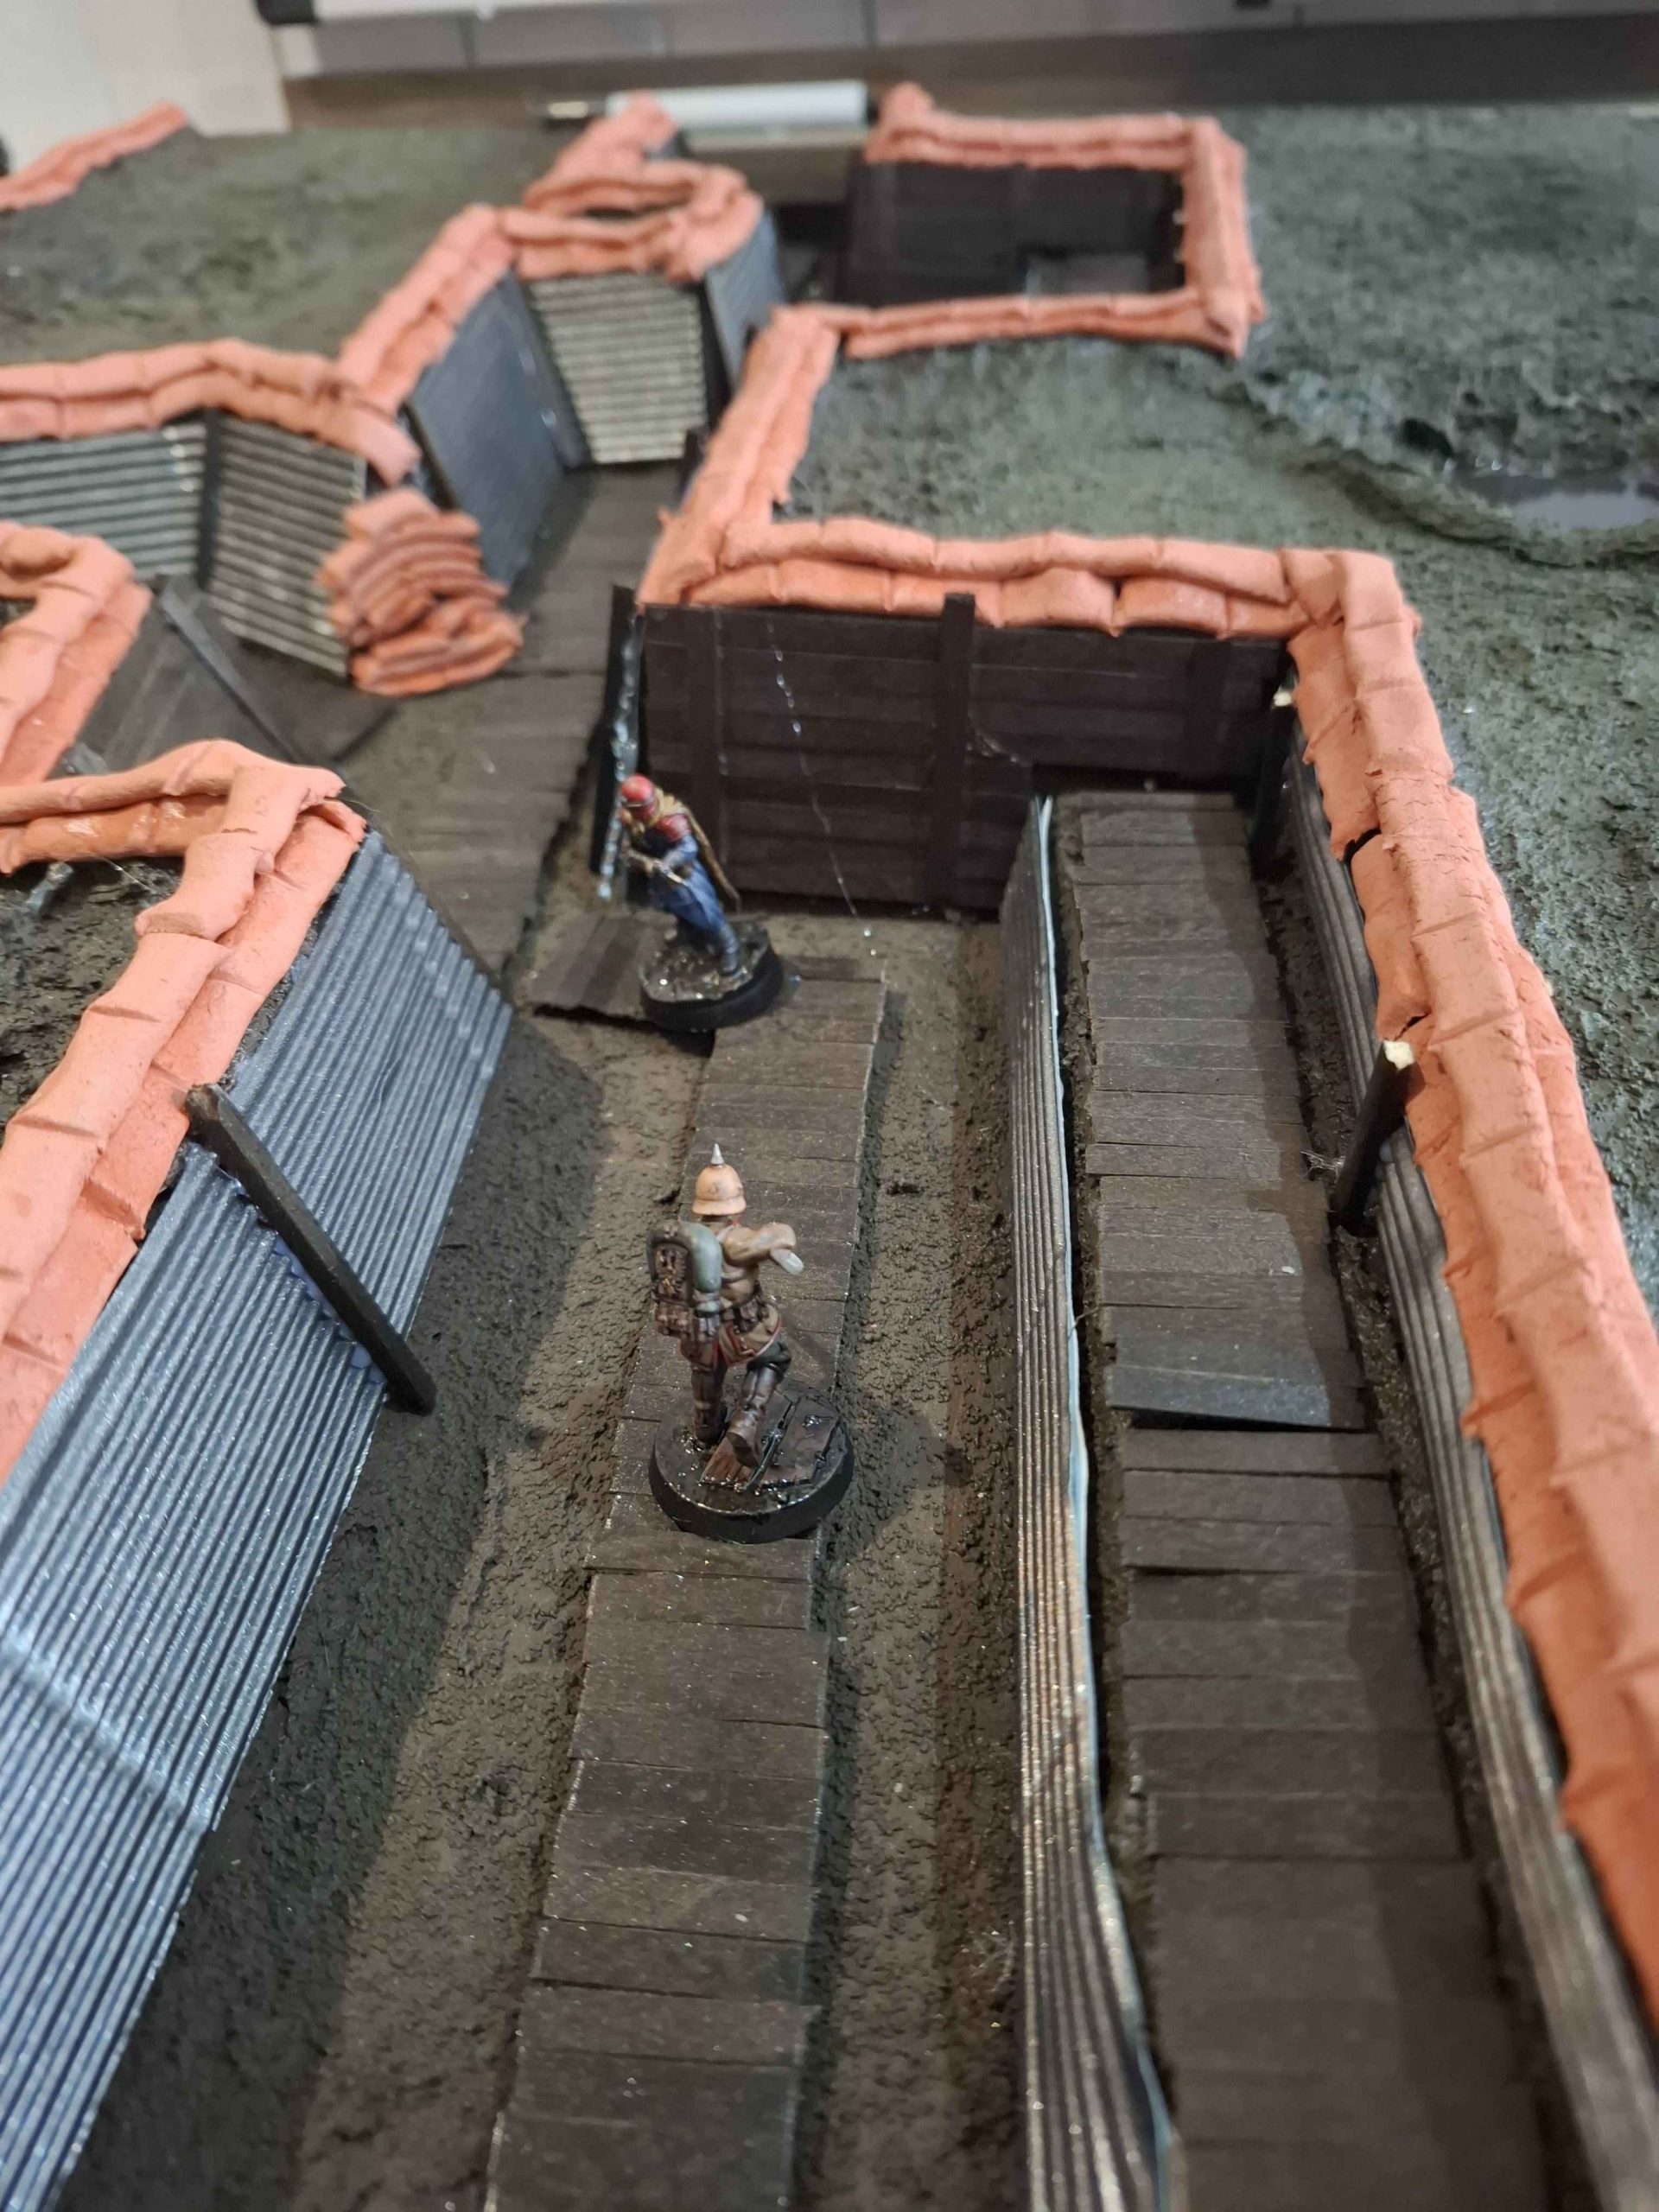
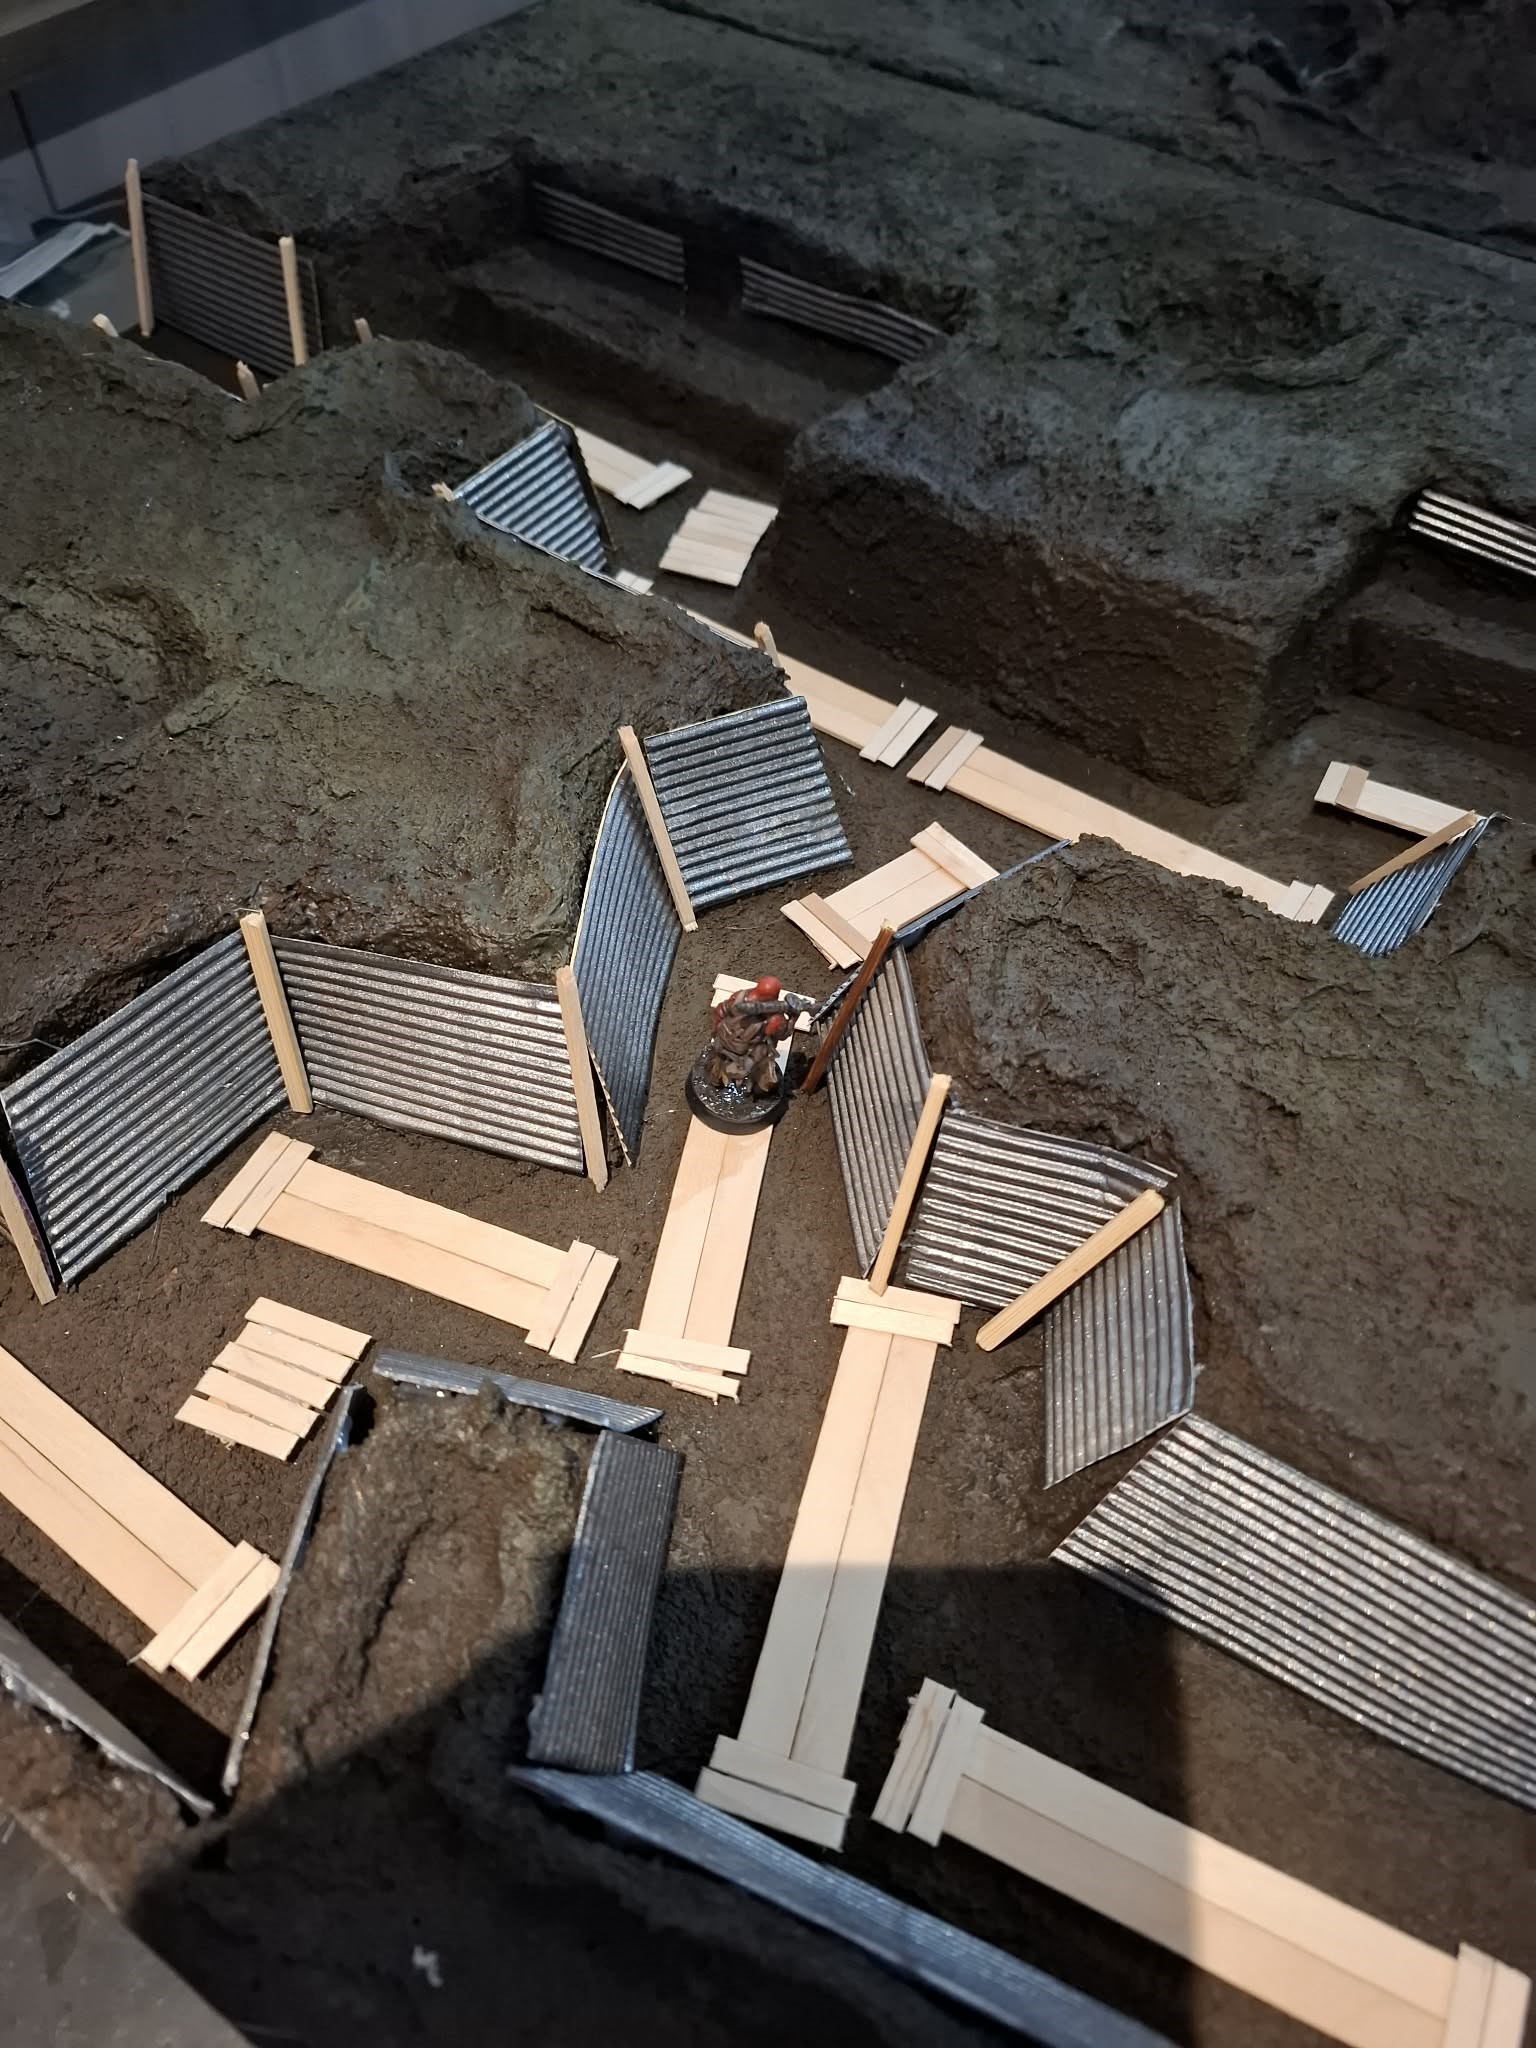
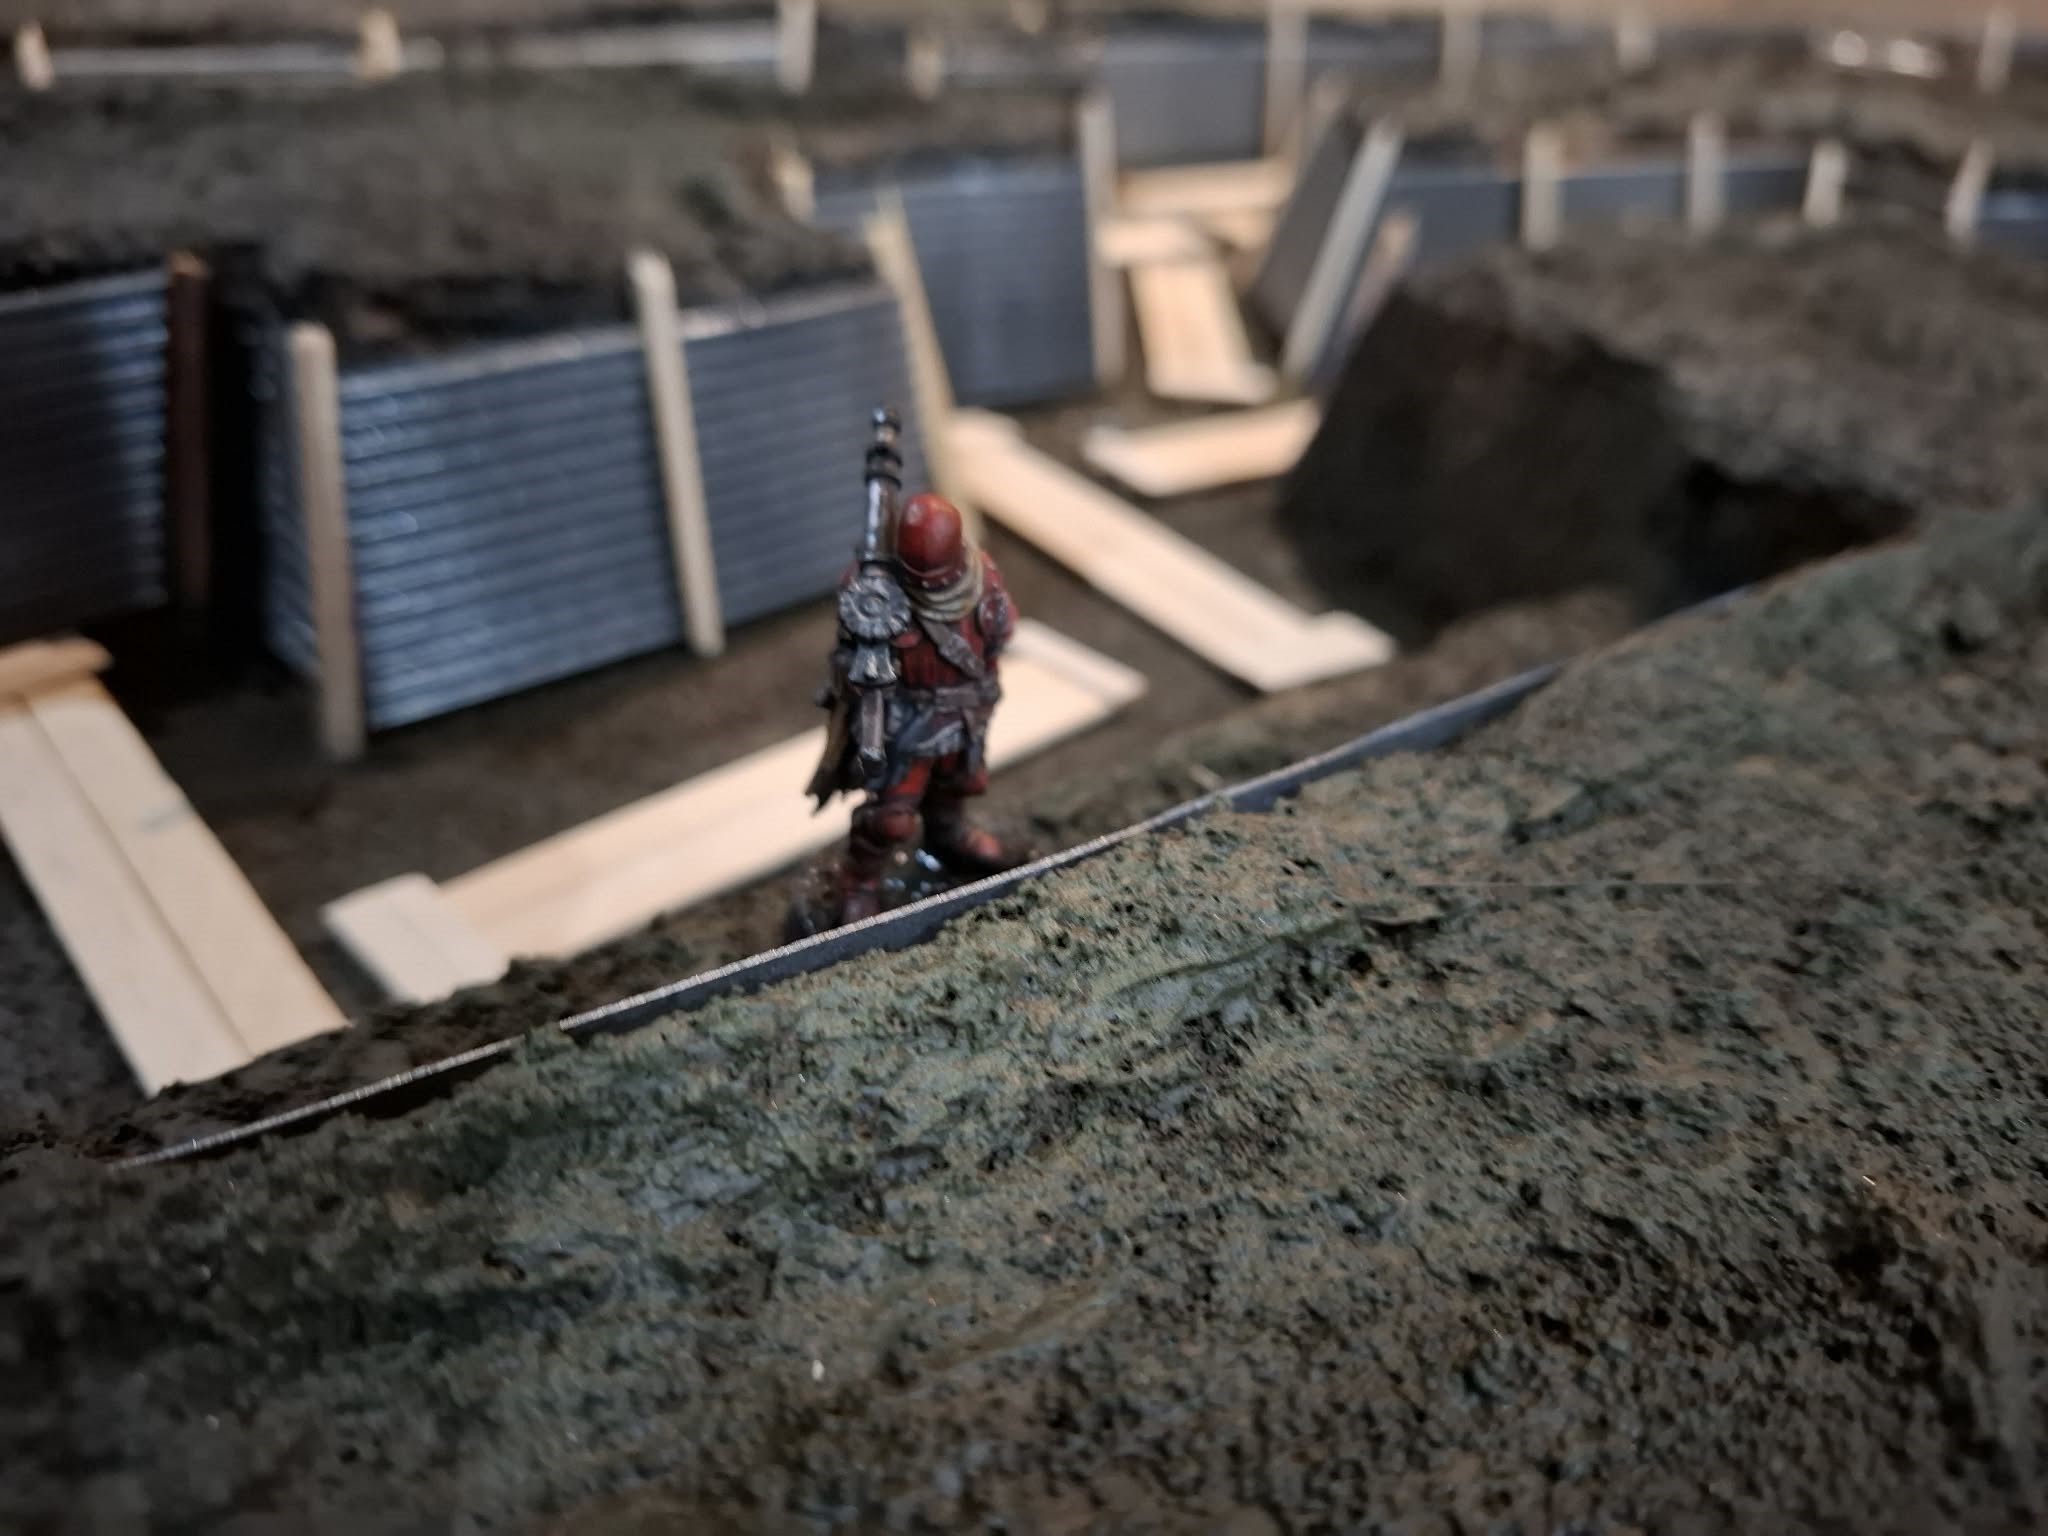
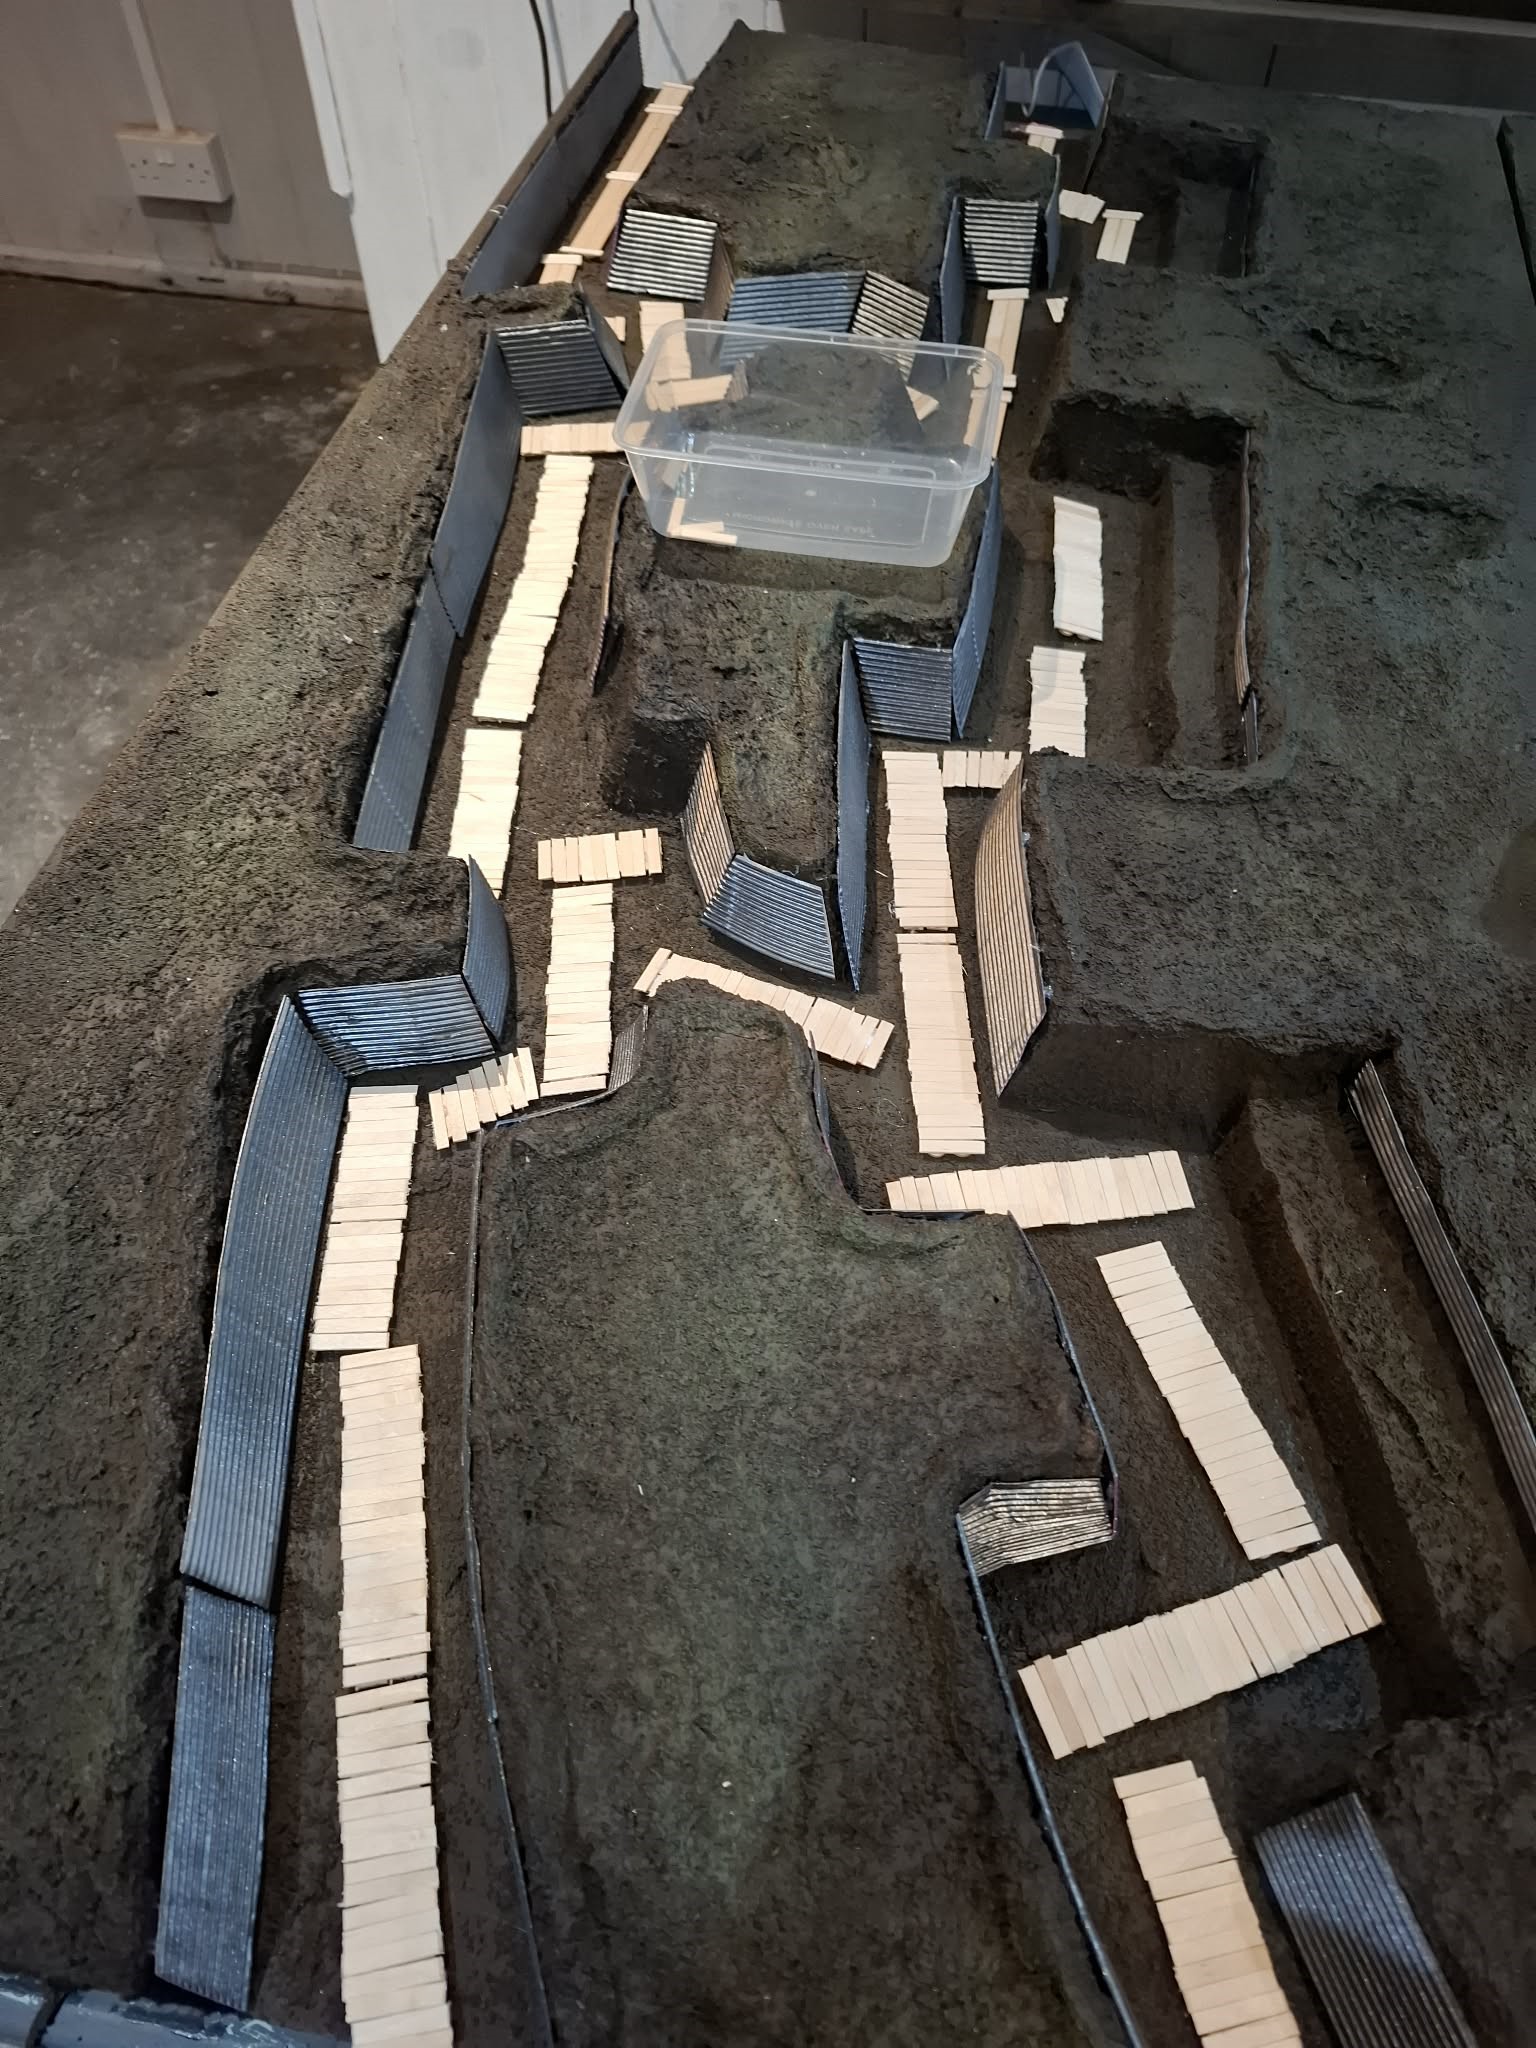
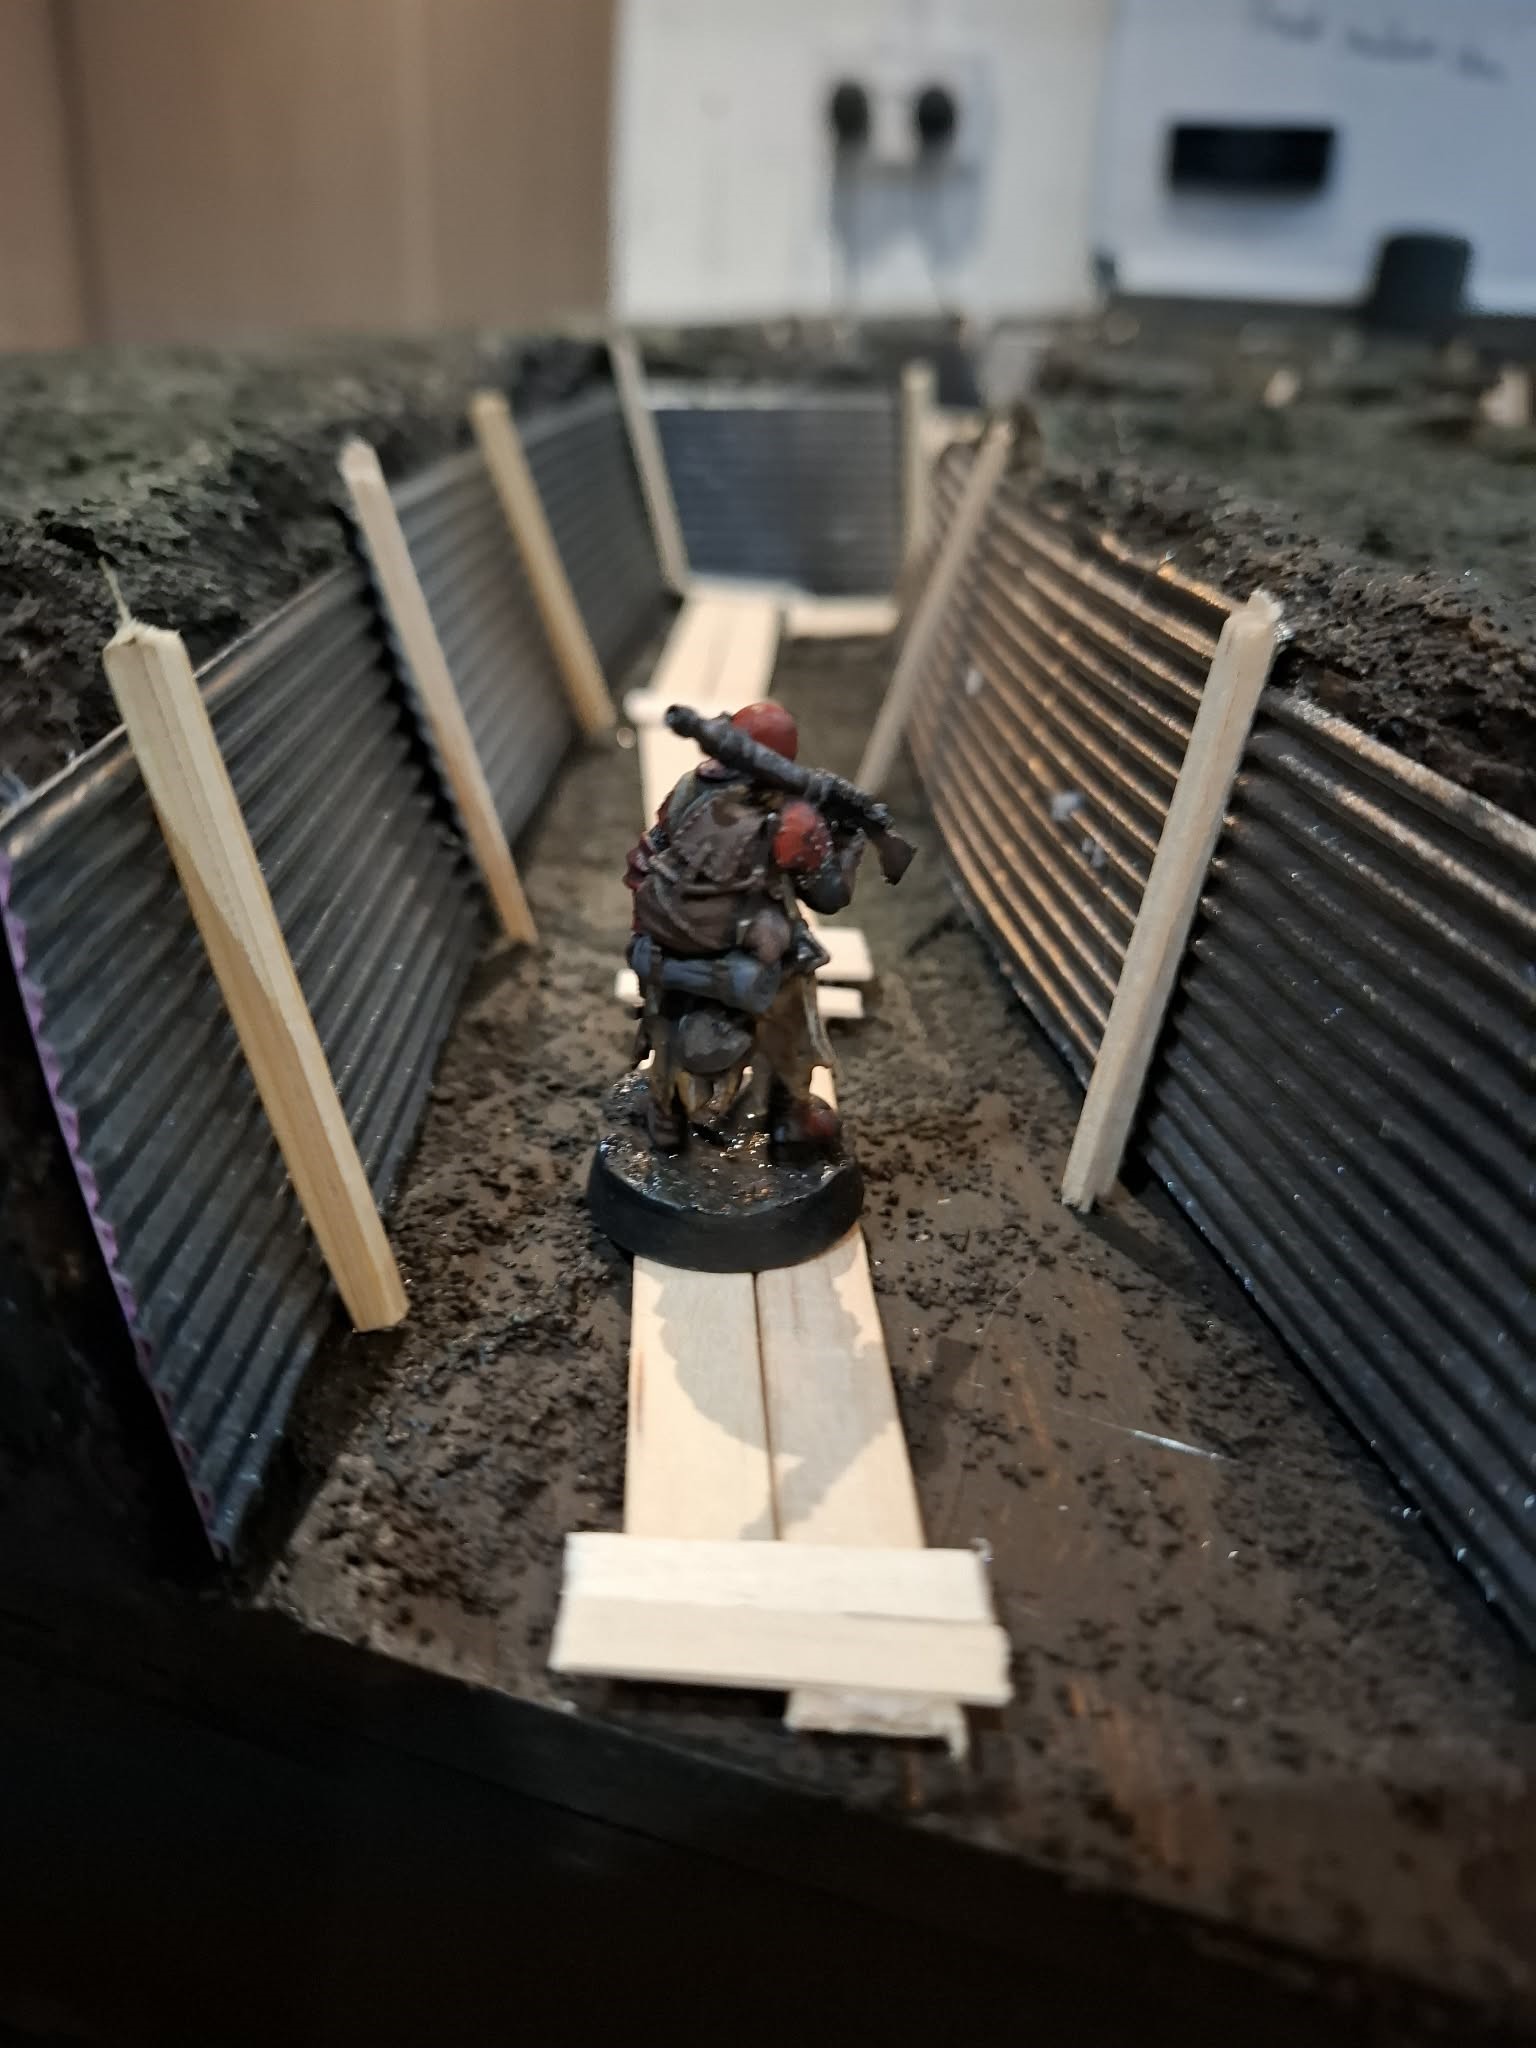
– Covering the trench sides in corrugated cardboard to represent corrugated steel sheets. This has simply been done by spraying corrugated card, cutting it to shape and gluing it to the sides. Then spraying some bamboo skewers and cutting them to size and gluing them in place to make them look as if they are holding the sheets up in place.
– Making the walkways. Done by cutting up lollipop sticks to layout the pathways, then coffee stirrers to 1 inch widths and sticking them across the lollipop sticks to create the wooden walkways. I have also used this method to create some trench wall panelling in a couple places.
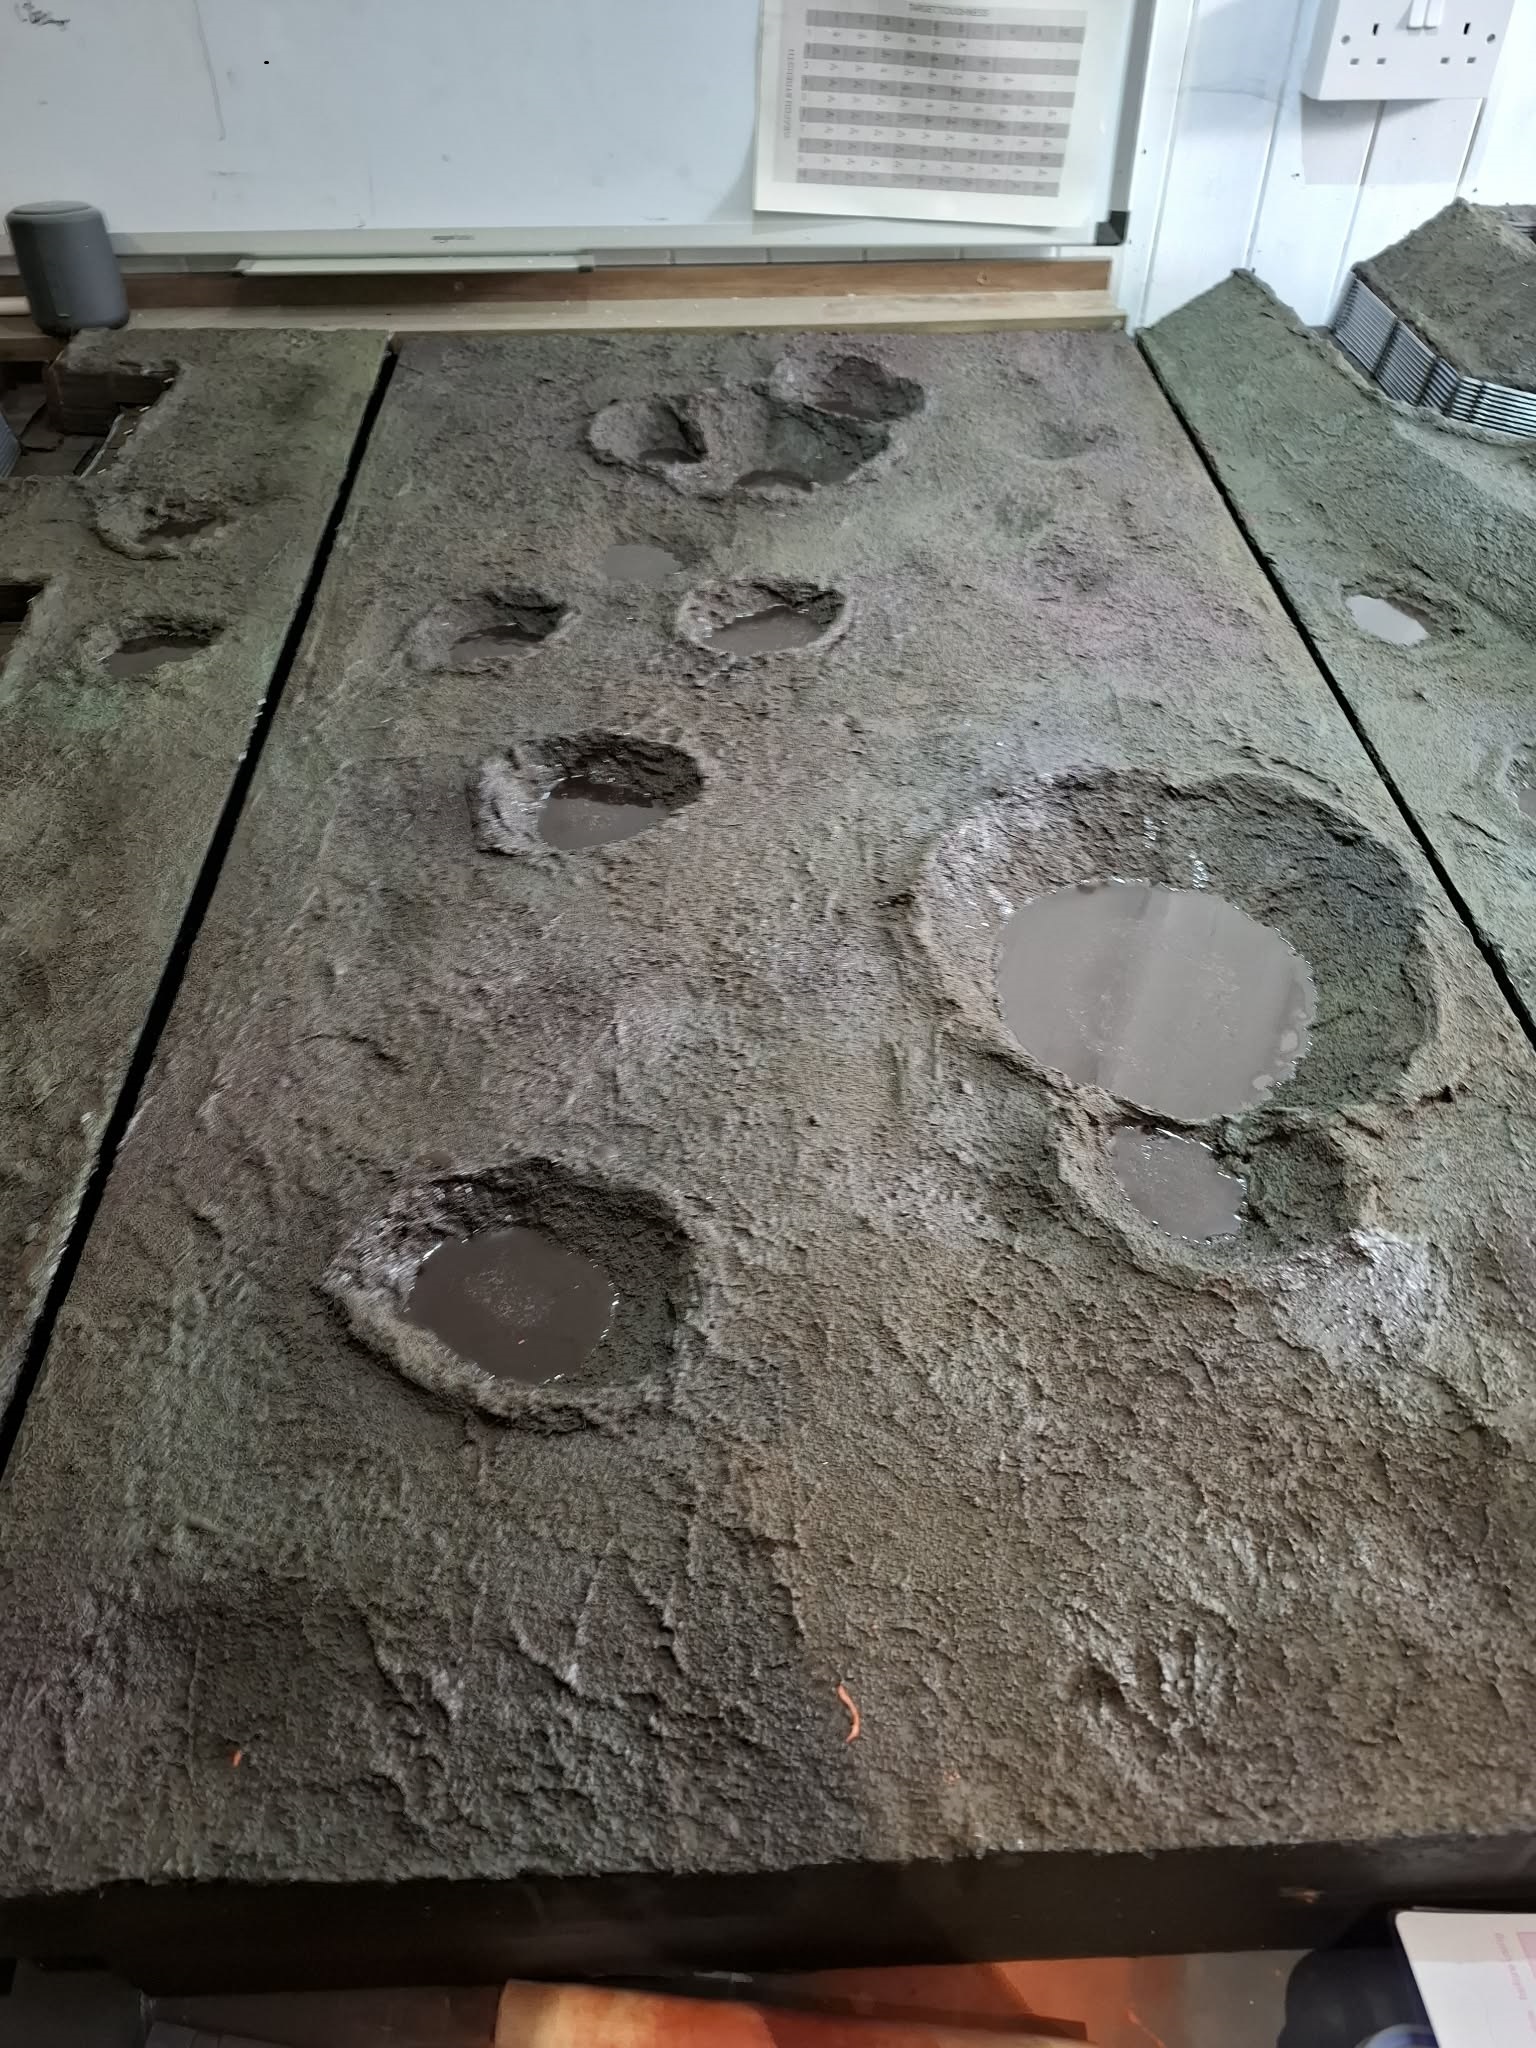
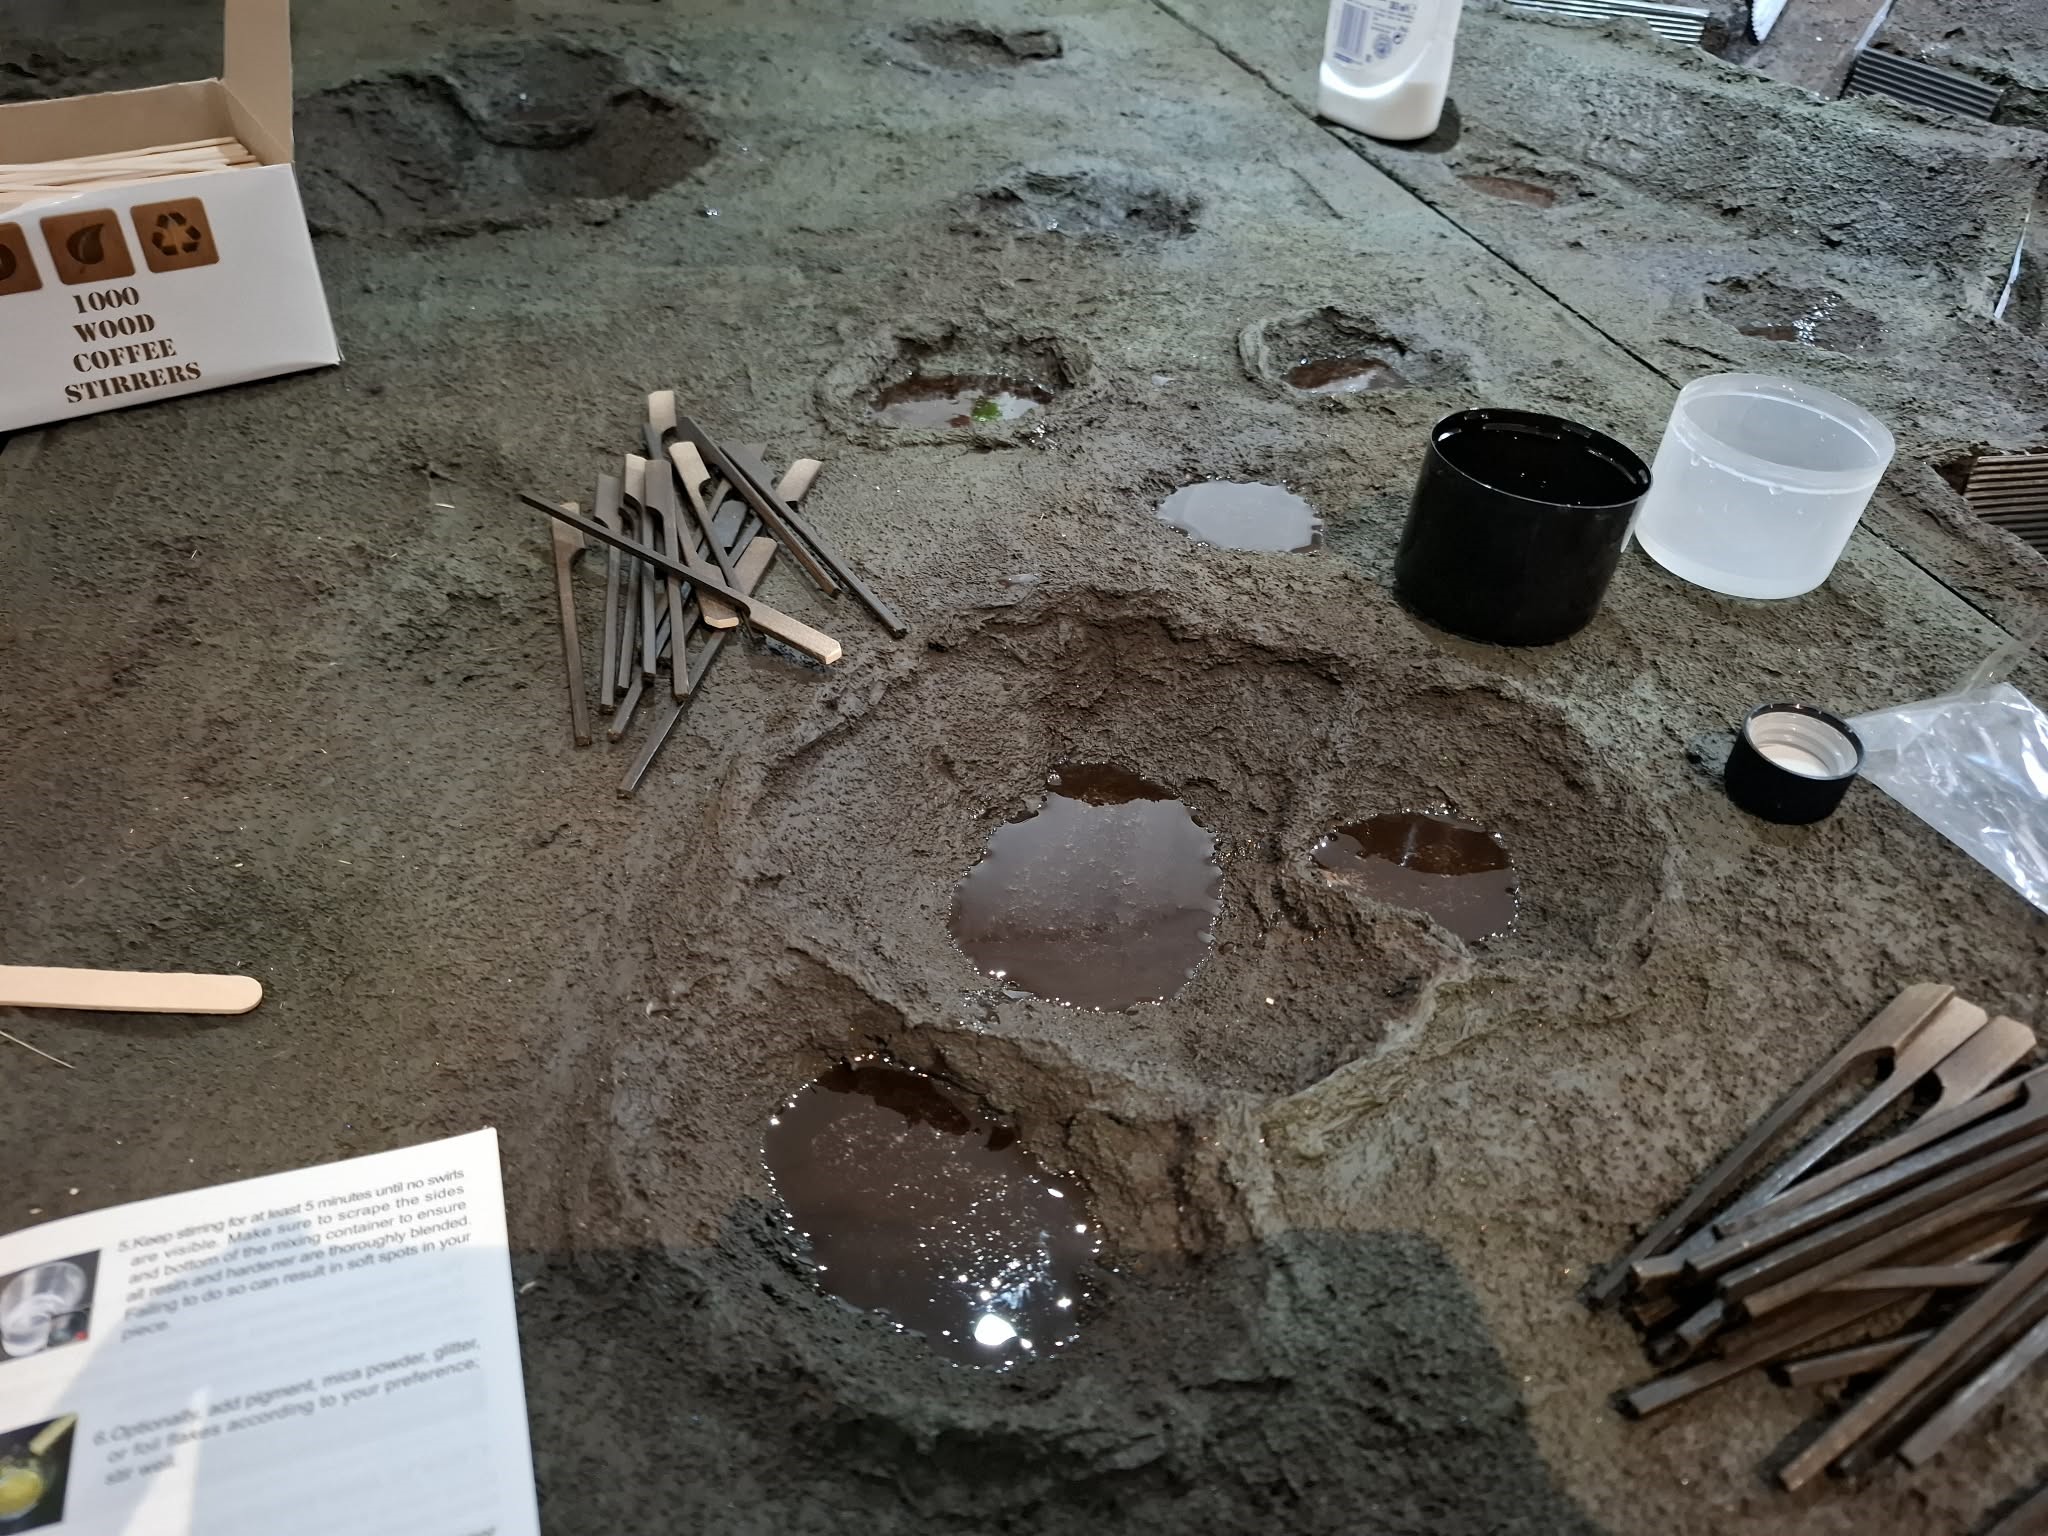
– Creating puddles in the blast craters. 2-part epoxy resin and a small drop of brown paint. Simple
I haven’t got photos of the finished details yet, as I’m still working on them, so they will come in the next update which will hopefully involve sandbags. But for now enjoy the WIP shots.
Probably won’t be updating again before Christmas, so Merry Christmas everyone!

Muddy Hell
So the first part of this update consists of what I forgot to document… In the last post I mentioned I was planning on getting to B&Q for some MDF strips, well, I did go, and I got what i was looking for. Those strips are now fixed to the long edges of my board, gaps and been filled in and sanded and now the boards meet up nicely. I completely forgot to take pictures of that, but, lets be honest…its not the most exciting update.
What is an exciting update though, is that the board now has colour on it!!! AND technically now could be used to play on. But I’m obviously not stopping here.

The mud texture was made using a mixture of:
– Silicone Caulk
– Brown Paint
– Sand
– White Spirit
I dont have exact measurements. I just emptied a whole tube of caulk (per board) into a tub, and chucked in brown paint and sand until it felt right, then white spirit to thin the mixture down a bit and make it easier to paint on. Then, using a cheap decorating brush, I applied very generous coatings all over each board section, making sure to get the mixture in all the nooks and crannies. The final step then was to essentially use a stippling technique to hide all the brush strokes and make mud look churned up.
I also decided to give the boards a light spray over with some death guard green and a brown paint, just to give ground colour some variety, as well as getting some black spray and give an even lighter spray over, focusing on the craters to perhaps suggest they were burnt out.
The edges of the boards will be painted black eventually, and then it’s on to adding all the fun details to really make this board come to life.
First set of details
Due to both the board not quite being the width I needed, and my shoddy cutting skills, the board had several gaps in the joins. Fortunately I had a fairly large tub of pre-mixed plastering filler, so a healthy application fixed the majority of the issues there.

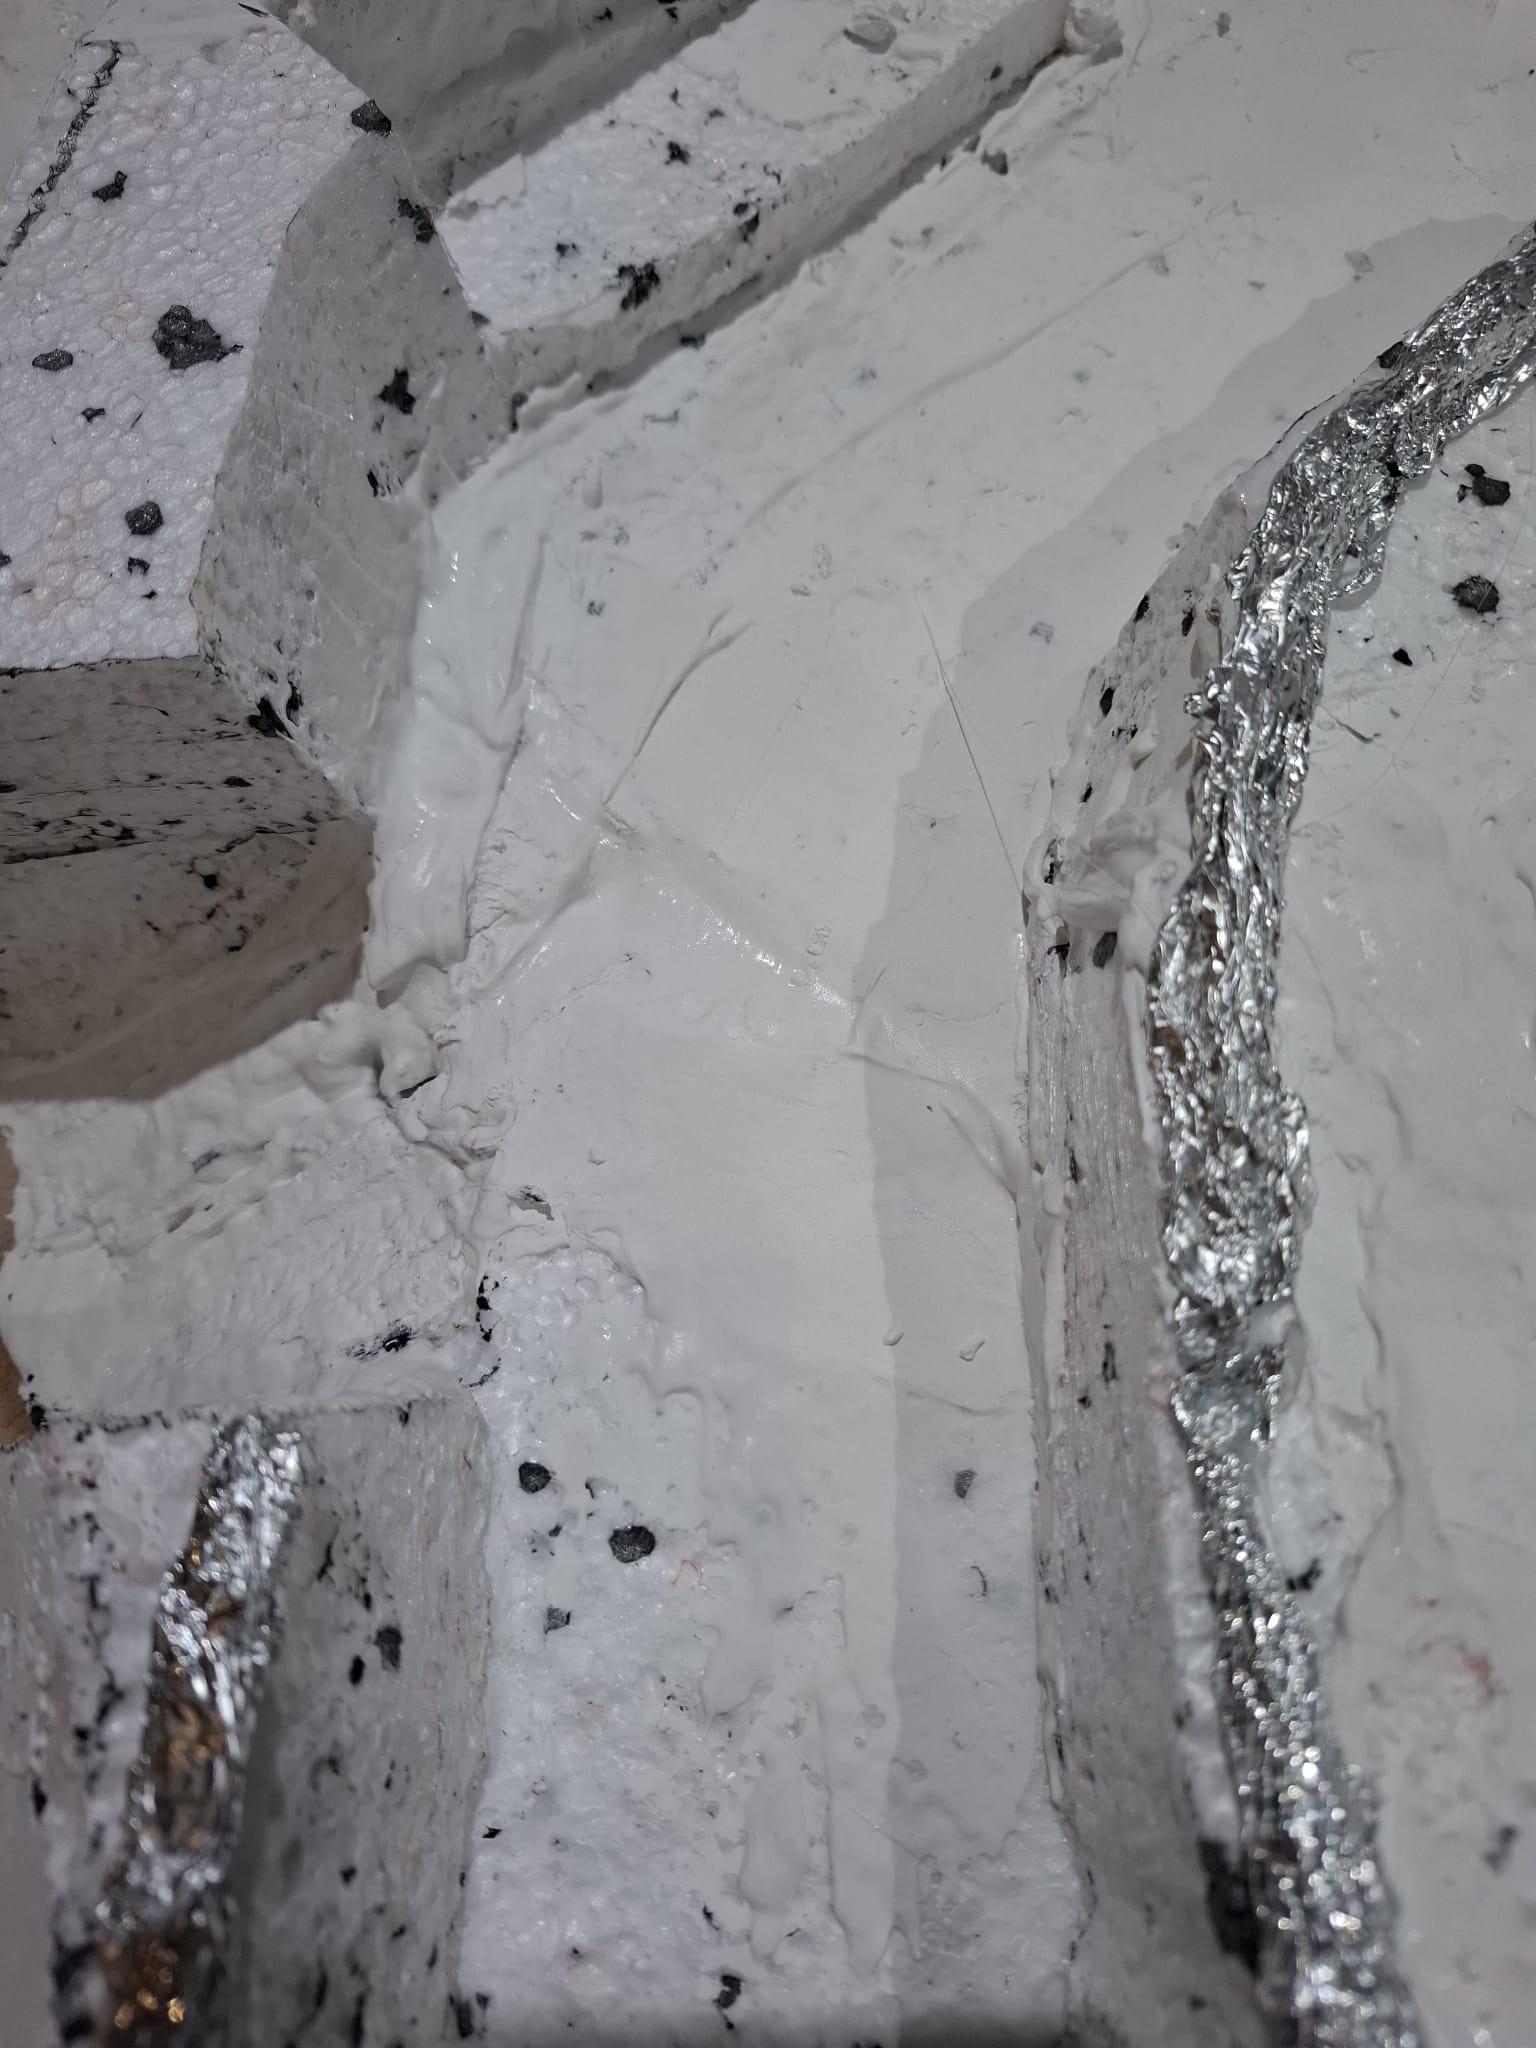
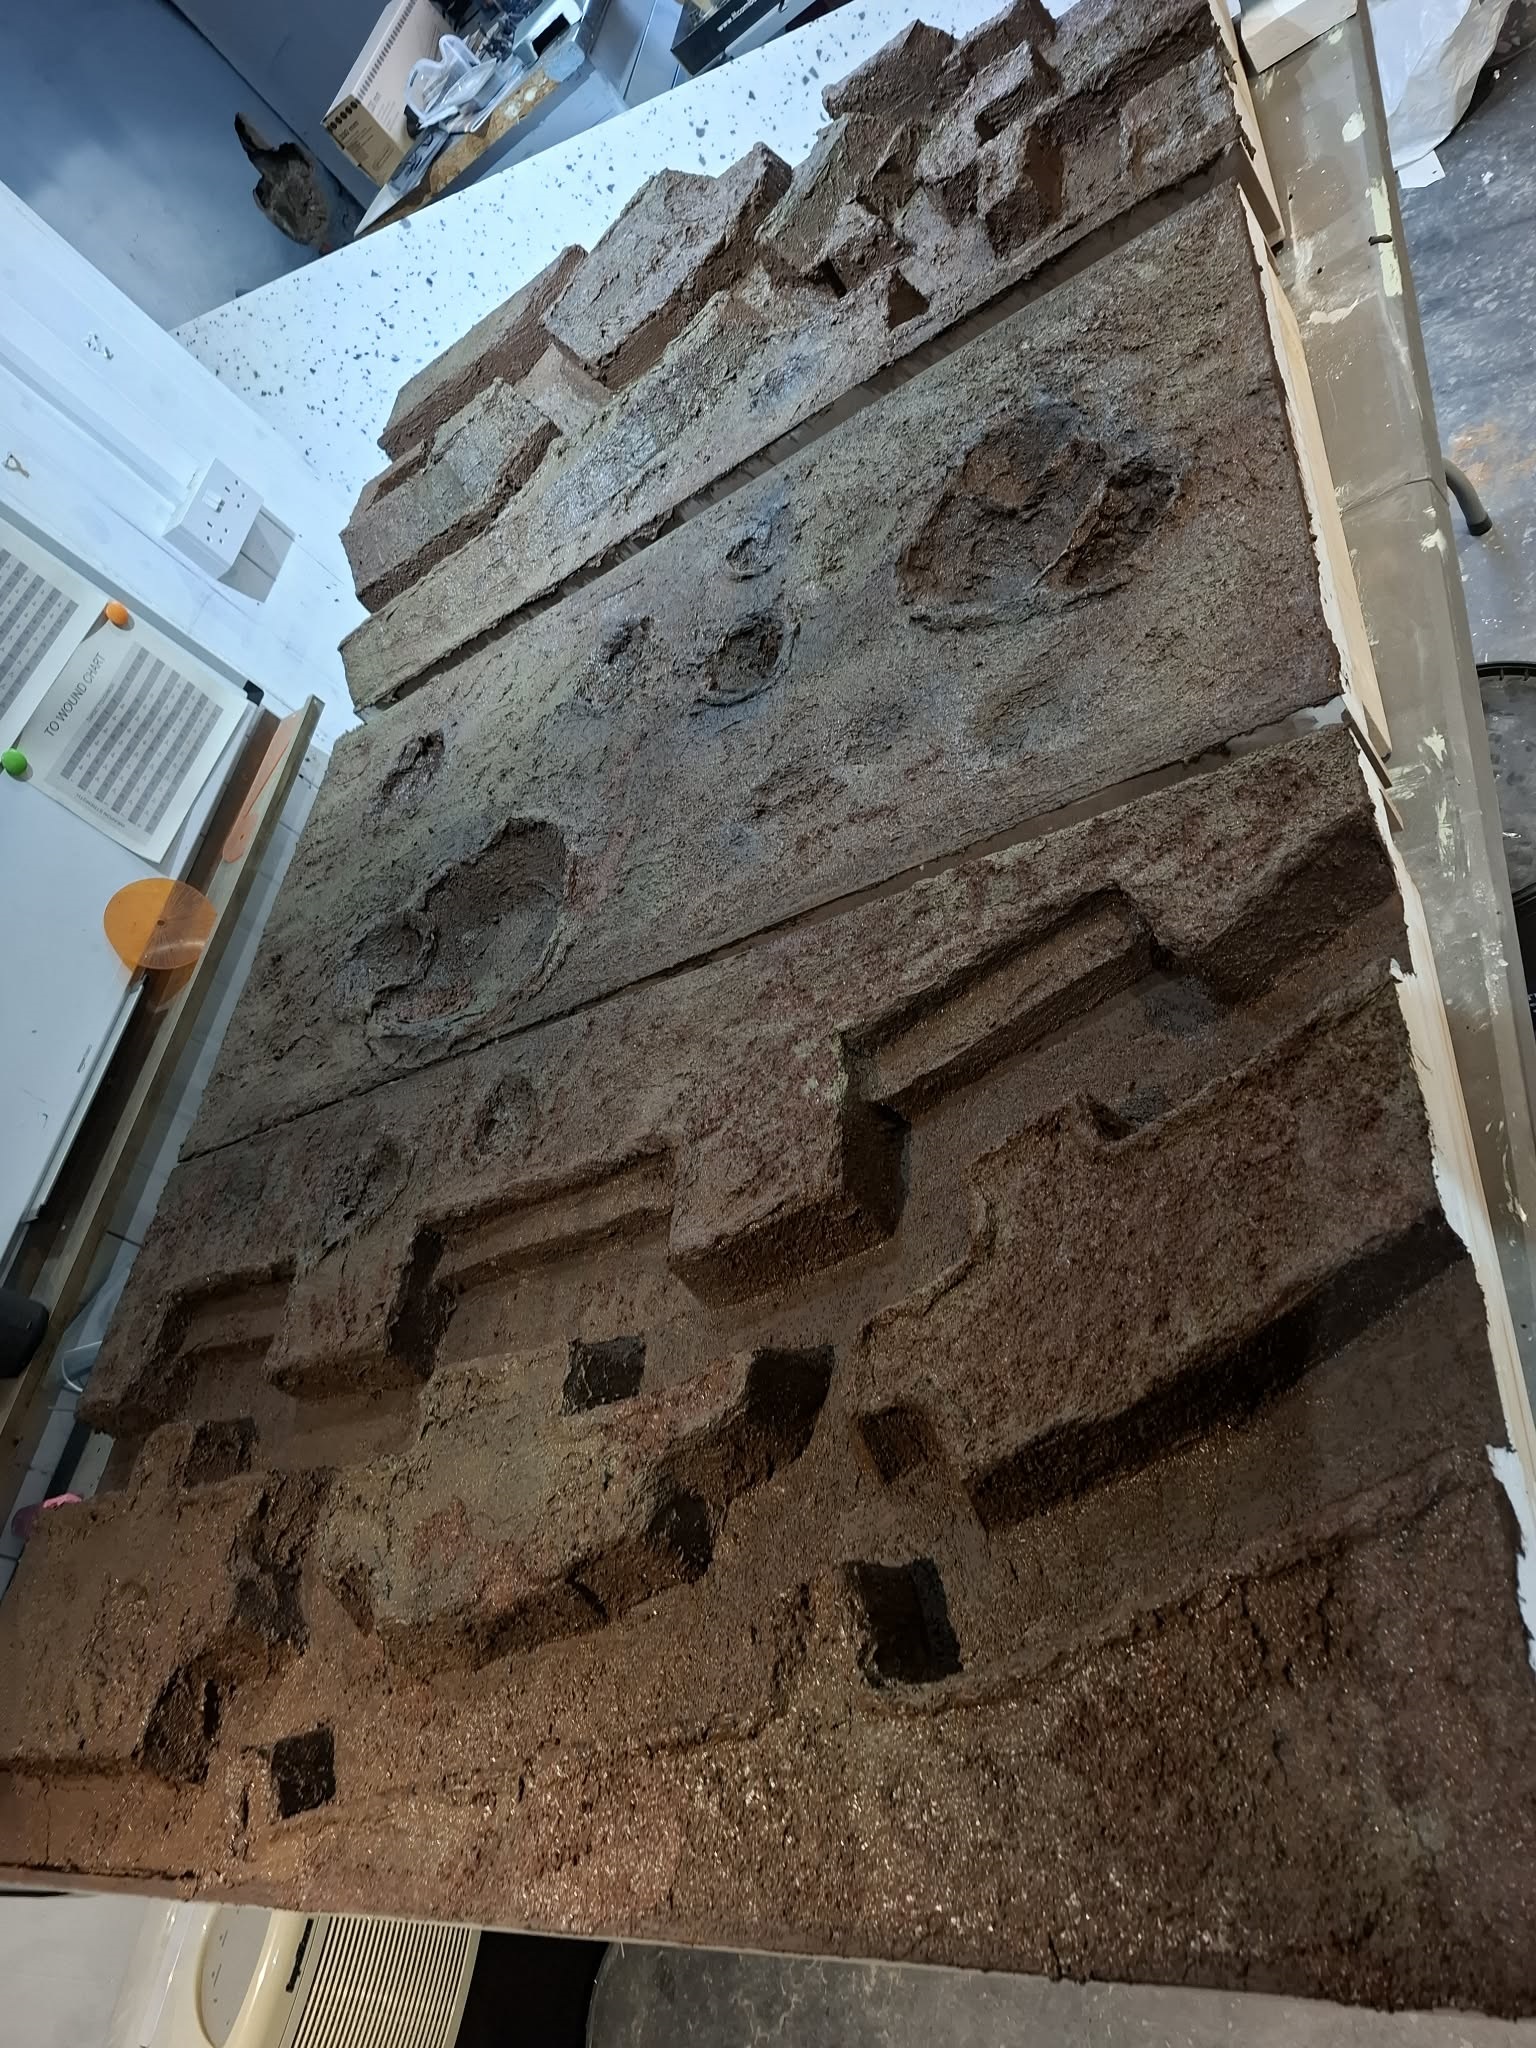
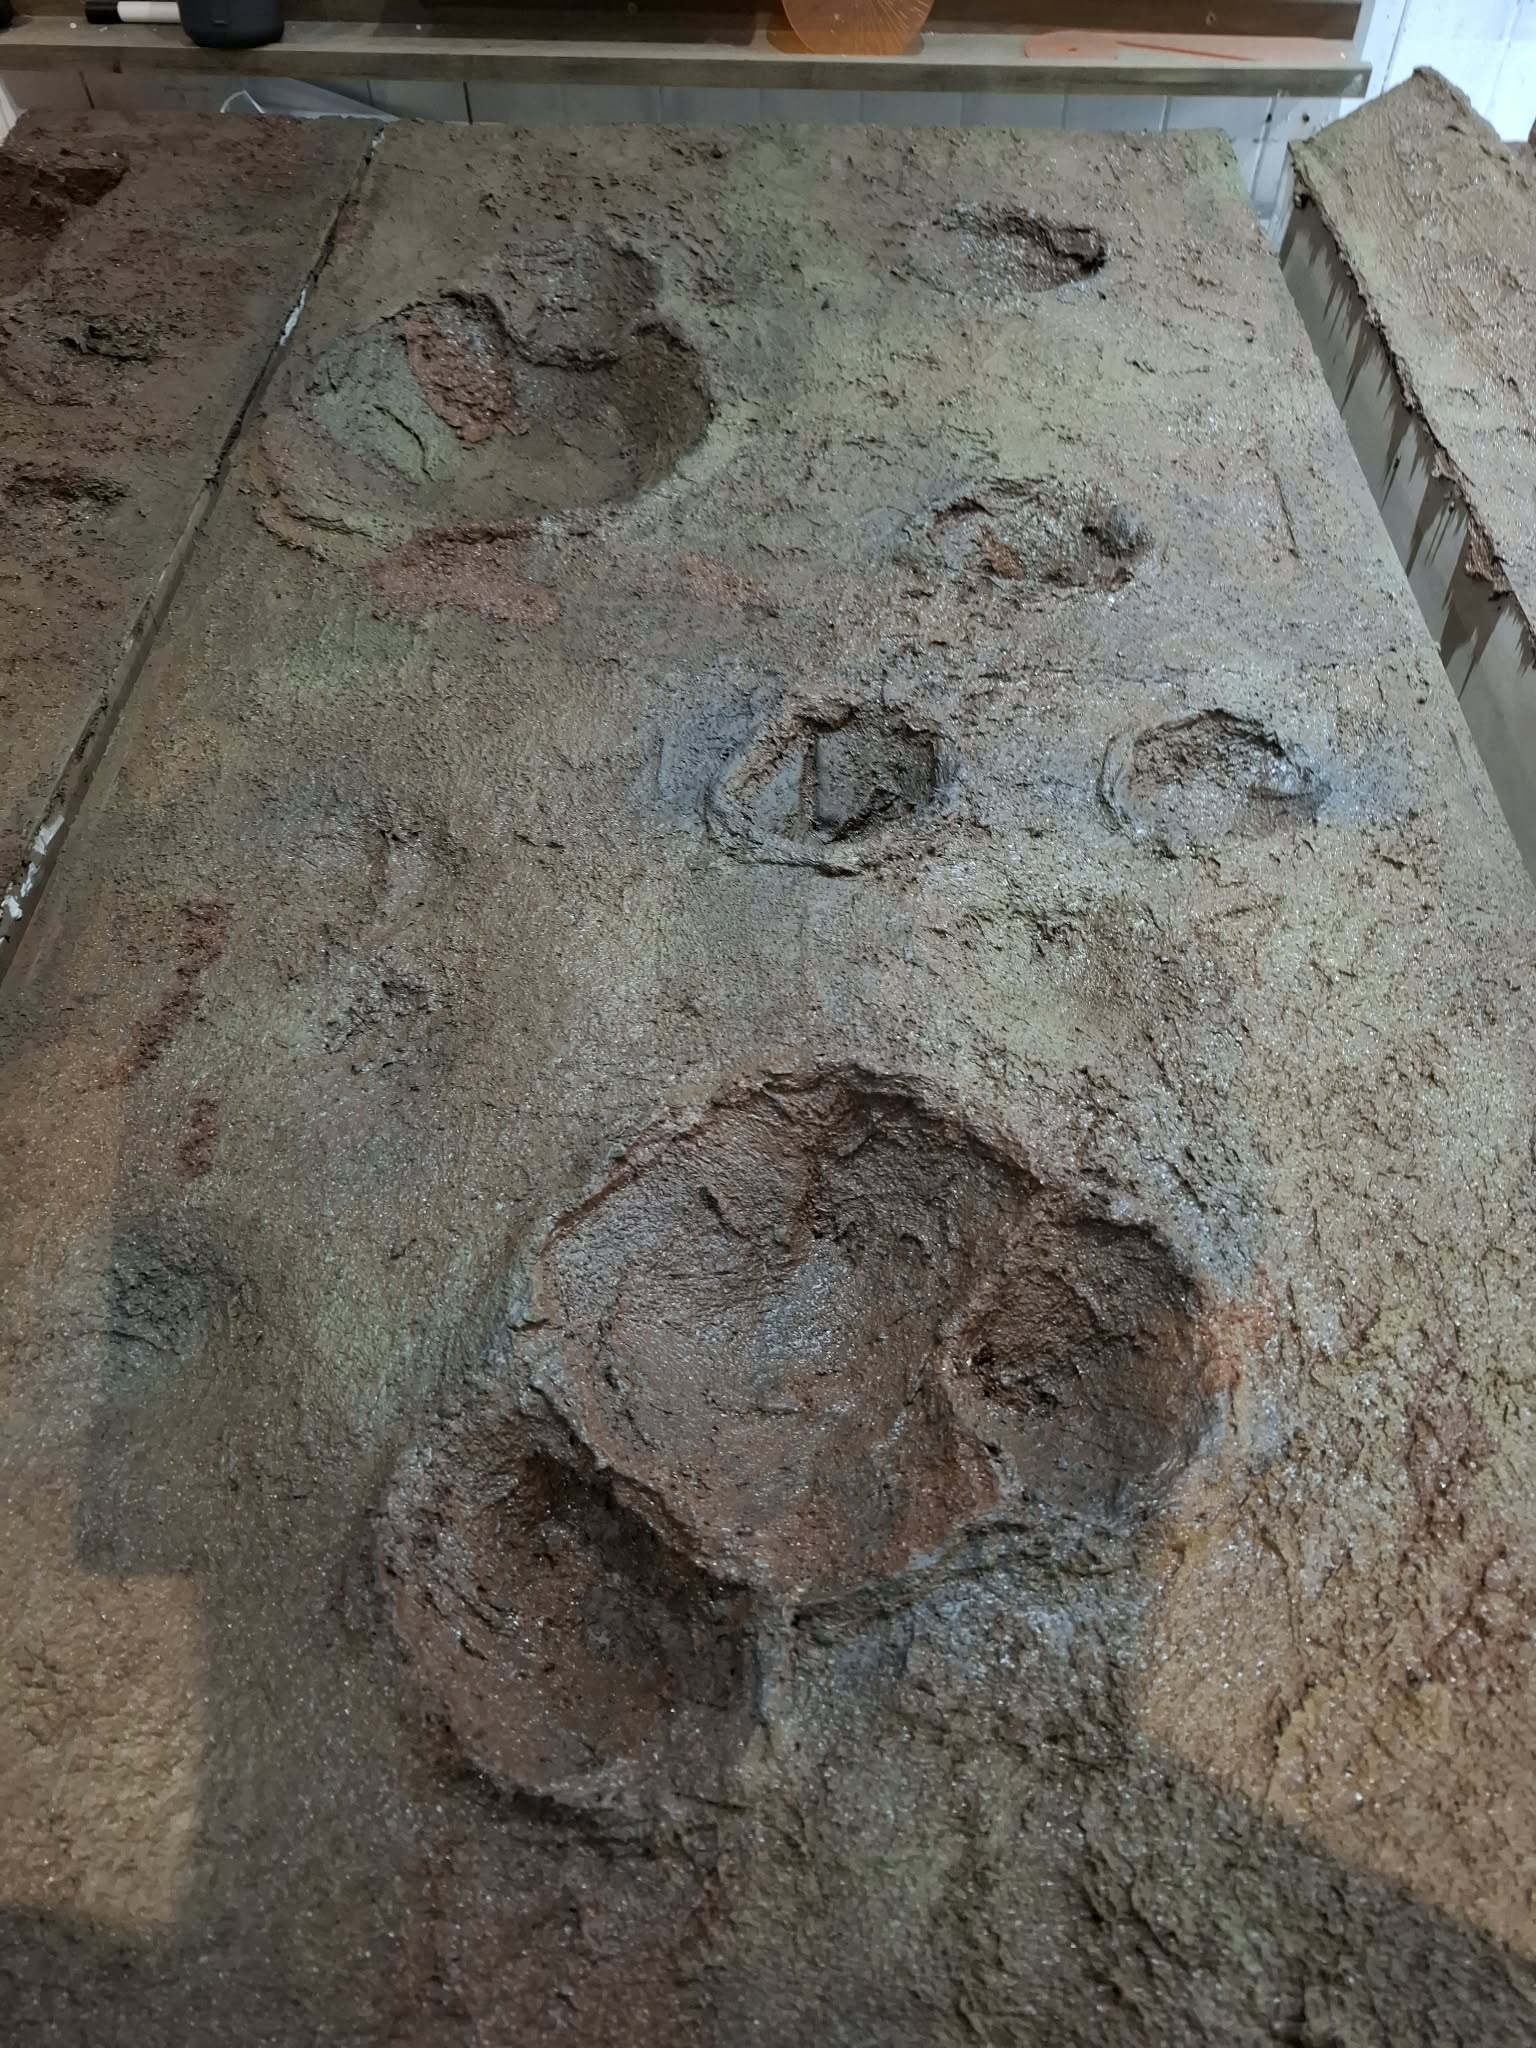
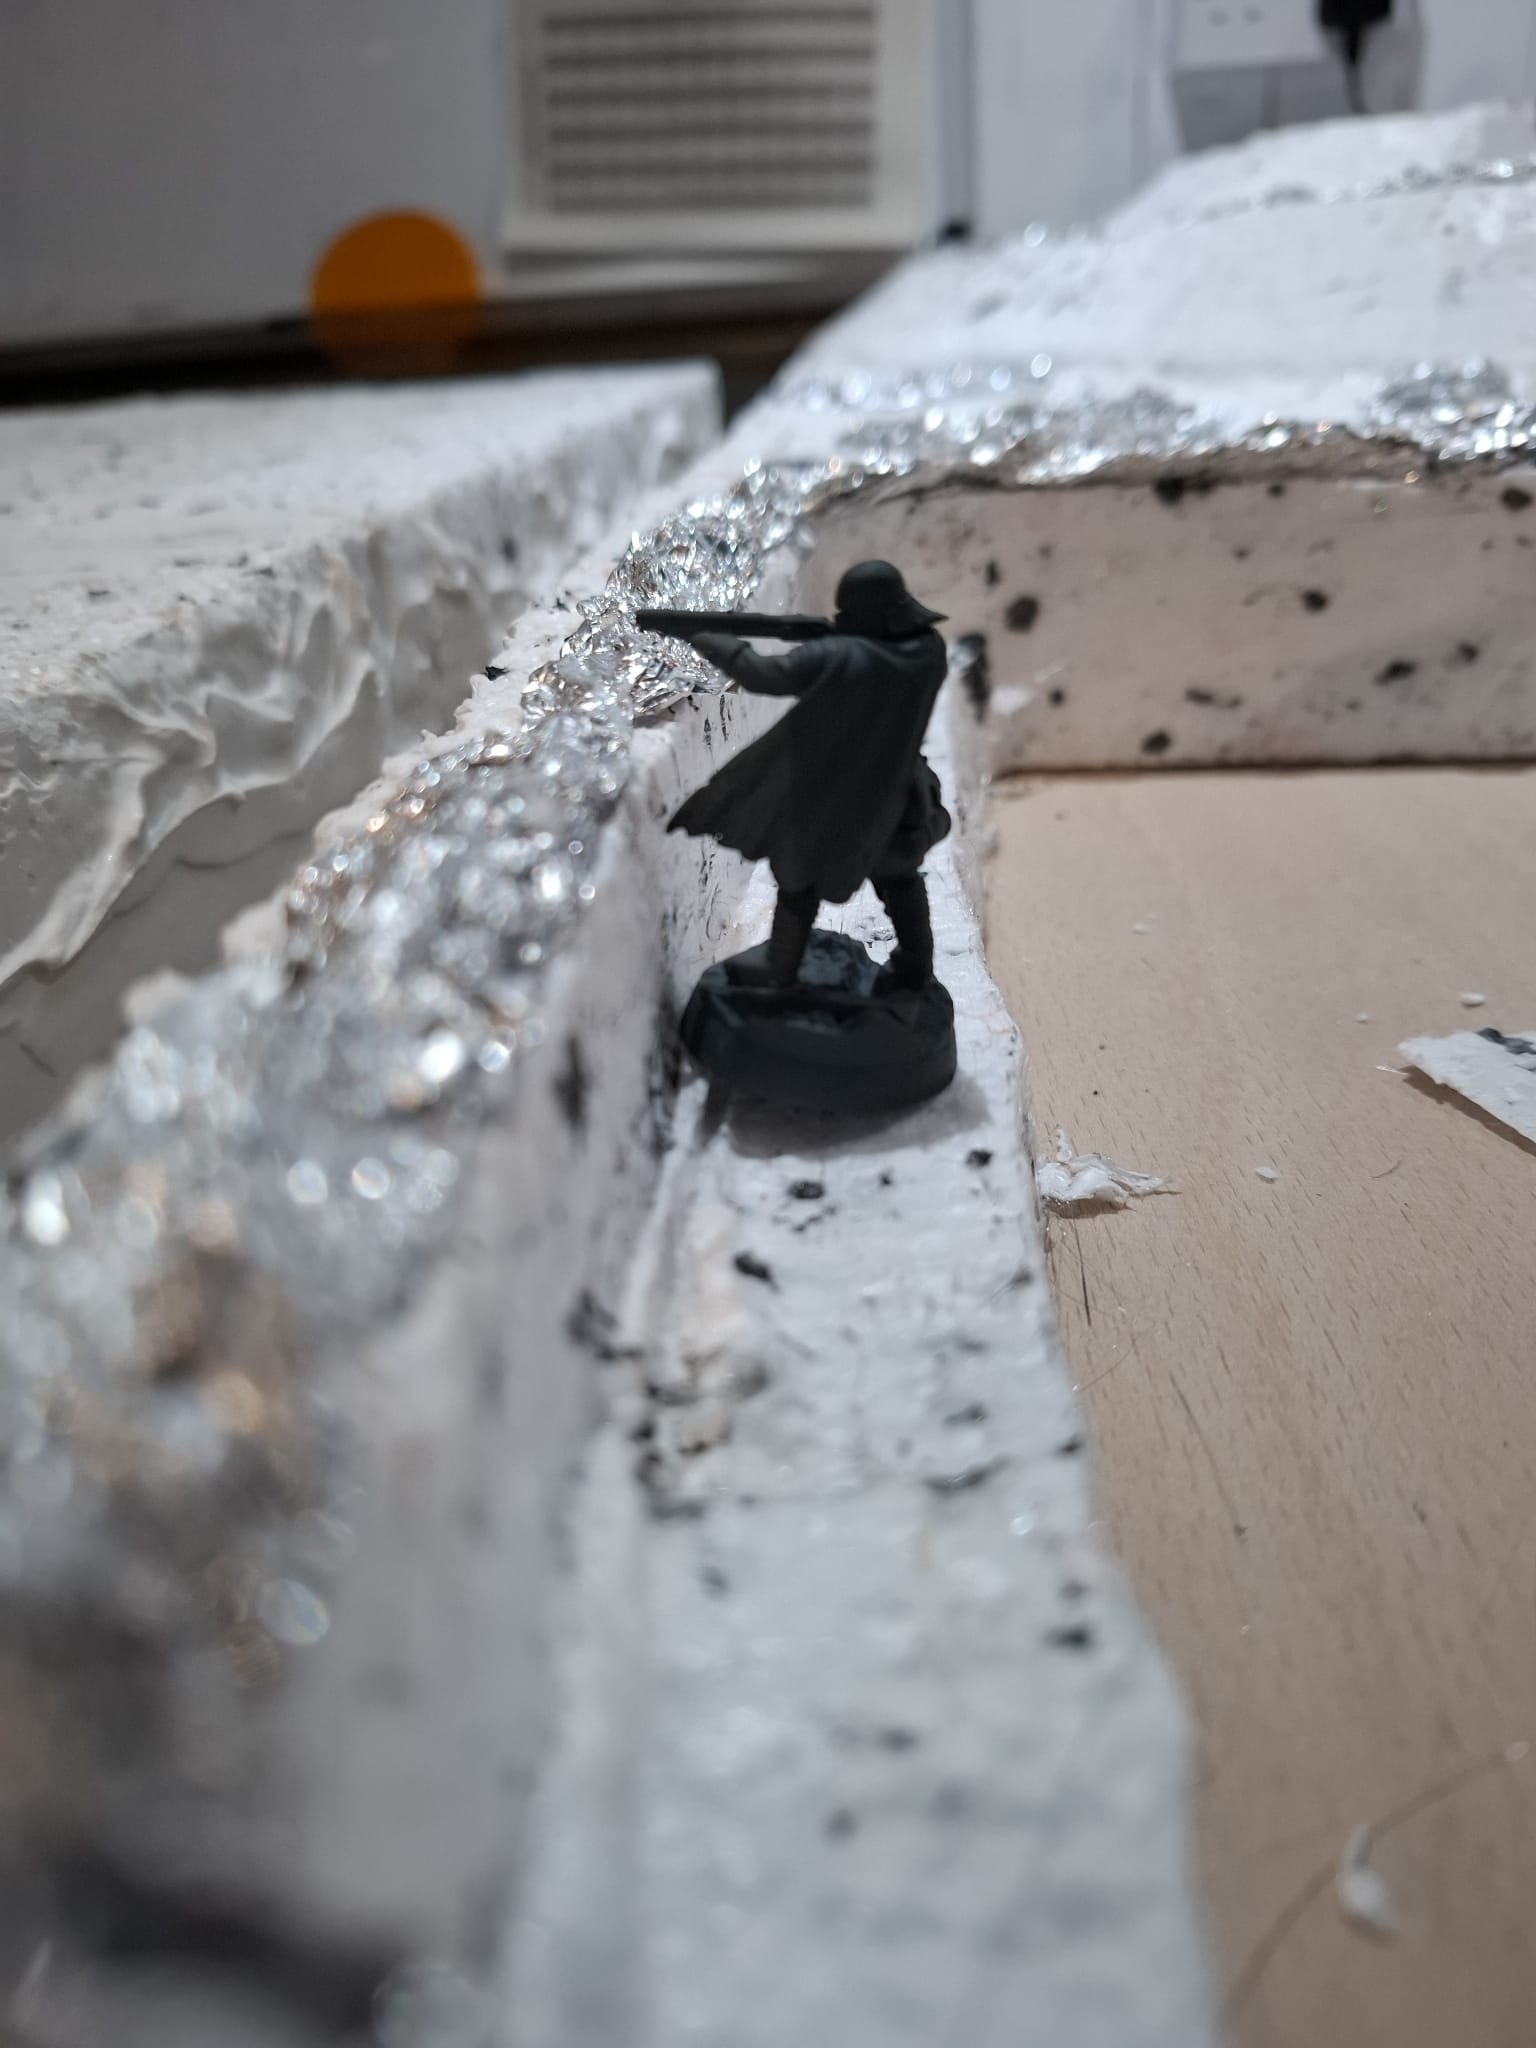
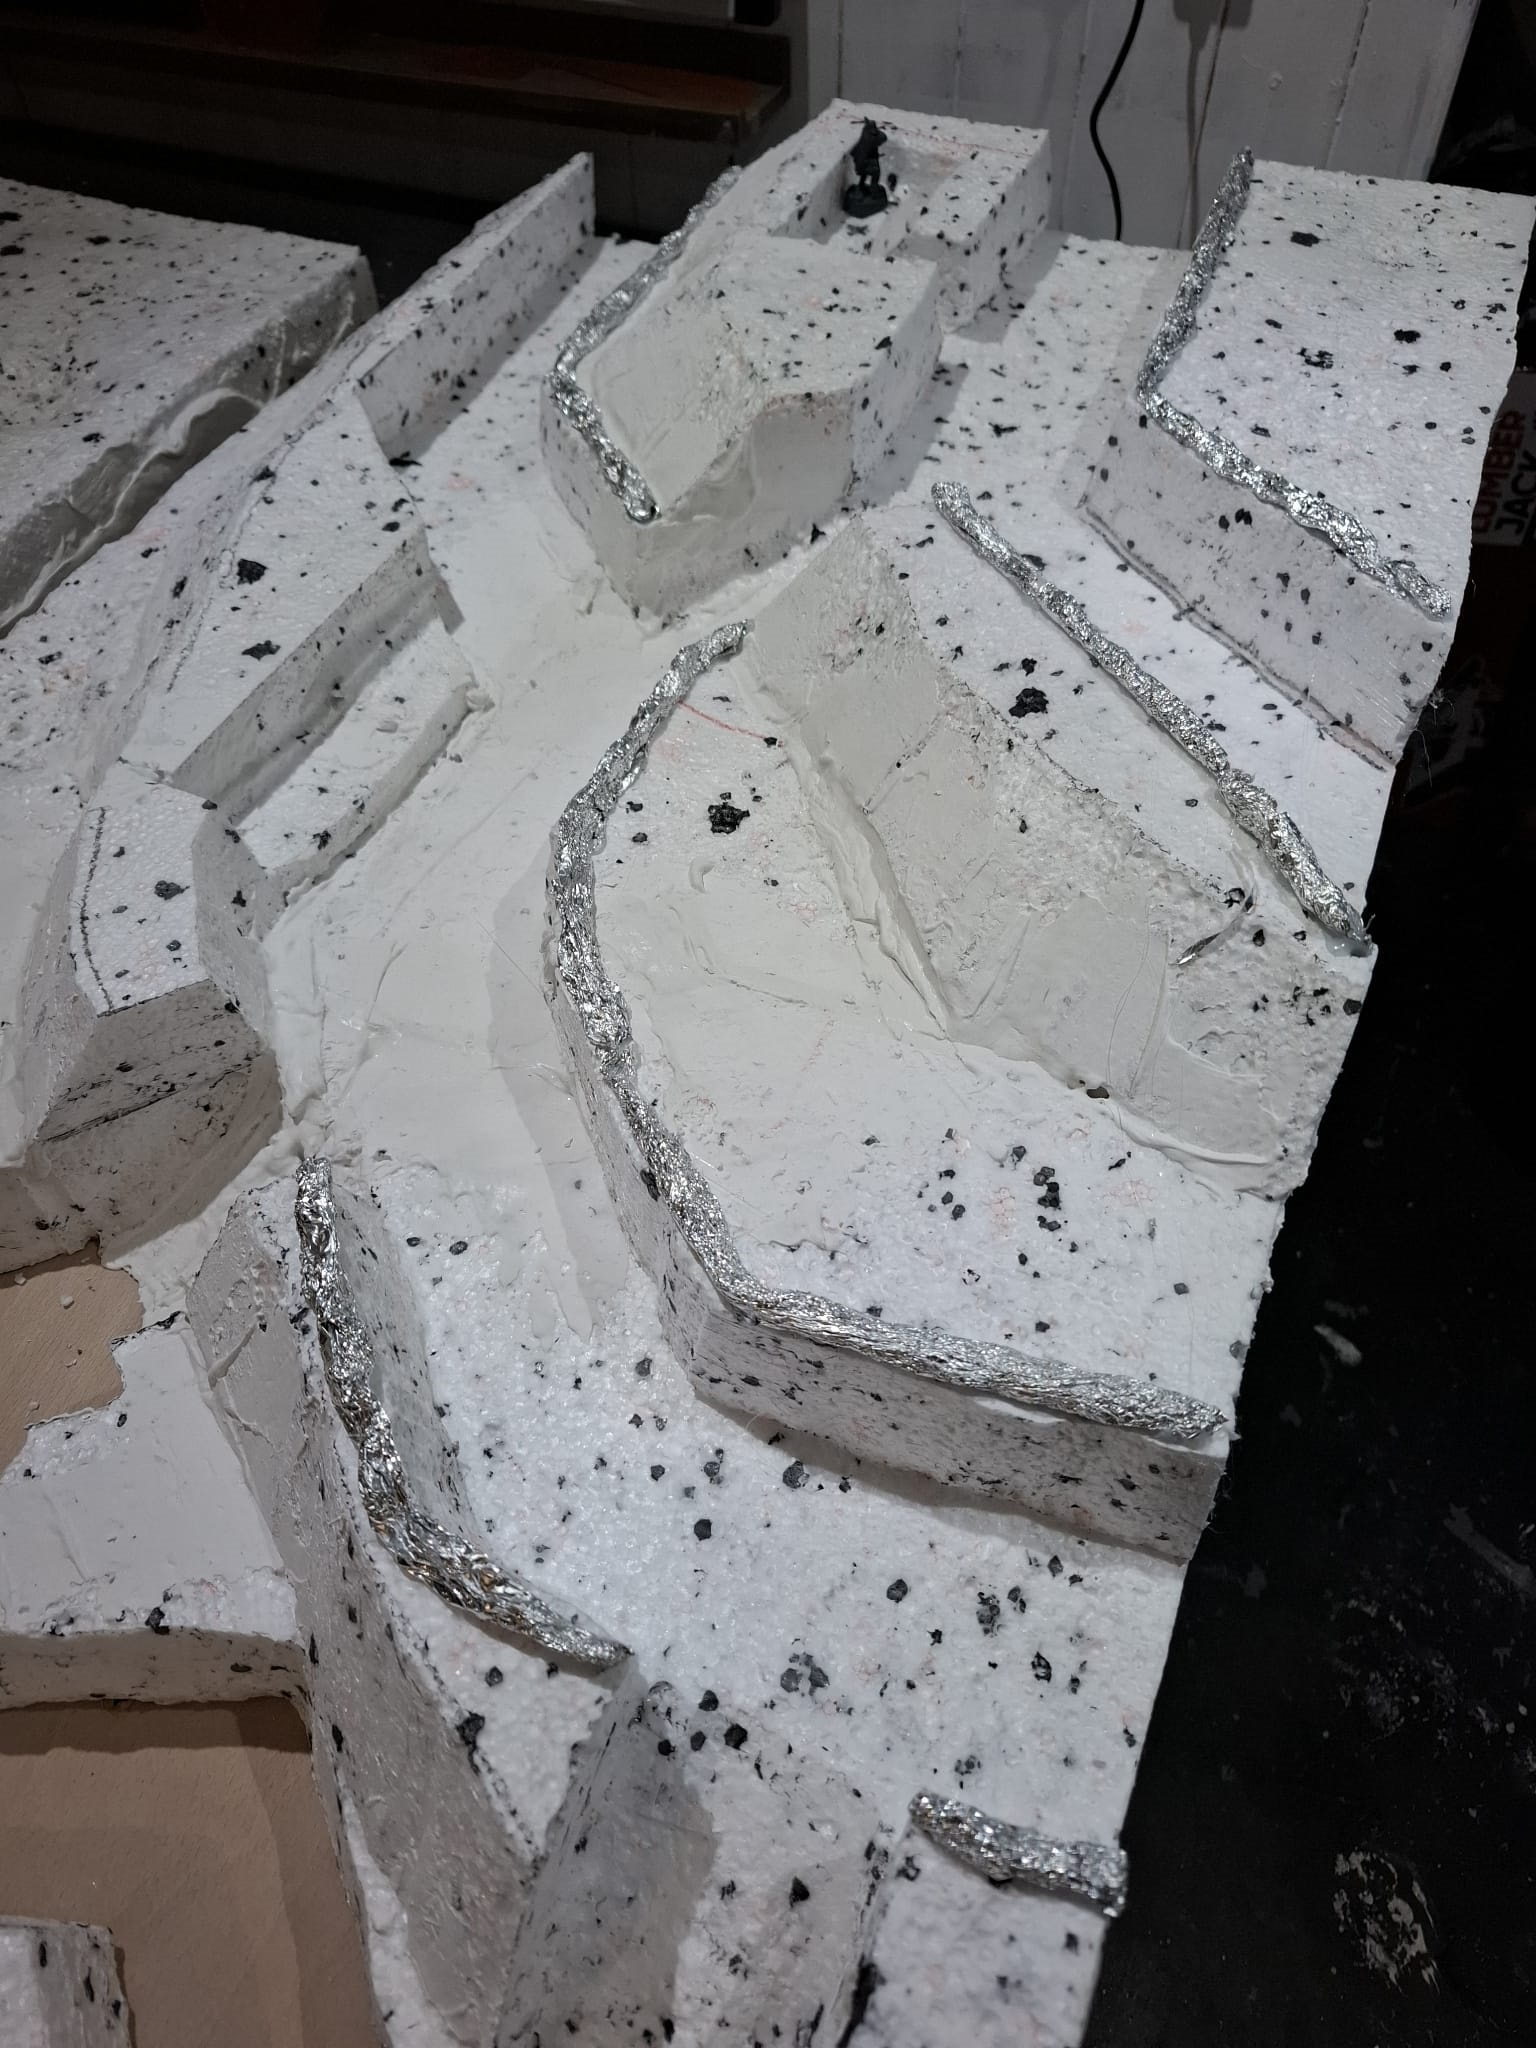
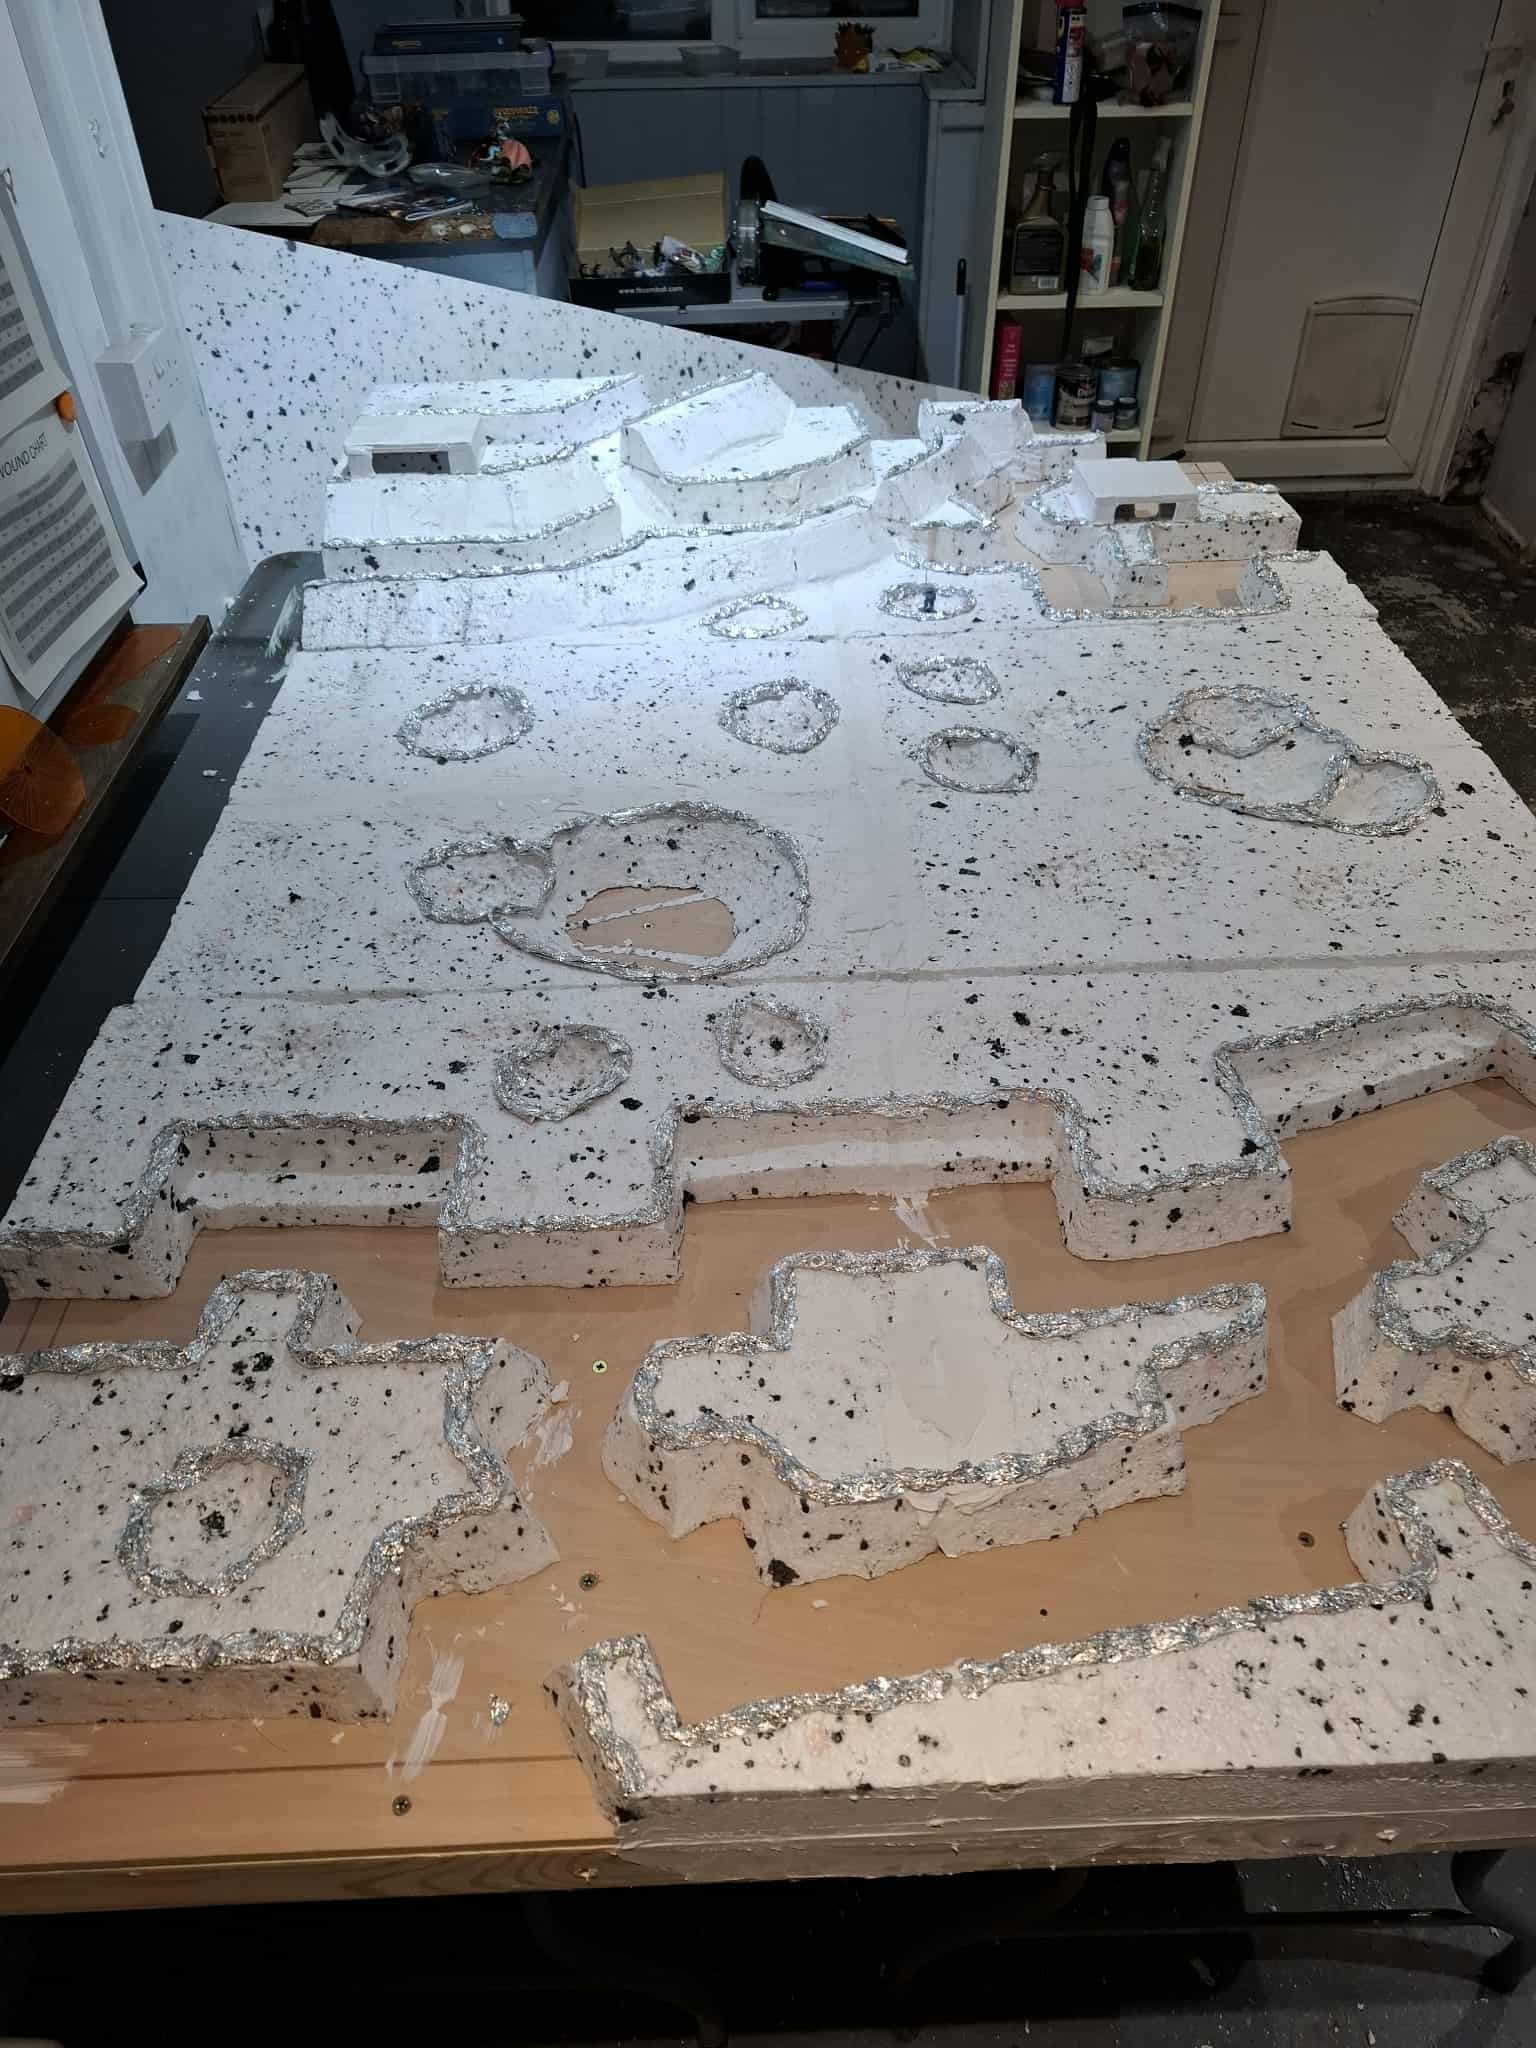
Next step was to start adding the built up dirt around the trench and crater edges. This was done using rolled up tin foil and a glue gun.

Halfway through this however, i remembered i wanted bunkers in the fortified trenches, so the gluing was put on hold whilst i made up the bunkers.
For the bunks, i simply cut some 1 inch wide strips out of foamboard to form the bunker sides, glued them with pva and pinned them in, then cut out a roof slab to simply stick on top. Nothing too spectacular, but they’ll do the job.

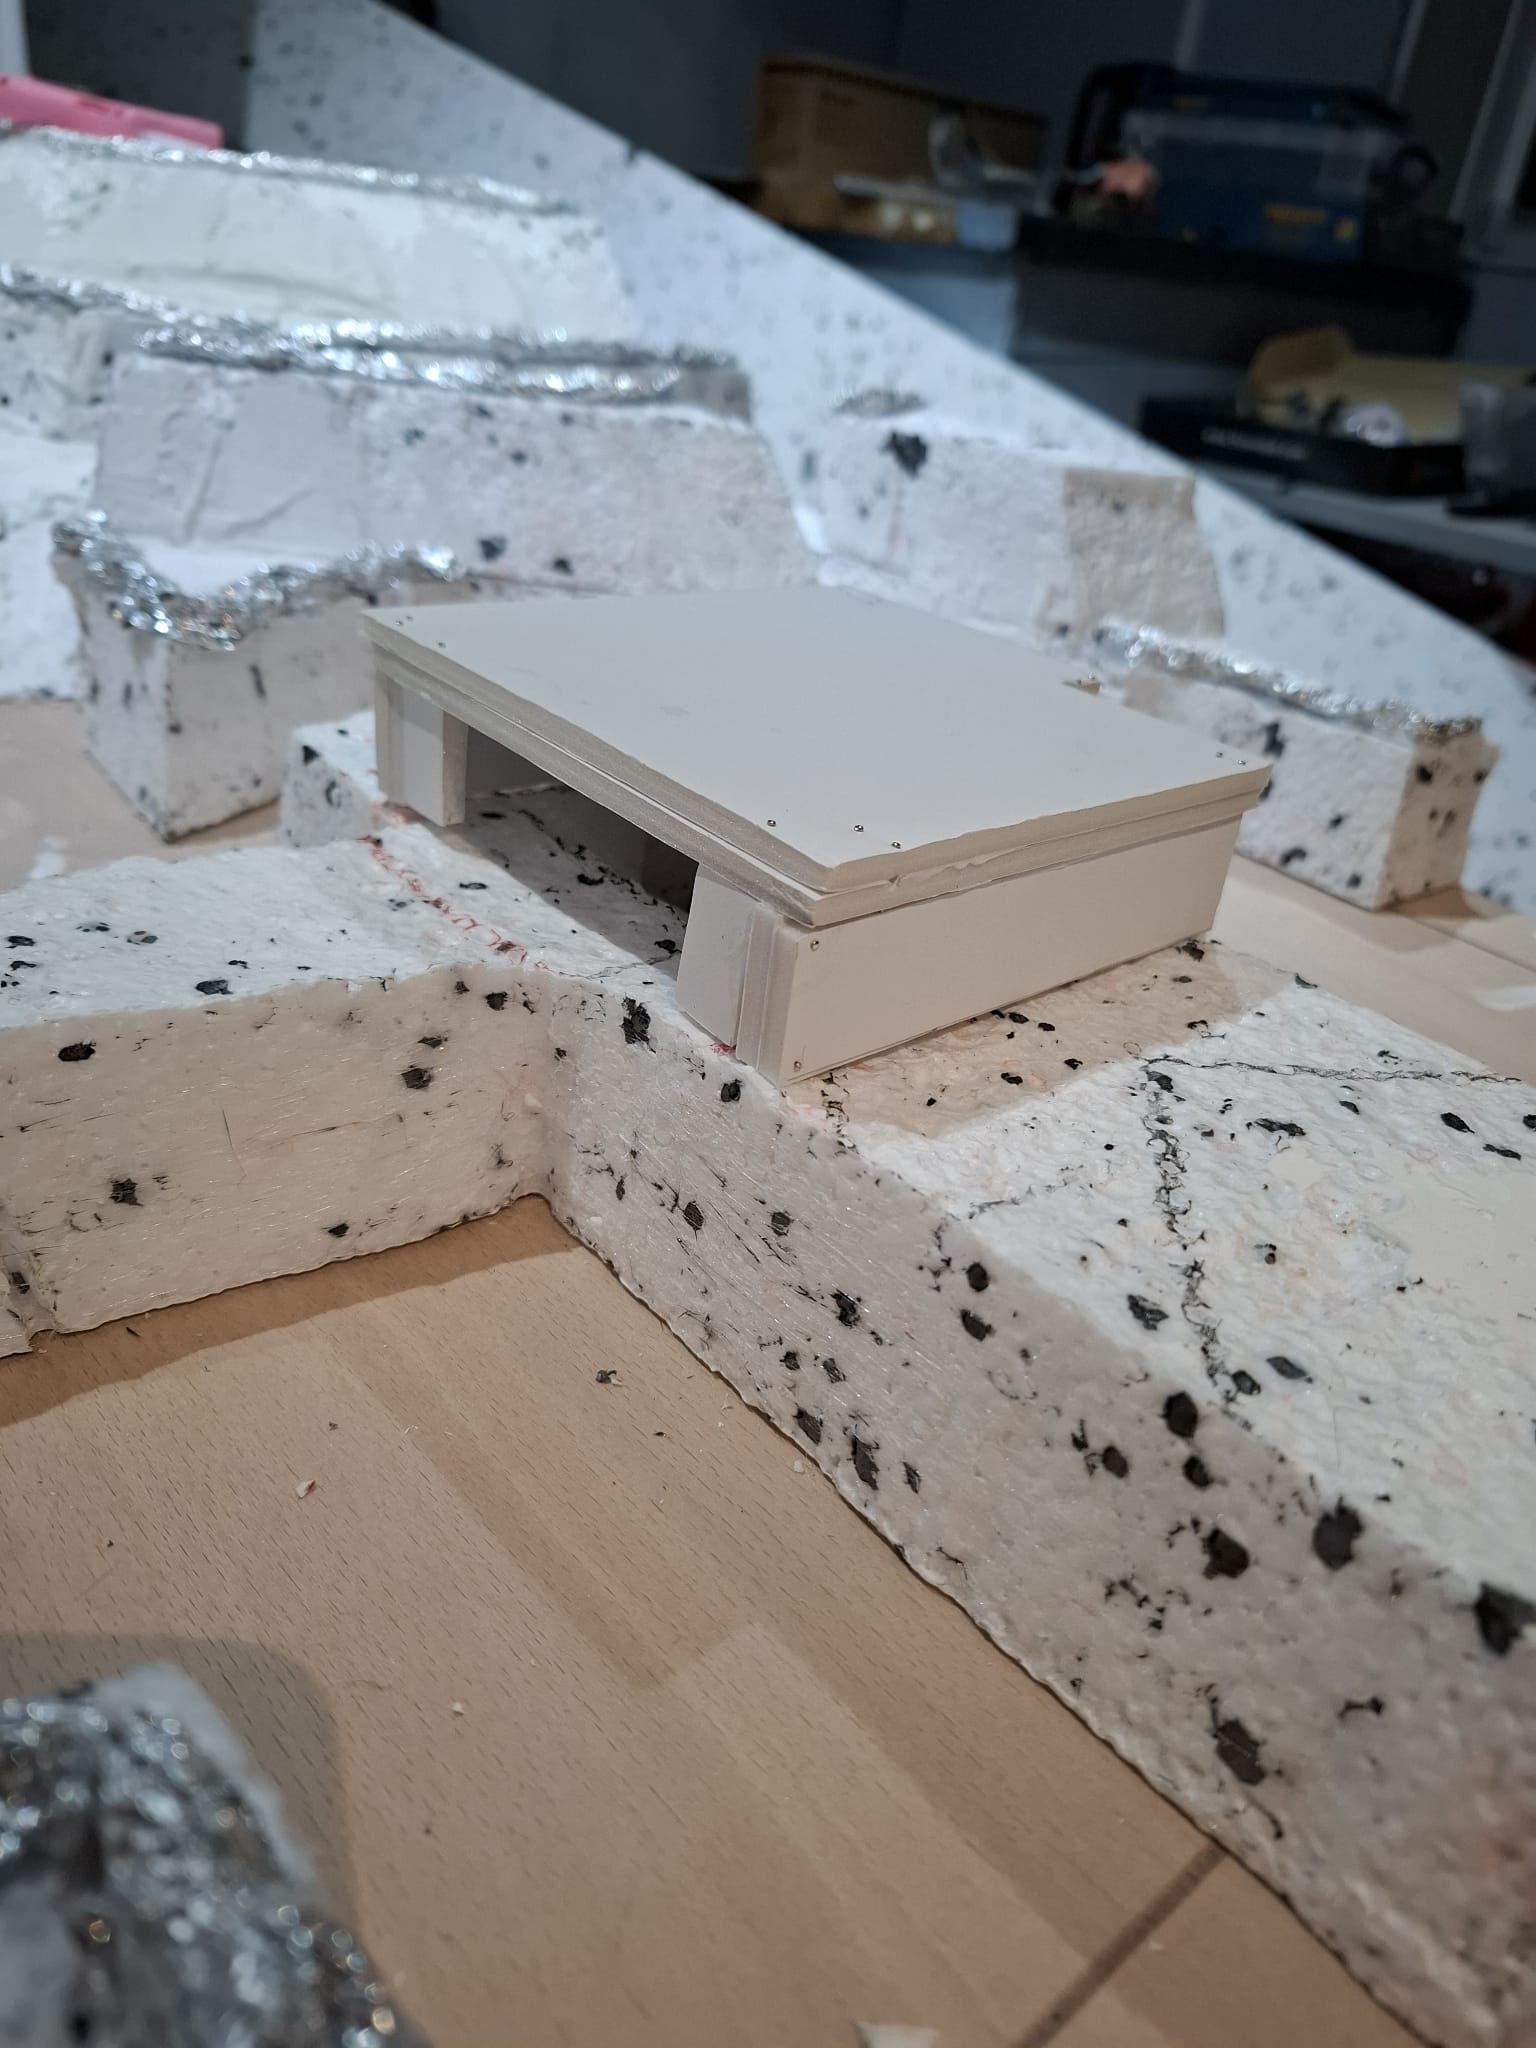
Afterwards i was able to continue applying the tin foil to the edges, allowing for space around where the bunkers will be.
I also started covering the bunkers using the same filler i used for the gap filling, just to give them some texture. Once its dried ill sand it down and hopefully it will have a bit of a concrete texture to it.


I have one more step to do before i can start applying some colour to the board. Again, due to my shoddy cutting skills, the edges where the boards butt up against each other are not squared up, so I’m left with large crevices at the joins.
Tomorrow I’m hoping to get to B&Q for some mdf strips which im planning on screwing onto those edges and fill in, so that i can get some nice smooth joins. I’m hoping to have some colour on the board by next weekend, or, at the very least, be in a position to get the colour on. I have the materials I need, just need to be patient and get the edges done first.
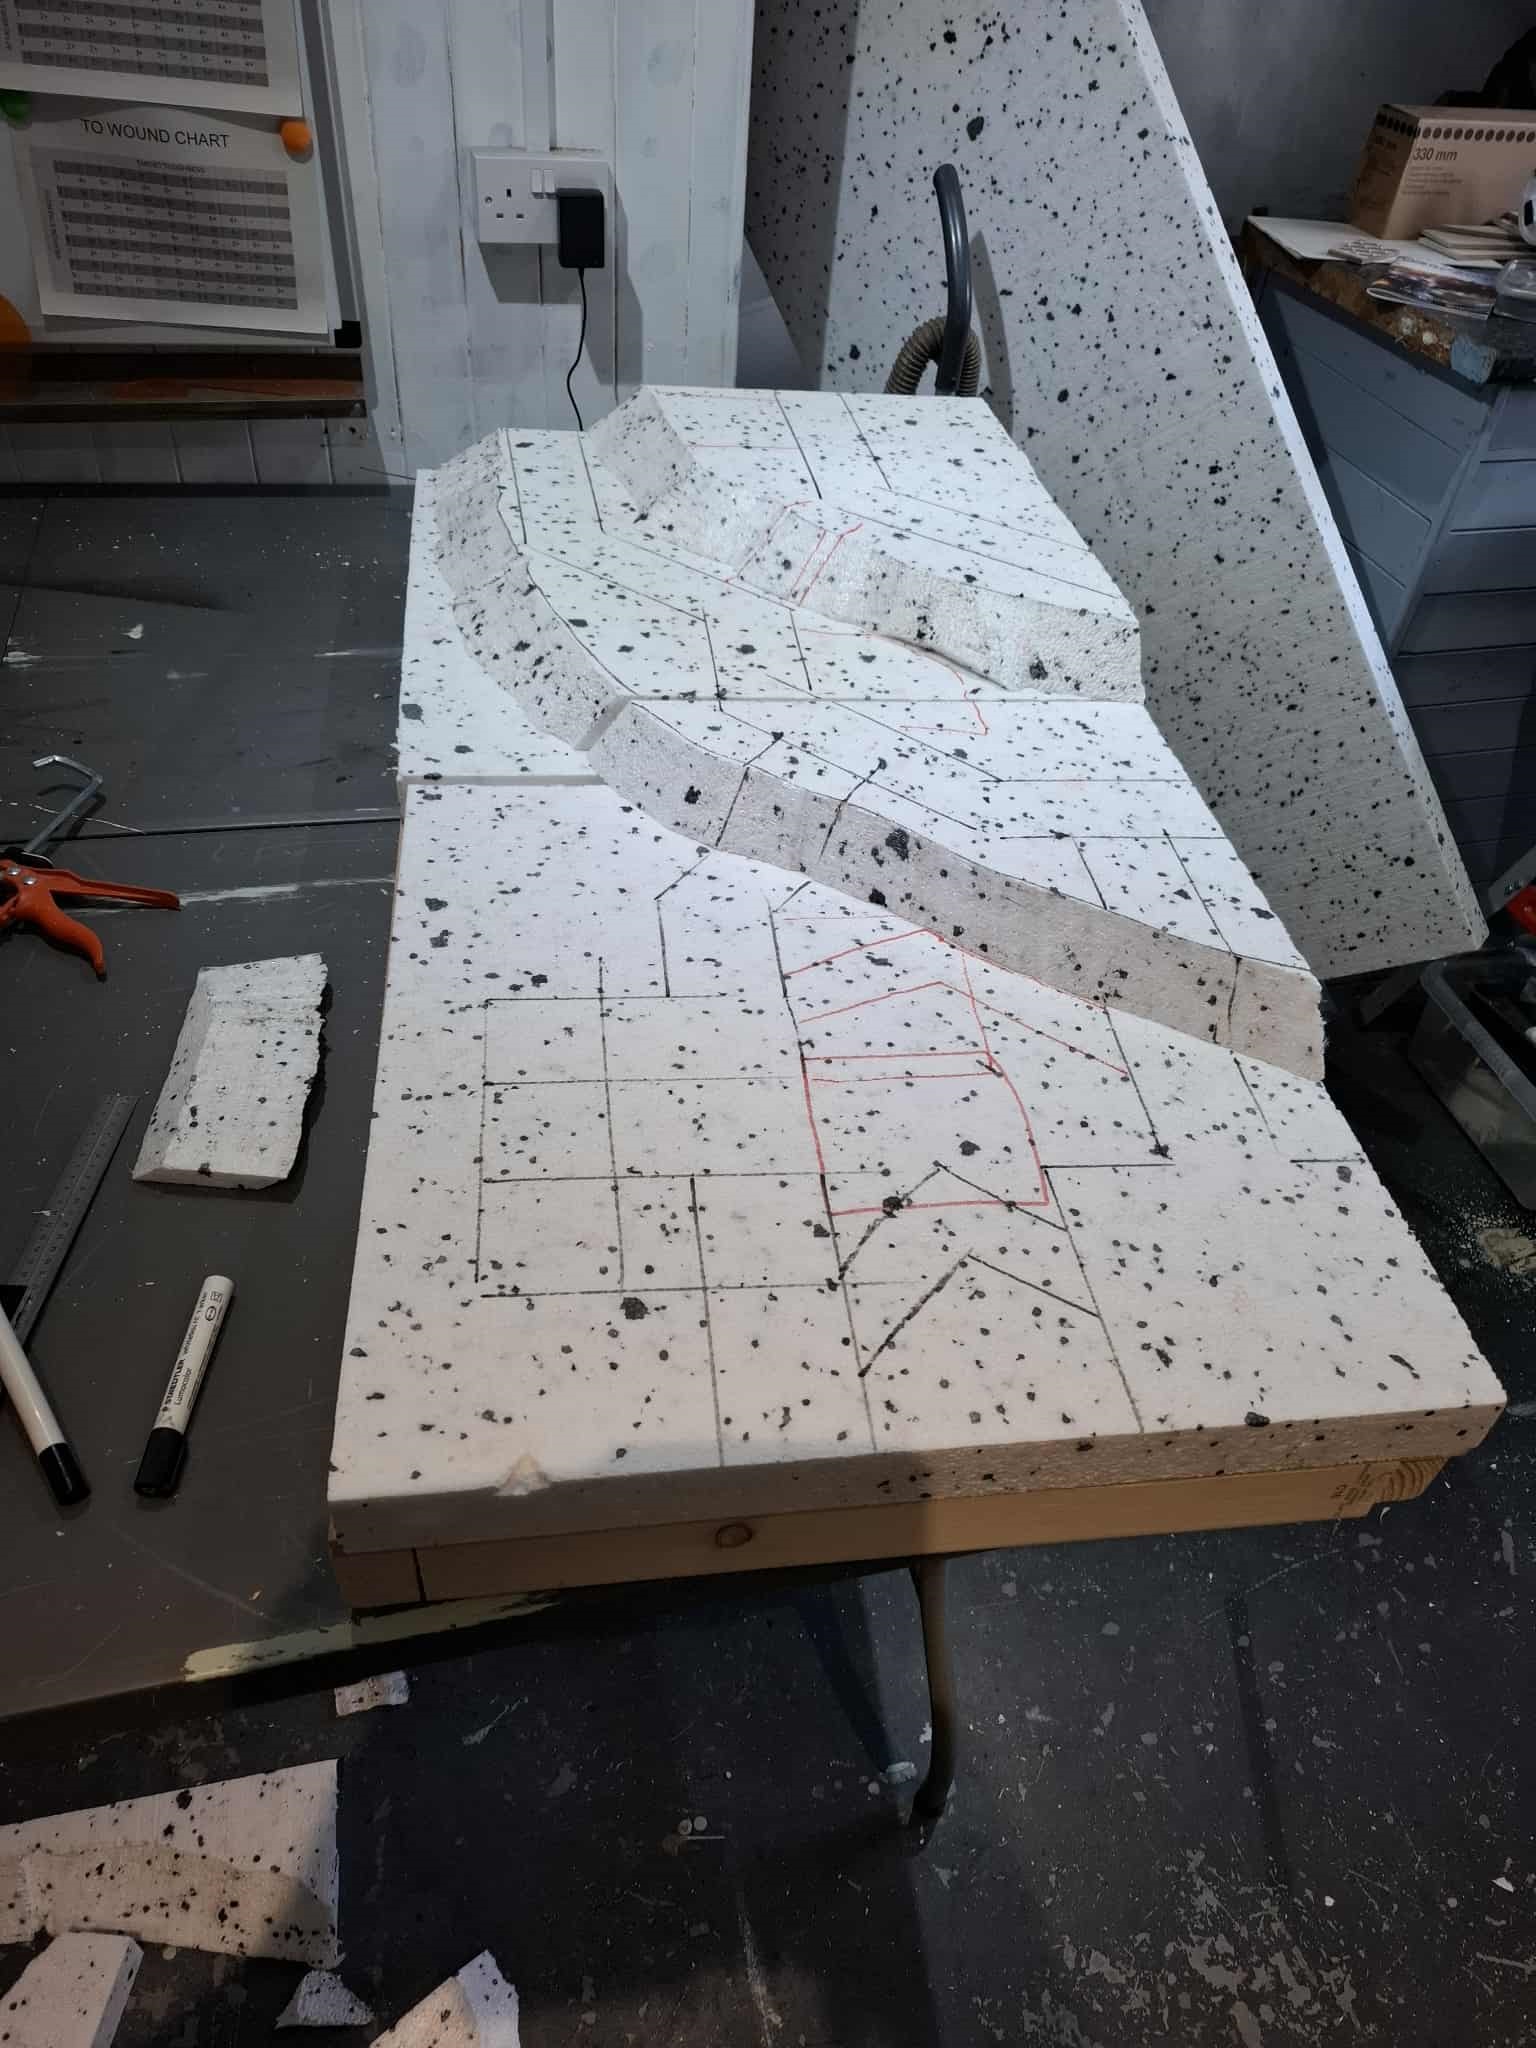
Digging the trenches
Now that my baseboards were assembled, it was time to lay up the polystyrene and draw out my trenches. Firstly i cut down my sheet to size, then hit the drawing board. I re-watched the video from Eric’s hobby shop, as i wanted a similar layout to the one he had done, and i then drew up a couple of maps, even trying Excel to get a better sense of scale which i couldn’t achieve with pen and paper.
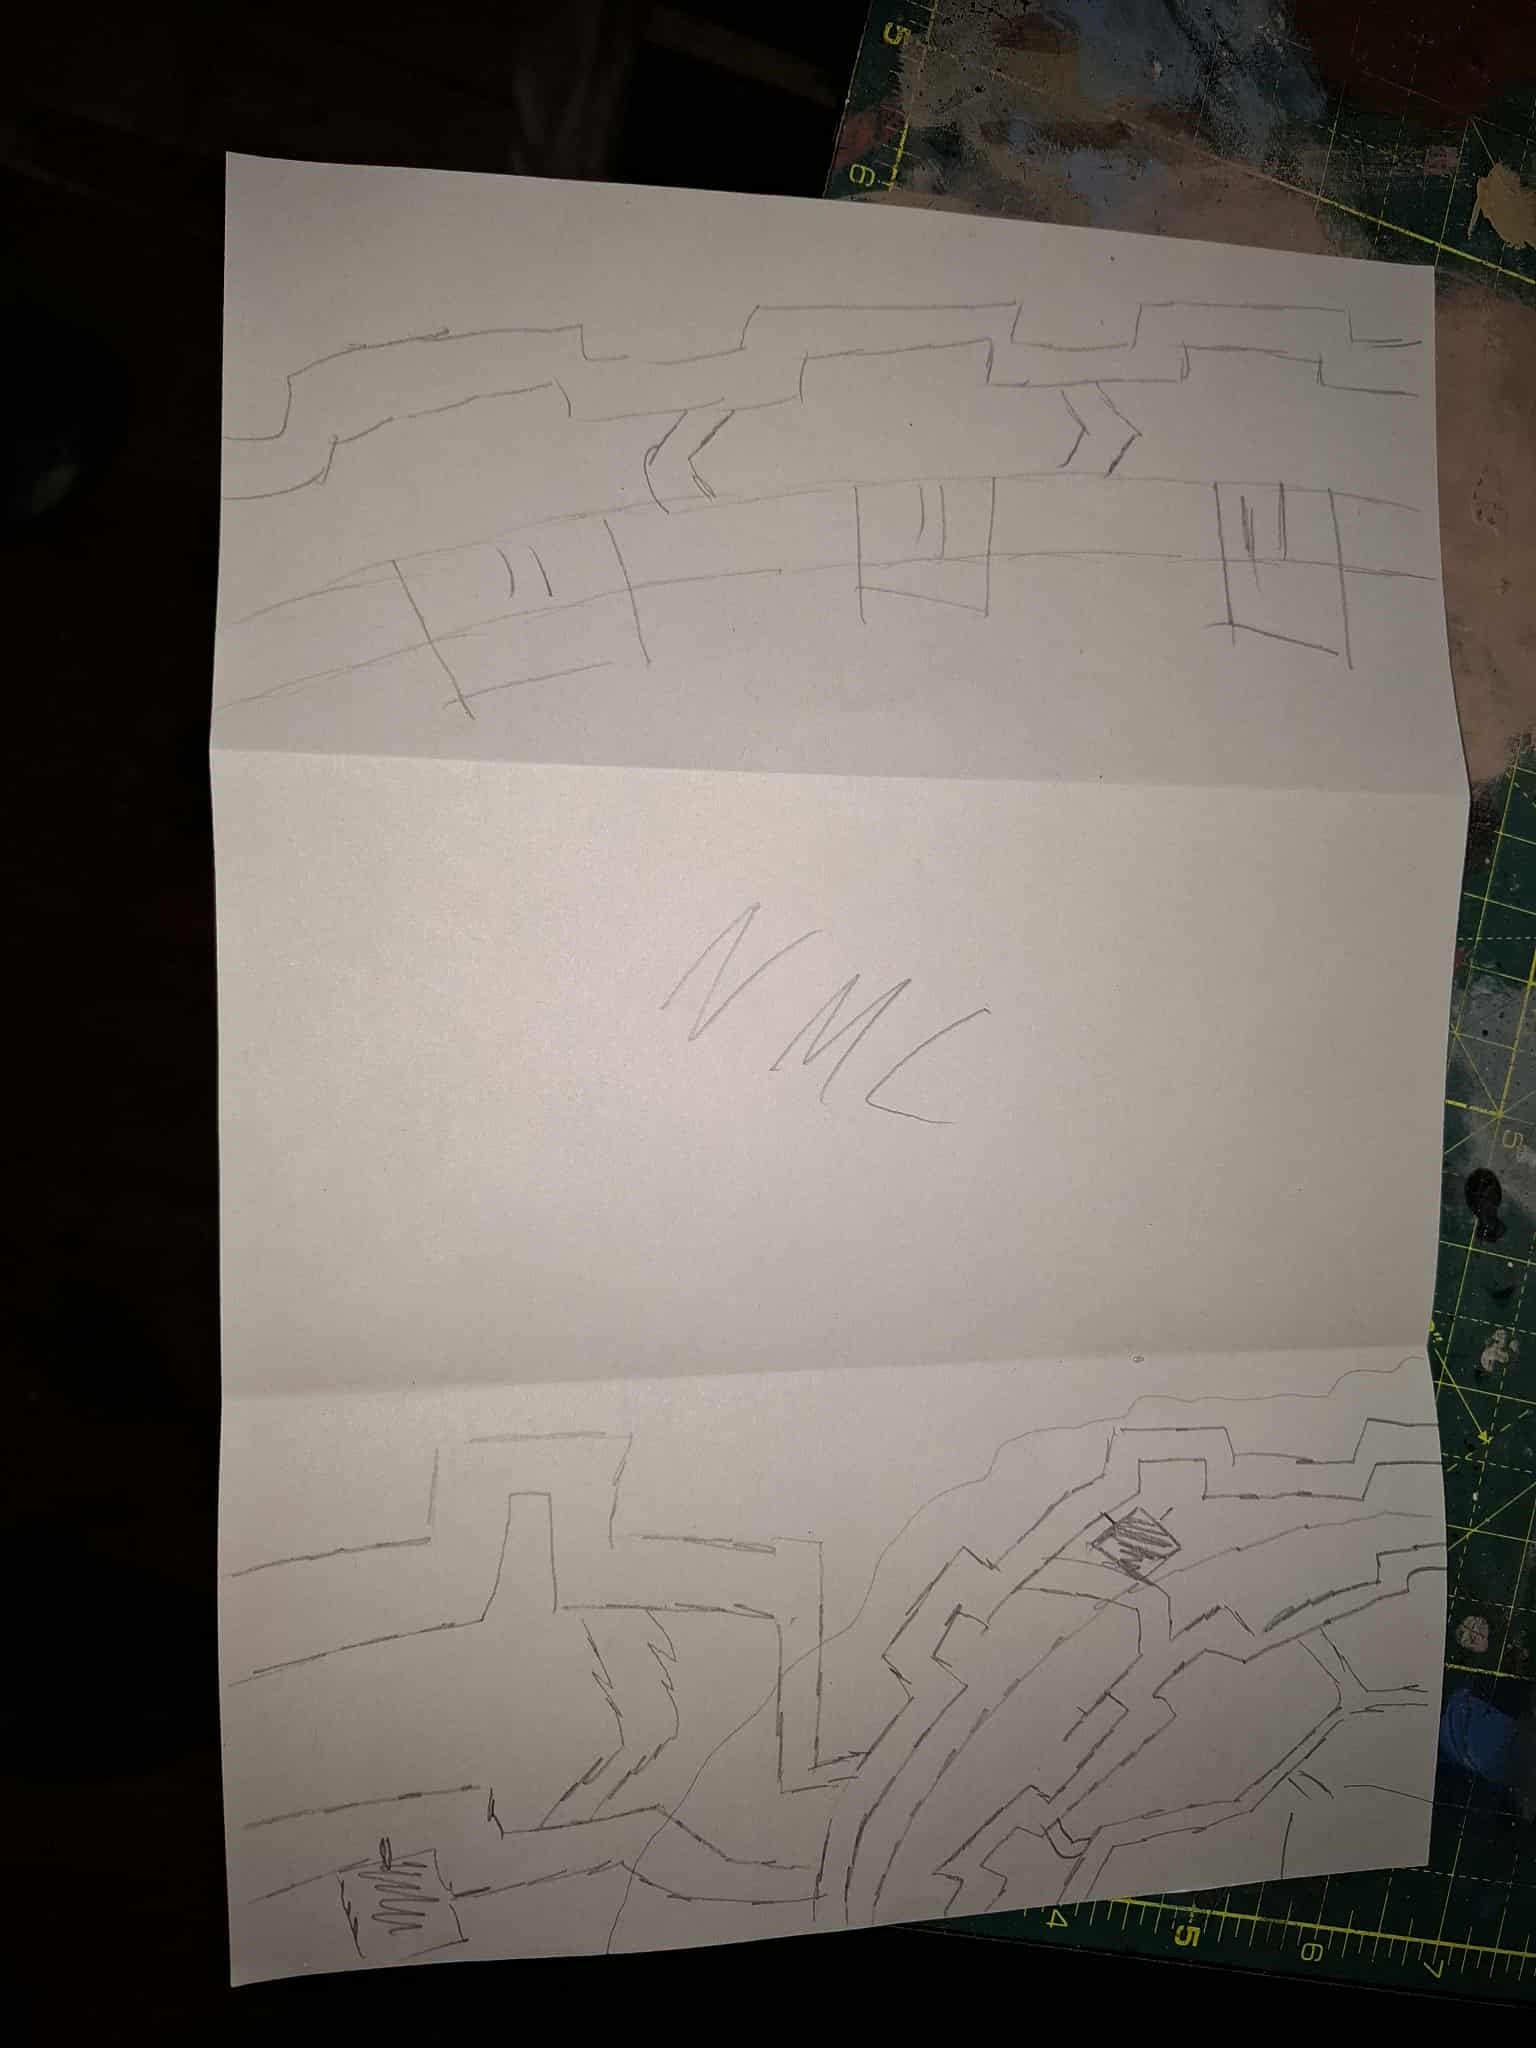
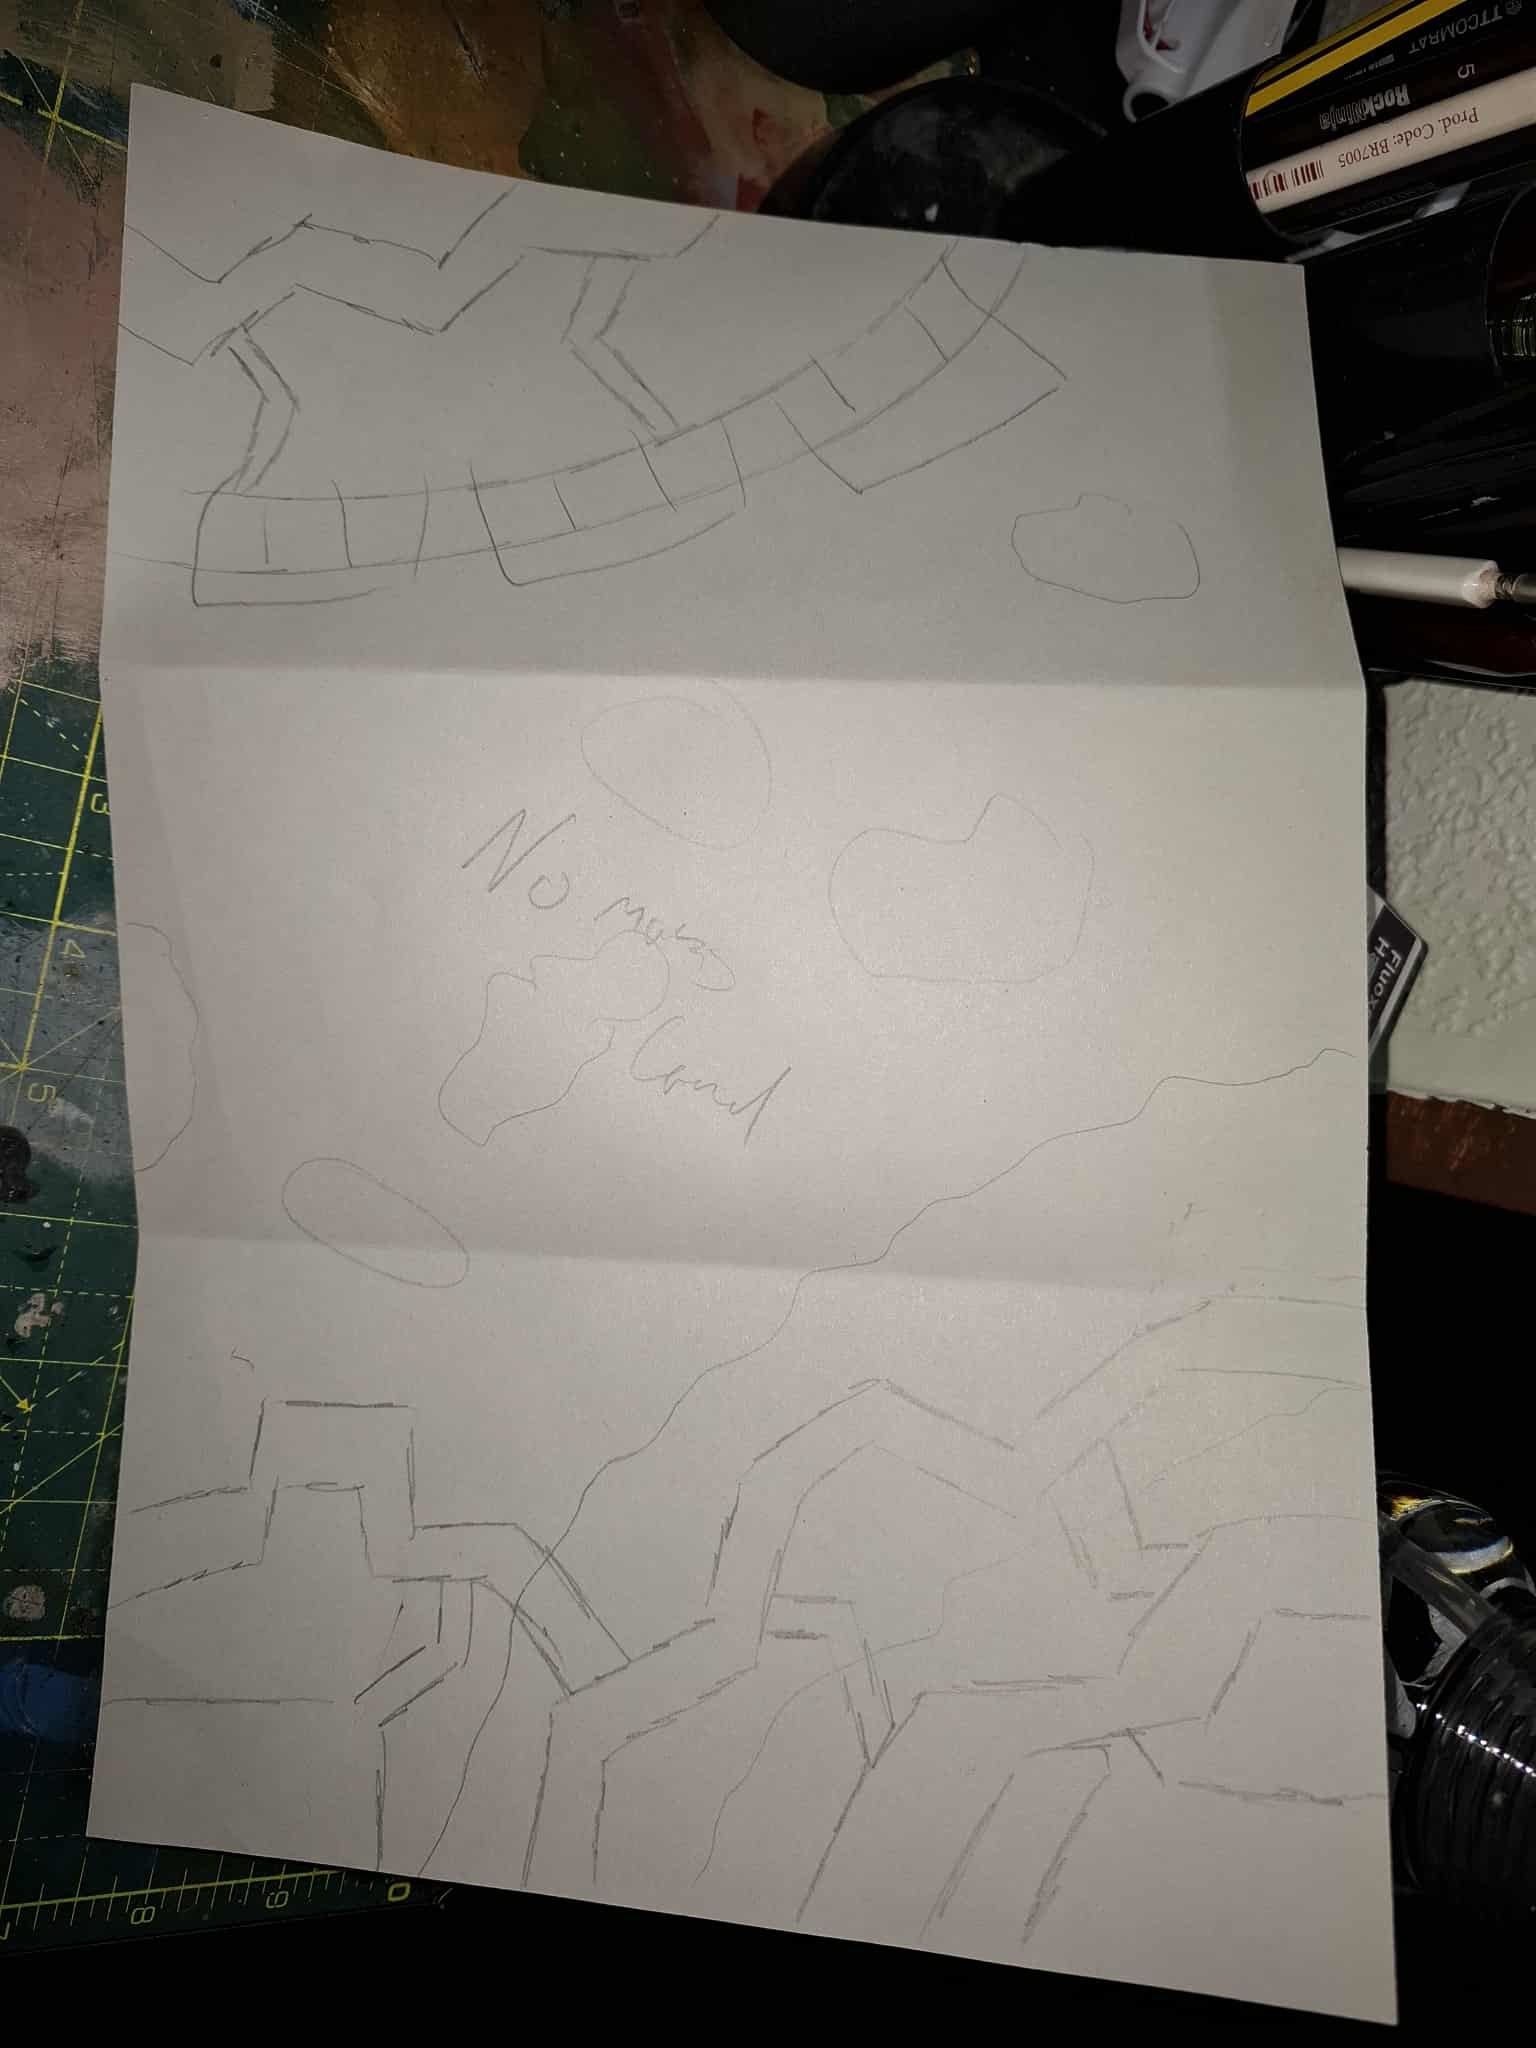
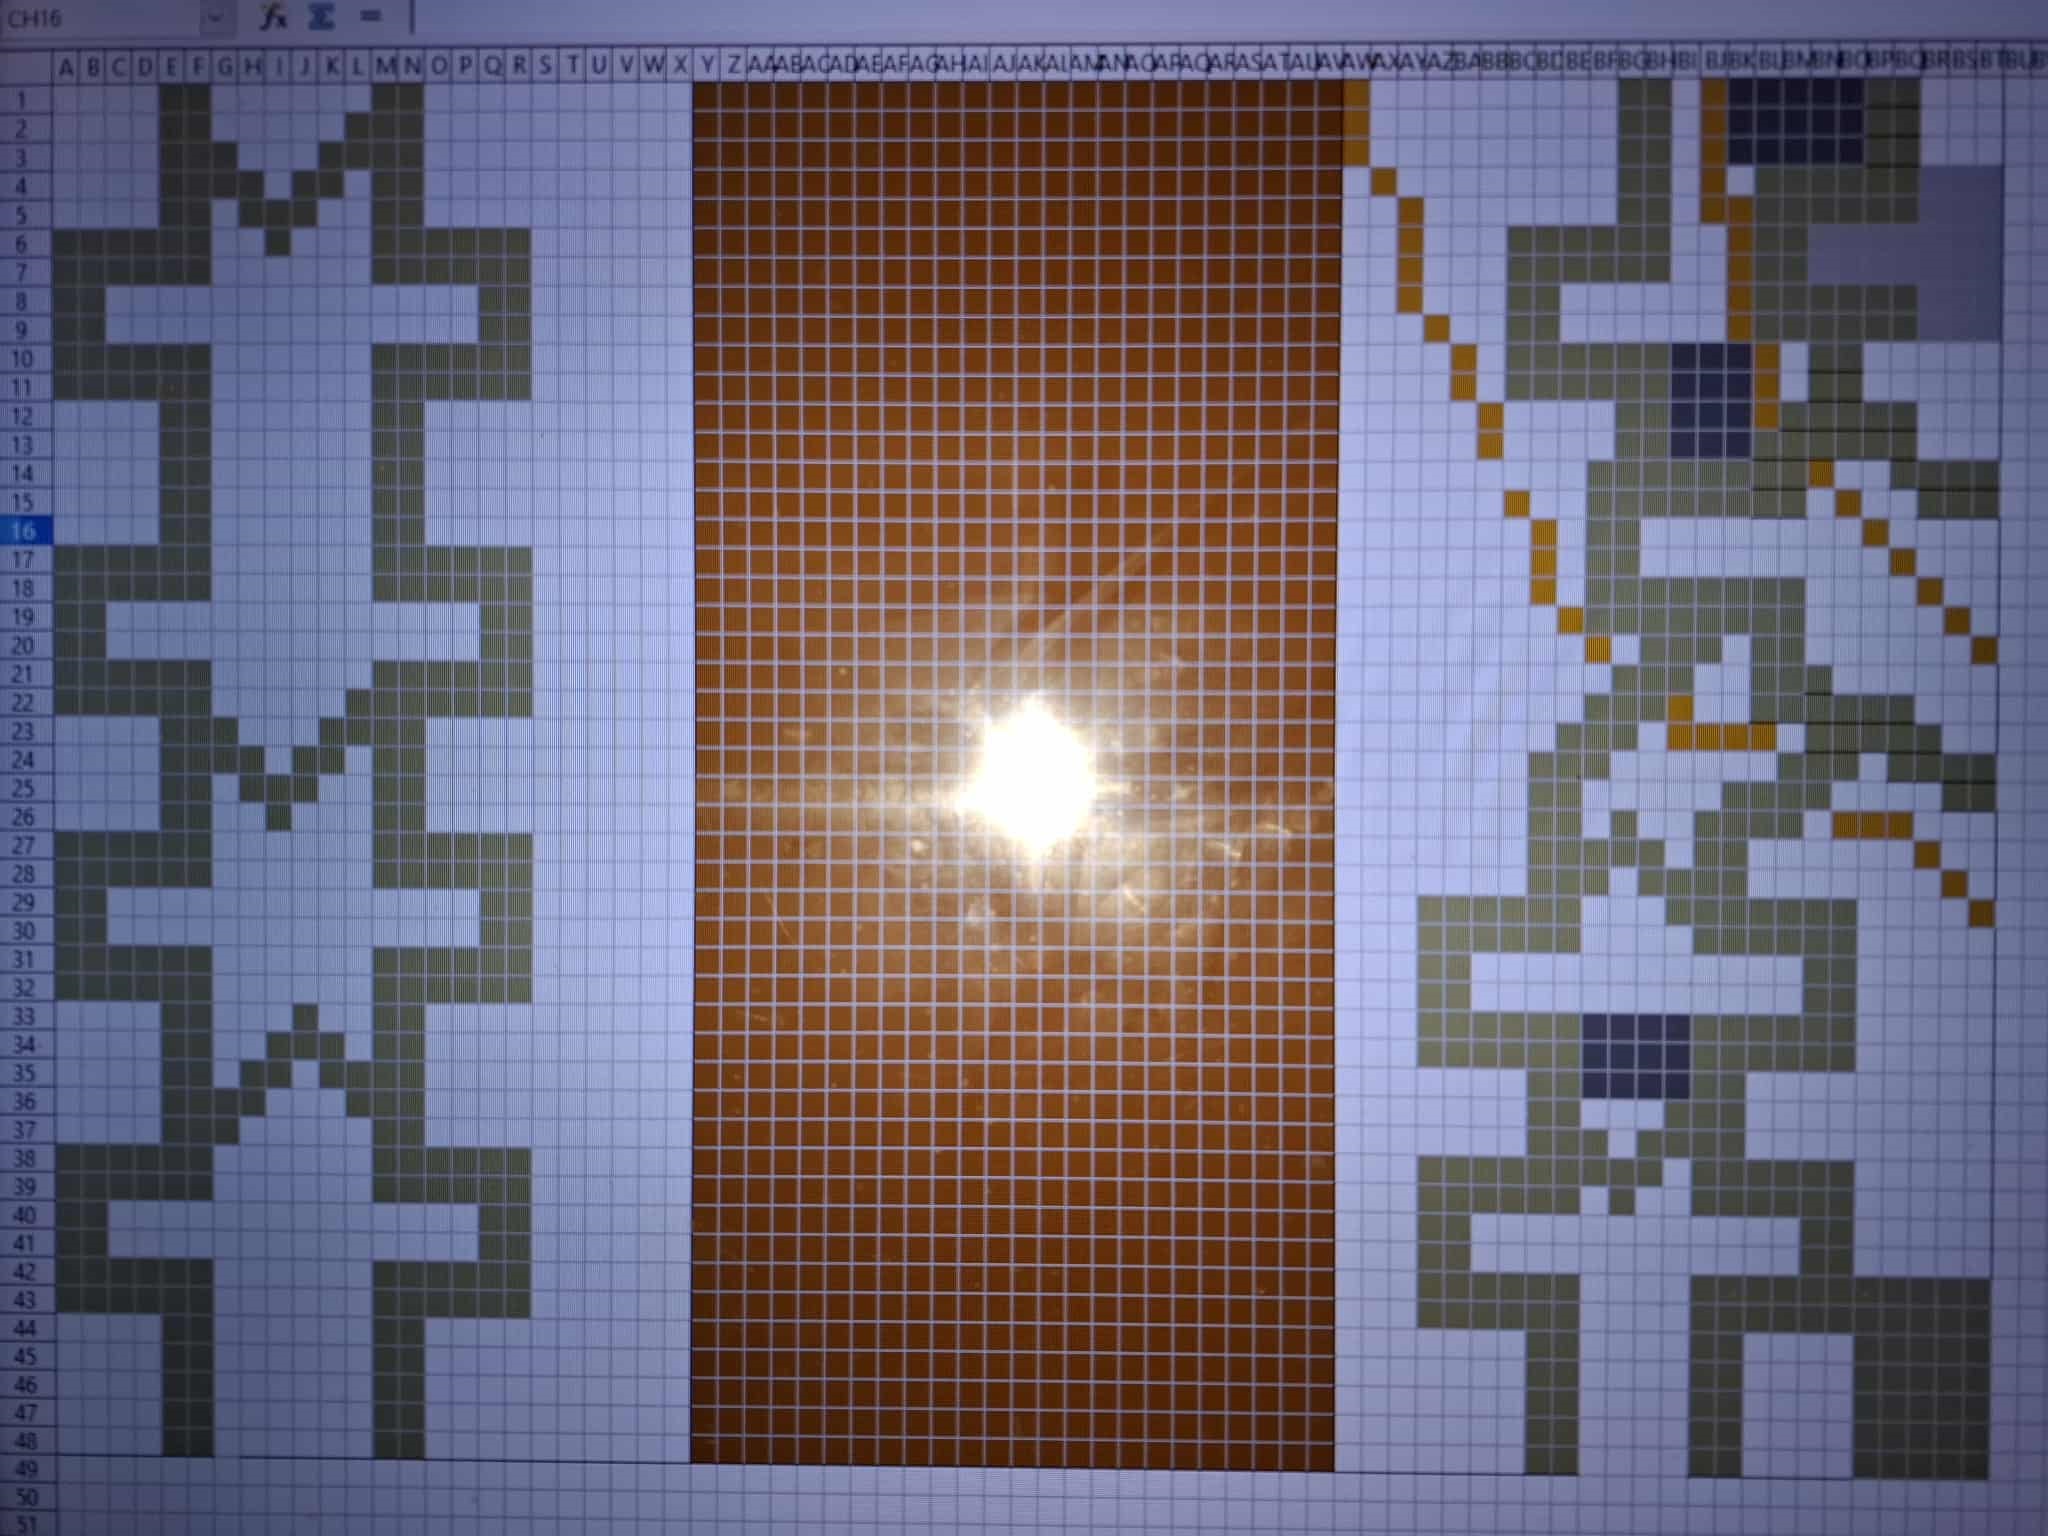
I was thinking of drawing more, but to be honest, there’s only so many ways you can draw zig-zags on a rectangle.
Once i was happy with the map i drew on excel, it was time to actually draw them out. I started with what will be the lower lying trench. I wanted them to be wider than trenches might normally be, which would allow for better gameplay, so decided about 2 inches was about right, it would give enough room for 2 infantry minis to go side by side, or one large best or weapons team. So i found a block of wood that was roughly the size i wanted, stuck my pens to it and drew out the trenches.

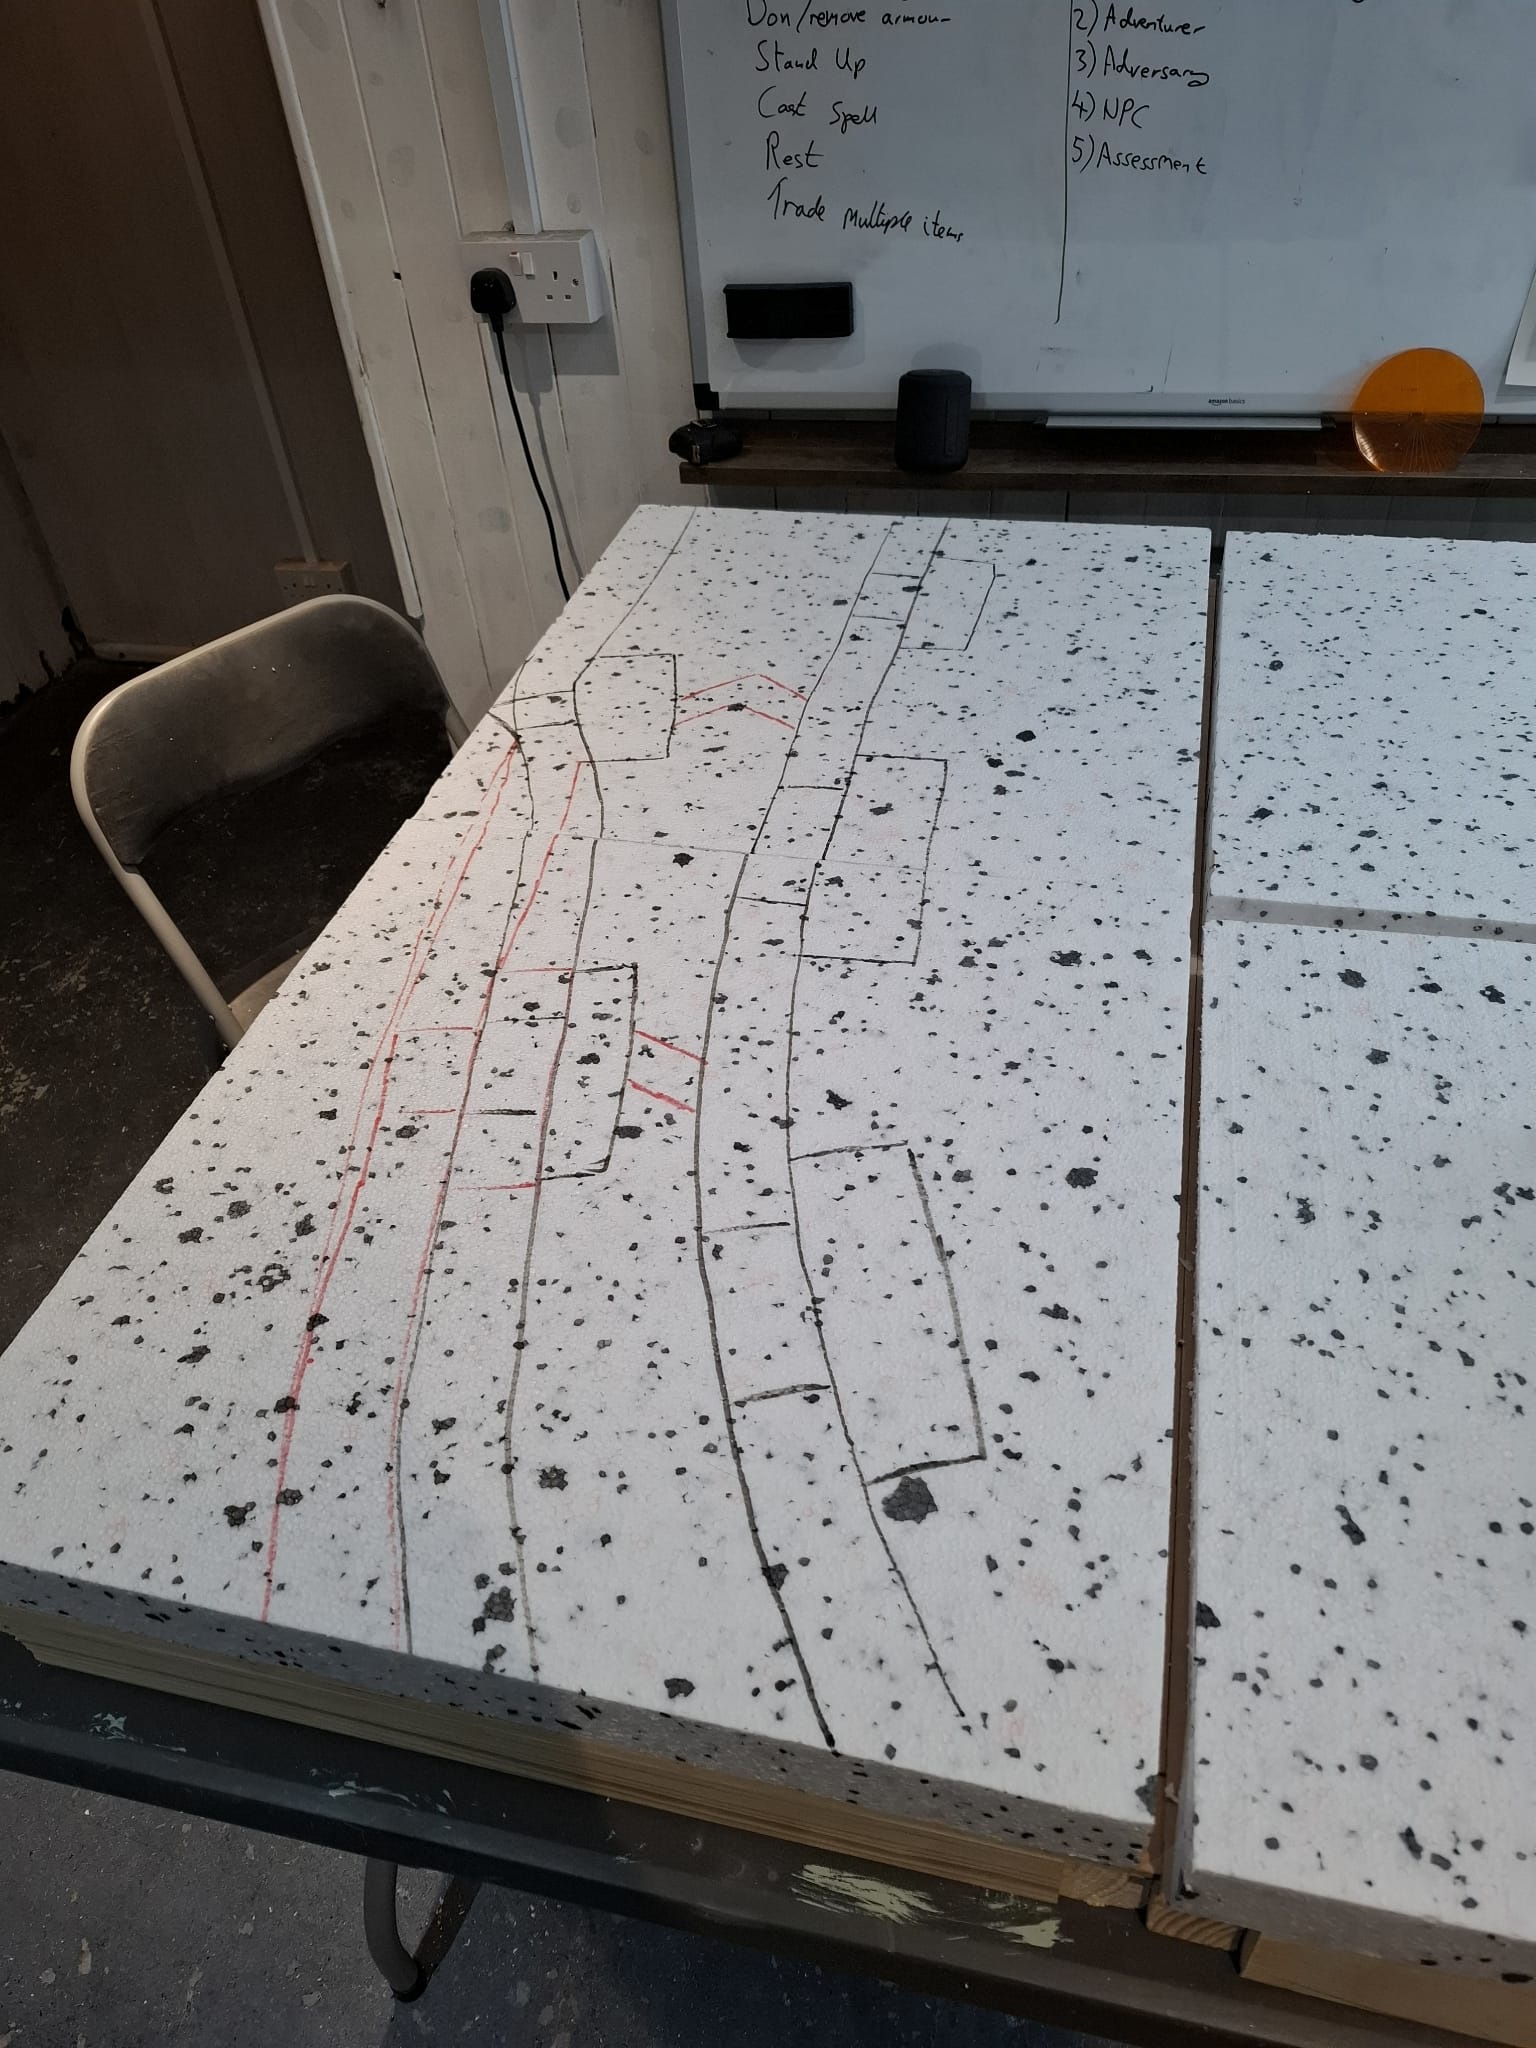
After drawing the lines, i made some edits with a red pen until i was happy, then it was time to cut, which was done with a combination of hot wire cutter and knife.
Once the trenches were cut, it was time to stick the parts down, which i did with some construction adhesive, then laid one of the plain baseboards on top to weight it down whilst it dried.
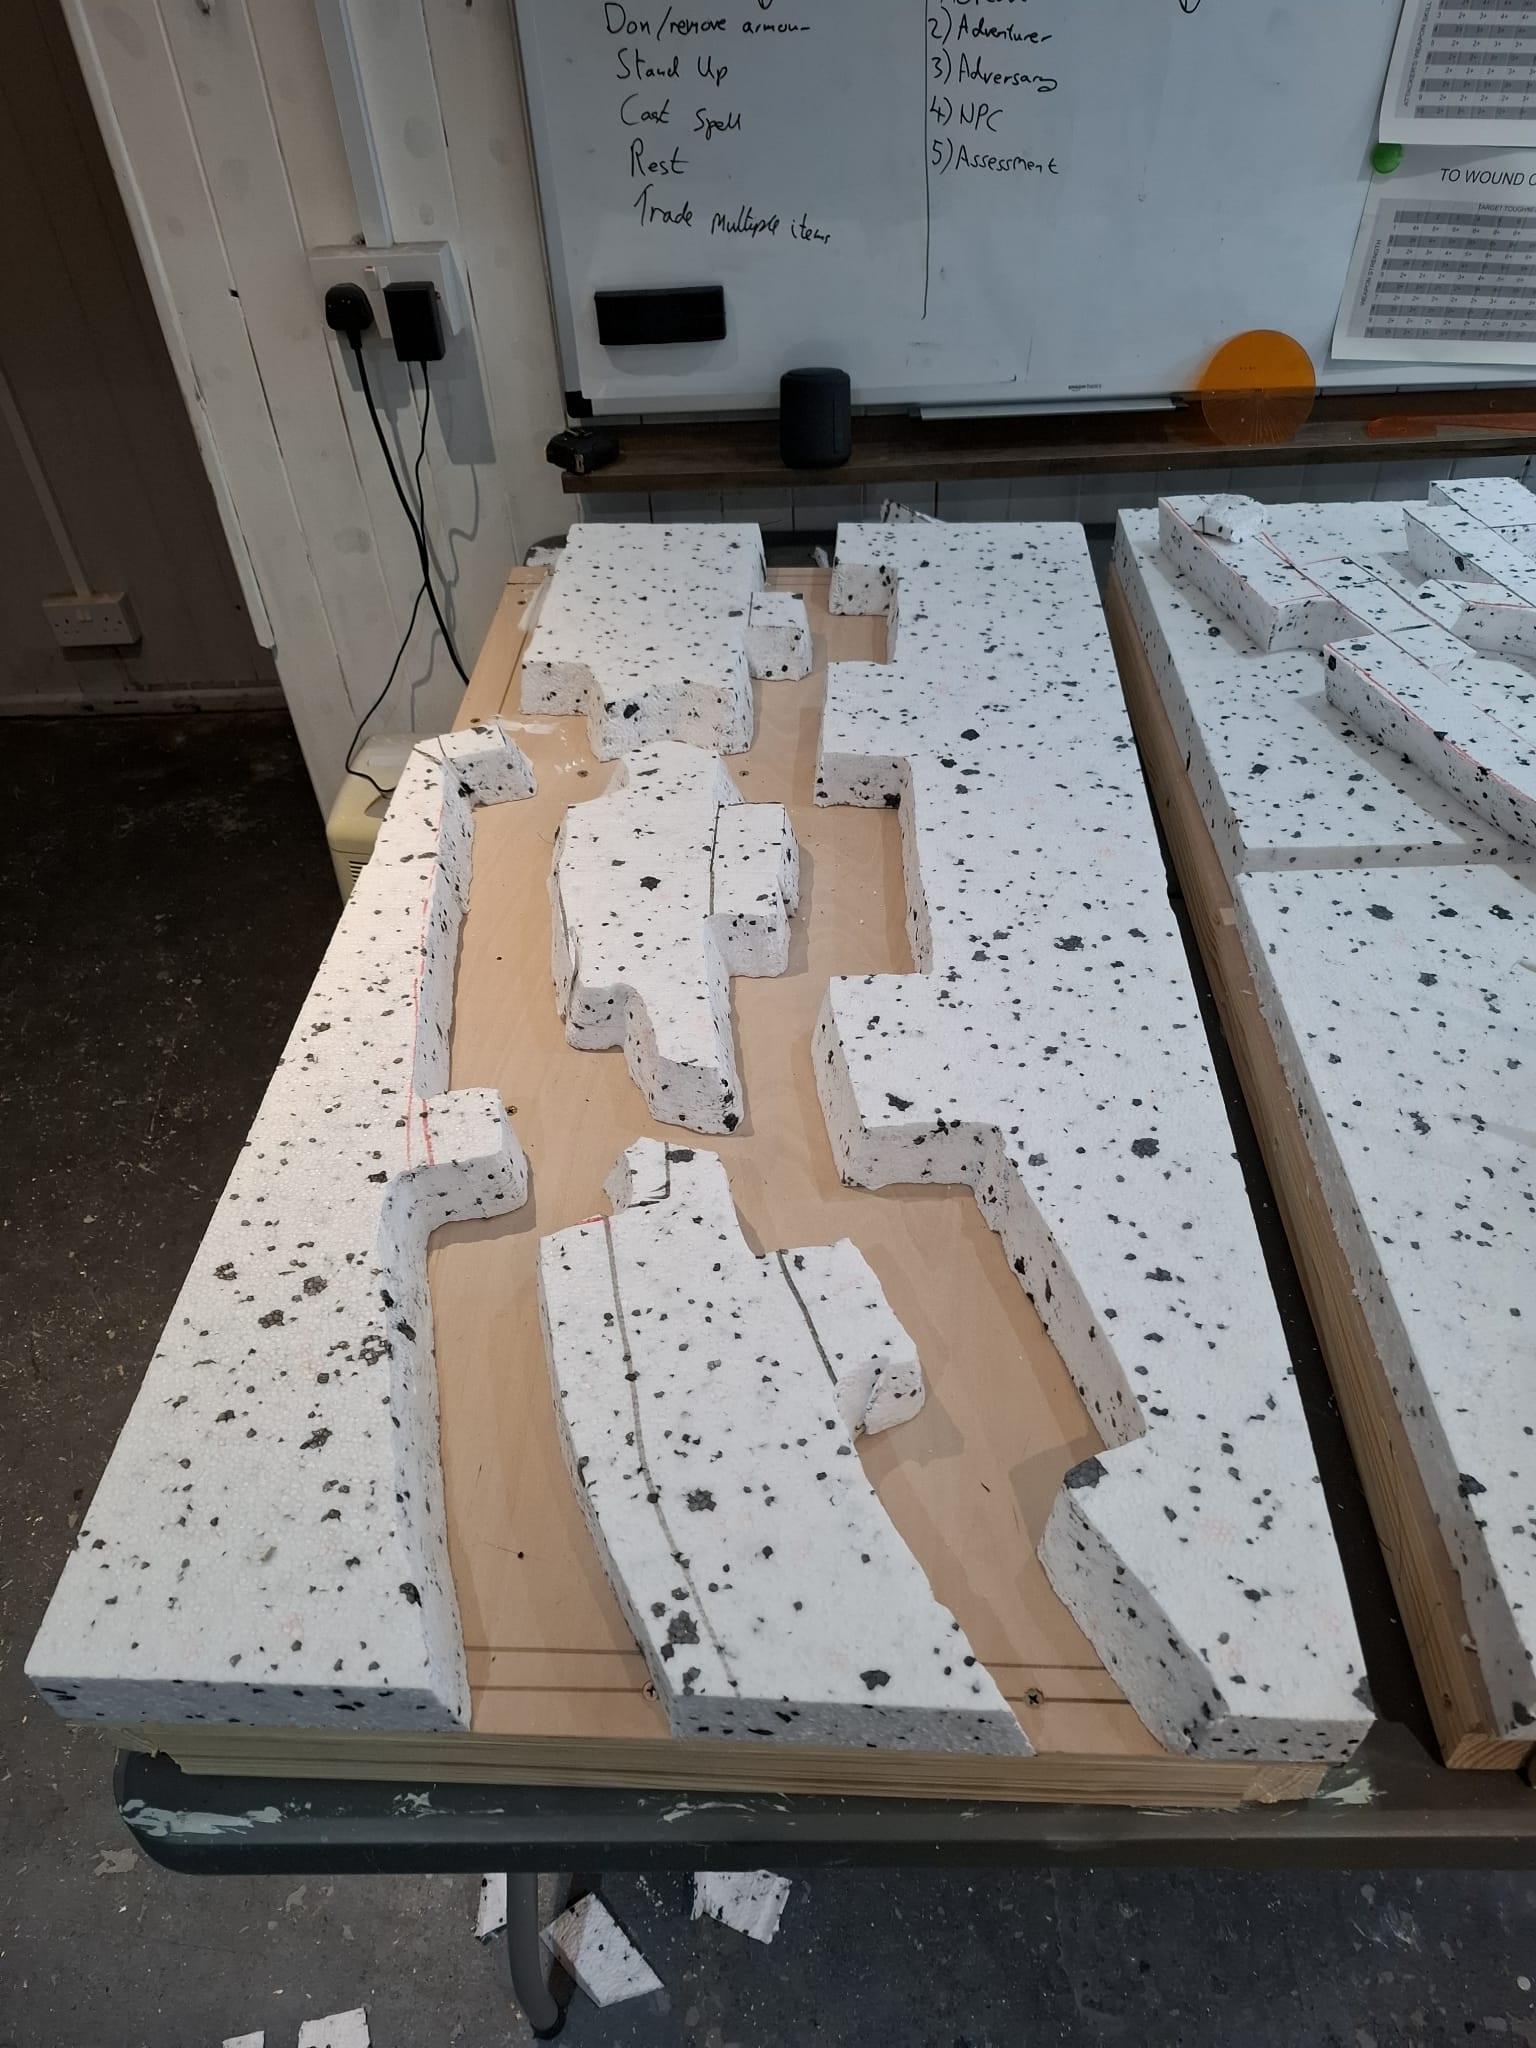
With the opposing trenches, I liked the idea of having a more fortified, built up position set into some hills. Whilst the other board dried, i worked on this idea and eventually built up the opposing trenches.

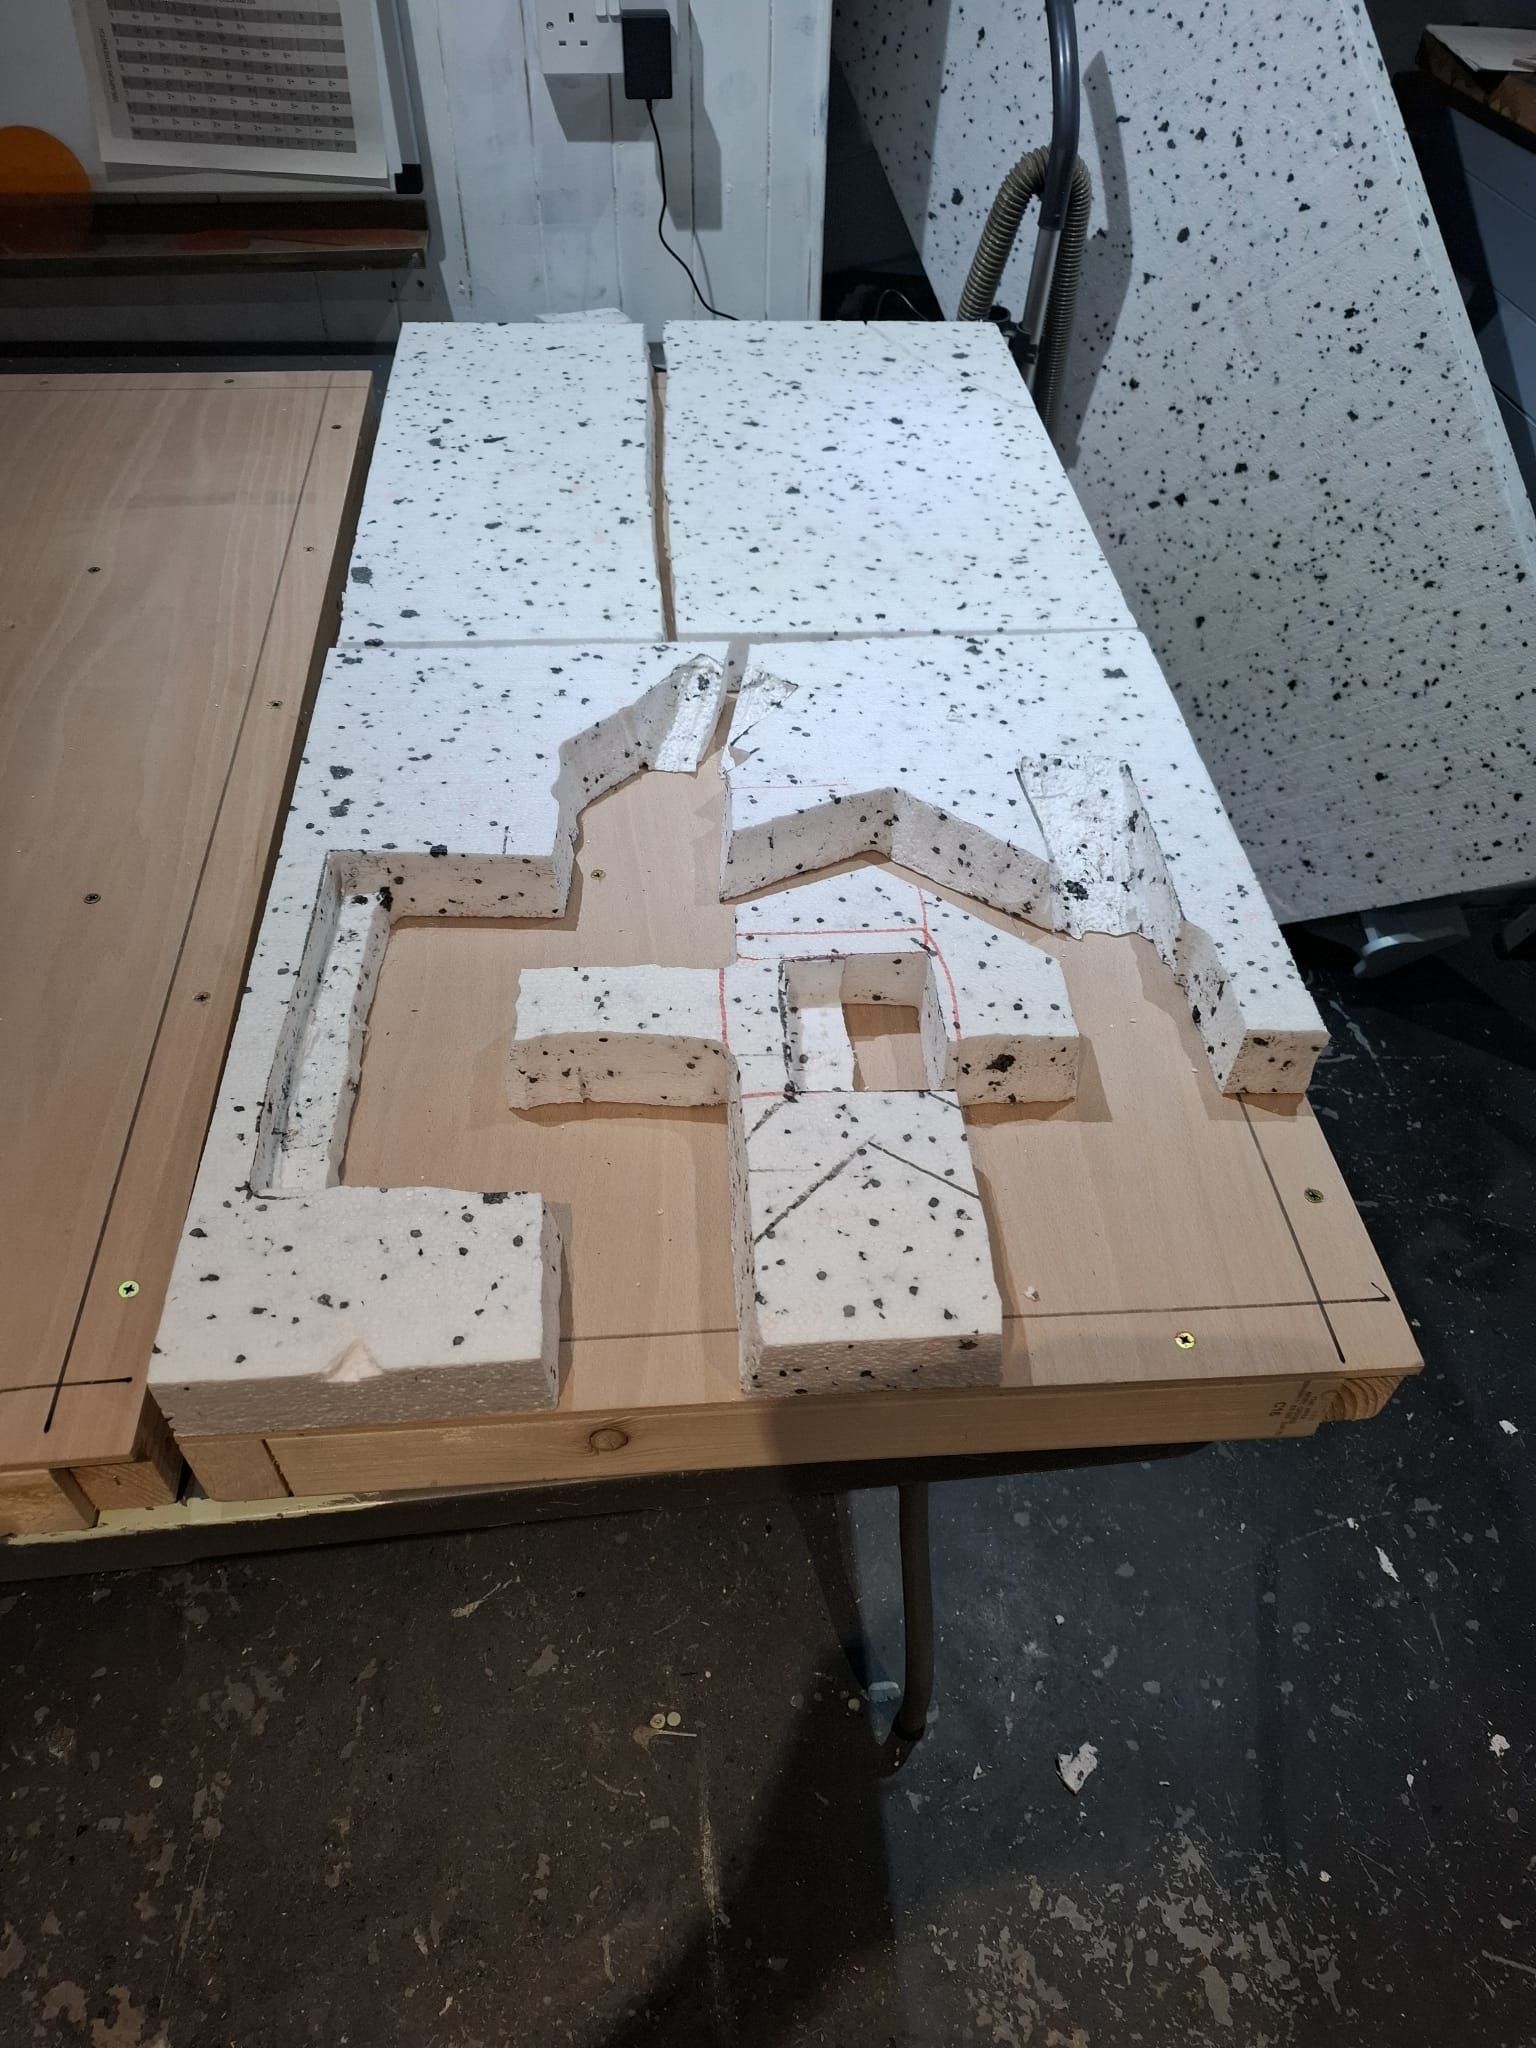
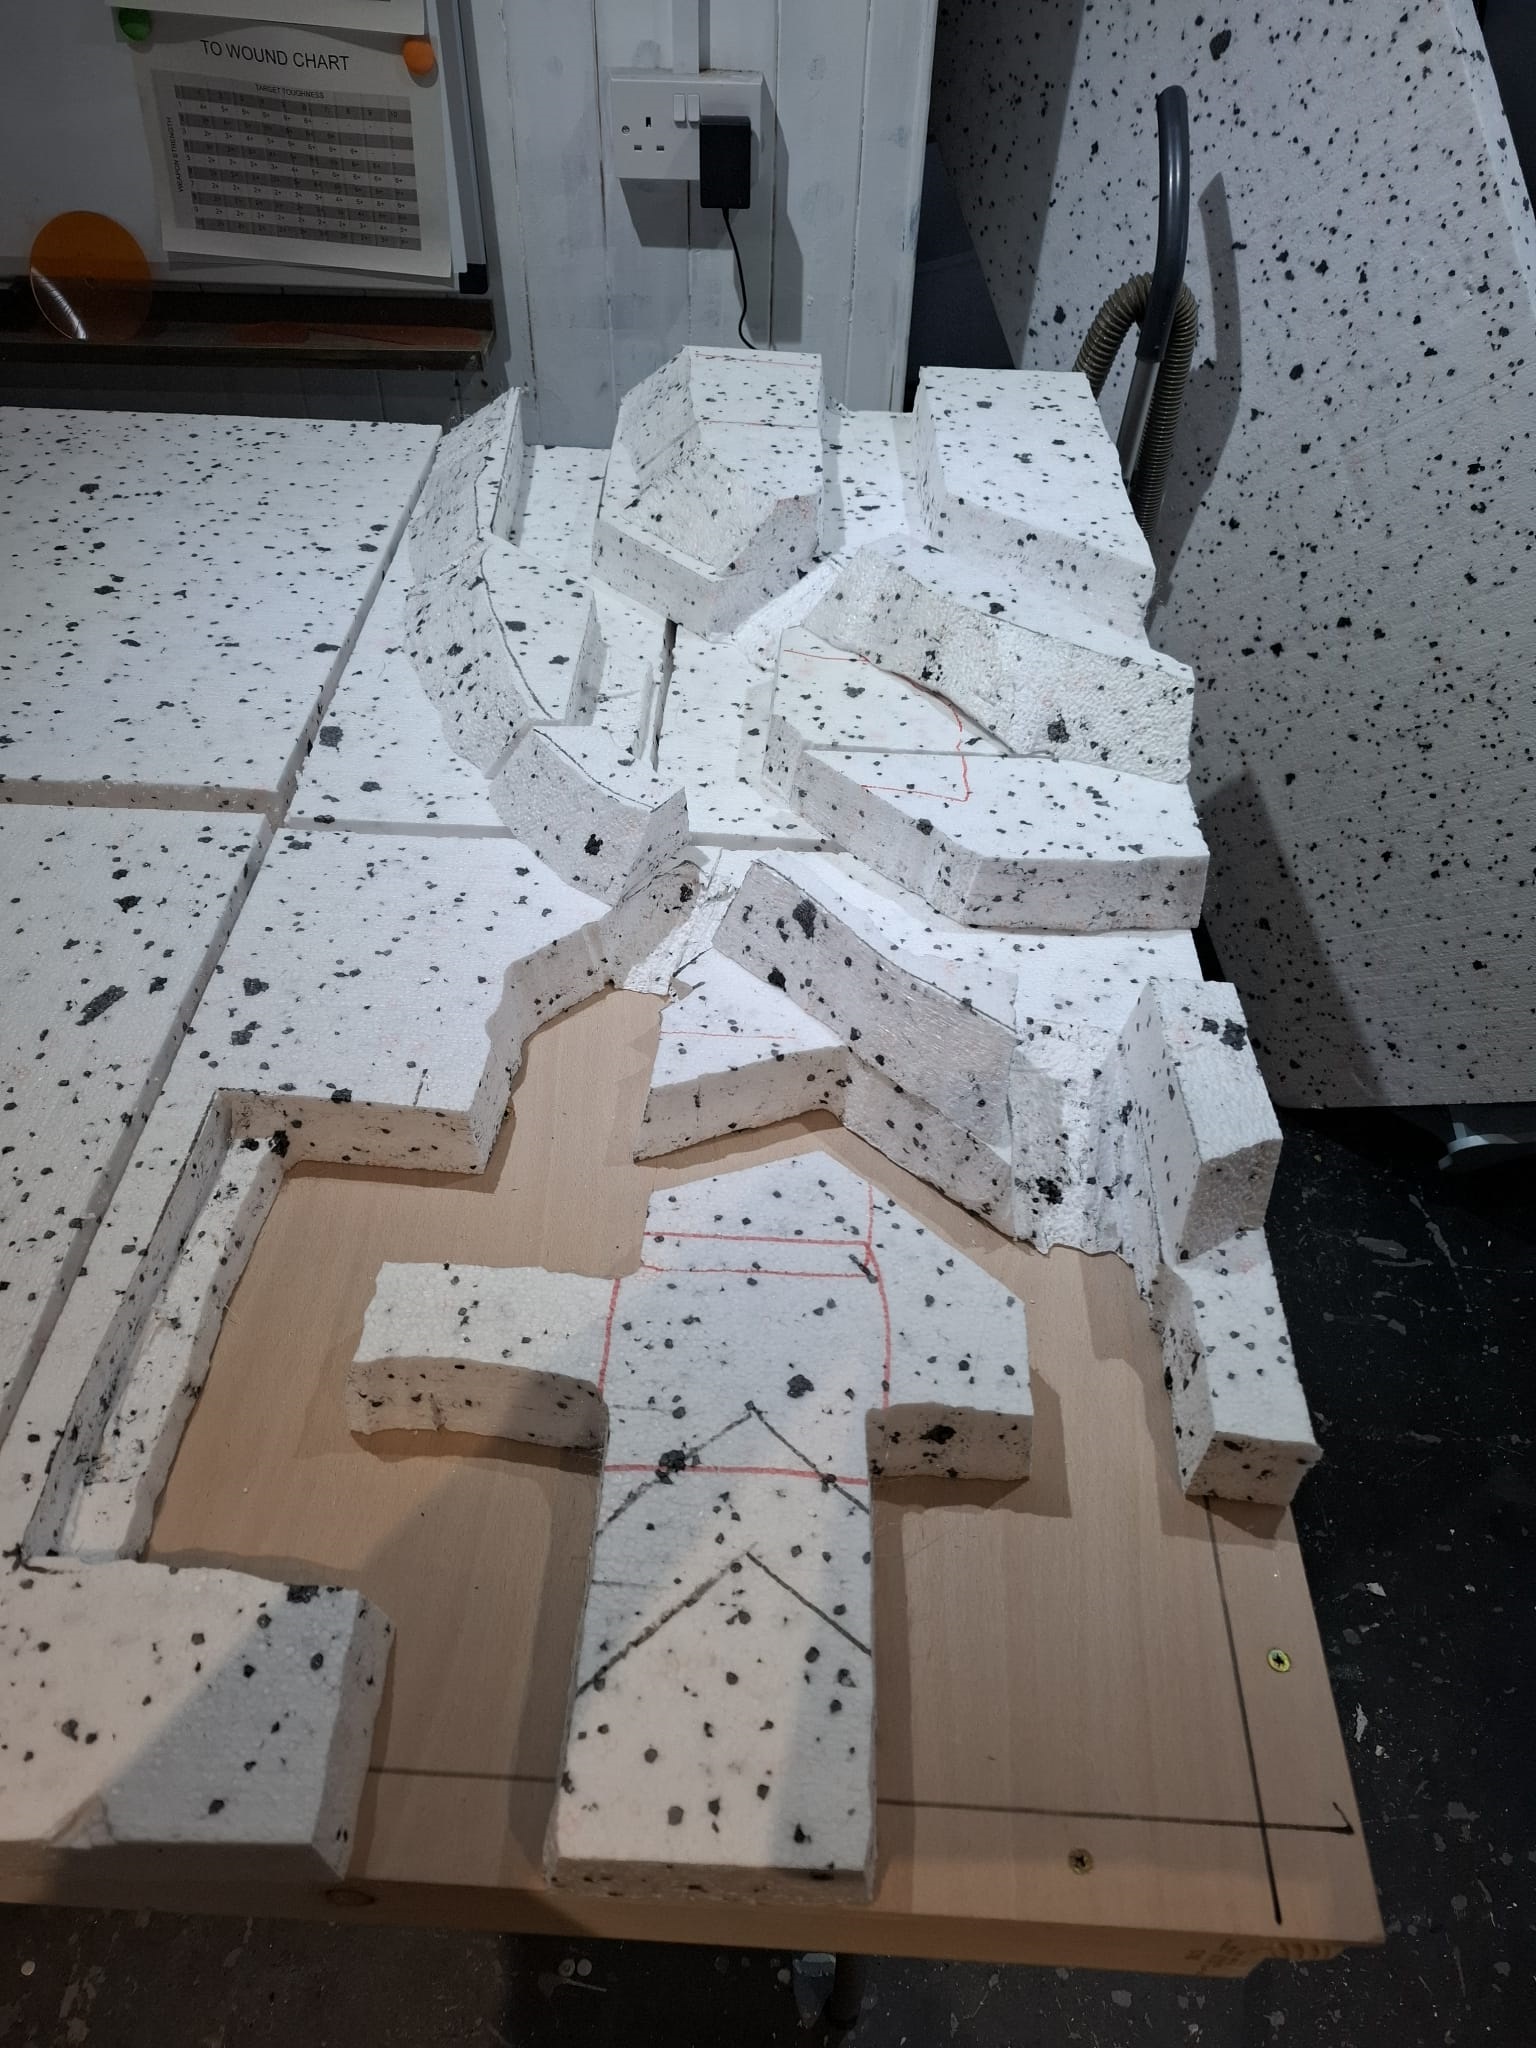
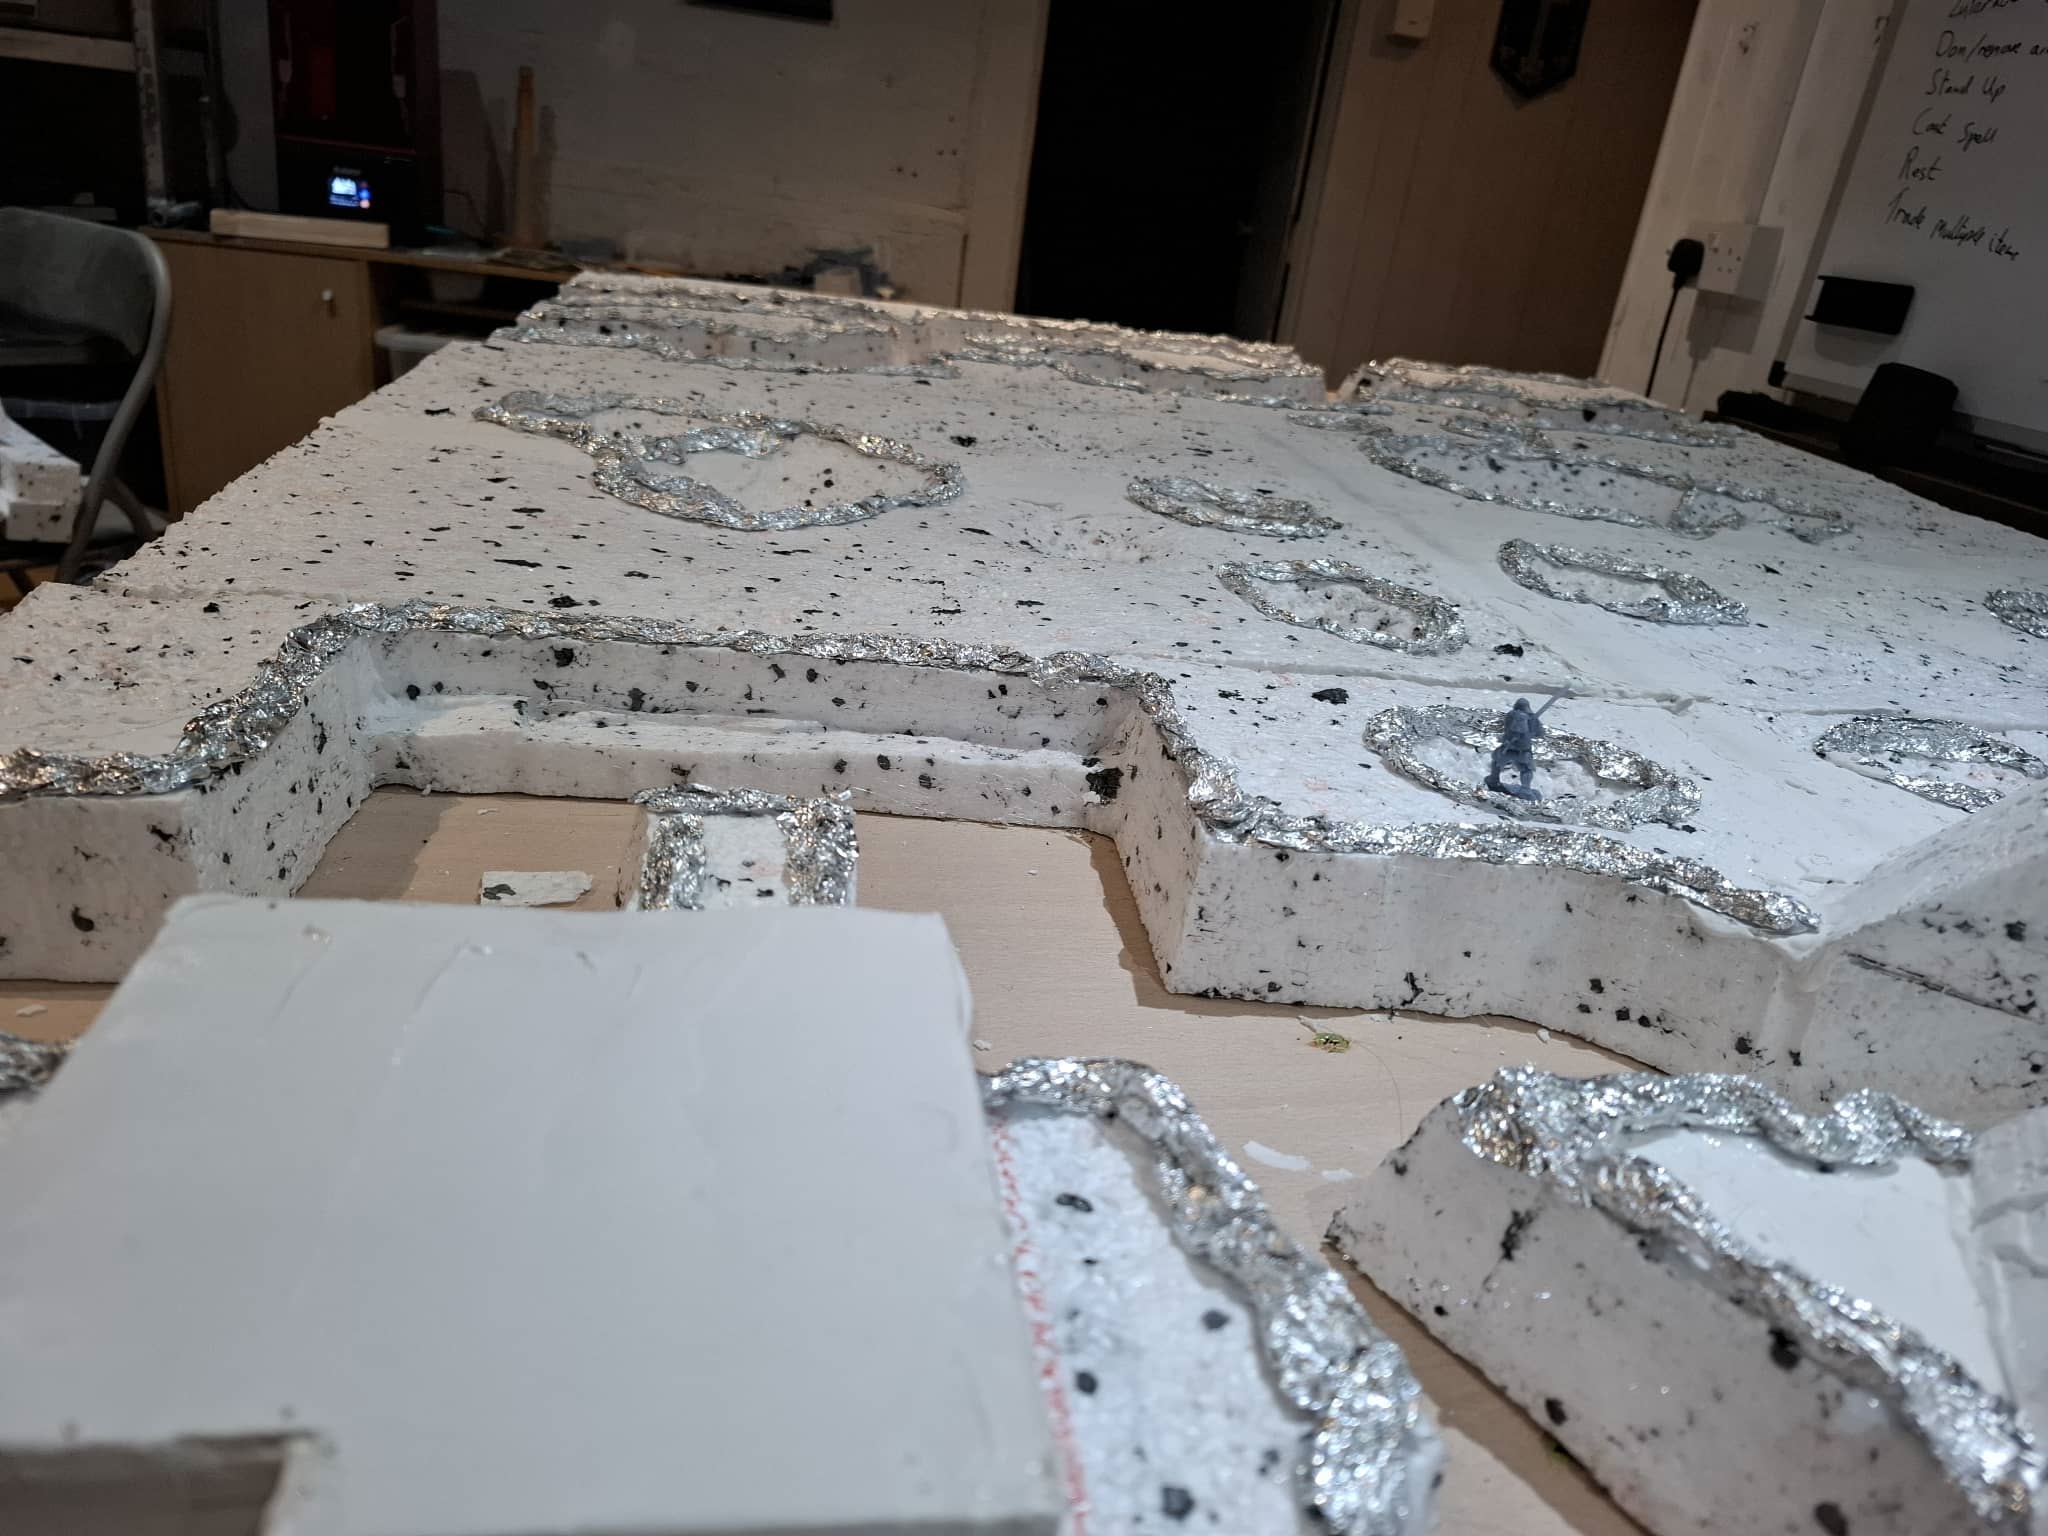
The final bit of this step was to add some more details. I had forgotten to add firing steps to the trenches, so that was the first thing i did. After that it was craters and I also wanted a couple of bunkers in the fortified position so the cut outs for those were added as well.
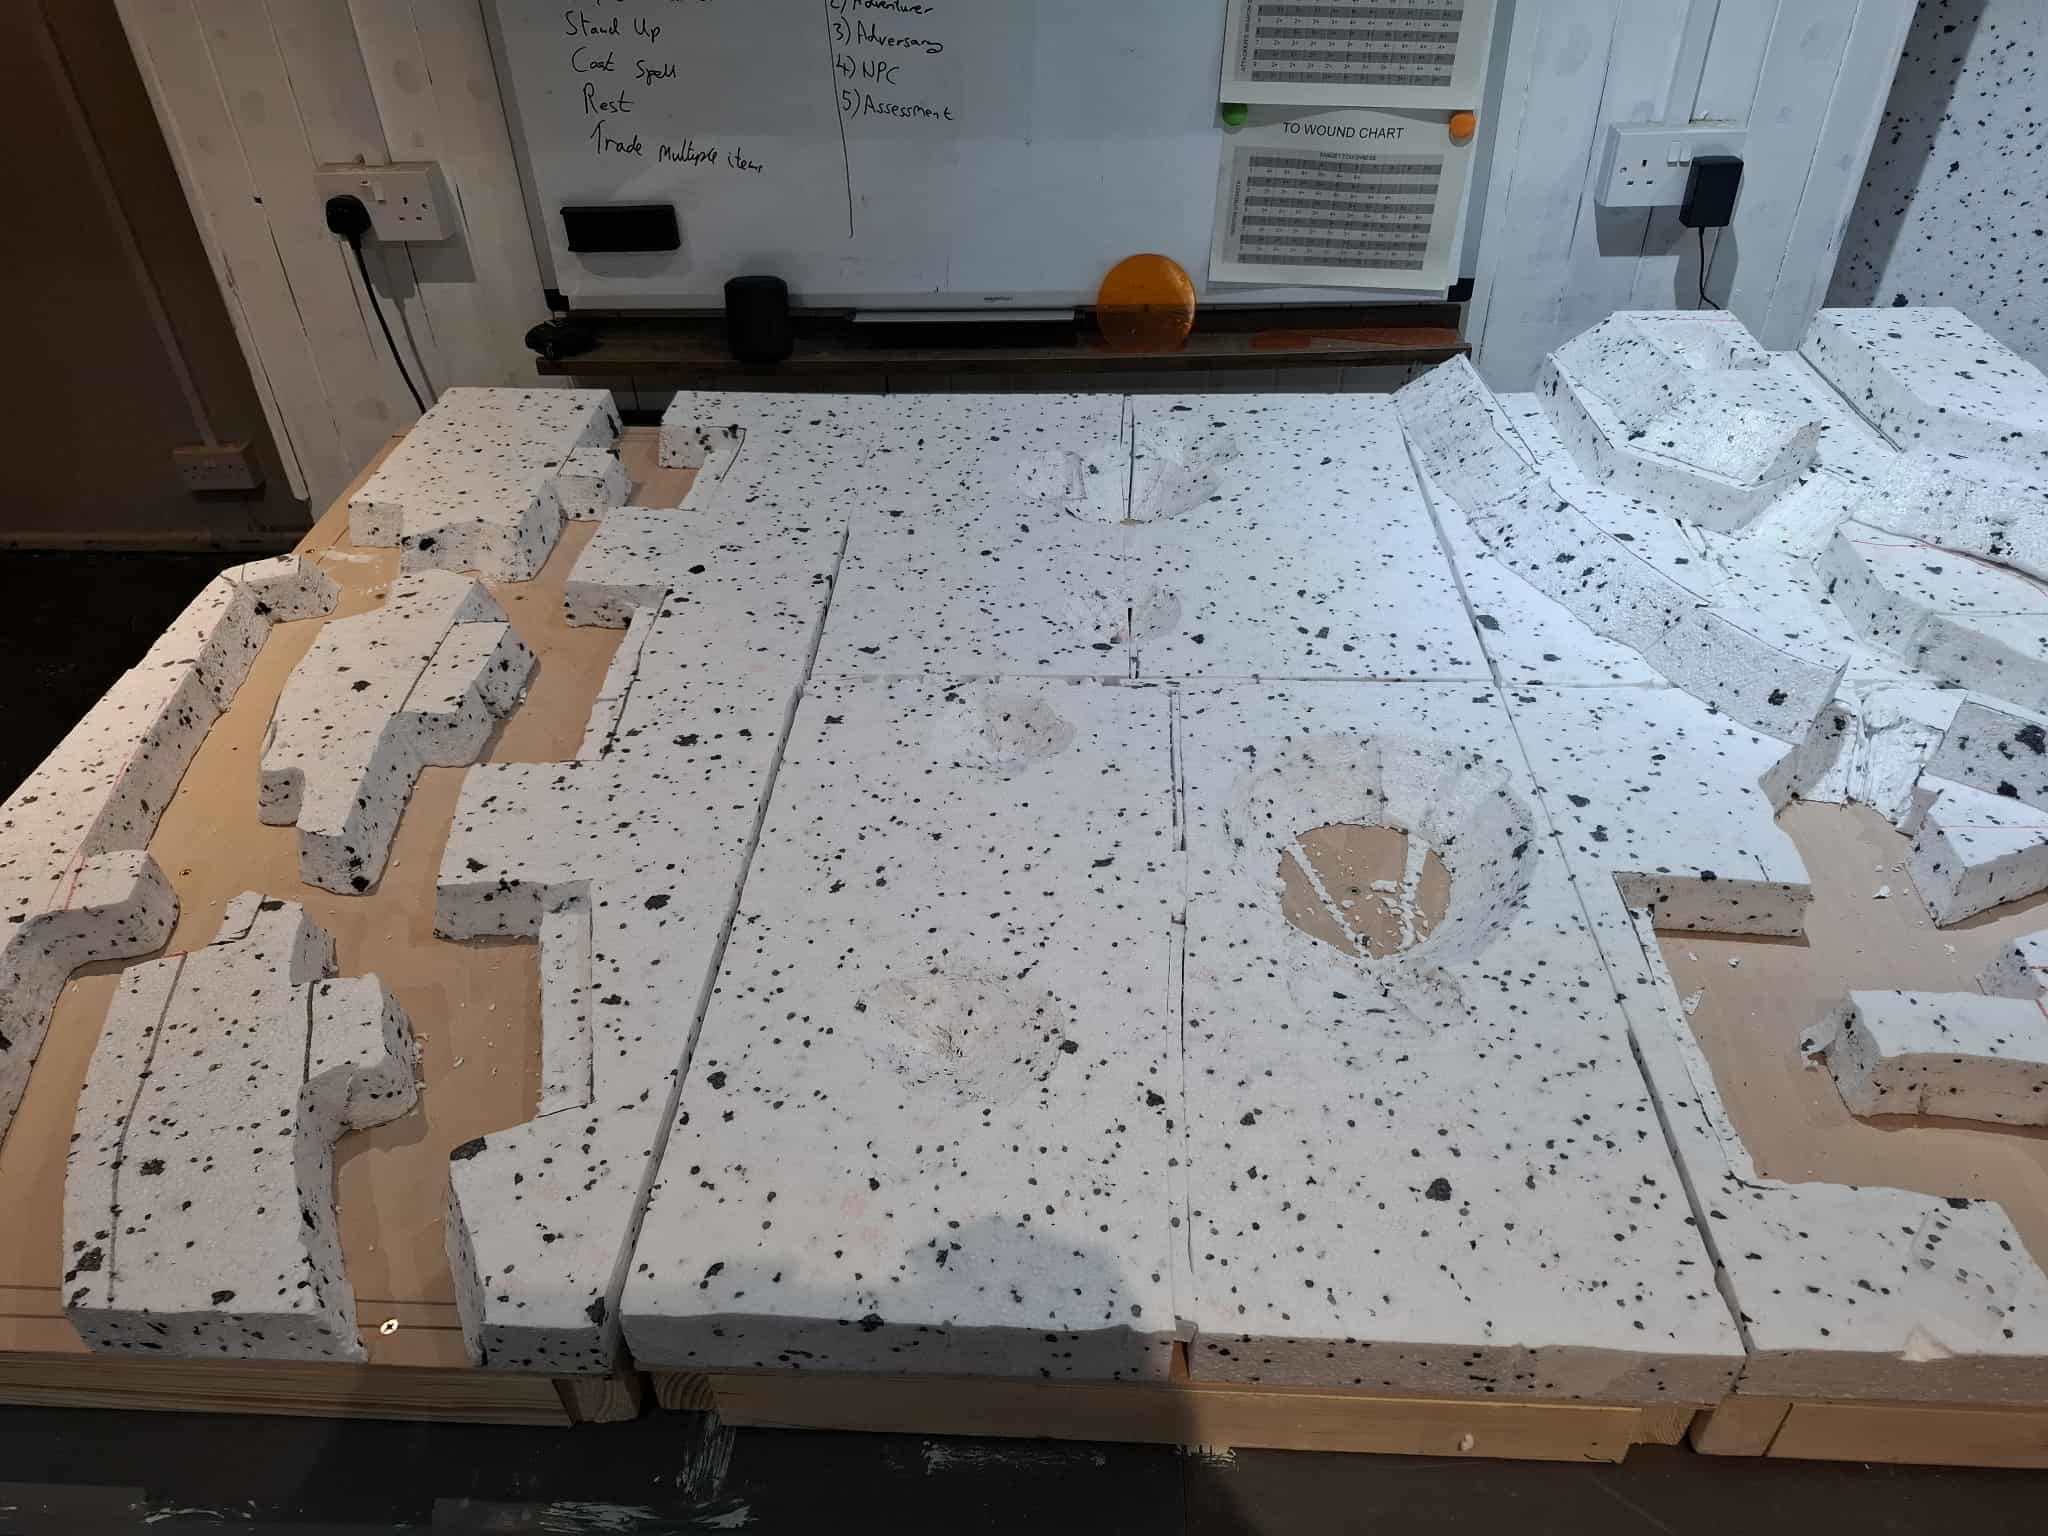
And there we are, the trenches are beginning to take shape! The only thing i did after this photo was attack the board with a heat gun to give it some texture rather than smooth polystyrene, didnt bother with a photo as it wasnt really visible in the camera…but i promise its there!
This weekend I’m hoping i have time to do some gap filling and some extra detailing, before getting some paint on the board. After that it will be over to doing the detailing that will make them actually look like trenches, rather than holes cut in polystyrene!
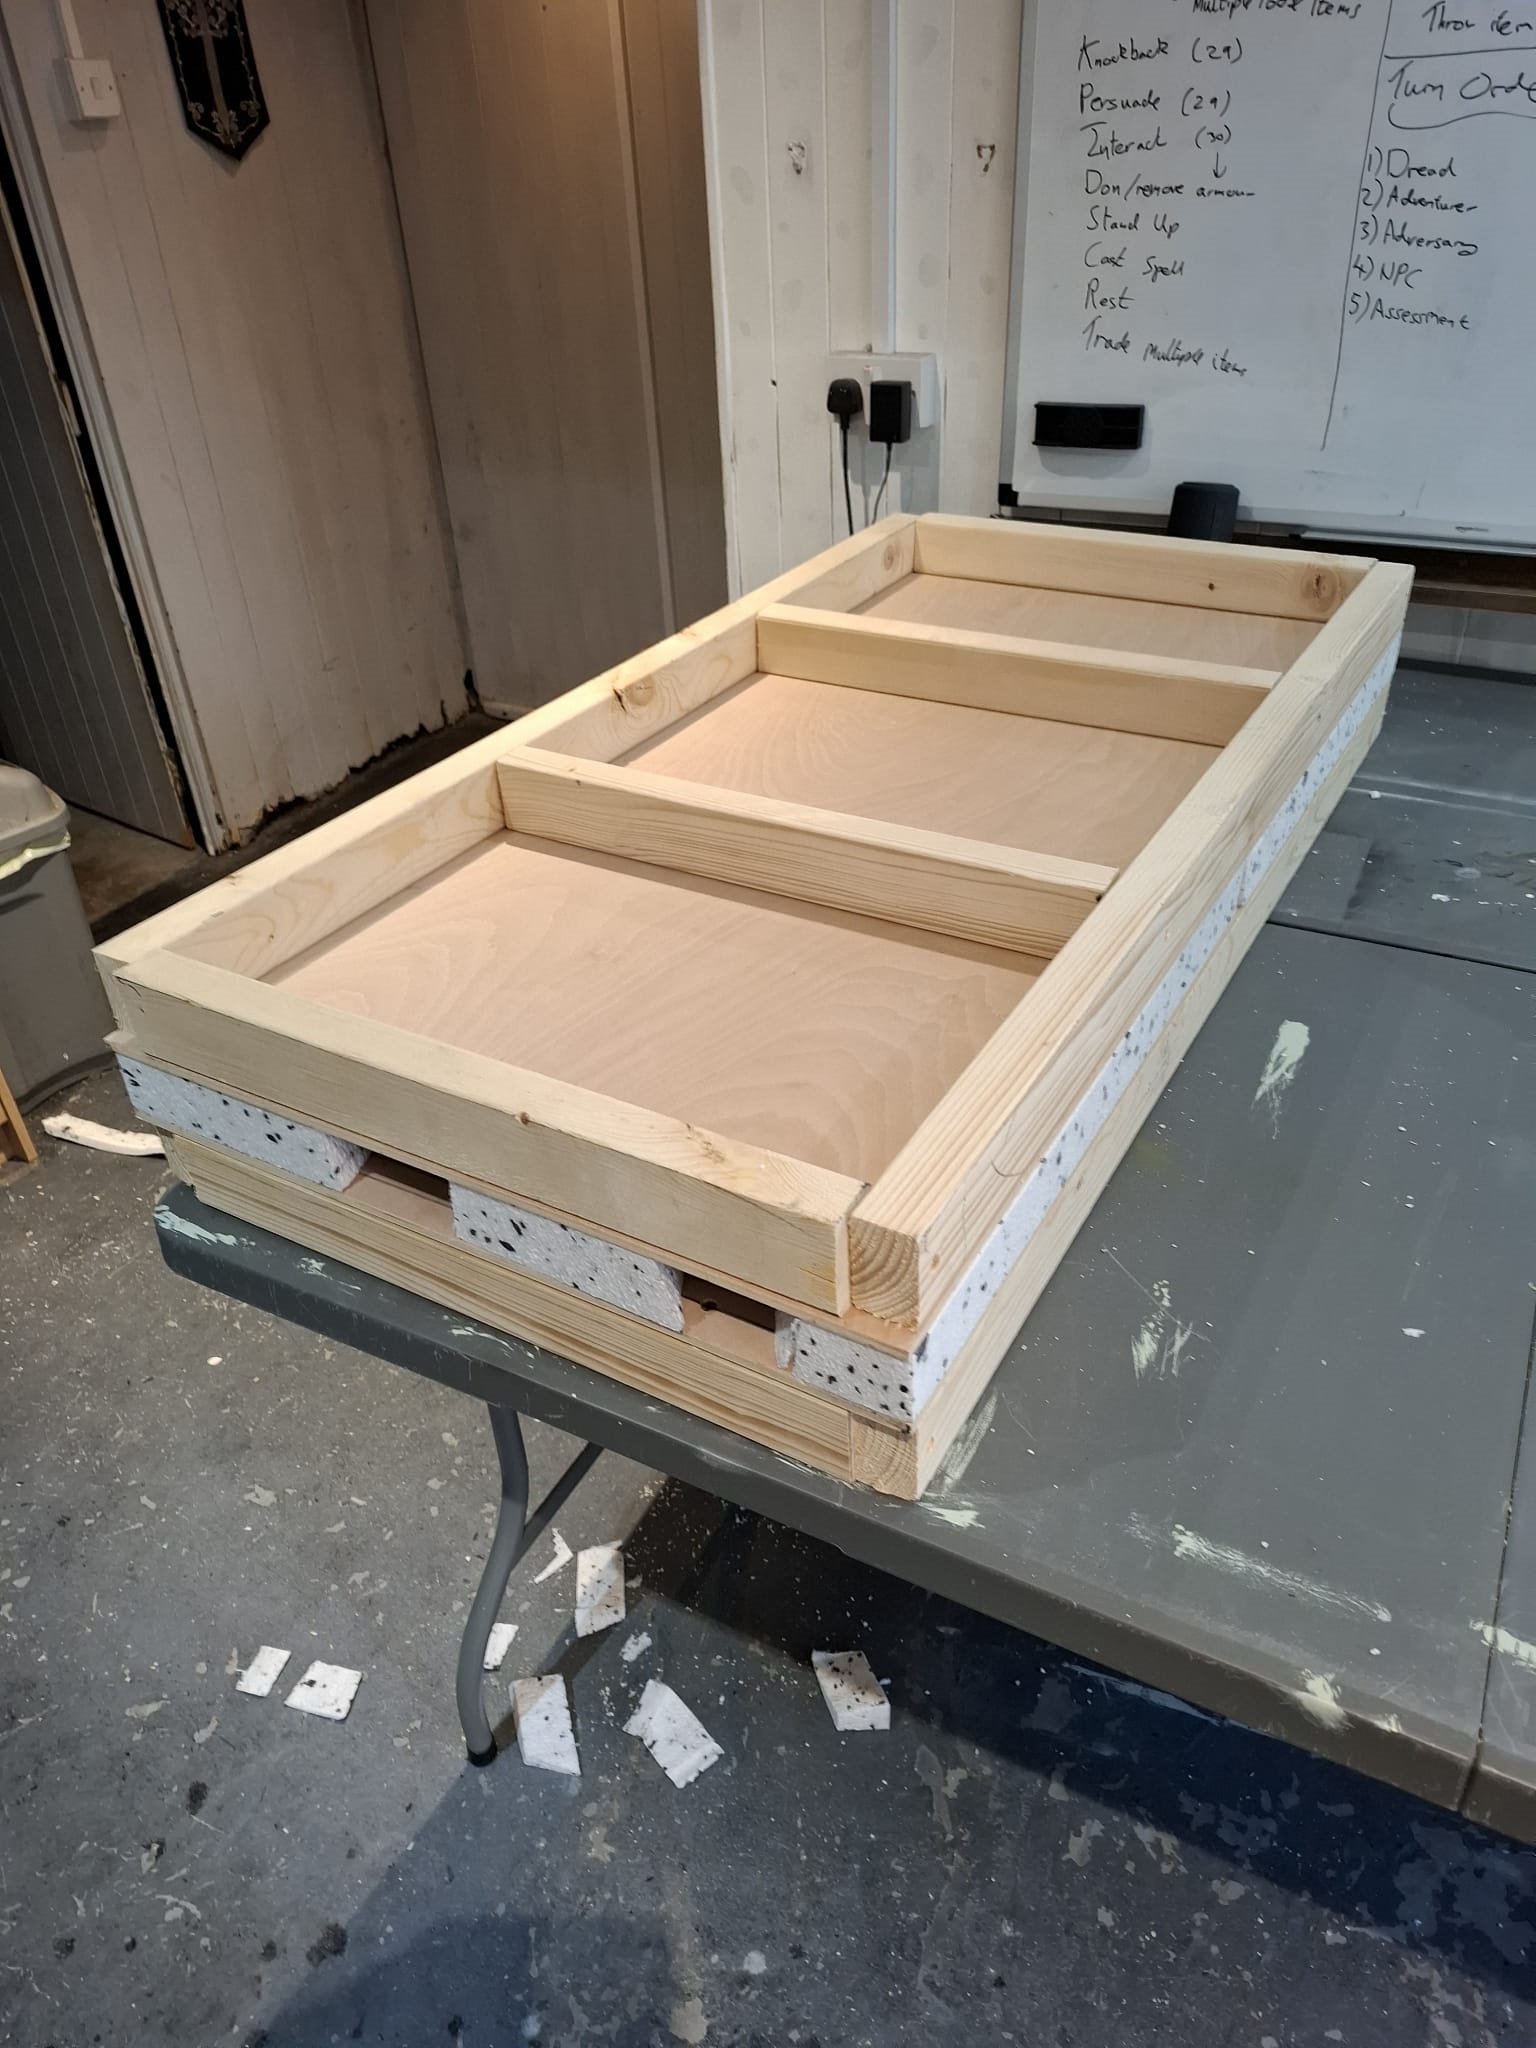
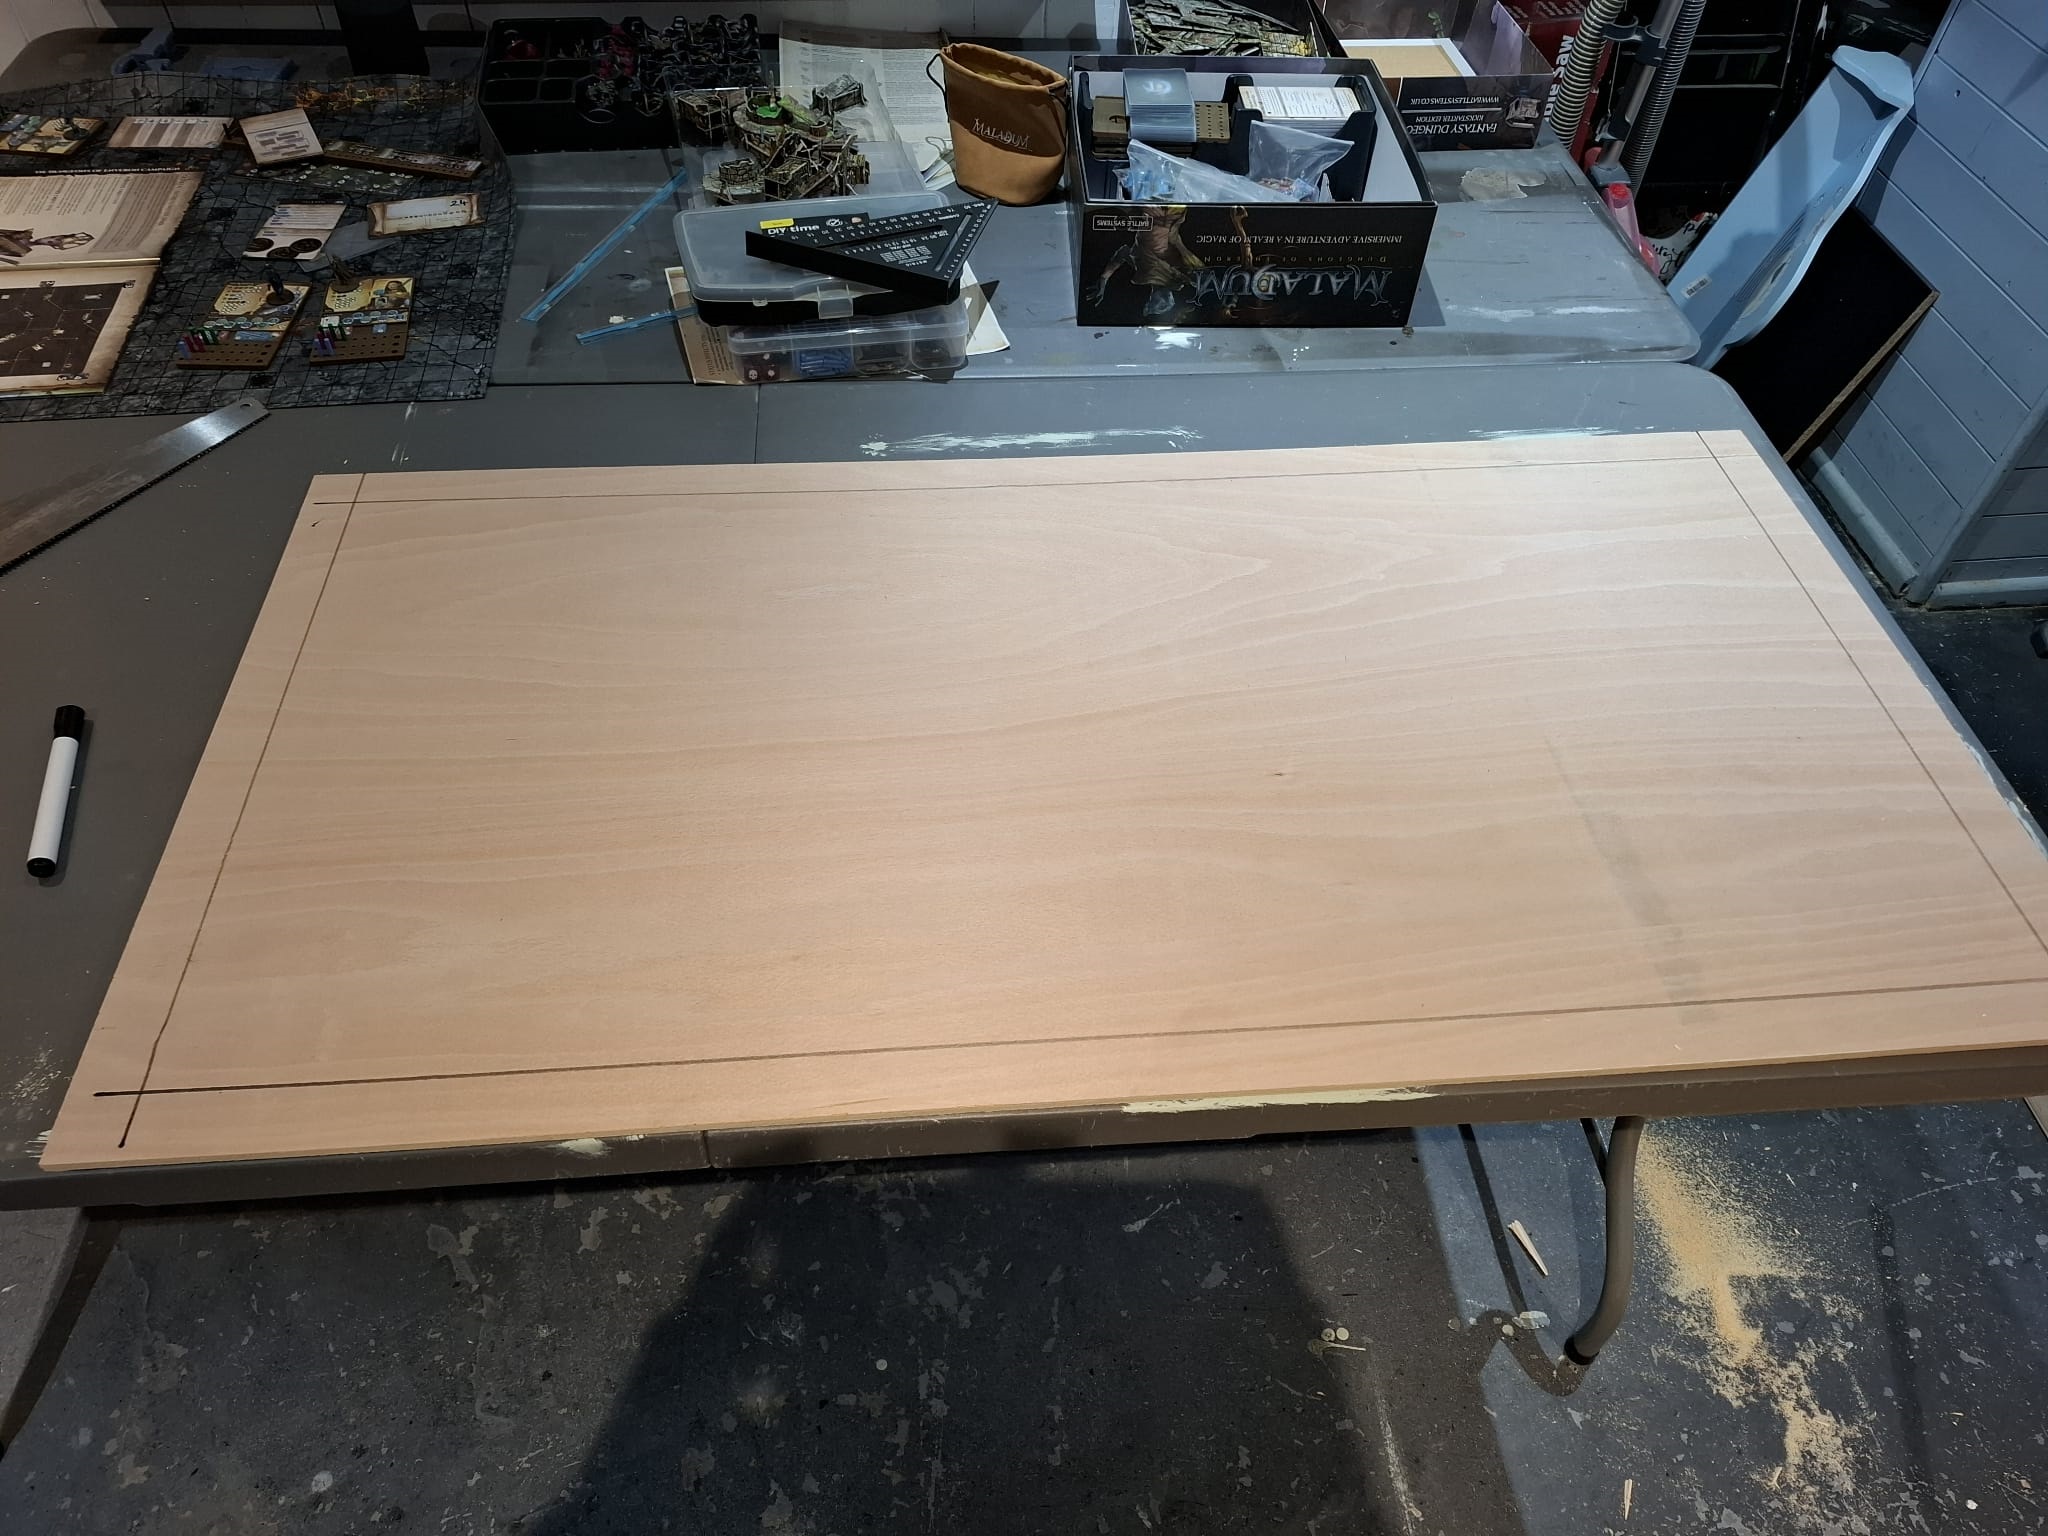
Building the base boards.
So I knew straight away that I wanted this to be a 6x4ft board. I’m lucky enough to have a basement in my house that i can use for wargaming in, and in theory…i should be able to store it…but I’ll deal with that when i get to it……
I watched a bunch of videos by other creators on youtube, and one creator stood out to me above all others. Eric’s Hobby Workshop. He has a 3 part video series where he makes a large trench wargaming table, so I decided i would follow his video and base my table on his work.
First thing i needed to do was to build the base boards. I decided that three 2ft x 4ft boards would be best for me so I ordered the materials I needed from Wickes.

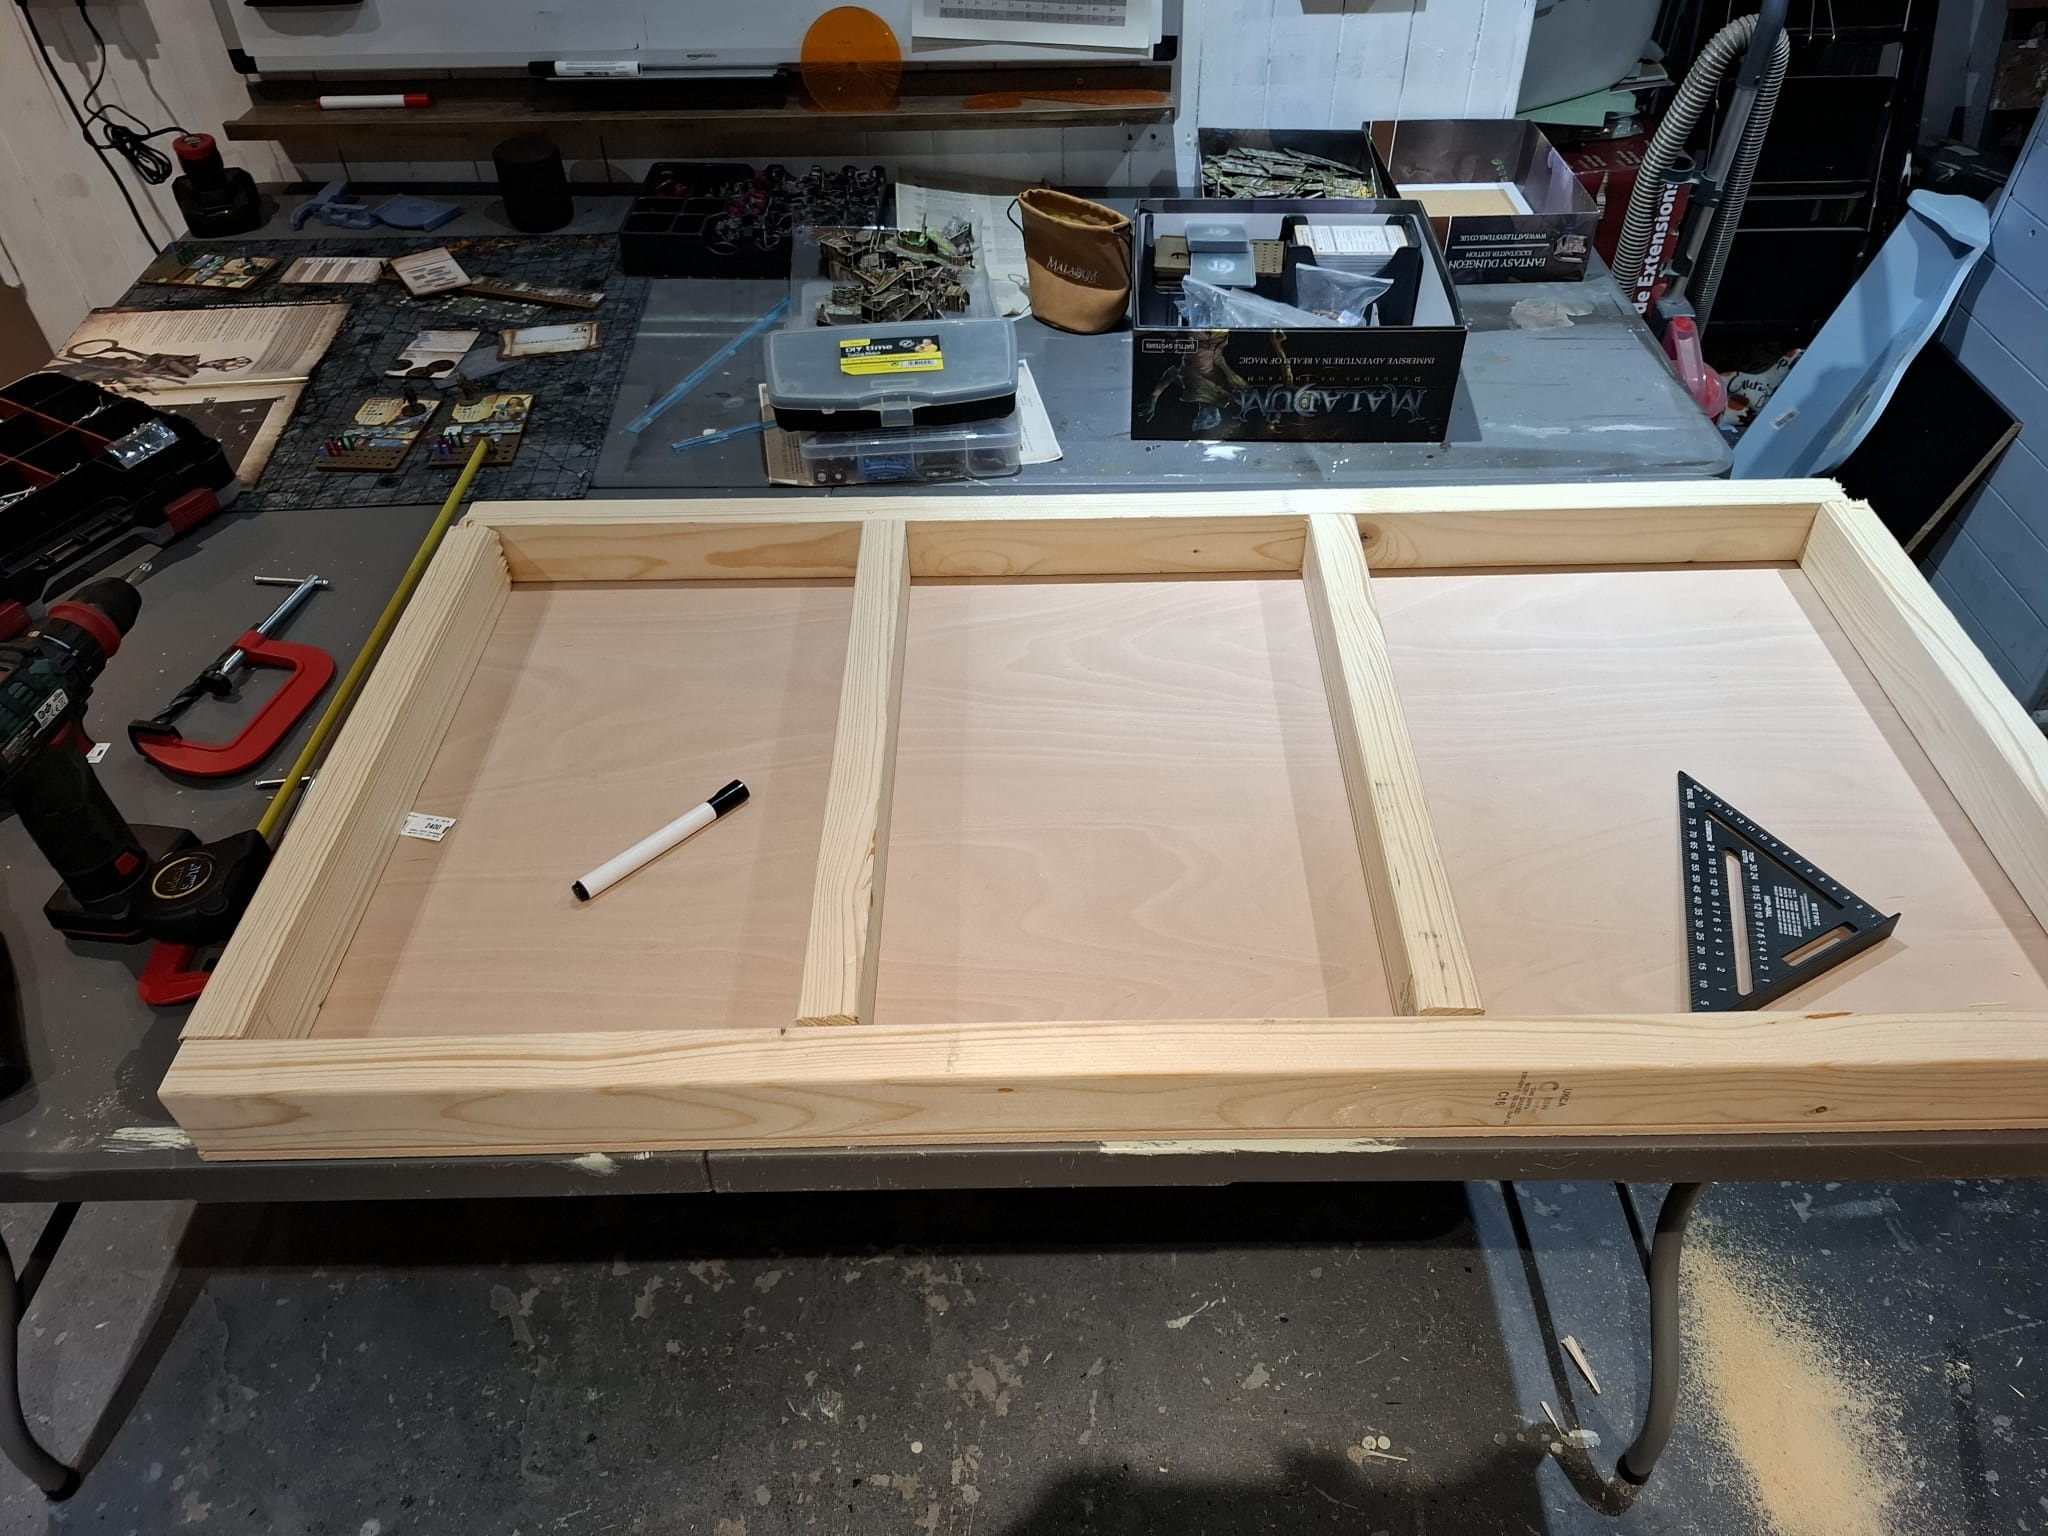
I made a frame from 9mm ply, and 38x63mm battens, cutting the battens down to size, then drawing a grid on the 9mm ply so i knew where to drill my fixing holes. Then clamping the external battens to the ply, i drilled my pilot holes so that i could screw them together


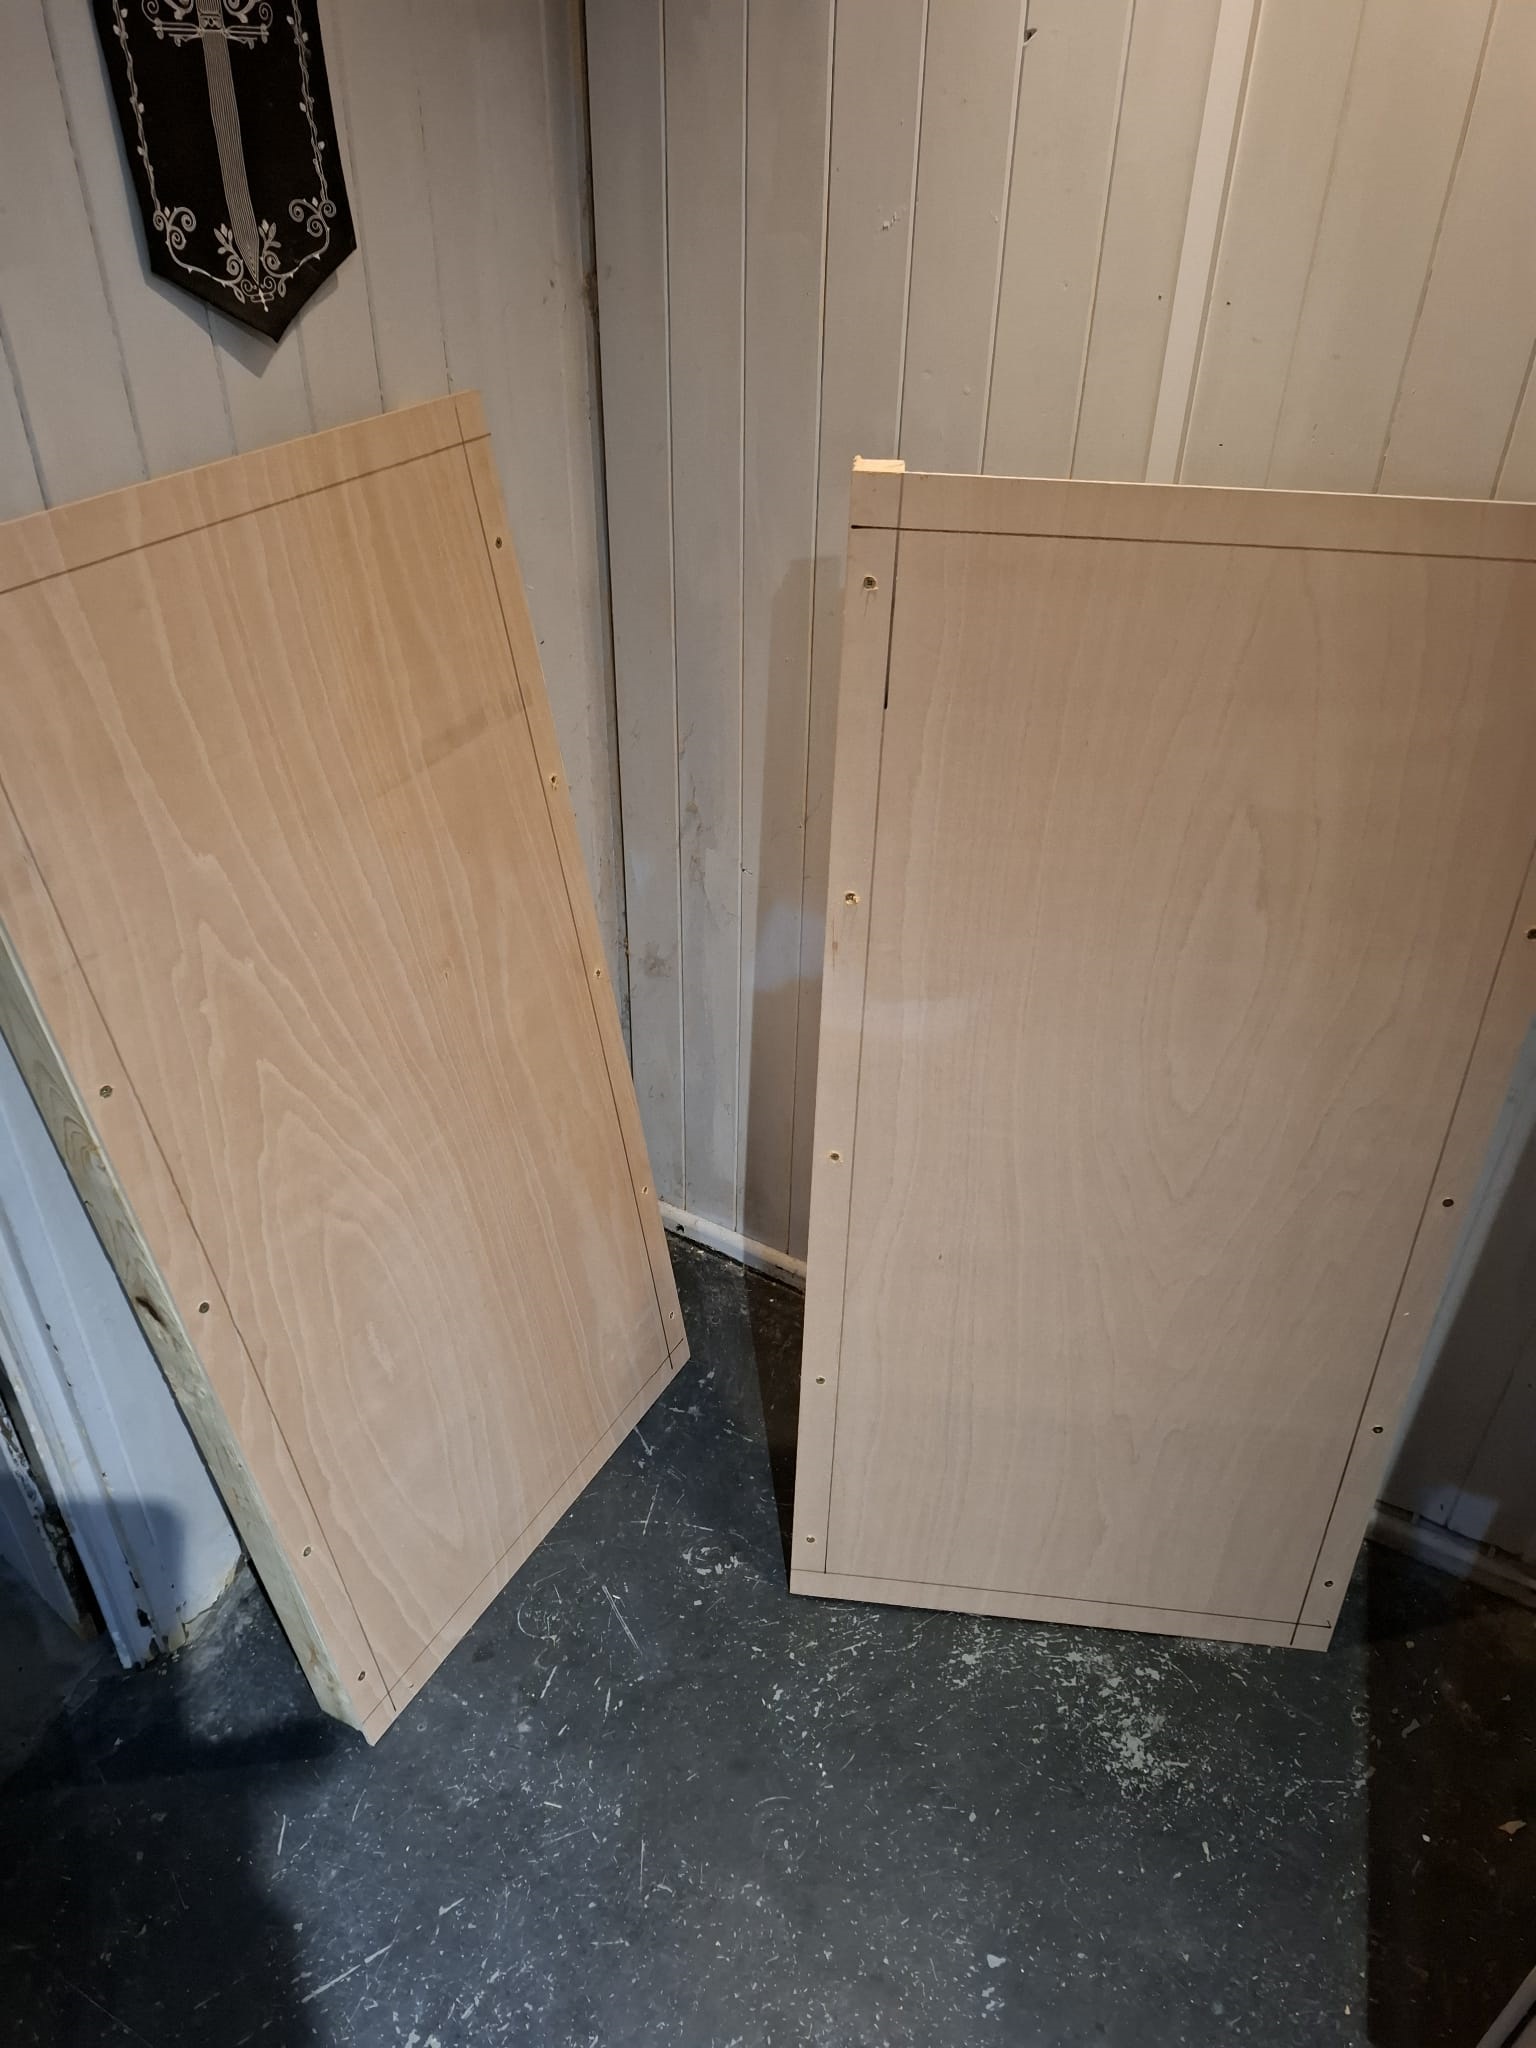
Once the two long edges had been fixed on each board, I then attached the short edges and the cross beams. until all 3 boards had been assembled. They were then given a quick sanding to remove any rough edges and splinters.
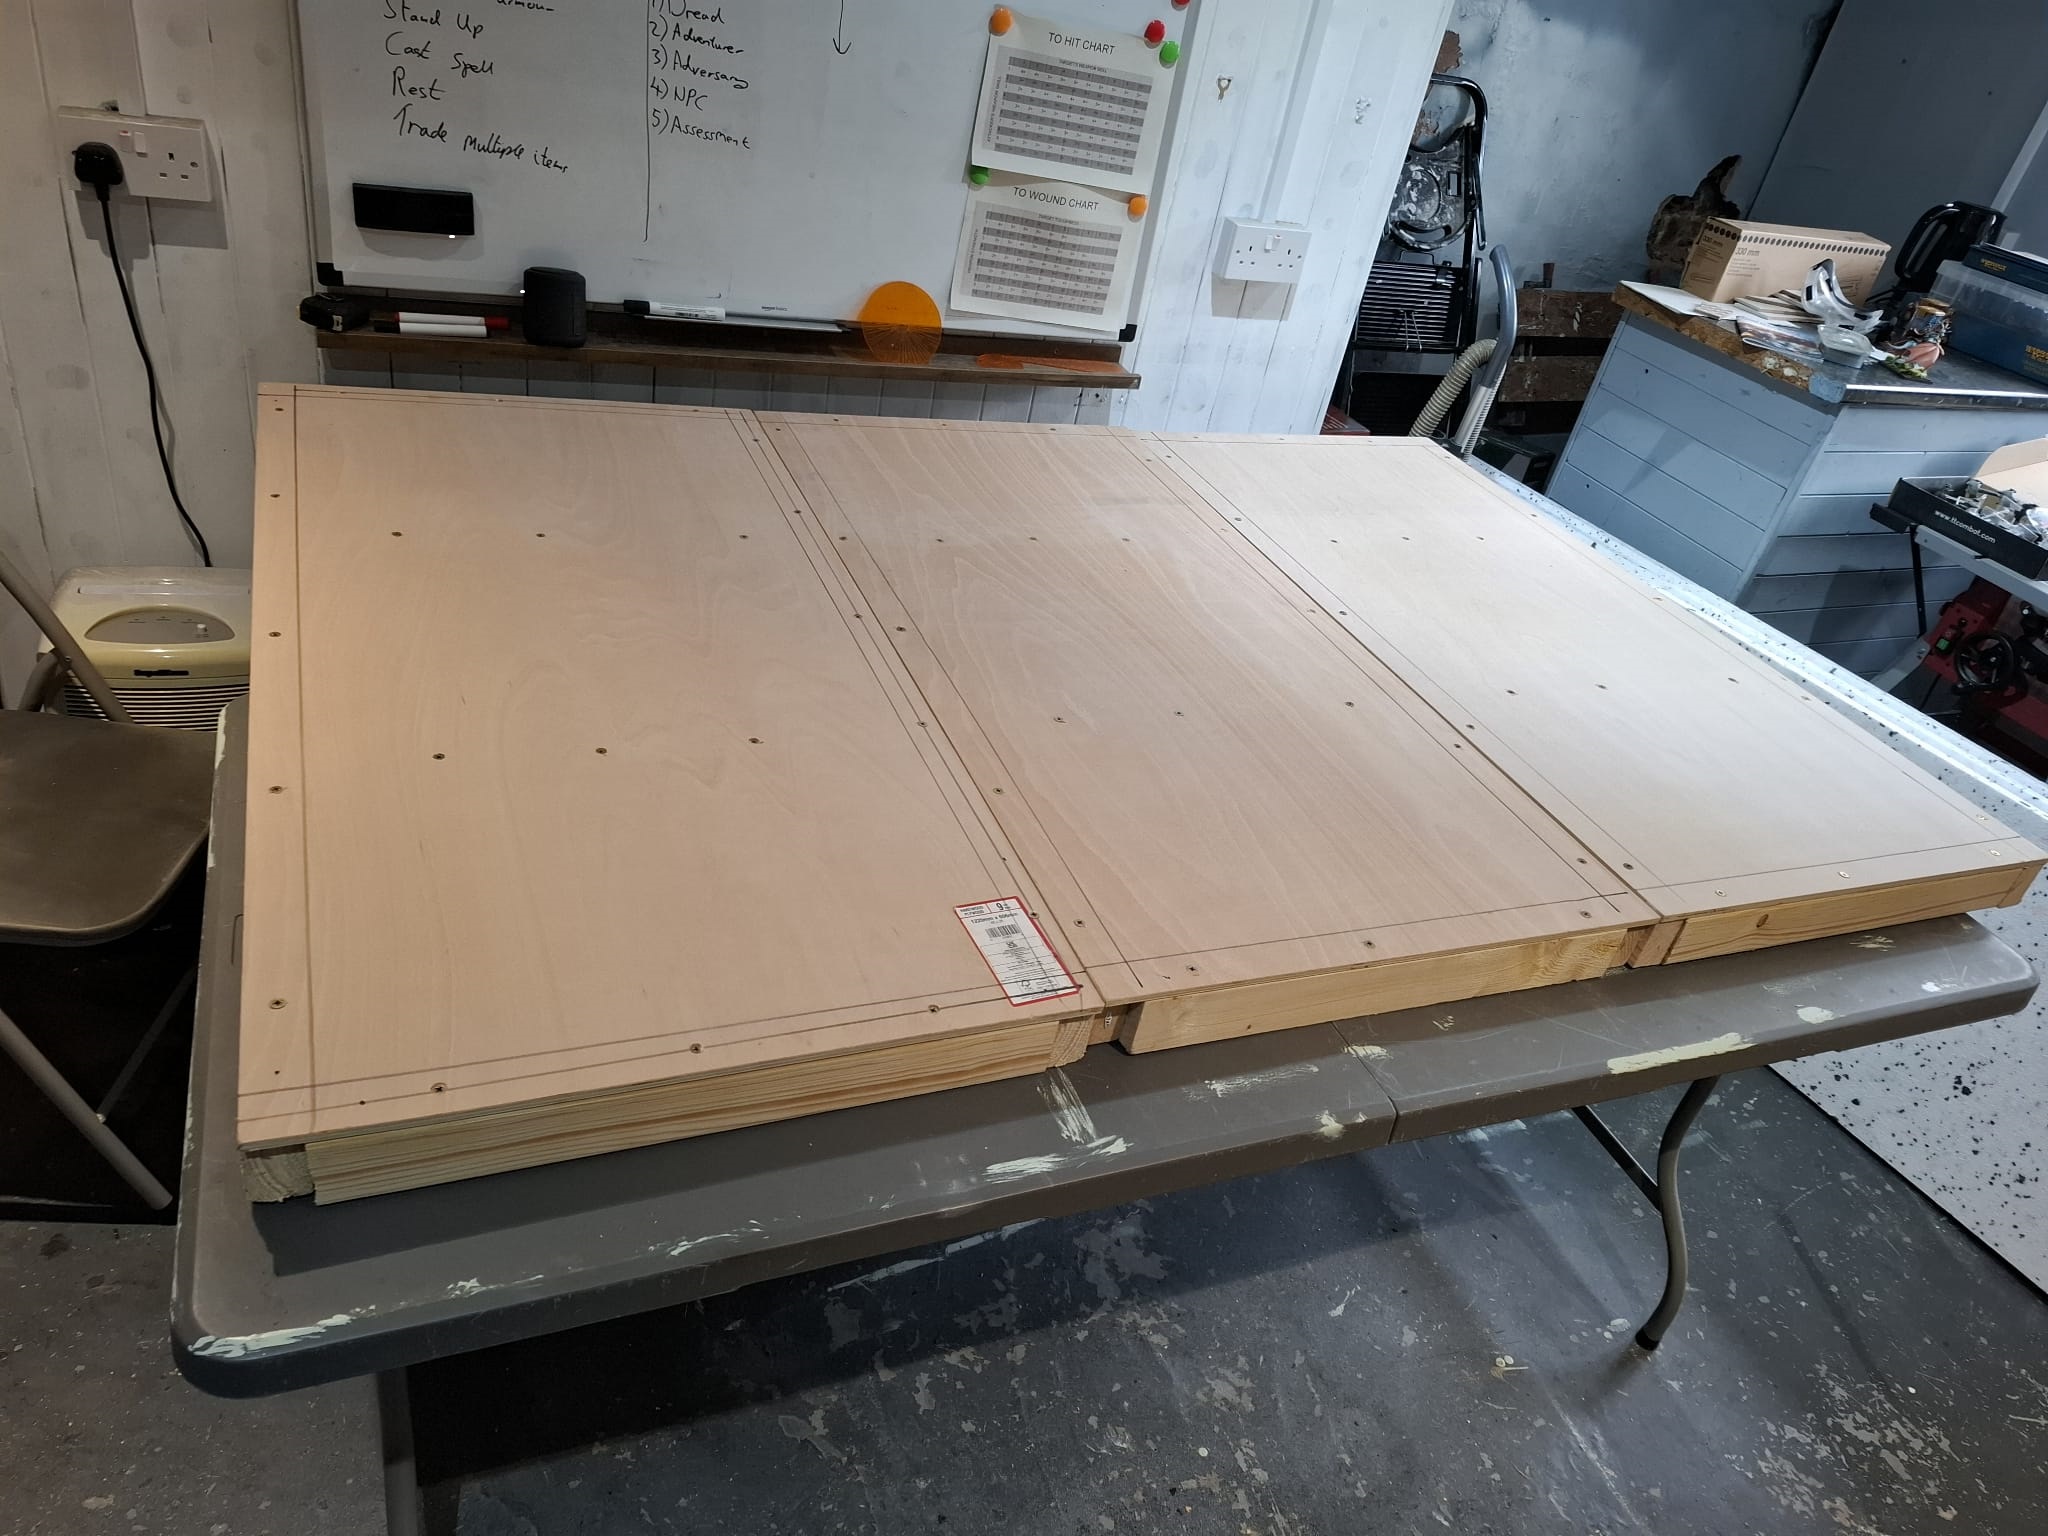
I now have my completed base boards for my 6ft x 4ft table. Next step is to cut the polystyrene sheets down to size


![StarCraft Tabletop Miniatures Game Pre-Orders Live Now [Updated]](https://images.beastsofwar.com/2026/03/starcraft-tmg-news-cover-600-338.jpg)


