


![1918 Spring Offensive Wargame | Full Rules Overview with John & Gerry (WW1 Tabletop Game) [7 Days Early Access]](https://images.beastsofwar.com/2026/03/unboxing-warfulcrum-games-1918-spring-offensive-review-coverimage1-225-127.jpeg)


Terrainfest 2025 – BigGrim returns to Necromunda!


Recommendations: 103
About the Project
I played Necromunda back in the dark days of the 90s. I've been meaning to return to the new version for many years. This year, with 40K no longer holding my attention, I finally decided to do so. I have broken out my TTCombat Iron Labyrinth Ultima Complex and Death Quadrant Complex sets. This, however, is just the start!
Related Game: Necromunda
Related Company: Games Workshop
Related Genre: Science Fiction
Related Contest: TerrainFest 2025
This Project is Active
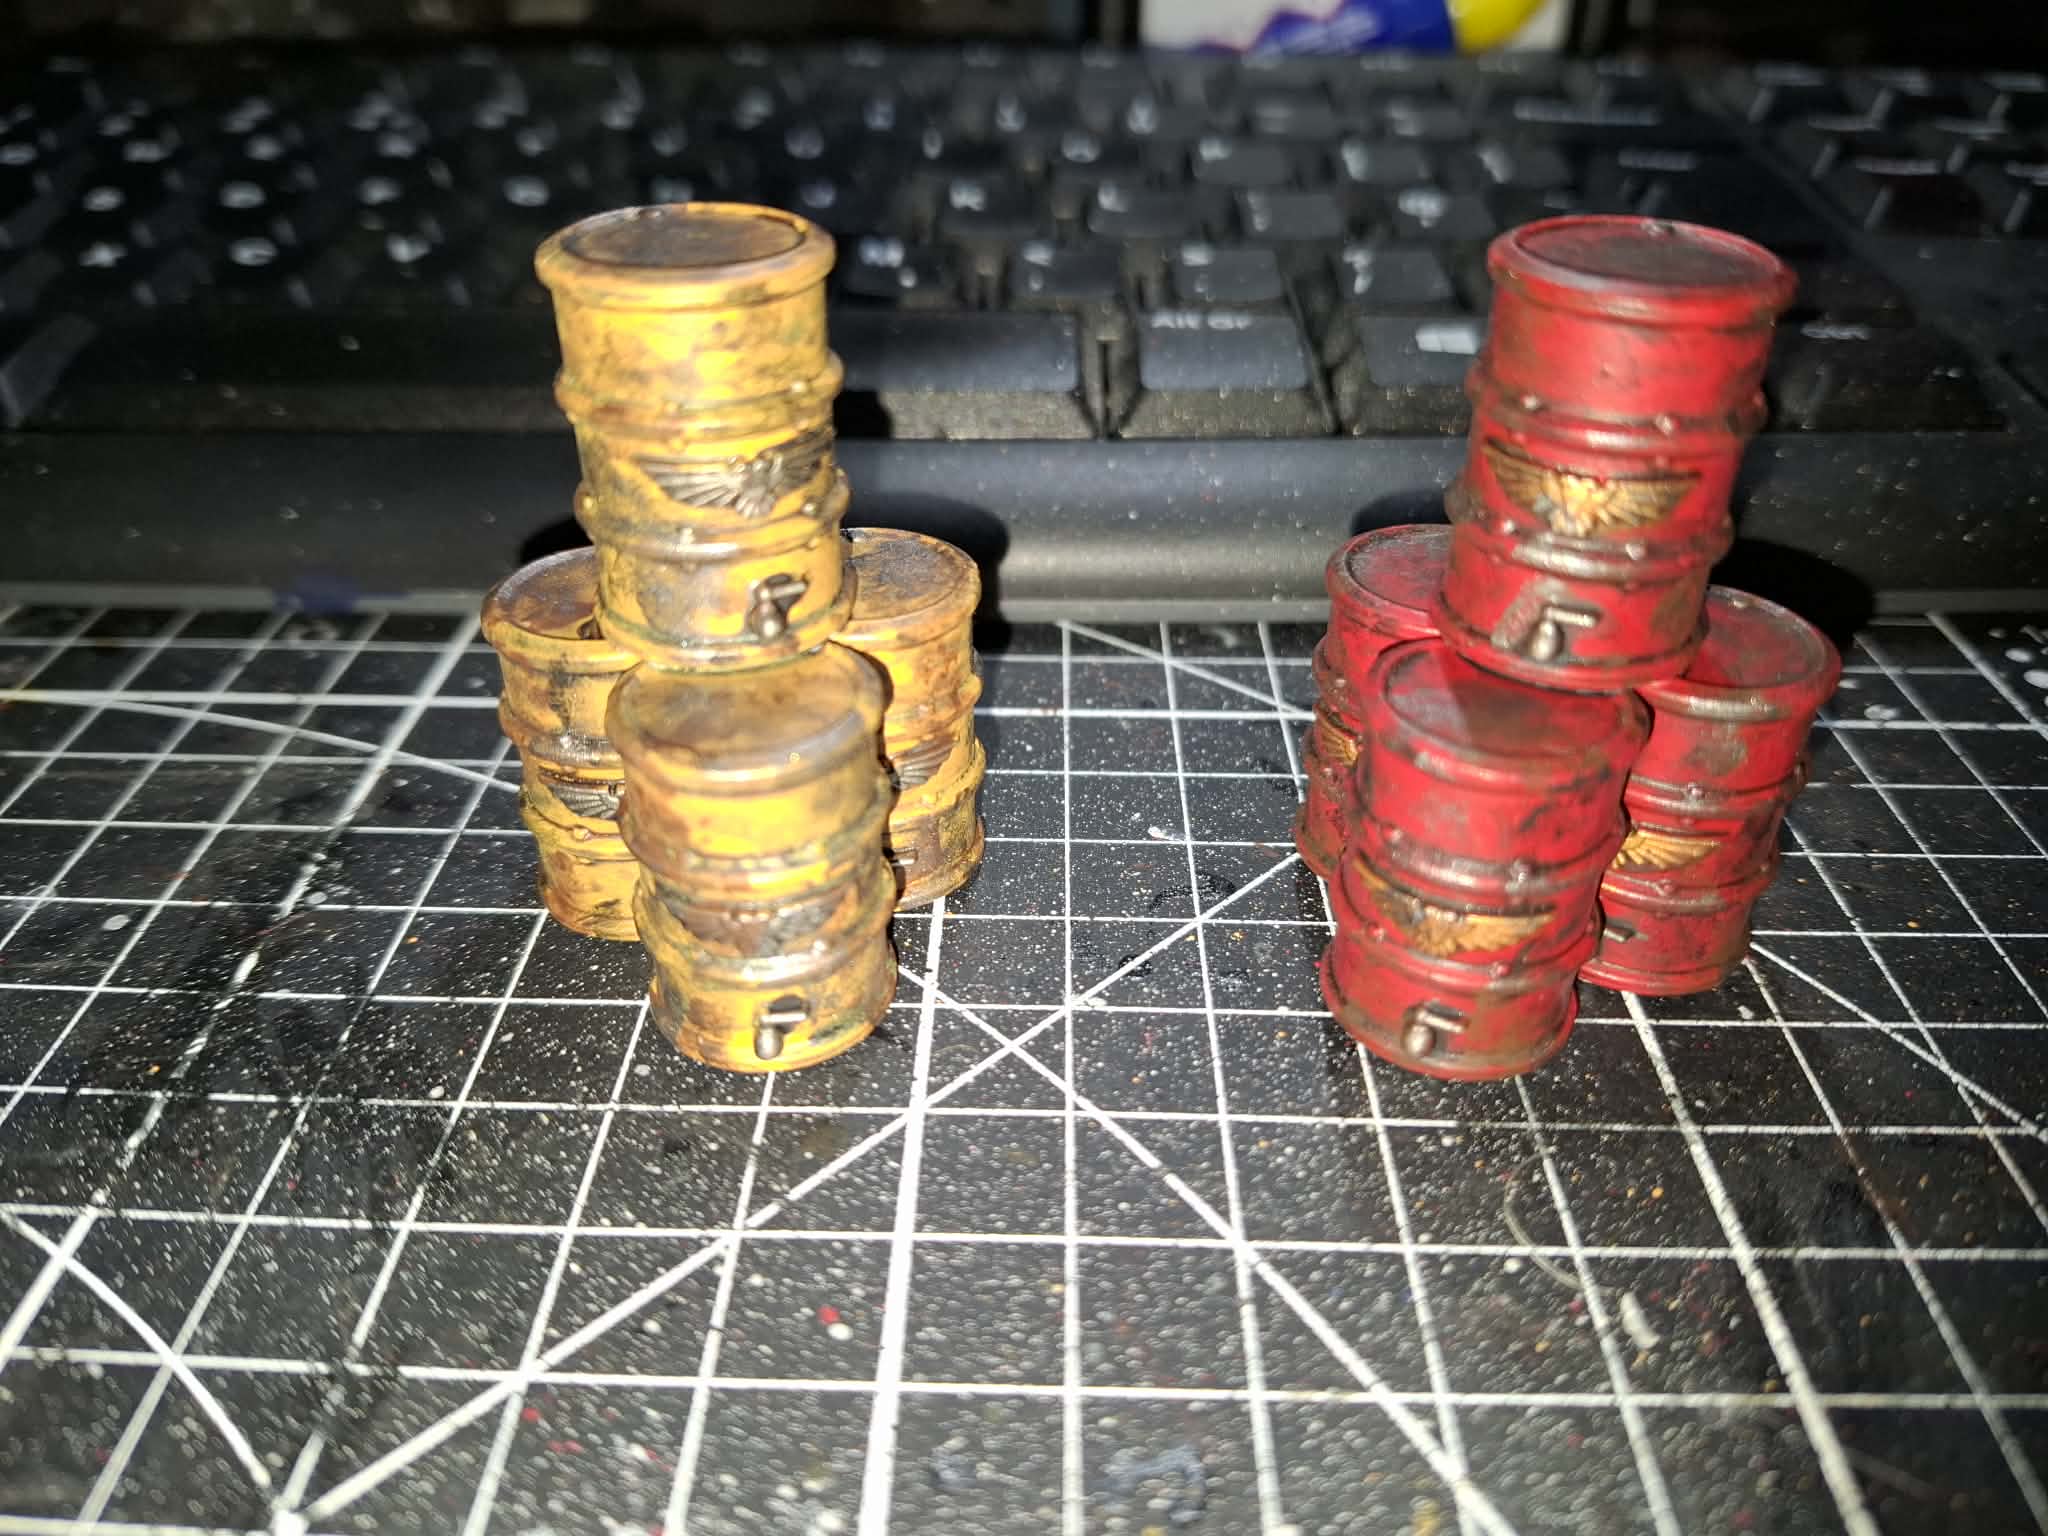
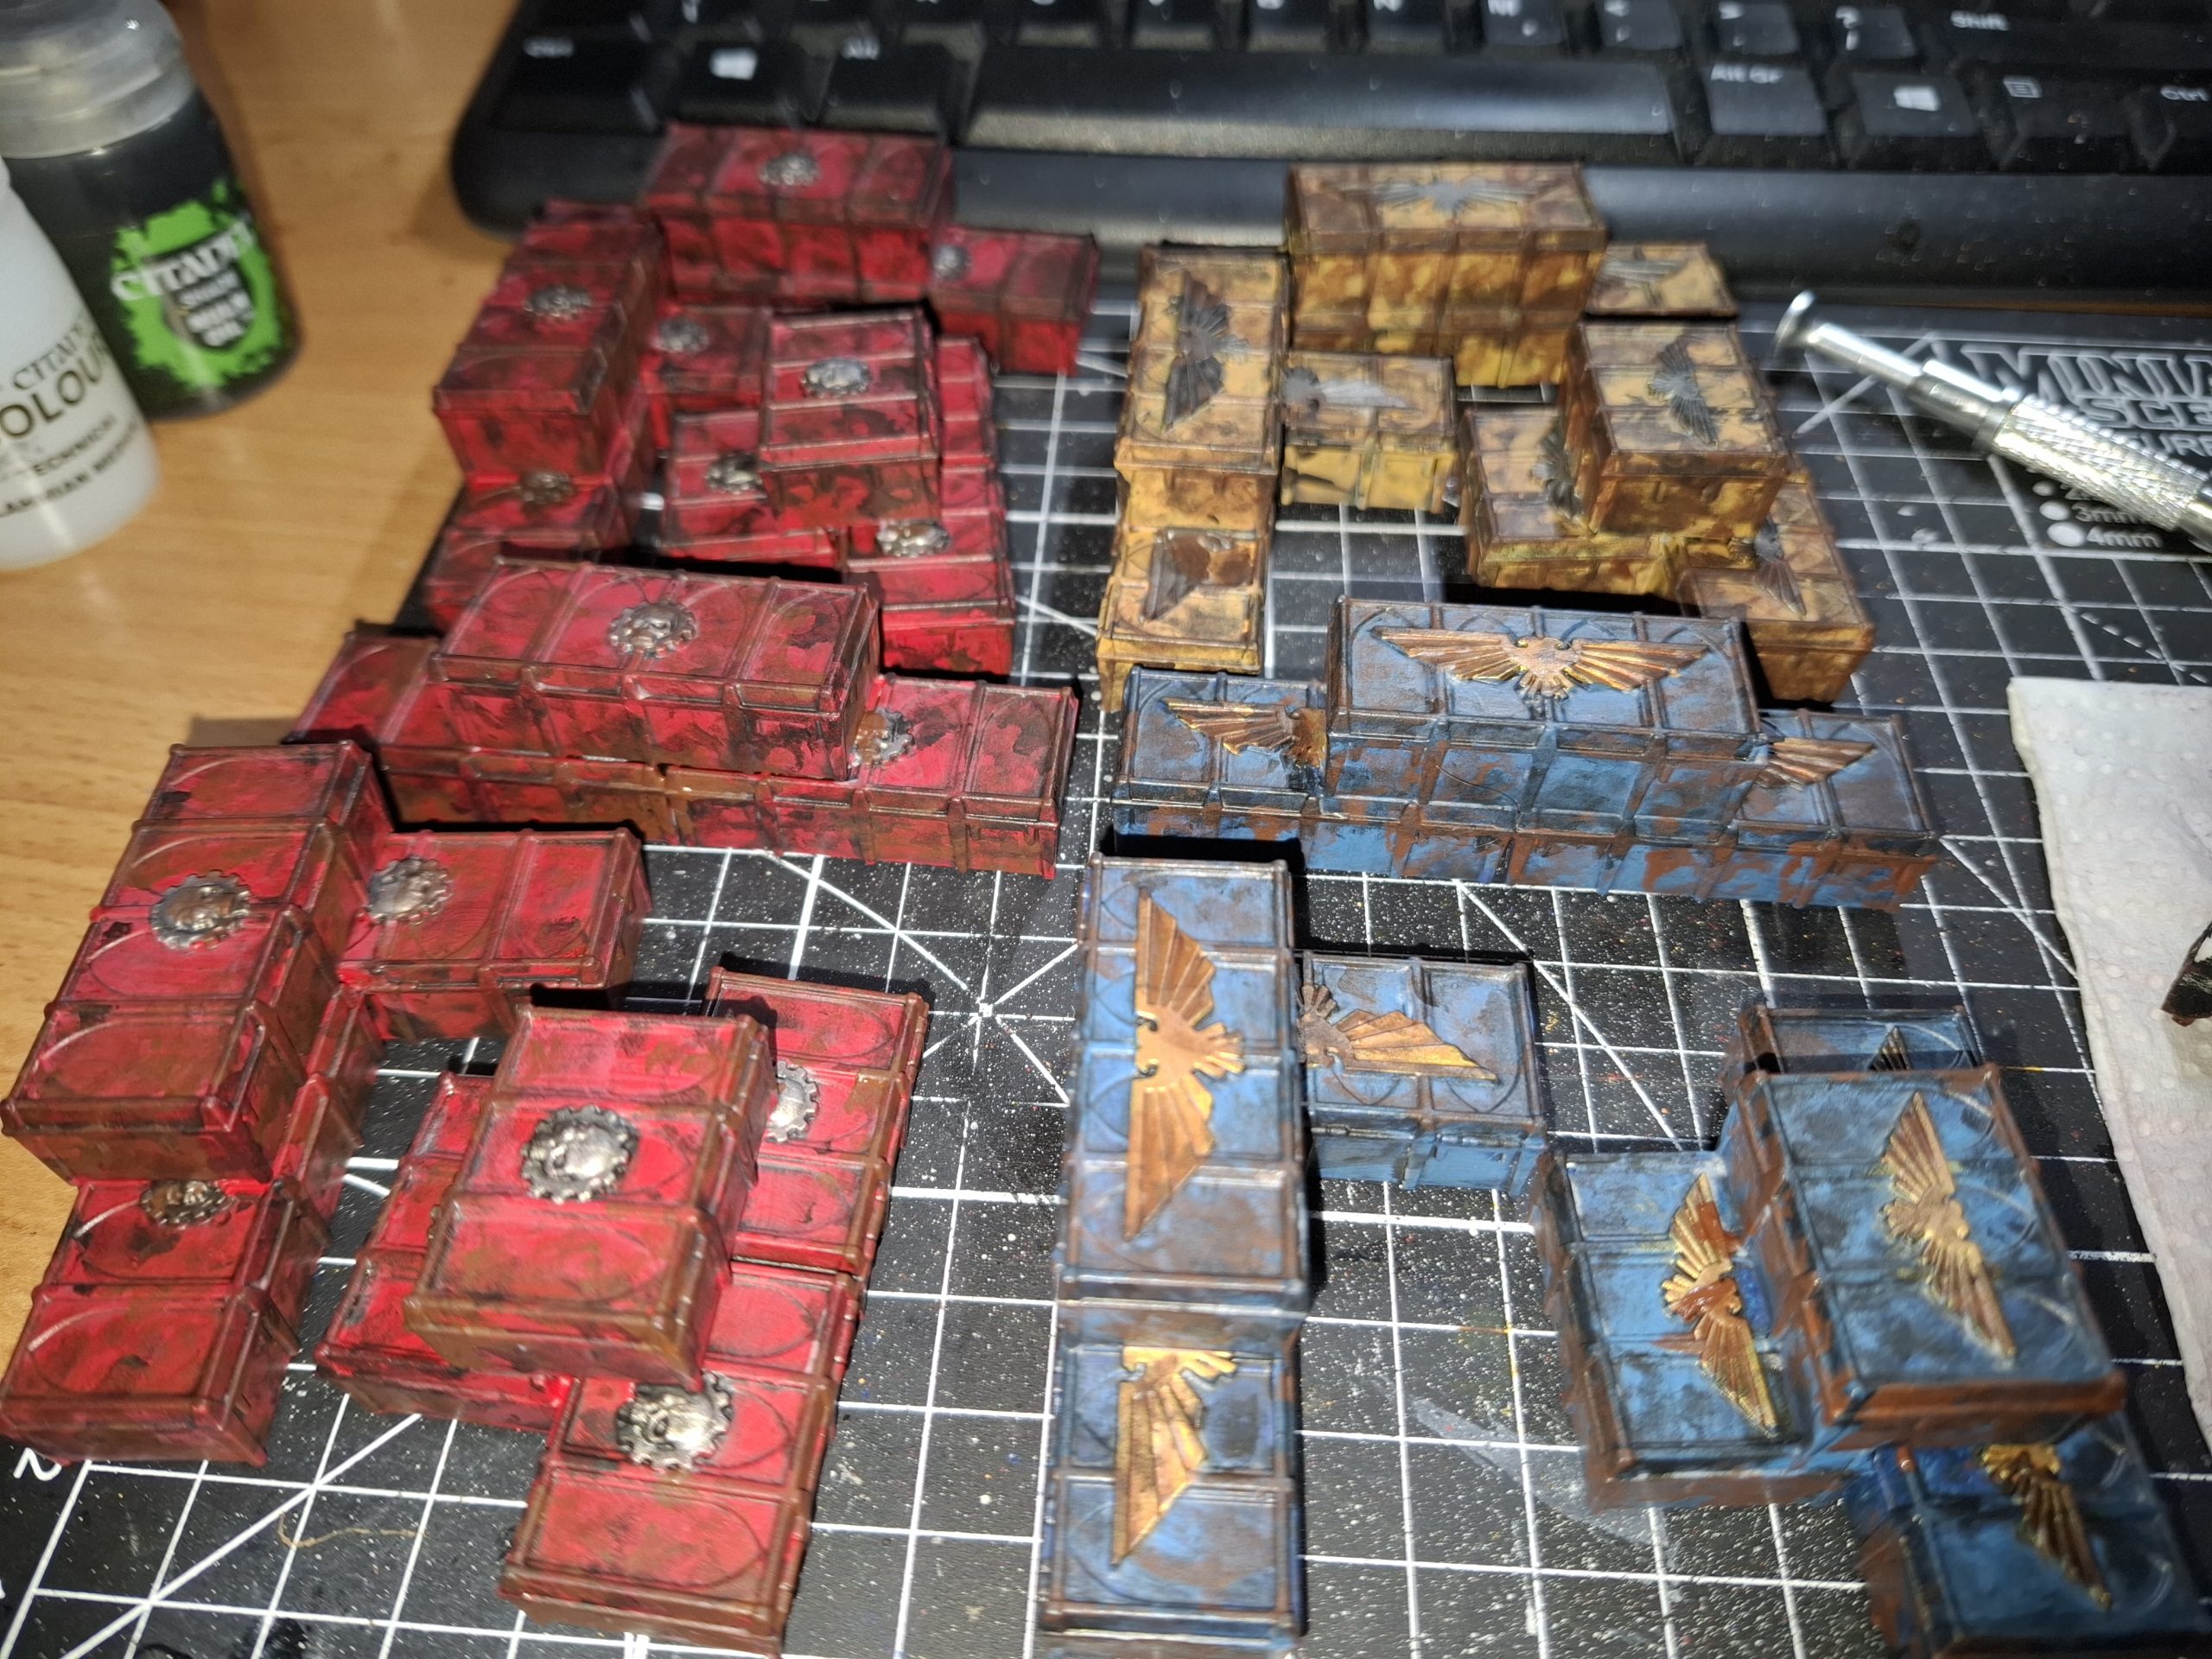
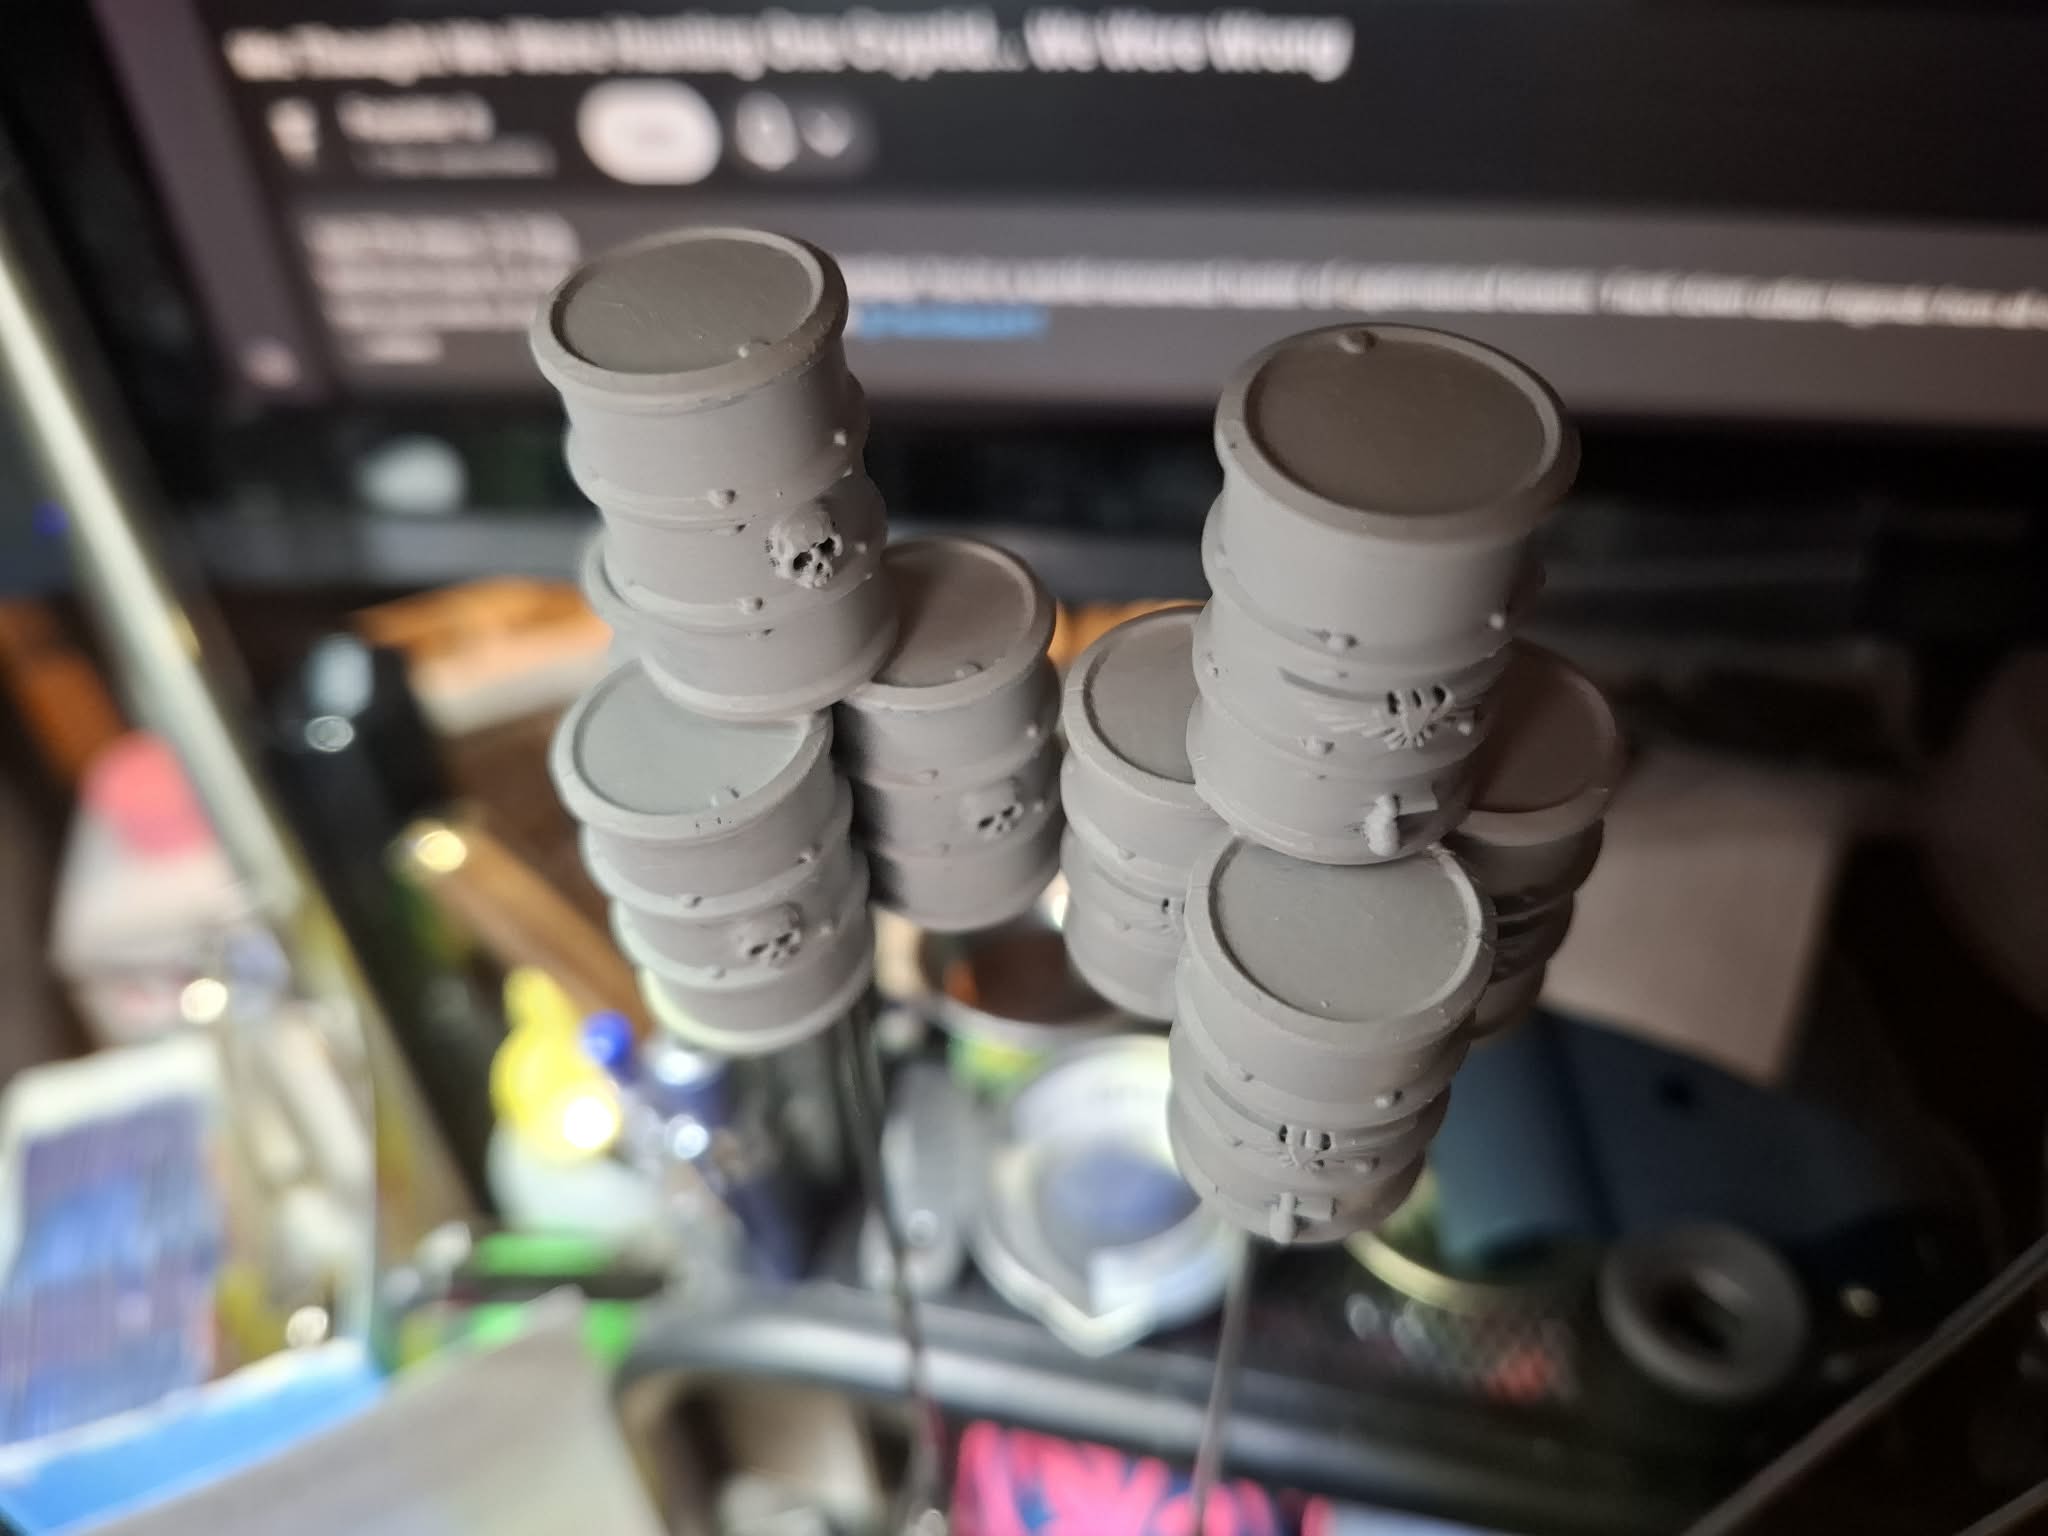
Barrels.
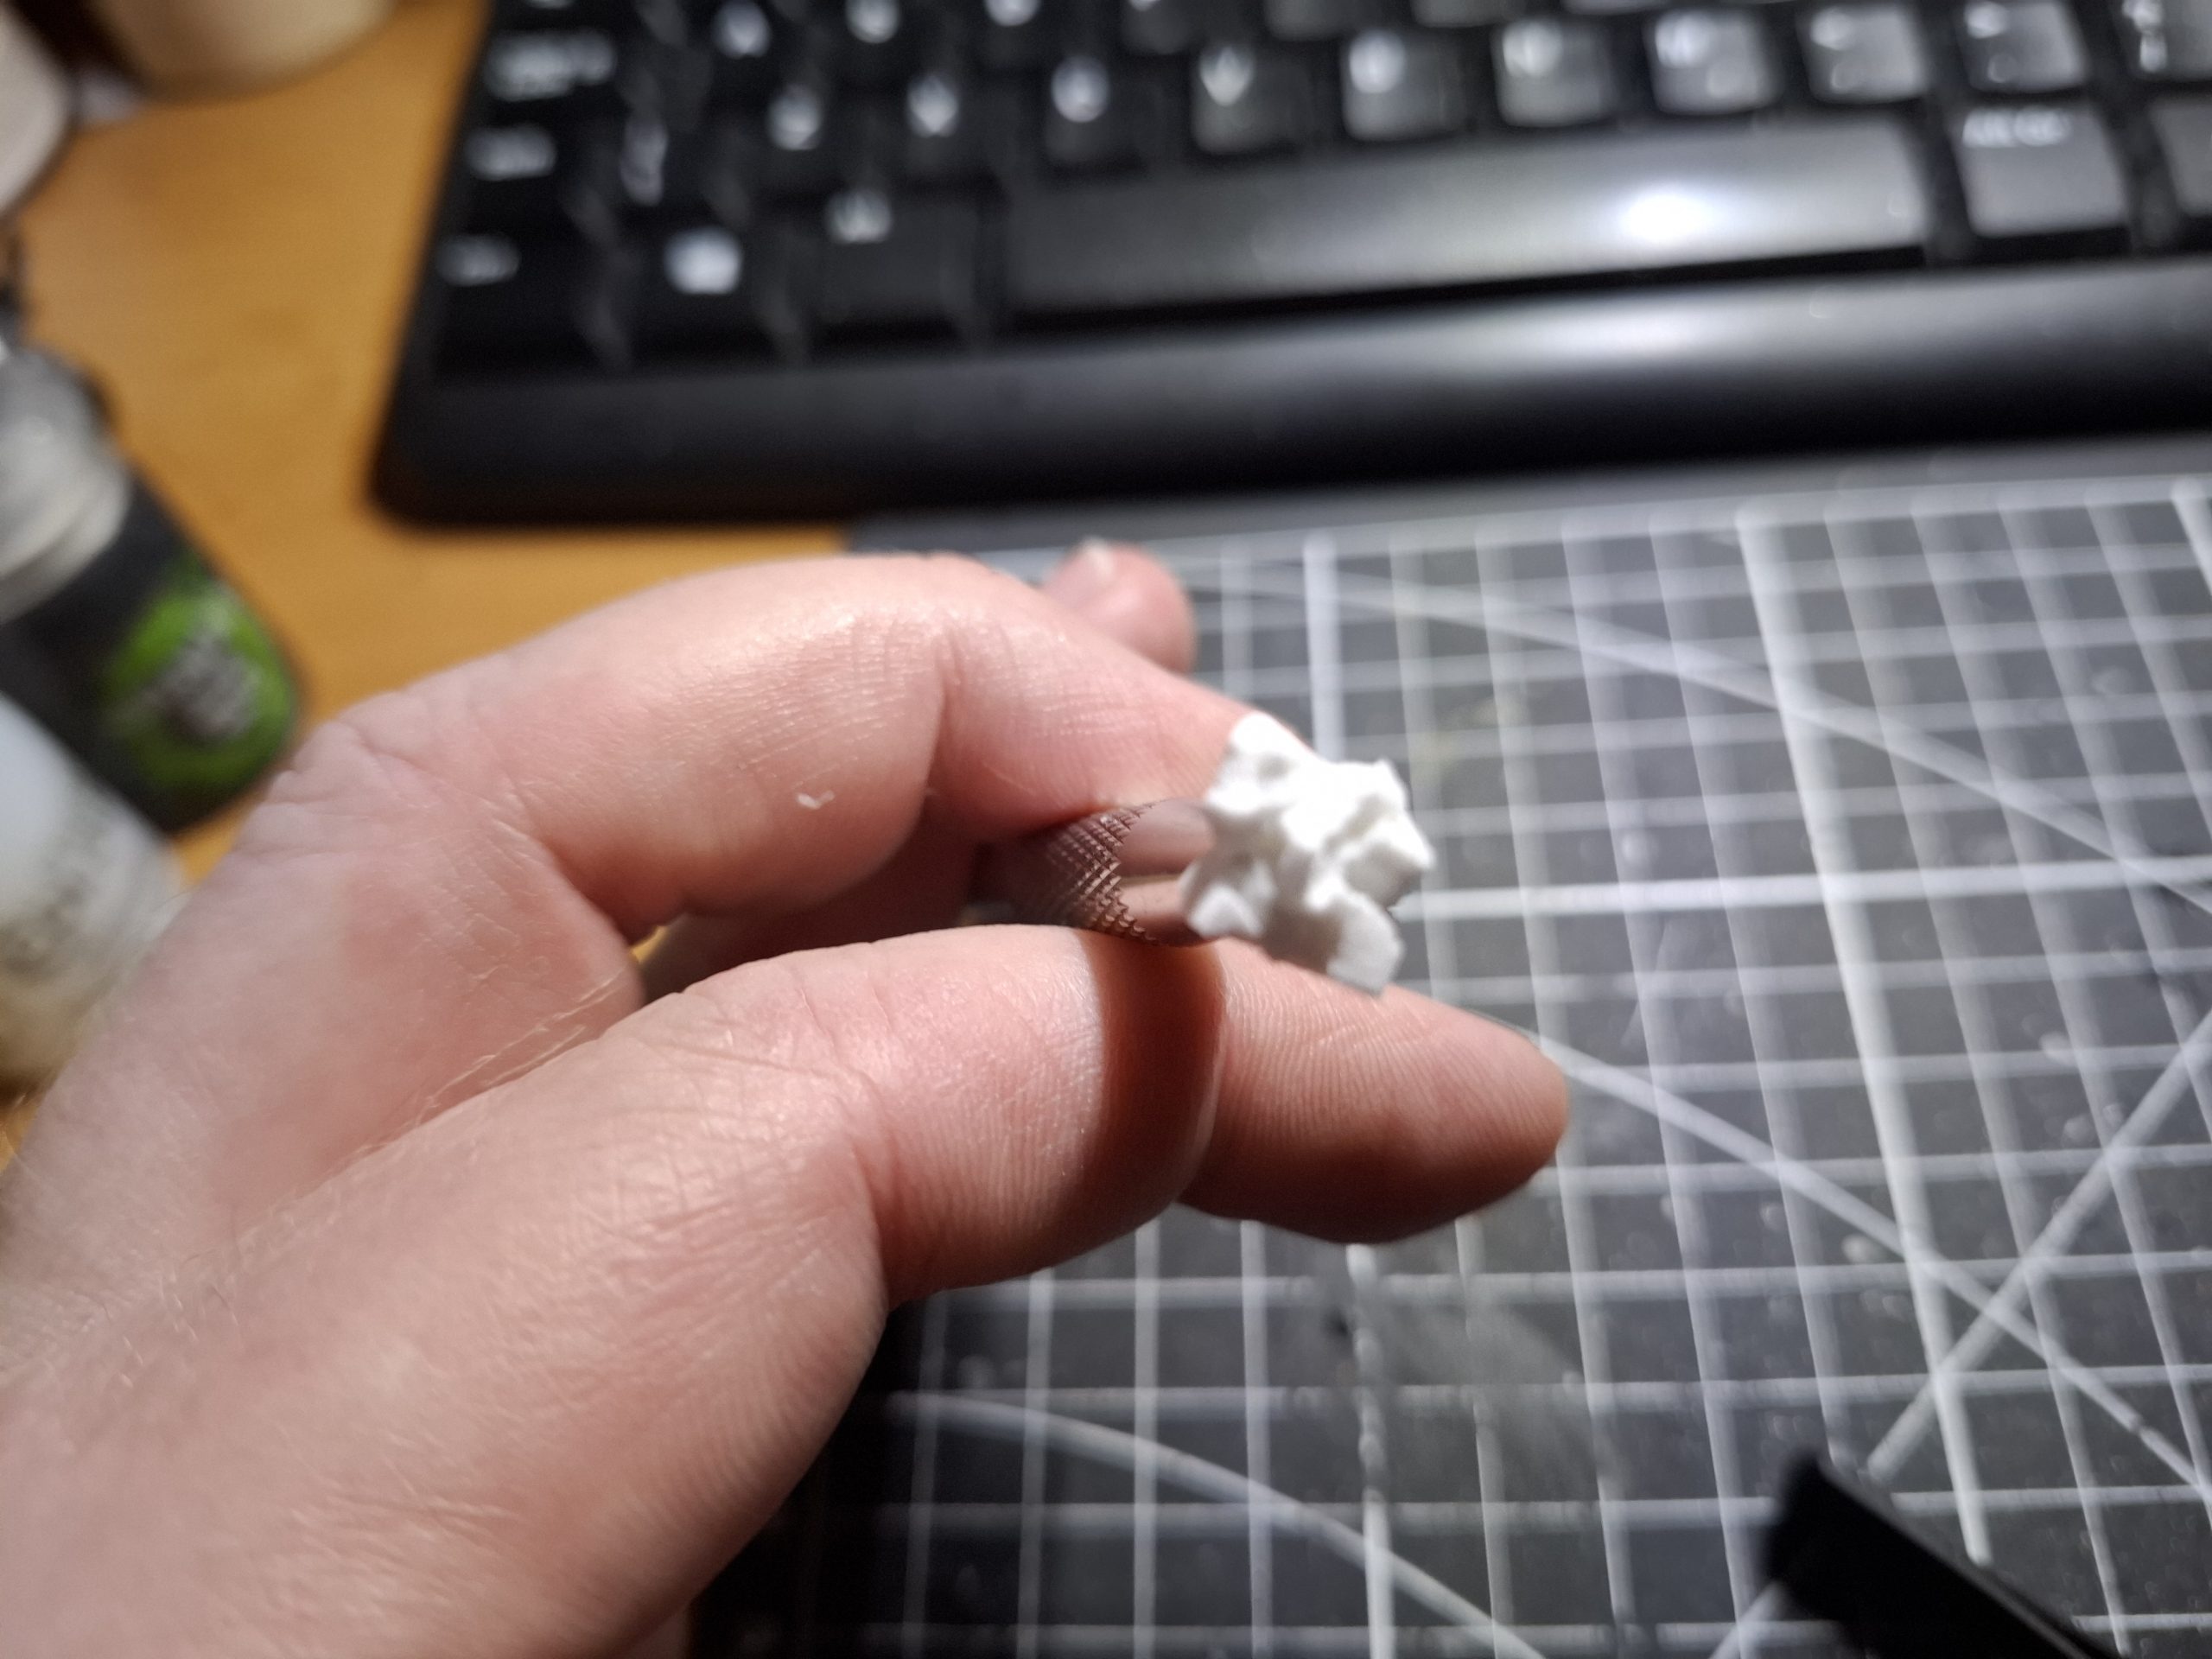
Decided to finish off the barrels last night. Not sure what I did differently with the nail tool this time, but after an initial attempt had the sponge pop out again, the second time, it held! So much black, brown and silver splotching later, I have the two sets of barrels done too.
I have decided that I was a bit of a daft sod, making them glued and facing front in such a unified manner. It looks a little over neat for the underhive. Ah well. You live and learn!
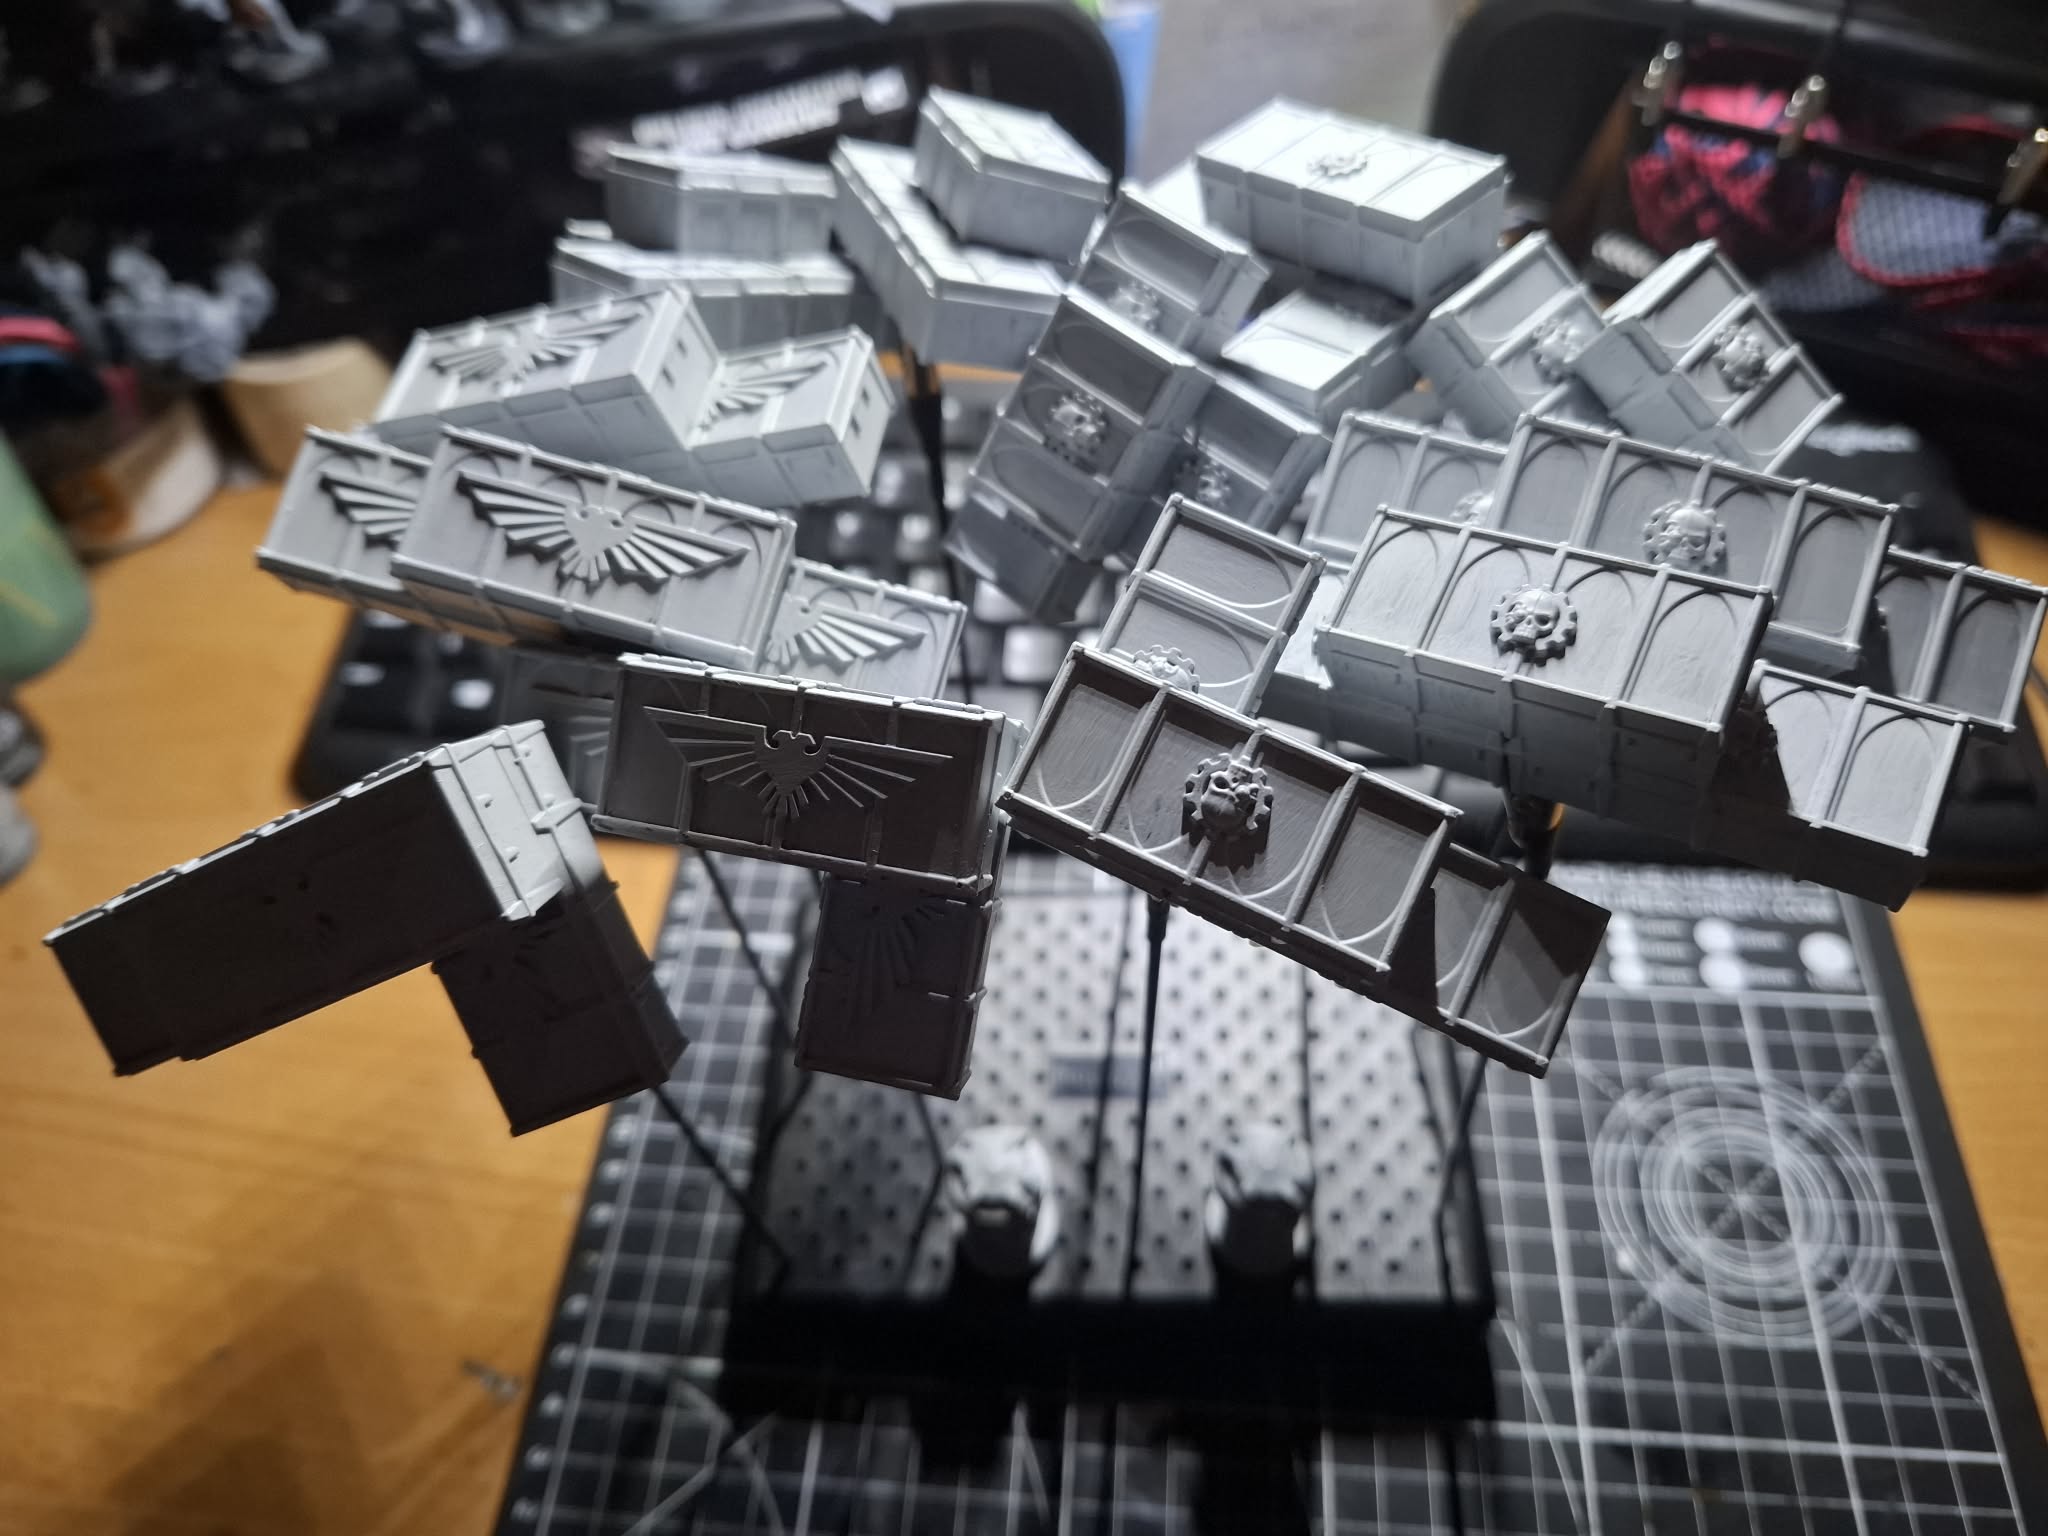
Crates Completed.
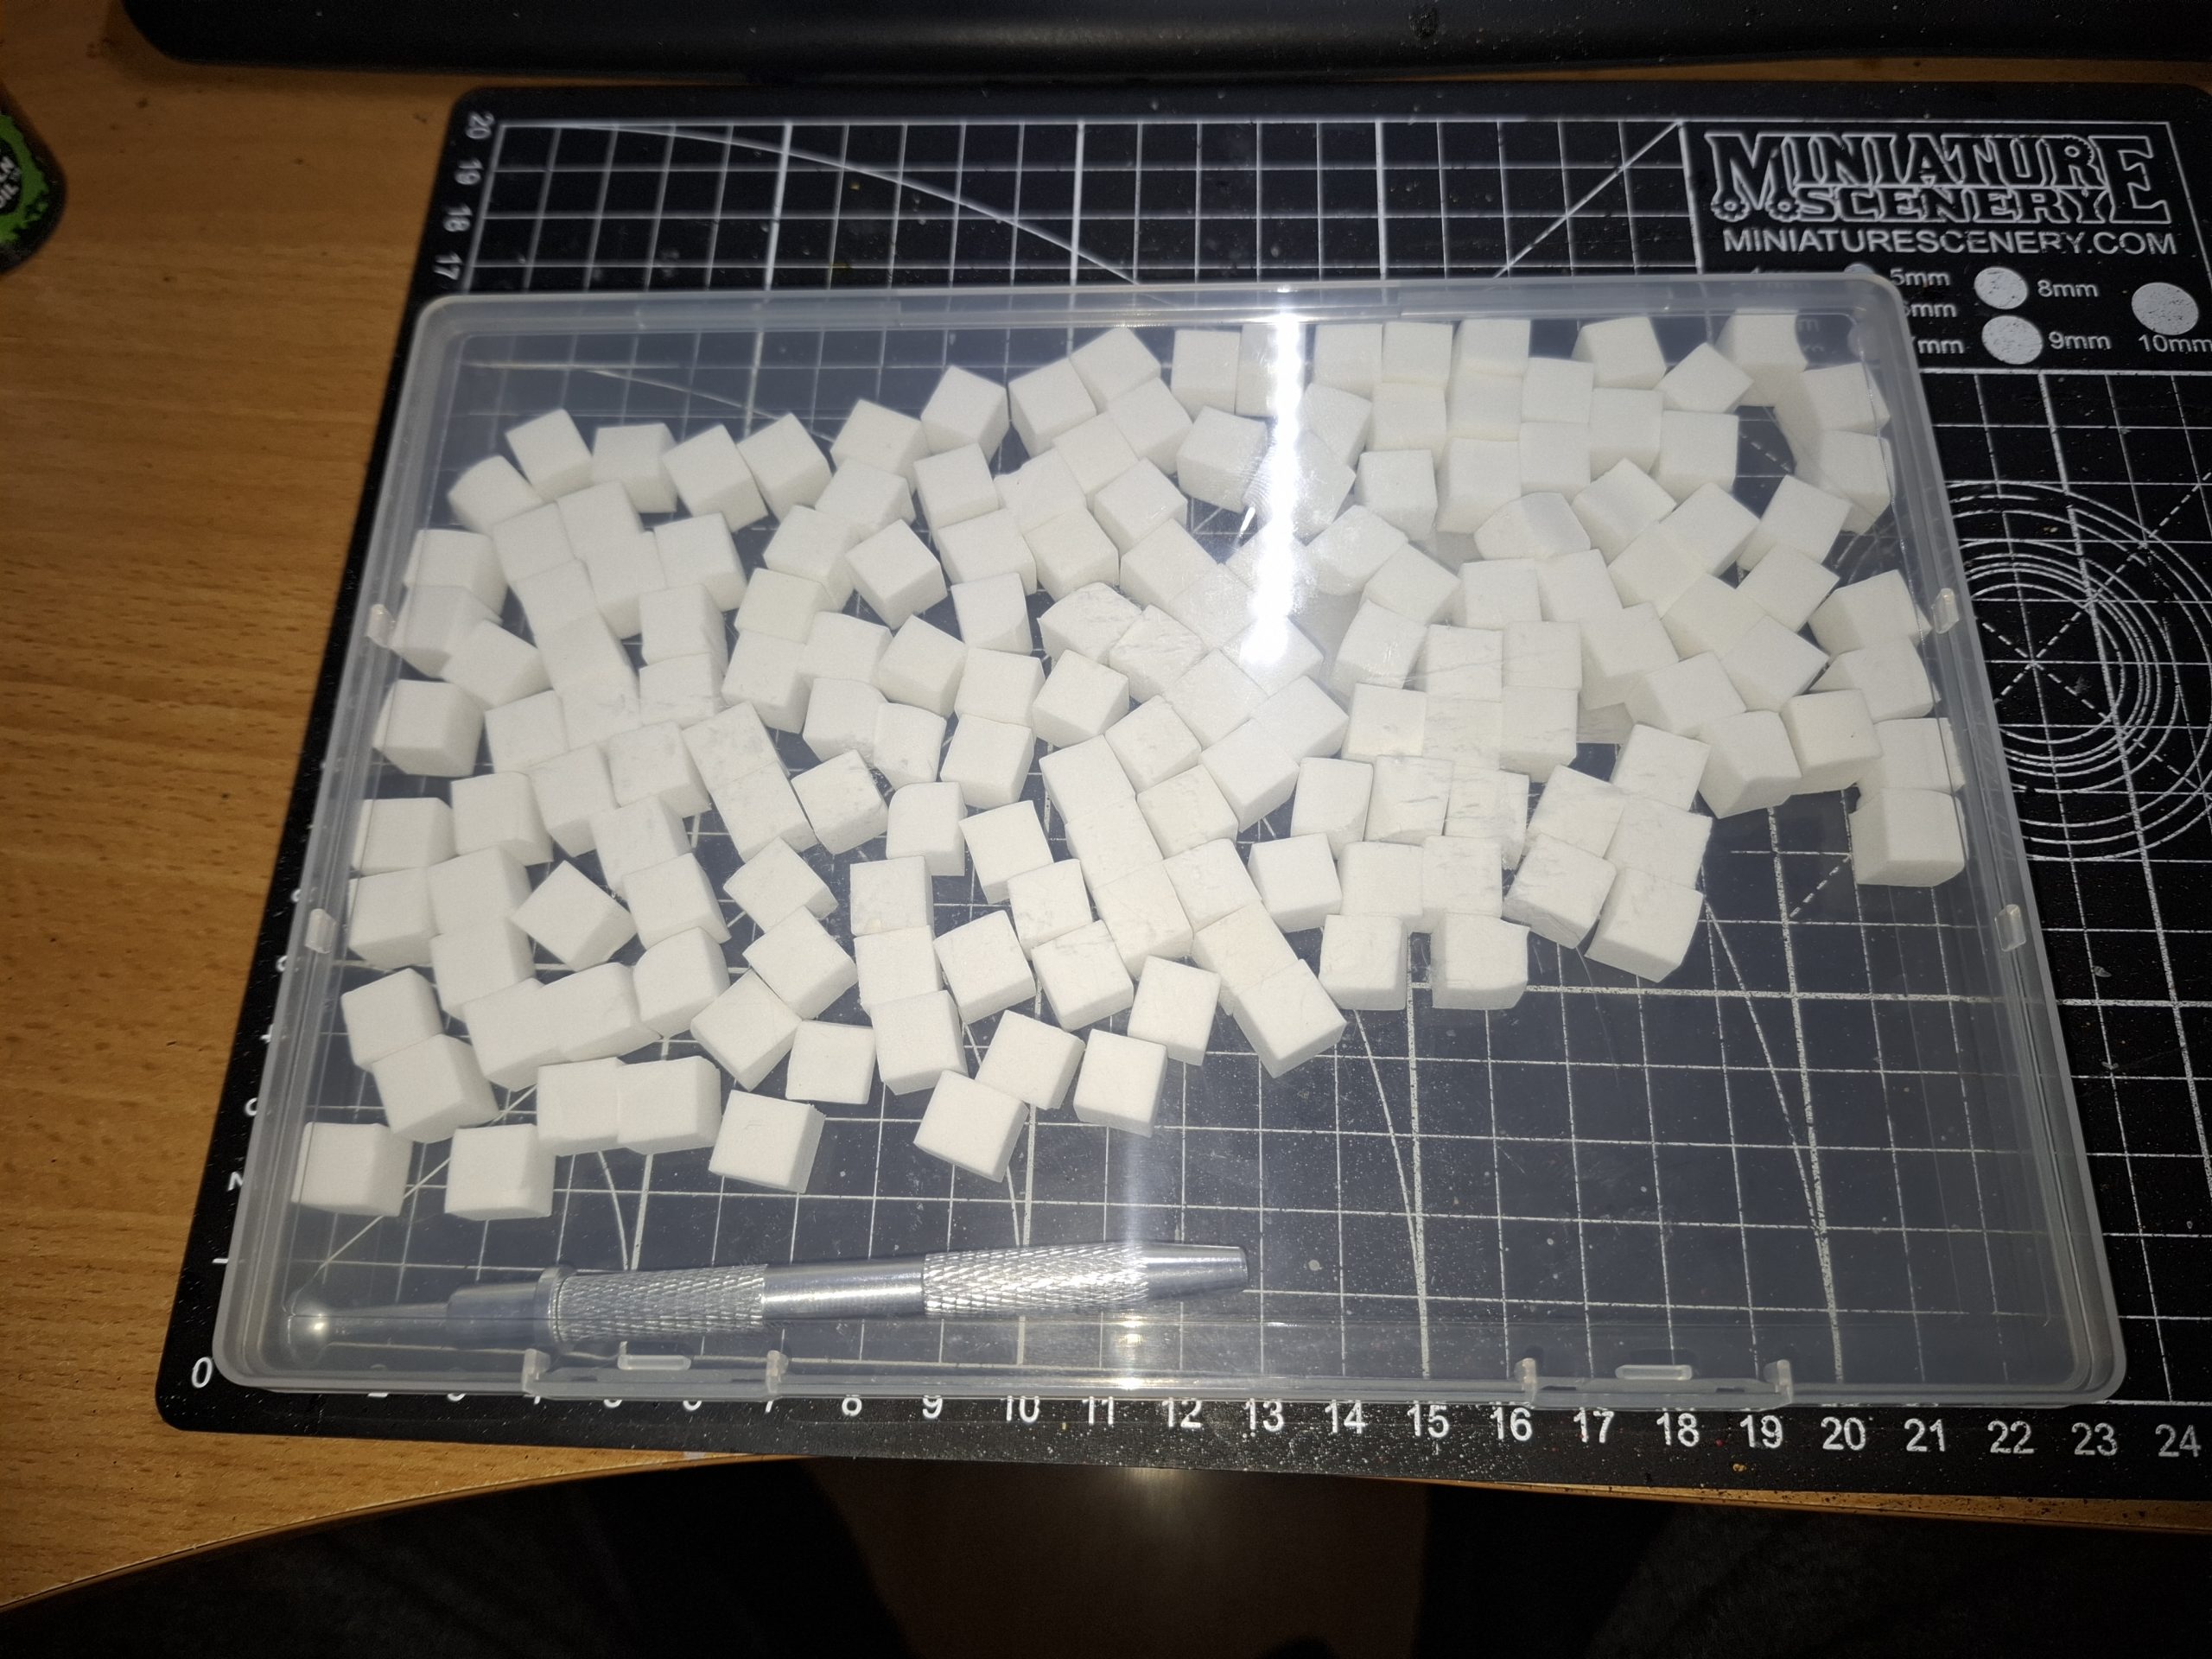
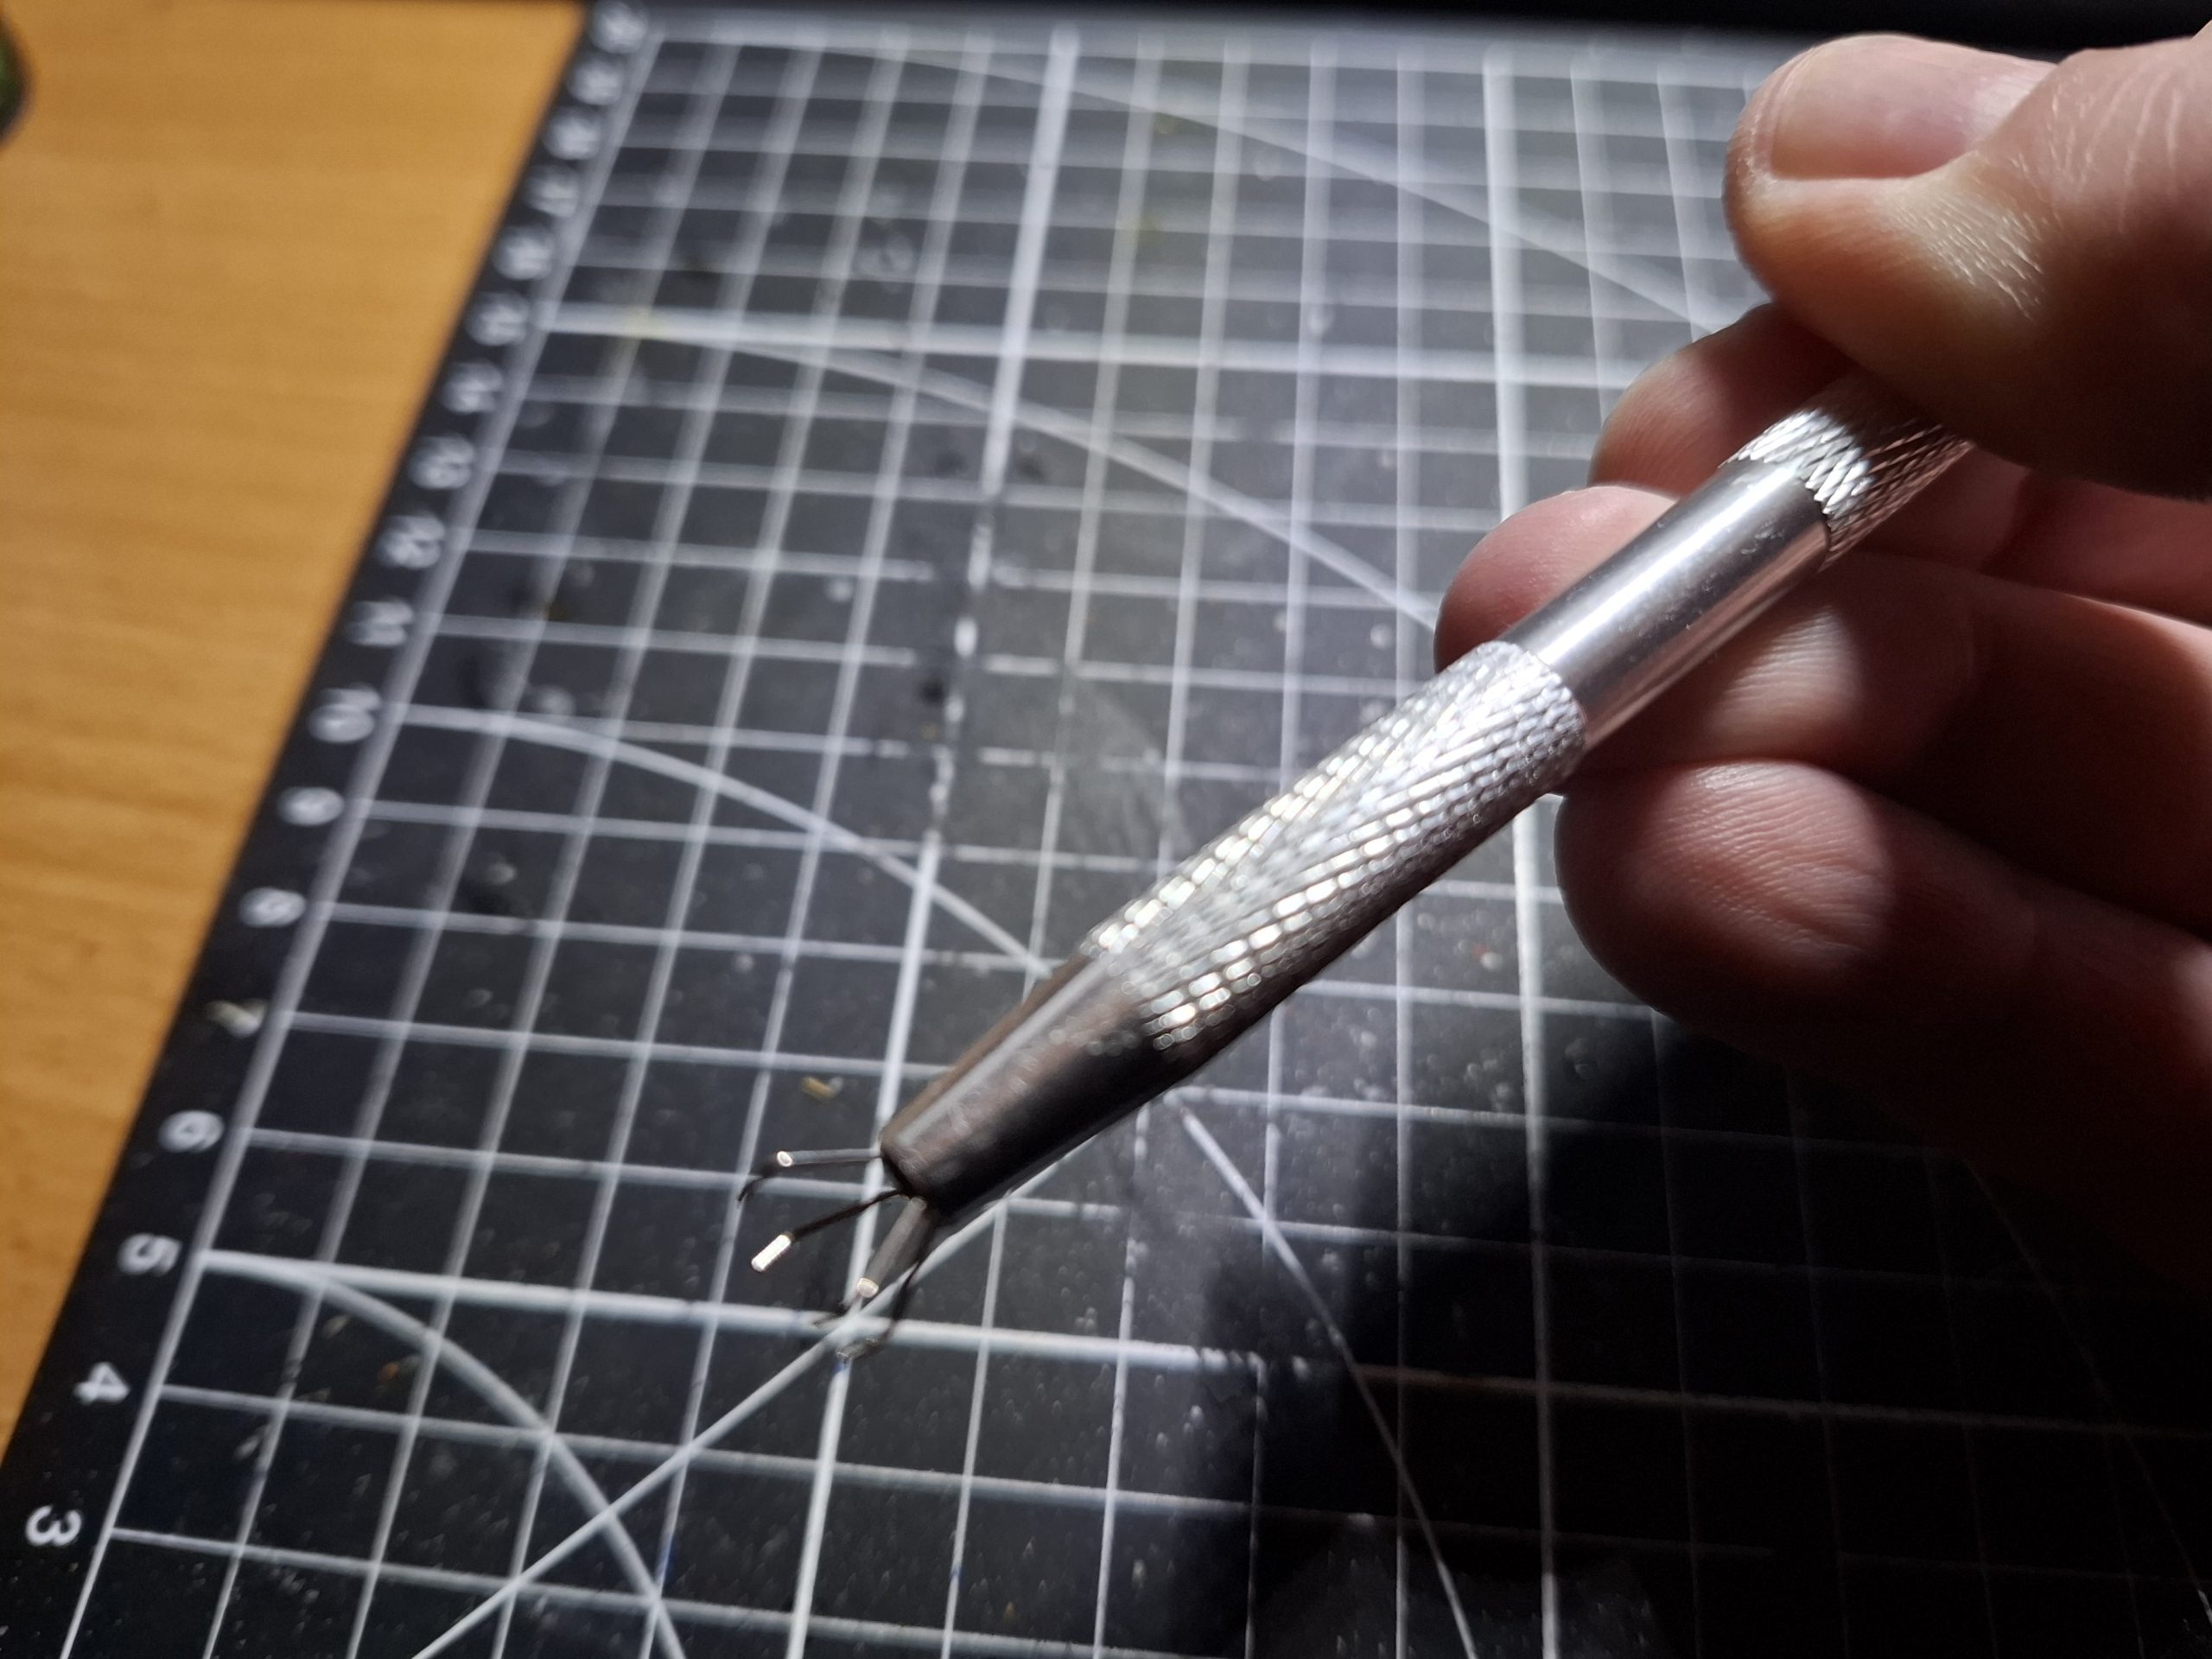
I decided to try the nail art tool I bought for some weathering. It’s a gripper tool that holds wee foam sponge cubes. I distressed the sponge by plucking at it with a pair of sharp needle-nose tweezers. After doing so, I grabbed the sponge in the gripper, and as I was easing it towards the paint, the sponge flew off!
So it turns out, the spring might be too tight? The claws keep pulling in, not stopped by the sponge they hold. In short order, they retract fully, popping the sponge off. Less than ideal. So, until I maybe take it apart and cut down the spring, I had to hold my thumb over the plunger to prevent the claws from 100% retracting. Not terribly useful. As such, I’m not linking them as a useful tool, as I have with certain other things. I might find a better version, but we’ll see.
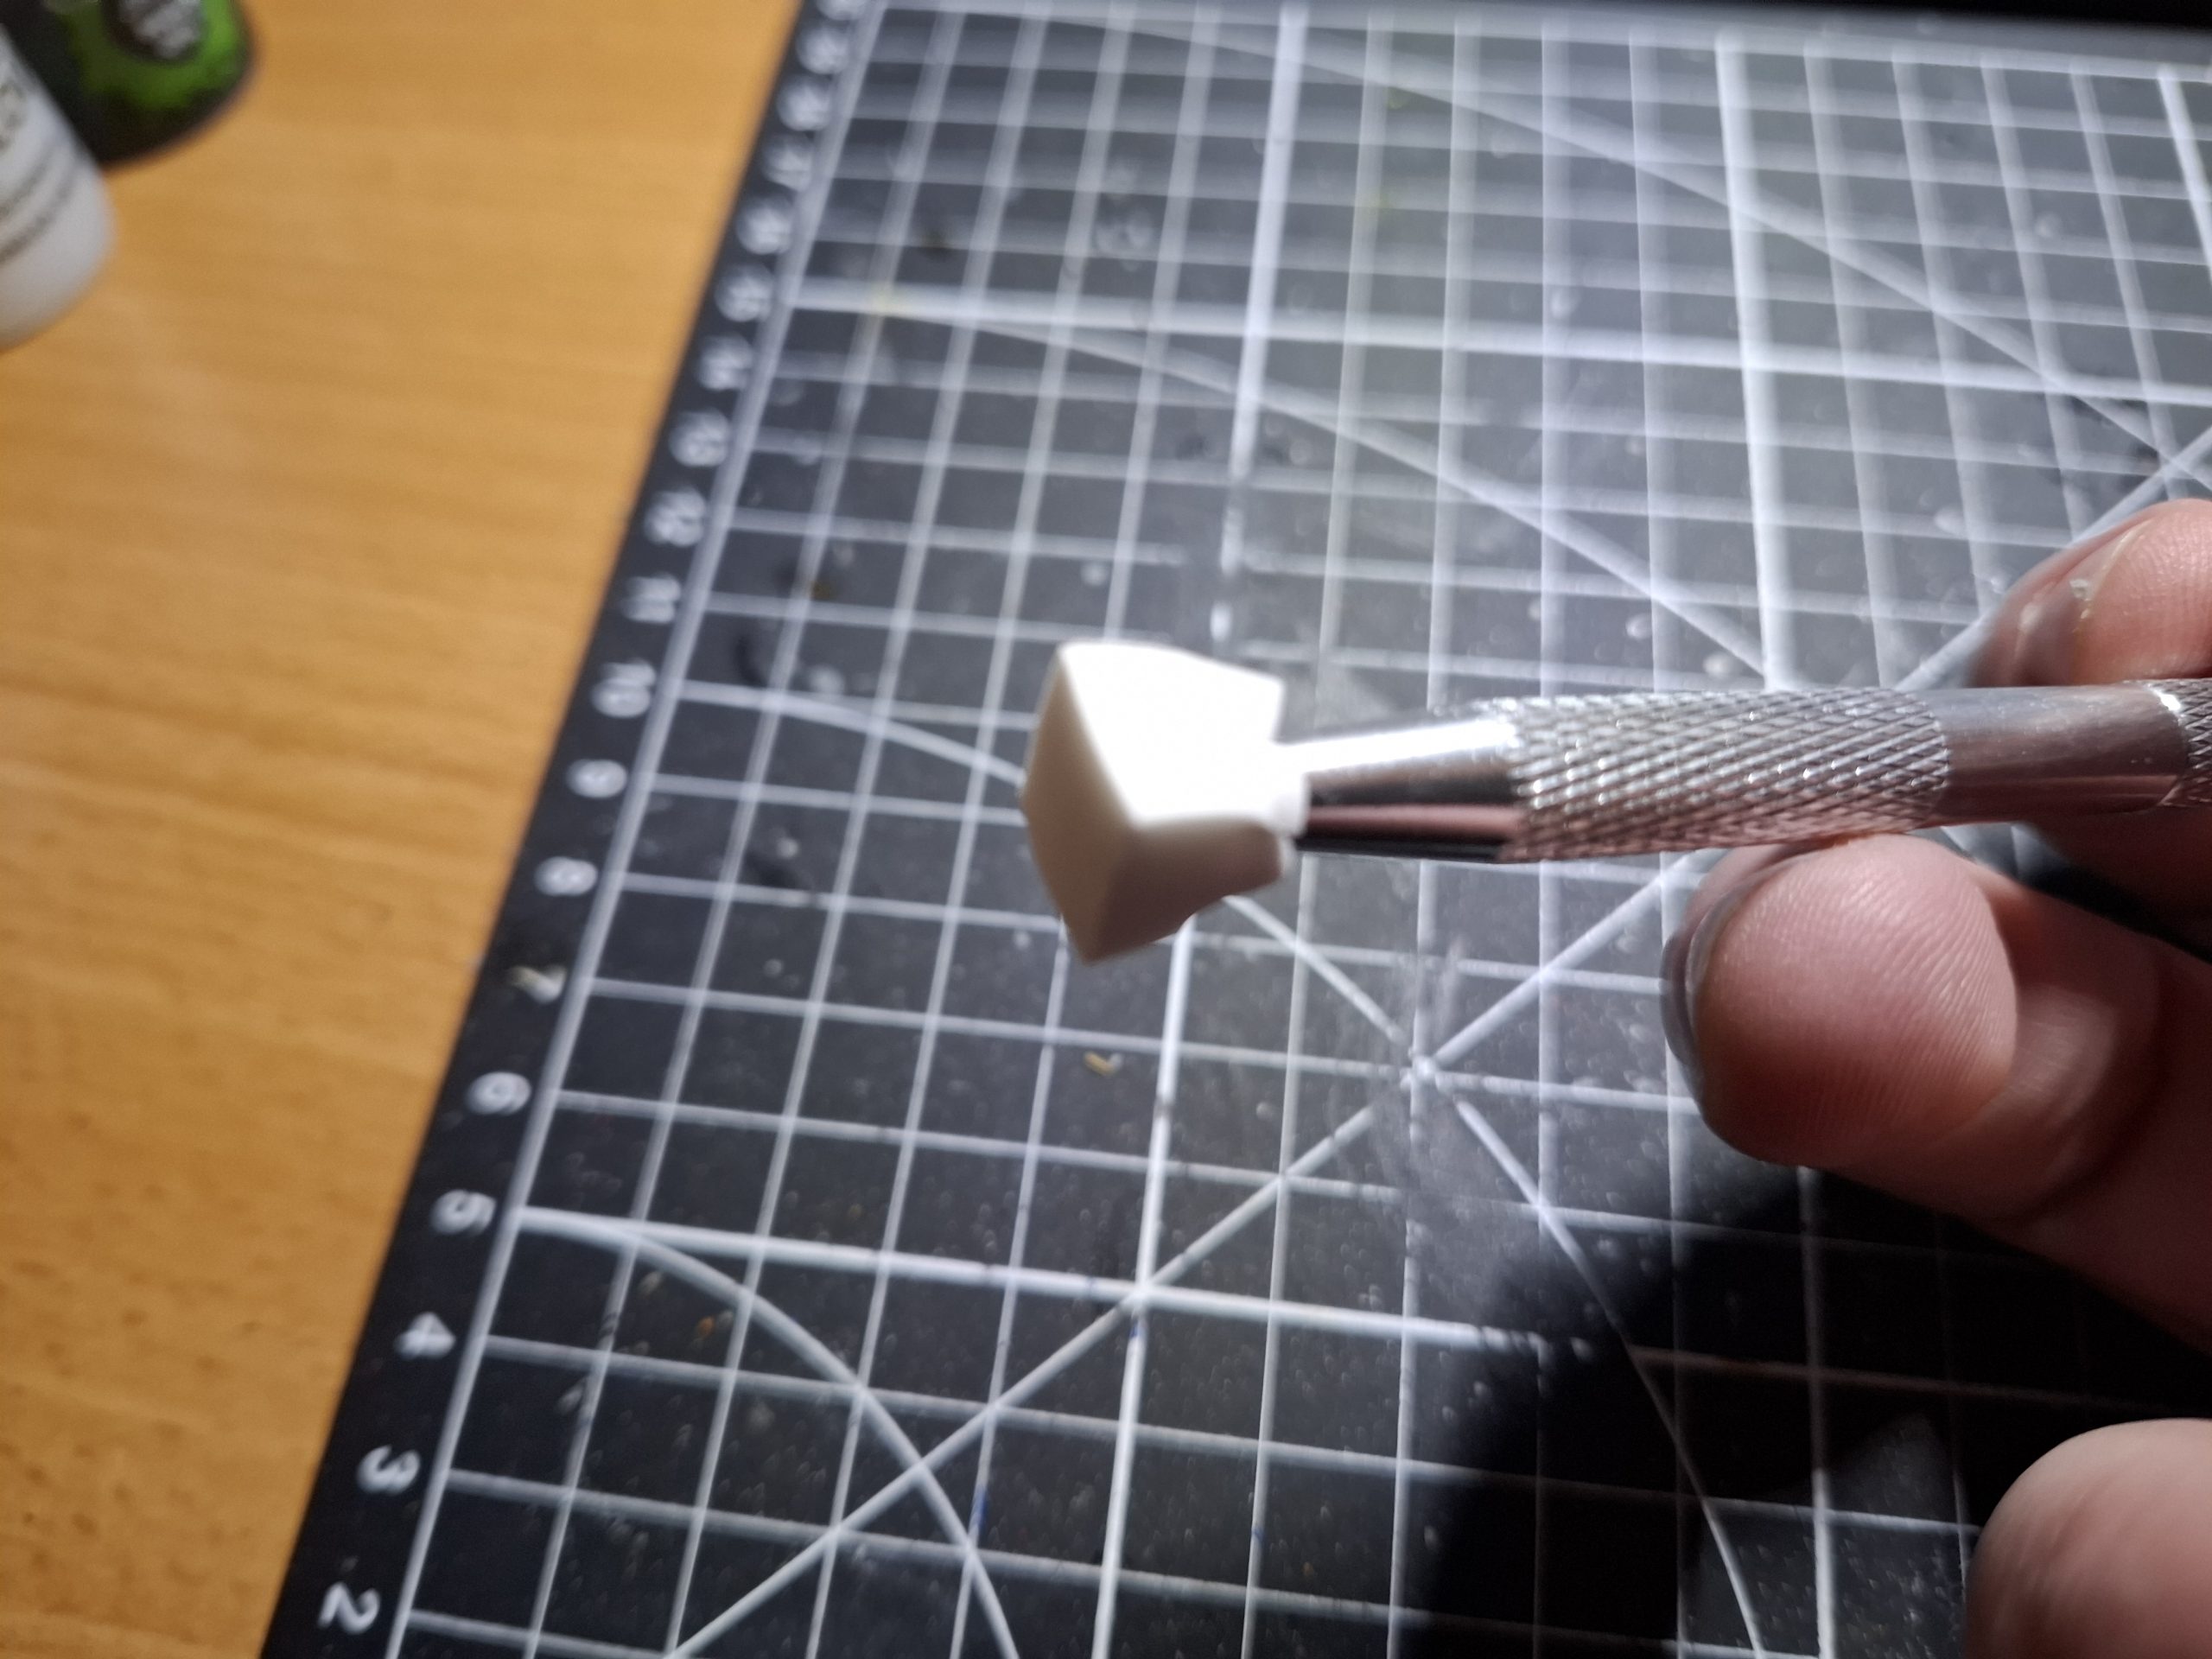
I added the same black and brown paints we used for the weathering of the Iron Labyrinth to my wet palette. Then, holding the tool in such a way as to hold the plunger down a bit, I dabbed the sponge in the black, wiped the excess off, and applied colour around the various crates. Once dry, I did the same with the brown. I was reasonably happy.
Once the brown had dried, I finished the crates off with gentle dabs of GW Ironbreaker, all around the crates.
I feel these look nice and beat up, grimy and perfect for cover around the filth of the Underhive! Now to finish off the barrels and do the loot crates that can be deployed all around the battlefield.
I have so many more ideas!

Minor Crate Work.
Minor update today. Been a bit “low energy” of late but managed to drybrush the crates and barrels.
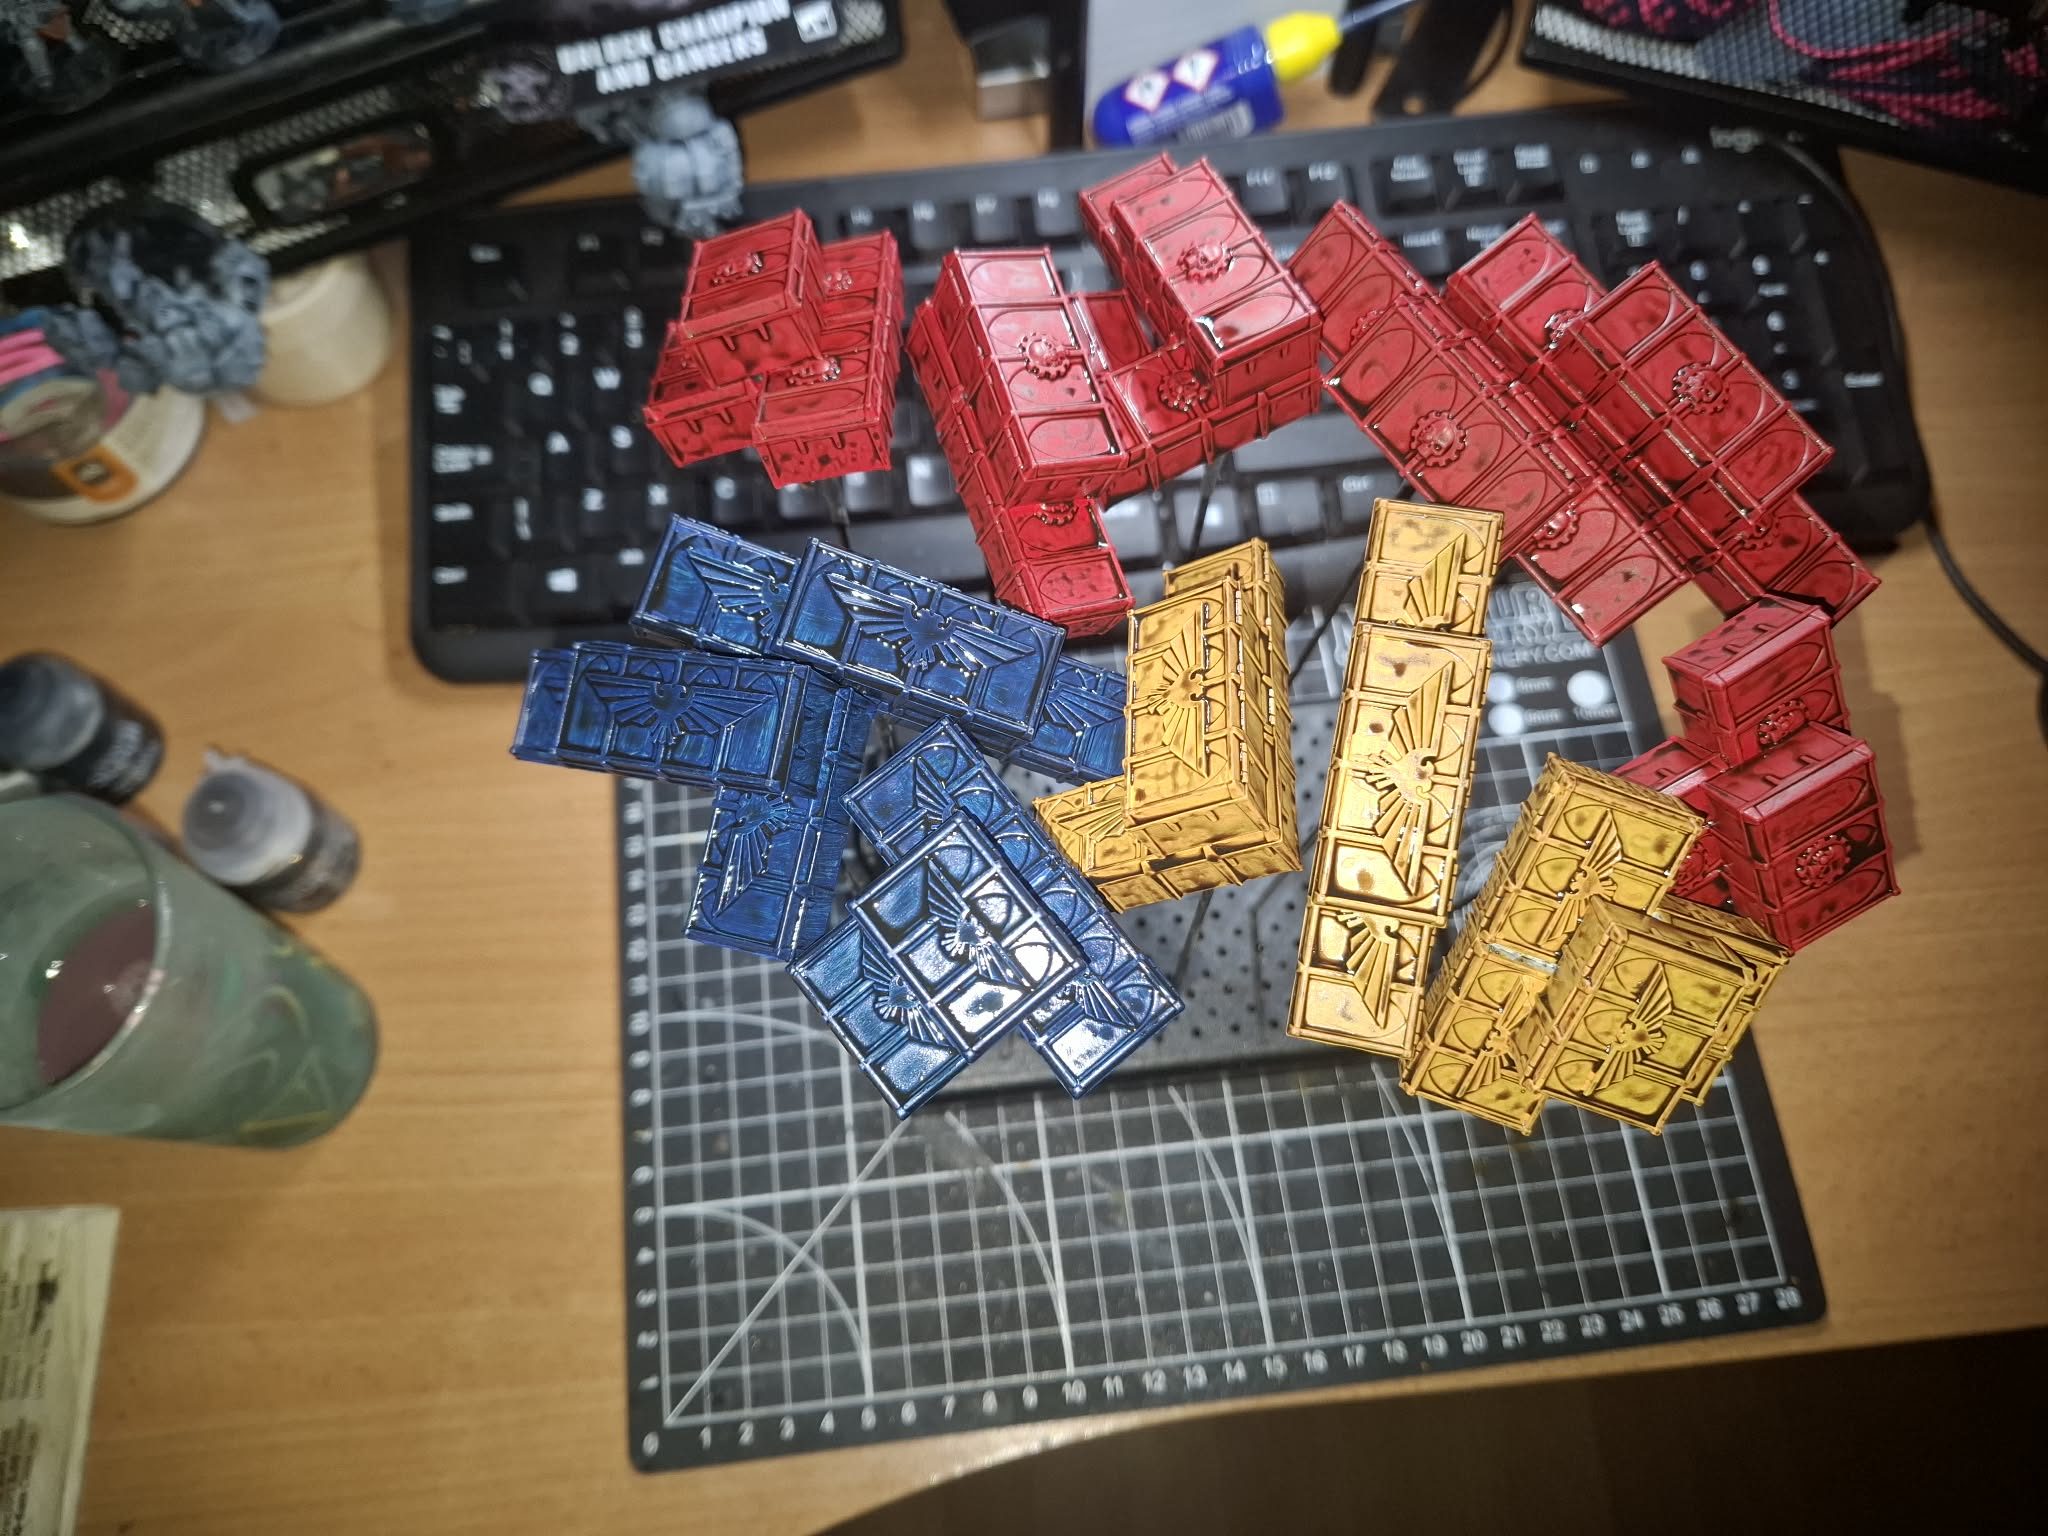
The Mechanicus, were again drybrushed with Army Painter Dragon Red, the yellow with (I think) Army Painter Demigod Flames and the blue with GW Teclis Blue.
With a bit of luck, this weekend I’ll finish them off. Icons Mechanicus painted appropriately, blue crates with gold Aquilla, yellow with silver, to ensure some contrast. Then varnish with Stormshield, and I intend on weathering them with a nail art tool with a sponge. More on that next time!

More trucks and crates!
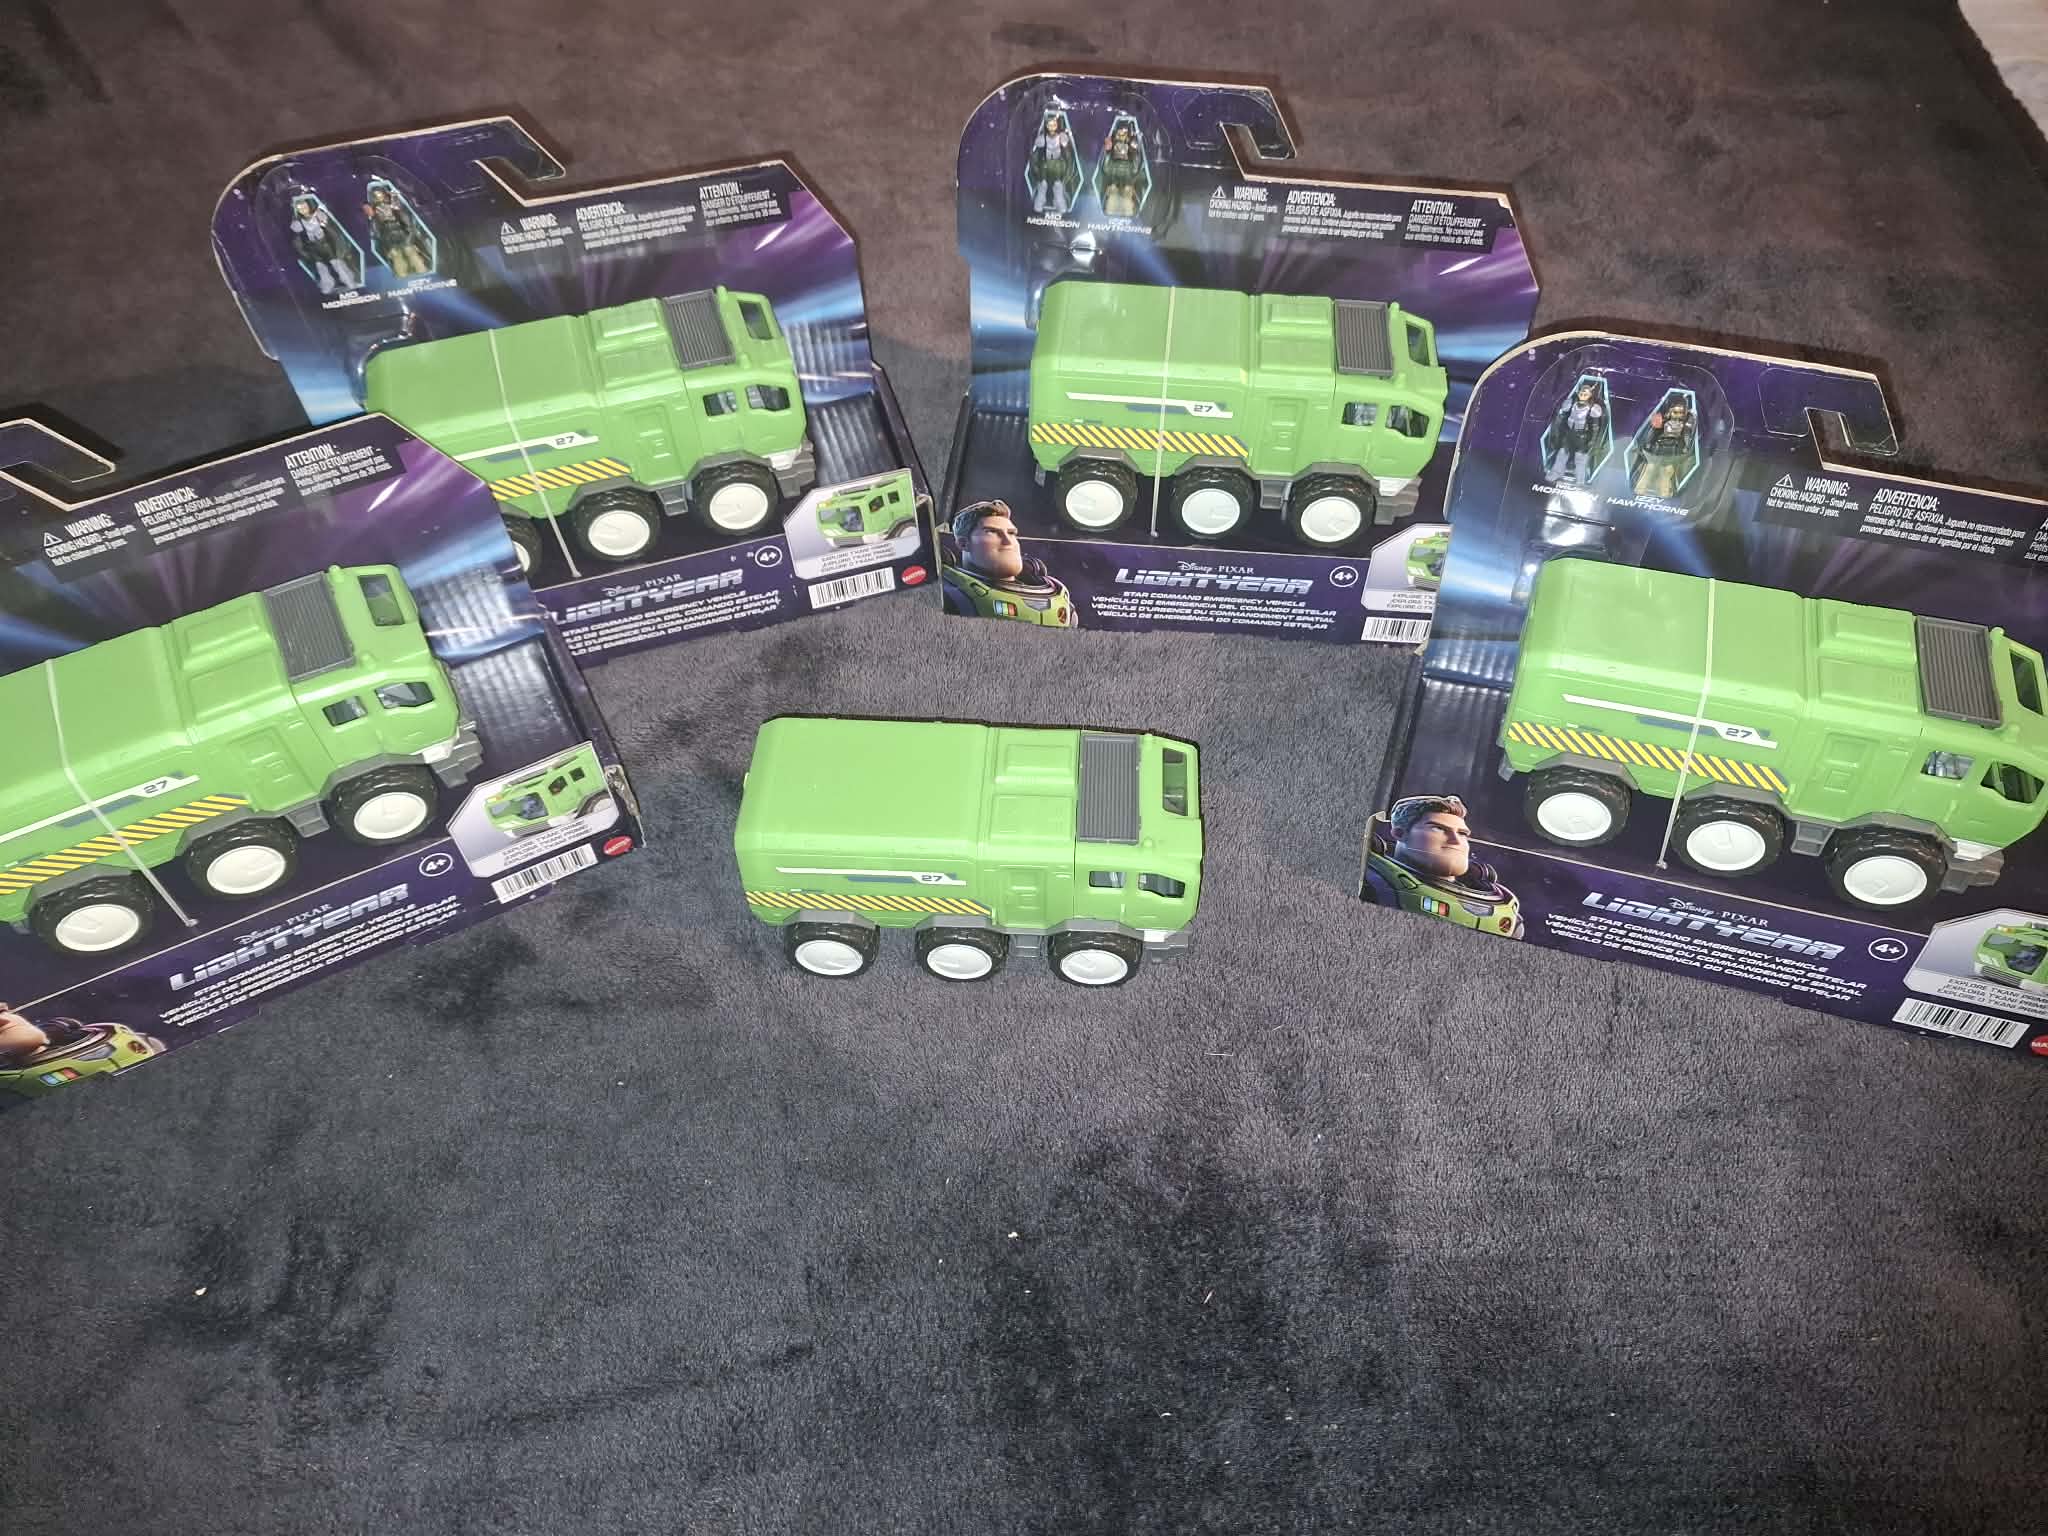
Having sourced one Lightyear truck for future Ash Wastes conversions, I managed to get another 4. One went to Brett, the rest are for the future!
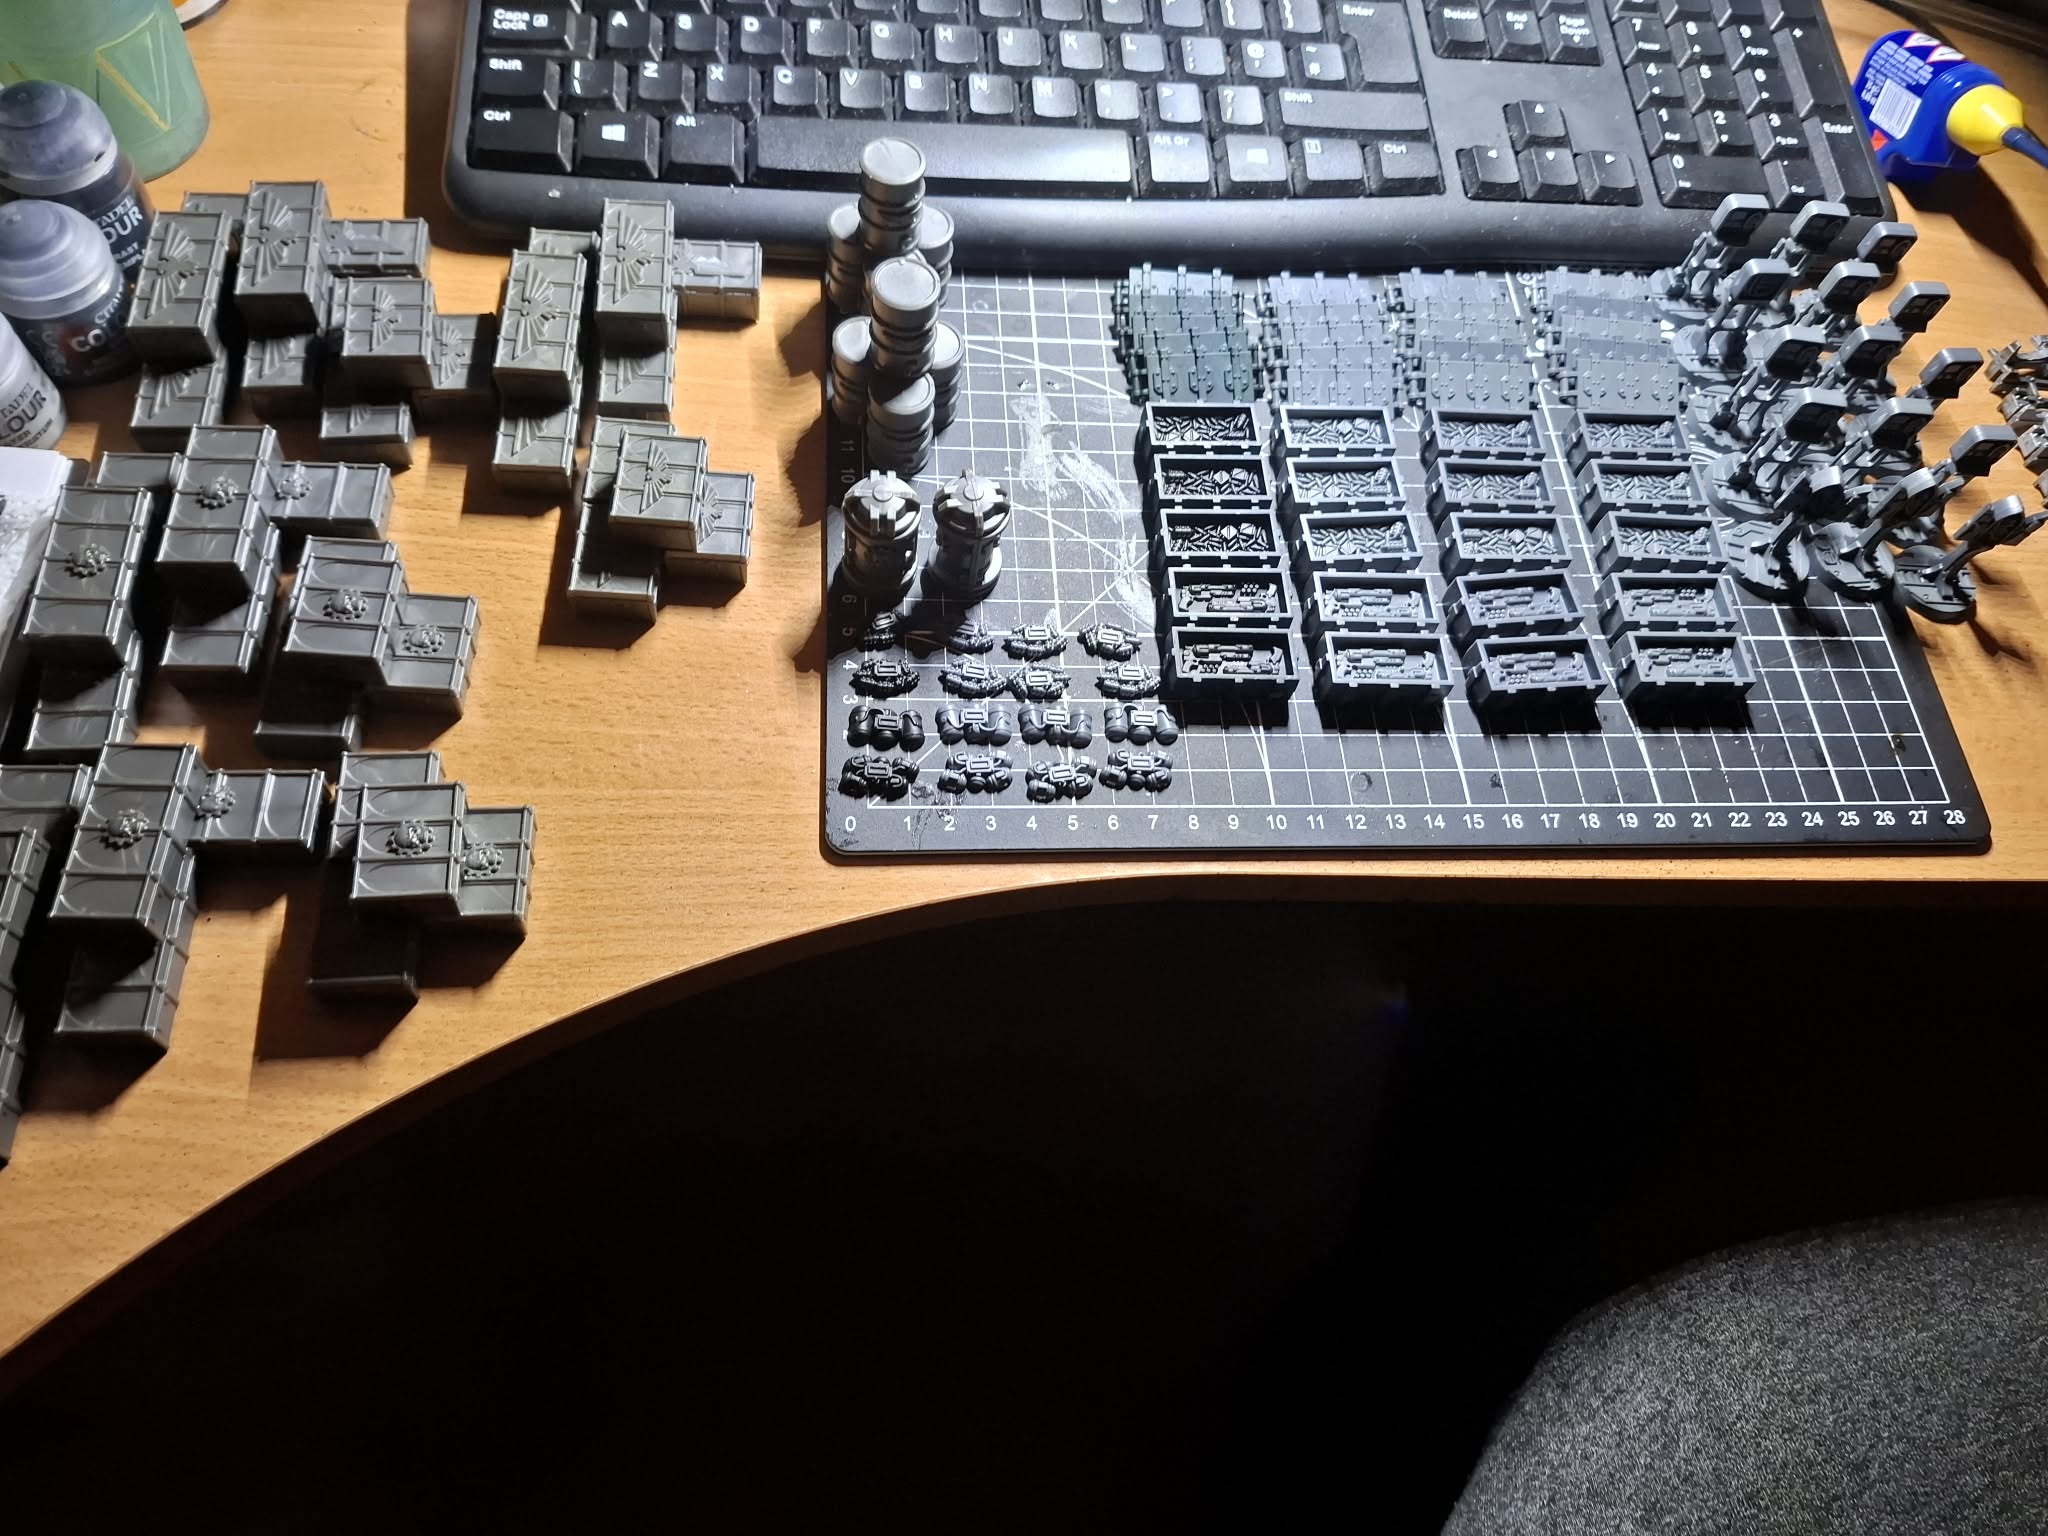
Beyond that, I decided to organise what items I have for the Underhive. I split off the loot caches for future battle, coins, tentacles and crates!
I painted all the crates and barrels I have in GW Grey Seer. 2 thin coats.
Then, all Mechanicus crates and one stack of barrels were painted Army Painter Dragon Red, half the Imperial Crates and the second stack of barrels with Army Painter Daemonic Yellow, with the other half being GW Celestium Blue. Once dry, they were all hit with GW Agrax Earthshade. I want em dirty and blotchy! Next, I’ll have to highlight!
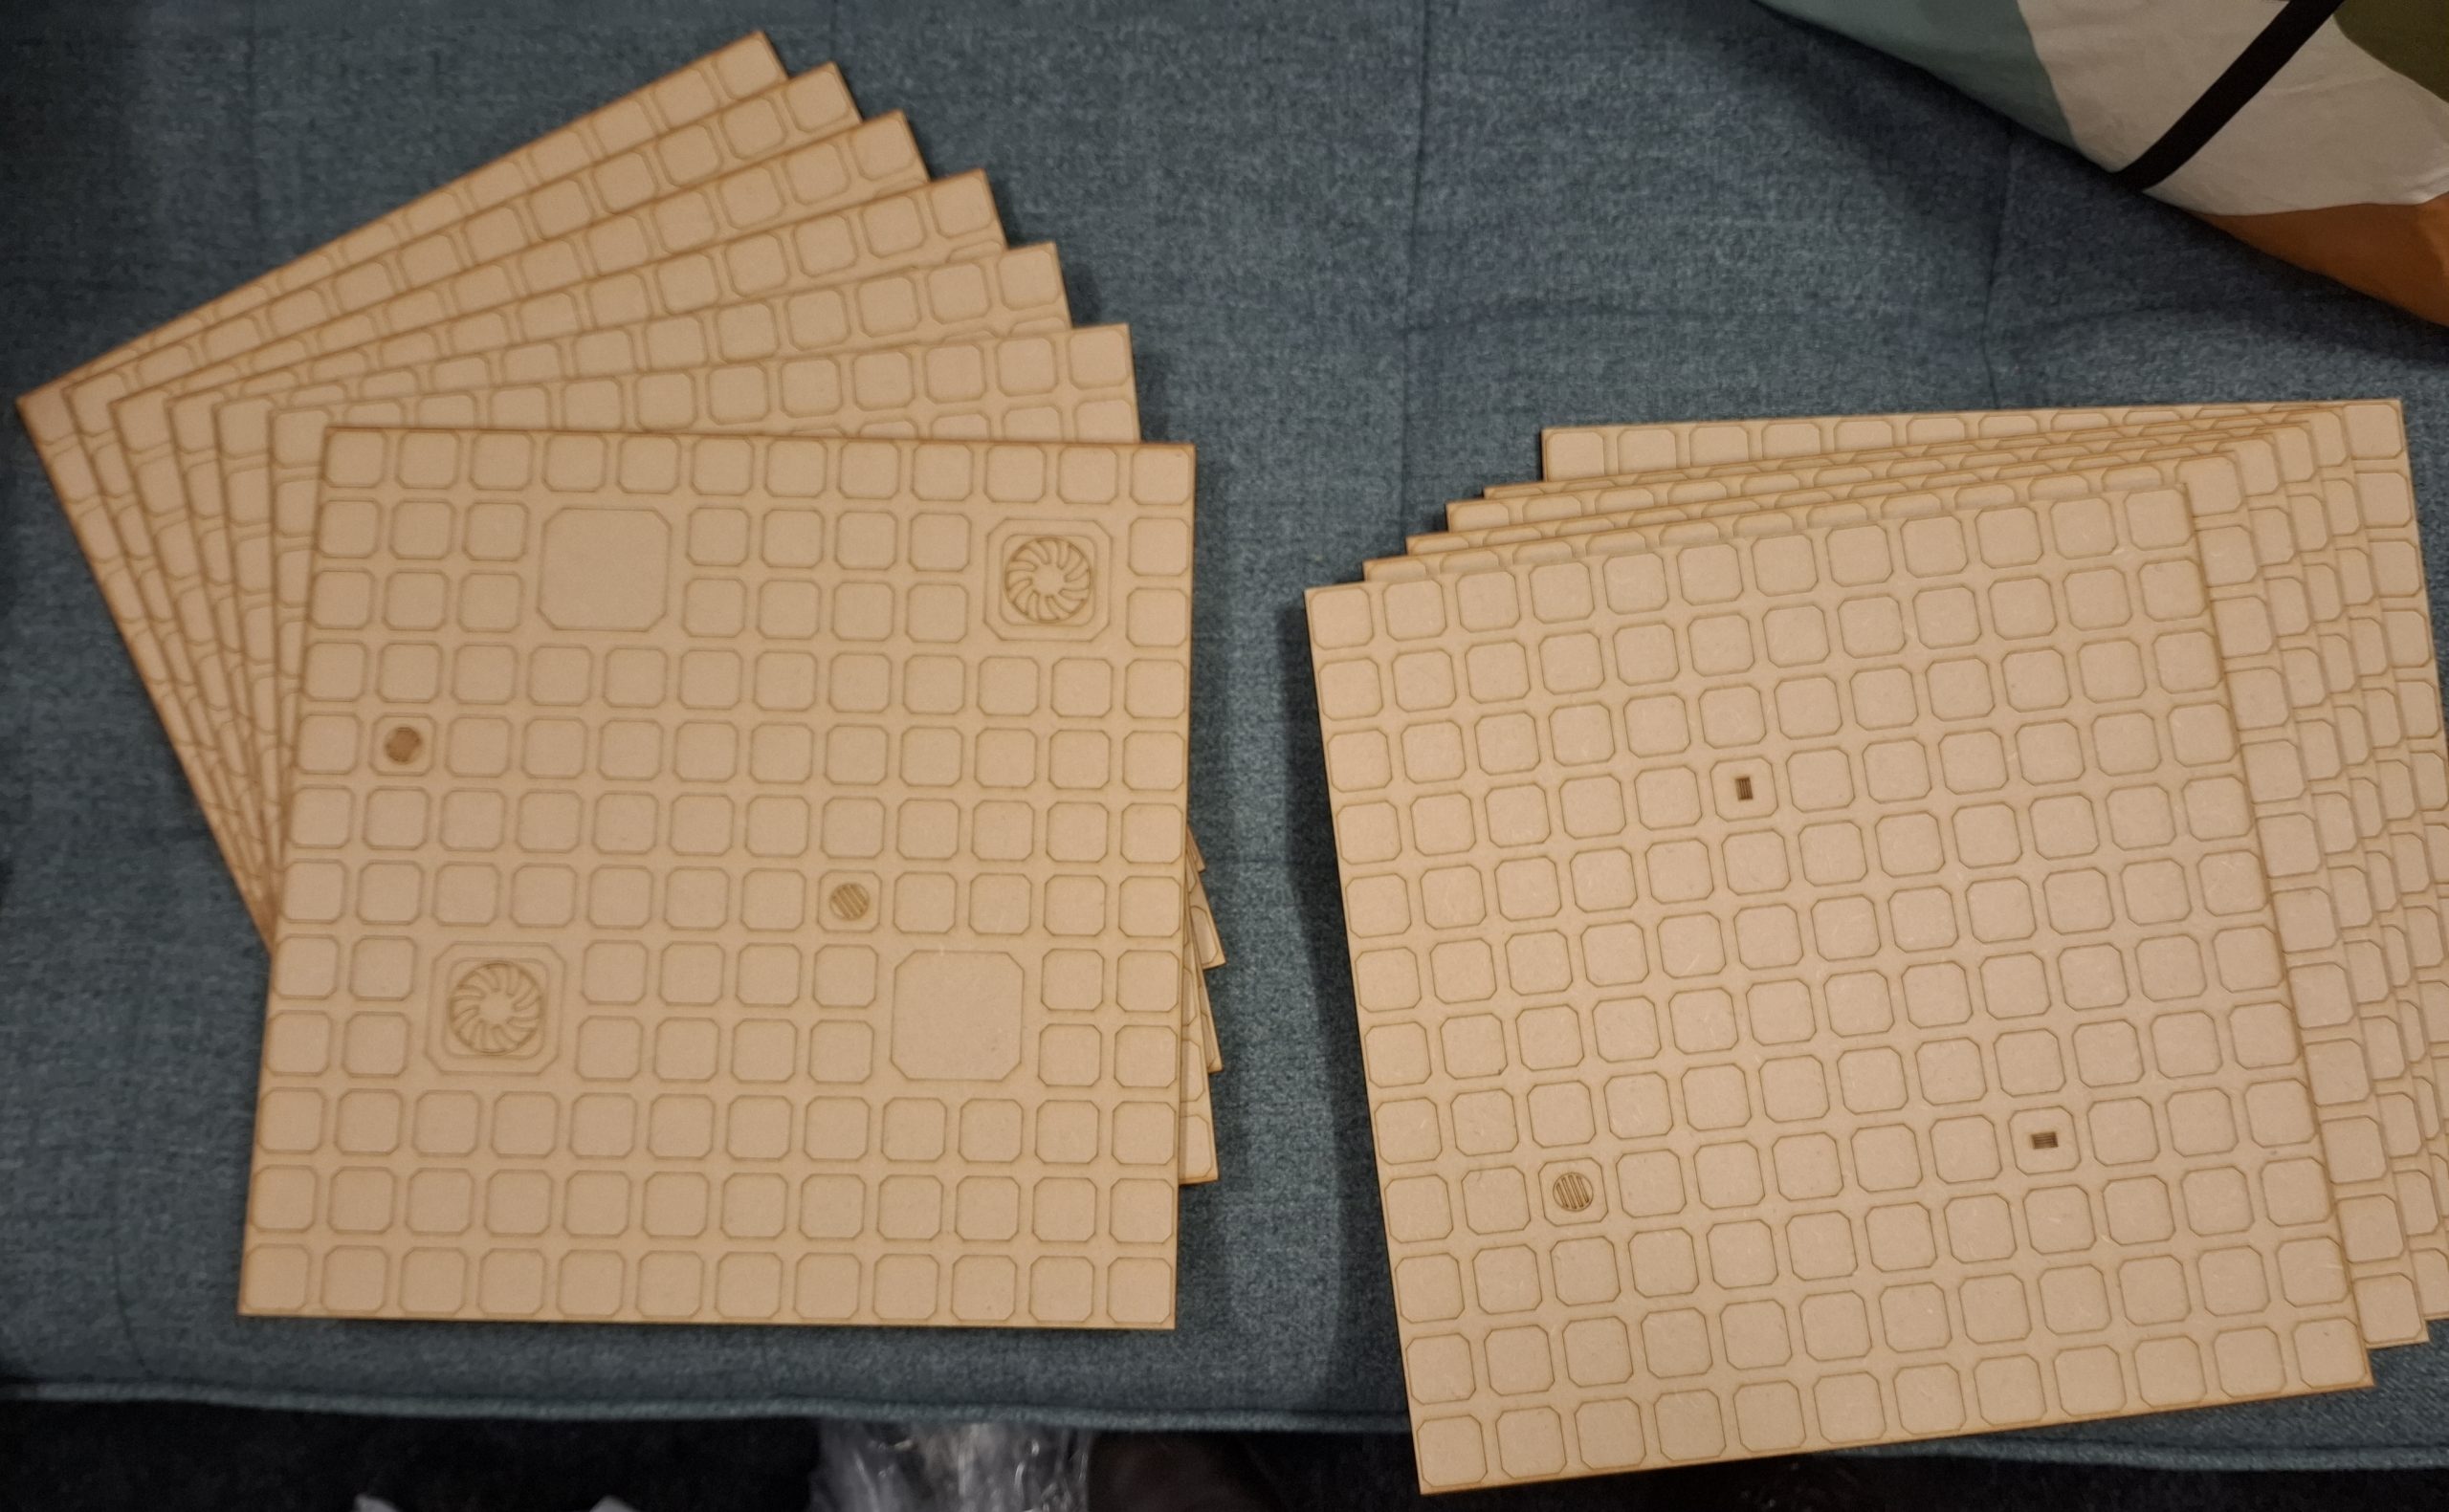
Tiles & Trucks!
My buddy Andrew, who runs a wee Etsy store for tokens and tournament terrain called WarToken came into the office with a pile of 12 x 12-inch MDF tiles I’d bought. They had new laser-burned etching on them! Brett and I shall paint up for Necromunda, and he has another dozen, which will get another two designs etched on. Should look great when painted, plus I reckon I’ll use some for bespoke terrain tiles. The previously mentioned Cloud Buster terrain piece would likely benefit from a central tile to be mounted upon.
I also managed to source the below Lightyear truck toy. While a wee bit small, it ought to serve as an excellent base for future Ash Wastes content.

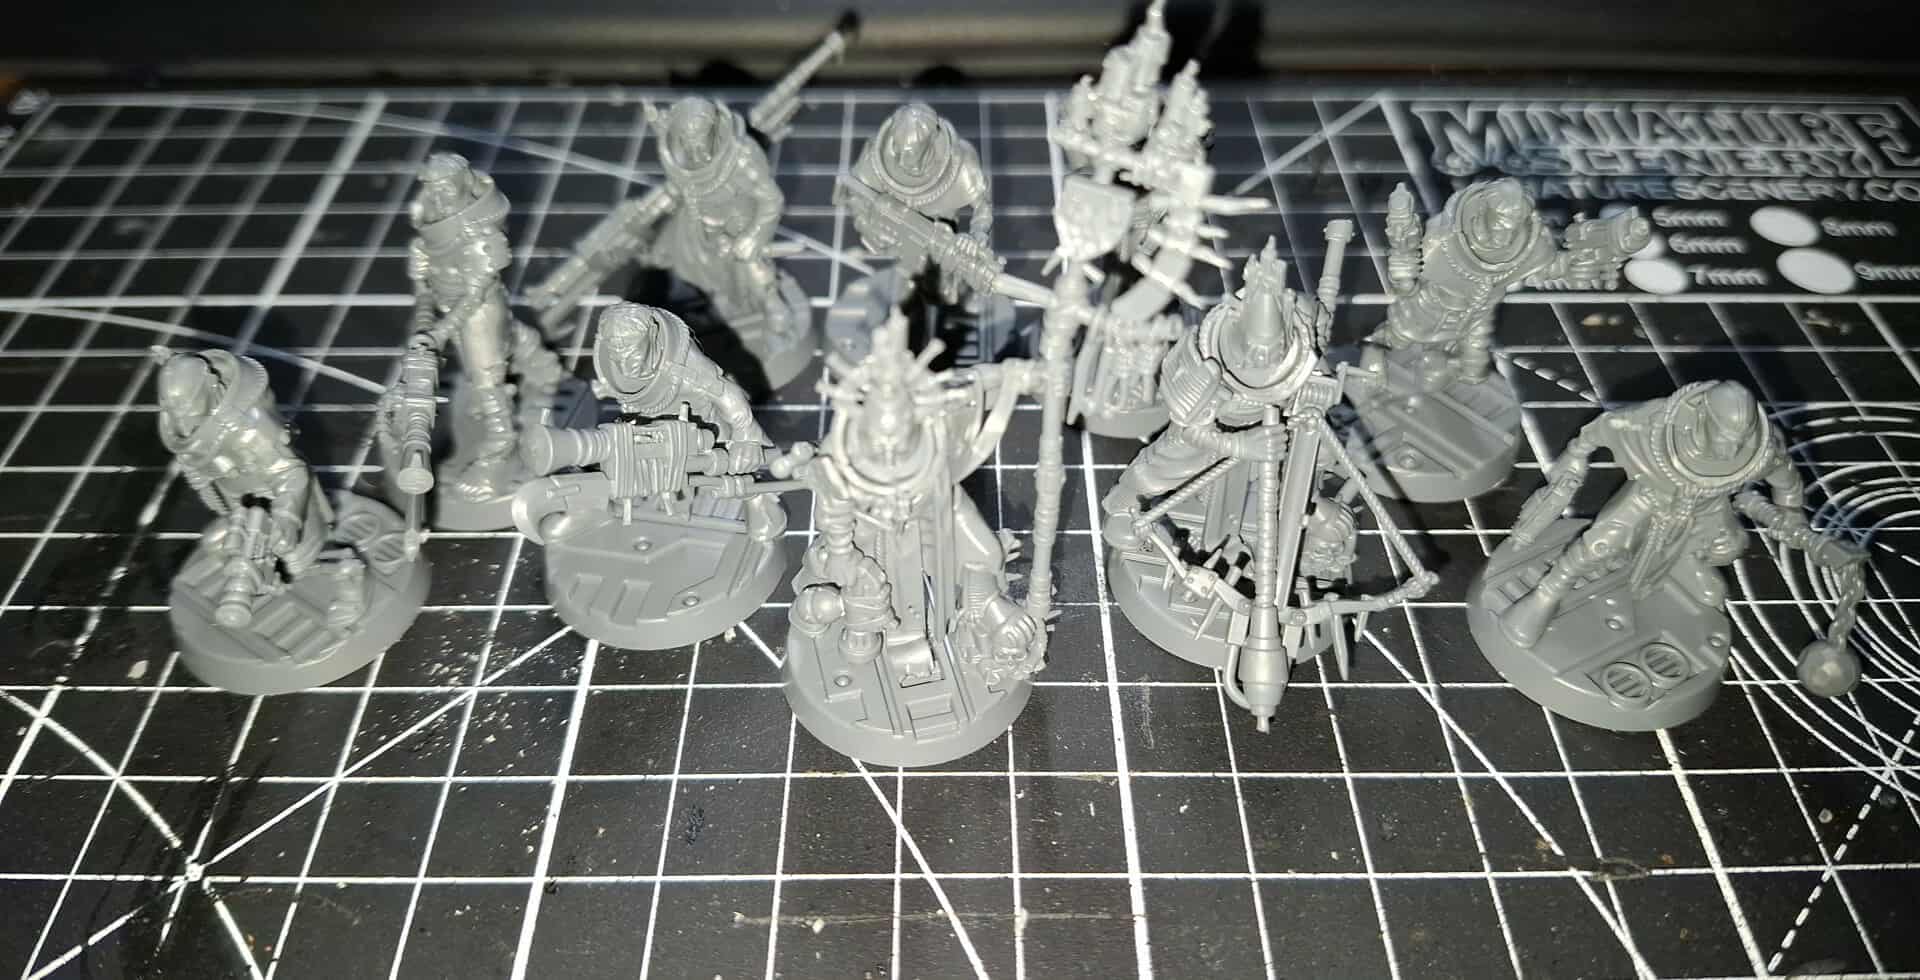
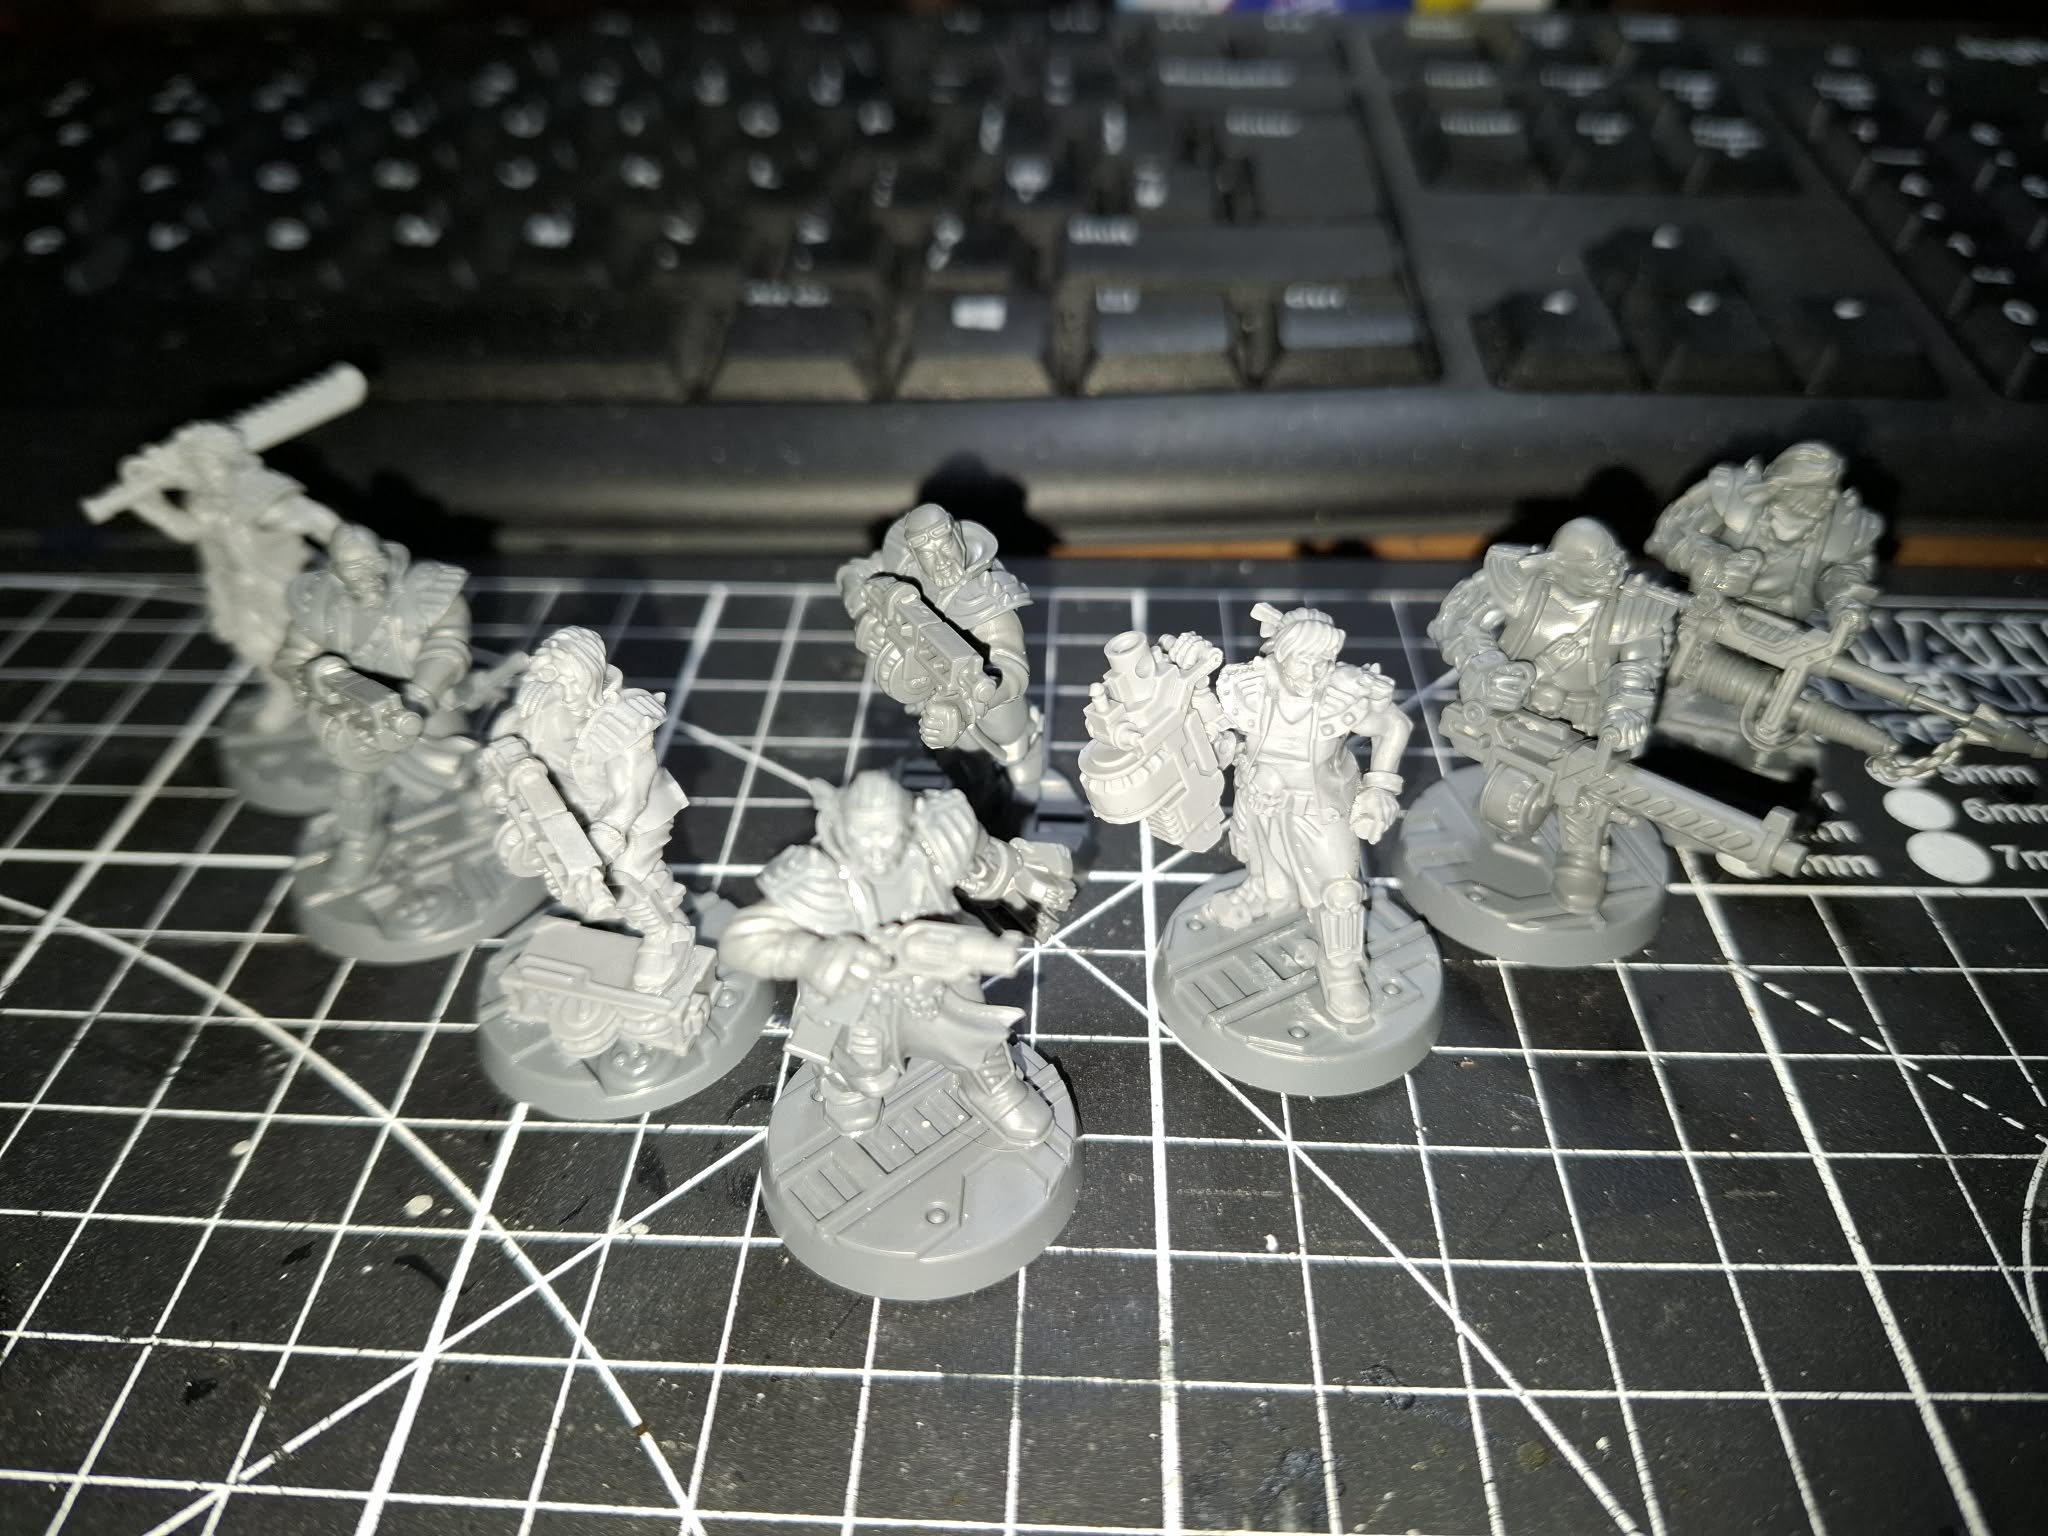
More Gang progress.
I’ve done some more work on Necromunda gangs. I have built the core box of Cawdor to use as a “floating” gang for use by other people to get them hooked.
The Orlocks, though, I have built more plastic individuals and the female expansion booster. So now I have a pair of close combat gangers, three wielding Autoguns, 3 more Road Sergeants, with a harpoon launcher, heavy stubber and heavy bolter, respectively and a close combat version of my Road Captain, Devin, armed with a stub gun and servo claw.
I will say, Necromunda minis continue to be somewhat fiddly to build. Not terribly enjoyable, though the resin fighters were a serious pain in the bum. In a few instances, I actually brought out the Gorilla Glue gel. This had the bonus of self-filling some gaps and really grabbing the required pieces, particularly the heads and, on Strode, the heavy bolter wielder, her ponytail.
I name all my Gangers. I have a document where I list names that I feel will work. For my Orlocks, I’ve harvested names from John Carpenter and action films. Strode? Named after the original Final Girl, Laurie Strode from Halloween. The heavy stubber Road Sarge? Blane, from Predator. That sorta thing. It’s a bit of fun. I DO intend on getting some name plates for all of these gangers. Probably from Versatile Terrain.
More terrain coming soon!
Necromunda is a lot of fun. I reckon I’ll try and get the gang finished off and we’ll get a few more games in before starting a campaign!
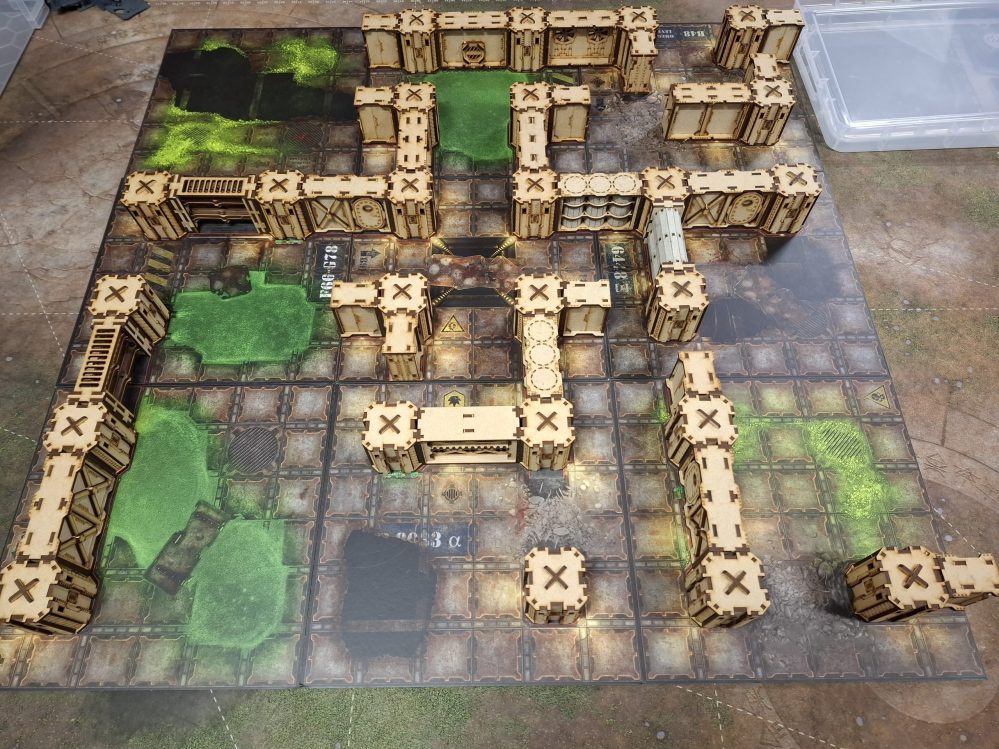
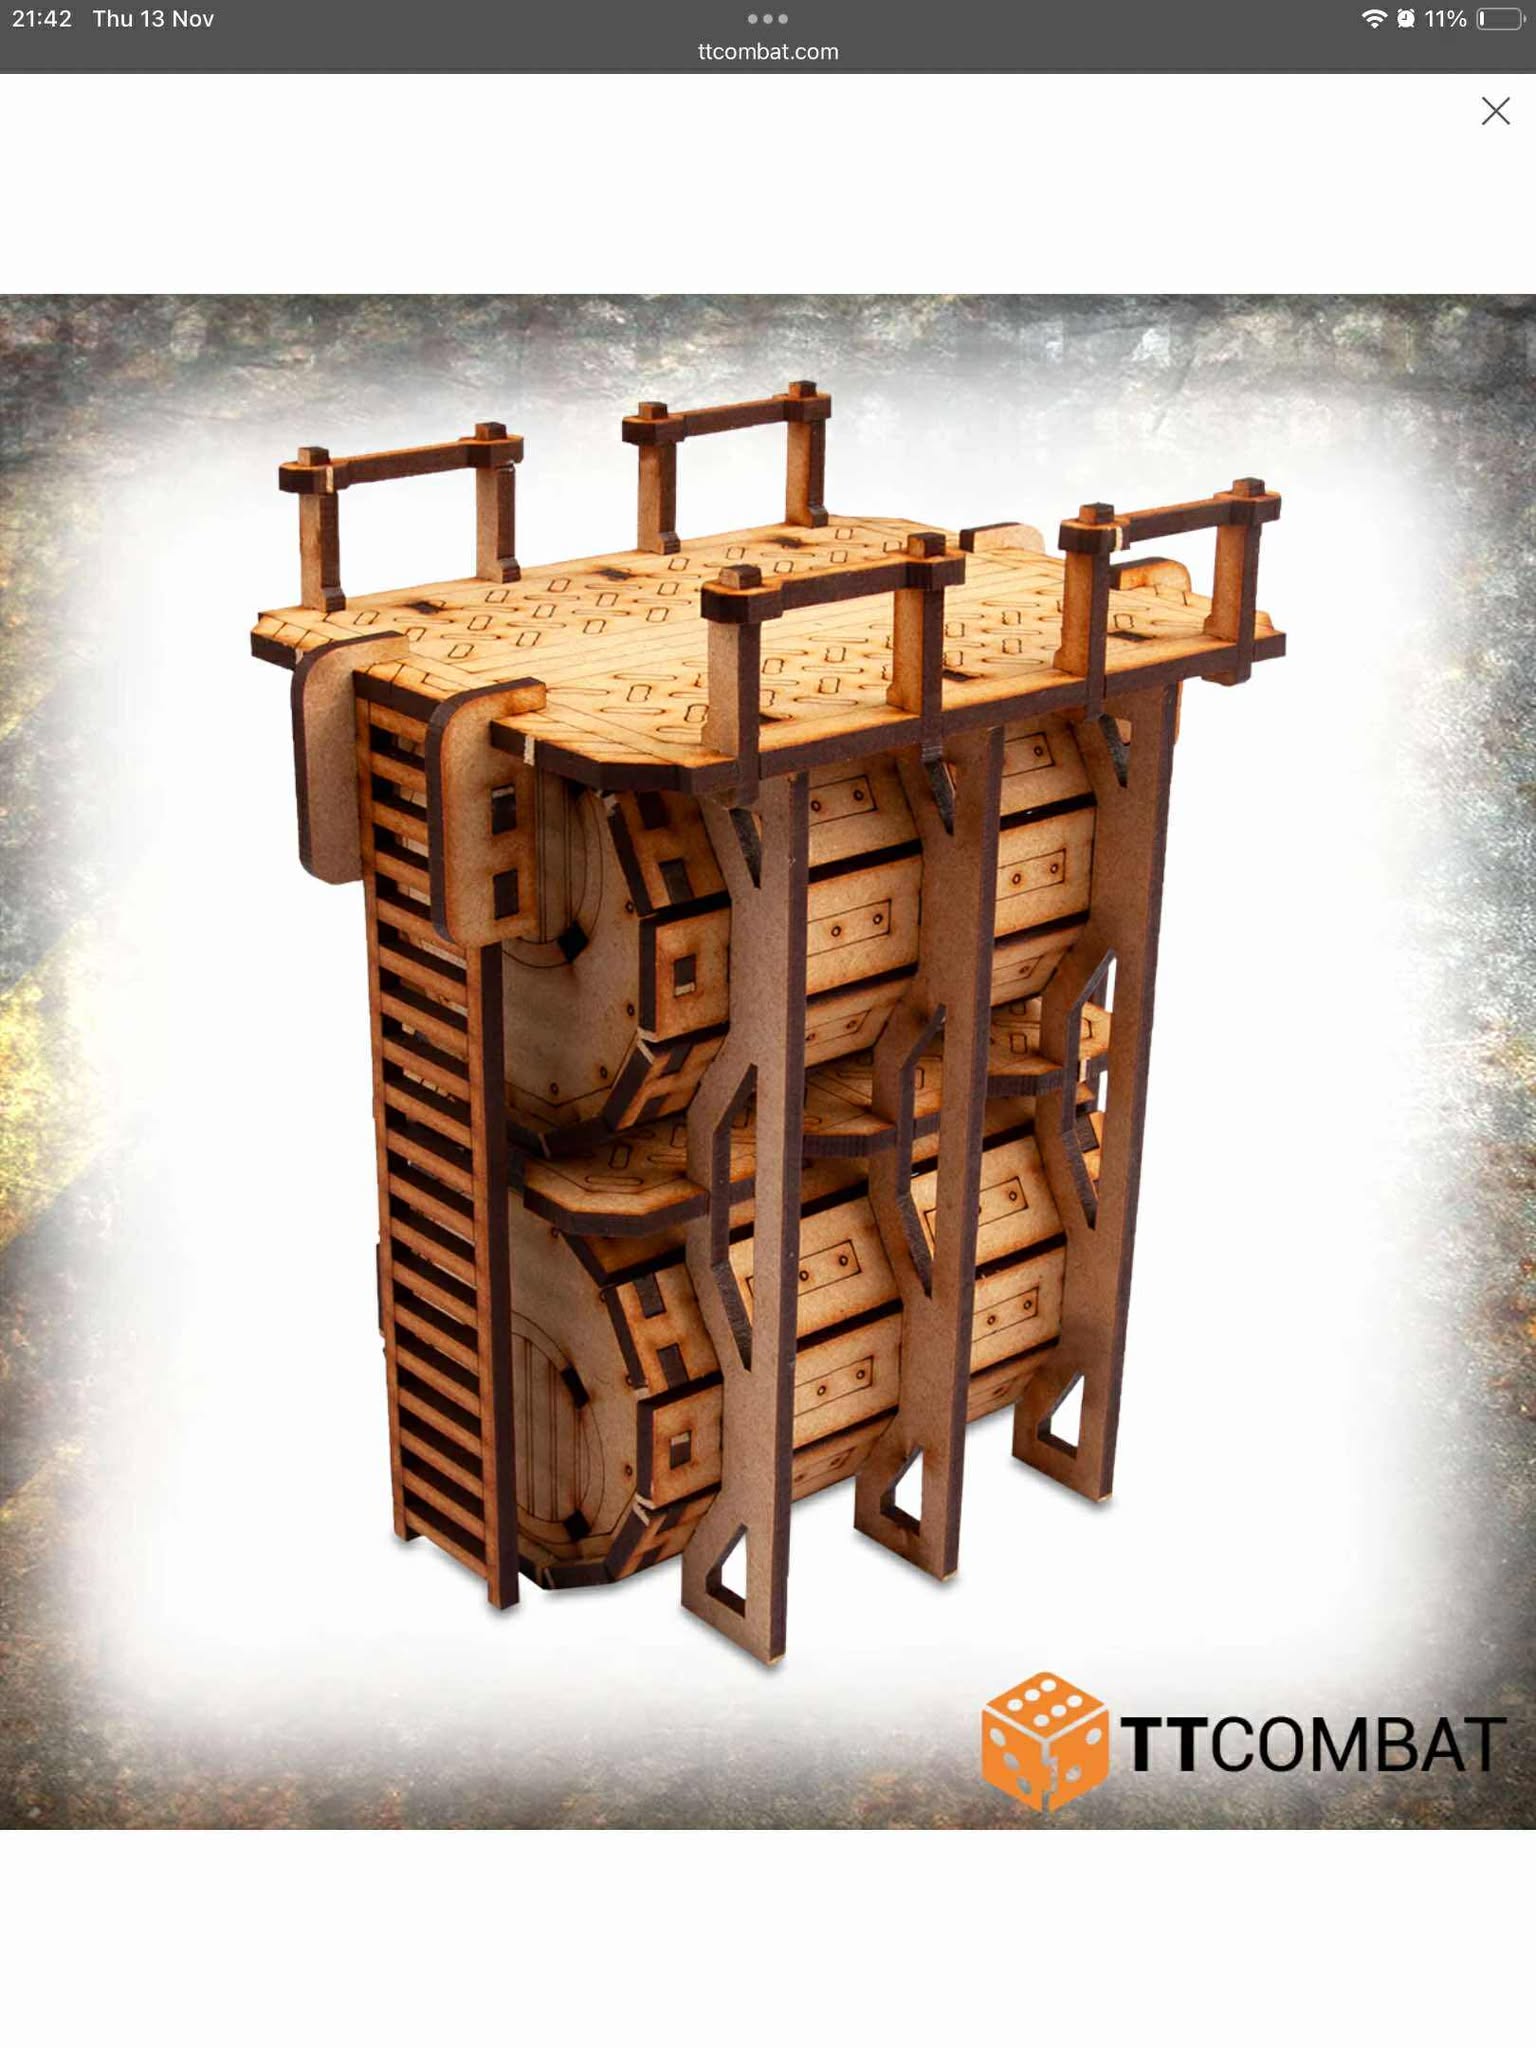
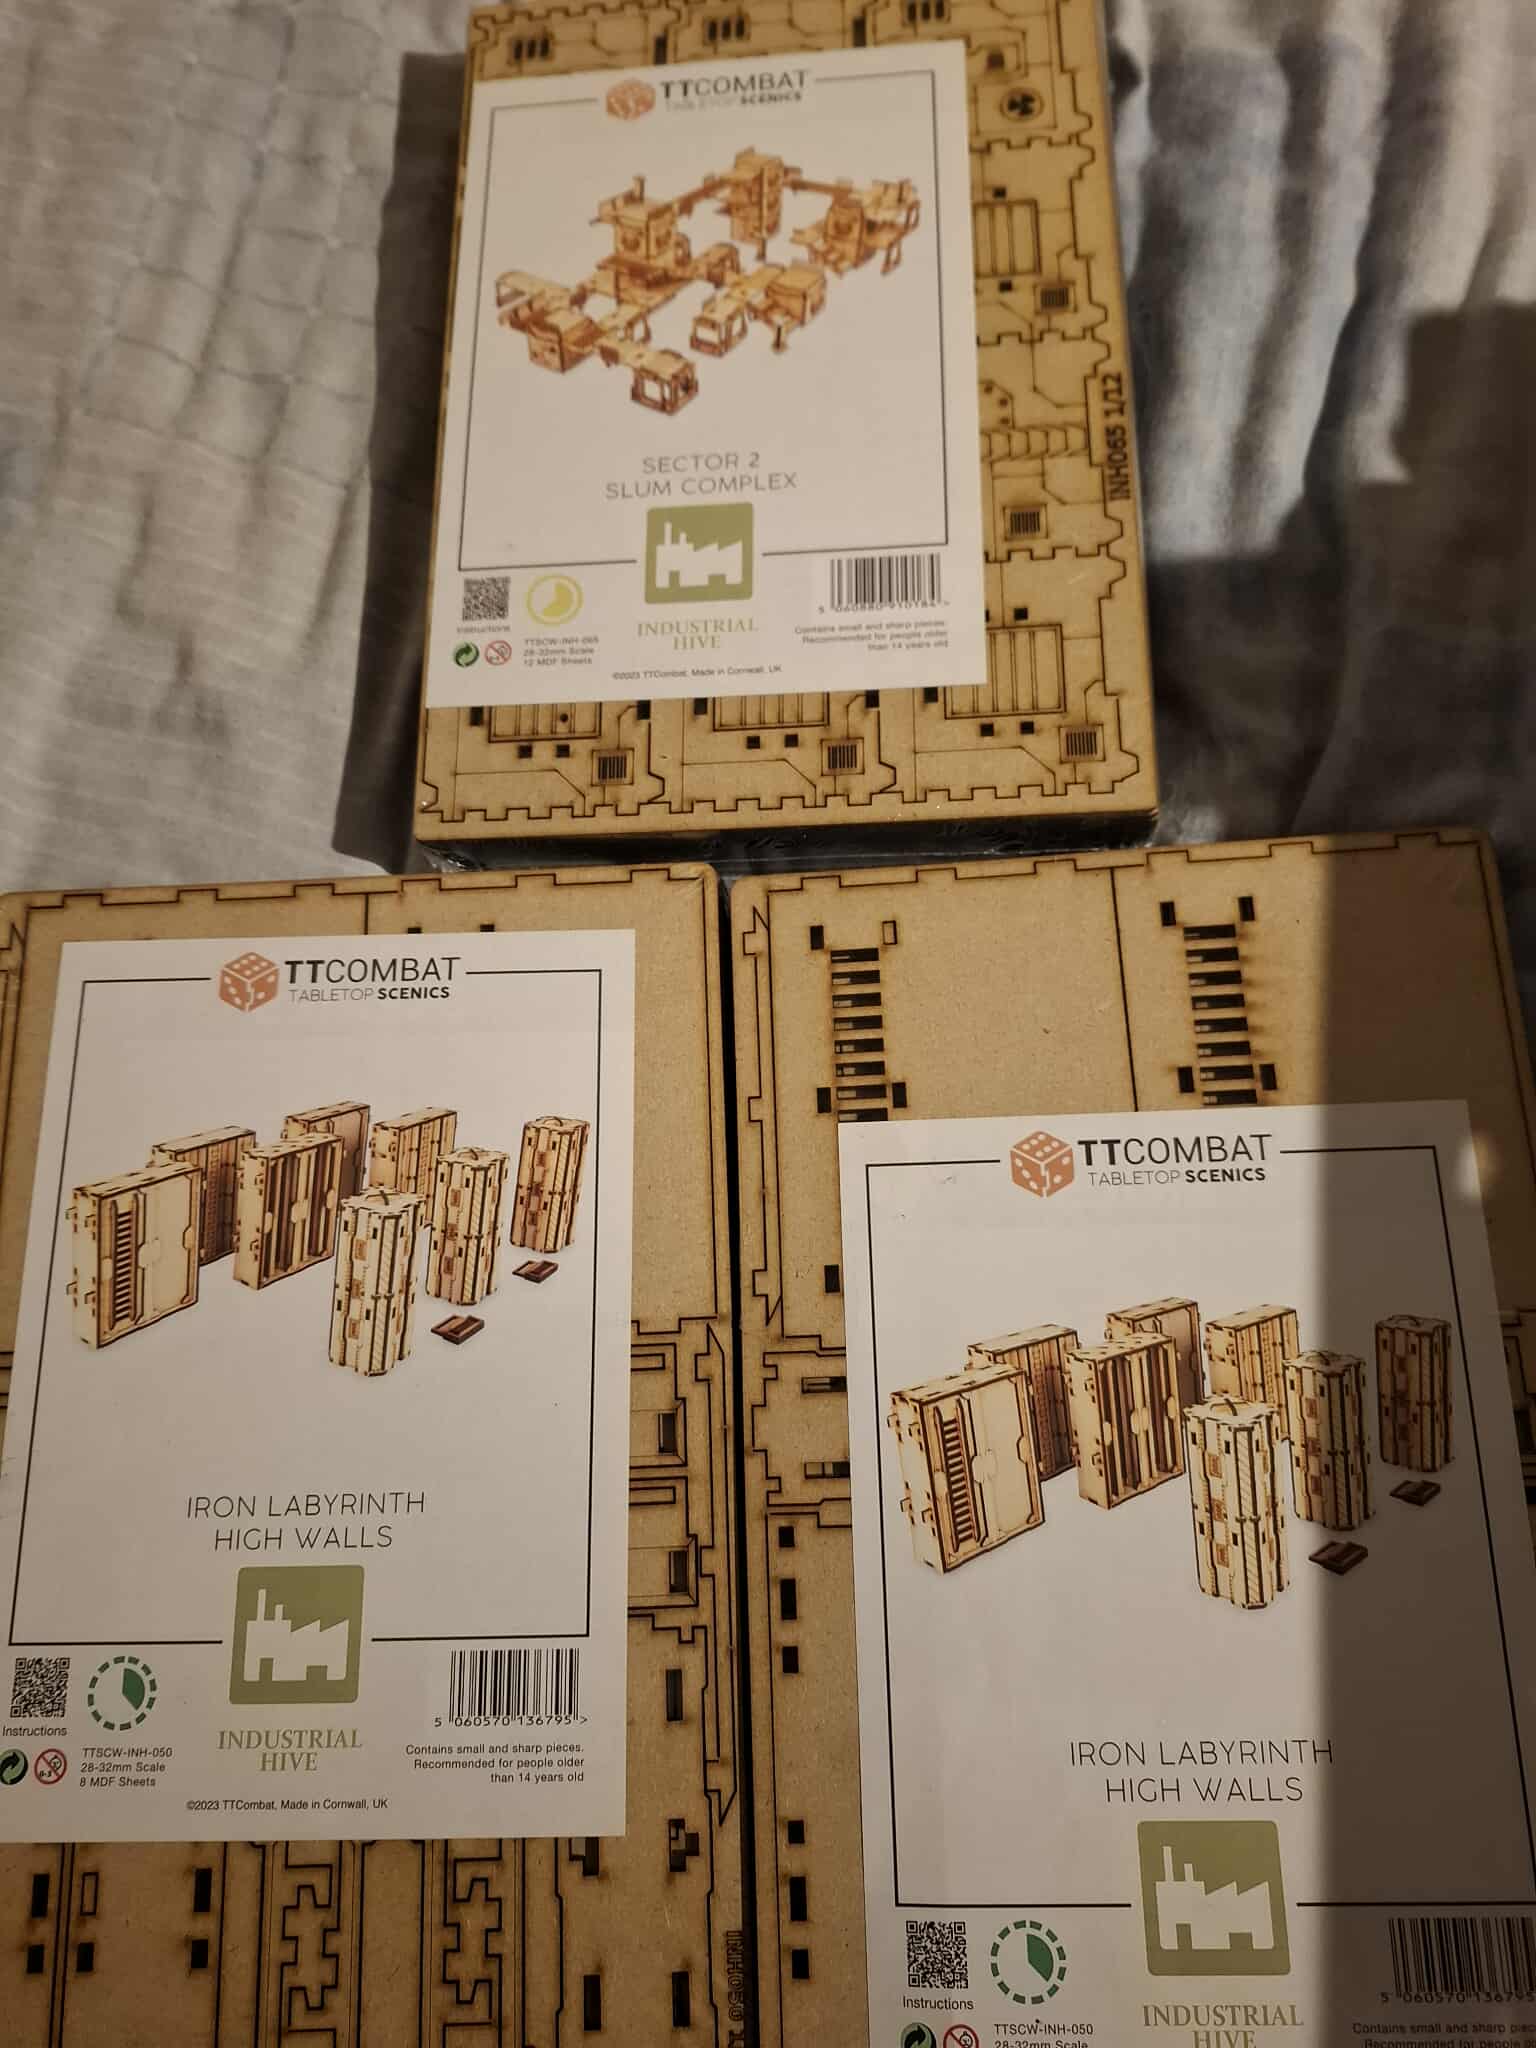
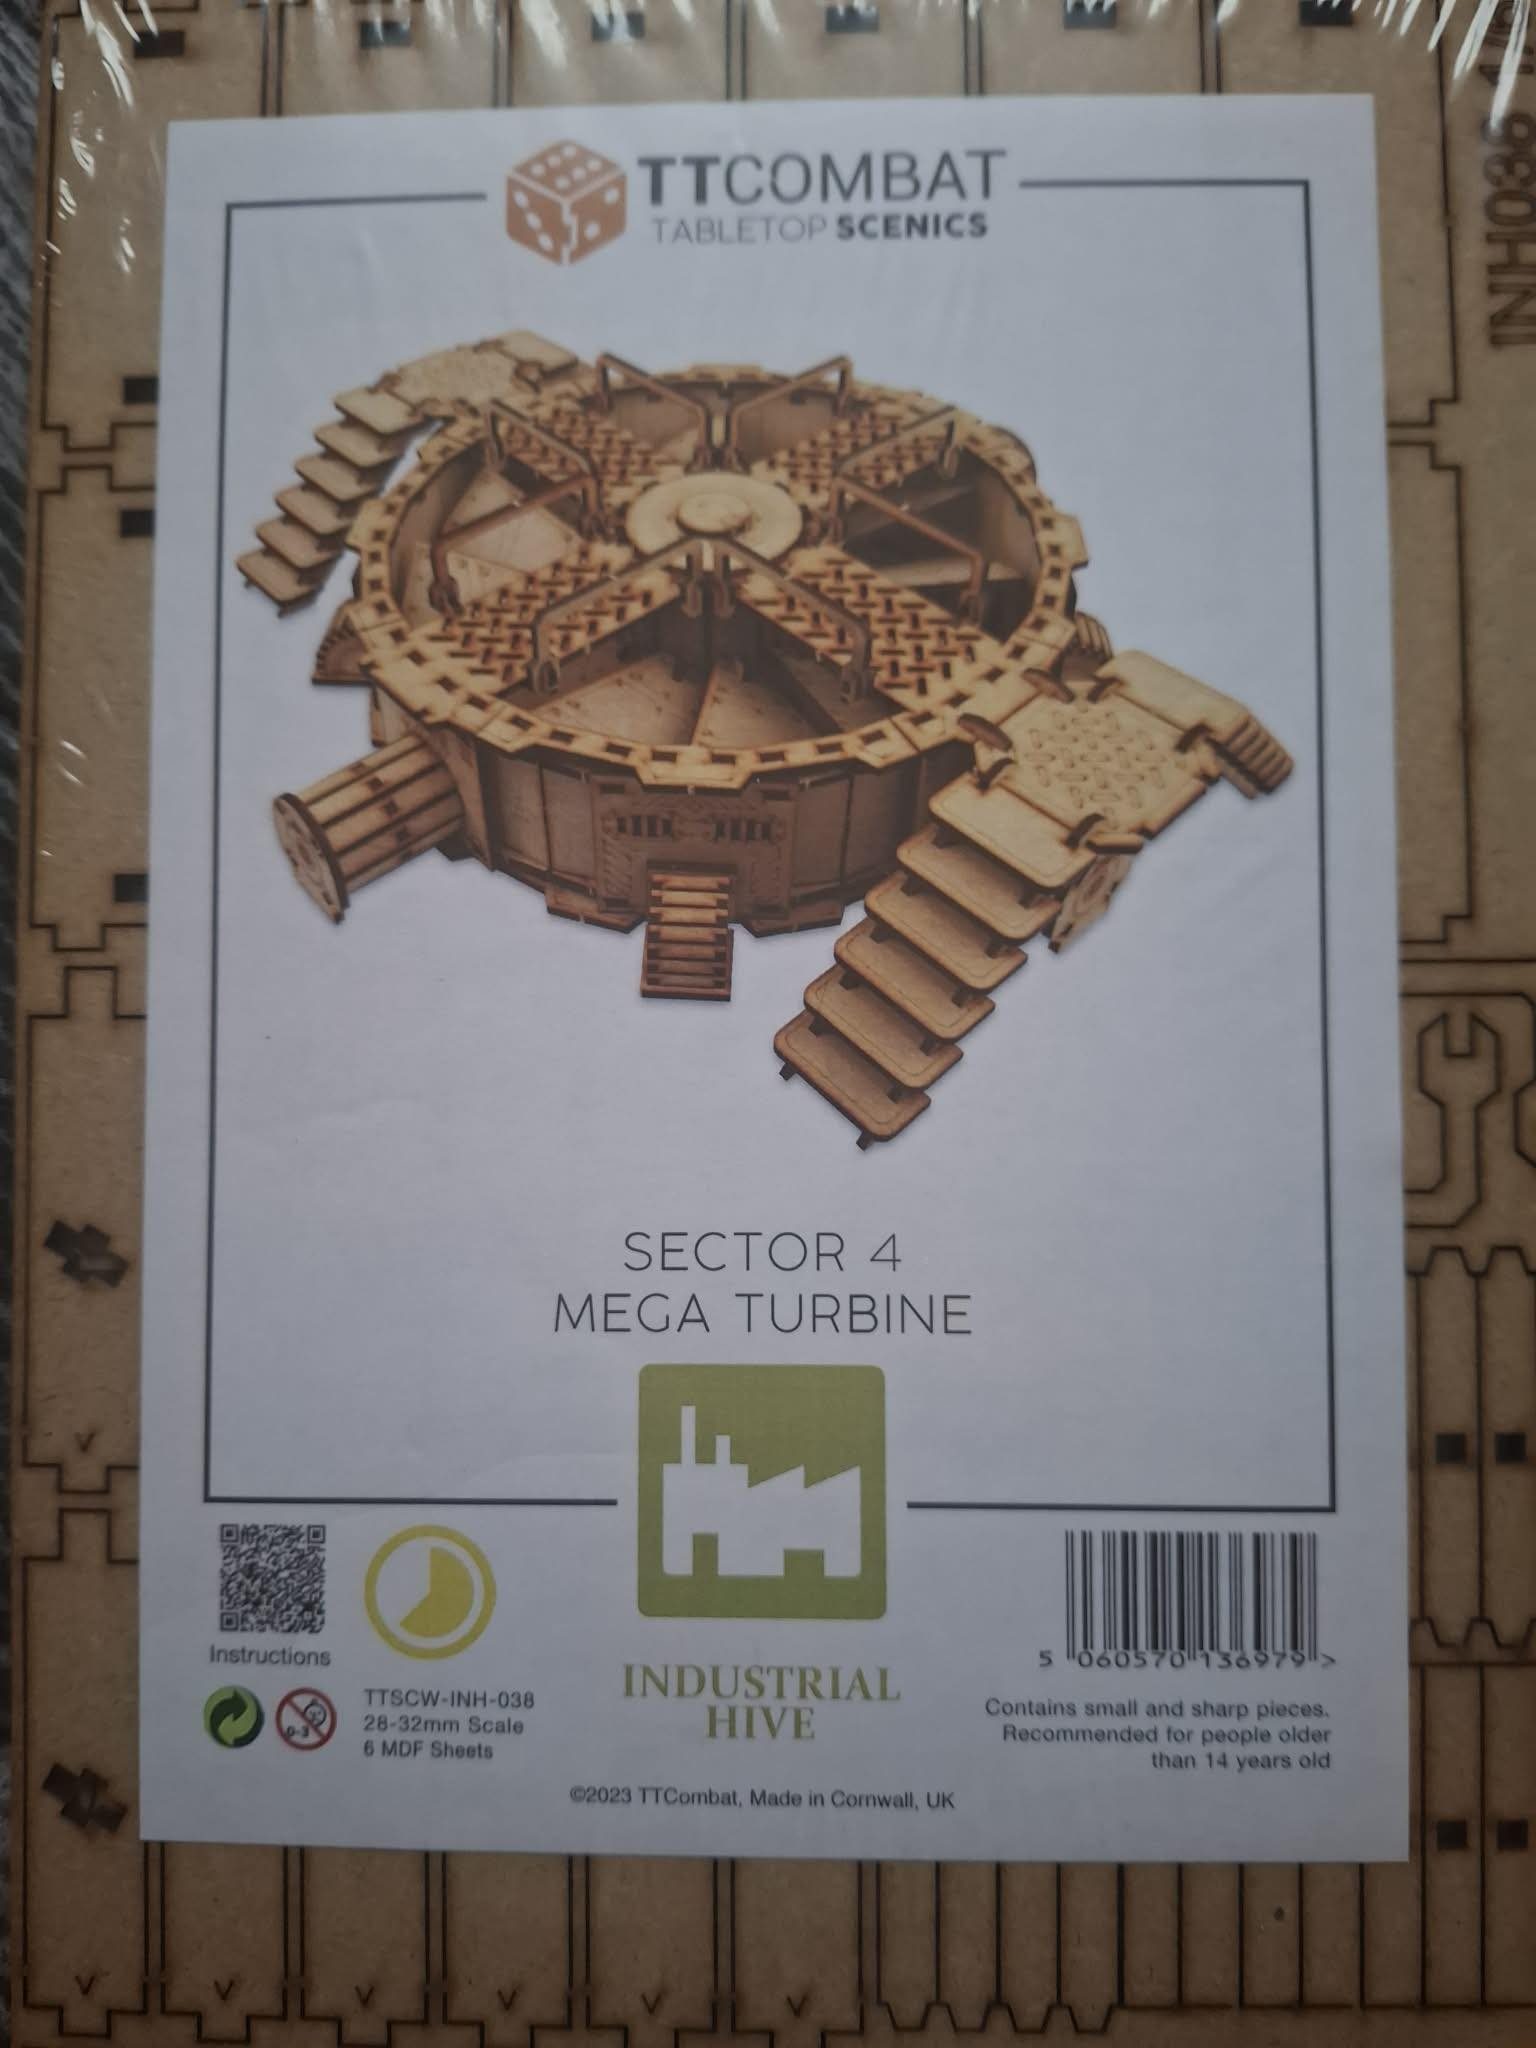
Then, more terrain. I have bought more TTCombat over the years and my folks have bought me more terrain too!
We have the following:
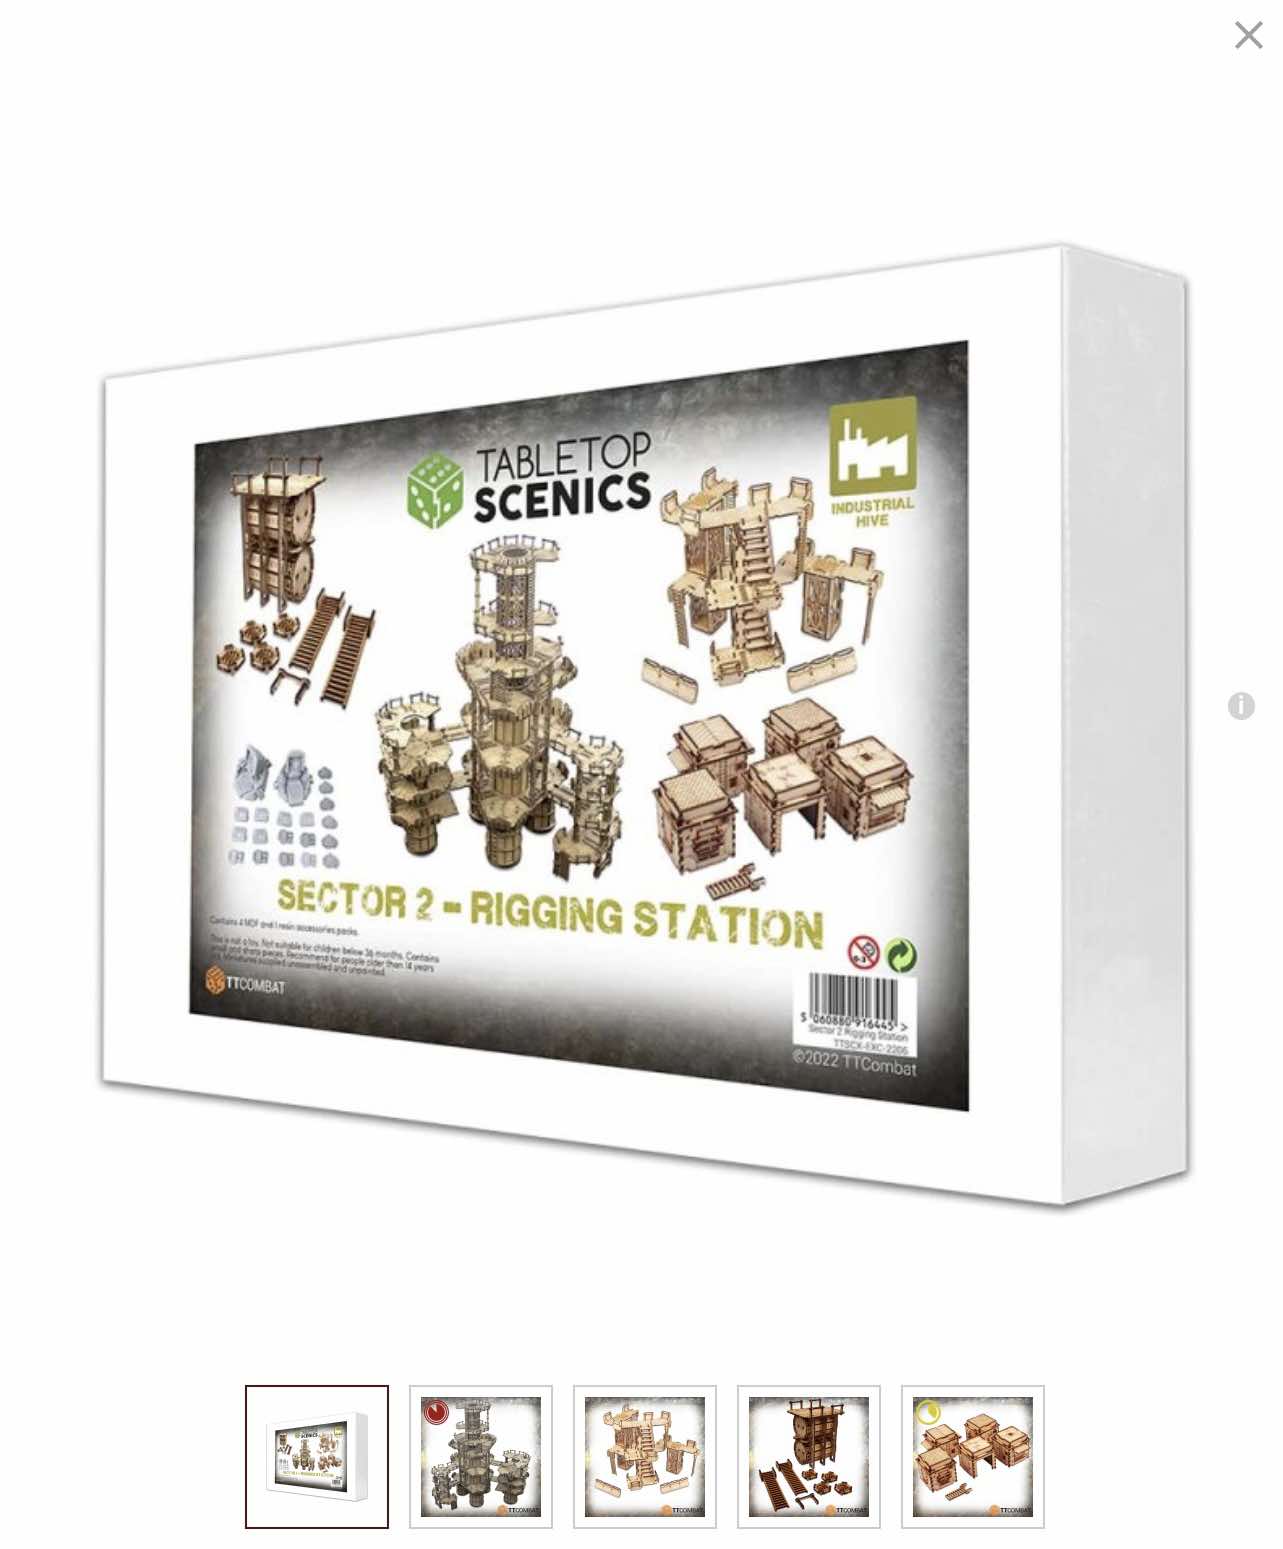
Sector 2 – Rigging Station White Box, comprised of the Sector 2 – Cloud Buster, the Sector 1 – Walkways, the Sector 4 – Storage Tanks and the Sector 2 – Slum Blocks.
The Cloud Buster excites me, as I remember an old “game show” style of scenario from Outlands, where multiple gangs fought to the top of a tower for mayhem and cash prizes. This feels perfect for that. It also scare me as that is a HUGE kit.
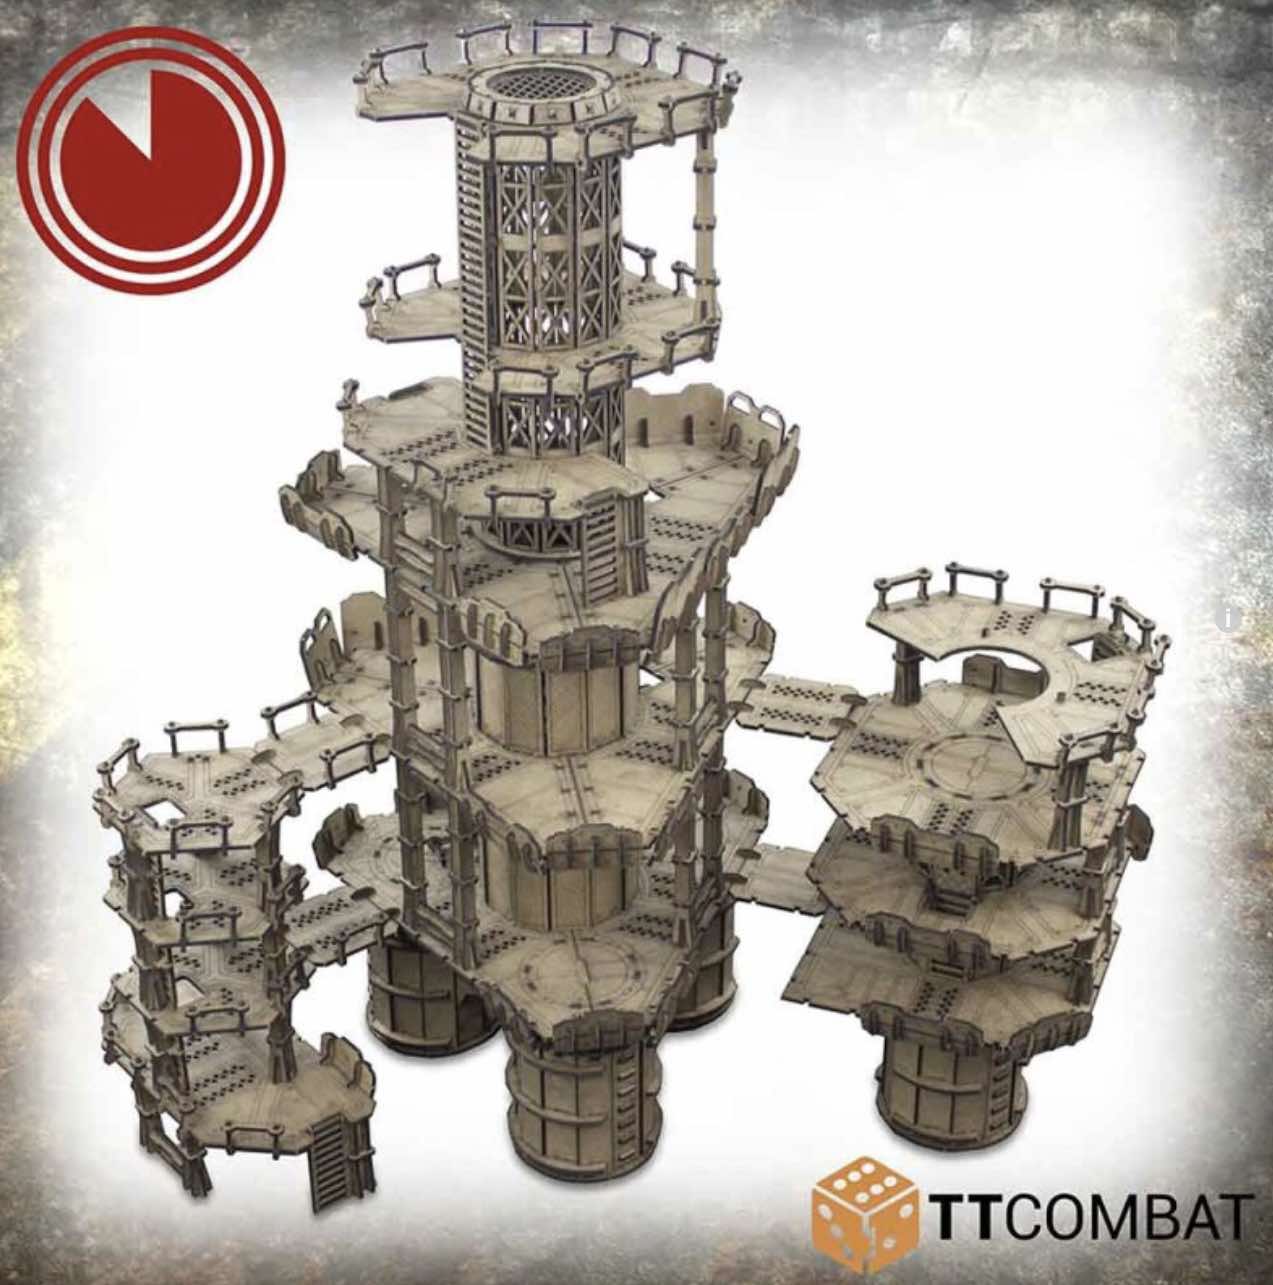
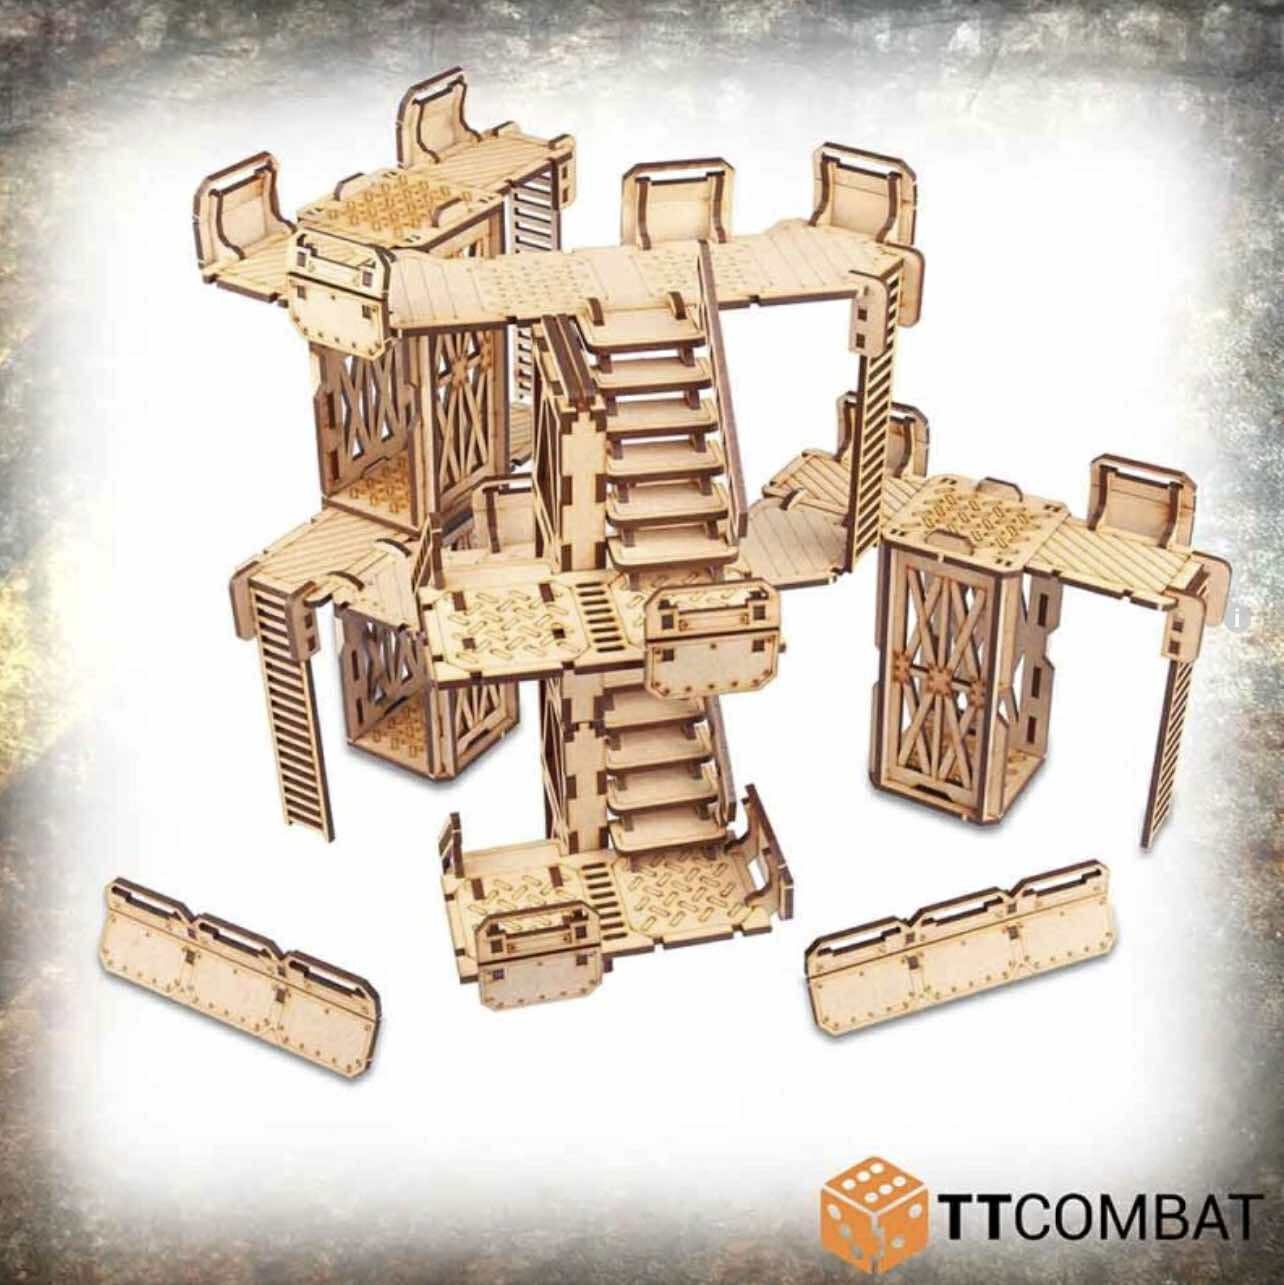
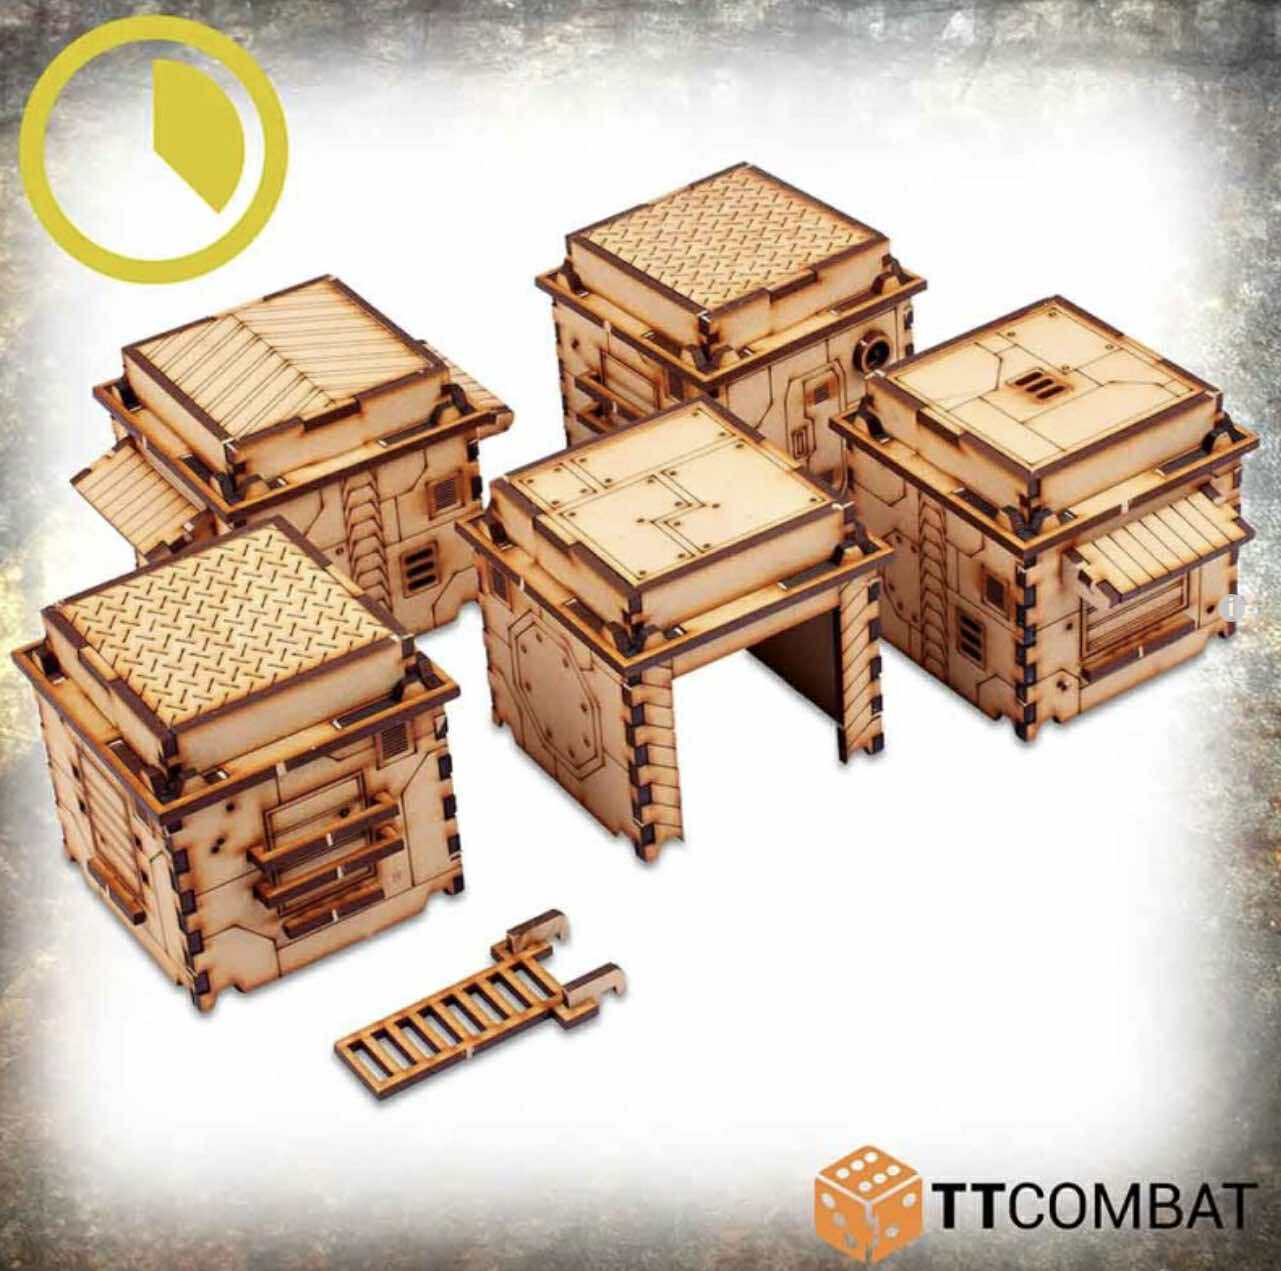
My parents delight in buying me (their 40+ year old grown-ass man) “more toys” at Christmas, and they got 2 Iron Labyrinth High Walls sets, the Sector 2 – Slum Complex AND the Iron Labyrinth Mega Turbine.
What to build first?
To battle!
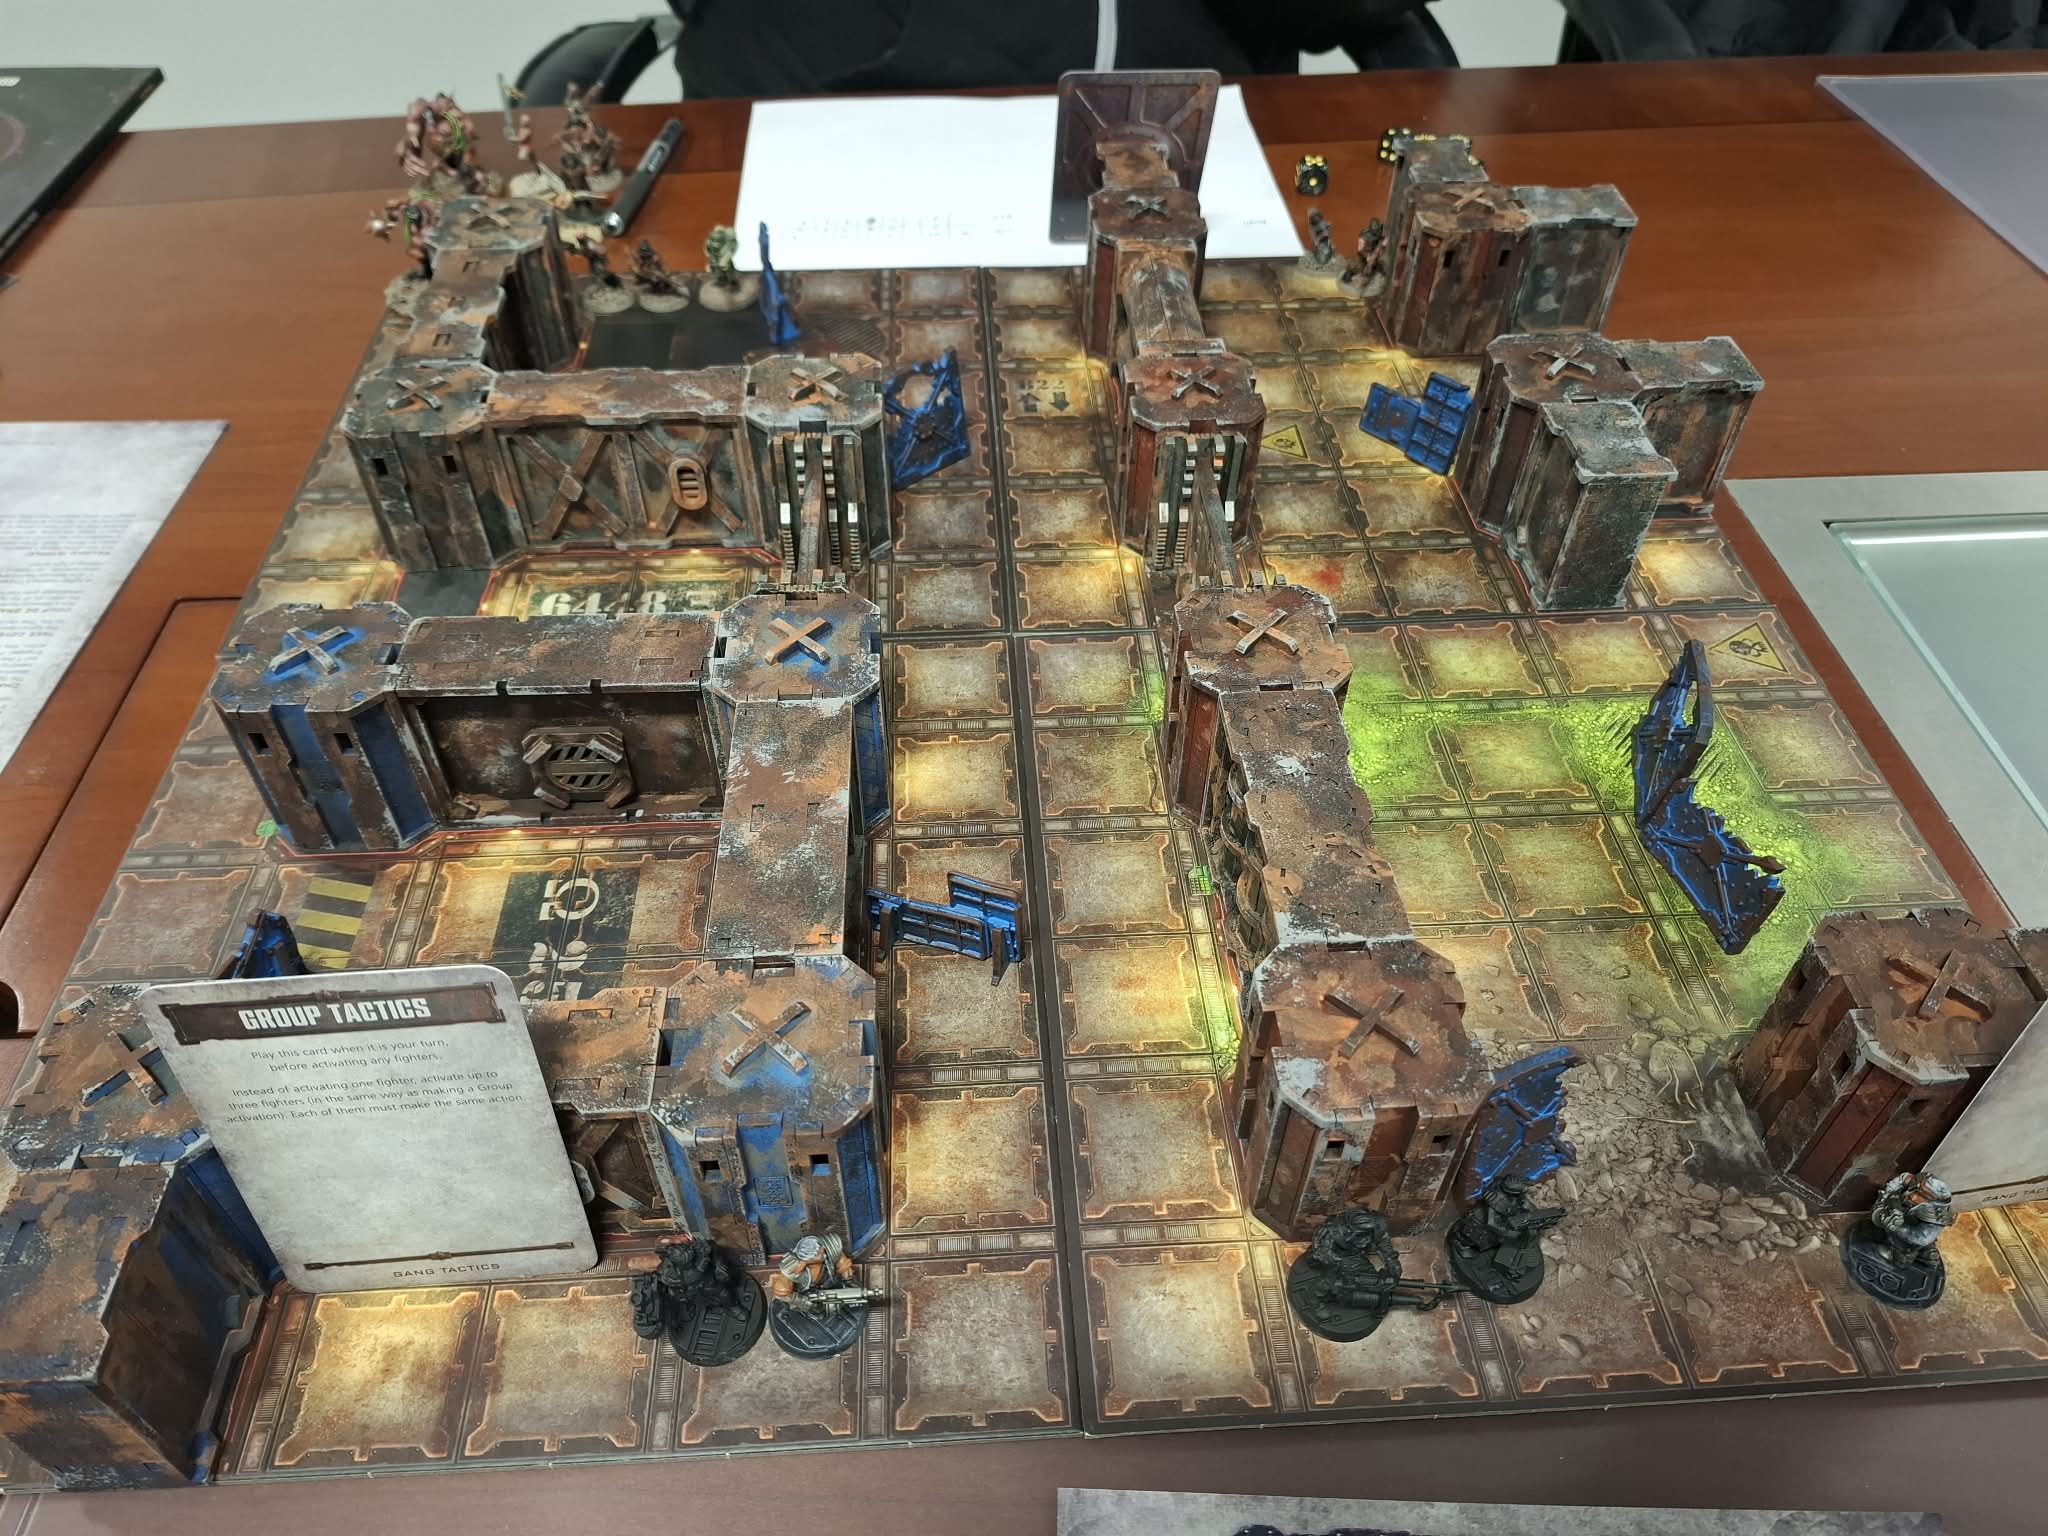
Brett and I had a test battle last night! 6 v 6. My Orlocks Vs his filthy Chaos Helots.
4 turns of mayhem, having a laugh, boggling at the resilience of Chaos Spawn. Much combat, 3 of my guys going down to one of his, and Brett failed his bottle test and then rolled to run. The game ended! 2 points to him. One to me. I claim moral victory while he claims technical victory.
Necromunda is a LOT of fun!
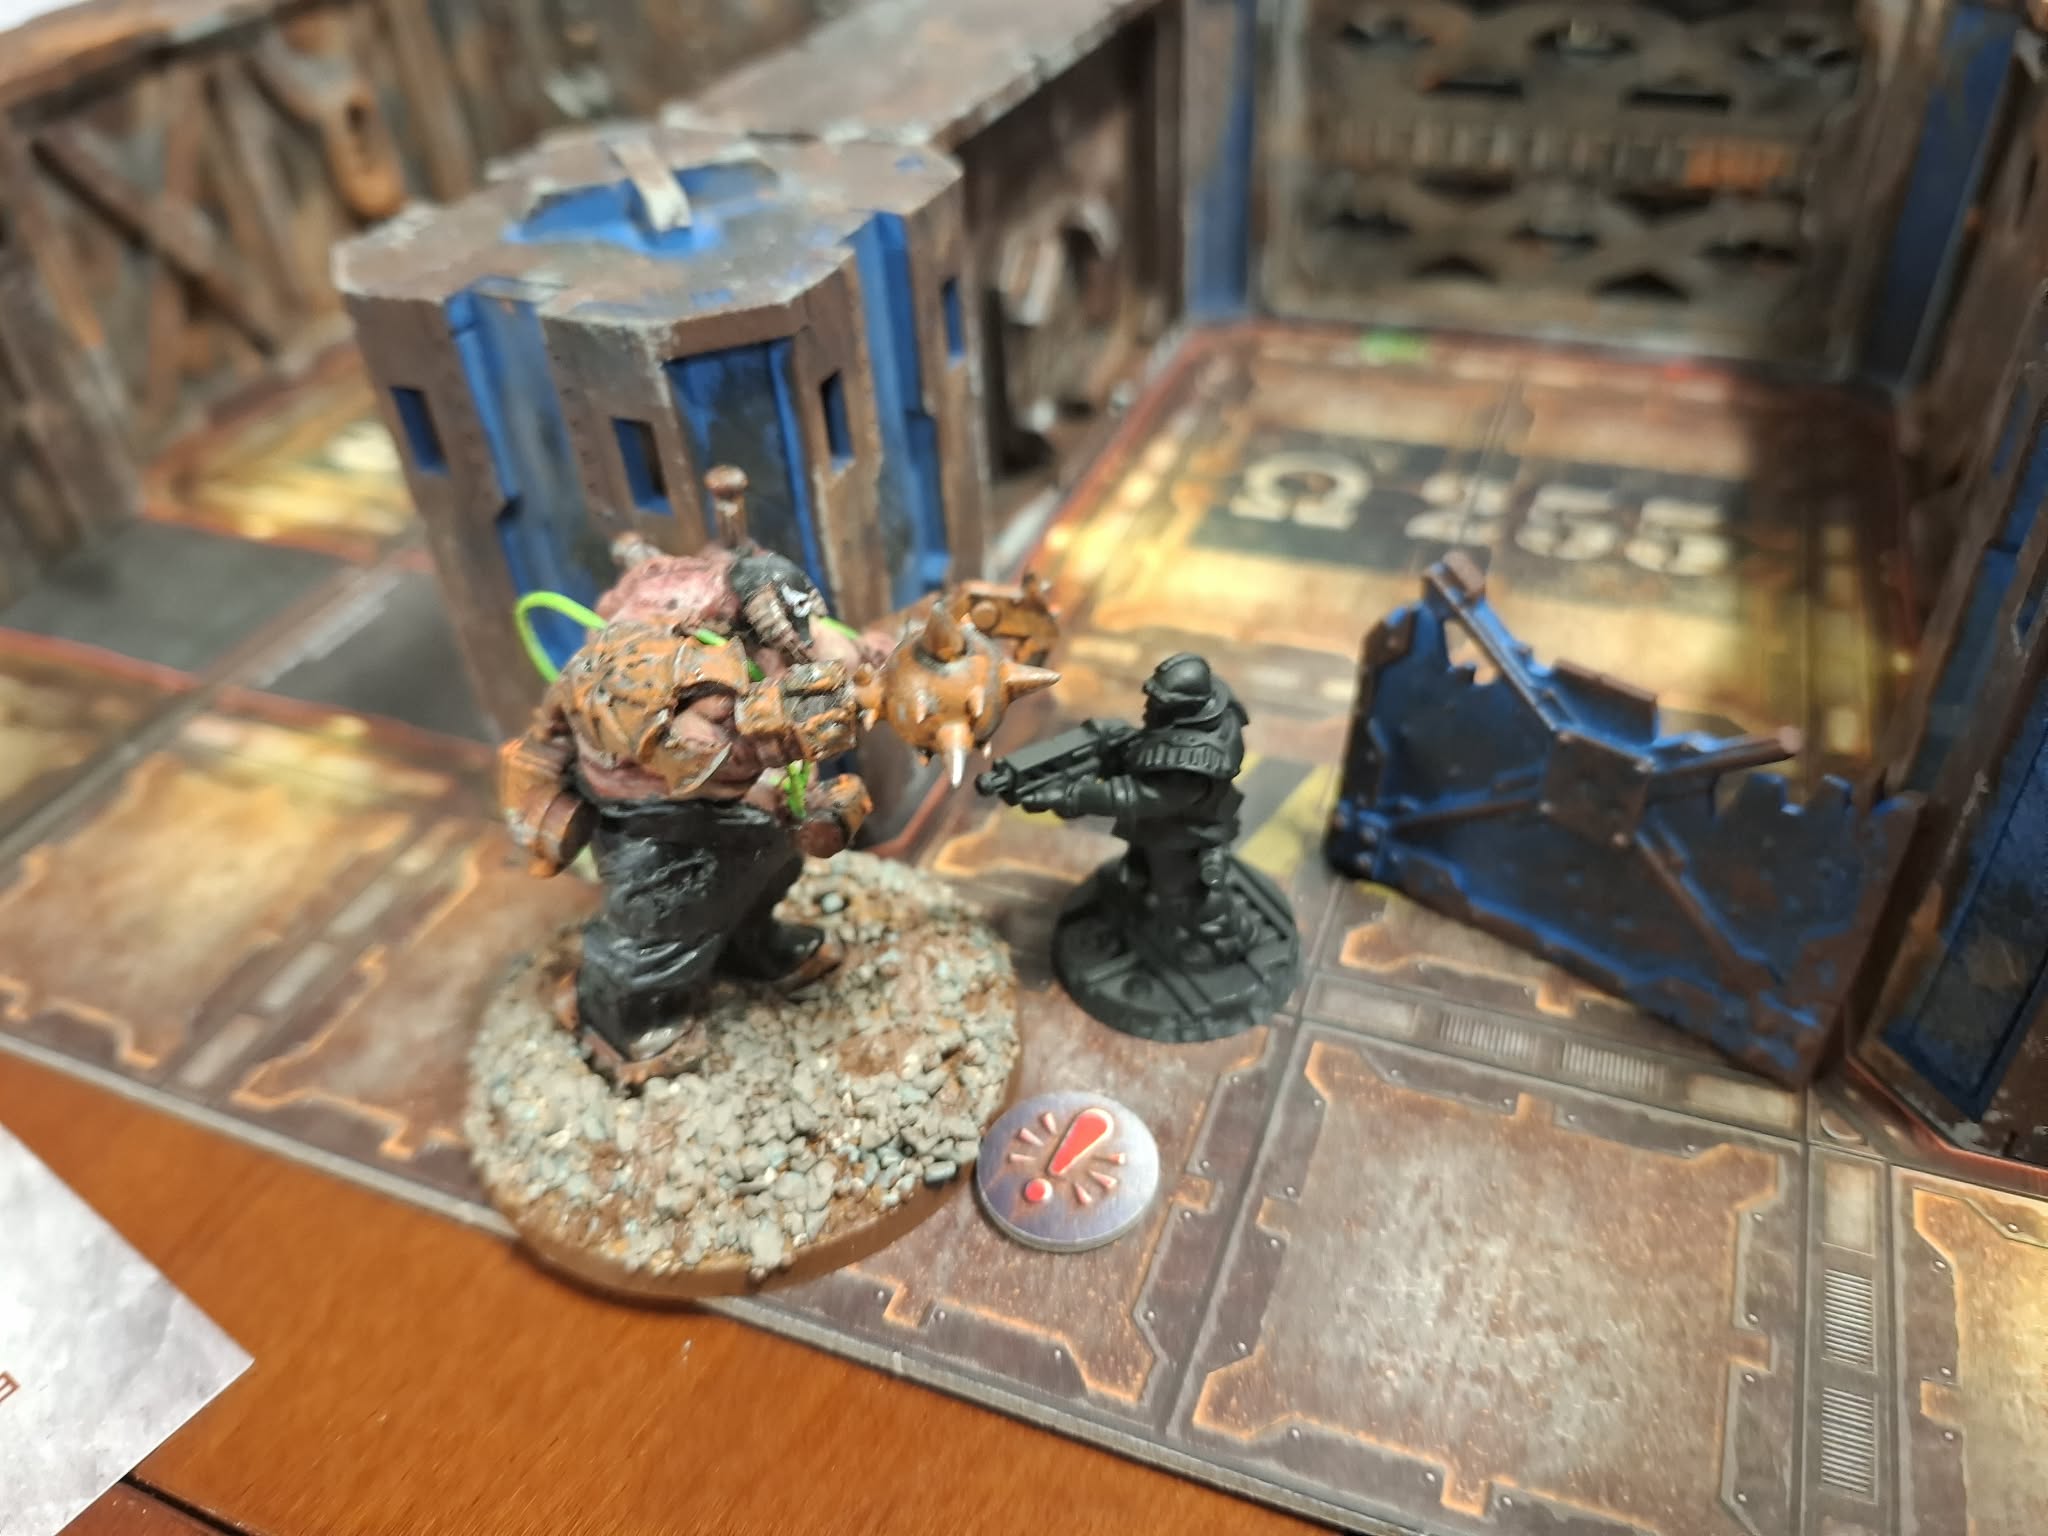
What’s that? Oh, a monster. Uh oh…
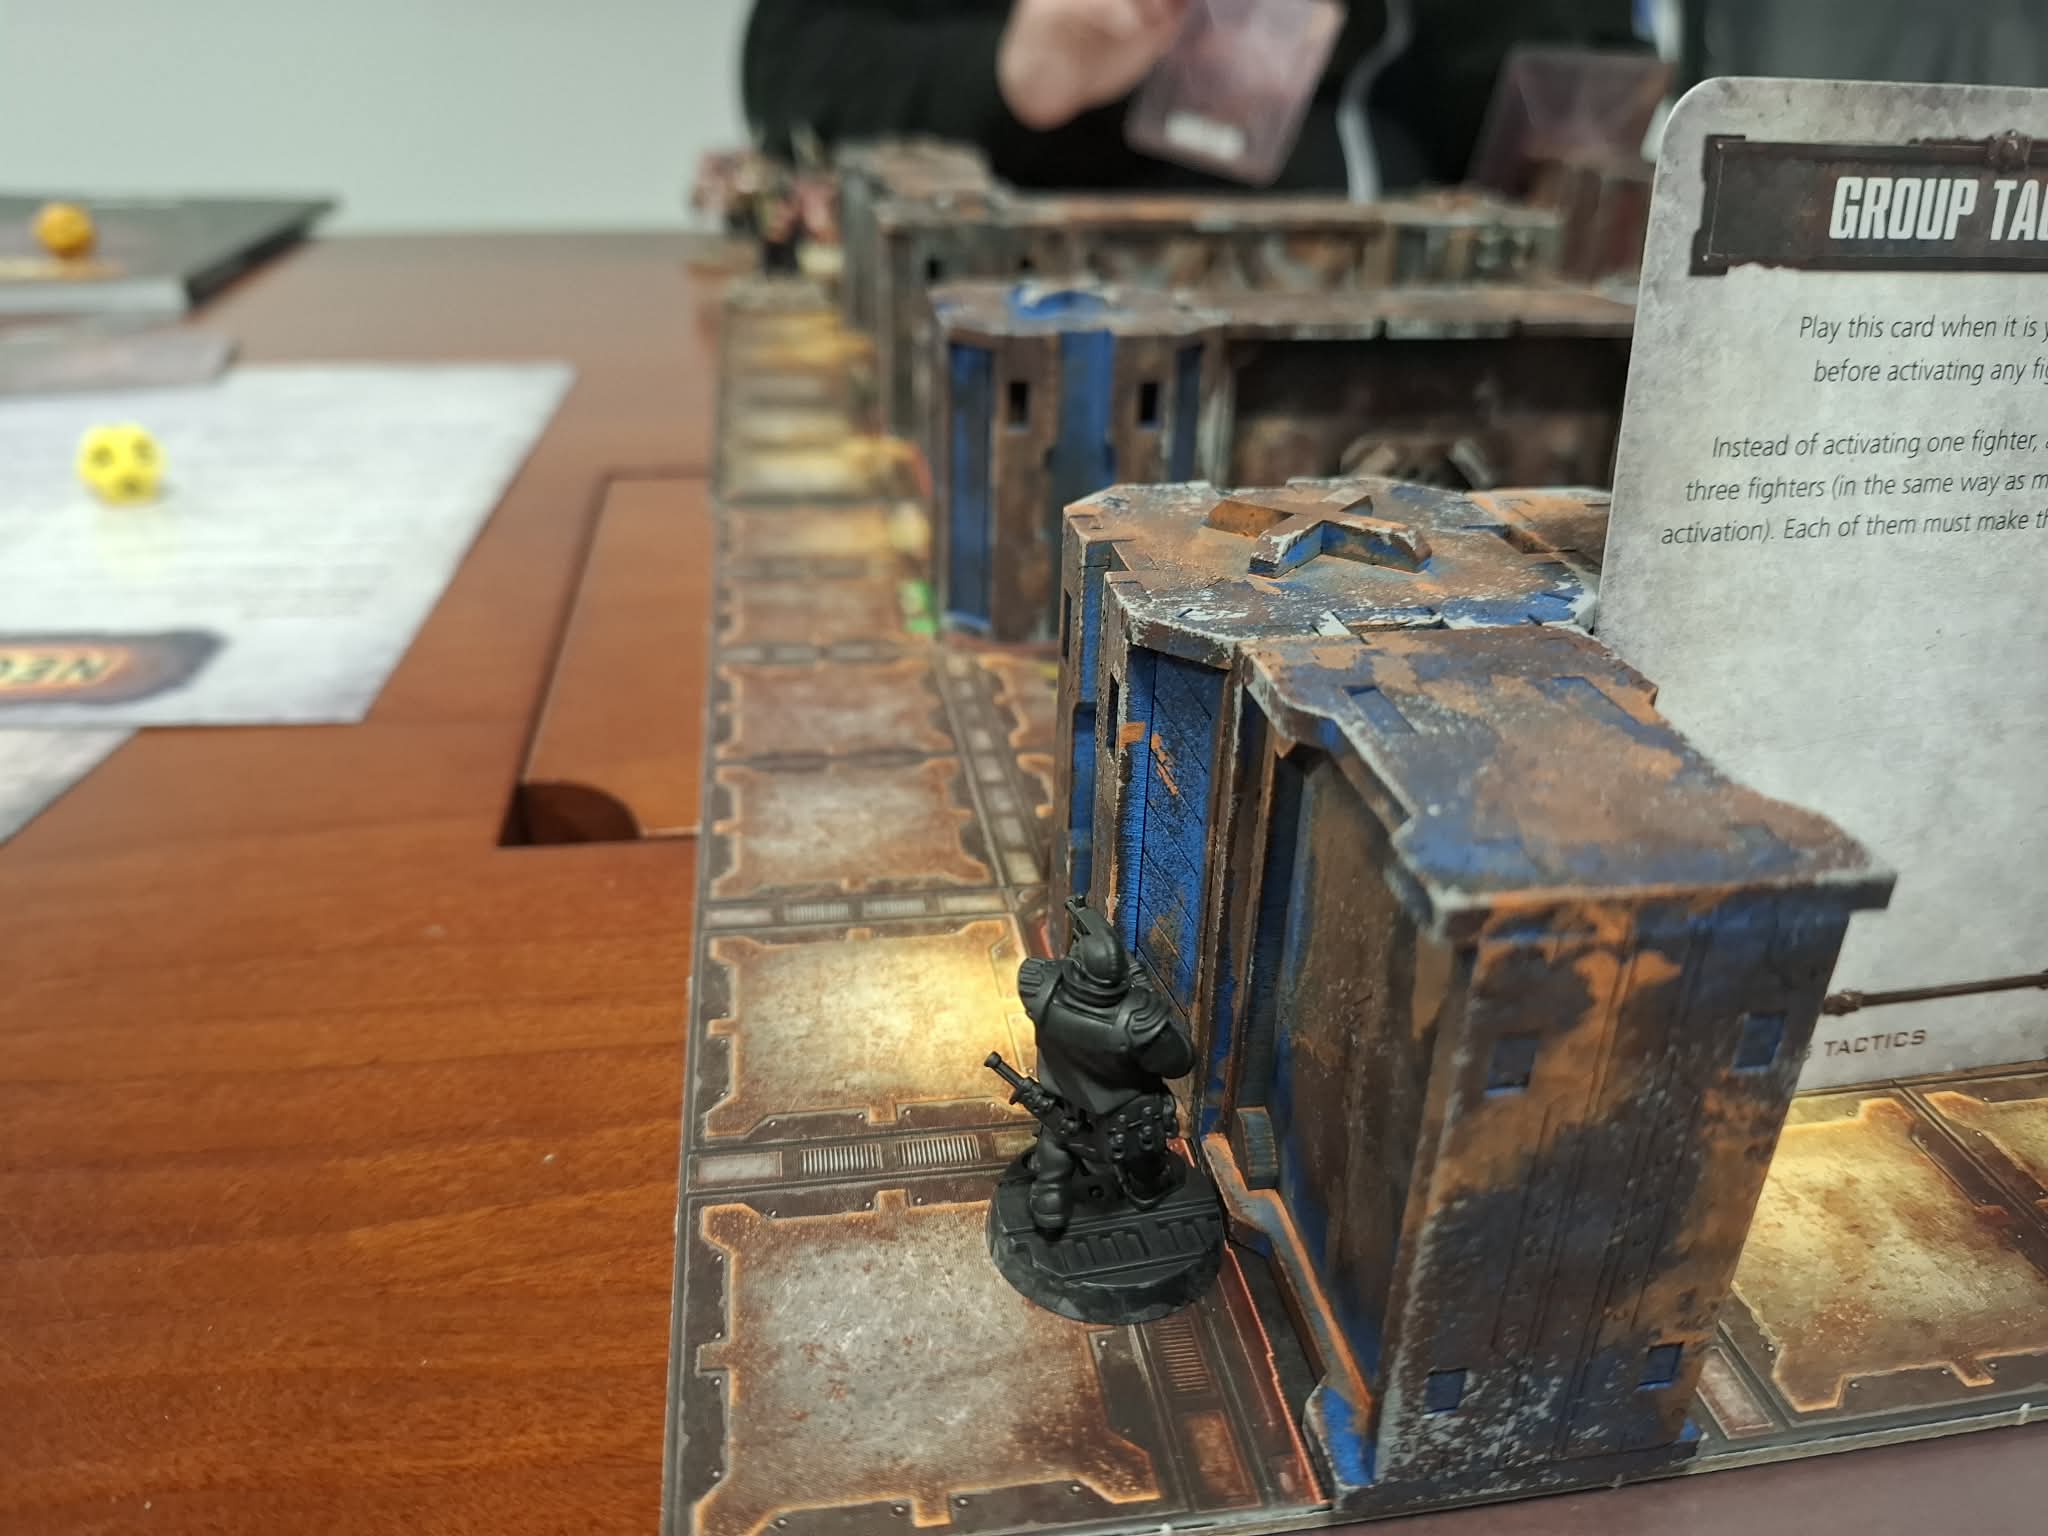
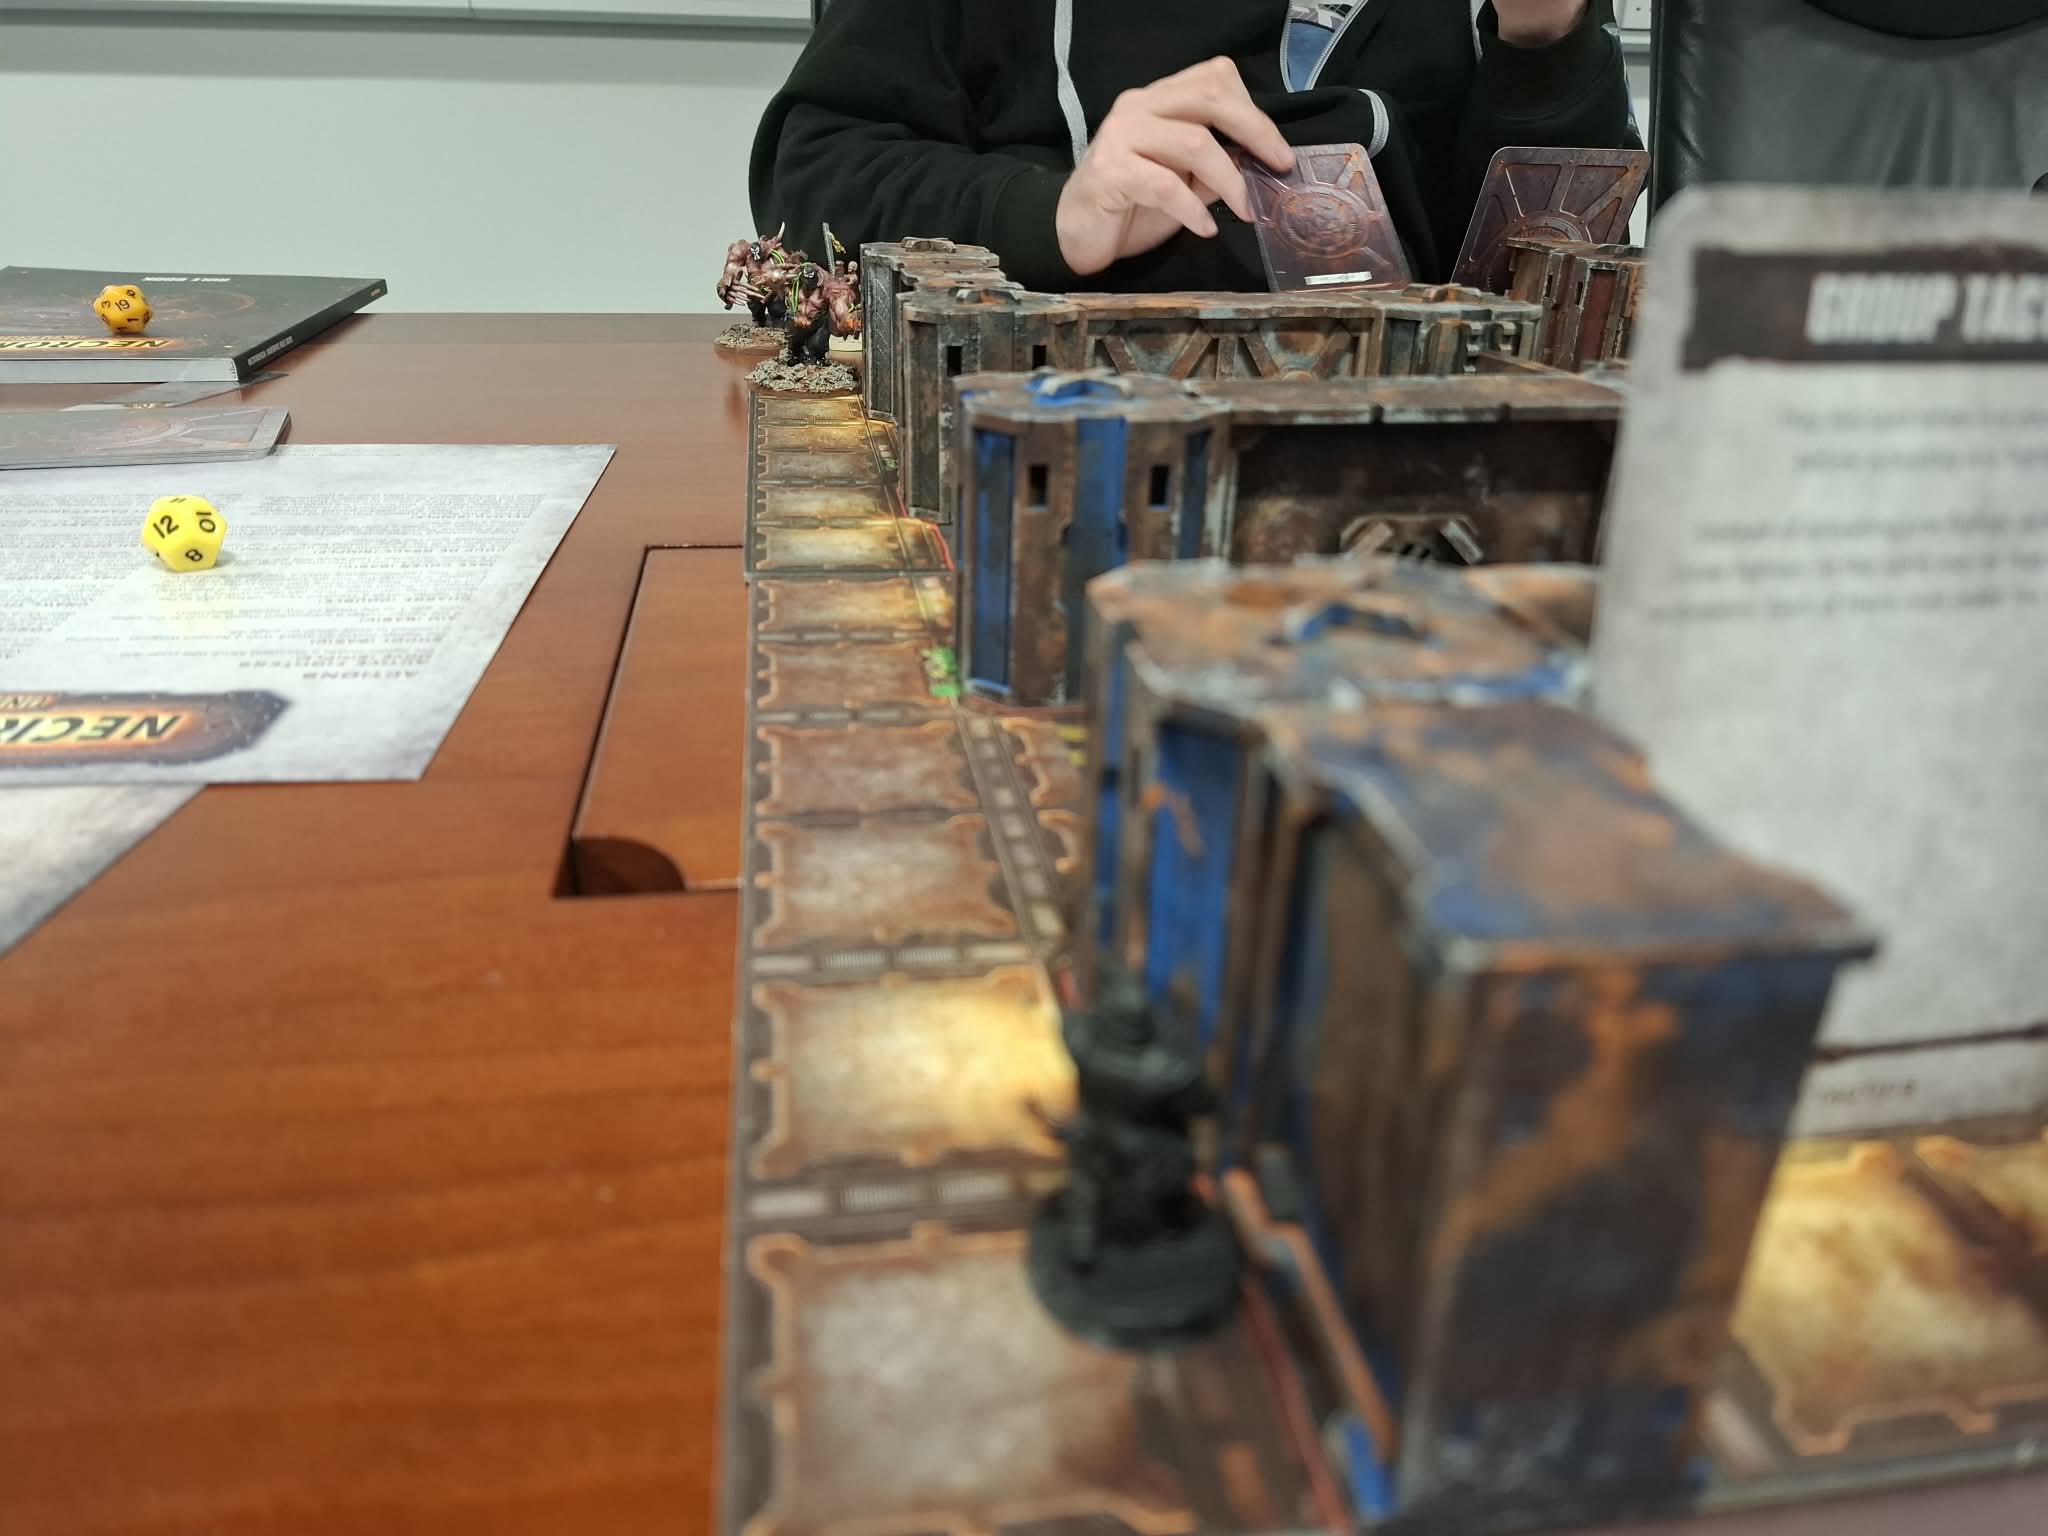
We advance towards each other. Quint, my harpoon-rocking Road Sergeant, is surprised when the door next to him opens of it’s own accord (Brett had a DEVIOUS Tactics card). He is even MORE surprised when he takes an overwatched grenade to the face from an enemy heavy. He suffers a serious injury and goes down.
I never got to fire my harpoon…
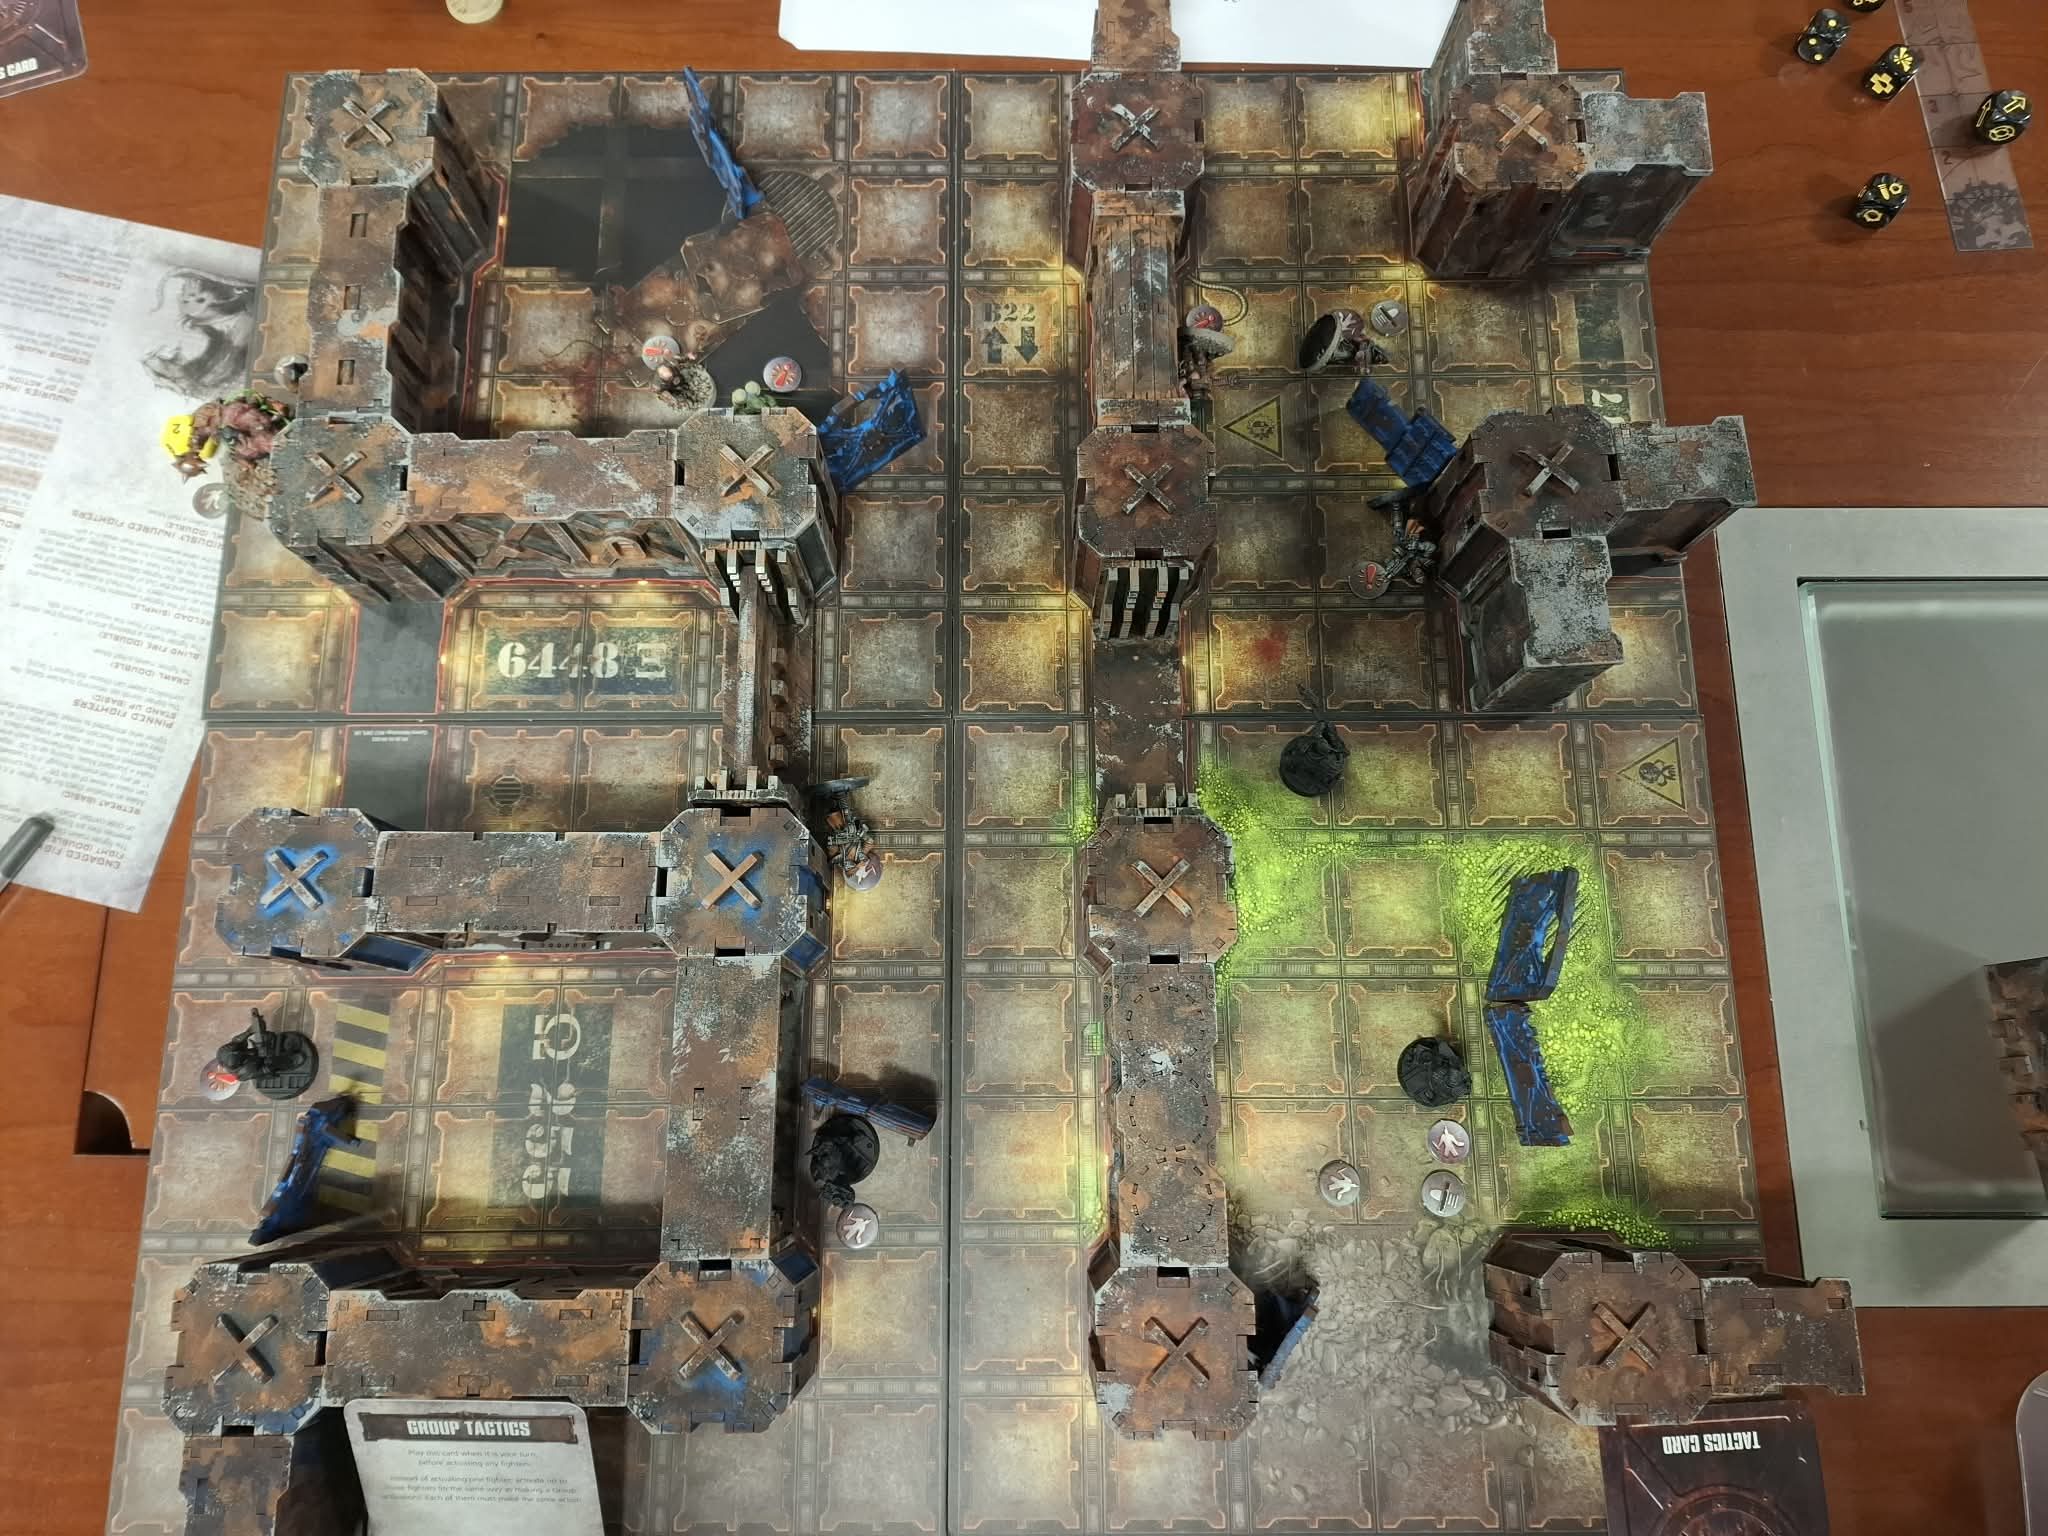
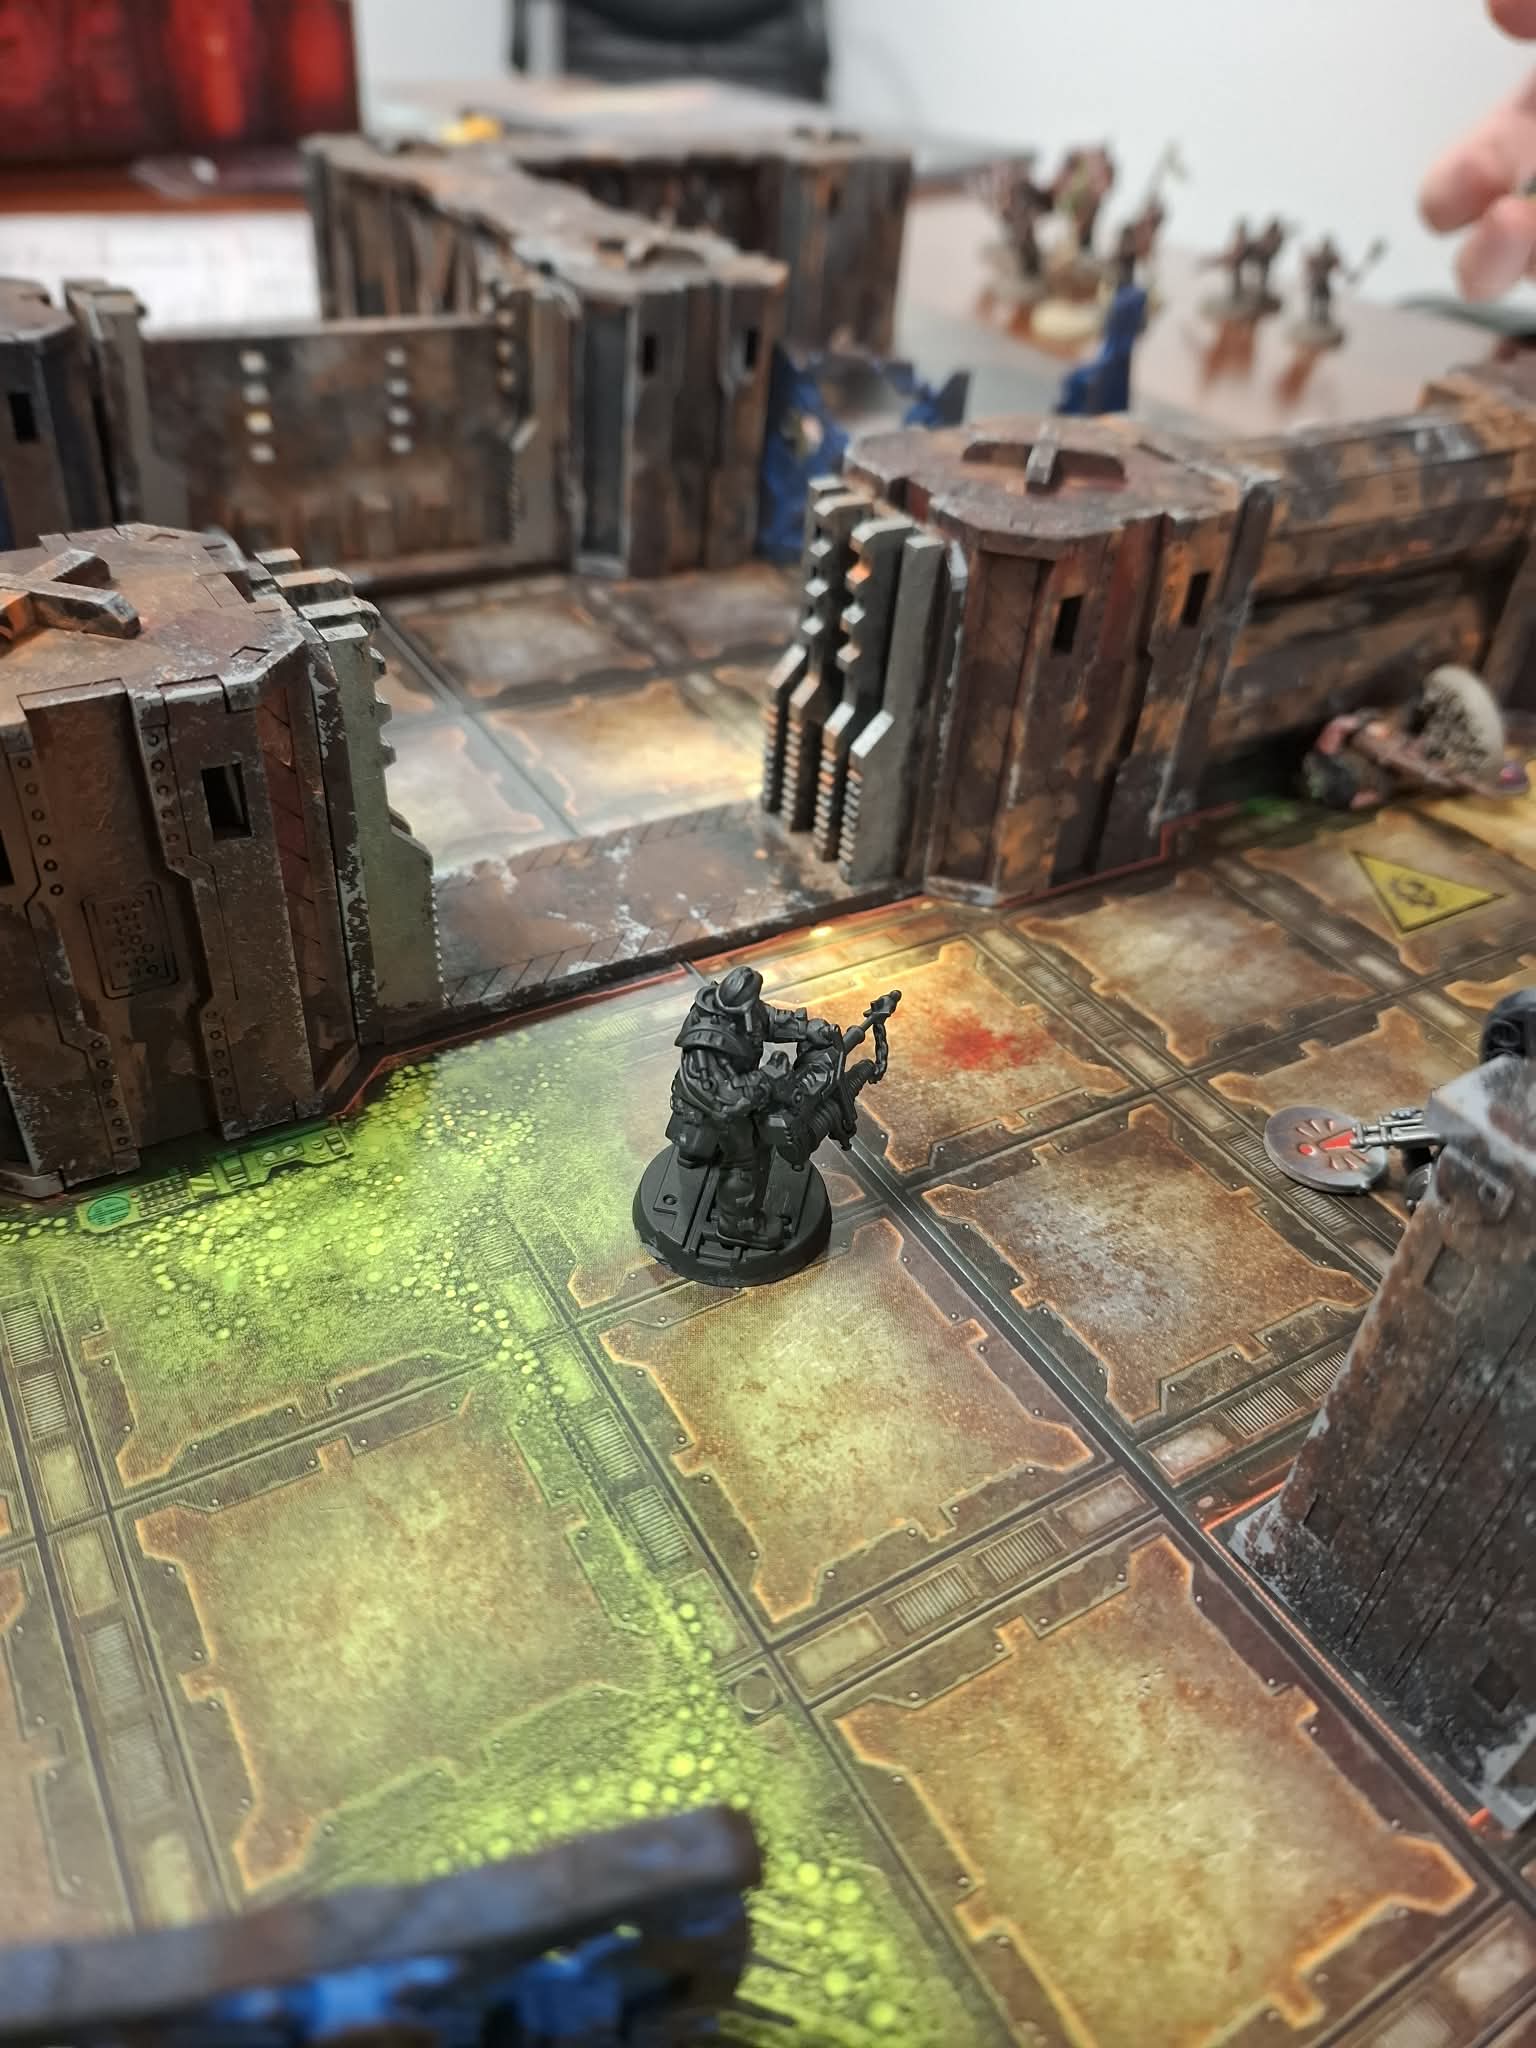
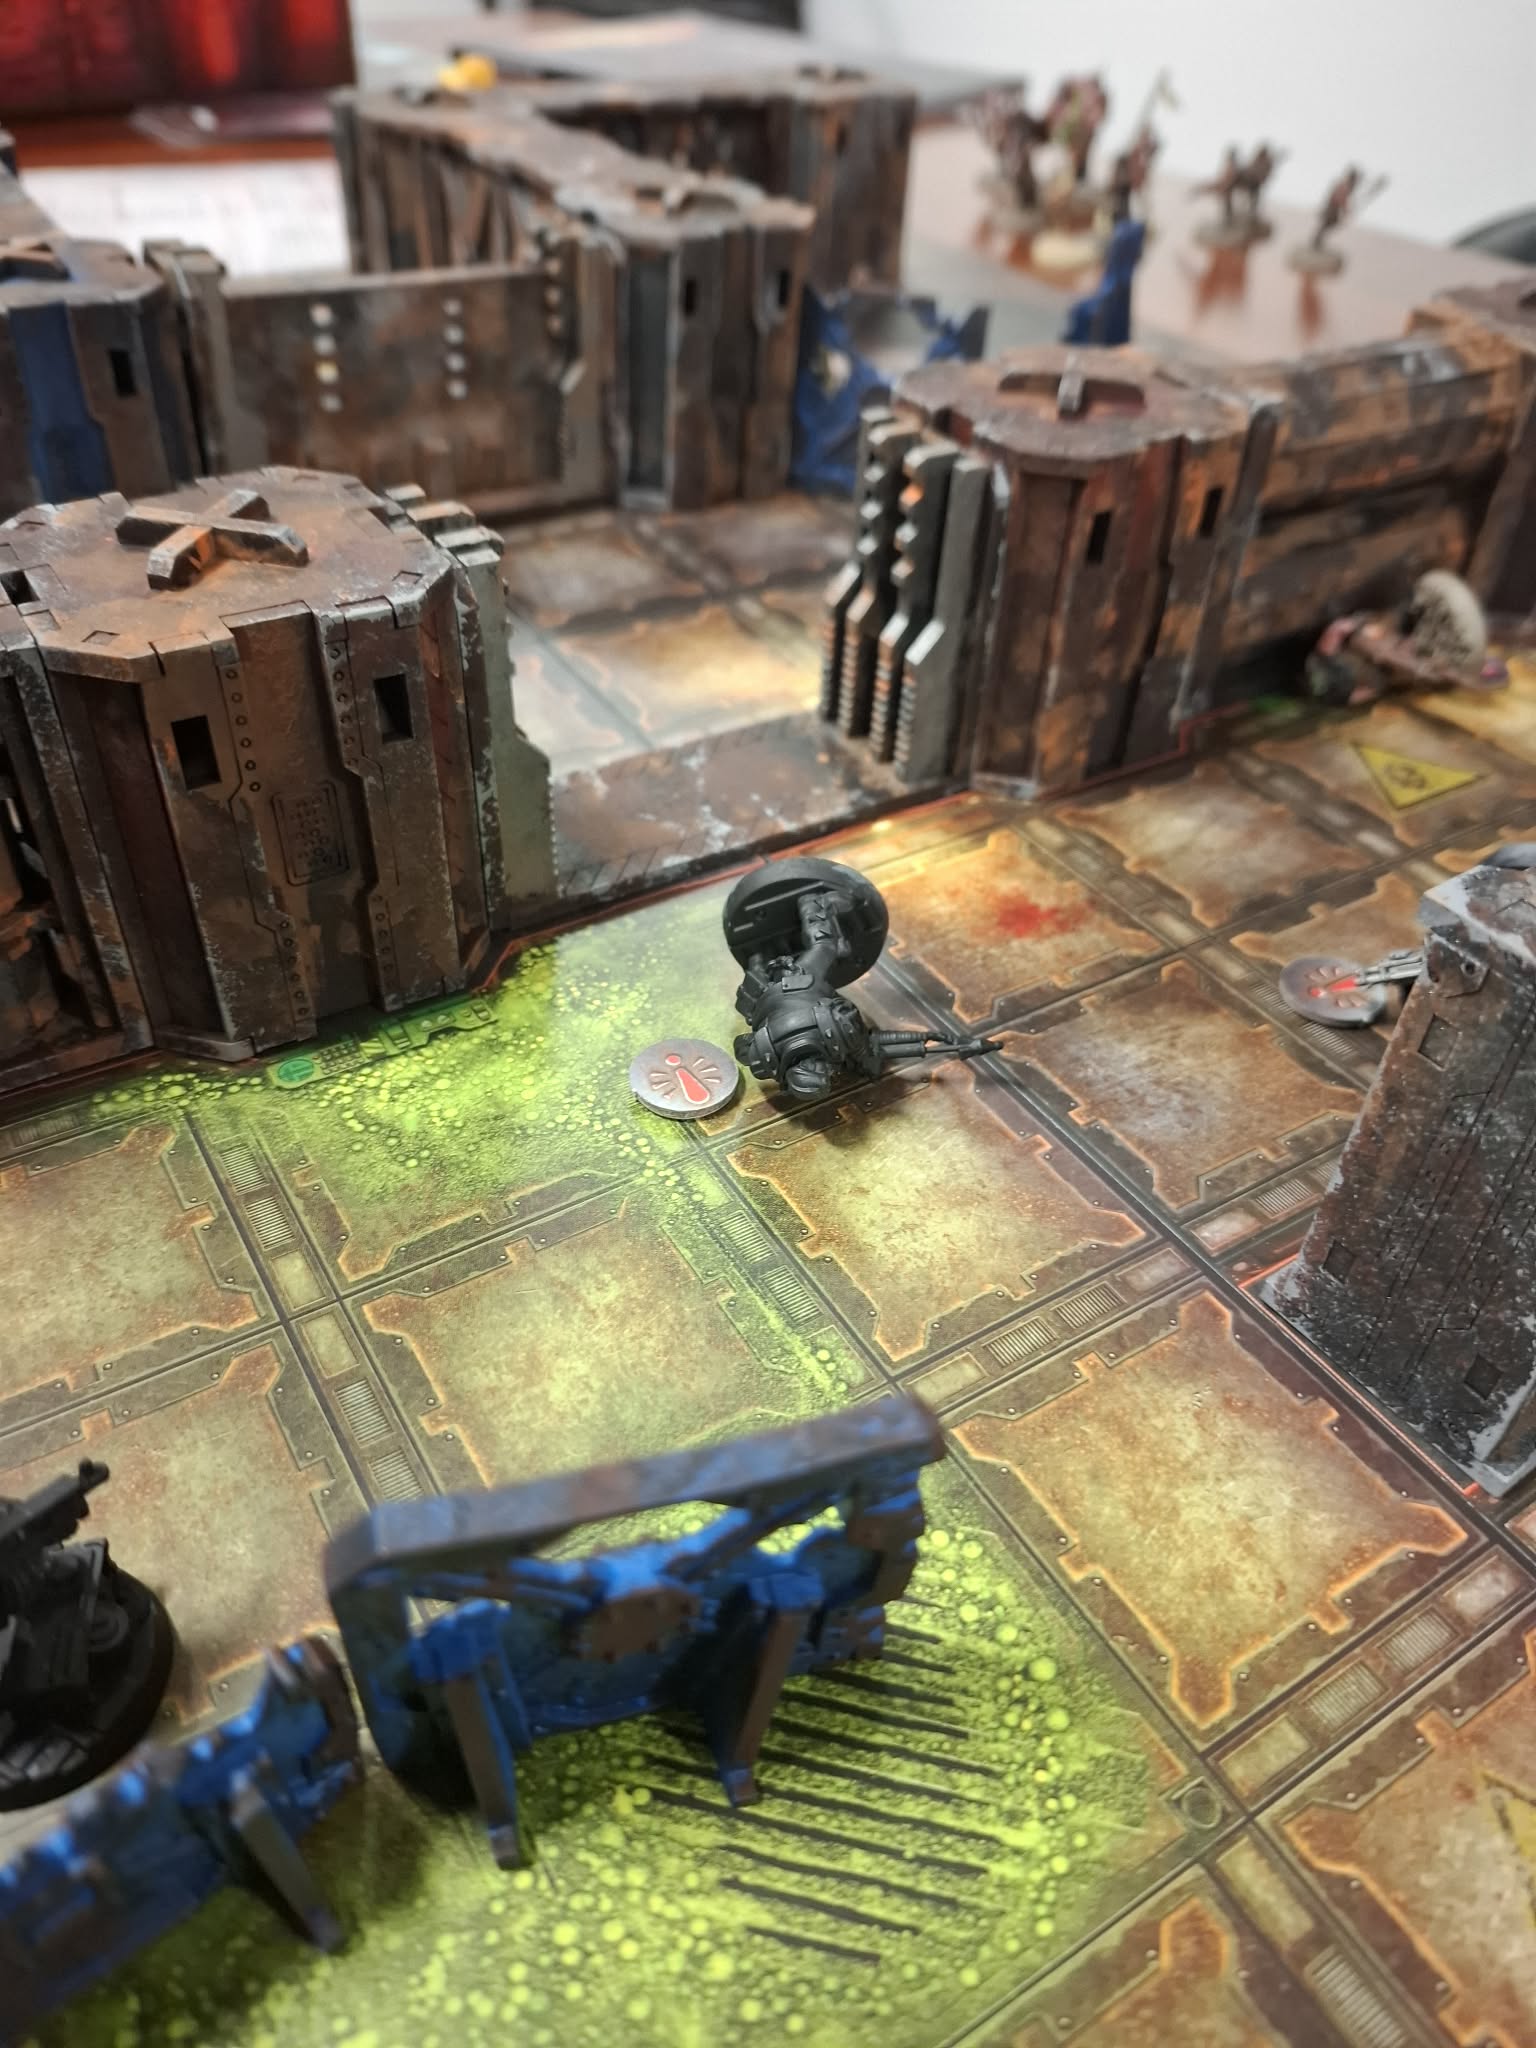
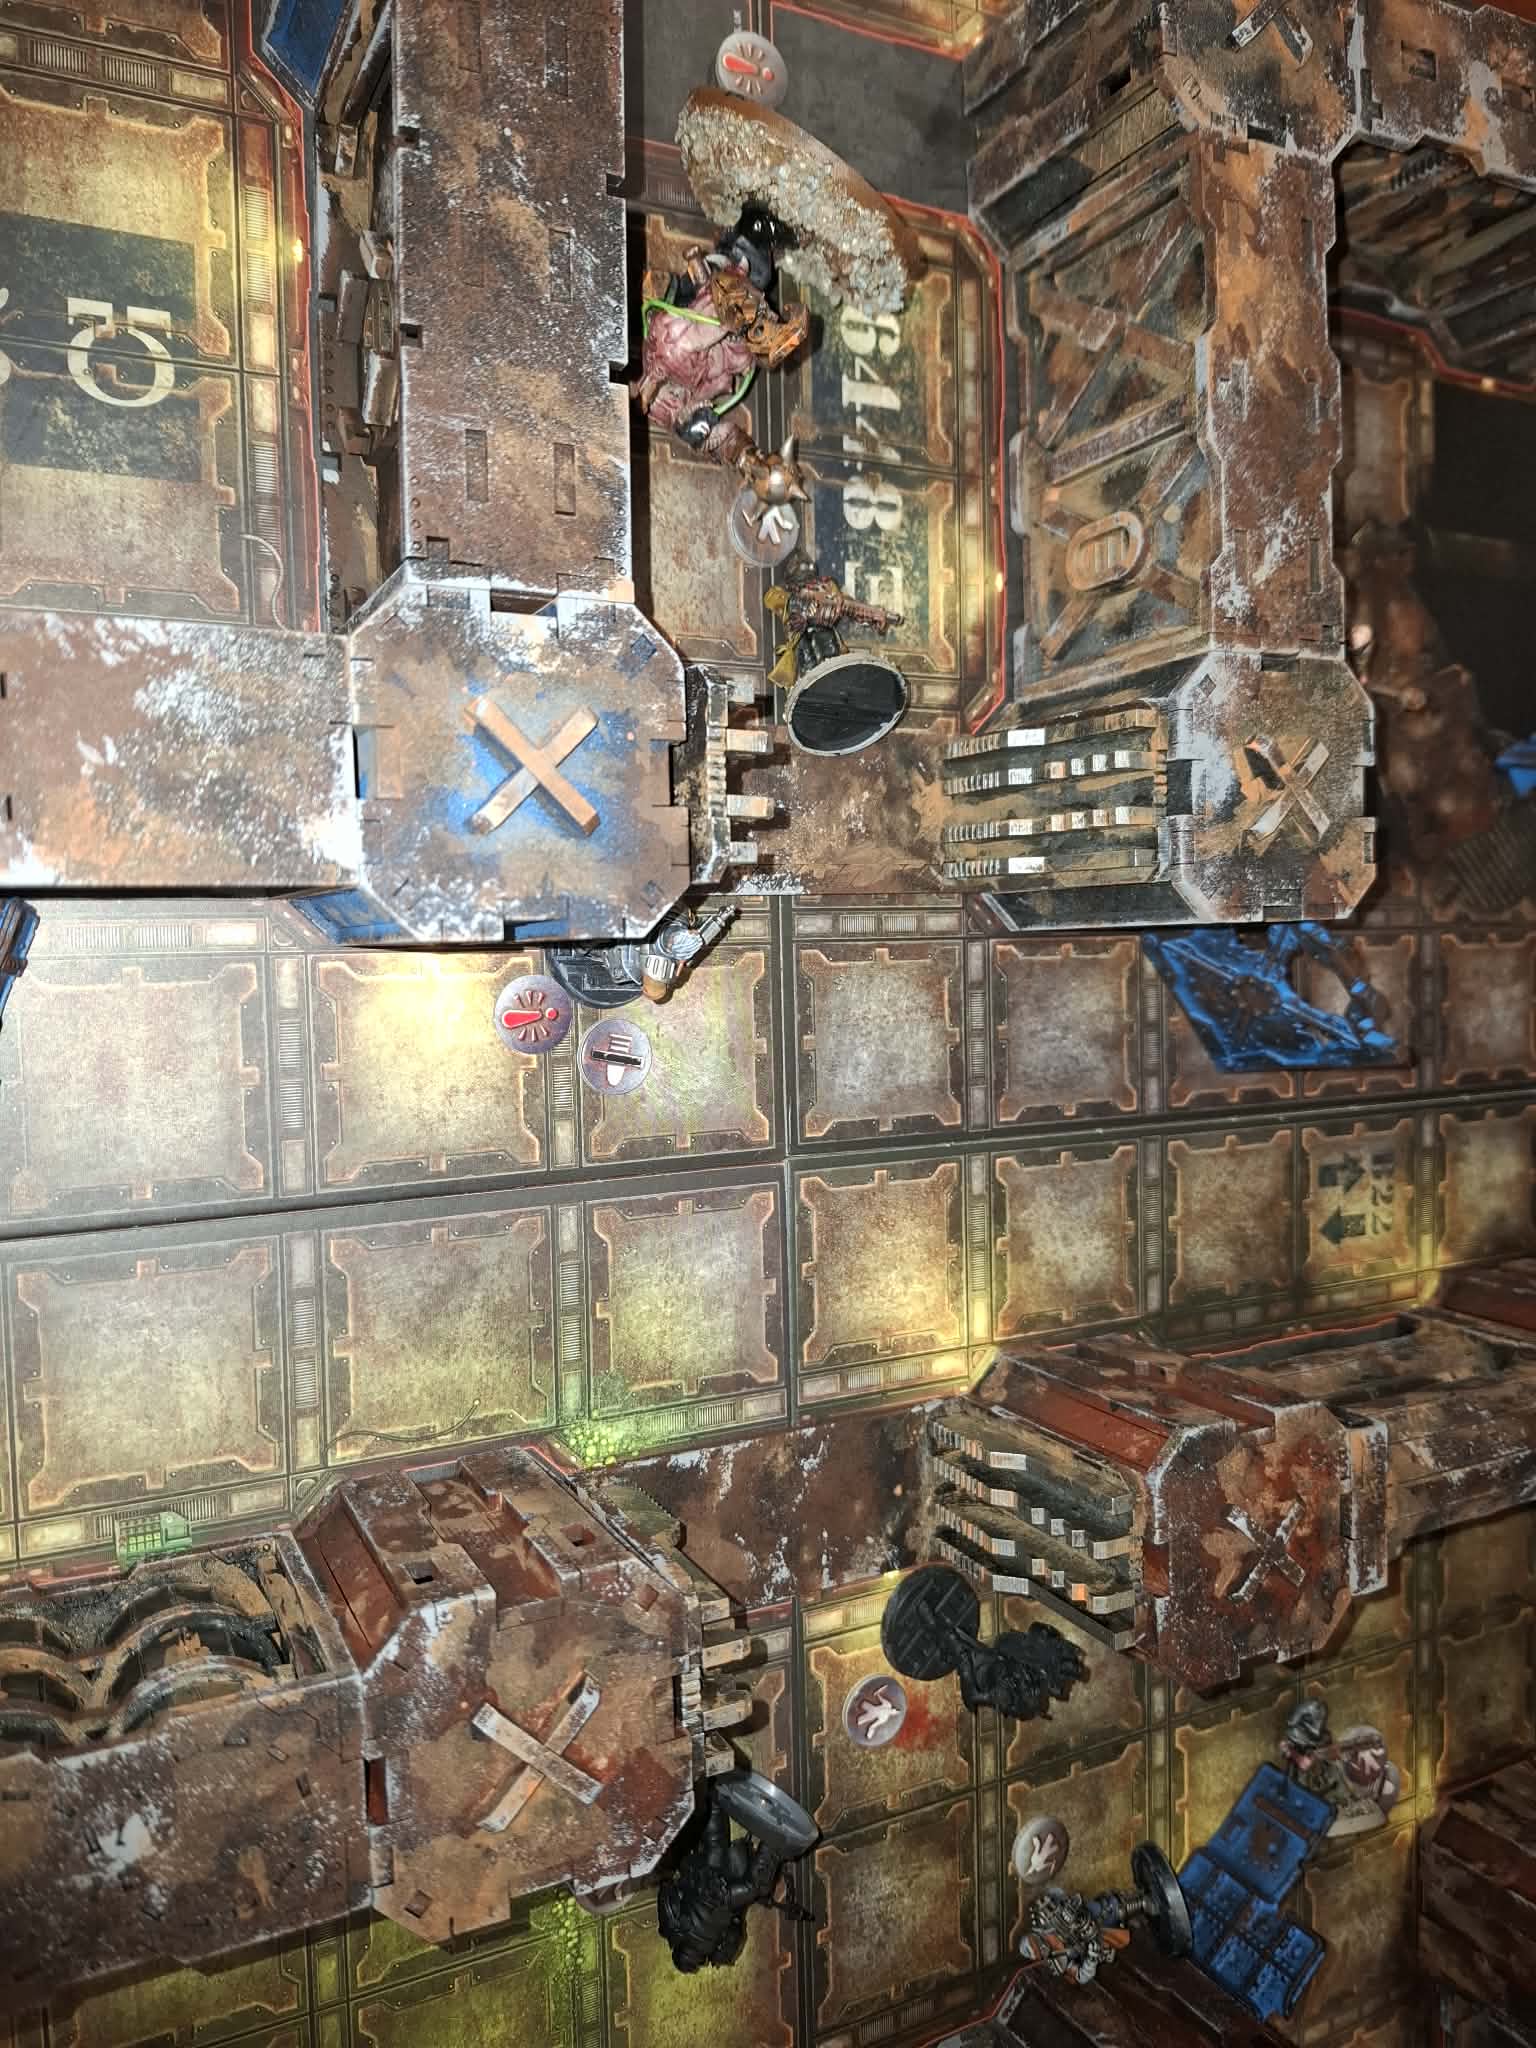
The Spawn reaches poor, headstrong Gunther. It murderises him and moves on. An increasing cluster of shooting and bonkers nonsense comes together in the centre. More of my guys go down, then Brett’s filthy Helots fail their bottle check and a 6 is rolled for the end of the game.


![StarCraft Tabletop Miniatures Game Pre-Orders Live Now [Updated]](https://images.beastsofwar.com/2026/03/starcraft-tmg-news-cover-600-338.jpg)


