![NO Weekender Or Cult Of Games XLBS This Weekend [Updated]](https://images.beastsofwar.com/2026/03/No_Weekender_and_XLBS_this_Weekend-225-127.jpg)


Washed UP, 1490 Doom diorama board #TerrainFest2025


Recommendations: 156
About the Project
I found a bag of skulls when sorting a box of hobby materials. 2 tubes of superglue and several hours later I had the foundation for a costal settlement. Its primarily intended for 1490 Doom so has the characteristic round base but the dimensions also work well for Necropolis28.
Related Genre: Fantasy
Related Contest: TerrainFest 2025
This Project is Completed
Laying the foundation
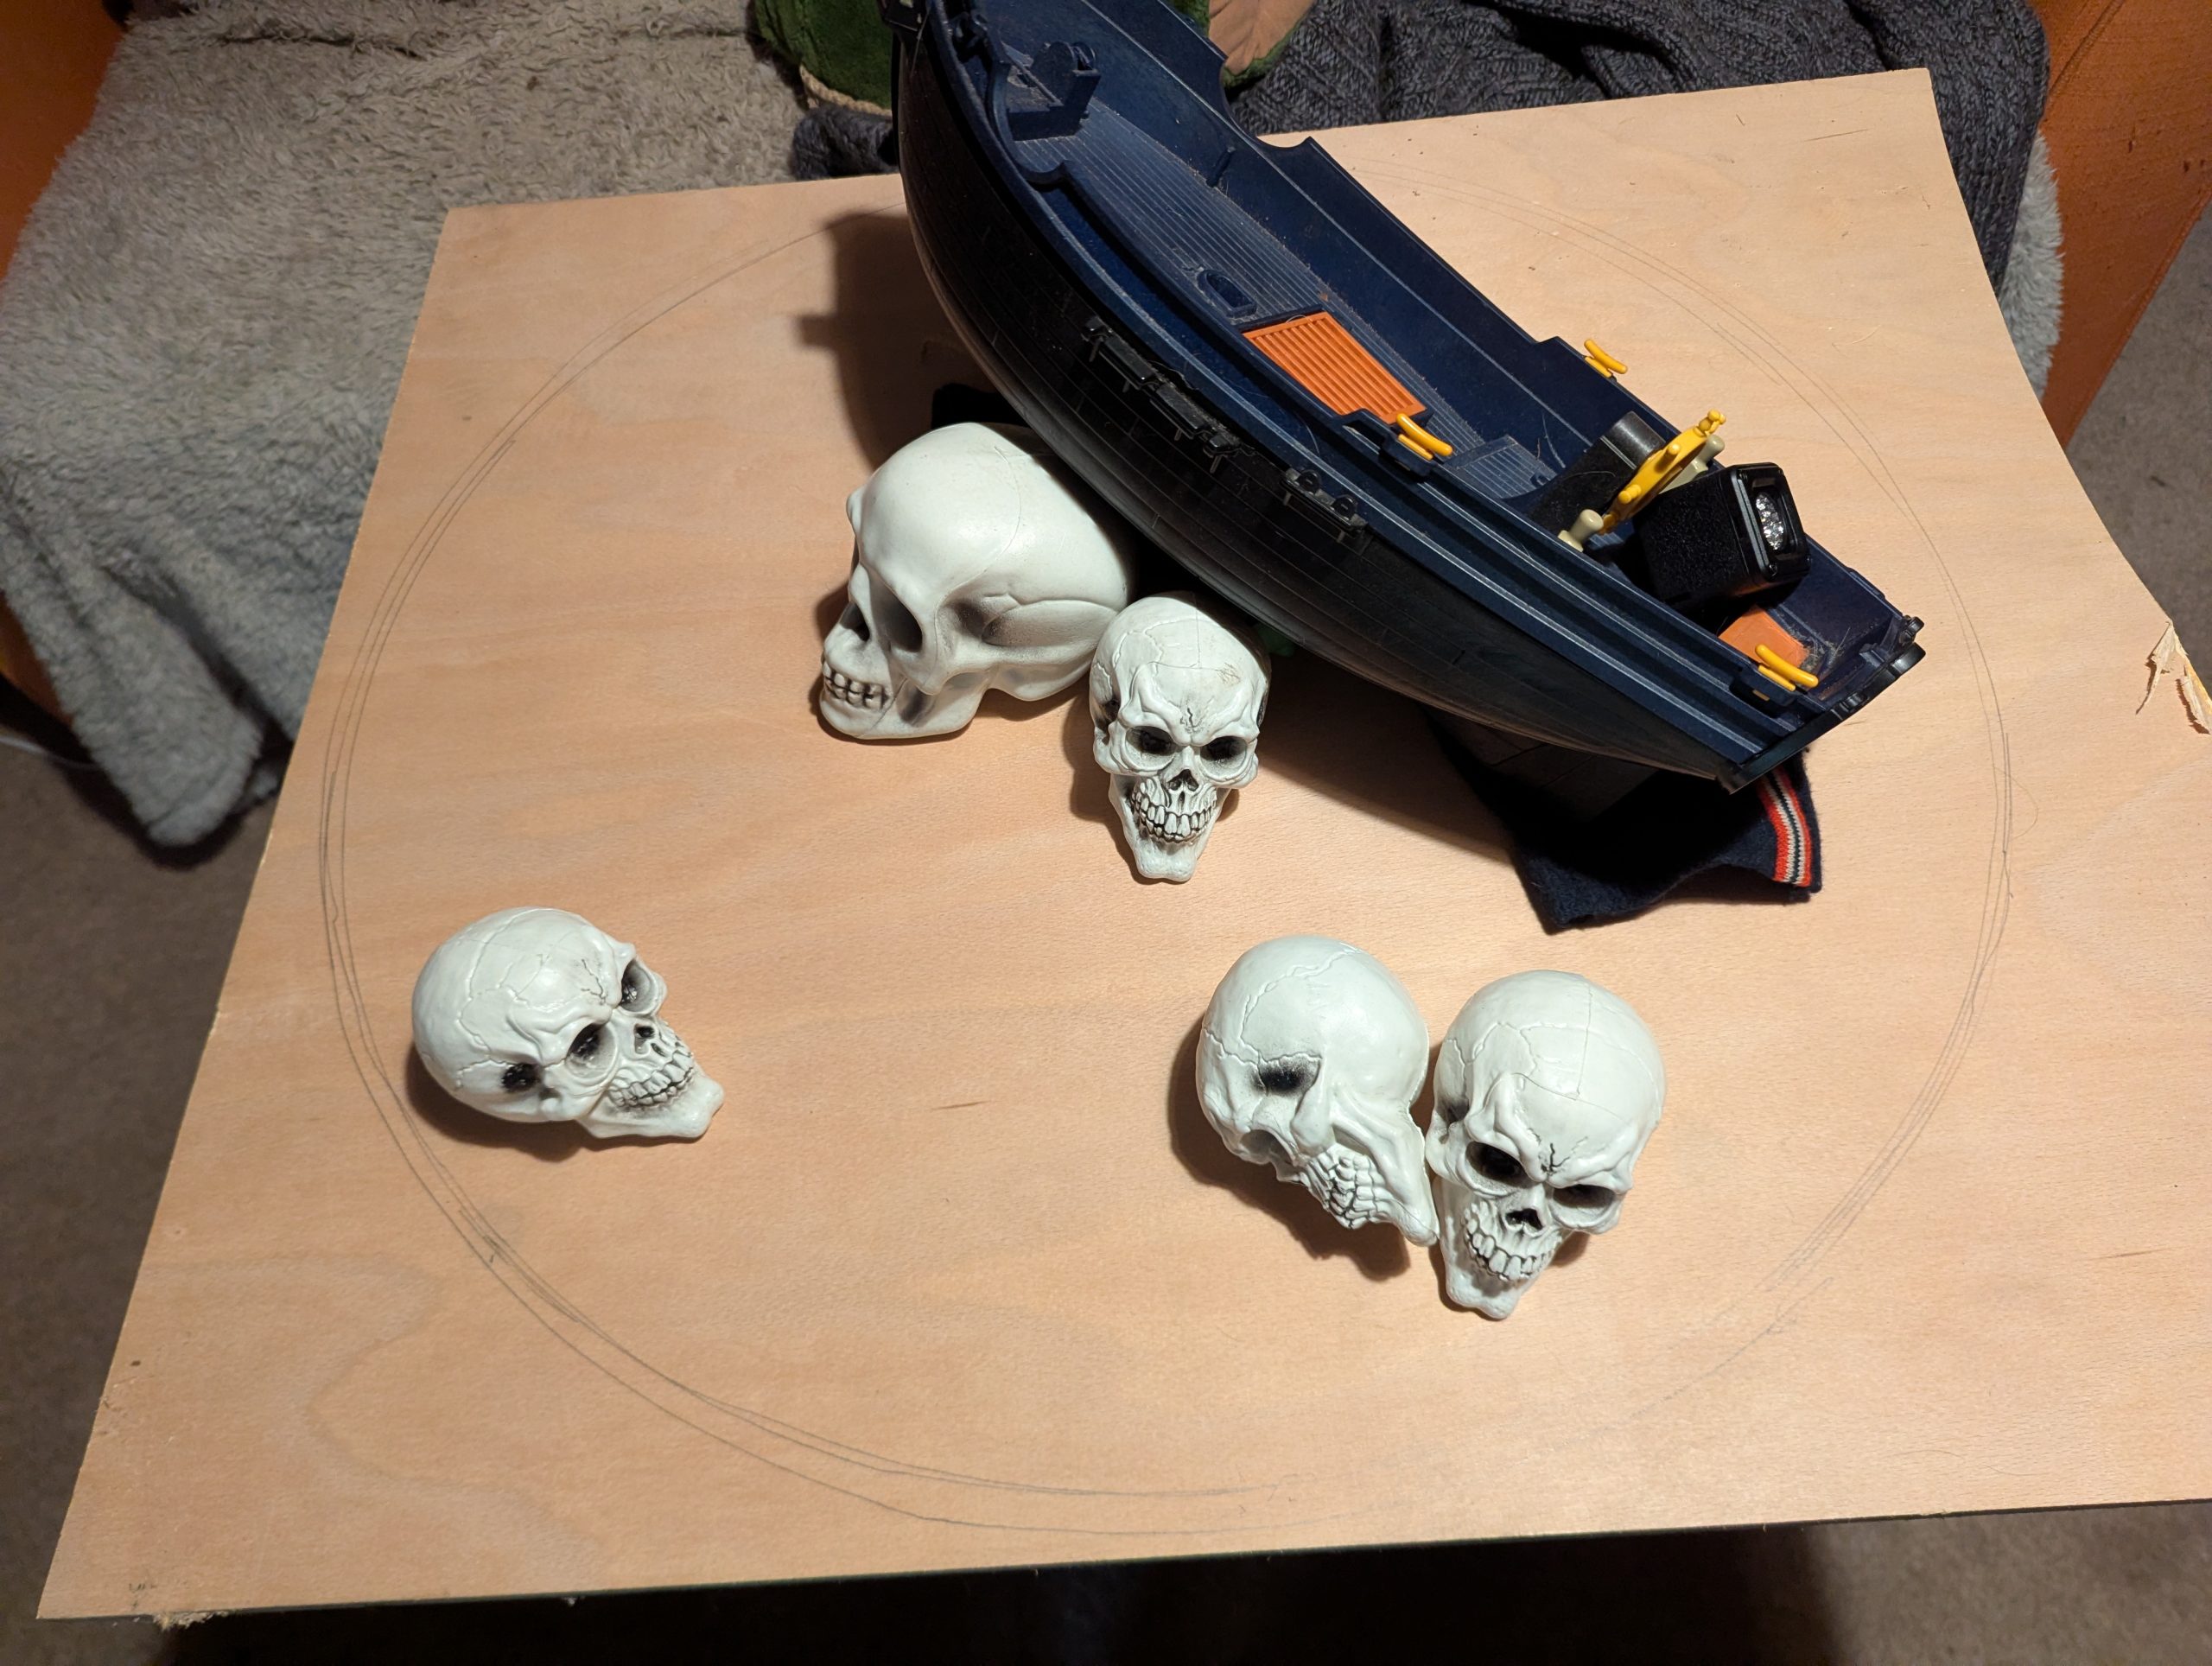
After deliberating for far to long how I would cut a perfect circle without access to my workshop, in the end I just buzzed it out with a jigsaw.
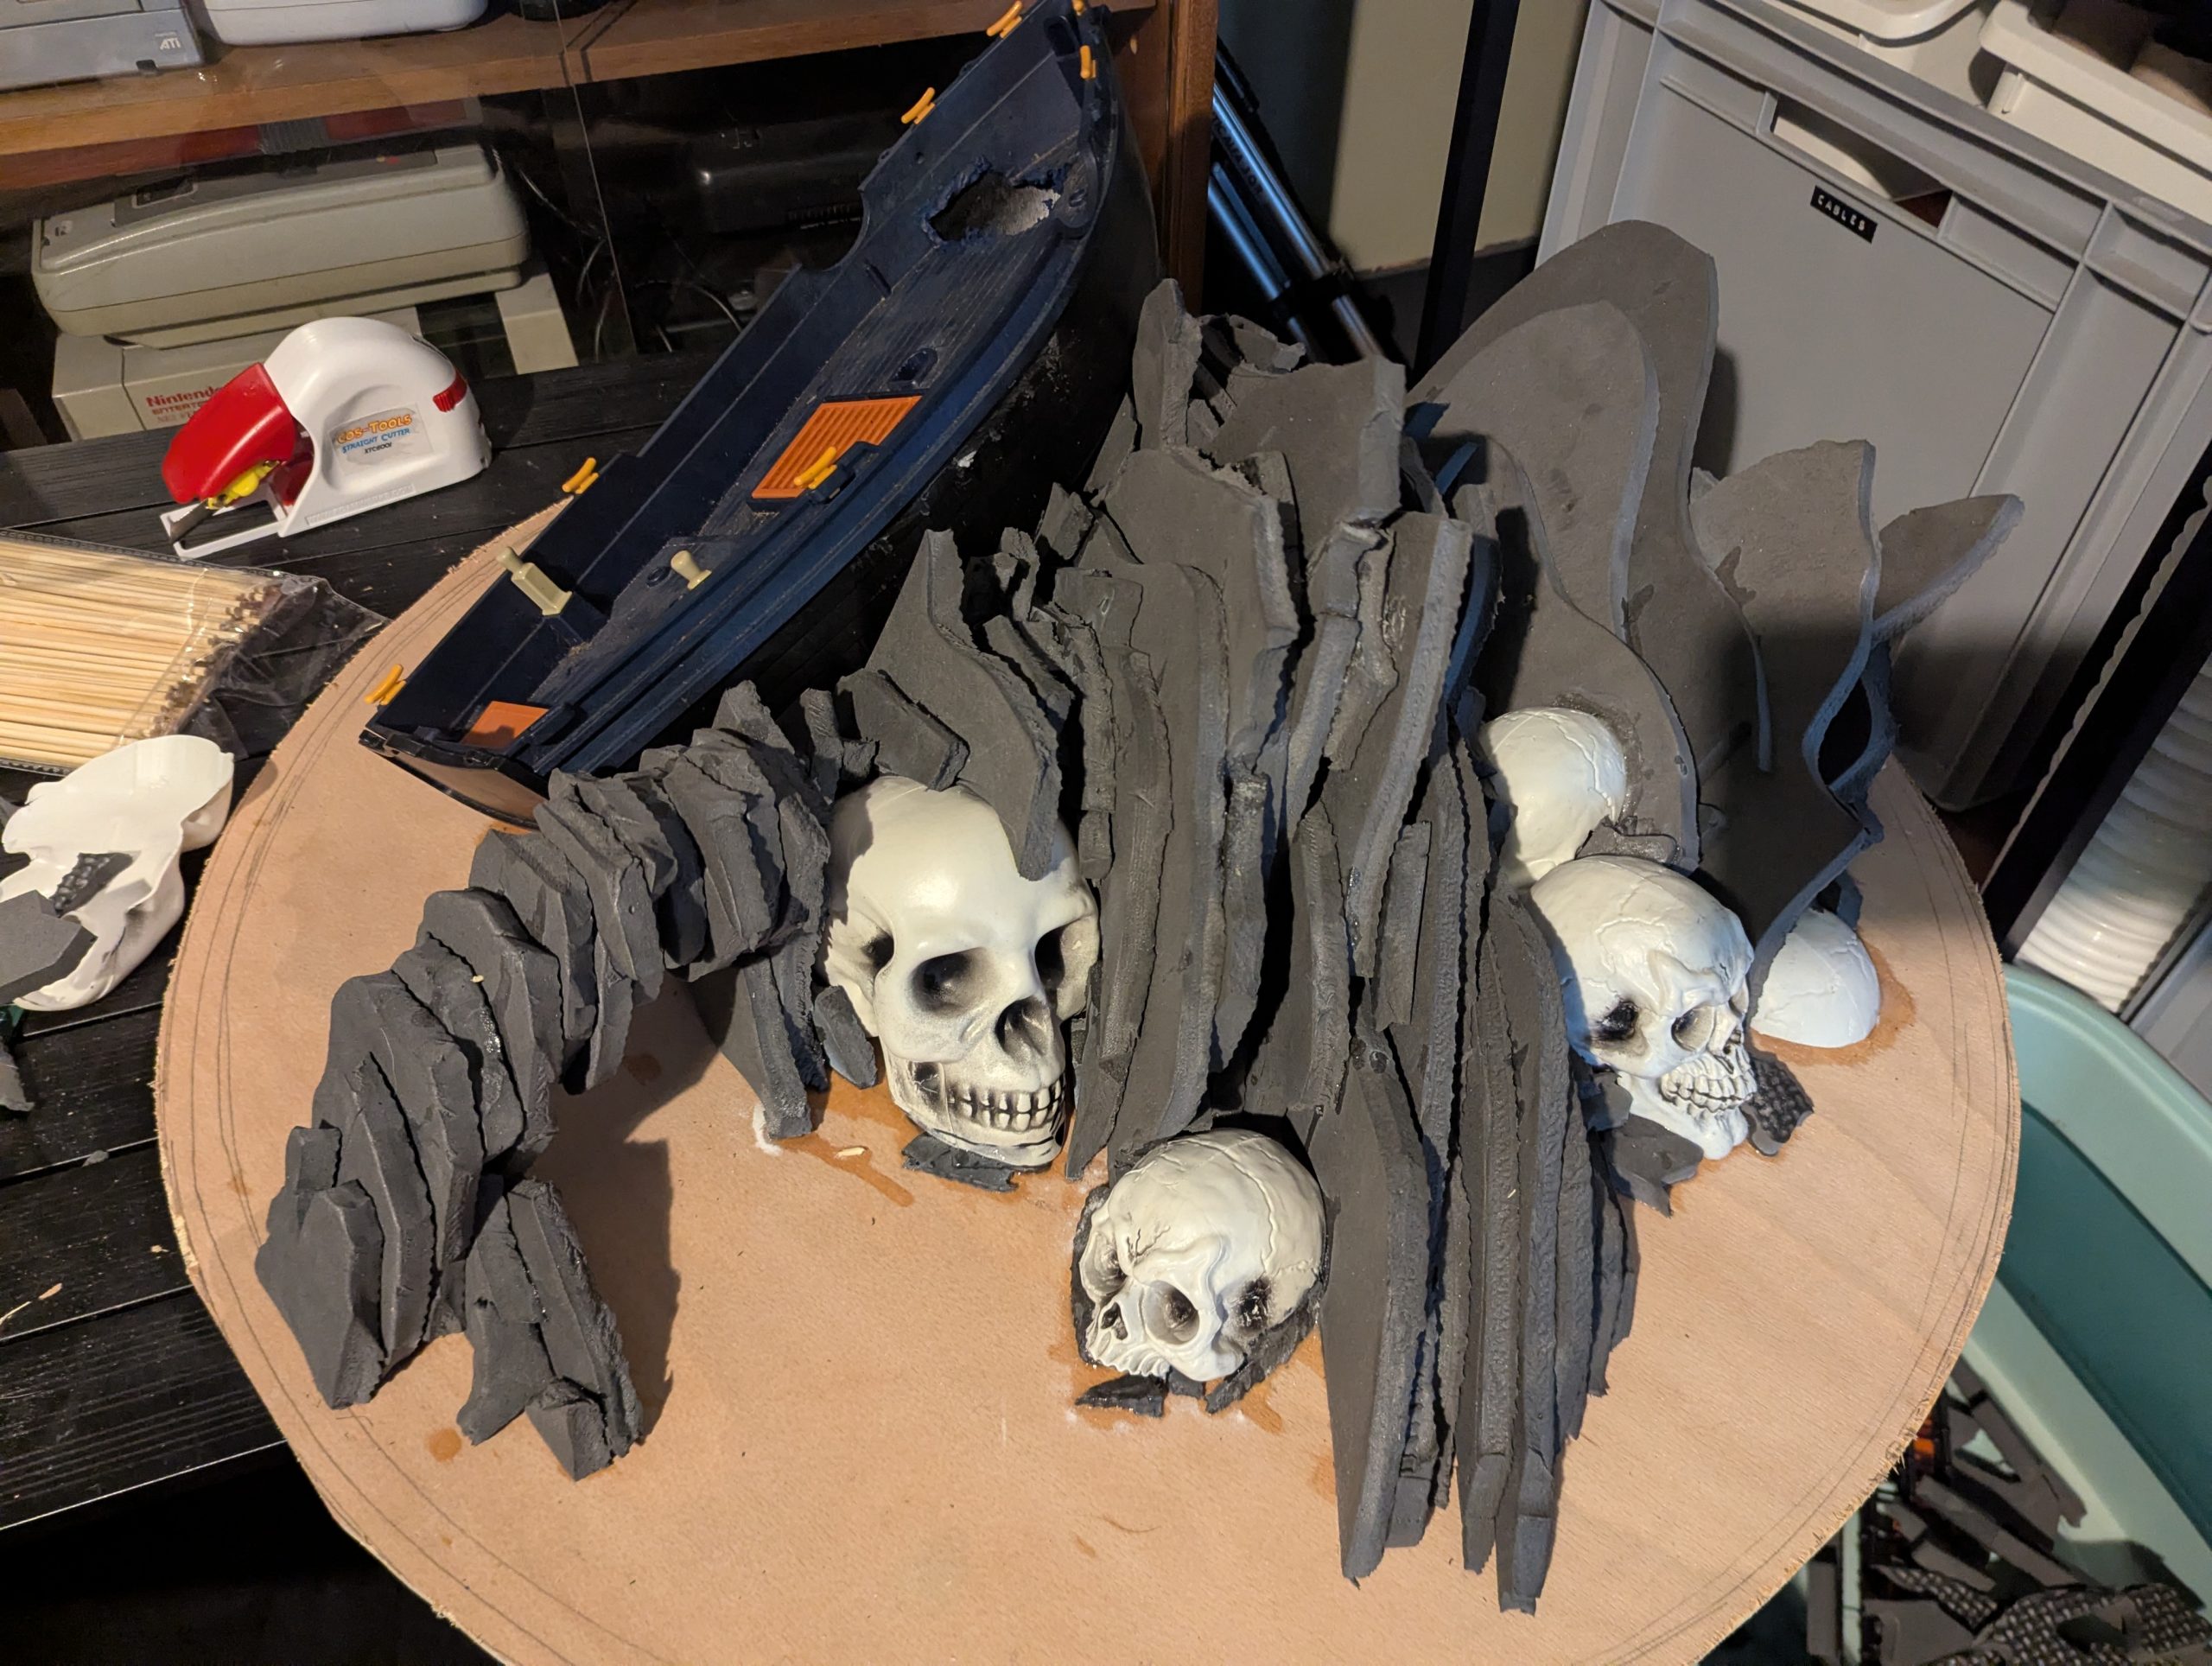
For the initial shapes I cut/ripped 10mm EVA (craft foam) floor tiles to shape and used bamboo skewers to hold in place before locking them in place with liquid super glue. EVA foam loves superglue! this allowed my to secure the skulls which were again roughly cut to shape. The scale breaking sections of the playmobile pirate ship were removed with a rotary tool and ball gouge.
Most of this will be covered with other material in later steps so its just about roughing in the shapes at this stage.

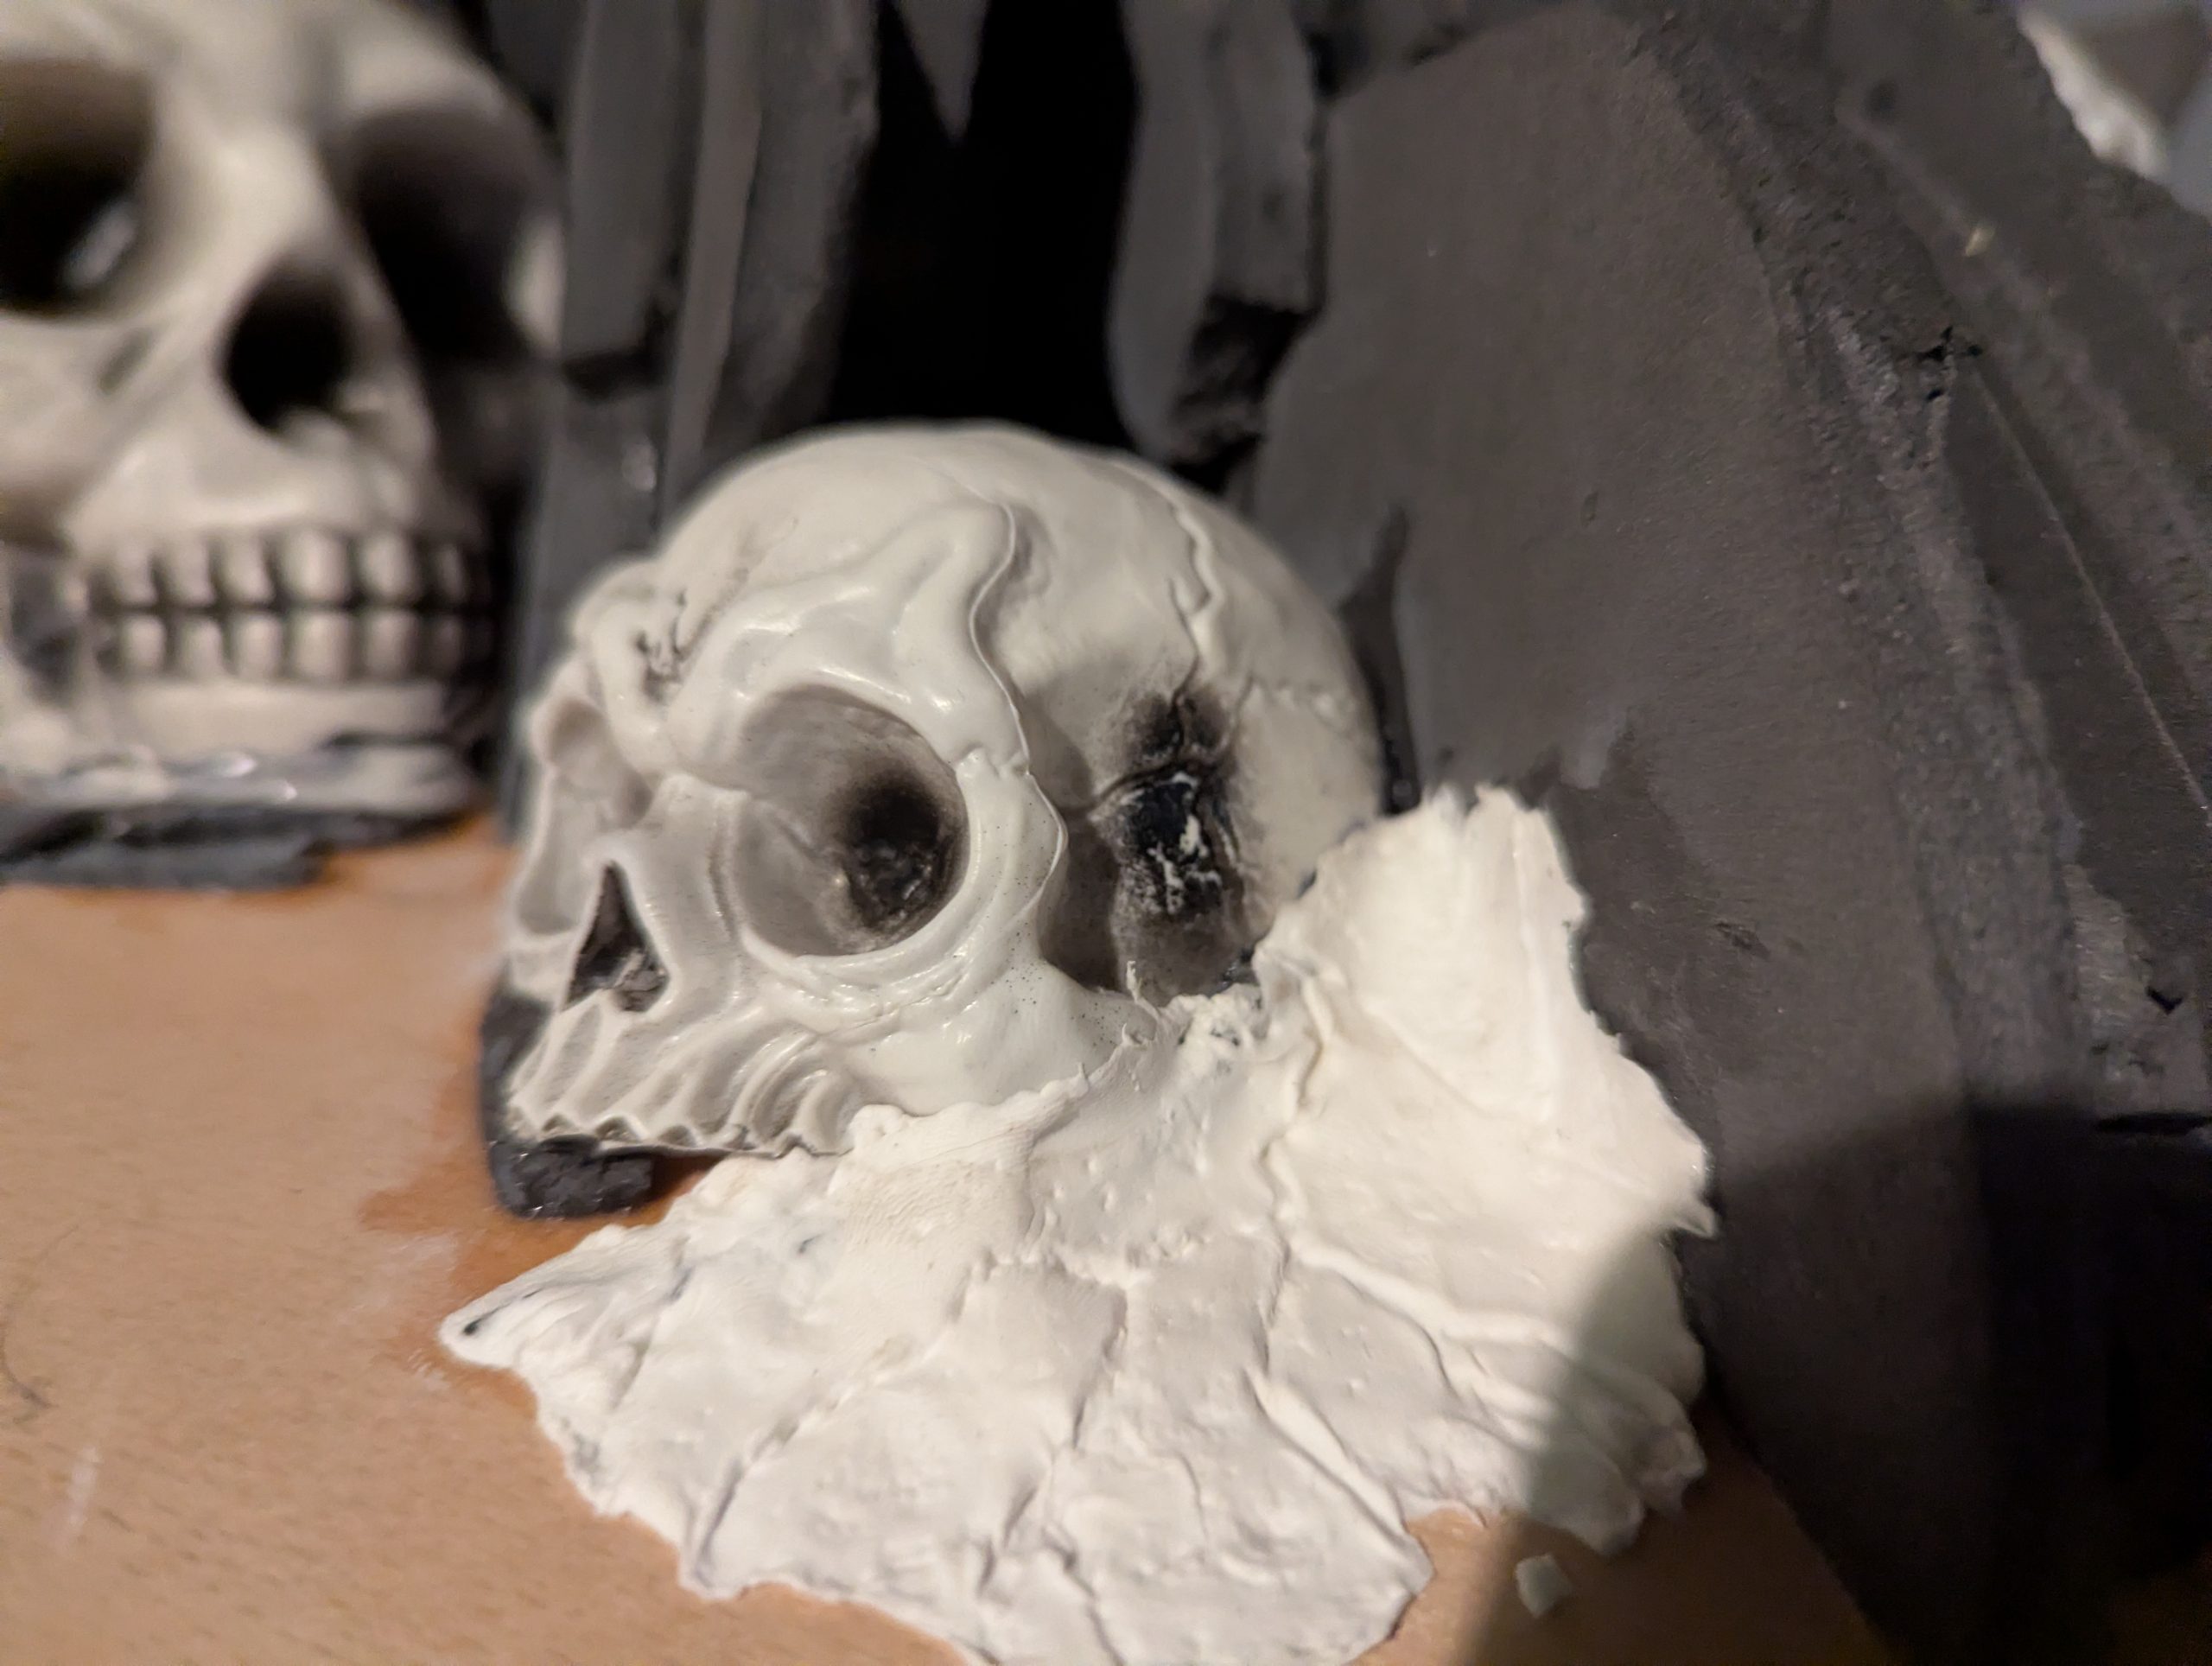
Foam Clay Test
I haven’t used foam clay before but as this will be a 600mm diameter diorama I want to keep the weight to a minimum.
I did a small section to test adhesion and detail retention. The foam clay is a pleasure to work, with no mess or strange smells. I replicated the fractured texture of the skull which is quite convincing when cured.
I thought the clay would bond well to the EVA foam but it just slides off. I’m going to try heat sealing the foam and a coat of modge podge next. Once cured the foam clay binds well with superglue.
The main issue I found was that I couldn’t get a smooth transition from the foam clay to other materials (plywood, foam and smooth plastic) as I would with Milliput or Das clay. I think this can be mitigated with more strategic sculpting but I will also try, cutting and sanding the edges after securing with more superglue.


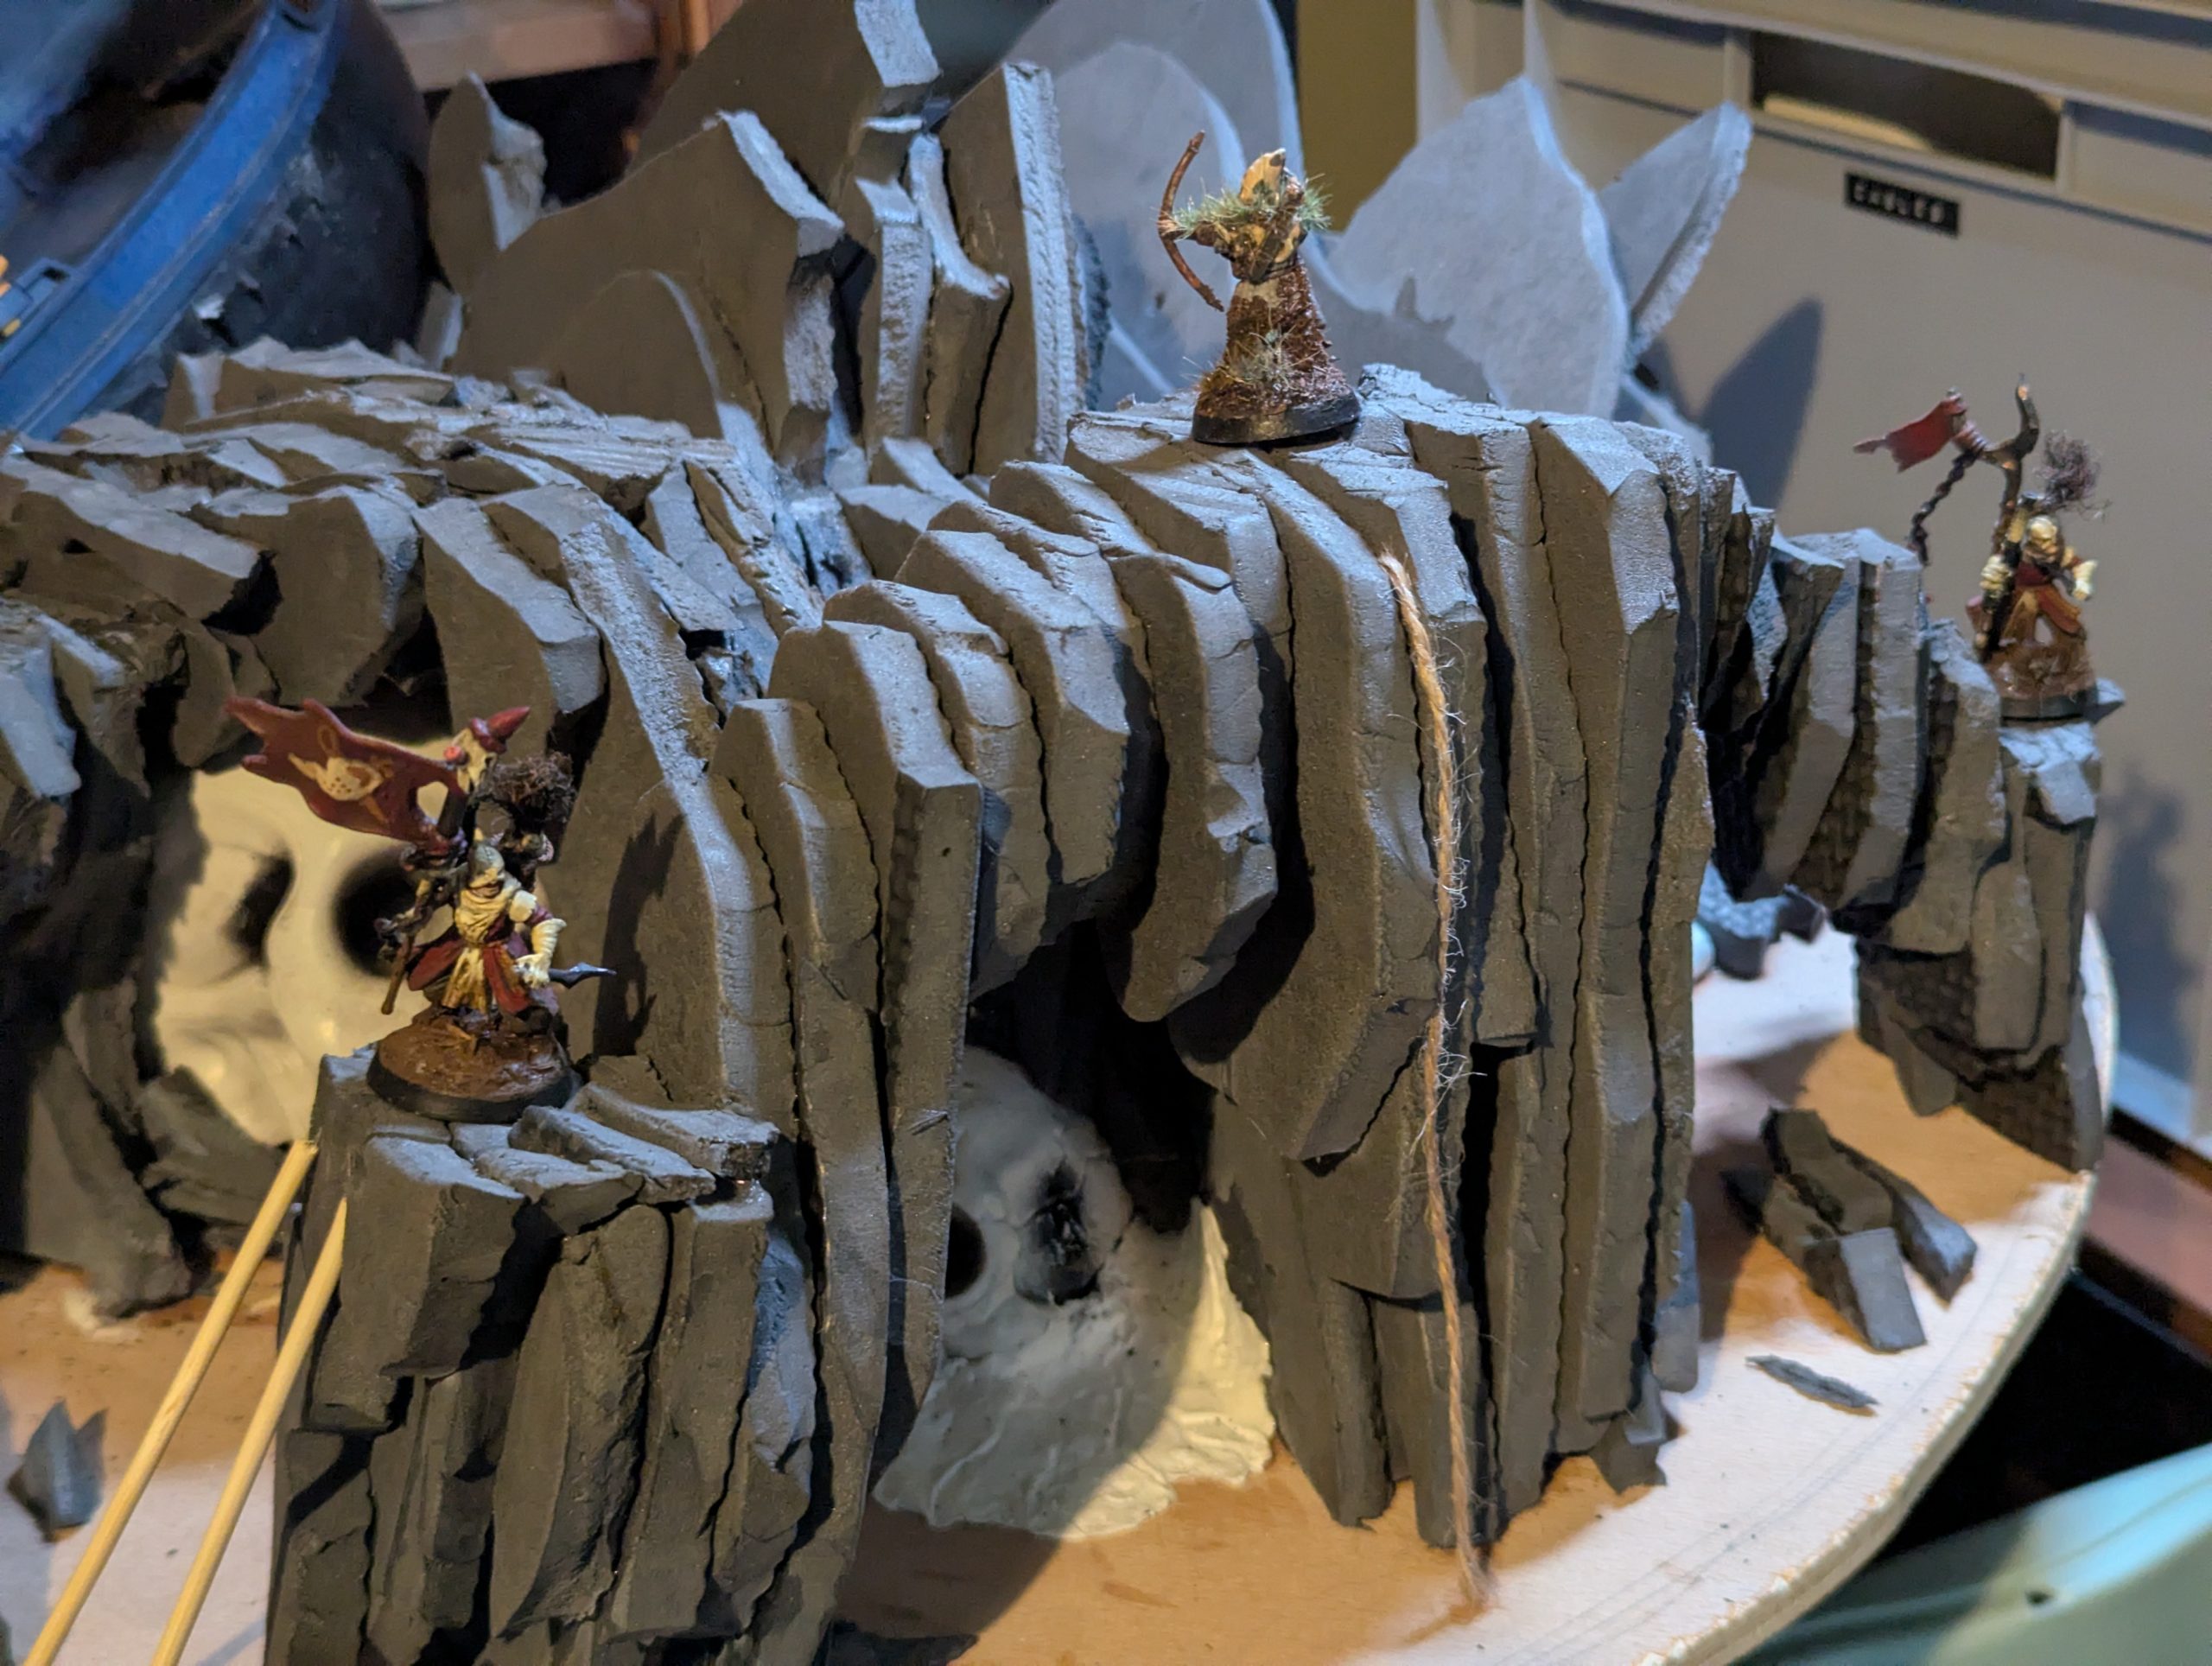
Level Up
As the rock formations are built up I’m paying particular attention to the height, in 1490 Doom equipment allows characters to clime different heights. I’m creating levels at specific heights to create different routes to navigate the board.
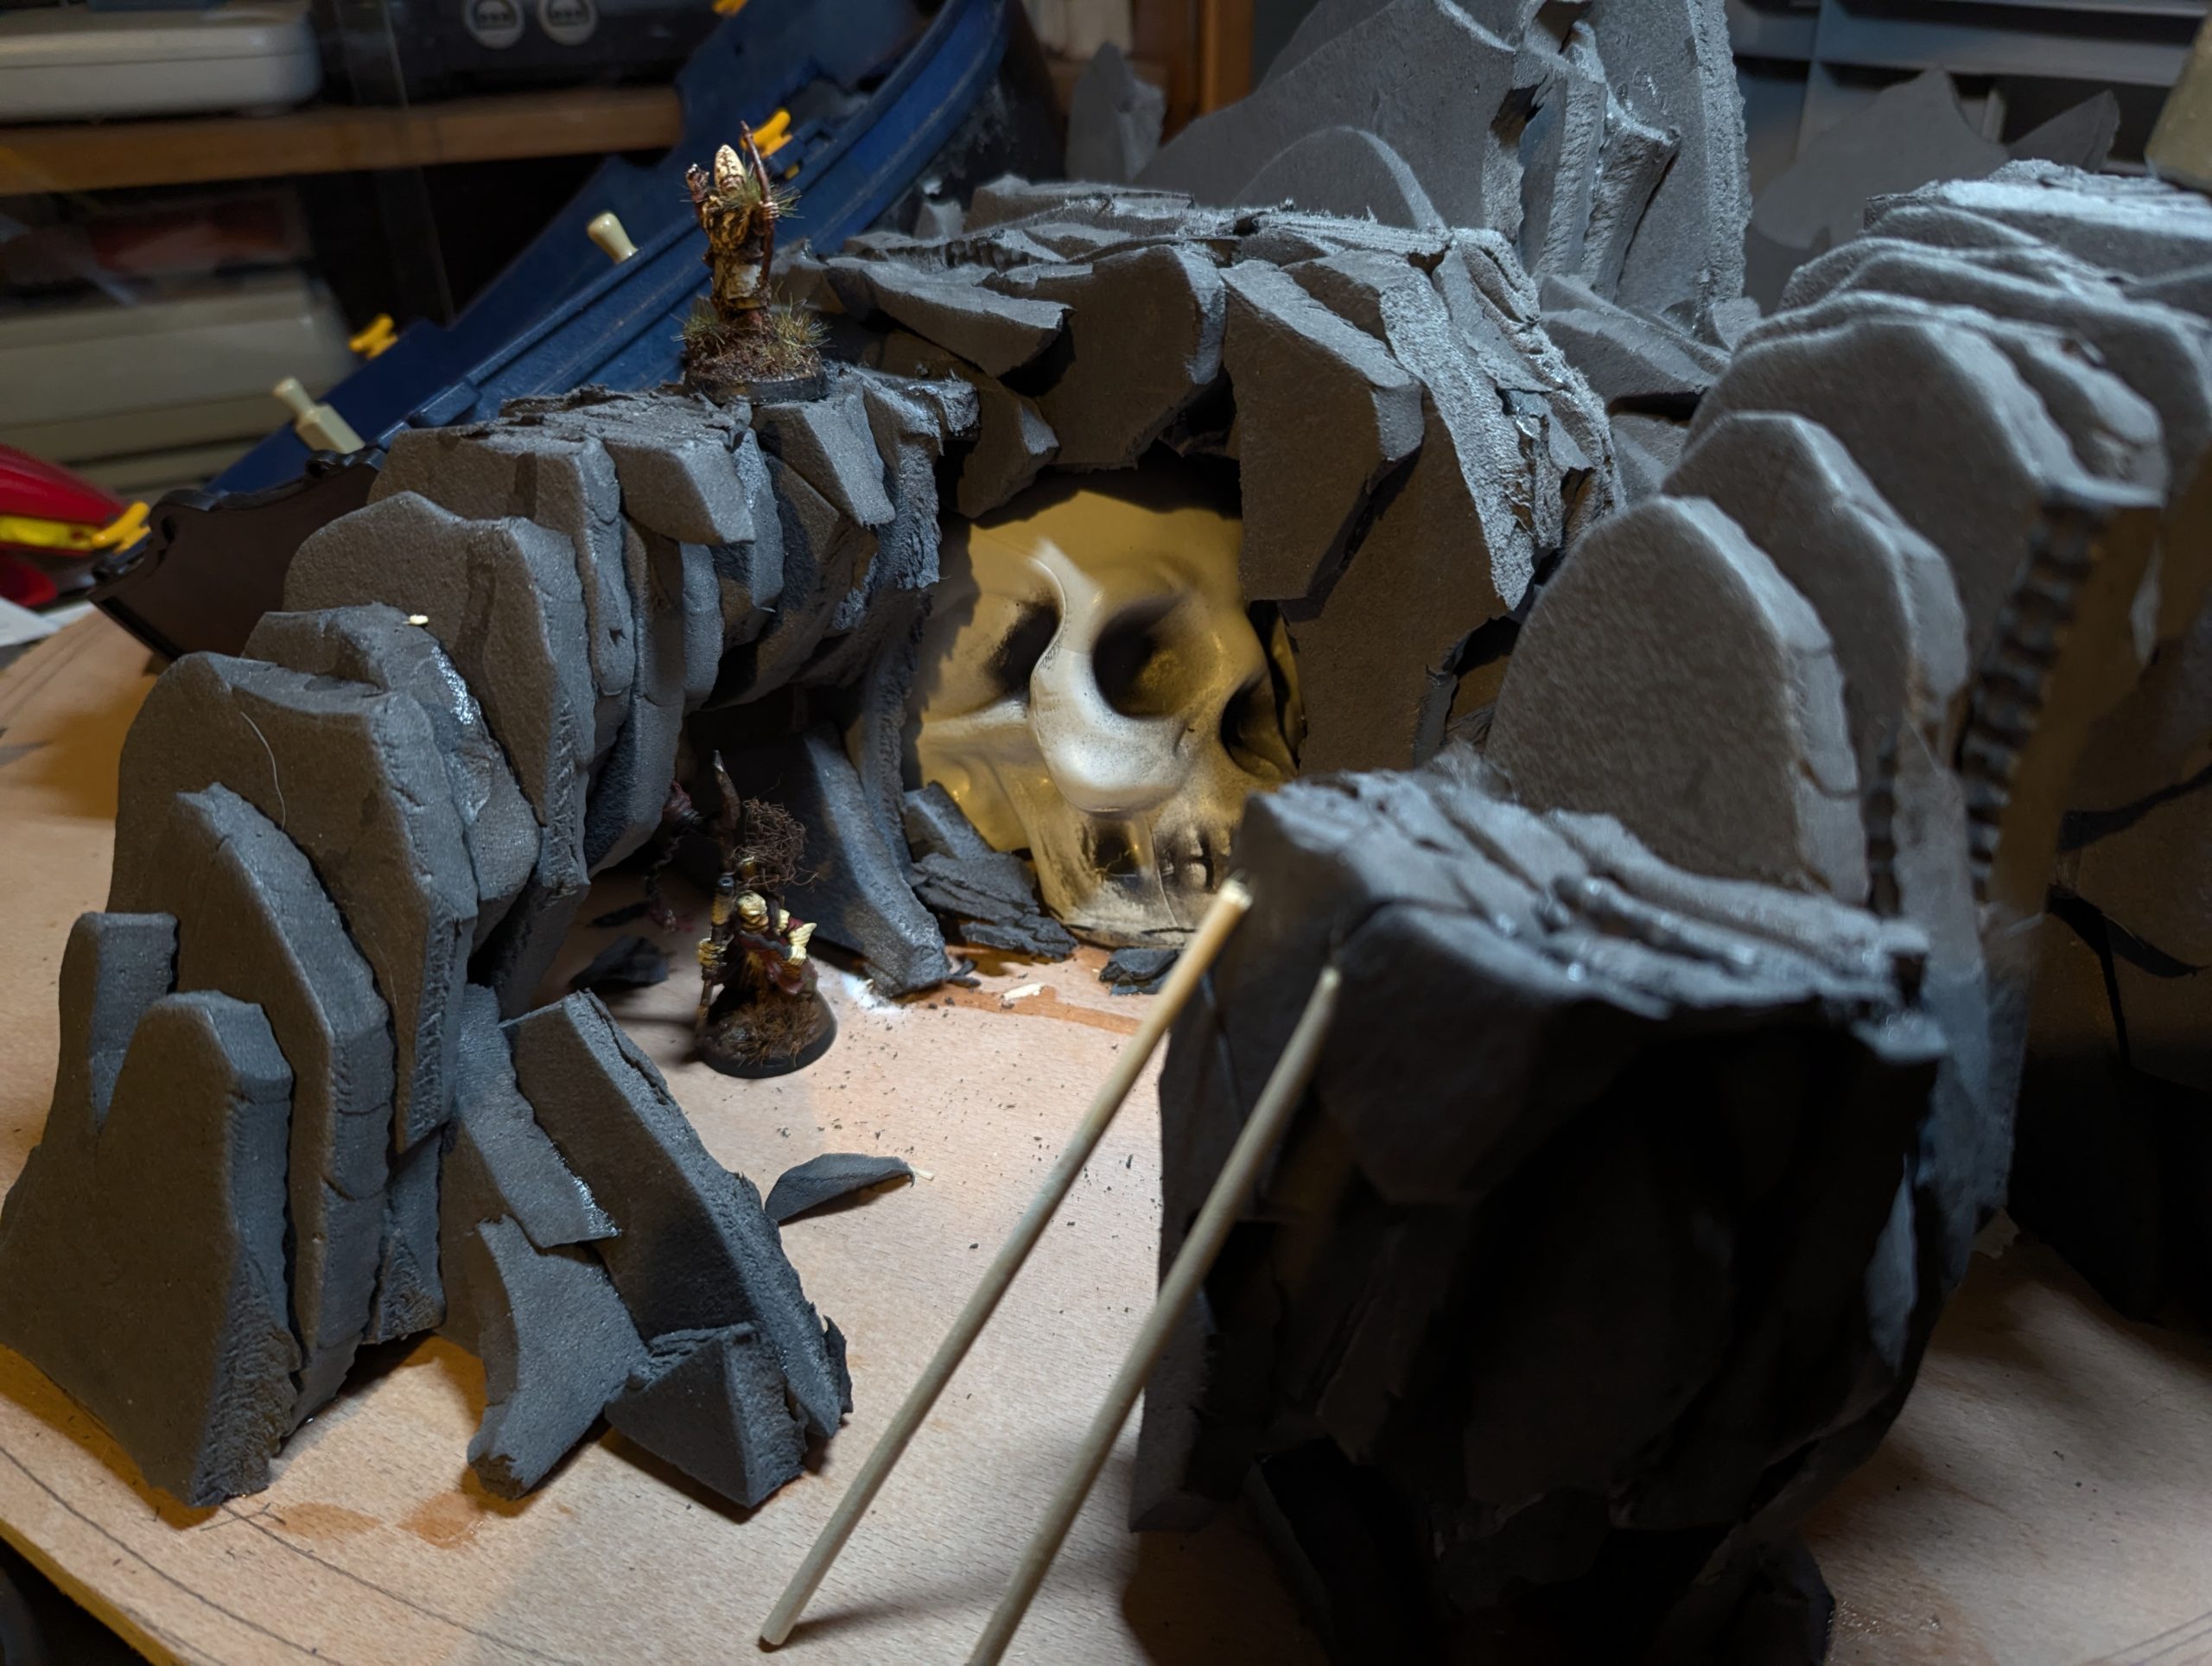
These local friendly cultists offered to demonstrate my process. Cuddles on the right had no equipment so climbed to the lower ledge at 3″. Bubbles on the left had a ladder in his equipment so was able to reach the 4″ ledge. Fluffy in the middle used a grappling hook to climb straight to the top ledge at 6″. In the finished piece the ledges will be identified with grass tufts to aid gameplay and add more more contrast.
Despite covering the board with 20ft skulls I don’t want them to be a prominent part off the finished piece. They are recessed in to caves and overhangs in create more interest (and hide the heinous mould lines).
Rocky start
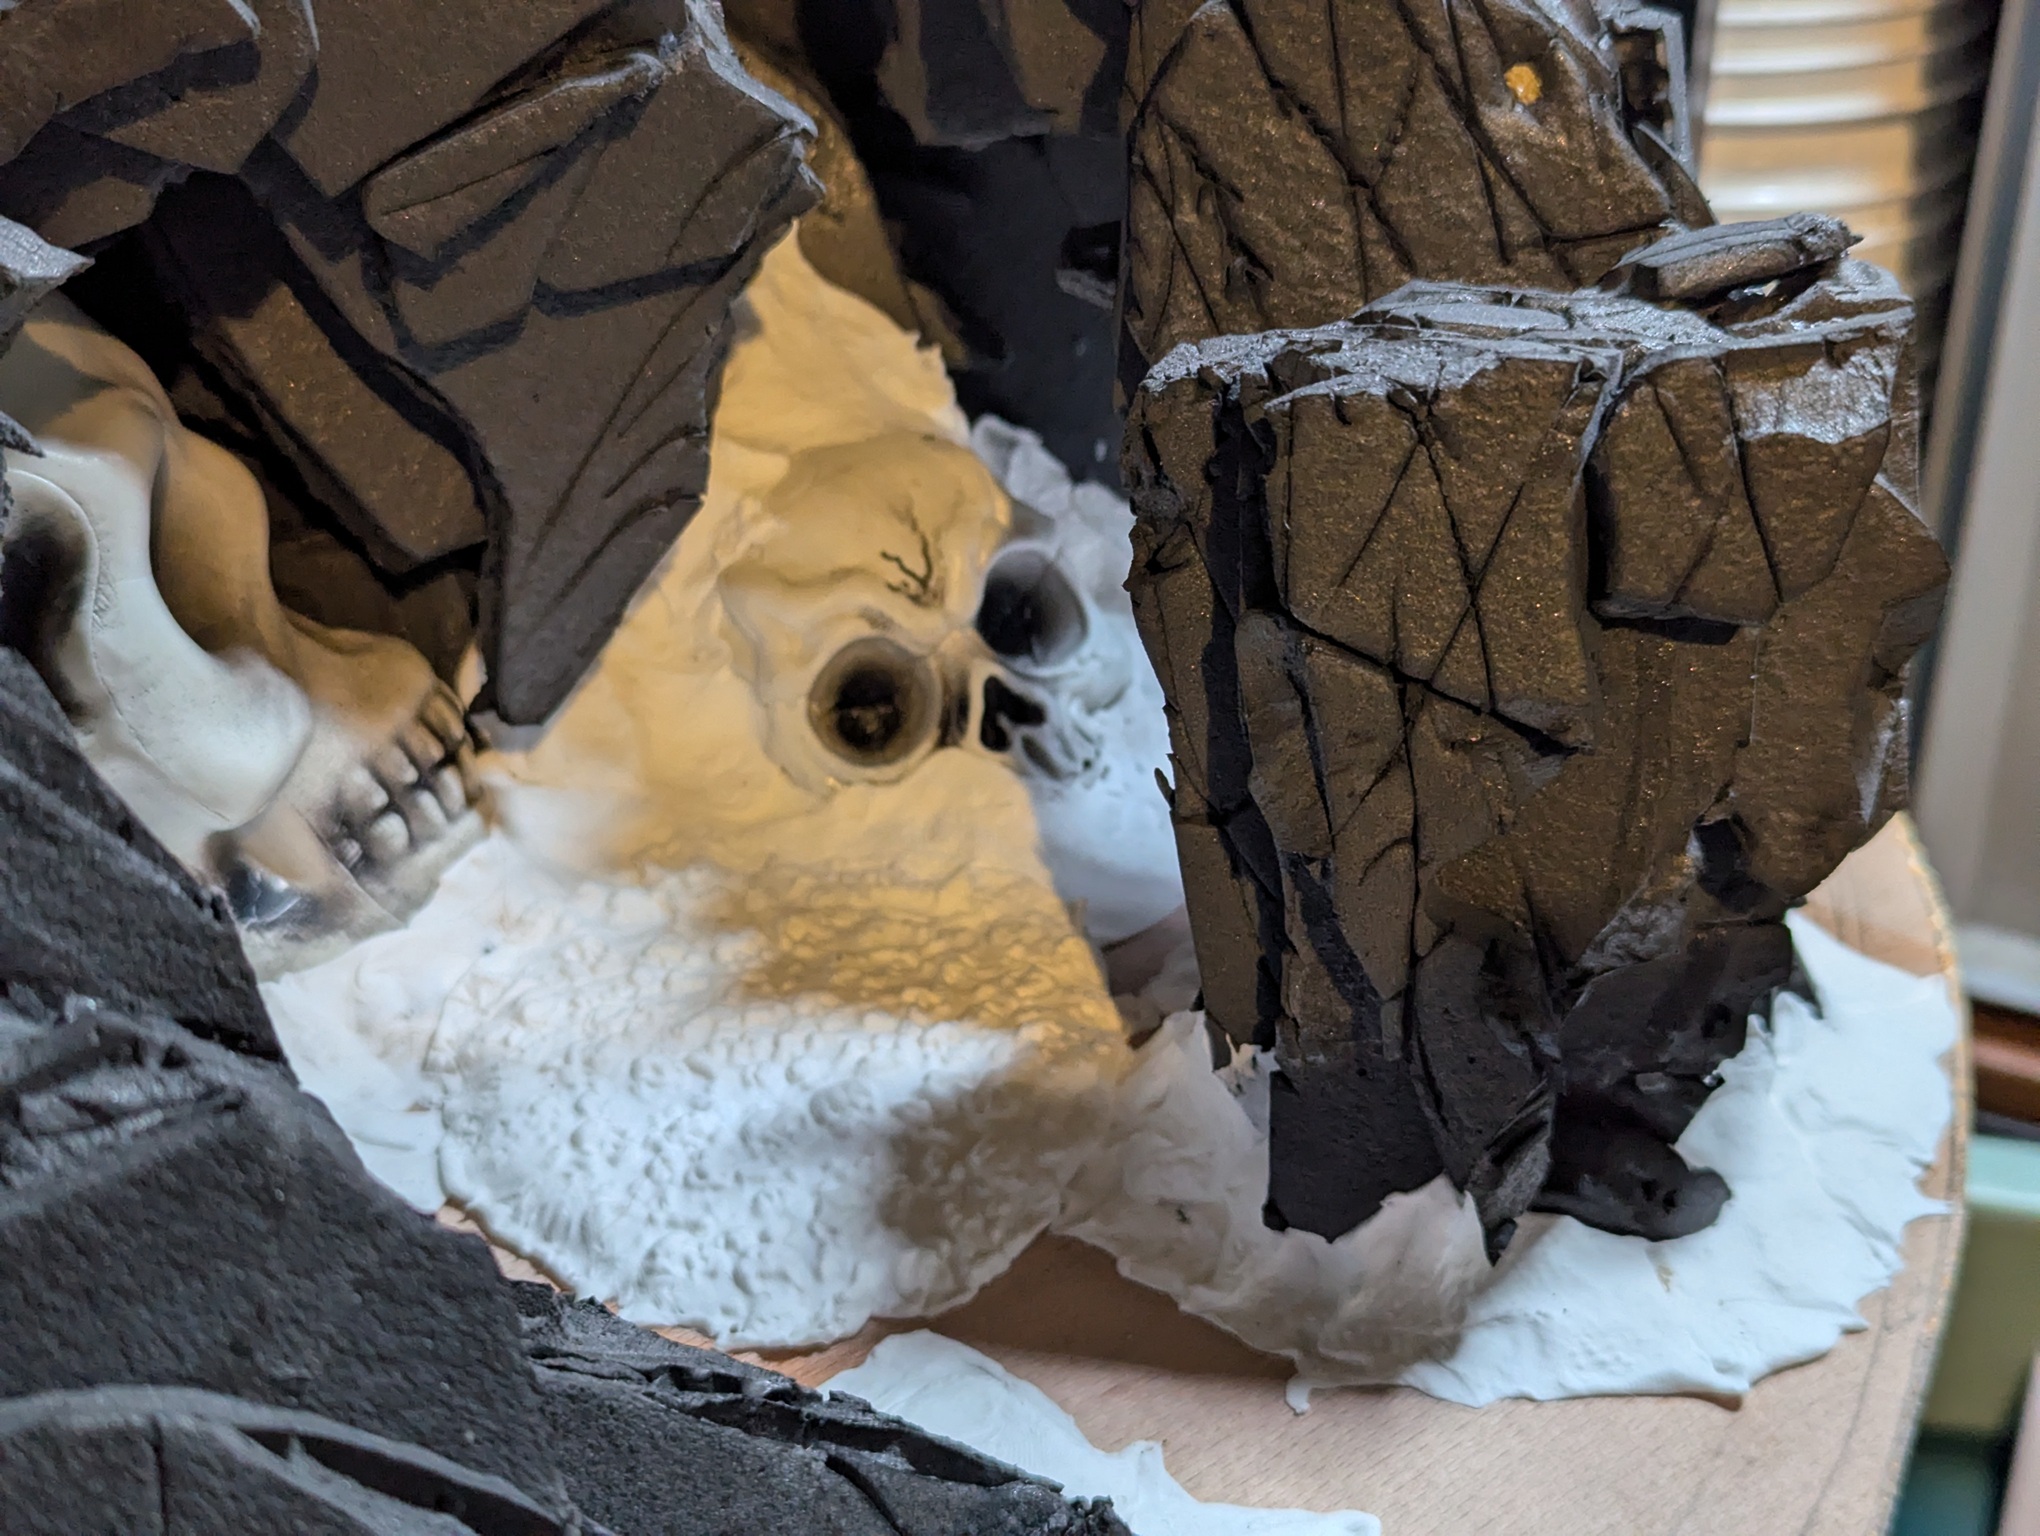
I finished building up the EVA foam and did a first detail pass by cutting diagonal and perpendicular across the foam stacks to emulate fault lines. This created a grid like pattern, which I attacked with tweezers adding depth and texture. The foam was sealed with a heat gun. I used foam clay to transition the EVA foam into the board, after heat sealing the foam the clay adhered to it far better than before.
Super glue releases hydrogen cyanide when heated, the surface of the foam should not reach temperatures high enough for this to be an issue though did this outdoors, used a respirator and left it for an hour to off gas.
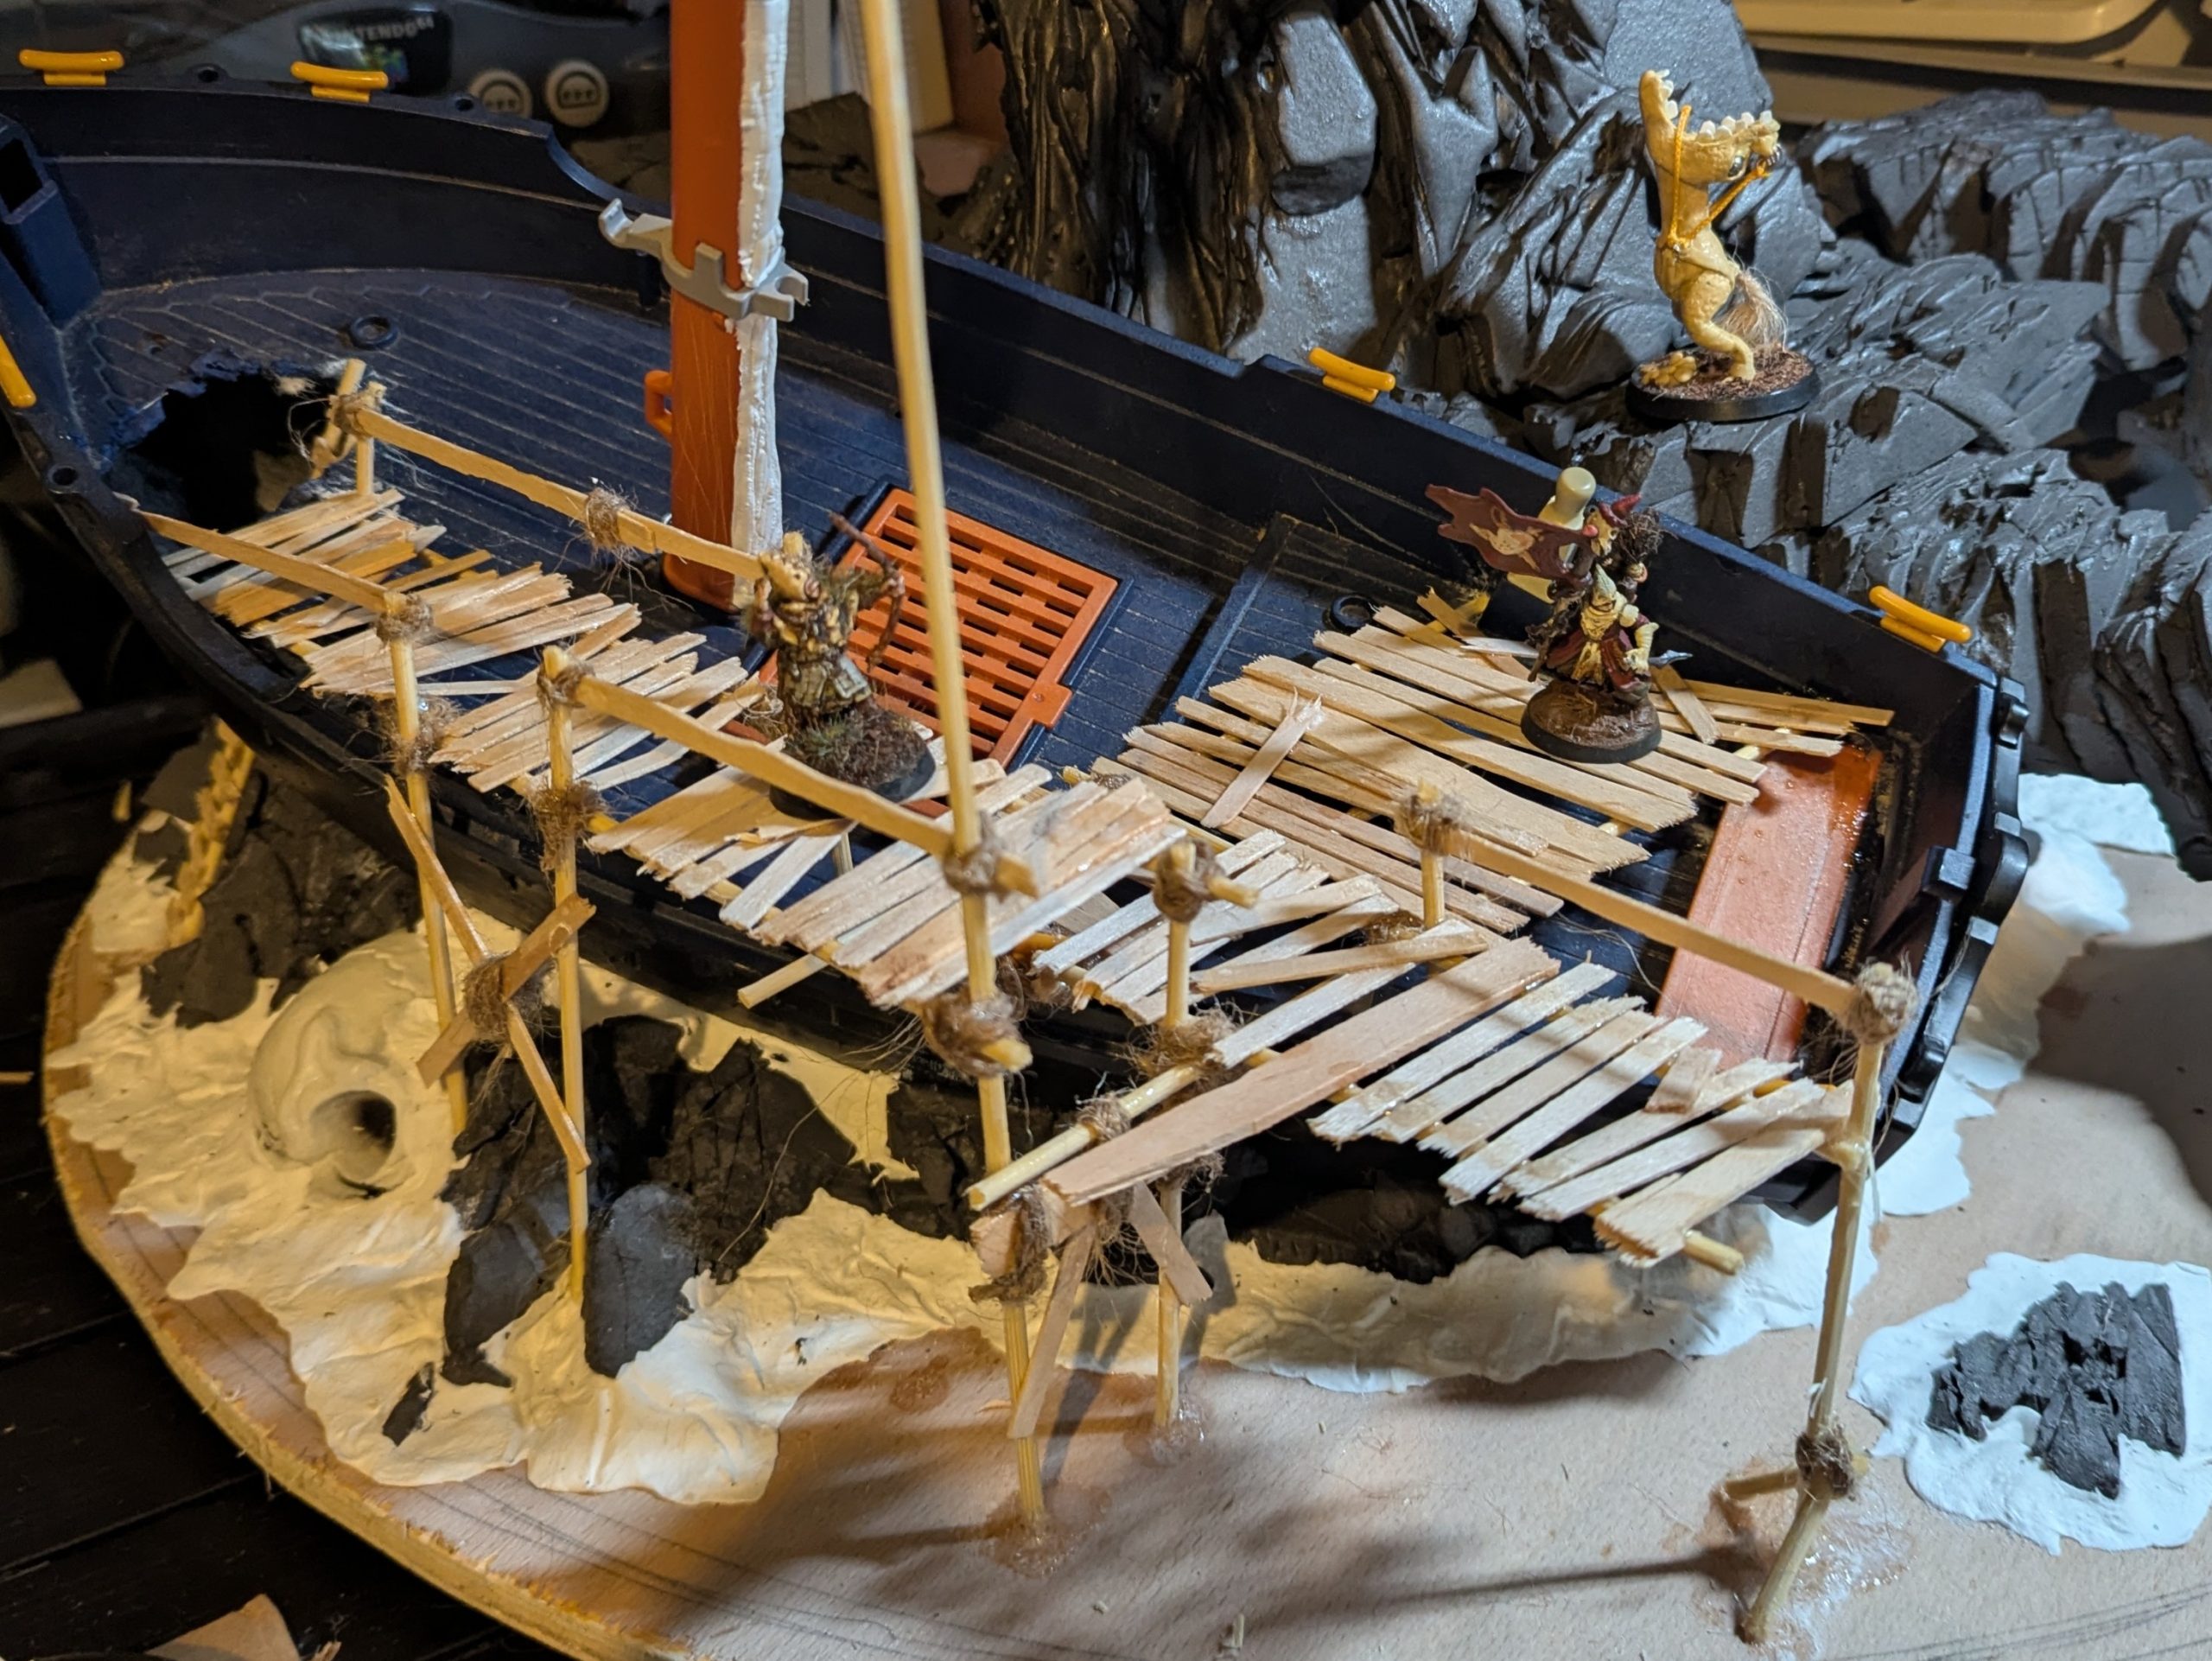
Next I started on the fishing settlement, these platforms that will form the bulk of the playable surface of the board and instantly provide a sense of scale.
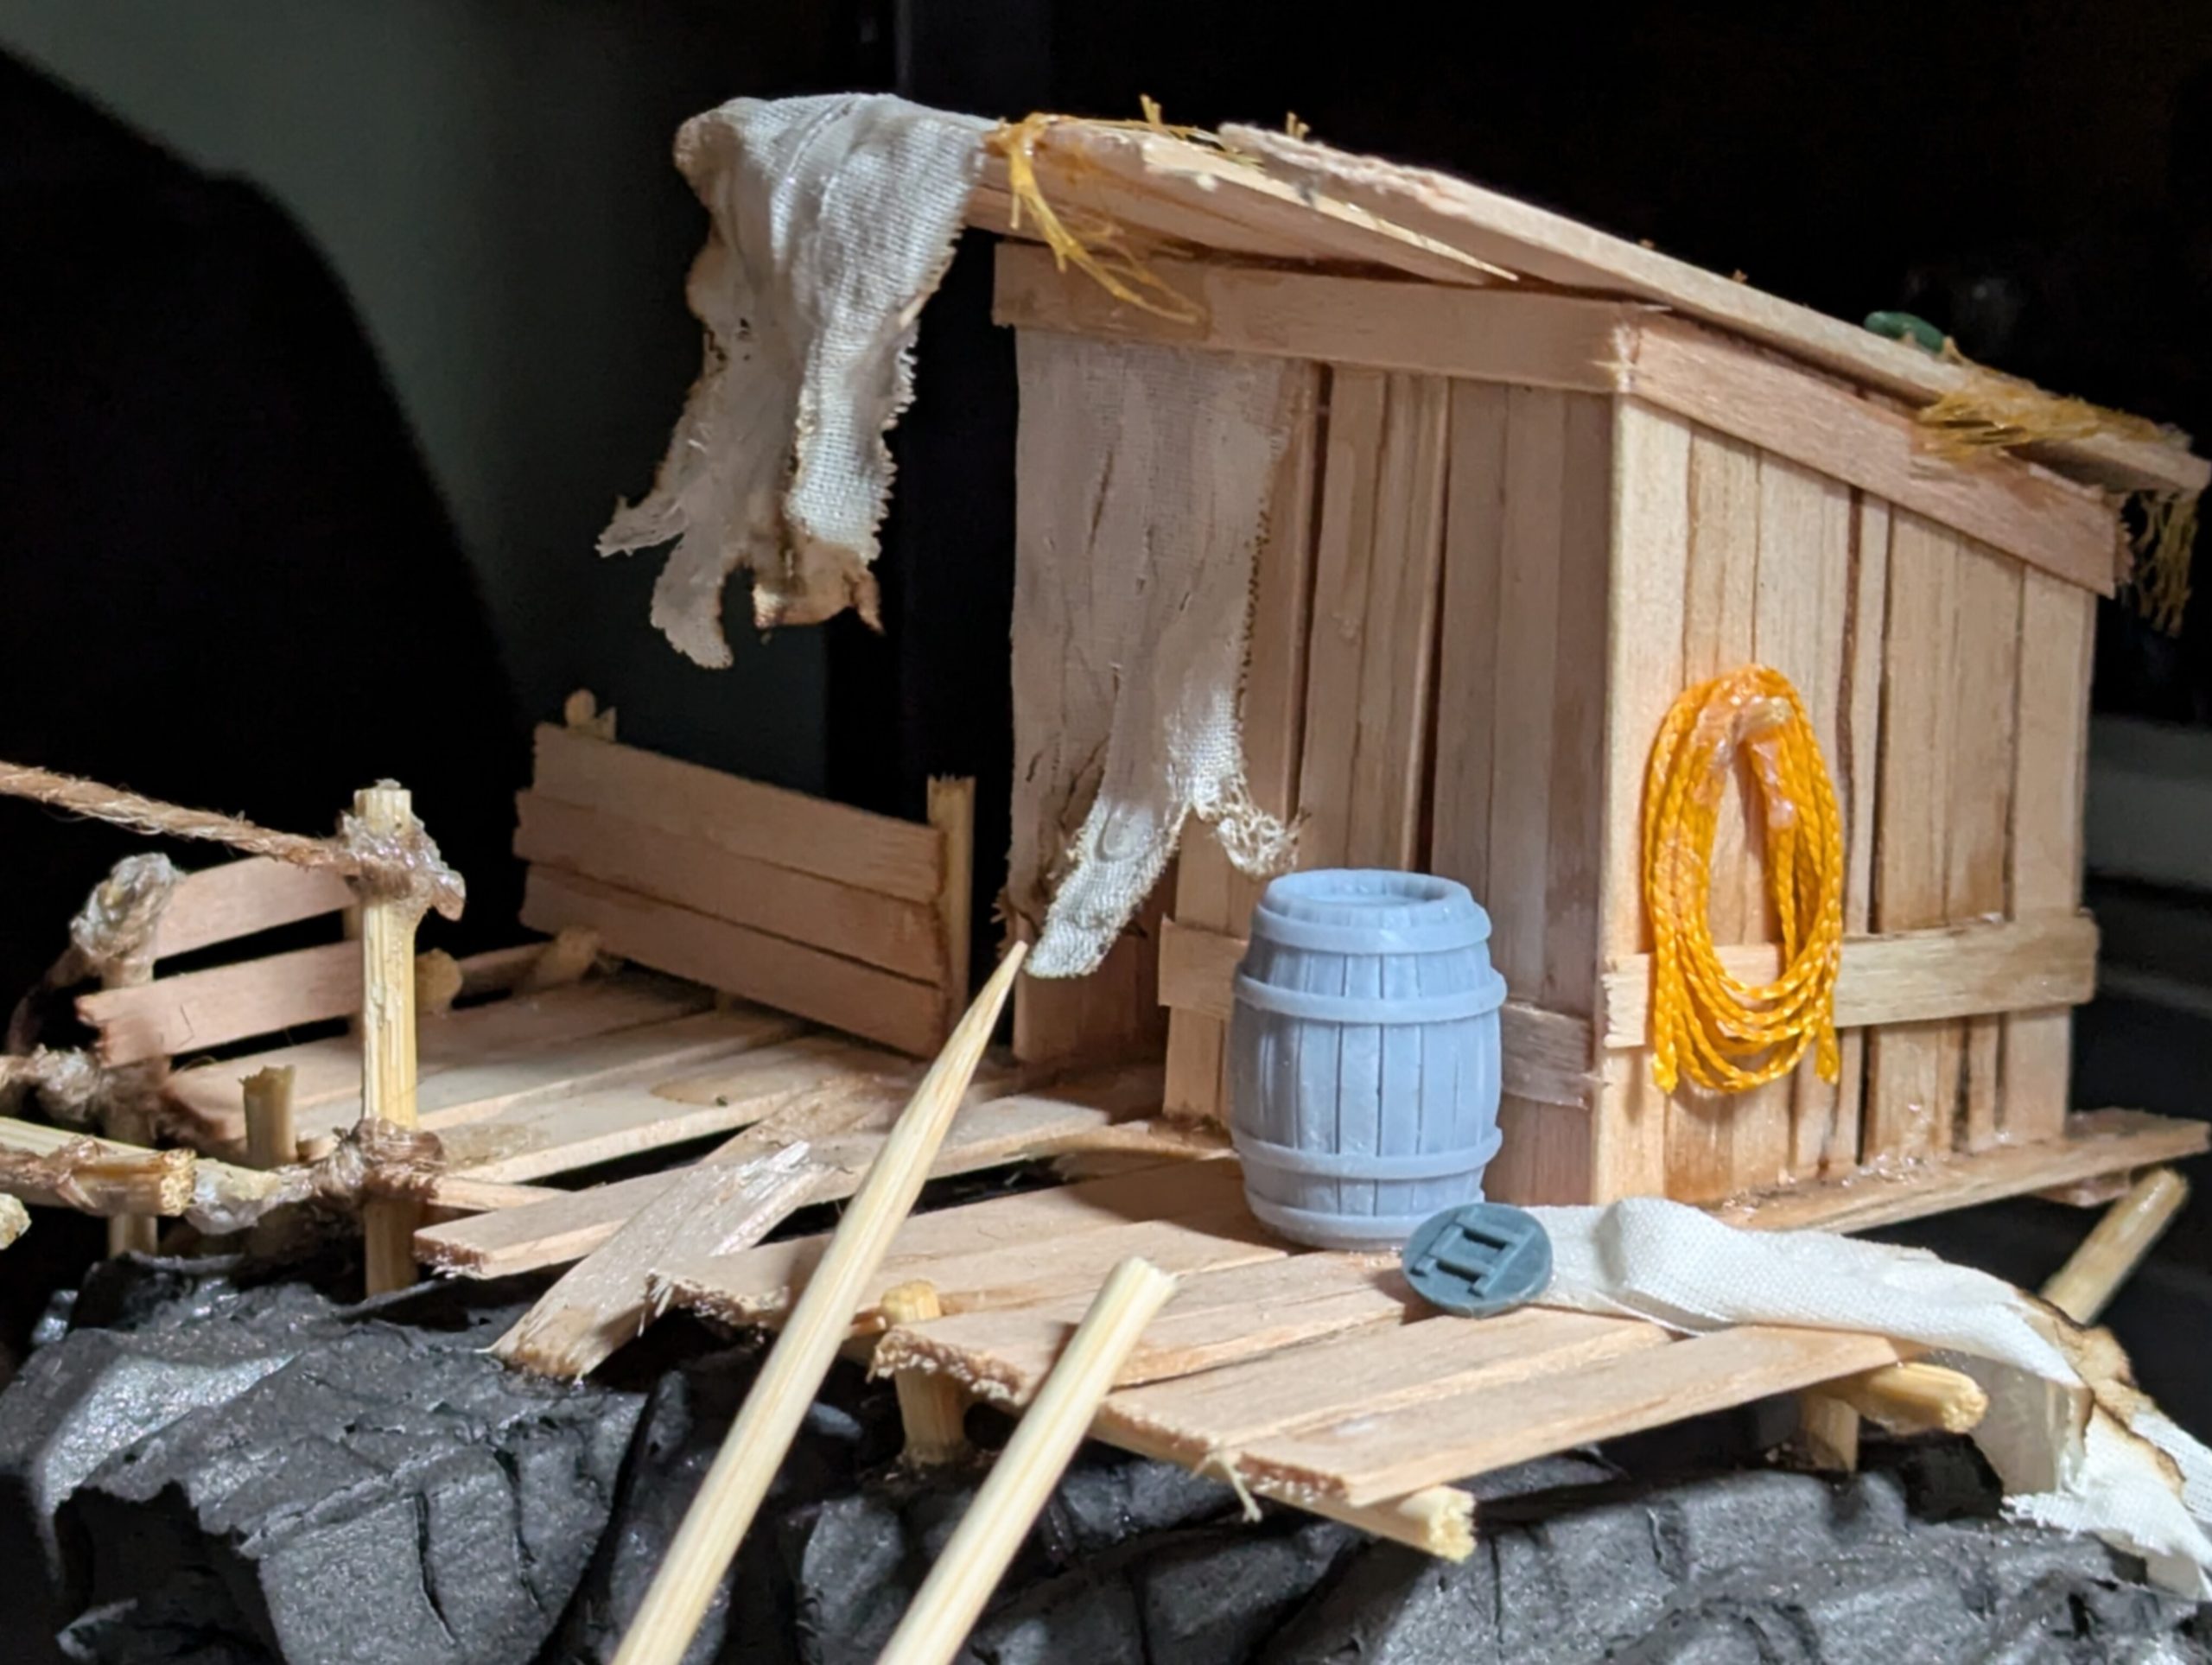
Dwellings
I used to hate cutting parts out of a project, even when I knew they weren’t working. It felt like a waste of time and materials. Now I see those sections as research and development I can carry into future projects. Thinking about it that way makes it much easier to rip things out, redo them, and confidently take on bigger projects.
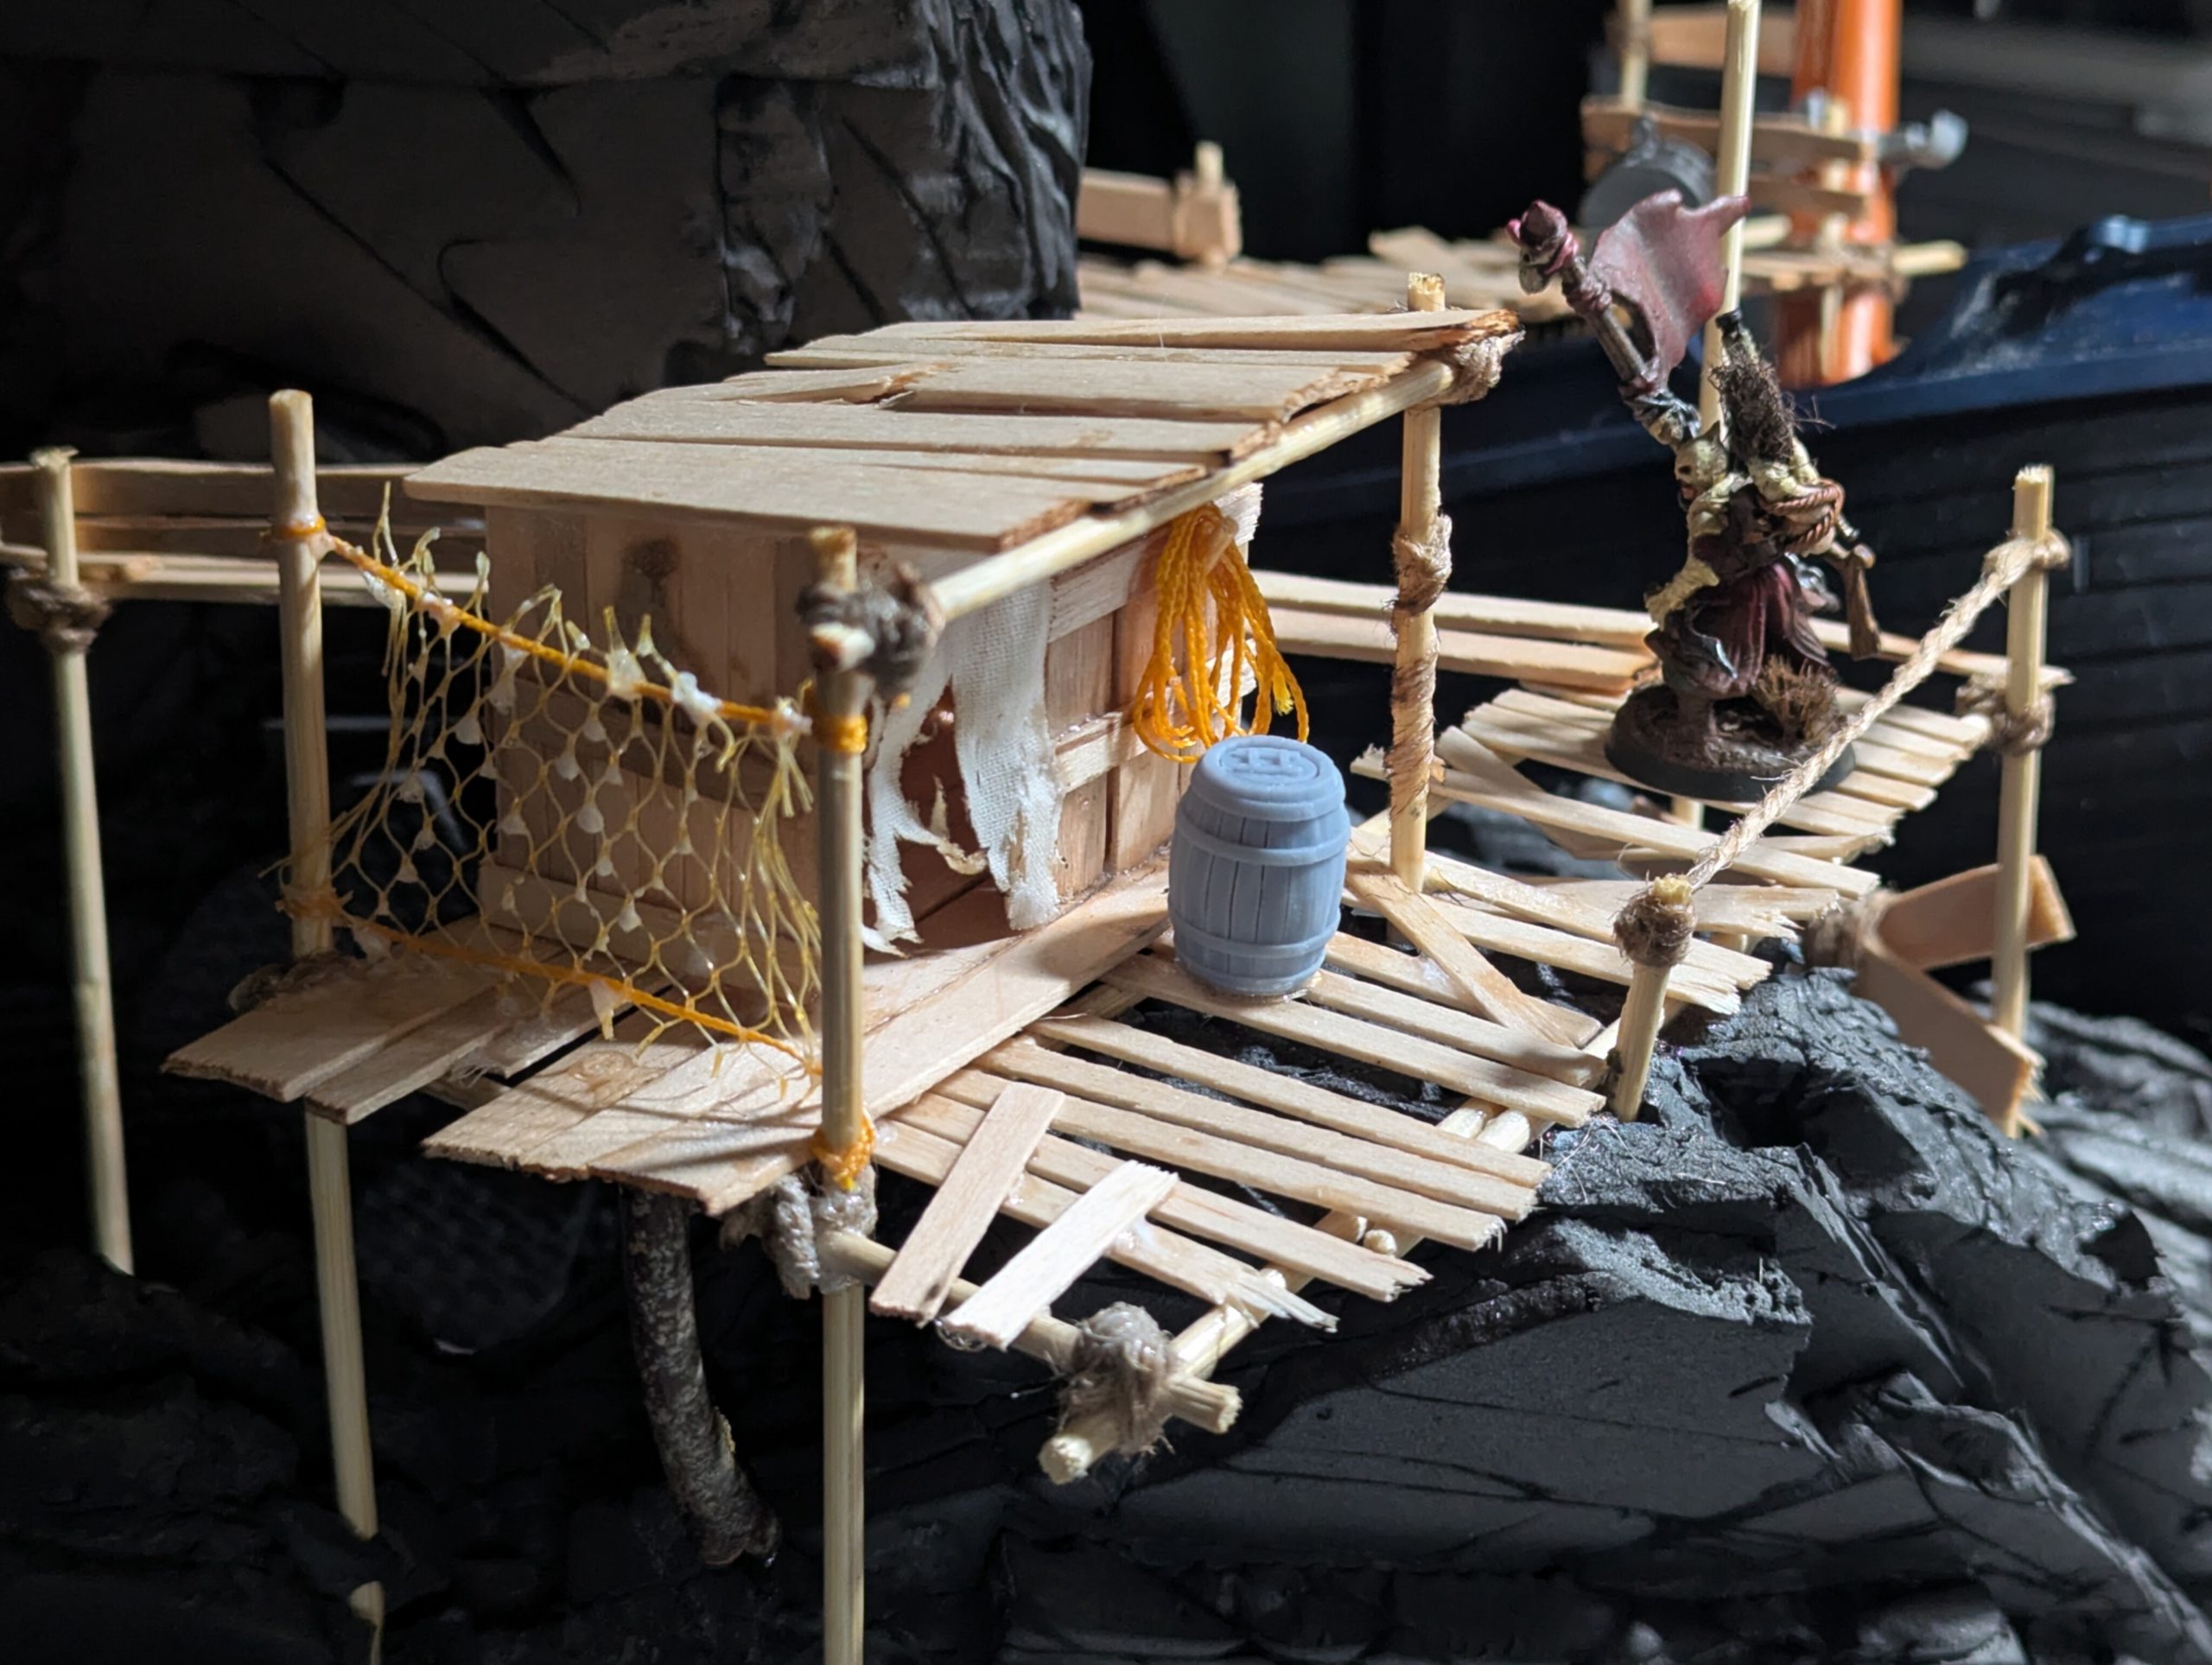
The huts took several attempts to achieve the feel I was looking for. It wasn’t until I looked up references that I was able to design something I was happy with.
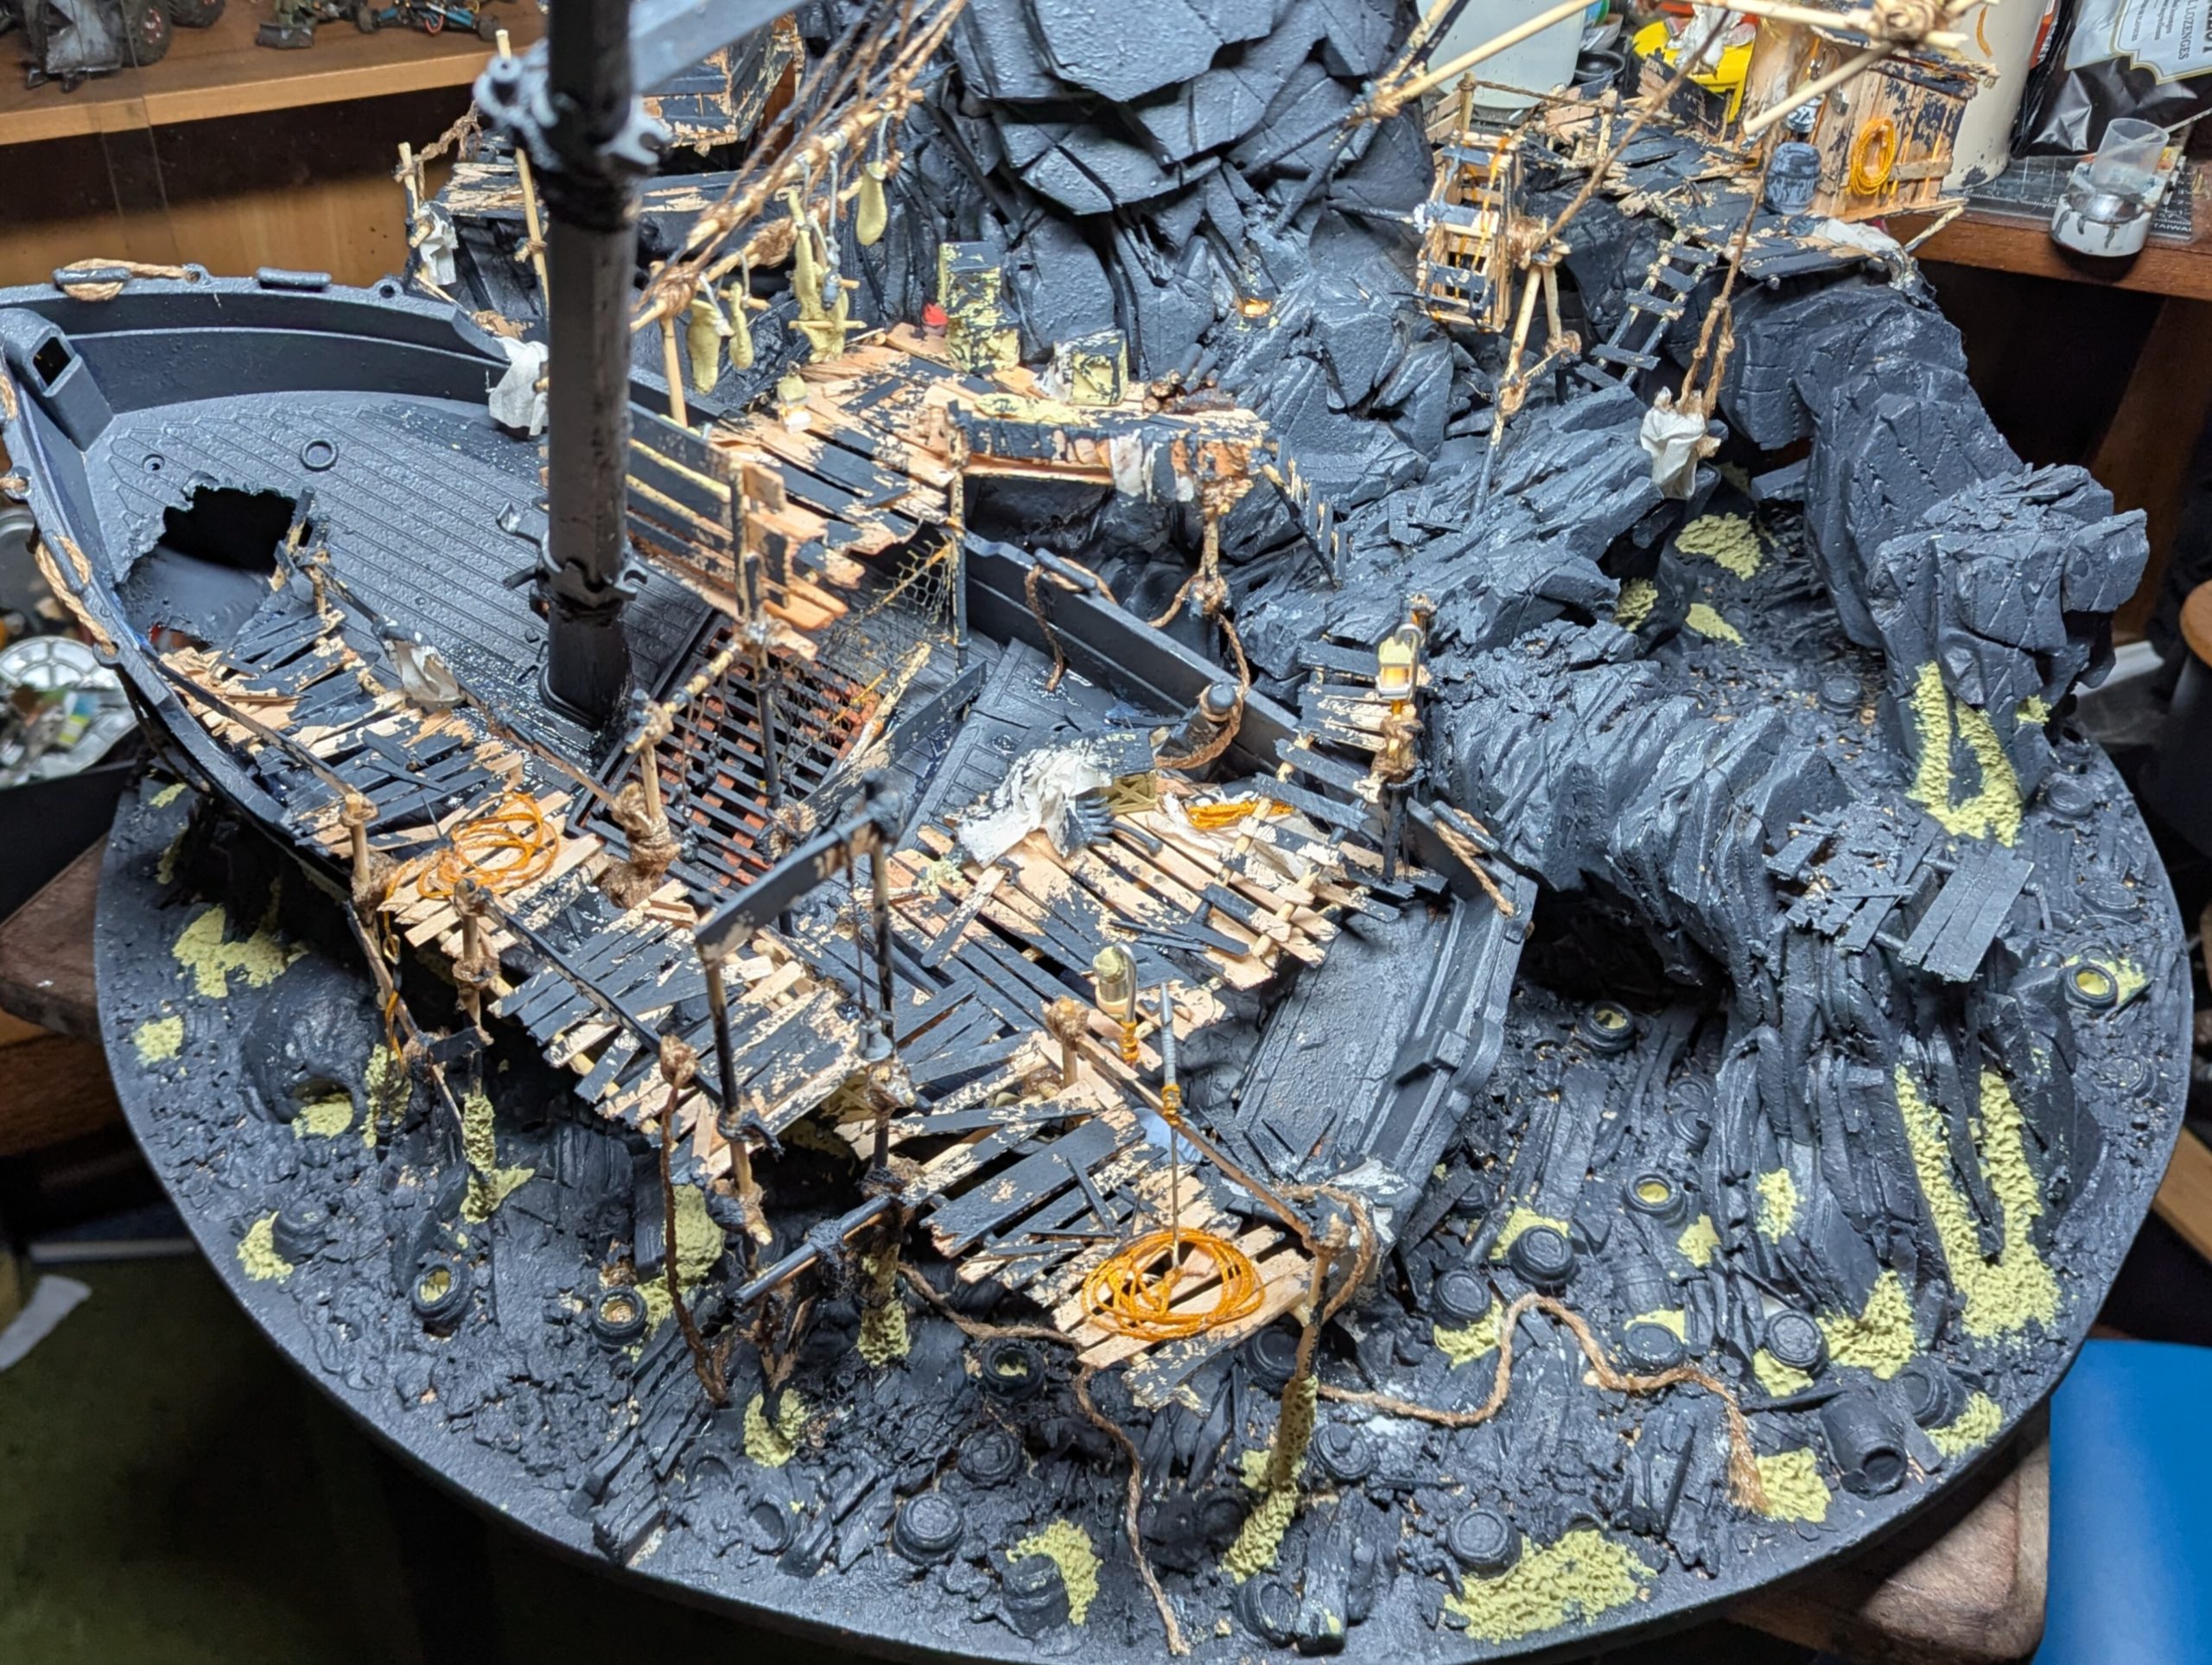
I continued to build out the ramshackle platforms and carve more realistic rock formations, constantly considering the visual balance and playability of the board as a whole. I also moved into my favorite phase—the detailing—where the storytelling begins.
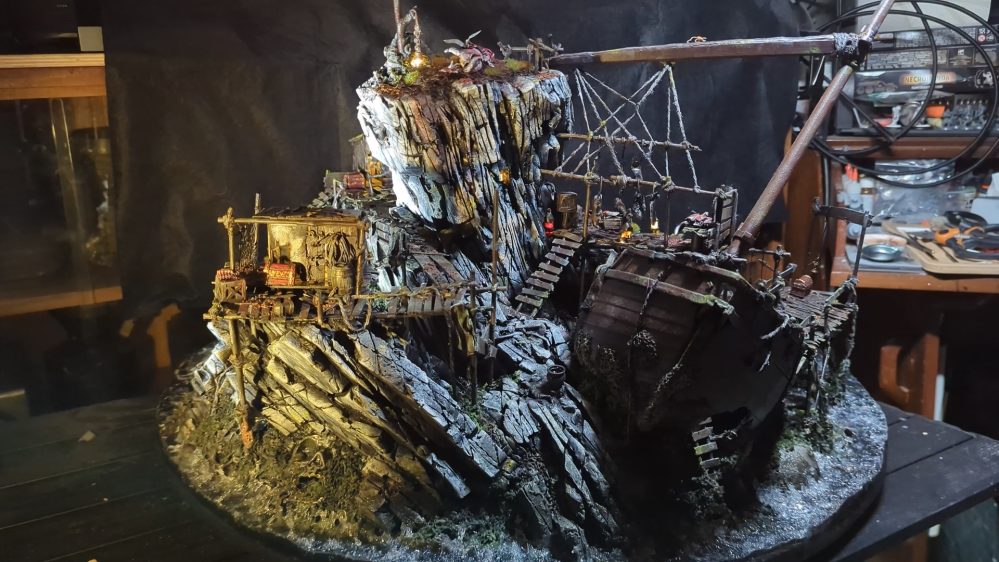
Bright Idea
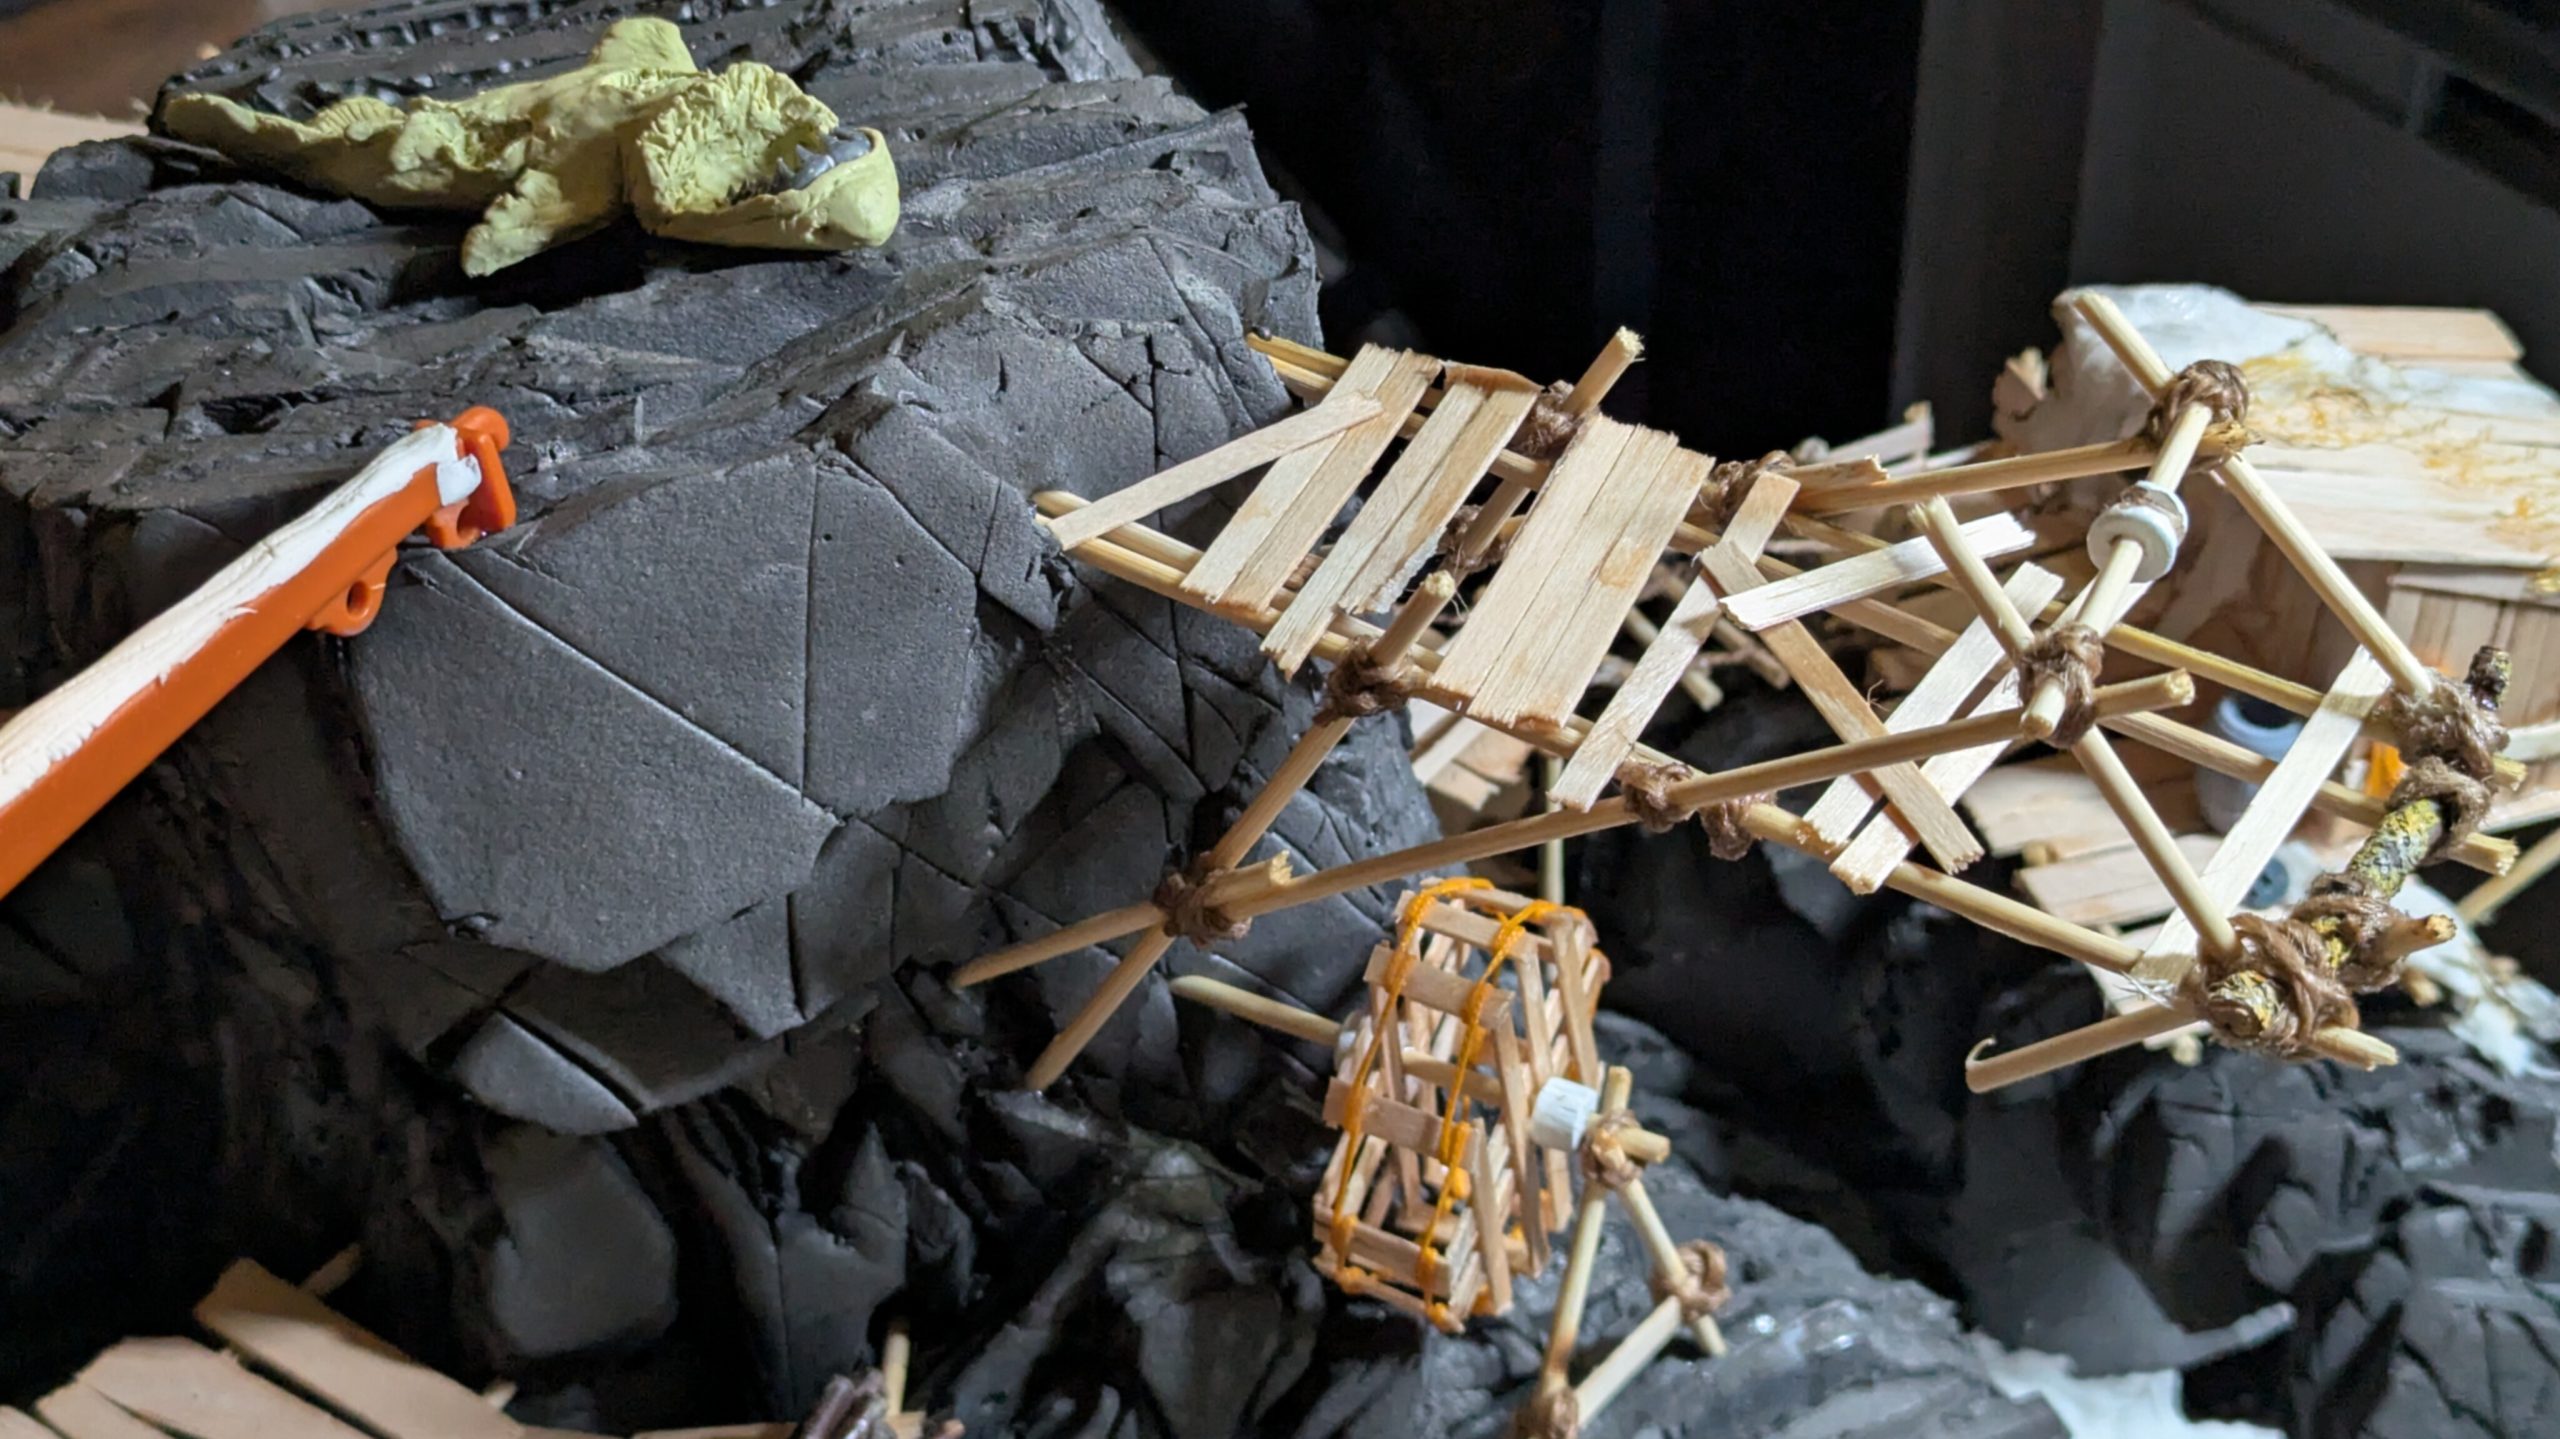
It took a while to decide how to tackle the high point of the board. I eventually decided that the inhabitants would have made a great sacrifice atop the highest column in an attempt to appease the forces that had brought the deadly fog upon them. I sculpted a decaying shark in milliput, using a jawbone from “dead animal bits” as a starting point, and added a treadwheel crane to hoist it up the cliff face.
I thought flickering candles and lamps would add an eerie atmosphere, so I picked up a set of flickering LED string lights. I drilled a hole in the underside of the board large enough to house a small power bank, then threaded the lights around the board. The cracks I had previously made in the foam provided the perfect way to hide the wires. This took the best part of an evening; I kept the lights powered up and worked carefully so I would catch any breaks in the thin wire, but it held up well.
Barrels of fun
To imply that the ship’s cargo had been lost at sea, I wanted to cover the surrounding area with partially submerged barrels. I don’t own a resin printer, so I decided to take casts from the few remaining barrels I had from a past project. I wasn’t sure if Oyumaru would hold up, but 12+ rounds of casting later I can confirm that it does.
I went through a stick of Milliput recasting the barrel sections, working every 4–6 hours. I took extra care to apply a thin layer to the surface of the mold before filling the entire cavity. I found the inevitable blemishes and inconsistencies to be no issue, free weathering!
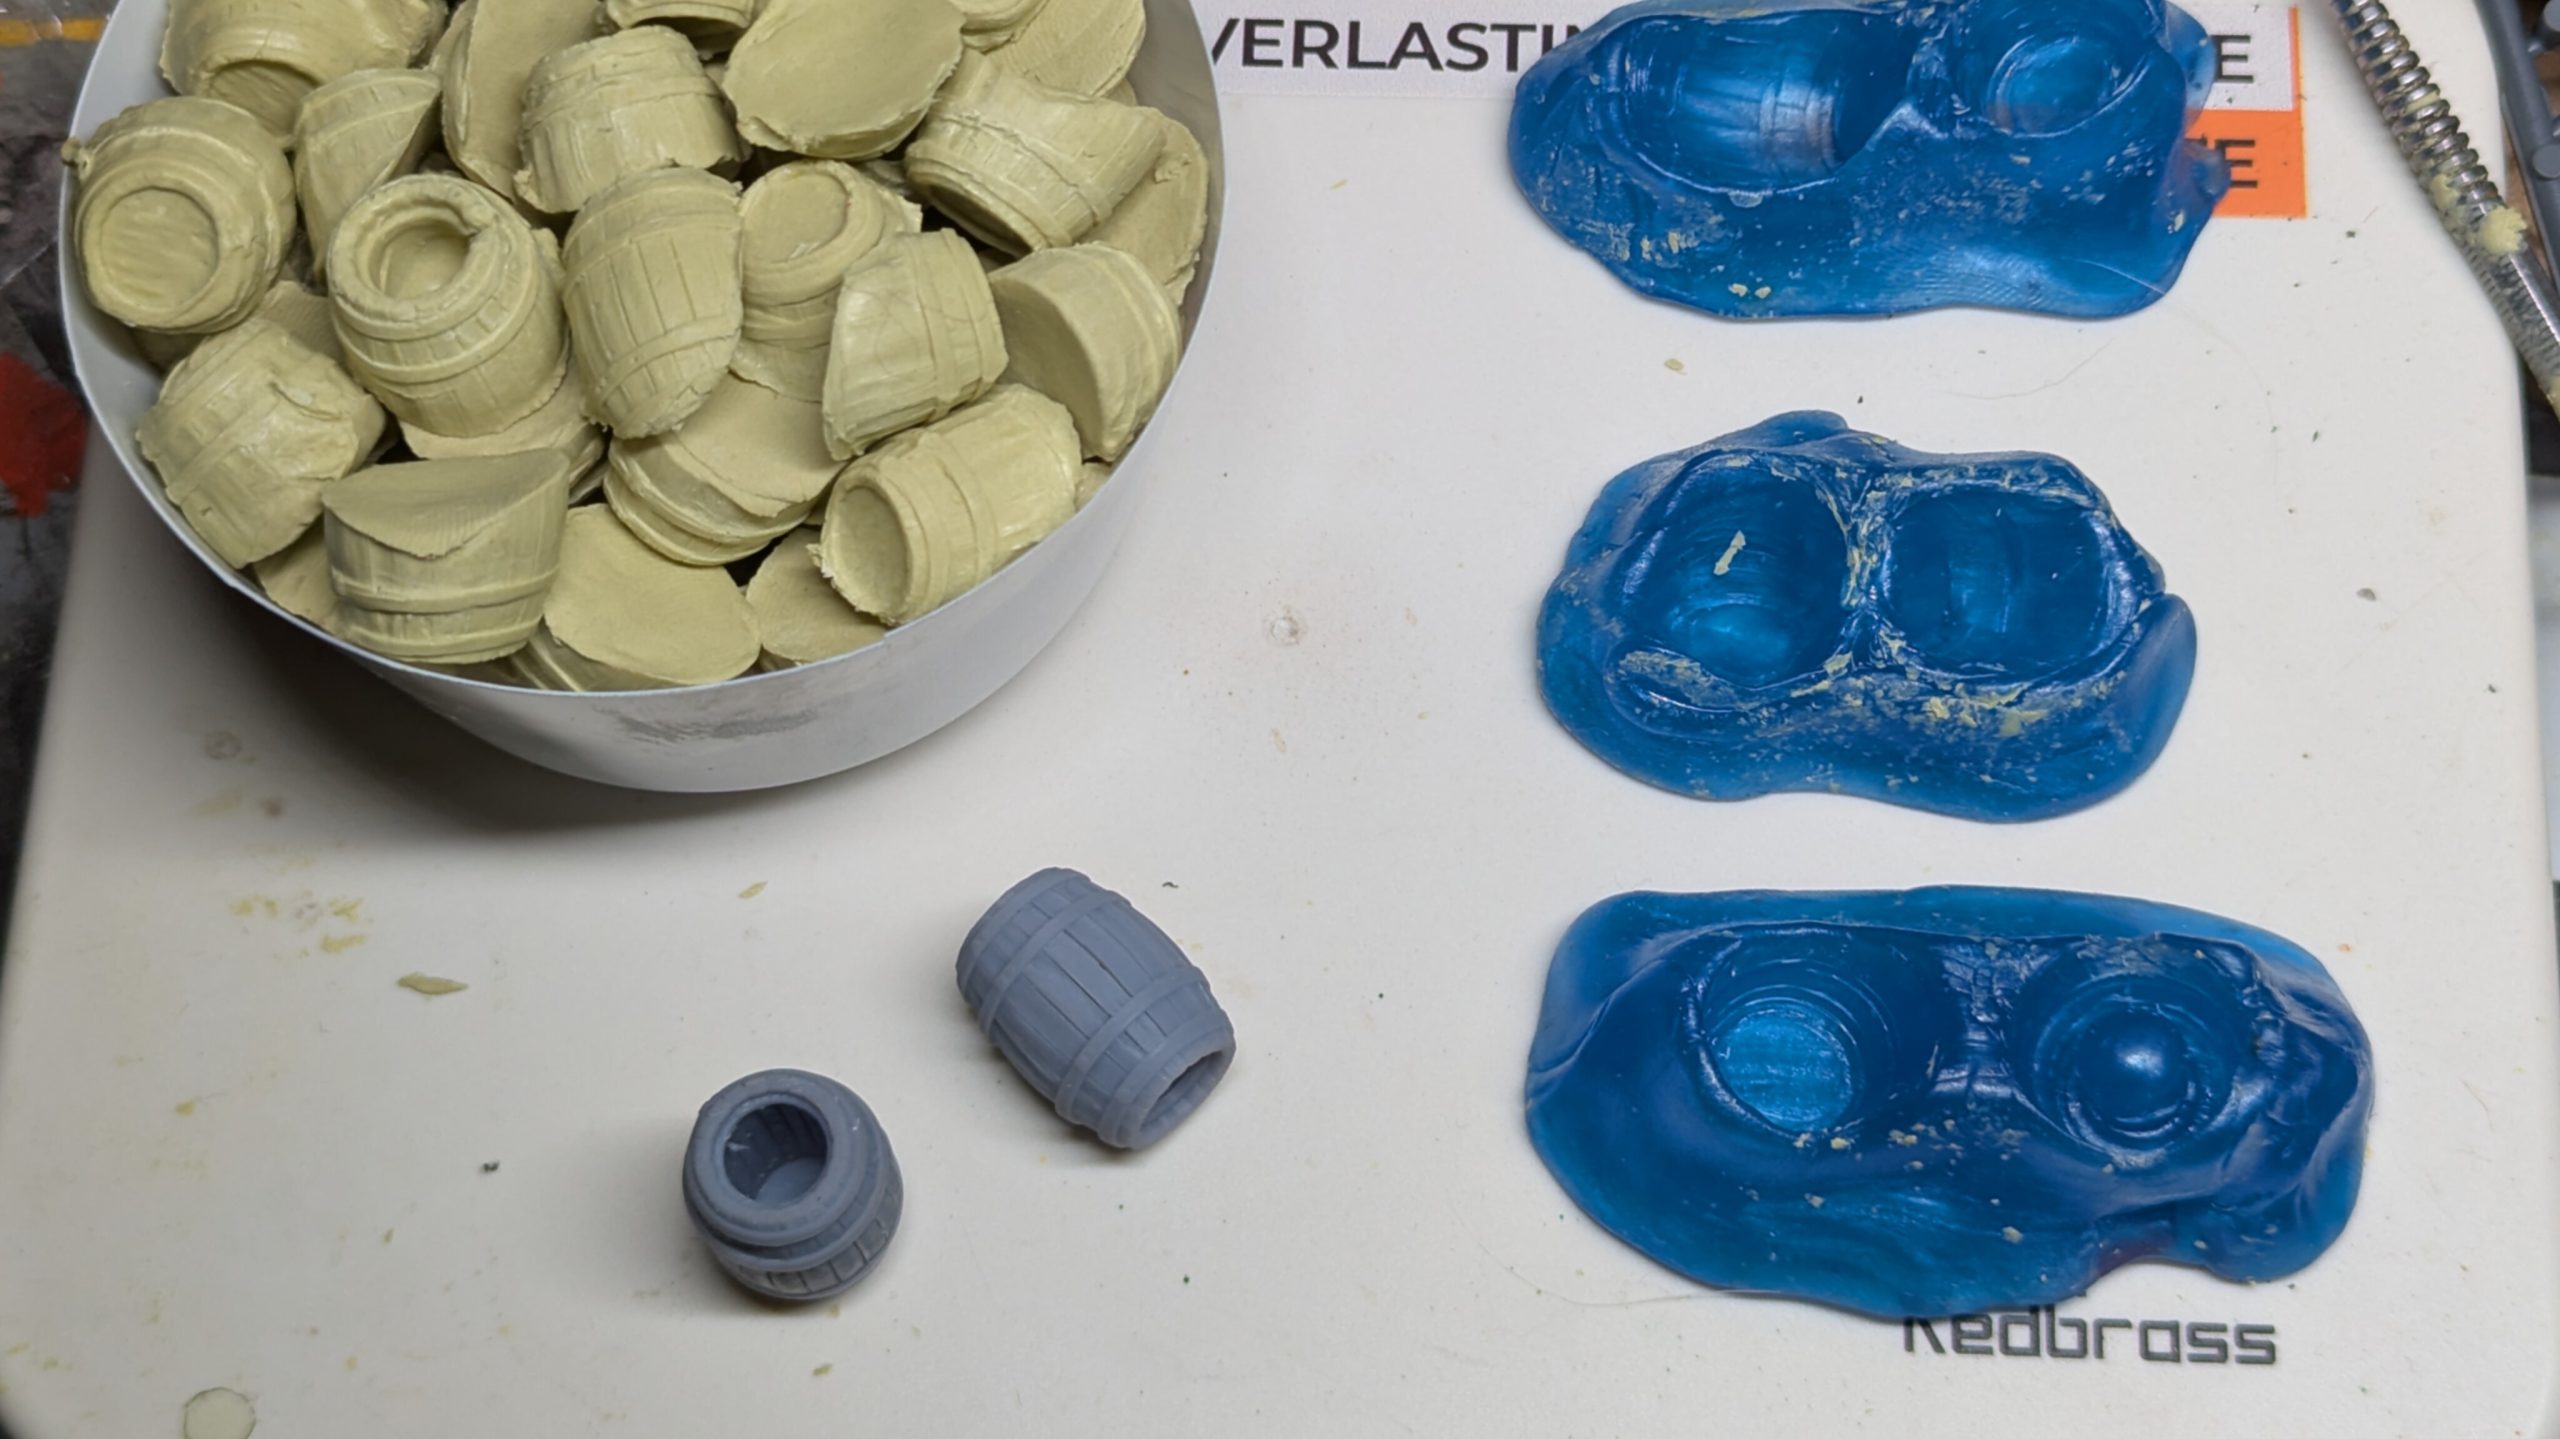
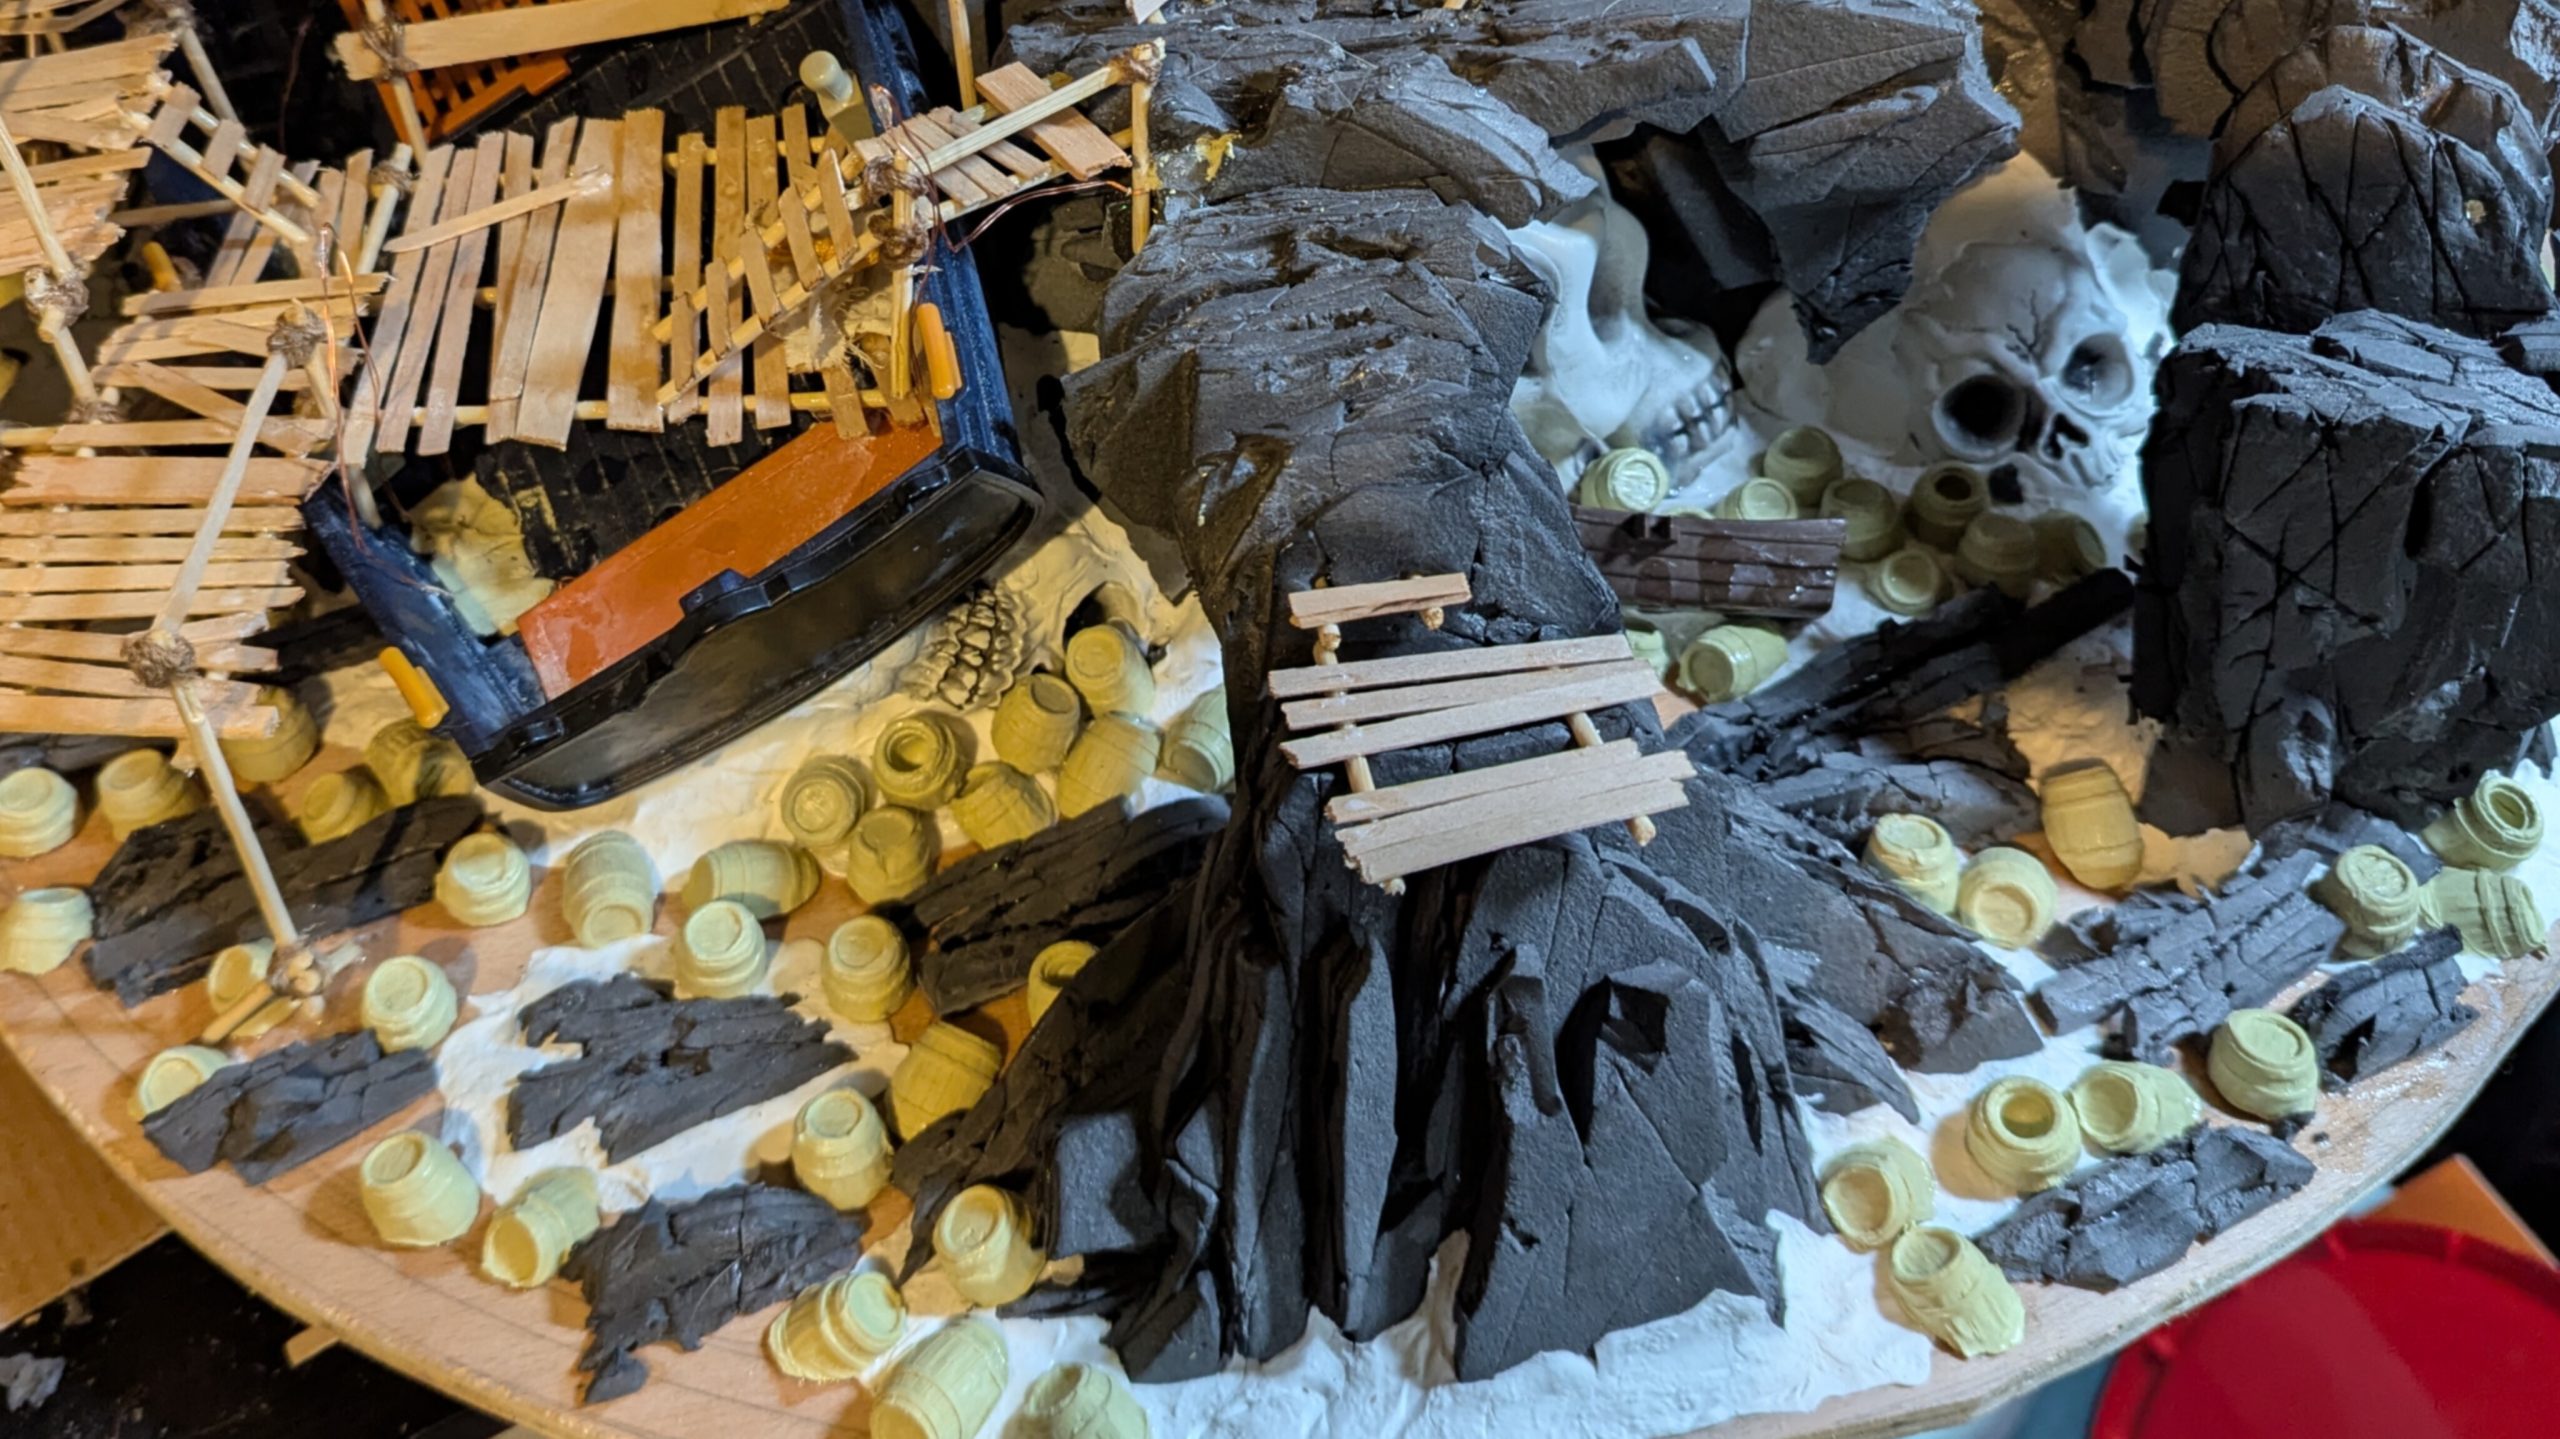
The barrel casts were randomly glued in place, then small EVA foam rock formations were selectively added before covering the whole area in layers of vermiculite, sand, and baking soda.
Barnacling
Over the busy festive period I grabbed time where I could and documented very little. Details were added throughout; I created lamps from polystyrene extrusion, “fleshed” out the butchery table and drying racks, draped rope and canvas over most surfaces, etc.
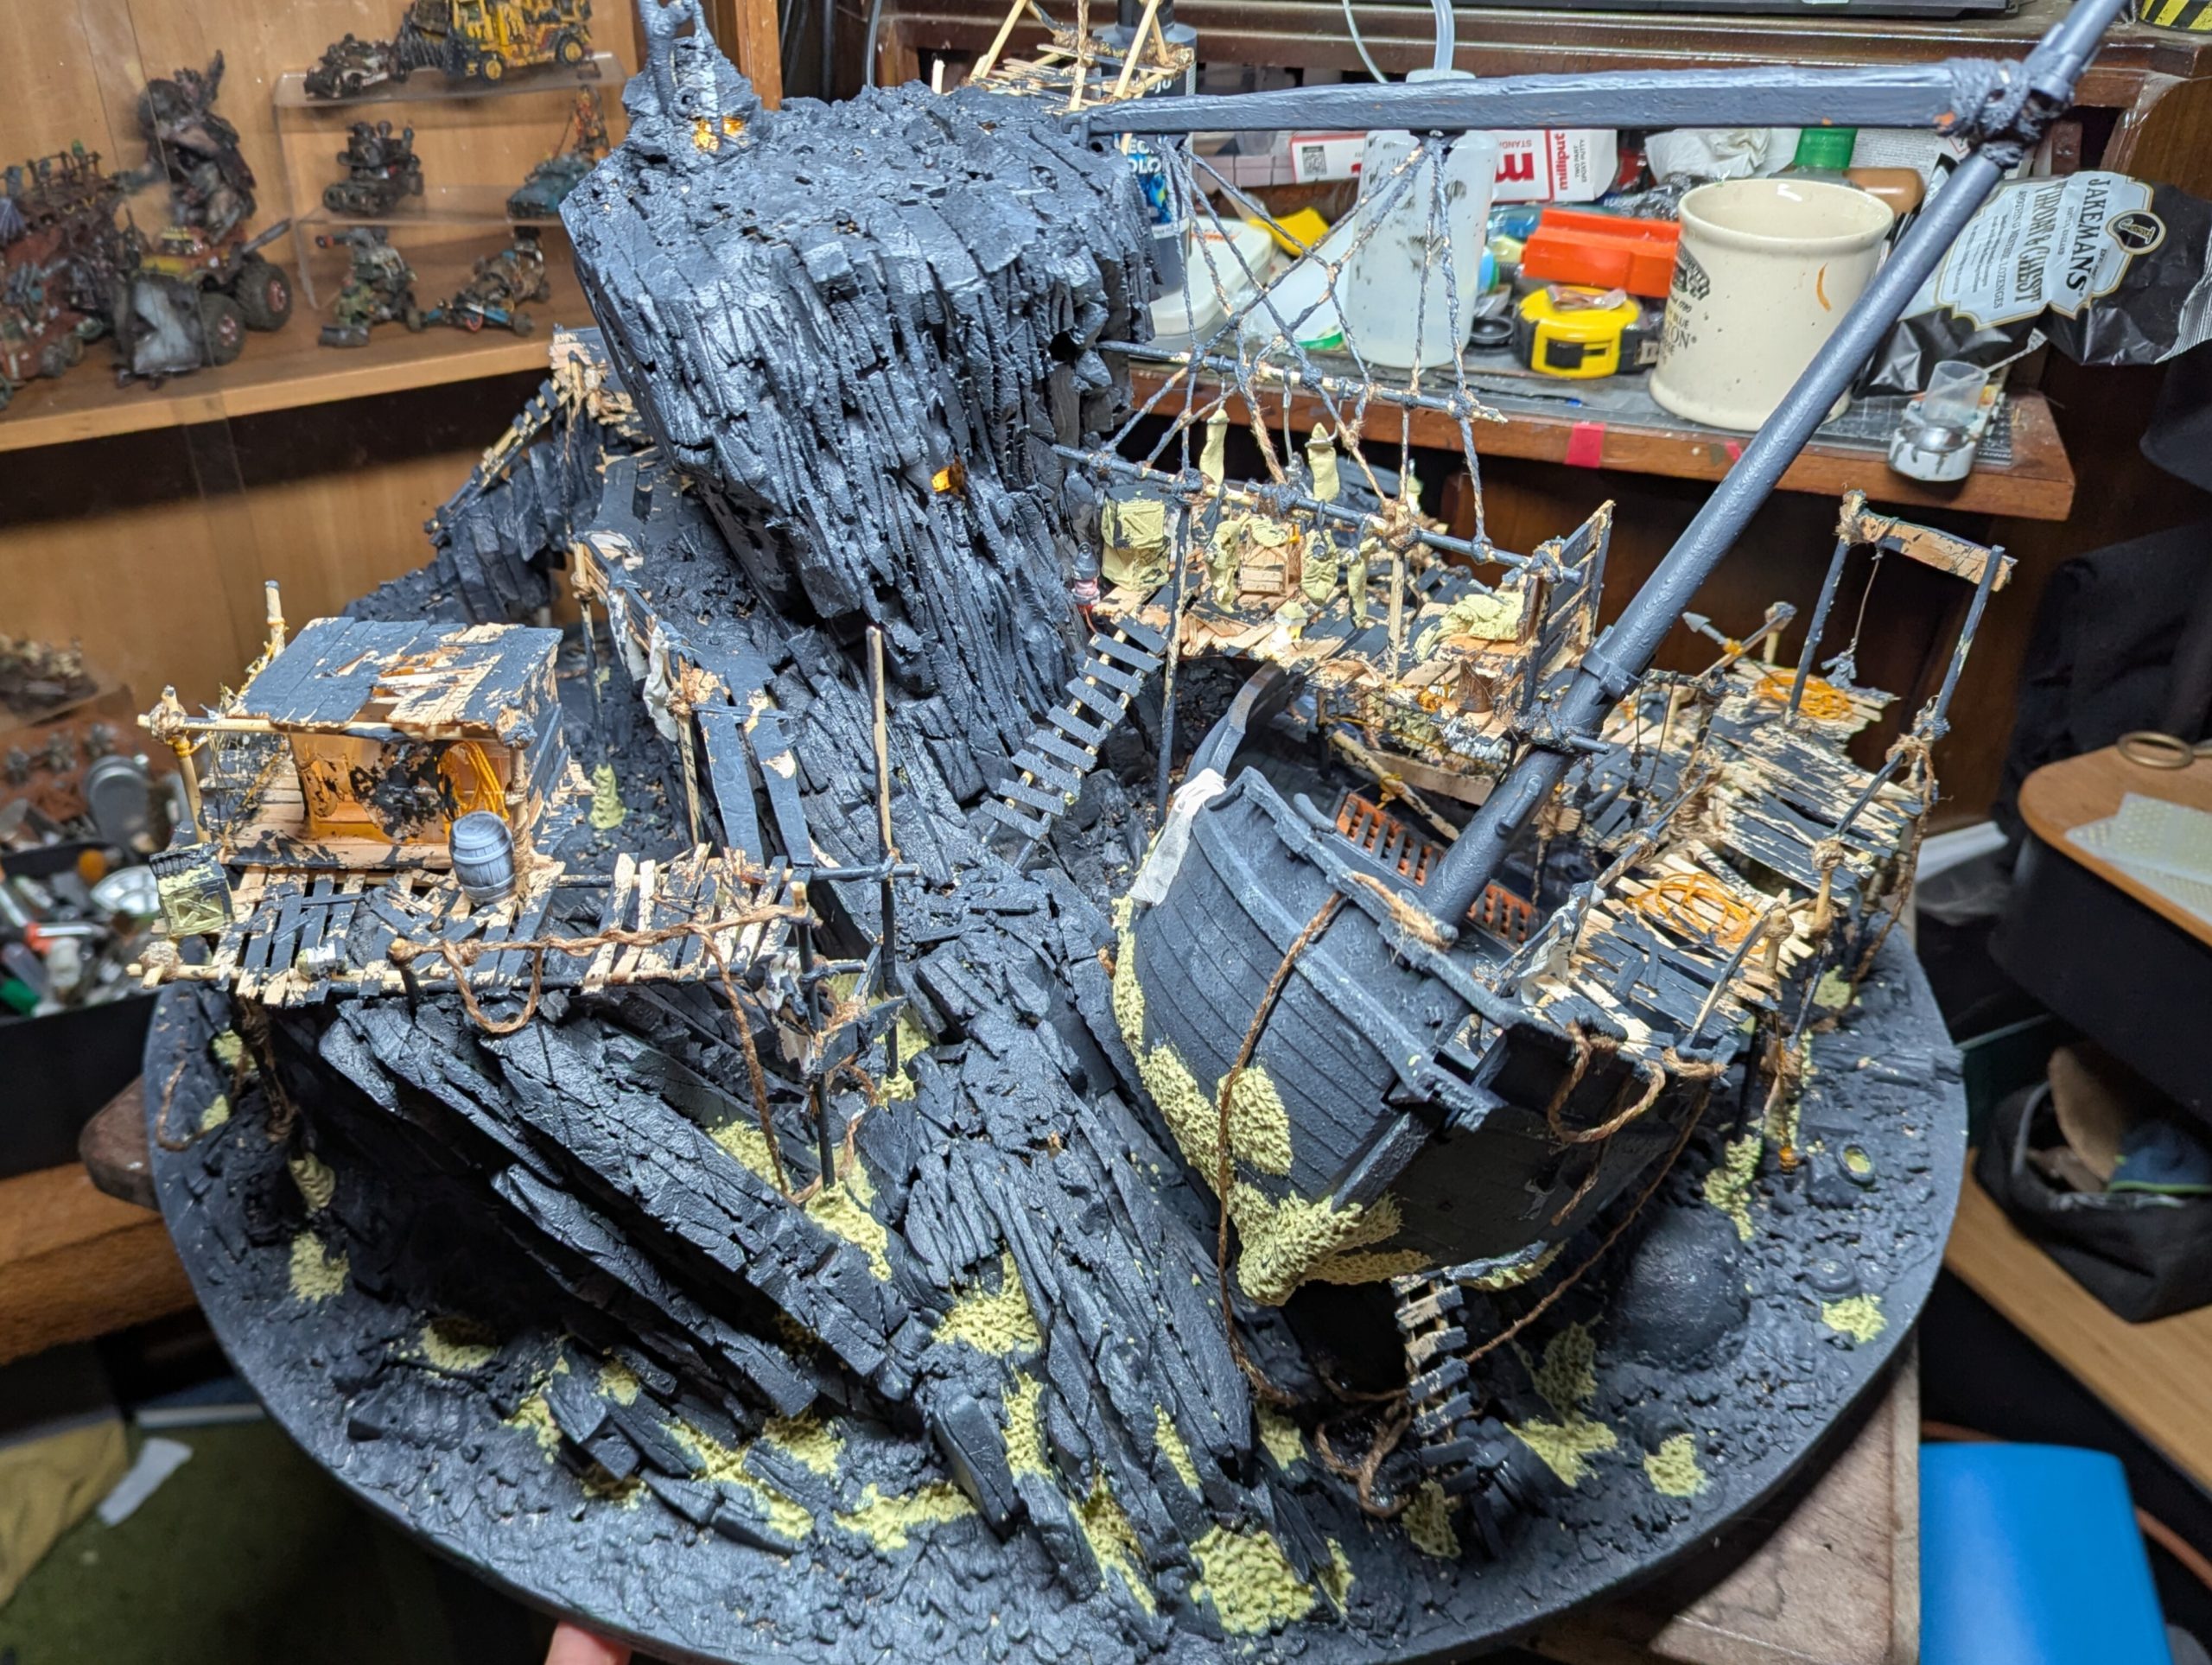
Next I sealed the EVA foam rock faces with a mixture of equal parts PVA, acrylic paint, gesso, and water, with a few drops of dish soap to aid surface tension.
I then decided I wanted more texture on the rock faces and spent over five hours adding milliput barnacles, using a selection of ball styluses, to every recess that I imagined would regularly be submerged by tides. I applied the milliput in small lumps and used the larger stylus to push them into shape and add deep recesses then about 30 mins later as it began to cure I textured the raised areas further with smaller styluses.