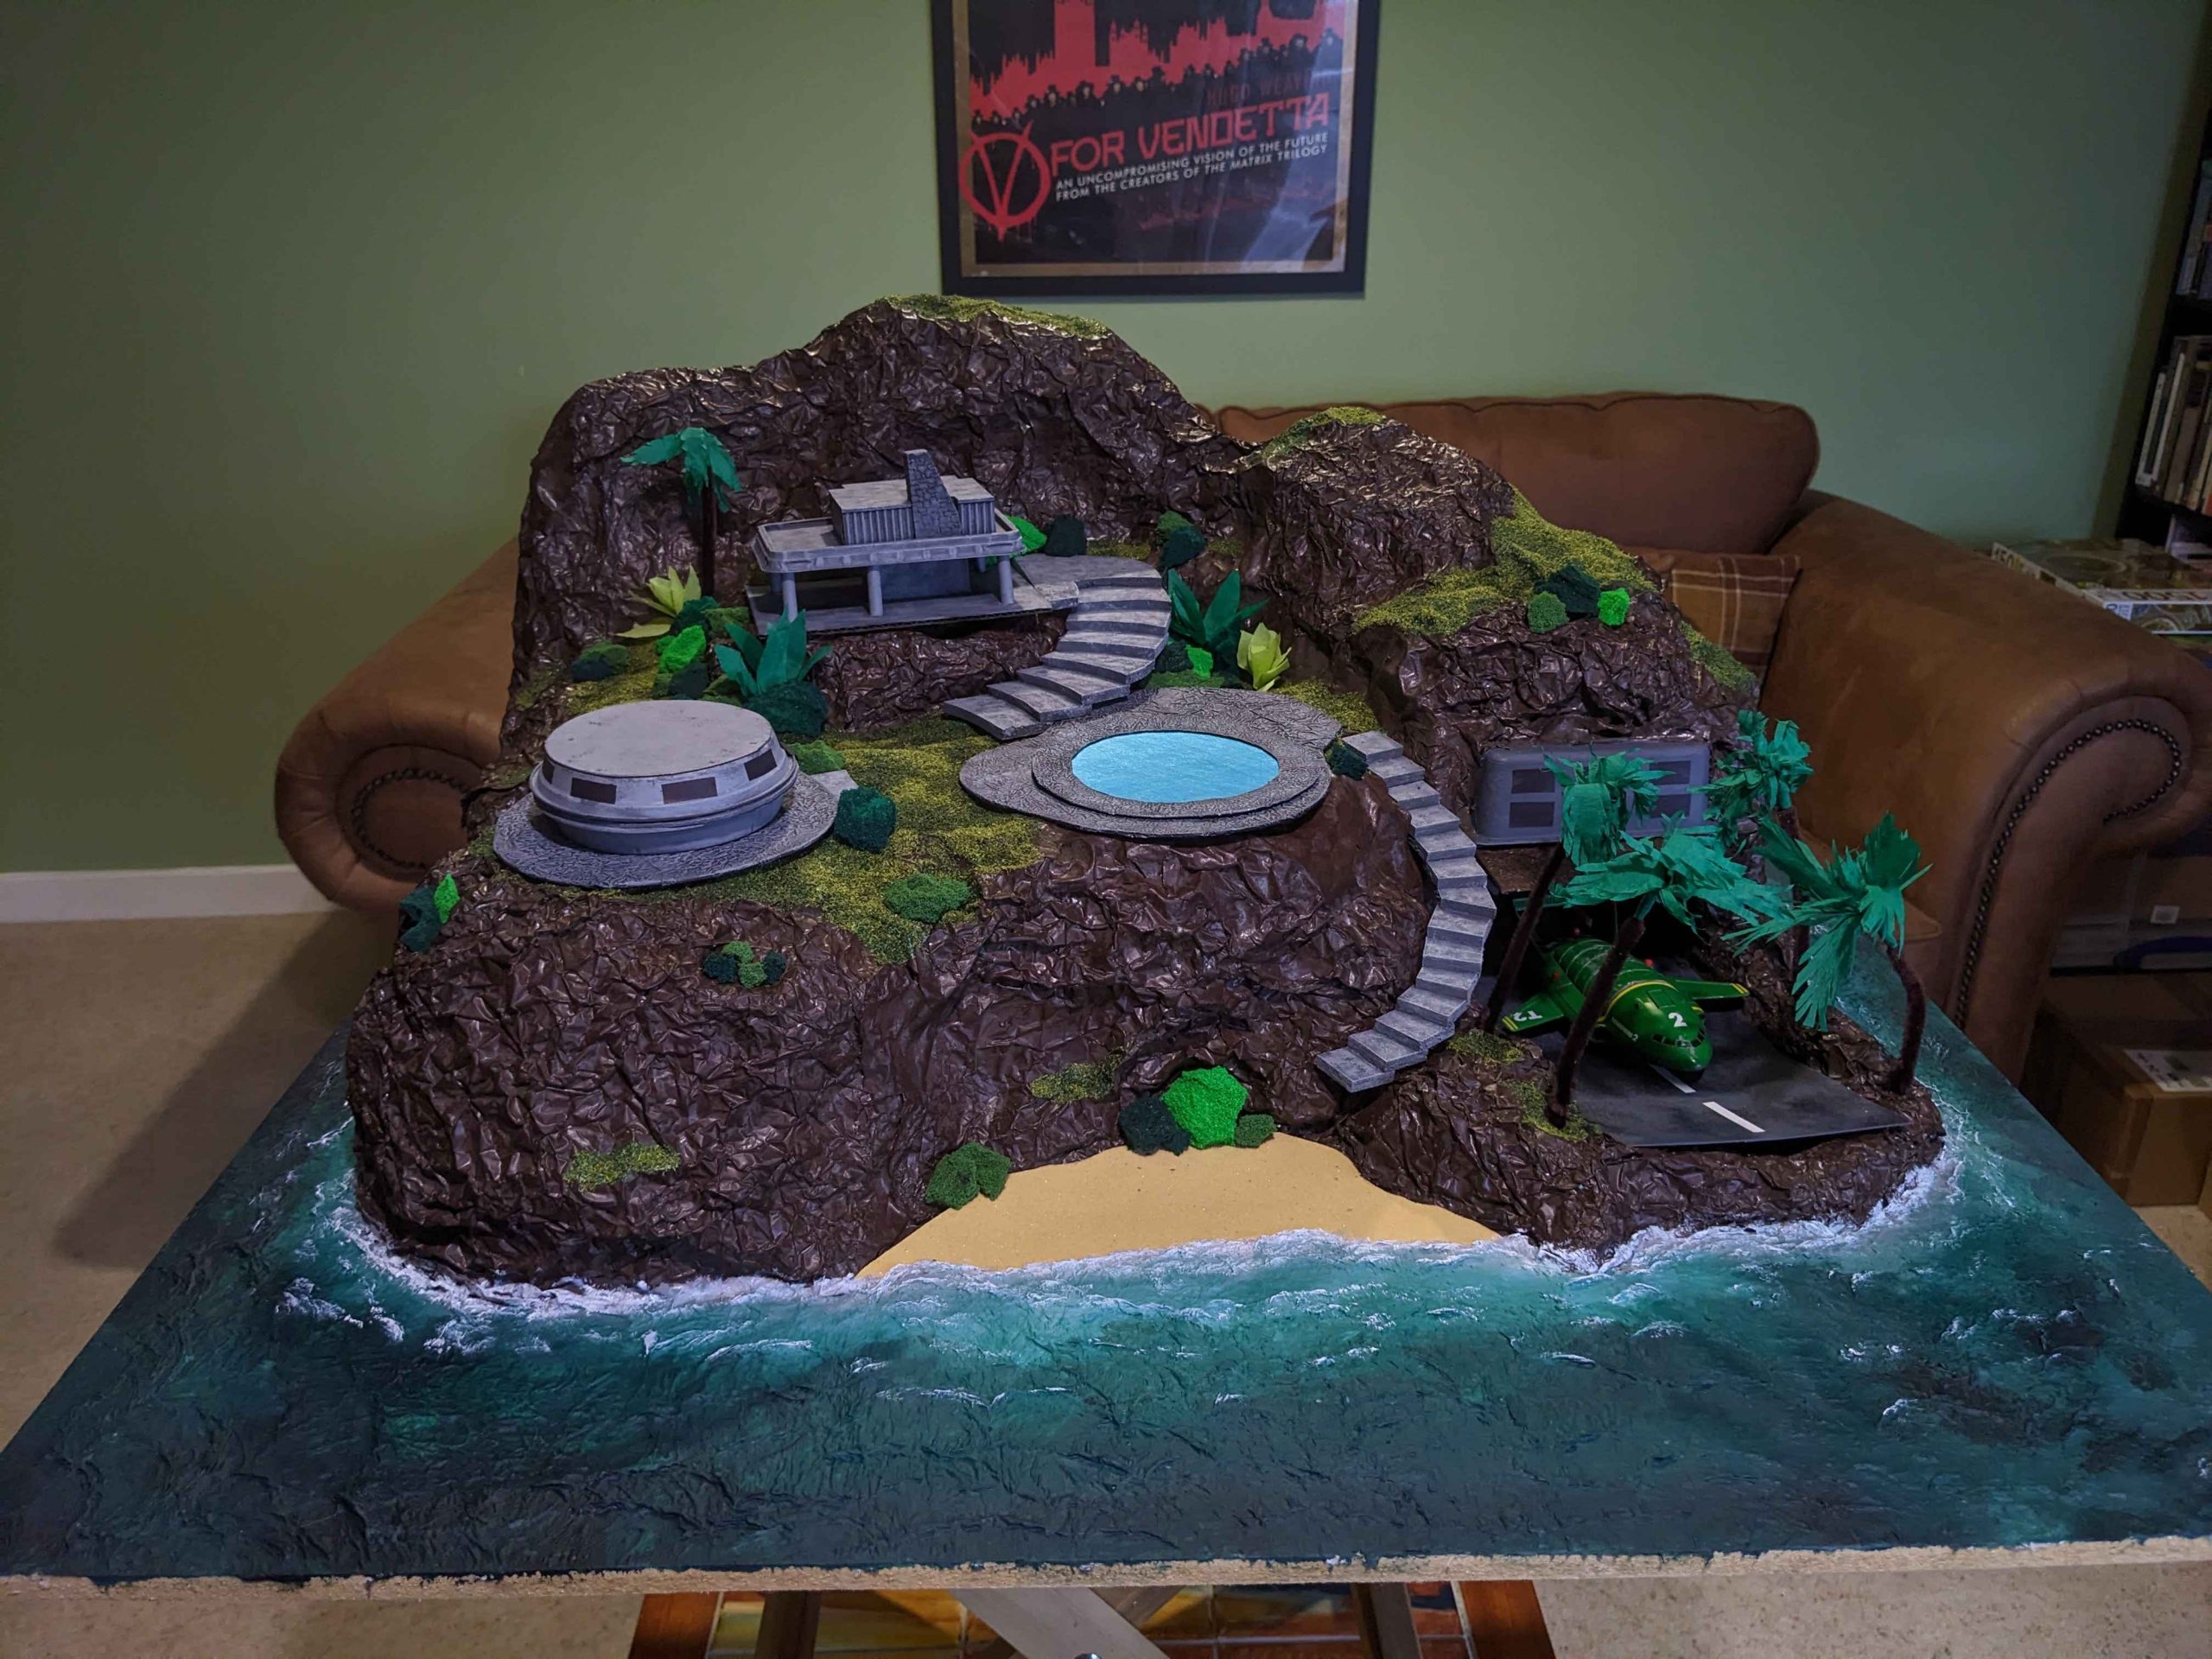
Gorram Tracy Island


Recommendations: 369
About the Project
Making my first ever convention game board to go to a couple of events in 2026. I apologise for how a) British and b) 90s this project is.
Related Genre: Science Fiction
Related Contest: TerrainFest 2025
This Project is Active
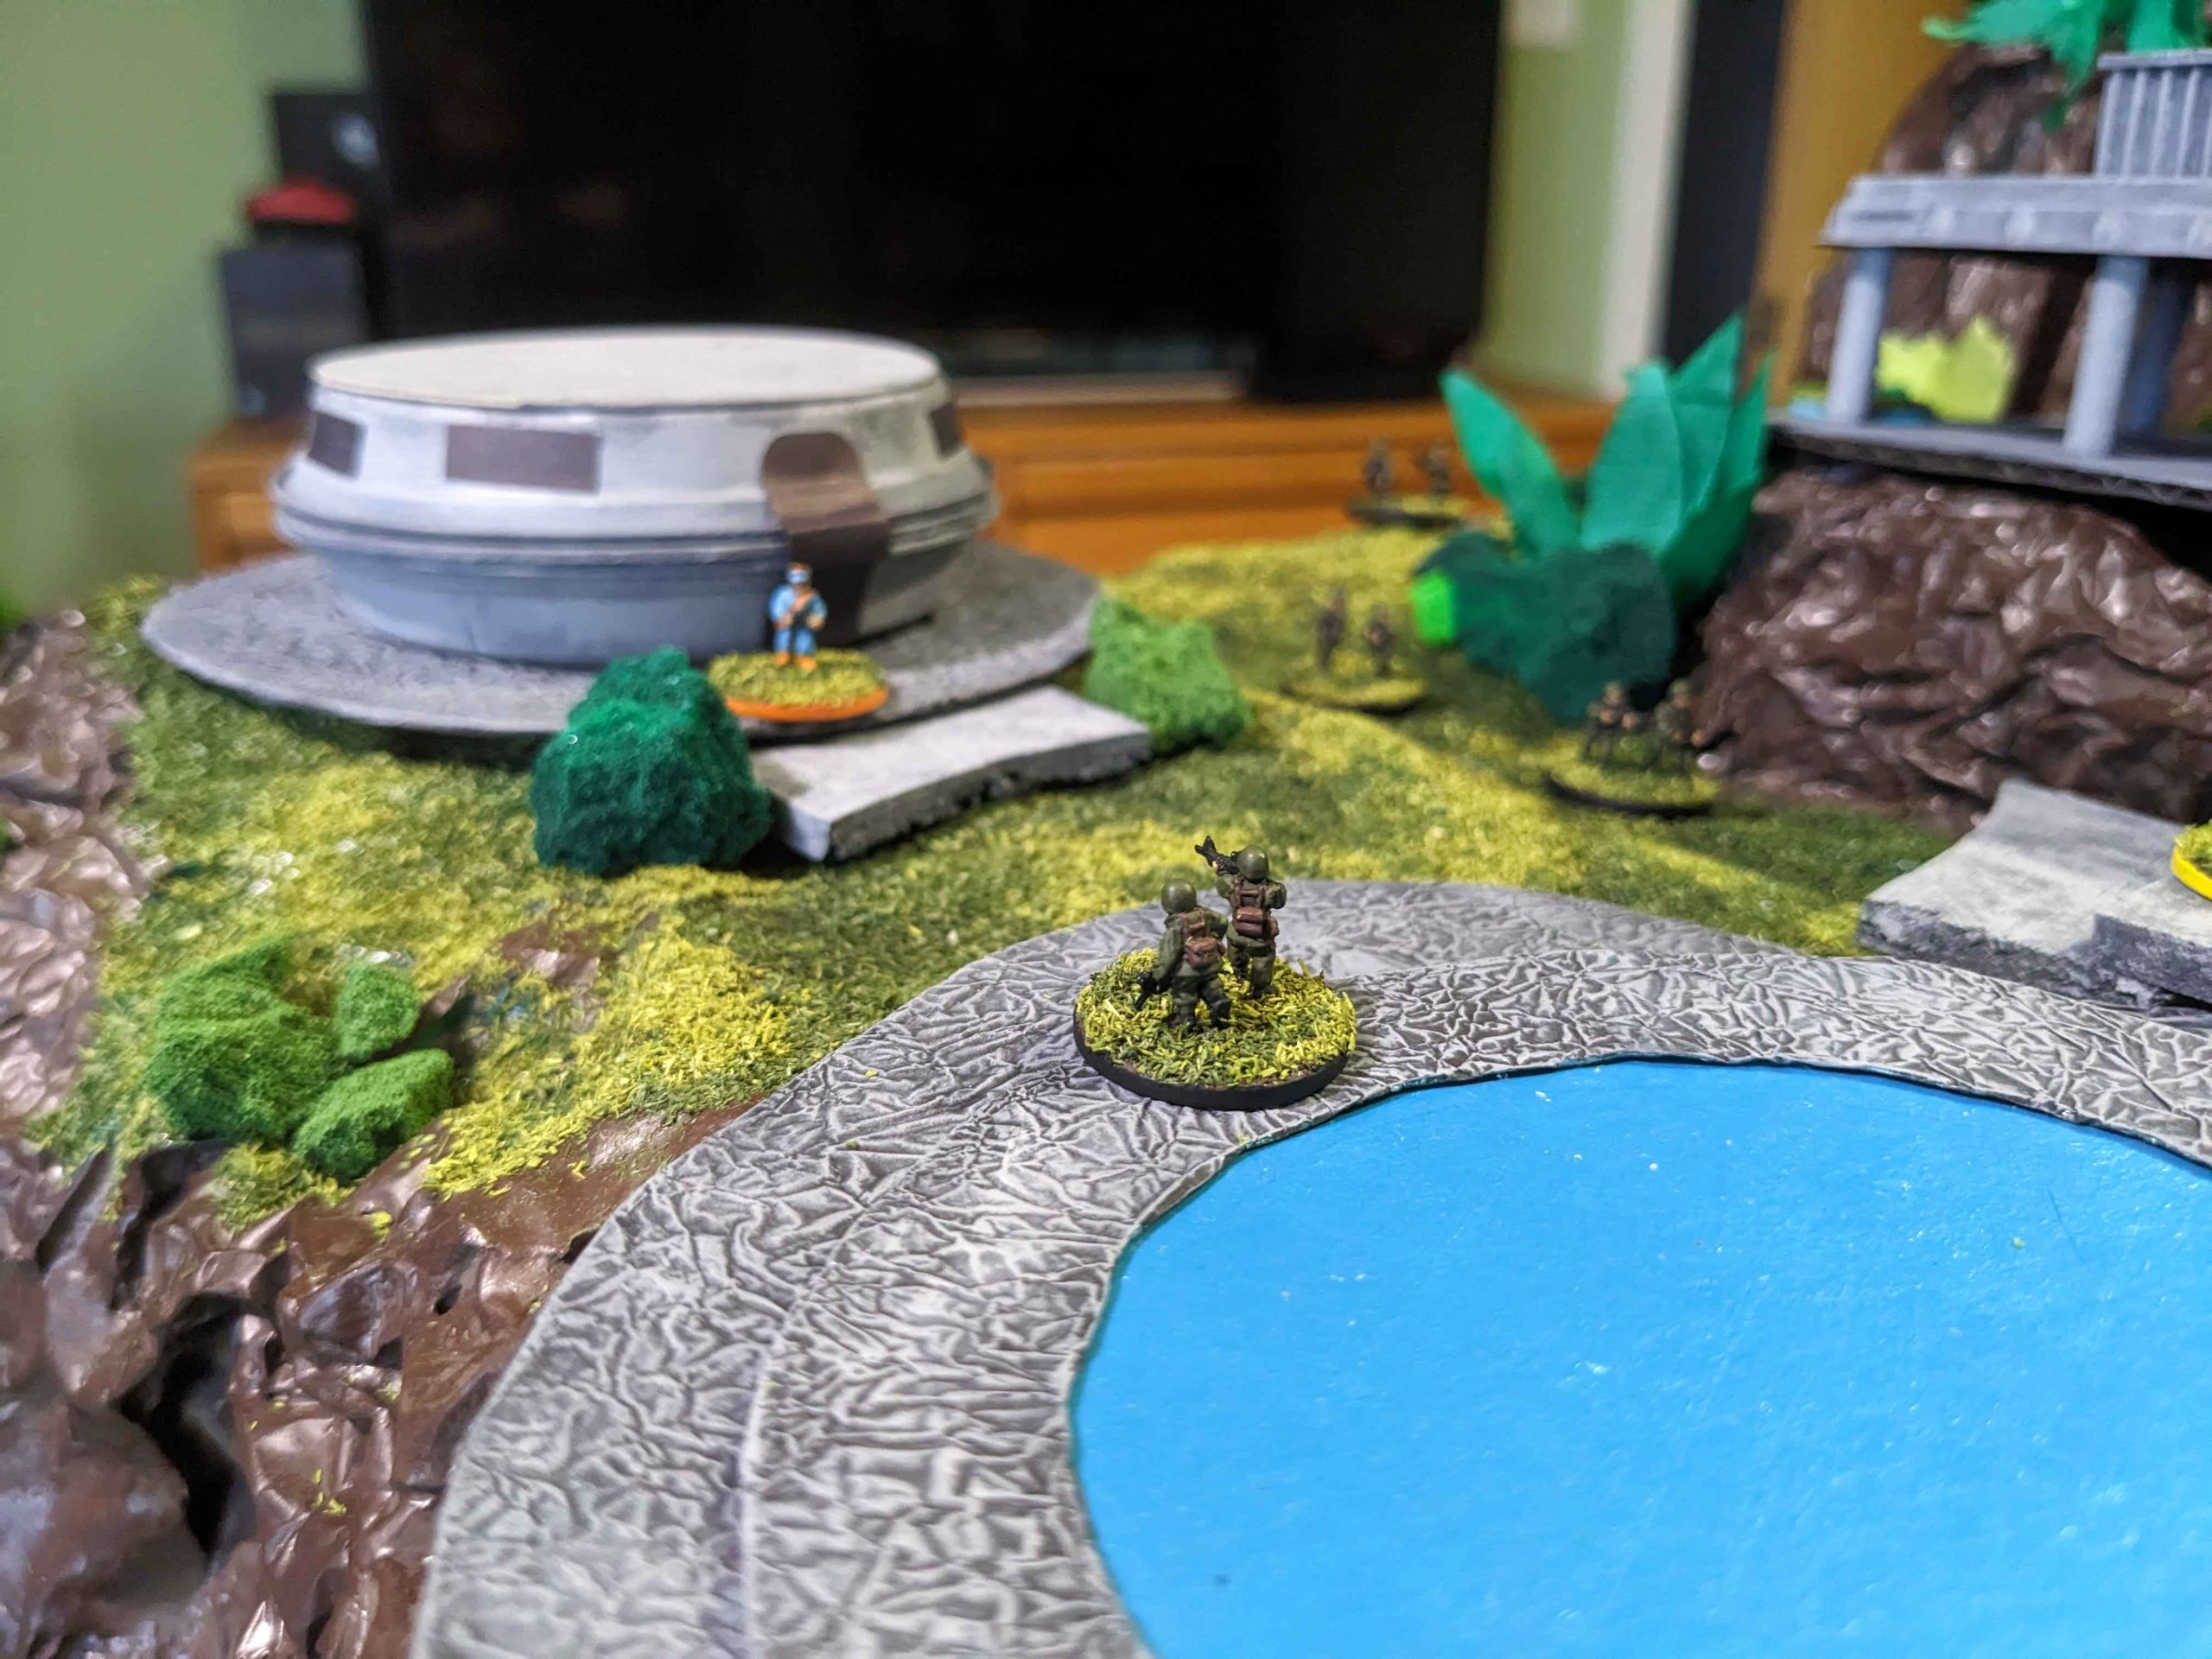
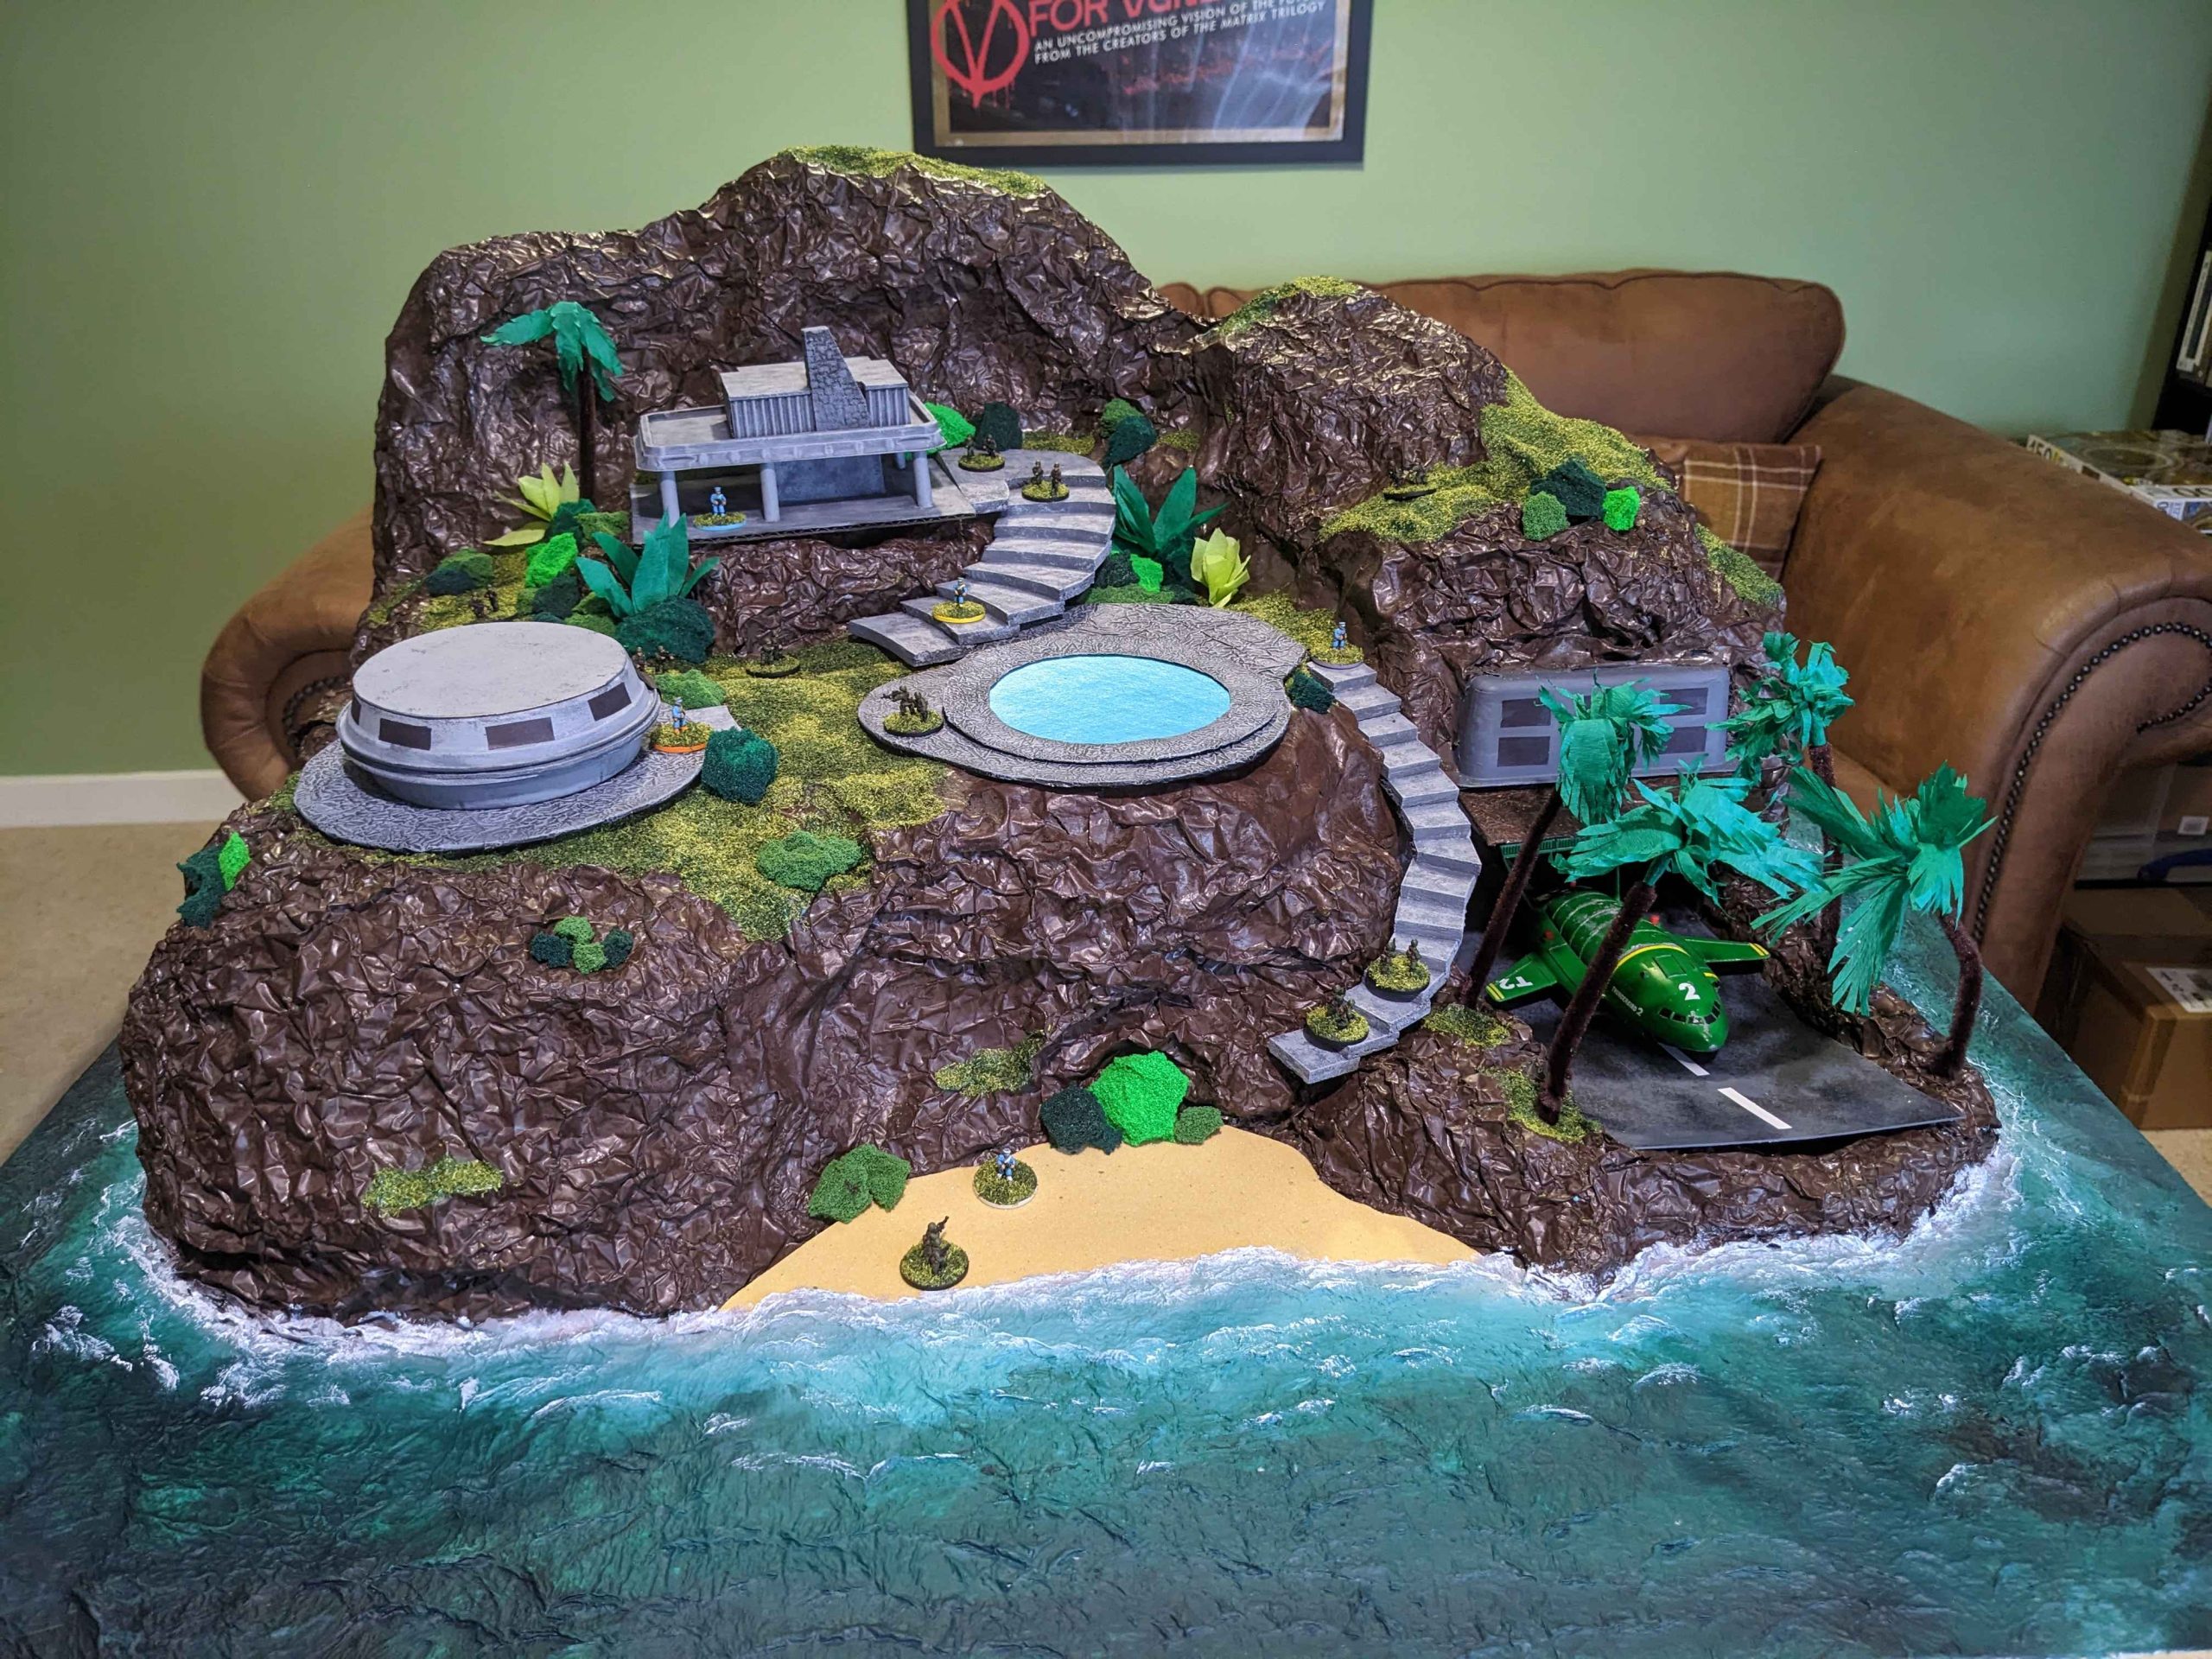
Thunderbirds are done! Wait, no, that's not right...
It’s been a bit of a week and I ended up cancelling my social plans this weekend to allow myself time to wallow a little in self-pity and paint some lovely little models. The beauty of painting 10mm is that they take very little effort but have a satisfying end result; I’ve said it many times before but I think it is my perfect scale.
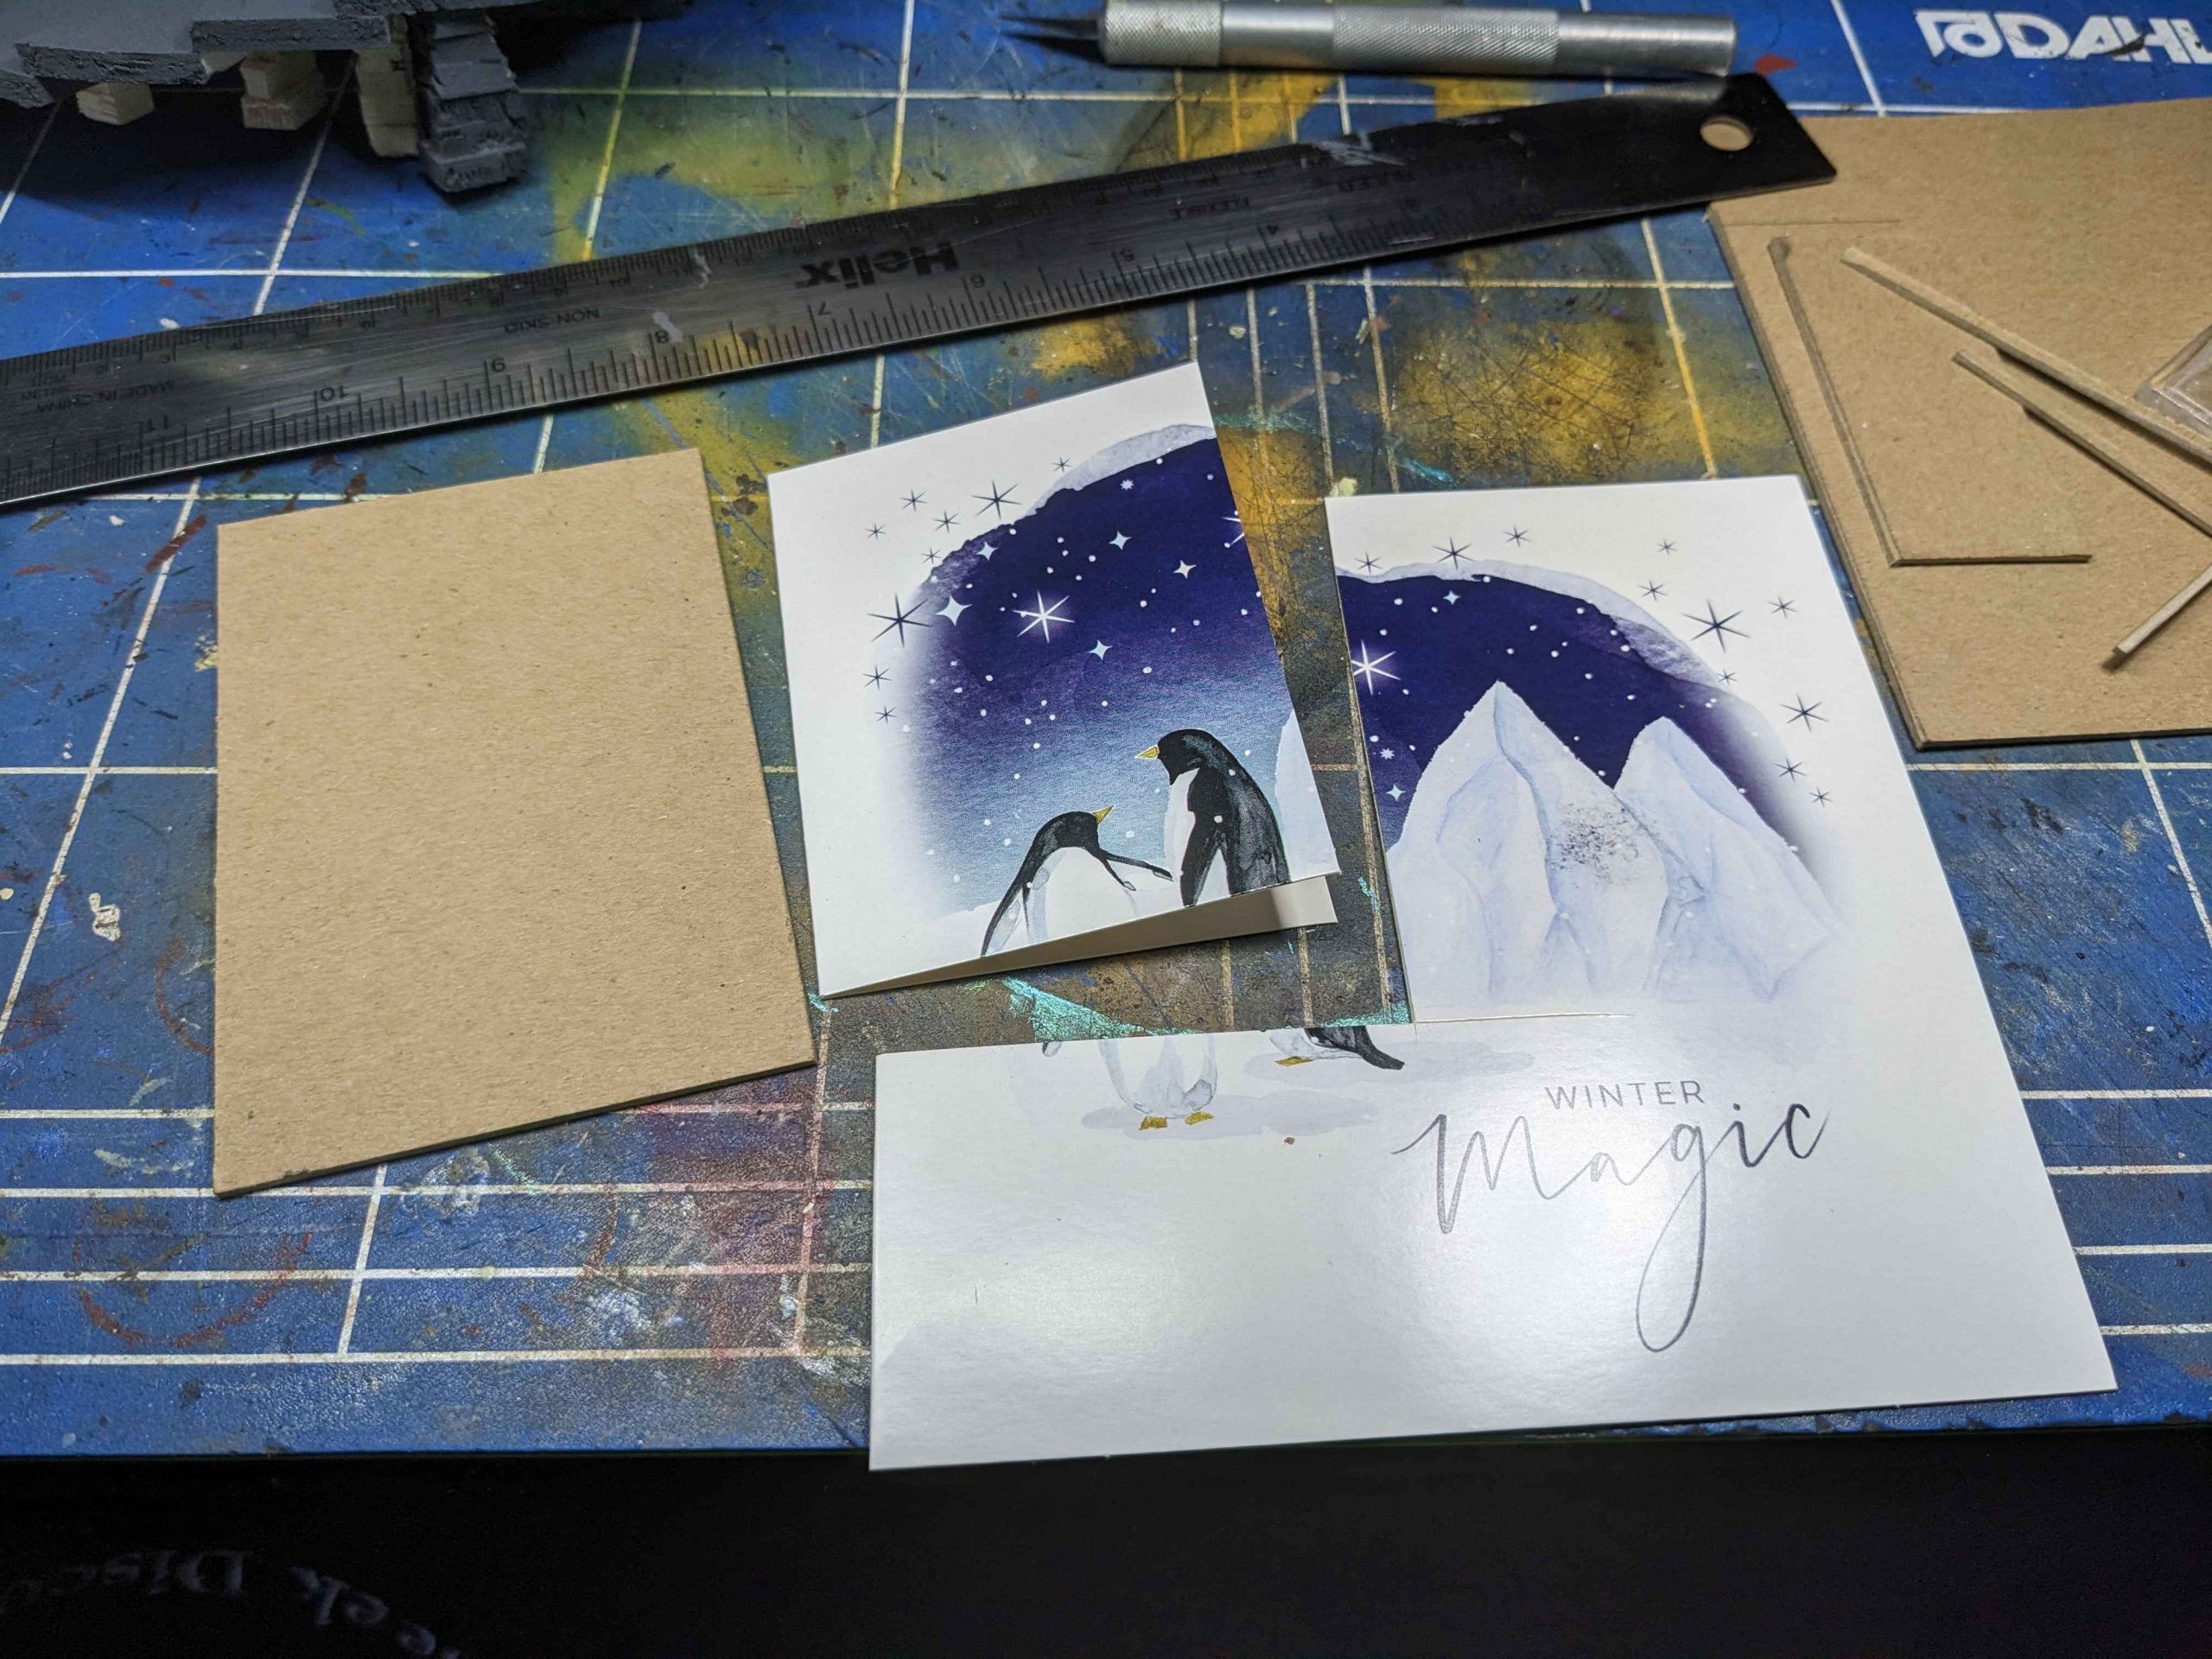
Everyone was based on shiny 1p coins because I have a jar of the that I Cillit Bang-ed many years ago for science and haven’t found much other use for since. Then a black spray prime and then some AK Dark Earth diorama paste for the ground. The flock is the same sawdust stuff as used on Tracy Island.

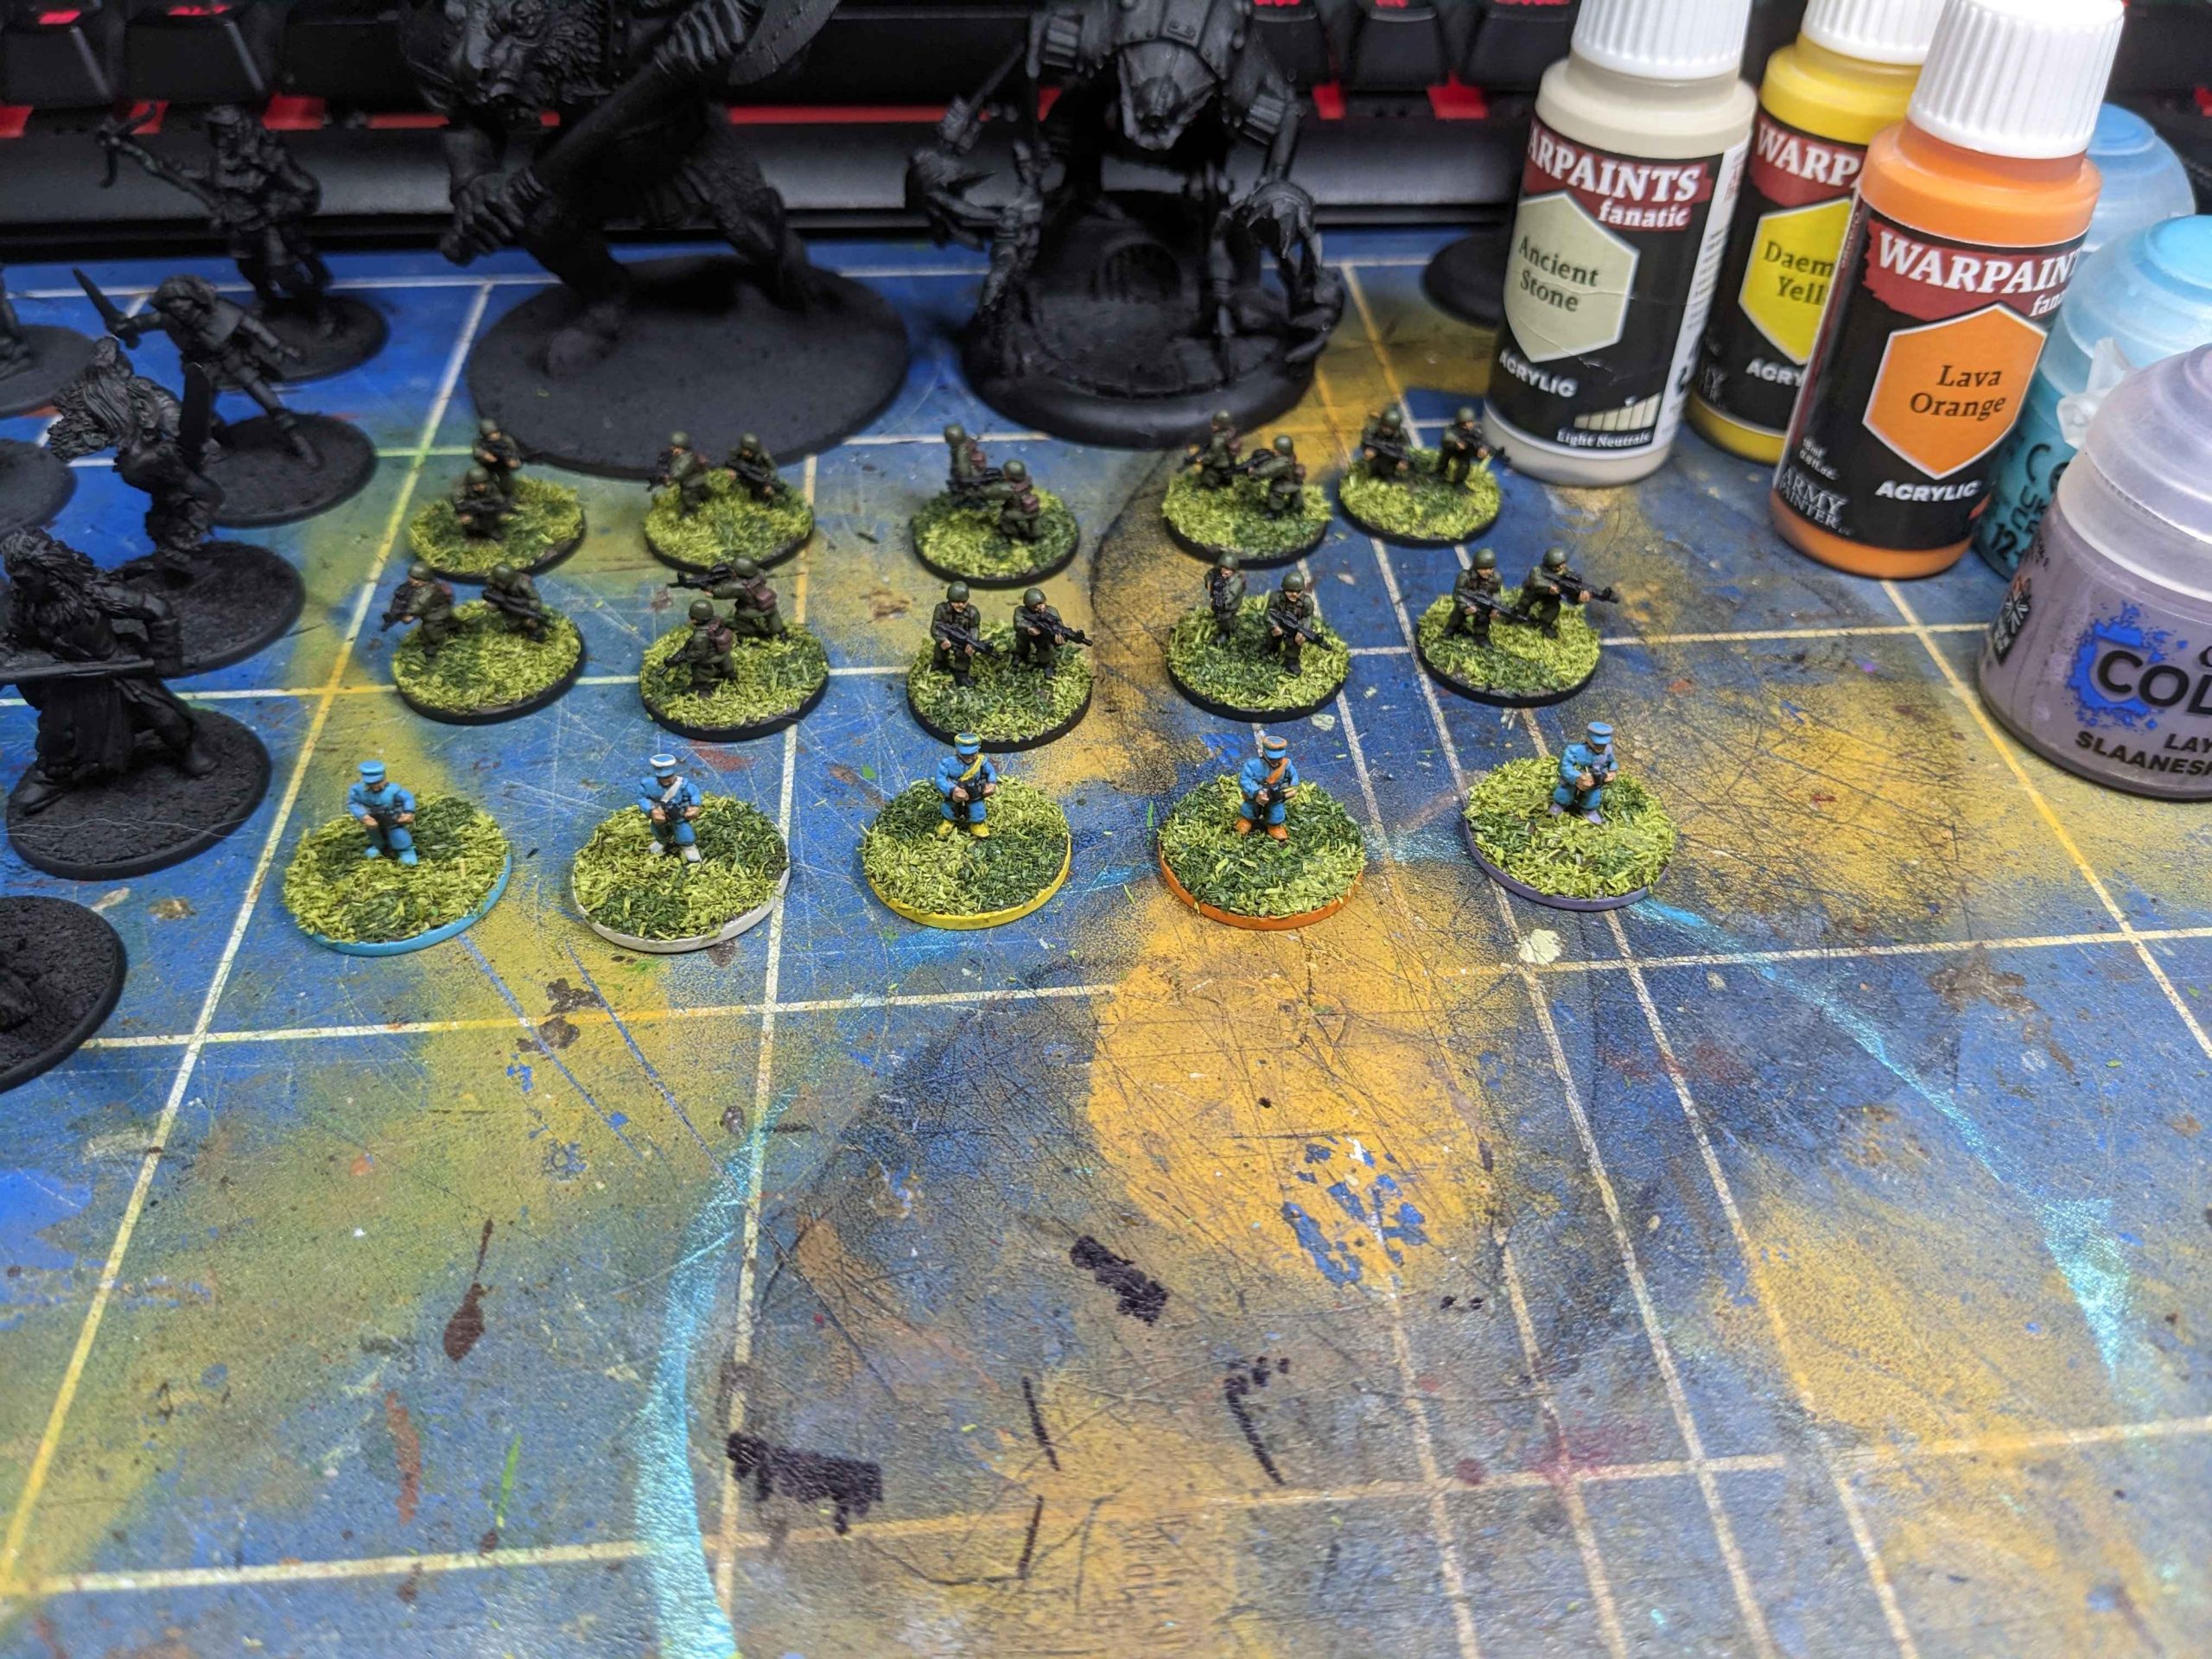
The attacking forces are USA1 and USA2 from the Pendraken modern USA section. They were going to be painted up in black but I decided last minute that Vallejo Model Colour Refractive Green (70.890) was a better fit. A little black for the boots, a little brown for pouches (just to add visual interest rather than accuracy) and Kislev Flesh for all the skin tone. I debated camo-ing the faces but at 10mm you really need stark contrast between areas for it to read well at a distance. I used a wash of Marine Juice to add in a little more definition and they were done.

The Tracy Brothers (all five in one place at one time? Perfectly timed surgical strike by the invaders!) are actually from the same range. The USA15 Officers have two sculpts and one of them wears something close to the Thunderbird hat. They come in a pack of ten with five of each sculpt – the universe gifts you what you need 😊 They were base coated in Lothern Blue. Once I’d done the skin I gave them all a wash in Marine Juice. I knew that I wanted the definition that comes with it but that the colours to mark them out needed to be bolder so waited until after the wash dried before putting them on. They are:
- Fanatics Ancient Stone
- Fanatics Daemonic Yellow
- Fanatics Lava Orange
- Citadel Slaanesh Grey
- Citadel Baharroth Blue
I had a fun little weekend getting them ready. I might add in some more bases in the future but I really need to start thinking about rules/scenario before I go down that road. The Pendraken order also had a couple of Hueys and Patrol boats for the landing but I’m not going to do them right now. I wanted a nice easy win and that’s what I got.
They're here
Came home after a pretty stressful week to a heavy little envelope from Pendraken. The kind of heavy that tells of comforting metal miniatures.

Part sixteen - finished
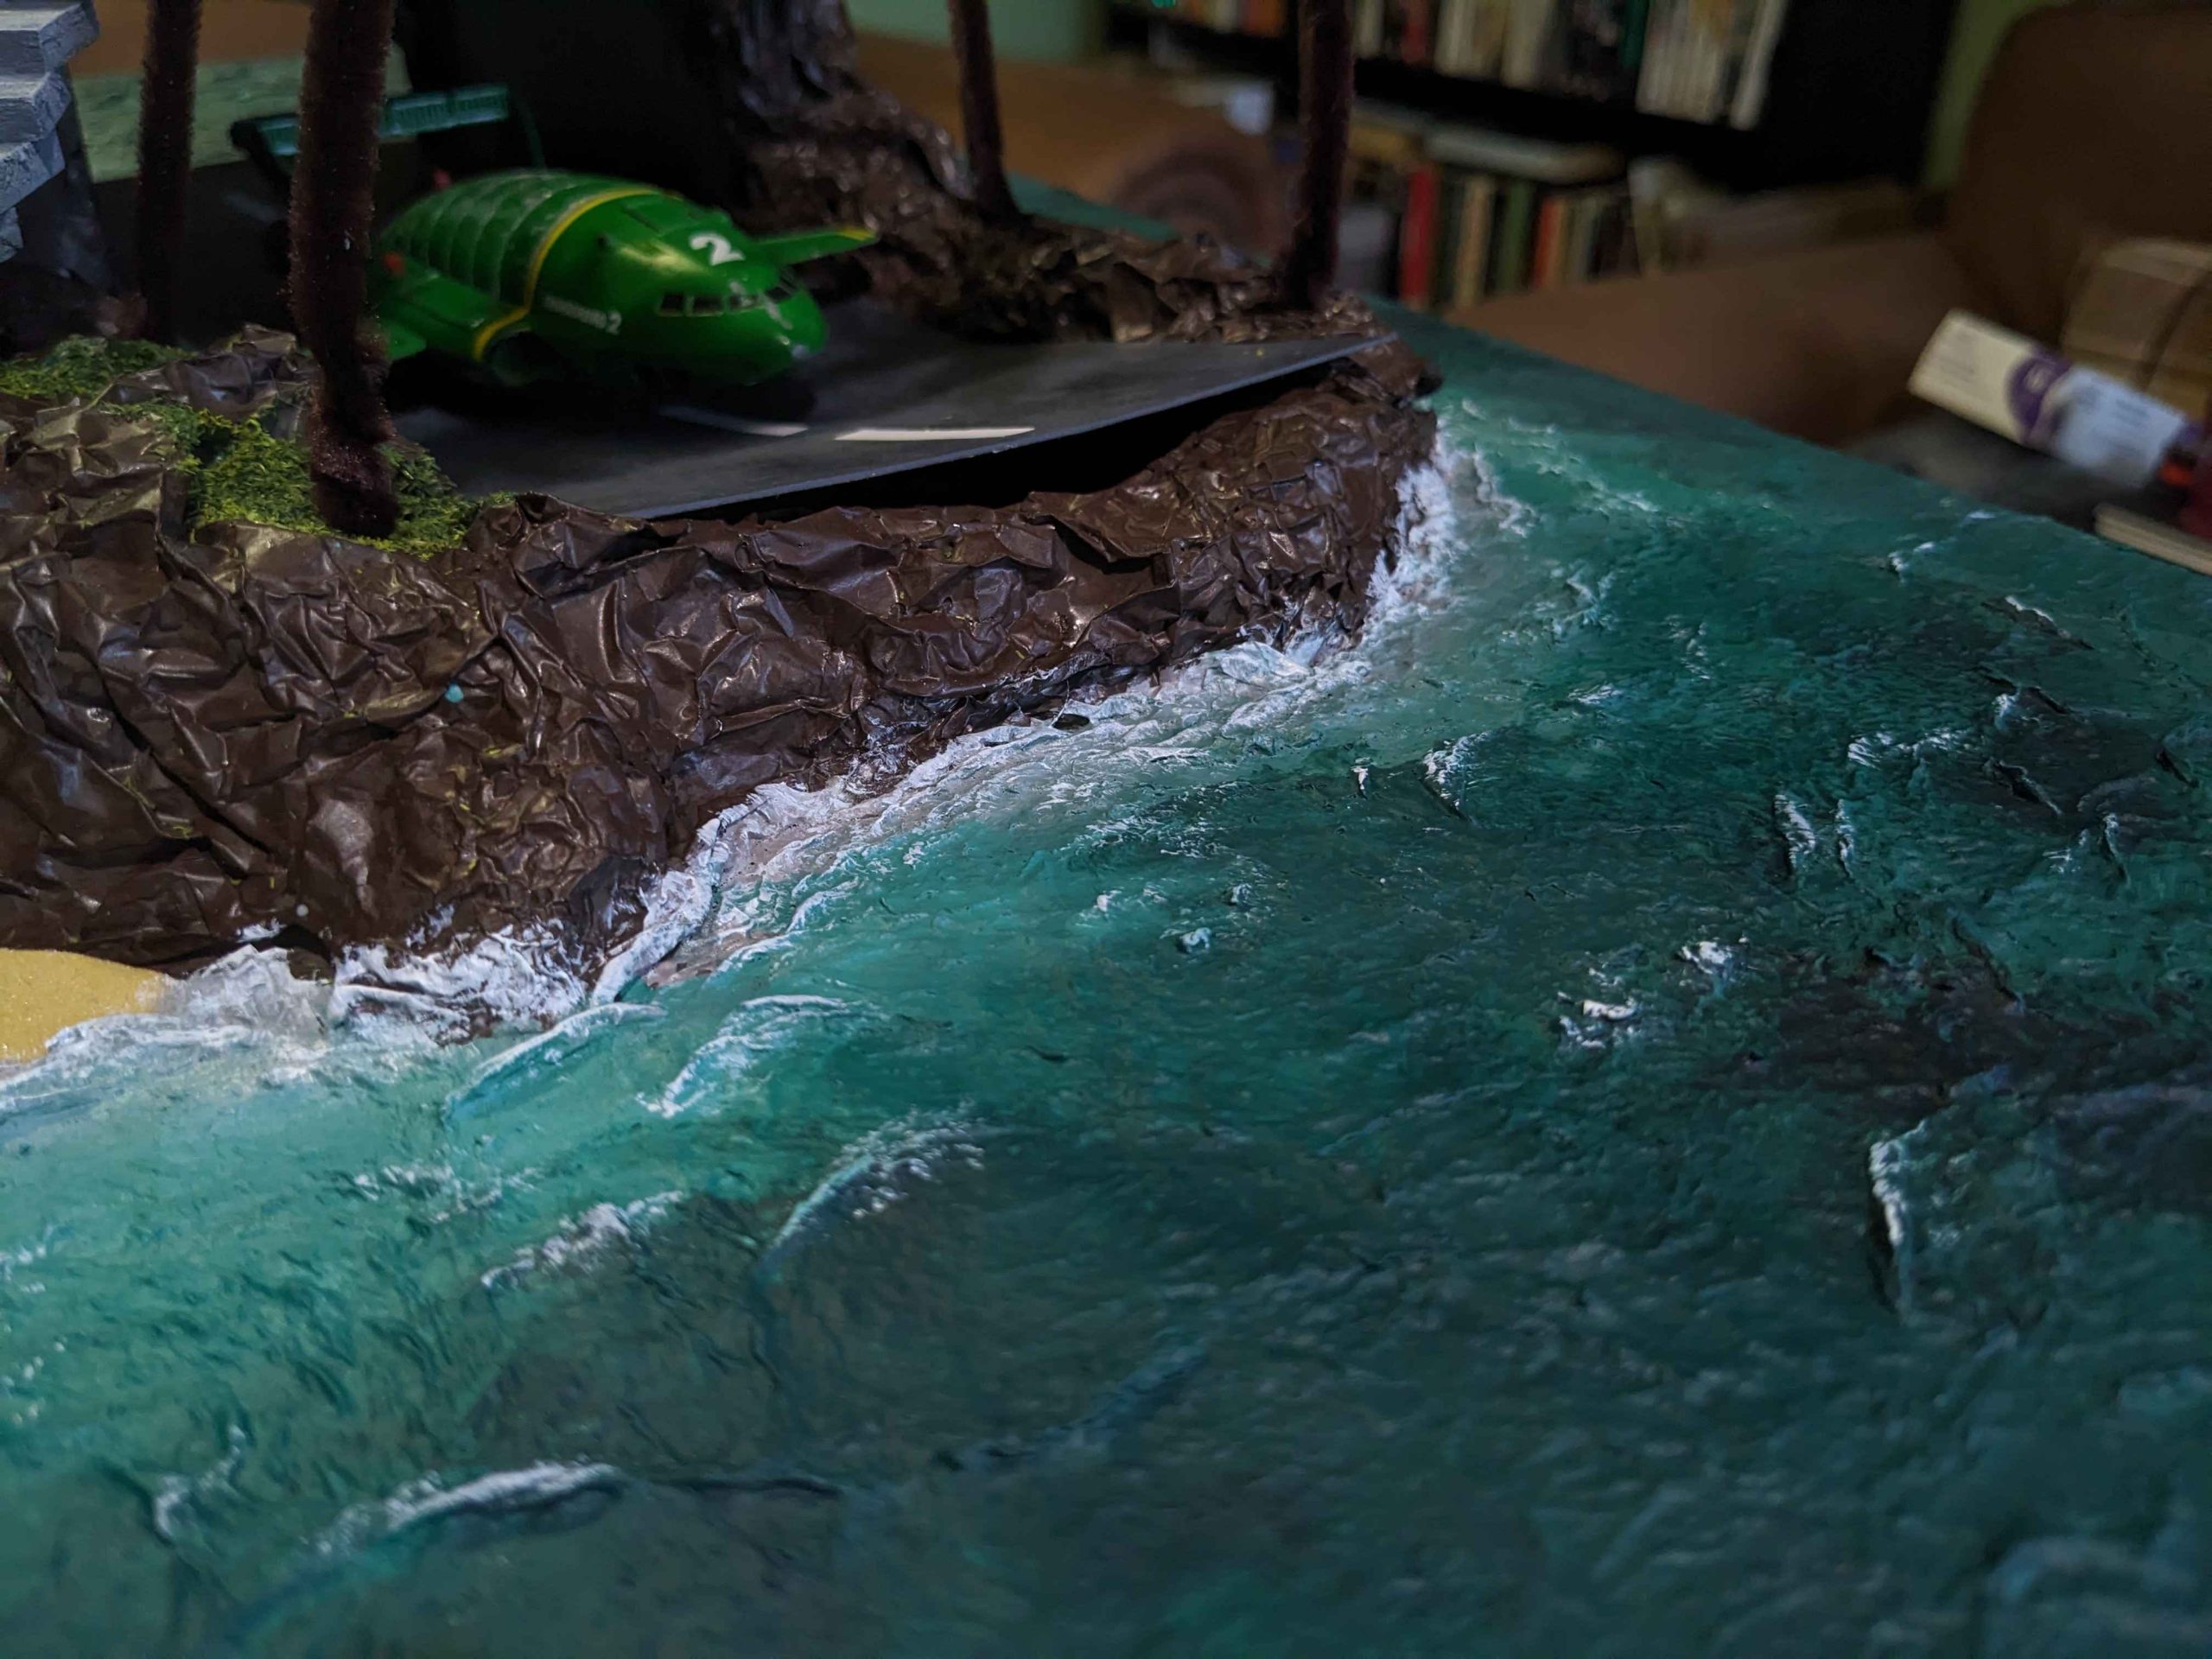
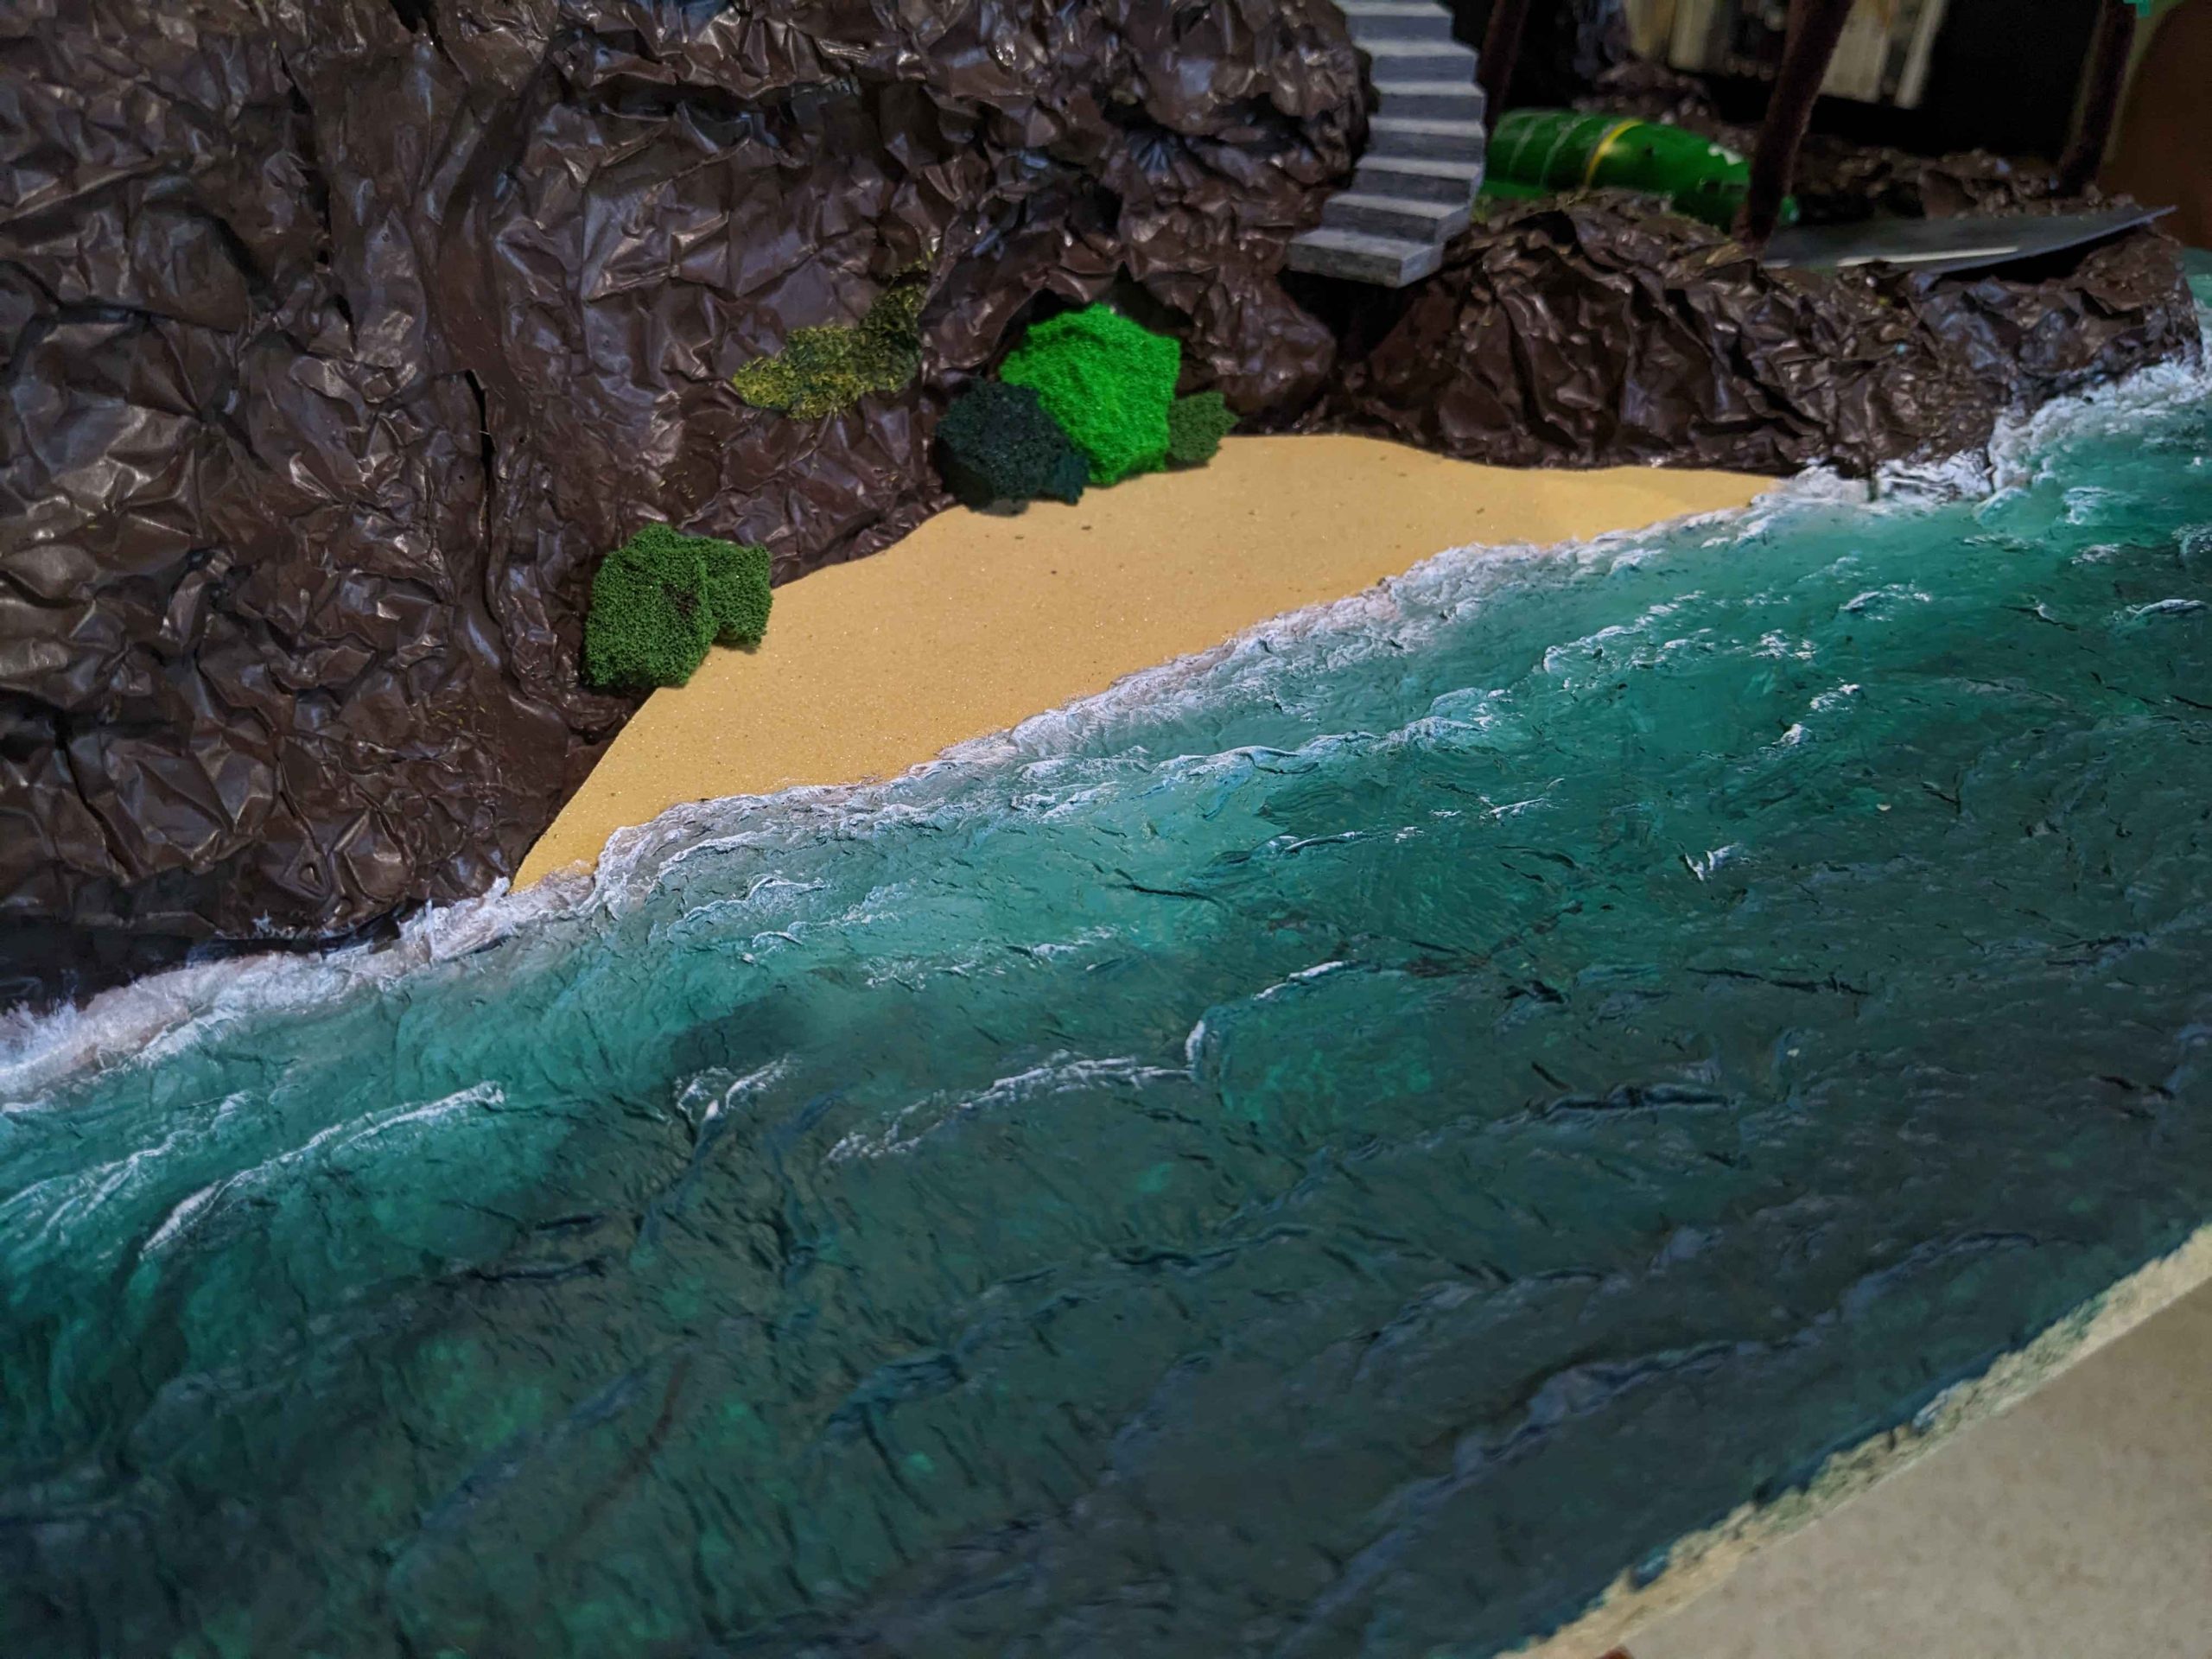
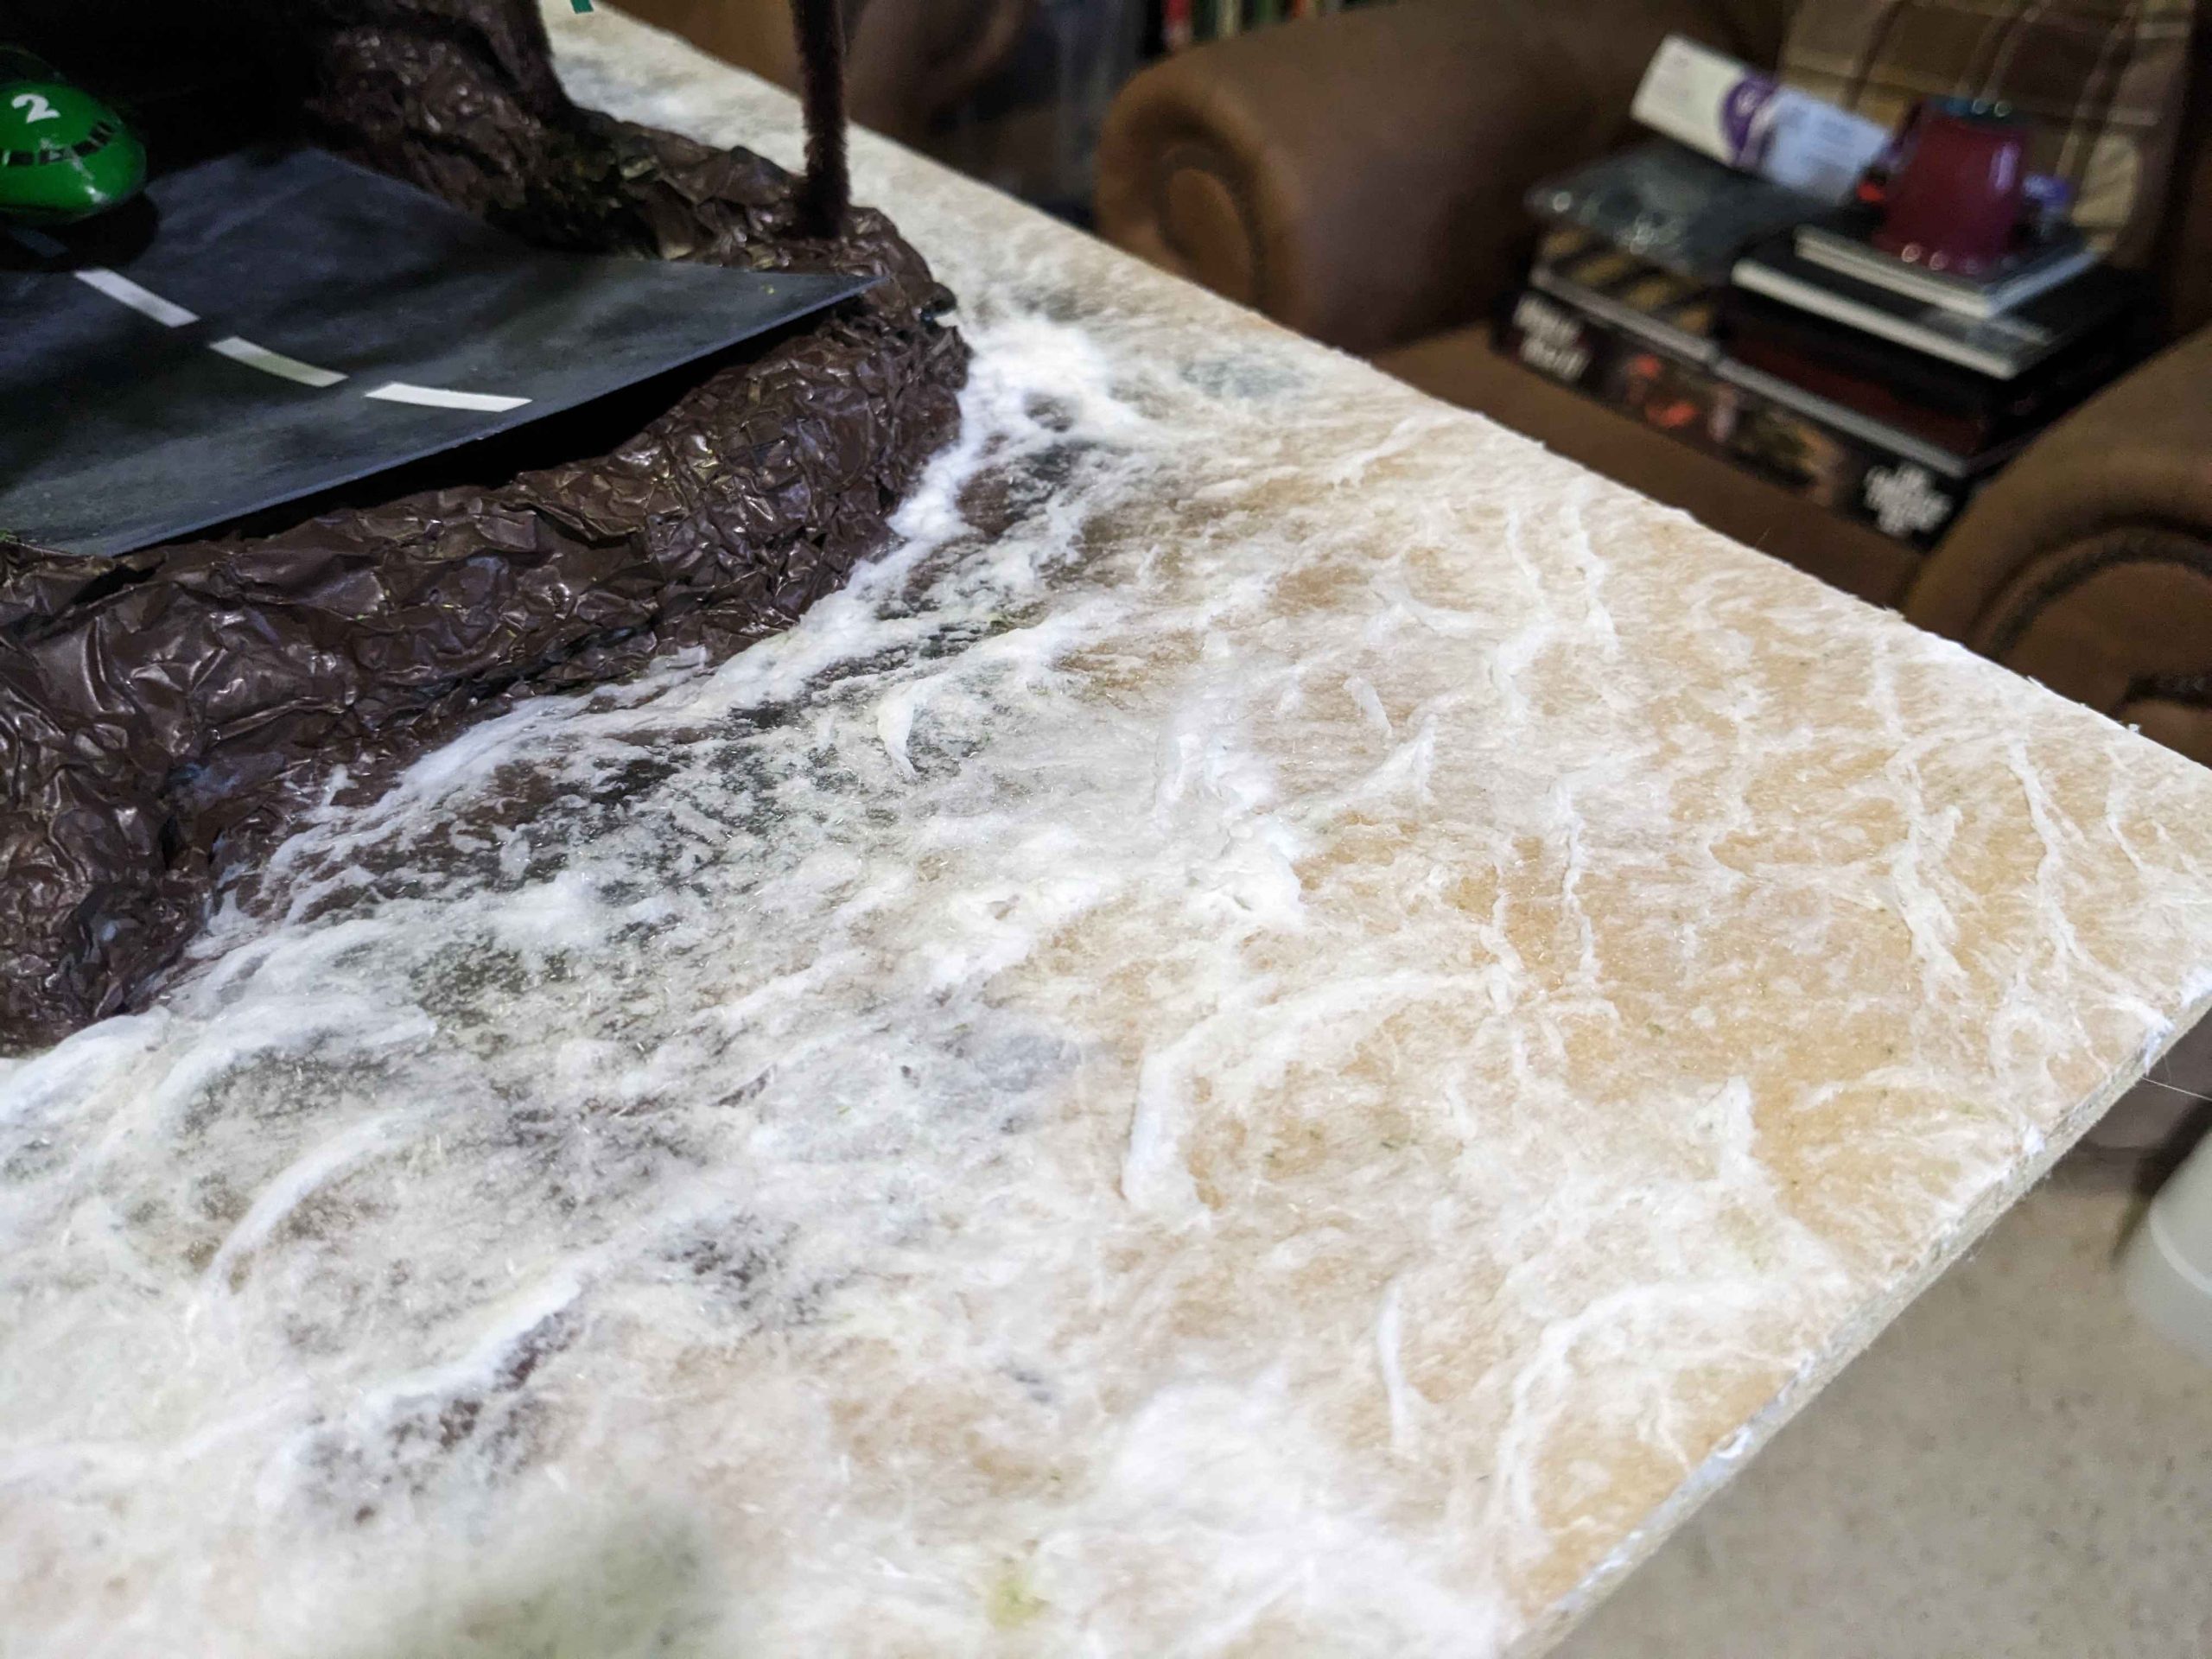
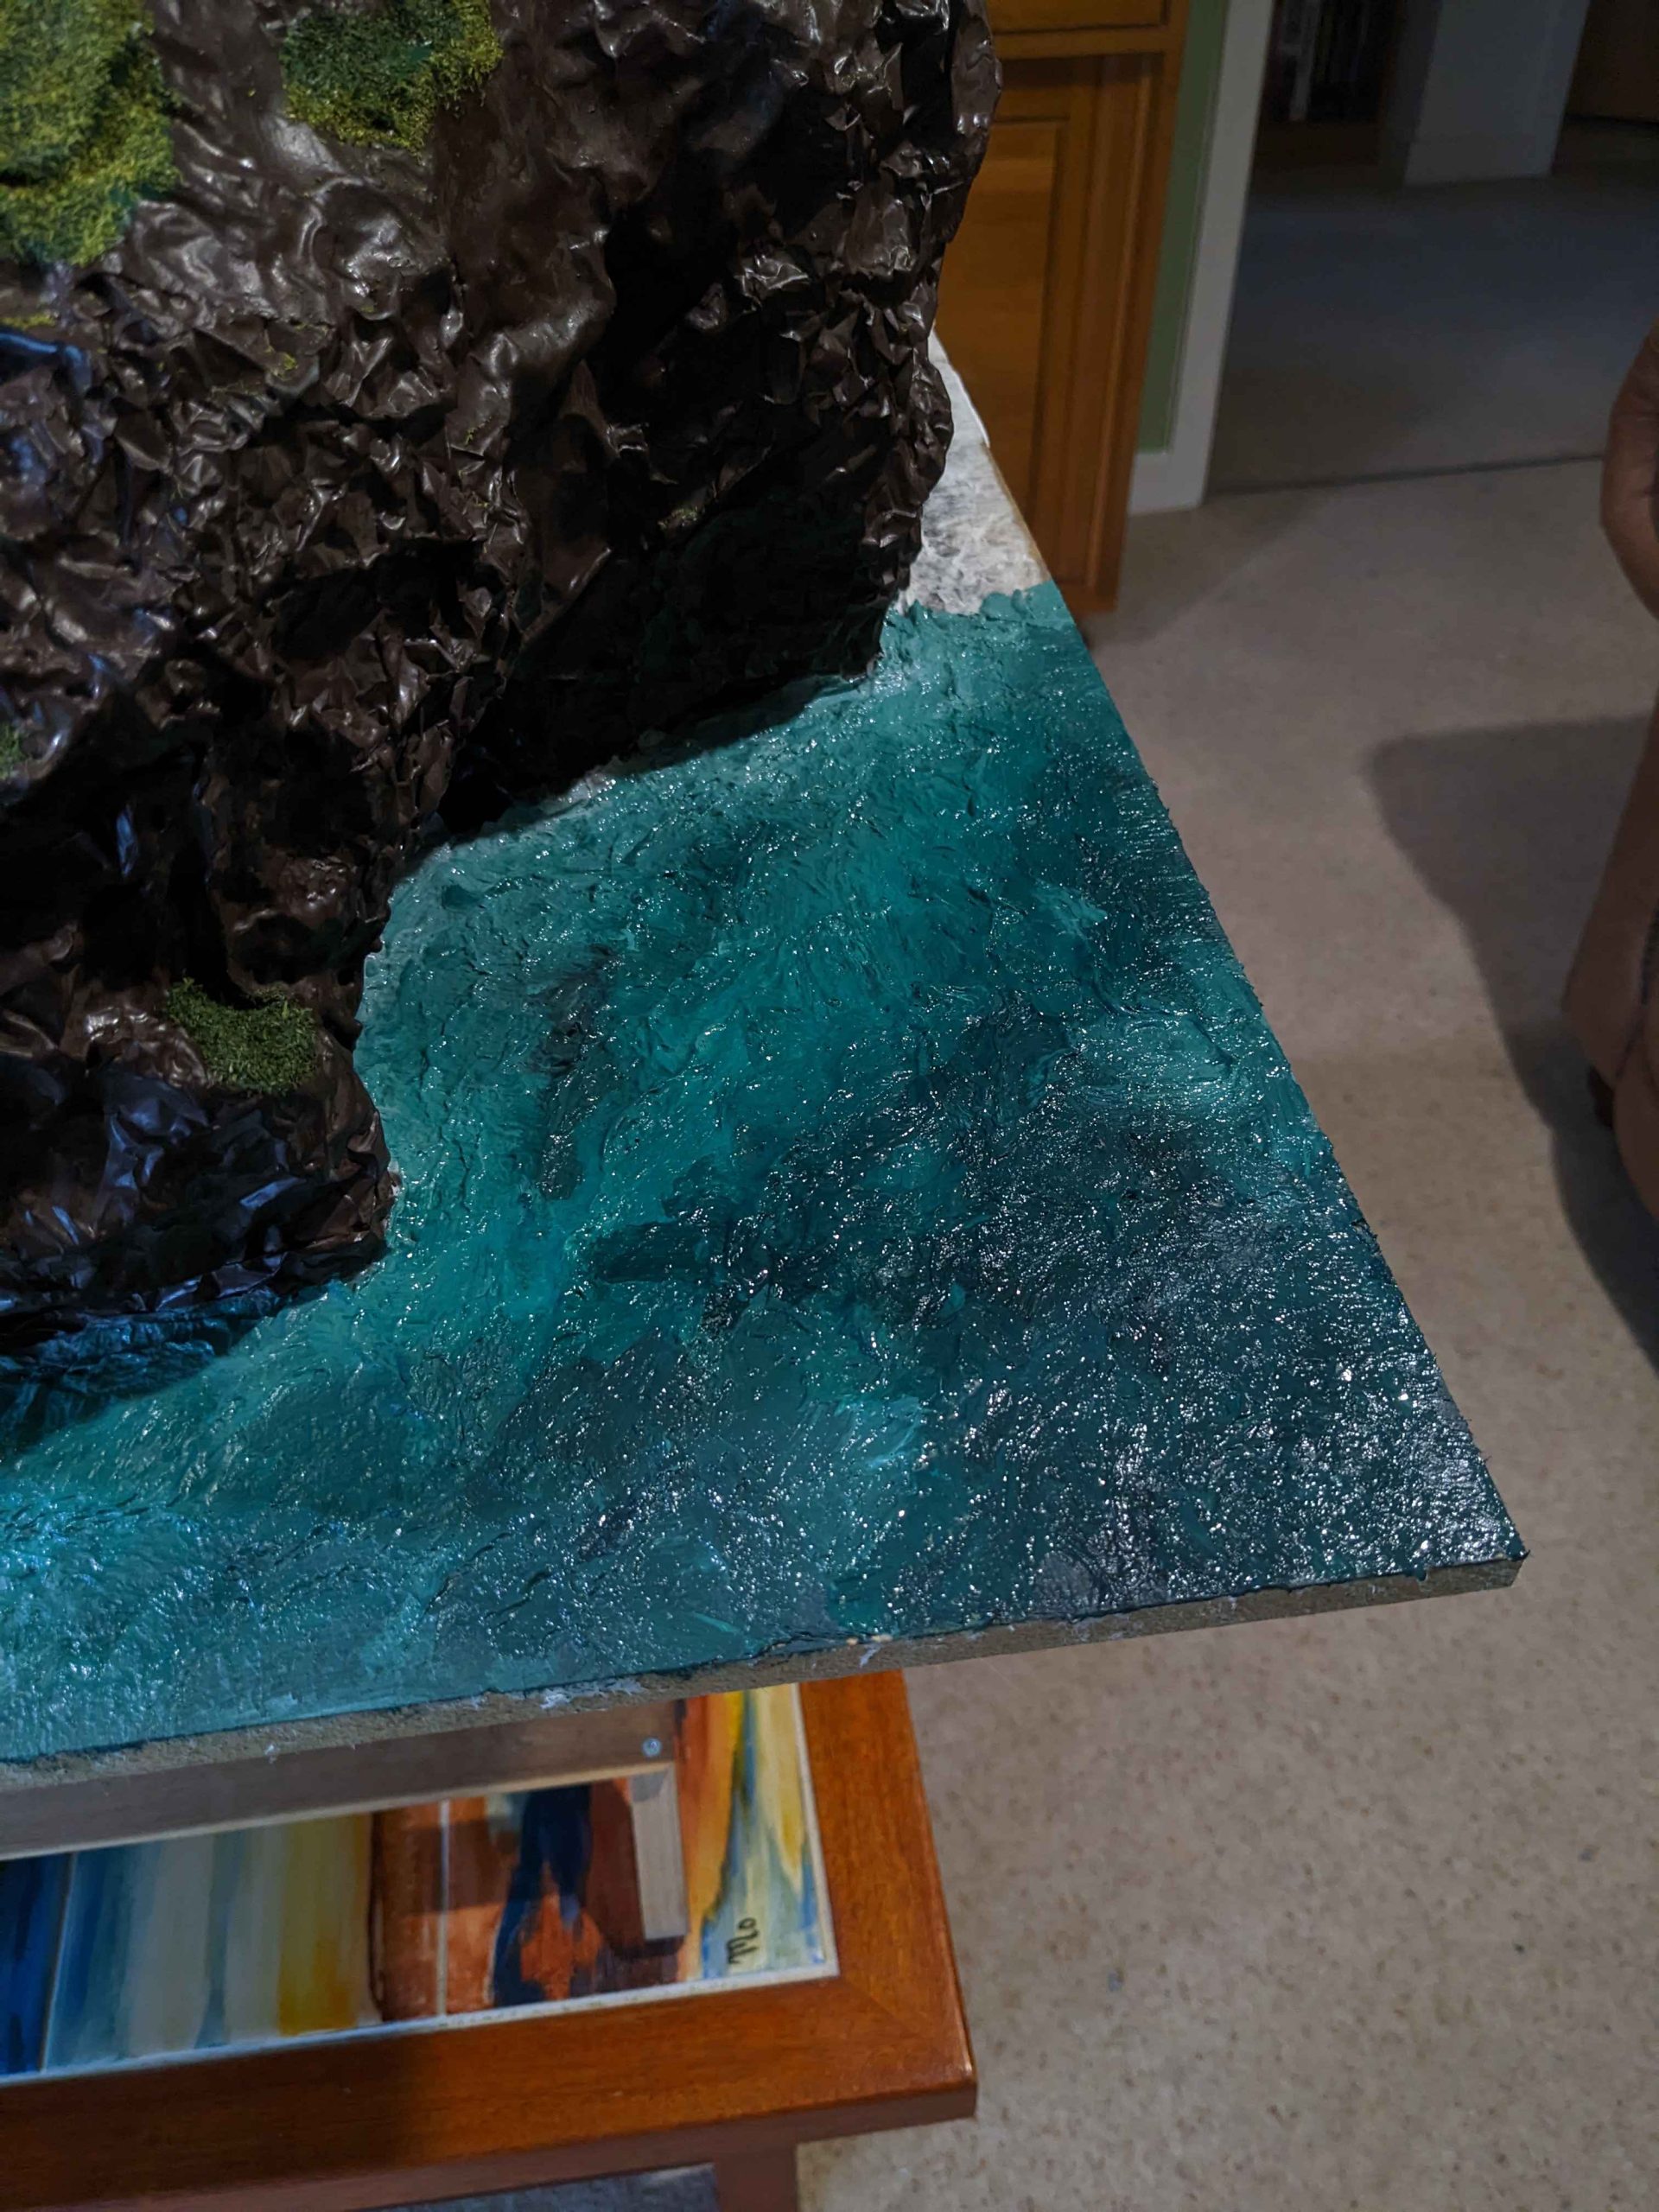
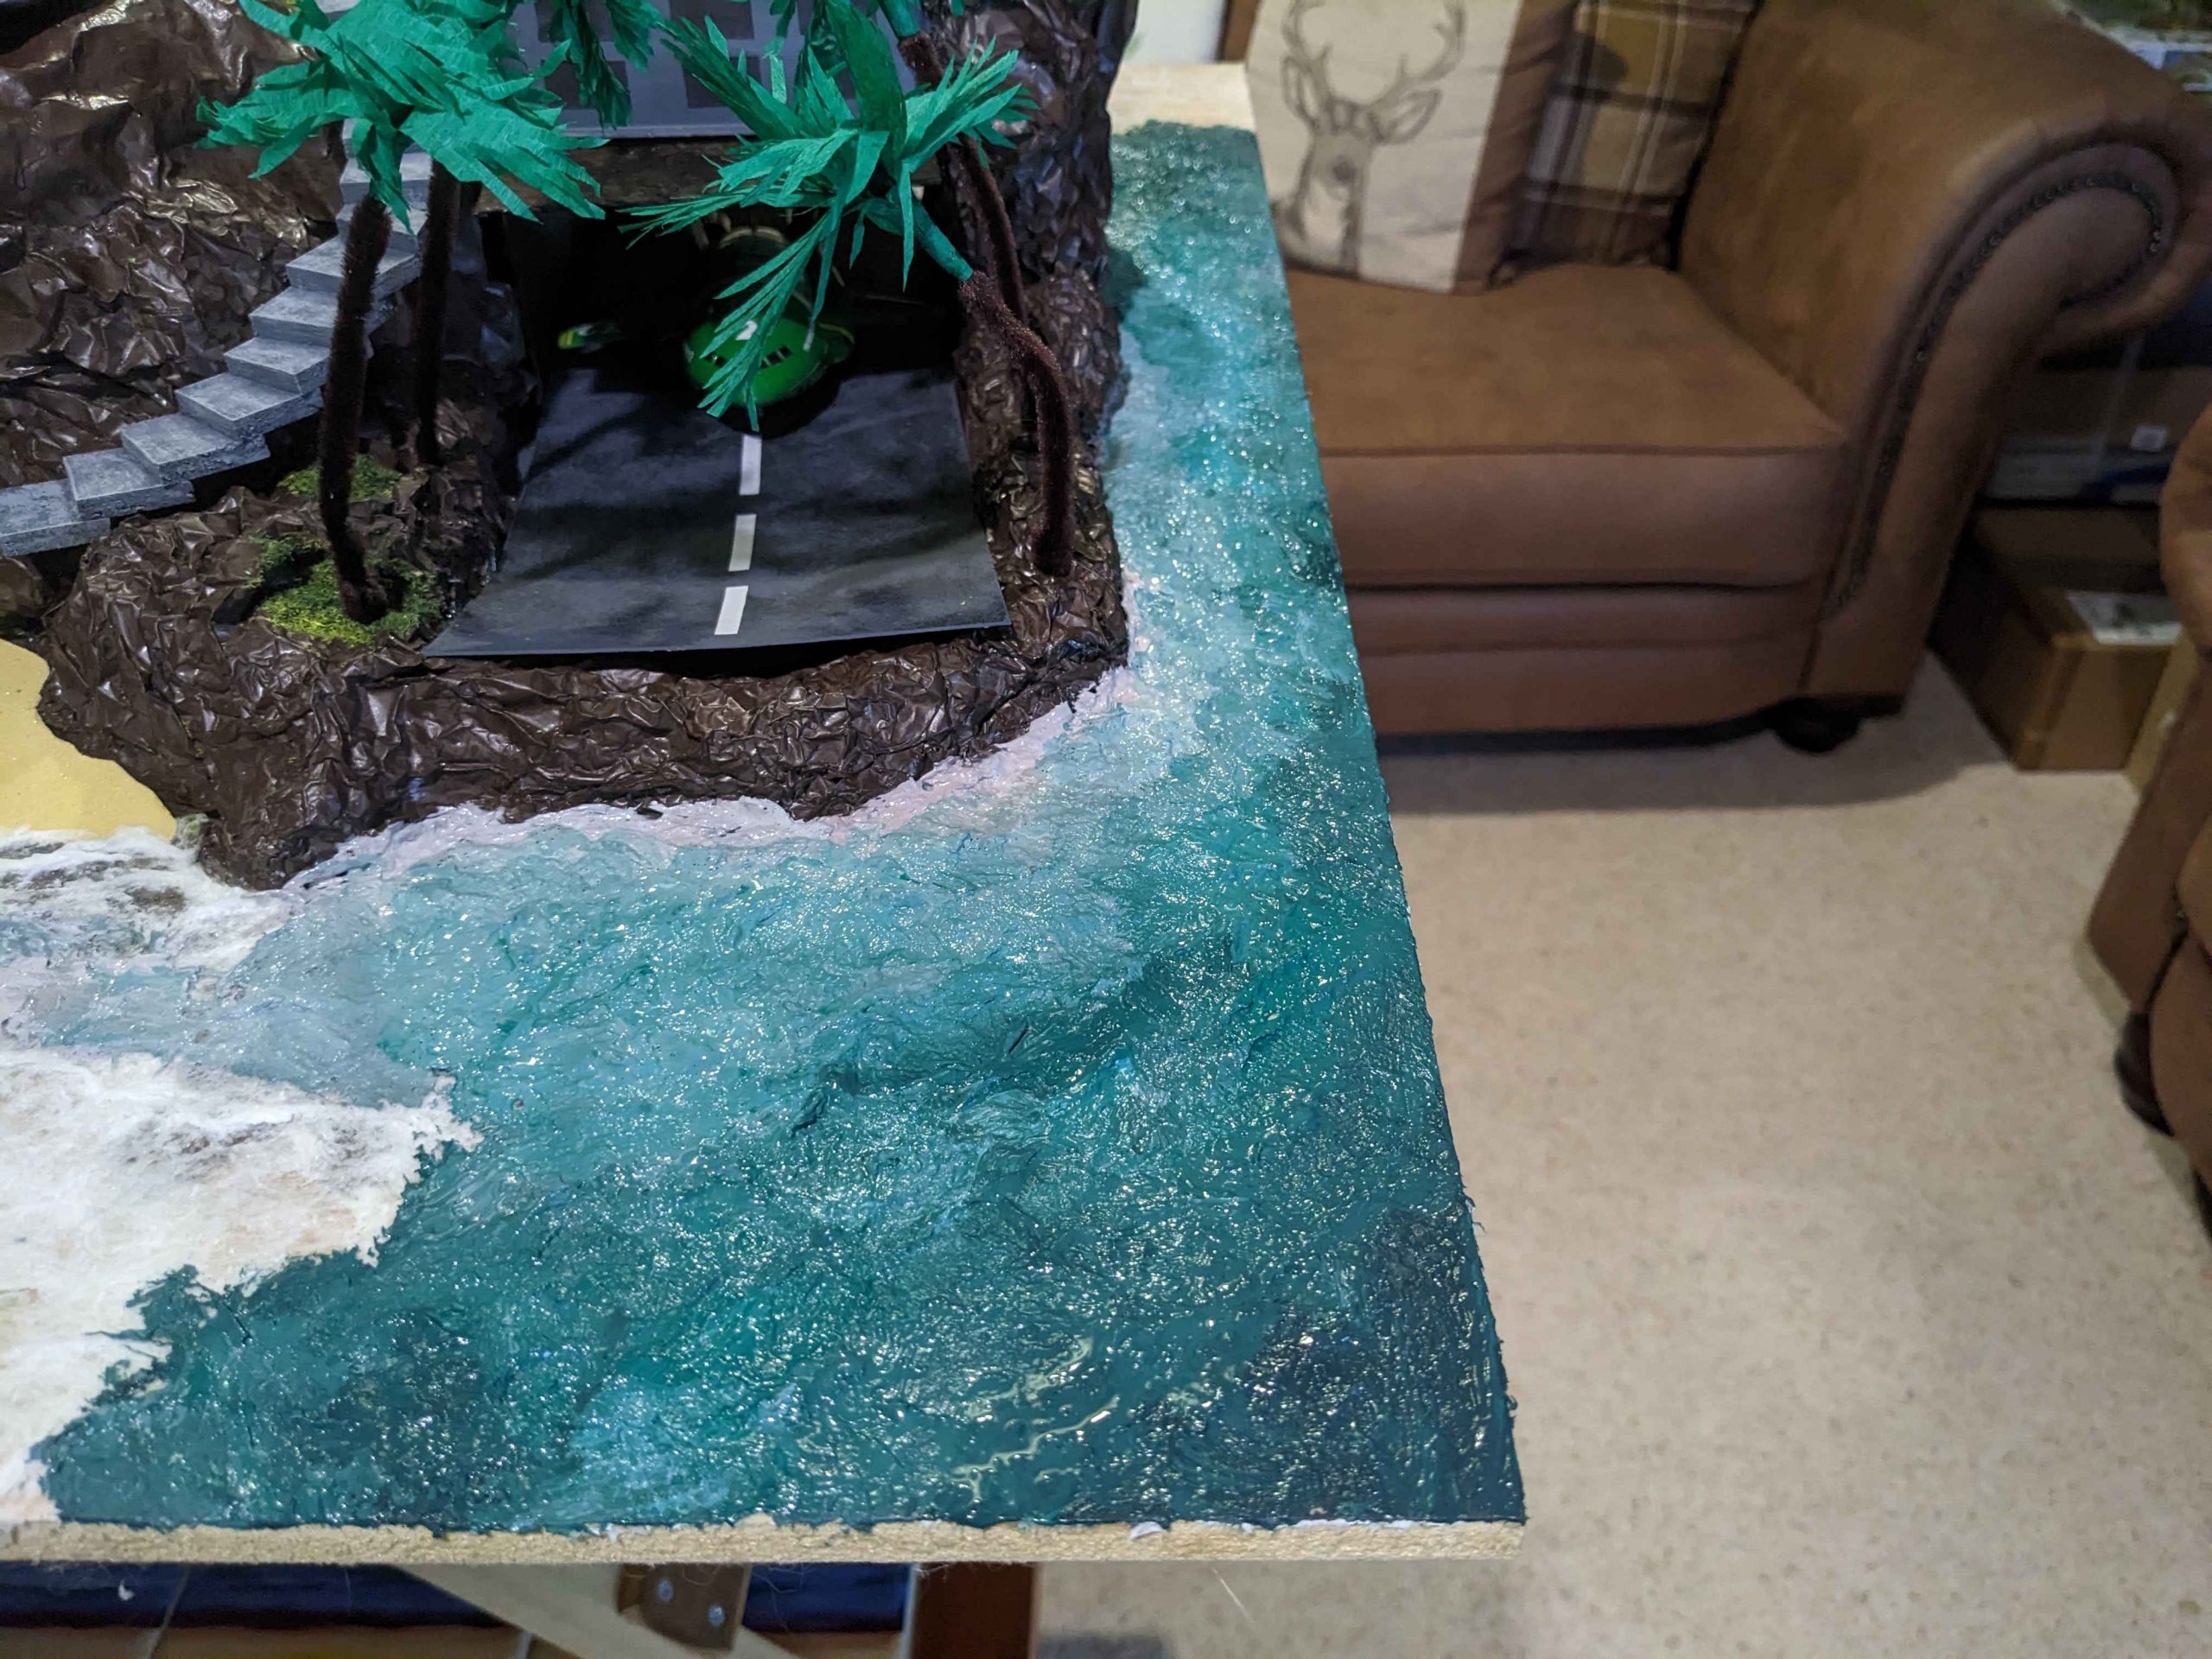
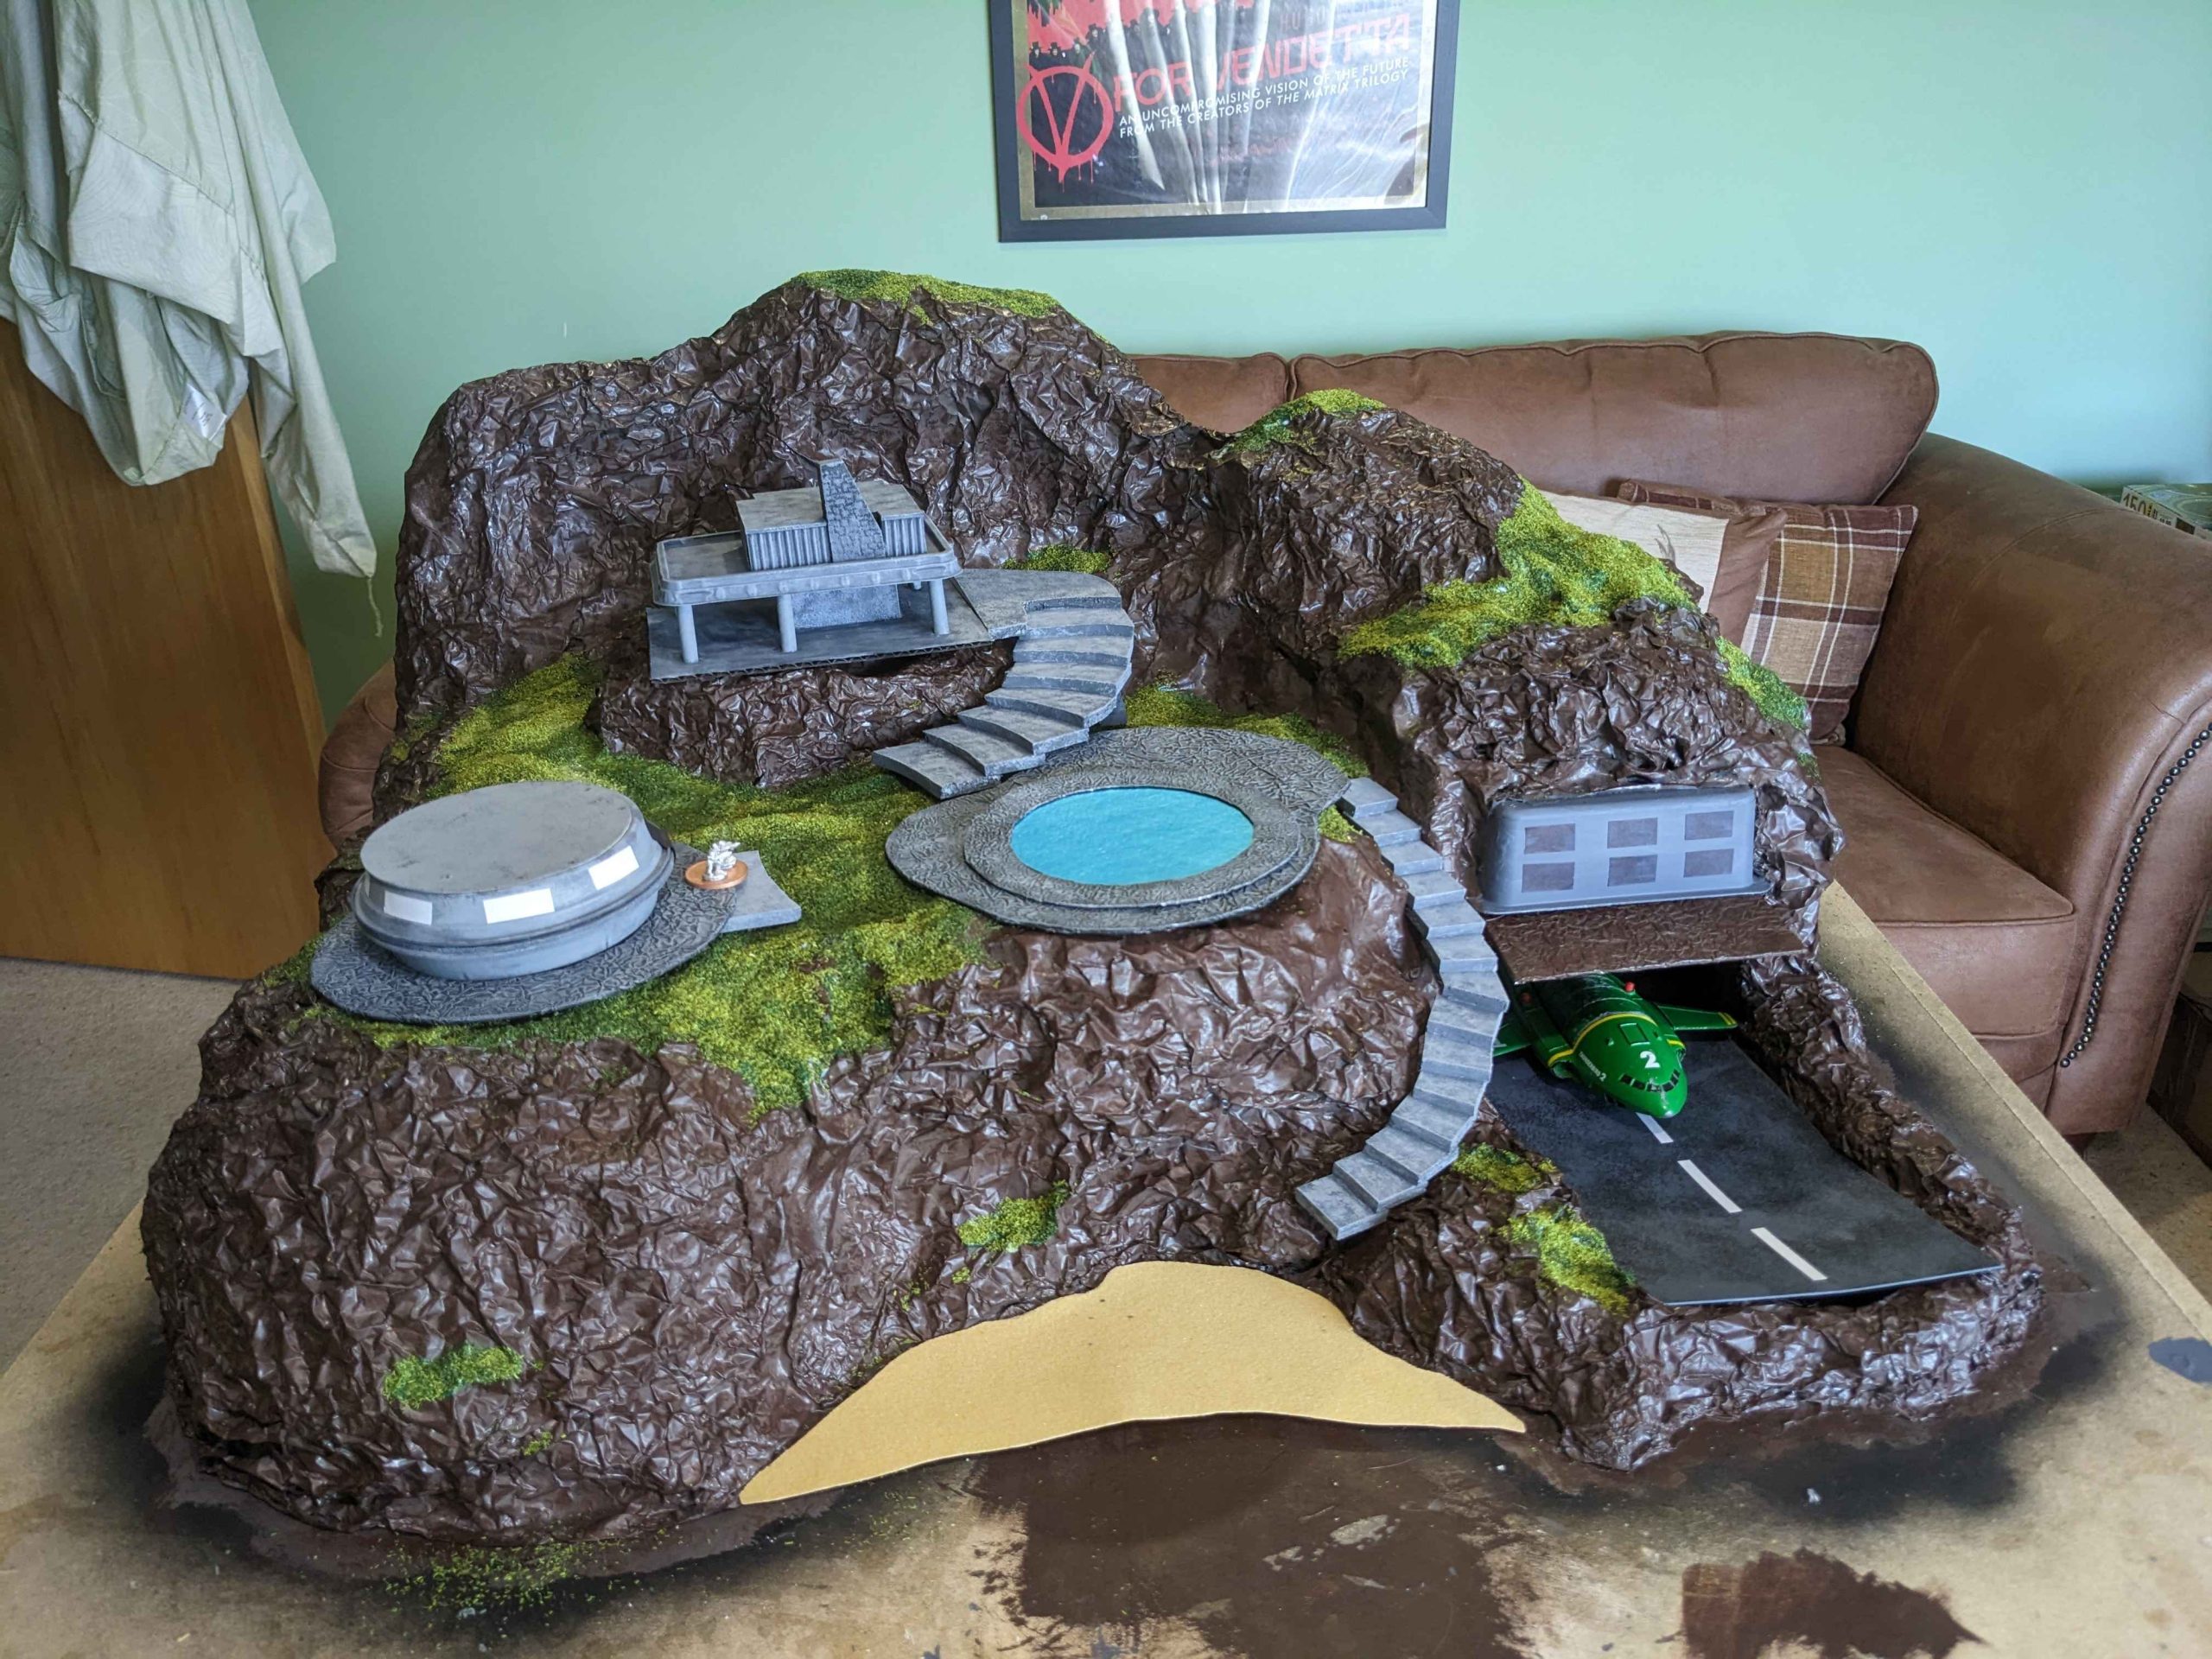
An hour last night to finish the water and ten minutes before work this morning to add a little white to the waves near the shore and Tracy Island is done!
I’ll varnish it all in the future but the weather here is too driech for it right now.
This was a perfect little project for right now – work has been pretty awful the last few weeks and my doctor has put me onto anxiety meds daily. Coming home, putting on some music and just chipping away at this has been a wonderful way to just drown it all out for a few hours.
I’ll update this project once I get the minis from Pendraken and start to work on the scenario but, for now, this is finished.
Part fifteen Water palavah!
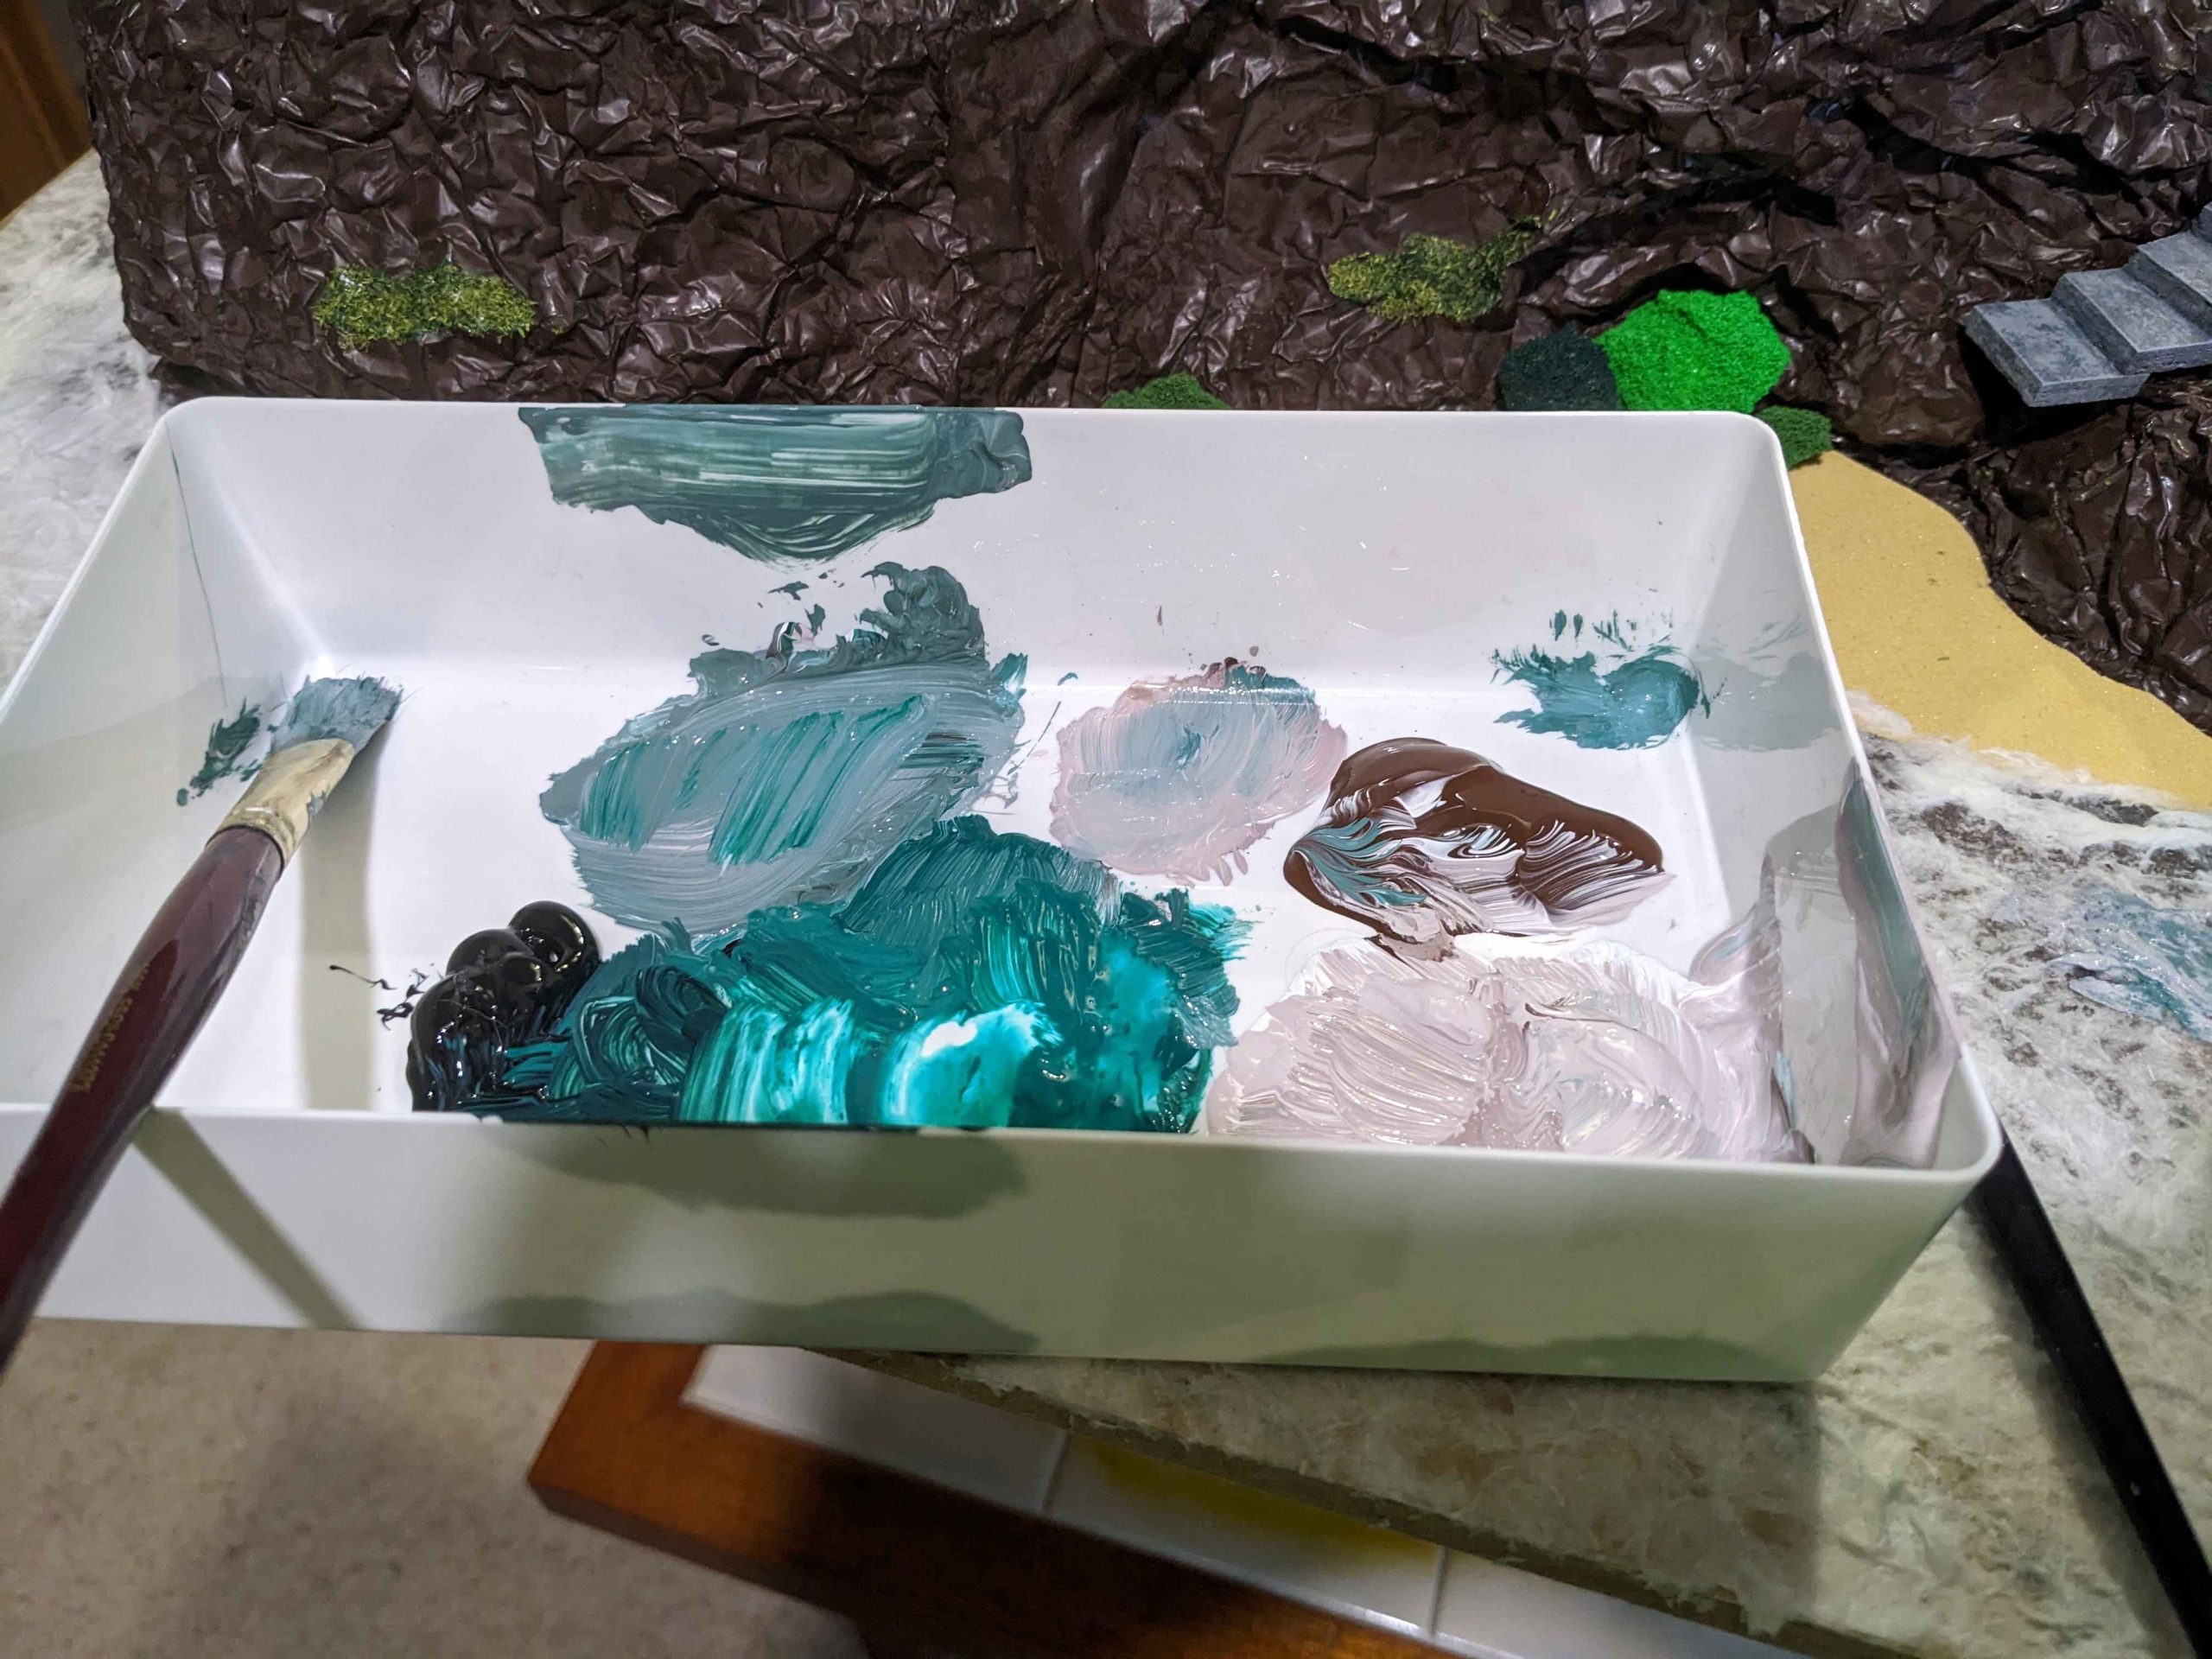
The paper layer was dry this morning and I had a late start at work so grabbed my paints to get cracking before leaving.
Four paints in total were used; titanium white, black, burnt umber and phthalocyanine green (phthalo for short). I used pretty cheap Pebeo acrylics and followed the guide linked in the last video.
Starting at the shoreline with a light brown (white and a touch of umber) then add more green m, up to pure phthalo then start adding in black as the water gets deeper. Each paint is out on in a line and then you go in with a clean, wet brush and blend the tones together. I found I liked blending dark into light more than the other way round as I want to water to appear deeper.
This was the point I realised I don’t have enough phthalo to do the whole way round the island. Bugger. I don’t have time to grab another bottle today so it is tools down until tomorrow night.

Part fourteen - Bog (roll) water
I’ve used this method before on my Kings of War Armada bases but this is the largest surface I’ve worked on. I took it directly from this video – there’s a lot we can learn from the model railway people.
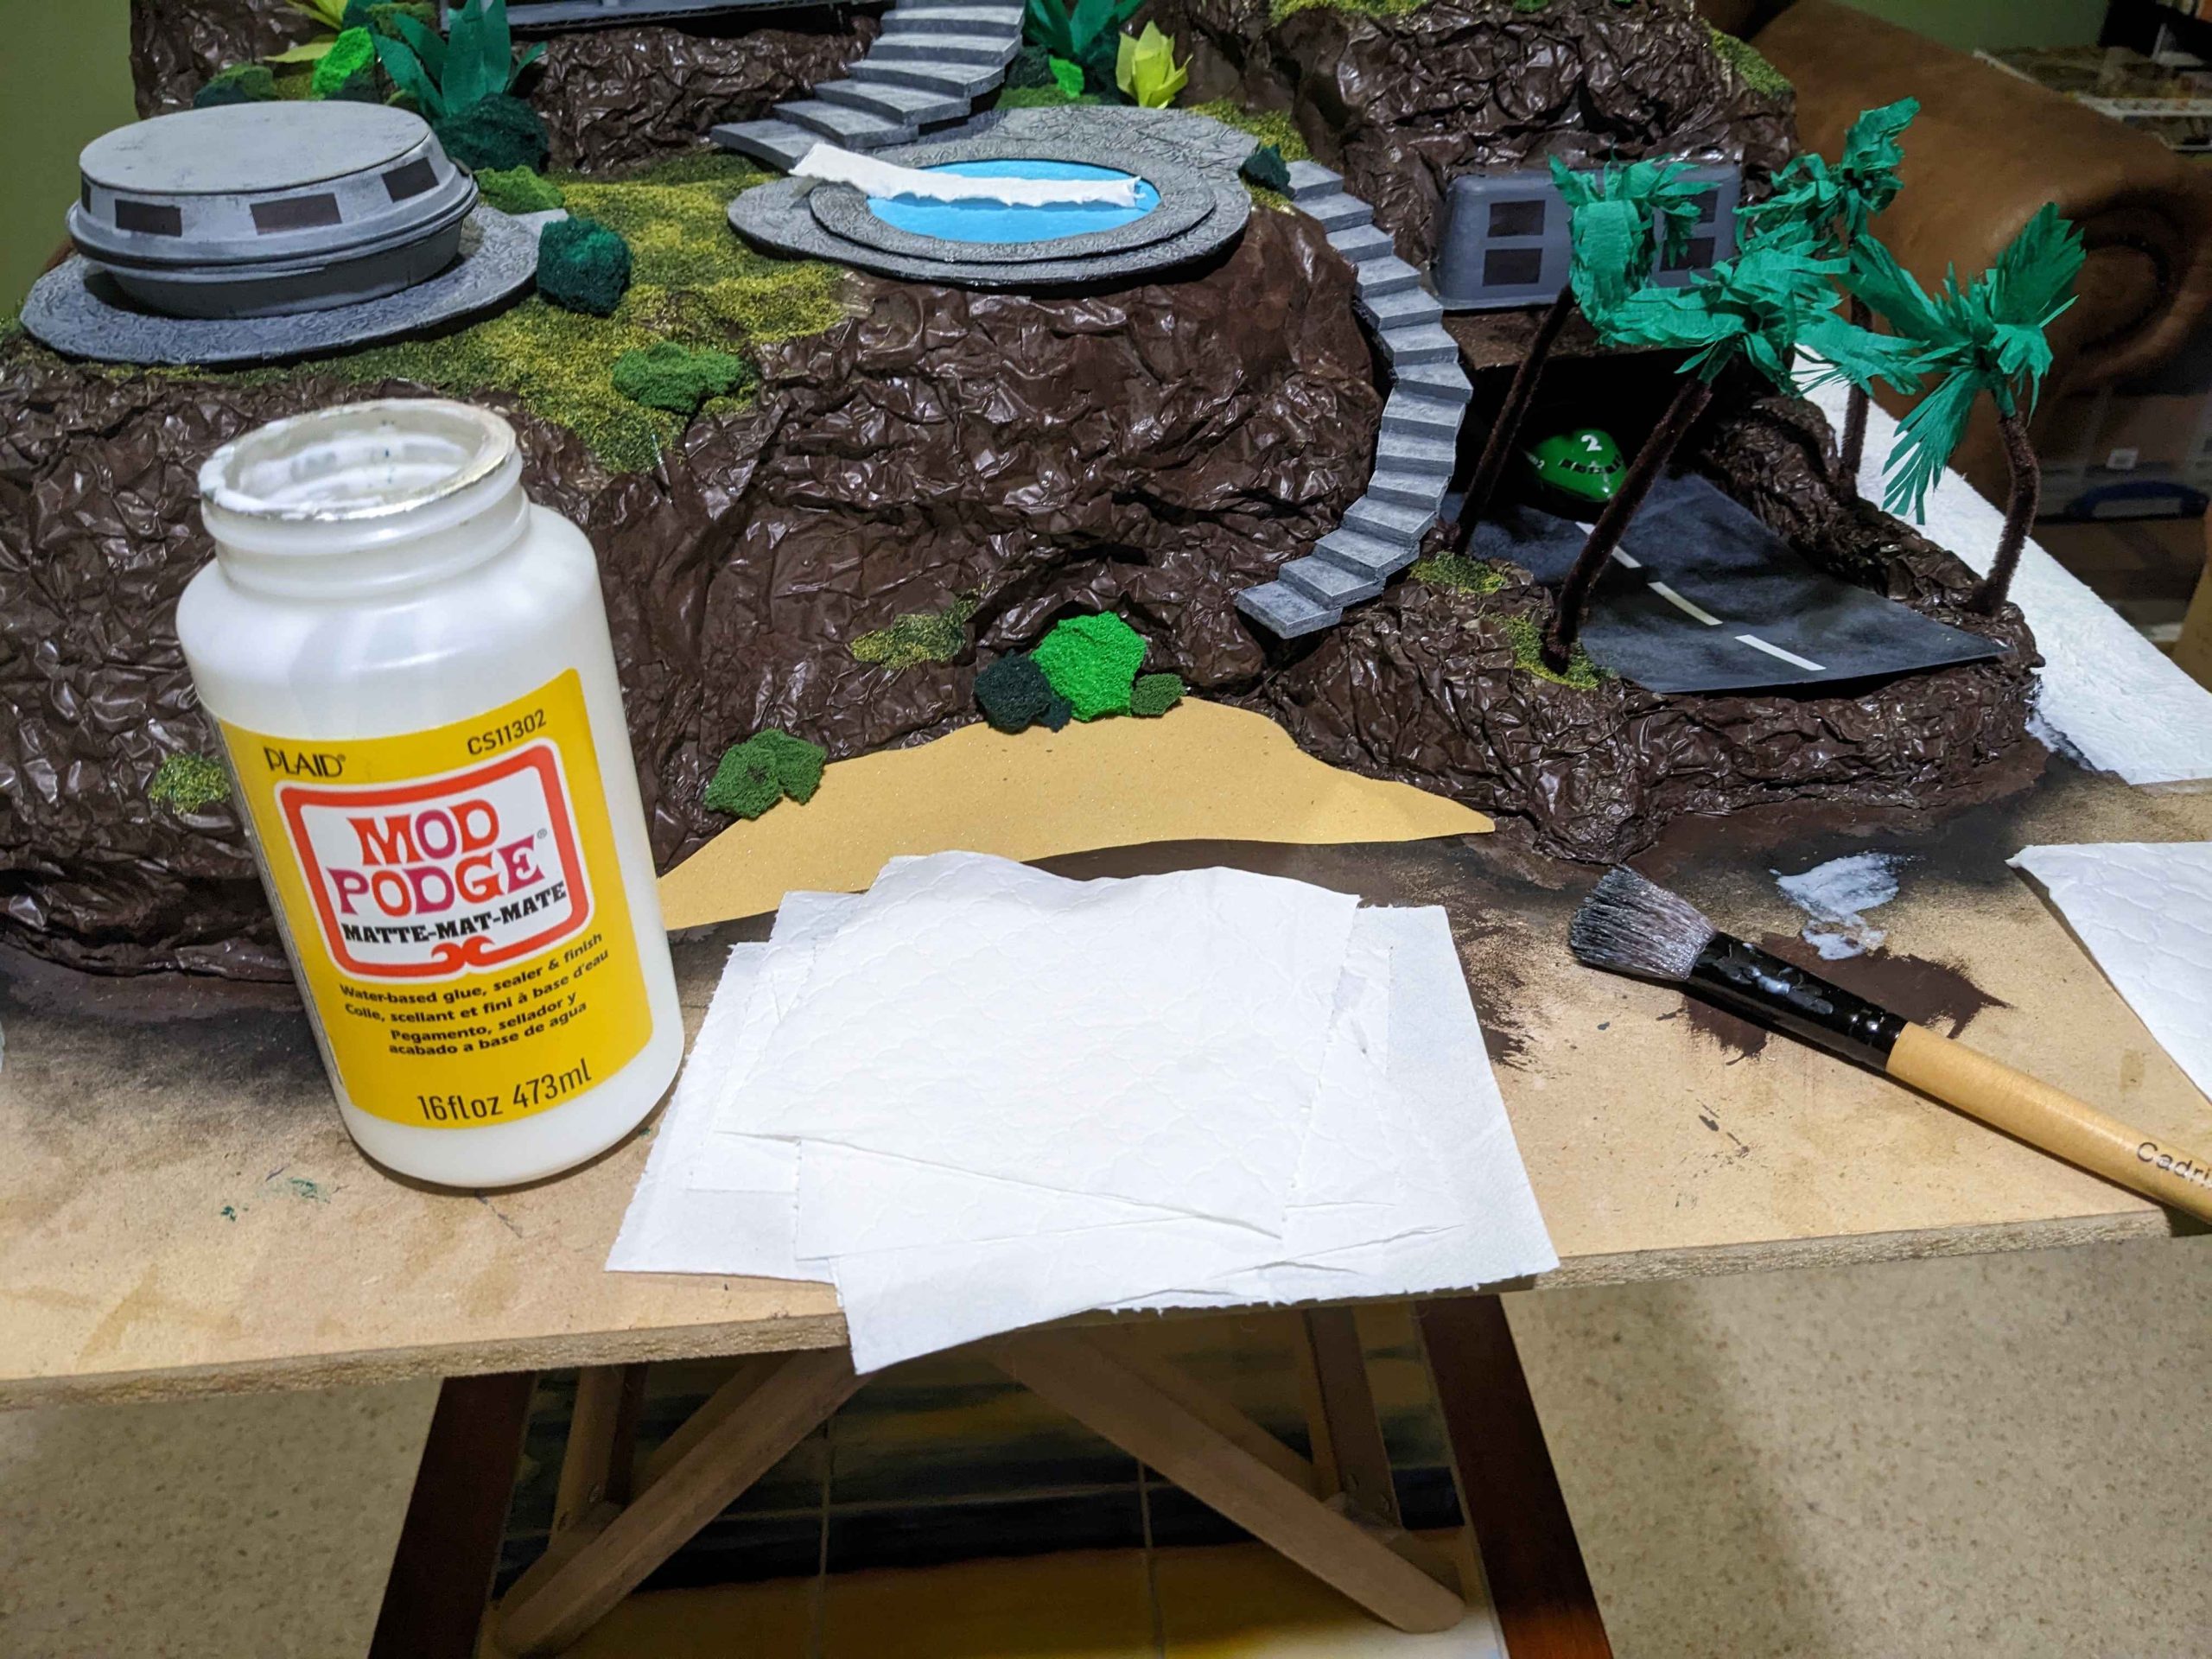
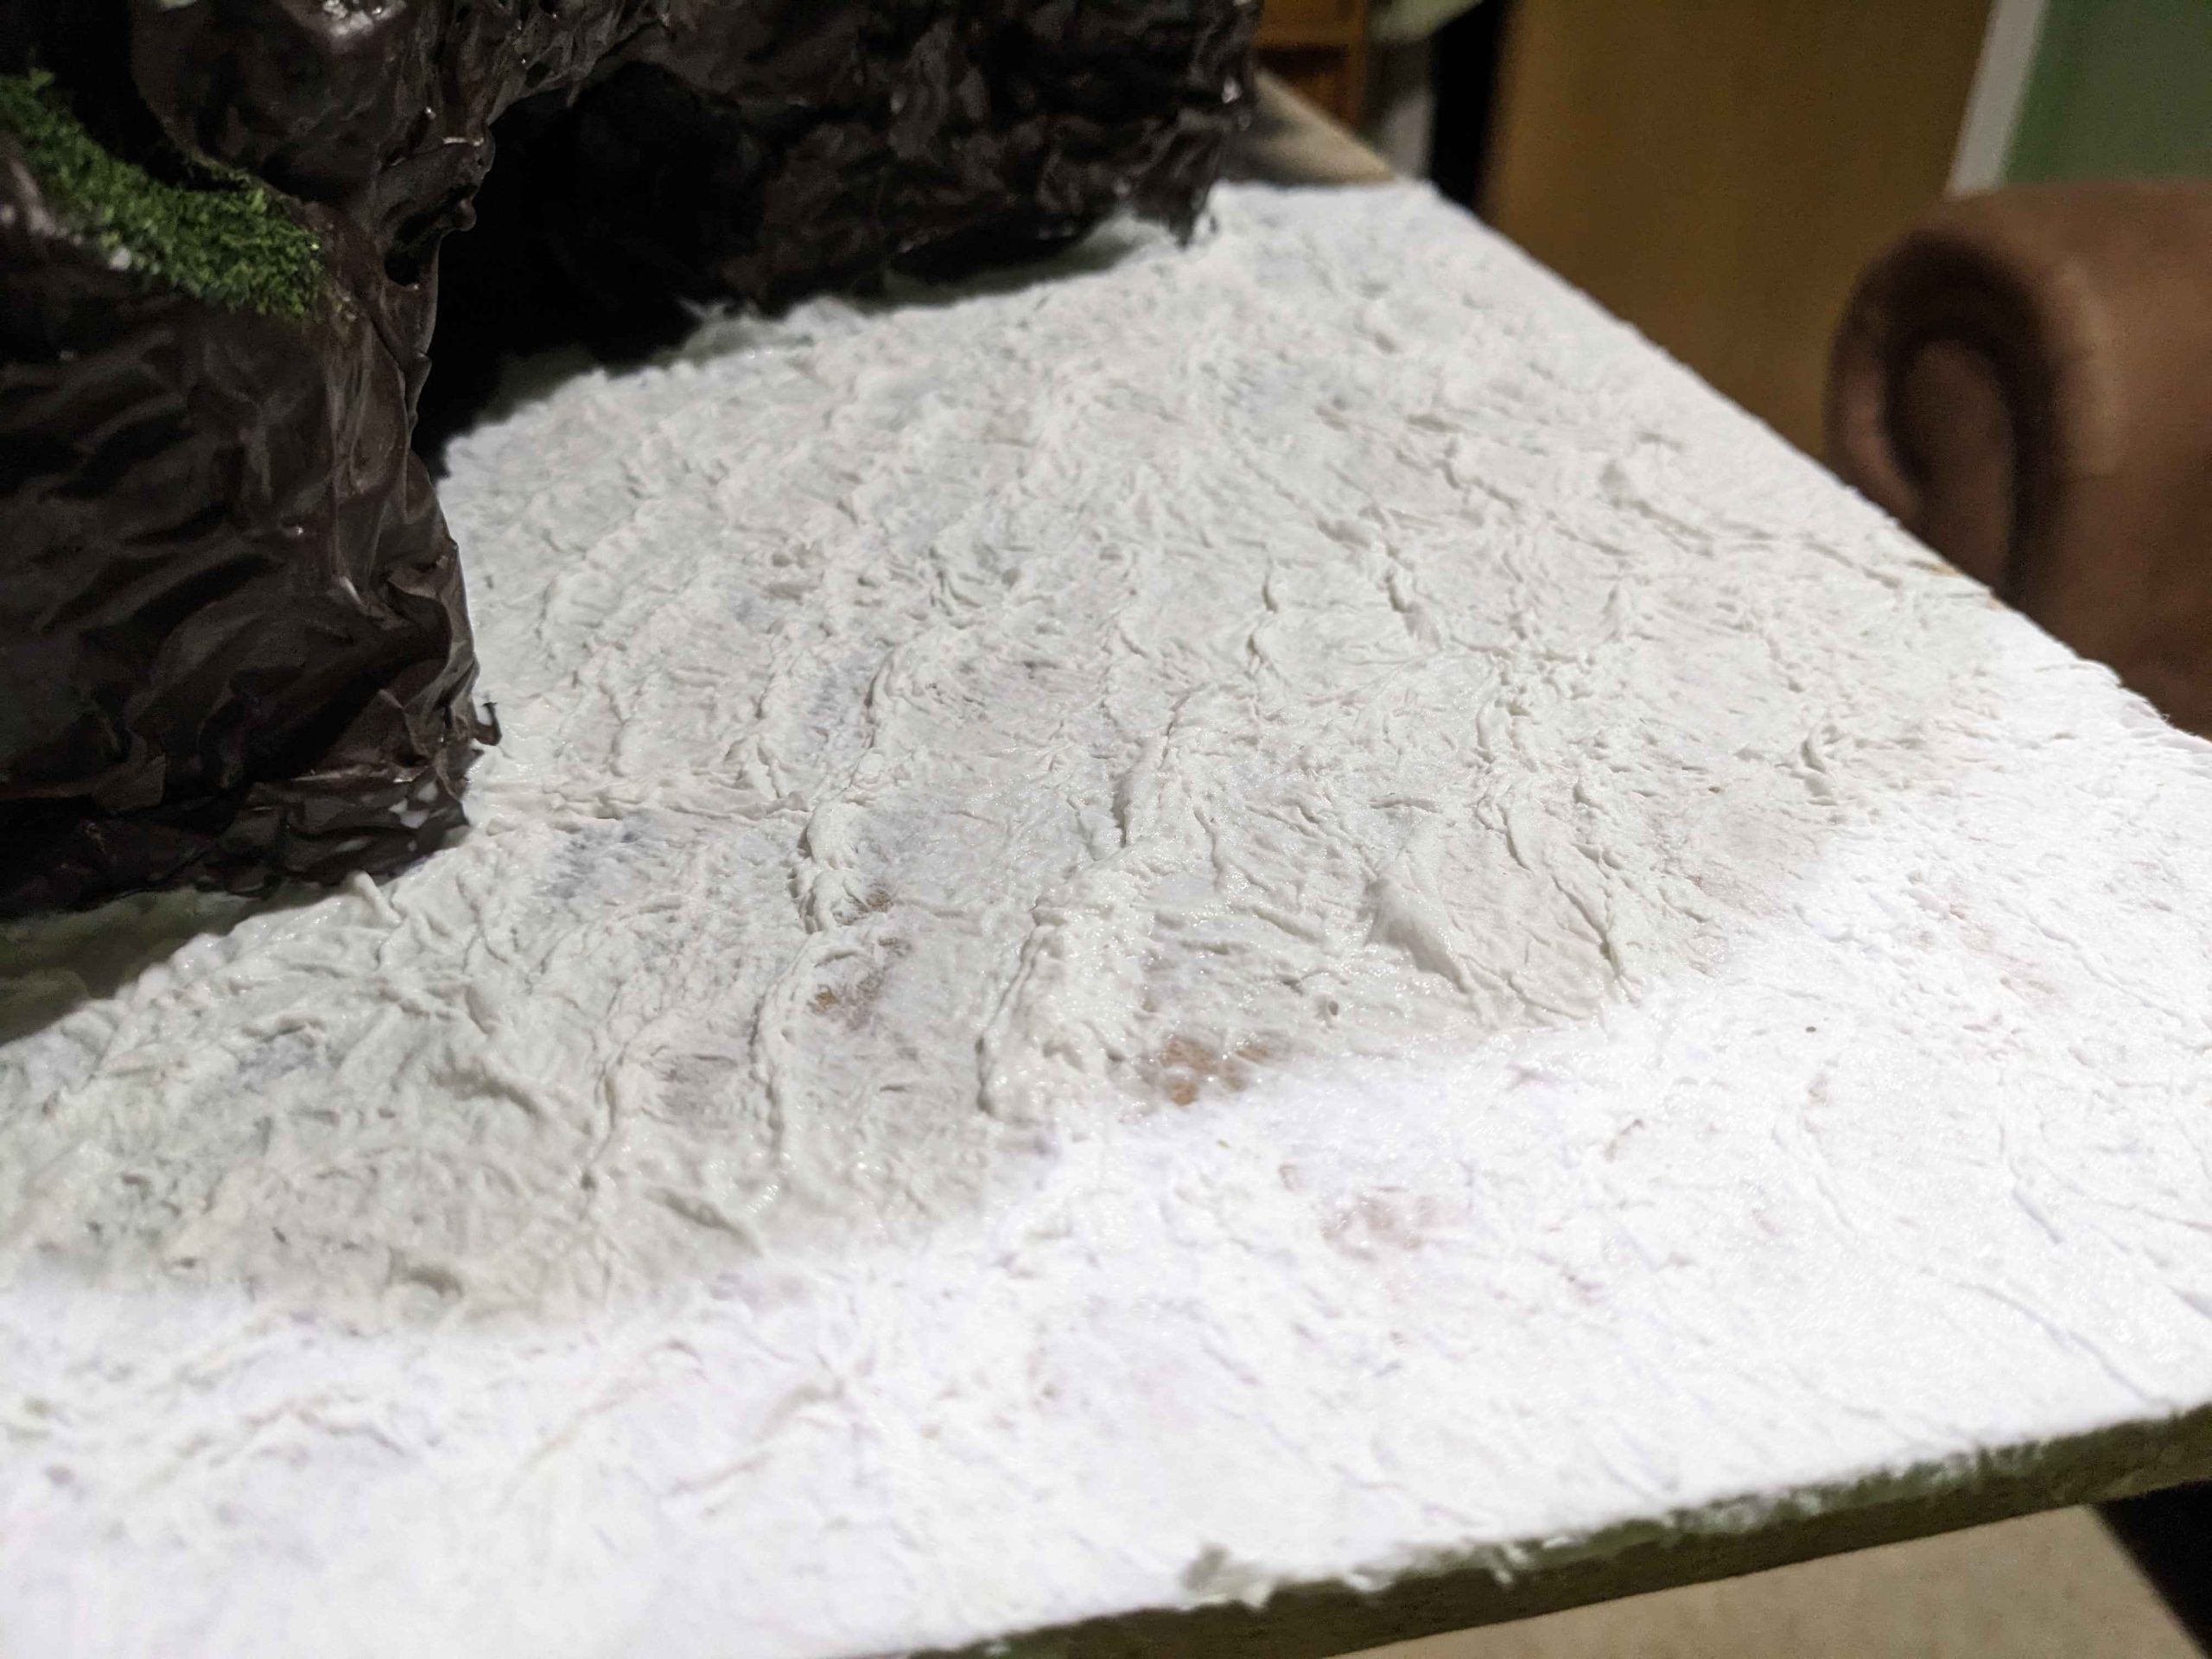
This stage took maybe 90 minutes to go round the whole island. I used the last bit of Mod Podge, watered down and now we just need to leave it dry… and pray it doesn’t warp the MDF. I forgot until after I’d done it that I was going to put down a layer of Shellac to seal it before I started. It might only be Monday but my brain is already mince.
Part thirteen - Foliage
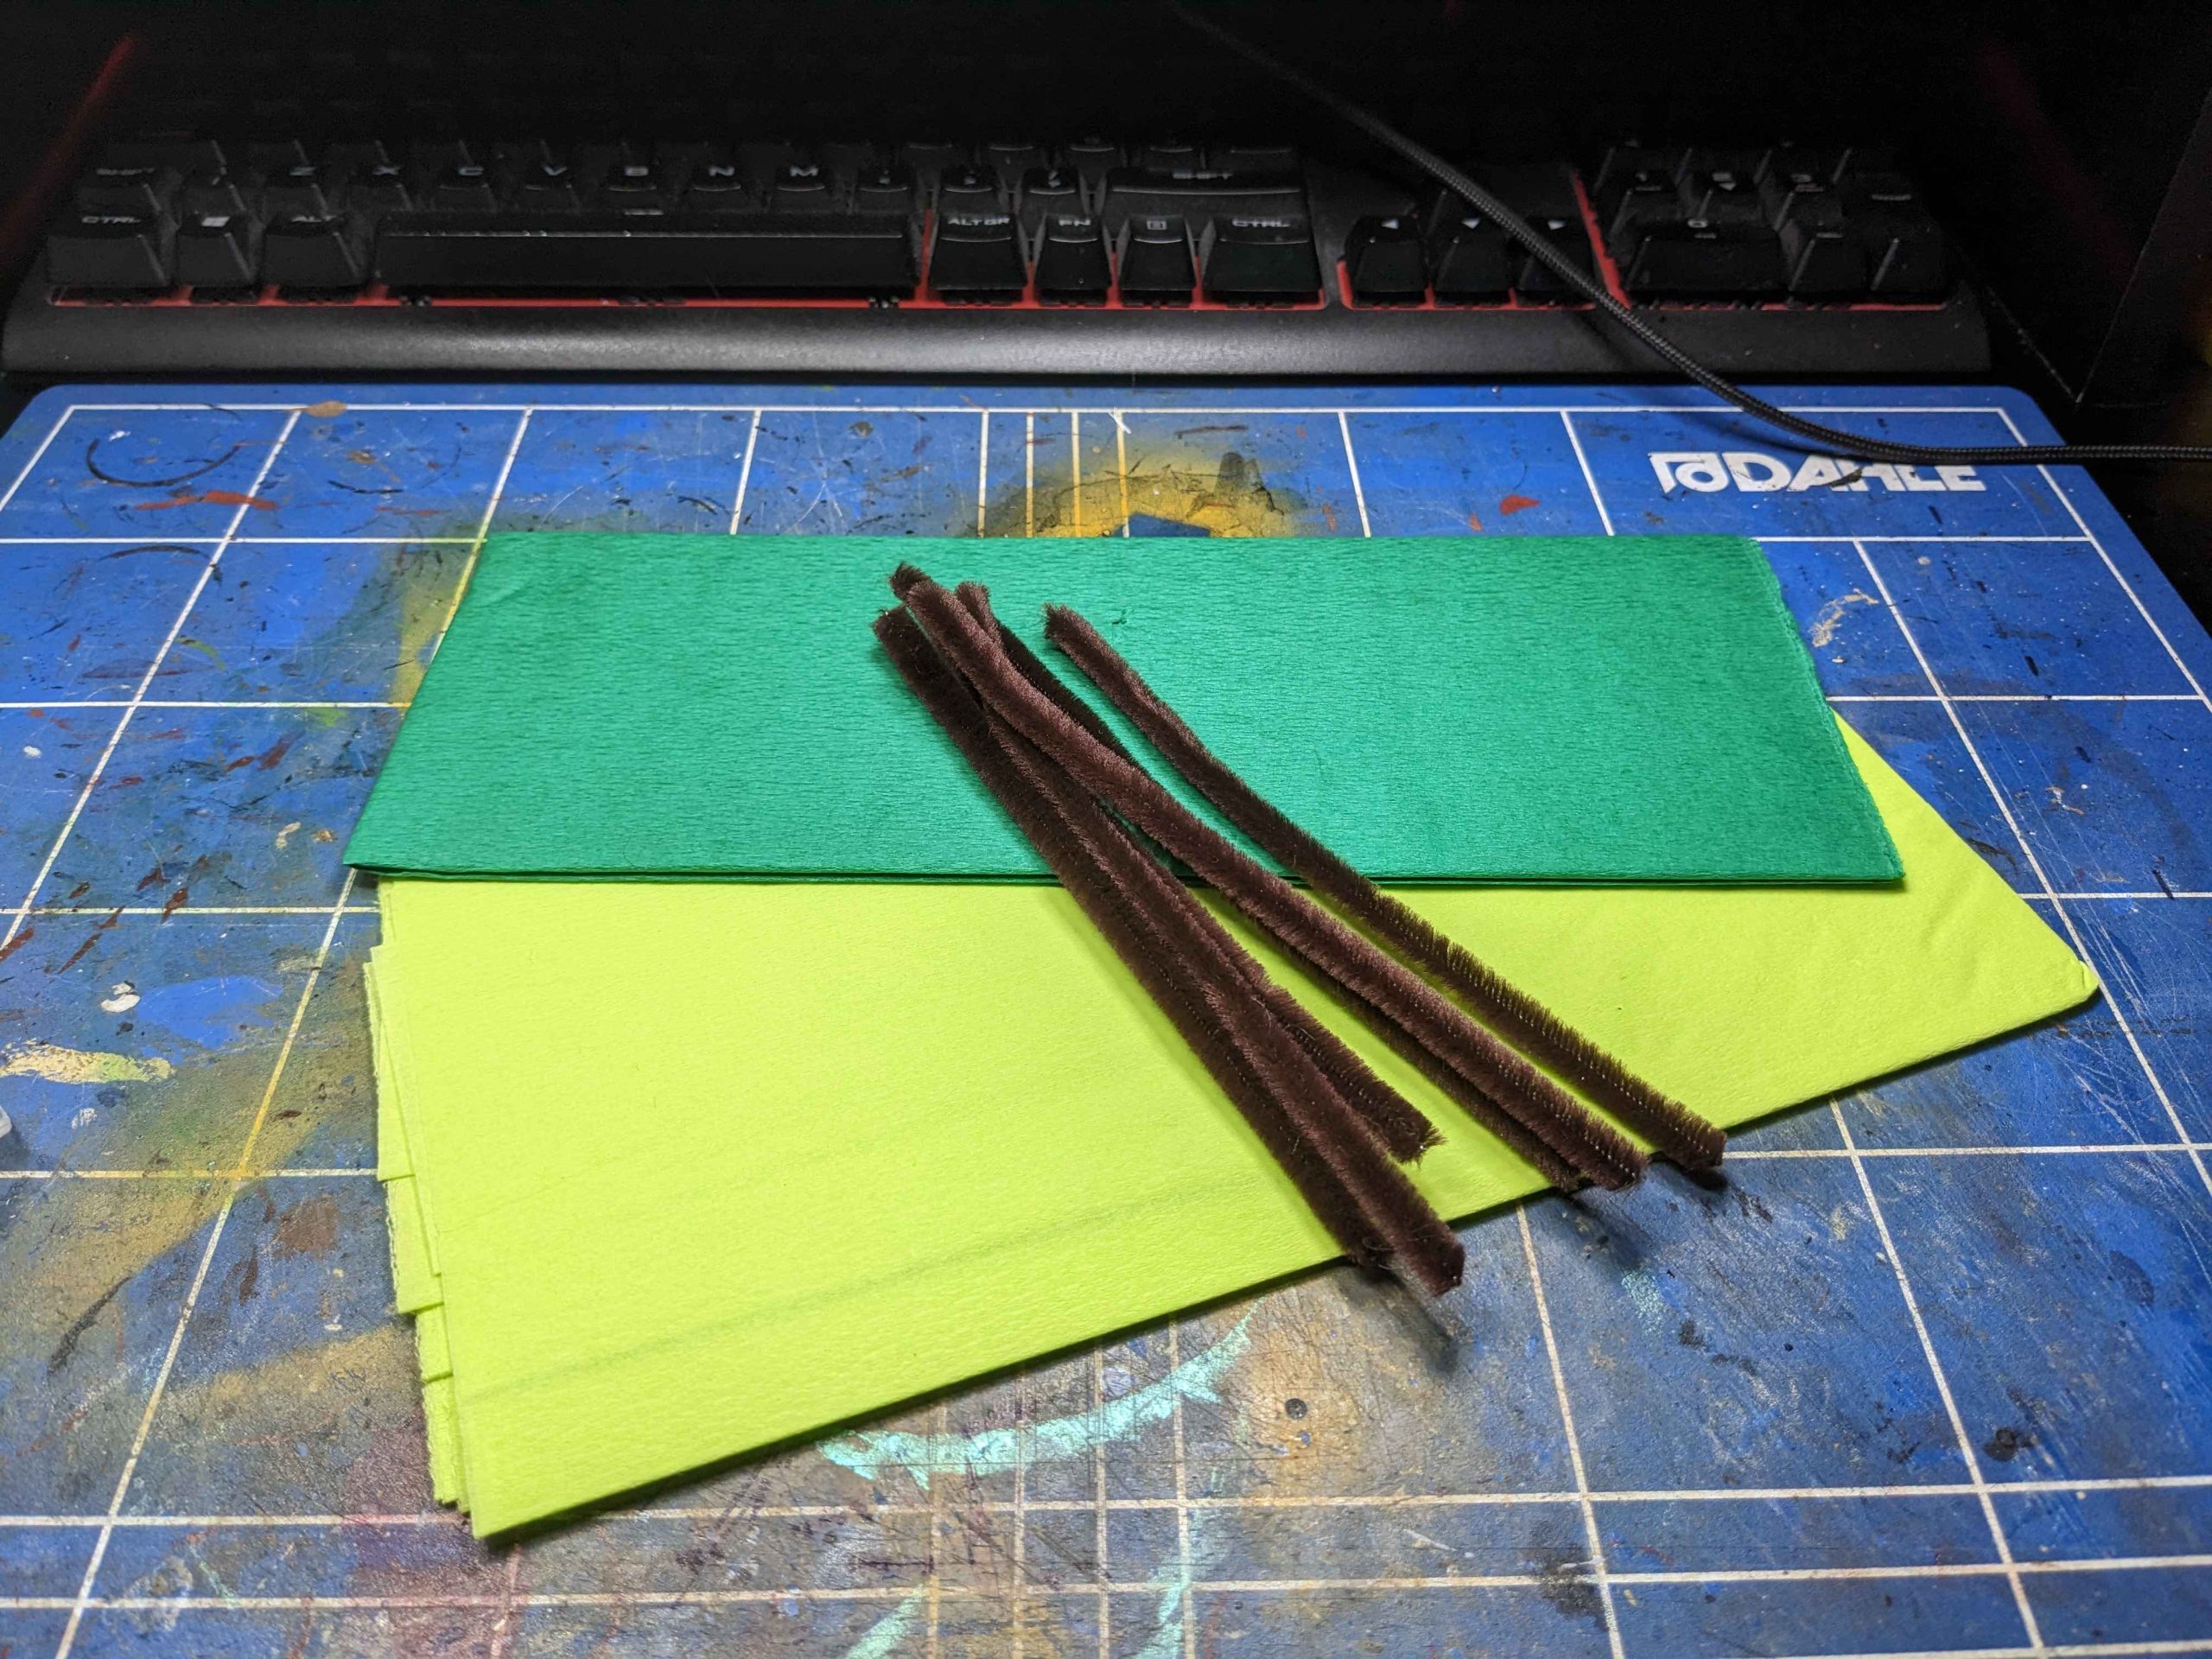
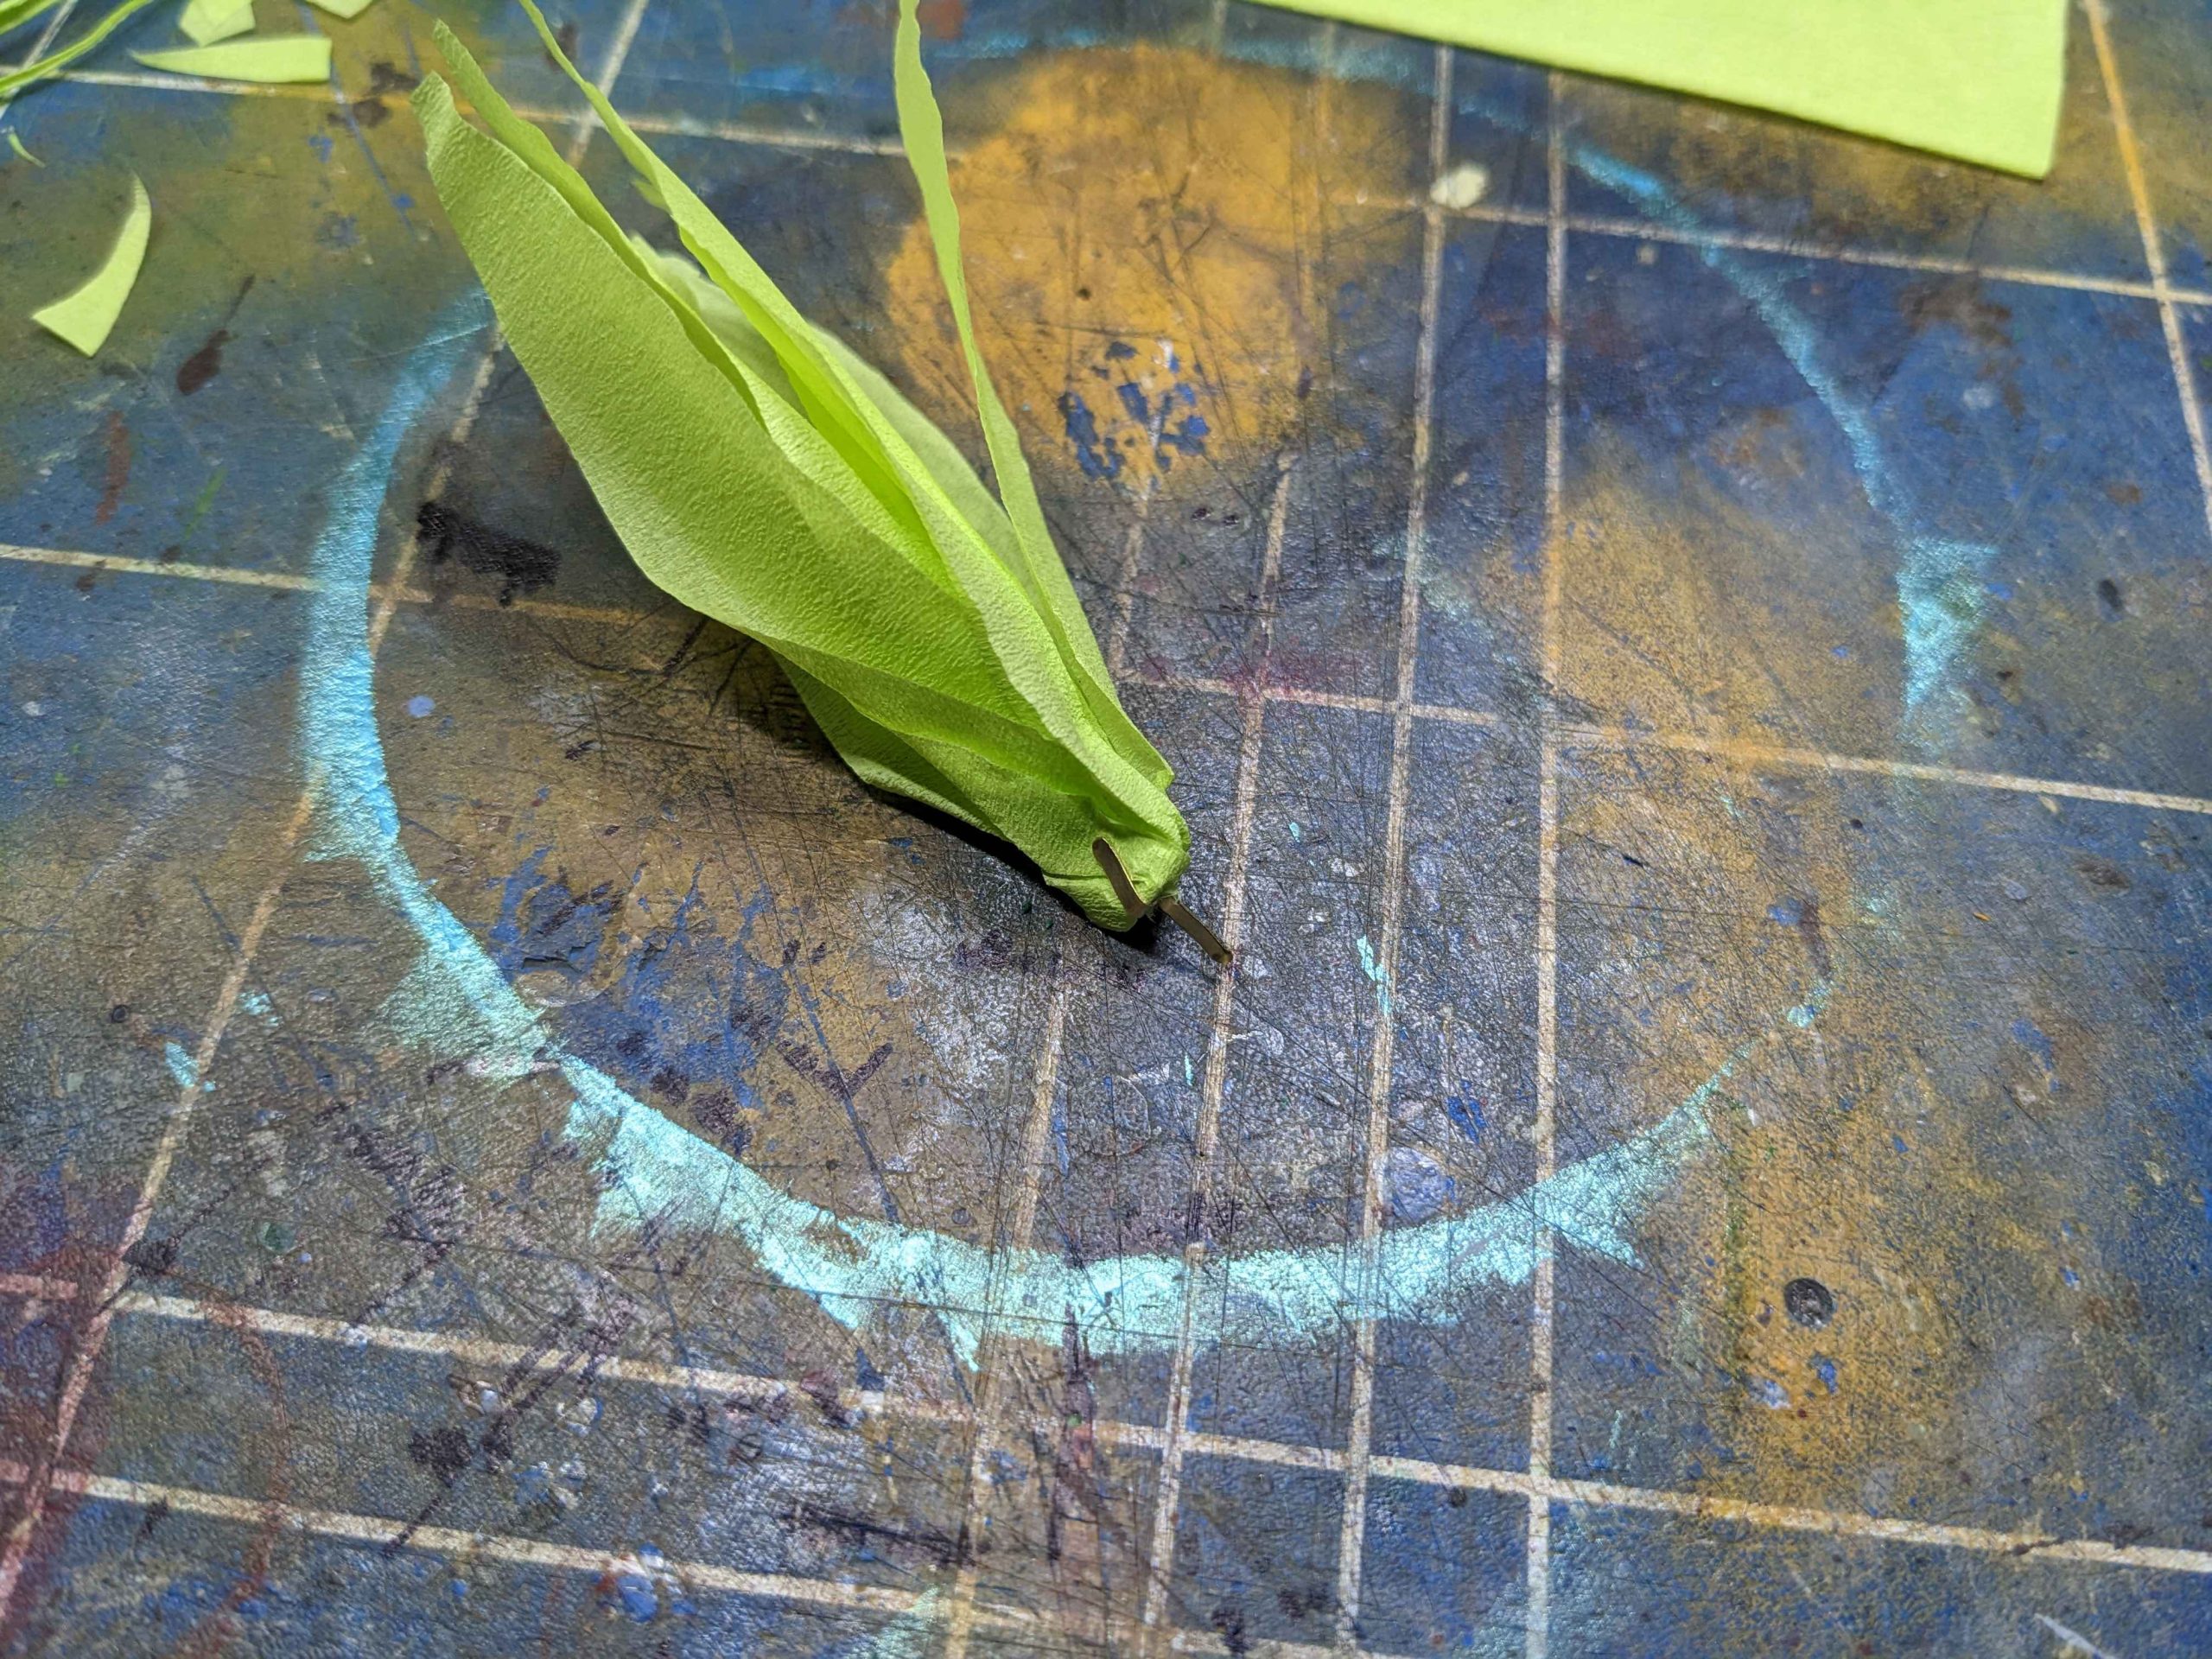
The sponge bushes had mostly dried and it was time to crack out the crepe paper and pipe cleaners.
Showing that thirty years can give us progress – pipe cleaners now come pre-coloured in brown instead of having to paint them or wrap them in brown crepe paper like the instructions said.
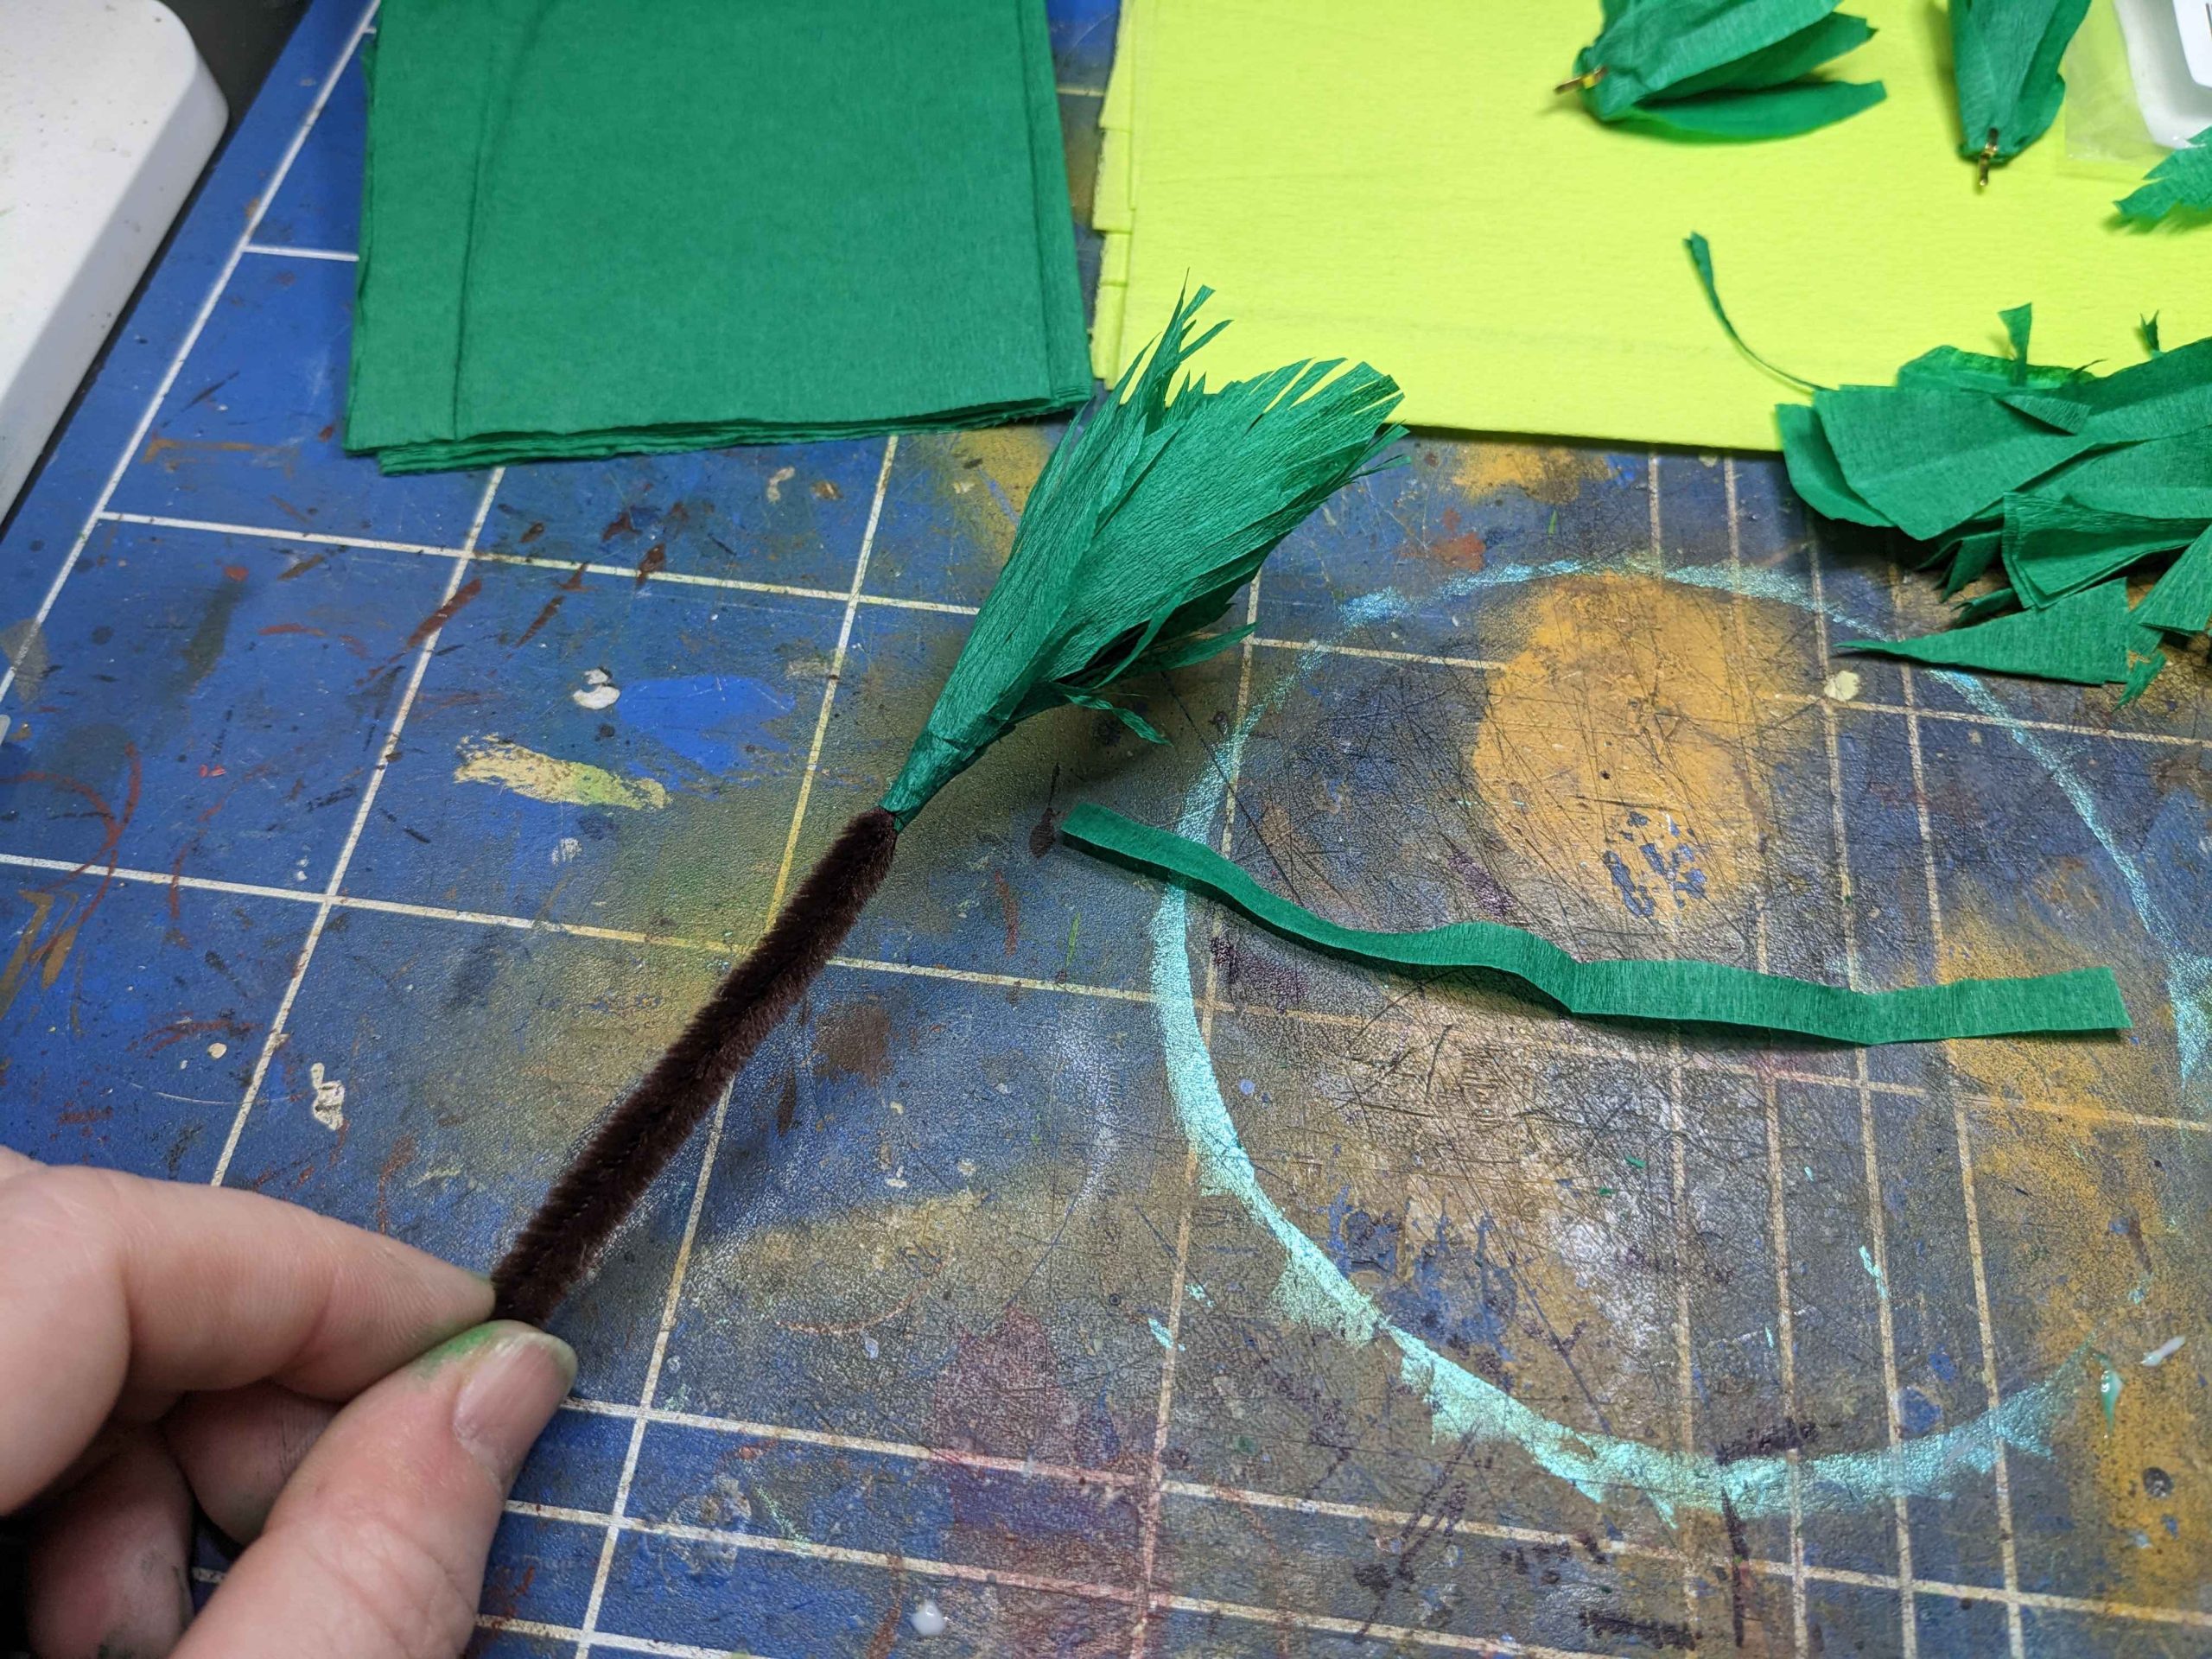
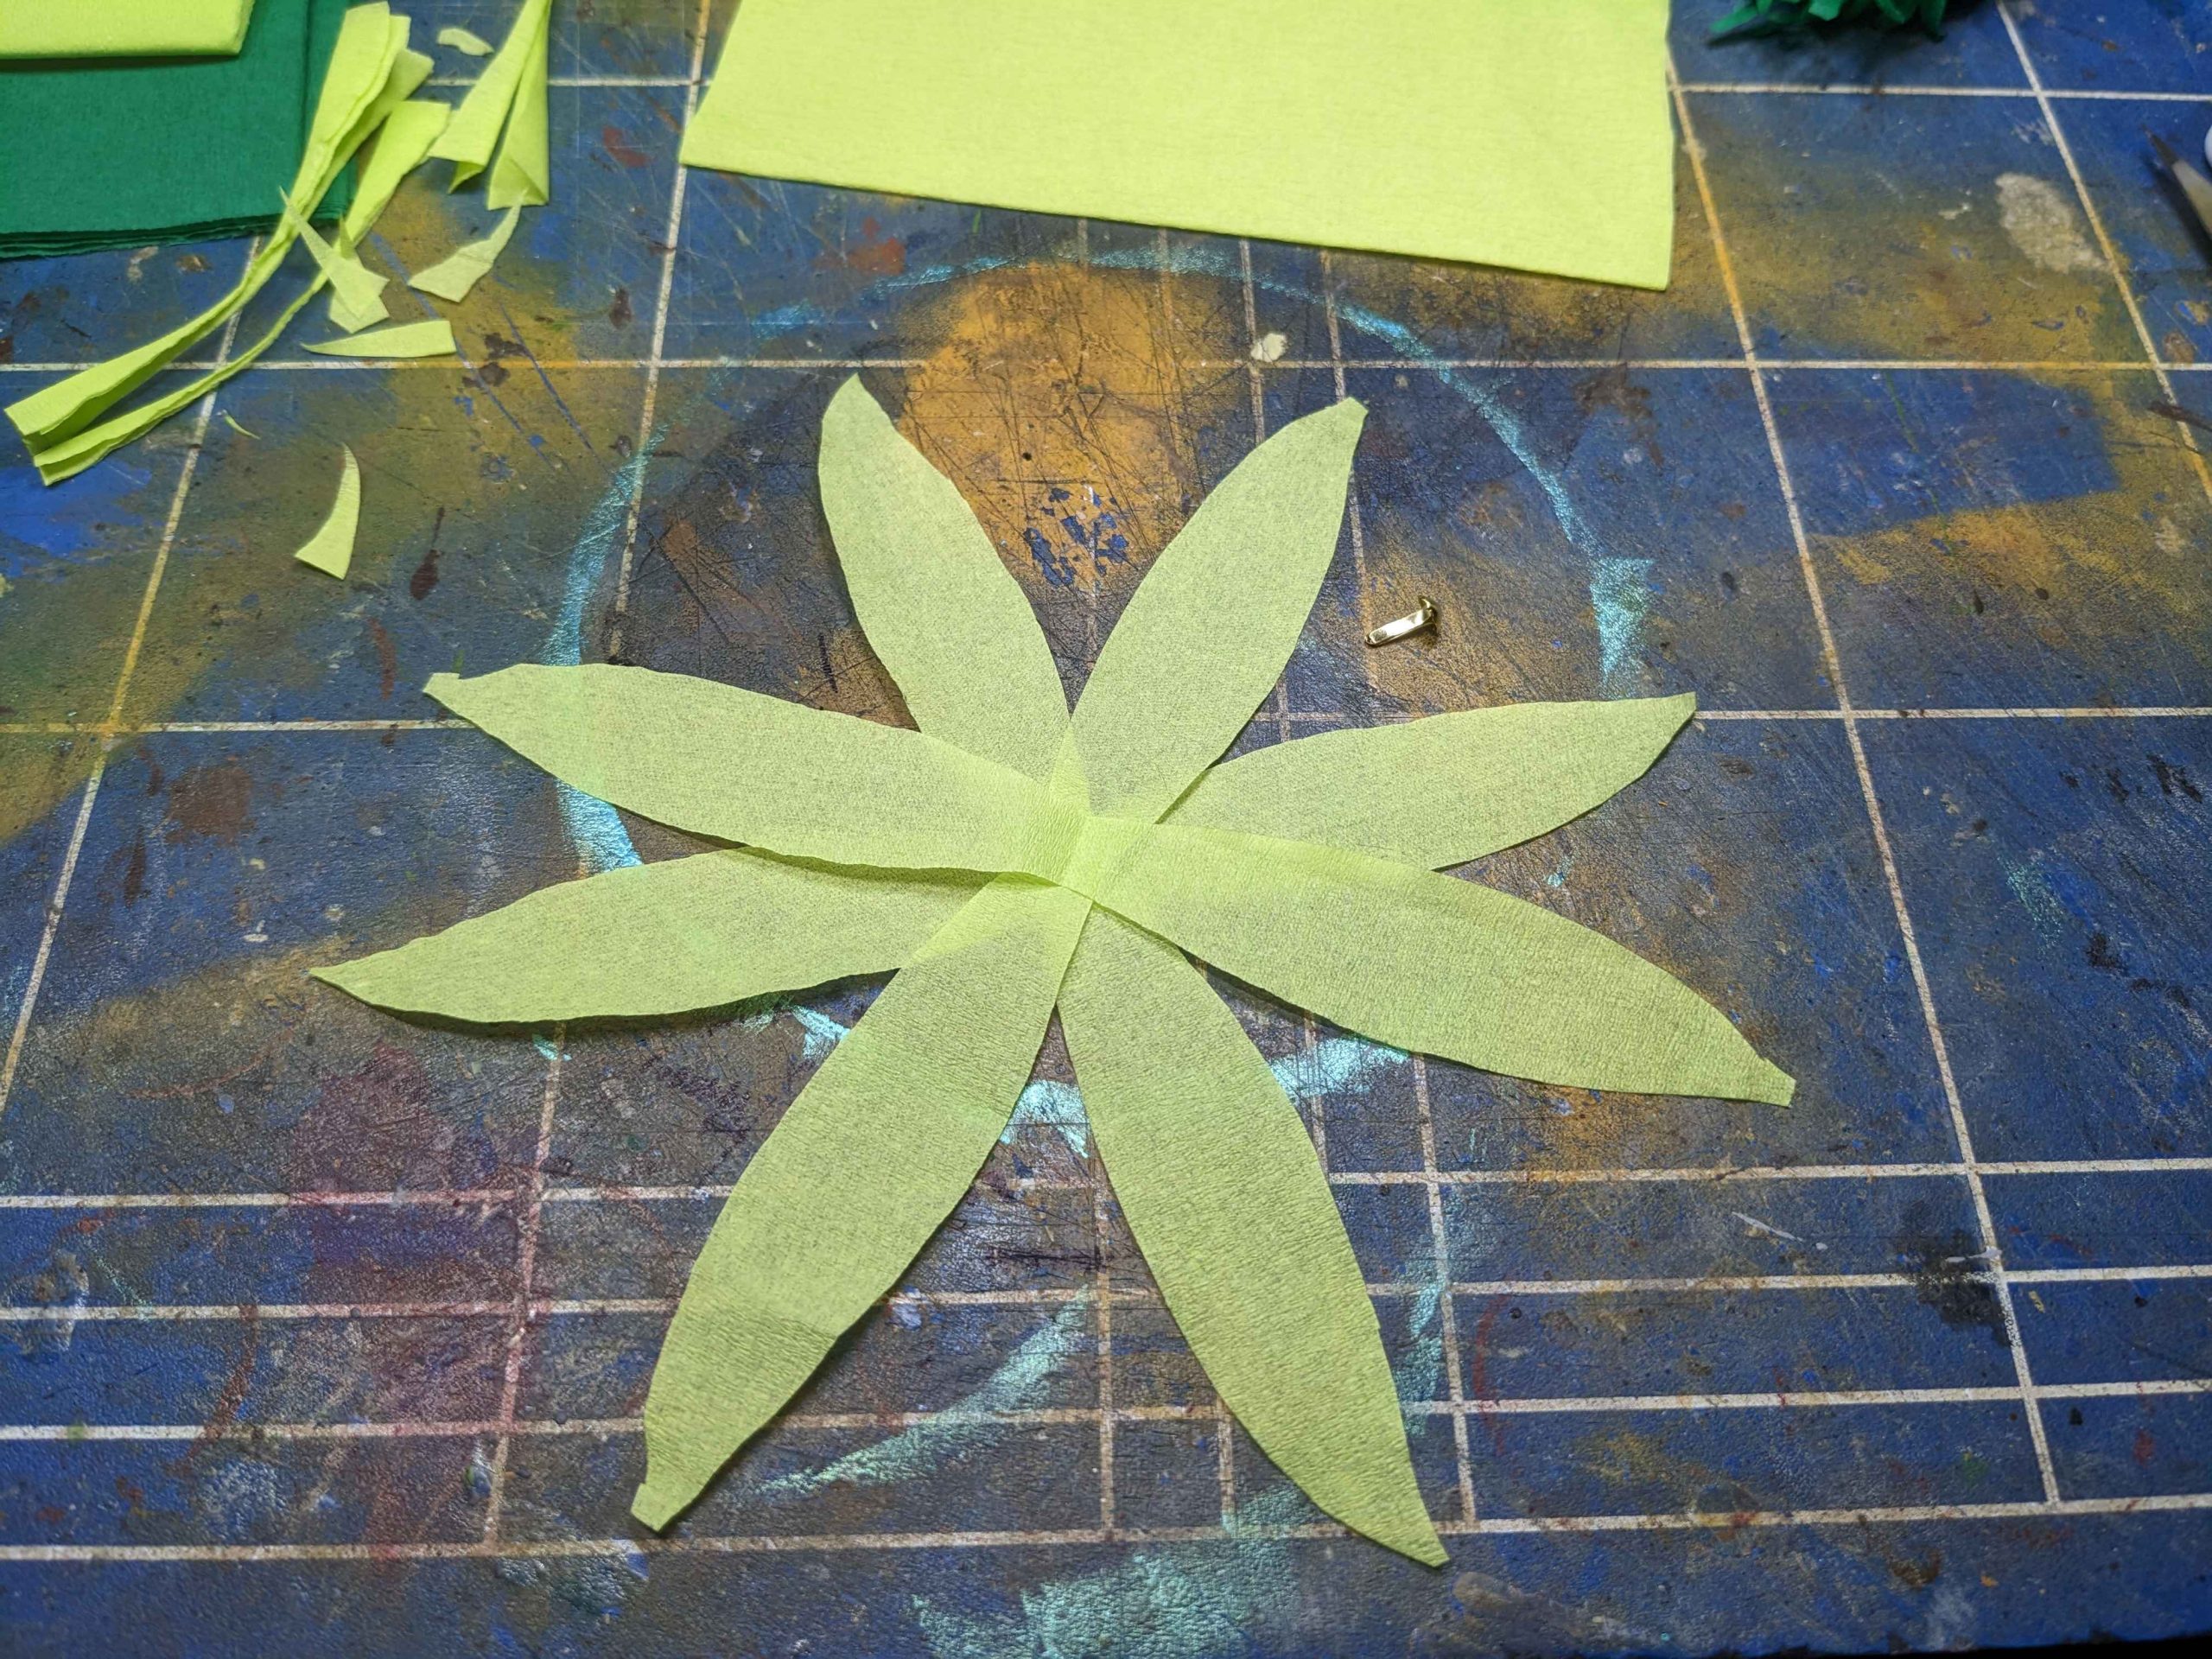
The palm leaves were folded bits of crepe paper cut to the shape and then messily glued to the pipe cleaner. After the first one felt a little weak, I decided to also wrap one of the bits of cut off paper round the leaves to secure them on better. While they fit the look of the original perfectly, I think I’ll have to make several spares cos they just don’t feel like they’ll hold up to much of a battering during gameplay. I used a pointy file to poke holes into the papier-mache to put the pipe cleaners into.
The smaller palms were made much the same way but the leaves were kept in pairs. I then joined several sets of them together with a tiny split pin and bent one arm up to secure them, the other stayed straight to stick into the ground.
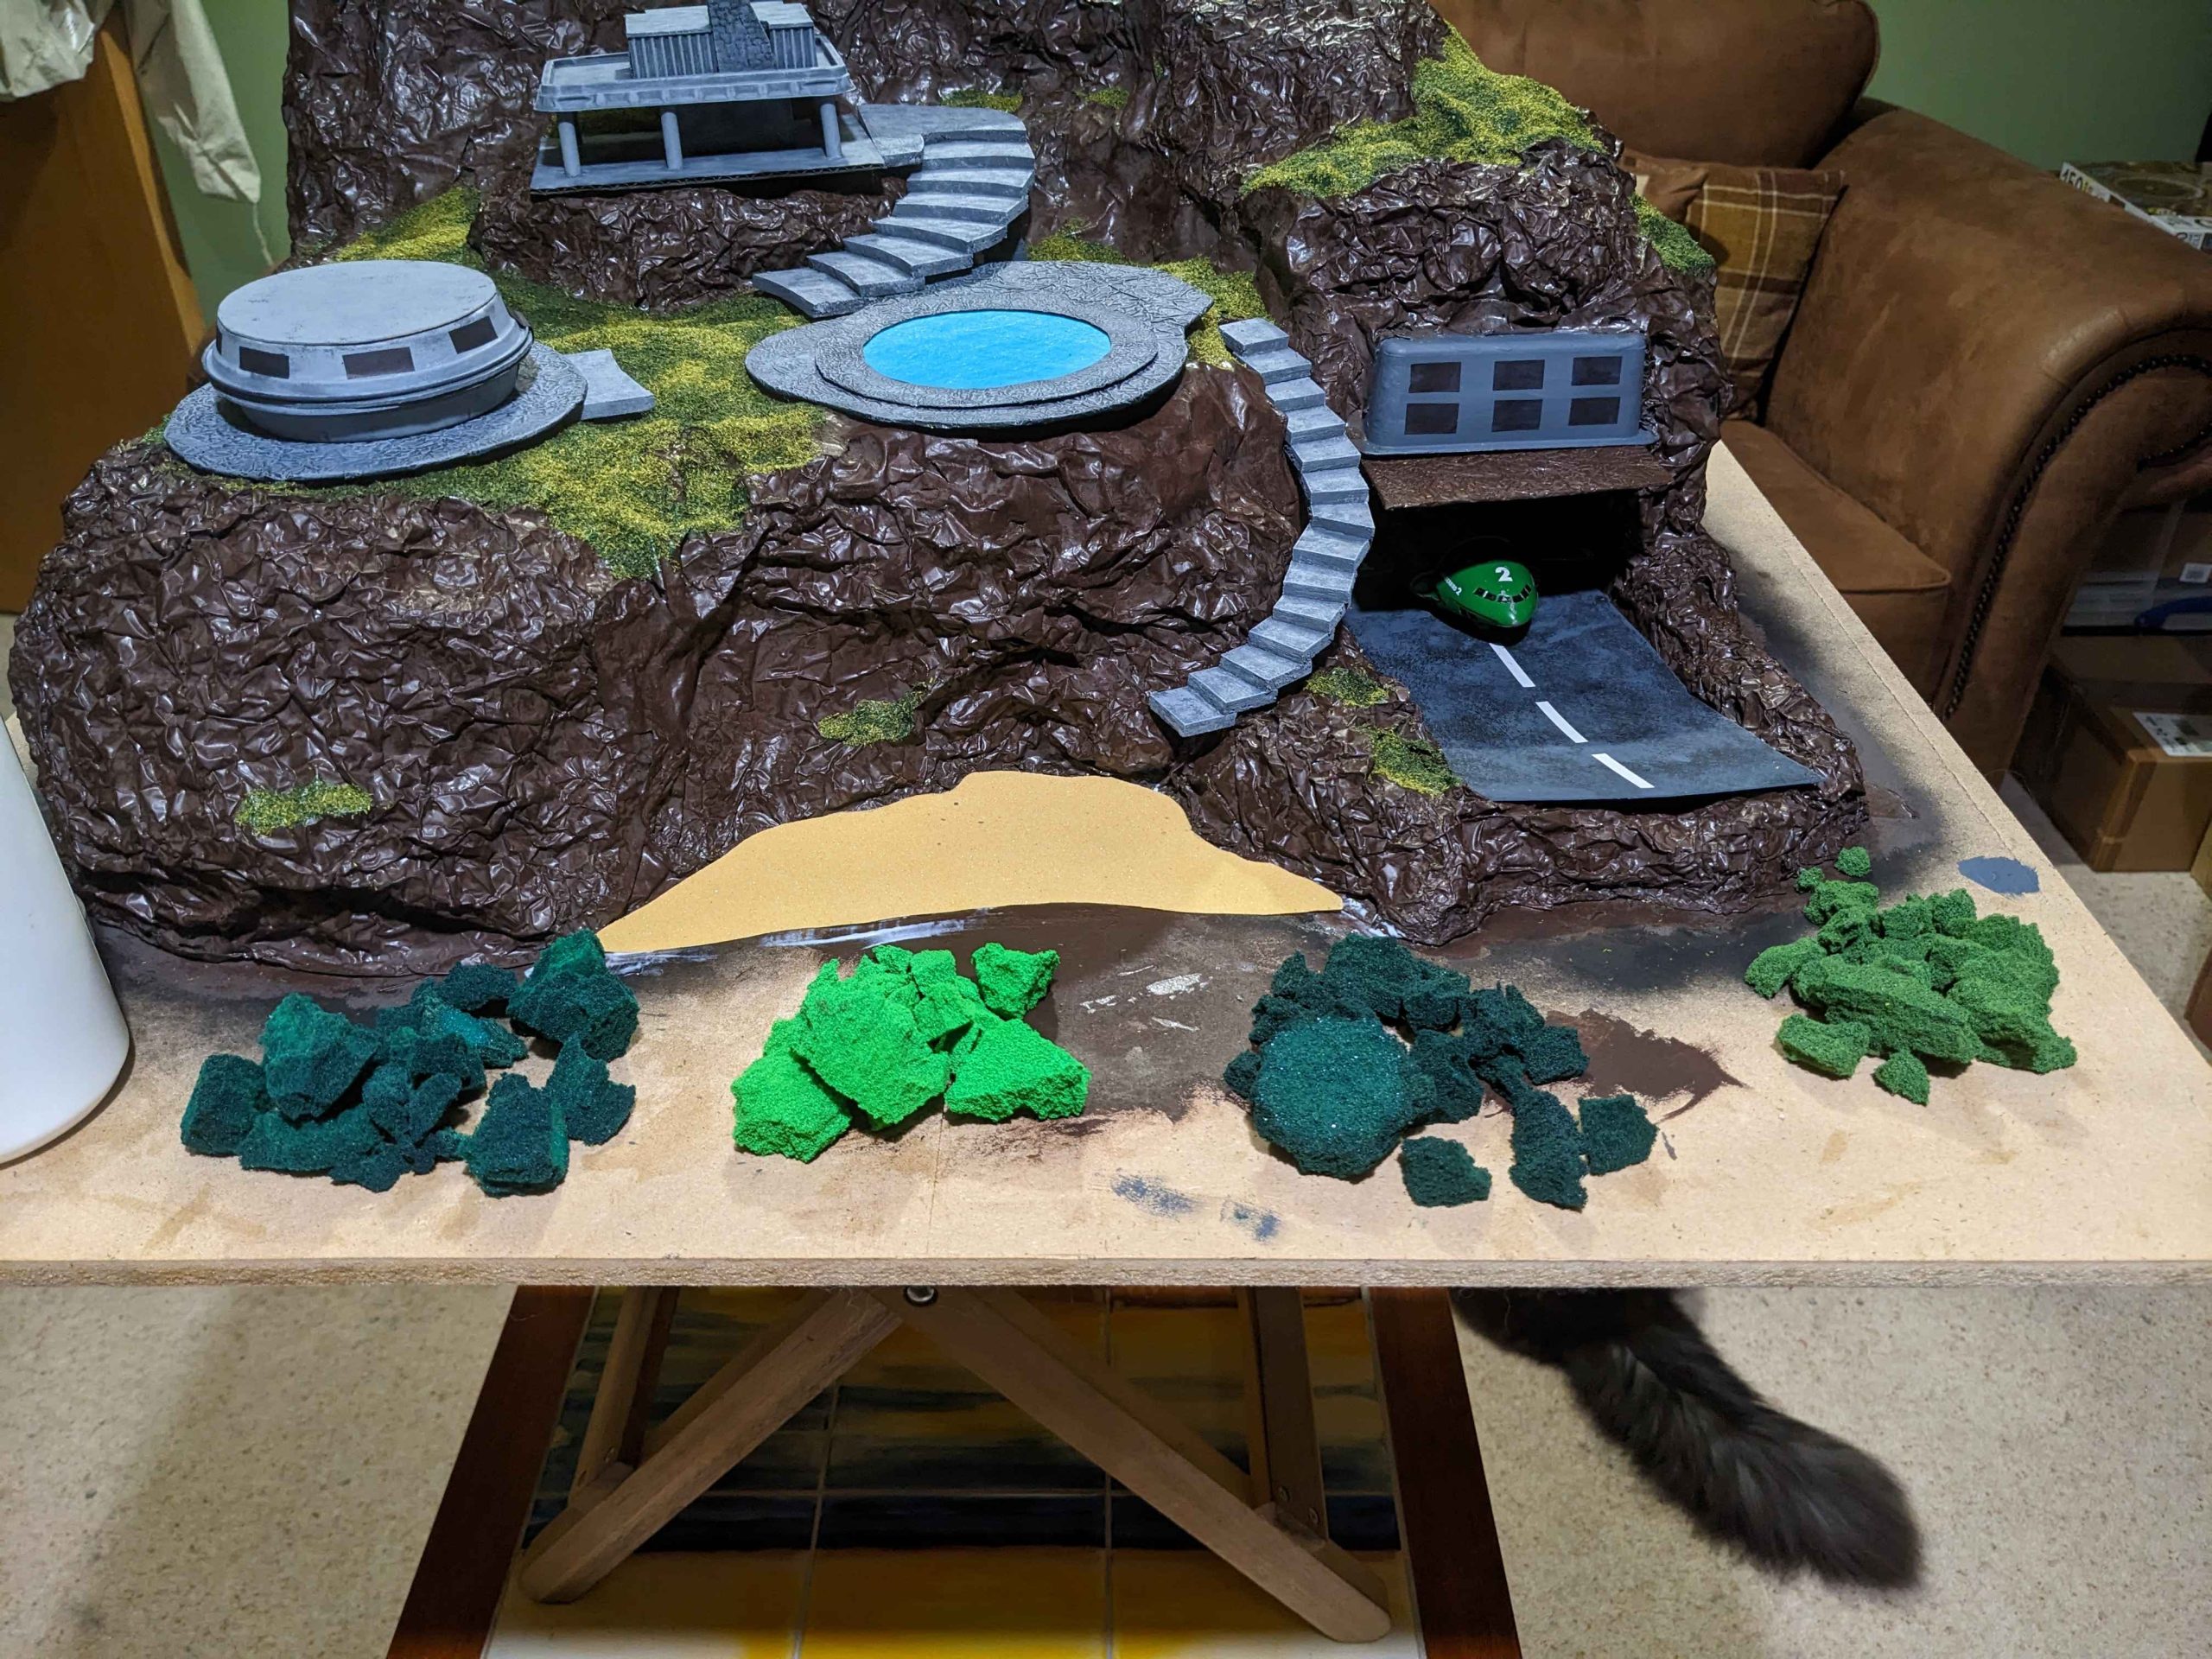
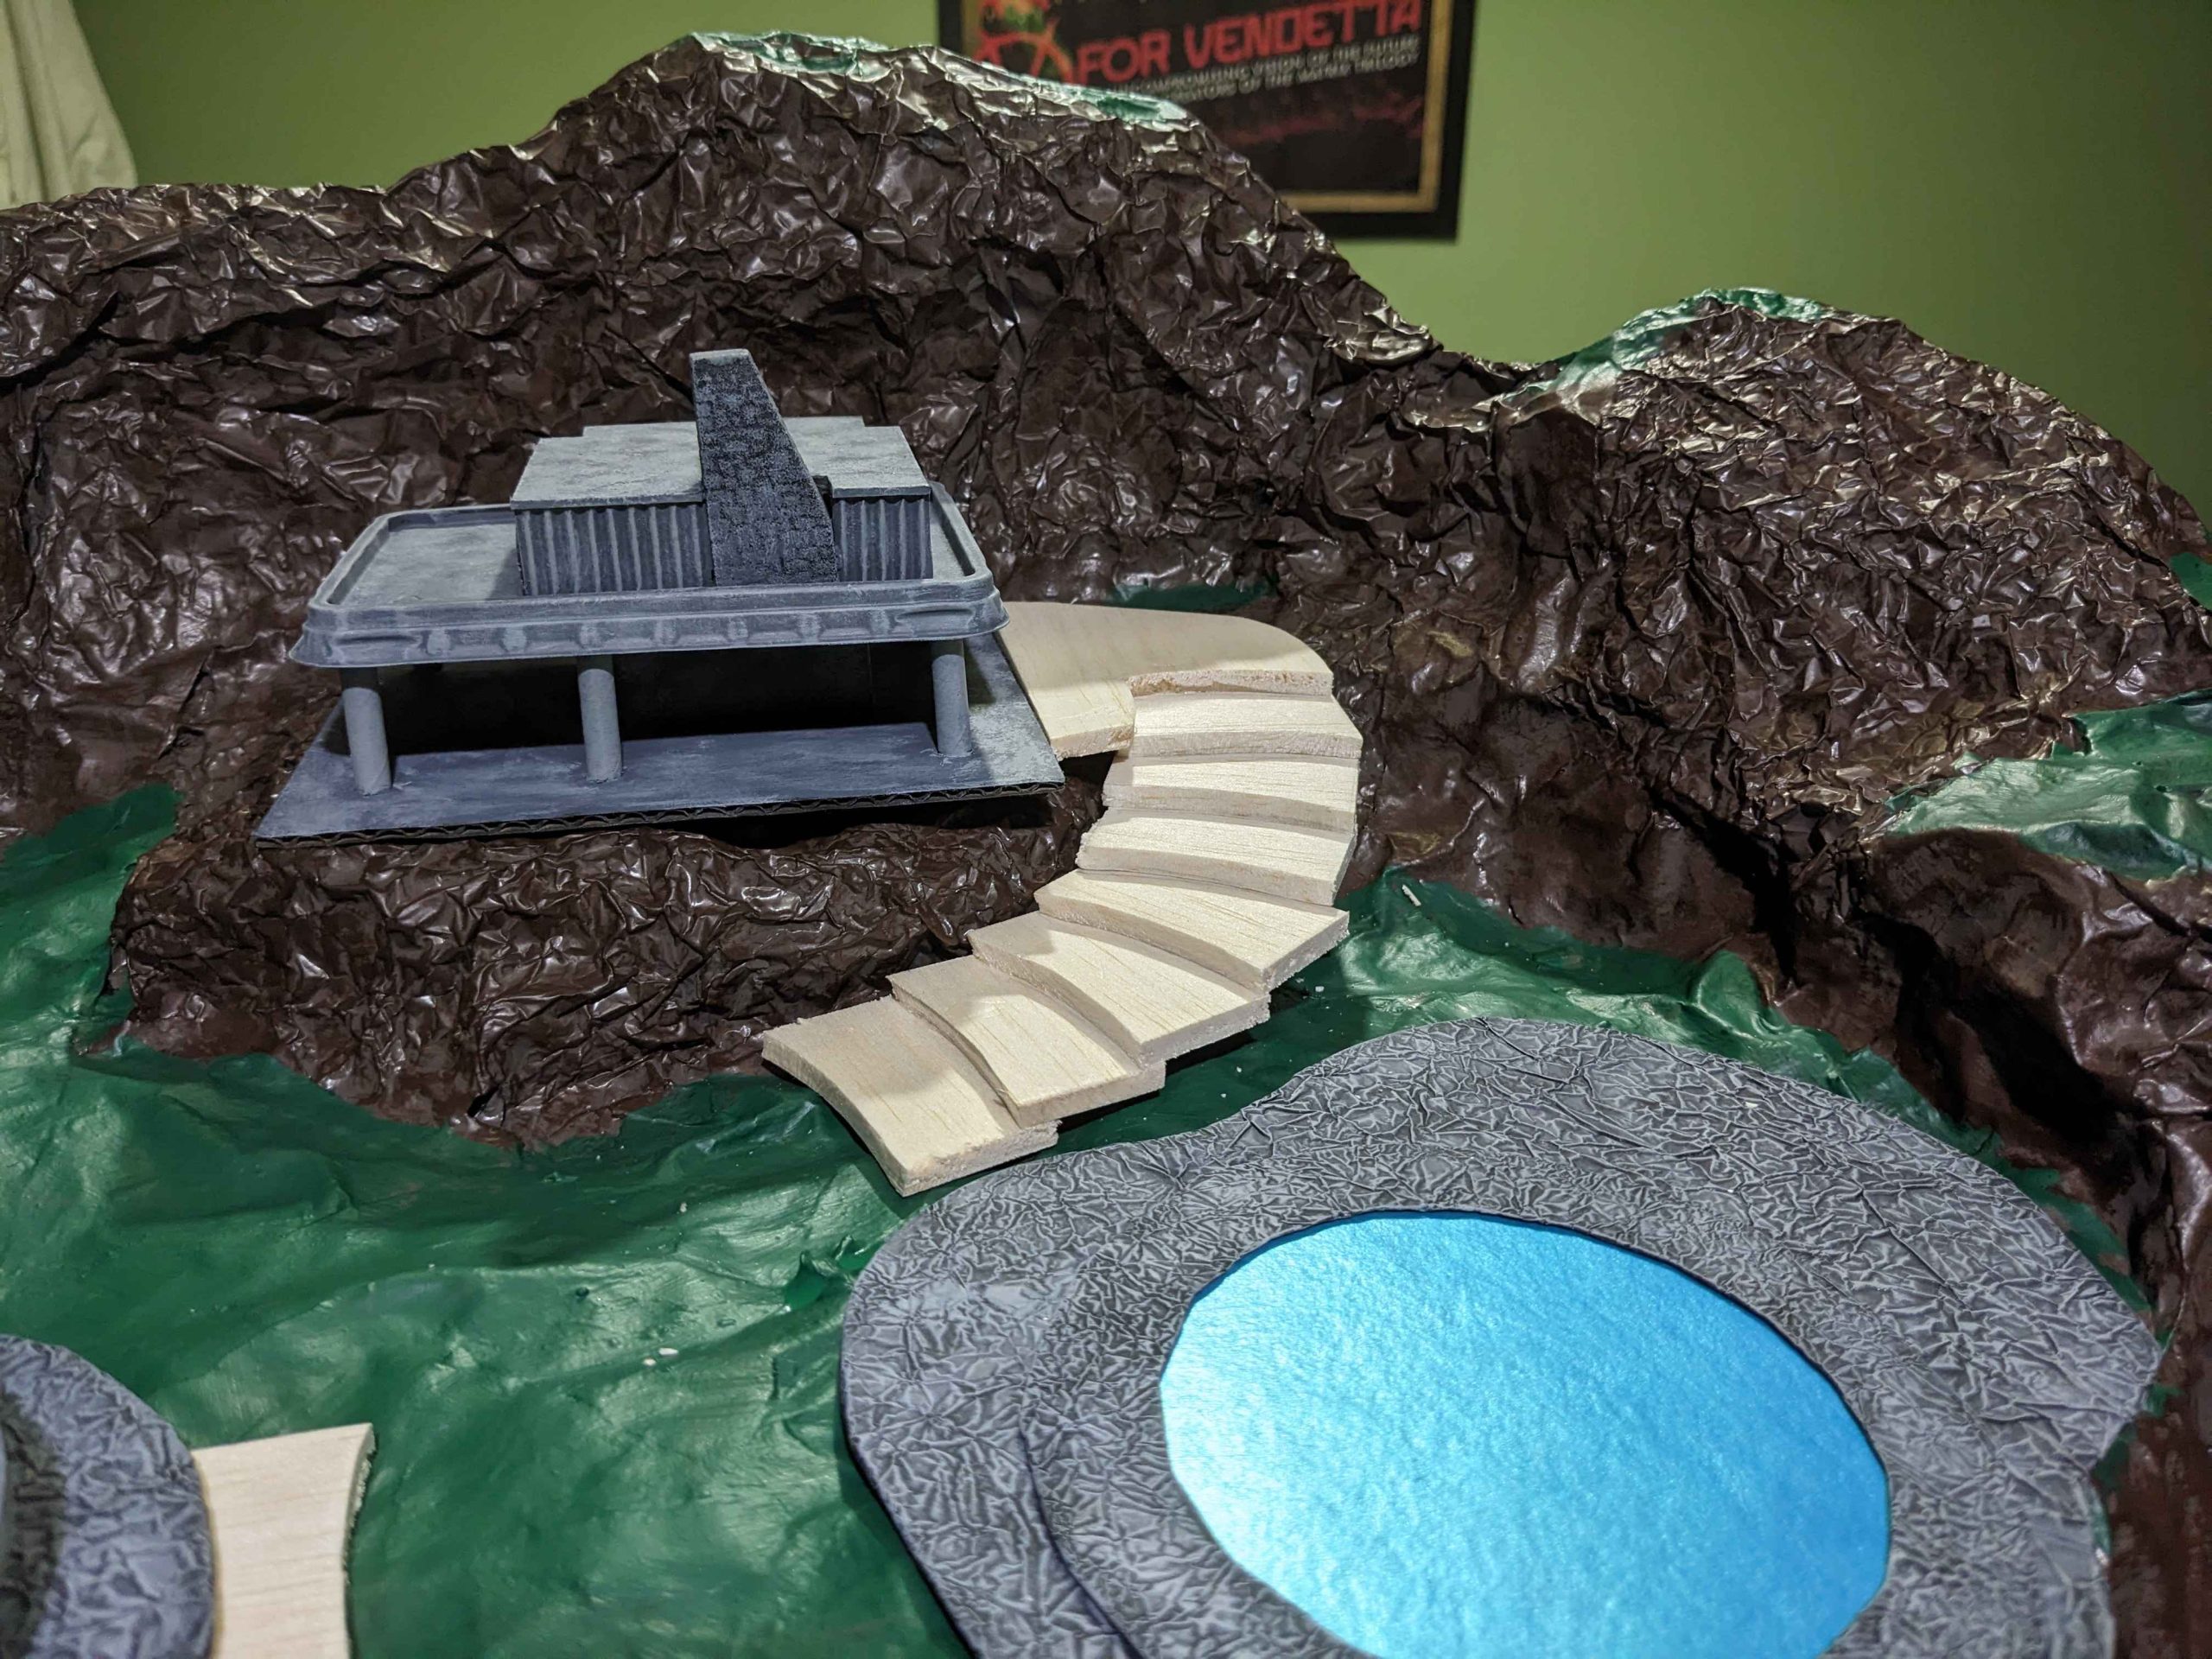
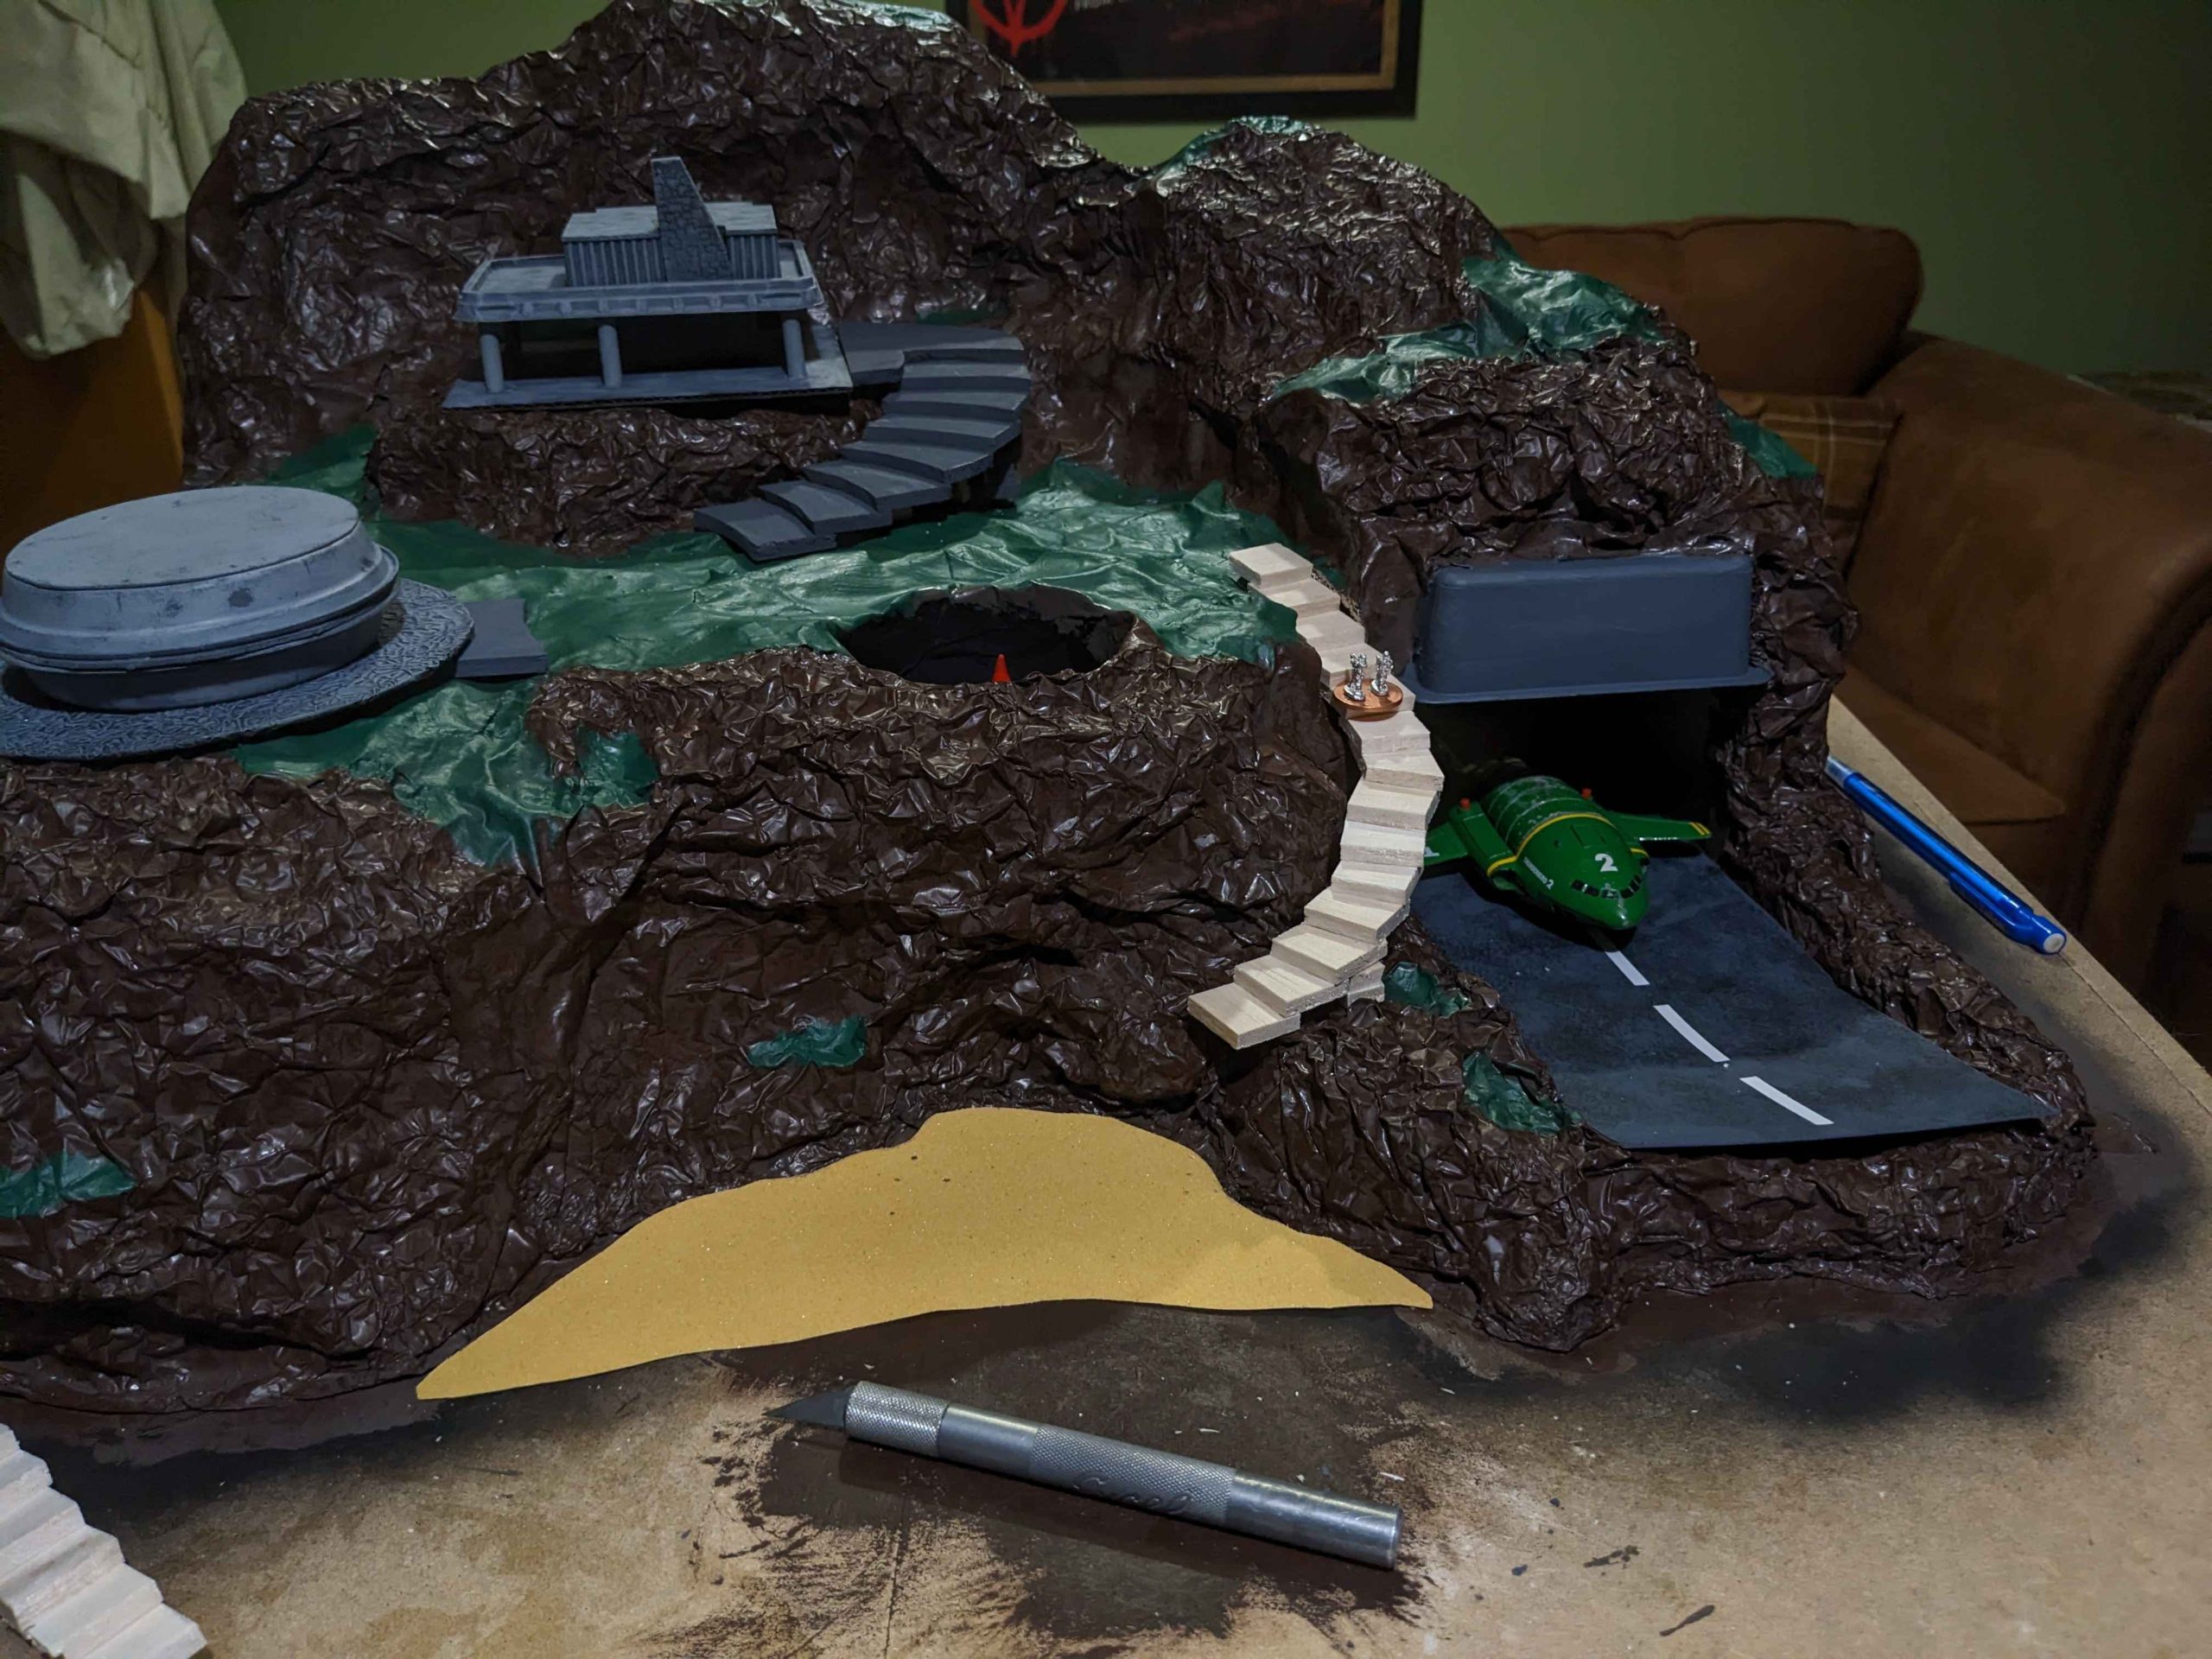
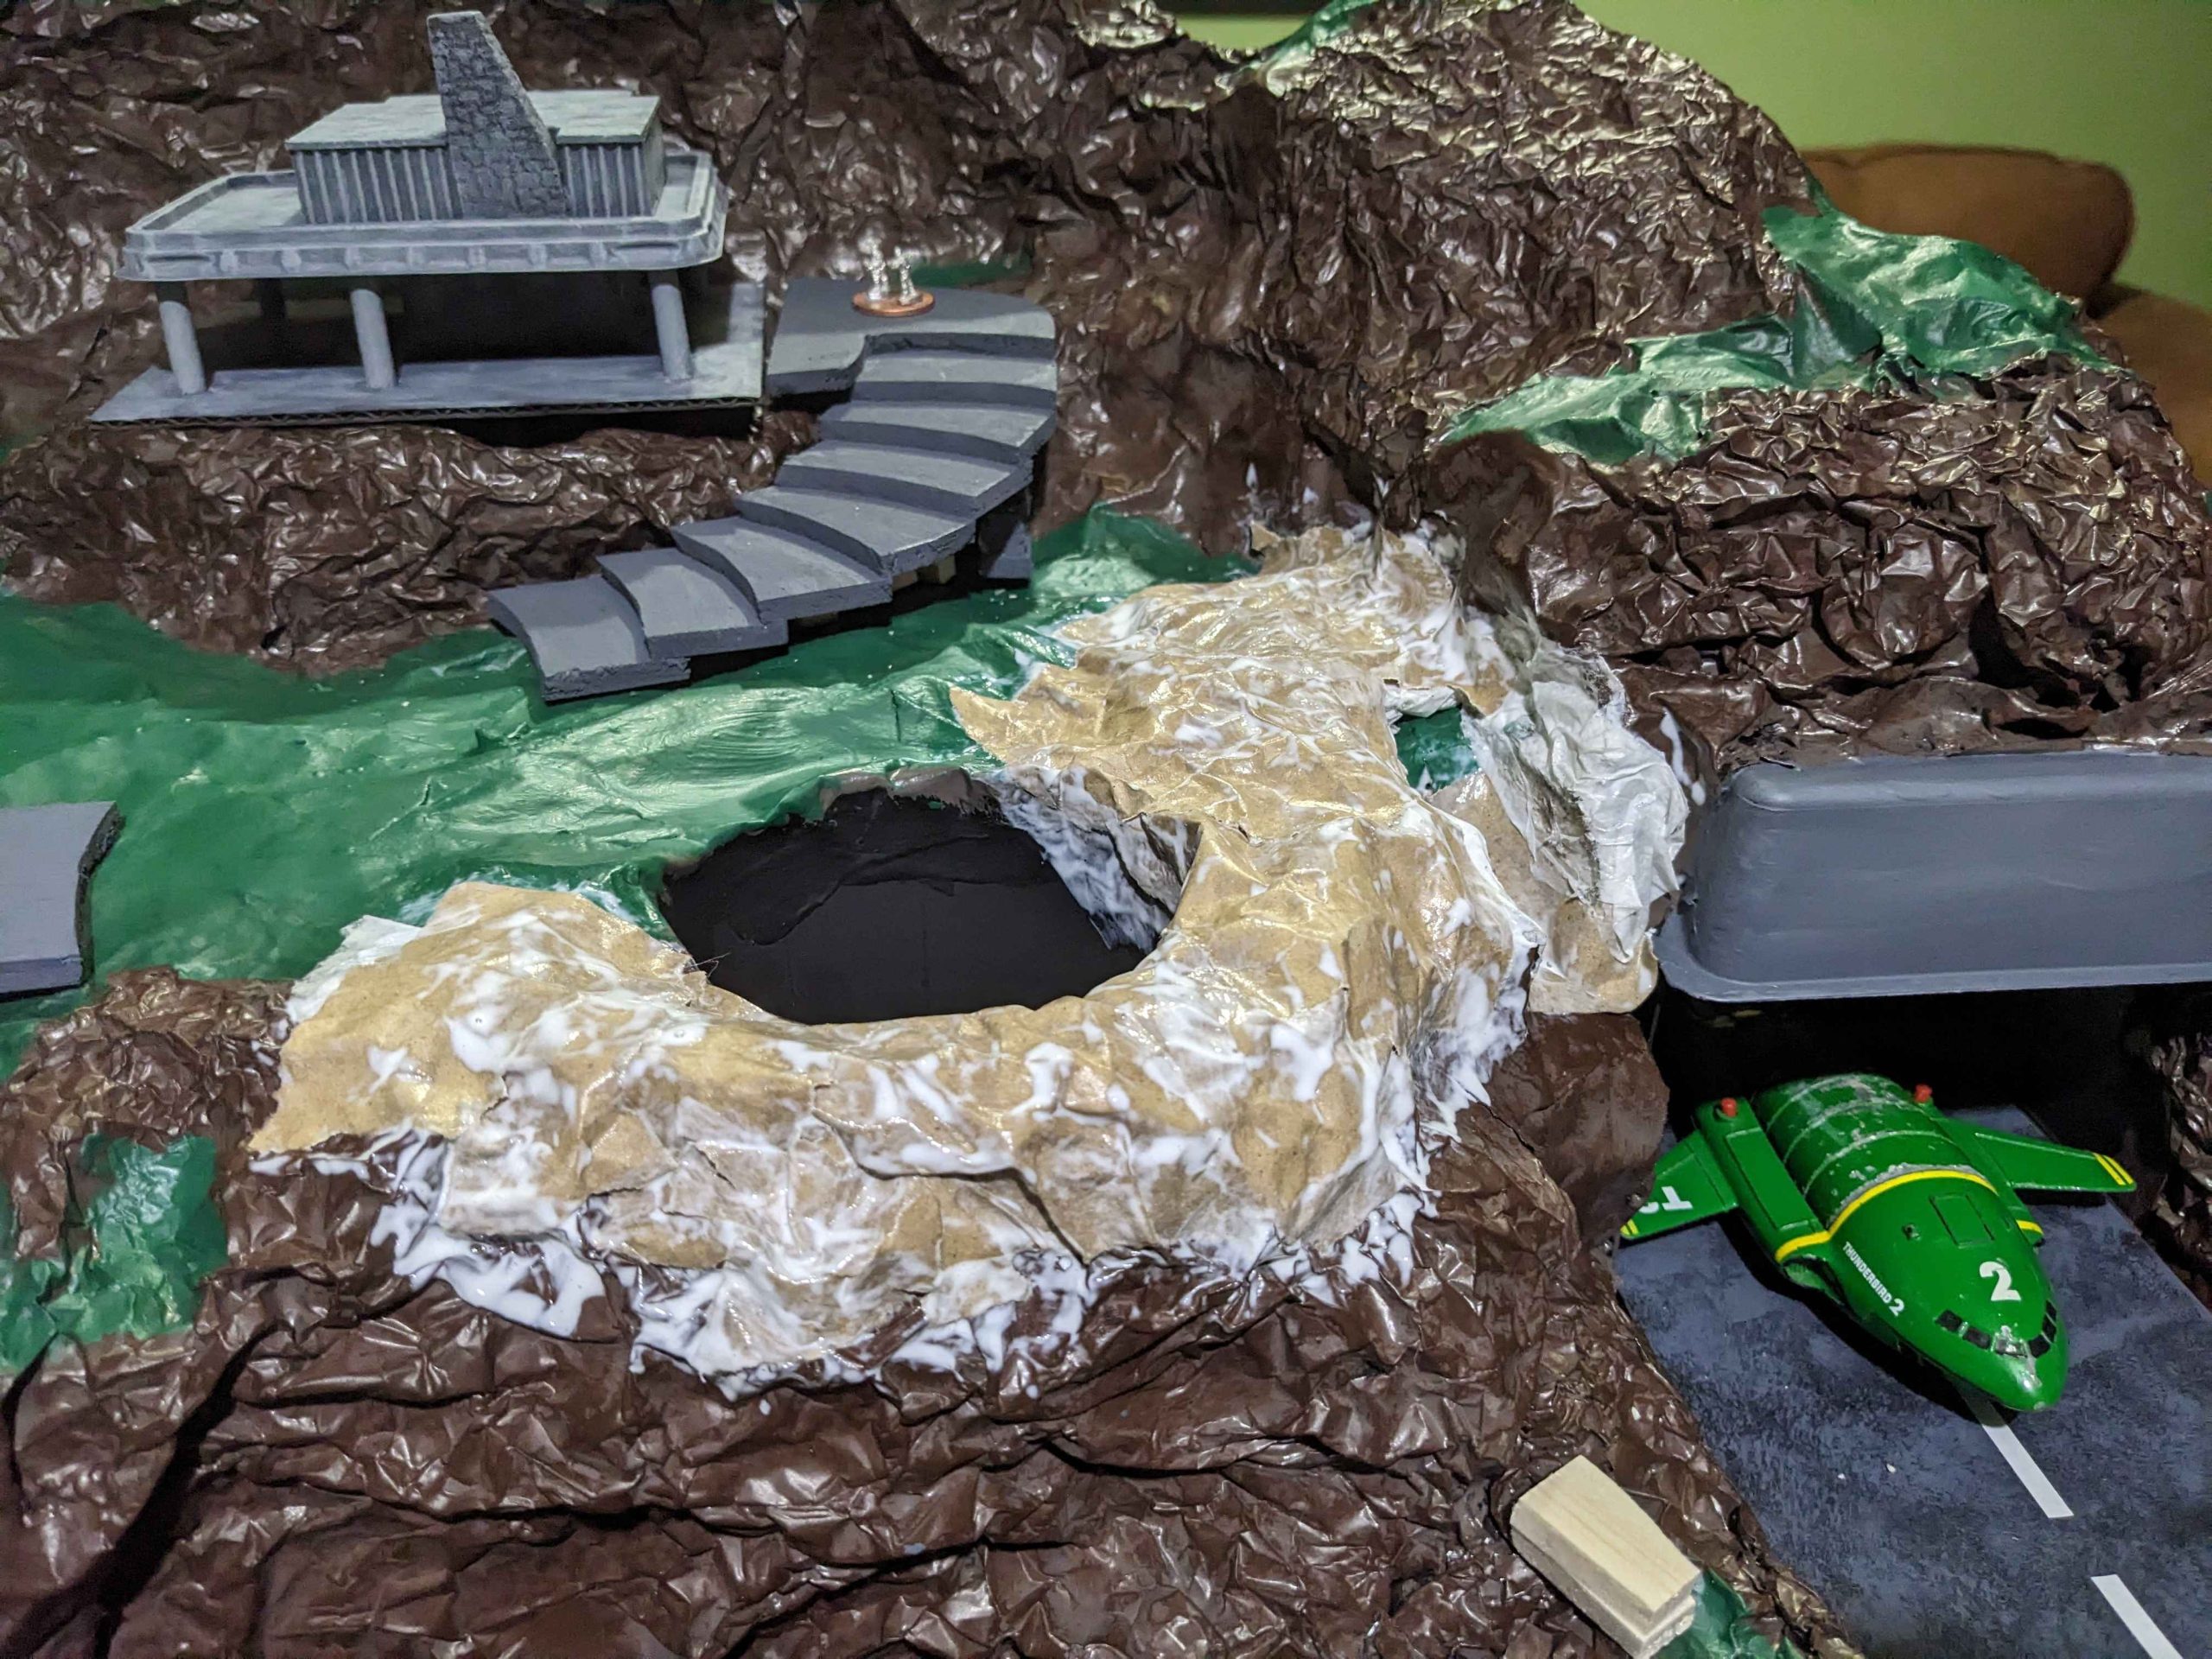
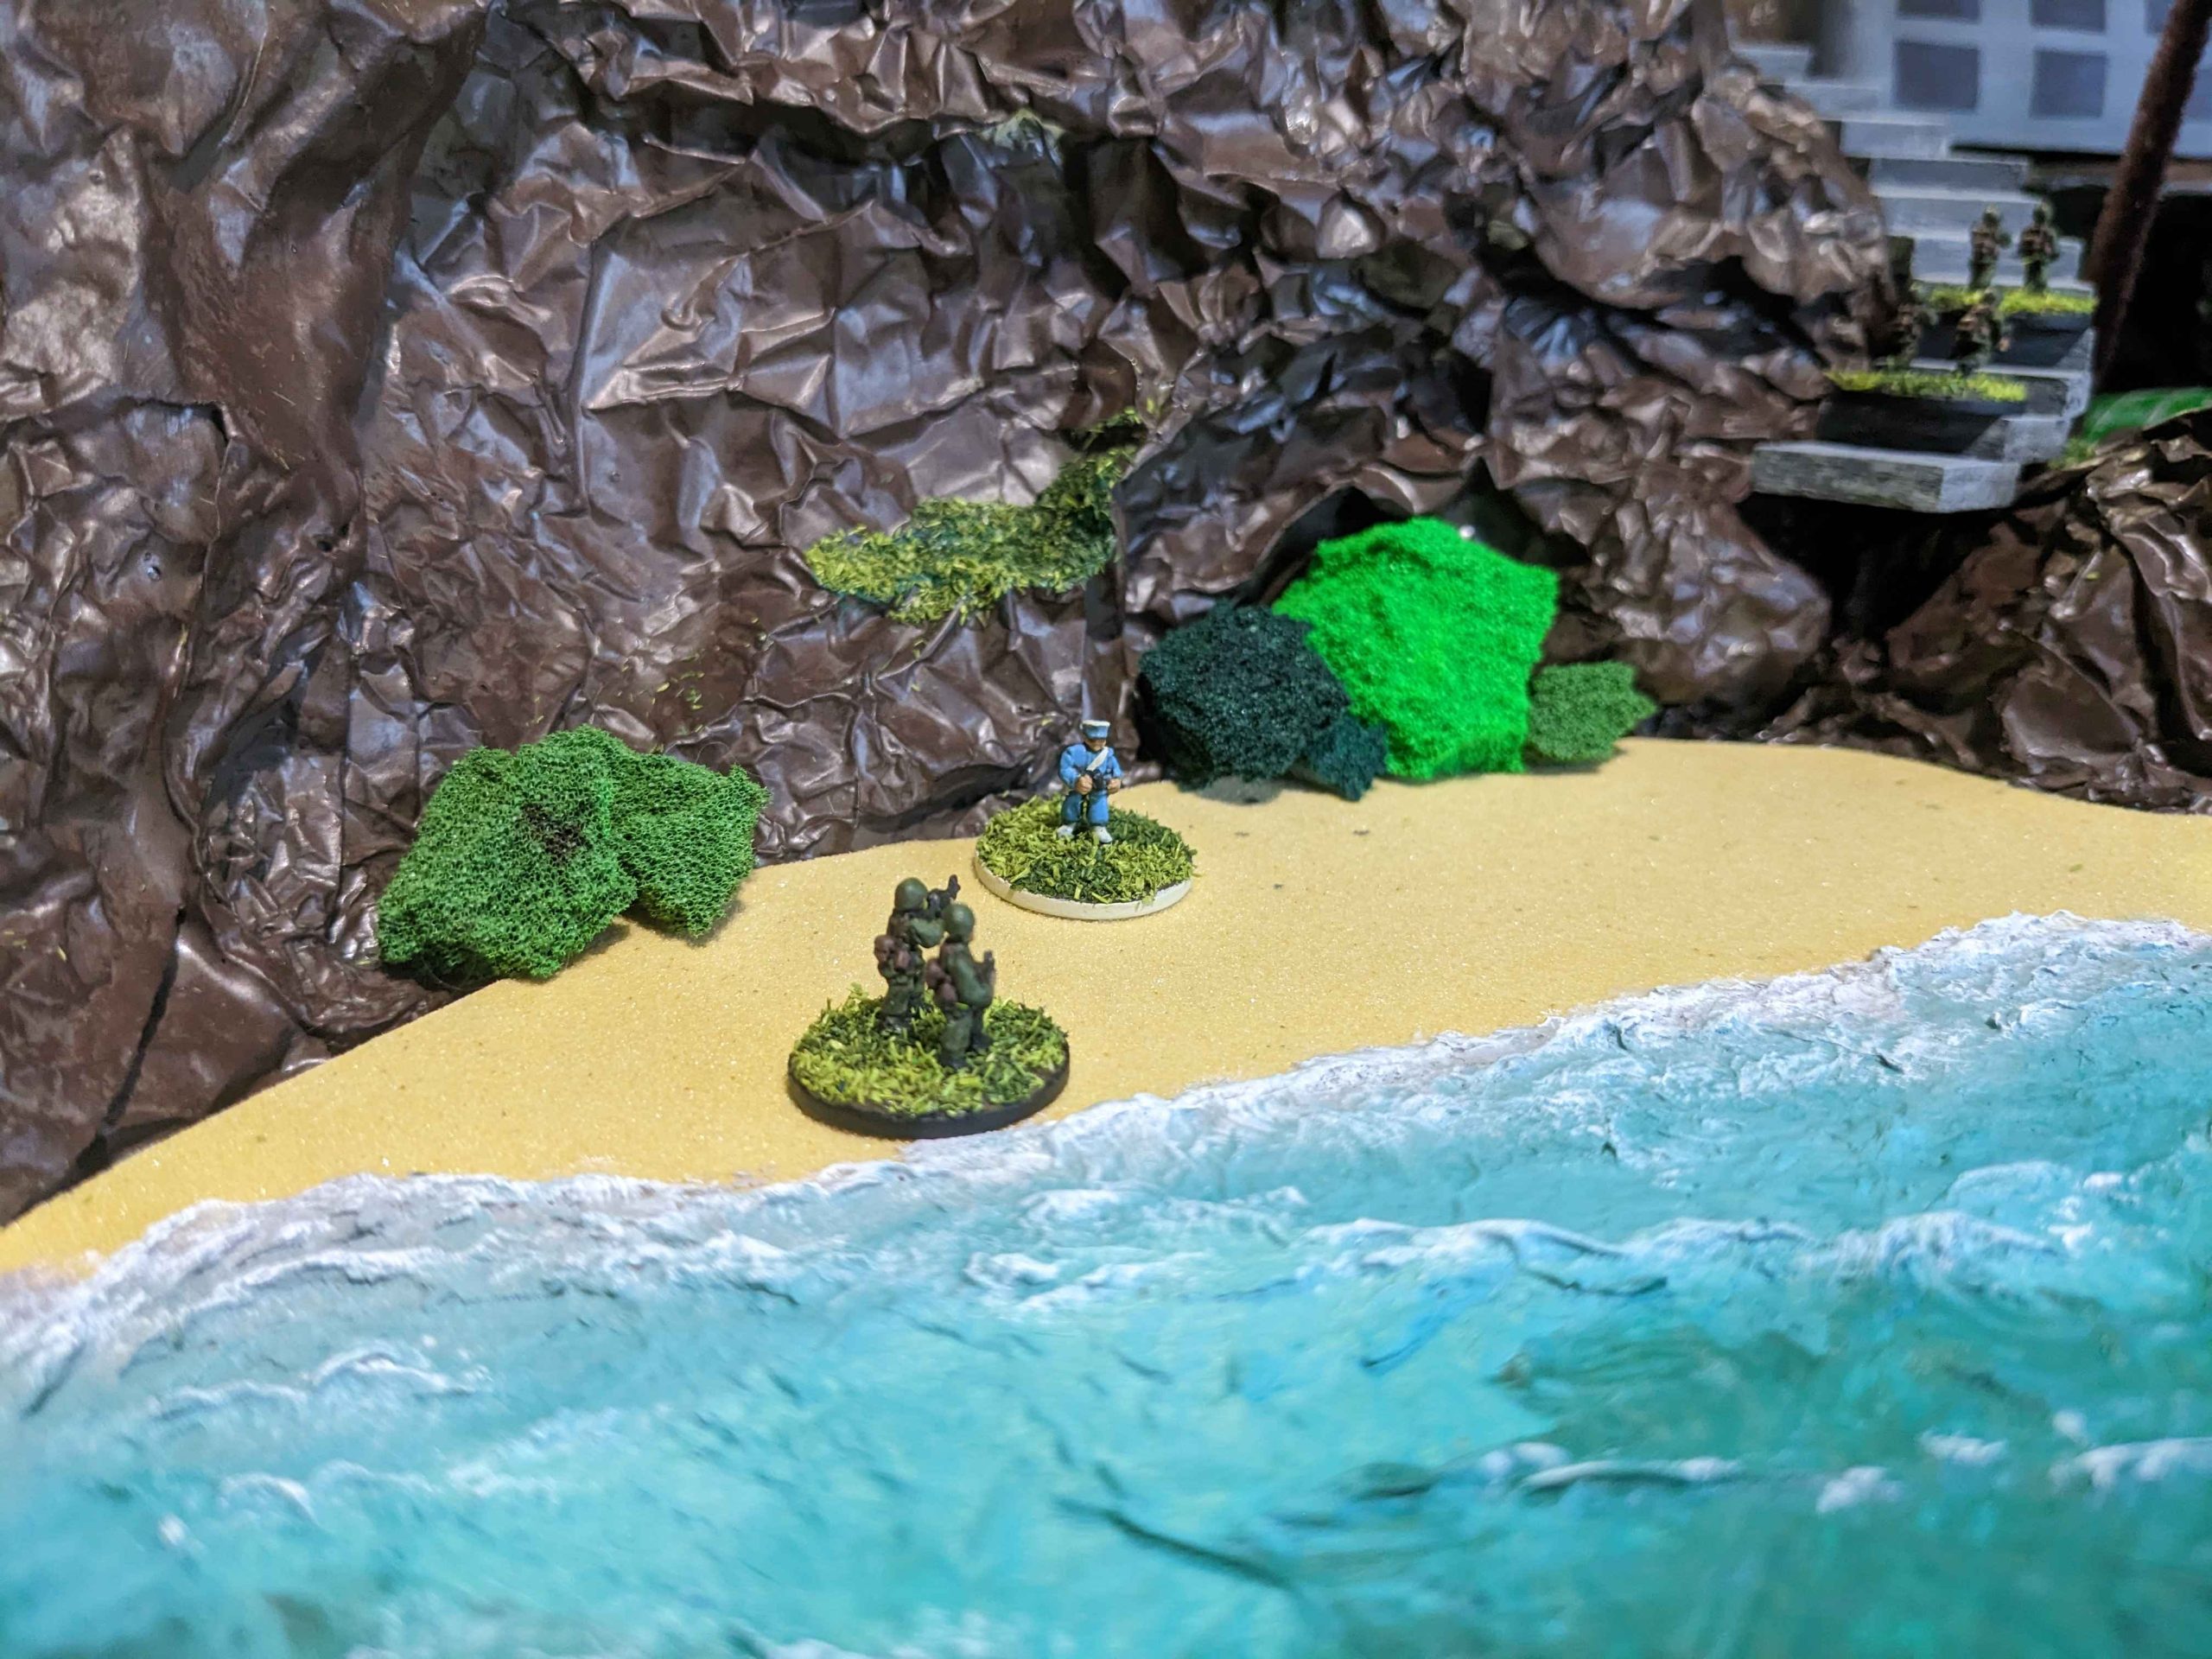
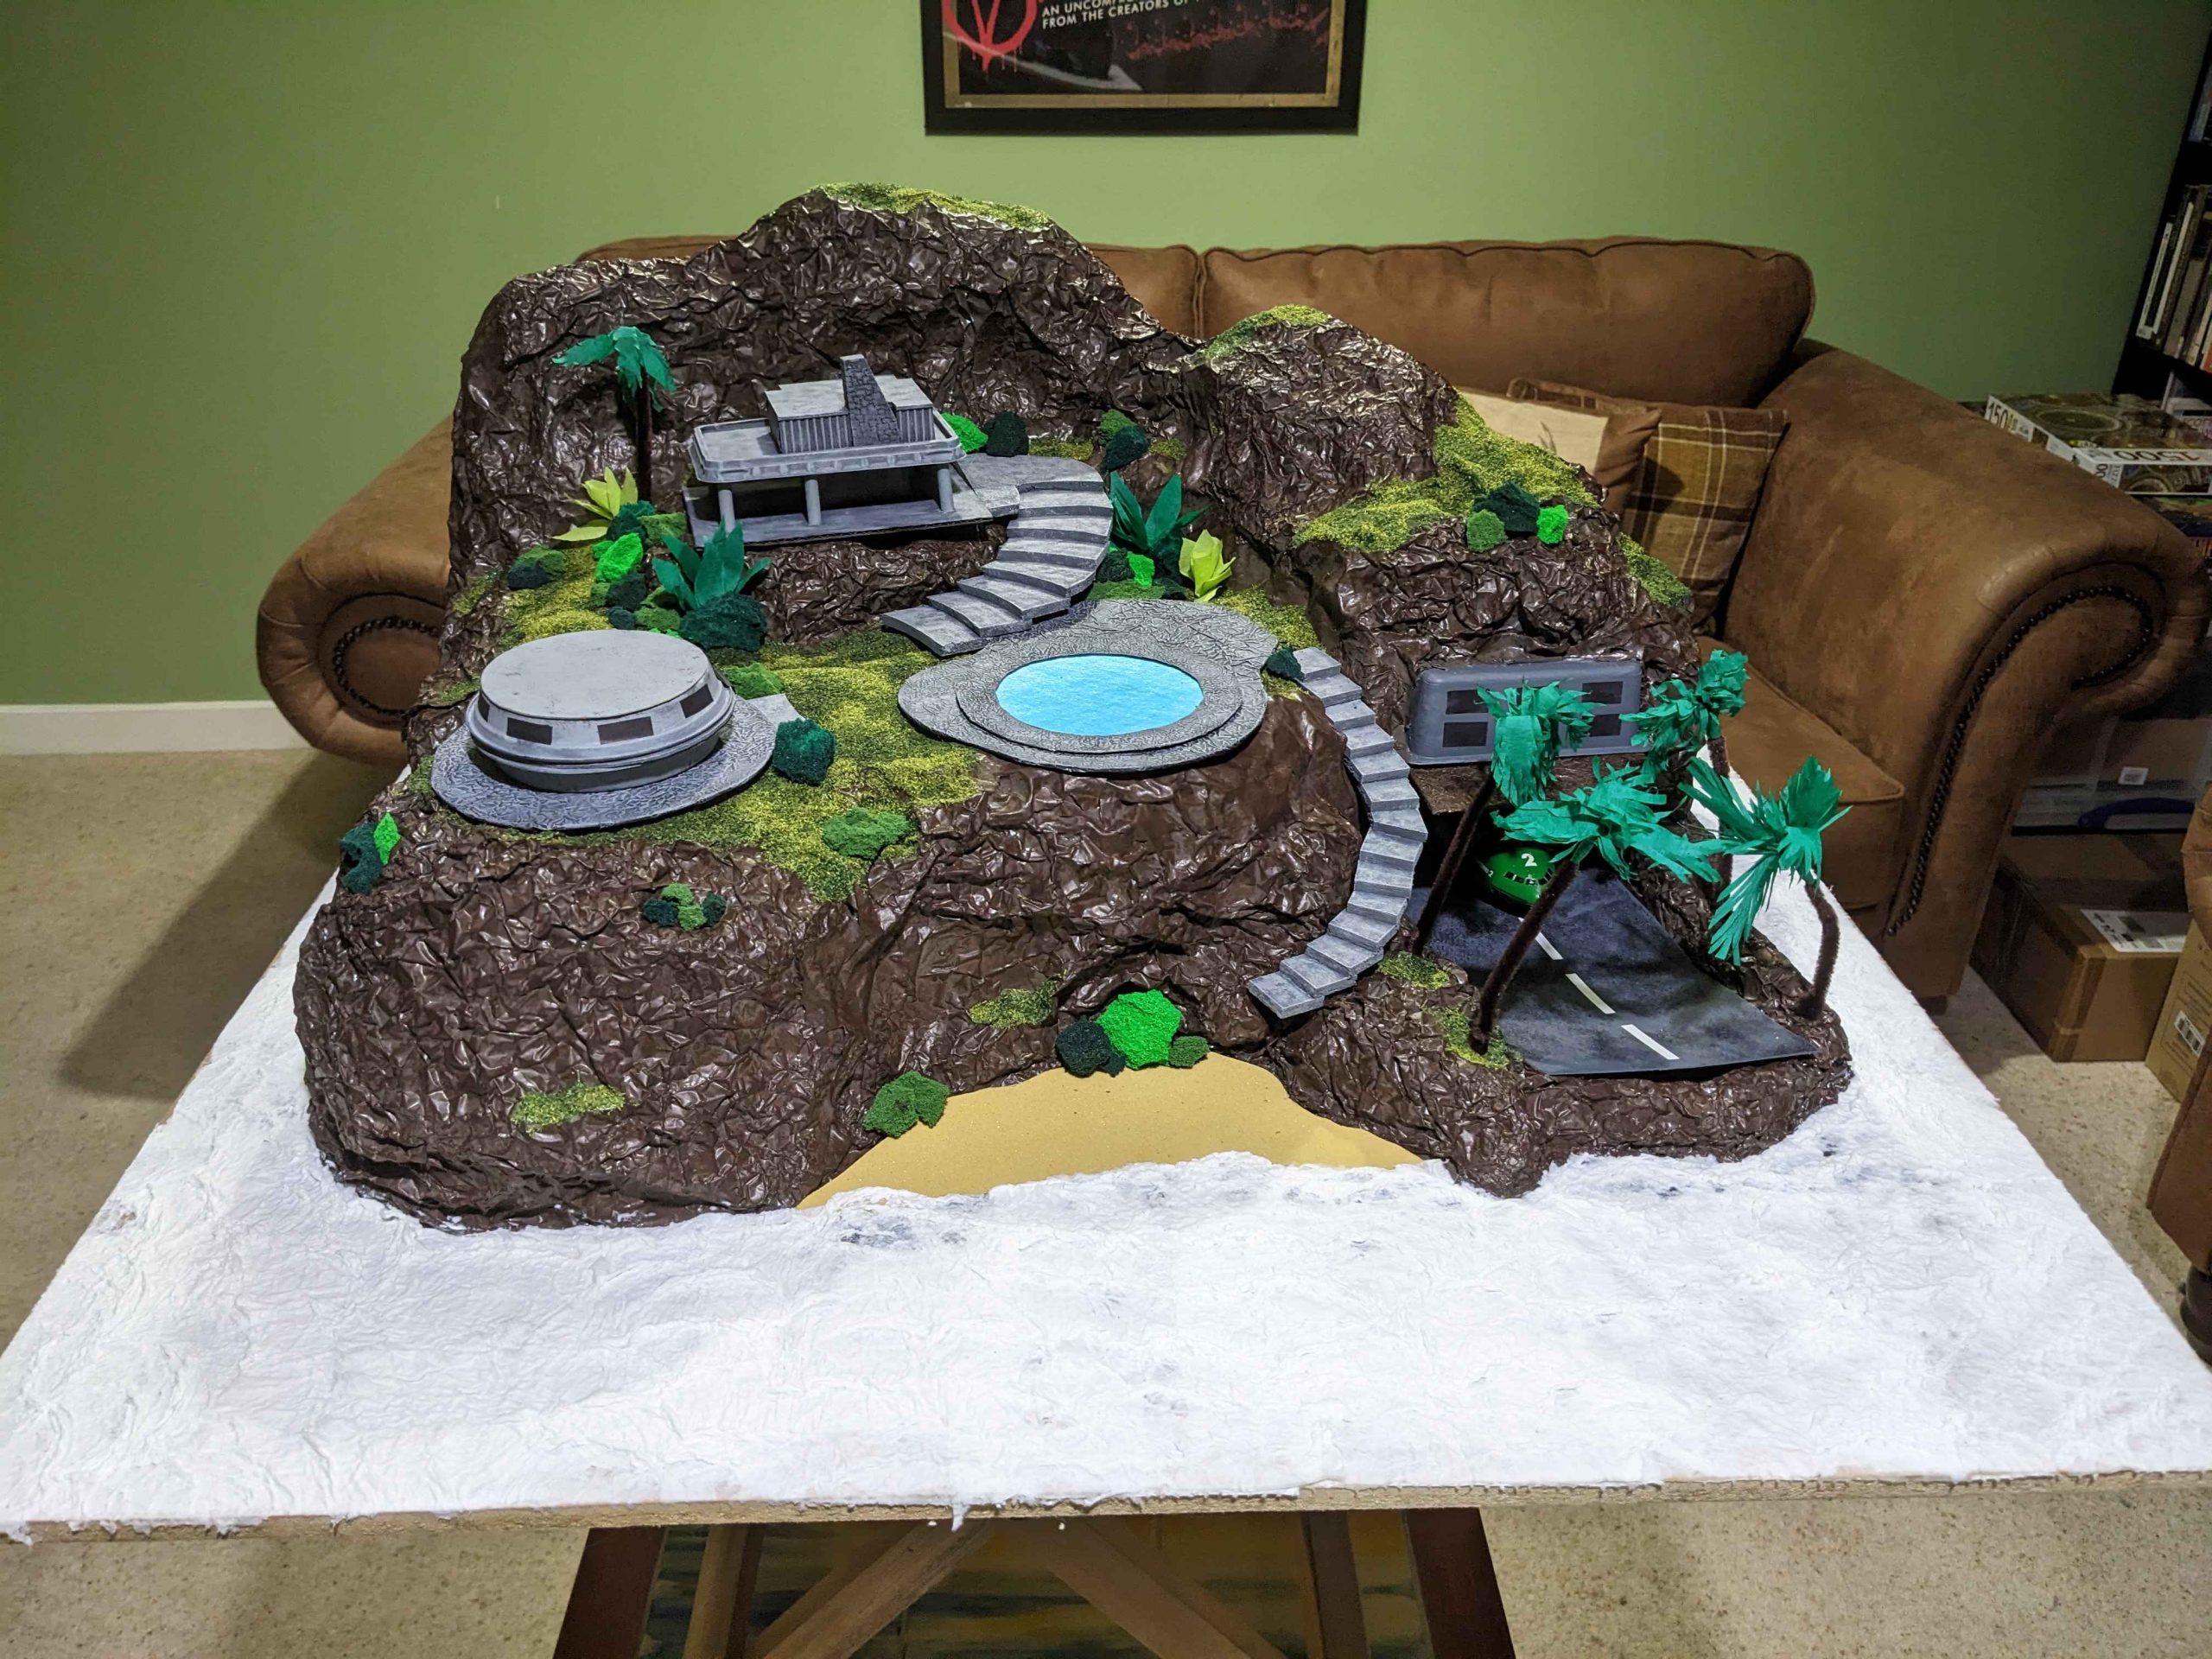
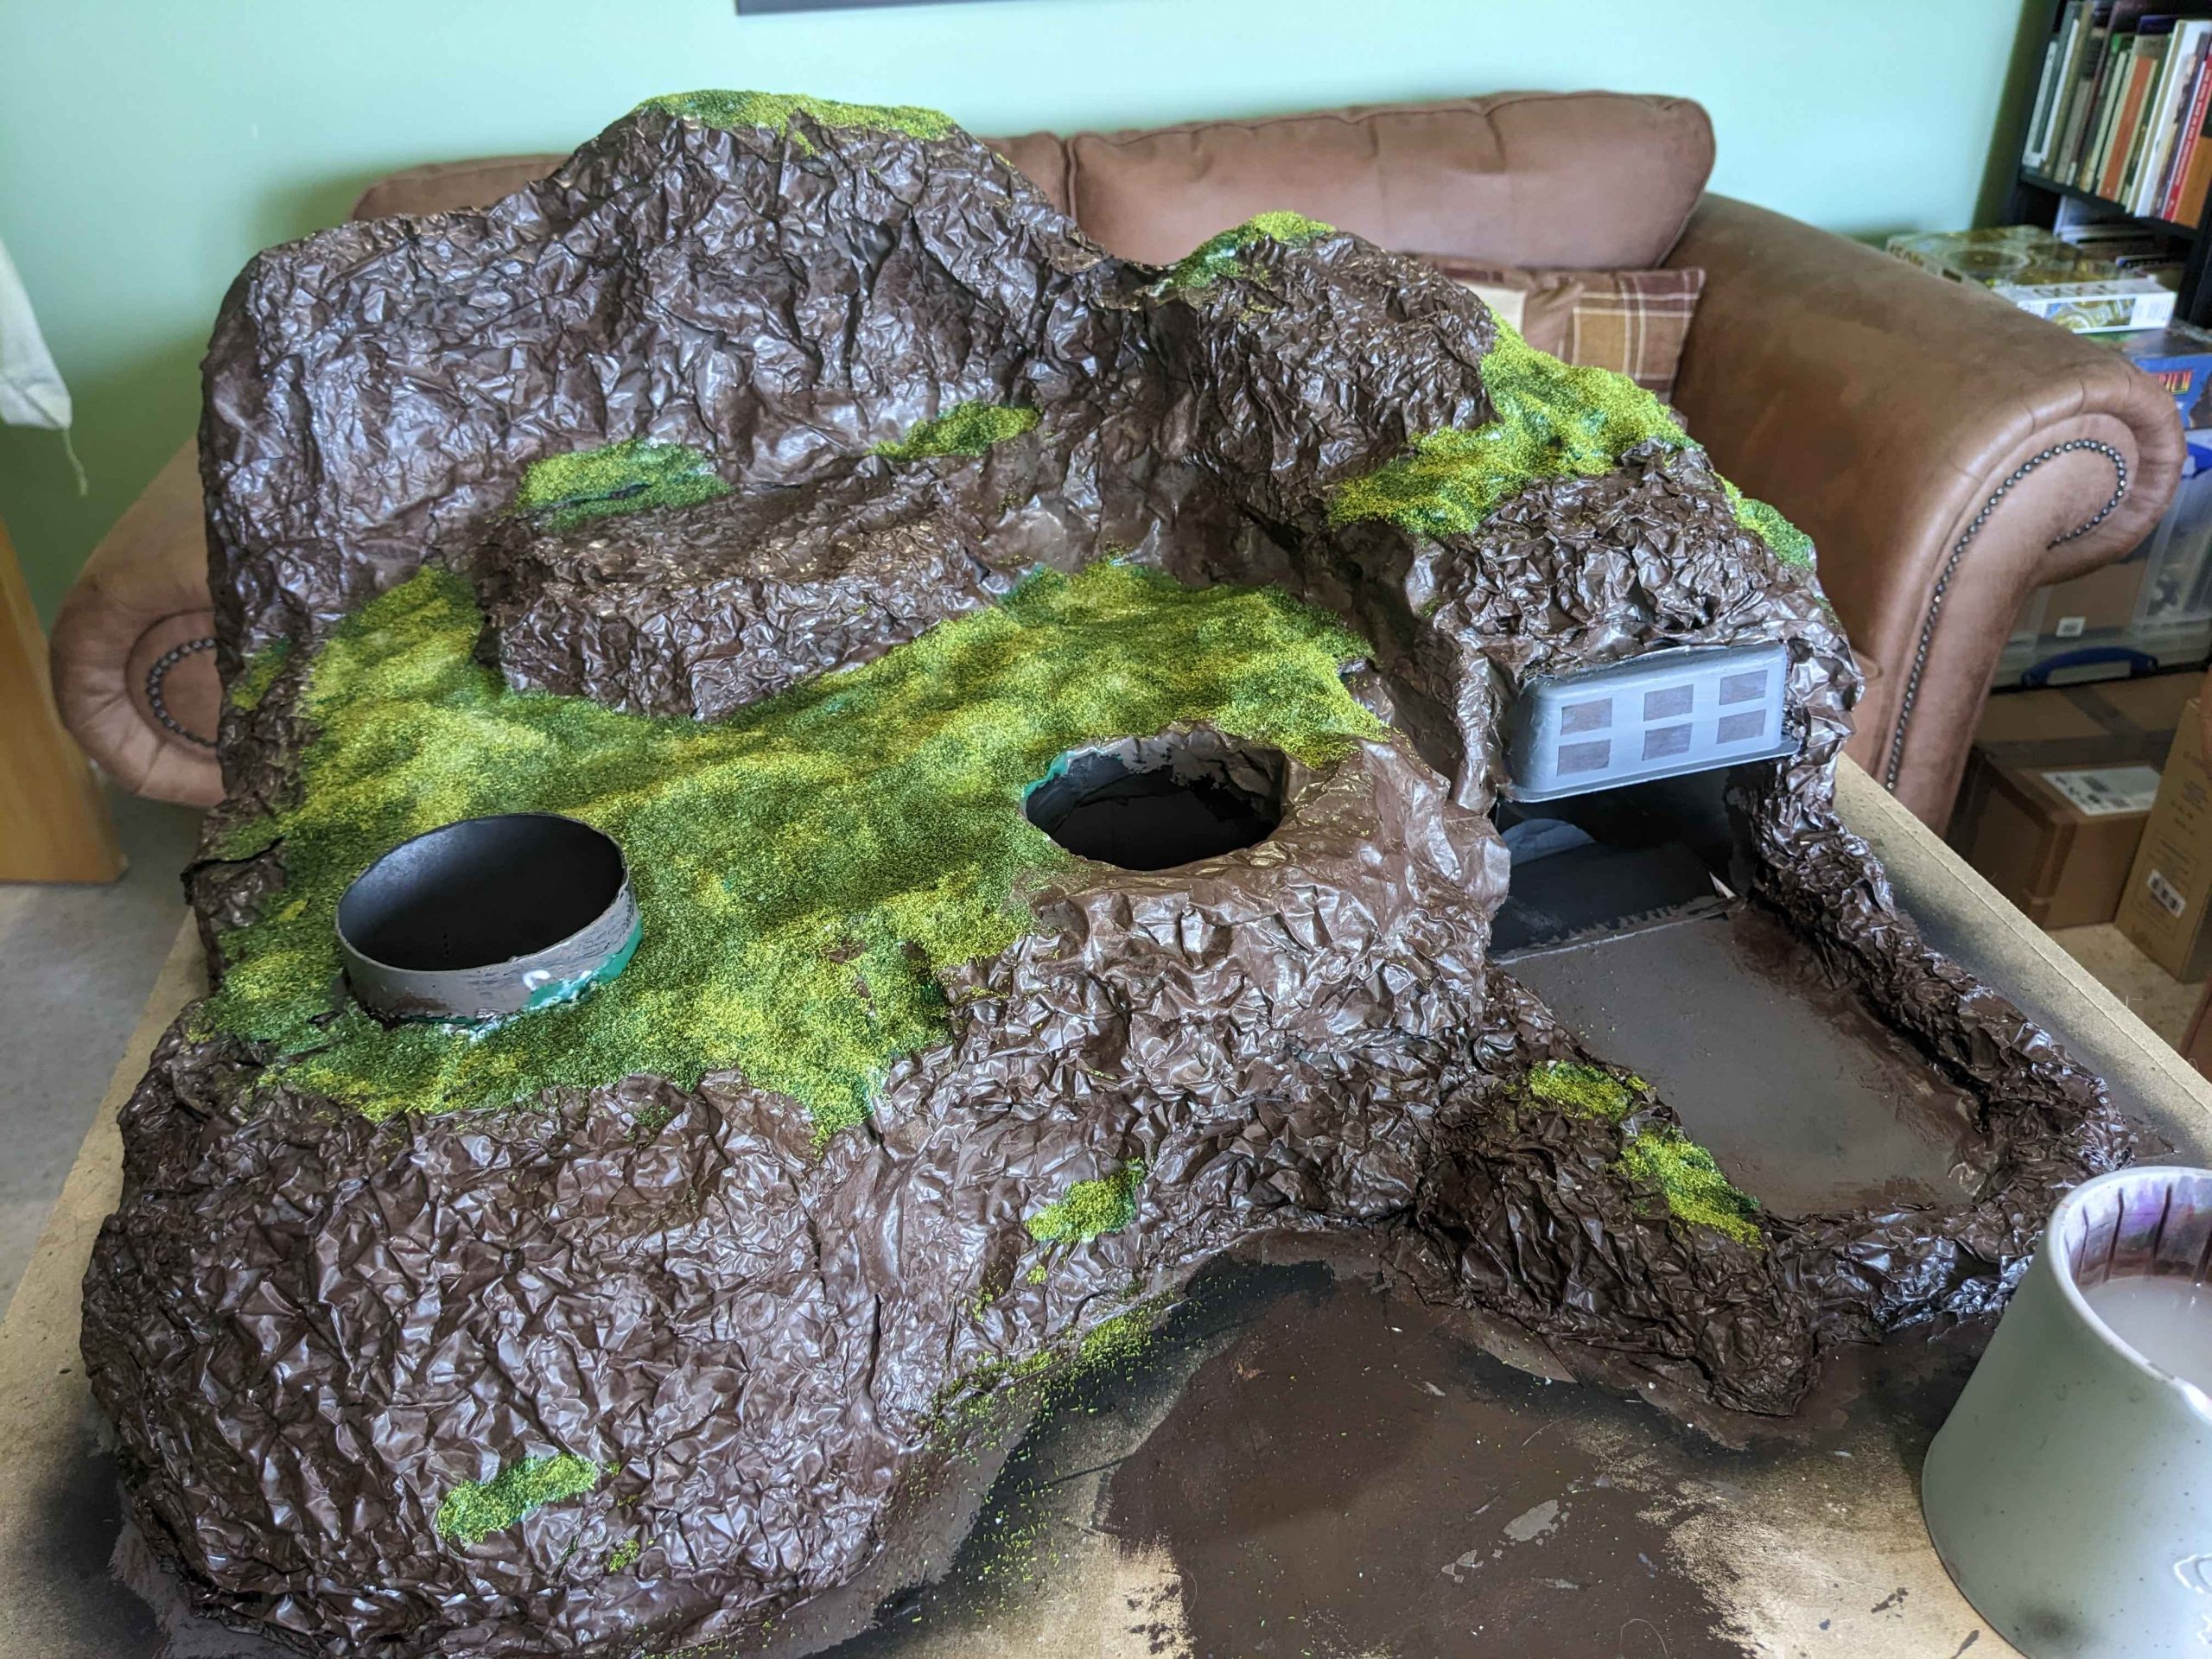
All in all, this is mostly done. There are a couple of small things need done; a ladder down to the beach because stairs were too obnoxious and a cave up in the back left corner which links down to a secret inlet on that side (in the show this is where Thunderbird 4 launches from but in our scenario it gives the Good Guys somewhere else to land).
The main thing is going to be the water though. The original didn’t have any because the craft was only the footprint of the island but as a wargaming table, water is necessary. I debated just using some blue fabric but then I remembered watching a Marklin of Sweden video years ago about making water with just glue and toilet paper which matches the spirit of this project perfectly. I’ll start that tomorrow evening though.
For two days of solid work, I’m very happy with this. It is one of the dumber things I’ve done in a while but I giggle whenever I walk into the room so that alone makes it worth it. I went ahead and ordered the minis from Pendraken too… there’s no way I was going to manage another few months before picking them up.

Part twelve - Funday Sunday (?)
Another bright(ish) start this morning and the first thing I did was write down what still needs done.
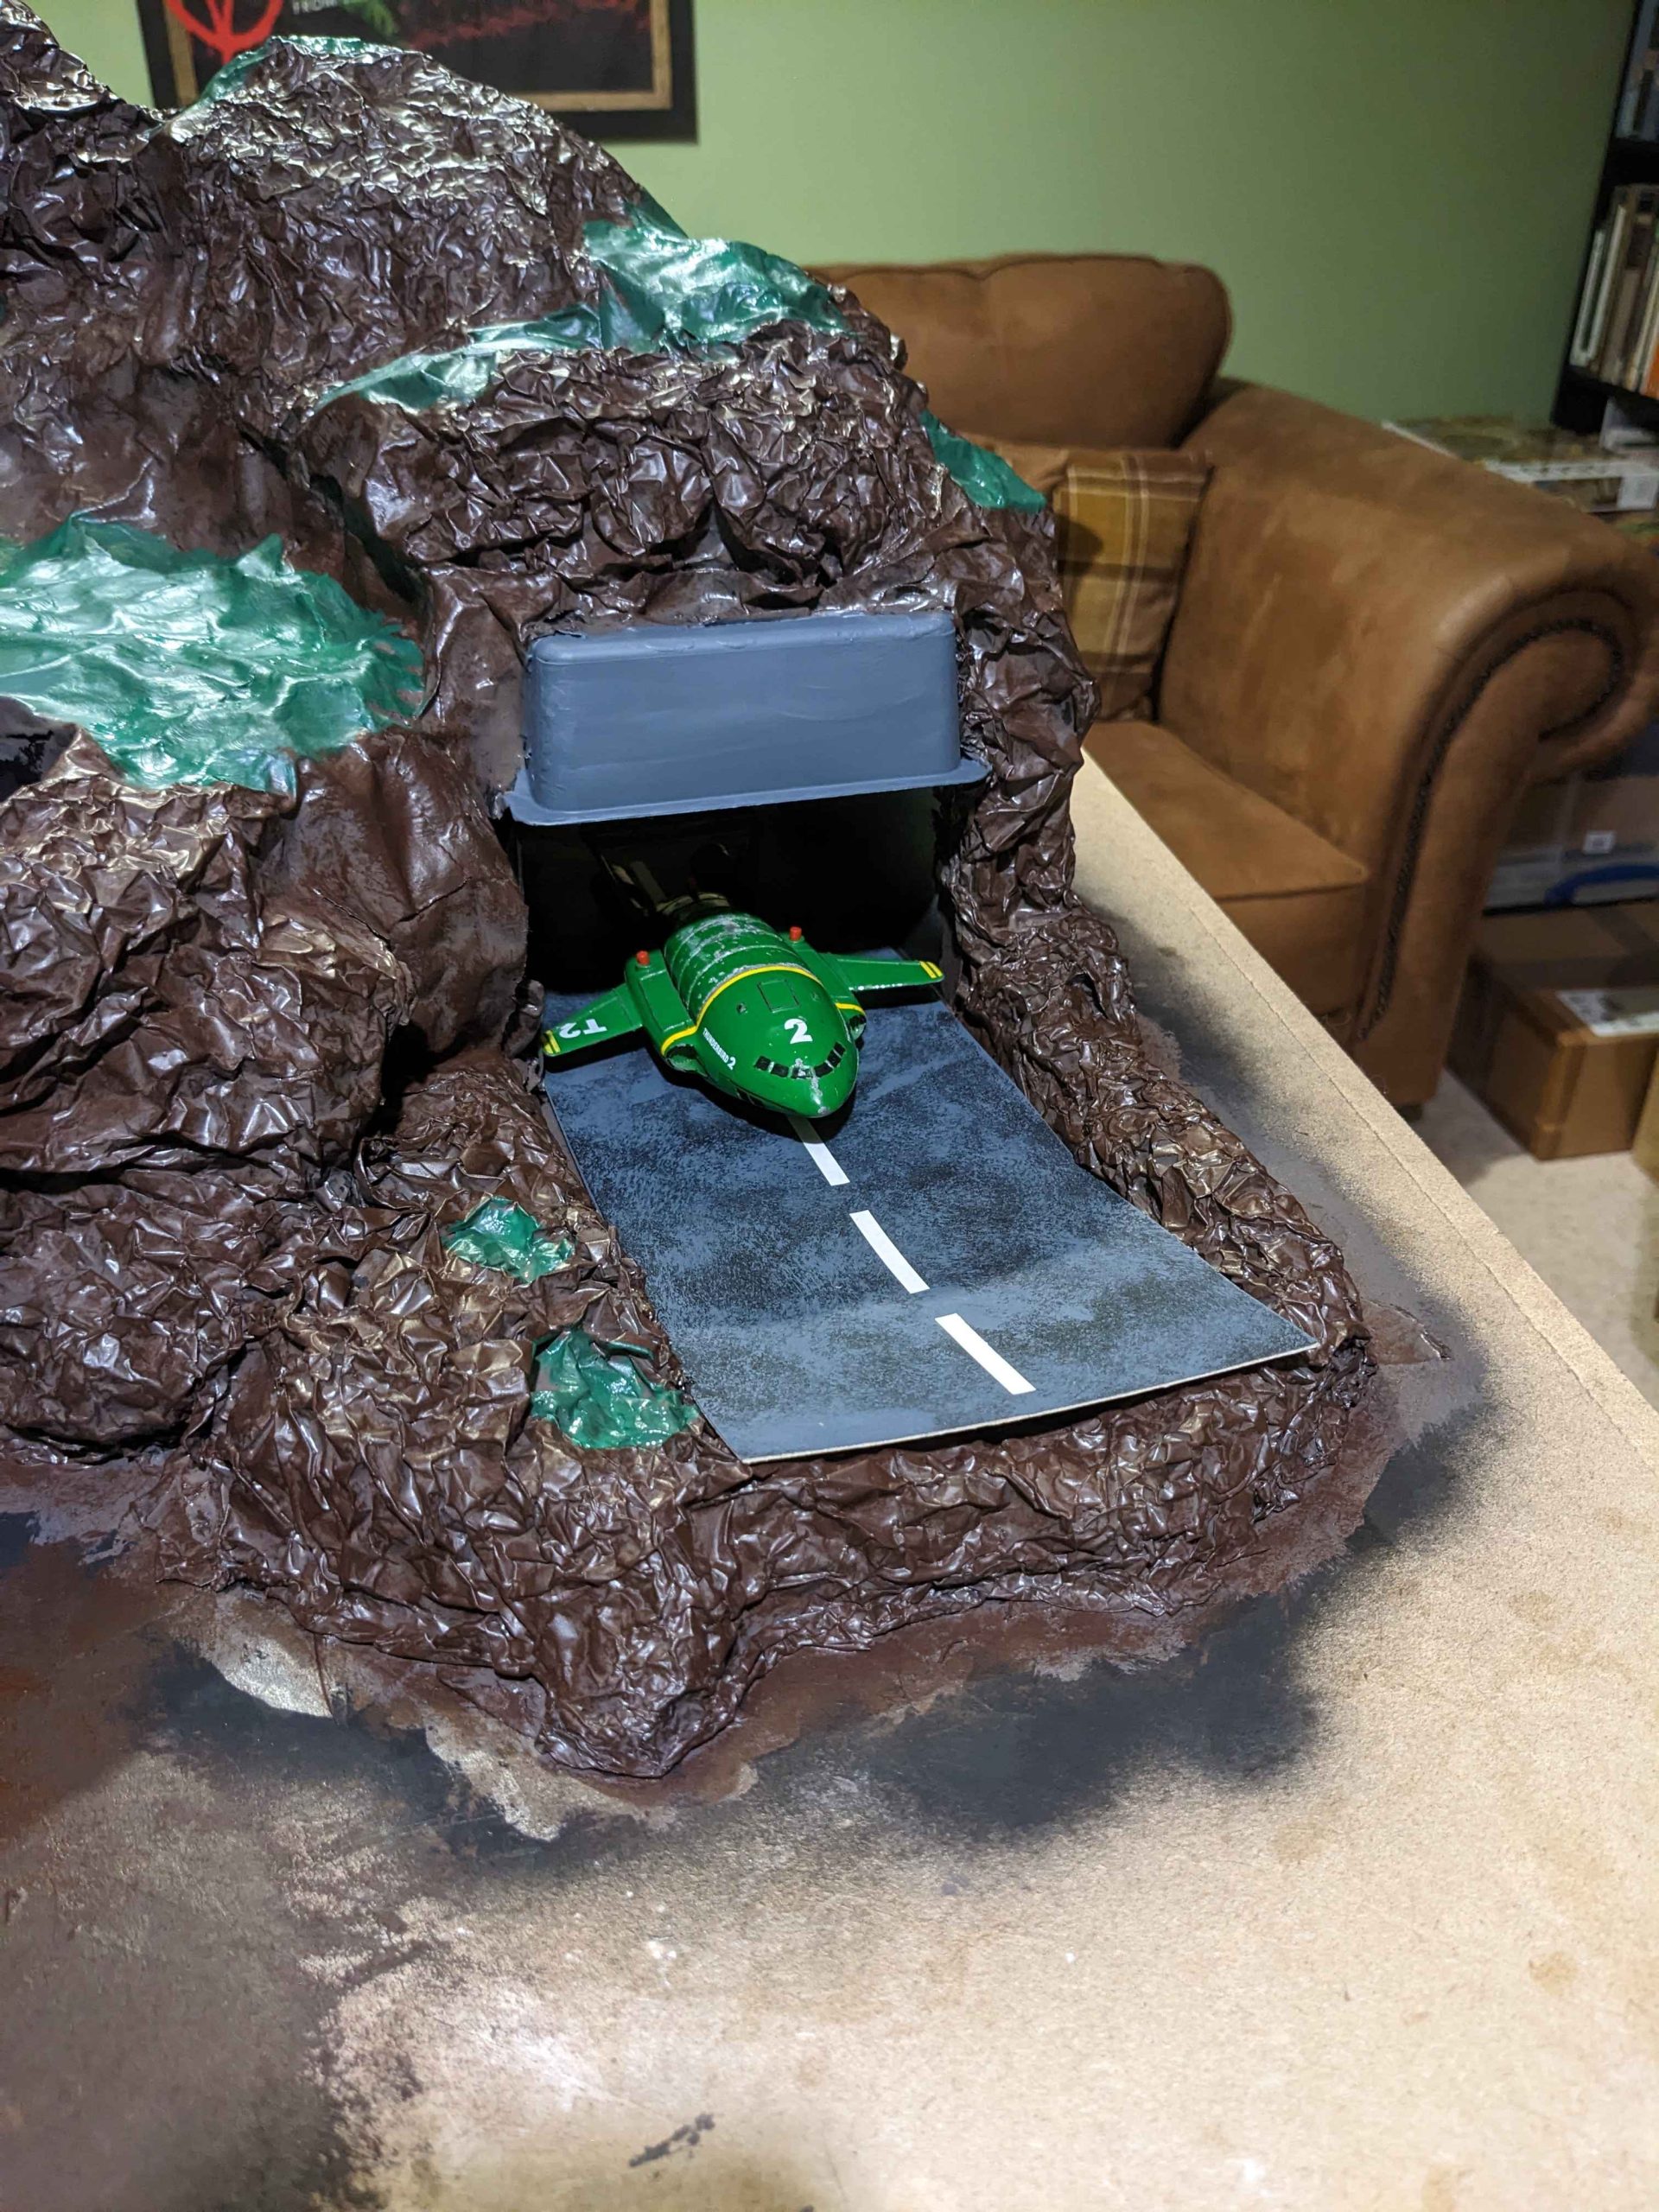
- Thunderbird 2 hangar door
- Windows for the Round House and the building above the Thunderbird 2 hangar
- Flock the whole thing
- Potted palms
- Palm Trees
- Glue on bushes
- Water round the island
Hangar door
This is just a piece of card board cut to fit the tissue box opening. To the back of that you glue a second piece of card to act as a hinge – as Anthea suggested, I used an old Christmas card for mine. This all then gets covered in scrunched tin foil the same at other parts of the build and painted the same way.
Windows
These would have been easier with stickers the right size that you just colour in like they do in the video but I didn’t have any to hand so cut up larger address labels instead. Coloured with a black Sharpie (originally the ones on the Round House were left white but after taking the photo I decided to black them out too).
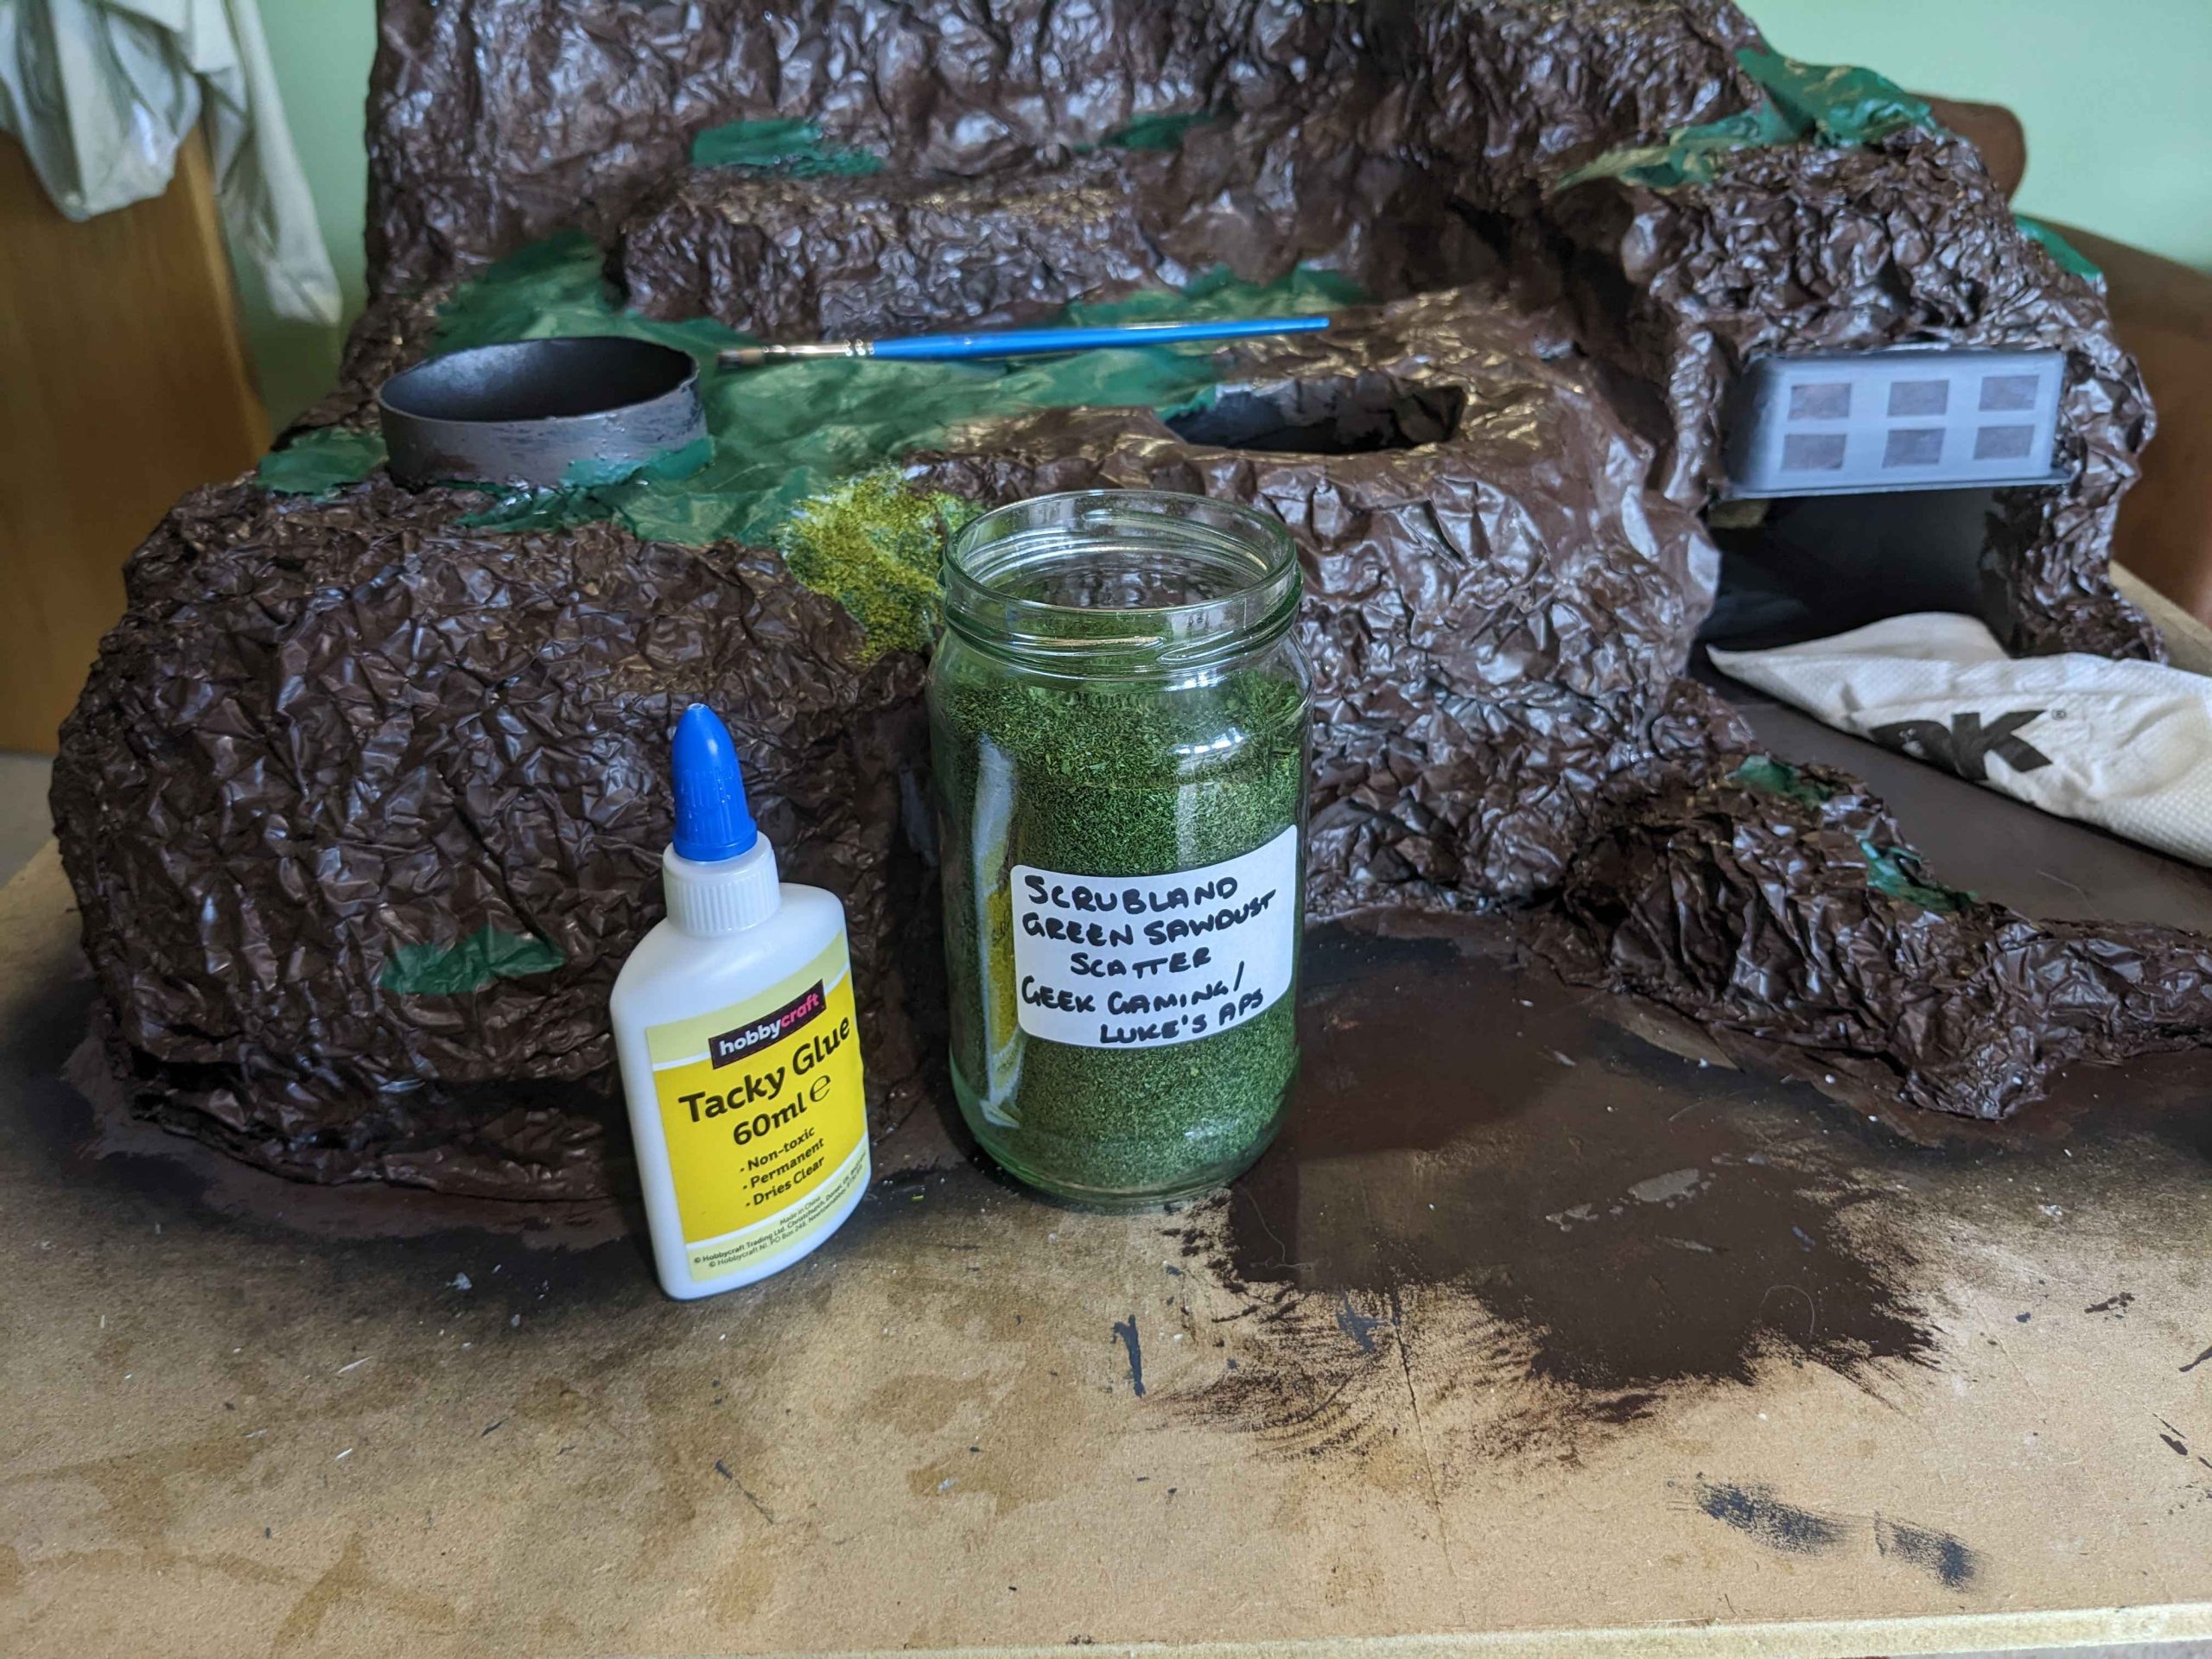
Flocking
This is a bit of a spirit of the craft rather than the letter. On Blue Peter they mixed the sawdust into the green paint that they used to give texture. I didn’t have any plain sawdust available and even if I had, I still think I’d take more of a wargamer approach. I painted the model with green paint (as seen yesterday) and then used sawdust flock from Geek Gaming Scenics which I already had in my flock collection. I have two different tones so used a mix of both across the island.
Part eleven - Saturday part iii
It turned out that one coat of the brown house paint was enough so I dry brushed some burnt umber over the top but by the time I was taking photos, our short Scottish days meant there was only artificial light so there isn’t much to see. I also painted some areas green that are due to get sawdust flock out on them as much a mental reminder to do it than anything else.
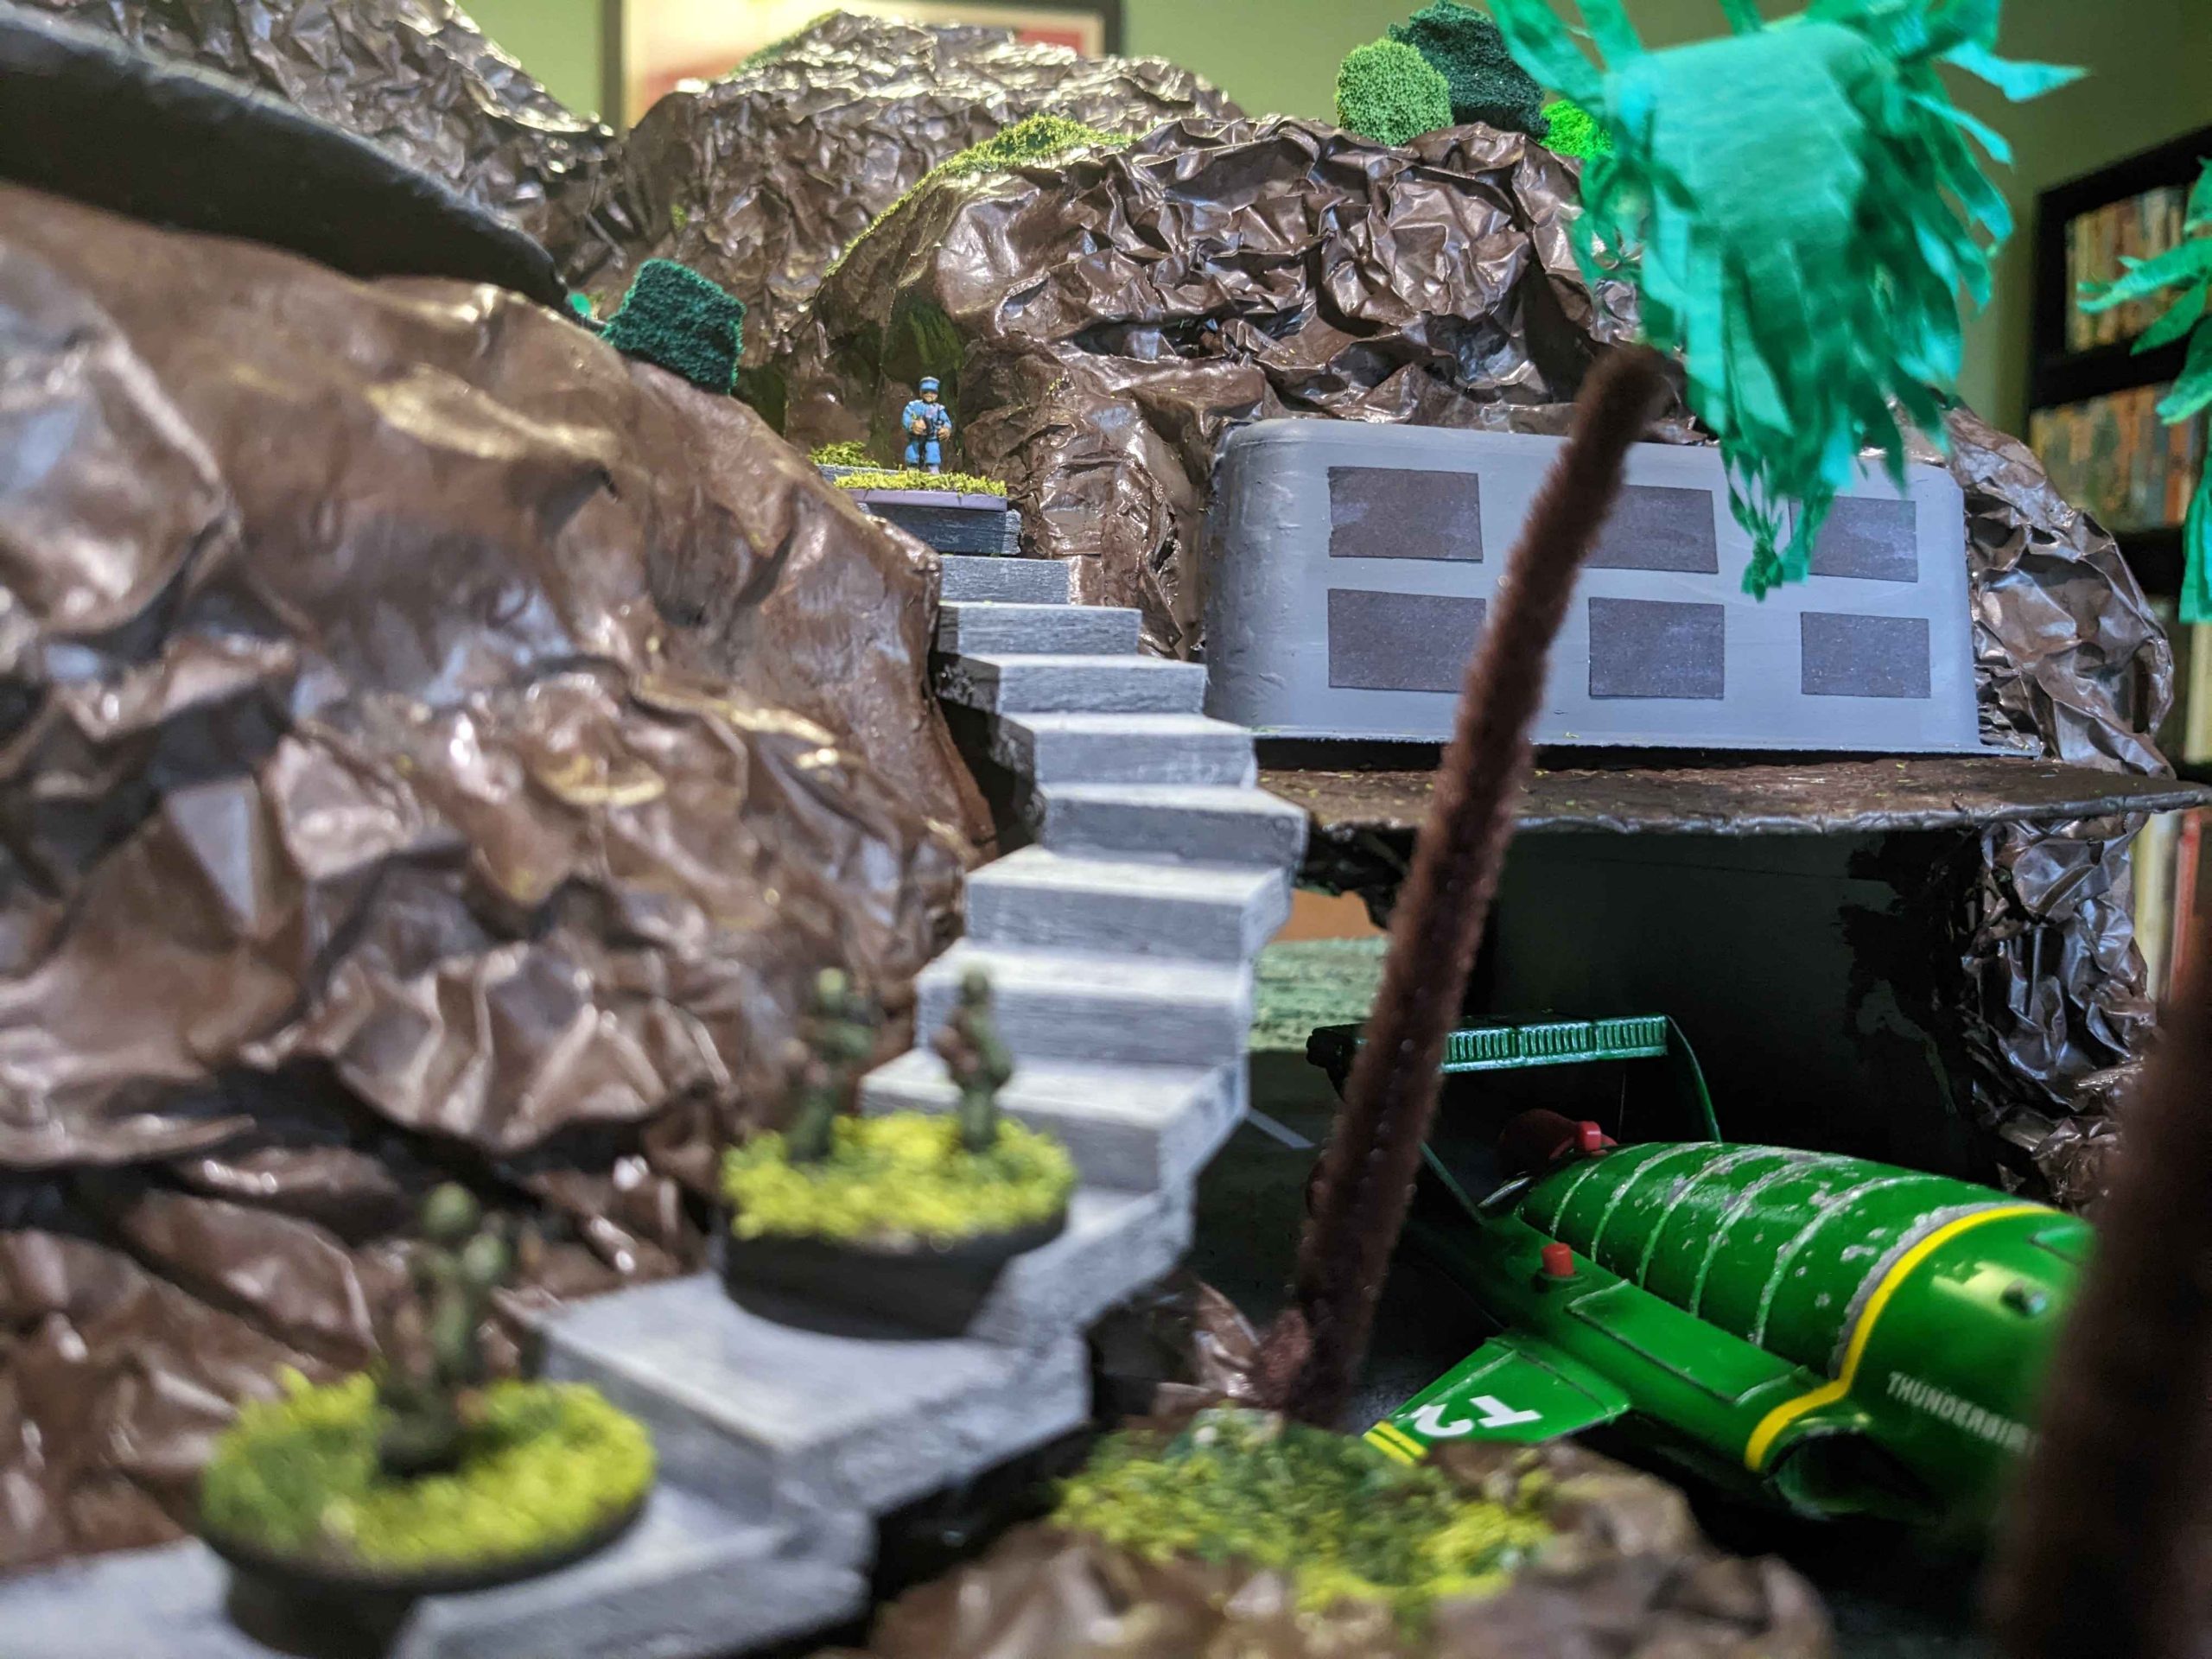
Next up was the runway for Thunderbird 2. A simple strip of cereal box, painted black and then dark grey sponged on to stop all the grey I’ve been doing looking the same. The clever sausages at Blue Peter used bits of white sticky label for the runway markings and who am I to argue. I also added the sandpaper for the beach at this point though it isn’t stuck down because there is still some messy stuff to come.
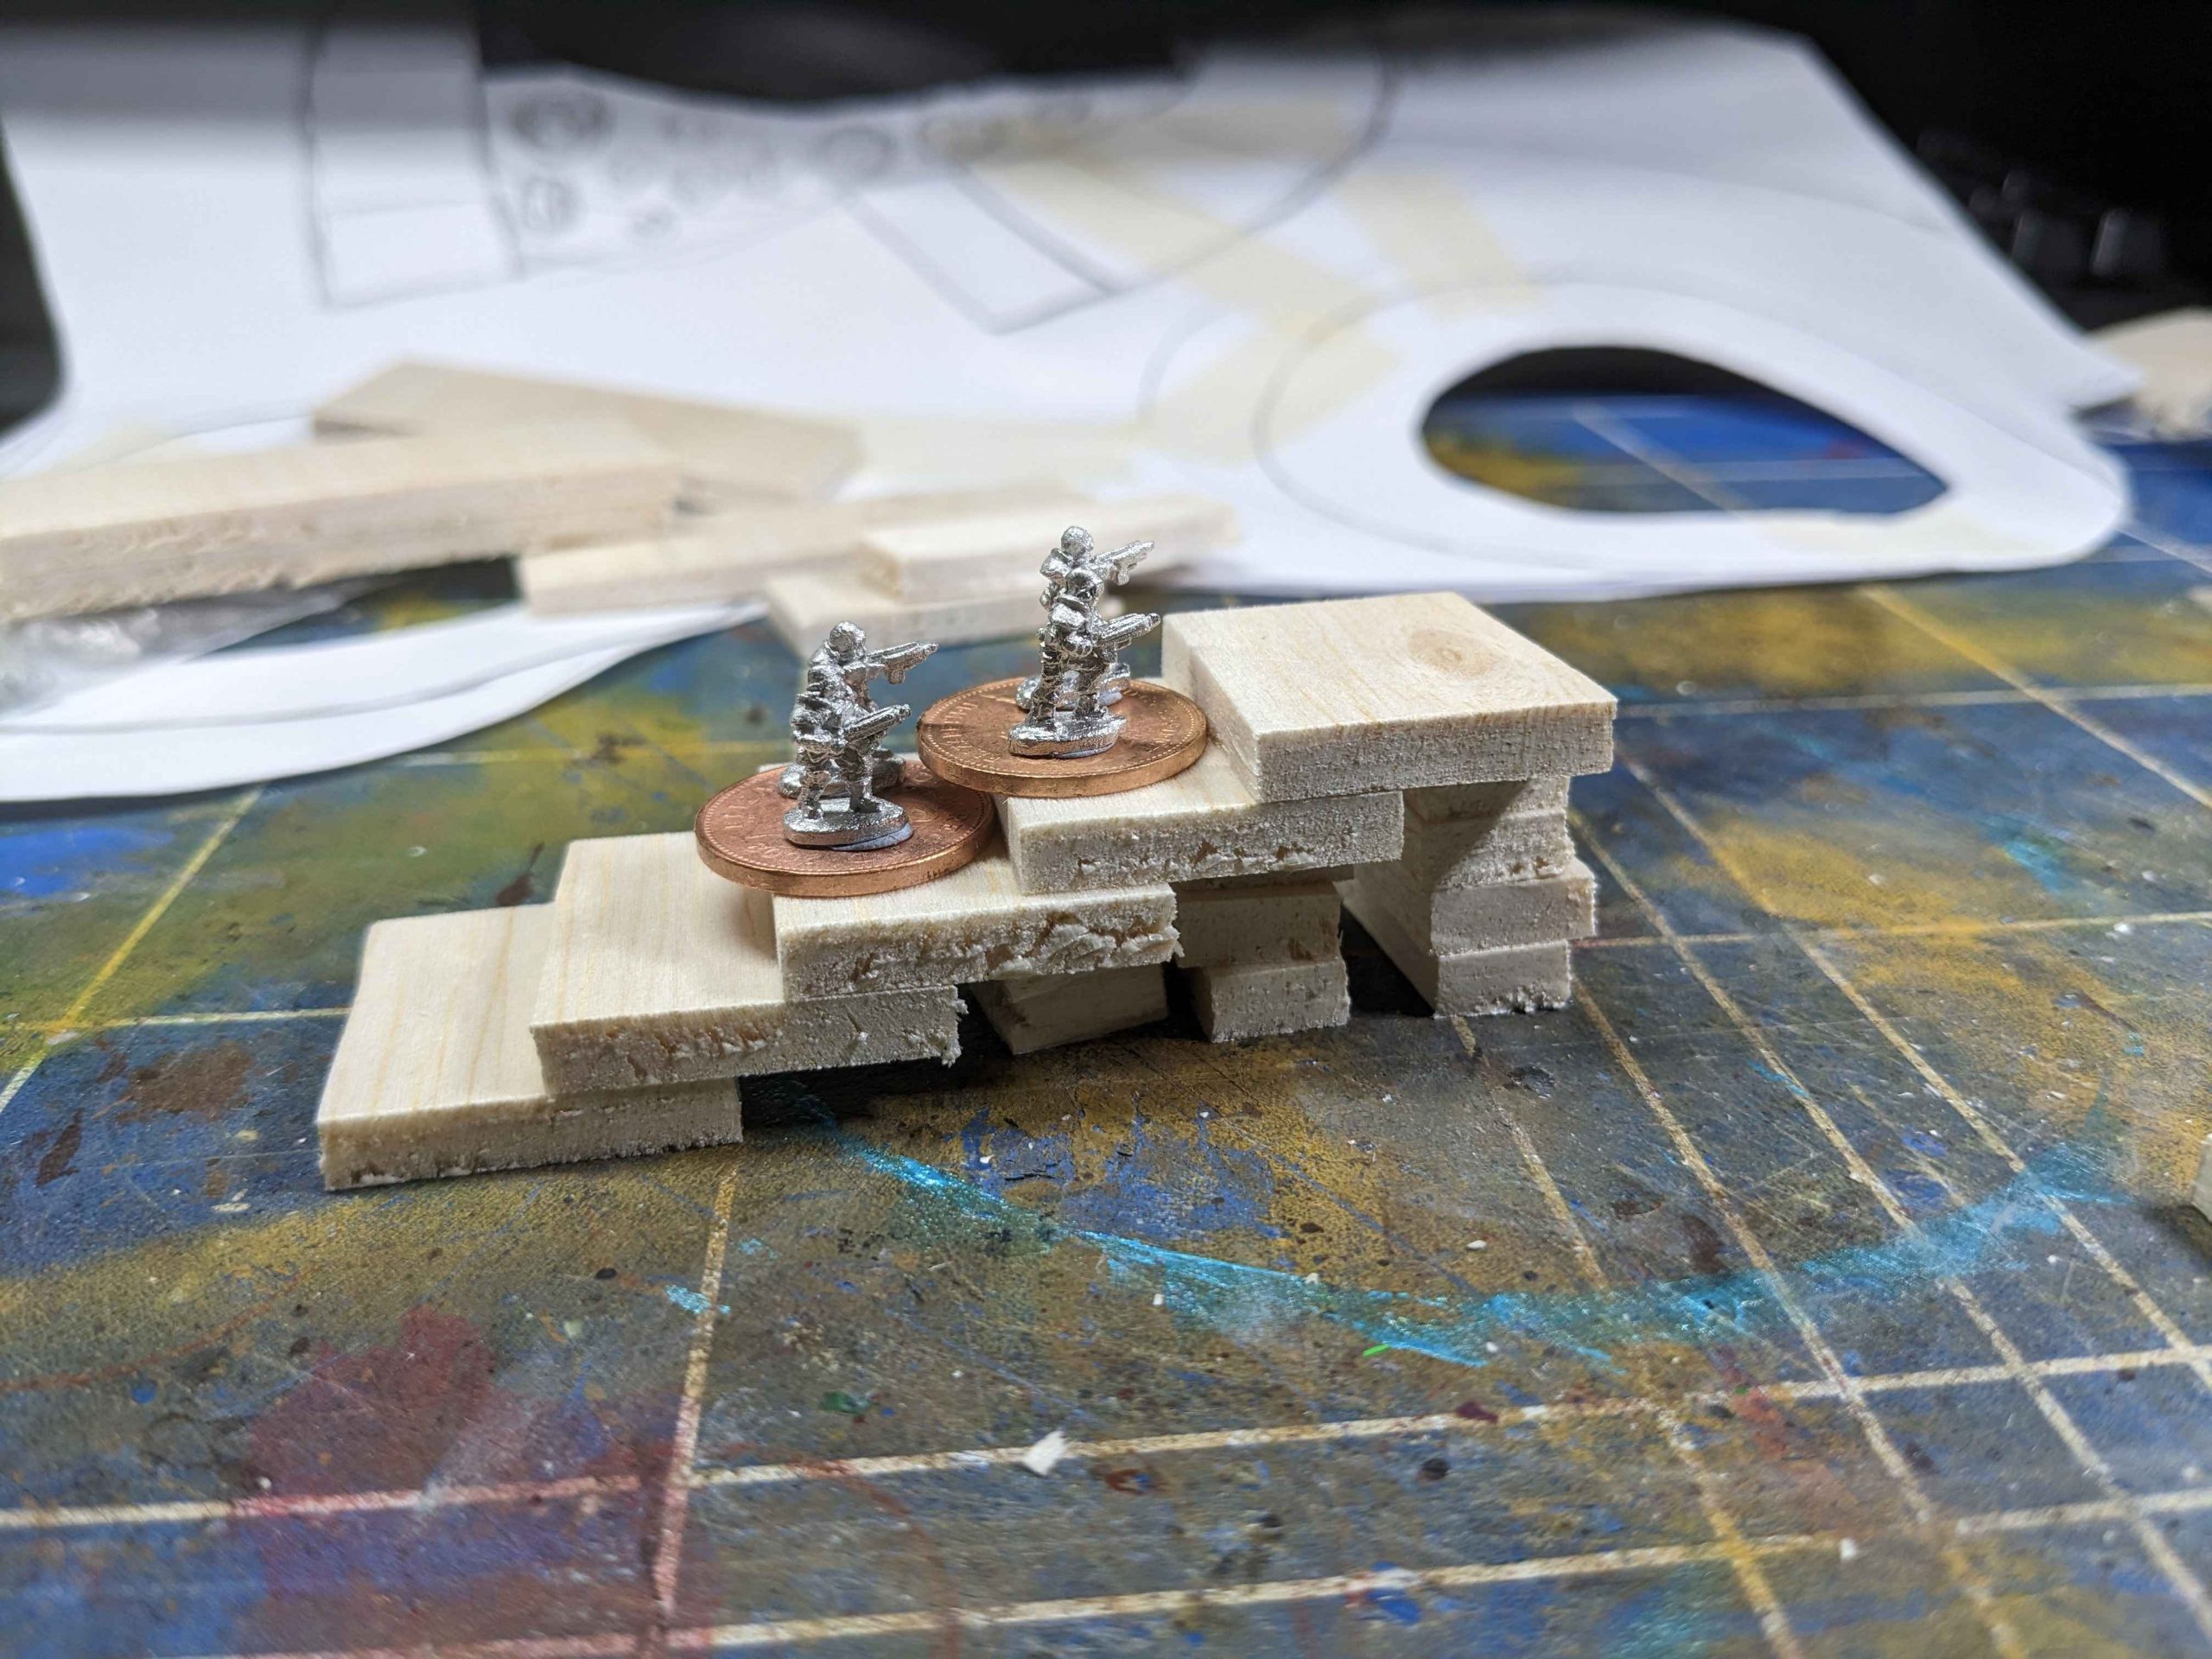
Now the bit I haven’t been looking forward to. Stairs.
In the original video, Anthea Turner says make stairs out of cardboard or bits of wood and they are nice little things. My Tracy Island though is a) bigger and b) for wargaming so my stairs were going to be trickier. I took her suggestion on wood though – I have some 4mm balsa sheet in the cupboard.
First up I did the ones up to the main house. These I curved around to the side to give myself the space for each step to hold two bases. Supports were made out of balsa off-cuts and these will be hidden with bushes.
My Round House has ended up much the same height as the rest of the lower level so it only needed one step to it rather than the set she suggests.
Now we break from the original completely. The infiltrator forces (or the good guys as they are known) need places to land and while there will be rules for scaling the cliffs around the island, and a hidden cave with secret stairs to the upper area (not modelled), an easier stairway was necessary. Coming up from the beach is actually quite a steep climb but I wanted each step to be able to hold a base so they take up a lot of space. To make it work I ended up having to cut into the papier-mâché/foil layers for the top stairs. Once each step was glued together, I took them off and repaired the area so it can get repainted on Sunday. I also had to level off the area around the pool a bit after finishing up the surround for it so by the end of the night it definitely feels a little like I’ve gone backwards!