


![NO Weekender Or Cult Of Games XLBS This Weekend [Updated]](https://images.beastsofwar.com/2026/03/No_Weekender_and_XLBS_this_Weekend-225-127.jpg)


War of the Flamin’ Roses (Terrainfest 2025)


Recommendations: 155
About the Project
I painted up a warband for Here's the Ruckus .... but have no terrain! I had better fix that then.
Related Game: Never Mind The Billhooks: Here’s The Ruckus
Related Genre: Historical
Related Contest: TerrainFest 2025
This Project is Active
Making a bit of a splash
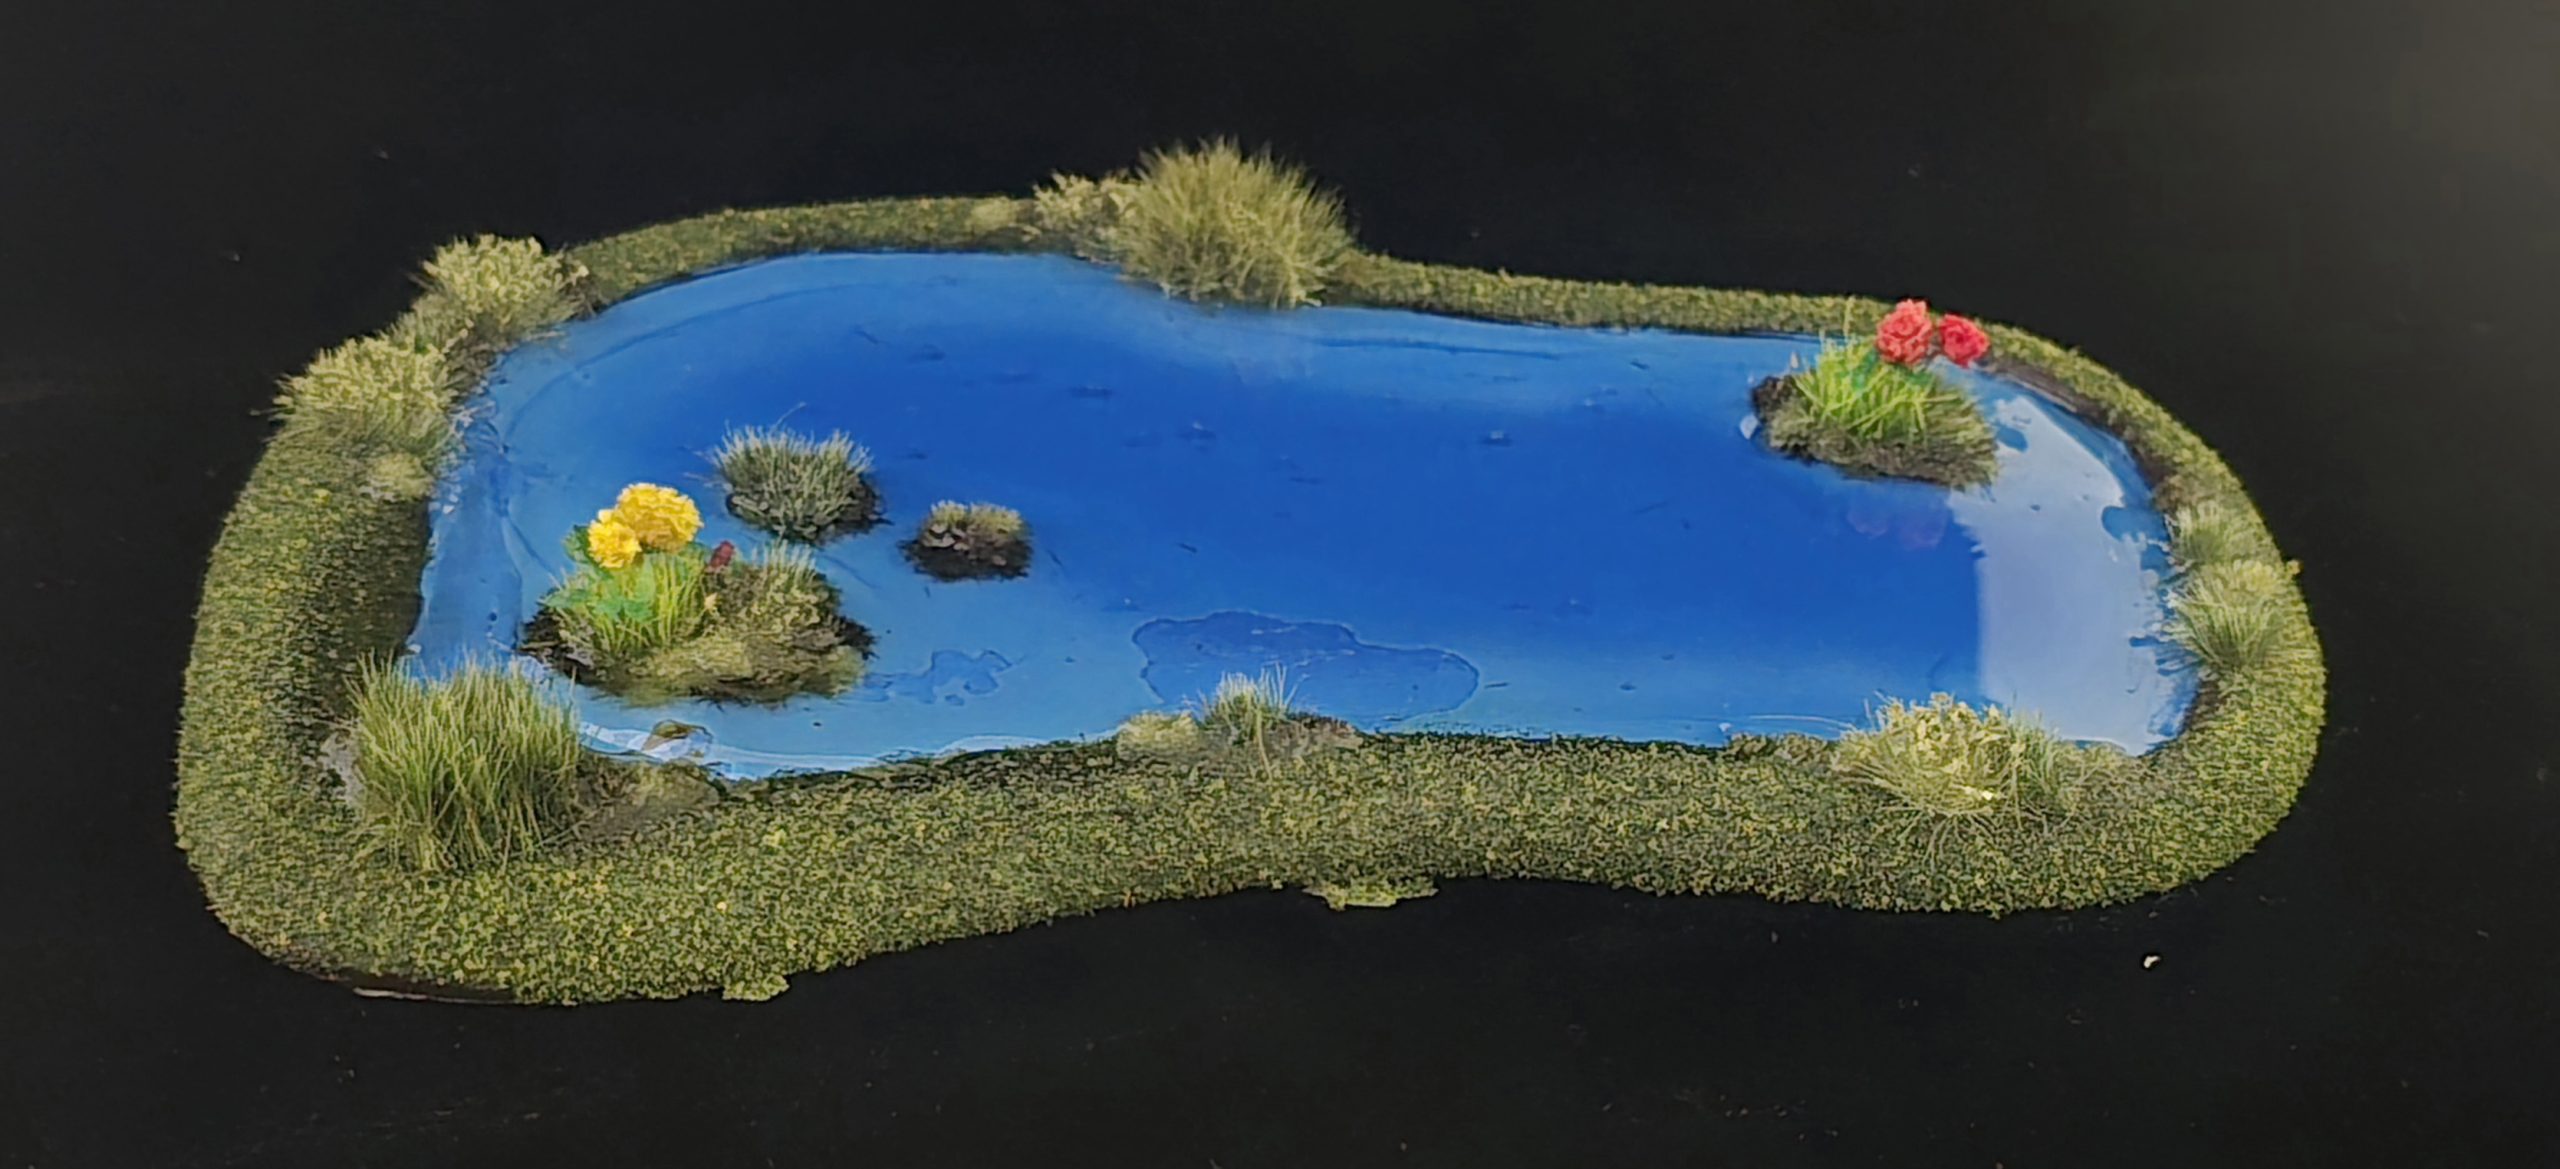
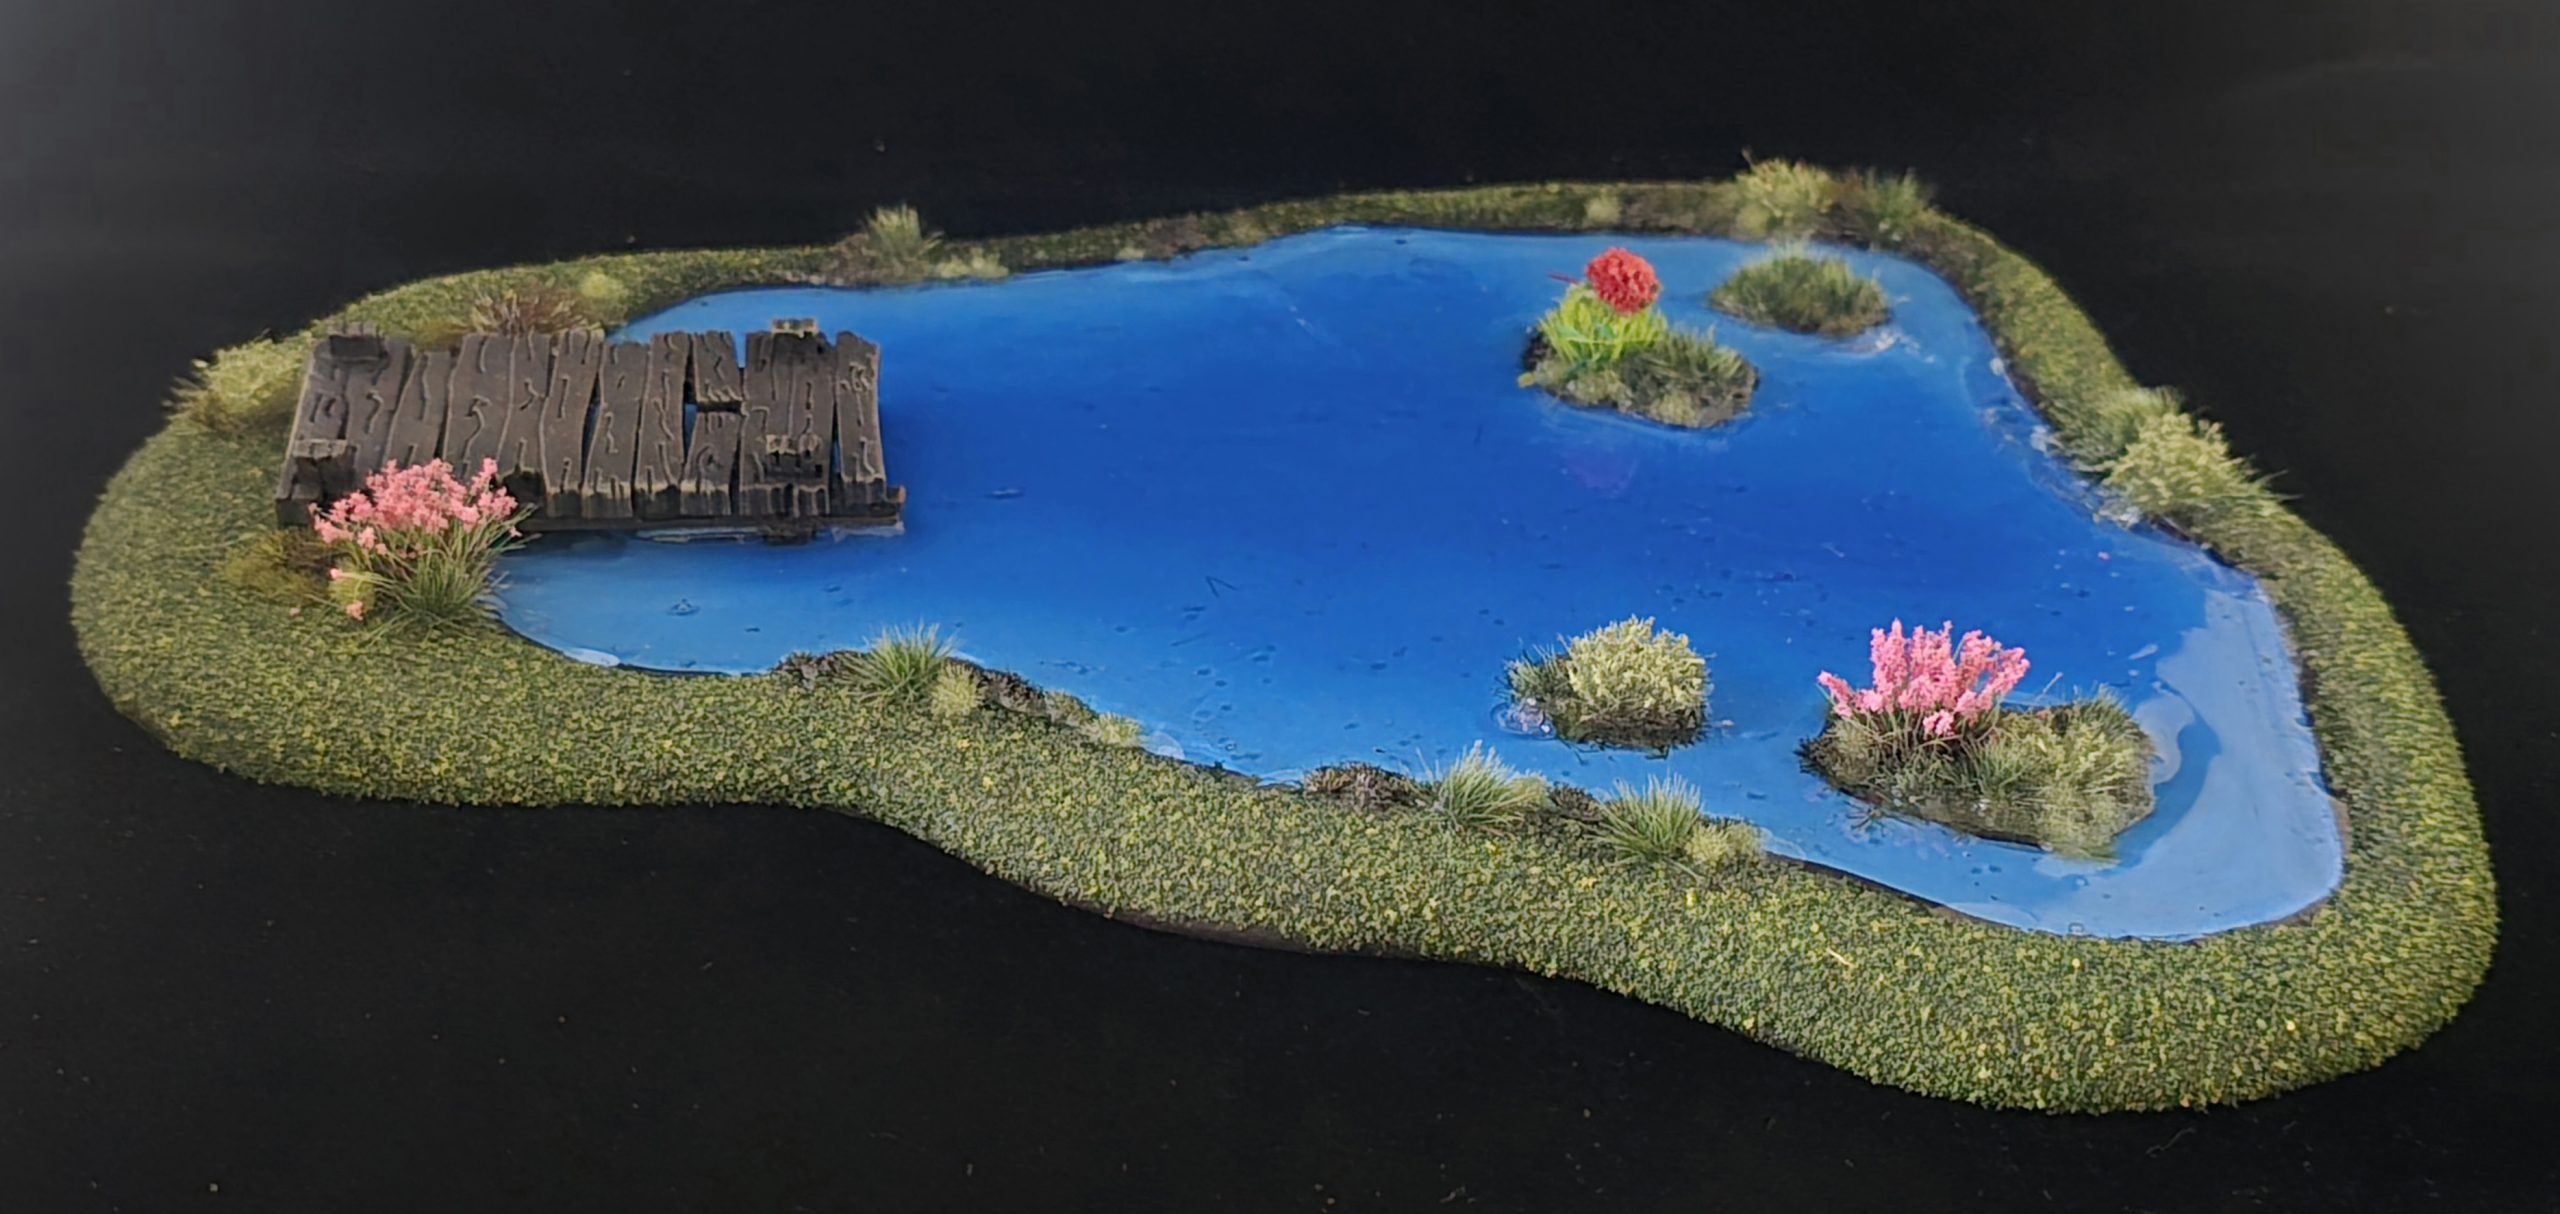
So, as I mentioned last week, here are a couple of ponds, plus some extra scatter. I have a feeling with Ruckus boards that it will be the scatter that truly helps bring the board alive, so I should really get on with that.
Anyway, a couple of things with this part of the build. The Battlekiwi ponds, while excellent, are two 3mm mdf sections on top each other with no grading, so the edges are actually pretty steep. This is where the Dremel I bought to help me woth the river sections I mentioned early came in great hand, adding a curve to the outer and inner rims, as well as the little pondy bits.
I am using a different brand of UV resin than I used before, and it handled quite differently. It is a lot more liquid-y than my other lot, which while it made spreading it much easier, it spilled a bit when I tried to put PVA glue underneath to help.prevent warping.
While I have abandoned trying to completely cure the resin with a little UV torch, especially when I have a sun outside putting out 40°C + heat at the moment, I may use it to stabilise the pour first so I can move the pieces without so much mishap next time.
You live and learn I guess.
Speaking of next time, I finally have primed one the the two last buildings, as well as a village bell, so that is going to be this week’s work. Maybe next week I will finish up a bunch of hedges, and a few rocky terrain pieces to put on the ground. Could be fun!
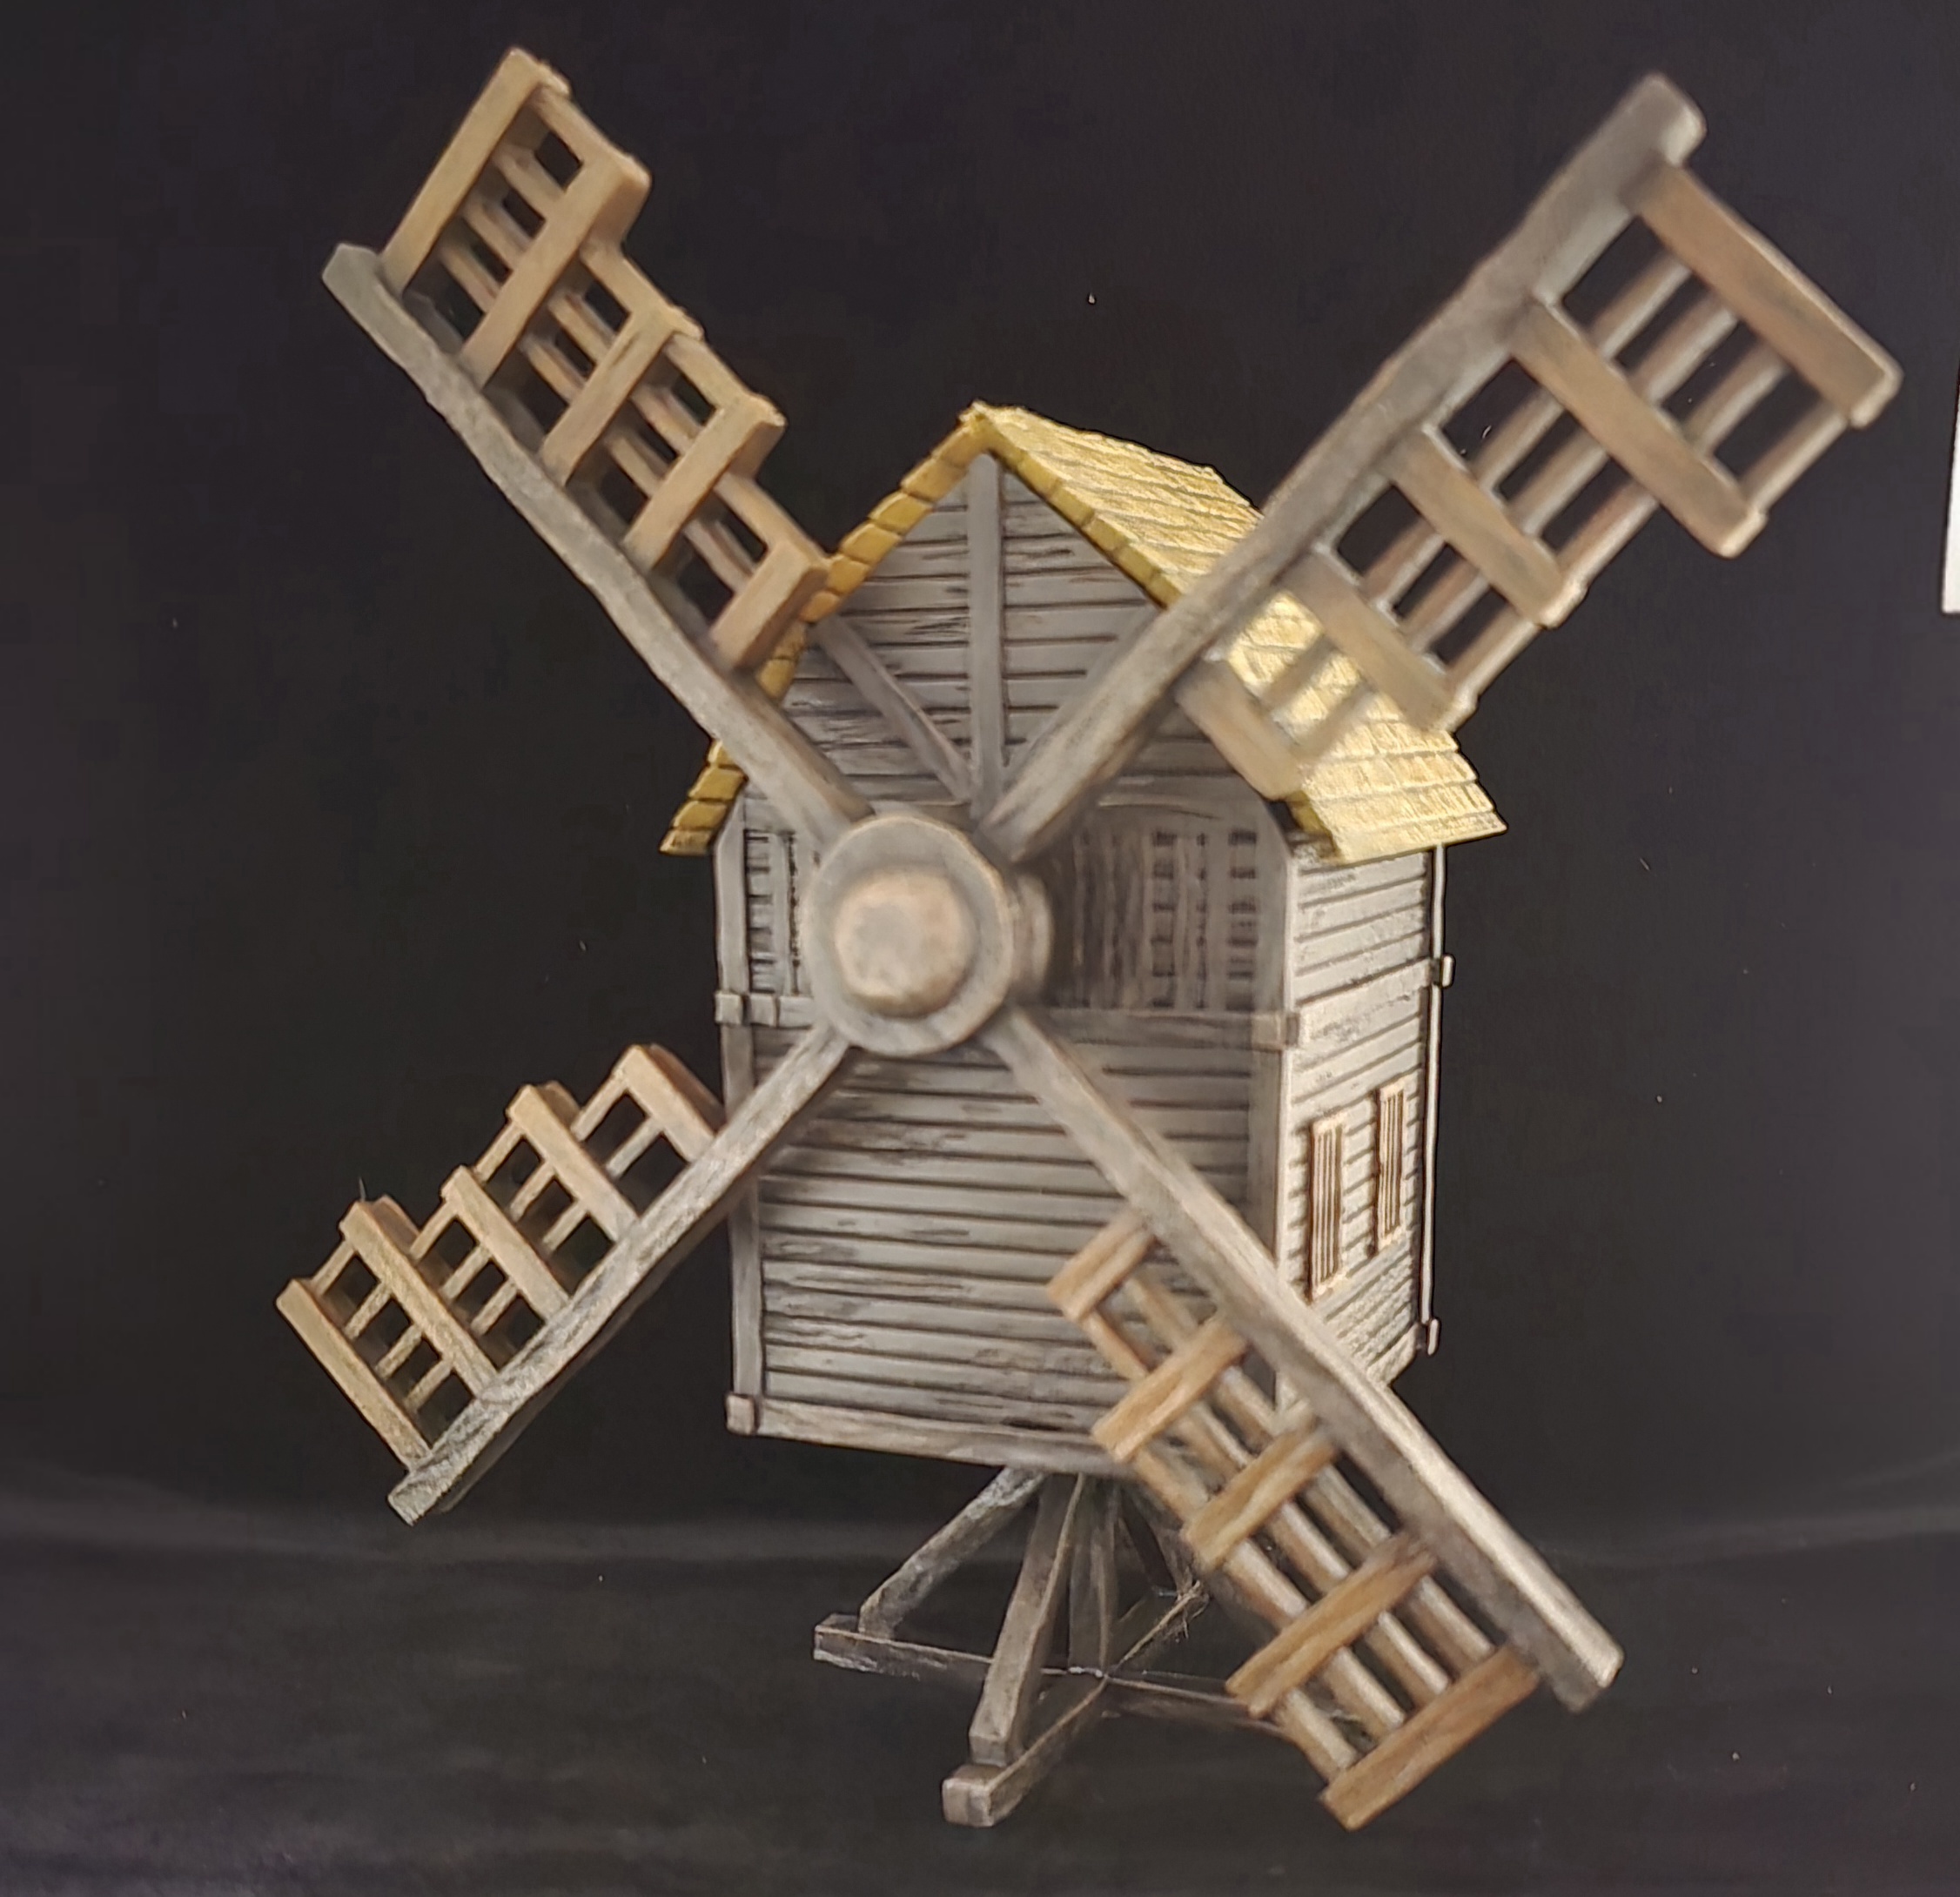
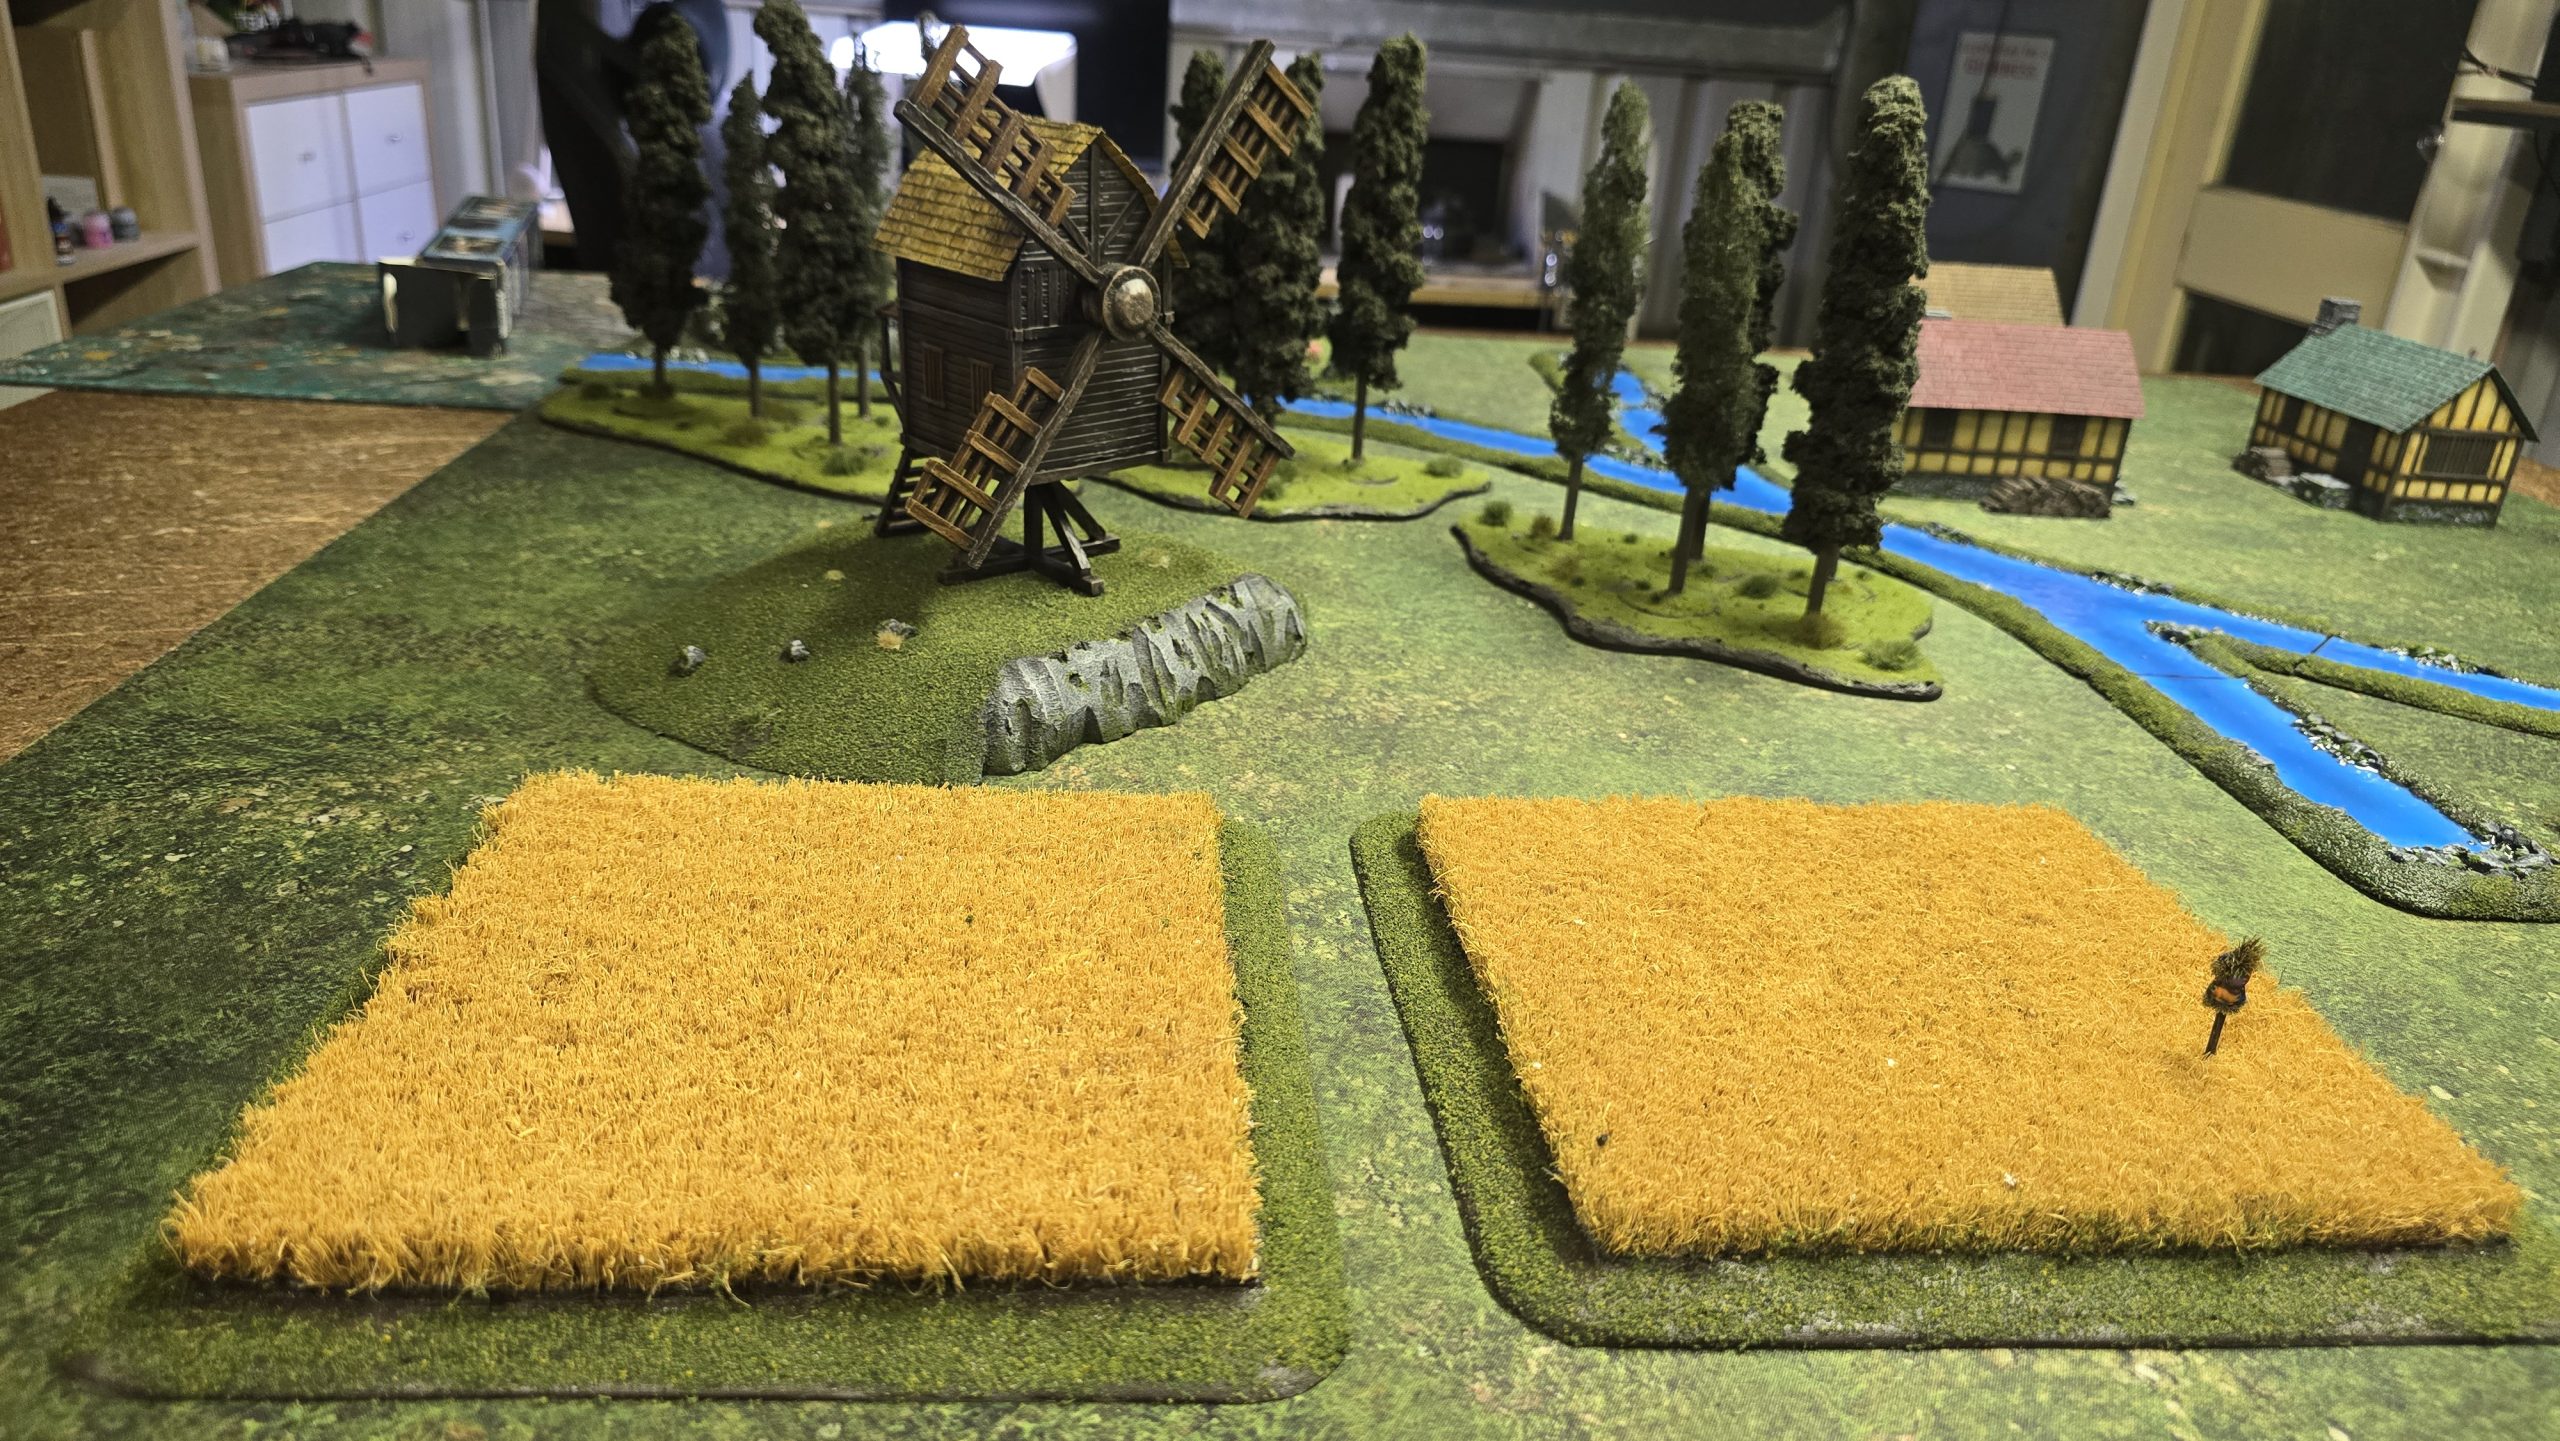
Away with the Wind
It’s that time again!
This was a fun one. Also, the blades on the windmill are magnetised as it is otherwise just a bit too tall for me to store otherwise, so that was a fun little experiment.
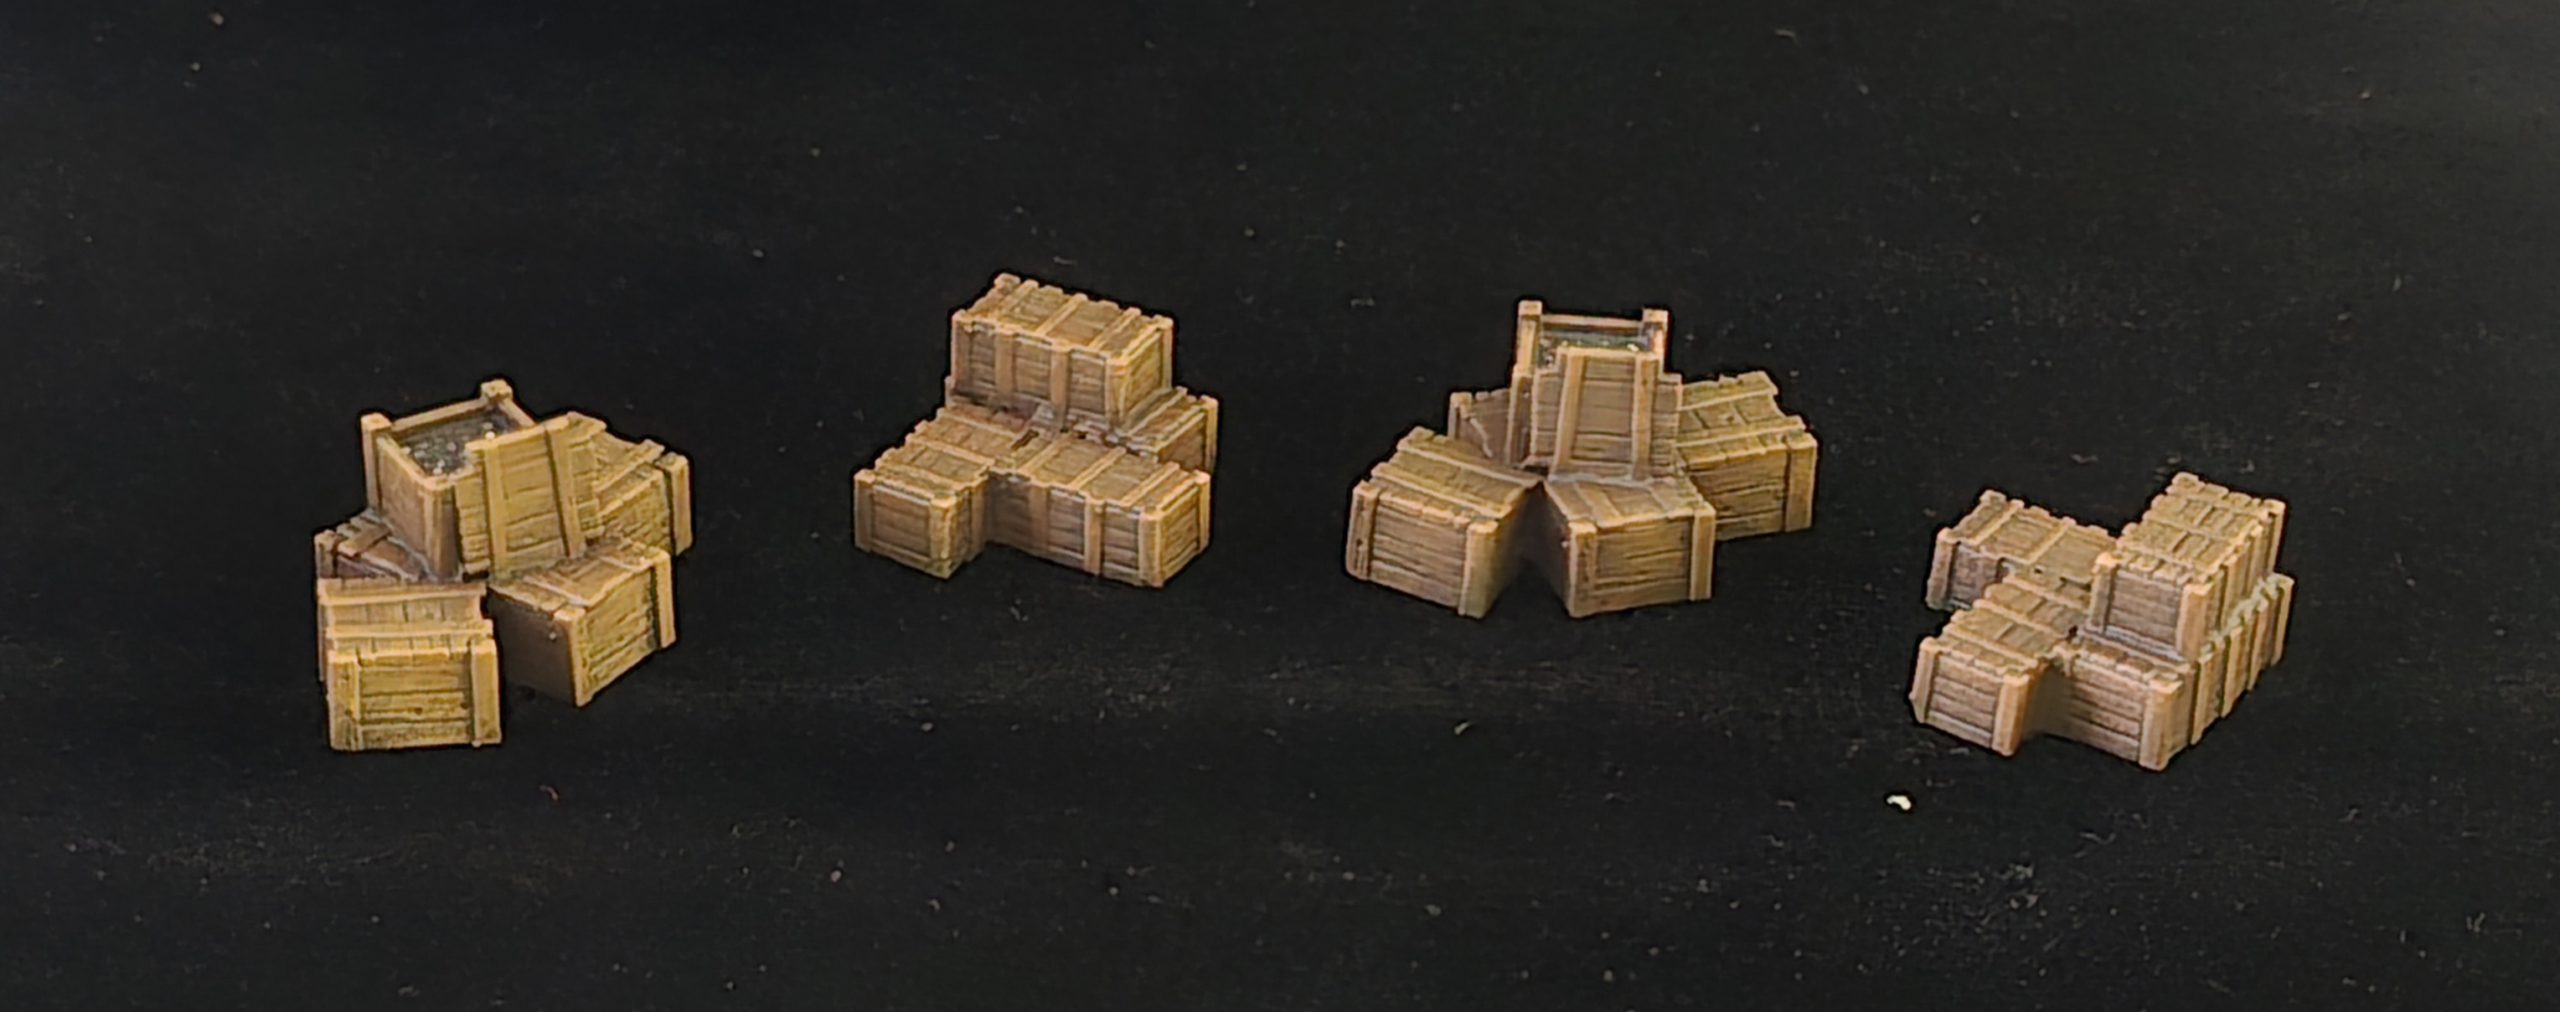
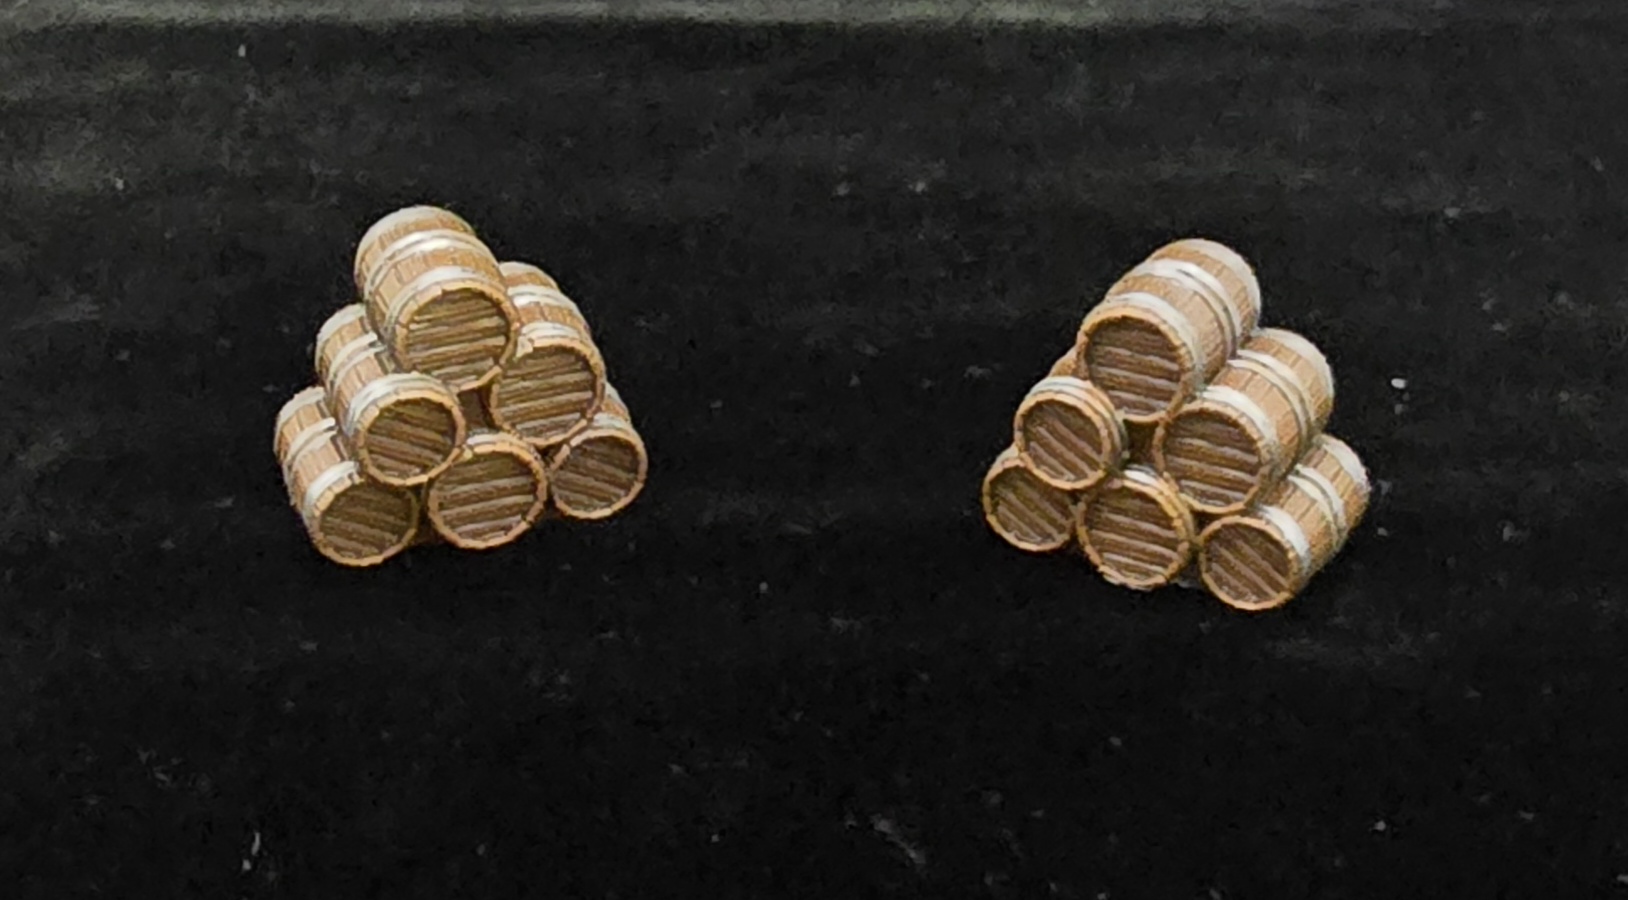
The barrels are there for additional scatter.
I think next might be a pool and some hedge rows, then it will be back to one of the buildings and the damned wooden trim again!

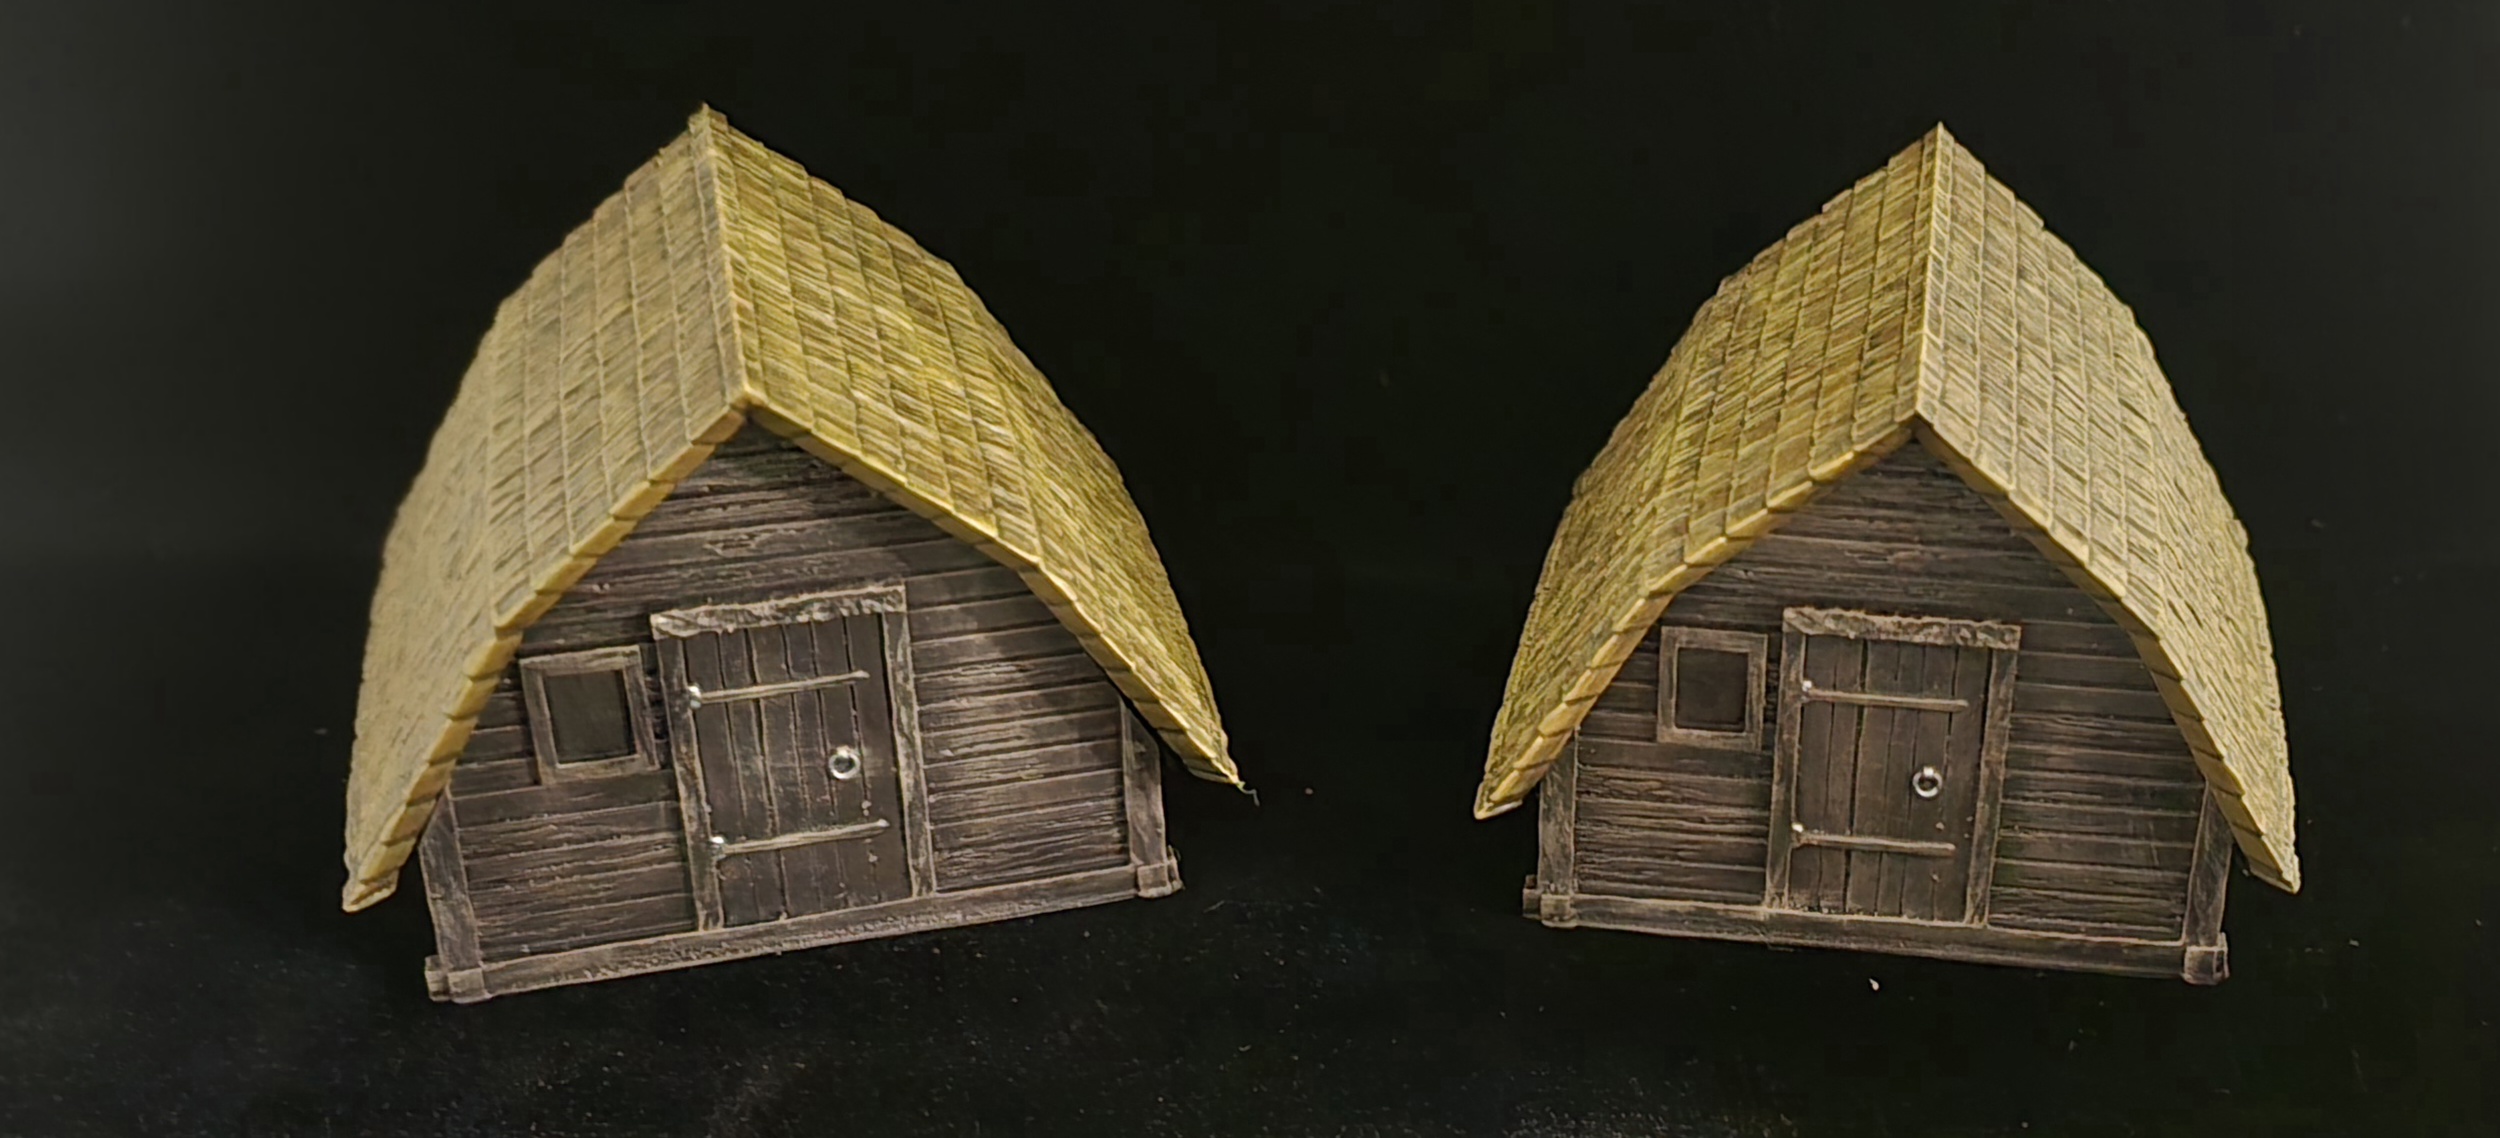
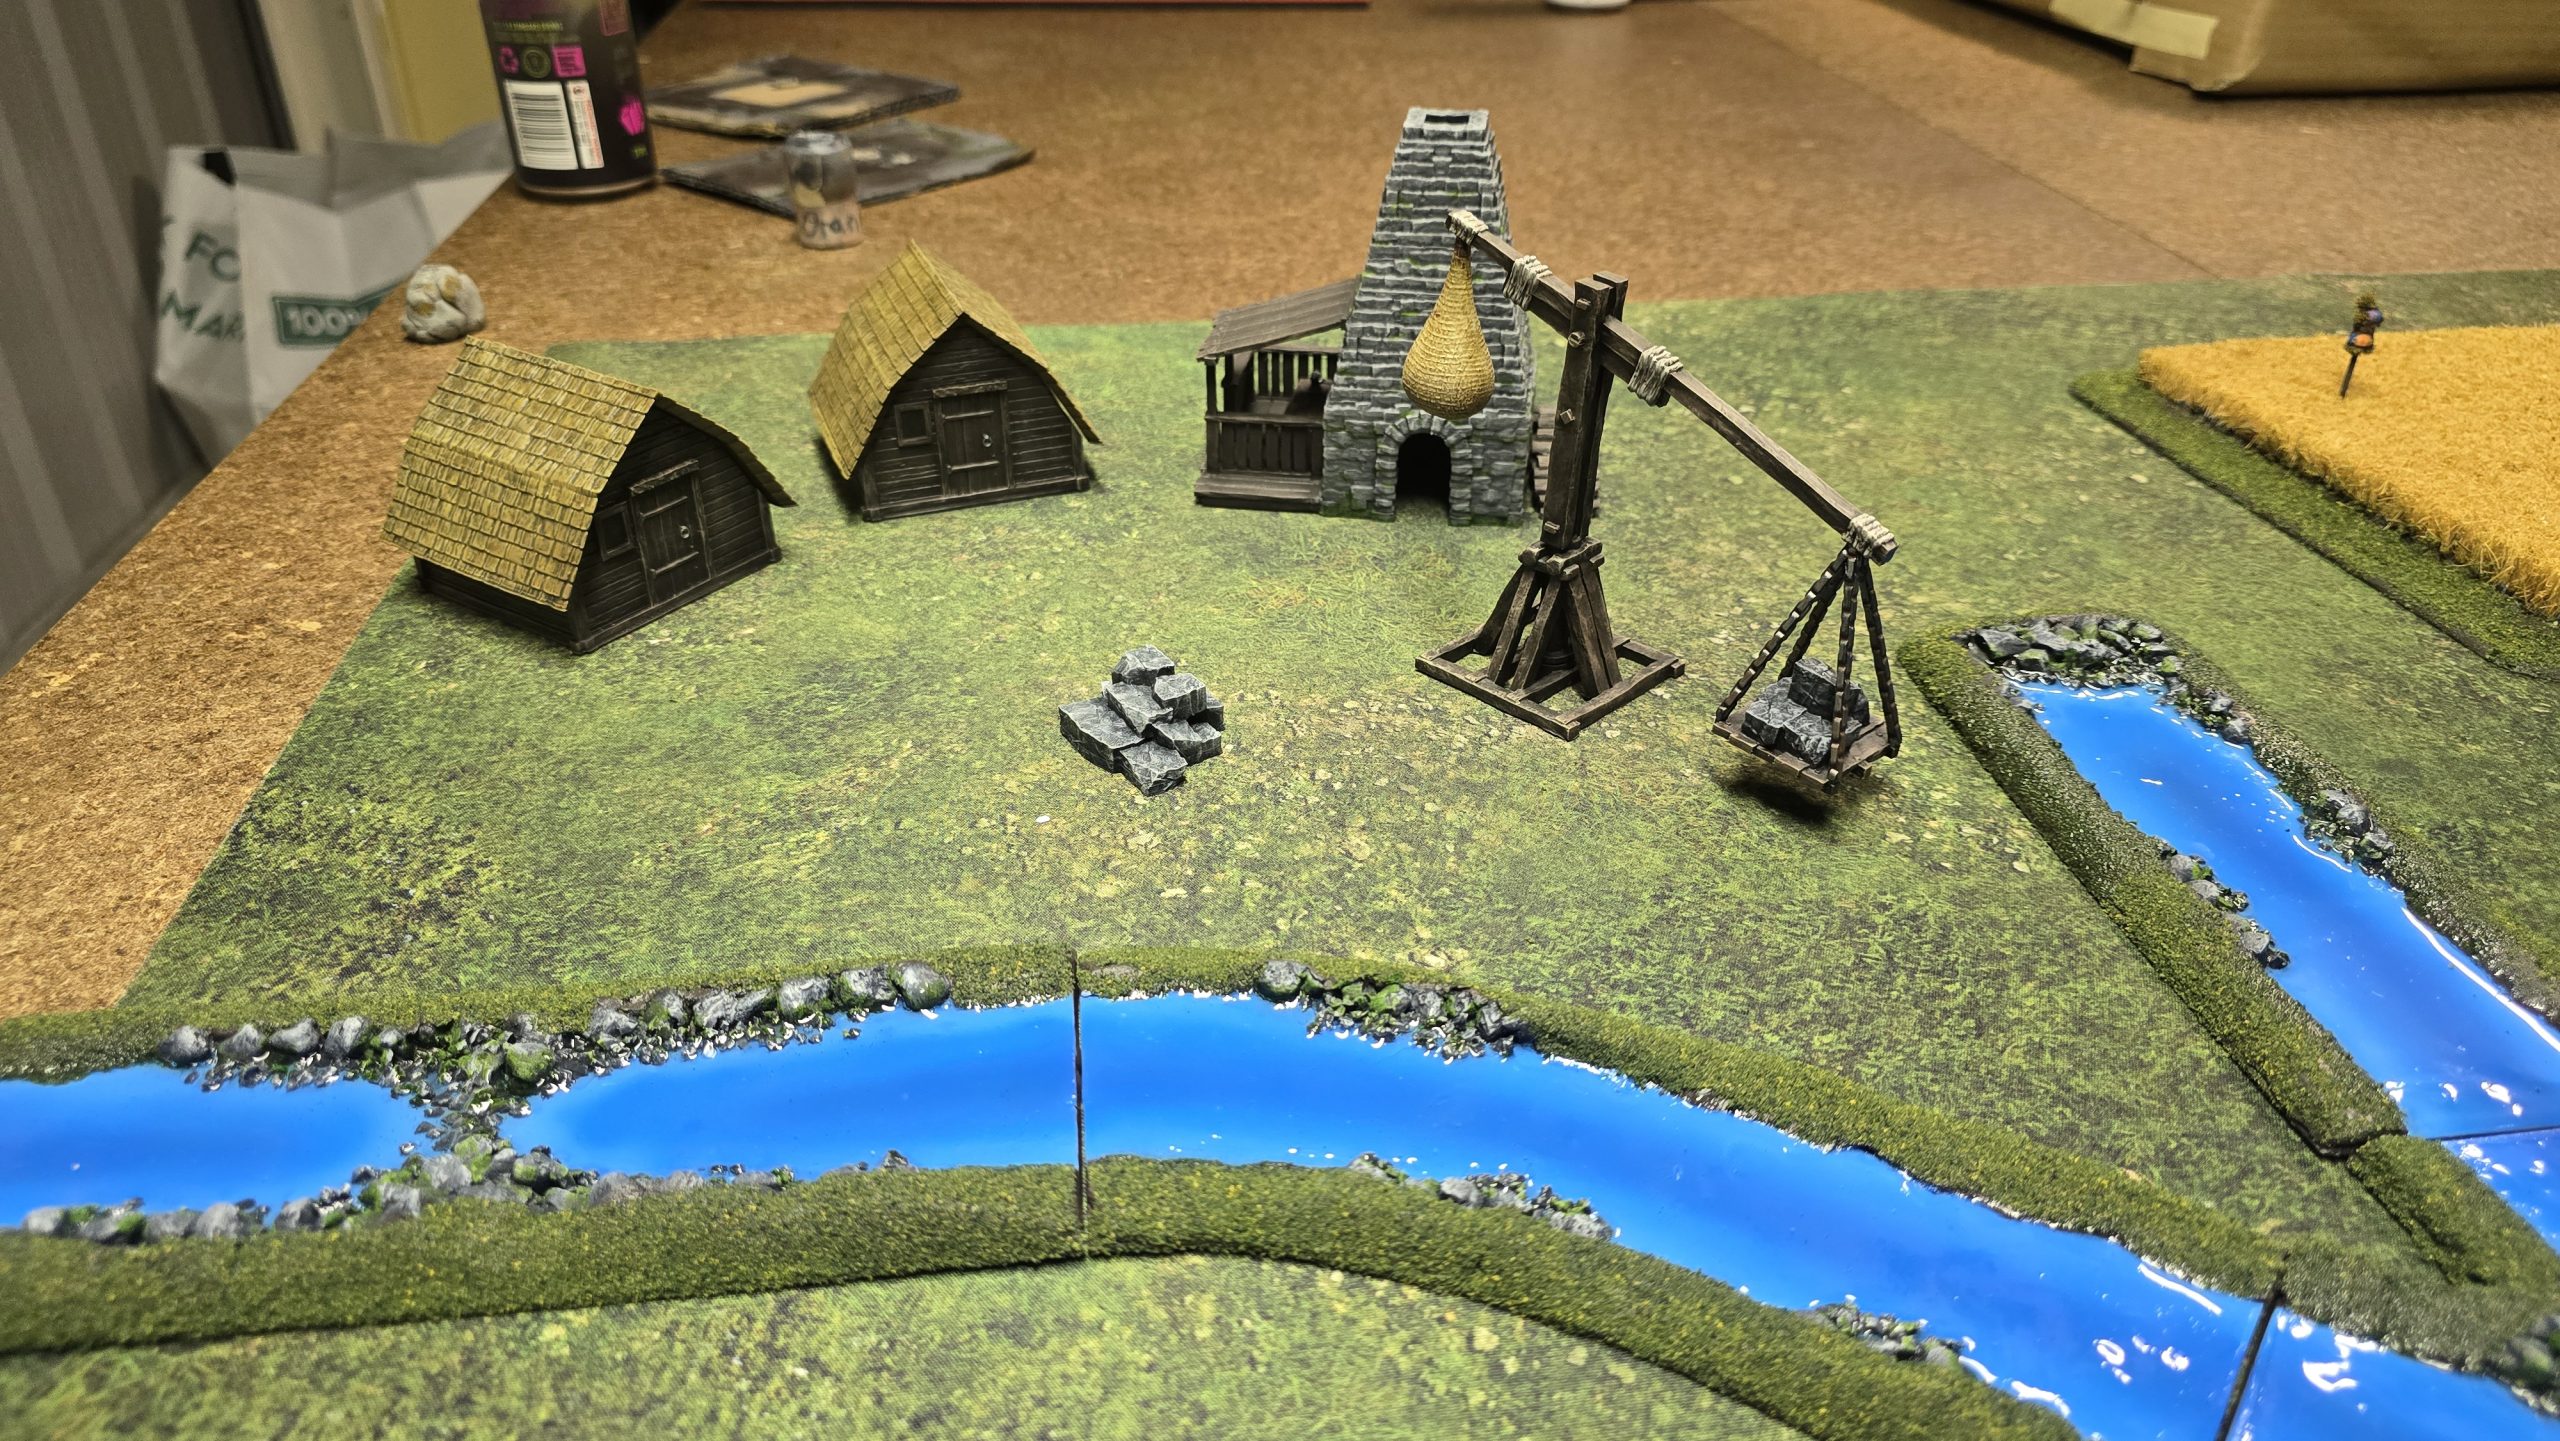
More Heavy Lifting
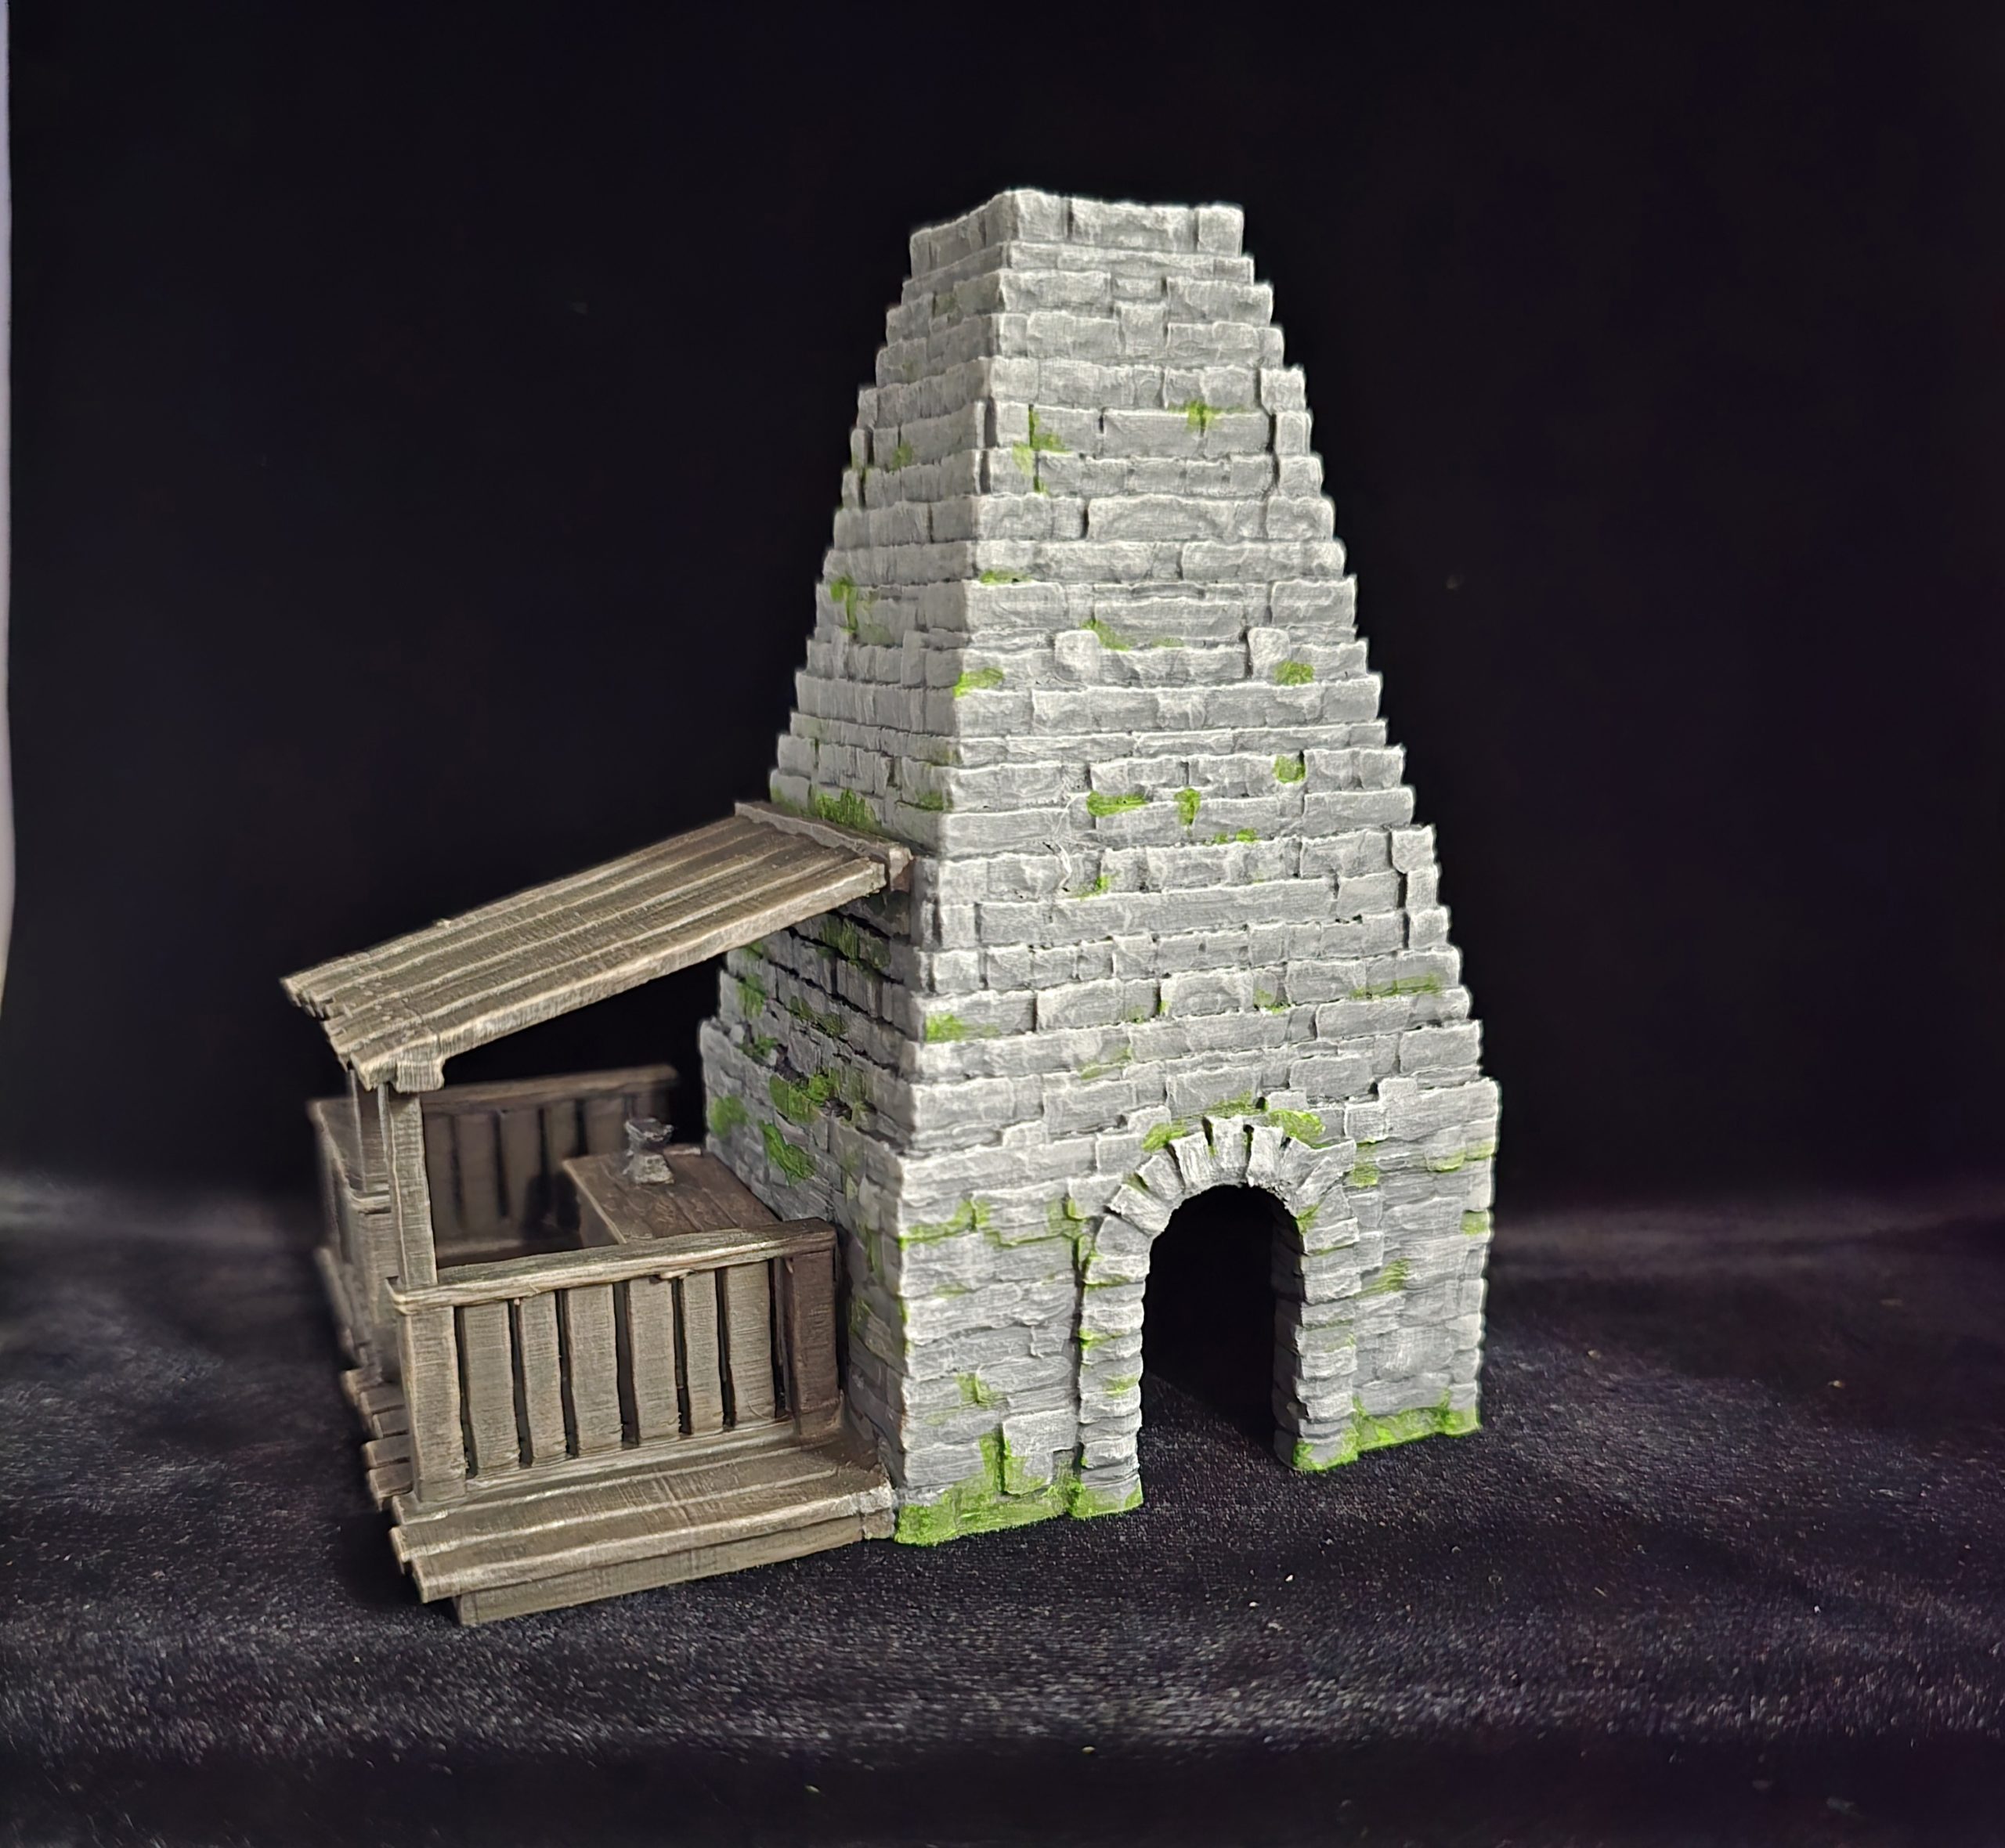
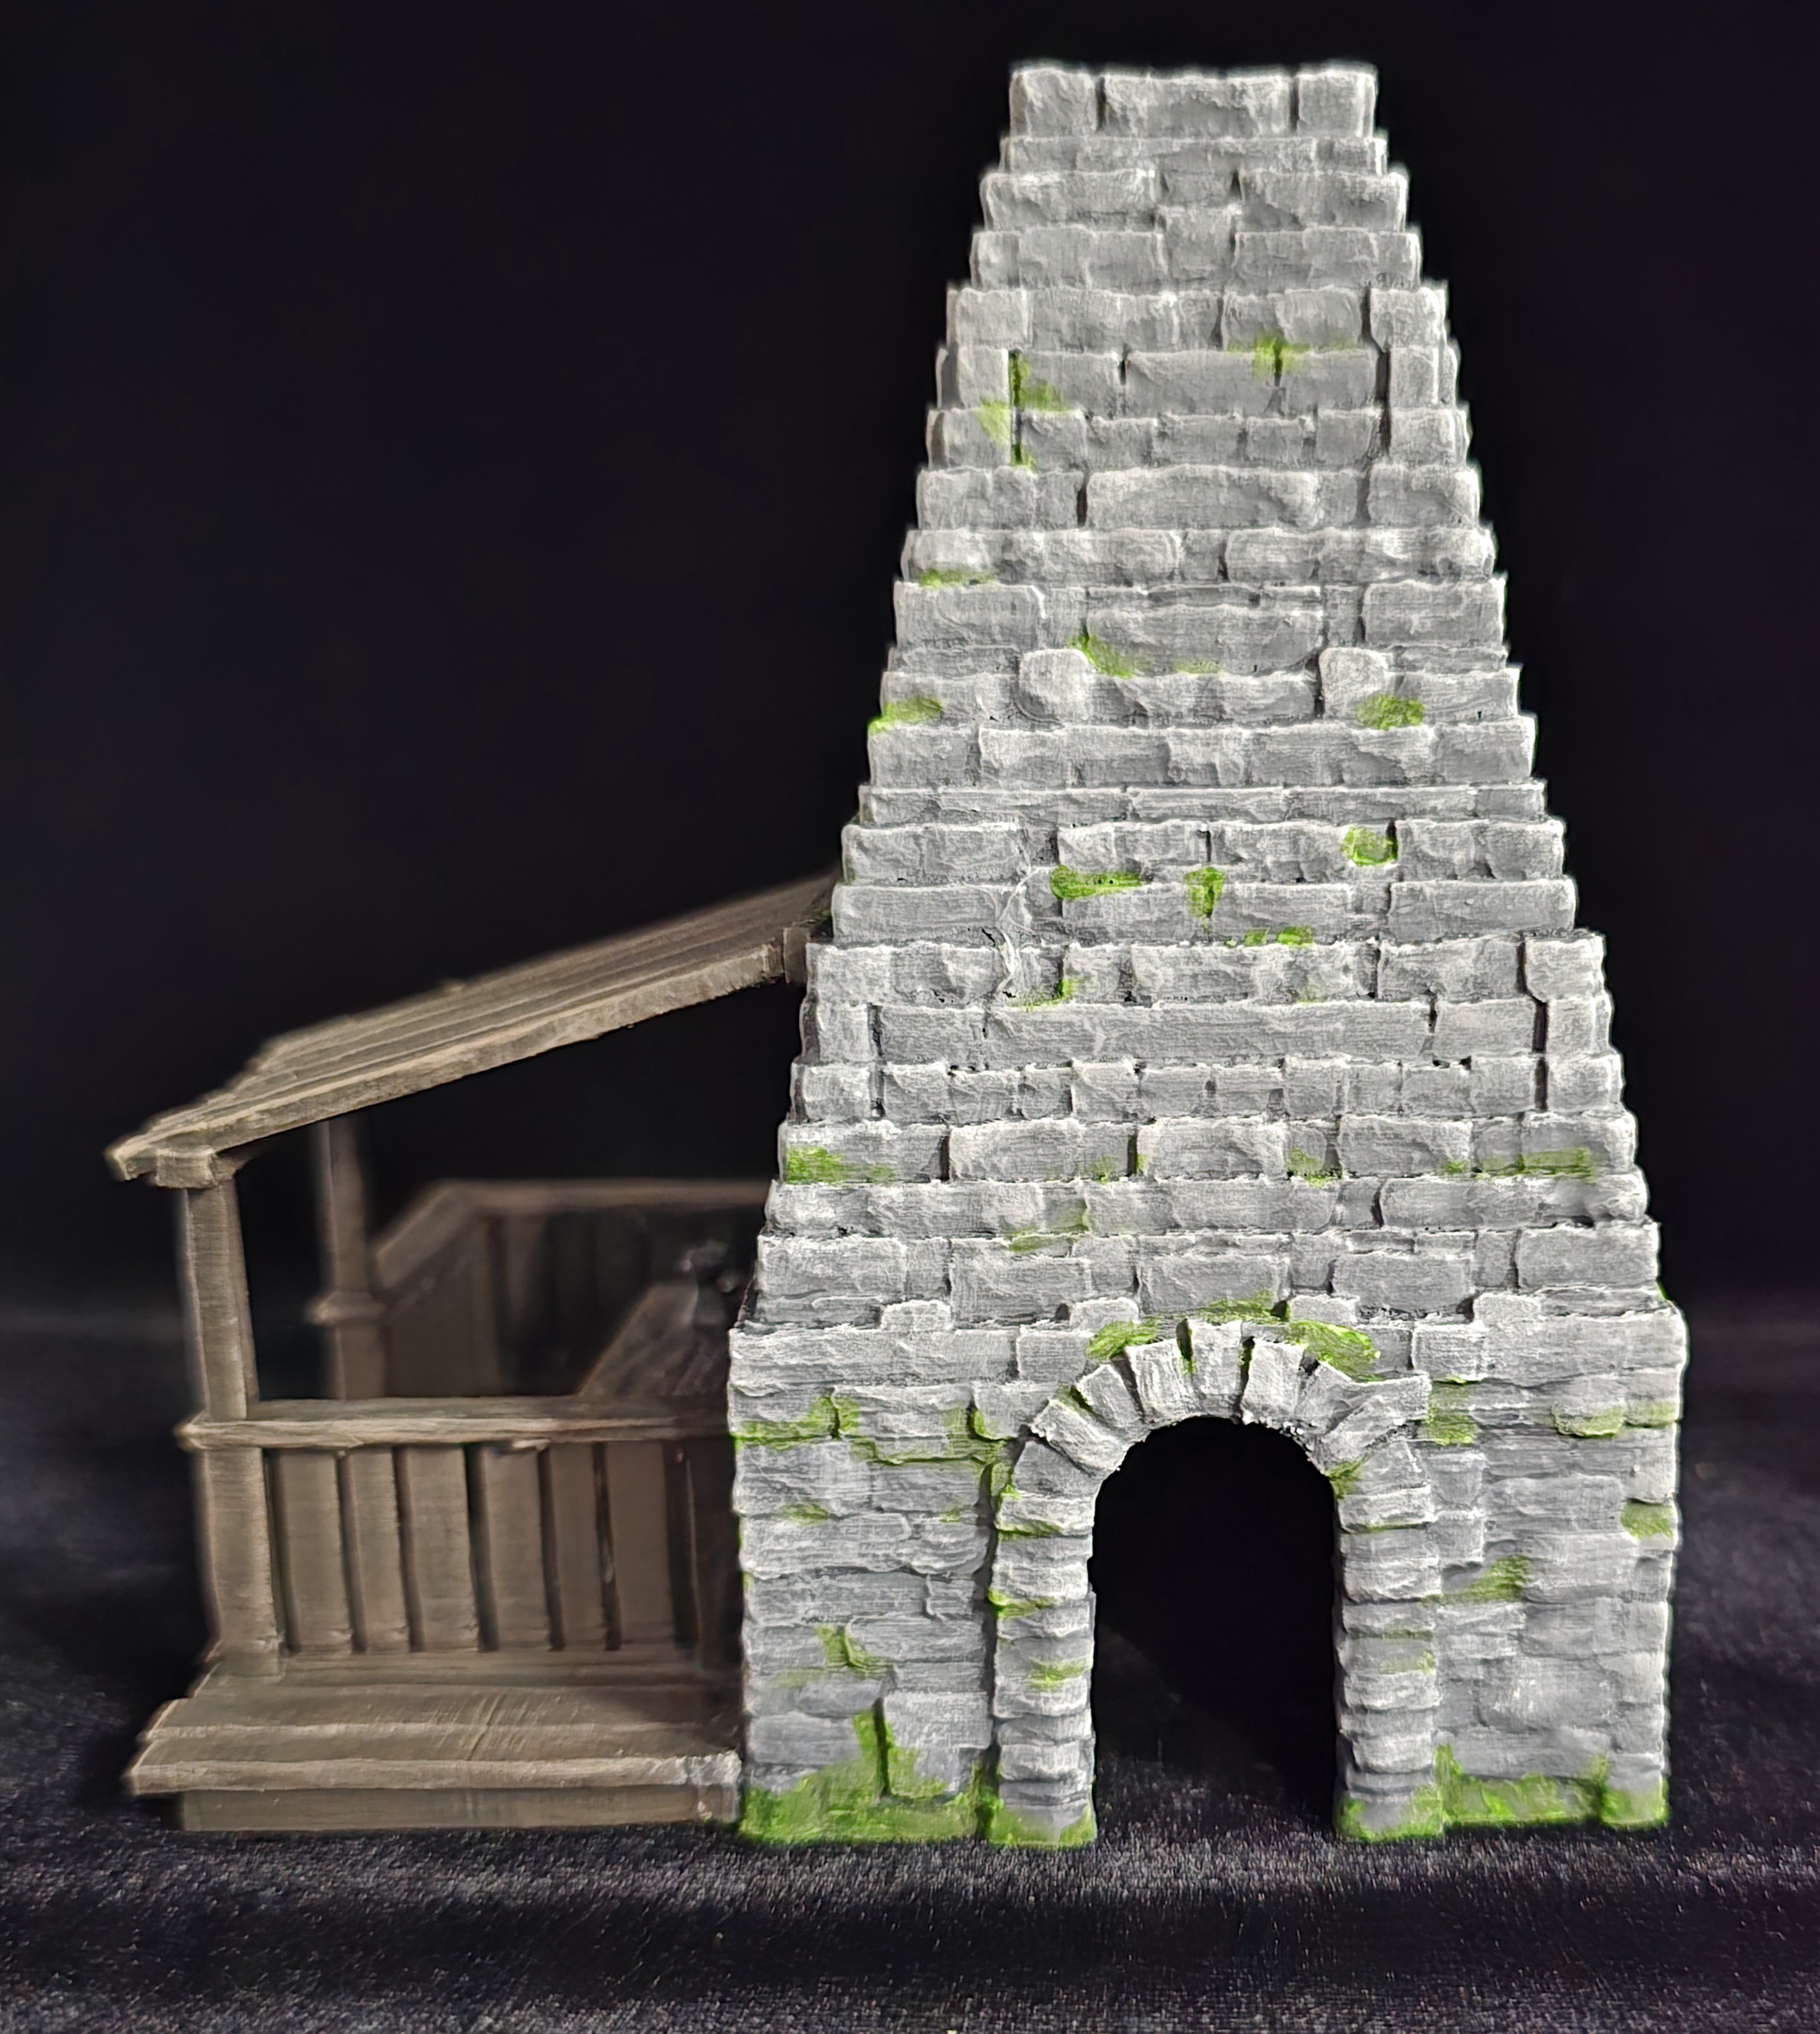
Here is the stuff I mentioned last update. Two smaller, hut-esque buiildings, a pulley system thing for lifting rocks and a little bunch of rocks for scatter terrain.
Quite quick and pretty fun to paint, good stuff.
I like that together with the forge from last week, there is a little industrial area developing.
I know I should finish one of the last two reminaing buildings now … but instead last night I spent my hobby time magnetizing the sails (blades?) of a windmill, so that’s what is getting painted next!

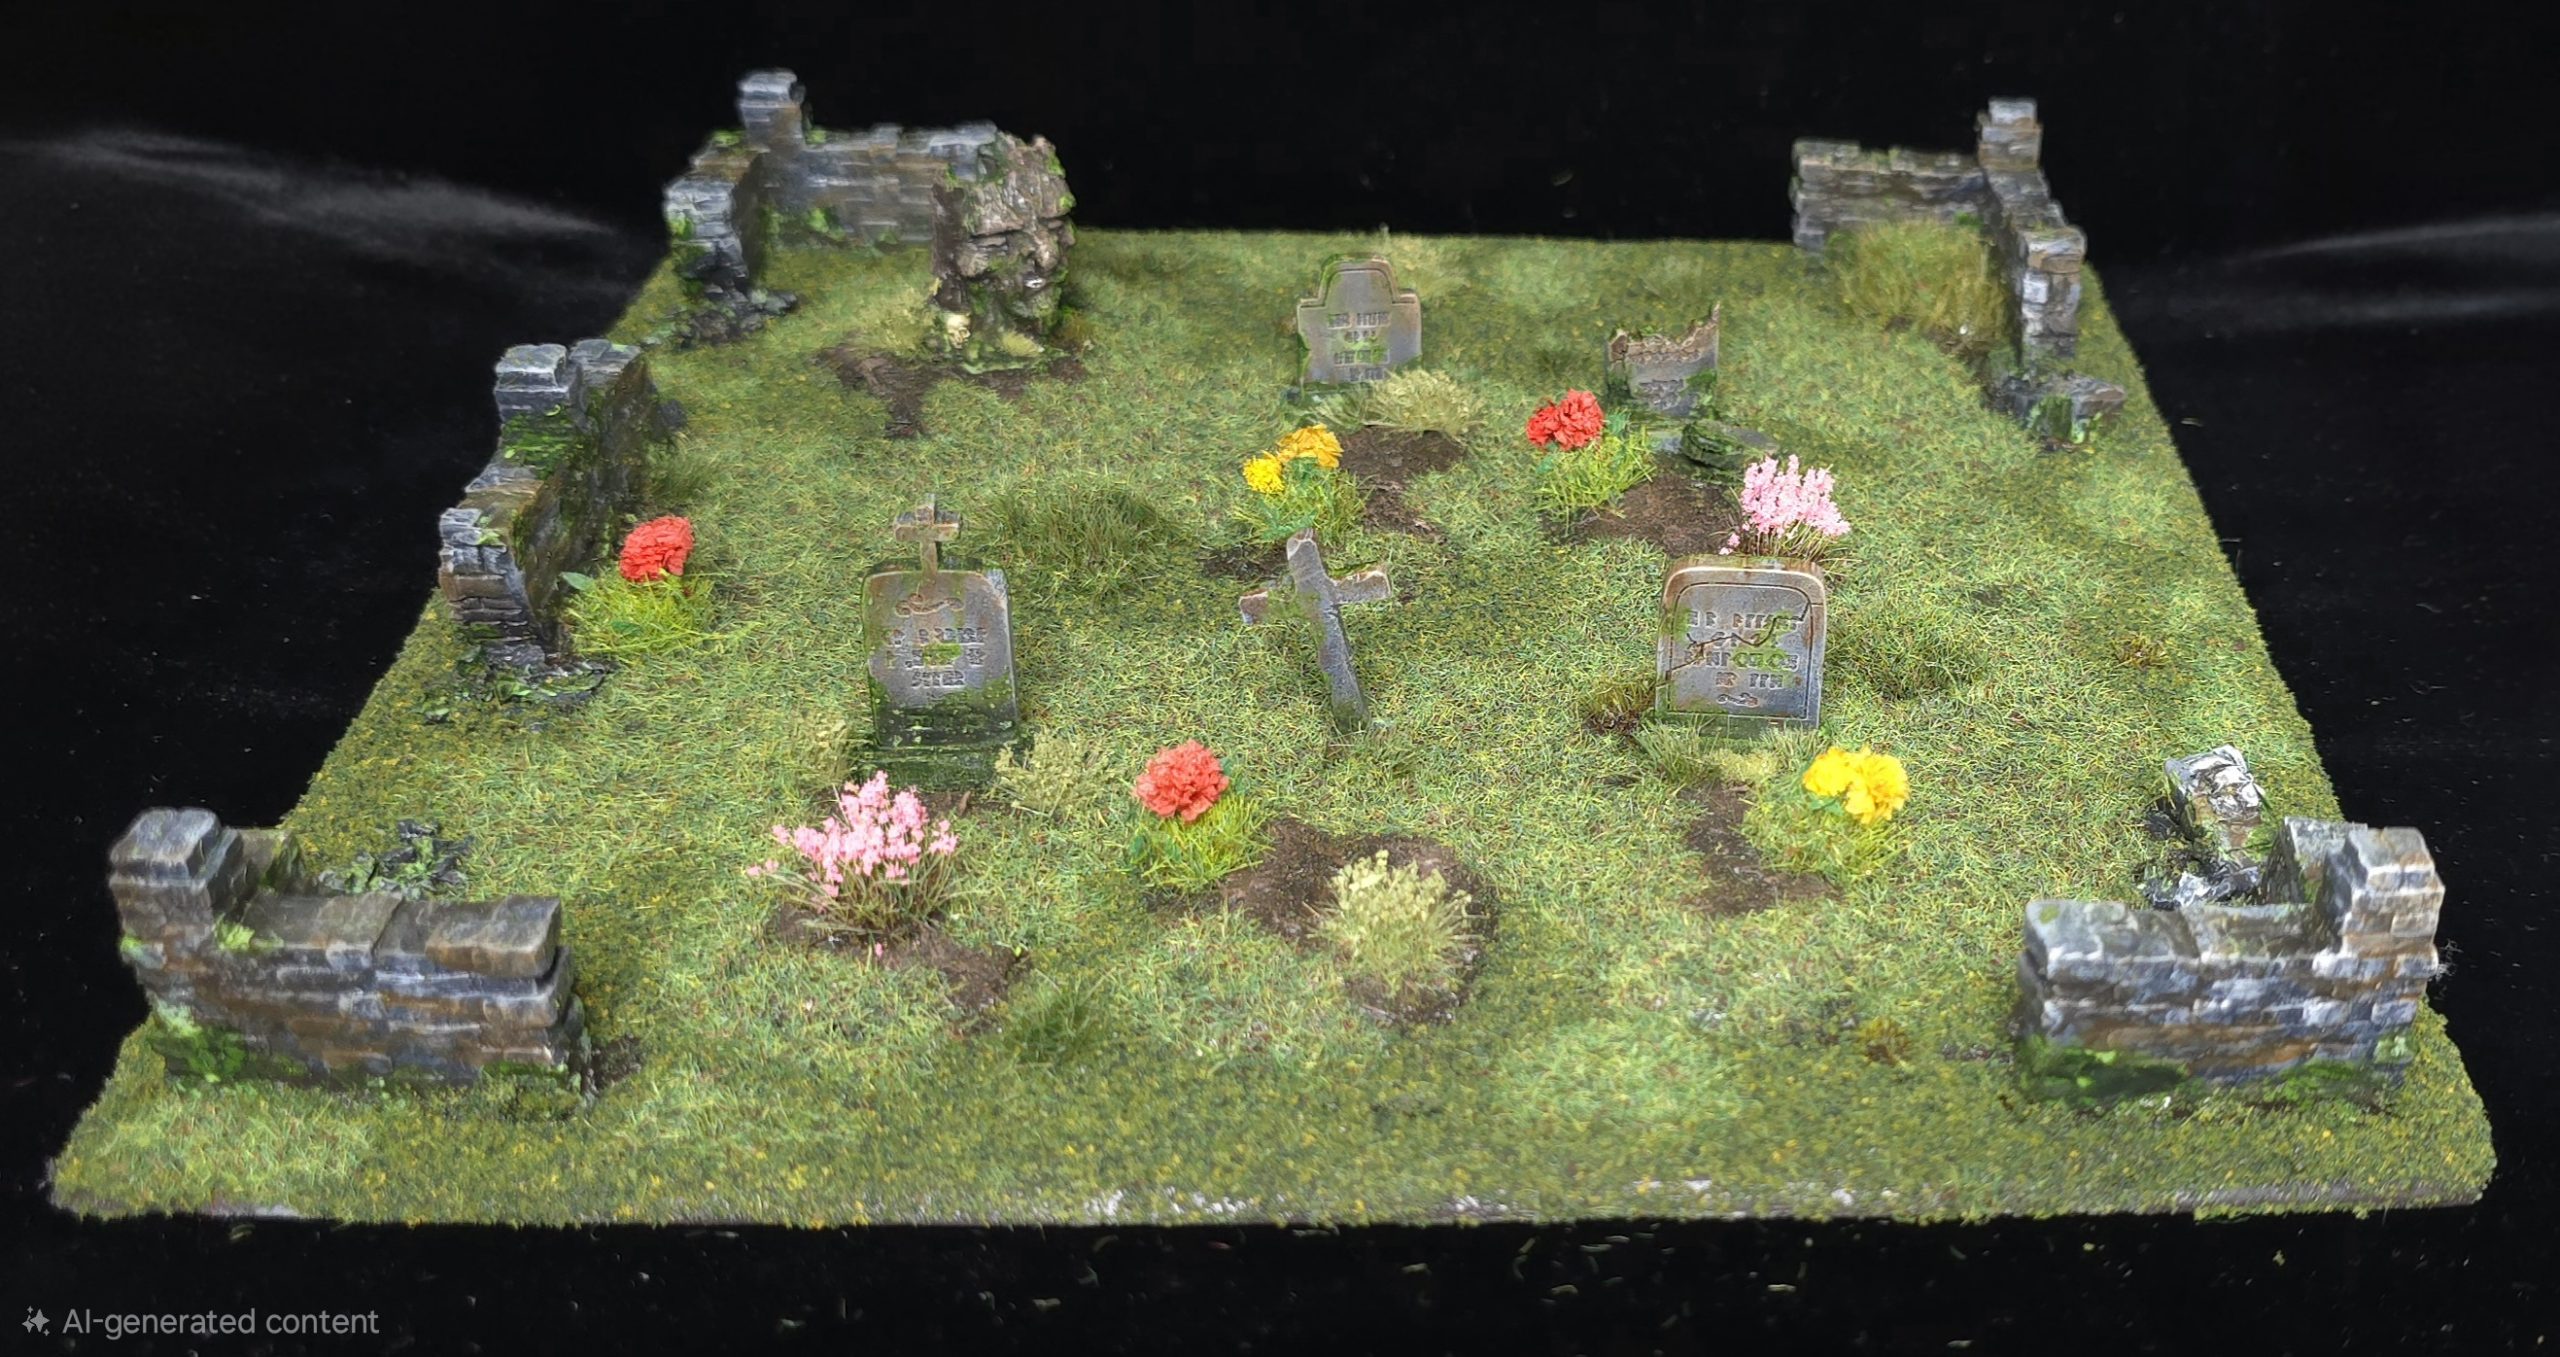
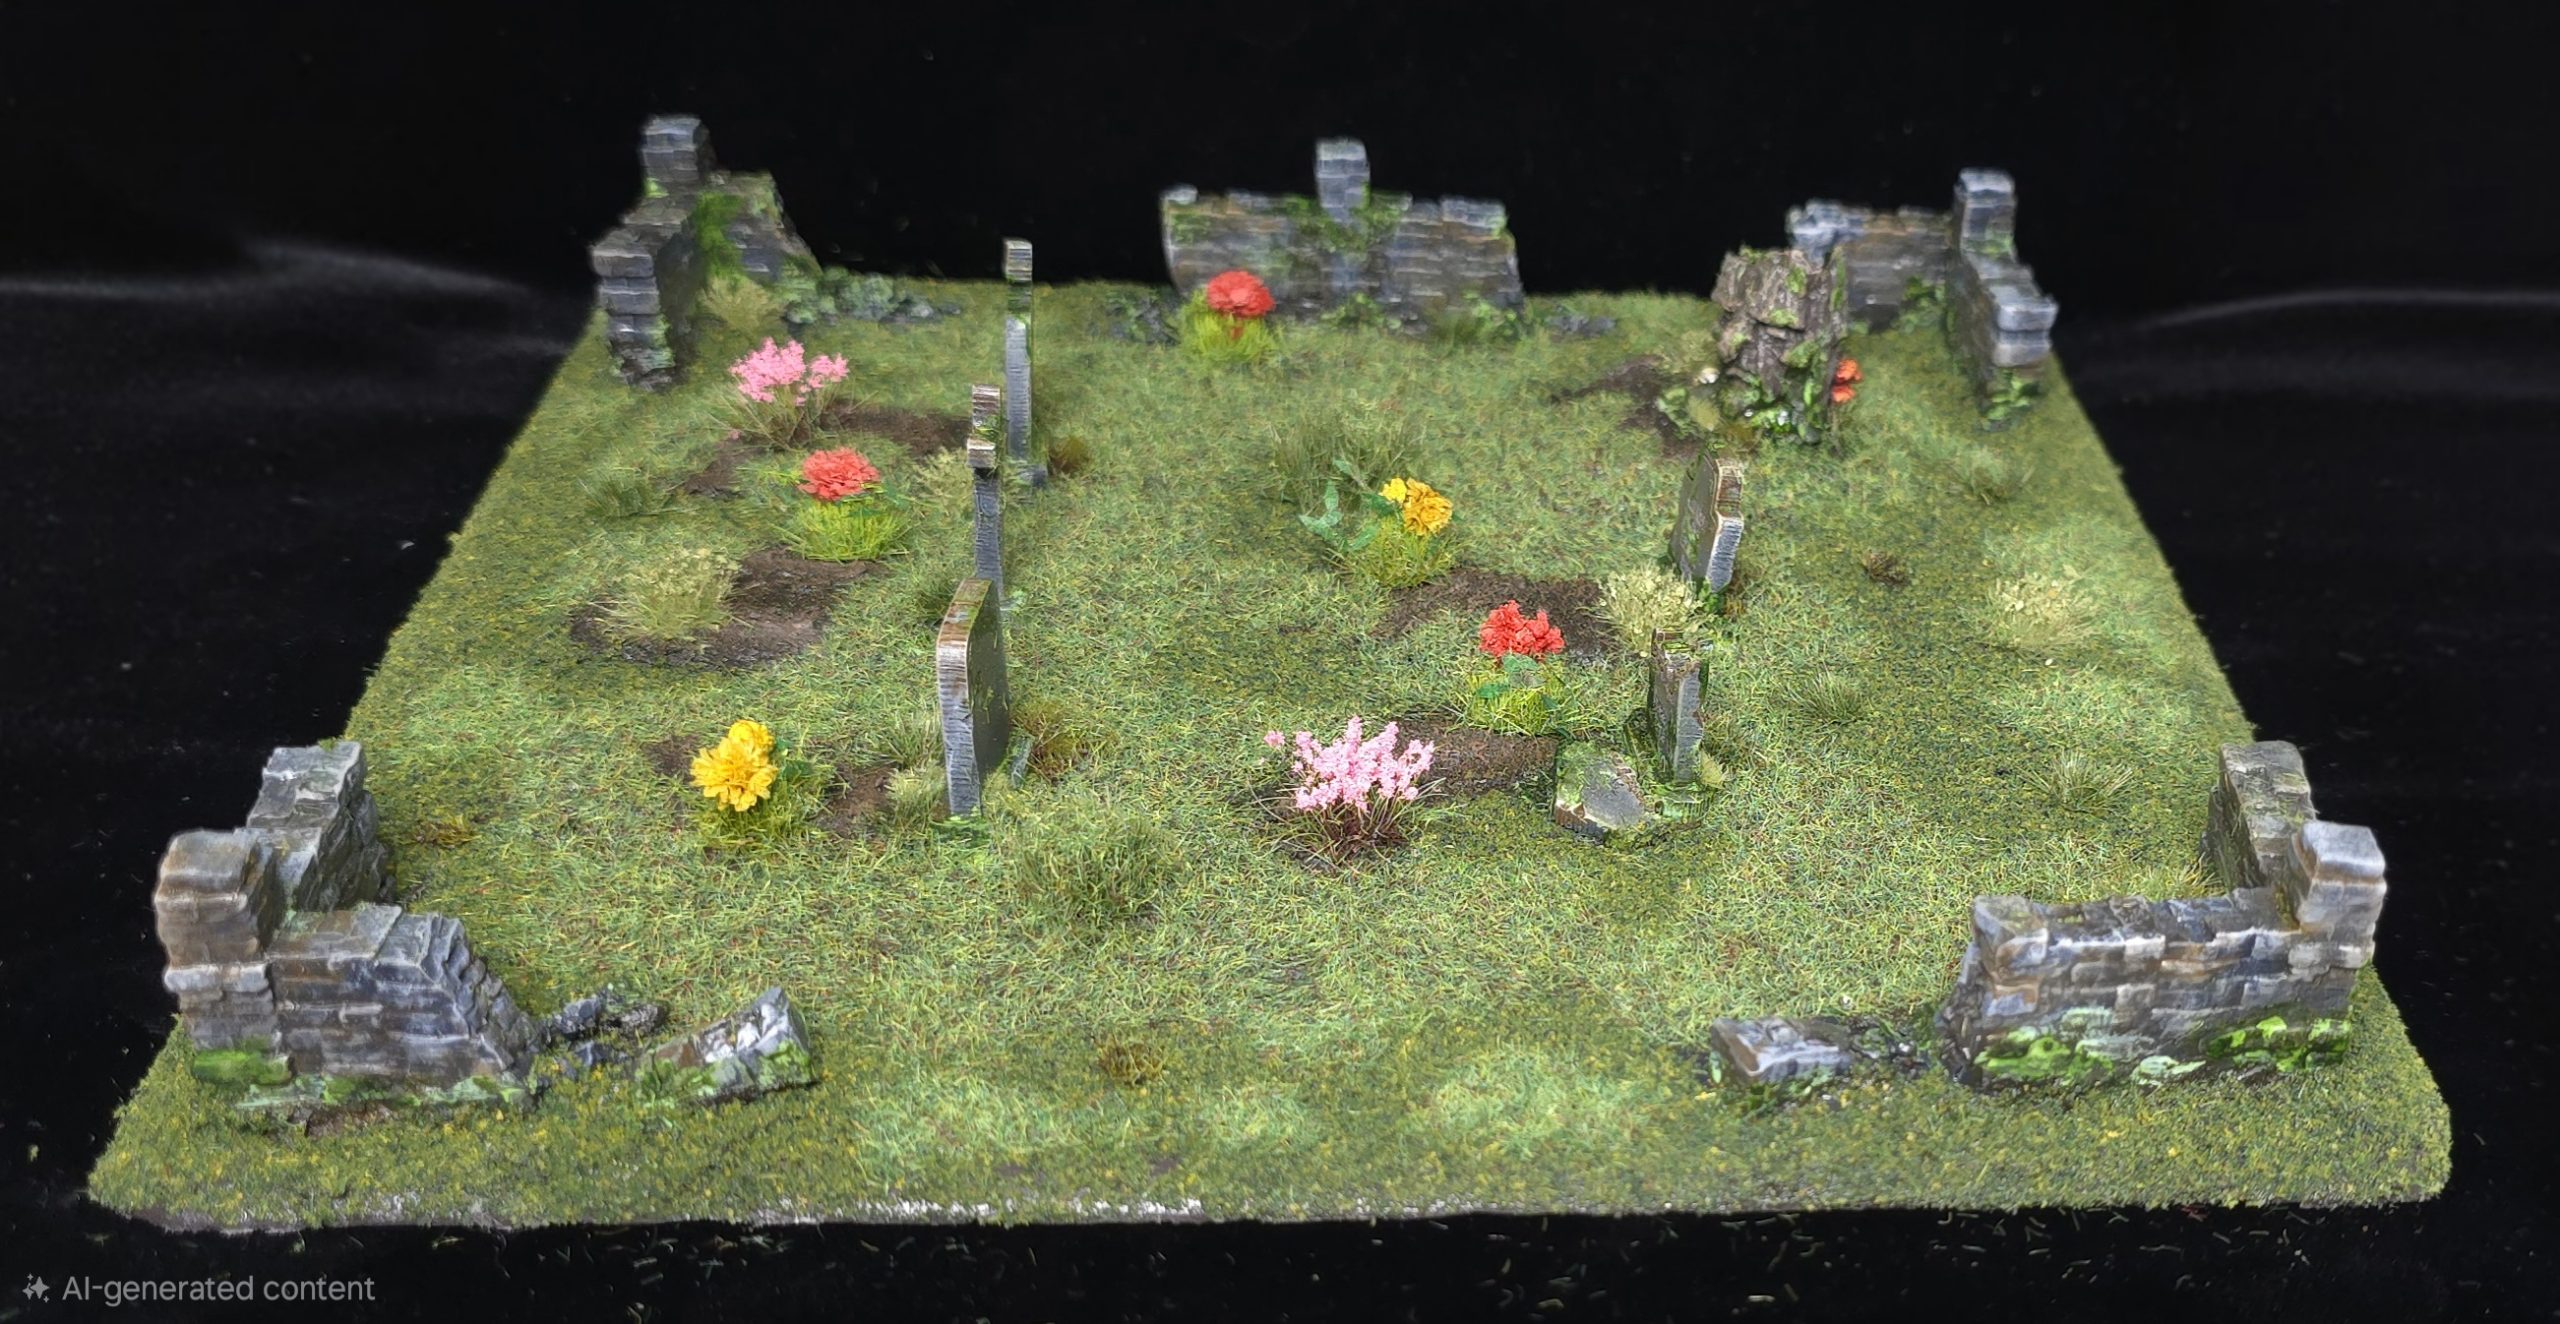
A Grave Matter
Once again, the progress of work has slowed down, unlike the aforementioned sleep regression, which continues unabated. Joy.
I have managed to finish this gaveyard though, this was a fun little project. The gravestones themselves are from Battlekiwi, good stuff. The walls themselves are failed prints from the selestion of STLs mentioned in the original post. THe ends were tided up/ orughed up wiht a dremel, and then closed up with green stuff which was then scultped to look like bricks. Grave mounds are just wall filler, and the Haunted tree stump is a Greenstuffworld resin thingy left over from a previous project (a small all squig goblin army from Kings of War. That was also pretty fun).
Learnt something new. I already knew that you have to apply the Dirty Down effect paints *after* varnishing, or they reactivate due to the varnish and mostly disappear. So I followed the usual process of weathering with enamals, varnishing then applying the Moss Effect. What I didn’t expect was that when I sprayed Woodland Scenics Scenic Cement to seal the turf terrain, any moss effect paint that was hit turned a bright, pale green. Weird. I brought most of it back down by repplaying the moss effect, or with brown enamels over the top, although I left a bit as glowing moss in a graveyard is pretty cool.
I have a couple of wooden huts and stuff all primed and base coated with an airbrush, so it shouldn’t be too long before my next update!
Banging things into shape.
It’s been a hot minute, sorry for the lack of updates! Between a 7 1/2 months old child suddenly going through sleep regression (FUN) and work, not too much time has been available for hobbying.
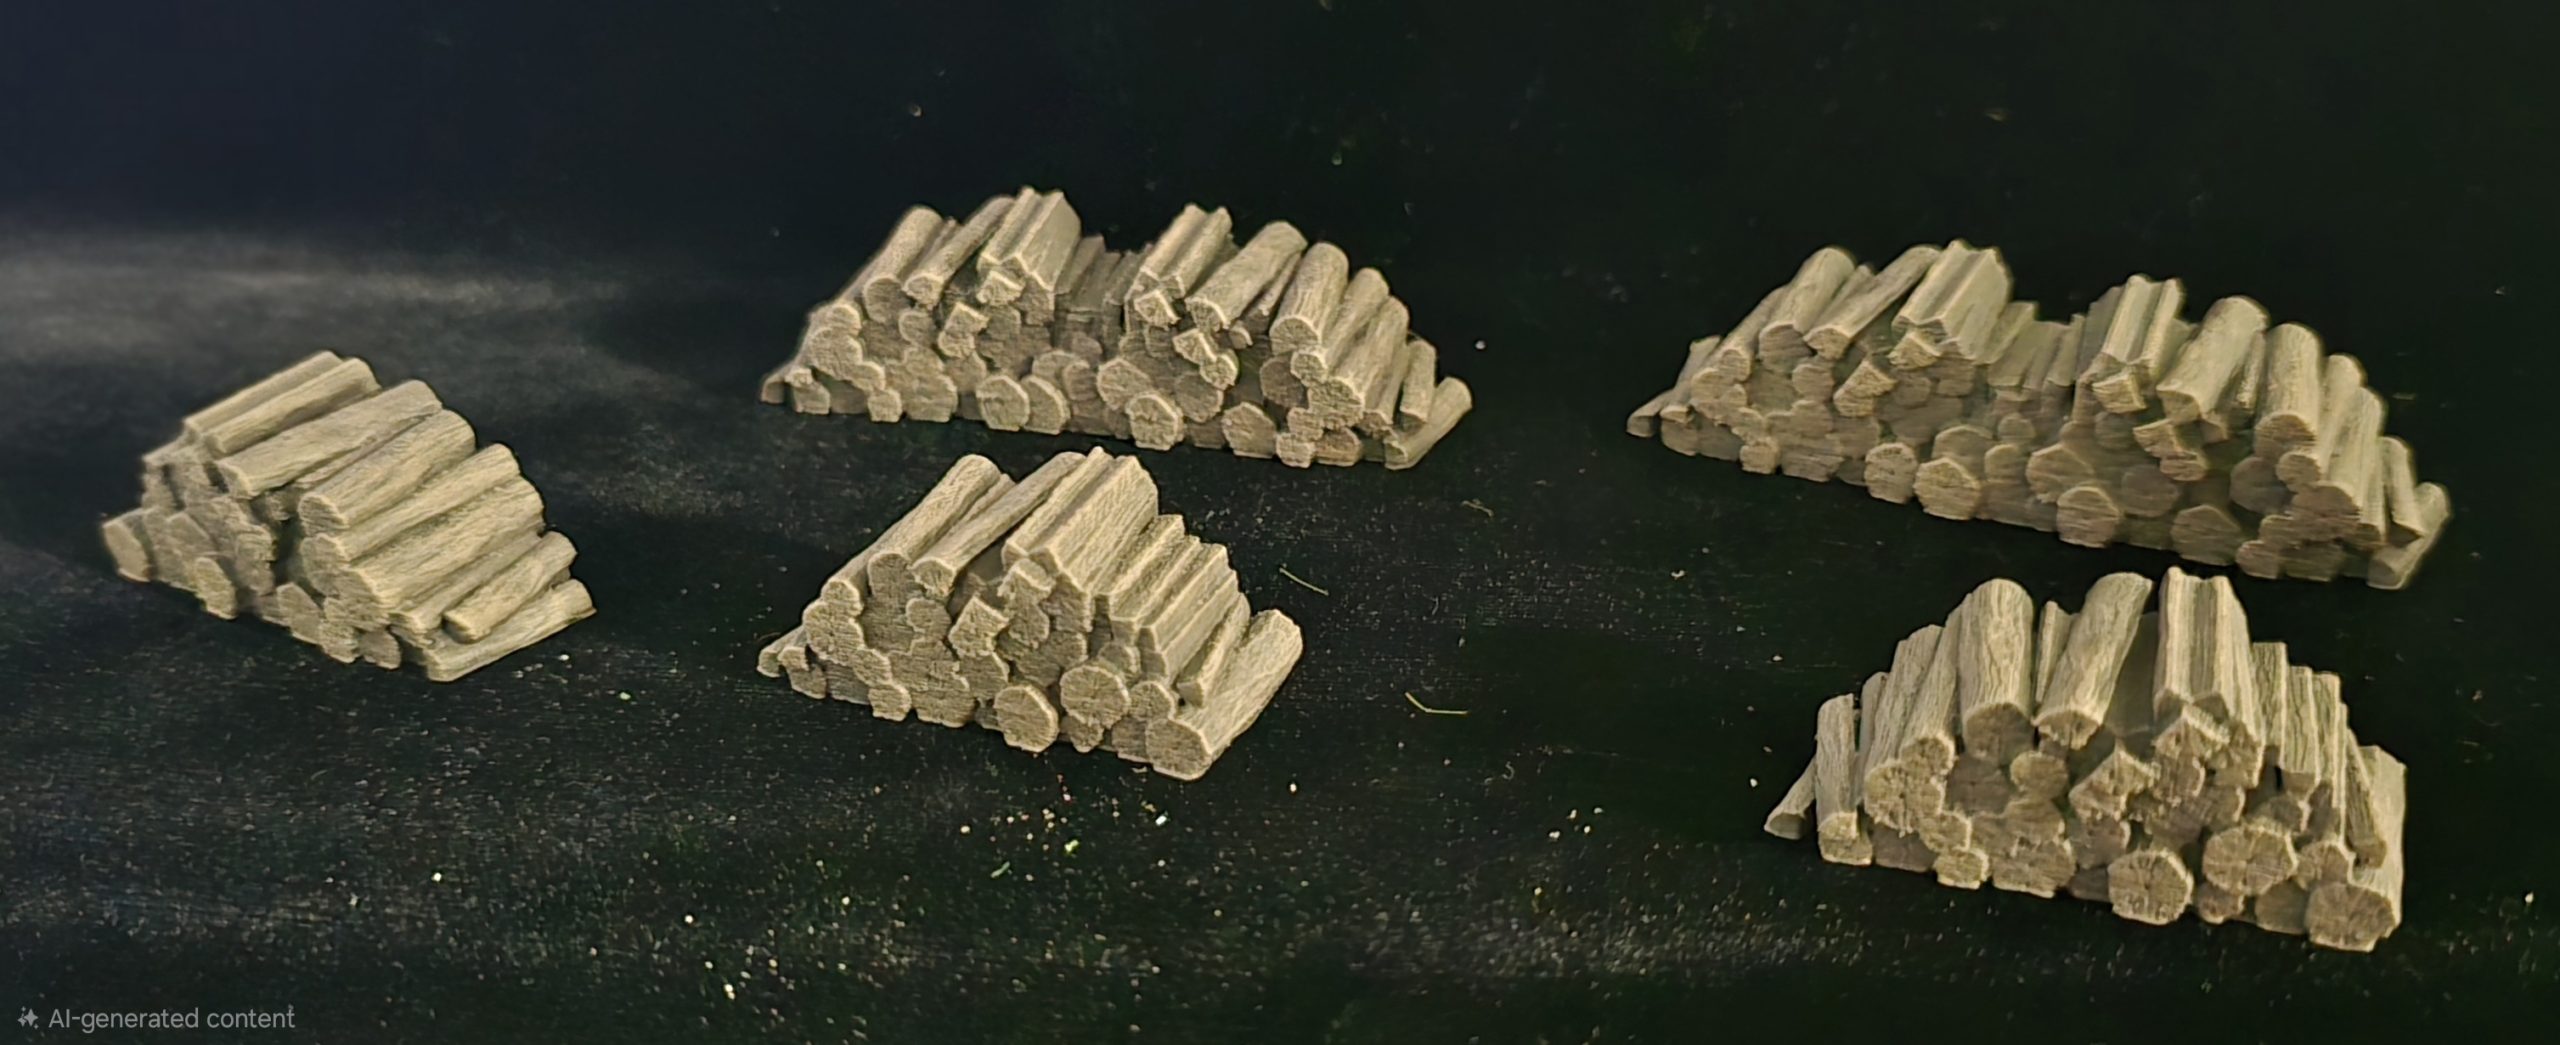
Still, I have managed to finish off this Blacksmith forge and some wooden logs for scatter. The layout of the table is a little different, as I did have a few friends over for a few rounds of the Worms boardgame the other night (that actually IS fun), so I had to put away all my Rukus terrain.
I am about halfway through a graveyard, so that should be up in the not too far future!
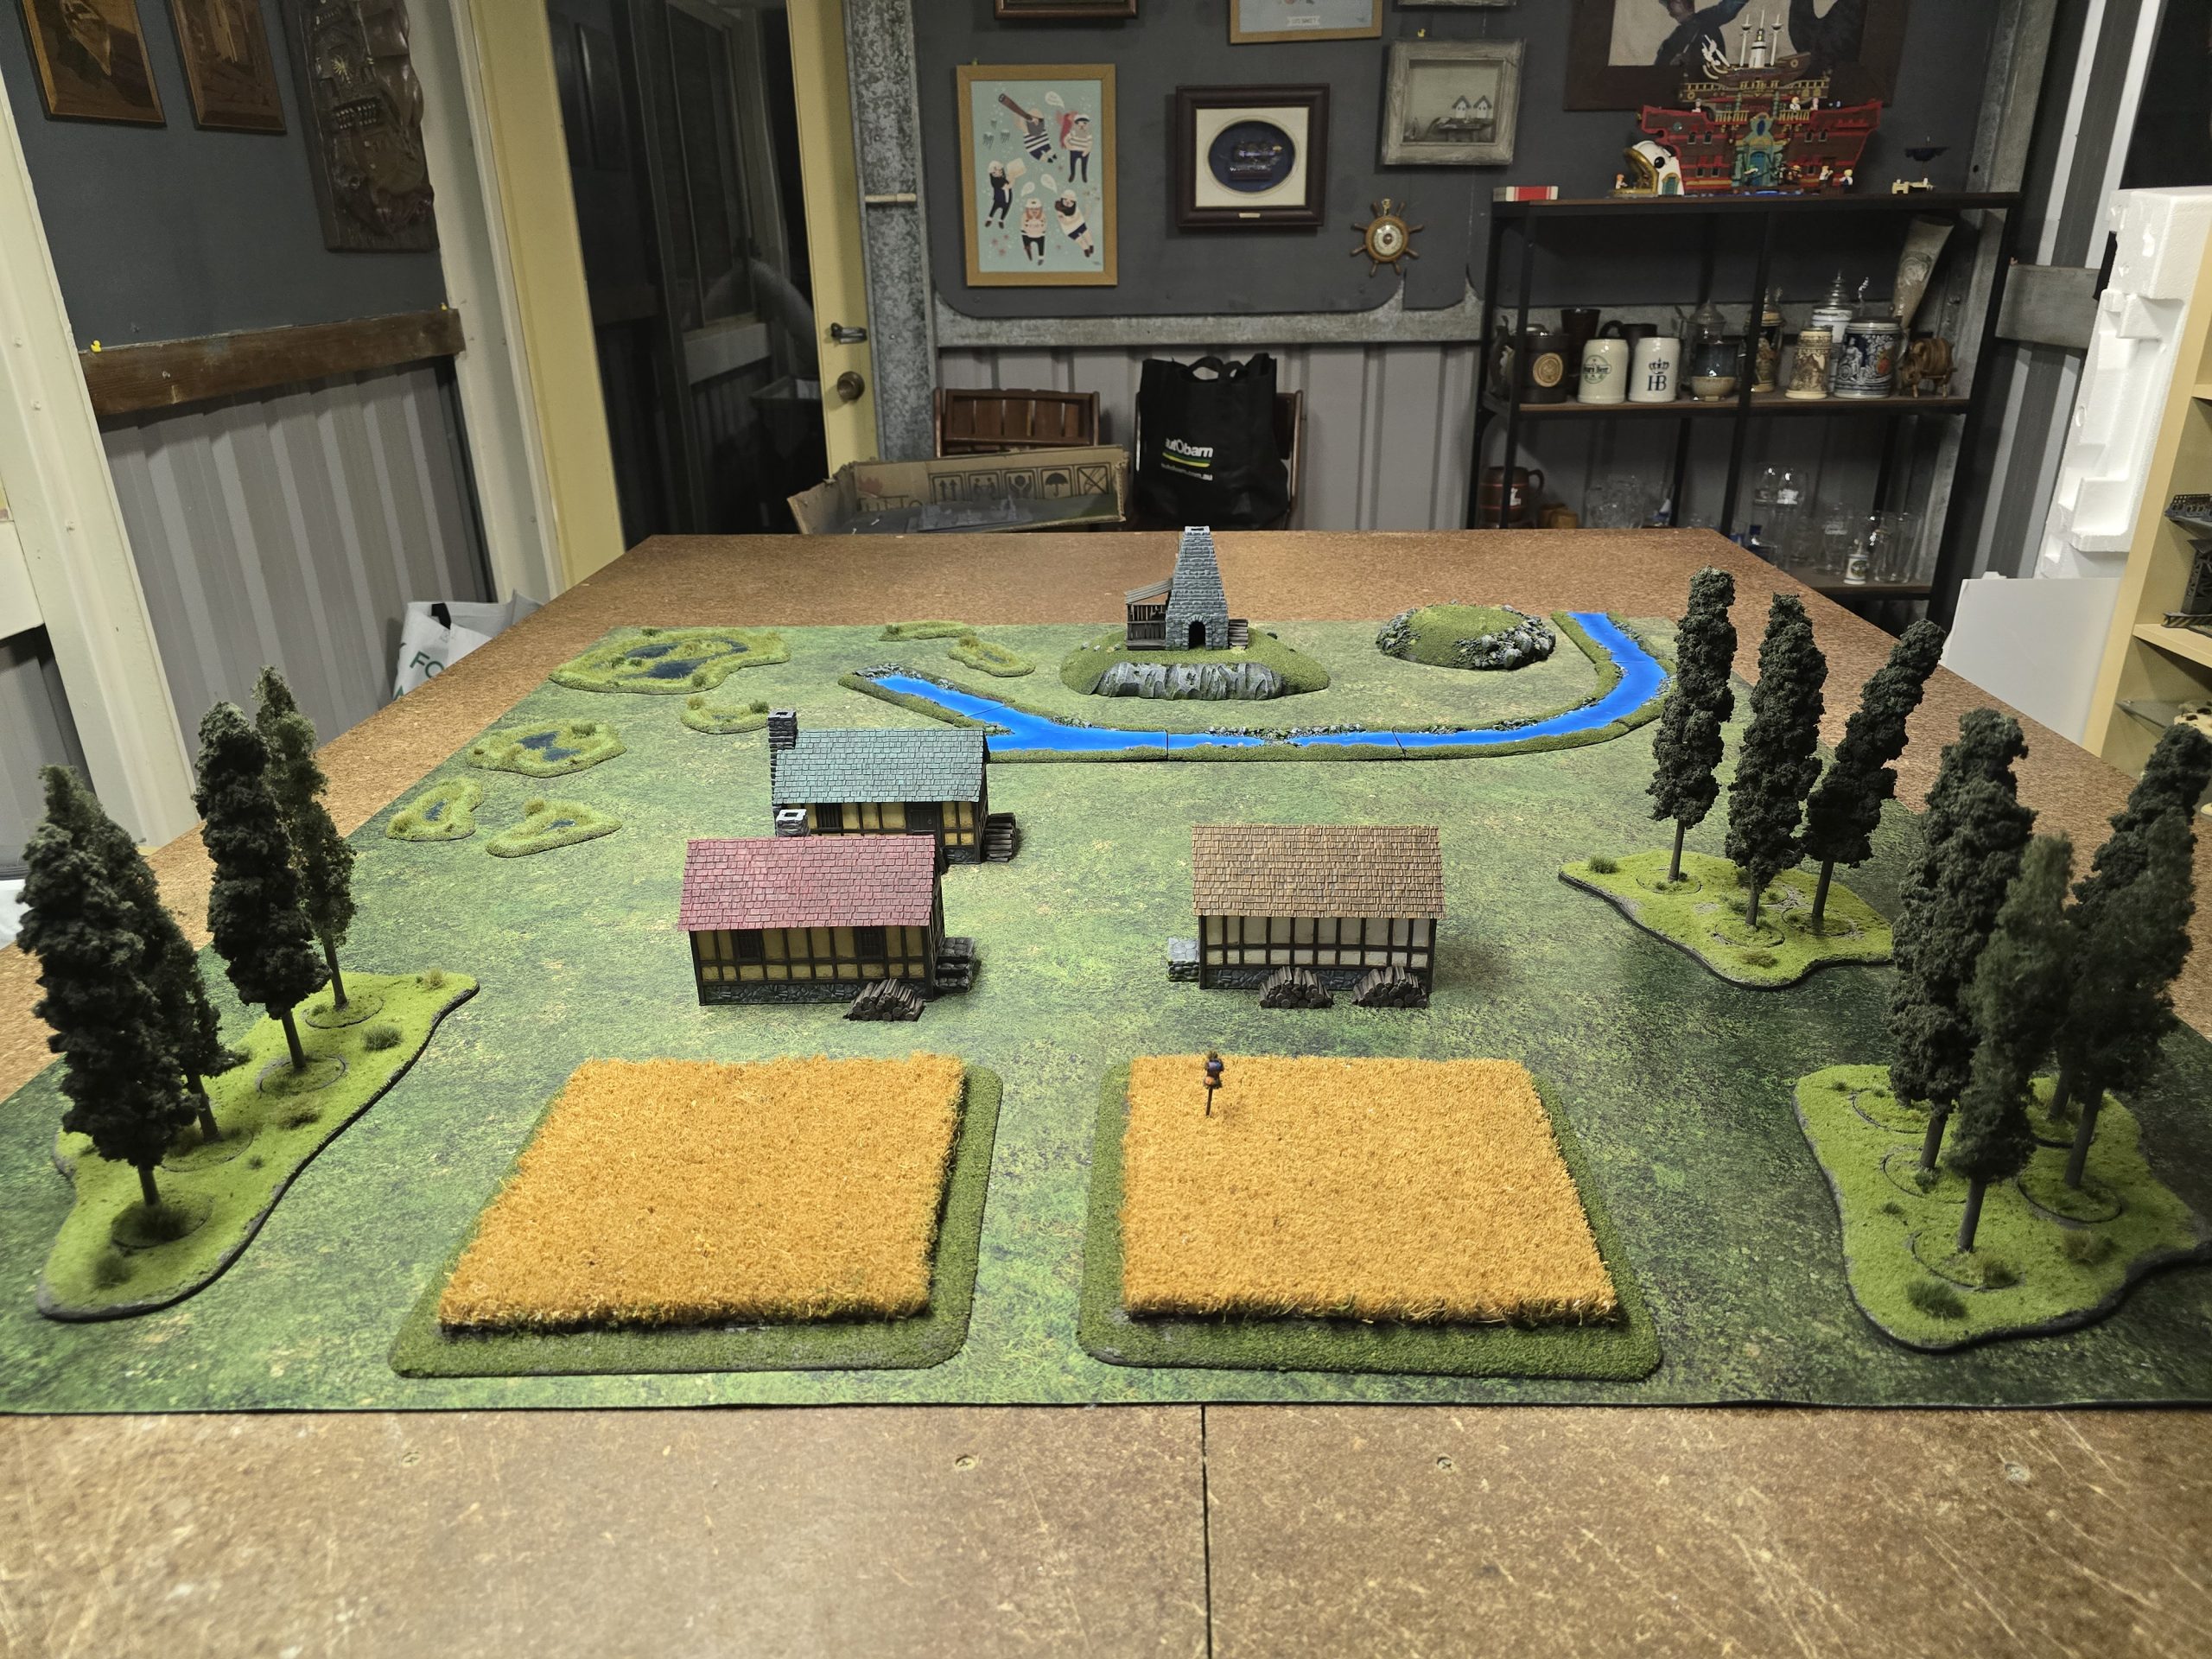

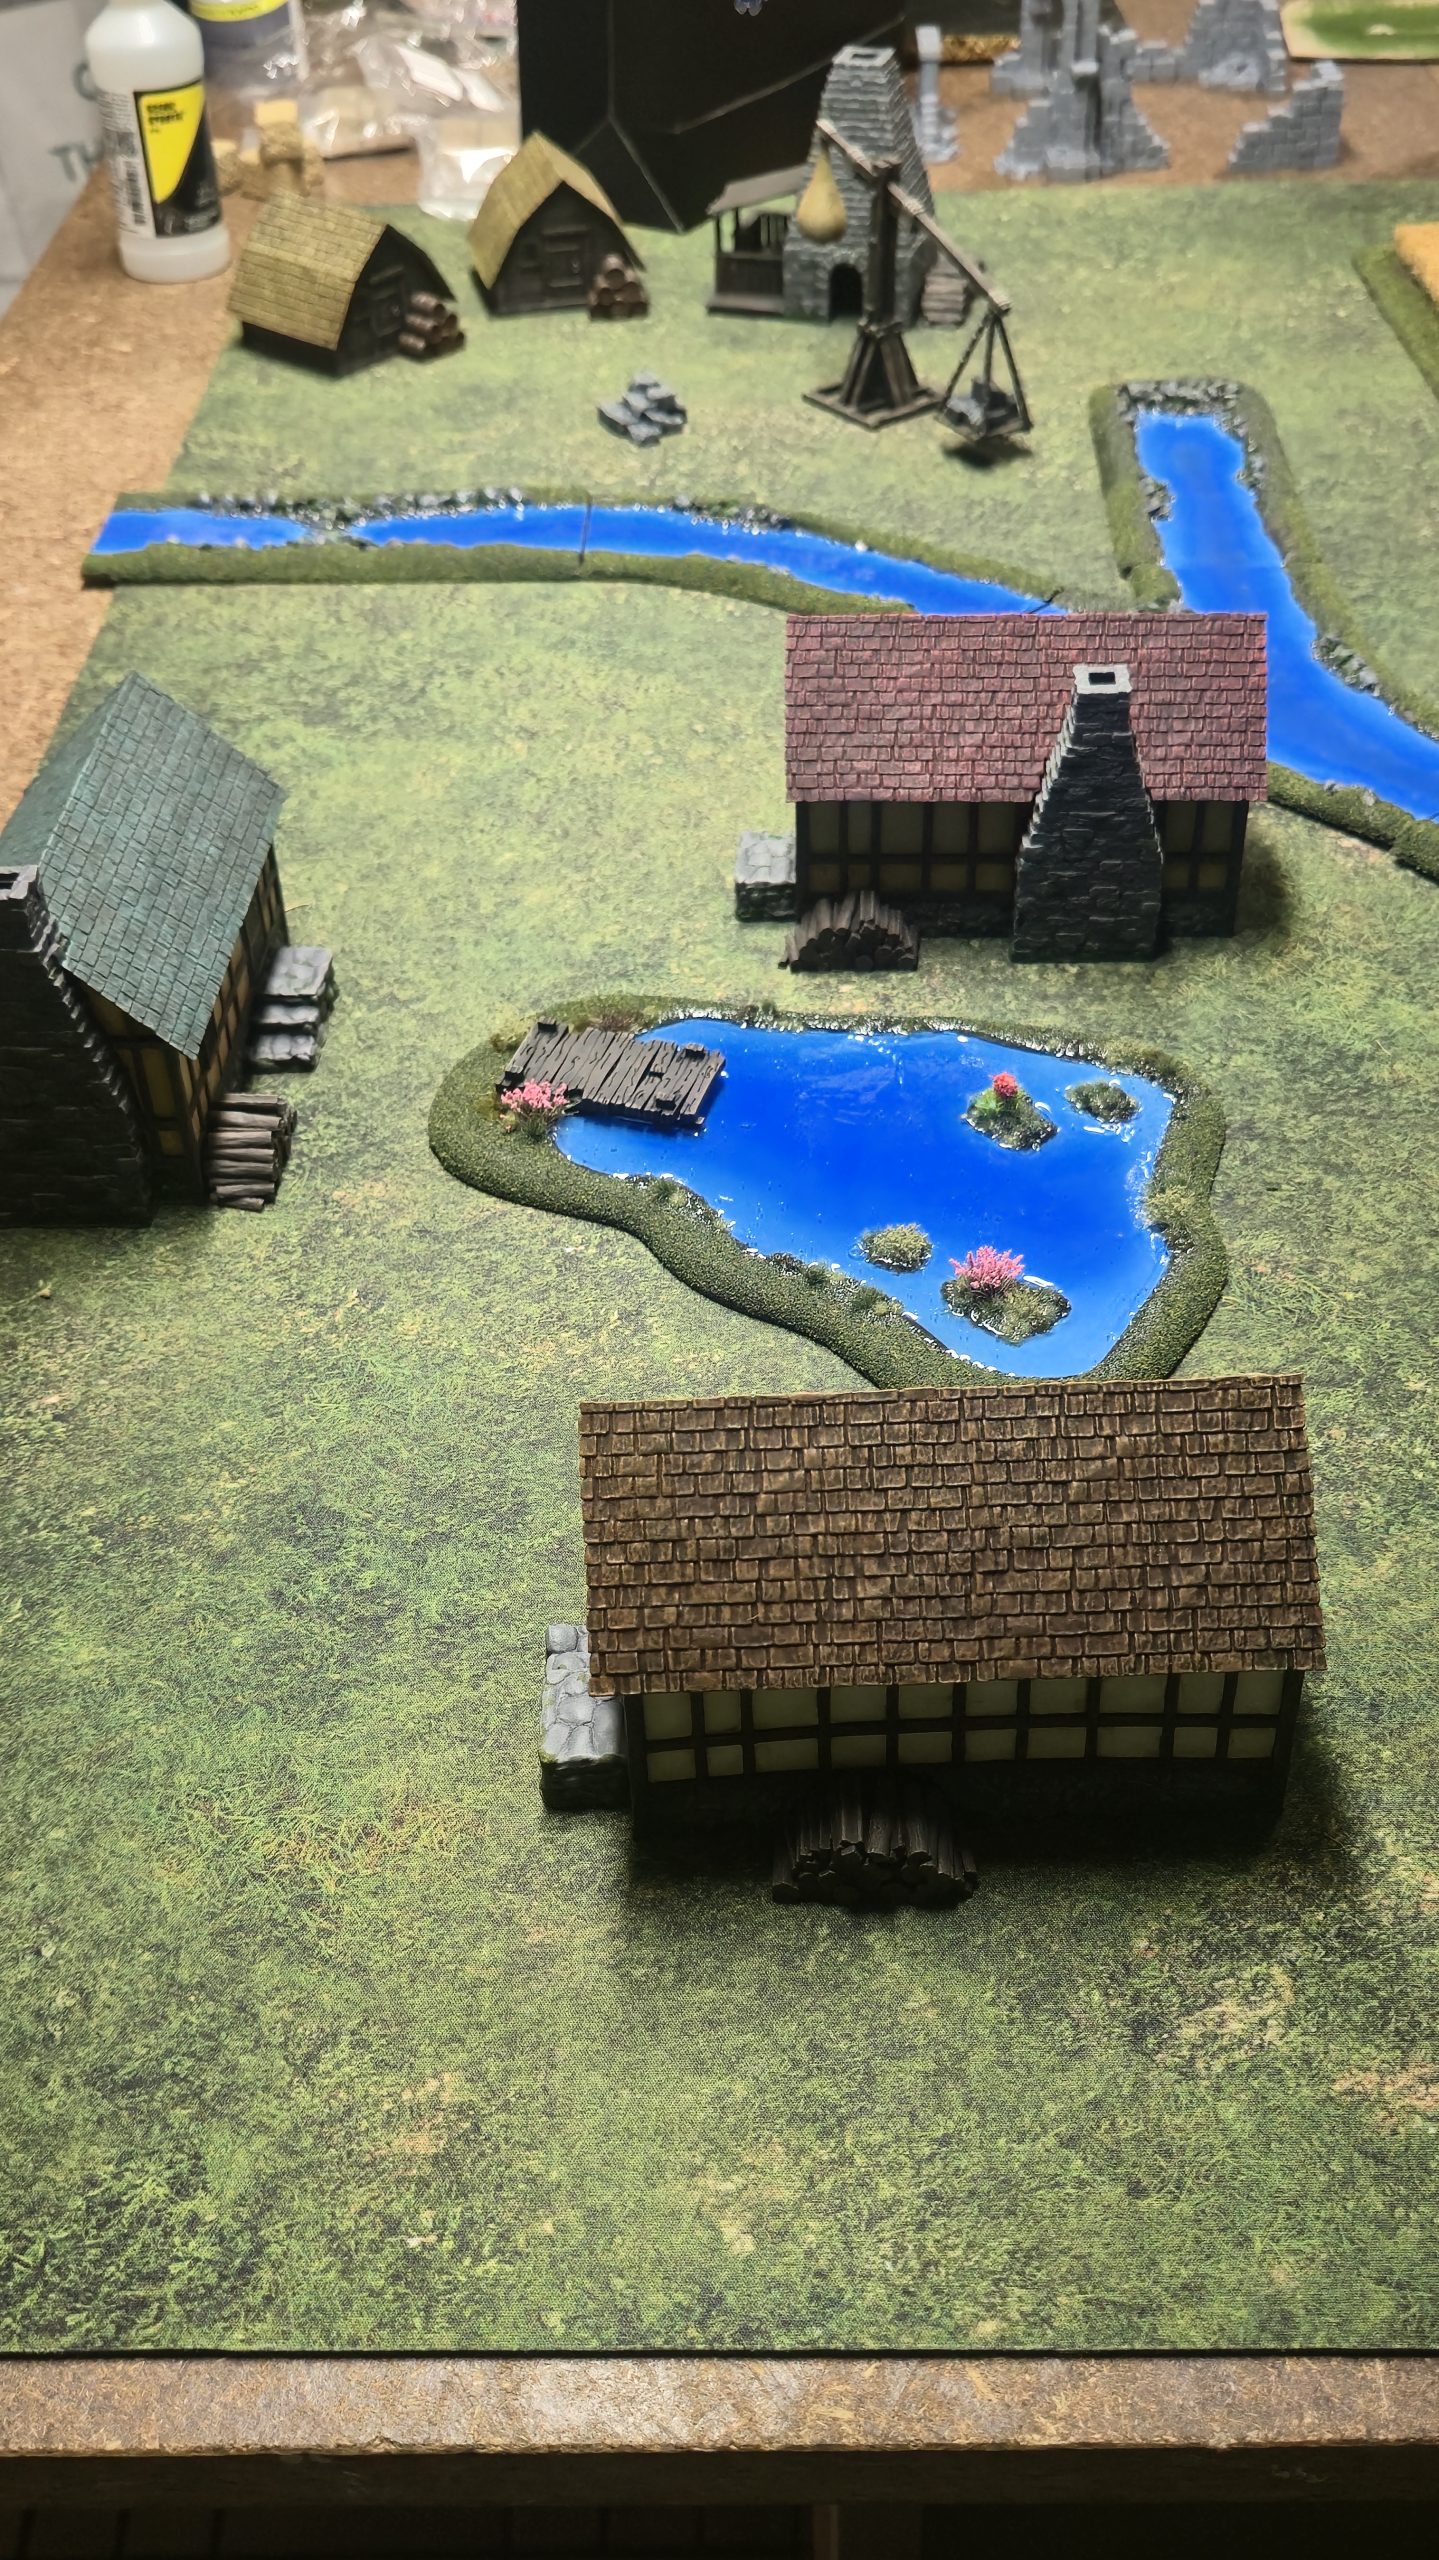
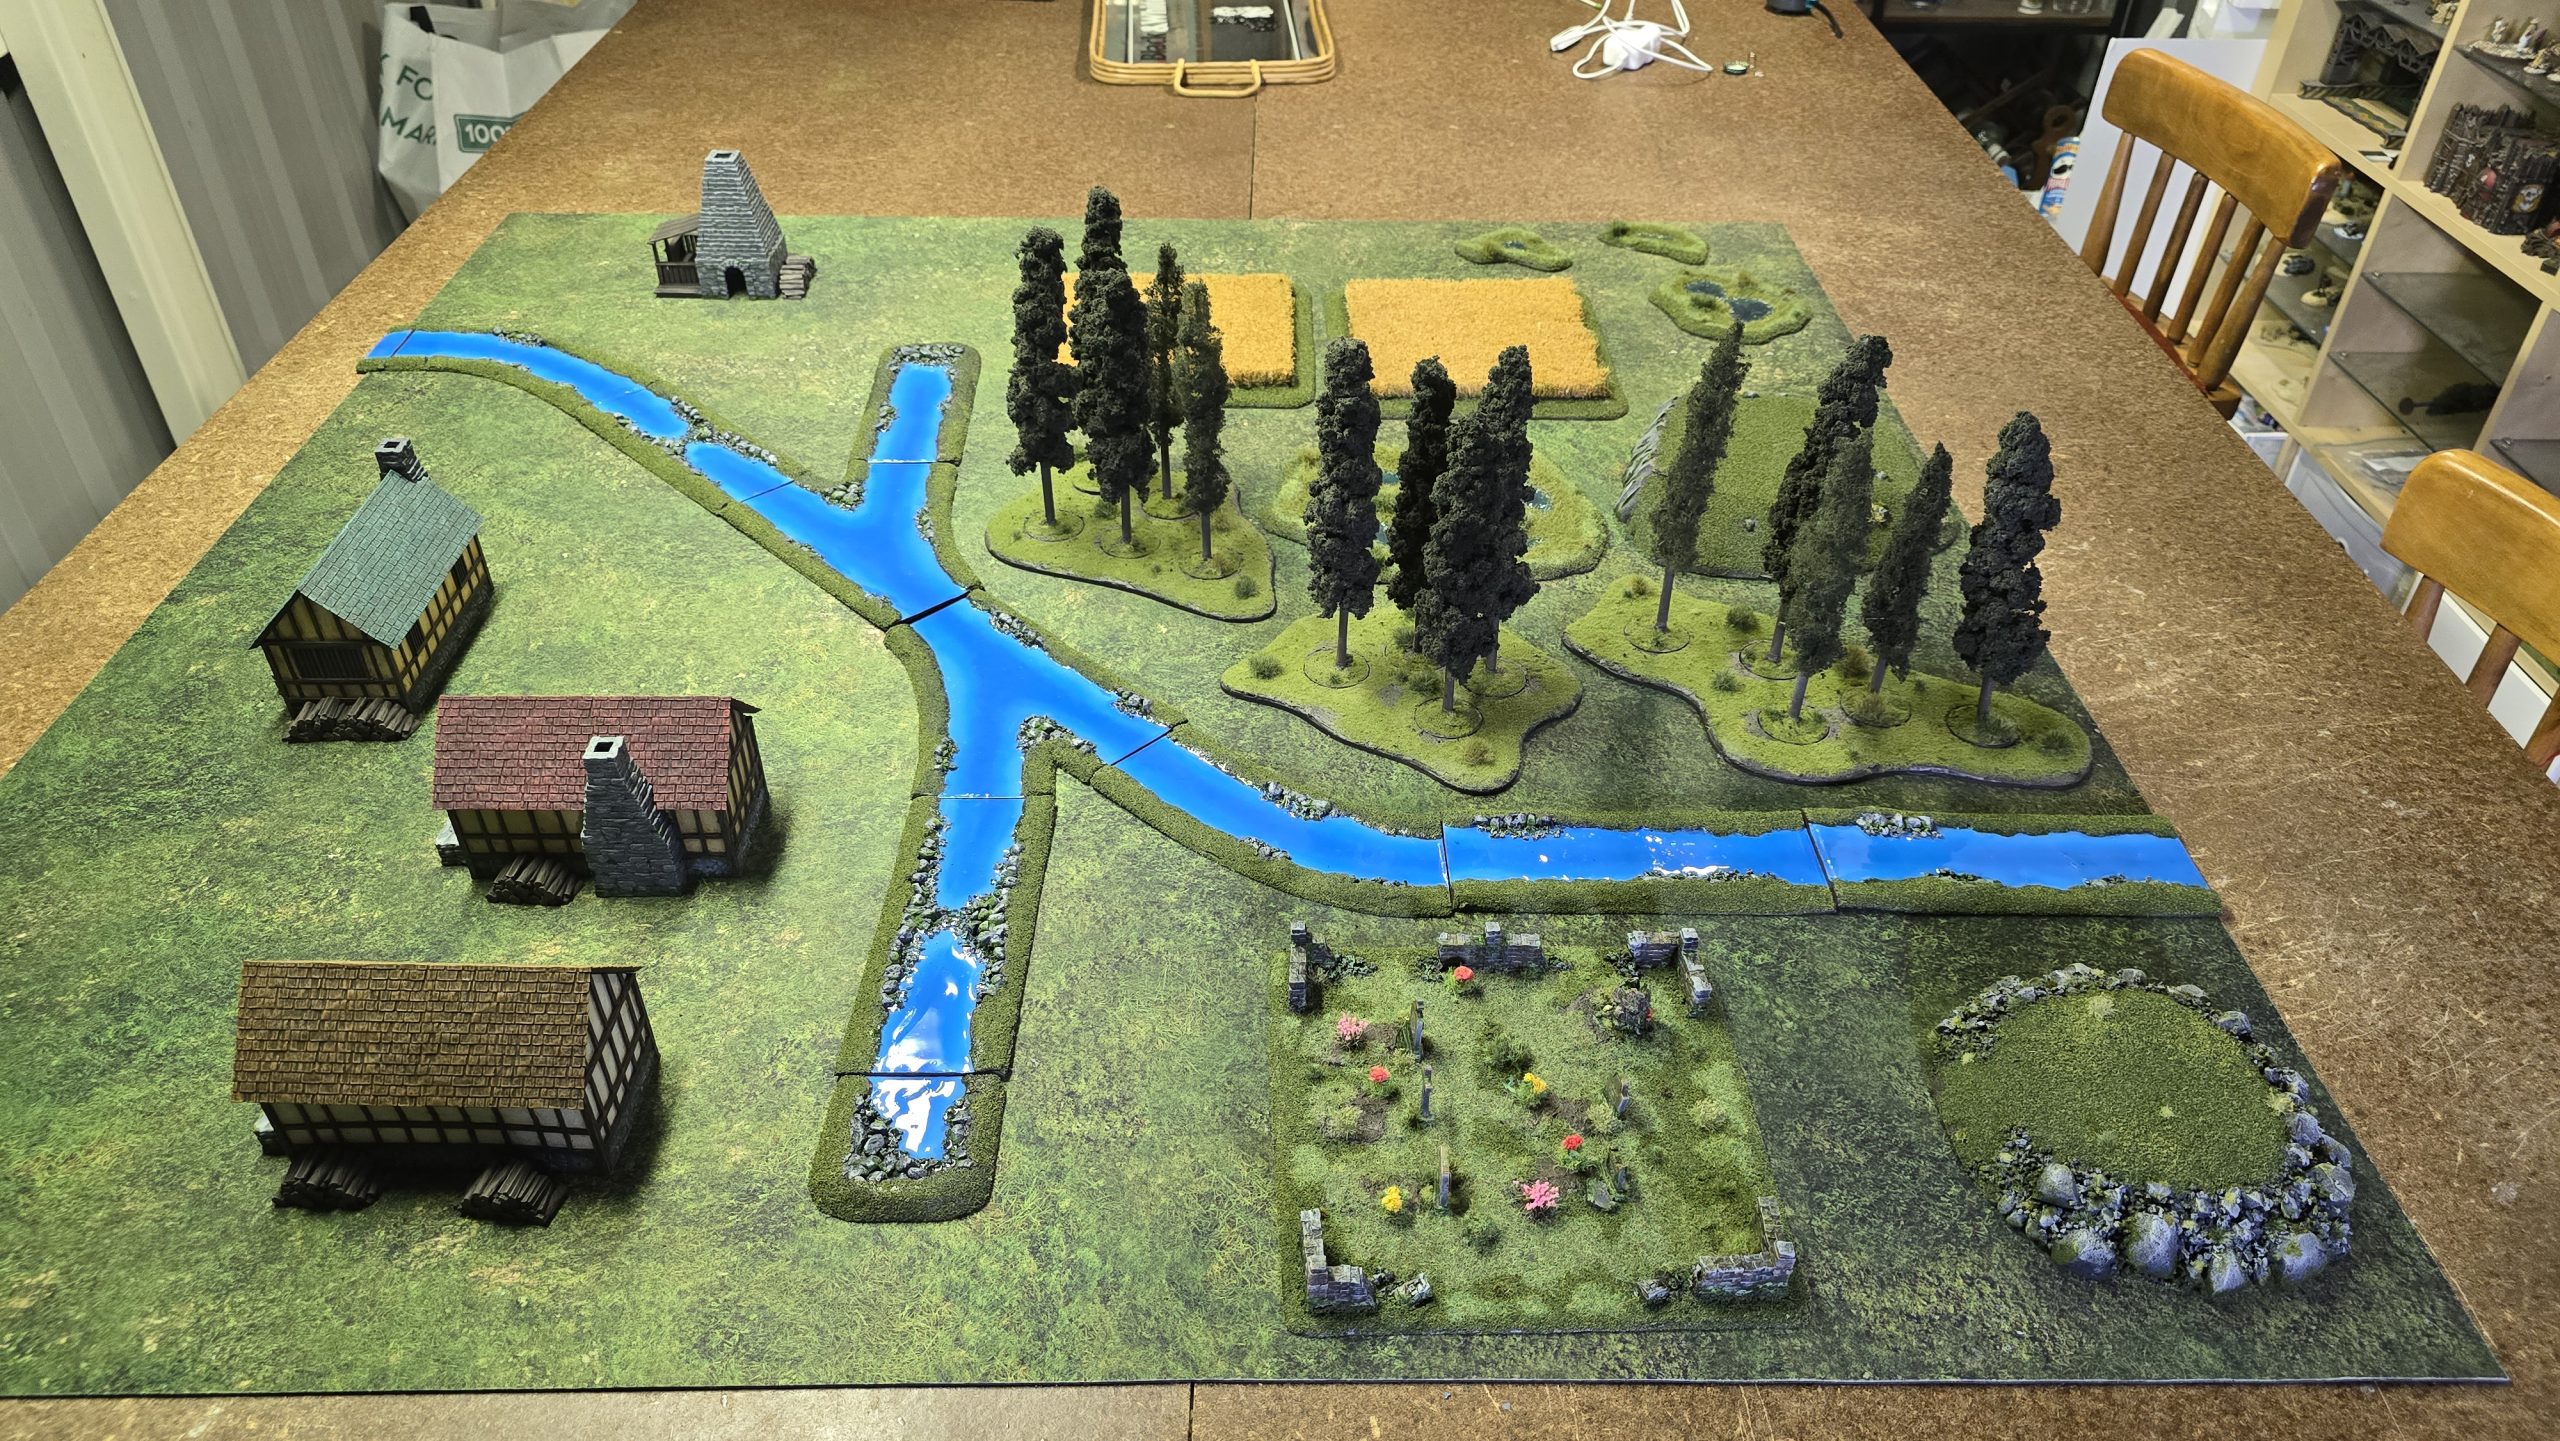
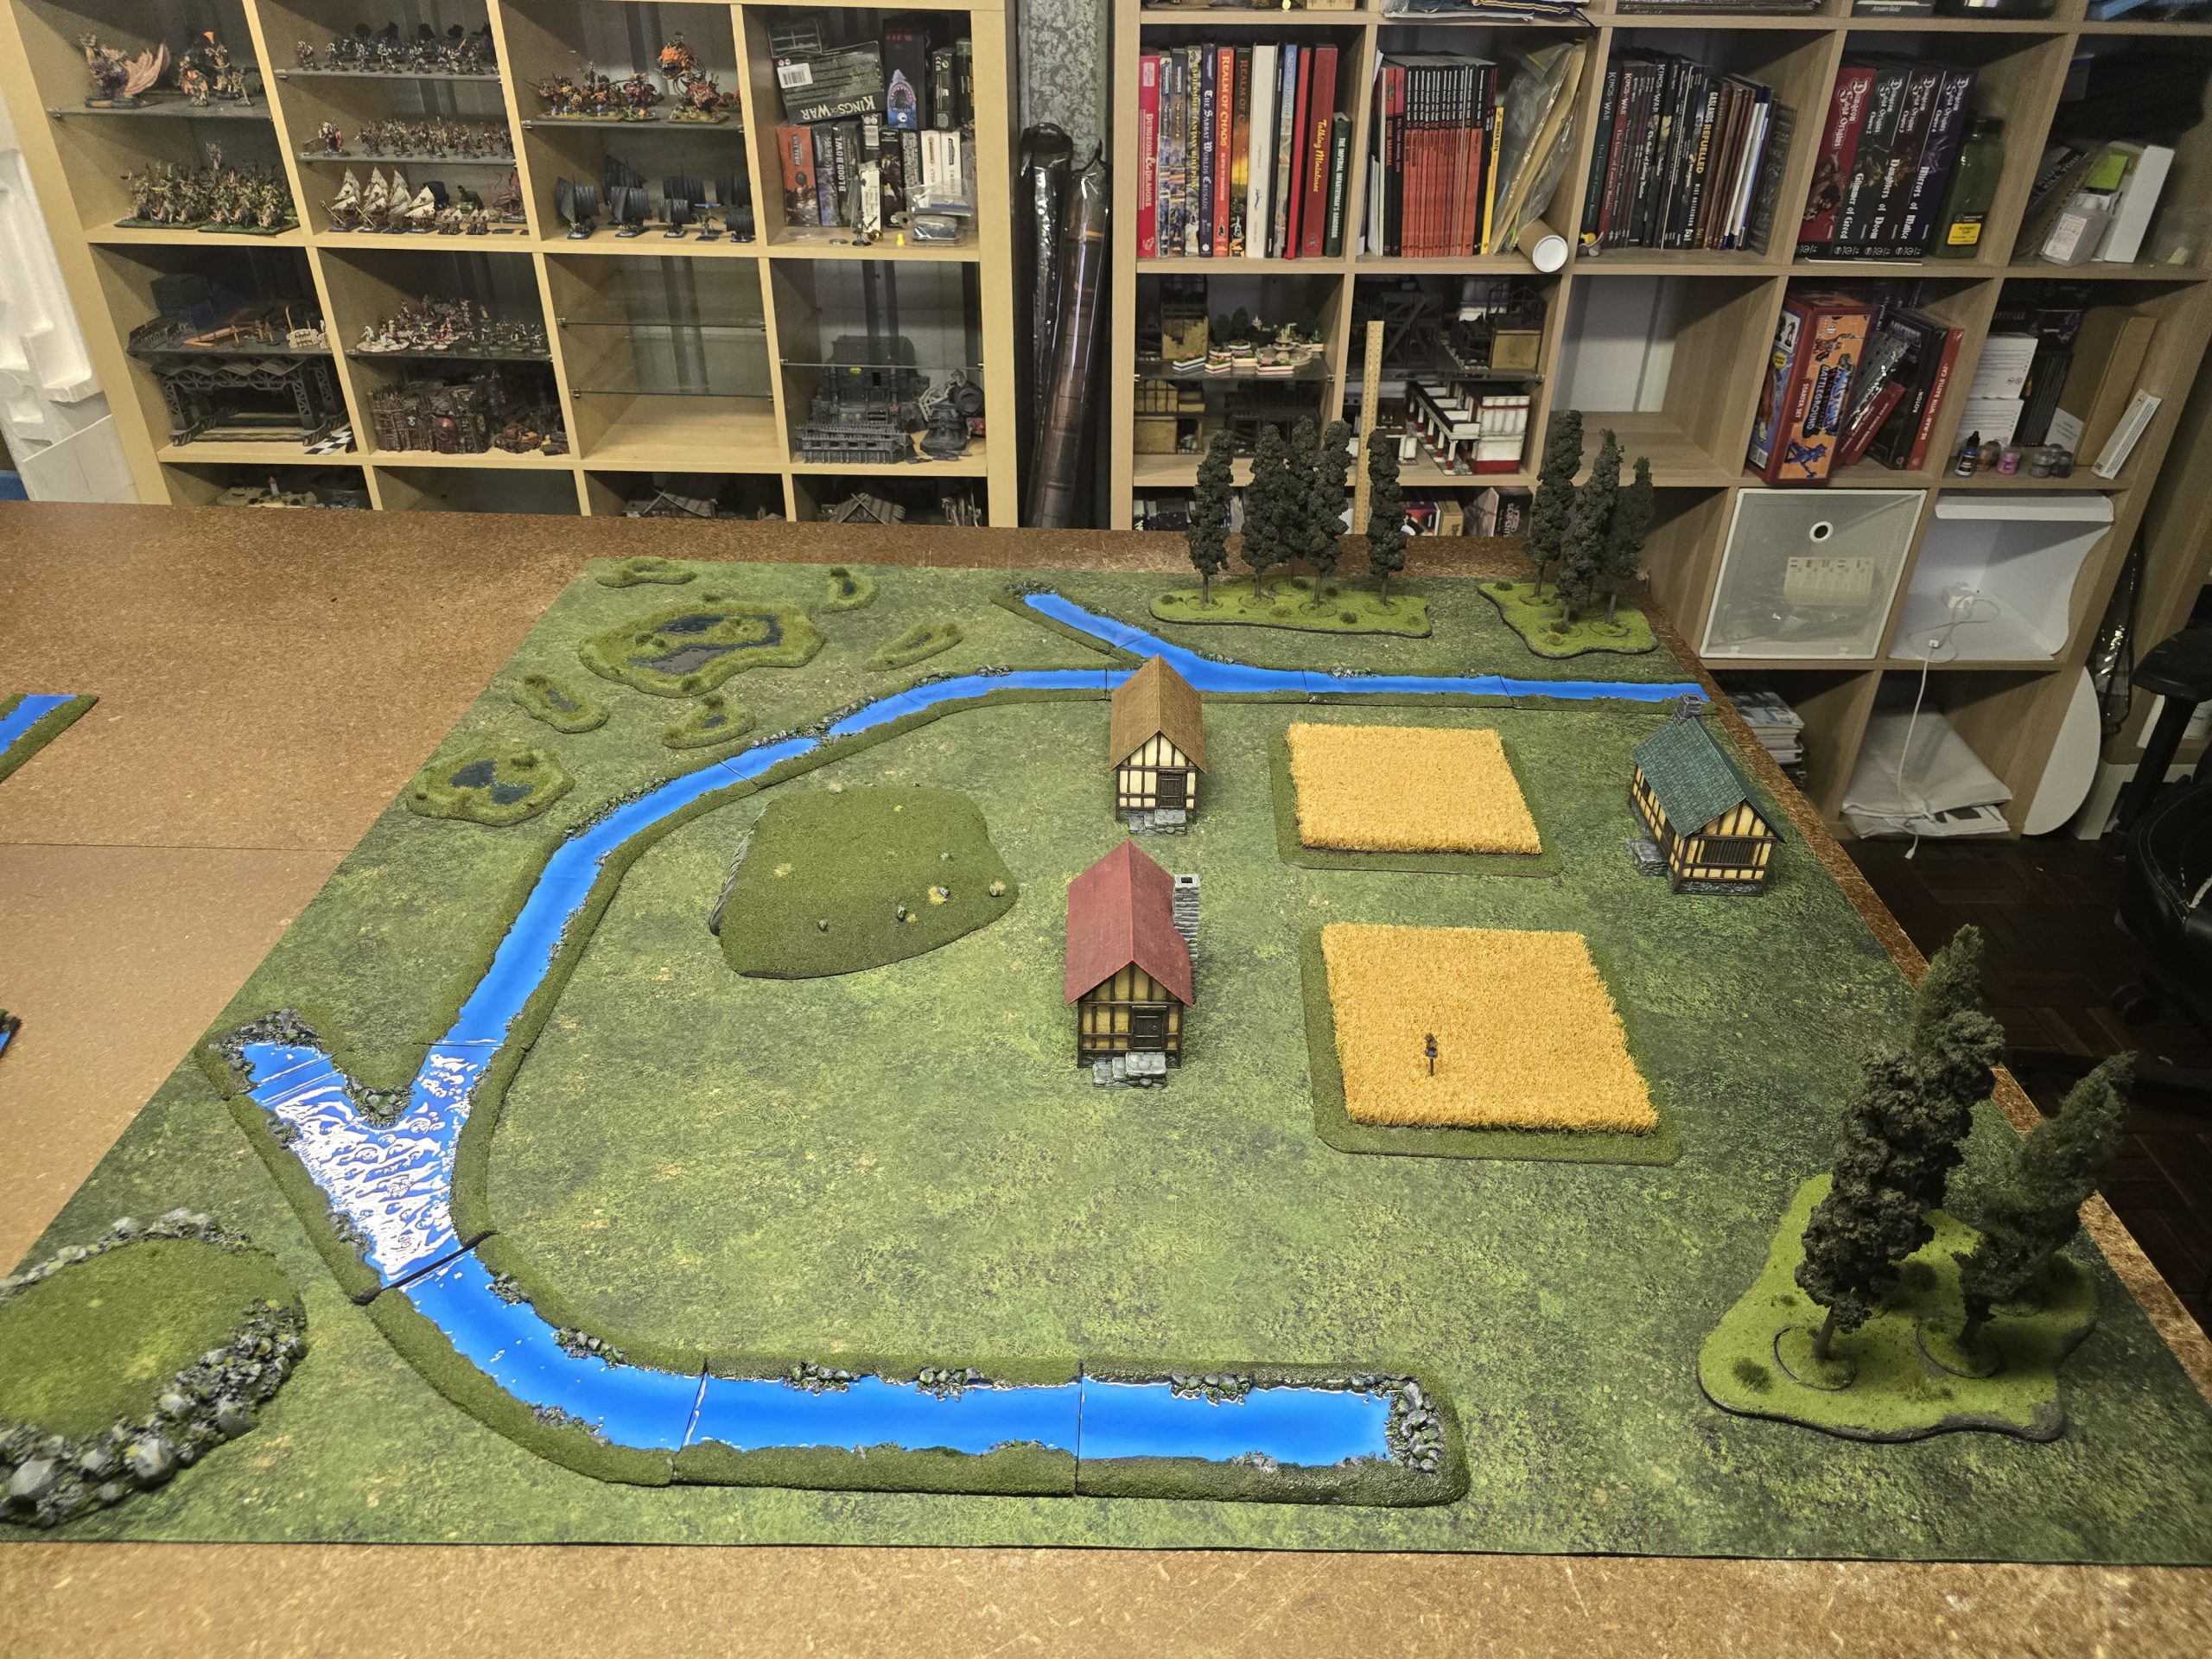
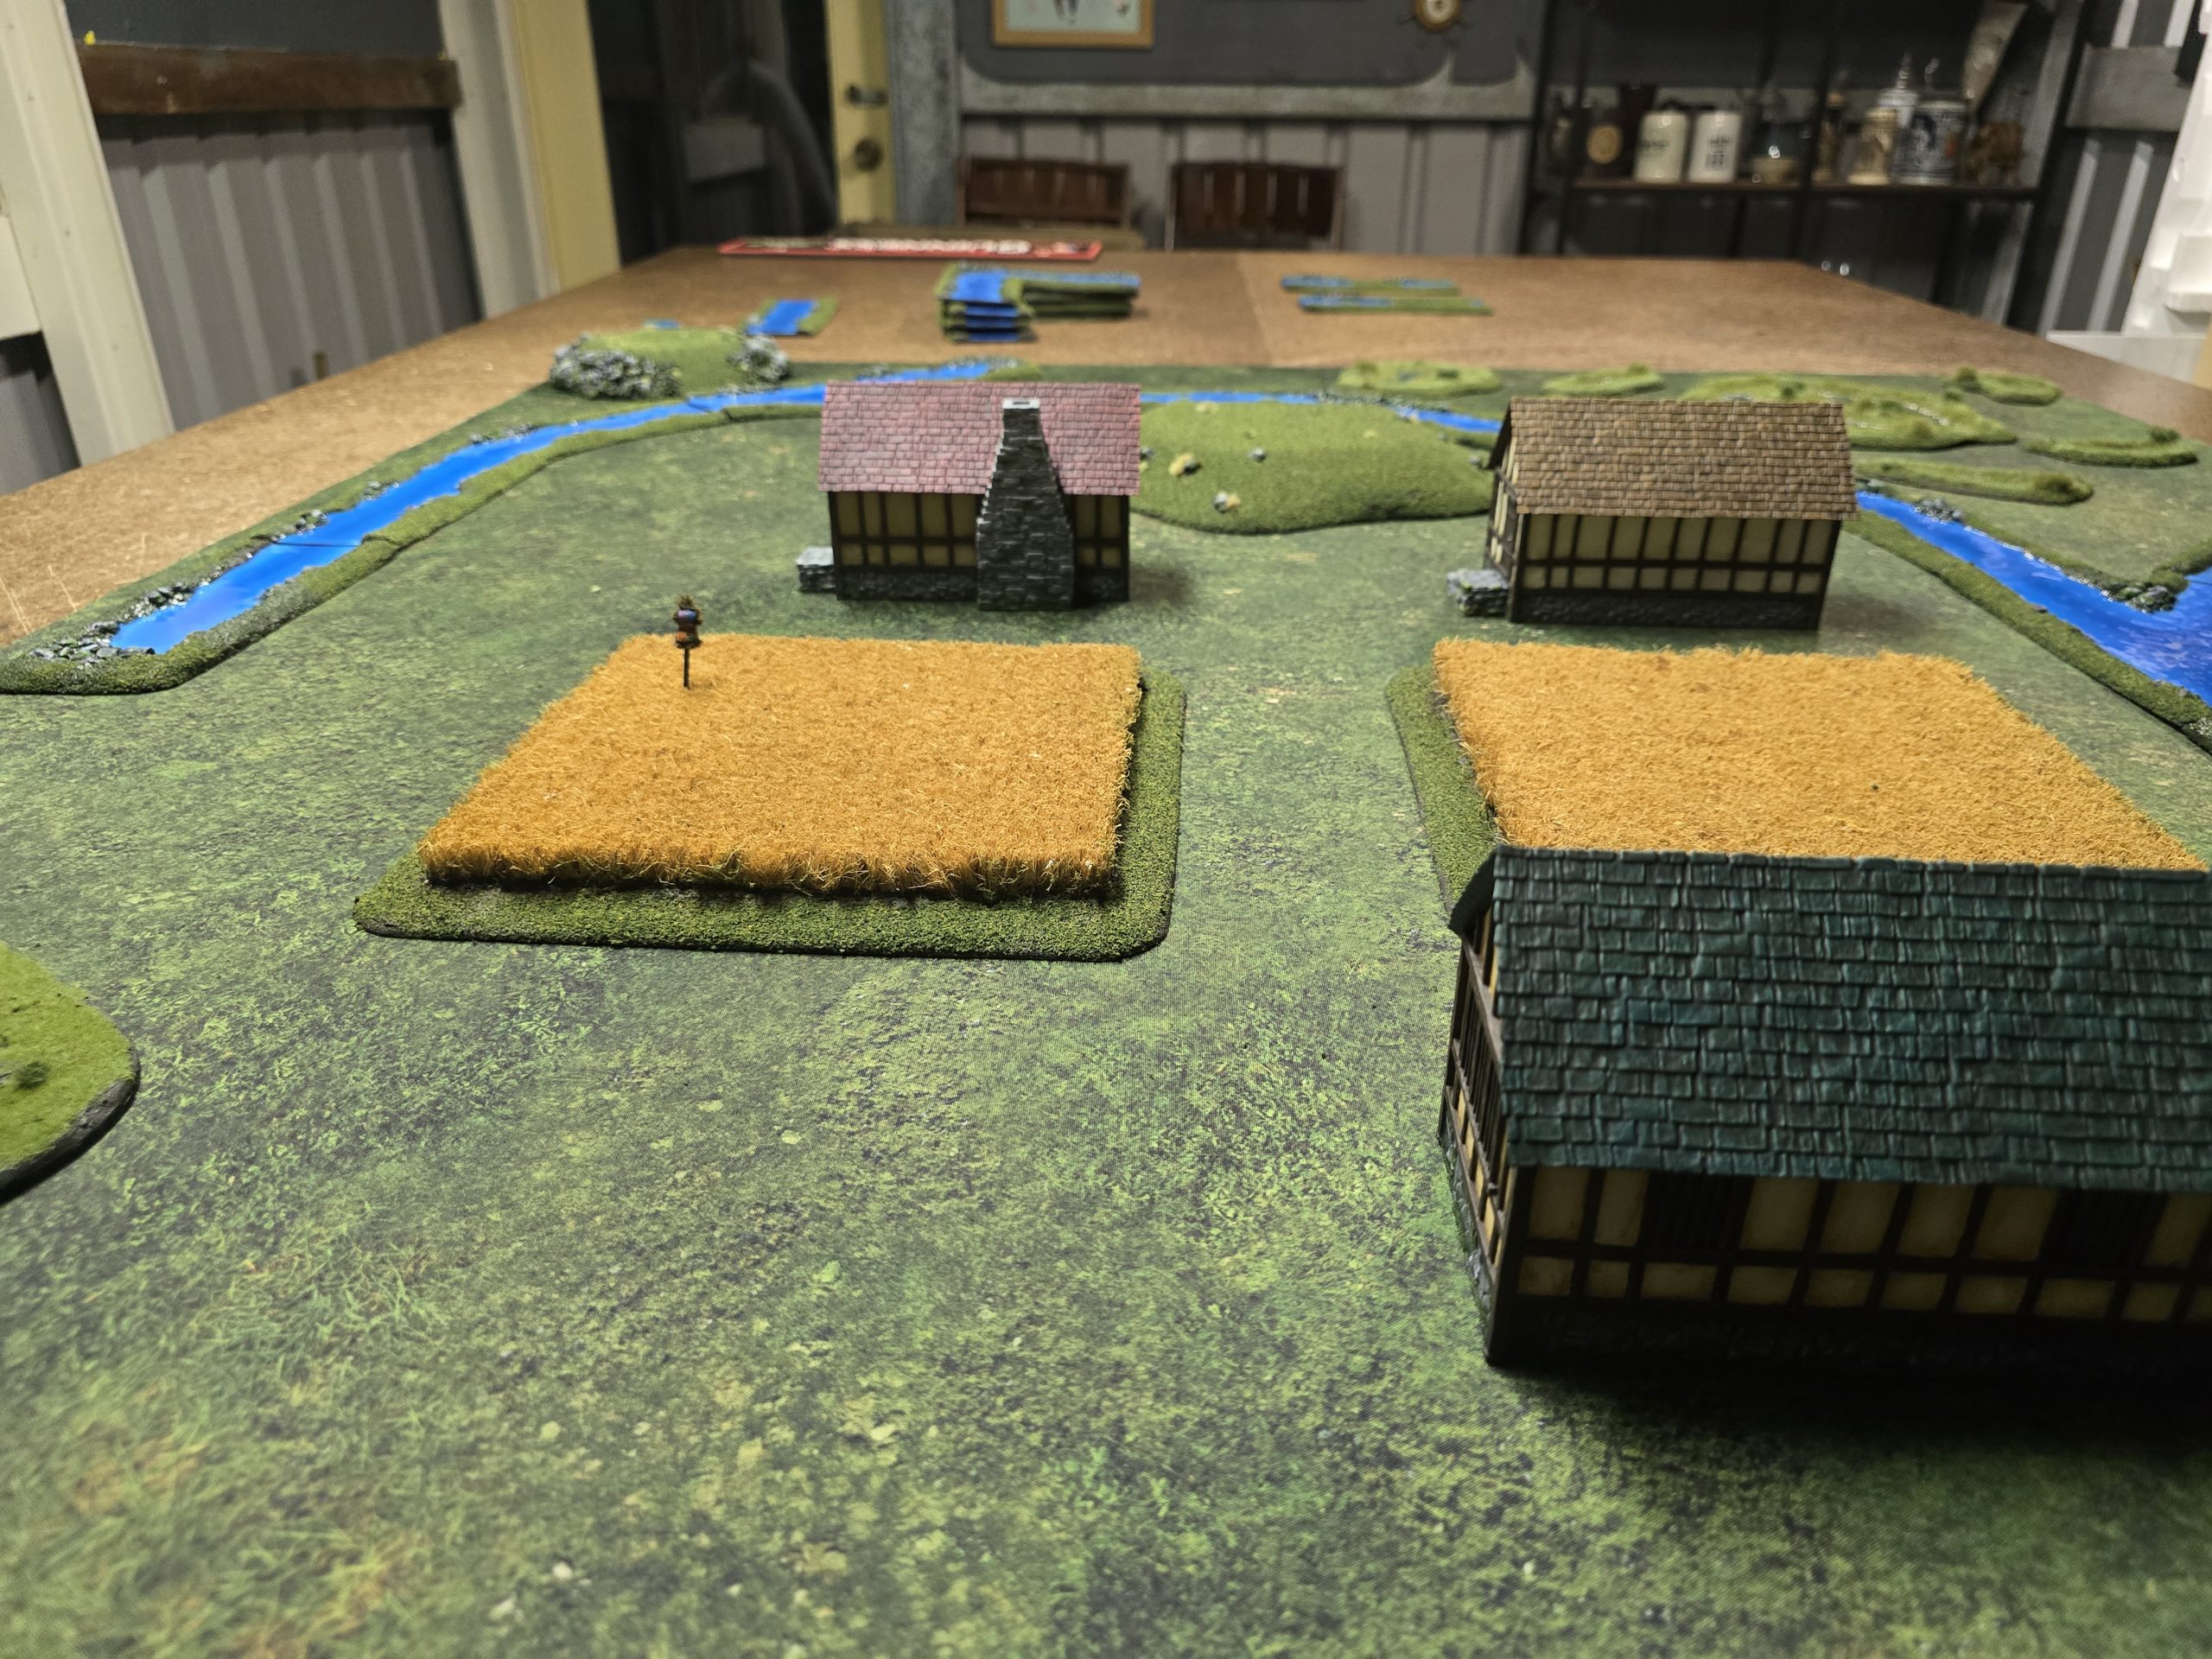
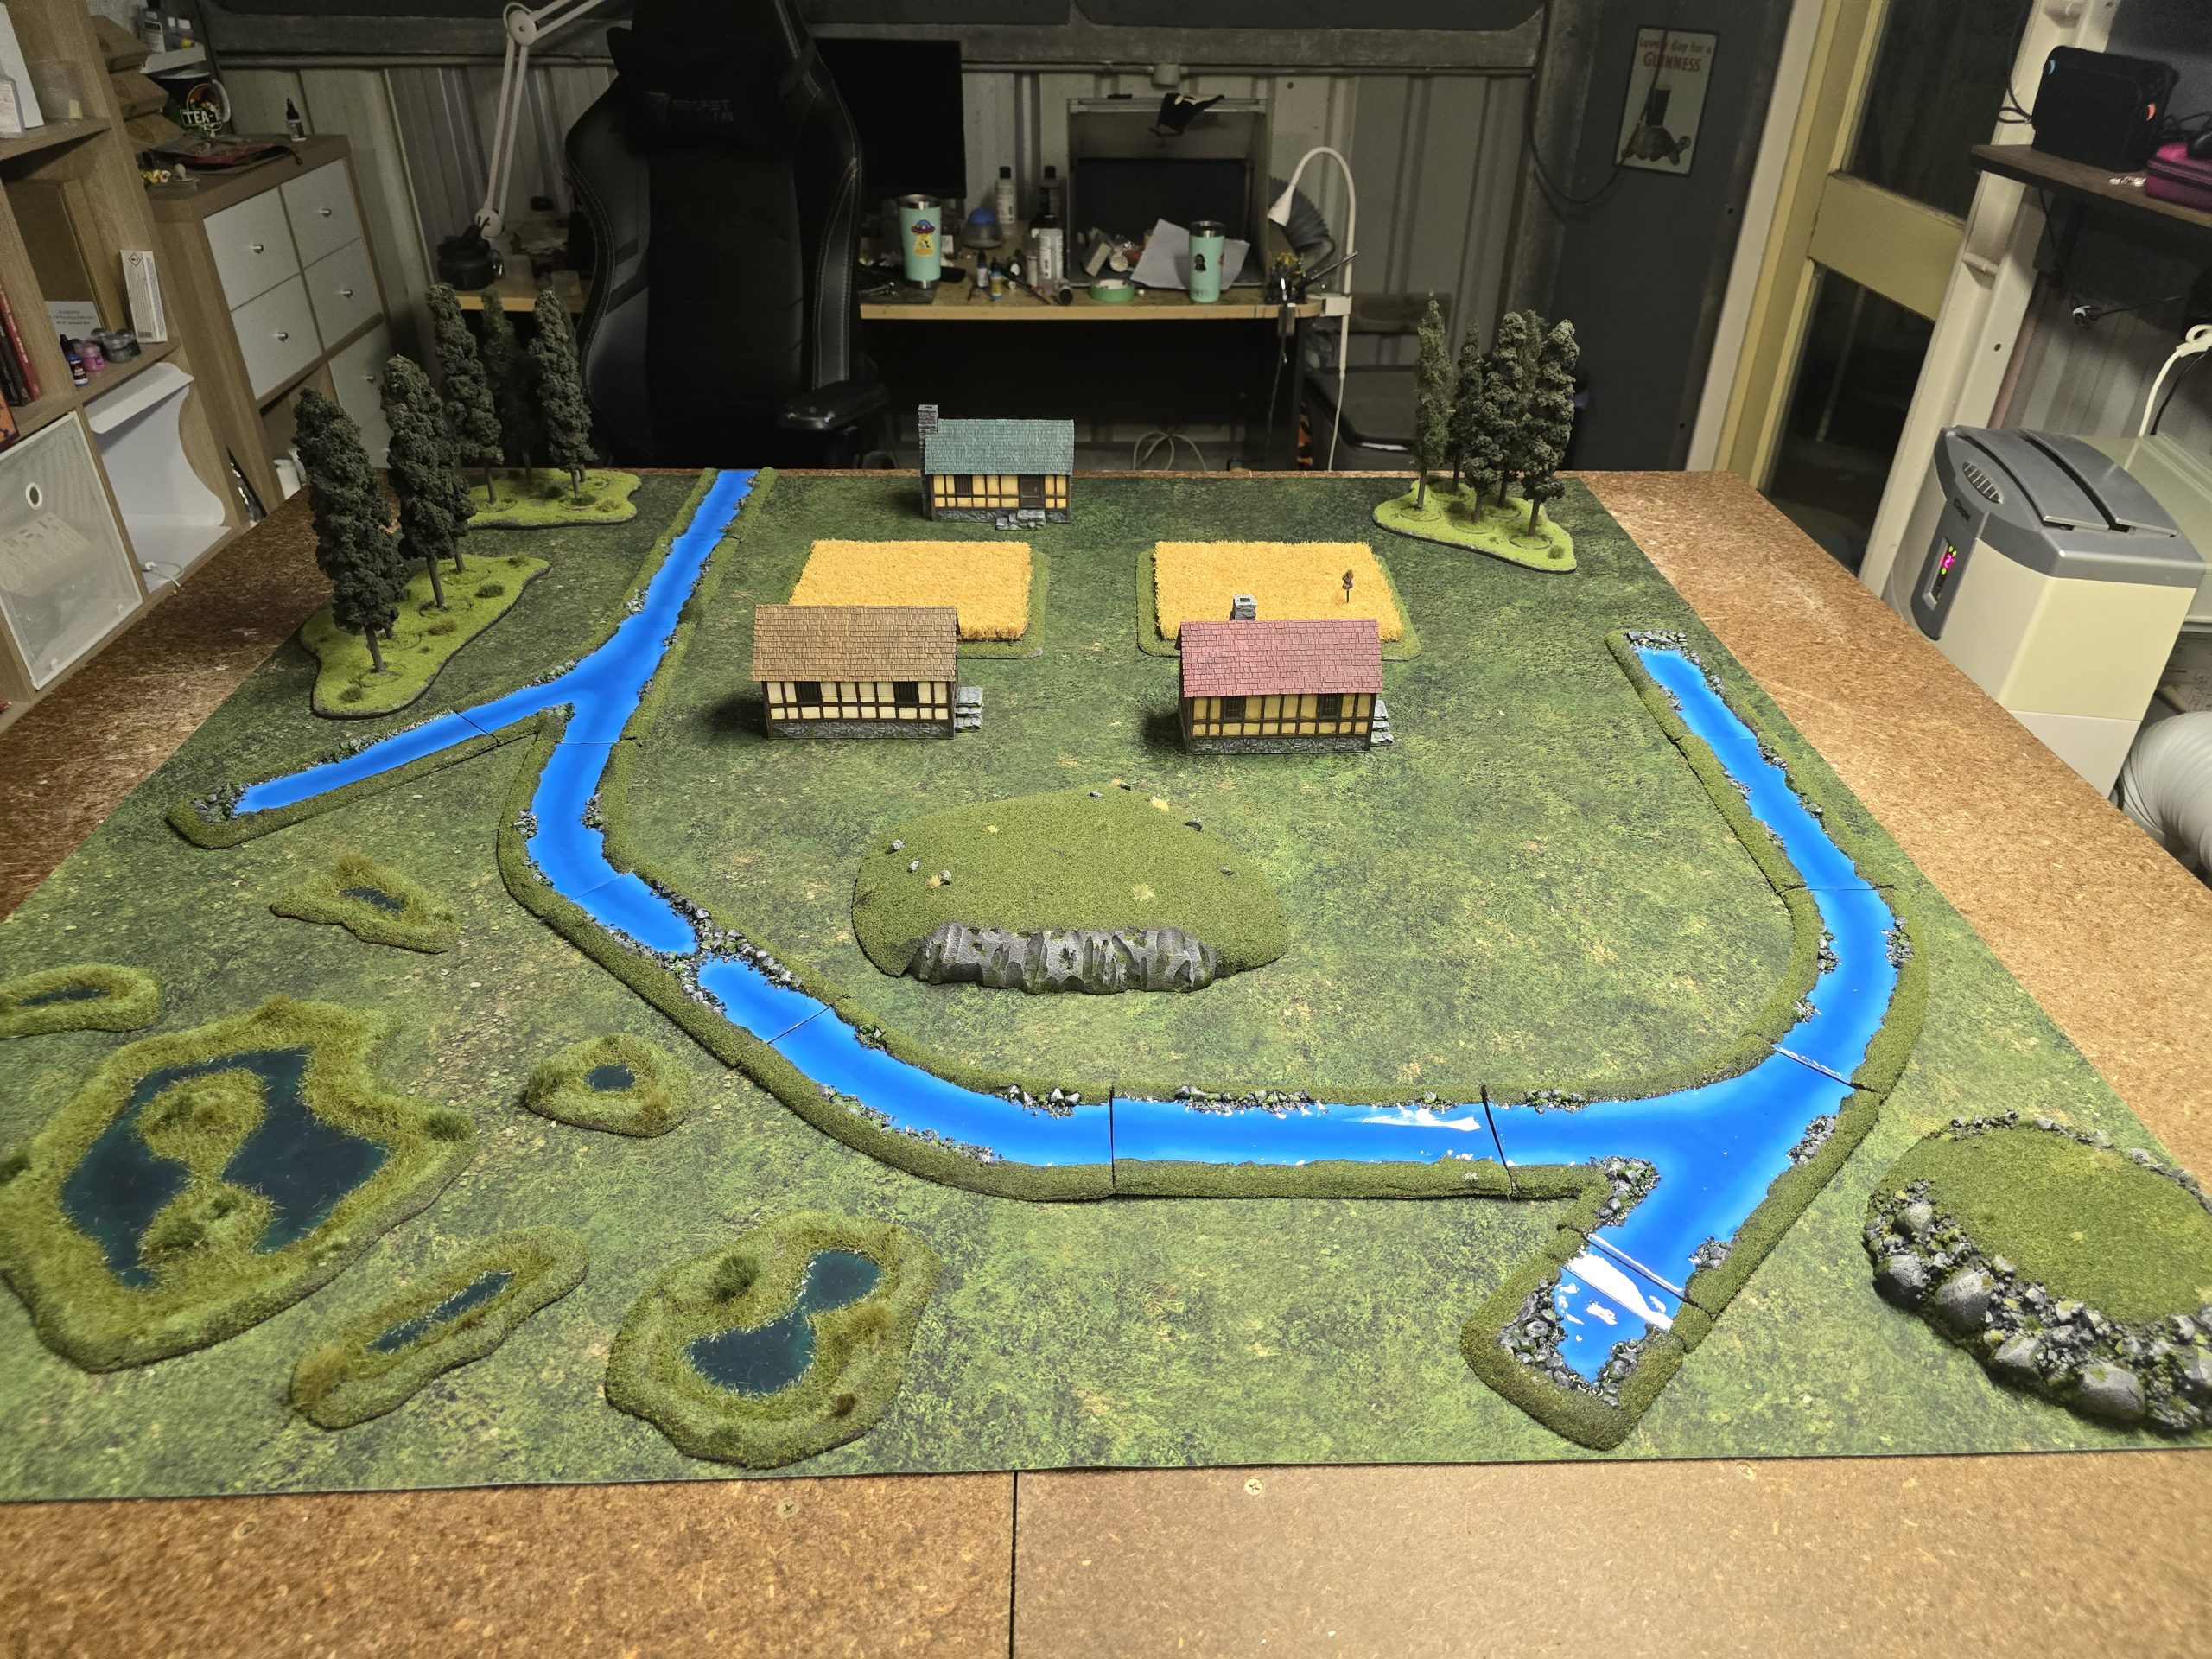
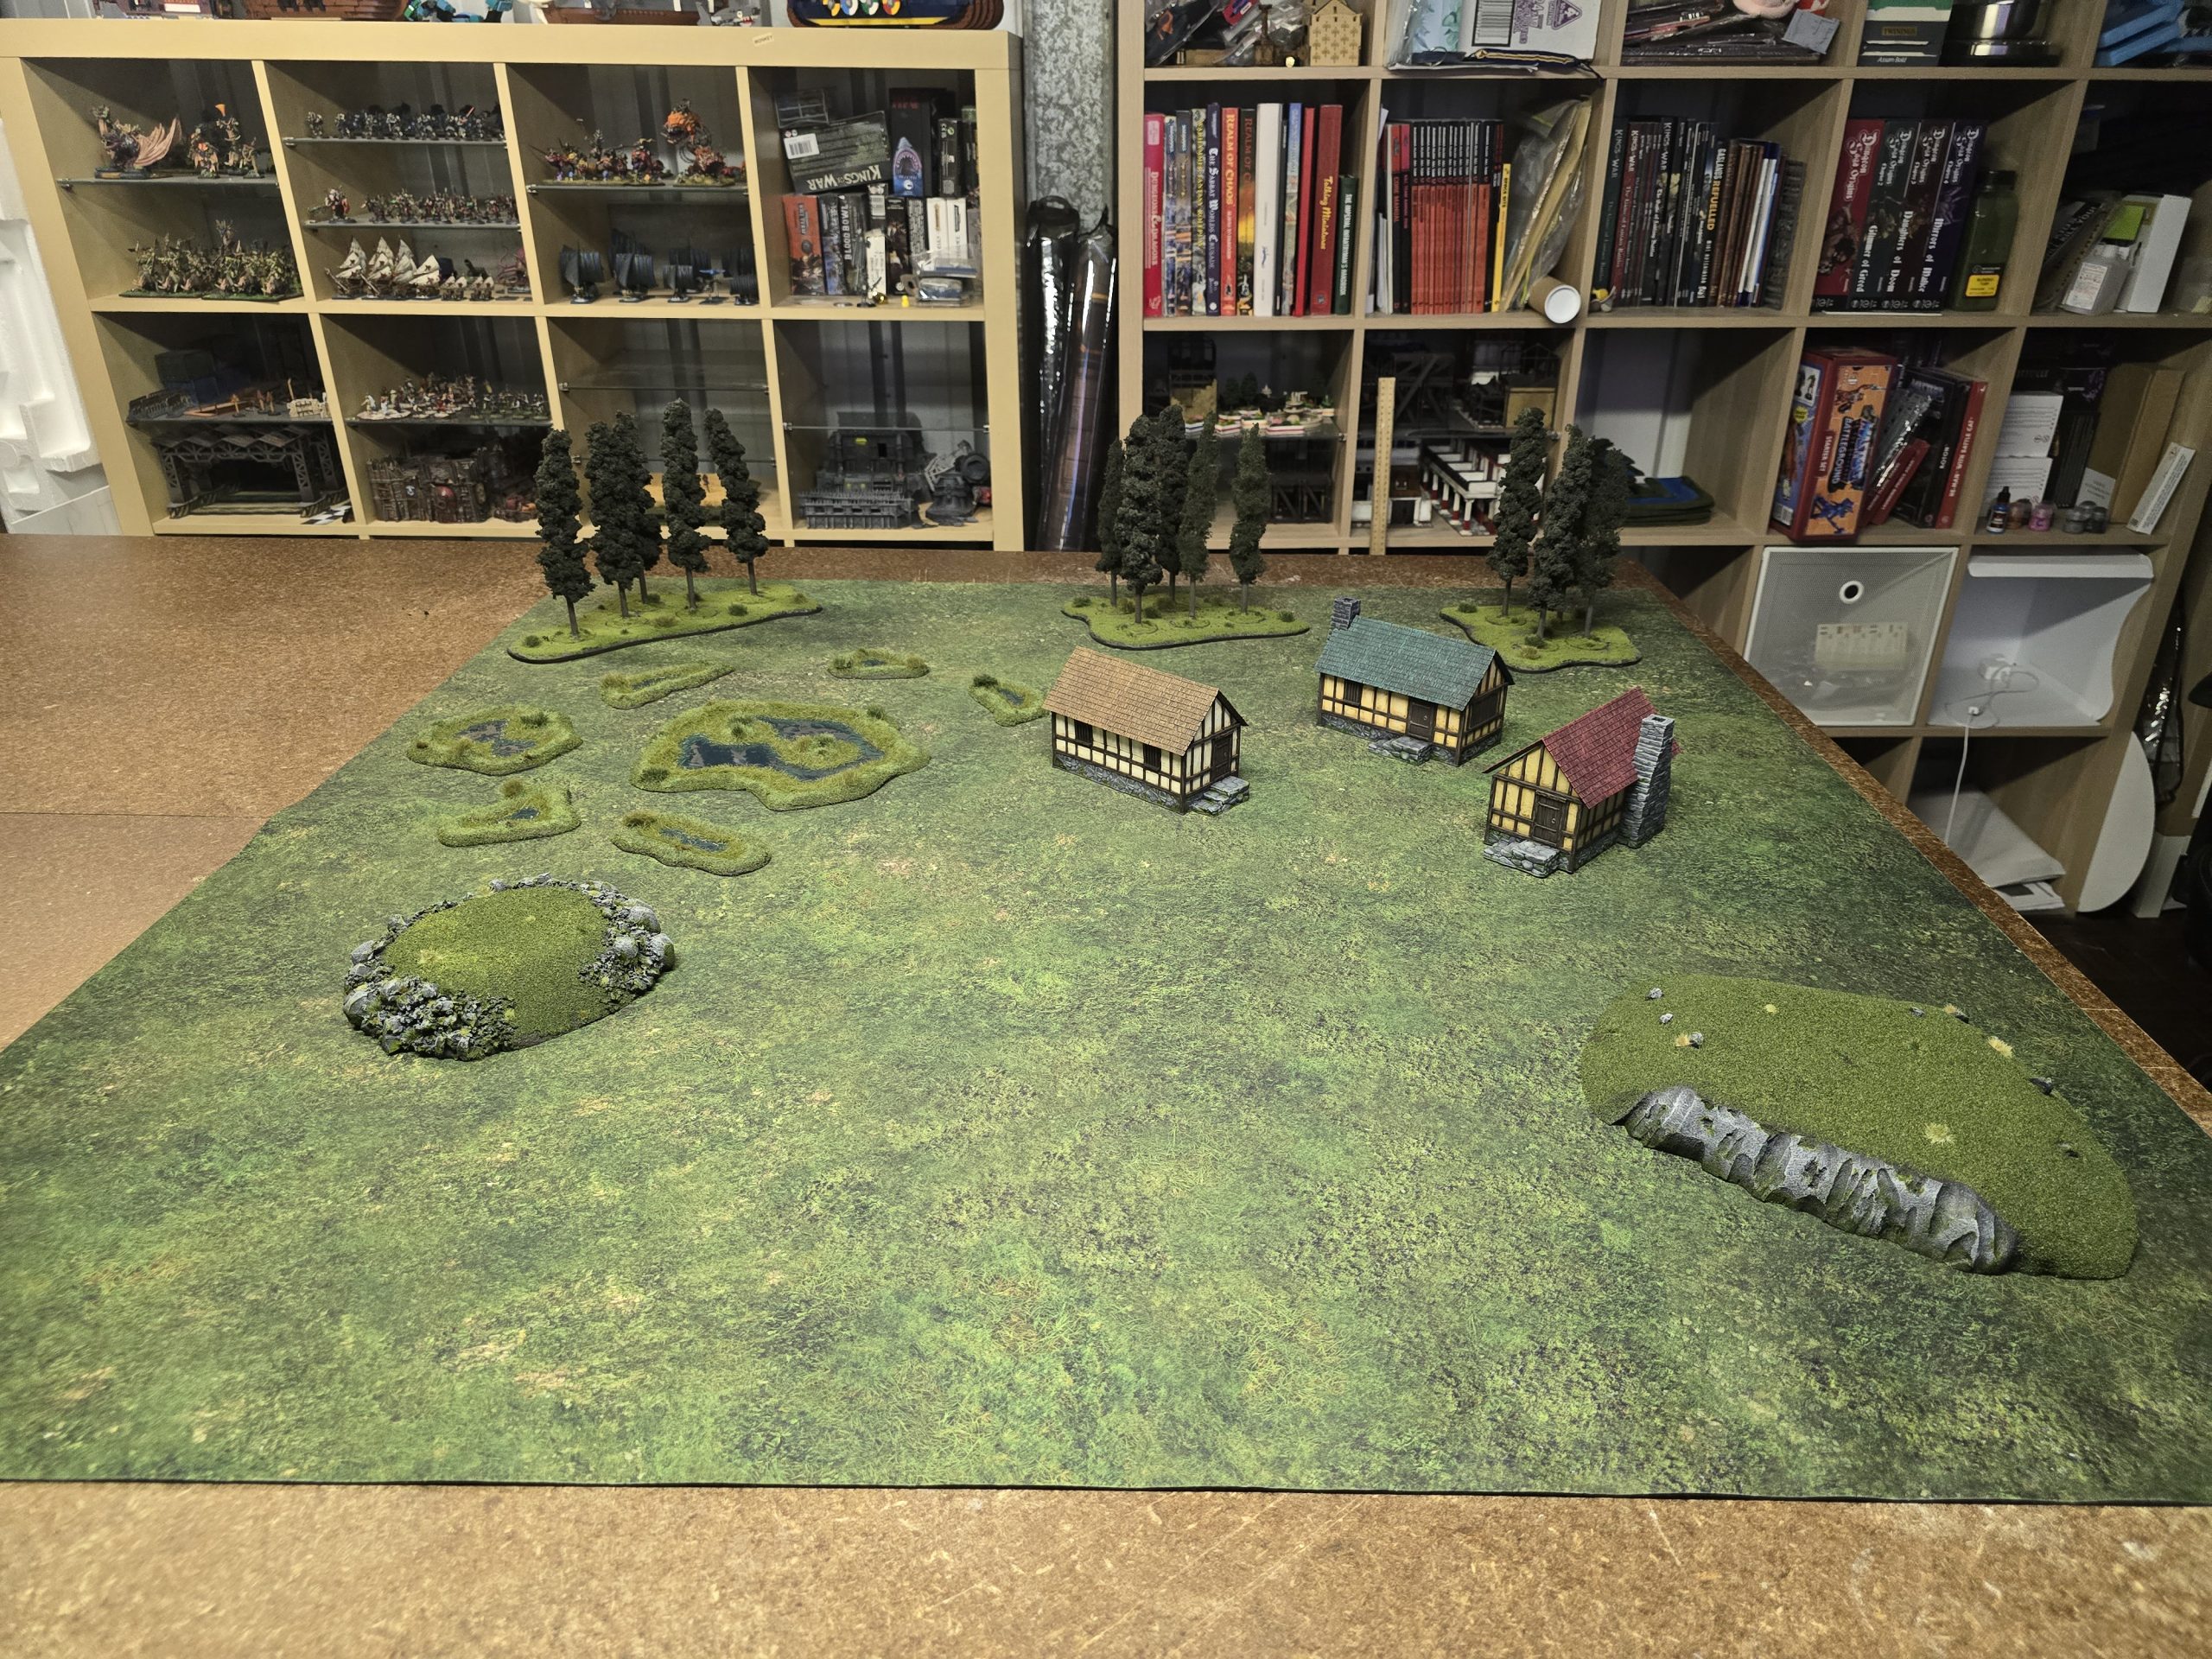
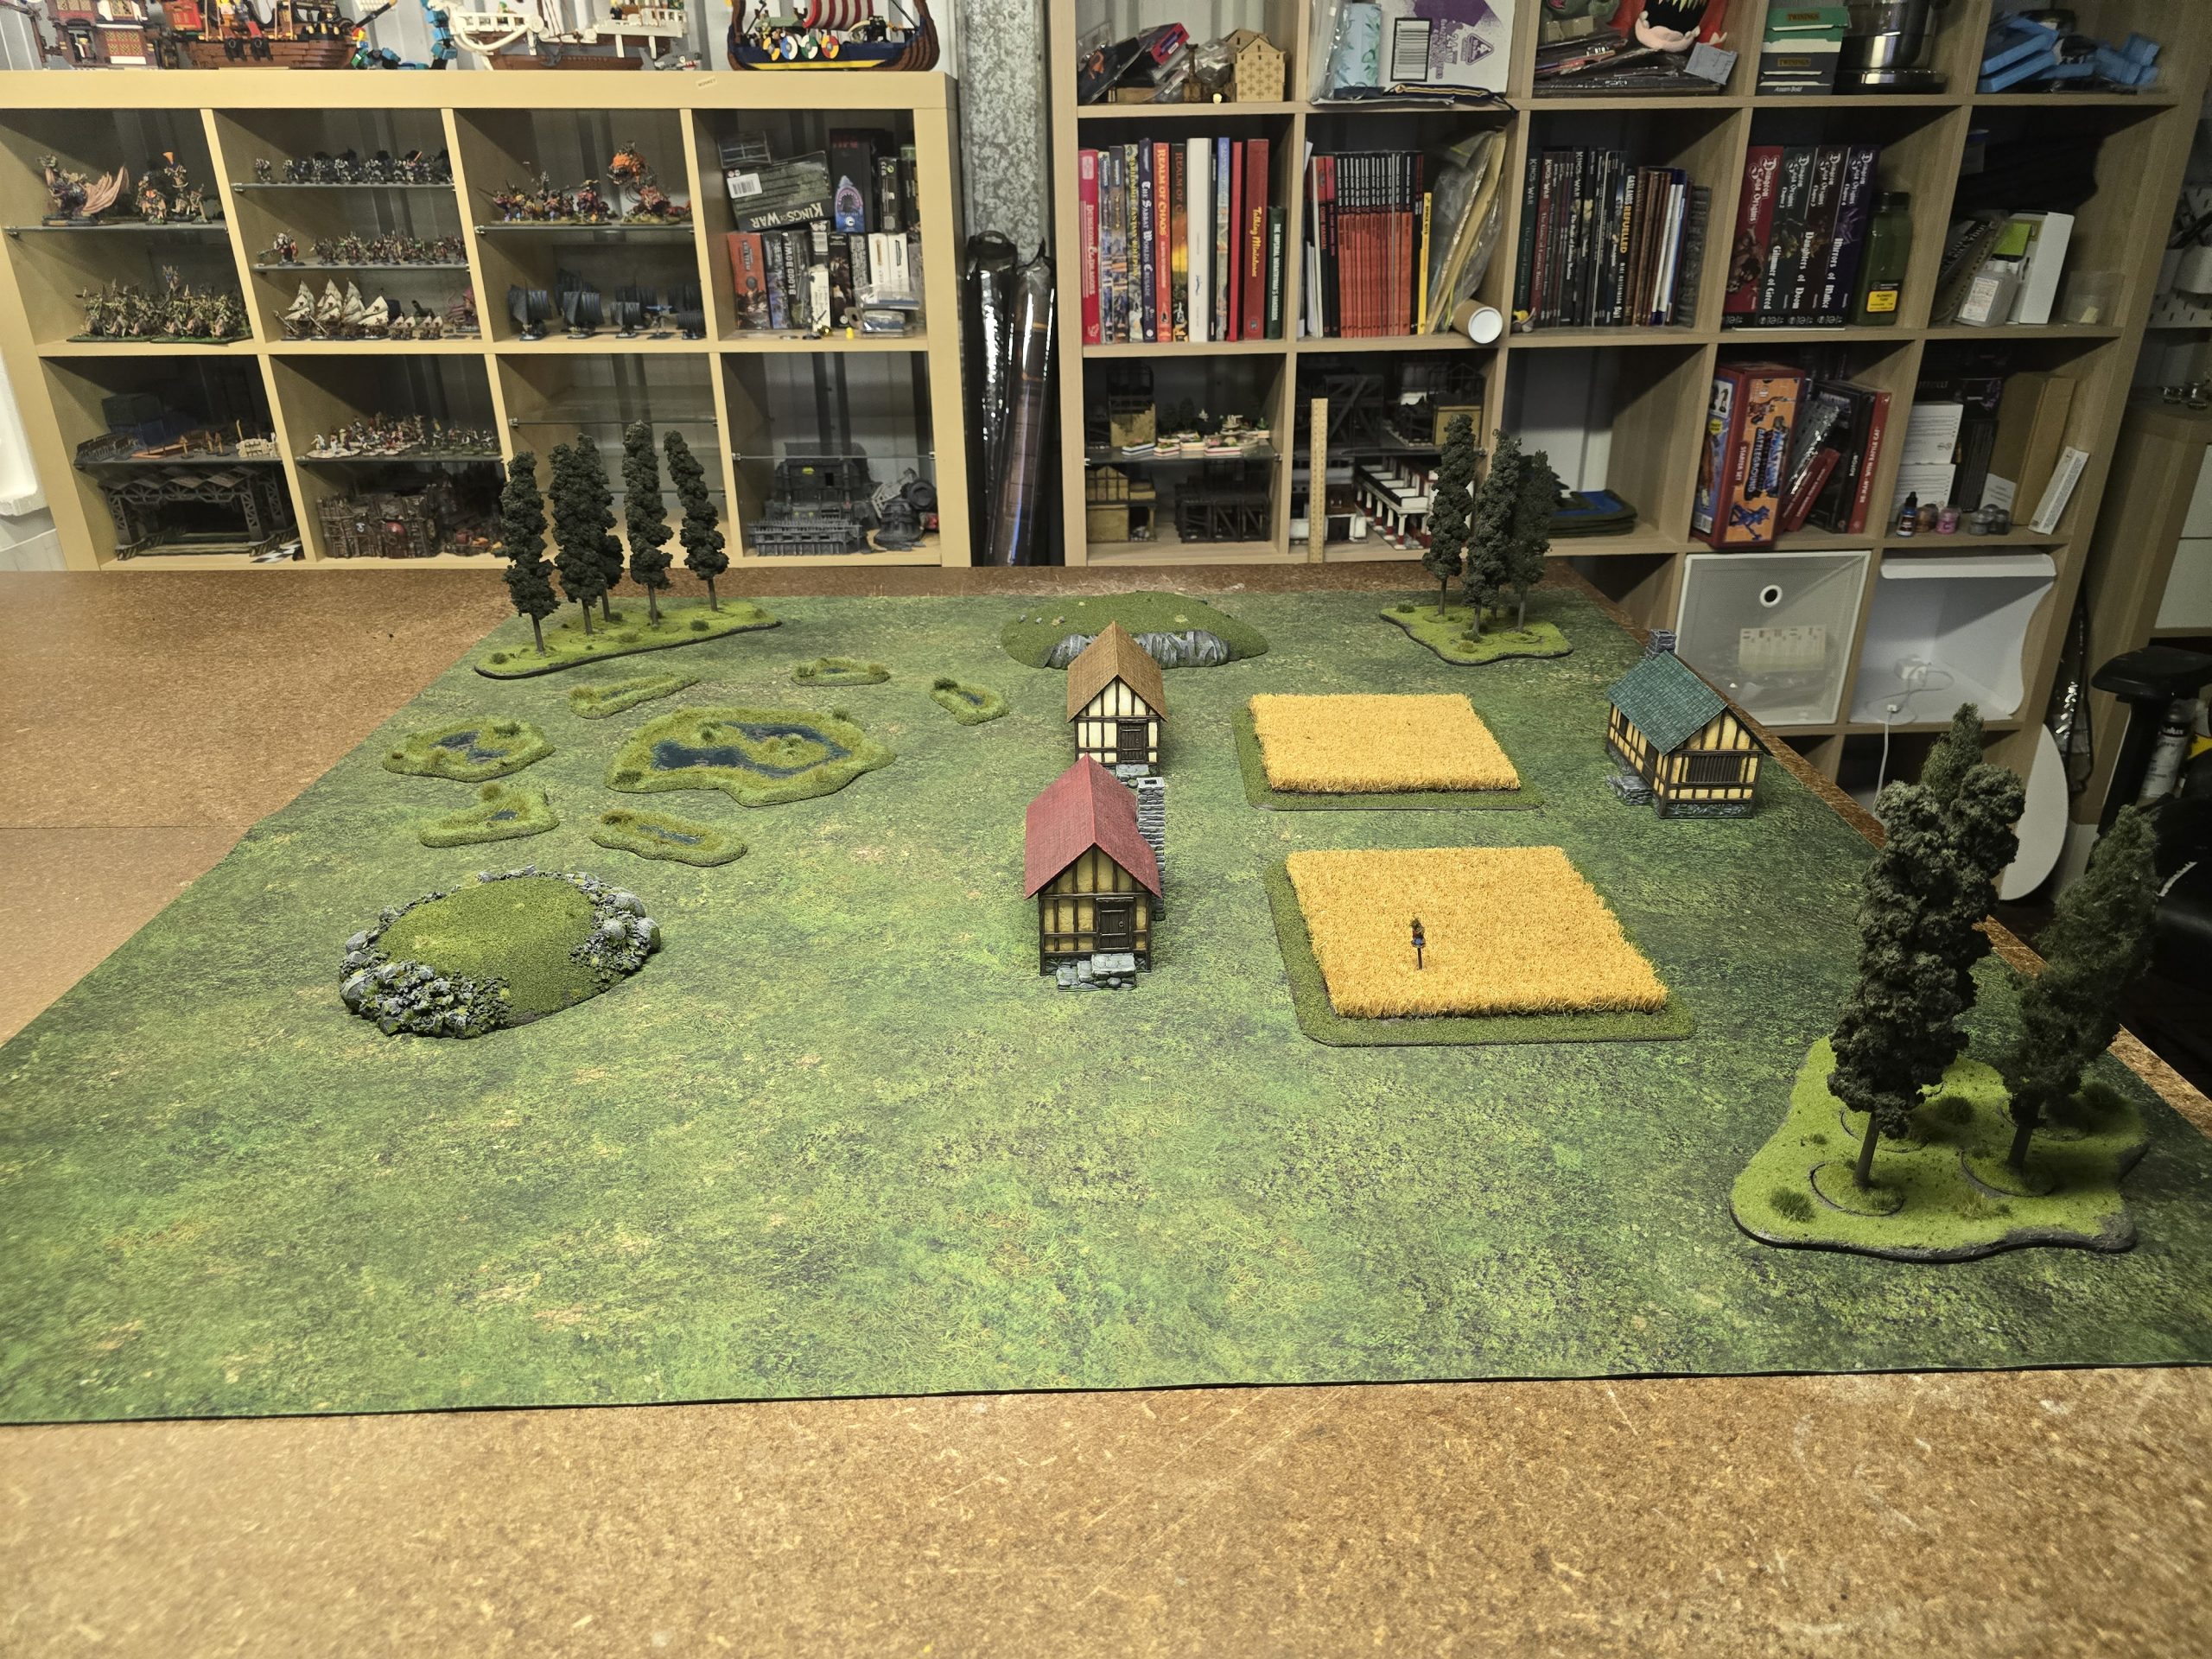
What the table is starting to look like.
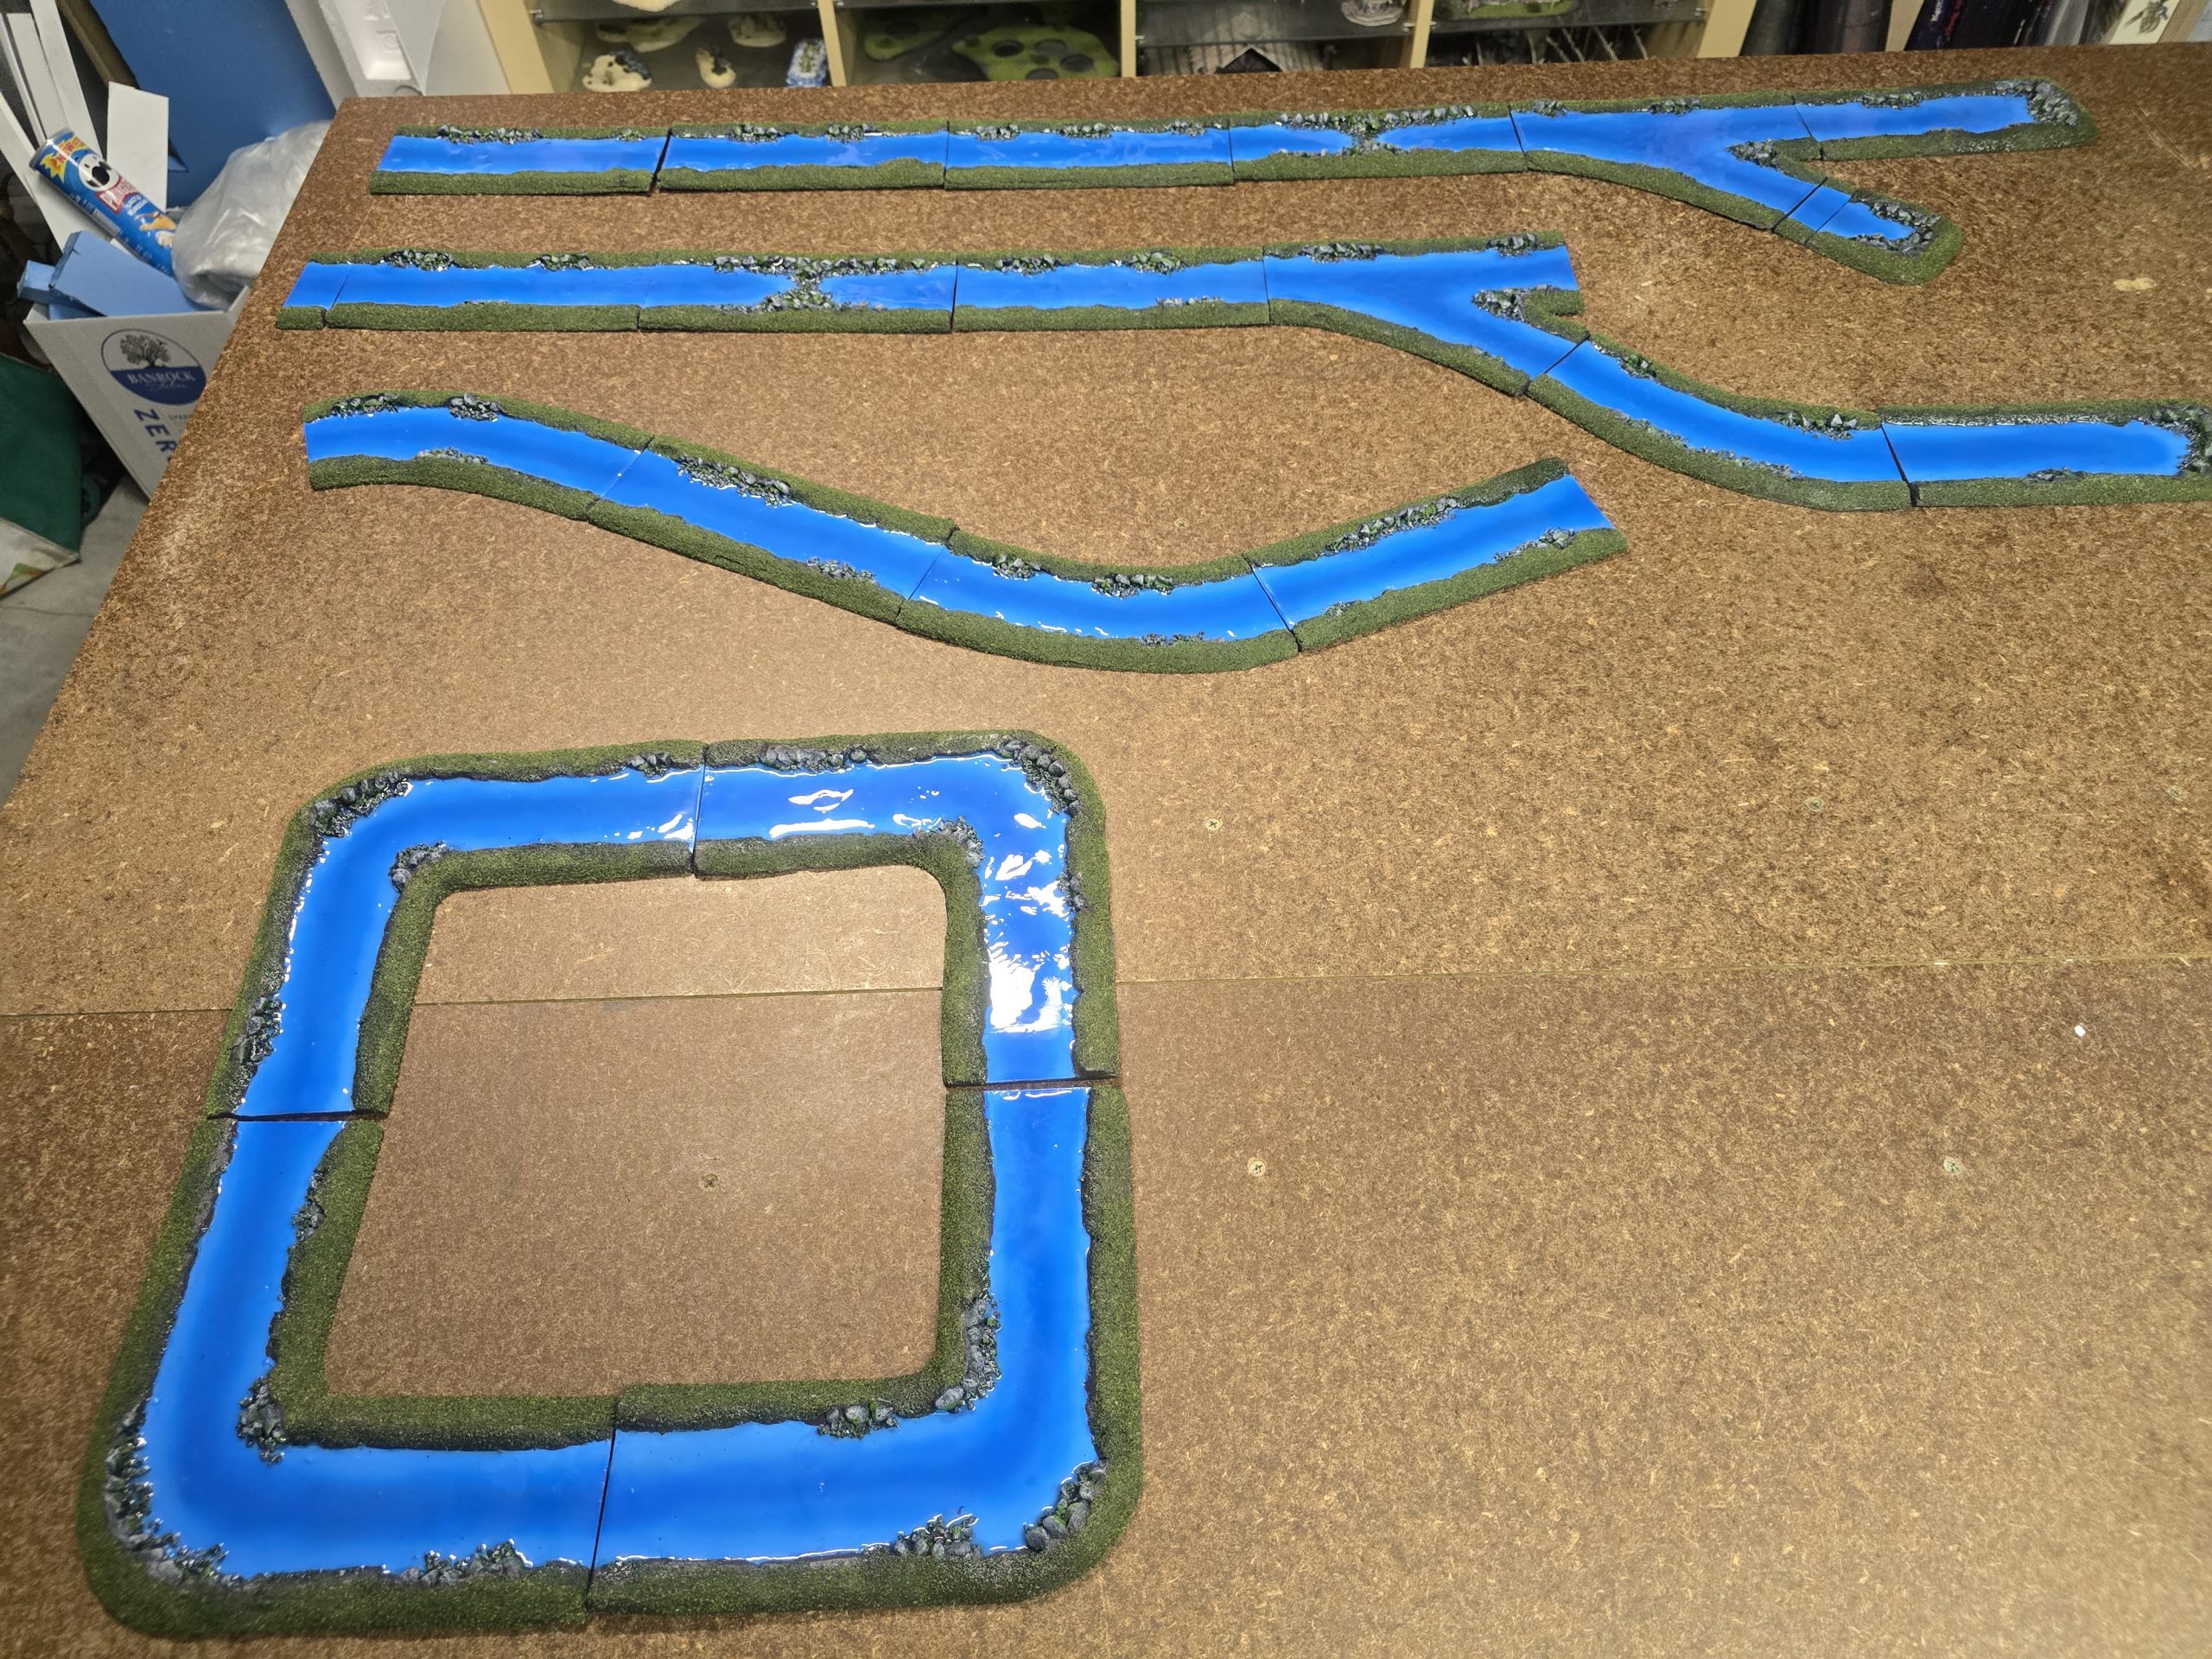
It is starting to look somewhere half decent! I obviously can’t fit all the river onto a 4×4 mat, but here is a little layout of some peices, fun to play with!
I want to build a fair bit more on there, as there is nothing worse than every game having the same elements just shuffled around. I can’t just keep doing this forever though, the stack of mdf I have waiting to become a Blade Runner-esque board for Warpath Epic isn’t going to build and paint itself! Left on the queue right now:
- 2 more 3D printed buildings, on of which is two storey.
- A windmill and a furnace (I think that is what it is) with associated scatter (also 3D printed, all from the aforementioned Kycapas collection)
- More random scatter.
- I have ordered another set of forest tree bases, this time from Battlekiwi, as I would like the option of more varied/ thicker tree cover.
- A couple of ponds.
- A grave yard.
- A vegetable patch.
- Some stone walls and plant hedges.
- a couple of bridges to go over the river sections.
I would like some random animals, and have been brainstorming rules for their random movement. I love the idea of some vain glory seeking lord dashing across a field, only to trip head over tip over a pig, right into the mud.
Given I have added all this in one night (so smart), I havent really gone into any depth about paints used or any other stuff. ANybody reading, please feel free to leave me a comment, I will help however I can 🙂
If anybody needs more/ better photos for any reason (hint hint 😉 ), let me know, I will get my wife to take the photos you need, she is far better at that stuff than me!
Drowning in the details
Okay, what terrain set would be complete without rivers? Fresh, back from a family (we are a family now, it is very exciting) holiday for a week, I thought it would be fun to knock this out quickly.
What an idiot.
I wanted to future proof this set, so that it could be easily used to larger and smaller games. This meant that at a minimum, it had to be able top go straight across a 6 foot table.
I ended up making:
- 9 straight sections (two of which have rough rocks for crossing)
- 2 small adapter sections (being a metric country, the sheet of EPVC I was using was just over 1cm short of 2 feet. so I made a small section so it could go straight across a 4 foot board, and a lsightly larger one so it could go across a 6 foot board)
- 4 90 degree turns, so you could make moats or some other man-made river course.
- 3 gentle turns (more natural, 3 because that is what fit evenly across the sheet I was using).
- 2 y-sections to split the river.
- 2 long dead ends and one short one
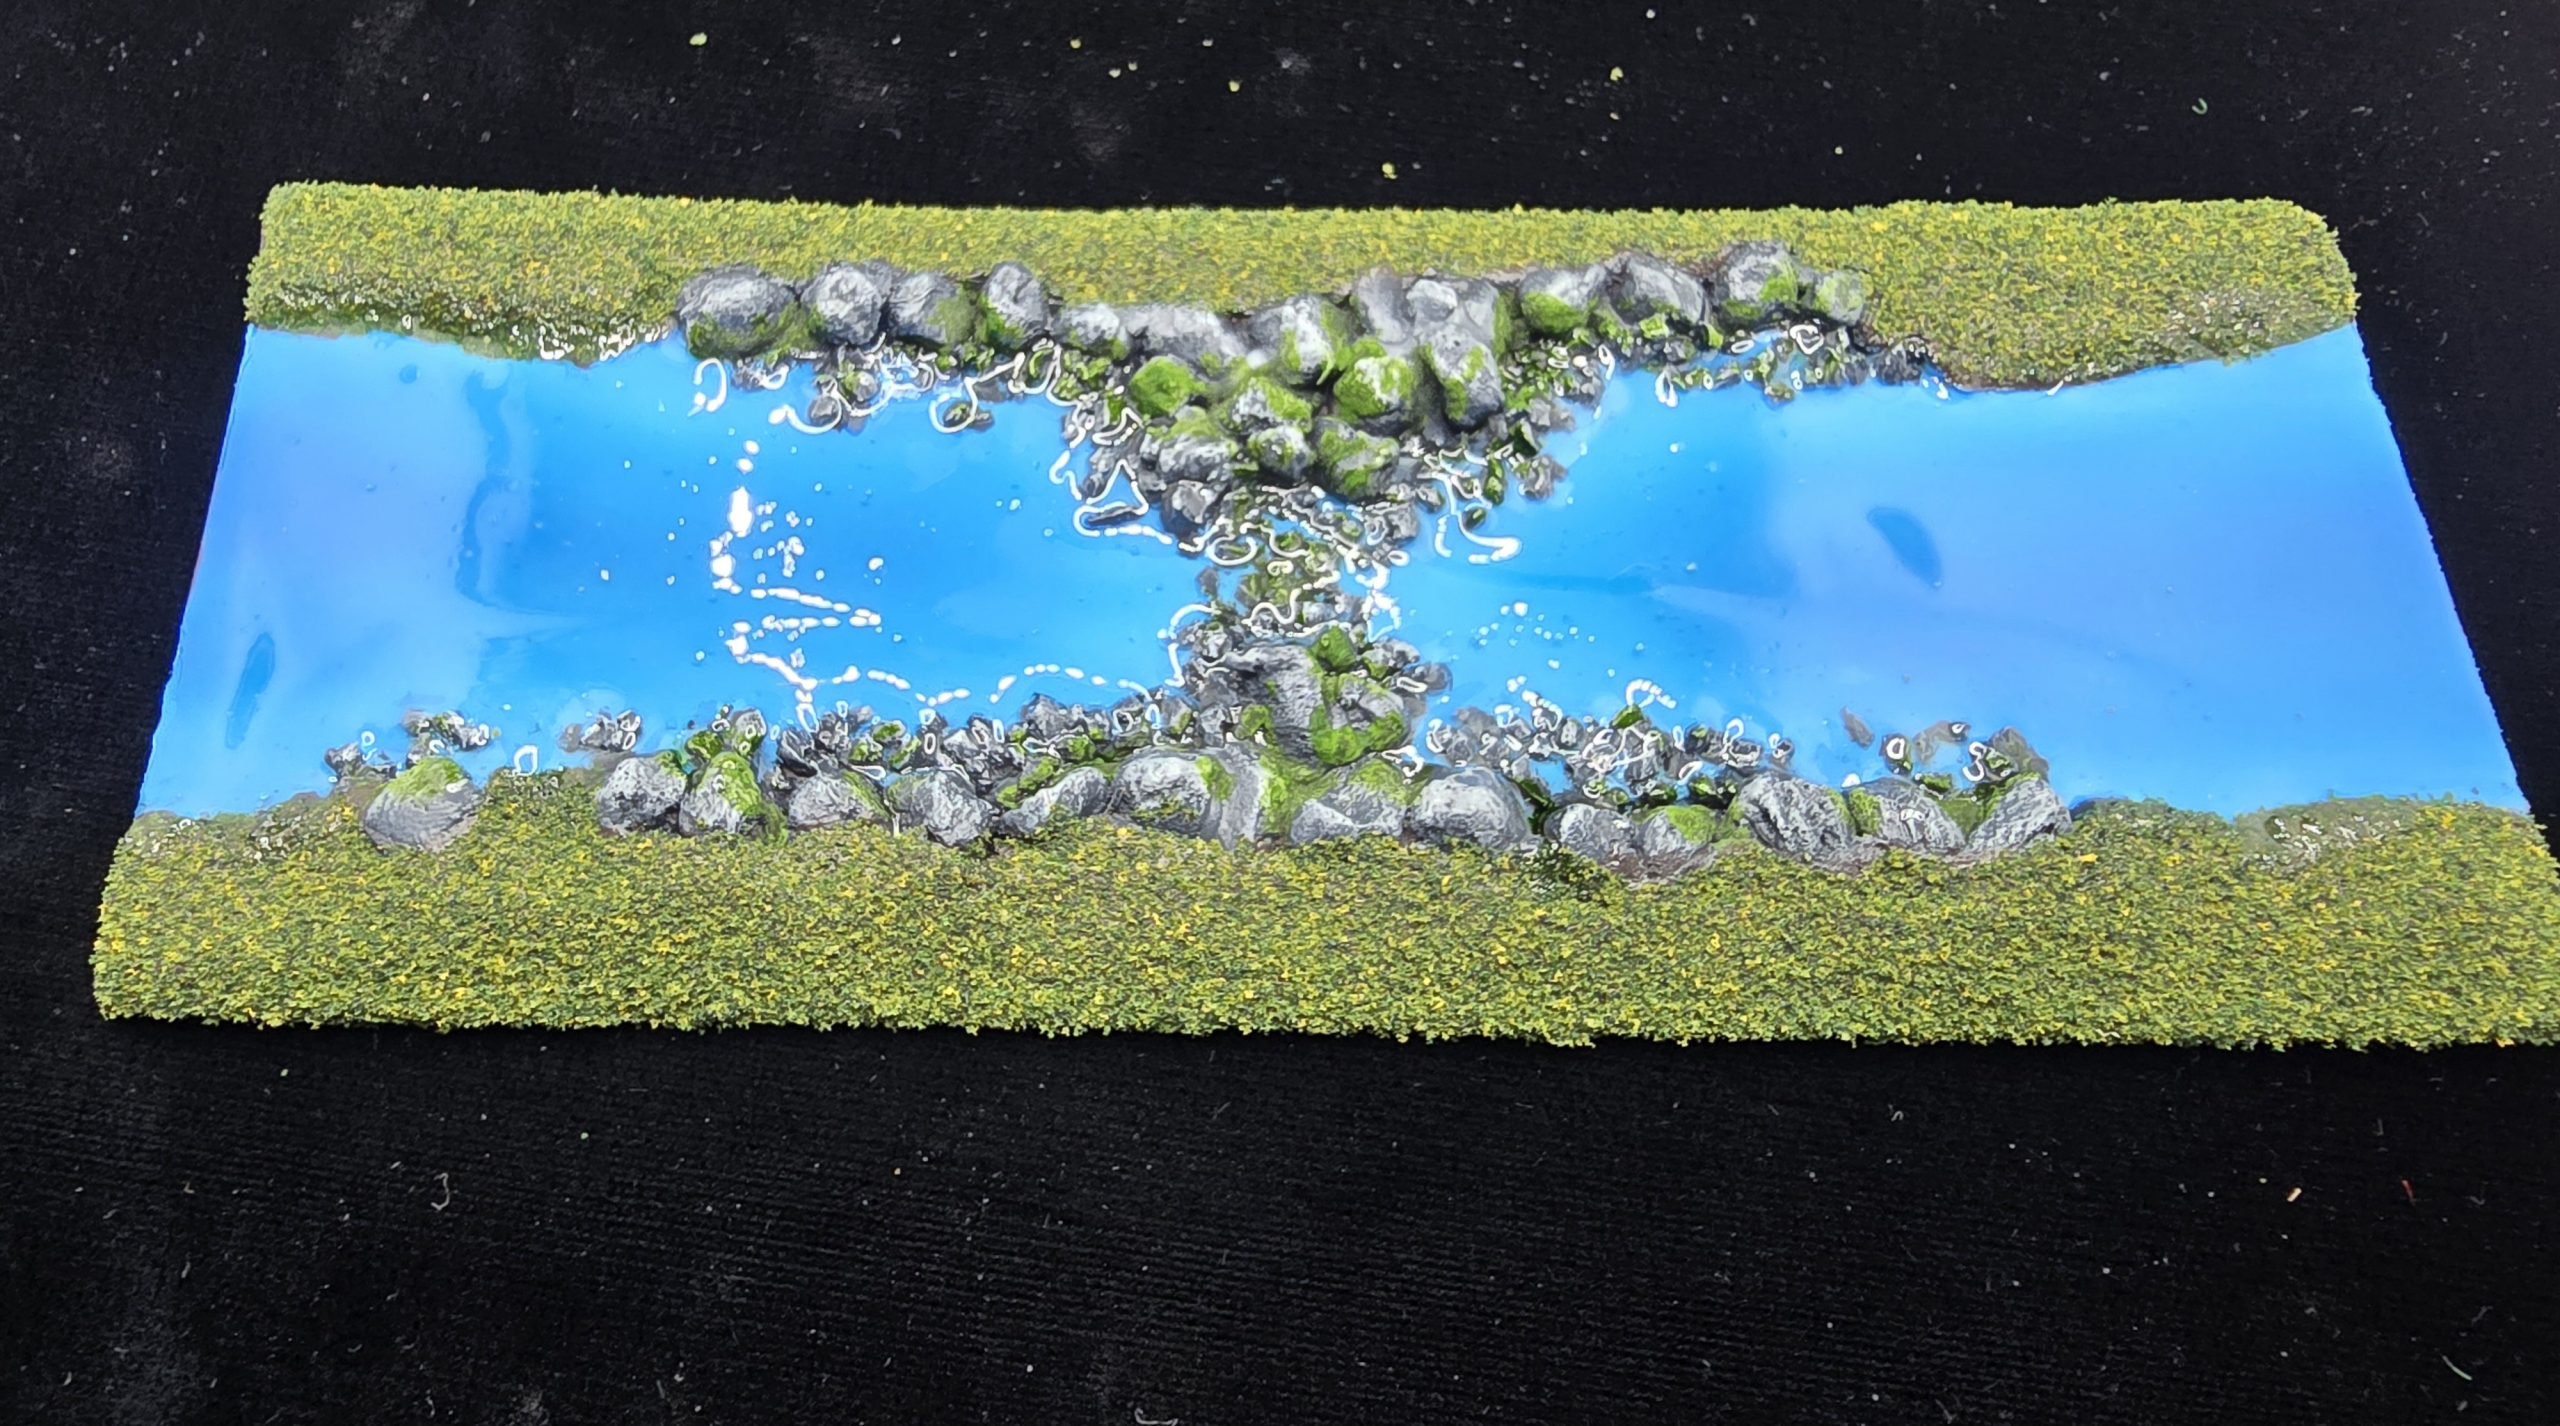
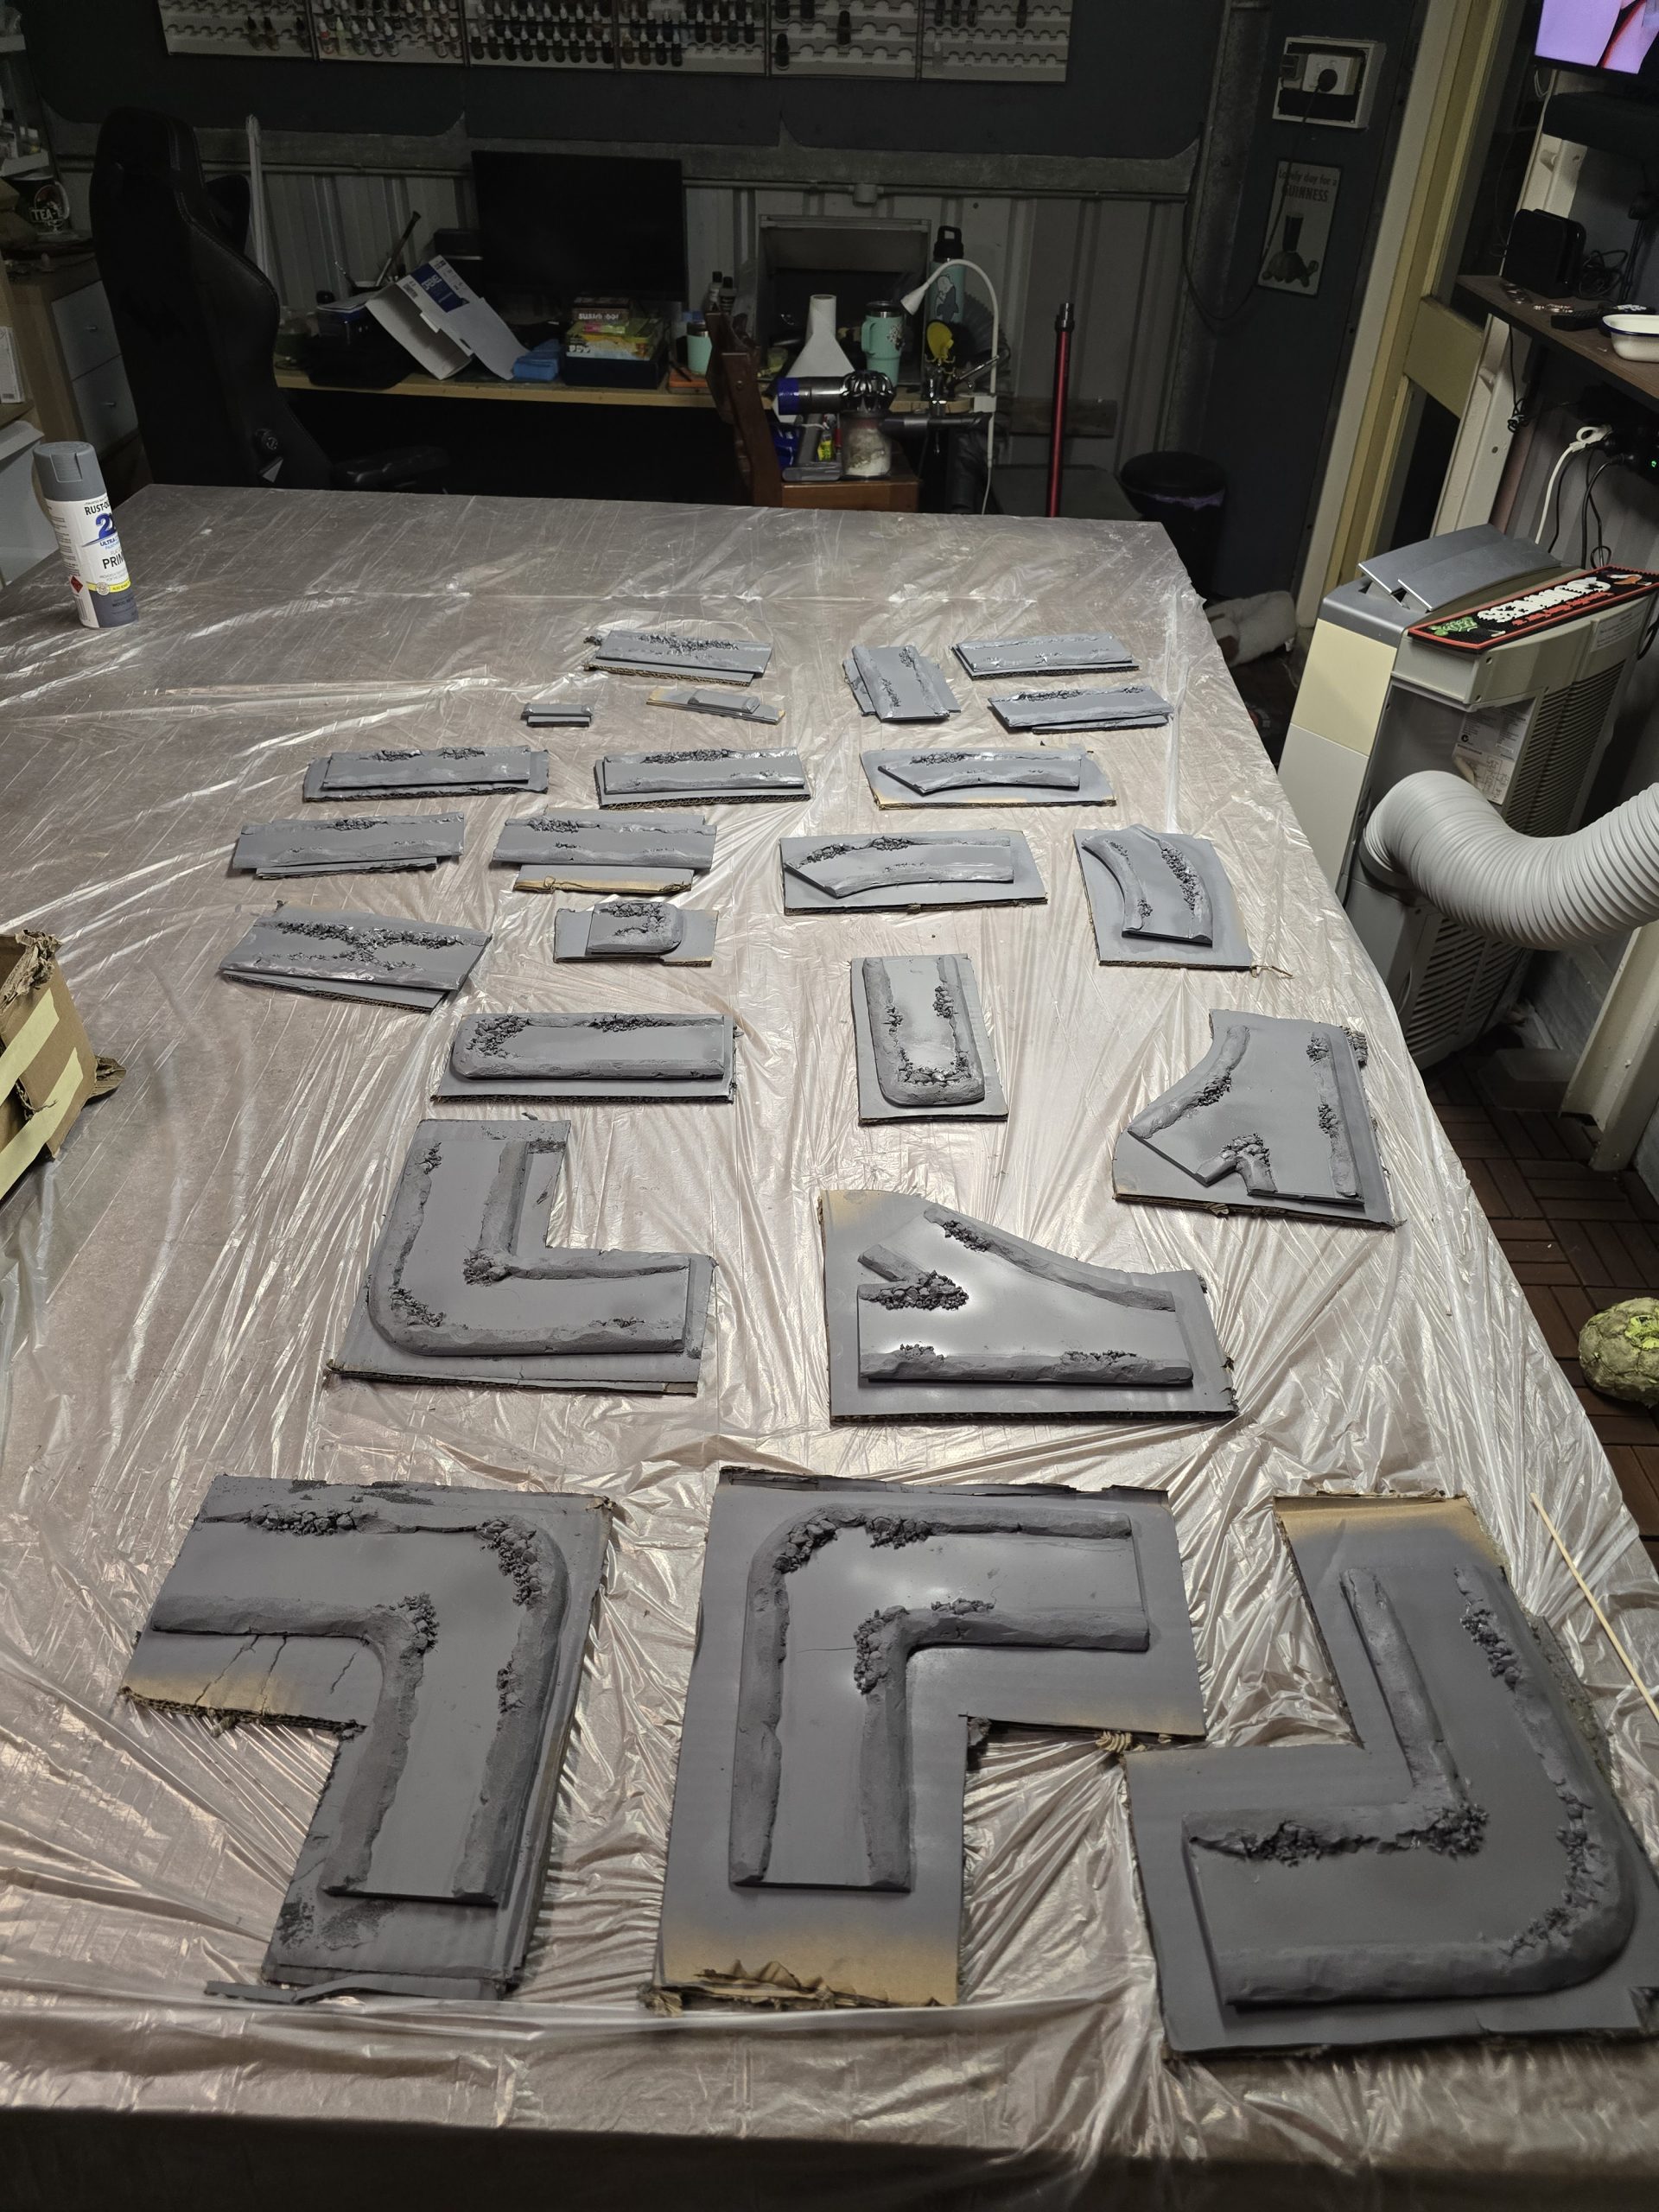
Crikey. All sections were measured and cut out, and then the edges bevelled with a Dremel. I then glued large rocks and cork rubble along the sides. I then used hardware store wall filler to make the slopes, and then dremeled them again once they were dry. After that, I airbrushed the slopes brown, and the water a few different shades of blue.
In the above step were two unexpected sources of additional work: making sure that slopes on the sides would match up evenly with all the other pieces once sanded (ugh) and making sure the deeper blue sections airbrushed in the river matched up in width at the ajoing ends, for the same reason (double ugh). I should probably have just let my mate 3D print me the river sections, but where is the fun in that.
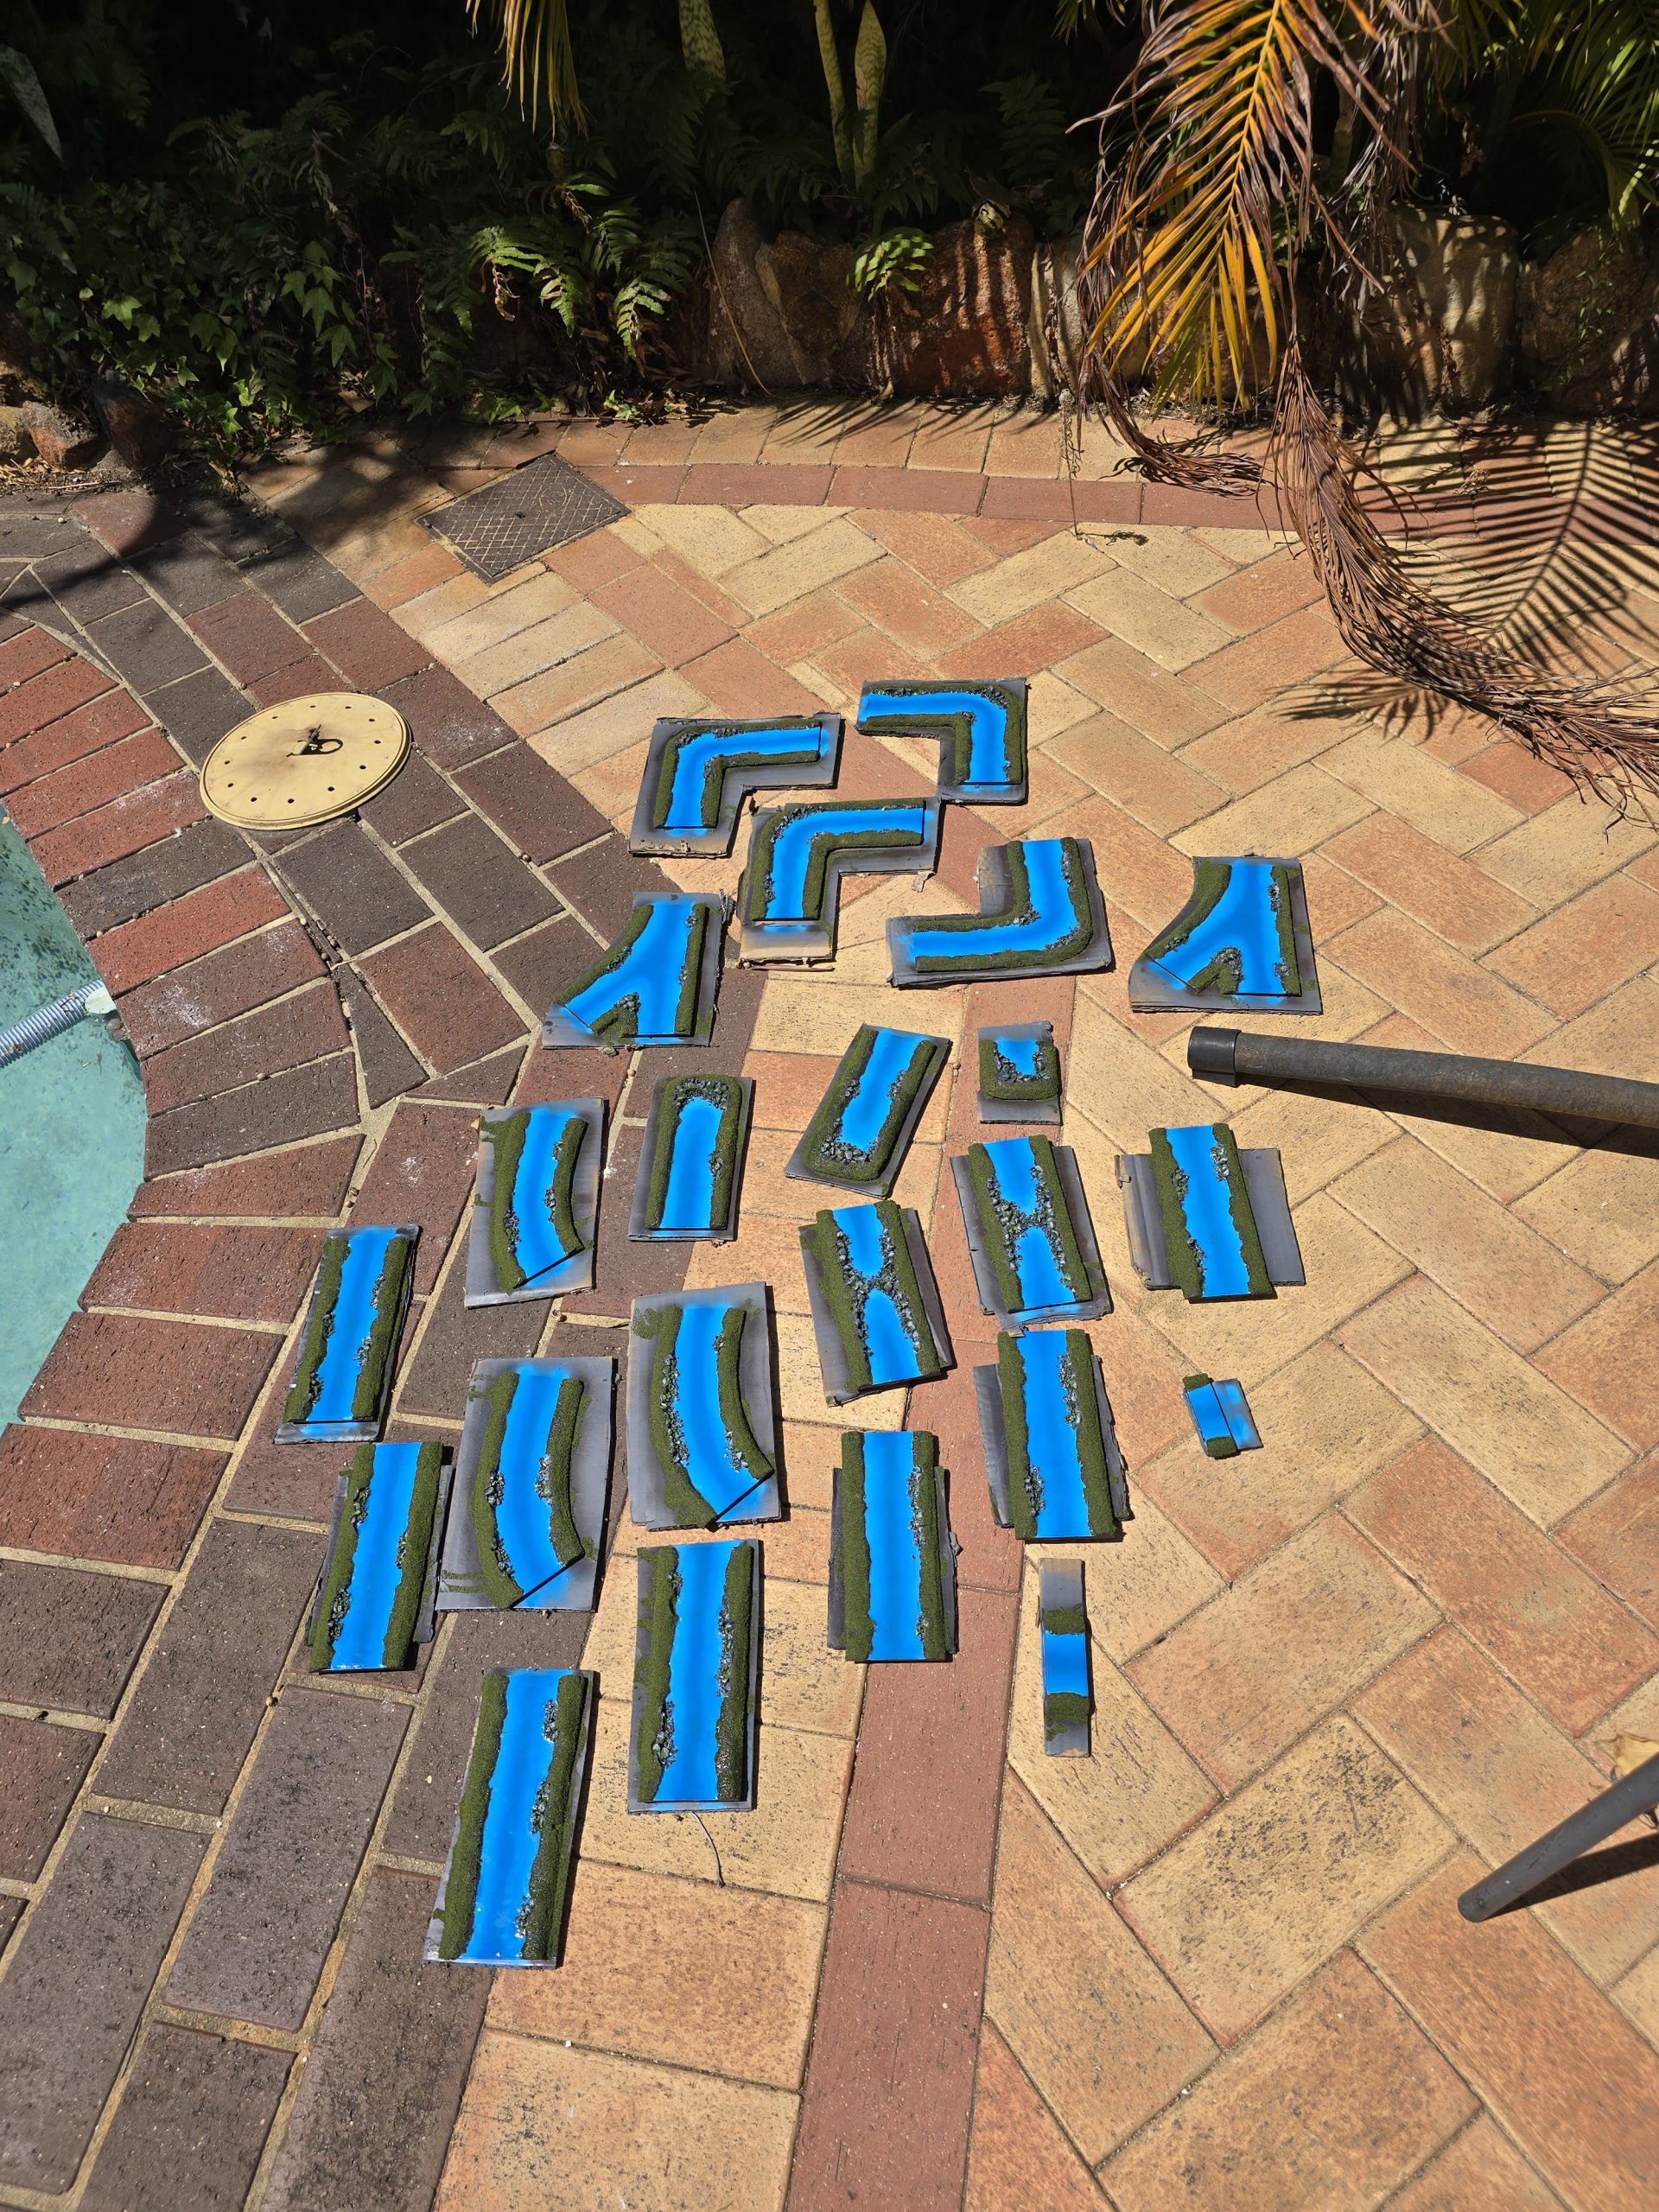
Once that was all done, sprayed Sceneic cement, flock and then sealed it. Varnished the river with gloss varnish, and then poured over UV resin once the varnish hardened.
I find the UV torches never completely set UV resin, but luckily (?) Australia has that gigantic hole in the ozone layer right above us, so I have all the UV radiation I need! Lucky me. Anyway, outside next to the pool for a wee bit, and then job is done!
1 1/2 – 2 weeks all told. Not so quick.

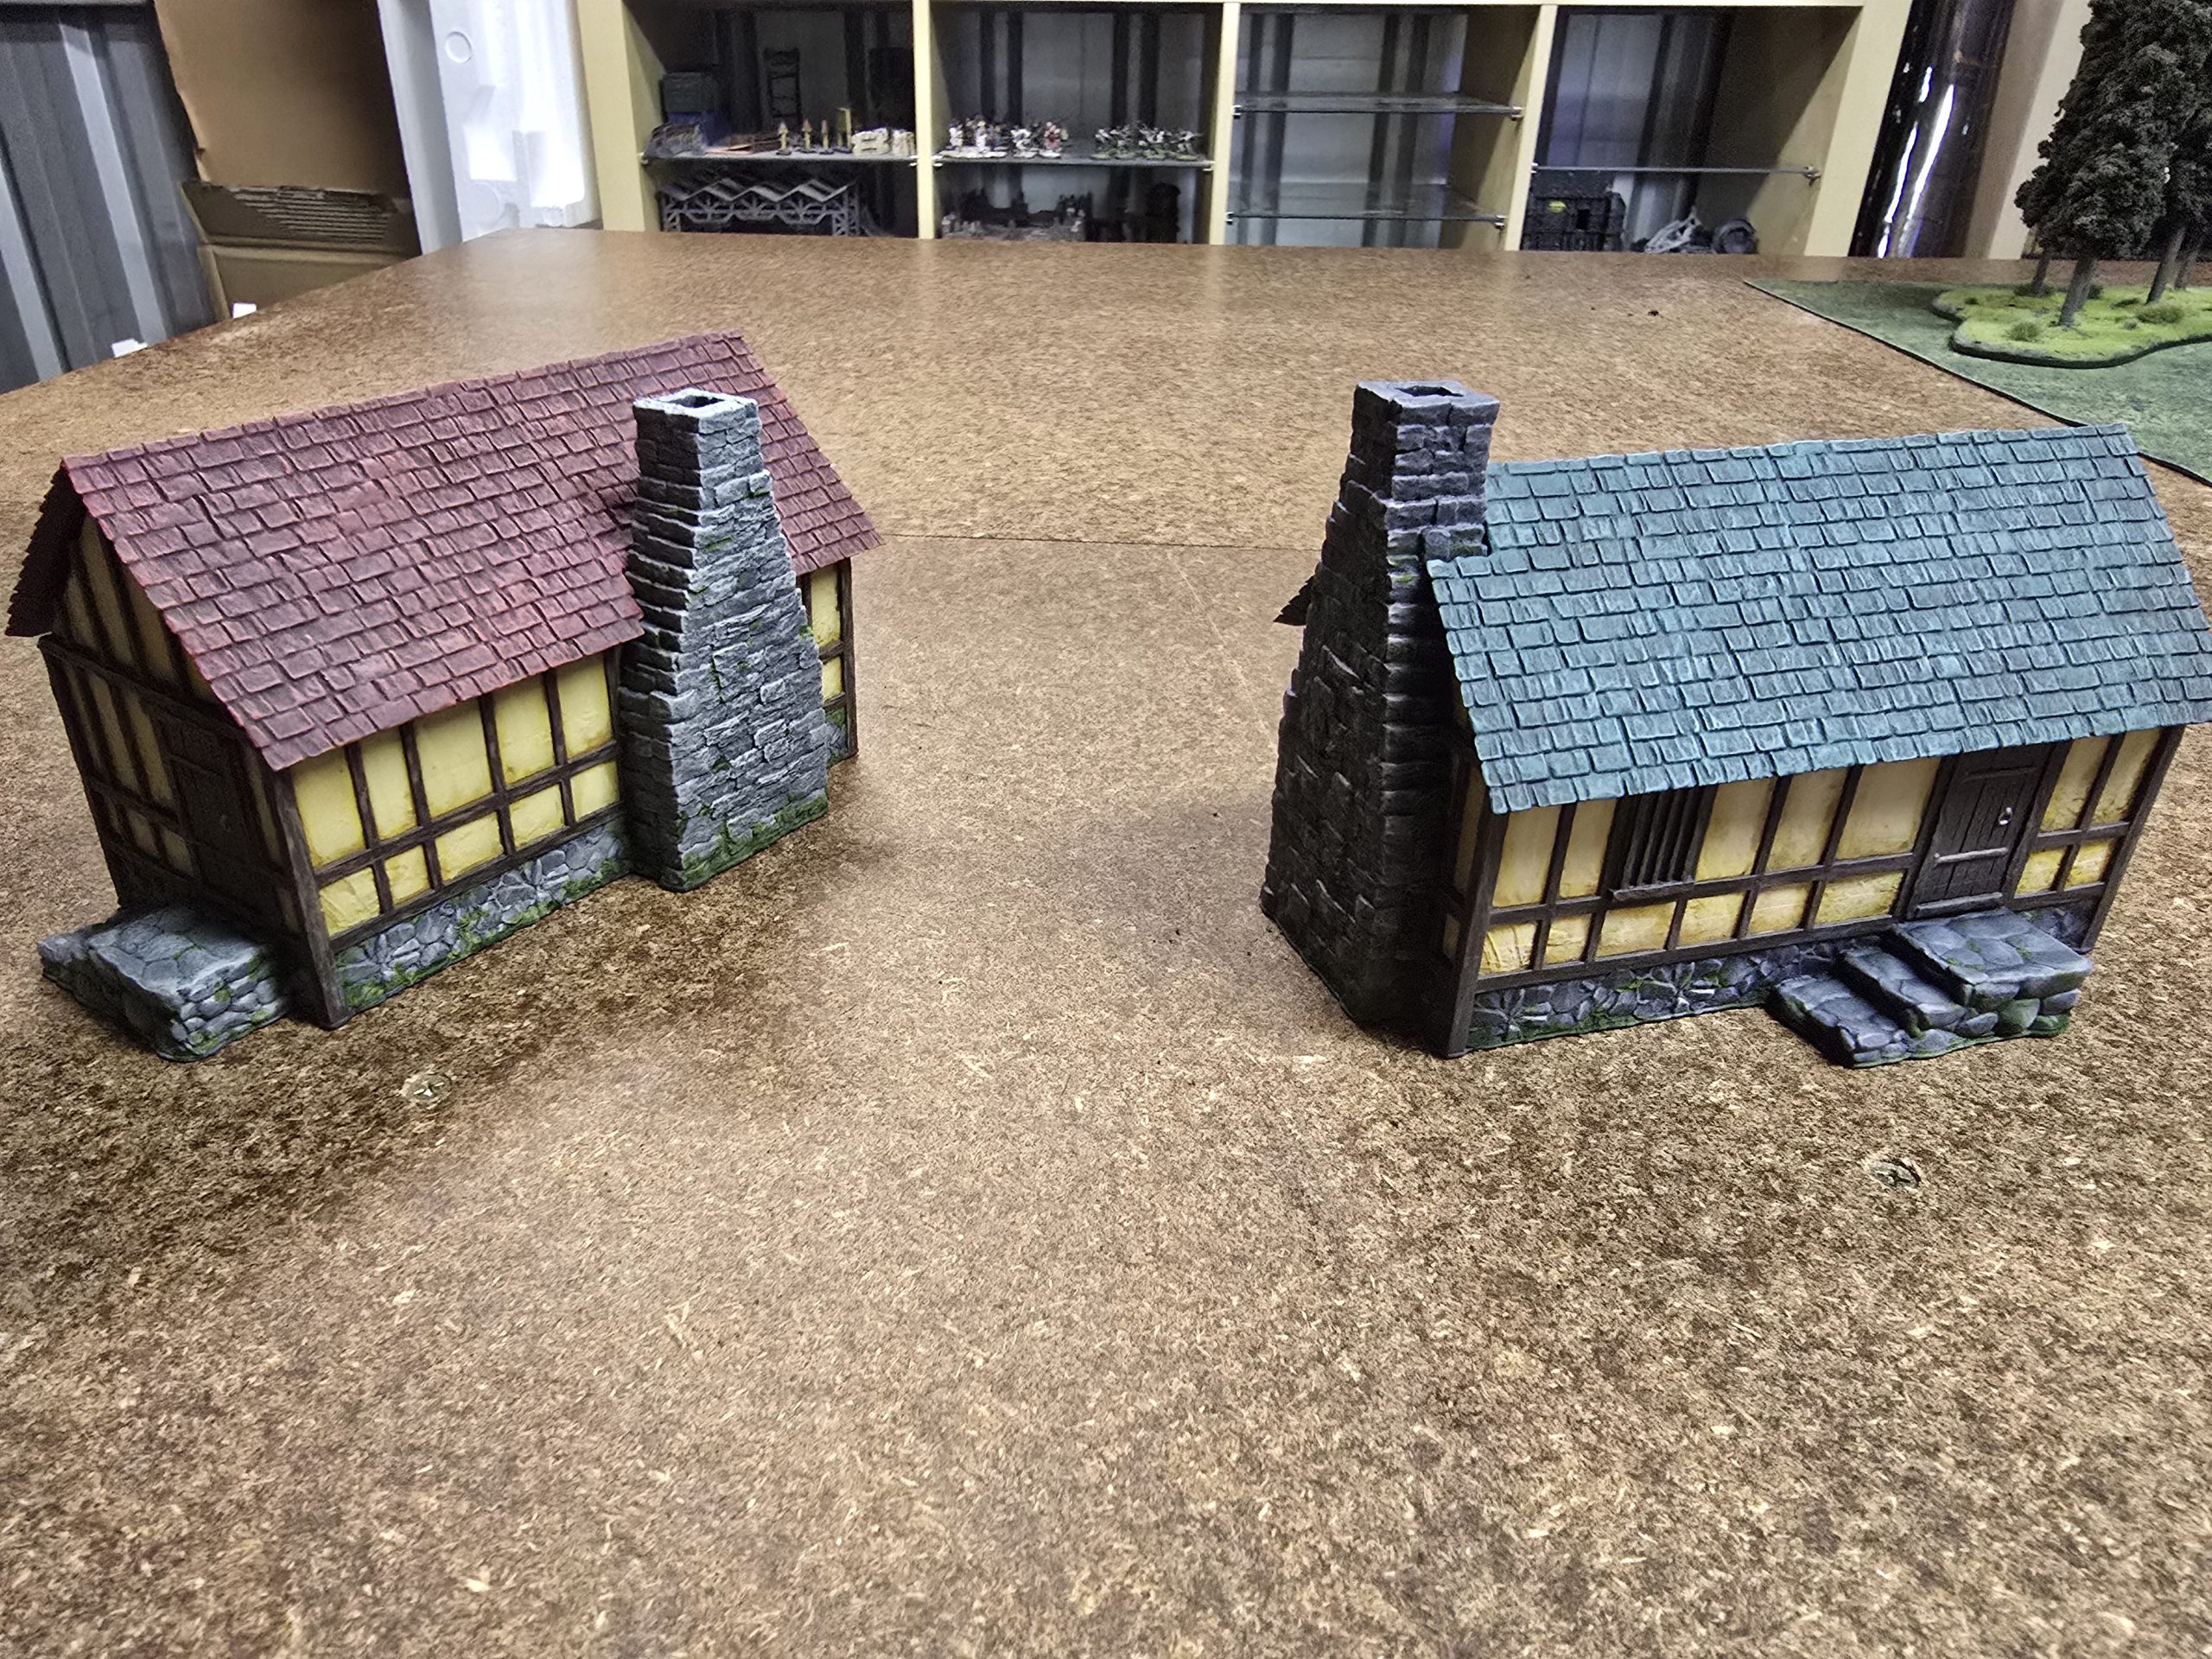
Fine, back to the buildings.
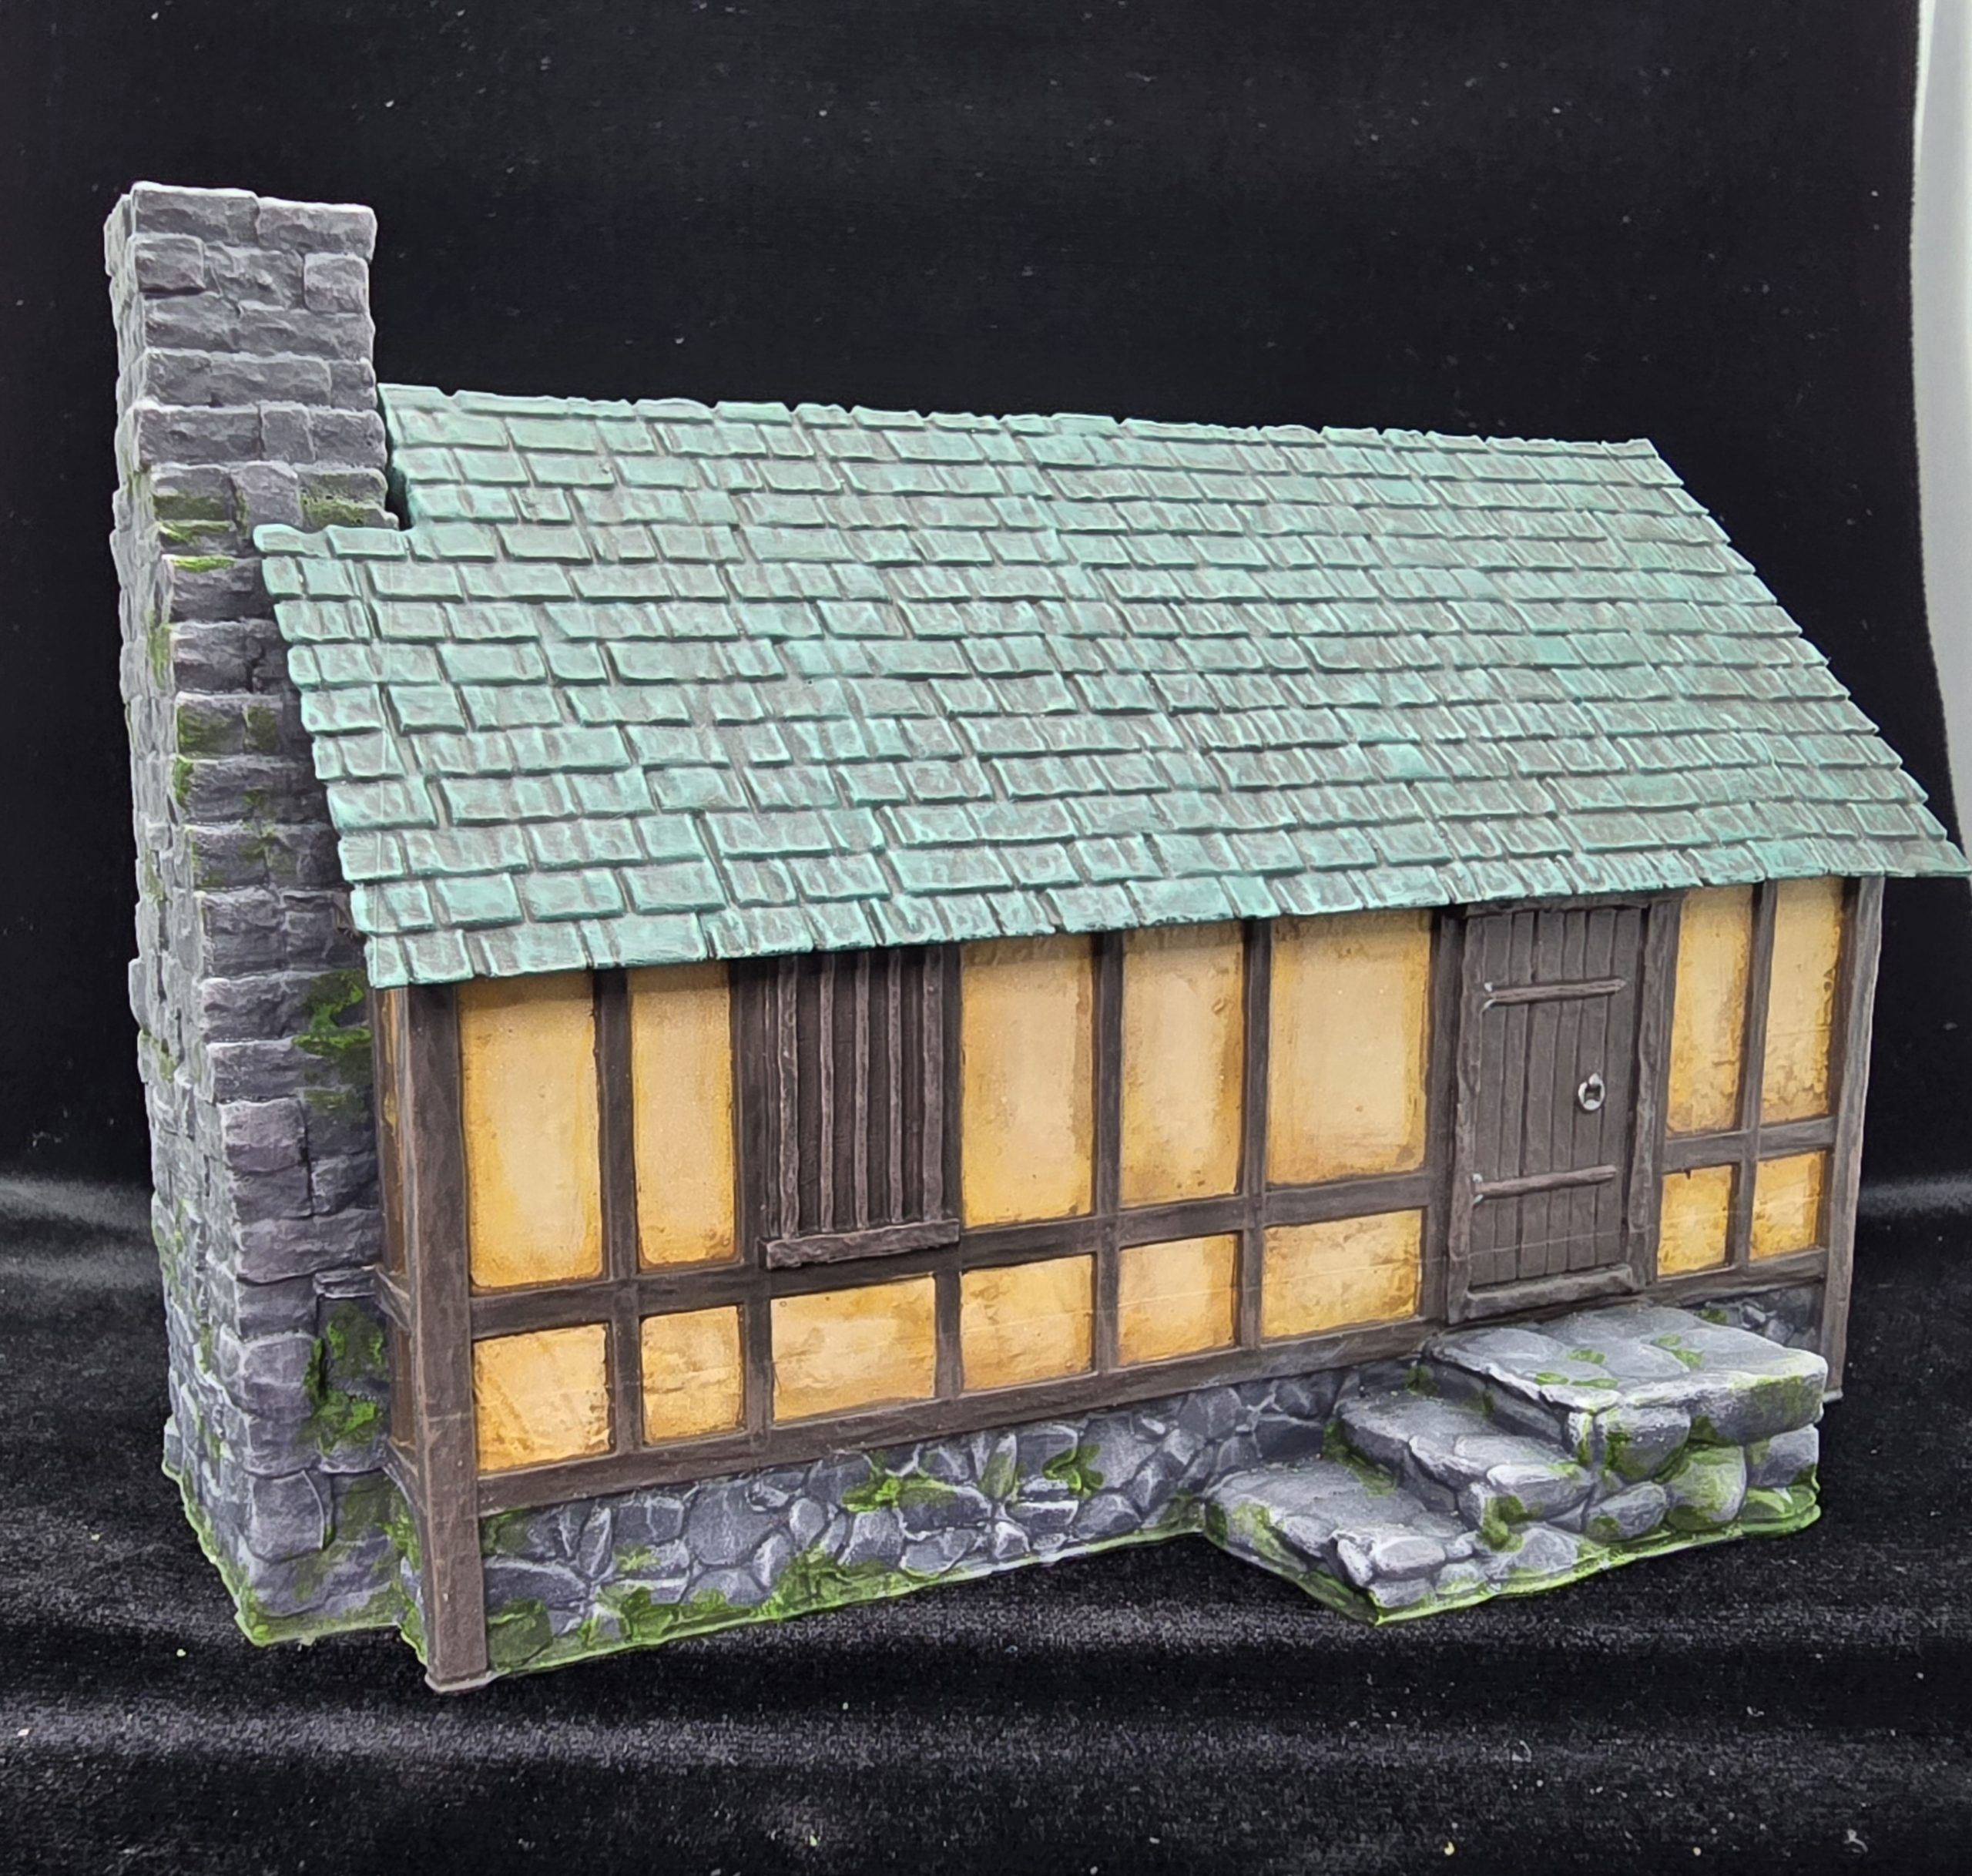
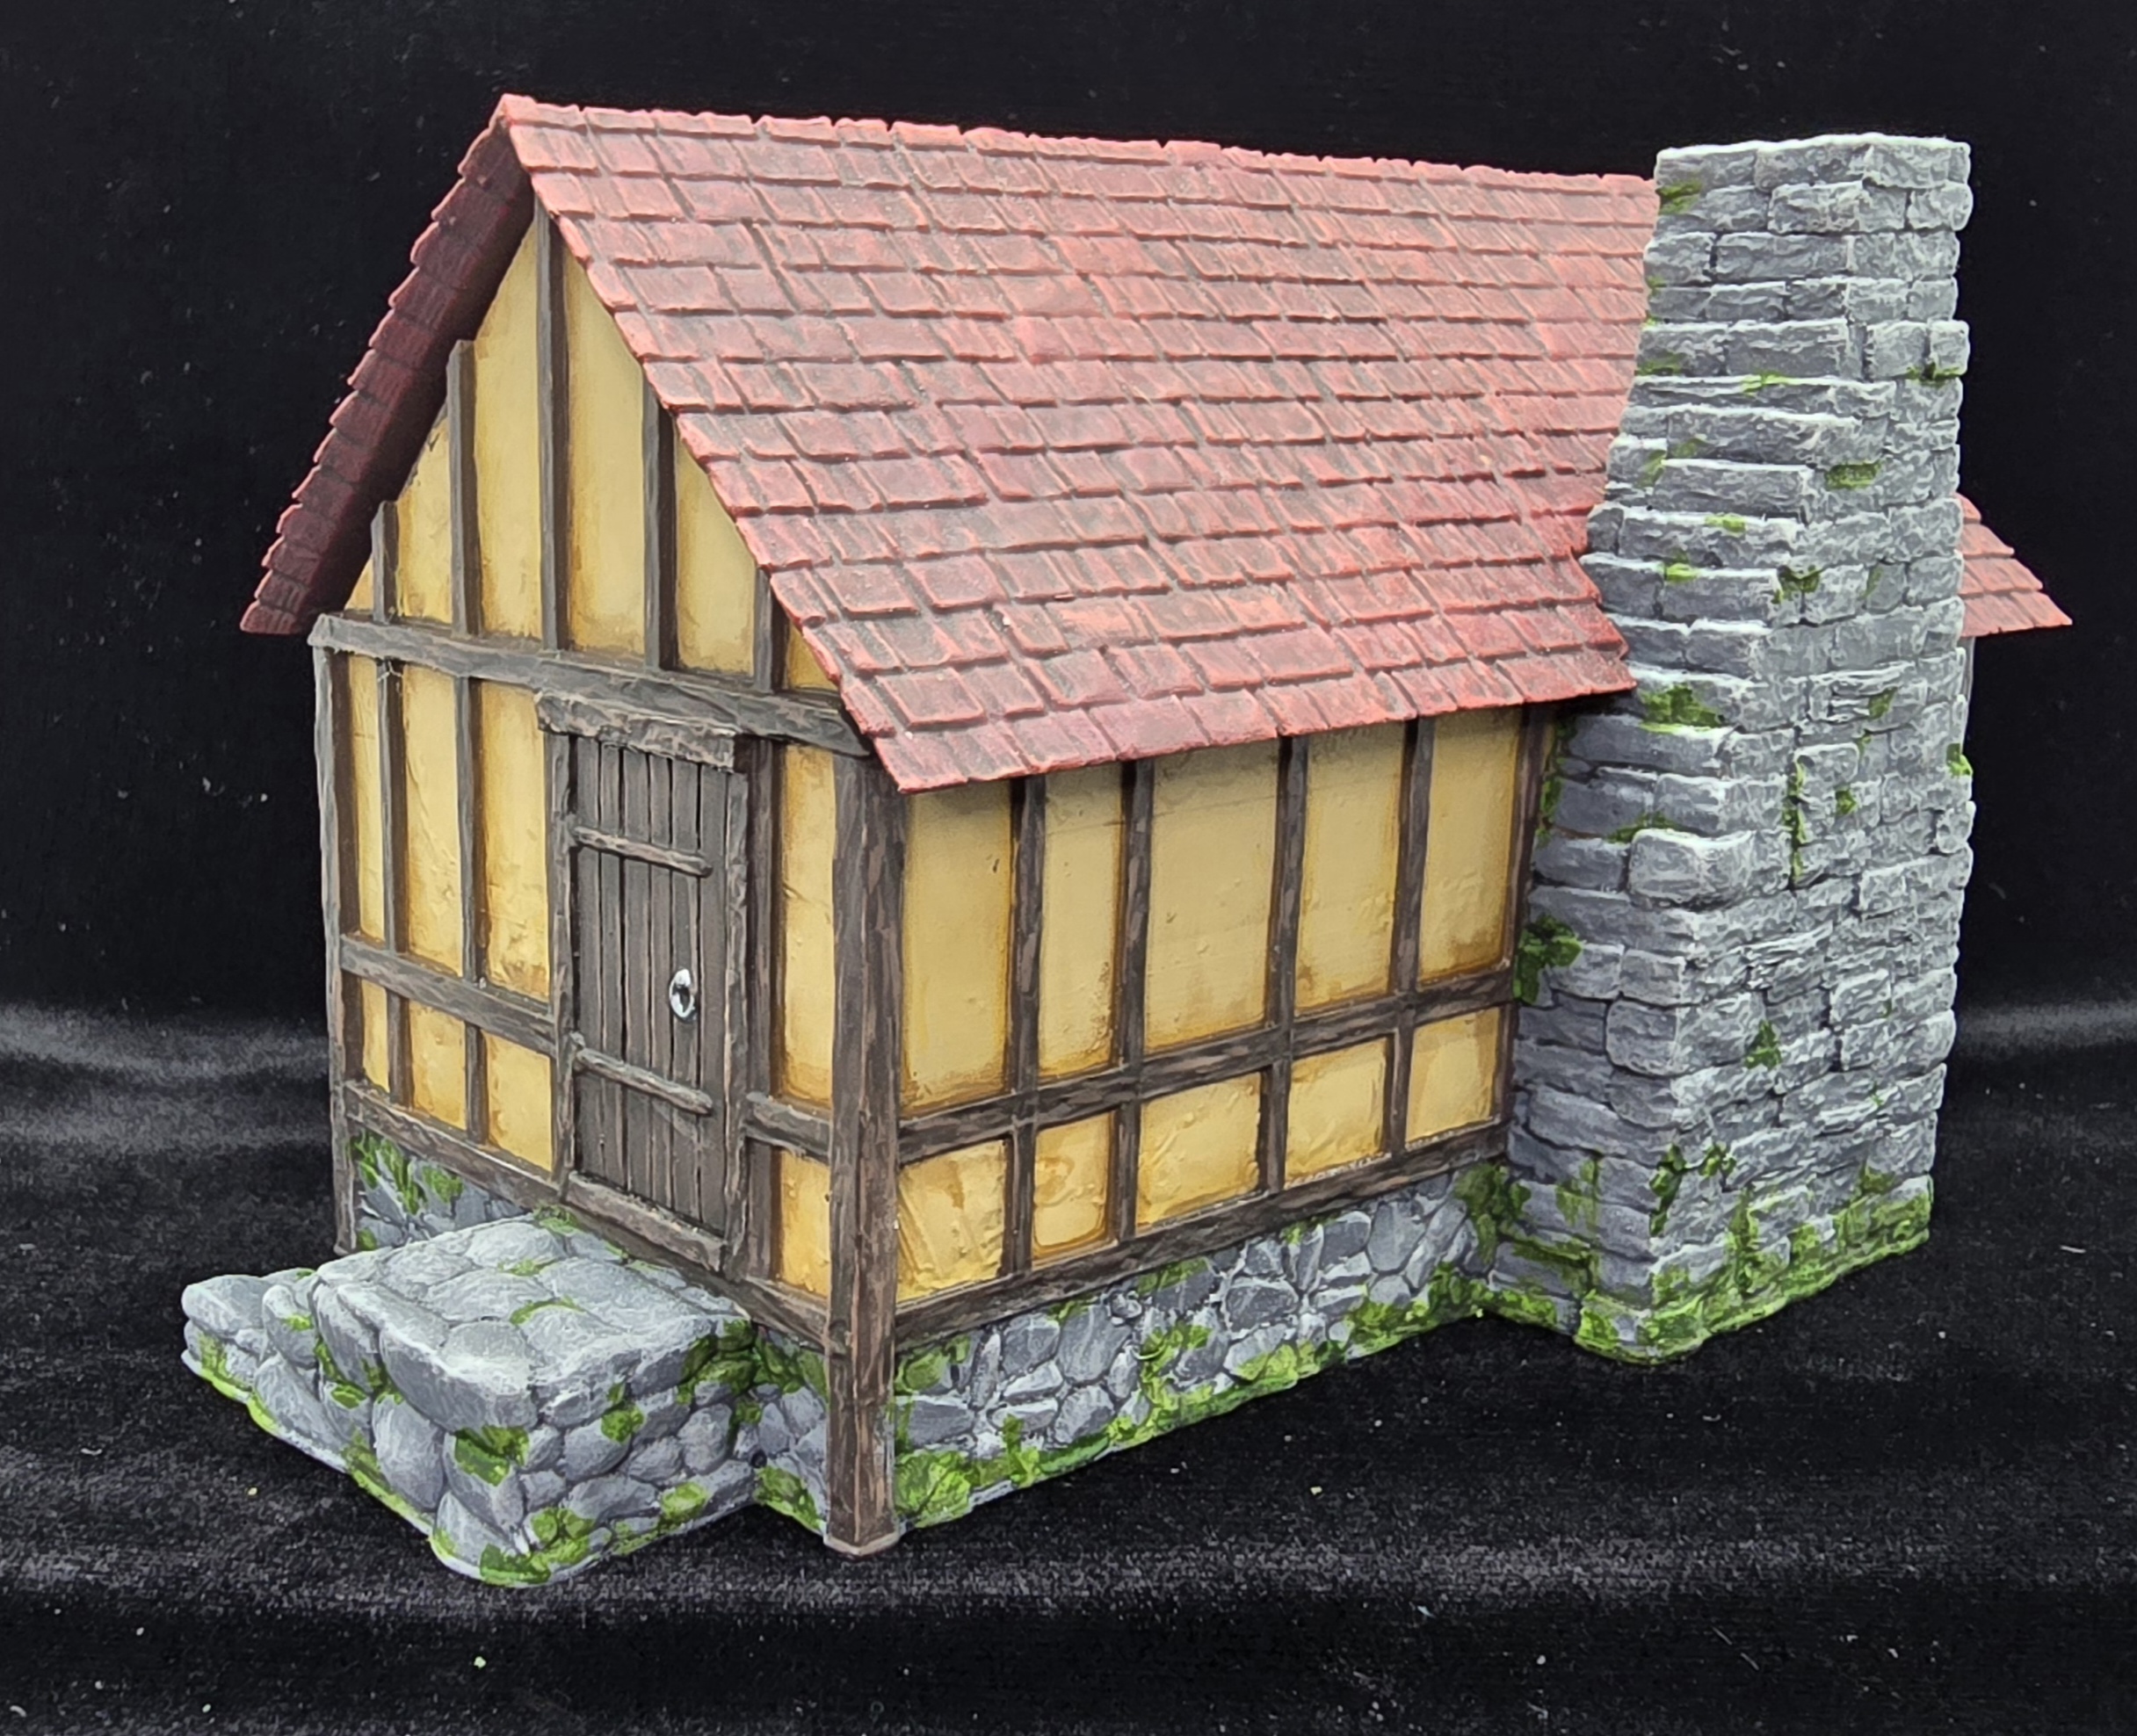
The next two buildings. Wooden trim aside, they are quite fun to paint.
Variation in the paint colours is a bit obvious here. The wood was also shaded with Tamiya Deep Brown enamel panel liner, and the sides of the building with Brown Panel liner. I quite like the enamel washes, it is like a quick and convenient oil wash.


![StarCraft Tabletop Miniatures Game Pre-Orders Live Now [Updated]](https://images.beastsofwar.com/2026/03/starcraft-tmg-news-cover-600-338.jpg)


