


![NO Weekender Or Cult Of Games XLBS This Weekend [Updated]](https://images.beastsofwar.com/2026/03/No_Weekender_and_XLBS_this_Weekend-225-127.jpg)


2026 Mission to smash the pile of potential


Recommendations: 73
About the Project
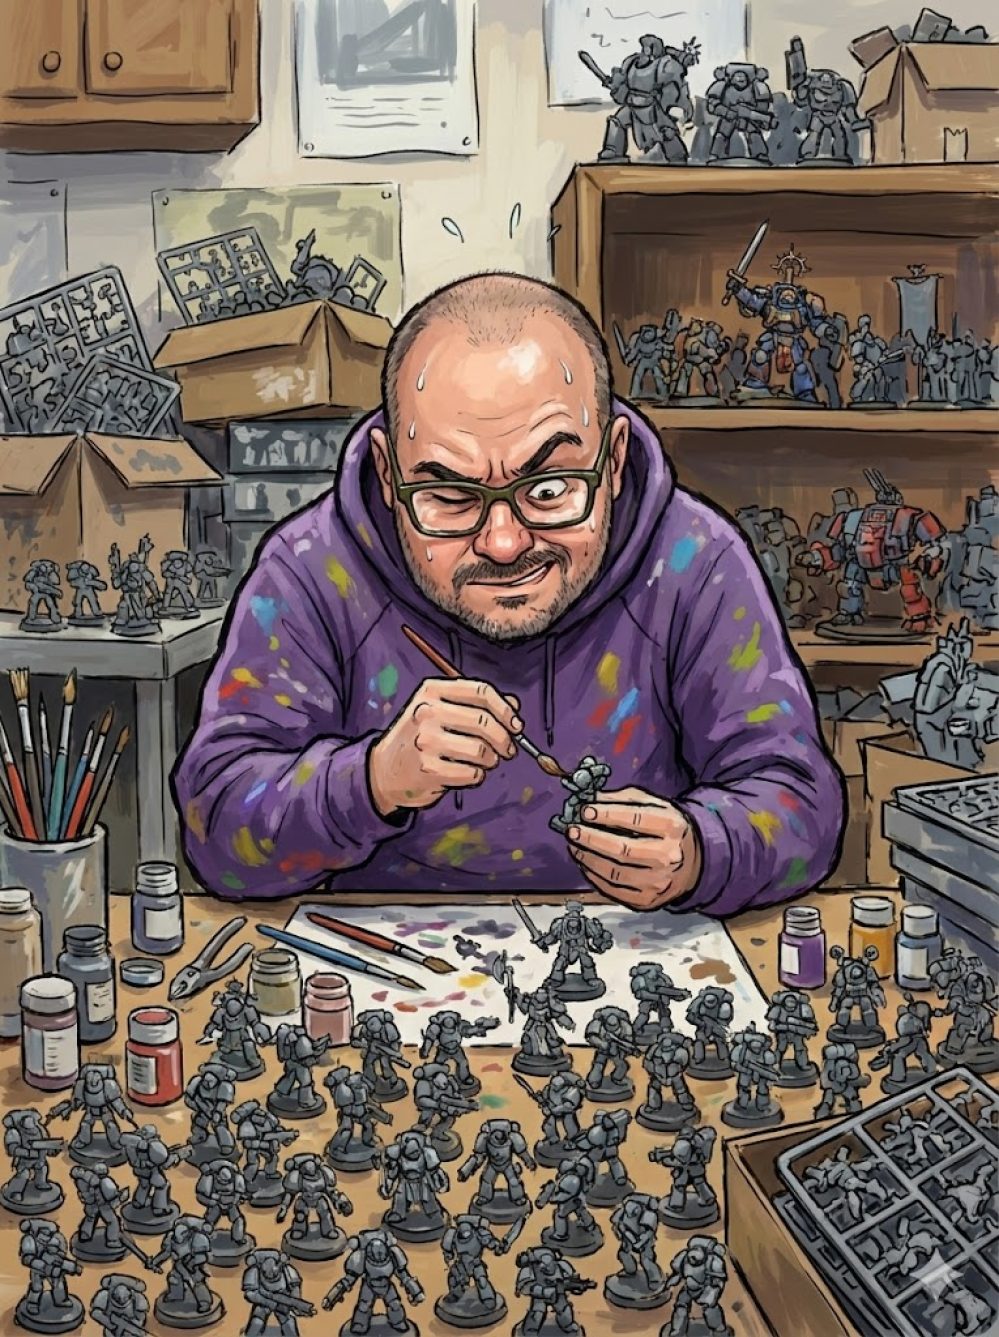
Over the past couple of months I have decided to sell an awful lot of my pile of shame and focus more on getting projects done... I wont go into details unless asked but I am driven to getting stuff on the table and played with. So here we go.
Related Game: Warhammer 40,000
Related Company: Games Workshop
Related Genre: Fantasy
This Project is Active
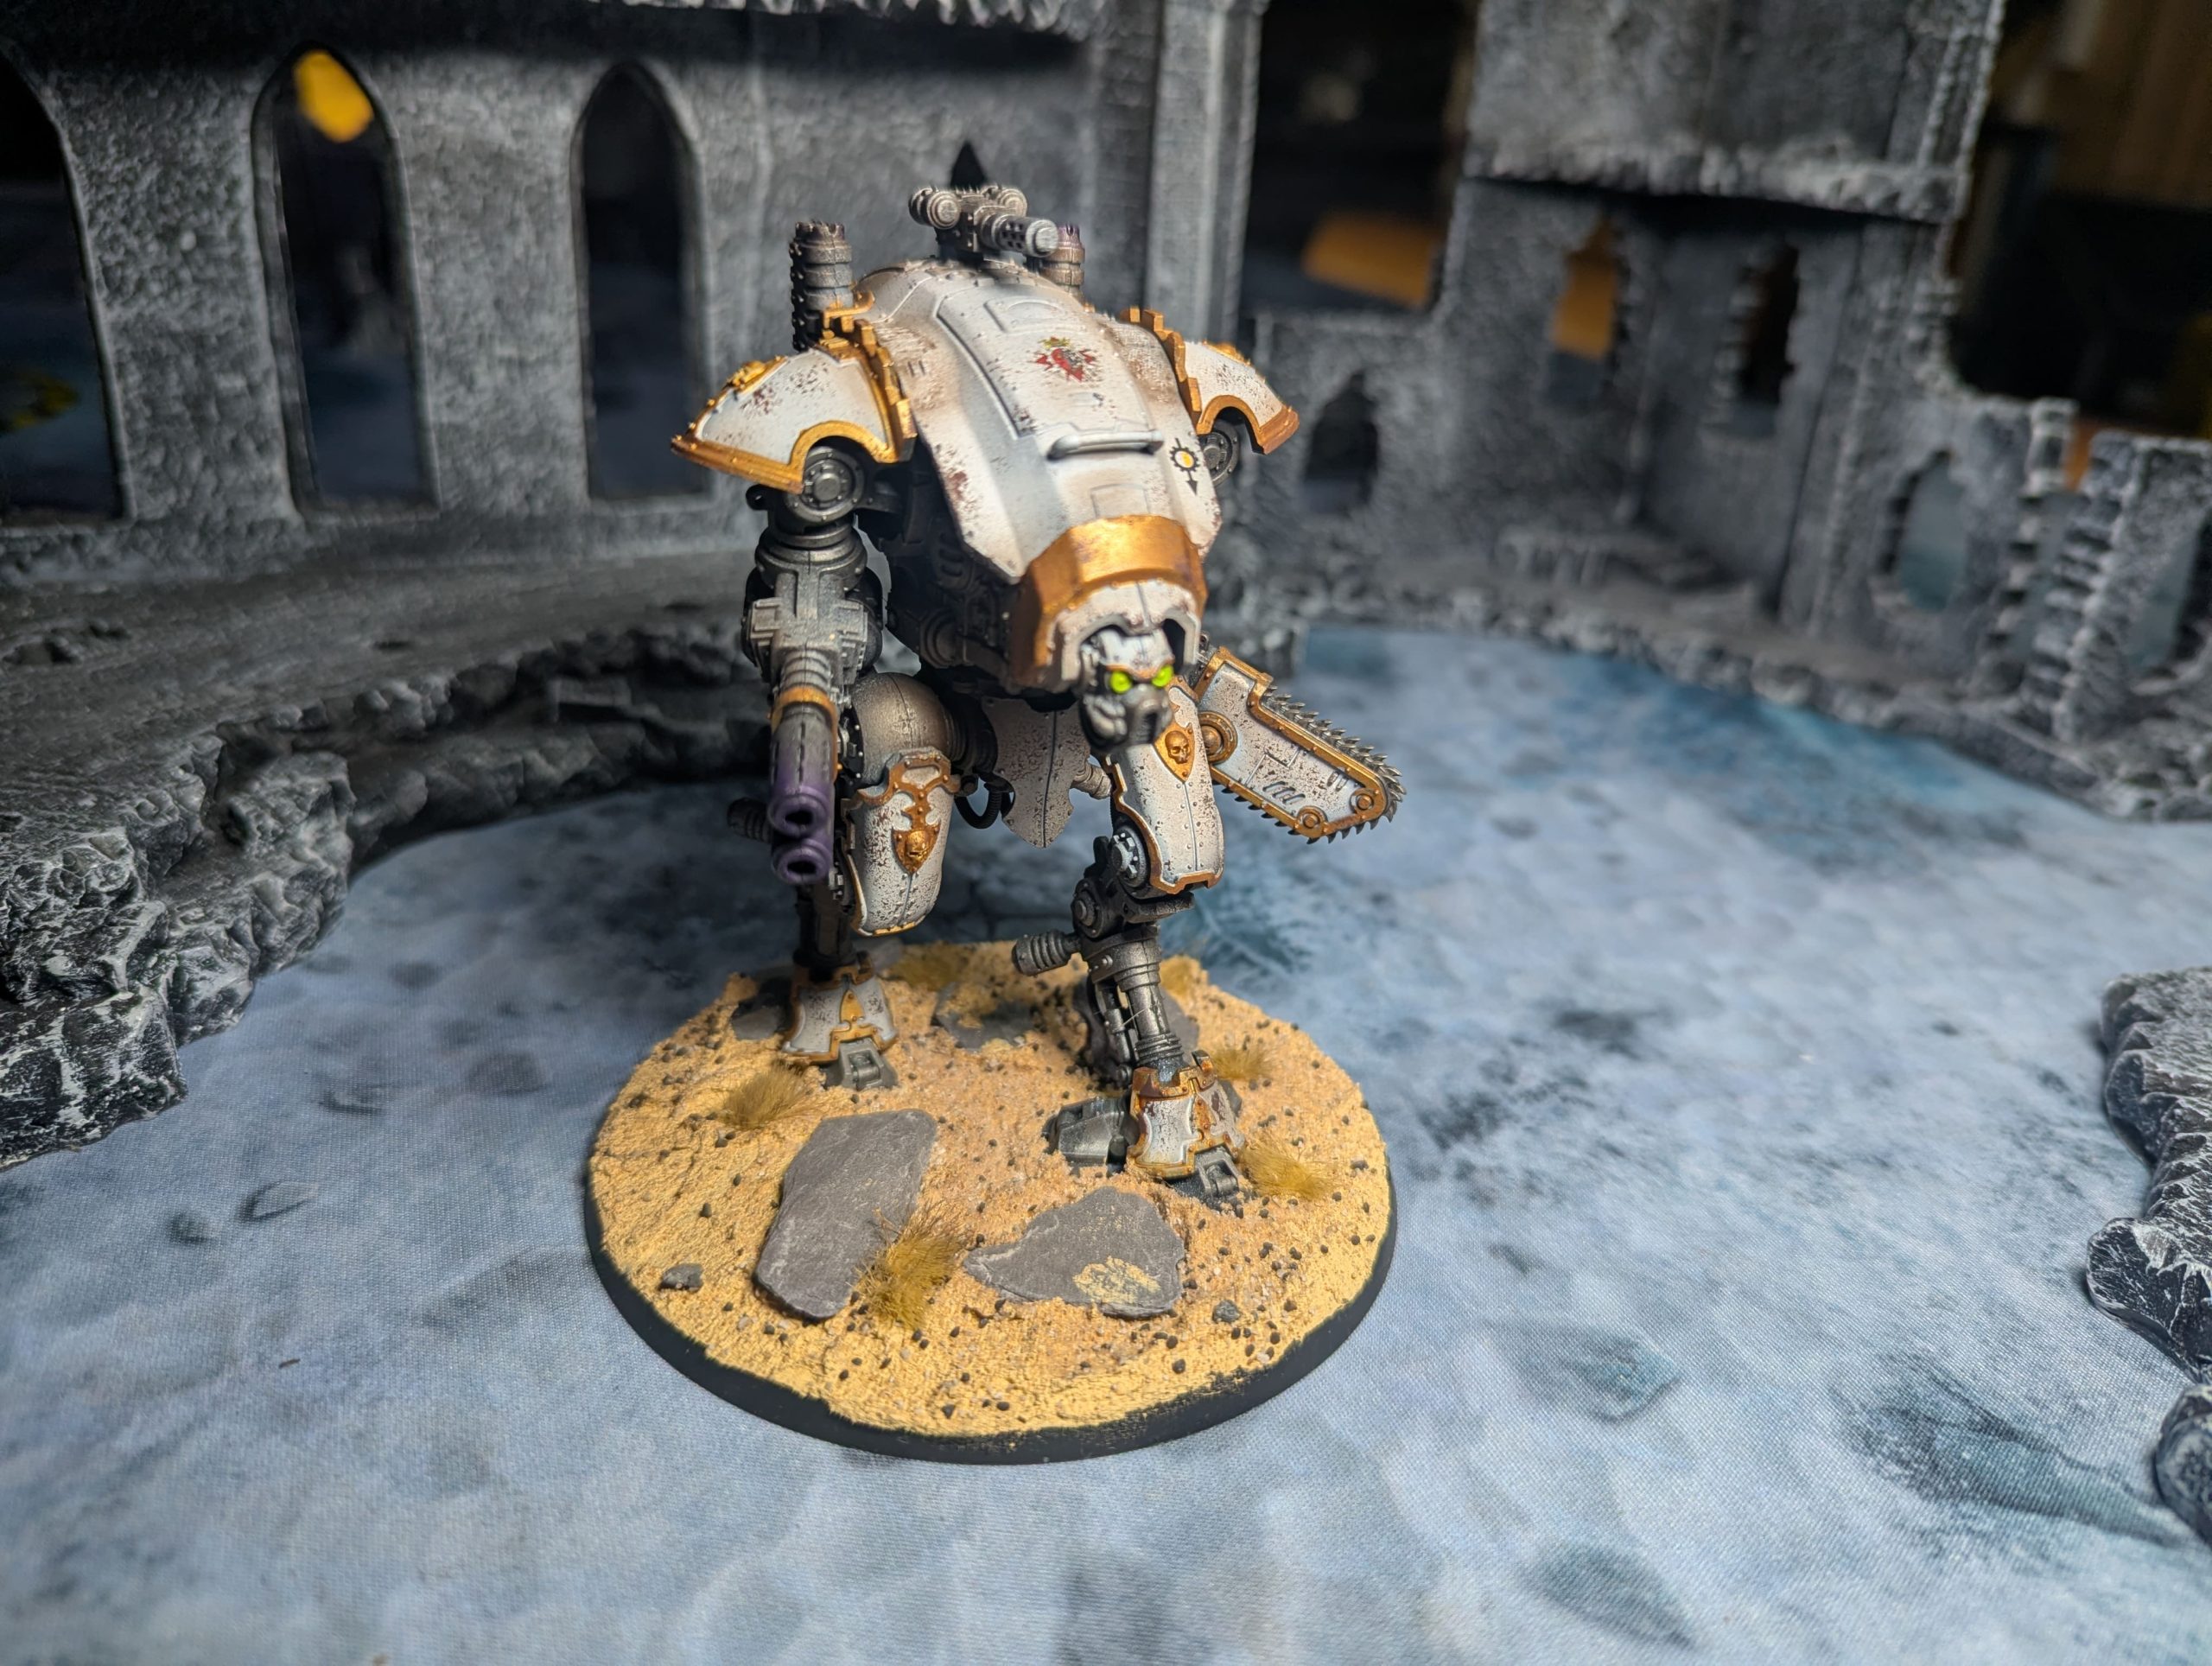
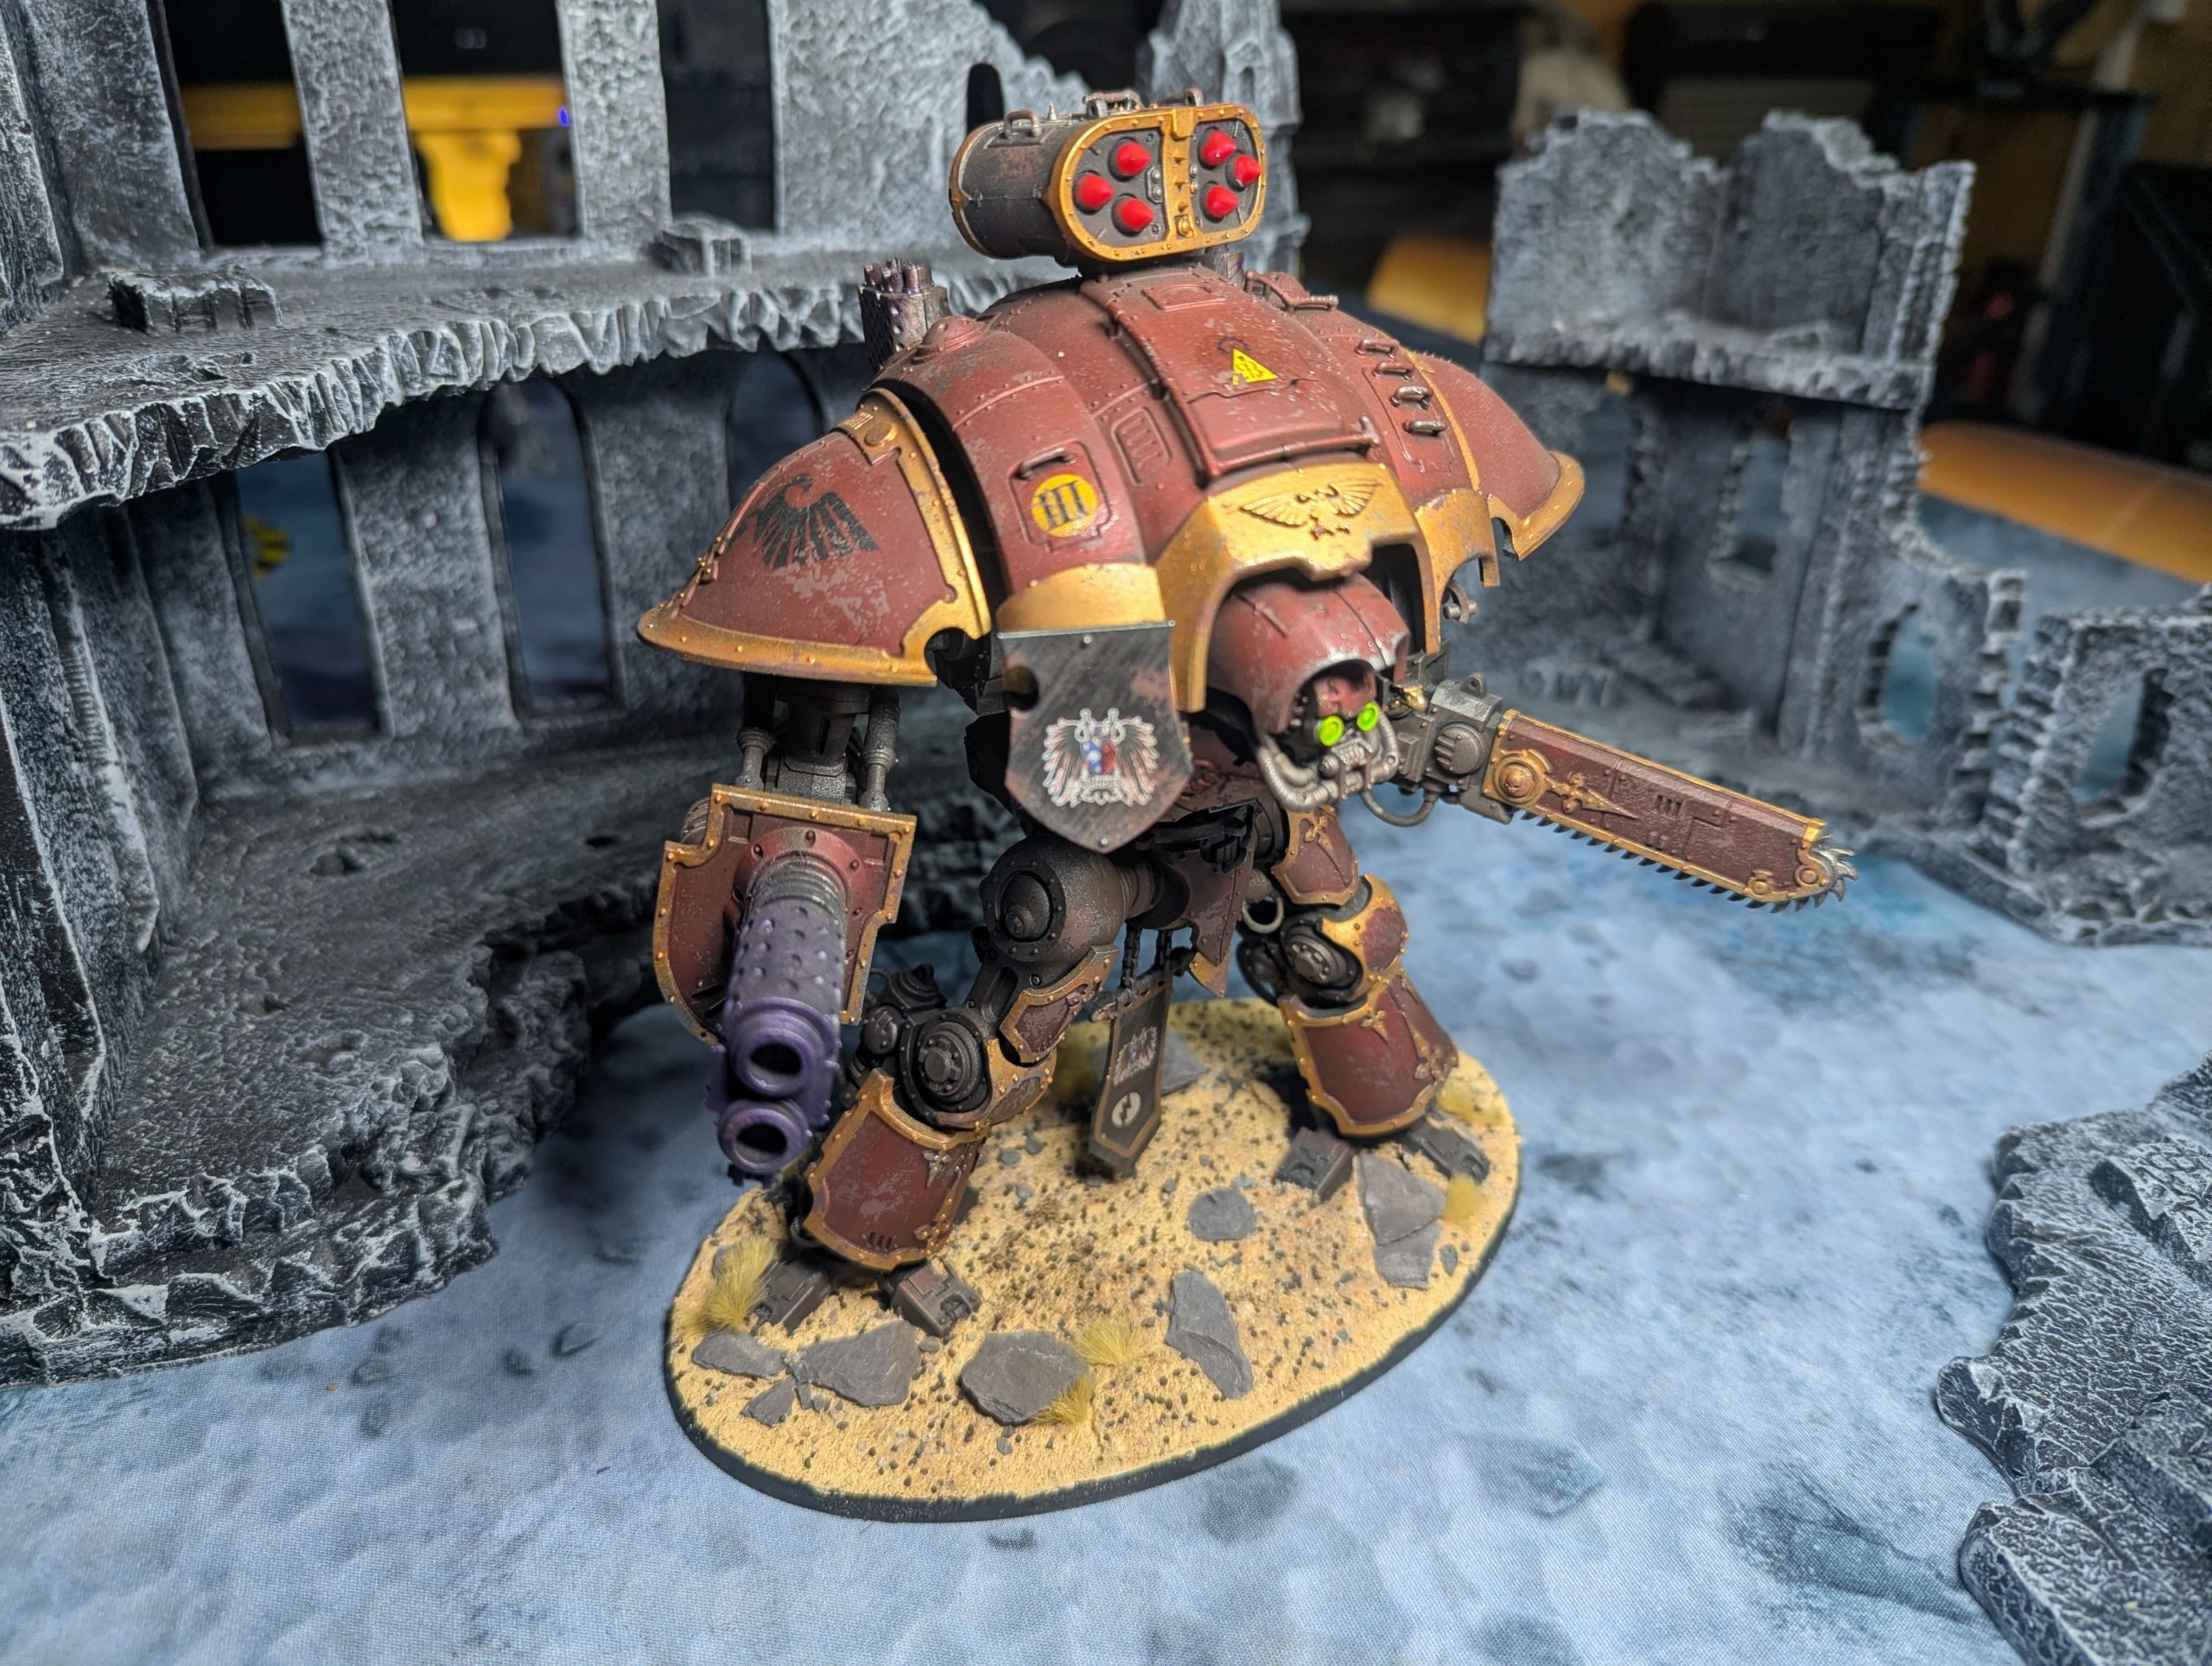
Knight by night
A Father-Son Project: From Reluctance to the Roar of Battle
I’ve long harboured the hope of getting my middle son interested in tabletop gaming, a hobby I’ve enjoyed for years. While he would dutifully accompany me to events and places like Warhammer World, the game itself never seemed to capture his imagination. He enjoyed the atmosphere and the spectacle, but the thought of actually playing seemed to be a hurdle.
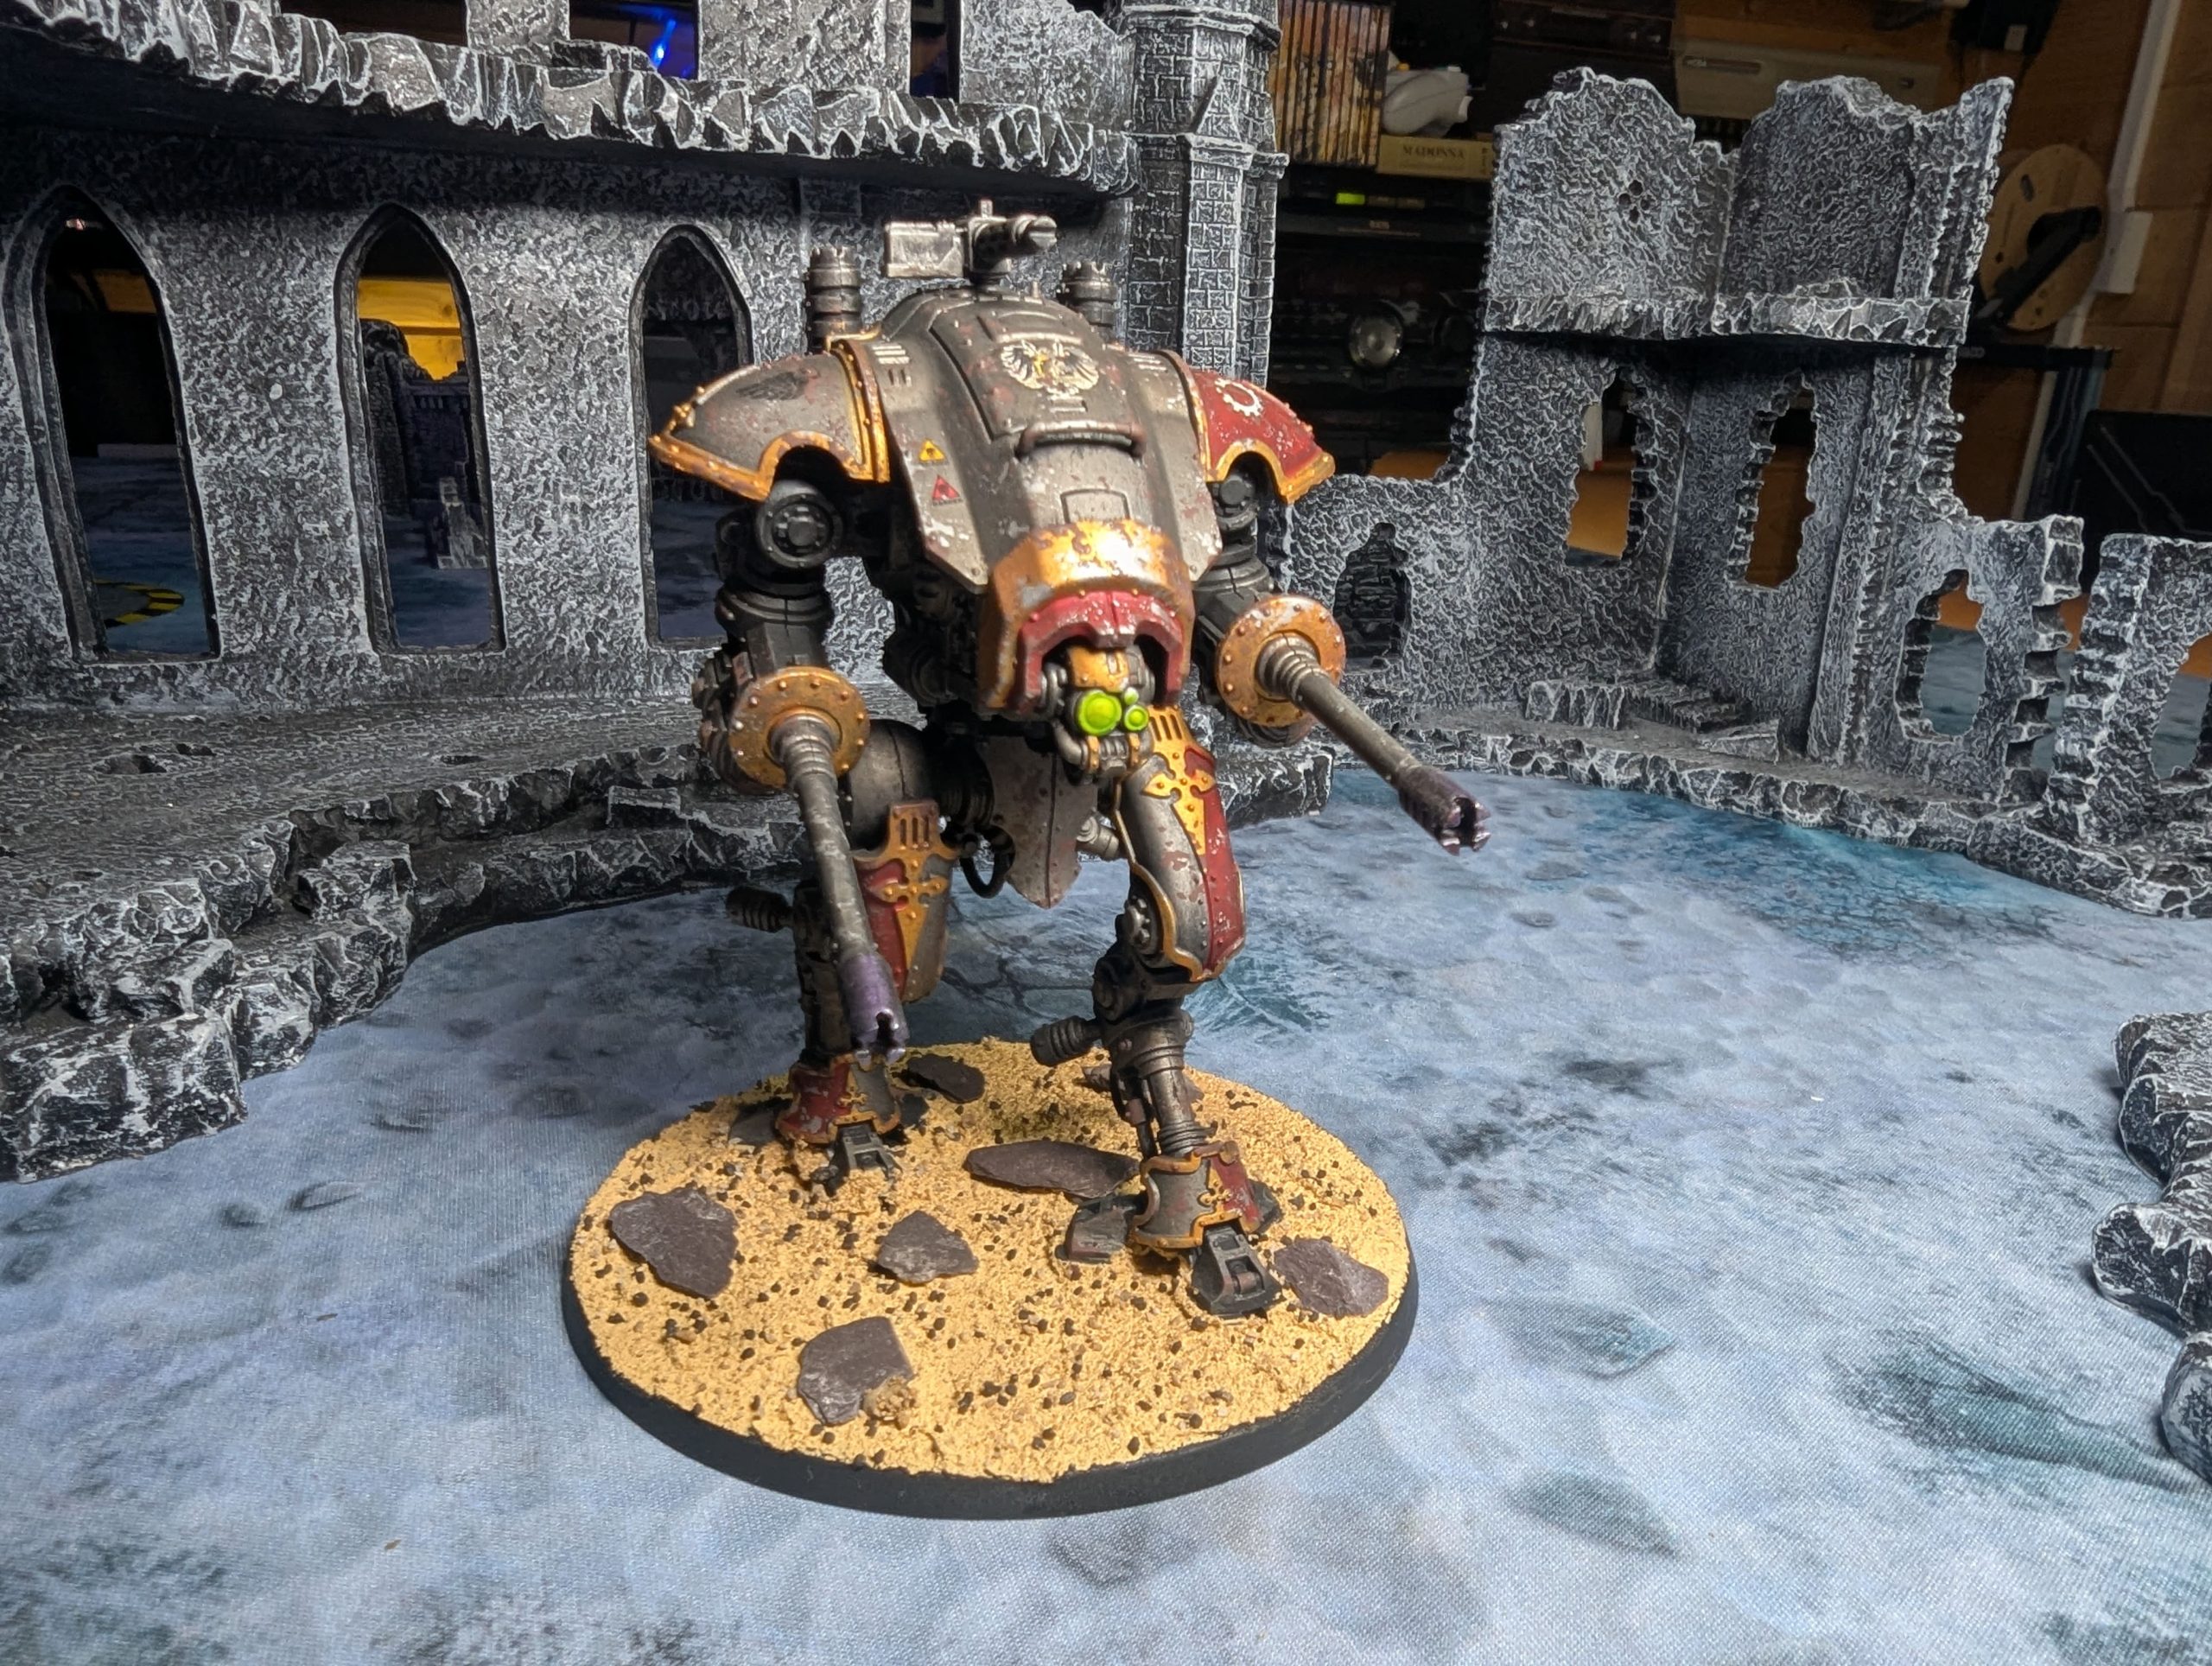
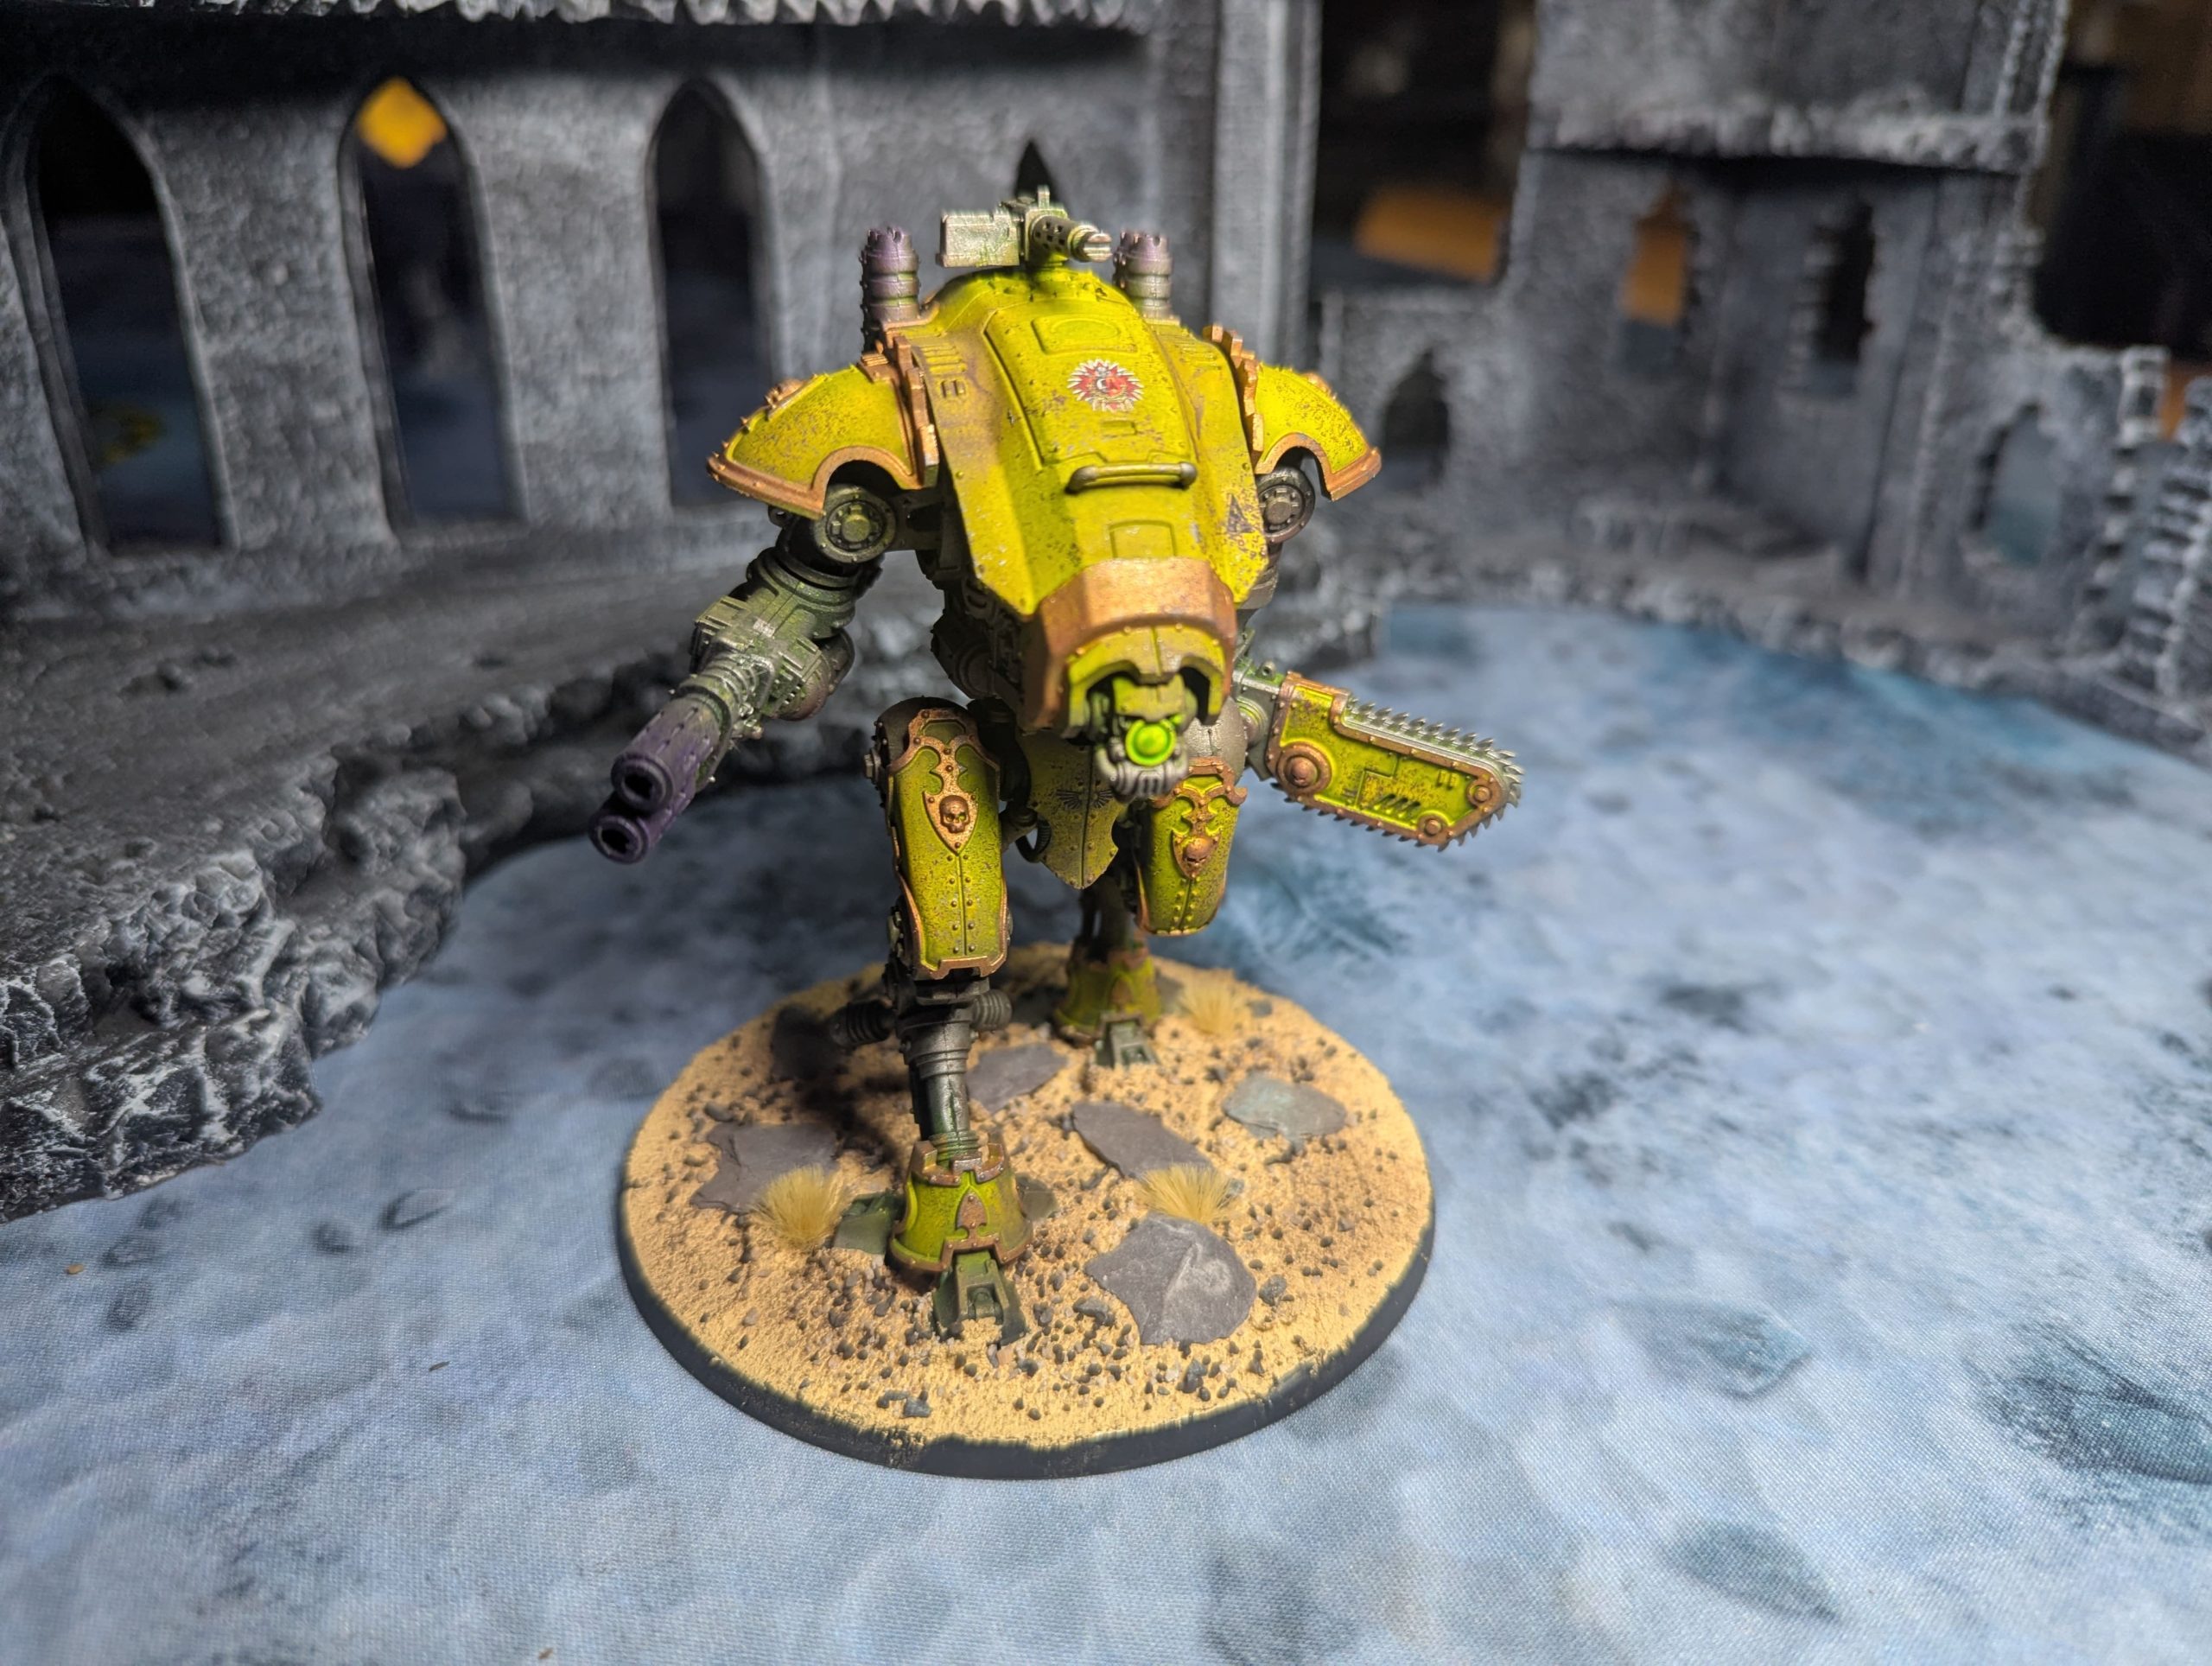
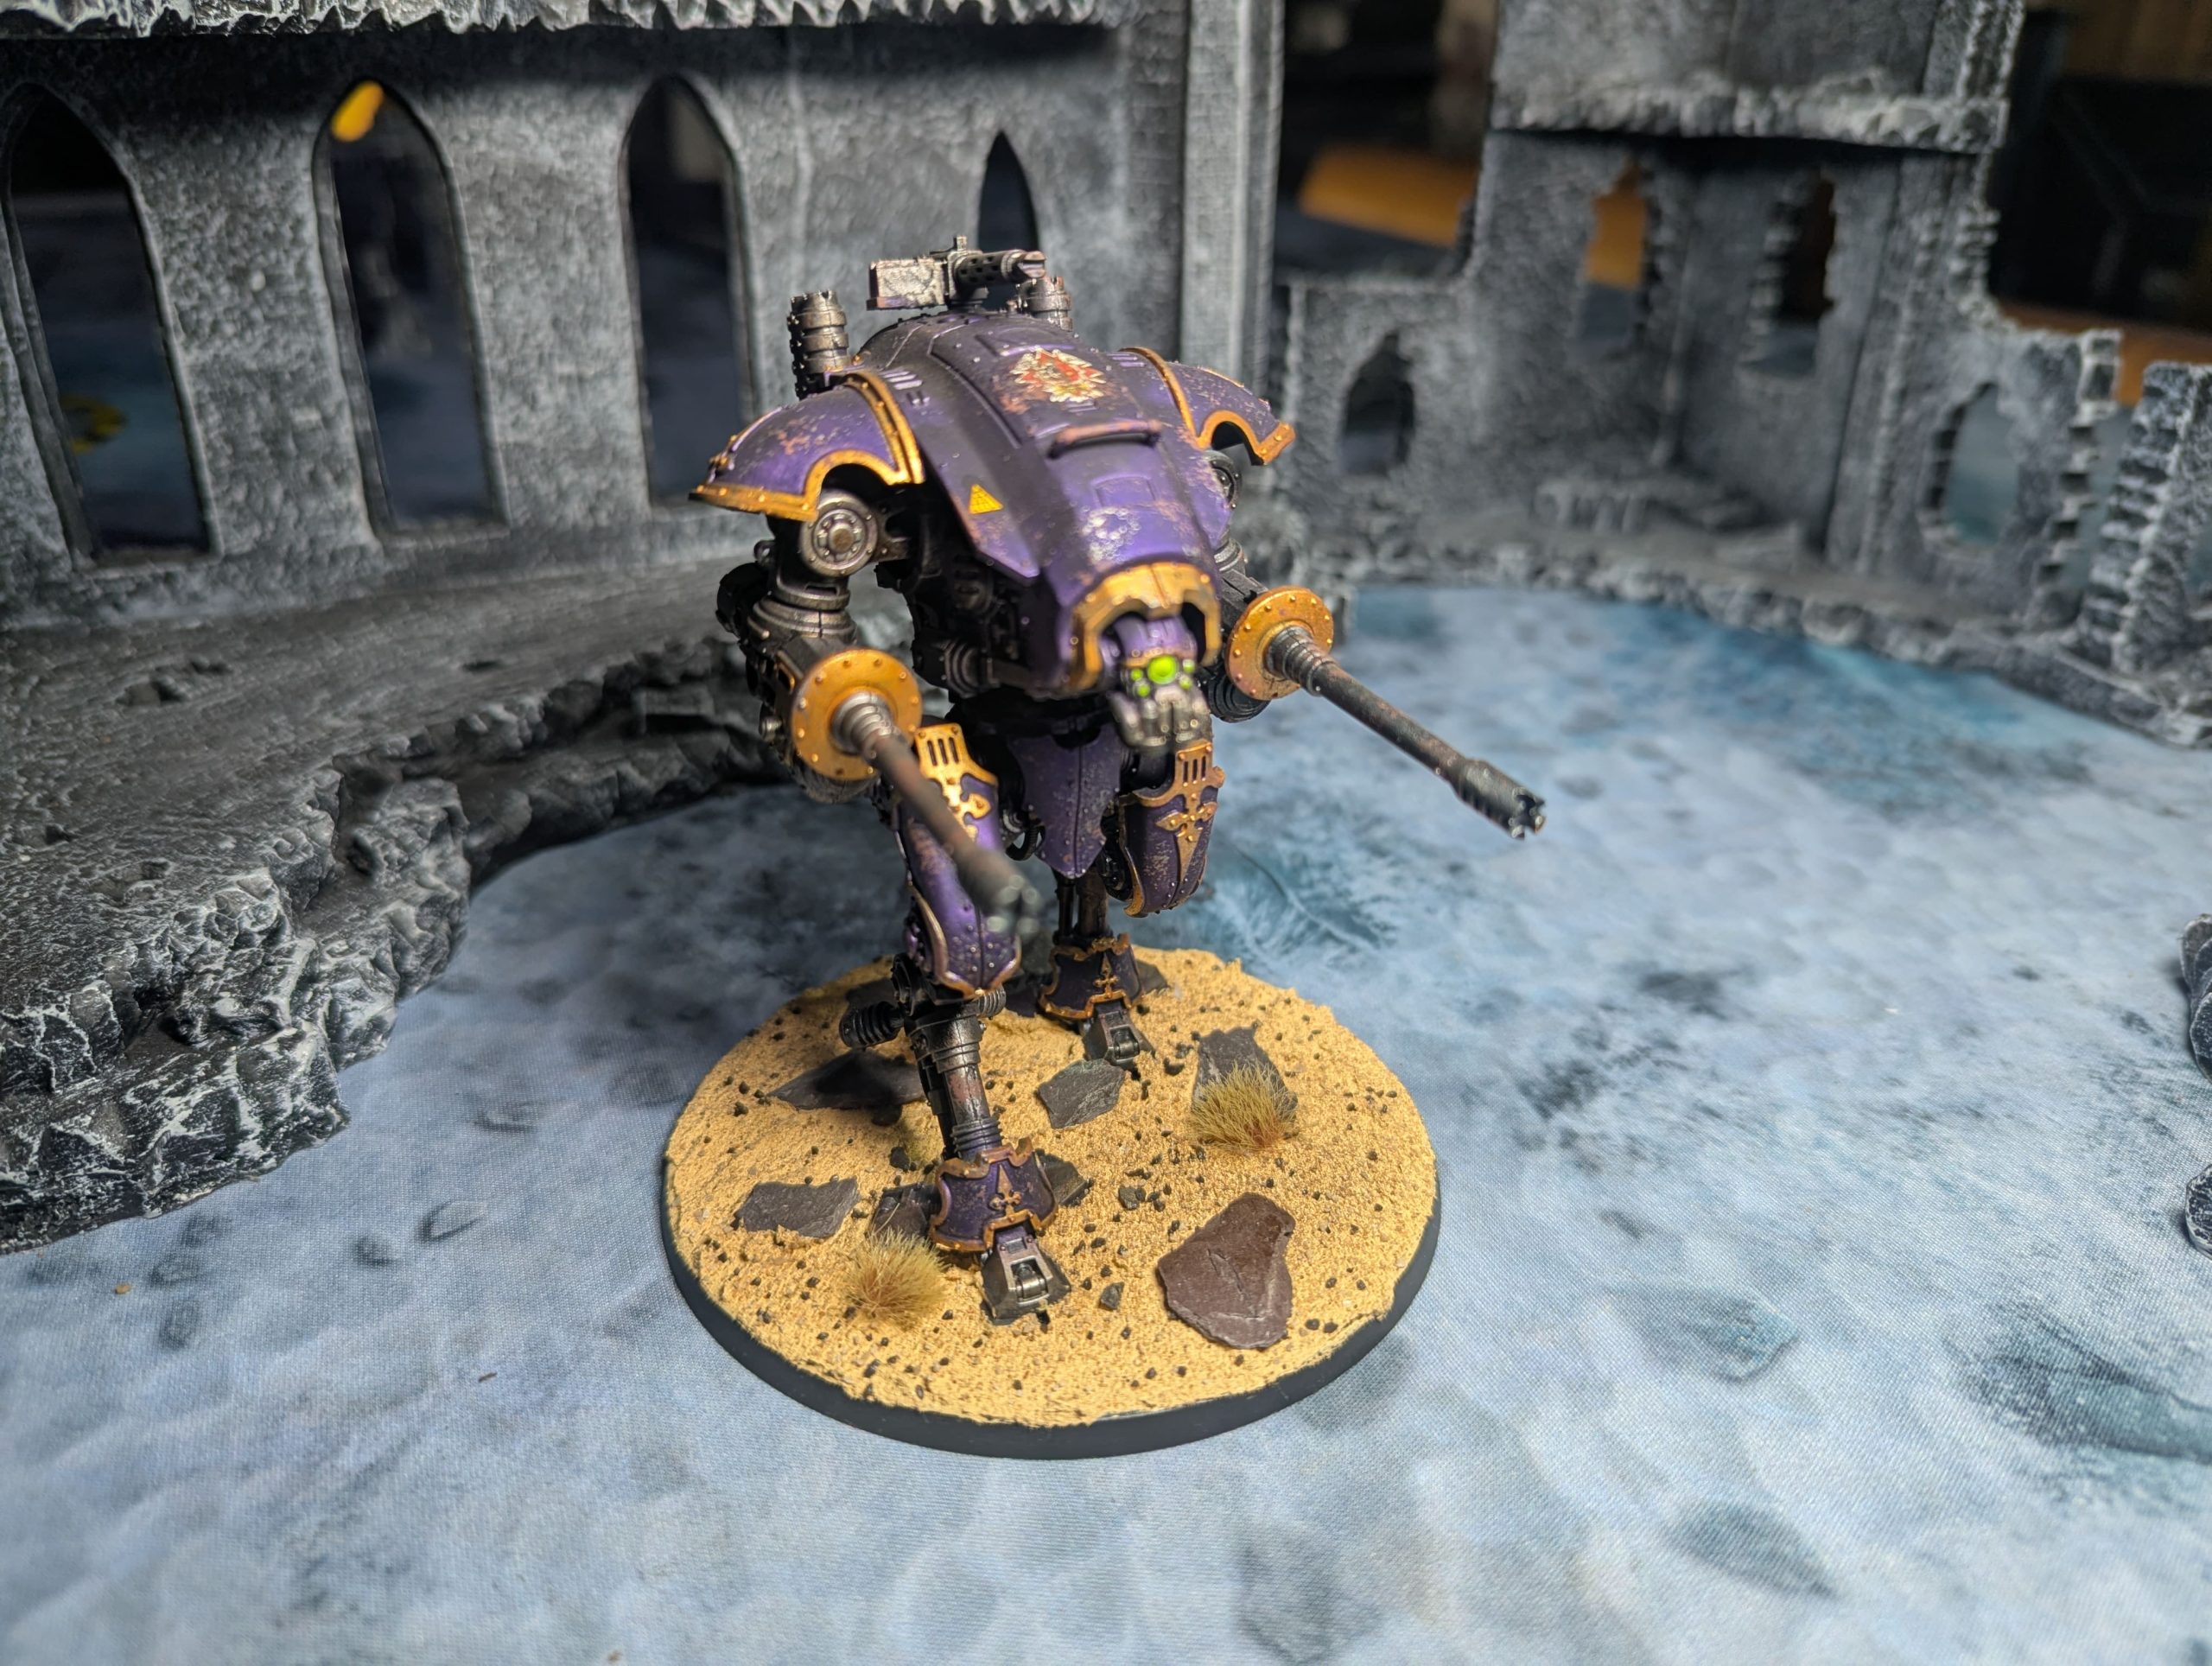
For several years, I had a secret weapon lying dormant in the hobby cupboard: the Imperial Knights: Renegade box. It was an impulse purchase, honestly, sitting there without a clear plan. One evening, I showed him the towering miniatures, and to my surprise, something clicked. He looked at the massive, intricate models and declared he’d be interested in playing, but only with the big robots. We had a starting point: two colossal war machines!
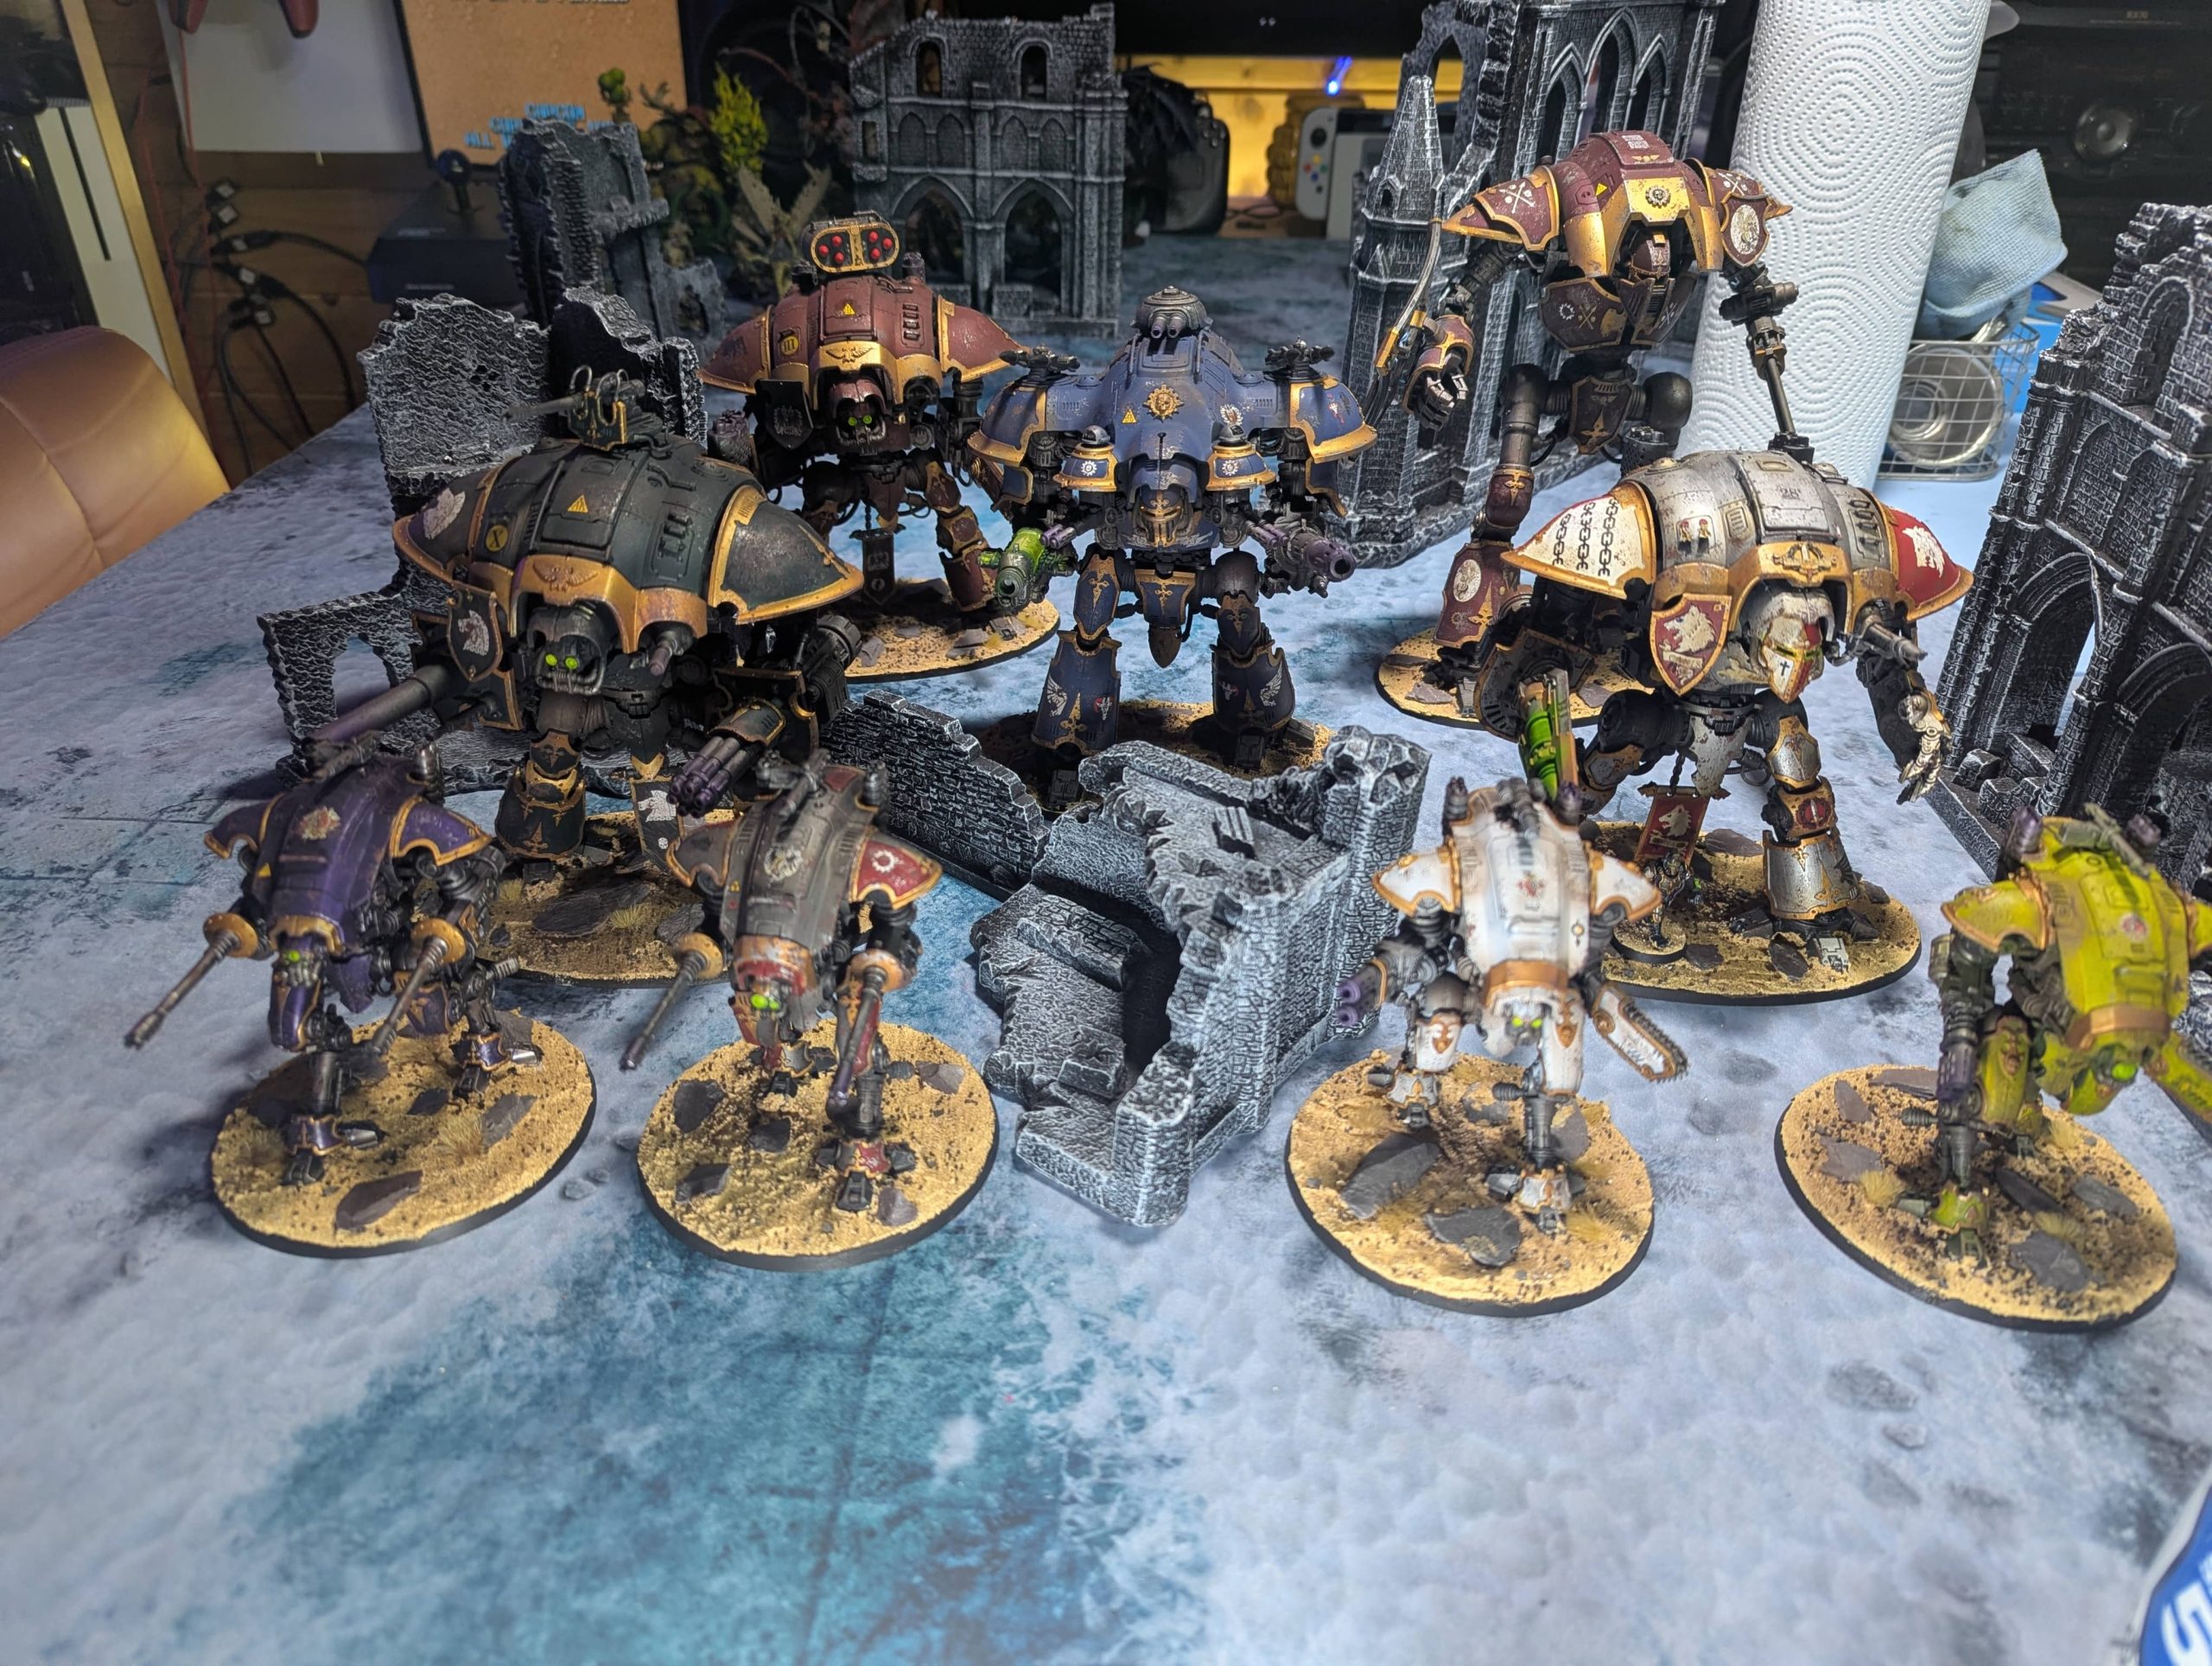
Of course, two Knights, impressive as they are, don’t constitute a functional army for a standard game of Warhammer 40,000. This spurred us into action, and we dove into the Imperial Knights codex and various online resources. We meticulously planned an army list, focusing on what was available and what would allow us to reach a competitive threshold of over 2000 points using only Knights and their smaller but still formidable skirmishing allies, the Warglaives. The planning stage itself became a bonding experience, a collaborative venture to build a truly imposing force.
Painting the Colossi: A Lesson in Scale and Efficiency
Approaching the painting of these models—Imperial Knights are simply massive—was initially daunting. However, I found the process to be far easier and quicker than anticipated, mostly thanks to a few clever techniques and, crucially, the use of an airbrush, which I would honestly describe as essential for a project of this scale.
Our chosen process was designed for maximum impact with minimum fuss:
- Preparation and Zenithal Highlight: Each Knight was primed uniformly black to provide deep, natural shadows. This was immediately followed by a zenithal highlight, spraying white directly down from above to simulate natural light and establish the volumetric highlights.
- The Metallic Base: Once cured, I took a coarse brush and overbrushed the models with a bright silver paint. This aggressive overbrushing covered the vast majority of the surface, establishing a rugged metallic chassis, while the deep black primer remained untouched in the deepest recesses, enhancing the contrast and providing an oil-stained look.
- The Signature Armour Colour: This is where the airbrush truly shone. After the silver was dry, I used a chosen contrast paint colour for the armour plates. By spraying the translucent contrast paint directly over the metallic silver base, I achieved a vivid, colored-metal effect—it looked precisely like a high-quality, colored metallic spray paint job, granting the armour a unique, vibrant sheen that catches the light beautifully.
This simple, multi-layered technique laid the foundation for the detailed work.
Bringing the Battlefield Grime
With the bulk of the work complete, the focus shifted to adding the character and history of battle damage. I followed up the base coats with extensive dry brushing using lighter metallics to define edges and mimic general wear and tear from movement and environmental abrasion. The crucial gold trim, denoting rank and tradition, was then carefully picked out where appropriate across the carapace and weaponry.
Adding the Imperial or House transfers was a surprisingly delicate process, given the scale of the armour panels. I applied the decals that came with the kits, utilising setting solutions to ensure they adhered seamlessly to the curved surfaces, adding a final layer of authentic detail and heraldry.
For the weathering, I employed sponges to execute a realistic chip damage effect. This was done in two stages: first with a deep brown to simulate rust where the paint was stripped away, and then a lighter layer of silver within those brown chips to represent fresh metal gouges. This was followed by targeted washes—thinned with plenty of medium—to introduce grime, soot, and oil stains around mechanical joints and exhaust ports.
These are undoubtedly larger models, but by relying on fast, effective techniques like zenithal highlighting, overbrushing, and airbrushing translucent paints, it was entirely possible to complete a comprehensive, battle-ready paint job, from start to finish, in just a few dedicated hours per model.
The Reward
The real victory, however, was seeing my son’s reaction. He is extremely happy with the final result. The imposing, vibrant, and battle-scarred Imperial Knights are now his army. The process of building and painting transformed his passive interest into active engagement. He has now proudly taken his army to the tabletop and played several successful games of Warhammer 40,000, embracing the strategy, the dice rolls, and the sheer spectacle of commanding a force of giant stompy robots.
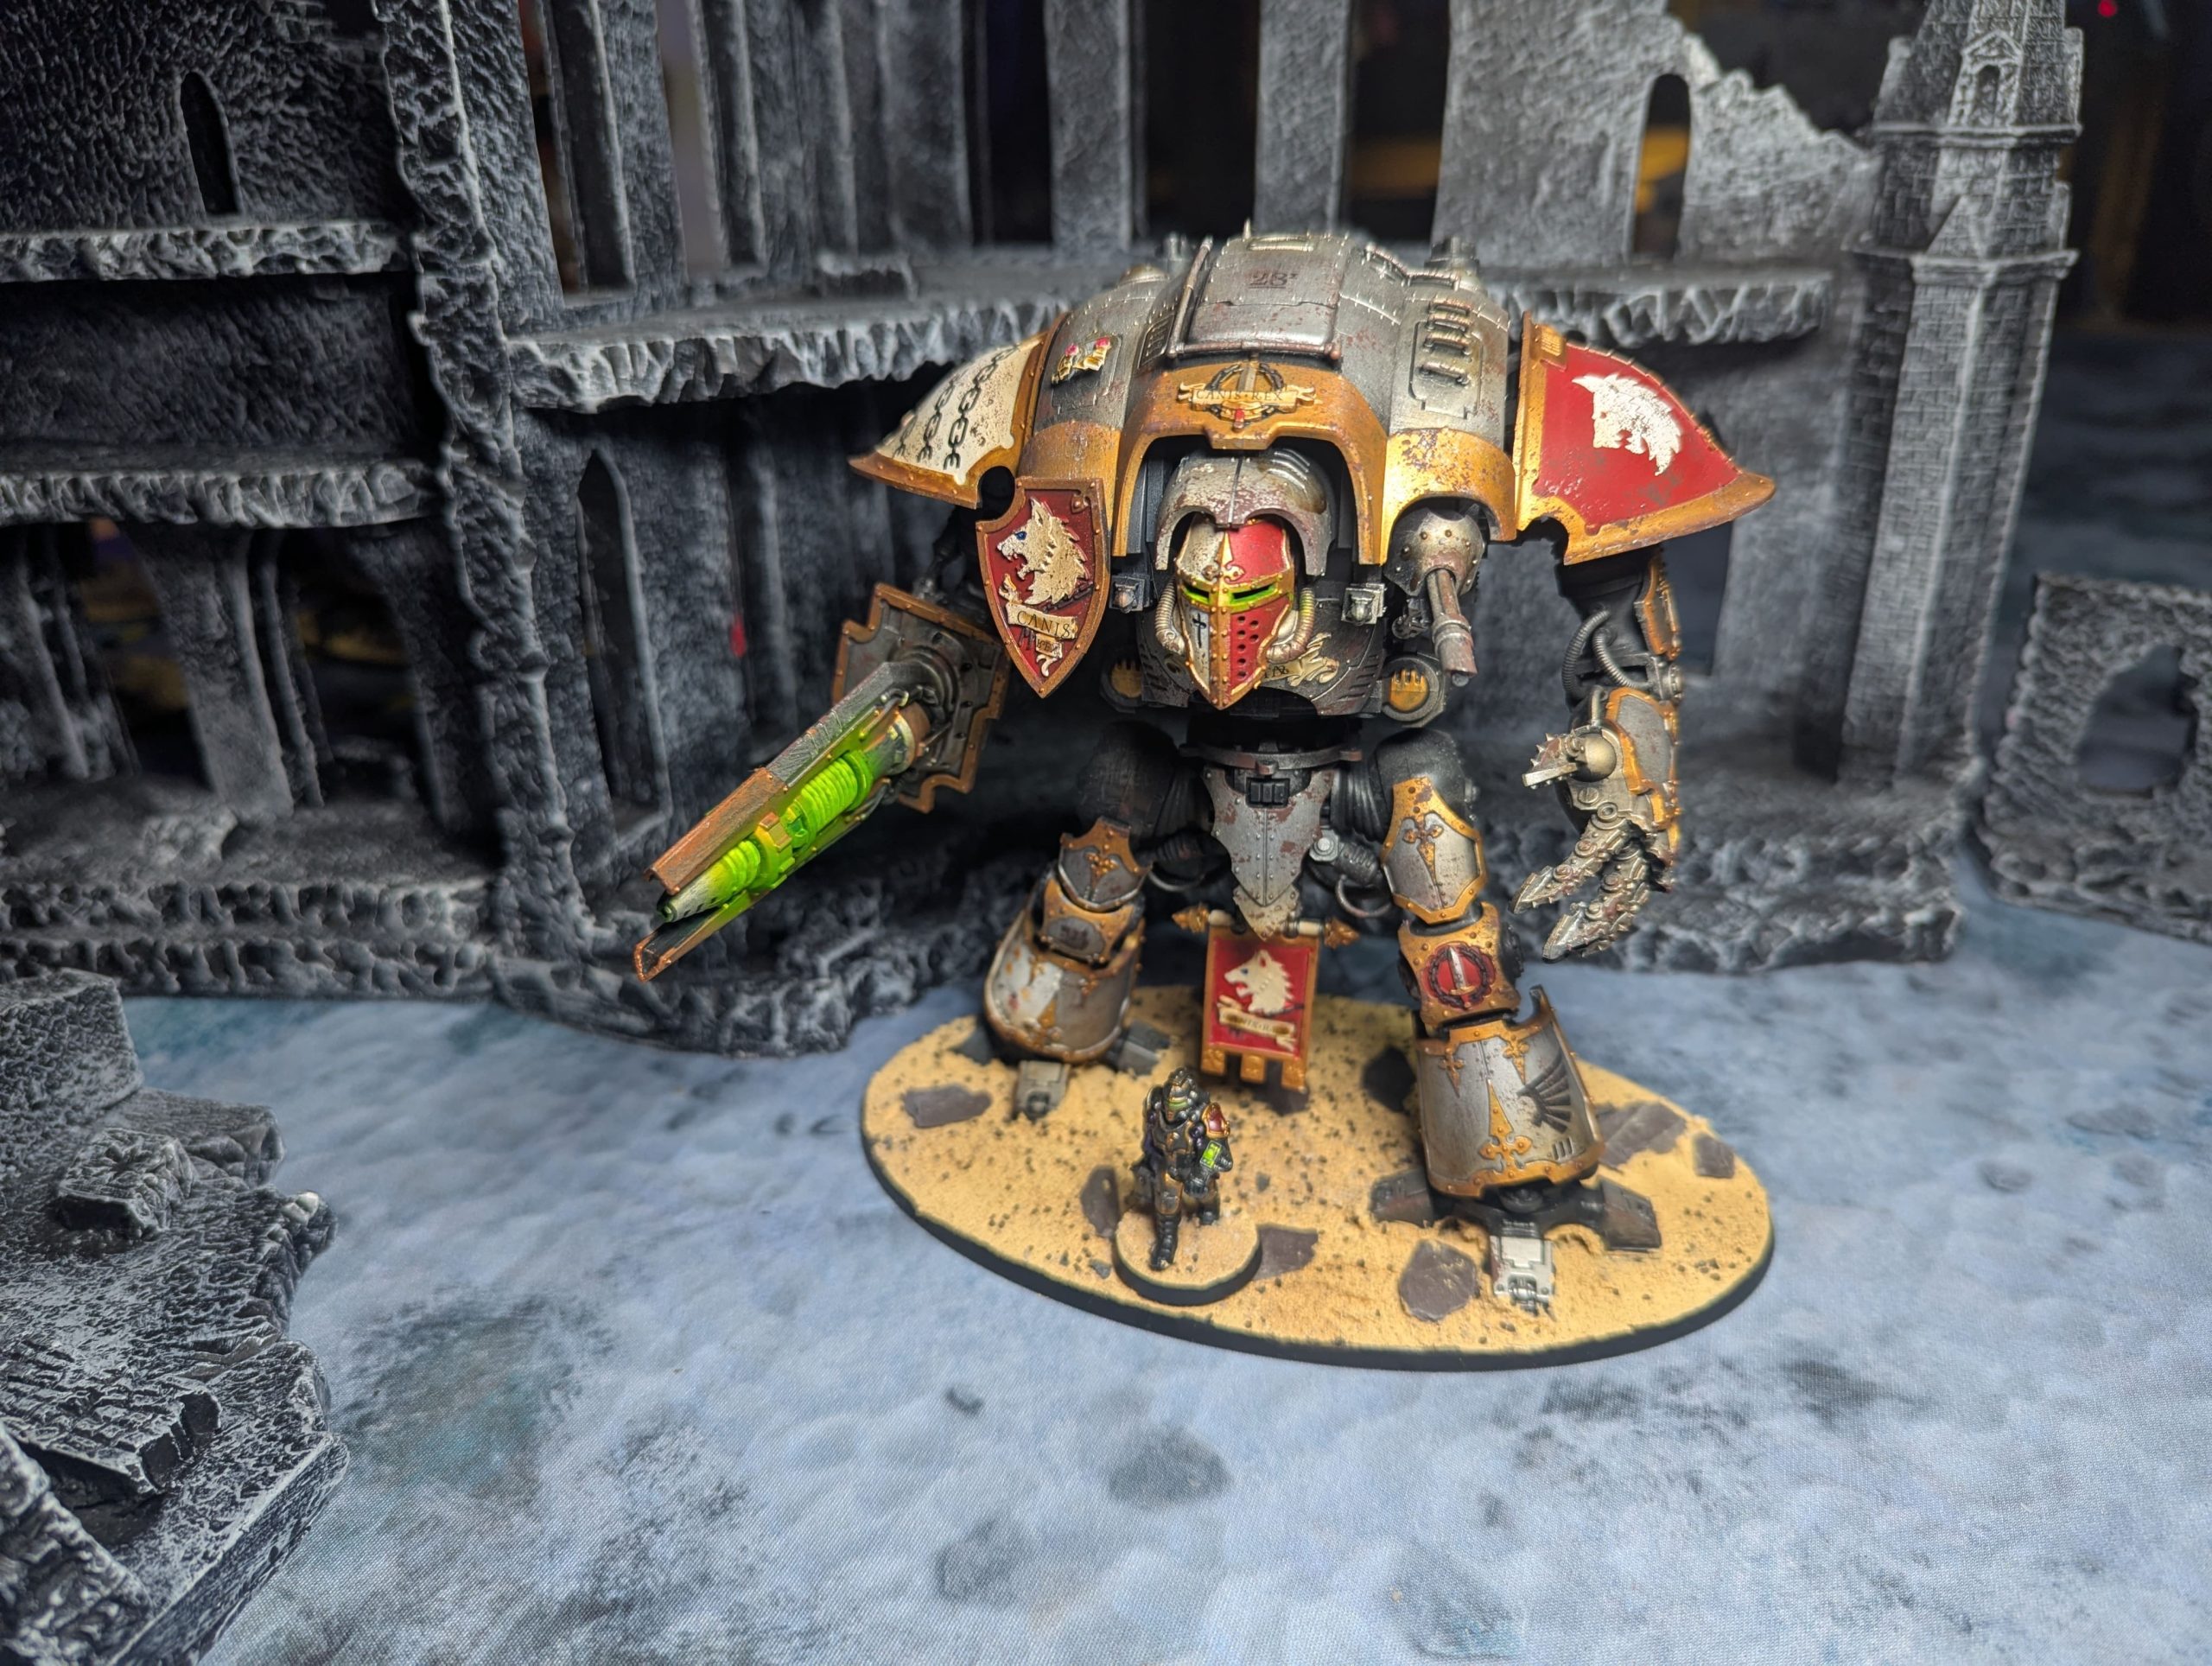
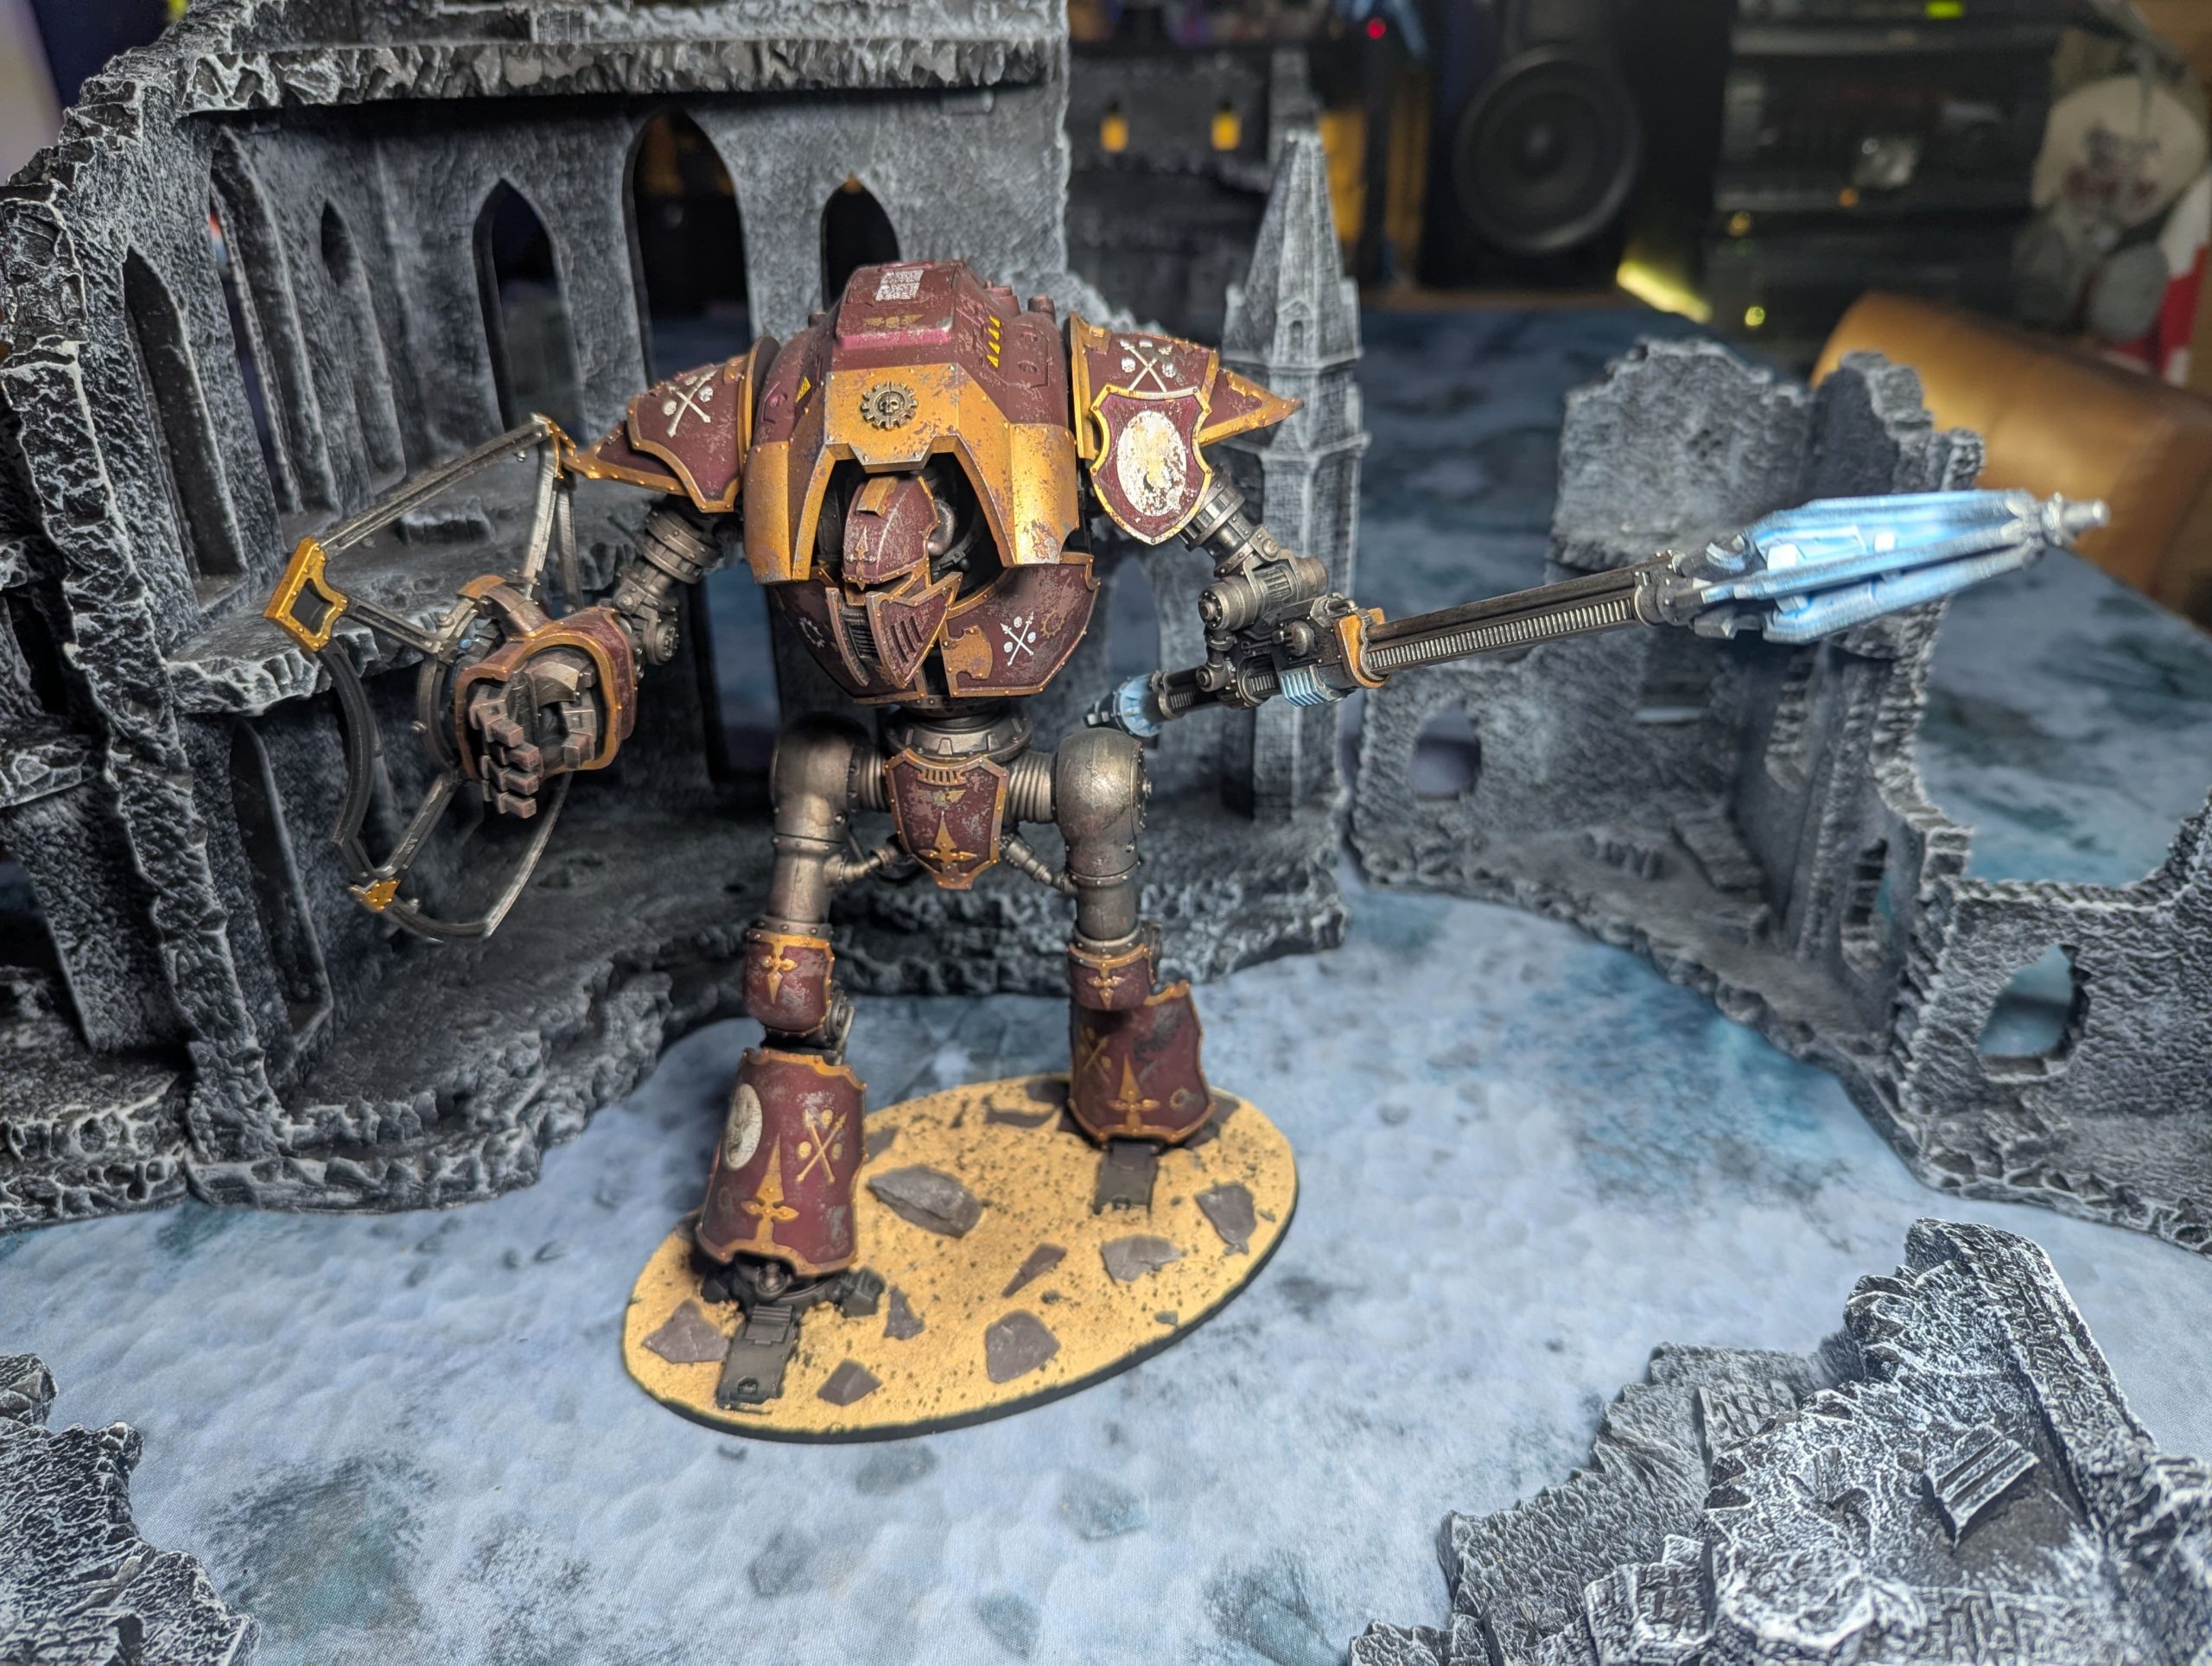

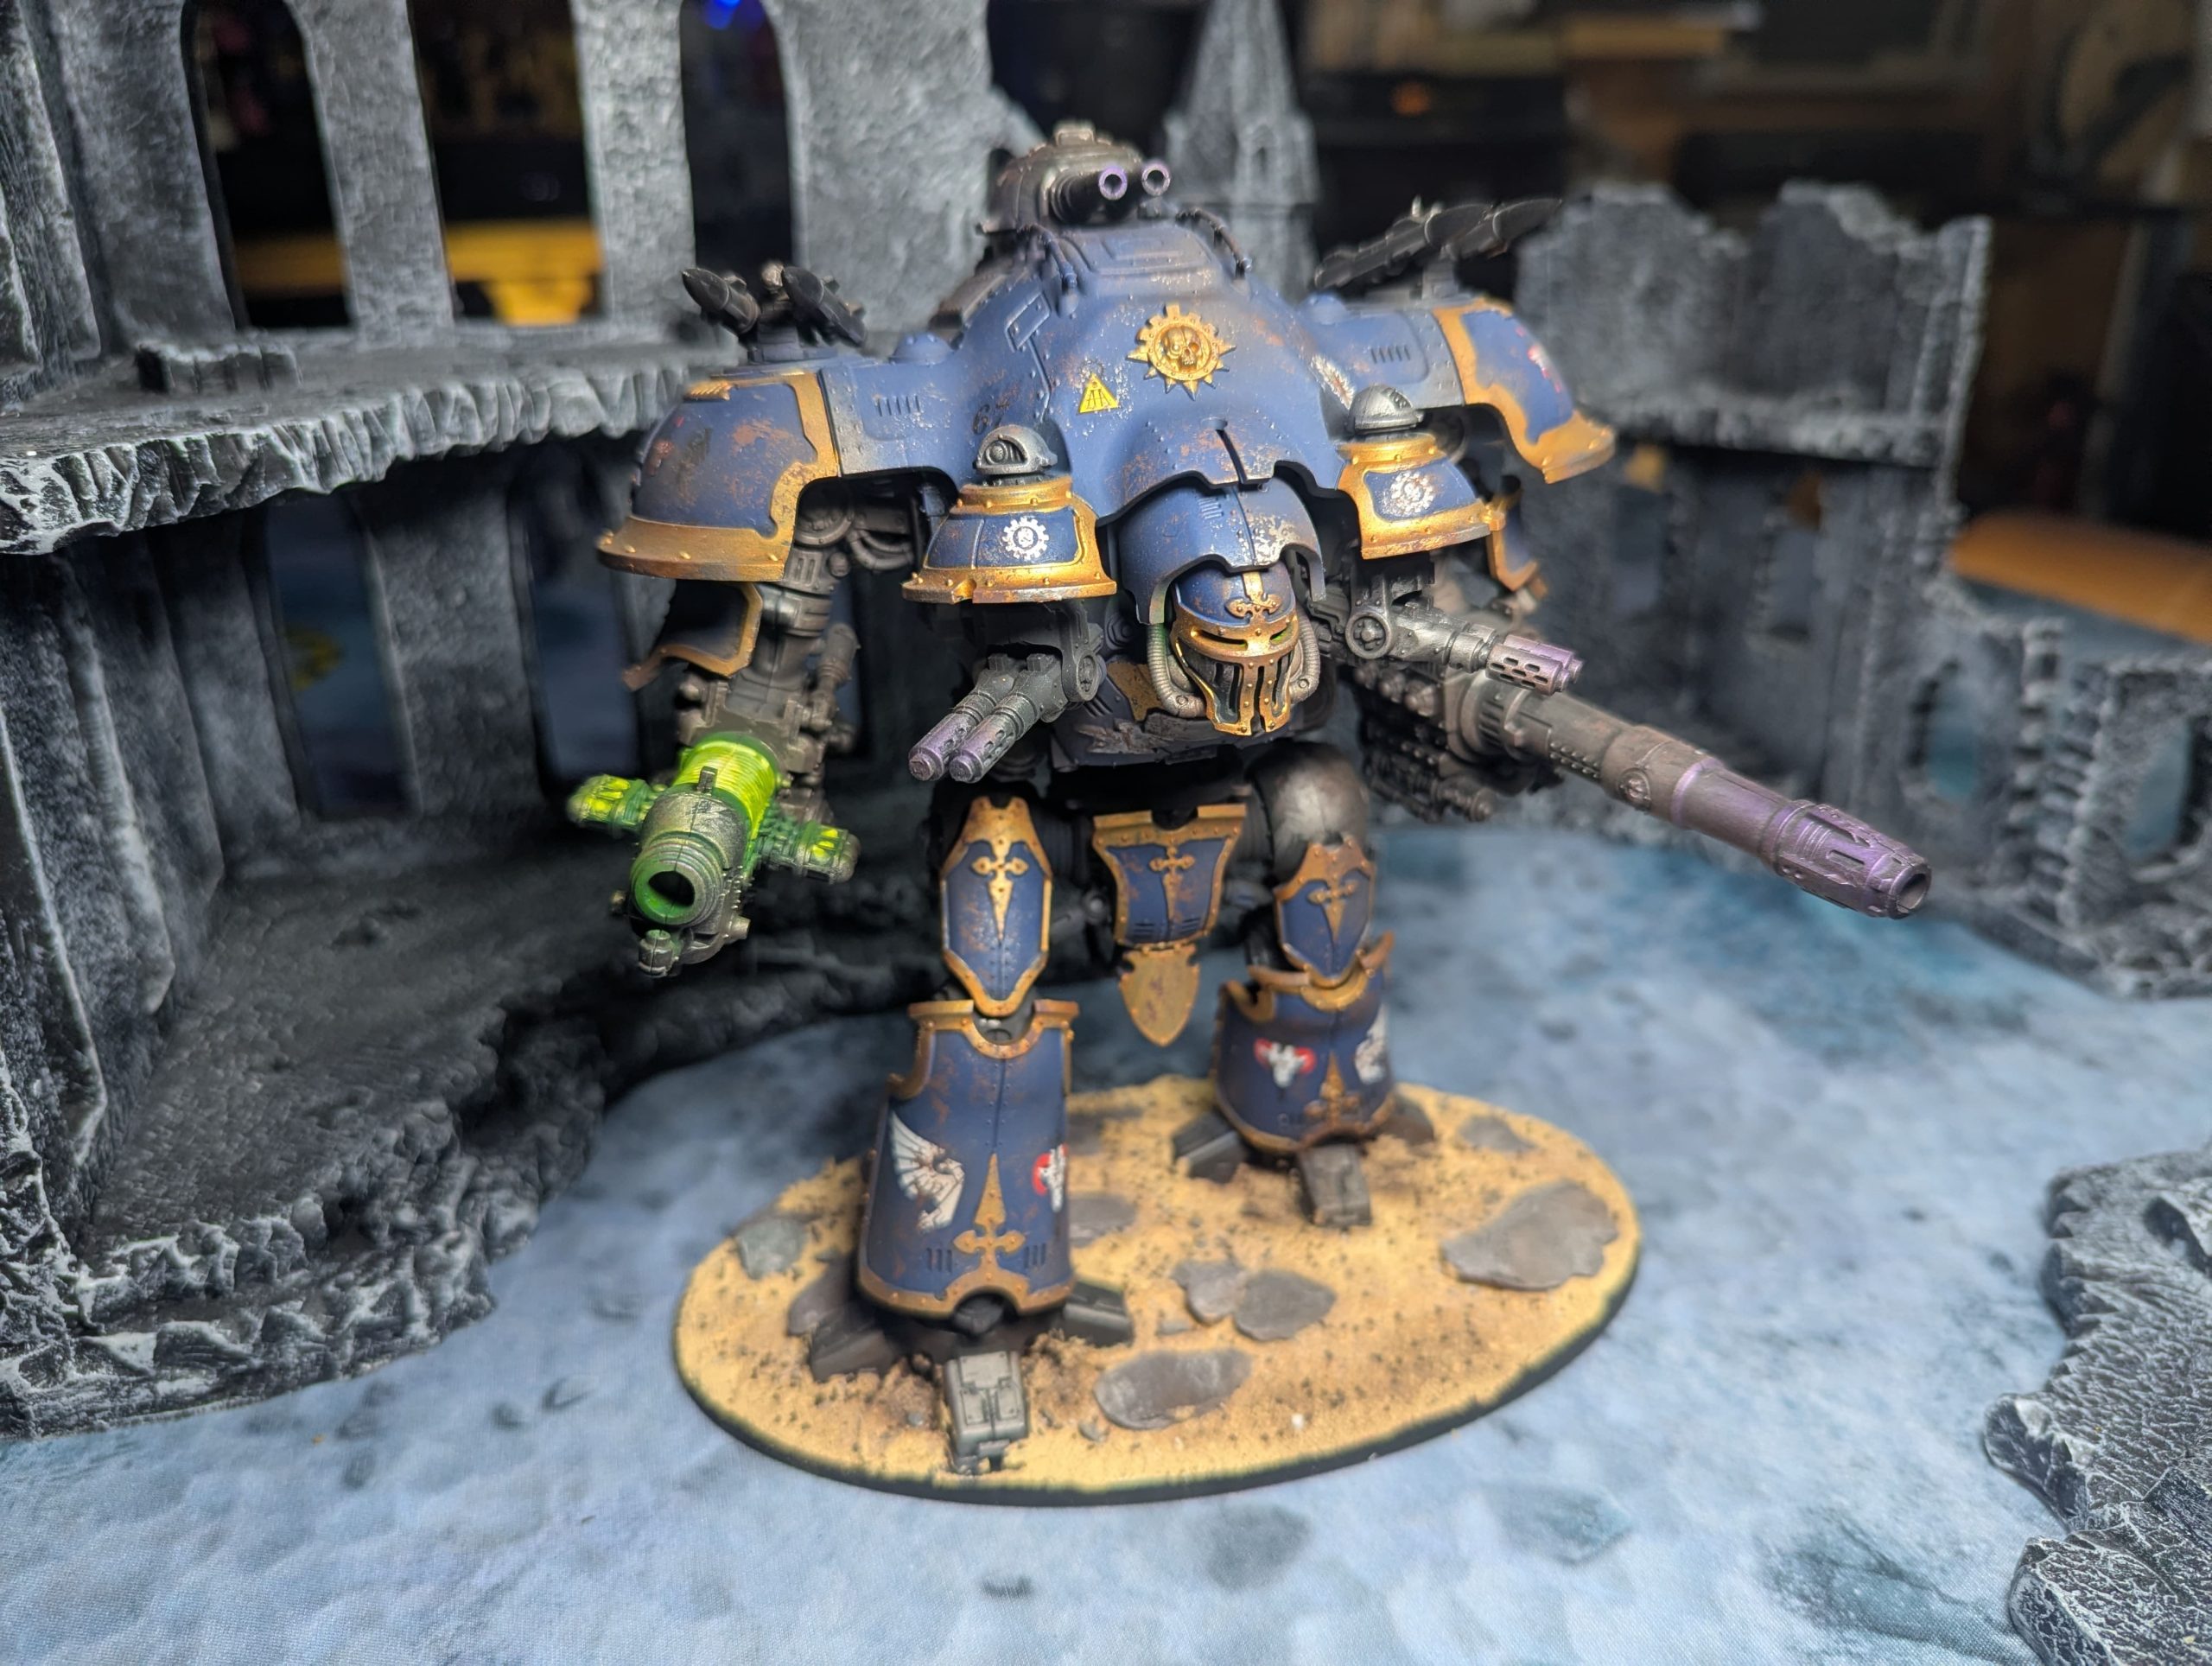
Good Knight
I will be adding a more comprehensive gallery of images very soon, but I couldn’t wait to share these initial results. I am genuinely ecstatic with how these Imperial Knights have turned out. The process was surprisingly quick and incredibly satisfying, allowing me to complete one full Knight model each evening—a genuine Knight a night! This translated to a painting time of just a couple of hours per model, proving that high-quality results don’t necessarily require weeks of effort.
The painting technique was intentionally simple and highly efficient, focusing on achieving a weathered, battle-worn look with maximum speed. The core process involved a smooth base coat applied with an airbrush, followed by focused drybrushing to pick out the sharp edges and mechanical detail. This established the primary colour scheme and initial highlights very quickly.
Once the main colours were established, I moved onto the detail work, focusing on areas like the cockpit glass, weapons, and any gold or metallic elements. The final, and perhaps most impactful, steps involved applying battle damage. This was achieved primarily through sponge application of a dark metallic paint to simulate chips and scrapes, followed by the careful application of transfers (decals) for unit markings and heraldry. This combination provides a gritty, realistic finish that is perfectly suited to the brutal world these machines inhabit.
I am more than happy to provide an in-depth, step-by-step breakdown of my full process, including specific paint choices and techniques, for anyone who comments and expresses an interest. The key takeaway from this project is the demonstrably fast turnaround; I believe this level of quality is perfectly achievable for any hobbyist in just a few dedicated hours per model.
The strategic outcome of this rapid painting project is significant: we have successfully added over 2,500 points of fully painted Imperial Knights to the collection in approximately one week, transforming our force into a formidable and visually impressive army ready for the tabletop.


