


![1918 Spring Offensive Wargame | Full Rules Overview with John & Gerry (WW1 Tabletop Game) [7 Days Early Access]](https://images.beastsofwar.com/2026/03/unboxing-warfulcrum-games-1918-spring-offensive-review-coverimage1-225-127.jpeg)


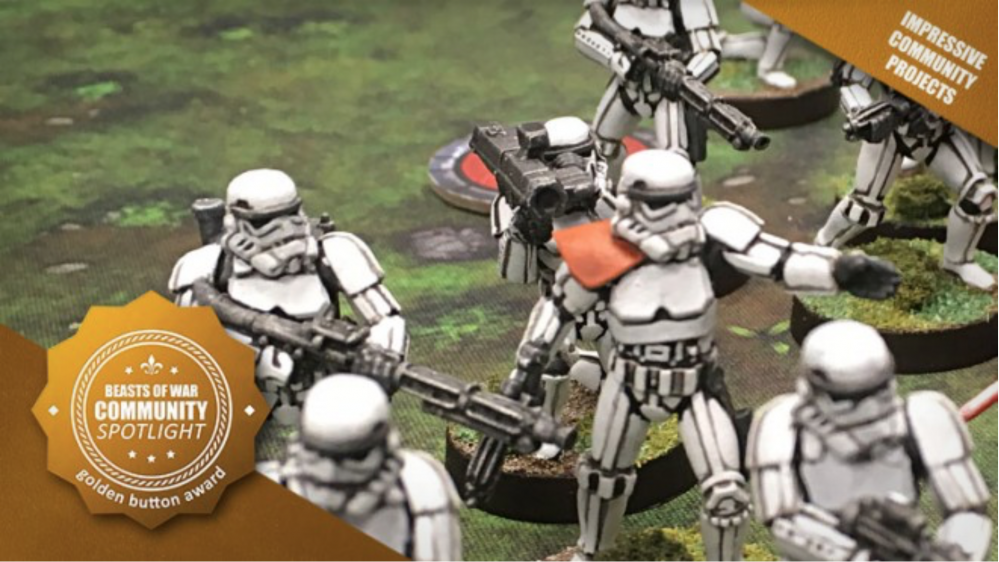
Collins Does Star Wars Legion


Recommendations: 1126
About the Project
This project is all about me documenting my journey through painting my Star Wars Legion models. I'll explain the steps I take, the paints I use, any conversions I do and also other cool stuff I've found out there that I like or am inspired by. Although some of this painting was done for my FLGS (Friendly Local Gaming Store) most of it is for me and my own enjoyment. Im not brilliant but I am certainly happy with the results I get, I just wish it didn't take so long!
Related Game: Star Wars: Legion
Related Genre: Science Fiction
This Project is Active
Got a bounty to collect? an aluminium falcon to find perhaps...

this chap was a quickish job using mostly contast paints. munitorium green and bright yellow.
always have a body double so you can come back for the sequel...
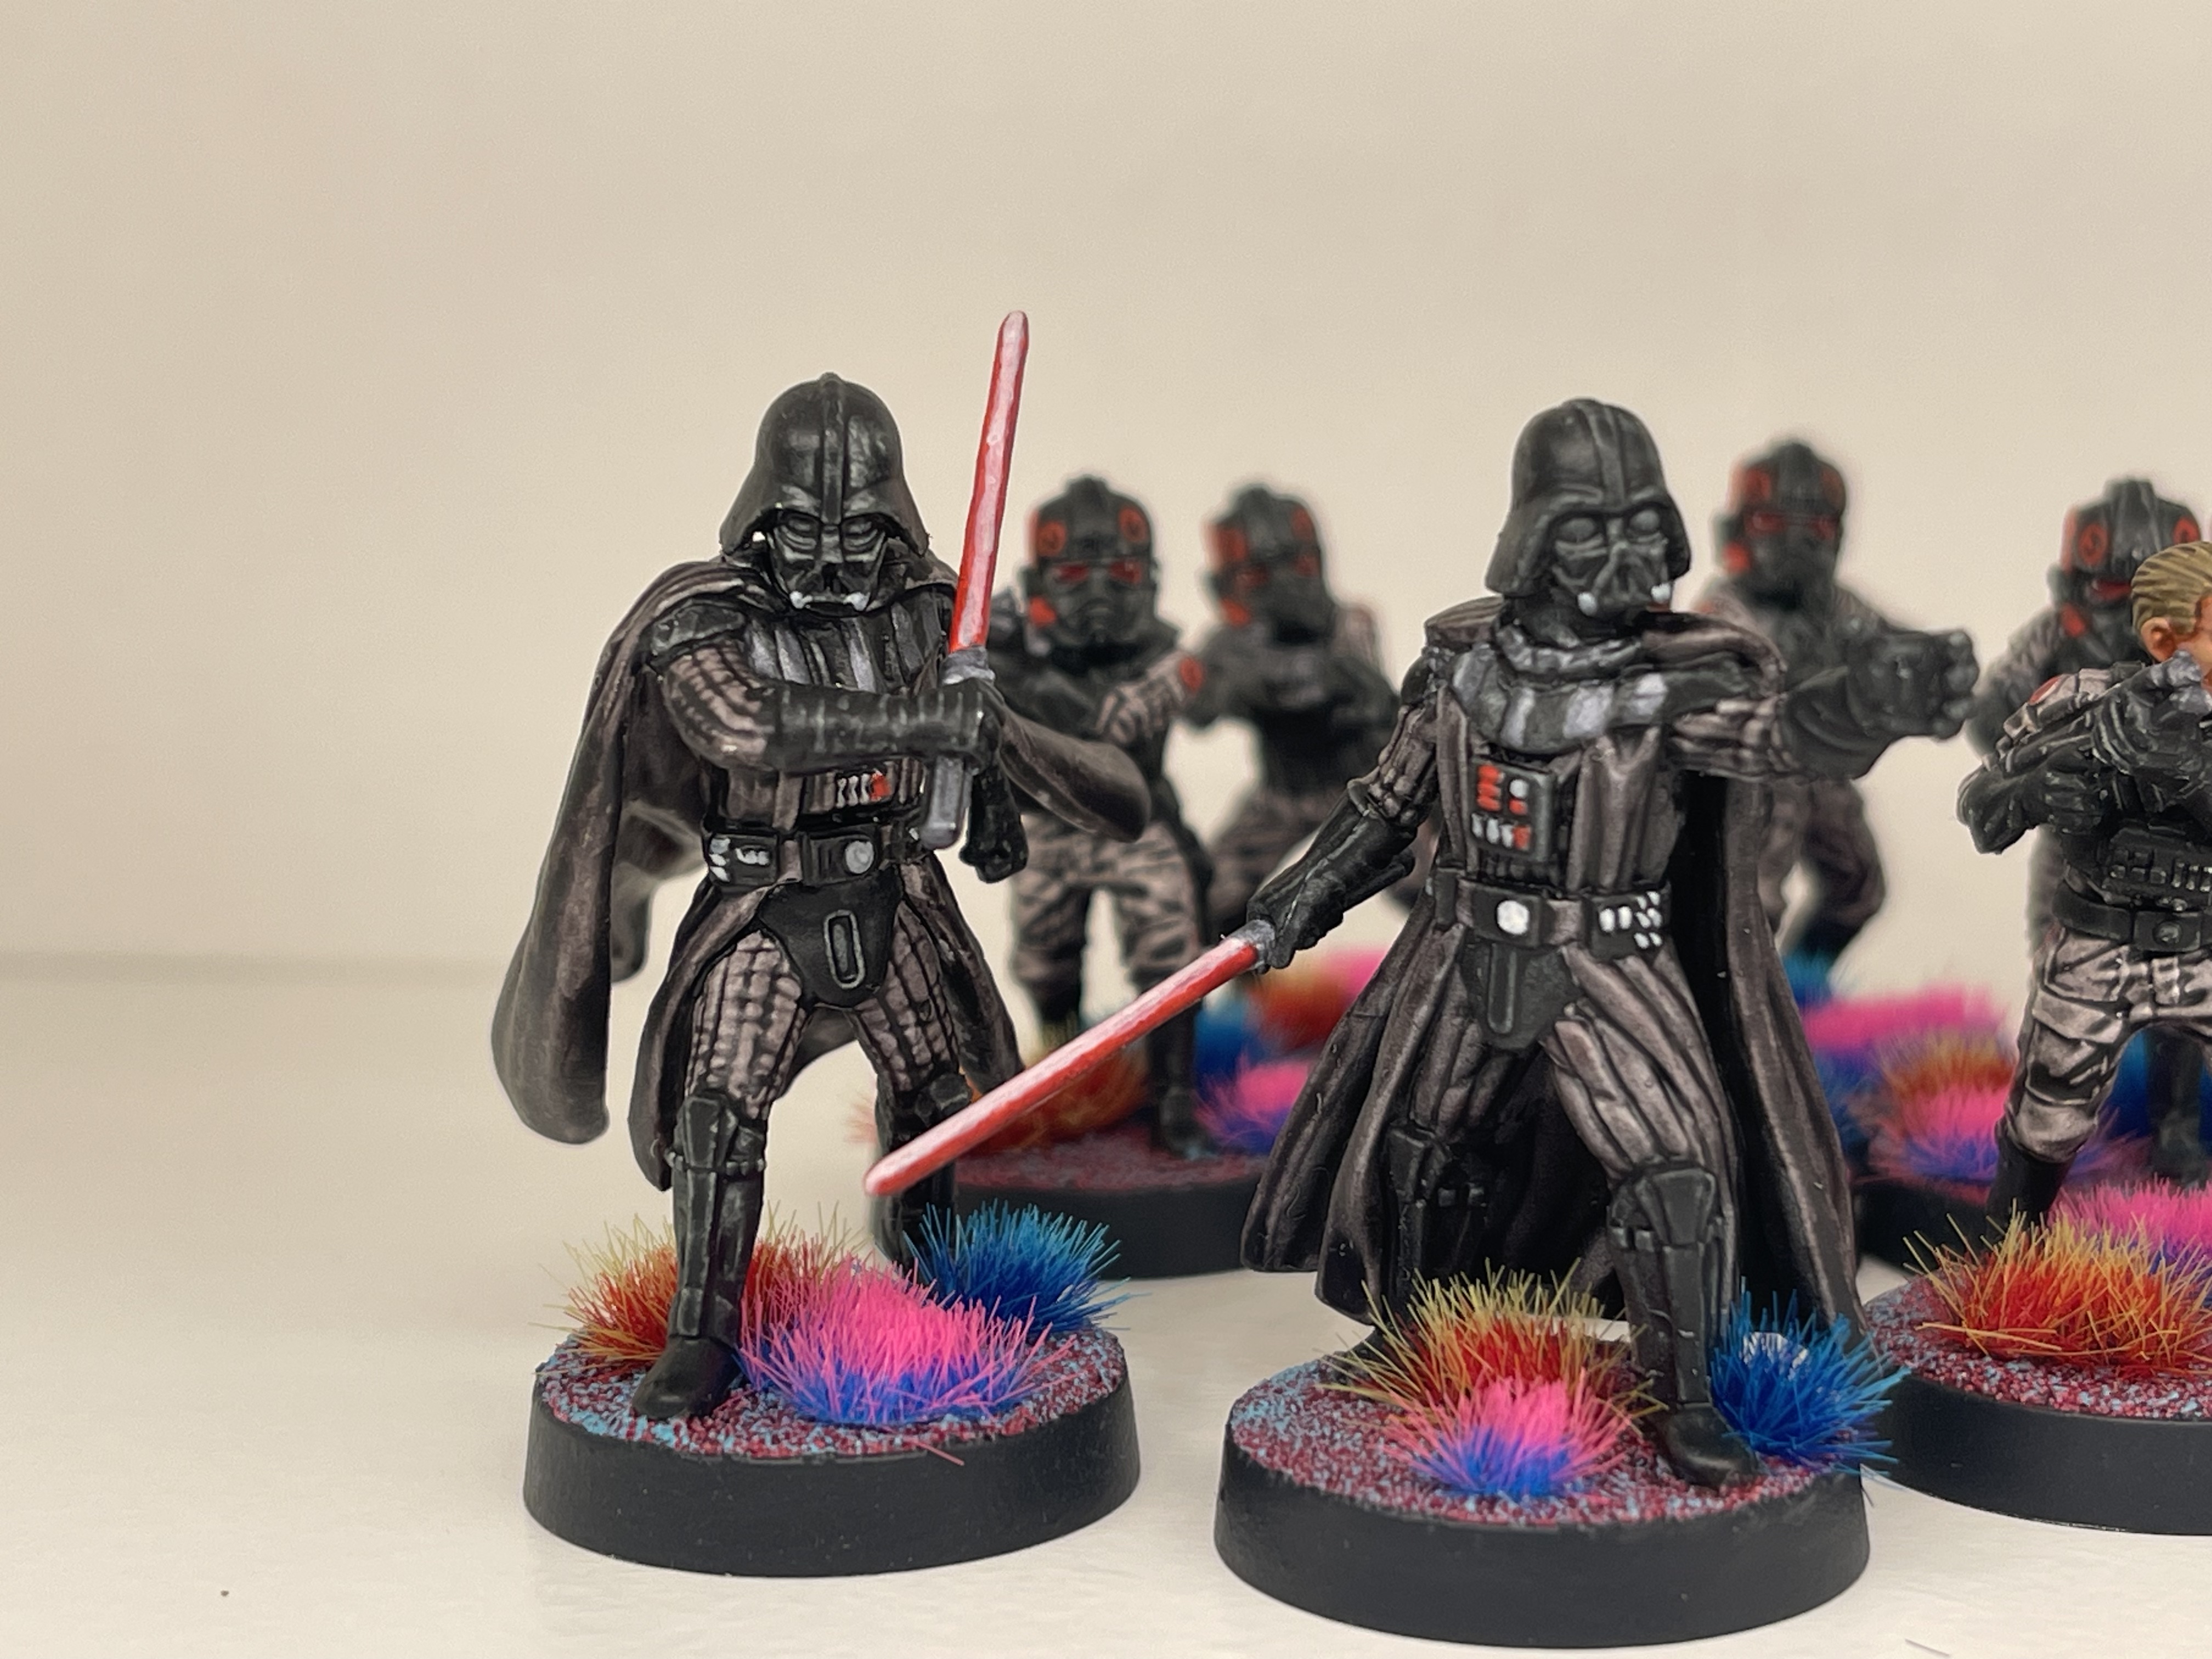 limited time offer, buy one vader death, get another free!
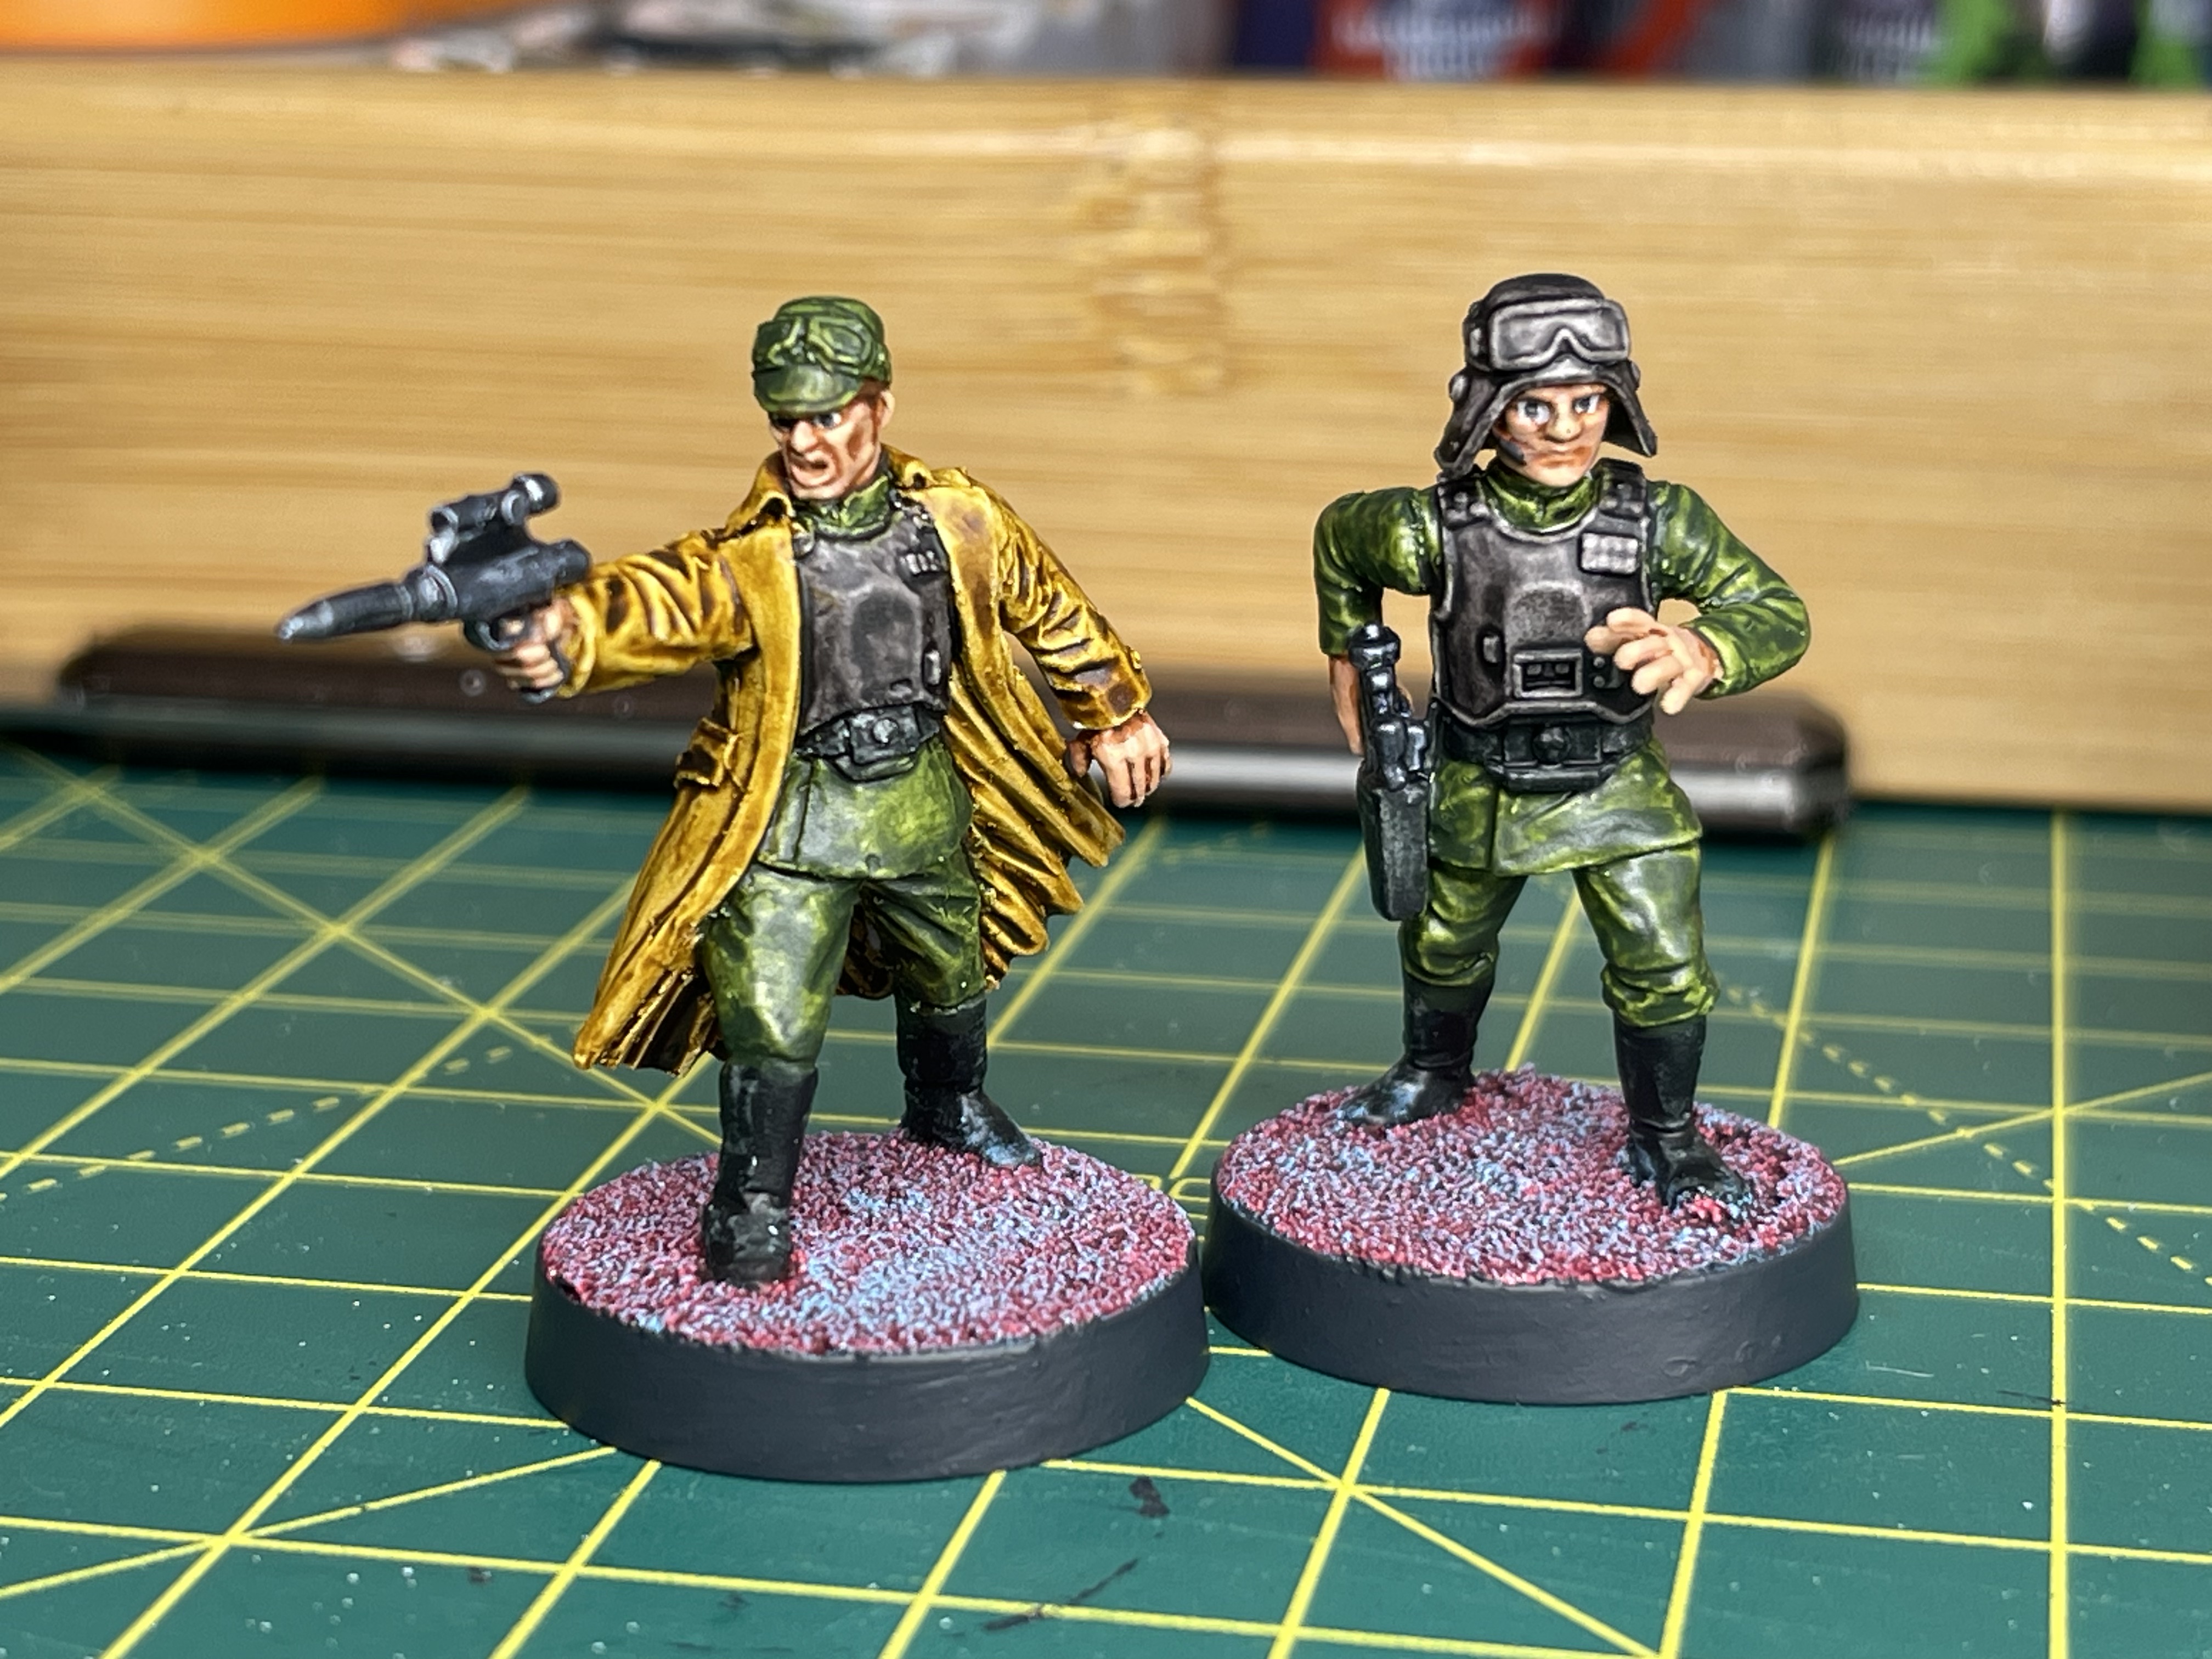
I tried to paint up these two officers (generic and veers) using the contrast paints I had on hand, the idea of my empire force is to use what I have and do it quickly.
you’ll note I haven’t put tuffs on them. that is because although they are ‘done’ I am not happy with them and so they will be redone at some point. probably using German field grey to get a reasonable grey/green mix. the duster coat on the generic officer also isn’t the shade of brown I would want. im not sure what I would use agreos brown contrast paint for to be honest, it strikes me as a bit of an inbetweeny non-specific colour.
Always two there are...
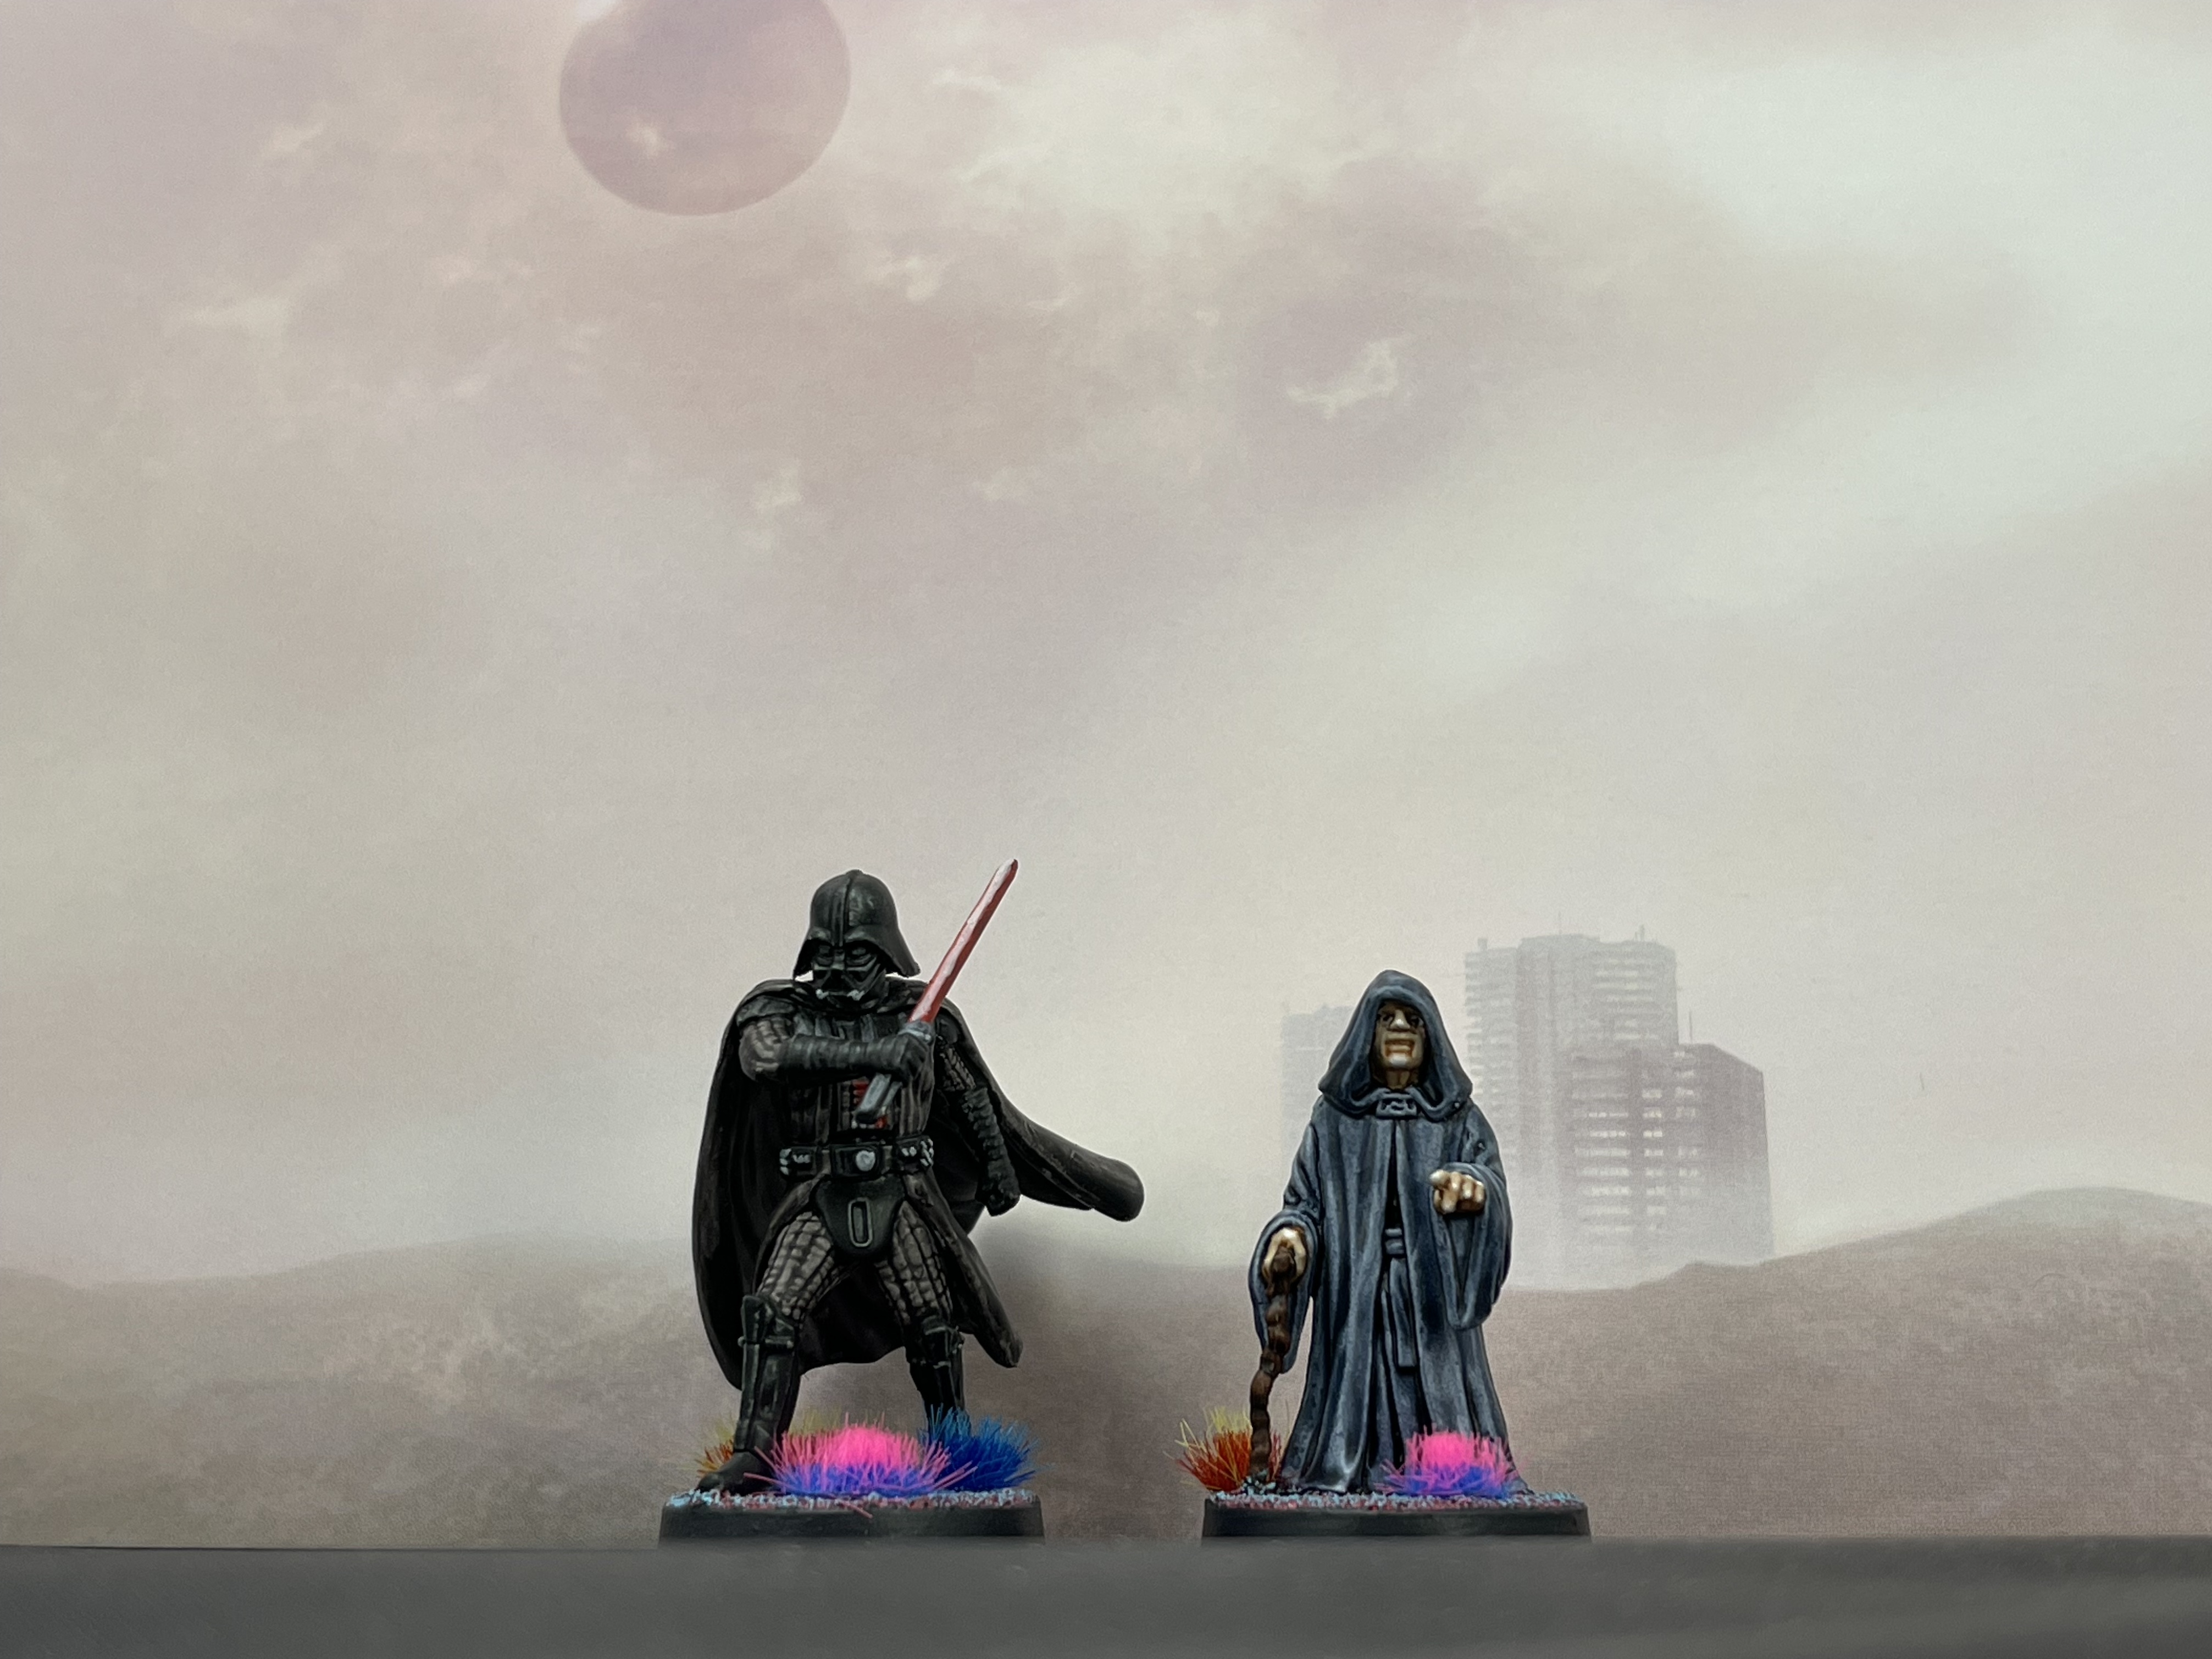

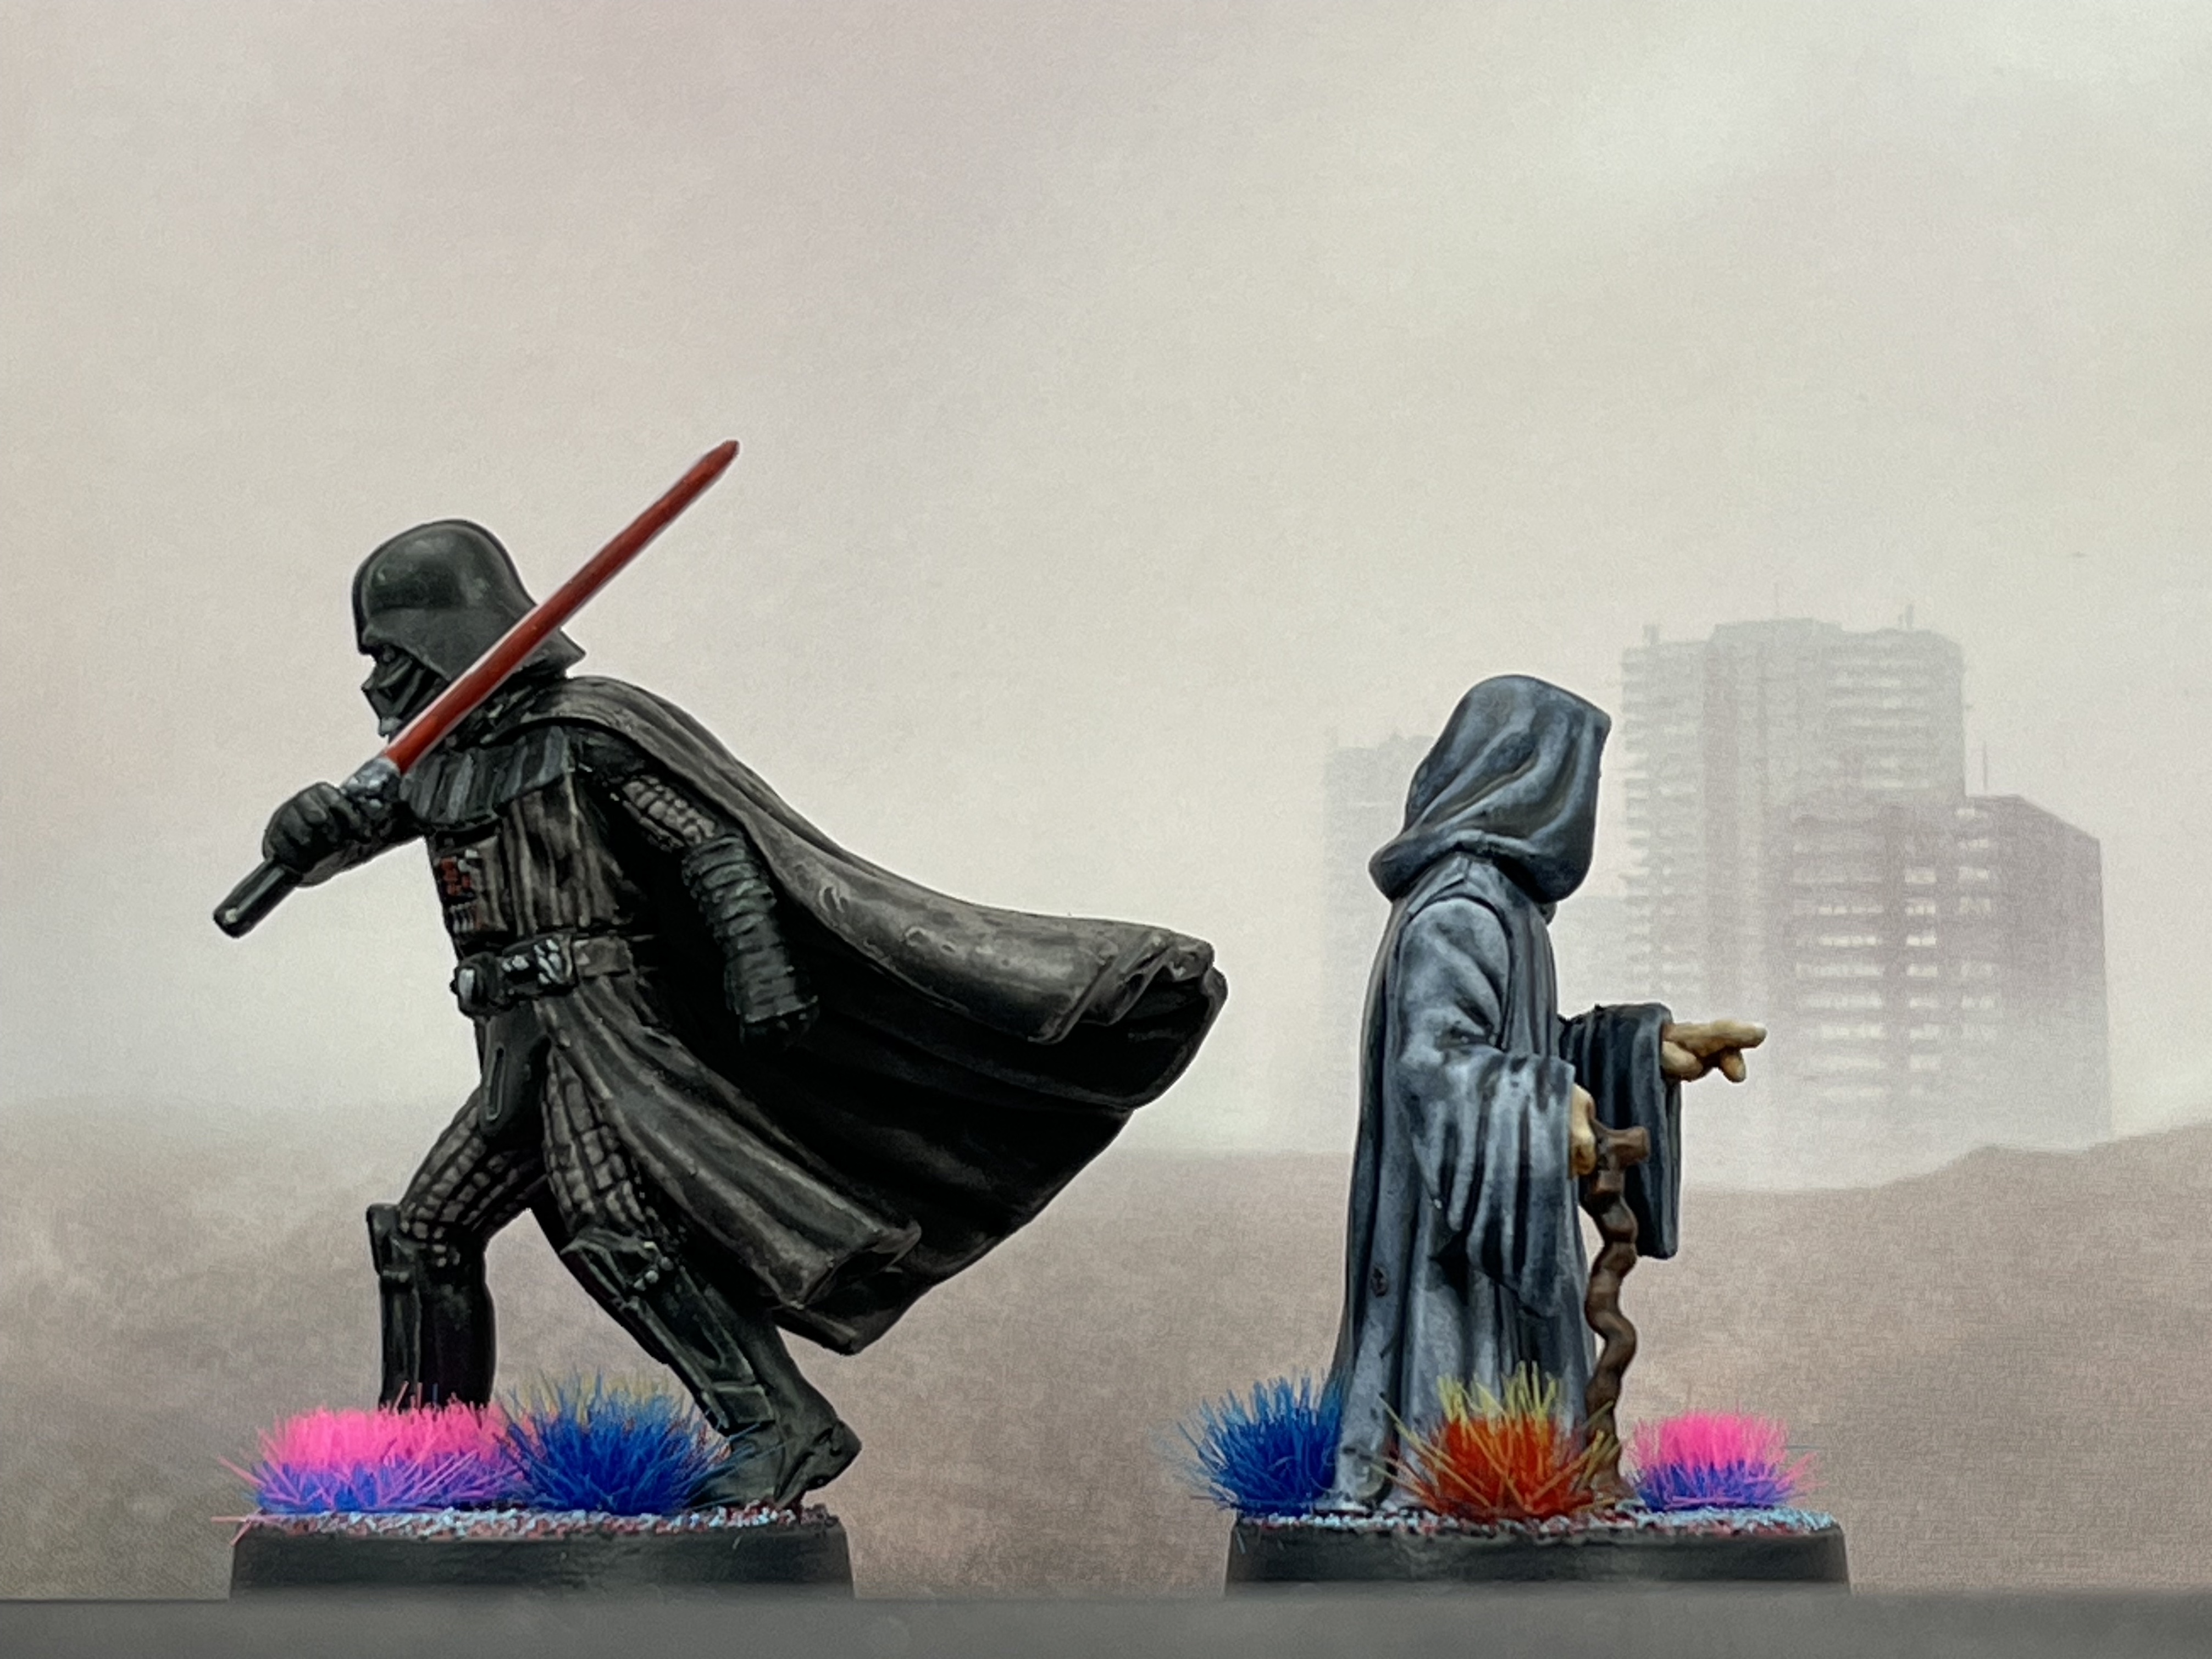
pumping out some more contrast quick paint jobs over a white primer
the primary colours used are space wolves grey (papa palatines cloak) and templar black (Vader armour) and basilicanum grey (Vader clothes and cloaks).
the lightsaber effect was achieved via the medium of blood angels red contrast and then a thin sliver of white paint down the centre to give the impression of an inner glow which is only possible if viewed from one angle… but then people only ever see Vader from the front before he murders them to death… just ask the fleet troopers on the profundity in Rogue One…
Imperial SpecOps ready to strike
Back into the stars I go, been a while since my last update (over a year!!) and I am restarting with another faction, the Empire.
Ive decided to make use of a cracking base I saw on Facebook. I cannot claim credit for this so see the piccies for the creditable person.


 tried out a number of different base colour schemes along the theme, but the original colours were the best.
I asked the House of Water #besthouse for advice on which of these two schemes was the best. the vote came back as blue clothing with black armour, so a mix of the two schemes.
I then swiftly ignored the masses and went with grey clothing and black armour as I felt it would be better.
The paint colours I’ve used are
- White Primer
- Black templar Contrast
- grey contrast
- evil suns red
- enchanted metal speedpaint
- nuln oil
- cadian fleshtone
- fleshtone wash
- Kislev flesh
so for the most part, these models have been done with contrast and no highlighting except on the faces and bases. Relatively quick paintjob to be honest and the face/bases distract from how little effort has actually been put into these.


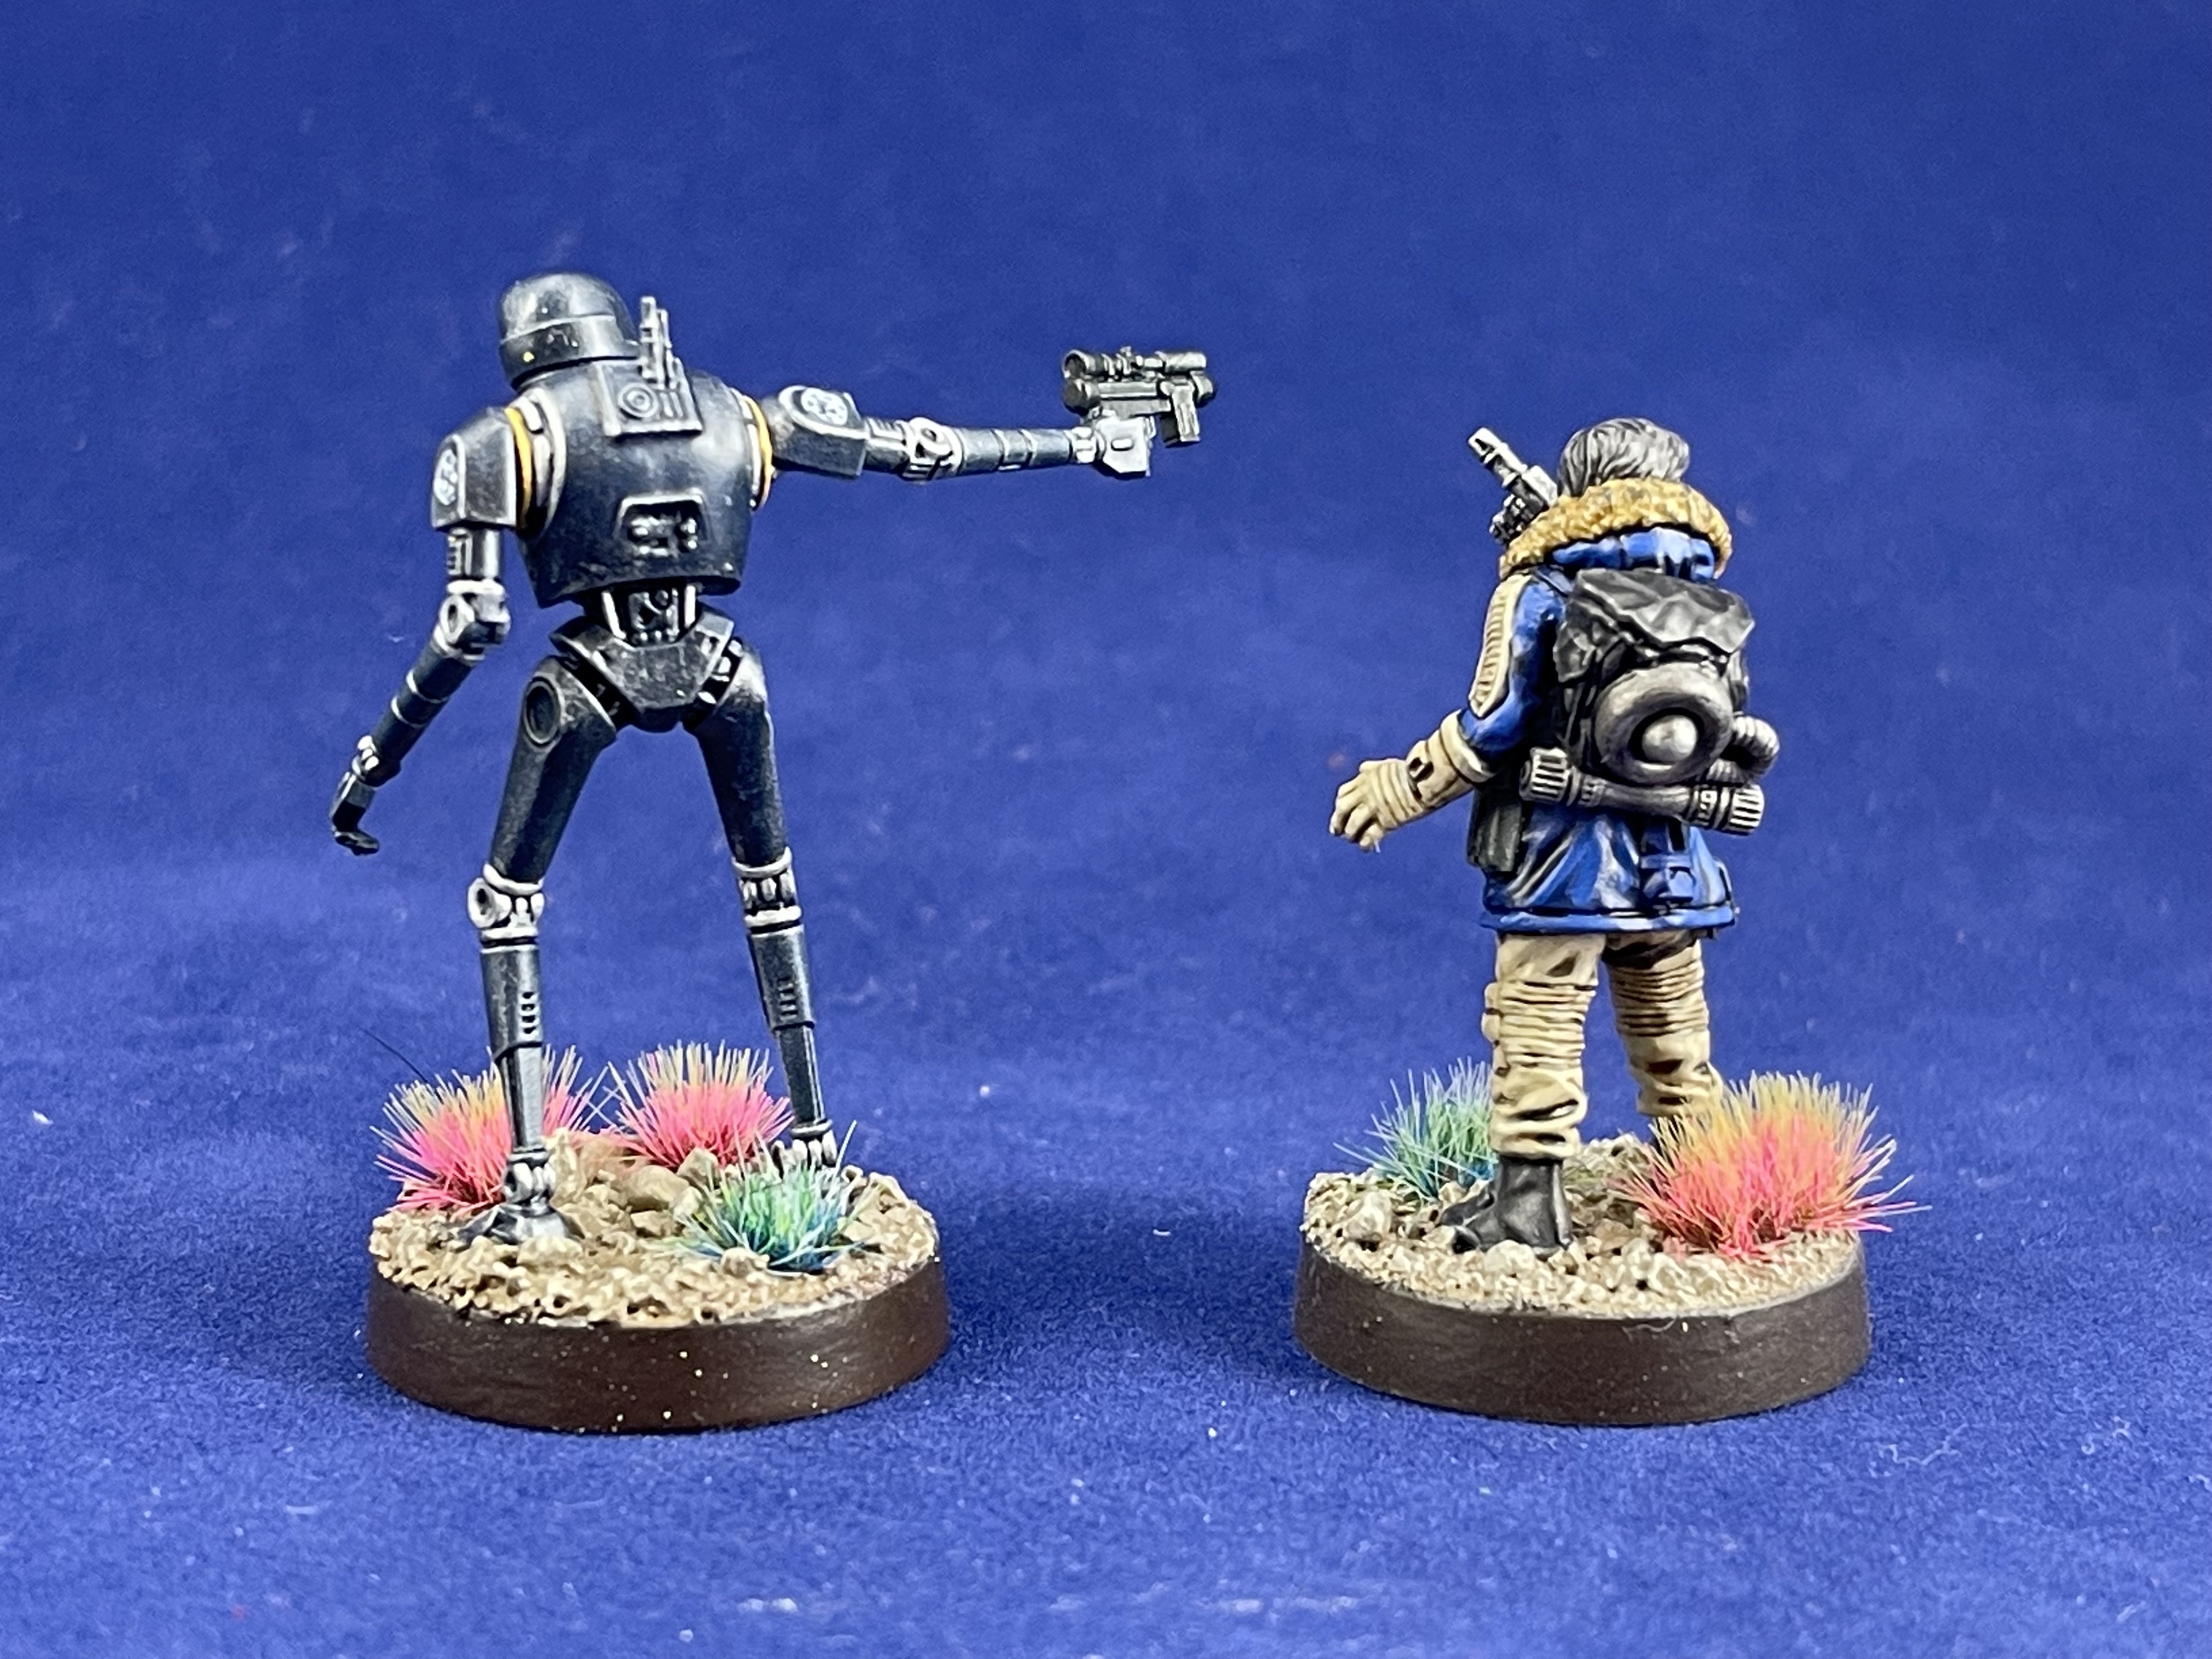
The little droid was pictured in all the promotional material as having its own base. It was then delivered without the flying stand and base. as far as im aware the newer made ones rectified this but there wasn’t a course of redress for people who bought an older packaged one.
I solved this little conundrum (as I don’t think the droid has much need for its own base, and if it does, I can re-solve or apply the DILLIGAF rule) using a paperclip, and black contrast paint. The paperclip was straightened out and then bent into a sharp 90 degree L shape where the base of the L is glued to the underside of the base and the upright passes through a small drilled hole and up into the base of the droid. all secured with superglue.
Been a waiting a while for this bus...
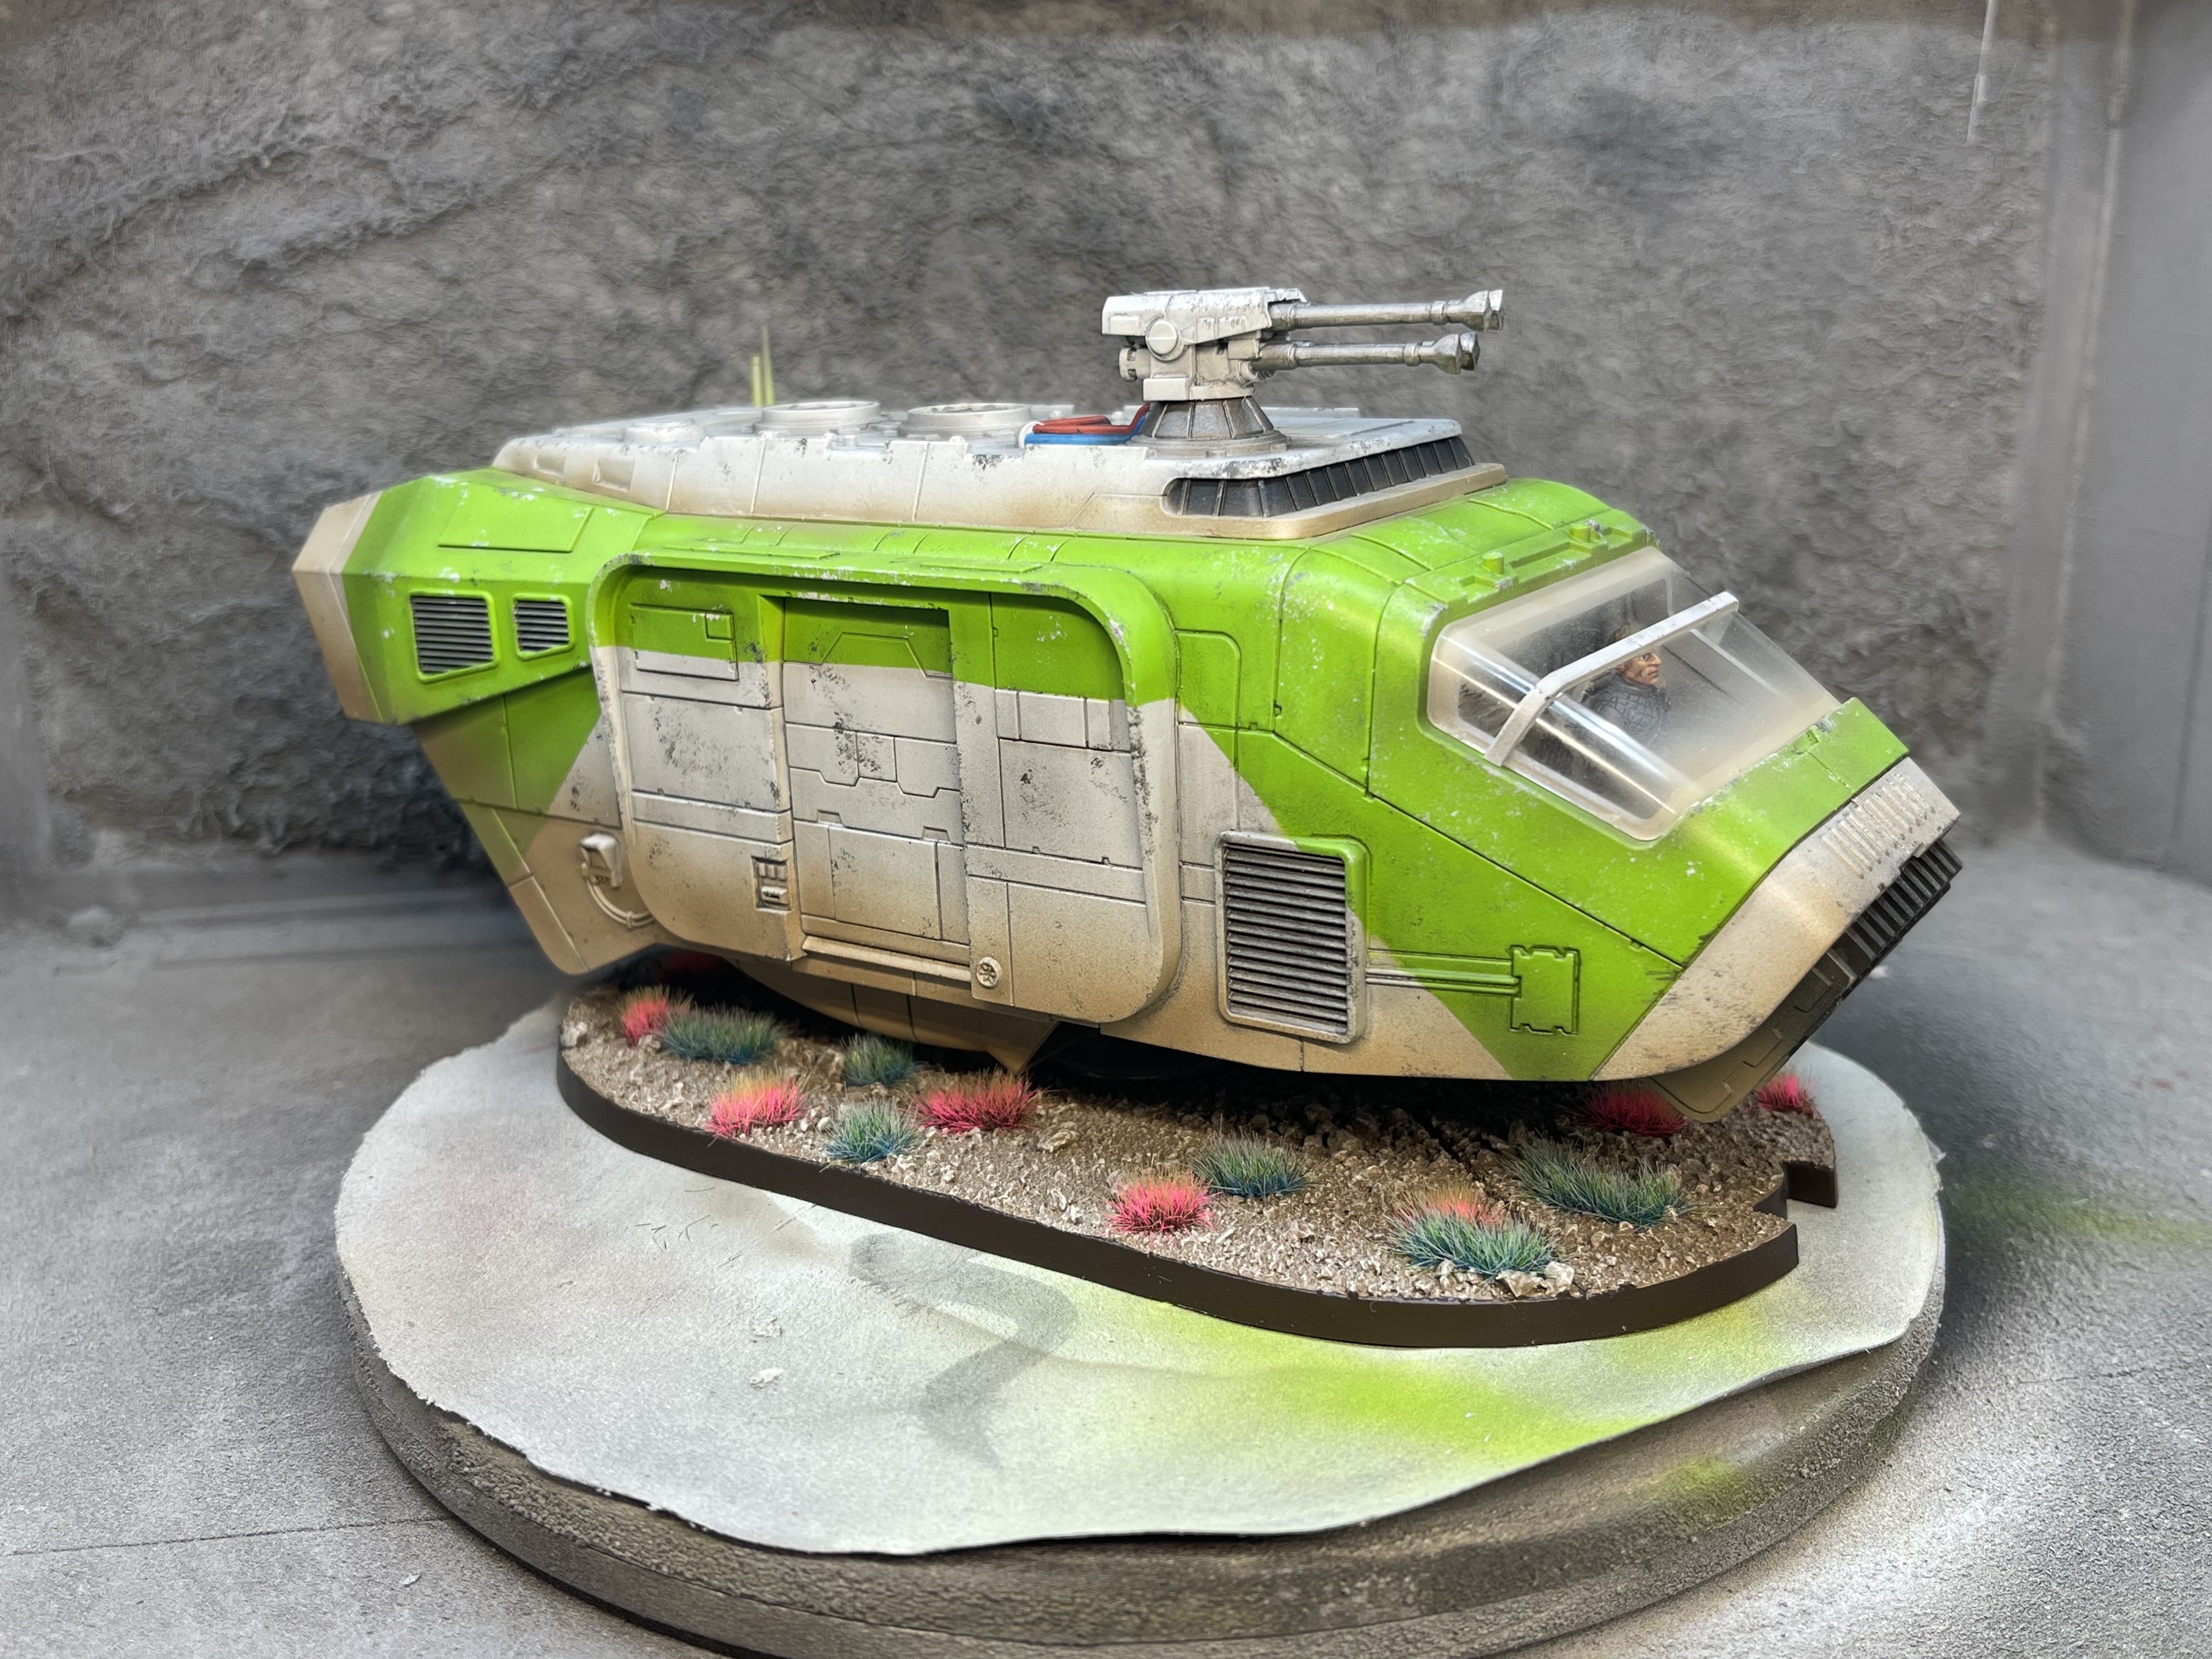


Been a while since I visited the world of Star Wars (criminal I say!) so I eased myself in gently with a simple paint job with an airbrush.
simply grey seer prime, then a nice vibrant green (moot green I think) over it in areas that I had masked off.
farted about with white a blue on the engines and a few contrast colours to show heated metals on the exhausts too, won’t be seen by many people though so semi pointless.
then I sealed it with lacquer (shiney stuff) and gave it a lamp black oil wash and let it sit for a few days to cure. Then sealed that with matt varnish.
after that it was onto stippling and airbrushing weathering.
the final step was to glue it all together (I painted it in subassemblies) and put the pilot in before glueing on the windscreen.
simples.
I did swap out the head and keep the sullustan head for a different model to make best use of it
I did some painting.... Cassian said I had to

So I might have been a bit busy recently looking after the new member of the family… our own stormpooper made an arrival and all other things got put on hold! It’s been rough but we have all settled down and mostly adjusted to our new life. So today I managed to finish off this boxed set of rogues.
Wookiees, many, for the use of
 3 squads with a couple of options
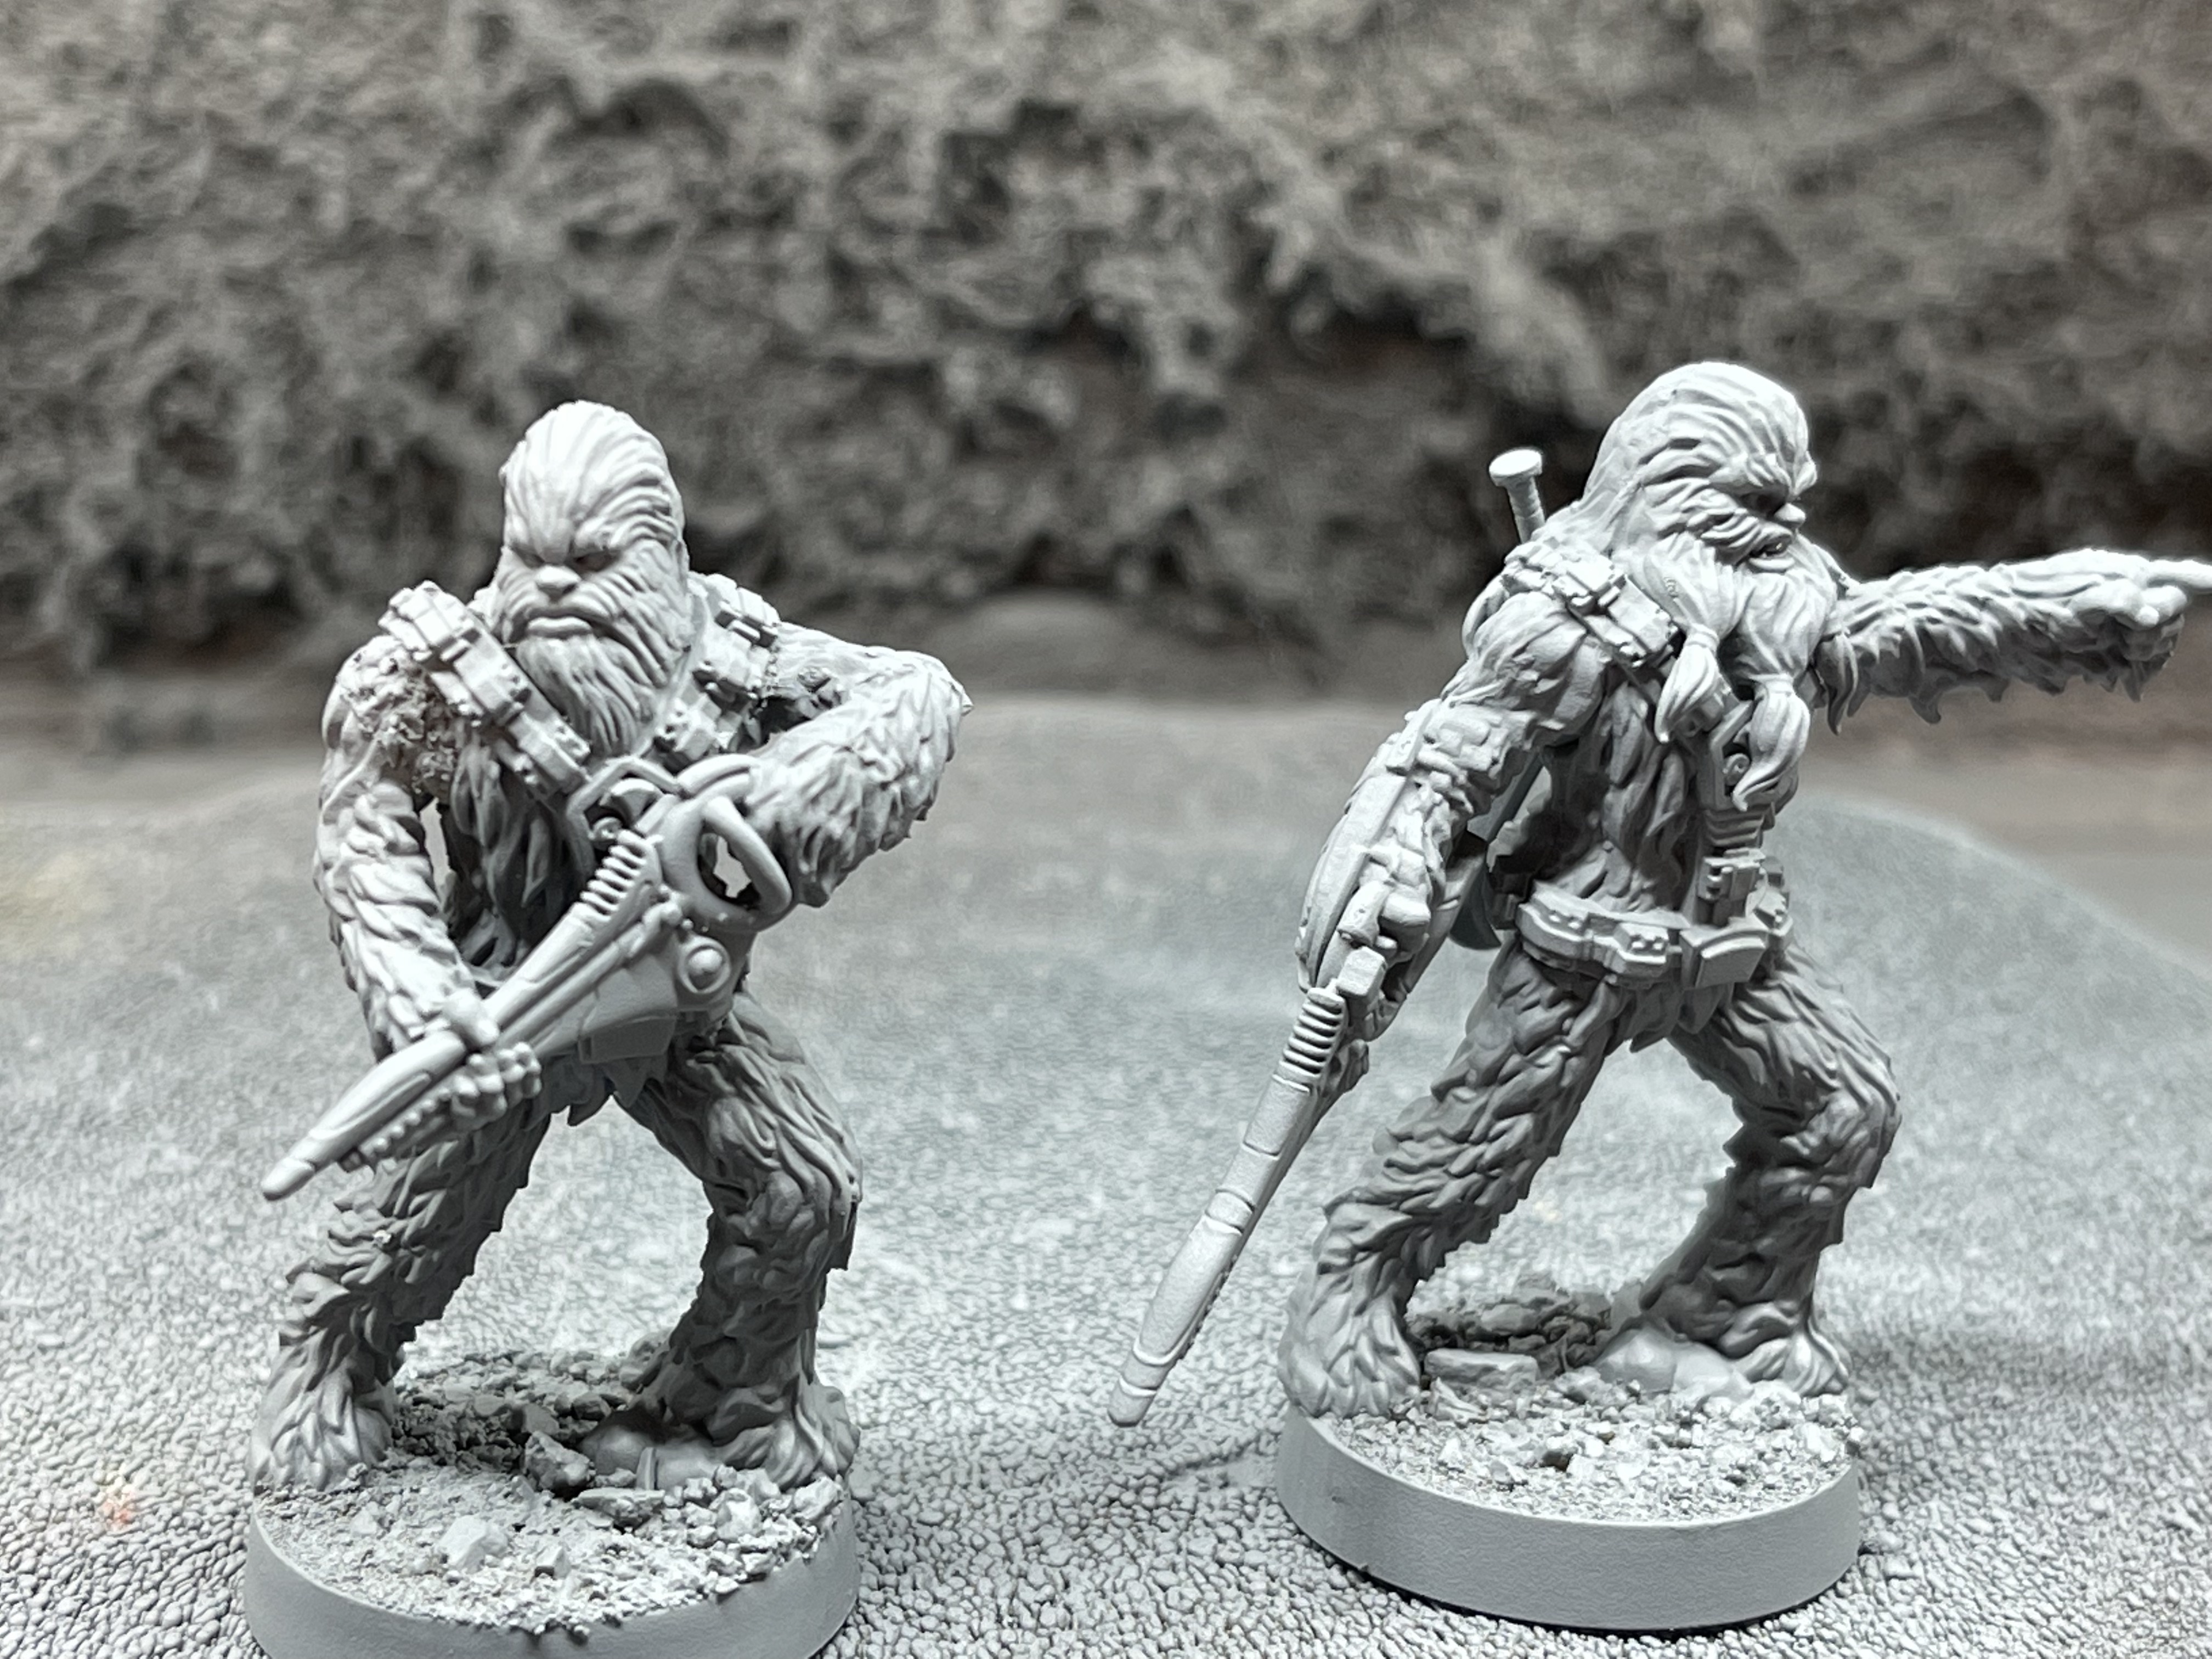
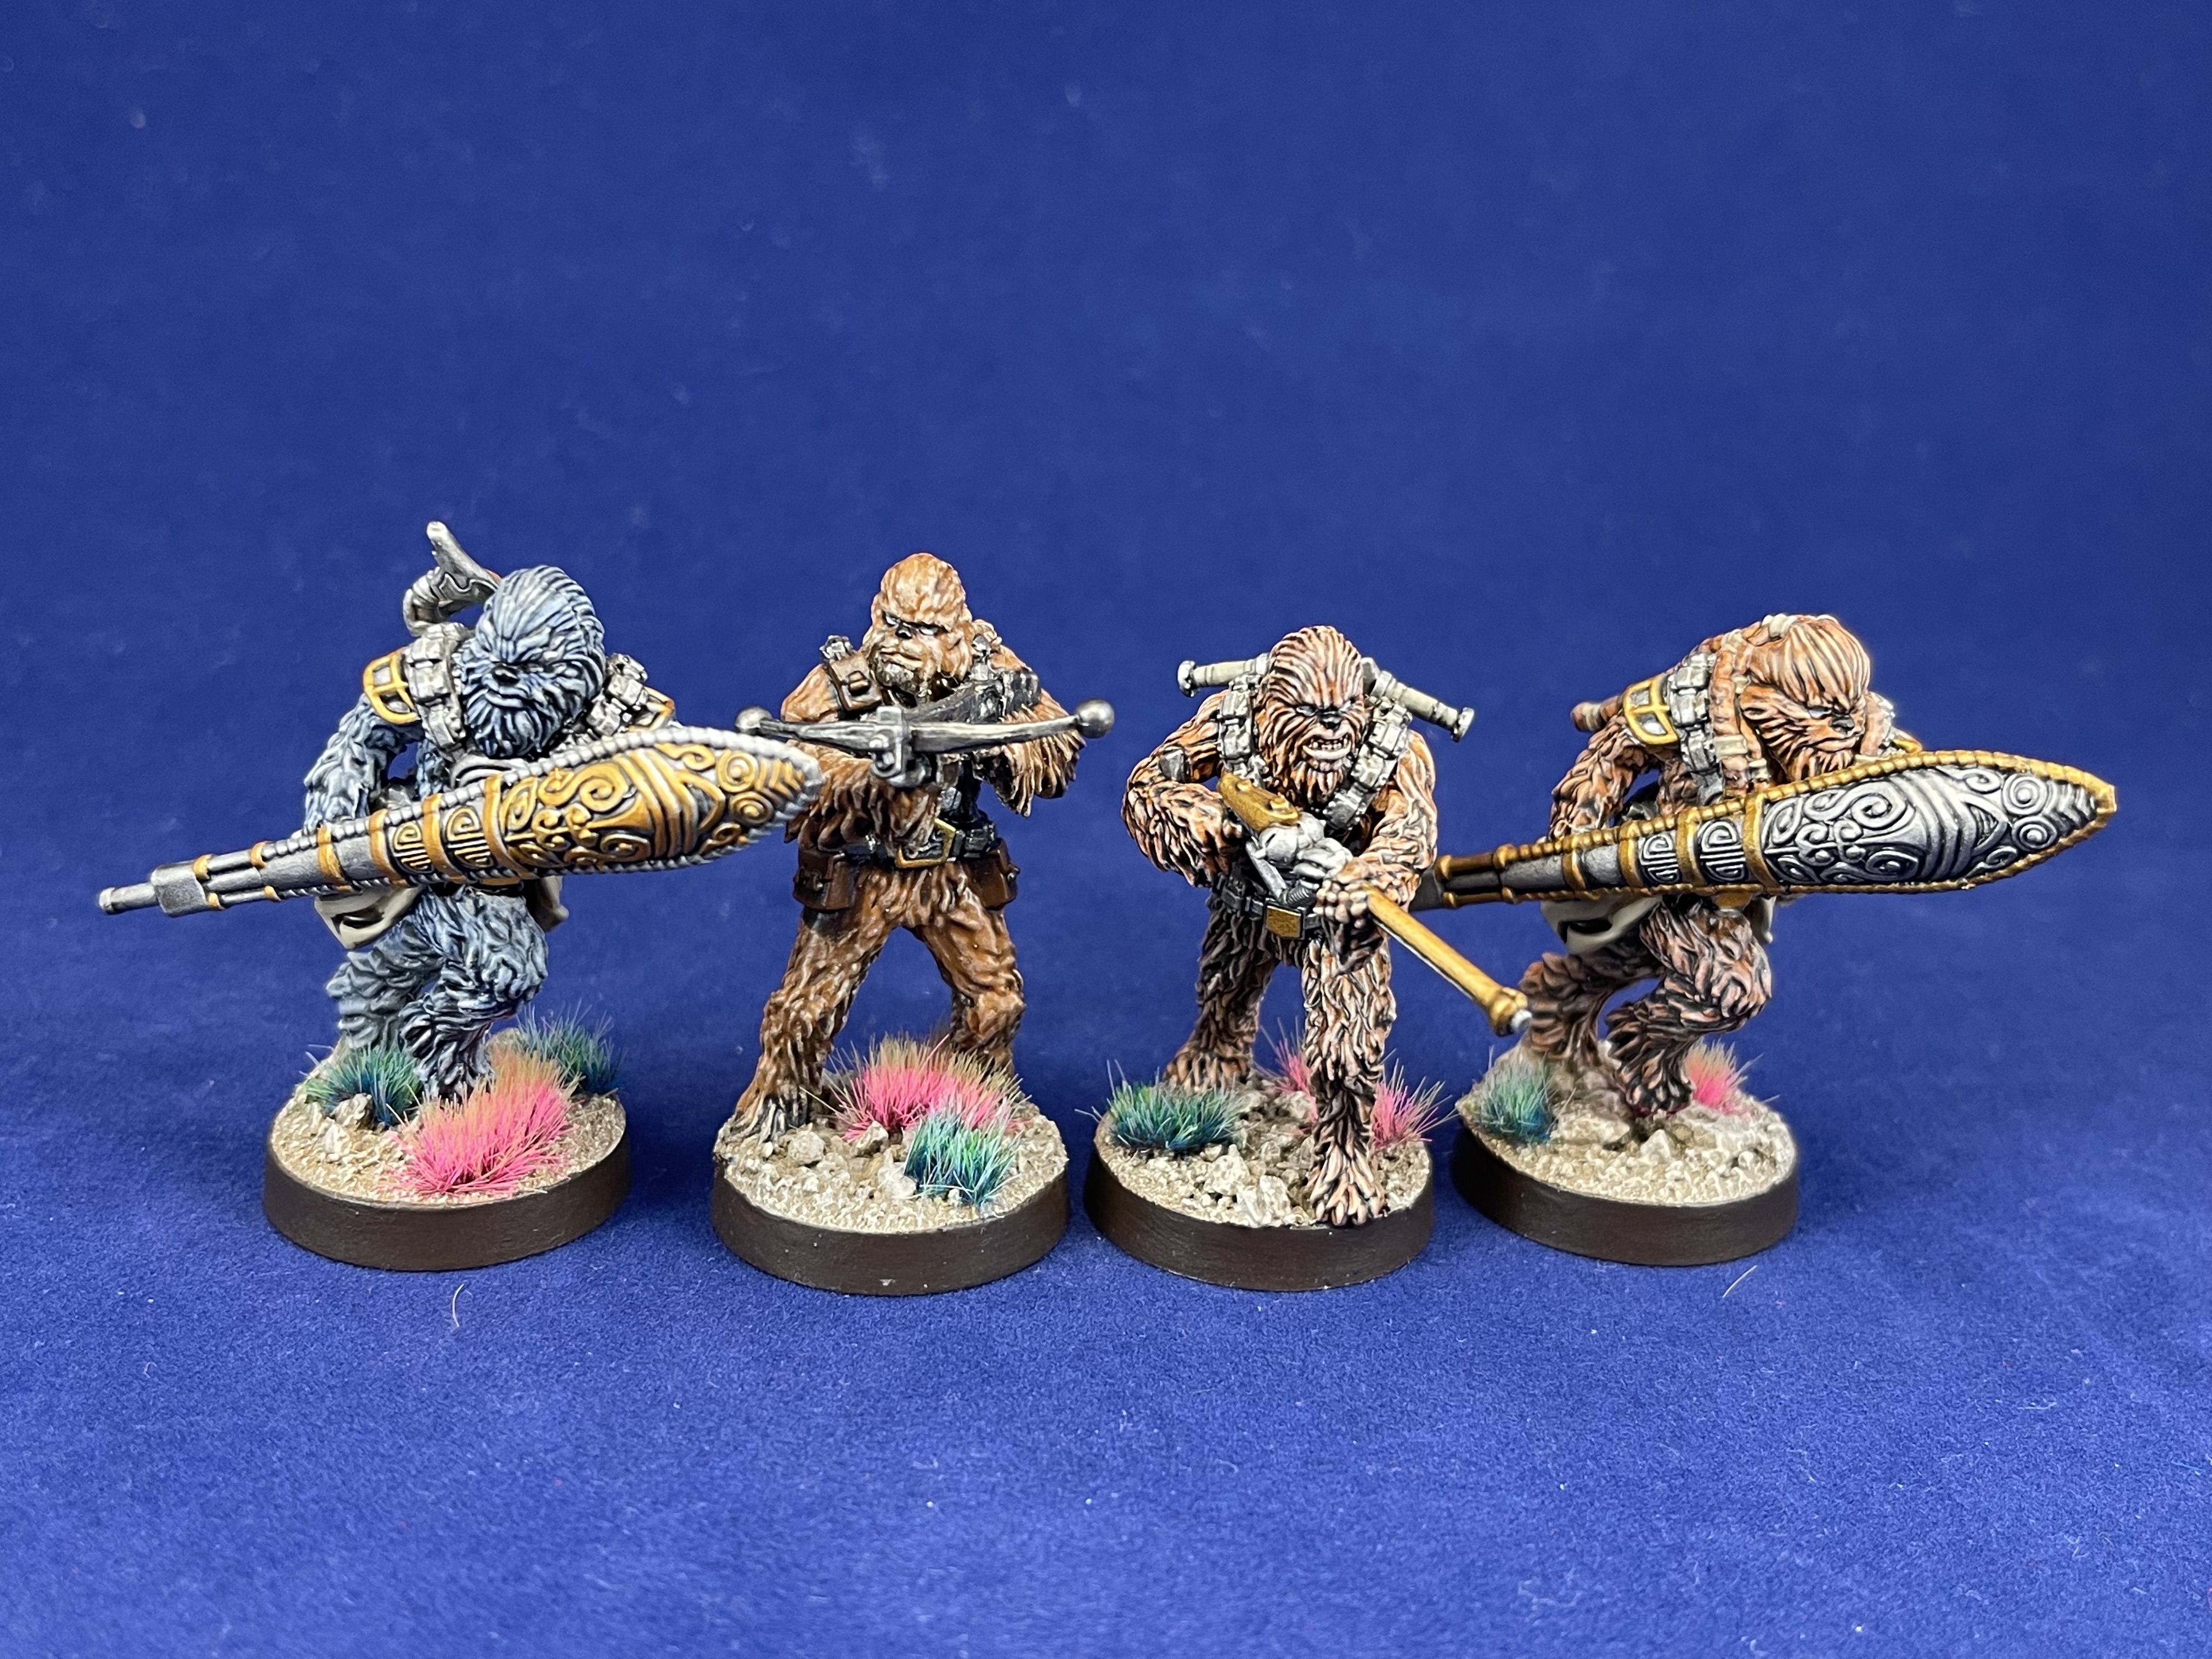 here you can see just how soft the older FFG minis are (compare bowcaster to a shield chap)
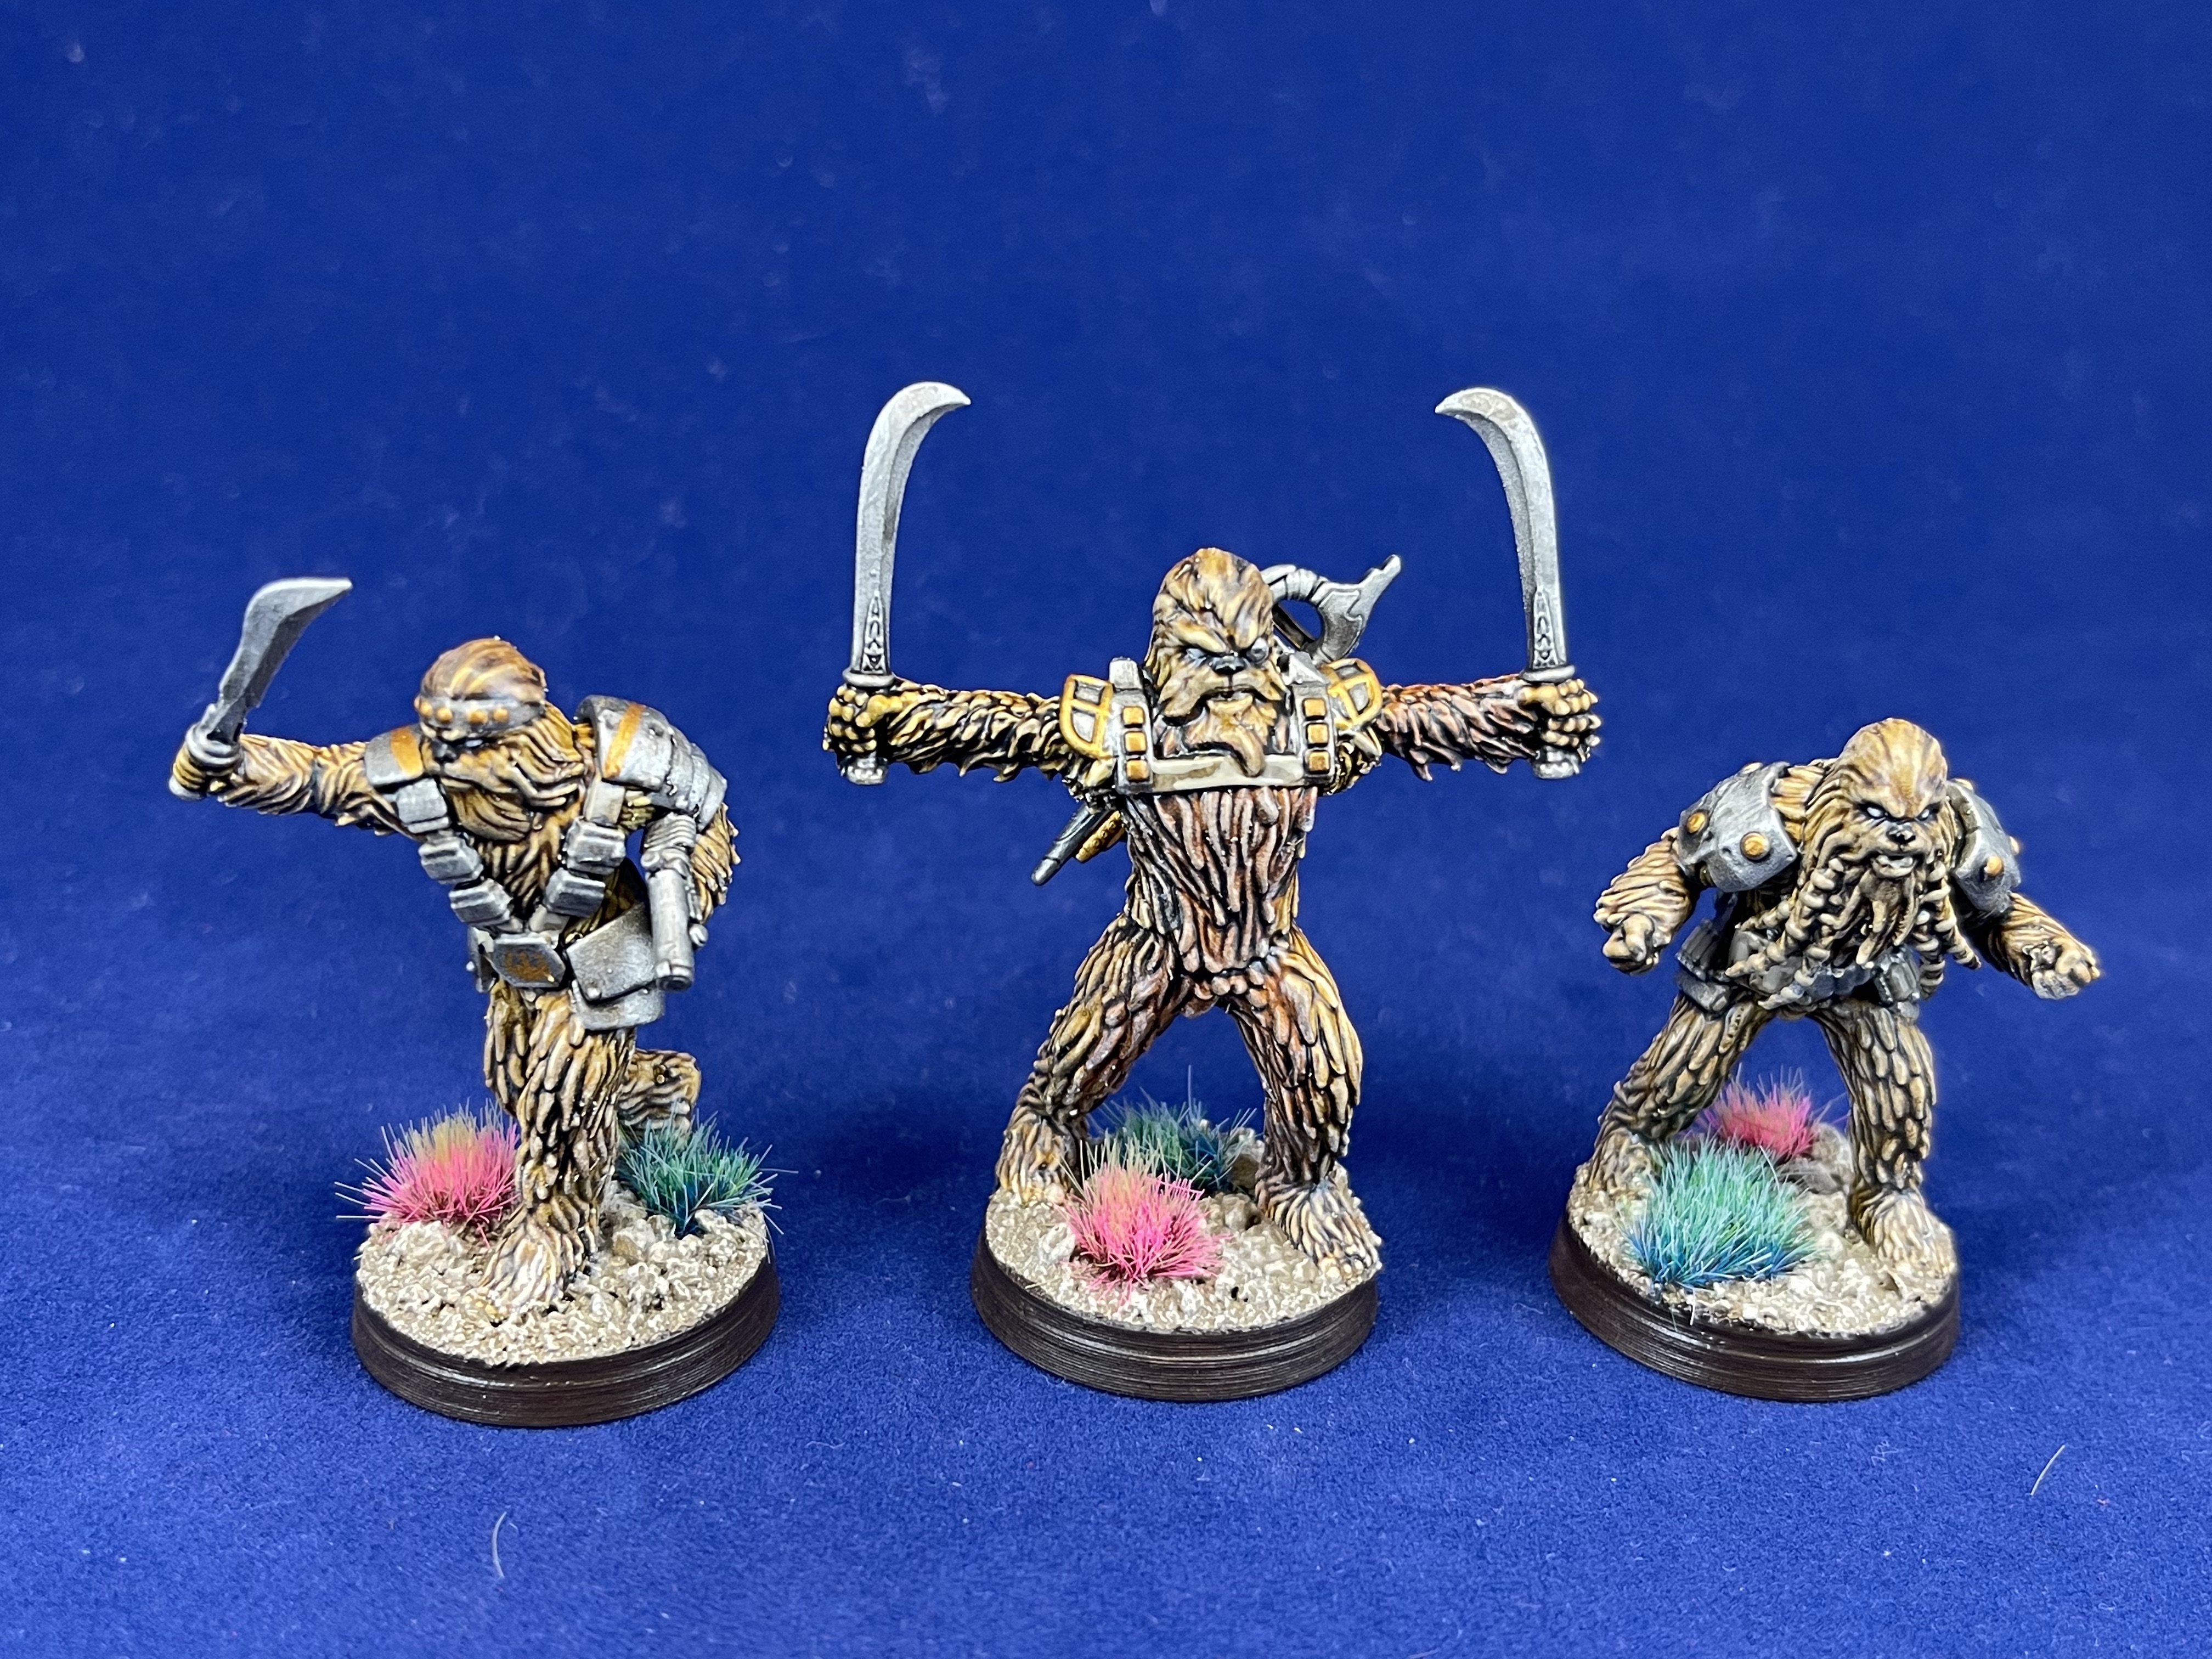 3D printed (and then fixed with milliput) 'come at me bro' close combat squad
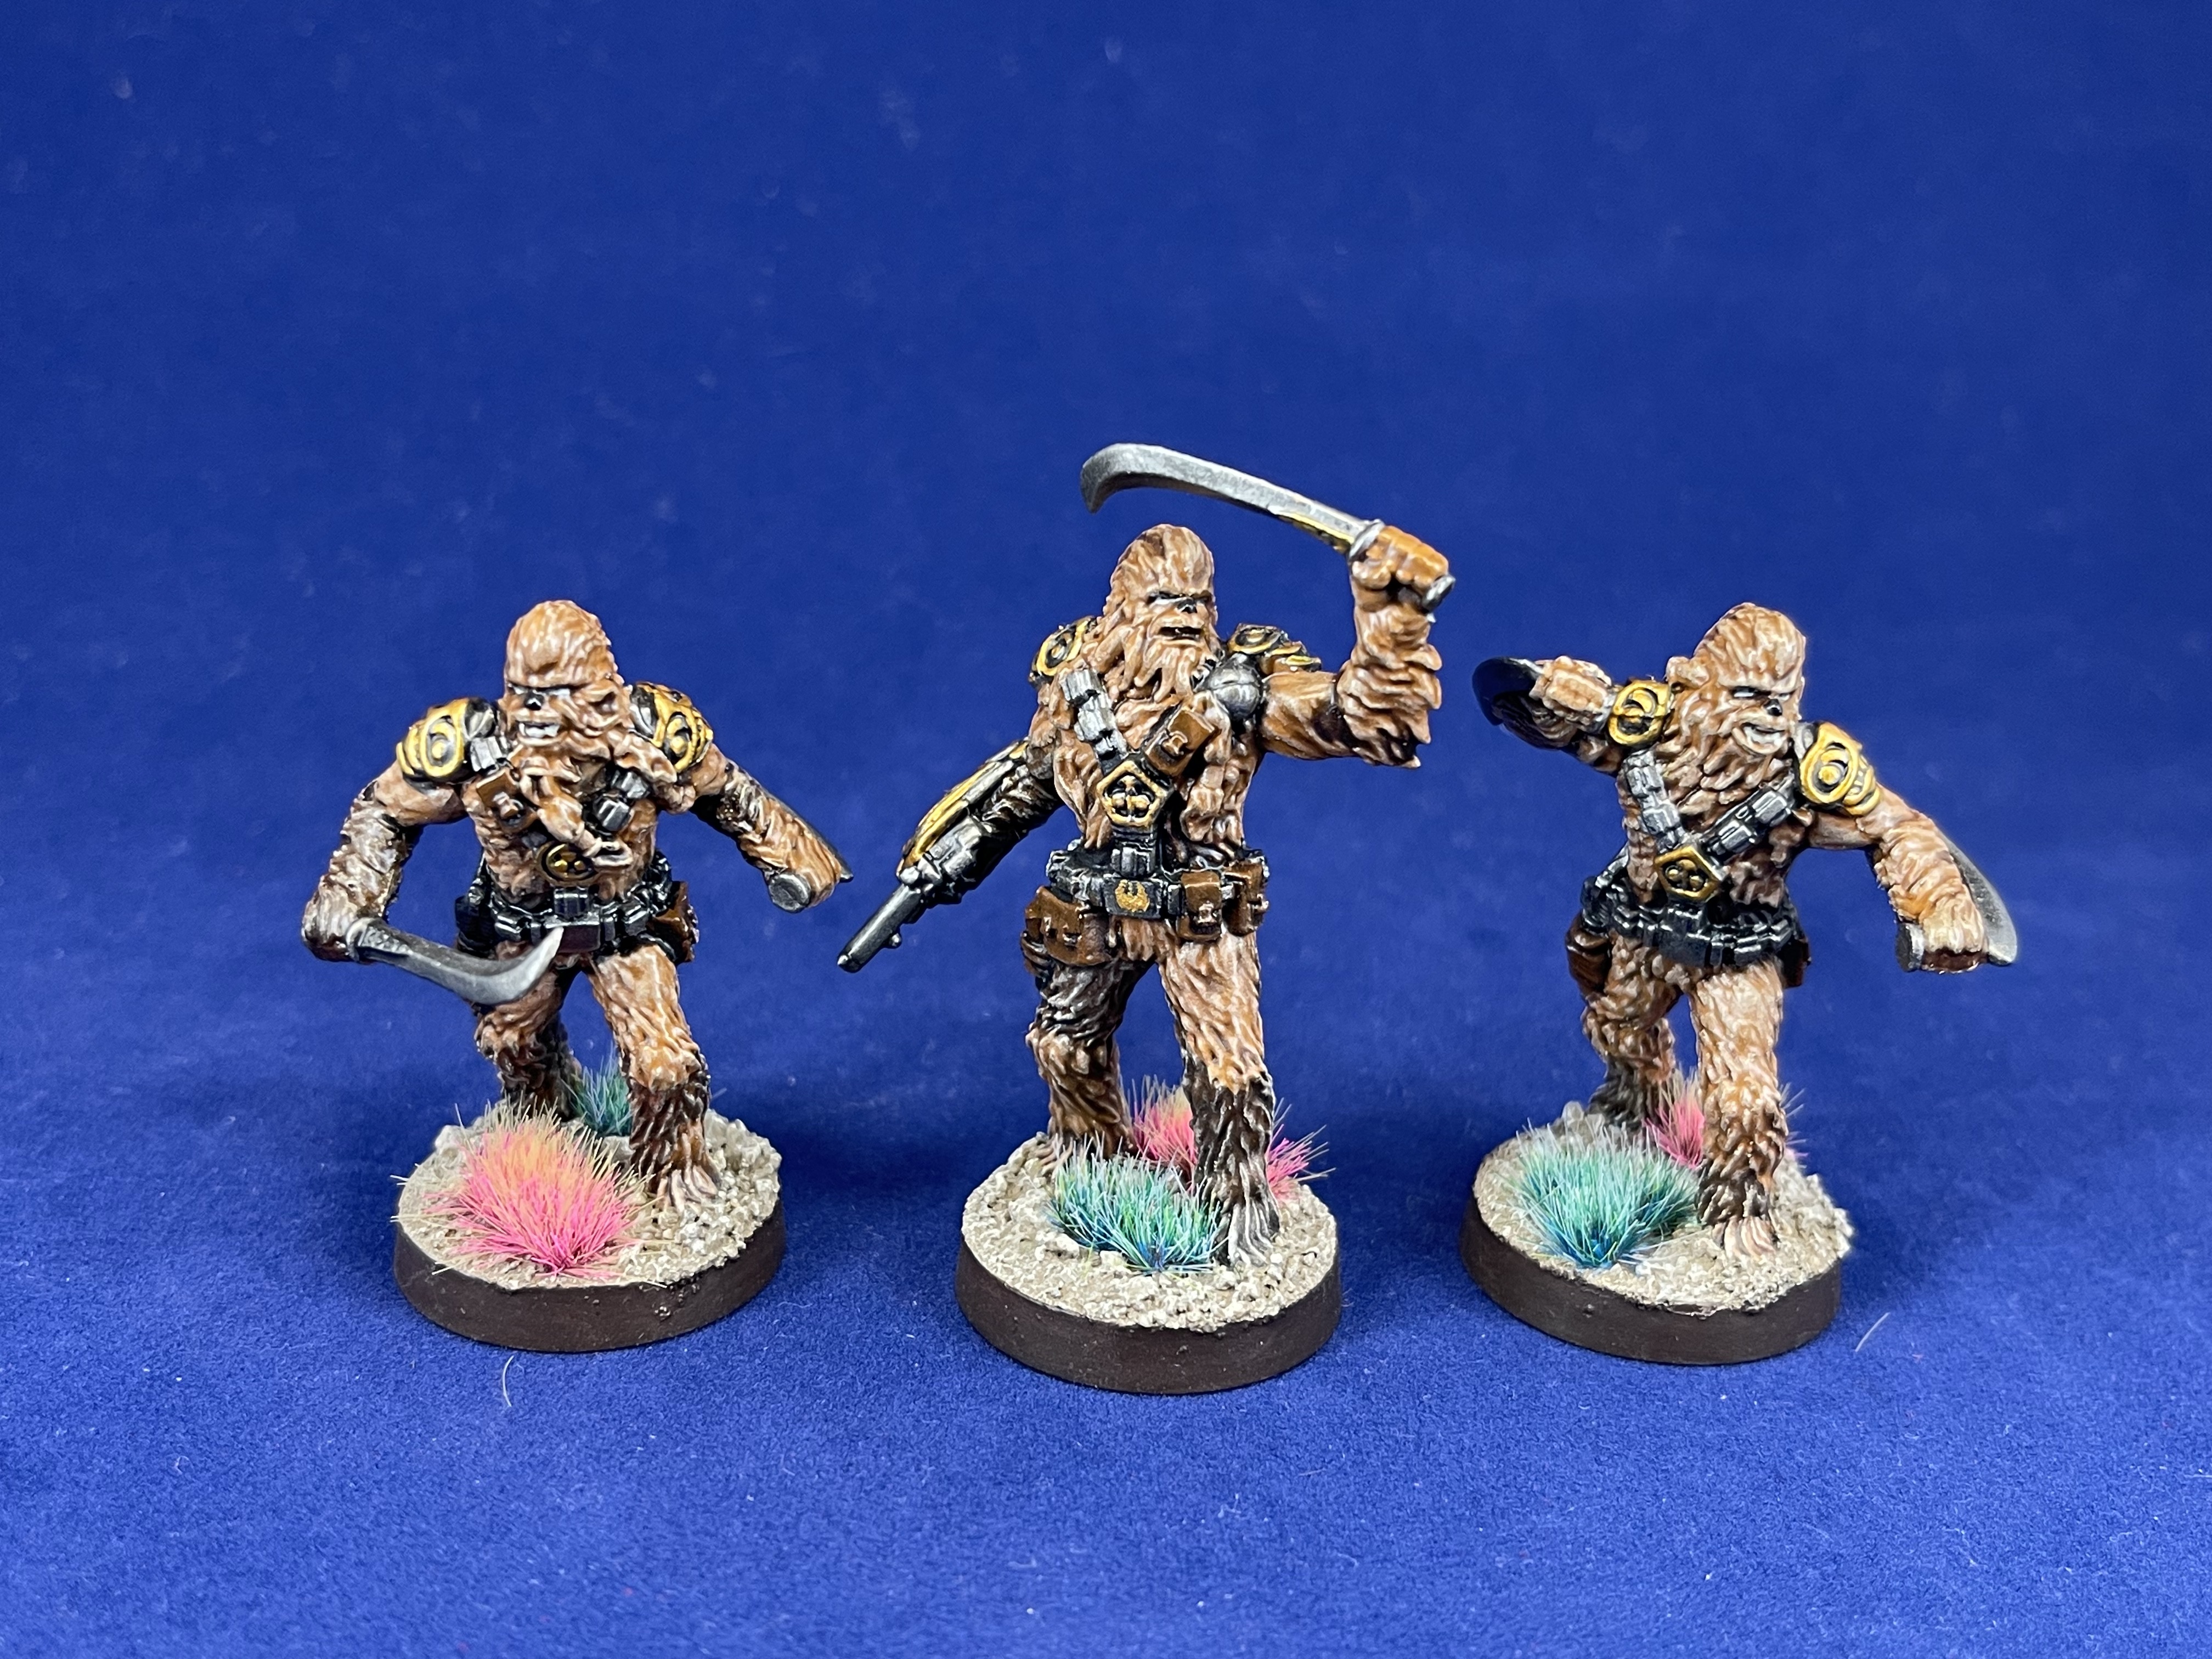 FFG original rebel squad
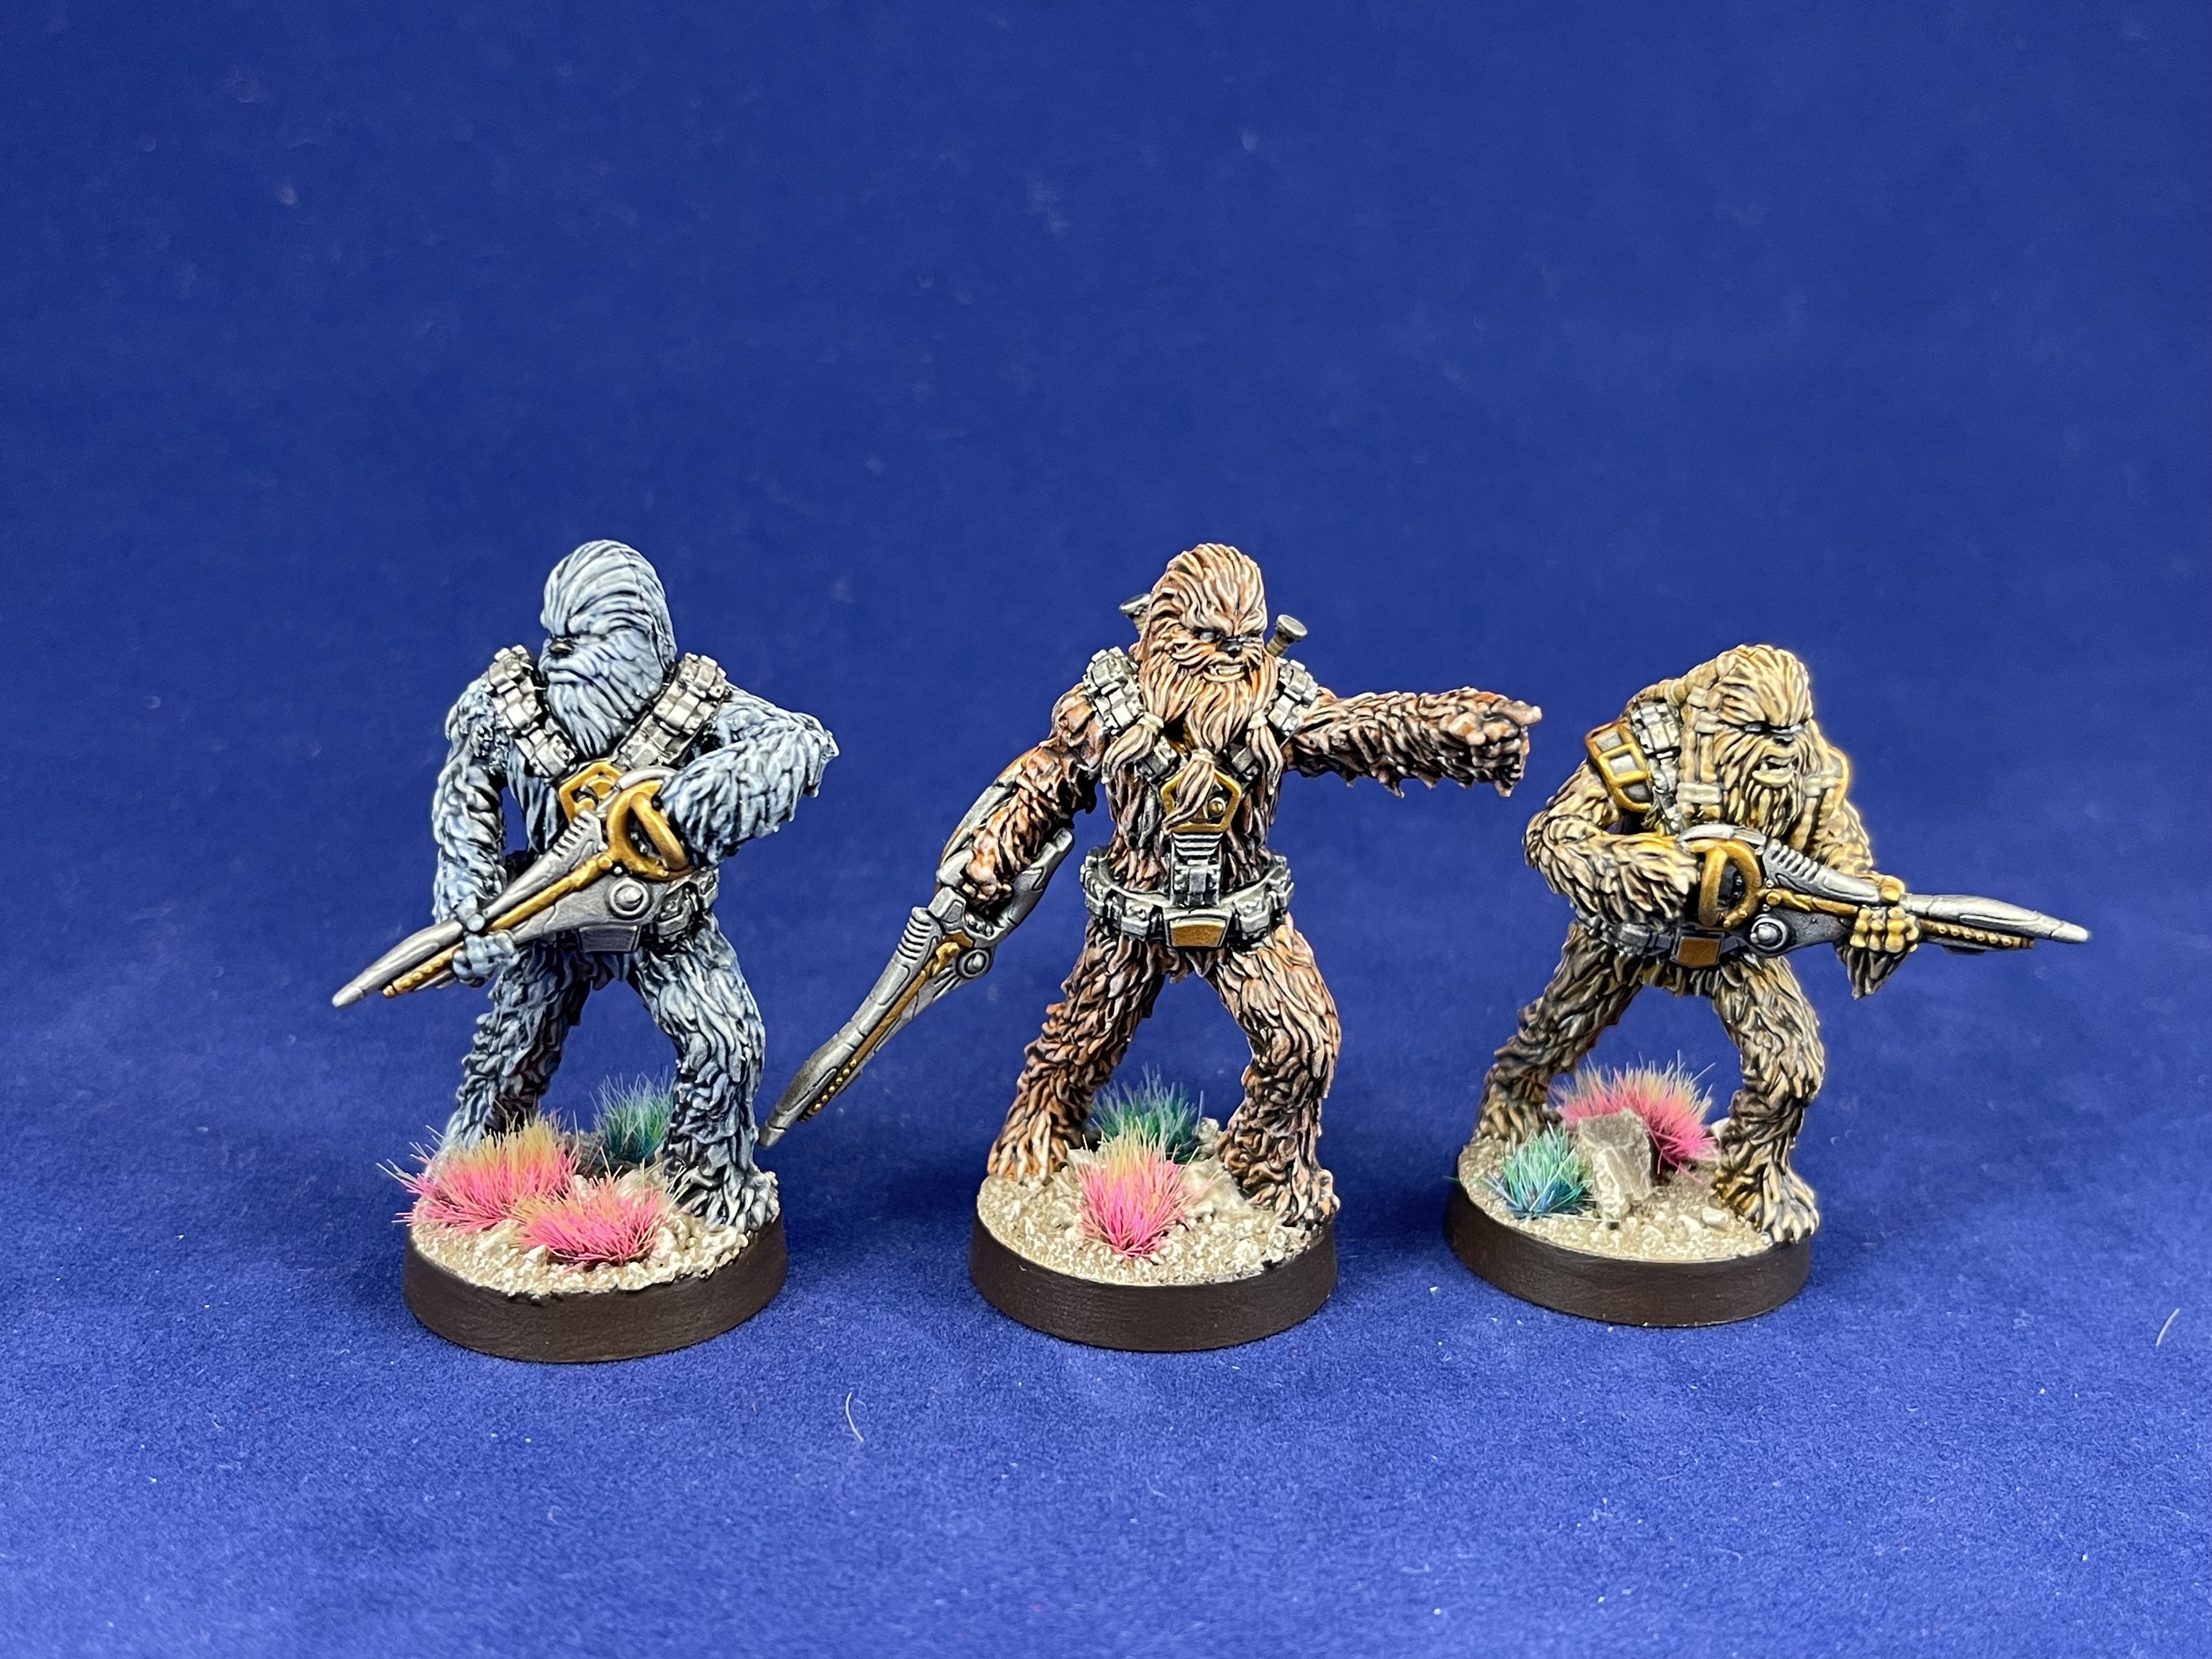 AMG new plastic shooty shooty squad (also milliput used to get more out of the kit)
Bring out the fur missiles
 original basic squad
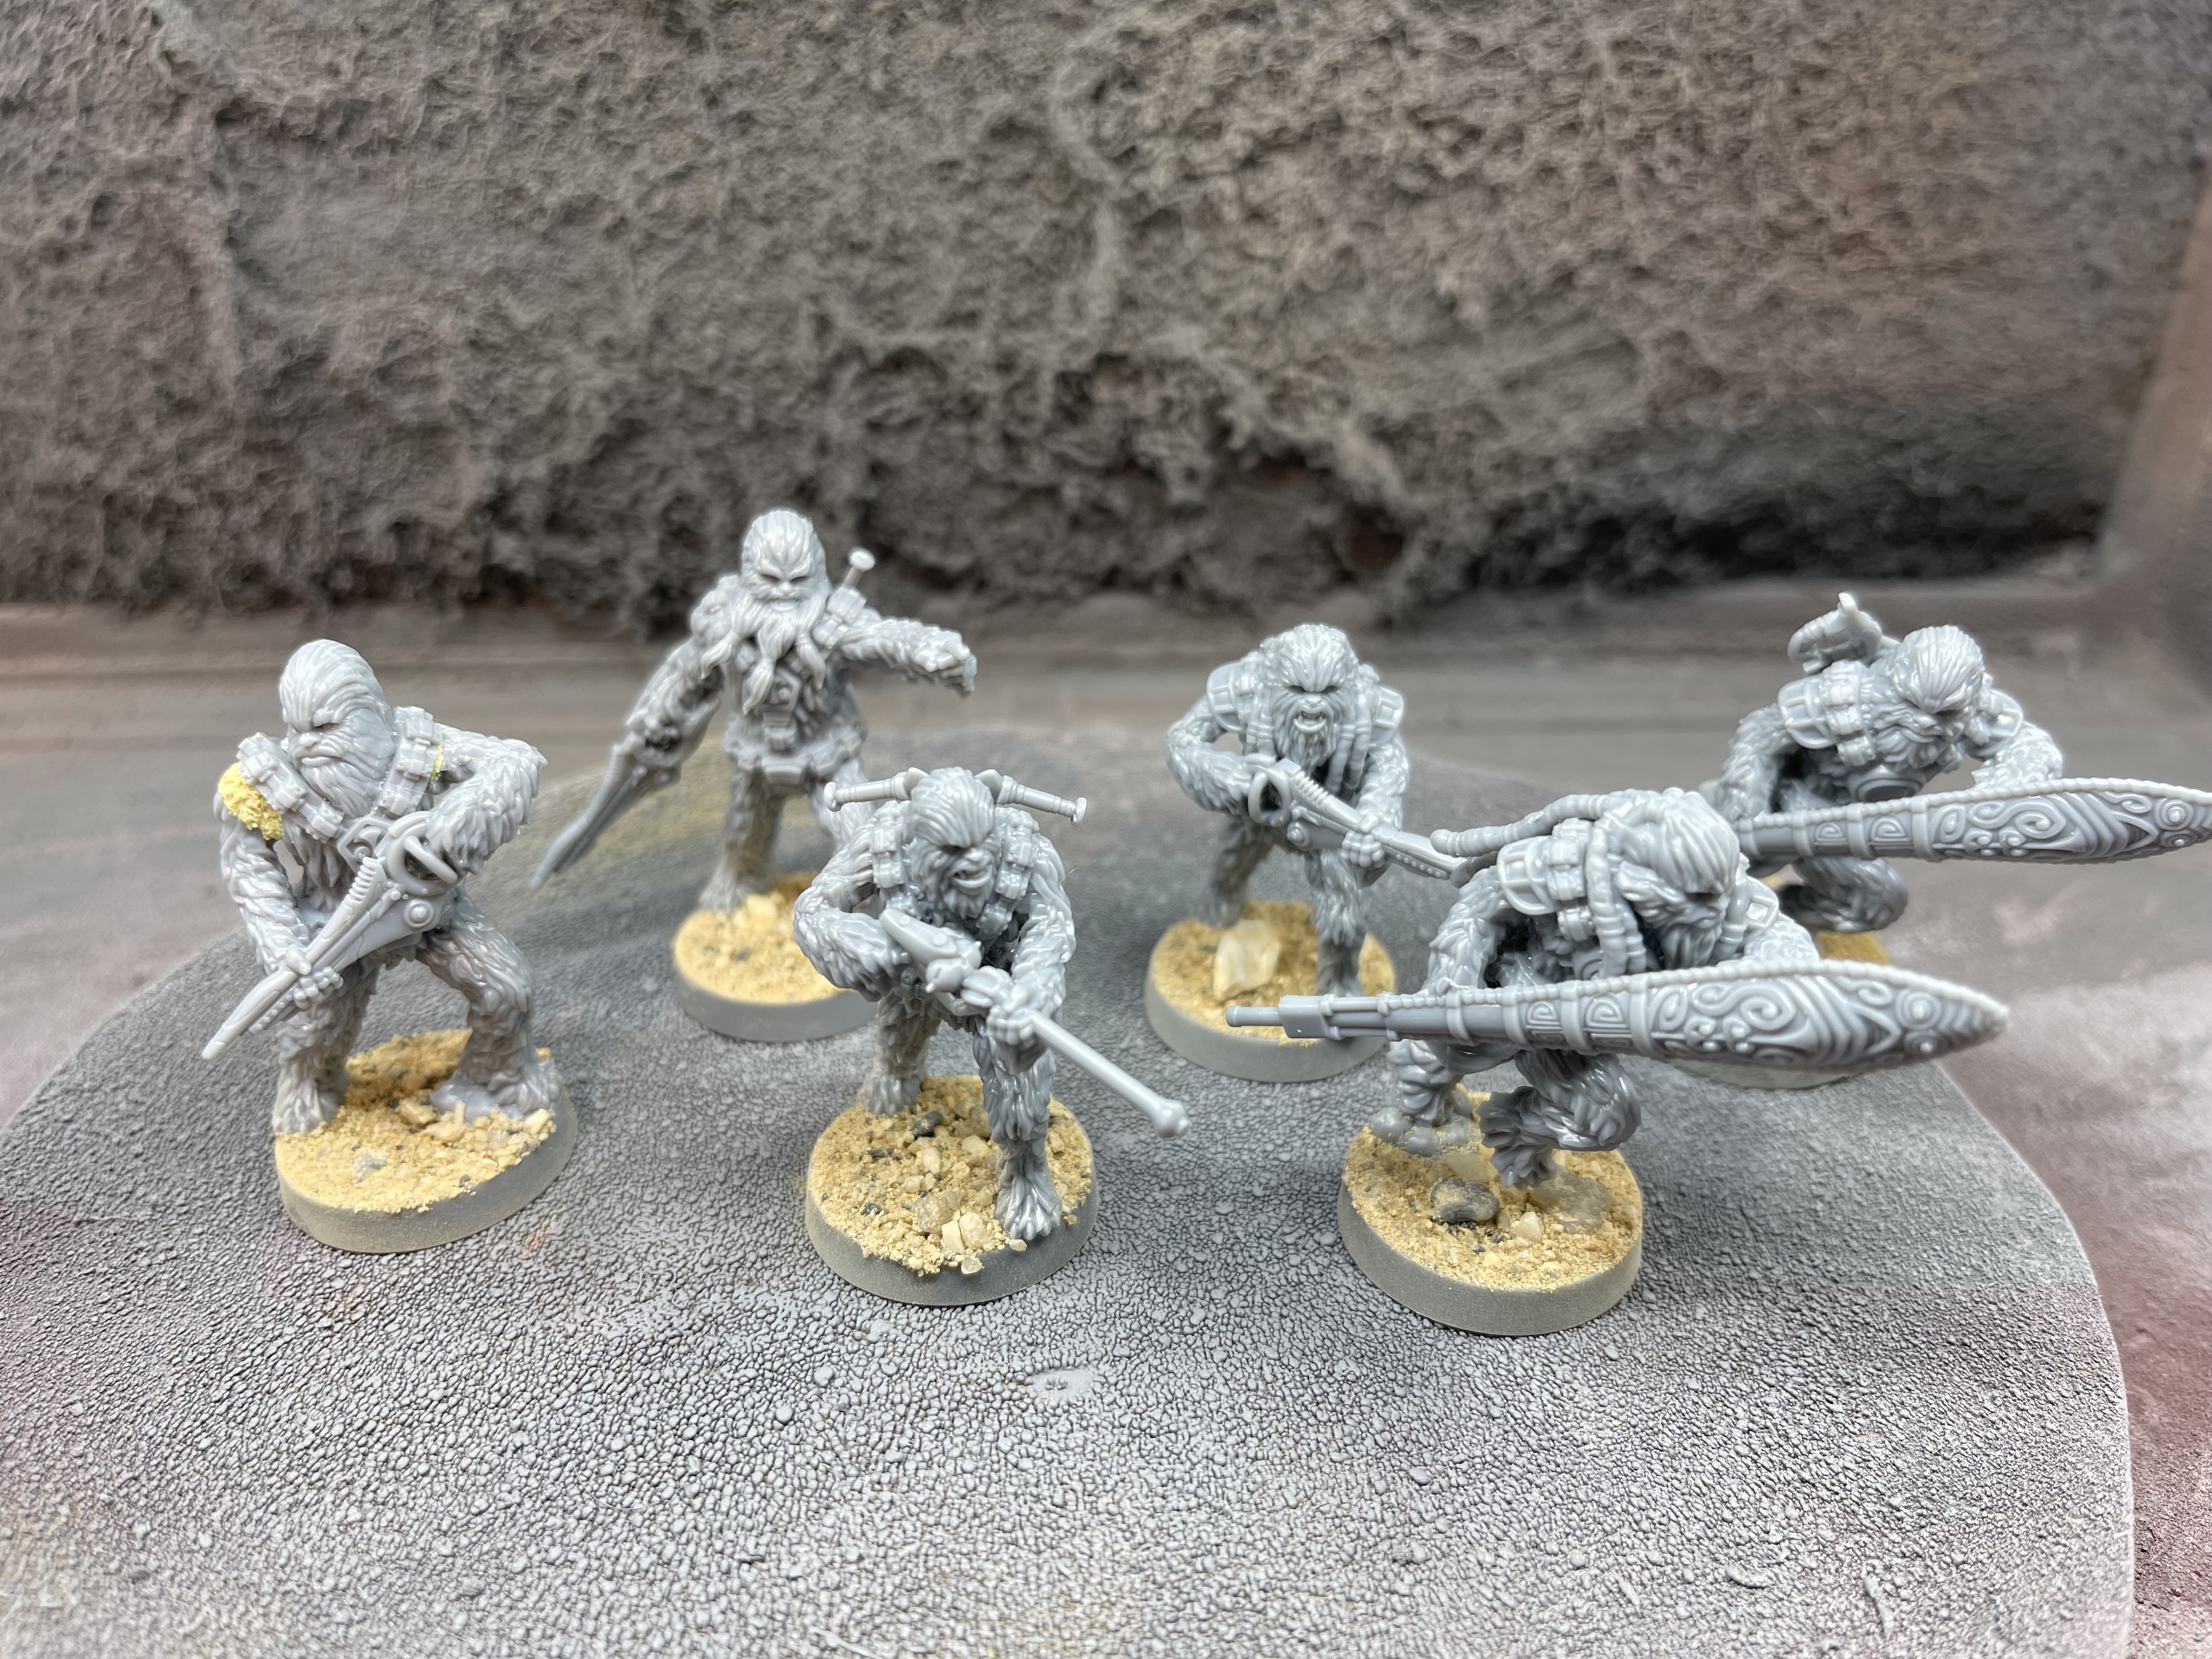
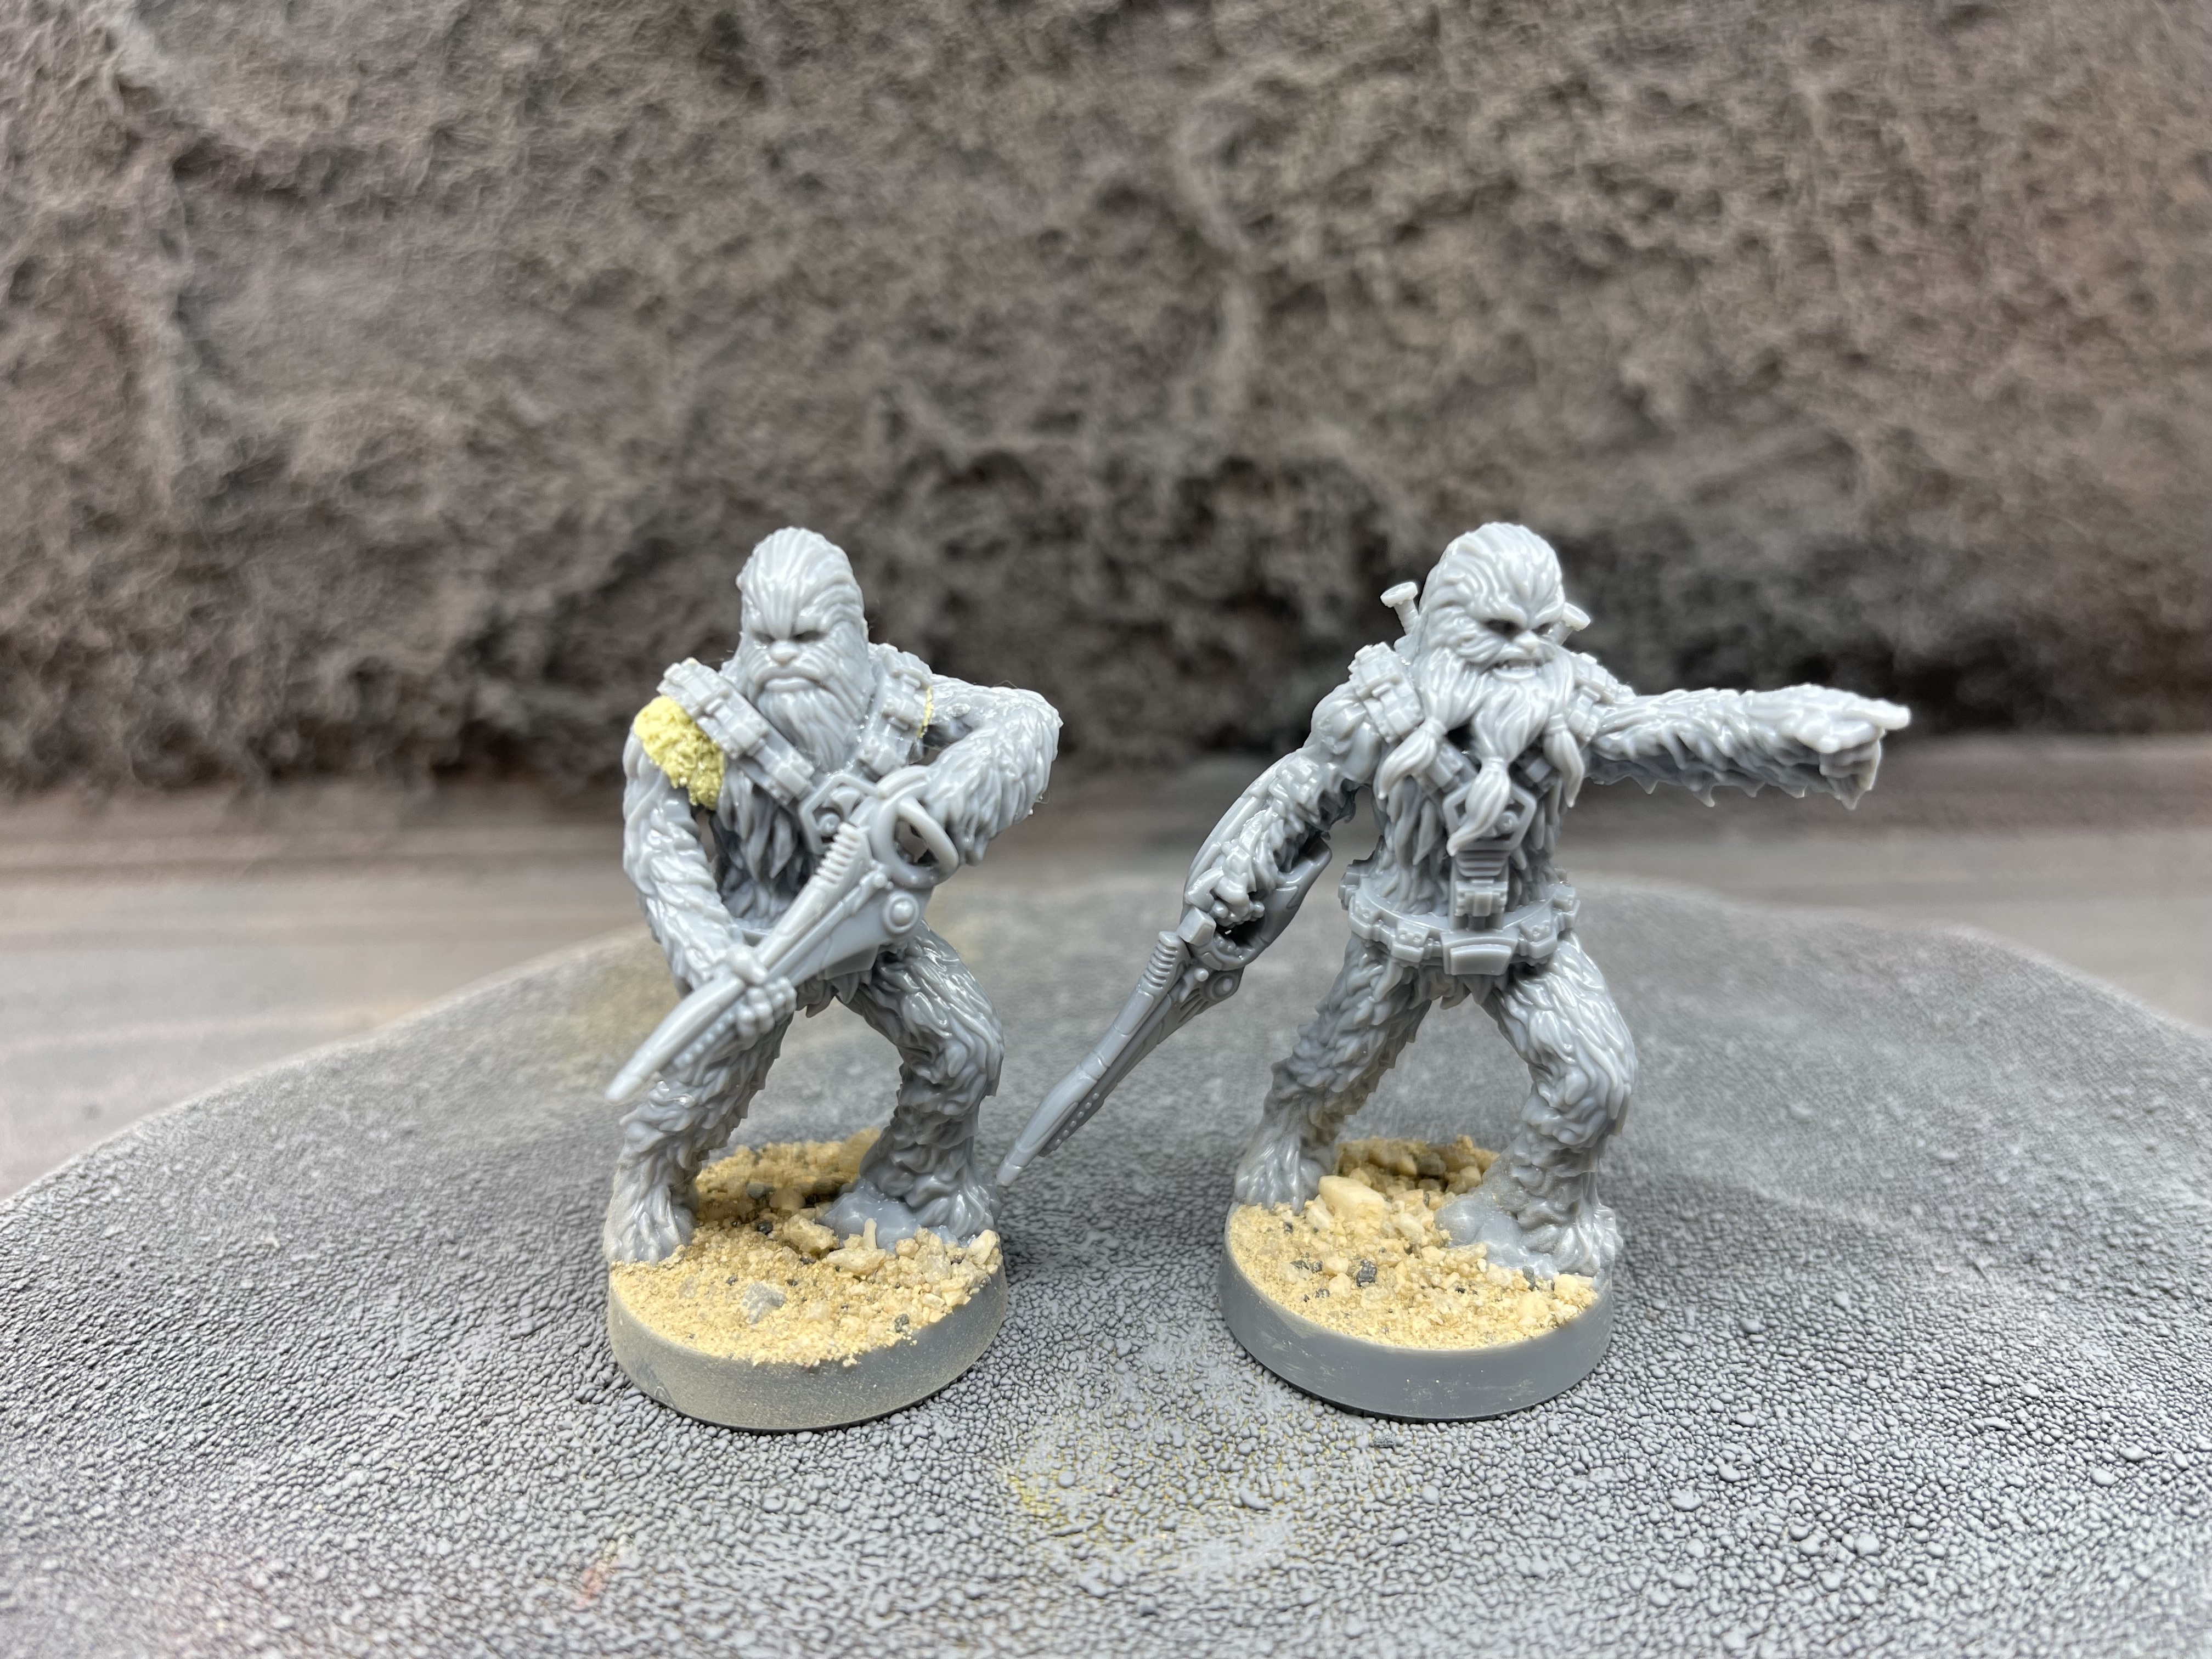
to get what I wanted out of the republic boxed set I had to break out milliput to make additions to the fur. that way I could use all the special weapons and still get a unit of carbine wielding Wookiees. came out ok in the end one it was primed, not perfect but it’ll do!
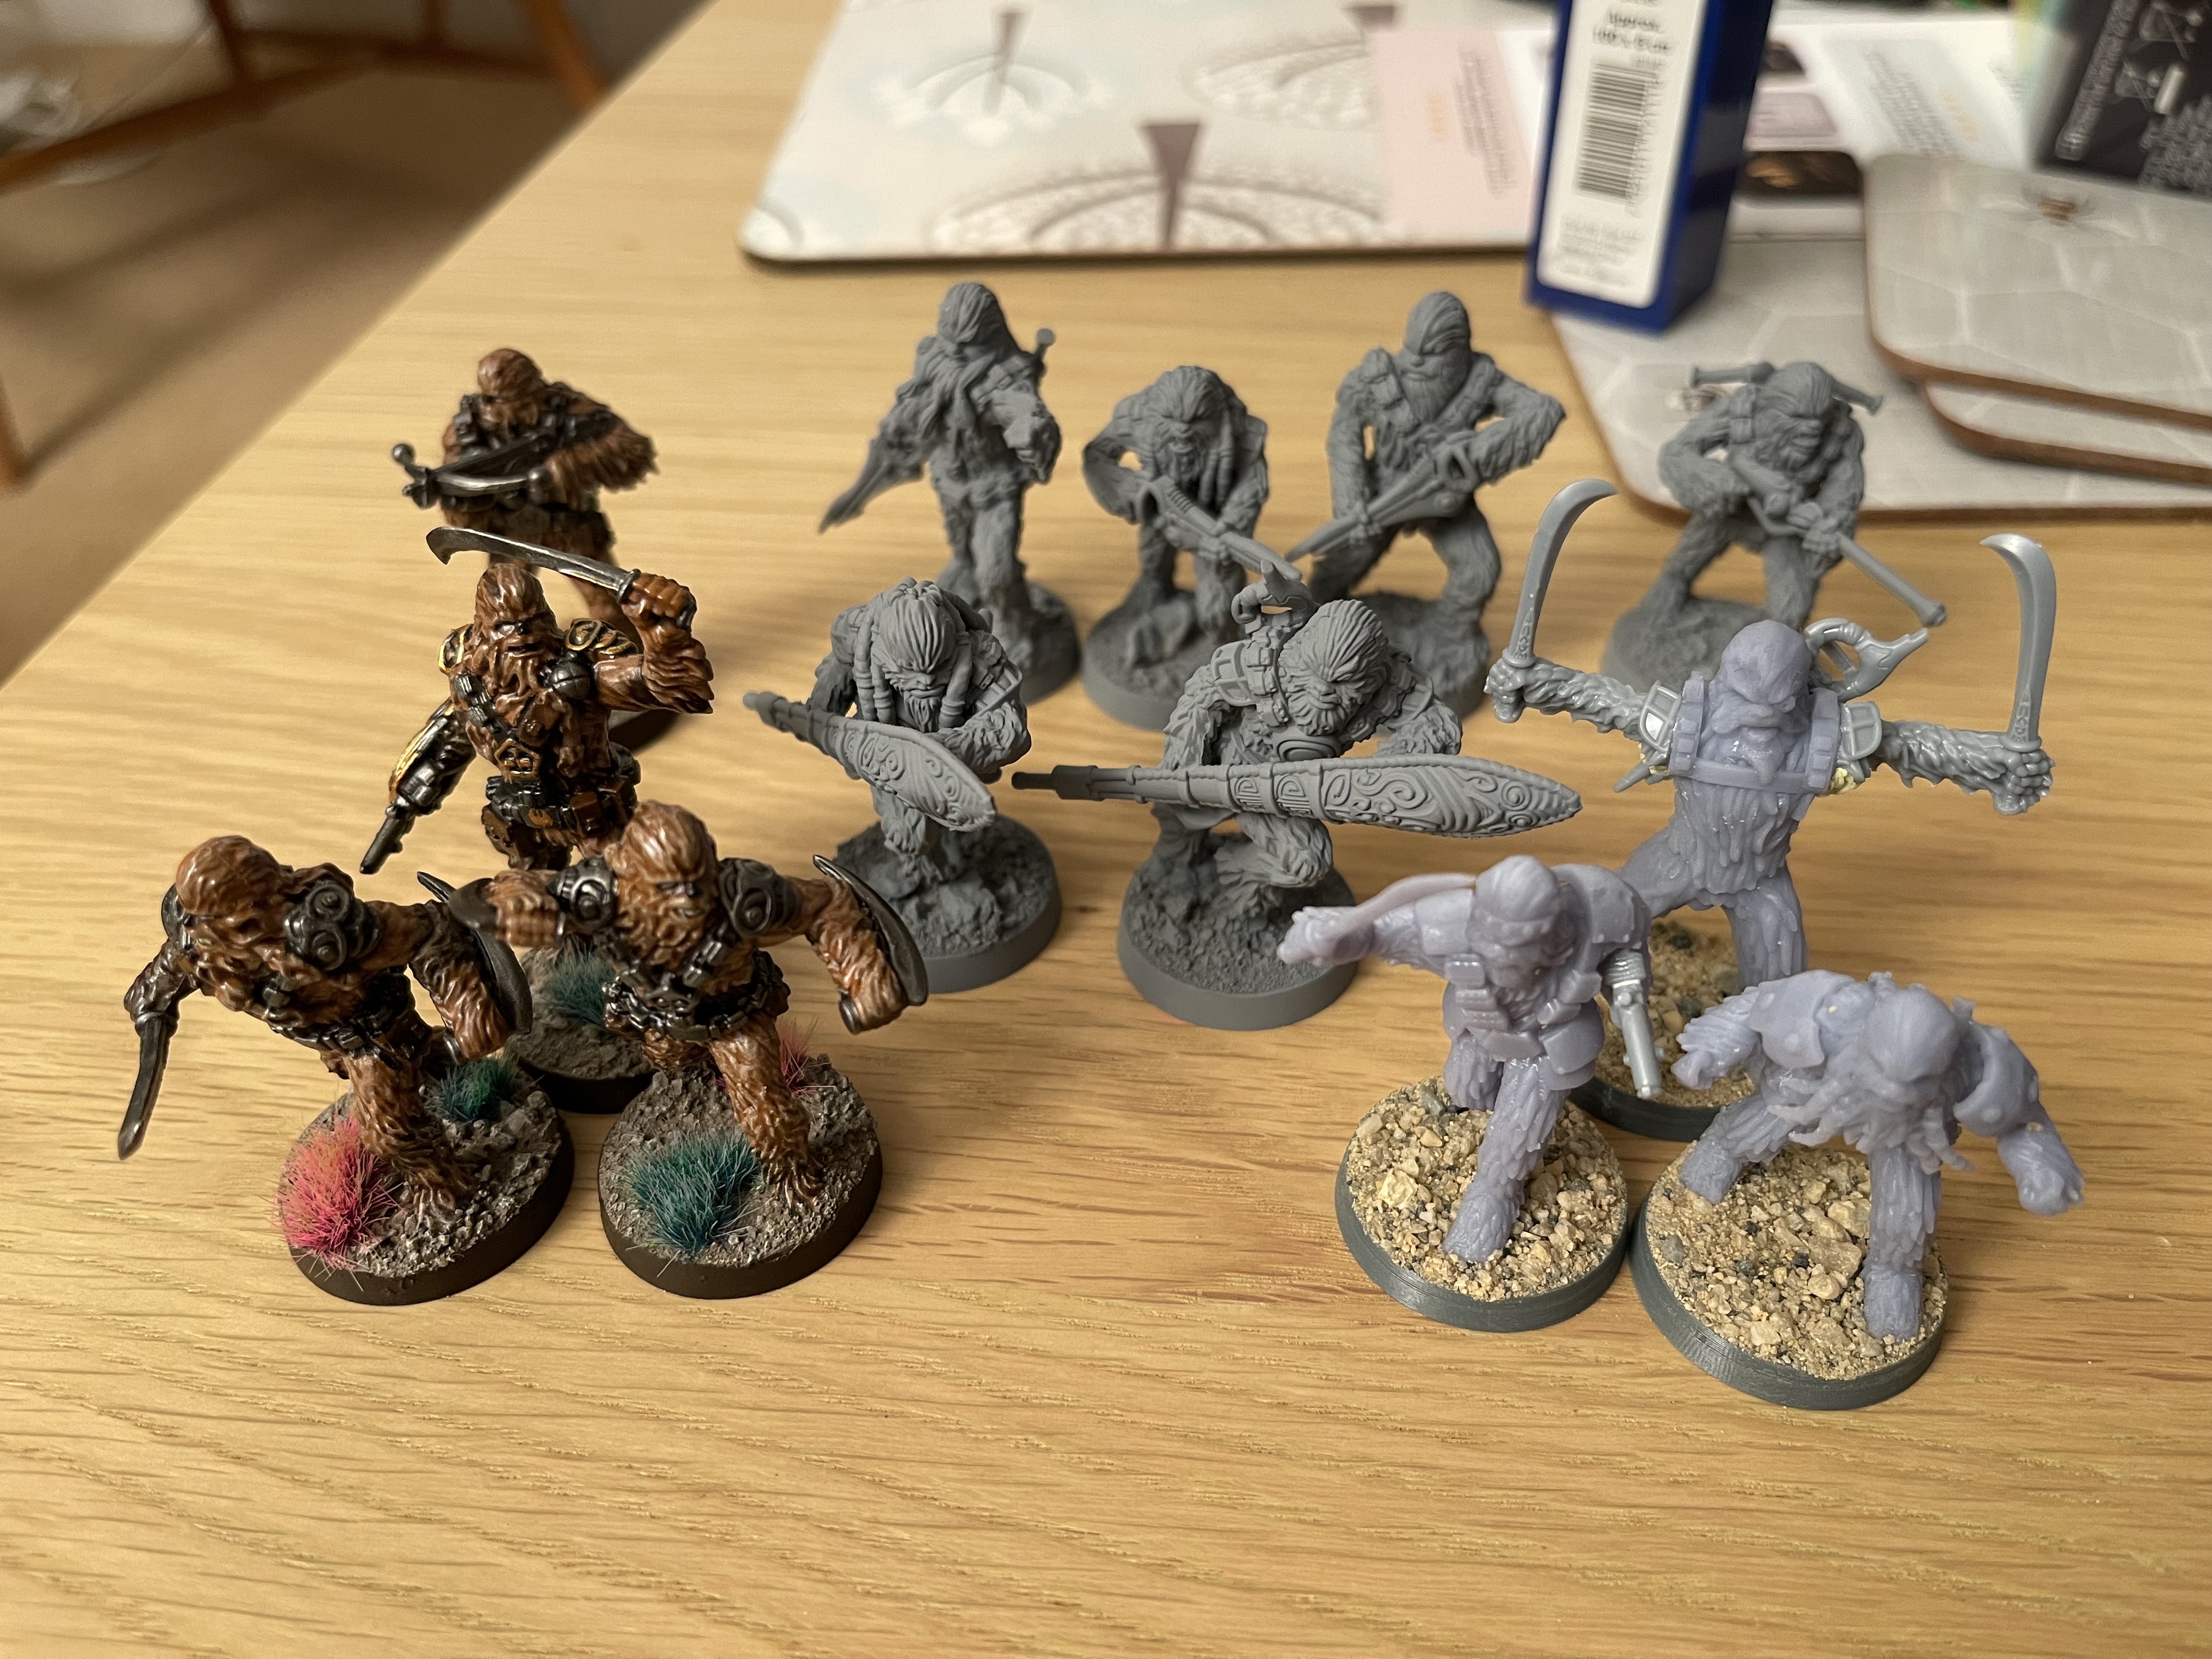
finally I then added a few more close combat ones from my 3D printer.
I’ve been having a few temperature related issues recently based on where it is stored/used (garage is too cold) but instead of throw it away I decided to upcycle it with the tonne of spares you get from the republic boxed set.
this lot will allow me to run the maximum of 3 squads. 2 being close combat and 1 being ranged with a variety of additional weapons.


![StarCraft Tabletop Miniatures Game Pre-Orders Live Now [Updated]](https://images.beastsofwar.com/2026/03/starcraft-tmg-news-cover-600-338.jpg)


