Burrows & Badgers – getting back to sculpting!


Recommendations: 534
About the Project
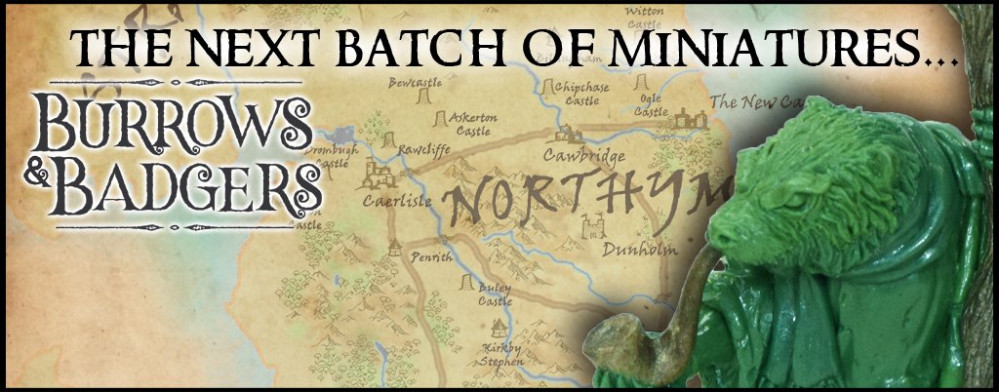
We're getting ready for a new Kickstarter for another batch of Burrows & Badgers miniatures. So there's lots of sculpting and planning involved... I'll post as much of it as possible here.
Related Game: Burrows & Badgers
Related Company: Oathsworn Miniatures
Related Genre: Fantasy
This Project is Active
A mouse with a crossbow...
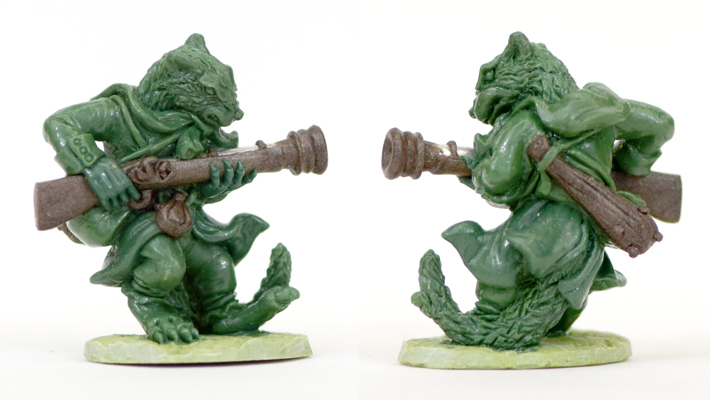
So… I sculpted a tubby mouse soldier with a crossbow. Somebody had to.
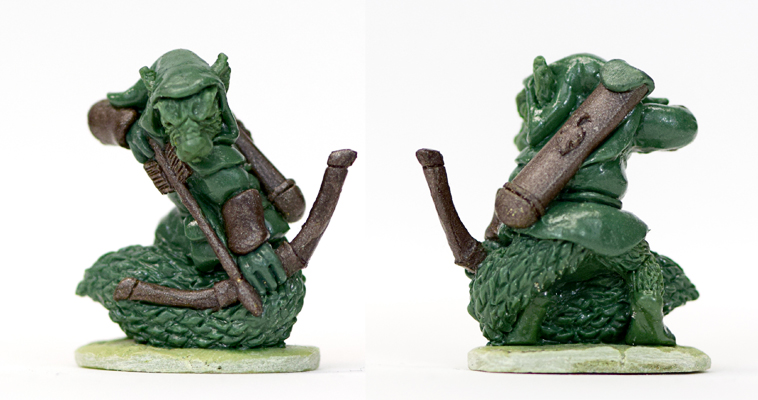
I haven’t had time to edit all the step by step pics yet, so here’s the finished green:
The sculpt has a fleur-de-lis on it… I did a video a while back on sculpting fleur de lis’s, or whatever the plural is.
I’ll post it here in case anyone fancies a go at it. They’re very useful for Sisters of battle conversions and stuff like that.
A weasel with a blunderbuss...
Not a lot to show this time… the last couple of weeks have been spent on paperwork and year-end accounts, doing irritating and dull business stuff, and grabbing the odd moment to sculpt. So I didn’t get the chance to take step-by-step piccies unfortunately.
I decided to sculpt a weasel / stoat (they’re pretty much the same thing in Burrows & Badgers), based on one of the pics from the rulebook.
The pics tend to be a bit cartoony, so I wasn’t planning an exact version; it would need modifying to fit in with the aesthetic of the rest of the miniatures.

There’s an old Ork conversion from the 3rd edition 40k Ork Codex which I’ve always loved; it’s an Ork with a big shoota, being blown backwards by recoil. I’ve always fancied sculpting a mini in a similar pose, and I reckoned the weasel with a blunderbuss was the ideal opportunity… so I posed the armature.
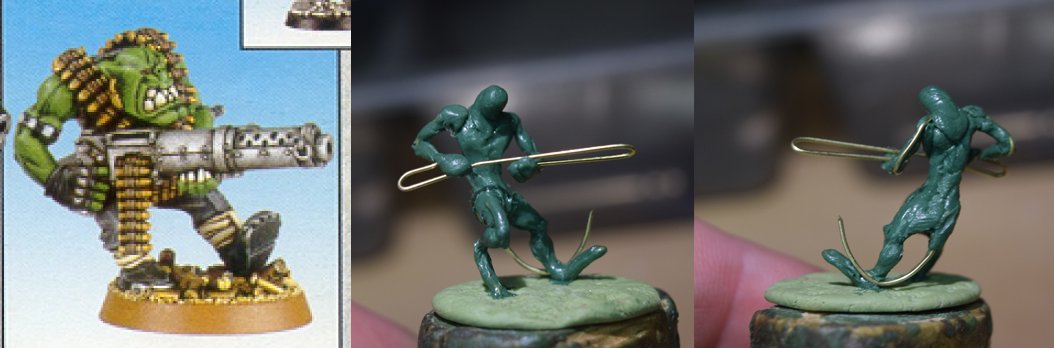
I didn’t take pics after that… I was spending too much time grumbling at the Inland Revenue, and being messed about by our landlords. Still, I did manage to finish the sculpt!
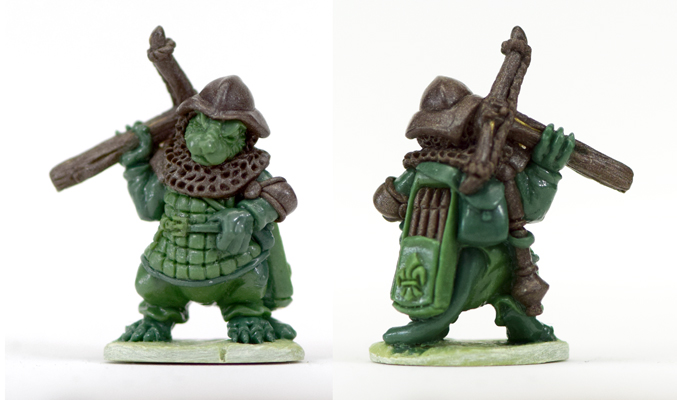
So, here he is:
Finishing the squirrel...
Next, I sculpted the hands; these were much easier than usual, as the pose meant that a lot of the hands and fingers are hidden, so I didn’t need to sculpt them!
Then I sculpted the tail. This was pretty simple too; a big blob of putty, shoved into place, smoothed a bit, then marked all over roughly, and finally the fur texture gradually tidied up.
I next added a couple of bracers on the forearms using Brownstuff; Greenstuff would have done the same job, but I find the different colour makes it easier for me to keep track of everything while sculpting.
Again, I mixed too much putty, so used some to add a bit of detail to the quiver.
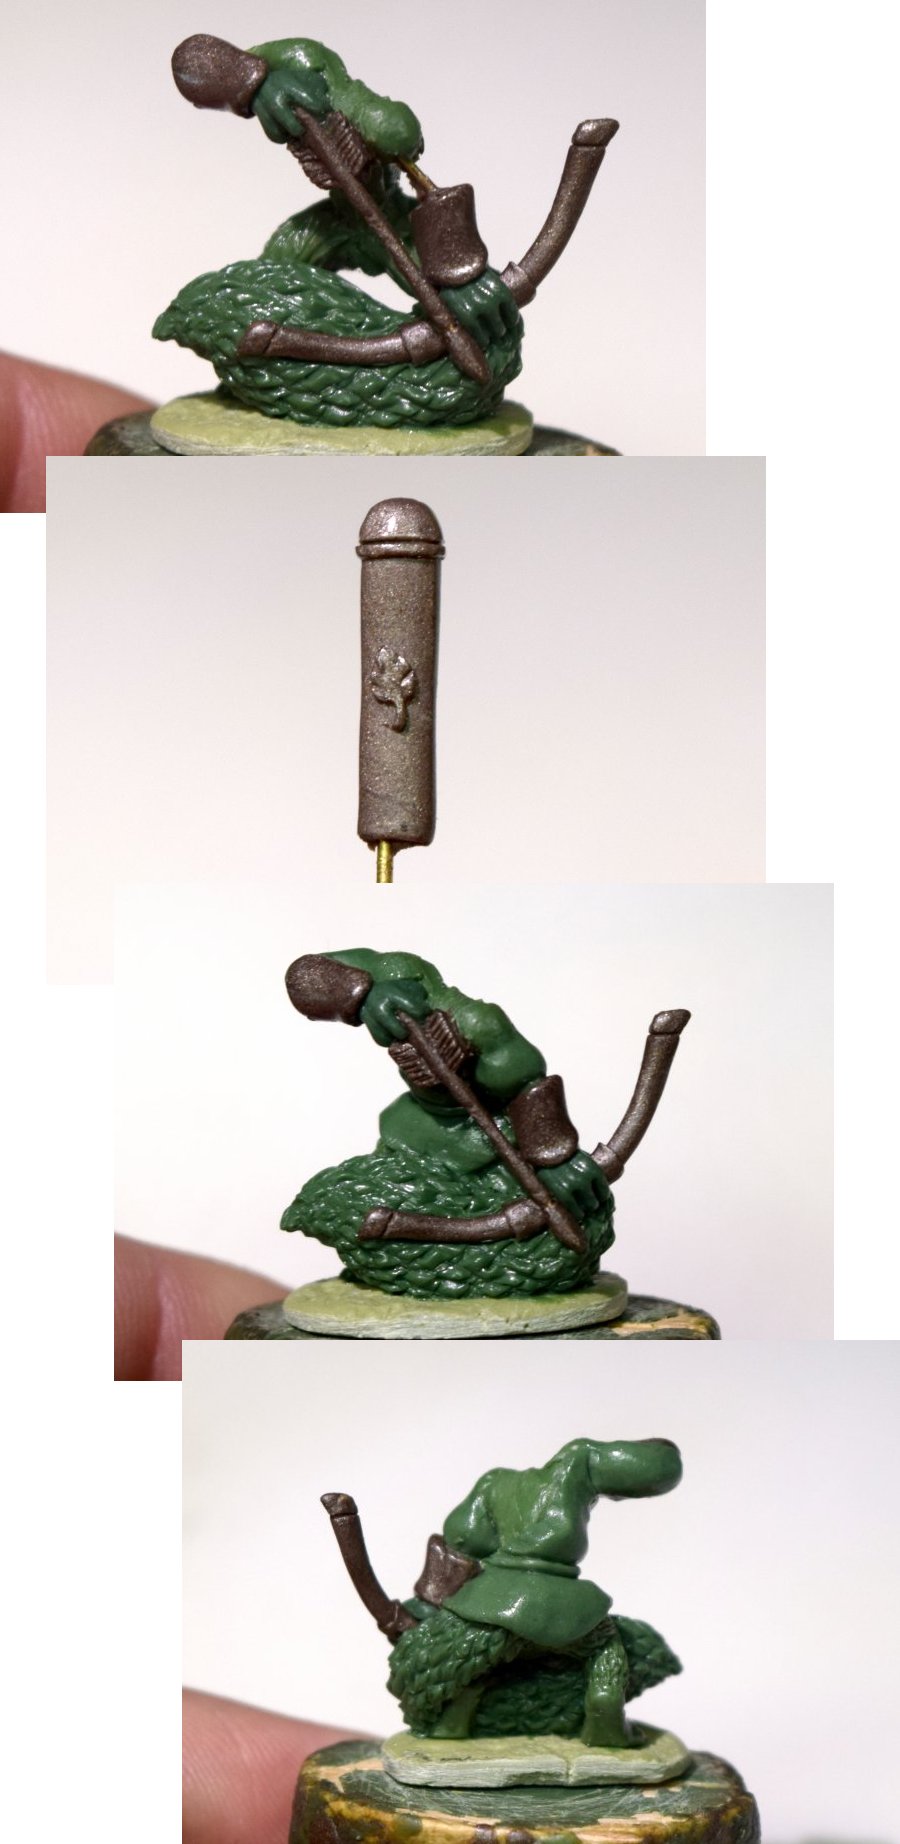
Then I added the squirrel’s head; I drilled a hole into the body, and inserted the wire, bending it where needed to get the pose I wanted.
Then I started adding the quiver and a couple of pouches to fill gaps under the arrow.

Lastly, I needed to add a hood. I used a small flattened piece of putty on top of his head, and added a couple of loops around the ears, then a longer piece on the back of his head, and blended them all together. Then I spent some time smoothing and shaping the hood, until I was happy with the way it looked.

And with the hood done, the squirrel archer was complete!
Quick note – all tools used for this sculpt were the same as in the ‘Tools’ entry earlier.
A squirrel with a bow...
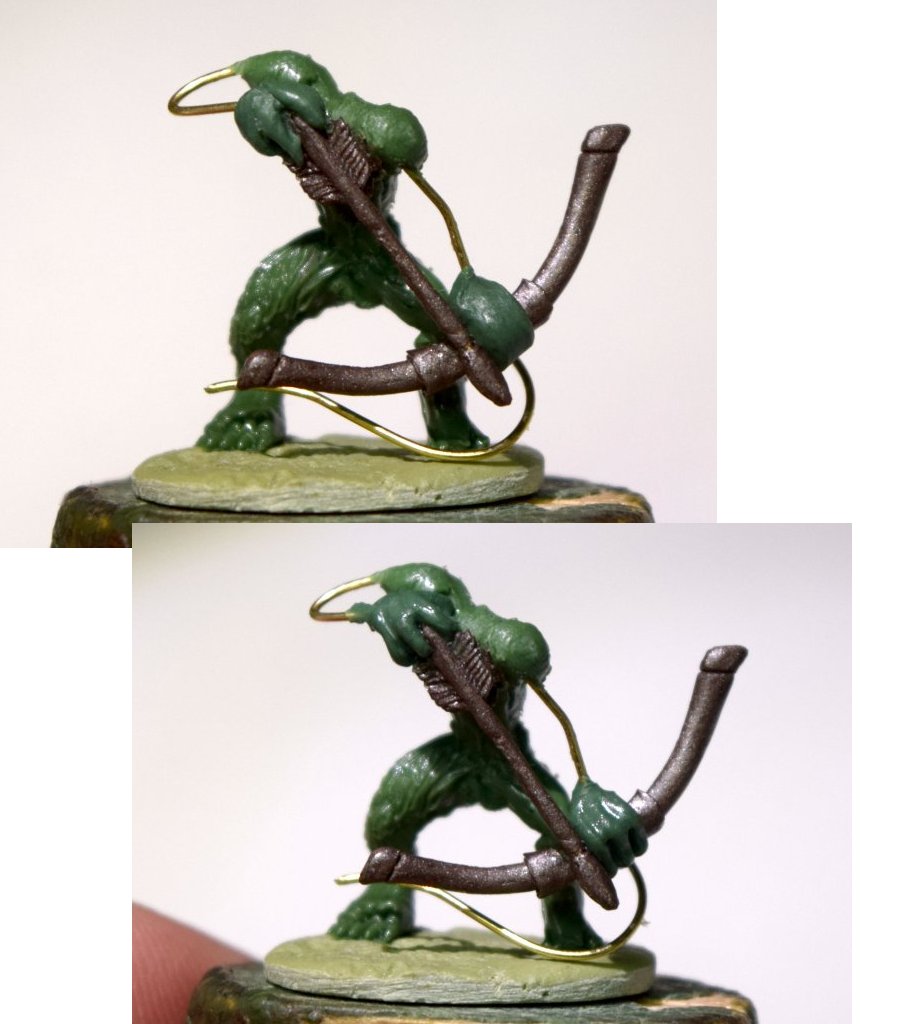
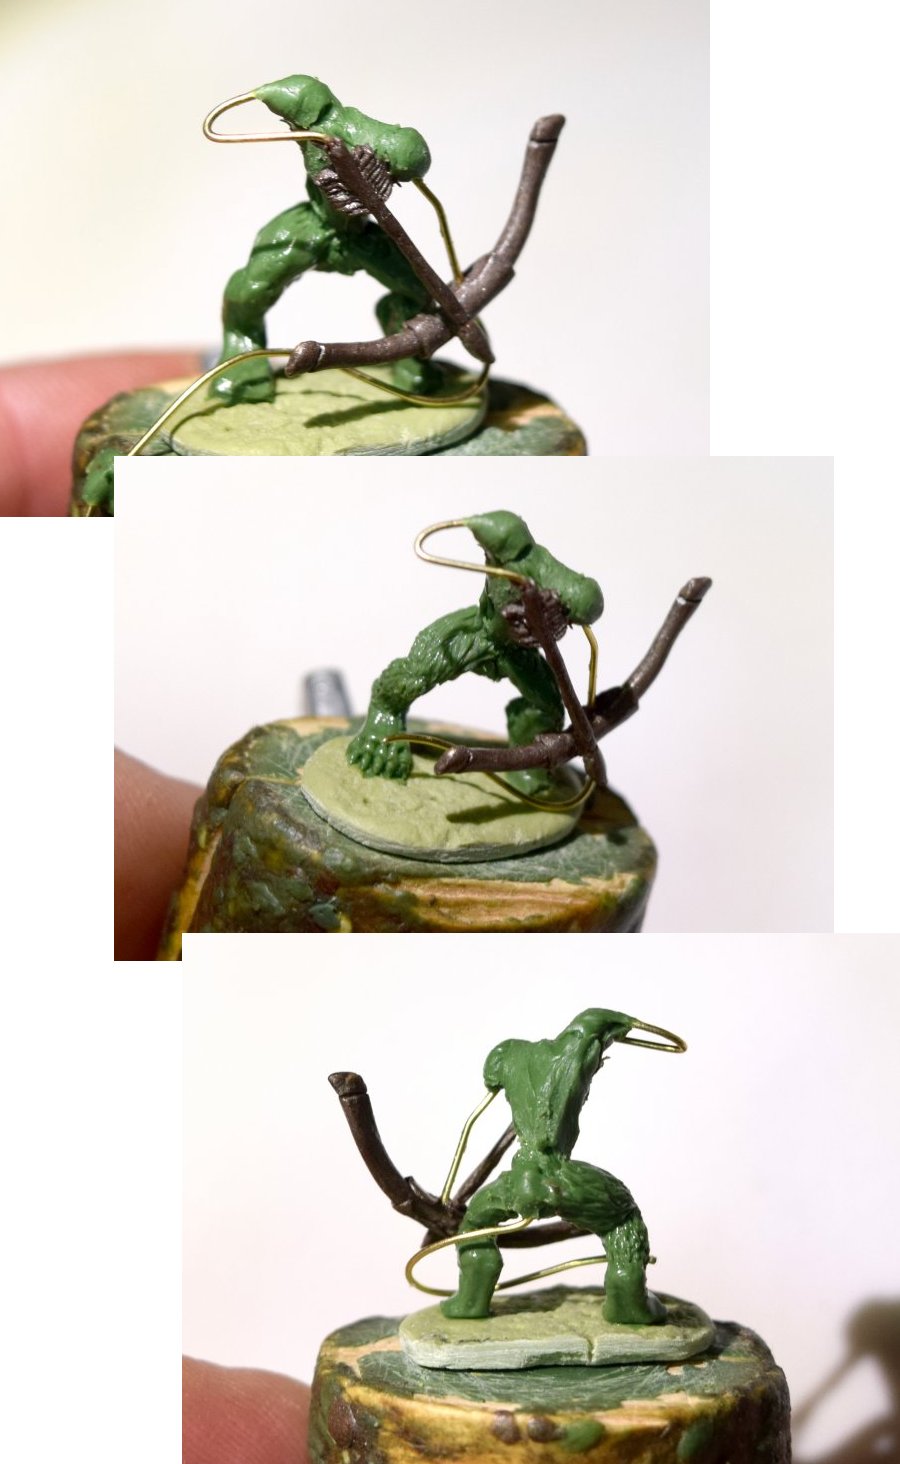
I decided to tackle the ‘squirrel archer’ sculpt this week; he’s a lot smaller than the badger, so I figured it would be a good test of my rusty sculpting chops…
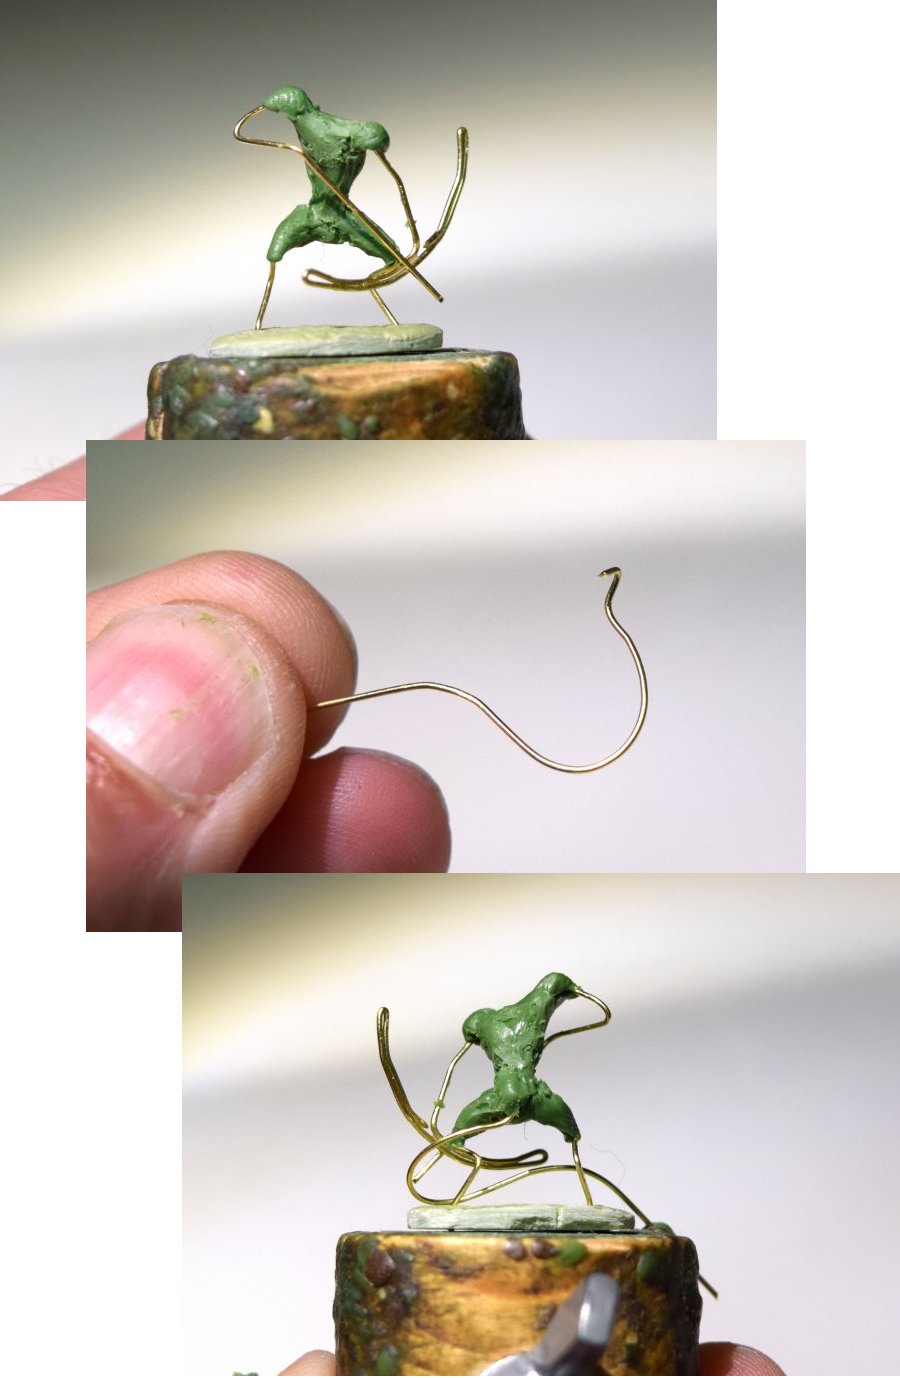
I started as usual with the armature. This one was a bit different, as I wanted him to be holding a bow and an arrow. A lot of sculptors would make the weapons separately, then attach them later, but I generally prefer them to be part of the armature.
So I used thin (.51mm) brass wire, and twisted two pieces together, leaving one end with a lot more length; those long bits would be bent back on themselves to form the bow armature.
The pose I chose would be uncastable in a single piece usually, but I was planning to se the squirrel’s big, bushy tail to sort that issue…

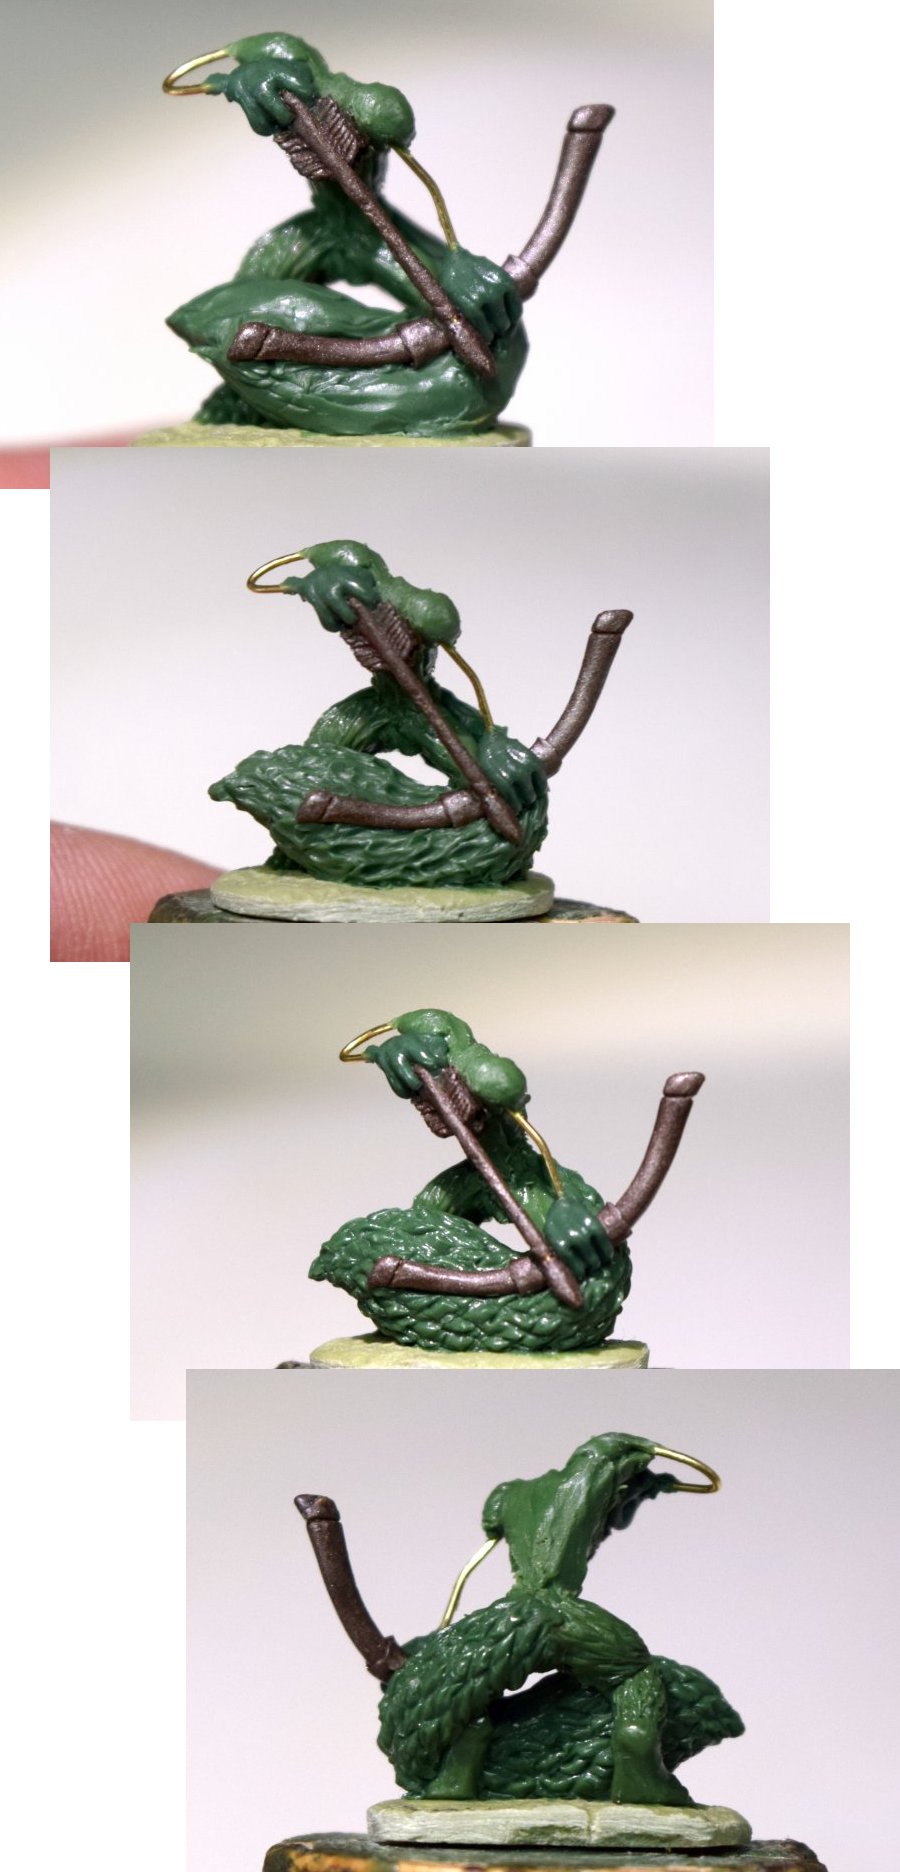
Next, I roughed in the body shape with some Greenstuff, and bent a piece of wire for the tail, which I attached while the Greenstuff was still soft.
Then I had a go at the head. I started with a small piece of cured putty on a wire as usual, then went through the normal process; adding blobs of putty for the main masses, blending them together, marking in details. But it was all going wrong, putty sliding all over the place and generally not behaving the way I wanted. So I had to scrap it and start over…
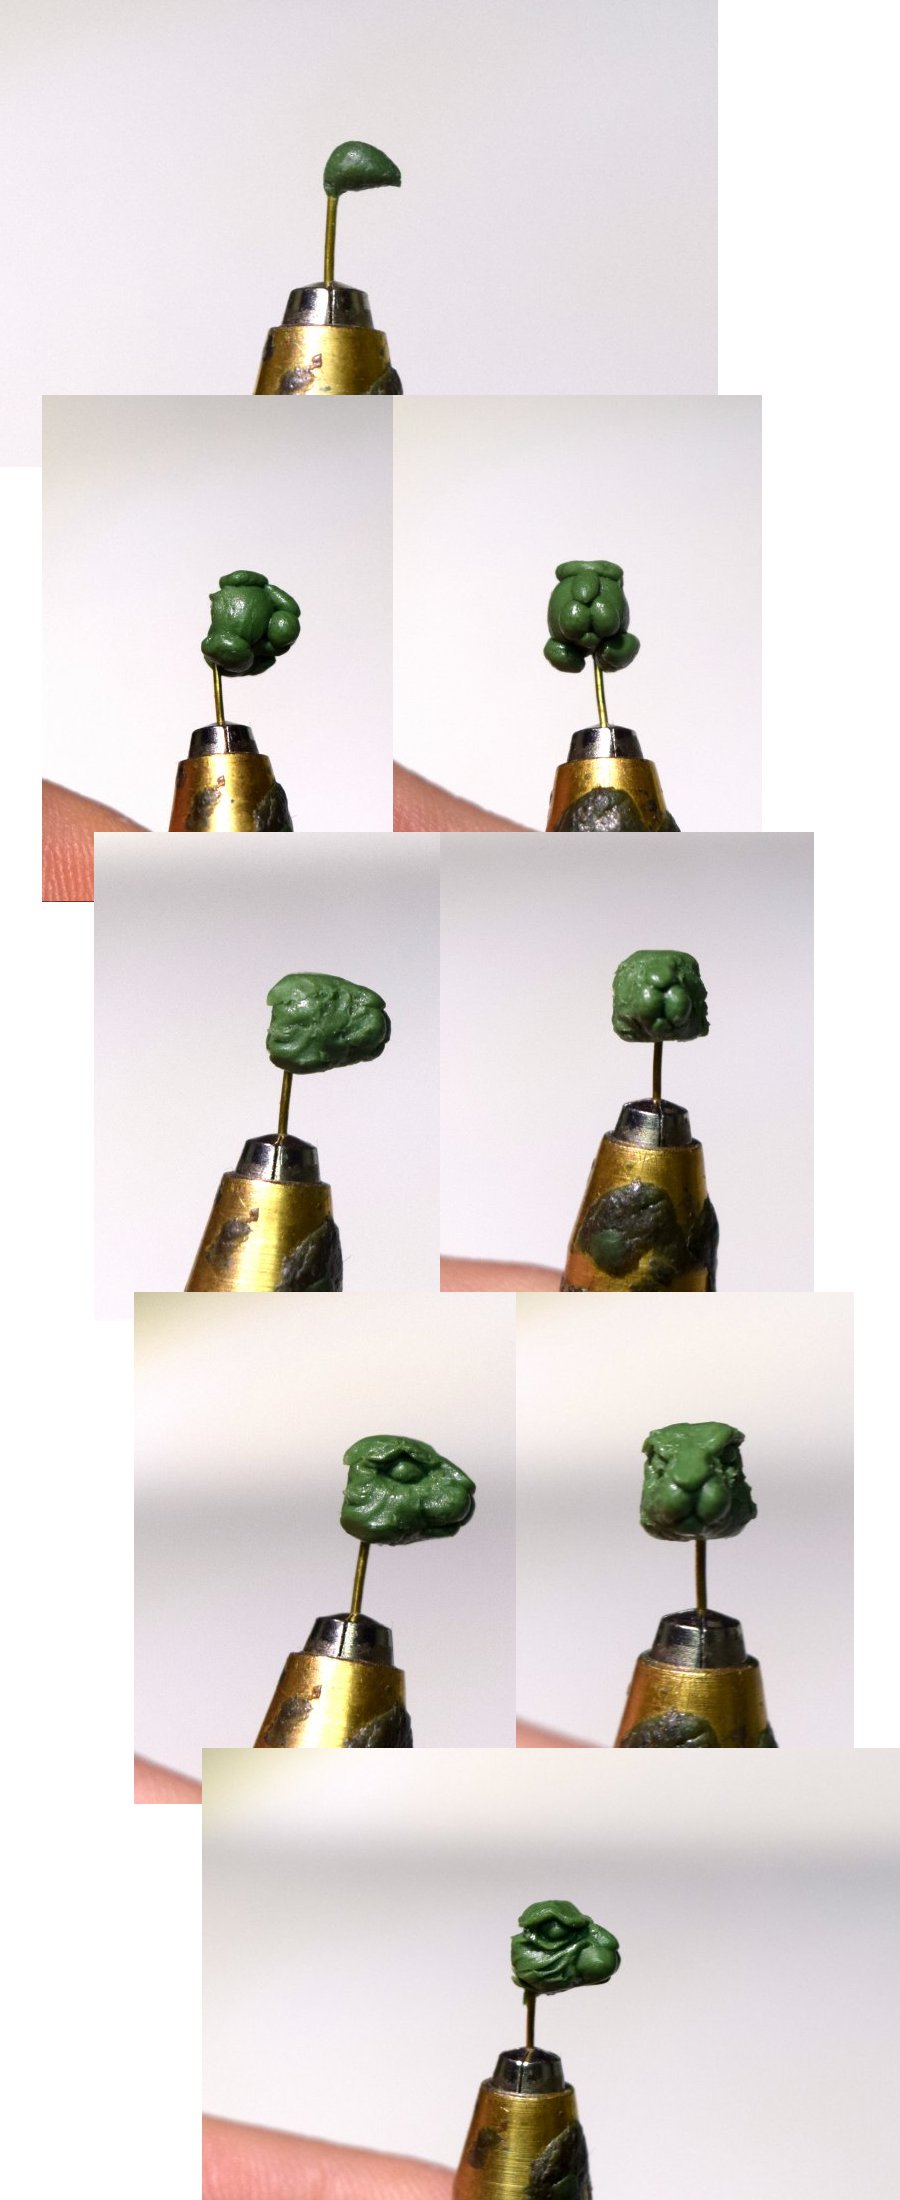
I came to the conclusion that I needed to start with a larger, better shaped cured putty armature, so that’s what I did. Then the usual blobs, blend, detail process, followed by adding ears, and tidying the fur. Sounds quick, but took about 3 hours in the end!

Next I used Brownstuff to cover the bow and arrow, smoothed into place, and a couple of details added, like the fletching.
I’d mixed up too much putty as usual, so I used the extra to start a quiver.
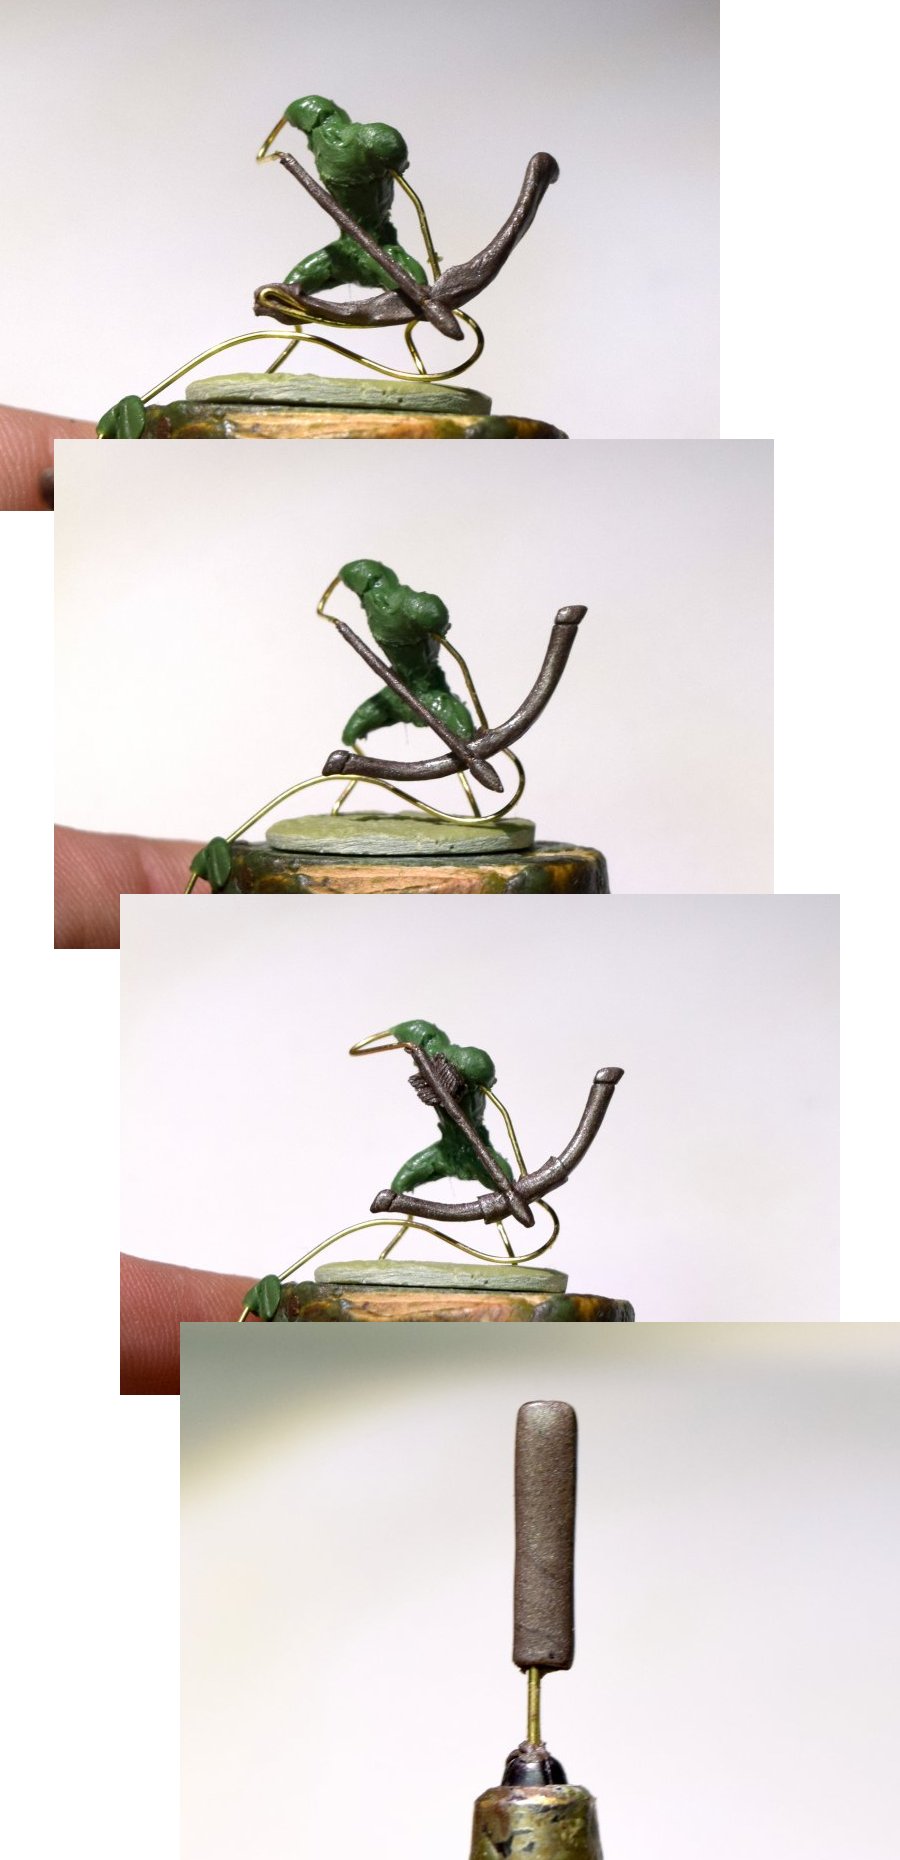
Then I started on the legs; I only needed to sculpt the front on one leg, as the other would be hidden by the tail. I did this exactly the same as I did for the badger, in the previous project entries.
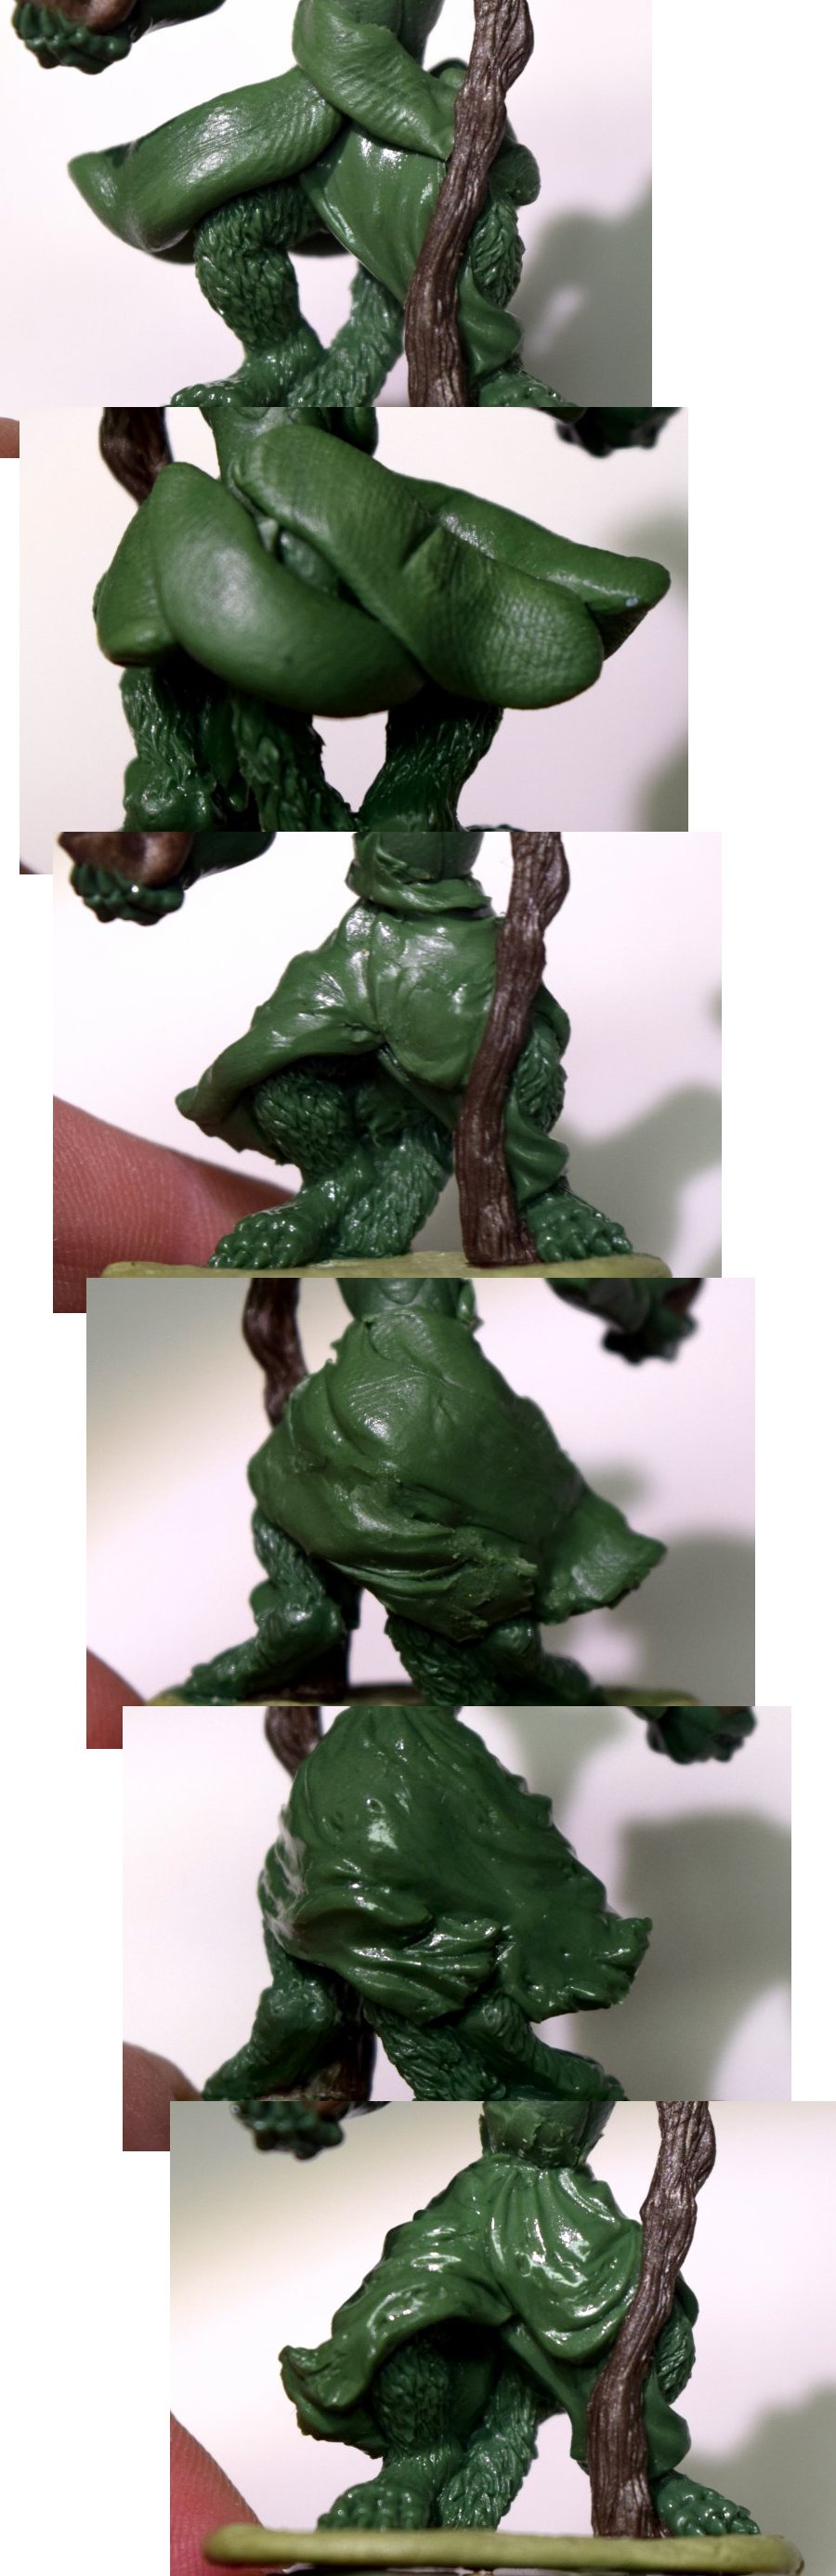
Finishing off...
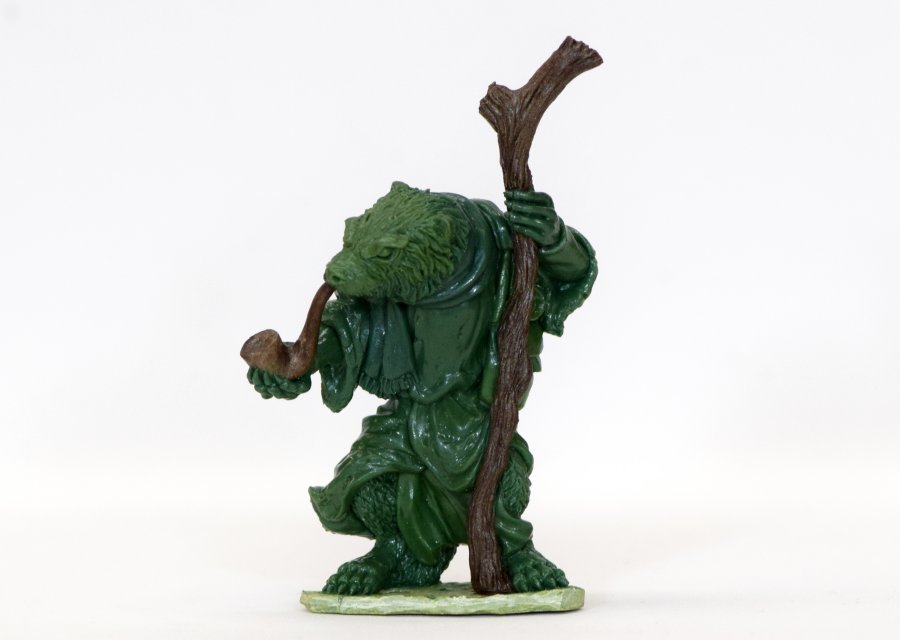
I also went back to the loincloth area; it had served the purpose of making the miniature easier to mould and cast, but I wasn’t happy with the way it looked. So I extended it across the miniature further, which helped to improve the balance a lot.
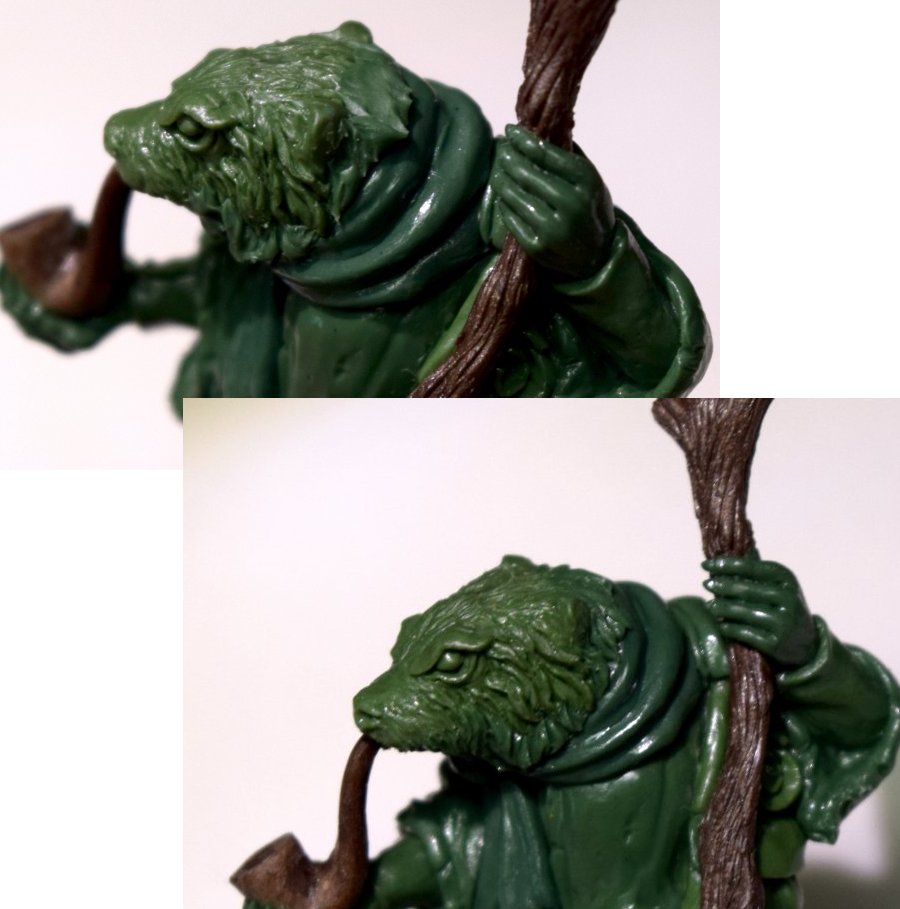
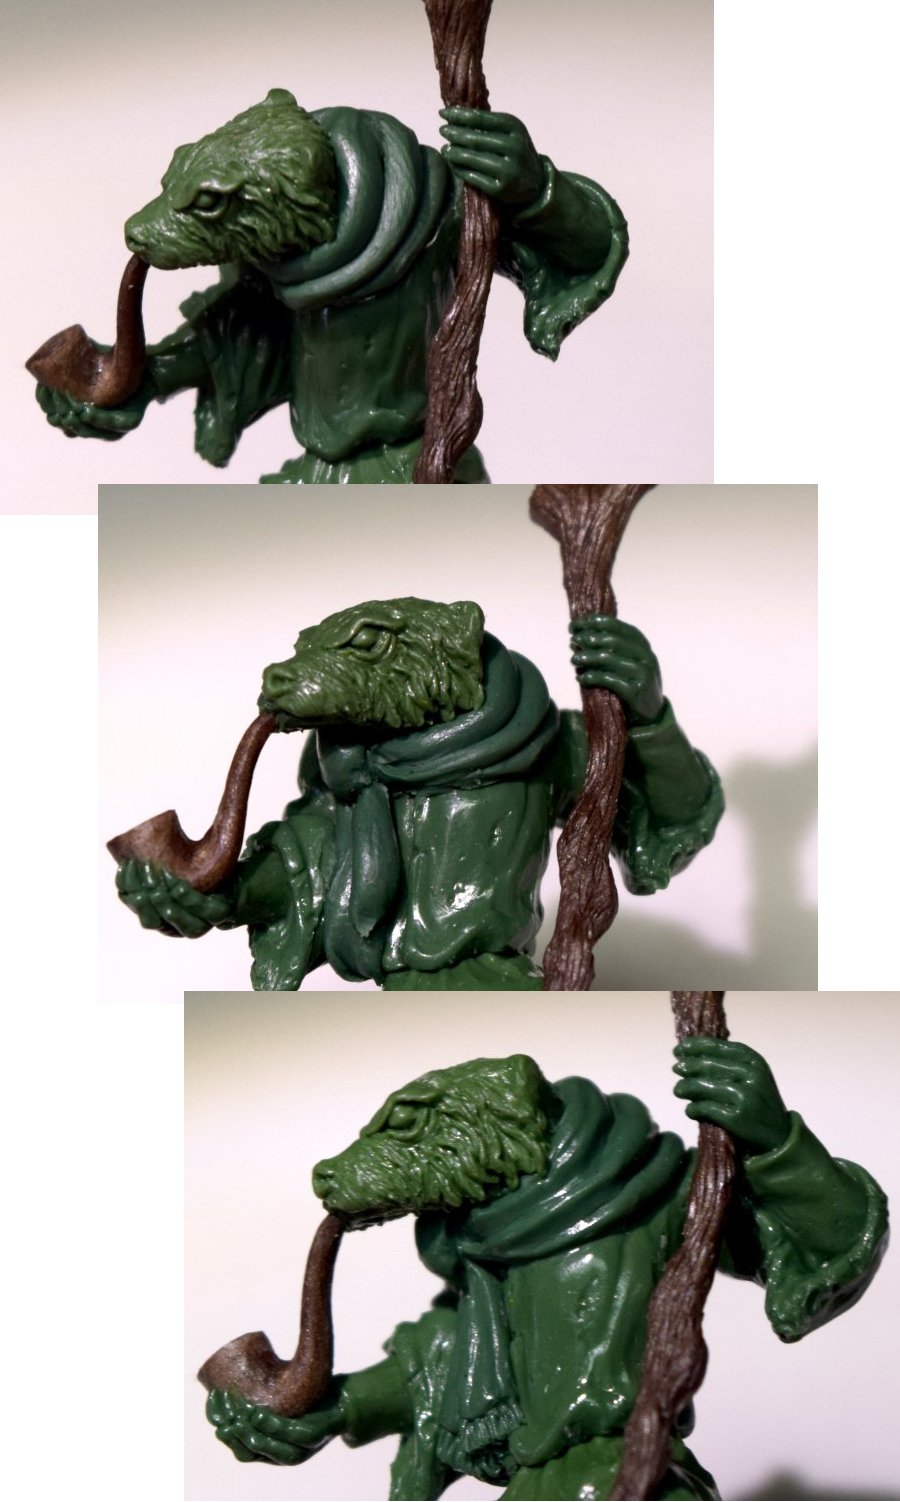
Finally, I wanted this badger to be an old, wise brock; so I thought a bit of extra hair might help give that impression. I added small amounts of putty to the back of his head and lower jaw, then worked them into shape.
And that was the job finished; after a six month hiatus, I’ve finally sculpted a new miniature!
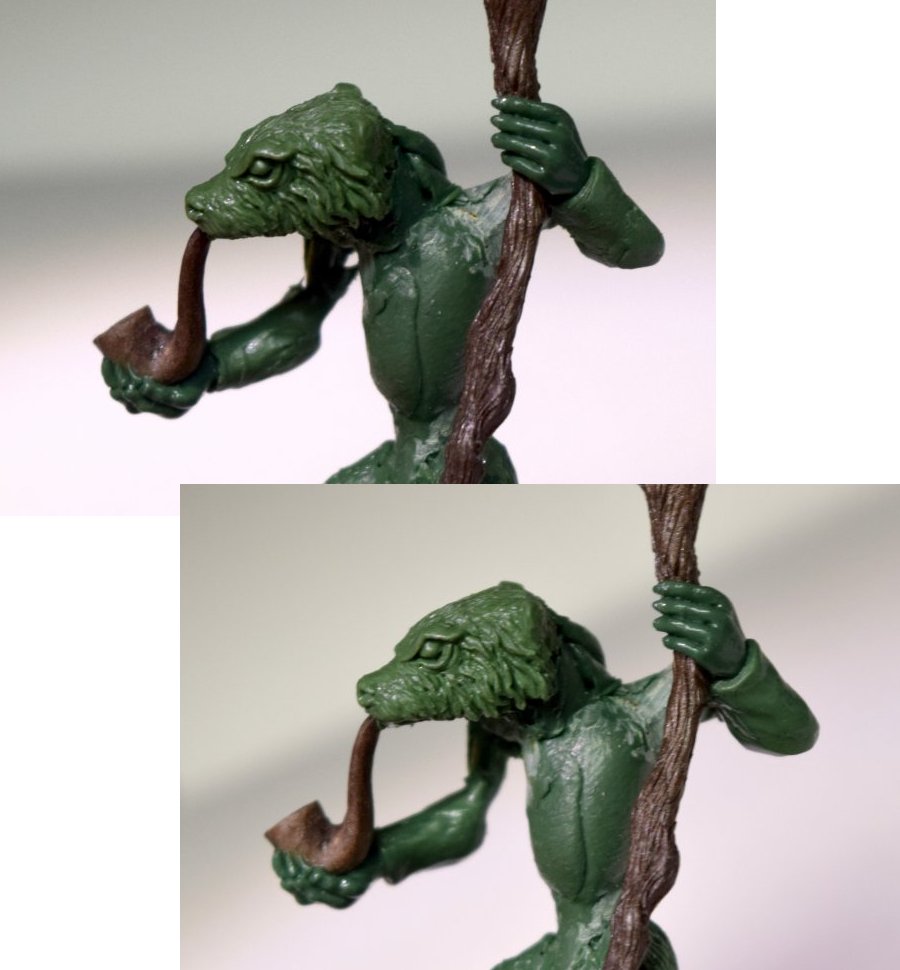
Adding some gear...
Next, I gave him a scarf. I rolled out some sausages of putty, and wrapped three of hem around his neck. I added a lump of putty for the scarf’s knot, then a couple of strips for ends of the scarf. I then did a bit of careful blending and smoothing on it, and cut in lines for the tassled ends.
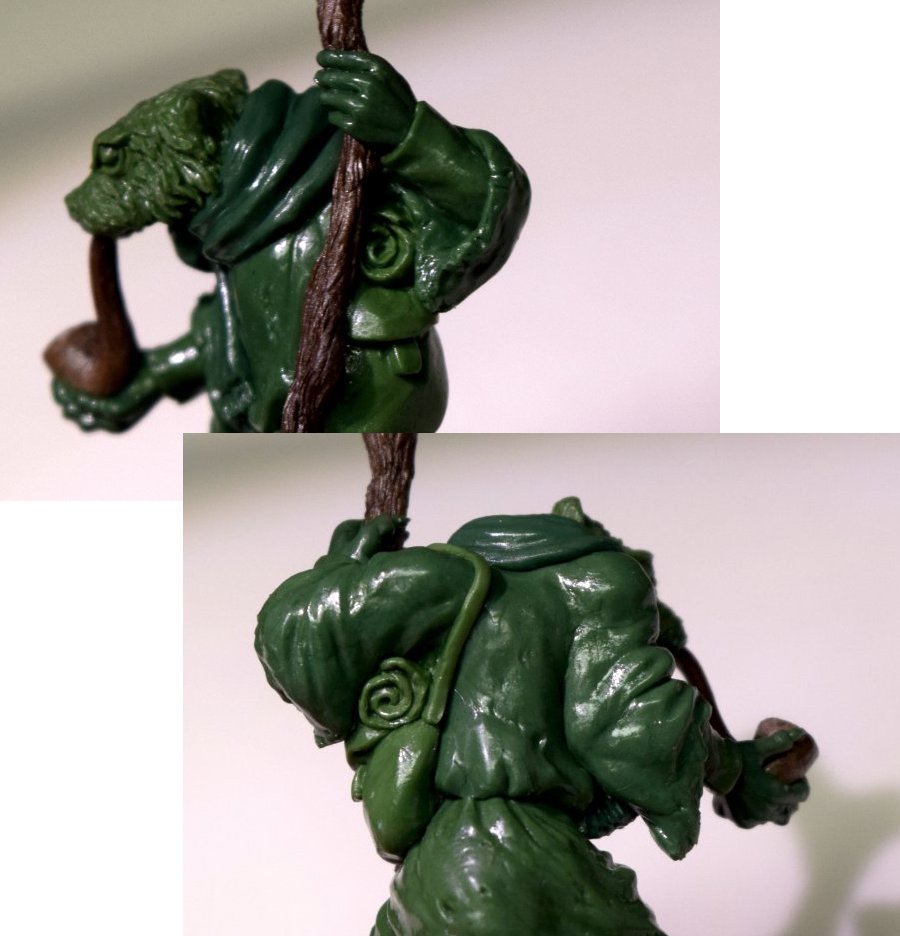
At this point, the miniature still had a large void between his arm and his staff. Thankfully he also needed a bit of equipment adding anyway, so I used that to fill the gap. A shoulder bag and a scroll filled the gap pretty well.
On to the upper body...
Often I’d add a belt at this point, but I didn’t want one here, as I felt it would just detract from the folds in the robe. So I assumed the robe had a thin belt or cord tying it, which would be hidden by the folds of the upper part of the robe.
I added more putty for the upper portion, and gradually pulled it downwards until I was happy with the look, then smoothed and tidied it.
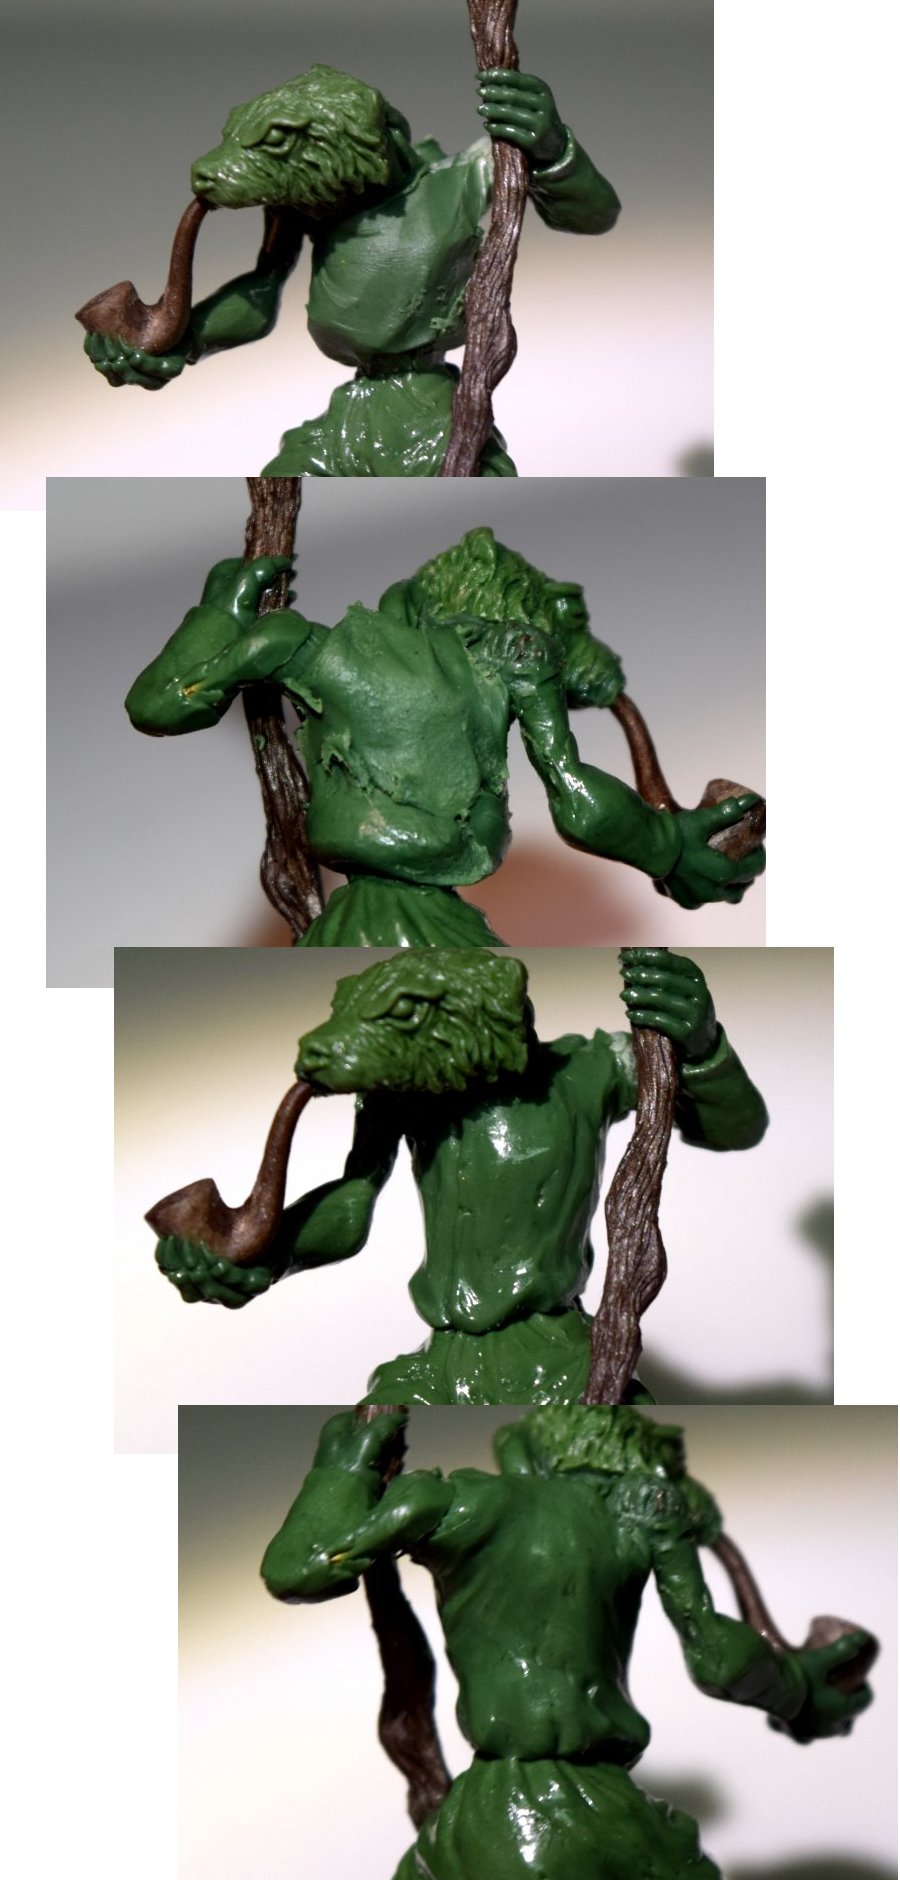
Then I added the robe’s sleeves; the process was the same, putty pressed into place, blended together, smoothed, then folds were added.
Getting dressed...
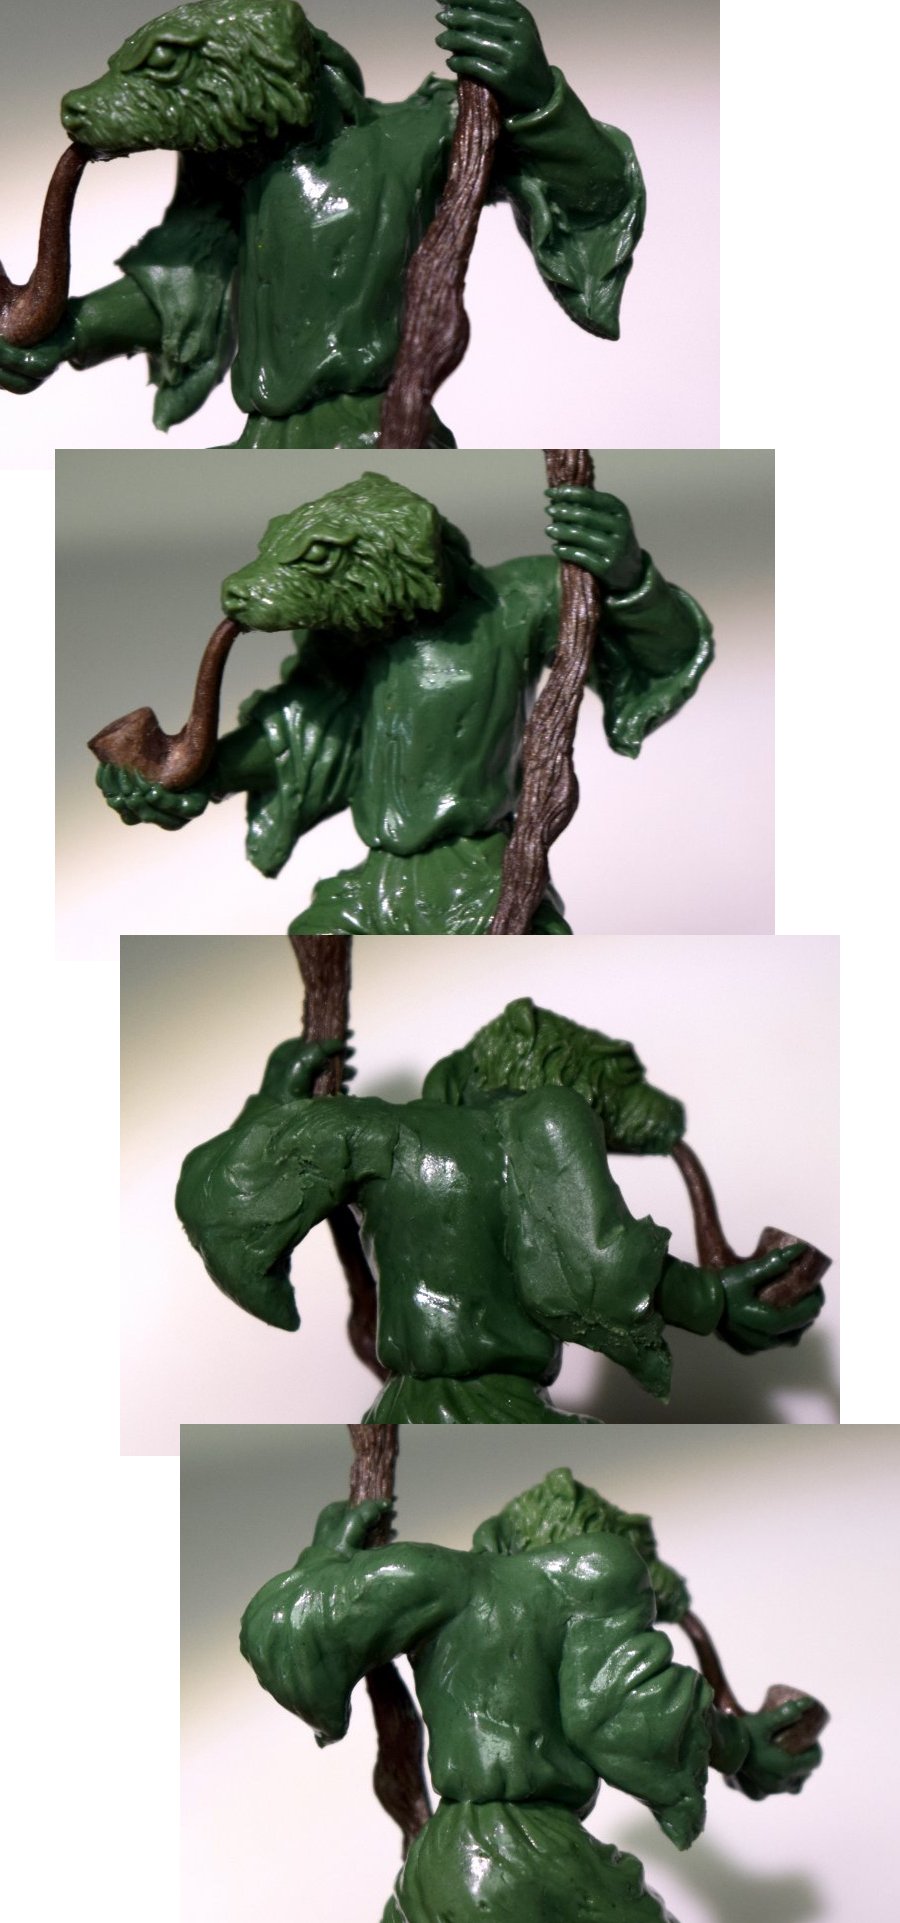
I started adding sleeves; they were very simply pressed into place, smoothed, and then some light creases and folds were marked in.
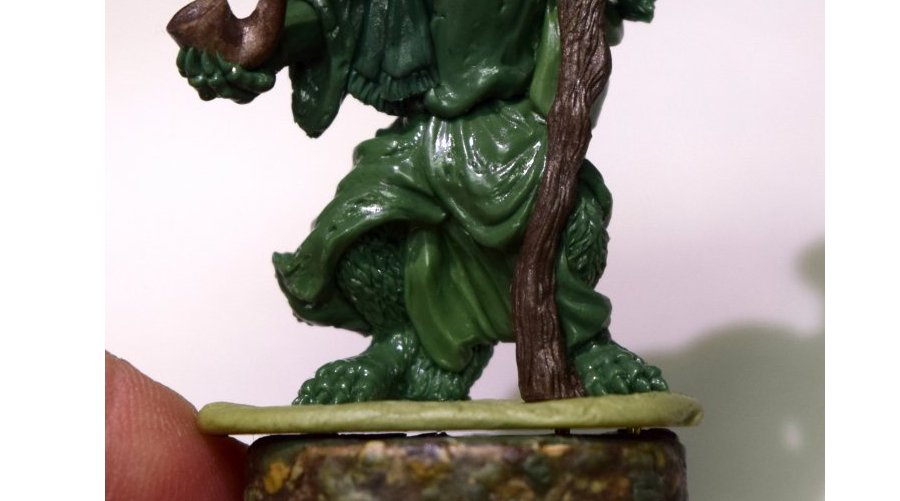
One important factor when sculpting a miniature for production is making it castable; and that means voids and undercuts should be avoided. There was a void between the lower part of the staff and the foot, so I decided to add a section of loincloth to fill it. I added some lumps of putty, blended them together with the Wax 5, then smoothed them with the Clay Shaper, and finally marked in some folds.
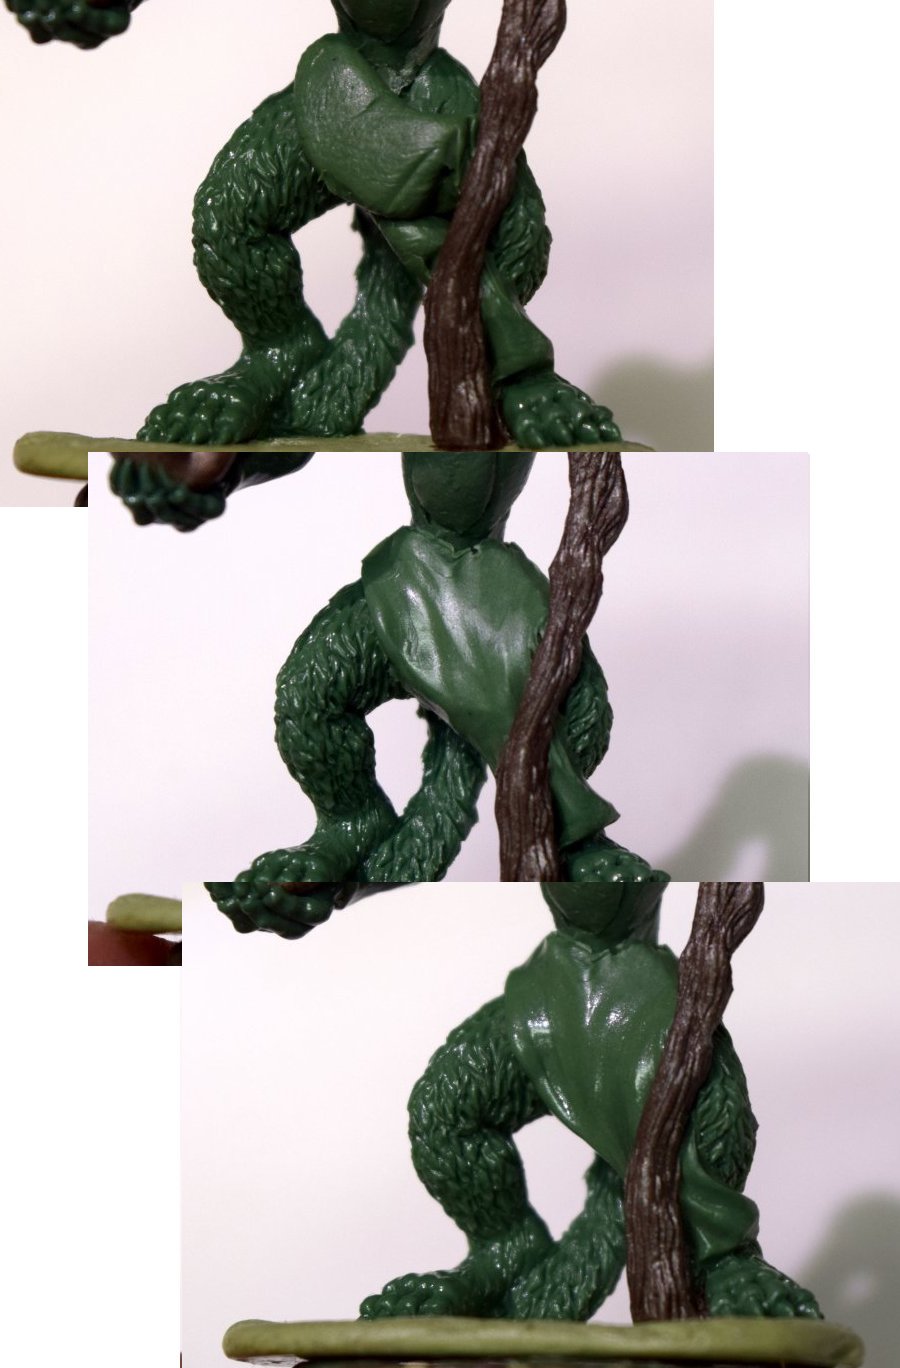
Next I added the lower sections of his robe; again, I added some lumps of putty, blended them together with the Wax 5, then smoothed them with the Clay Shaper, and finally marked in some folds, and marked in a few cuts and holes to make the robe look old and worn.