

![Pure Sci-Fi Nostalgia! War Rocket Review | Hydra Miniatures [7 Days Early Access]](https://images.beastsofwar.com/2026/02/unboxing-hydra-miniatures-war-rocket-coverimage-225-127.jpg)


2026 Mission to smash the pile of potential


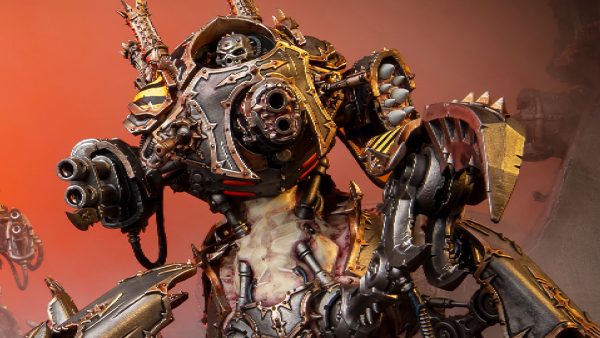
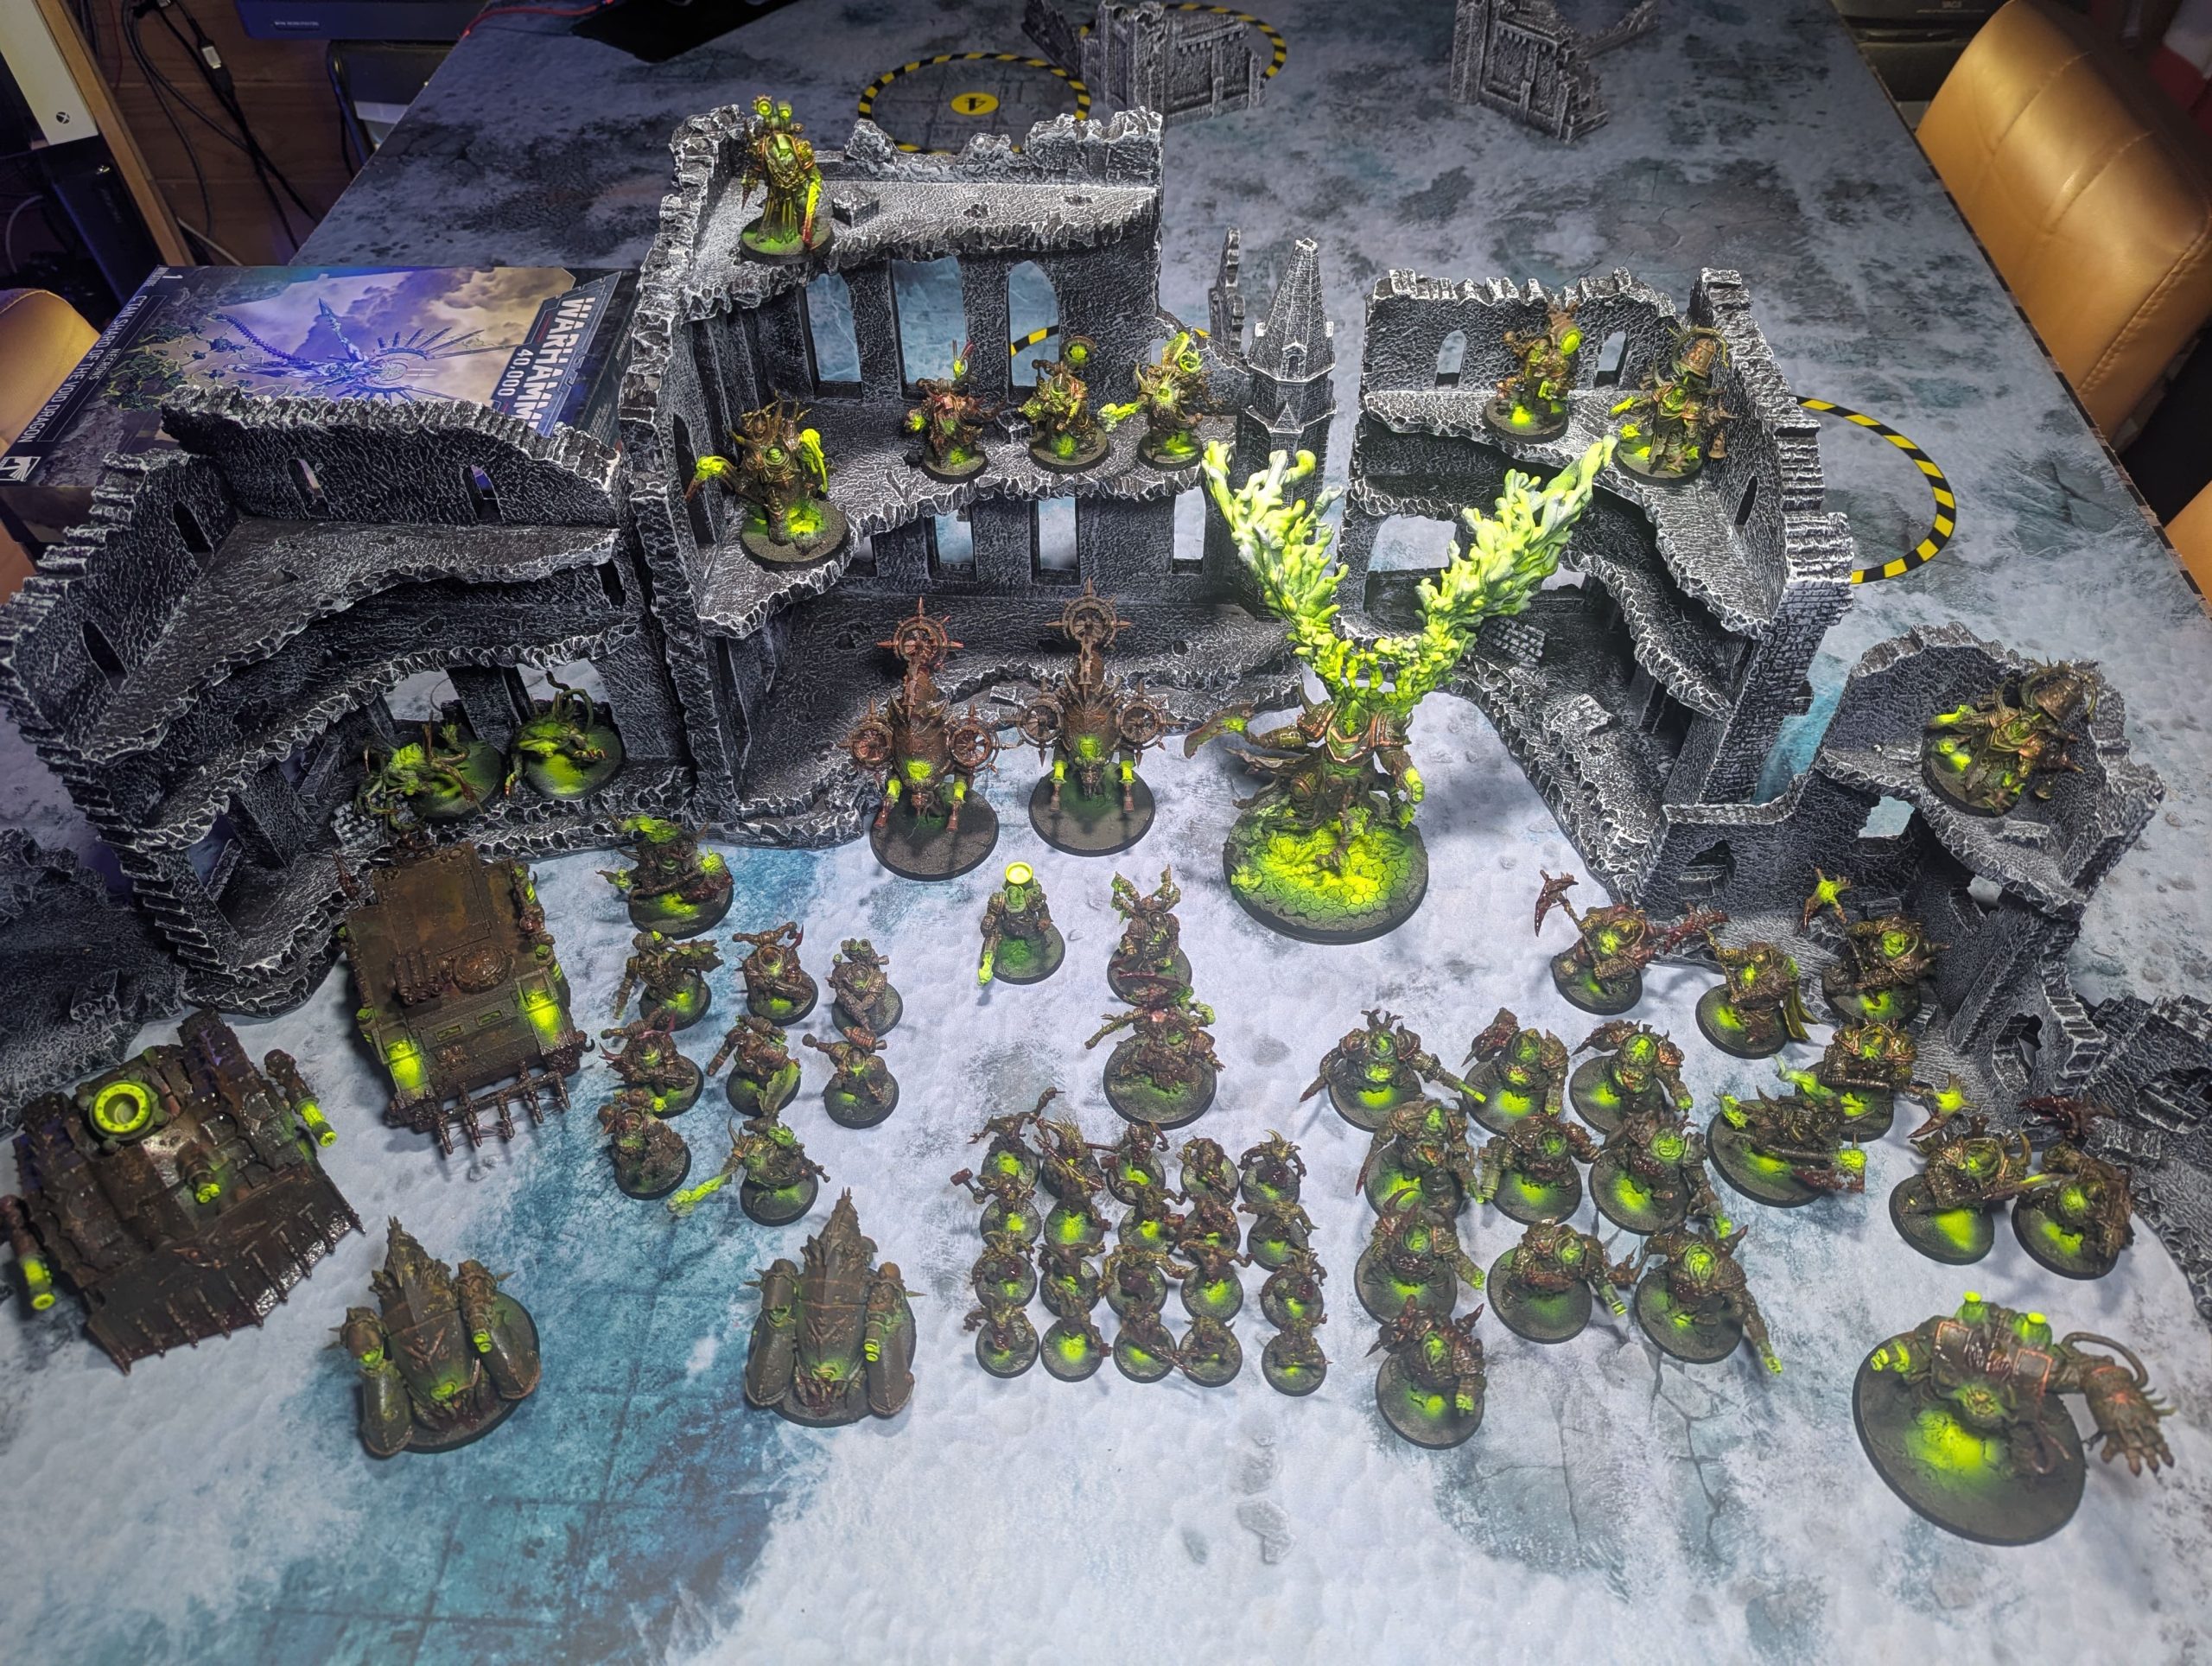
The Grim Dark Death Guard Project: A Deep Dive
My passion for the truly grim and dark aesthetics in miniature painting has always simmered beneath the surface of my hobby. While I’ve occasionally dabbled in small, focused projects capturing that desolate, gruesome feel, I’ve never before committed to a full army. The desire, however, has always been there, fueled by striking examples I’ve seen in the community.
The Army’s Foundation: A Hoard Unearthed
Over the years, almost by accident, I’ve amassed a significant collection of Death Guard miniatures. They arrived piecemeal—a few models salvaged from various starter boxes, a few more acquired through subscription magazines—a scattered host waiting for their moment. Seeing this substantial hoard of Nurgle’s chosen laid out, I realised the time was finally right to stop thinking about a grim dark army and actually build one.
The commitment was cemented by a recent hardware upgrade: I had just installed the Mars 5 Ultra resin printer. This meant any crucial unit or unique piece I was missing to complete the army list could be swiftly and affordably proxied. With the miniatures and the means now in place, the project officially began.
The Process: Speed and Purposeful Mess
Remarkably, this entire army was completed in approximately two weeks. This rapid turnaround was only possible because I relied heavily on quick, effective painting techniques perfectly suited to the grim dark aesthetic. My toolkit revolved around the airbrush, drybrushing, innovative effect paints, and only the most essential detail work. Crucially, this project allowed me to experiment with new products focused on achieving gross, wet, and corrupted textures—specialist grim, blood, and slime effects. The Core Technique: Zenithal and Speed Painting
The fundamental process for every model was structured for speed and atmospheric impact:
- Black Prime: Every model was primed black, providing a deep, natural shadow layer for the grime to cling to.
- Zenithal Highlight: A zenithal spray of white was applied from directly above. This subtle volumetric highlight instantly established the light source and helped the subsequent colours pop—or, more accurately, rot.
- Base Layers – Airbrush & Drybrush: I then moved on to the core colours for the armour plates, weaponry, and tattered cloth. The choice between airbrushing and drybrushing was tactical: large, flat areas of armour were quickly blocked in with the airbrush, while textured or damaged areas were hit with the drybrush for quick, weathered coverage.
- The Grim Dark Advantage: Because the ultimate goal was a heavily weathered, grimy look, I could afford to be fast and messy. Lines didn’t need to be perfectly sharp; colours didn’t need to be perfectly neat. A degree of controlled chaos was not only acceptable but encouraged, contributing to the final, disgusting appearance.
Layering the Corruption: Oils and Weathering
Once the core colours were established, the models were given a protective layer of varnish. This barrier was crucial for the next, most transformative stage: weathering with oil paints.
- The Streaking Grime Bath: I liberally applied oil-based products, most notably a dedicated “streaking grime” wash, over the entire model. This heavy application pooled in recesses and stained the armour plates, instantly aging and dirtying the surface.
- The Fading Process: While the oils were still active, I used cotton buds dipped in white spirit (or alcohol) to strategically ‘draw back’ the paint. By wiping downwards, the grime was lifted from the raised areas, leaving behind realistic streaks and concentrated dirt in the recesses and along panel lines—the perfect simulation of years of neglect and chemical runoff.
- Final Protection: Once satisfied with the level of weathering, the models were allowed to thoroughly dry before receiving a final, robust coat of varnish to seal the effects and prepare for the final touches.
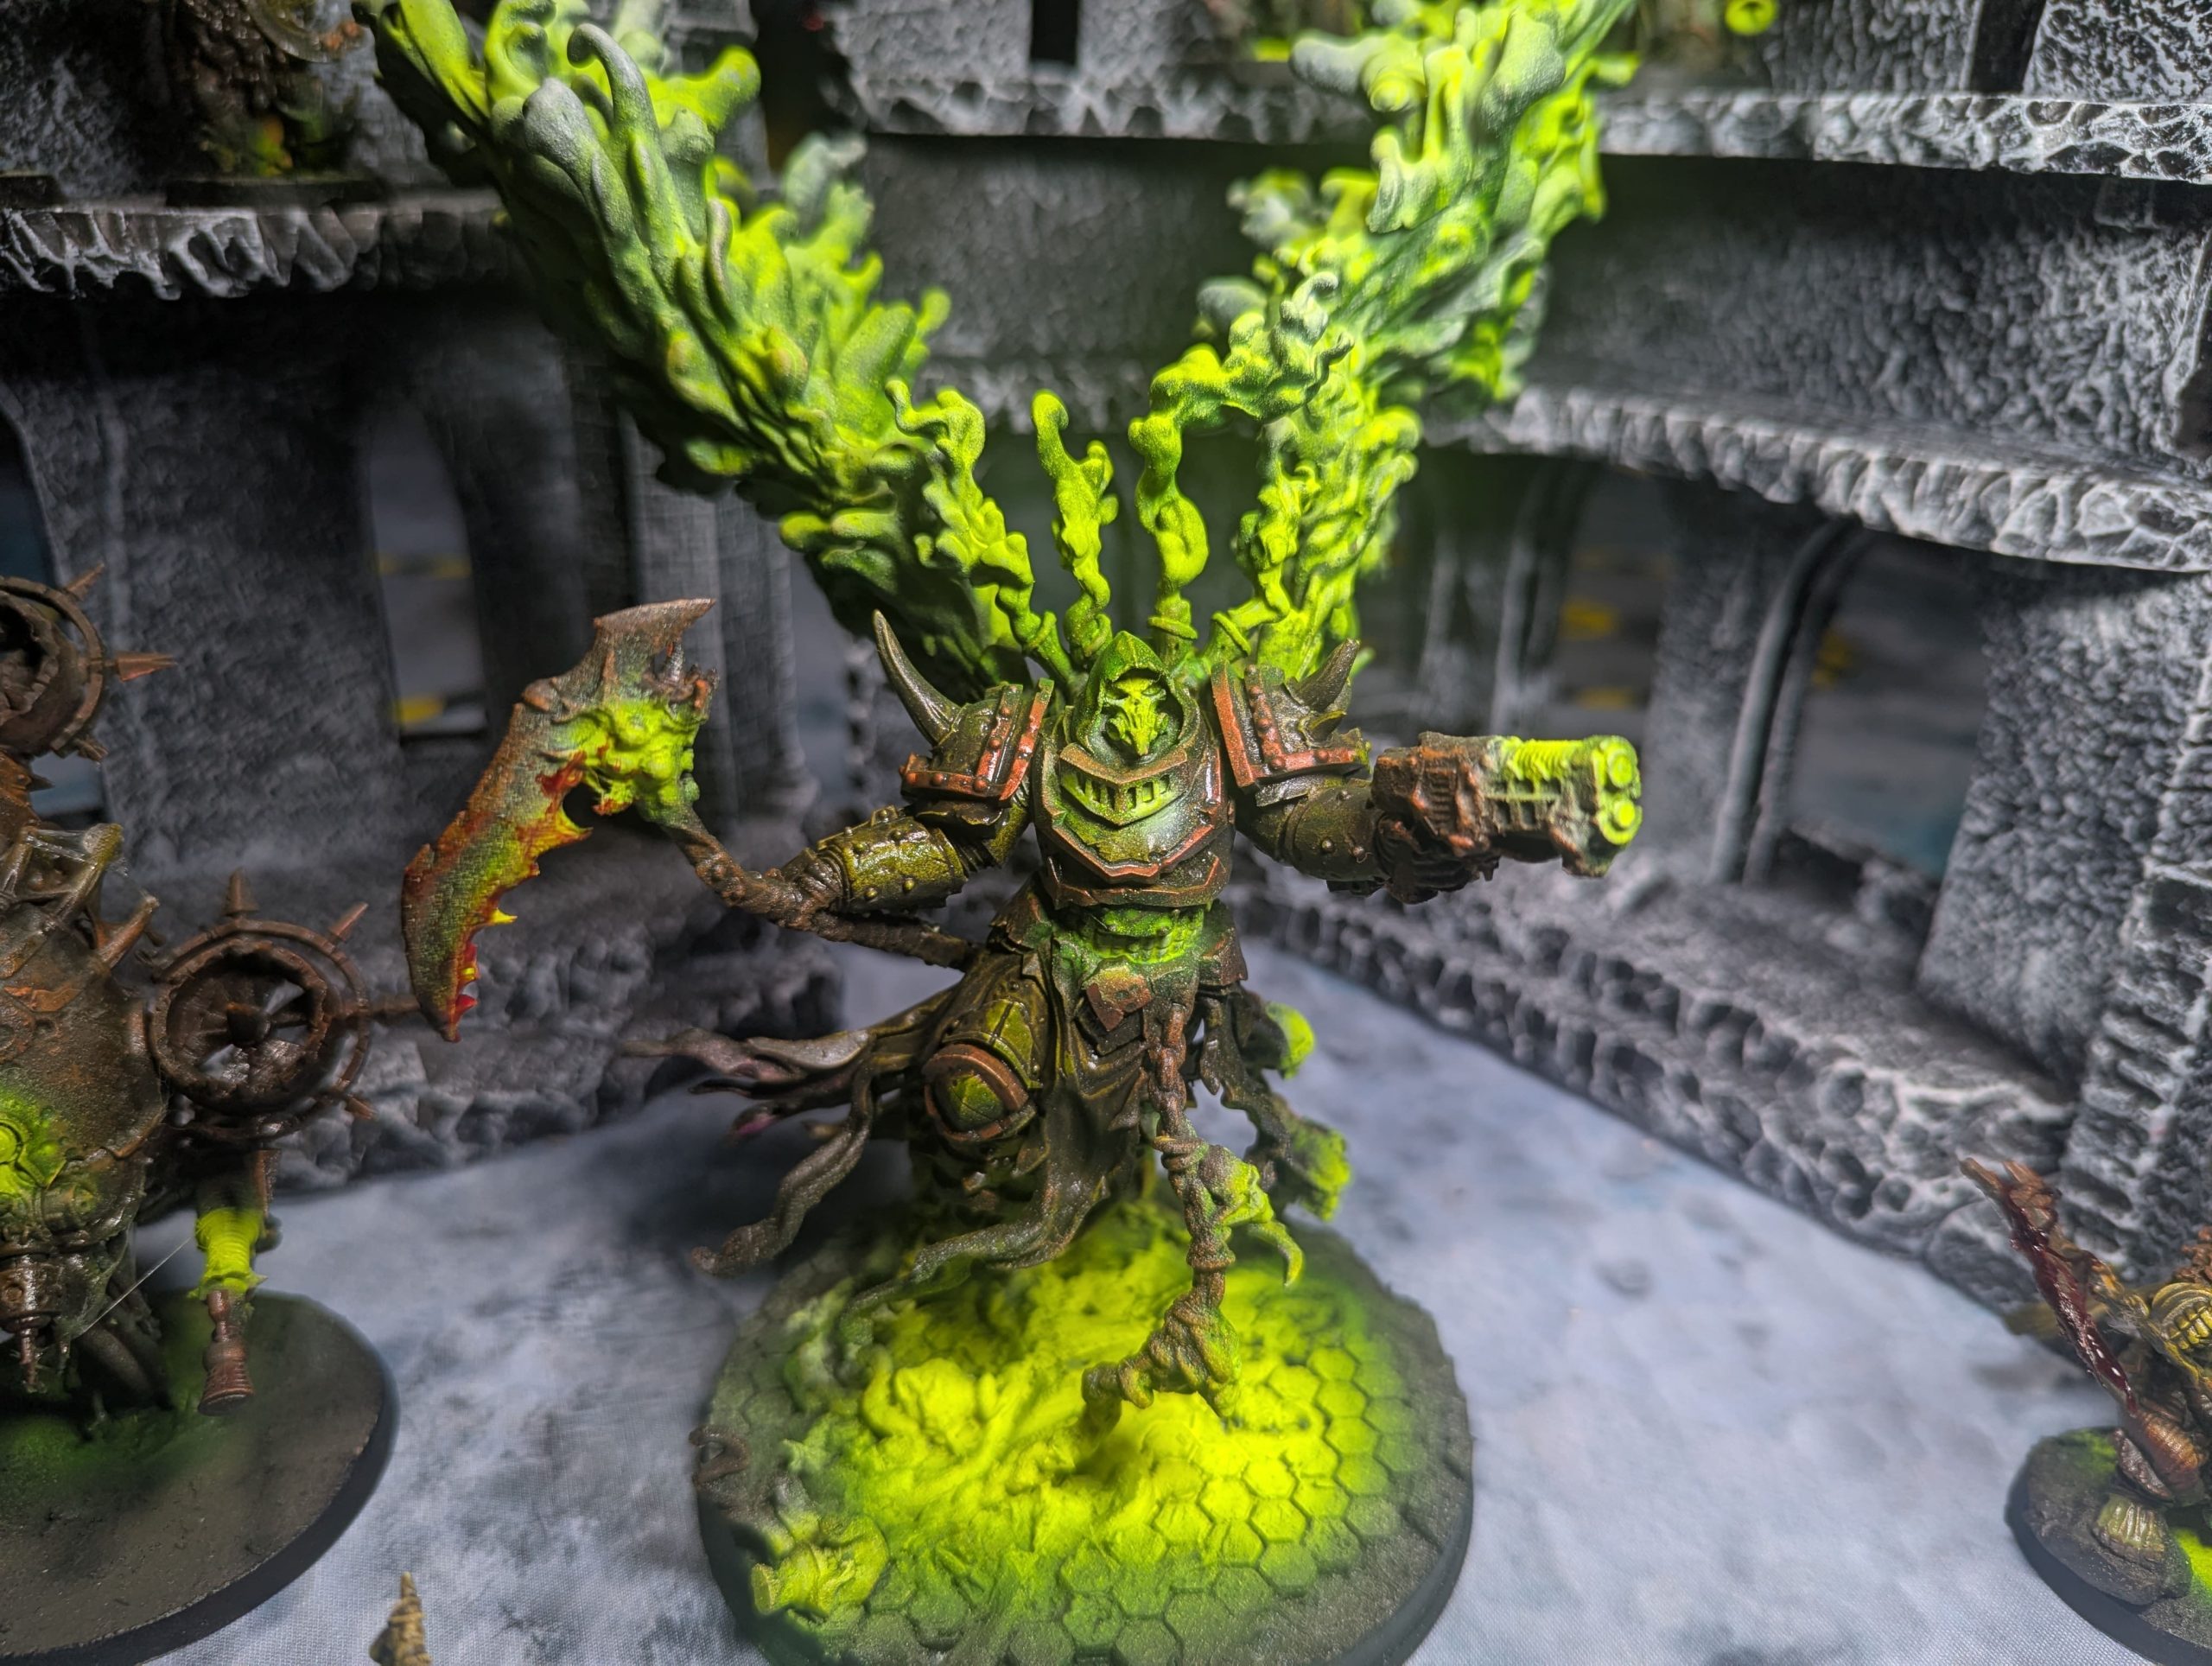
The Deathly Glow: Fluorescent Effects
This stage was dedicated to adding the supernatural, sickly horror characteristic of the Death Guard. It was time for the “fun bit”—creating the unsettling, deathly glow.
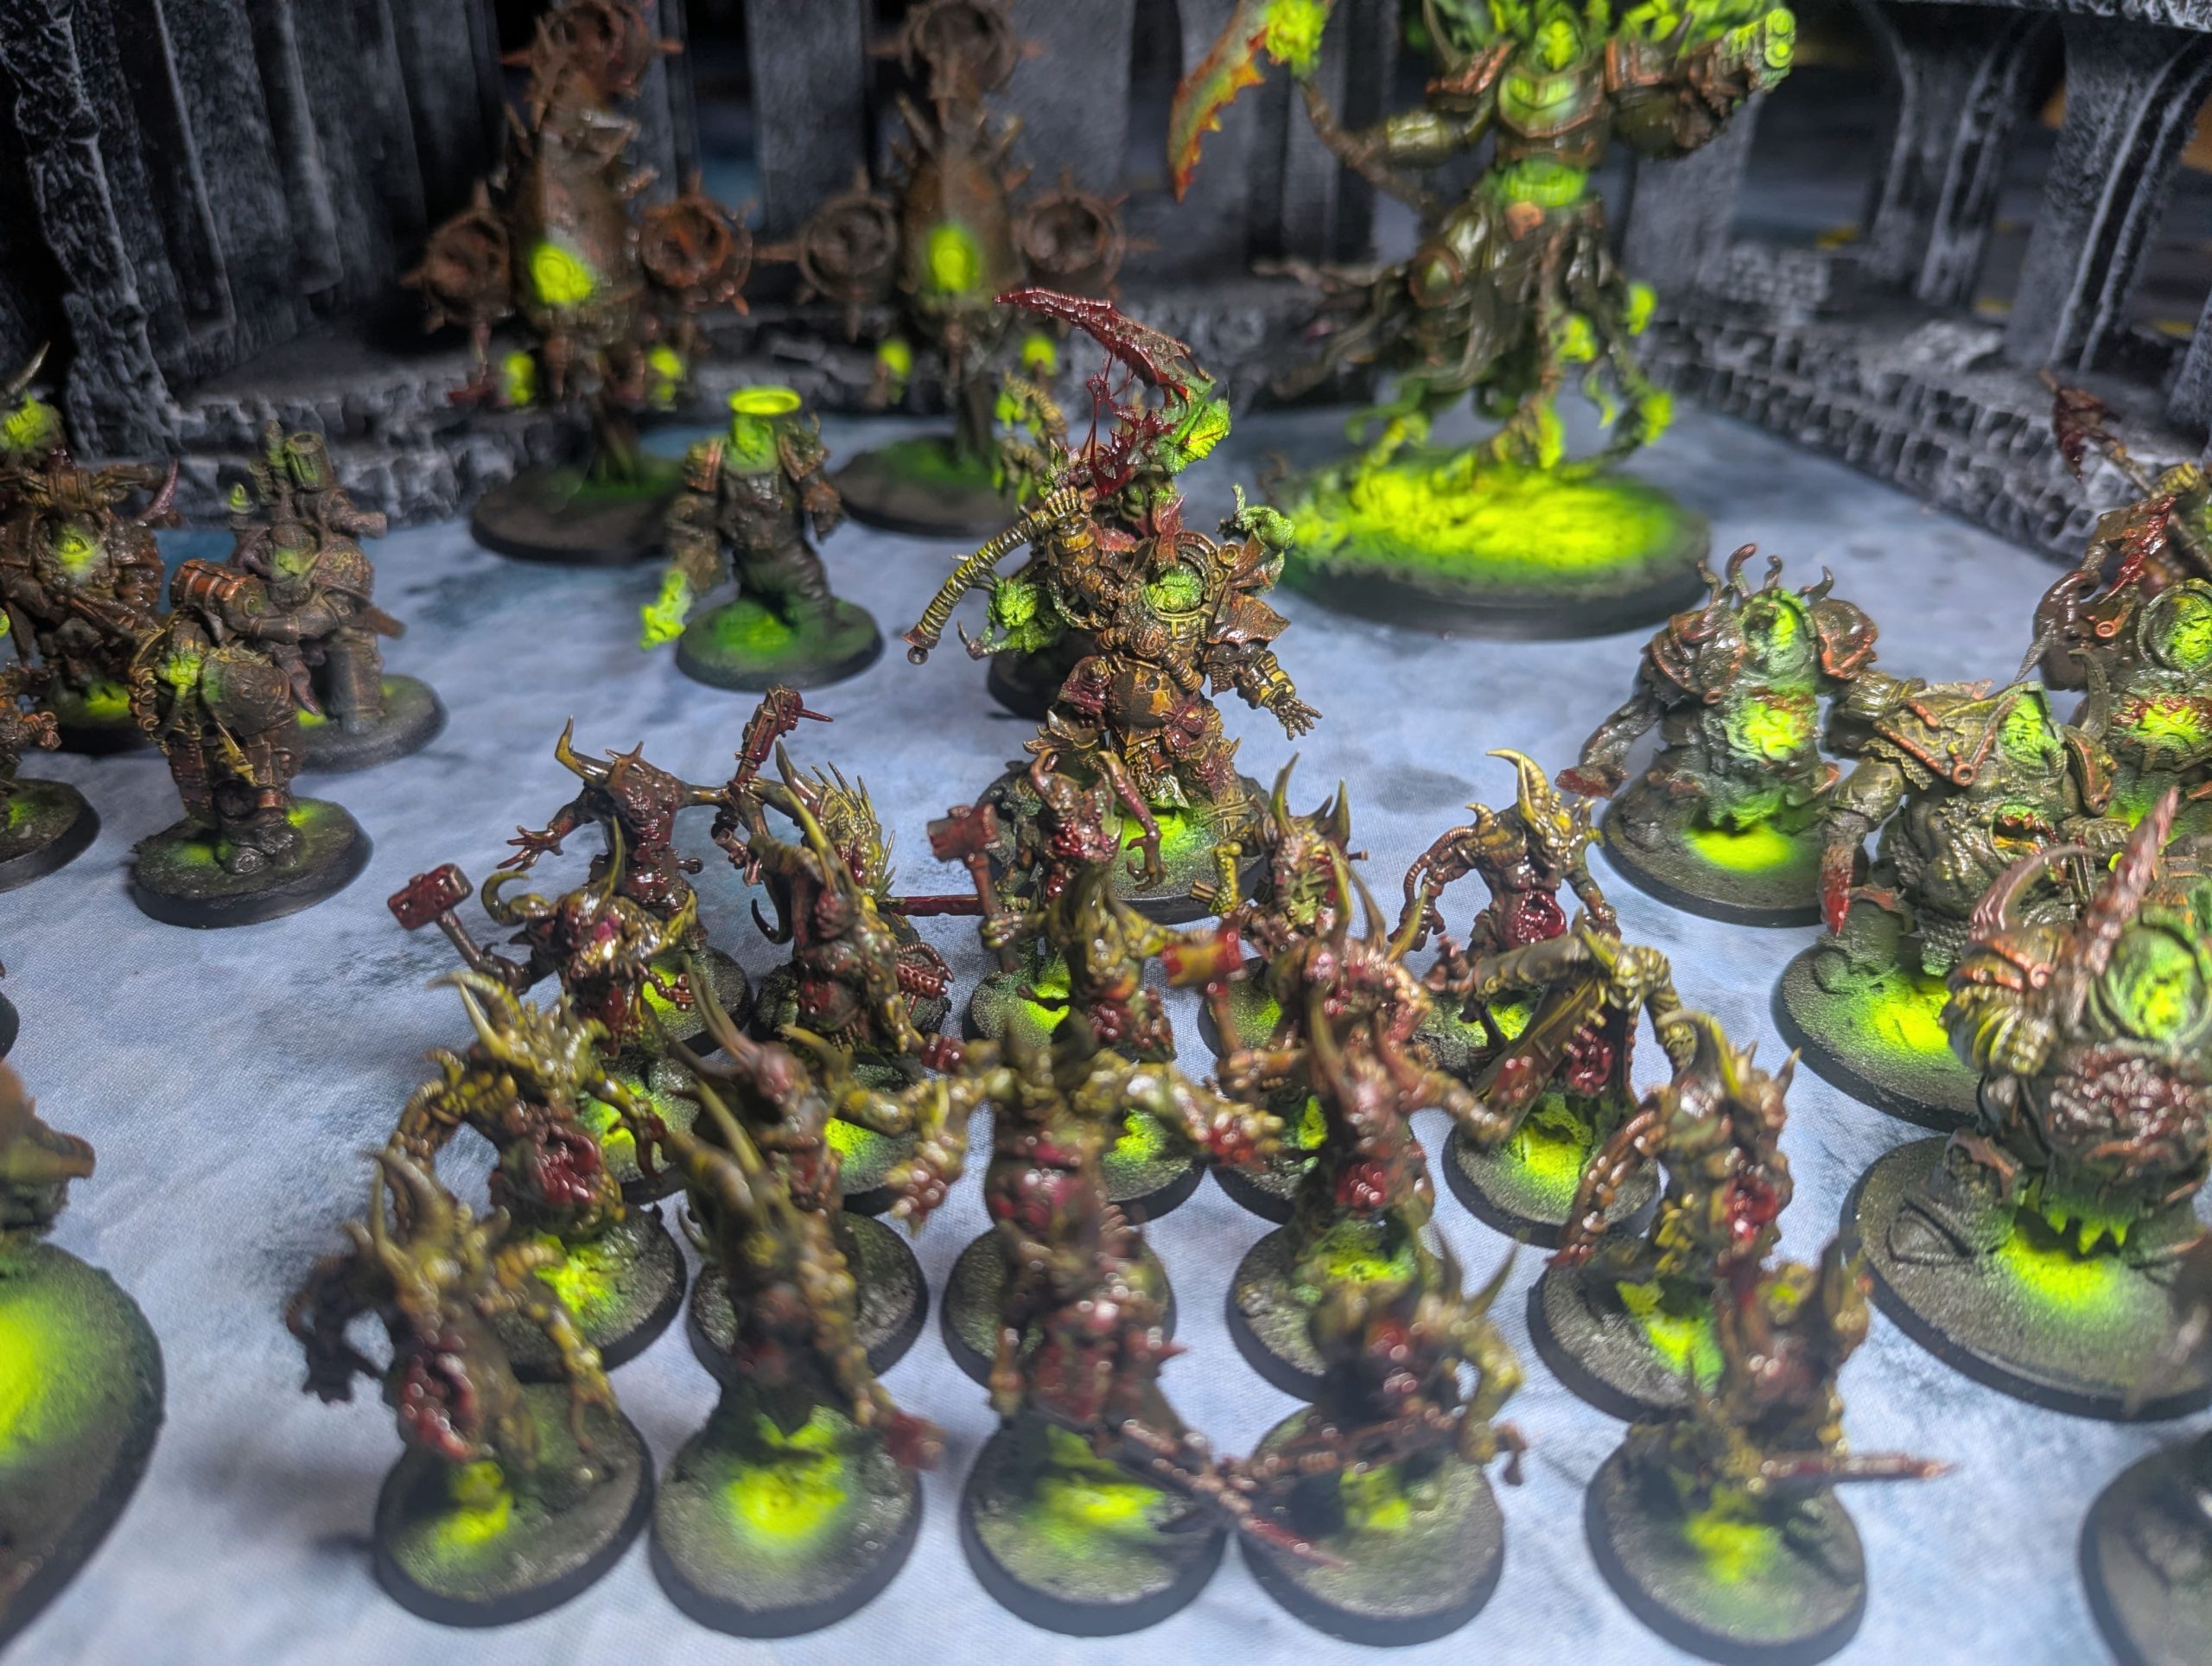
- White Ink Base: Targeted areas—tentacles, mutated flesh, or areas where warp energy was seeping out—were hit with a layer of white ink. This provided an opaque, reflective base for the fluorescent layer.
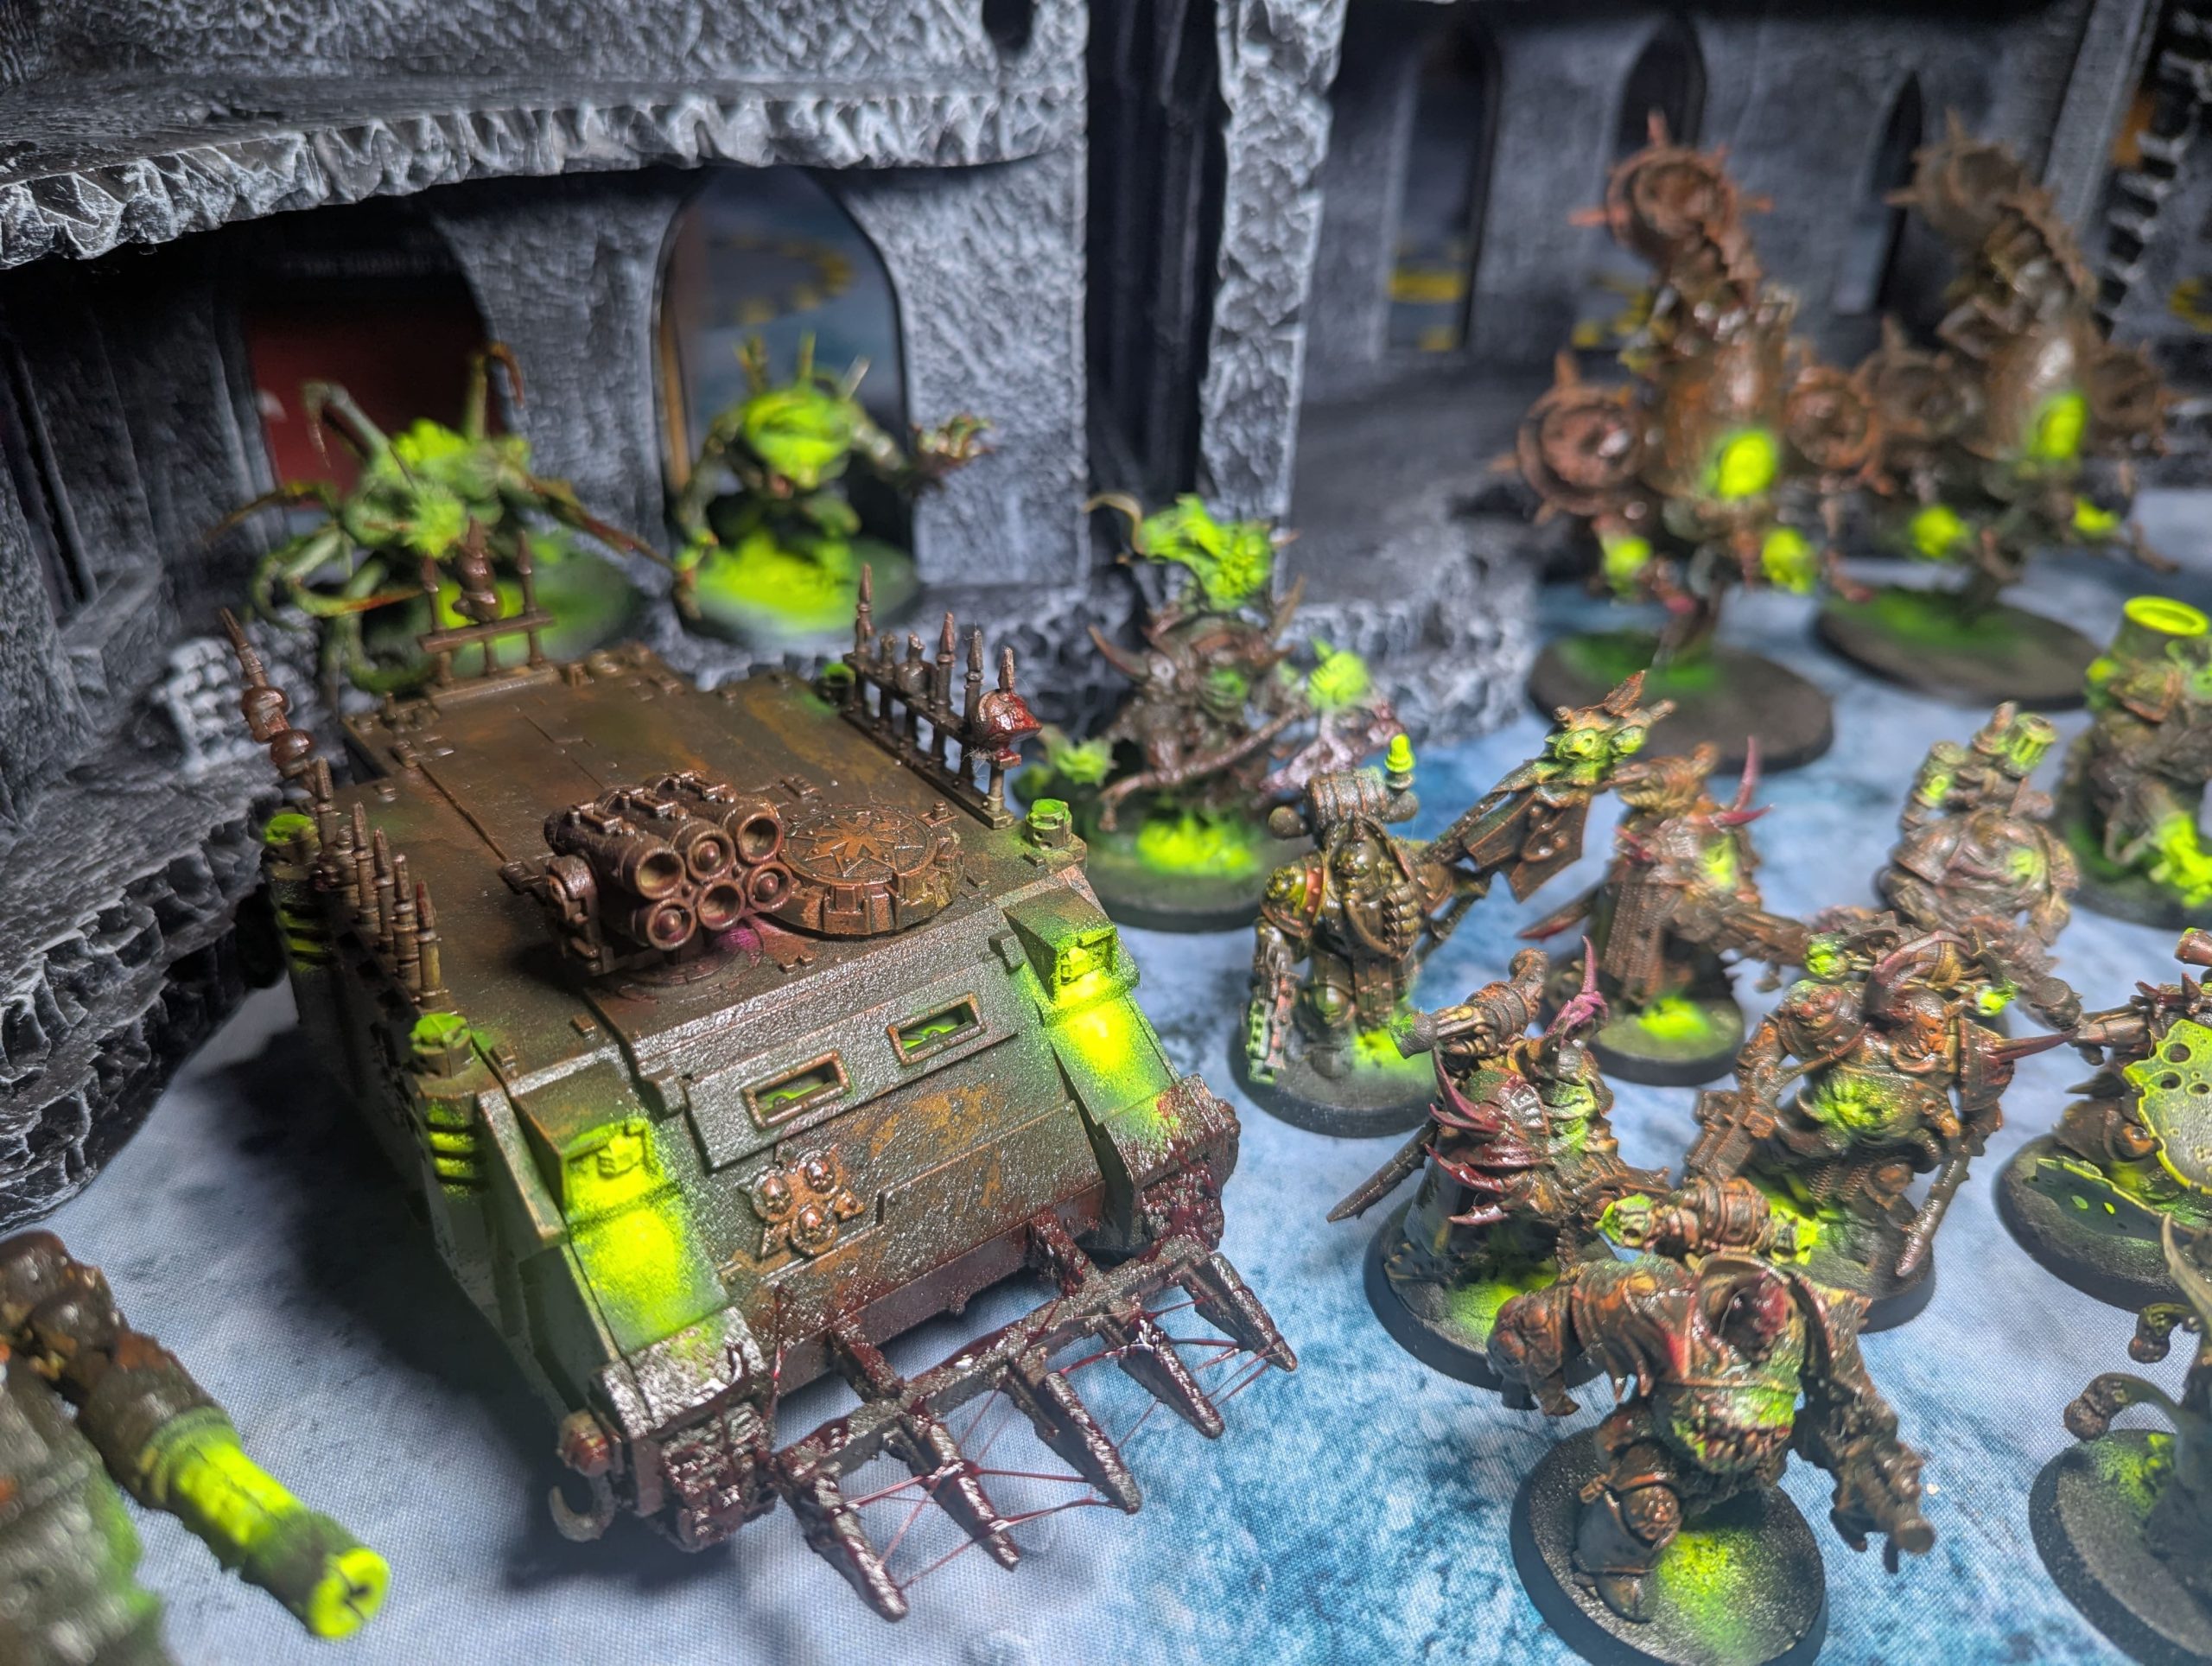
- Fluorescent Green: Over the white ink, I applied a fluorescent green paint. This technique ensures that the areas possess a sickly, unnatural glow in regular light, and under a black light (UV light), the effect becomes intensely luminous, giving the entire army a terrifying, rotten phosphorescence.
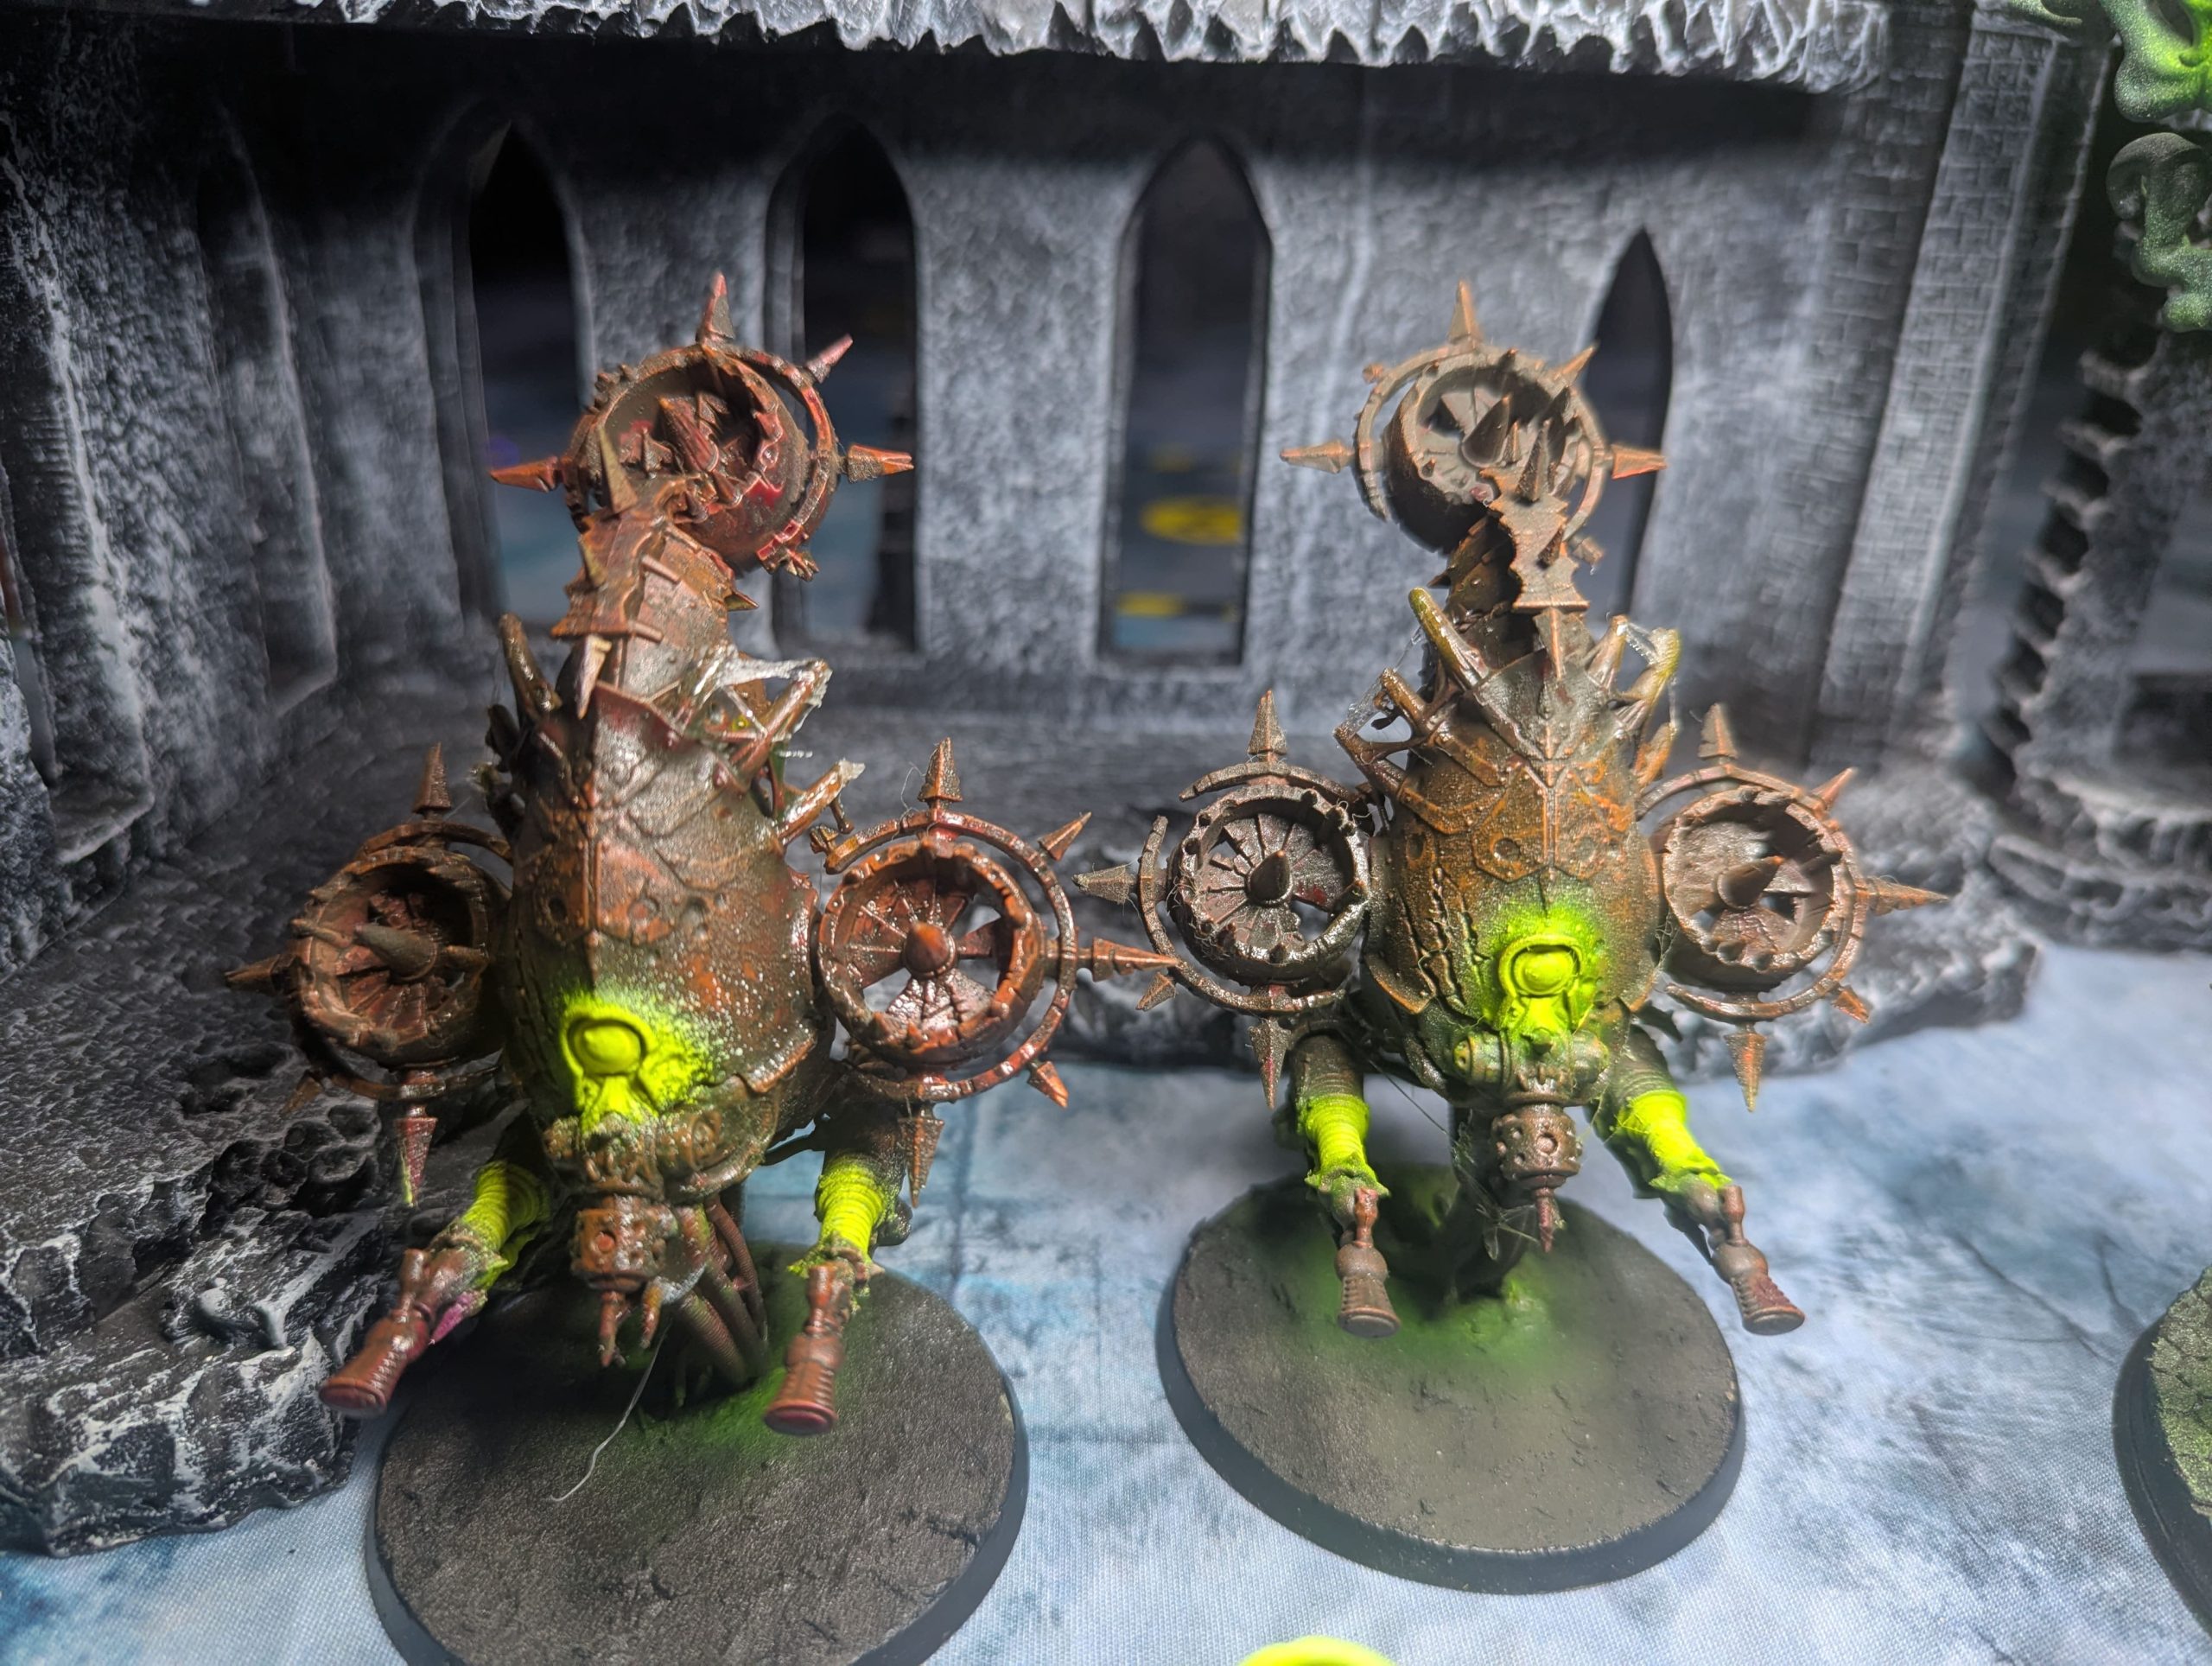
The Finishing Filth: Texture and Wetness
The very final stage was pure enjoyment—the application of the texture effects that truly sell the army’s disgusting nature. I enthusiastically deployed a range of gross effect paints: specialised products for blood spatter, oozing snot, crusting rust, and sticky slime. These were dabbed and applied to weapons, joints, and wounds to complete the illusion of a wet, infectious, and decaying force.
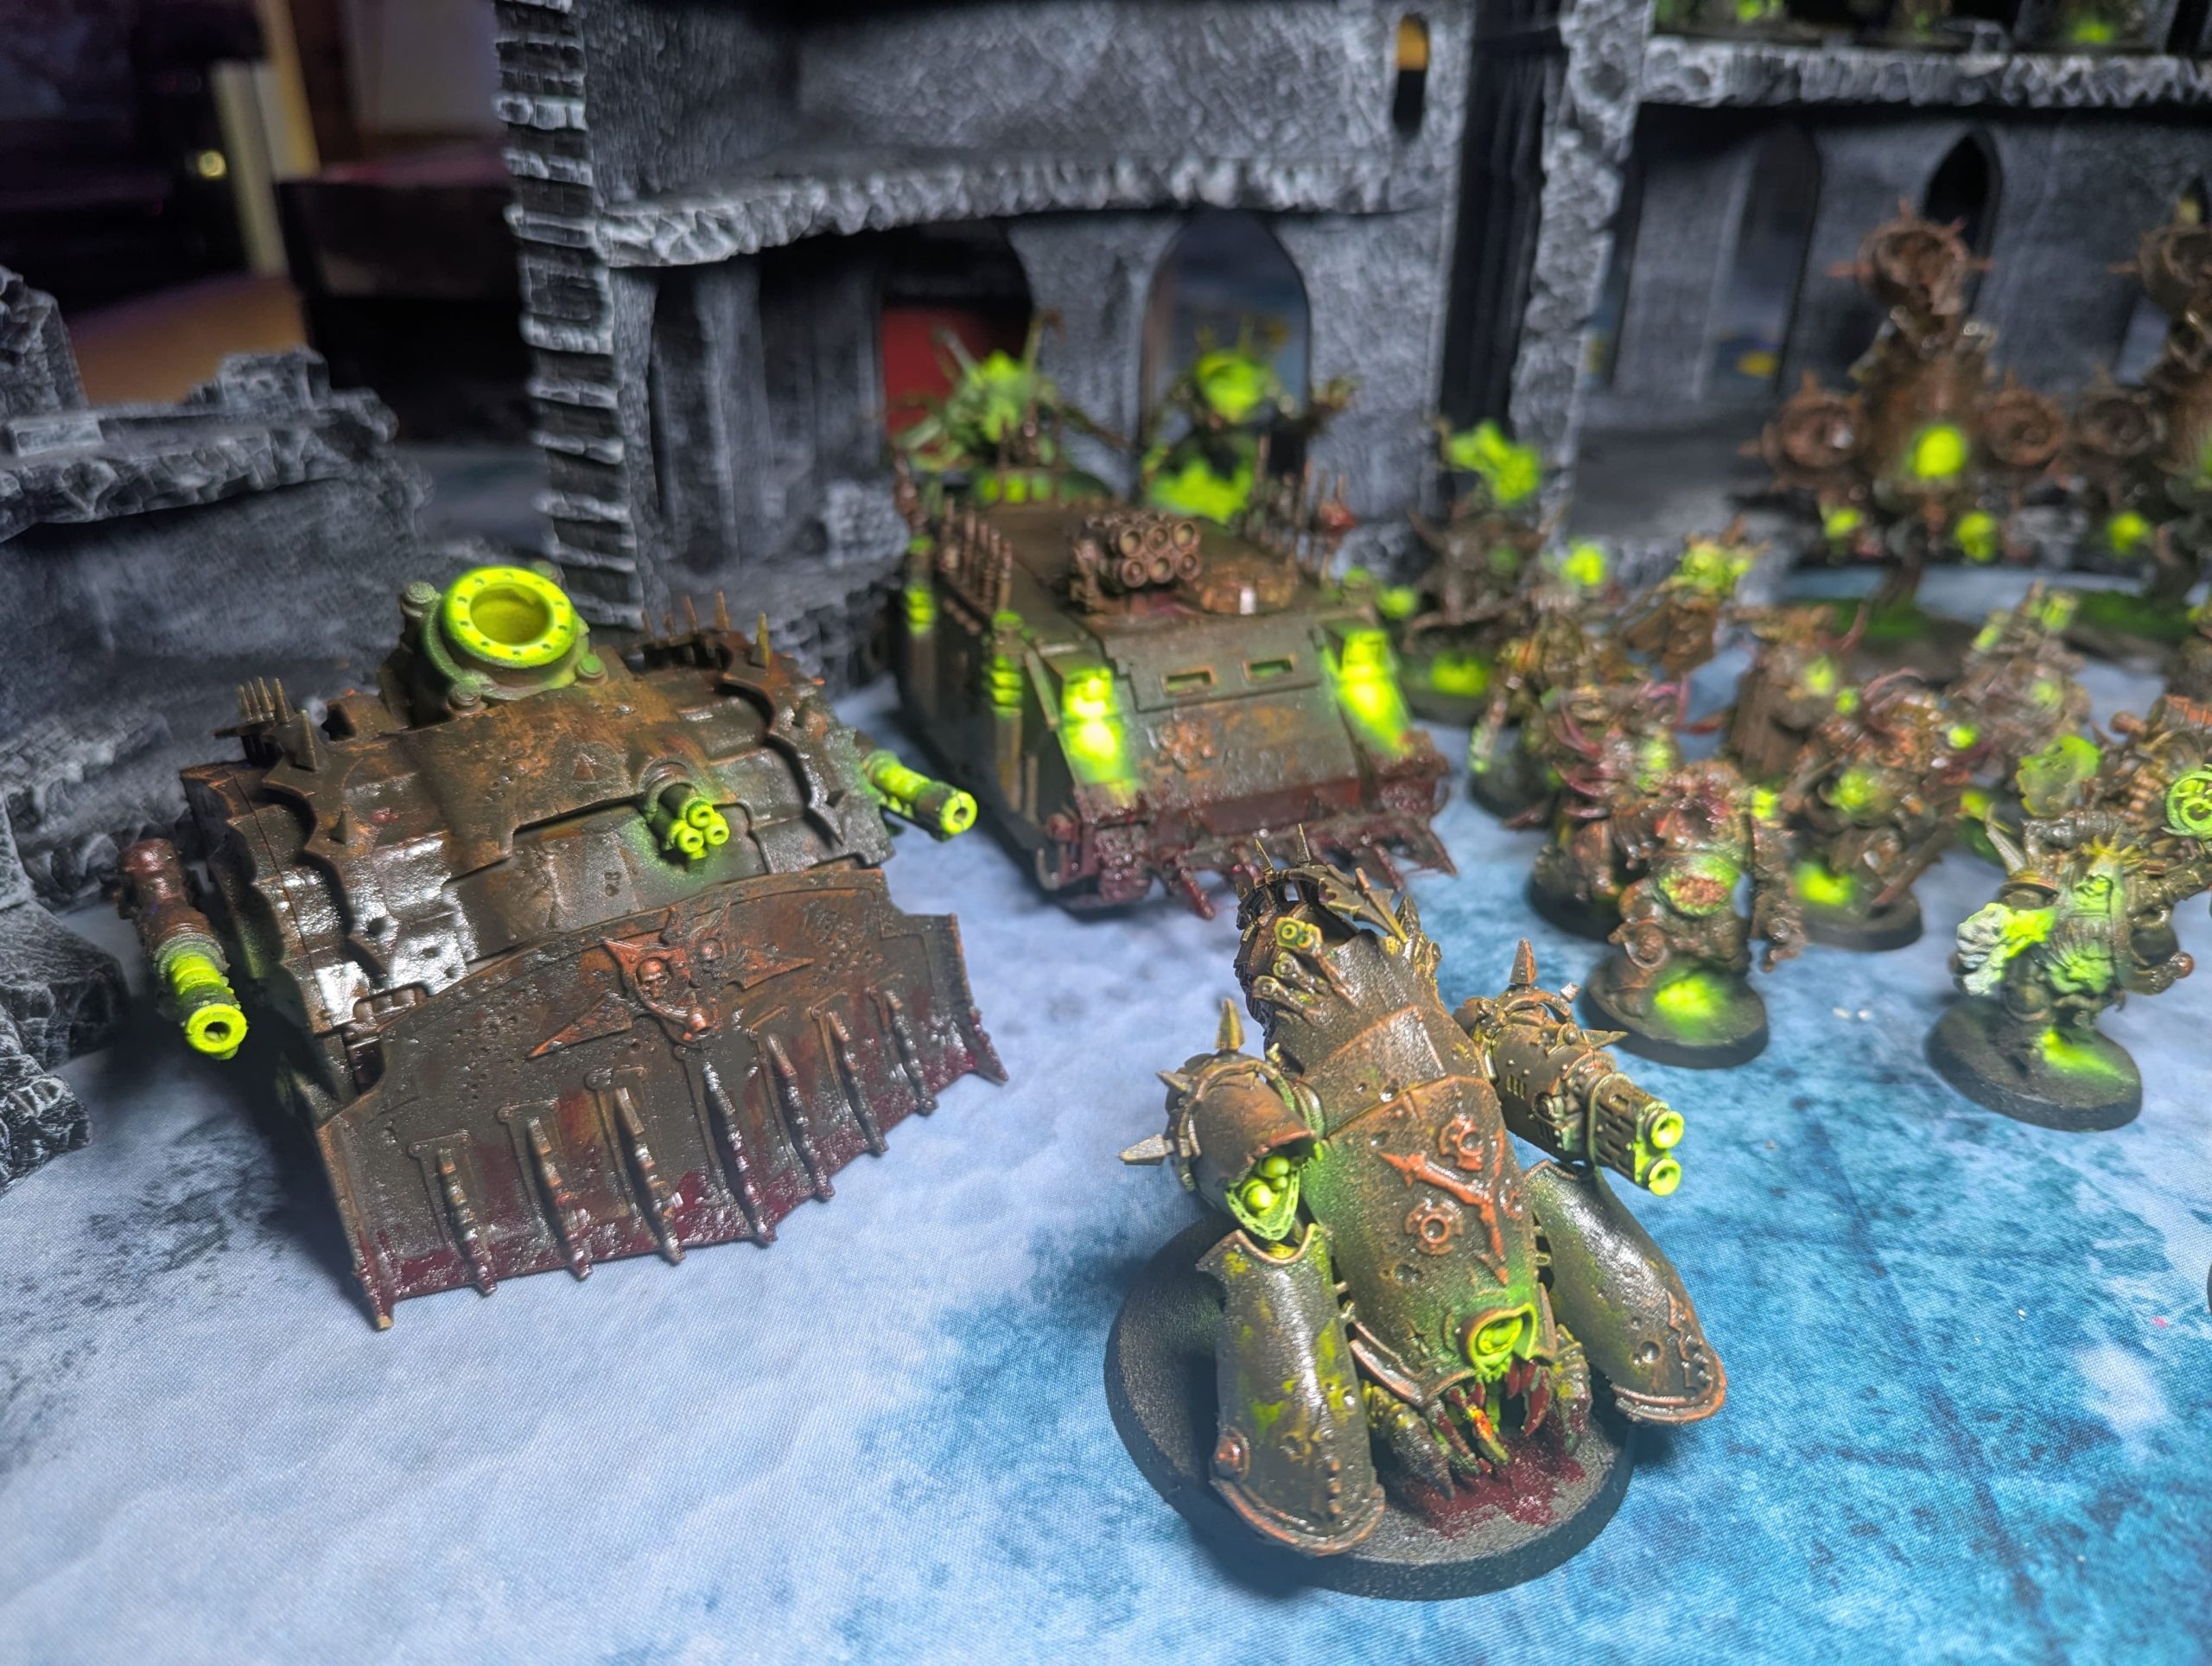
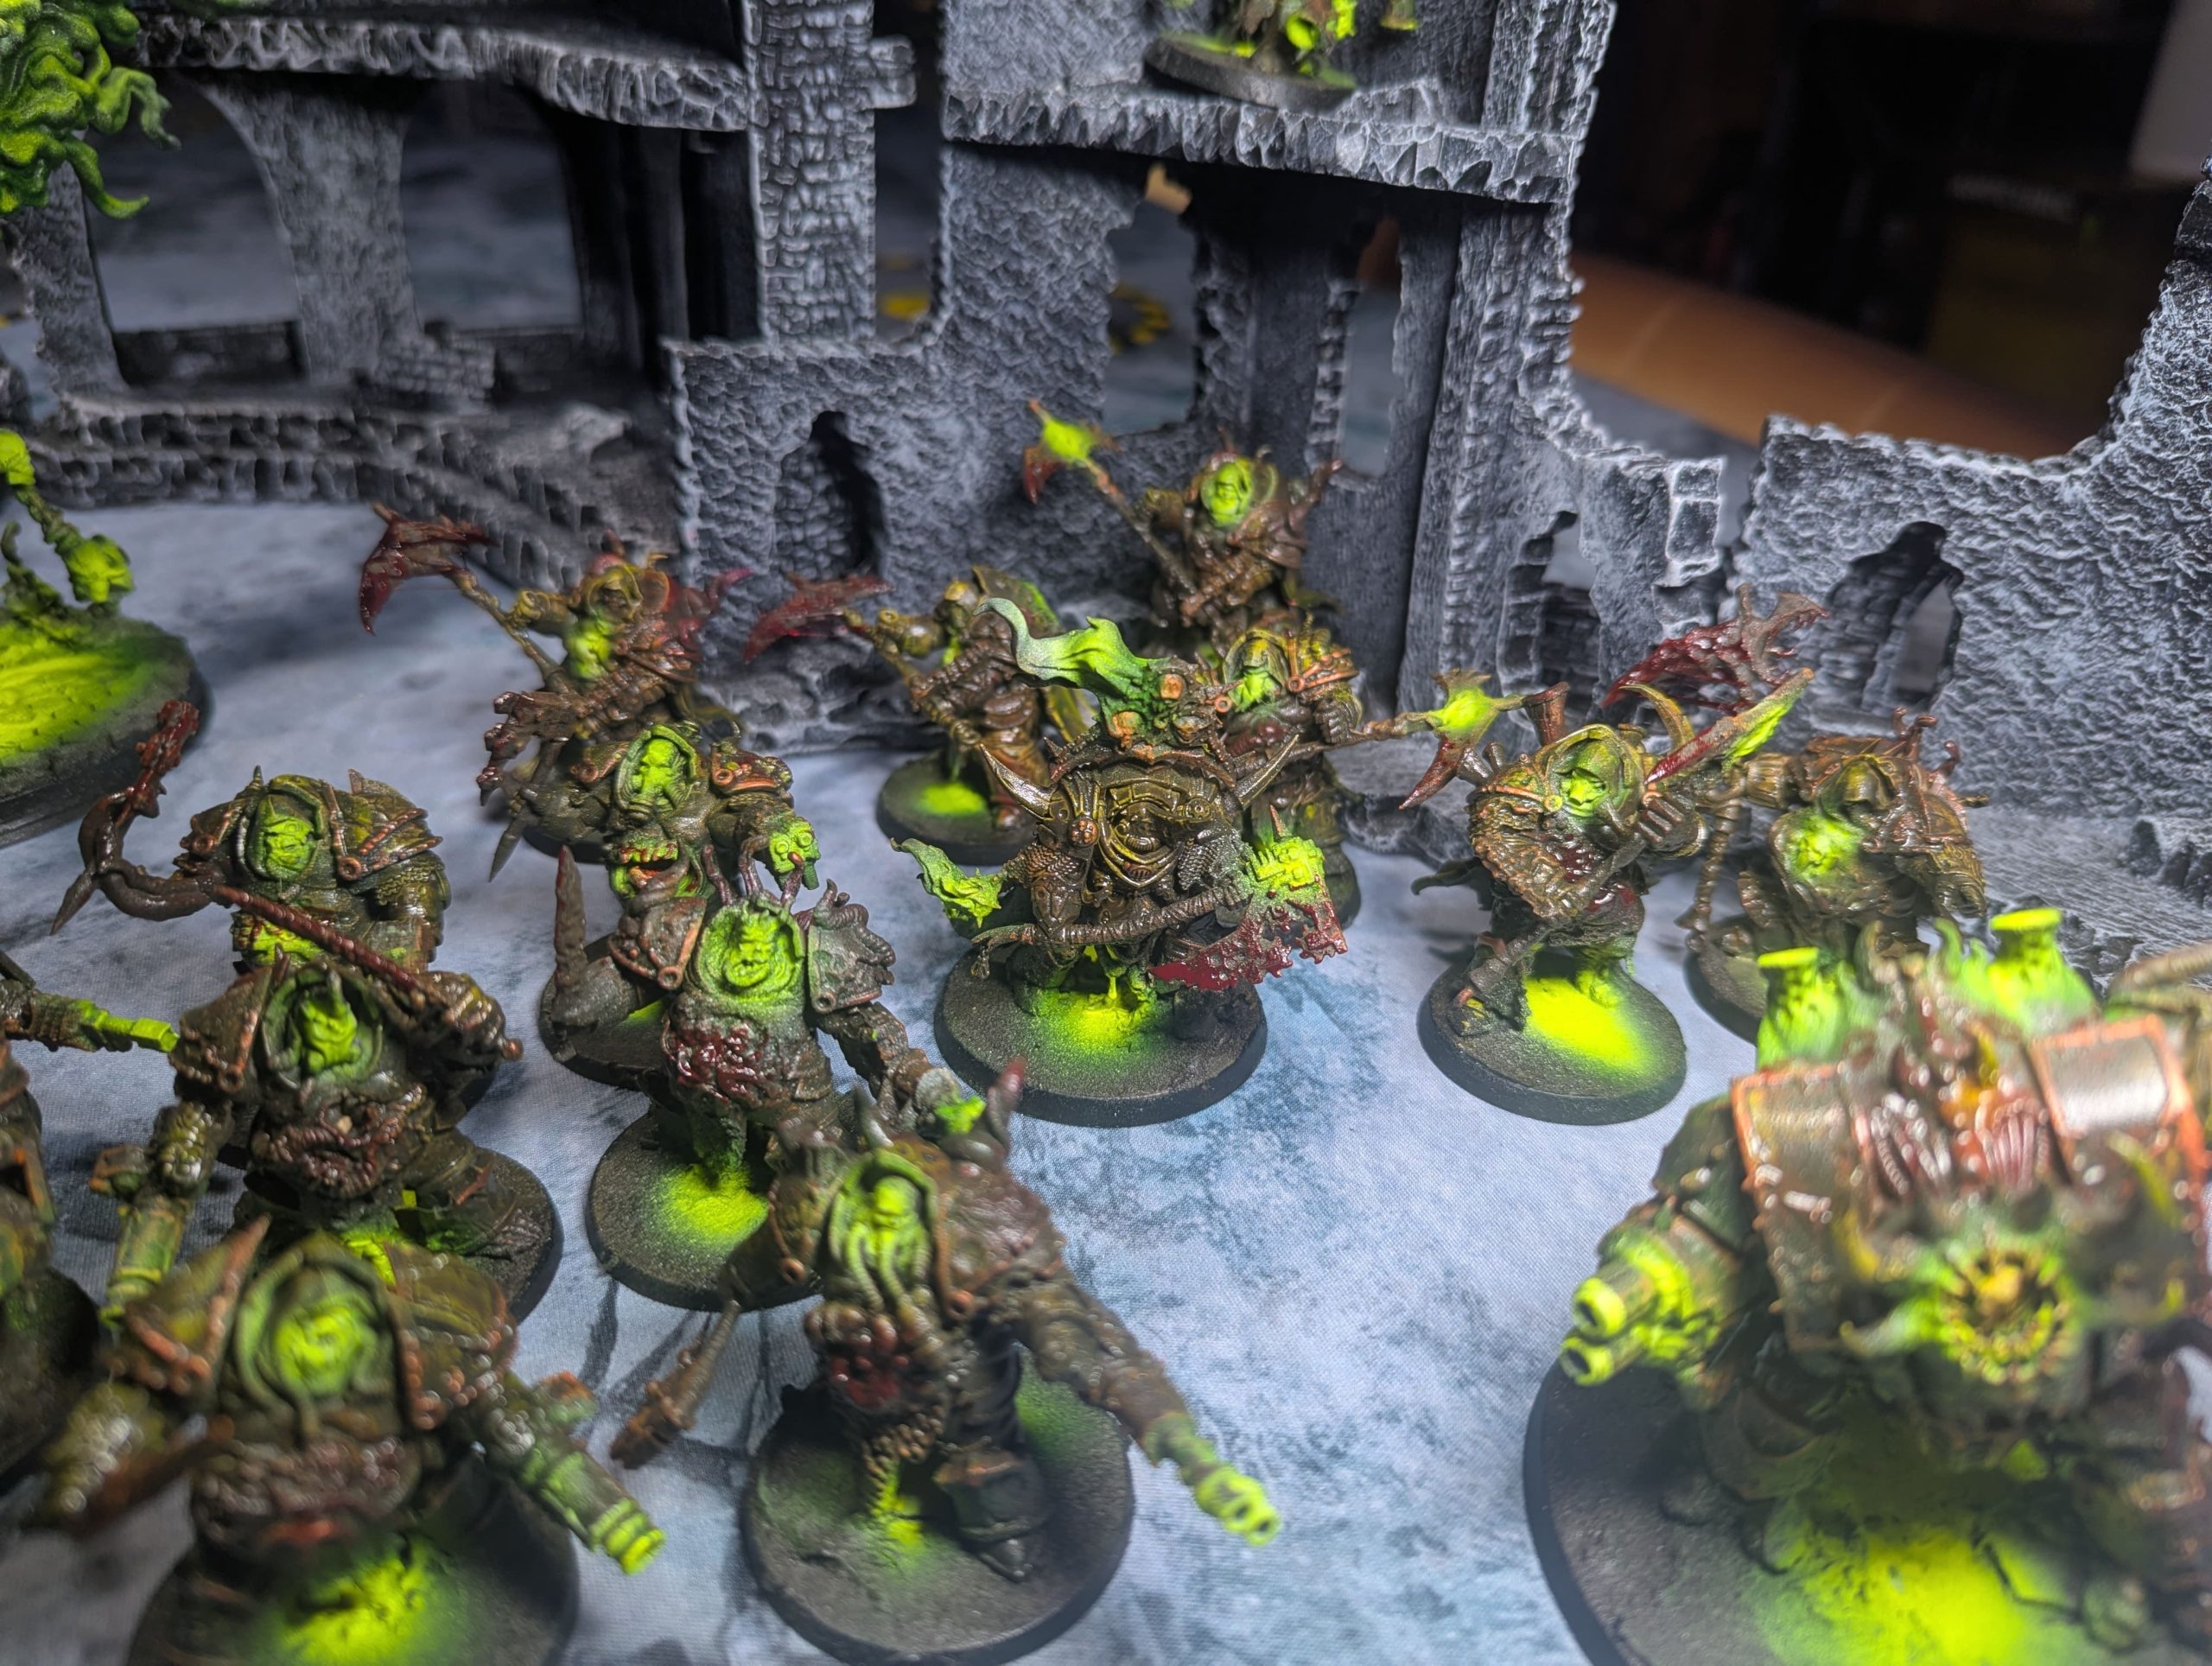
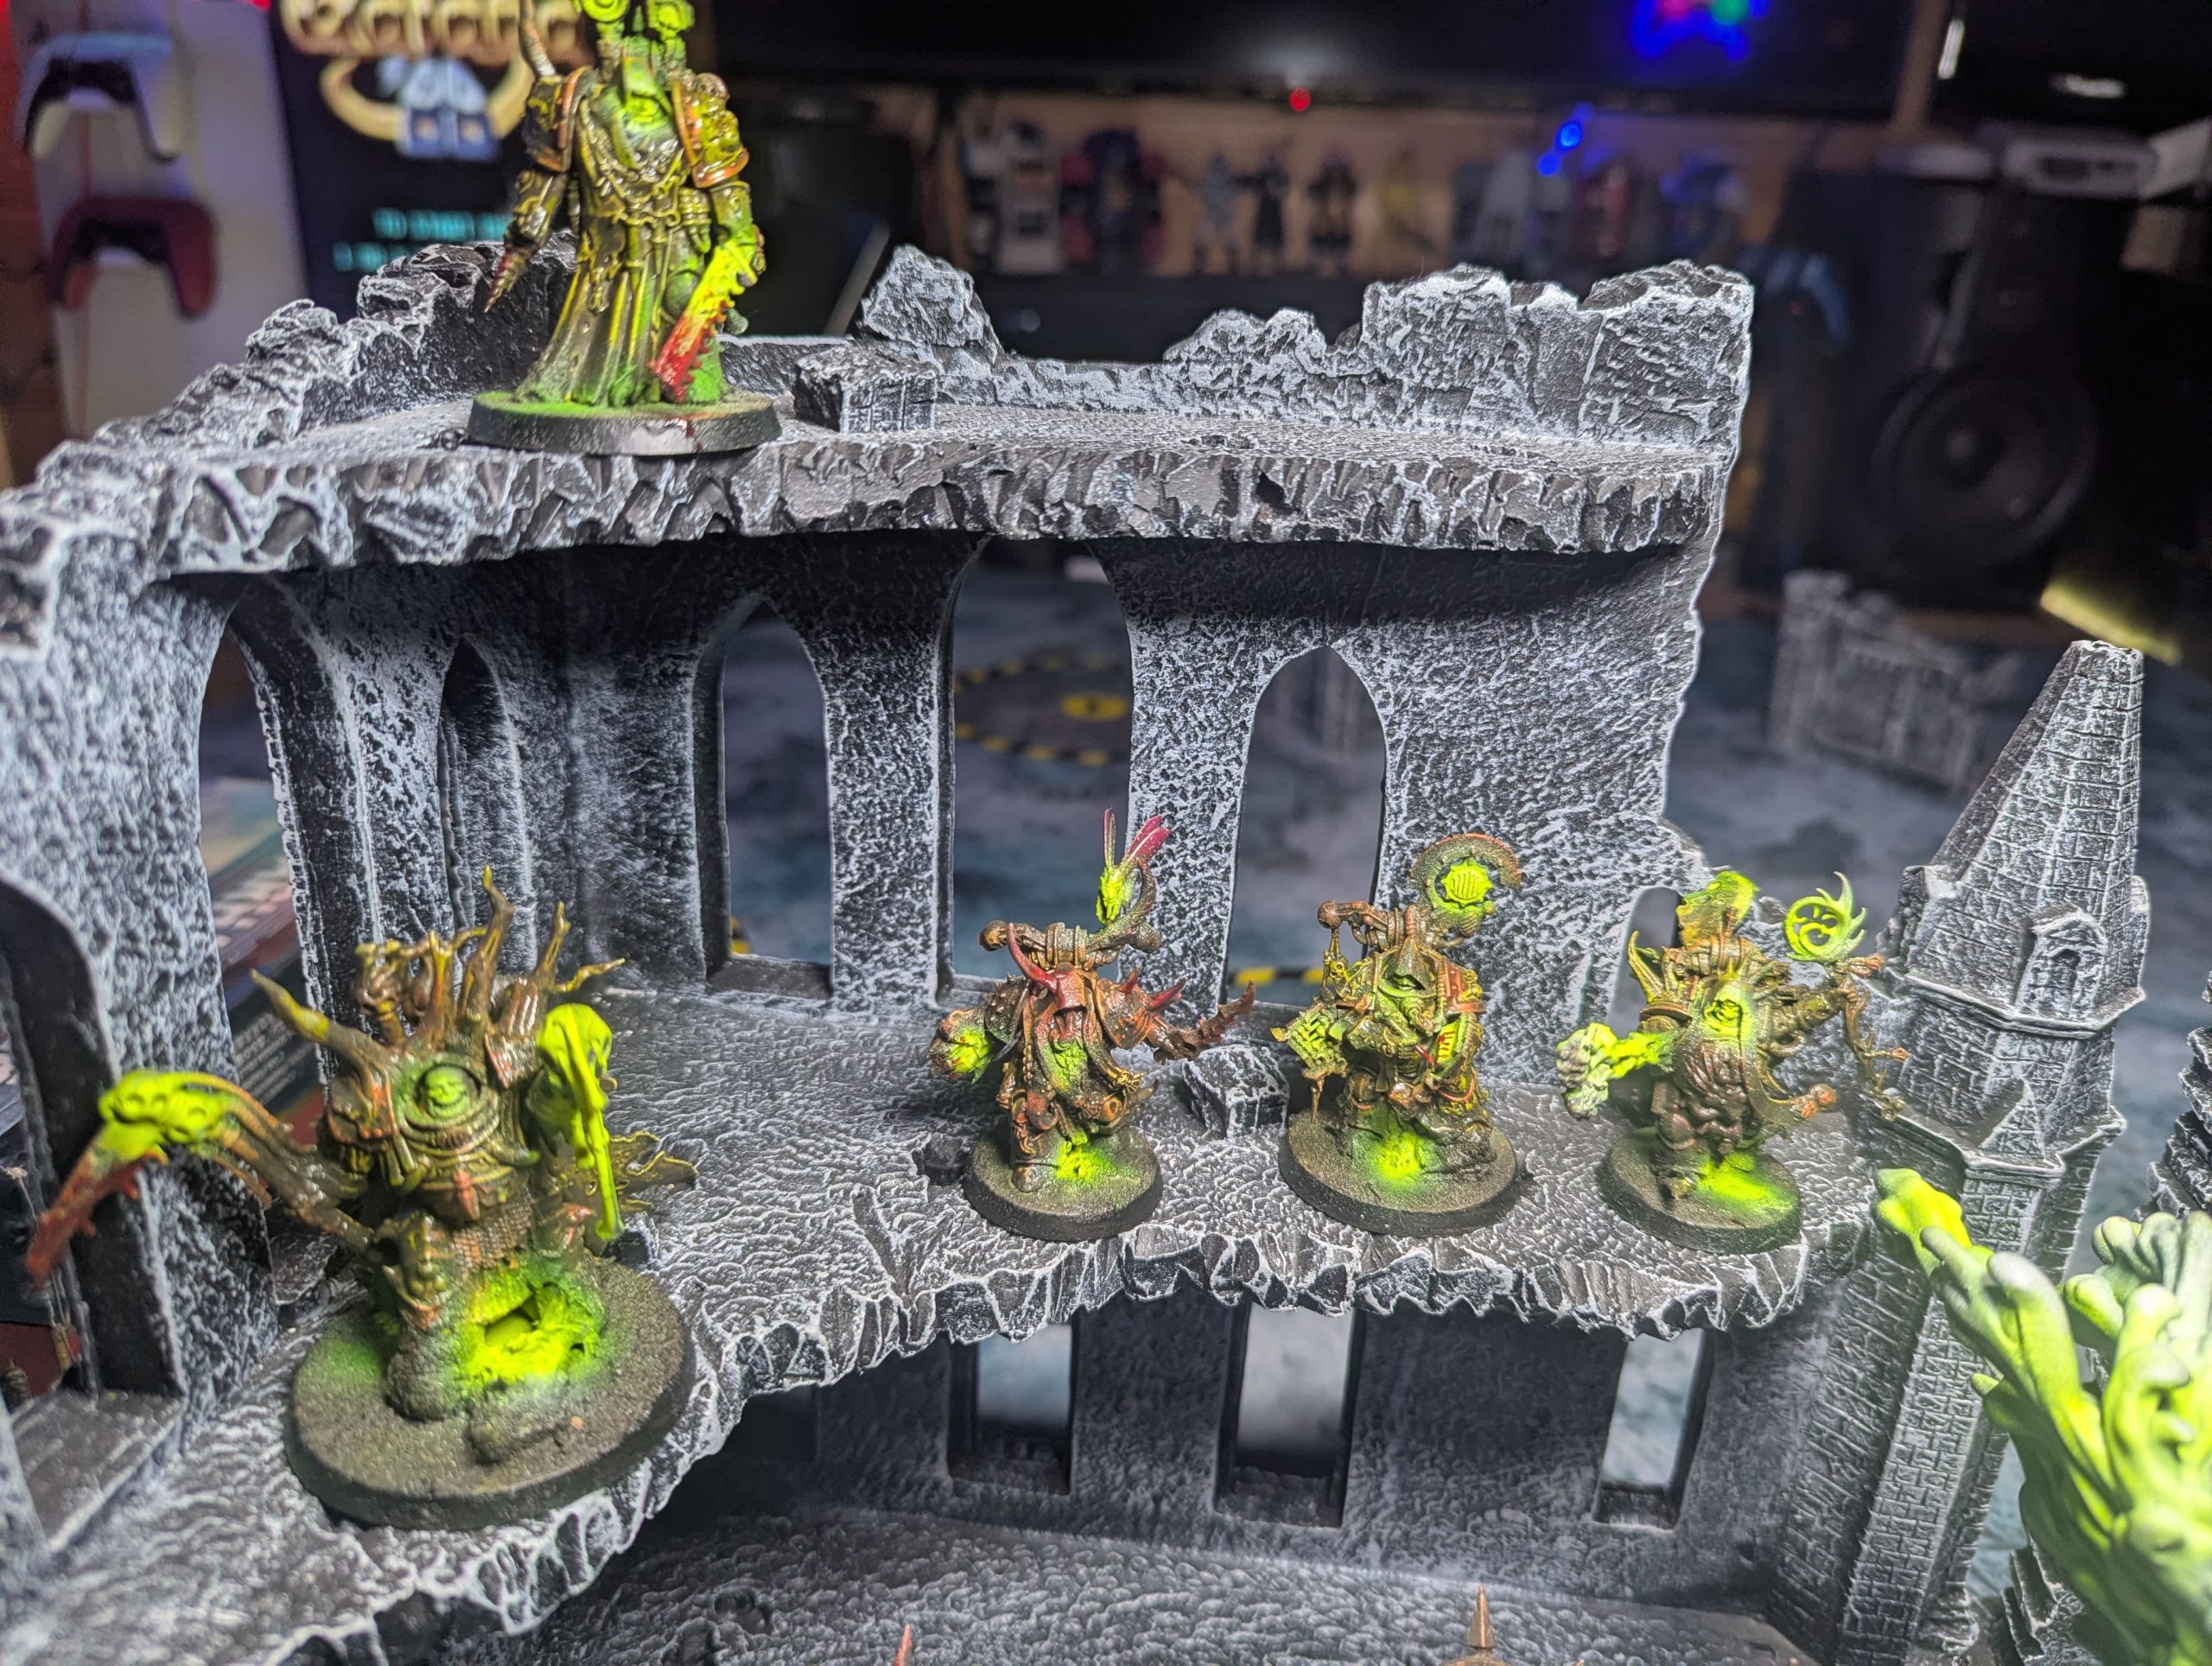
The Final Result
I am genuinely thrilled with the final look of this army. The speed painting techniques delivered a unified, high-impact force, and the relentless application of grime and effects achieved the exact grim dark look I had been chasing. I made the deliberate decision to retain a gloss varnish finish on various parts, as this subtle shine is crucial to maintaining the visual illusion of the “wet, gross look”—the oil and mucus that perpetually coat the Death Guard in a sheen of pestilence. This project was a perfect marriage of efficient painting and unbridled aesthetic commitment to the truly corrupted.


![Zenit Miniatures’ Samurai Warlords Now Live On Kickstarter [Updated]](https://images.beastsofwar.com/2026/02/samurai-warlords-launch-main-600-338.jpg)