The Desert War: Gaming WW2 In North Africa Part Four – Turning The Tide
September 7, 2015 by crew
For the past three weeks, we have reviewed (and more importantly, gamed) our way through some of the more decisive engagements of the Desert War, fought primarily in the deserts of North Africa during World War II. For those just joining us, our progress thus far has been presented in Parts One, Two, and Three of the series.
But, after two years of ebb and flow, attack and counter-attack, a crisis point has been reached in the late summer of 1942. Having been thrown back halfway across Egypt, the Allies can retreat no further. Having exhausted their supplies and reinforcements, the Axis can wait no longer. The Allies are out of space, the Axis is out of time. One way or another, a decision will now be made at a tiny desert railroad town...called El Alamein.
A Decisive Push
As we saw in Part Three, “Panzergruppe Afrika” decisively defeated the British and their Commonwealth allies at the Battle of Gazala. Rommel was thus able to overrun Tobruk (which had held out for 240+ days the last time the Germans had been here), and push the Allies back into Egypt. The British attempted to make a stand at Mersa Metruh, but were outflanked and defeated again. This time the retreat took them all the way back to El Alamein.
In direct violation of orders, Rommel went after them. His superiors knew this was a bad idea, to push this deep into Egypt against numerically superior forces would badly overstretch his already-vulnerable supply lines. The British knew it, too, and were using every weapon they had to strike at these supply routes.
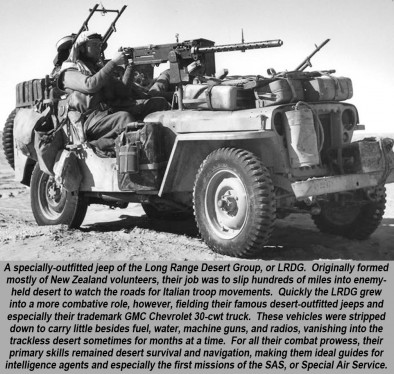
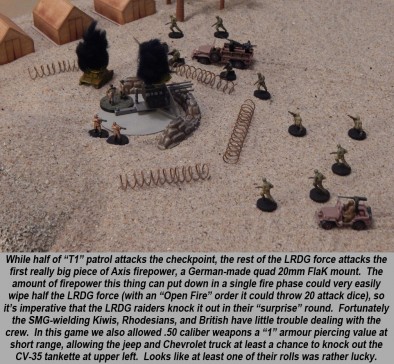
One of these weapons was the Long Ranged Desert Group (LRDG), which was about to carry out their most famous raid …
The Long Range Desert Group
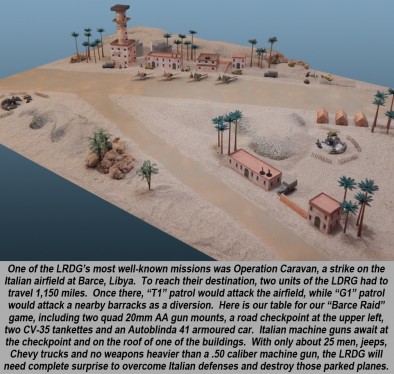
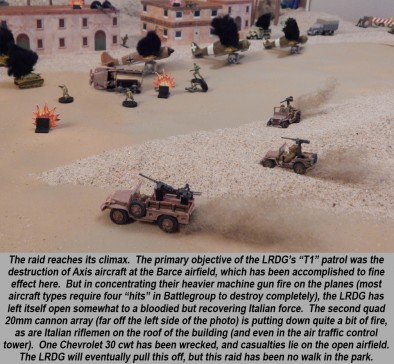
“Operation Caravan” was an LRDG strike at the Axis airfield at Barce, on the northern coast of Libya. It was part of a larger series of commando-type operations aimed at disrupting Panzerarmee Afrika’s lines of communication and supply, involving the SAS, British Commandos, the Royal Marines, the Royal Navy, and even a battalion of line infantry.
Interestingly, the Italians largely defeated all of these operations except Operation Caravan. The operation is also unusual because the LRDG was usually deployed as a reconnaissance force rather than a “commando strike” unit. Experts in desert navigation and survival, they often took the SAS to their targets, rather than strike the targets themselves. But, as they certainly showed at Barce, the LDRG could “get messy” with the best of them.
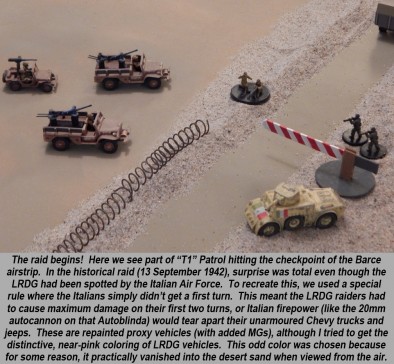
Ironically, the LRDG’s attack on Barce was not a complete surprise as they’d been spotted some time ago by the Italian Air Force. However, the Italians at the airfield did not expect the attack to come straight off the main road, “through the front door,” especially since one of their own columns had just passed up that same road. These Italians and the LRDG actually passed each other in the night, going so far as to wave hello. Such was the “fog of war” in the desert, especially in darkness.
The raid was a success, with just four of the LRDG attackers wounded. Accounts vary on how much damage they did, ranging from between 16 and 32 aircraft destroyed. Four LRDG vehicles had been wrecked and so many of the men had to WALK across the desert to other LRDG rendezvous points. They were attacked from the air and harried by Italian counter-attacks, while some LRDG raiders were captured.
This just goes to show that, despite the movies, “special forces” are just as fragile as any other troops. As units, they’re even more fragile because of their small size and lack of heavy weapons support.
These operations are complex and dangerous, and as we’ve seen as recently as Pakistan in 2011, it doesn’t take much for something to go awry...especially with your ride home. Who can forget that crashed helicopter at Bin Laden’s compound?
Turning Point At Alamein
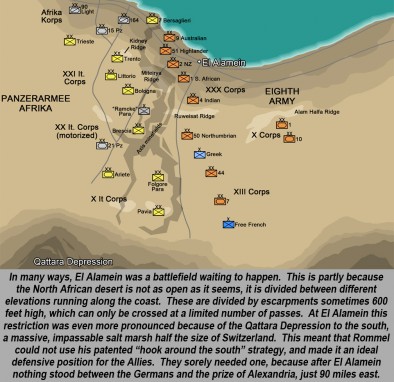
Back at the Alamein Line, meanwhile, the Eighth Army was trying to pull itself together after the twin disasters of Gazala and Mersa Metruh. Now set up at the superb defensive position at El Alamein, they knew there could be no further retreats. Alexandria was just ninety miles behind them, with Cairo, the Nile, and the Suez Canal beyond.
Fortunately, things finally started to turn around for the Allies. In early July, Rommel hit them yet again in a series of attacks, and with the Qattara Depression blocking his favourite “hook around the south” strategy, he had to wrack his brain. Rommel had come to the end of his leash. Generals Auchinleck and Ritchie hit back, heavily mauling Panzerarmee Afrika but not failing to push them back. This “First Battle of El Alamein” is largely considered a draw.
Meanwhile, Winston Churchill came to Egypt to have a look around for himself. Despite the recent checking of Rommel at the First Battle of El Alamein, Churchill yet again switched out his commanders. Auchinleck was rather unfairly replaced as C-in-C Middle East by Harold Alexander, while Ritchie was replaced as Eight Army commander by General Gott.
Gott, however, was shot down by two Messerschmitt Bf-109 fighters, then strafed and killed as he tried to help others out of the wreckage. Next in line, almost by mischance, just happened to be a bloke named Bernard Law Montgomery. History would never be the same.
While Montgomery undoubtedly inherited a great defensive position and reinforced Eighth Army from Auchinleck, “Monty” also went about restoring his army’s cohesion and espirit de corps. After all, this army had been under six commanders in two years, constantly reorganized, and pummelled repeatedly by an army one-third its size. This army needed to find its confidence, and through hard training and discipline, Monty gave them exactly that.
Meanwhile, the exhausted, ill-supplied, and terribly exposed Panzerarmee Afrika tried one last time to break Eighth Army’s line at the Battle of Alam Halfa. Again the Germans were defeated, further strengthening Eight Army’s resolve. Furthermore, a massive new convoy had just arrived from England, and the British took delivery of hundreds of their new “wonder weapon,” the American Sherman tank.
Another of Montgomery’s better traits was that he would not be pushed around by Churchill. All through the Desert War Churchill had pressured British generals into premature attacks that came to predictable disaster (then Churchill would fire the hapless commander). Monty would have none of it. Despite incessant pressure, he meticulously trained, reorganized, and reorganized his Eighth Army. He would attack only when he, and they, were ready.
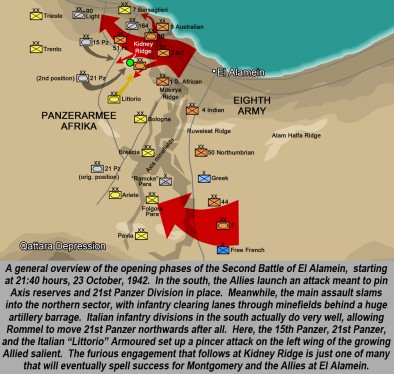
Thus, when Eighth Army finally hit Panzerarmee Afrika on October 23, 1942, it did so with the force of a thunderbolt. The artillery barrage was horrific, some sources claim it was the biggest single barrage since 1918. But the Germans and Italians both held out. After all, just as the Alamein battlefield had been a great defensive position for the Allies, so it was for Panzerarmee Afrika now that the positions were reversed.
Behind this massive artillery barrage, British and Allied infantry delicately cleared lanes in the sprawling minefields (the operation was ironically code-named “Lightfoot”), through which British armour was intended to strike. It didn’t work at first. Axis minefields were too deep, Italian infantry were too stubborn (especially in the south), and German 88s were just too accurate. After four days, however, the Allies steadily bent and eventually cracked the Axis line in the north.
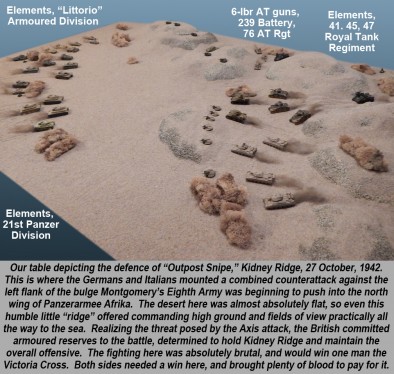
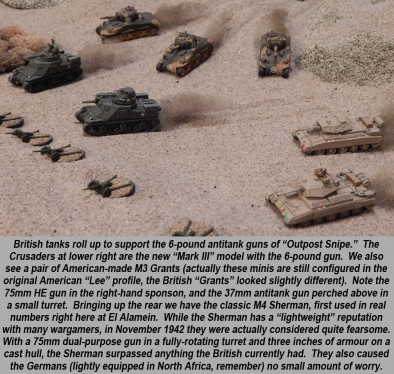
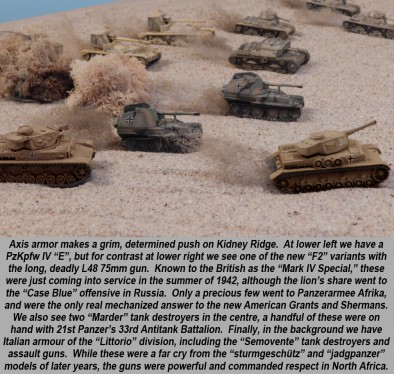
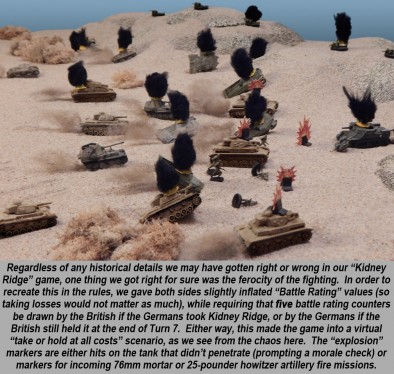
Frantic to contain this threat, Rommel hurled his three heaviest divisions (15th Panzer, 21st Panzer, and Italian “Littorio” Armoured) into a pincer assault on the flank of the Allied salient, which was anchored on a very modest “hill” called Kidney Ridge. Both sides knew what defeat would mean here, and accordingly the battle at Kidney Ridge was savage, desperate, heroic, and extremely bloody.
In the end, Kidney Ridge held. The Allied drive into Rommel’s northern wing was secure, and Panzerarmee Afrika had expended the very last of its strength. Montgomery reorganized and hit the Axis again with “Operation Supercharge,” which finally shattered enemy defences.
Utterly broken, the Germans finally had to break off and begin a retreat all the way out of Egypt, all the way across Libya, and eventually all the way to the Tunisian border. So starved was the Axis for fuel that Rommel could only evacuate his German units, tens of thousands of Italians were simply abandoned to be captured by the Allies. The tide had turned, this time for good. The mythical aura of the “Afrika Korps” and the “Desert Fox” were forever shattered.
As Winston Churchill remarked: “No, this is not the end. This is not even the beginning of the end. But it is, perhaps...the end of the beginning.”
Even worse for Rommel, entirely new Allied forces had landed behind his forces in Tunisia. These, of course, were the “Operation Torch” landings in the French colonies of Morocco and Algeria. Now the remnants of Panzerarmee Afrika would face not only British and Commonwealth forces, but for the first time, American forces as well.
Of course, the Germans would also be getting help. New units, new generals, and new tanks would all be pouring in, turning “Panzerarmee Afrika” into “Army Group Afrika.” Come back next week as this restored and recovered Axis force meets its new enemies for the final, climactic showdown in the Desert War.
If you would like to write an article for Beasts of War then please contact me at [email protected] for more information!
"Next in line, almost by mischance, just happened to be a bloke named Bernard Law Montgomery. History would never be the same..."
Supported by (Turn Off)
Supported by (Turn Off)
"The artillery barrage was horrific, some sources claim it was the biggest single barrage since 1918..."
Supported by (Turn Off)


![10mm Medieval Miniatures! Azincourt English Army Review | Wargames Atlantic [7 Days Early Access]](https://images.beastsofwar.com/2026/03/unboxing-wargames-atlantic-azincourt-english-army-coverimage-225-127.jpg)






![Mounted US Cavalry On Kickstarter For Dead Man’s Hand! [Updated]](https://images.beastsofwar.com/2026/03/us-cavalry-main-600-338.jpg)




![Play WW2 Commando Operations With Butcher & Bolt [Updated]](https://images.beastsofwar.com/2026/03/relaunch-600-338.jpg)




im loving this series!
Gah I do love these battle scenes – reminds me why I love the spectacle of wargaming so much.
Great miniatures + great terrain = awesome.
BoW Ben
Thanks very much @sebcranston and @brennon . . . although I might add one more factor to Ben’s equation . . . Minis + Terrain + Great Feedback from Fellow Gamers = Awesome! Thanks again! 😀
Well, Lloyd was right, the terrain just keeps getting better and better. Sometimes I can’t appreciate it as much while the game is going on. But seeing it cleaned up, well lit, and zoomed in really highlights all the detail you put into the board. It almost makes all the sand on the floor worth while 😉
As awesome as the rest! I hope you are going to do more of these. I hope your missus hates sand everywhere just like mine…
Thanks, @unclejimmy ! We have one more article in this series, and then a few more ideas for the next series in October or November. Actually spending a little time today taking down all this sand table stuff . . . sadly I don’t have a “studio” or spare room where I can leave gaming tables up indefinitely. 🙁
Loving the series, adoring the scenery.
One nit-pick – the Panzer IV F2 carried the L43 gun – the L48 with the double baffle muzzle brake did not appear until April 1943.
See, I thought that was a misprint in the book You’re right,of course. Thanks! You must be talking about the G or H (I think G had the turret spaced armor, H had the full schurzen?)
UH @oriskany this one was tough. Great stuff as usual. If I just could express my opinion I would add that not only were the German supply lines outstretched but also the supply was not arriving to Africa because of the ship loses and the units at the back (as always) kept a lot of it for themselves. While Montgomery was really sneaky his plan to lure the Germans to the South were an improvised attack (I like the part about the preparations – paper tanks, false pipeline, pre-recorded radio messages) by the XIII Corps did not work and in the North as you have mentioned the Axis defence was really stubborn. The Germans did lose Stumme as the commanding officer when he fell out of the car during an air attack and the driver did not notice it (sic!). Still, as you say American tanks and other vehicles, good preparation and the weakness of Rommel’s forces was evident.
Thanks very much, @yavasa , and please never hesitate to bring up opinions, additional facts, or even corrections. Lord knows I need them now and again. 🙂
Indeed I have read something about up to 60% of Axis supplies that arrived in Africa were being consumed by logistical efforts or rear-echelon forces. I don’t have the exact figures or the source off the top of my head, but it was definitely a lot. For every gallon of fuel that might have reached Panzerarmee Afrika by this point, it took two gallons of fuel to carry it there. PLUS, (as you say), some of the rear echelon people were deliberately hoarding. I was in supply in the military and a little of this ALWAYS goes on, a supply unit’s first instinct to to make sure itself and its own parent organization are supplied before other units . . . probably one reason front-line troops hate us so much. 🙂
You’re also right about pre-battle deception efforts in the south followed up by XIII Corps’ feint to the south, spearheaded by 7th Armoured, meant to pin 21st Panzer in place. This is sort of pointed out in the map I have included, but there’s just no way I can put all of this in the article.
I wanted to highlight the tenacity of the Axis defense in the south (primarily the Italian infantry) as part of the continuing efforts to dispel the general misconception that Italian troops always performed poorly in North Africa, or WW2 in general. Don’t get me wrong, there were plenty of examples where they did perform very badly, but there were also examples of really tough fighting. This was one reason for XIII Corps’ general failure to pin Rommel’s left, but another reason was the longer-than-expected time it took to punch a hole in his right (up north) with the main attack. Any feint, no matter how deceptive or well-fought, can only distract an enemy for so long.
In truth, a whole article series could be written just on El Alamein. There are easily 10-20 engagements that would make great miniatures battles. In my article the 7th Armoured, 9th Australian, Italian Ariete, New Zealand, and Italian “Folgore” Airborne divisions are barely mentioned. There’s just not enough room, and it’s tough to imagine the BoW community (or @brennon , my editor) maintaining interest for the 20 articles it would take to do this topic the real justice it deserves. We ran into the same issue with the WWDDC project last summer. 😀
Great read – again
Thanks @rasmus ! Four down, one to go! 😀
Just to note the Panzer IV ‘special’ or Ausf F2 (actually redesignated ausf G) had the L 43 75 mm gun, not the L 48, which was not fitted till later in the war.
Indeed the L43 was the correct gun, @piers – although it looks like @dorthonion “ninja-ed” in before you with the correction. 😀
Yer… sorry. Didn’t see that!
Trust me, I wish I’d “seen” it before I published the article. I knew the F2 had a different 7.5 cm gun, simply by the “Firefly-esque” tulip-shaped muzzle brake. I just never realized it was a different length.
Great articles, great tables, great models, just the great final to go @oriskany
Thanks, @zorg . . . and yep, just one more to go. That last part will focus on Tunisia, when the Americans (and some Tigers) finally make their debut. 🙂
So wait a second. The article says the long rangde desert guys had to go 1000+ miles to get to the airfield, then some of them had to walk home? You’re not telling us they had to walk 1000 miles through the desert, I’m assuming. 🙂
No, @gladesrunner , just back to rendezvous points. Much closer to the target, they’d set up hidden spots in the desert where they’d stage extra fuel, medical supplies, water, maybe even an extra vehicle, etc. Also, the LRDG force had split into more than one force to attack more than one target (the barracks and the airfield). Once everyone made it back to the rendezvous point, the guys who’d had to walk I’m sure could catch a ride with someone. 🙂 But just getting back to the rendezvous point was an Hollywood movie-level endurance point in itself, especially with Italian ground and air patrols looking for them AND carrying wounded men. Some of these guys WERE captured.
I think the record (not on this particular mission) was one private in particular got separated from his patrol and . . . ten days later, showed up on foot at an LRDG forward staging point something like 220 miles away or something. I’ll have to kick around for the details.
Excellent as usual! That last battle looked really fun, ‘hold at all costs’ scenario’s can really give great games!
I’ll have to pick up the pace on my Normandy collection so I can start with North Africa!
Looking forward to Kasserine!
Thanks, @neves1789 . I admit I really like really big mash-ups like this once in a while. But in Battlegroup, once you get a battle that size we usually discuss beforehand what aspects of the rules we’re going to drop – just to keep the game manageable
In this case, for example, one of the things we dropped was tracking ammunition per unit. We kept one exception with those really big Semovente 90mm SP ATGs. Very powerful guns (practically German 88s), but the only carried 6 shells historically (yielding an ammo value of “1” in Battlegroup I think). So the vehicle shoots once and you have to use a truck and “rearm” activation order to re-load the gun. And of course those ammo trucks are murderously vulnerable. The gigantic “Sturmmoersers” in WW 2.5 had the same issue.
Also “do or die” games like this tend to get really untactical. When one objective matters and nothing else does, everyone simply plows toward the one objective “Braveheart” style and “gets to the hackin’ and the slashin’.” 😀 Still, its definitely fun once in a while. And in games this big, anything you can make simple (like victory conditions) helps keep the overall data load more manageable.
I just try not to make it a habit, personally. 🙂 Like ice cream cake. Definitely fun to eat, but if you do it every day bad things start to happen.
Great series of articles. If it was stated I missed it; who won your Battle of Kidney Ridge?
Thanks, @lorddgort – You didn’t miss anything, I kind of “wrote around that” particular point because the actual tabletop results were a little unclear. Please bear in mind that because “Battlegroup” doesn’t have a North Africa book (yet), a lot of the games in this series were based on house rules, usually taken from games that DO have desert scenarios / terrain rules (such as Panzer Leader). Part of this was (as stated) some “off the cuff” victory conditions on this one.
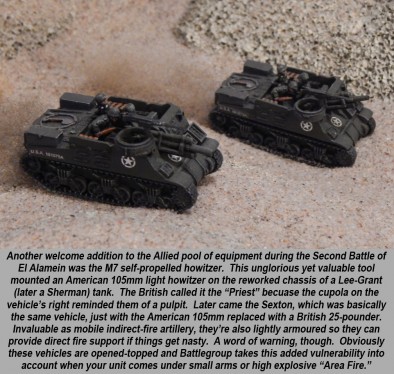
Anyway, on Turn 6 or 7, the Germans made a last determined shove at the terrain spot we had designated as “Kidney Ridge.” Actually Kidney Ridge was over half the table, but for the sake of clarity we had one spot set up specifically as the objective (marked with a counter). Anyway, the Germans reached the spot, the British had those two M7 Priests and the surviving M3 Grant on the reverse slope with “Ambush Fire ” reaction orders. The first German Pz III to push for it was taken out, and in drawing the subsequent required “Battle Rating Counter,” the Germans finally exceeded their limit. The very next activation though, another Pz III and a Pz IV were taking the same terrain feature, which the British wouldn’t be able to do anything about . . . thus giving the Germans the victory.
But, TECHNICALLY, the Germans exceeded their battle group’s “Battle Rating” first, so by the gamiest, beardiest, narrowest of technicalities, the British won.
Or maybe this is just me wishing I had sent in that PzKpfw IV first, 🙁 🙁 🙁 and possibly survived that round of ambush fire. Although now that I think of it, I think both the Mark III J and Mark IV F2 have the same “L” class armour, so it wouldn’t have made a difference.
Great article! You’ve reached the point in the campaign where my BA armies fit in so its especially interesting to me
Thanks, @koraski . Yeah, El Alamein and forward is where a lot of wargamers like to research, build, and play. More armies, more nationalities, and better equipment (even the Italians get some pretty decent assault guns and armoured cars 🙂 ). The Americans are in soon, the Vichy French, etc.
Which reminds me, @neves1789 . . .I’m terribly sorry but we actually skip over Kasserine in Part V. 🙁 I figured anyone who’s seen the movie “Patton” knows about Kasserine and the redemption at El Guettar. So I picked something else for the American debut.
I’ll be sure to put something about Sidi Bou Zid / Kasserine in the “Desert War – Further Materials and Discussion” thread. 😀
I chose based on what I can get in plastic. That’s the prime factor in my decision for theatre and army selection. So far only the armored cars are resin. Everything else I have found plastic kits for.
Gotta agree with that. I get plastic whenever I can. Perhaps I’ve just had bad luck, but a lot of my metal miniatures (from various manufacturers) don’t seem to fit together, and the mold lines are always tough to get rid of. As for resin, its often arrived chipped or outright broken. I’ve had to rebuild running boards, tracks, mudguards, etc.
Great read as I have come to expect 🙂 Others have already covered the points that I would have raised. I did get a hold of a copy of Battlegroups core rules and I like what I read. While I also prefer plastic for this time period sometimes you do not have a lot of choices.
Thanks once again, @tibour – There are definitely a lot of things I like about the Battlegroup system (as I’ve brought up before), so I hope you enjoy it as much as I have, though. If you don’t have any of of the source books, Battlegroup Kursk is probably a good place to start as it’s available .pdf on the PSC site.
In particular, I had a HELL of a time finding Crusaders (albeit this is about a year ago), and you need Crusaders to do the Desert War any kind of justice. 🙂 I finally wound up with some metal “Old Glory” minis that didn’t turn out too badly.
James please give some serious thought to publishing this?
It’s so well written and accessible that I would happily buy it !
On another note, you mention “Montgomery’s better traits was that he would not be pushed around by Churchill”
Was it this same trait confused by Patton as ‘indecisiveness’ or lack of ‘action’.
Now see, @lateo , I thought I HAD published it, right here on Beasts of War. 🙂 (cue corny sound effect for failed joke). Seriously, though, thanks very much.
What I was talking about re: Monty not letting himself be pushed around by Churchill was this: Previous commanders (Wavell, Auchinleck, Ritchie) were many times rushed into launching attacks like Brevity, Battleaxe, and Crusader before they were ready. The generals KNEW they weren’t ready. Yet Churchill, keen on showing Stalin and Roosevelt that the British were doing SOMETHING in ‘41 and ‘42, and also to keep up morale at home, exerted political pressure on these generals (usually circumventing their actual military superiors). The half-prepared attacks often came to grief, and generals in charge were fired, even though they TOLD Churchill they weren’t ready.
Monty was different. When Churchill pressured him to launch El Alamein, he stuck to his timetable and attacked only when he was ready.
I wouldn’t call it indecisiveness. He made up his mind when and how he would attack and would do ONLY that, even pushing back against the “suggestions” of a prime minister.
It did take quite a while to build up this force, which is part of where Montgomery gets the “lack of action” stigma. I don’t think he really deserves it, at least not entirely. At El Alamein, Auchinleck had picked the spot because it made a beautiful defensive position. But when the boot was on the other foot and the British wanted to attack, that same defensive geography now worked in favour of the Axis, who had also laid . . . . God I don’t even know how many thousands and thousands of mines.
Auchinleck was a “man of action,” and after Rommel’s failure at First Alamein in July of 1942, immediately hit back again and again, I think up to 11 times (depending on how you count it – July 10-30, 1942). He got absolutely nothing. Monty took his time, rebuilt the 8th Army (in very bad shape in terms of morale, training, and cohesion), and hit Rommel very hard in late October, and won. He wasn’t very indecisive about it, he warned his troops ahead of time that this battle would be “a killing match.”
Another part of Monty’s reputation comes from the somewhat slow pace at which he pursued Rommel out of Egypt and across Libya after Alamein. Here again, I don’t think he deserves quite as much flak as he’s given. After all, Rommel had been put to flight across the desert before, and when the British had pursued him too quickly, they wound up being impaled on the inevitable German counterattack. Still, many American generals and even some British ones think he could have done more to cut Rommel off and destroy him (or at least part of his forces) rather than simply chase him across the desert. Once Rommel got back to Tunisia, after all, and received 5th Panzer Army as reinforcements . . . yeah, that campaign got very deadly and drawn out. I guess I’m 50-50 on this one.
What irks people about Monty is his just terrible f***ing attitude and personality. The arrogance and glory-hounding are simply incredible. This guy could alienate Americans, British, military, civilian, anyone . . . like it was nobody’s business.
It gets so bad that he actually “runs away” from some of his better traits, like the tactical flexibility he shows in the attack when his assault doesn’t initially go his way. The way he makes adjustments on the fly (e.g., Operation “Lightfoot” to “Supercharge” in the middle of El Alamein) show great flexibility in the middle of a battle. But he DENIES this vehemently, pummeling everyone with the idea that “this was all part of my bloody strategy all along, chap!”
Another example can be taken from his command of 21st Army Group in Normandy . . . but I’m sure I’ll catch a lot of hell for this. Overlord, AS WRITTEN back in spring of 44, basically had the Americans in the west pivoting back and taking ports like Cherbourg, then pushing through France protecting the British south flank as the British moved on Paris. Obviously this was NOT what happened. In fact, quite the opposite. The British tied down the heavy German armour at Caen while the Americans eventually broke through in the WEST (Operation Cobra) and encircled the Germans that way.
Monty and his supporters insist to this day that this was “his plan all along.” Which is a statement of such arrogance and hubris as to be astonishing. The virtual annihilation of the Royal Tank Corps was part of your PLAN? Those tank graveyards at Operation Epsom, Bluecoat, and especially Goodwood (and three or four others I can’t think of right now) were all part of your PLAN? It’s amazing to me. He’d rather accept the horrific casualties and losses of all these basically failed offensives . . . rather than “admit” that he had the flexibility, agility, and skill to shift the overall plan in mid-stream.
Anyway, my two cents. 🙂
Sweet….
Thank you, sir! 😀
what a fantastic read again mate , thank you!
A really great read again thanks