


Not another Burrows & Badgers project


Recommendations: 462
About the Project
Yes, another B & B Project! I've been hooked on these minis and started with one so It's time to start a project log.
Related Game: Burrows & Badgers
Related Company: Oathsworn Miniatures
Related Genre: Fantasy
This Project is Active
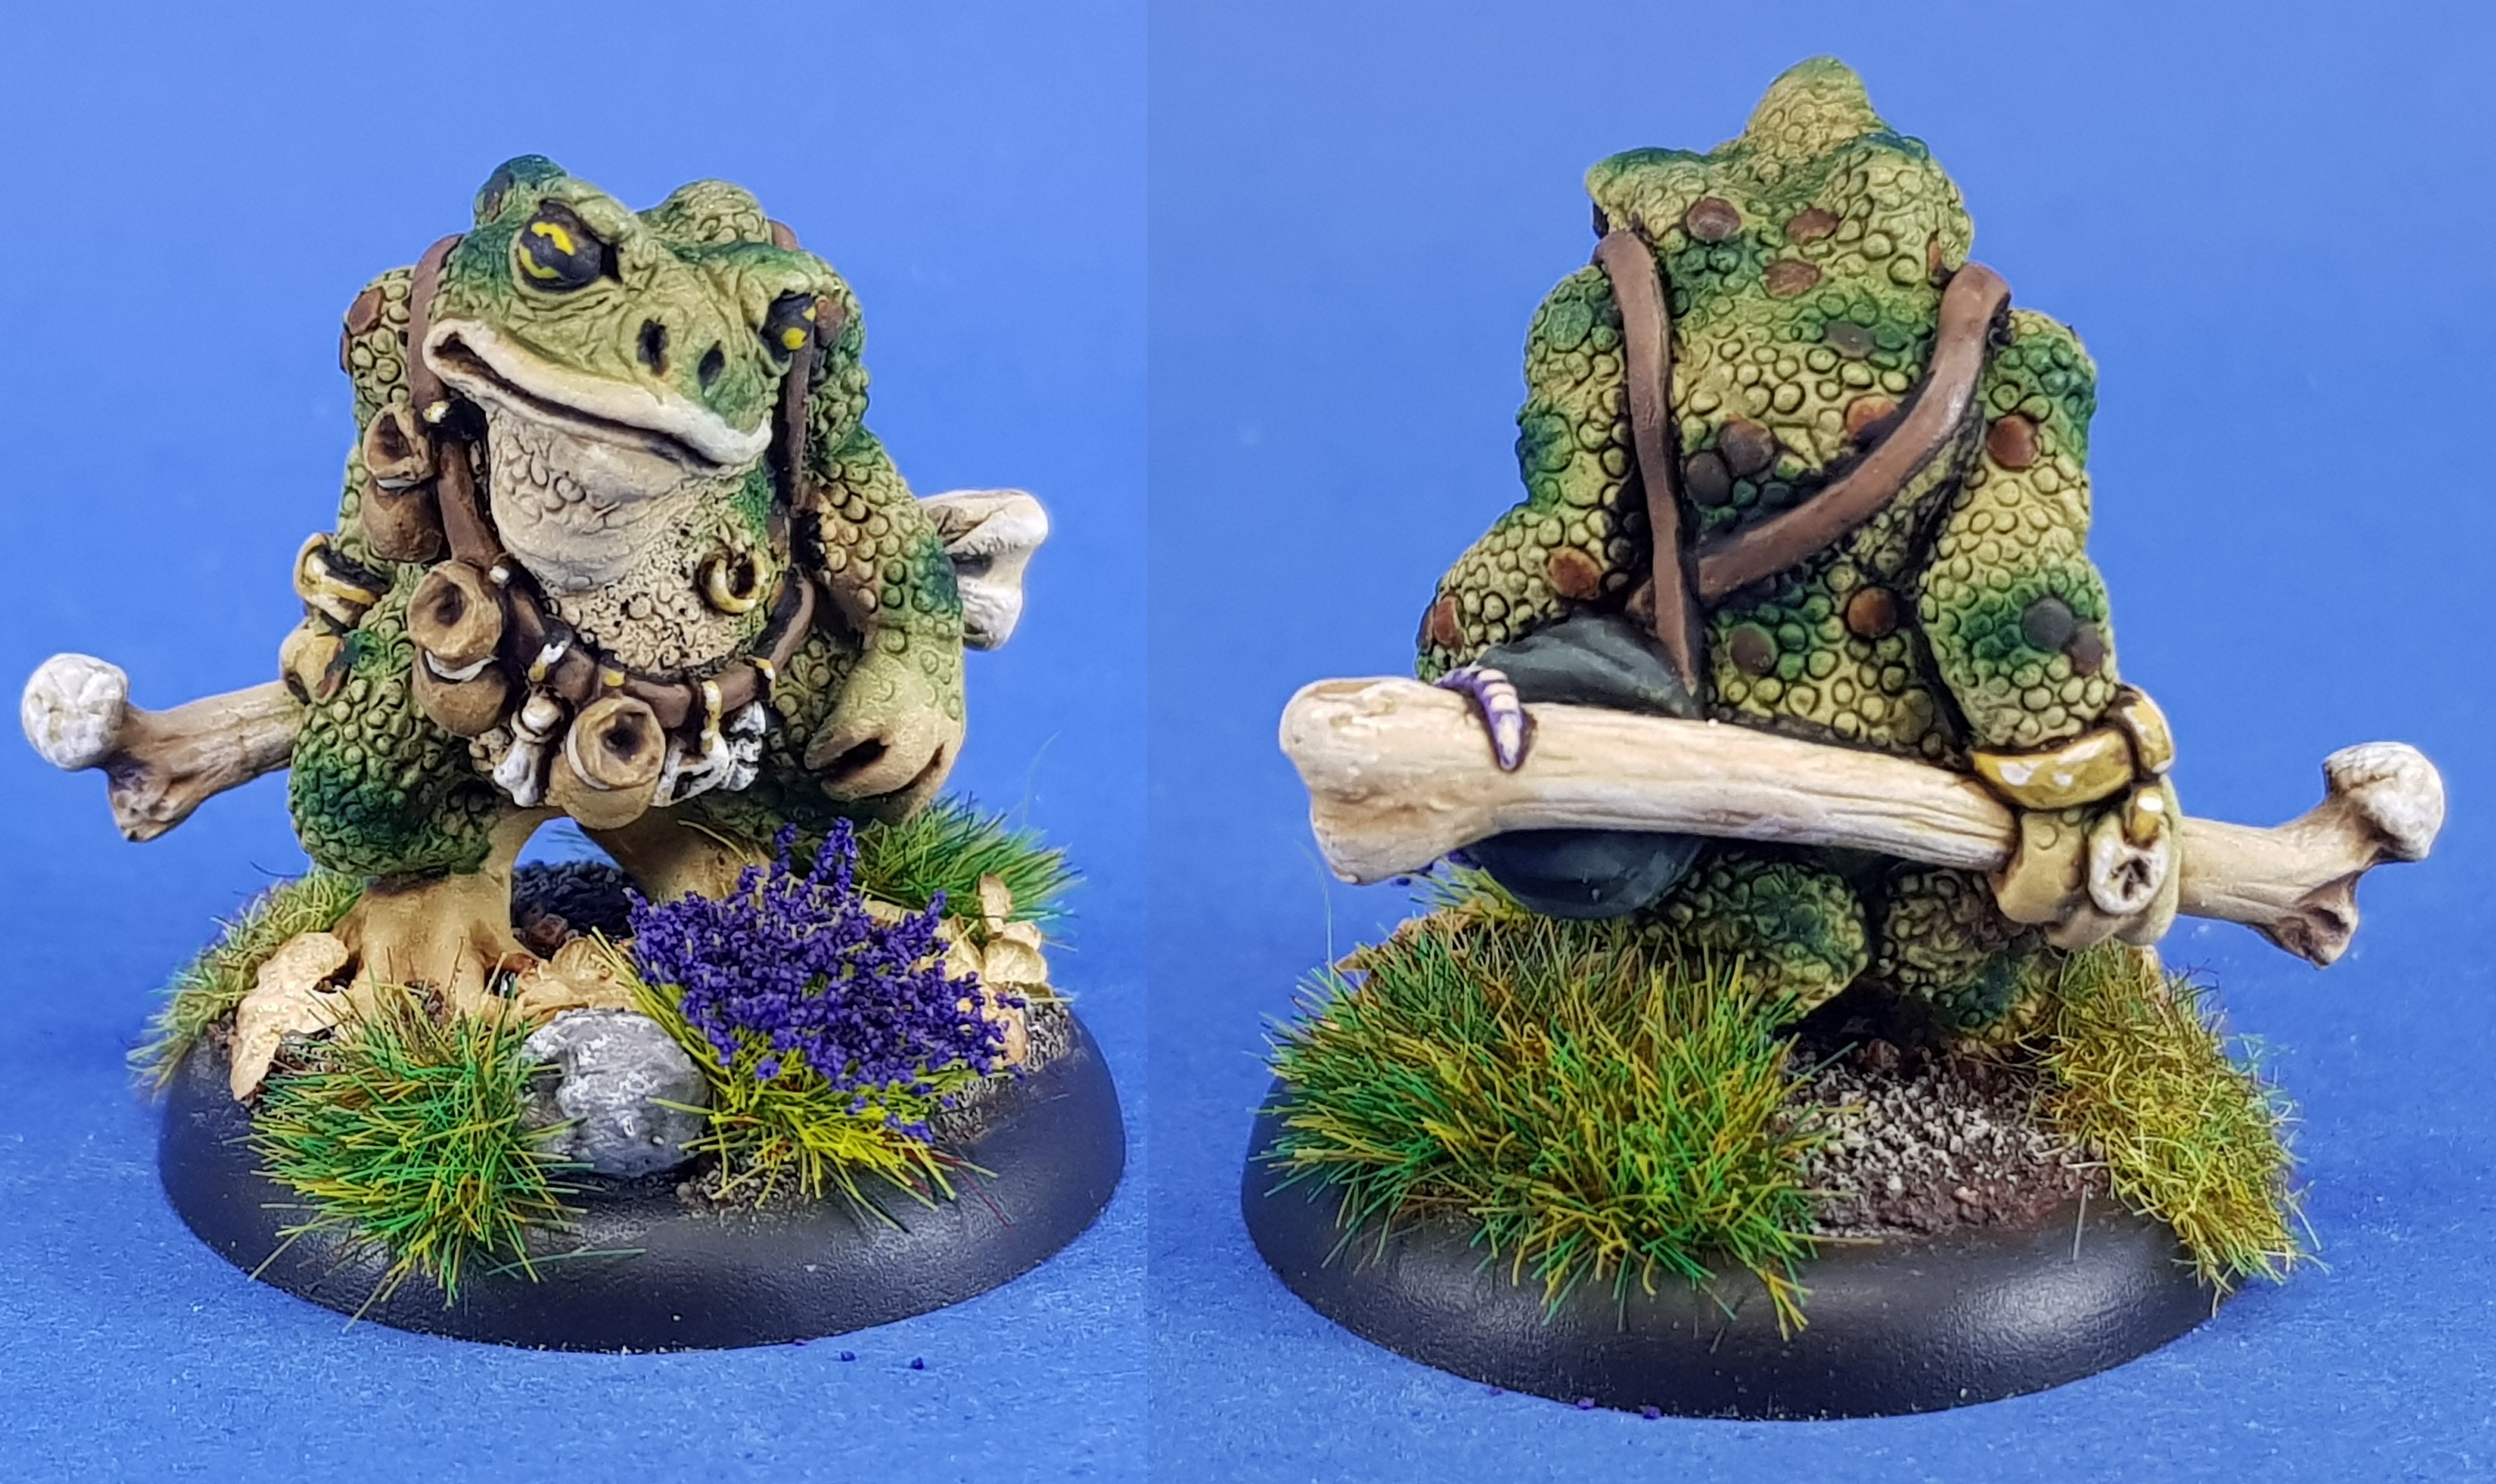
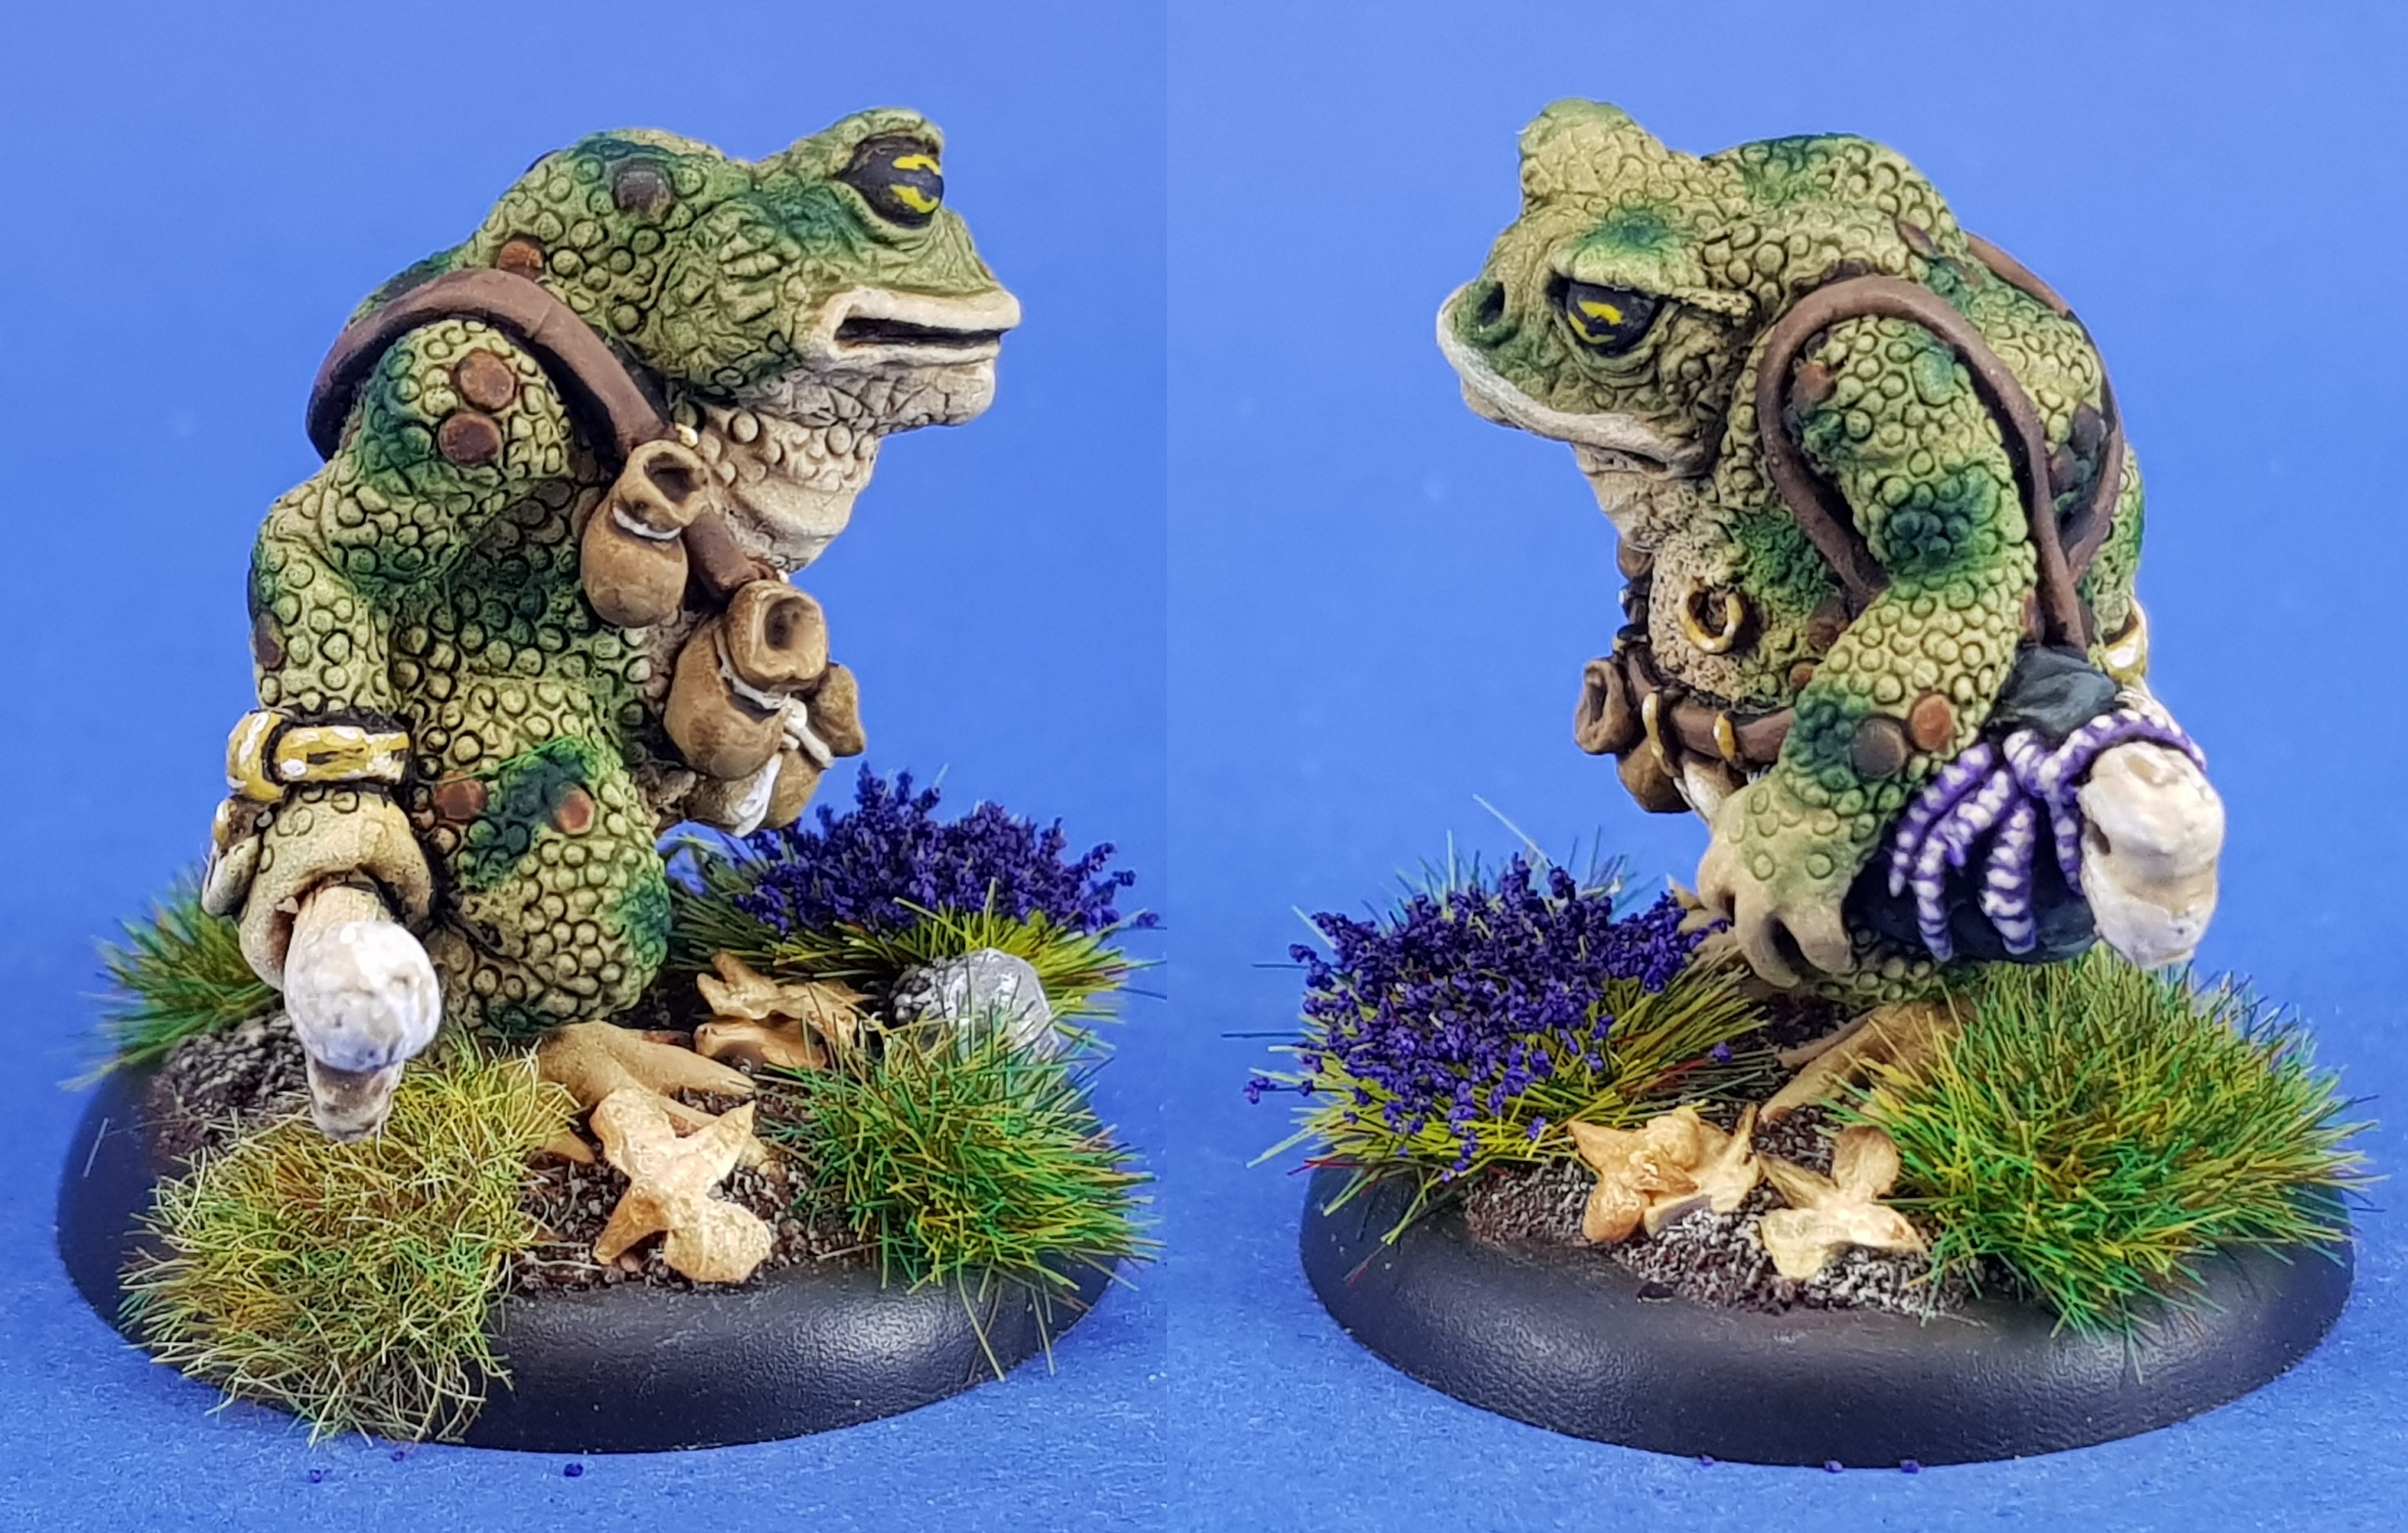
Toad skin
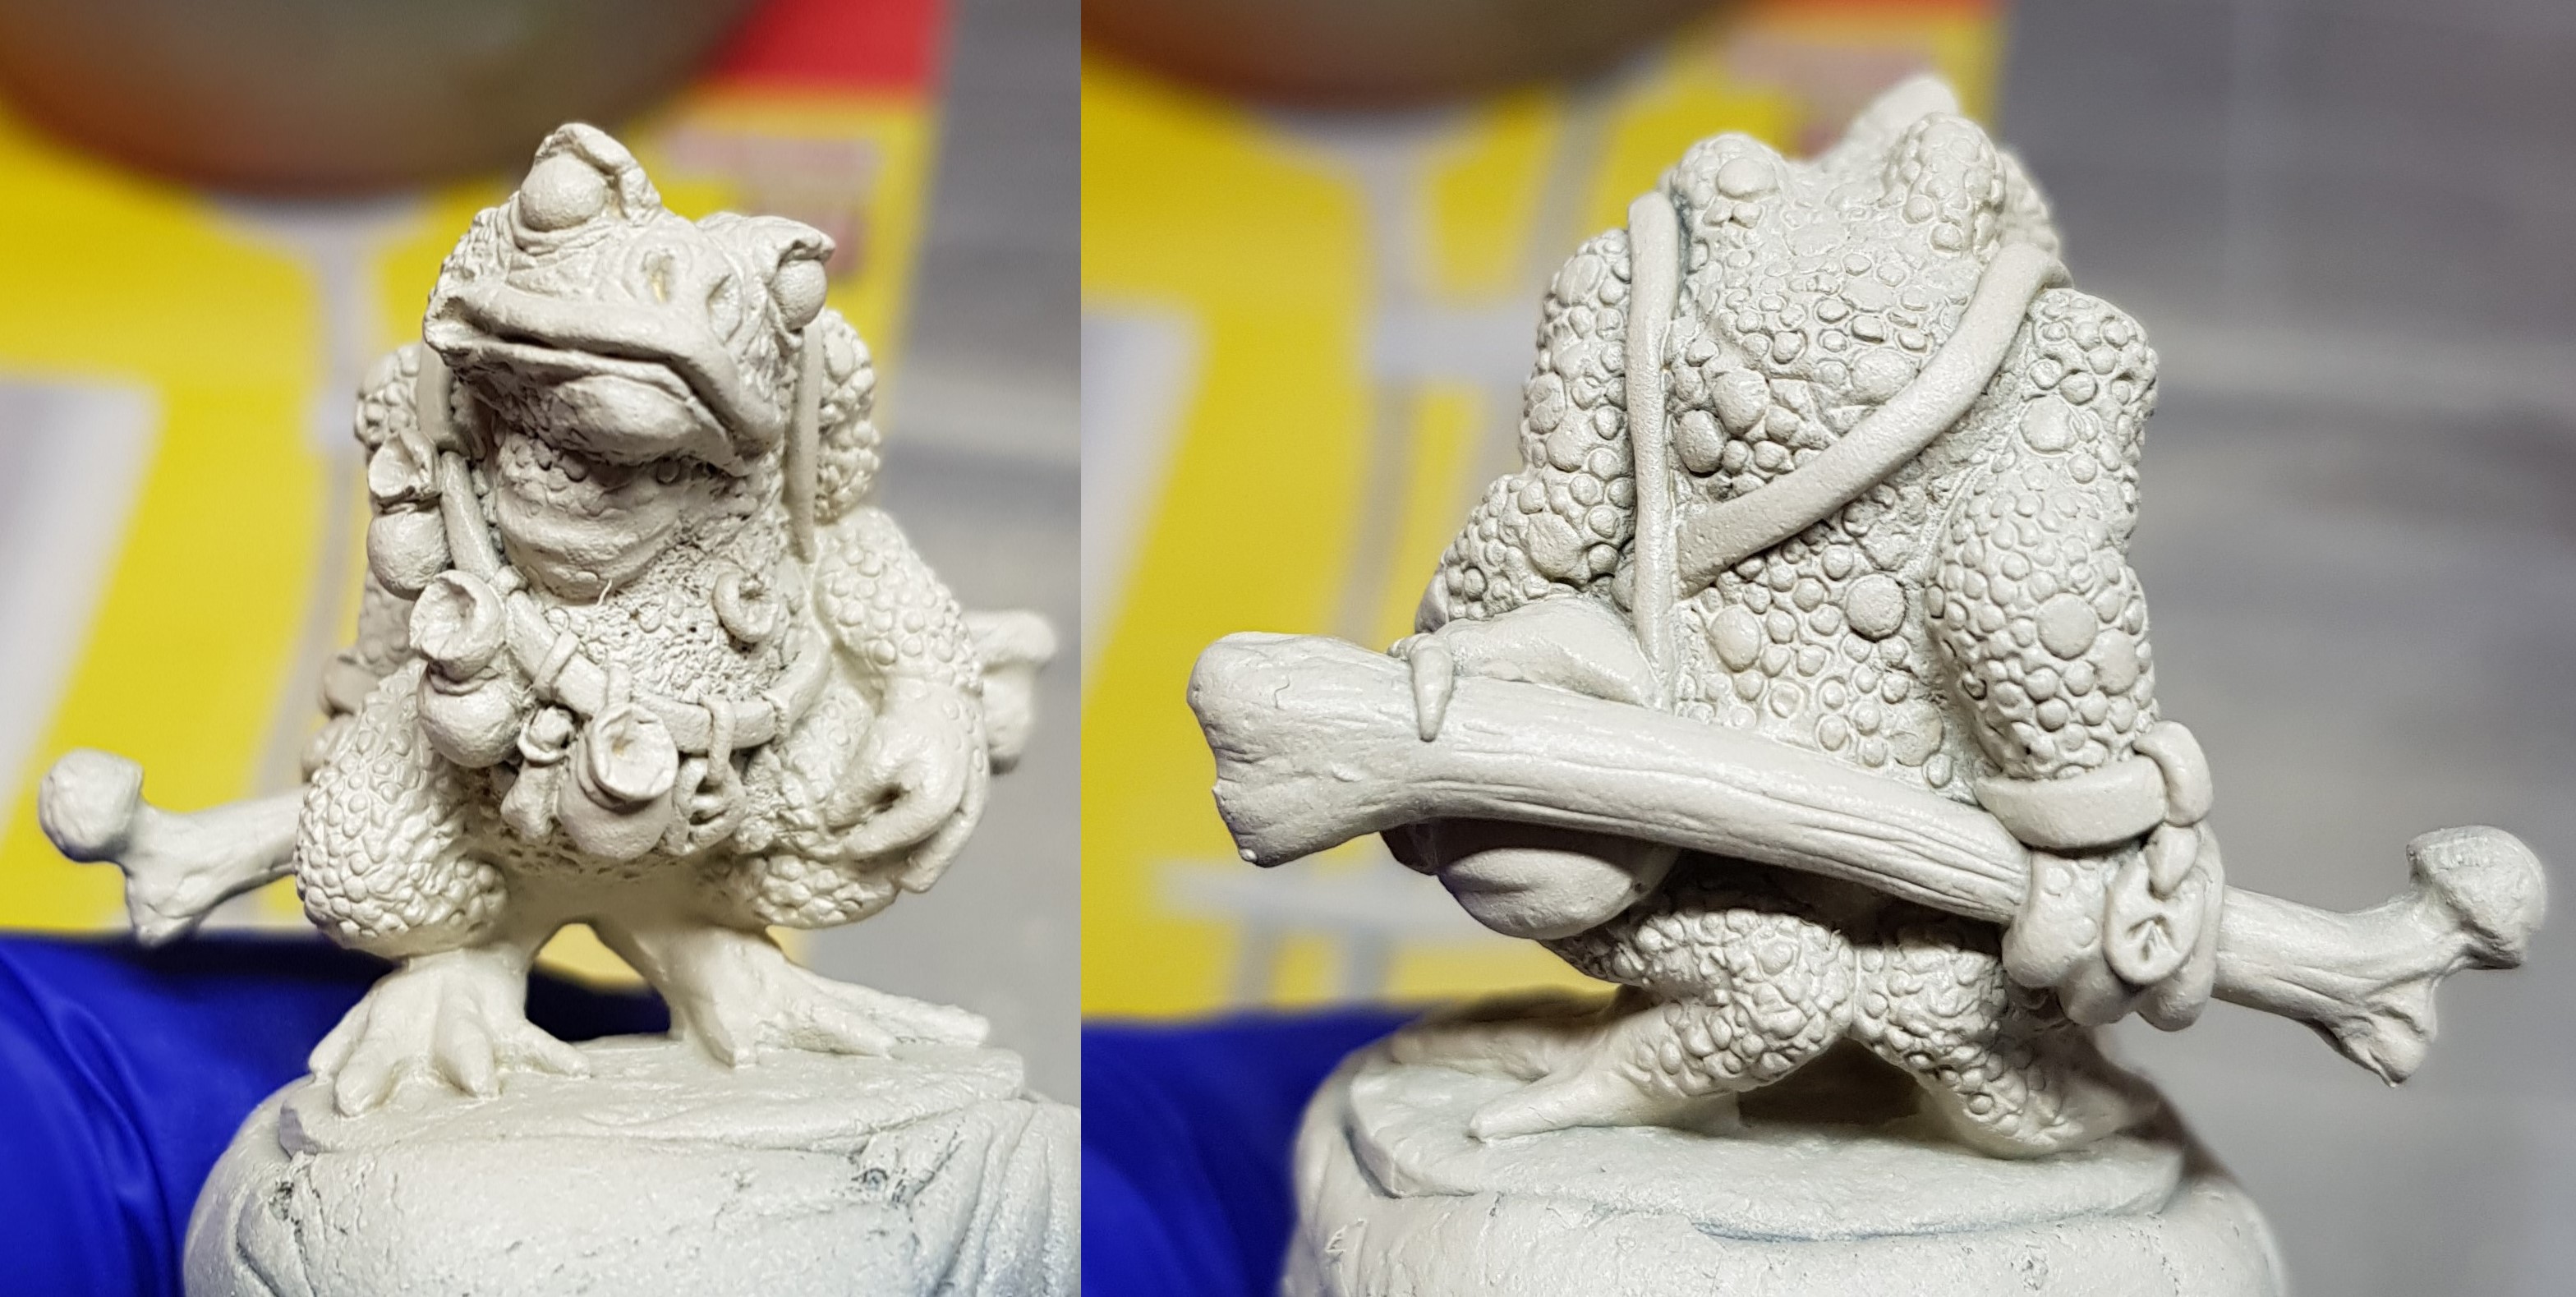
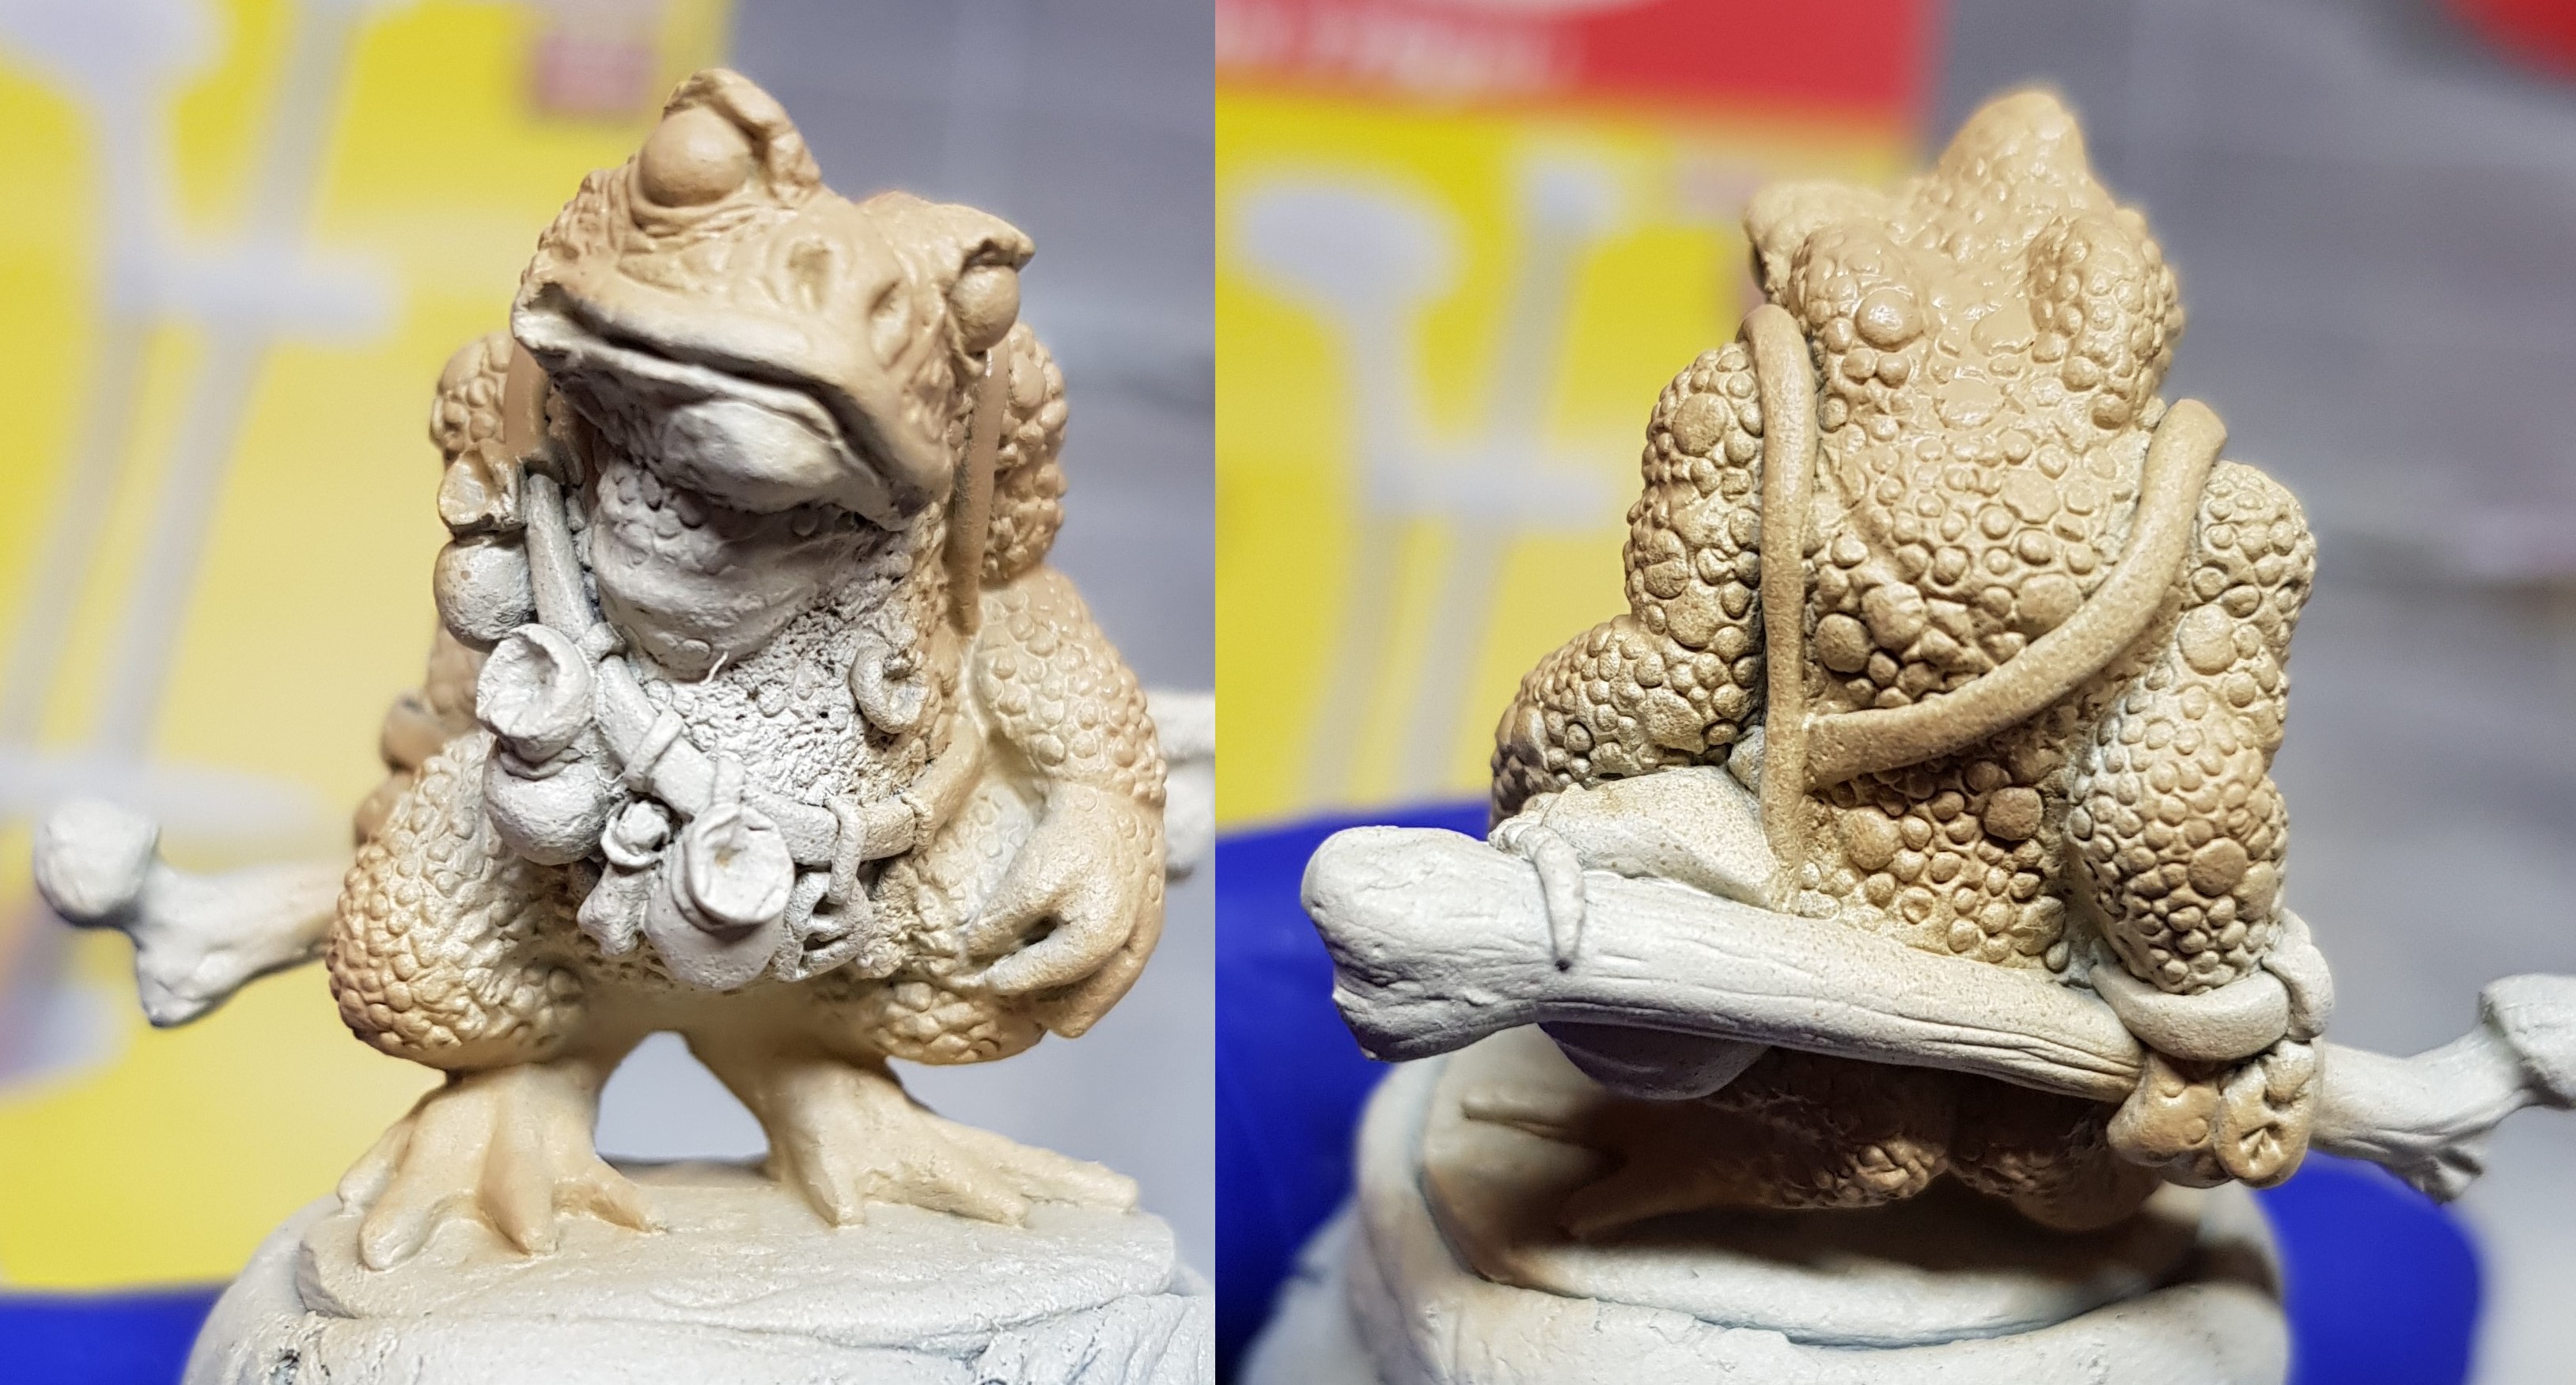
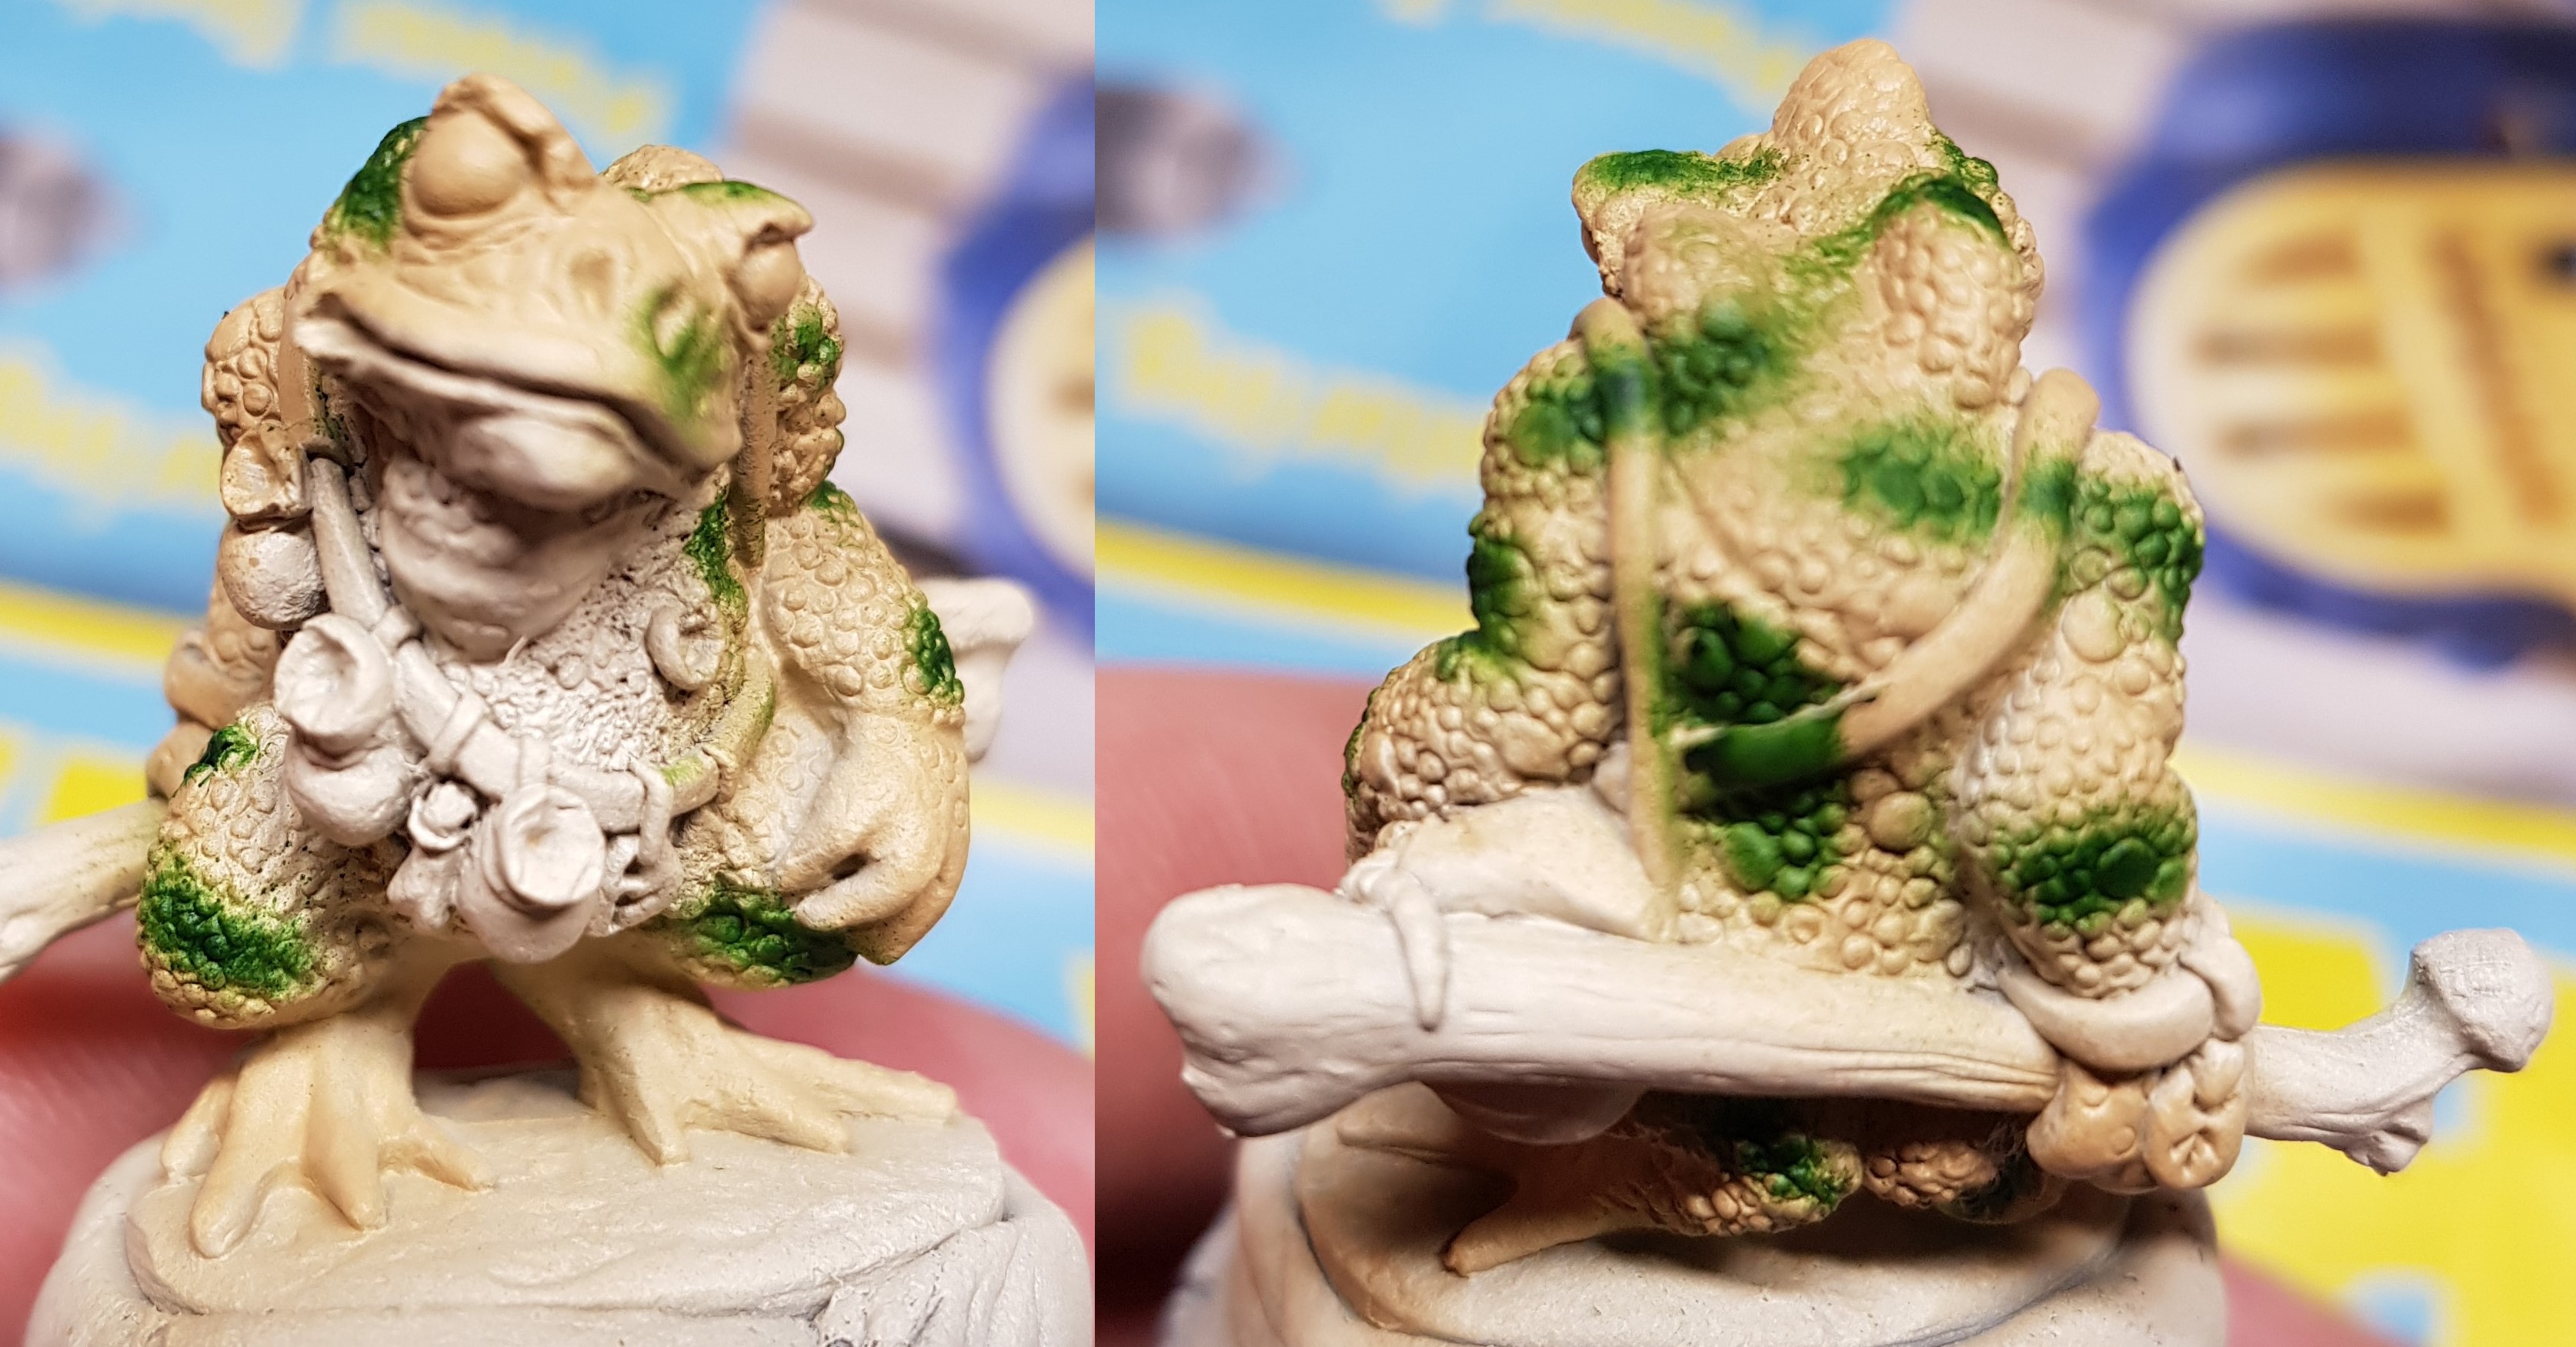
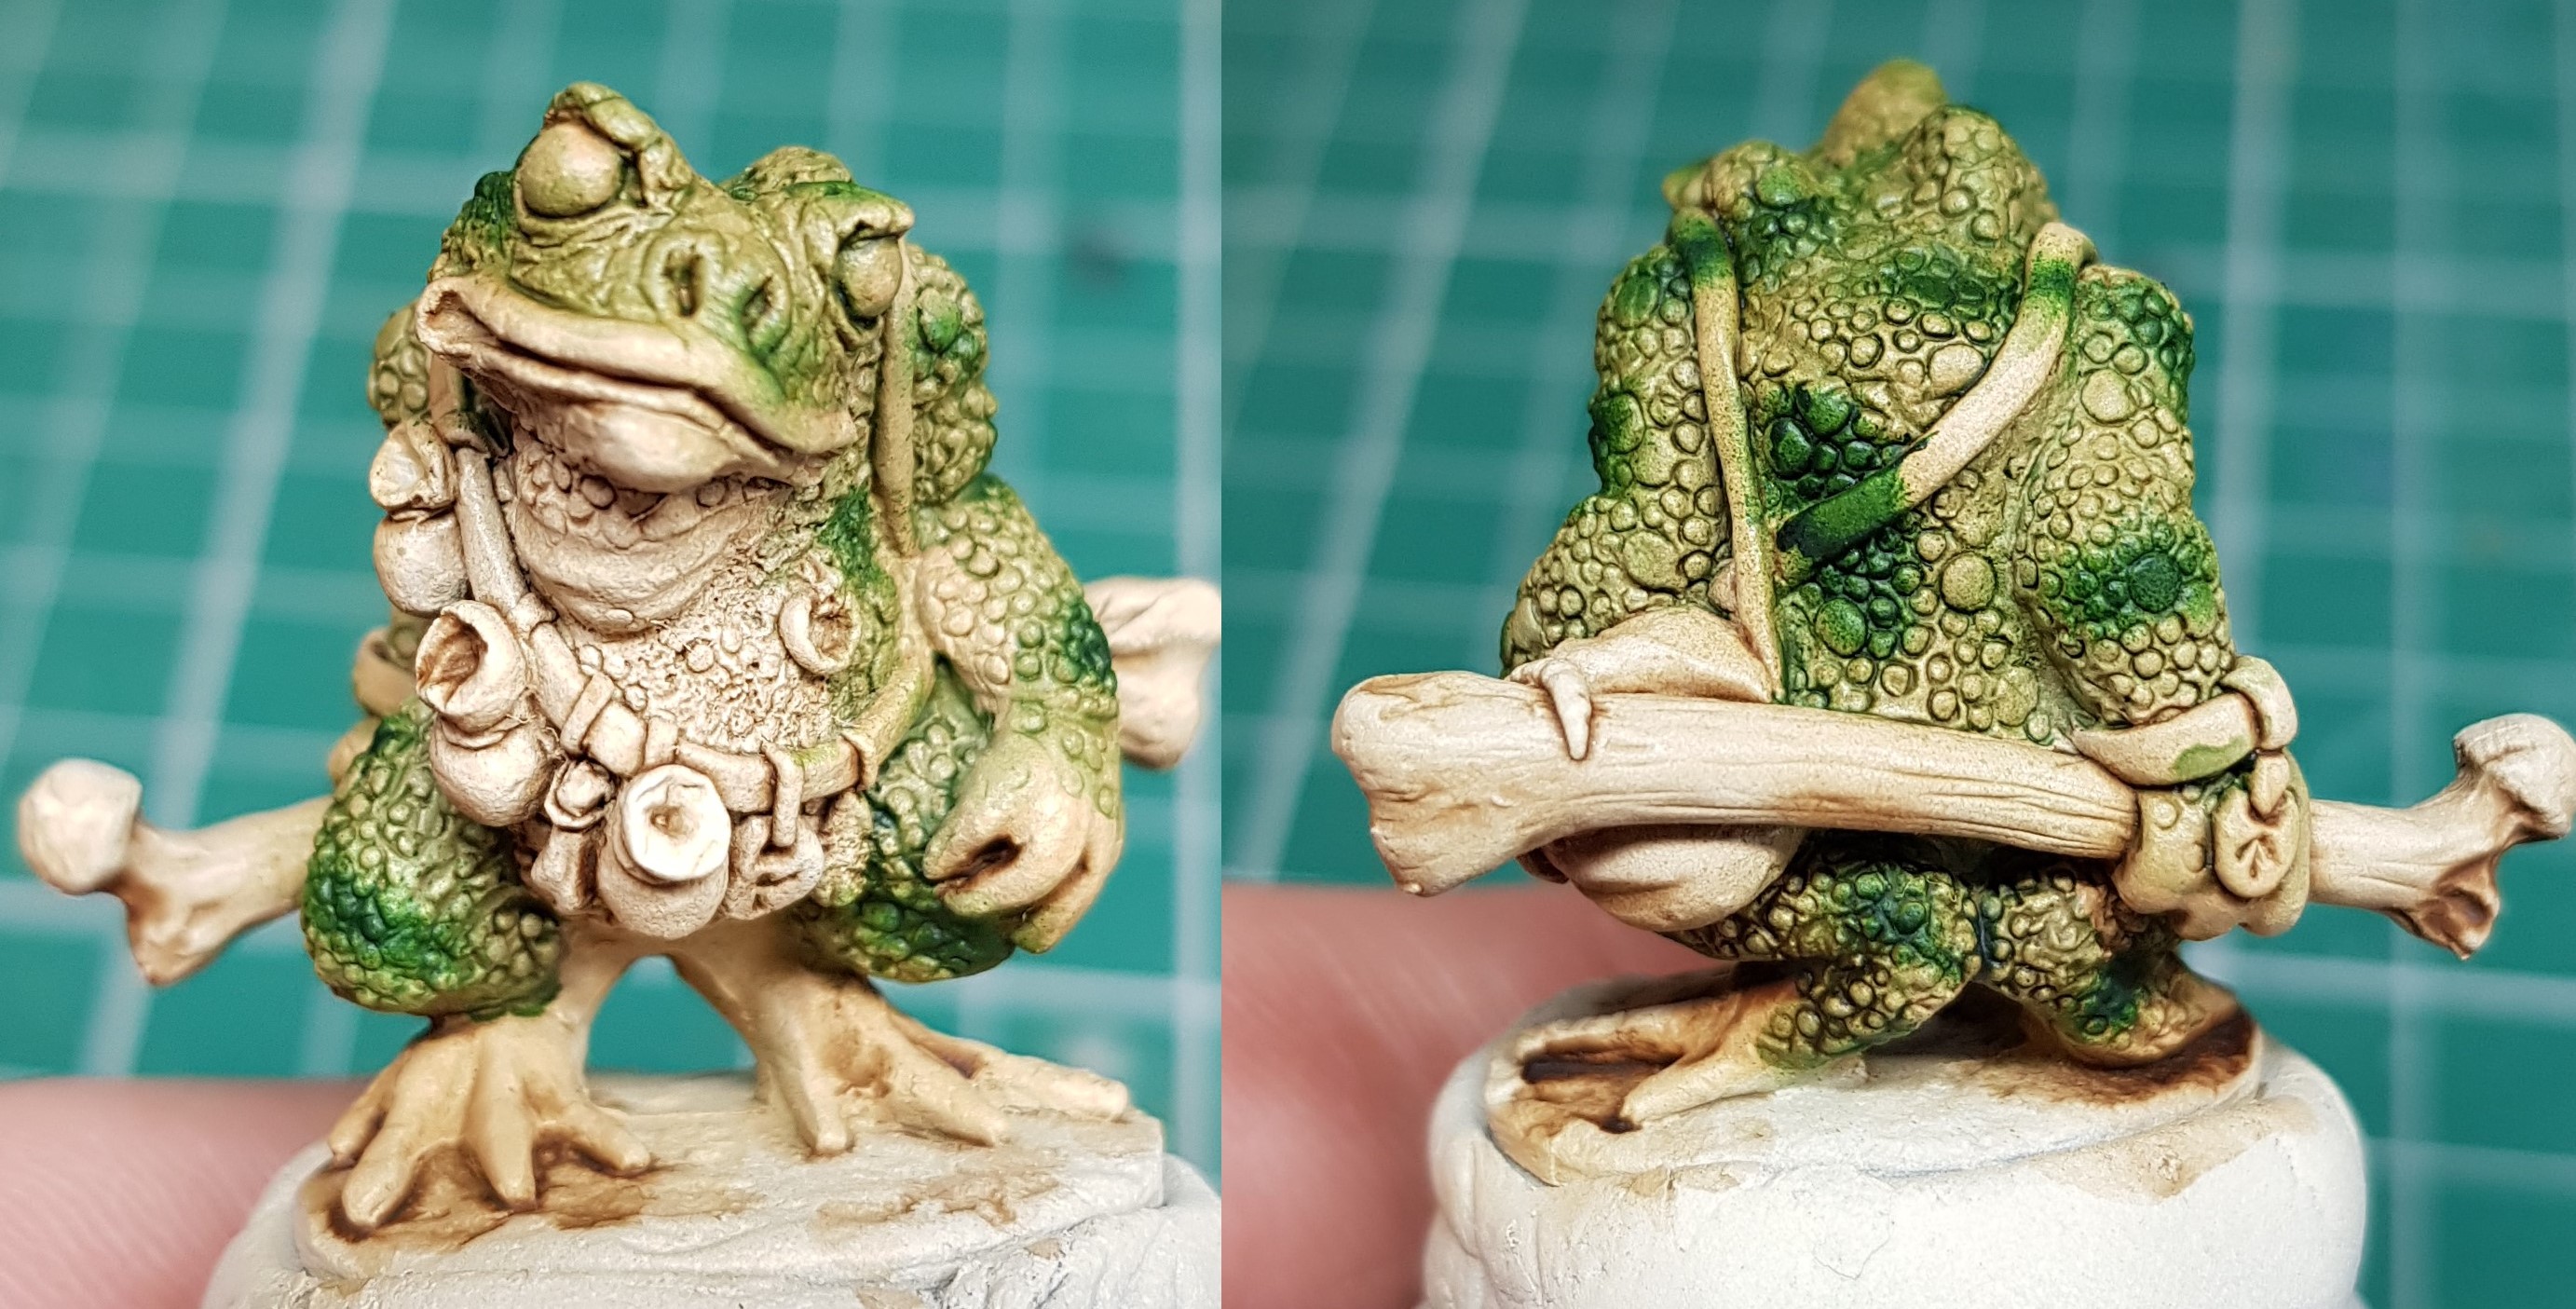
After an undercoat the whole mini was airbrushed with a base coat of AP Skeleton bone mixed with white.
The darker back parts were airbrushed in AP desert yellow.
The green patches were airbrushed in a thinned down Vallejo German cam dark green
The whole mini was then washed in Light tone wash followed by a wash of green on the darker back parts.
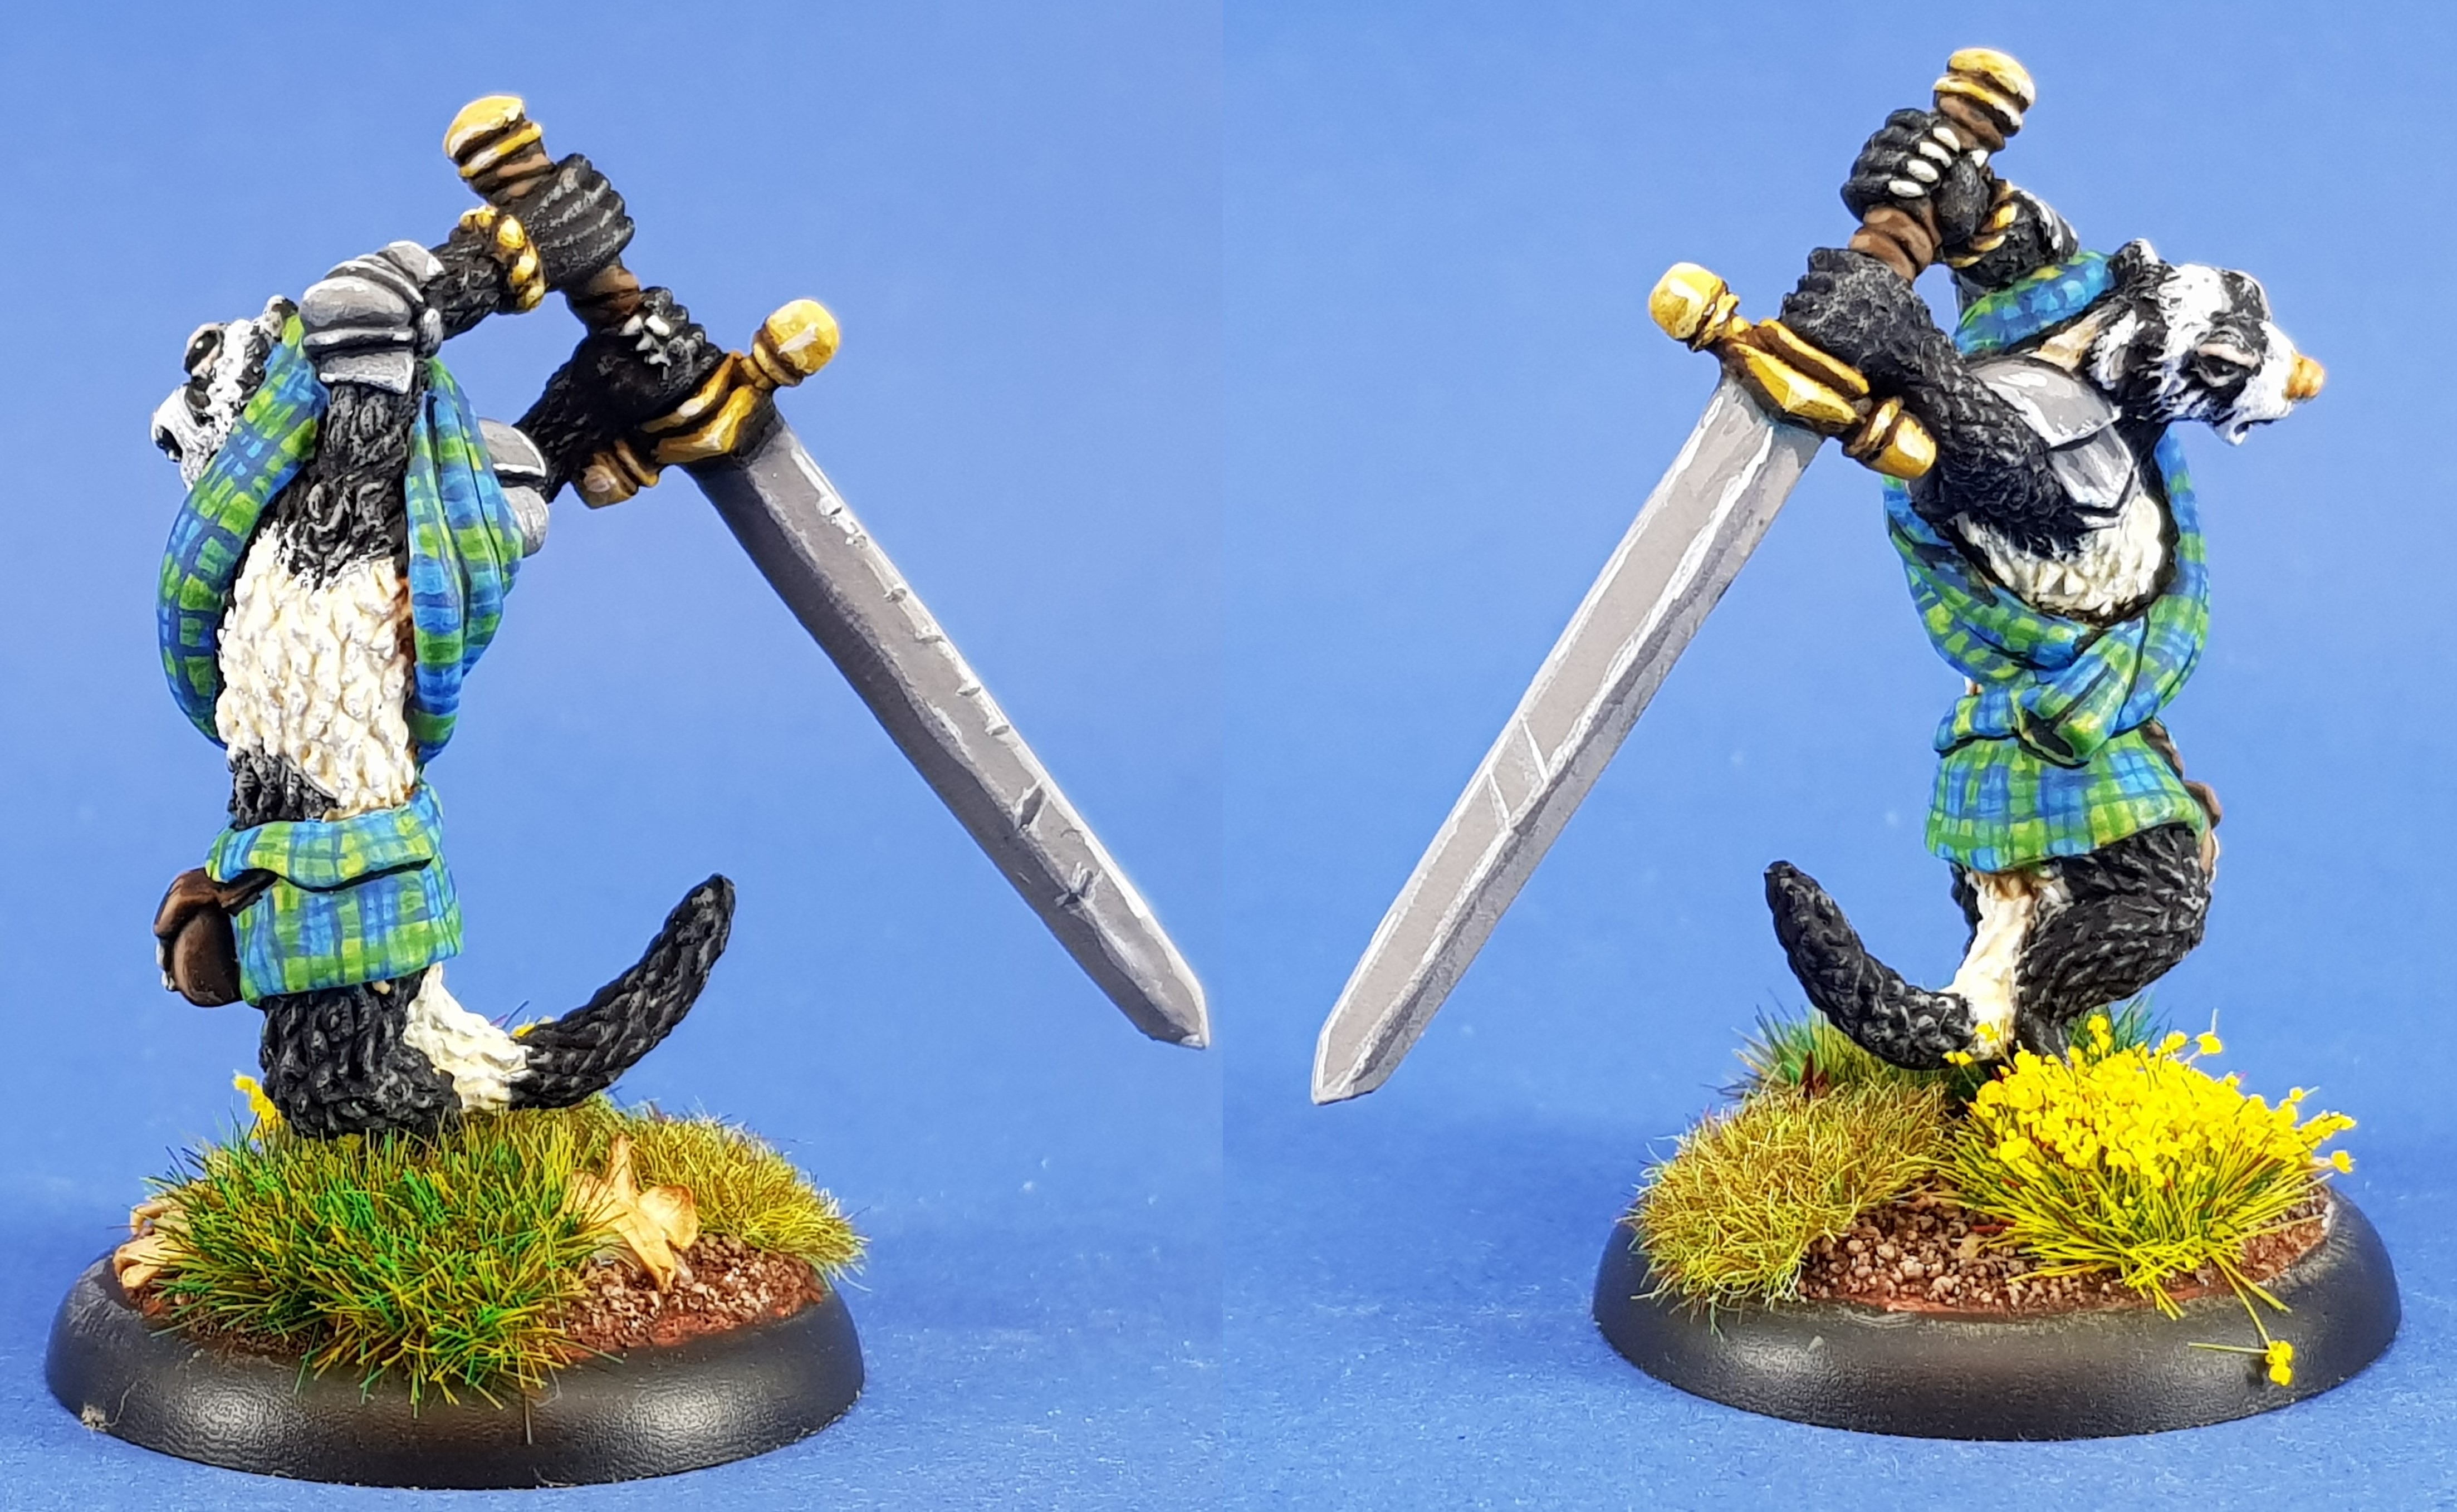
Ferret clan warrior finished
All done with the Ferret. I still need more practice on the NMM but he’s ok for now. I’m going to be working on a toad mage next and seeing how far I can get with the skin using the airbrush.
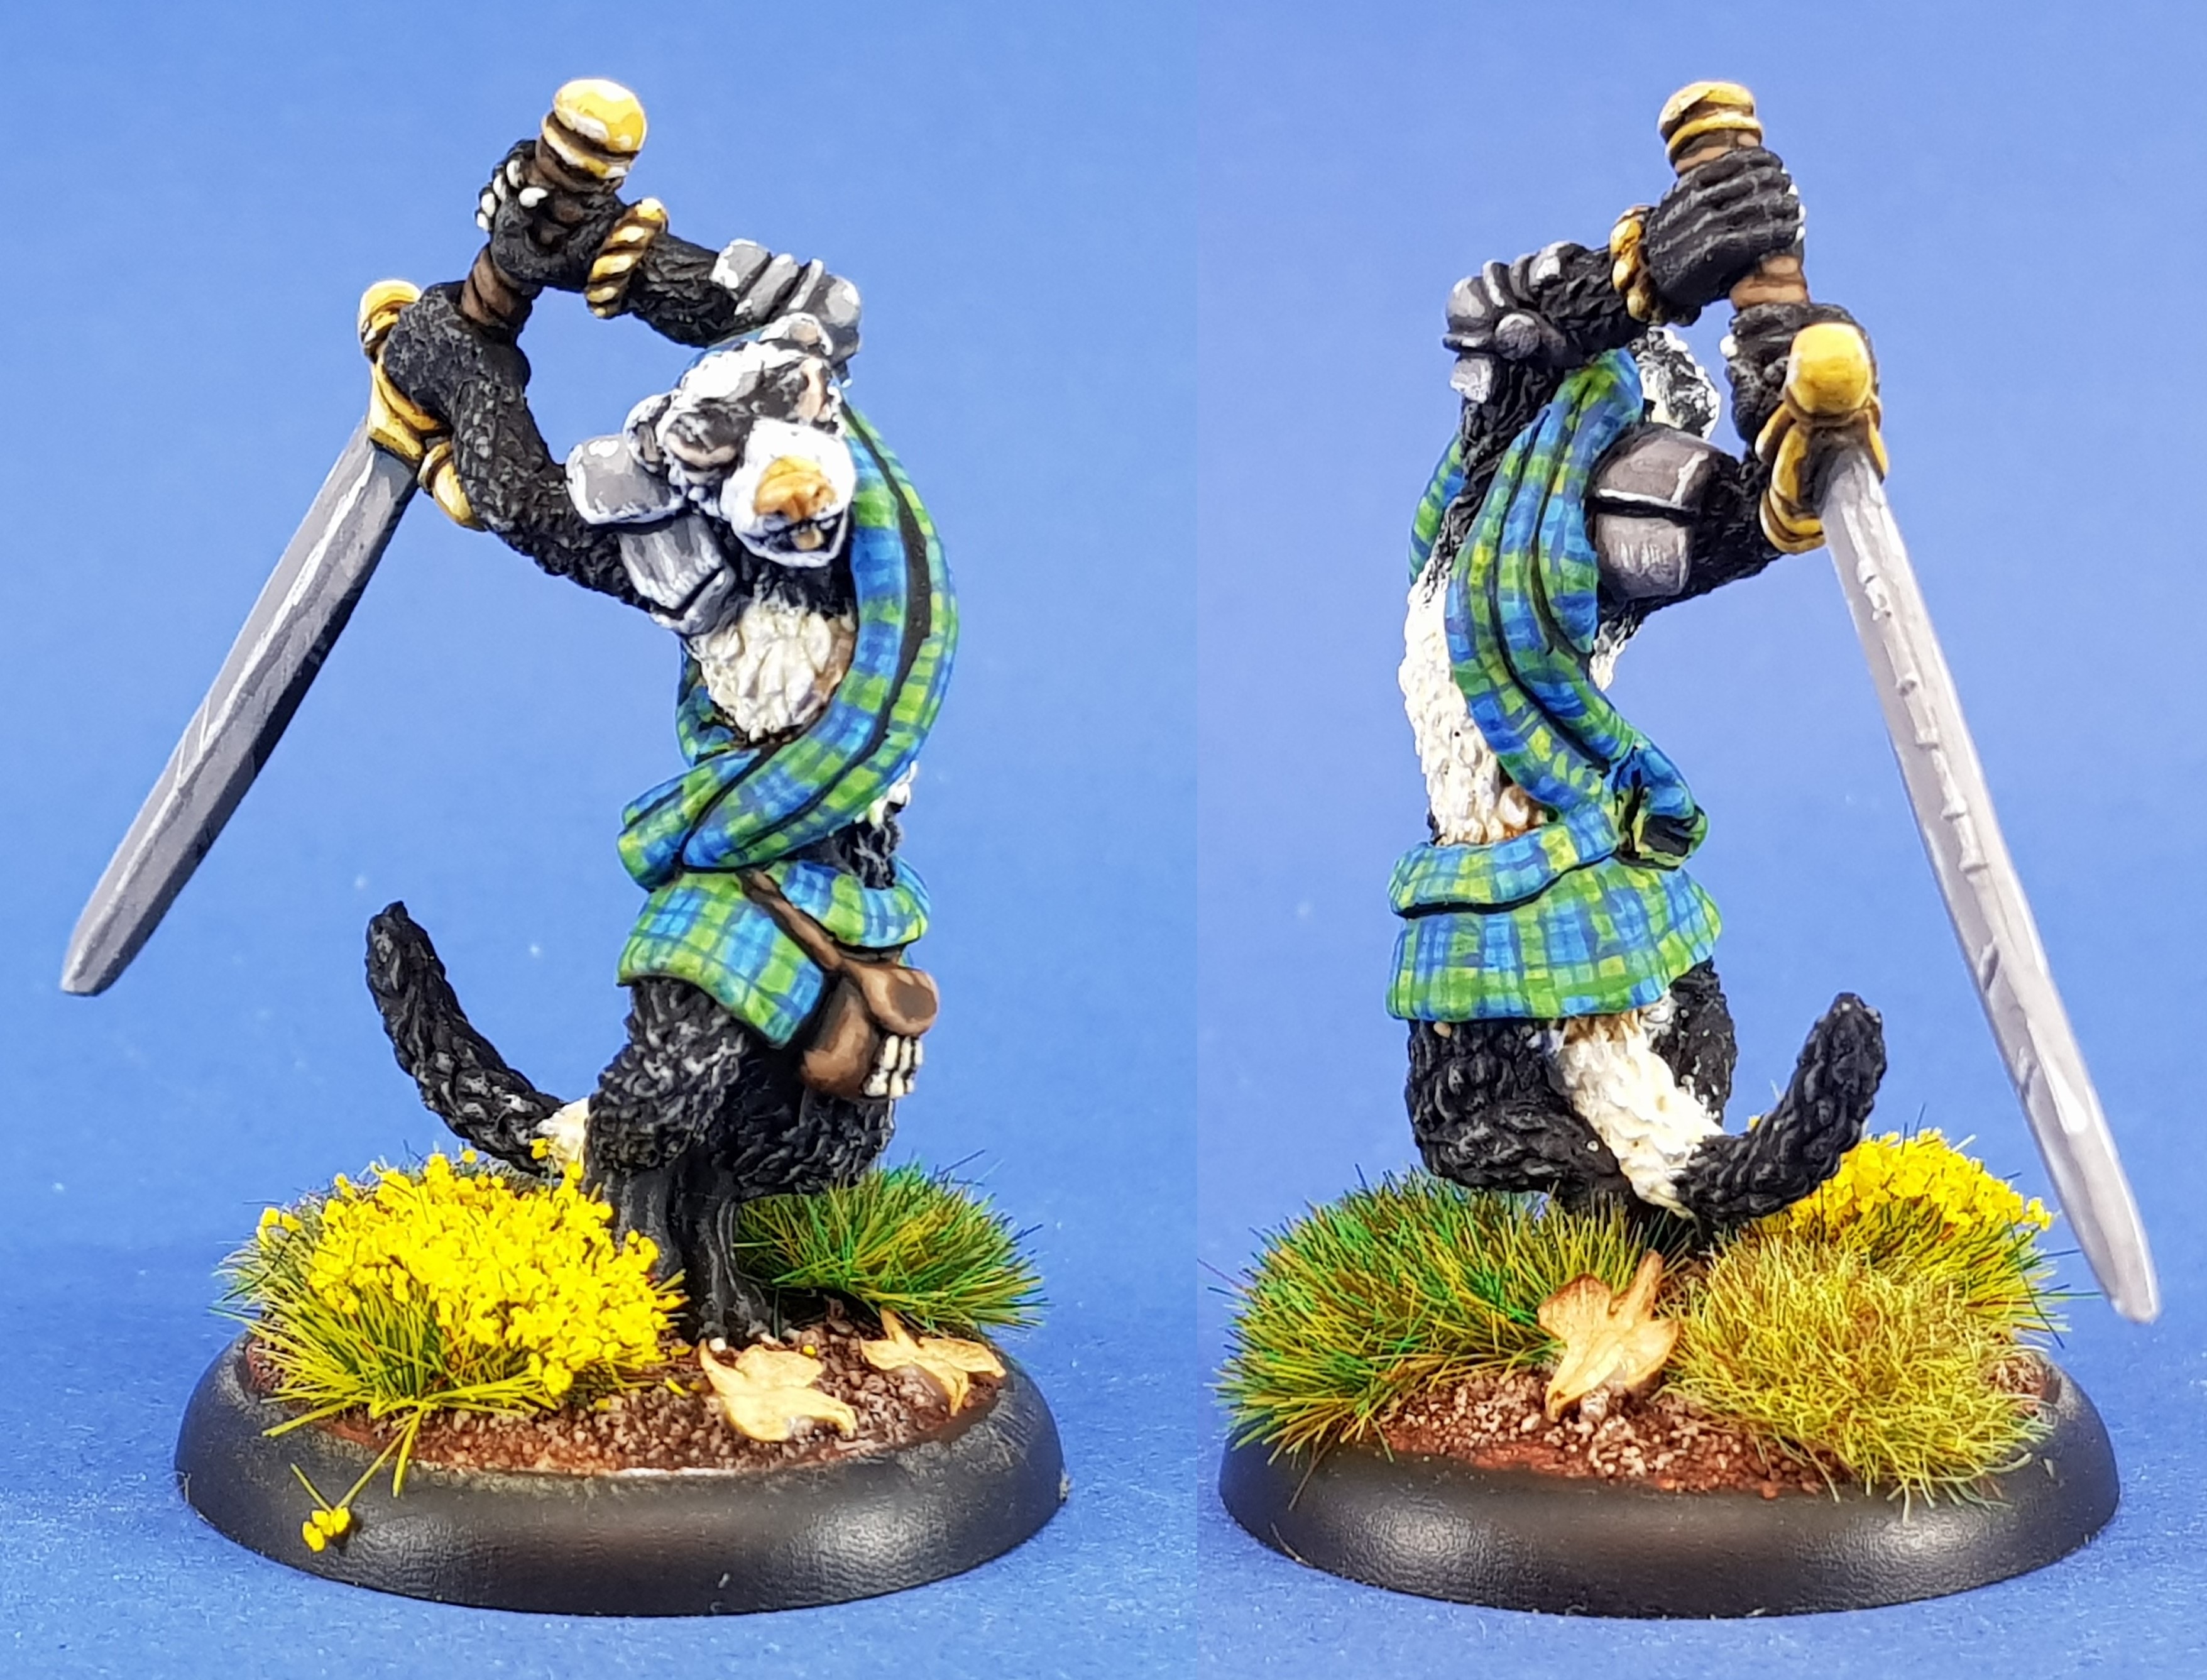
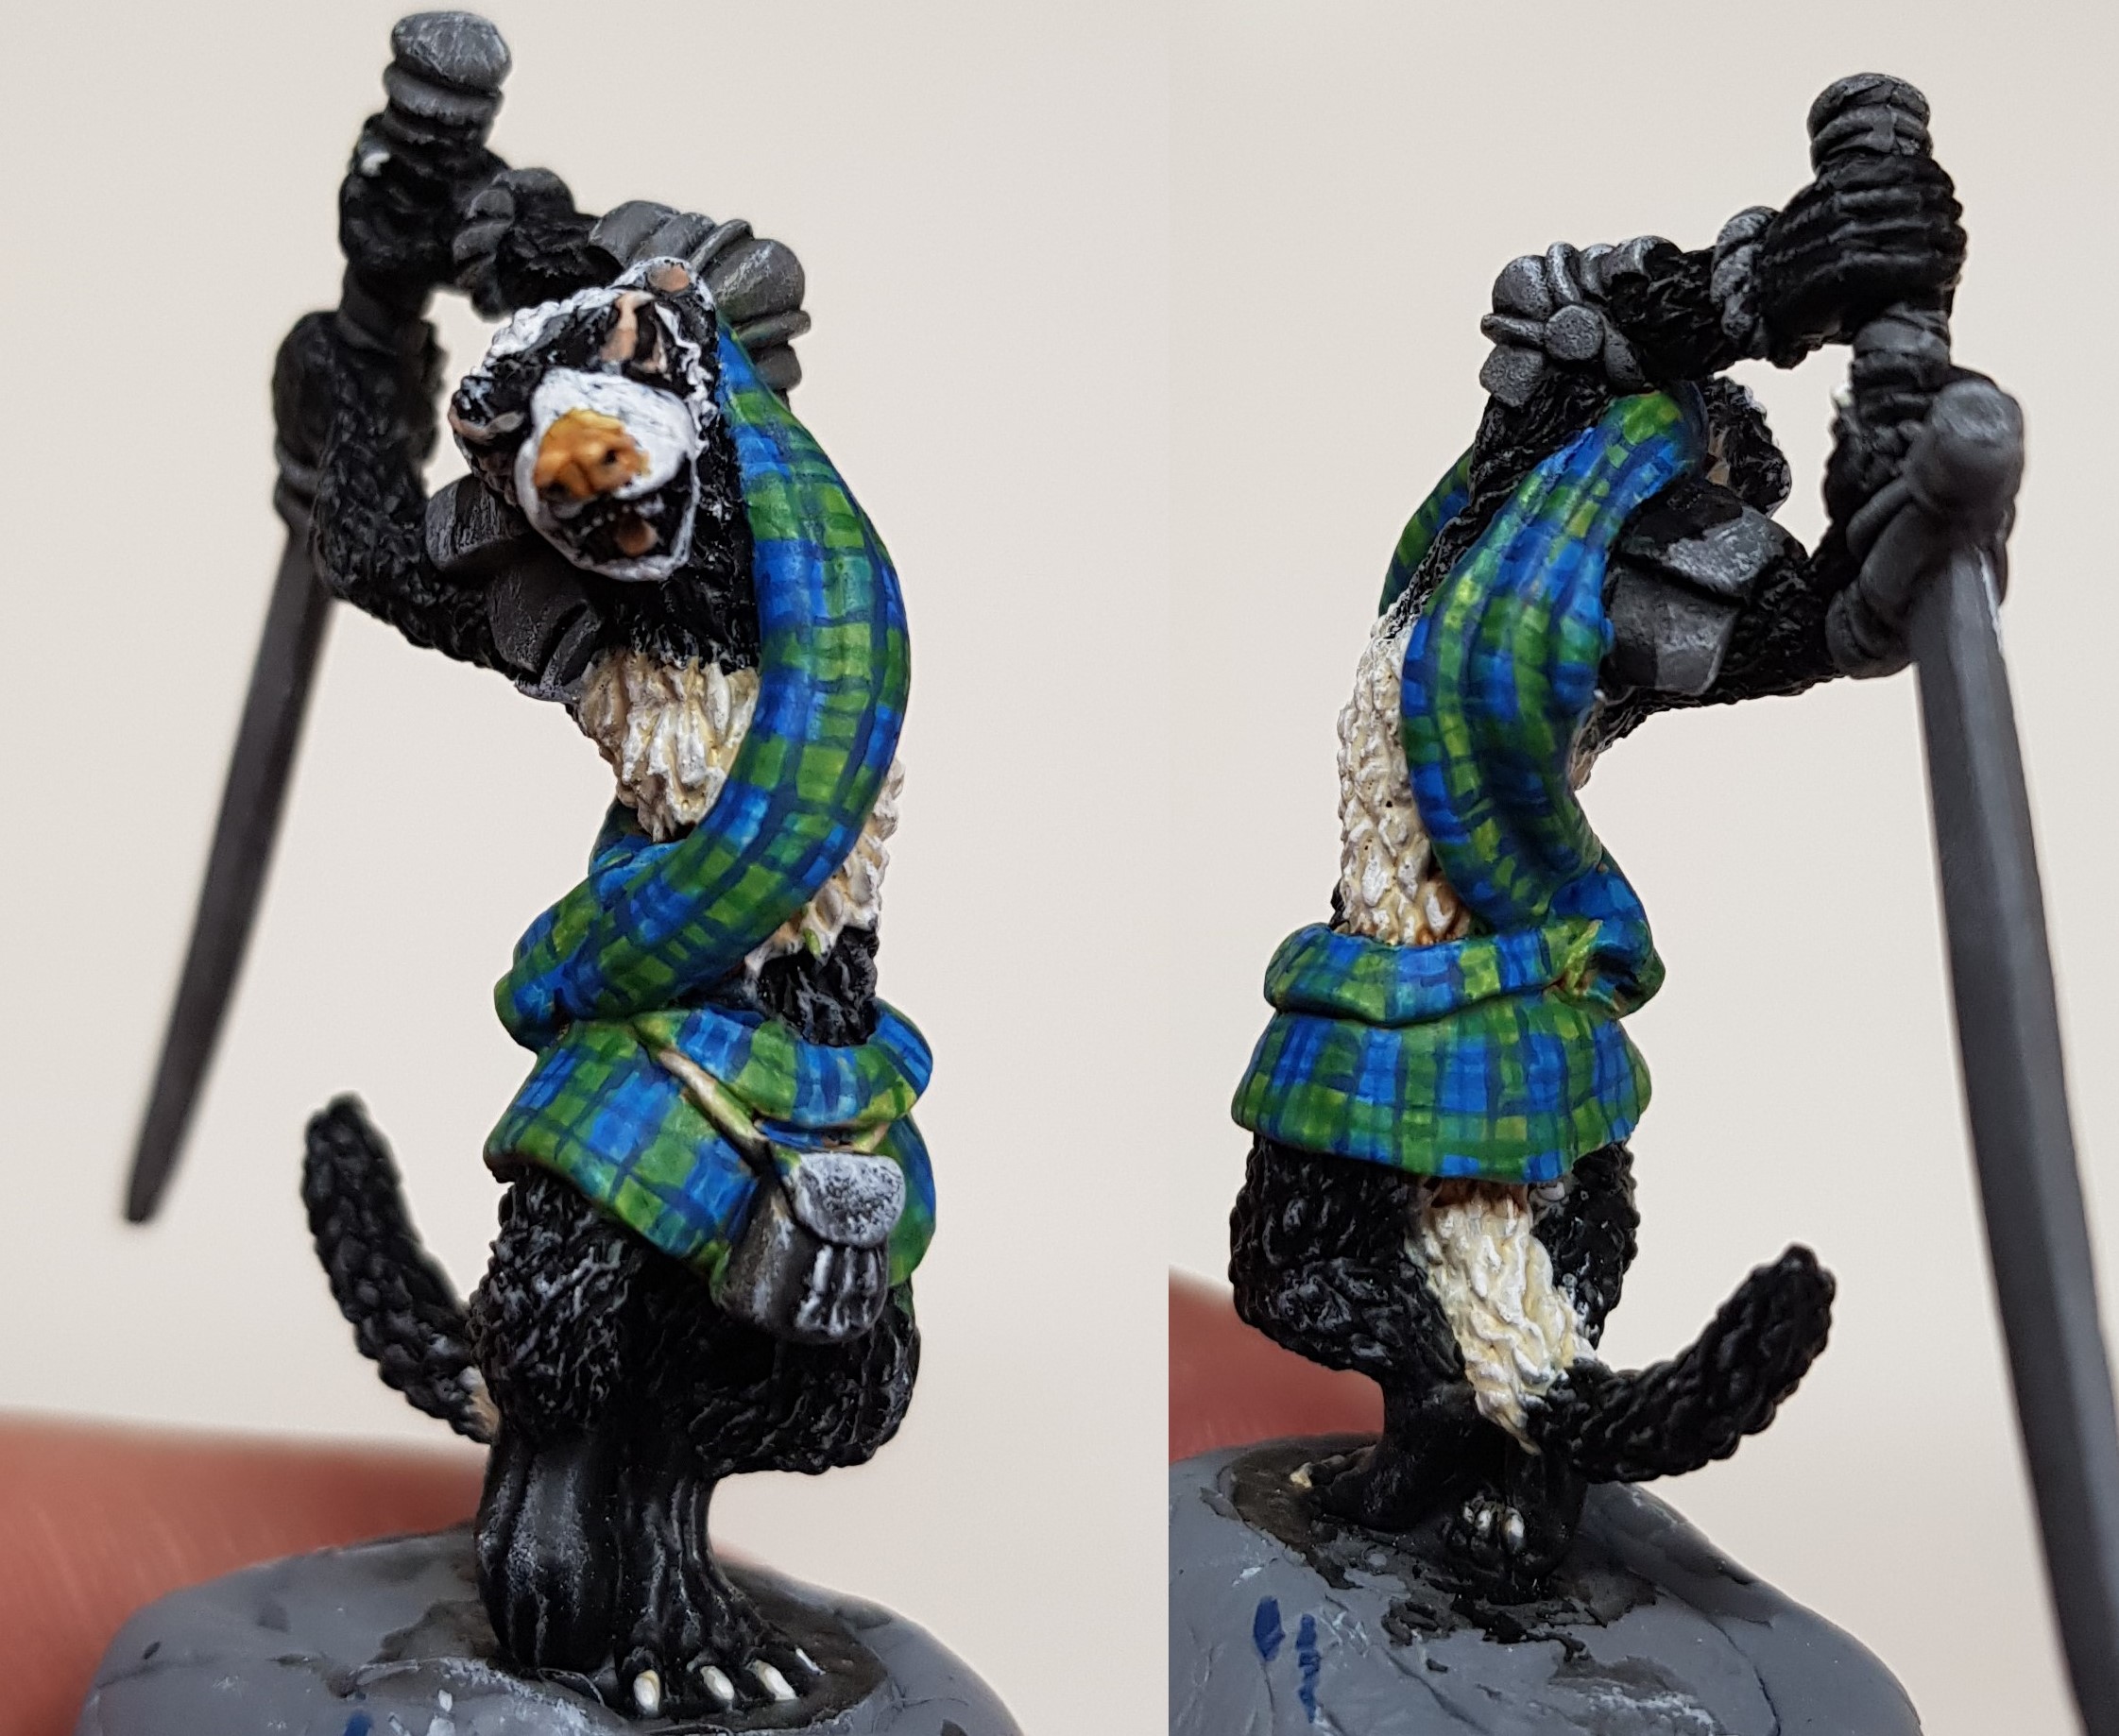
Tartan (F***ing Tartan)
 I decided to paint the clan ferret wearing tartan loosely based on the Black Watch tartan. So I started with a bit of youtube research and devised a plan!
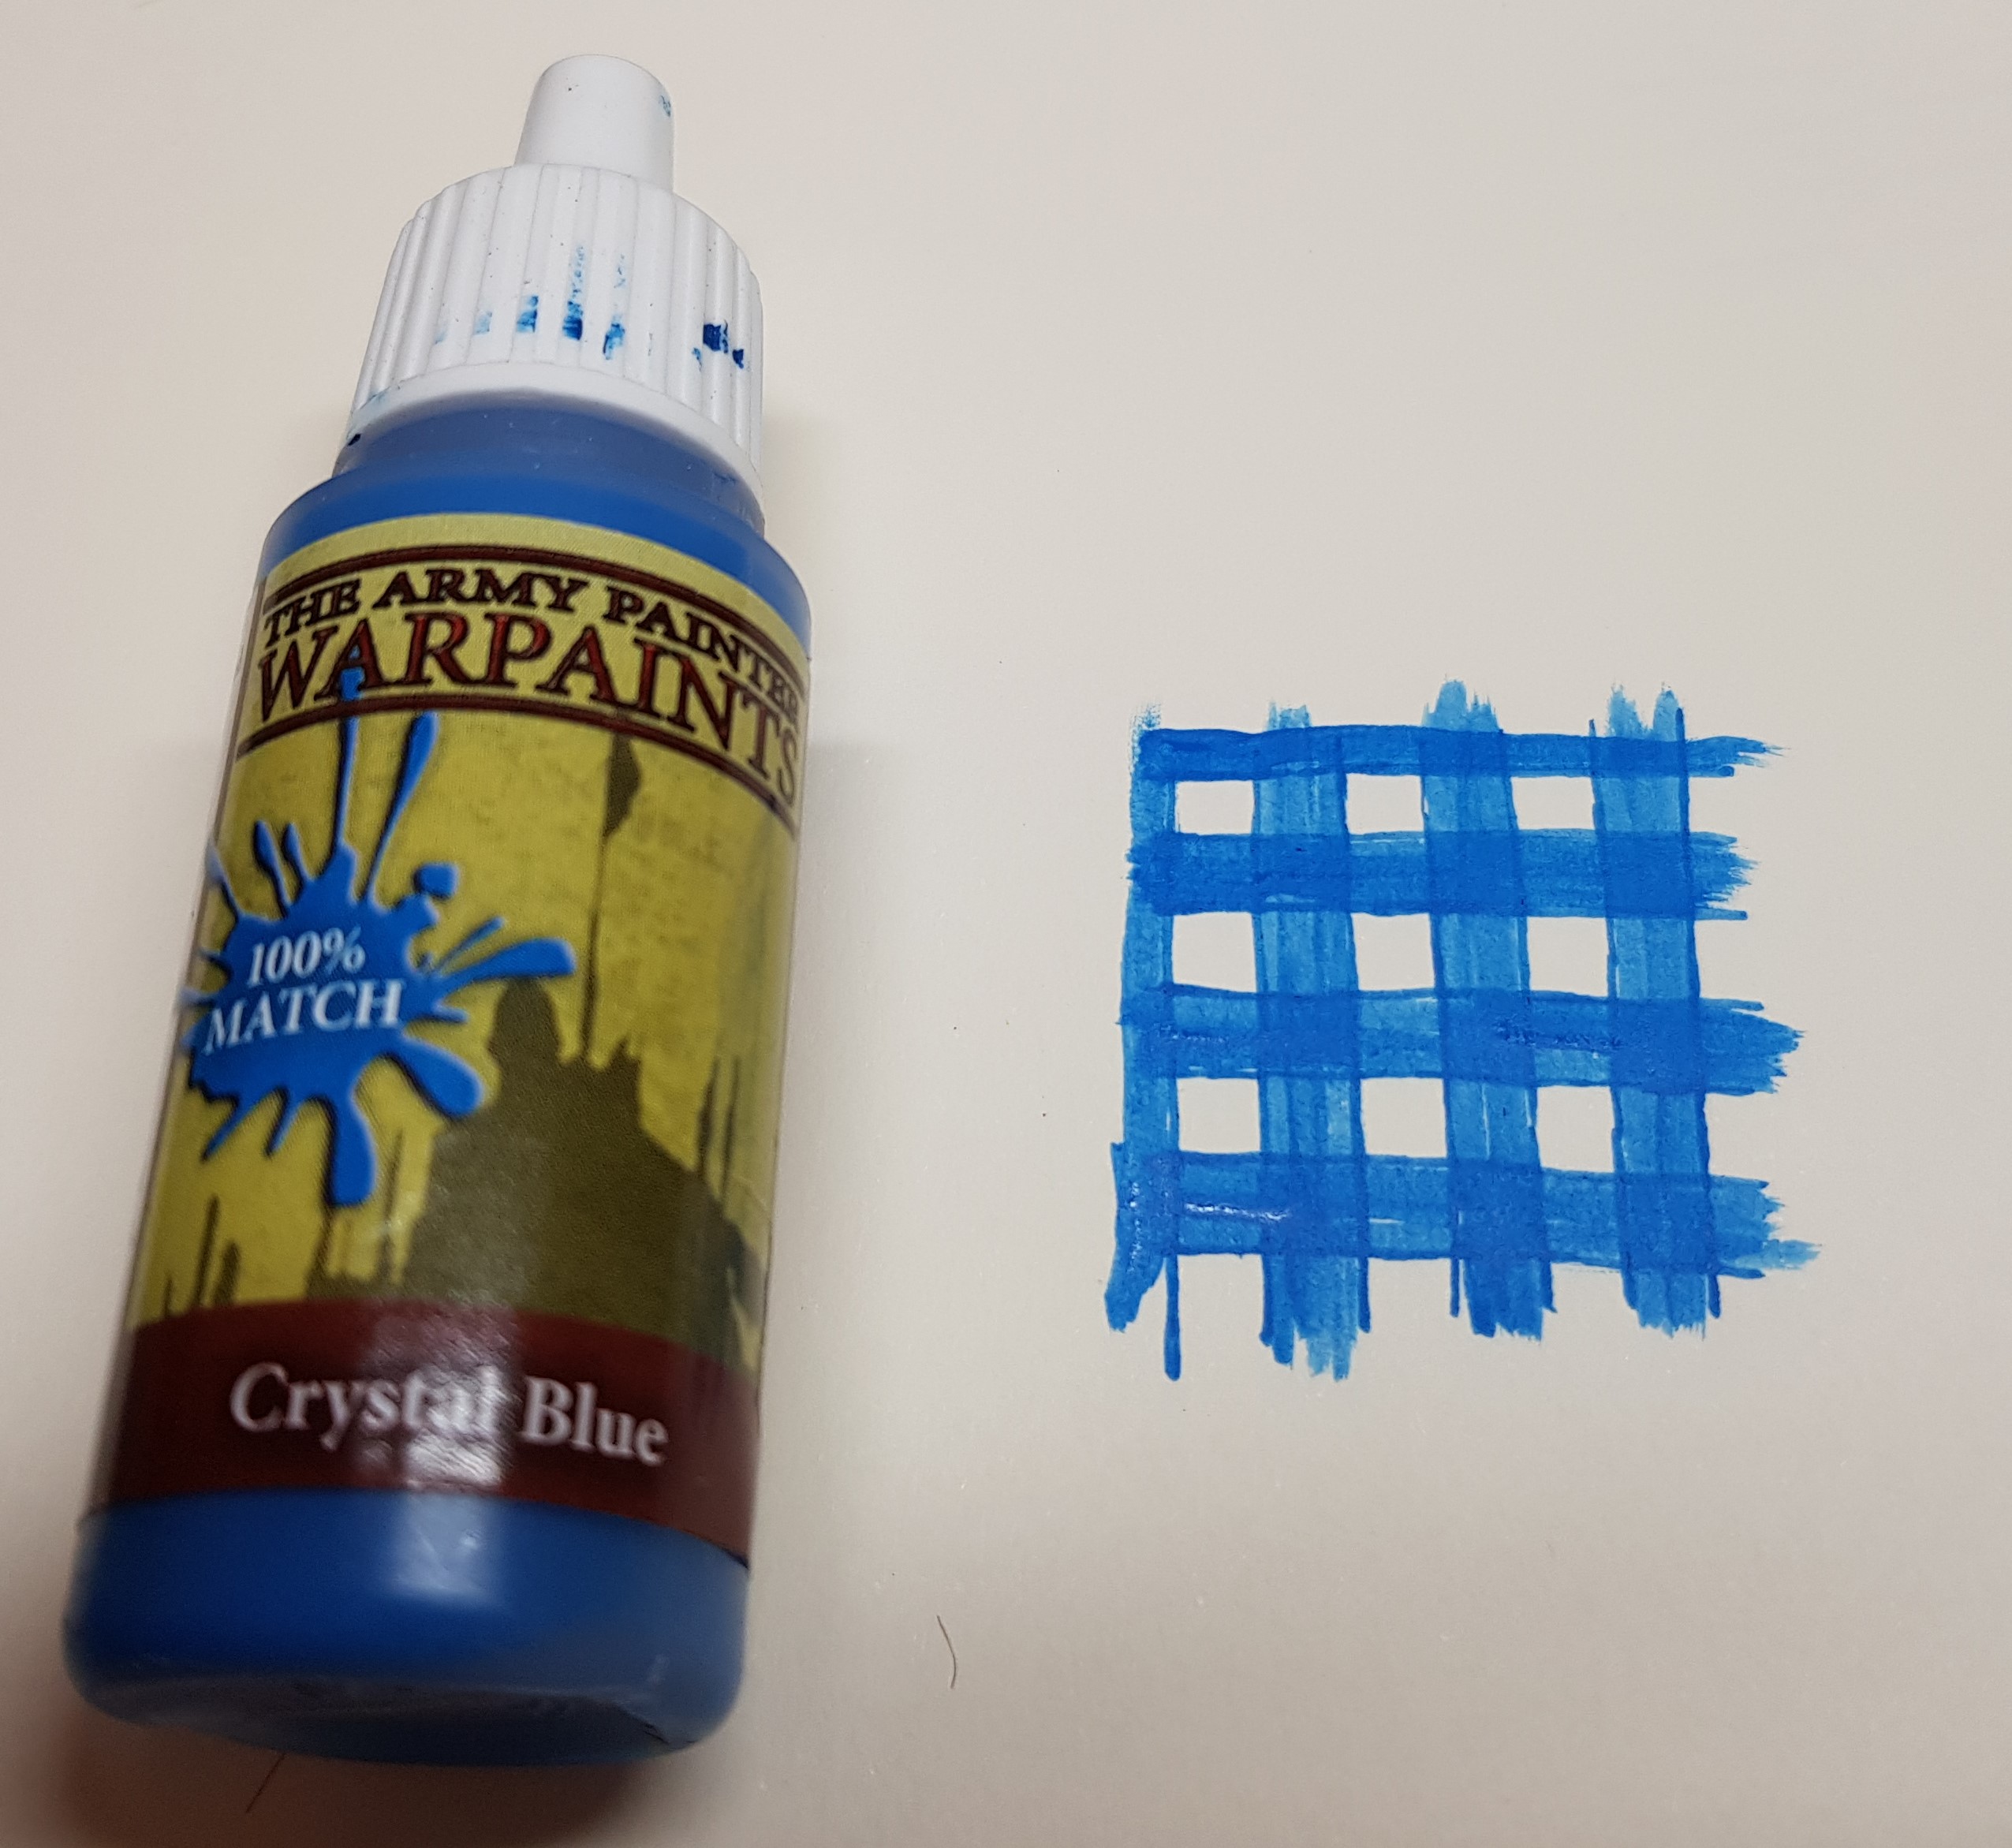
Time to test the plan on paper:
1 Lay out a grid of AP Crystal Blue.
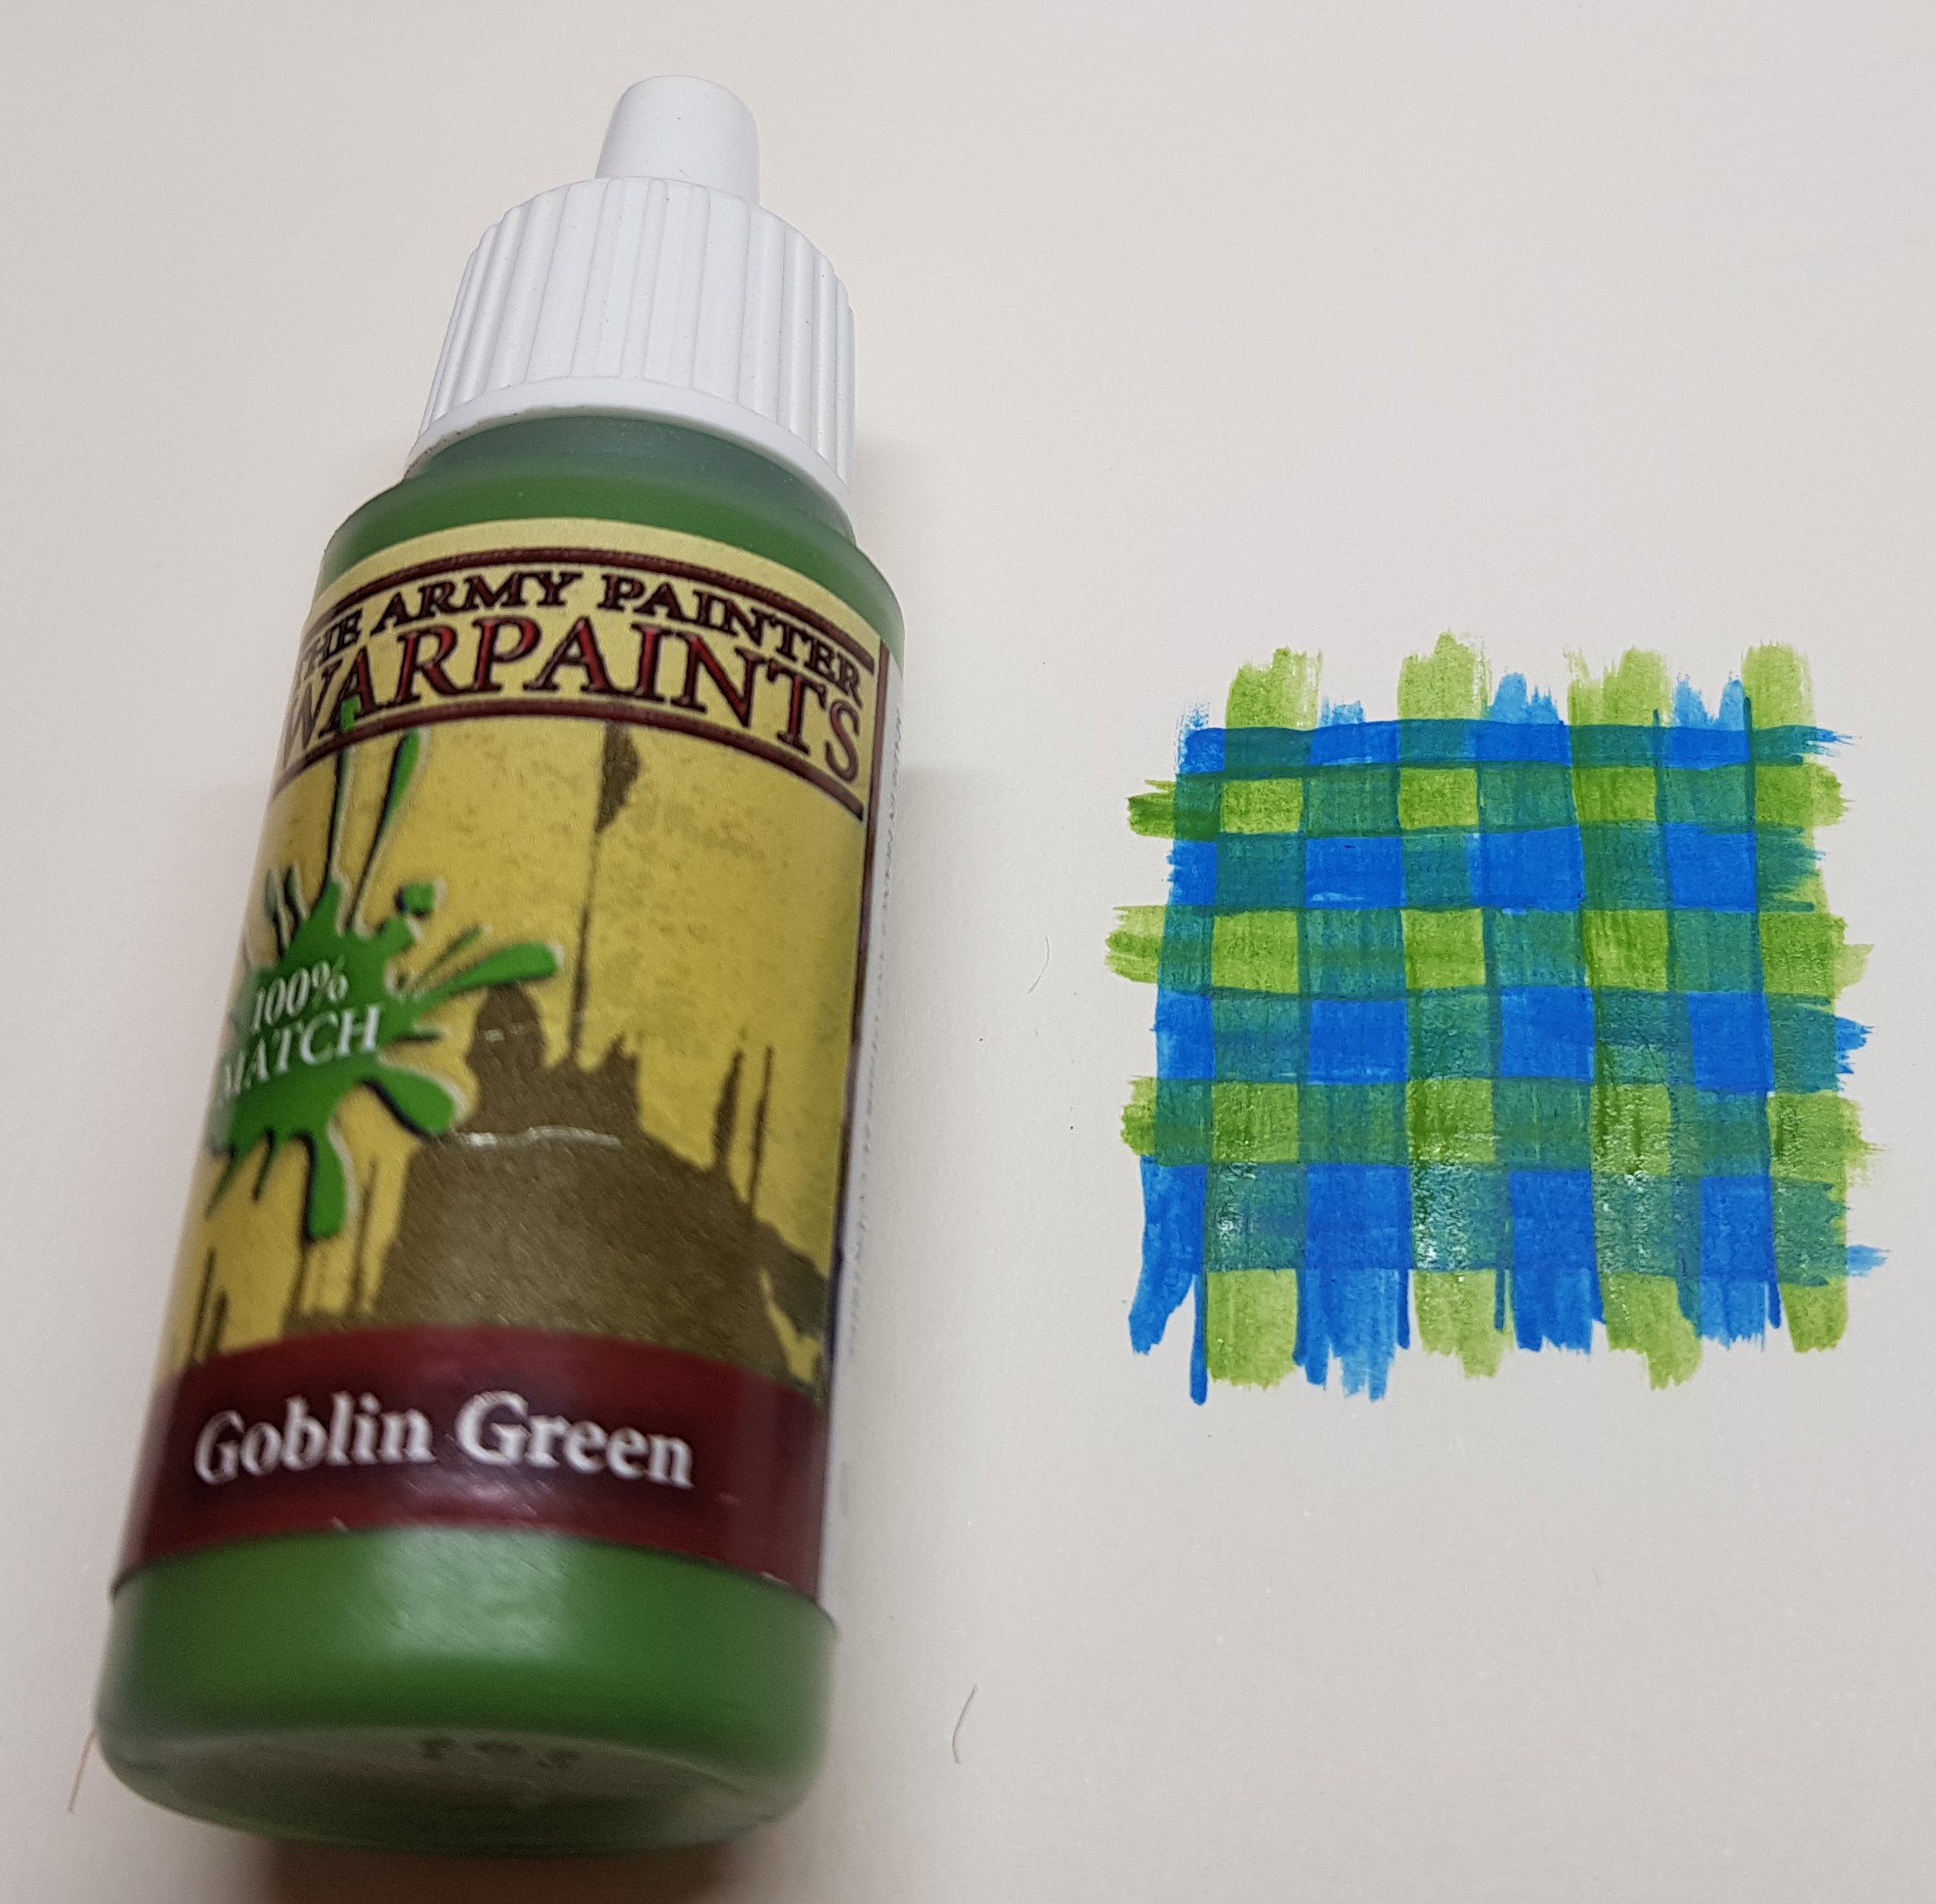
2 Paint in alternate horizontal and vertical stripes in AP Crystal Blue.
3 Paint the other horizontal and vertical stripes in AP Goblin Green, a nice thin coat so that the blue still shows through.
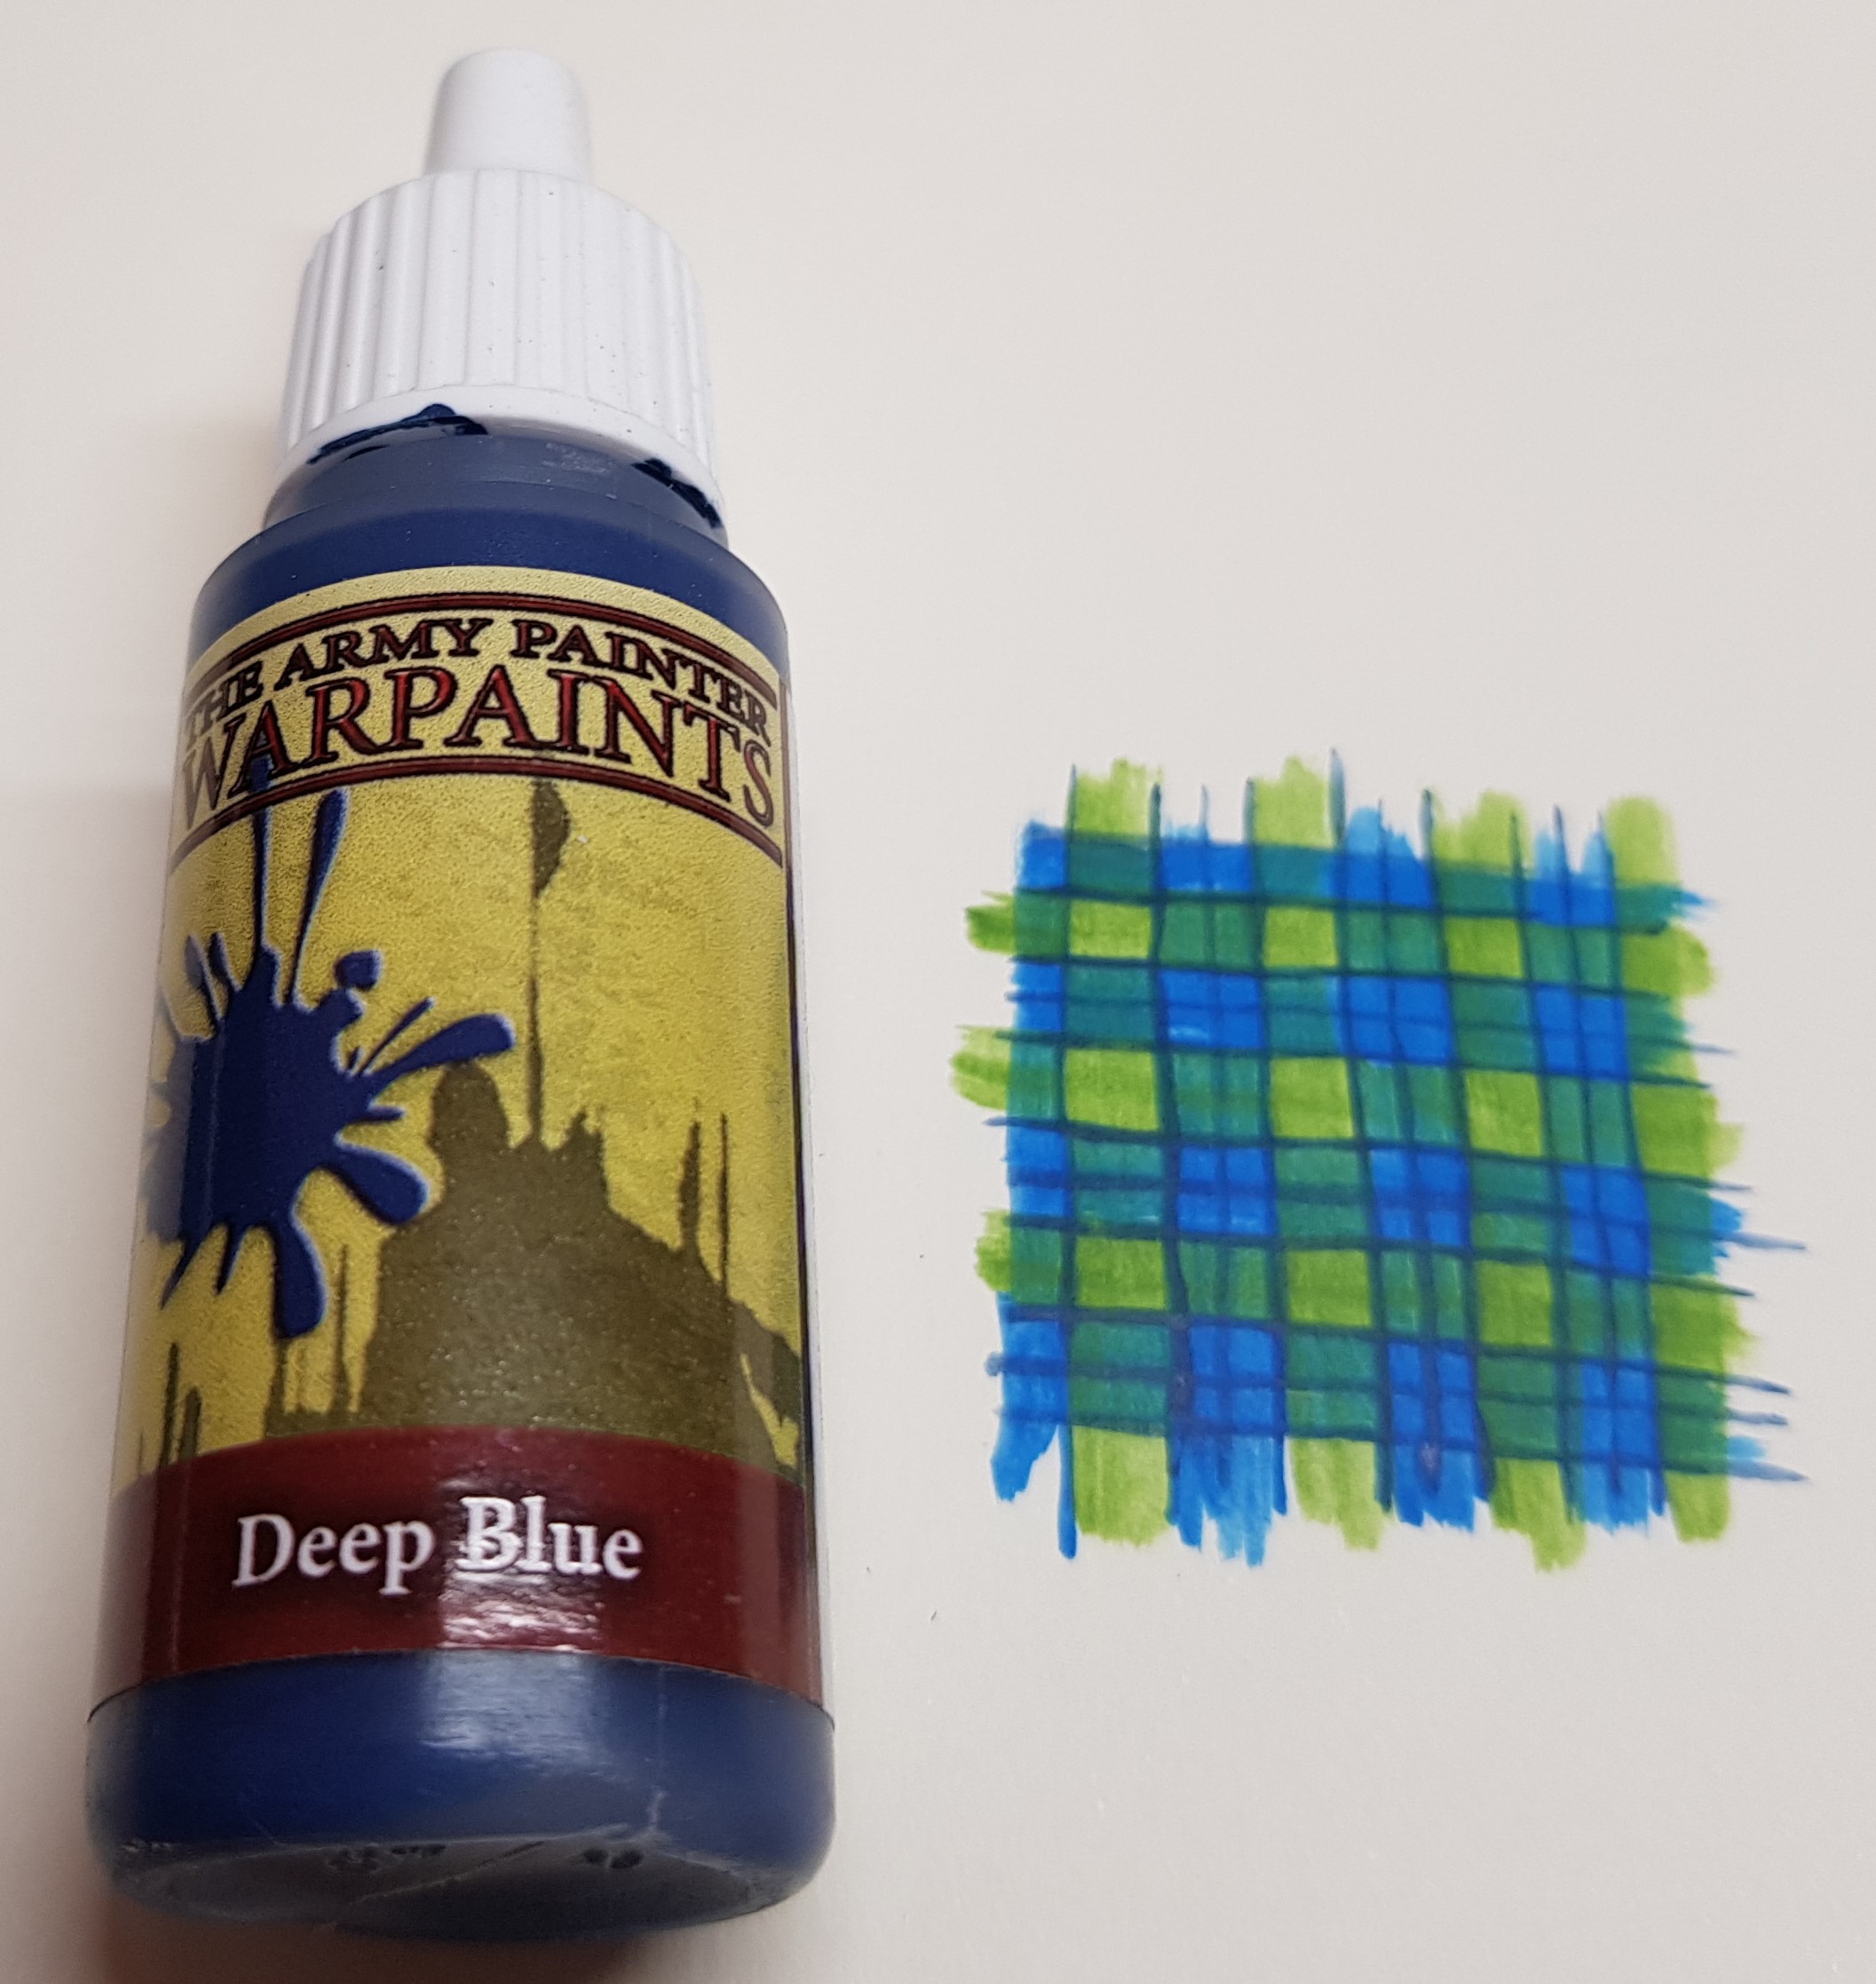
4 Paint a thin line of AP Deep Blue down the outside and centre of each horizontal and vertical blue stripe.
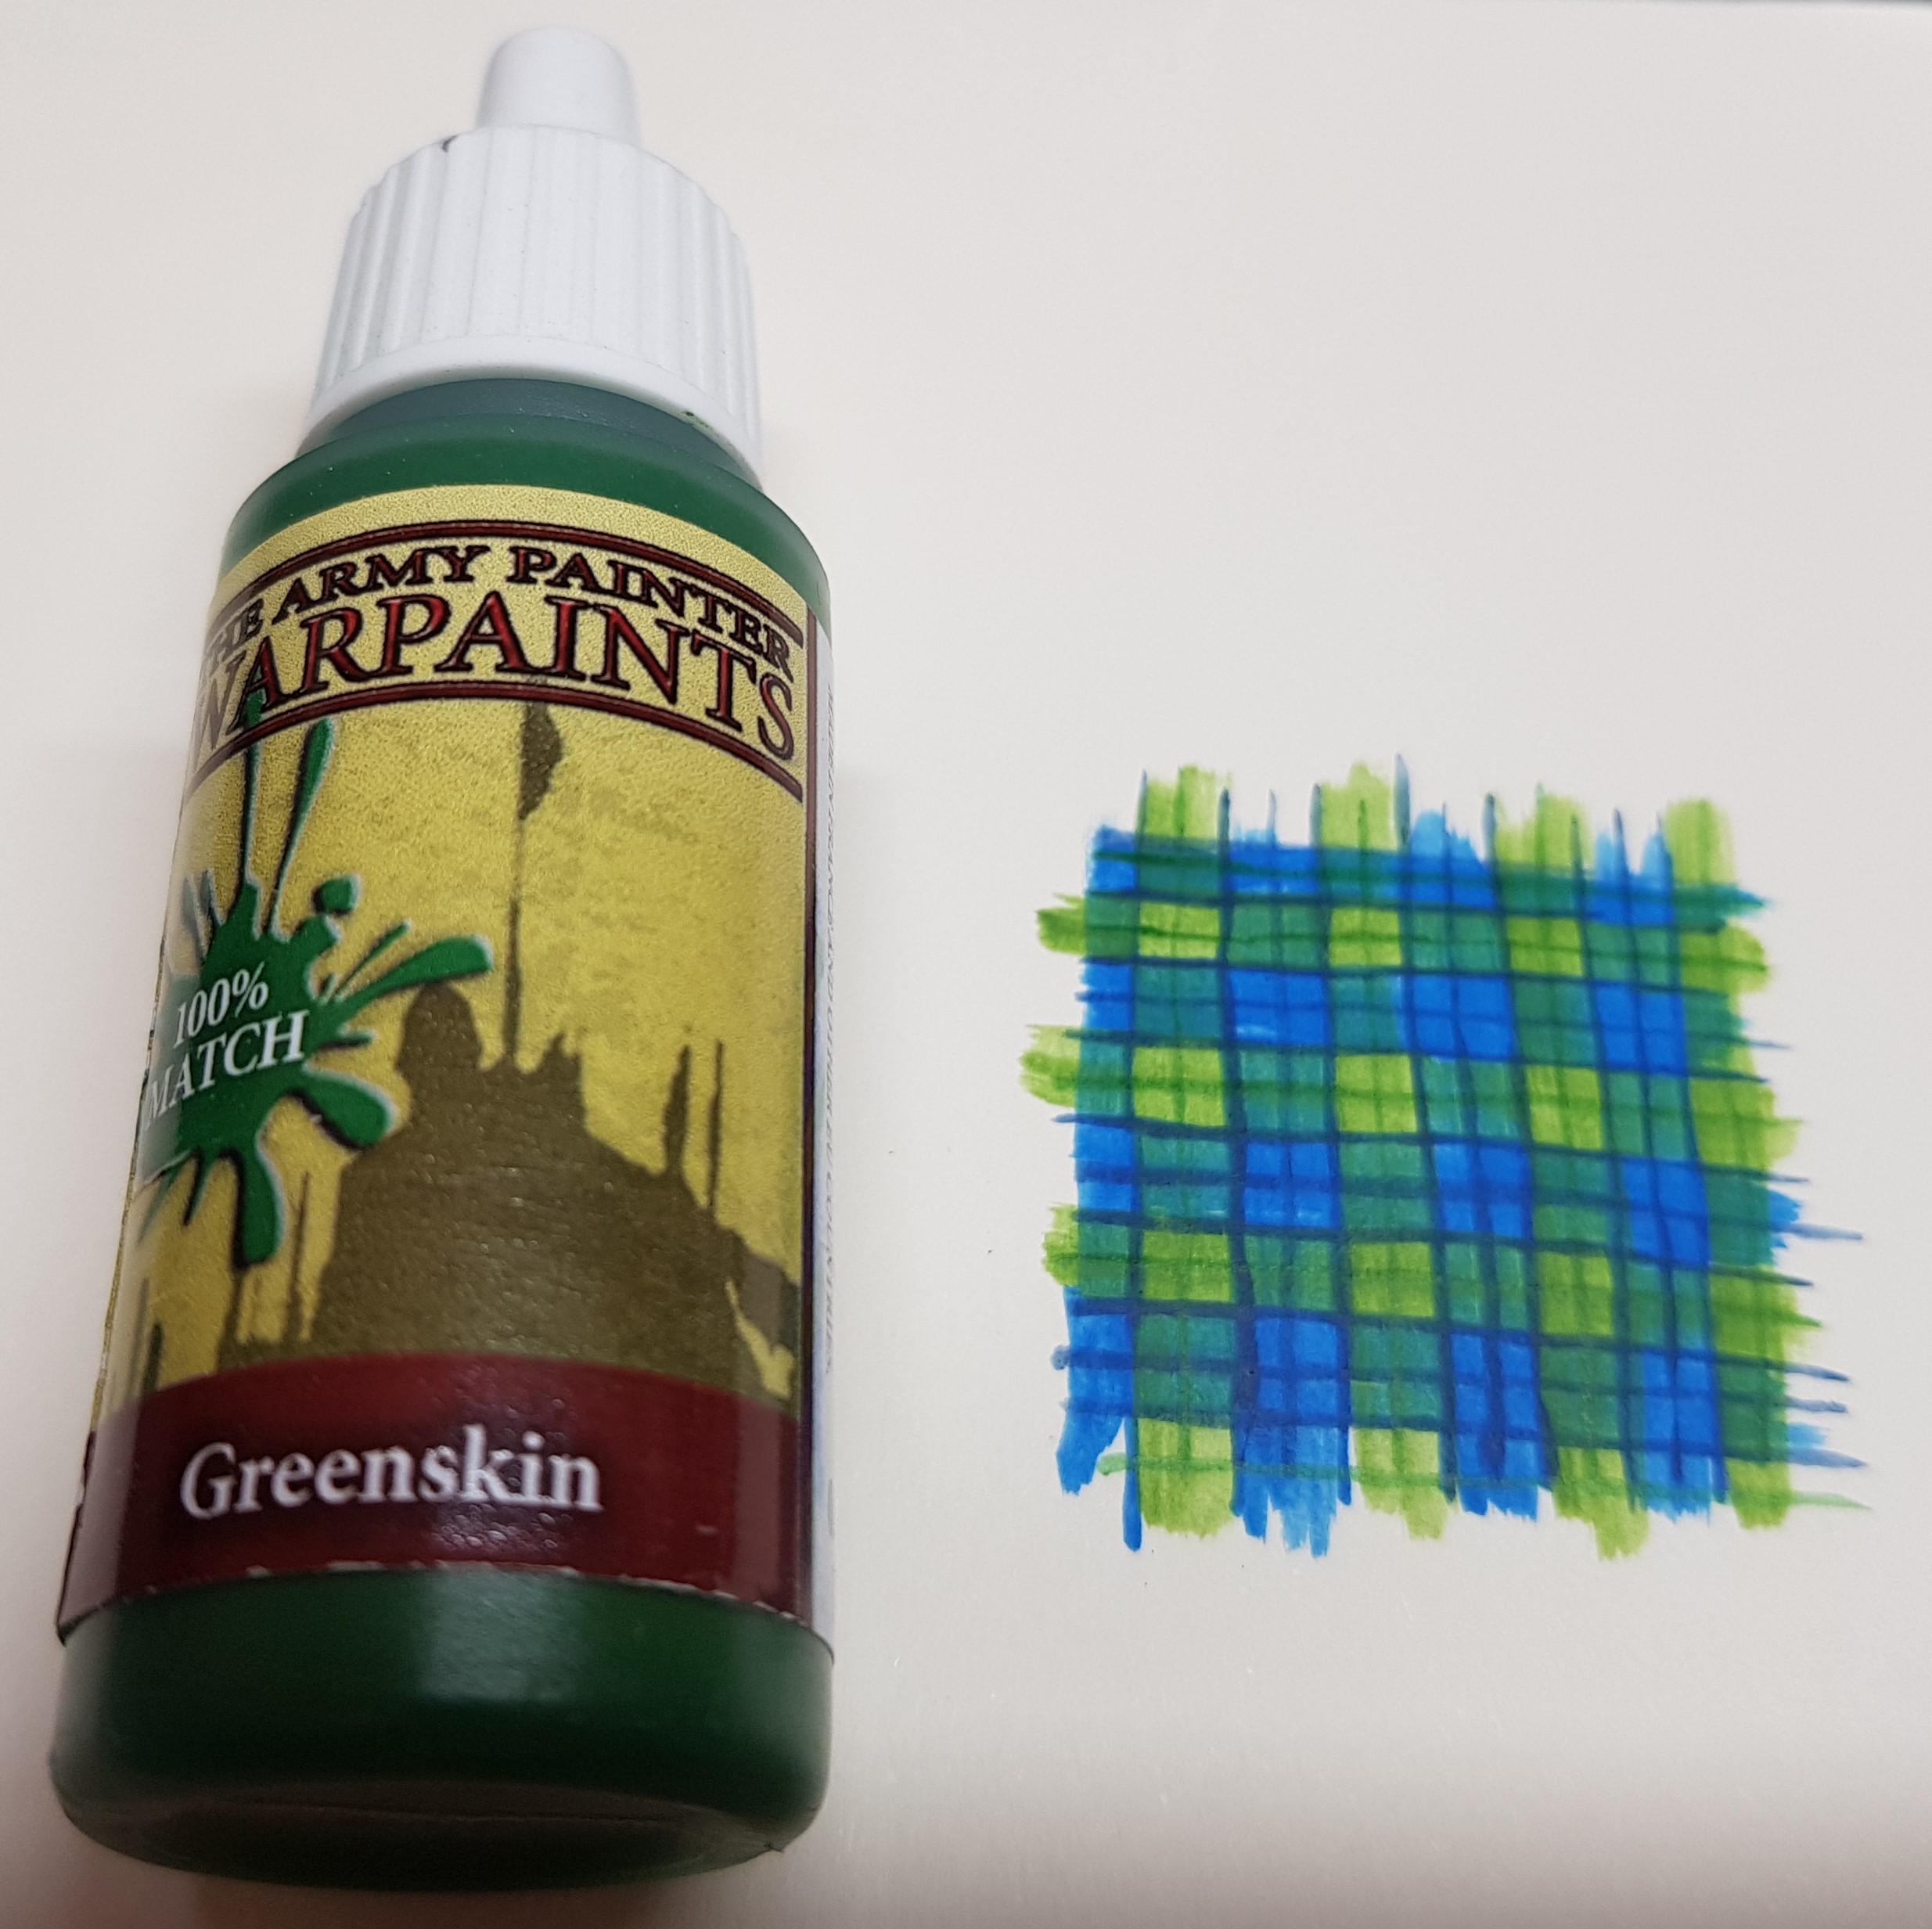
Paint a thin line of AP Greenskin down the centre of each horizontal and vertical green stripe.
Now time to see how this translates onto the miniature. I started with a base of white washed with soft tone in a hope that this shading may show through but that didn’t work out.
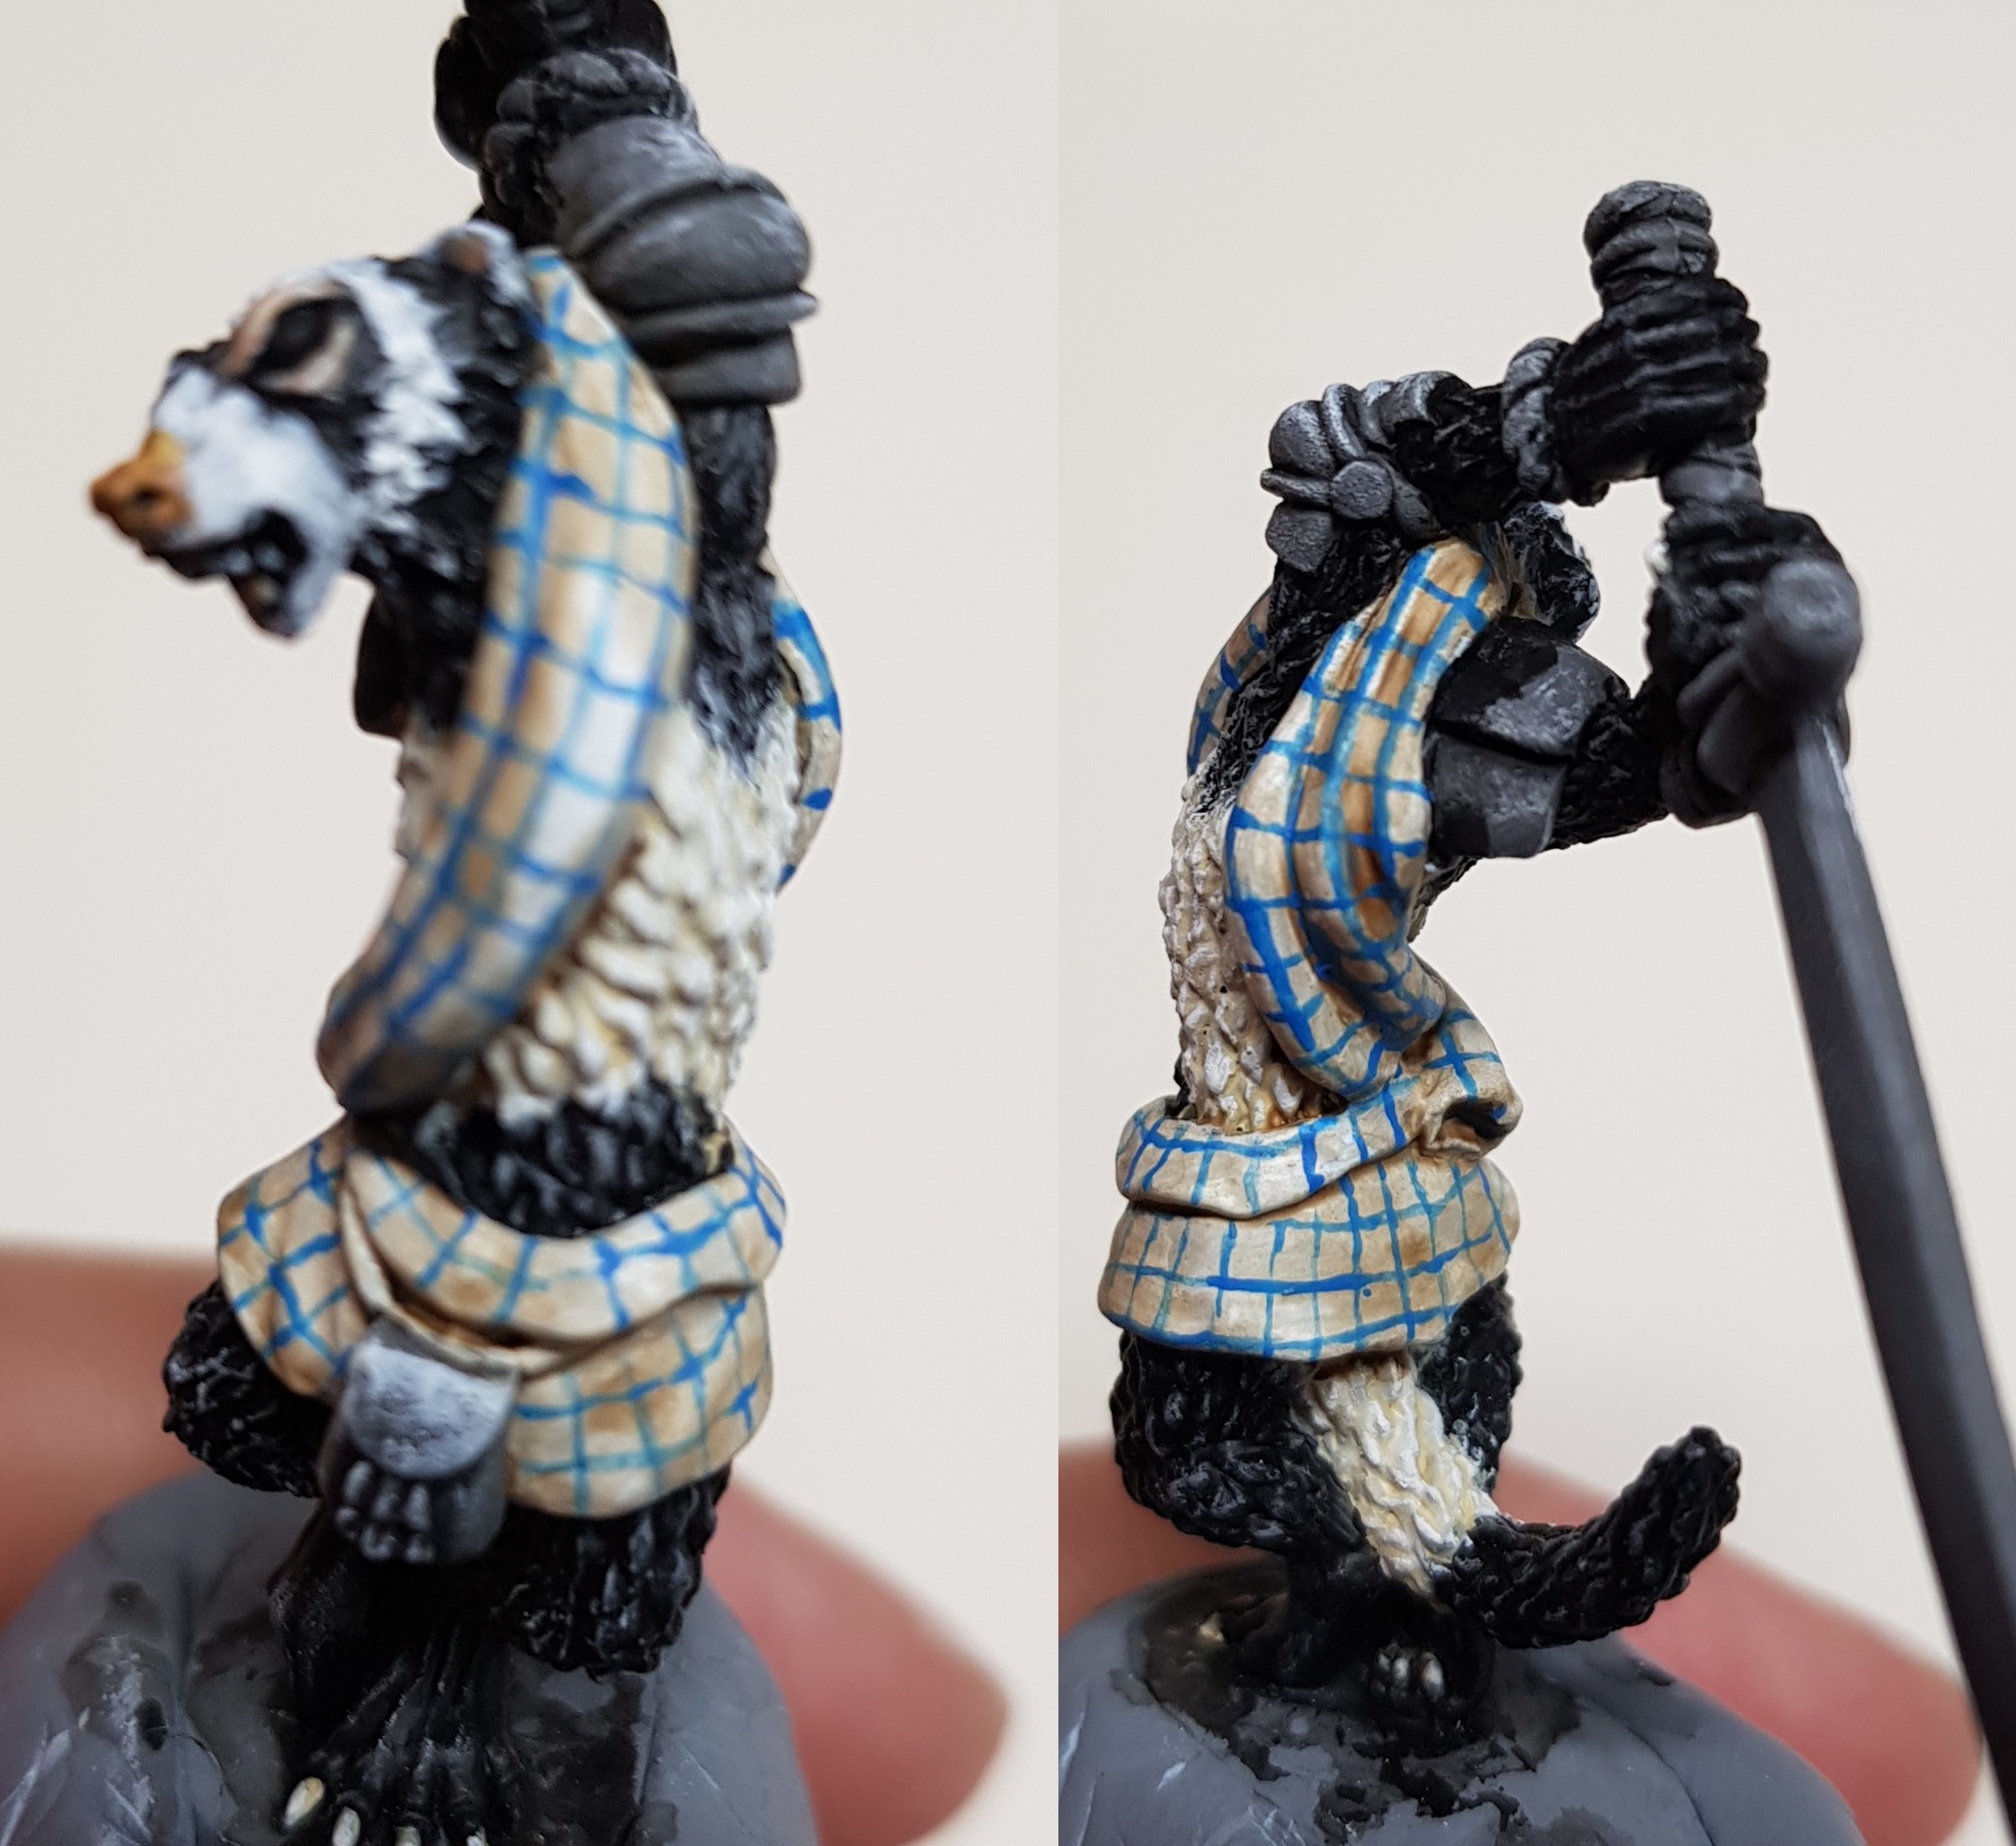
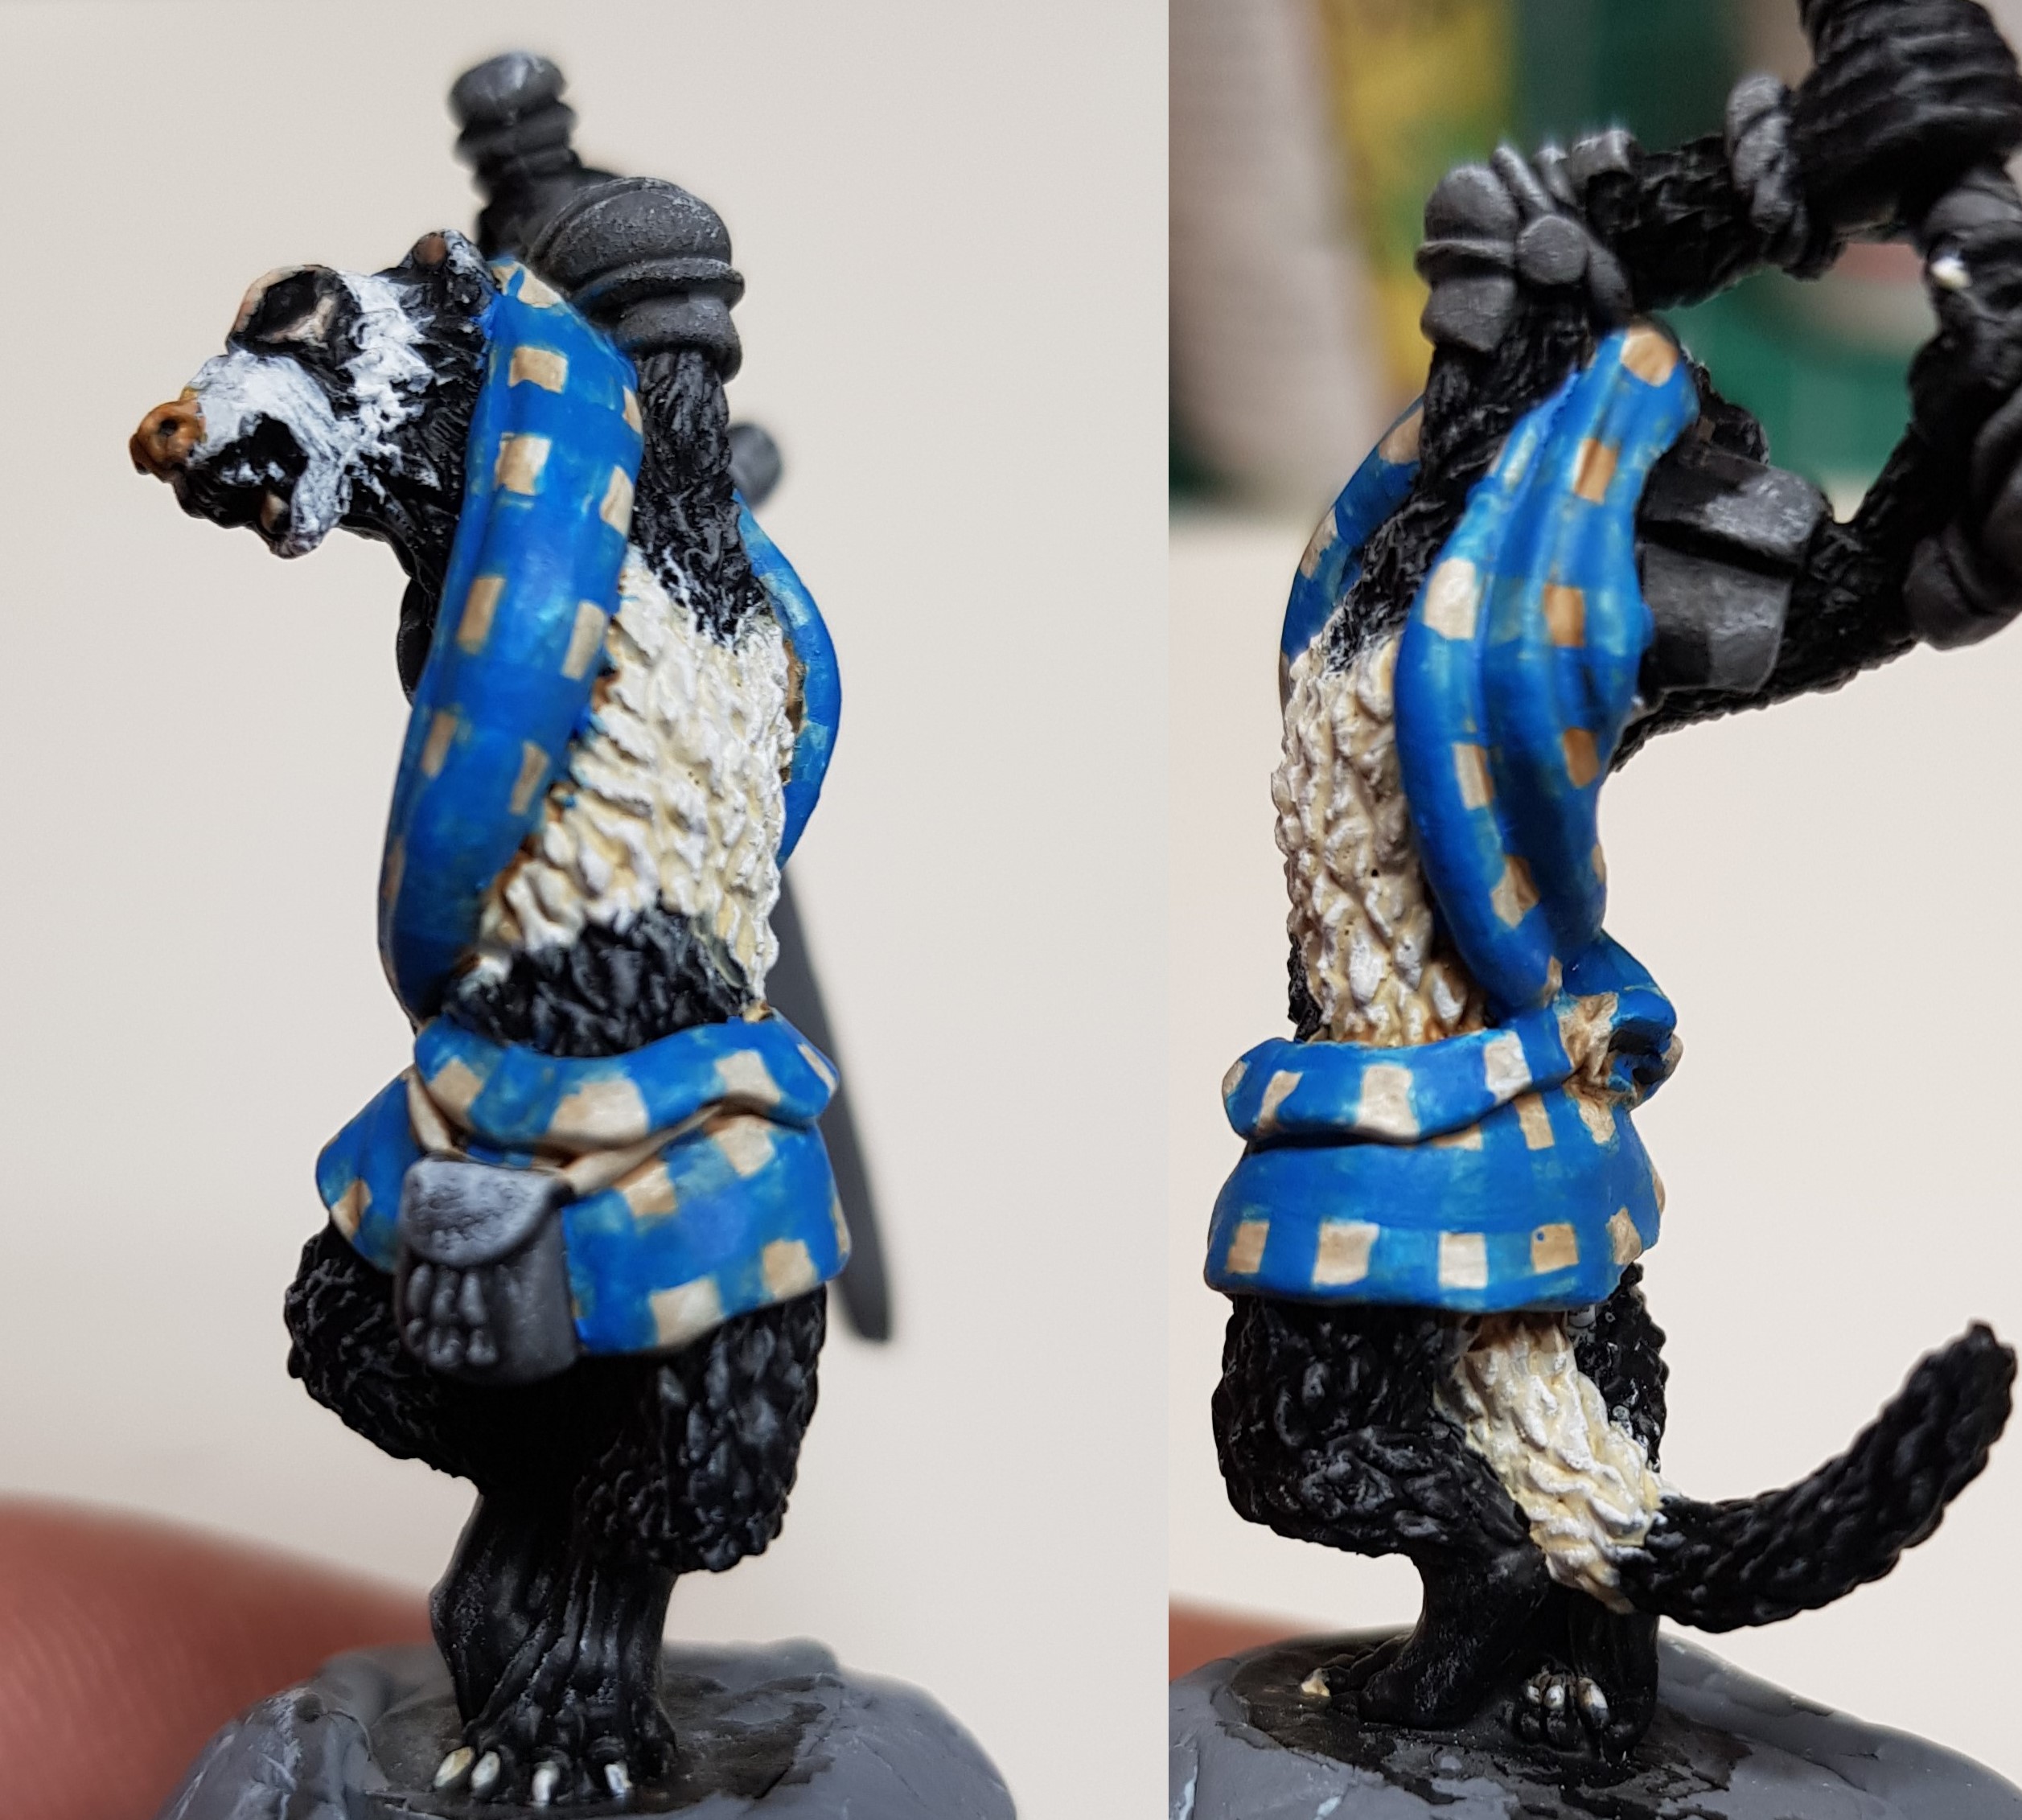
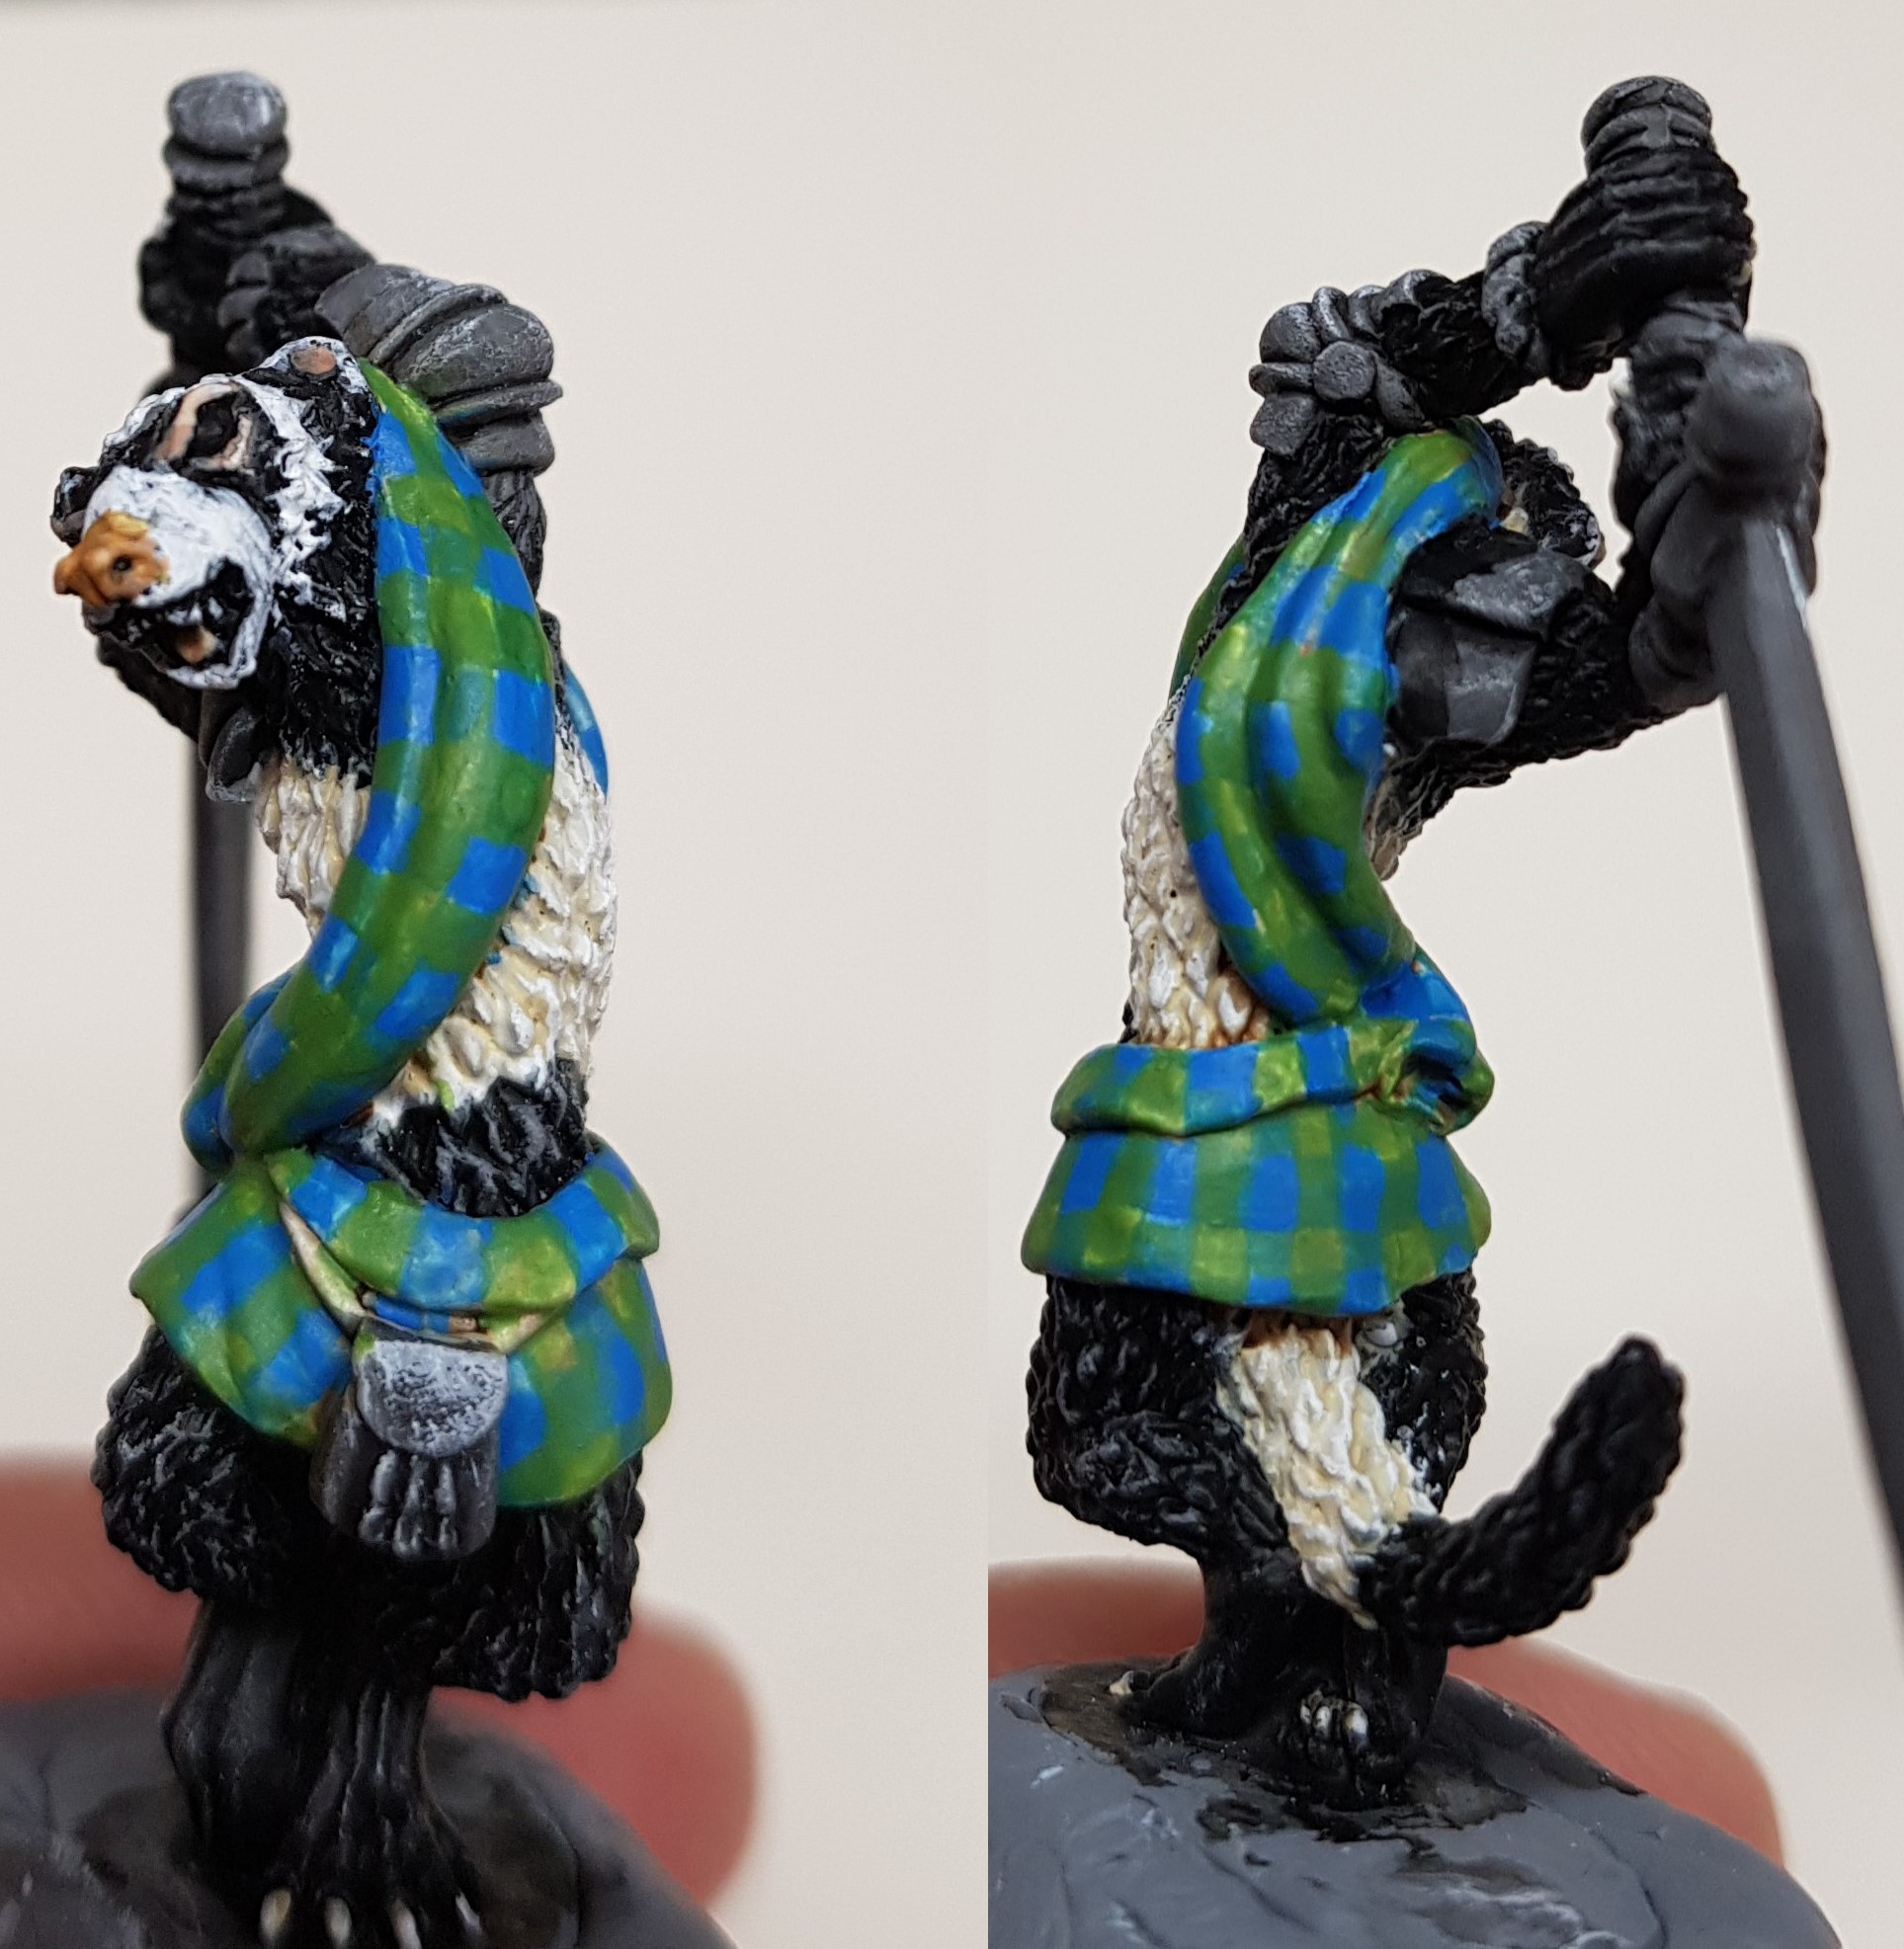

I’ll admit part way through I was wondering what I had let myself in for! On the mini the squares painted blue with the green over the top didn’t come out as well as on the paper and if I did it again I’d probably paint those squares in separately. Once I started the lining it didn’t turn out as bad as I thought it was going to and I still have most of my marbles!
That's one mean bunny!
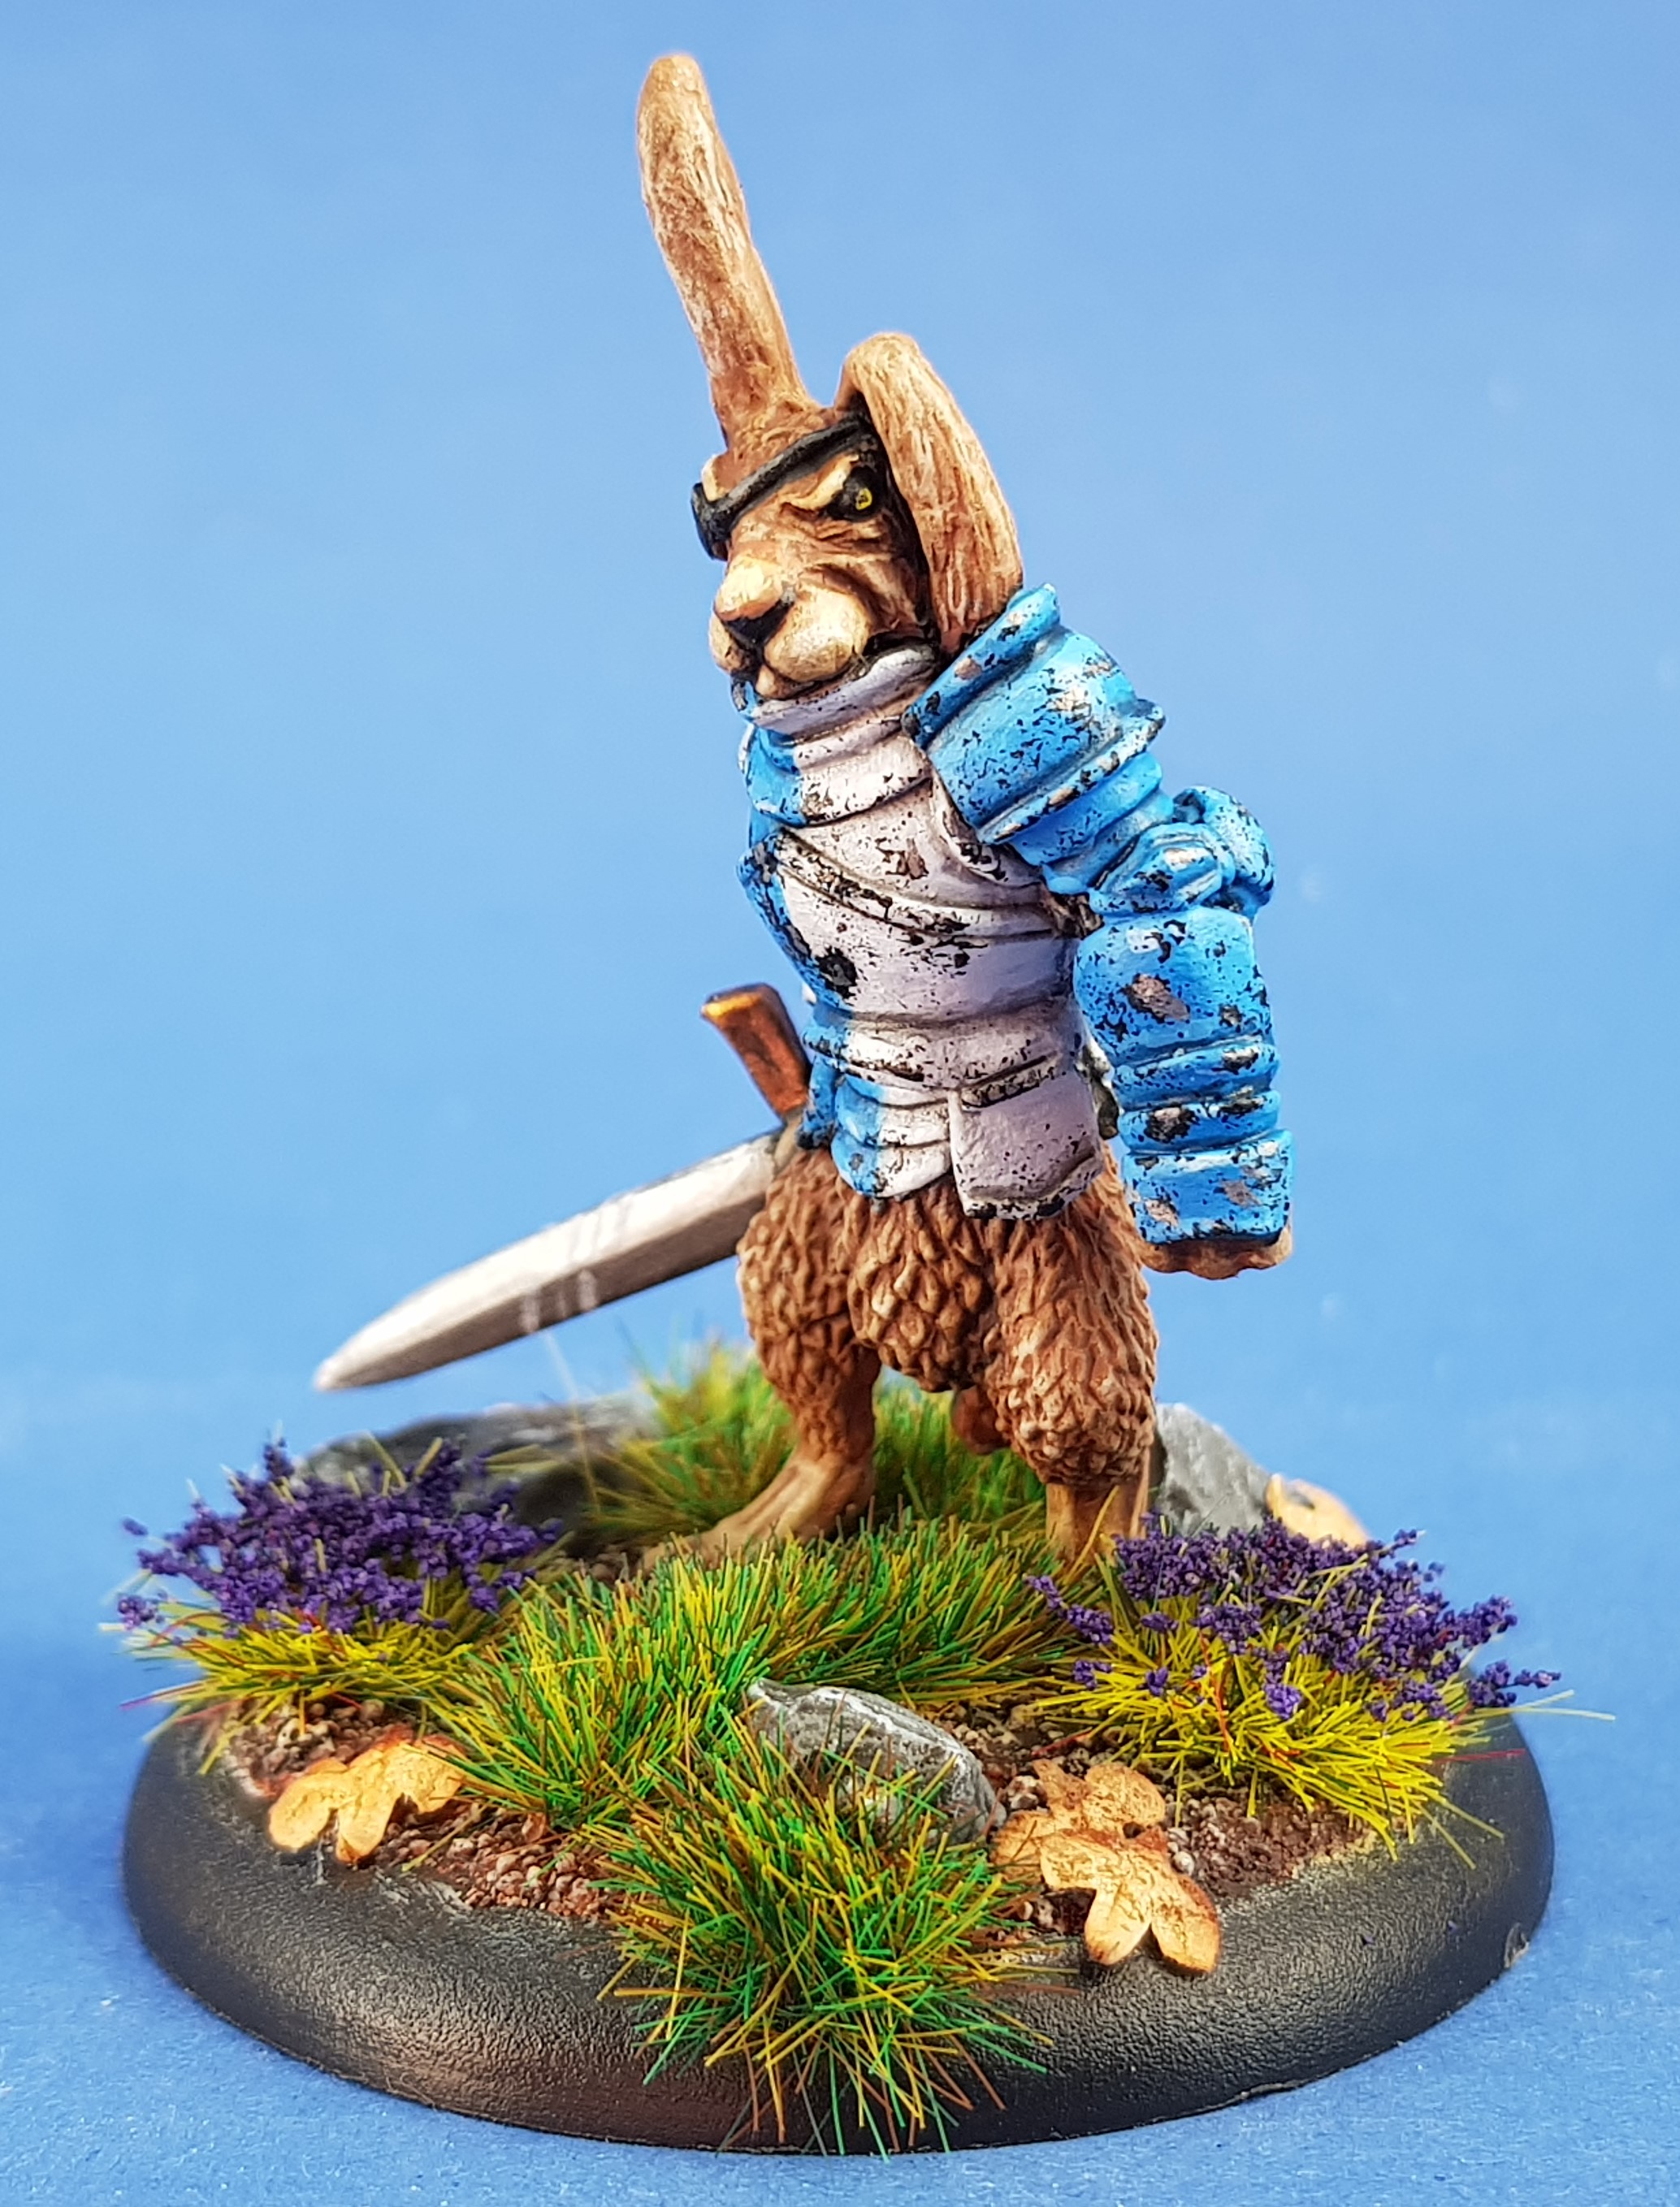

I managed to get the hare finished with a push last night and the sun drying the layers of the basing in record time today.
The armour was roughed up using a 50/50 mix of mahogany and black. I gripped a tiny bit of rough sponge in some forceps and dabbed it on. Then the same with some gun metal in the larger patches.
Today I are mostly been working on the armour!
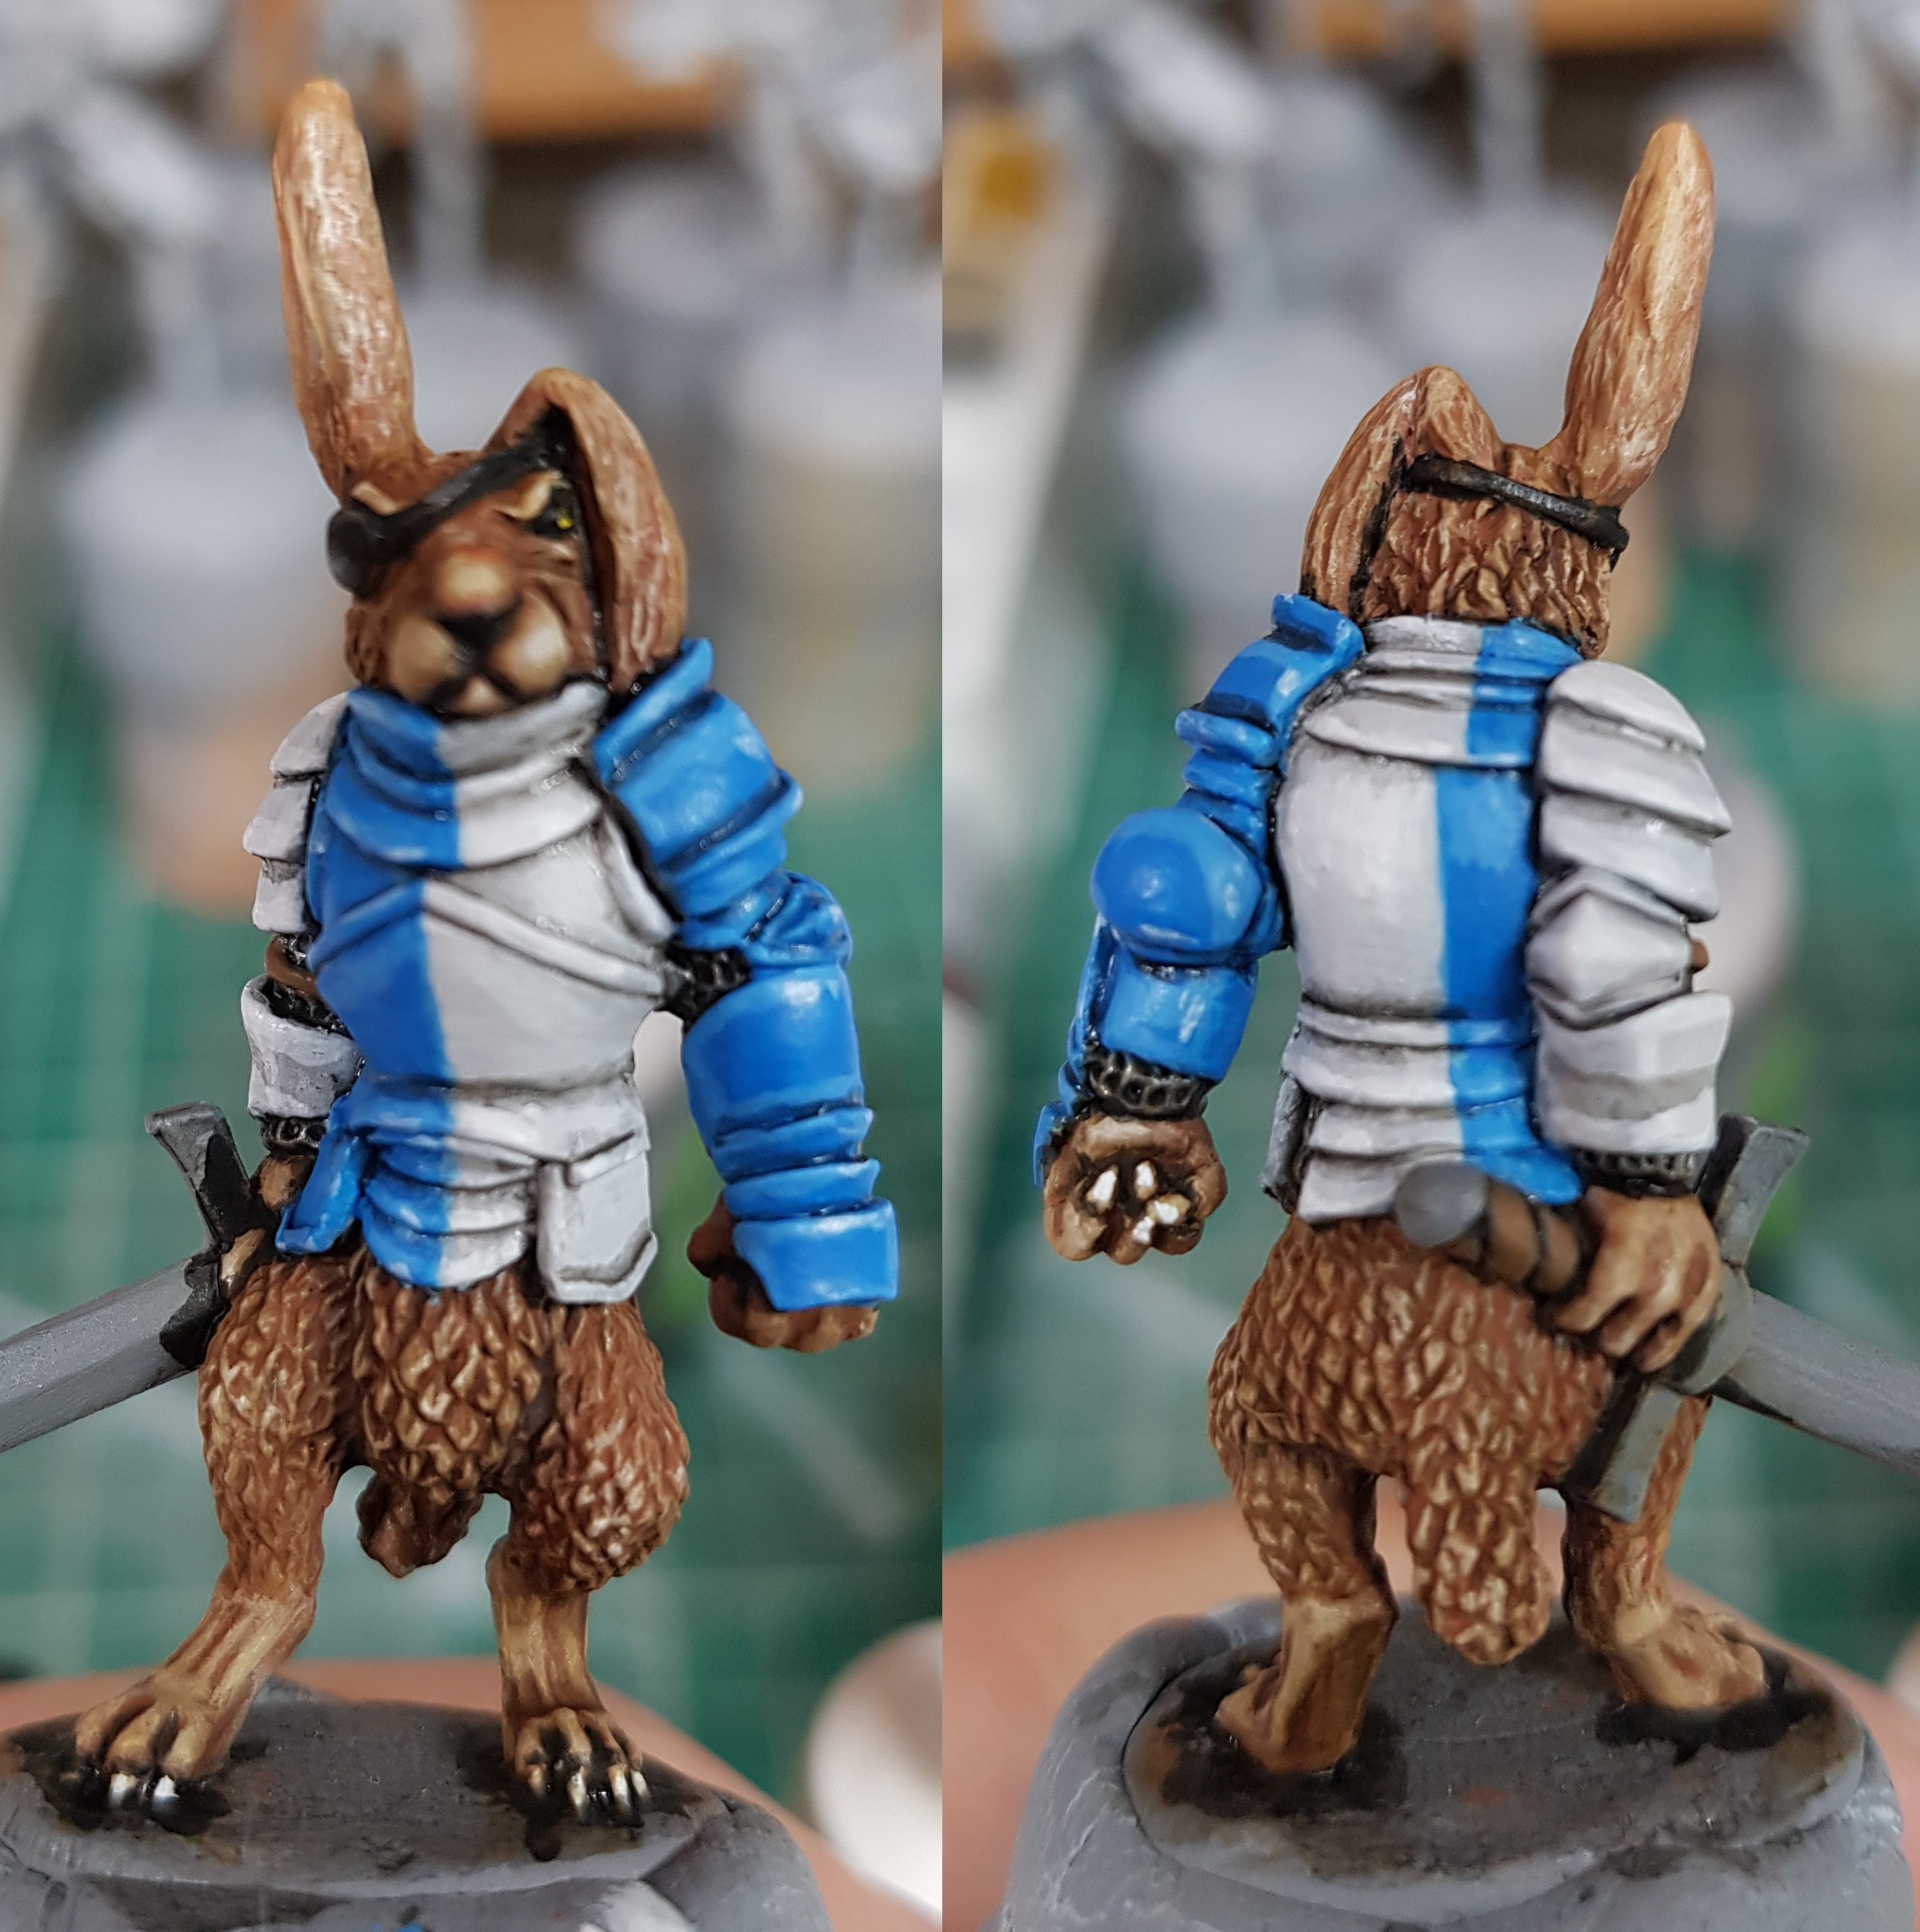
Had some time before work today so I have moved on with the armour, also repainted the nose.
Working on a hare

What do you paint after a tortoise? A hare of course.
I’m probably going to make this fella my leader, he looks mean enough. I have removed the raised chalice from the front of his armour and been working on the fury bits. Just realised I have done the nose wrong (all black, more like a dogs nose) so I’ll have to re-do that. As yet I’m not sure how to achieve the eye colour. Suggestions?
I’m planning on painting the armour in a blue and white painted look with battle damage.
1st Mini
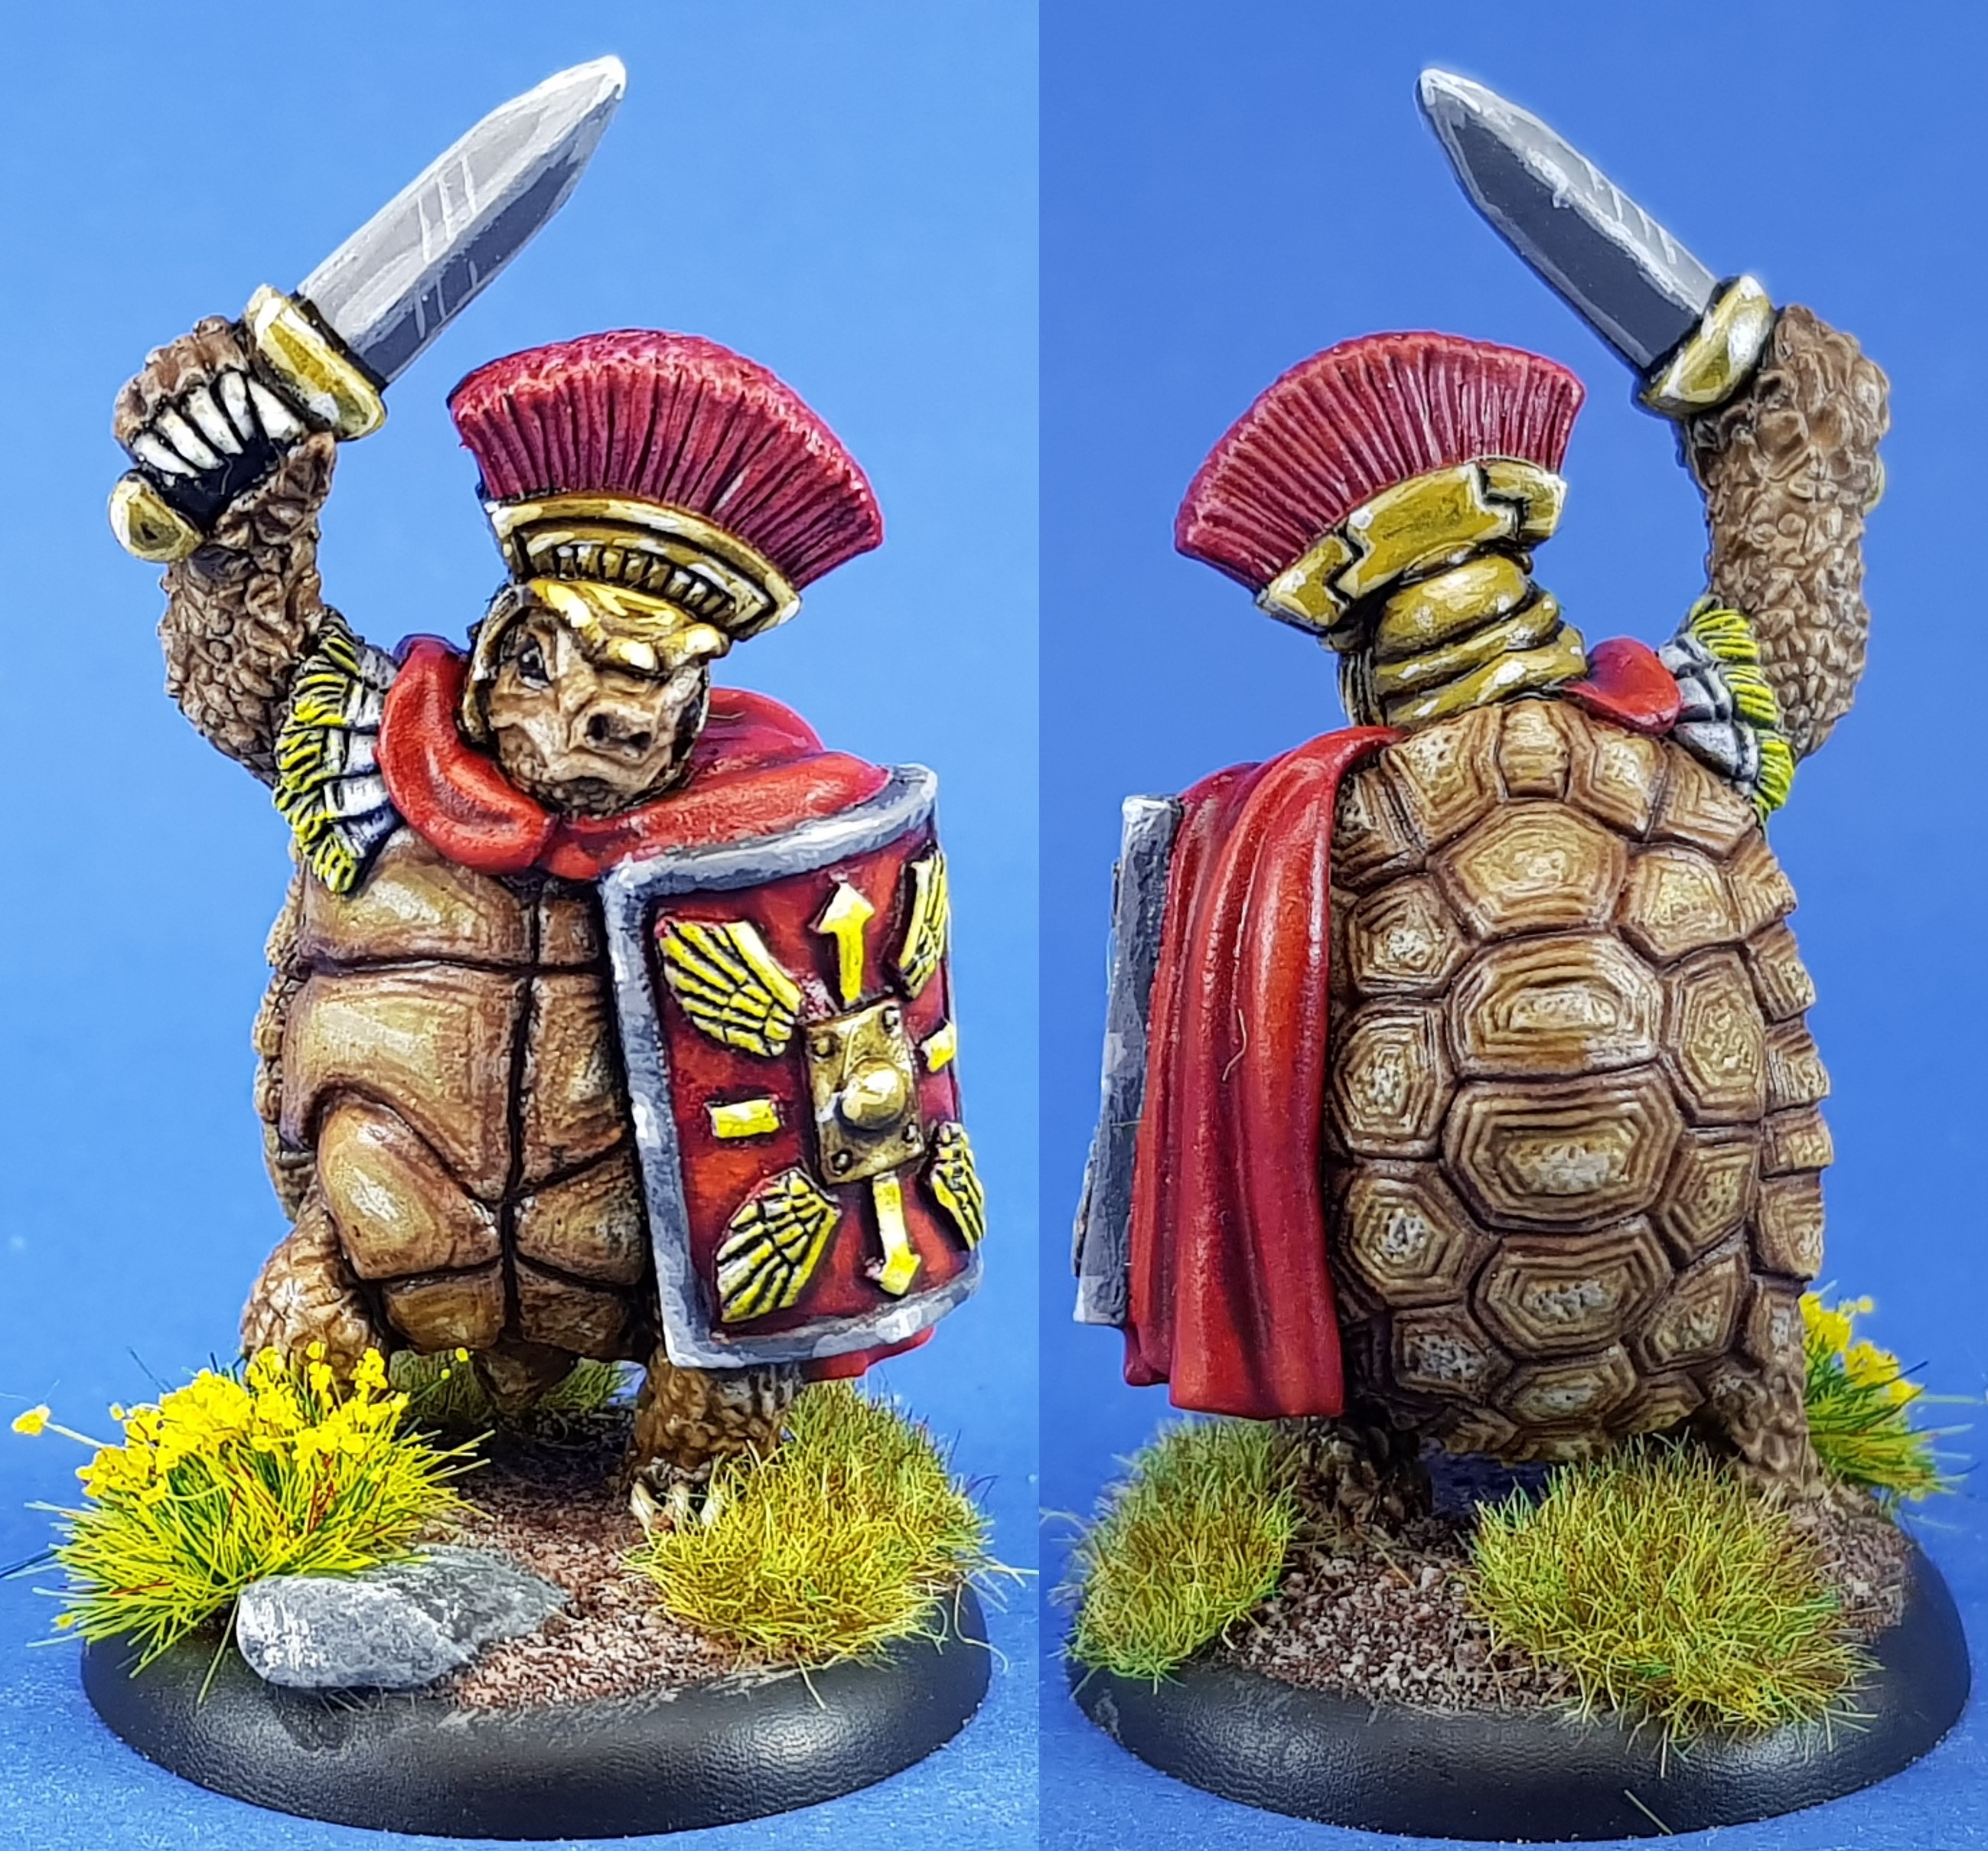 Brutus Testudo
I really didn’t know how this was going to come out never having painted tortoise shell before. I started with a thin coat of army painter Desert yellow, then working in decreasing bands around the panels, monster brown, leather brown and oak brown. The whole was given a dry brush with skeleton bone and a soft tone wash. I then pin washed dark tone into the deeper gaps and around the edges.
I have tried NMM on the sword, helmet and shield using vallejo’s NMM set. I need more practice and advice is welcome!
Enjoyed painting this guy so onto the next.


