![Perfect Call Of Duty-Style Miniatures? Wargames Atlantic’s Operators Review [7 Days Early Access]](https://images.beastsofwar.com/2026/02/unboxing-wargames-atlantic-operators-coverimage-225-127.jpg)


Appartmant Street ‘Terrain Challenge’


Recommendations: 643
About the Project
Due to a life getting in the way i never have time to enter any of the Terrain Challenges or even get involver in the forums as much as i like, and still don't have the time. so i thought for my Terrain Challenge why not let it build itself!! about two years ago i backed a Kickstarter by Z1Design whom had designed a modular modern day, 3D printable Buildings. I've only just got my 3D printer going and why not whits I'm at work have it build my Terrain Challenge for me HA HA HA. i hope to keep you all updater on my progress, troubles and successes as my work horse of a 3D printer churns through the filament and i can show what can be made. keeping it on topic. i will be making a tourist of American city style apartments t use in my games off Walking Dead, DC Universe and Fallout. the major thing i will need to contend with is time, for me to have time to keep up with the project and the time it takes to print everything to build this project. hope you all keep with me on my first ever Project, Terrain Challenge and first major forum posts.
Related Game: The Walking Dead: All Out War
Related Genre: Post-Apocalyptic
This Project is Active
Tag it..
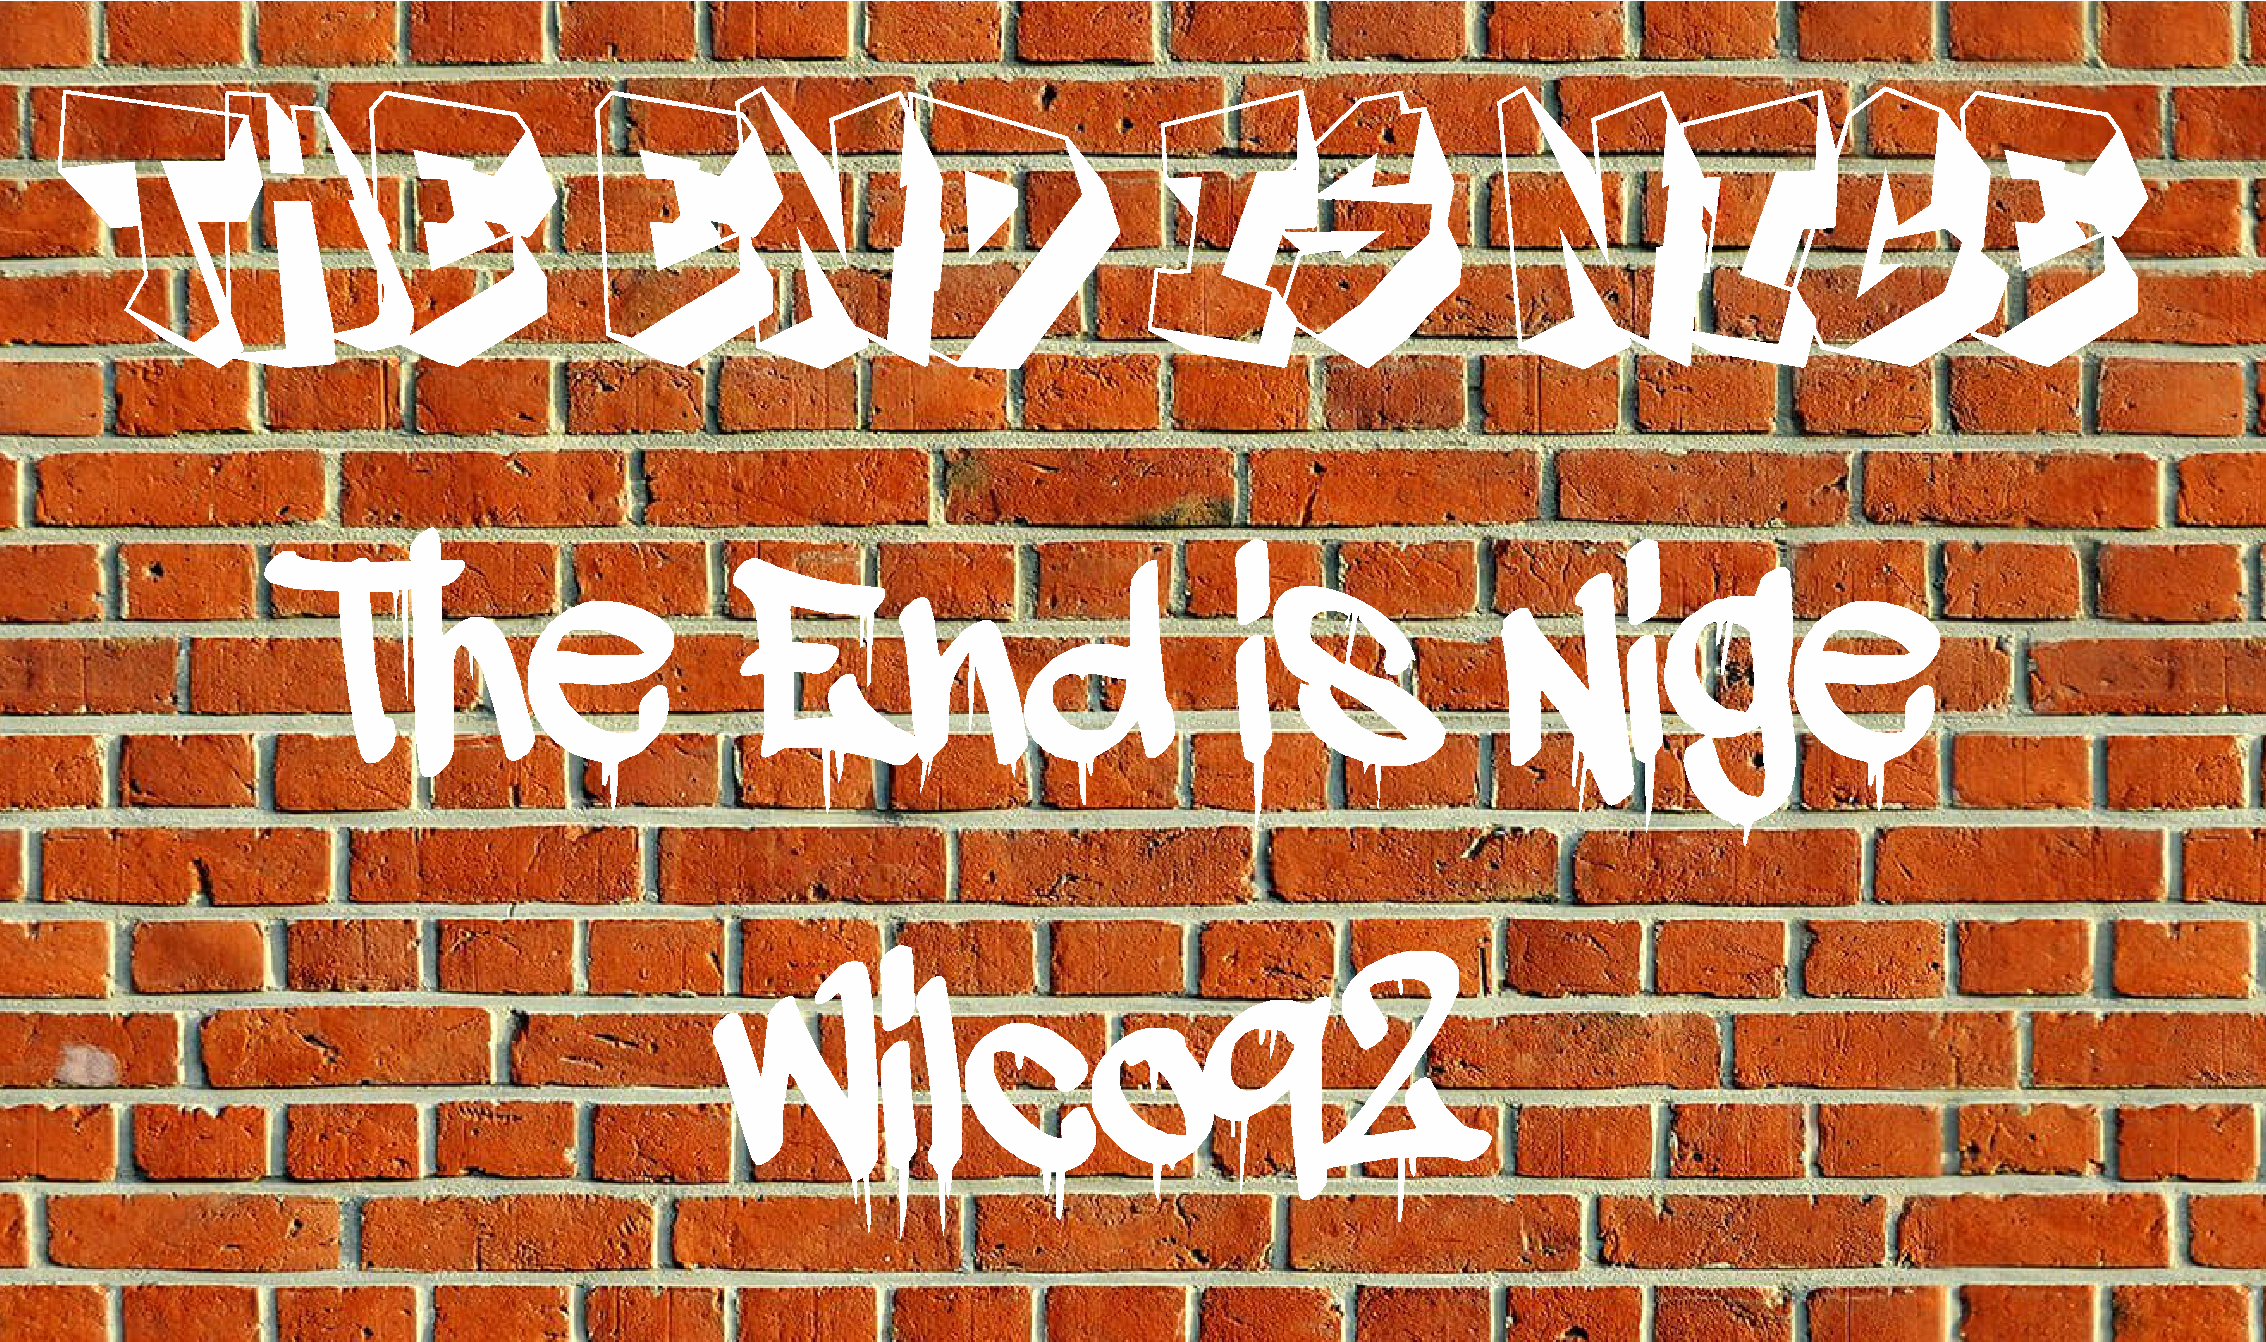
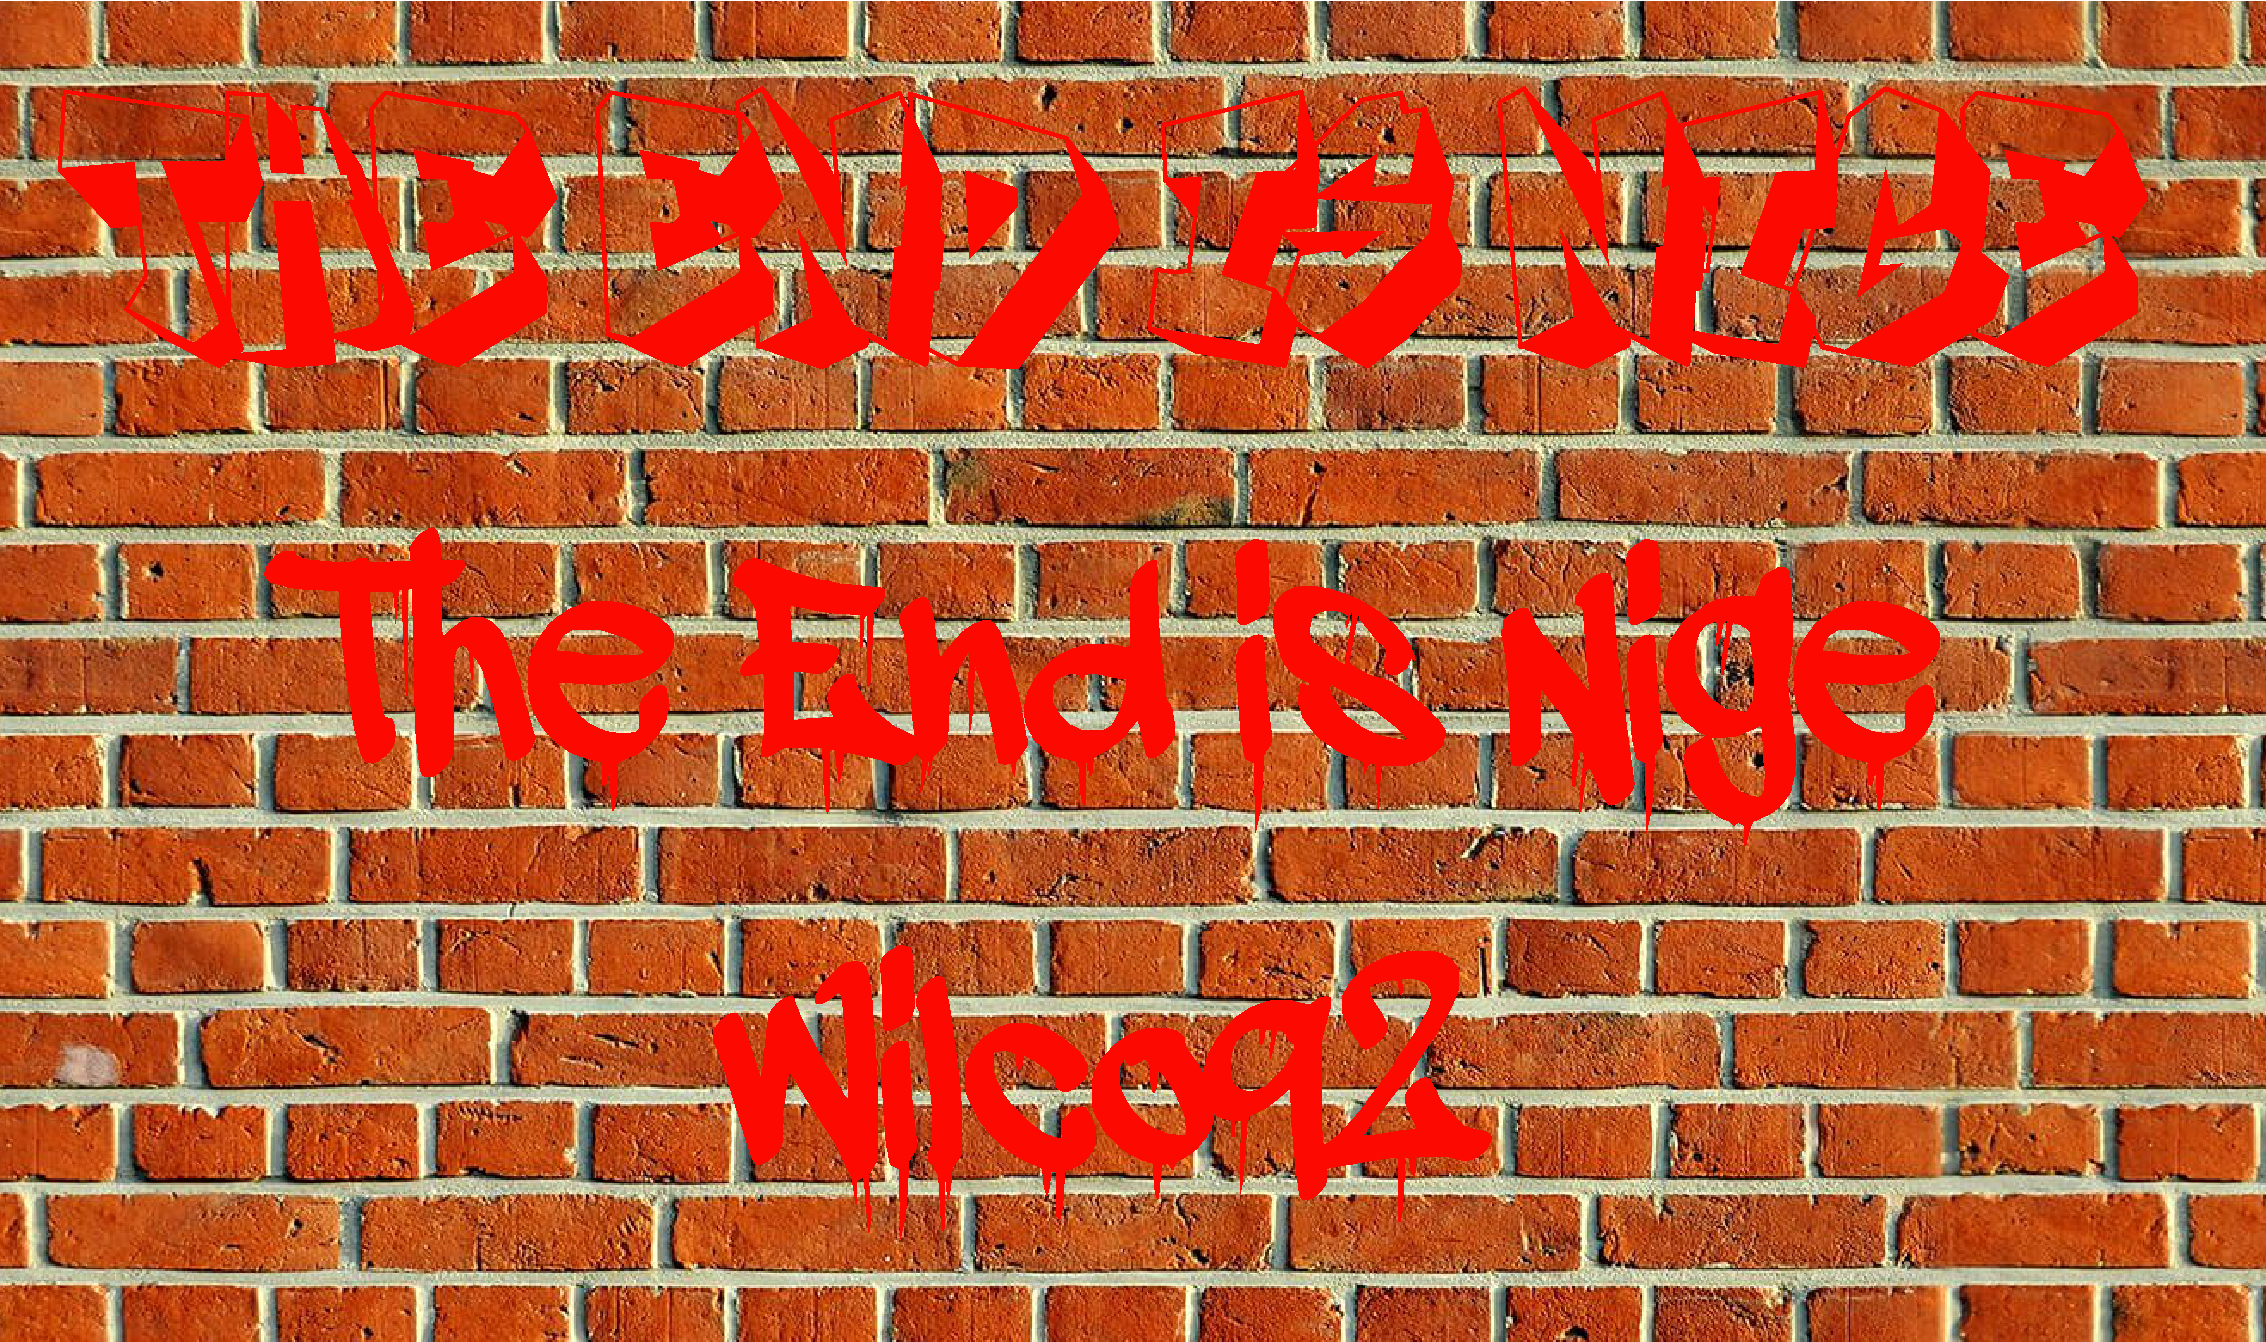
Been looking at doing some custom graffiti to put on my buildings.
i played with some graffiti fonts on my computer, think having a graffiti saying “the end is nigh” because of the terrain challenge title.
want to make a tag like graffiti with my user name wilco92 like a personal detail but like the idea of it in red but it dosing look good on the red brick so need to find the best colour surface to print that on.
plan to put the most of the graffiti in the ally between the building and not as many in the fronts.

Progress Report..
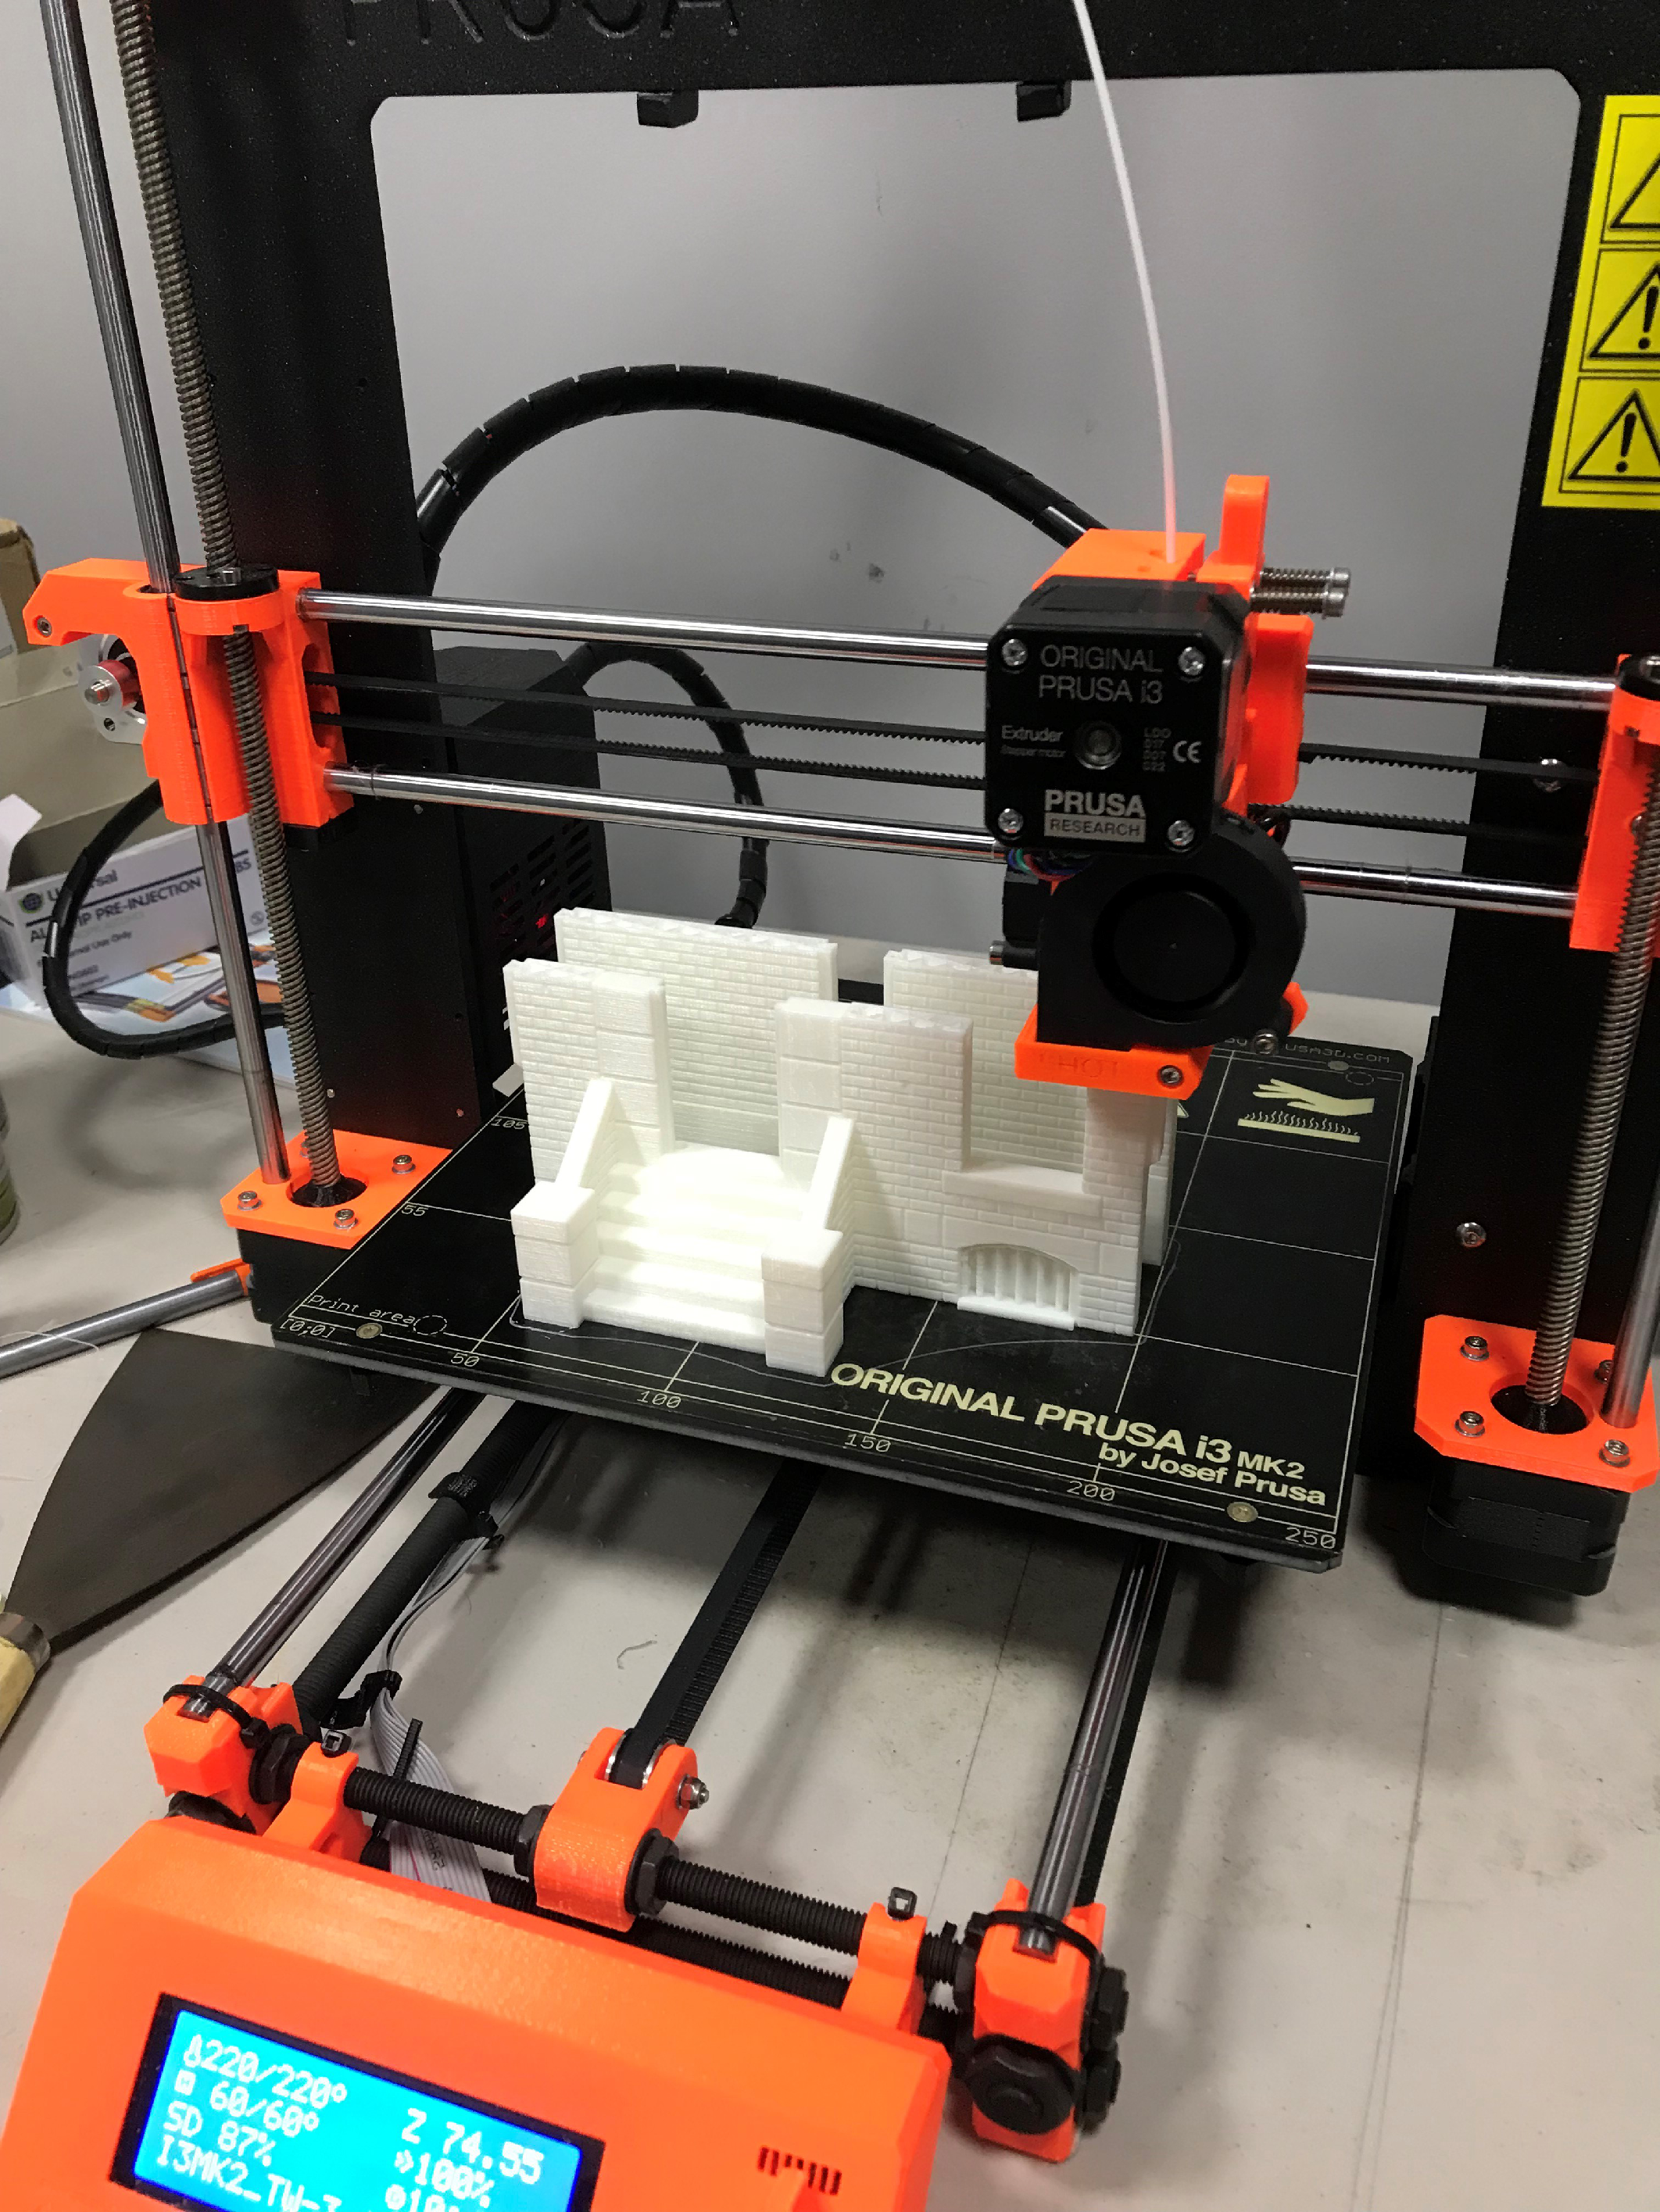
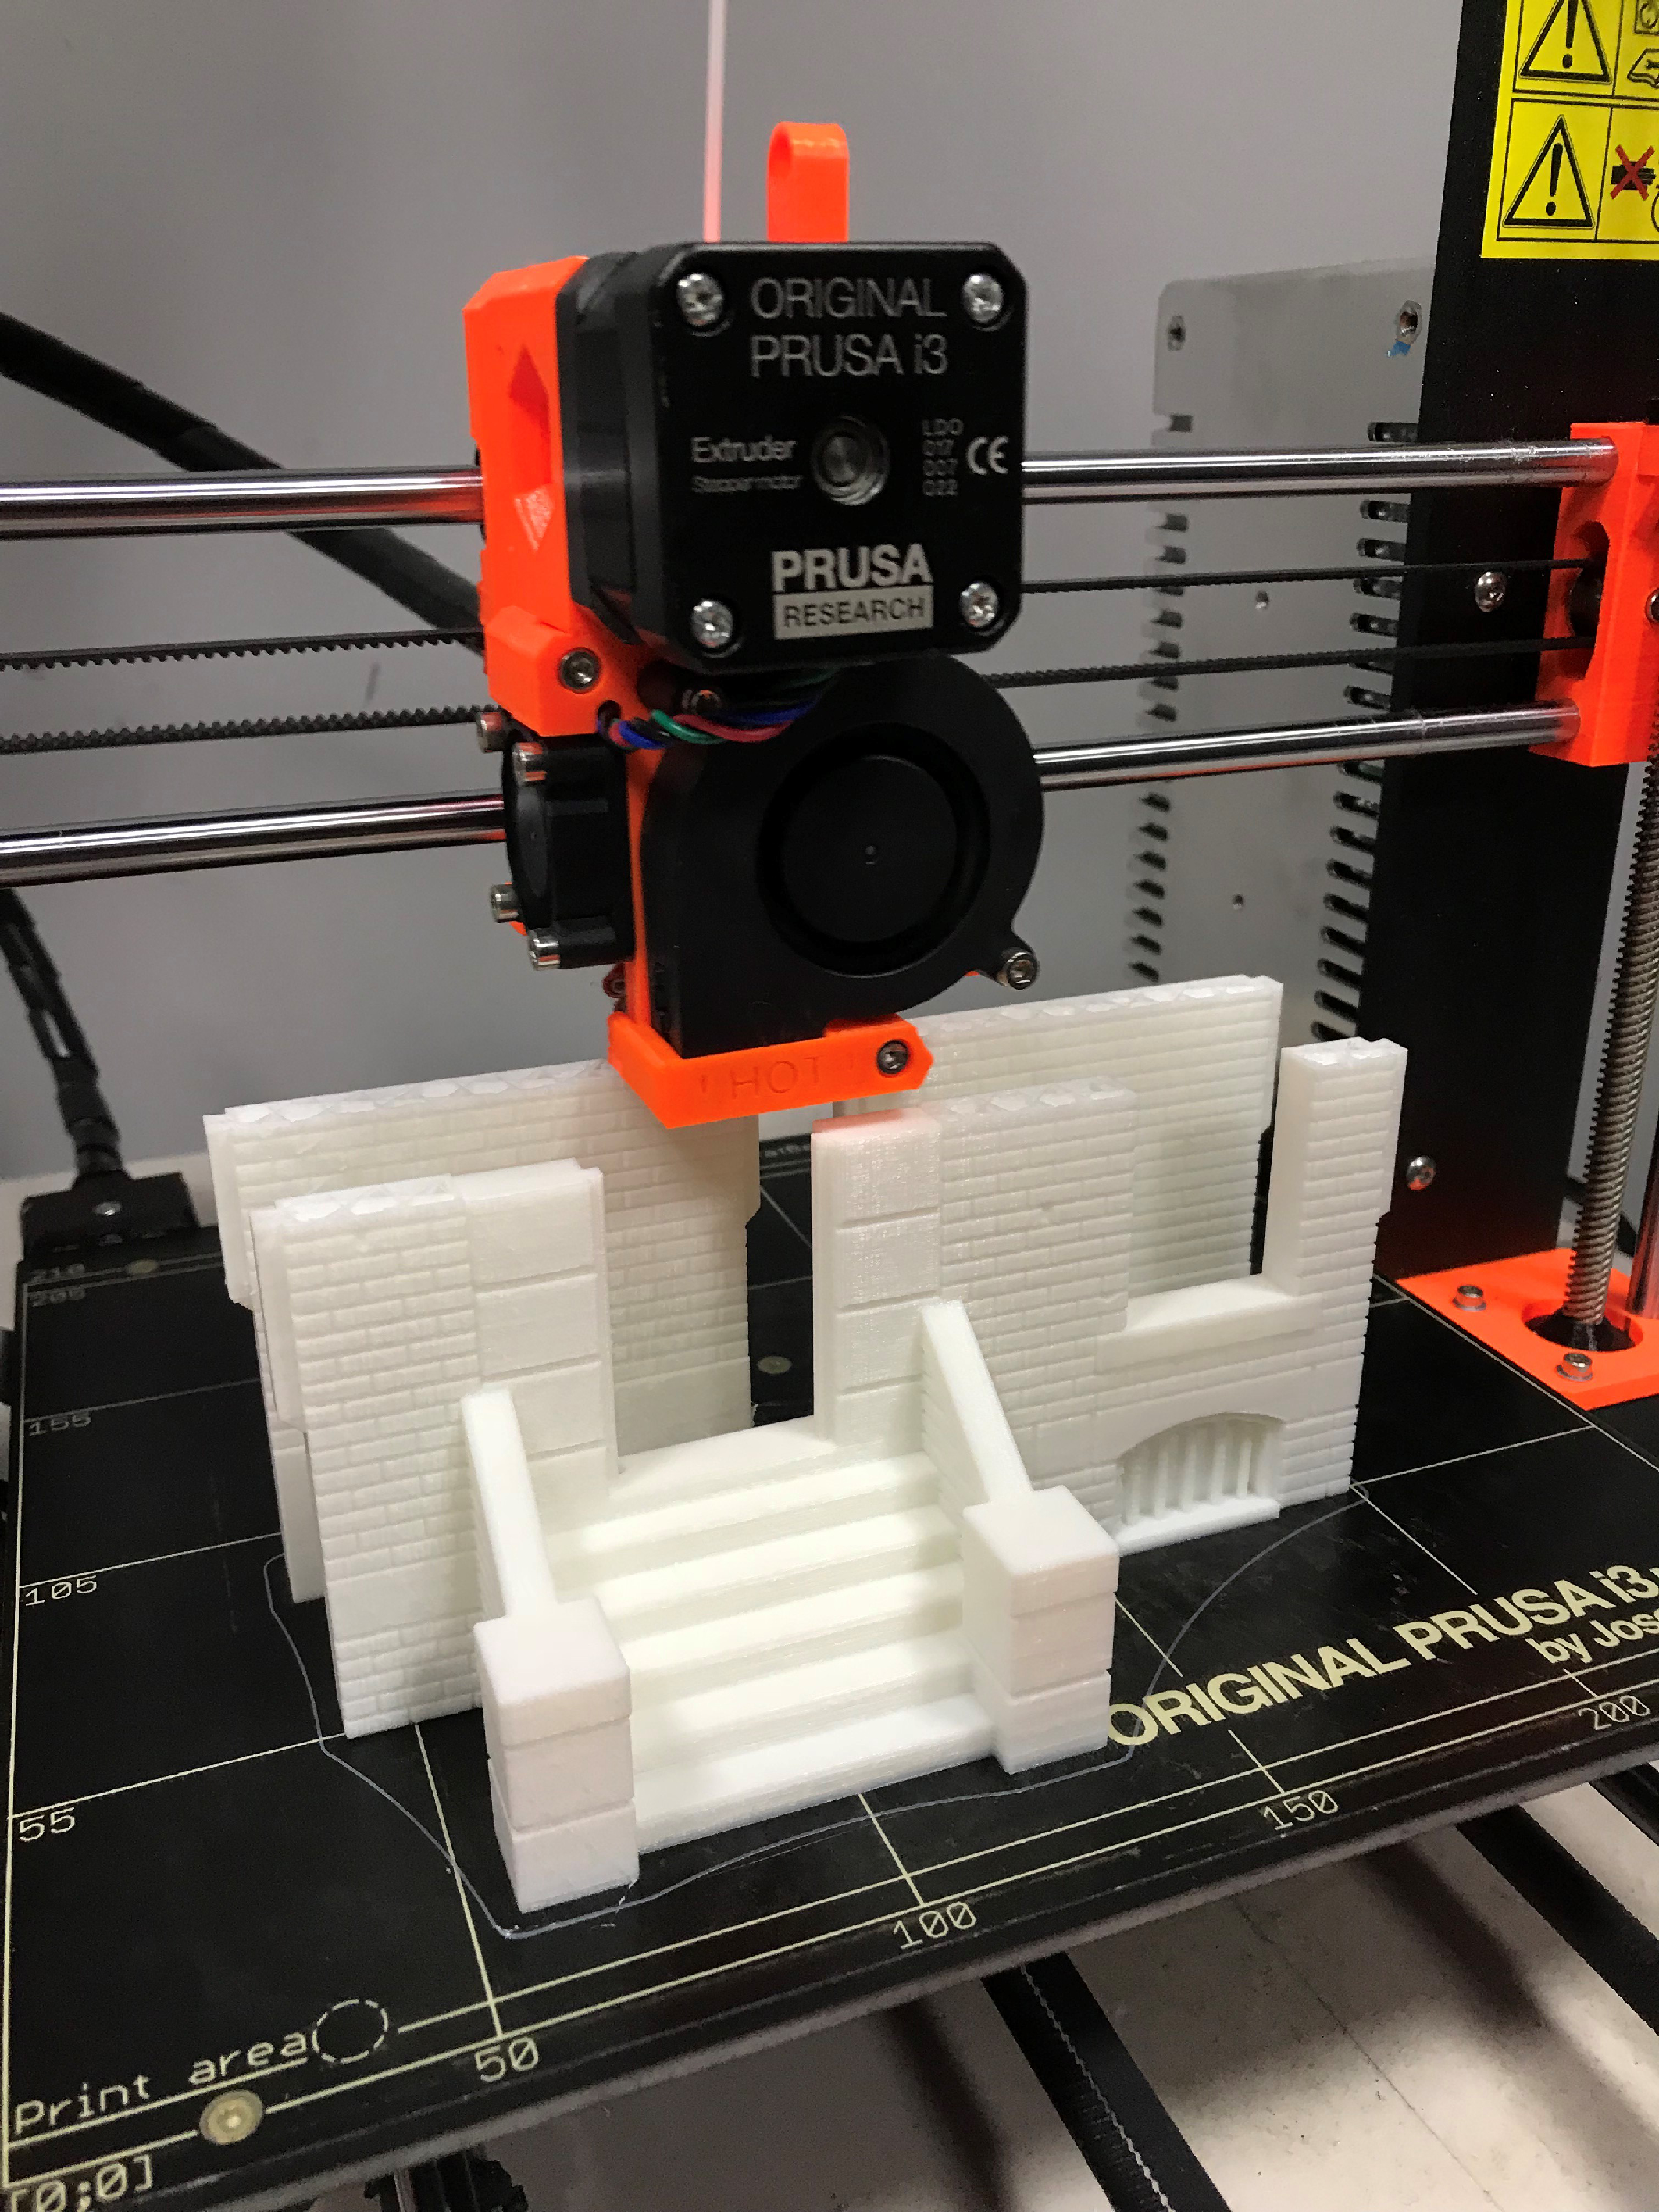
So I’m just starting to print building number three.
with how many hours it takes to print each of the buildings and the amount of stuff left to do once thats done like painting, detailing and scatter, i think i must accept with the time remaning i can only build three buildings and not four.
So i plan to build two then an ally then a third and when painting all three i will continue to print the fourth but this will be intermittent as the 3D printer will be needed to print things like room furniture and side walk accessories.
ill leave you today with what i am printing today, the first part of the third building.
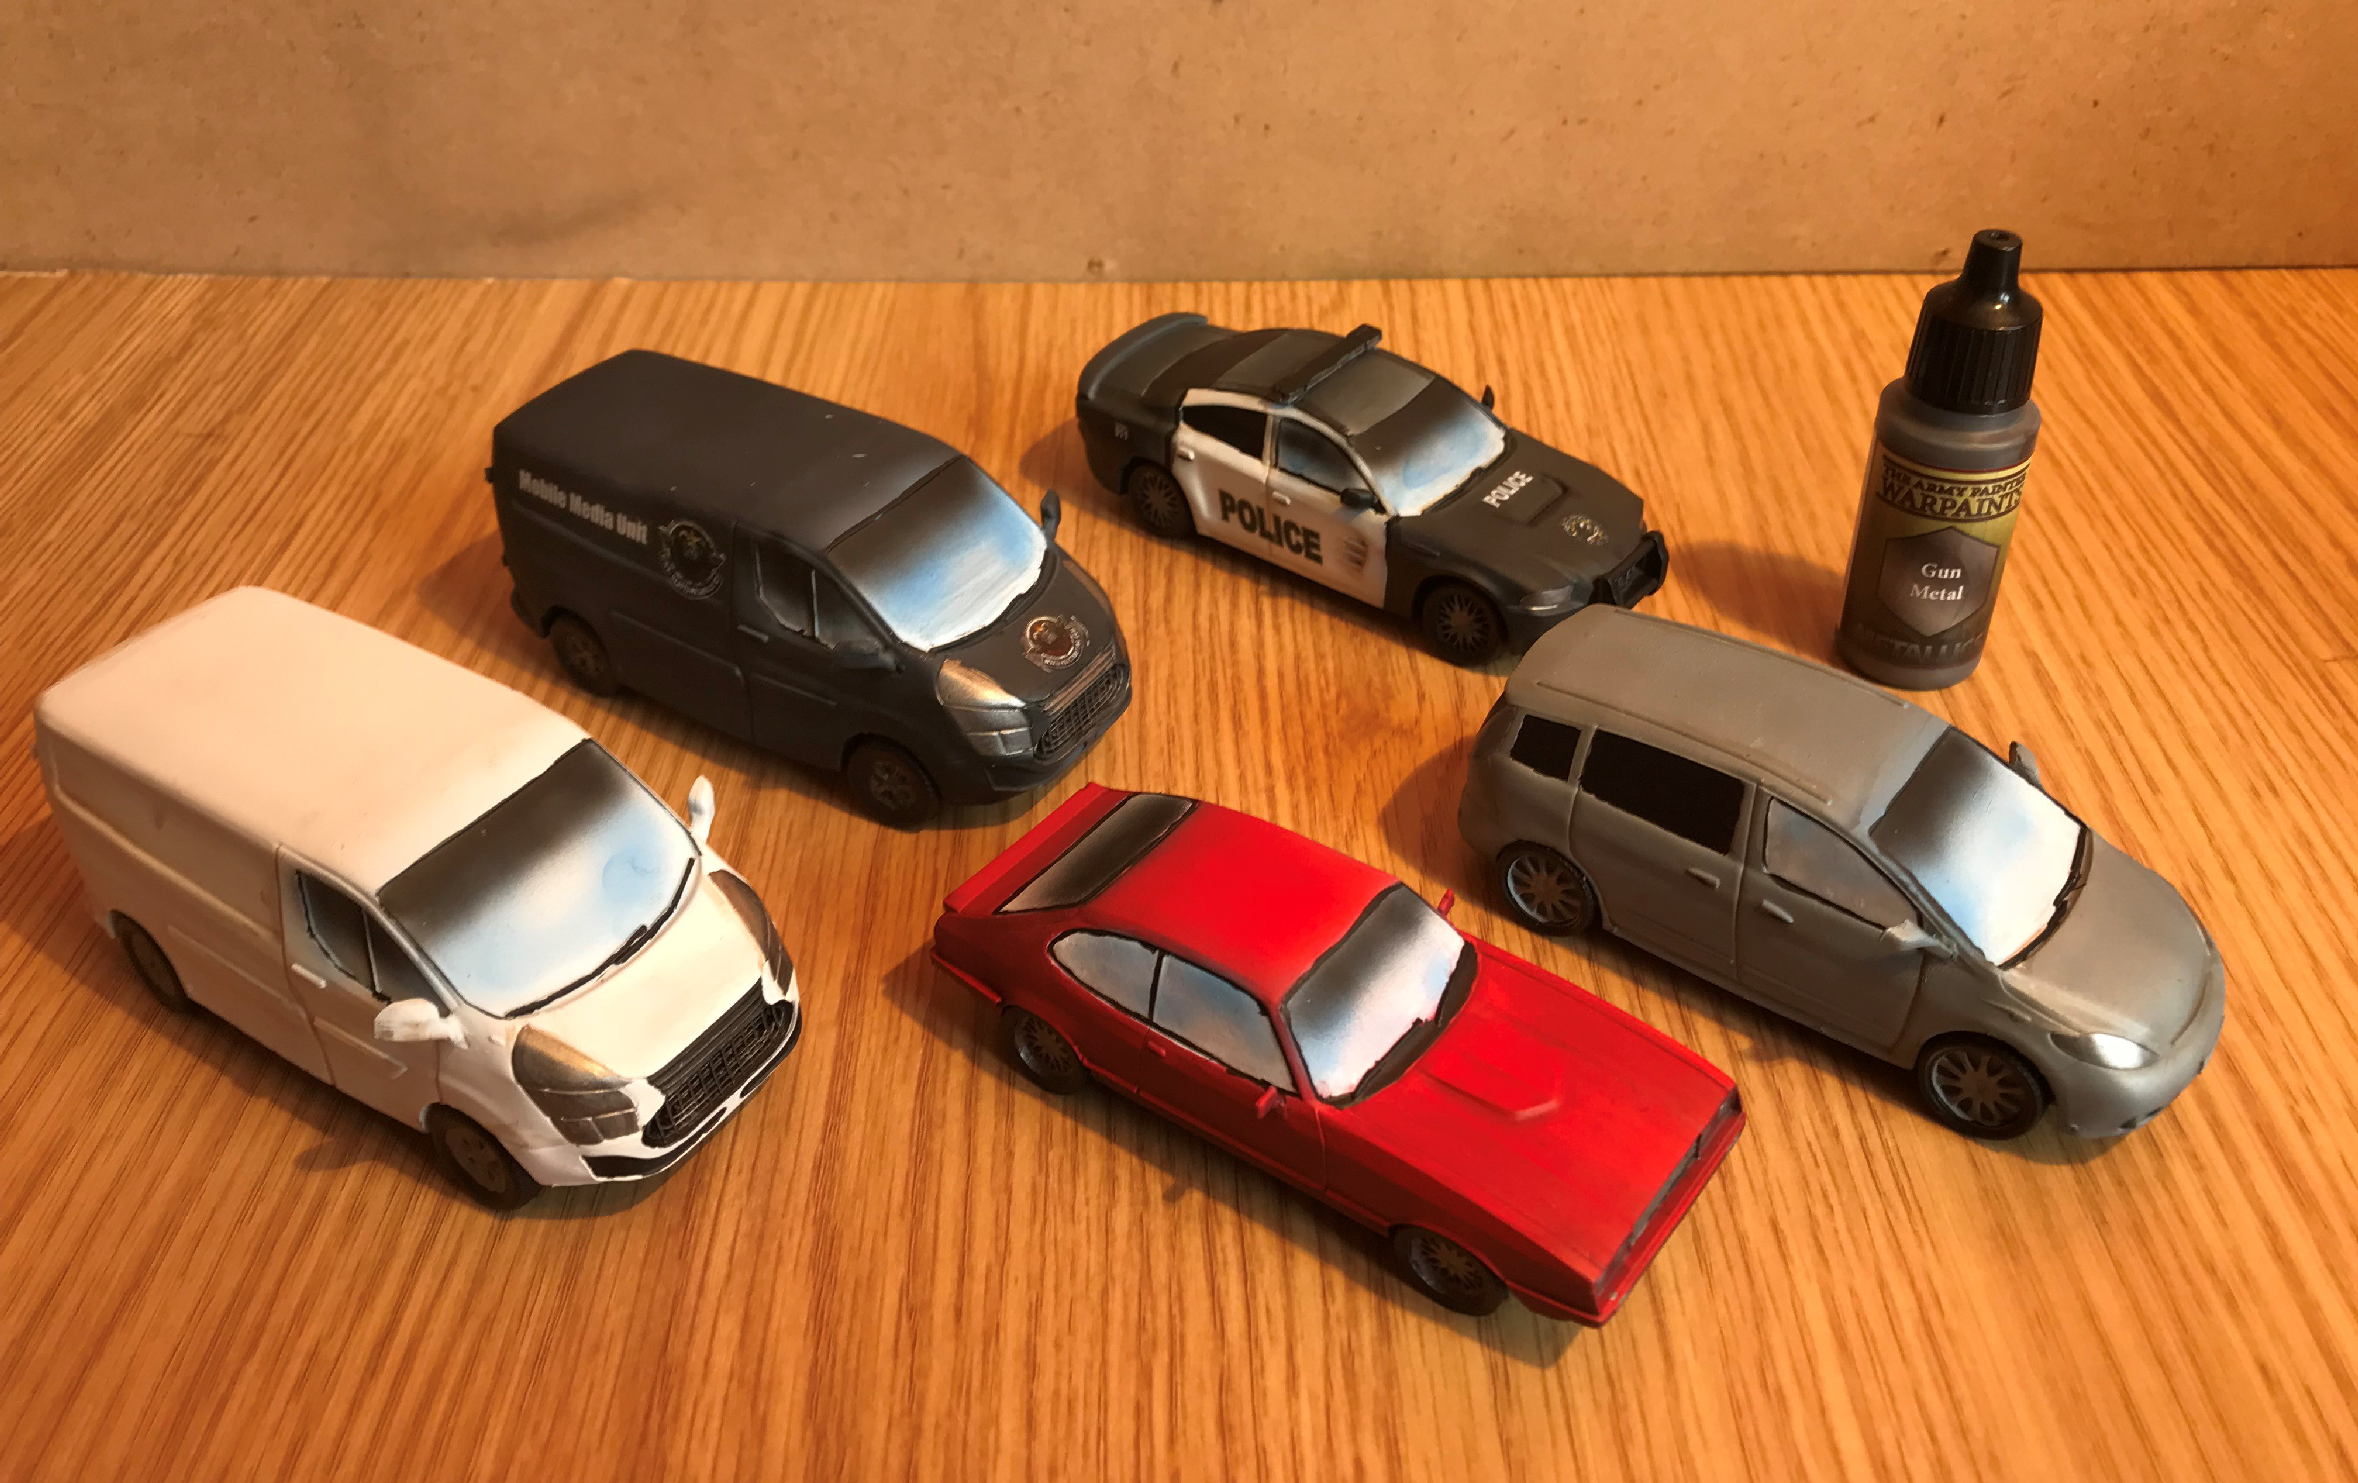
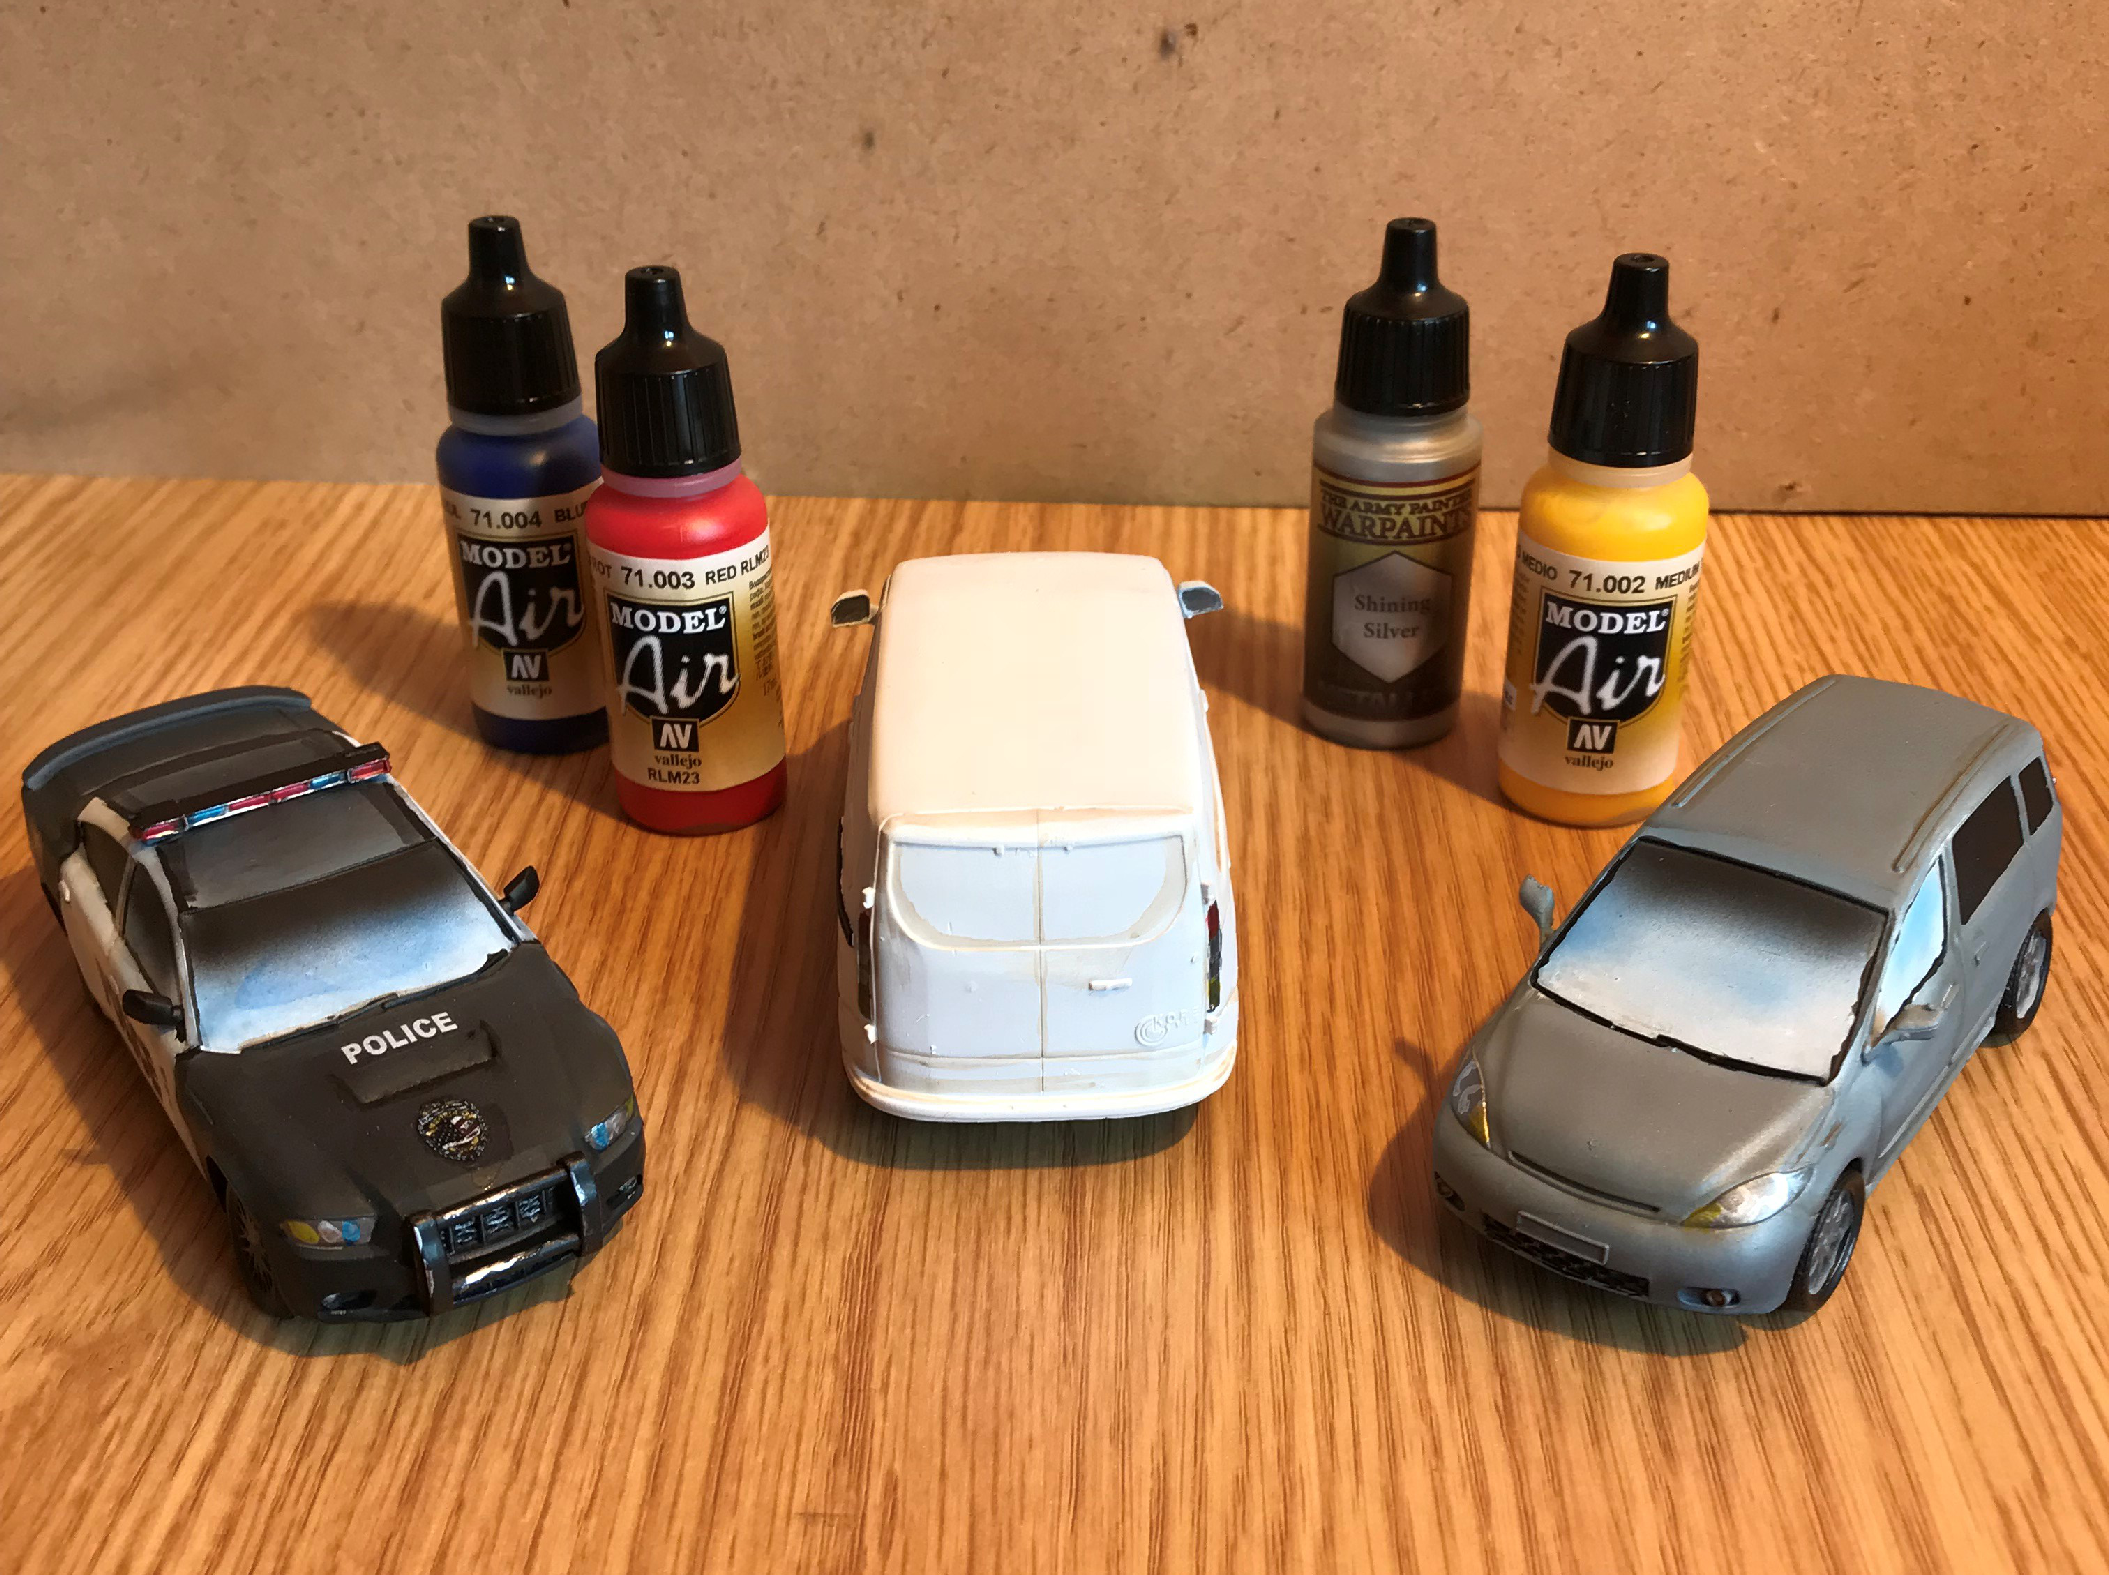
Let there be Head Lights..
To end the day i painted up the head lights and rear lights on my cars and vans.
I used a Dark silver highlighted with Shining Silver as a bace for all the lights.
I then added Colours to the silver using the Valjo Air Range as its a lot thiner to coat over the silver. love the effect of the silver showing under the colours.
Starting to Walk the Path...
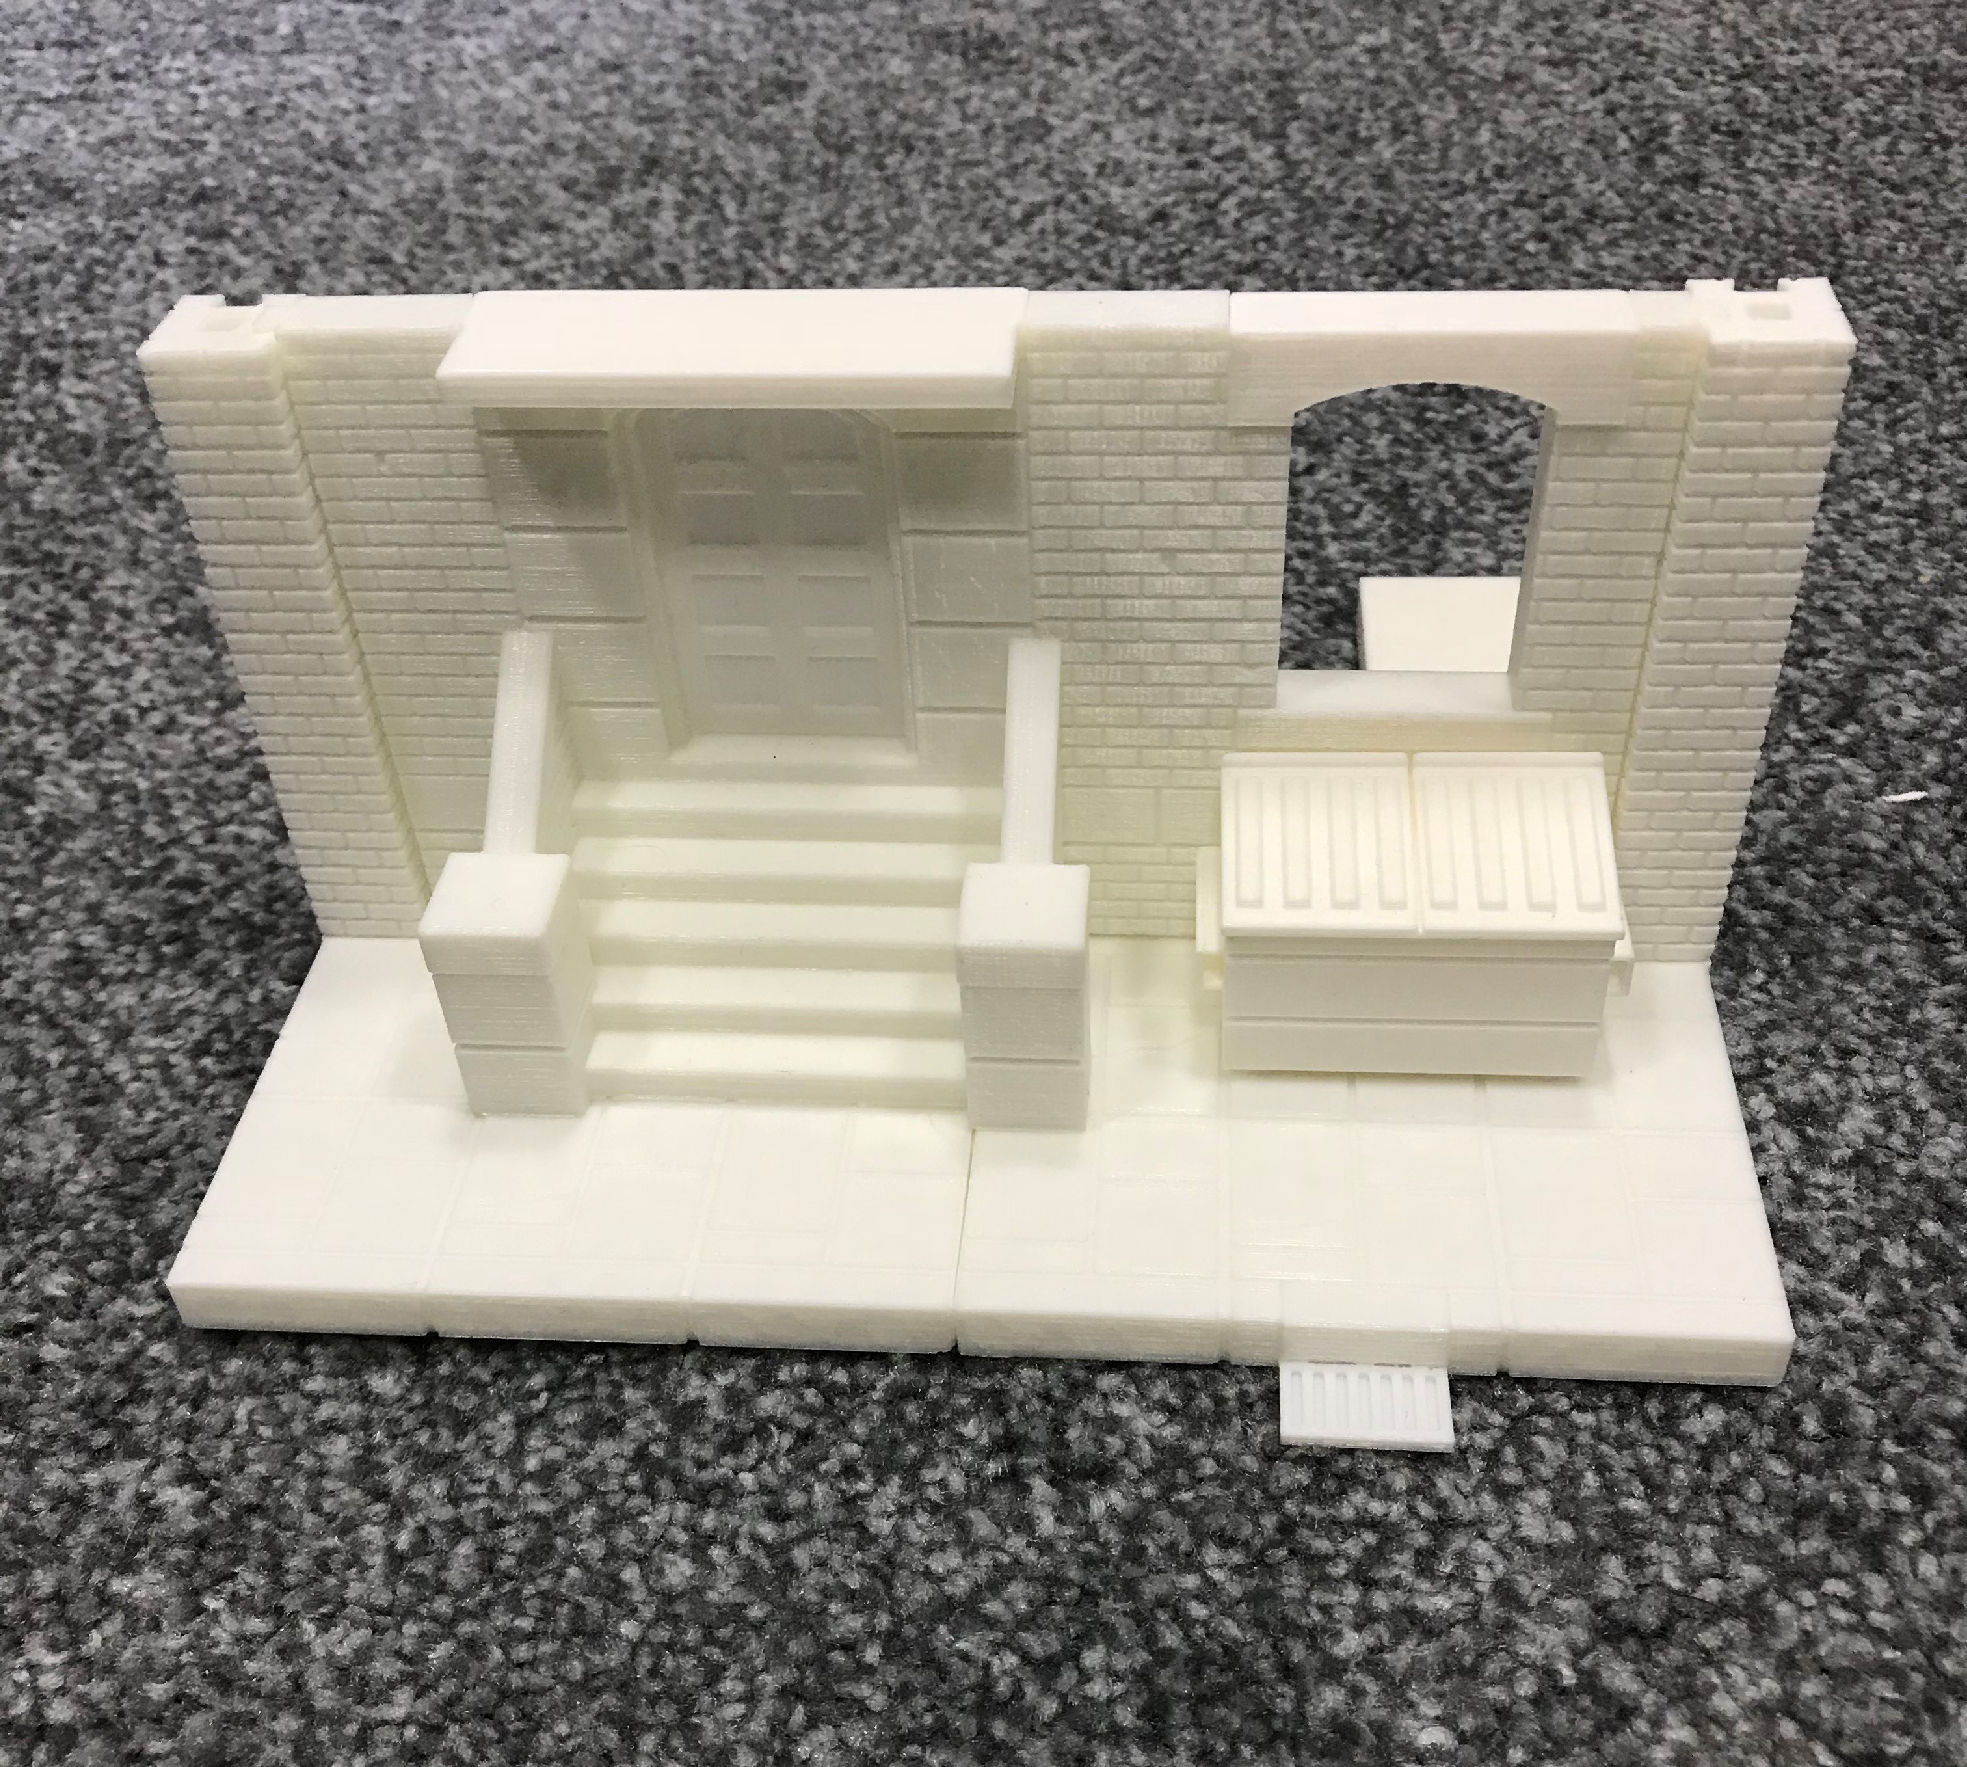
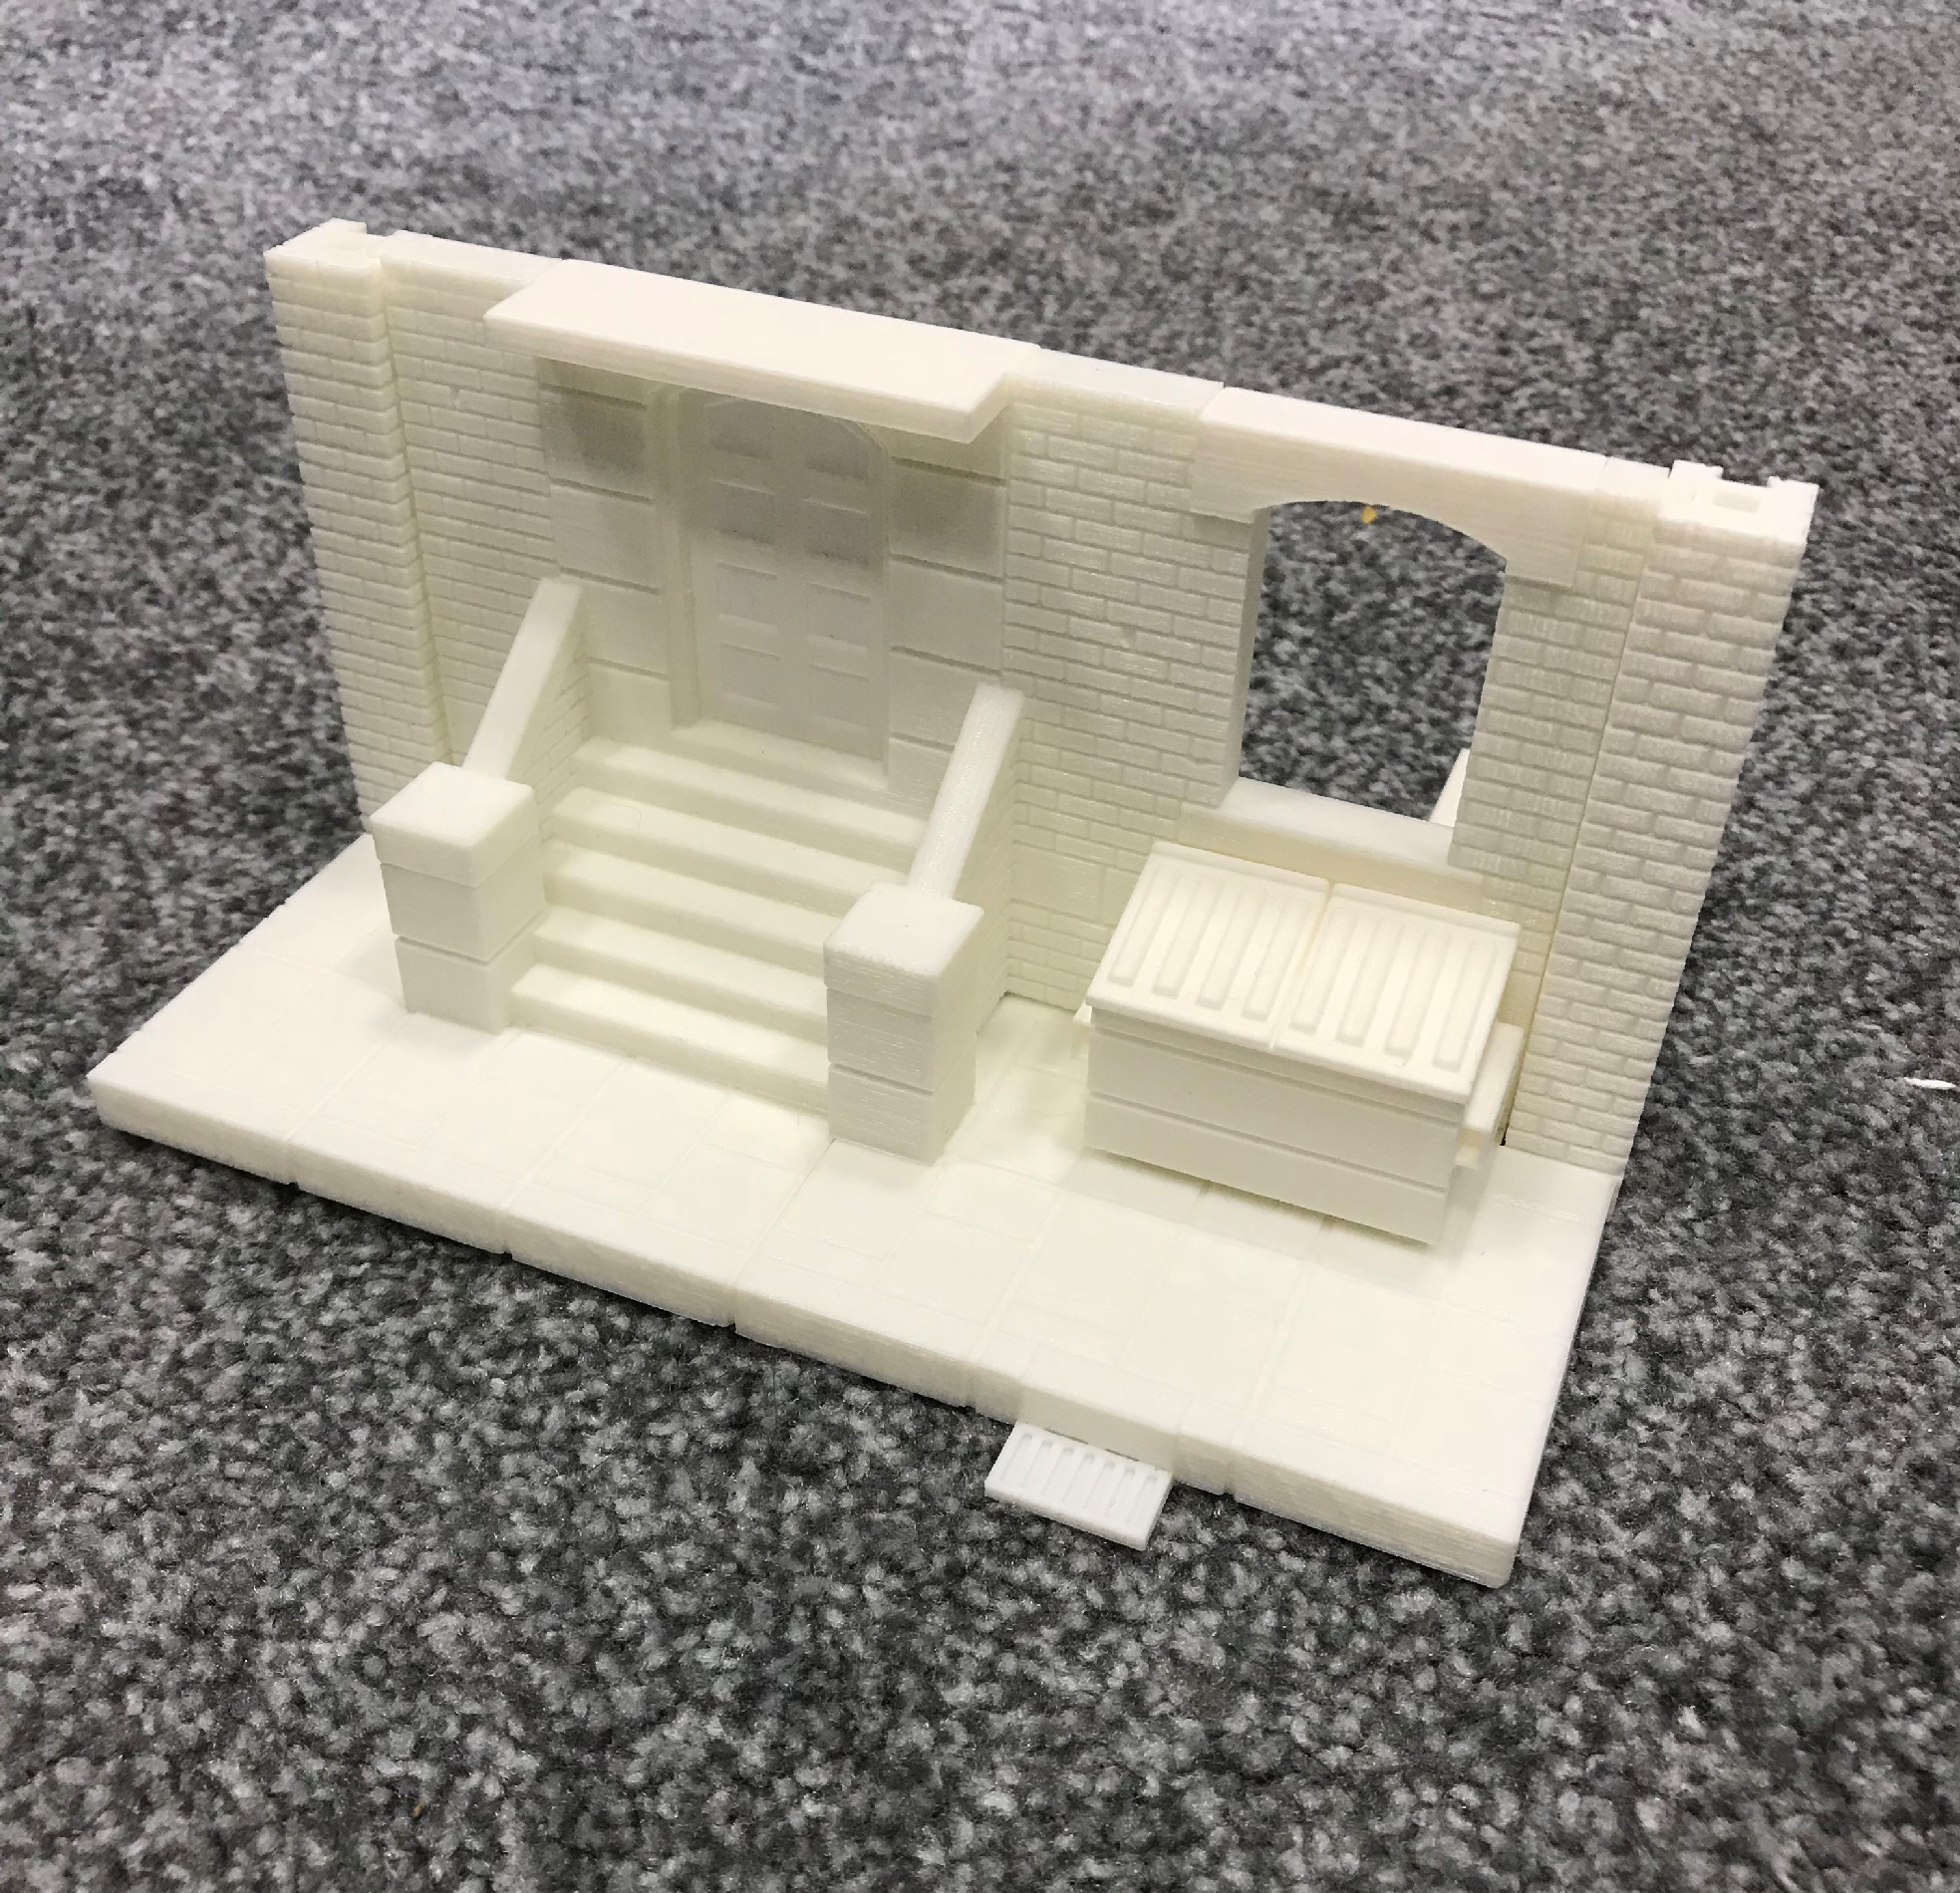
Im finally looking at the Side walk to add to the front of my Buildings.
one of the big things I’ve had to decide was am i printing tiles for the side walk that dose or dose not have road as apart of the side walk.
I decided finally to go without the roads as i plan to play the buildings on a mat with roads, this allows me more freedom to move the buildings on the table so i have more accessibility to make great tables.
One issues i have is the curves seem to high to the cars but after lots of hum and haring i decided to go this way with the sidewalk only.
i will soon put up some images of the buildings on the mat i plan to use so you can see what i mean about the ability to move the buildings on the table more freely.
Transfer Time..
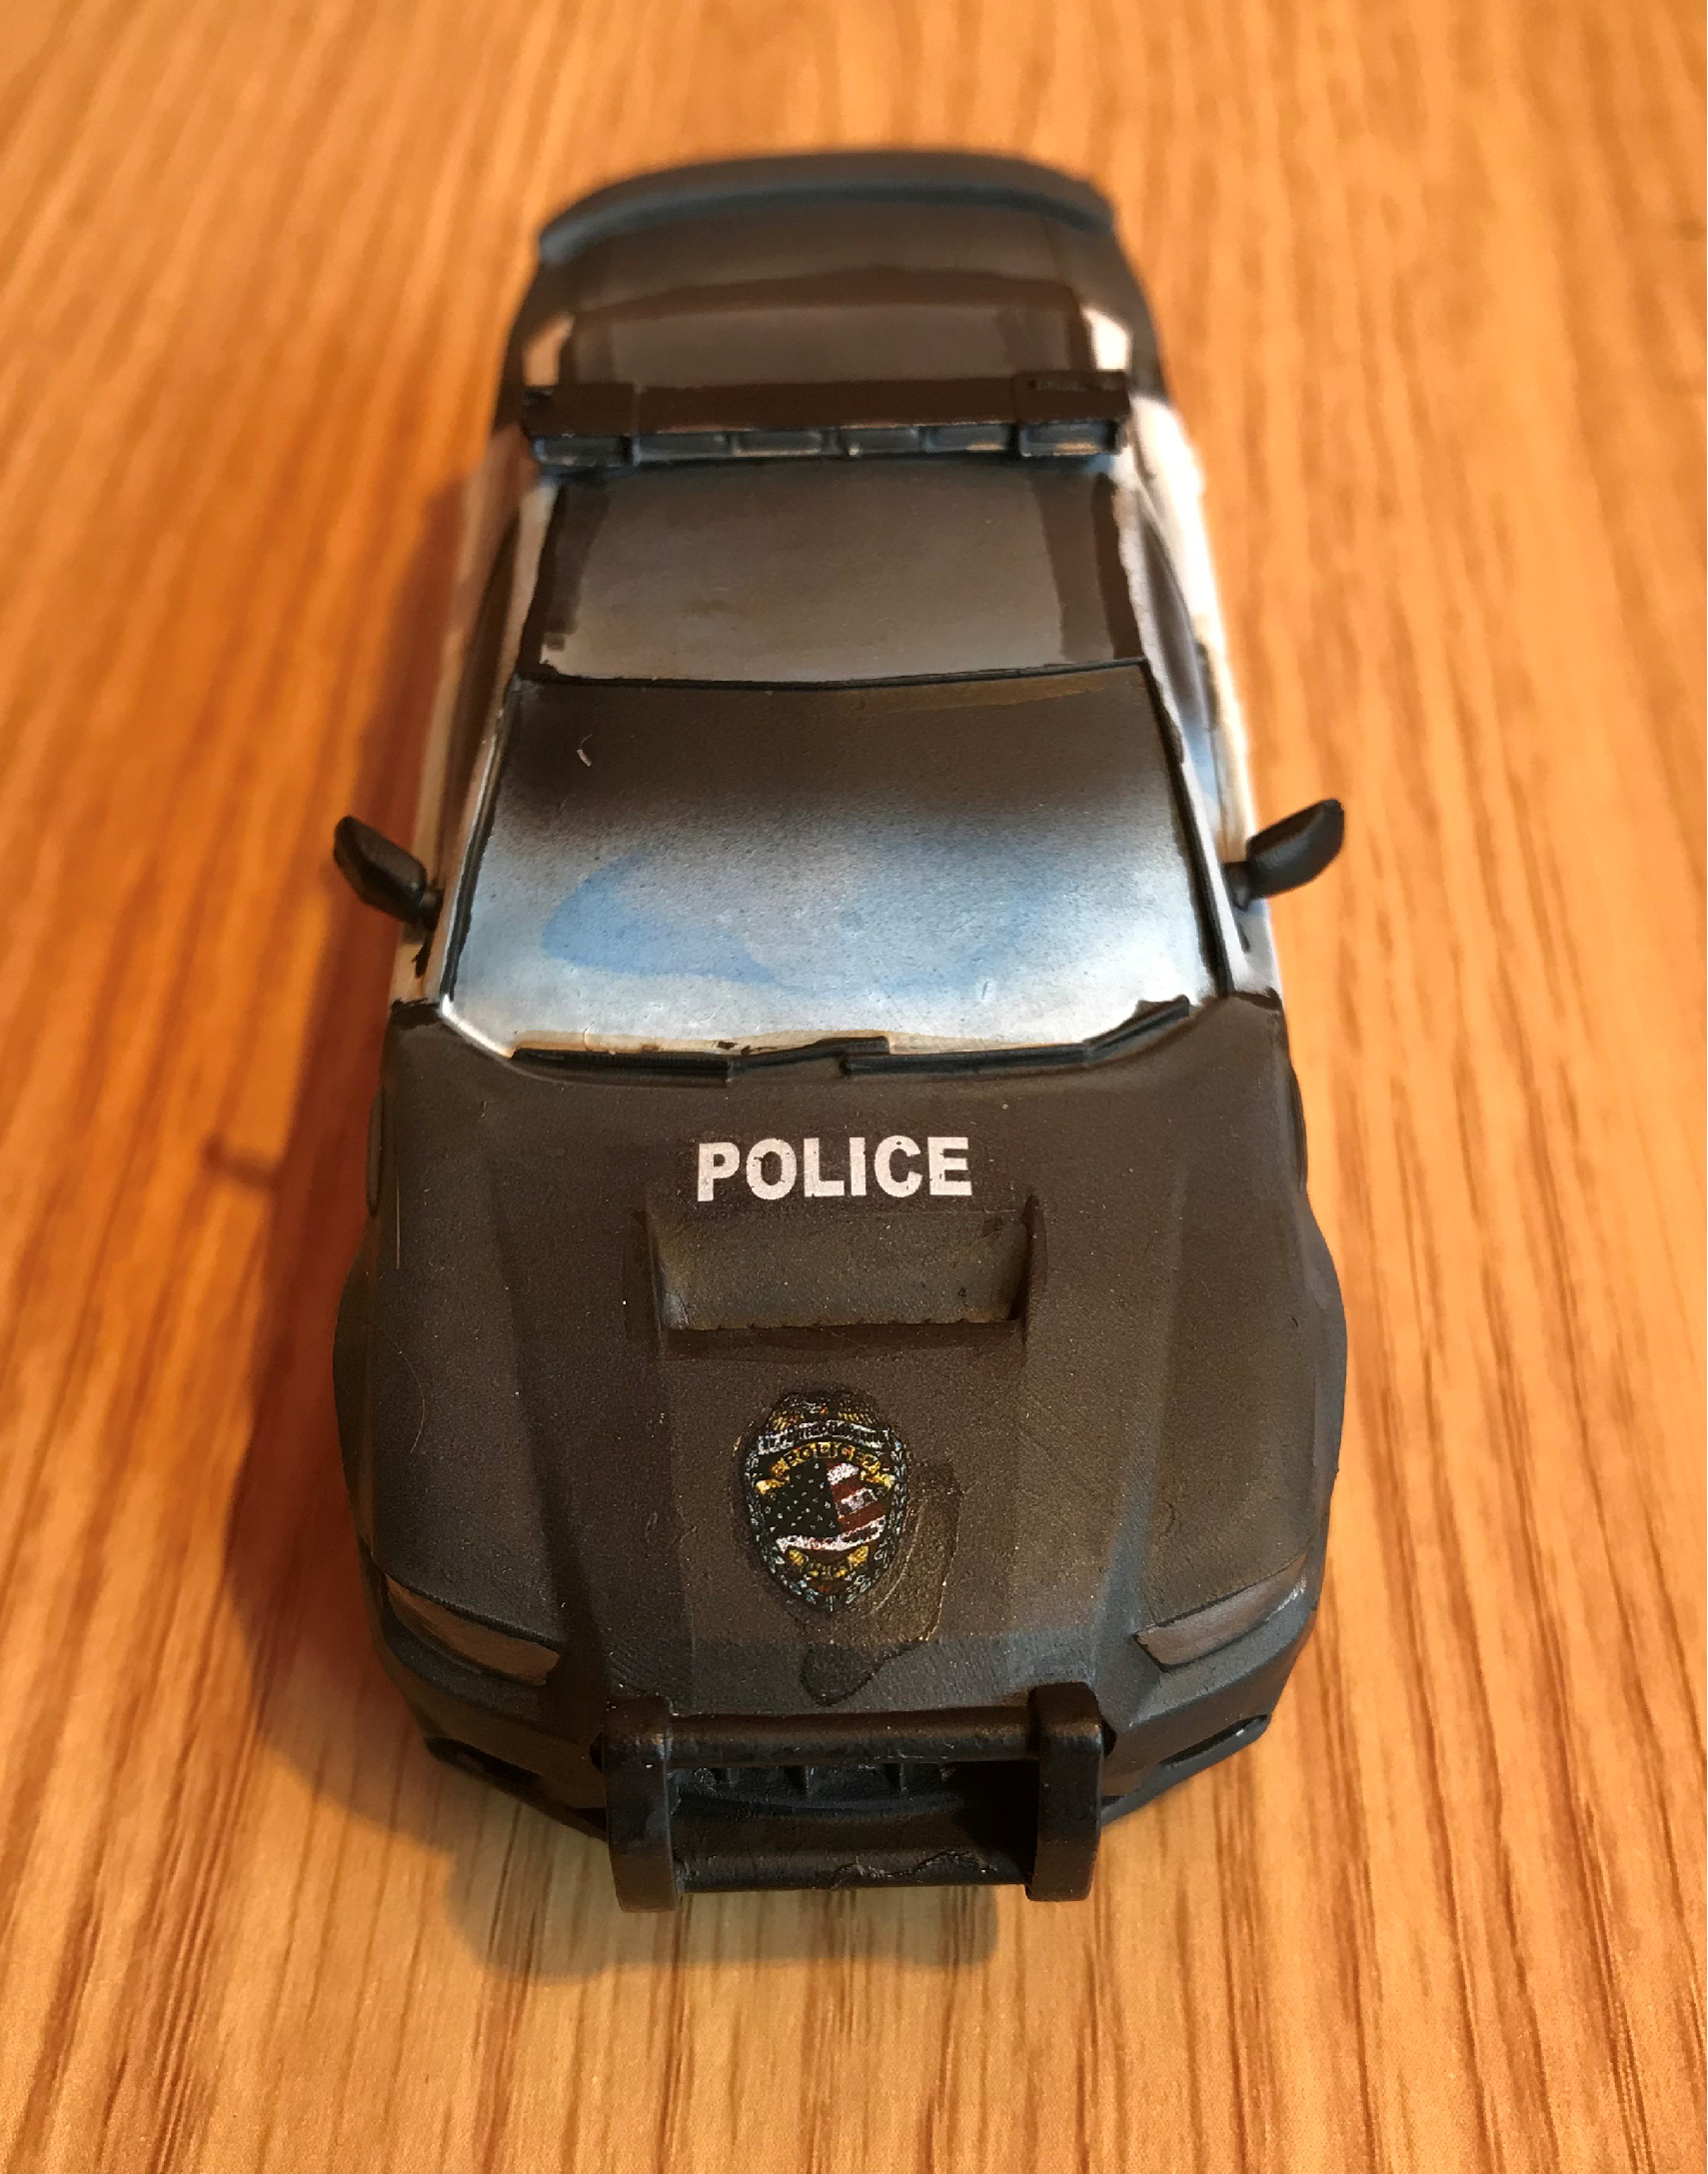
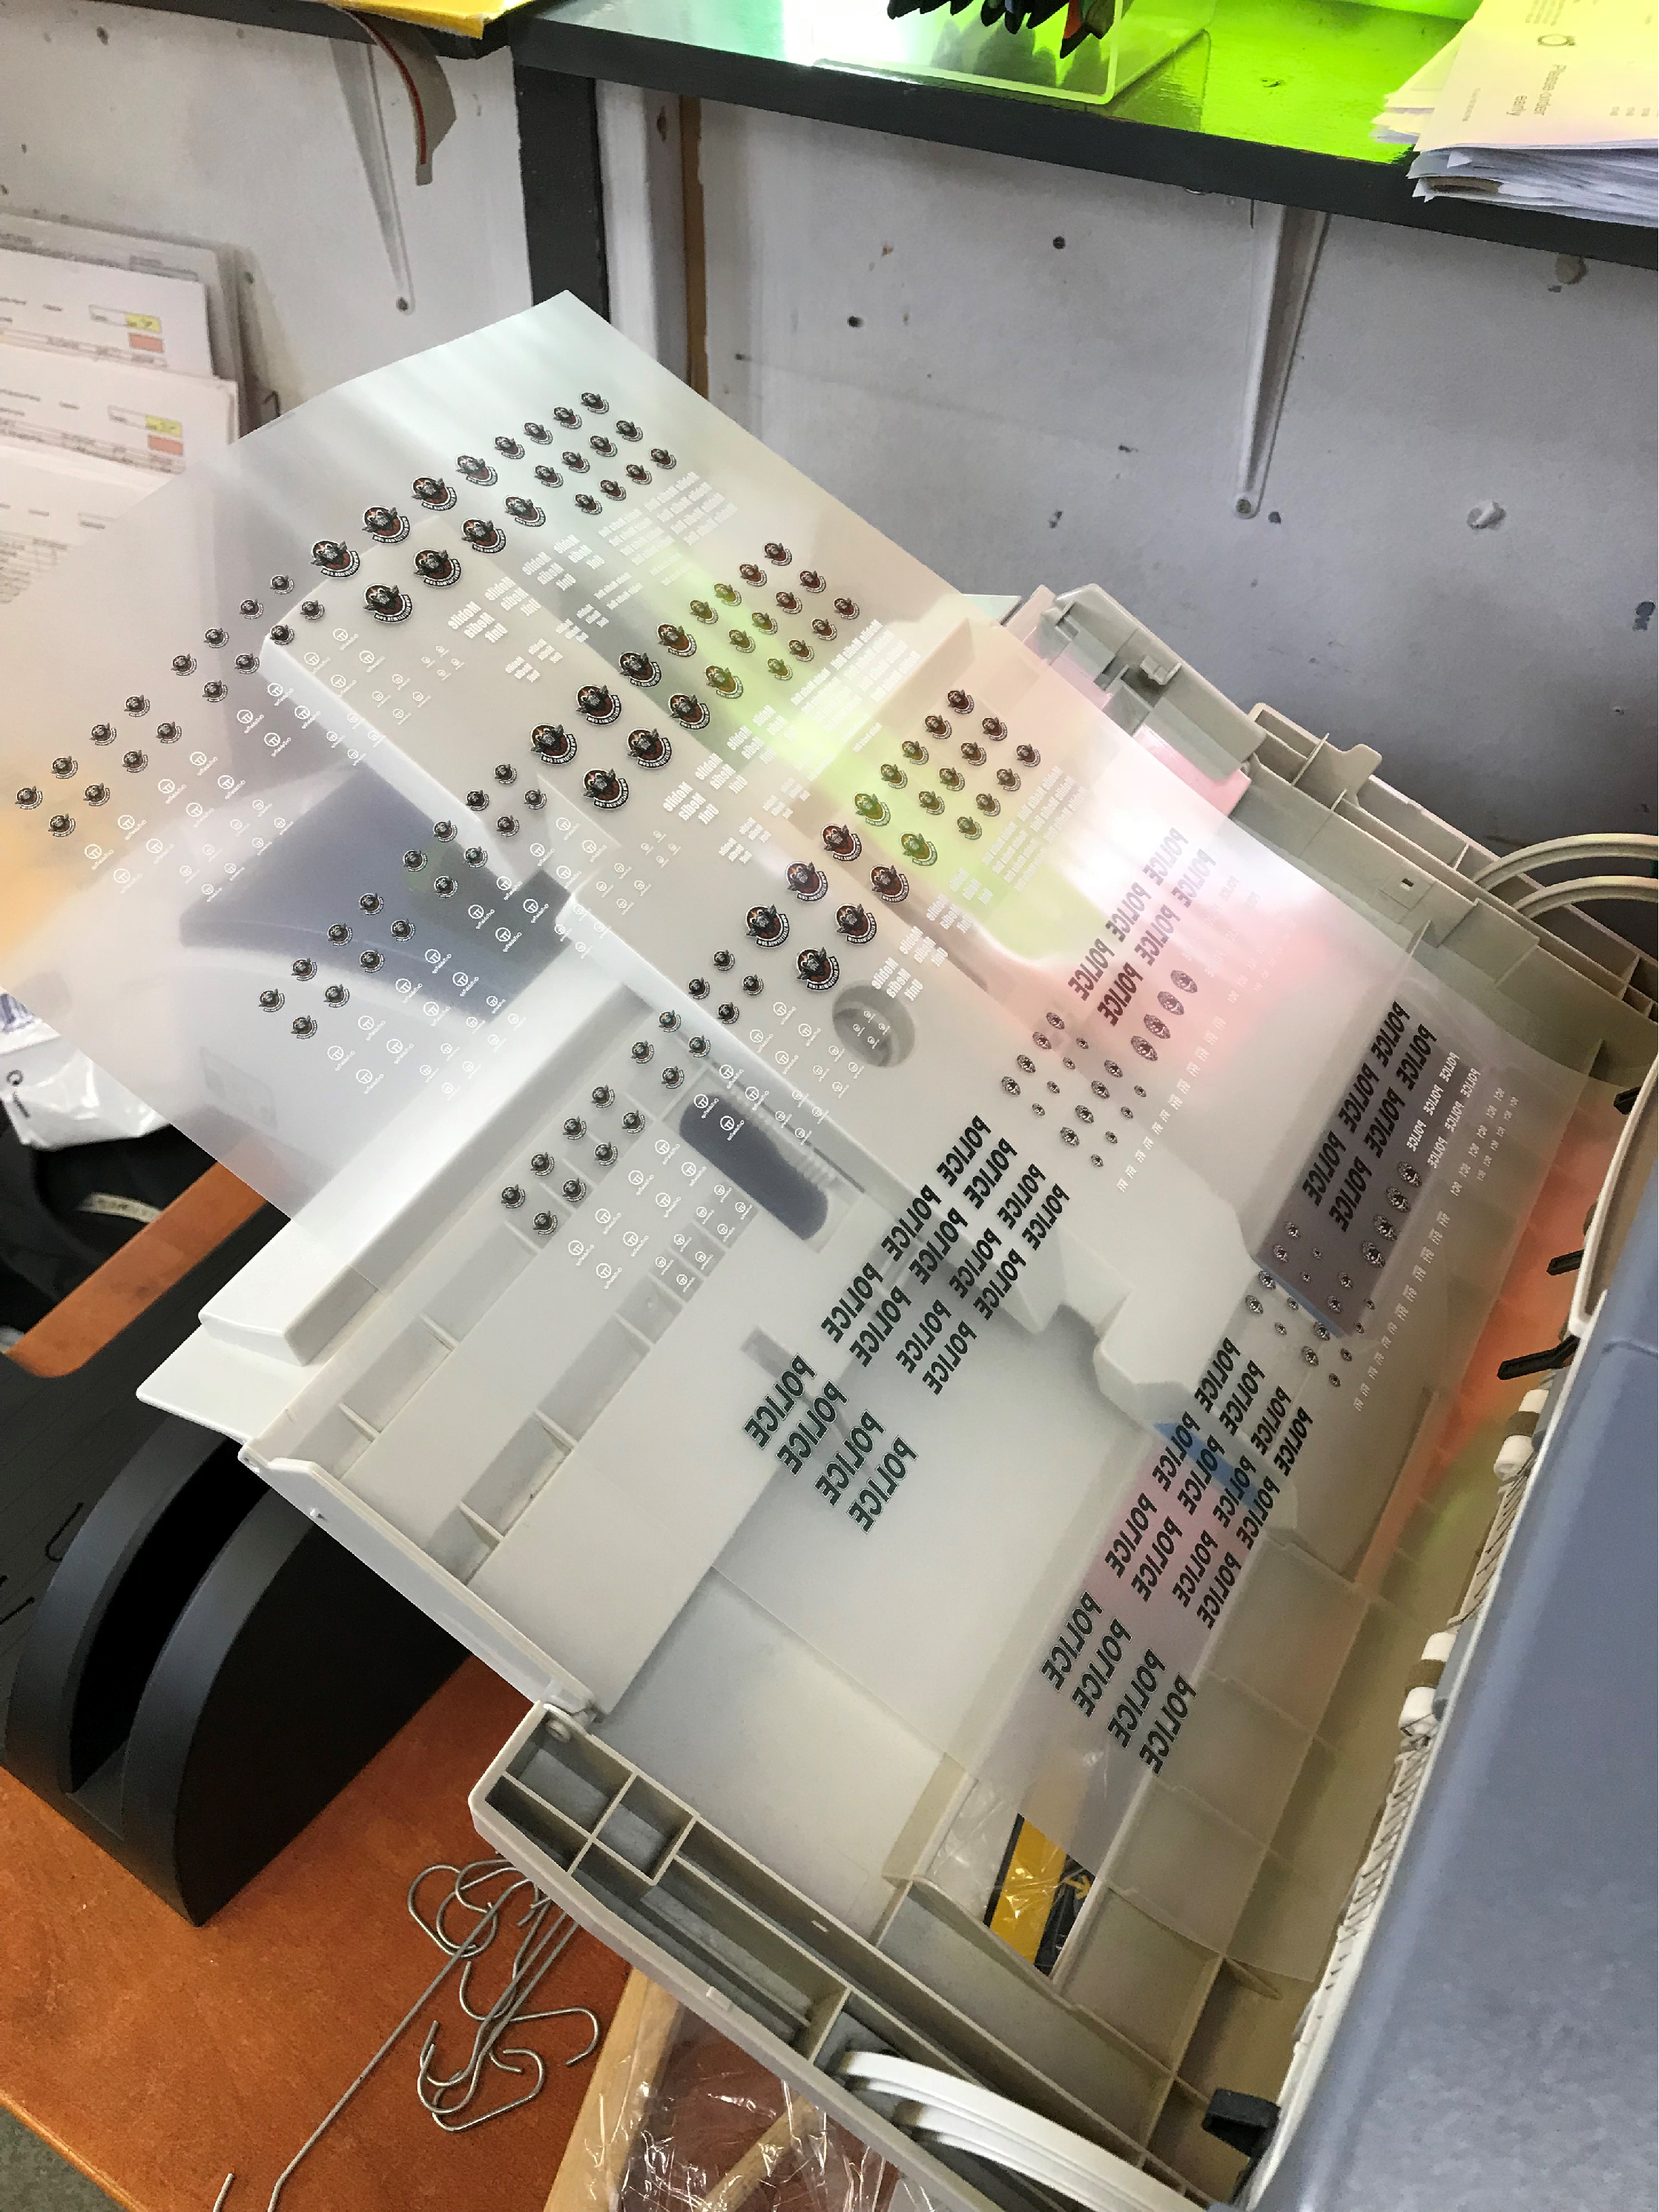
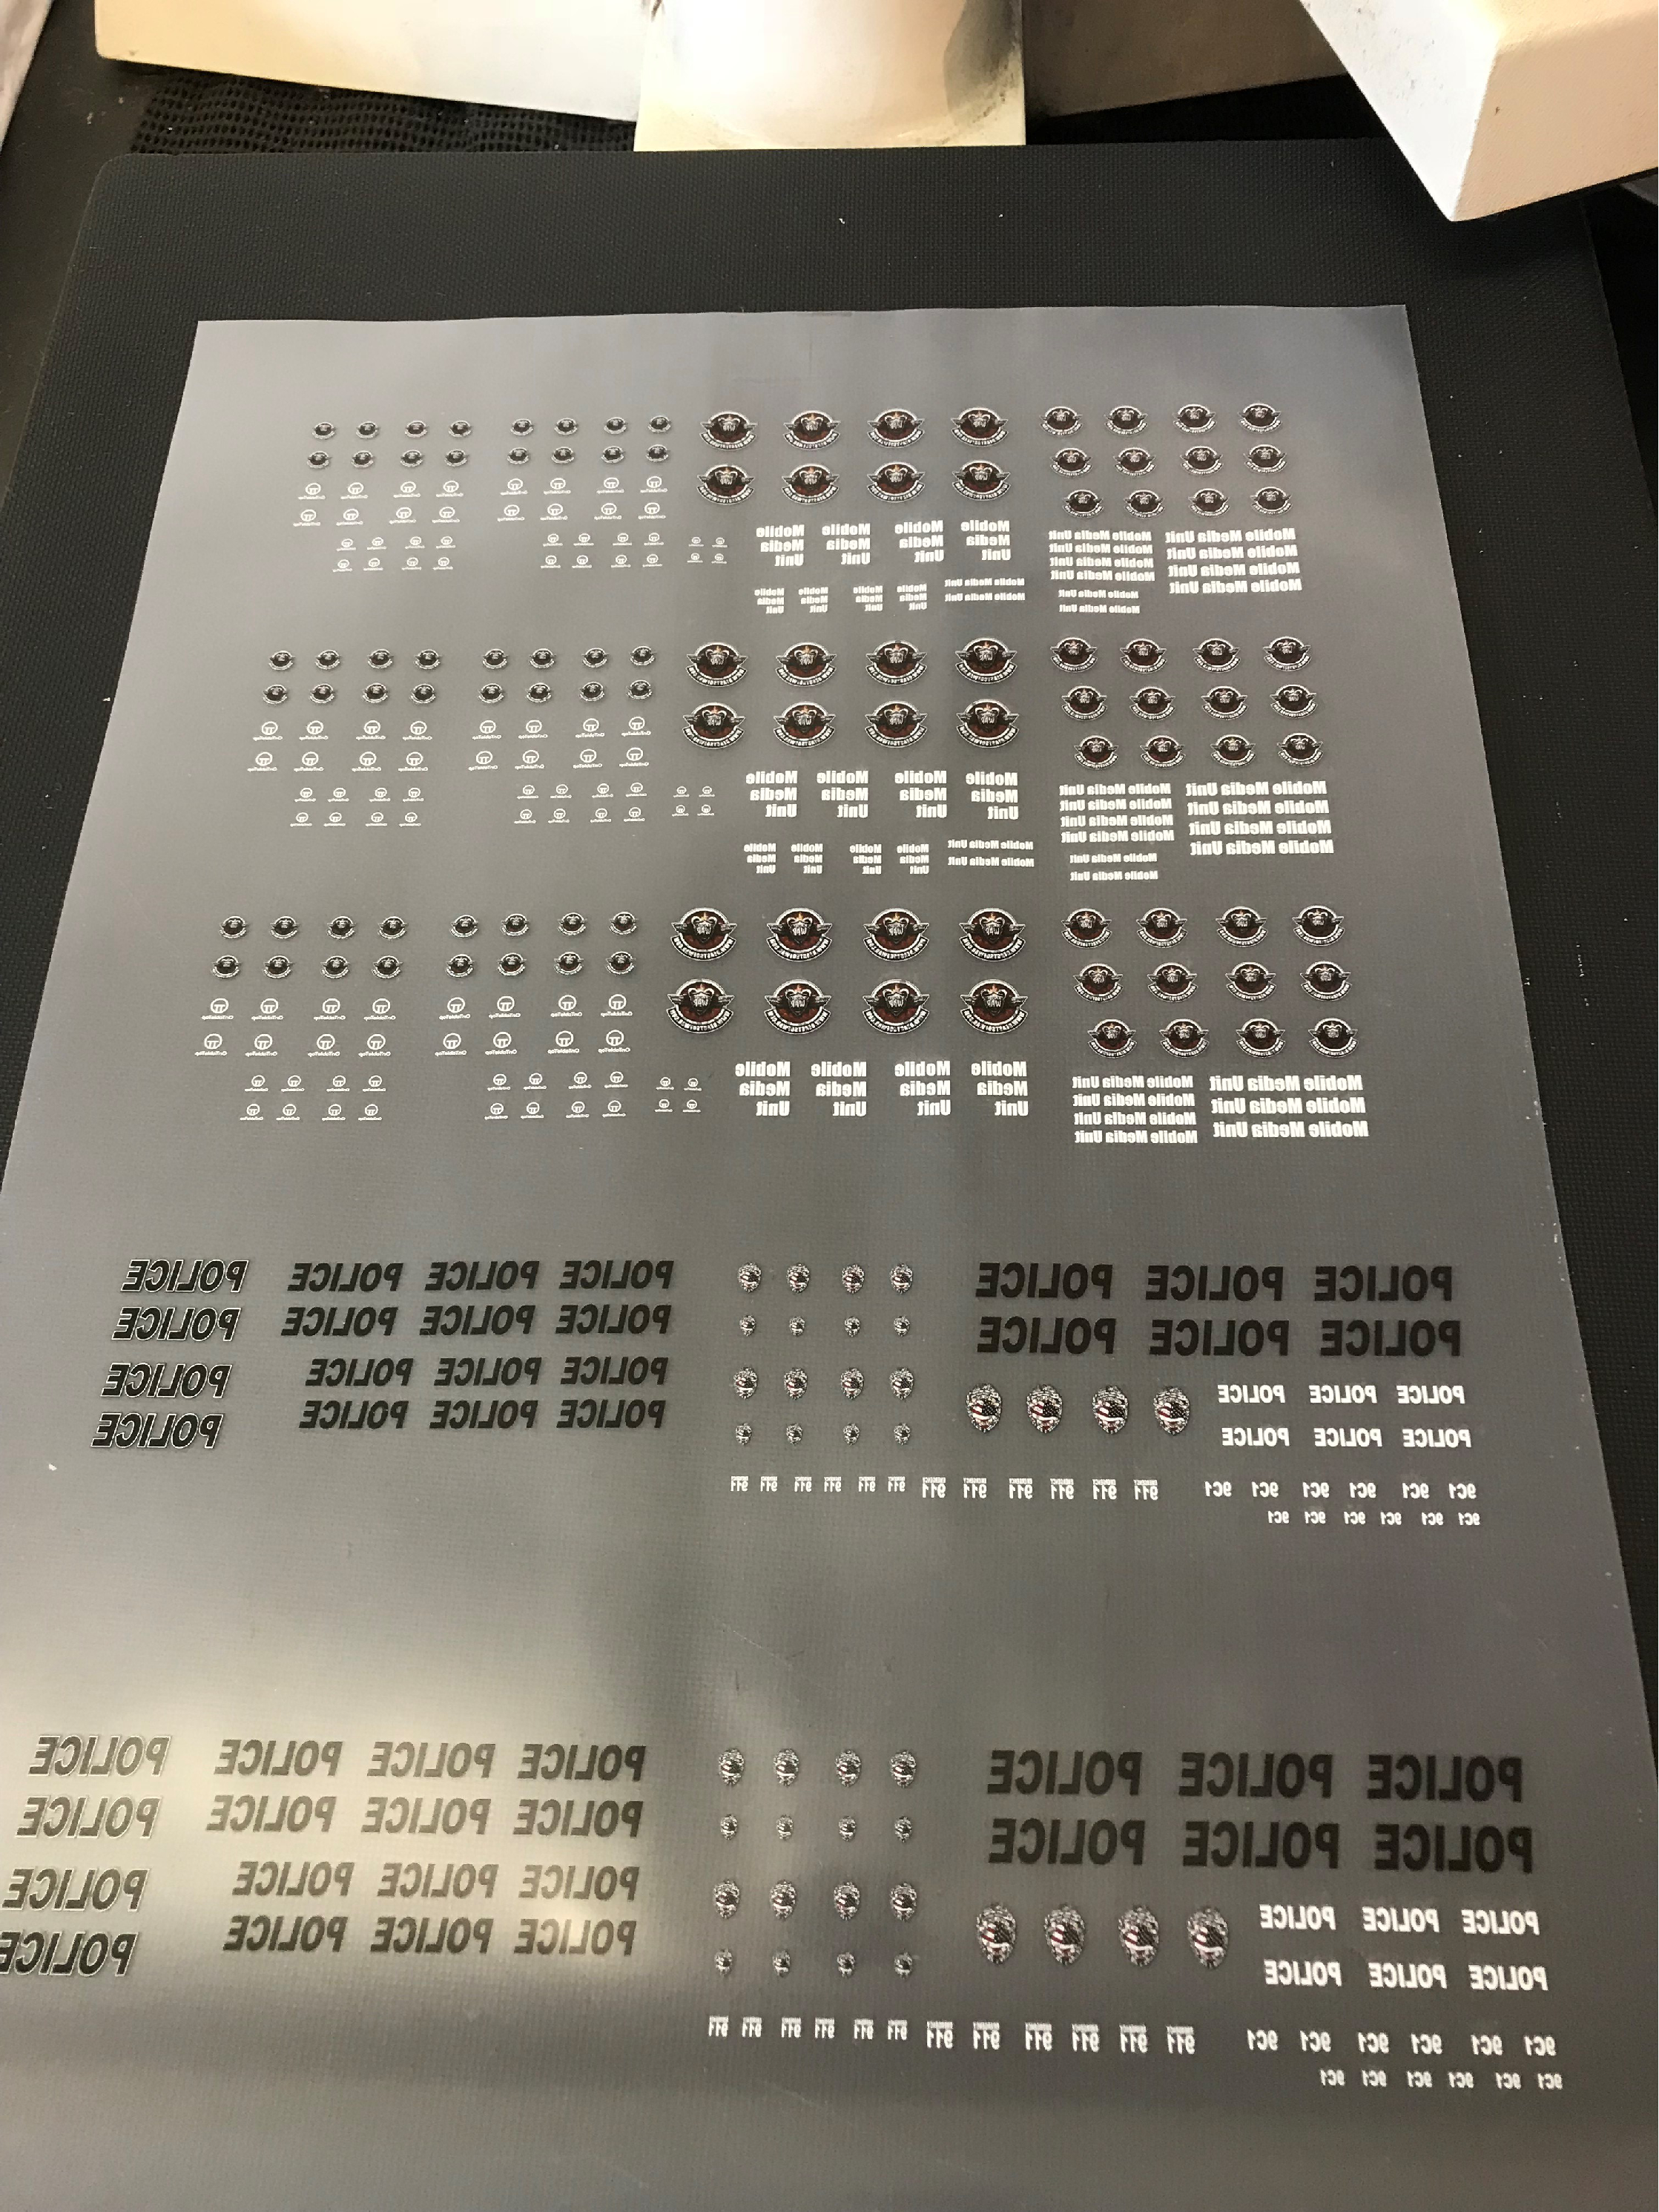
Applying Transfers to the Police Car on the Hood, Sides and Wings.
Using reference images of the web i set up some graphics including 199 graphics and shield design.

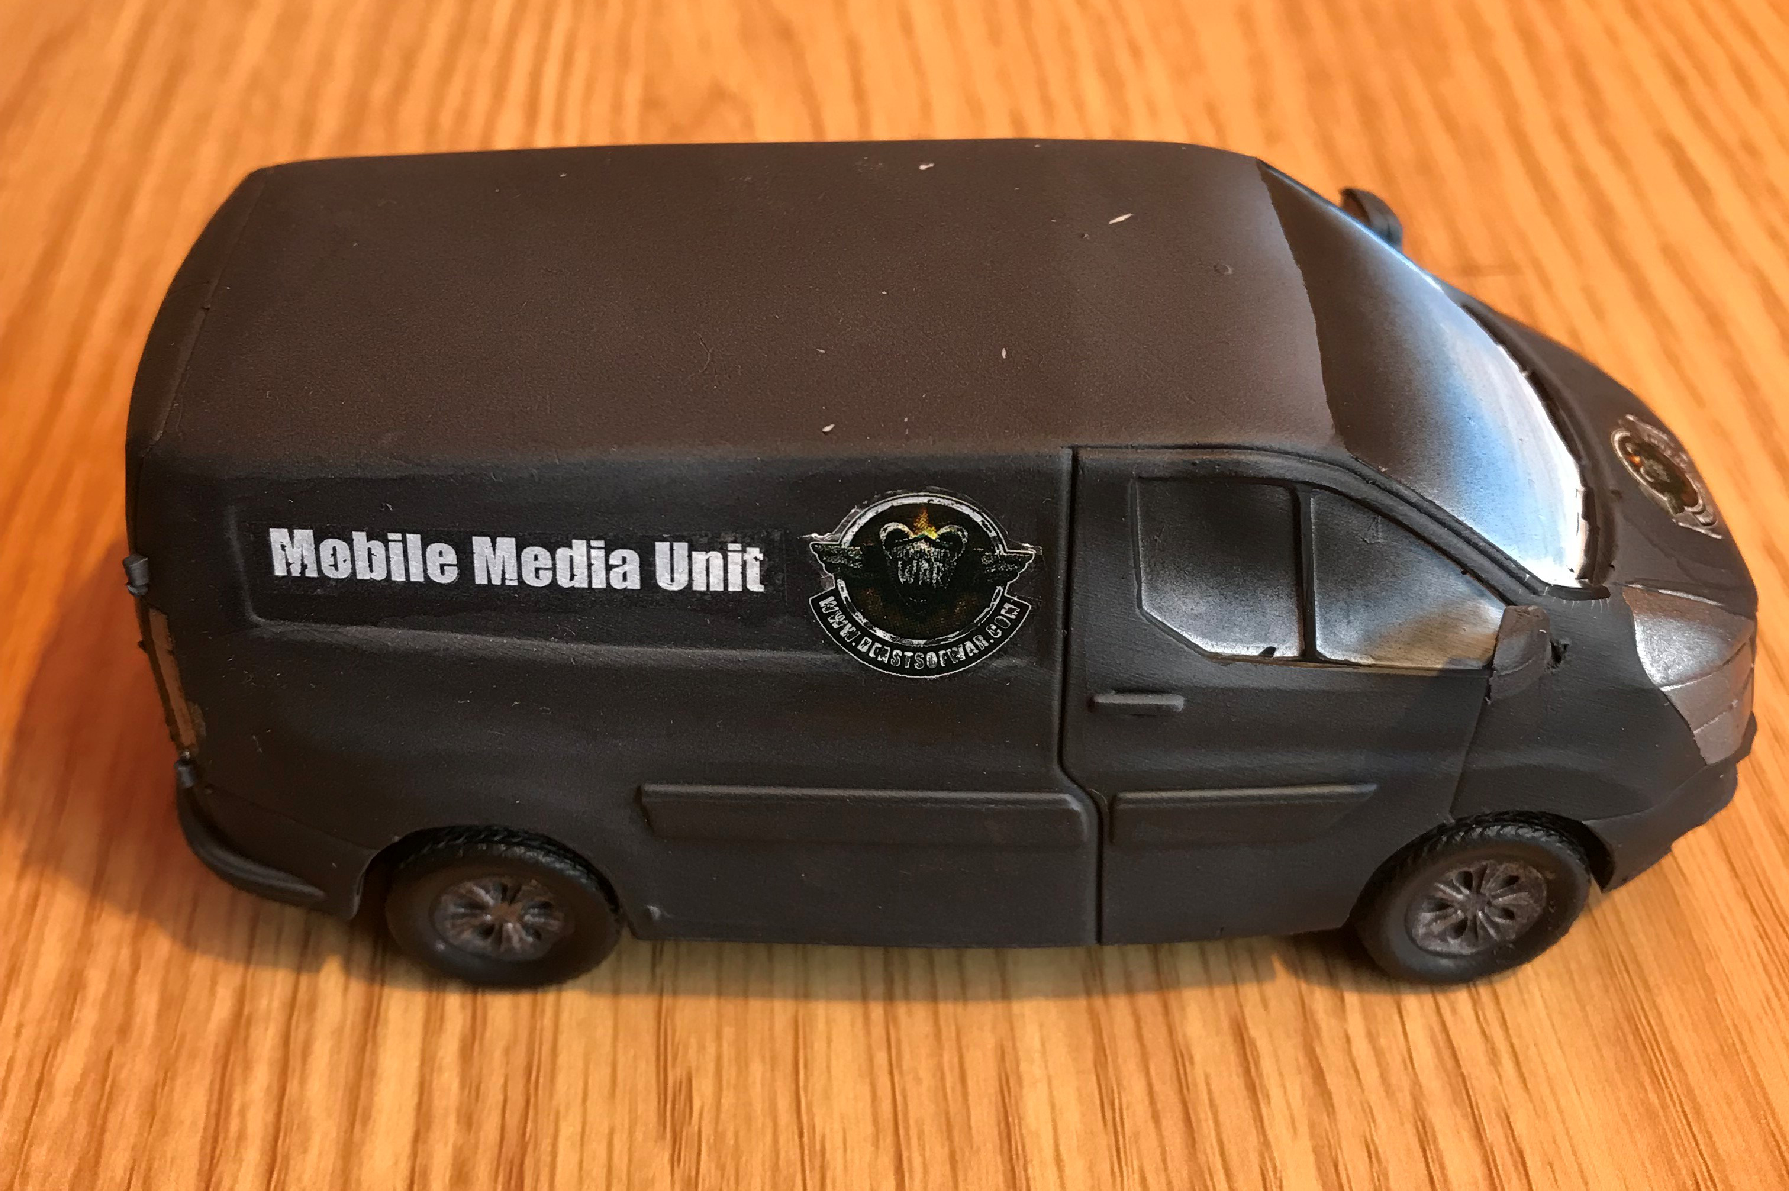
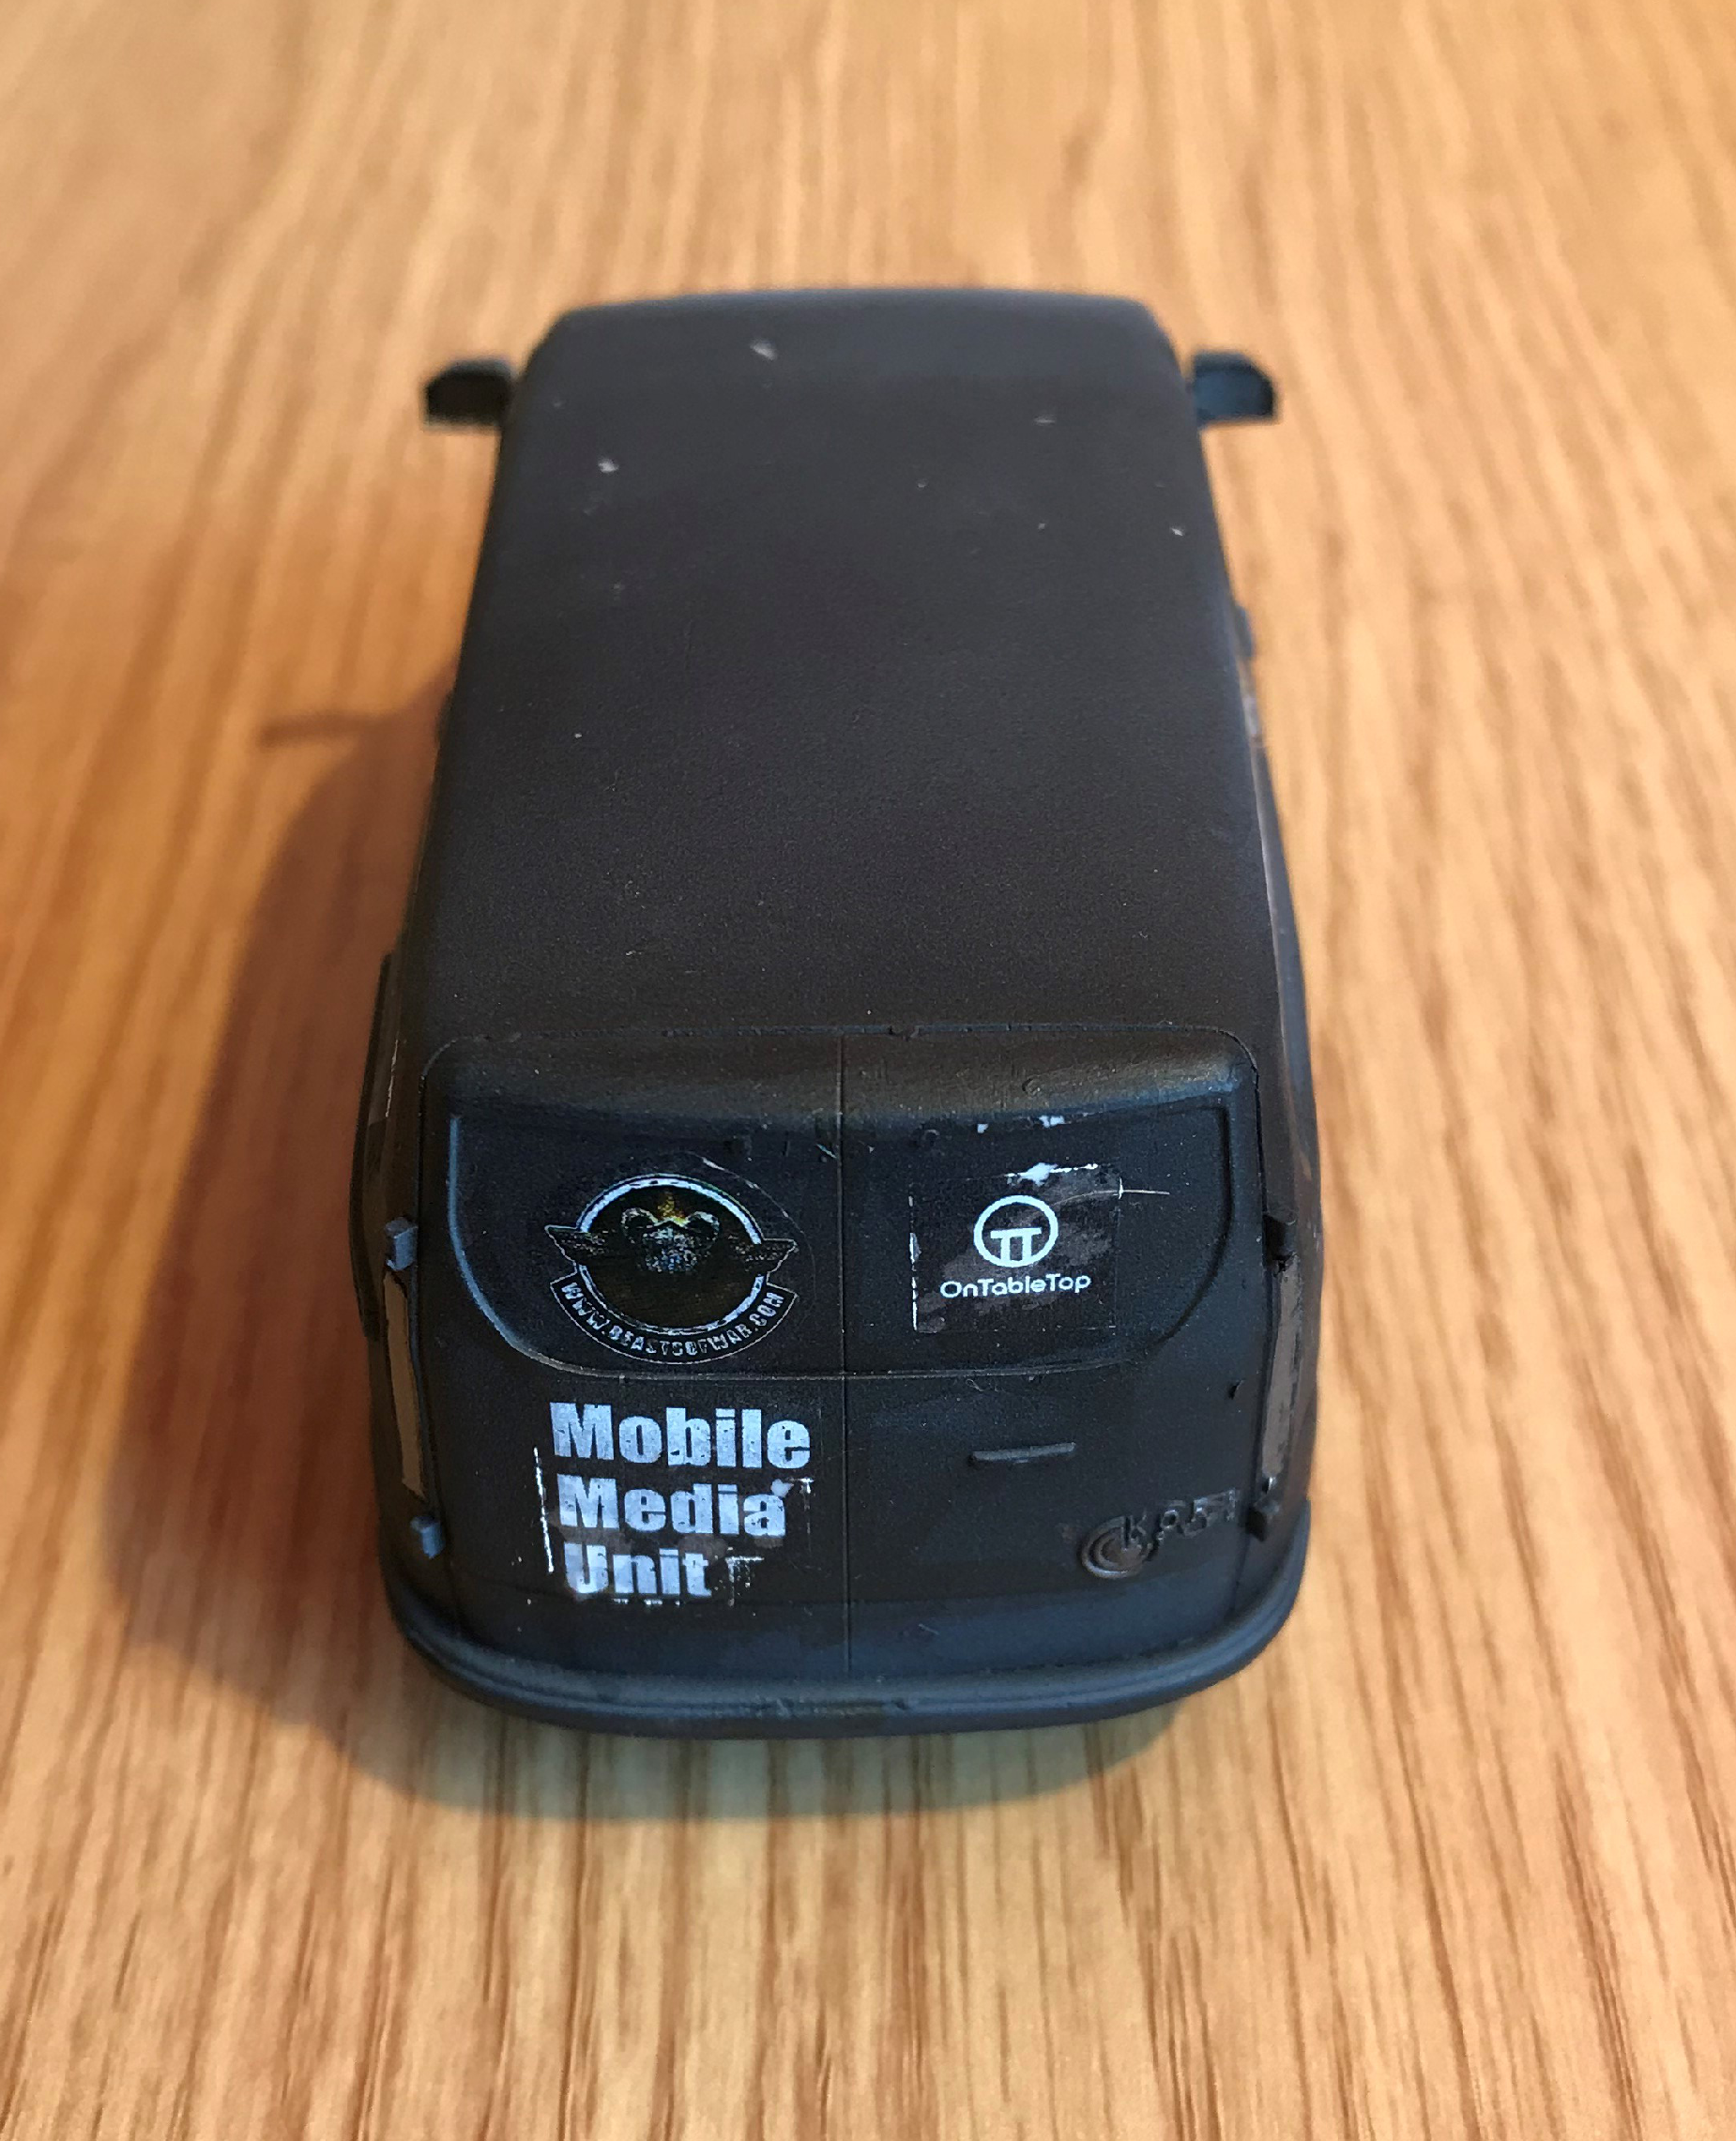
And Graphics on the Van. YES it is the BOW/OTT Mobile Media Unit Van.
it has Logo on Front, Back and Sides

I Used MicroSol and MicroSet to help to apply the Transfers but evan with this i have had issues.
on the front go the police cart has led a mark i need to clean up and in places the paint has been chipped but i want to matt vanish them ASAP but am waiting on it to arrive from Ebay. this should help stop any more damage.

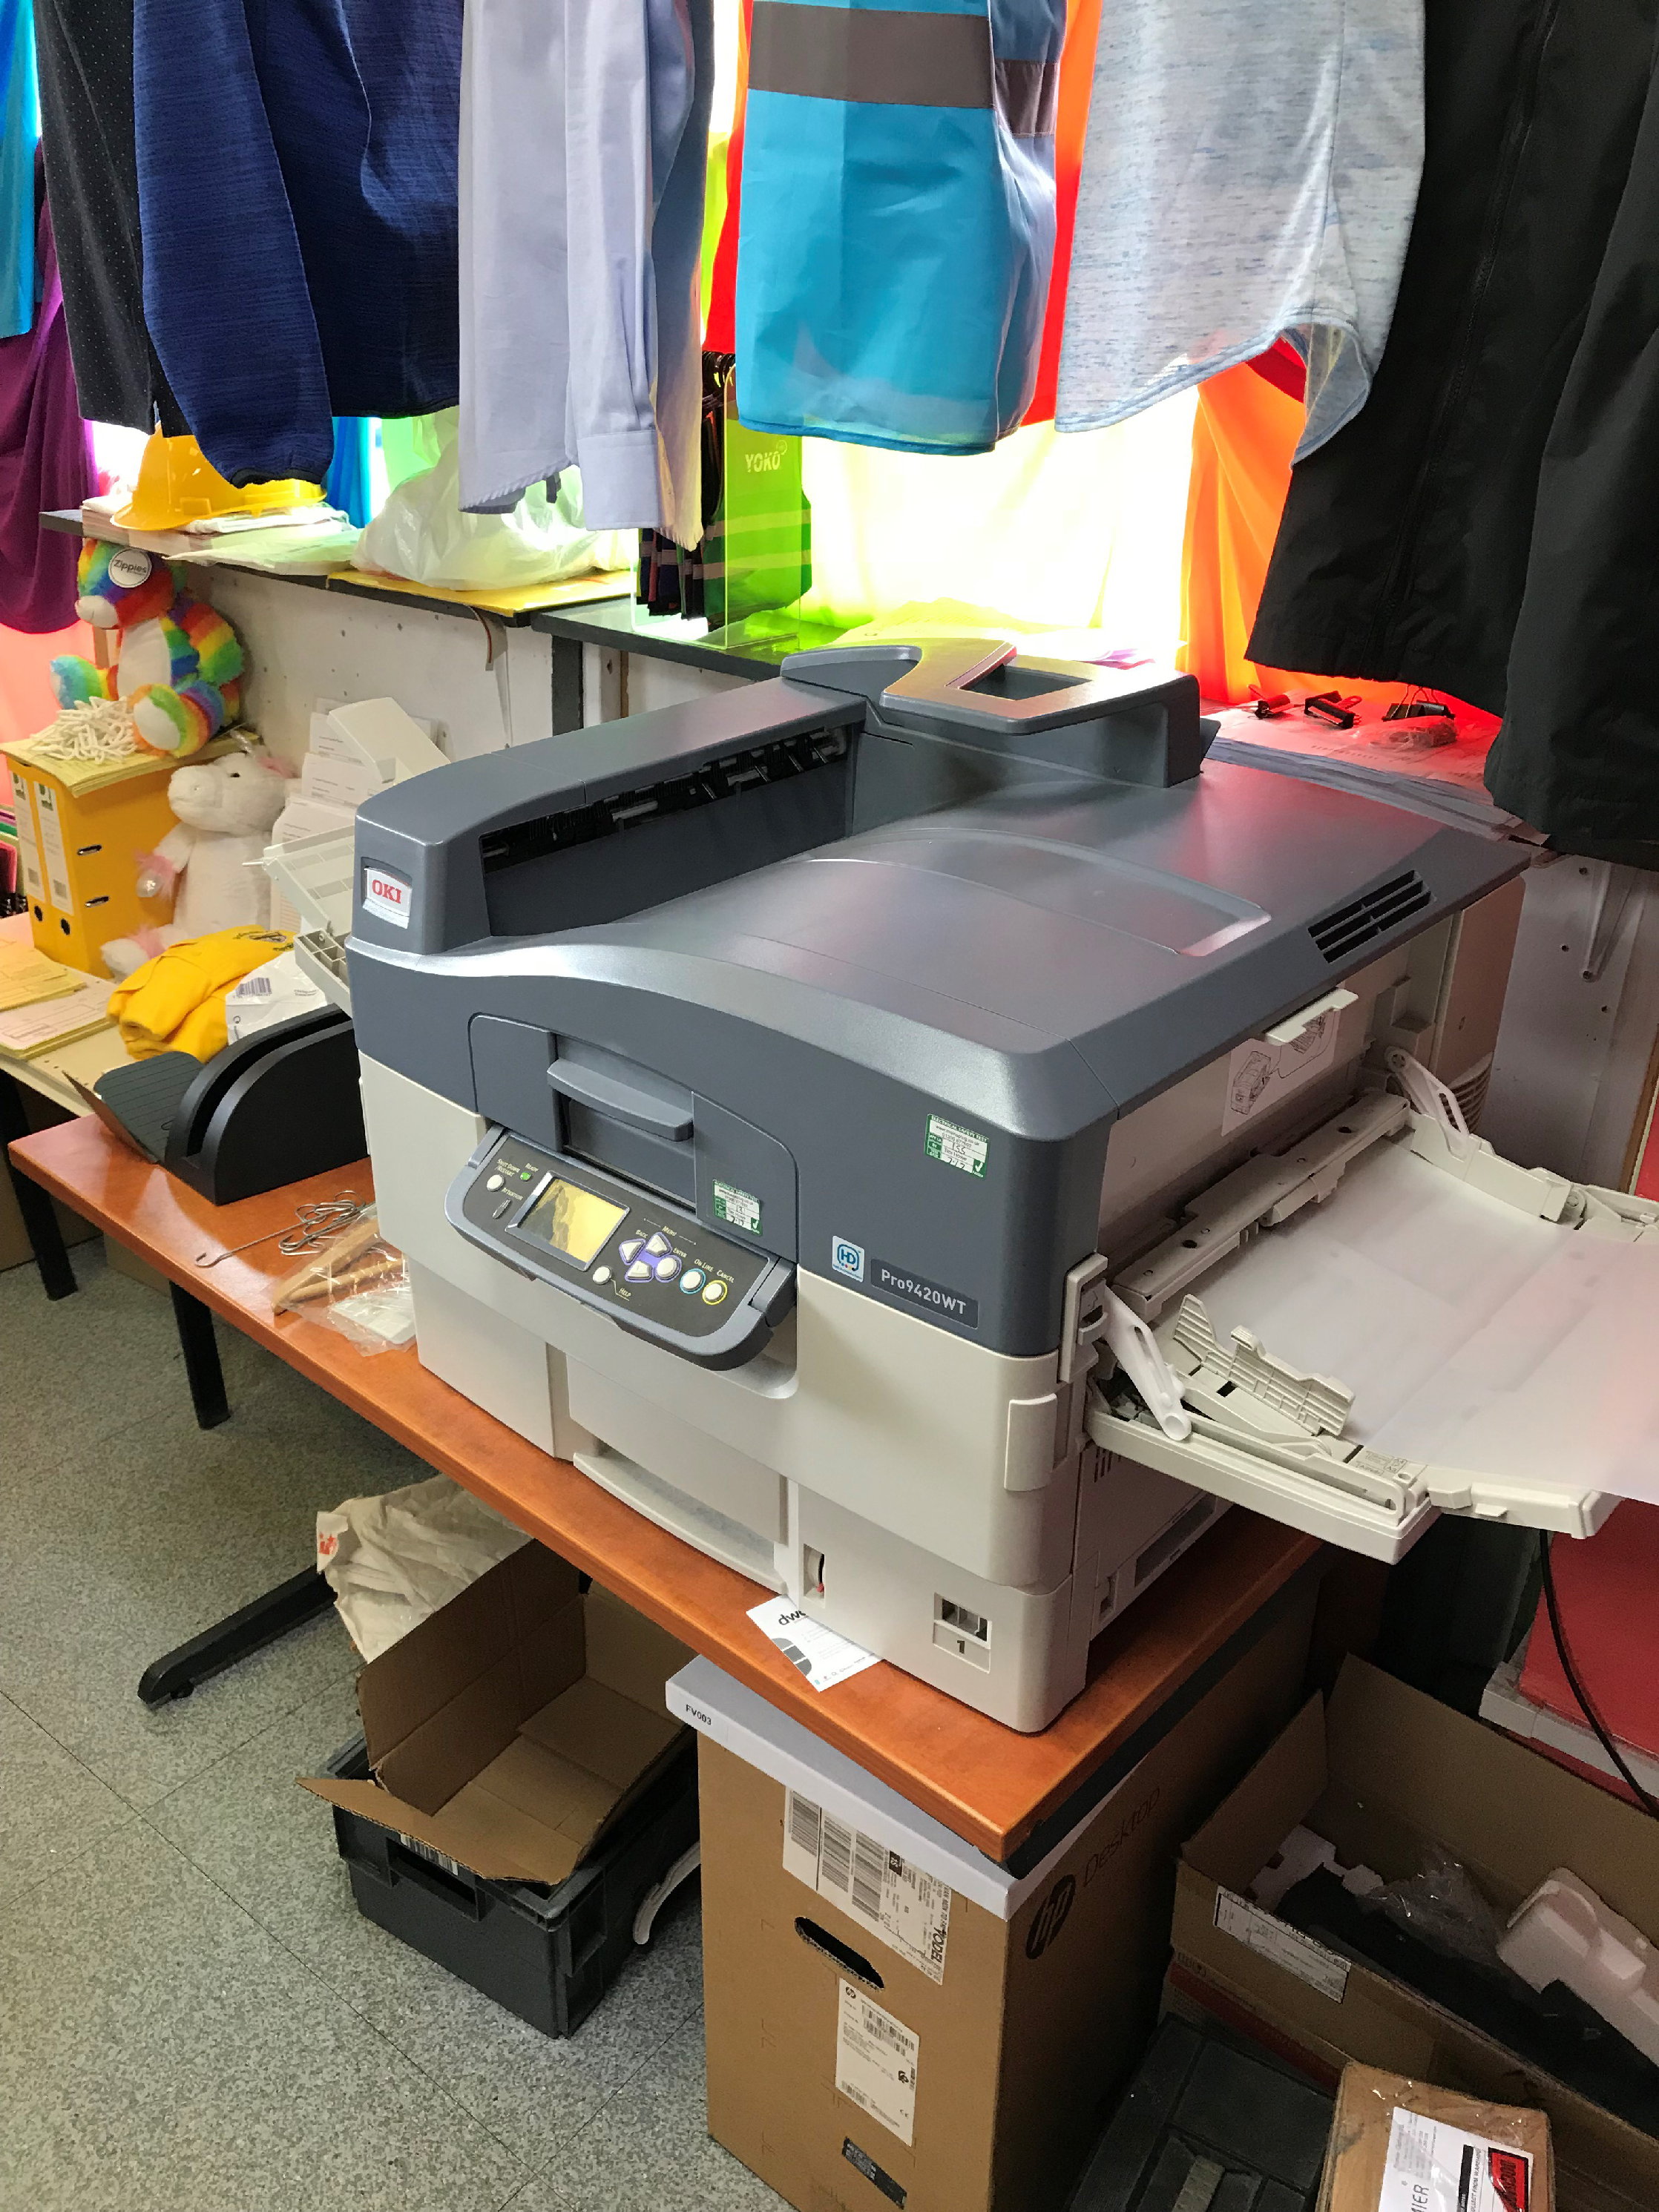
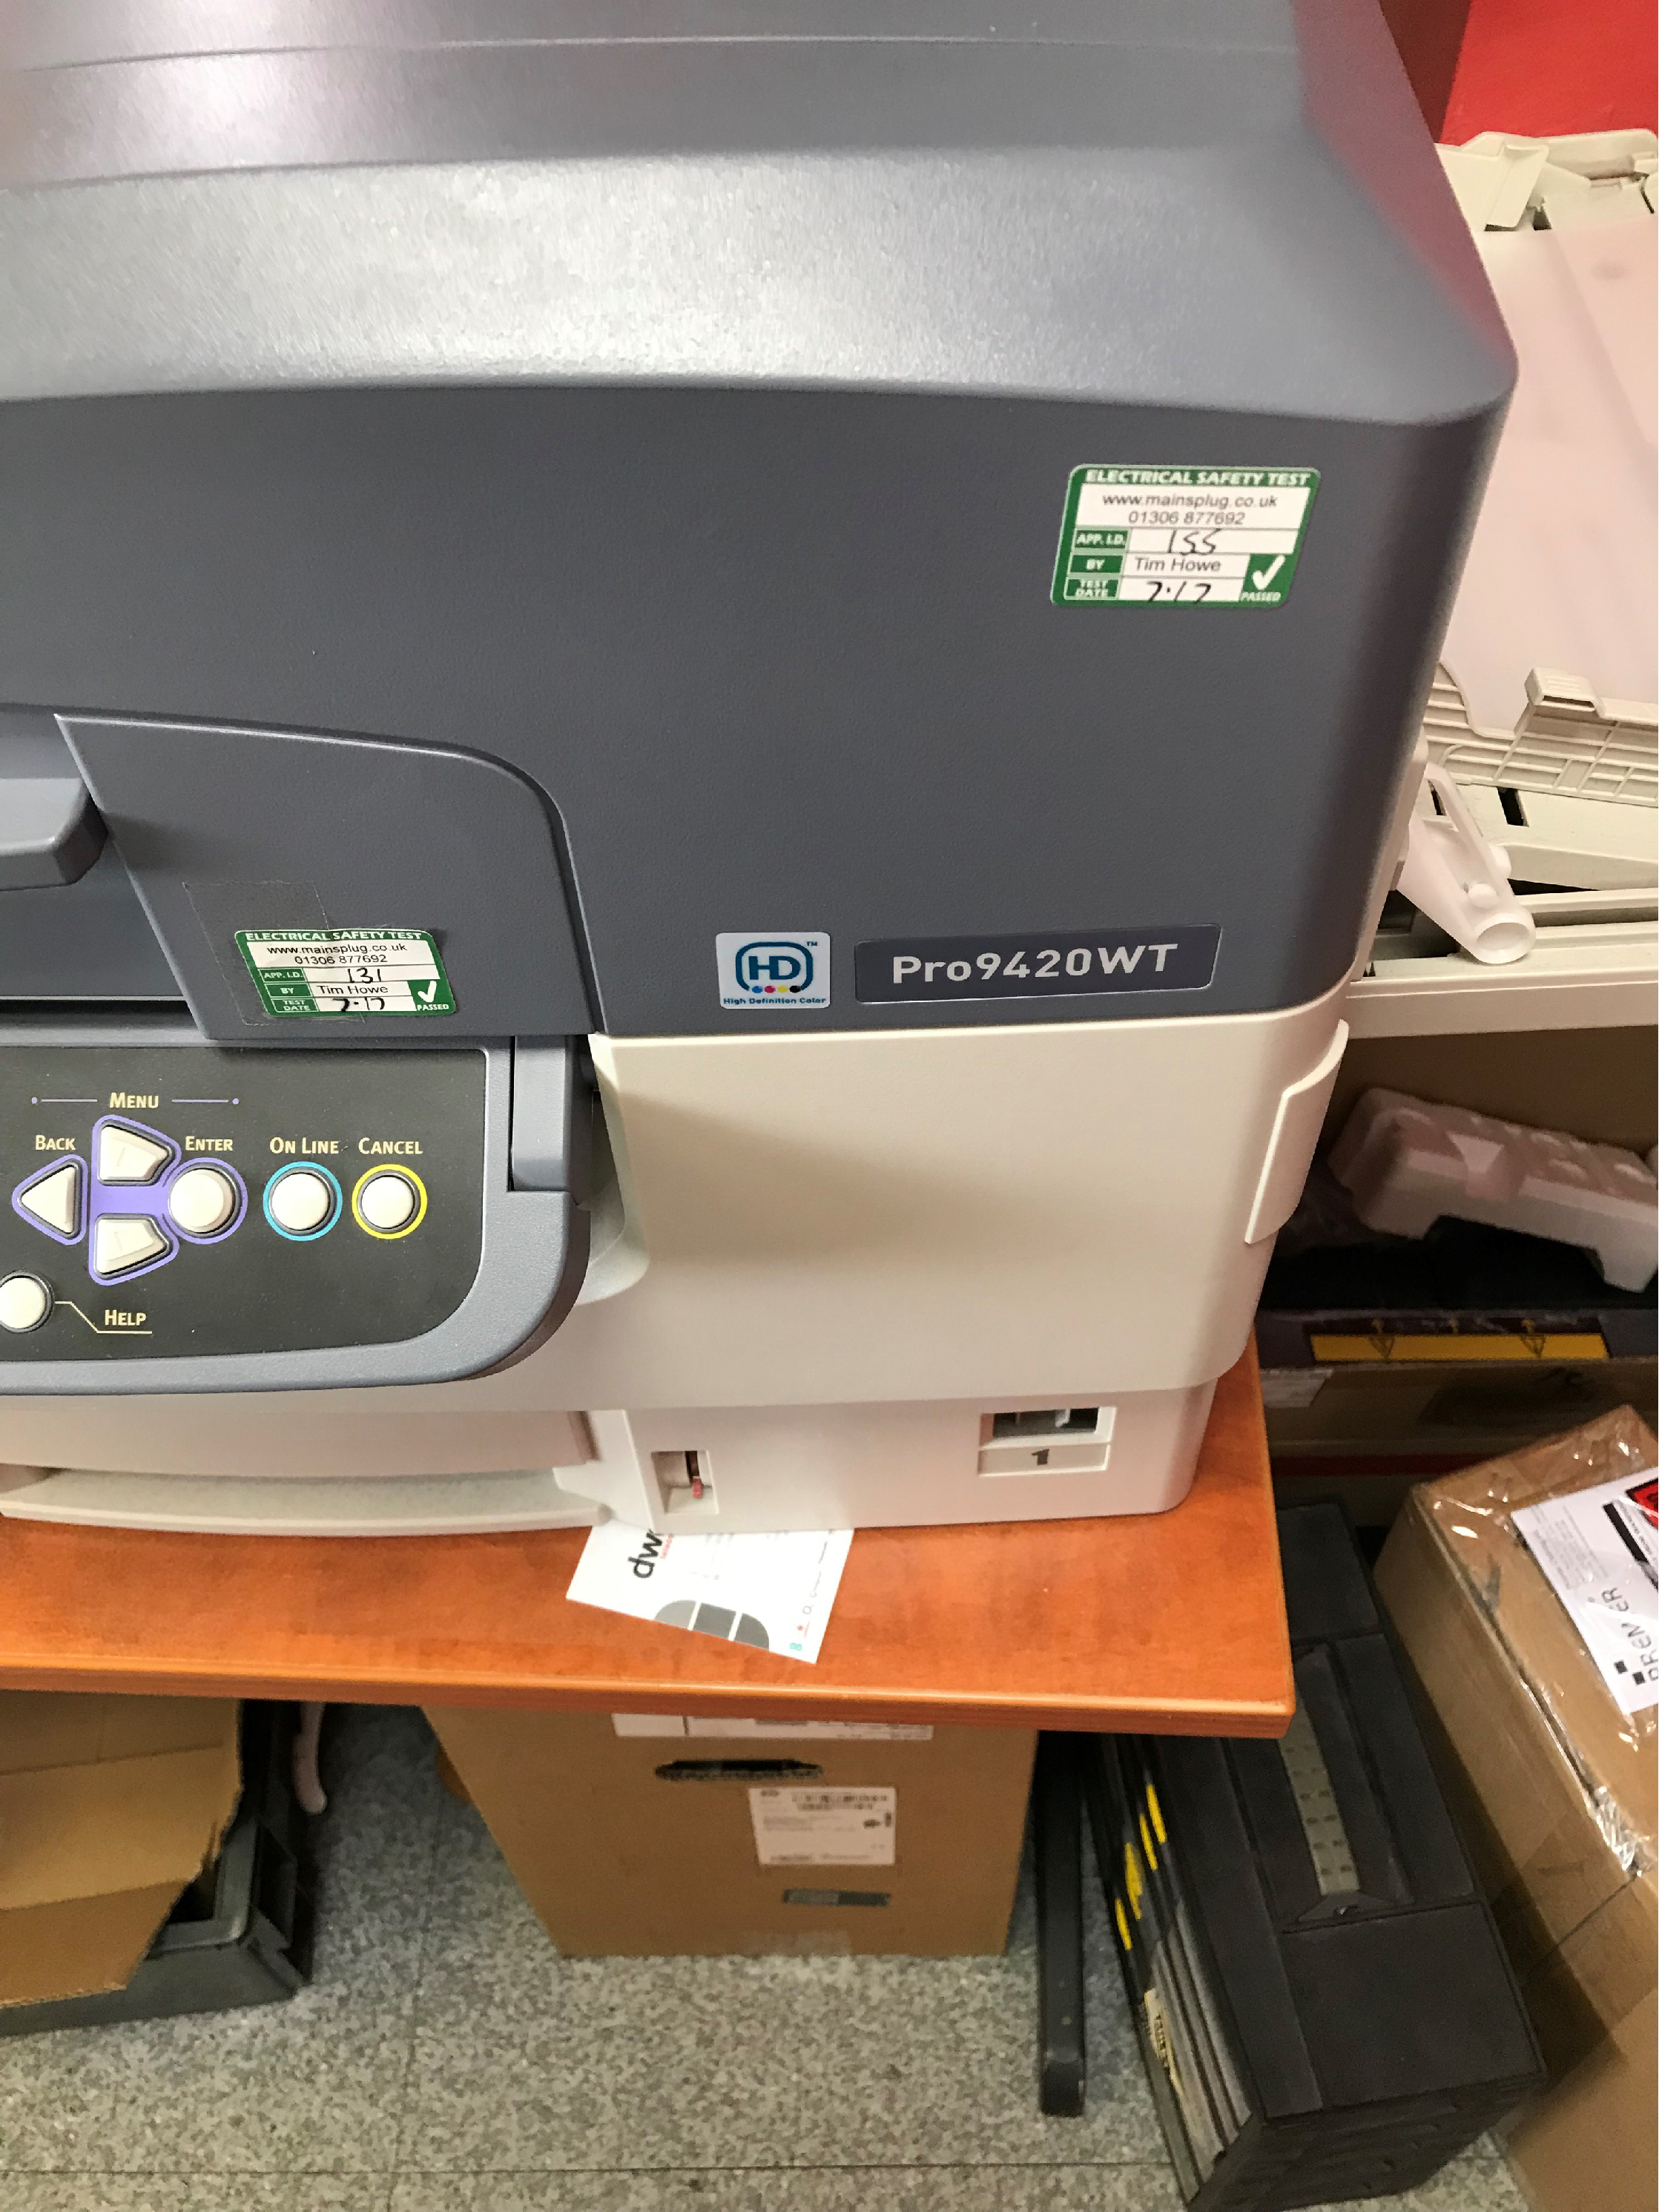
Printing Transfers...
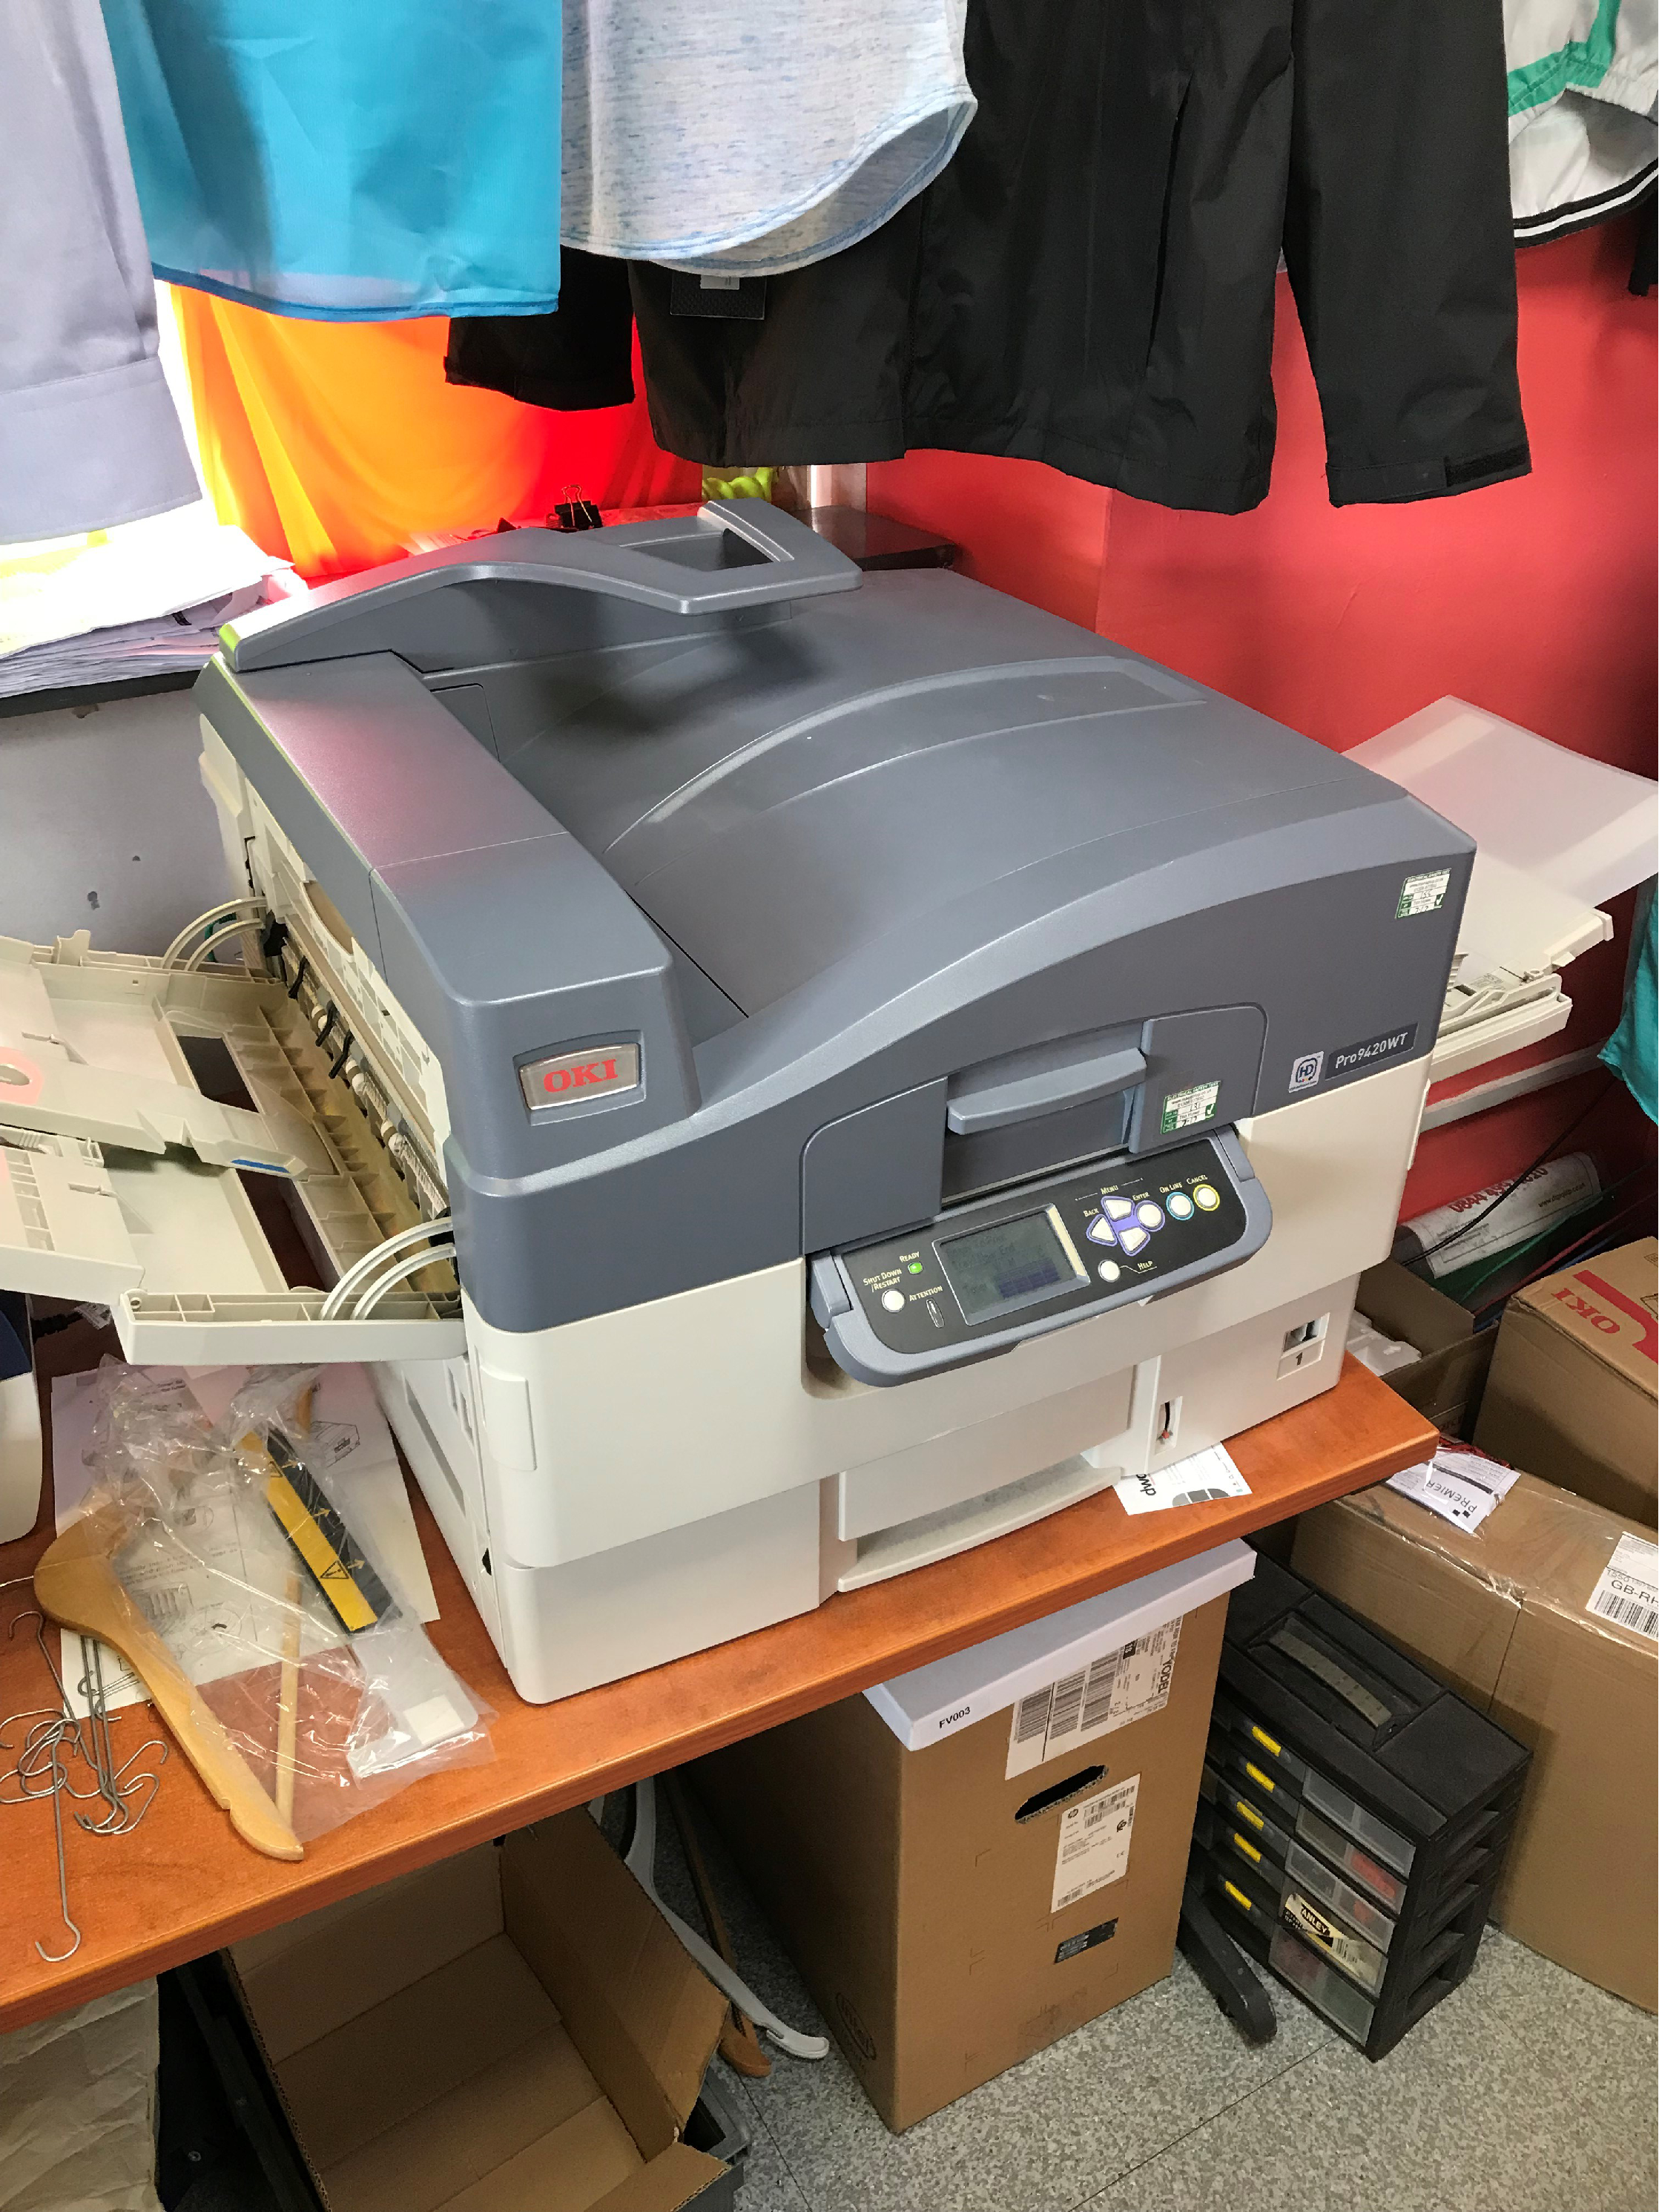
I work in Printing o have access to printers that i can print water slide transfers and also using white in for waterslide transfers.
Ill be using our Oki Pro9420WT to print transfers for the police car and one of the van.
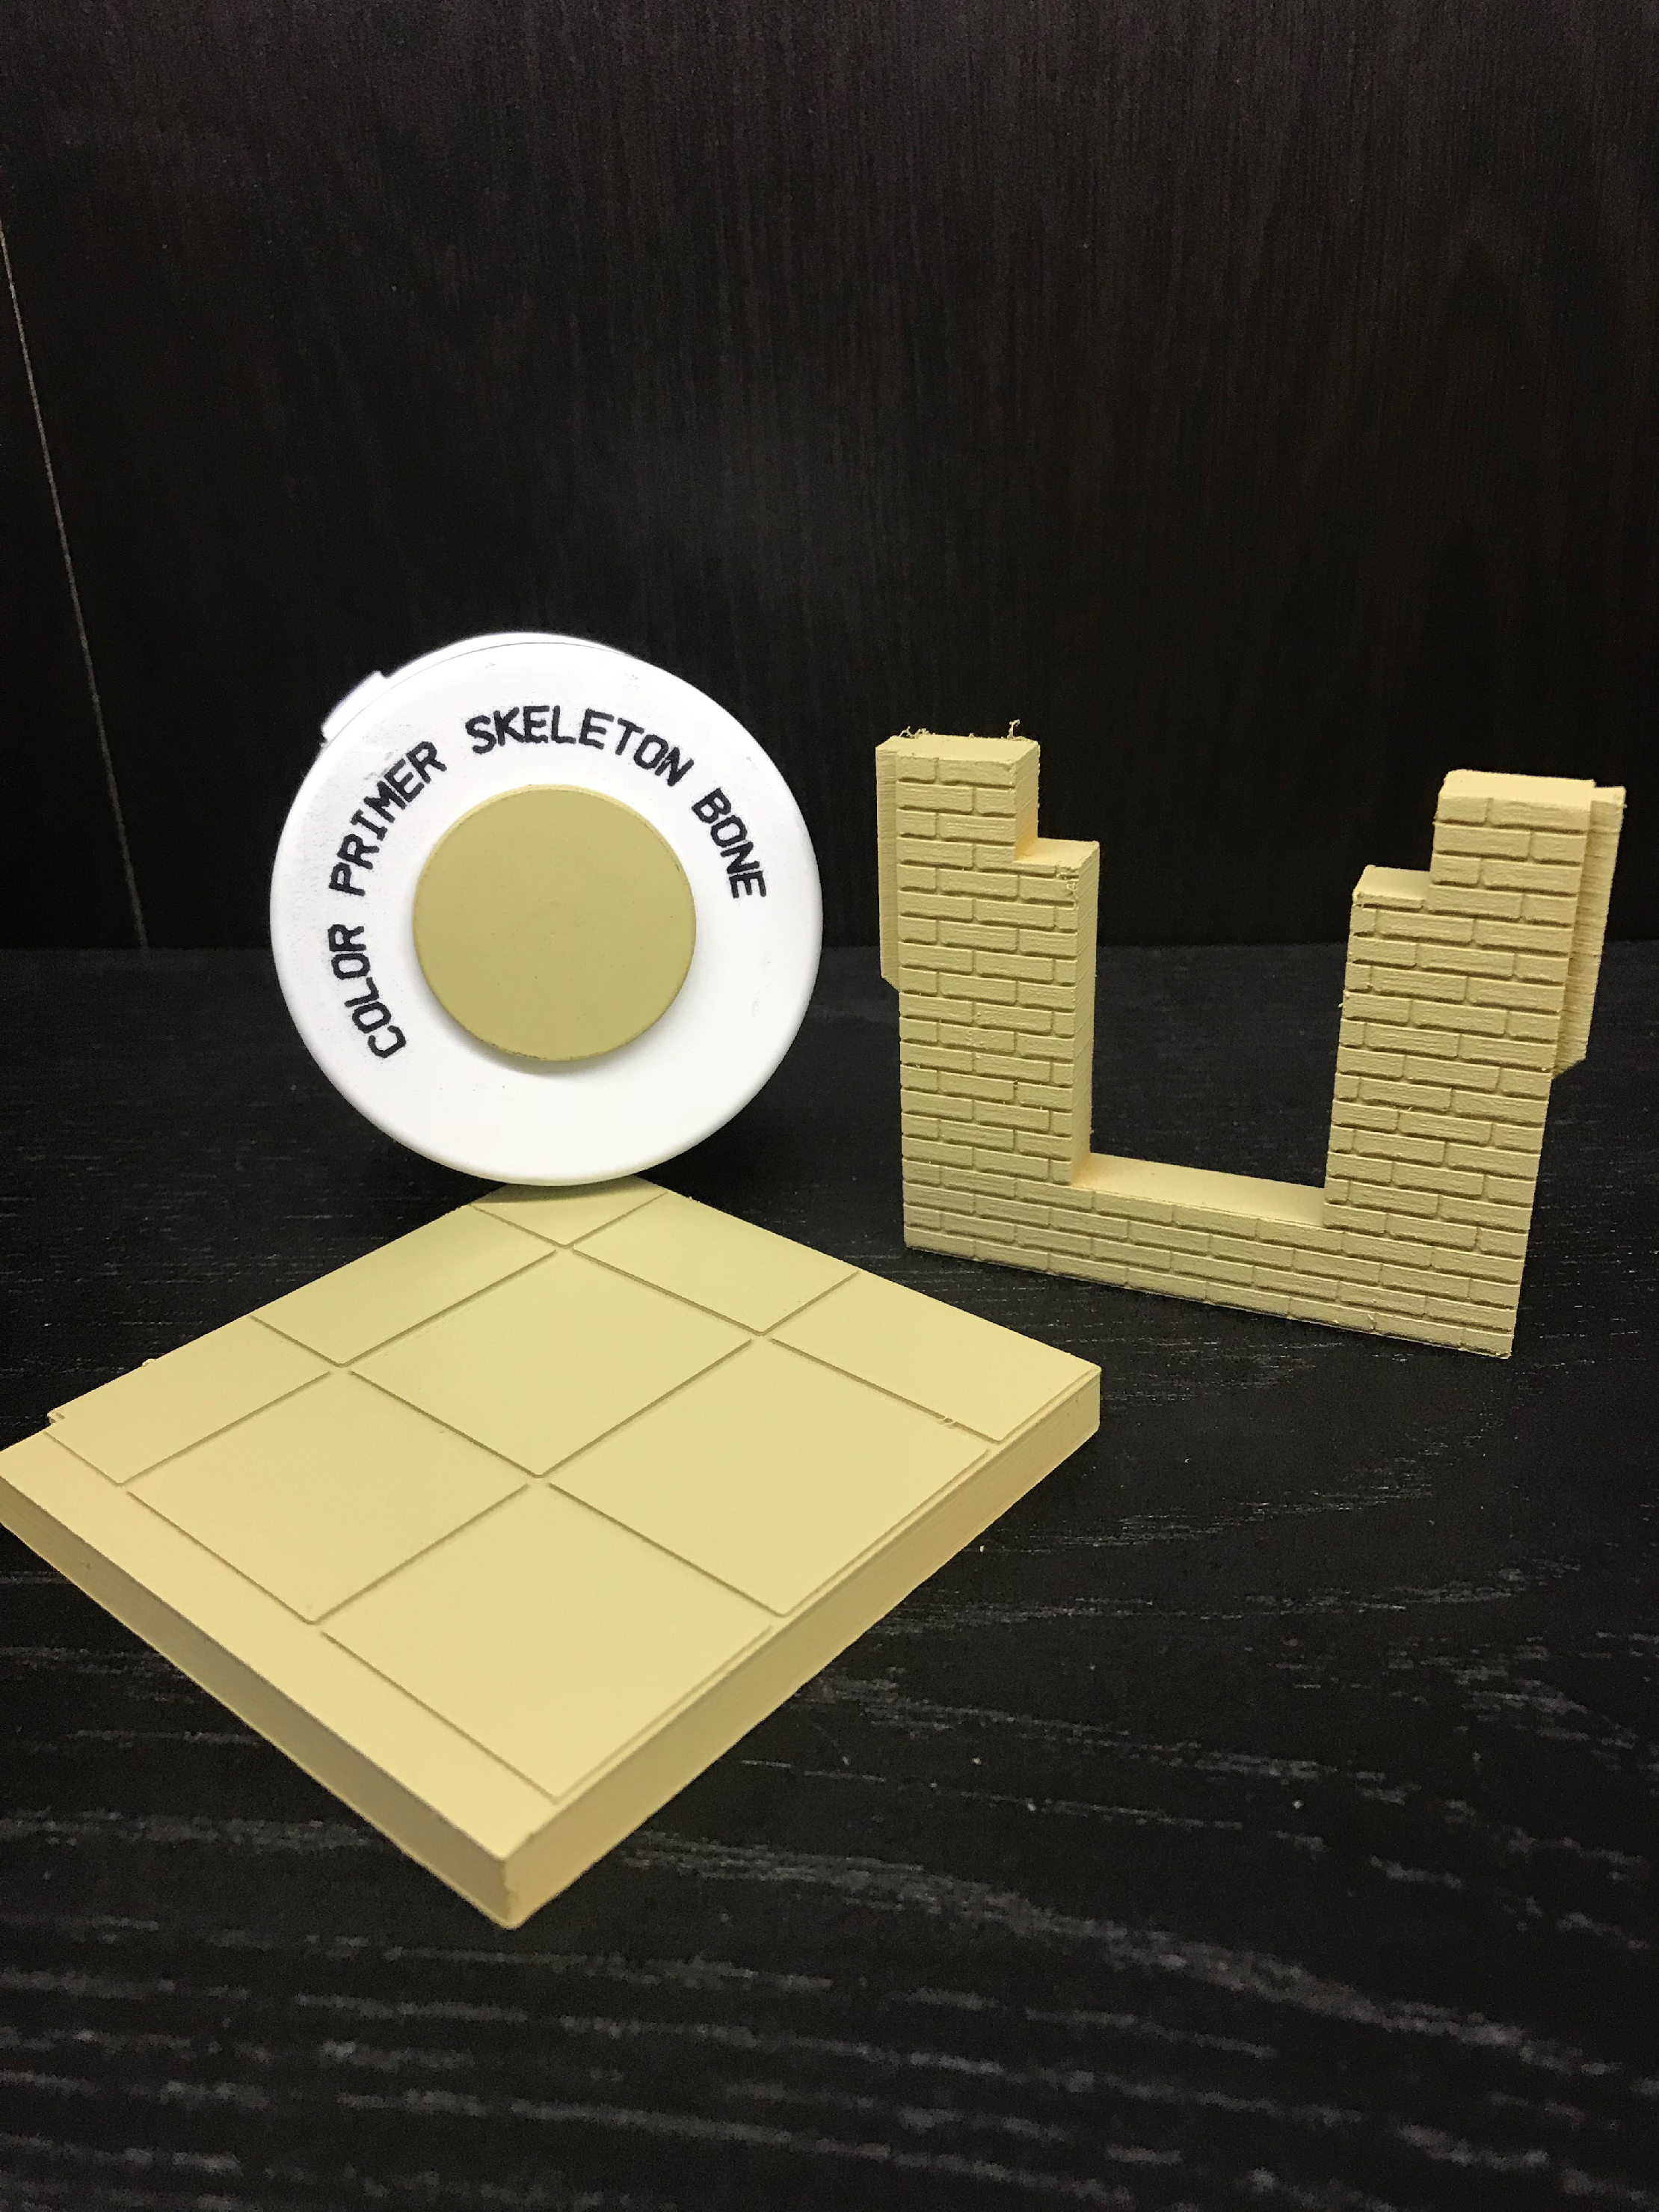
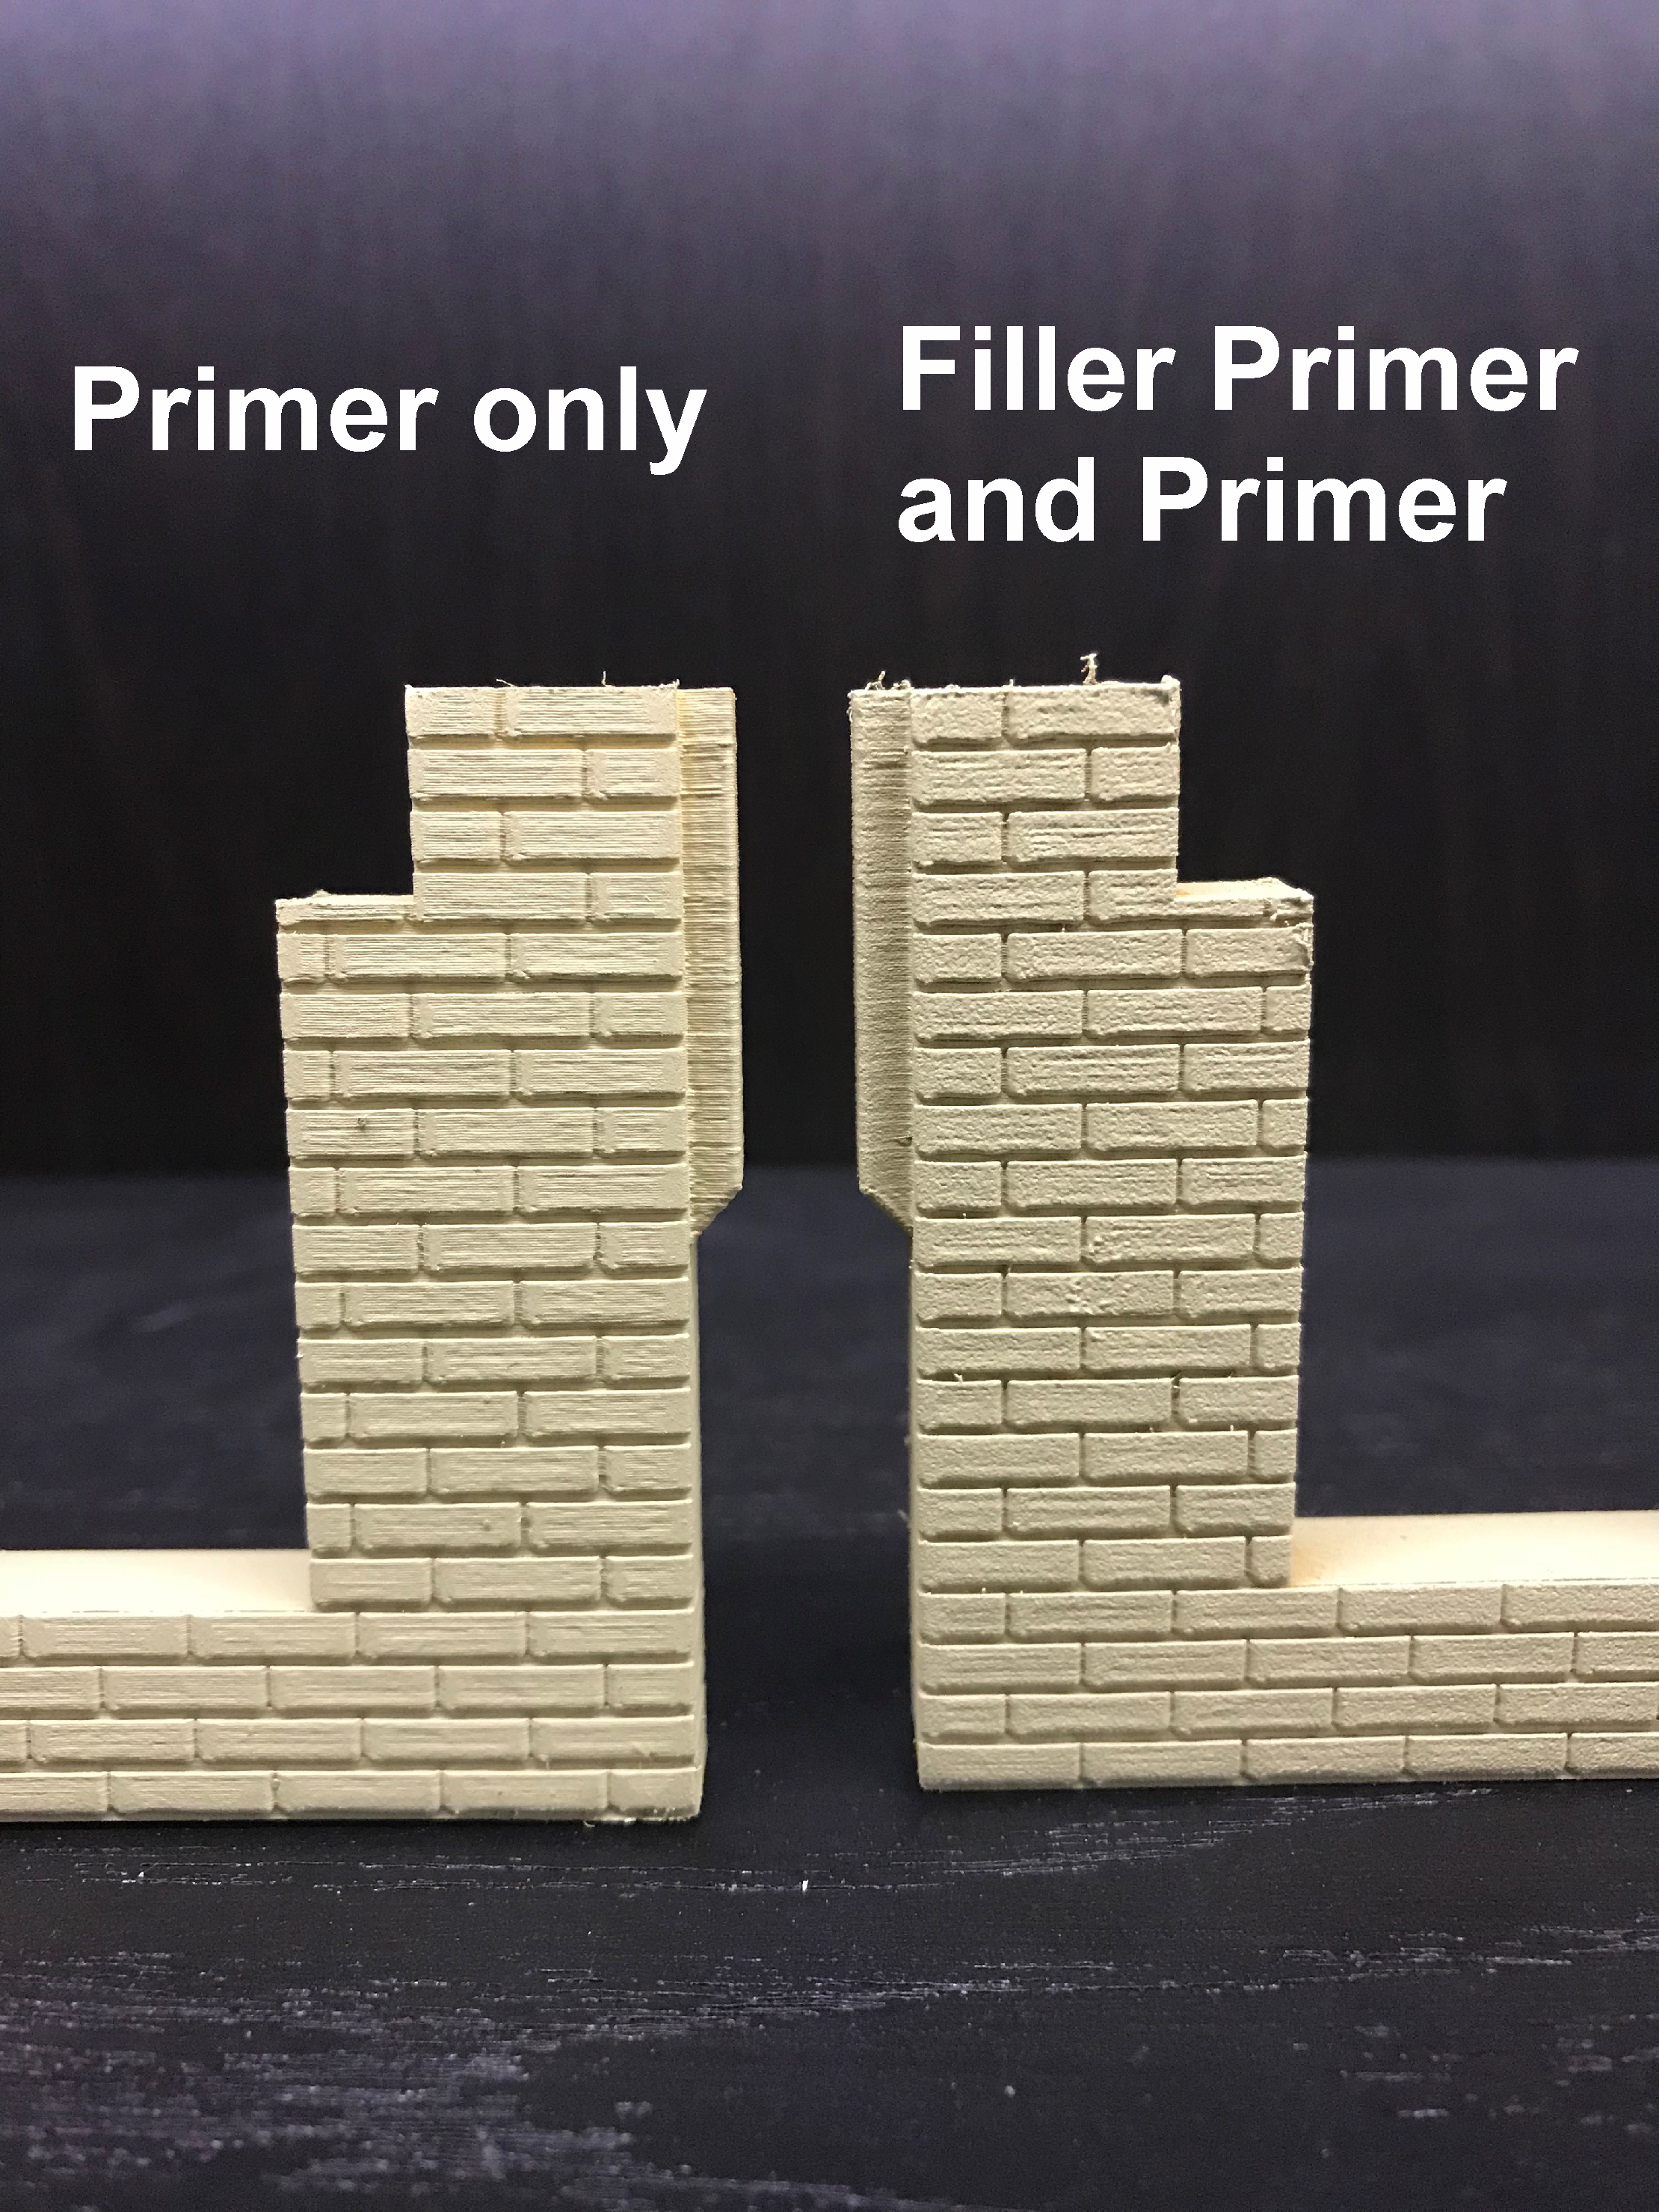
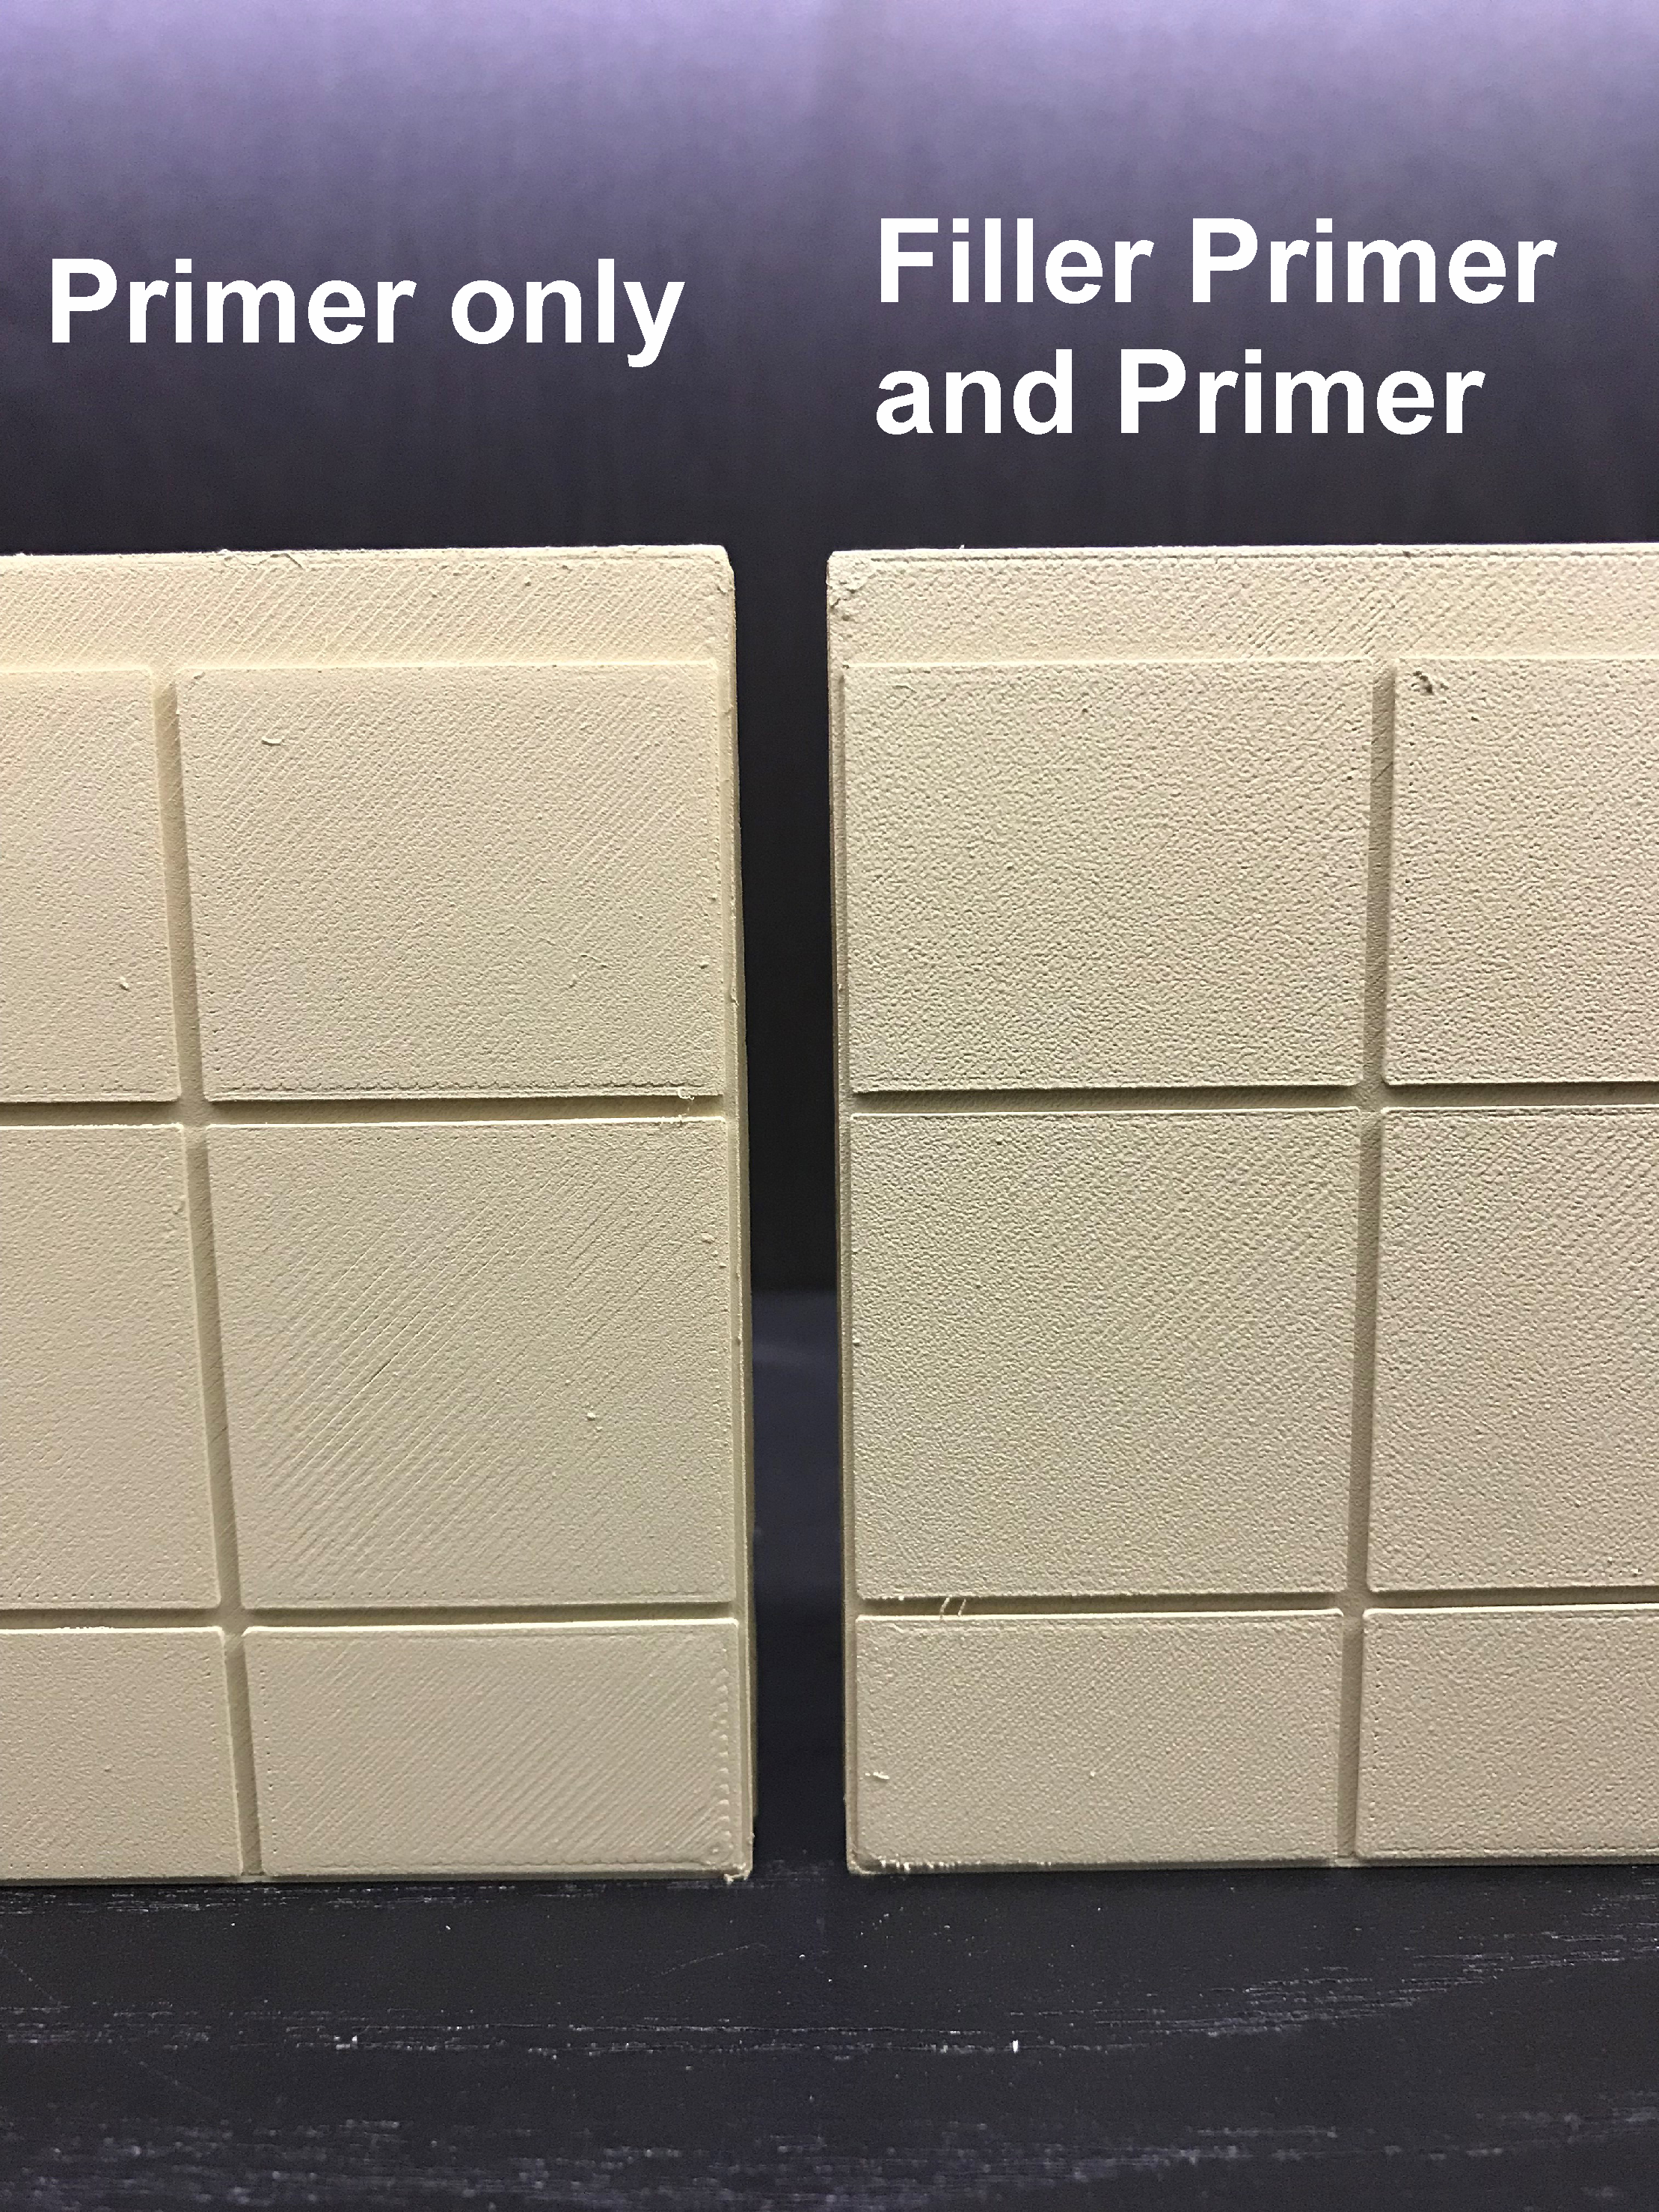
Dose the Pre Primer Work?
So once dried and on the pre primed test then primed in the skeleton bone lets see the results.
i think in the bricks the pre primer (filler Primer) has firstly helped mask some of the visible stepping n the brinks and secondly has given a small amount of texture to the bricks that i really like.
on the floor tiles the difference is less apparent by I’m still thinking that the pre primed has more potential to help fix issues that may appear on some other parts.
in addition i notice that due to the darker colour of the filler primer the files do have a darker tone.
you may be asking why go for skeleton bone. i want to have the bace colour represent the multer between the bricks so when over brushing the bricks the colour between them is still there.
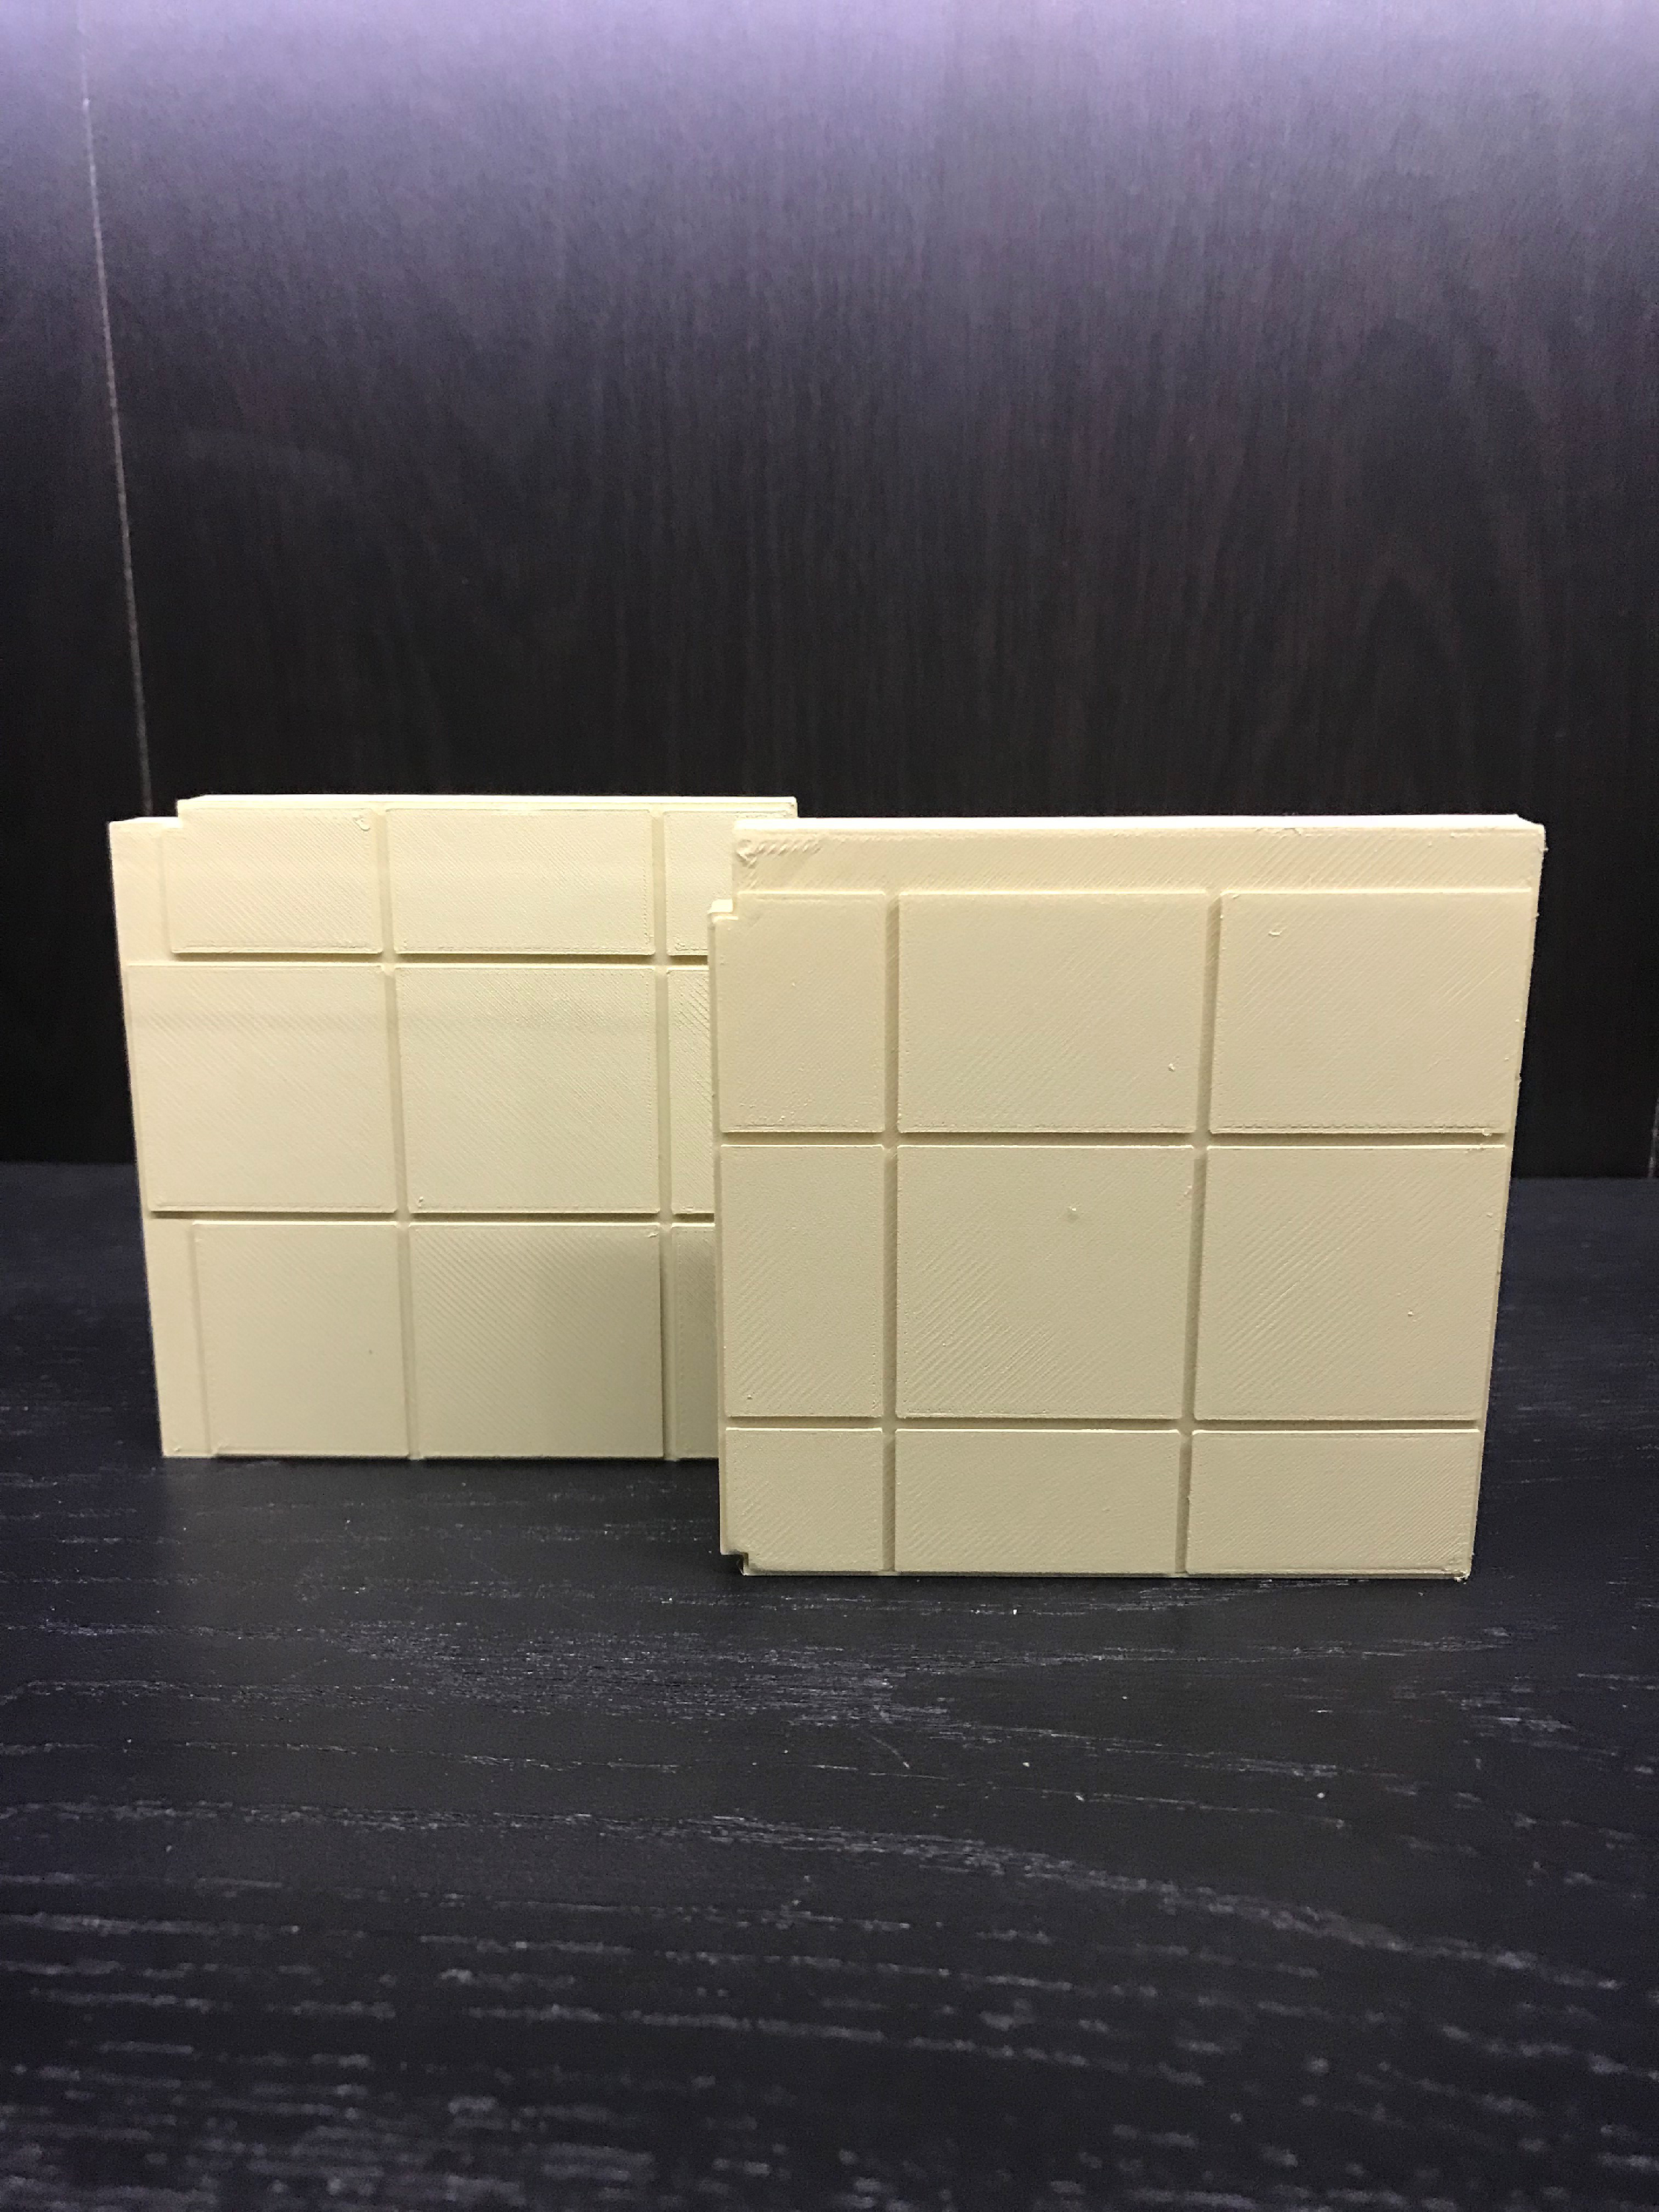
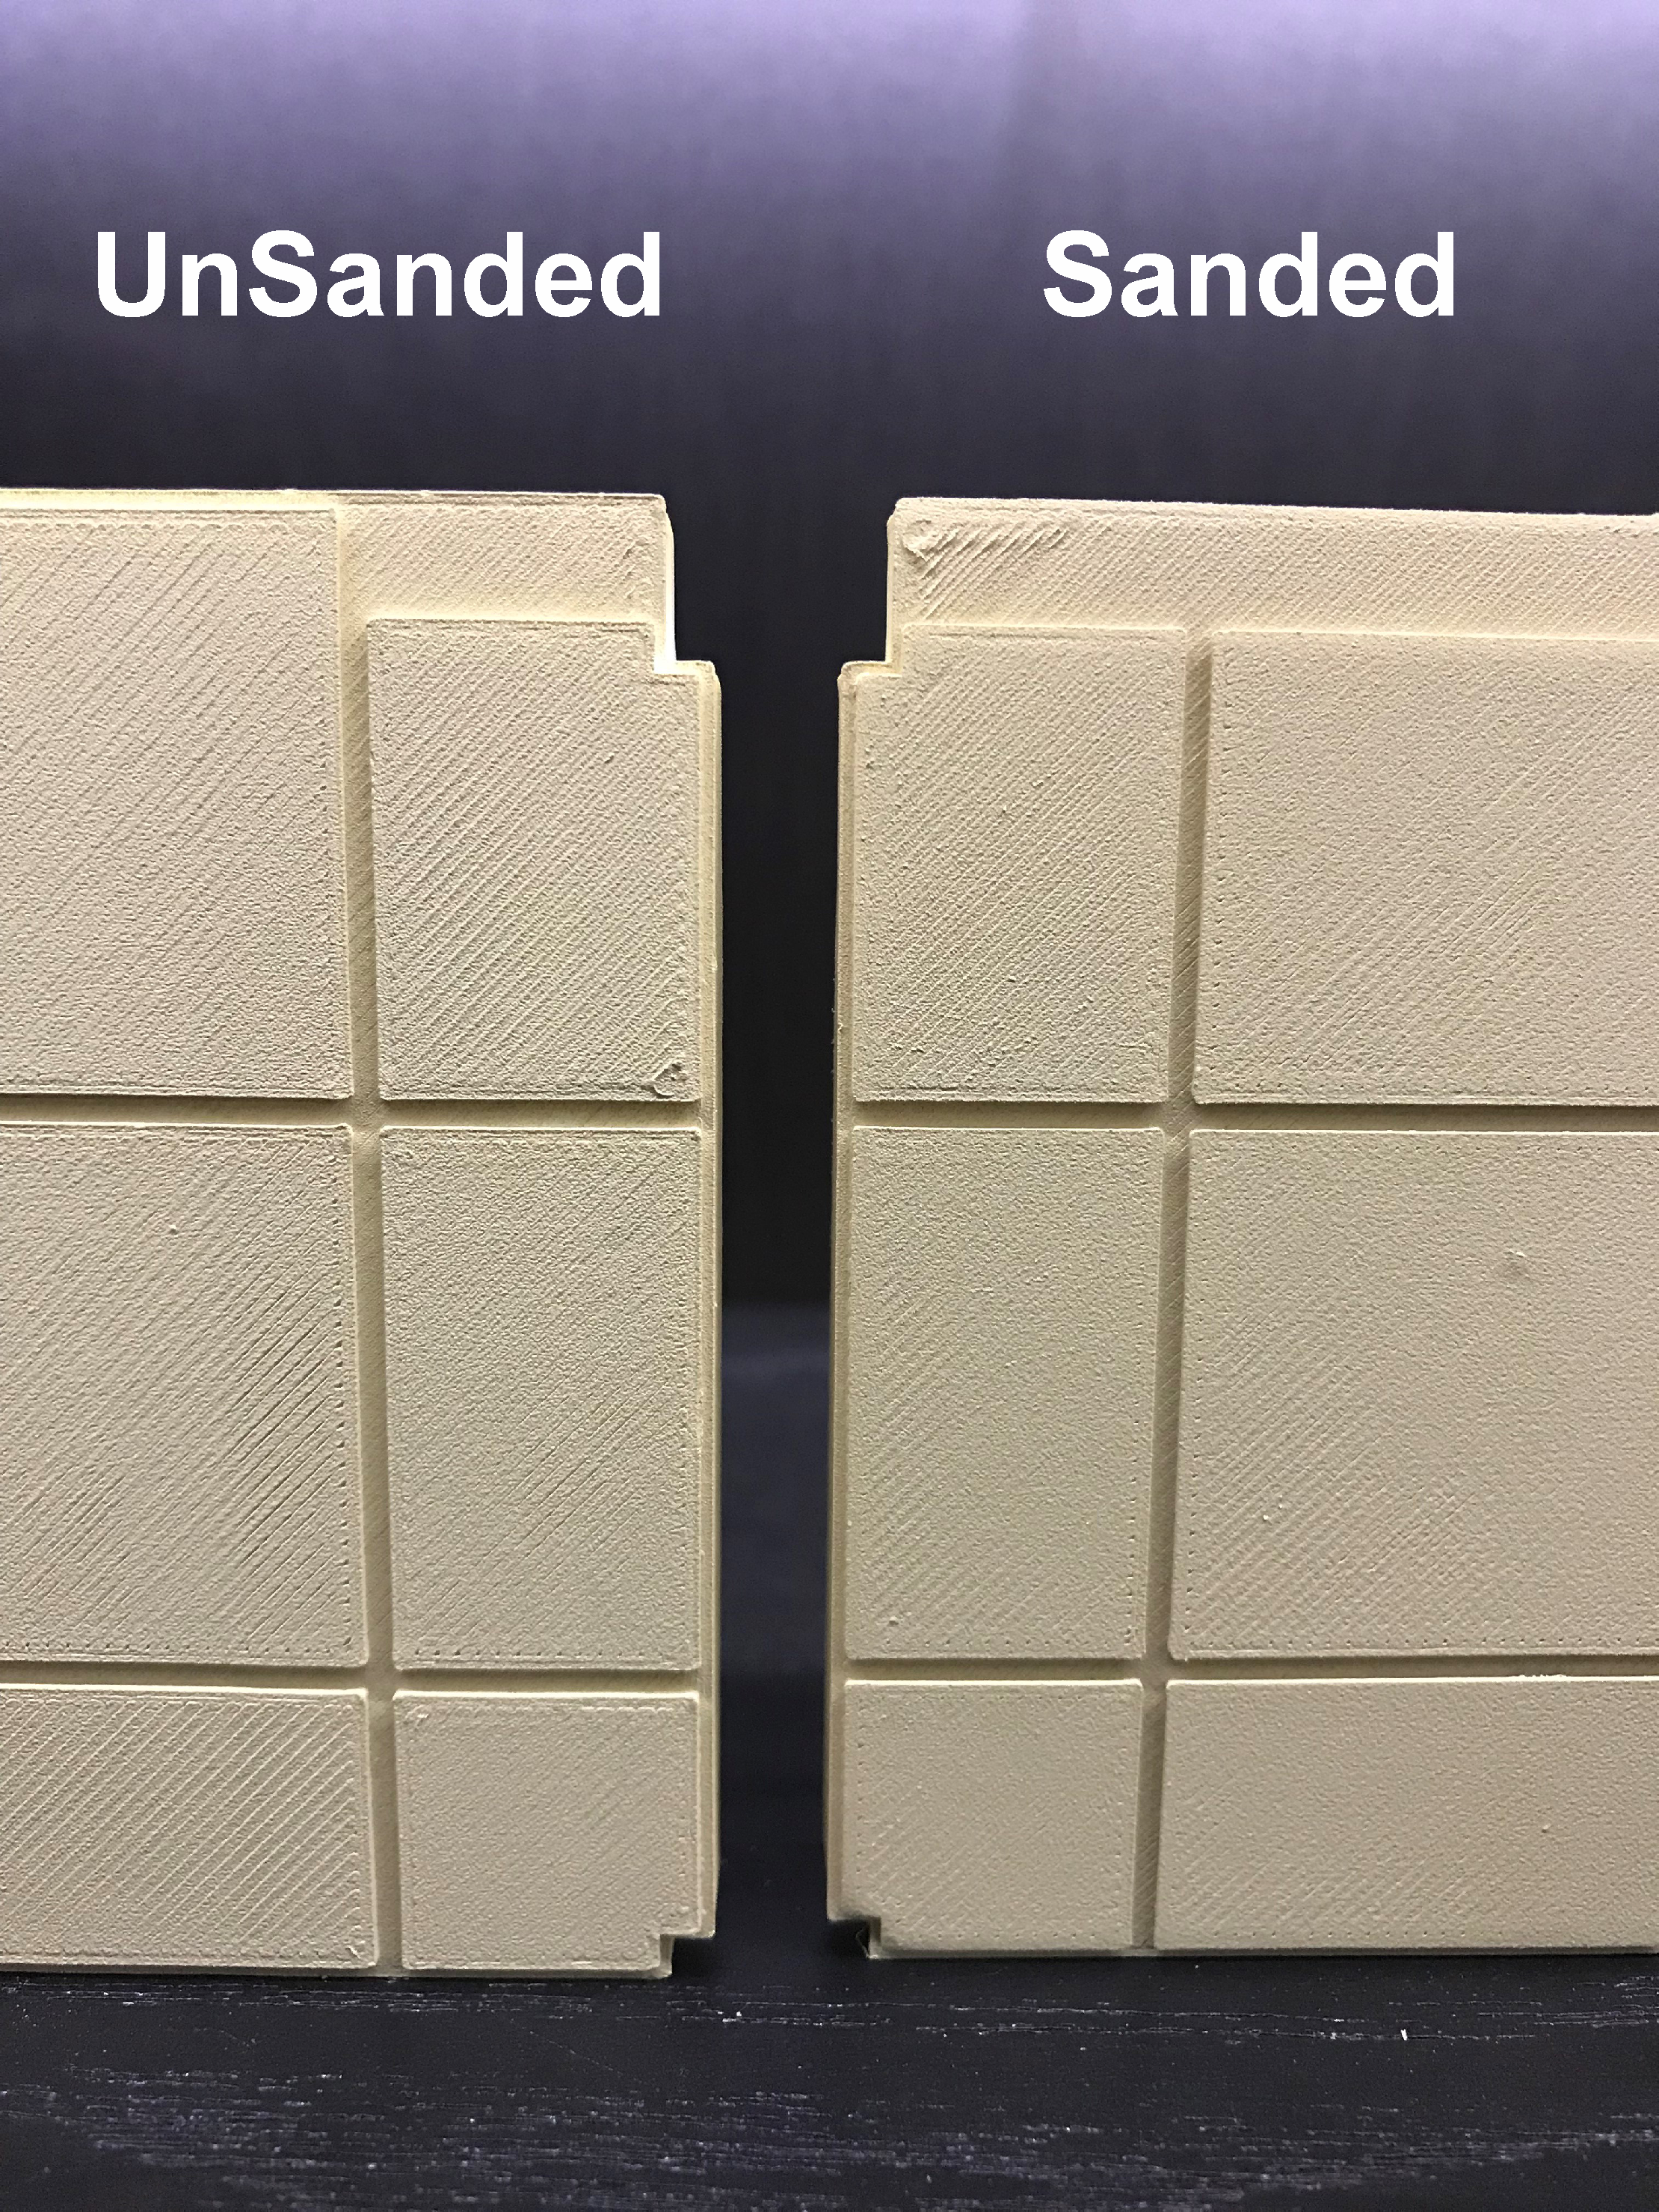
Compare the Primmer (.com)
firstly i also have a sanded and unsanded tile that have both been primed in the skeleton bone to see if the sanding is an over all help.
Note: after sanding i have used a tooth brush under a tape and brushed in to the nooks and cranys to remove excess from sanding to hep adhesion of the primer.
looking at the result i do think it has helped towards removing some of the texture left behind by the 3D Printer.