


Odds, Sods n ……Stuffs. A Medley of Mayhem


Recommendations: 792
About the Project
I have so many 'other' minis and projects on the go at any one time so I wanted/needed a nice tidy place to put progress photos and thoughts about those bits that just don't fall into a more specific project plog. Get ready for a mass of everything mini related from all over the board!!
Related Genre: Science Fiction
This Project is Active
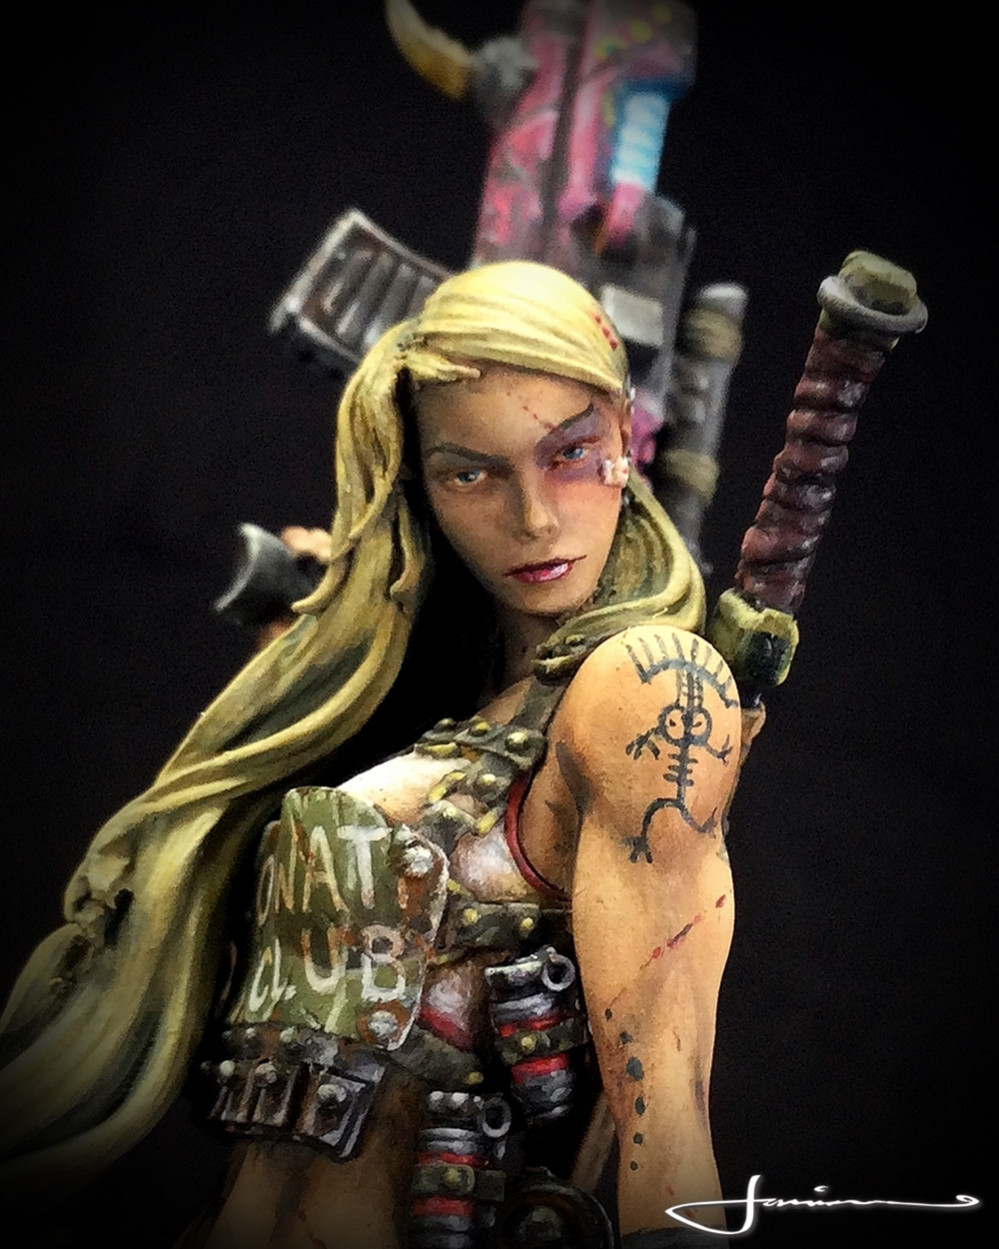
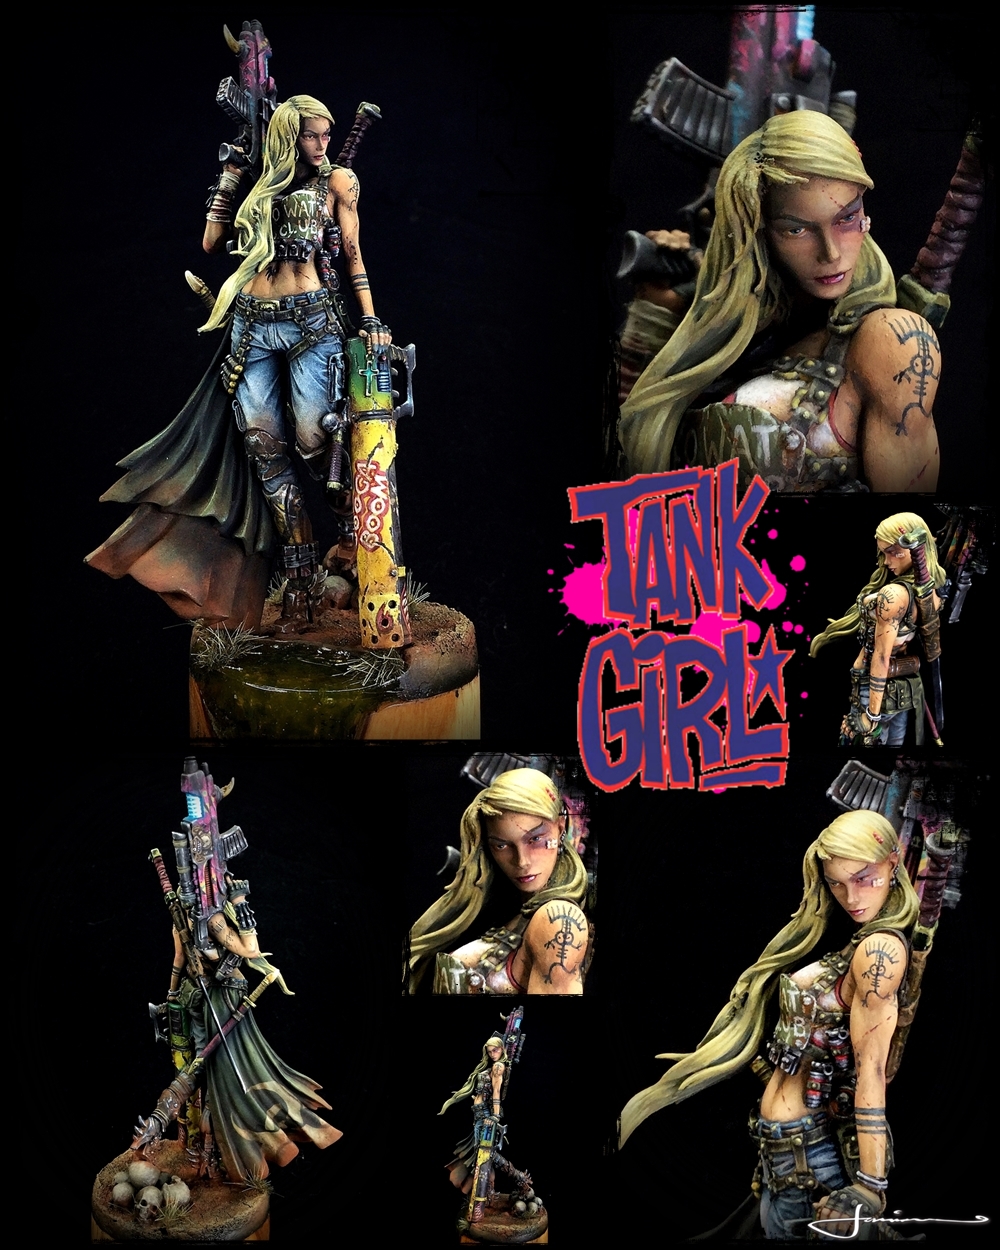
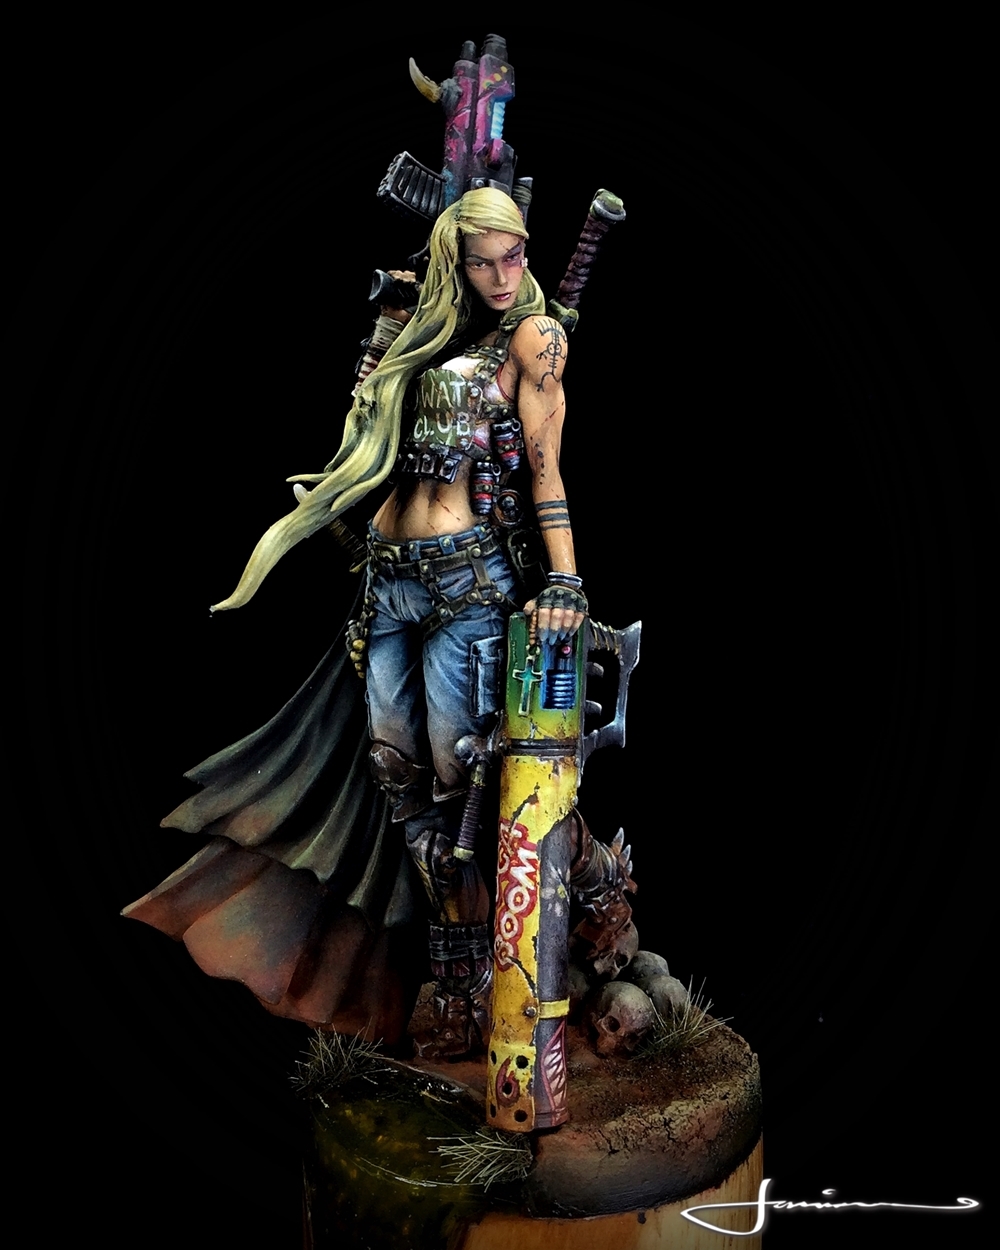
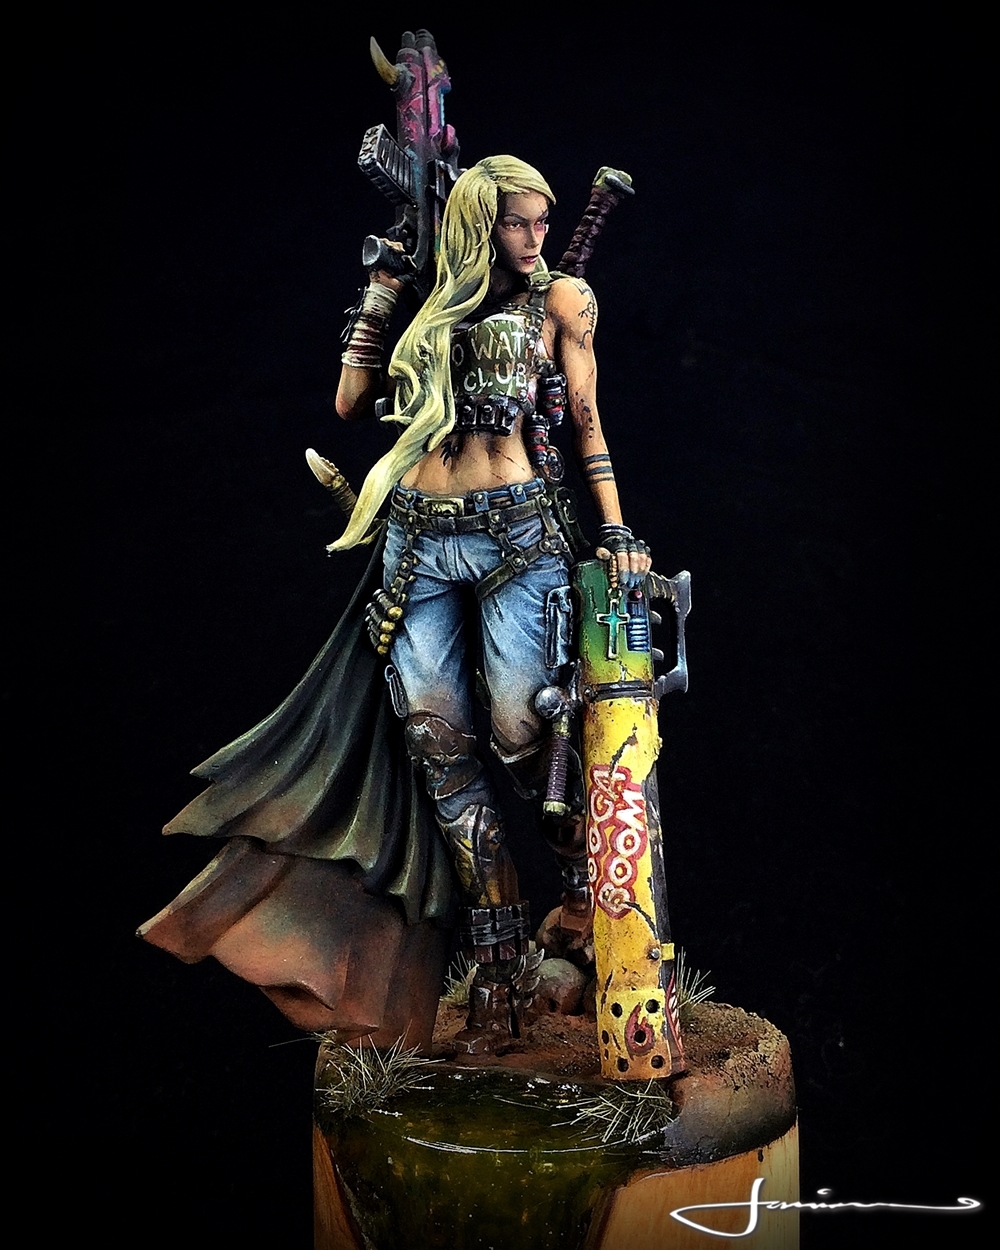
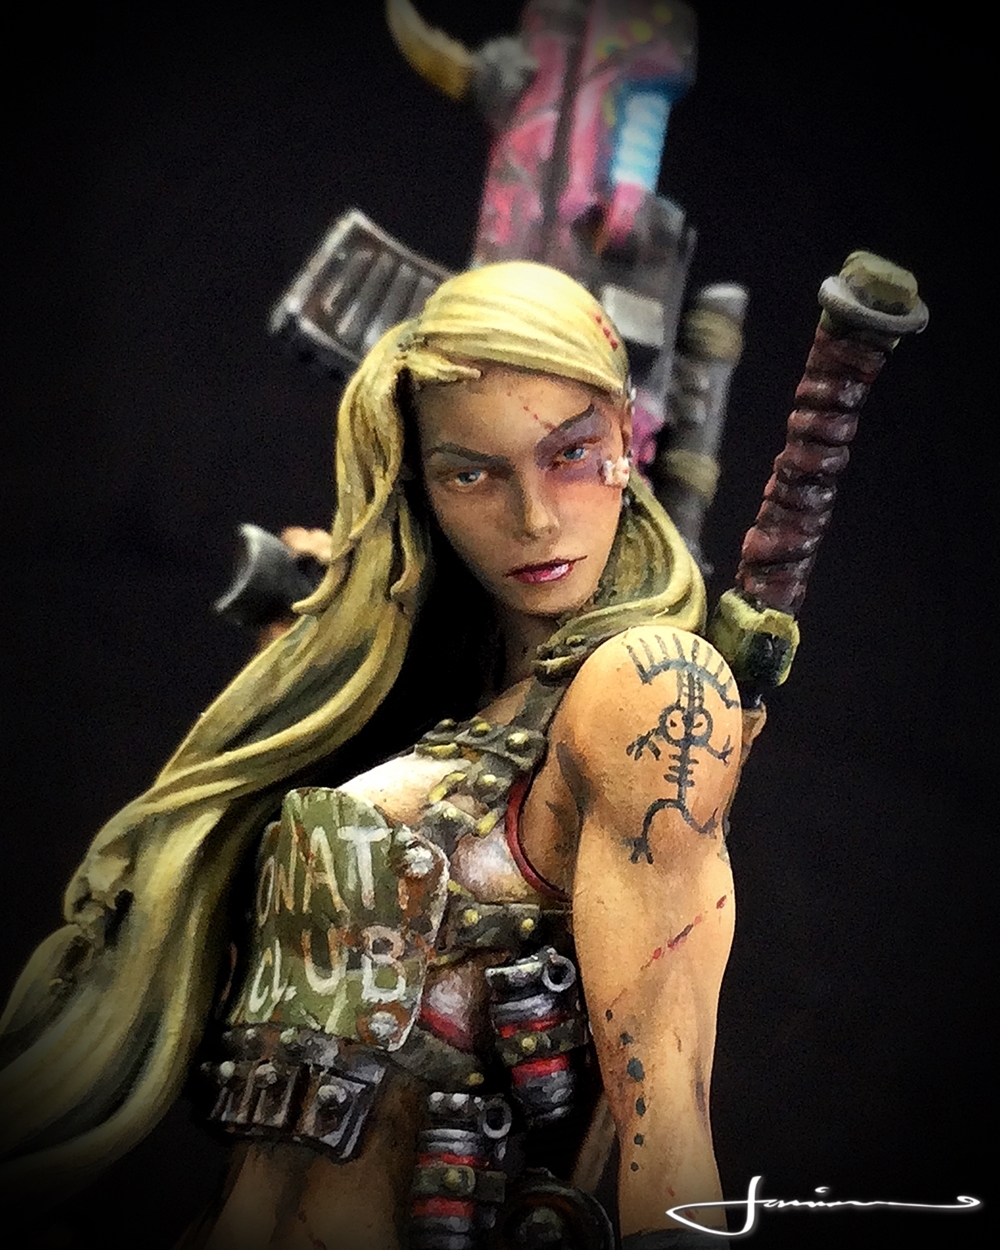
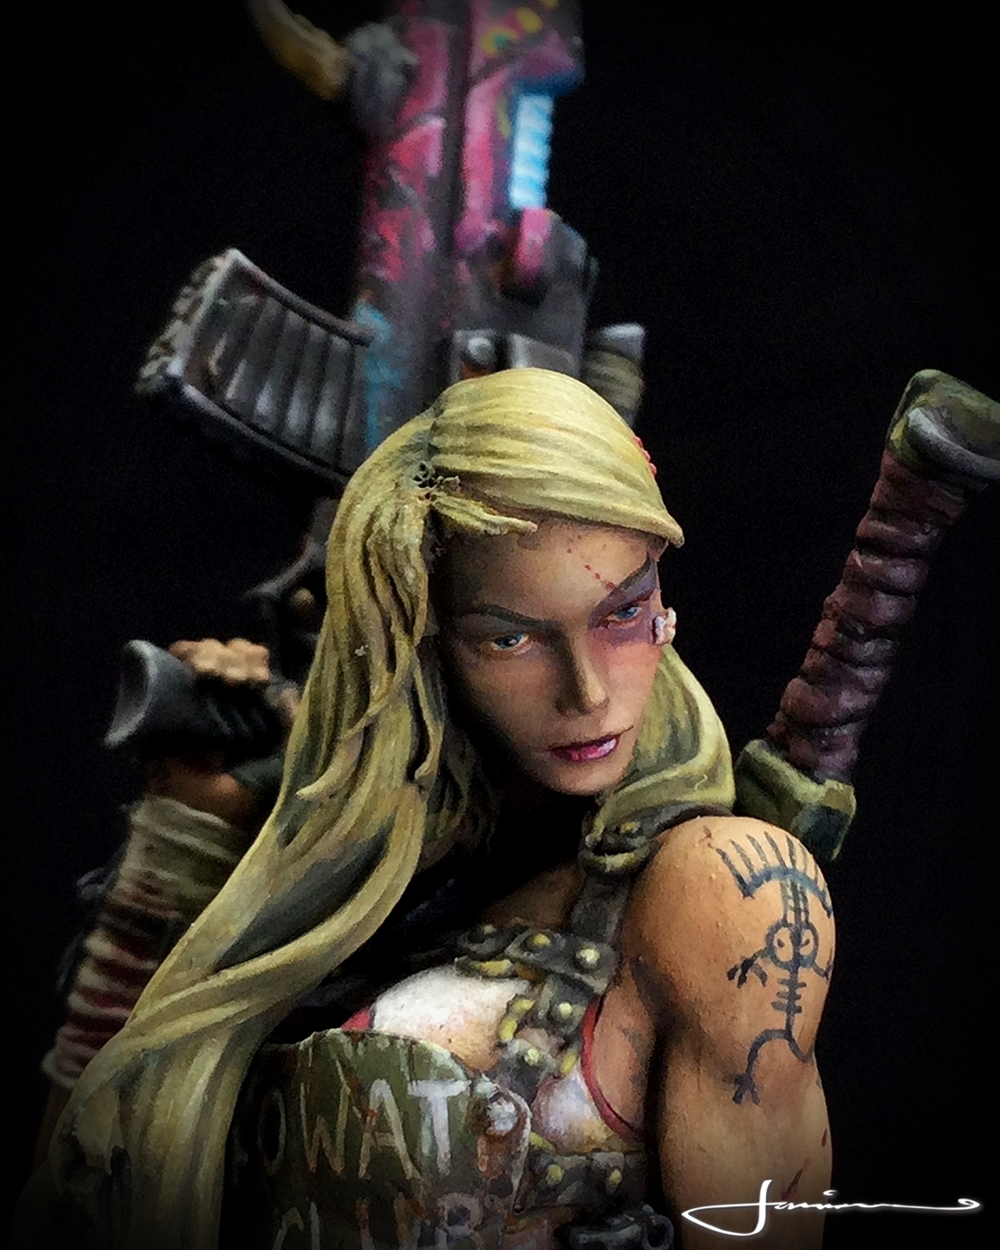
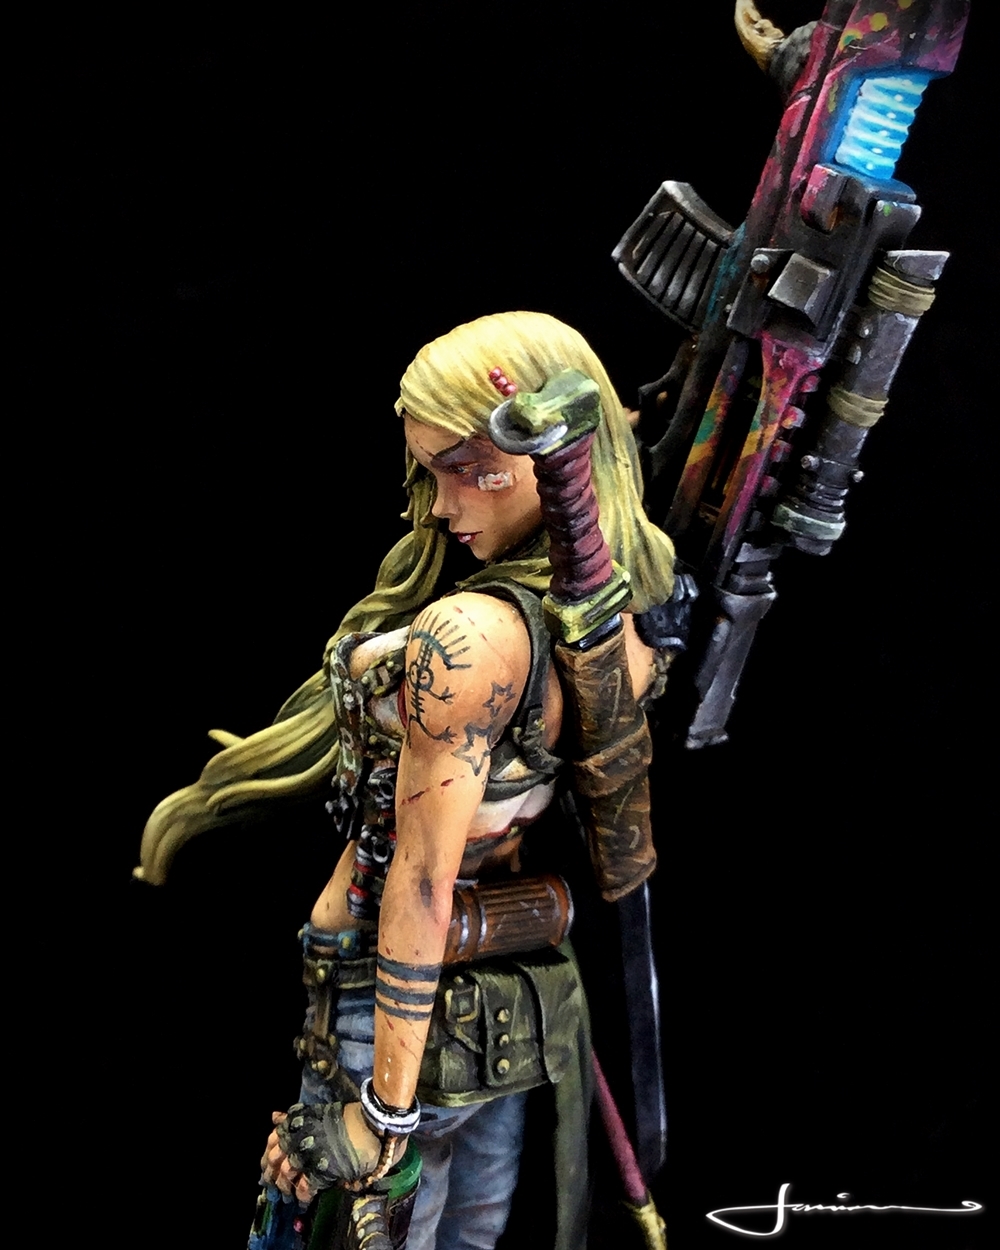
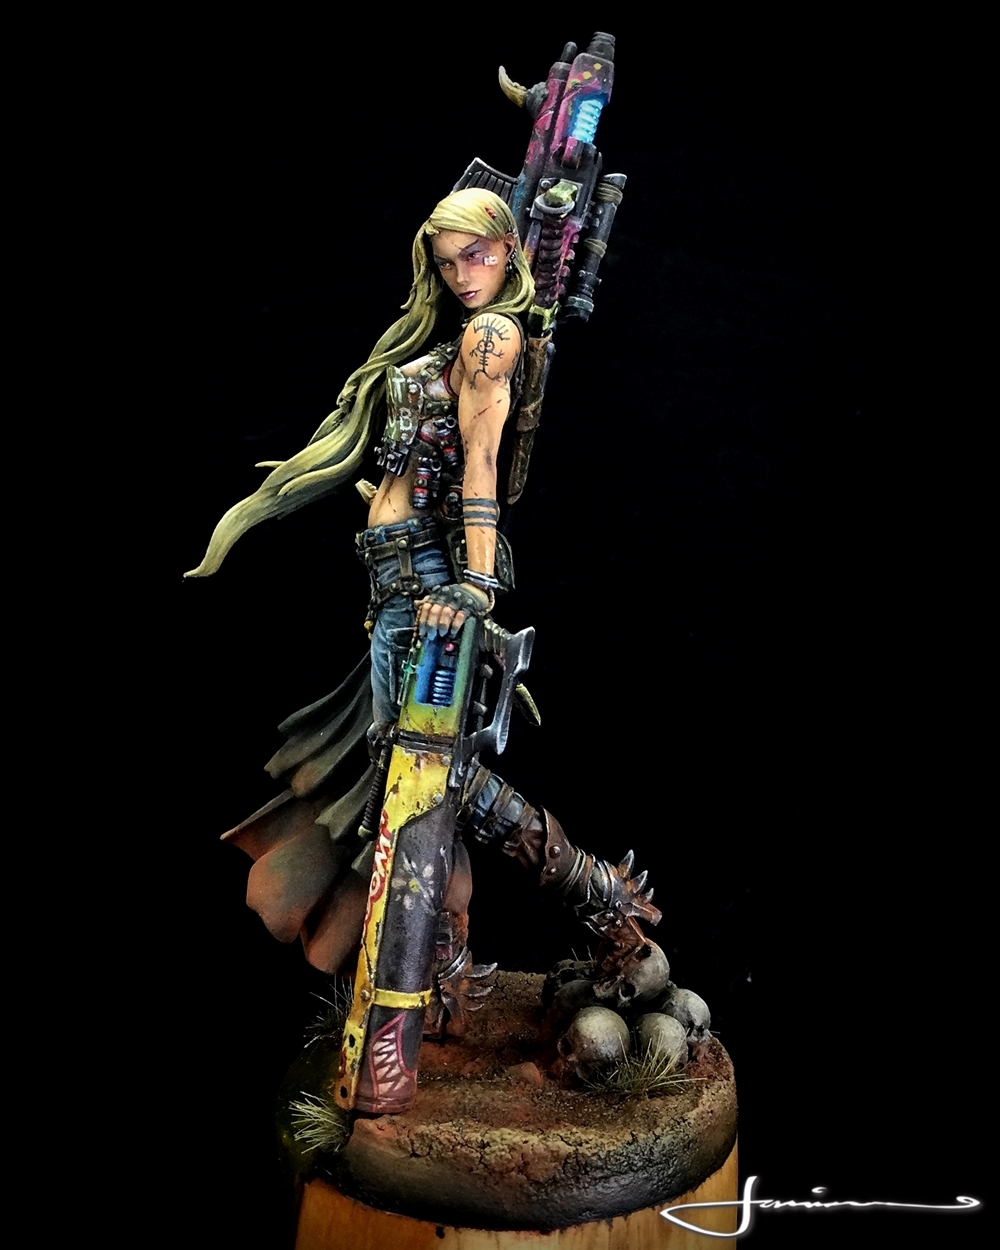
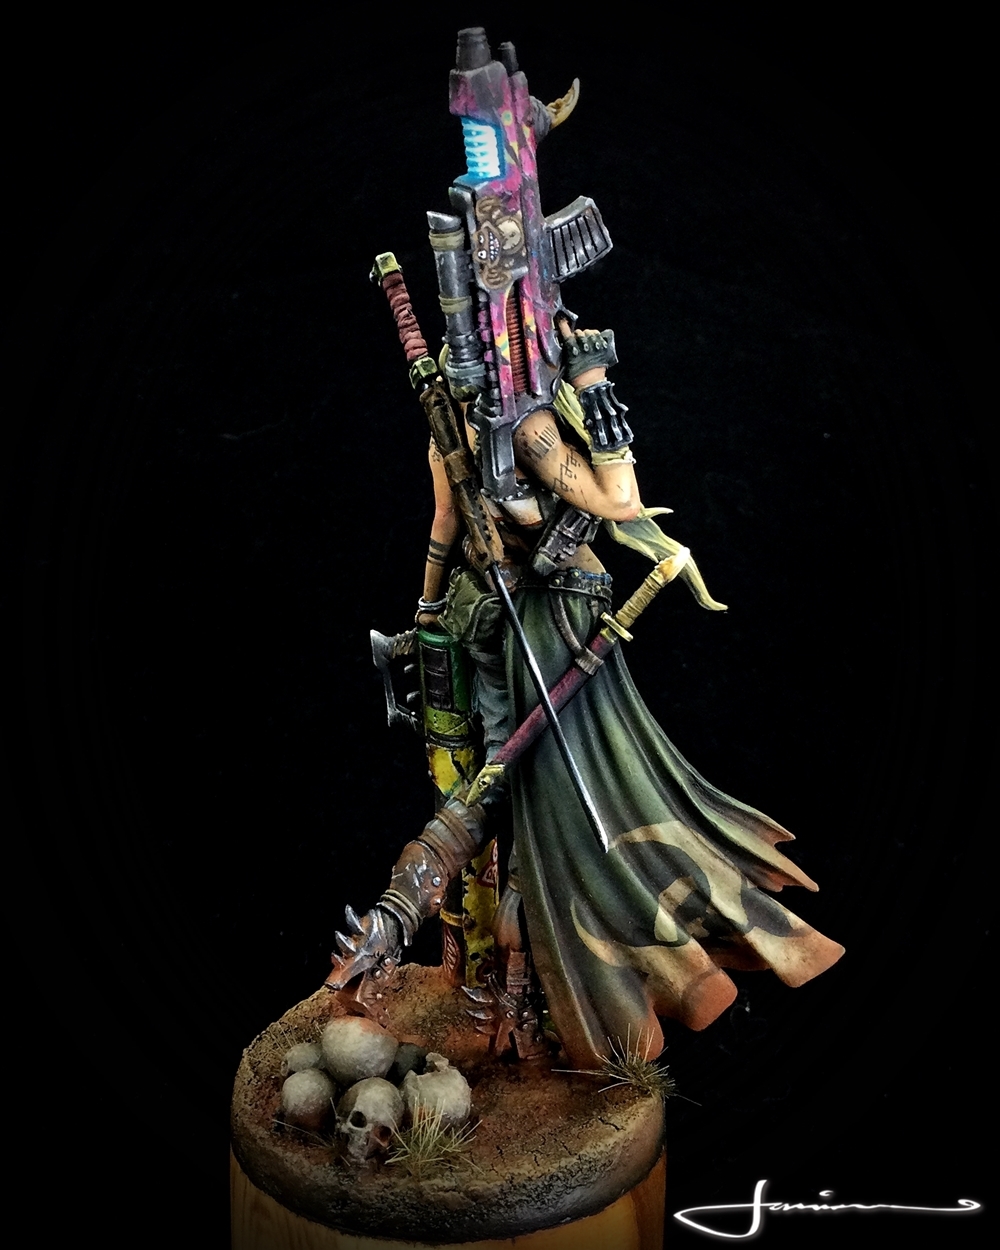
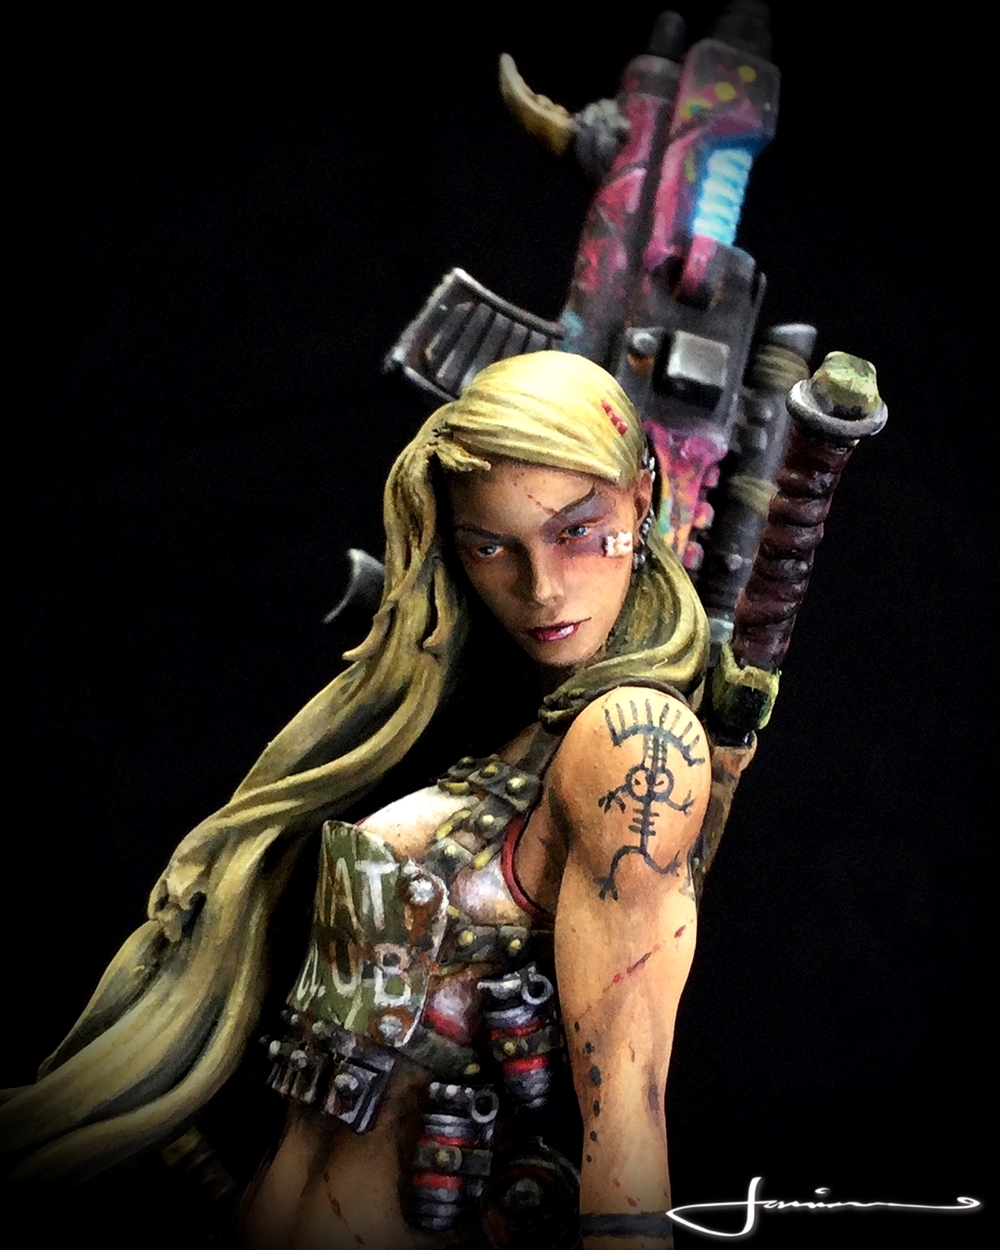
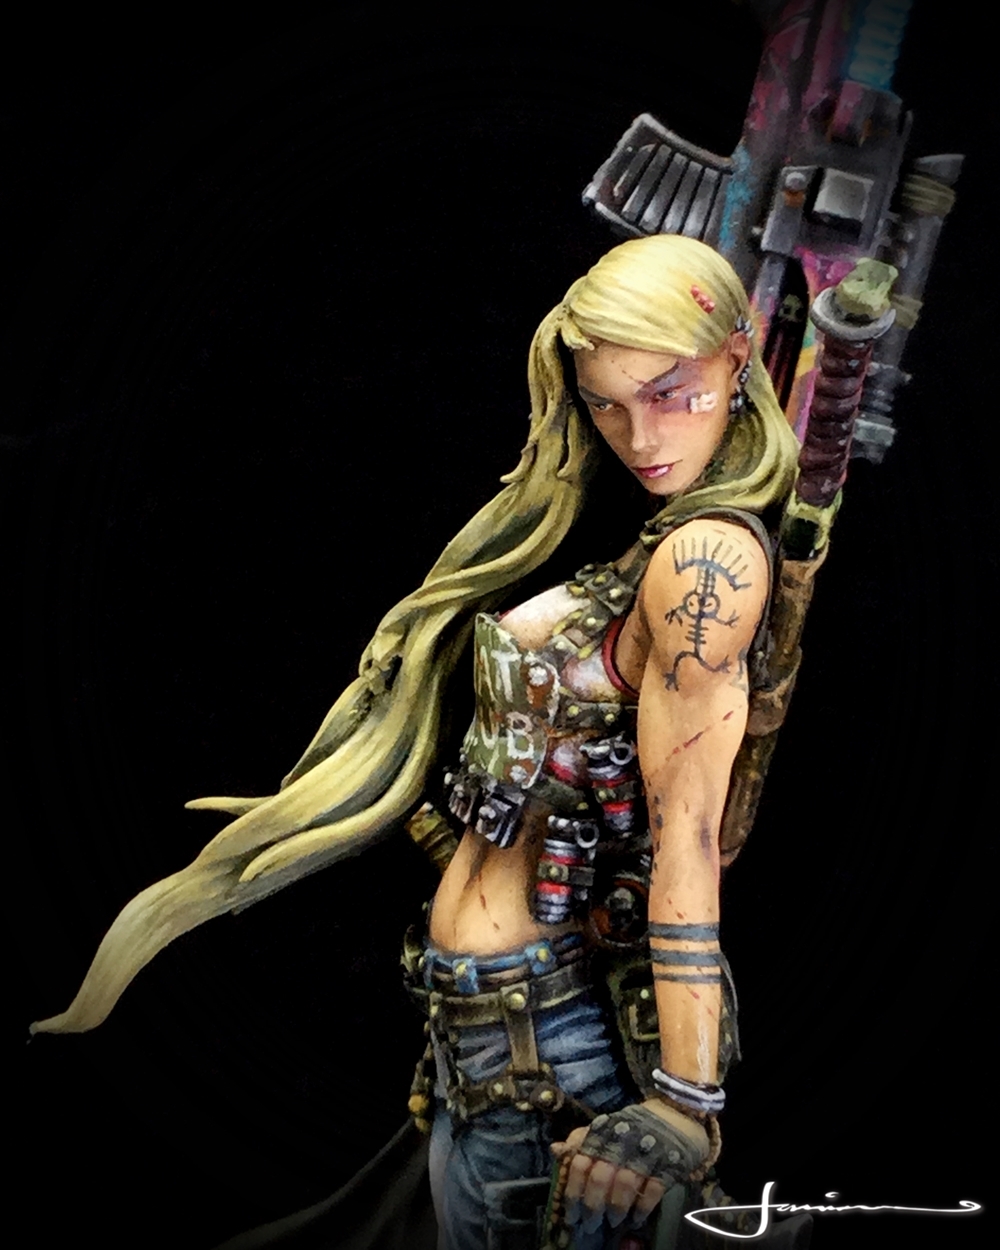
Tank Girl~~~!!!
Tank Girl is finally finsihed!!! https://www.instagram.com/p/CNkRK3HHYmR/
The model is actually ‘Valerya’ from Hera Models but I fancied painting her up in the vein of one of my favourite comic book characters – ‘Tank Girl’ by Jamie Hewlett and Alan Martin from back in the day
Had a real blast working on her and used the project to really push myself forward: trying out a few new techniques as well as trying to improve on some older ones.
I even went the lunatic route and fashioned a tiny band-aid for her cheek as the comic book version is always sporting several plasters about her face!!
Hamelin - The Bard Of Twilight 2 - Vines n Primes
So bit more work on the base and we are starting to see the base take some serious form!!
So with the layout is pretty much locked in and sealed with three coats of wood glue & water solution (1st coat 50/50 and then 2nd and 3rd coats about 72/25 glue to water) I added some more under-dressing to the base.
This is certain details and dressings that go on before the primer and form a base for later top dressings such as moss, lichen and other flora as well as pushing some rubble and dust into corners to break up the clean angles of the built elements.
I also added in some vines to wrap around some of the architecture. These are dried and preserved ‘vines’ I got from rival crafts. They look great but were an utter bastard to place and glue down esp when my Superglue decided to be lazy AF and not cure quickly!!
With all the things sealed, glued down and ready it was finally time to bring it together with some primer.
I primed first with black (Stylynrez ofc) in two layers and then a light coat of white over that to pick out the details.
Priming at this point deos more than just get the piece ready for painting. It flattens out all the different coloured elements and materials from the build so I can see more easily if there are any mistakes made in the build or any areas that need more underdressing, filling and so on. Also shows up any areas where glue has left noticeable tidemarks or ripples so I can then either cover them with some fine grit or sand them done and then reprime.
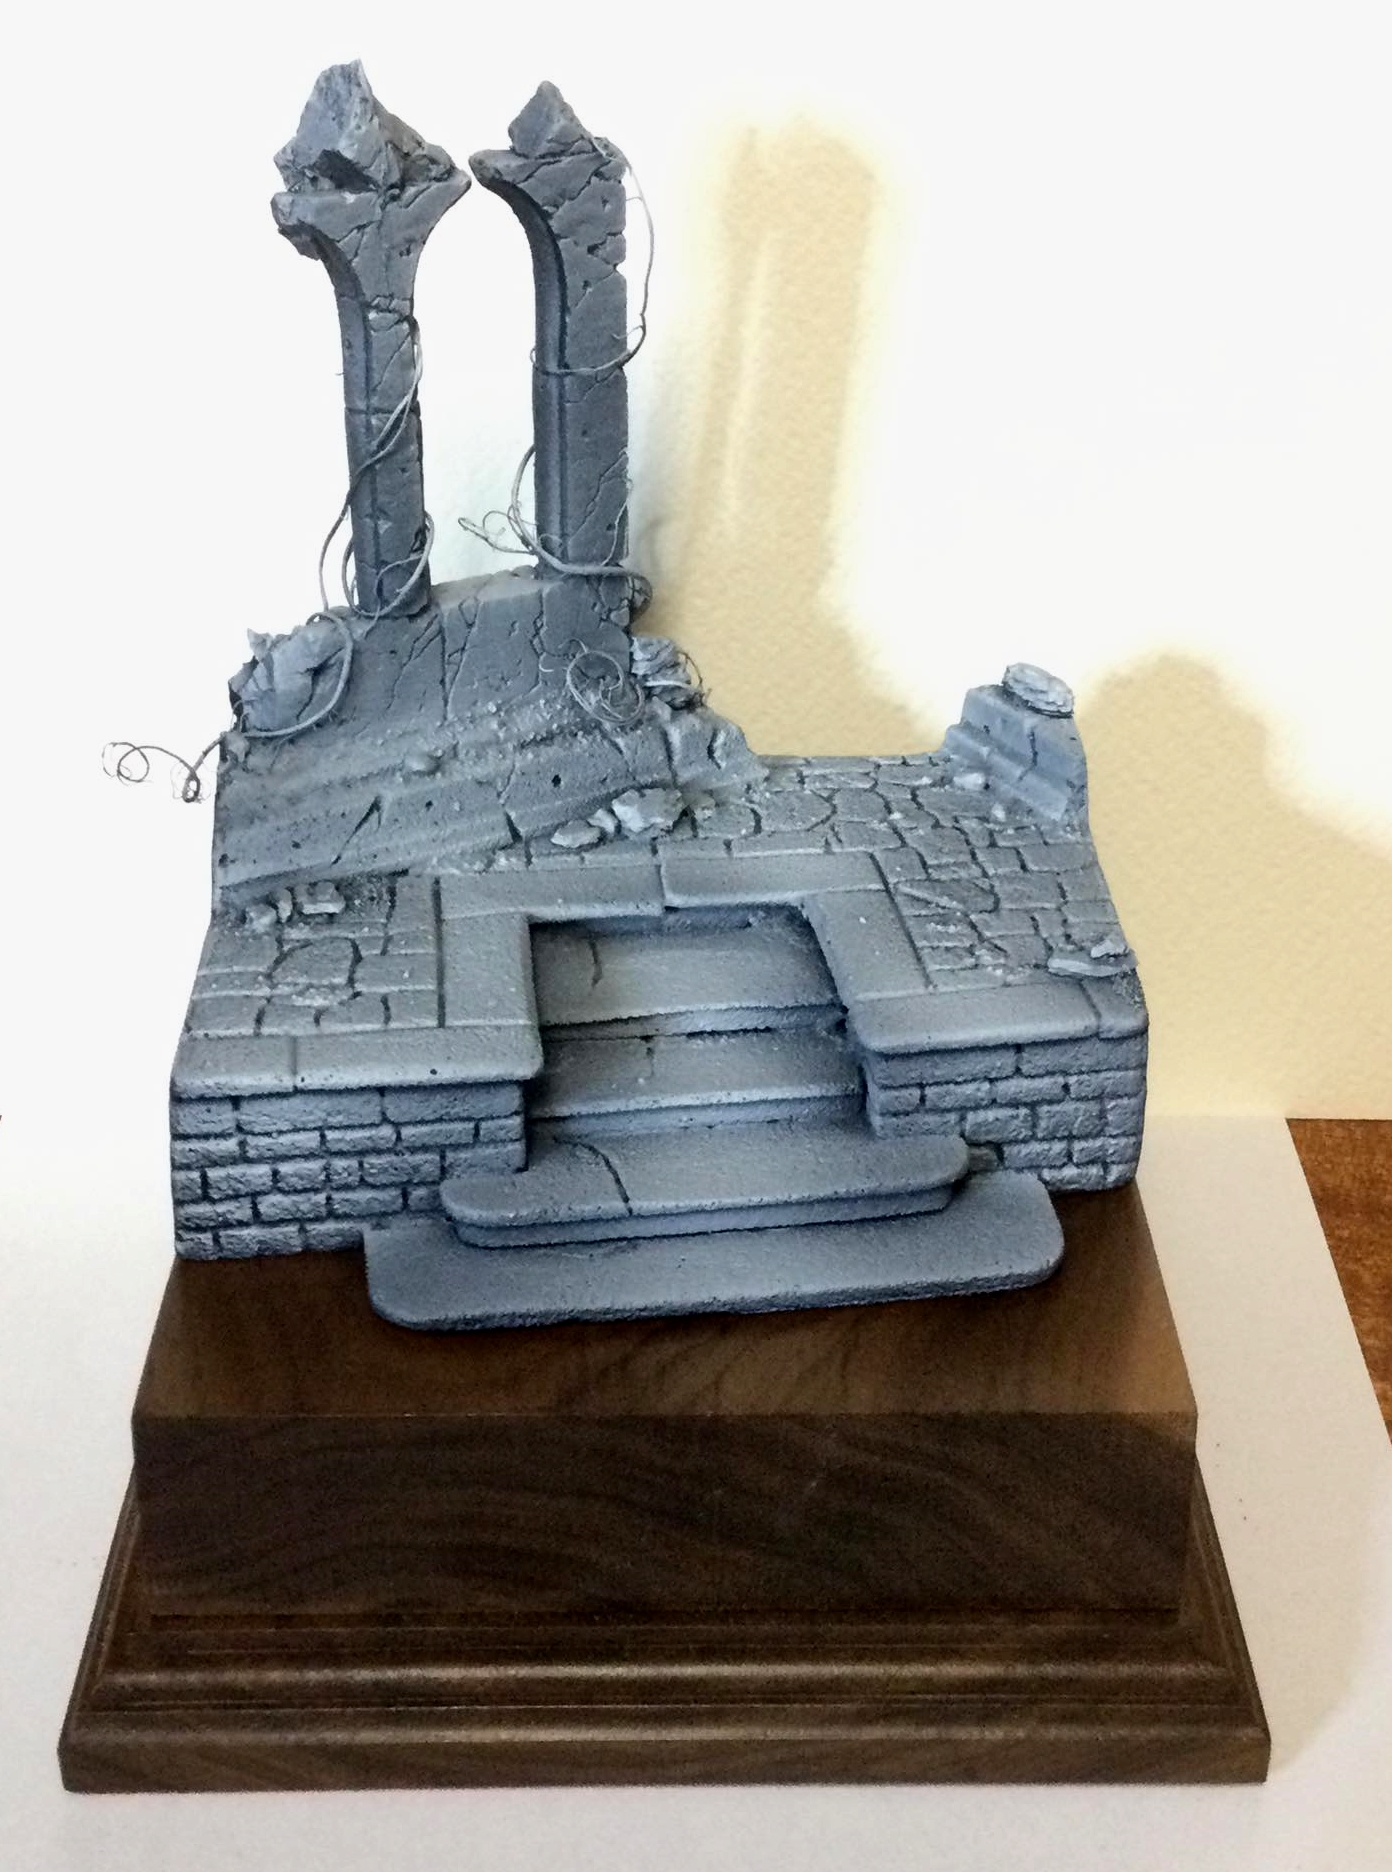
With the priming done I place the scene back on top of the walnut plinth where it will eventually go. Again could check size and fit and get a better idea of how the final piece will look.
Hamelin - The Bard Of Twilight I - Building the biggest base I've ever tried!
We’re jumping into this after the main figure has already been nearly finished but I want to focus more on the diorama portion of this project.
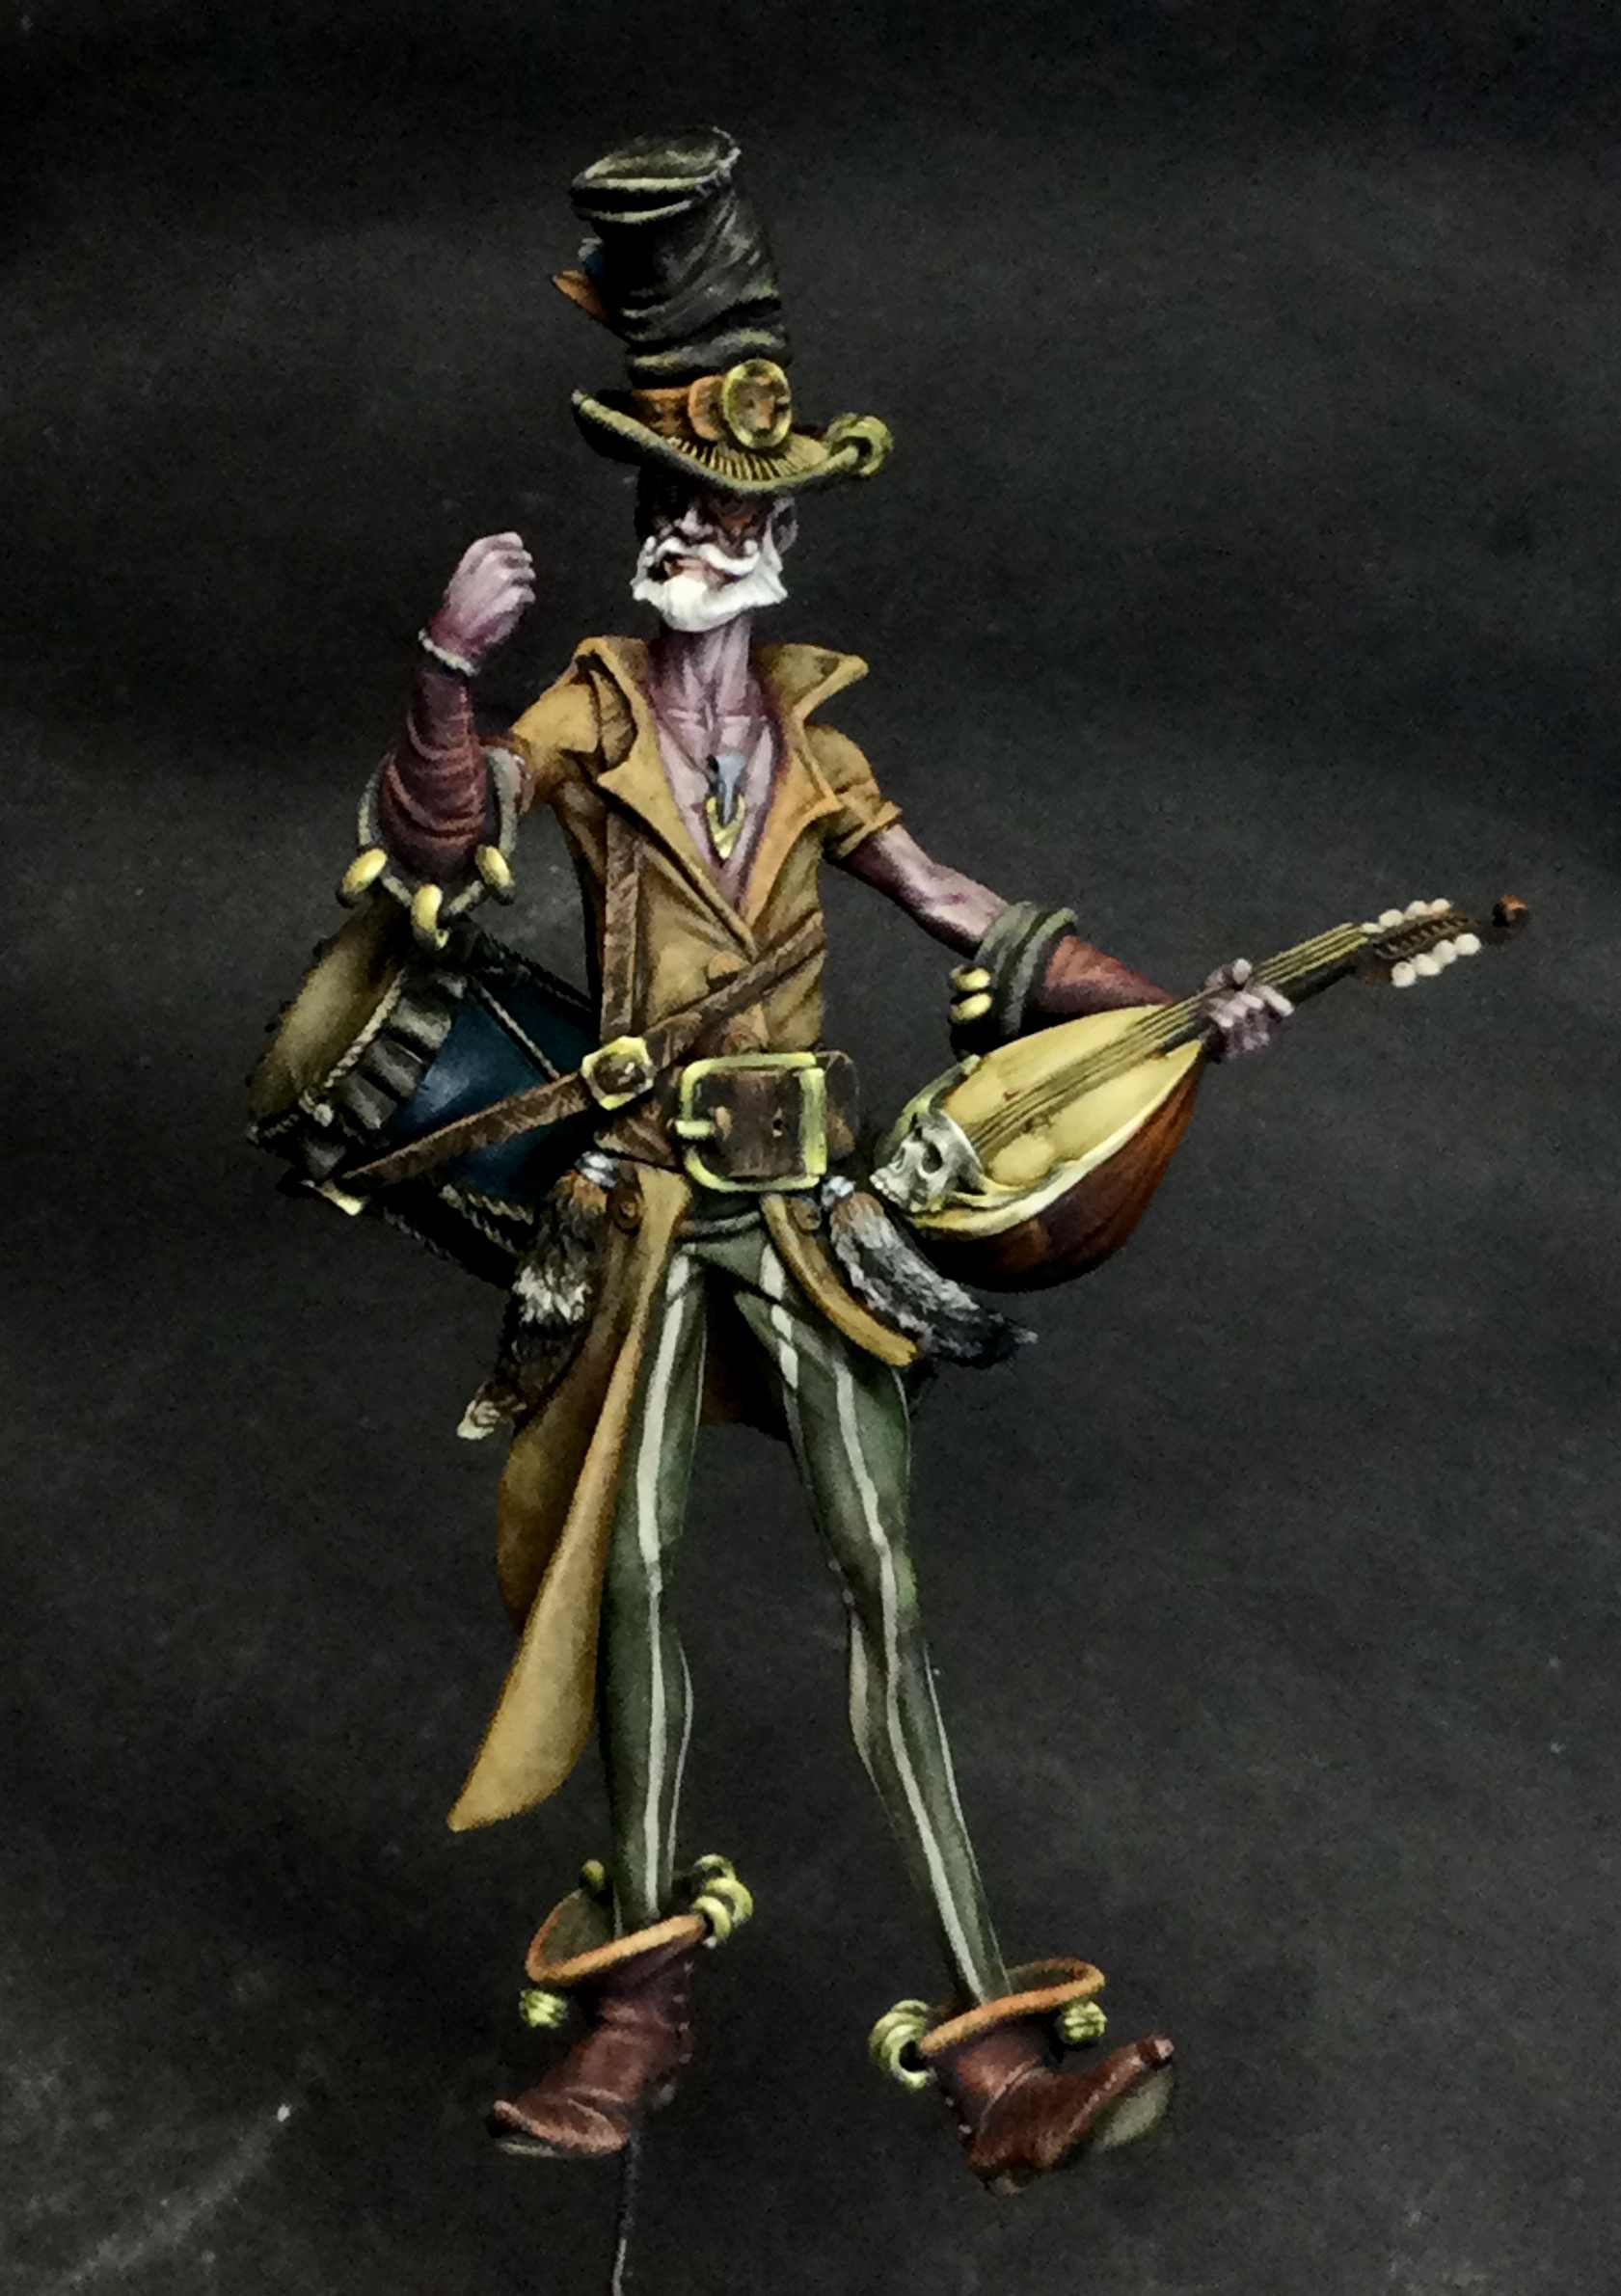
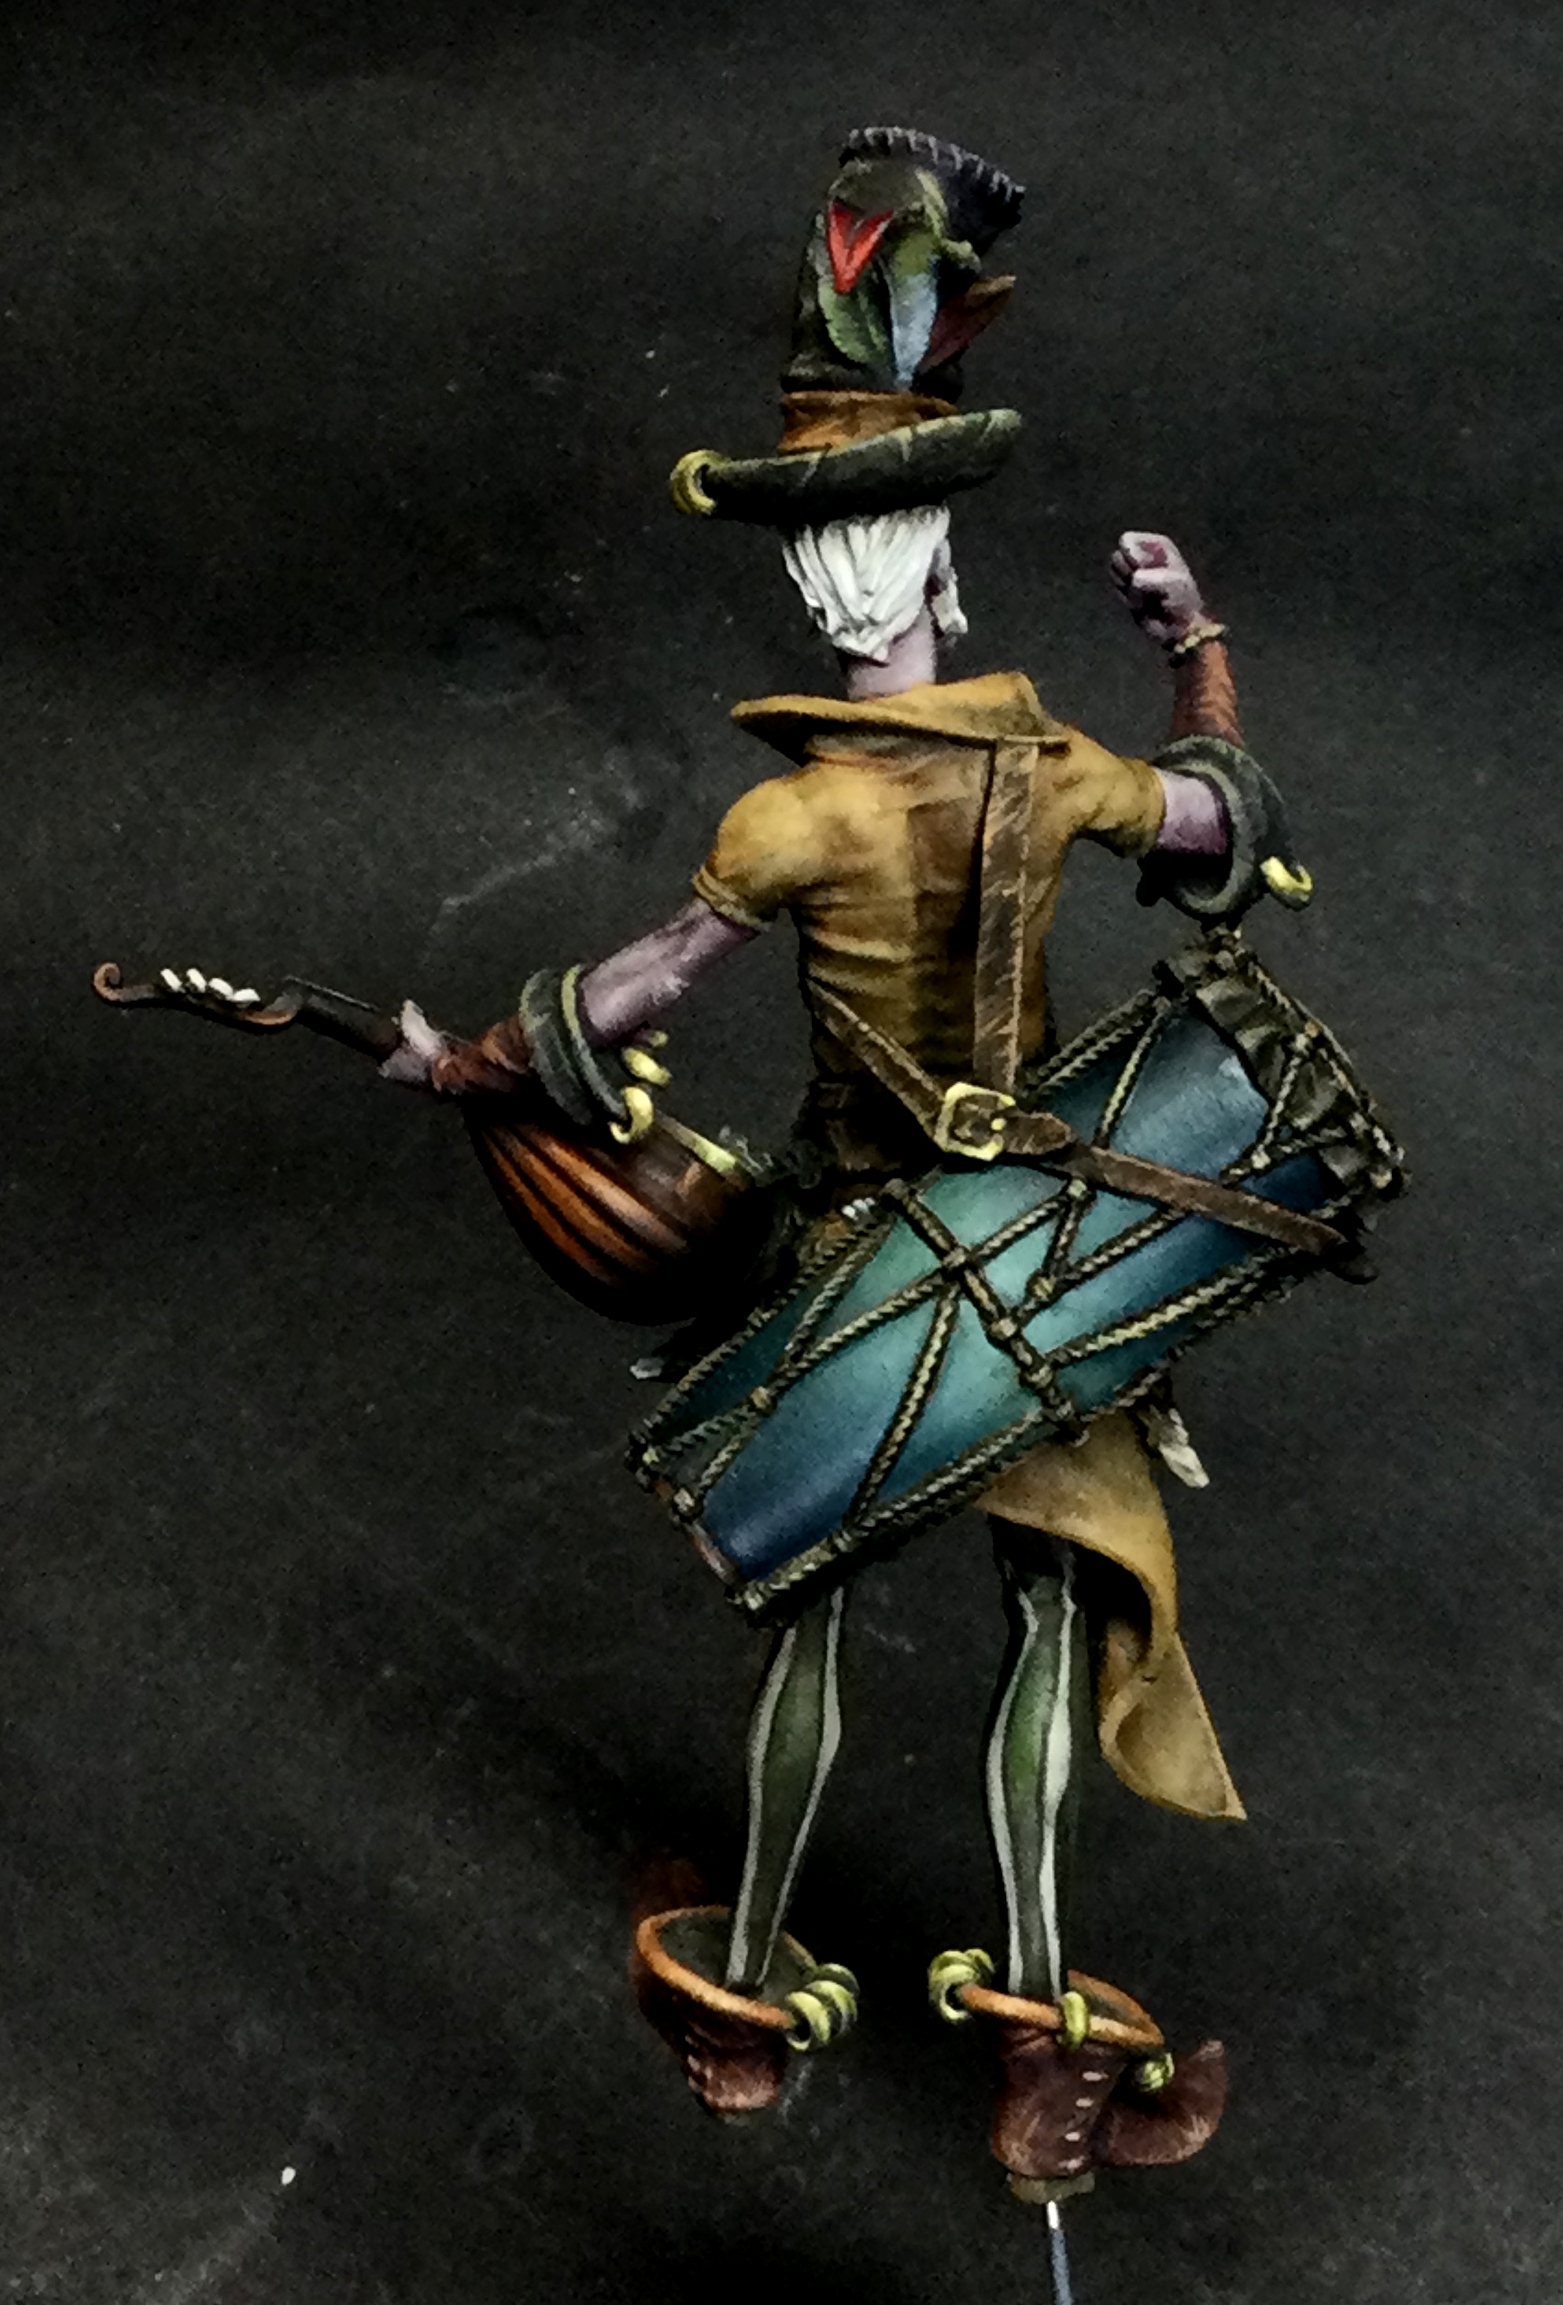
To catch up – Hamelin (plus his 4 wee….. ‘associates’) is a 72mm (i think) model from Mindworks & Kiimera which was gifted to me a good while back by a very very kind viewer of my twitch stream.
I’ve done a lot of Hamelin himself’s paint on stream to the point that his now about 85% finished.
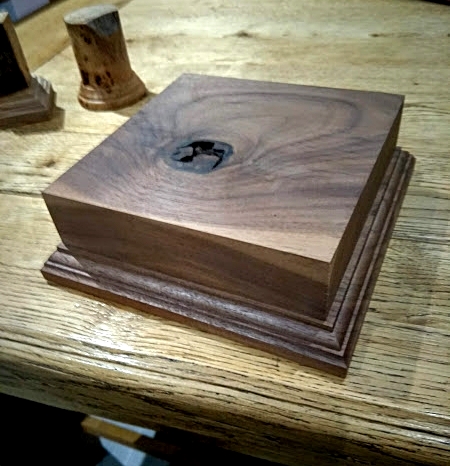 So thats the main model for the piece but let's look at the base!! First of all I knew I wanted to do something bigger than I had attempted before so I contacted Richard at Oakwood Studios and asked him to make me a plinth base thingy.......And he did!!!! 120mm x 120mm on top made of walnut. It is gorgeous!!
With the wooden base made I turned to what I was going to sculpt the top from. Iniitally I tried to find some XPS foam (extruded polystyrene. EPS can bugger right off) but I couldnt find any anywhere even on Amazon but then I came across a product called Sculpture Block!!!
And this stuff is the business. Very easy to work, holds detail a charm and doesnt melt with superglue!!!
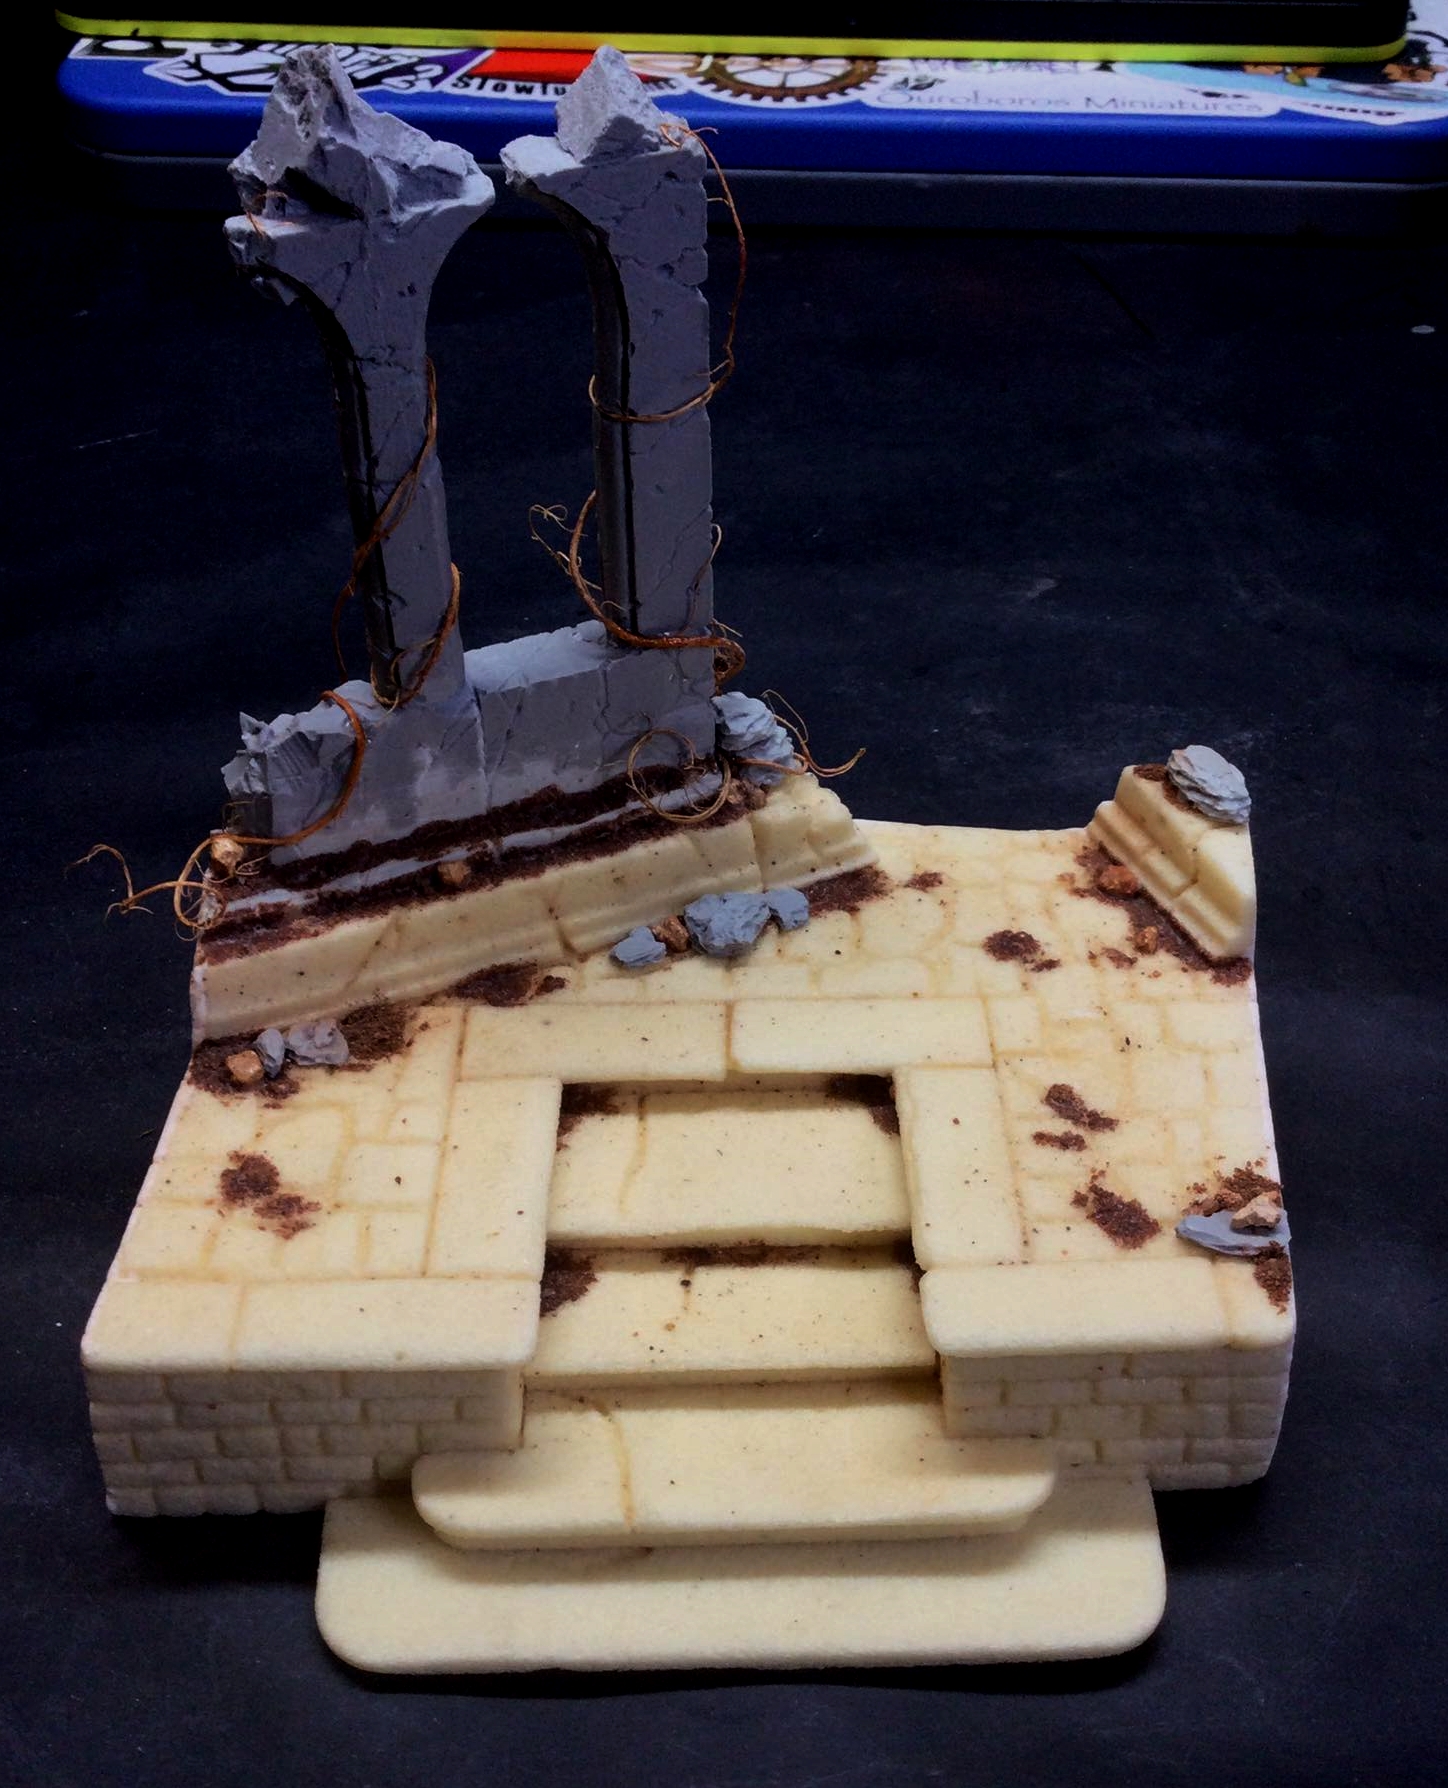
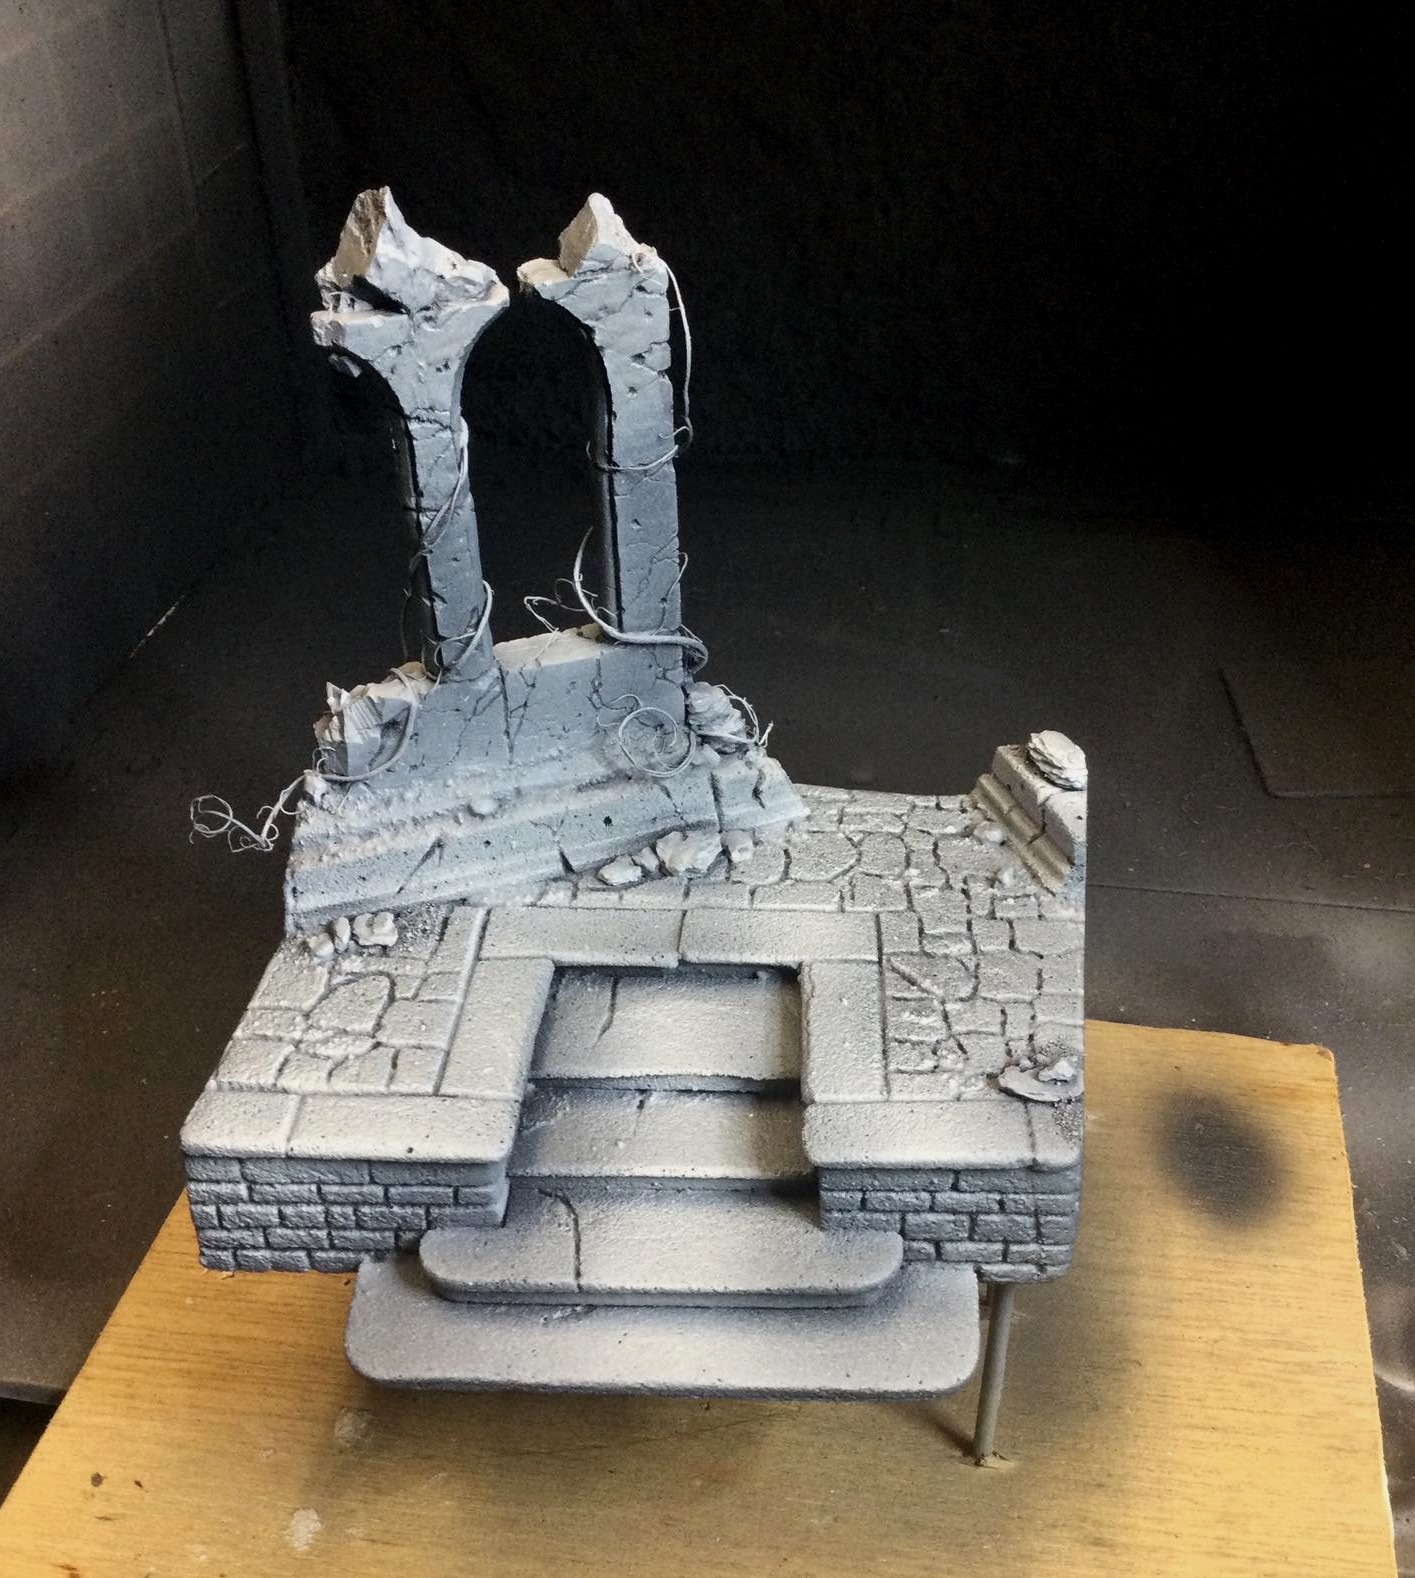
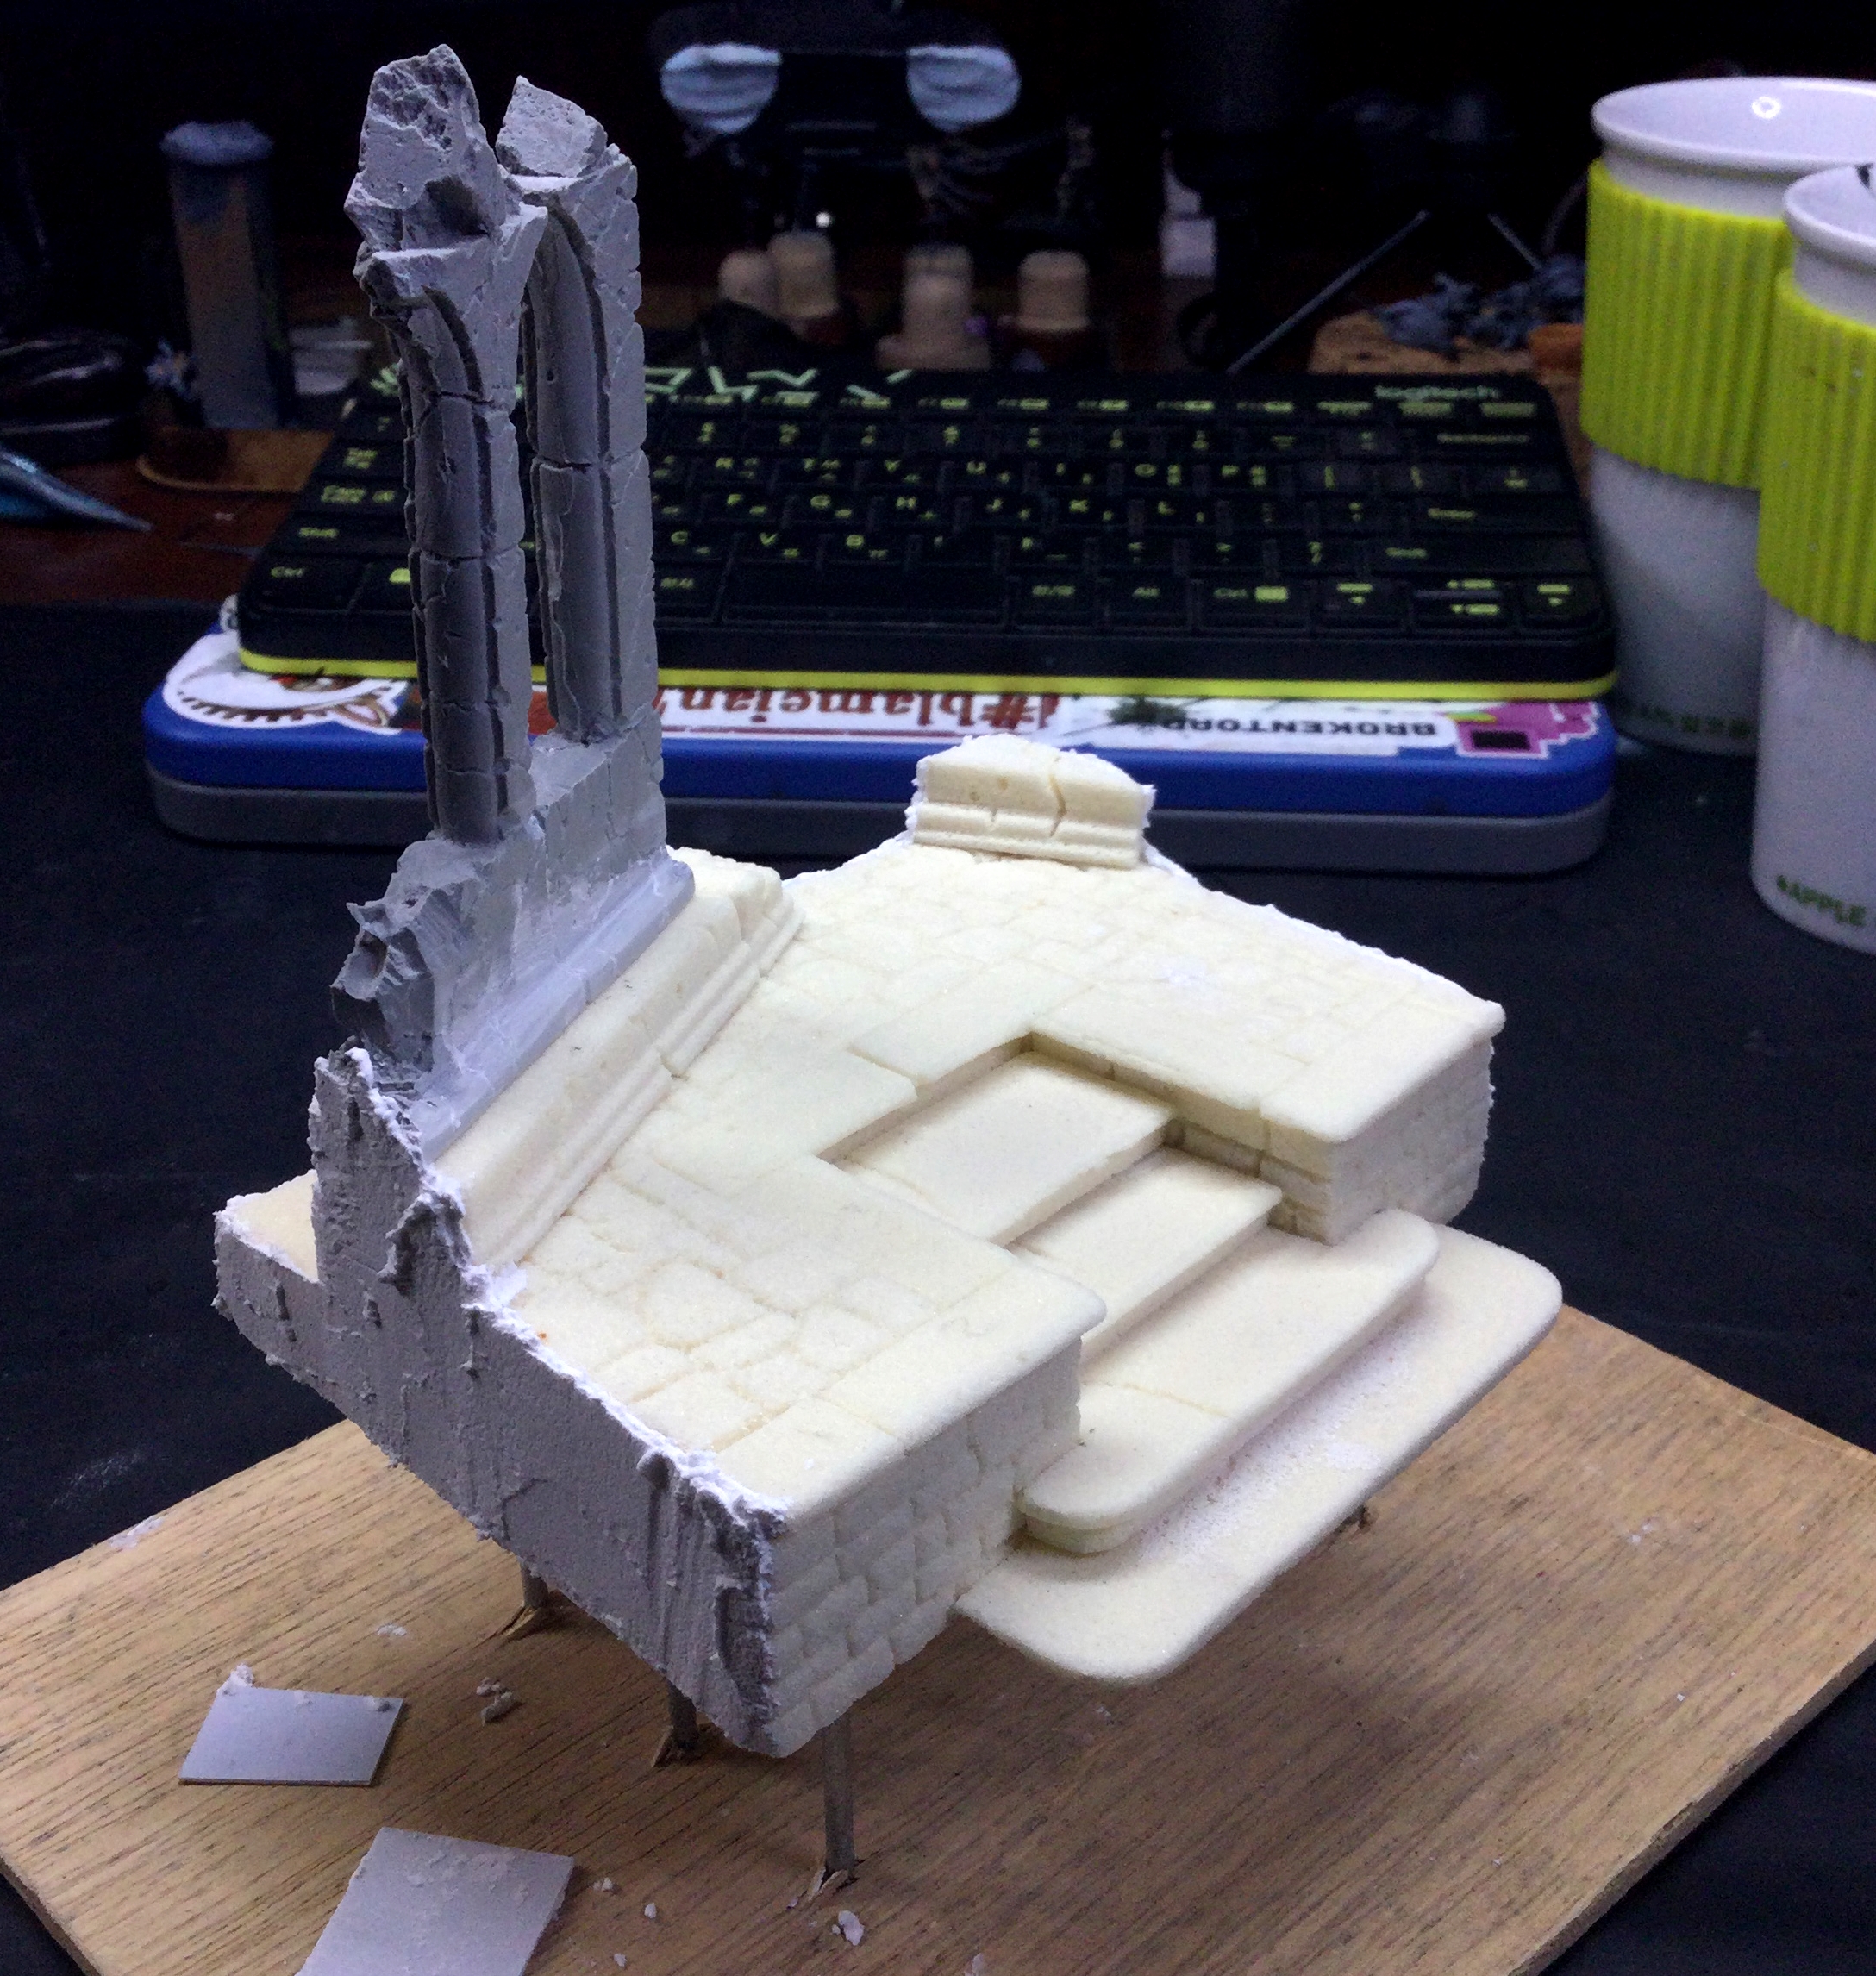
So i sized a piece up to the walnut base and cut out the main form
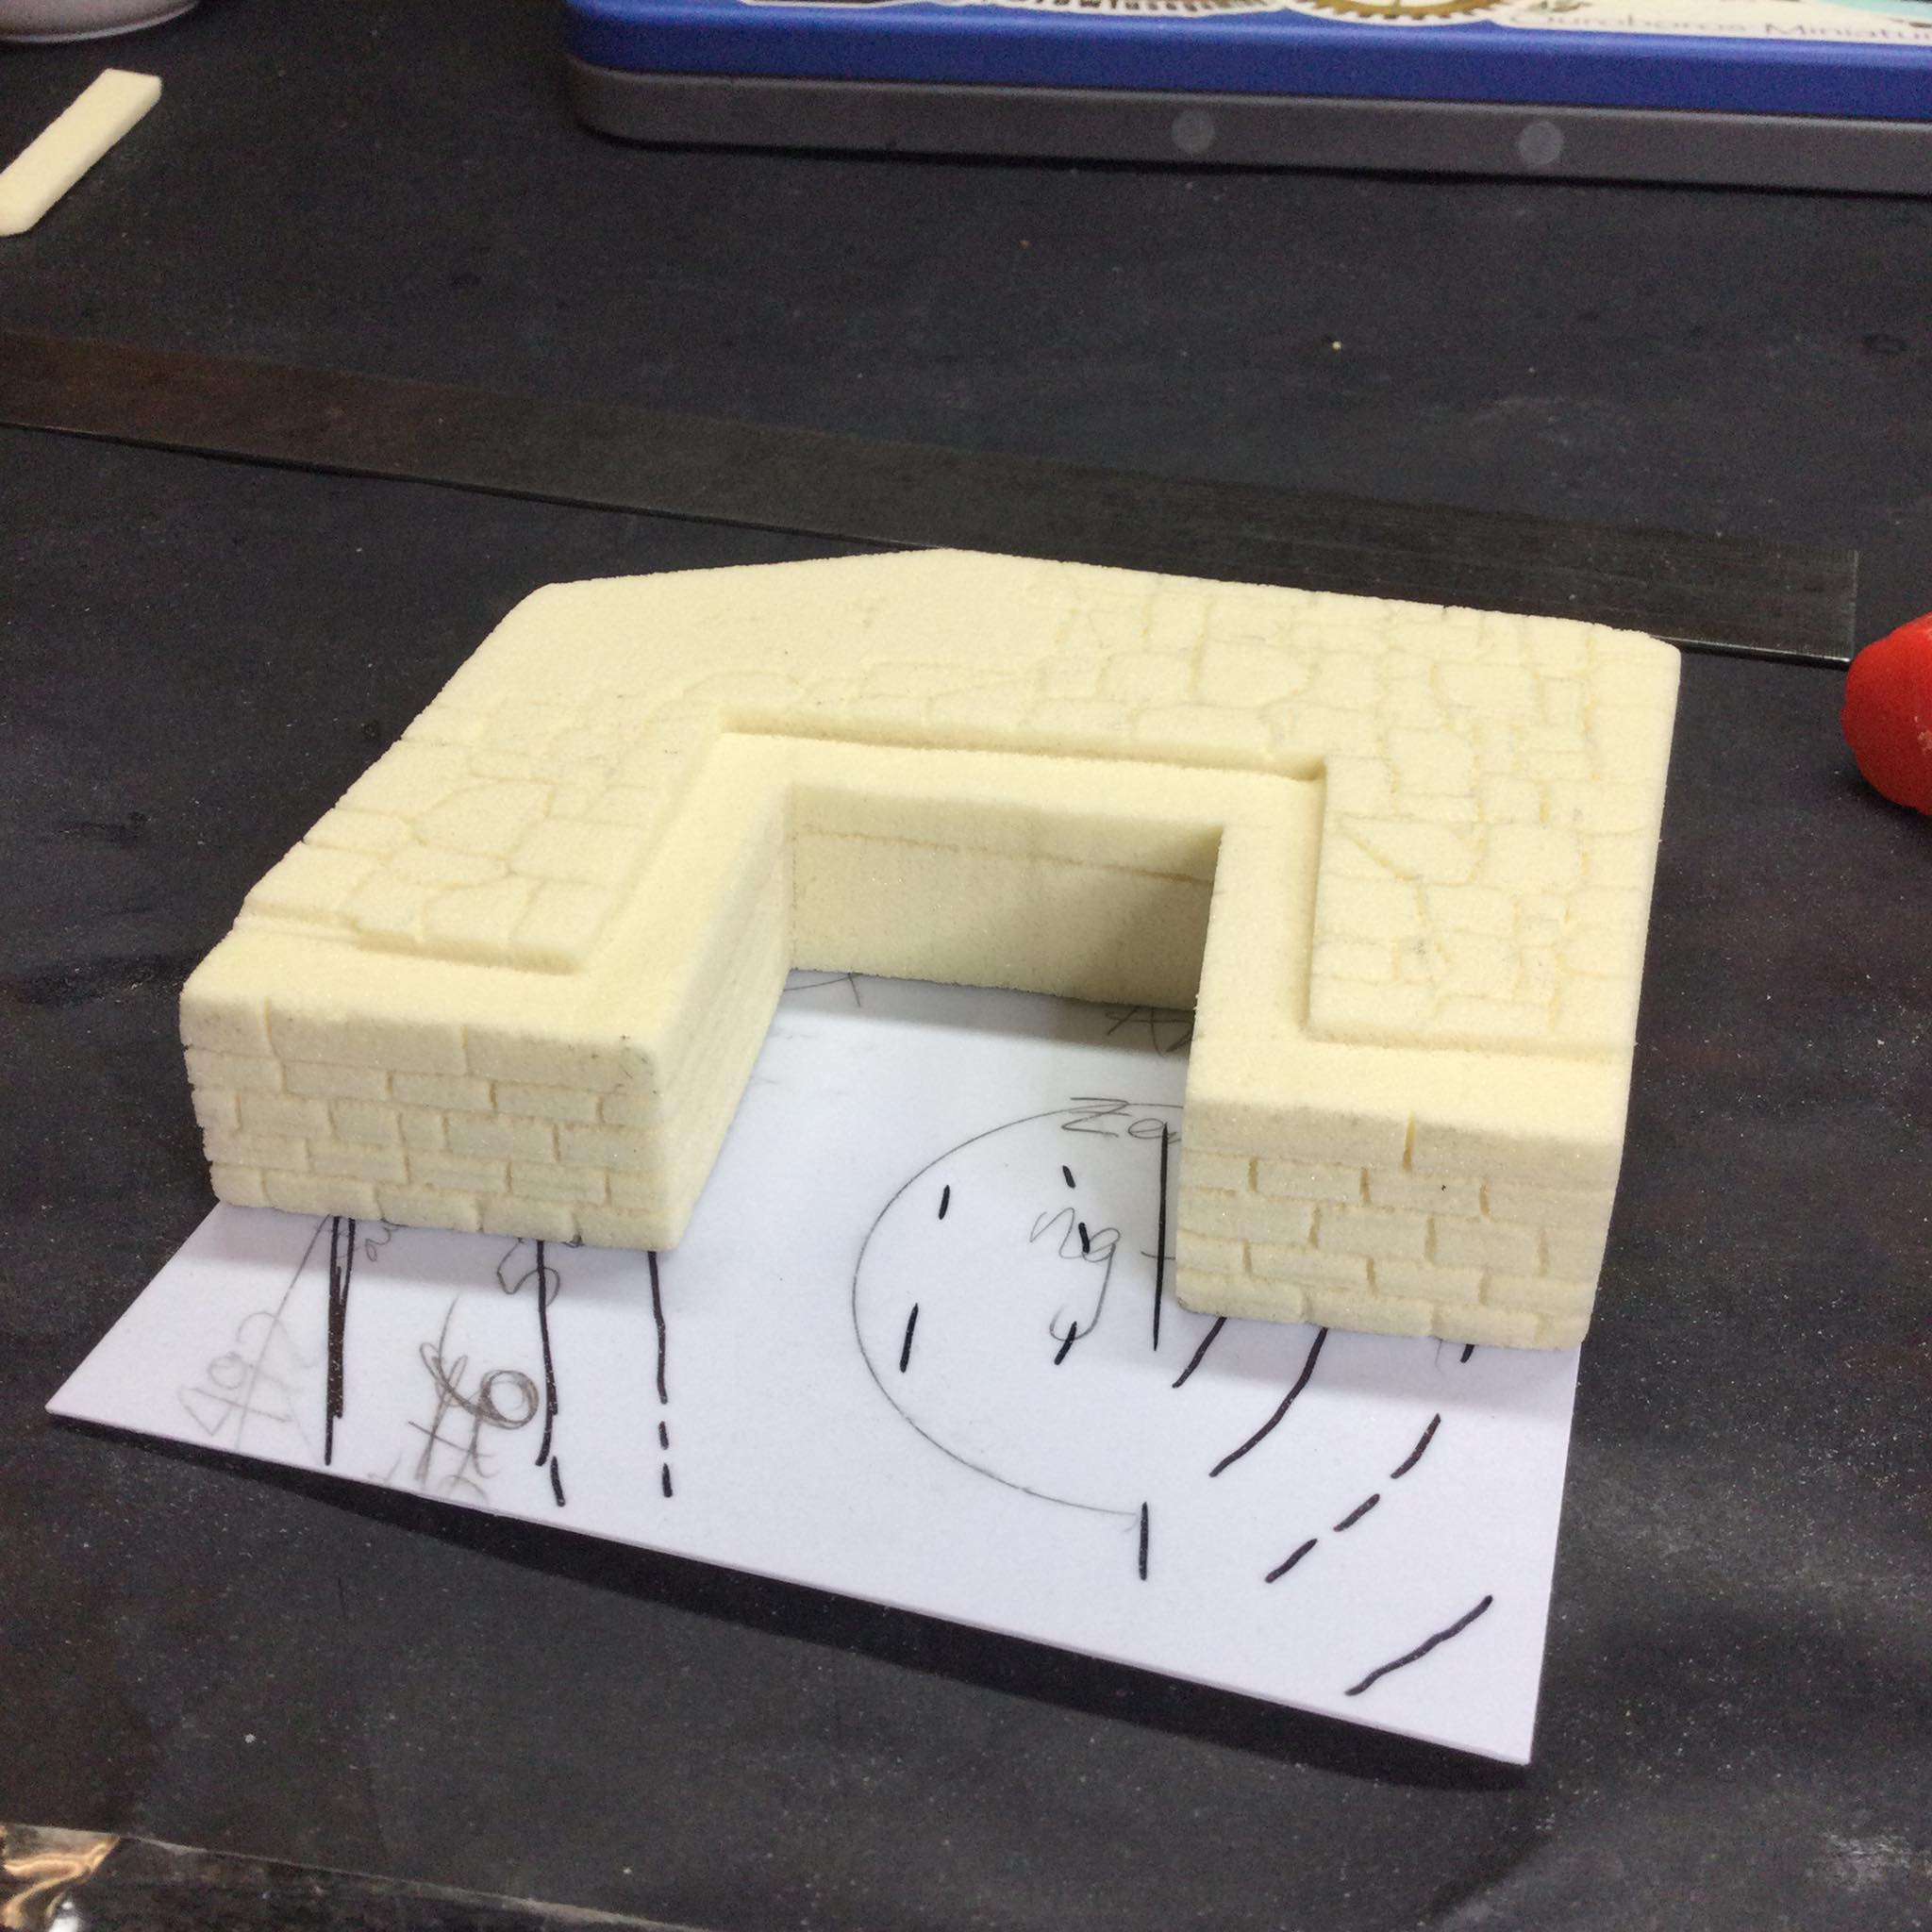 Main form cut to size and then brickwork and flagstones carved into the foam with an awl
 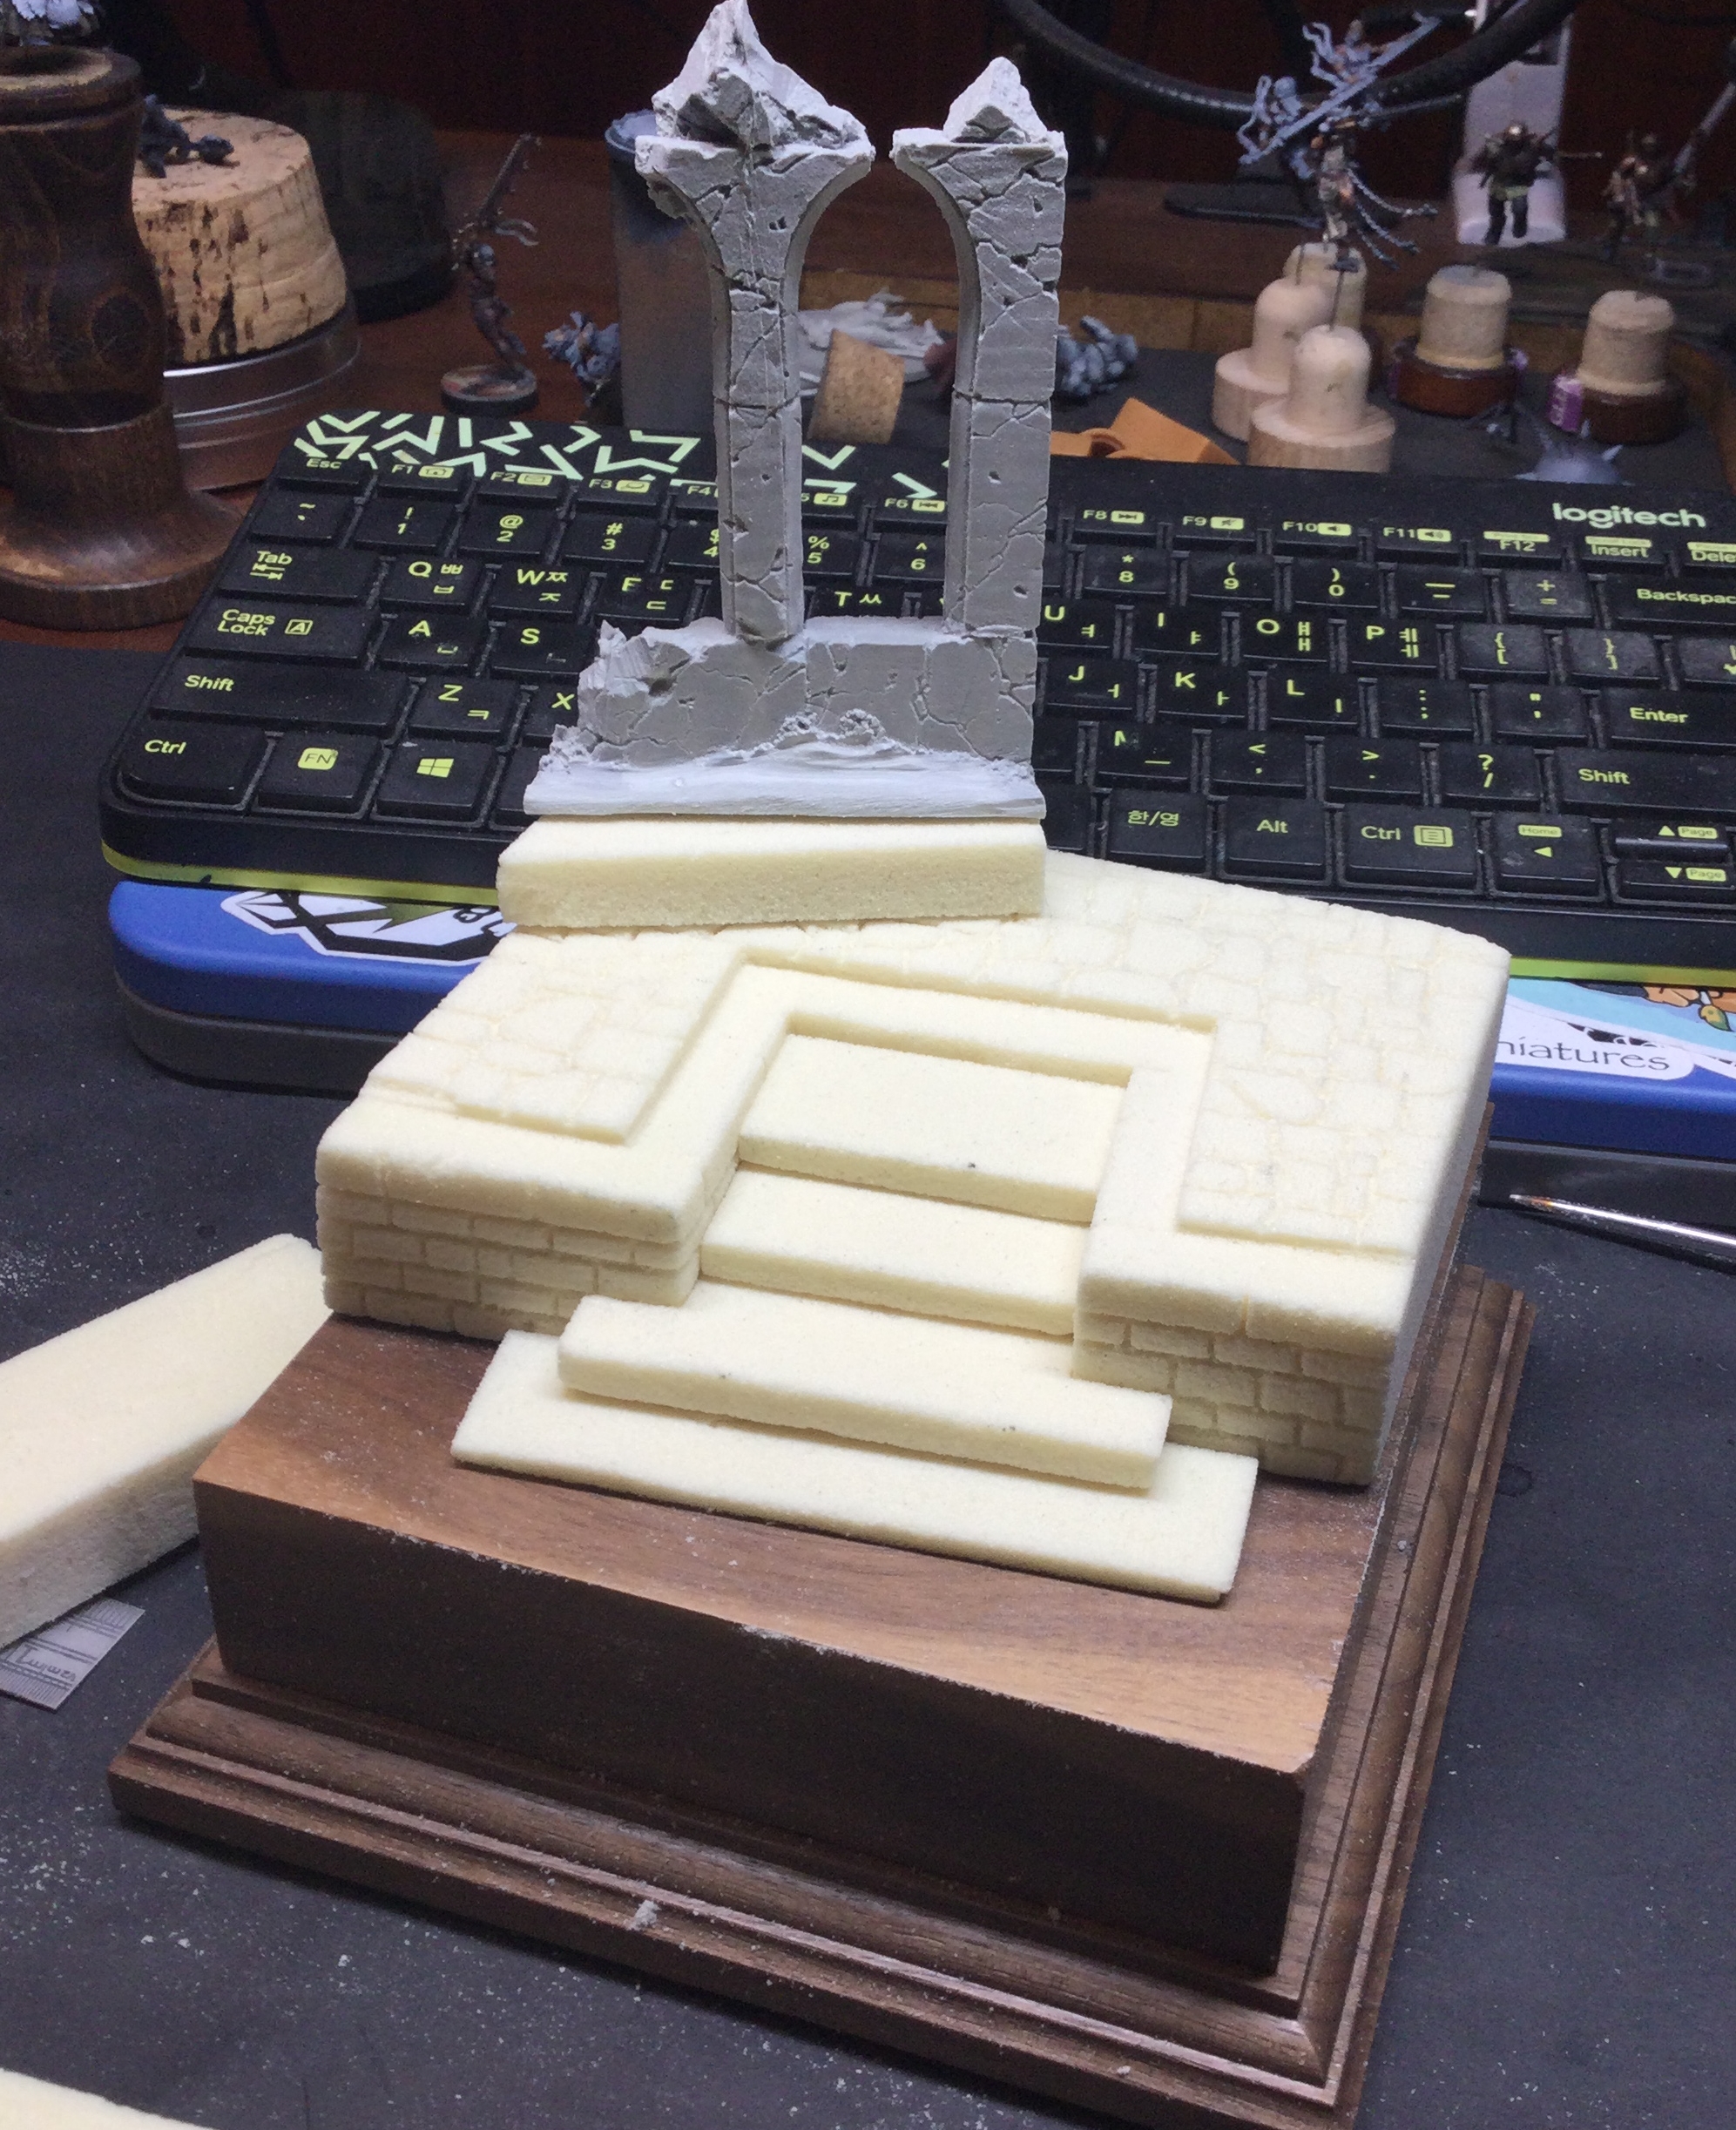 With the main base cut out I started to place some other elements on top to get an idea of a final layout. A piece of wall with some resin ruins (from Spellcrow) on top and I cut out some steps that would lead down from the top surface into the canal water element i planned at the front
  Happy with the elements and placements, its time for a little refinement work - With hobby files I sanded into some details: lips for the steps and some stepped coving on the wall ruins. I also sculpted the inset edge panels that go around the wall and the steps recess.
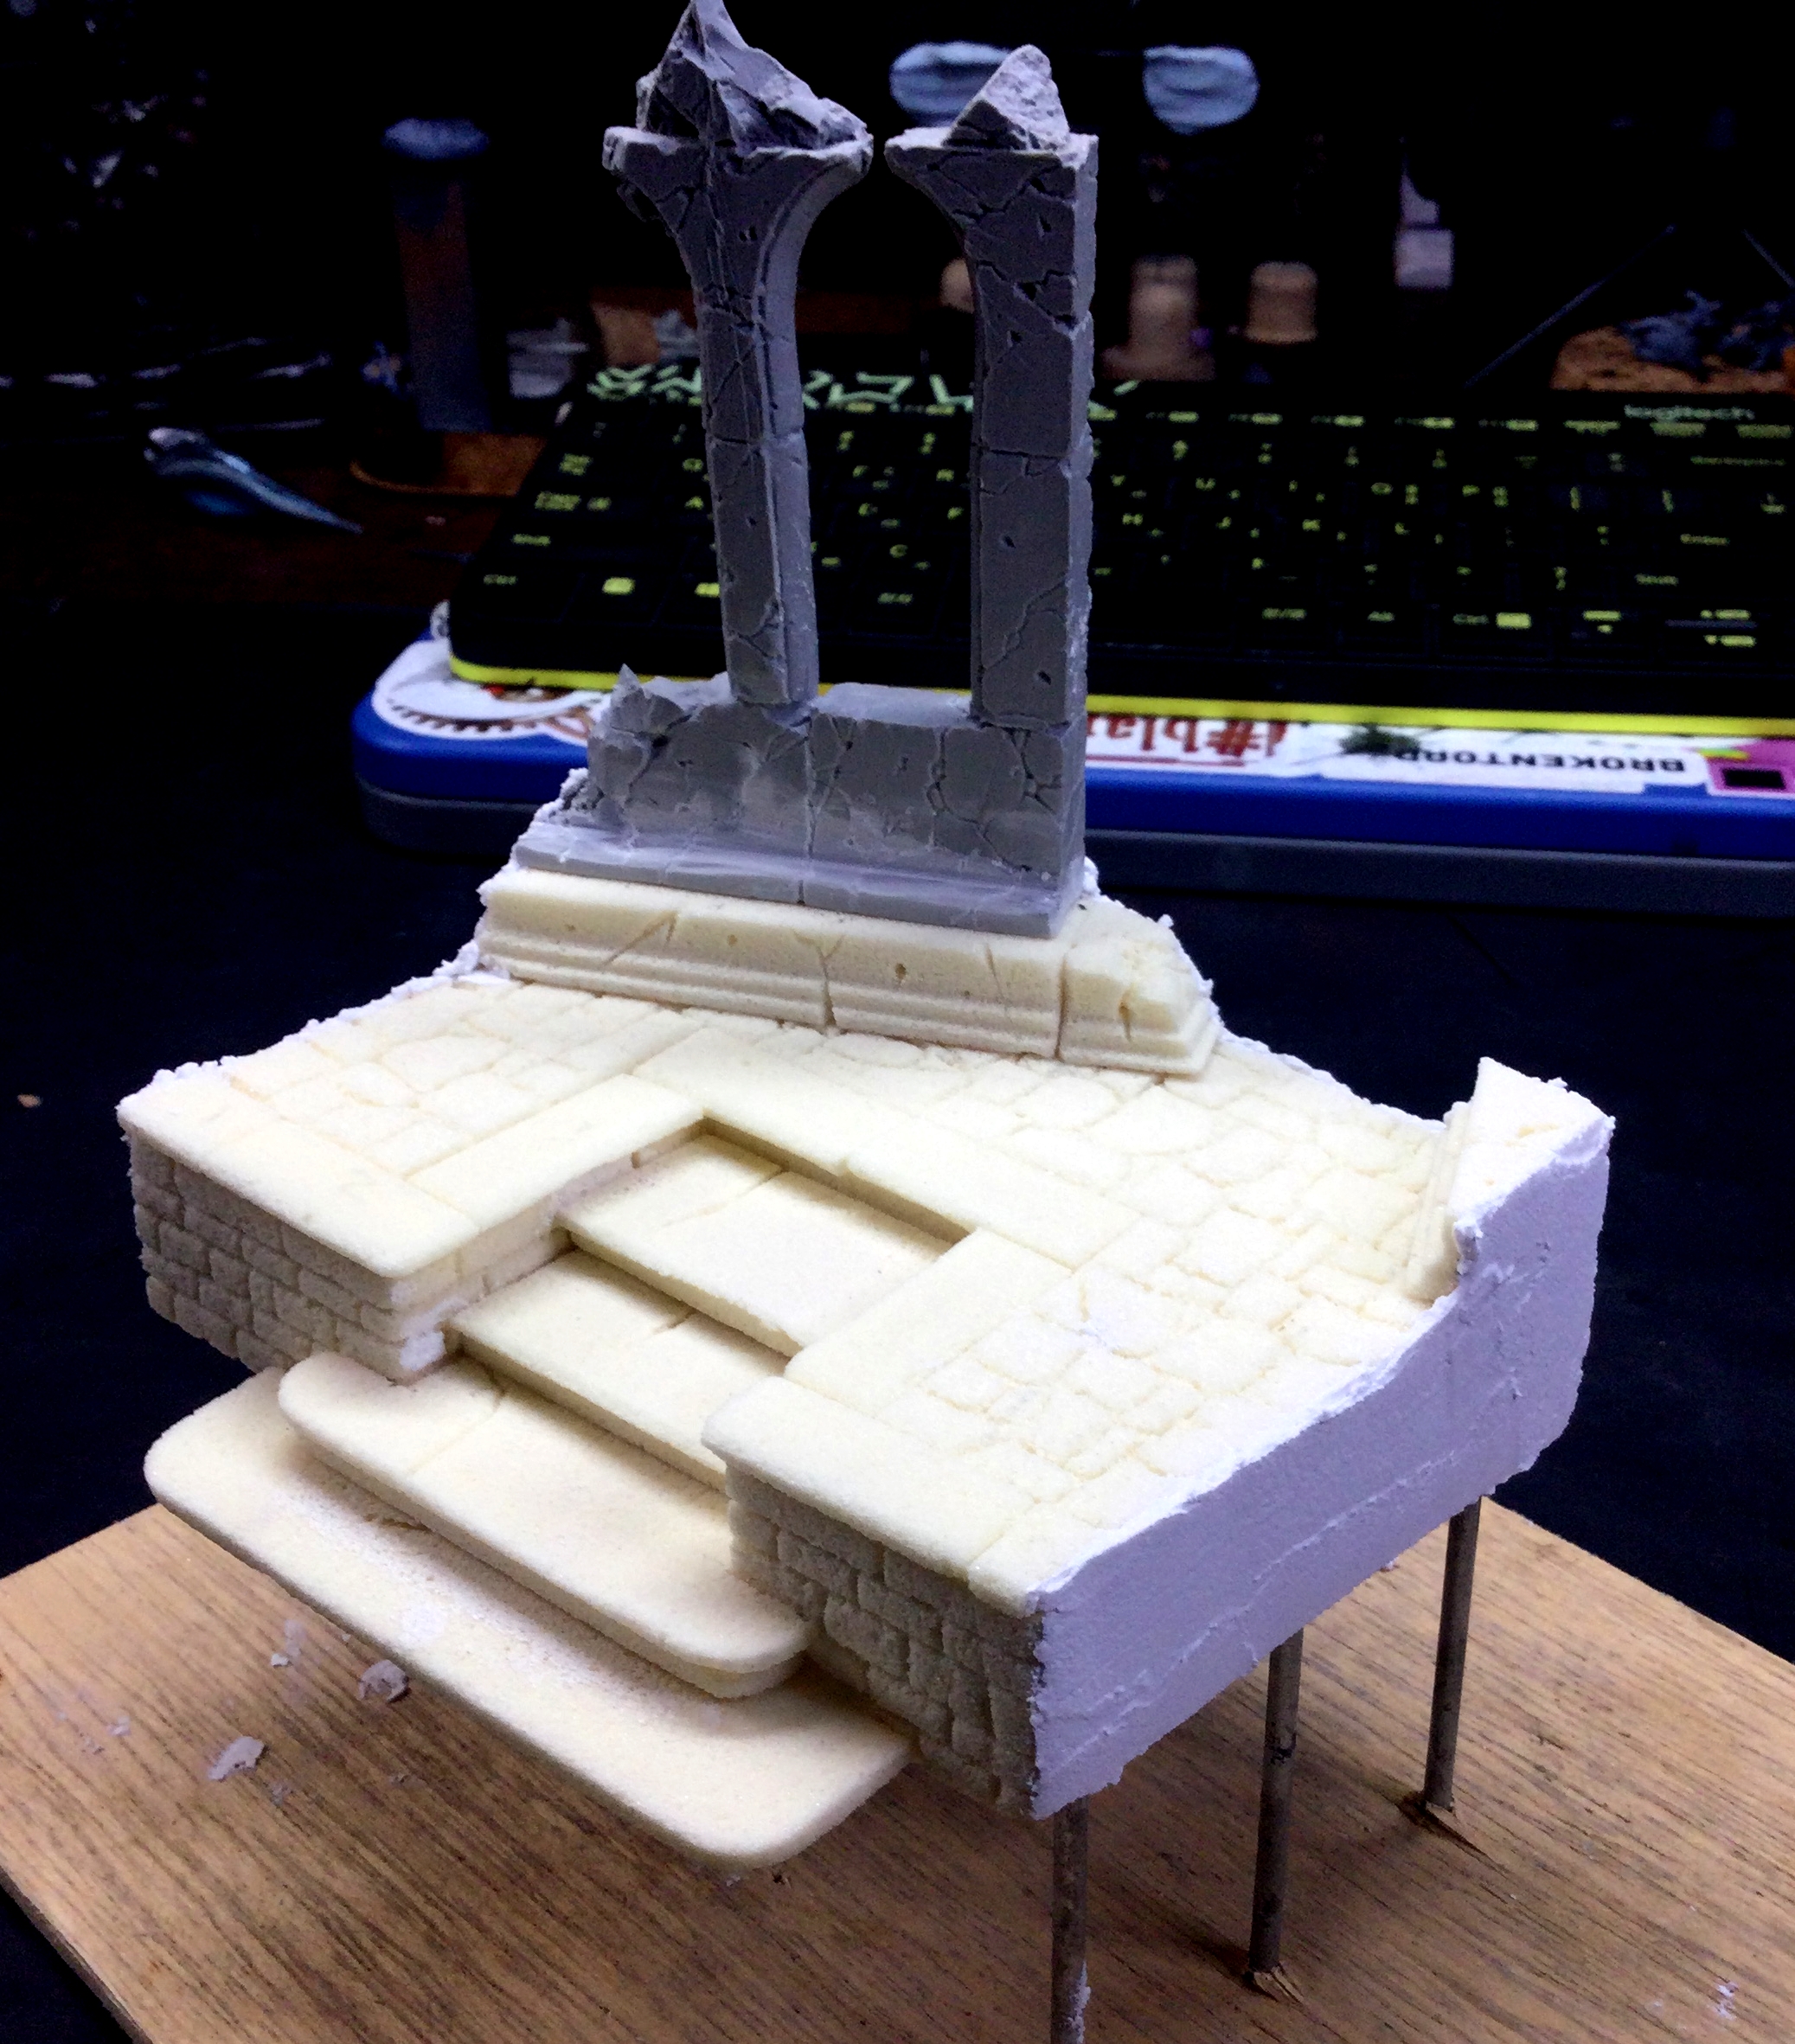
 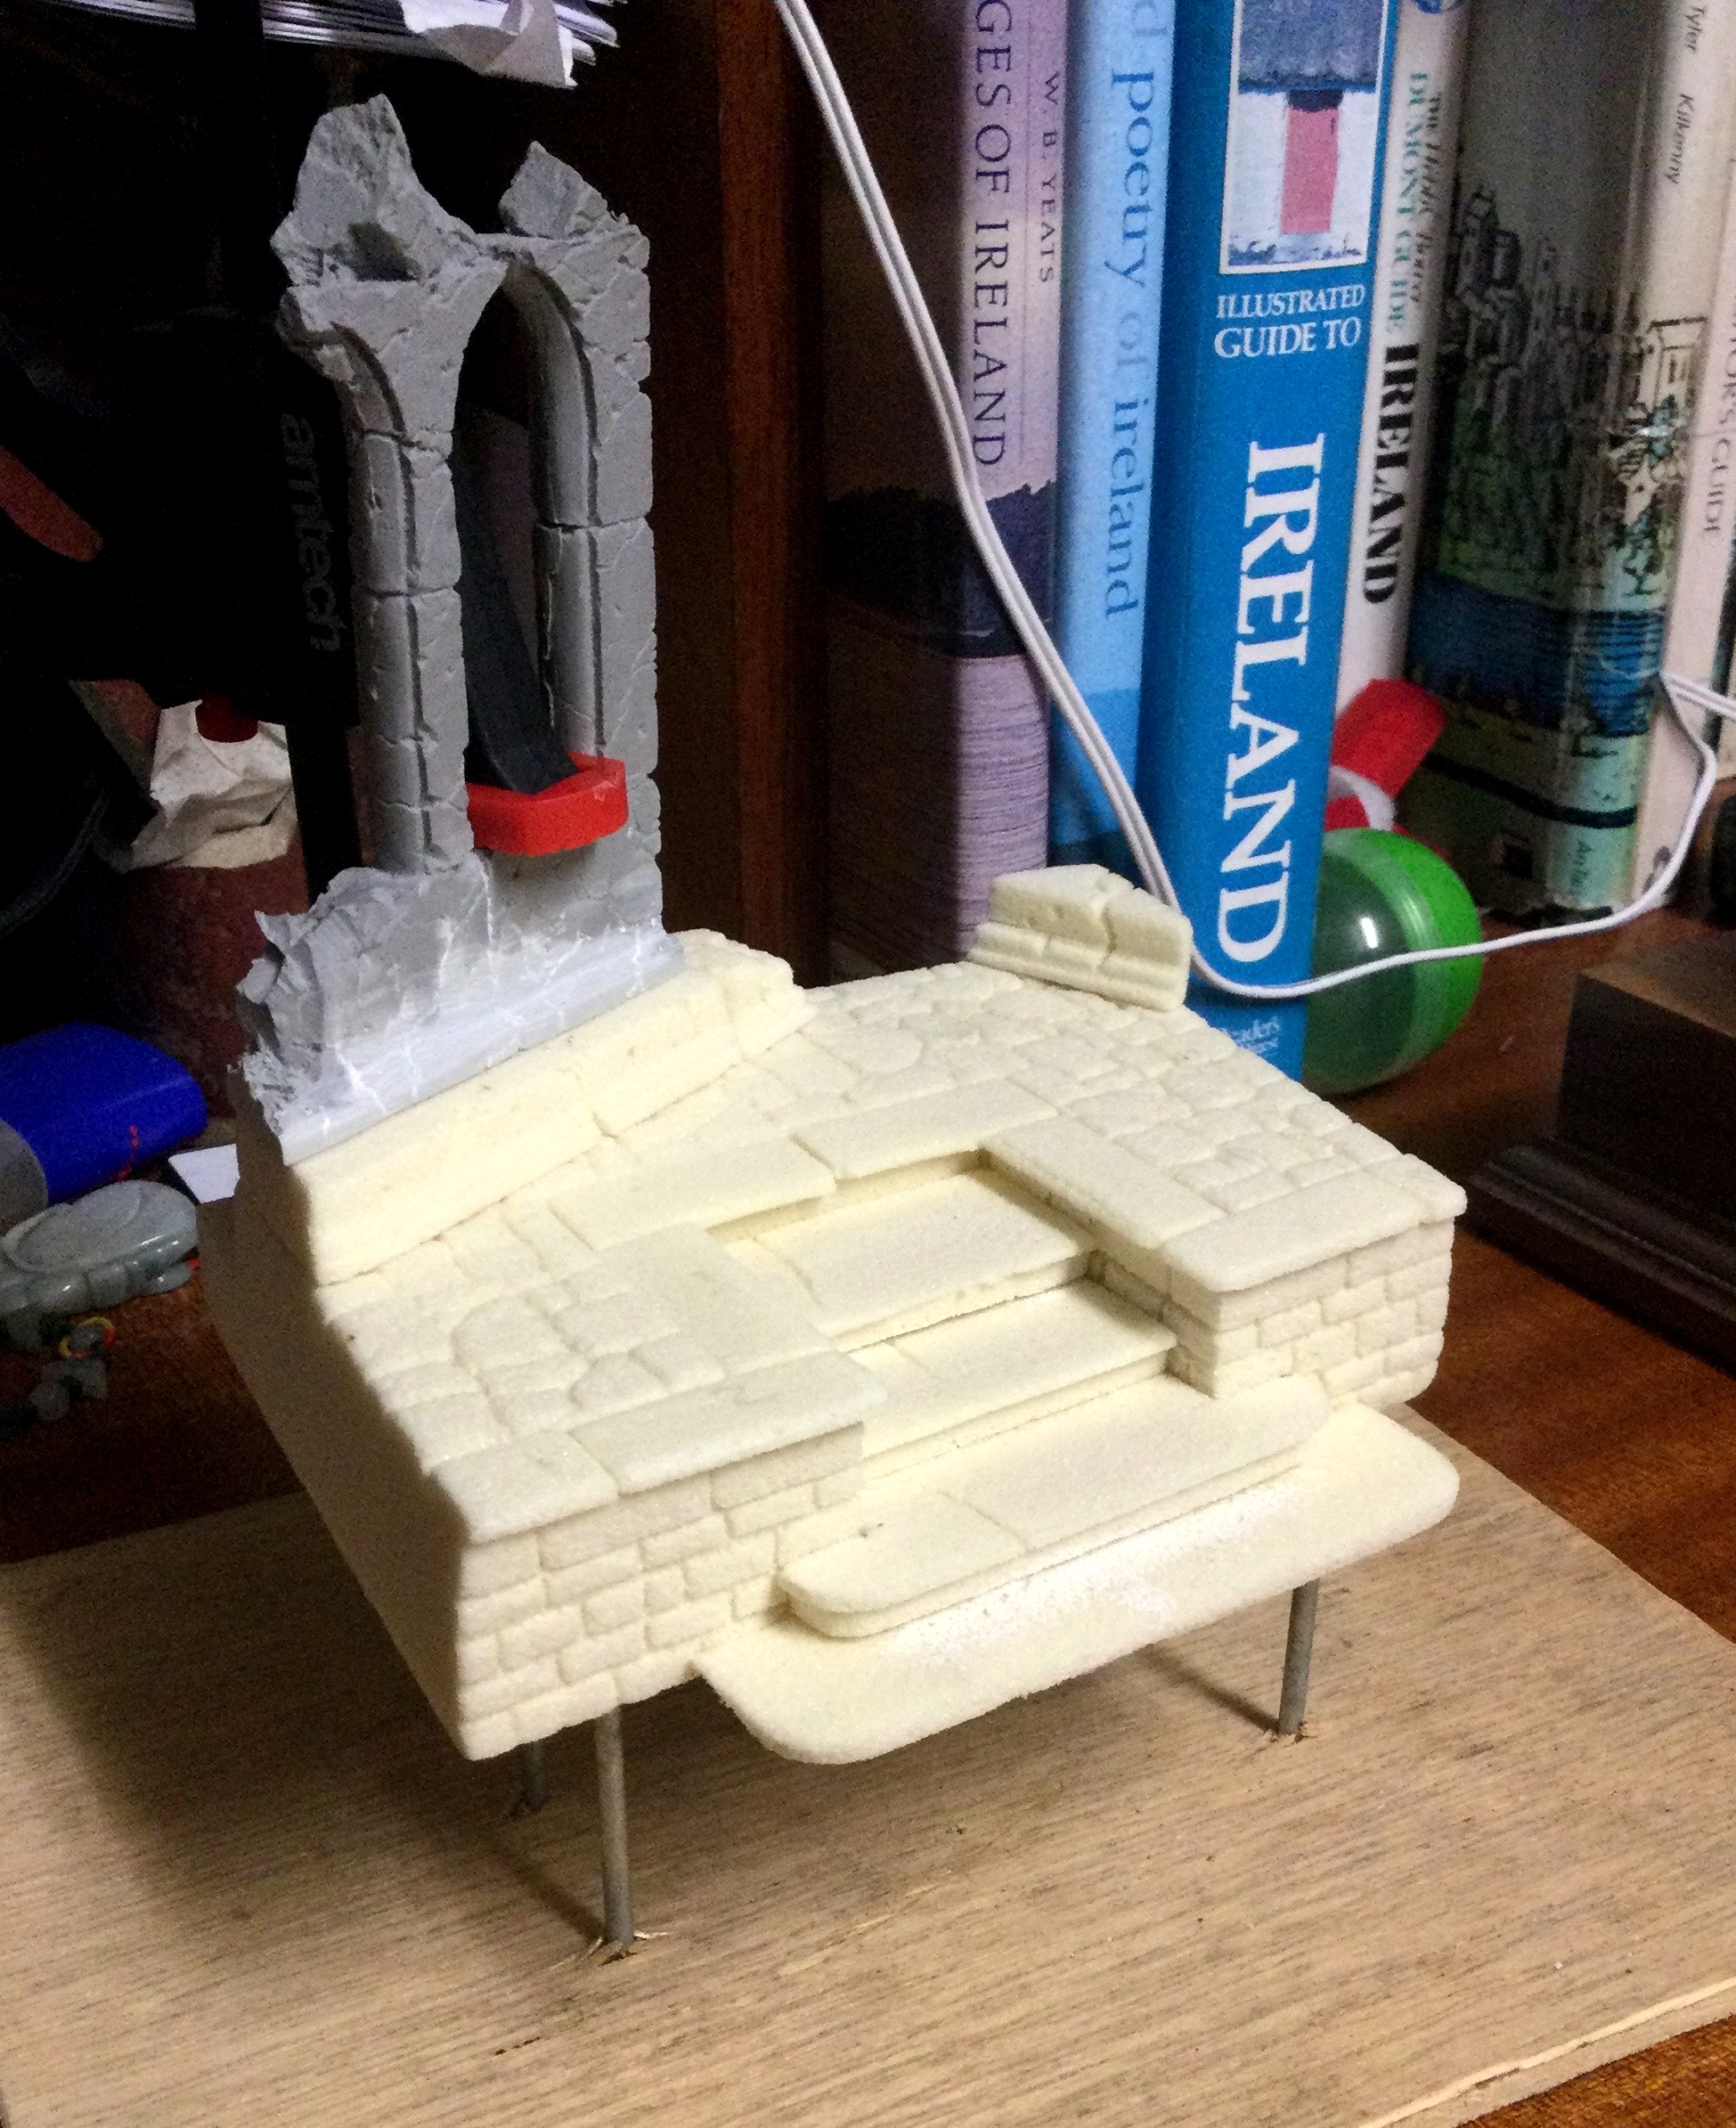 With all that done it was time for a little primary assembly. I glued the foam elements to each other with wood glue (avoid PVA glue as it reactives with water. Wood Glue is a far better glue as once dry it is water resistant) The resin element on top of the ruined wall needed a sturdier adhesion as it is both denser and heavier than the sculpture block so I drilled and glued 2 x 2" long pins (read straightened paperclips) into the resin piece and then drove them down though the foam, using 'hard as nails' adhesive to glue the piece into place. A smaller trigger clamp was used to keep the whole assembly in place while the glue cured (24 hours or so)
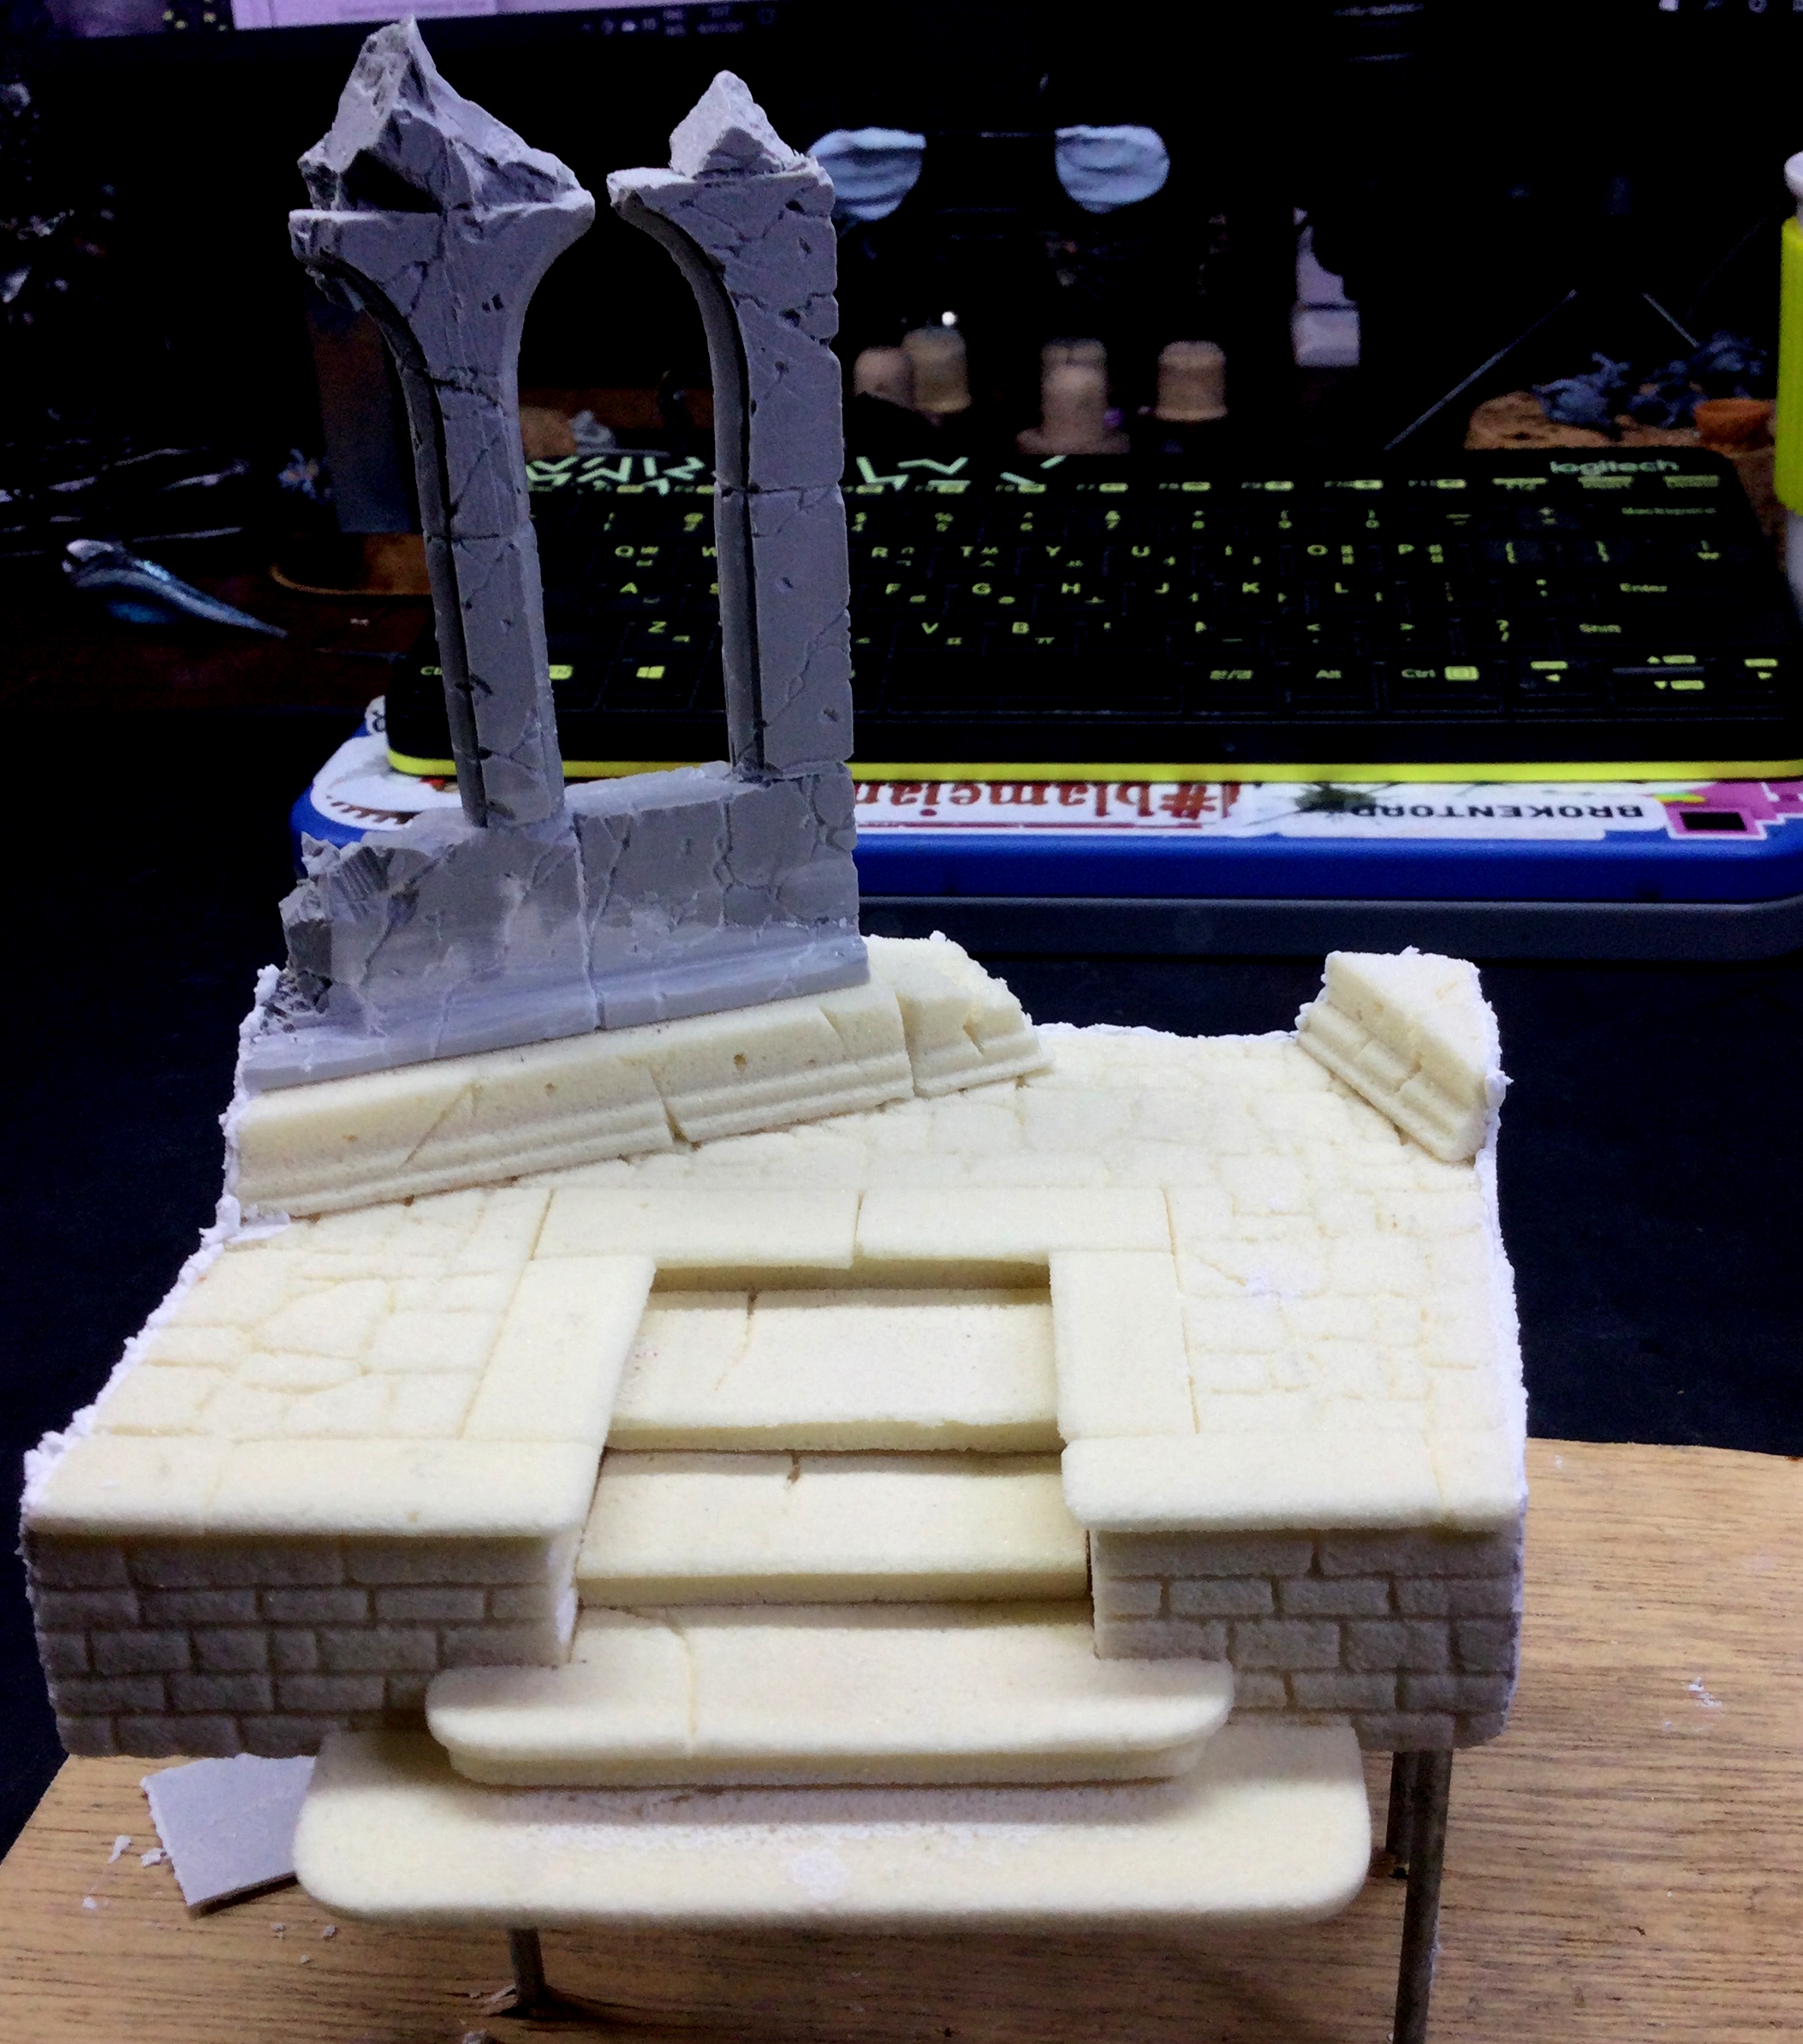
 With the main structure now shaped, trimmed, refined and glued together it was time to use filler on the sides to even out the outside ‘blind walls’
I used 151 all purpose filler which you can get in any euro store/poundland etc etc. This will homogonise the blind edges and sort the corners that had got a little nicked and eroded from handling. Once the filler (or spackle as them across the water call it) is fully dry, I’ll use a nail buffing block to sand down the roughness and then smooth it out.
Once that has all been done it will be time to seal the whole thing with a few coats of thinned down wood glue.
Oh a final note – the what looks like stilts that the base is up on – is a drying rack. very simply 7 long nails driven though a board. makes it much easier to glue and clamp things together and also to workl filler into the sides and then dry without anything touching or interfering with the piece.
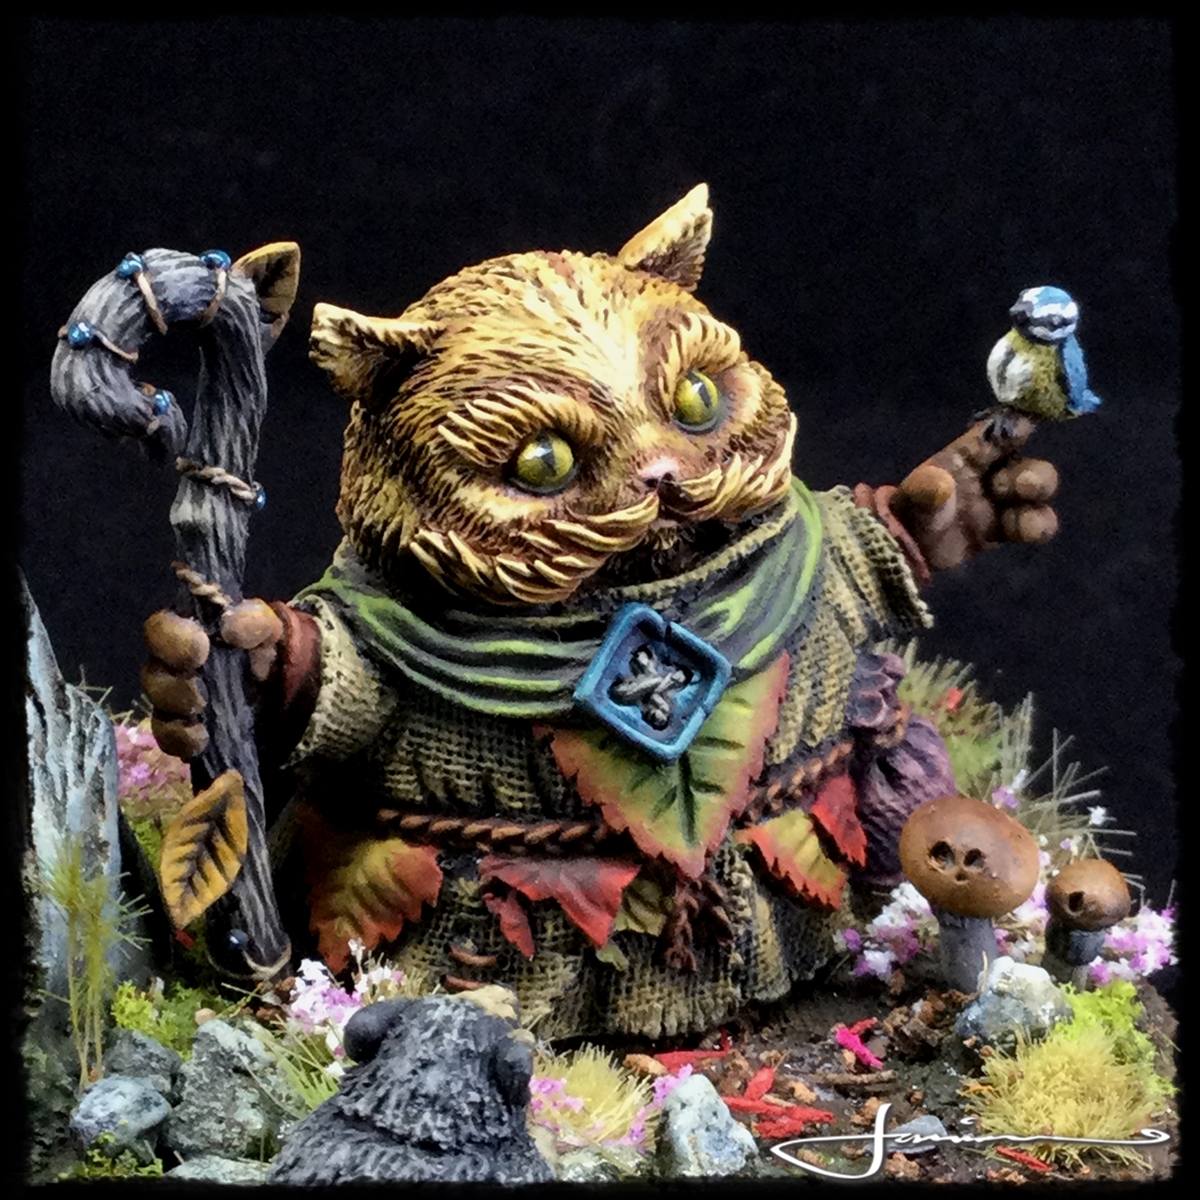
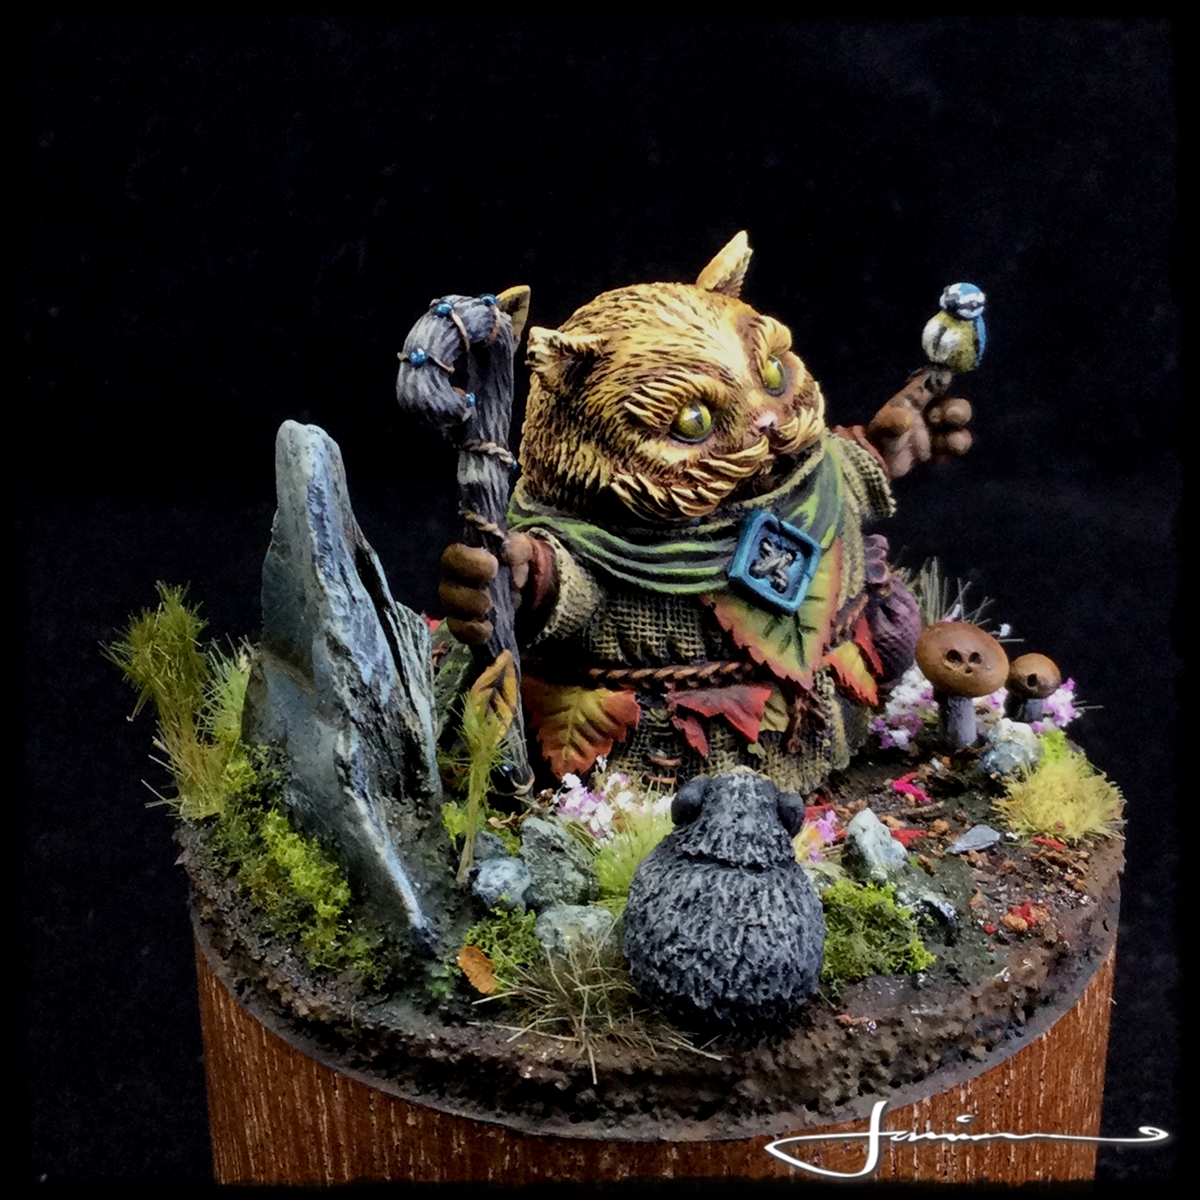
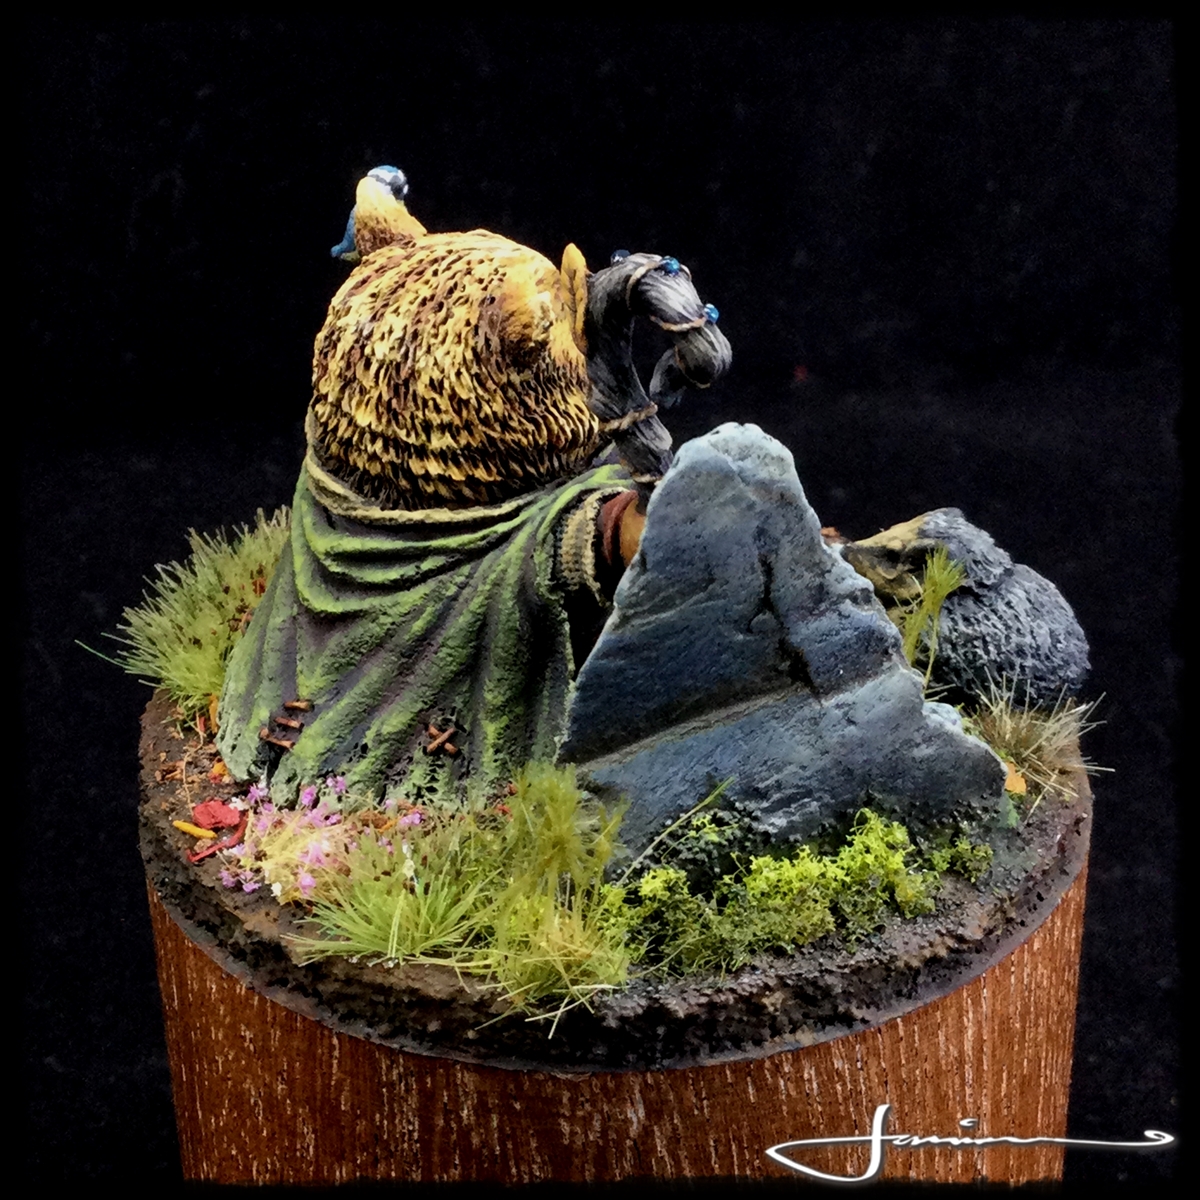
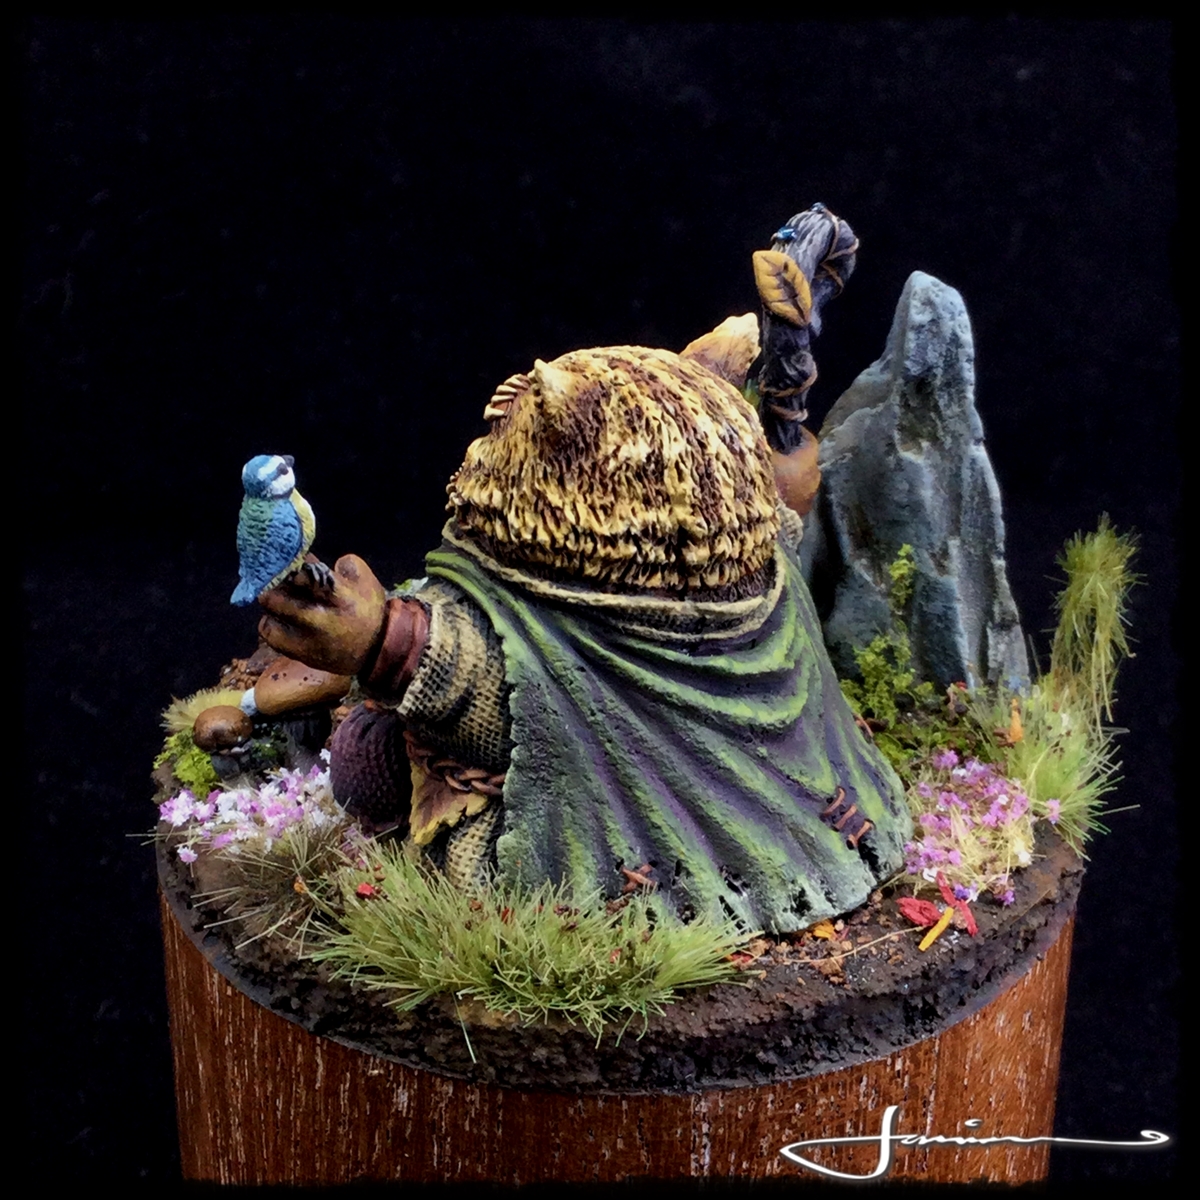
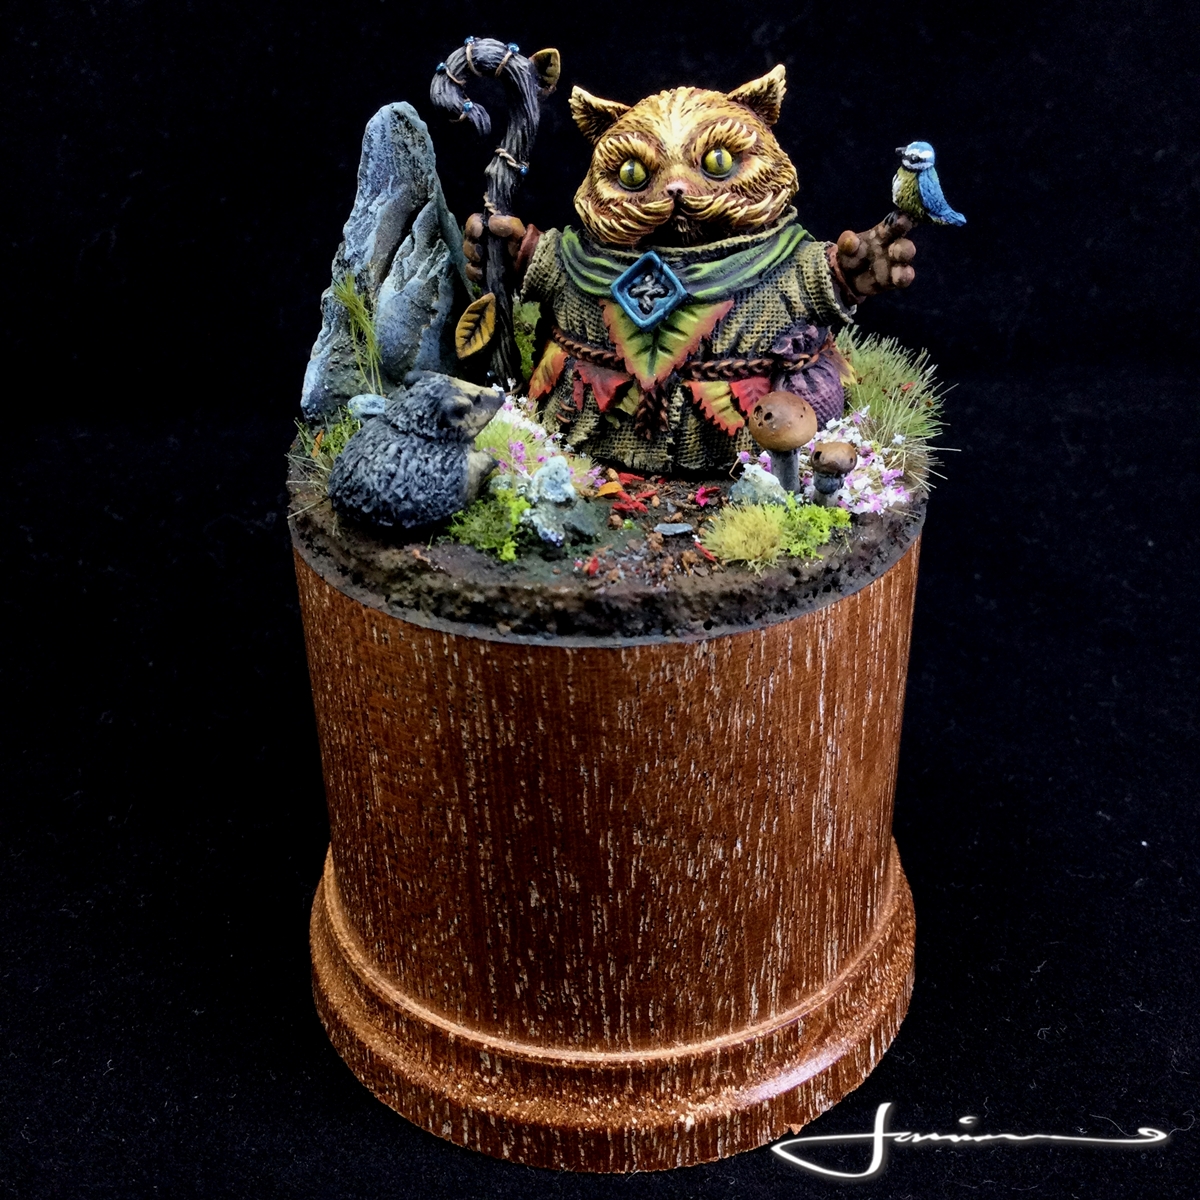
Tales Of Meowland!
Definitely not my usual type of mini to paint buuuuuu thought would start of the year with something a little differnt!
After finding the scalebro.com site I picked up a couple of the Tales of Meowland series by Alexander Kovalev. The sculpt and the casting are top notch and required little to none prep barring removing the gate nubs and assembly. Its not often resin minis arrive in such primo condition
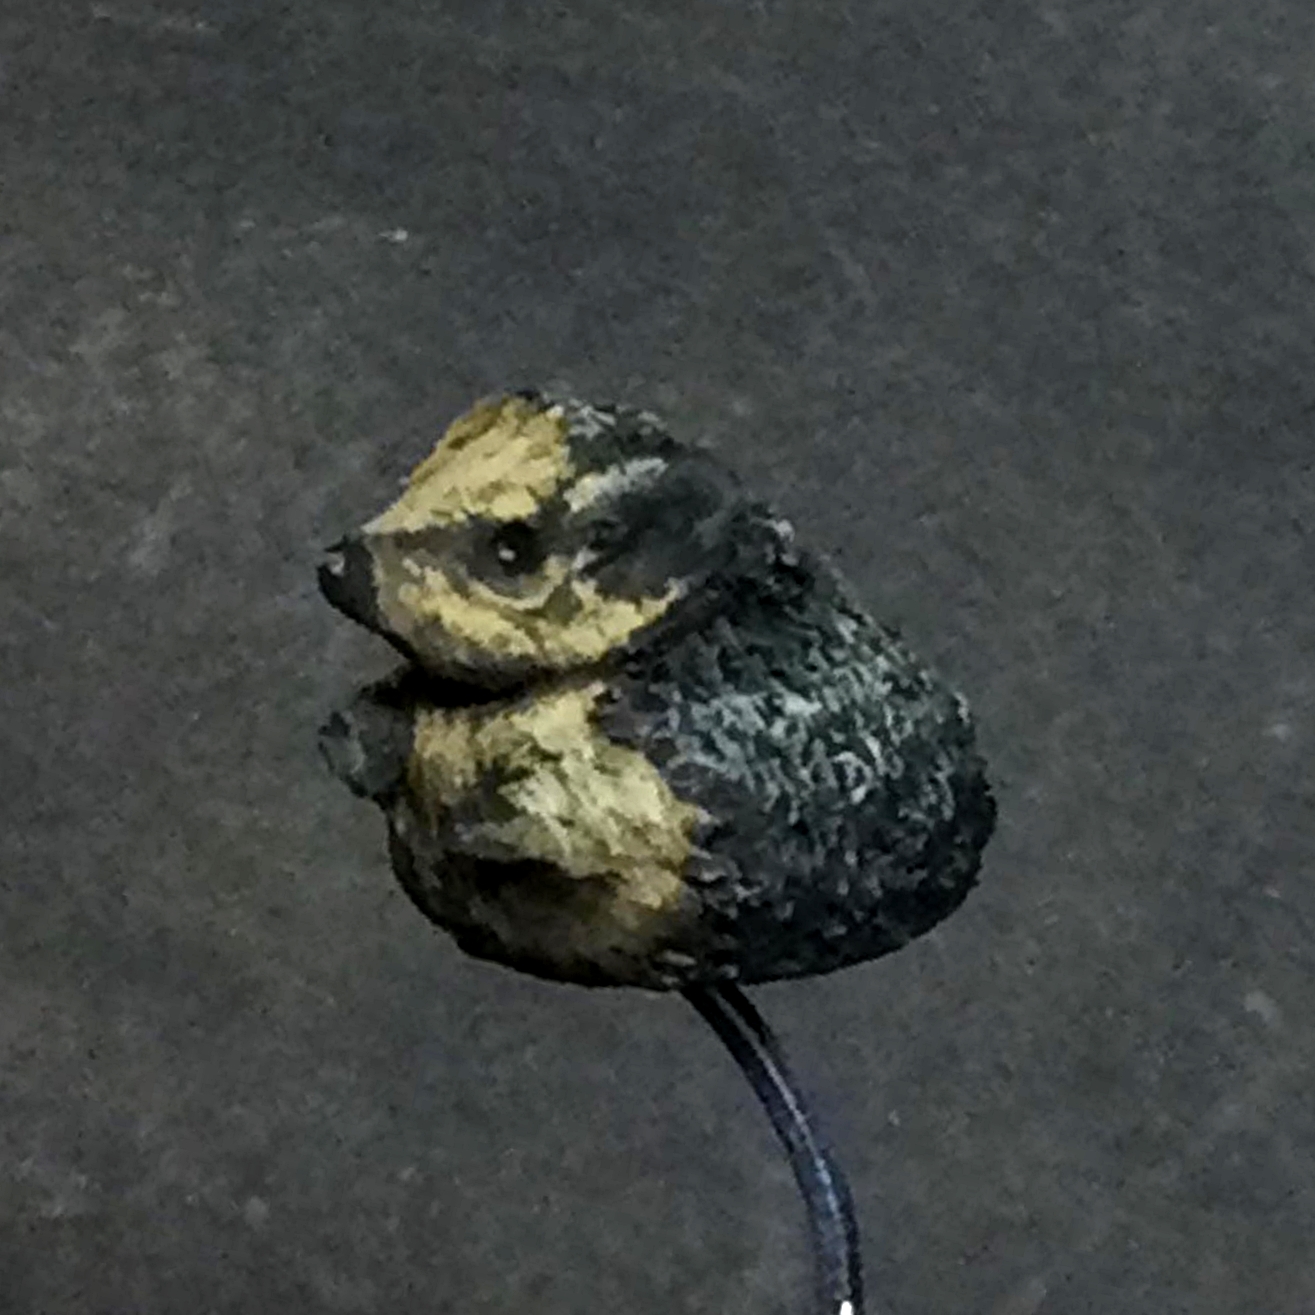
The first of the 3 I bought is called Meowgelior, the wise and ancient keeper of the forest ….. or something 😉
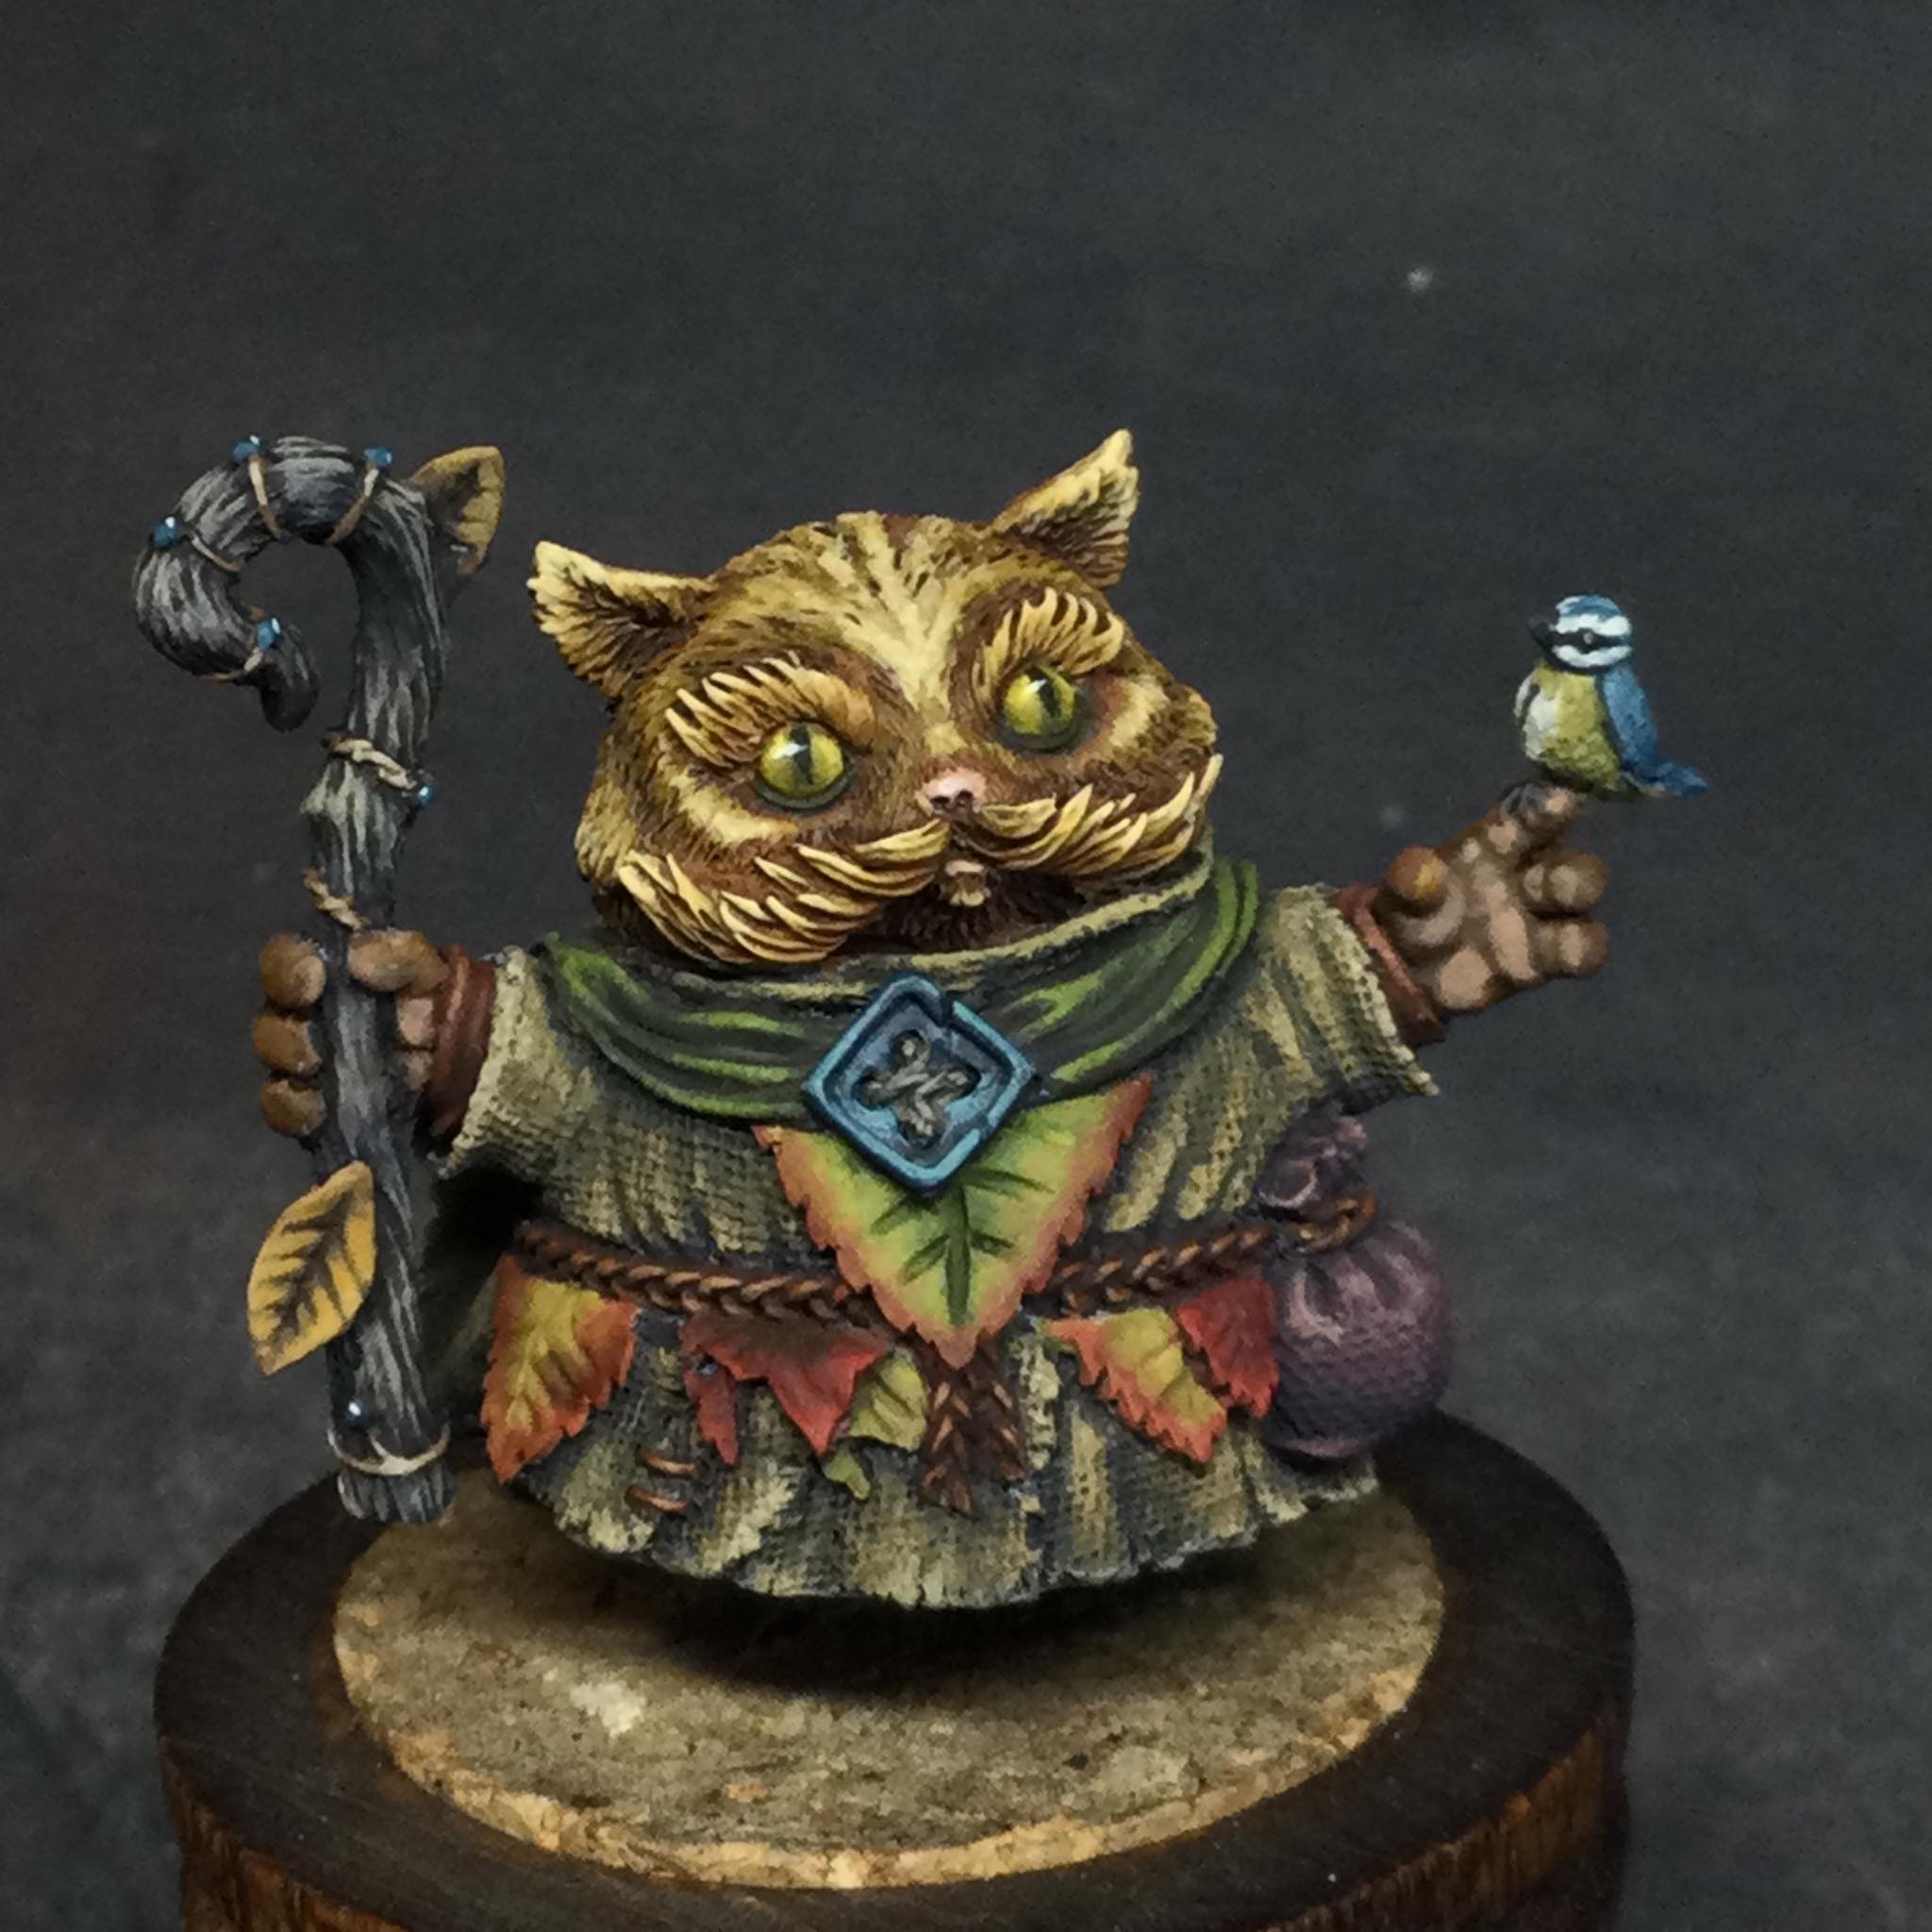
I painted him almost exclusively live on stream and was so happy with the wee fella that I sculpted a wee hedgehog pal for him and build him a wee dirorama base atop a plinth.
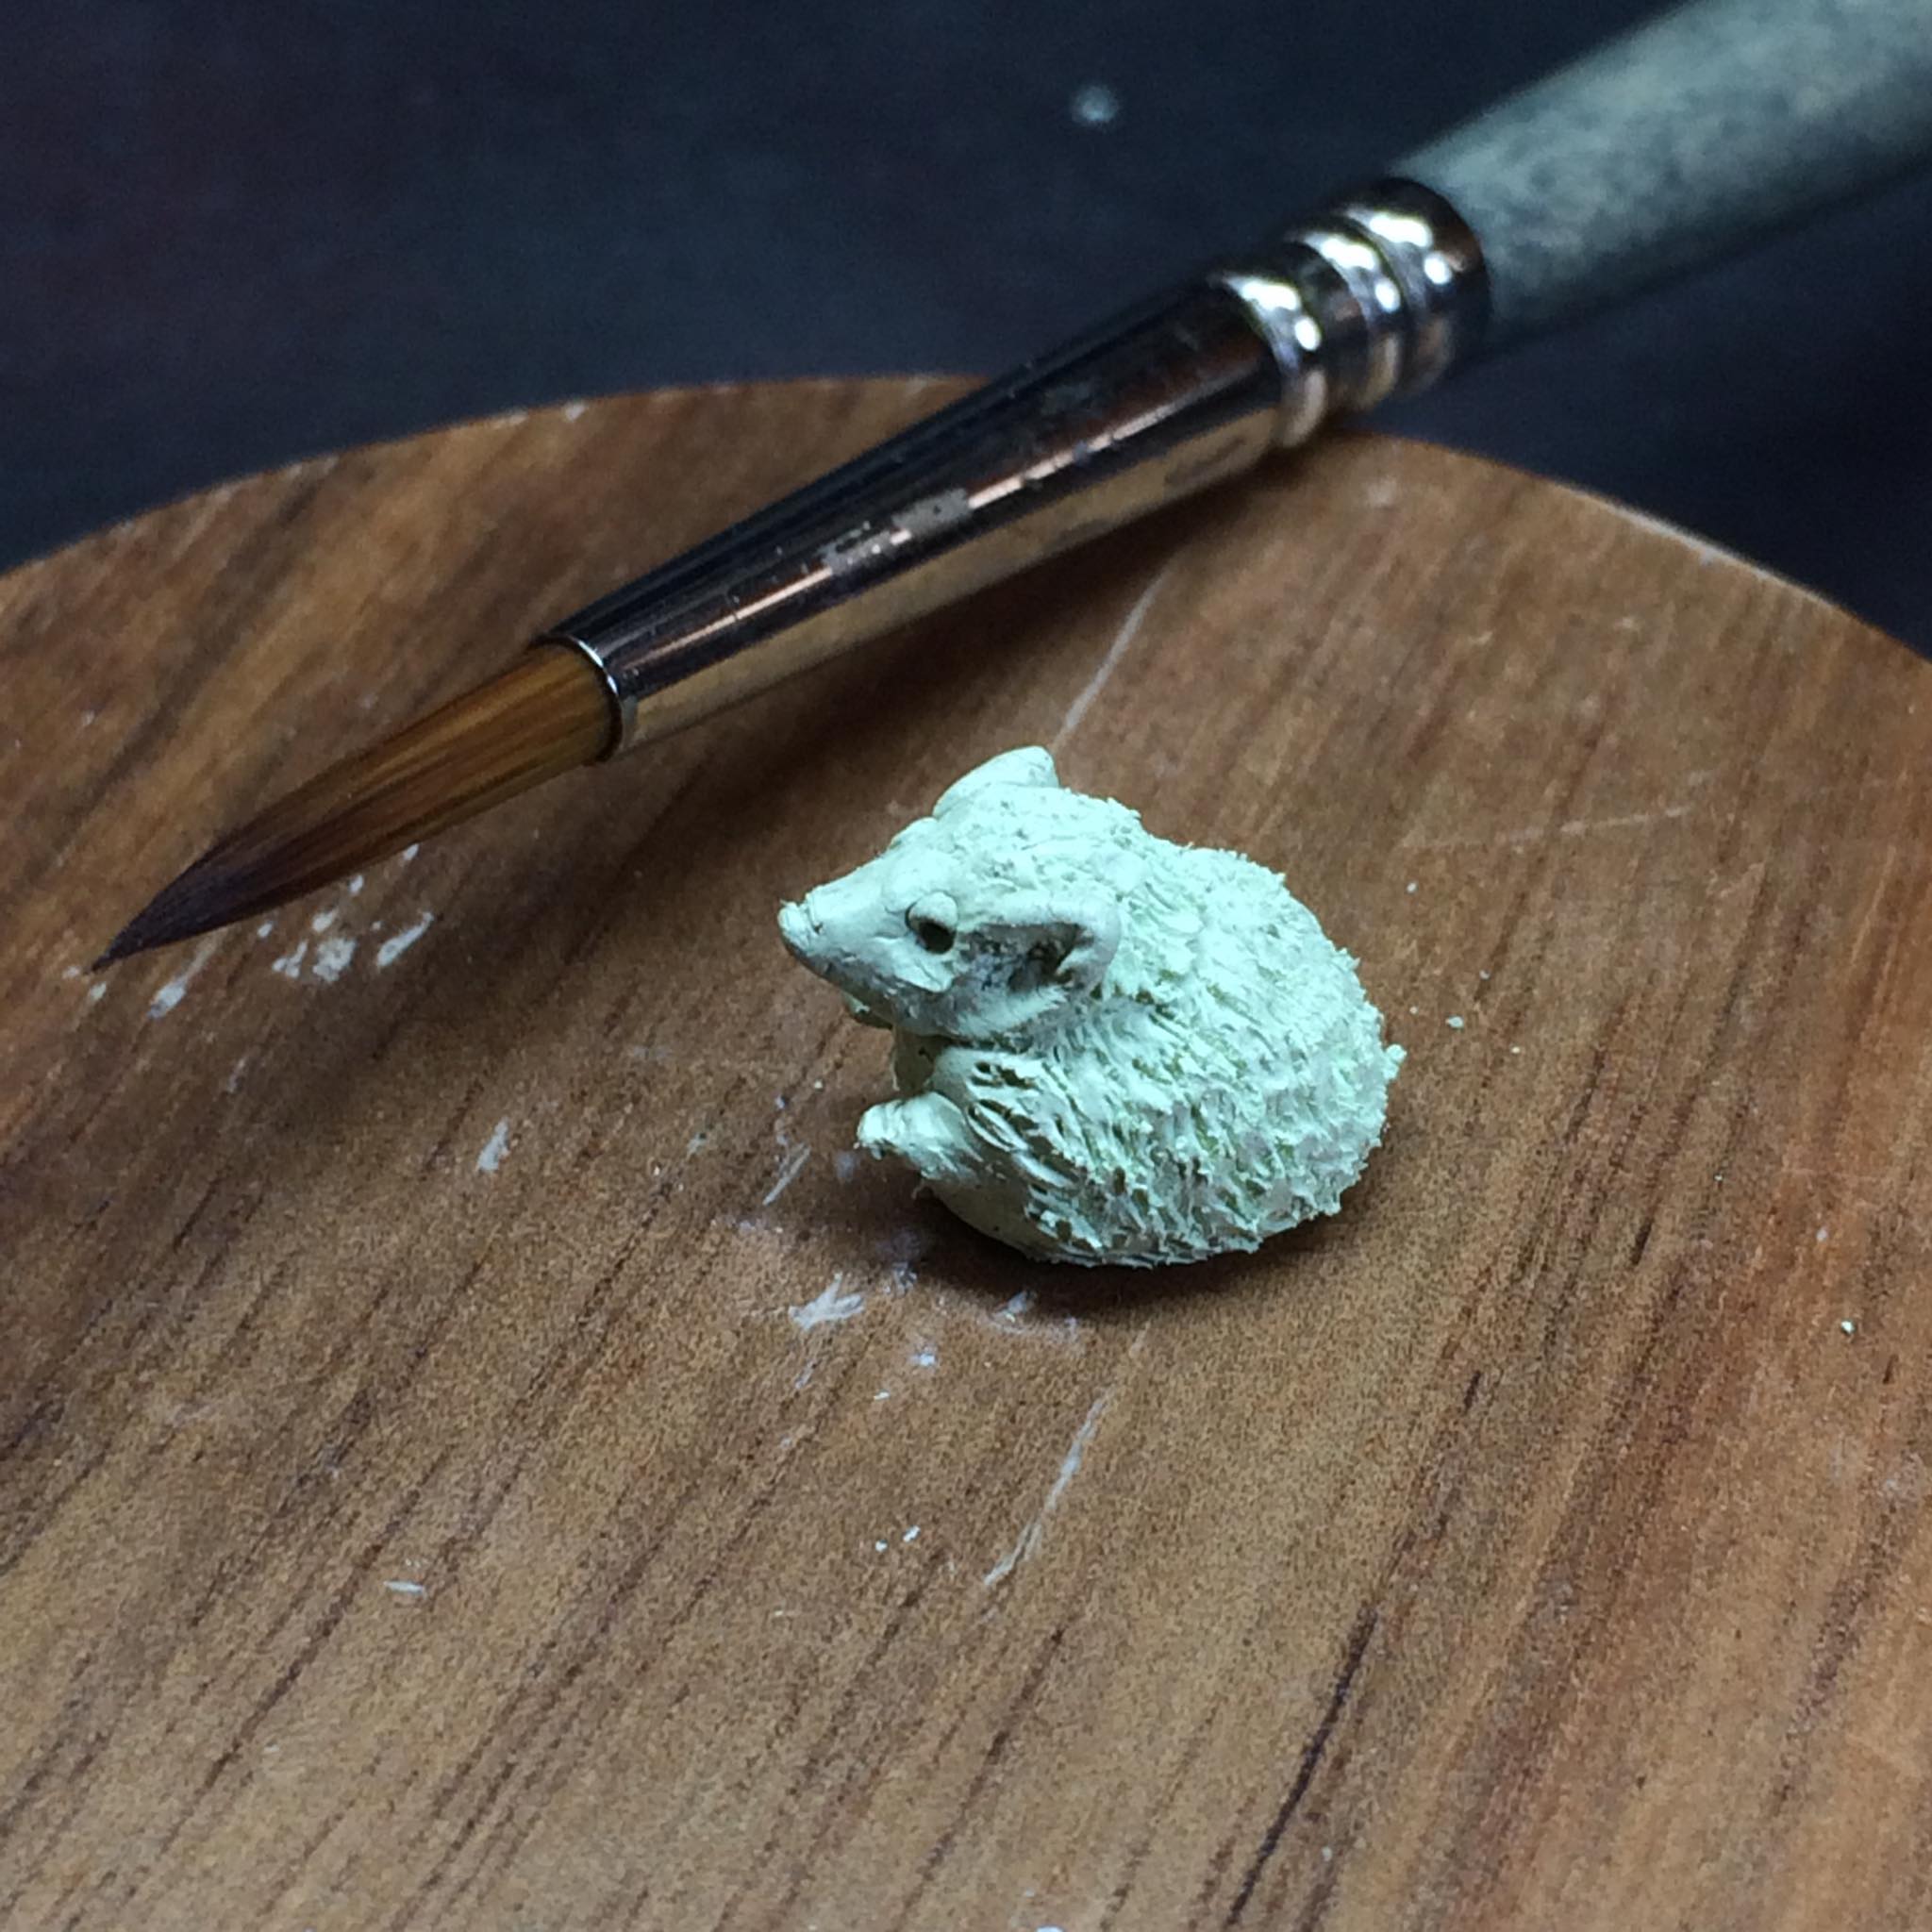
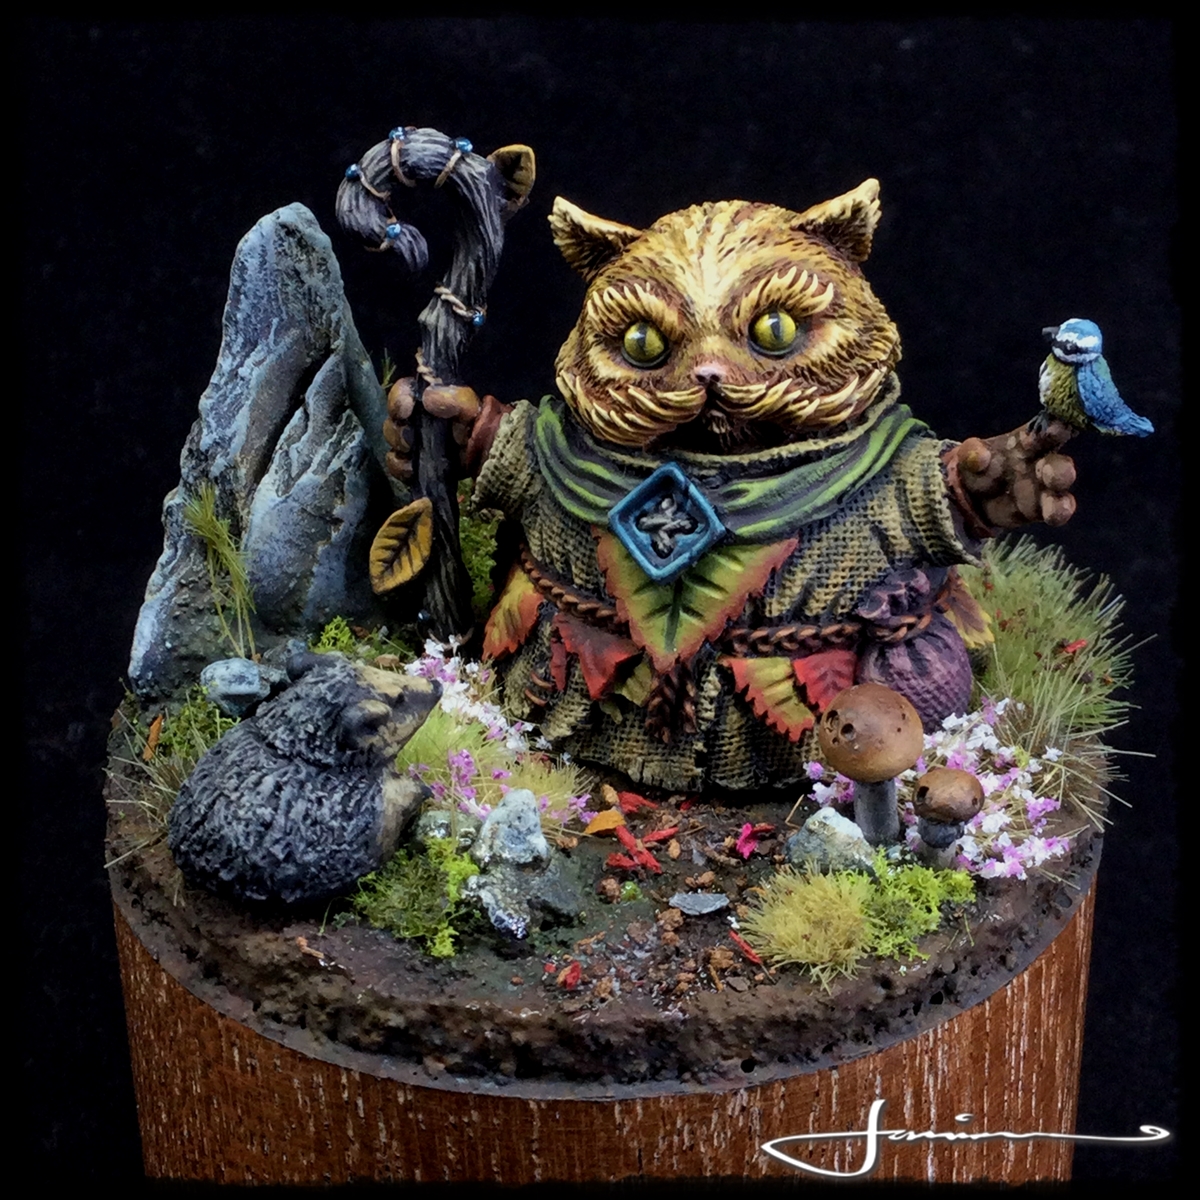
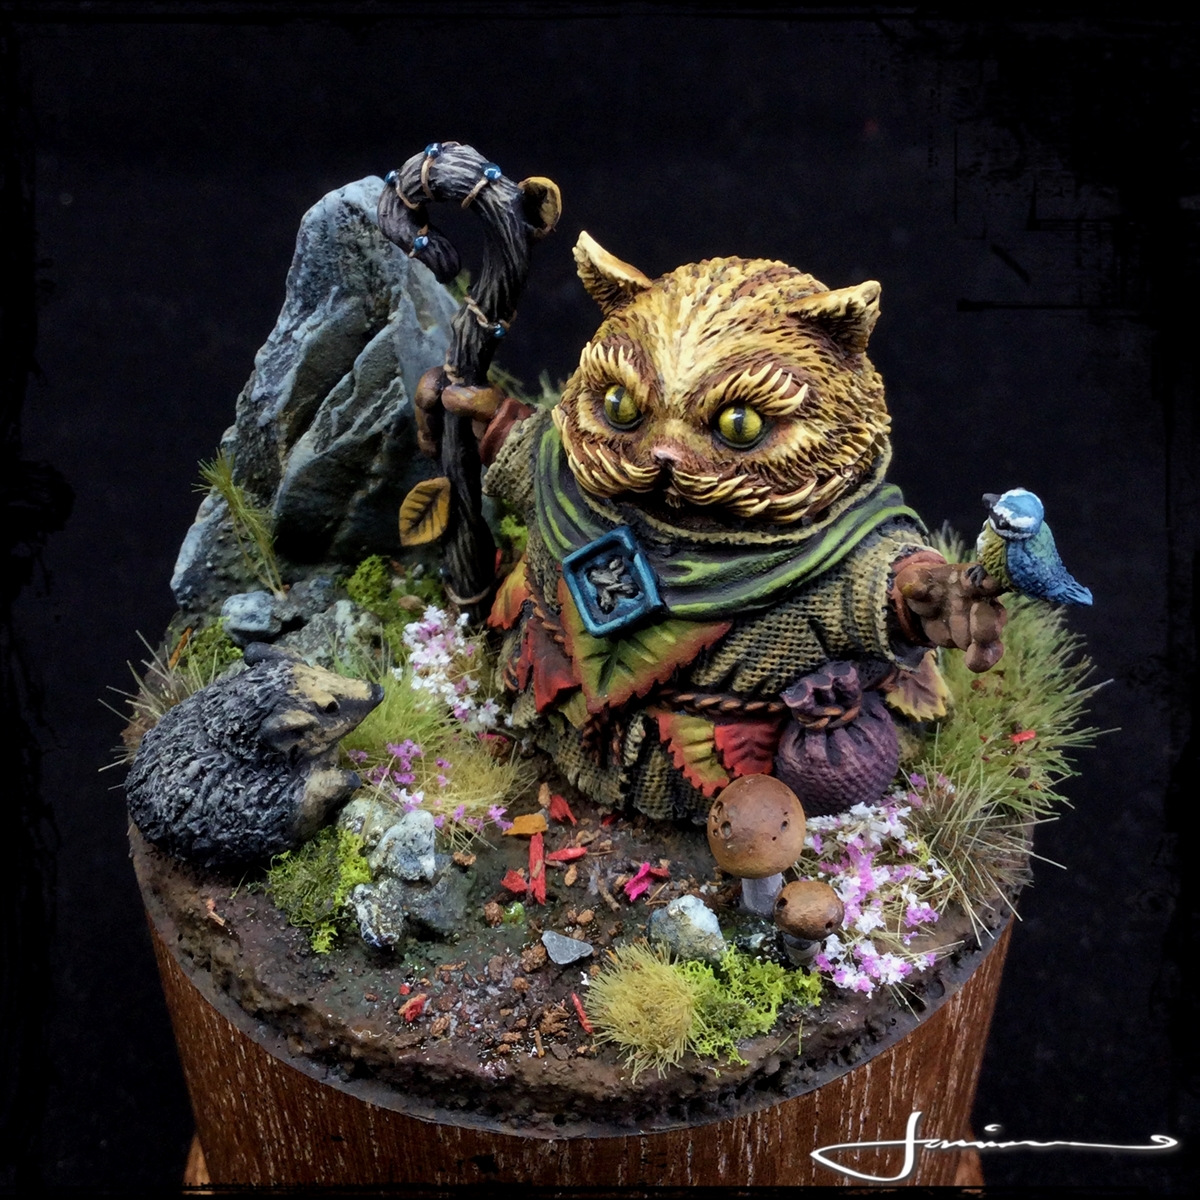
And this is the final piece – first mini of 2021 to be finished!!!
I promised him as a giveaway mini for my channel at the end of the month but am kinda wishing i’d kept my mouth shut!!
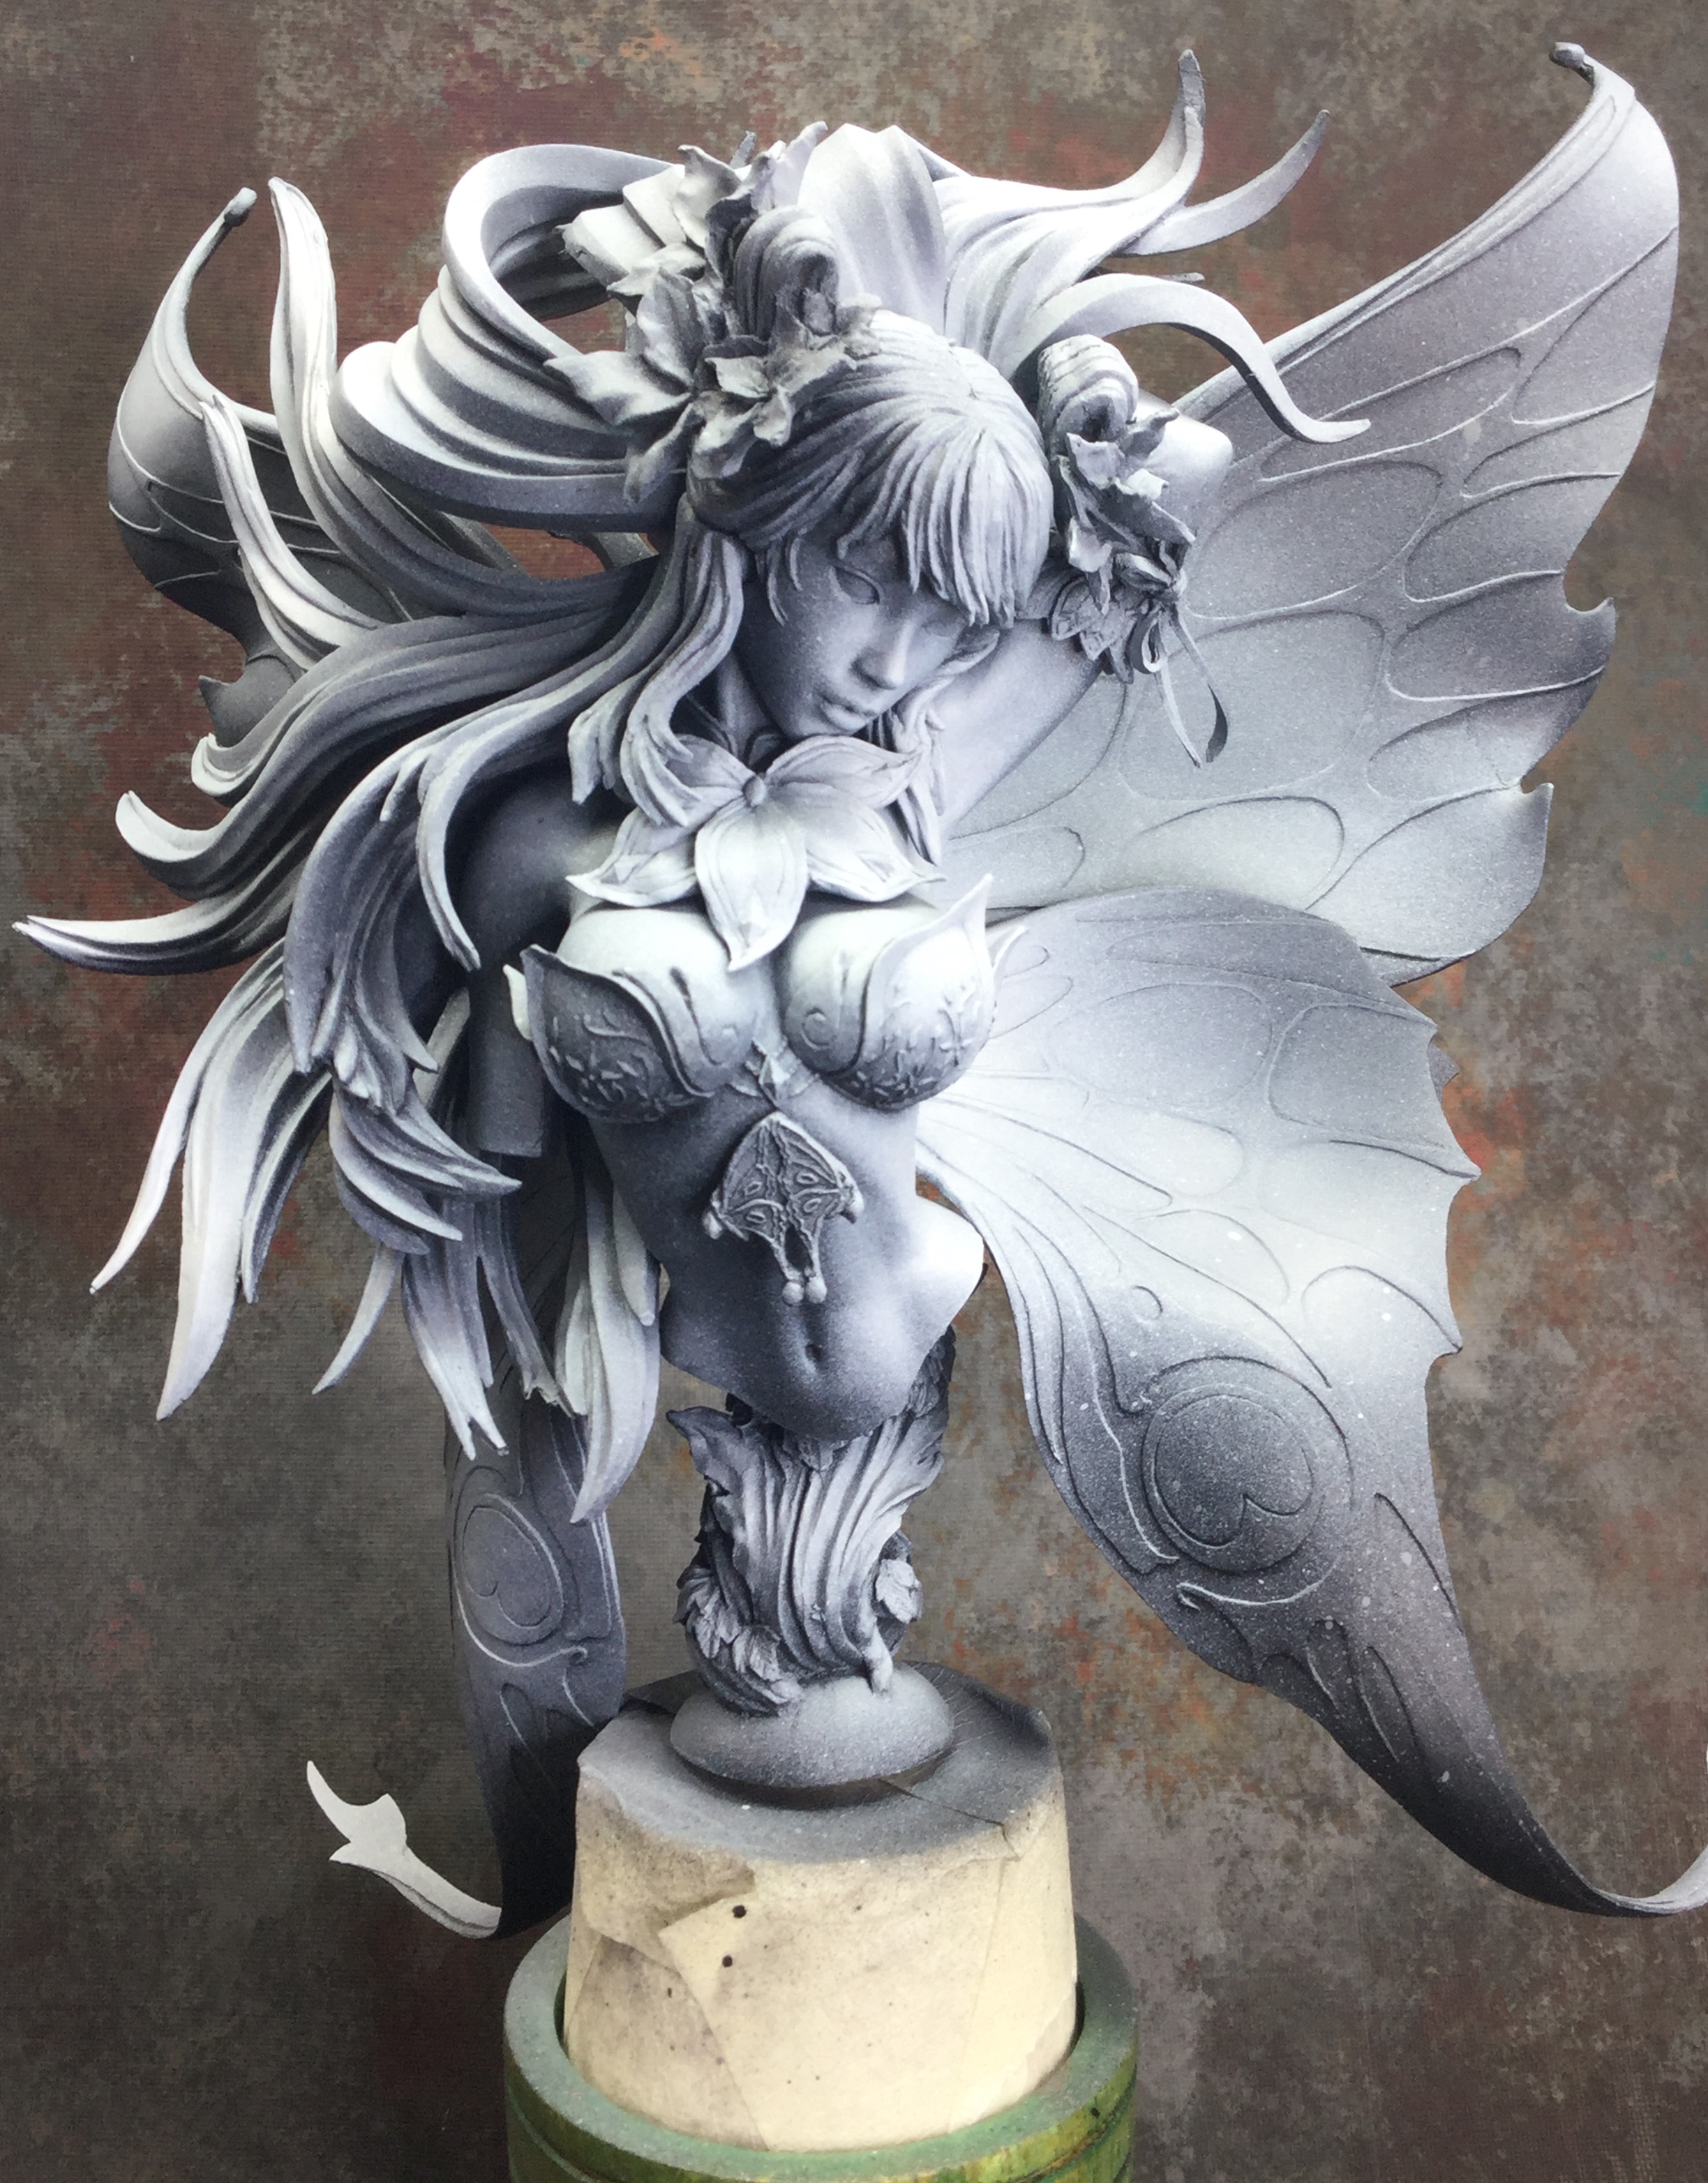
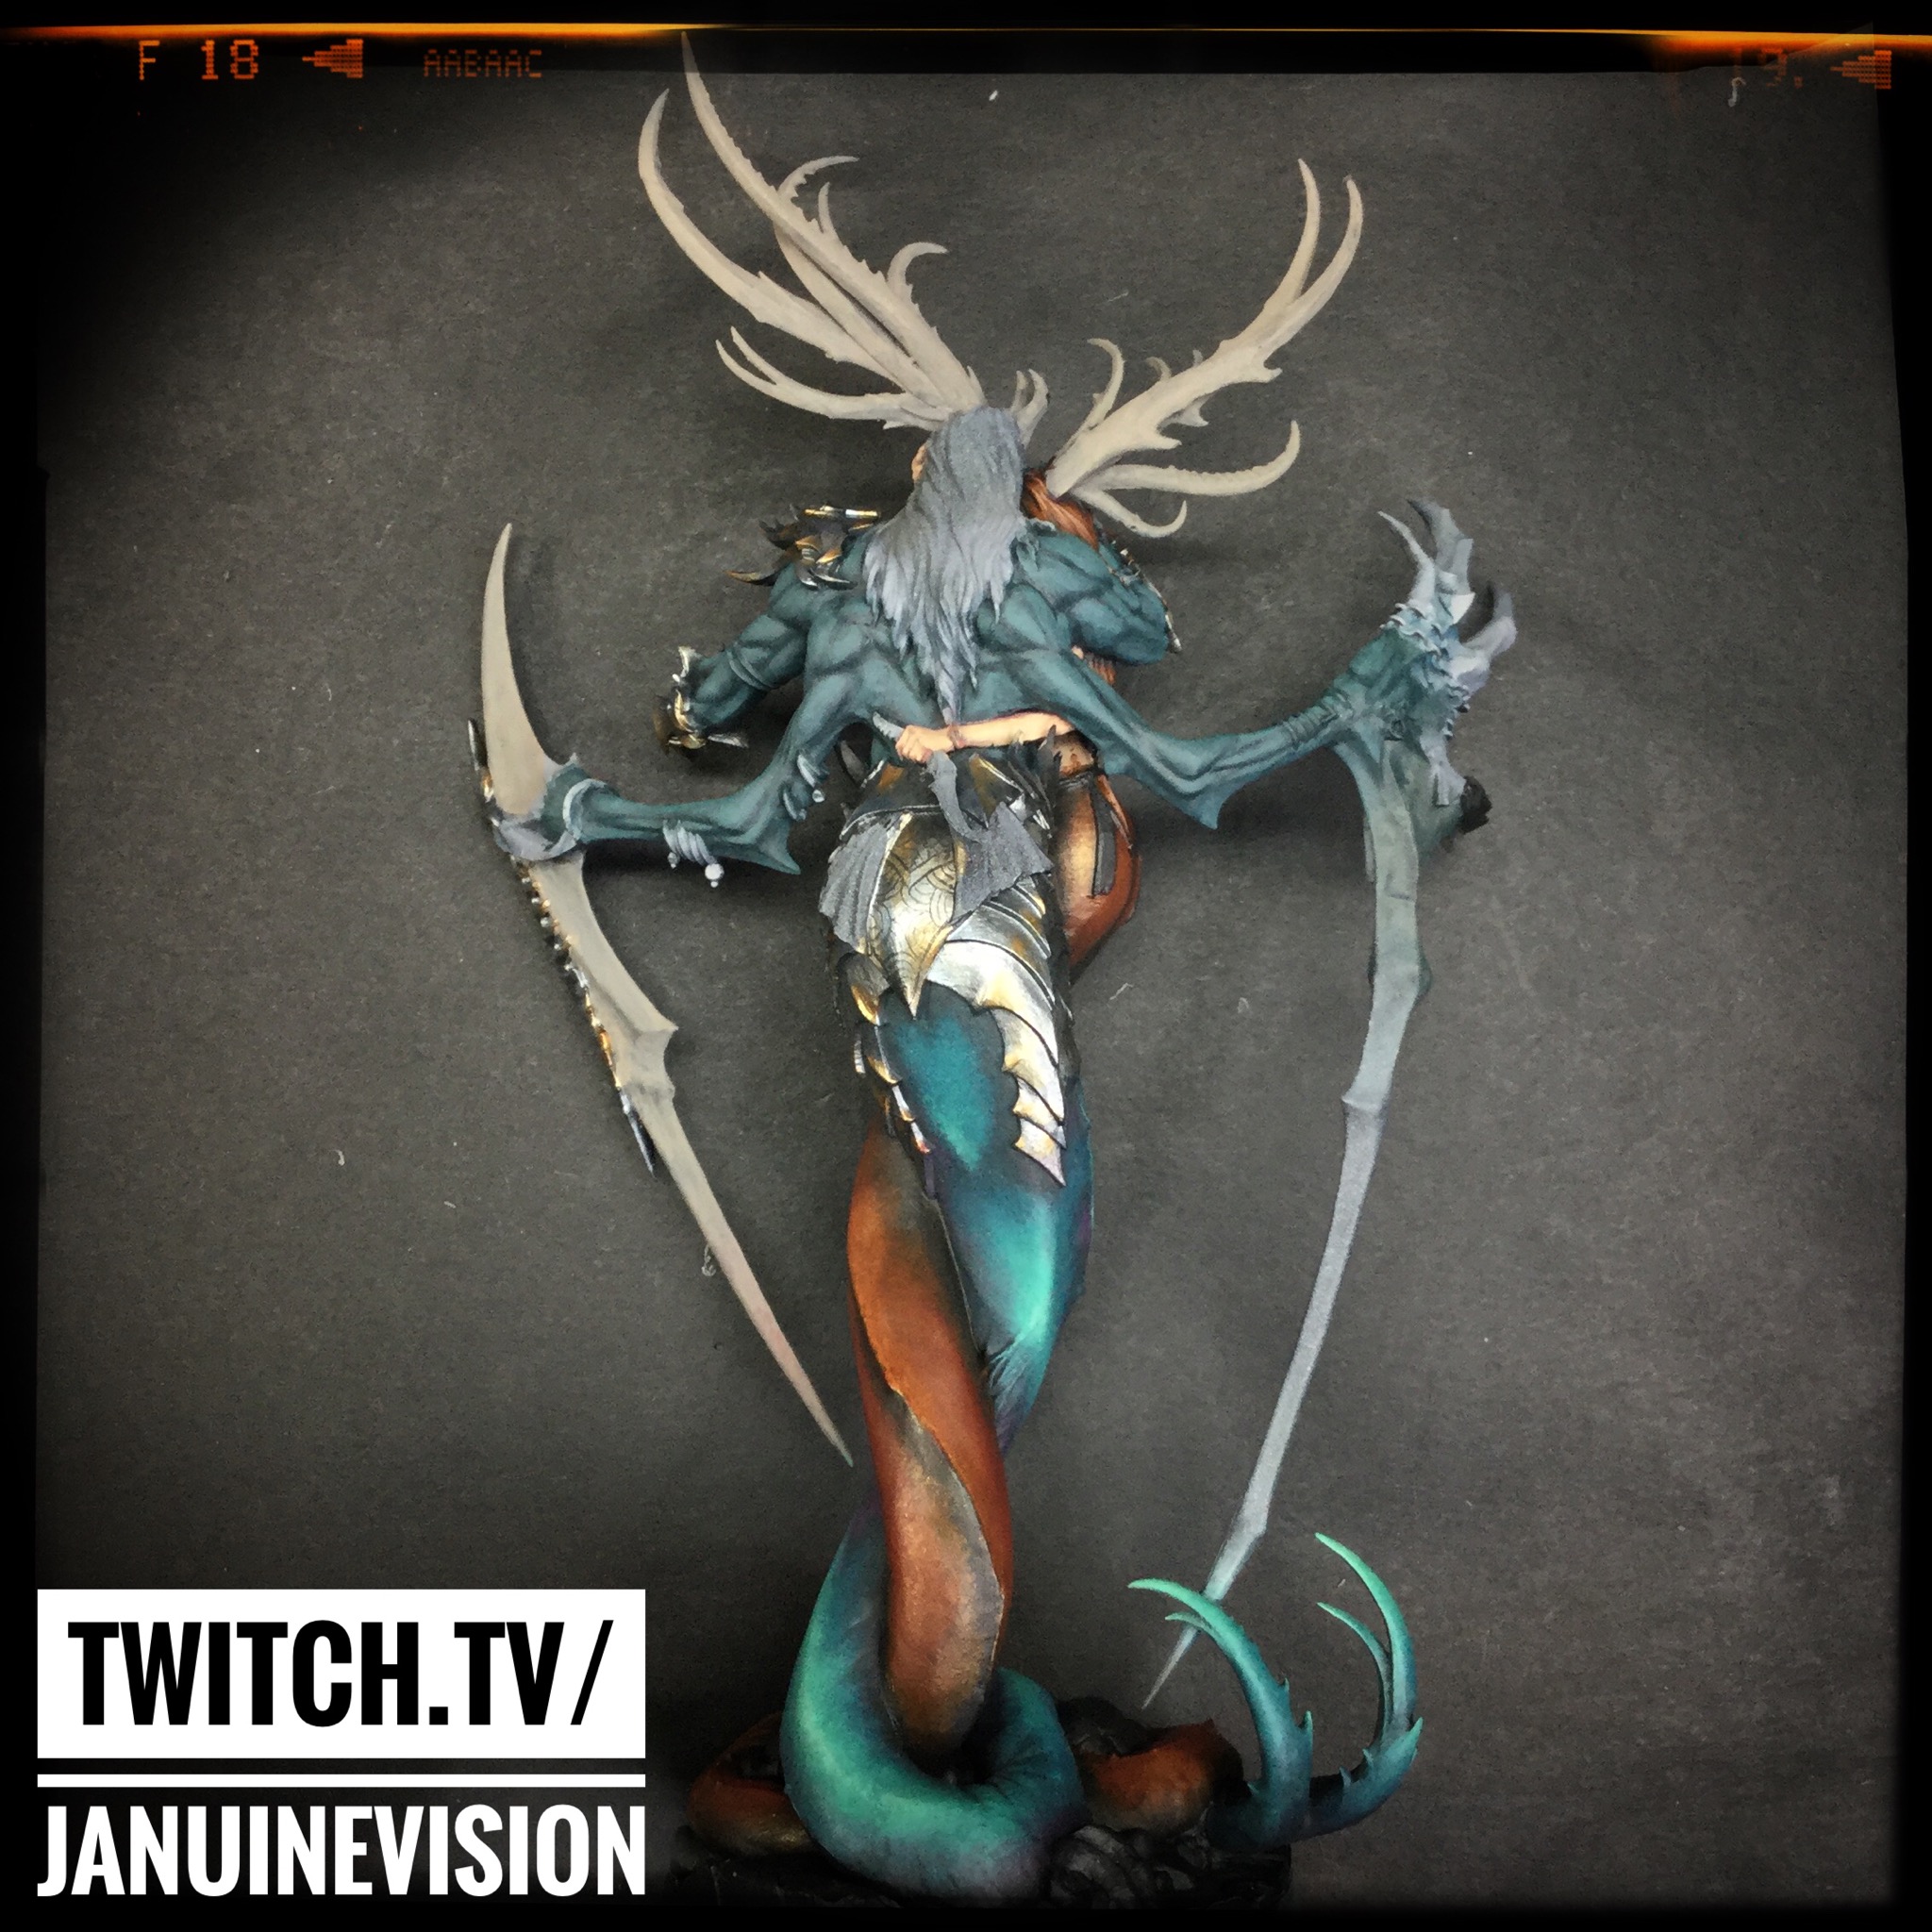
Dhalya The Faerie I - A Beginning
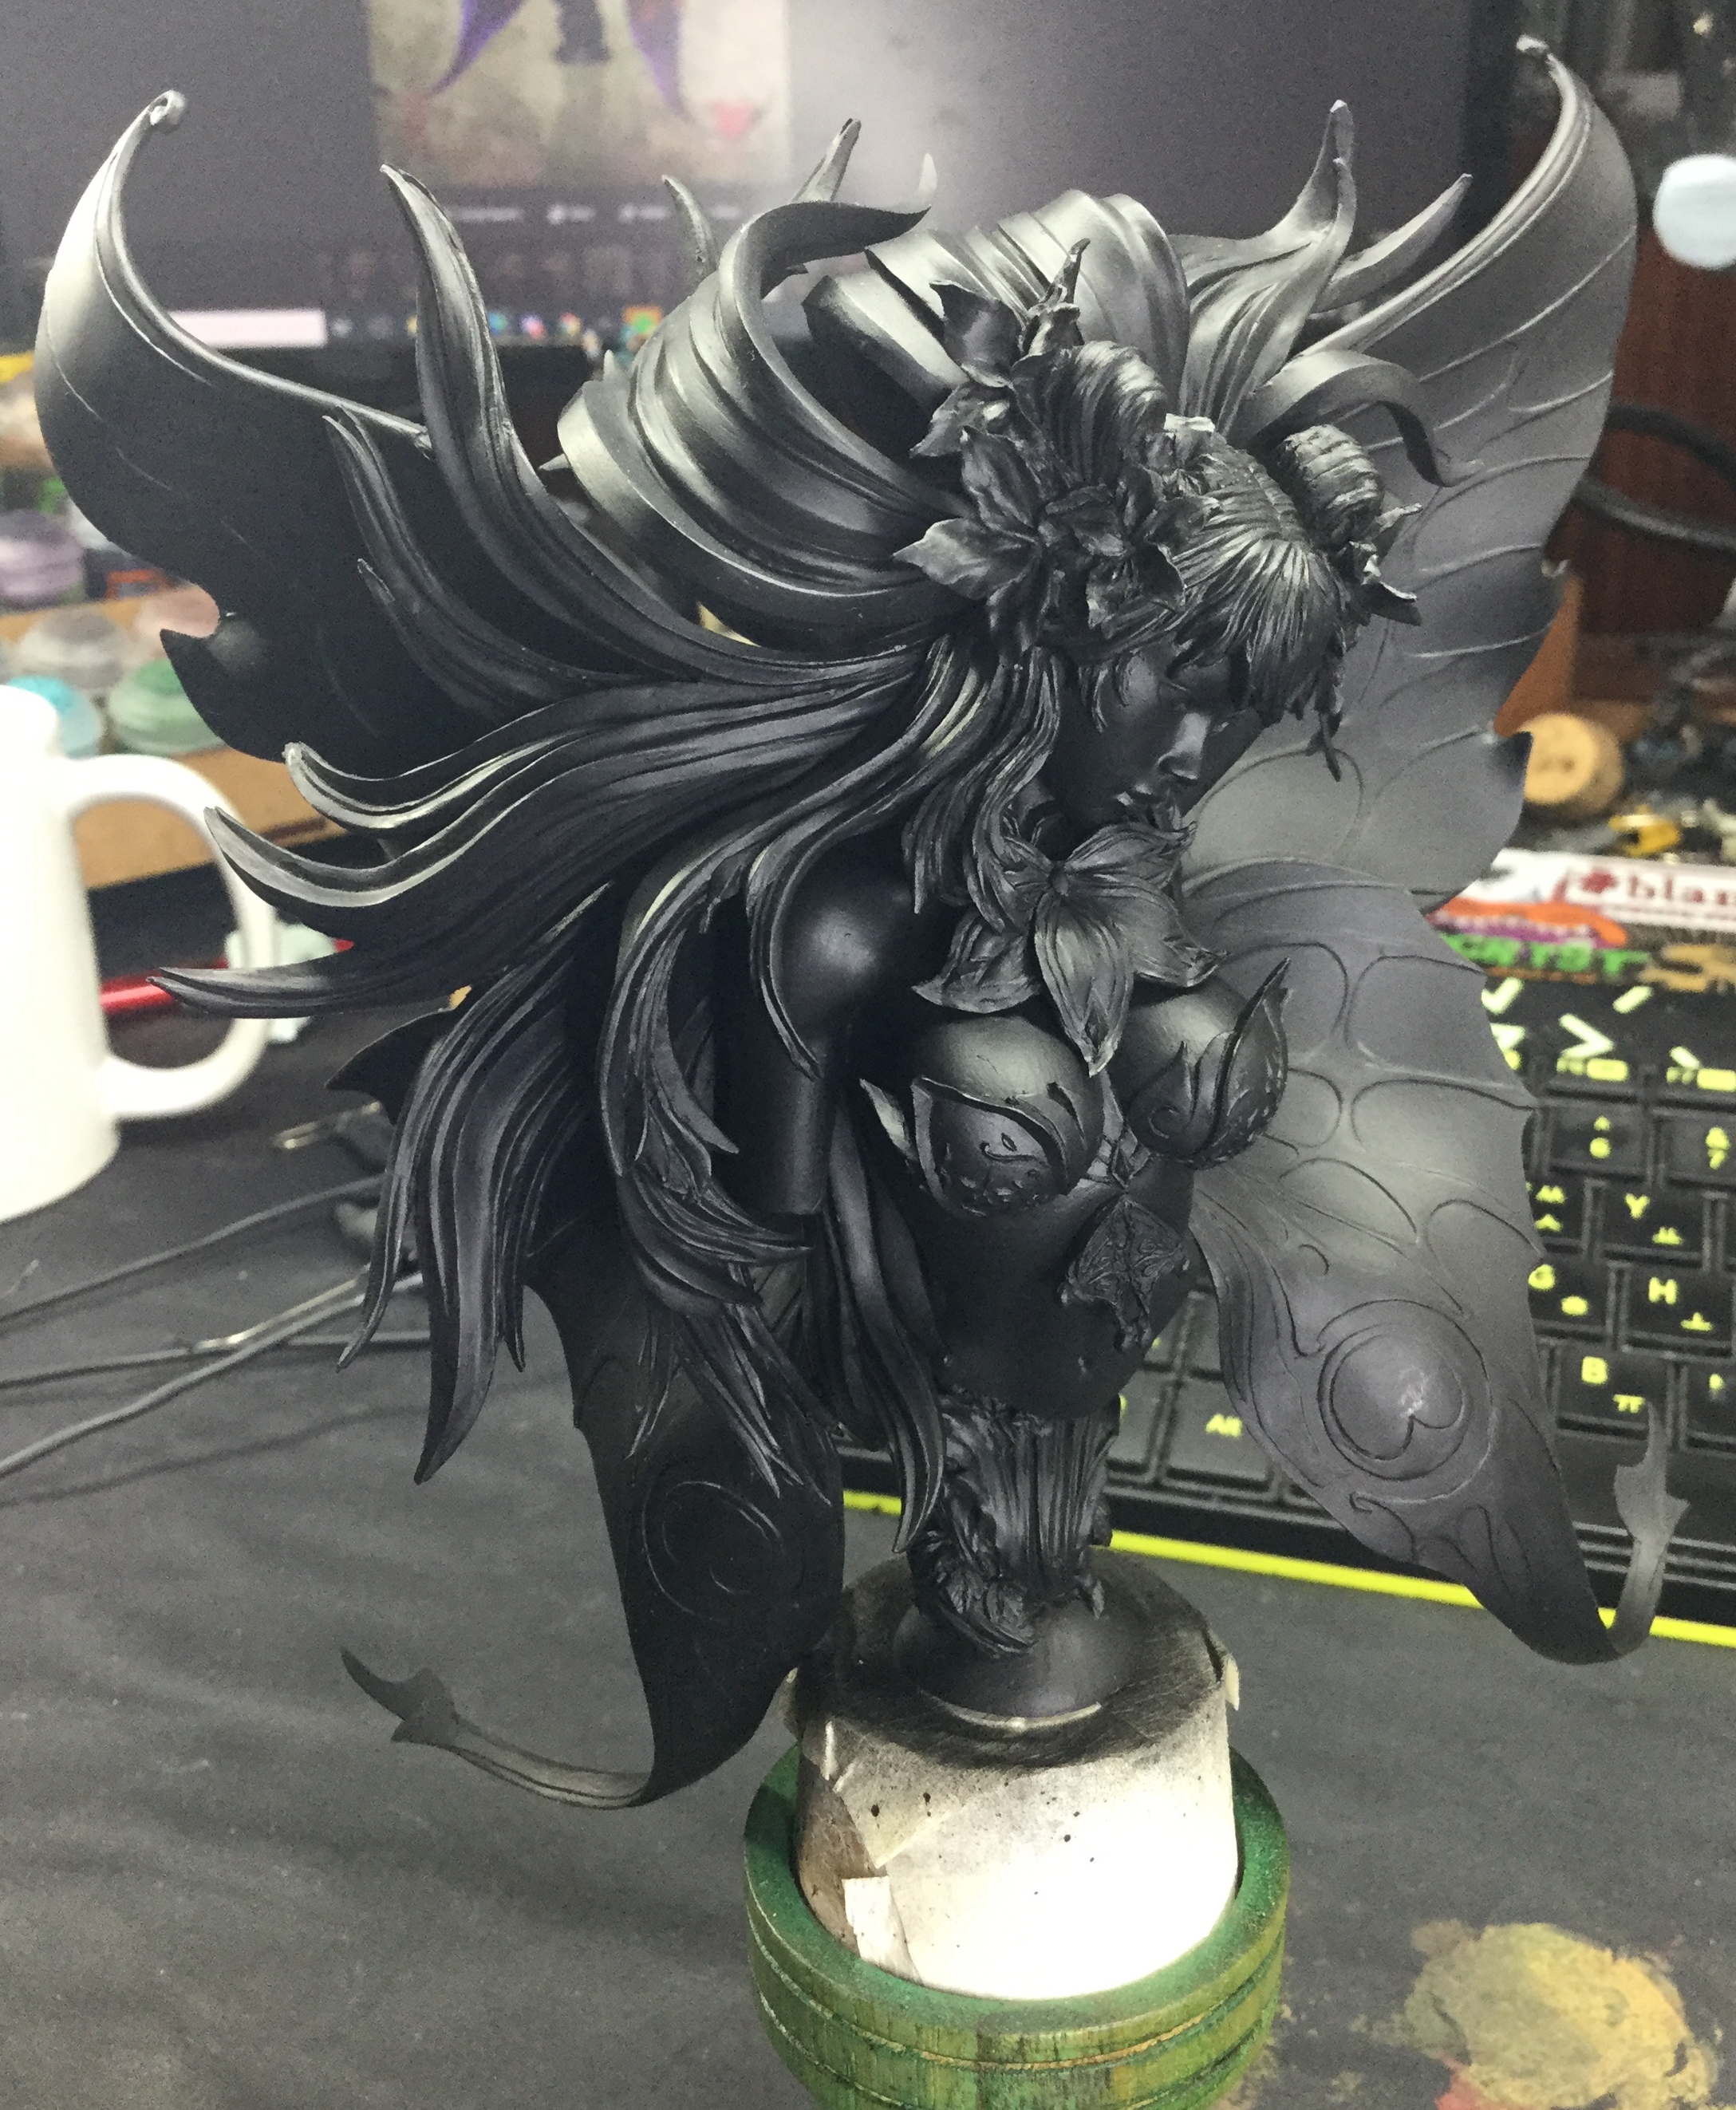
 Dhalya The Faerie from Kimera
And so another commission begins and this one is a bruiser!!
This is Dhalya from Kimera. A insanely beautiful piece sculpted by Ebroin. Both beautiful and a complete pain in the arse to prep!! There are a lotta lotta pieces and they all interlink and lock.
So after getting all the usual prep of degating, sanding, filing and the like done and then washing her, next up was to get the pins in and she requires quite a few!!
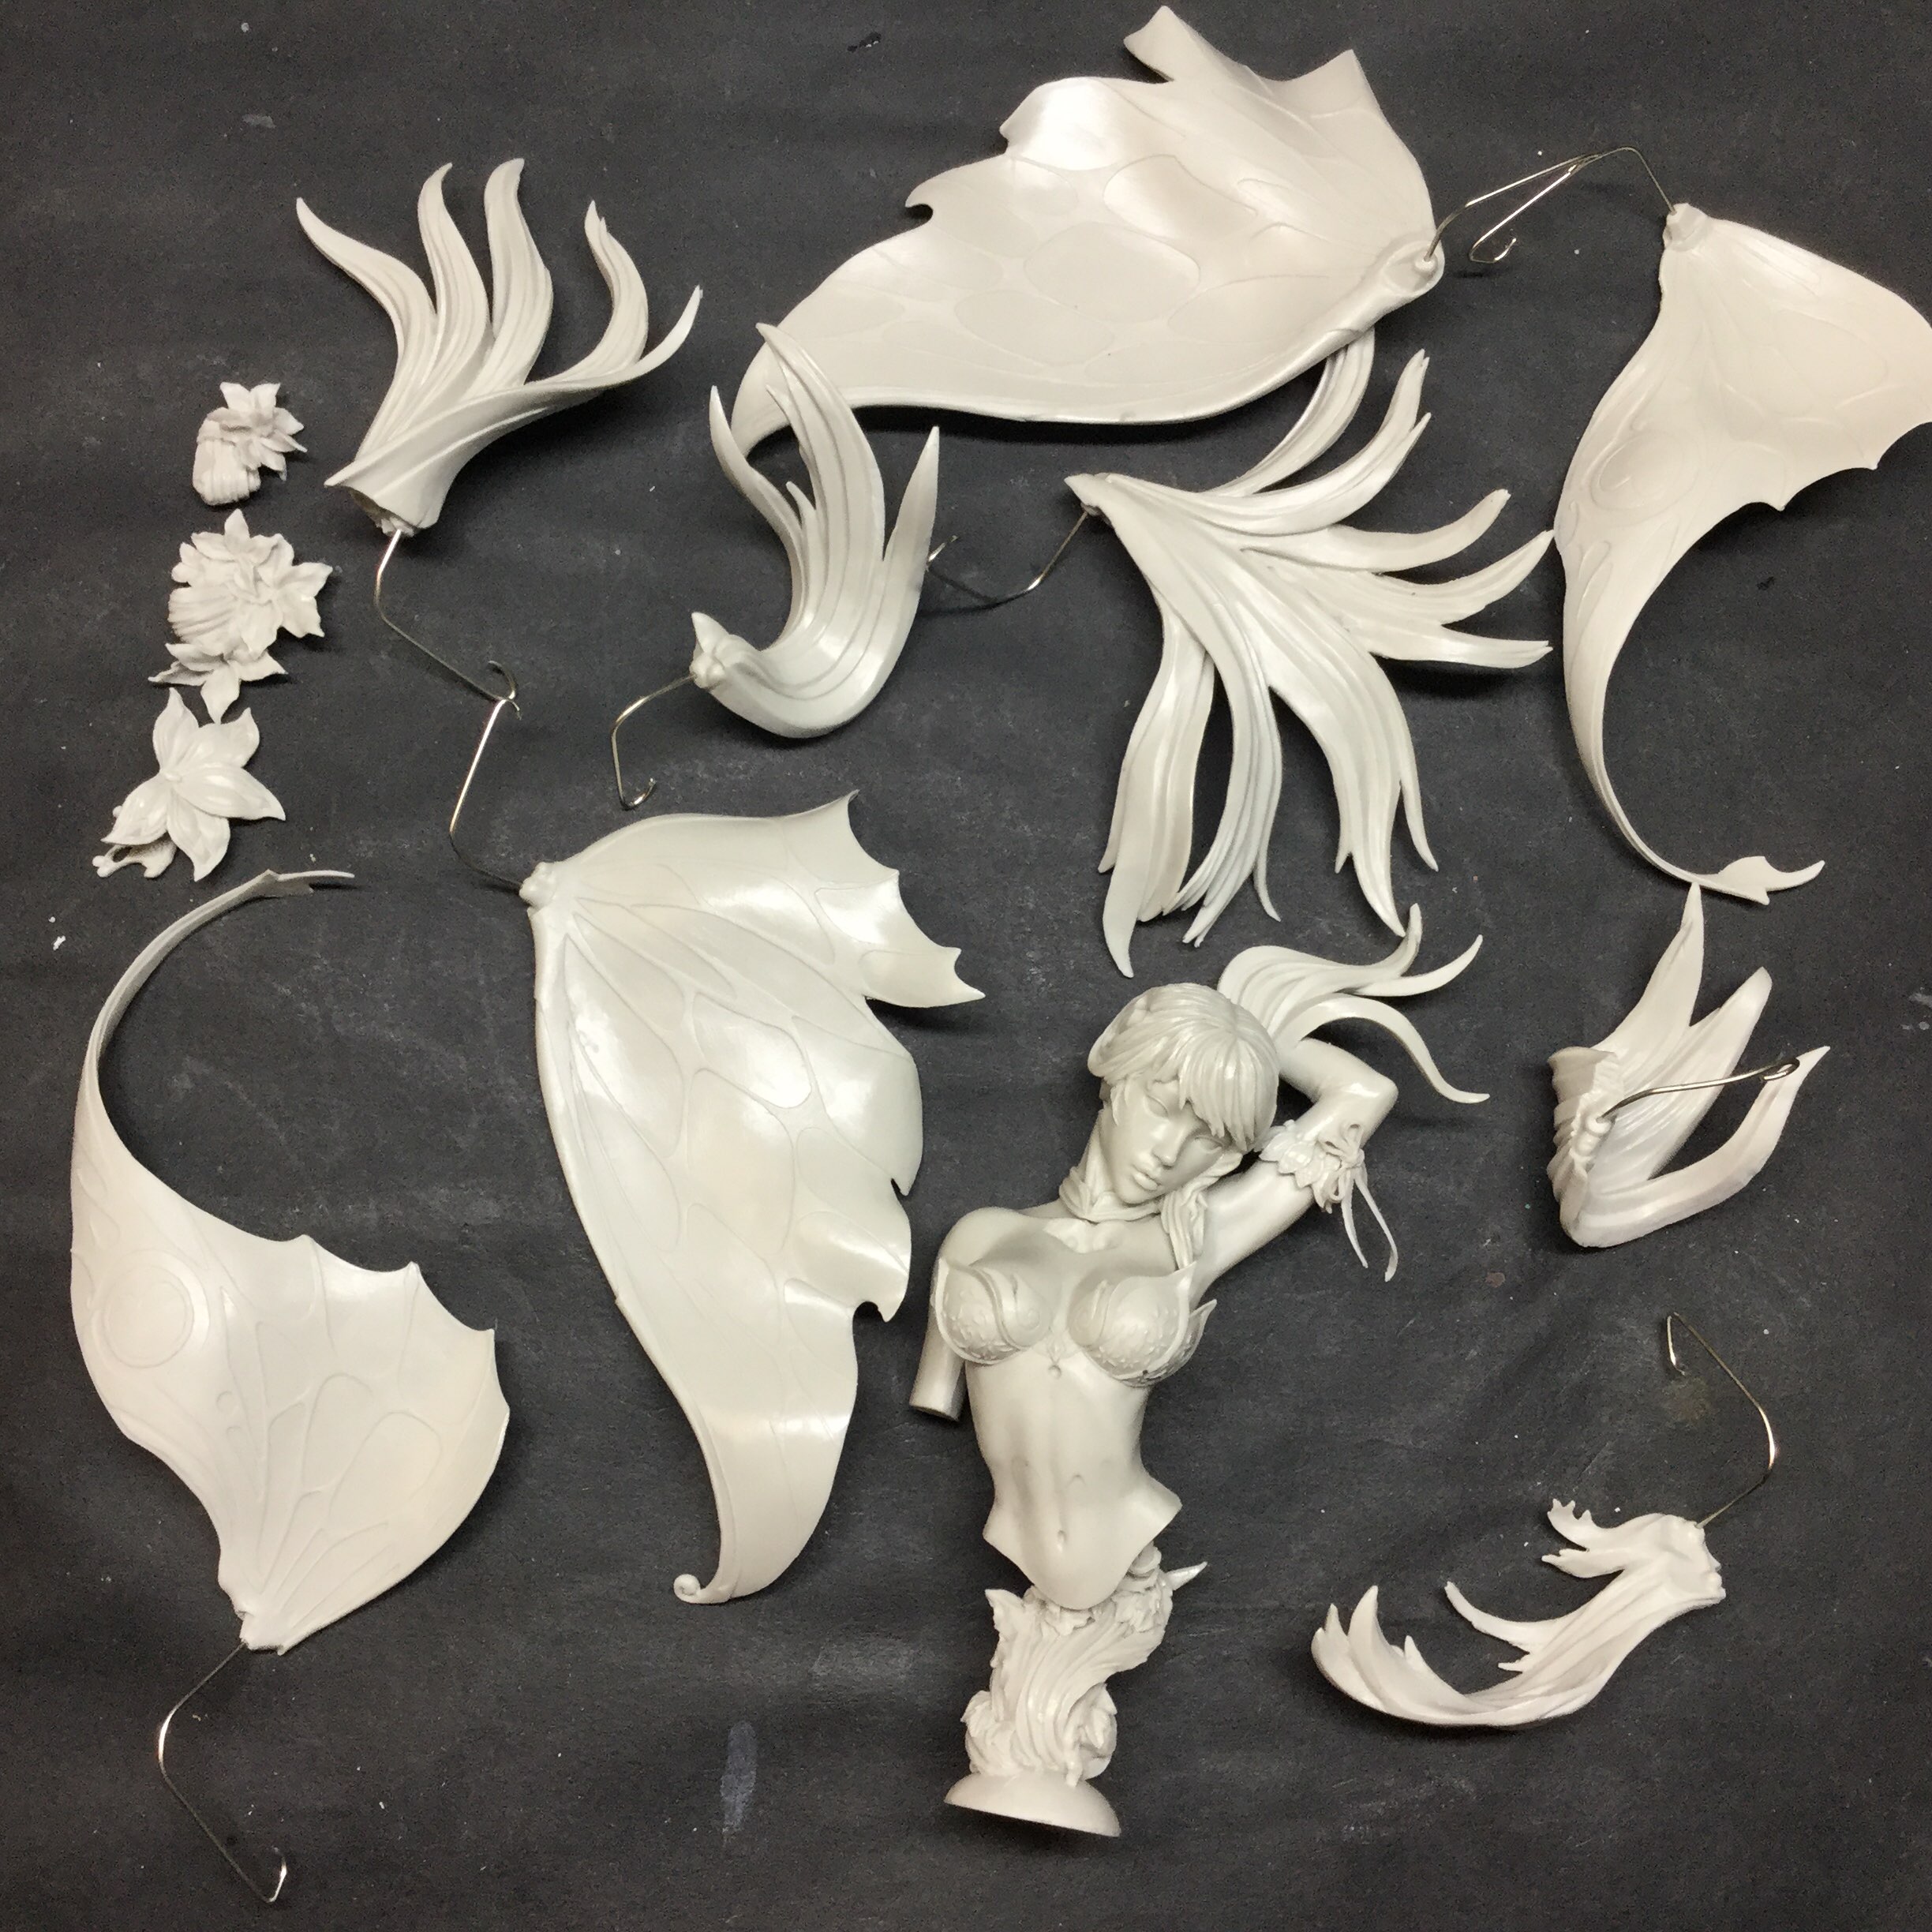 Pins drilled and then long opened paperclips put in to allow for easier priming
I first primed her in all her seperate parts with two coats of Stylyrez black. Then came the fun steps……….
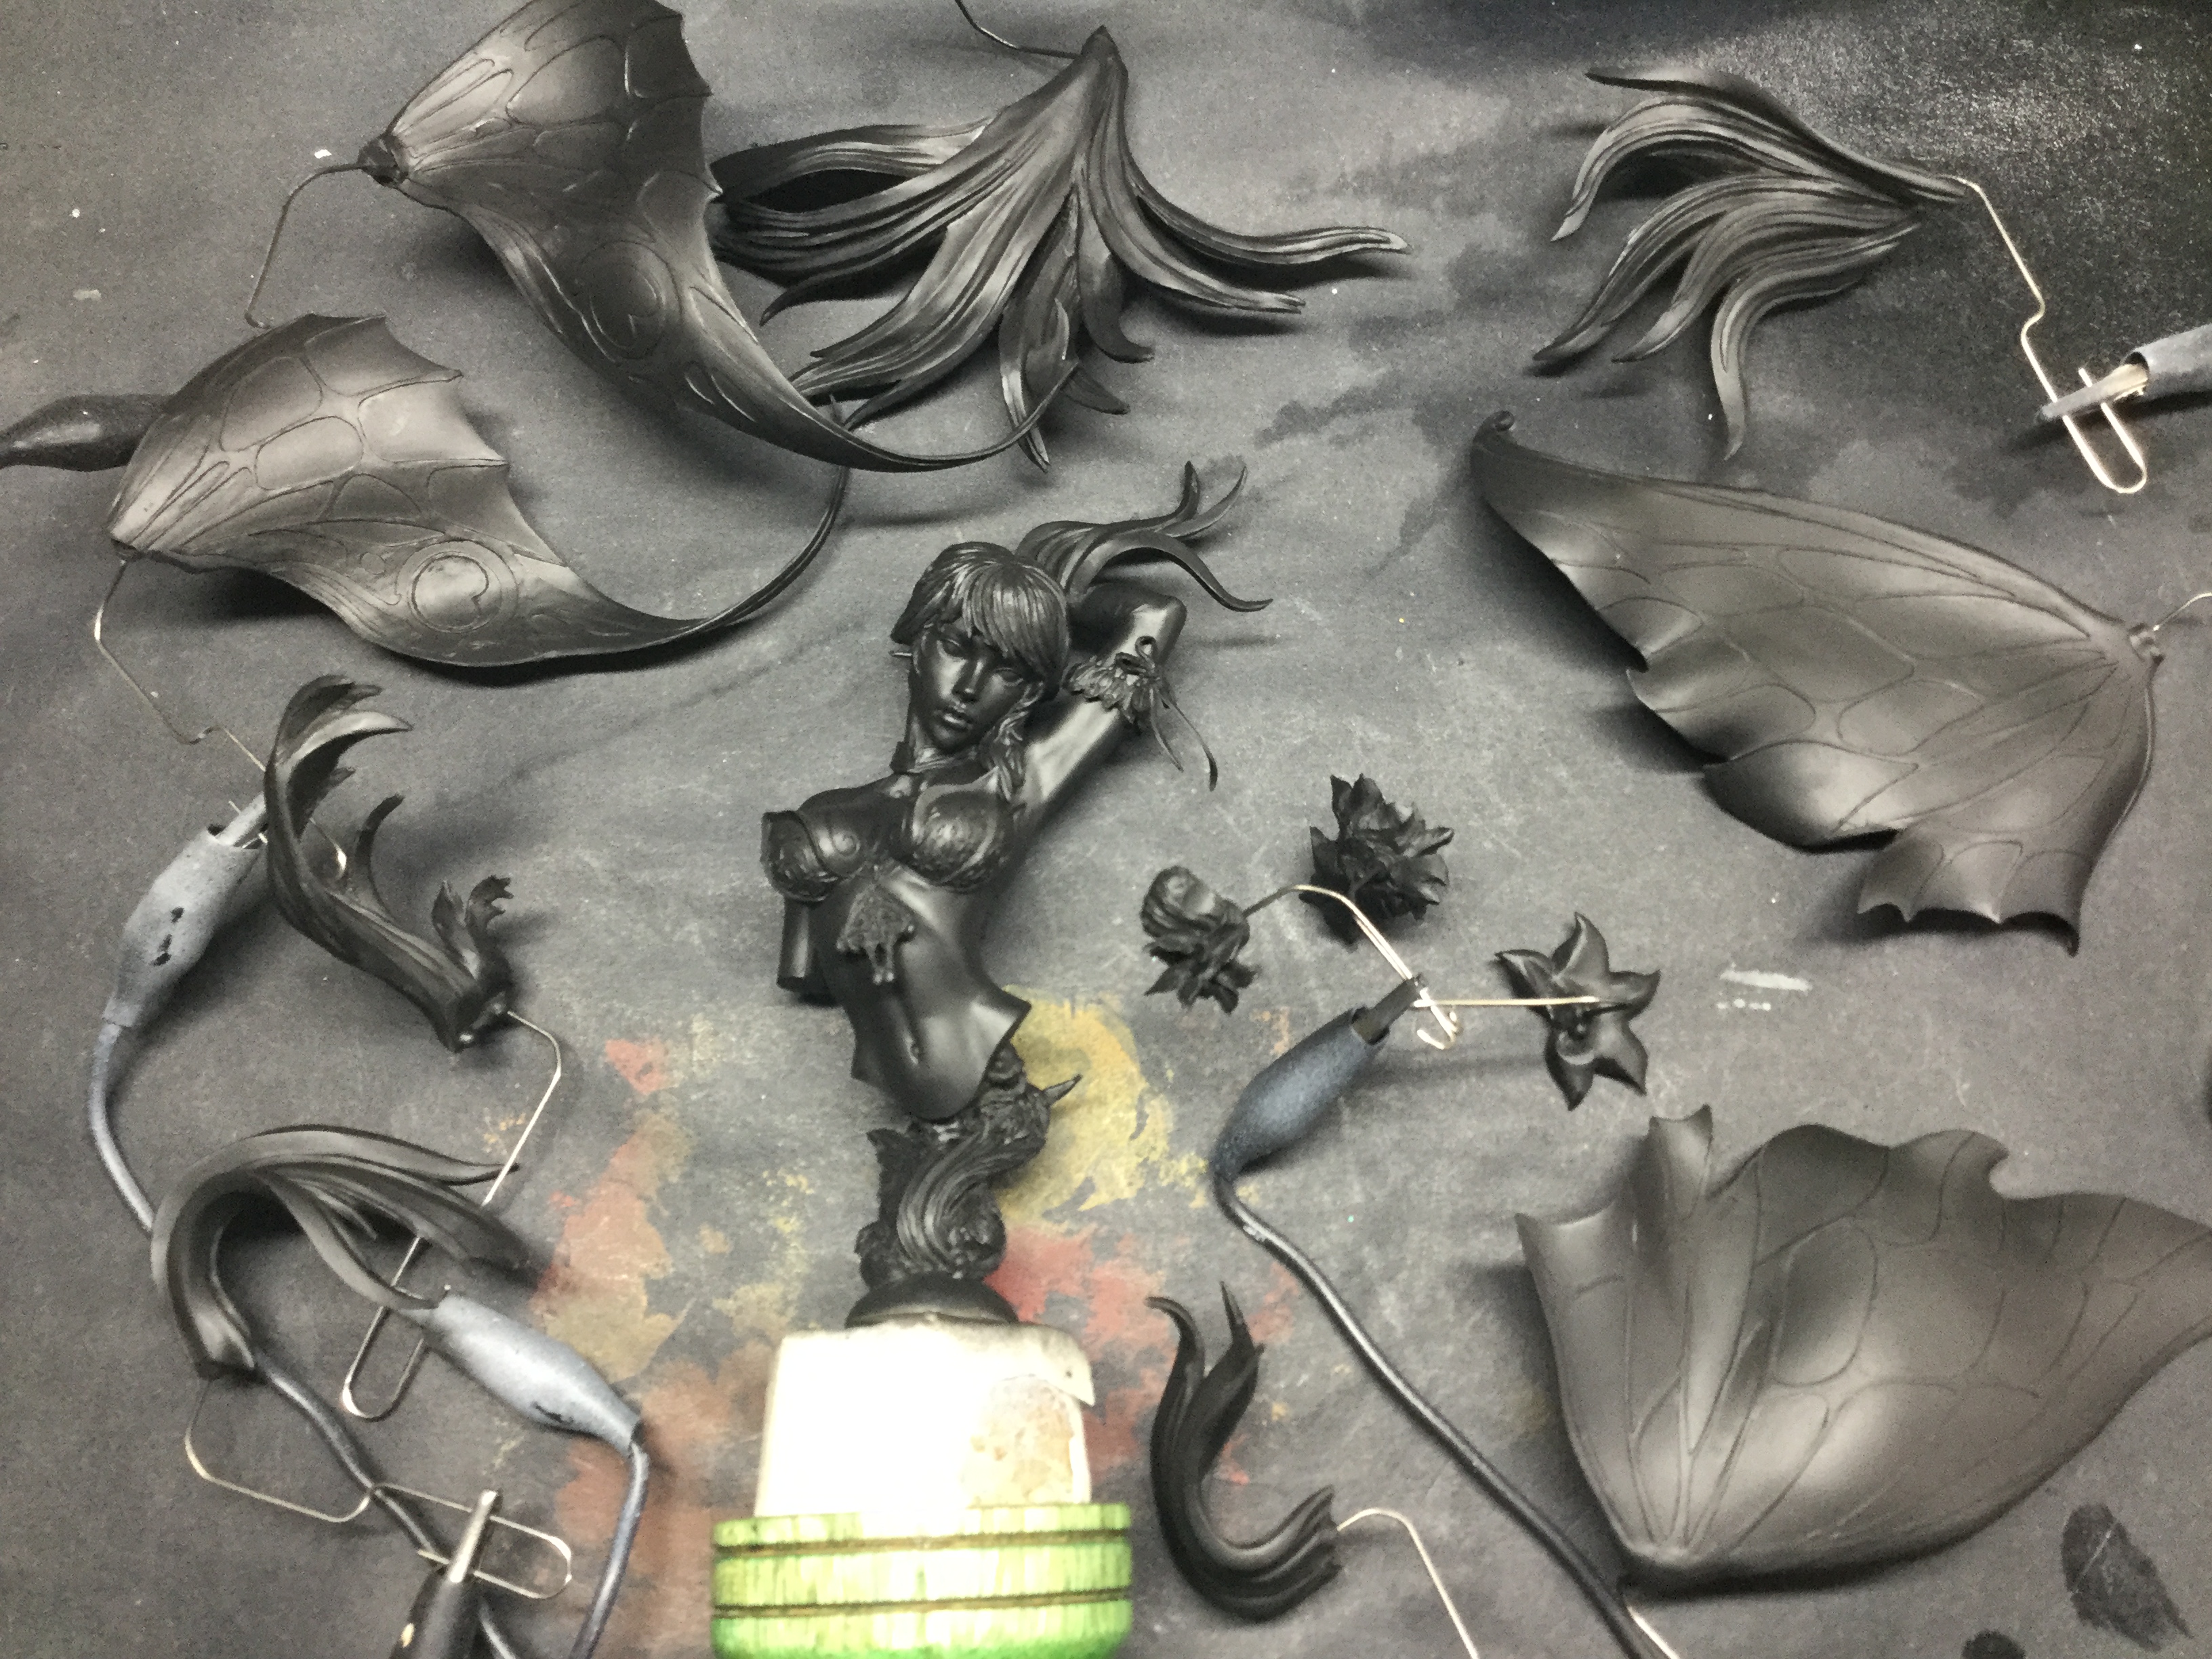
 With the initial black prime down, I reassembled the model - slotting all the pieces onto their respective pins 'dry' as in no glue used. I use a drill bit which is pretty much exactly the diameter of the standard paperclips I use for pinning so the subassemblies fit on snugly and dont fall off!
Once the model was reassembled it was time for the second and third coats of primer.
This seems like a lot of extra work and in some ways it is – However, it is work well spent for a number of reasons.
So the black primer is done to ensure all parts of all pieces get two coats of prime. If assembled for the start, due to the complex nature of the model, some areas would be missed and/or not get a good even coat.
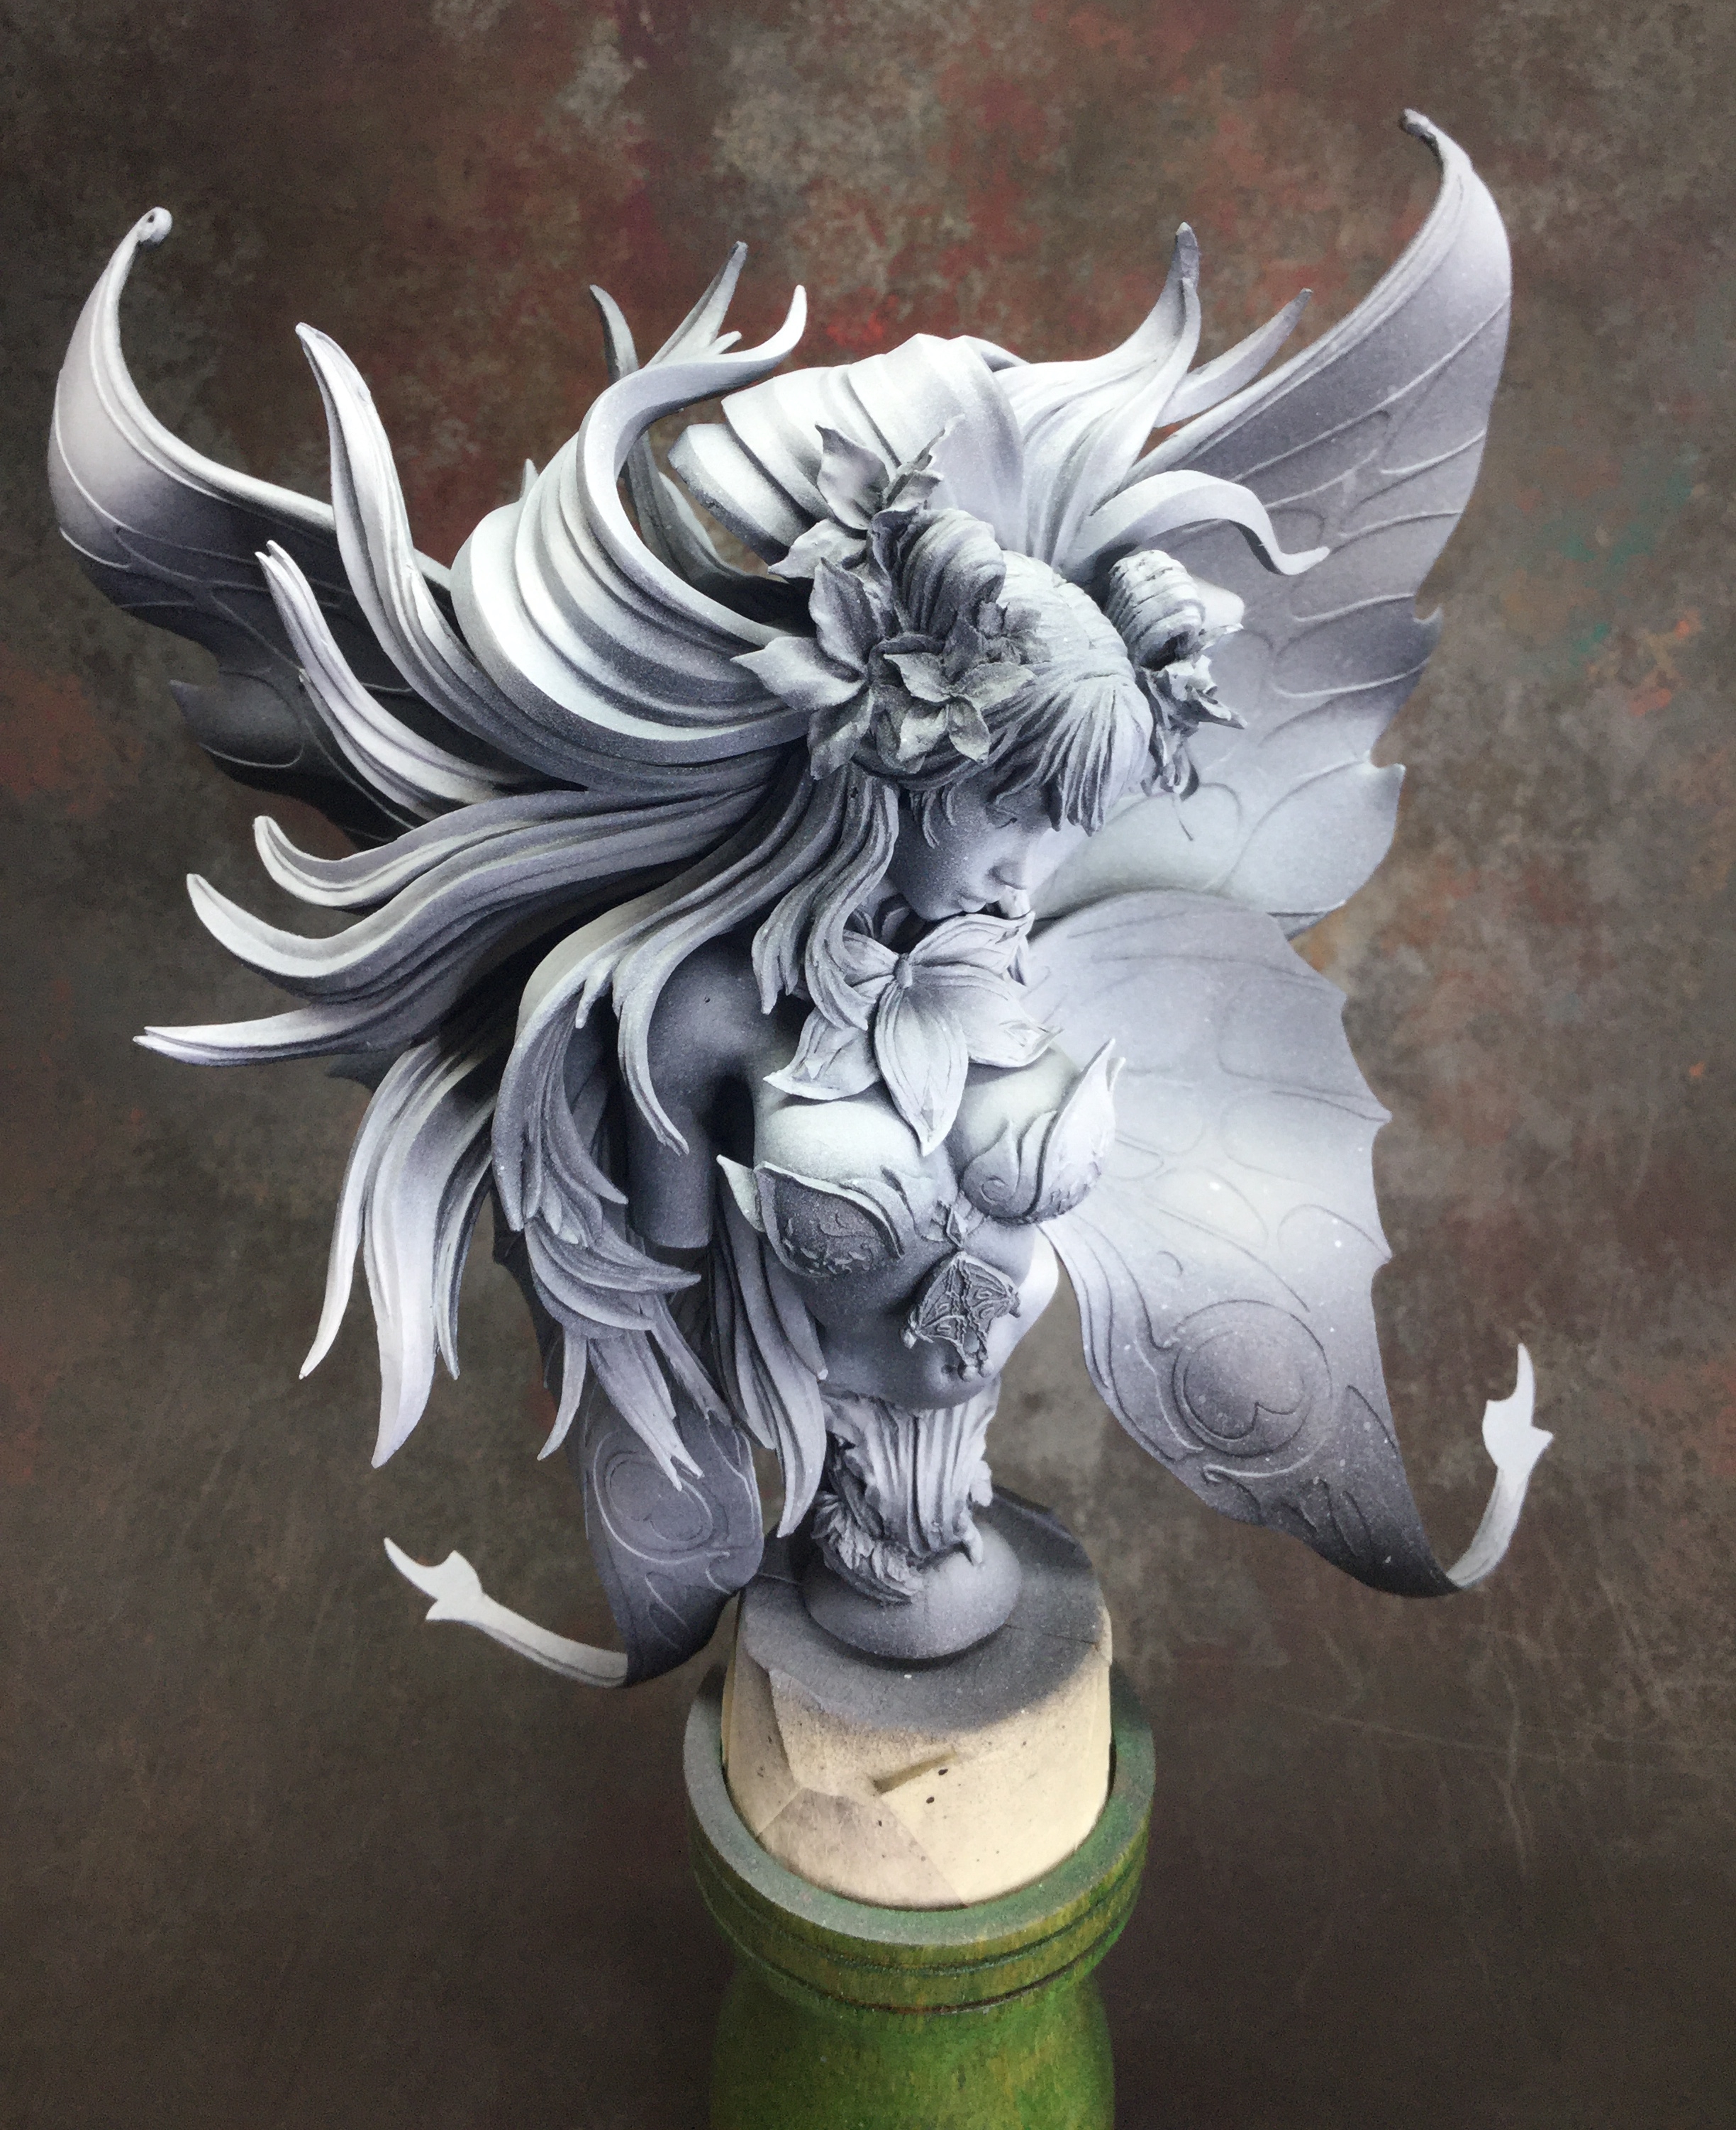
The second and third coats are primer are done in grey and then white respectively:
 Using the airbrush again, I reloaded first with grey primer and then gave the assembled model a further and lateral prime: essentially highlighting the model from the sides at a downward point angle. This llightens all the areas with a lighter shade and leaves the deeper shadow areas still black. I then reloaded the airbrush again but this time with Stylynrez White primer and sketched in all the extreme and most exposed highlights on the model.
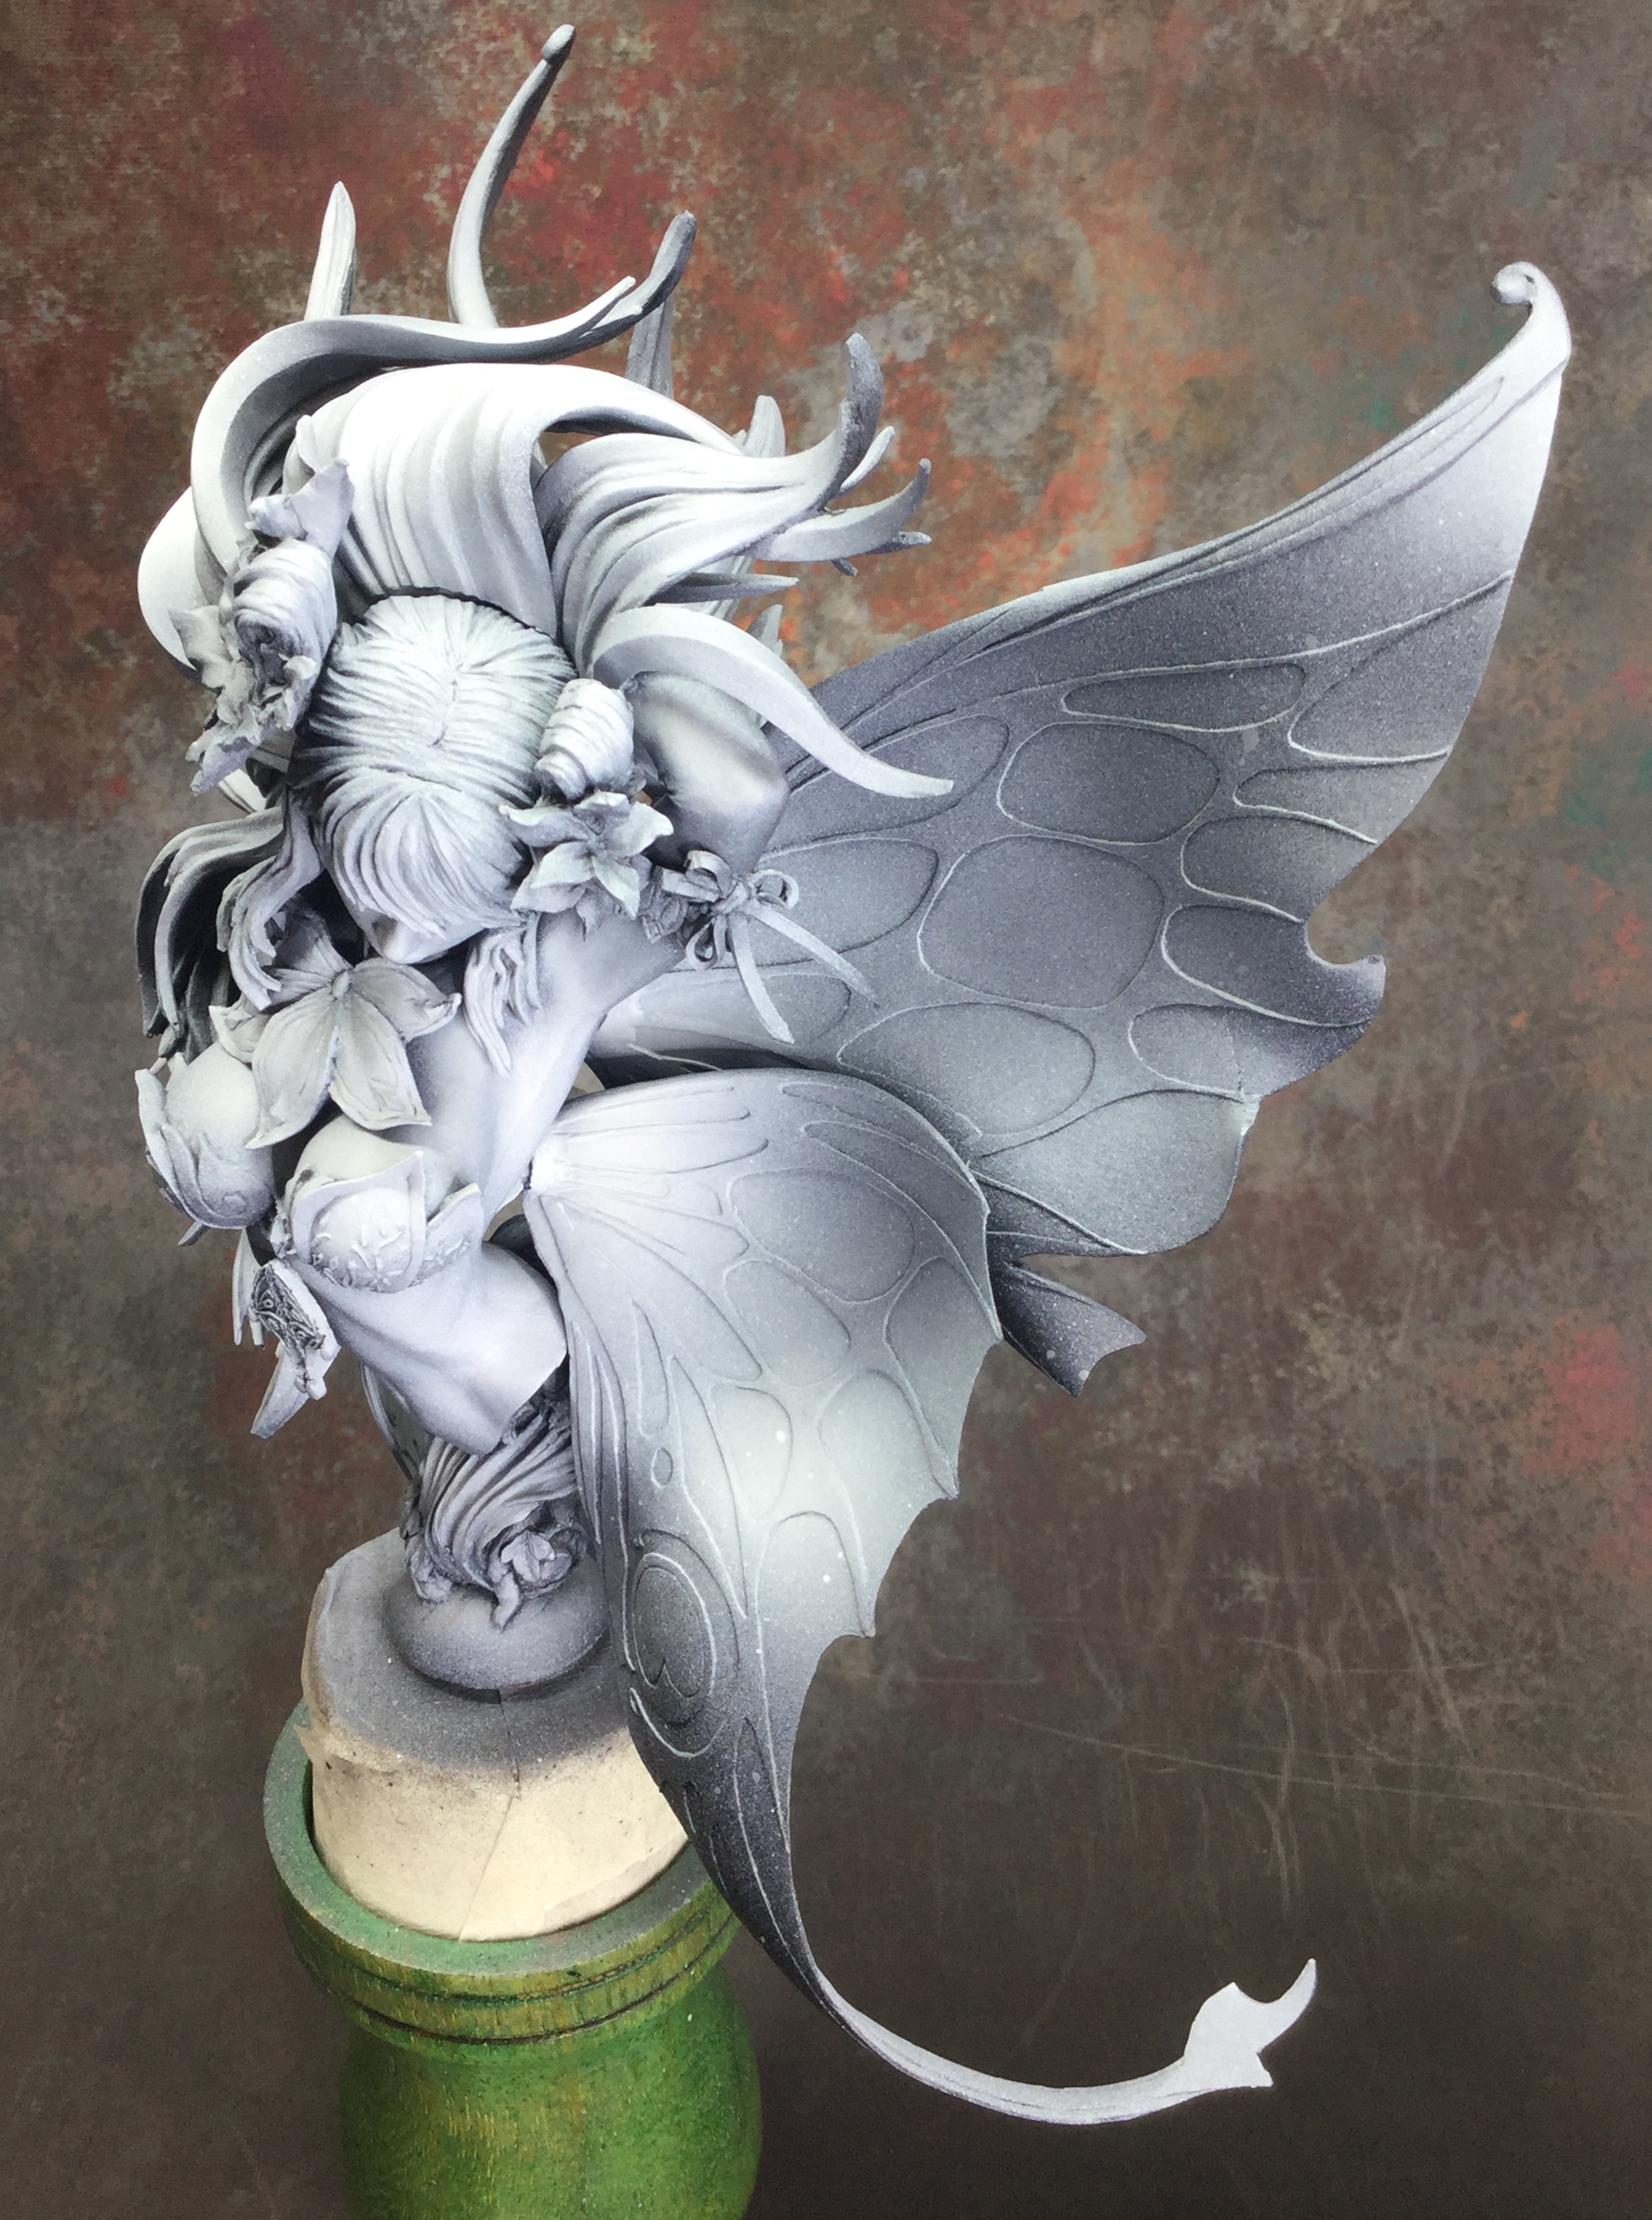
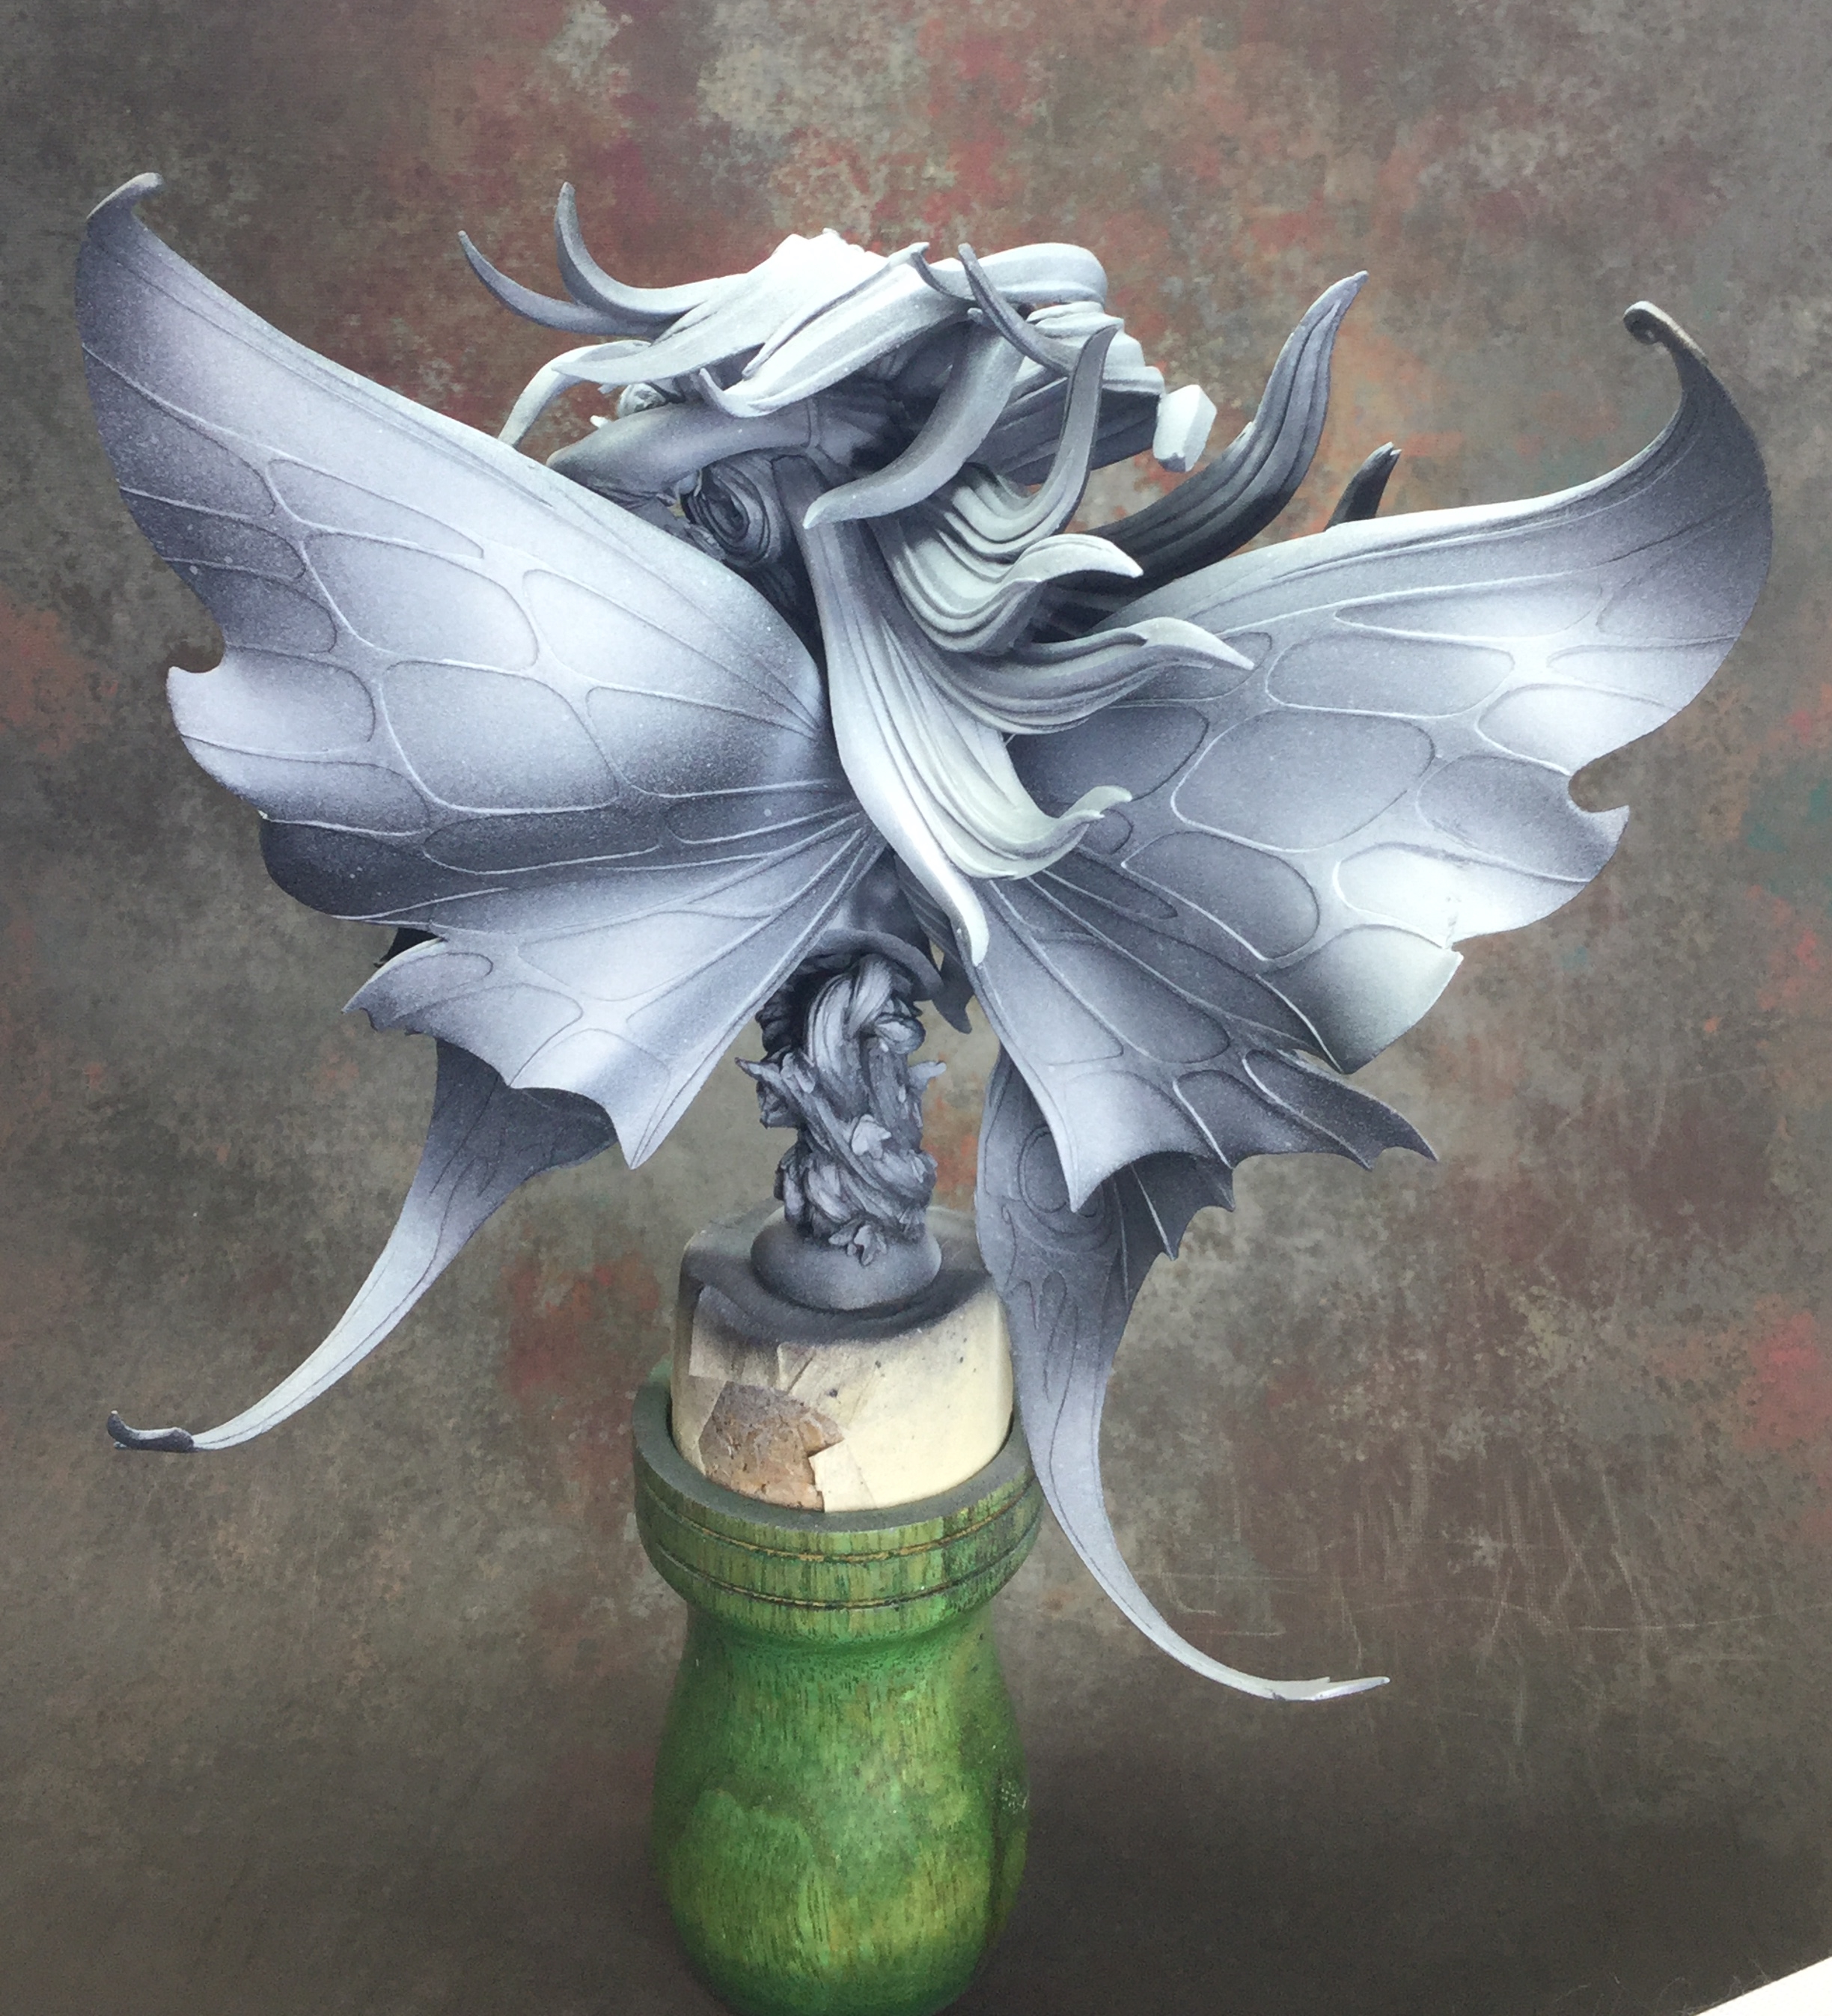
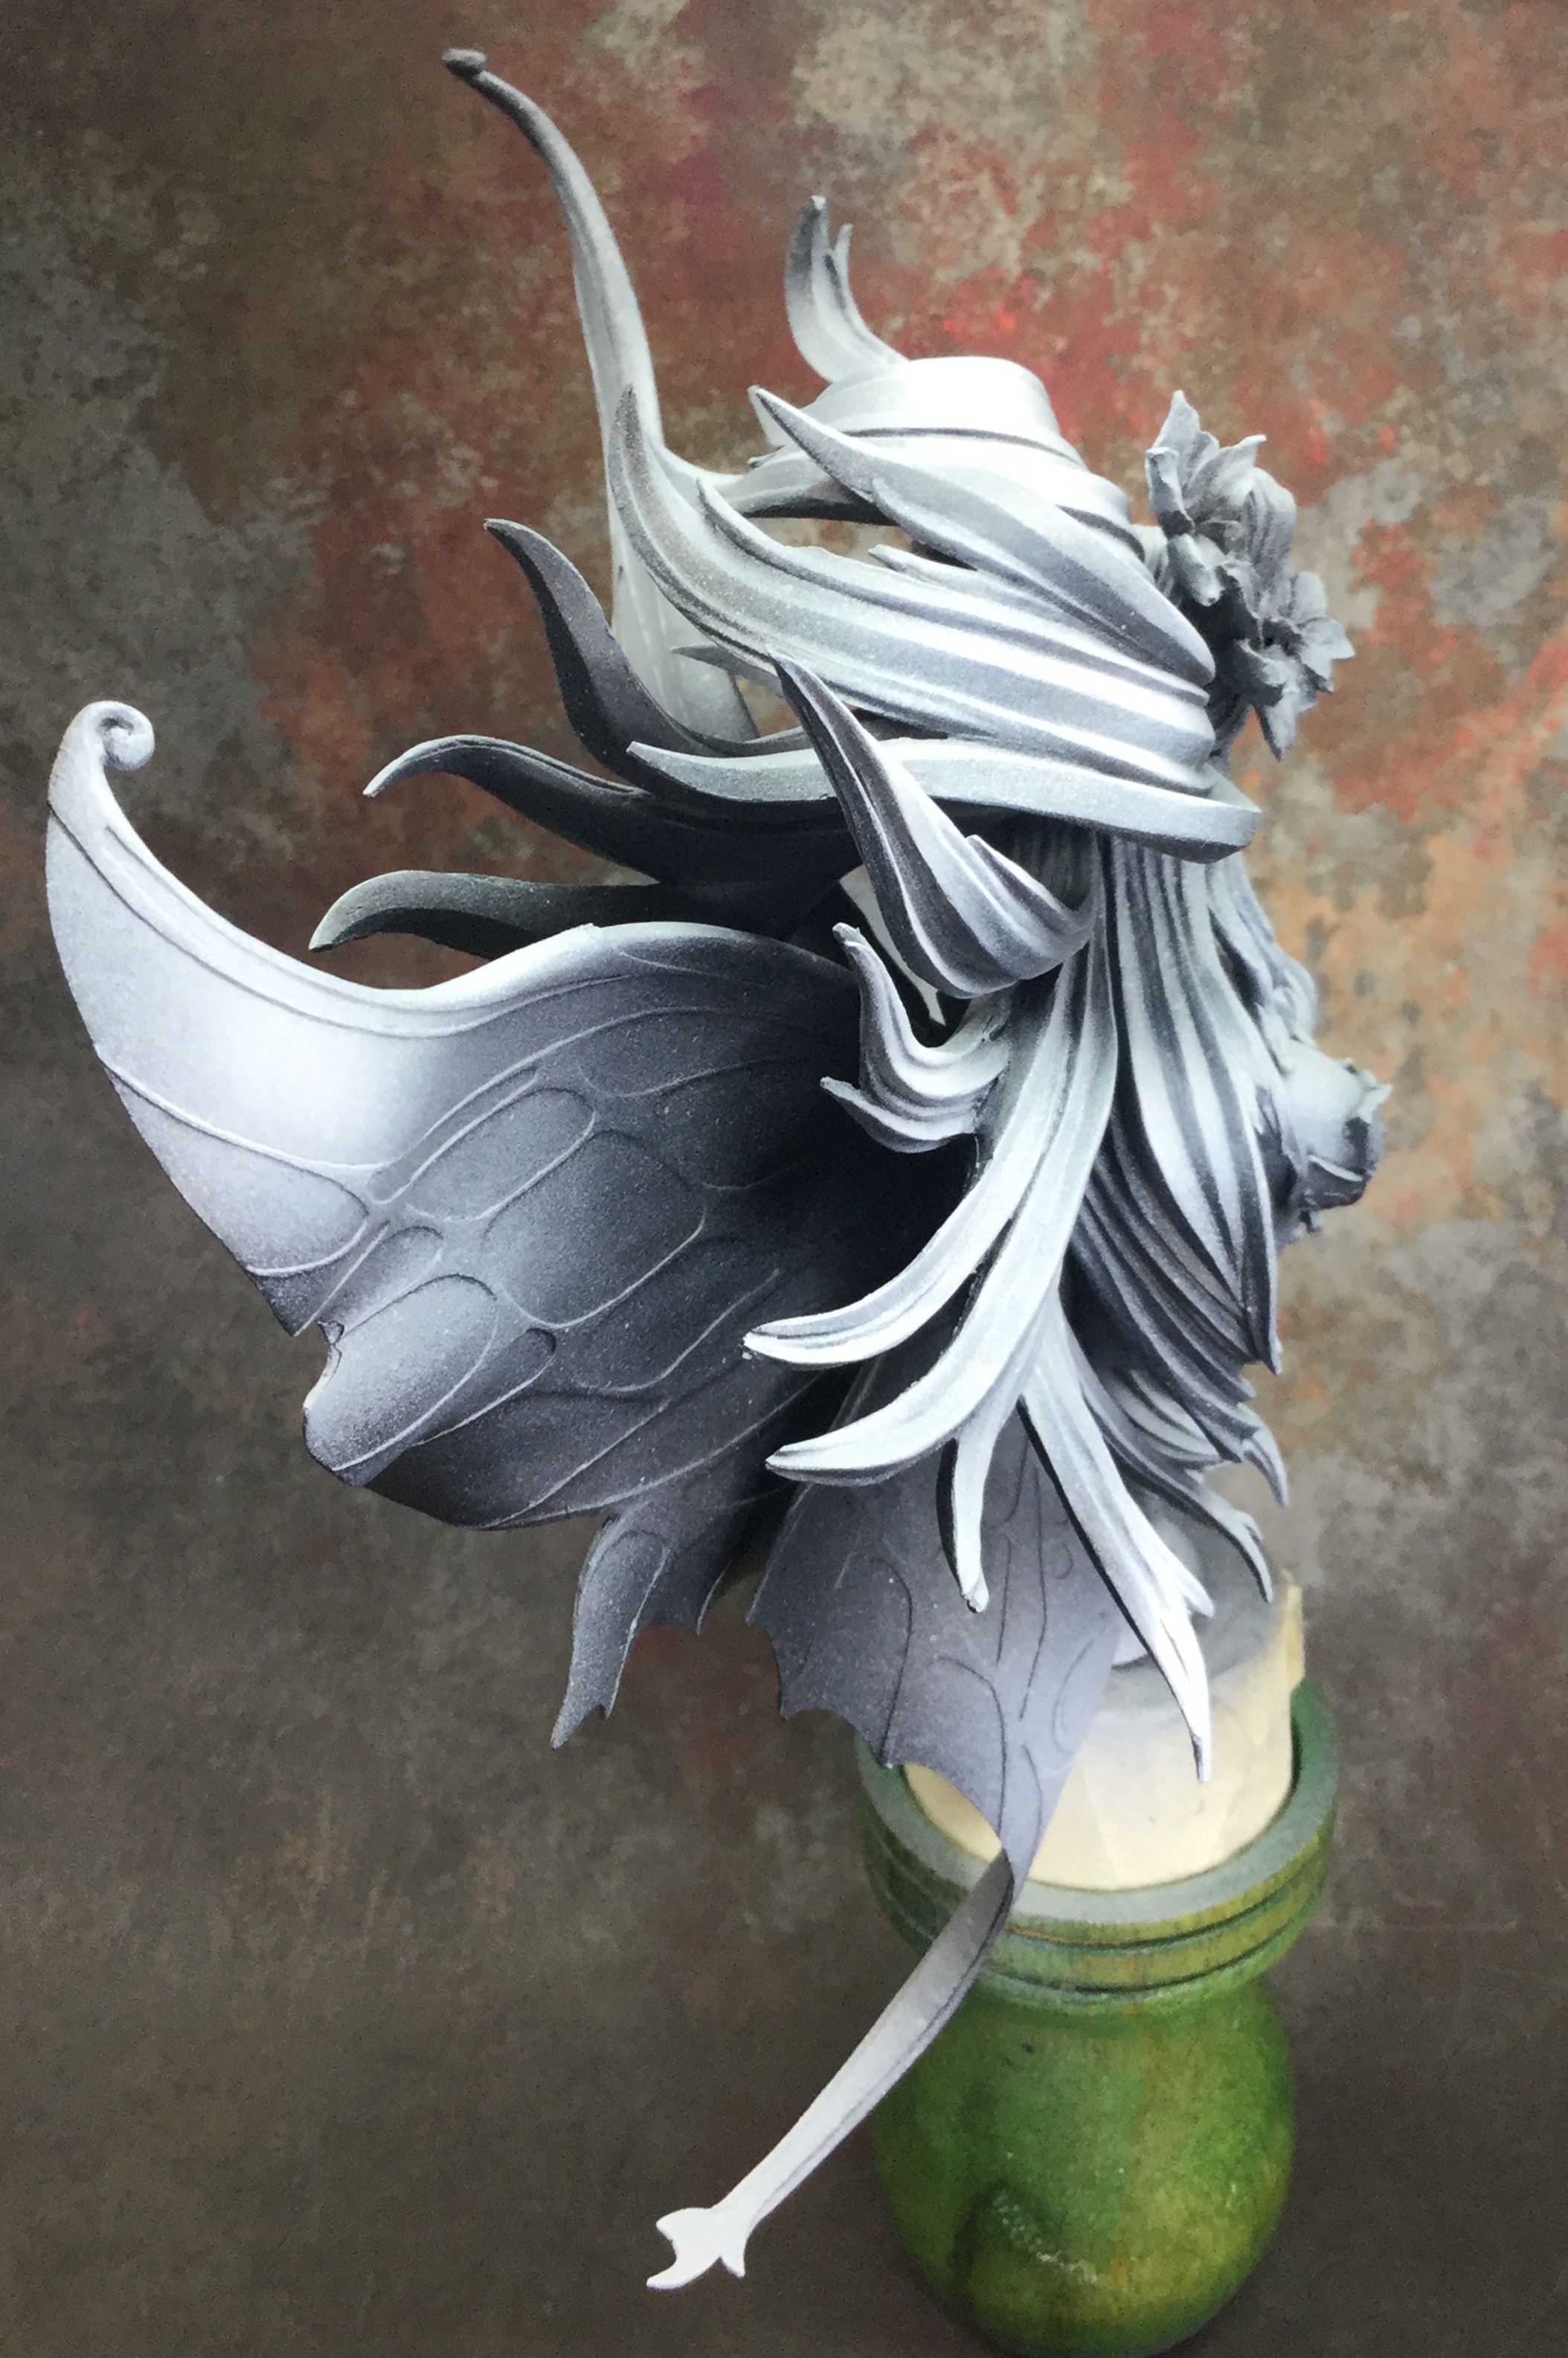
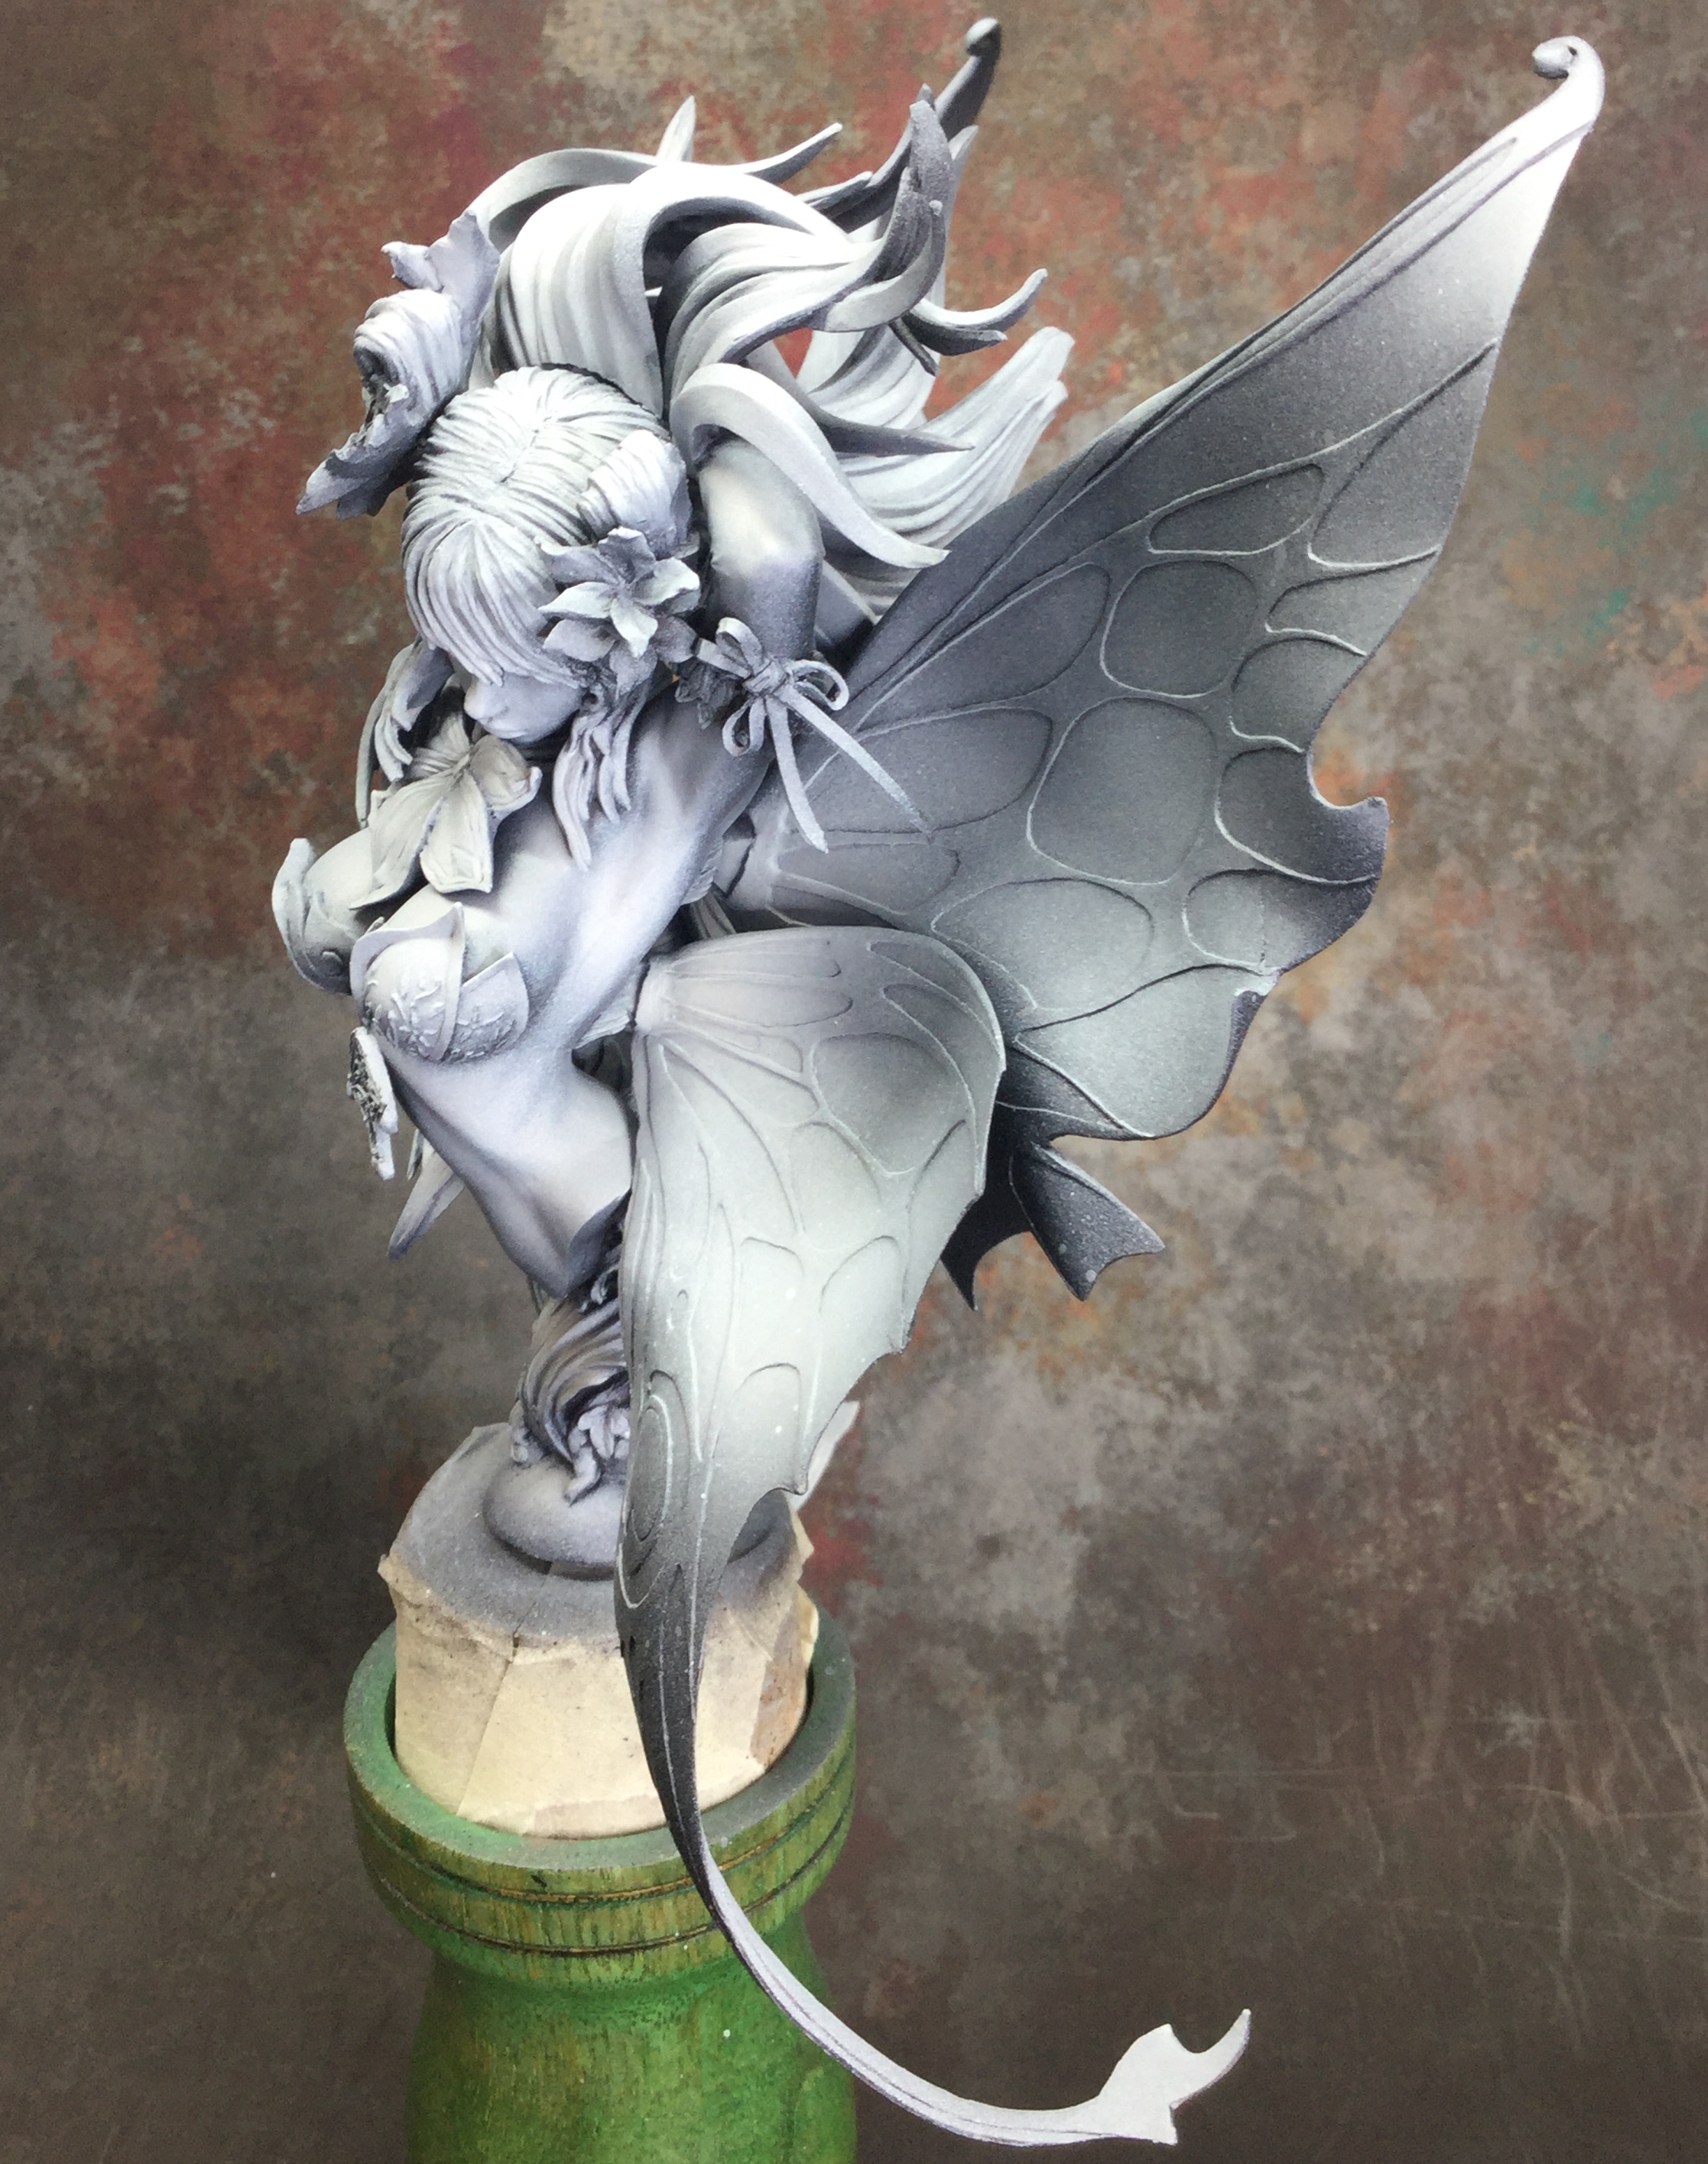
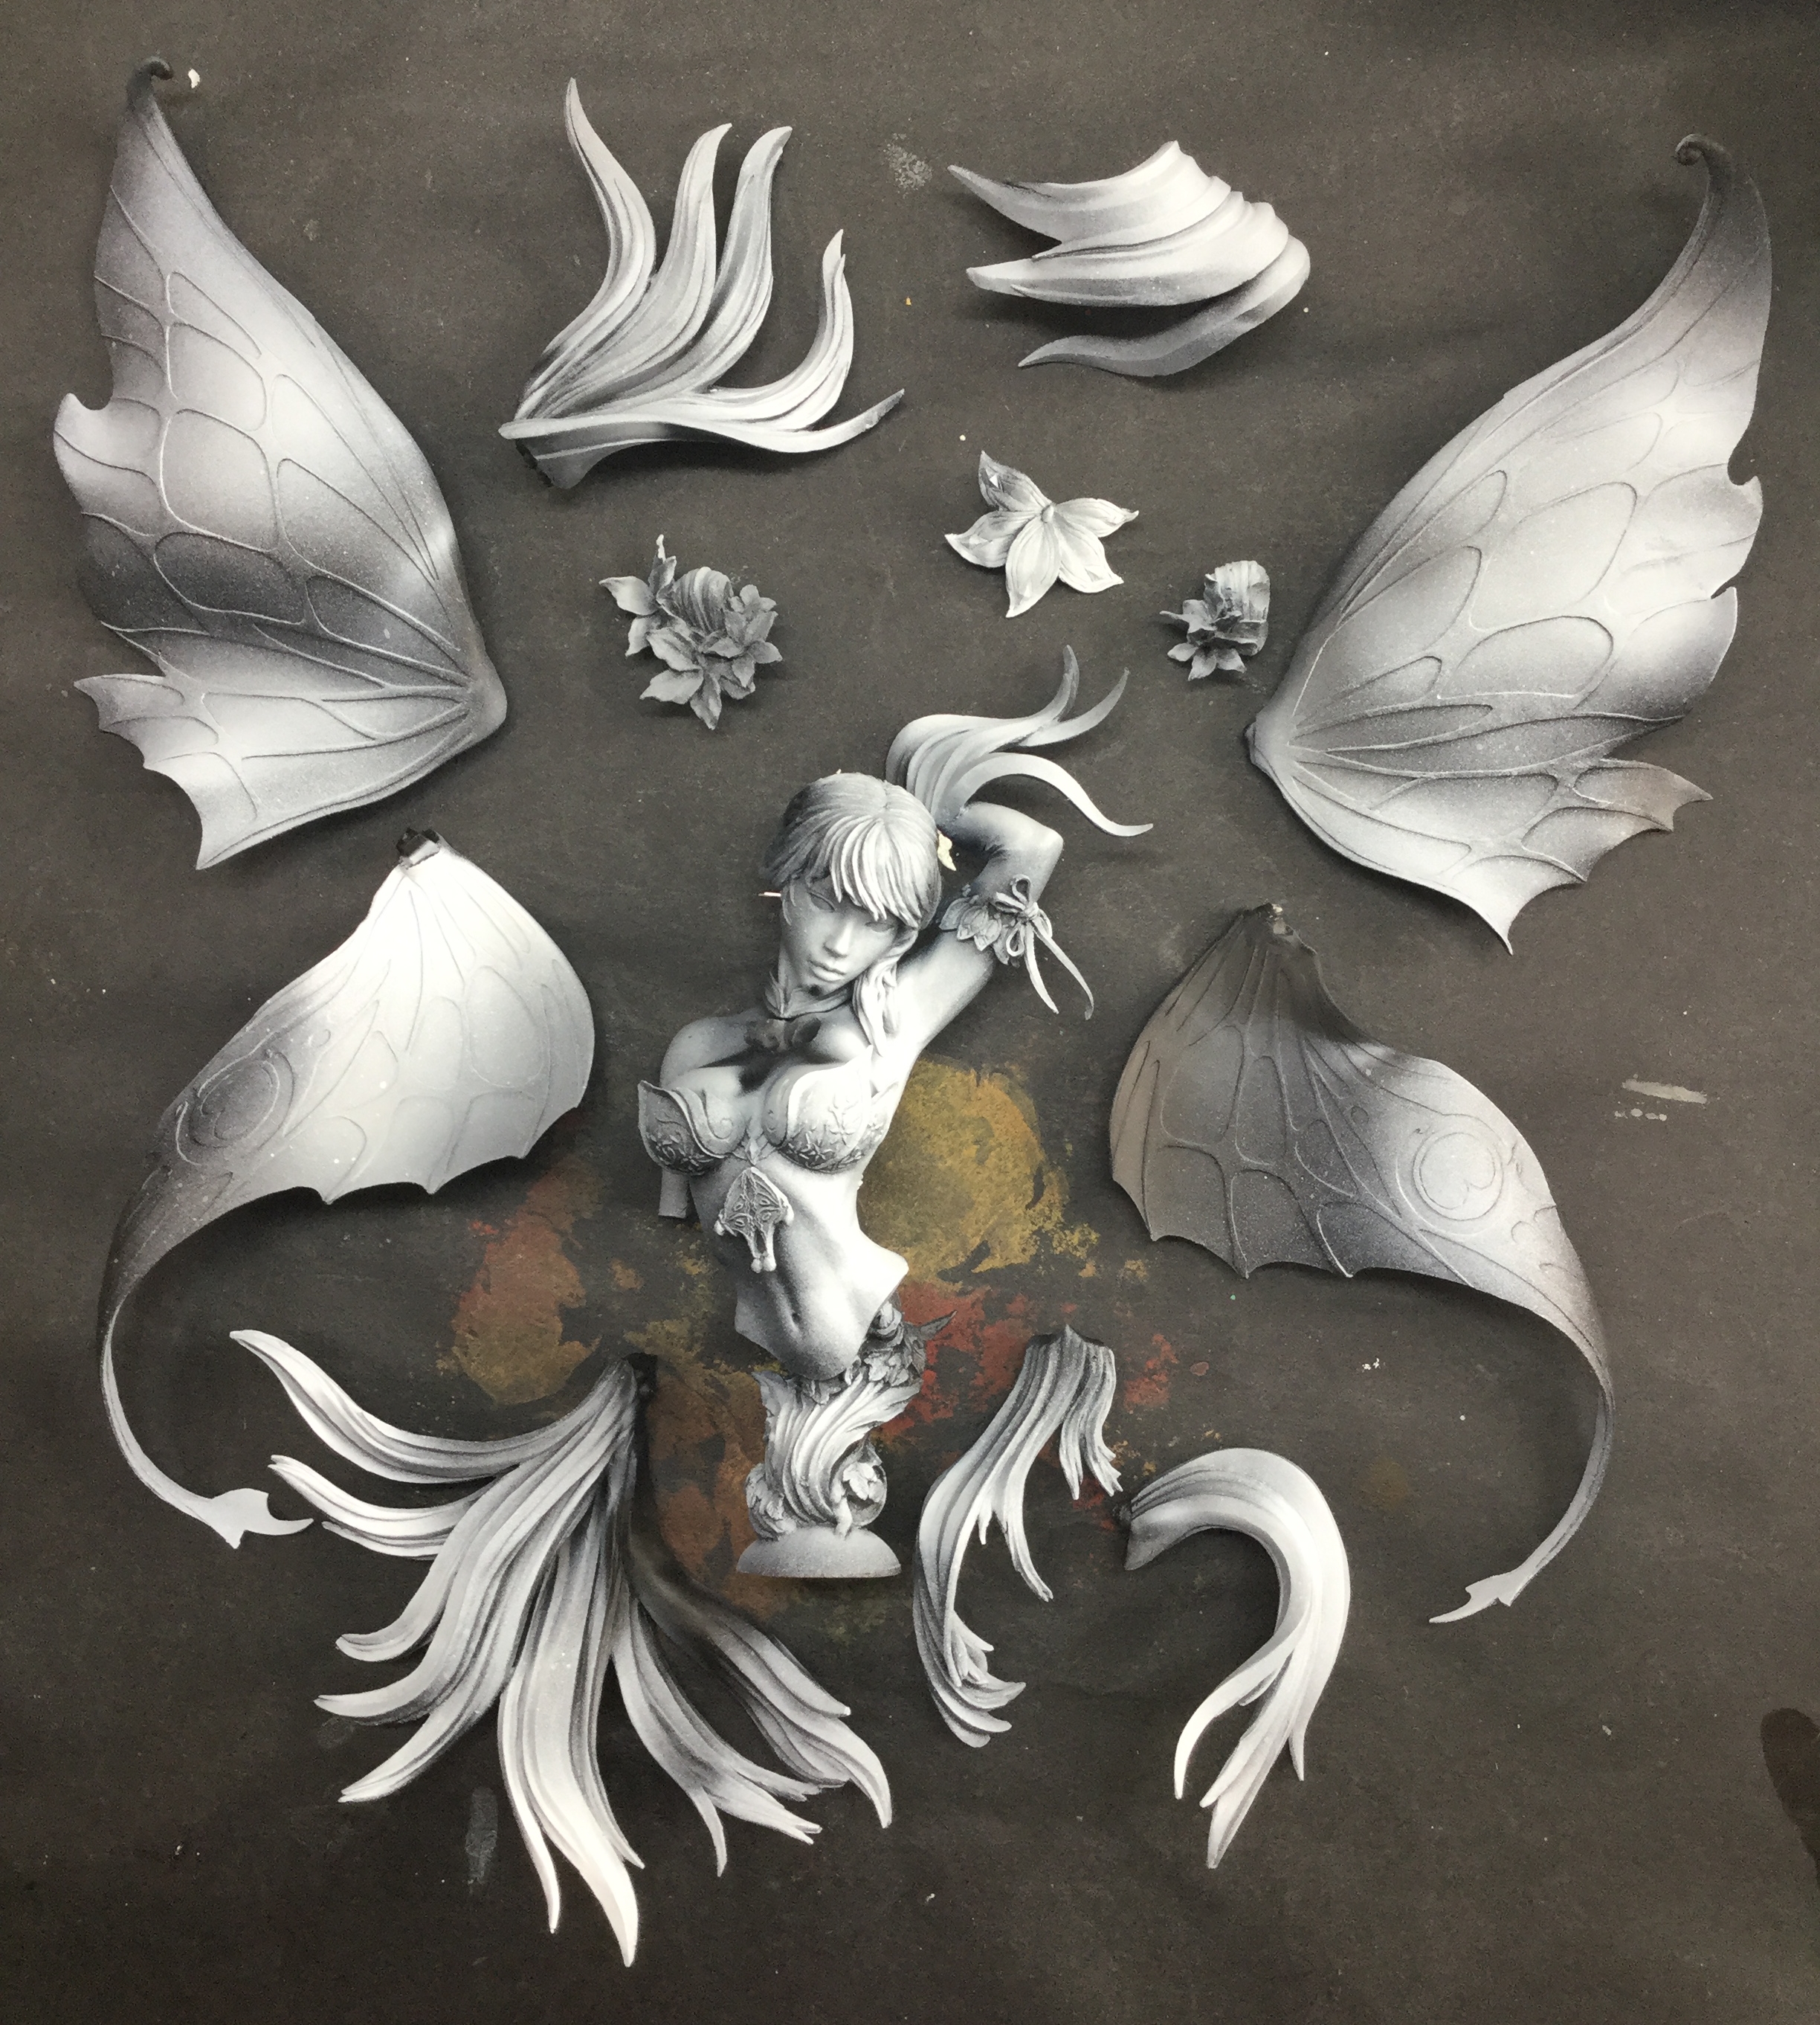 With the 3 different shades of primer complete, I then took a series of photos of the assembled model from different angles. This will serve as useful reference and roadmap photos later on when i am painting the now disassembled model. Even disassembled we can still see all the areas that are either in shadow, mid-tone or in exposed highlight and use this to guide and help when painting the model even though in pieces.
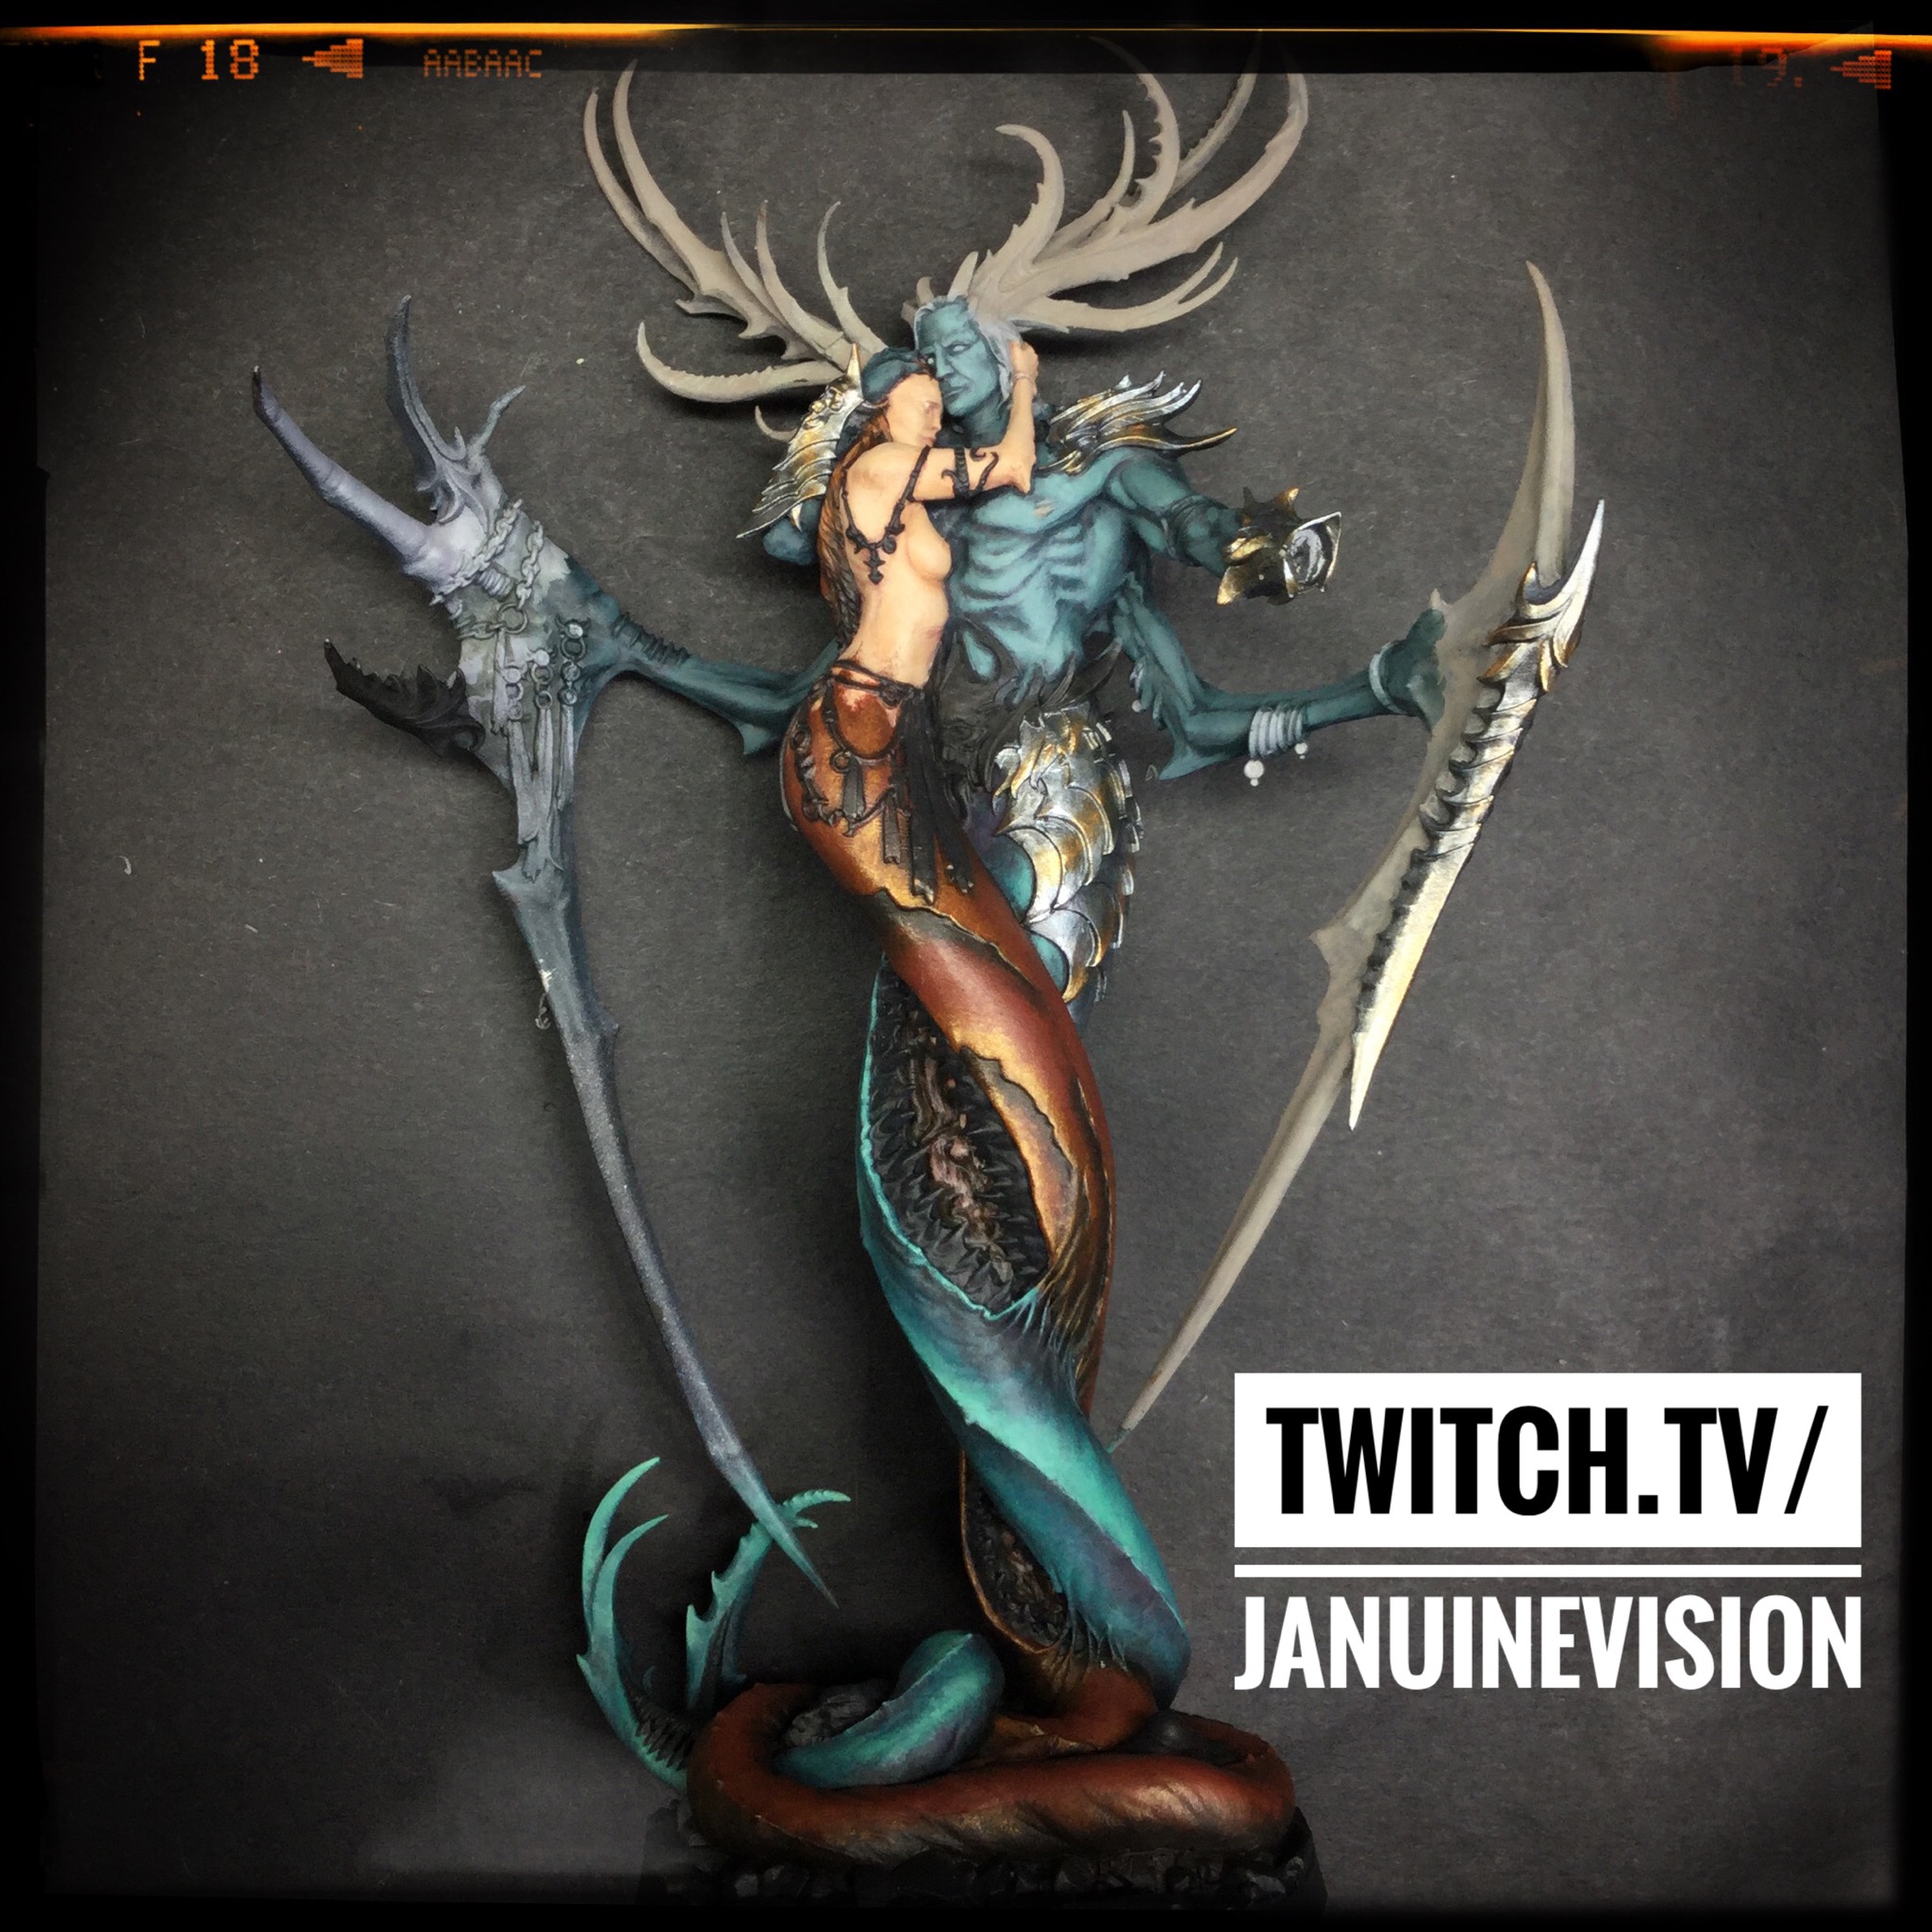
 Resin Beast entry for Adepticon 2020
Something a wee bit different than I usually tackle but ohhhhh it’s a peach 😉 with Adepticon fast approaching time is getting short to finish this piece off for the Creature Caster’s Resin Beast competition. He model is The Suzerain of Desire but have reimagined them as Balor of the evil eye and his queen, Cethlenn. finally starting to see forward progress and direction. Coming along but oh so much still to do. Experimented more and more with this piece and am learning oh so much! Pushing everything I would usually do to the side and trying new paths. Loving the journey!nAbout 2 weeks left or so. Top marks to @creaturecaster for such an intriguing sculpt. The tenderness in that embrace is something else!
hope you like the progrsss so far
Dungeons & Dragons Finished & an Ork Racer done too!!!
This has been one hell of a busy month!!! Finally got the final member of the giveaway DnD adventure part all done and dusted. Have really had such a blast painting these guys. Lovely characters and such awesome sculpts from Otherworld Miniatures. So here he is – Lenathorn the slightly bewildered!!
 Lenathorn the slightly bewildered

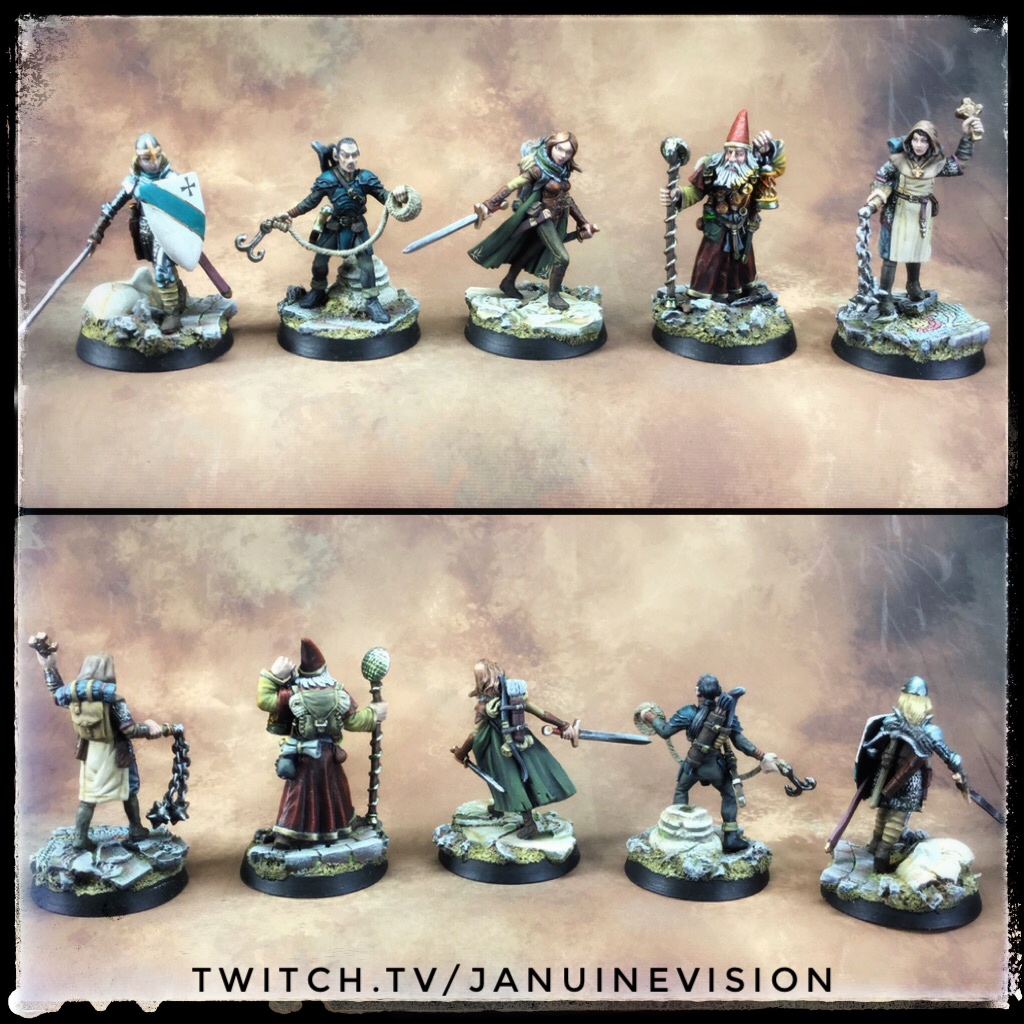 And now that there are all done......... Obligatory Group Shot!!!
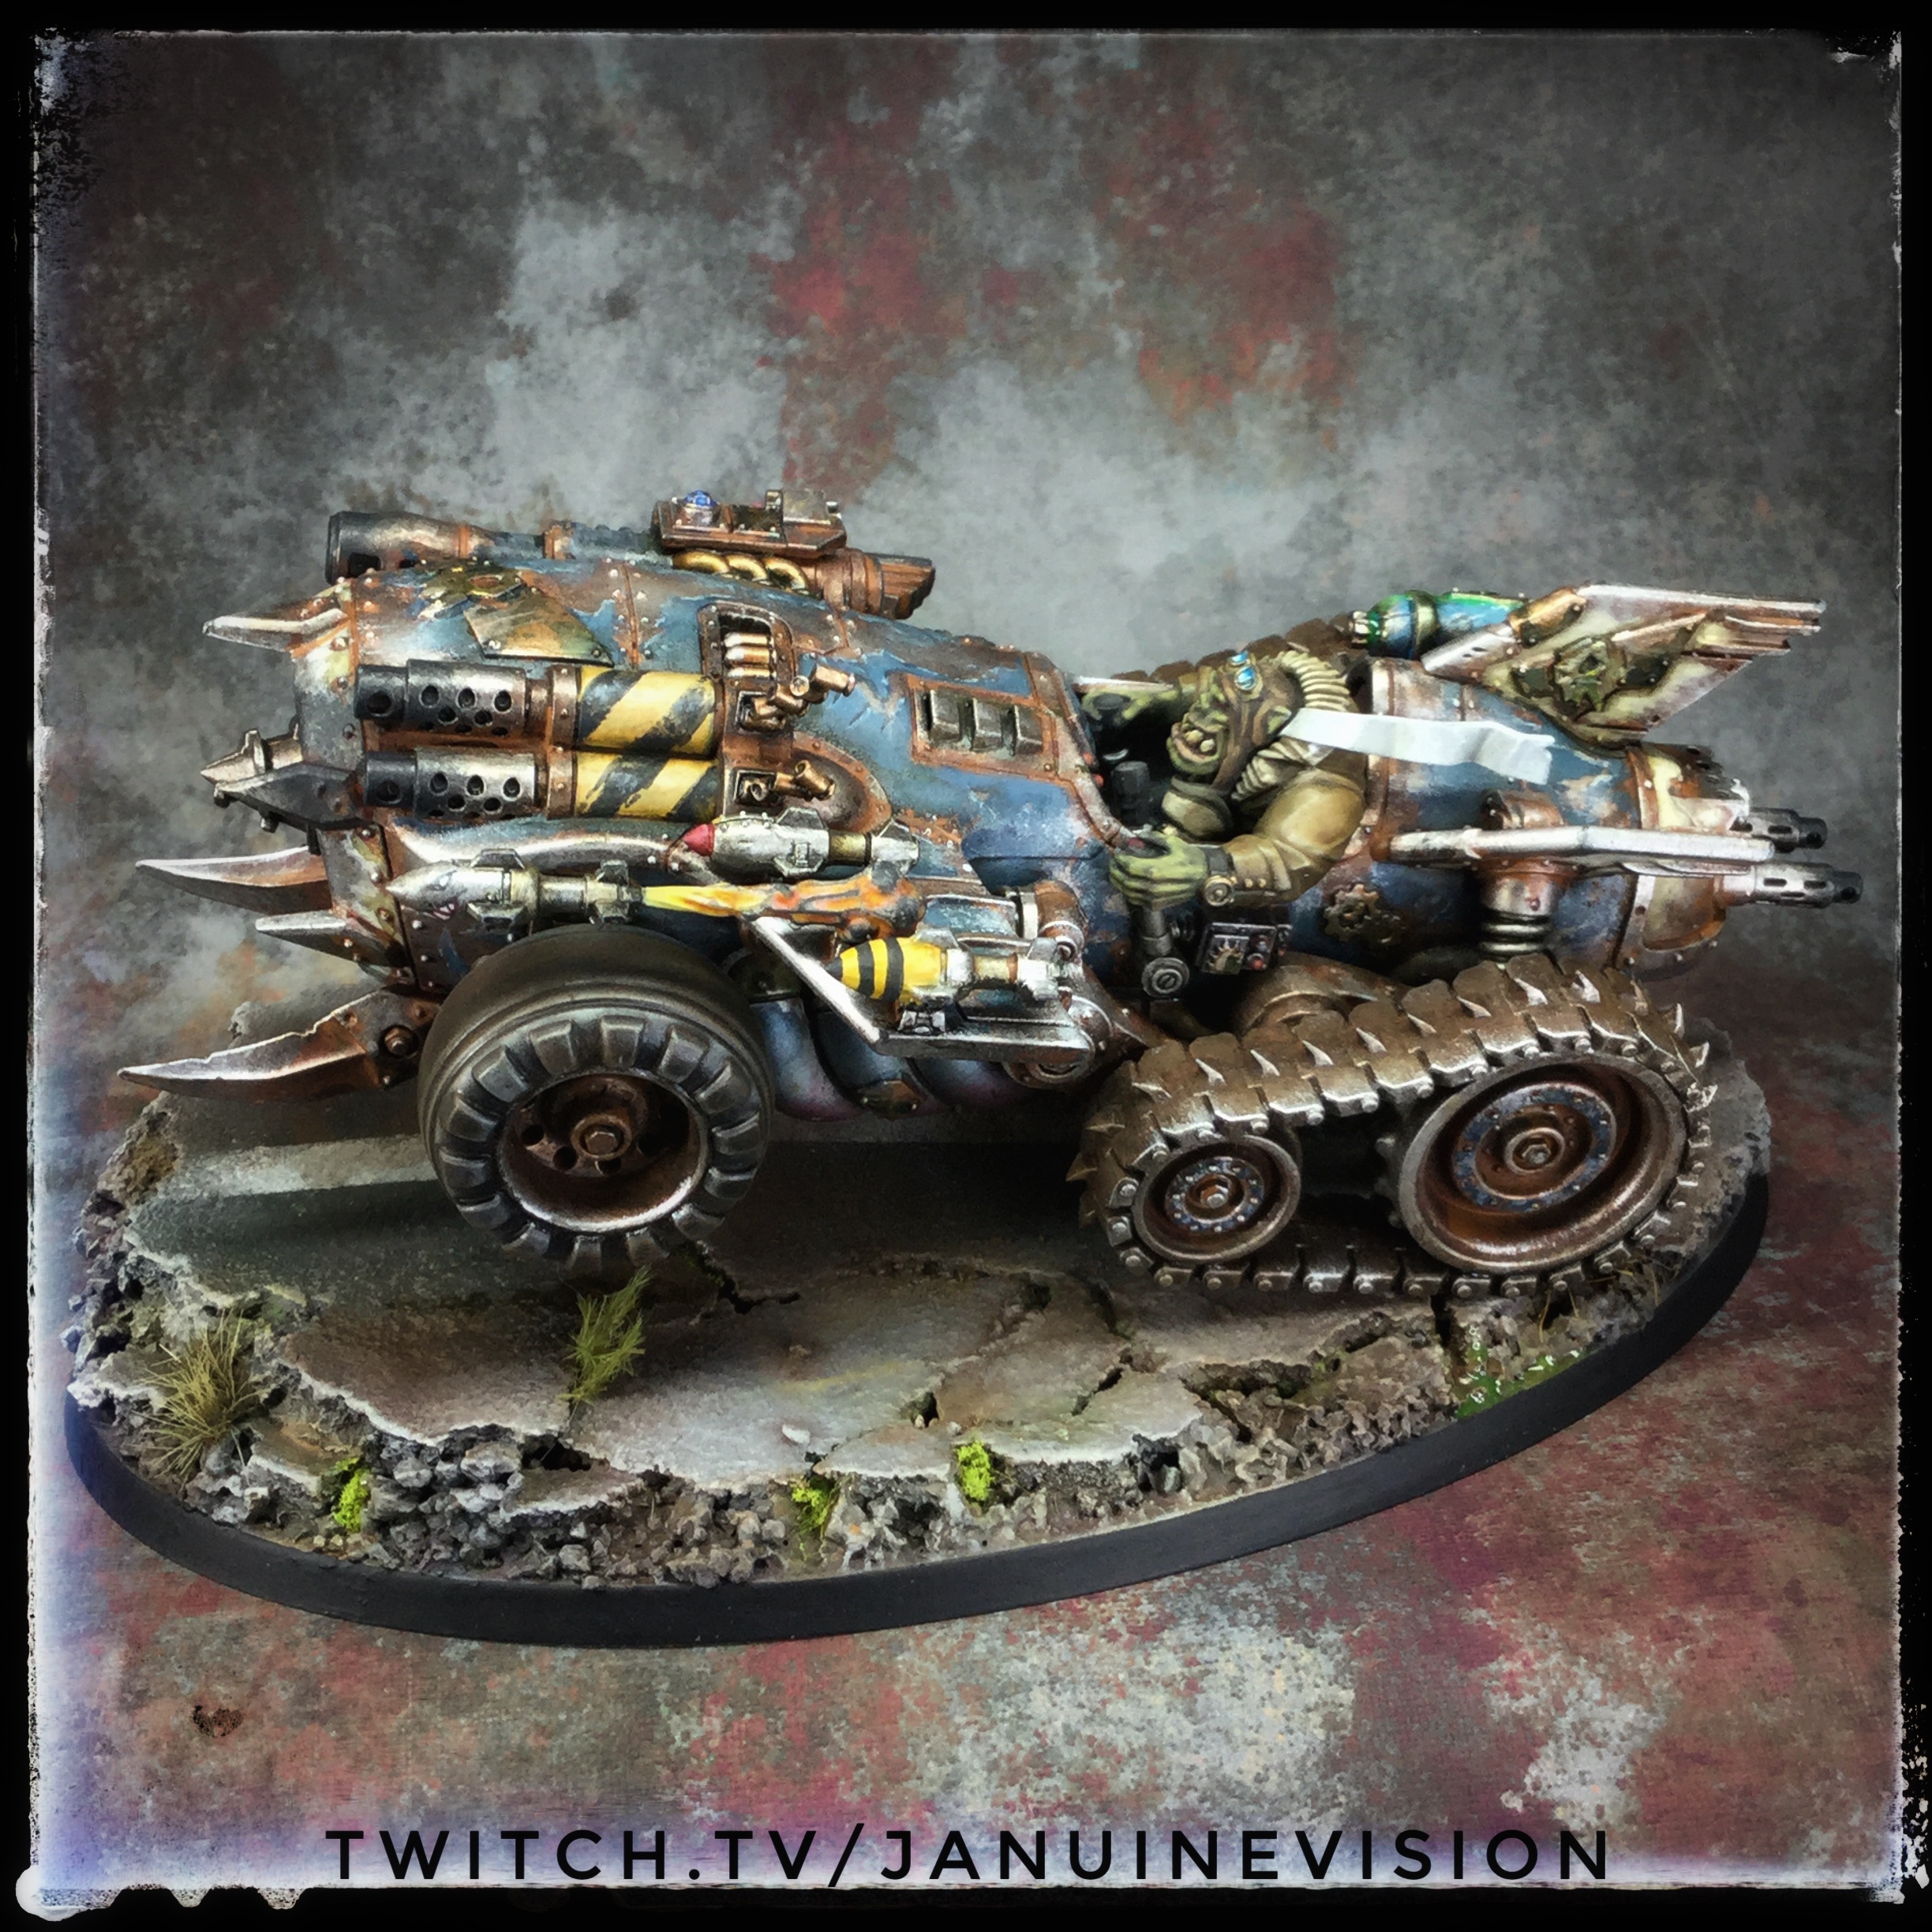
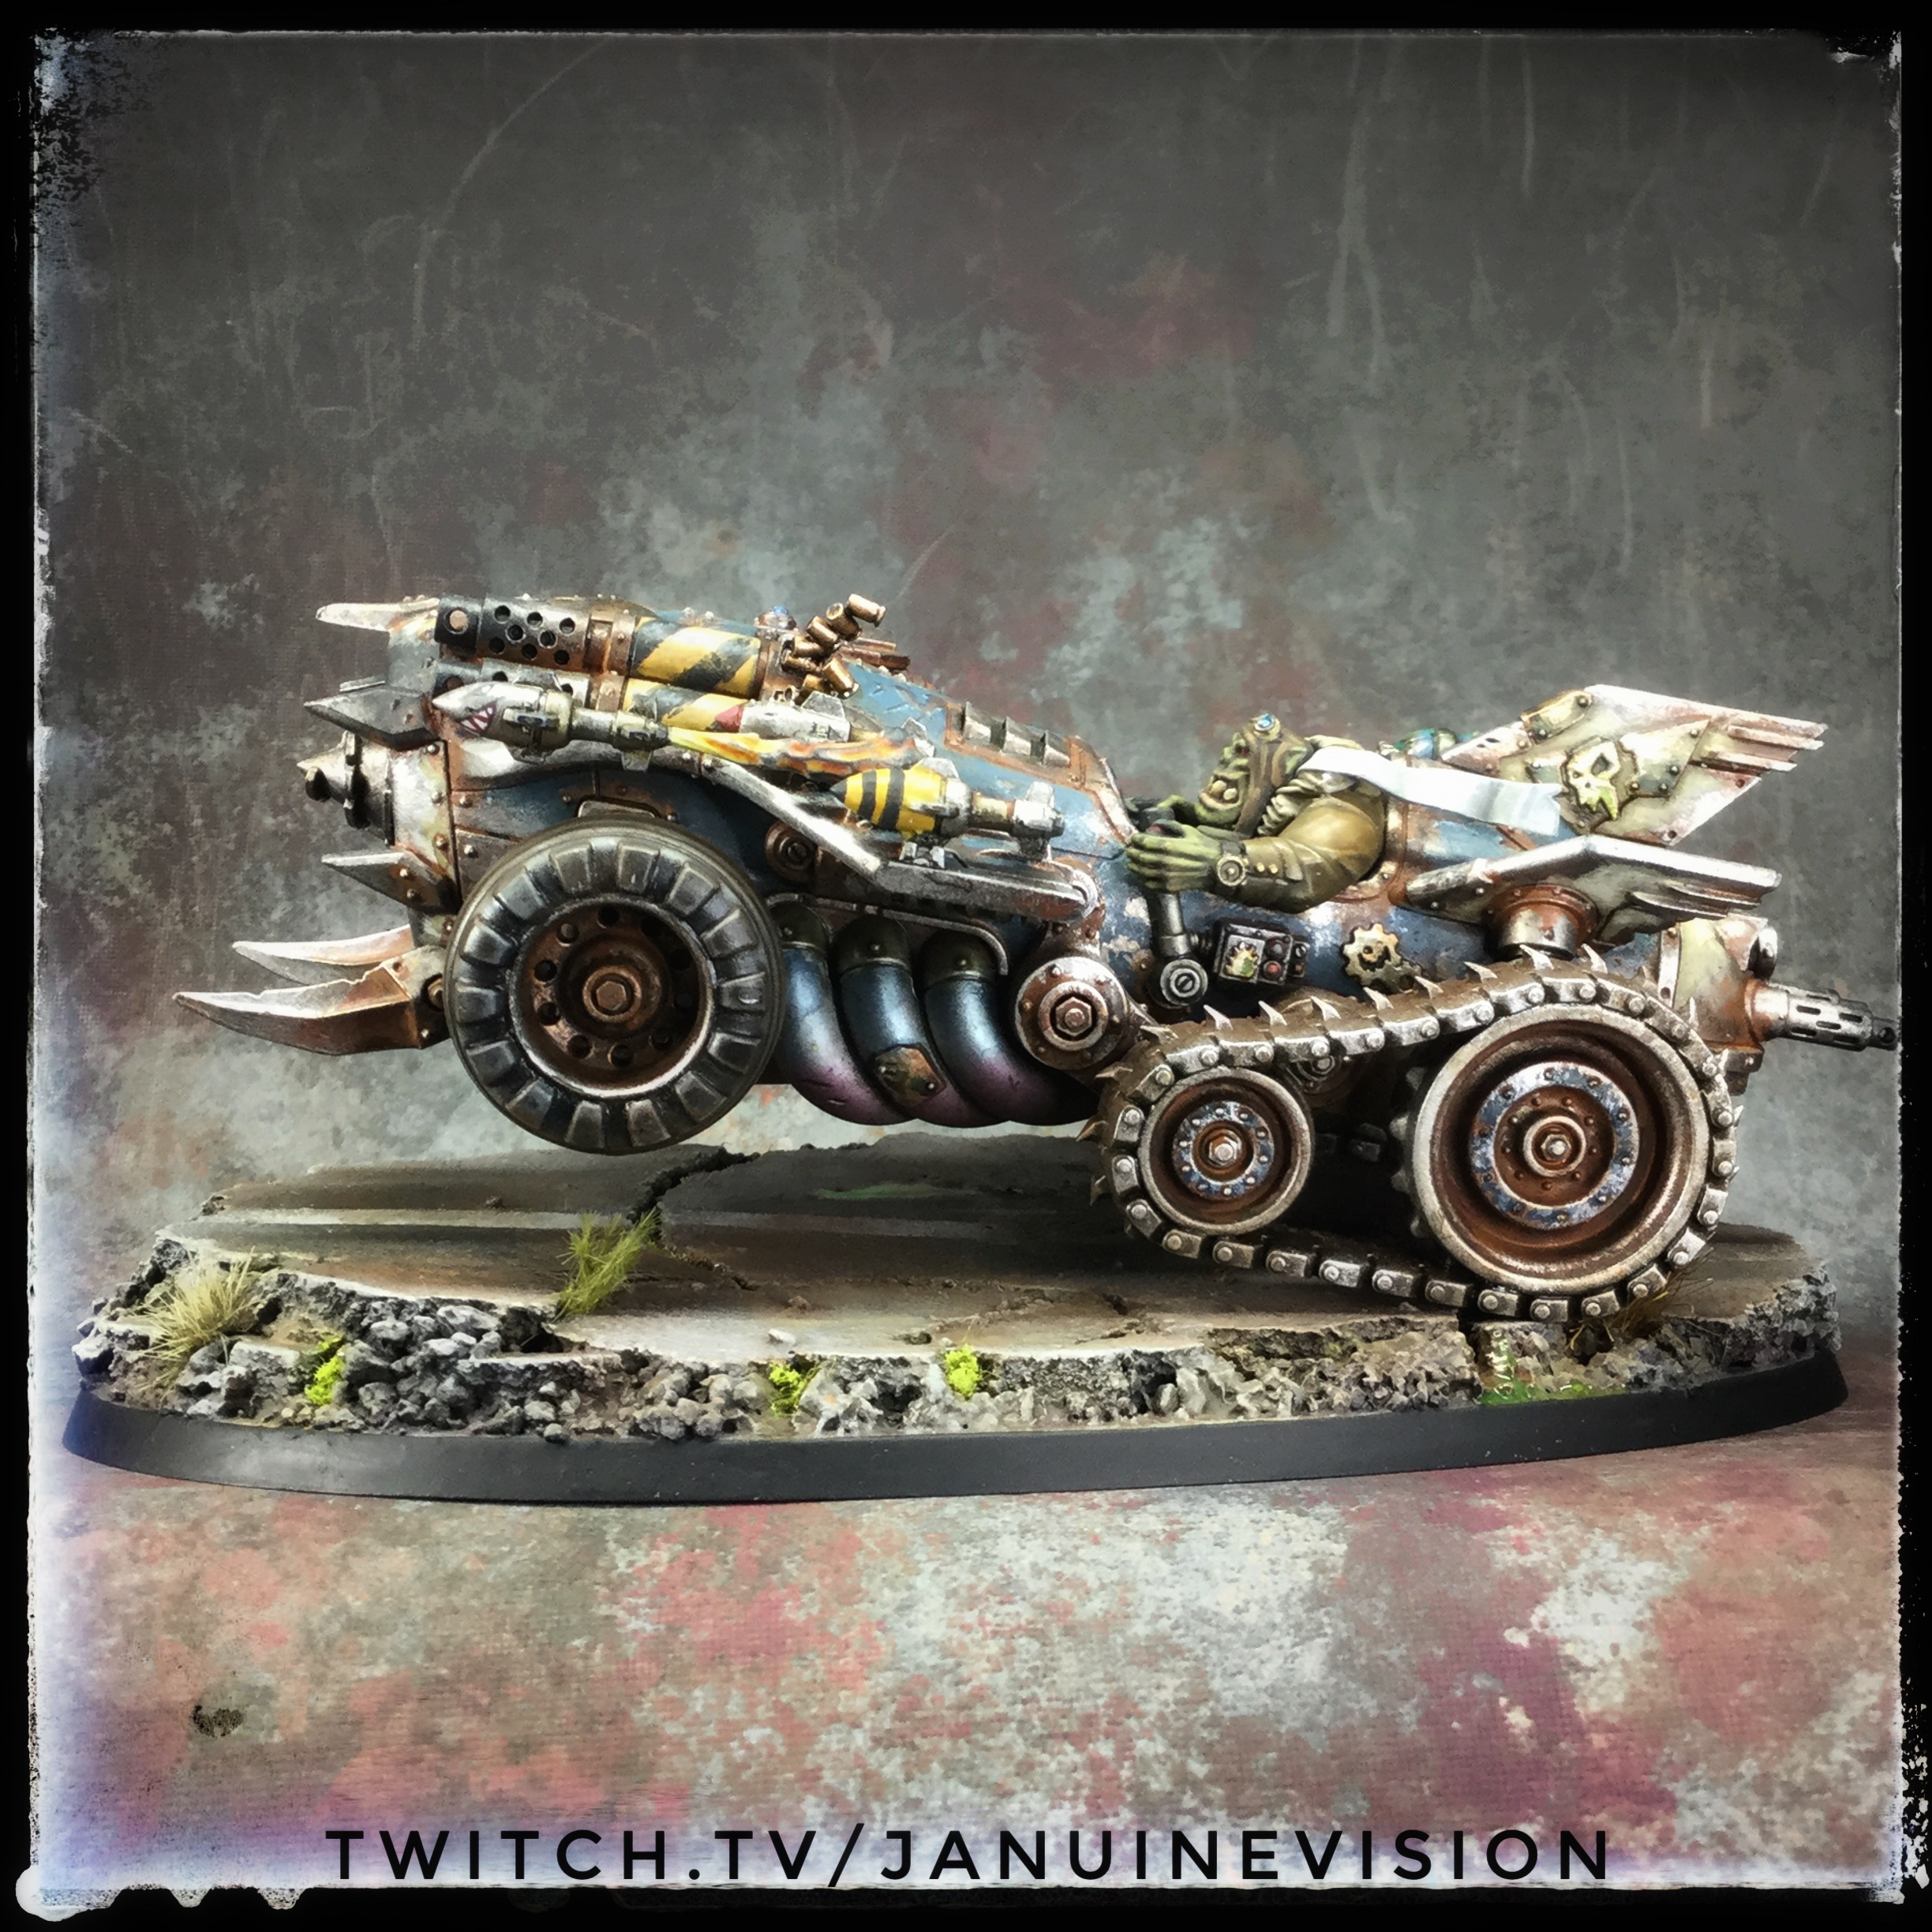
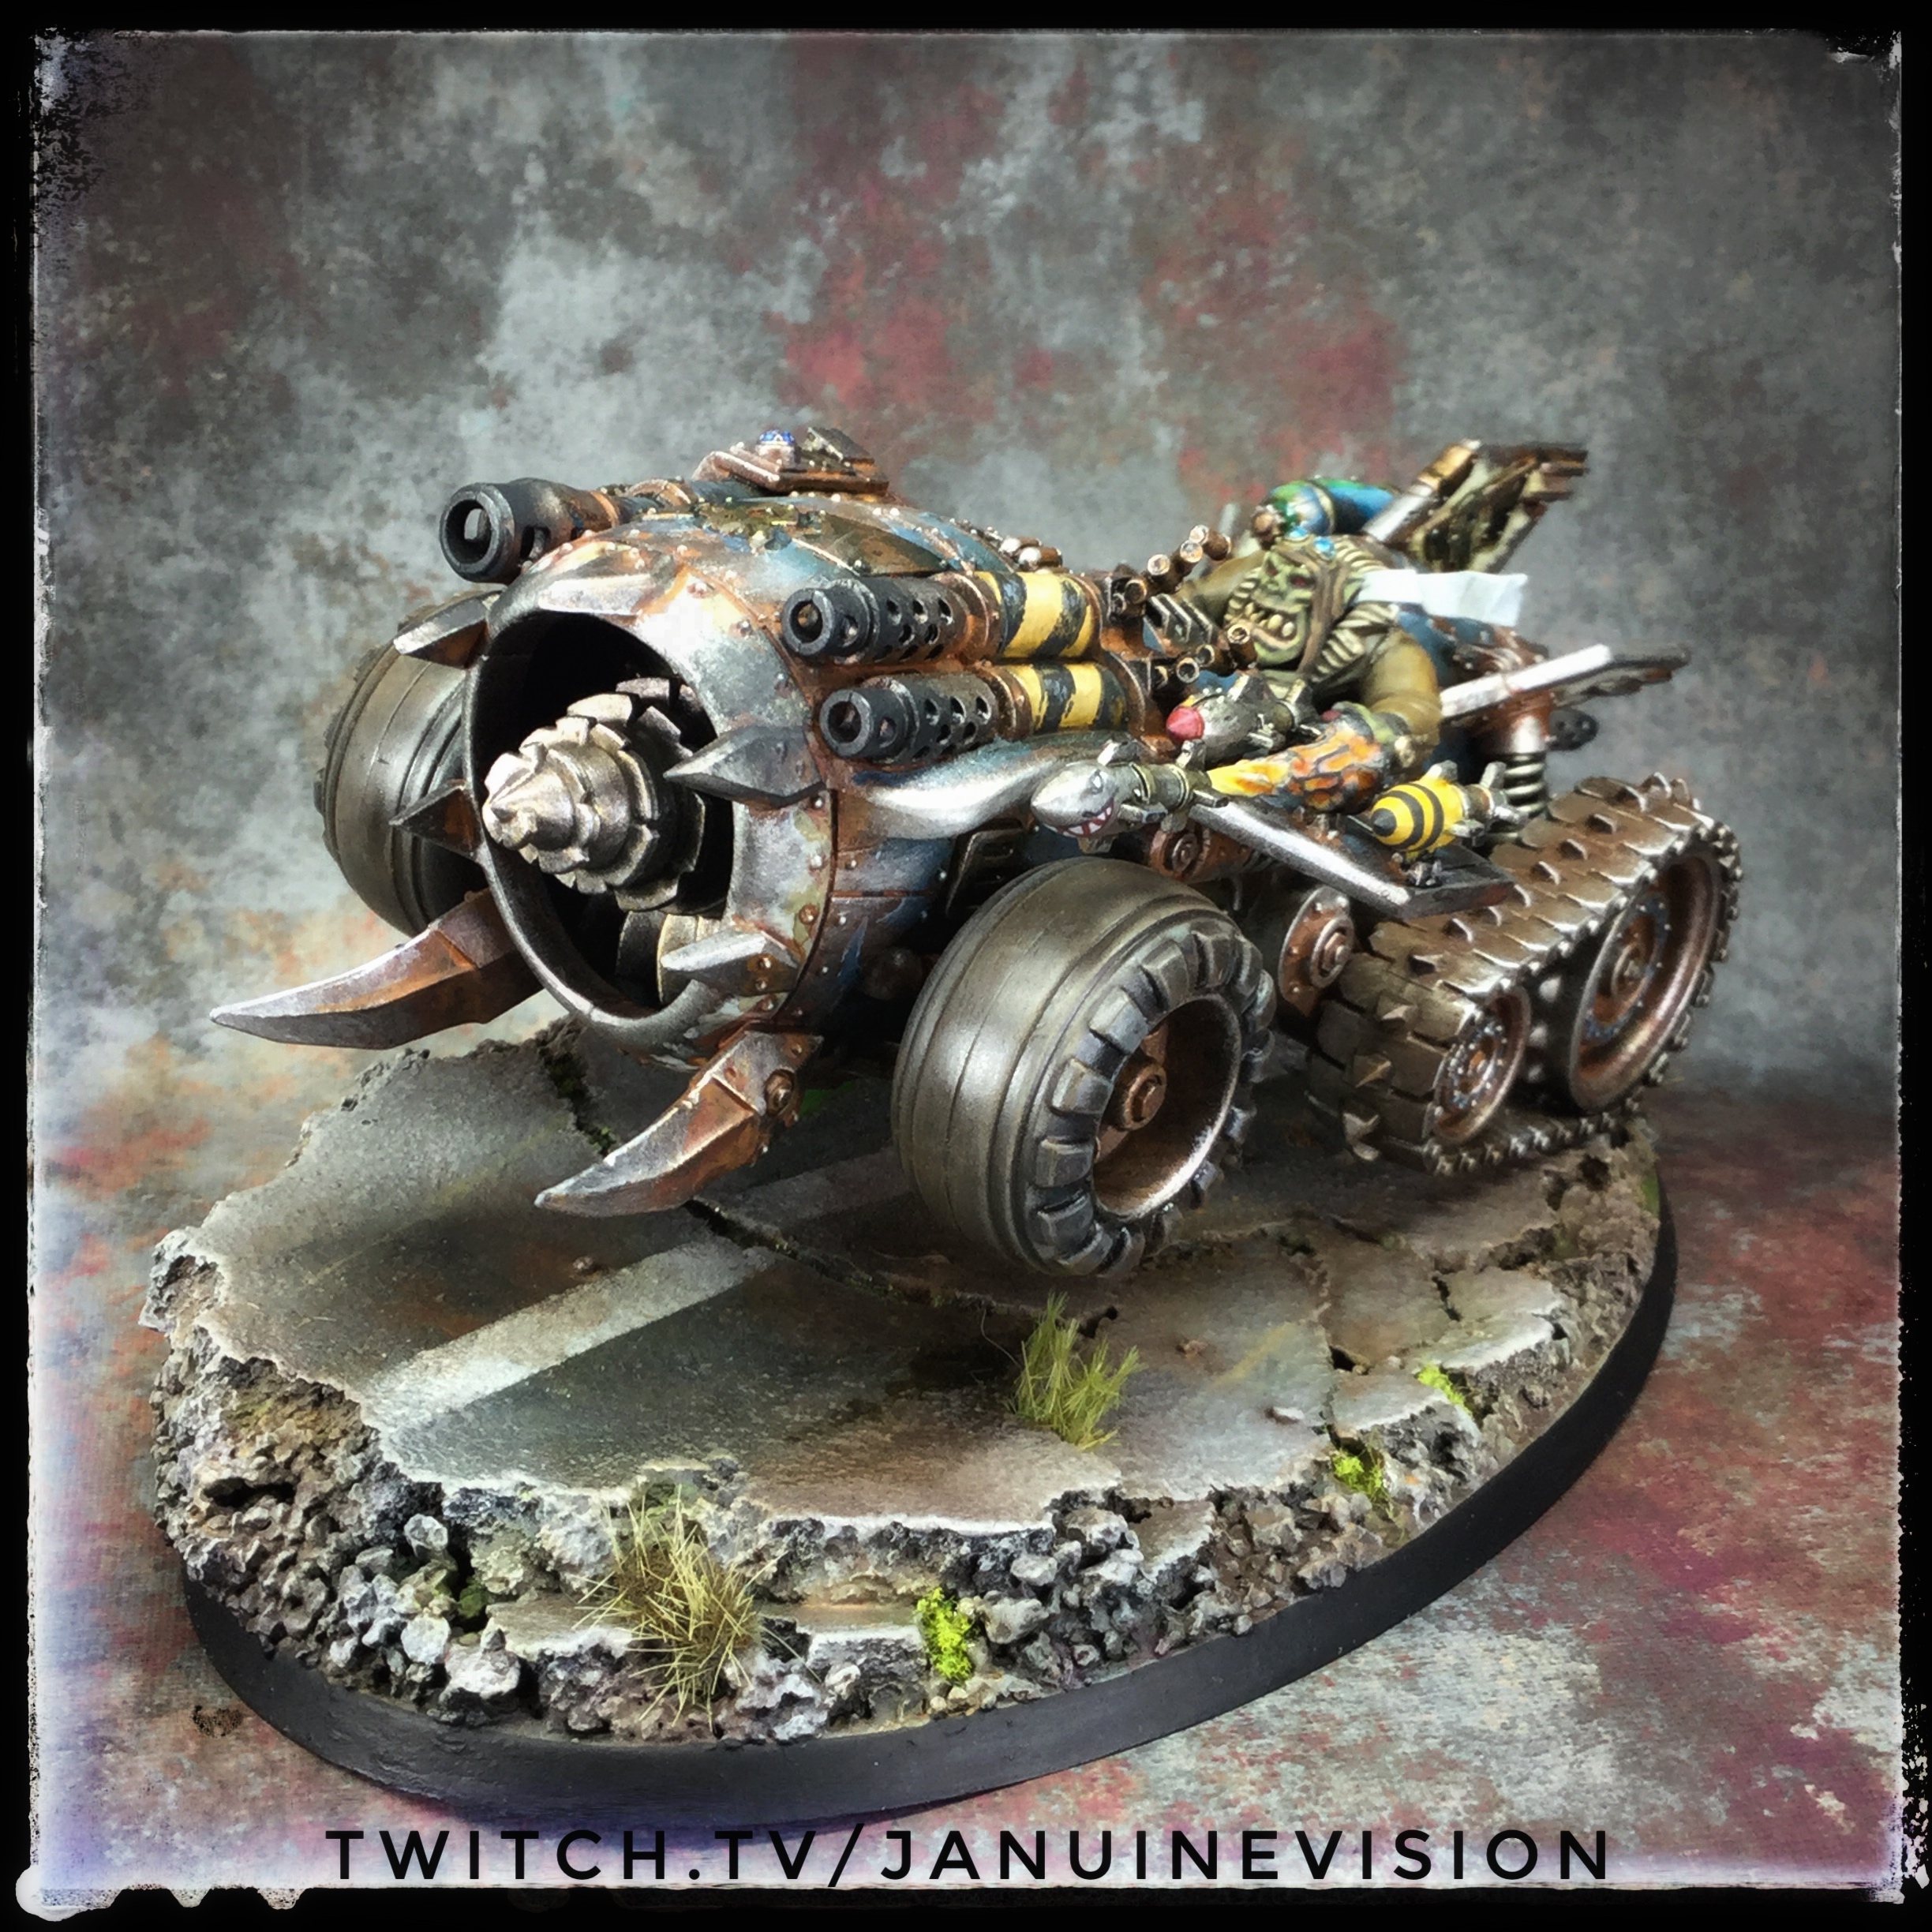
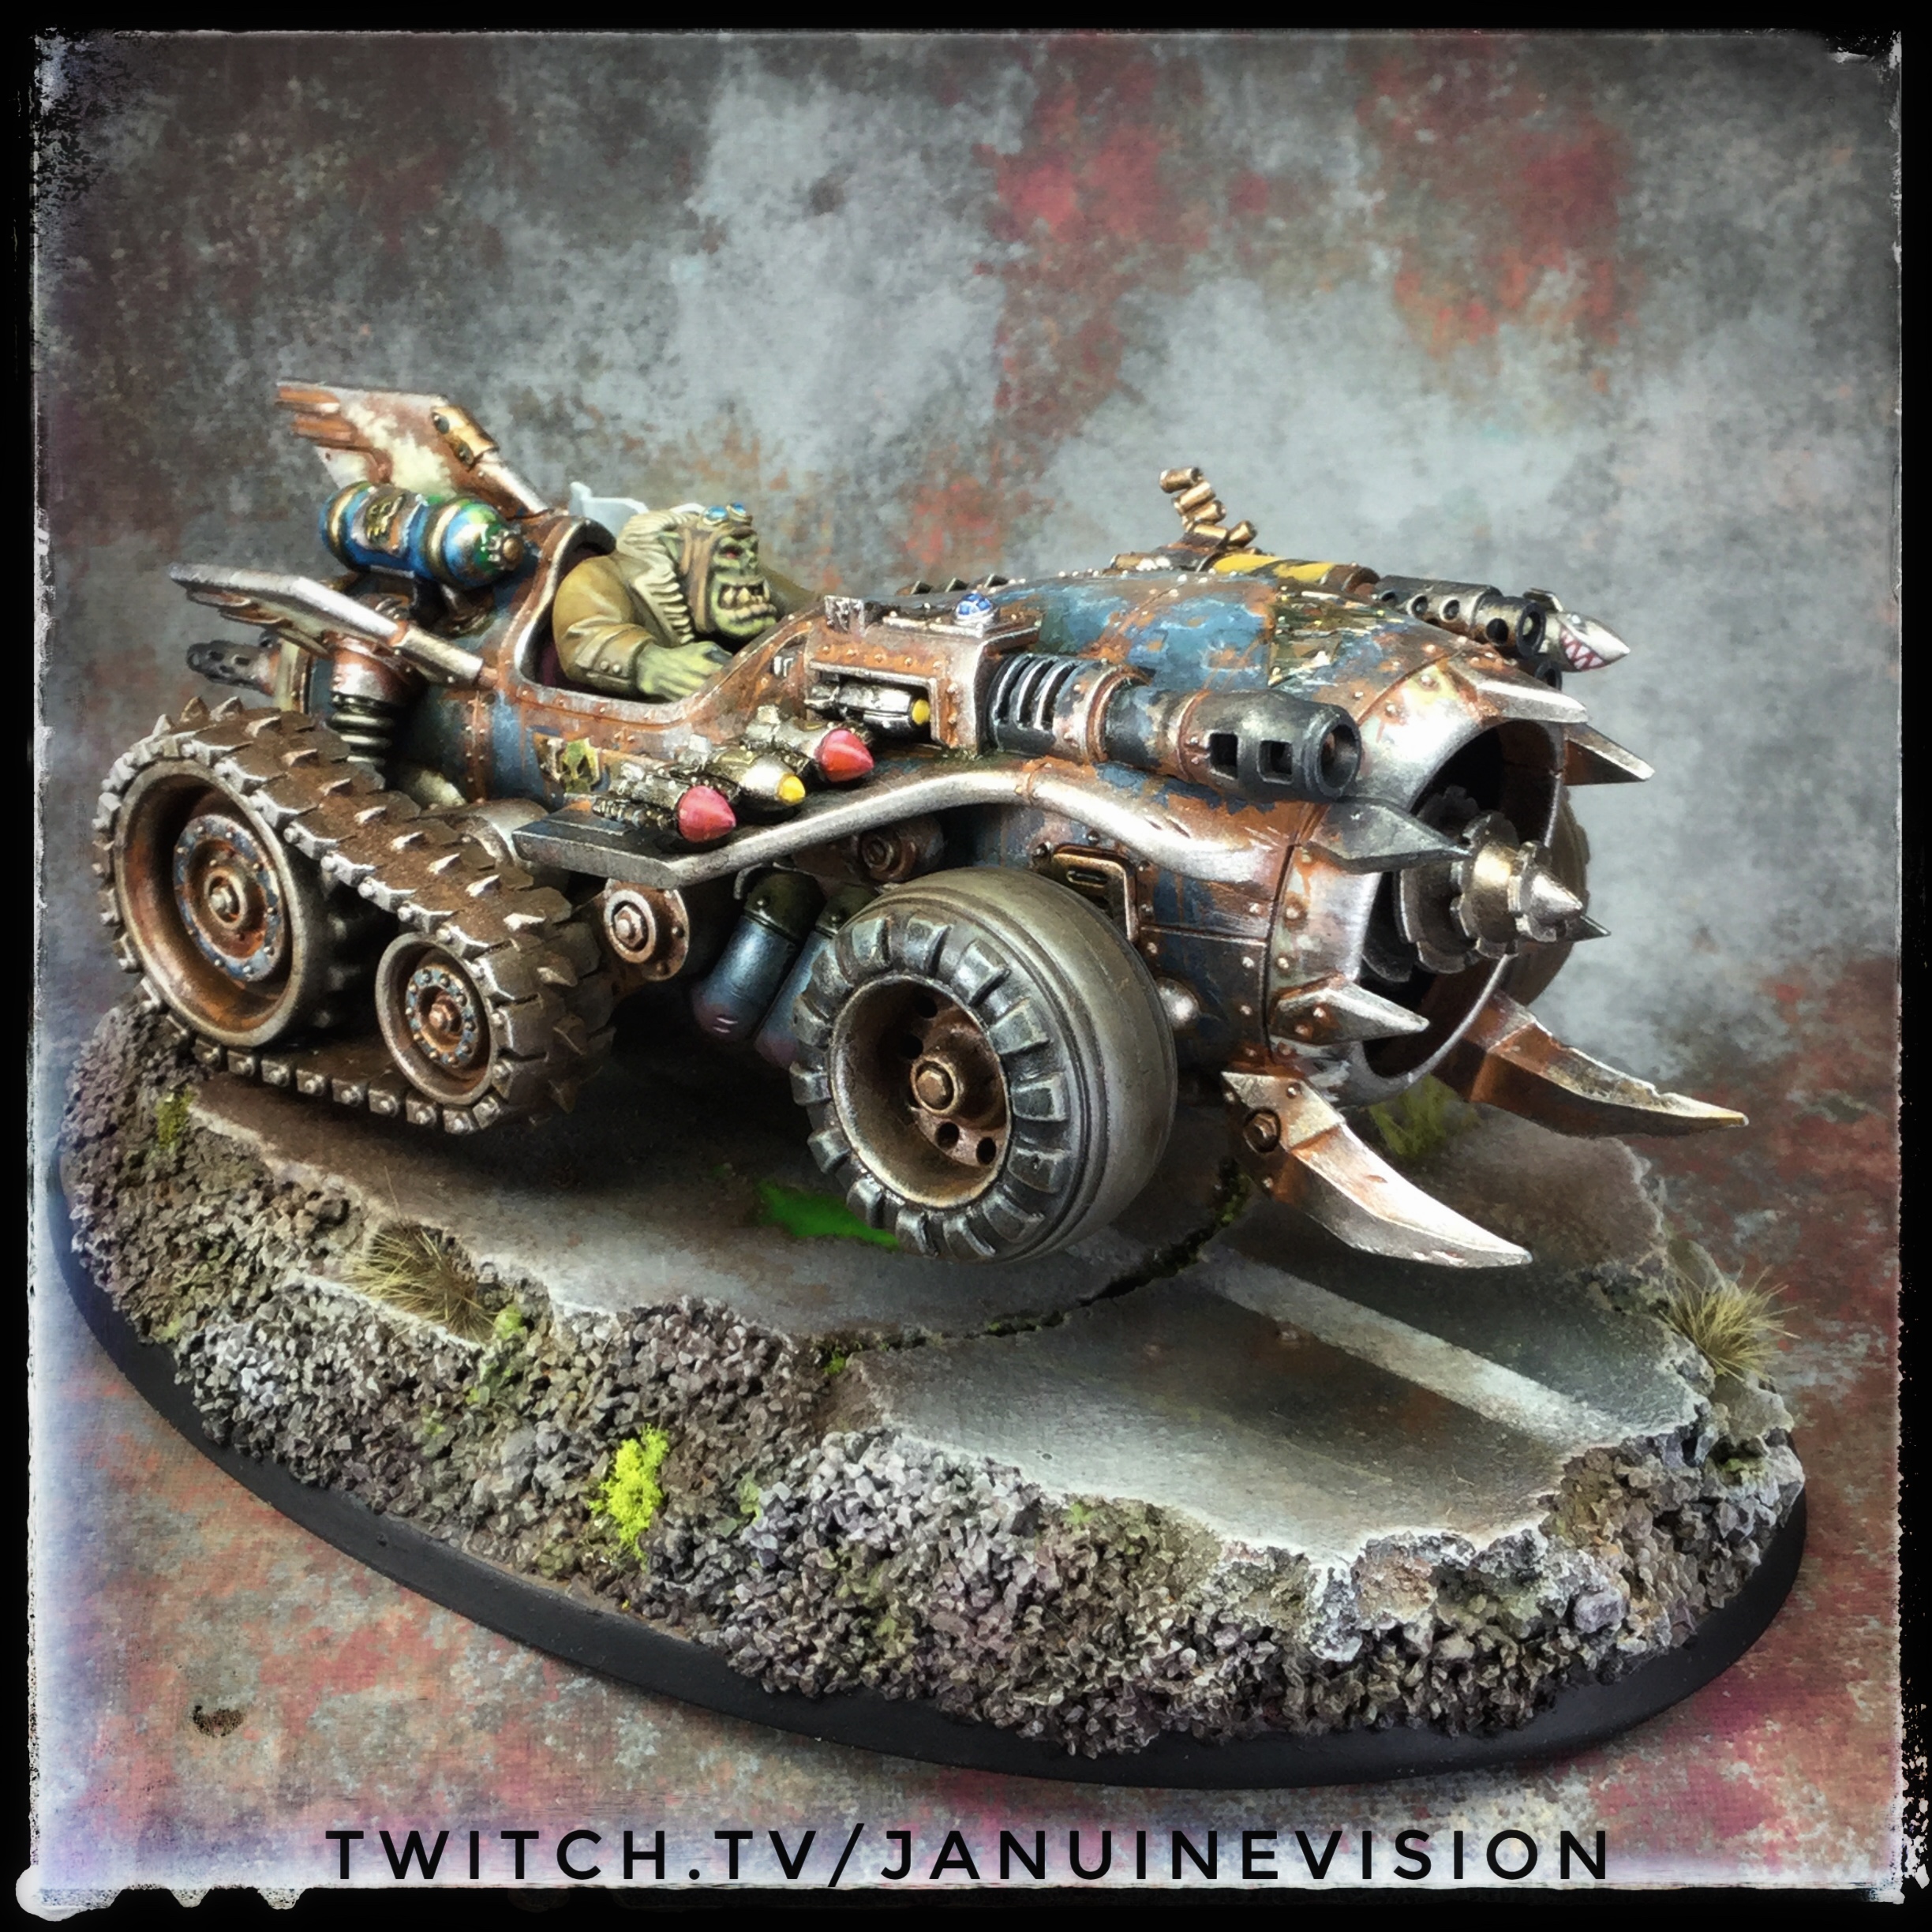
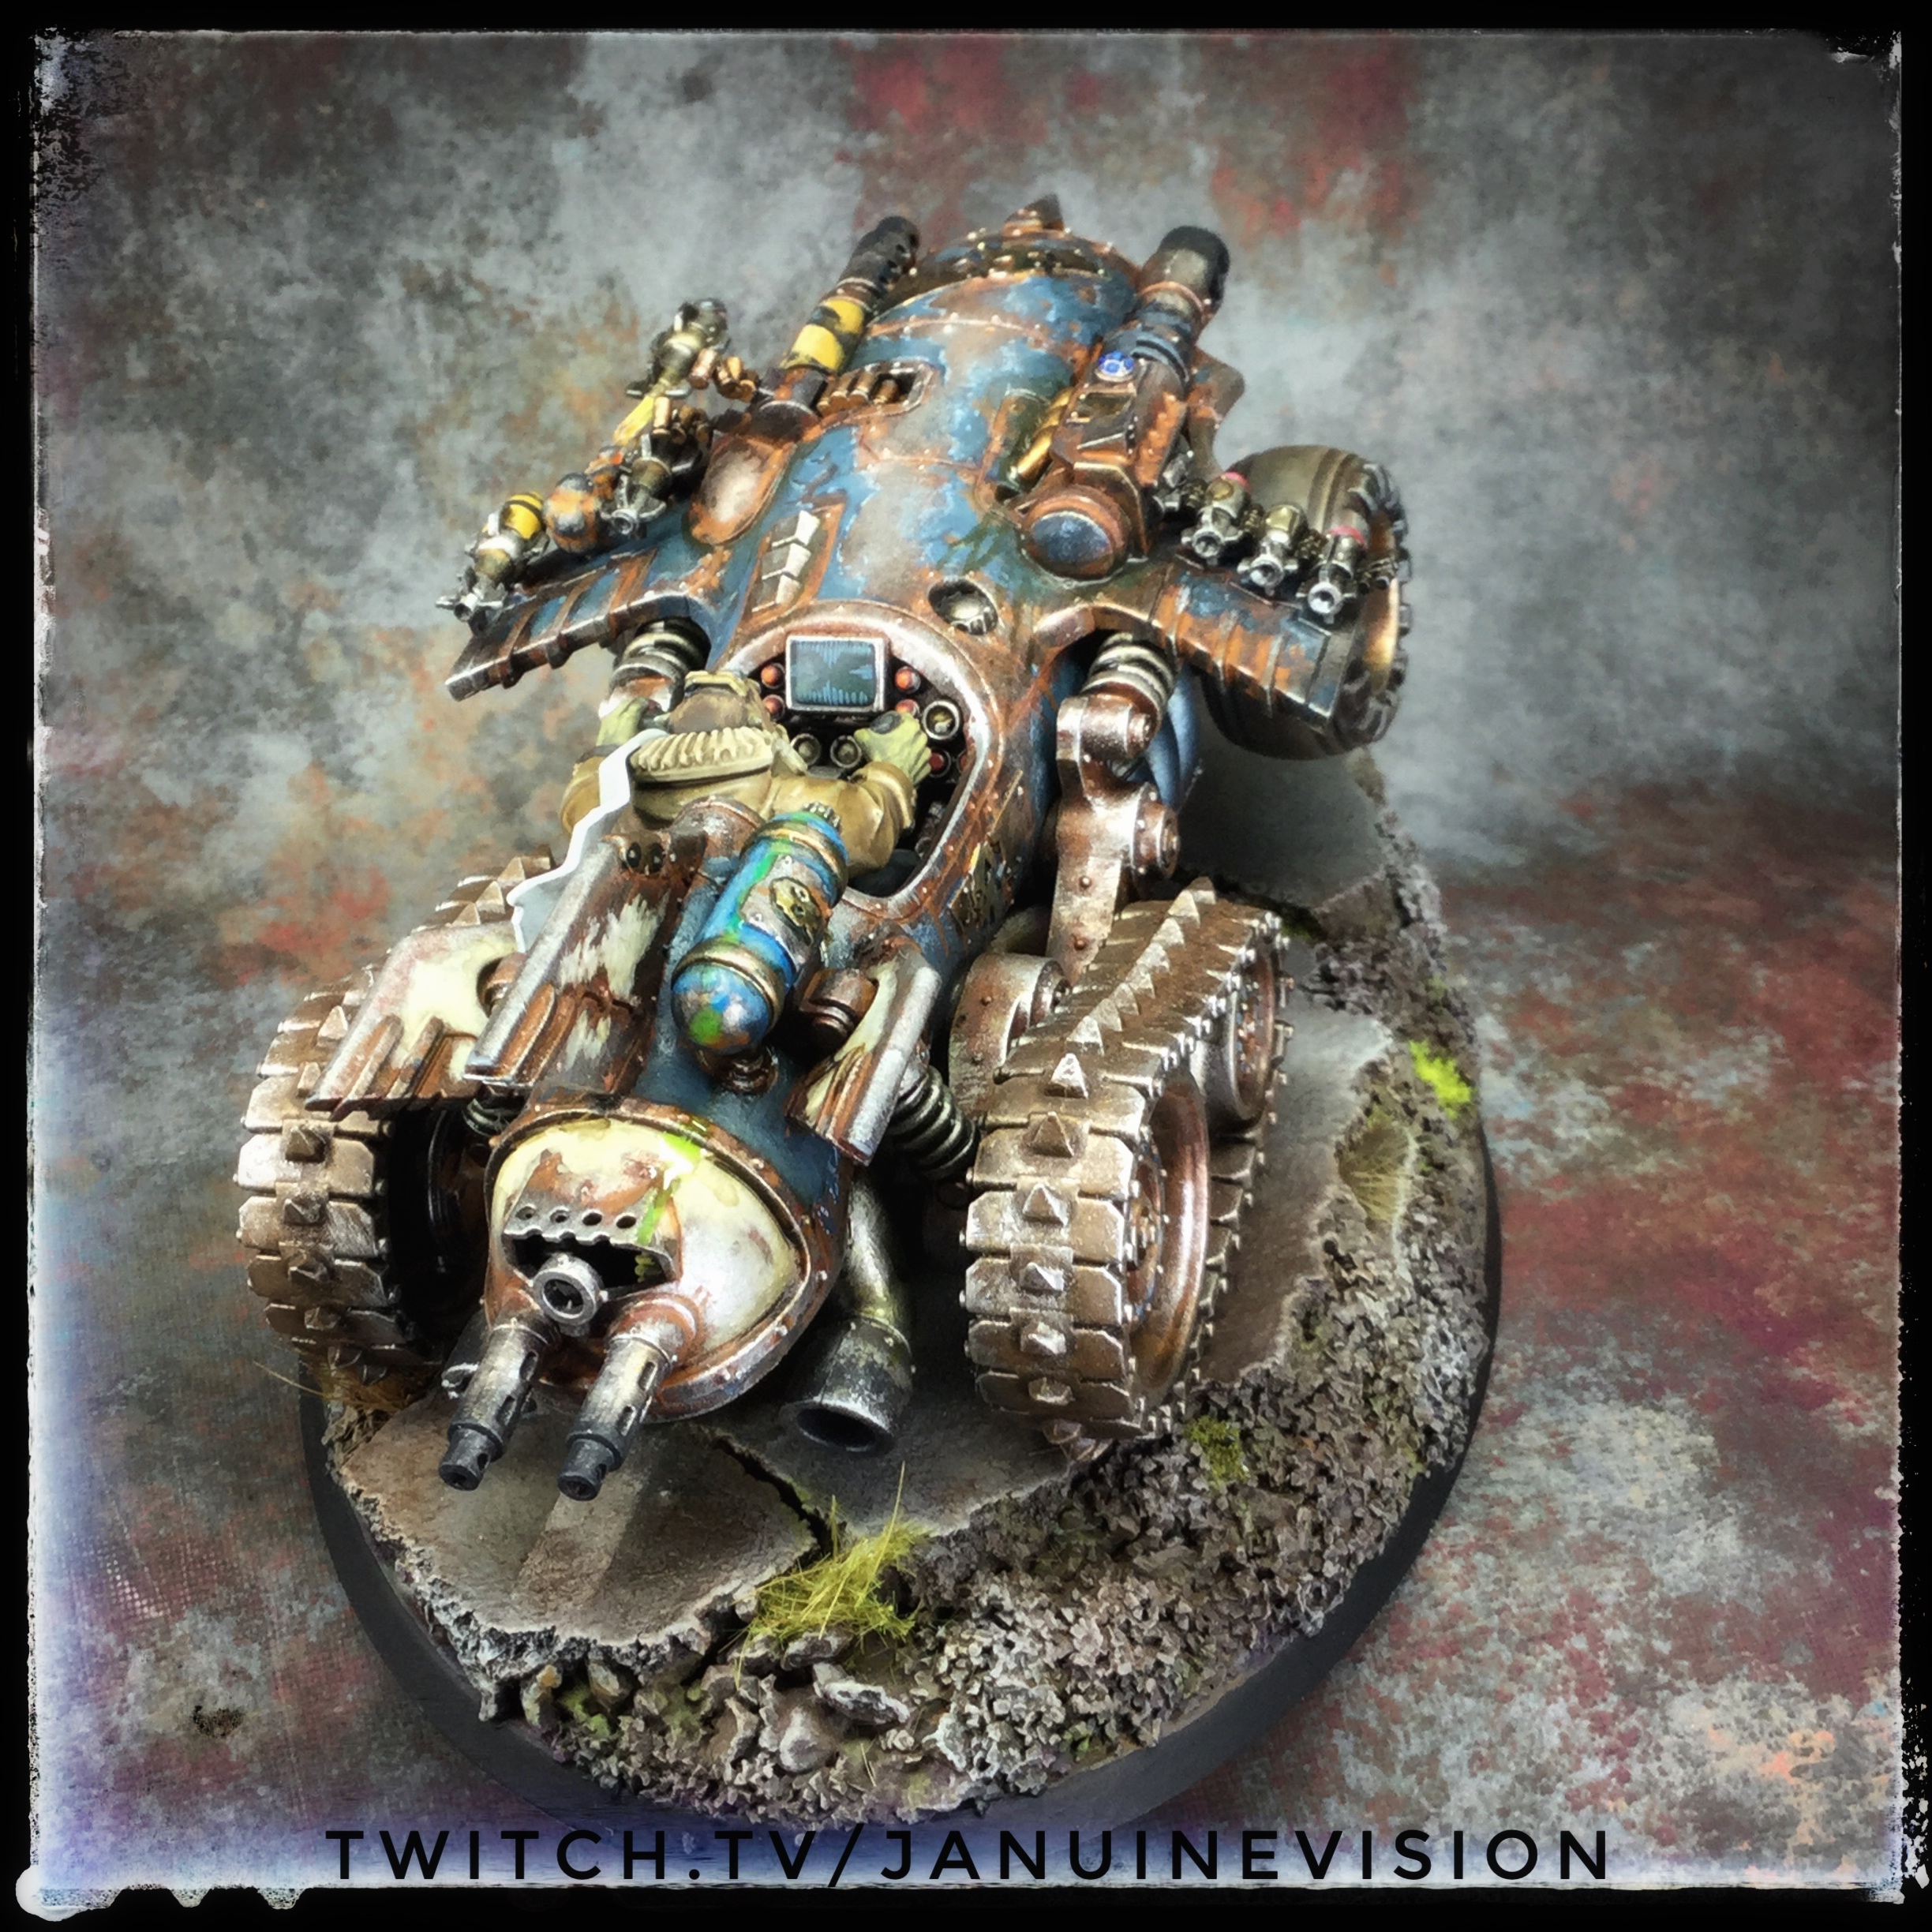
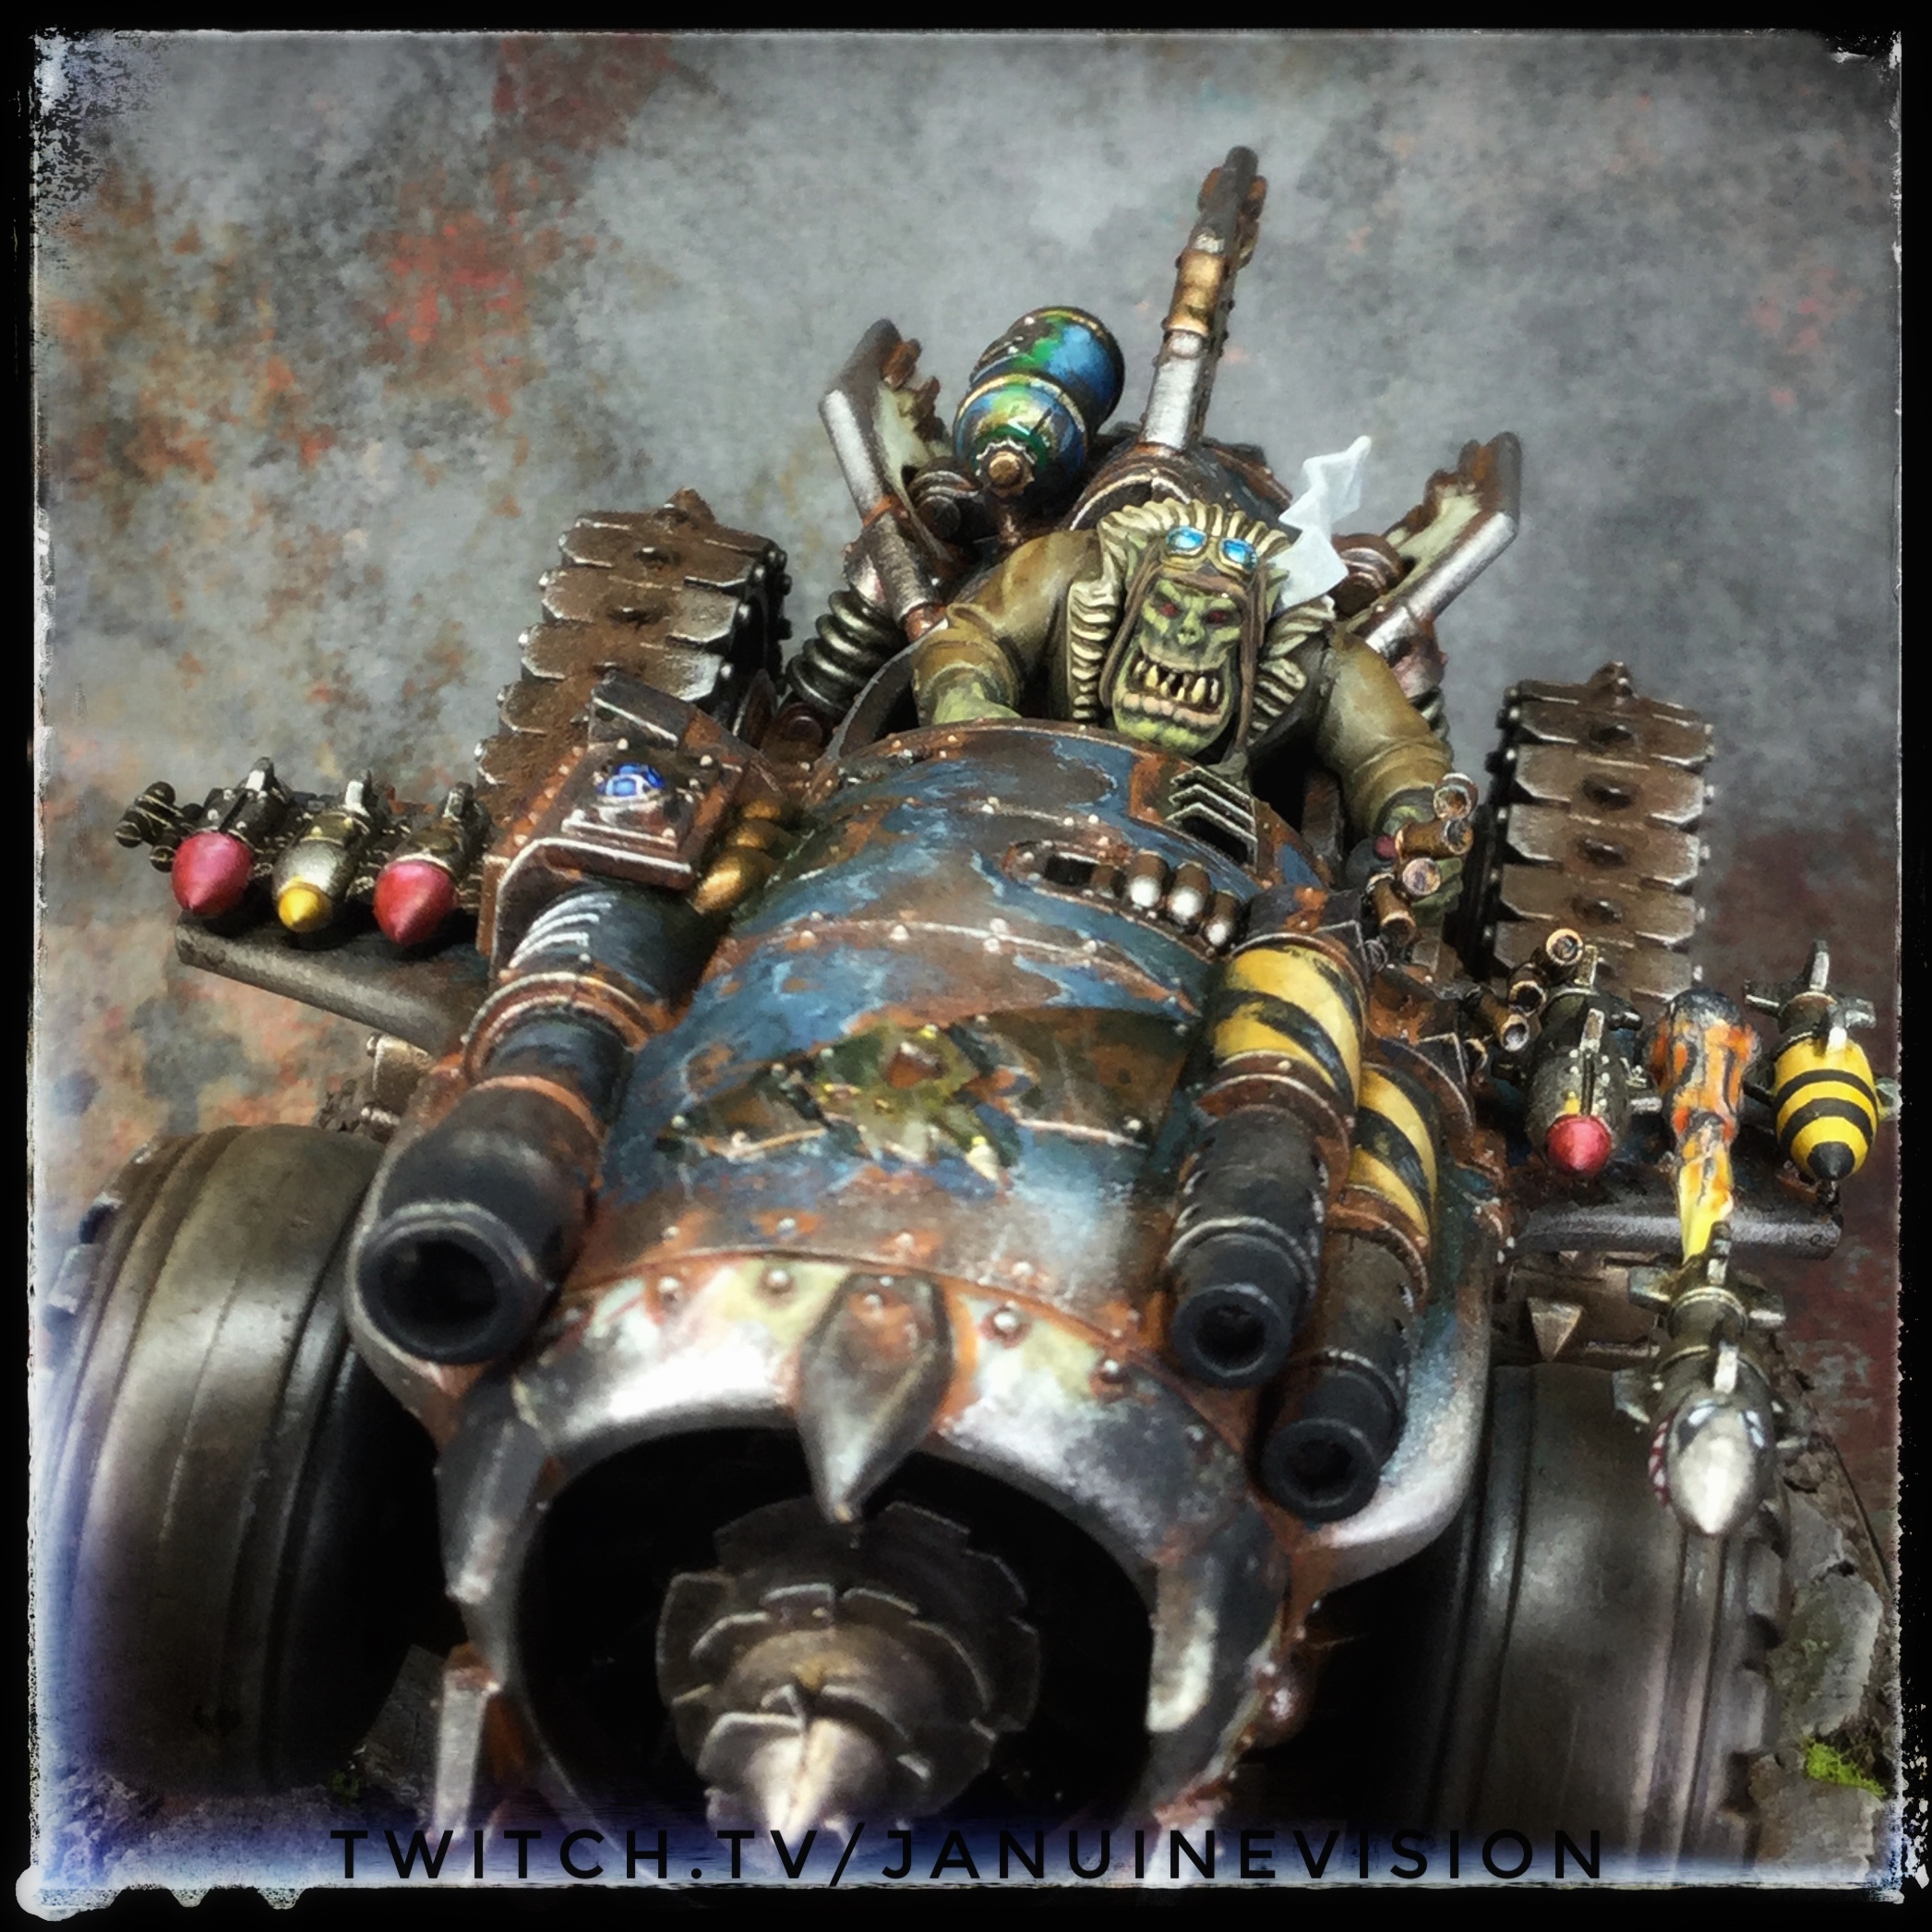
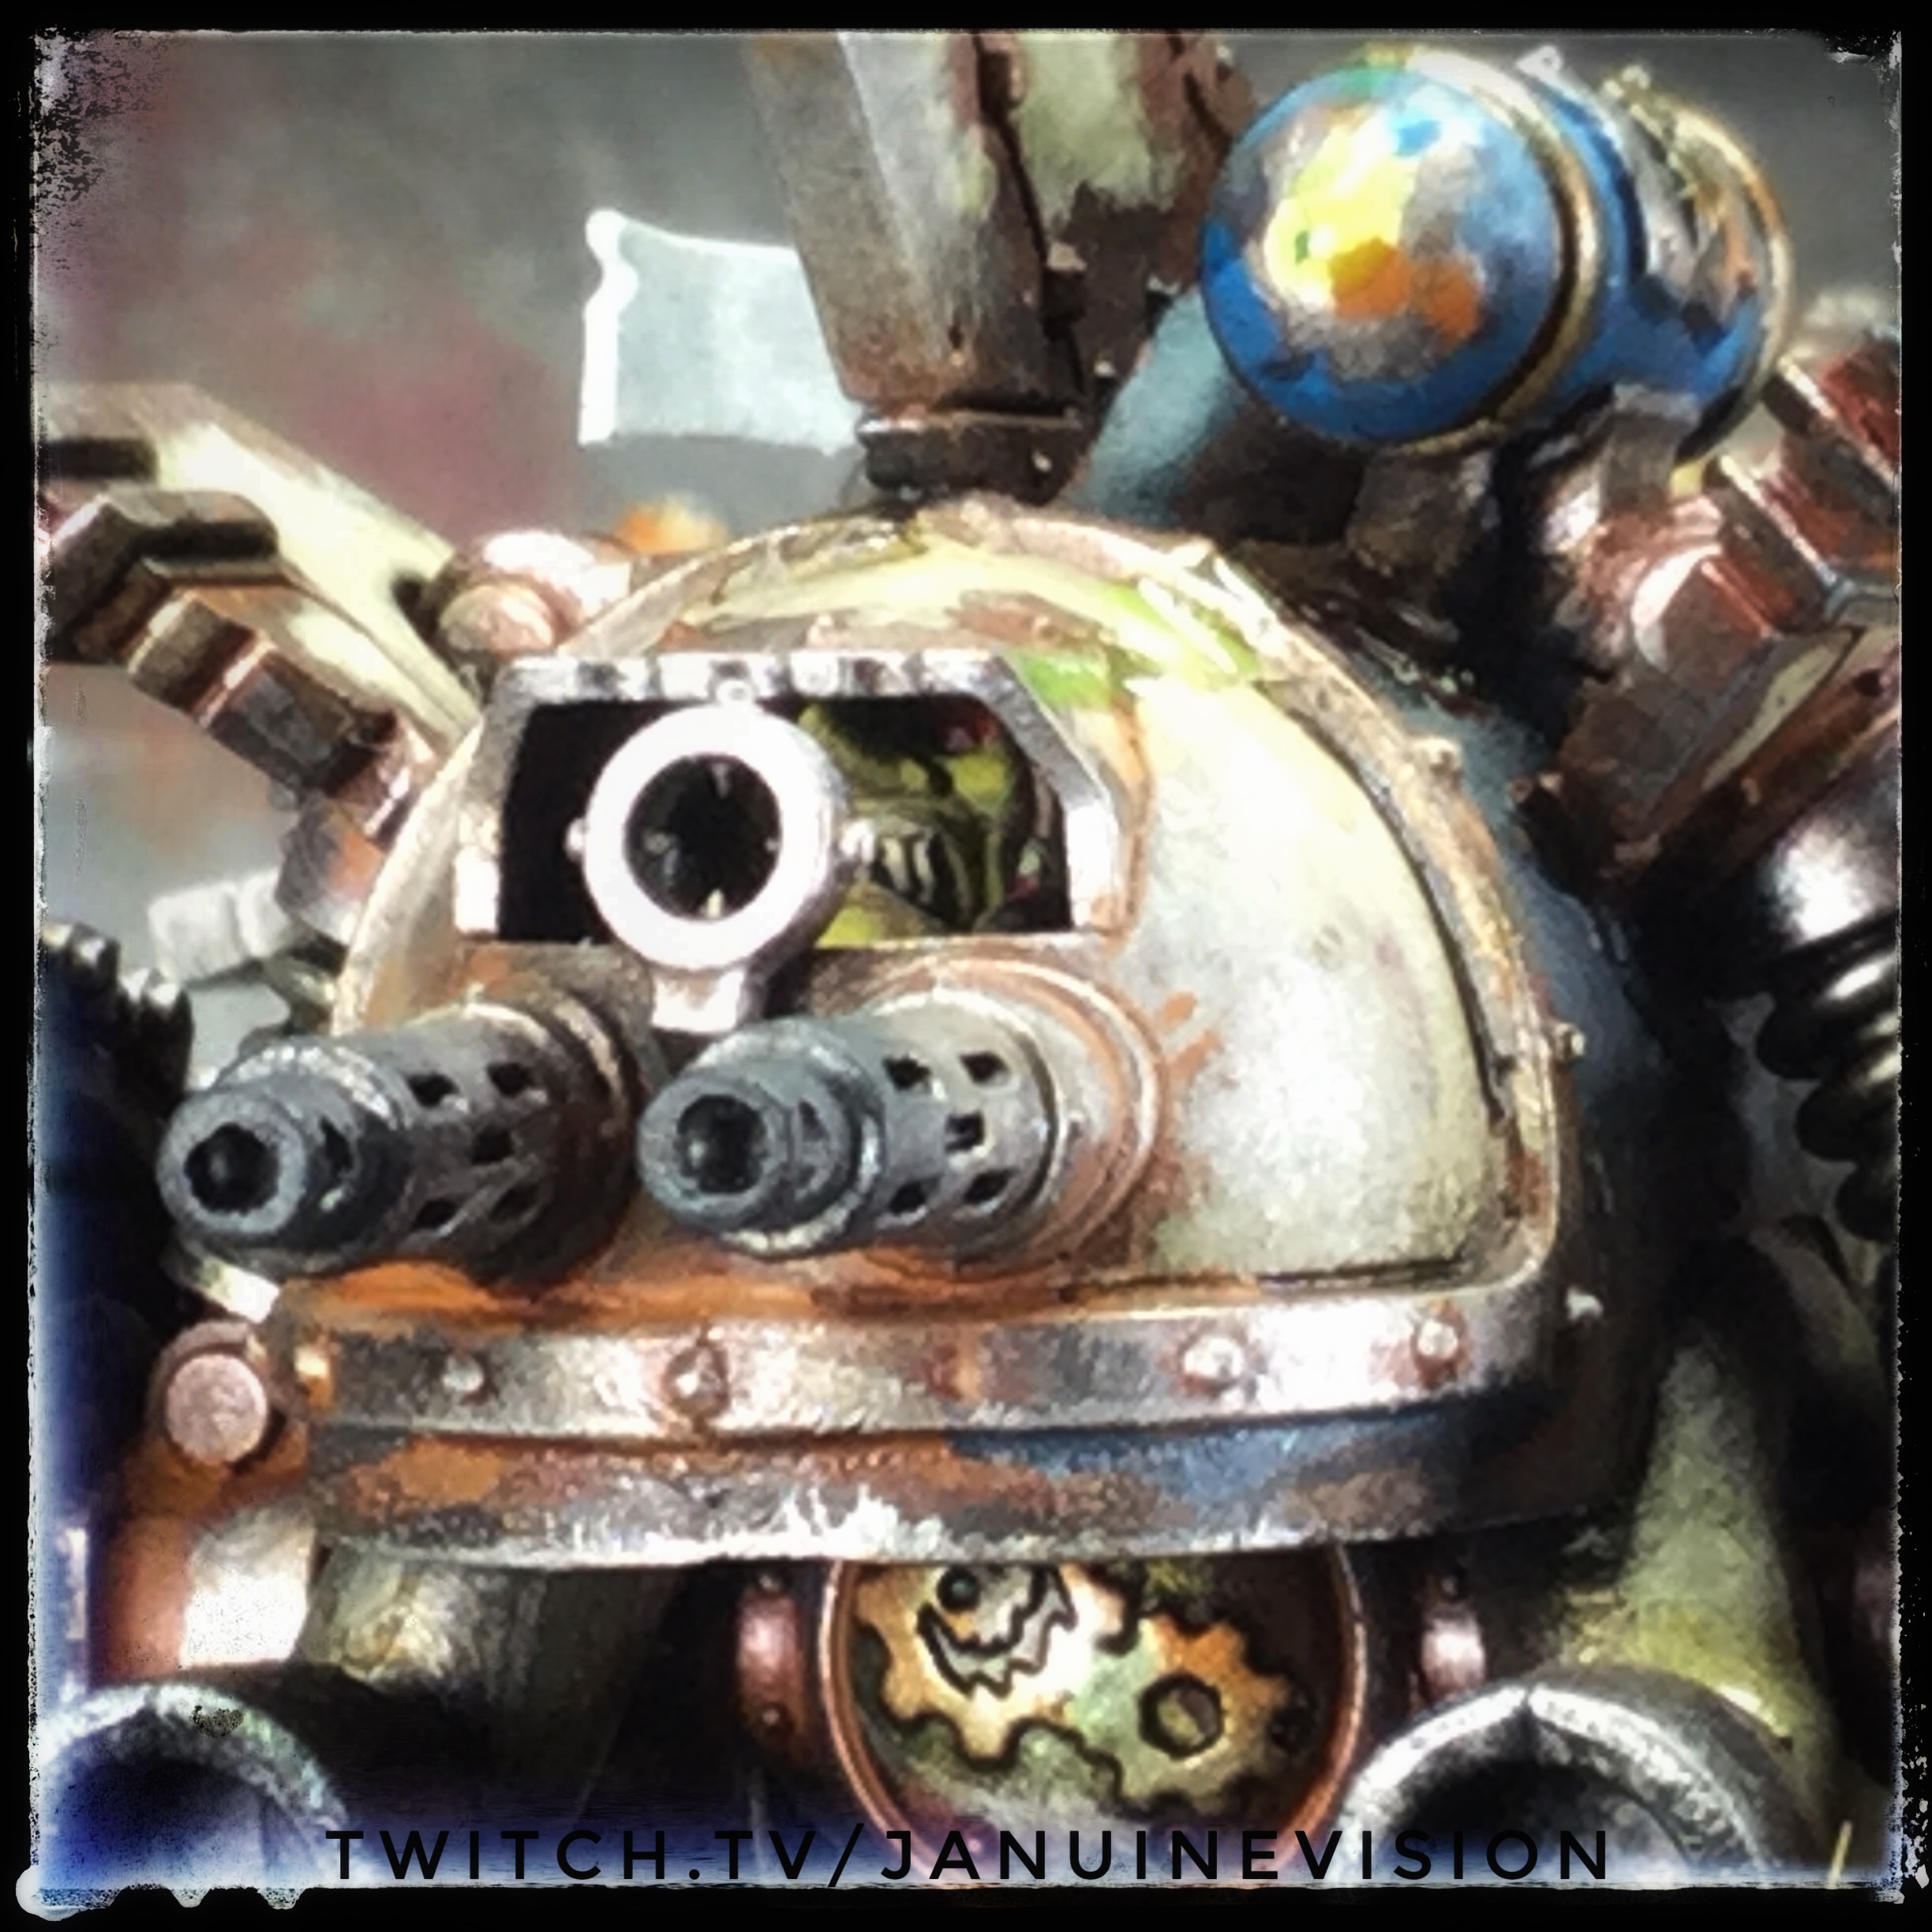
Also finished a few days is the Ork ScrappaDakkaThingy Jet Racer!! I originally bought this model to show a few differnt techniques and work up for viewer and also used it to make several PDFs on painting for my Subs.
Took a fair while to finish up but now he is all done and will also be given away at the end of the month to the TopD.
Big love to the BoW boys for showing off those UV resins from greenstuffworld on a XLBS!! Got some and they are awesome!! Used the fluor green one for the promethium puddle under the racer and the leaks on the Nos Bottle on the back of the racer. They glow in the dark when you shine a UV light on them!~!!!!!!!

Dungeons & Dragons from Otherworld Pt3
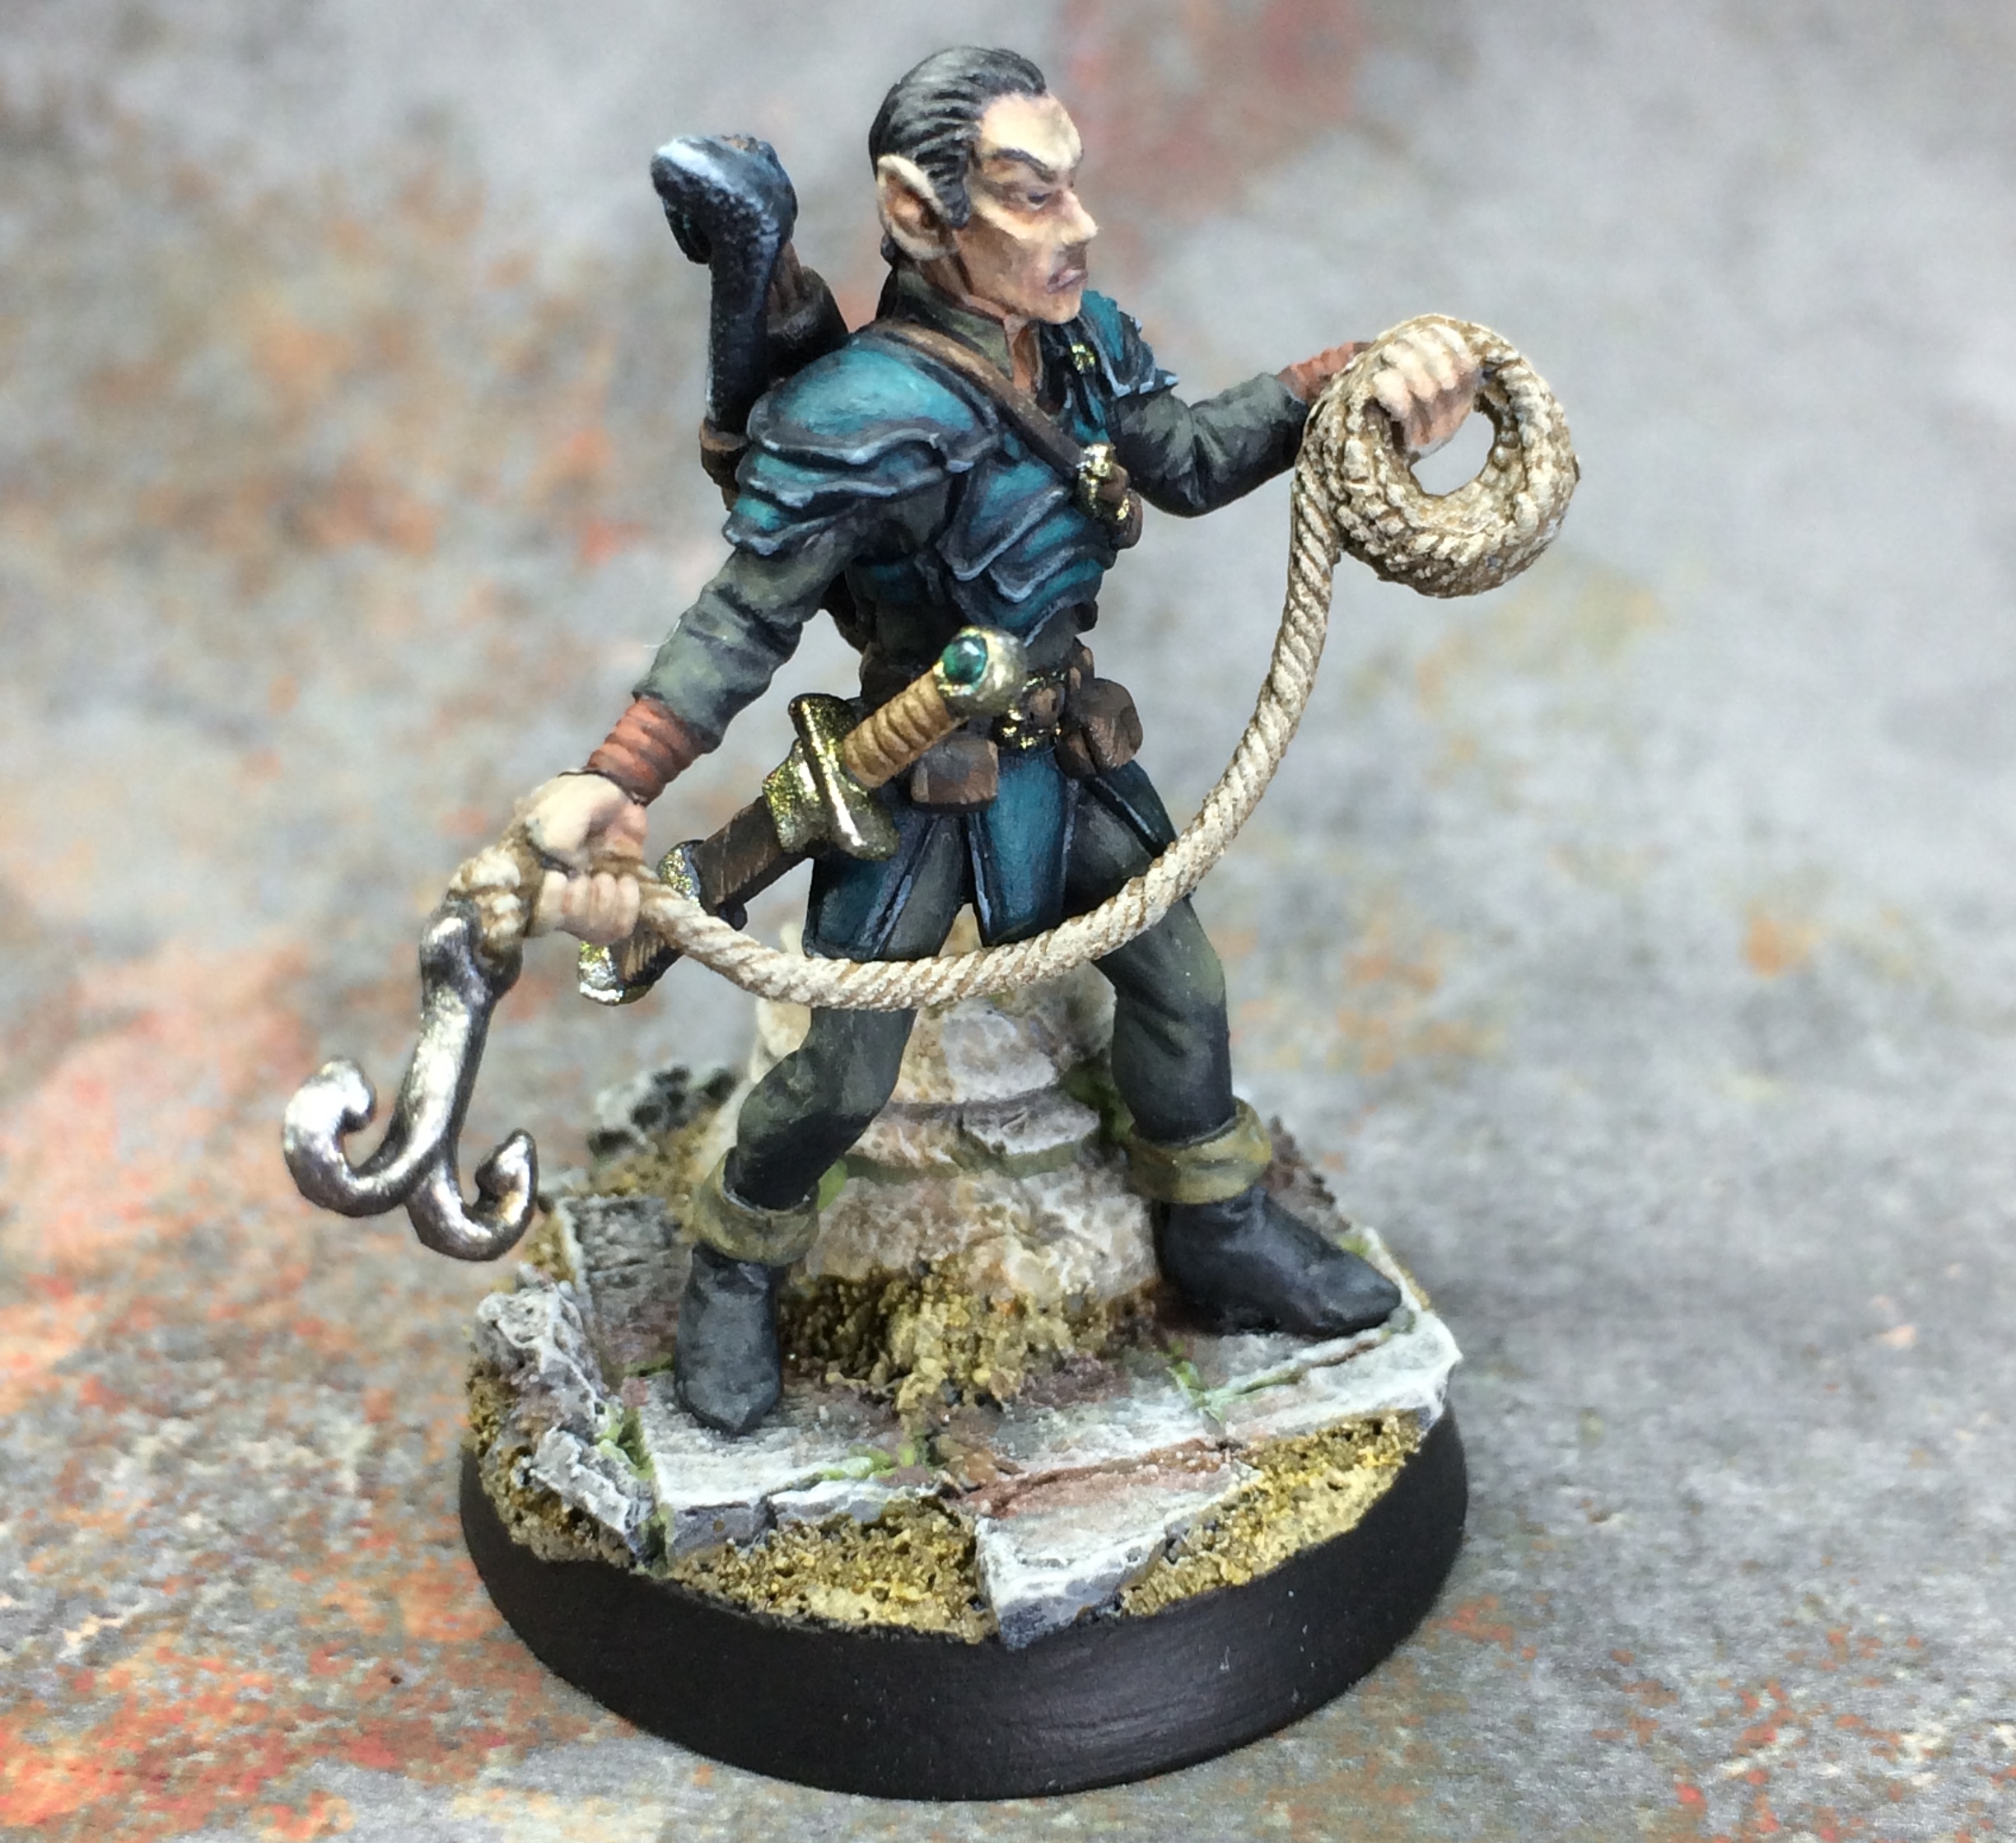
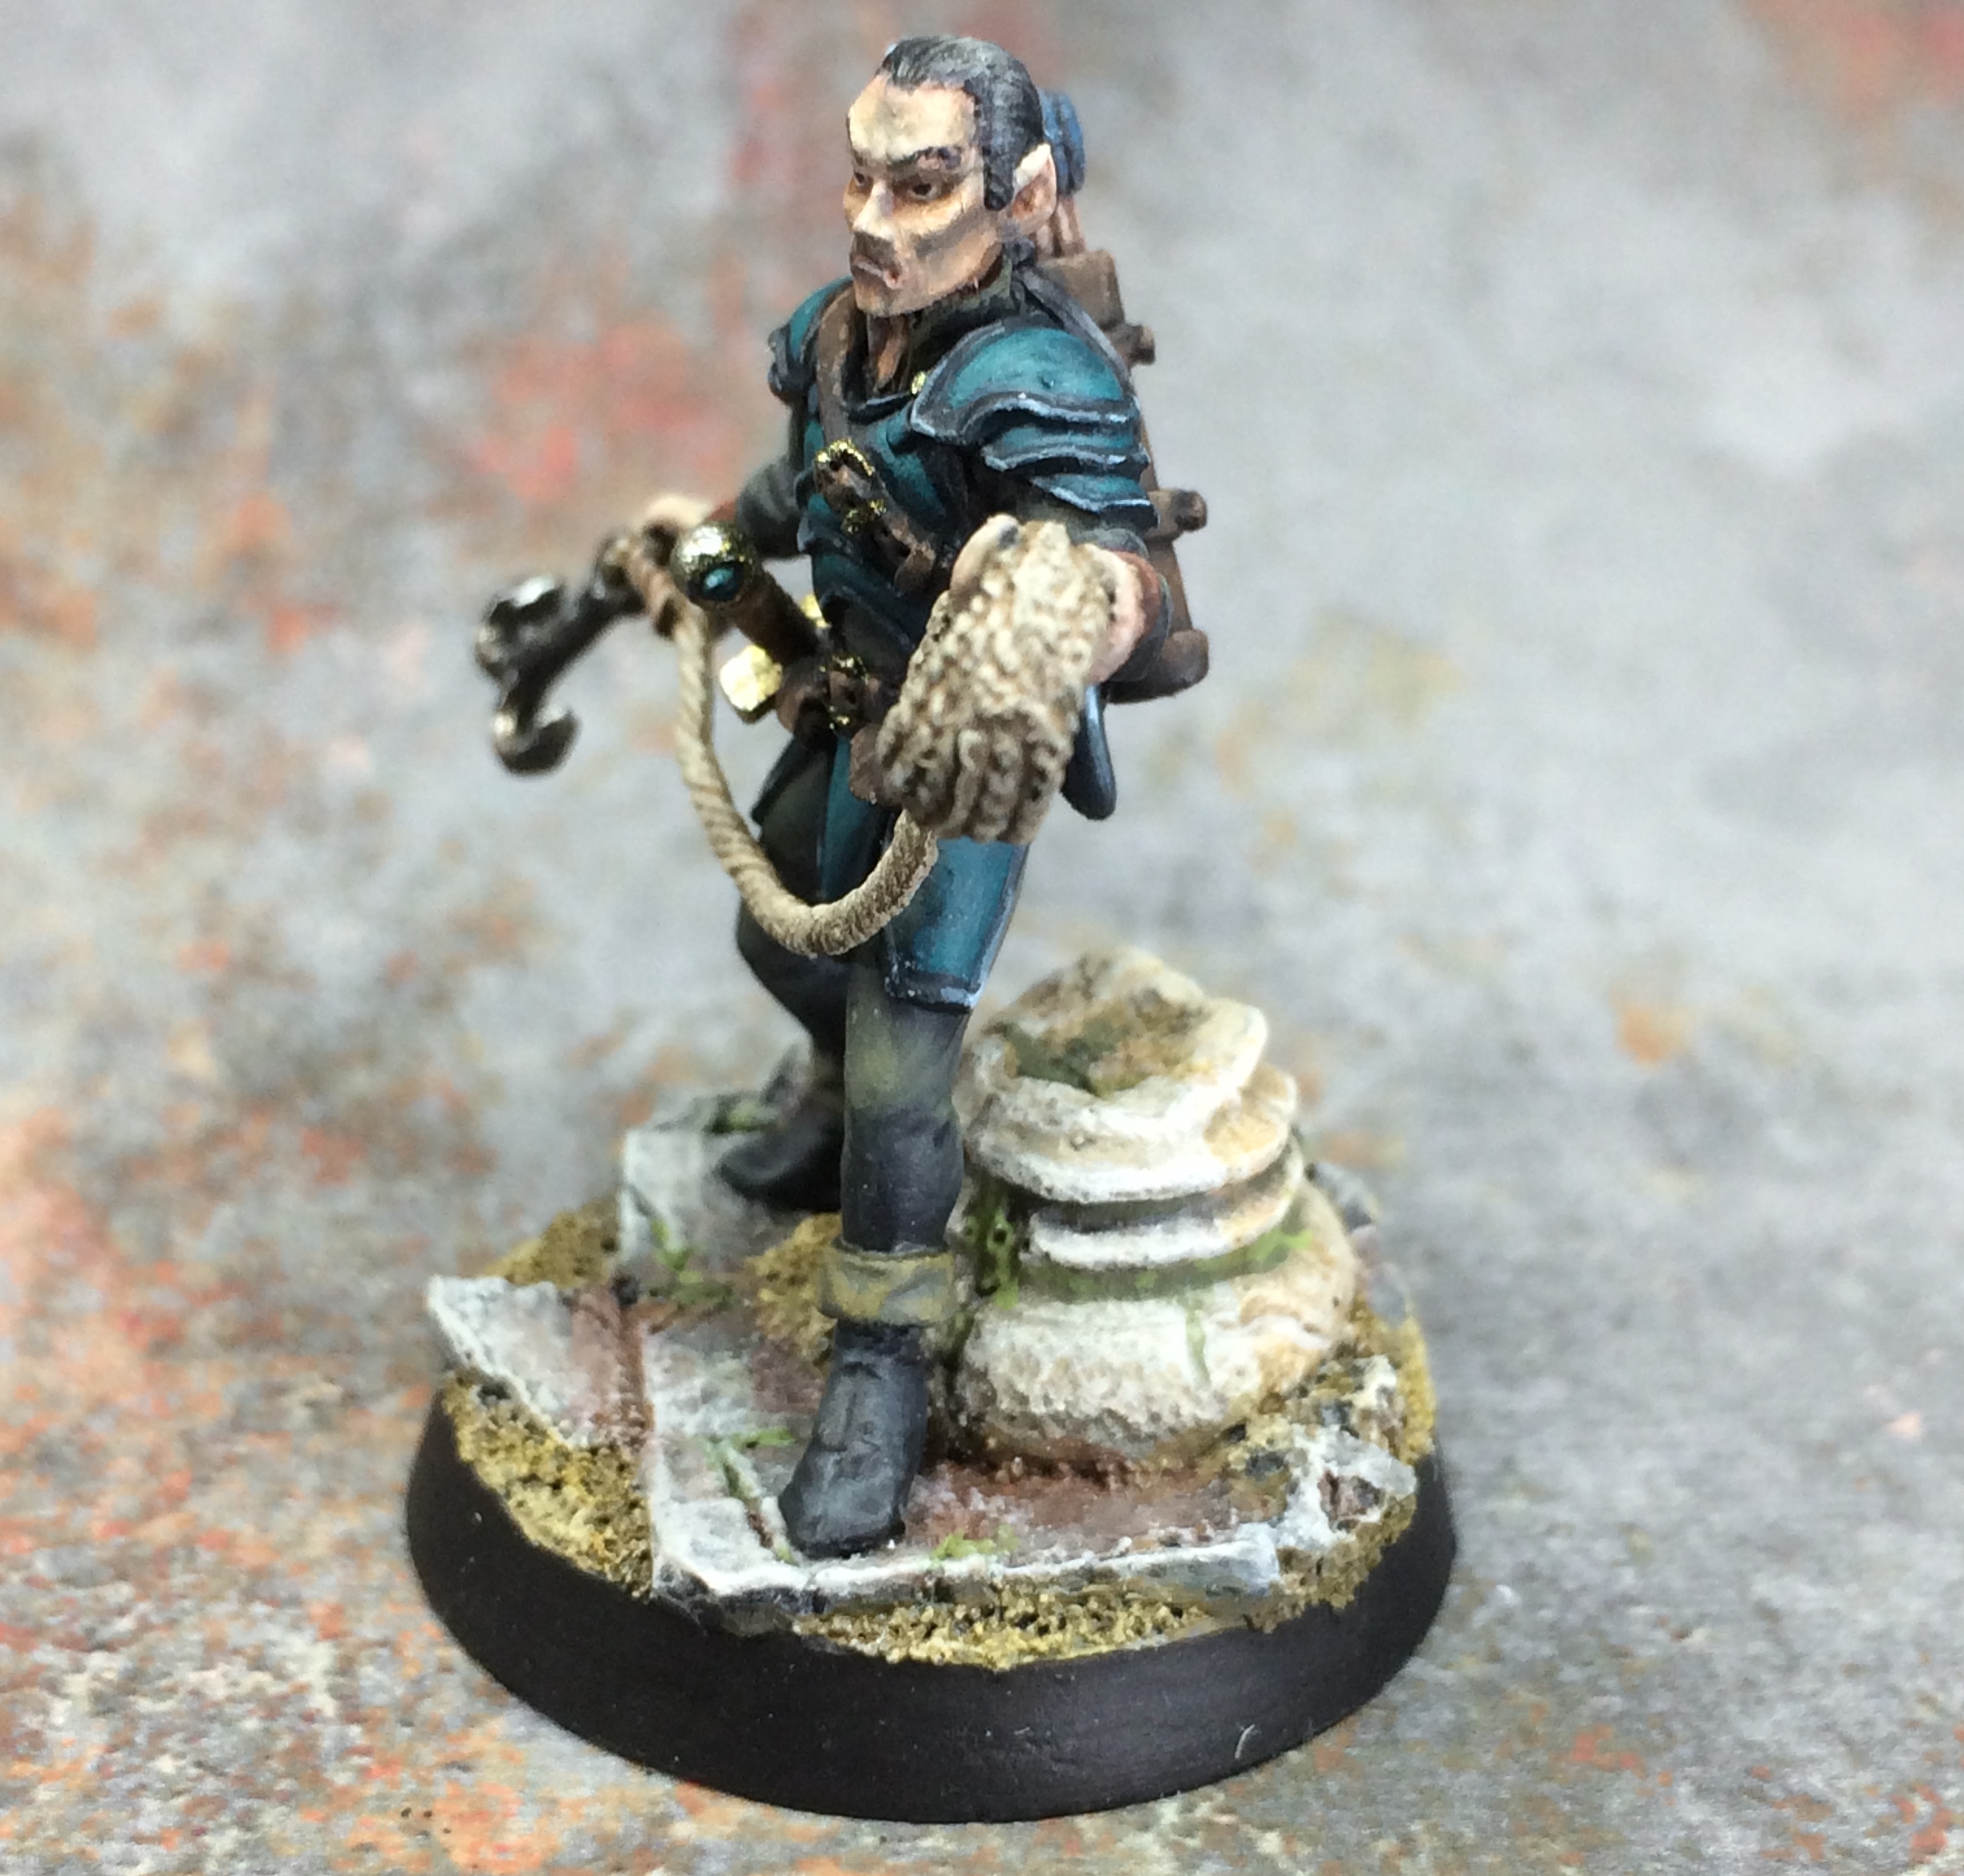
Finally got our 4th D’n’D party member and a few snaps taken!! And here he is – La’reean Tal, elf outcast, thief and all round grumpy git!!
He was a little trickier to paint than the previous three and once again I wanted to stick to a more natural and simple palette for him. He’s a thief – no bright bling or flasher colours for him! Unless he was wanting to get pinched by the Watch ofc! Miniature is from Otherworld again and the base from MicroArtStudio


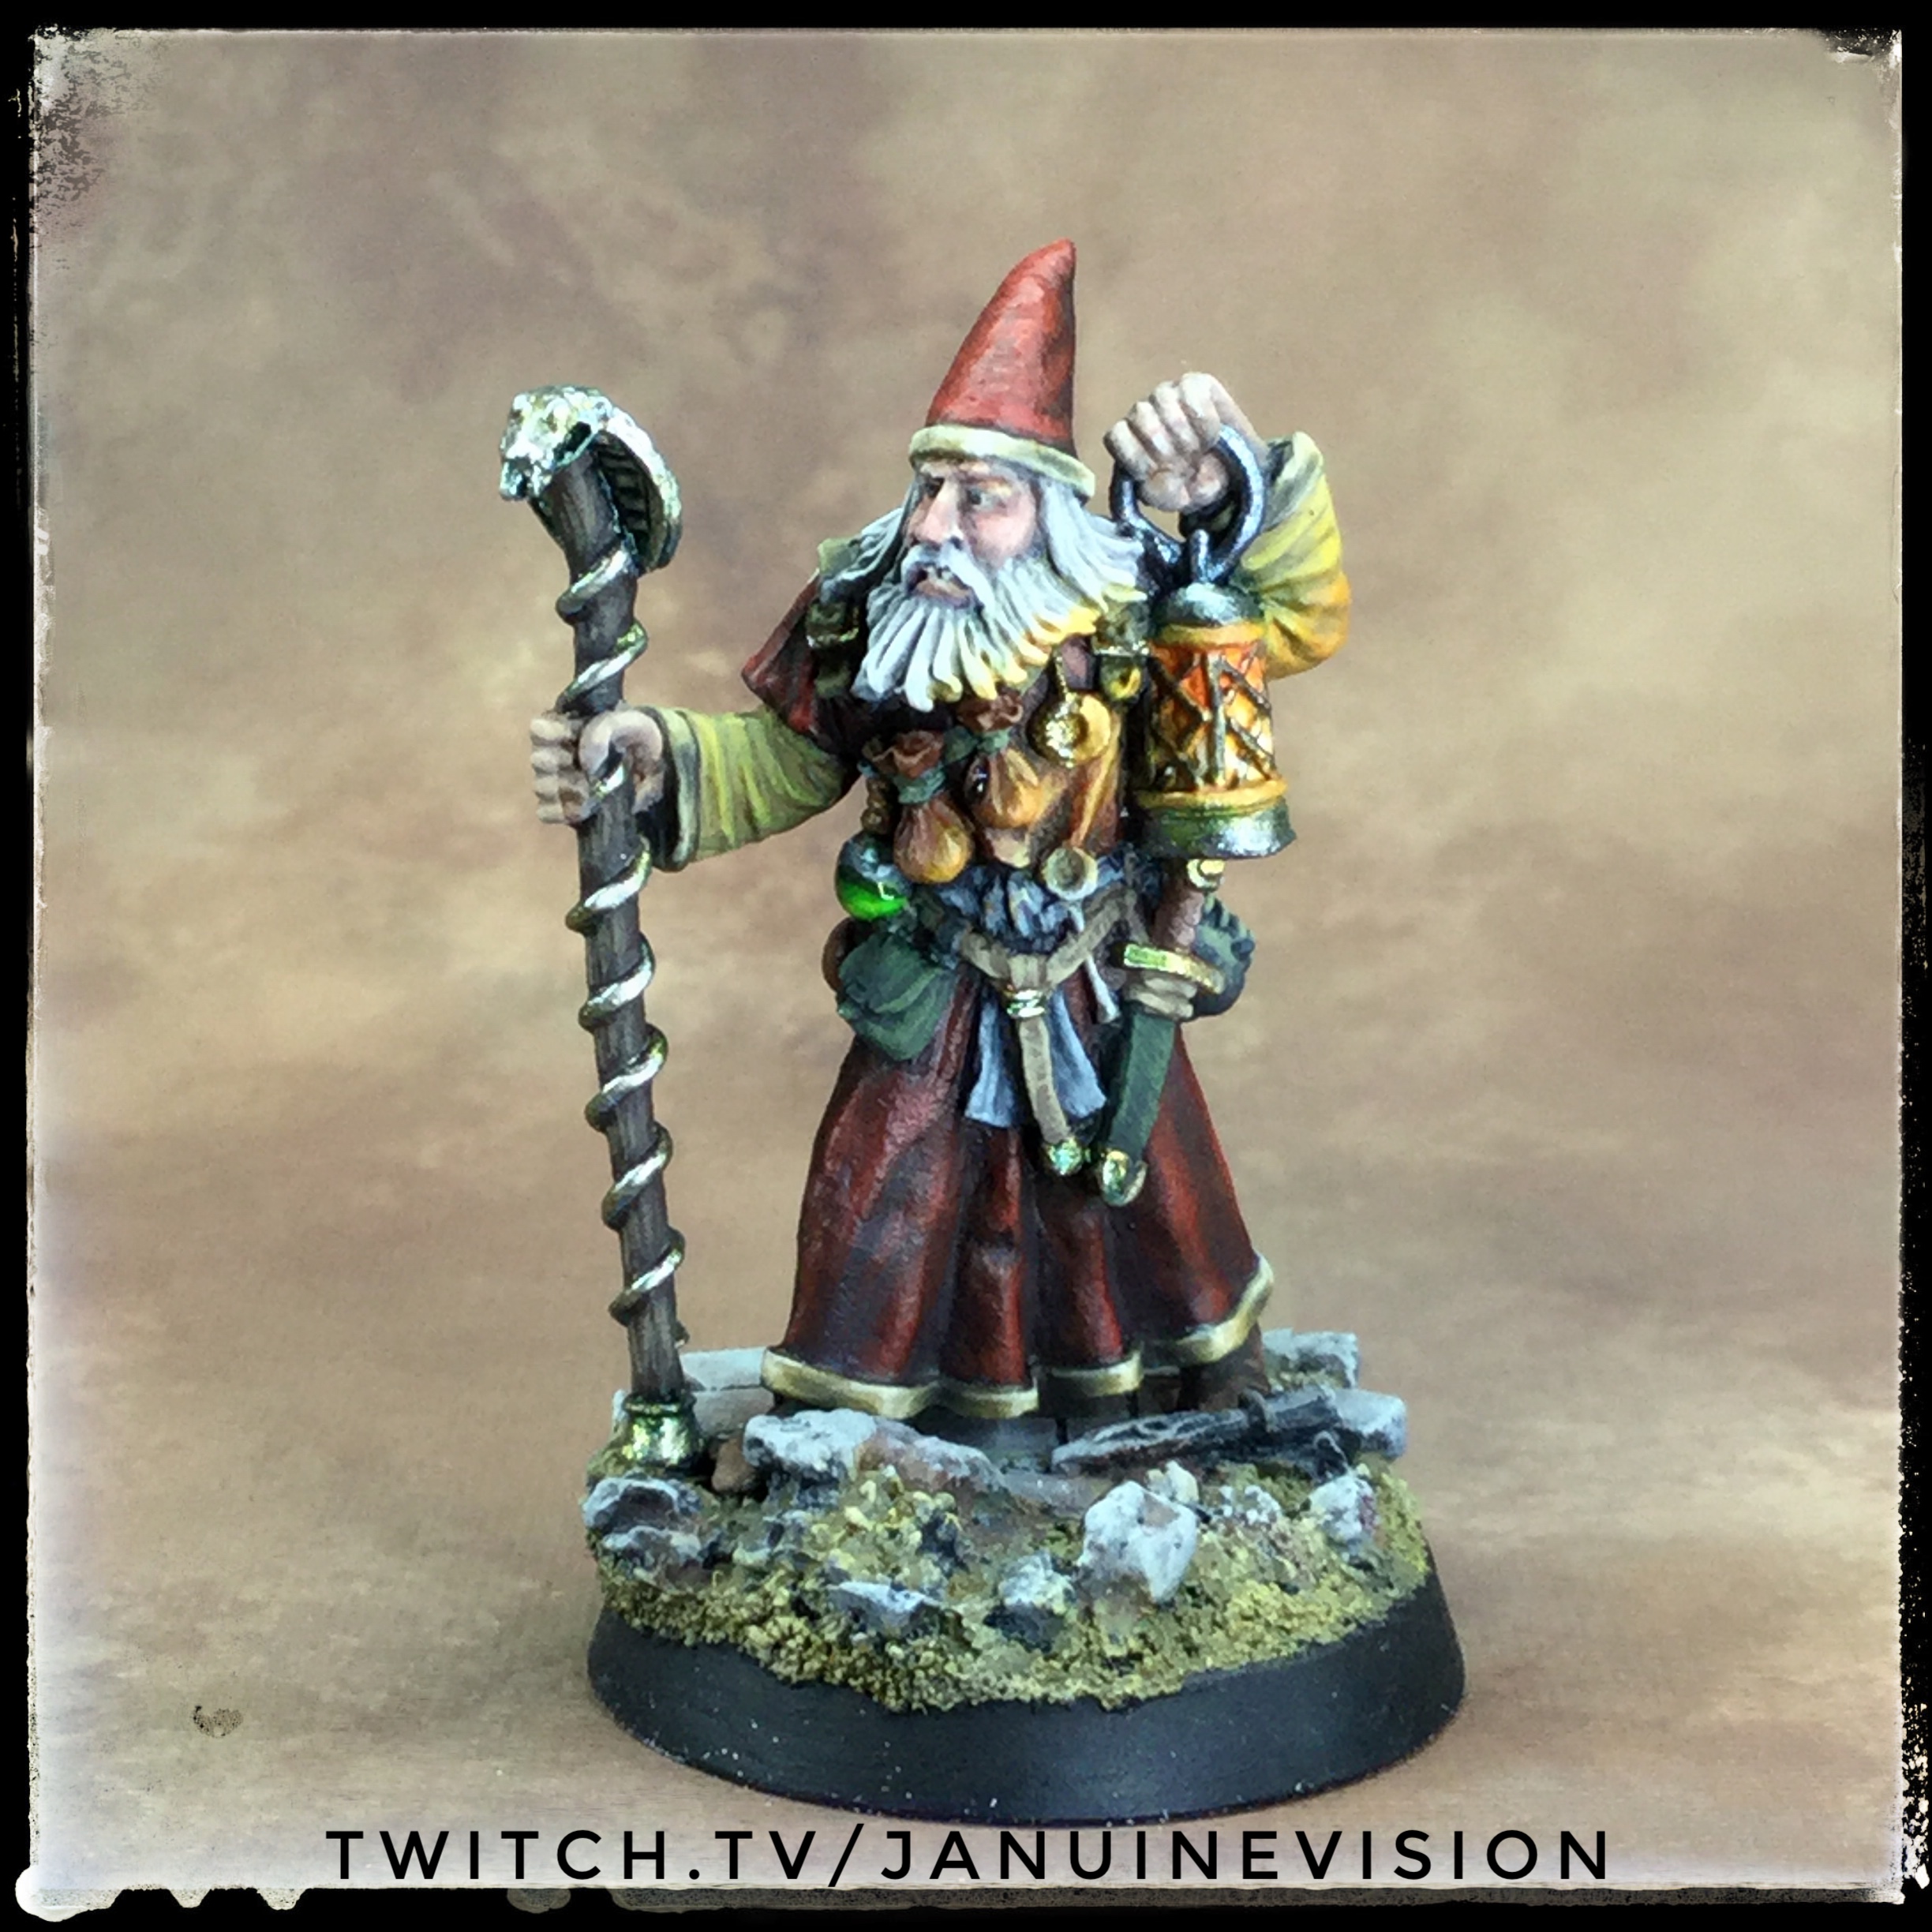
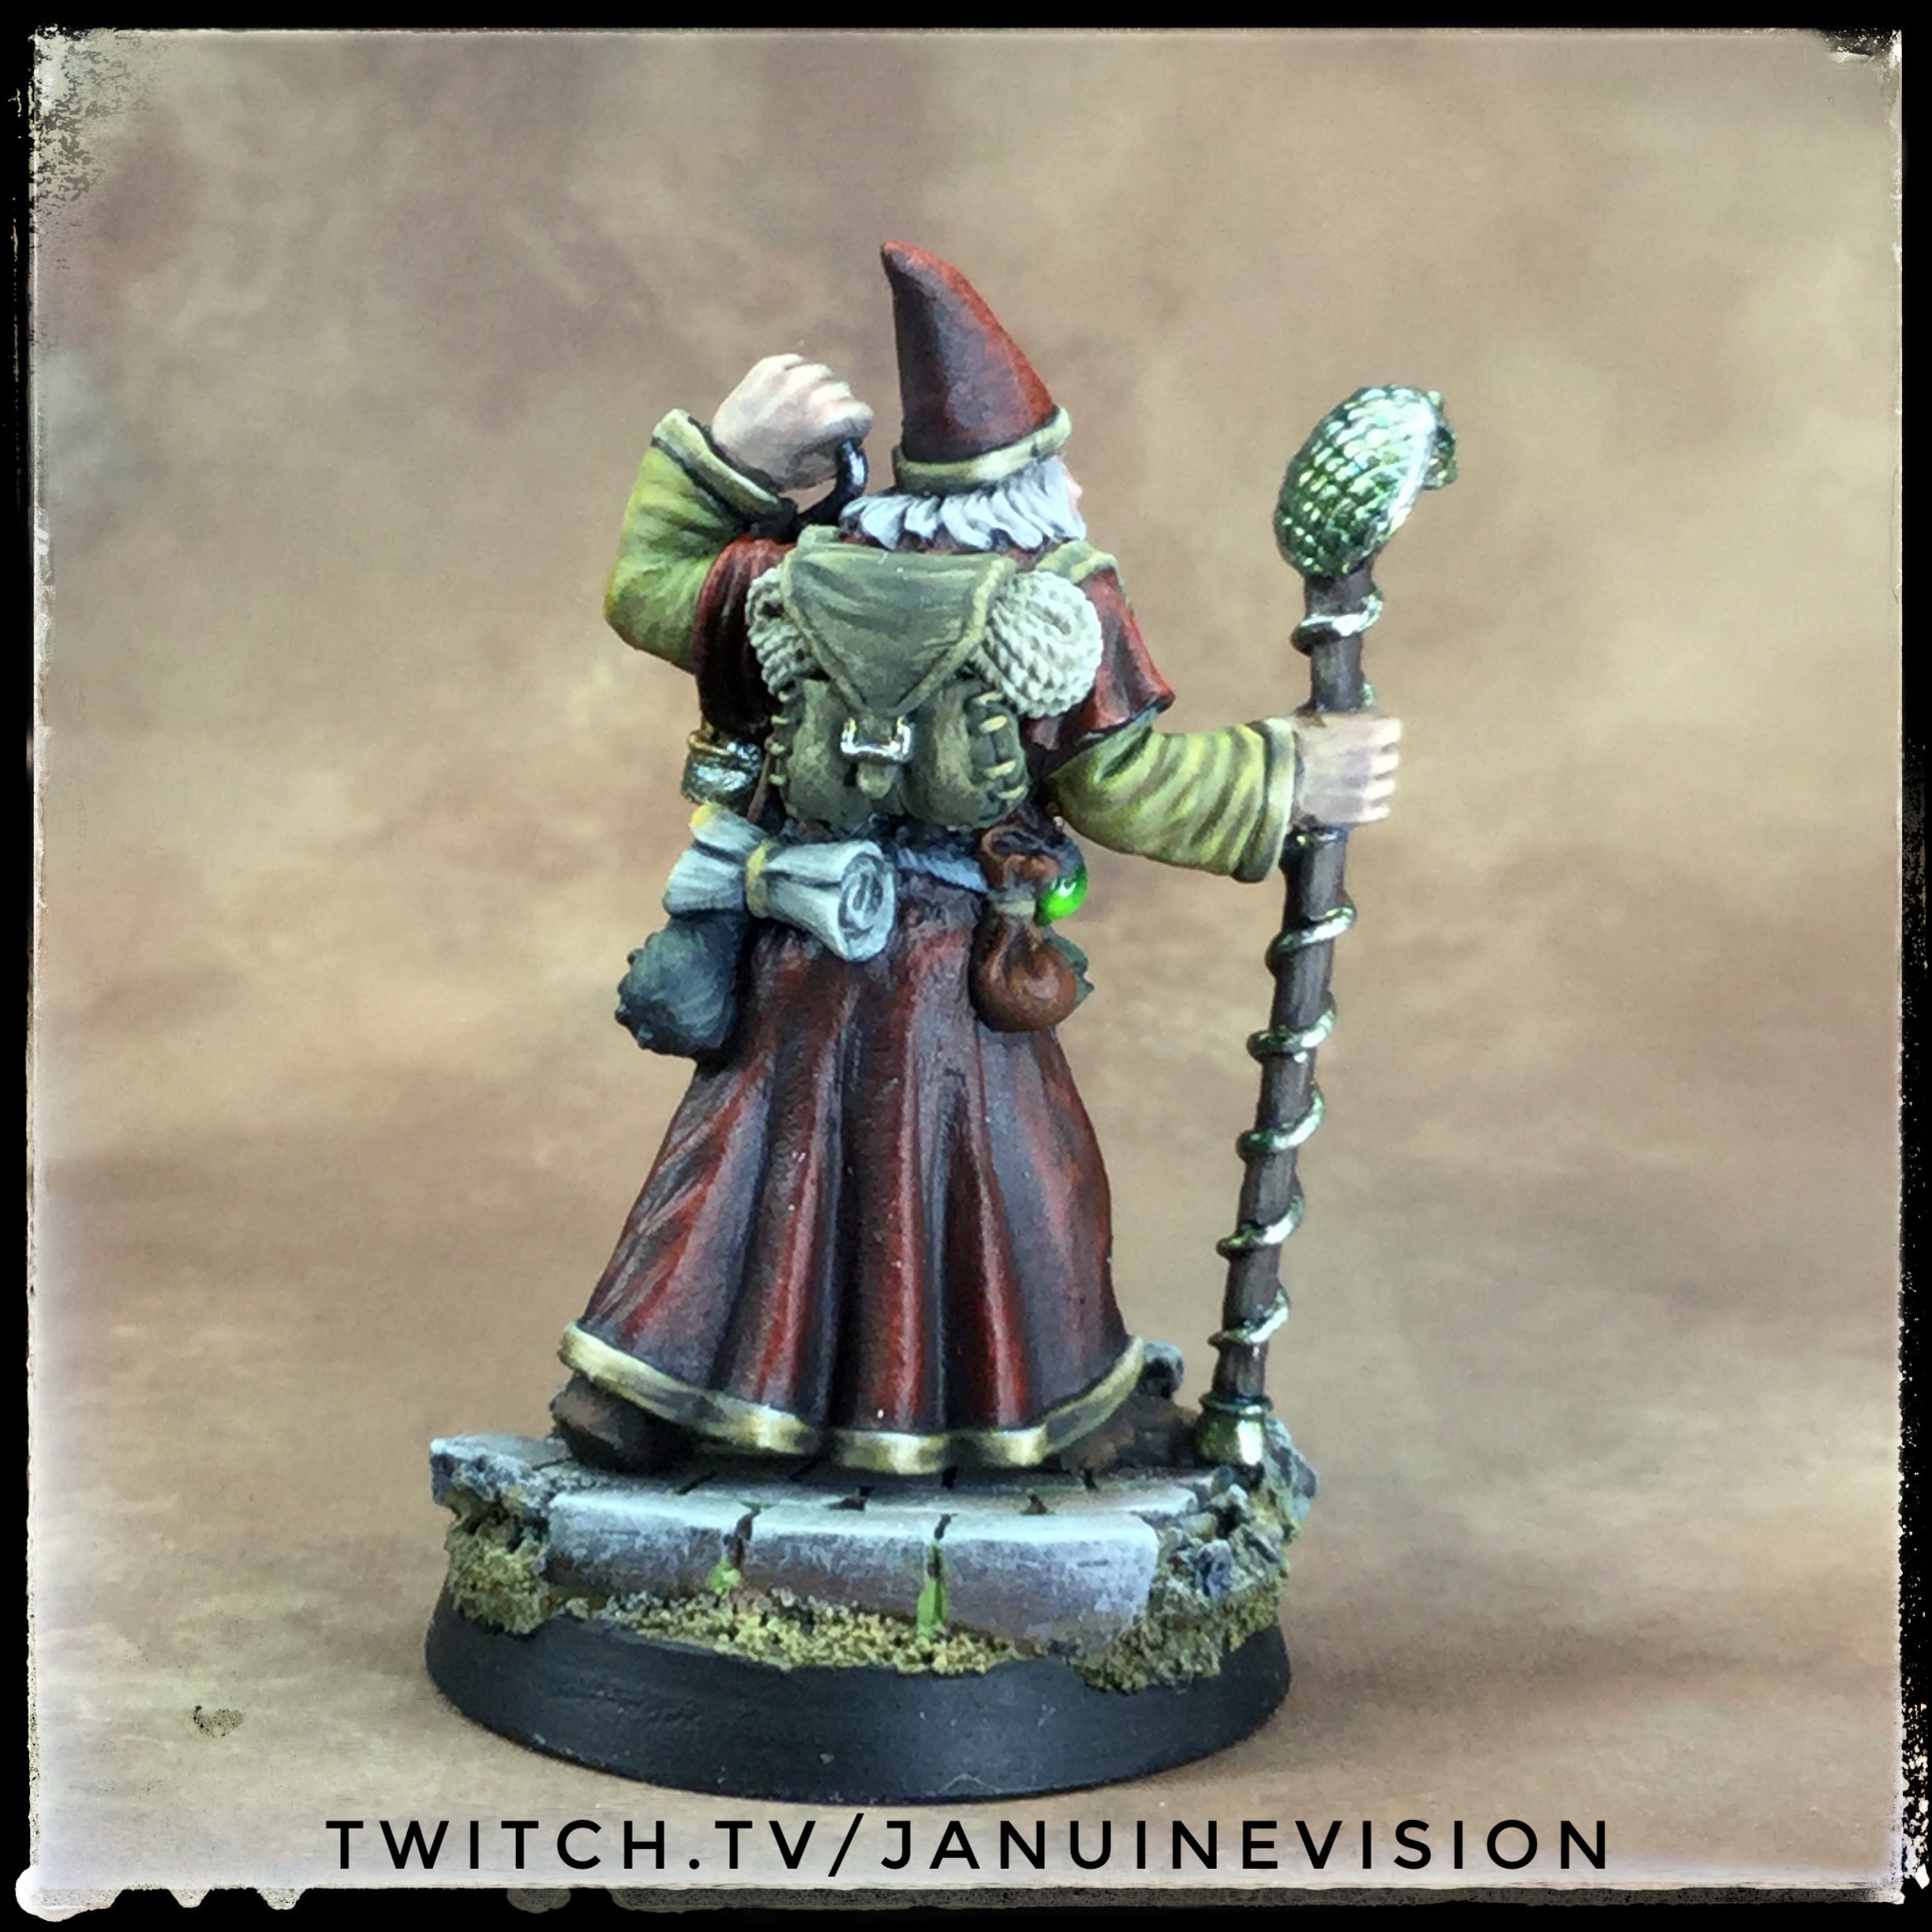
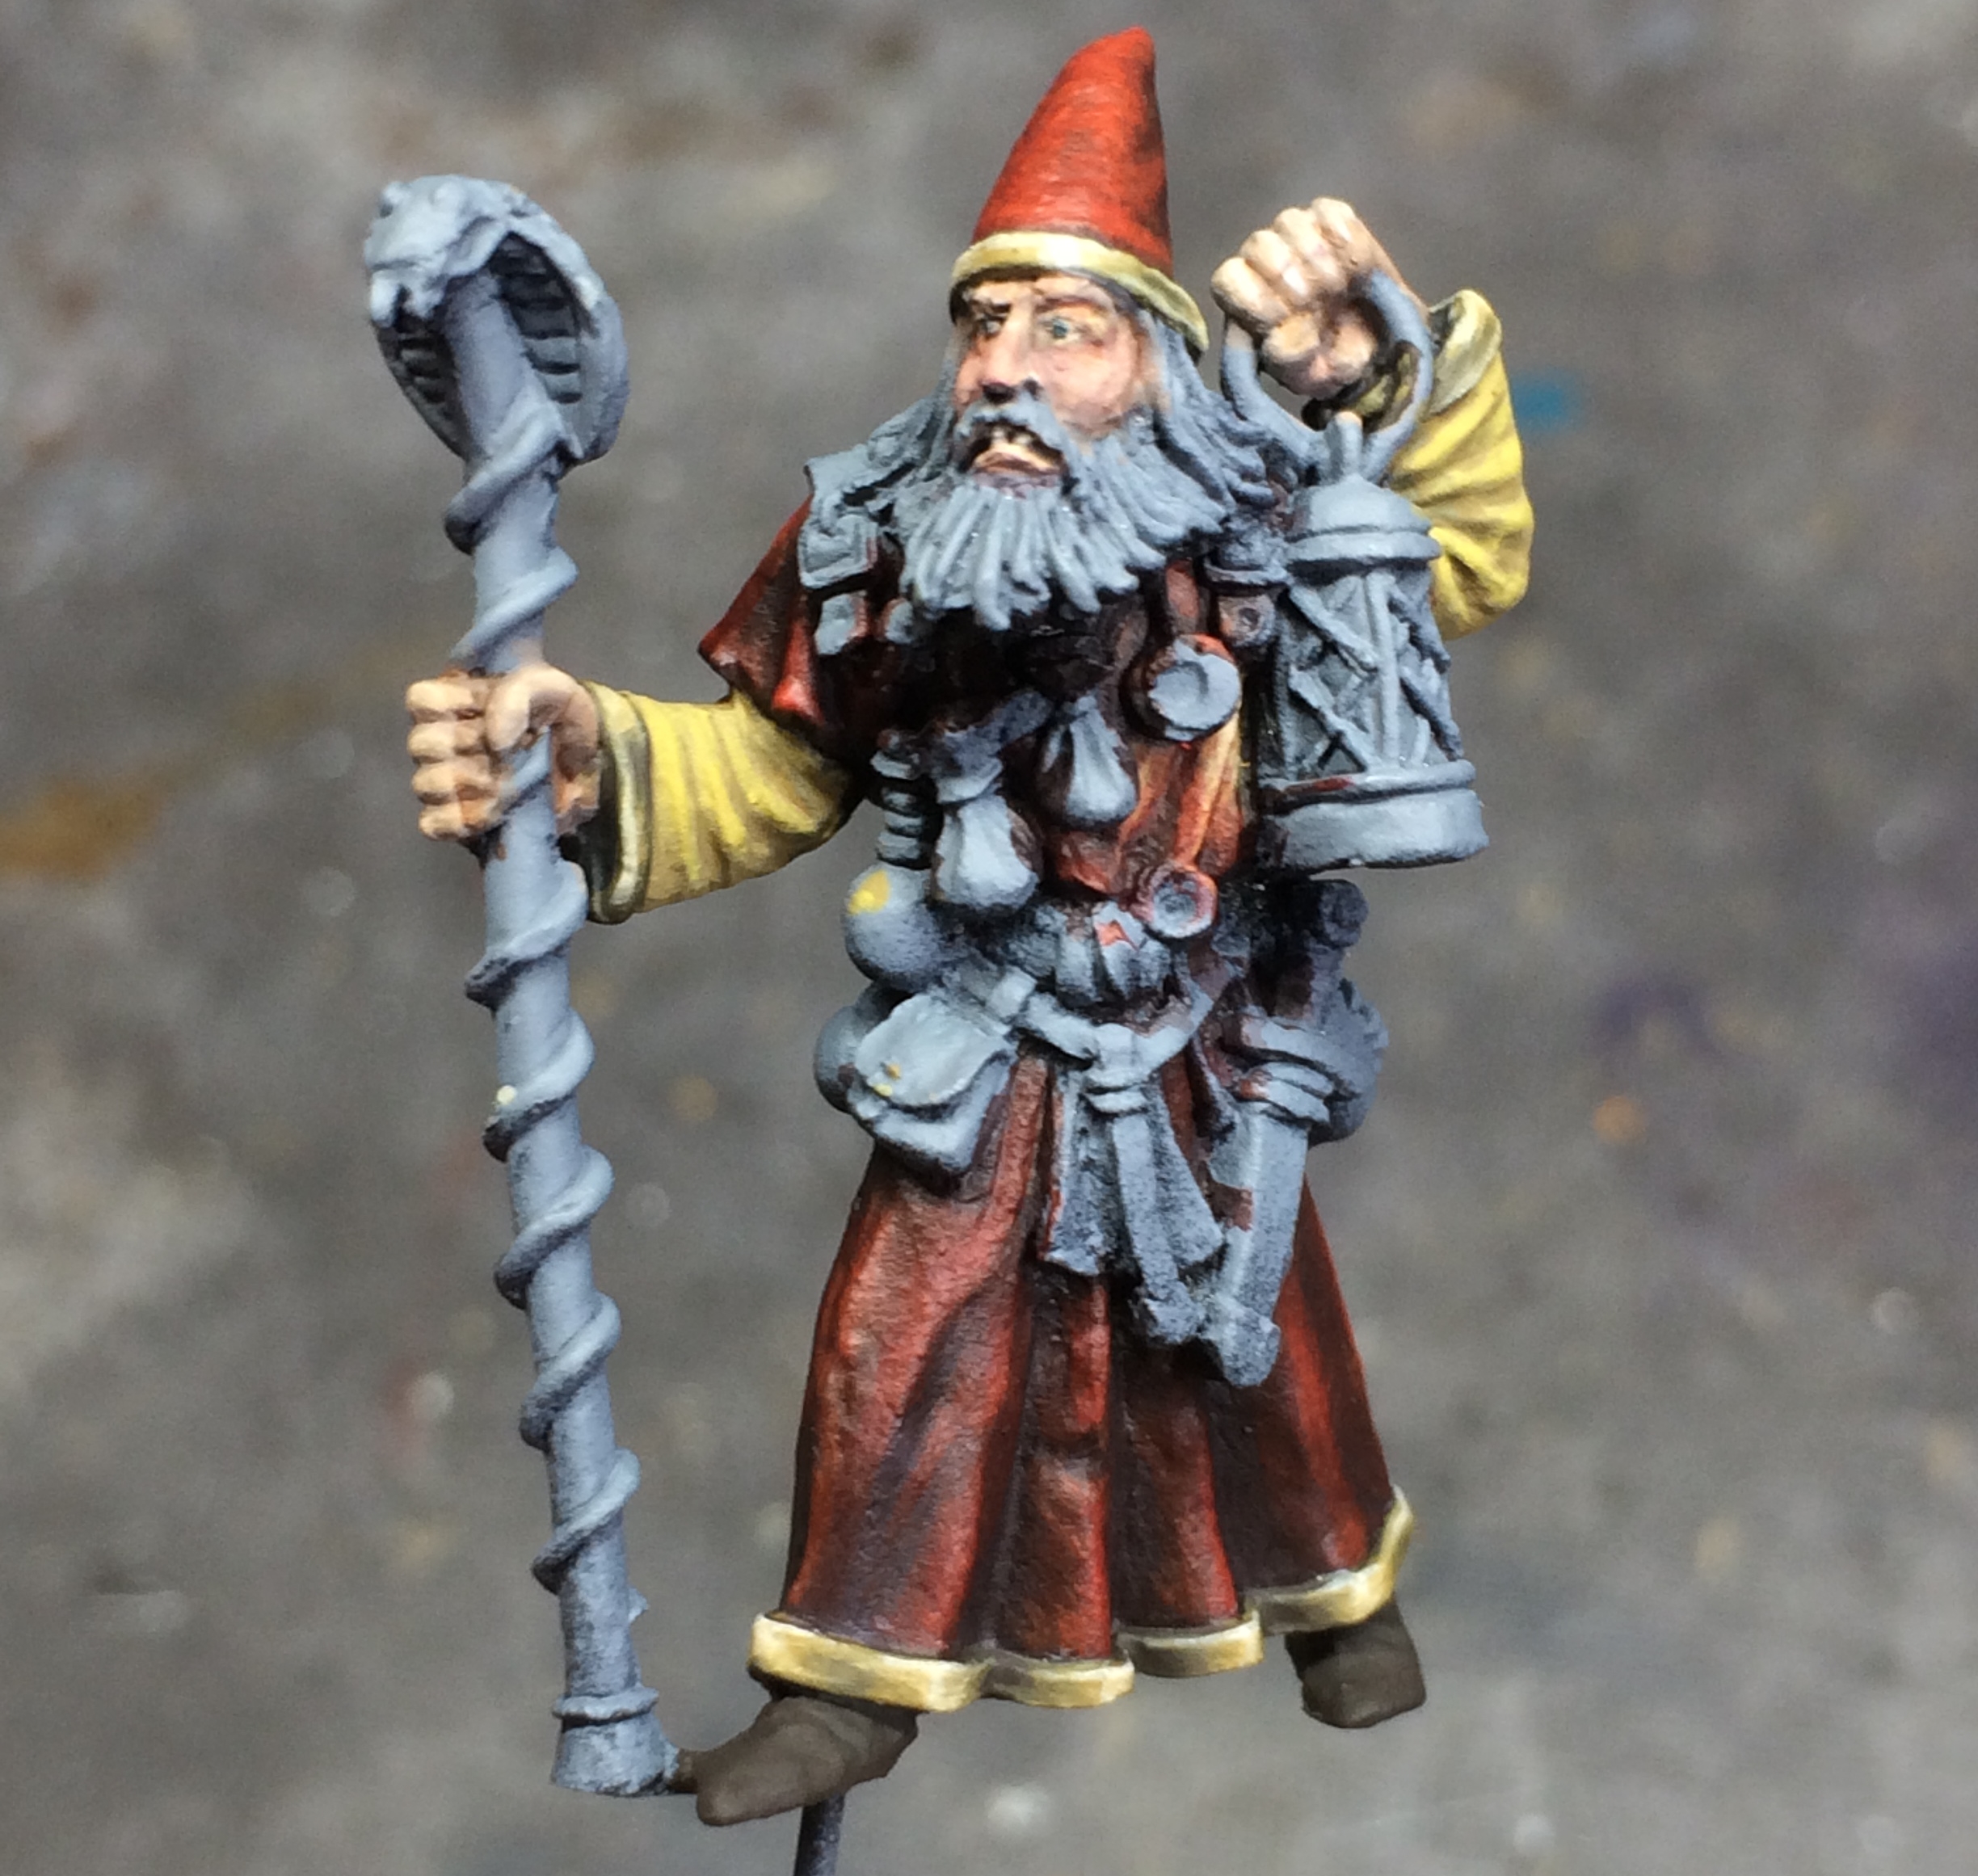
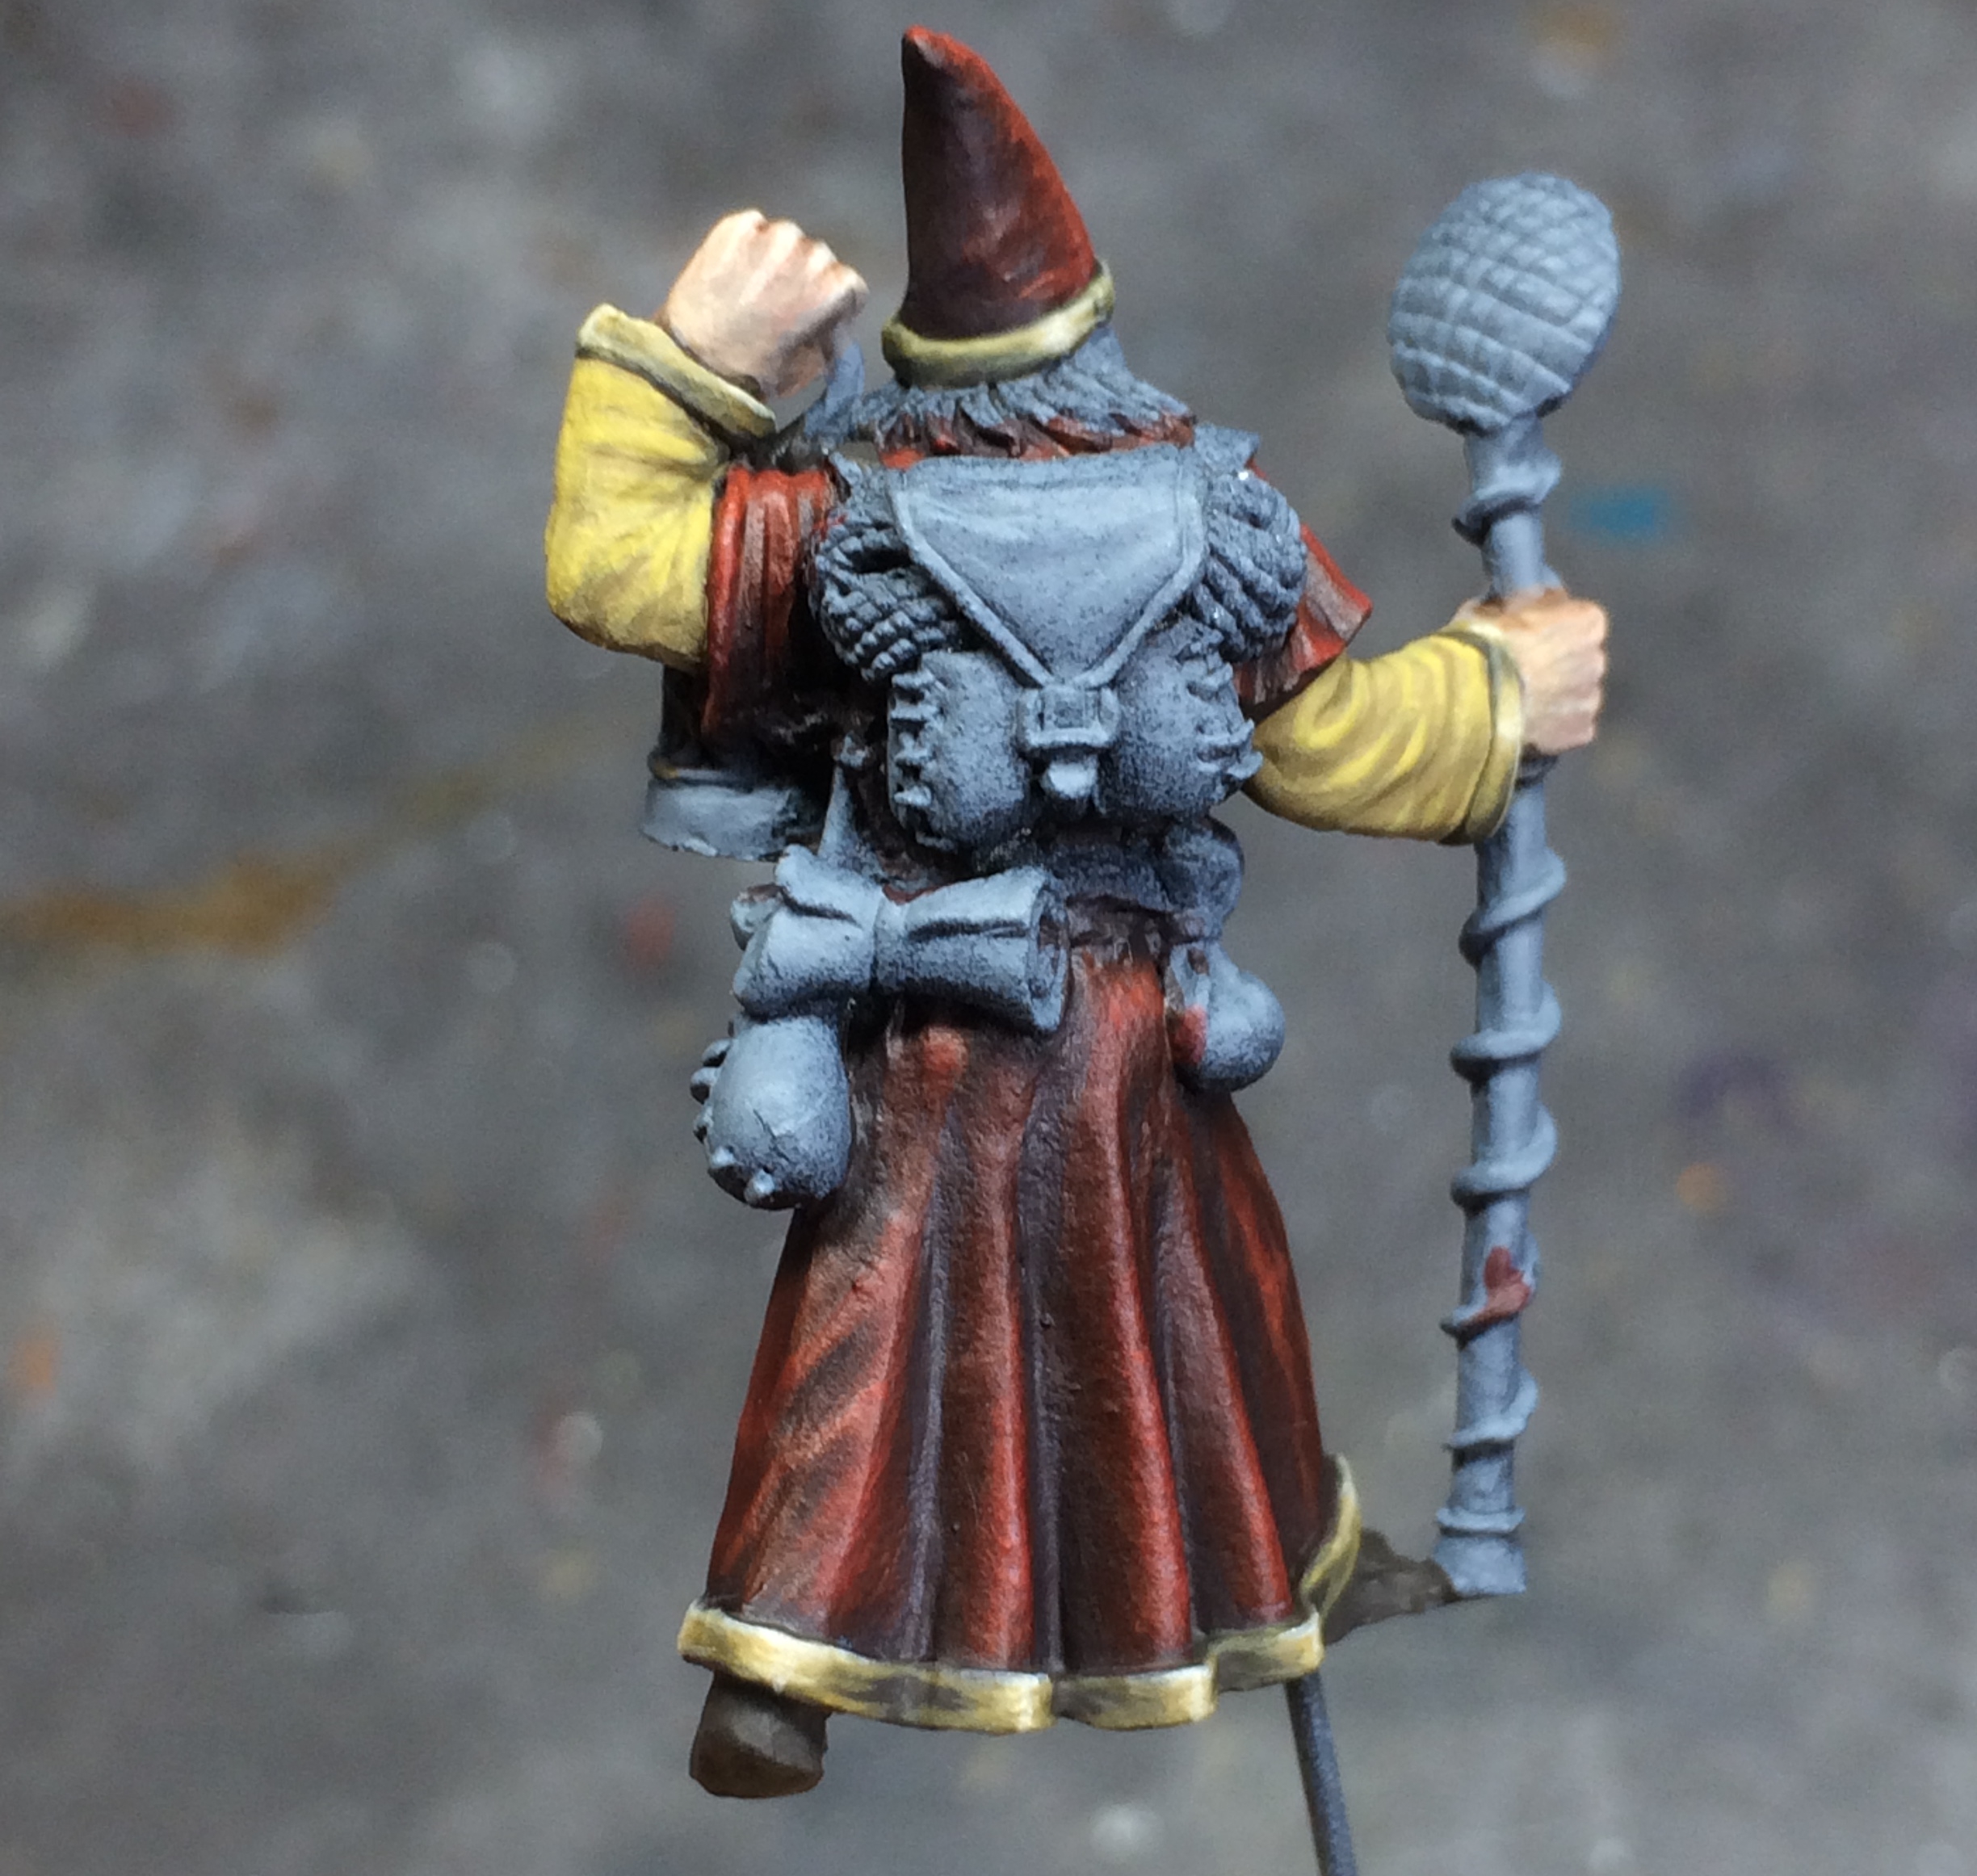
With La’reean finished, it’s onto our 5th and final of the party members. What D’n’D party would be complete without a magicuser?!
Colour choice was oddly a bit tricker with this one as I want him to fit in and be homogenous with the rest of the party but magic users usually seem to dressin quite pop colours. So I went with the trad red but toned it way back and worked in the darker range of the colour. Starting with a brown/black and gradually bringing in a rich dark red. Only using a brighter red for the apices of the folds and the front of the hat.
Still lots to do but should hopefully have him done in time for the birthday stream and giveaway


![Play WW2 Commando Operations With Butcher & Bolt [Updated]](https://images.beastsofwar.com/2026/03/relaunch-600-338.jpg)


