Legio Mortis – Adeptus Titanicus


Recommendations: 138
About the Project
Games Workshop Adeptus Titanicus, miniatures and terrain build and paint.
Related Game: Adeptus Titanicus
Related Company: Games Workshop
Related Genre: Science Fiction
This Project is Active
Journey to Mars
I haven’t been able to make a lot of progress on the Legio. I’ve instead been busy prepping for an upcoming Con next weekend where I’ll be DM’ing the Adventures League 2018 Open (8+ hour mod). It’s 77 pages long and I don’t want to disappoint. I was able to come up with a plan for the torso to fix the issues detailed below but I’ll save that for the next update.
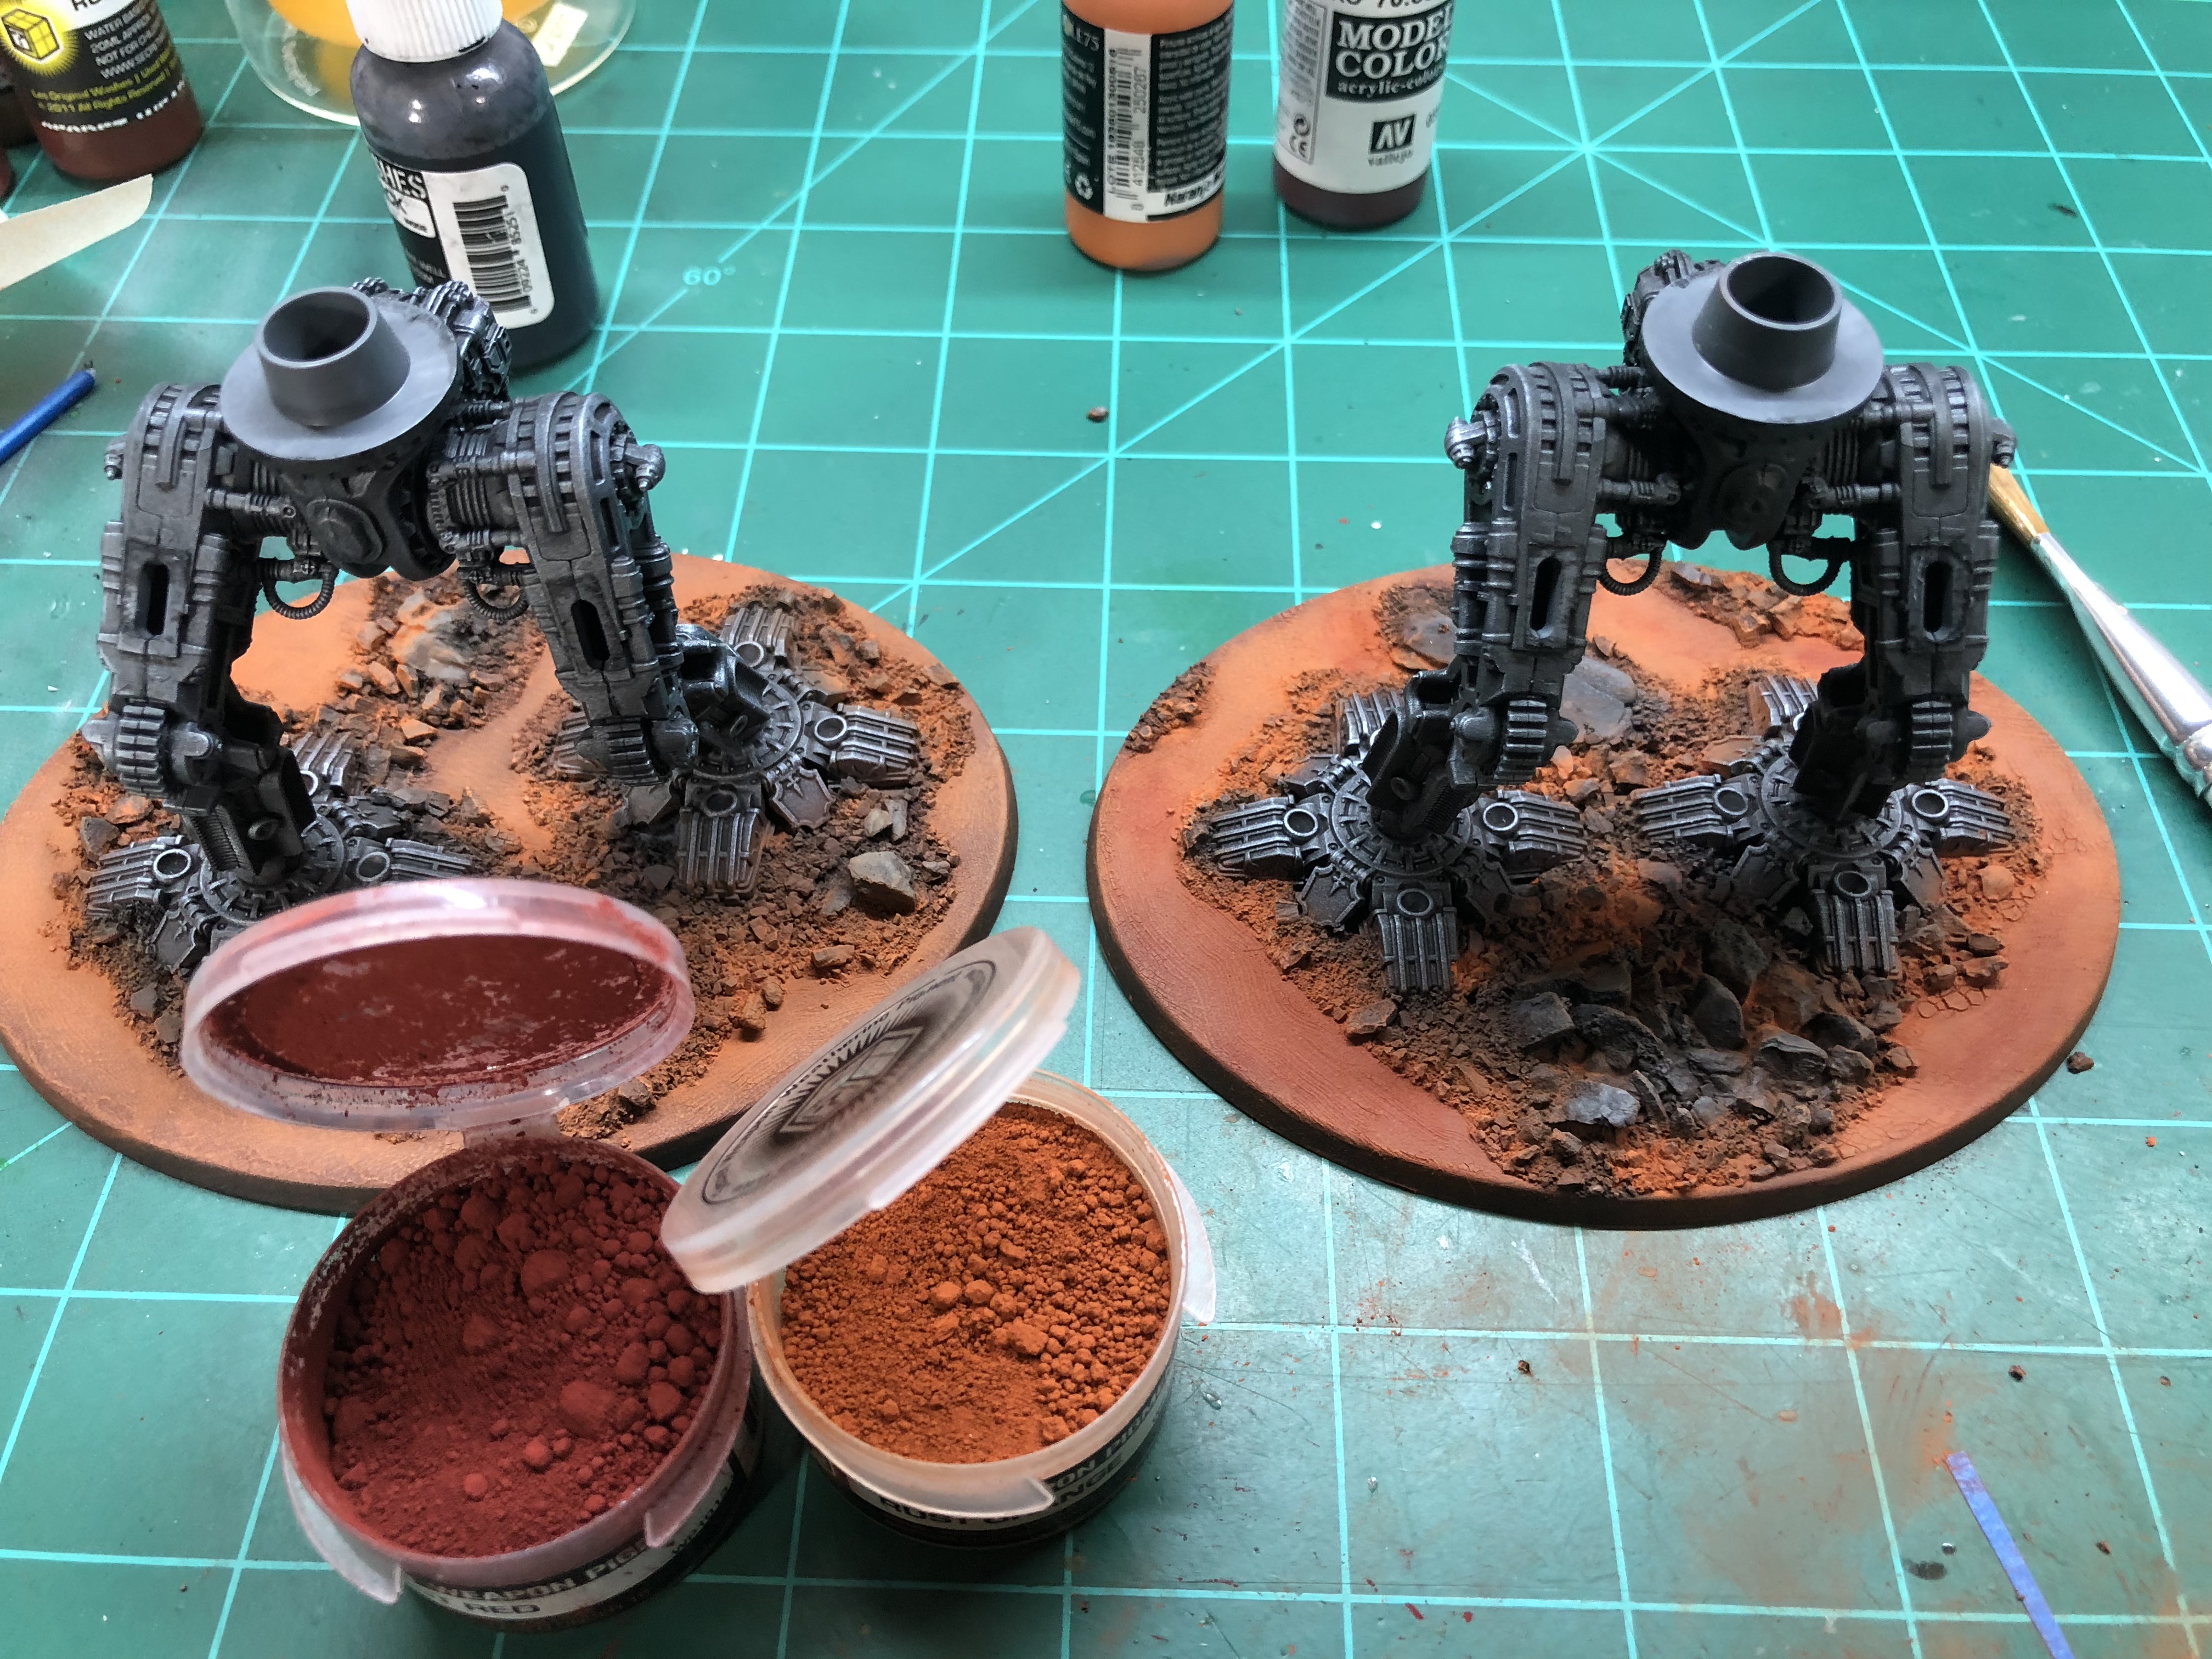
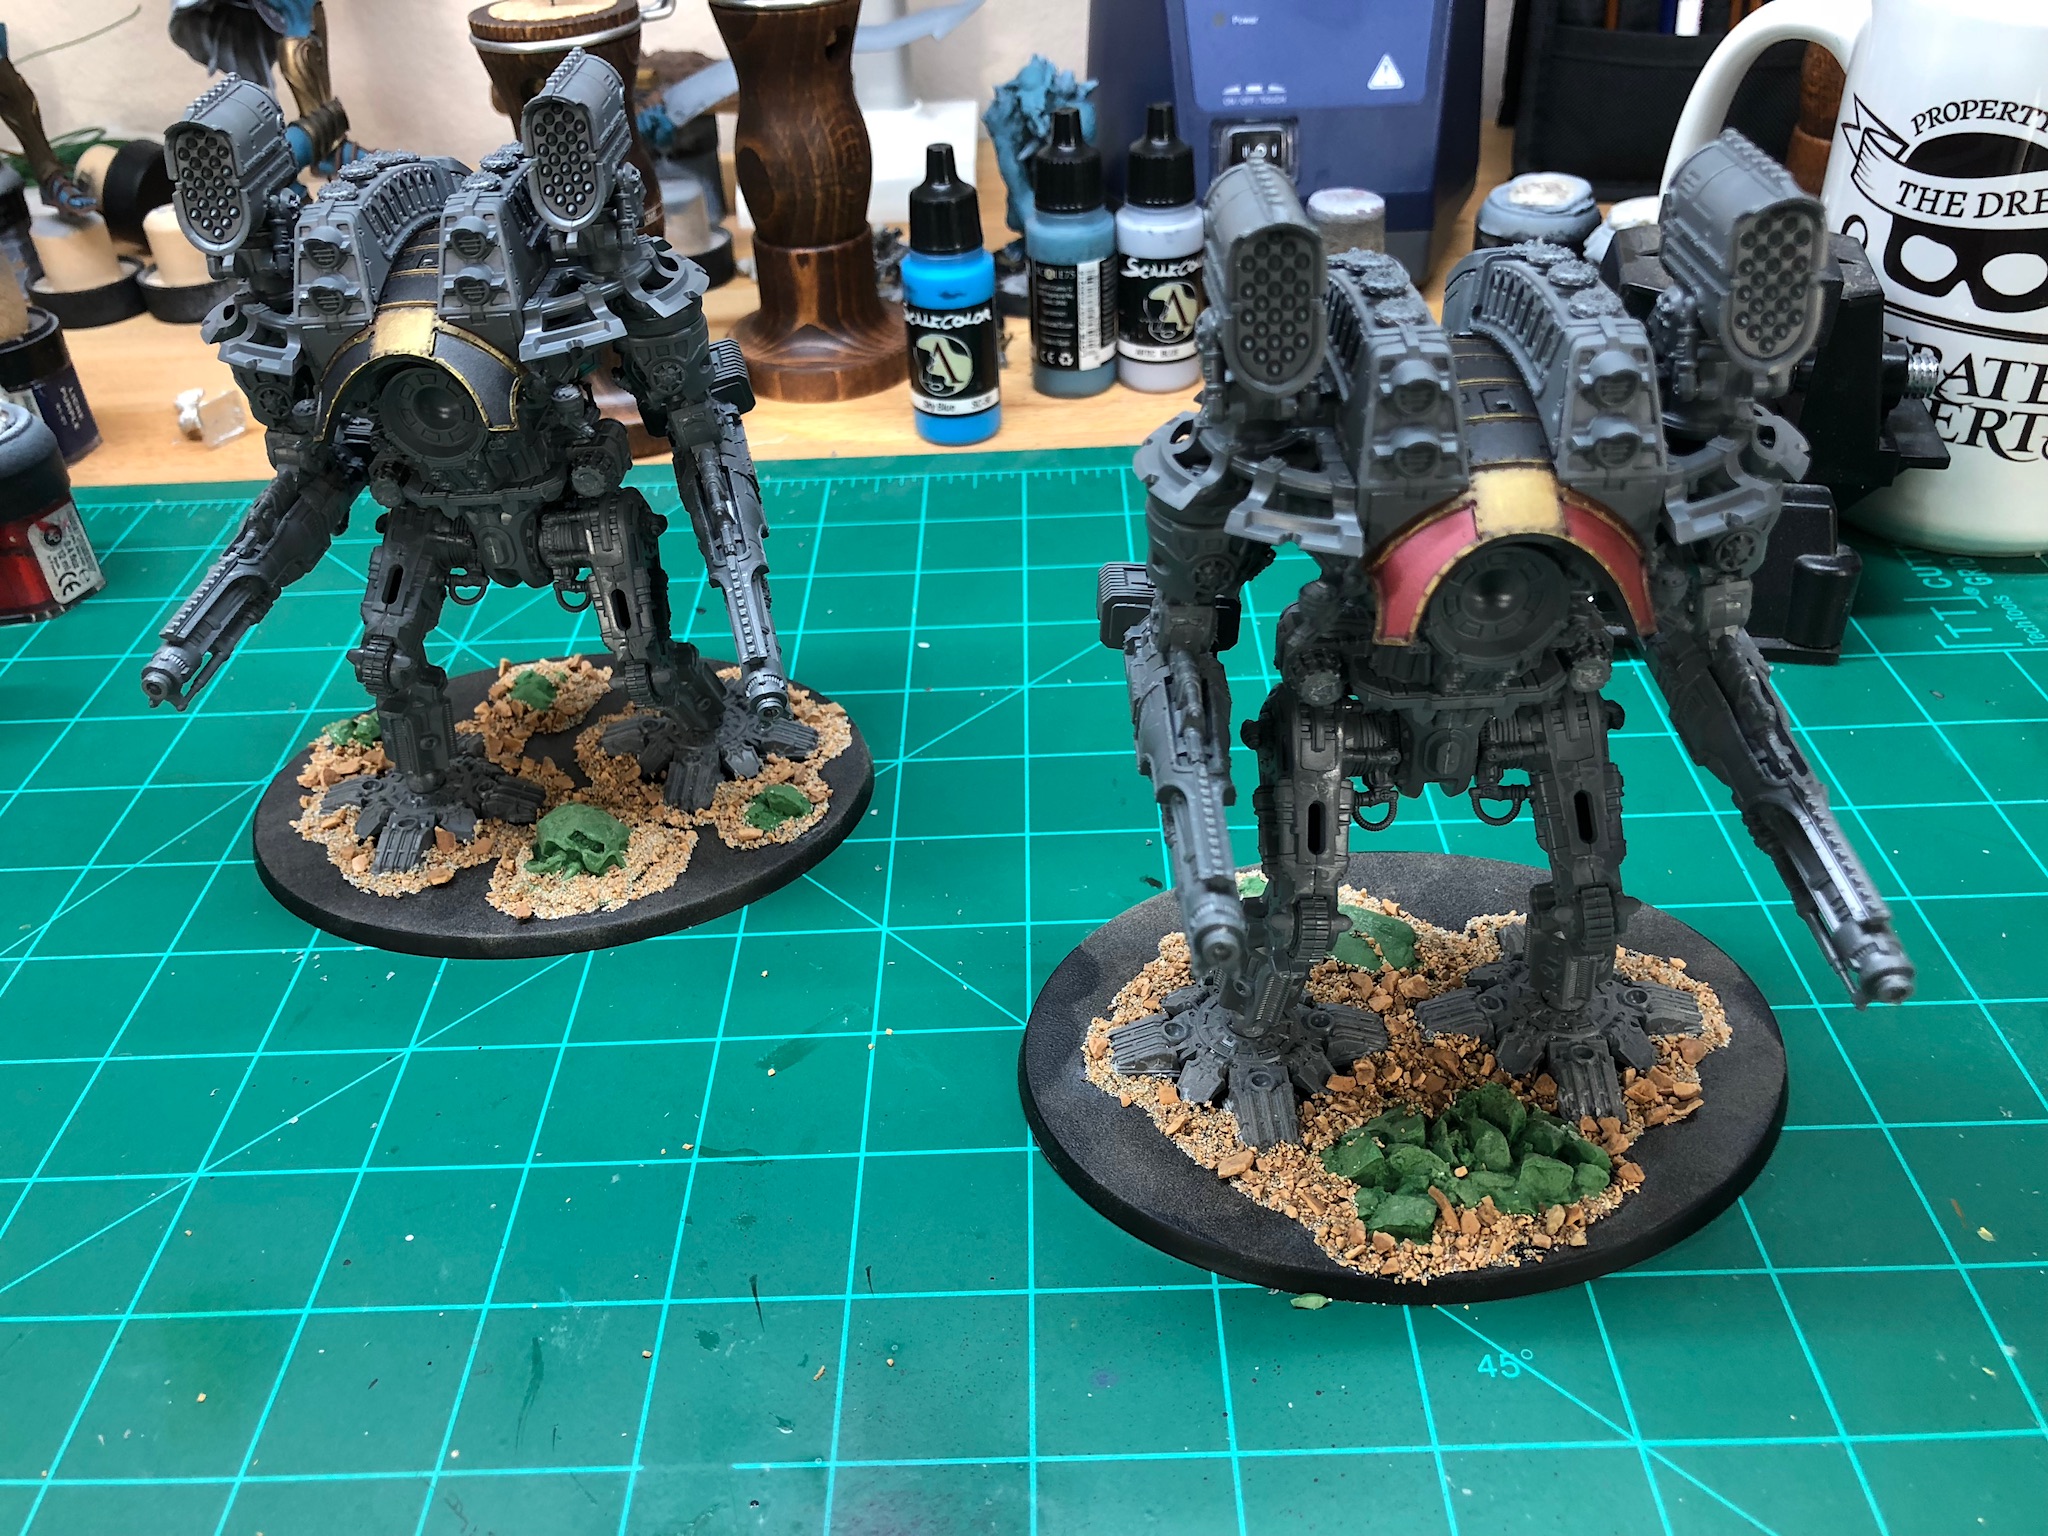
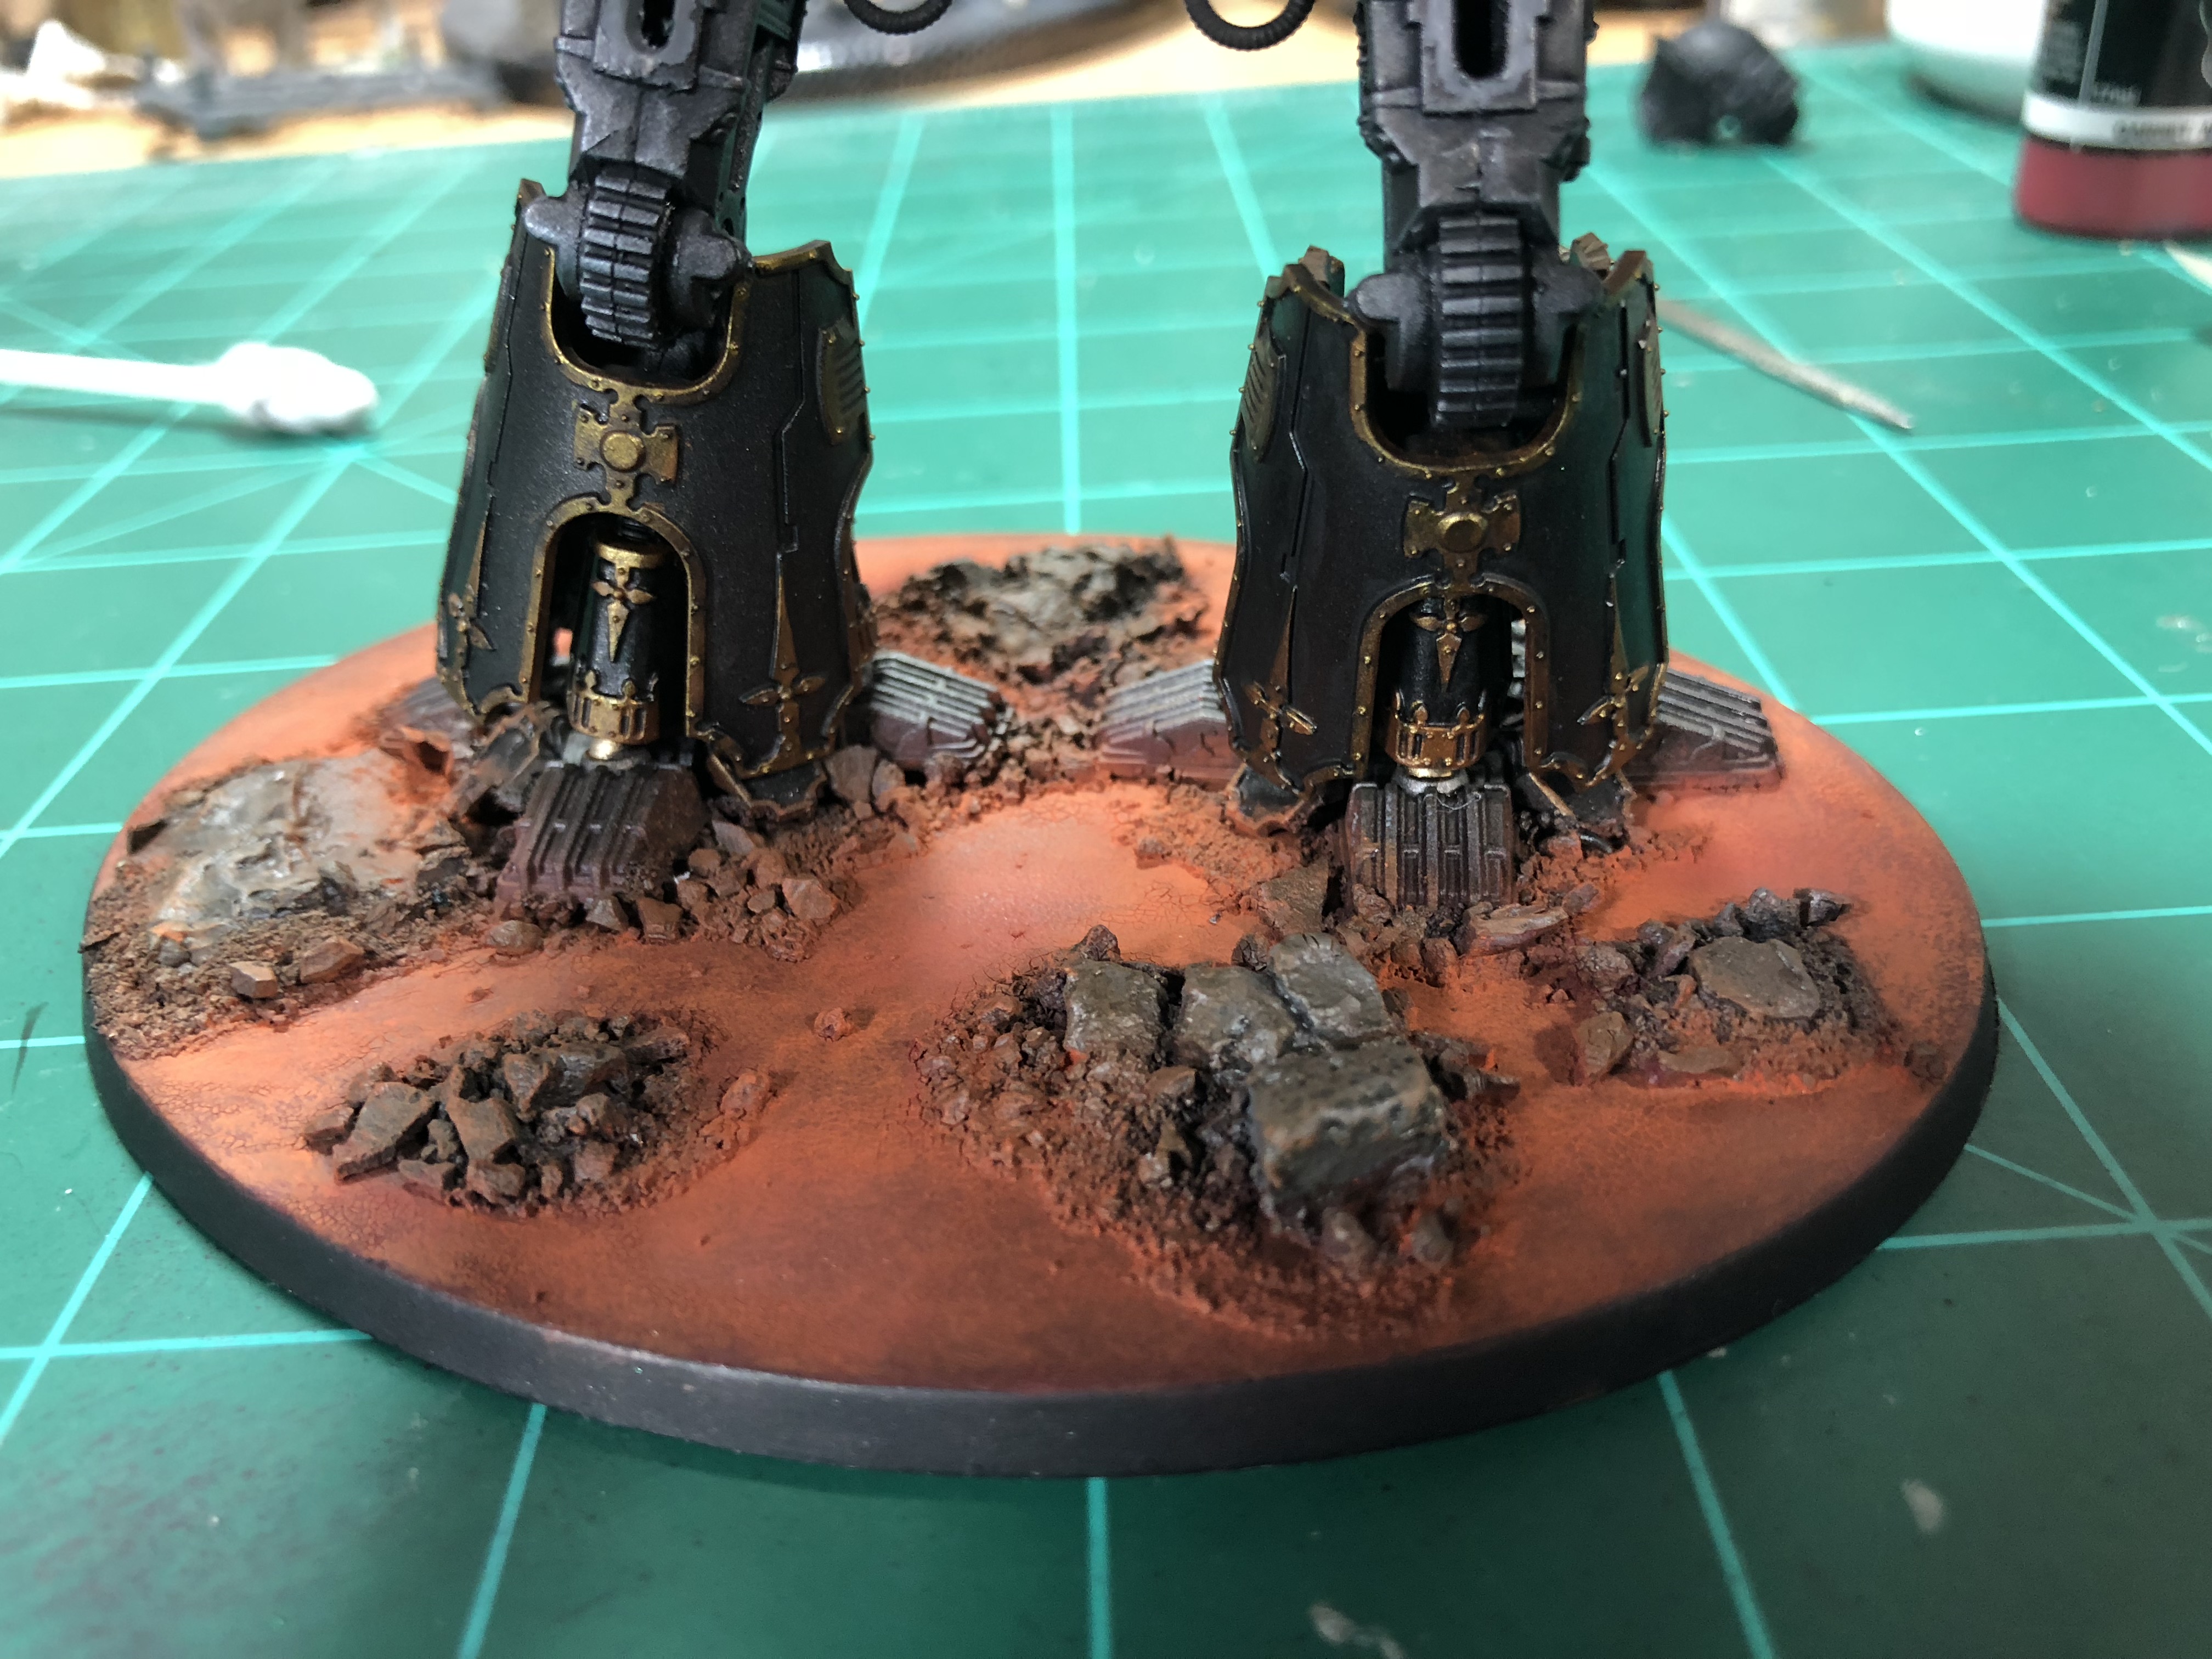
Since a few people commented on the basing for Titan Alpha, I’ve decided to document it a bit better this go-around.
First: Texturing, You’ll see that below, but a bit of text on the subject. I have a number of interesting textures I’ve collected, I utilize heat activated molding compound to make negative molds on them. I did that with the large rock structures and the Reaver head. Plunk them down with super glue and use superglue and flocking texture to make some disturbed earth. Then I used some crackle paint (not well, I need more practice with this stuff) on the flat areas.
Second: Prime, then build up the model. I want it painted so that when I do the next steps I can naturally dust over that paint job. I also painted the rocks here, some darkish grey with a green-grey highlight. Scale75 Graphene Grey with Secret Weapon Concrete wash as a glaze.
Third: Spray a Deep Red down as a base coat for the.. Base. This is Vallejo Model Black Red.
Forth: Drybrush an Orange. In this case, Scale75 Mars Orange
Fifth: Smother it in Orange Pigment Powder. Secret Weapon Orange Rust
Sixth: Mix in a bit of Red Pigment, I hate flat colors. Secret Weapon Red Rust
Seventh: Spray some fixer, paint the base edge black. I also painted the Reaver head, somewhat fun.
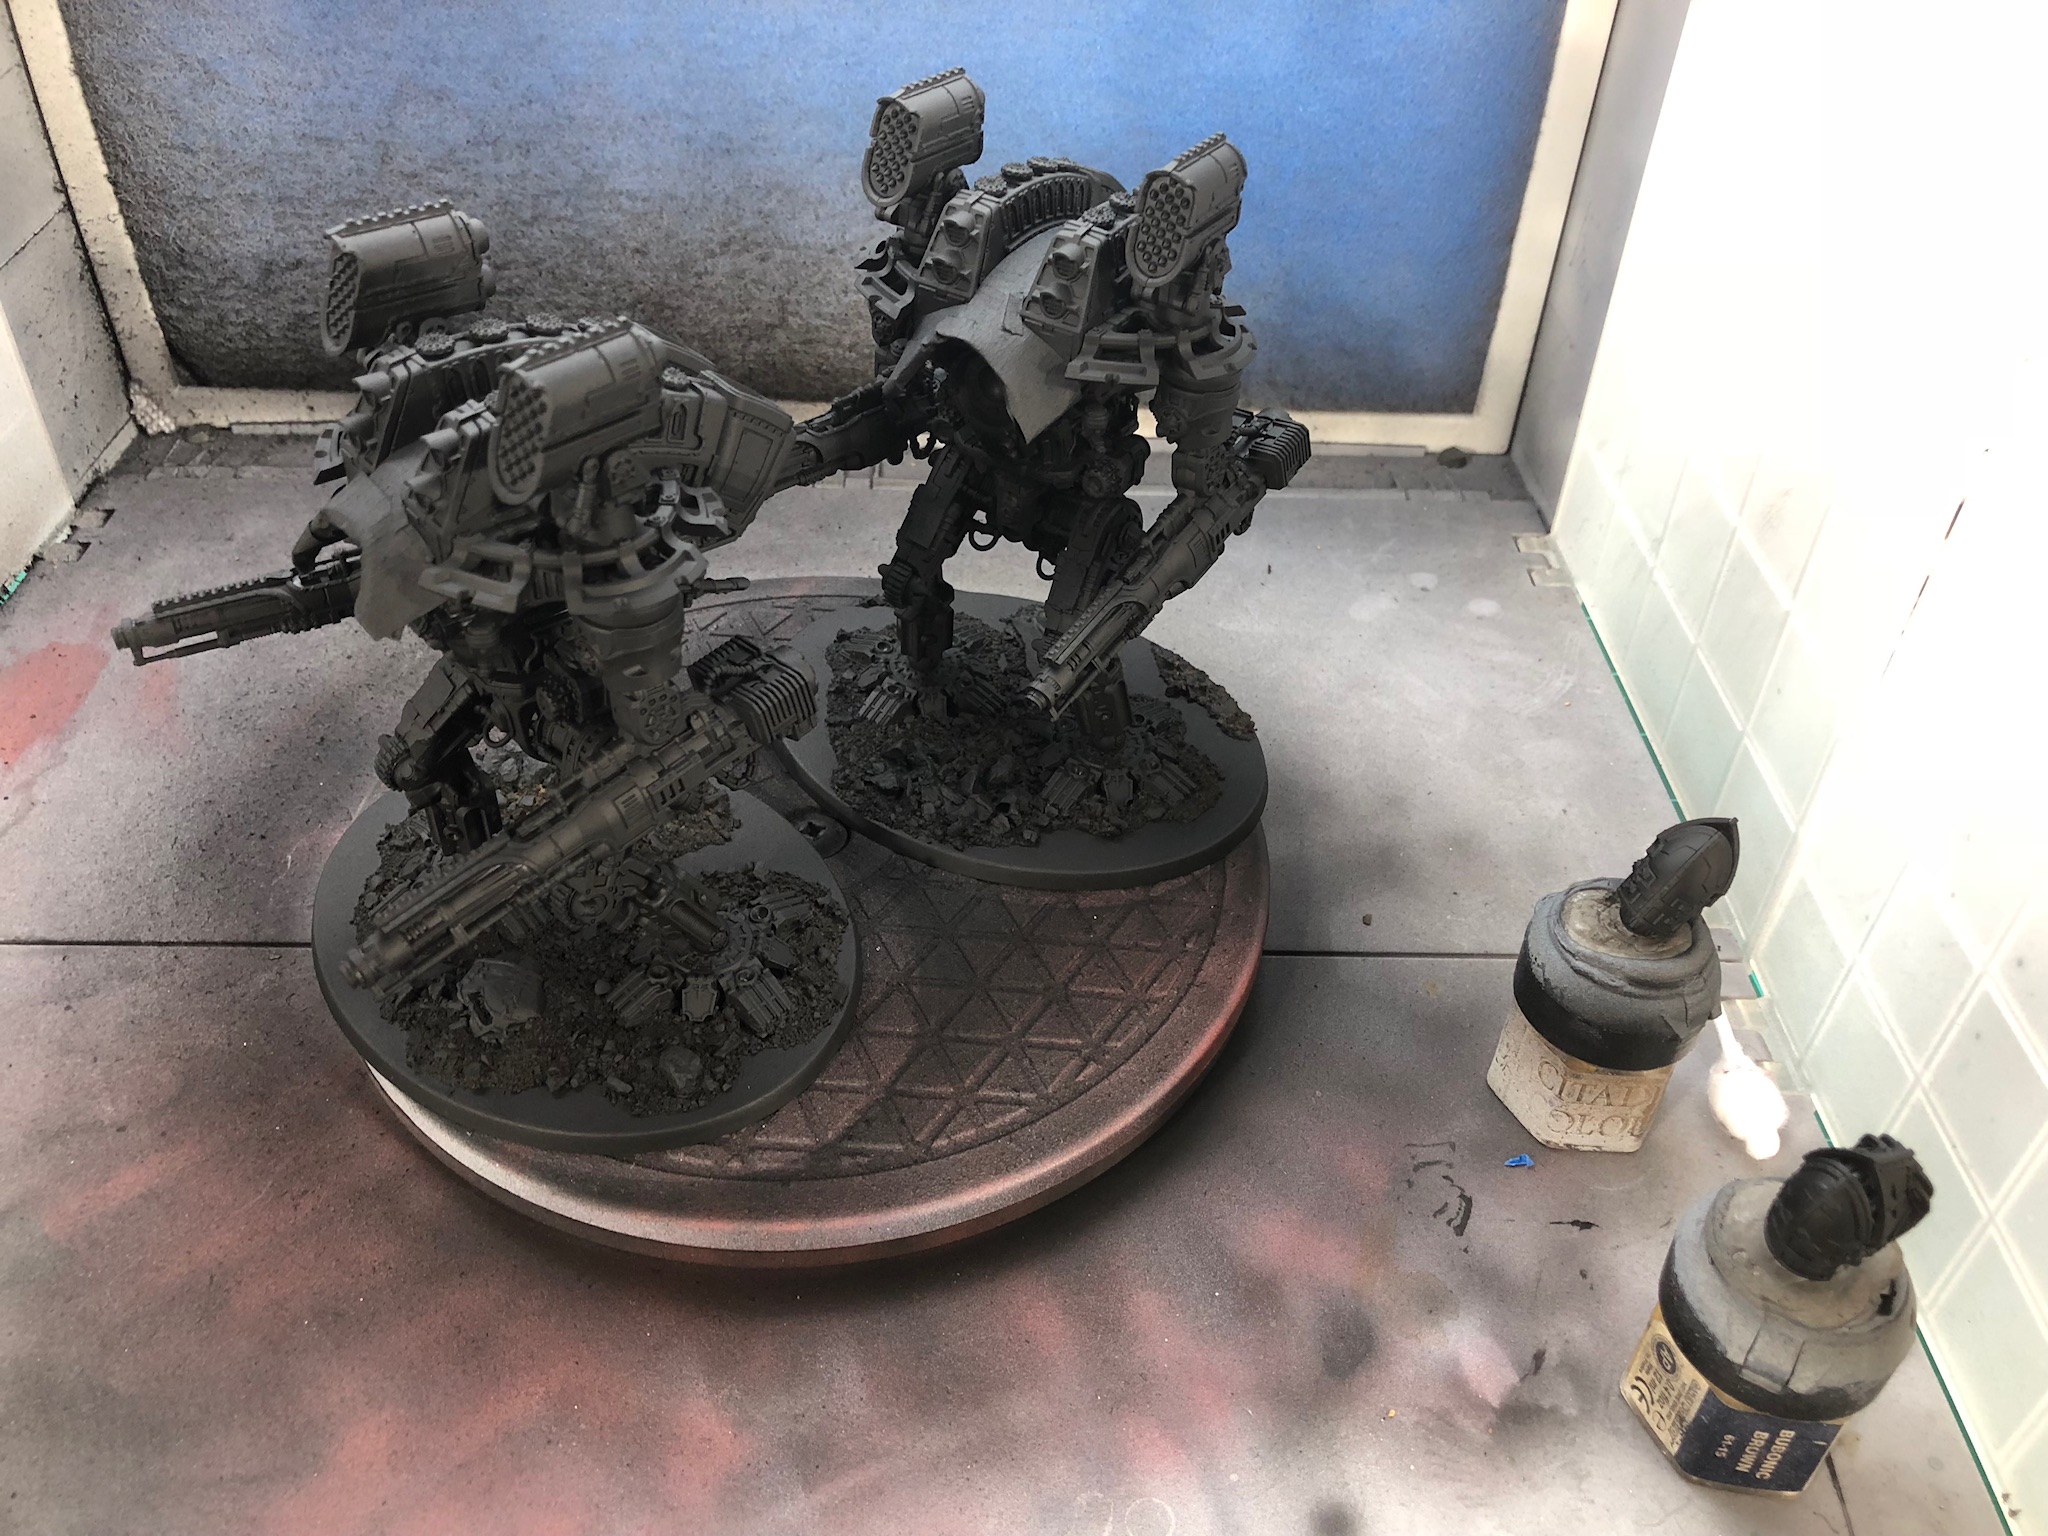
Minor Disaster
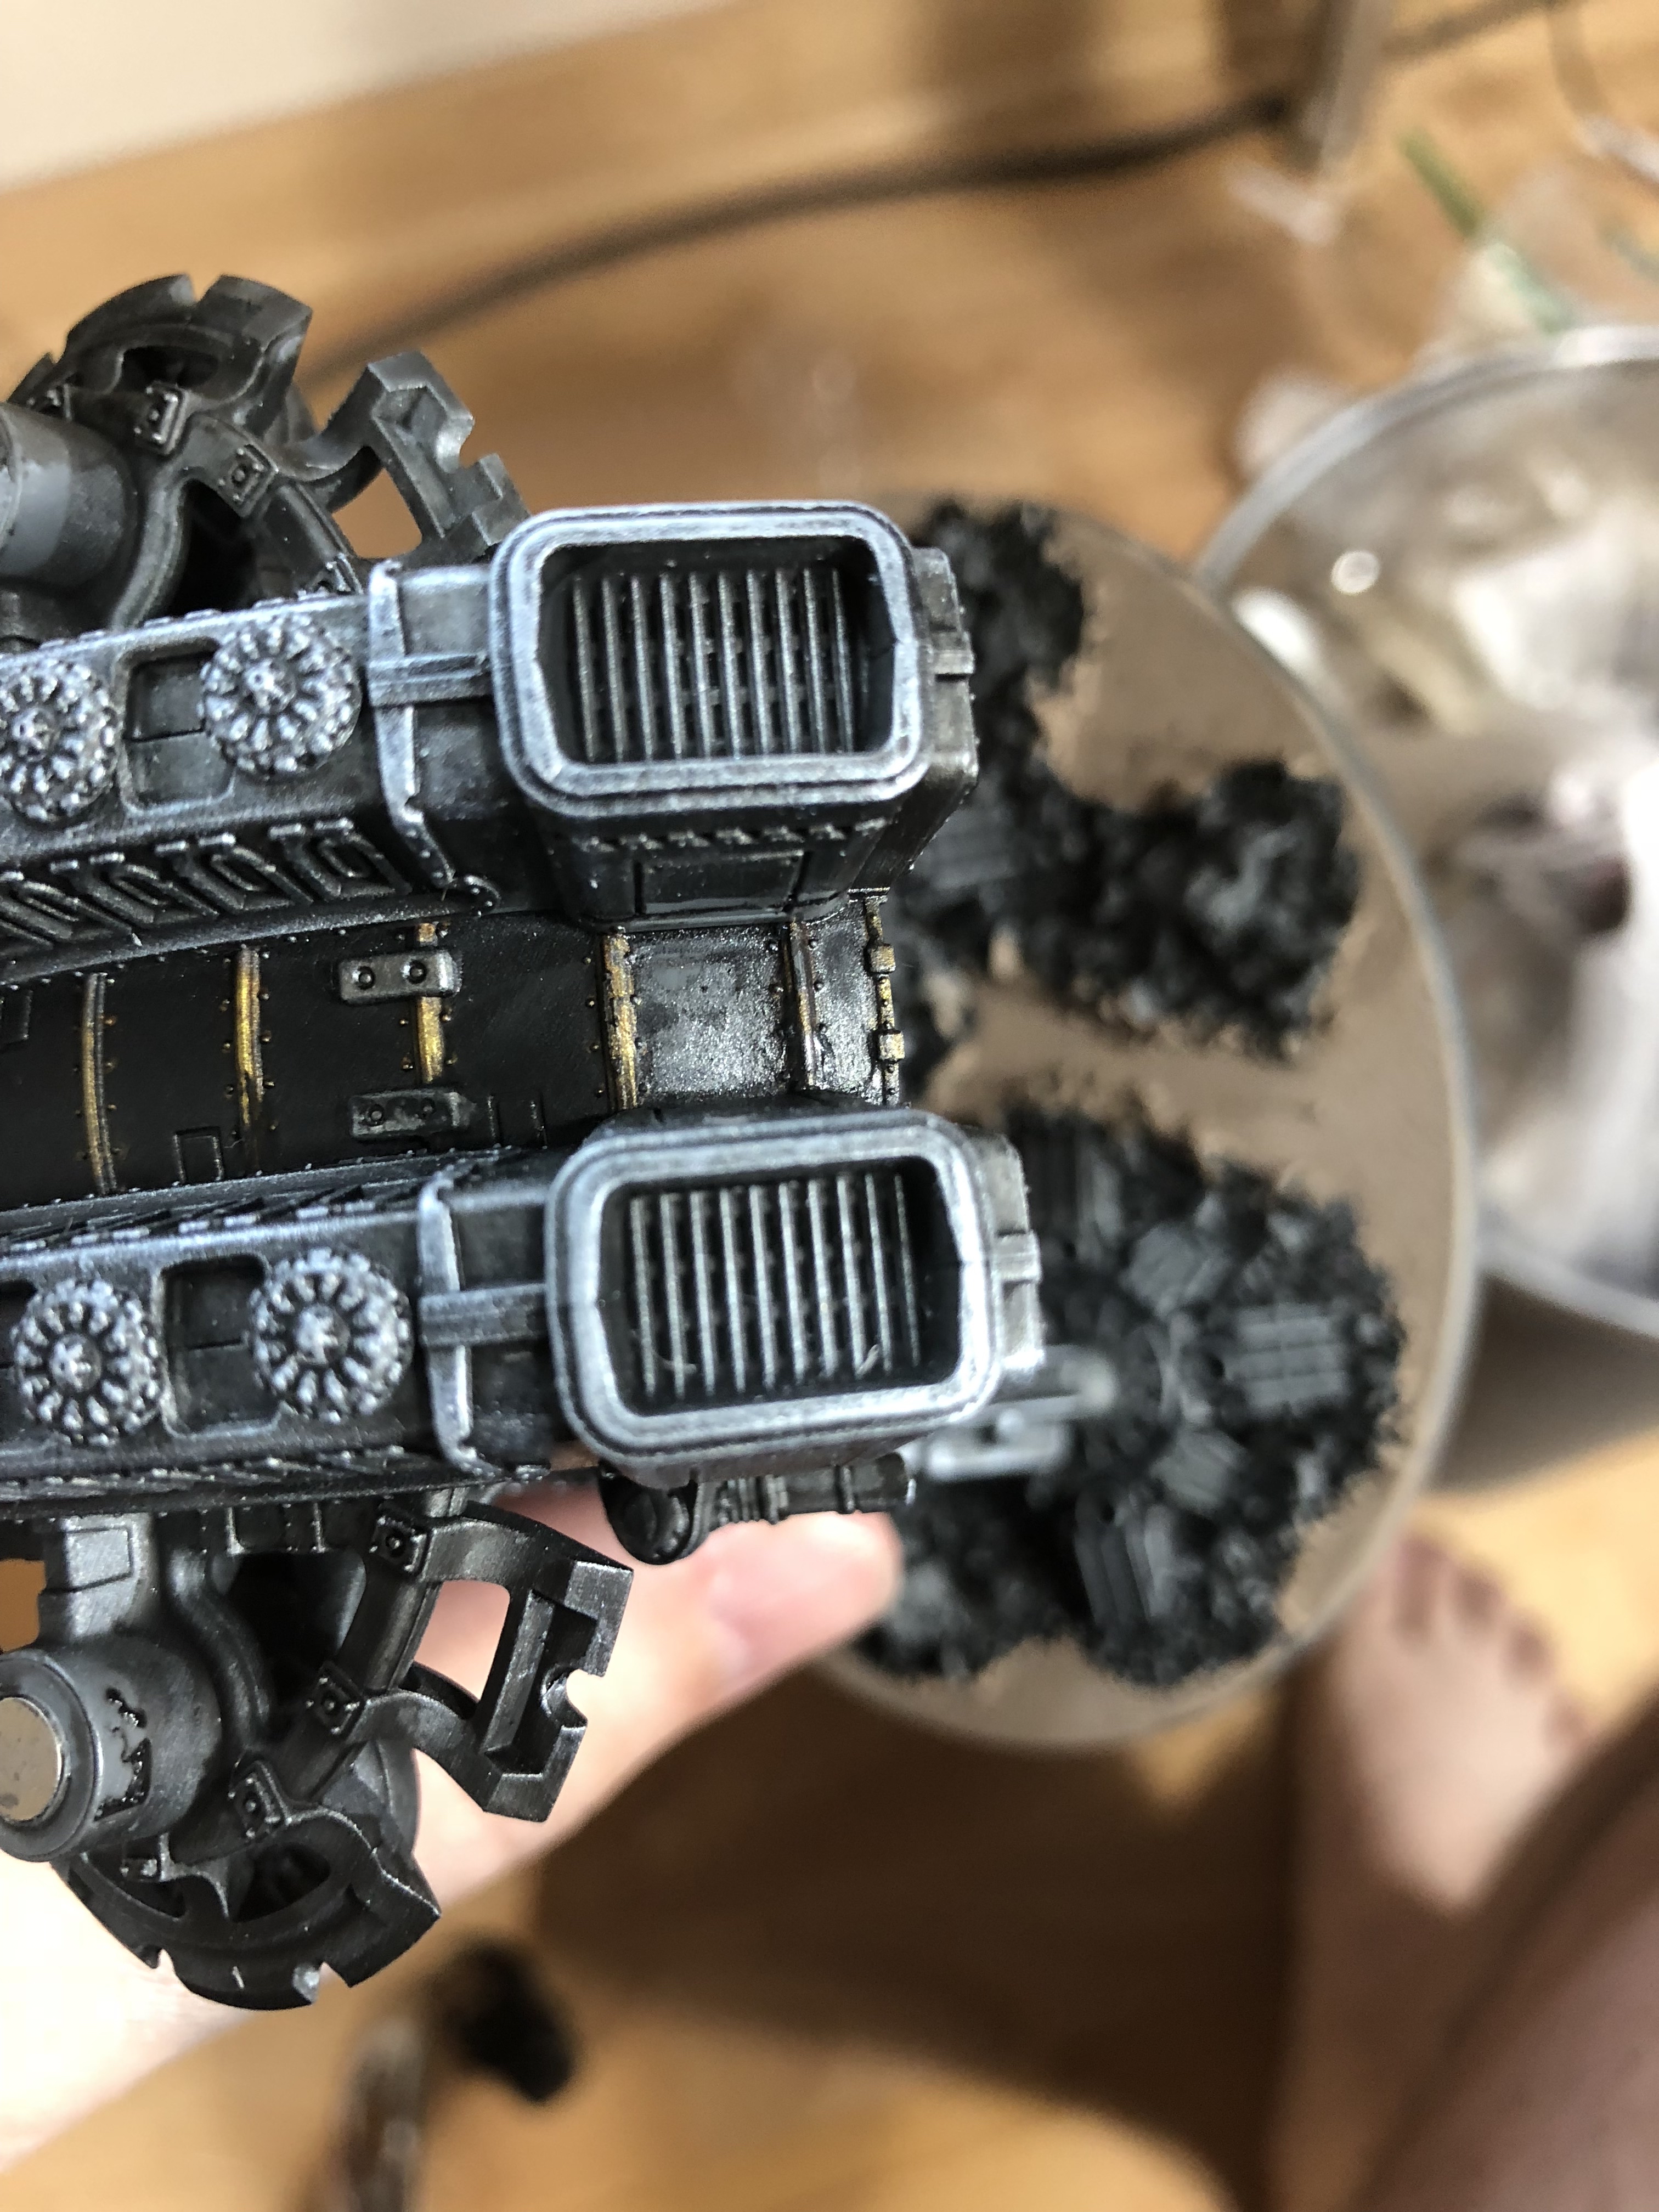
Ugh. I Unmasked the model. I think I made a terrible mistake with the wash. It pooled under the masking tape and formed a gummy mess. Minimally, I’ll have to redo the airbrushing on the plates, while on the model. I can do that I think. Cleaning up congealed Nuln Oil and reprepping the surface will be the annoying bit. Hopefully without damaging the surrounding paint.
This is the worst of it, but it happened on both models to varying degress.

This is the first swipe at clean-up. I think I got the majority of the gunk off, I can re-sand from here and then start at the primer up after another gunk pass I think.
Lesson Learned. Don’t do heavy washes with masked areas. Learn from my mistake gentlemen and ladies.

Masking and Spraying
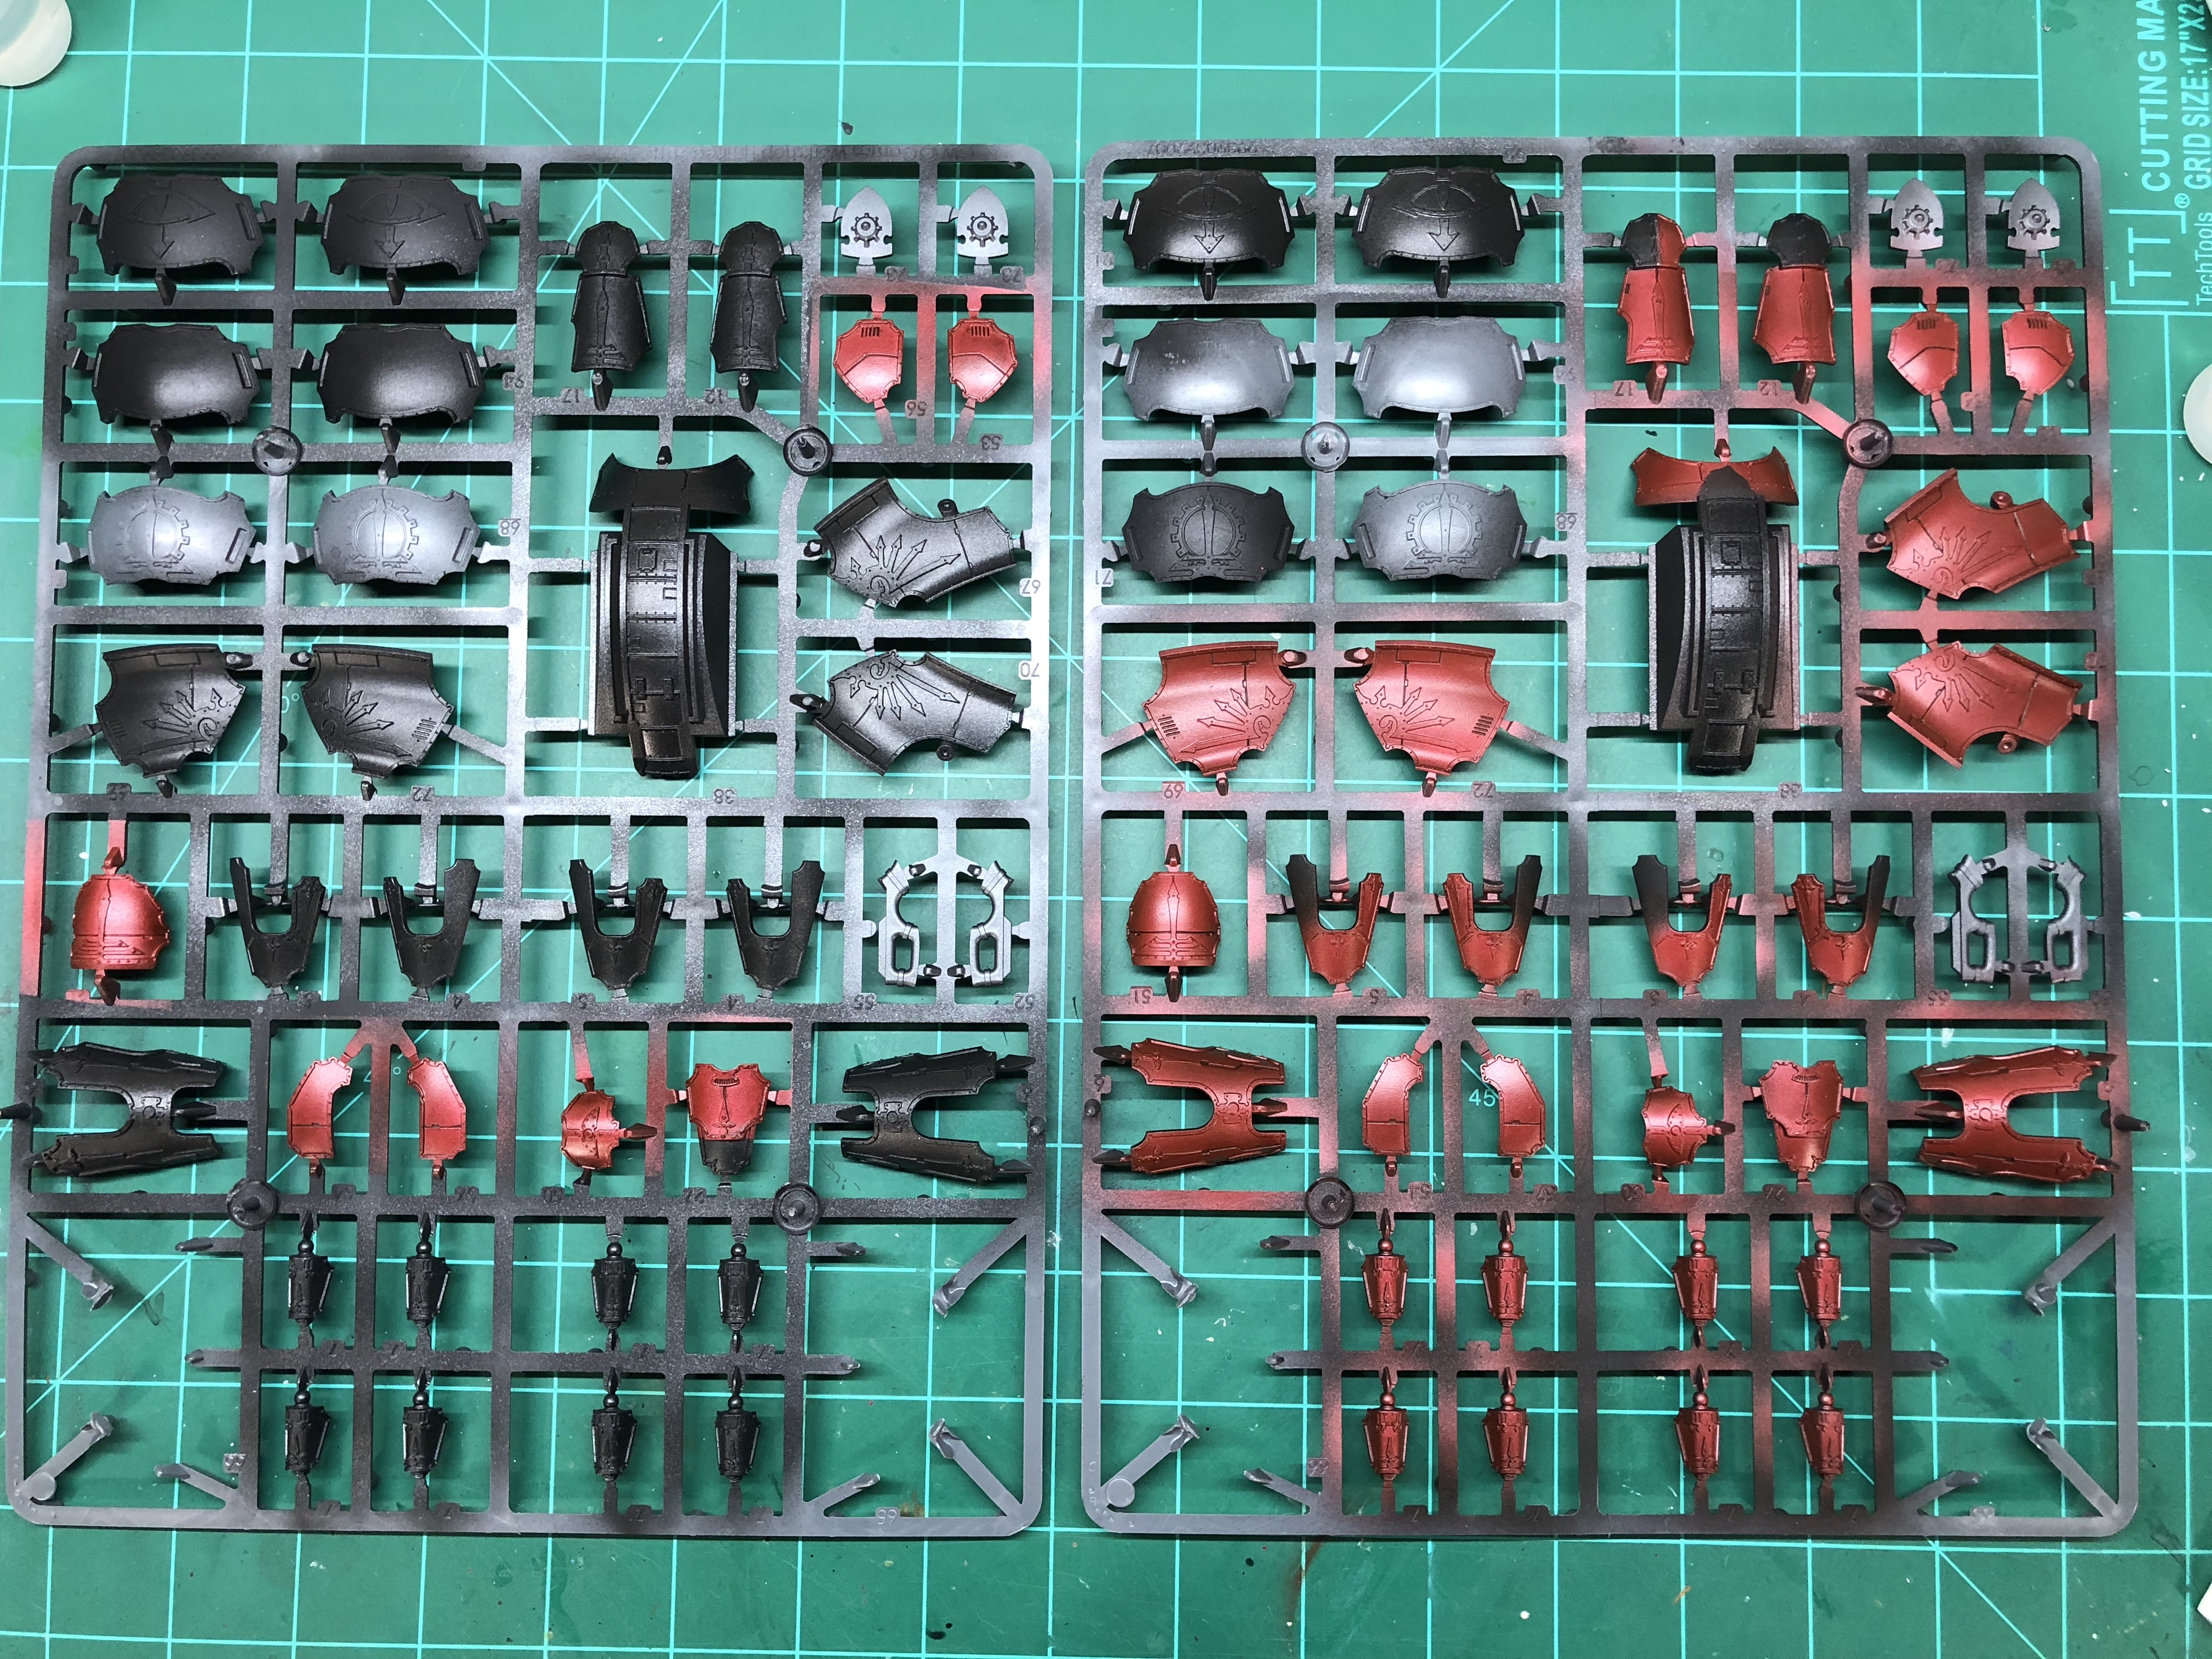
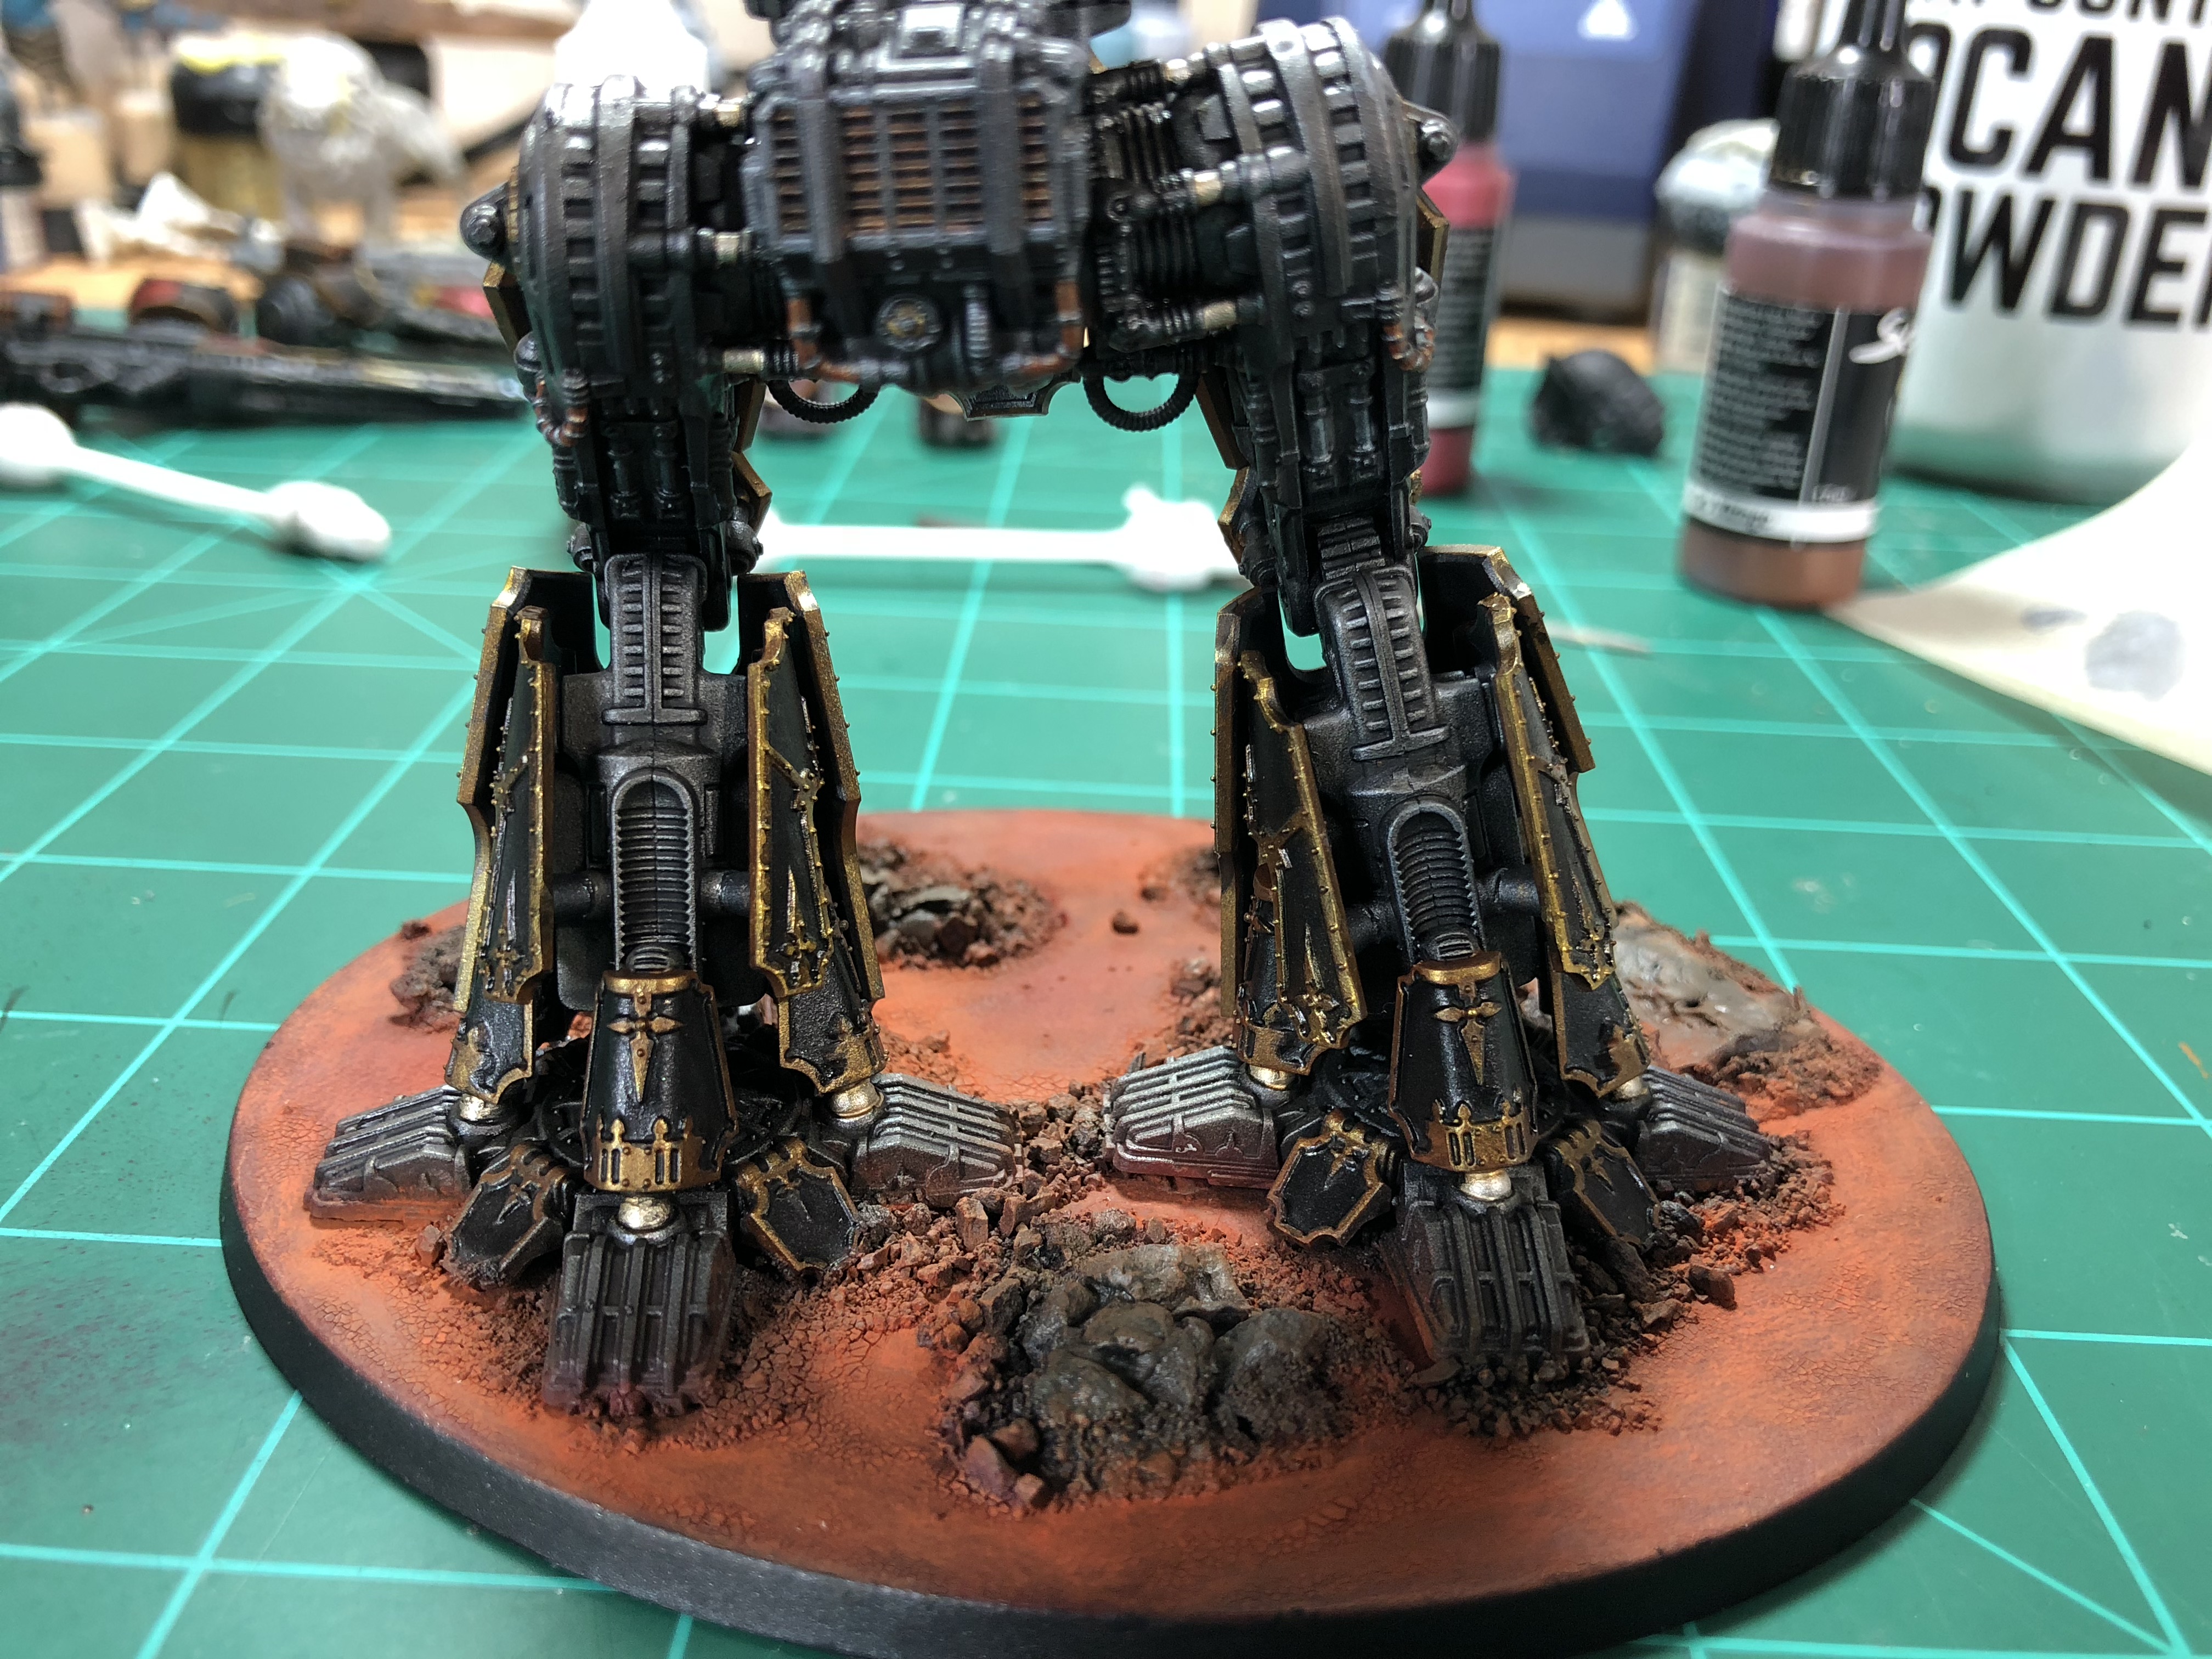
Spent the week building and basing. Another thing I wanted to change from my last build was to do the plates consistently with the airbrush. That lead to having to mask off the top carapace for this. This is also why I painted the armor sprue before the main build. The weapon plates i’ll be doing next. I also added liquid mask to some of the glue points that would be hard to scrape for adding plates later. Did that on the first one as well and worked well.
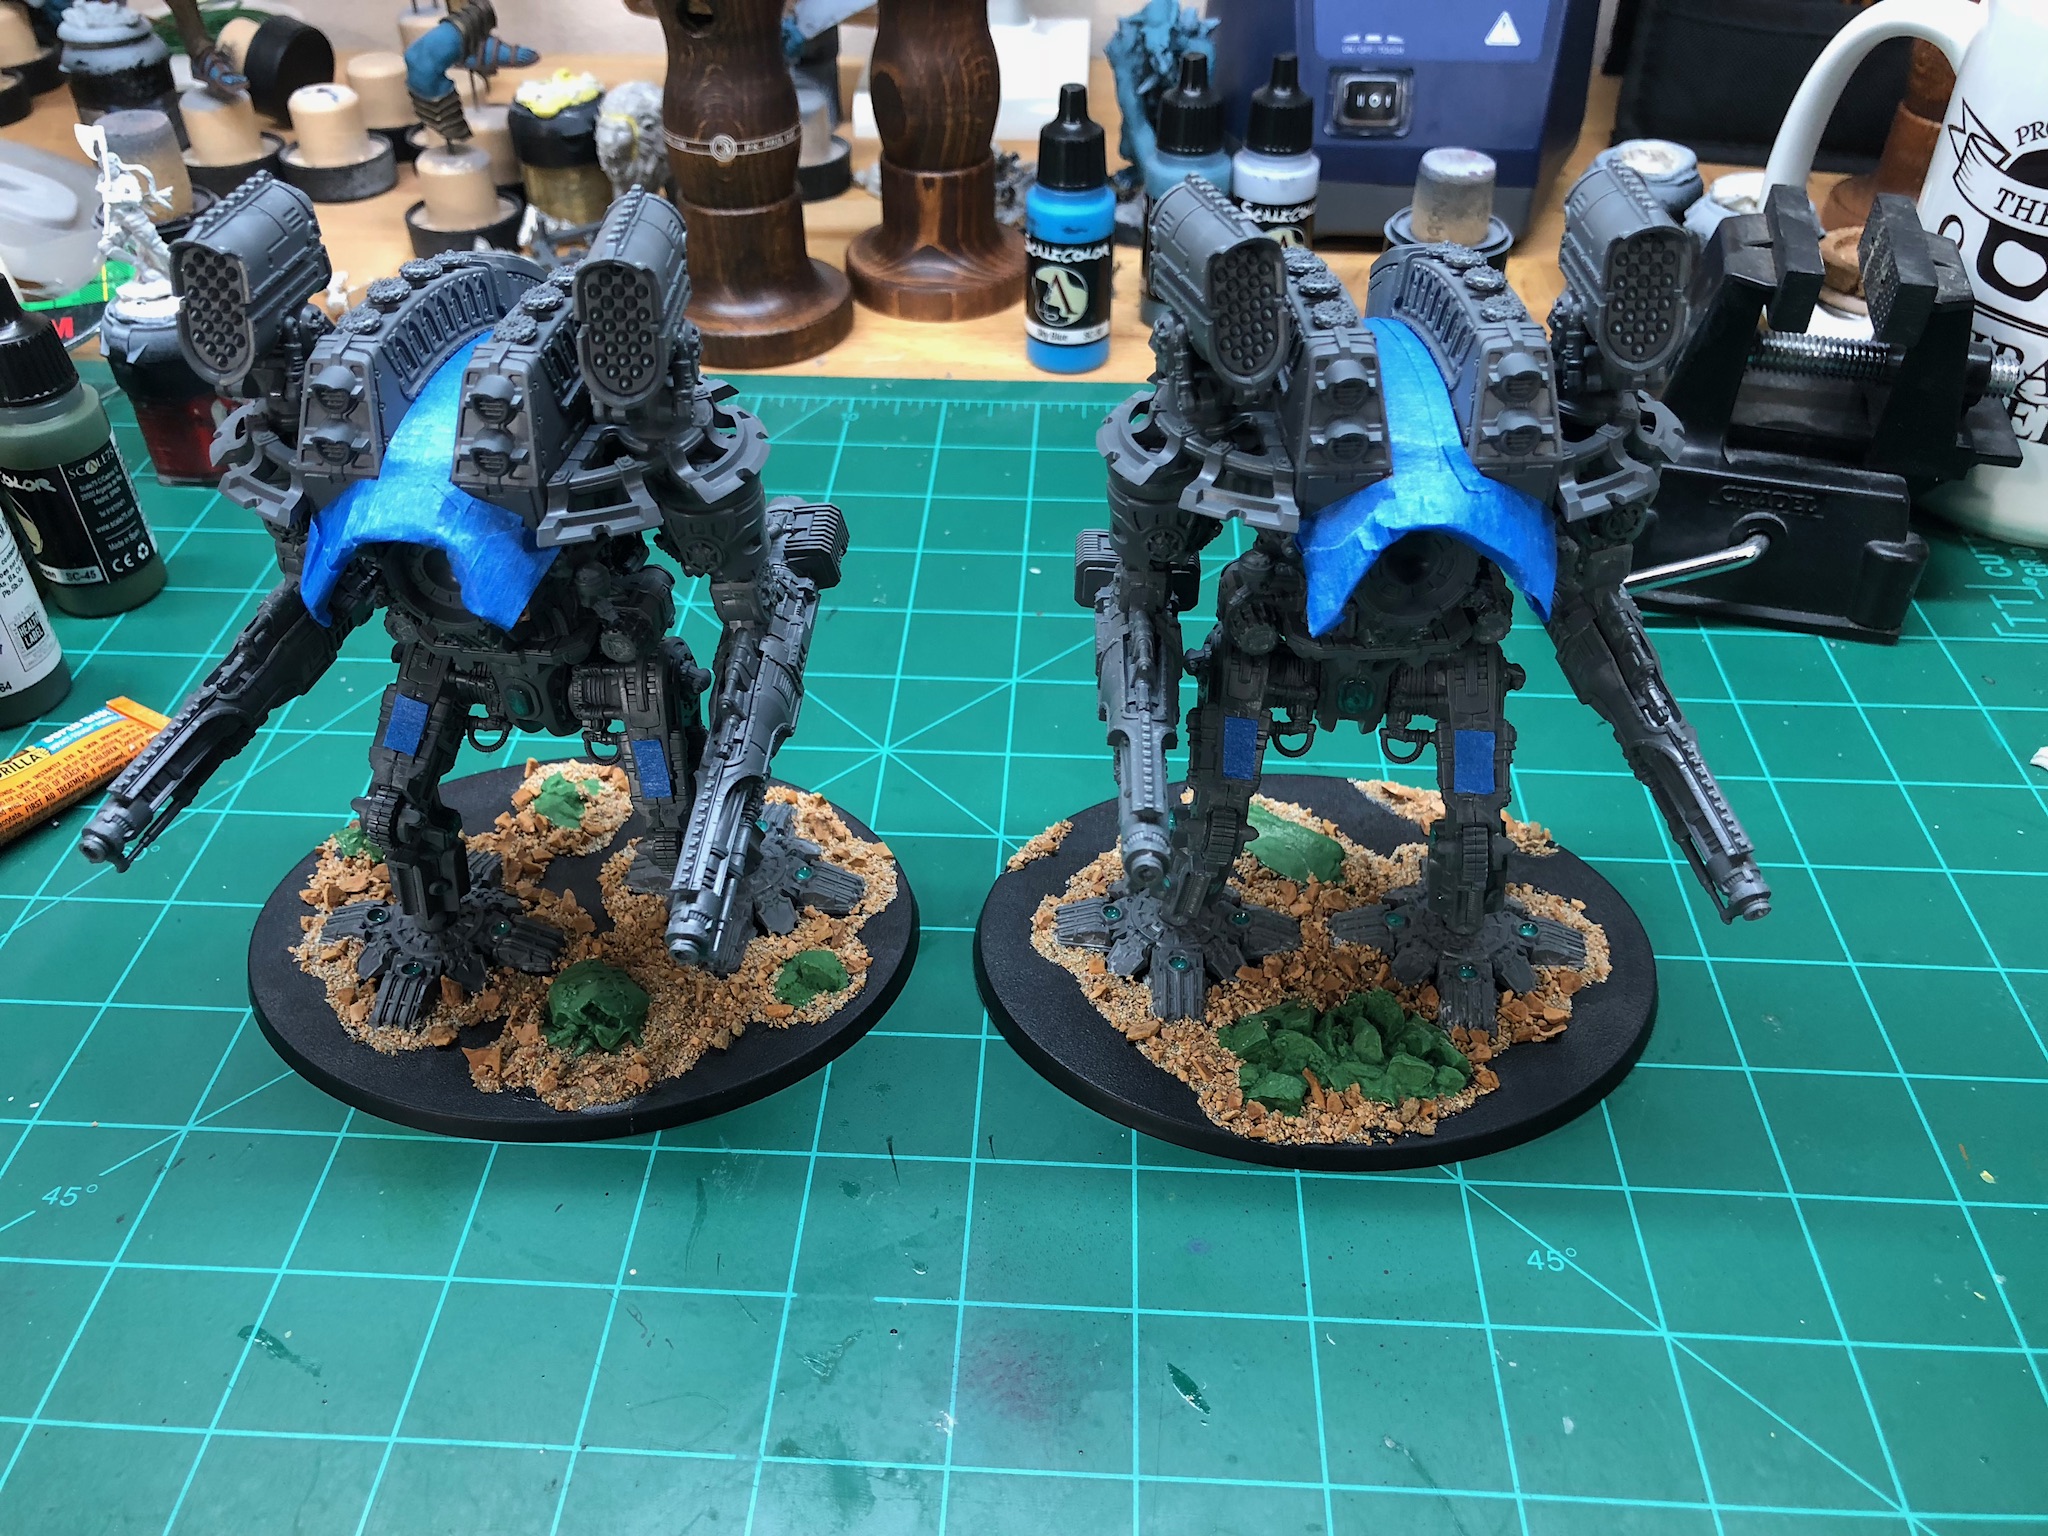
Masks are very comfortable.
Spent the day watching paint dry. The method I chose to paint my Legio is rather time consuming. I think I’m getting a bit better at it, less nervous about adding too much transparency. It’s also really helped having one warlord under my belt. Really helps visualize where the pieces will end up.
Reinforcement Roll
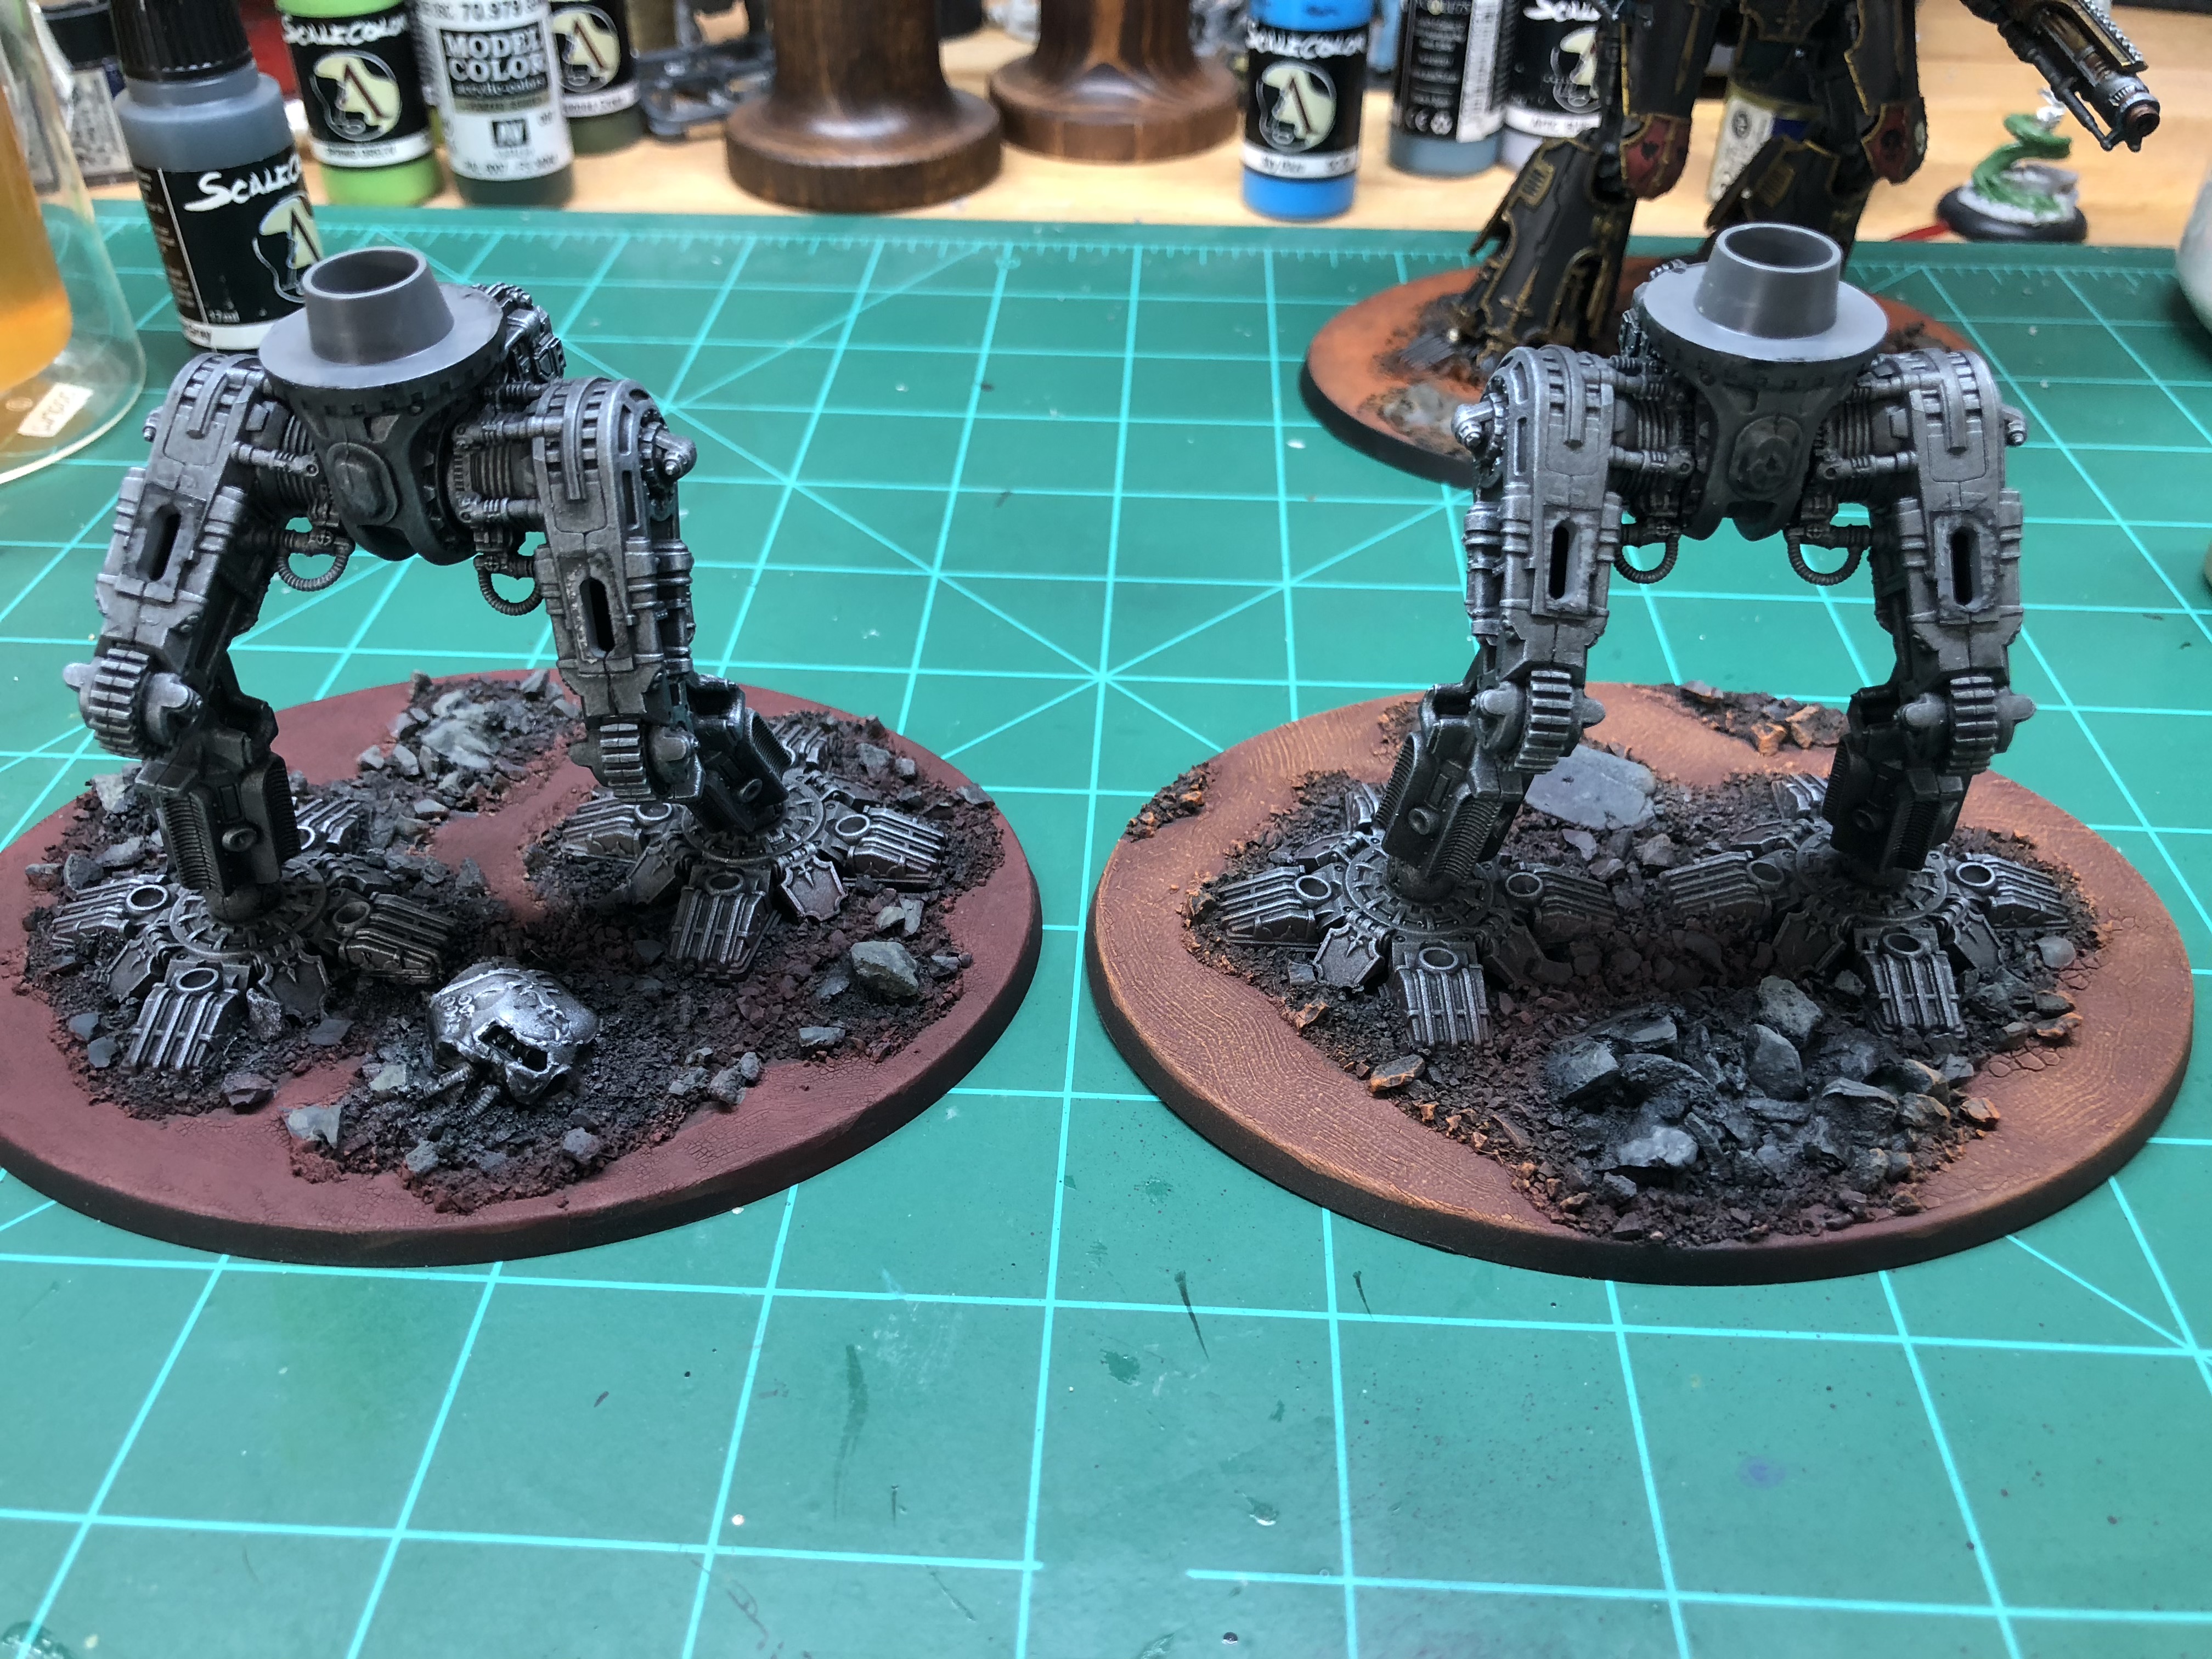
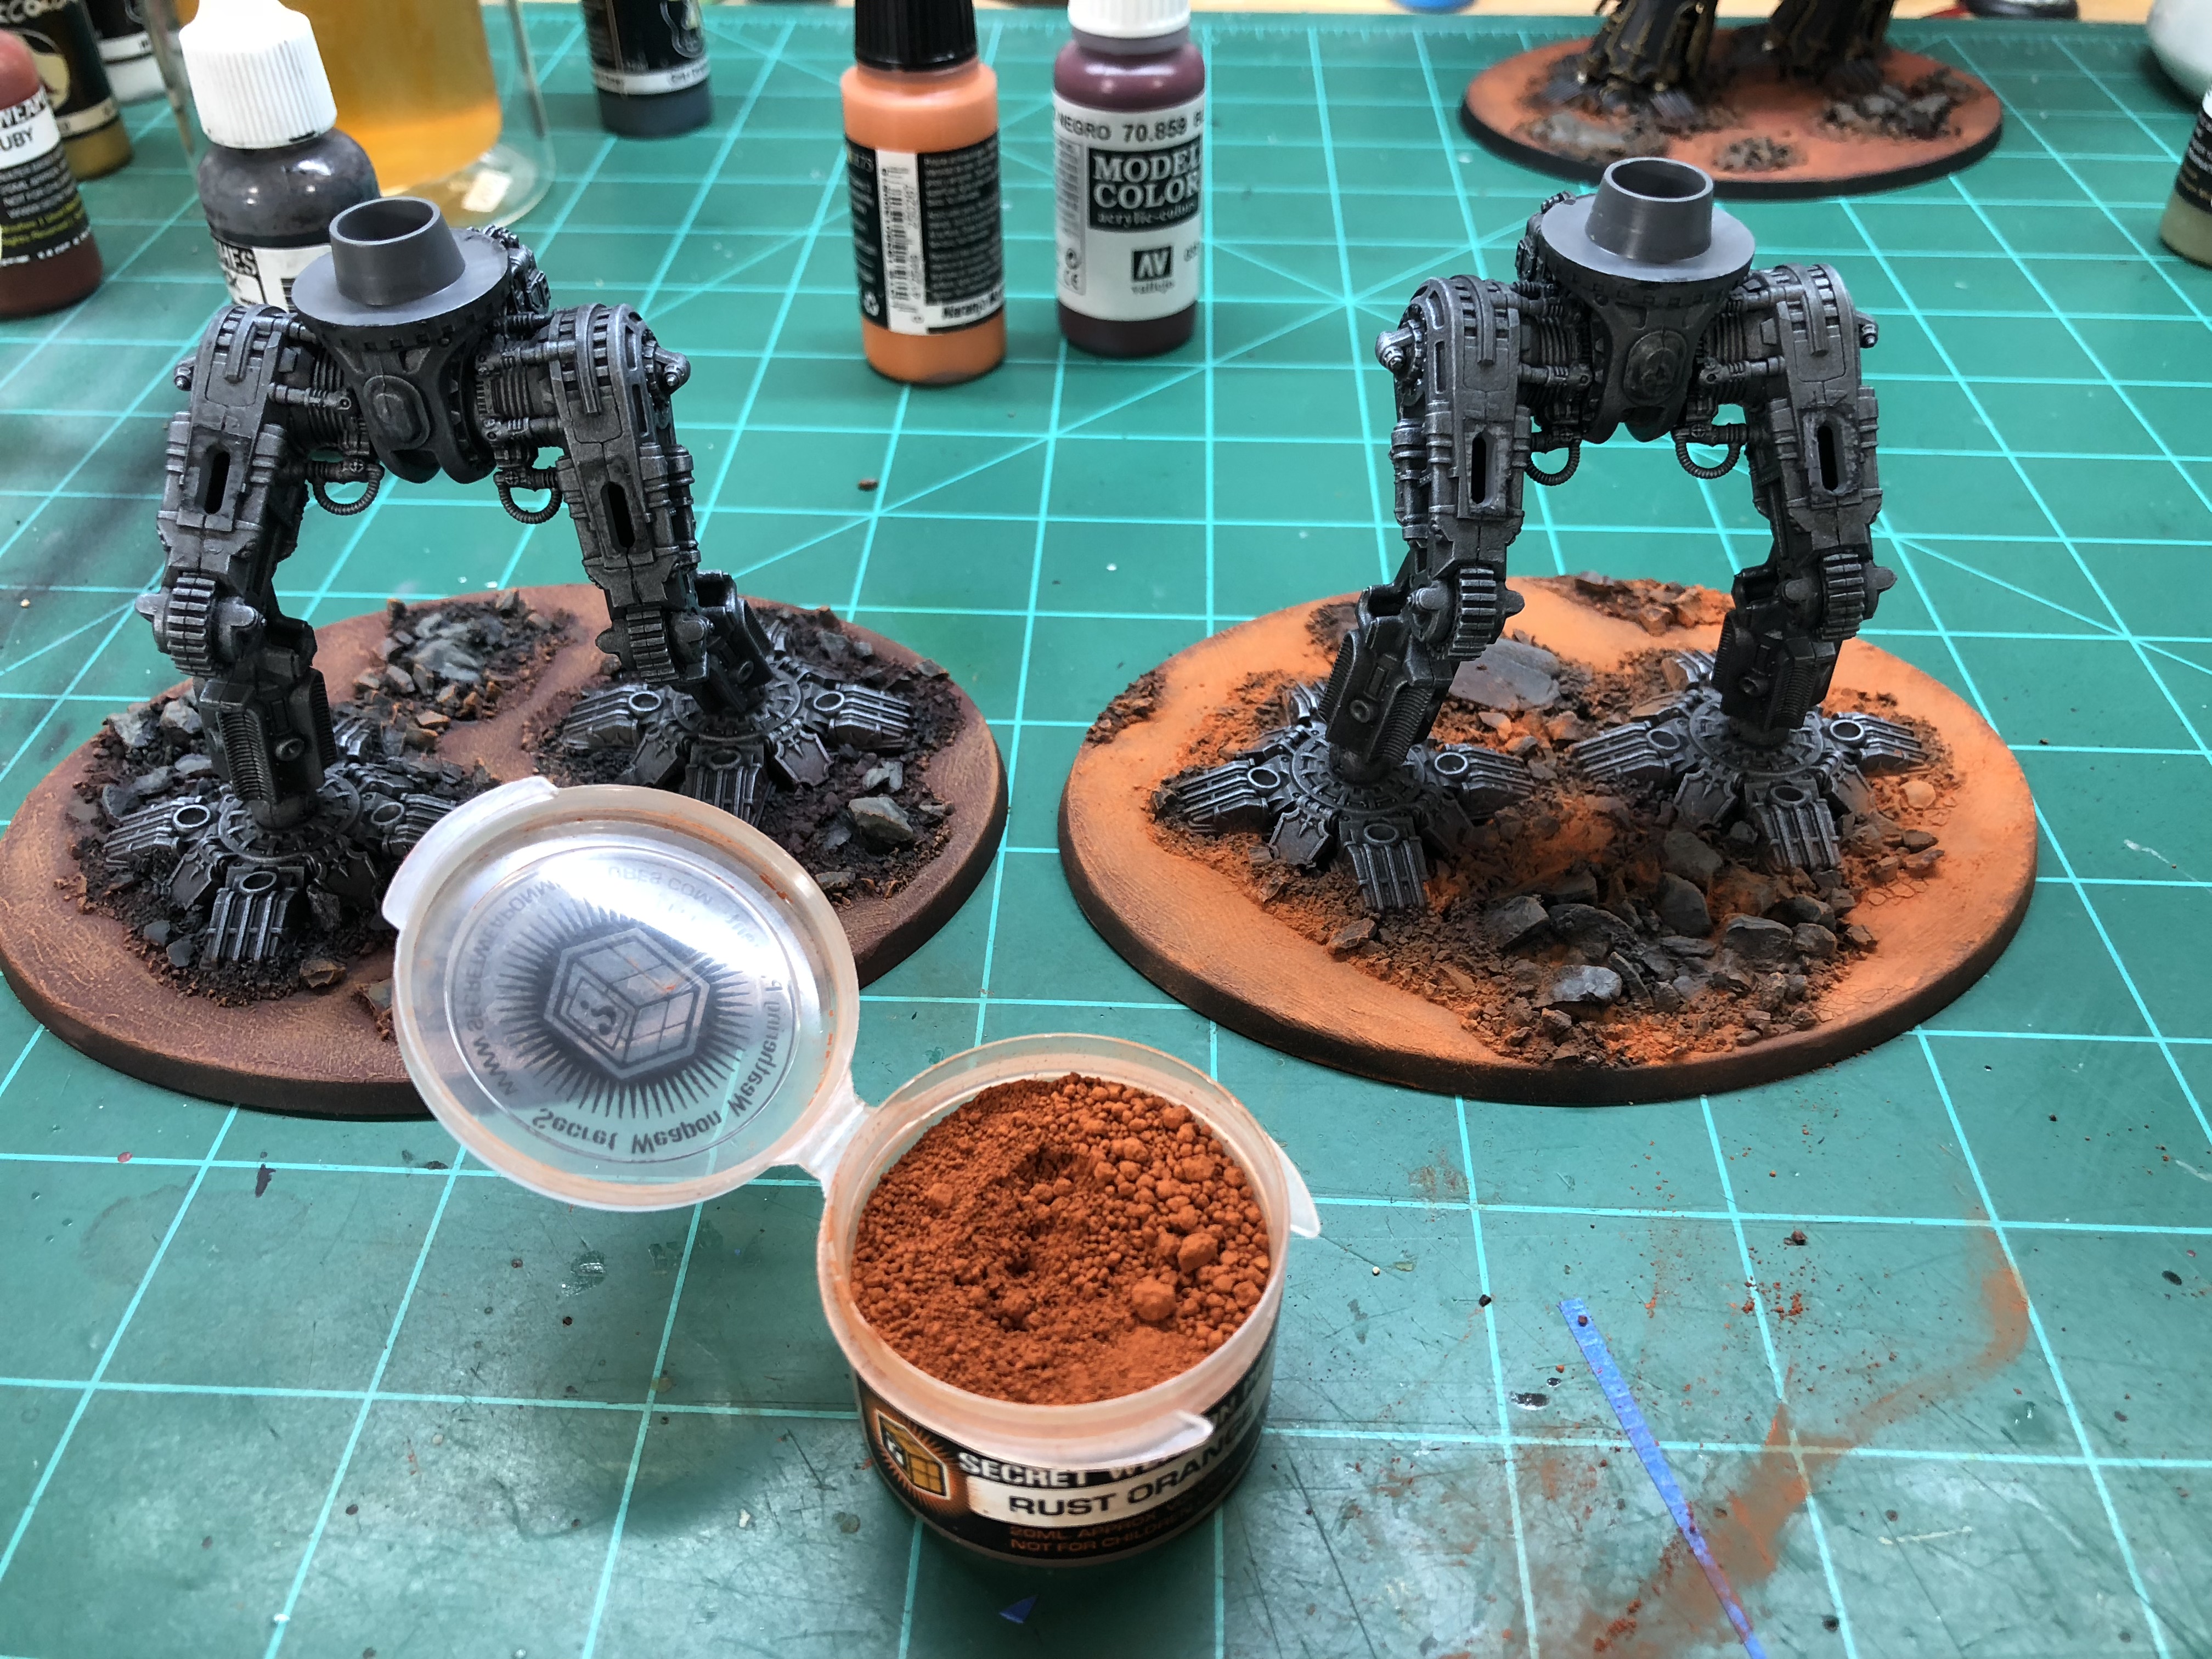
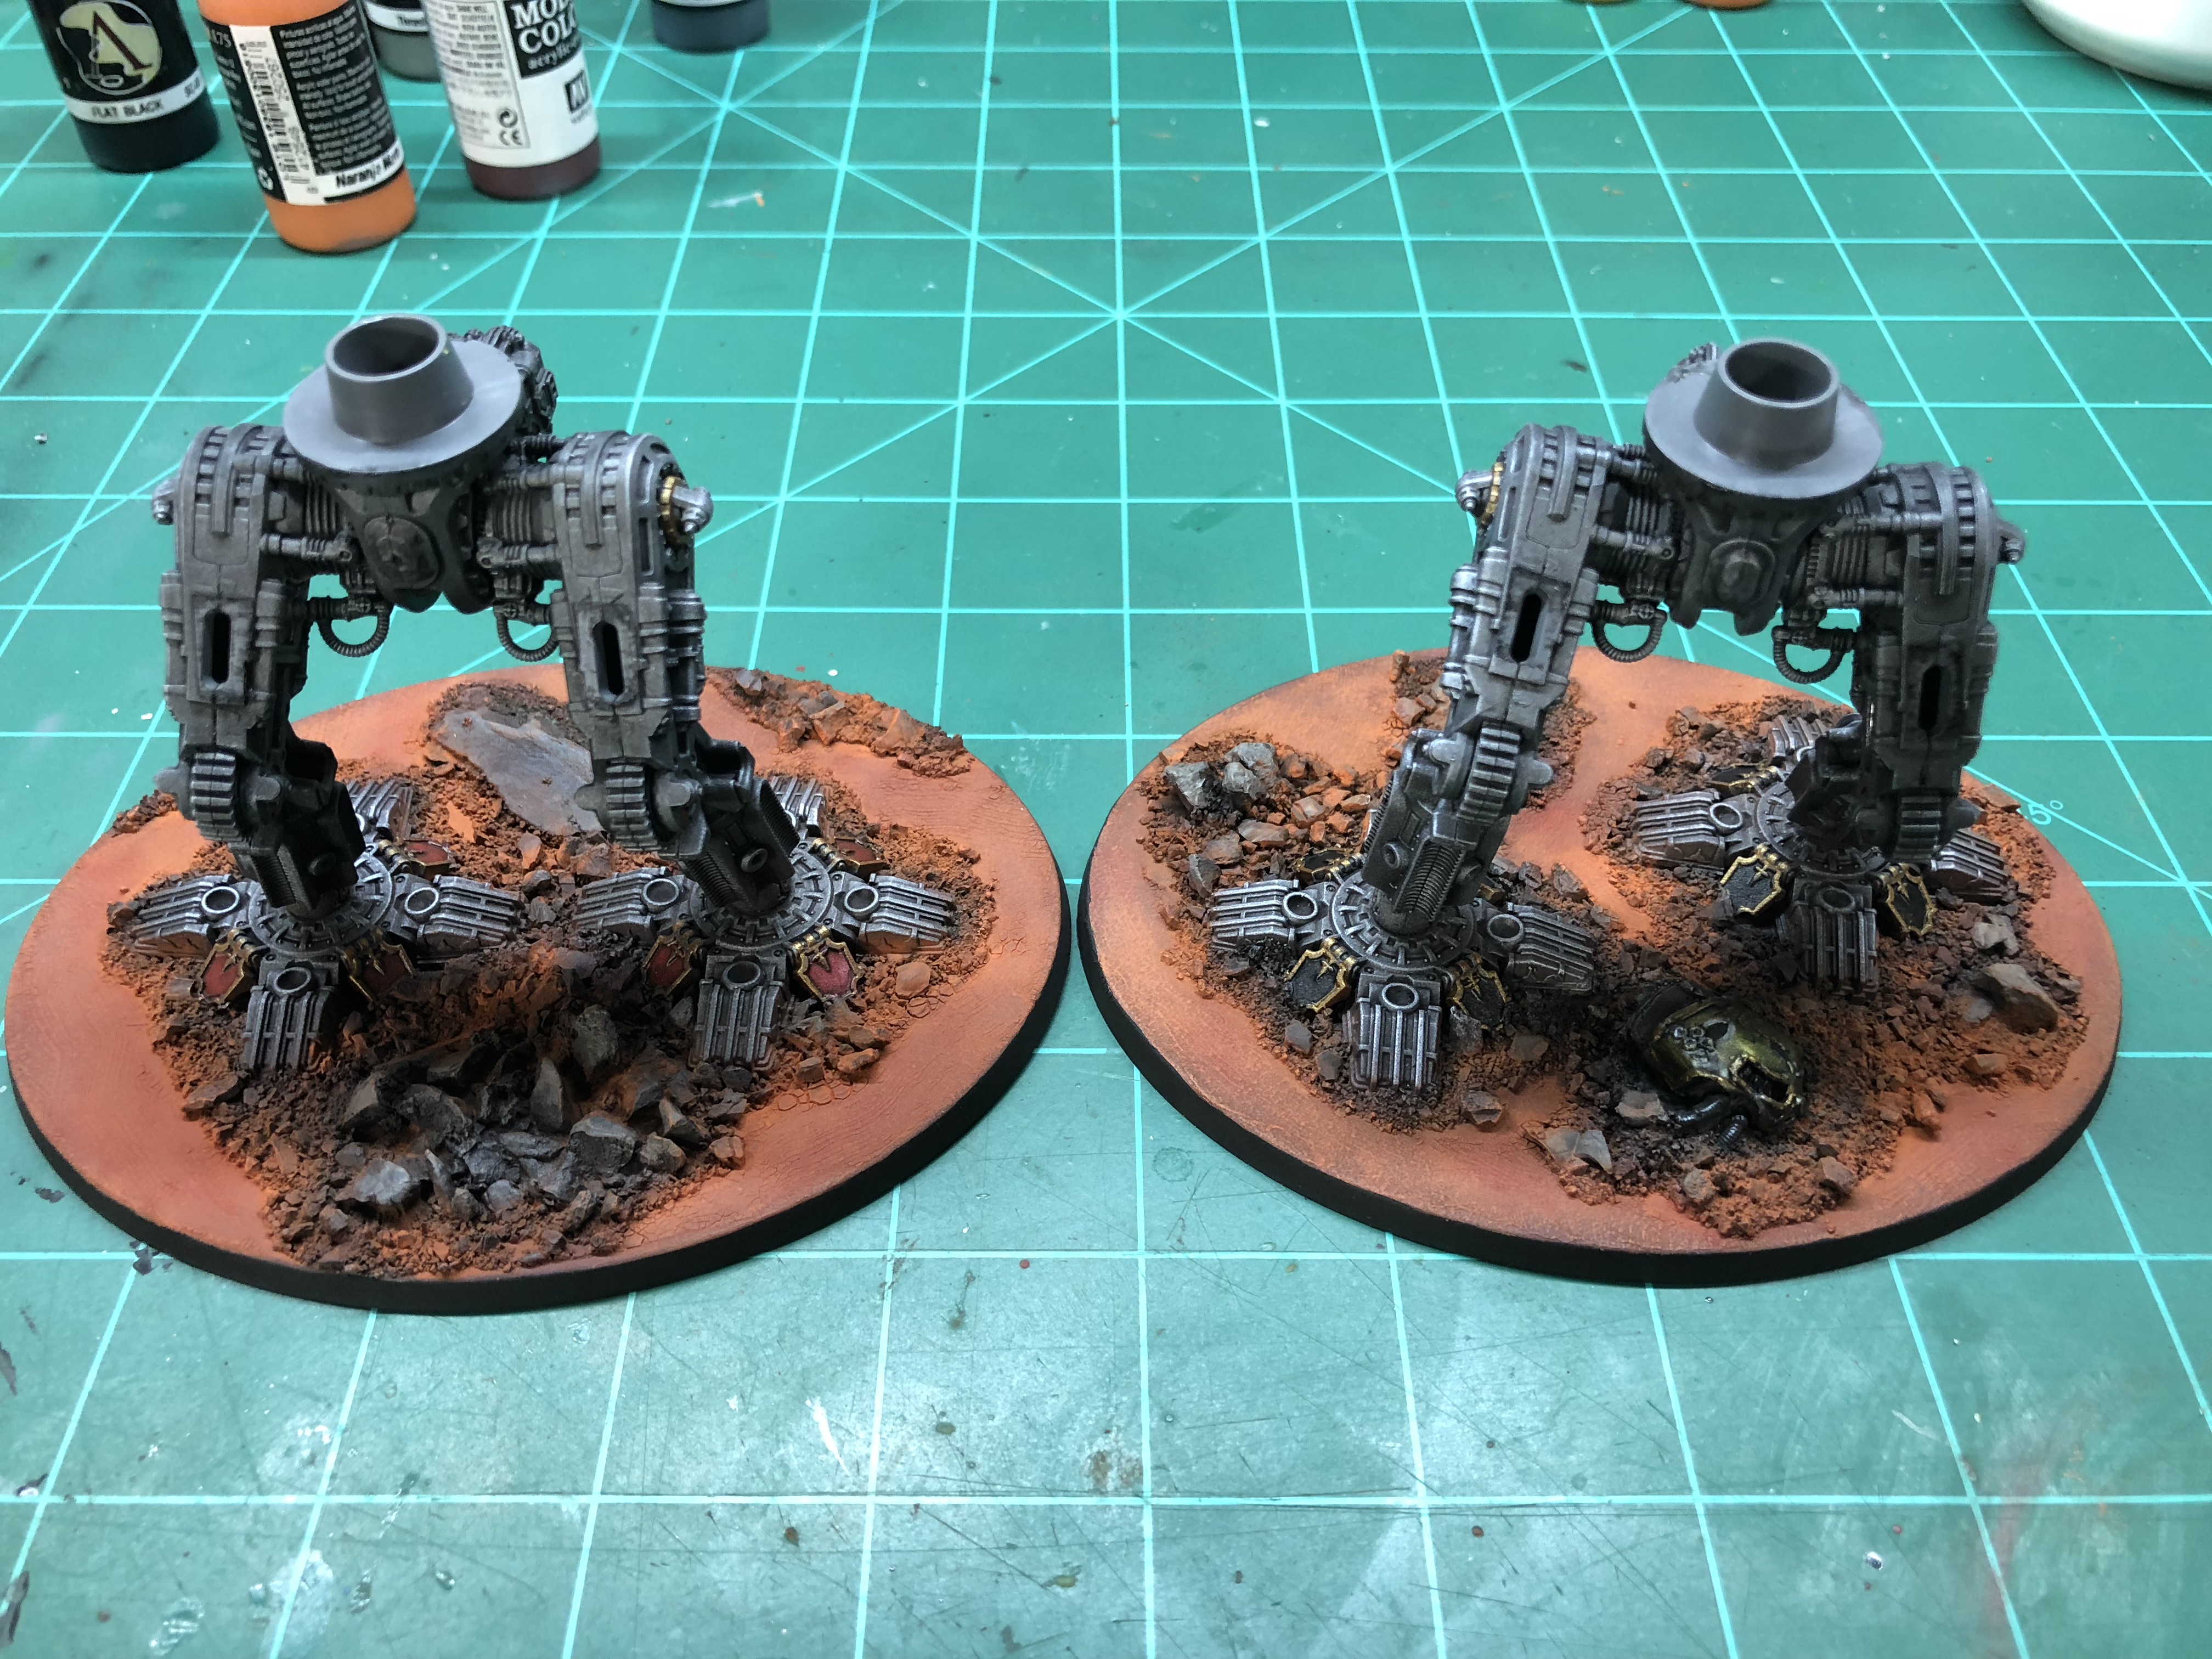
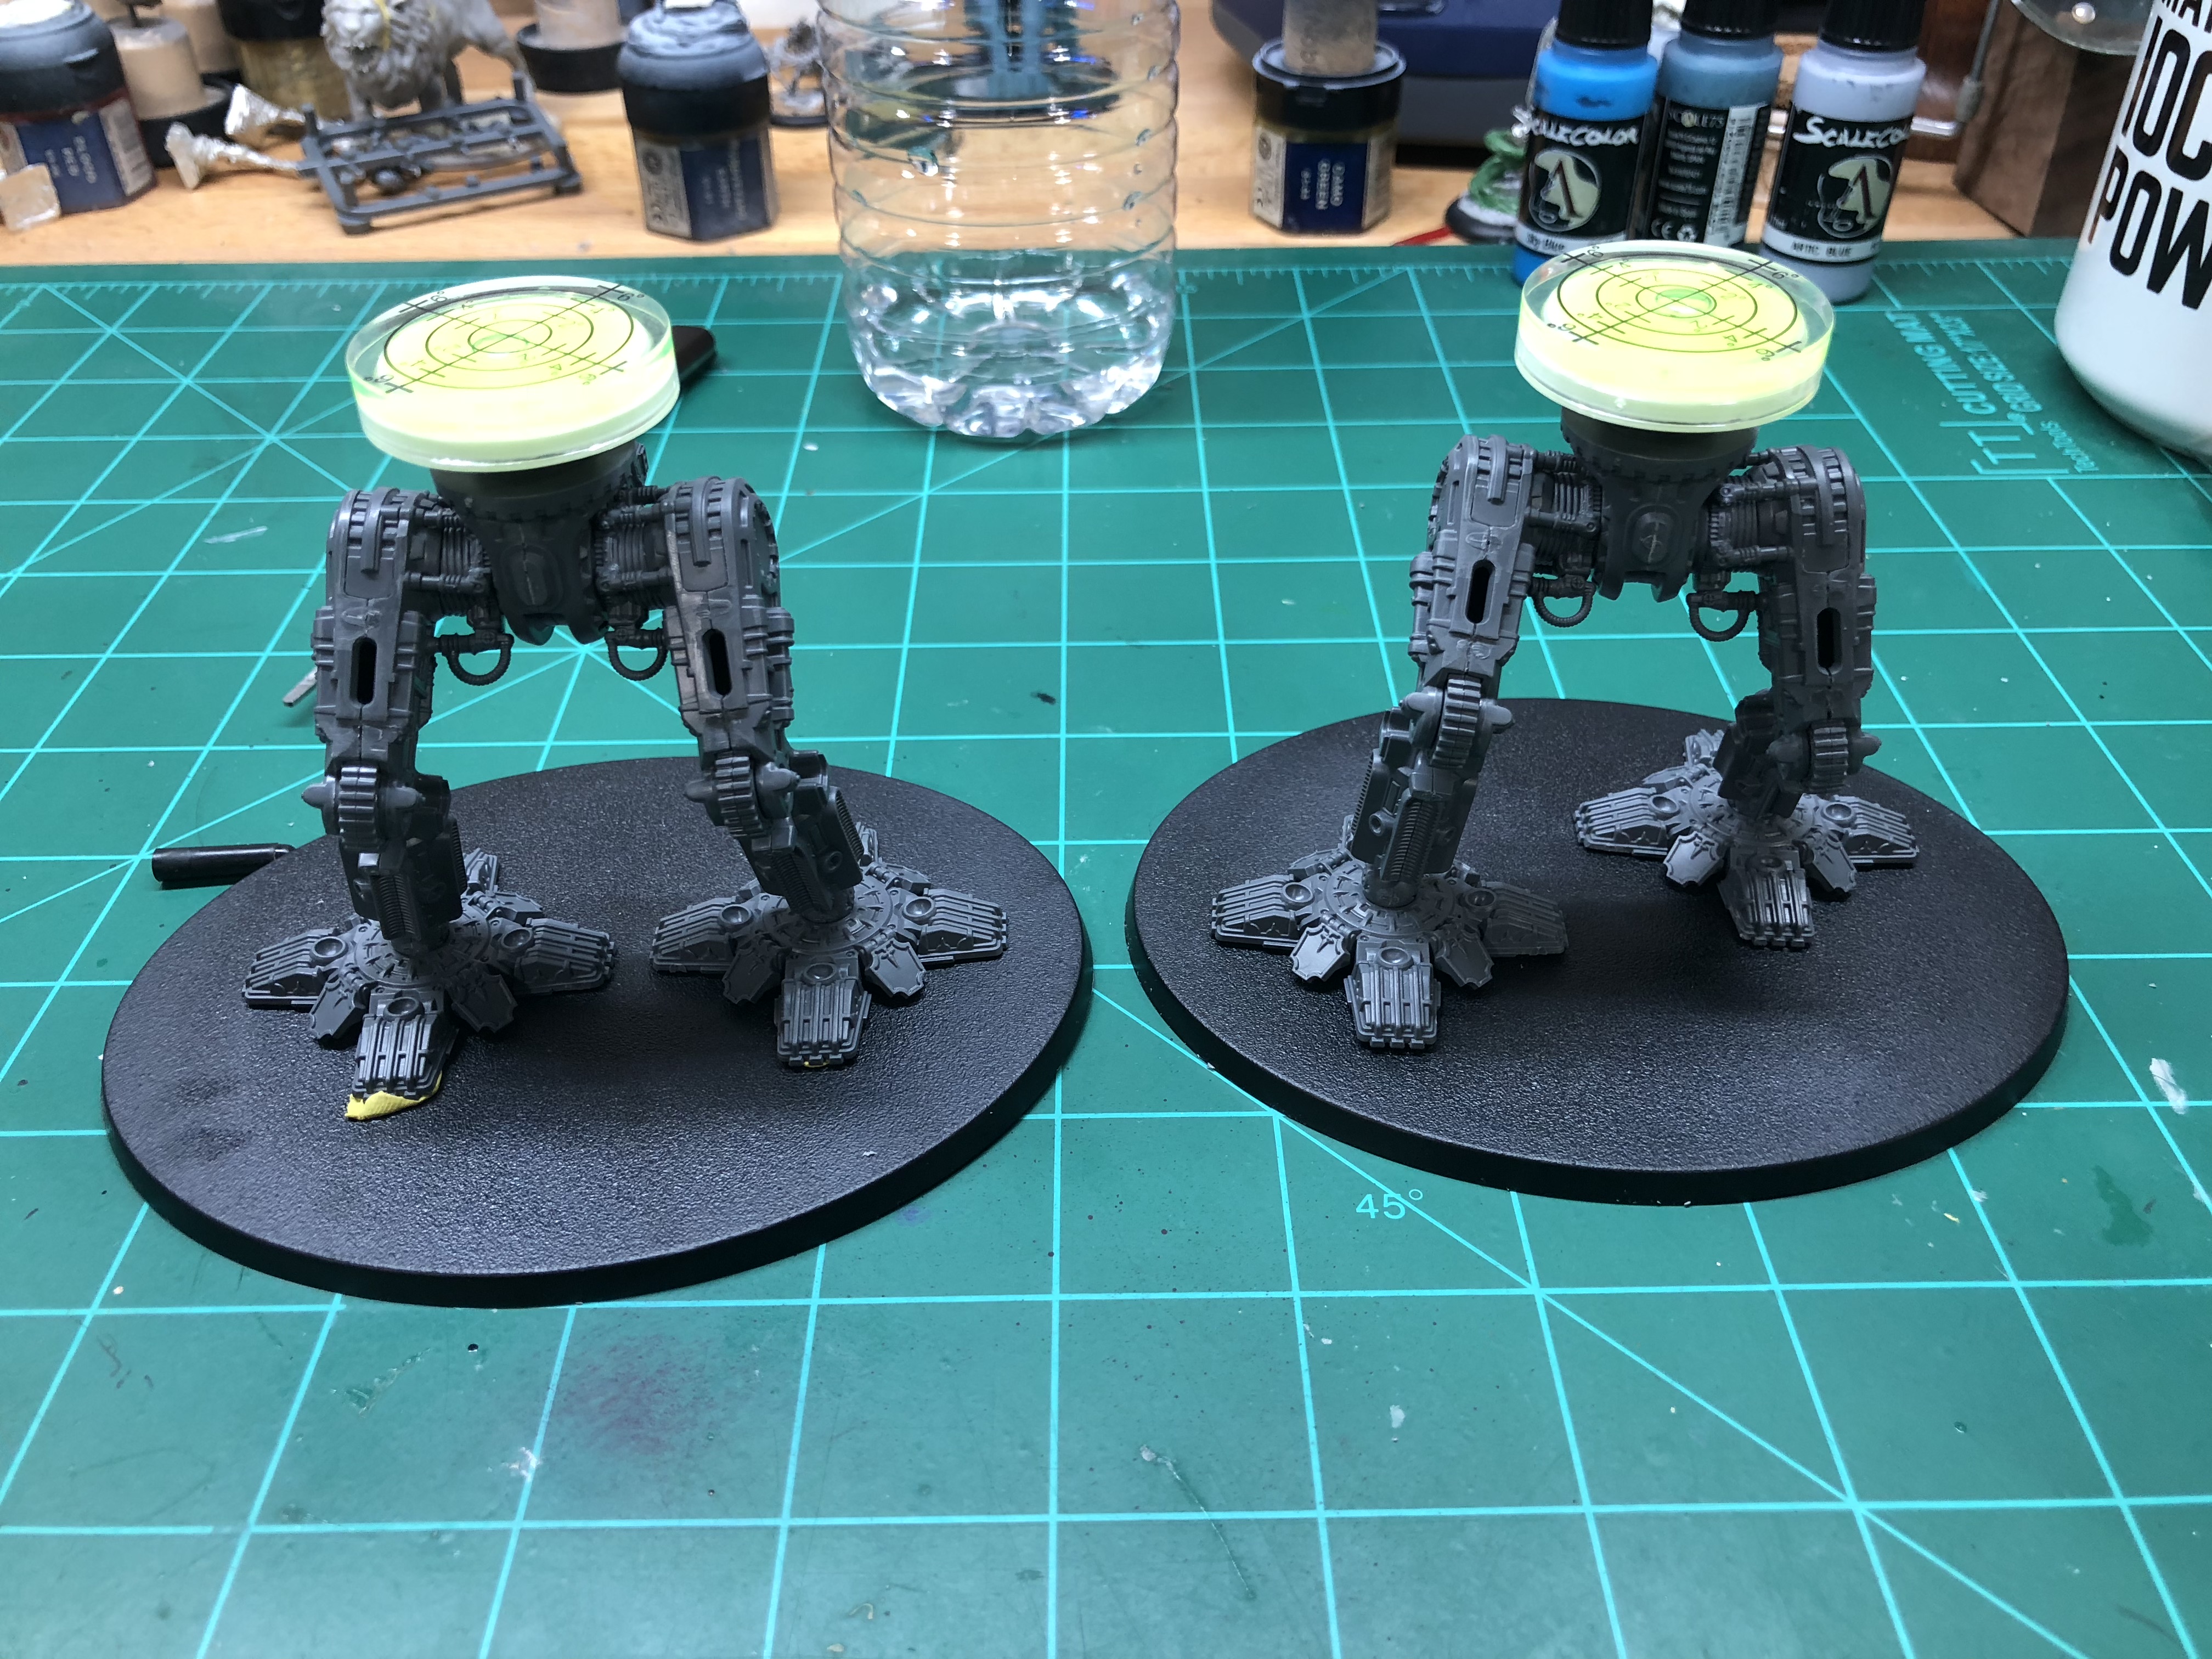
These are coming. One of my “Mistakes” on the first titan, the level of the center pivot was quite off. I mean, it works because who really says a Titan’s shoulders need to be level.. but there was a lot of tilt. This should fix that mostly. The legs are the most fiddly part of the build. There are two hip ball joints, two ankle ball joins and the knees. Warlord Alpha, I just chose two knee angles and went from there. This time I tacked the feet down and glued the rest of the mess and posed them before it set. (with the level also tacked to the hip pivot). Worked, but the thigh/knee join was constantly in danger of seperating.
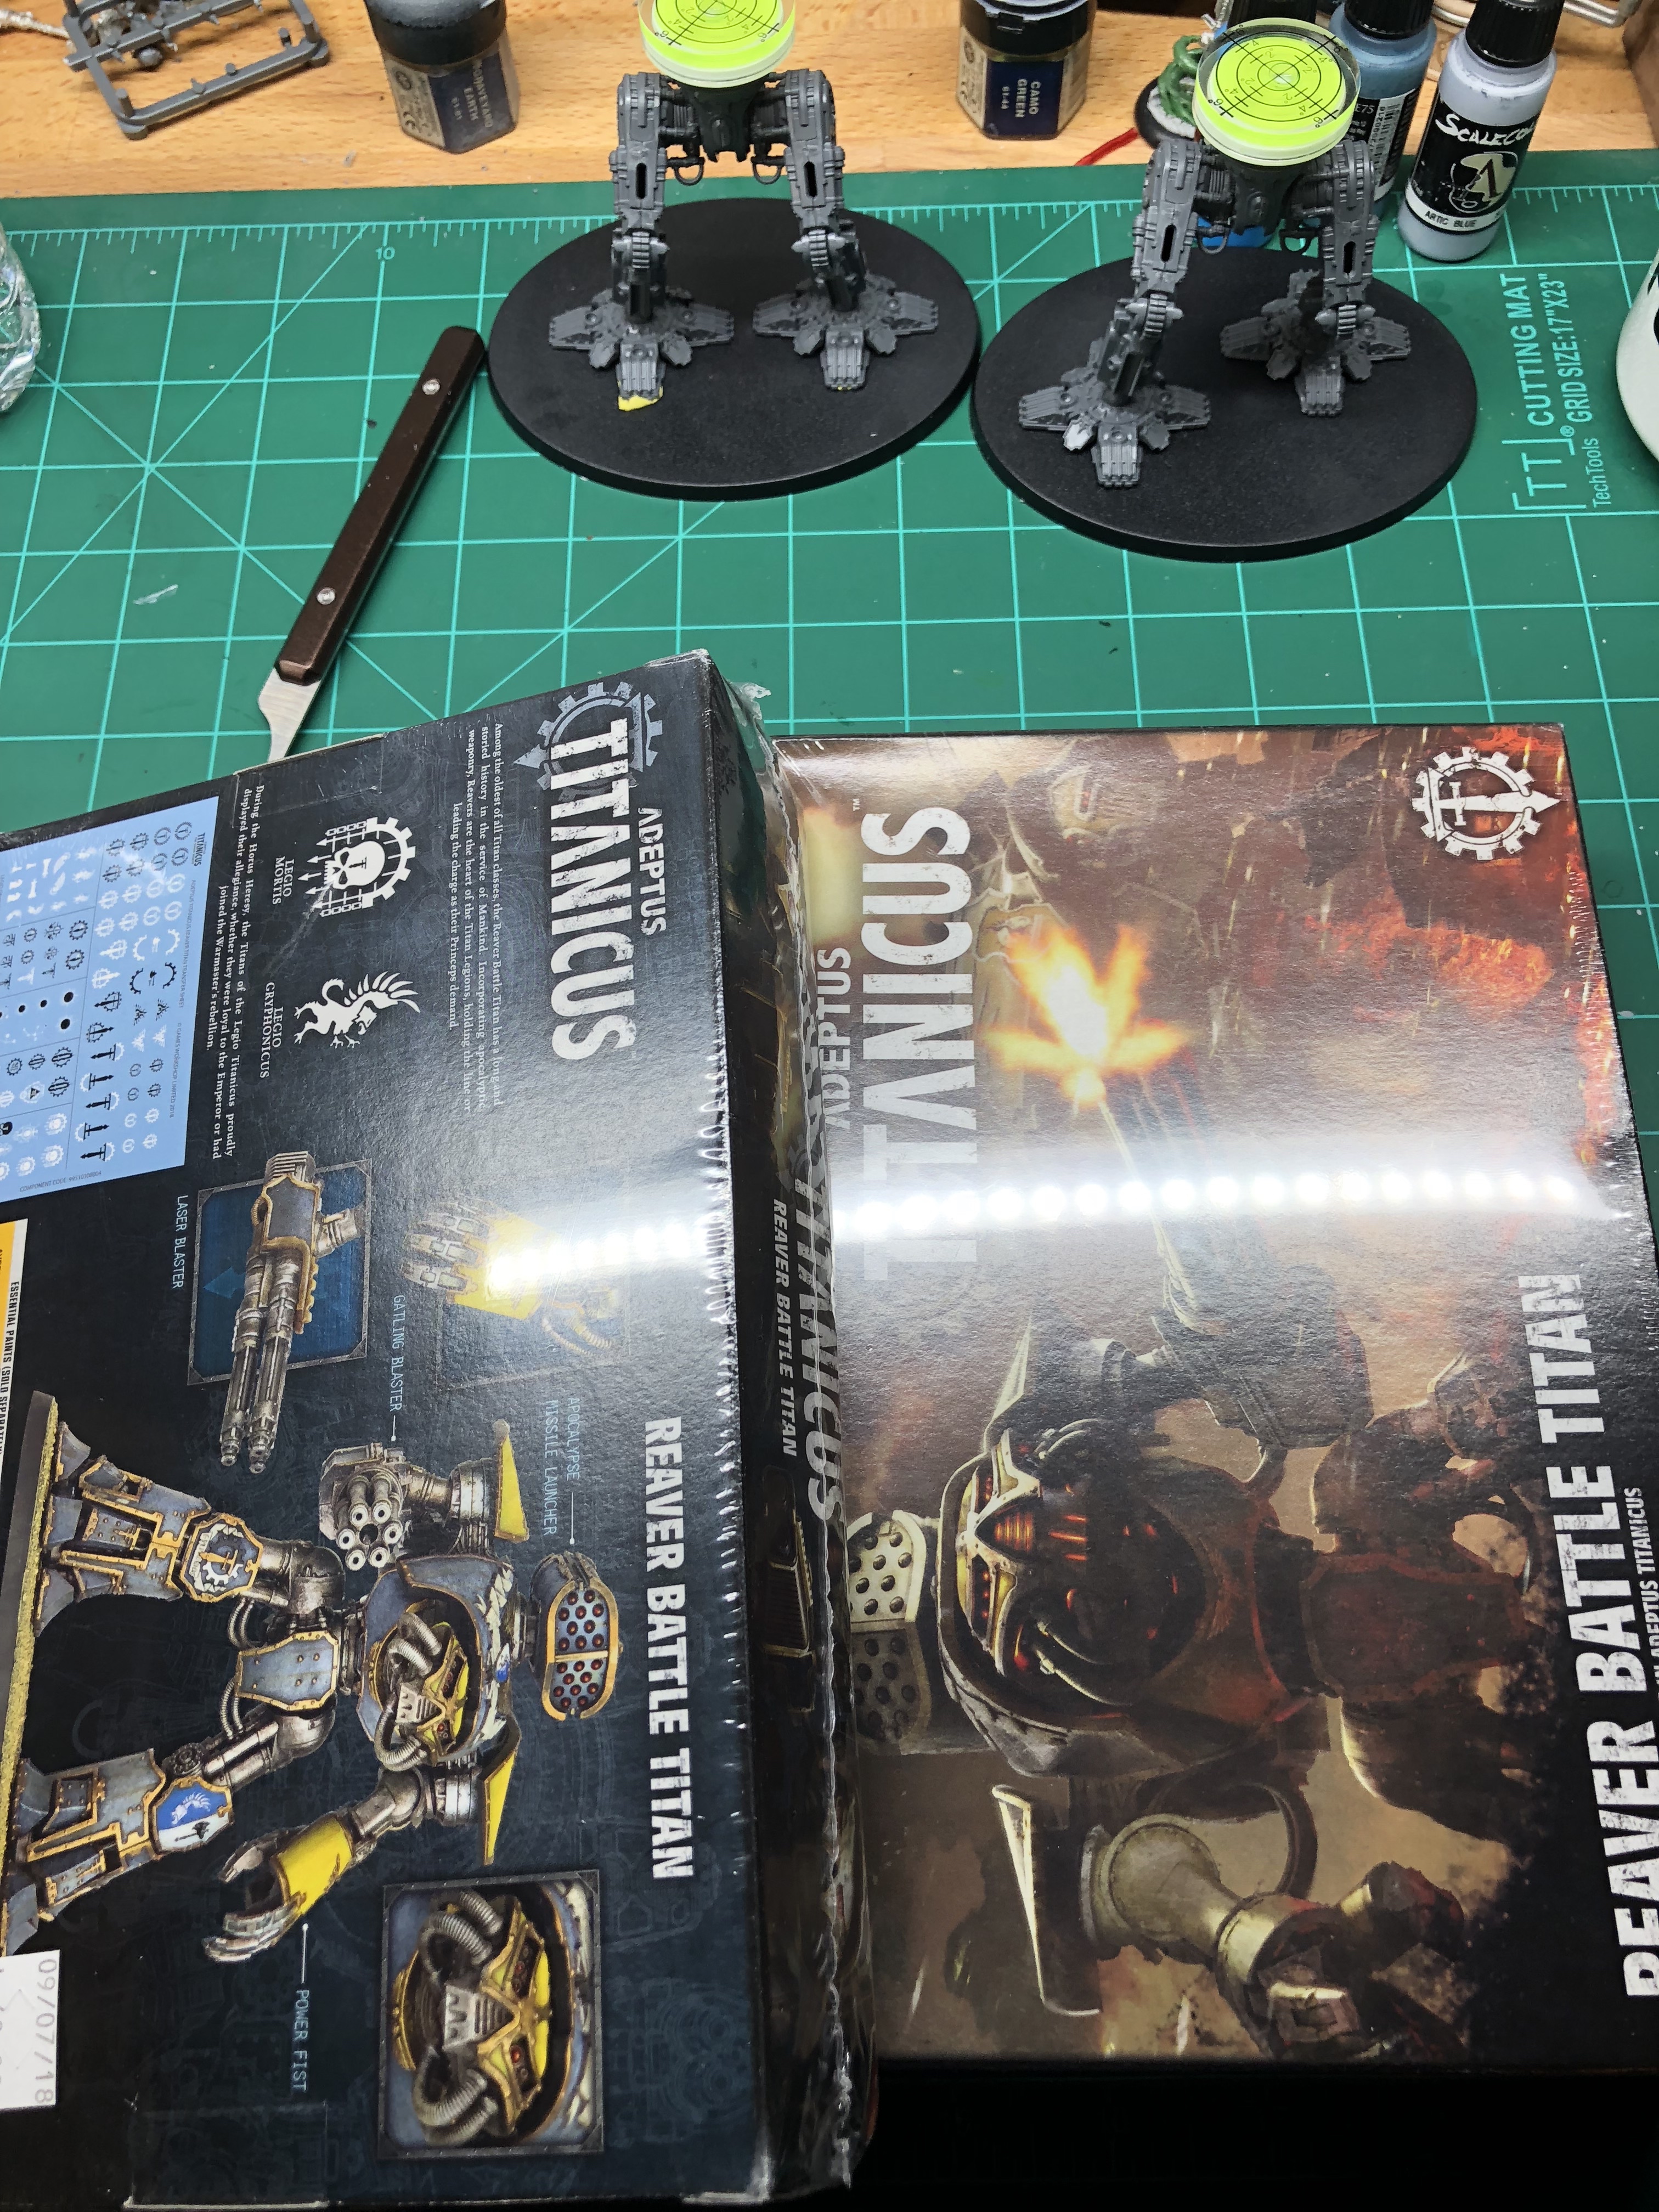
And these two.. my FLGS had some issues with my preorder as apparently the cards are webstore only. Don’t know what that’s about. I’m building a Myrmidon Maniple here, I need more cards than are in the Grand Master Box.
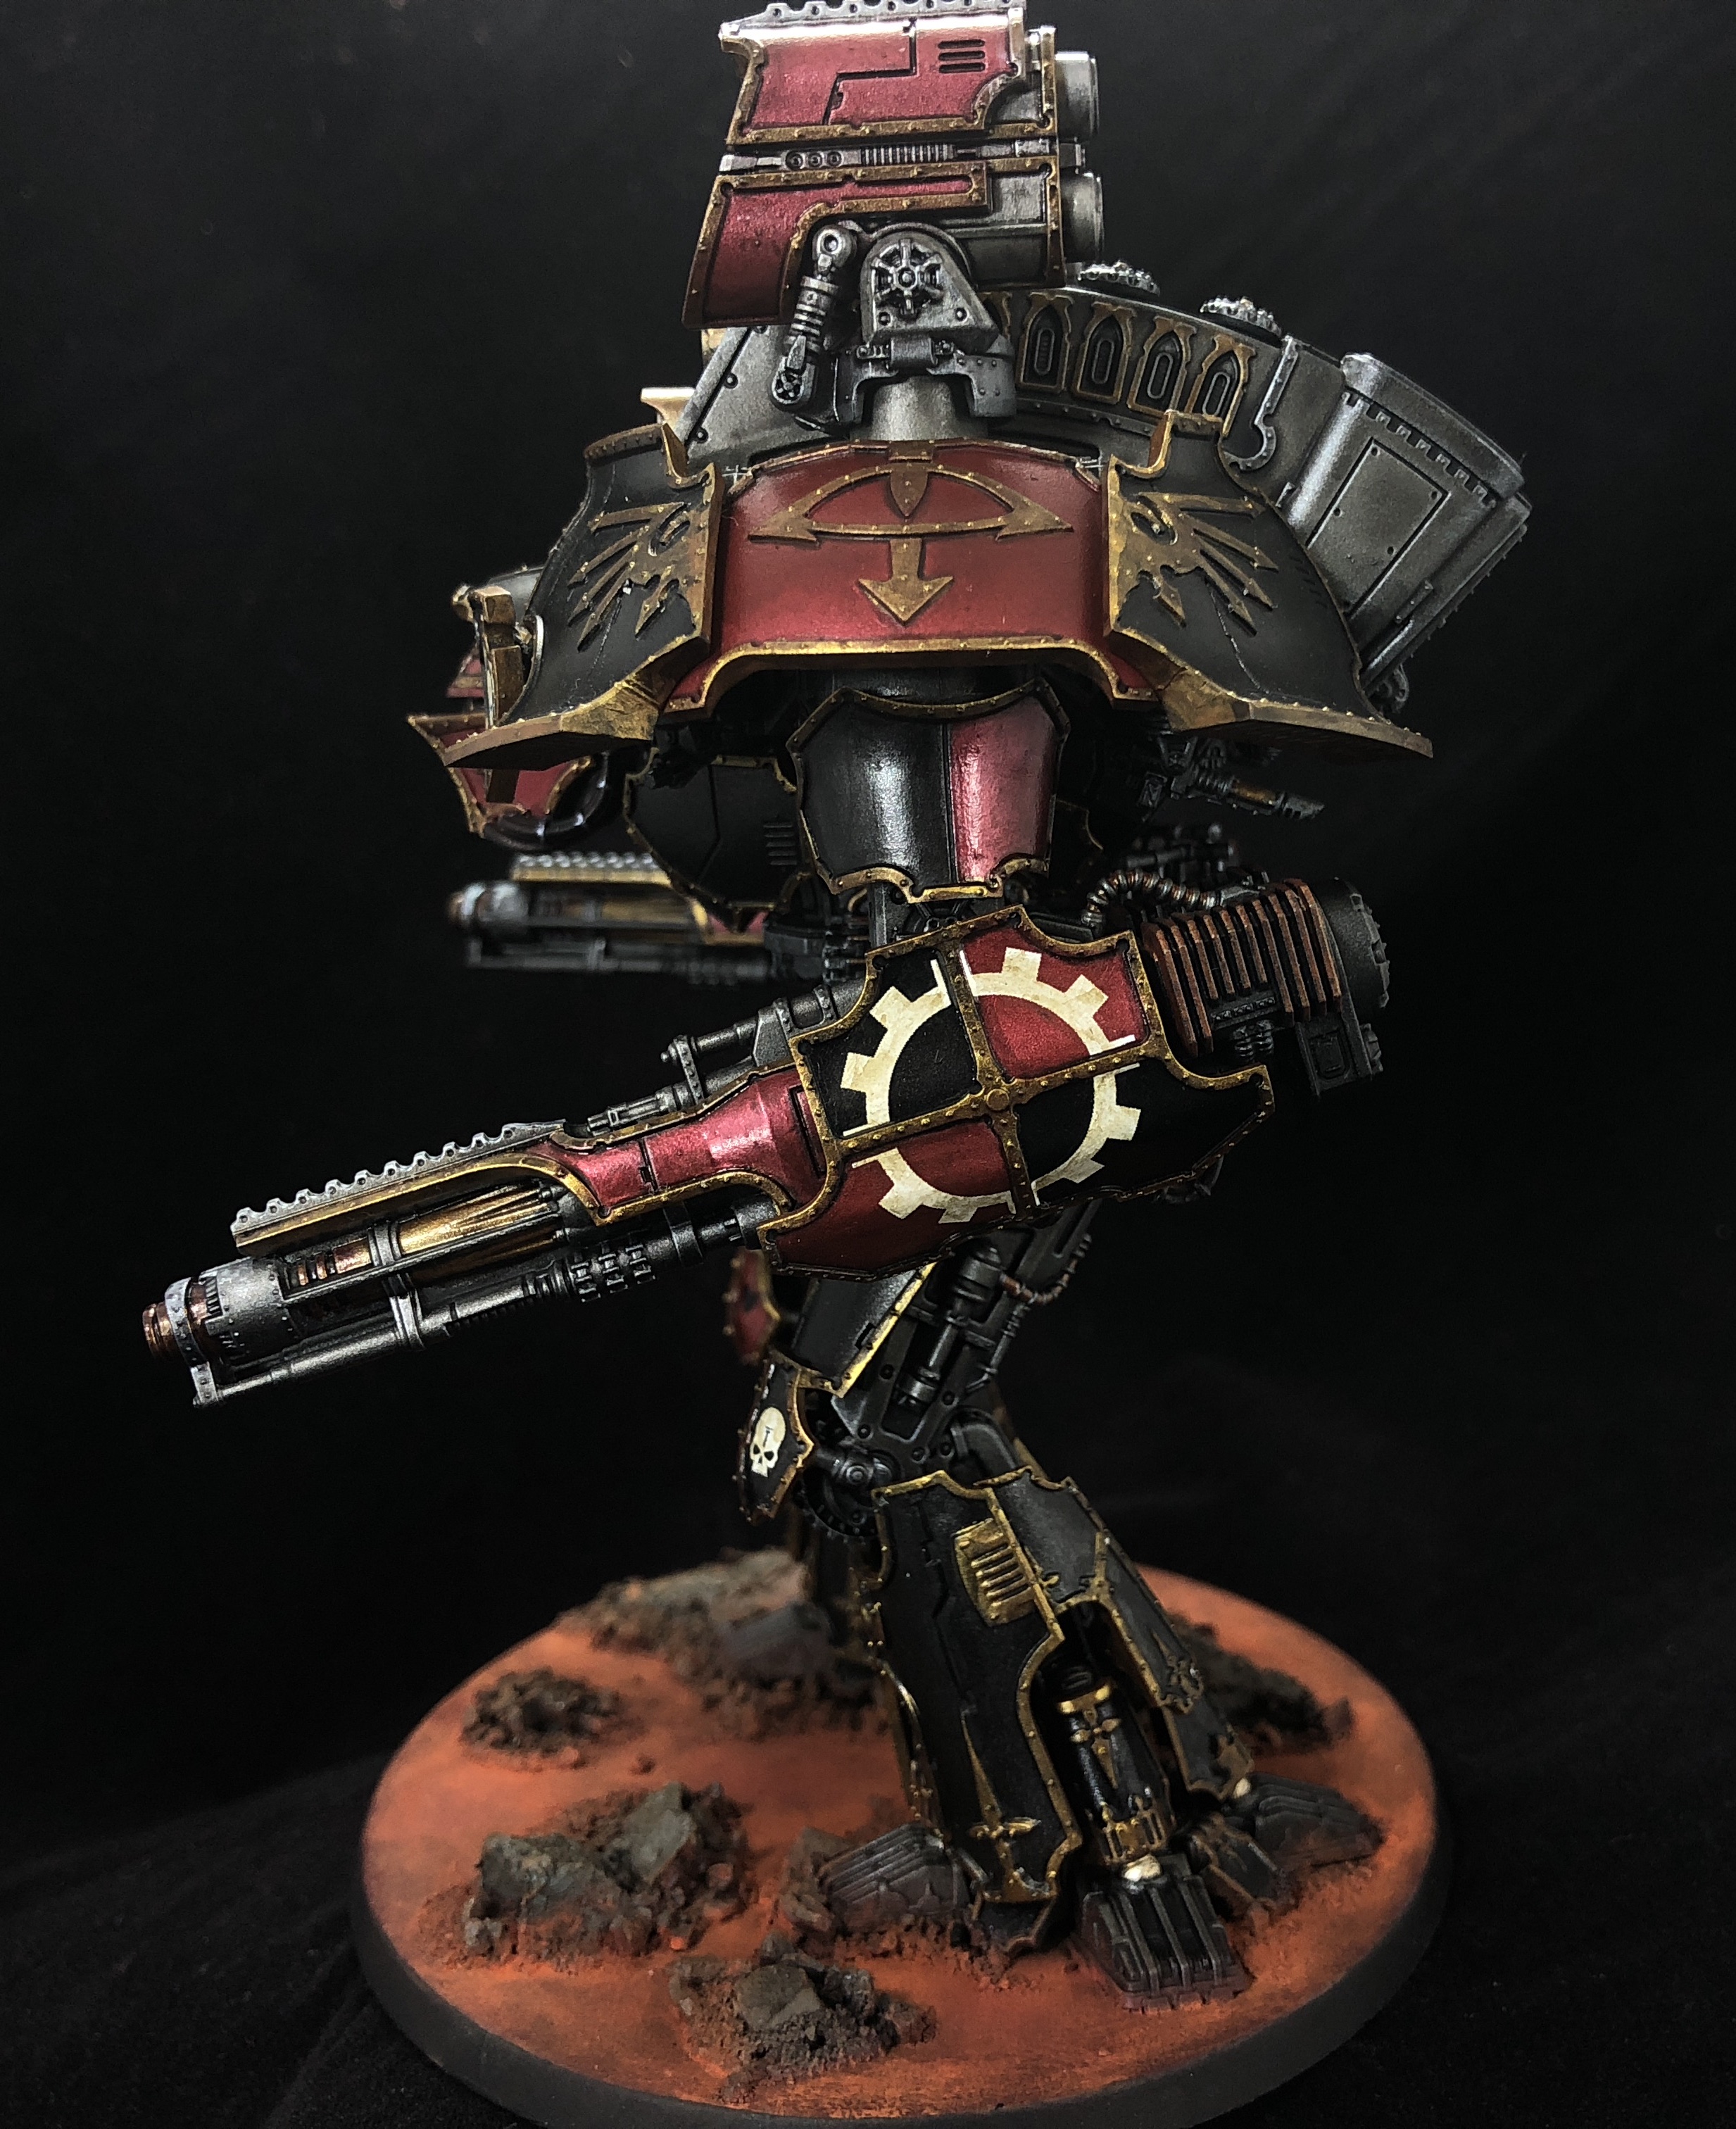
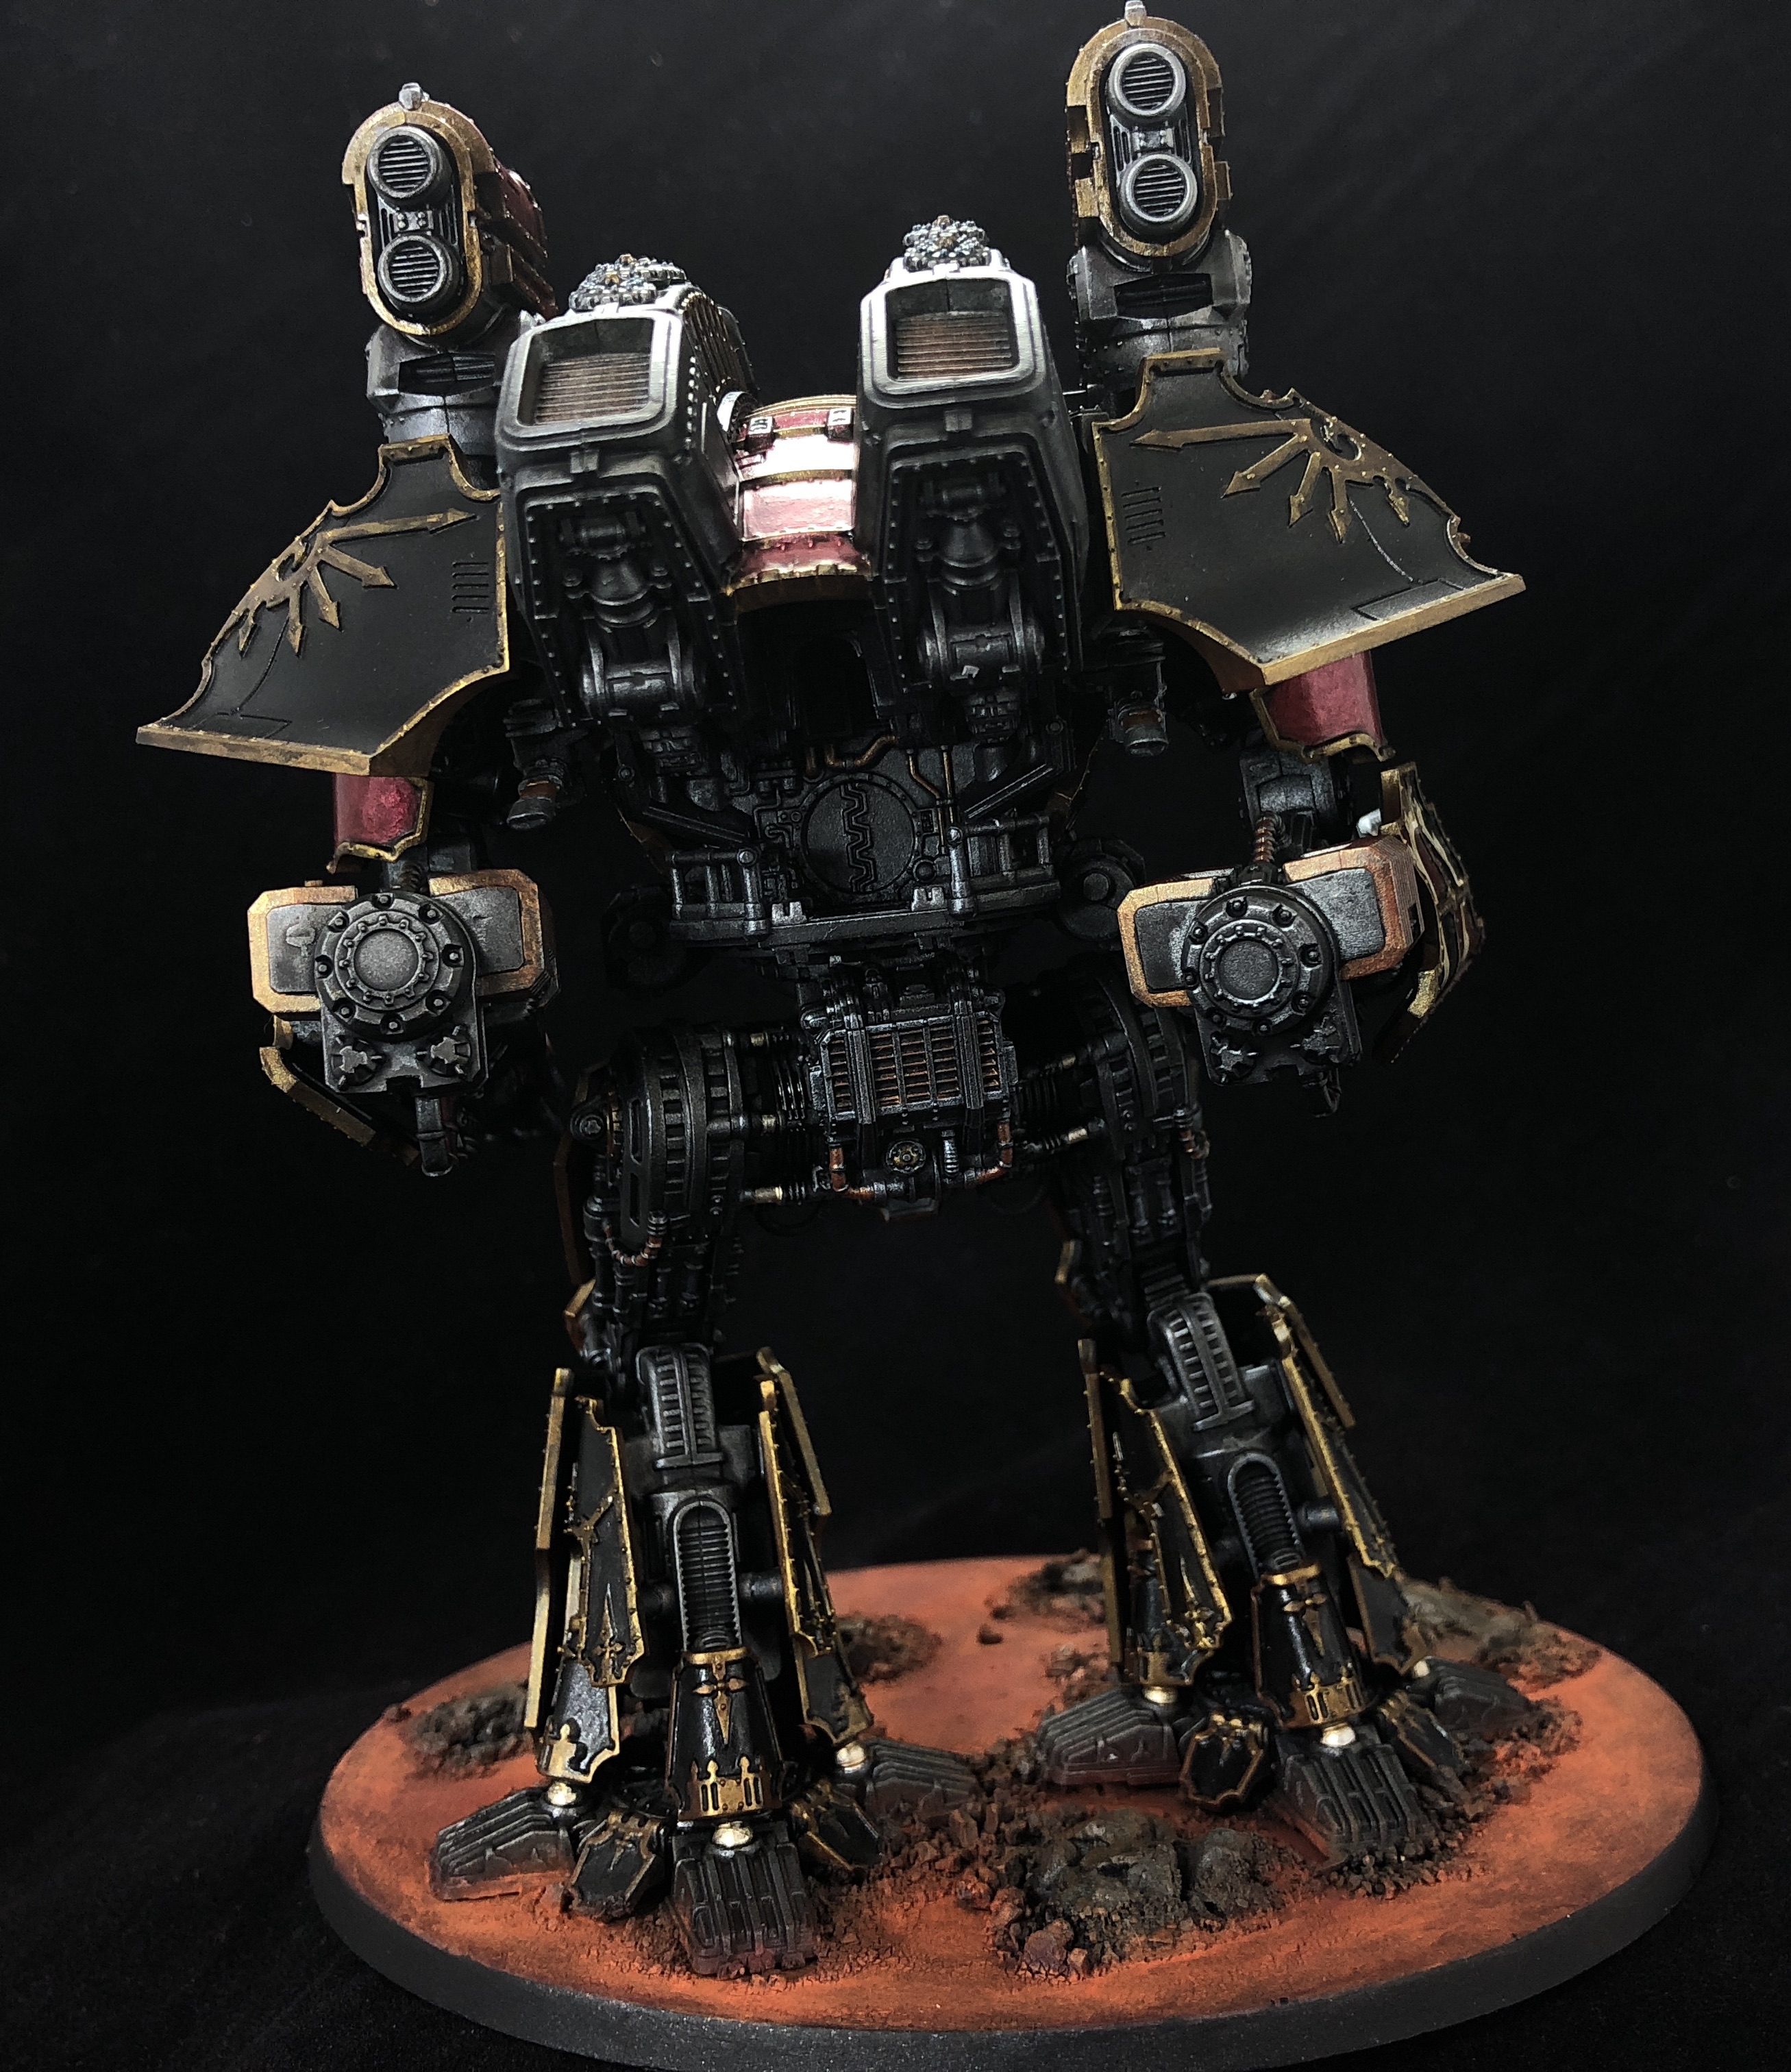
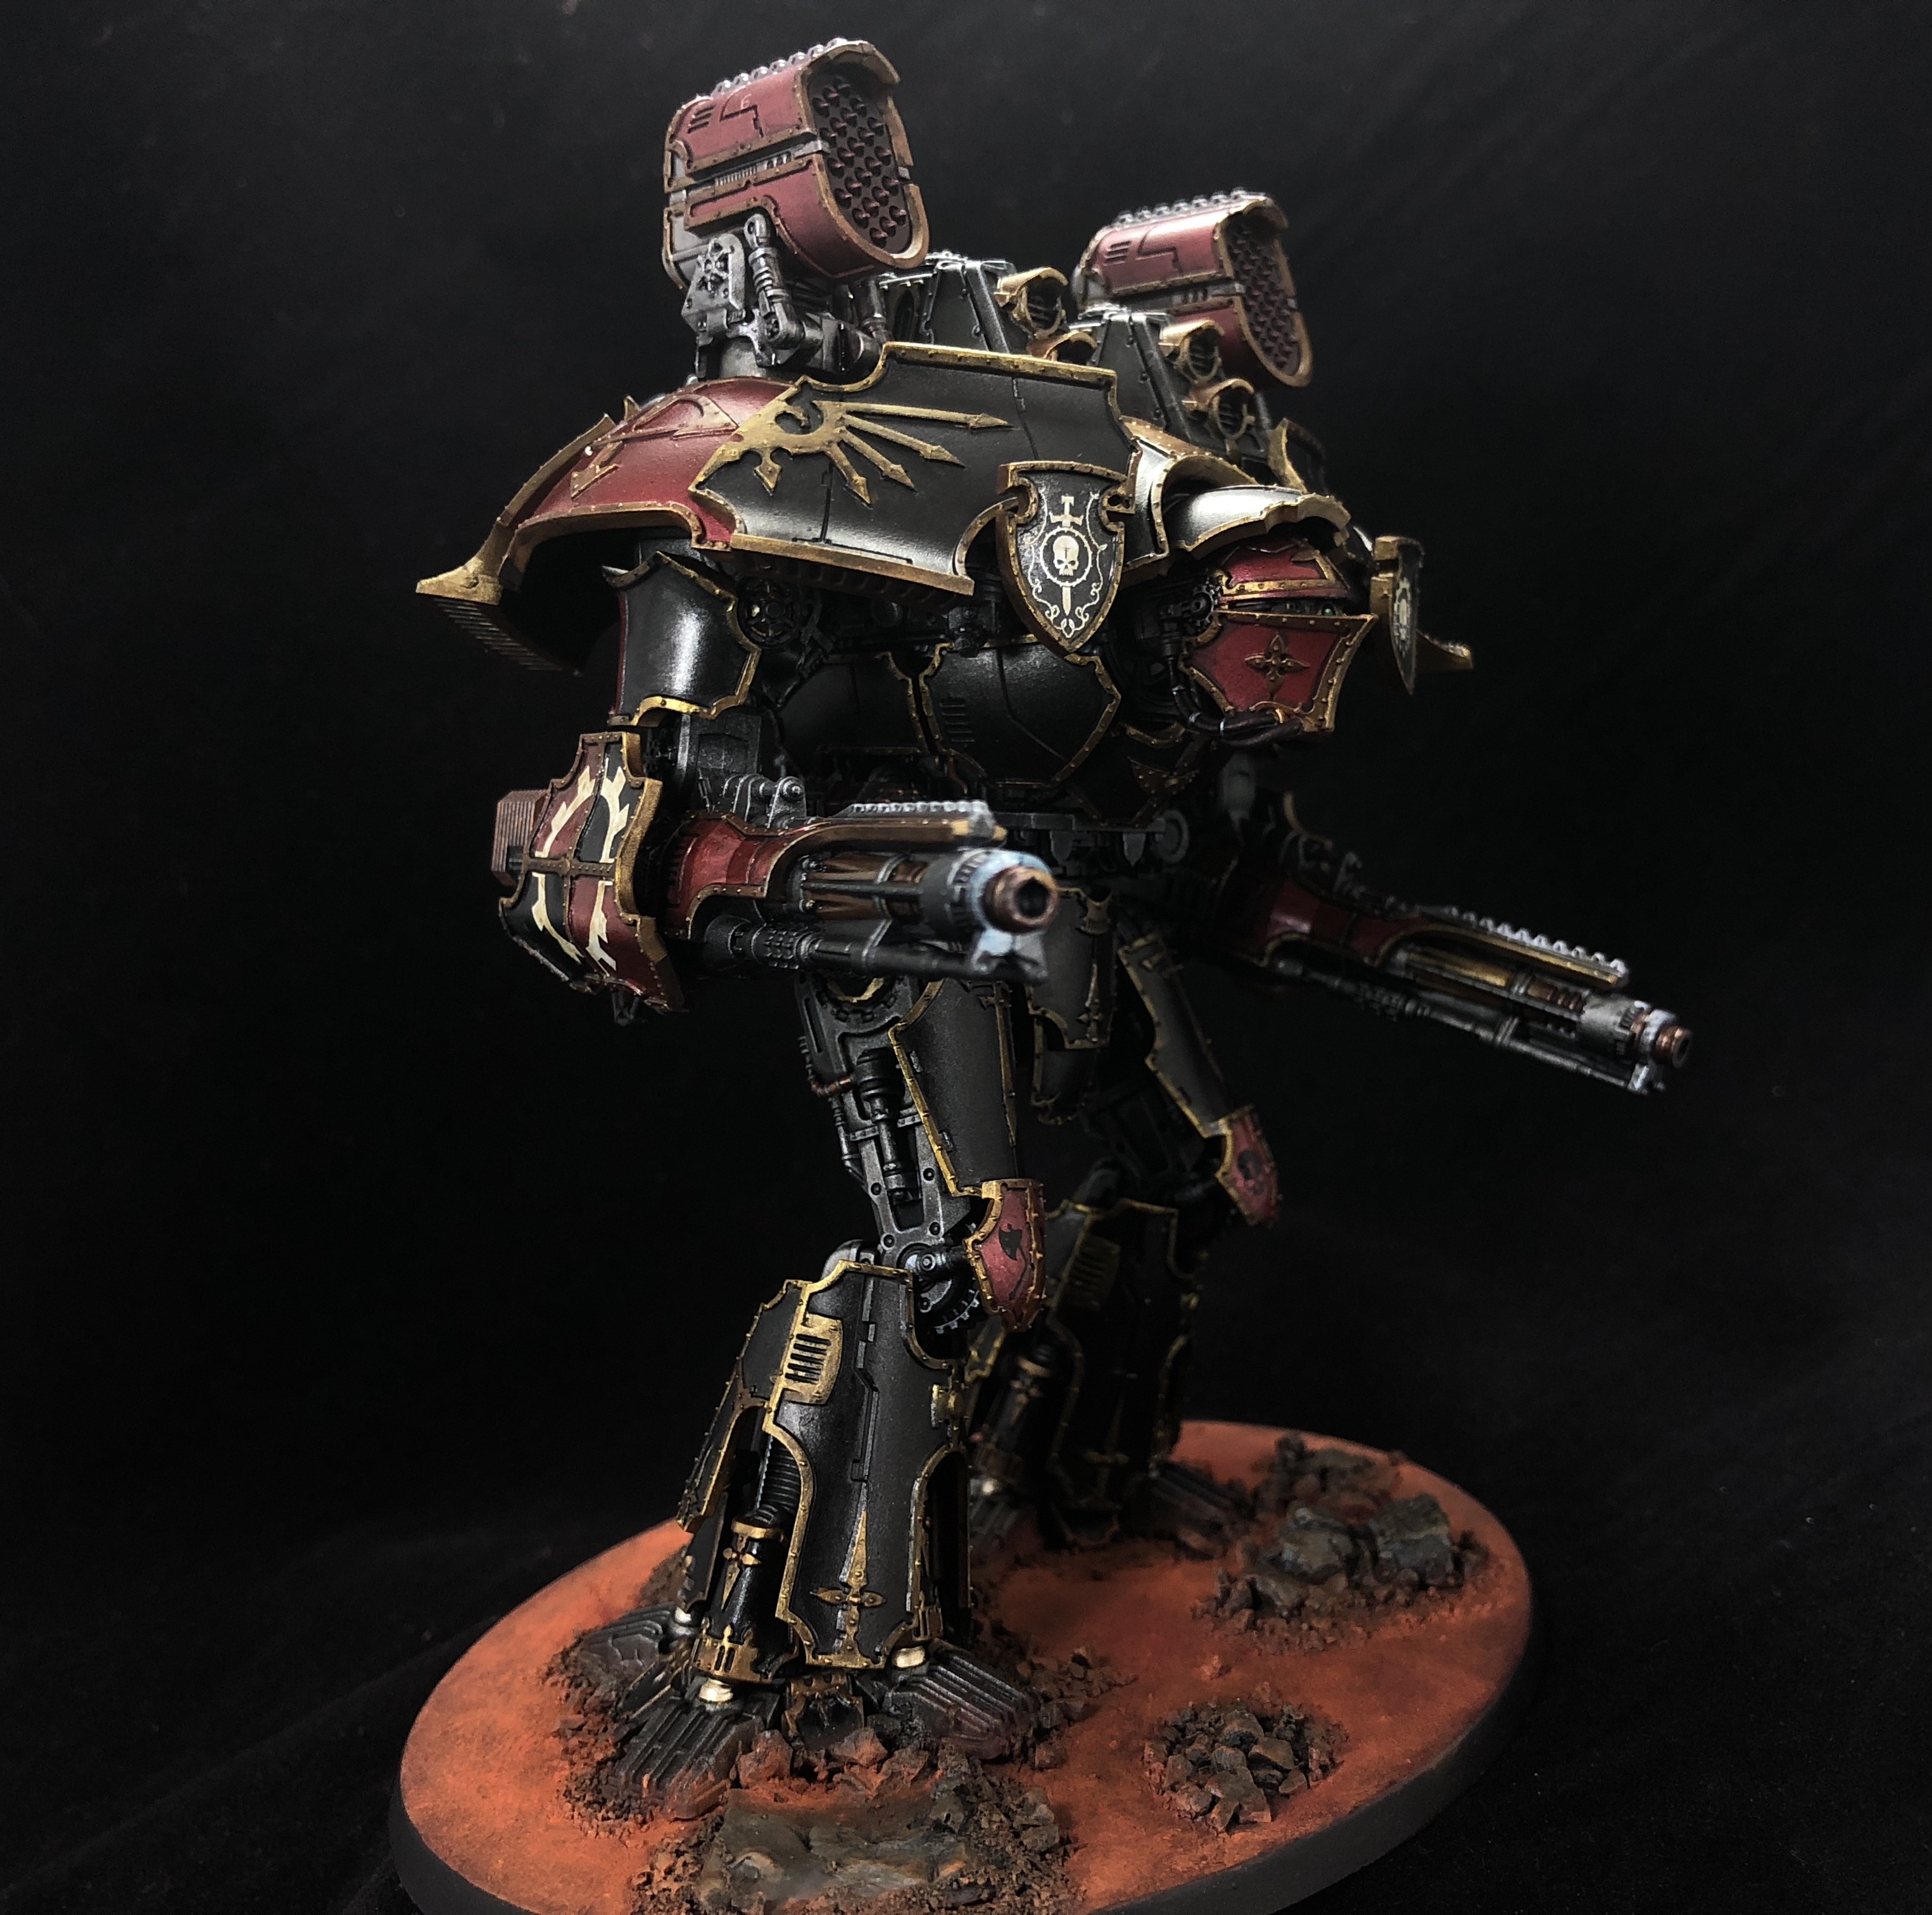
99% (Maybe)
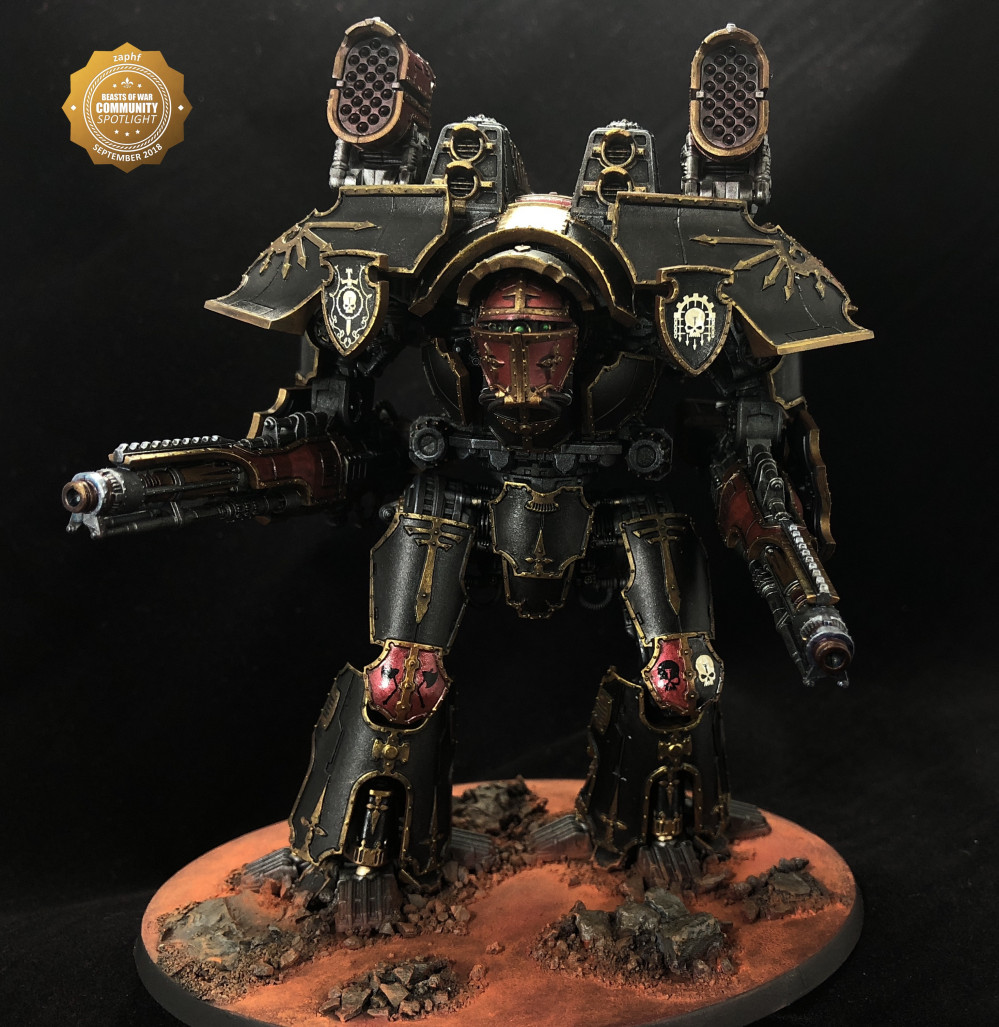
There’s a bit of general detailing, touching up the base, Varnishing, etc to do, but I just glued the head on and wanted some glamour shots. I still can’t take a mini photo worth a damn, but here for your review is Warlord Alpha. Comments and Suggestions would be appreciated.
My thoughts on the process… I learned a lot. The Candy Coating I think has mixed results. It looks better when done by hand with this mix, but I’m not sure I could have done it all by hand. Transparent Glazing, I found out, is a tricky thing without an airbrush. I’m fairly stuck with it as this is meant to be an actual tabletop army.
Edit: Thanks for the button!

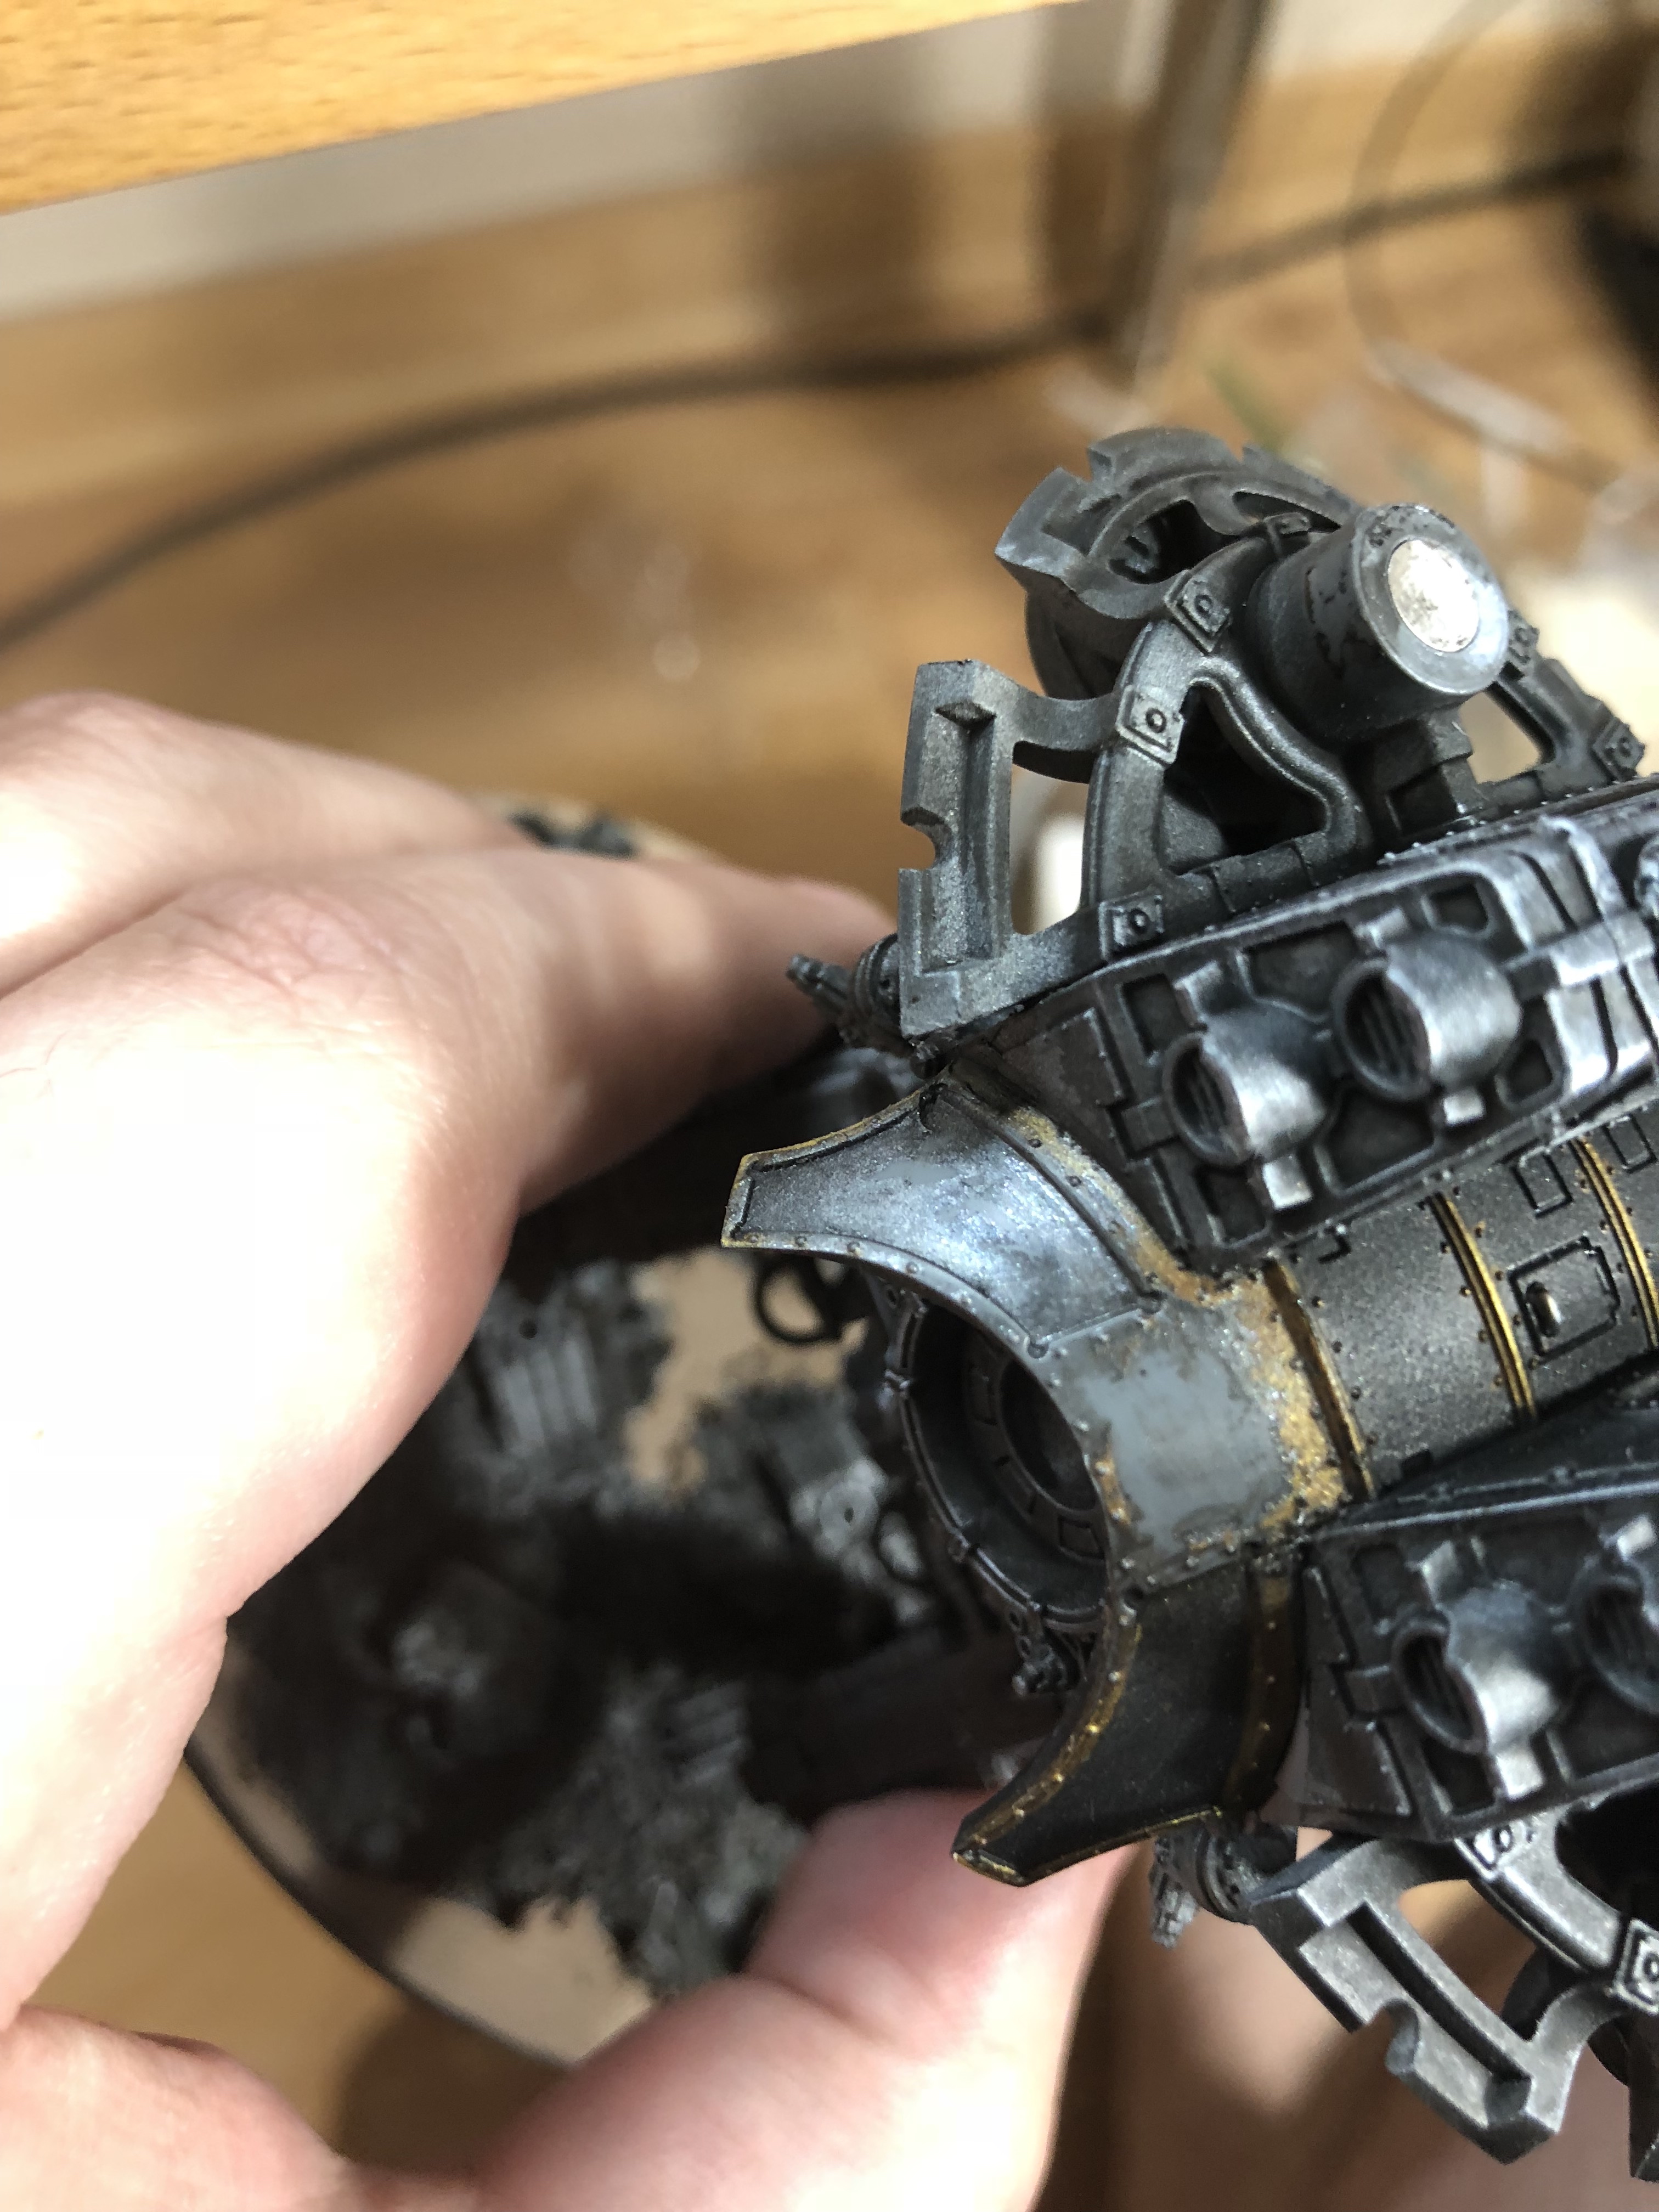
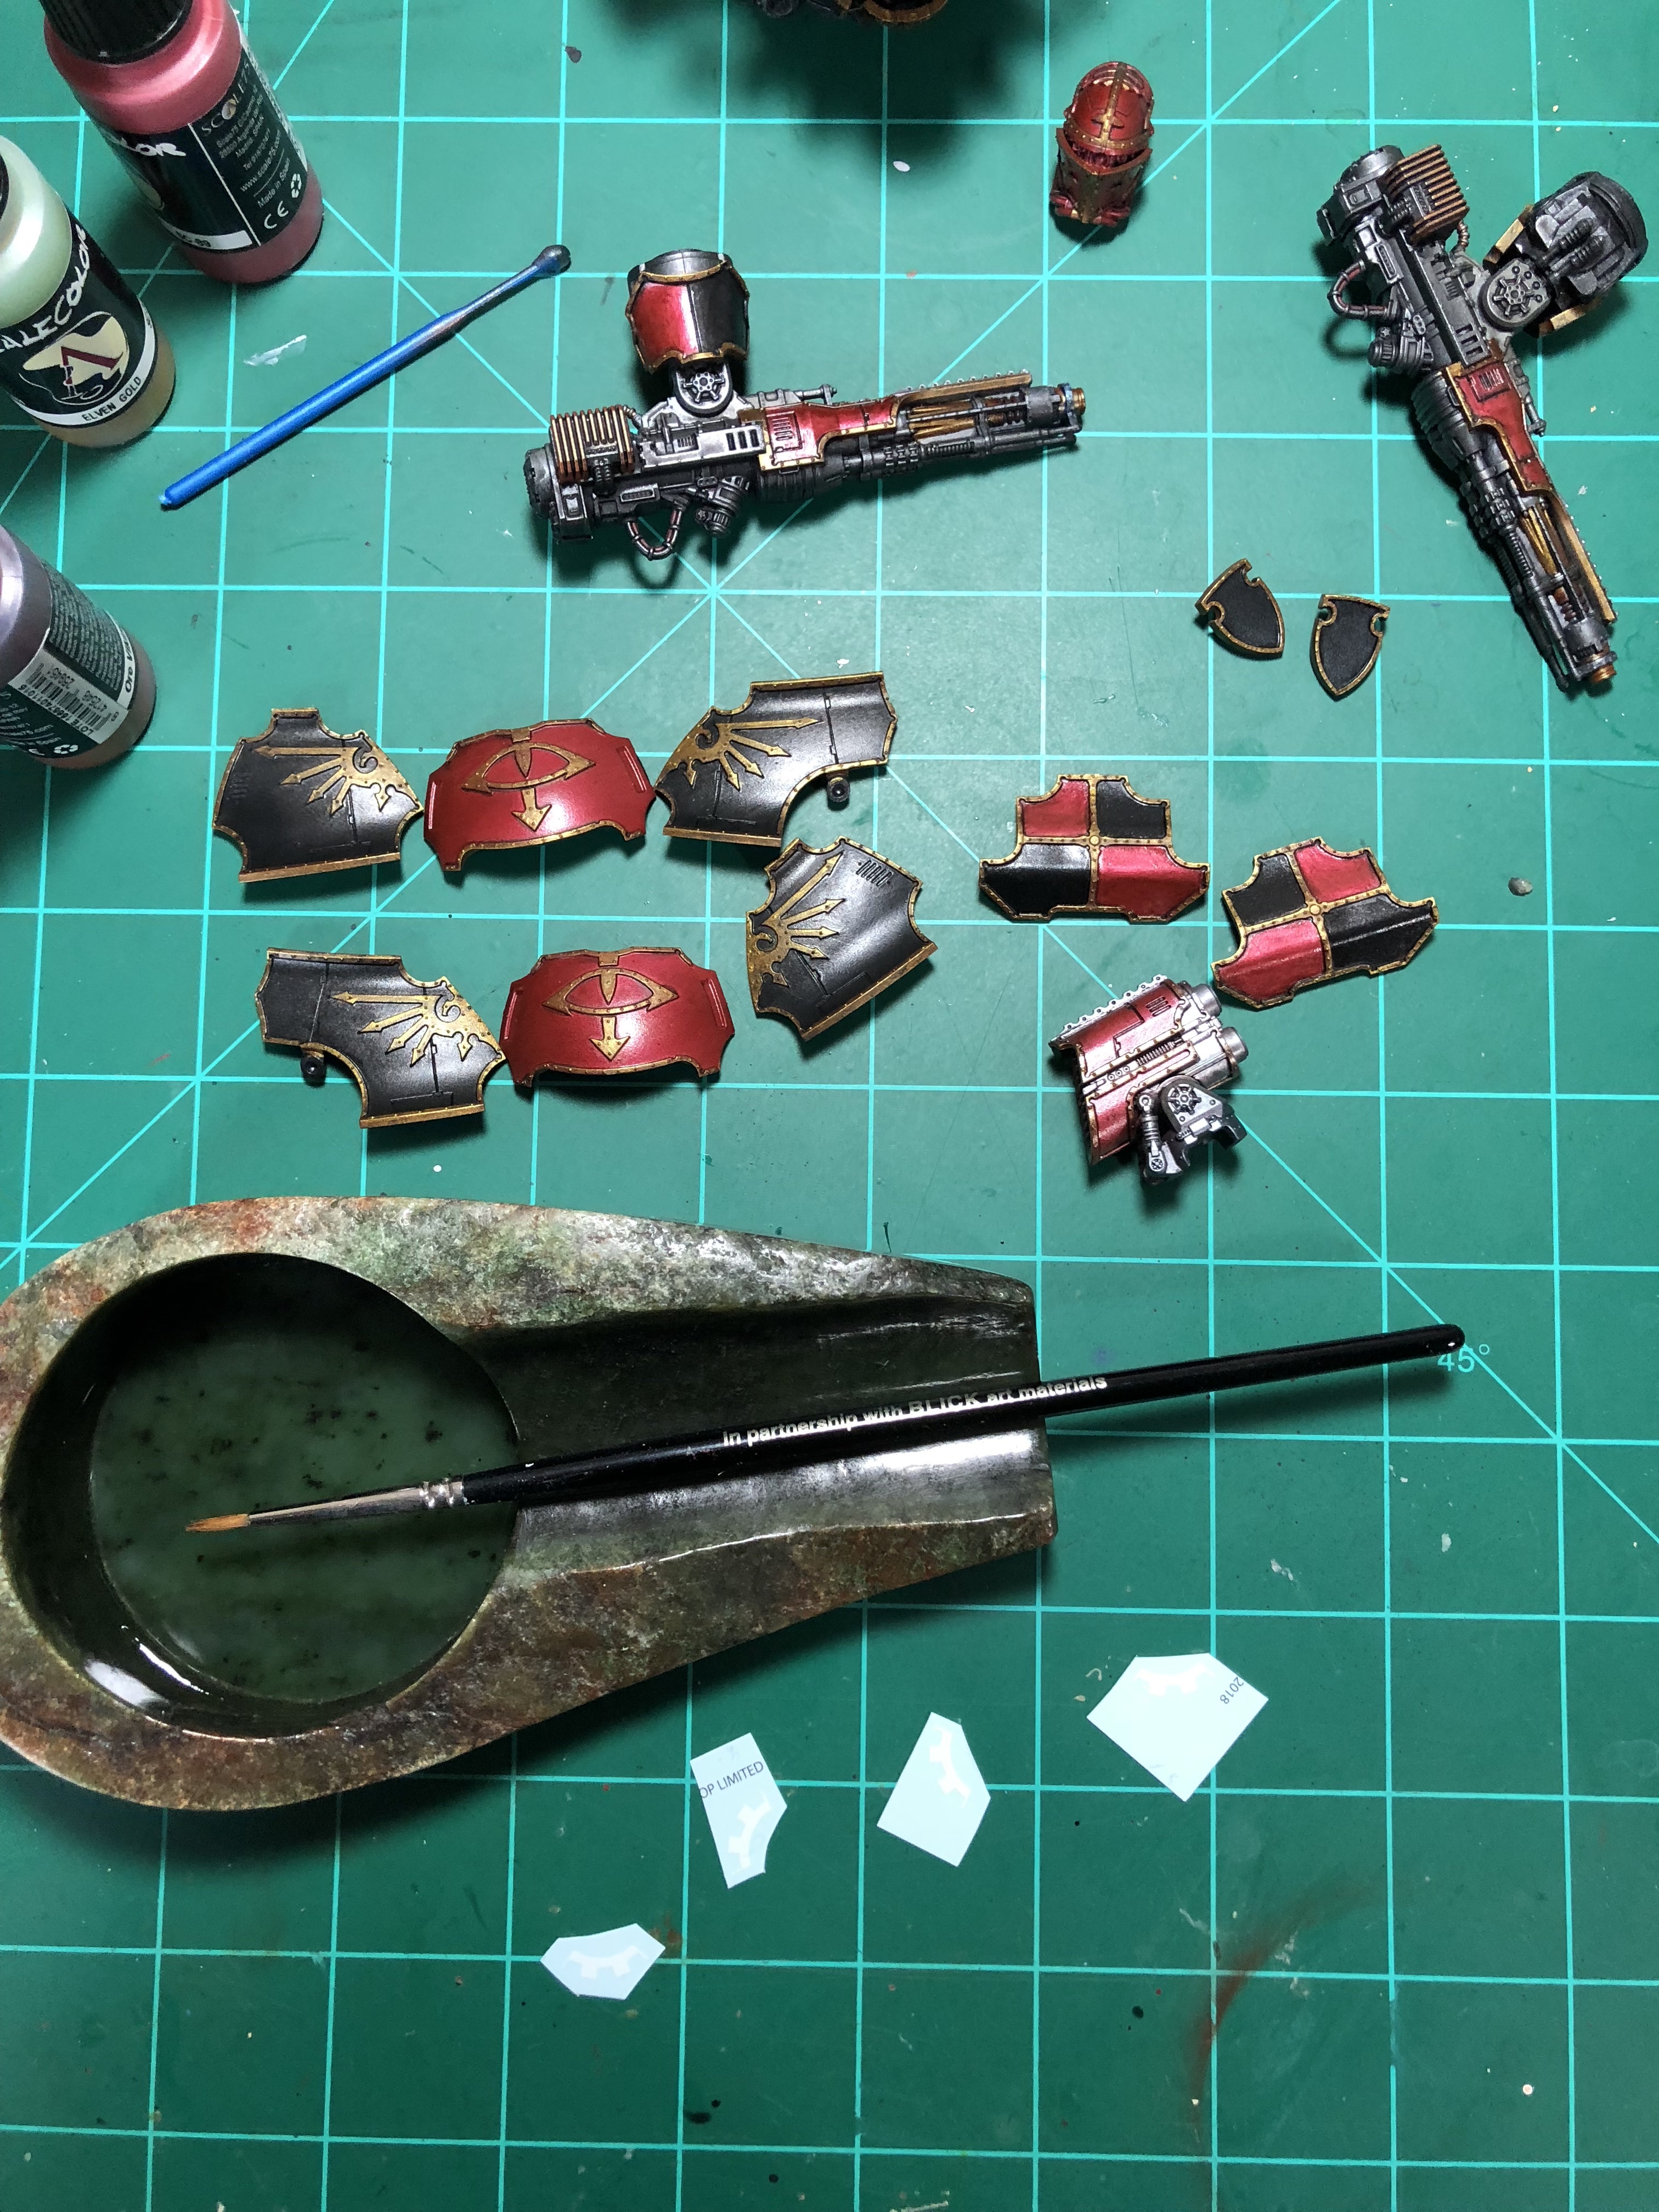
Trim and Decals
Ok, that was a lot of trim. The GW kind. It was a bit of a grind, but I got down to it.
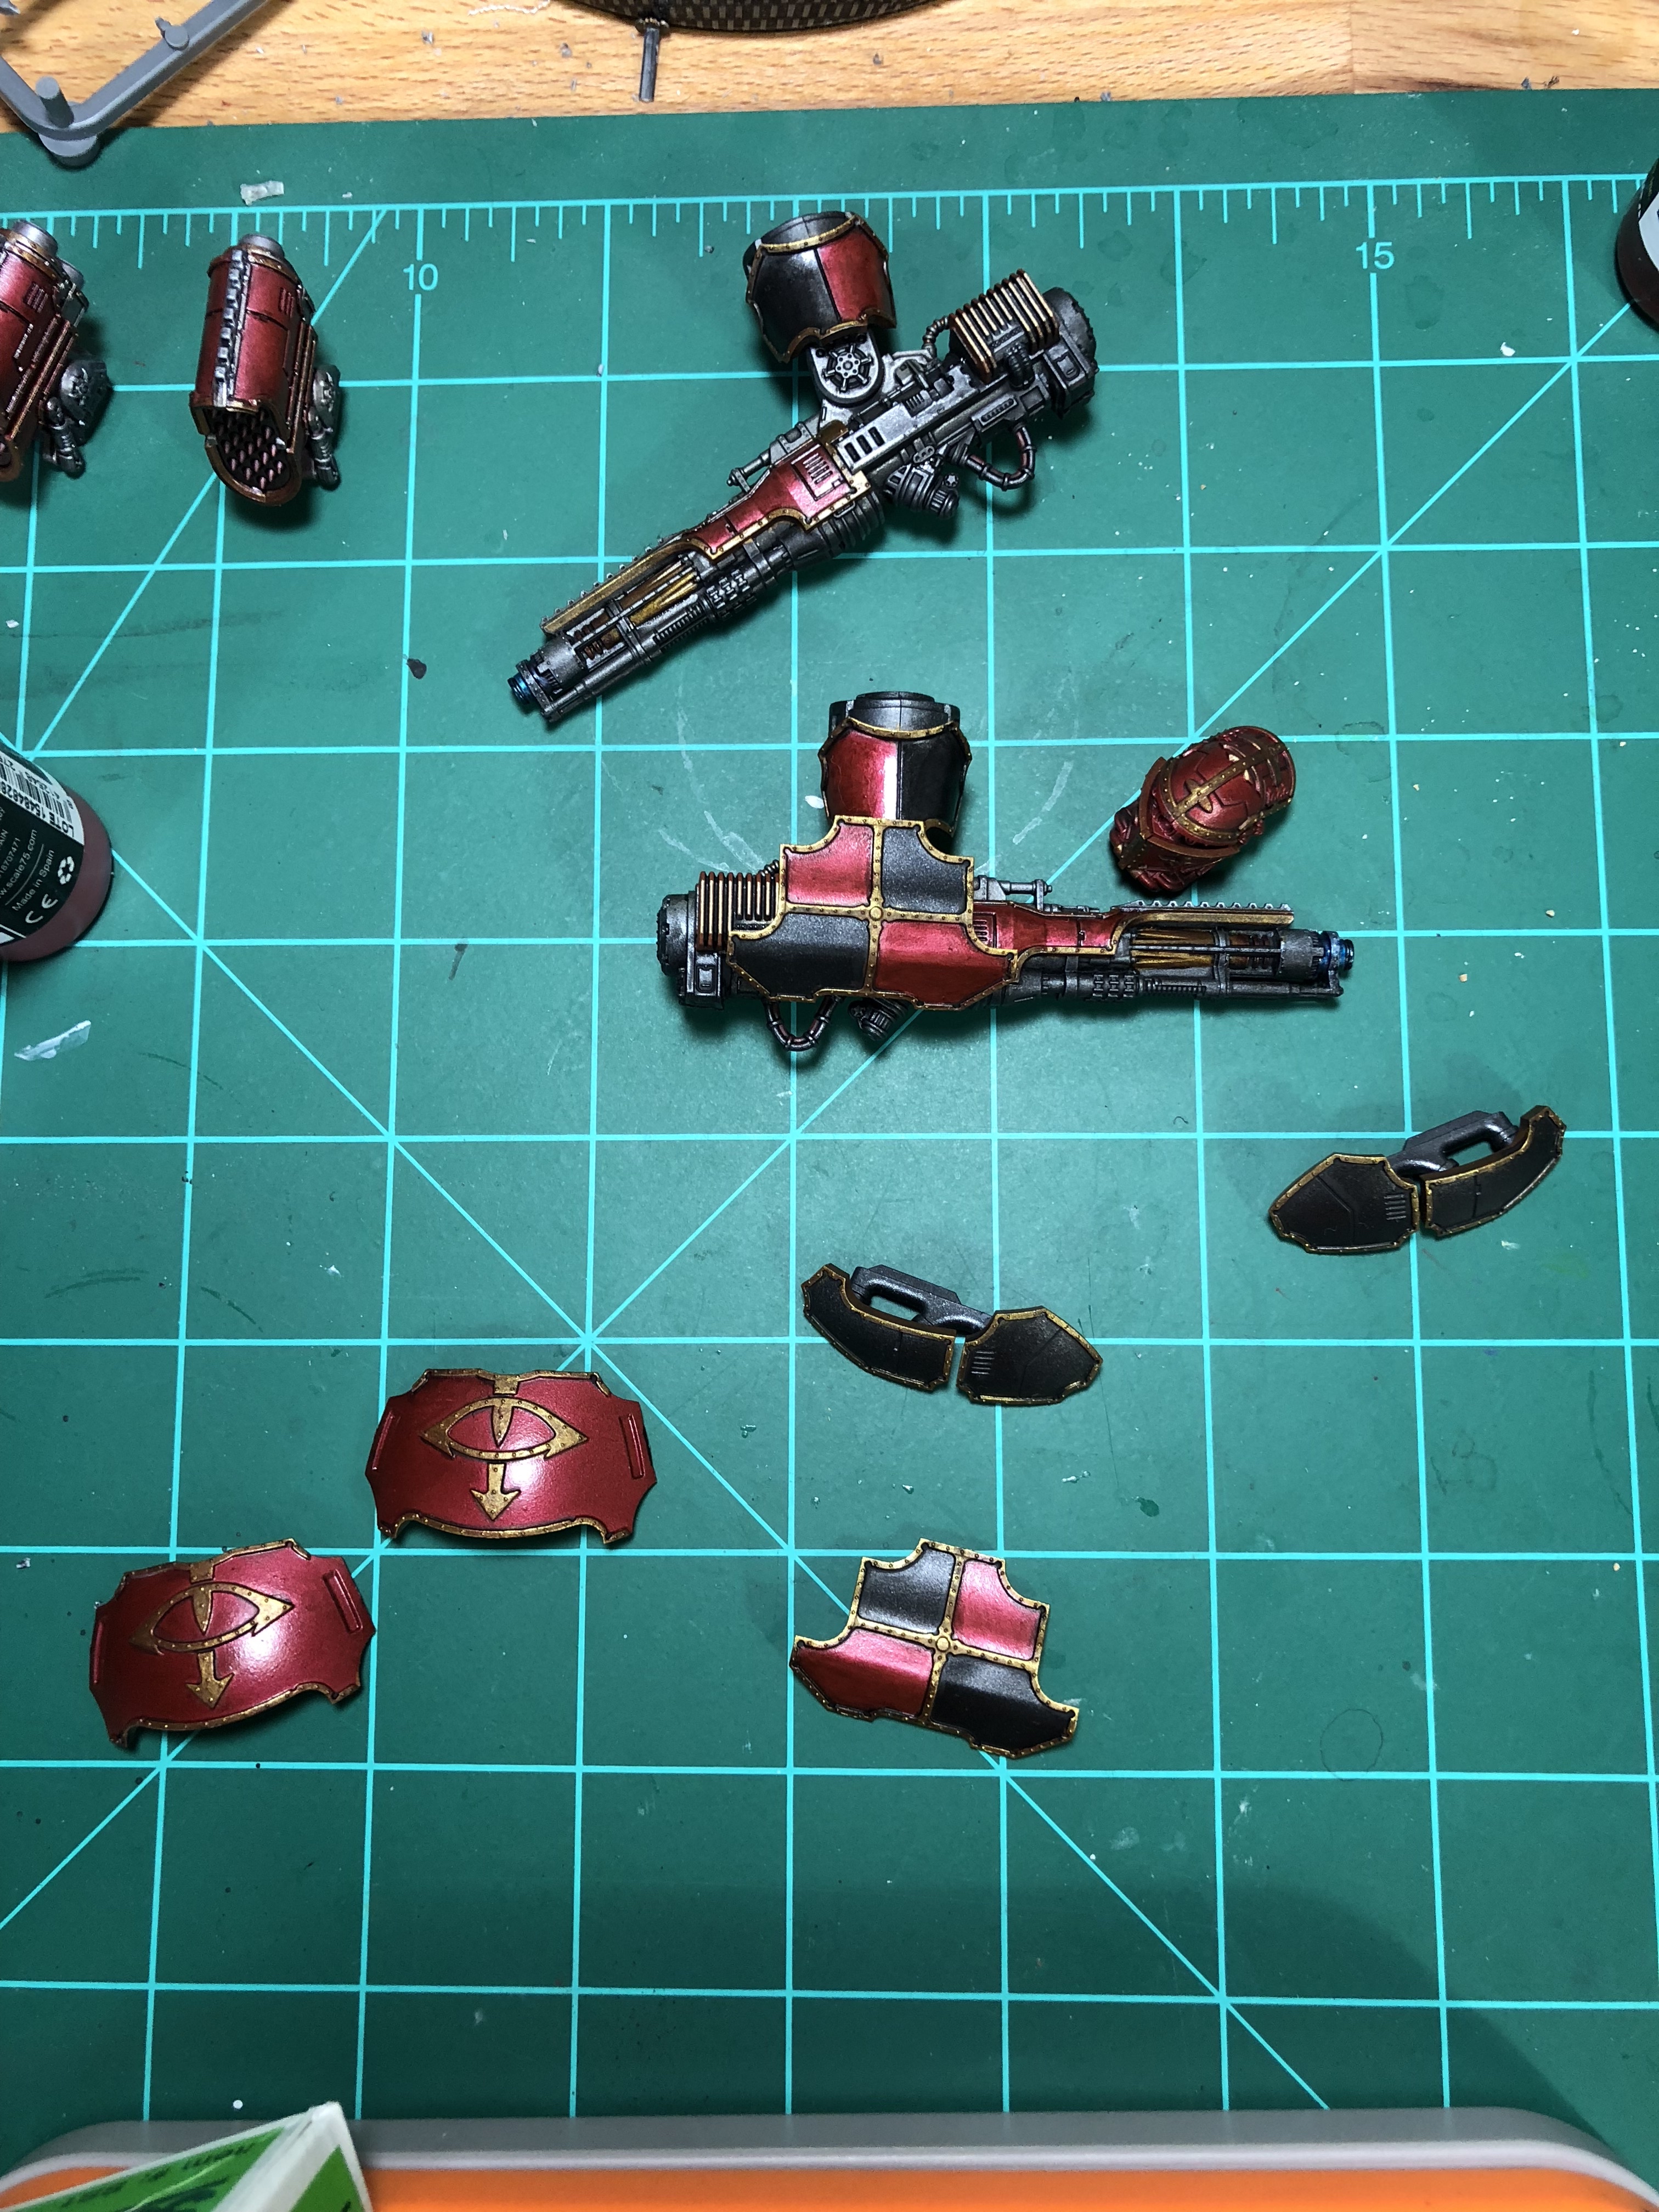
Decals.. Never done them. I did what was recommended with a gloss varnish layer, then the transfer. The Volcano Cannon Plate was probably not the best thing in the world to do your first transfer on. 4 pieces that need to align. Turned out tho, very slightly off I think (I could only tell once I looked at the picture).
Things are getting close to done with my first Warlord, but one mere Titan doesn’t make for a Legio.
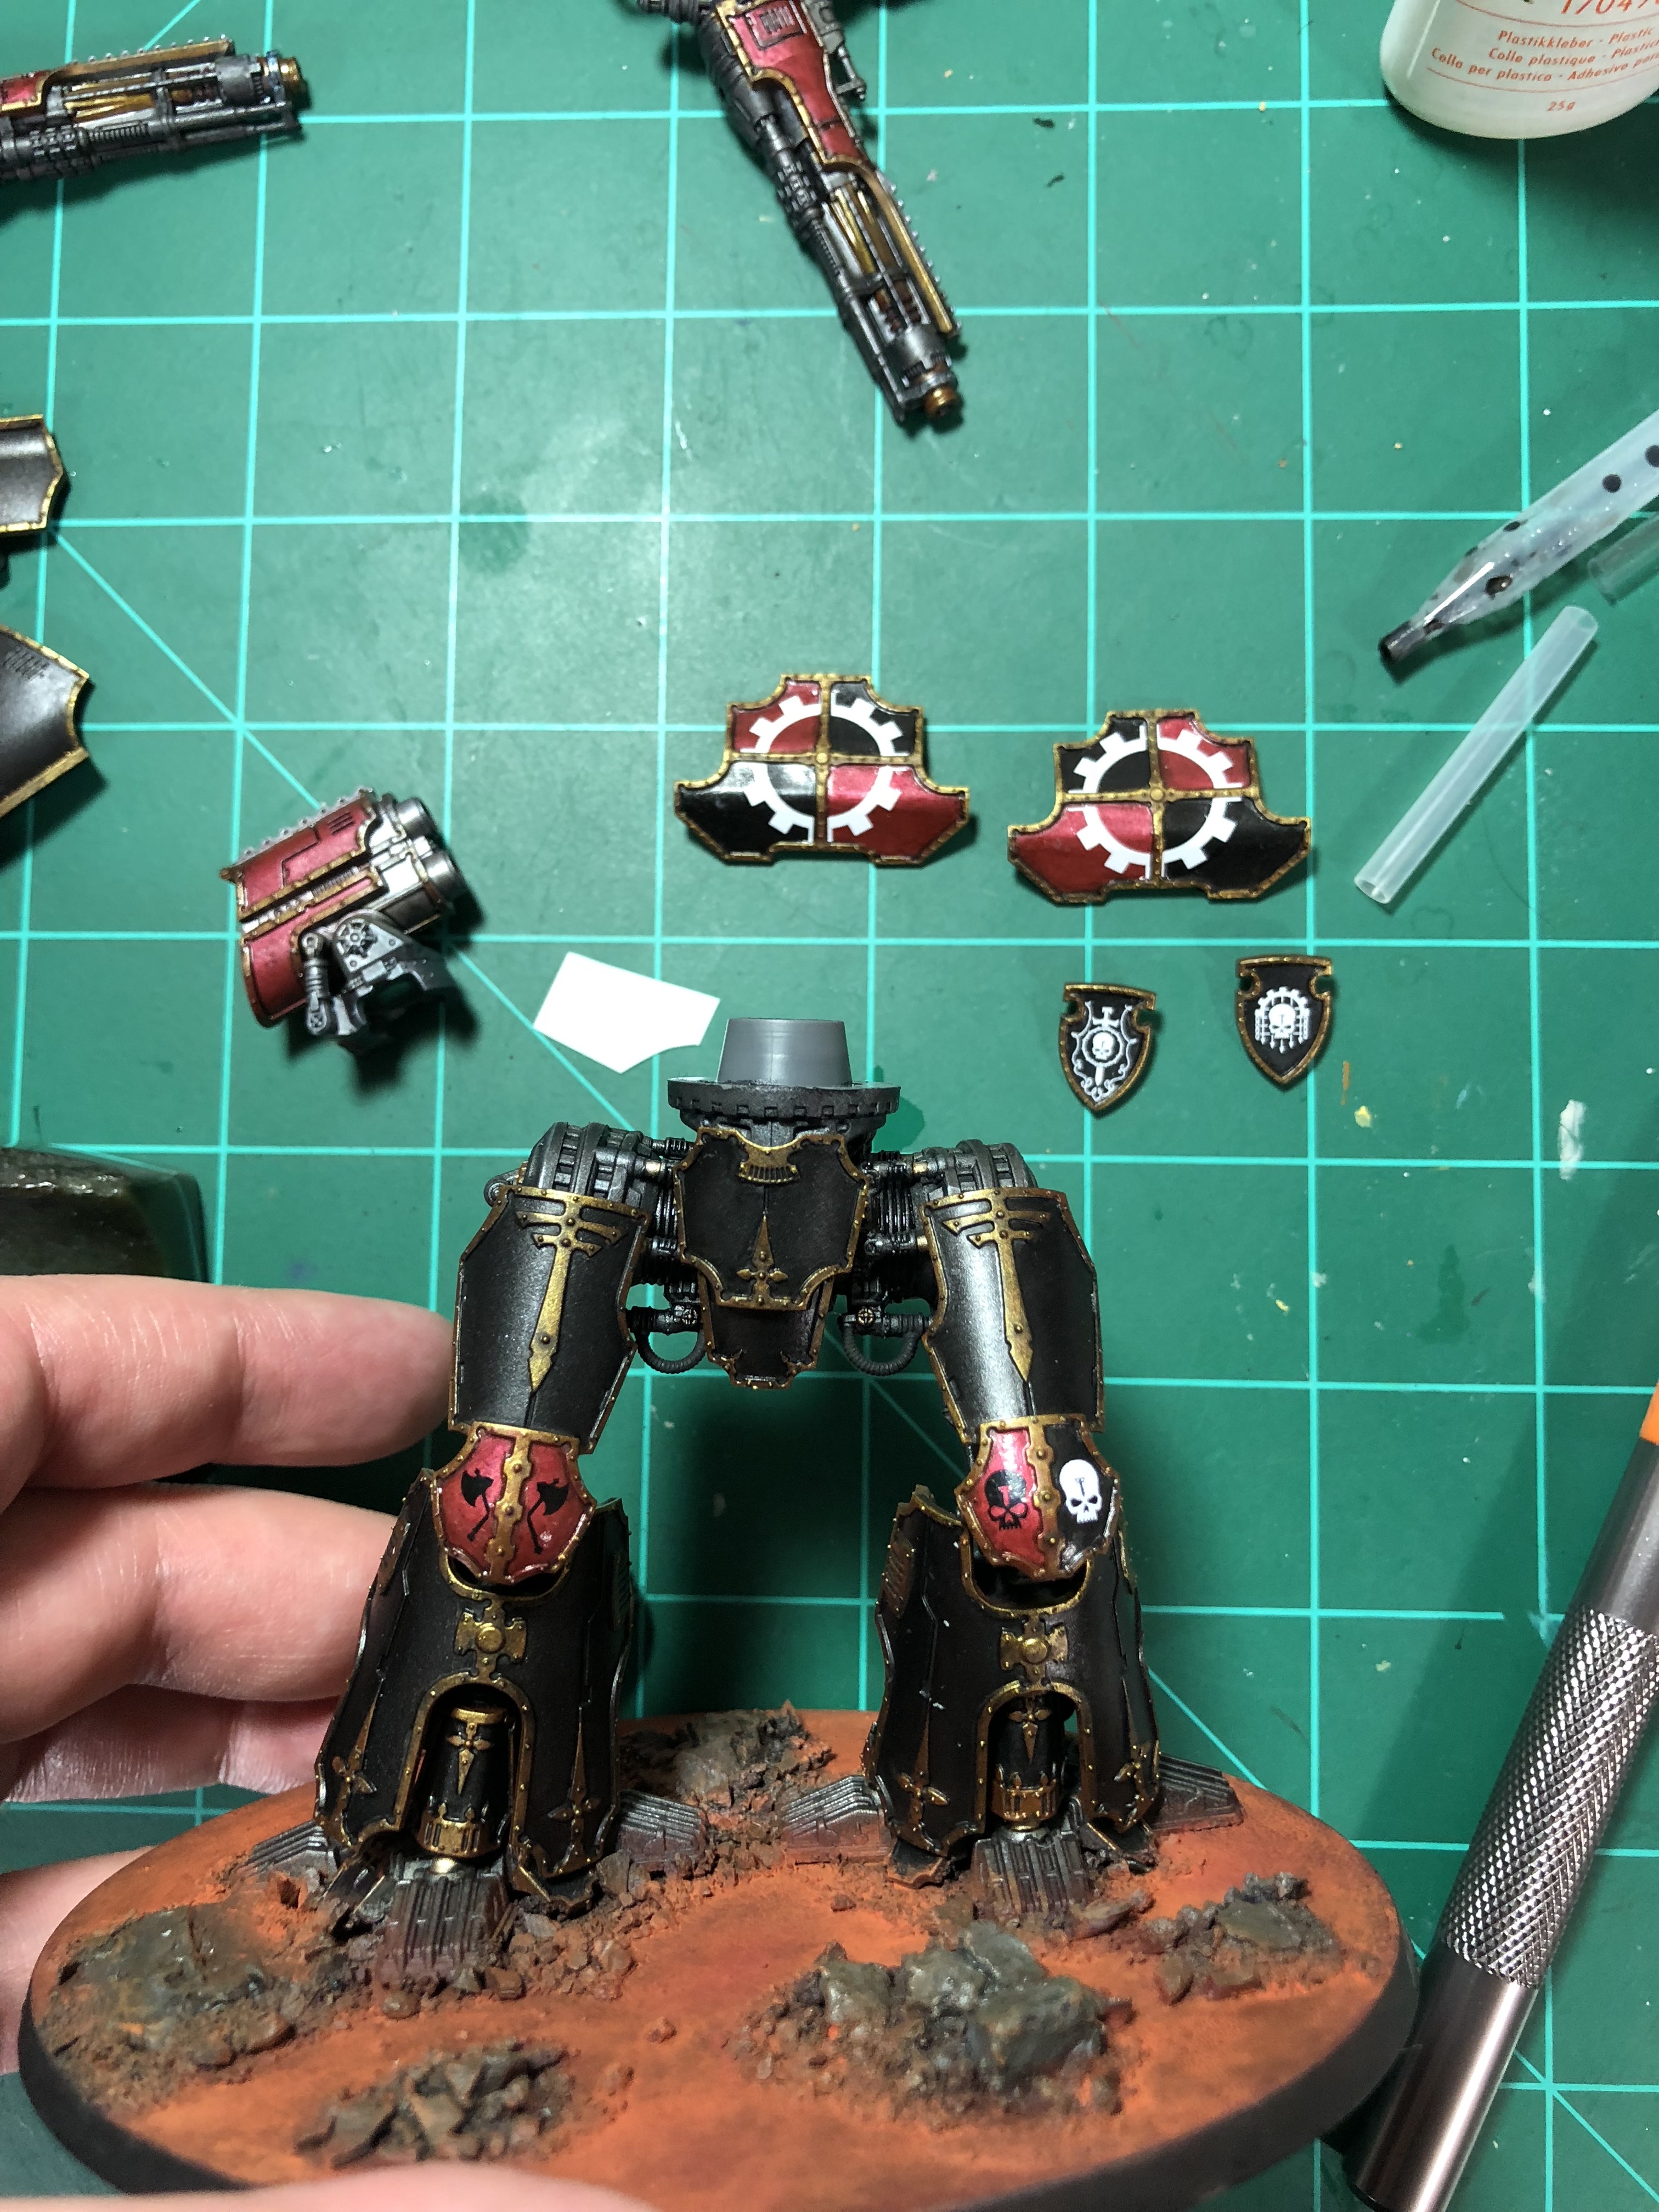
Leg Day
Never skip..
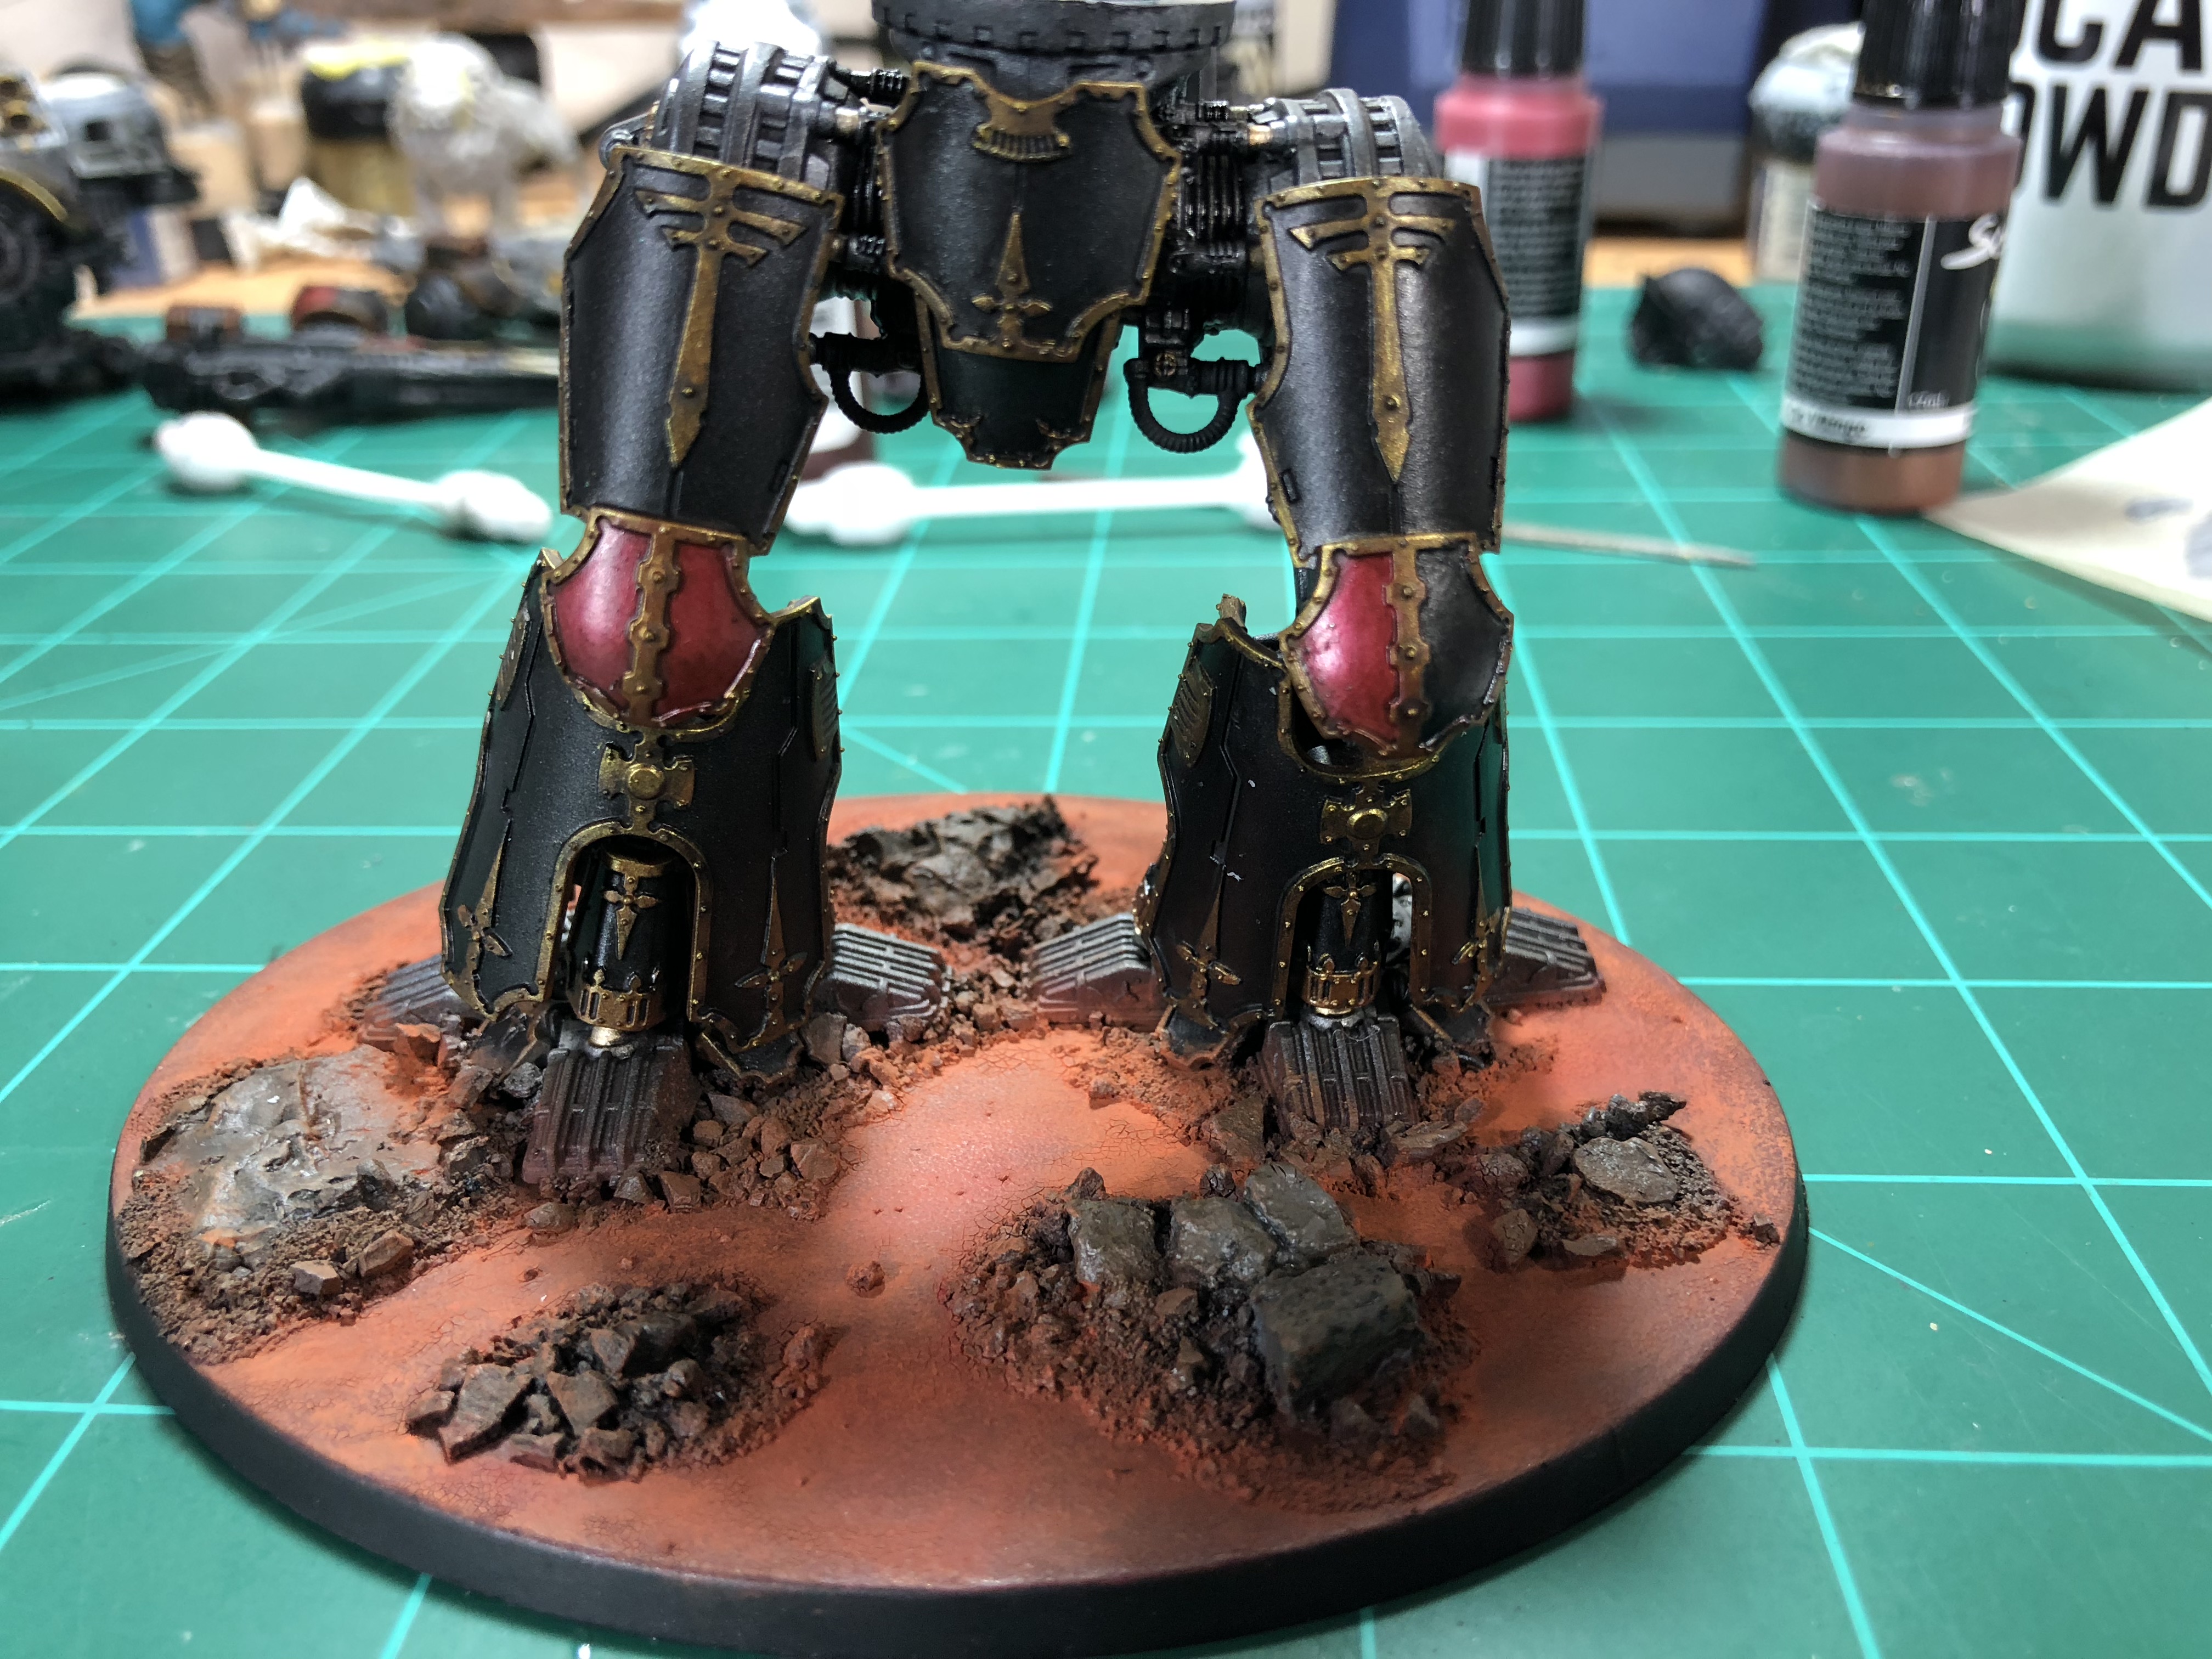
I started on the leg plates. Doing the trim caused a few inevitable errors that needed to be patched. This is why I left everything 1 shade too light on the airbrush. I was able to fix it up and do a final brush coat of the glaze to fix it up.
The red was glazed with candy paint by hand. One thing to note about this process.. your under layers are of course transparent. Meaning every one needs to be even. Puddles of pigment need to be dealt with on every layer.
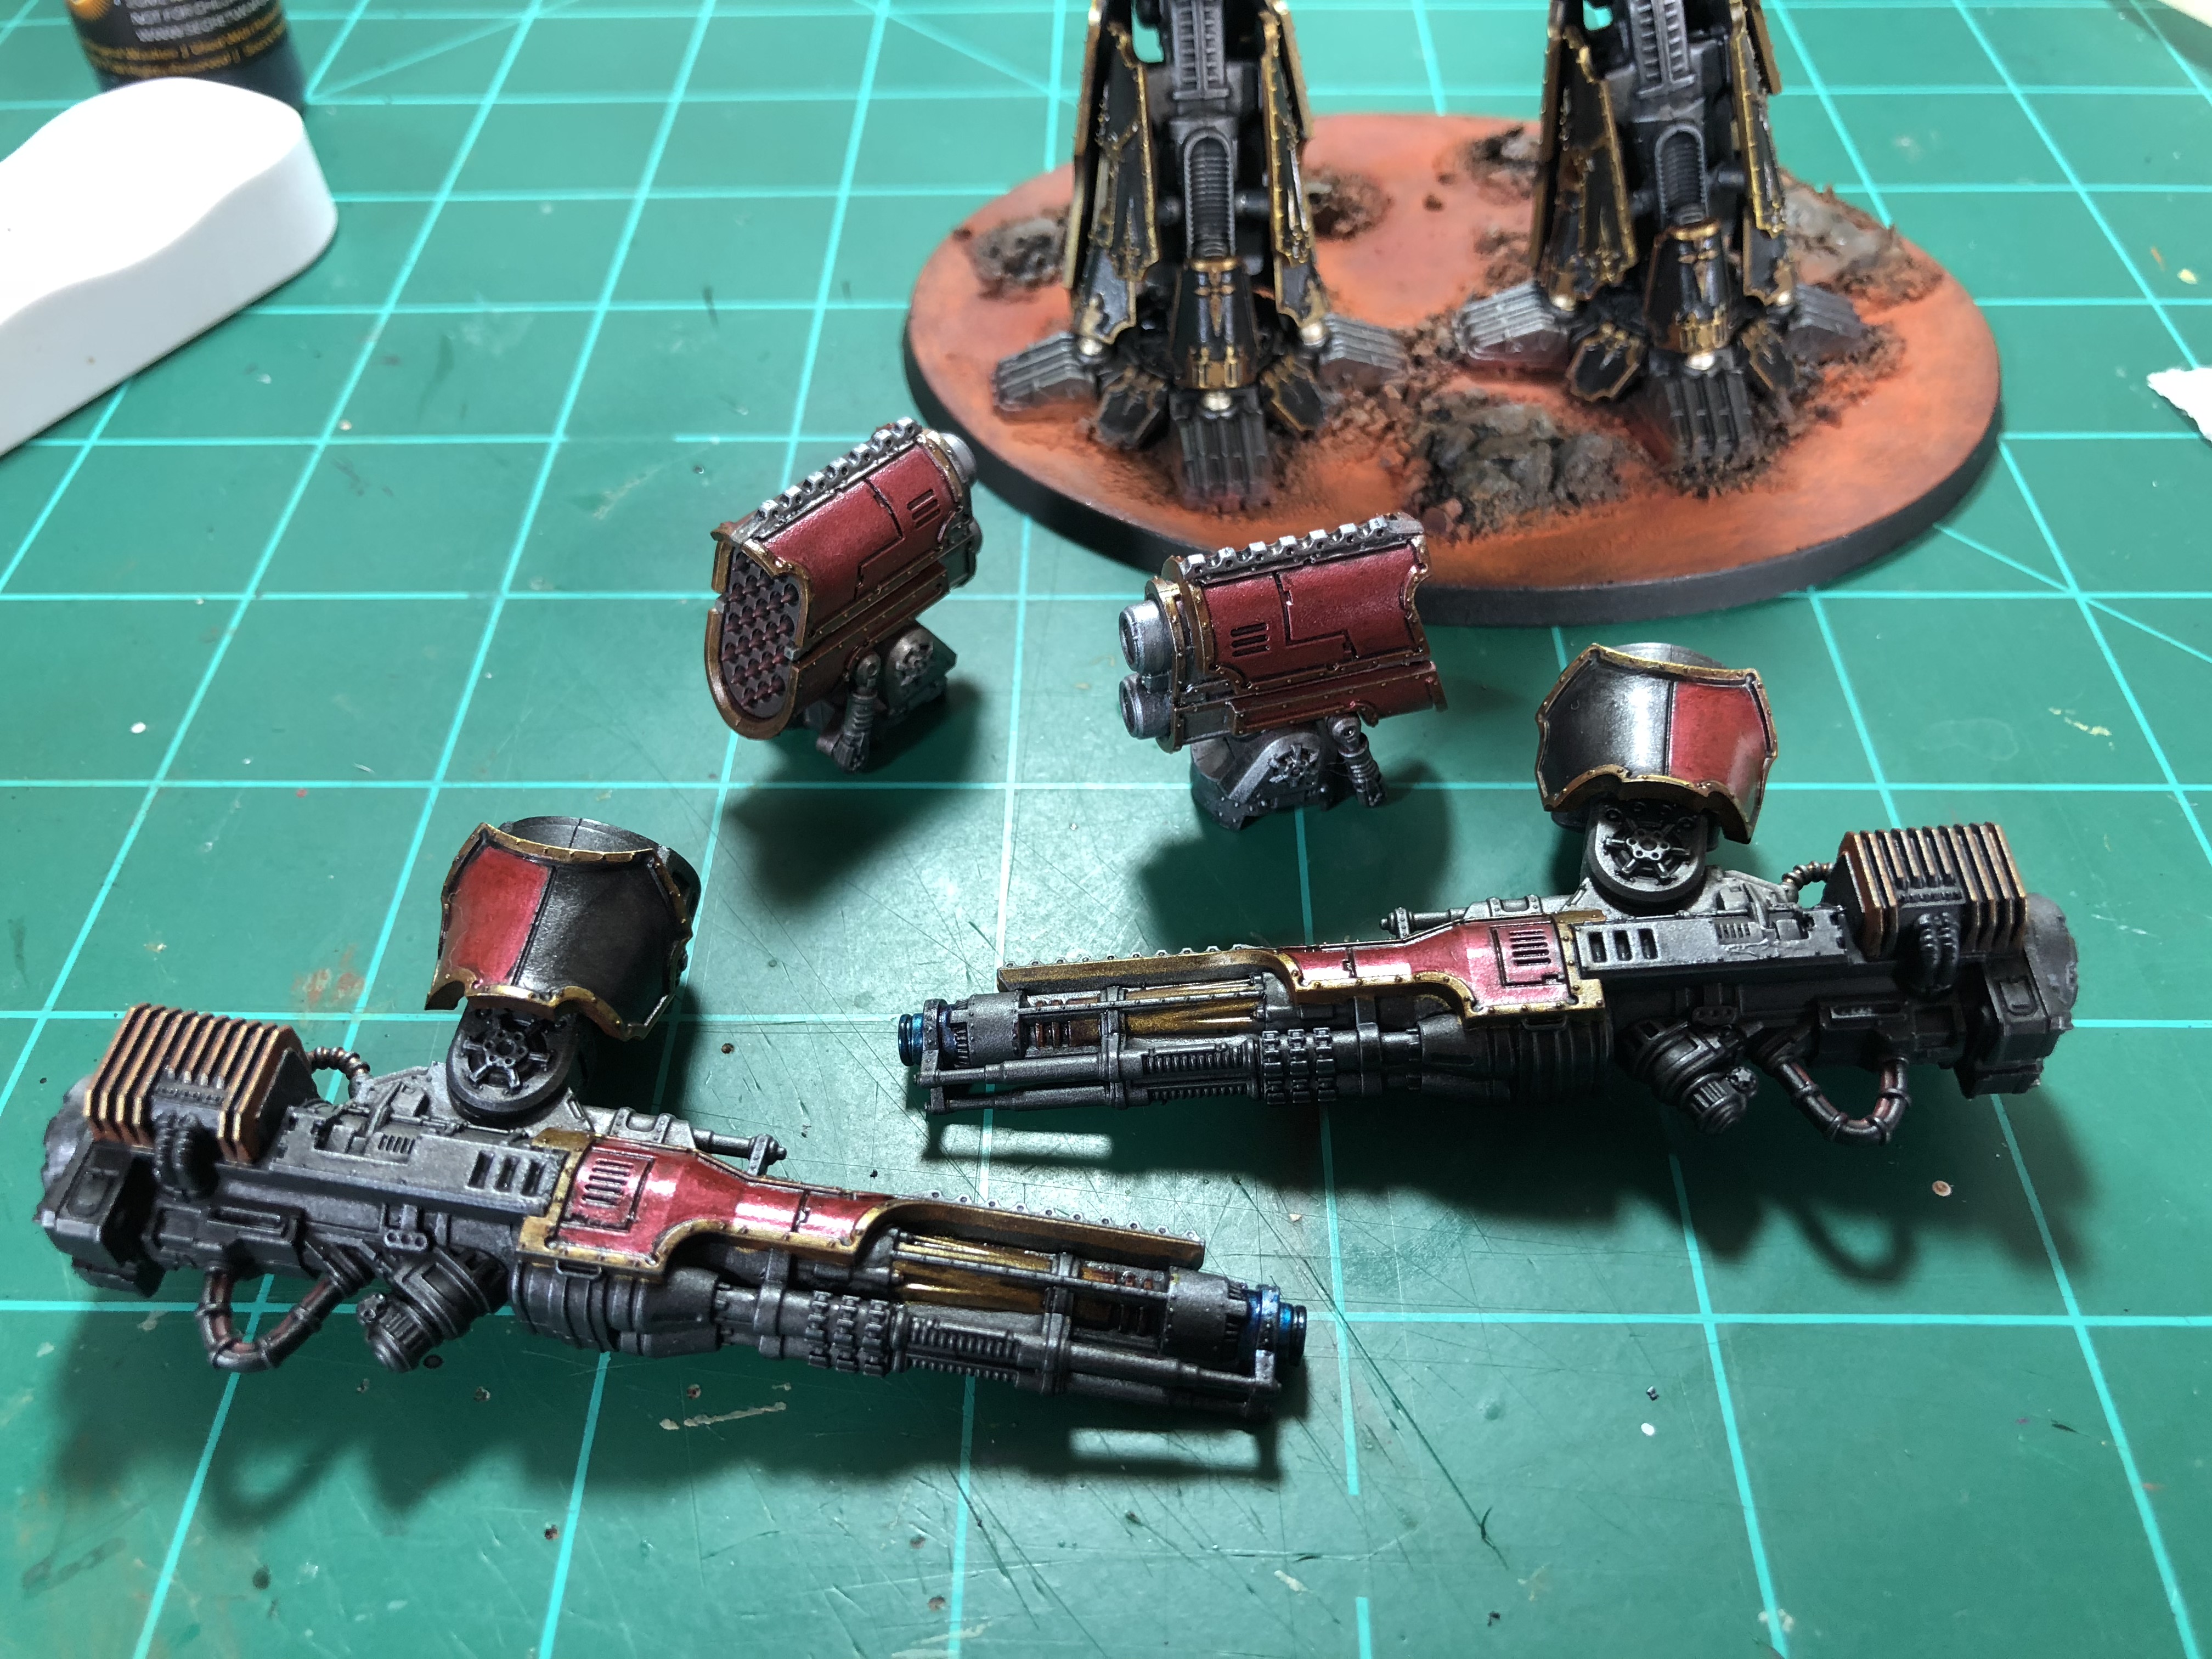
Worked a bit more on the weapons. Still need a lot on the launchers but the cannons are getting to the point where I’m questioning if more detail is too much. And the heat temper pattern at the tip I’m still not happy with.