


![NO Weekender Or Cult Of Games XLBS This Weekend [Updated]](https://images.beastsofwar.com/2026/03/No_Weekender_and_XLBS_this_Weekend-225-127.jpg)


Painting Boba Fett – Star Wars Legion


Recommendations: 255
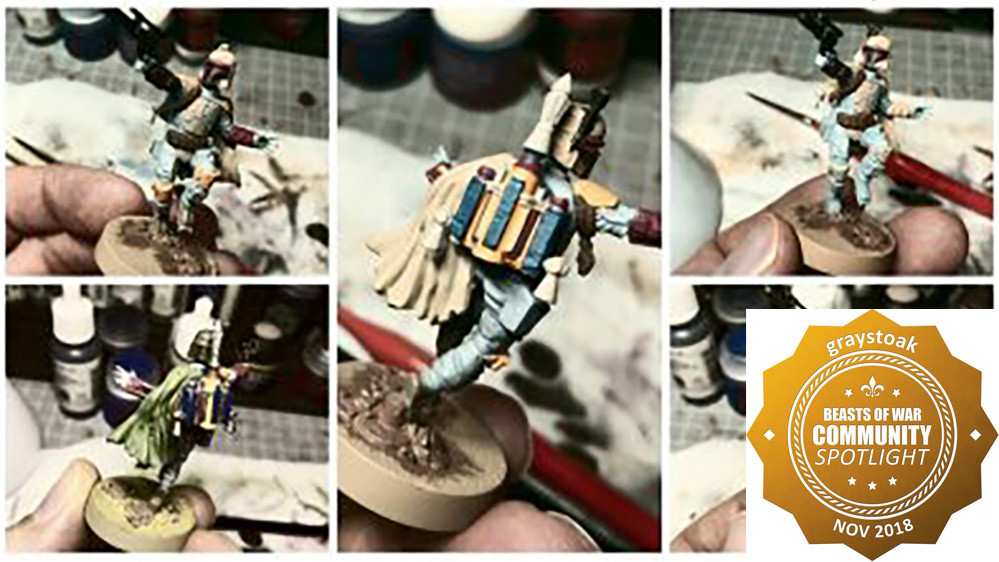
About the Project
When I began playing Star Wars Legion I made a promise to myself that I would adopt a quick and simple painting style in order to stay on top of my collection while it was still manageable. I’m having to invest a little more time in Boba Fett then the heroes that preceded him. He has a pretty eclectic colour scheme and I wanted to remain faithful to the character. That said the techniques I am using are simple and easy to replicate so I thought I would share what I have learned.
Related Game: Star Wars: Legion
Related Genre: Science Fiction
This Project is Completed
Washing Up
With the hard work done it was time to wash the model, base and all, with the ever useful Agrax Earthshade from GW.
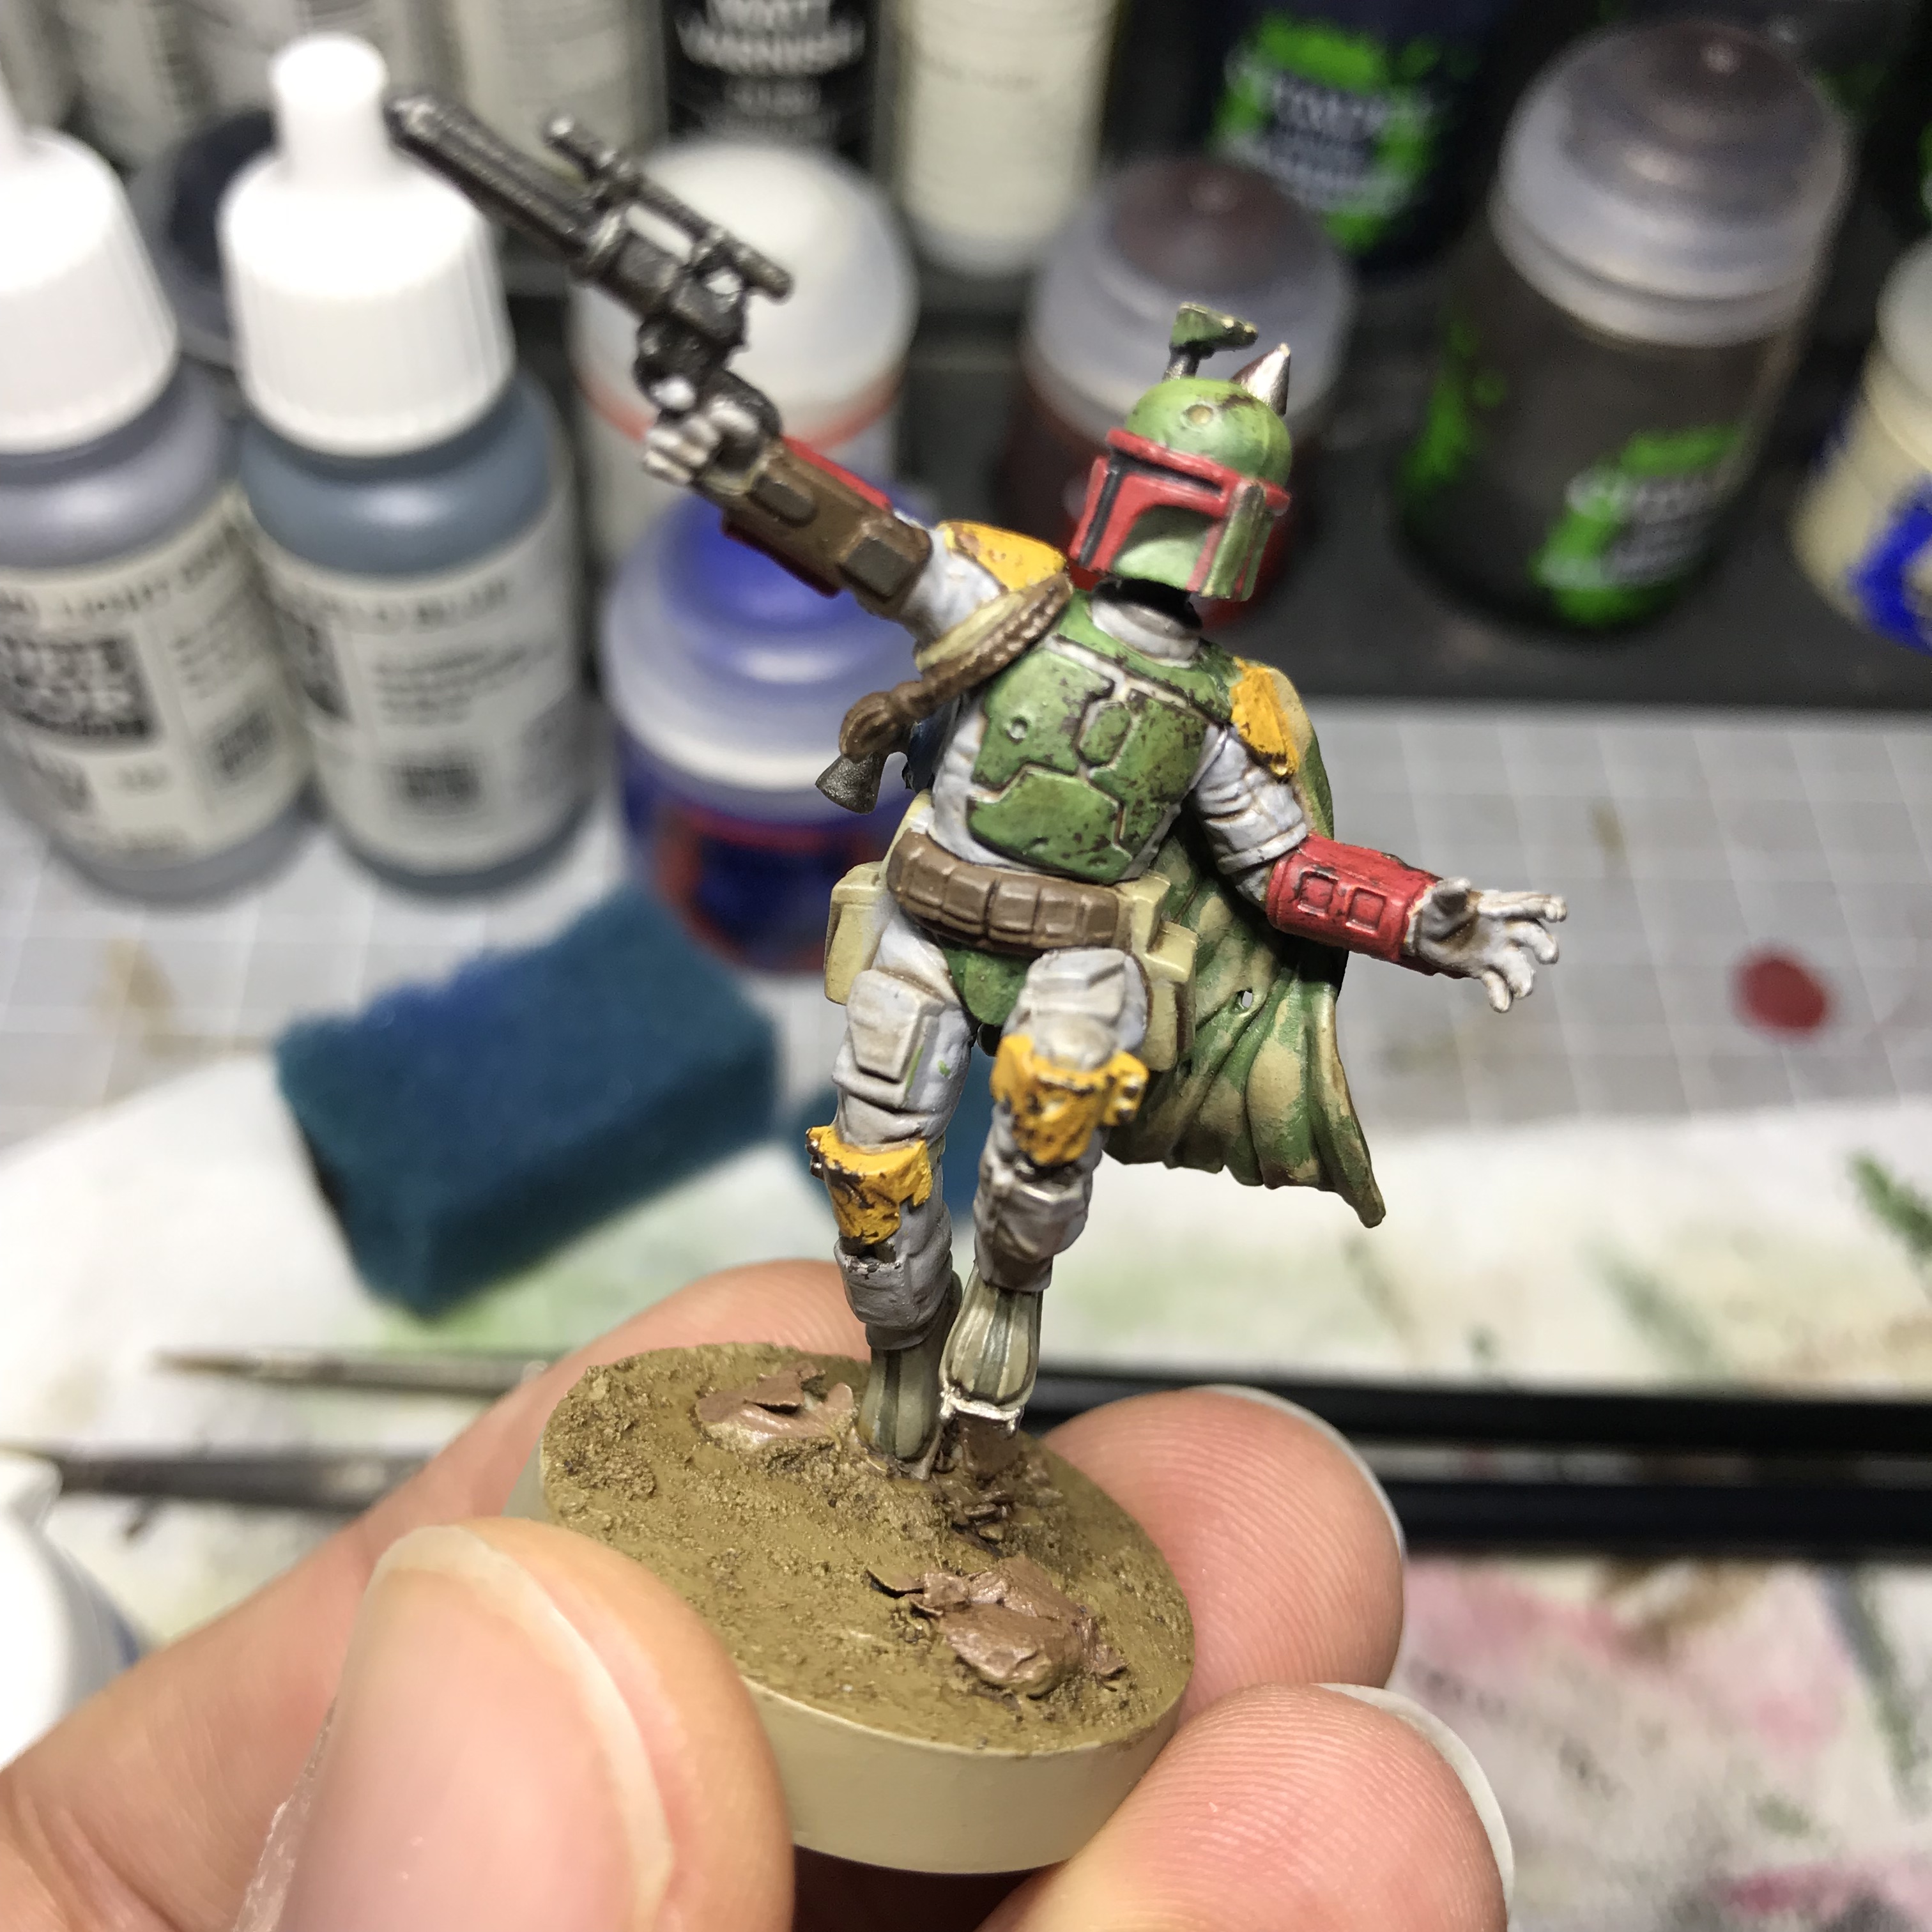
This simultaneously pulls all the elements of the model together, neutralises the colours and adds some nice shading. Once this was dry I used a little GW Nuln Oil on the helmet visor as well as the browns of the stock and belt pouches. I also ran a thin line of Nuln Oil along anywhere one of the silver components met another colour, such as on the boot spikes and rocket boosters.
Flicks and Chips
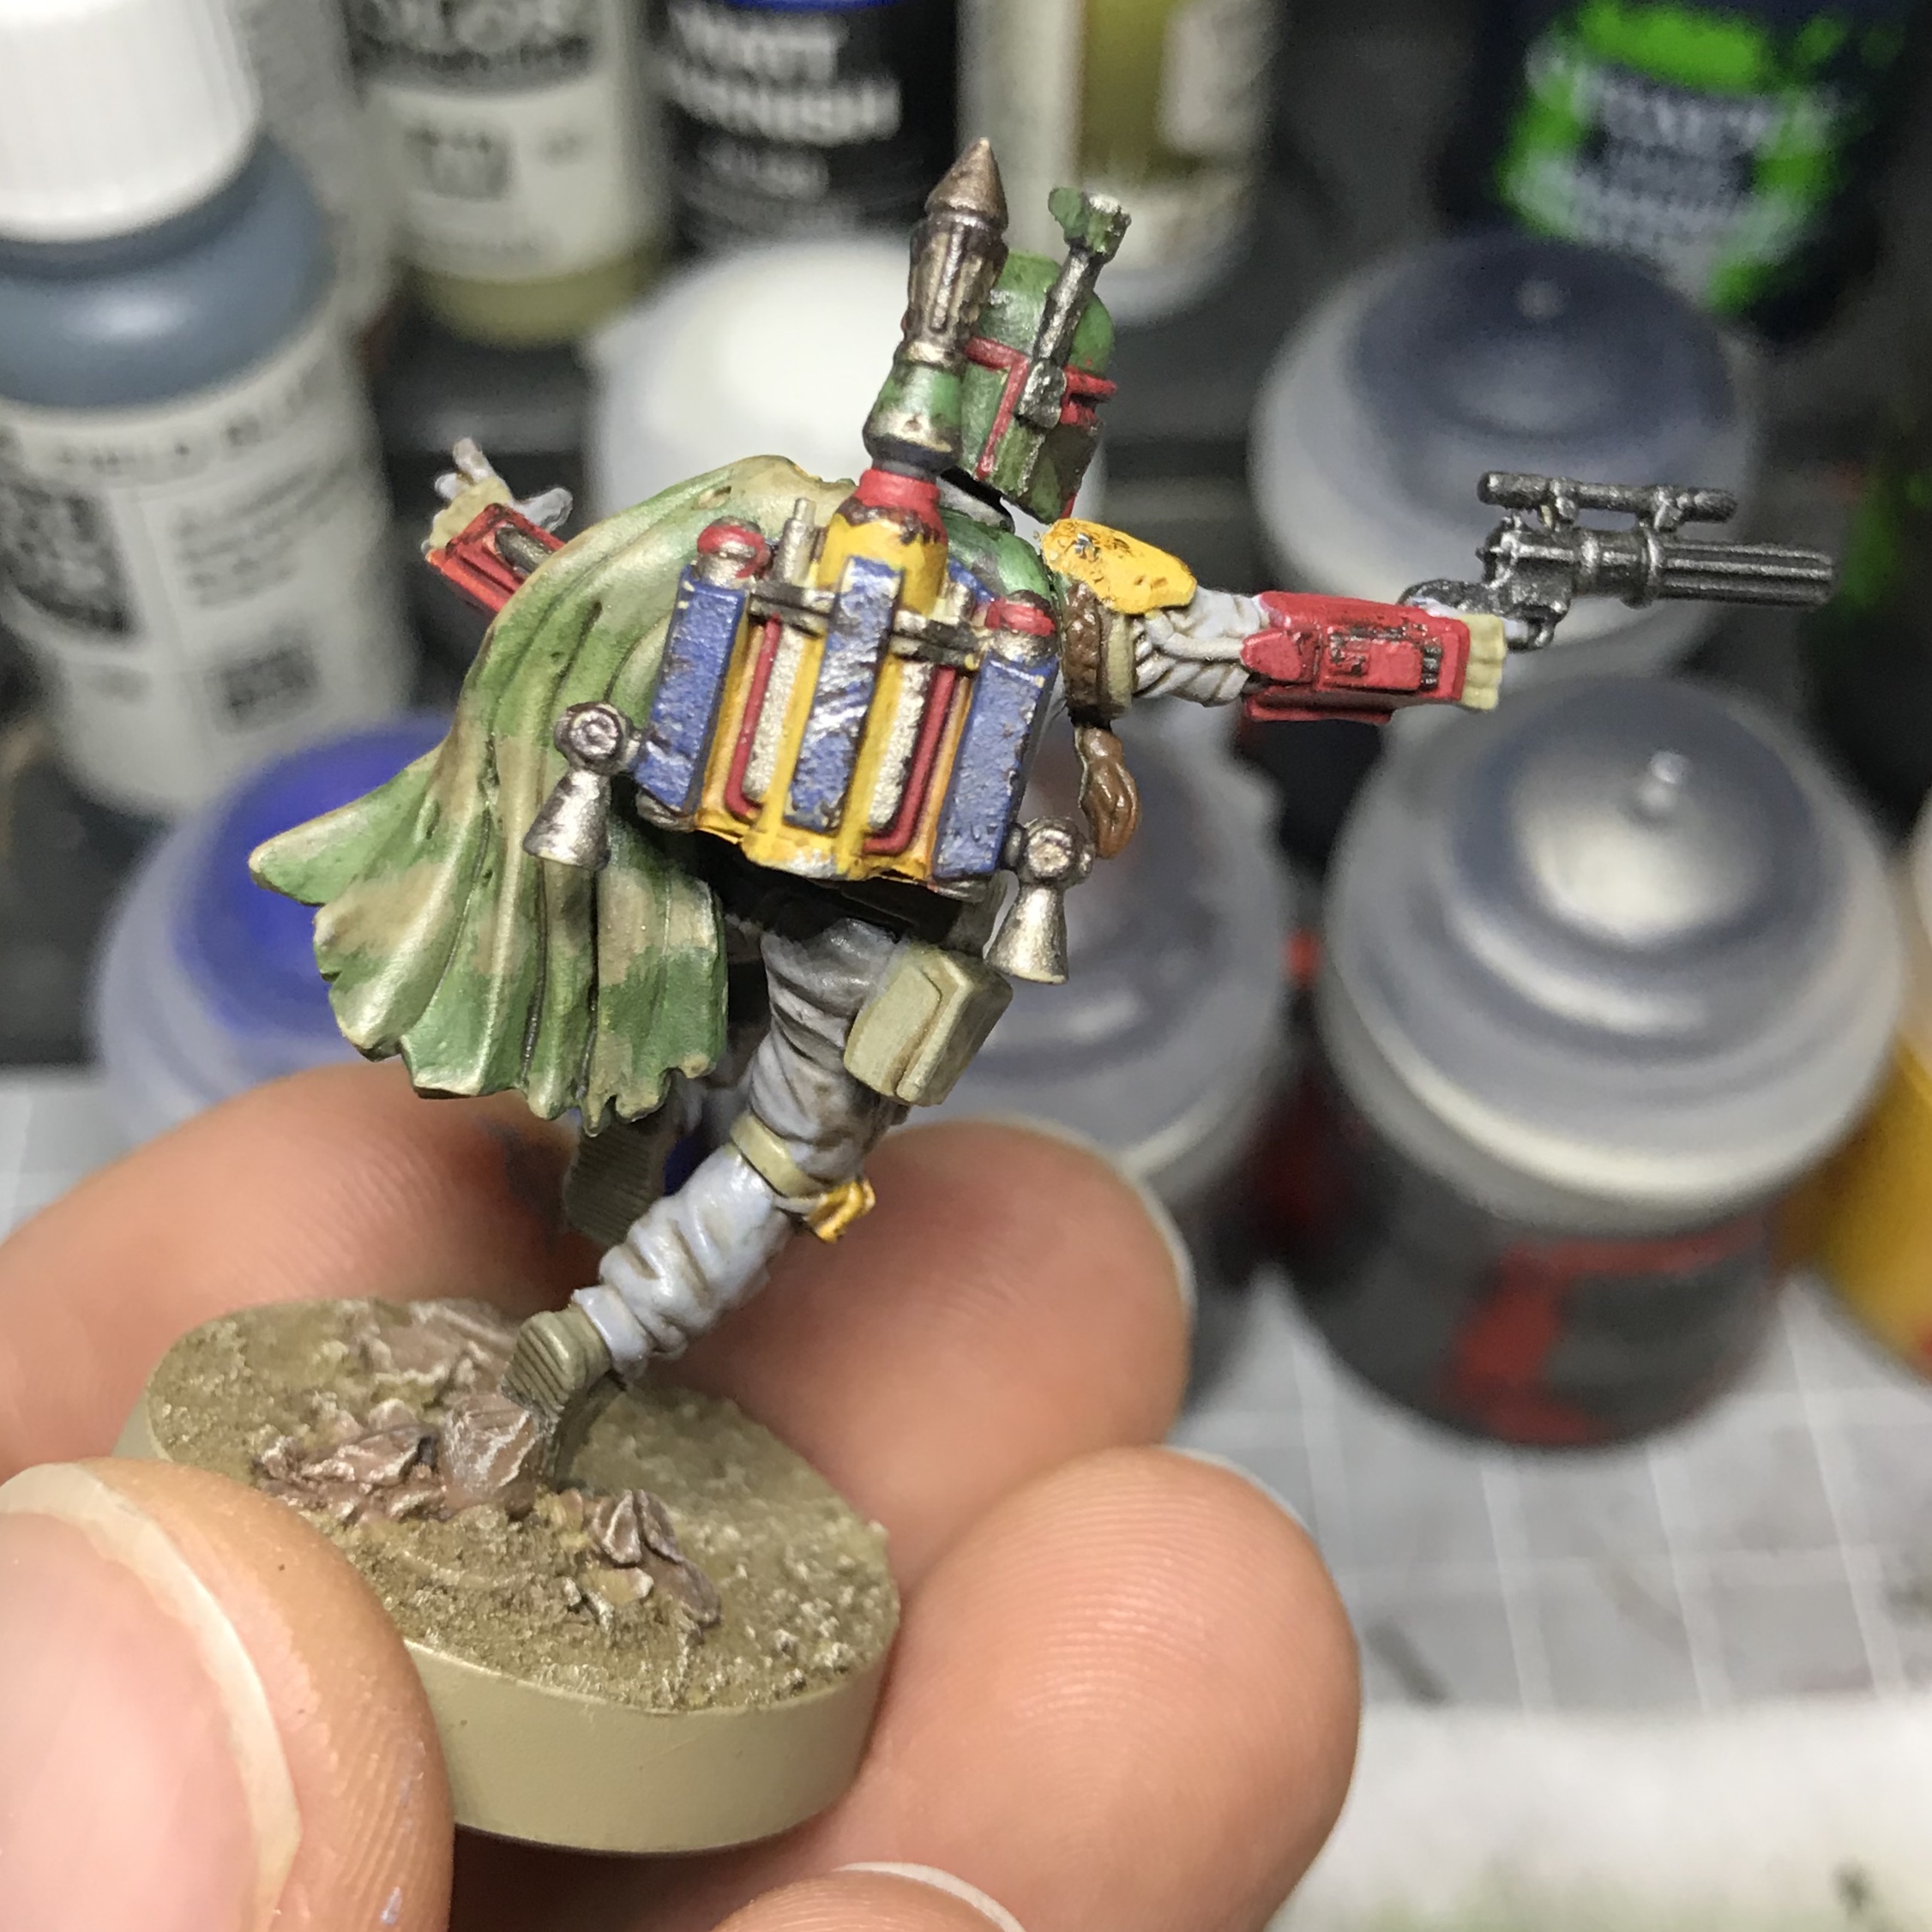
The next stage was to selectively add Lead Belcher chips to the sponged on weathering, especially the trade mark dent in his helmet. For this I used a very small brush. The idea being to leave a little of the Rhinox around the silver chip.
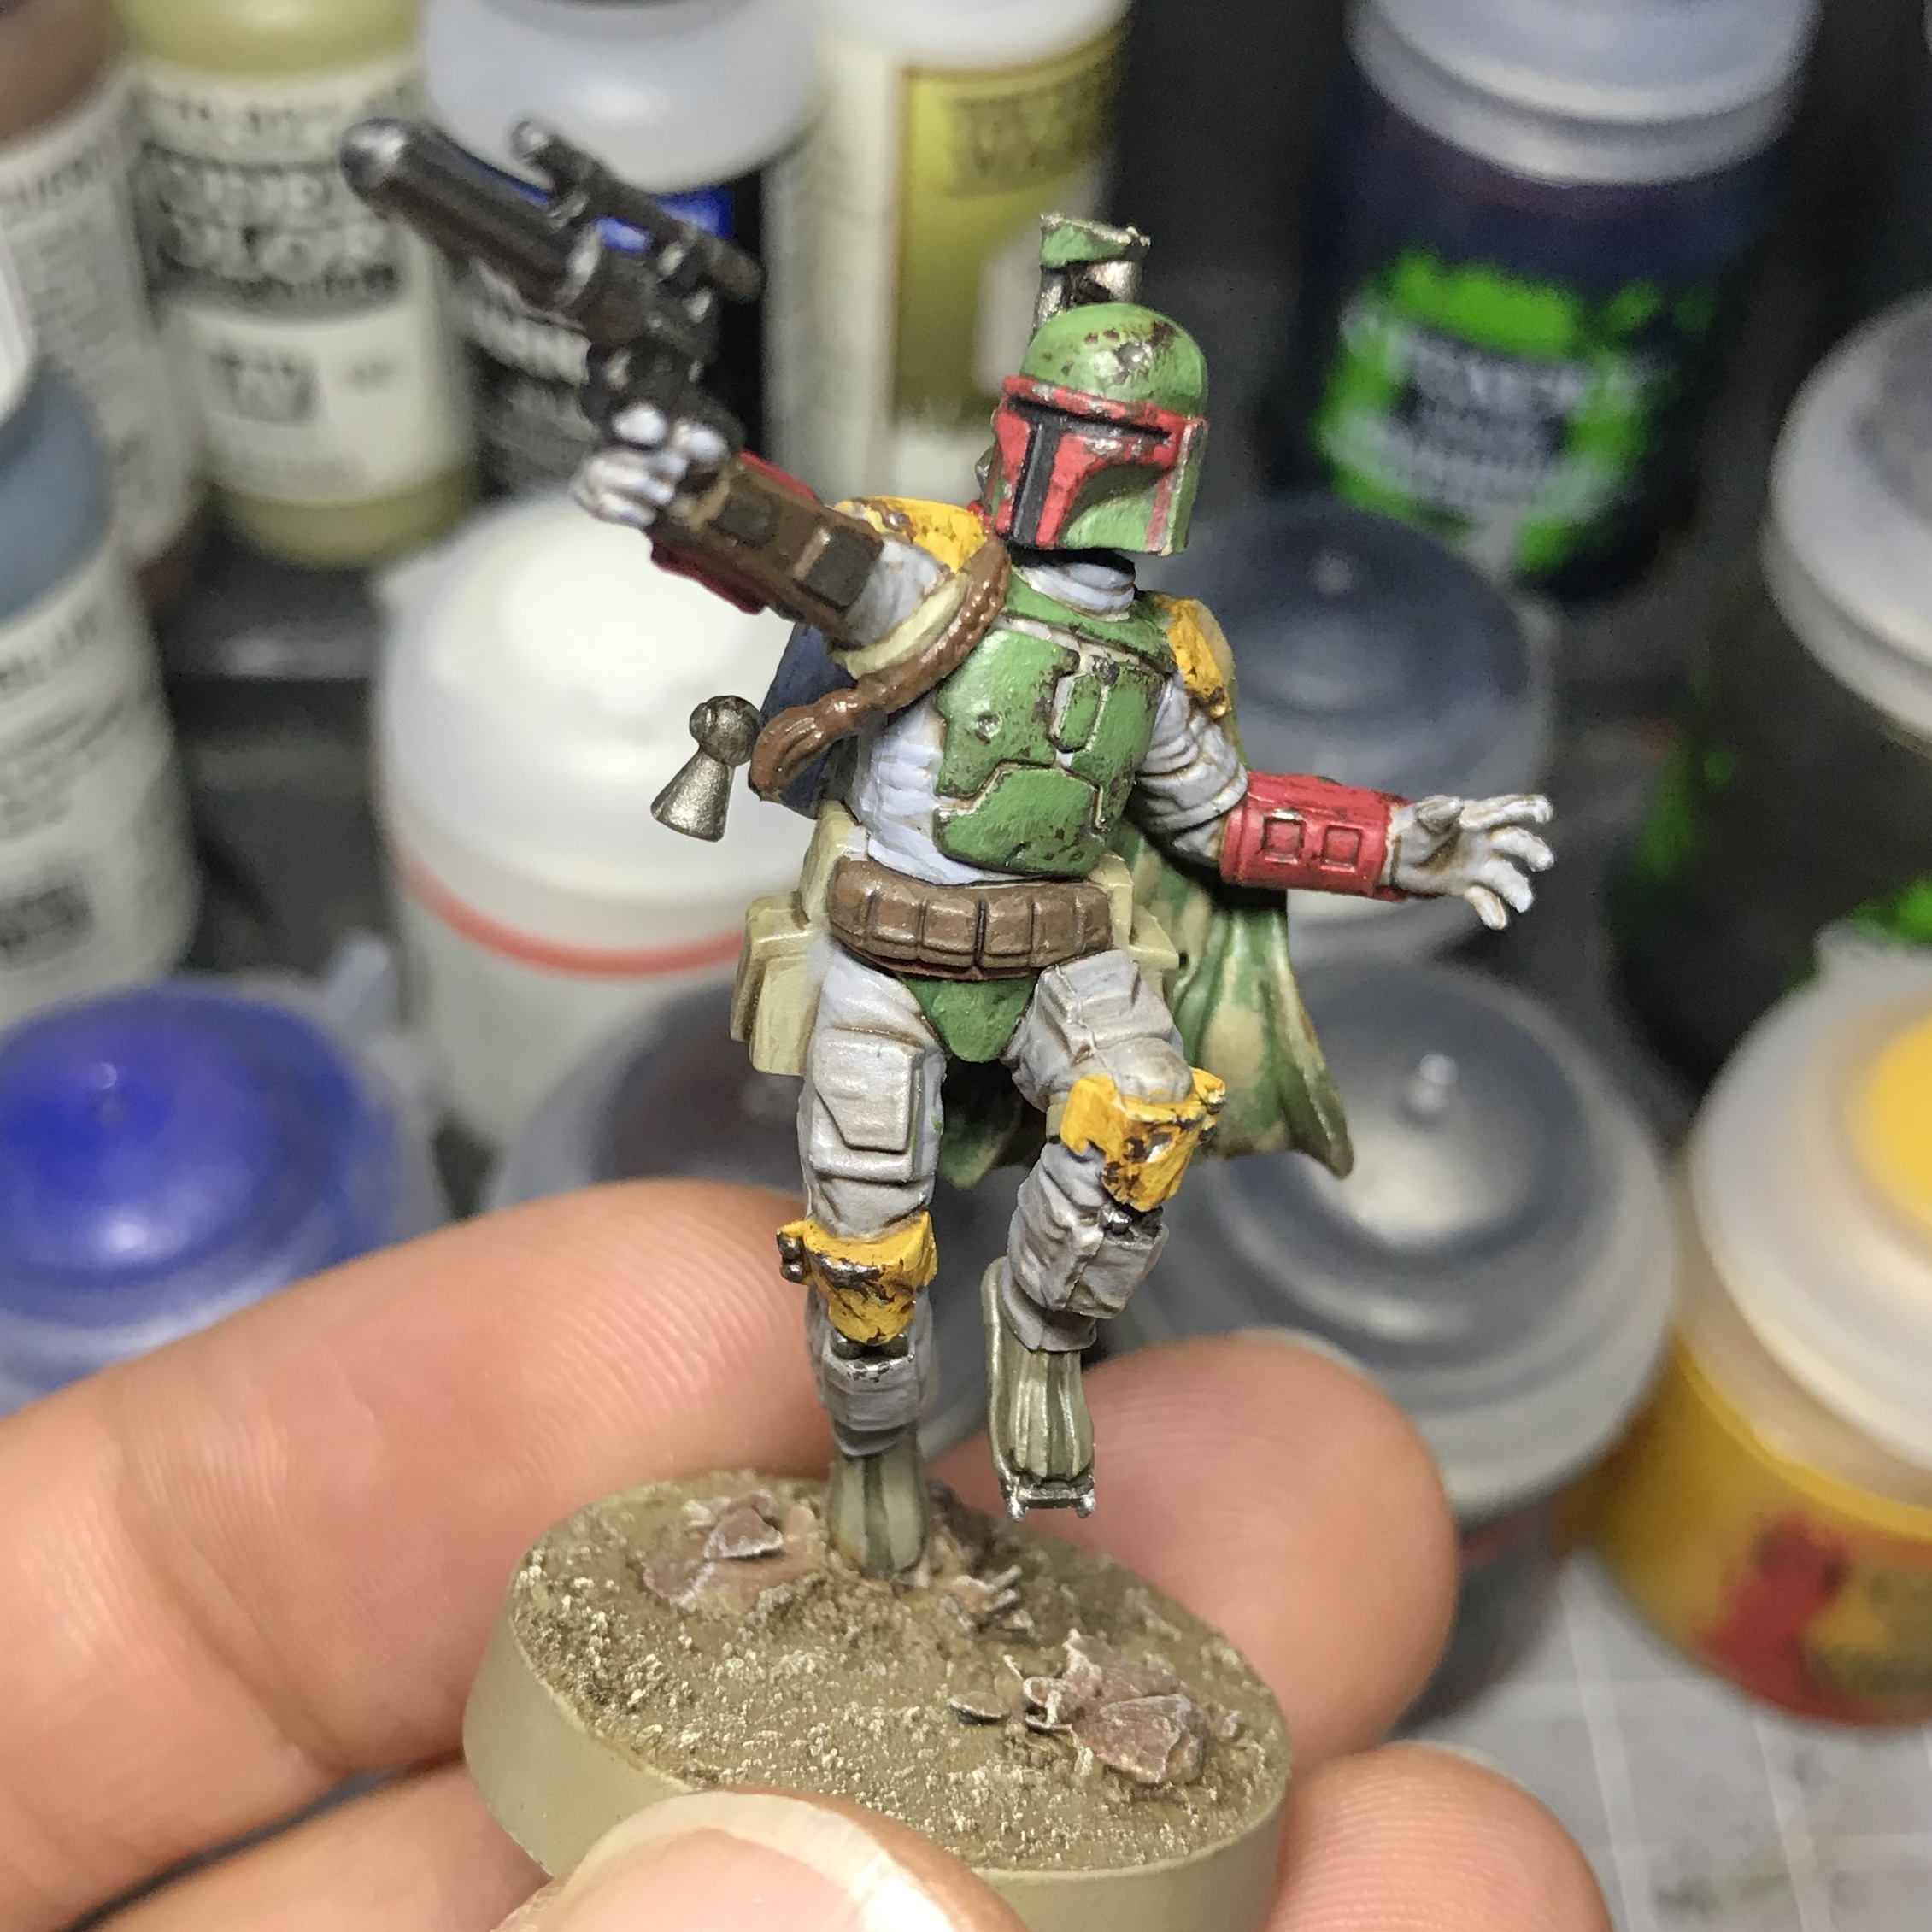
The helmet itself seemed to have escaped the worst of the sponging so I carefully repeated the previous step, applying a little Rhinox Hide across his face plate with a small piece of sponge before adding some silver chipping.
I didn’t want to spend too long on highlights but I did apply a fresh coat of the original colours to the red, yellow and green (using the earlier mix), wherever I felt a highlight was required. I also reapplied Light Grey around his torso and collar as the jacket that his armour is attached to tends to appear lighter than the boiler suit.
Finally the textured base was given a fairly strong dry brush with GW Screaming Skull.
Mission Accomplished
Once all the paint had dried the entire model was given a coat of Vallejo Mat Varnish. This was applied with a large brush and worked well in to every area of the model. It pretty much looks as though you’ve dipped your miniature in milk by the time you’ve applied it. However once it’s dry it leaves a clean mat finish and will protect against the inevitable fingering that goes on during game play.
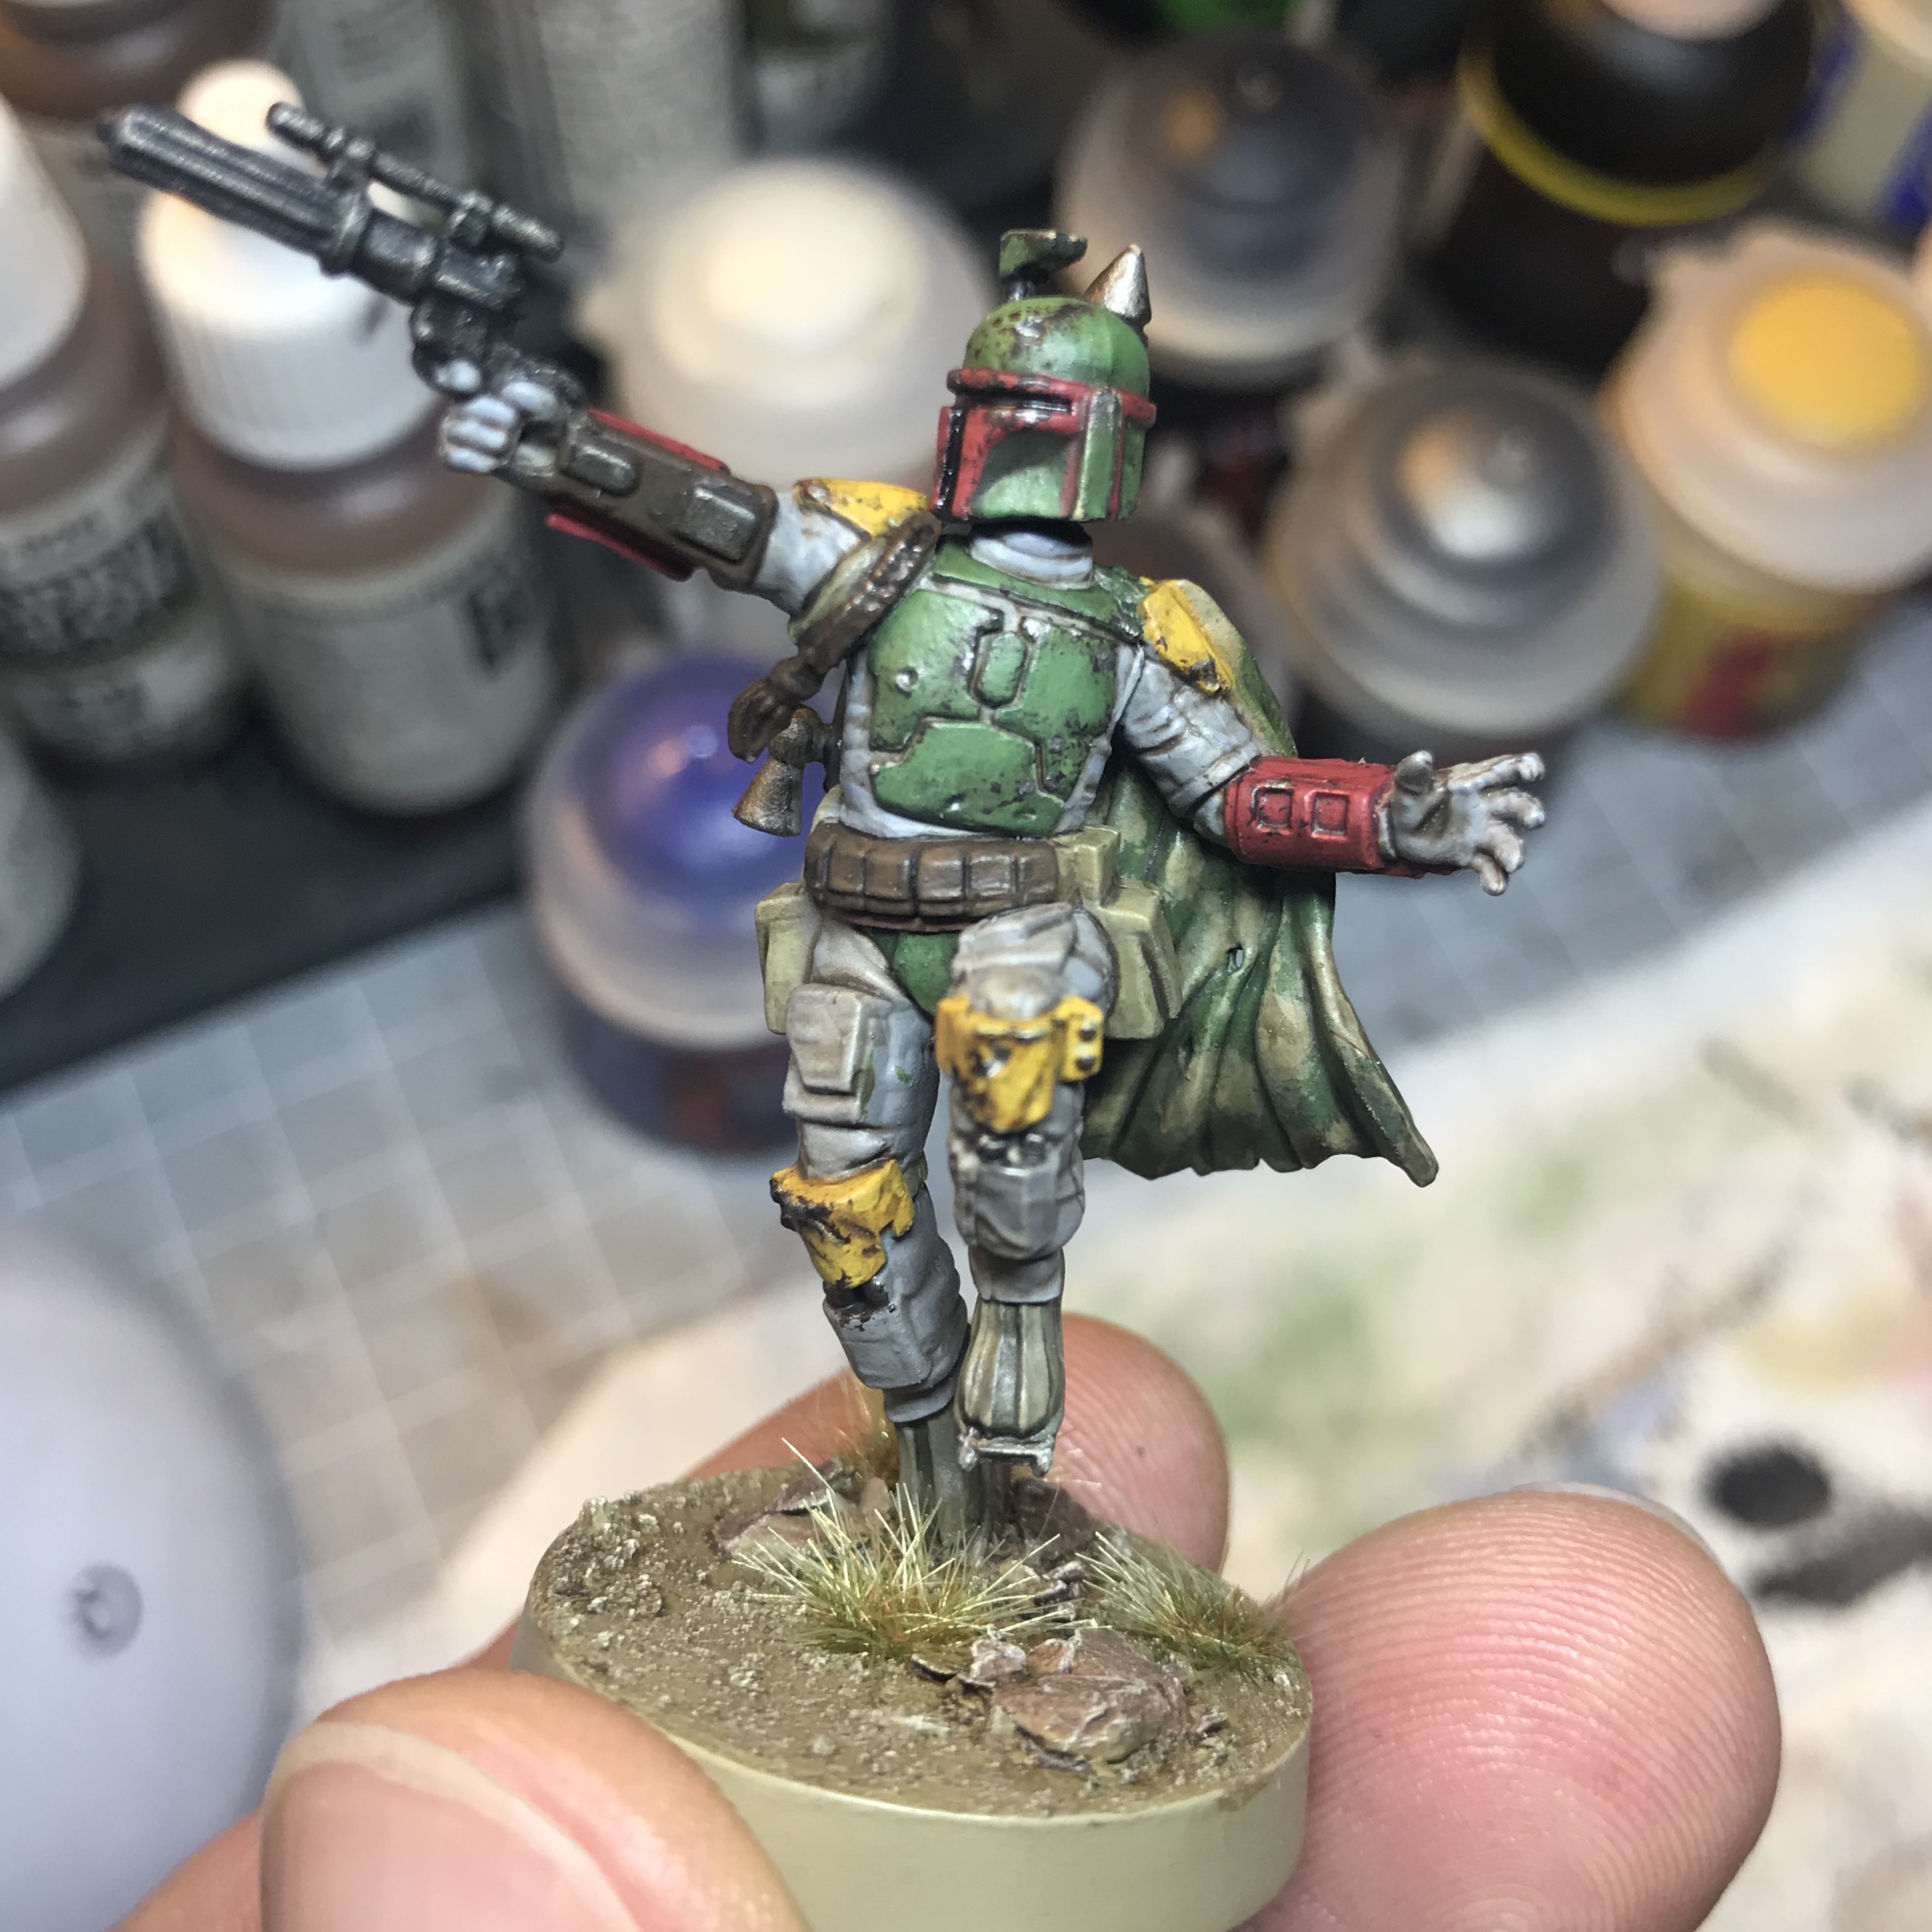
Once the varnish was completely dry I used GW Nuln Oil Gloss to add a slight sheen to the visor.

My philosophy for basing is the rule of three. Three elements, textures or colours makes for an interesting base and helps to set the model off.
I already had the red rocks and Sandy texture from the Agrellan Earth so the final touch was to add a few grassy tufts to the base. These are great as they are pre coloured and self adhesive so they take only seconds to apply. I used a large set of tweezers to position a couple of the smaller tufts and pressed them into place with the tweezer tips or the end of a brush. These ones were Middenland Tufts from GW but many other brands are available.


