
Manda’s (Amachan) Adeptus Mechanicus
Recommendations: 230
About the Project
With the ruination of the Space Marines because of Primaris marines (you can't change my mind on this), I have nearly decided to leave 40k altogether. I decided not to, but I'm going to refuse to spend any more money on anything related to Space Marines. Thus my Dark Angels army is unfinished right now, will be painted up at some point, but that's it. And my Space Wolves I'm calling finished. I'm not buying the new codex so I can't really play them any more. Because of this I have decided to start my new project. First I thought of doing the Armageddon Steel Legion, but a visit to my local gaming shop made me change my mind. There are just too many guard players around here and I want something a bit more unique. So I decided to do Adeptus Mechanicus.
Related Game: Warhammer 40,000
Related Company: Games Workshop
Related Genre: Science Fiction
This Project is Cancelled
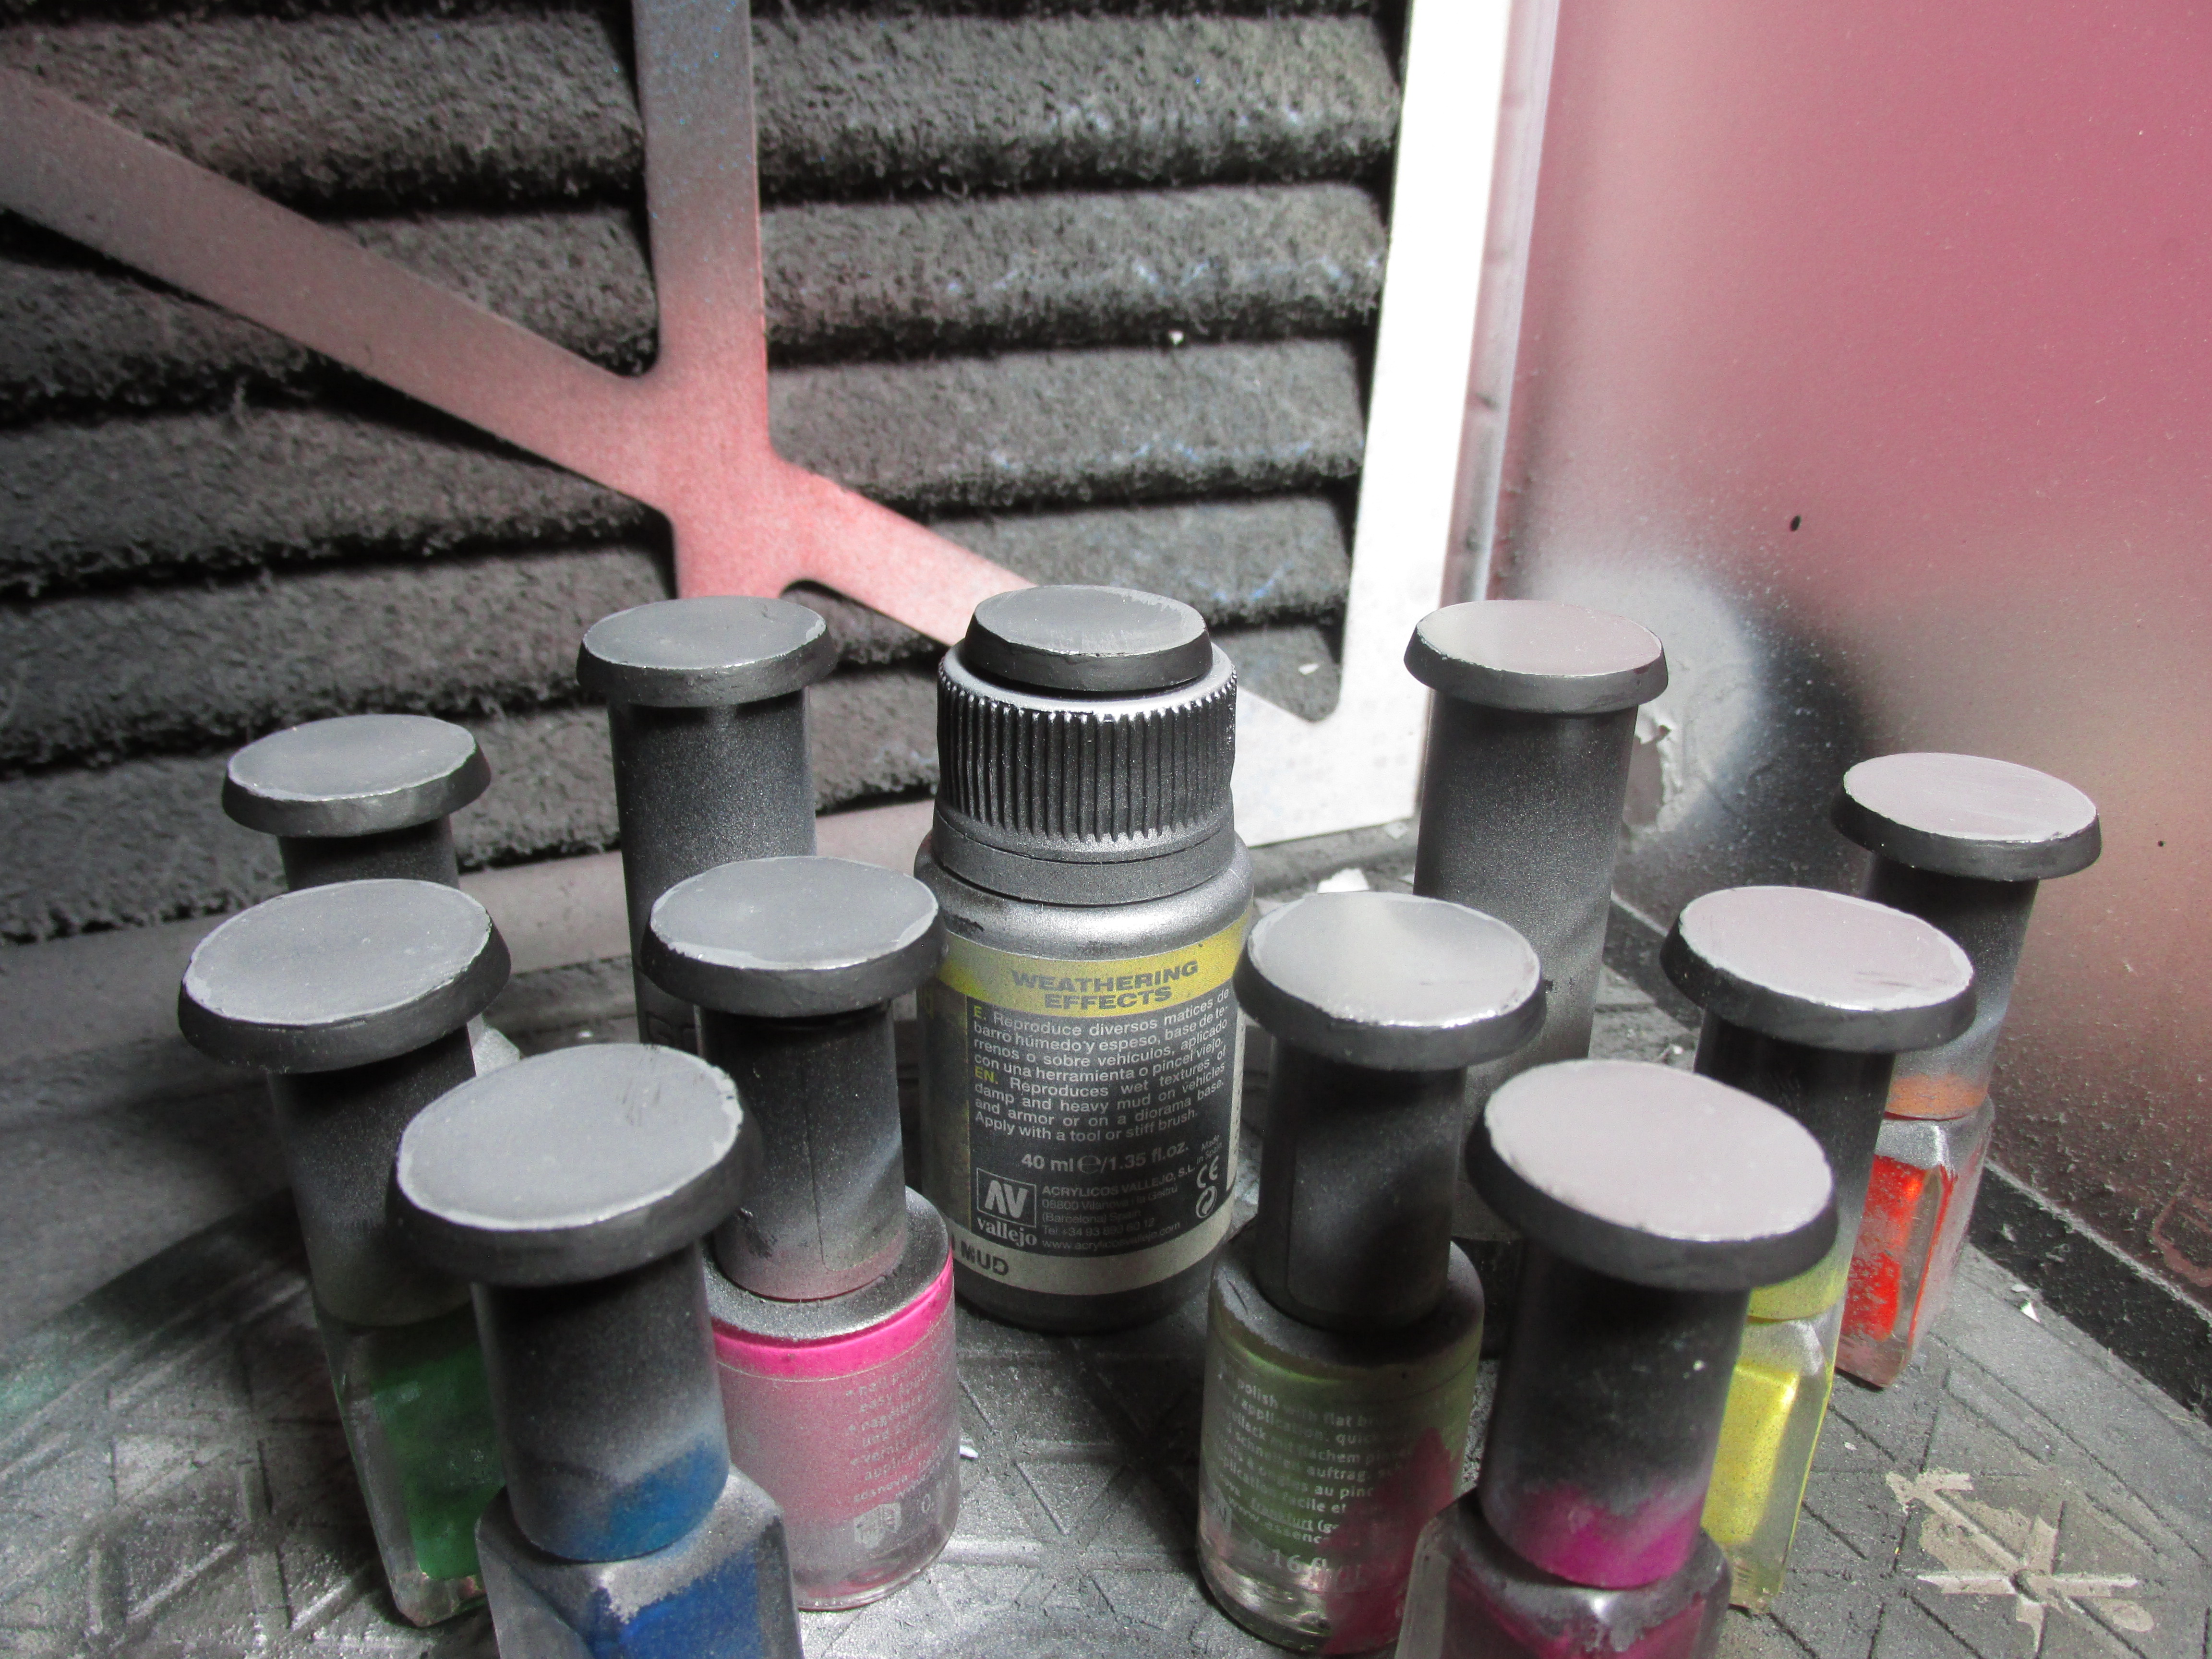
The Final Batch of Bases is Done.
The last batch of bases for my Mechanicus force is done and thus here is a picture of my whole army using transparent models.
Update
I updated how I do the bases to avoid using masking tape and avoid the problems I was having with the 3rd batch and masking tape.
Bases, 4th Batch Done
4th batch of bases for my Mechanicus force is done, 1 more batch to go.
Bases, 3rd Batch is Done
The 3rd batch also known as the irregular batch for my Forge World Metalica Mechanicus force is done. I had a lot of problems with these with masking tape and had to update the way I do the bases. Well only 2 batches of 25mm’s left.
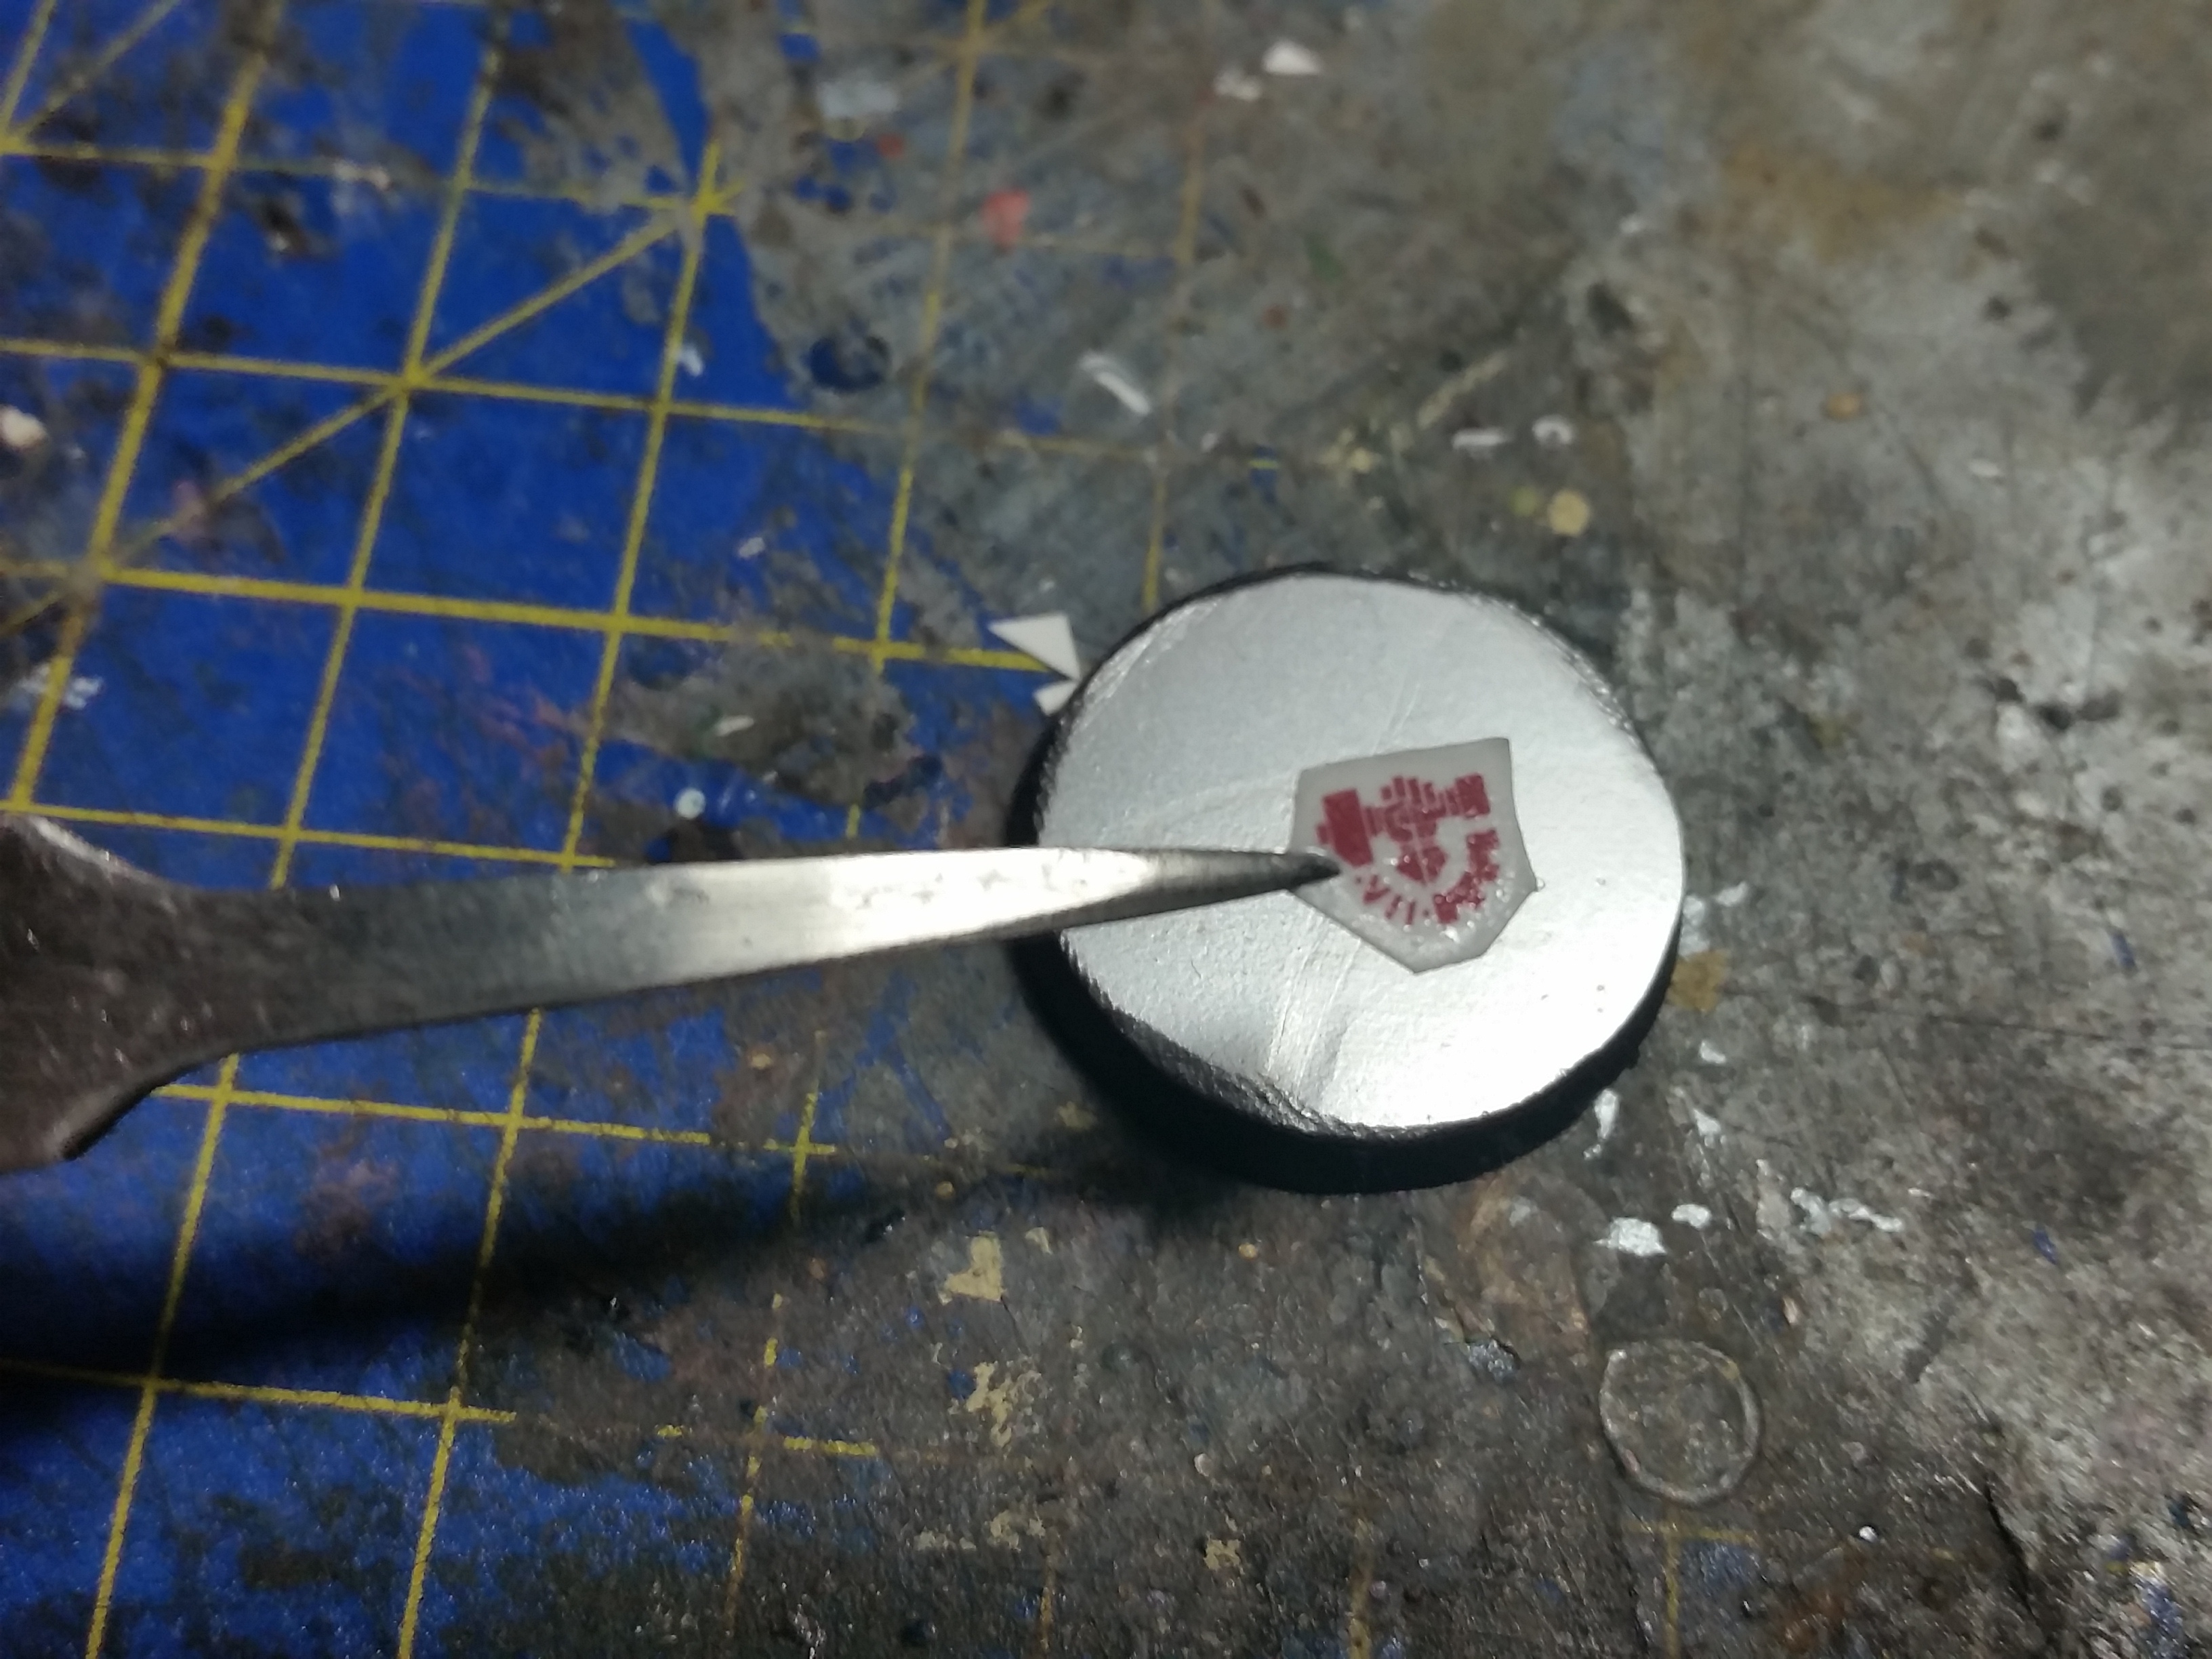
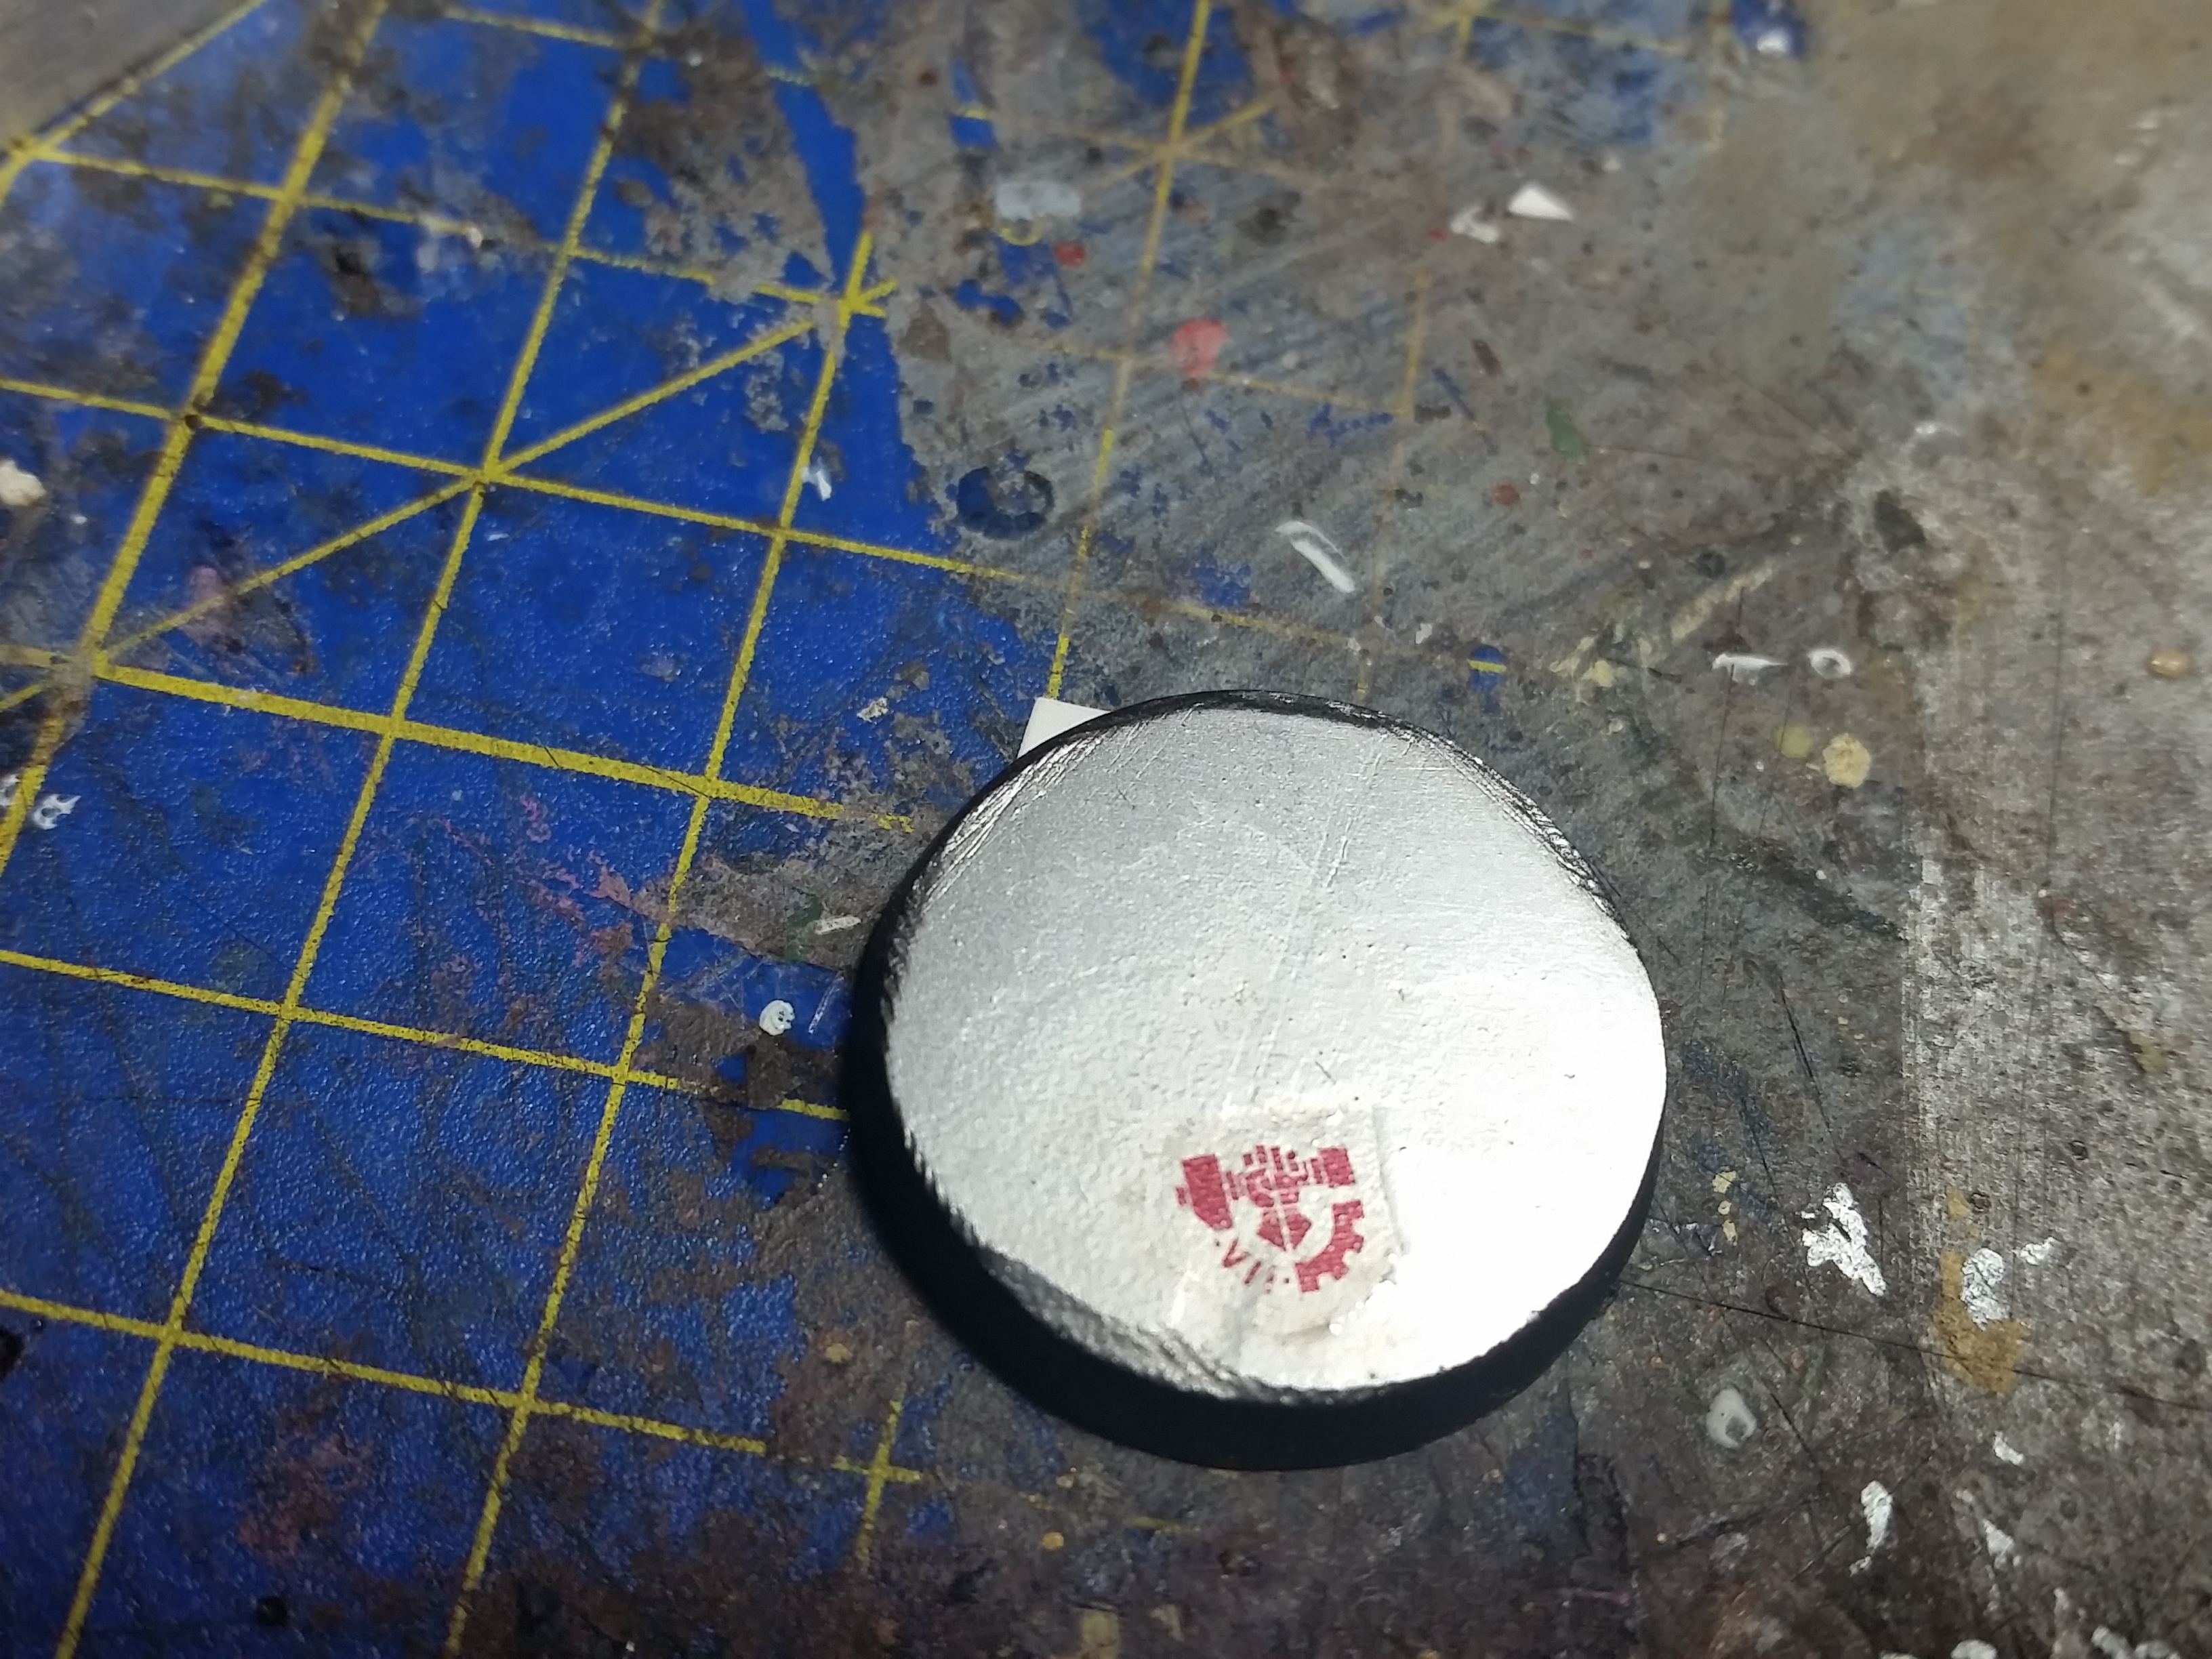
Transfer Sheet Update
After applying a quite thick coat of Vallejo Gloss Acrylic Varnish (28.517) mixed with a little bit of Vallejo Airbrush Thinner (71.161) I tried applying a transfer to one of the first test bases I did for my Mechanicus. It’s looking good so far.
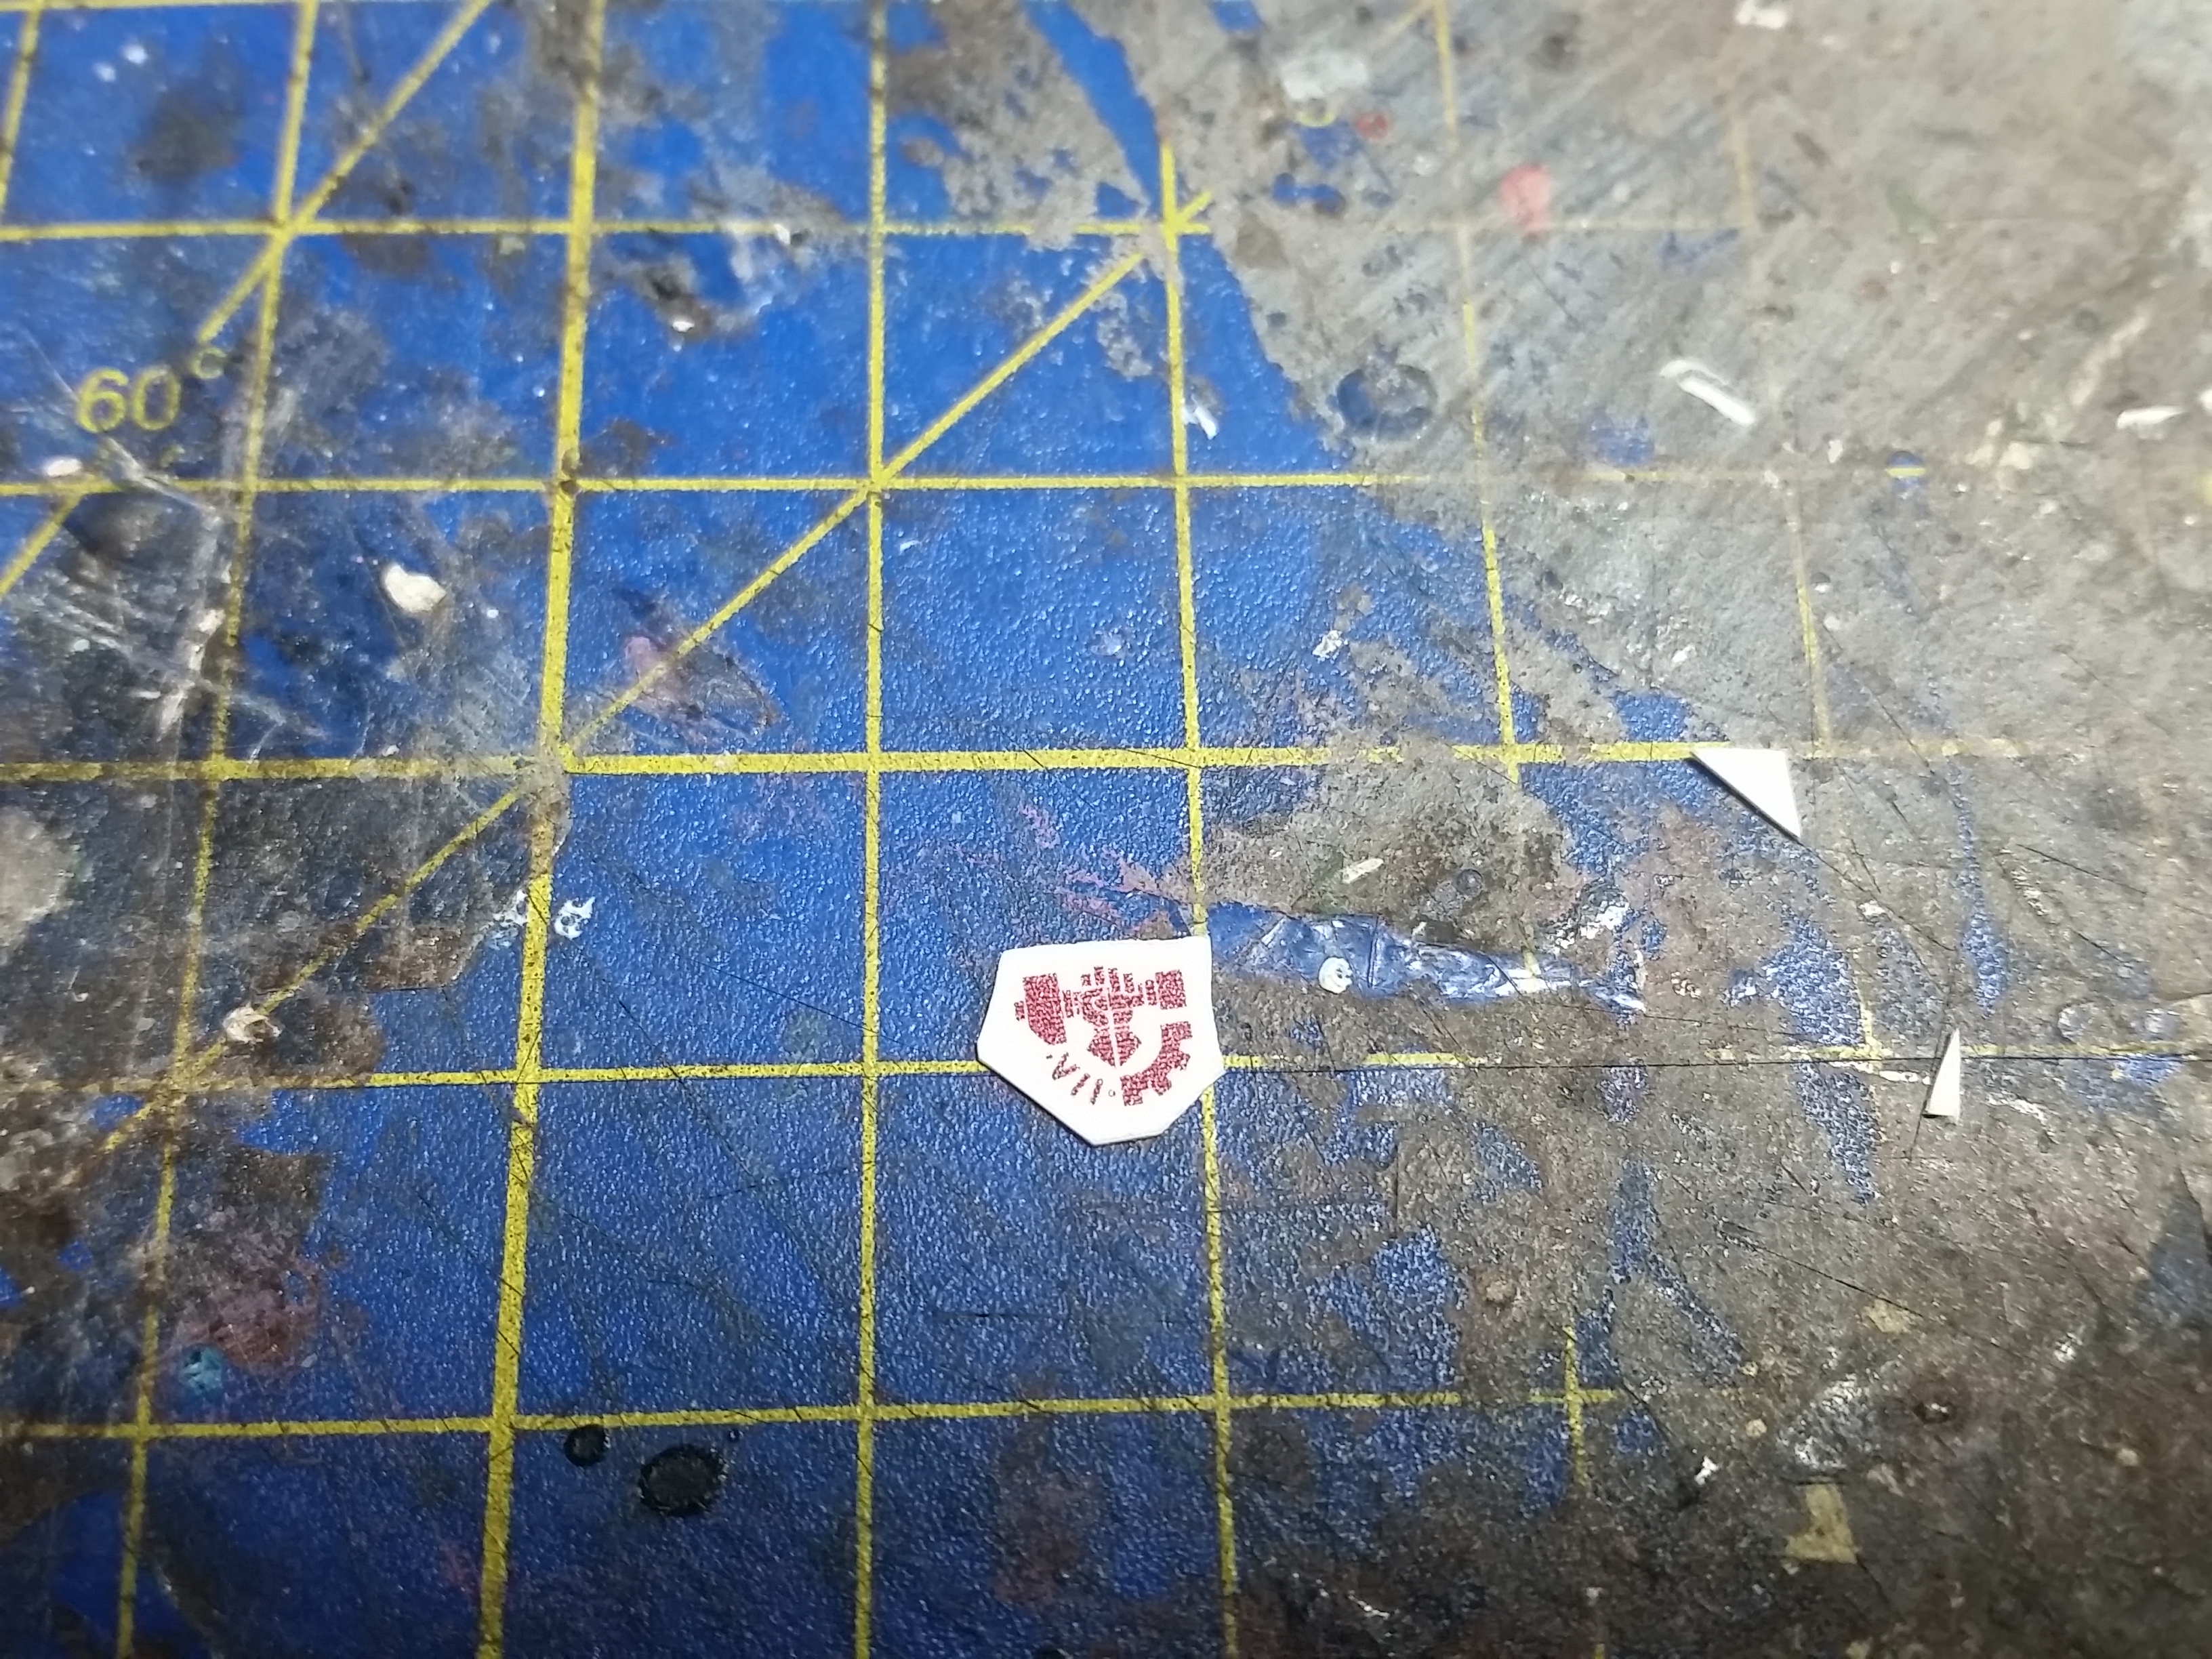
Transfer Sheet Printed
I printed the transfer sheet for my Forge World Metalica Mechanicus Force. Just letting the ink dry fully and then put a gloss varnish over it.
Bases, 2nd Batch is Done
The second batch of my transparent models…… I mean the bases for my Forge World Metalica Mechanicus force is done.
Skitarii Sub-Assemblies Part 1
The first 10 Skitarii are build in sub-assemblies and ready for painting.
Bases, First Batch is Done
The first batch of the bases for my Forge World Metalica Mechanicus force is done.
Transfers Sheet Test 1
Test print of my custom transfer sheet for my Forge World Metalica Adeptus Mechanicus force, printed on normal paper for size comparison. More transfers need to be added to the final sheet.
More mess.
I’ve been making a mess again with this whole pile of greenstuff dust. I sanded the tops of the bases smooth and now they can be painted. I will be painting them in batches since there are quite a lot of them.
Making a Mess.
Since I applied the greenstuff to the bases yesterday, it was dry now so I trimmed and sanded the edges tonight, now all is left is sanding the top and then on to painting.
Getting all my bases covered.
I got all my bases covered for my Mechanicus force (pun intended).
A Small Update About the Project.
There are a couple of changes I’m making to the army I’m building in this project.
- The 2 squads of 6 rangers will become 2 squads of 10 rangers with 3 Arc rifles and an Enhanced Data-Tether, the rest of these squads remain unchanged
- The 2 squads of 8 vanguard will become 2 squads of 10 vanguard with 3 Plasma Calivers, the rest of these squads remain unchanged.
I will also no longer attempt to put craters on the bases as was an idea I had earlier. I may experiment with this on bigger bases, but for now I struggle getting the rest of the bases as smooth as they are now and I’m happy with what I can make now.
The bases.
Some work in progress shots of the base.
How do I make this?
In here I’m going to tell you how I make these bases. This is as much as a reminder for me as telling you what I did.
- Grab a standard GW base of the required size.
- Apply a thin layer of greenstuff to the top and flatten it as much as possible, then let it dry.
- Cut the edges of the greenstuff to make it fit the shape of the base.
- Sand the top of the base using various different sandpapers ending with a 1000 grid sandpaper to get a smooth finish.
- Smooth the sides using a simple hobby file.
- Prime the base with Vallejo Surface Primer Gloss Black (77.660) and let it dry.
- Spray a thin coat of Vallejo Metal Color Dull Aluminium (77.717) over it with my airbrush and let it dry.
- Paint (by hand) the rims of the base with a coat of Vallejo Game Color Black (72.051) and then let it dry.
- Spray a coat of Vallejo Metal Varnish (77.657) mixed with a little bit of Vallejo Airbrush Thinner (71.161) and let that dry.
- Paint (by hand) the rims of the bases with a coat of The Army Painter Warpaints Anti-Shine Matt Varnish (WP1103).
- And when dry, they’re done.
How am I going to attach the models to the base?
Again this serves as a reminder to myself as well as giving you some info on how I am going to do this. This more of how I plan to do this rather than how I do this at this point.
The models will have holes drilled in the bottom, this is for mounting them on a stand so I don’t have to hold the model.
- Drill holes where the pins should go.
- Coat a bit of brass rod (most likely 1mm) with a bit of PVA glue.
- Then hold the model on the holes of the base and put the brass rod in.
- Cut the remainder of the brass rod off, so I only have the bit needed to hold it to the base.
- When the previous step is dry, apply a bit of greenstuff on the bits of the brass rods that may be sticking out to prevent damage to scenery or tables these models may be used on.
- And that’s that.
The First Basing Experiment
The first basing experiment, clay or greenstuff. For the bases for my Mechanicus I would like to use clay because it’s a lot cheaper, but after reading conflicting reports on how well it sands, I’m going to test it myself. I need to sand it smooth and drill holes in it.
Both the clay and the greenstuff sanded well, it will be easier if I apply a thin layer next time. Drilling went well as well, I guess we’ll see better after priming them how well it went.
The conclusion of my first test for the bases of my Mechanicus army. After primer and a basecoat the greenstuff (left) looks good, but the clay (right) won’t fully smooth out unfortunately.
The Plan Part 5: Bases
Metalica, a Forge World nestled deep in the Ultima Segmentum, is formed almost entirely of metal. No rocky crust covers the dull silver of its surface. No flora or fauna makes its home there. Other than the Adeptus Mechanicus, there are no biological life forms upon Metalica whatsoever. Even the atmosphere is inimical to life. It was not always this way, but the Tech-priests are by nature jealous of their treasures, and have had their Skitarii drive to extinction all other species so their quest for enlightenment can continue at peak efficiency.
*Source: 7th Edition Codex Skitarii.
Based on the description above I want to make the bases like Forge World Metalica, a smooth metallic surface. To do this I’m going to take a base, and add a layer of DAS clay or greenstuff, not sure yet. I will sand that down and smooth it. I will prime them with Vallejo Surface Primer Gloss Black (77.660) and then coat the surface with Vallejo Metal Color Dull Aluminium (77.717) followed by a coat of Vallejo Metal Varnish (77.657). I will then tape off the top of the base and spray the sides with Vallejo Model Air Black (71.057) and then varnish it with whatever matte varnish I feel like using now (still can’t find one I really like).
The first steps in this project will be the experimentation with the bases.
Additional features.
The forge world Metalica is inimical to life. The sole exceptions are the legions of the Cult Mechanicus that purposefully keep the planet bare so their work can continue in blessed sterility.
*Source: 7th Edition Codex Cult Mechanicus.
There is no flora or fauna on the planet so the bases would be a smooth metallic as it is described in descriptions. One thing I may want to try as well is adding craters. It seems like the atmosphere of Metalica is either very thin or very toxic or both, but for it to be known as “The Gleaming Giant of Ultima Segmentum” I doubt it would be very thick. The planet is formed almost entirely of metal, so the it would have to be smaller than Earth to have the same mass and gravity and again since it’s known as a giant I would assume it to be larger than the Earth. Making it’s gravity at least 2 probably 3 or 4 times as strong if not more. Since like I said it probably has a thin atmosphere asteroids and meteorites of any size would have no problem impacting on it with high velocity, the gravity just pulls in more. The crates is something I want to experiment with once I got the experiments done for the regular surface of the bases.
The Plan Part 4: Unit Markings.
What do the markings mean?
Every unit has a number on their chassis or robes, this number is the number of the unit. Next to that is a Greek letter, in the case of the vanguard above it’s Ω. This marks the maniple they belong to and this is only applied on the leader, alpha or princeps of the unit. Above the number is the emblem of the Forge World, in case of the leader, alpha or princeps this is replaced with a skull. The emblem above the numbers is only applied on robes, vehicles will usually have the emblem of the Forge World applied on another location on the vehicle. Units are very much divided in the way the codex allows.
Each maniple only contains one form of unit, 6 units of Skitarii or 3 units of bigger of bigger troops like Kataphron Destroyers or 1 big unit like an Onager Dunecrawler. 3 maniples form a cohort and 4 cohorts form a macrolade.
My force for now will be 18th Macrolade of the Forge World Metalica.
The markings on the robes are not a 100% accurate for Sicarians, Sydonians and everything apart from the Skitarii themselves, but I’m going to use this for the whole army.
How am I going to get my numbers?
All units I have for 40k have a markings on the bottom off their bases and that corresponds to an Excel sheet where I keep track of what the unit is and also the progress through painting and such. This marking consists of 2 letters followed by a dash and then 2 numbers. For example: SW-02. This is unit 02 or the third unit (the first is 00) for my Space Wolves. For the Mechanicus I will be using ME-xx. The numbers of these markings will be the numbers I use for the unit markings and it will help each unit stand out from each other.
Yes, this will make the army less flexible for using models in a different unit than that I defined before, but for me building and painting a unit like this is more interesting and they will look more interesting on the battlefield. I can always add to units that are not on their max limit of models to make a full squad or otherwise just make a new squad.
The identifiers for my maniples.
This is the list of maniple identifiers and to which cohort they belong in my force.
1st Cohort
- 1st Maniple – Δ
- 2nd Maniple – Ω
- 3rd Maniple – Σ
2nd Cohort
- 1st Maniple – Λ
- 2nd Maniple – Φ
- 3rd Maniple – Ζ
3rd Cohort
- 1st Maniple – Γ
- 2nd Maniple – Ψ
- 3rd Maniple – Θ
4th Cohort
- 1st Maniple – Χ
- 2nd Maniple – Ξ
- 3rd Maniple – Π
How will I apply them?
To apply the numbers and unit markings I will be printing and using my own transfers sheets. This will be my first play with making transfers and during the project you will see the progress I make with this. I have already got most of the digital files that I need to make the transfers.
The Plan Part 3: Painting Vehicles
Armour
The vehicles will be primed with Vallejo Surface Primer Black (74.602) and panels will be highlighted with Vallejo Model Air White (71.001) to create a modulation effect. Then the base coat will be Vallejo Model Air Insignia White (71.279) over the armour. Vallejo Model Color Flat Red (70.957) will be used for details, like stripes etc.
The trim bits on separate armour plates or other decorative bits of trim will be painted in Vallejo Game Color Bright Bronze (72.057).
For chipping I will be using two colours. First a heavier layer of chipping using Vallejo Model Color White (70.951) and then a lighter coat of chipping with Vallejo Game Color Charred Brown (72.045).
Washing the white I will be first applying a layer or two of gloss varnish and then fill in the panel lines and crevices or any place where I want it to be a bit darker with AK Interactive Paneliner for White and Winter Camouflage (AK 2074).
Mechanical Bits.
The mechanical bits will be painted with Vallejo Metal Color Burnt Iron (77.721) and then a drybrush of Vallejo Model Air Steel (71.065). The more painted looking mechanical bits, like the legs etc. on the Dunecrawler above will be painted with Vallejo Model Air USN Sea Blue (71.295). These will be getting a coat or 2 of gloss varnish and then a coat of AK Interactive Landing Gear Wash (AK 2029). When this last coat is dry I will be rubbing most of it off, so it will remain in the crevices etc.
Pistons and the like will be painted Vallejo Metal Color Pale Burnt Iron (77.704) before the varnishes of the other mechanical bits go on. And then after the varnishes it will receive a coat of AK Interactive Wash for Shafts and Bearings (AK 2032) where I will rub some of it off when dry.
Weapons
The weapons will use the same painting scheme as the infantry does, except that the base colour for the weapons will be Vallejo Model Color Black Grey (70.862).
Exhausts
I do want a nice rusty worn look for exhausts. They will get a light and mostly uneven coat of Vallejo Game Color Charred Brown (72.045) over the black primer. Then I want to apply a mix of Vallejo Pigments Old Rust (73.120) & Vallejo Pigments New Rust (73.118) while using Vallejo Model Wash Rust (76.506) as an extra tone and a binding agent.
The Plan Part 2: Painting Infantry
So my Mechanicus force is coming from the forge world of Metalica, which means I’m going to have to paint white…….. ? A lot of white.
The Cloth
Let’s start of with the difficult bit. In order to get the white shaded on the cloaks I’m going to use a pre-shading technique using Vallejo Surface Primer Black (74.602) as base and Vallejo Model Air White (71.001) on the parts I want highlighted. I then want to apply a thin coat of Vallejo Model Air Aged White (71.132)) hoping that the pre-shading will do all the shading work for me. This will be done with the airbrush.
For the inside of the cloaks I will be using Vallejo Model Color Flat Red (70.957) shaded with Citadel Shade Carroburg Crimson (99189953016).
For the rest of the cloth like on the legs and such I will be using Vallejo Model Color Pale Blue (70.906) and some Citadel Shade Drakenhof Nightshade (99189953020) to shade it.
The Metals
For the metals I will use a colour combo I have been using for a while and it turns out really well. So all the bionic implants and the armour on the Skitarii will be base coated with Vallejo Metal Color Burnt Iron (77.721) followed by a drybrush of Vallejo Model Air Steel (71.065) and a wash of Citadel Shade Nuln Oil (99189953017).
The trim bits and decorative bits will be painted with Vallejo Game Color Bright Bronze (72.057) before the shading in the previous step occurs.
The armour on the Sicarians will be different as the lore states they are supposed to be white for Forge World Metalica. So the armour will use a modulation technique where it will be basecoated with Vallejo Surface Primer Black (74.602) and the centre of the armour plates will be highlighted using Vallejo Model Air White (71.001) and then covering that will be a thin coat of Vallejo Model Air Insignia White (71.279). This will be done with the airbrush.
The Weapons
For the base colour of the weapons I will use Vallejo Model Air USN Sea Blue (71.295), the exposed metal bits will be painted with Vallejo Metal Color Dull Aluminium (77.717) and the trim with or decorative bits with Vallejo Game Color Bright Bronze (72.057).
Plasma coils on plasma weapons will be basecoated with Vallejo Model Air Silver RLM01 (71.063) and then receive a coat of Vallejo Model Color Transparent Blue (70.938). To finish of after all the varnishes are applied I will apply a coat of gloss varnish over these bits, just to make them stand out a bit more.
Coils on Radium weapons will have the same as the plasma coils in the recesses and the outer bits of the coils will be painted with Vallejo Metal Color Dull Aluminium (77.717).
A similar thing I have planned for arc weaponry except that the coil block on the outside will be painted with Vallejo Model Color Copper (70.999).
Bladed parts on power weapons will be painted with Vallejo Metal Color Burnt Iron (77.721) and then receive a drybrush of Vallejo Model Air Steel (71.065).
Leather grips on weapons will be painted with Vallejo Model Color Cavalry Brown (70.982) and rubbery grips with Vallejo Panzer Aces Dark Rubber (70.306)
Everything will be shaded using Citadel Shade Nuln Oil (99189953017) apart from the plasma coils and inner coil things, which will be painted after the shading as it will look better without.
Gribbly Bits and Other Stuff
The Mechanicus cog will be painted with Vallejo Model Air White Grey (71.119) & Vallejo Model Color Black Grey (70.862) and then shaded with Citadel Shade Nuln Oil (99189953017).
Lenses and light will be done in the same way as the plasma coils, a basecoat of Vallejo Model Air Silver RLM01 (71.063), then a layer of Vallejo Model Color Transparent Blue (70.938) and a gloss coat in the end.
For all the gribbly bits and other bits that I find and cannot define right now I have no plan at all and will paint them with whatever I feel will look good on them.