Brush With Death 2019 Entry


Recommendations: 265
About the Project
I view competitions as a way of pushing myself. When Mantic Games announced their 2019 Brush With Death painting competition, I decided to try building a diorama. Here goes!
Related Company: Mantic Games
Related Genre: Fantasy
This Project is Completed
Part 1 - Foam!!
In the past, I’ve only ever done scenic bases on miniatures intended for gameplay, so the idea of building a diorama was daunting, to say the least. Step one was browsing the Mantic webstore for (at least) two miniatures that not only looked interesting to paint, but also seemed like they would fit together in a world. After a while, I found them, and they demanded I build…. a sewer!

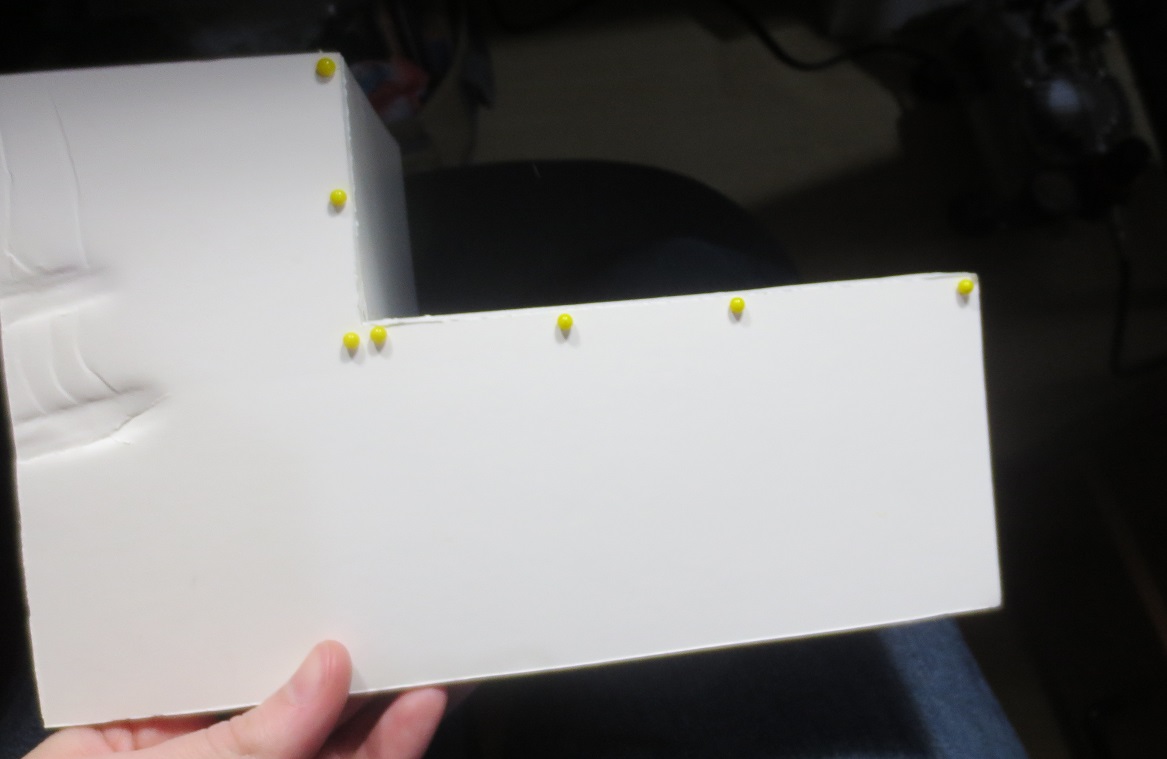
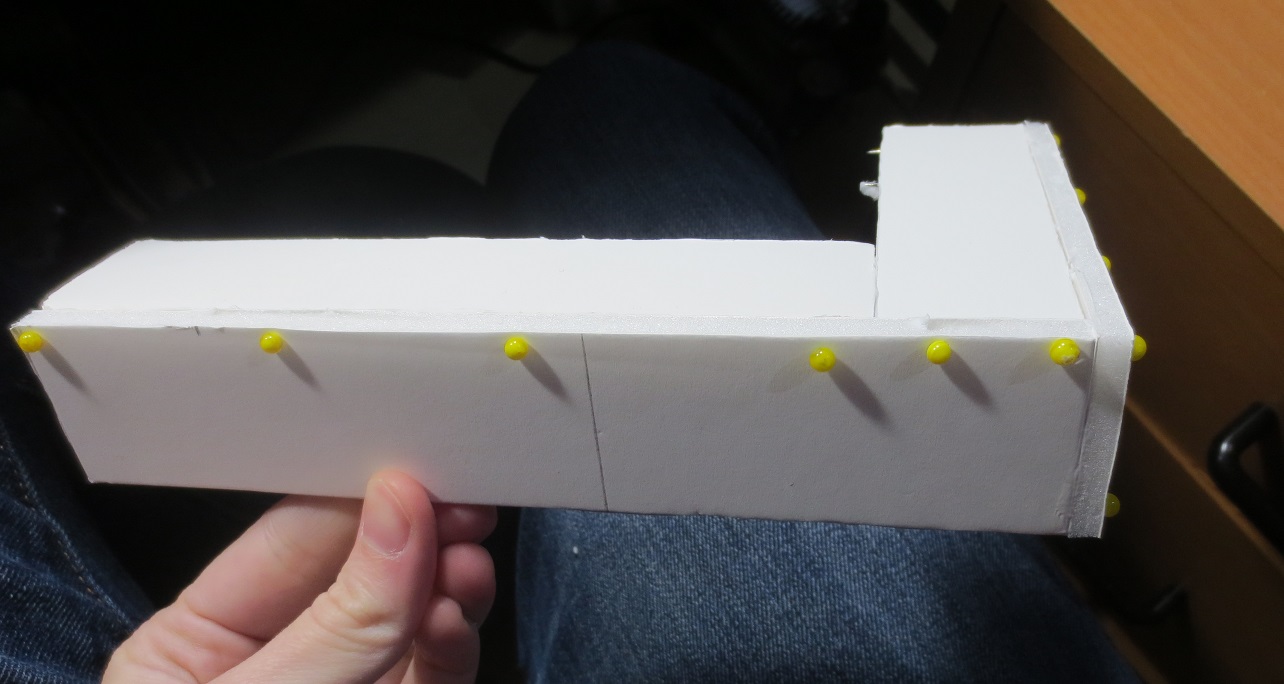
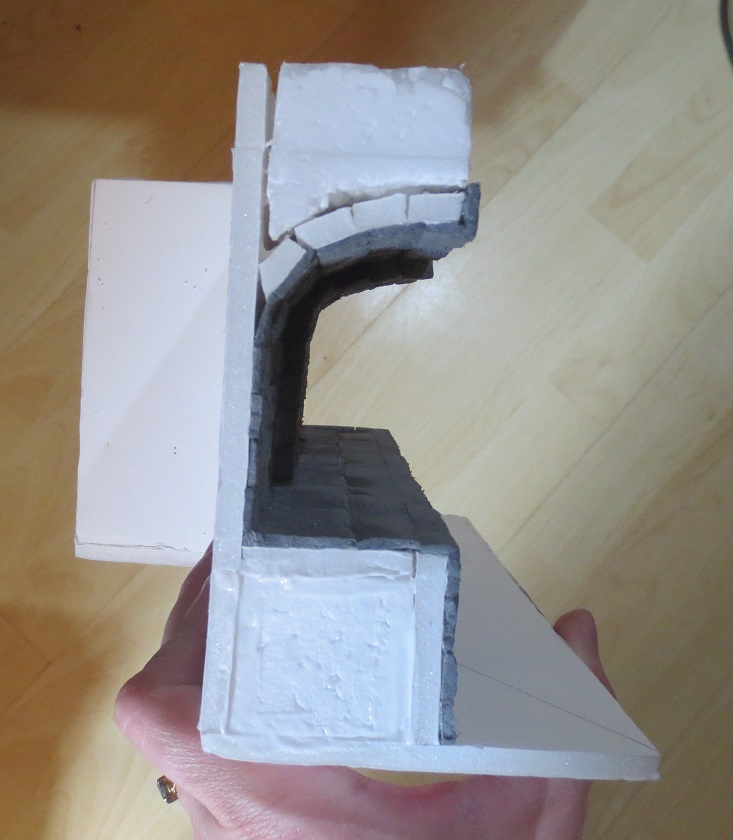
I had a basic shape for the diorama in mind, but the first step was to make sure I adhered to competition rules. The diagonal line through the “L” is the longest side, and it’s exactly 11 inches. The rules state the diorama can have a diameter of no more than 300mm or 11.81 inches.
(Please let me know if something here is off – I don’t want to get disqualified!)

I cut out the “L” for my base and added walls. I wasn’t sure how tall I wanted it to be, so in the end I just went for 5 inches.
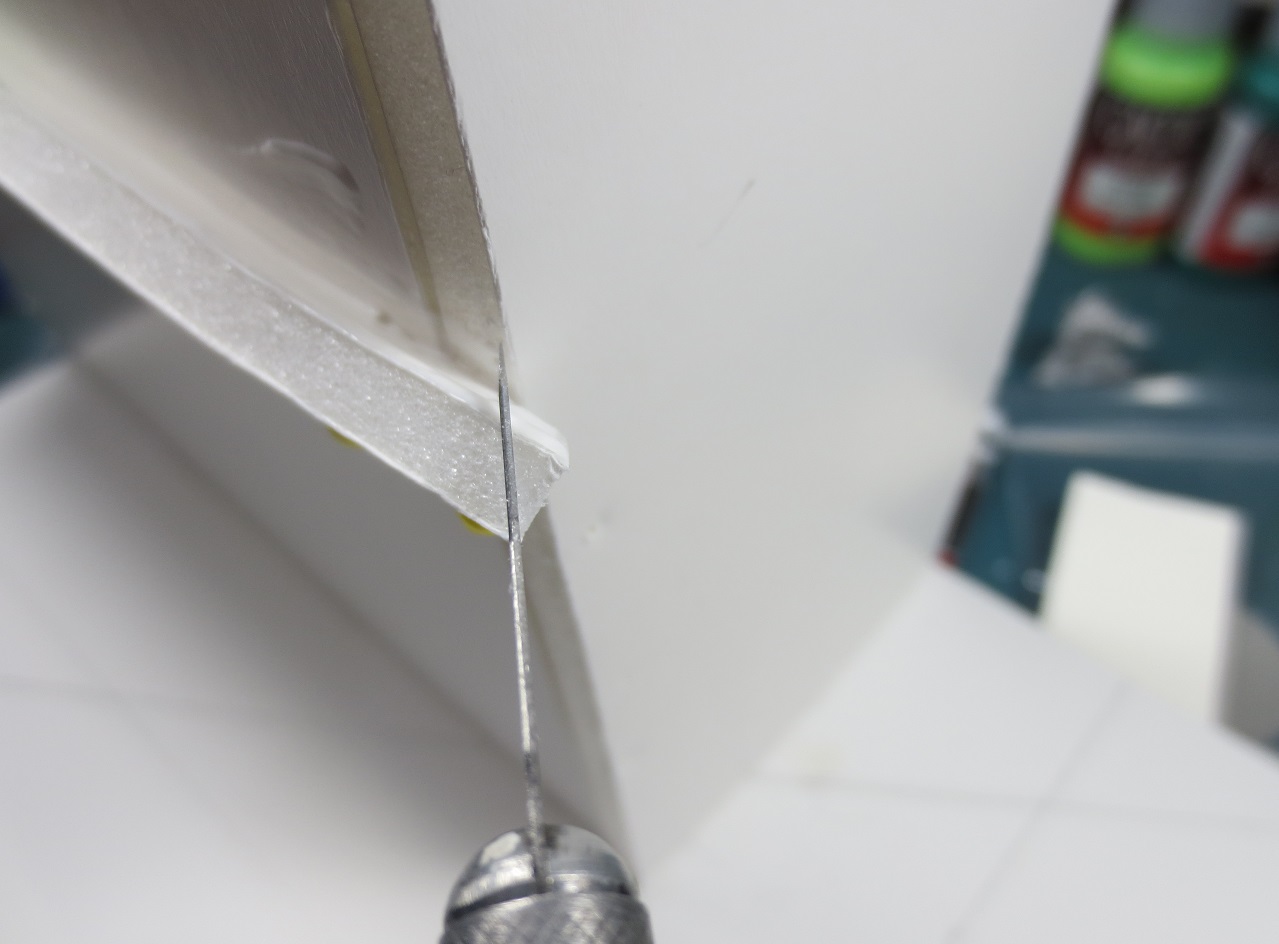
Throughout, I’m using PVA glue and straight pins to make sure everything gets a good seal.
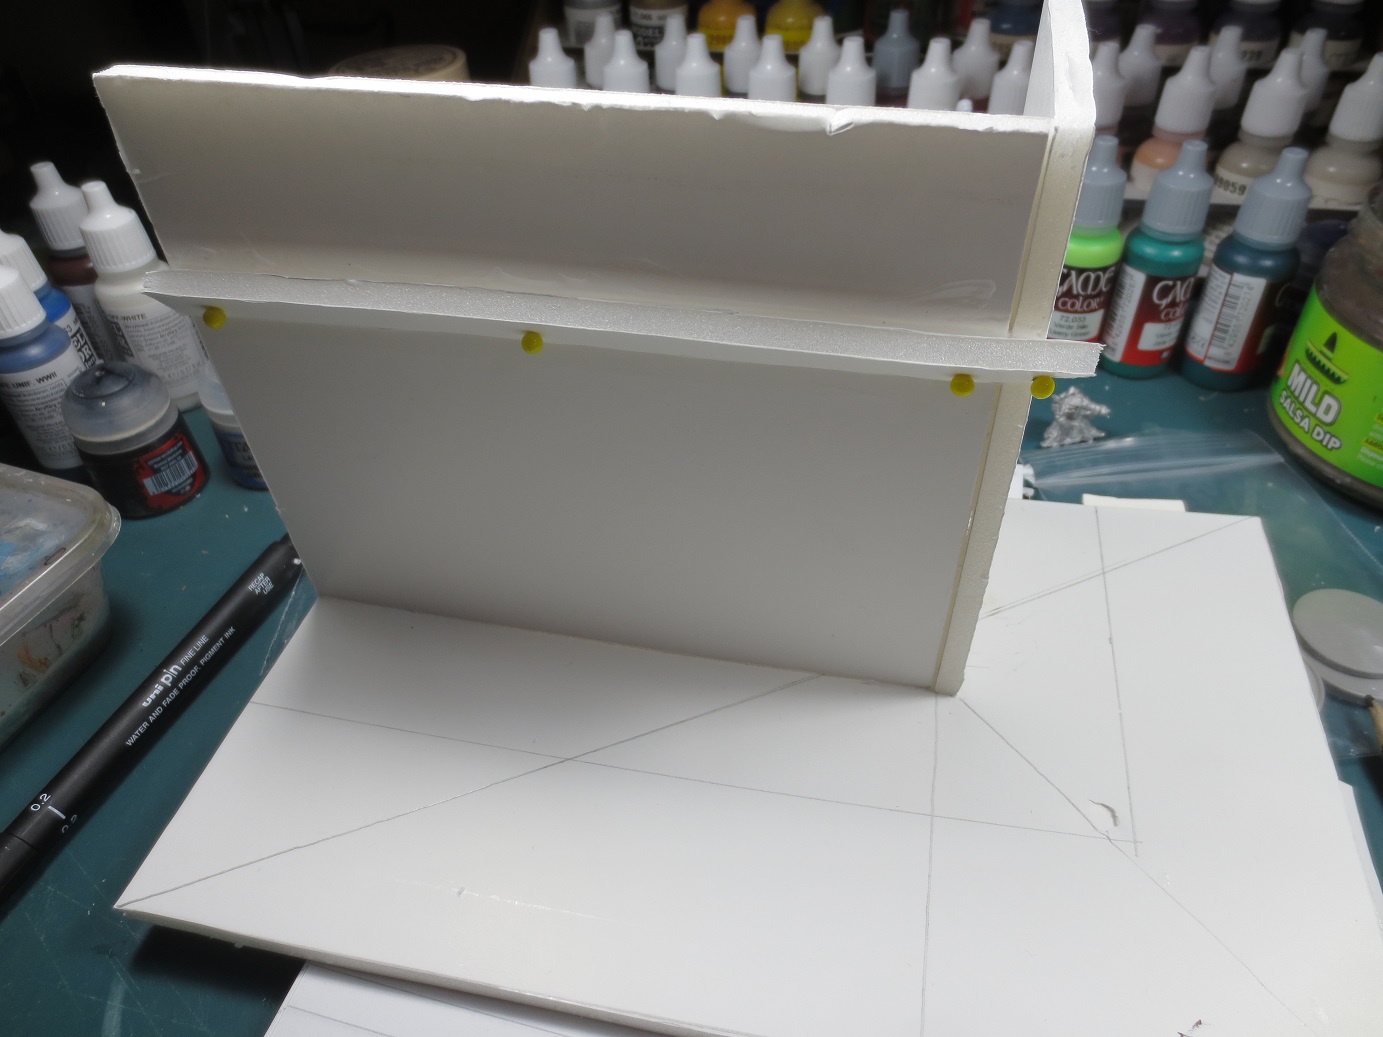
The next stage was constructing a walkway running along the back walls. I measured the wall lengths and, again, eyeballed a width I thought I would be happy with. In the end I gave myself a little extra room to work with by adhering the sides on level with the top surface, instead of beneath (which was the original plan).

As you can see, I didn’t attach the walkway straightaway. Instead, I drew a line between the wall corner and the far corner of the diorama and used this as a way of how I should shape the ceiling pieces. I want to try to for a curved sewer ceiling, and the only way I could see going about that was using long strips glued into the correct shape.
Part 2 - More Foam!!
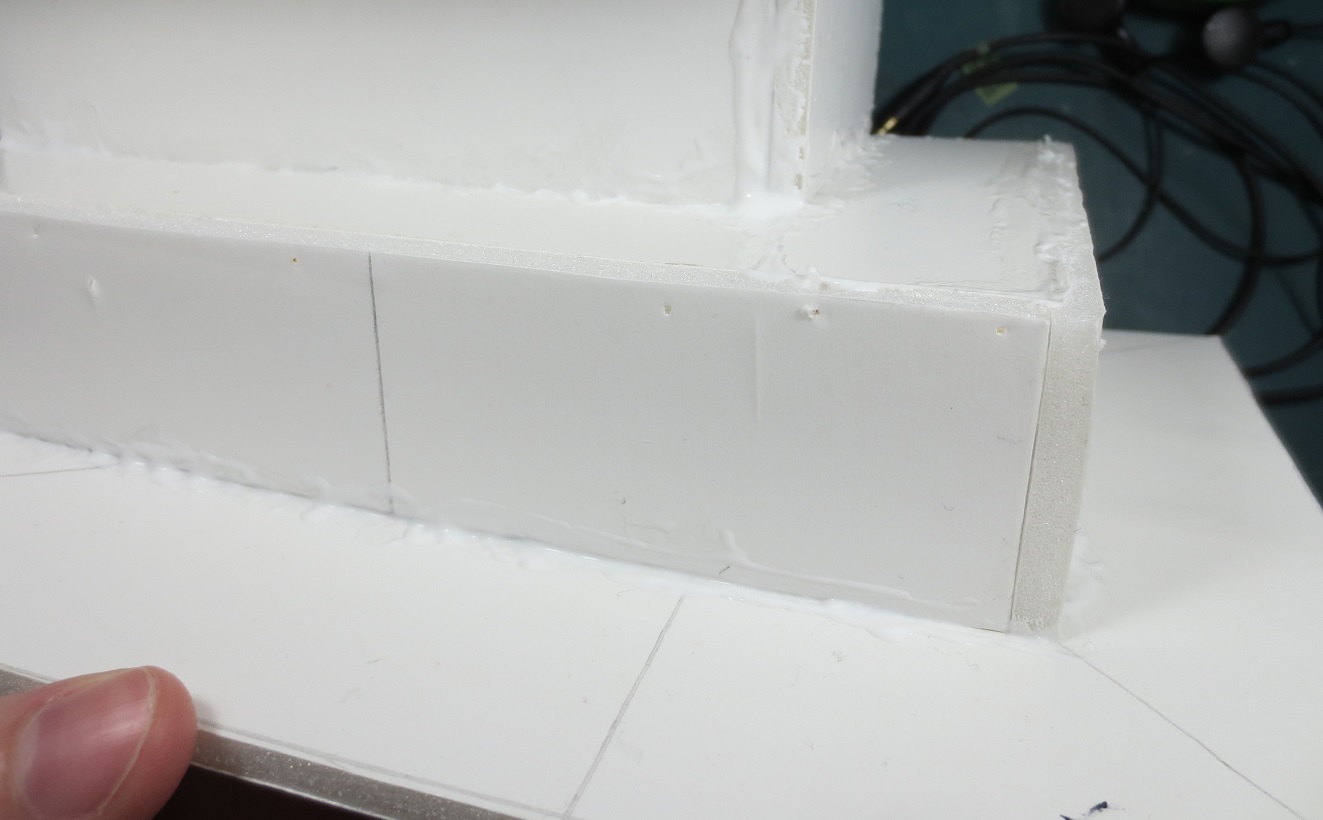
To aid in making the shape I want, I cut the lower corner of the whole strip off, then glued and pinned it in place.
A little more was cut off on the end, staying in line with the guide on the base of the diorama and the wall corner.

More strips were glued on in the same manner. I also glued a strip of paper over the join to strengthen the connection.

Finished. I put the miniatures in place to see if I was happy with the shapes and empty spaces. The empty space is probably what I eyeballed the hardest, as I didn’t want to the piece to look too empty.
While it does look a little empty right now, I intend to bulk it out with sewage, bricks, and maybe some supports.
Part 3 - A Little More Foam
For the next step, I glued down the walkway. Although you can’t see it in the picture, the base piece of foam was warping a little, so I made sure to slather on the glue and pin really well in an attempt to straighten it out.

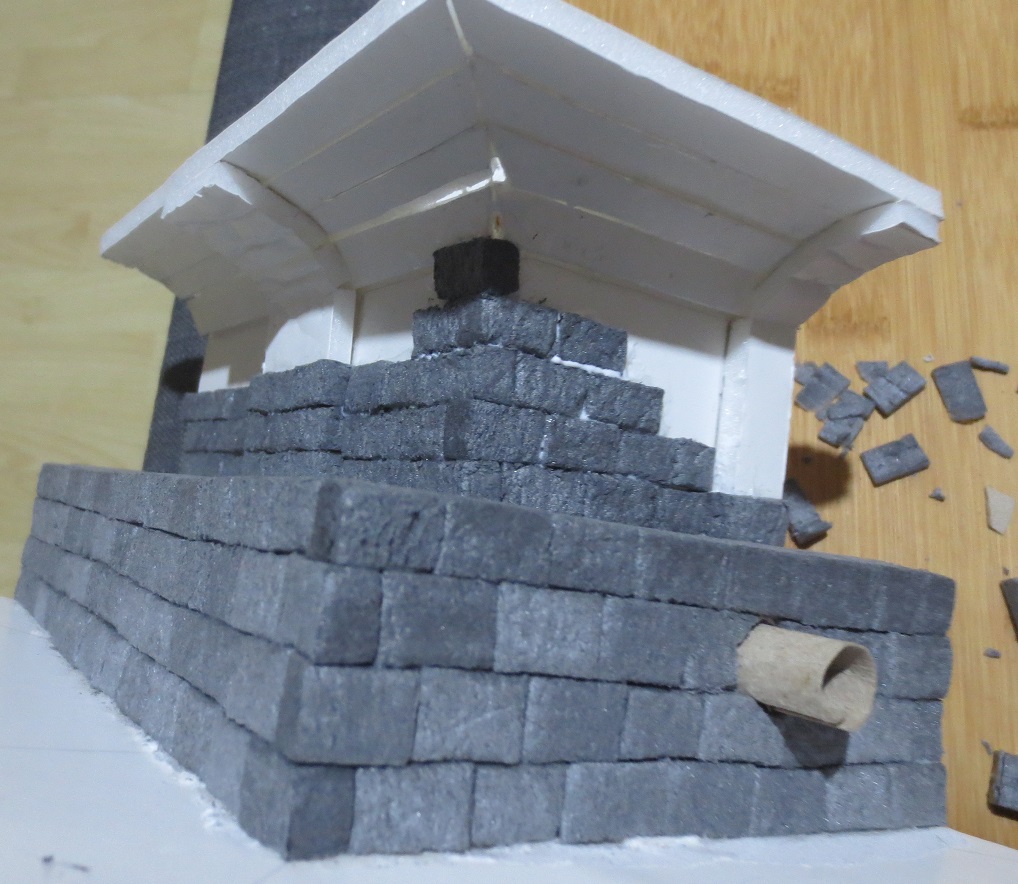
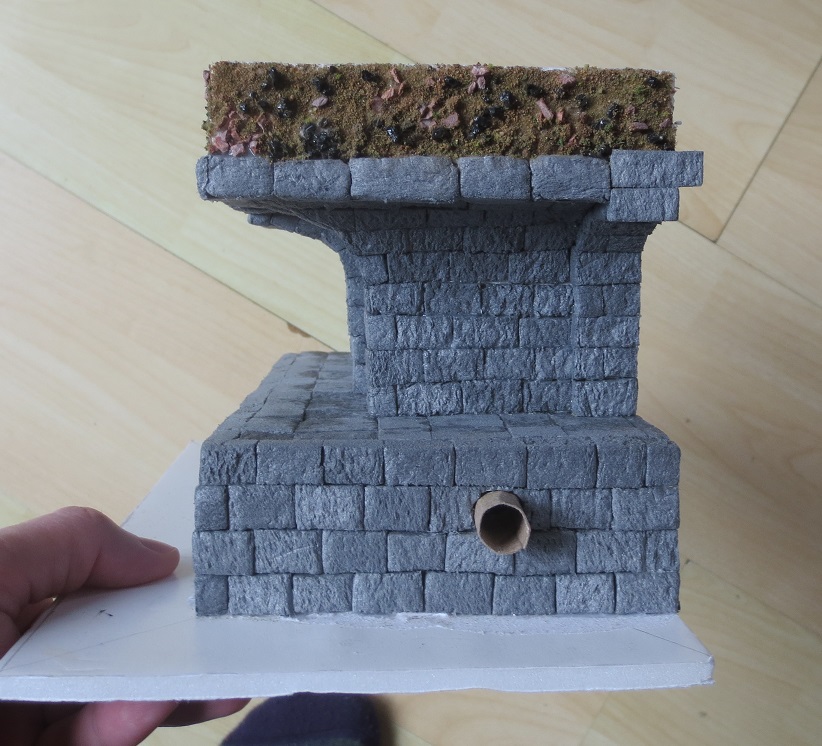
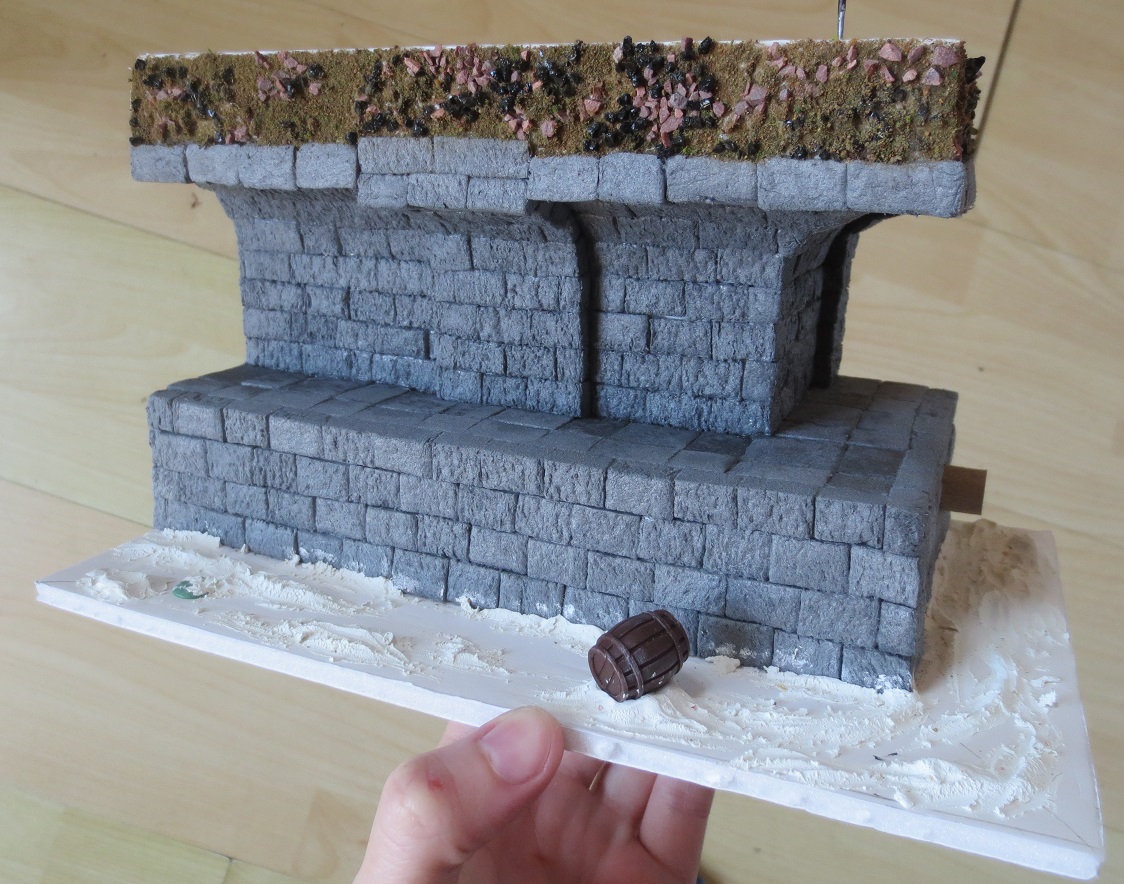
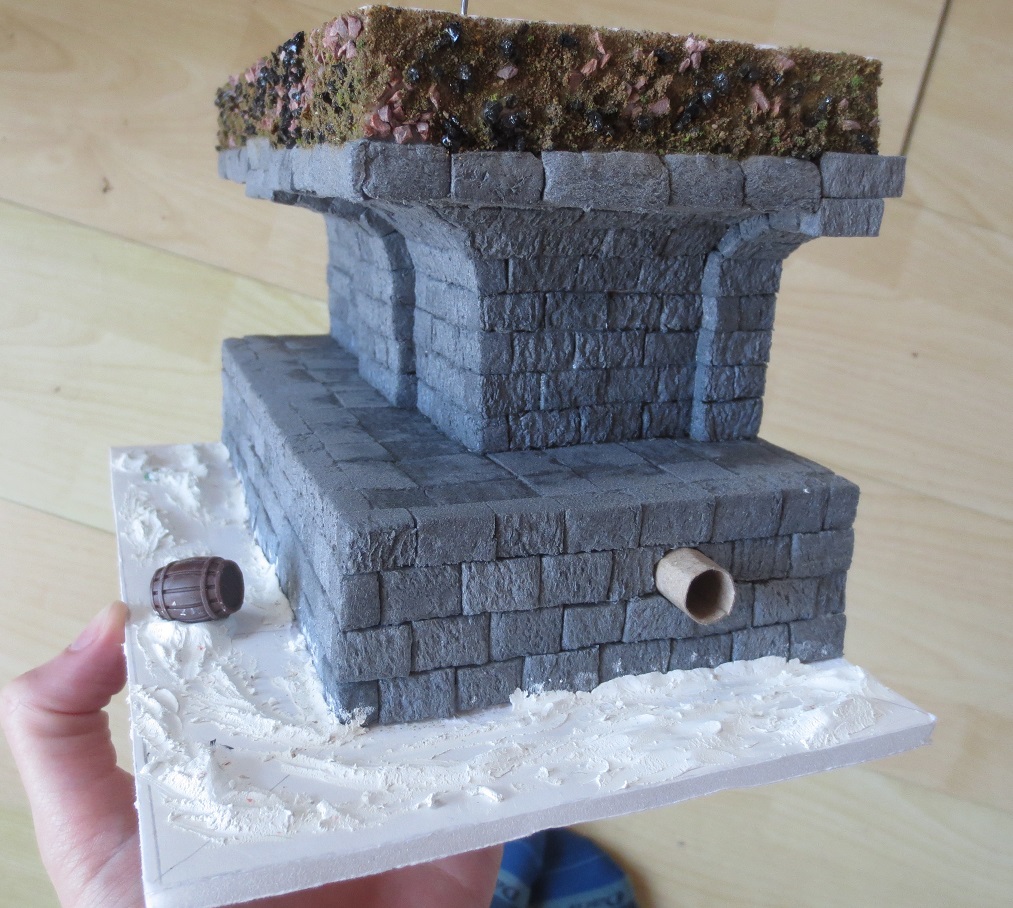
I also cut out a hole where I think I’d like a sewer pipe to emerge out of the walkway.
Bricks! - Attempt One
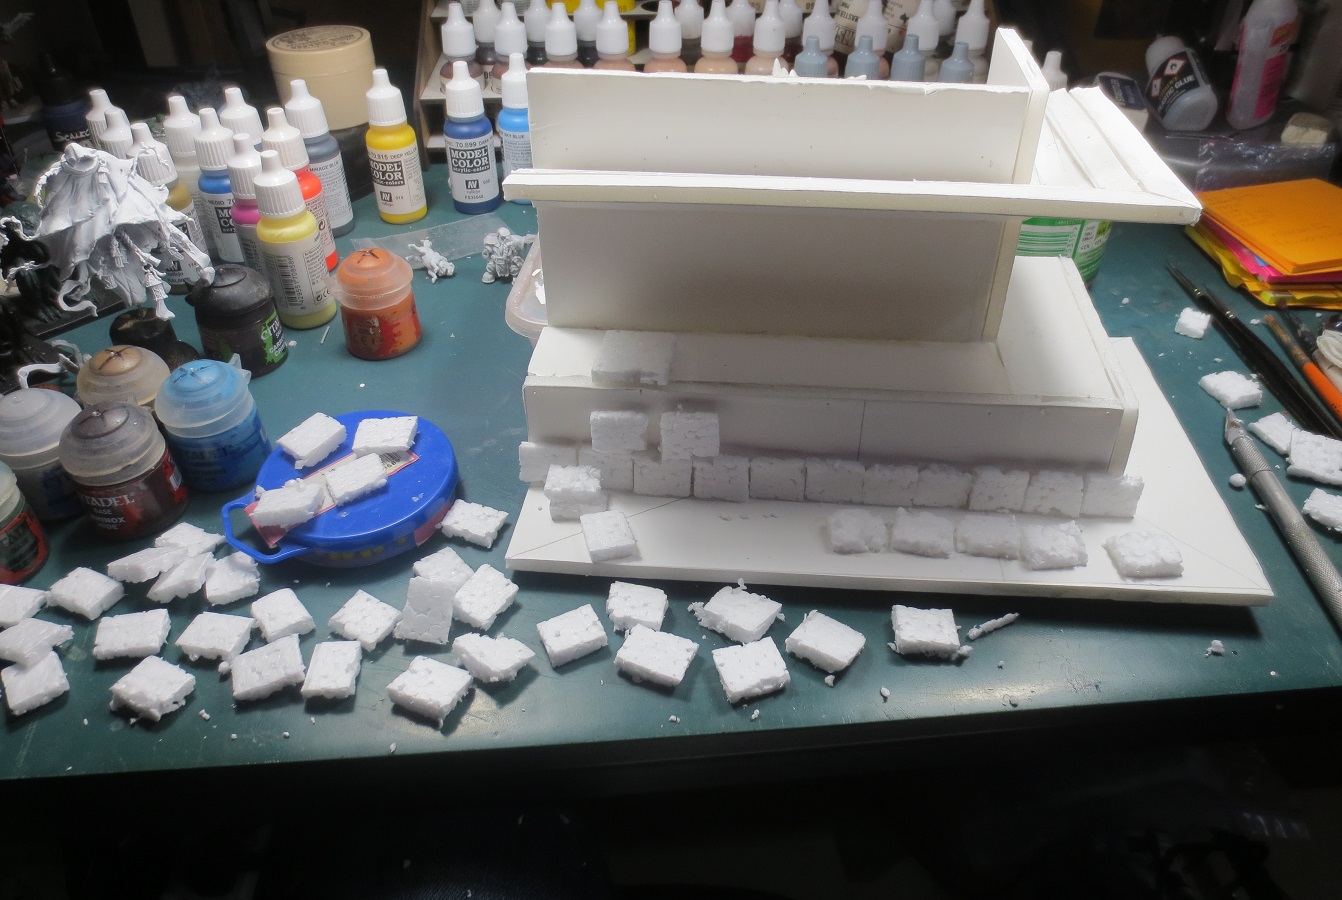
A part of Sunday was spent cutting bricks from foam! I decided to build from the base upwards, so that I could make sure the brickwork was seamless. In my head, I saw one of two options: rough sewer crumbling into disrepair, or very-well constructed sewer (if not exactly tidy). I decided to go with the latter, as in my head I’m imagining a goblin fleeing through the bowels of a dwarven city.
And, as we all know, dwarves are very good at stonecutting and construction.
Unfortunately, I used the wrong kind of foam! My SO pointed out that the foam beads would only look more obvious once I’d painted and washed the brickwork. If there was one good thing to take away though, it’s that the brick layout looks good.
So, off it comes, to make way for the new high-density foam even now winging it’s way toward me.
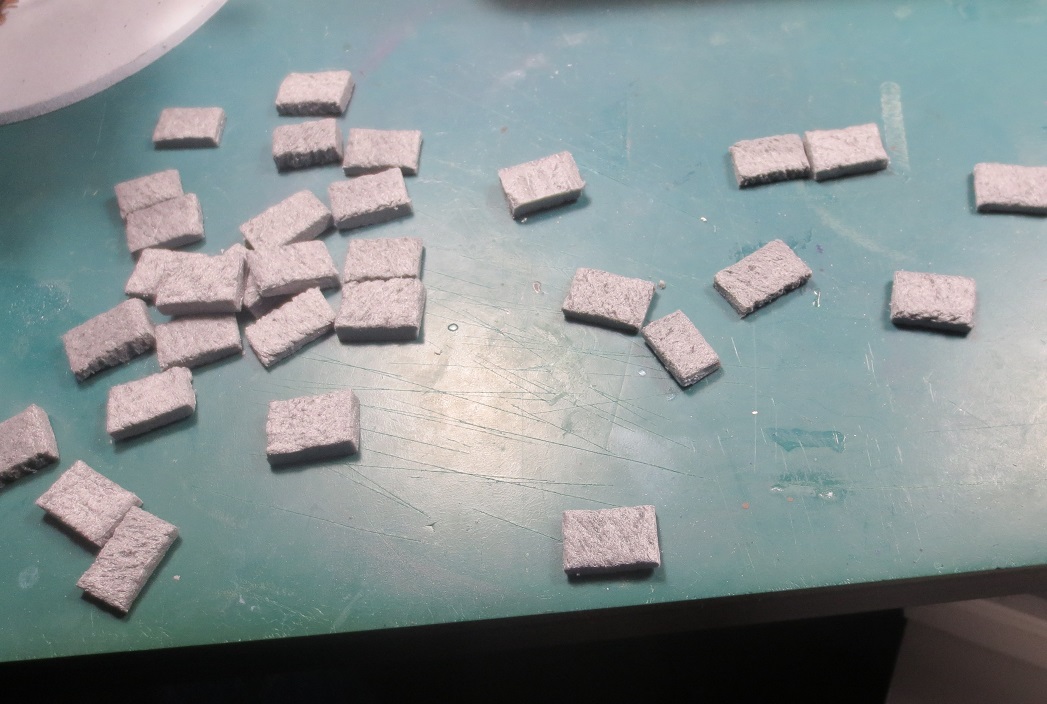
Bricks! - Attempt Two

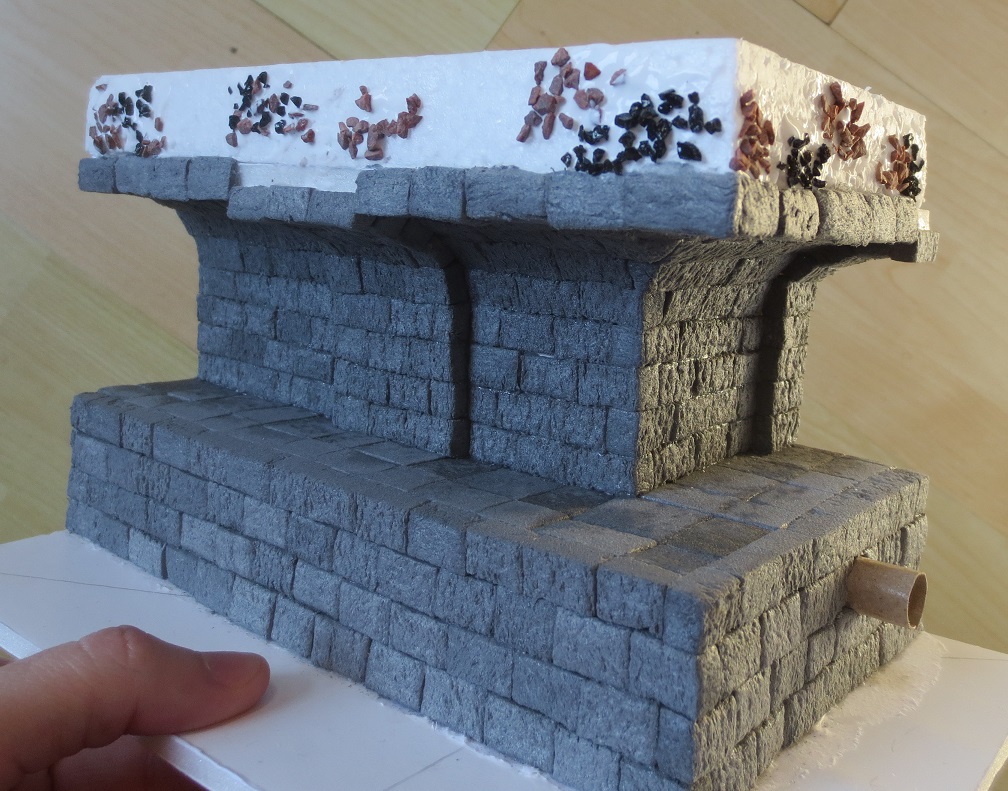
The high density foam arrived, so I’ve been cutting and shaping bricks for the past couple weekends! I decided to take the longer, more work-intensive route of cutting out individual bricks; by cutting from different parts of the foam block and swapping bricks around, I was able to create an uneven, worn effect that I really liked.
The first wave – it took a lot more bricks than this.
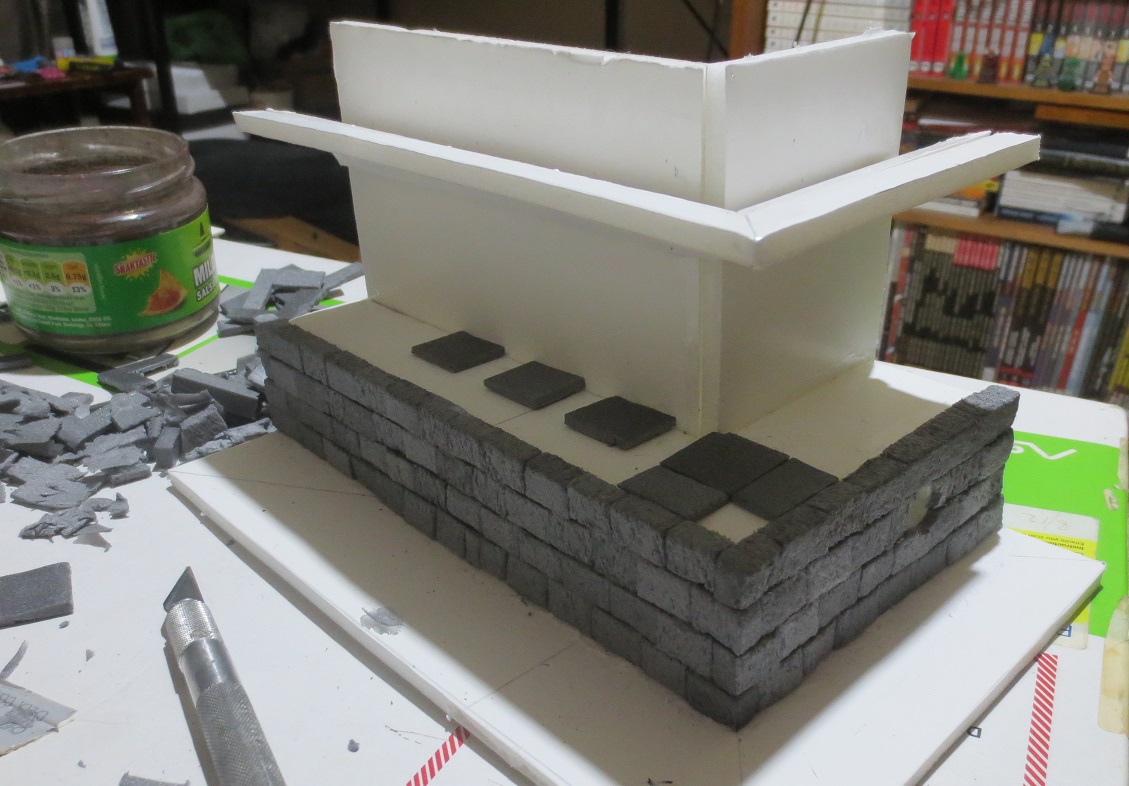
Base of the walkway done, at which point the overall effect of different brick textures really comes through. Hopefully, that will do most of the work when it comes time to paint and weather.
I played around with a couple patterns for the top of the walkway. The only thing I really knew is that I wanted it to look smoother than the sides.
I started with large flagstones (larger than those in the picture), which looked too out of scale with the miniatures. I cut them down to the size you see above, with the plan of filling the surface with them.

After shuffling around differently-sized pieces for a bit (as well as a Sunday nap), I hit upon the above pattern. Hopefully it will toe the line between utilitarian and boring.
Done!
Next I’ll be continuing the brick pattern up the walls. I’m not sure how I’ll achieve the join on the arch, but it will probably require some Googling for reference pictures.
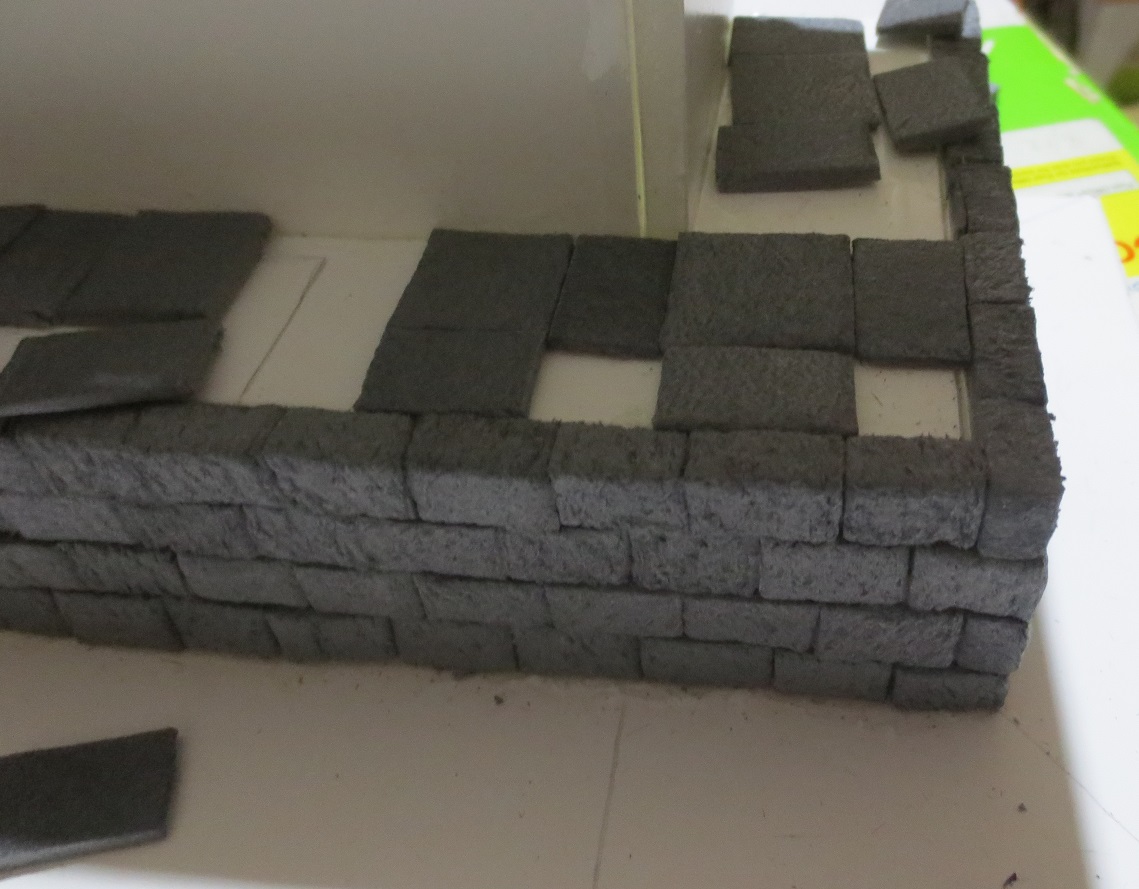
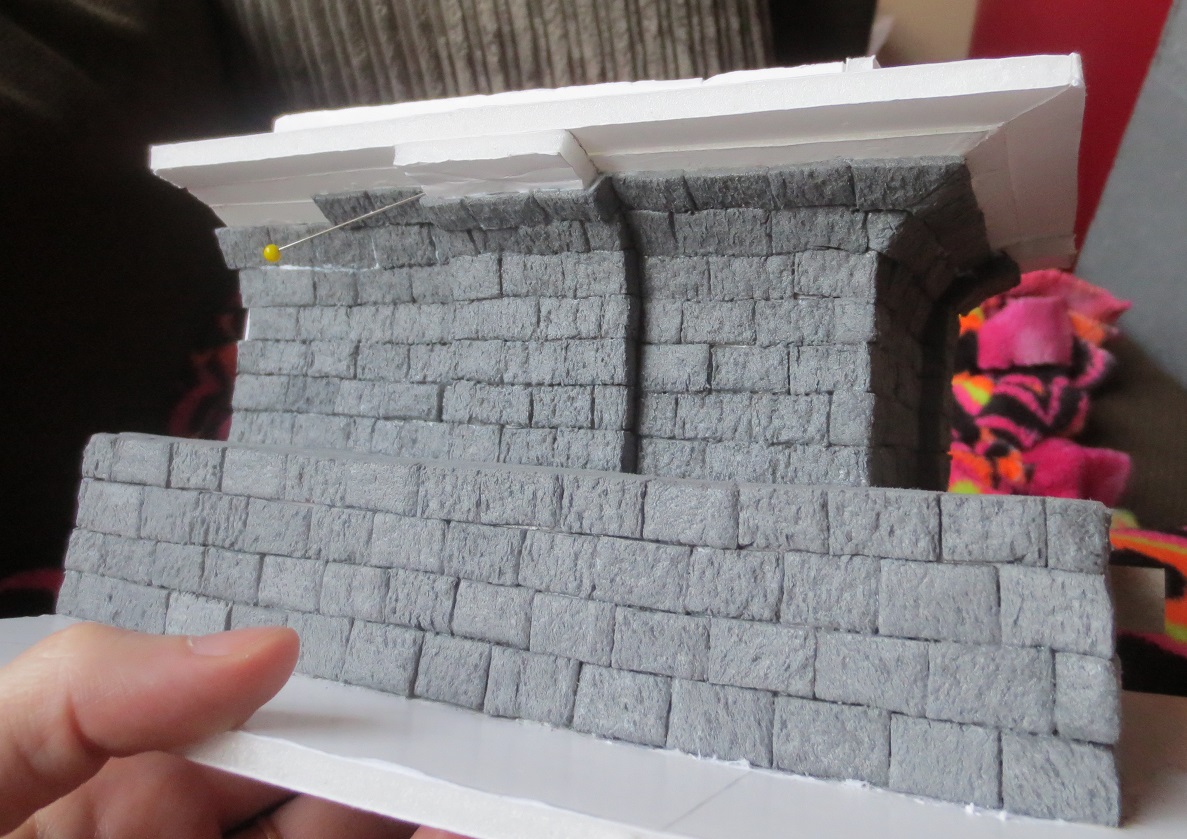
Walls
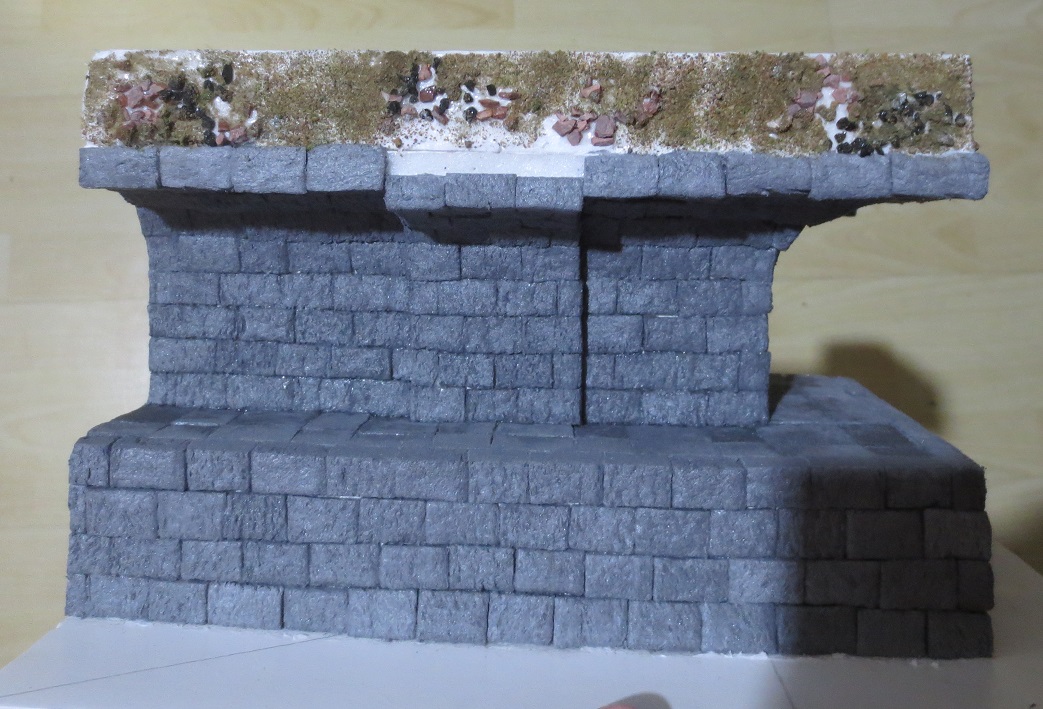
With the walls, as I did on the walkway, I started from the corner and worked my way outwards in each direction.
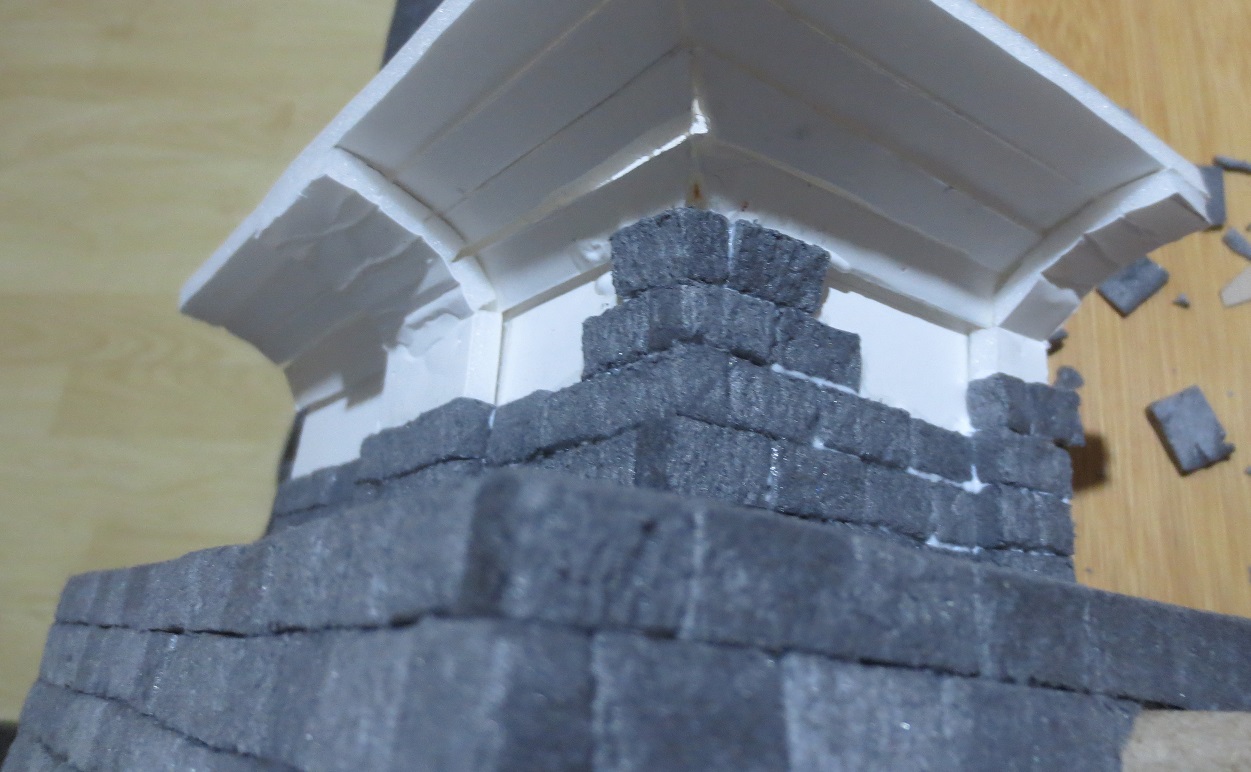


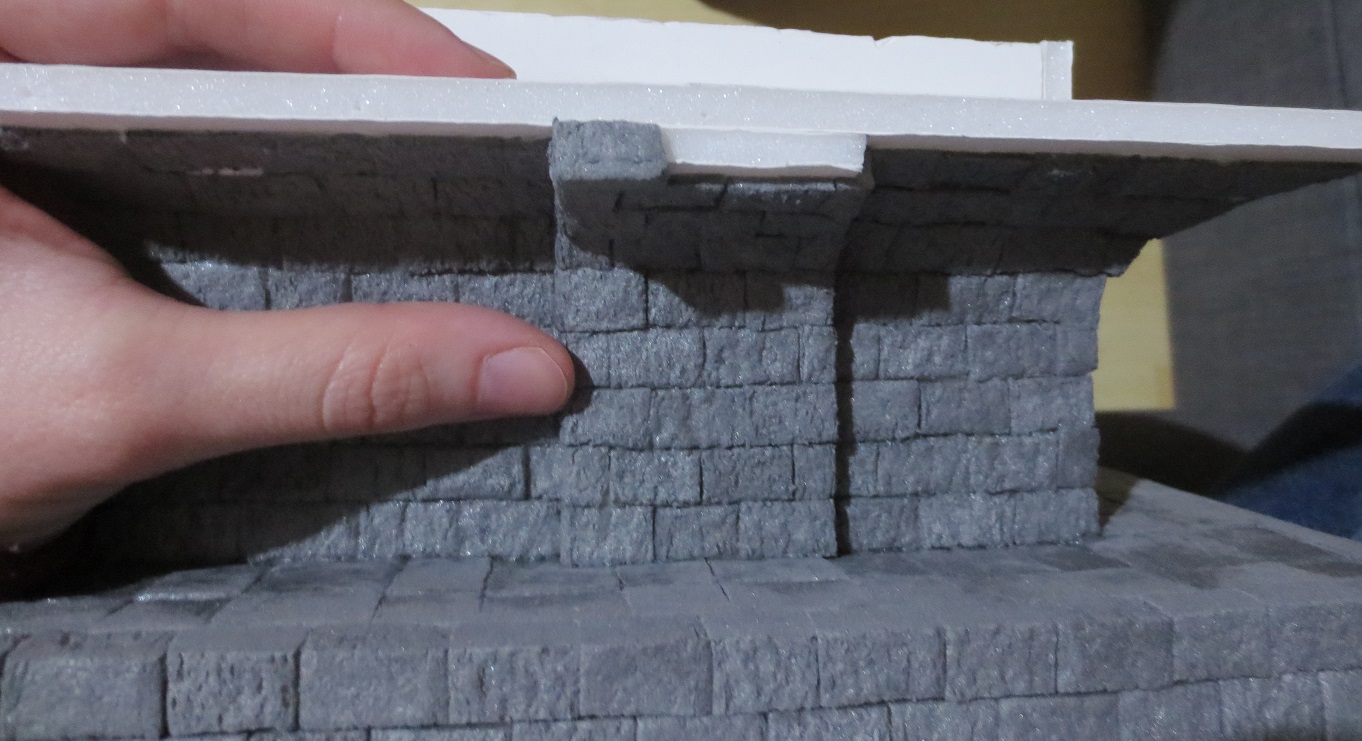
The most difficult part was navigating the smooth transition of wall to arched ceiling. As the angle bent further and further from 90 degrees, I had to switch away from bricks that wrapped around the corner and instead create corner pieces using two flat surfaces. Although I’m not sure it fully supports the illusion of 3D bricks, the eye will probably pass over them when the diorama is fully painted.
You can see where I’ve used drawing pins to hold bricks in place while the glue dries (laid above the brick edges, not pushed through the foam). I used this a lot on the corner pieces of the supports as the roof began to curve, in order to lessen the gaps between bricks. Normally, these gaps would probably be filled with mortar but I wanted to create the effect of well-fitting stonework.

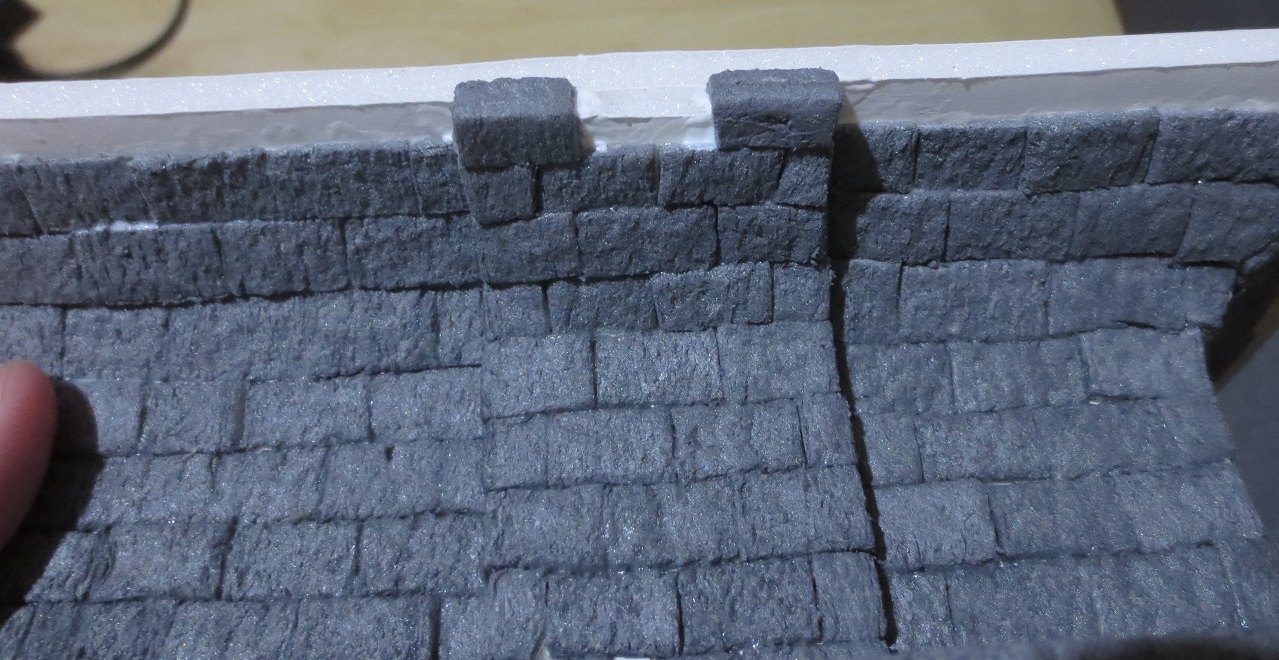
The final layer is what (I hope) really sells the illusion of brickwork.
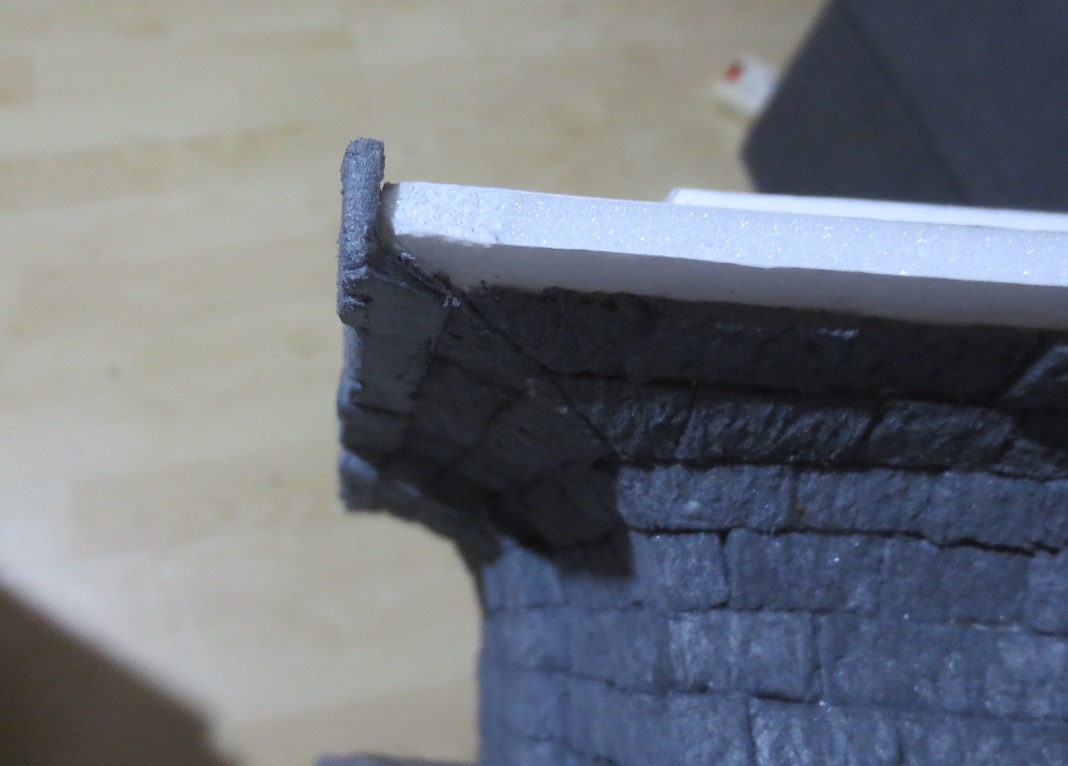
Again, I had to fake a corner piece in order to continue the lines established on the curve by earlier layer of bricks.
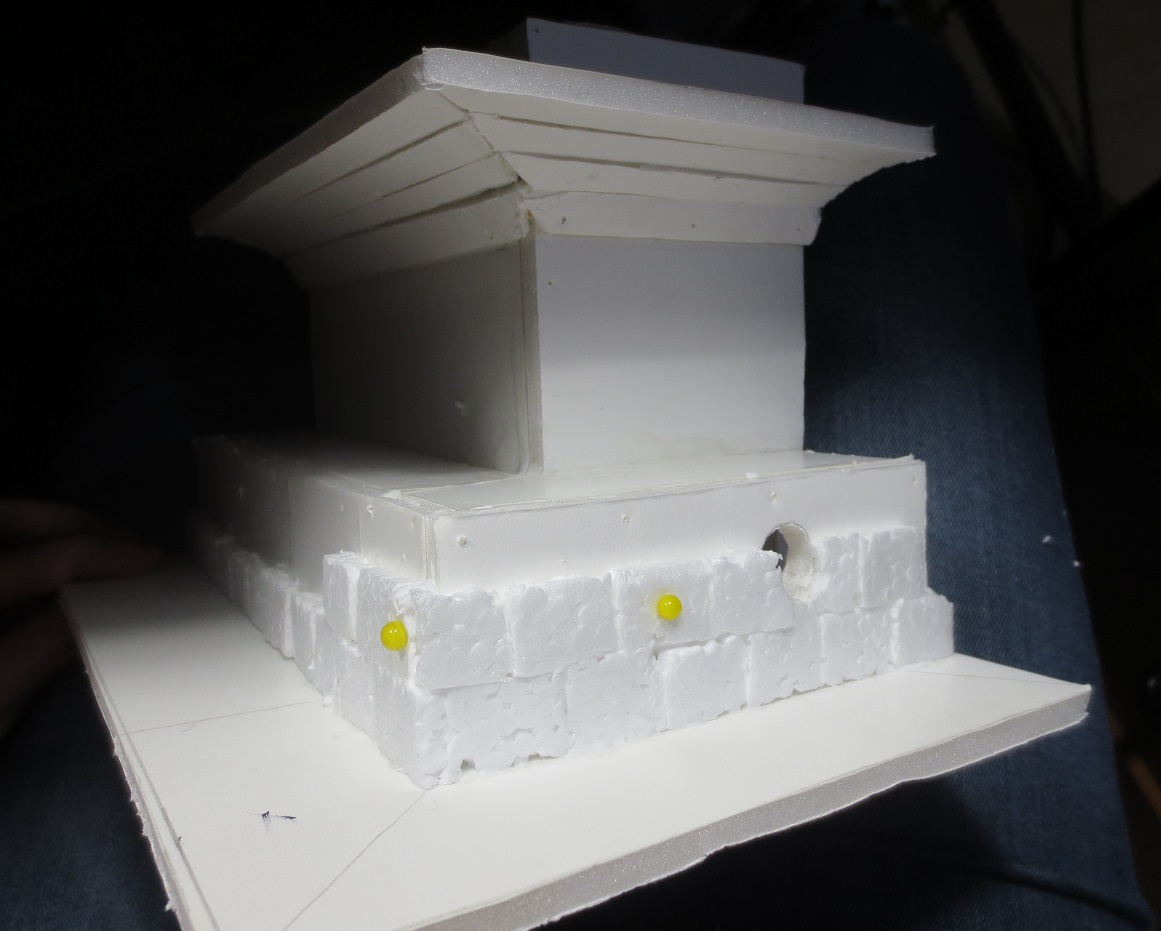
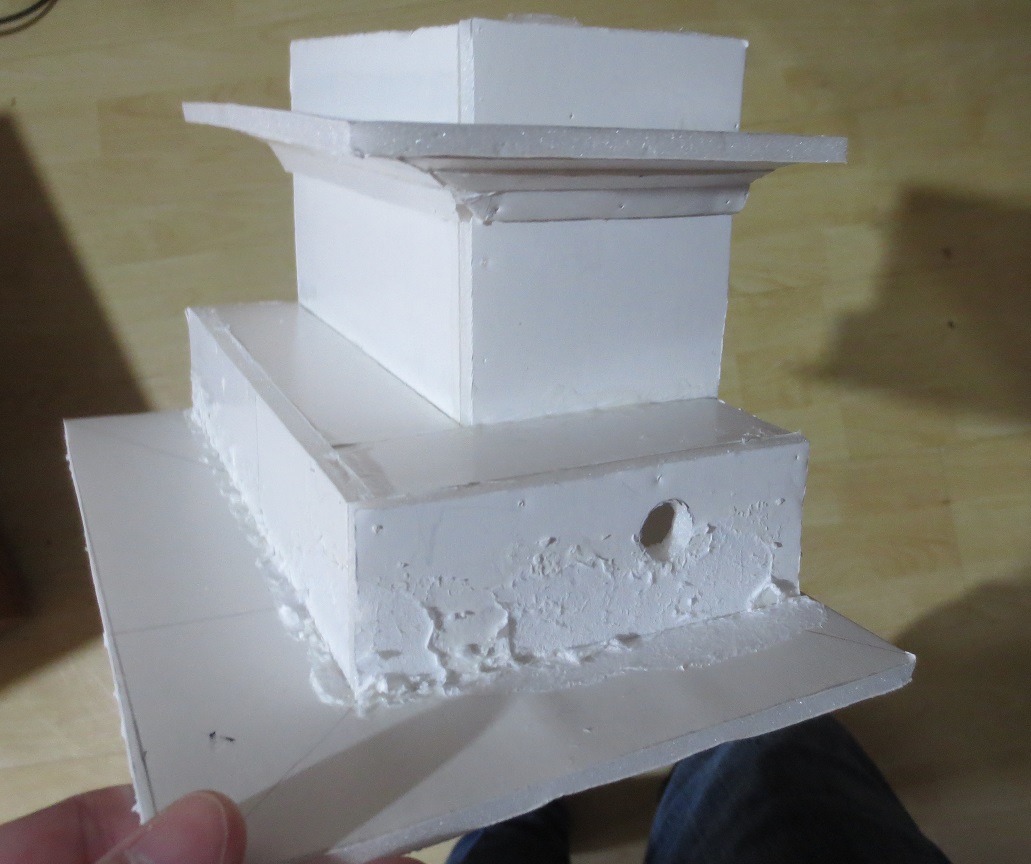
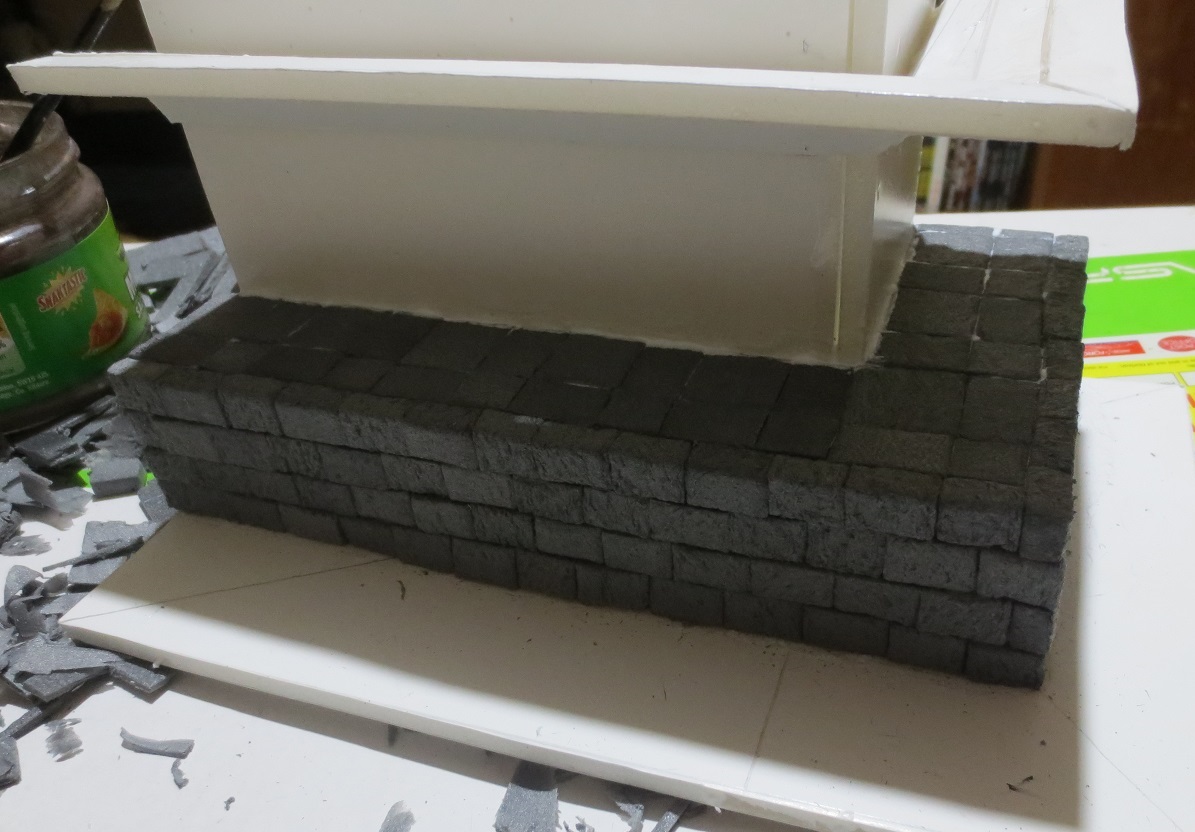
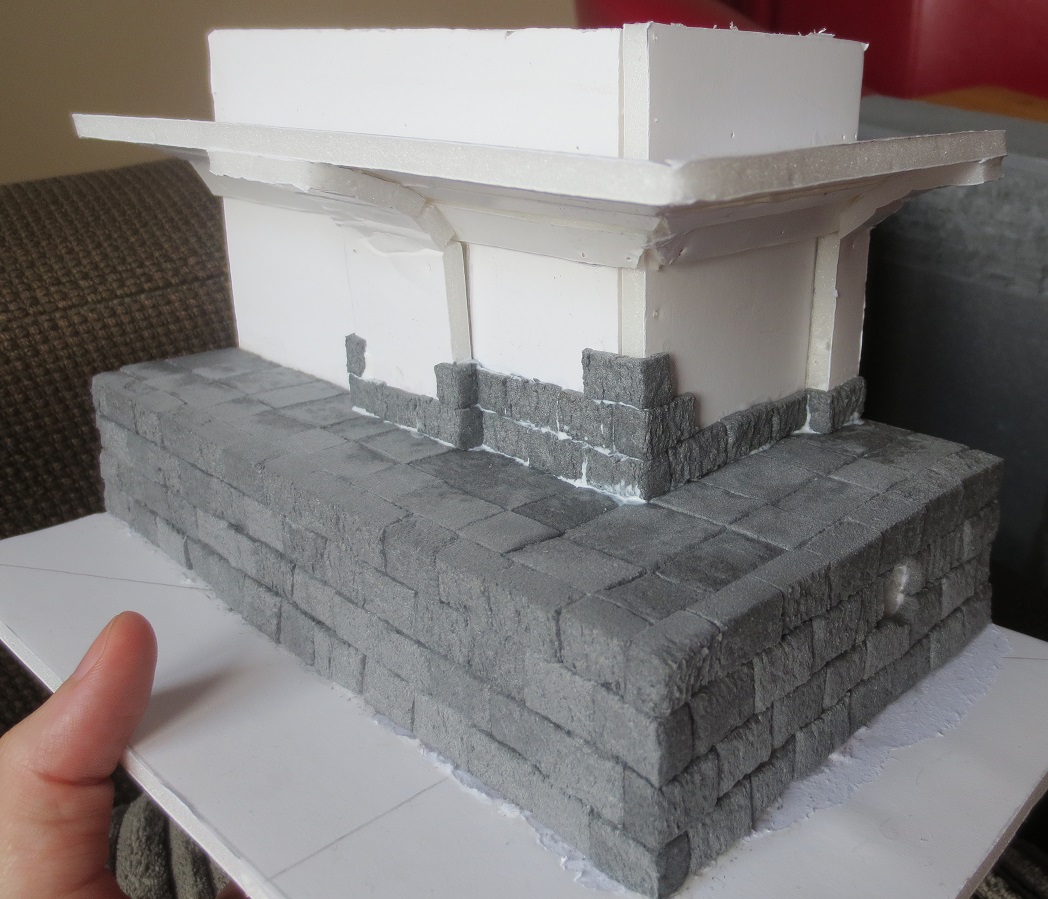
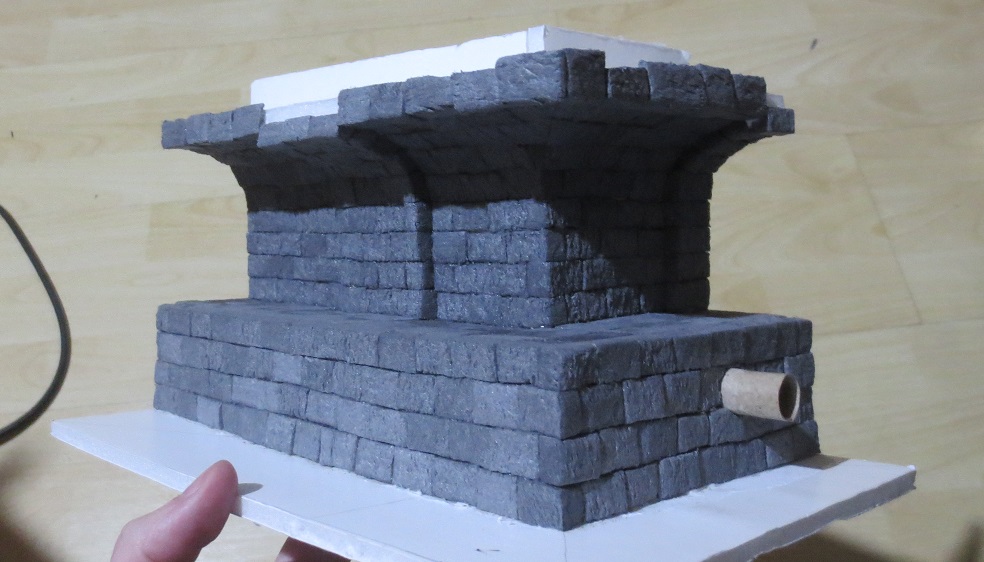
The next step will address the empty space above the tunnel as well as the open ends on the walkway.
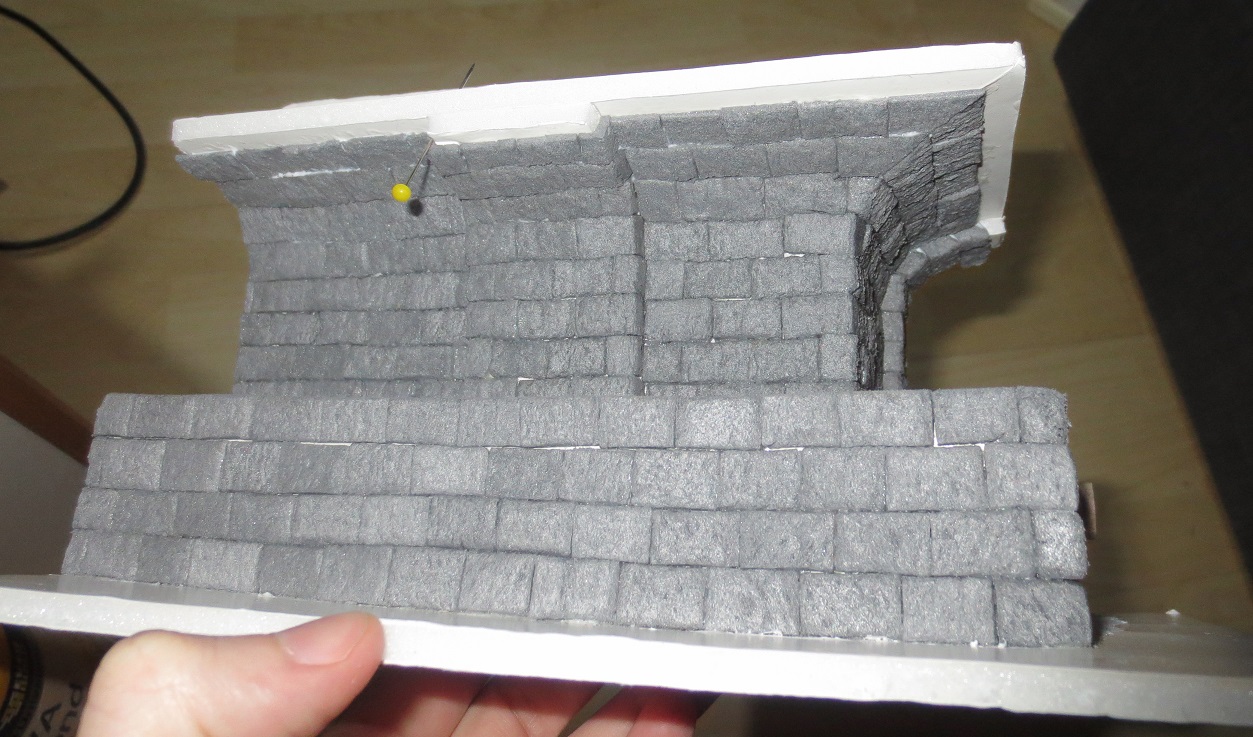
Above the Tunnel

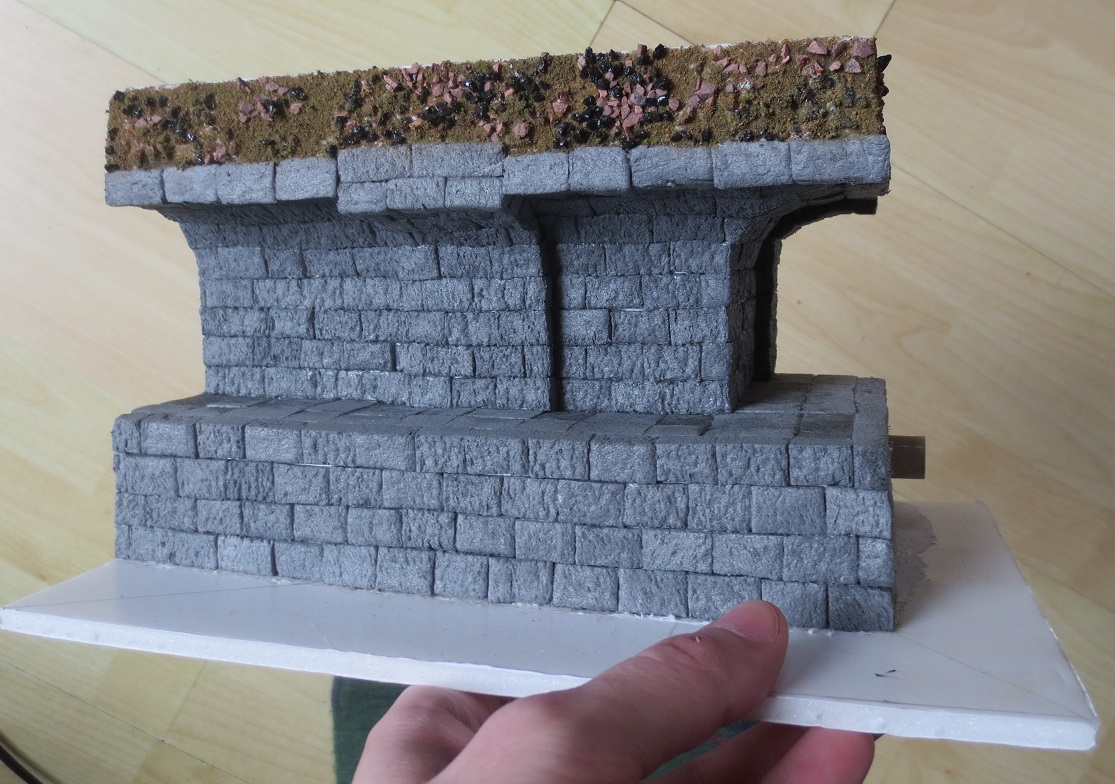
As a first step to filling above the tunnel, I cut a piece of my low density foam to fit the space. Once it had been fit as closely as I could make it, I began gluing two kinds of basing materials as well as dirt.
At one point in the middle of this process I also cut out the final bricks and glued them into place.
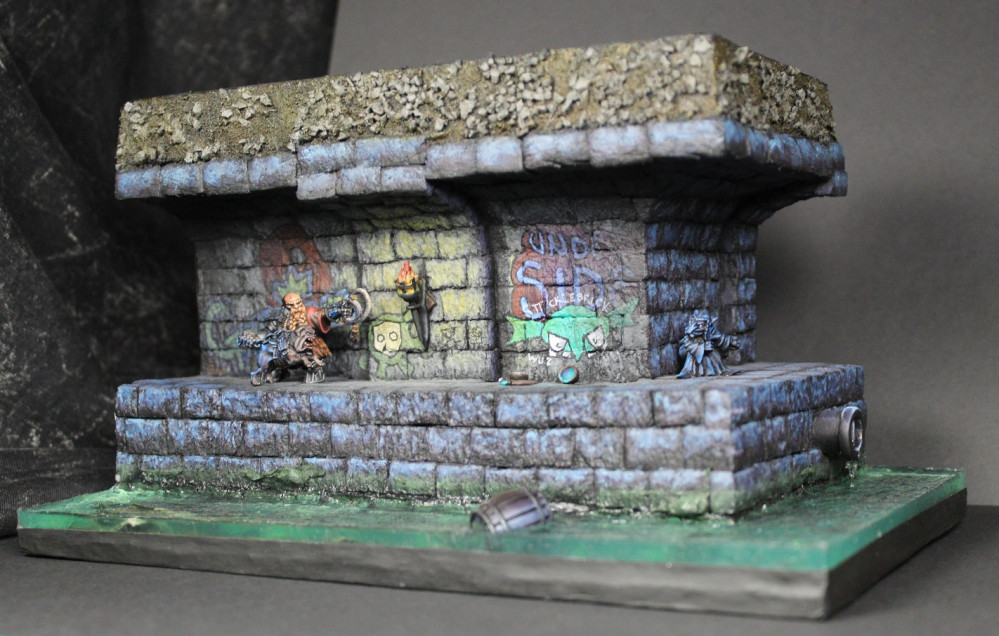
Populating the Diorama
With all the foundations in place, it was time to start filling empty space. I plan to attempt a resin pour alongside the walkway, but adding random detritus to the flow will help make it look like a sewer. So – Milluput piles and a barrel from the Mantic Dungeon Sage Furniture Set!
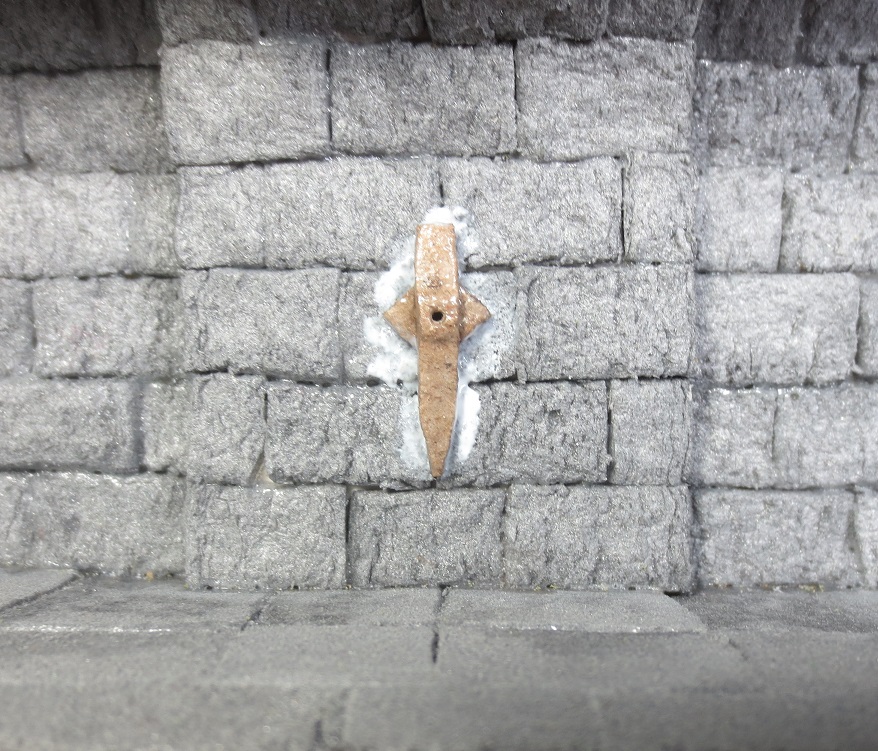
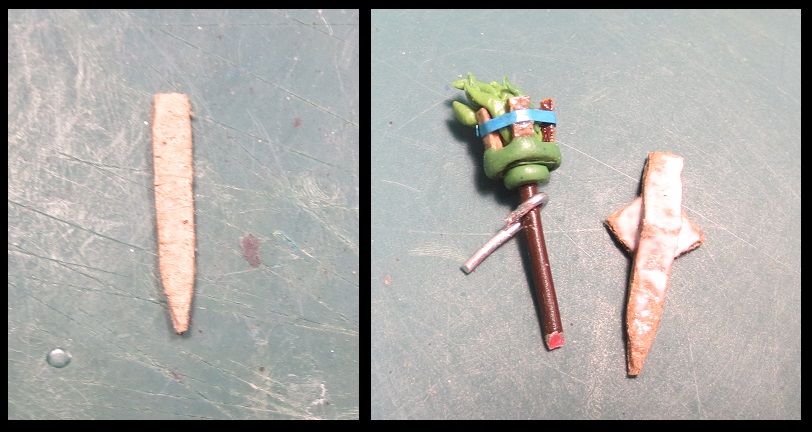
The diorama also needed a light source, so I set about sculpting a torch and wall bracket, using this picture as a rough guide:

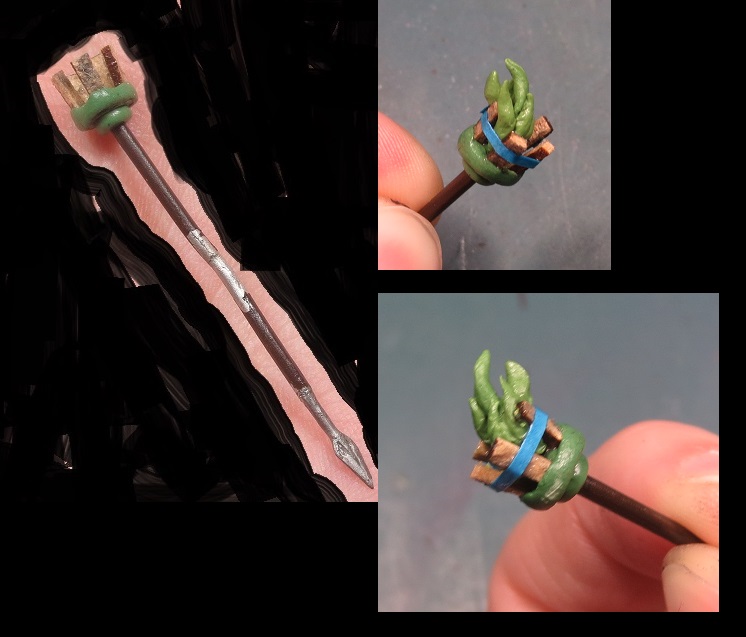
Finally, glue the wall bracket in place, sculpt the end of the pipe that’s been lurking at the edges of these WIP pictures for a while, and draw a newspaper to throw in the sewer flow.
(The newspaper was originally one of the paper labels that come on the ends of tea bags, painted over and then drawn on.)