


Spring Clean Challenge: Developing WWII infantry for 3D printing


Recommendations: 45
About the Project
After joining a forum conversation about the shortage of 3D printable WWII miniatures, I decided to have a go at creating my own.
Related Game: Flames of War: The World War II Miniatures Game
Related Genre: Historical
This Project is Active
Spring Clean Challenge
I’m blowing the dust off this project for my spring clean challenge.
It had been a while since I’d opened these digital files. In fact I had to read through this project to remind myself where I had left it!
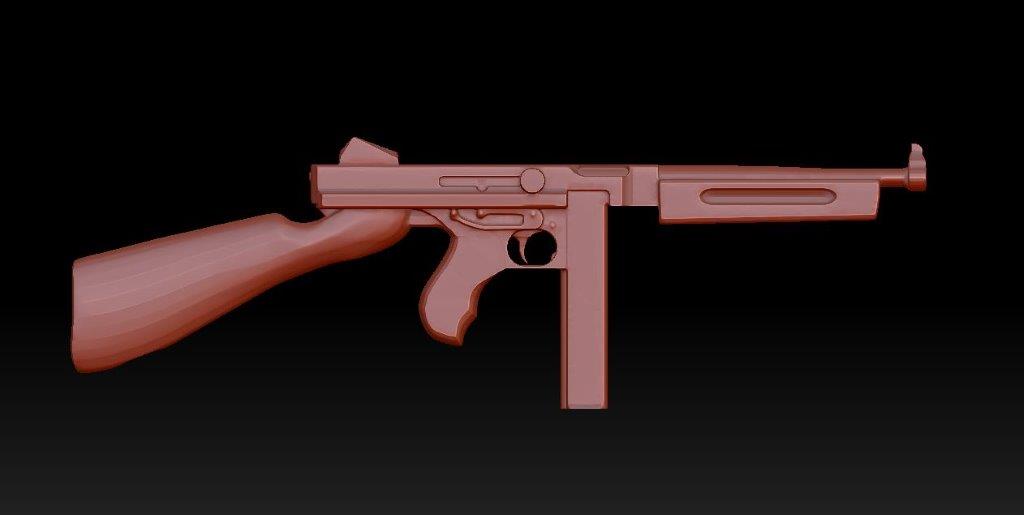
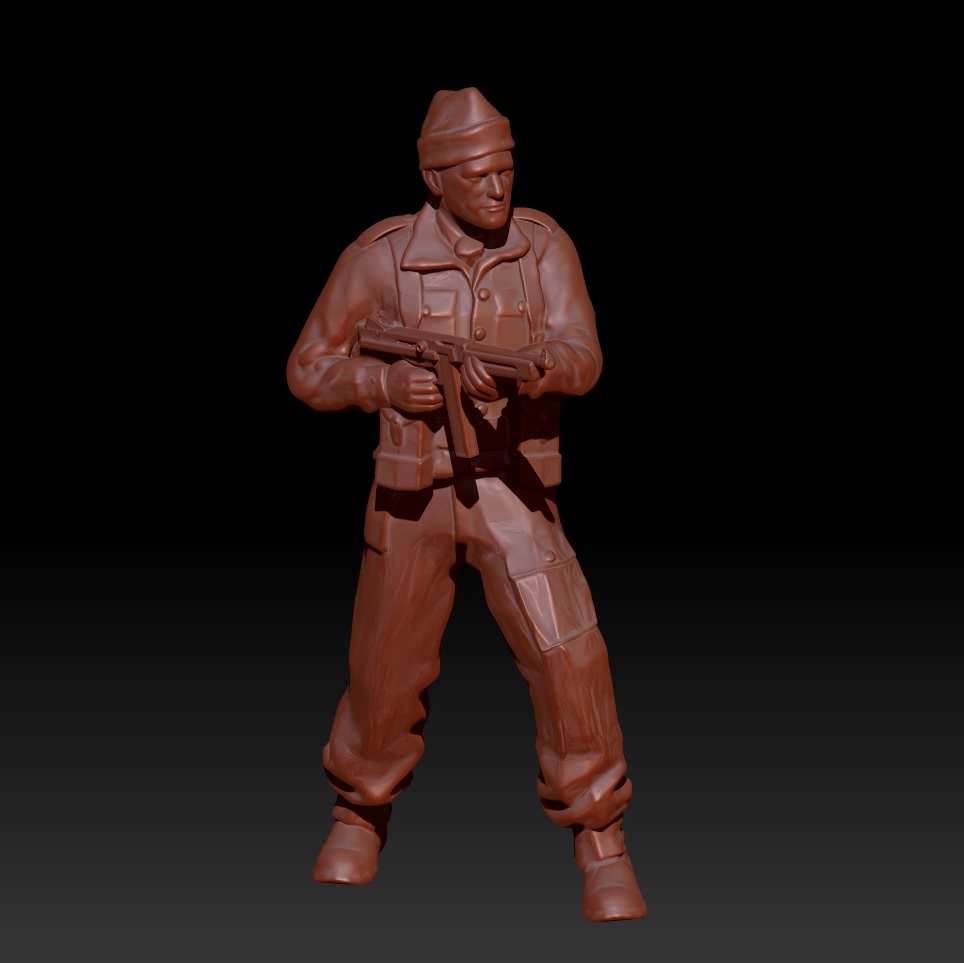
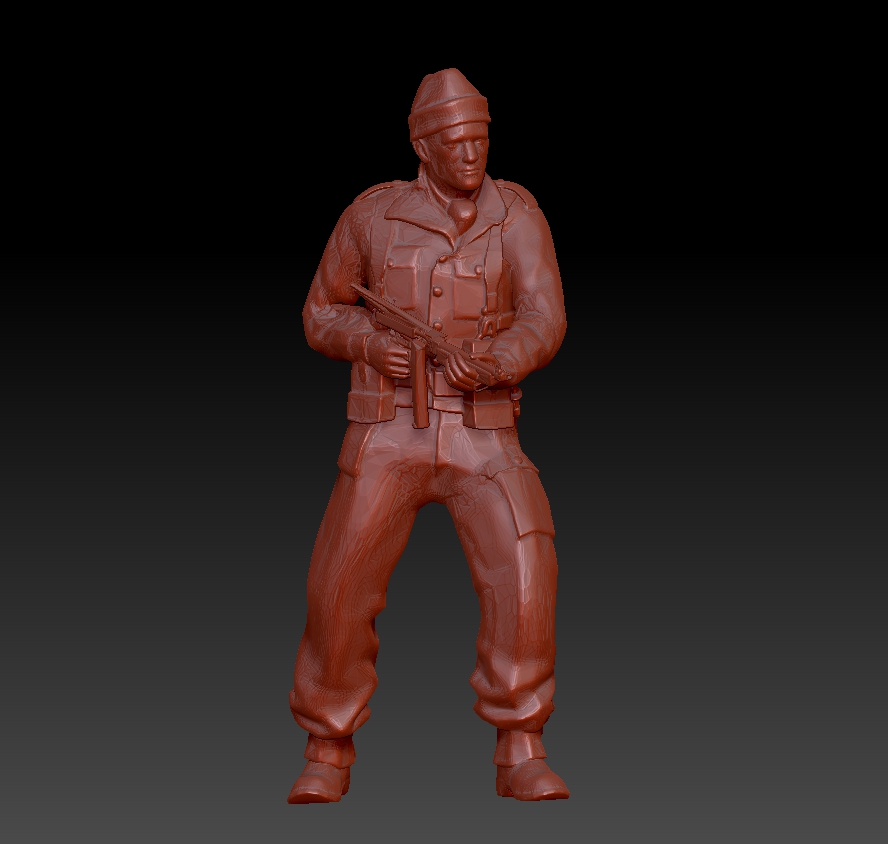
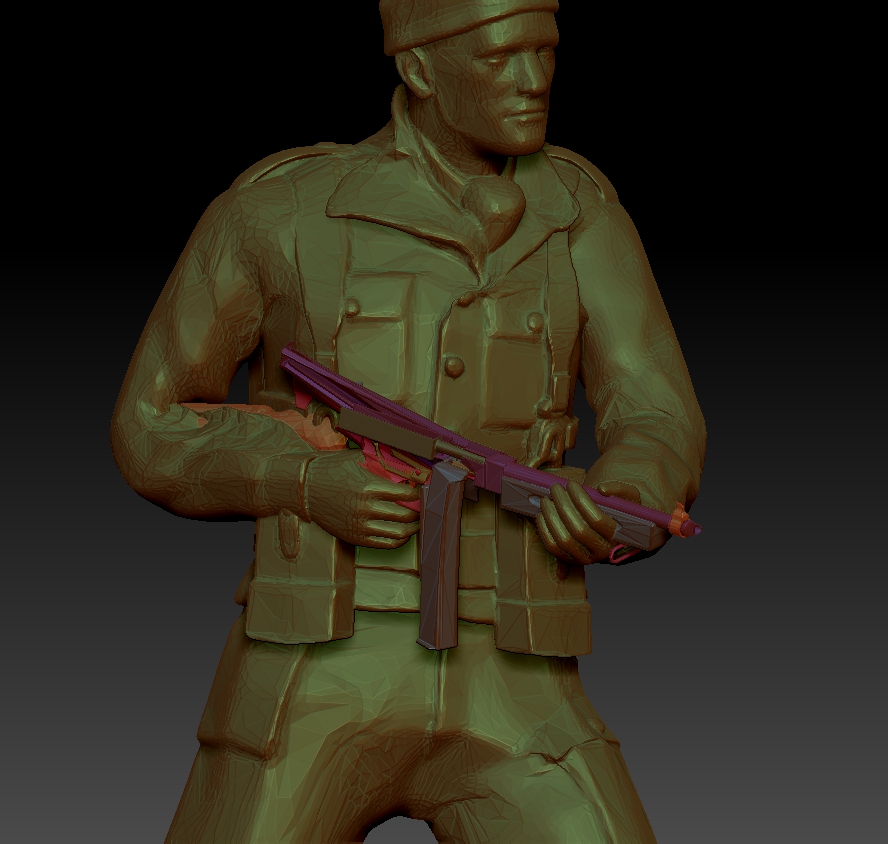
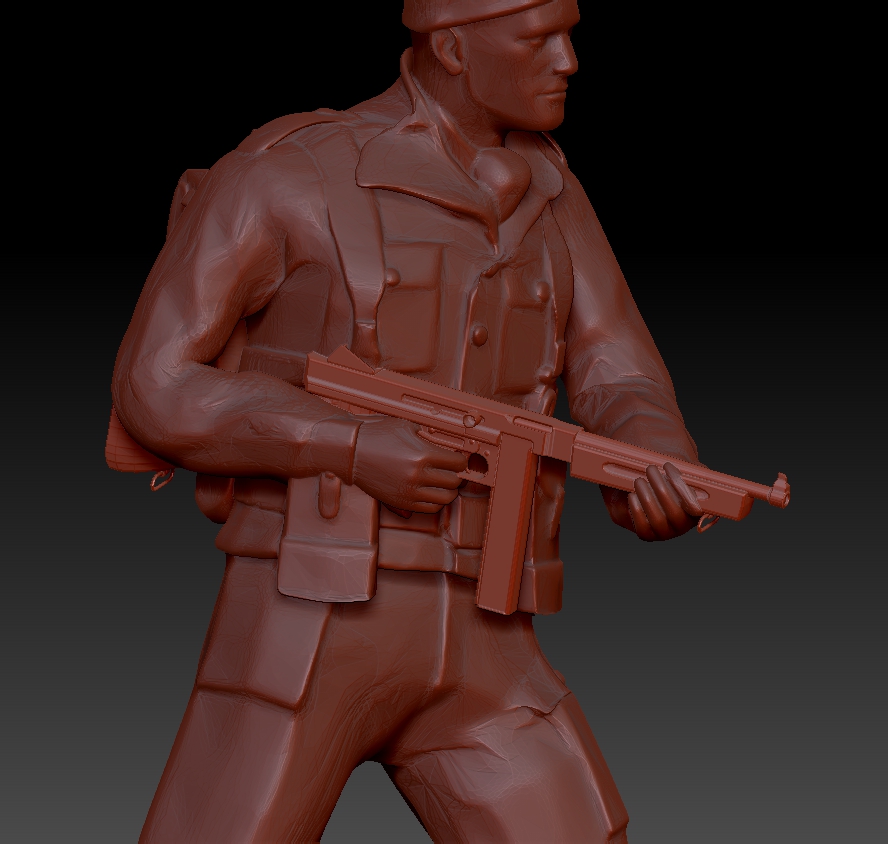
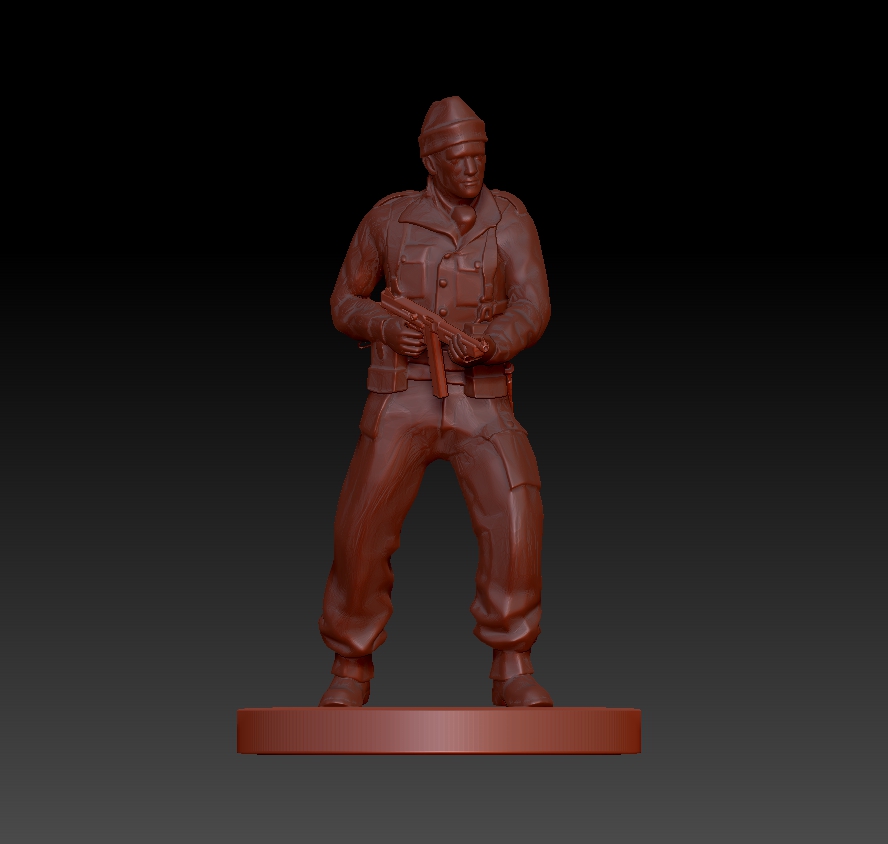
In order to re-familiarise myself with Zbrush and create better models to work with, I decided to rebuild some of the components. I began with the Thompson which I reworked to a bulkier, more print friendly design.
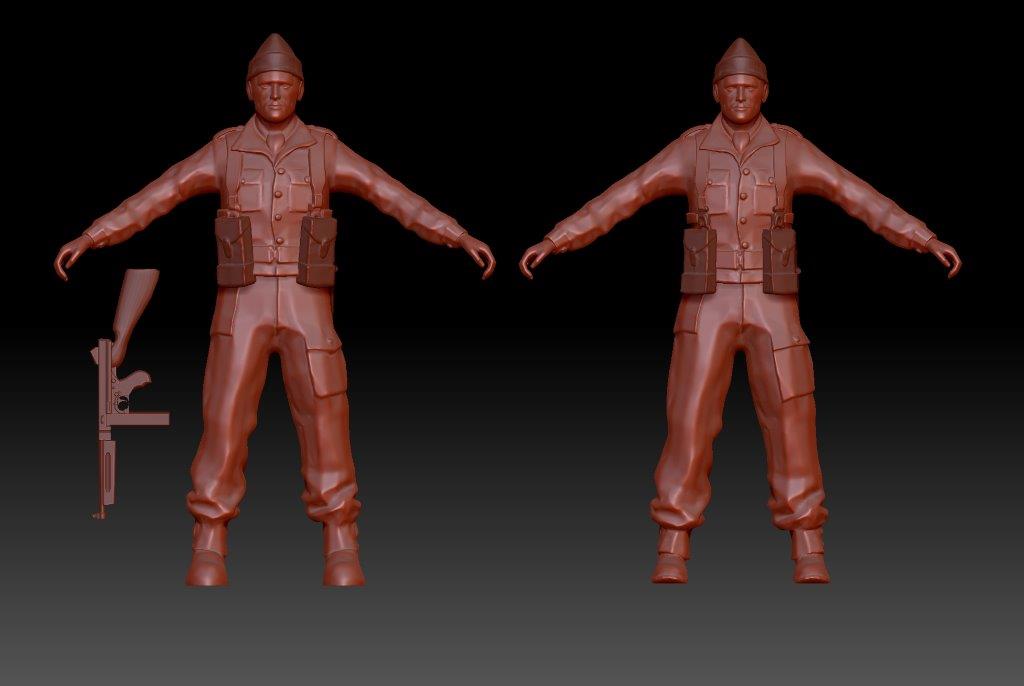
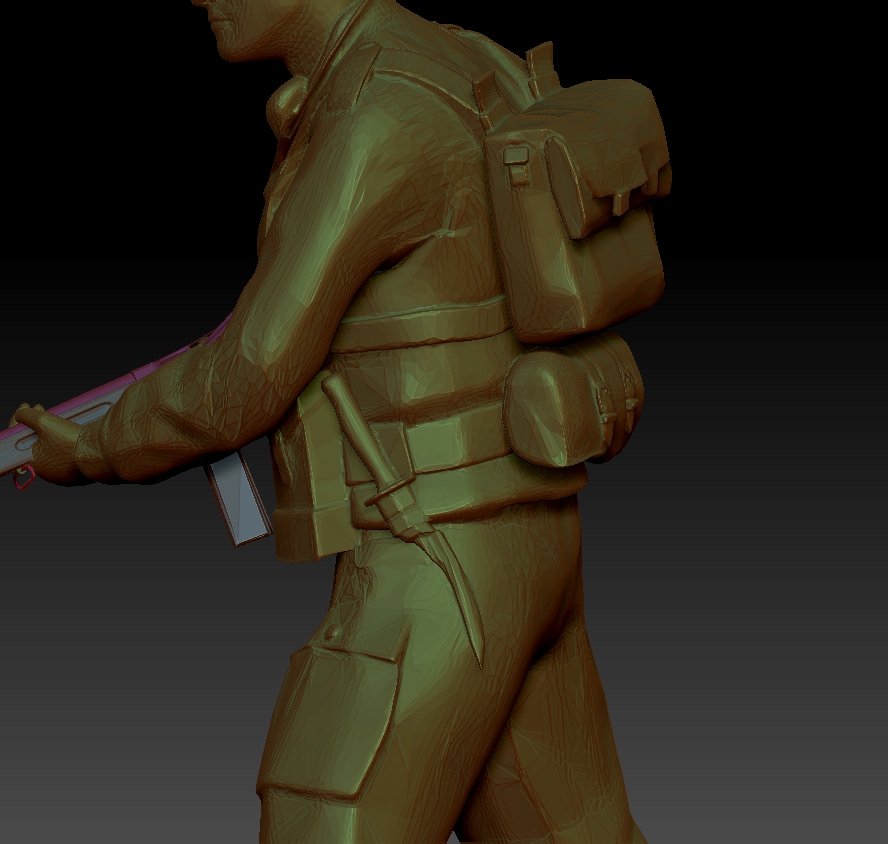
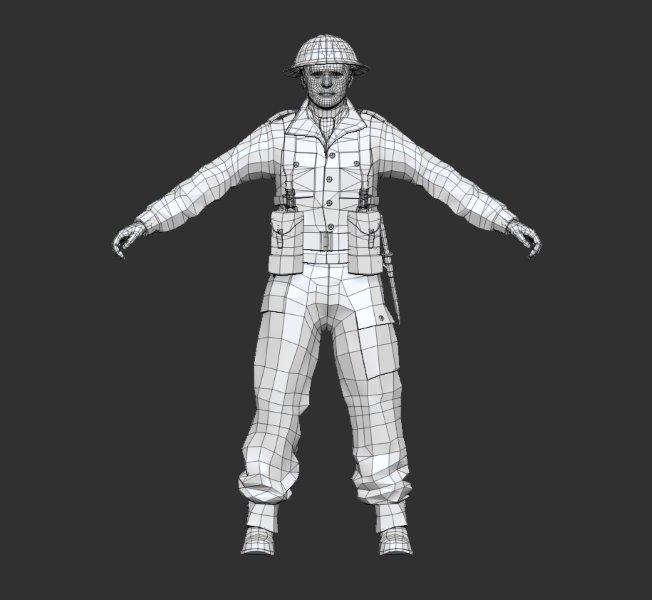
I went back to one of the earlier soldier files and played around with his proportions. The figure on the left of the screen is the new model, with the original on the right. I’ve enlarged the head, hands and feet. I also bulked up his torso and arms and adjusted the proportions of his legs and hips. While I was at it I took the opportunity to bulk up details such as the collar and webbing. This was primarily to close up any holes that would cause problems in printing and make these details more pronounced.
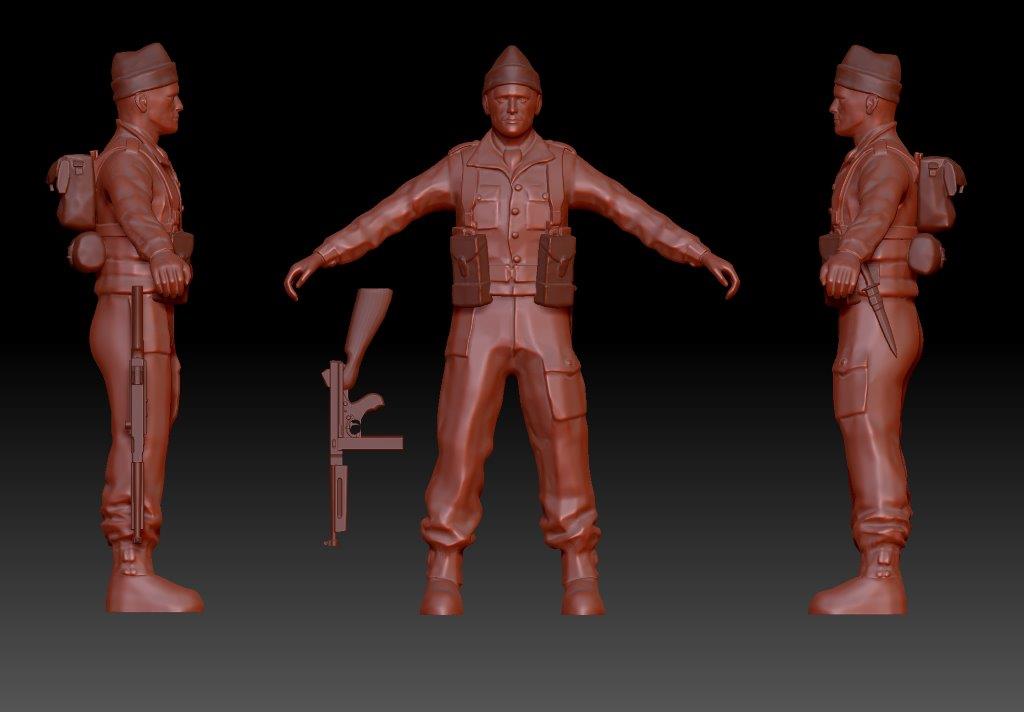
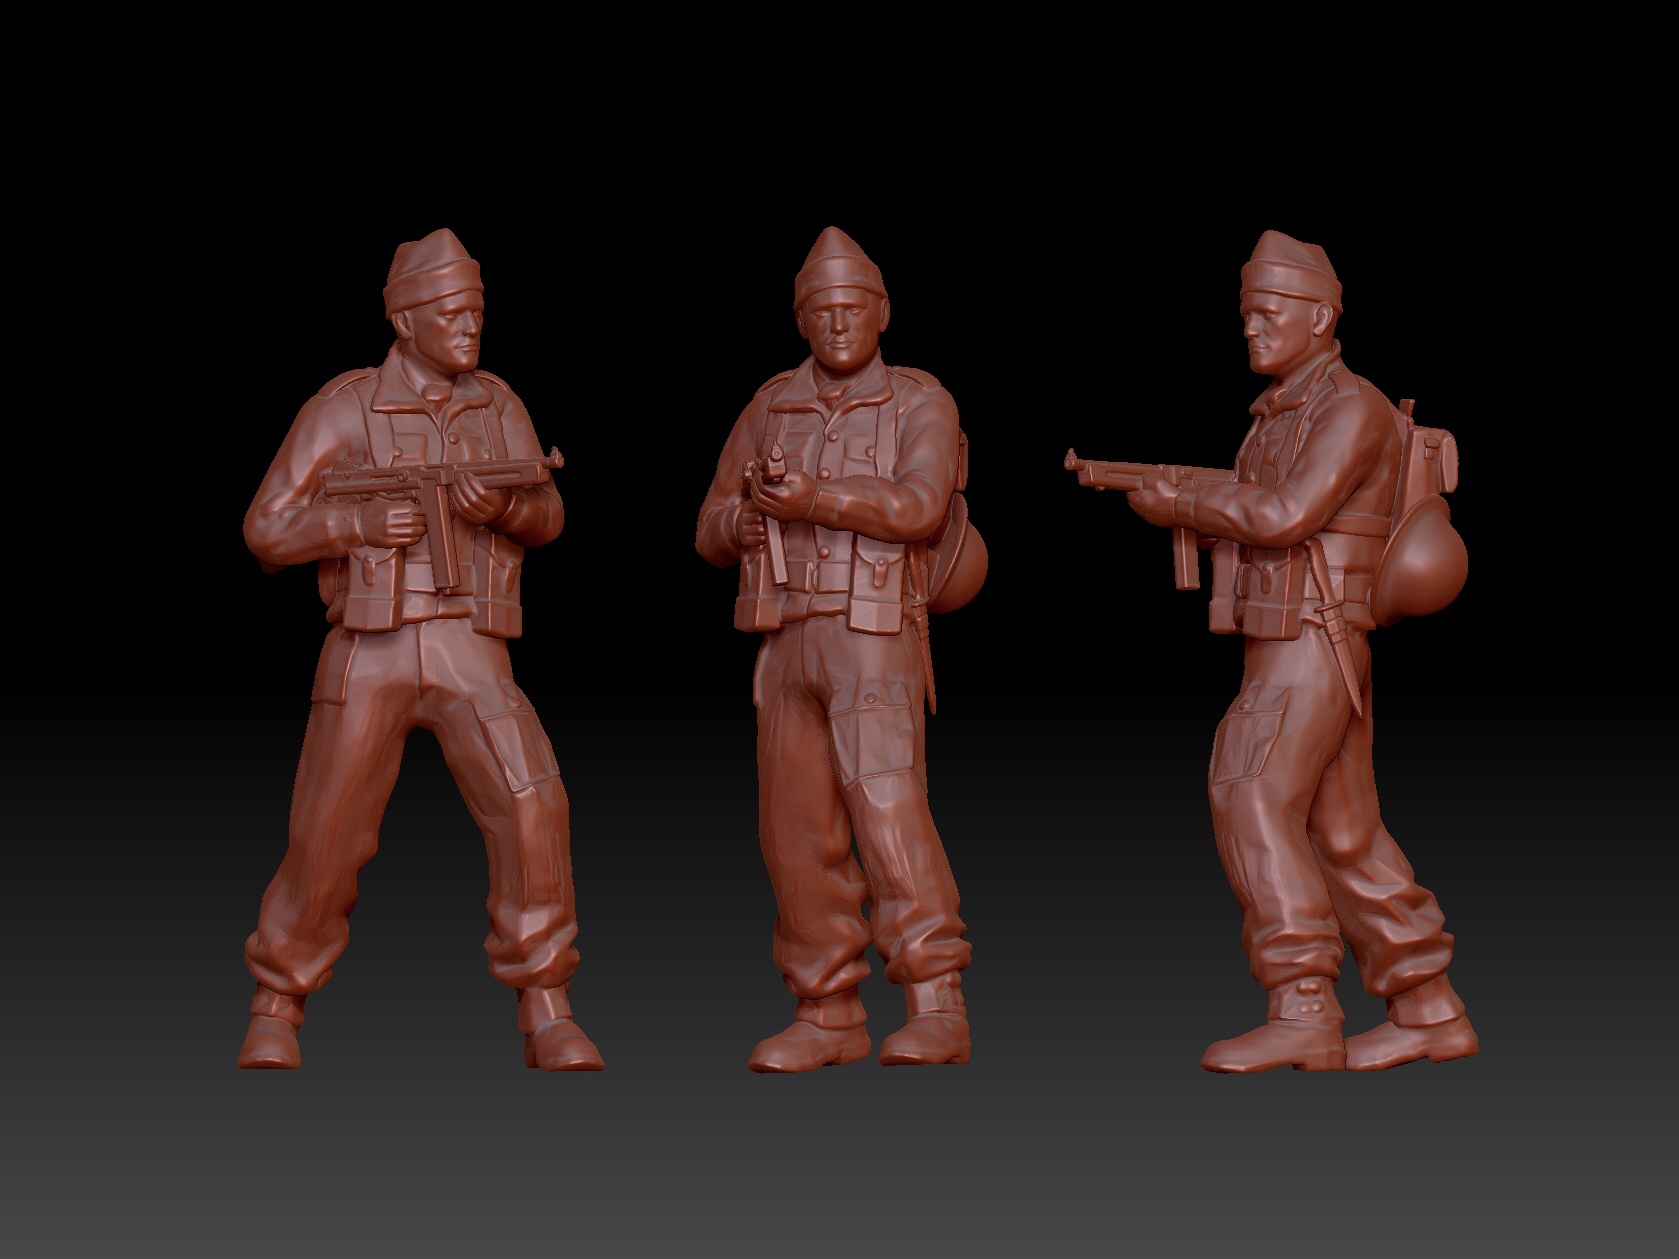
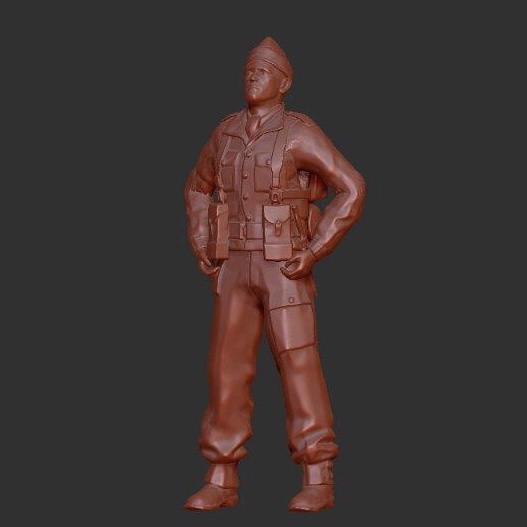
Here you can see the new Commando model from the front and profiles, along with the bulked up Thompson to show its proportions.
Small Soldiers
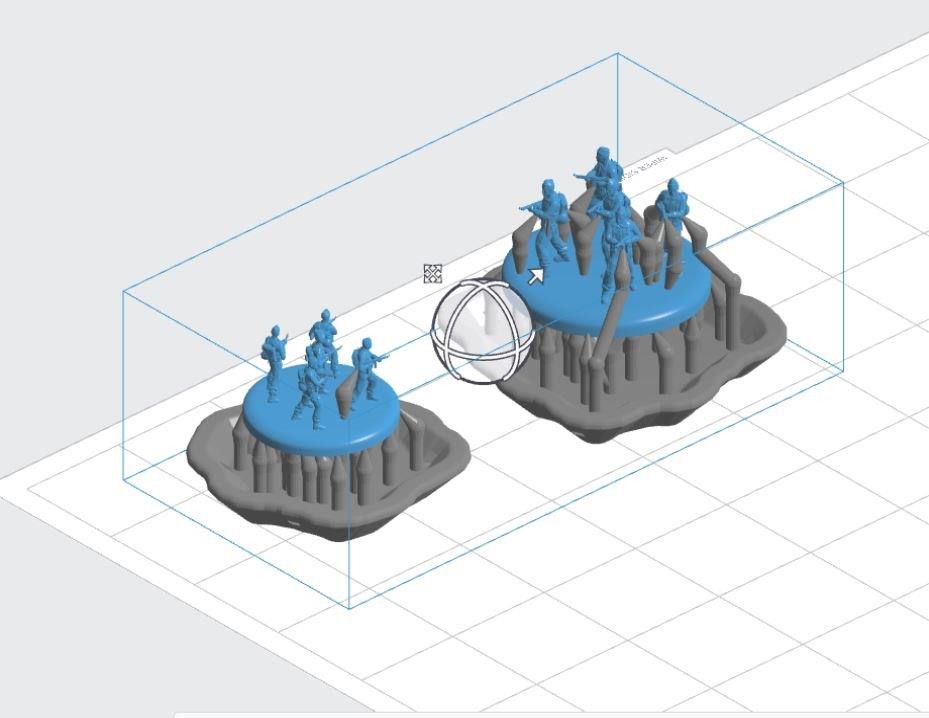
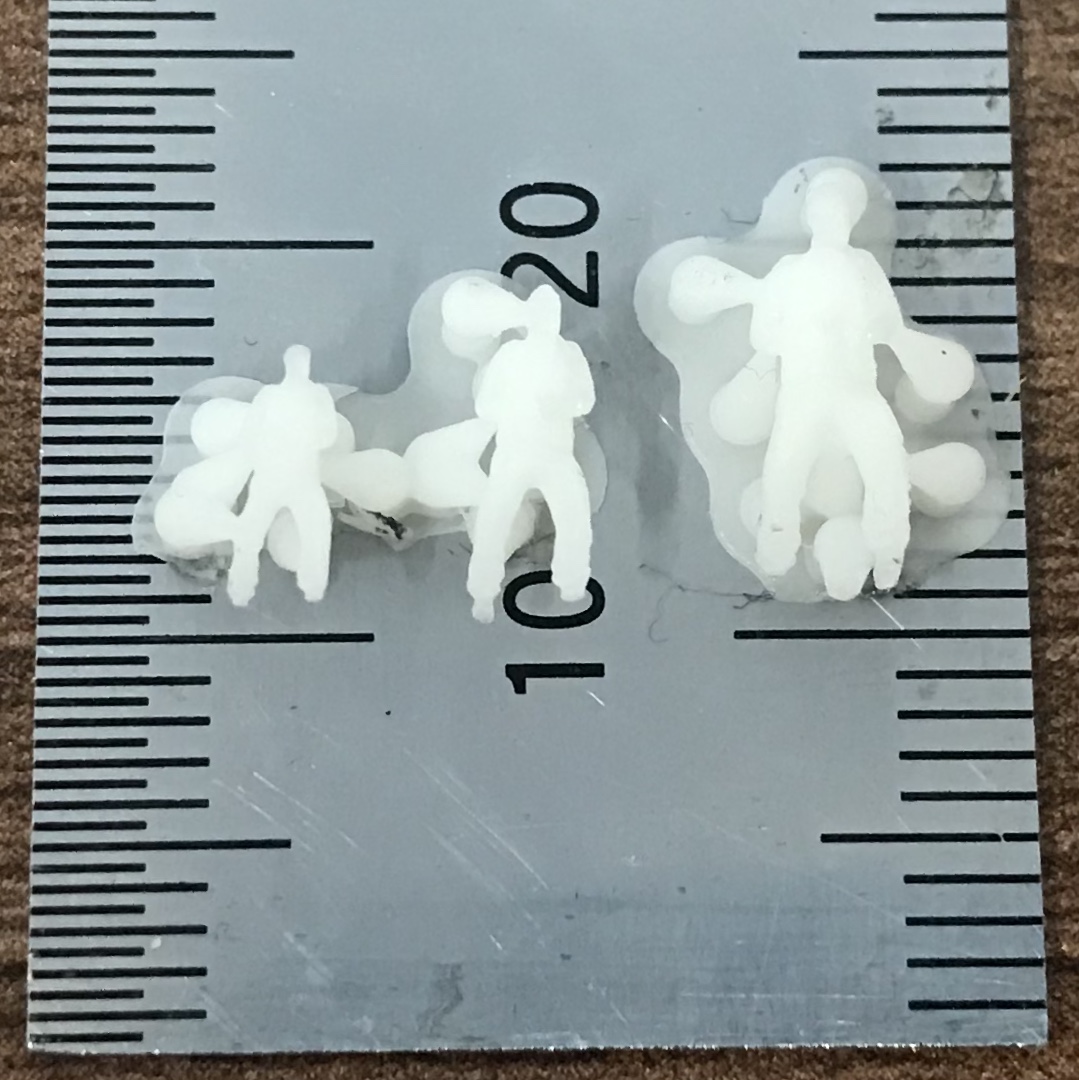
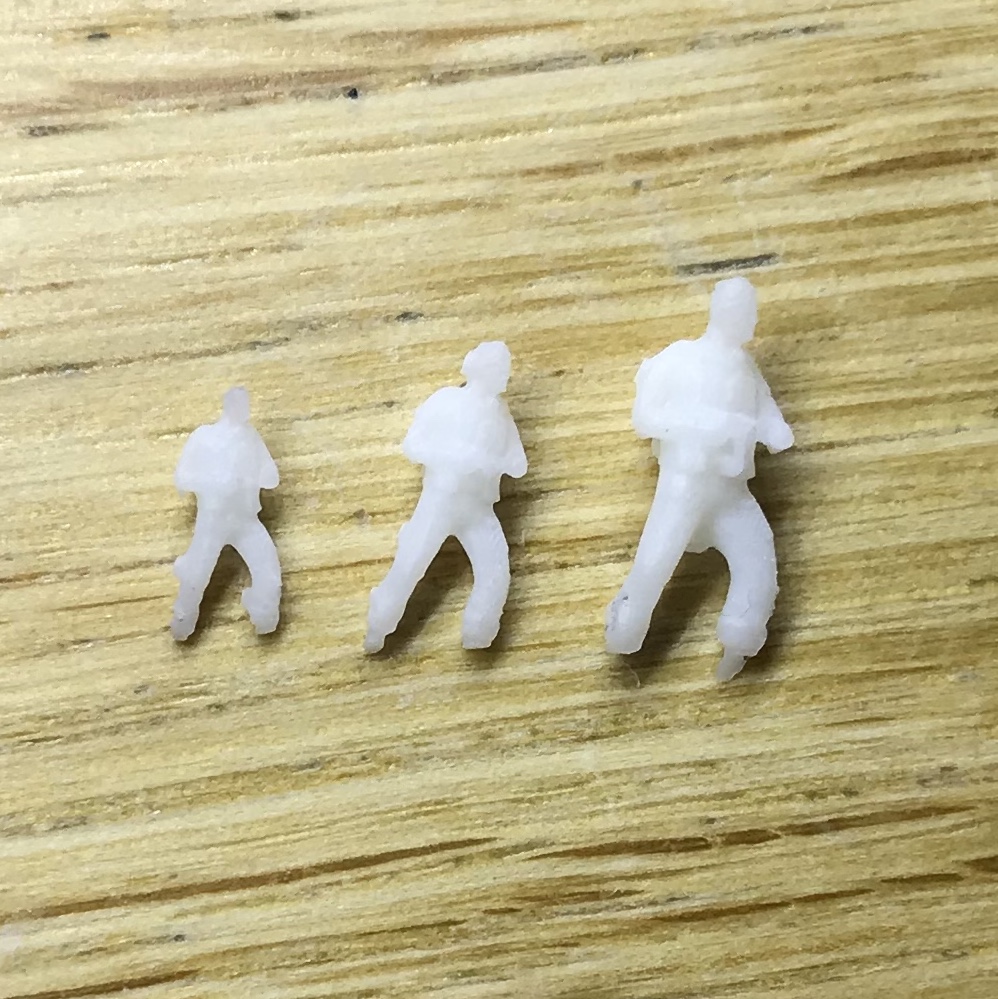
The next step was to export the commando base from Zbrush as an OBJ file to be loaded into a slicer program (in this instance Preform). I decided to print another scale comparison so I made the first base of figures 6mm as well as a duplicate scaled to 8mm.
I positioned the first commando base in the slicer program and tried several different orientations in order to find the position that resulted in the fewest support struts being generated. As I had hoped, this turned out to be base down. This was ideal as it meant most of the supports would be beneath or against the base where they could more easily be removed.

I set the printer to the smallest layer size available (0.25mm), to get the cleanest print possible. Within a couple of hours I had the above prints out. The rafts protected the delicate models as I removed them from the print head to be cured. Interestingly the 6mm base required fewer supports, resulting in even less clean up. The 6mm also doesn’t seem to have lost any detail compared to the 8mm, although at such sizes it’s hard to tell for sure.
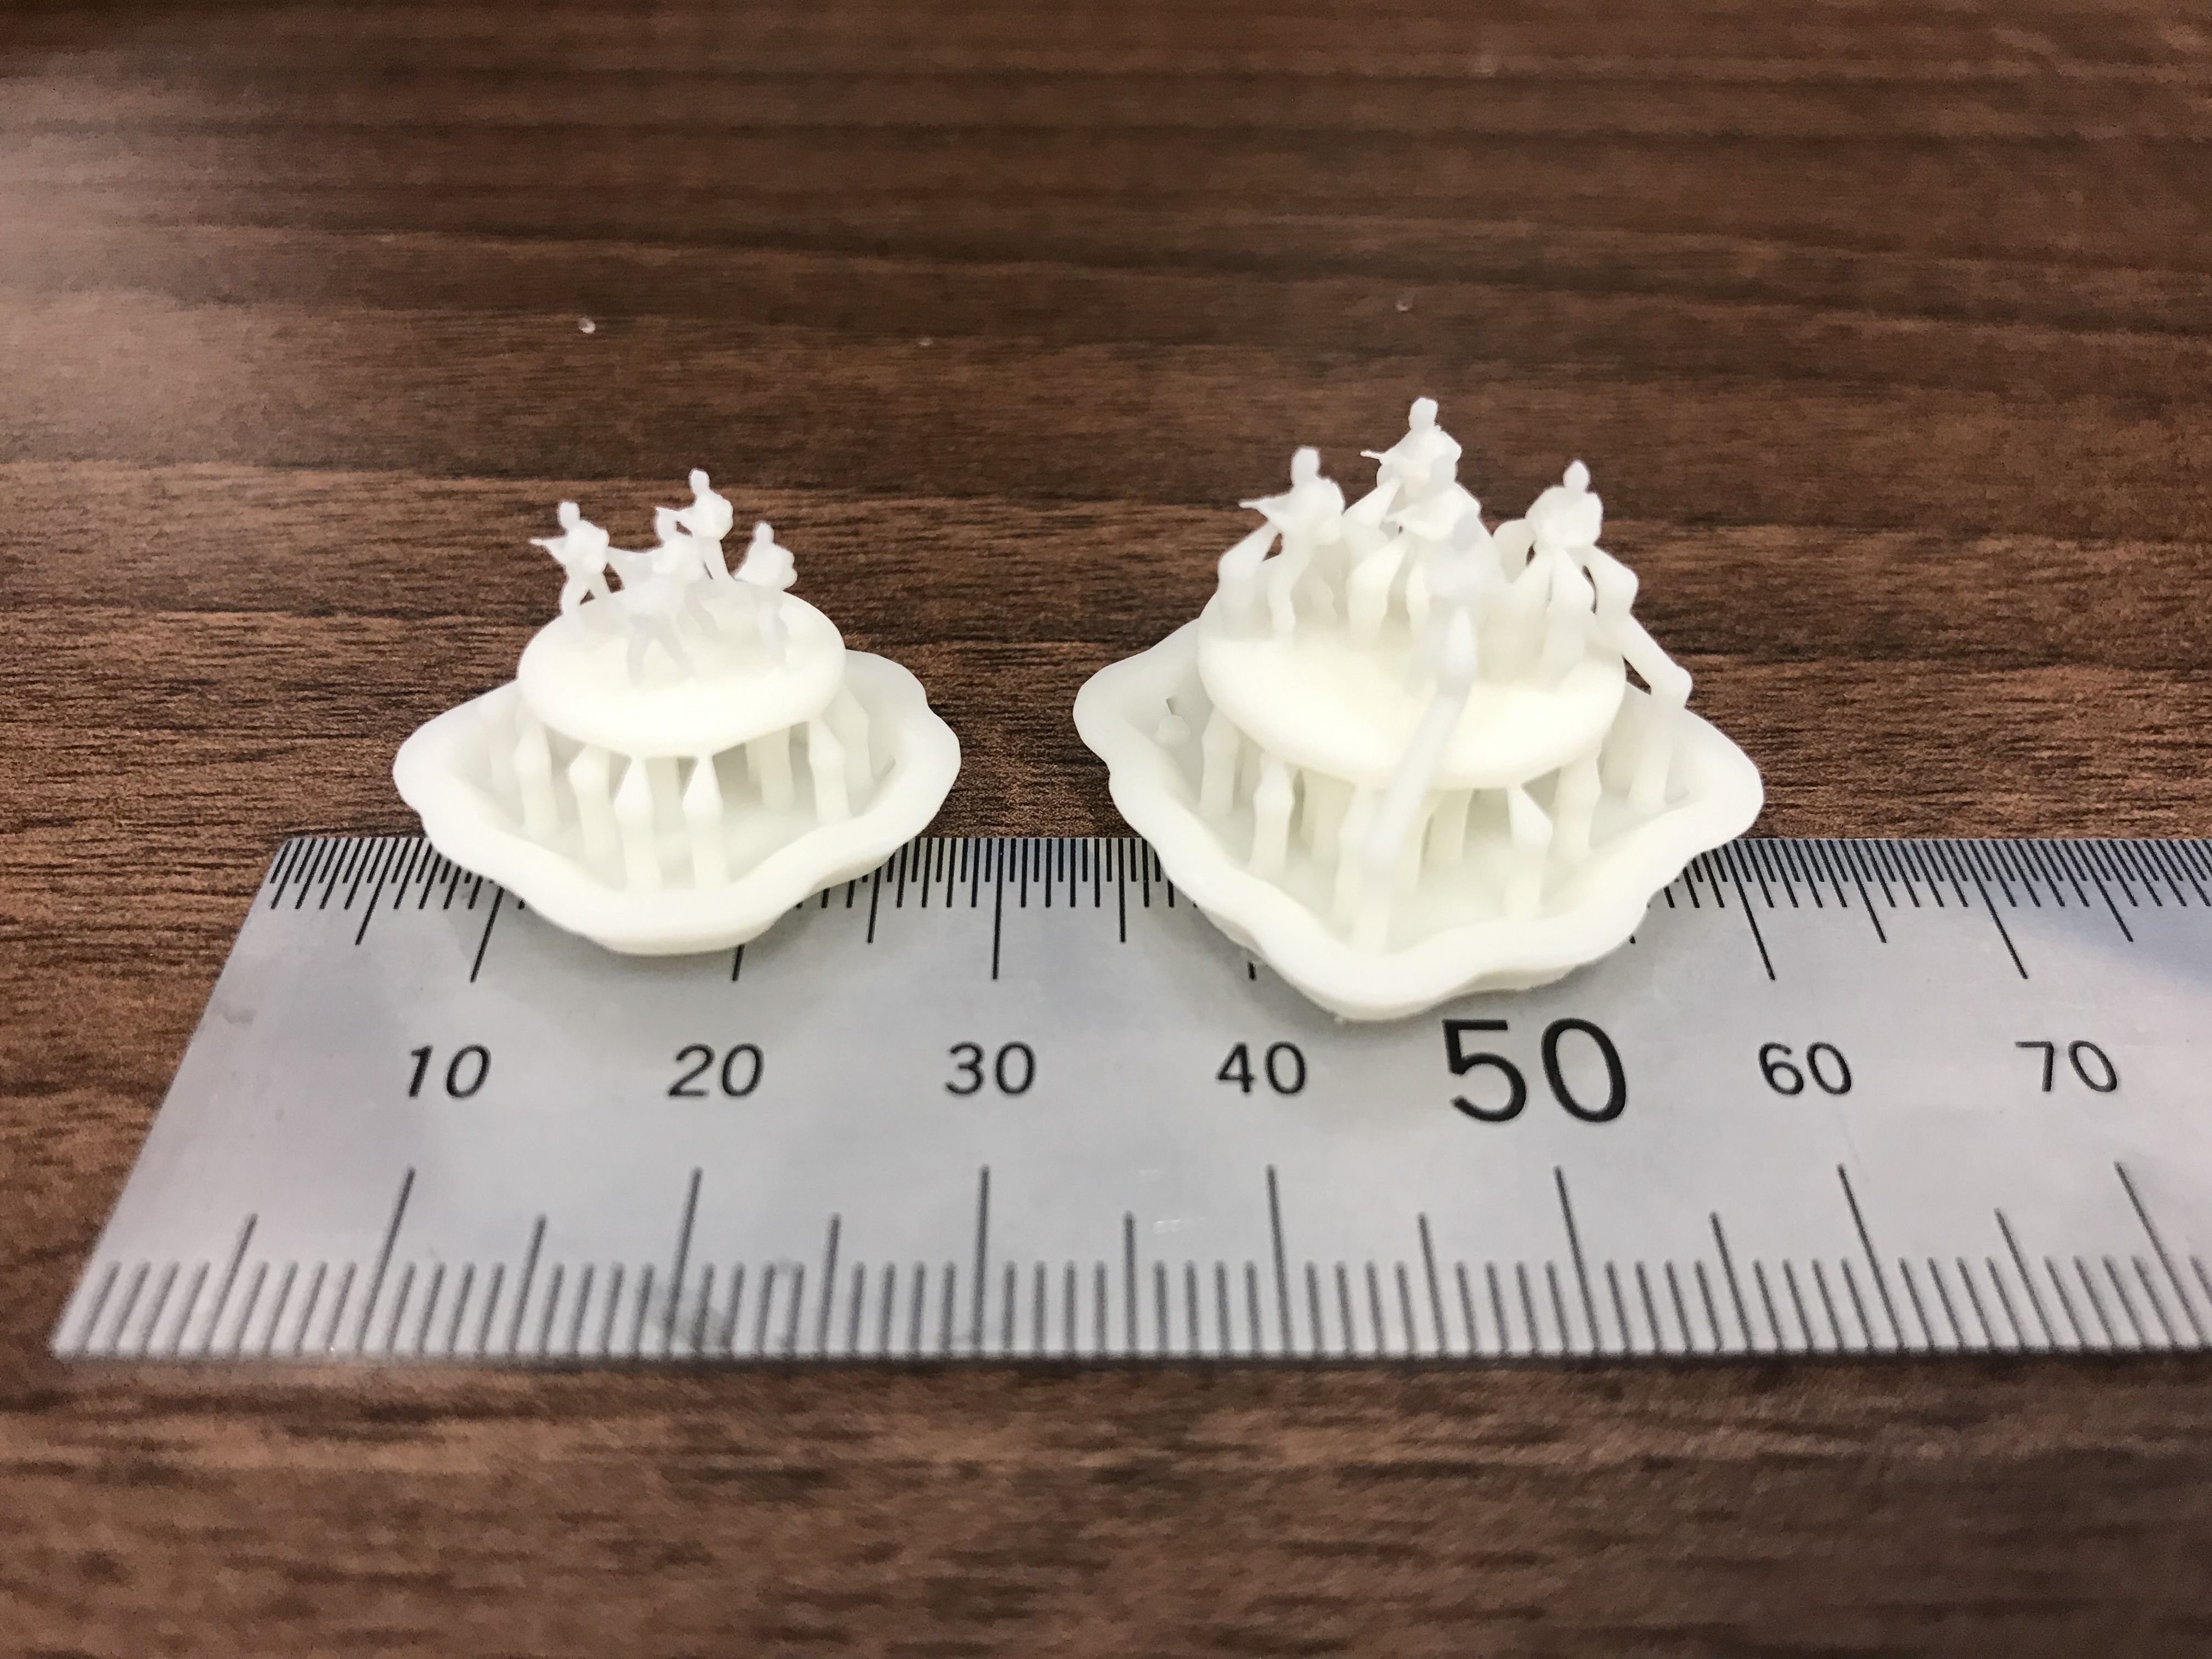
Unfortunately once again the 6mm figures broke at the ankle during handling. This kind of resin is hard and therefore brittle at such small sizes.

The 8mm faired a little better and I managed to snip away the supports without damaging the figures themselves. Hopefully you can make out some detail from these images. I have to say I’m pleasantly surprised by the results but the fragility of the figures is a bit of a problem. The guns have all printed this time although the barrels are pretty insubstantial on most of the figures. The Thompsons definitely need to be scaled up again, requiring a further increase in bulk. I think the easiest fix is probably just to inflate the whole model again, this time I’ll try 5% rather than 2%.
Squad Up
I decided to go back to my rigged model and have another go at posing. I was happier with the results this time and again went through the process of reintroducing details such as the packs and knife.
Again I swapped out the Thompson but this time I scaled it up by 10% and inflated it by 2% to give it a little more bulk and volume. I also increased the size of the head, hands and feet by 5% and finally inflated the whole model by 2%. The difference is subtle but I’m hoping all these changes will give me a little more bulk for printing.
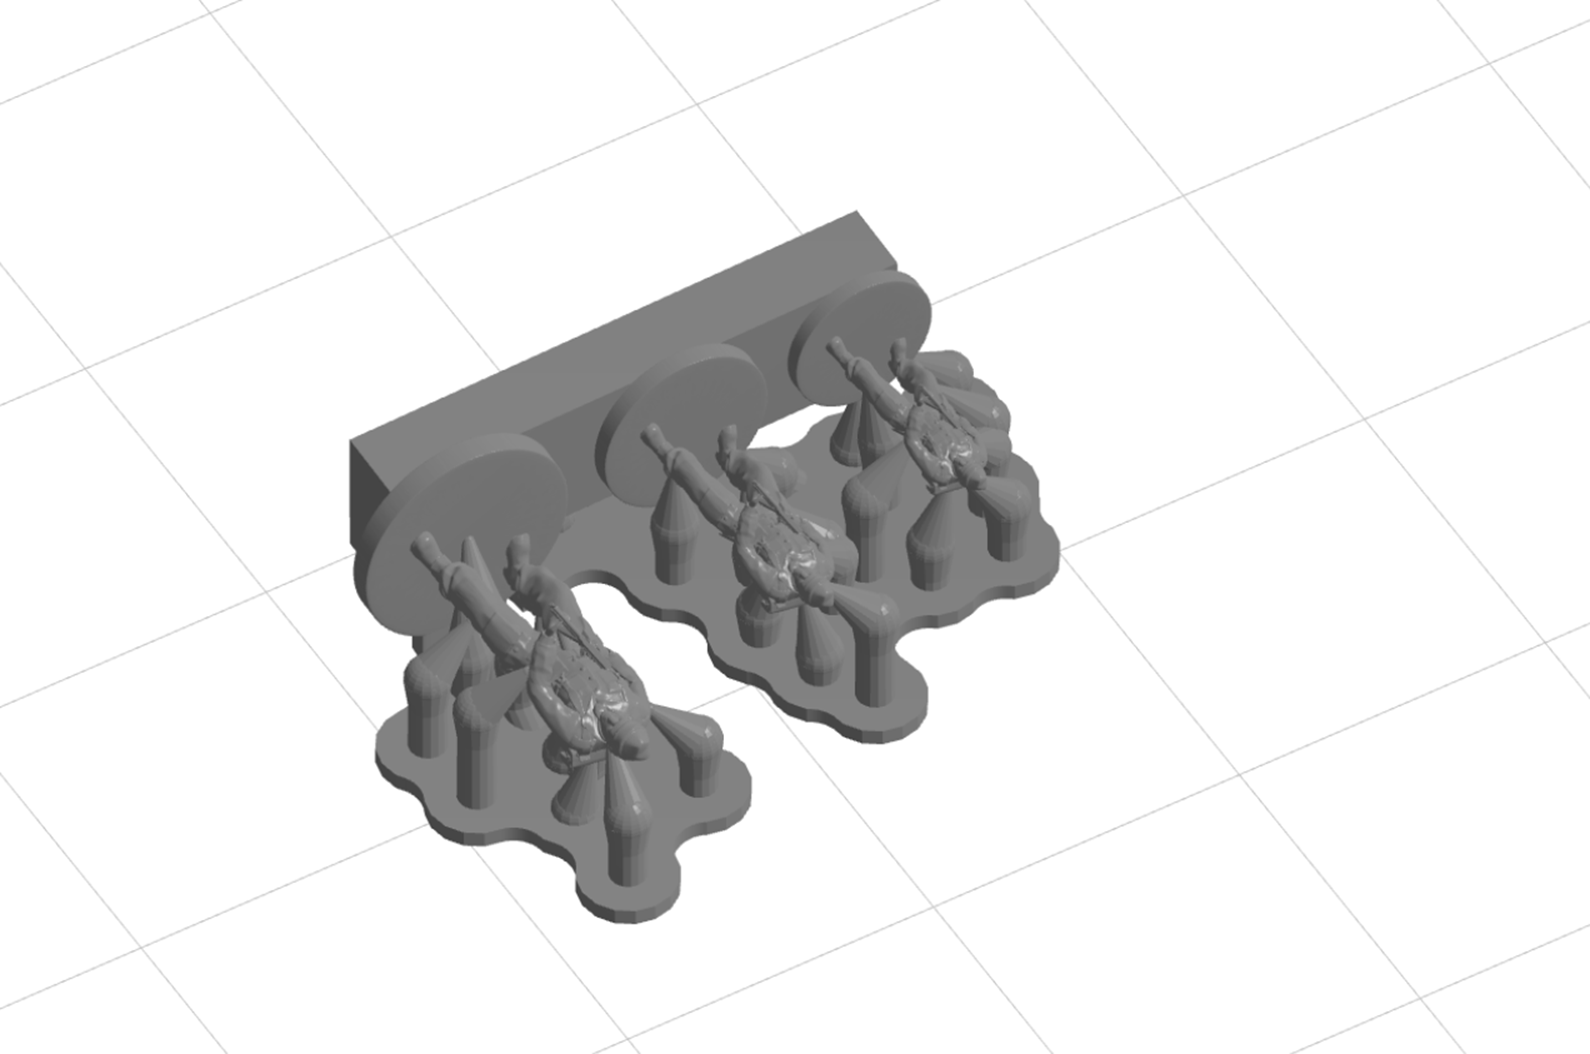
This time I decided I would assemble a unit of models on a single base, to create a useable gaming piece. The only 6mm game I have played was Epic Scale 40k, back in the early 90’s (I think called the Horus Heresy at the time). The miniatures in this game were assembled on square bases of five marines, each making up half of a squad. Going with a similar convention I instead opted for a round base and made four clones of my Commando.
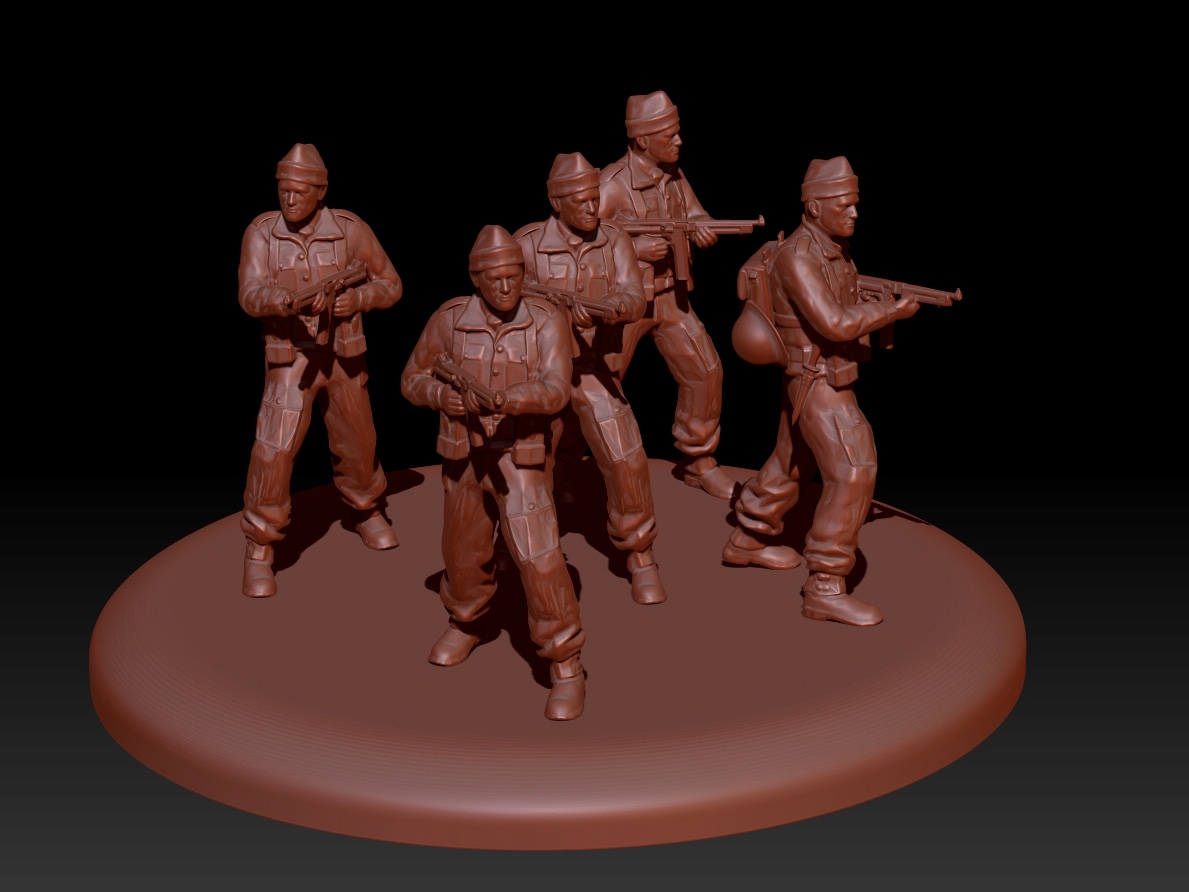
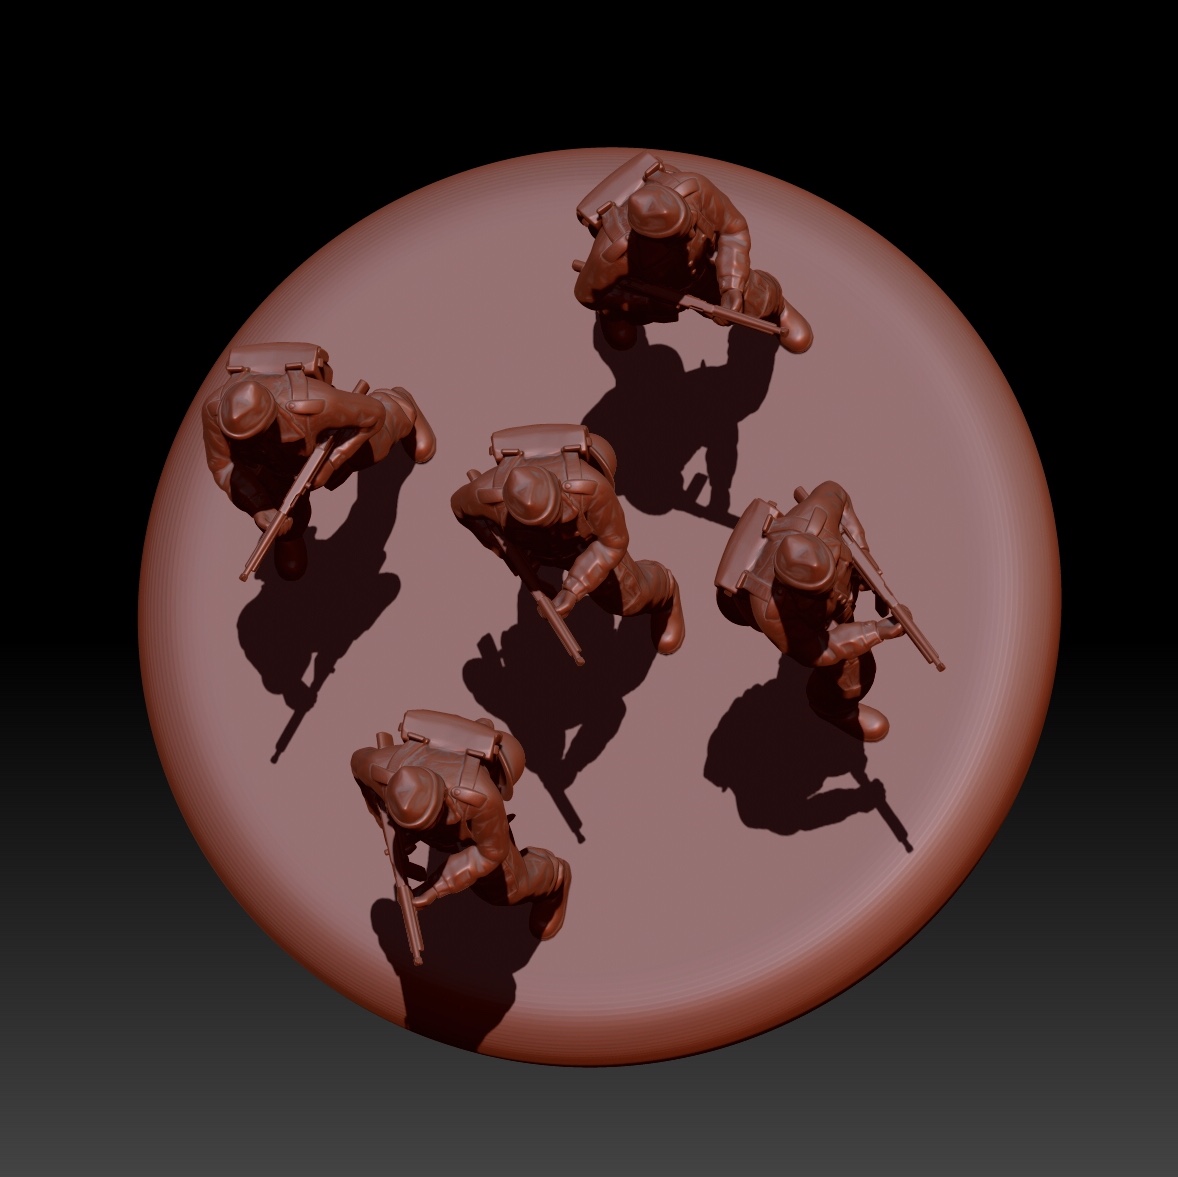
For the final version I intend to create five different poses but while I’m still running tests duplicates will do fine. I used the simple trick of mirroring two of the poses and positioned them at different angles to give a modicum of variation.
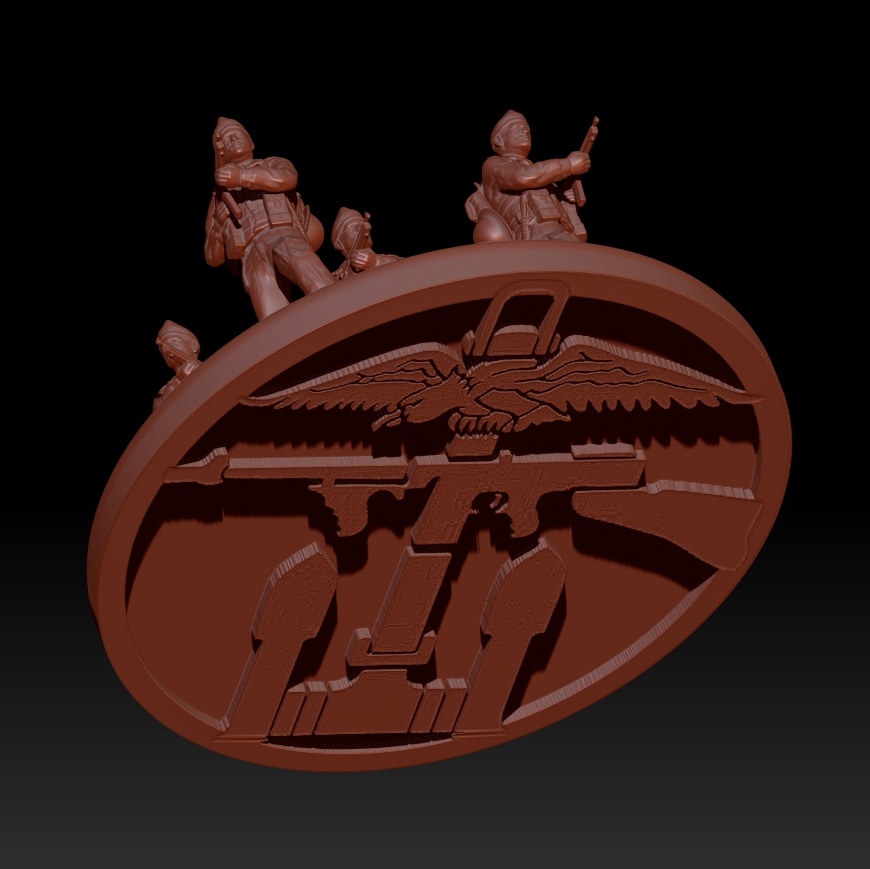
As a finishing touch I decided to add the British Commando insignia to the base!
Print Test II
Just a quick update on my second print test.
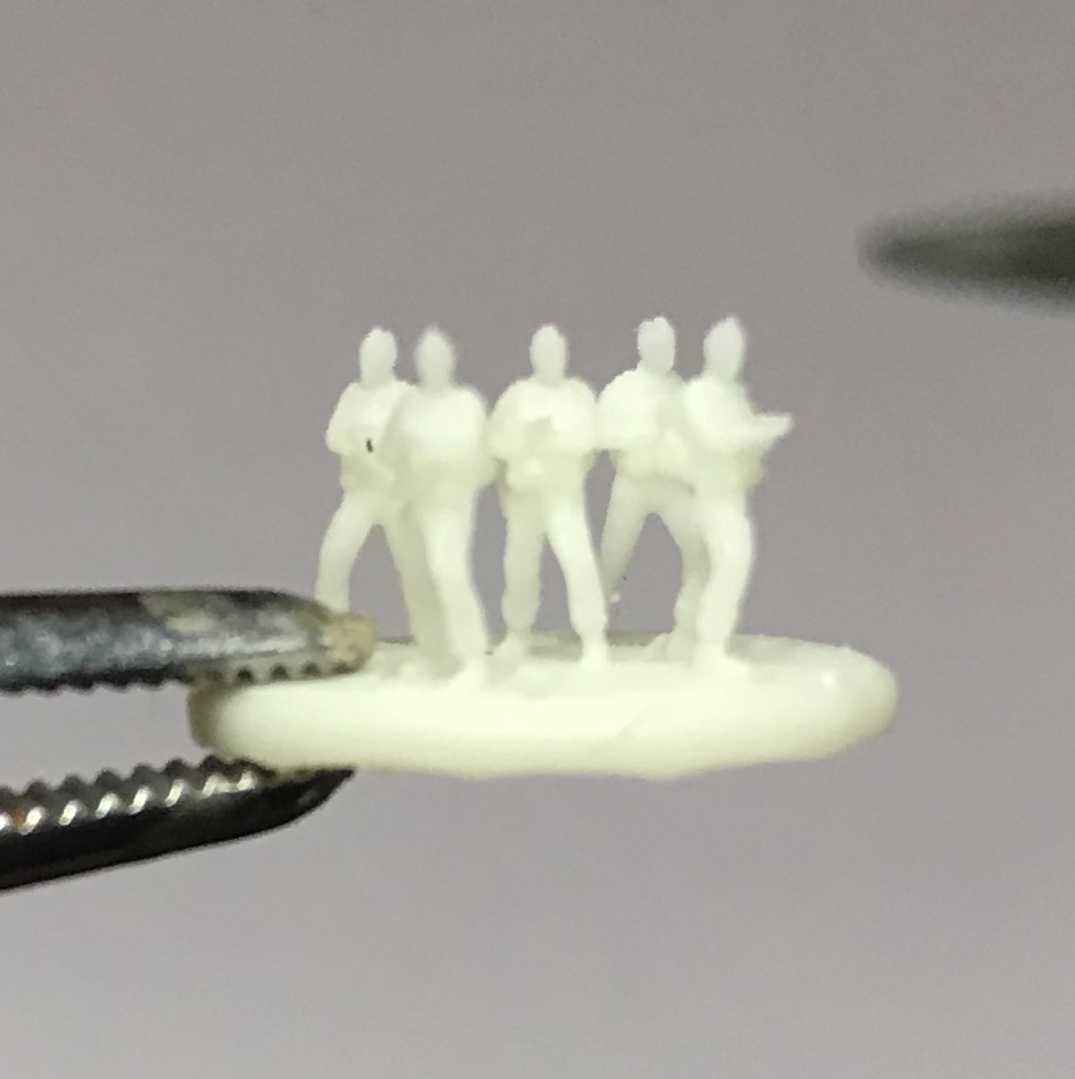
With the addition of a block beneath the miniatures they were strong enough to remove from the build plate. However this time they snapped at the ankle! On reflection this part of the model is less than a half millimetre thick on the 6mm figure. Positioned so closely to the base the ankle makes for a likely break point. You can probably also see from the attached images that the guns didn’t print successfully.
With these issues in mind I think I will have to make some concessions to the proportions of the model. This is something I had already considered but I wanted to stick as close to true scale as I could manage.
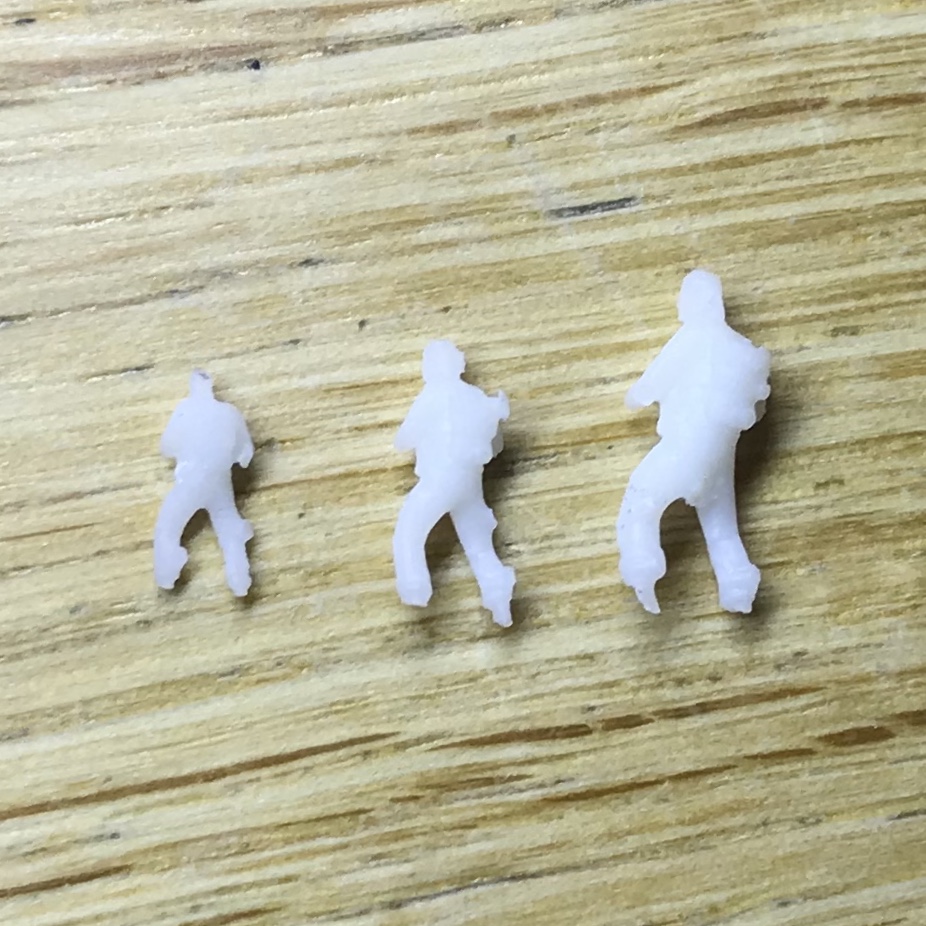
These figures really are very small but you can see details such as the back packs and even the knife on the hip have been retained. On my next test I will aim to reduce the number of supports as removing them on such a delicate model is tricky. It’s possible that a 6mm model is just too small to work with. The 8mm model seems to have been more successful, the extra volume giving it a little more robustness and detail.
Print Test I
My own 3D printer is due to arrive later this month but in the meantime I managed to run a test print on the printer we have at work (it’s also much better than the one I’ll be getting so a bonus really)!
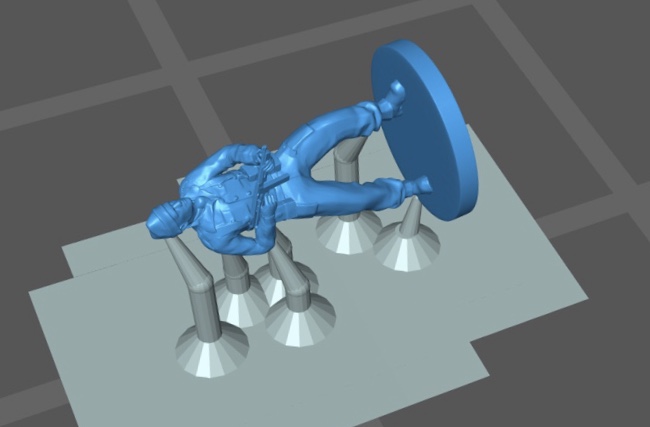
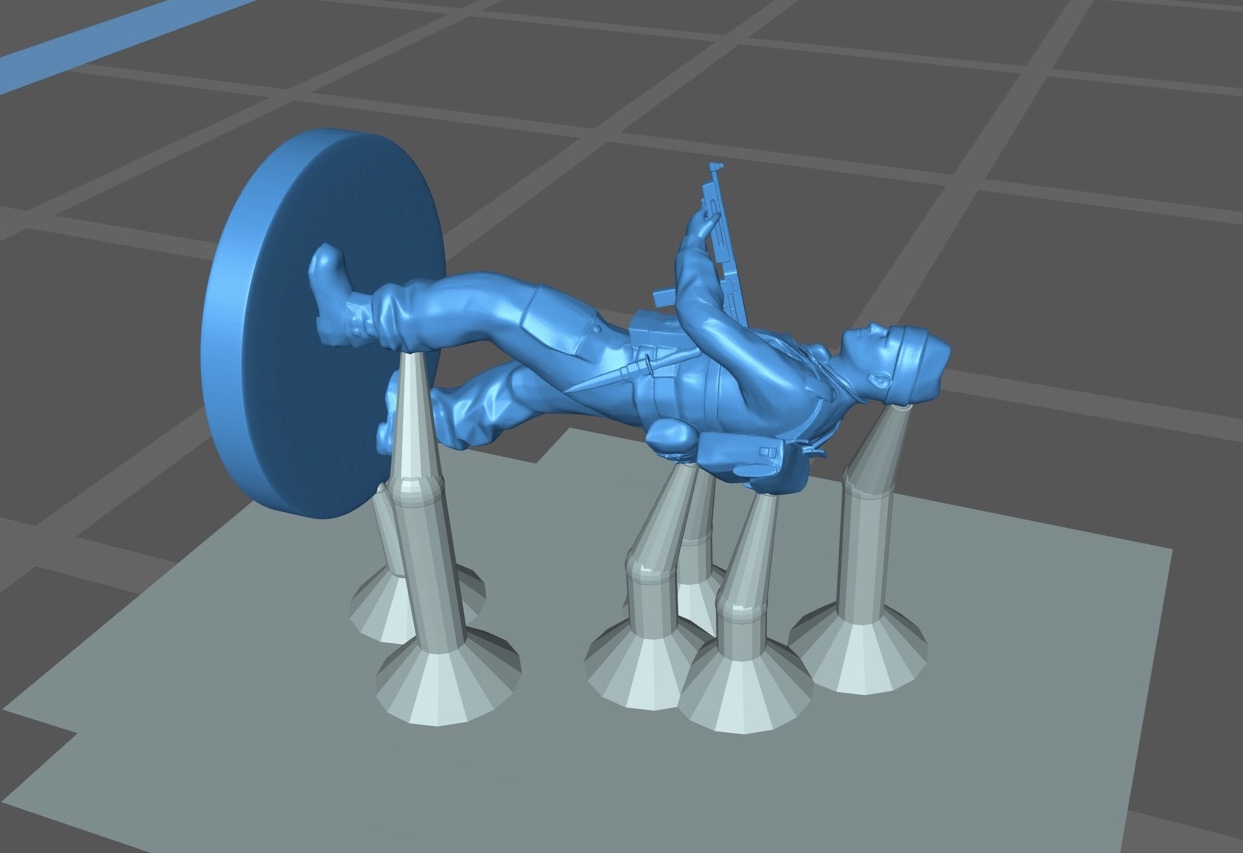
I positioned my commando on his back with the SMG facing directly away from the build plate. This was in the hope that I could avoid the need for any support structure around the front of the miniature and especially the barrel of his gun. I reasoned the gun would be quite fragile and cutting away a support would likely result in snapping the barrel.
I left the print running over night and although it printed successfully the model was destroyed while being removed from the plate! The plastic used in SLA printing remains in a slightly jellyfied state until it’s cured under a solar lamp post printing. Unfortunately such a small component wasn’t strong enough to be removed from the print head successfully.
Lesson learned. This time I would print the model on a block to give it a little more integrity while it was being processed. I also decided I may as well print some size comparisons so I scaled a couple of duplicates up to 8mm and 10mm respectively.

Once again I arranged the component with its back to the build plate. This would mean the figures would be printed facing downwards, from back to front, as the build plate was raised from the resin bath below.

Eureka!
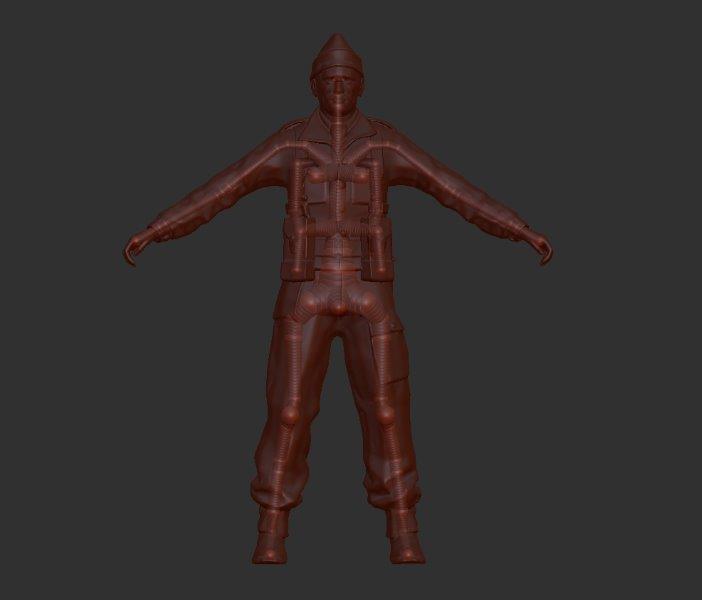
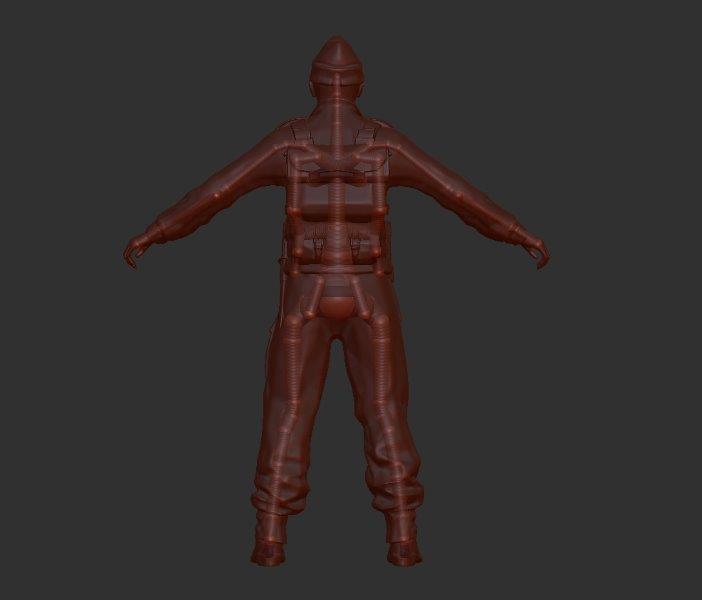
I didn’t see the point in taking a neutral pose forward as a test print so I figured I’d have another crack at posing. After a little homework I found out about a function callet Transpose Master. This operation drops the working model (referred to as a tool in Zbrush and often containing multiple sub tools), to a low polygon count in order to facilitate faster processing.
I also constructed a new rig as this was a process I could carry out pretty quickly now (10-15 mins). As soon as the new rig was bound to the soldier mesh I noticed big improvements. The lag I had suffered previously was now gone and the model moved freely. A further benefit of using Transpose Master was that I was able to bring the Thompson along with the model as a separate sub tool (I was only able to use a single sub tool with the previous rigging method).
I was able to create this pose in around 20 mins. It’s not perfect and you can see in the below images that some areas, especially the knife and Submachine Gun, have distorted very badly.
I had anticipated some clean up would be required to the posed model so I had replacement parts standing by. I swapped the Thompson and knife for undistorted versions from my earlier clean up and touched up the modelling here and there.

With the addition of a simple circular base my soldier was beginning to look a lot more like a gaming miniature.
Before exporting the model for printing I checked over the mesh. Specifically I needed to ensure that the model was ‘Water Tight’, which is to say that there were no holes into the mesh and no areas of hidden topology within the model. Once I was happy that the mesh was fit for printing I scaled him to a height of 6mm from the top of the base to the dent in his woollen hat. As I had conducted sculptural work on the model again the poly count had crept up to around 2 million so it was necessary to Decimate once more before exporting my Commando as an OBJ file.
Two Steps Back
I’ve hit a bit of a brick wall with this project.
I loaded my finished model onto my MKII rig and went through the earlier steps to pose him. Immediately I ran into problems. The model and rig suffered major slow down whenever I connected the two together. This made posing impossible as the rig moved out of sequence with my cursor or was completely unresponsive. After a frustrating hour of trying to resolve the problem I did the smart thing and consulted the internet.
What I discovered was that rigging with a model comprising circa 1 million polys (or points), is a fools errand. Who knew?! Certainly not me as there was no mention of this in the tutorials that had gotten me this far. My labours to improve my sculpt had resulted in an unwieldy amount of information which would have to be significantly reduced if I were to have any hope of posing it. Worse then, it seemed the low poly count of the original model was not the cause of the softening of detail after all. In my search for a solution to the lag problem I had noticed a slider that adjusted the resolution of the posed model.
Infuriating as this was my efforts had not been completely wasted. Zbrush has a tool for every task and I only needed to decimate my mesh to achieve a lower poly count. This could be done without loosing much detail as the function generates a more economical mesh, much like the original form of the model. To clarify, the higher density, evenly sized poly frame (Dynamesh), is necessary for modelling but is large and unwieldy in terms of sheer data. Now the modelling phase was complete, reverting to a lower density poly frame would result in a mesh that was easier to process and therefore manipulate.
Here are three key stages of the modelling process, each displaying their polyframes for comparison:
 Original Polyframe 5,957 points
  Sculpting Polyframe (Dynamesh) 992,813 points
  Final Polyframe (Decimated) 198,562 points
So now I had a re-sculpted, re-topologised model it was time to try rigging again. I took the Decimated mesh back to the rig and tried again. It moved a lot better and I was able to create the below pose, however I was still experiencing a lot of lag. One of the tutorials I watched mentioned a function that can be used alongside rigging and I think this is what I need to get my head around next. If I’ve understood correctly it allows you to pose a low resolution model (to get around the lag), then transfer that same pose to a much higher resolution version of the same model.
Again I must remind myself that the aim here is to produce miniatures as small as 6mm. I’m considering taking a break from modelling to progress a basic version of my model to the 3D printing stage. I think it’s worth seeing how one of these figures comes out.
Above all this project is about learning and I have learned a lot so far.
Going Commando
After finishing my clean up of the model I wanted to check it against some reference material. After a couple of searches on St Nazaire and British Commandos in general I pulled up some historical images. The first thing I noticed from photos taken at the time, was that the Commandos rarely seemed to have helmets on. Most of the images portrayed them in woollen beanie hats or berets.
This look was far more in keeping with the image of SSB troops that I had in my mind. I was tempted to go with berets but these seemed more for parade than operational use. In the end I modelled a woollen hat on my soldier using the reference images shown. It’s pretty basic but does the job of giving him a more elite appearance compared to the tin helmet worn by the infantryman.

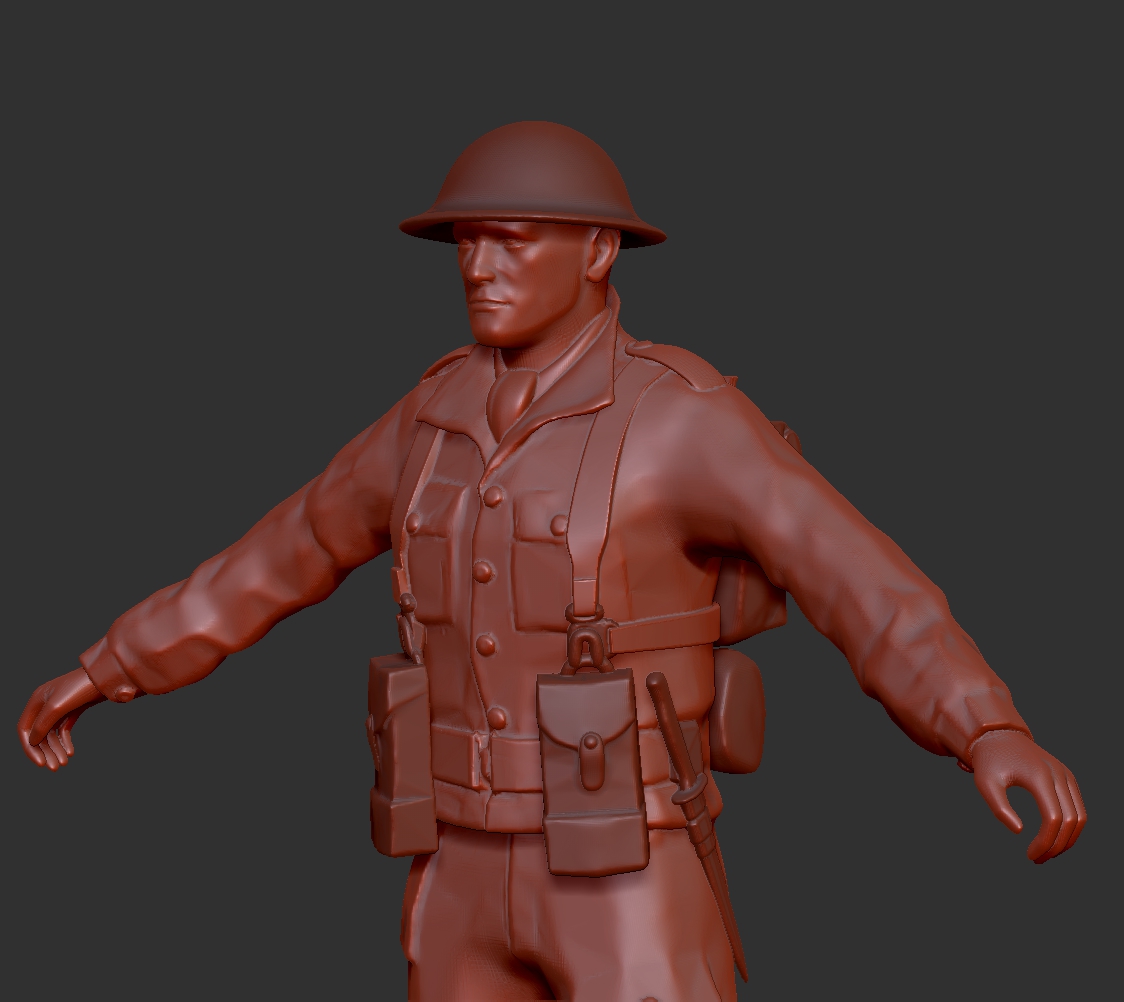
I also played around with attaching the helmet to the pack. Although this wasn’t obvious from the images it offered me another detail option for the models.
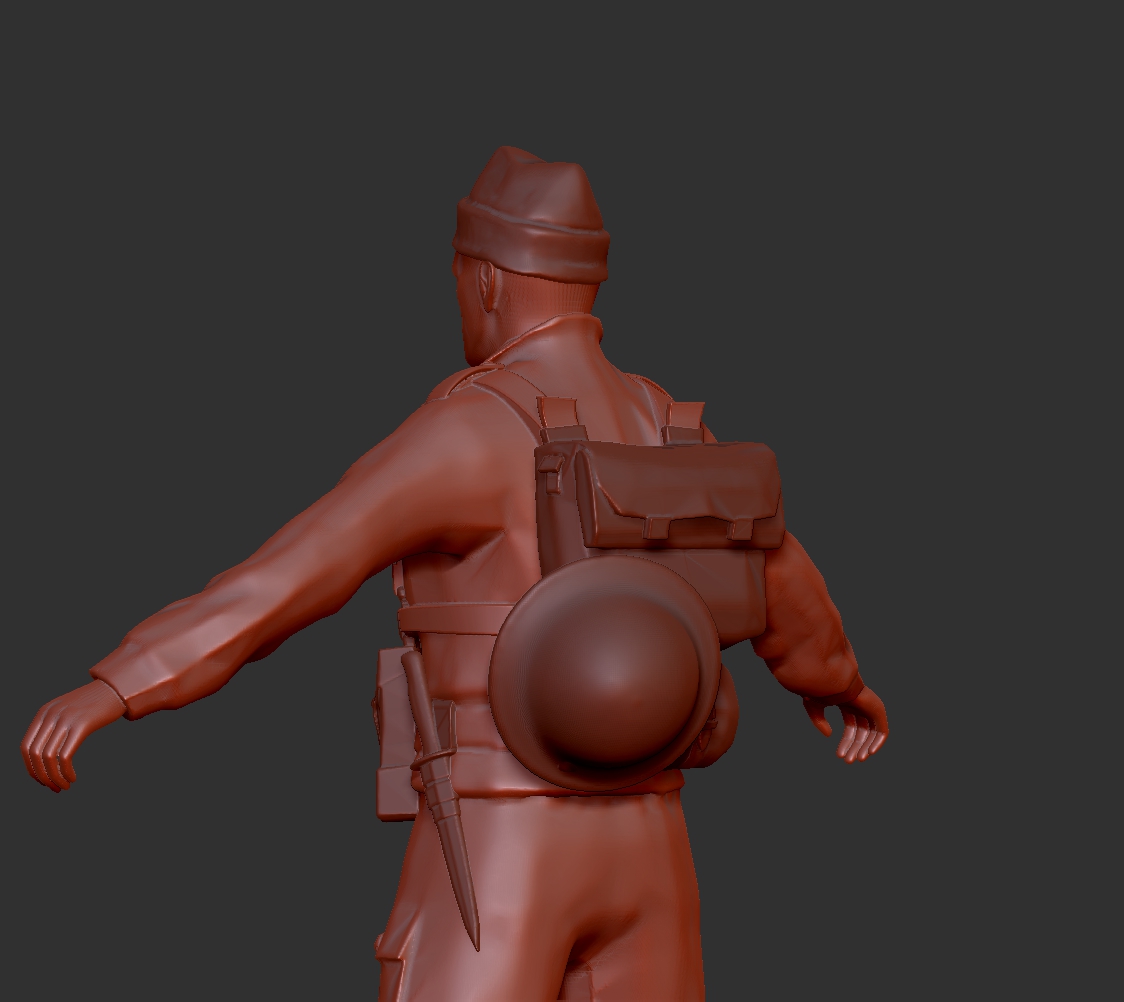
My other concern was what weaponry would be appropriate as Rifles aren’t really in keeping with the mobile nature of commando raiding parties. The Wiki page for St Nazaire references that the men responsible for laying charges on key targets of the port would be armed with only pistols. They would be accompanied by units armed with Thomson or Browning Submachine guns who’s job it was to escort and cover them.

The compact nature of submachine guns would no doubt make life easier at the printing stage. Long, narrow rifle barrels would require support structures to print and were likely to snap when removing said support structure from the printed model.
My model only came with a rifle but the British Officer, available from the same supplier came with an M1A1 Thomson Submachine Gun, exactly what I needed.
I had intended to download this model at some point as it would give me the option of making a distinct Command unit. This is of course a staple for any Wargame.
Next stop Turbosquid.


