


![How To Paint Moonstone’s Nanny | Goblin King Games [7 Days Early Access]](https://images.beastsofwar.com/2024/12/3CU-Gobin-King-Games-Moonstone-Shades-Nanny-coverimage-225-127.jpg)


Spring Clean Challenge: Developing WWII infantry for 3D printing


Two Steps Back
I’ve hit a bit of a brick wall with this project.
I loaded my finished model onto my MKII rig and went through the earlier steps to pose him. Immediately I ran into problems. The model and rig suffered major slow down whenever I connected the two together. This made posing impossible as the rig moved out of sequence with my cursor or was completely unresponsive. After a frustrating hour of trying to resolve the problem I did the smart thing and consulted the internet.
What I discovered was that rigging with a model comprising circa 1 million polys (or points), is a fools errand. Who knew?! Certainly not me as there was no mention of this in the tutorials that had gotten me this far. My labours to improve my sculpt had resulted in an unwieldy amount of information which would have to be significantly reduced if I were to have any hope of posing it. Worse then, it seemed the low poly count of the original model was not the cause of the softening of detail after all. In my search for a solution to the lag problem I had noticed a slider that adjusted the resolution of the posed model.
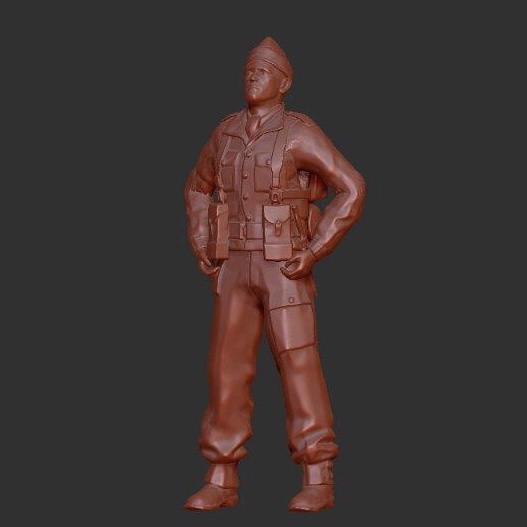
Infuriating as this was my efforts had not been completely wasted. Zbrush has a tool for every task and I only needed to decimate my mesh to achieve a lower poly count. This could be done without loosing much detail as the function generates a more economical mesh, much like the original form of the model. To clarify, the higher density, evenly sized poly frame (Dynamesh), is necessary for modelling but is large and unwieldy in terms of sheer data. Now the modelling phase was complete, reverting to a lower density poly frame would result in a mesh that was easier to process and therefore manipulate.
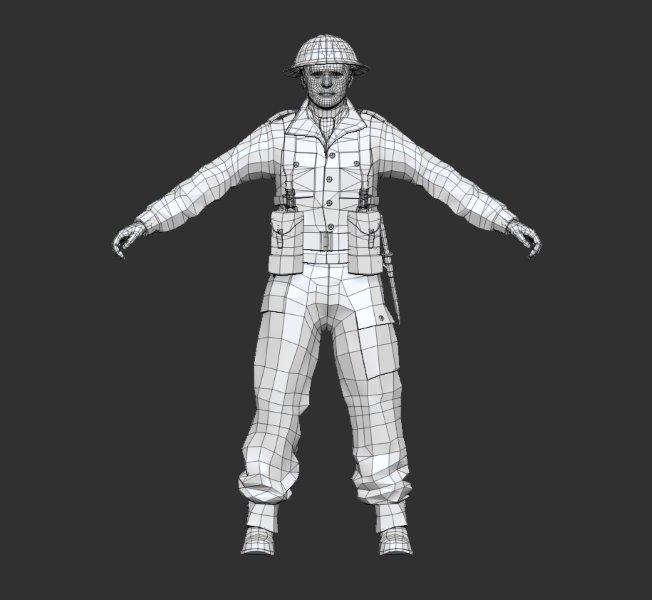
Here are three key stages of the modelling process, each displaying their polyframes for comparison:
 Original Polyframe 5,957 points
 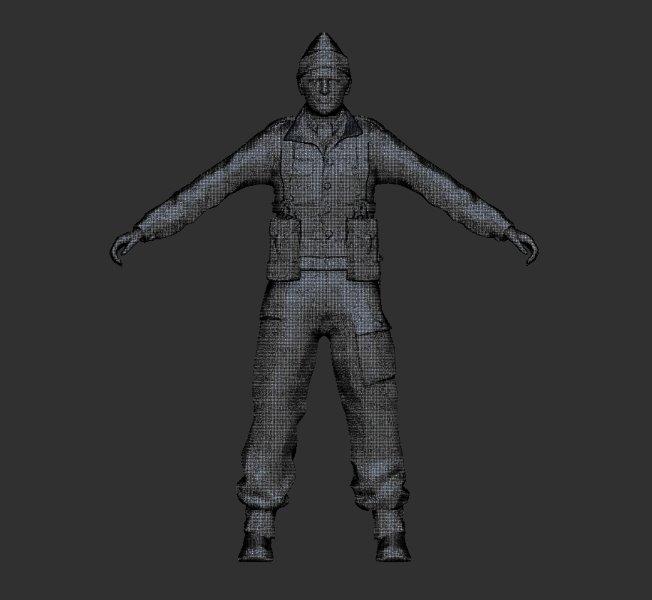 Sculpting Polyframe (Dynamesh) 992,813 points
 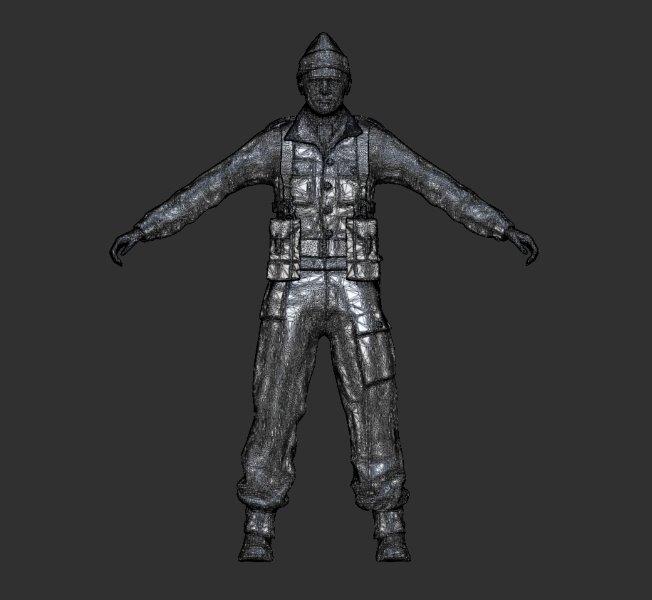 Final Polyframe (Decimated) 198,562 points
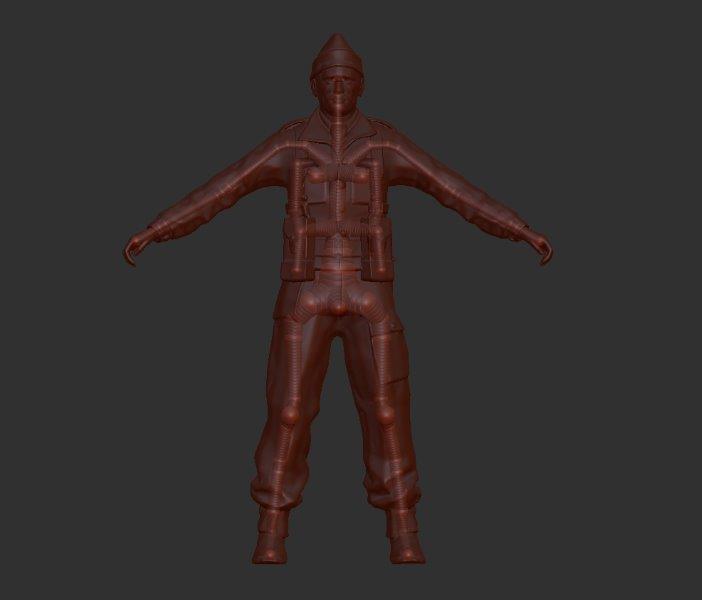
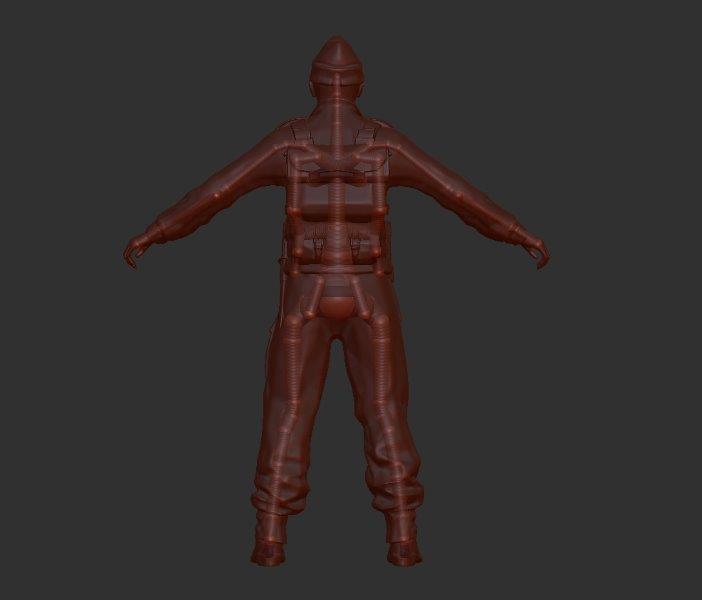
So now I had a re-sculpted, re-topologised model it was time to try rigging again. I took the Decimated mesh back to the rig and tried again. It moved a lot better and I was able to create the below pose, however I was still experiencing a lot of lag. One of the tutorials I watched mentioned a function that can be used alongside rigging and I think this is what I need to get my head around next. If I’ve understood correctly it allows you to pose a low resolution model (to get around the lag), then transfer that same pose to a much higher resolution version of the same model.
Again I must remind myself that the aim here is to produce miniatures as small as 6mm. I’m considering taking a break from modelling to progress a basic version of my model to the 3D printing stage. I think it’s worth seeing how one of these figures comes out.
Above all this project is about learning and I have learned a lot so far.


Leave a Reply