


A Saga of Glorantha


Recommendations: 389
About the Project
With the glorious re-assurgence of Runequest and Glorantha (I will be purchasing the slipcase edition tommorow) I will be painting and converting models building scenery (two boards worth, one based on a Dark Age style settlement to represent Sartar and the other some Greek/Middle Eastern style building to represent Pavis and the Big Rubble). I will be looking at both Mortal Gods and Saga/Fantasy Saga for rules.
Related Genre: Fantasy
This Project is Active
Resting, not Forgotten
Although distracted by my mini four figure 40k project Runequest is not Forgotten.
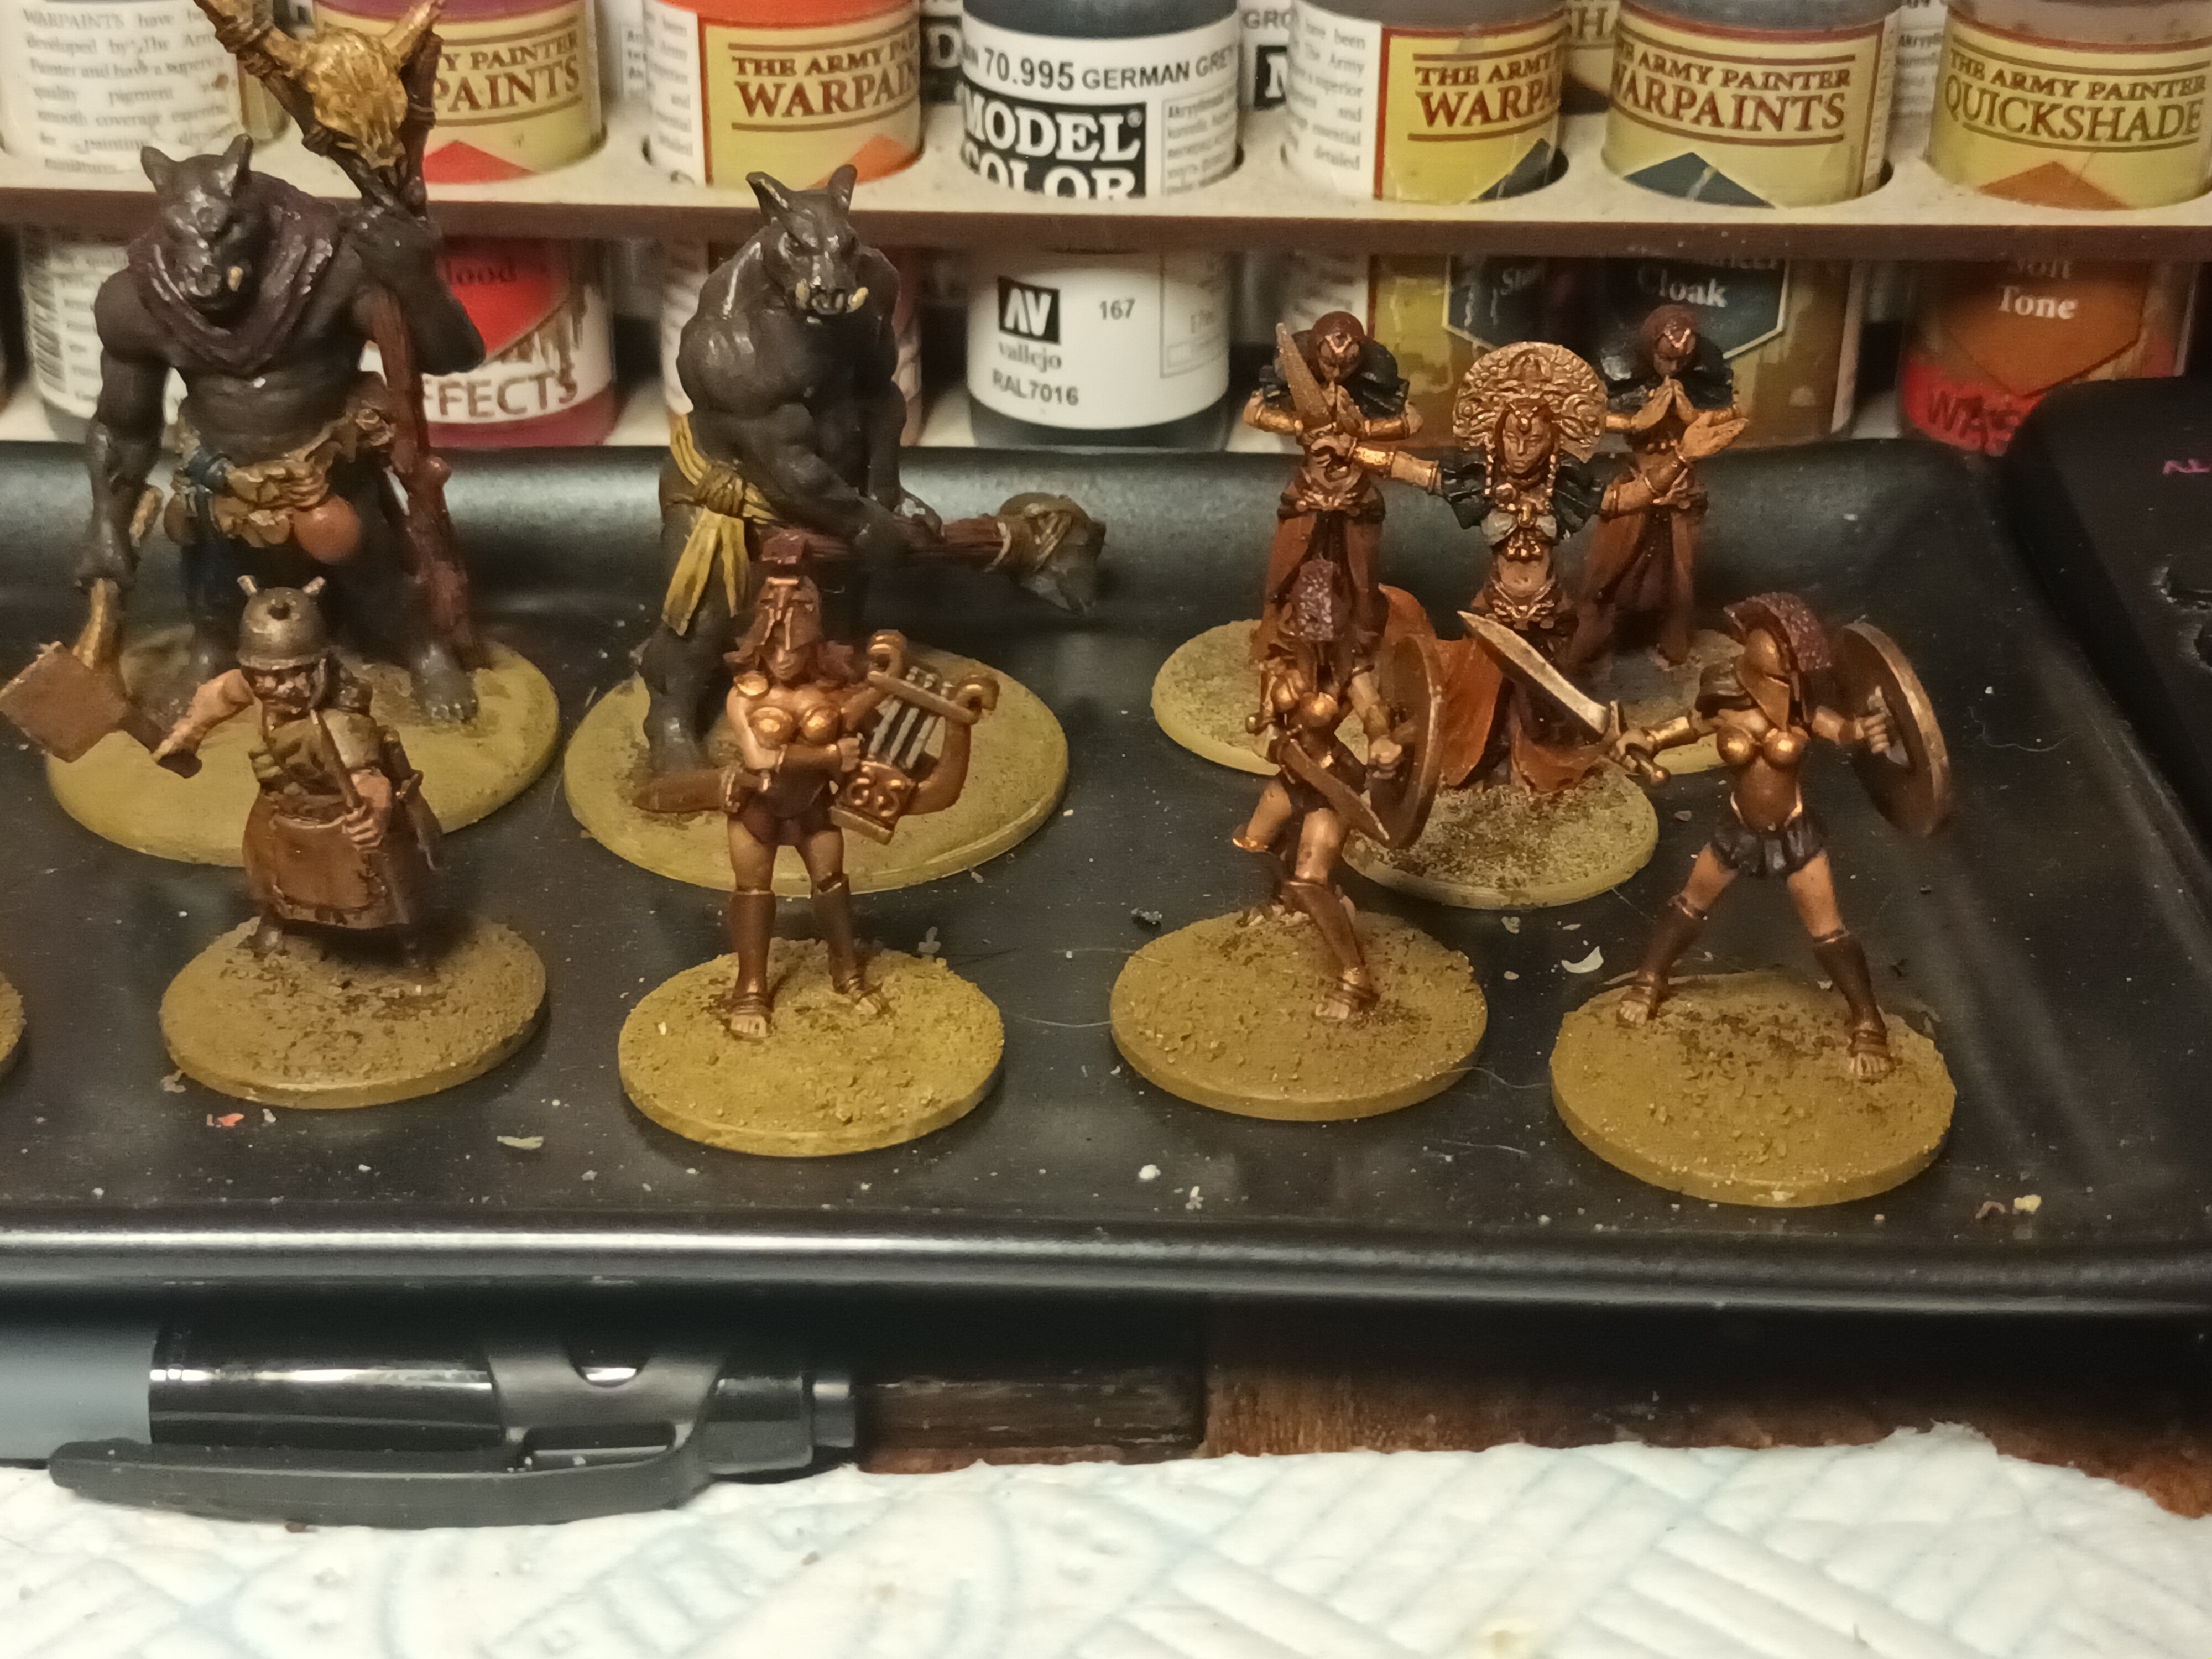 Front row: left to right Beat Pot Aelwrin, Jar El, two Lunar hearthguard. Back row: two trolls, three priestesses
 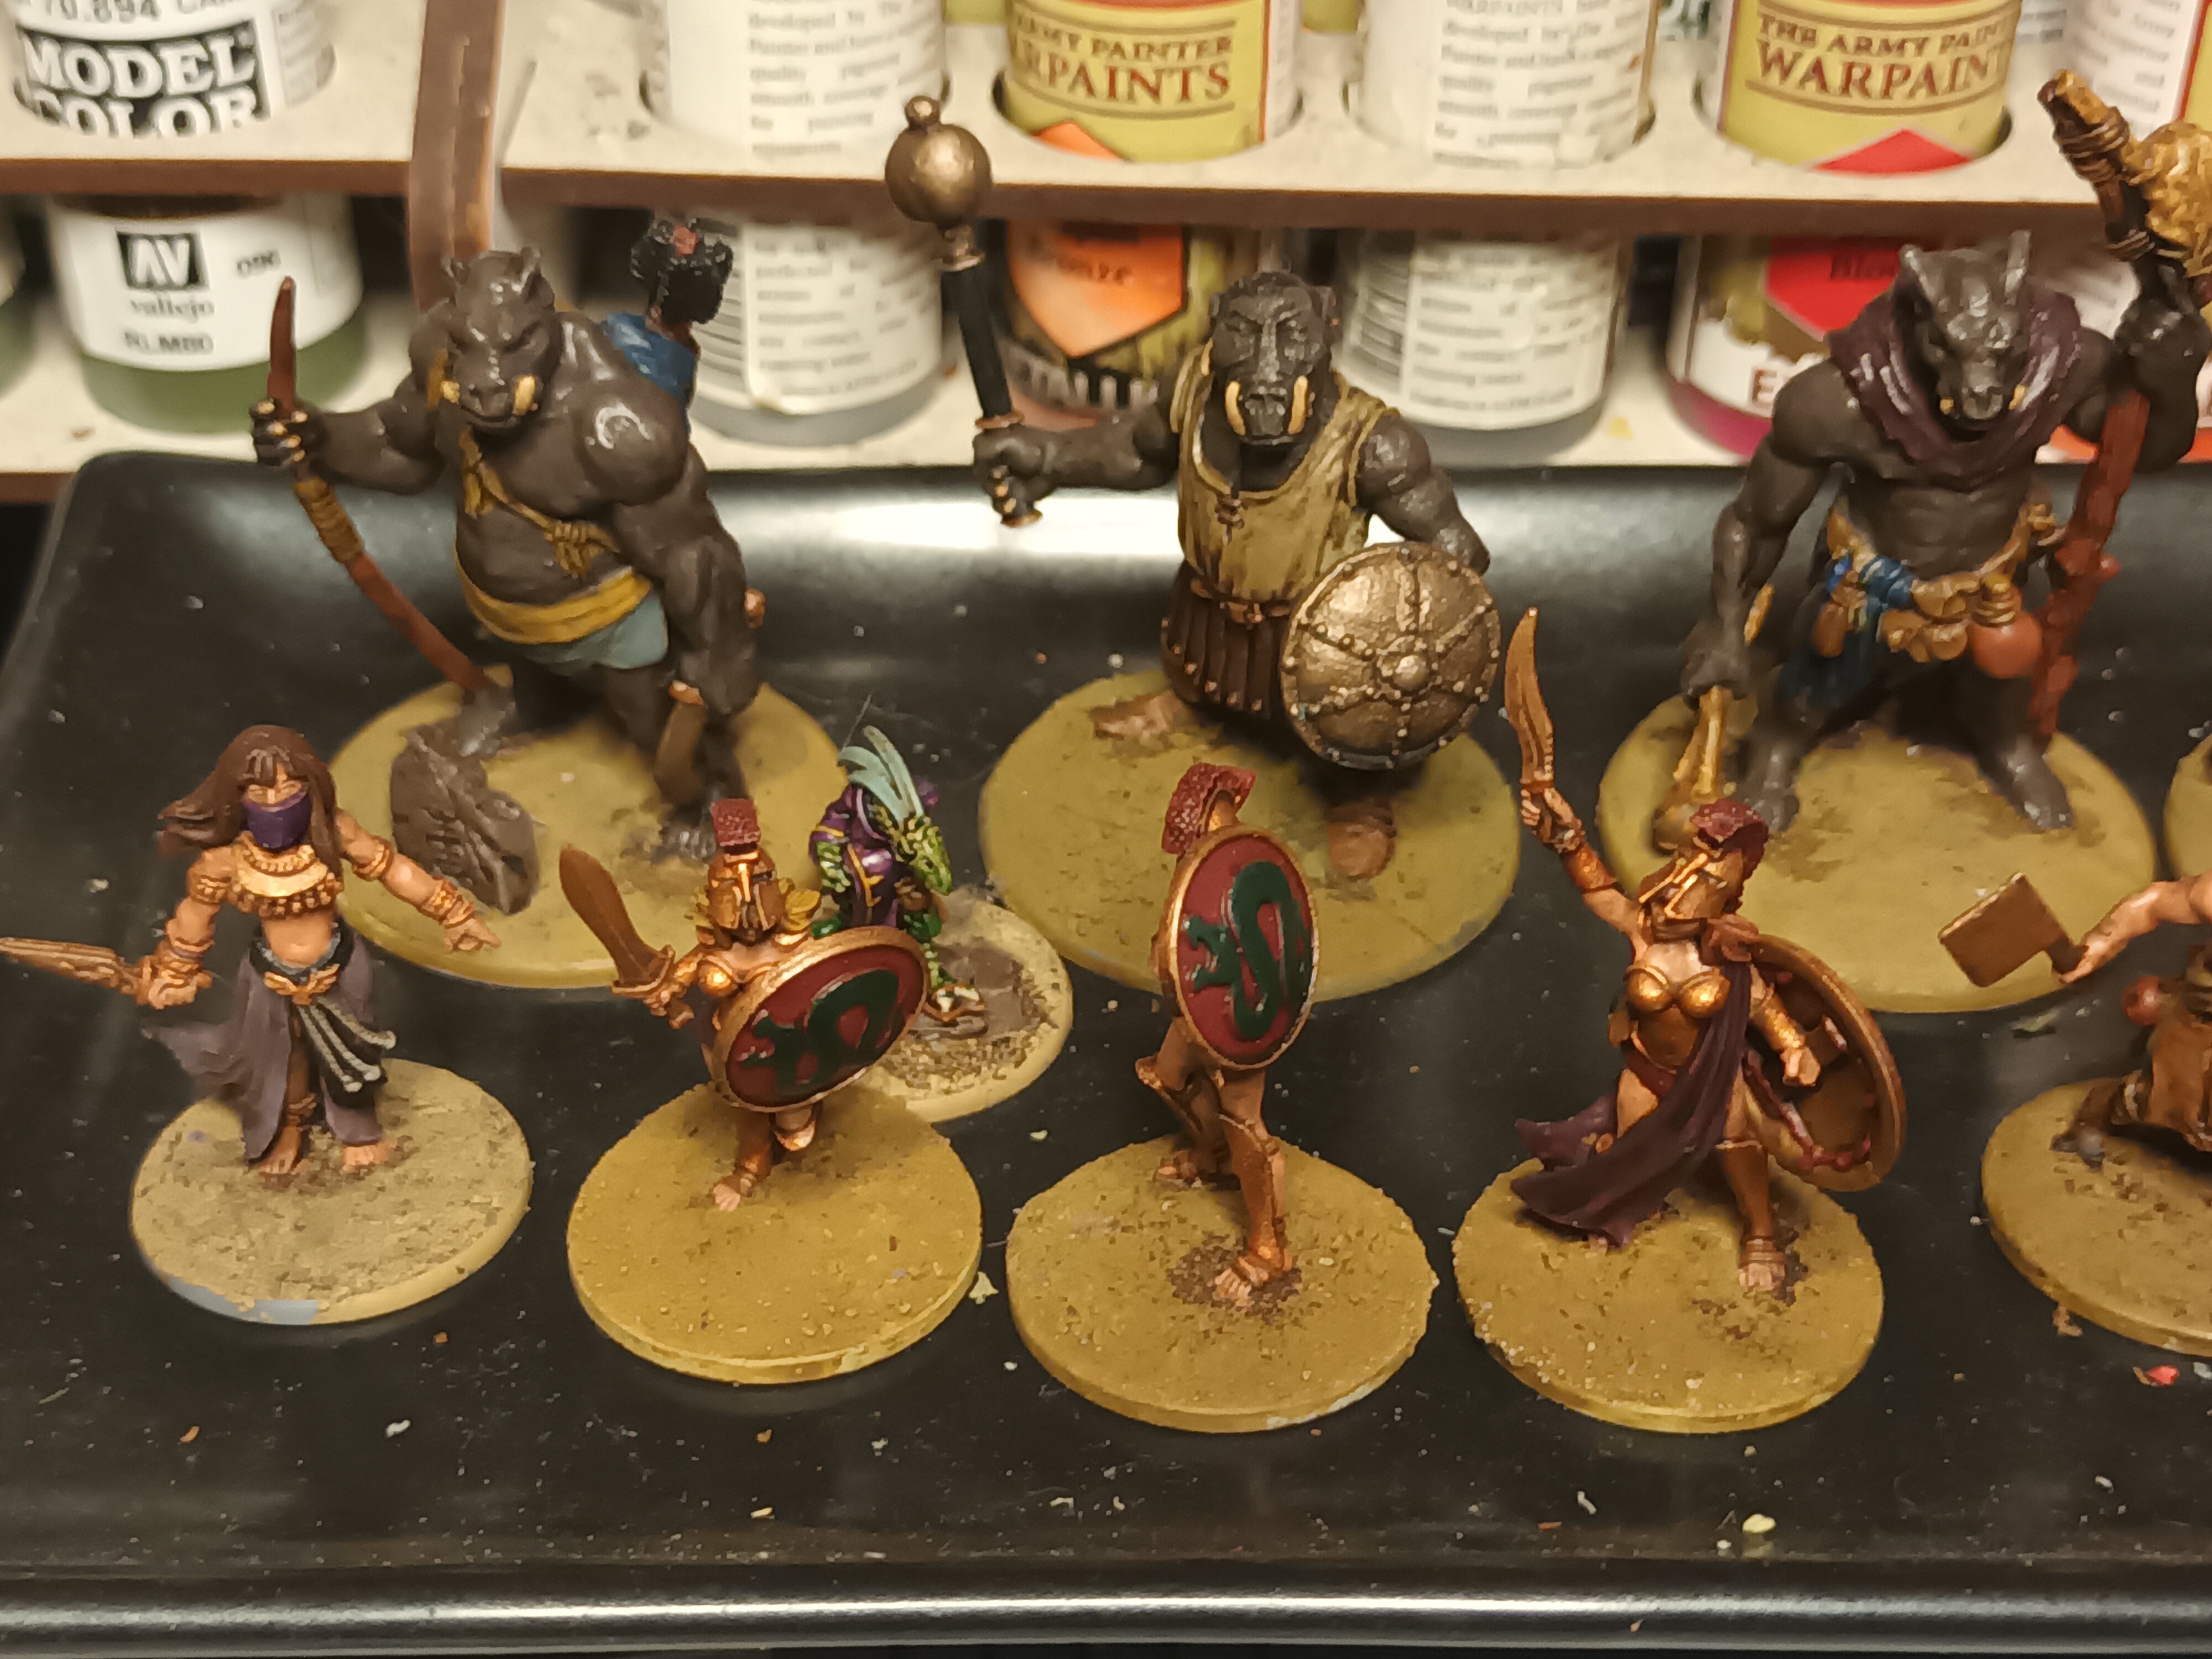 Front row: Kyger Litor priestess, two more Lunar Hearthguardand another Jar El. Back row: trolls, and hiding a tiny Dragonewt.
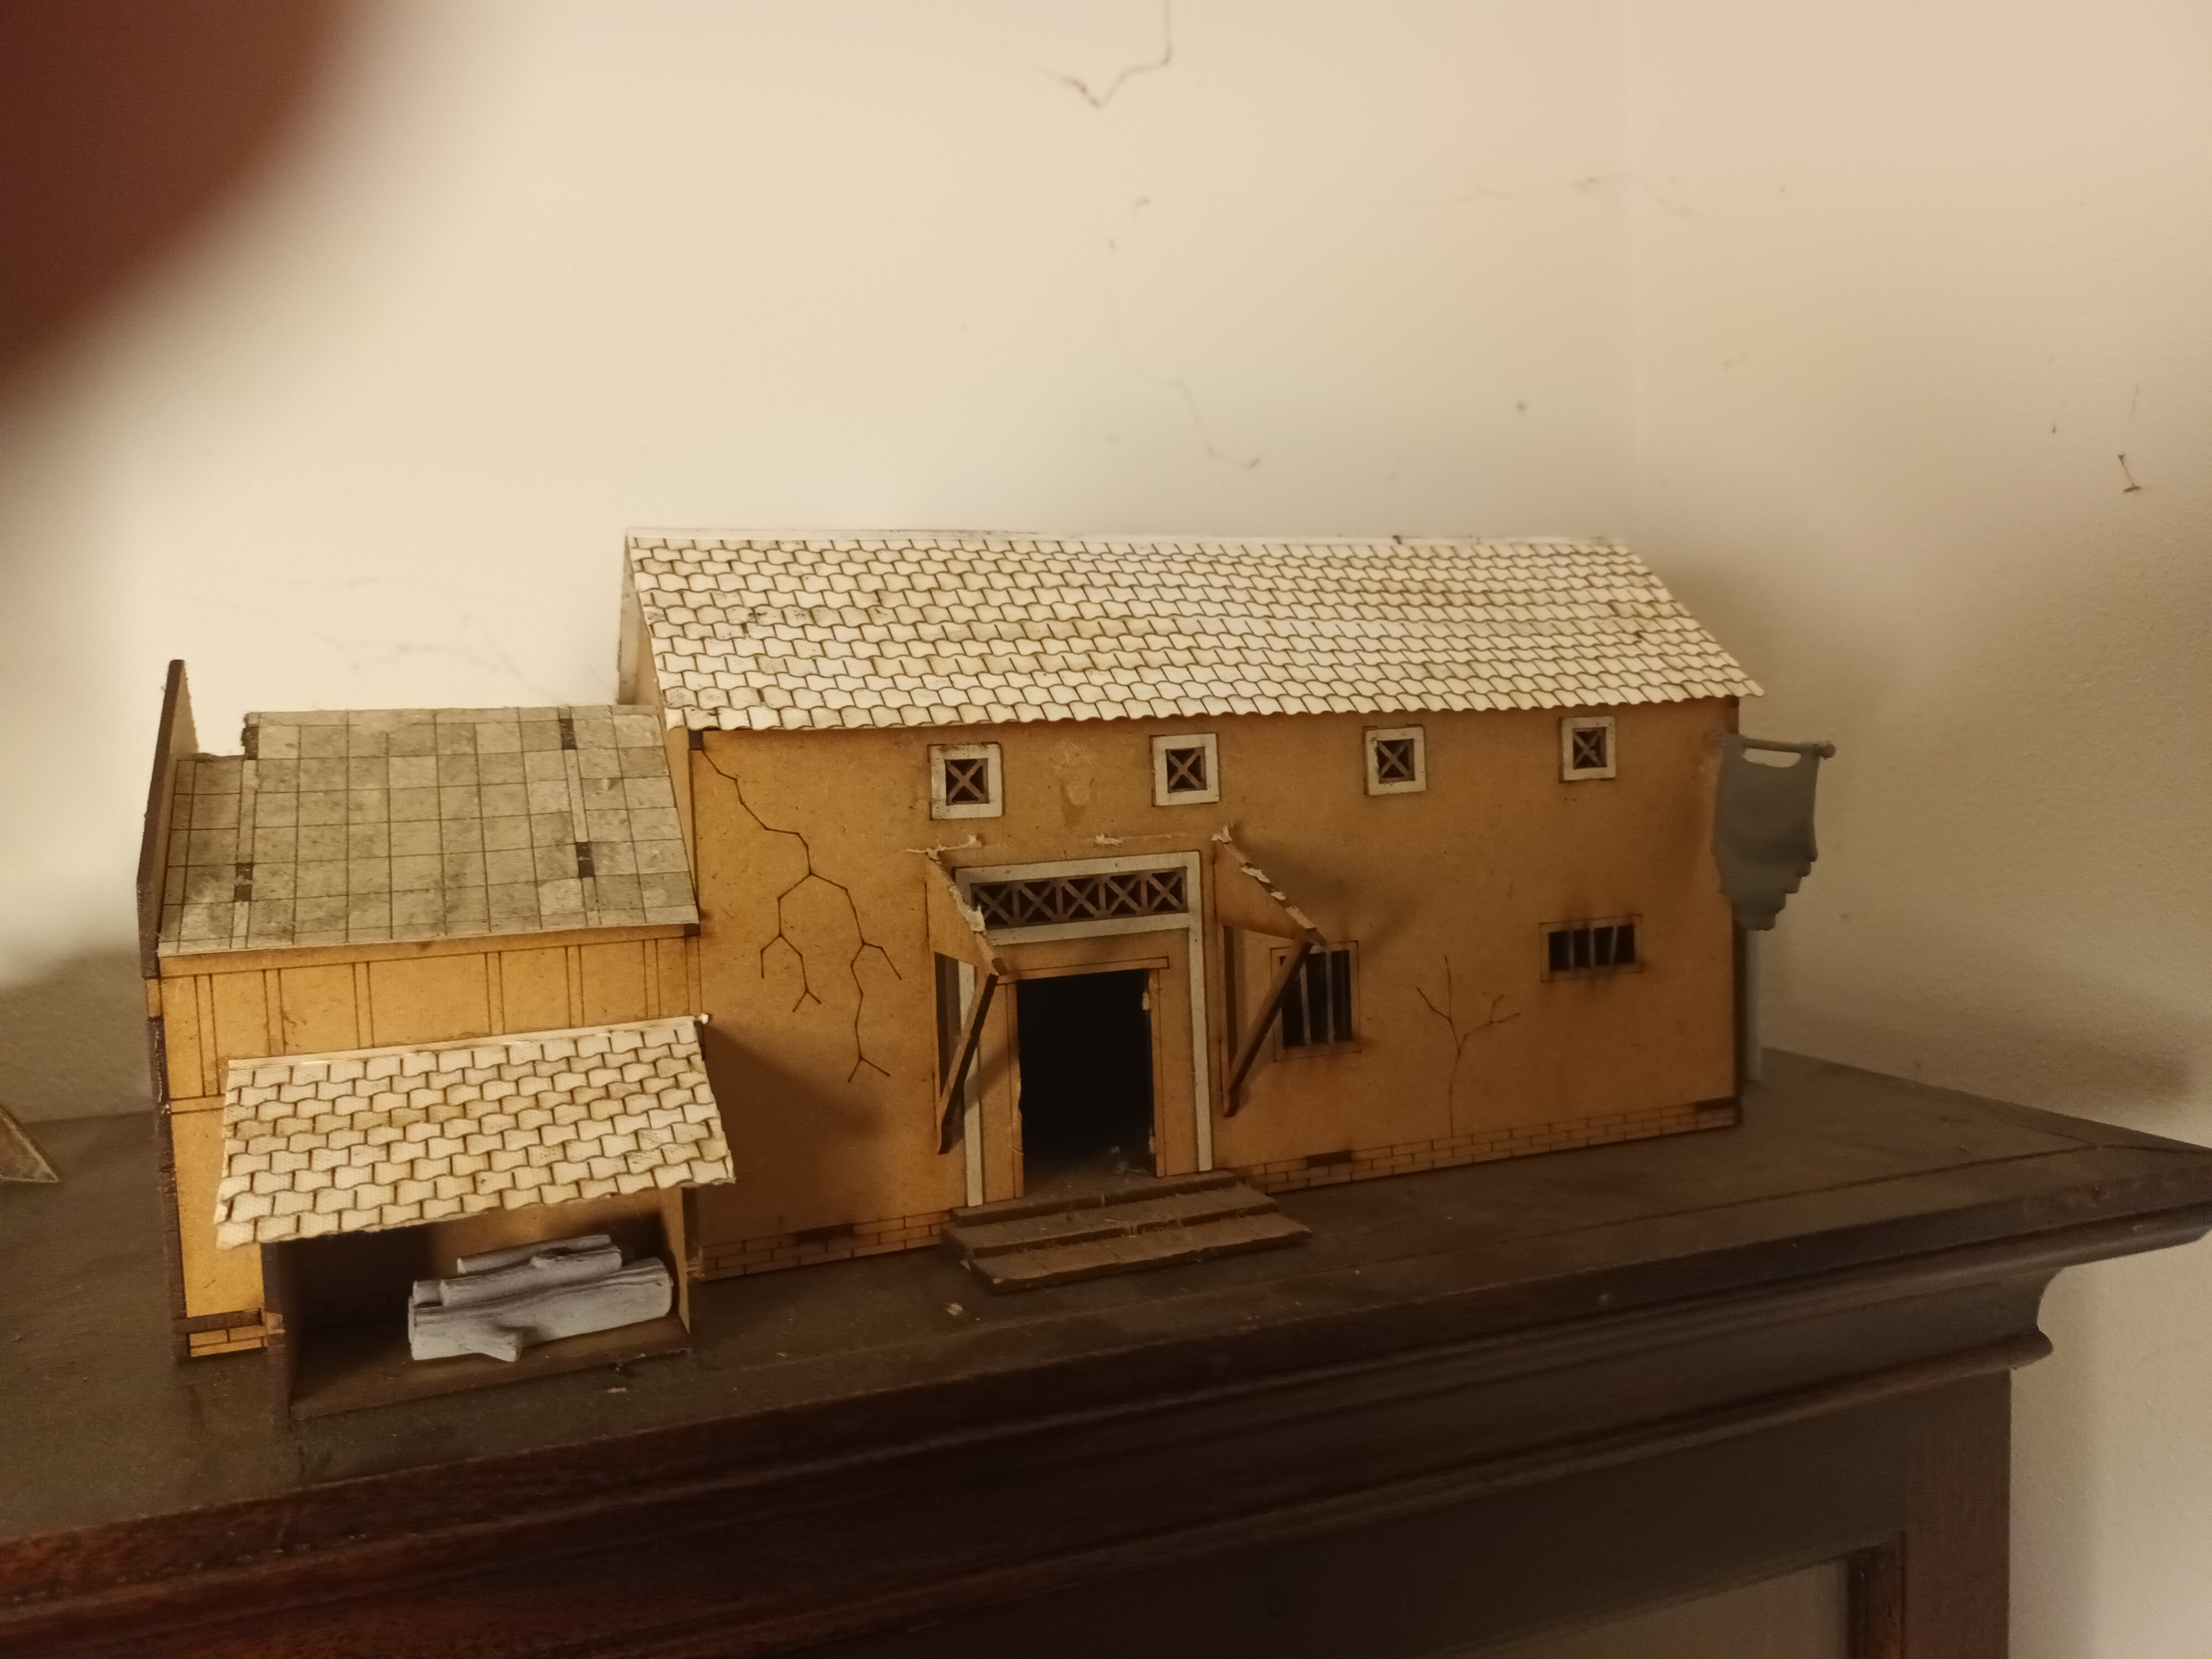 My Inn, I have started to add roofing roofing from Warbases. I have photographed the process and will post a tutorial once all construction is finished.
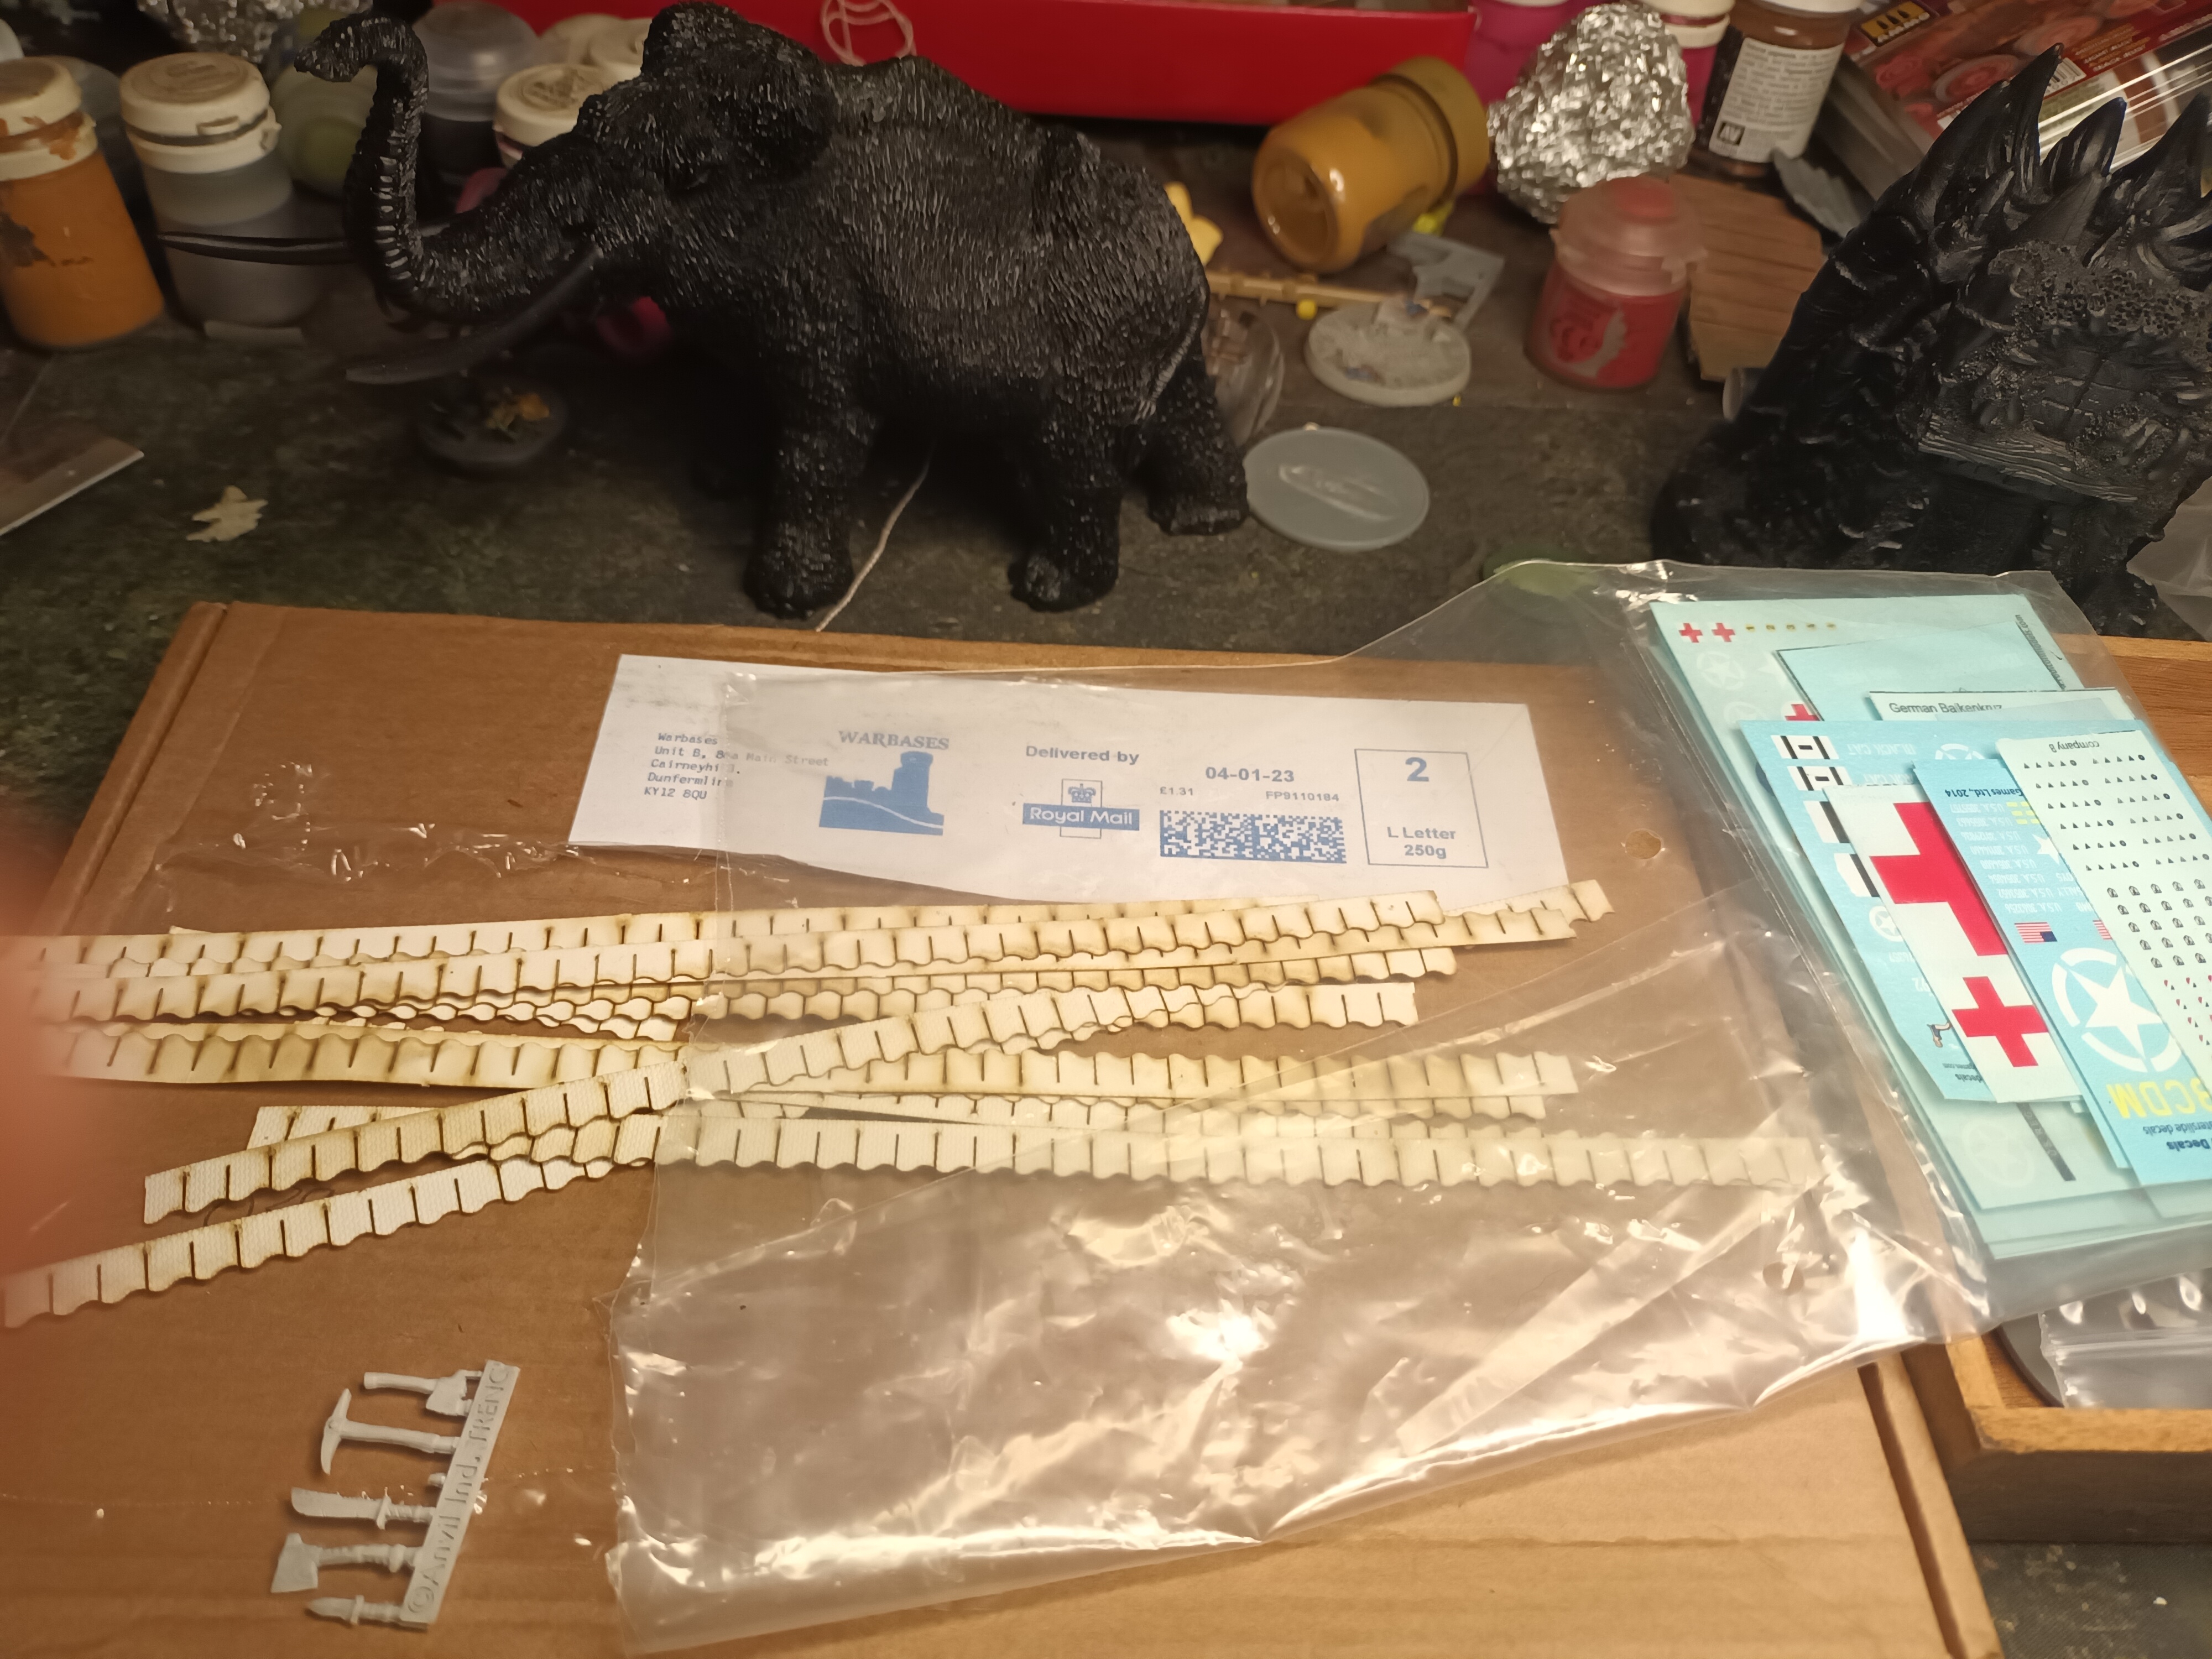 Some of the Warbase tiles they are very effective, in the back is a mammoth and a tiny resin tower for this project.
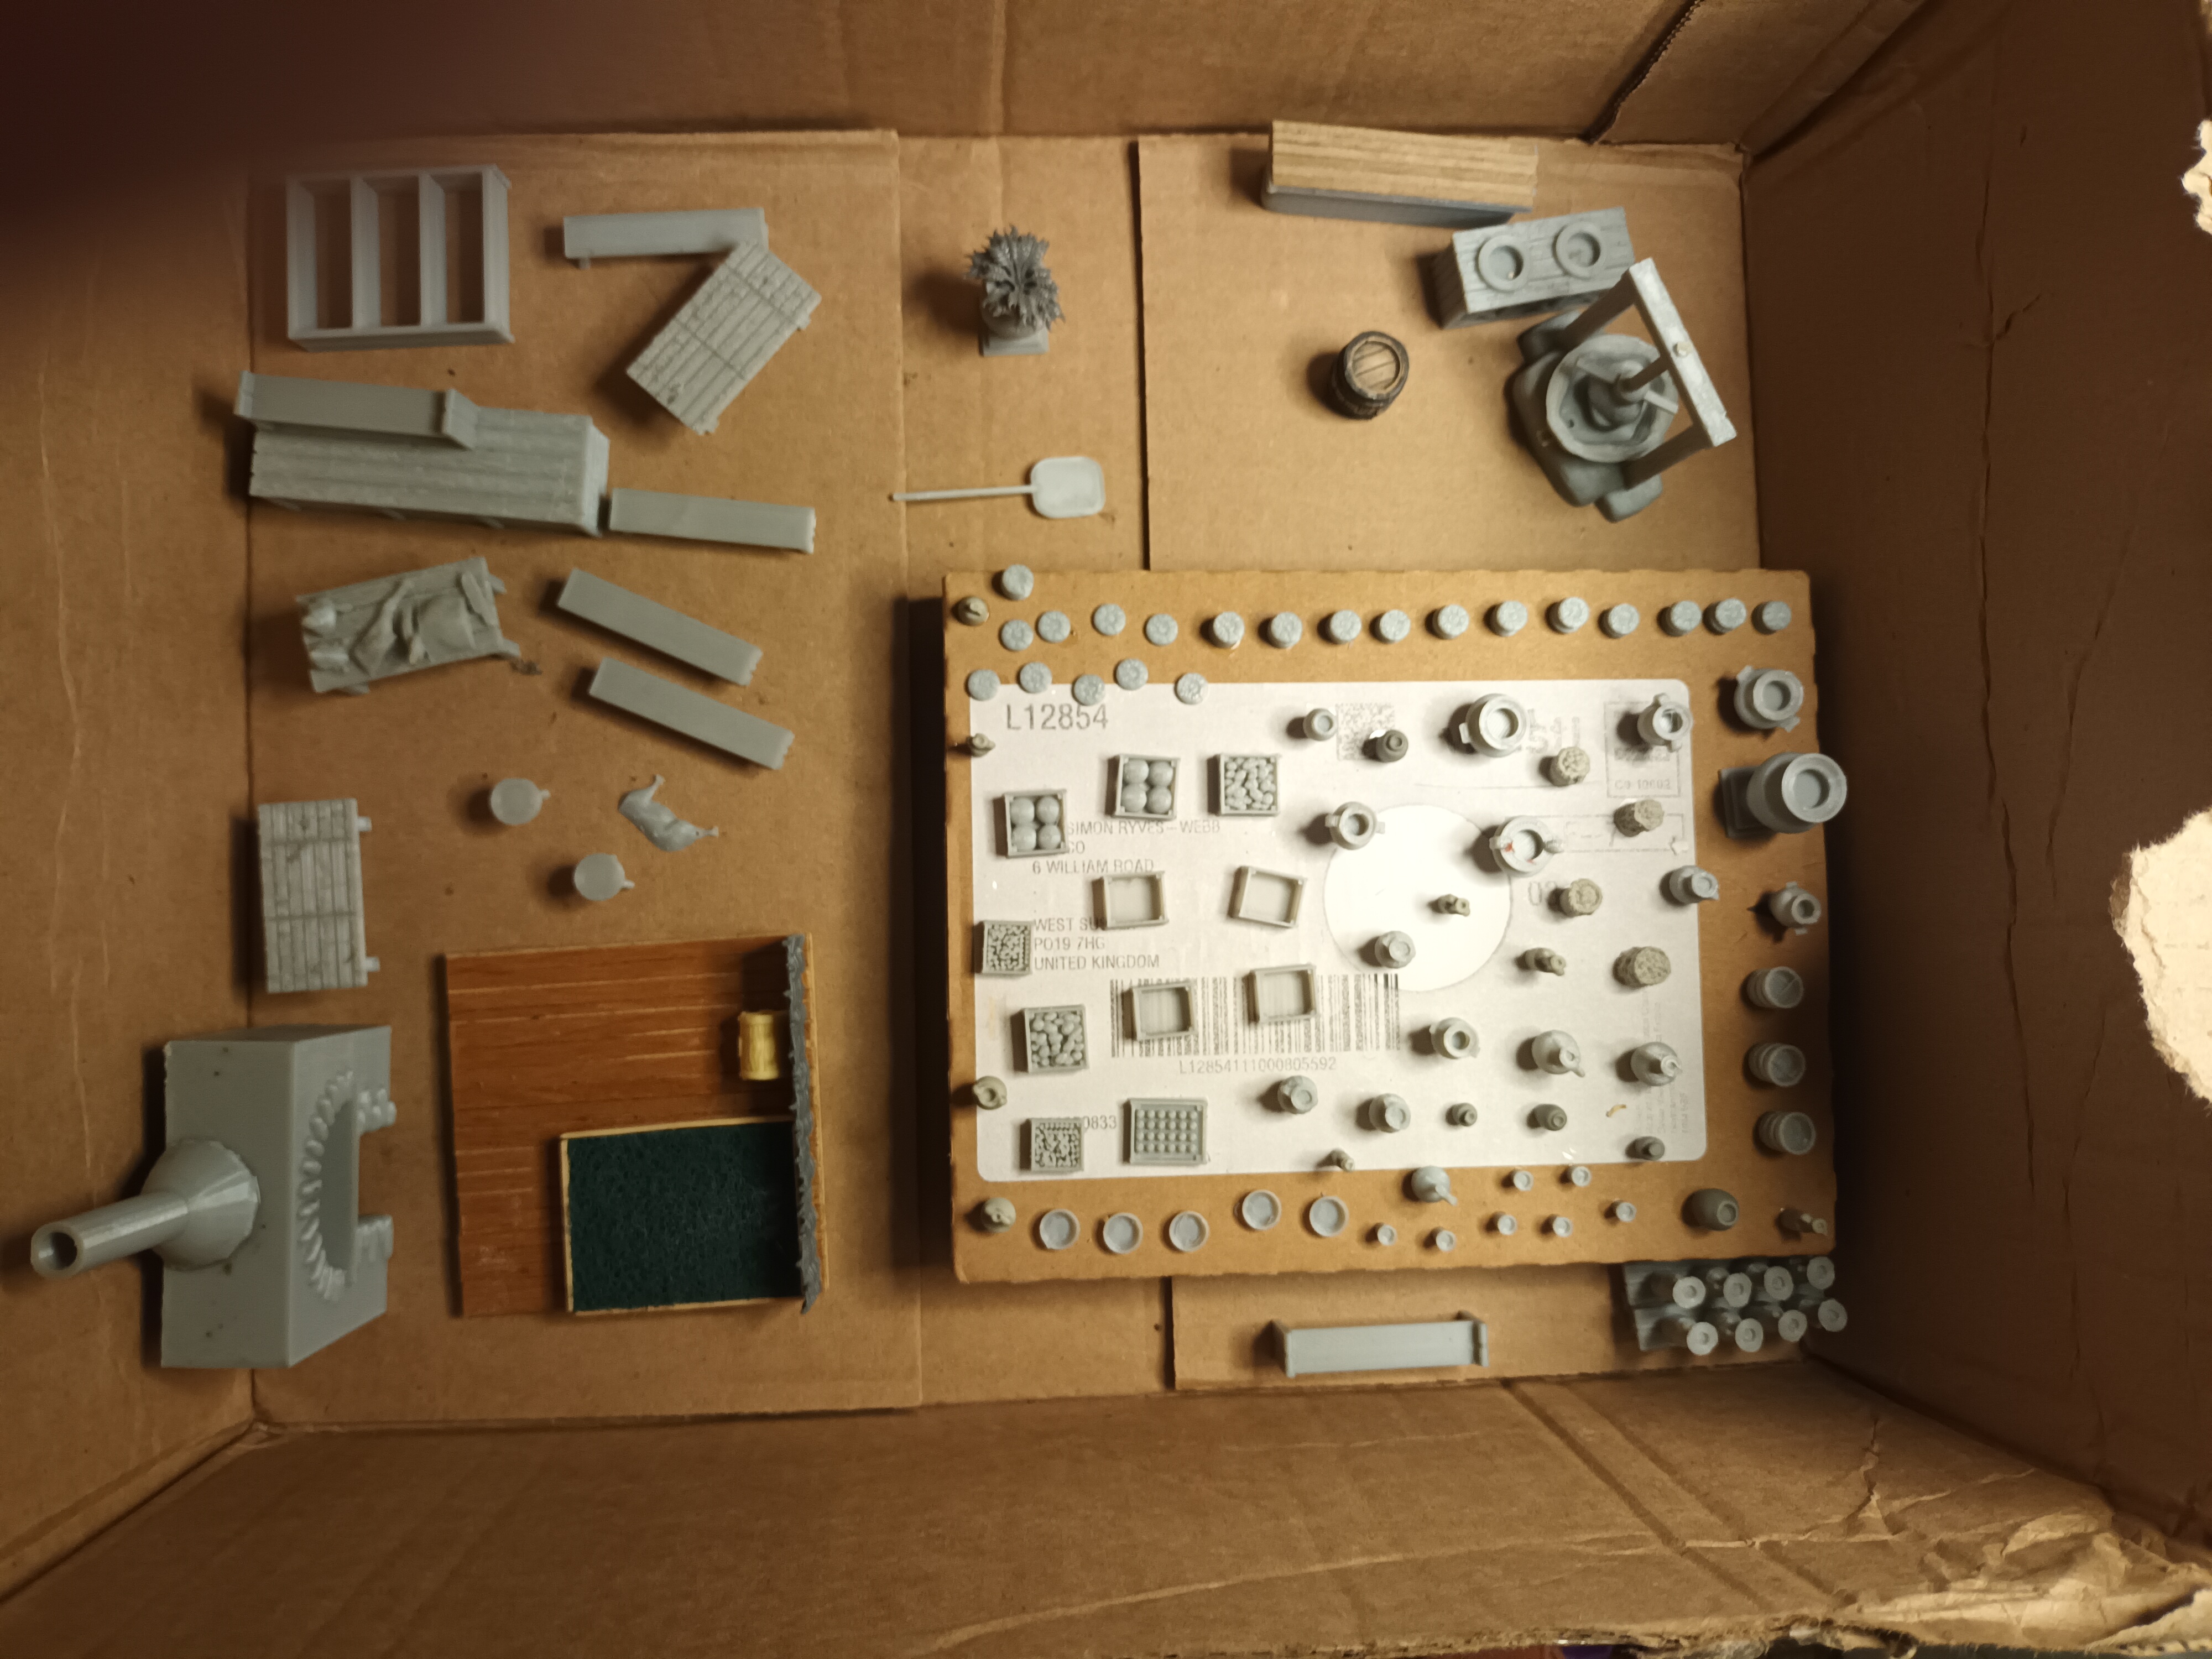 All of the extra pieces ready for undercoat. The small items glued on the box include various urns and bottles, mugs, plates, bread, boxes of produce. There are parts for a wine press, the kitchen, the bar and a few other peices, I still need to add blankets and pillows to the bed and other details in the bedroom.
Will return to this within a couple of weeks, once 40k project finished to this first stage of building a small inquisitor force.
Looking forward to finishing the building as this has been assembled for three years.
Bloody hell, how long is this taking me.
As I stated in this week’s XLBS comments, I have made a resolution to make some proper progress on this project this year.
Looking back at this project, it has been going on for over two years now and I have not made a lot of progress, I keep getting distracted by new shiny, NOT THIS YEAR I SAY (haha, who am I kidding) but seriously I have alot of stuff still to paint and many half finished scenery projects and with money being tighter I have resolved to focus on this for the majority of this year.
I have already painted 17 figures this year many of which have been base coated and had a wash ( only requiring highlighting) for almost two years shame on me. But they are done now.
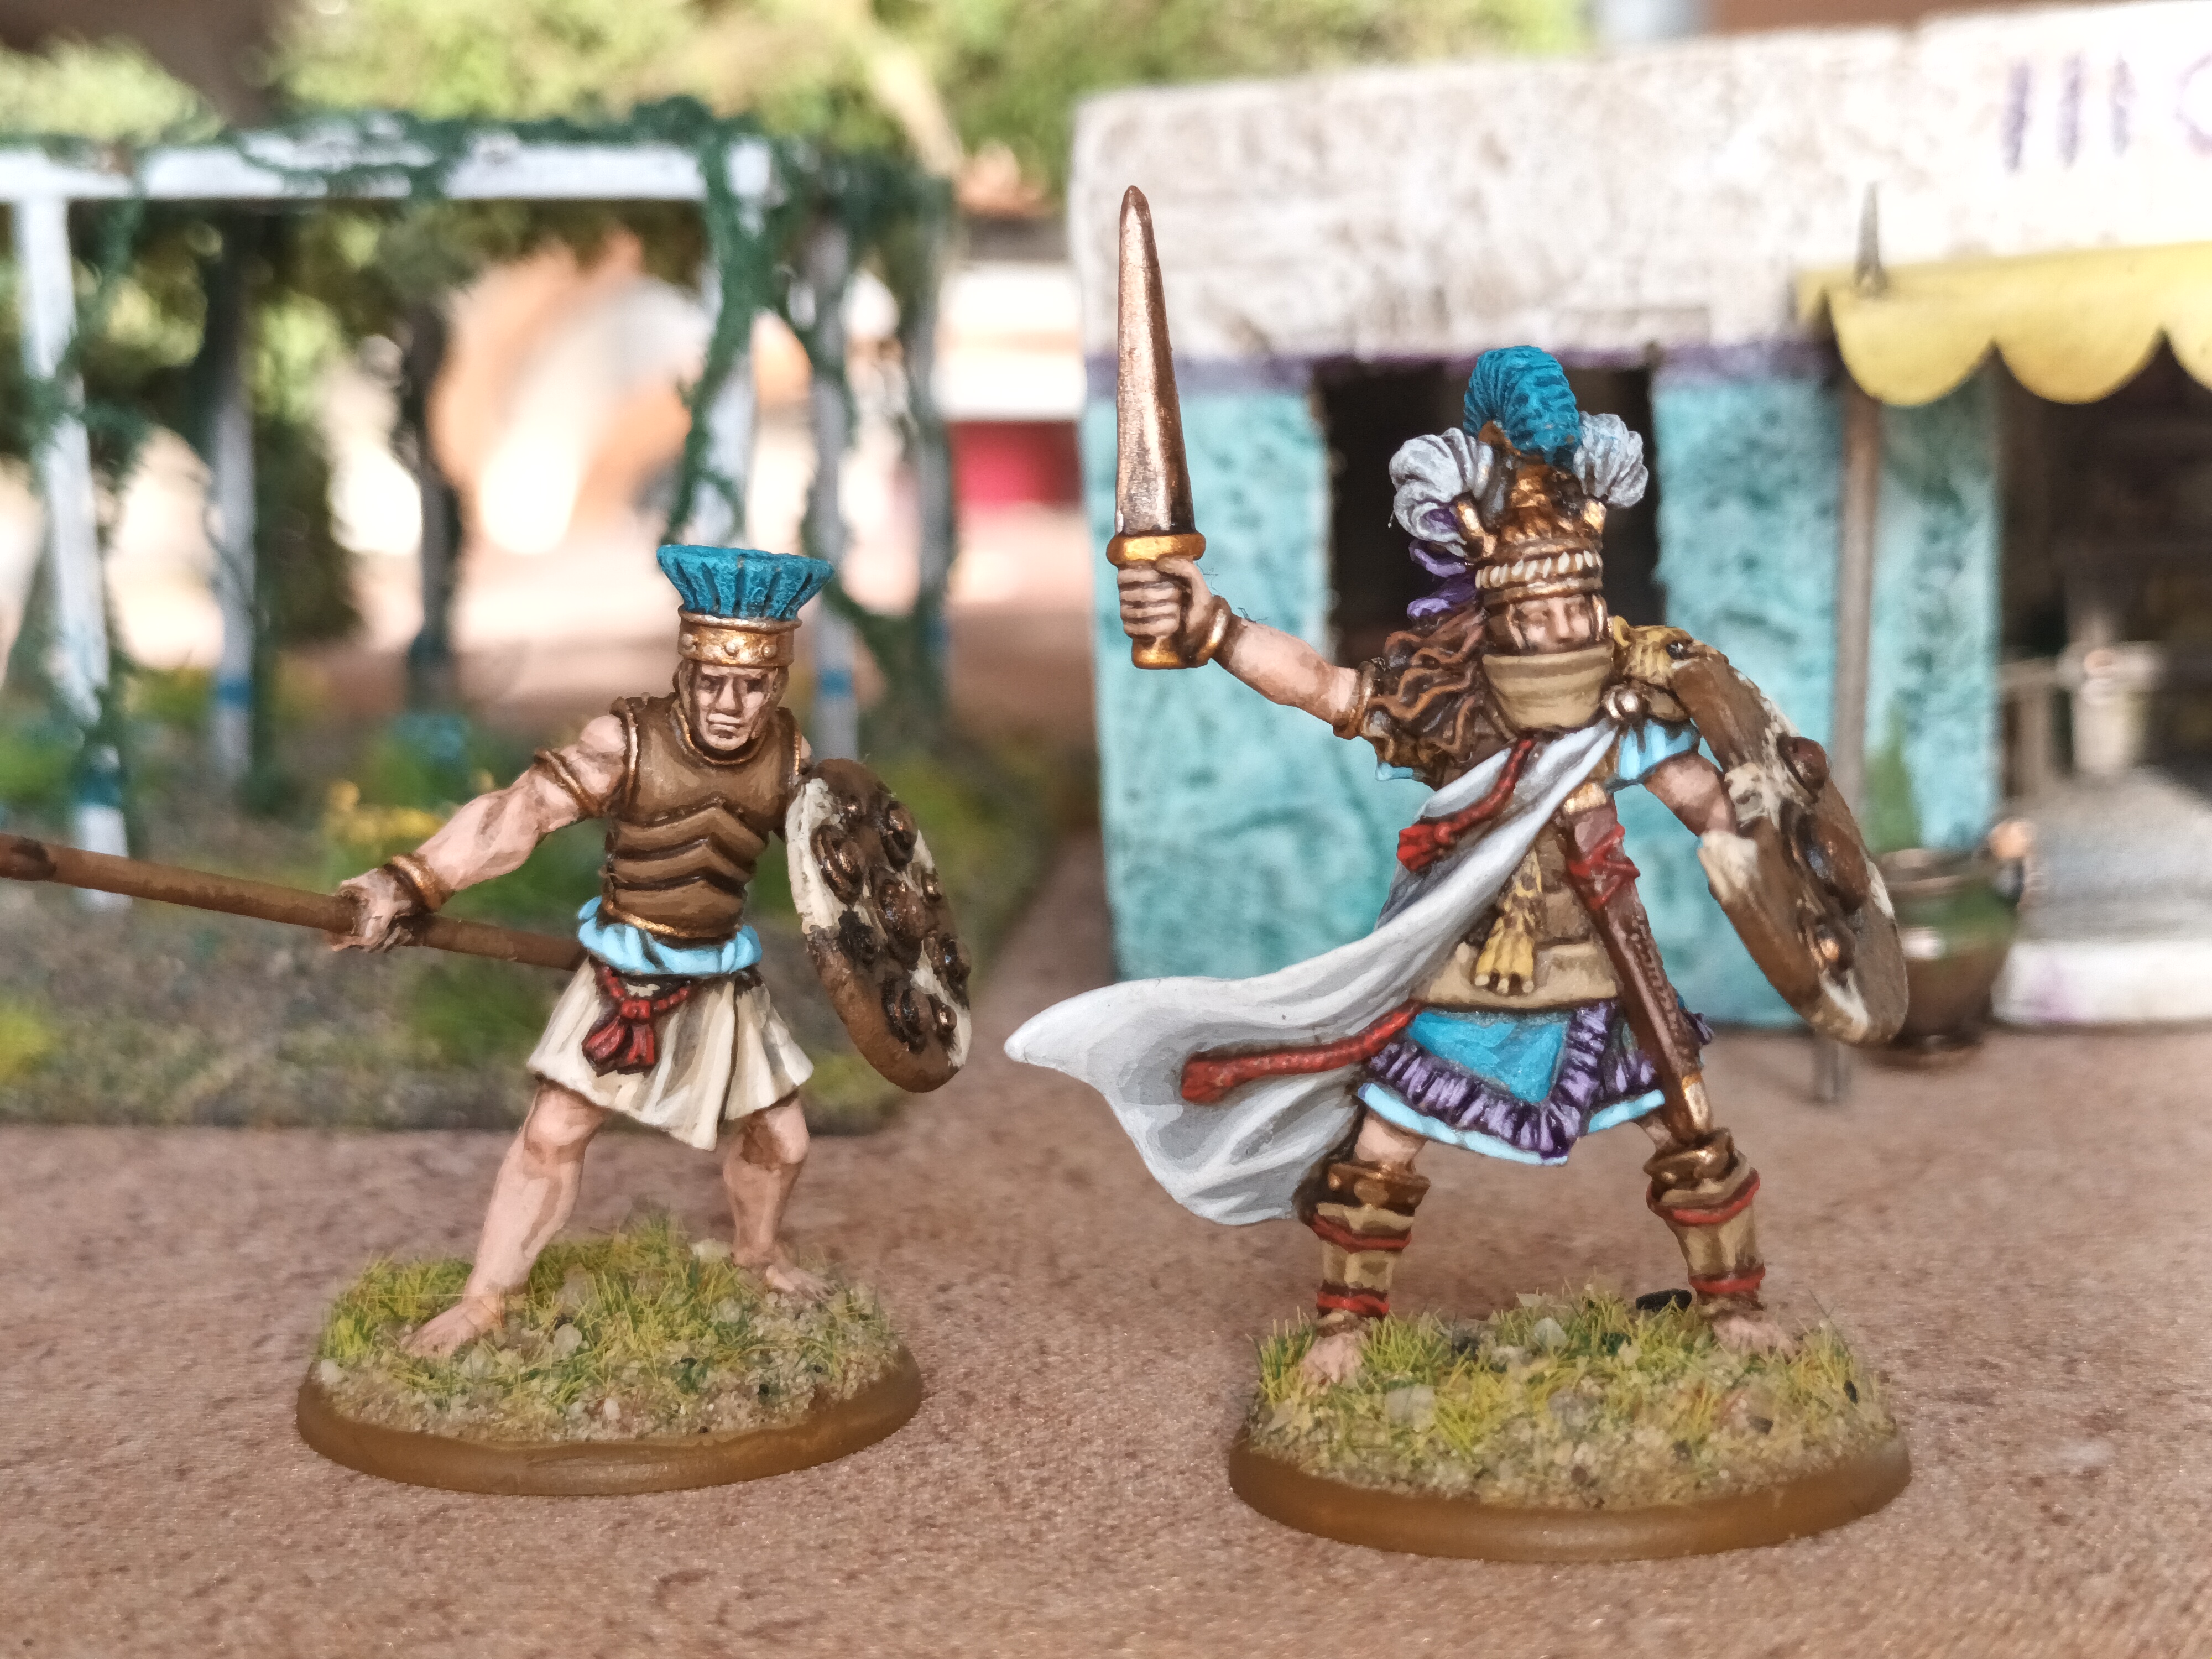 These are Lucid Eye miniatures from their Ziggurat range, a great resource for Runequest miniatures, and are two characters that I use in my games as a player, sorry Gerry.
 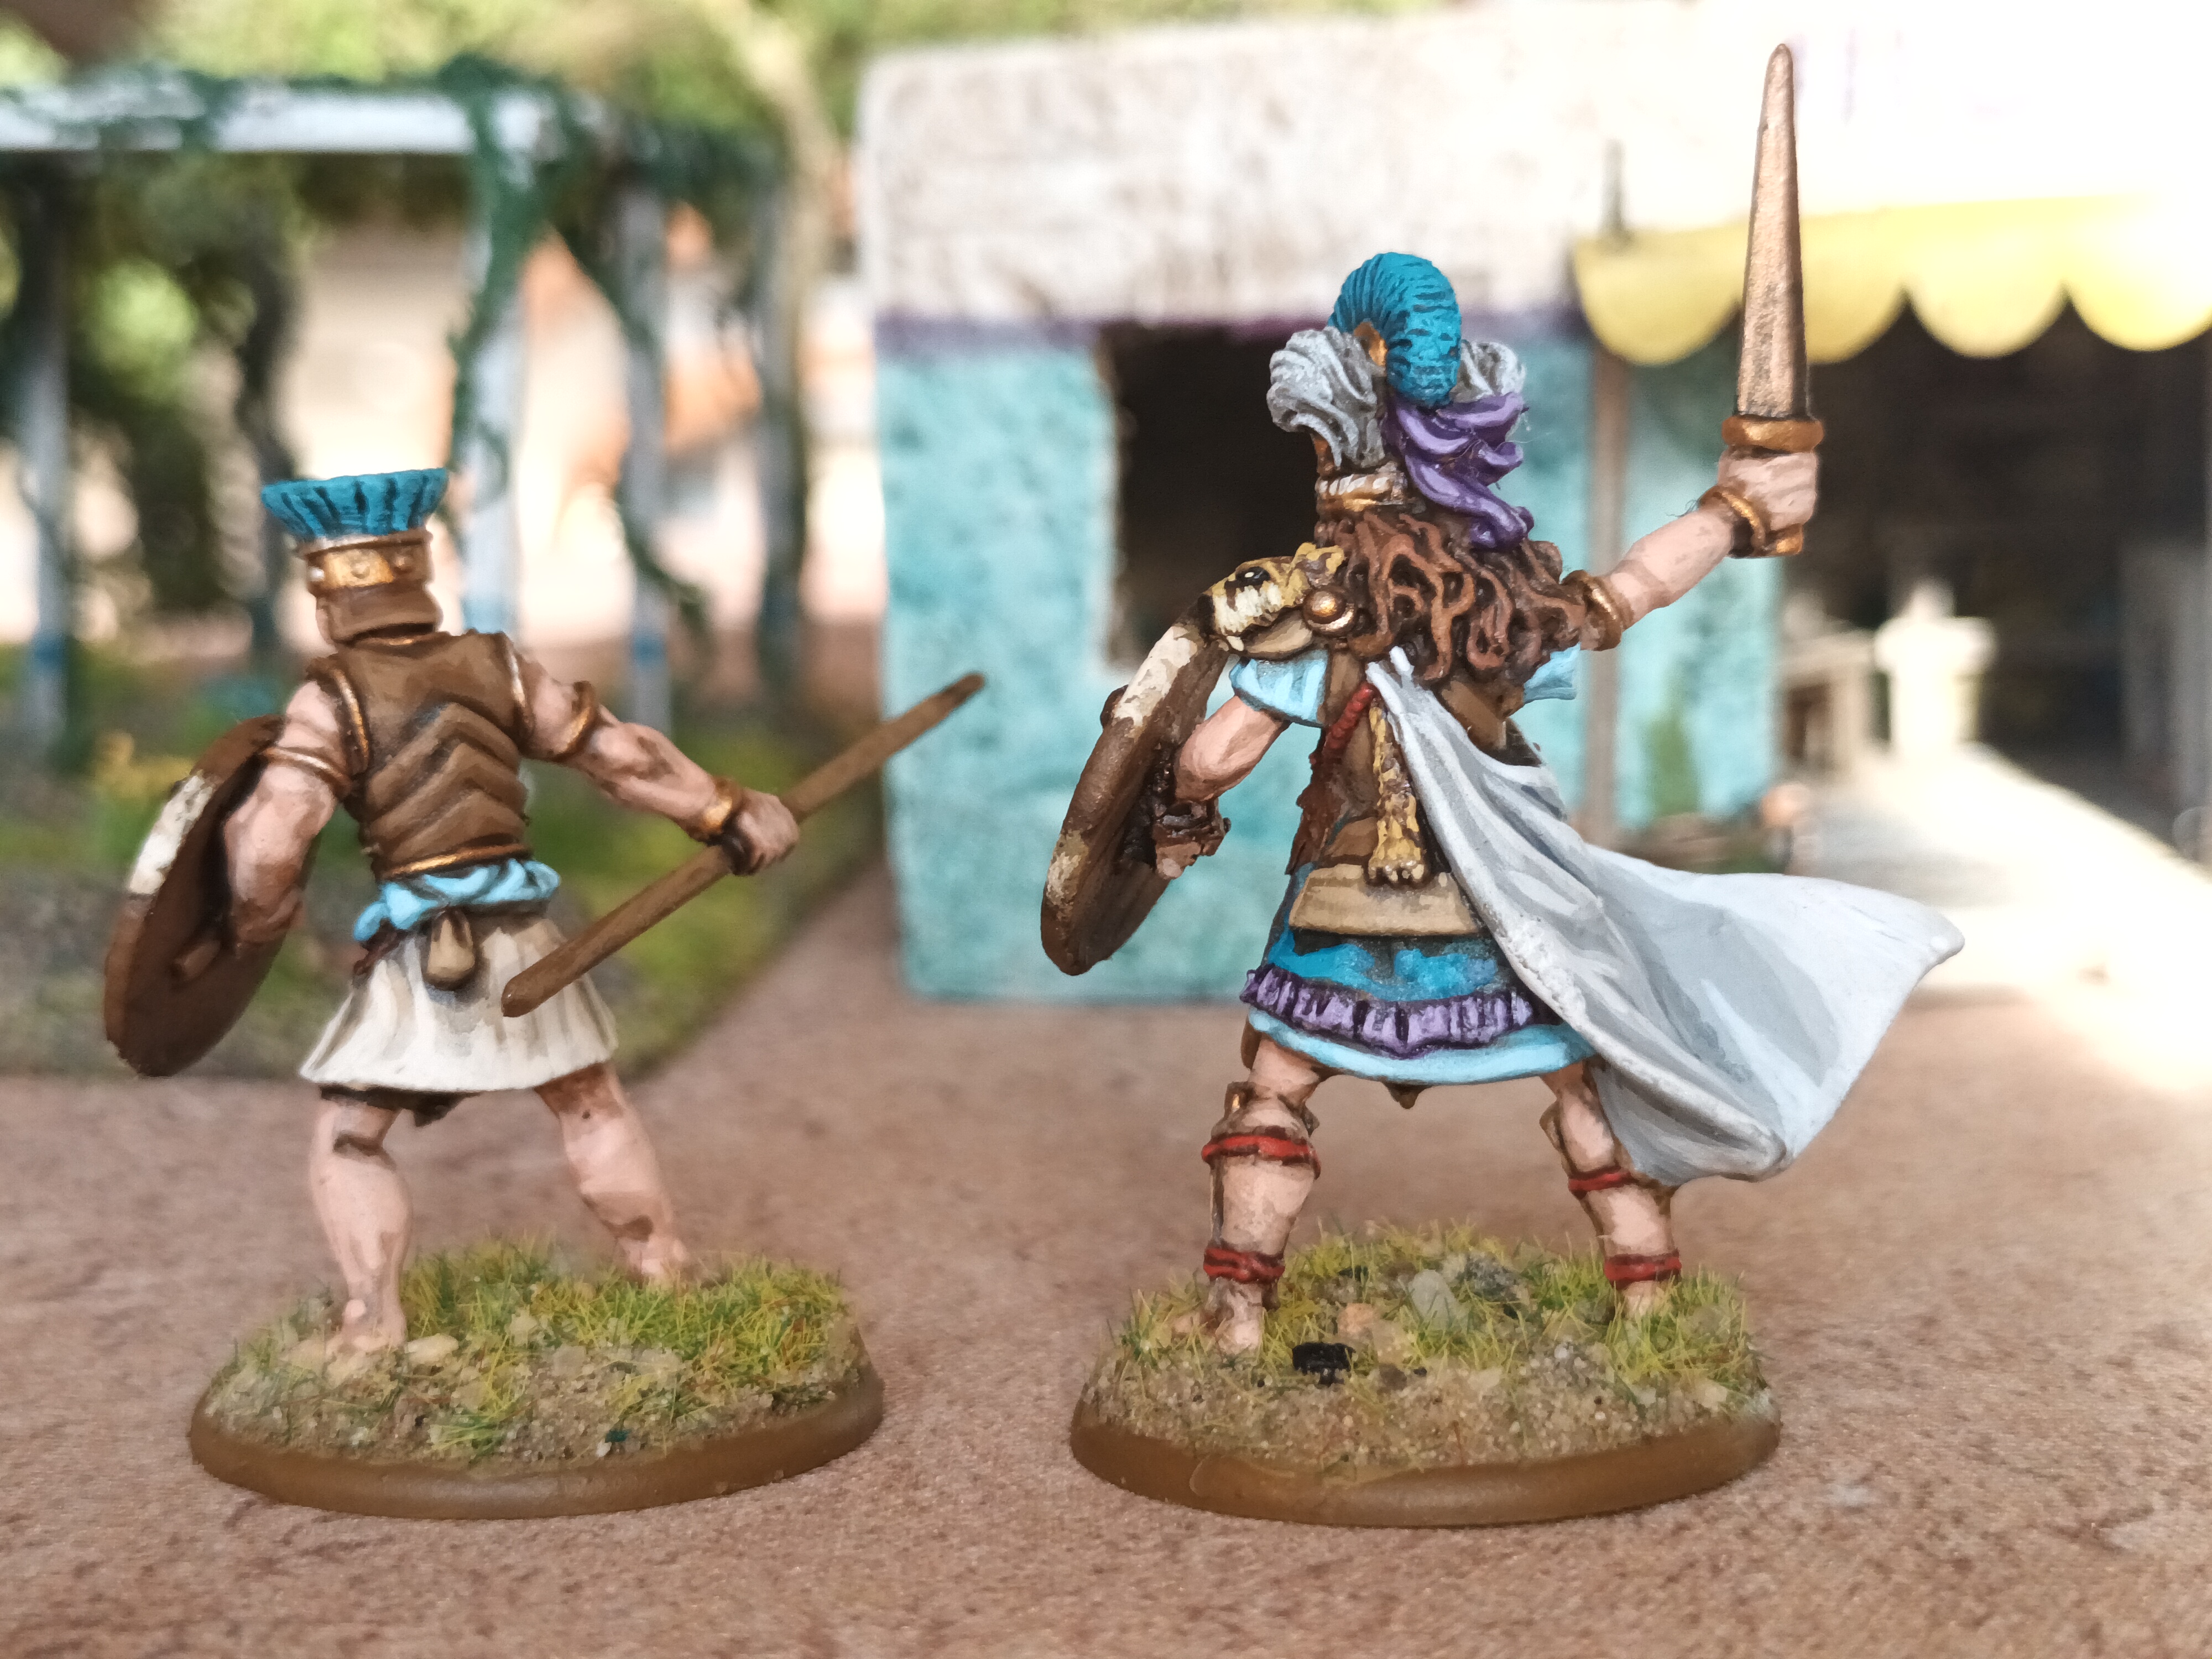 The obligatory Lloyd shot
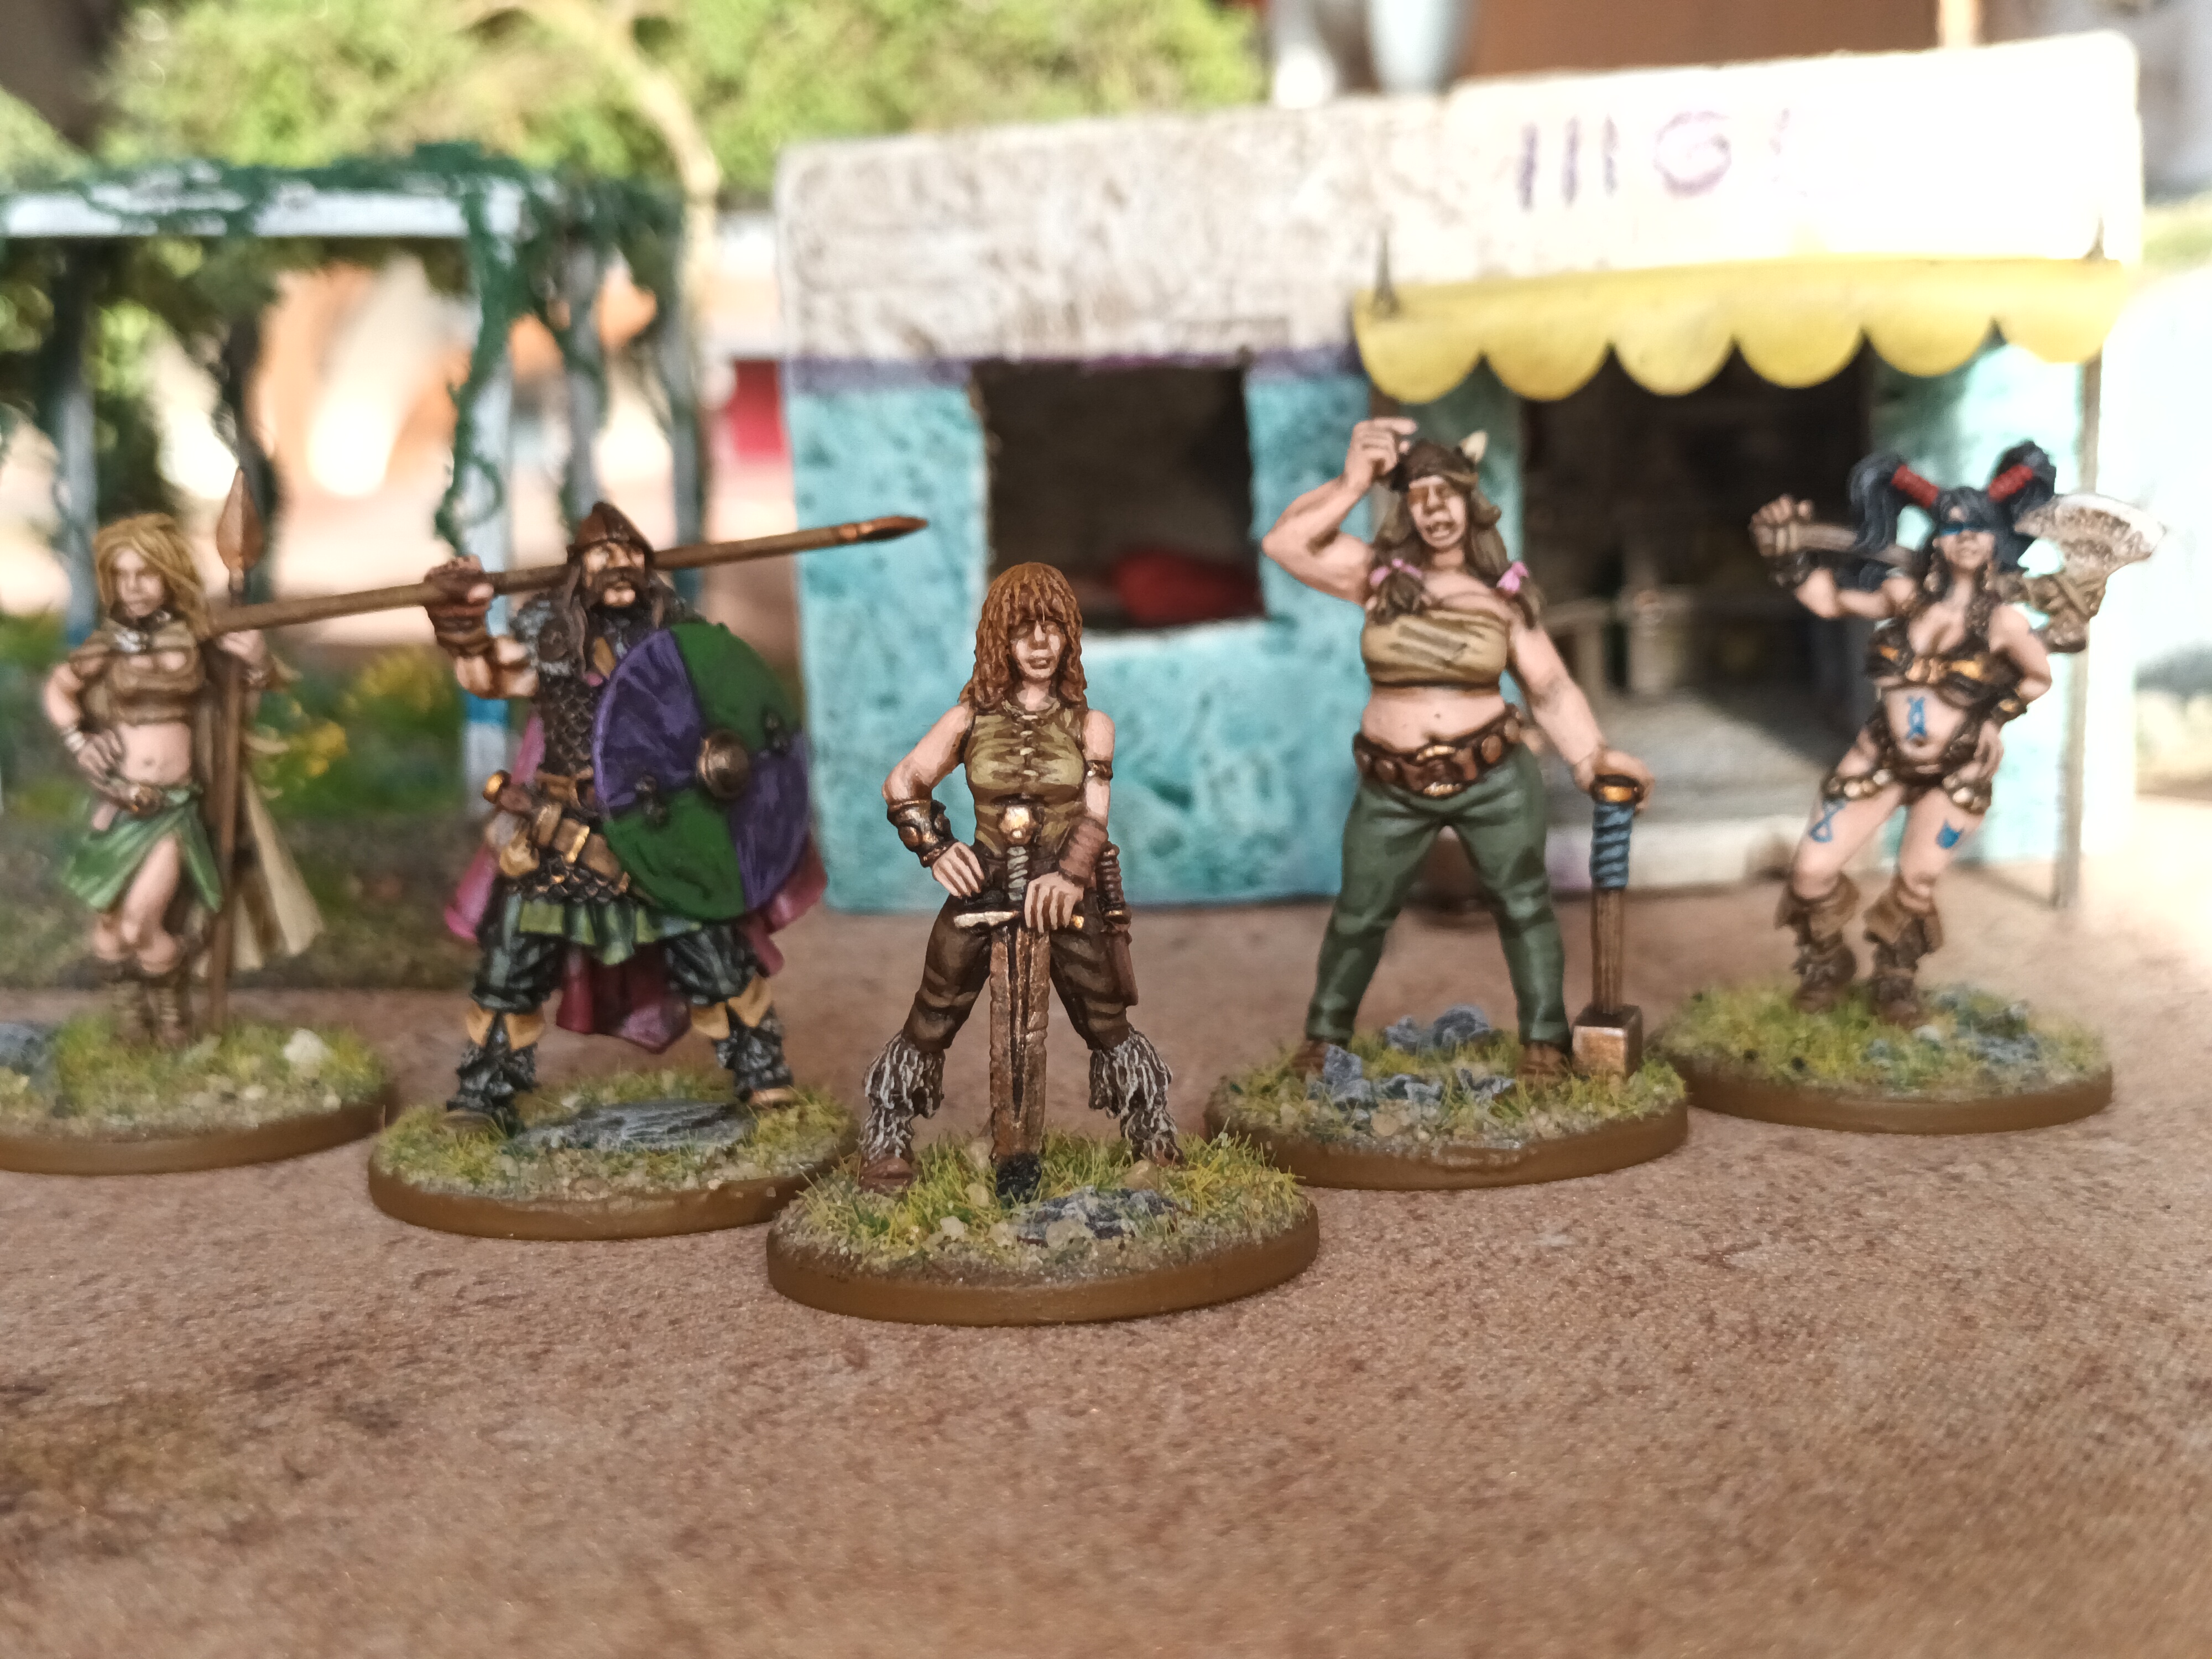 I think these models featured in my second post on this project over two years ago. All inspired by the fantastic Oliver Dickinson Griselda stories. In the centre is Griselda, to her left is Wolfhead and to her right is Hanufa, the armoured bikini axe girl represents a Stormbull Cult member and the other girl is a random unprepared adventuress.
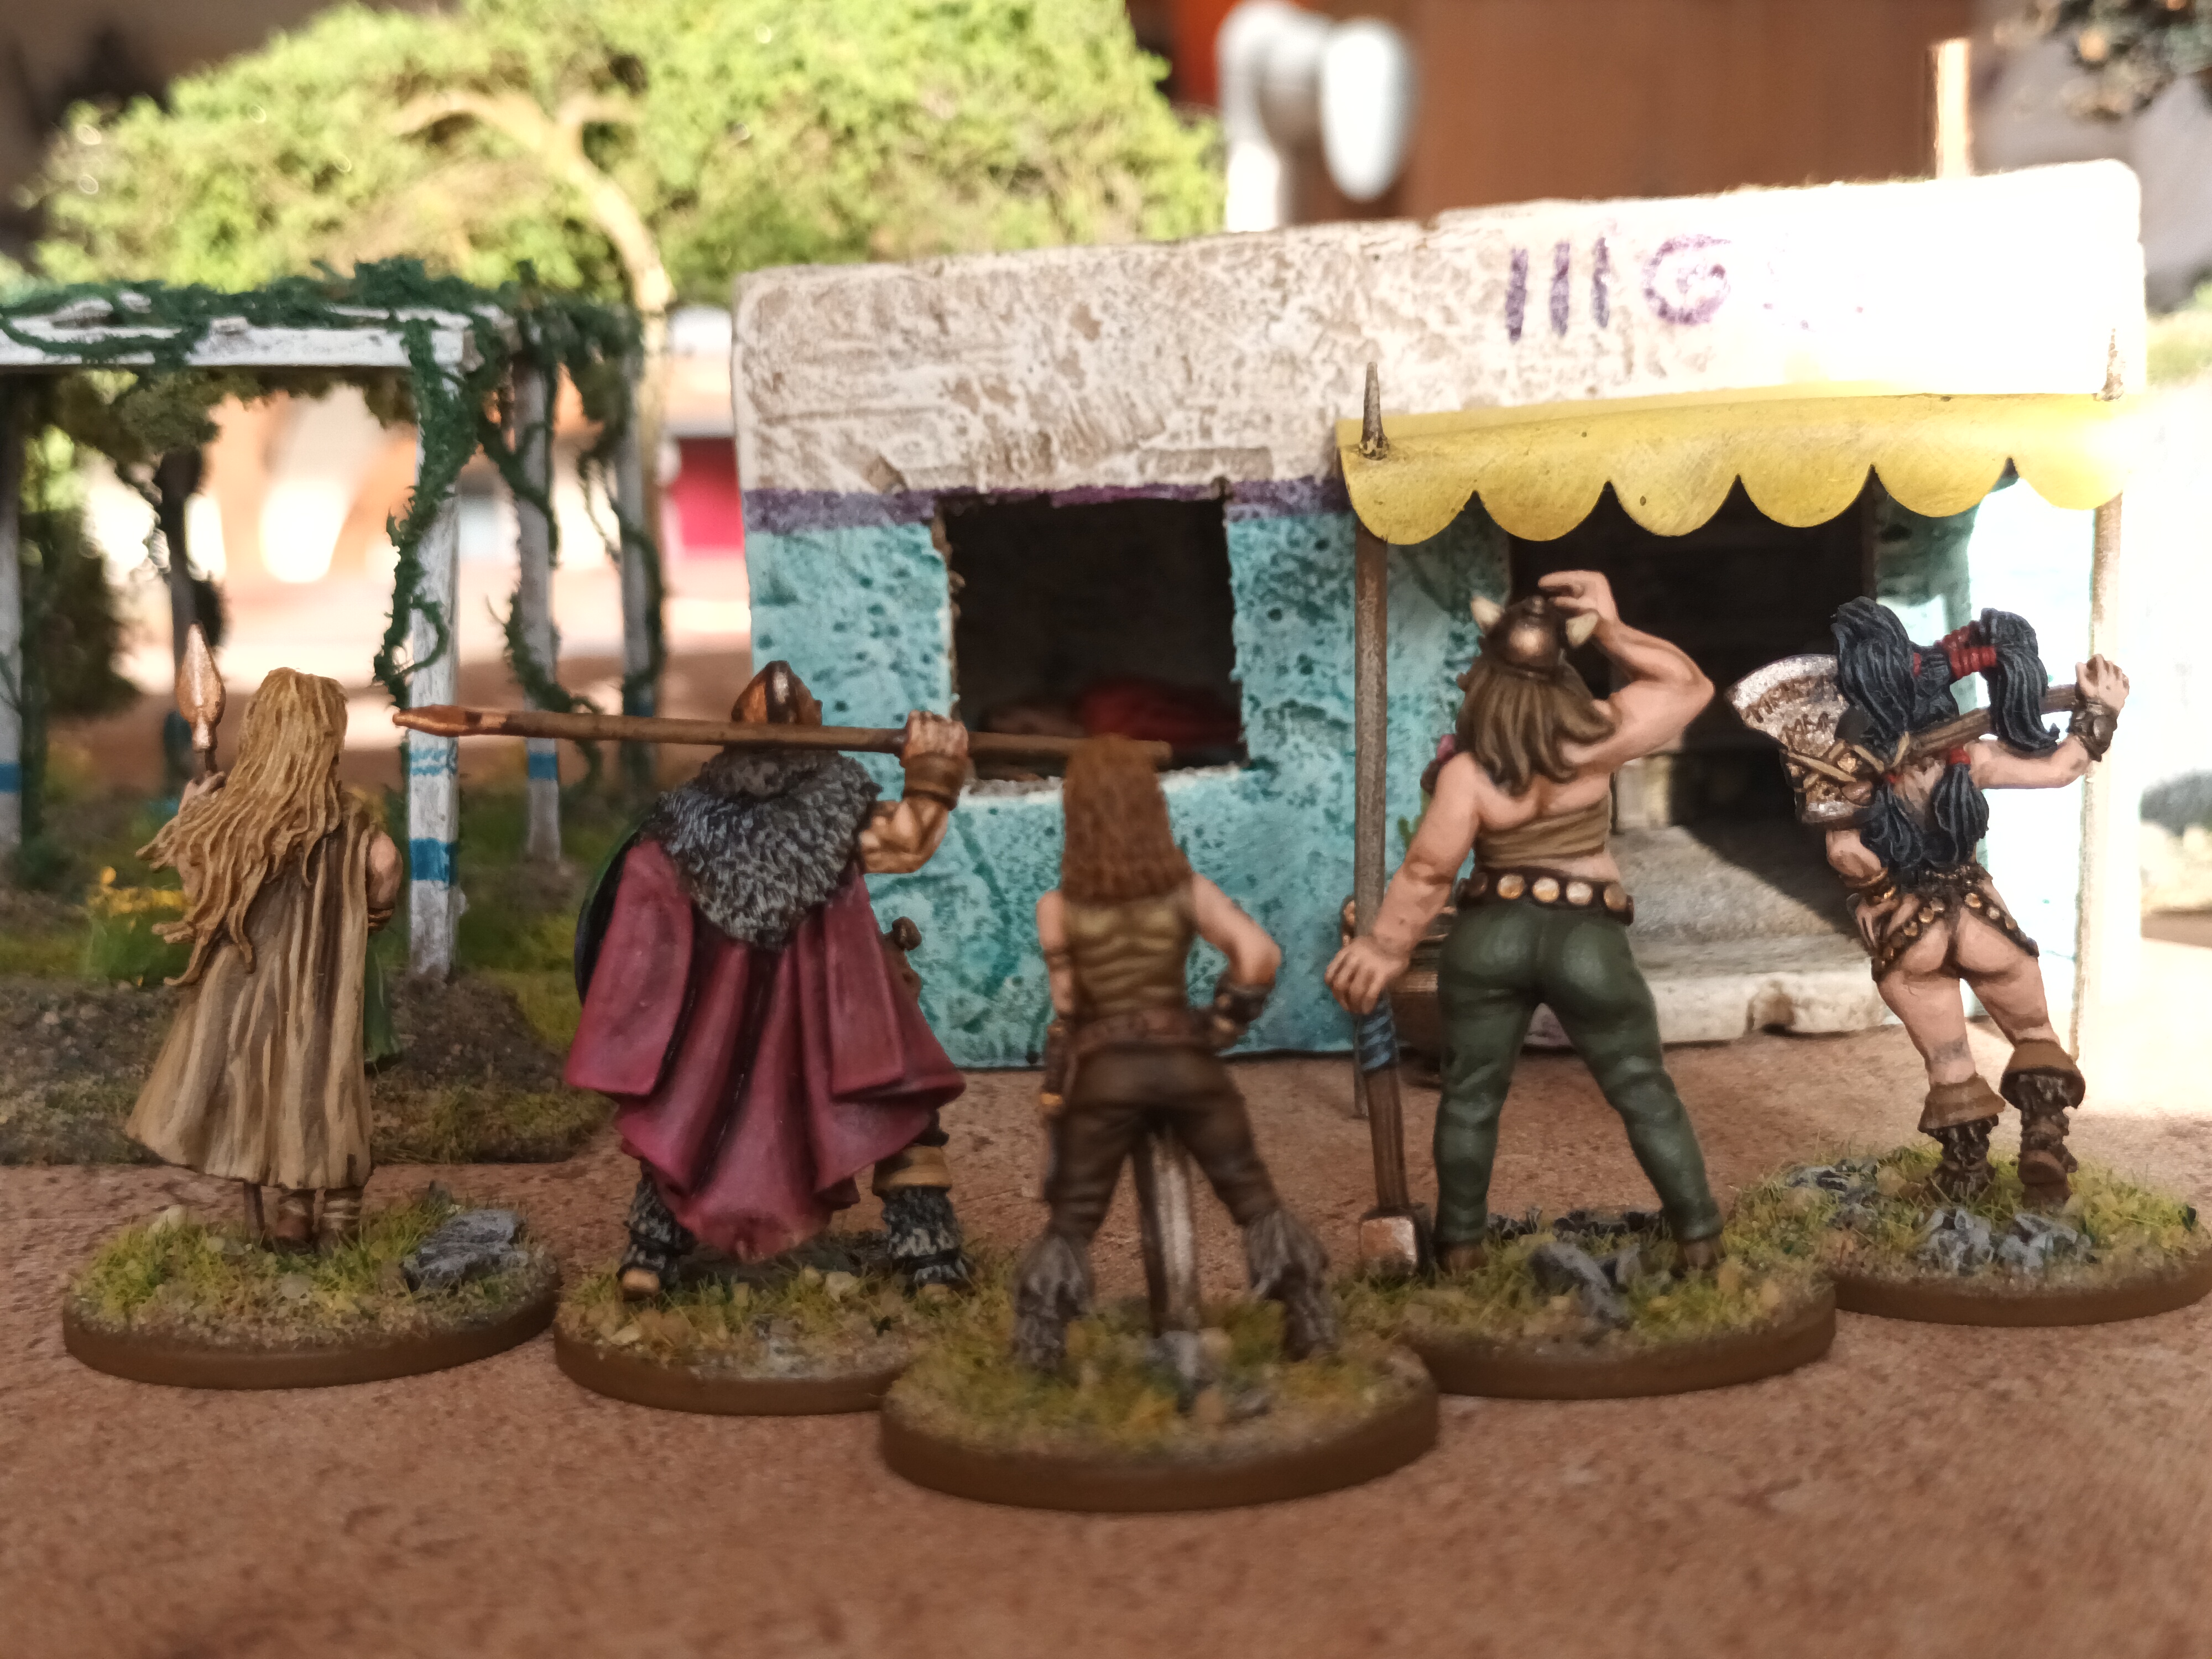 Some bottoms. All these figures are from Hasslefree miniatures.
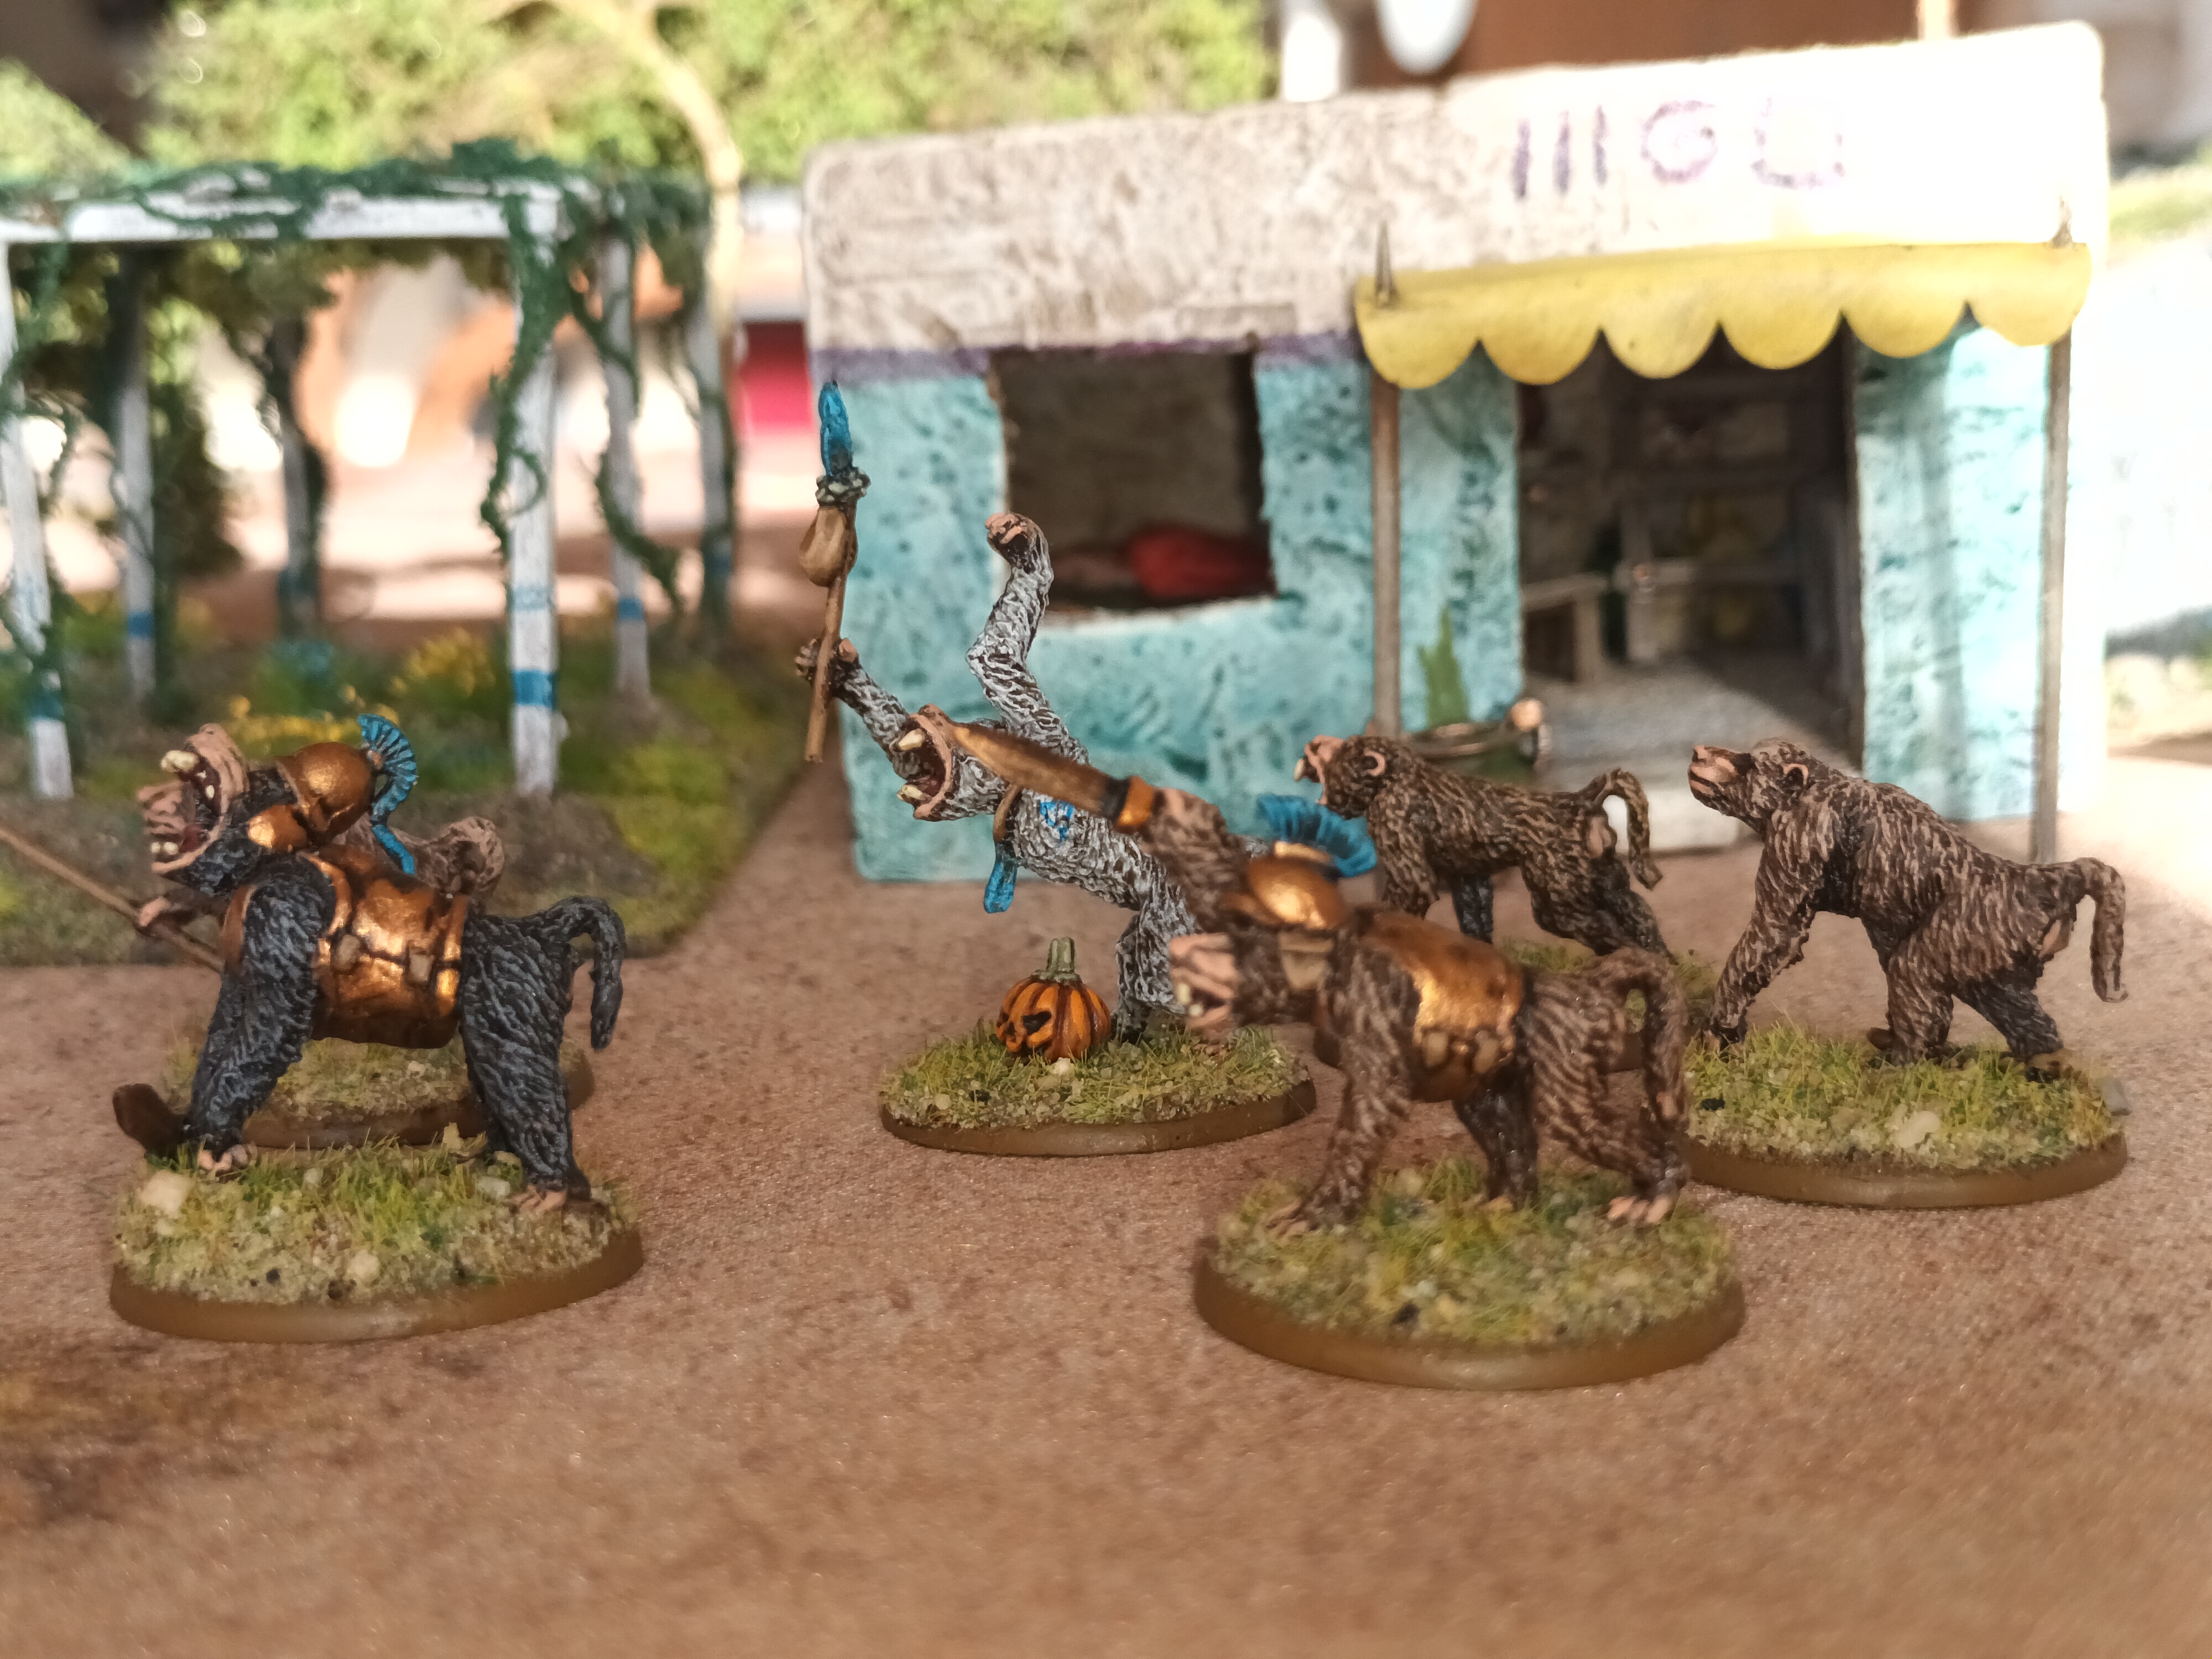 Some Obilisk Baboons (Sadly now unavailable), to which I have added some armour and weapons. The helmets and swords are Victrix plastic, and the breastplates are greenstuff.
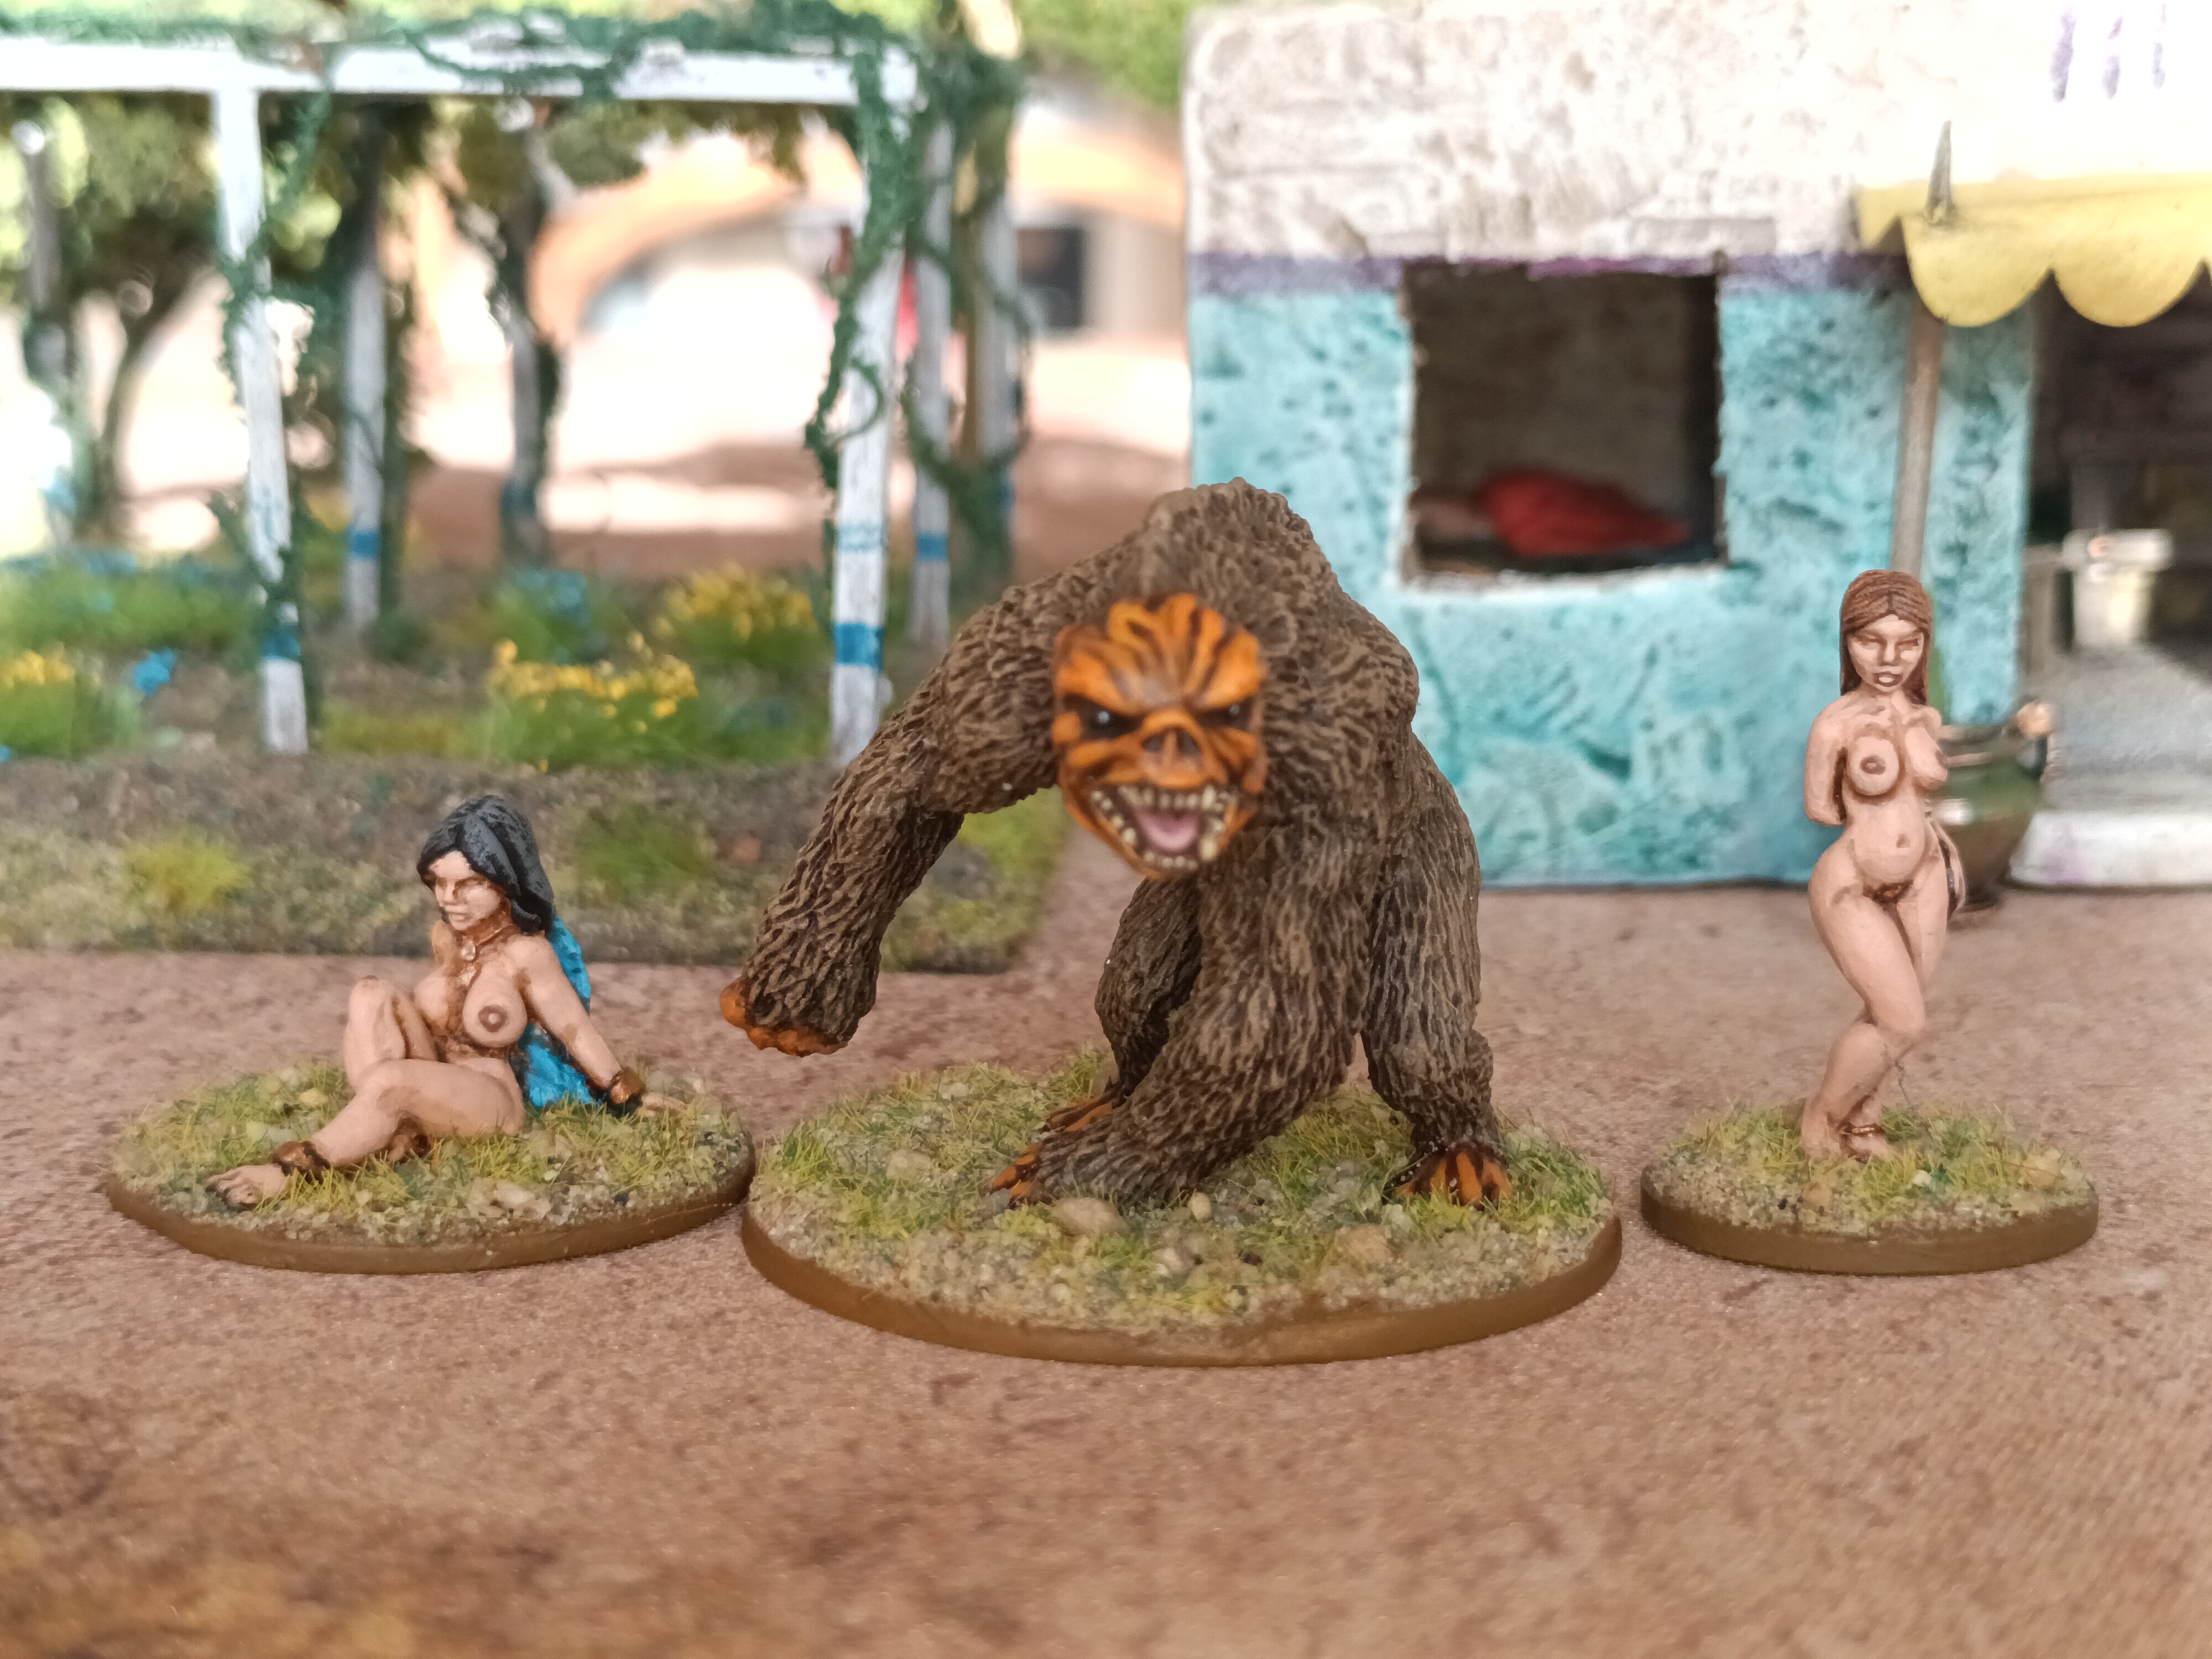 A couple of random Hasslefree ladies, and a Fenris Jack'o'' Bear
I am currently painting another 15 figures, which I hope to finish this week. Then I hope to complete a couple of bits of scenery that have been half finished for years!!!
Upgrading the Accomadation
The building started as a plain Adobe building made from blue foam textured with a rolled up ball of kitchen foil and painted in a boring beige/ white all over.
I wanted to give it some personality and to tell a bit of a story.
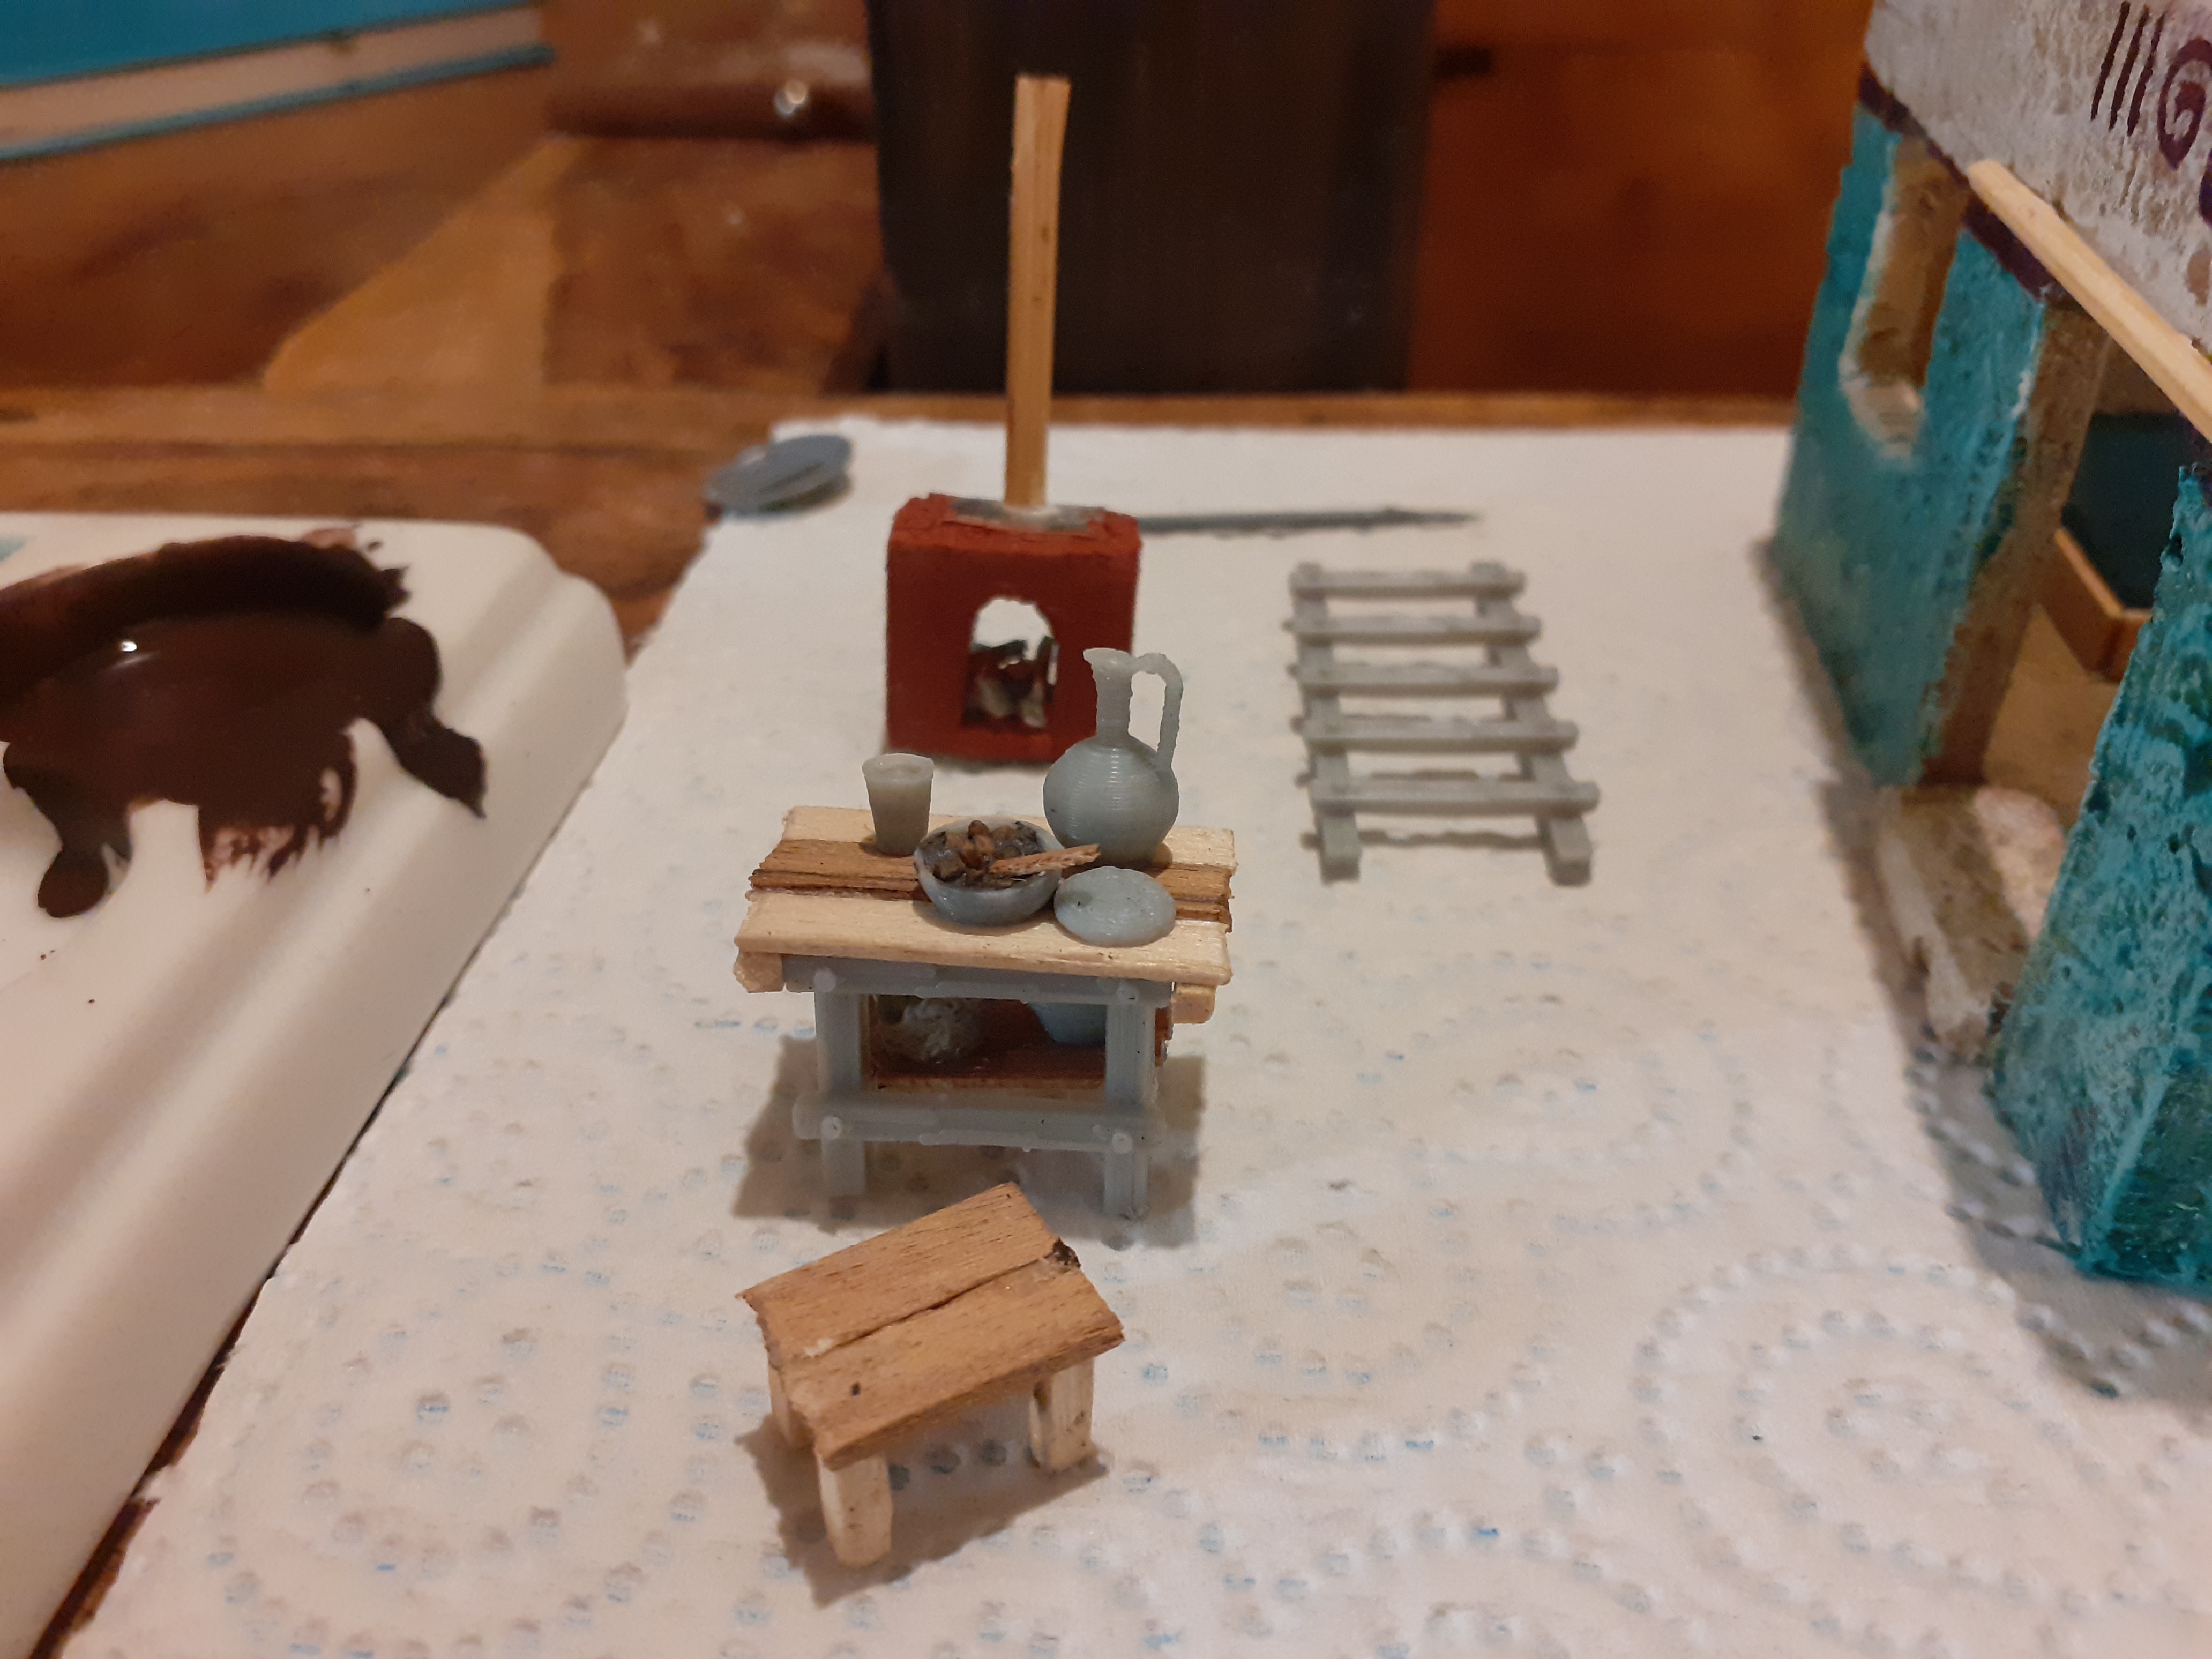 I built a stove from blue foam, with a bamboo skewer chimney, the hot plate is a peice of lead foil (tomato puree tube) . The logs are cut and carved peices of sprue. The benches are made from peices of sprue. The table and stool are made from scraps of wood. The ladder and front of table and bowls, jug etc. are from Iron Gate Scenery, I added a spoon from a slither of wood, in a stew made from GW texture paste with a few cork granules sprinkled on top.
 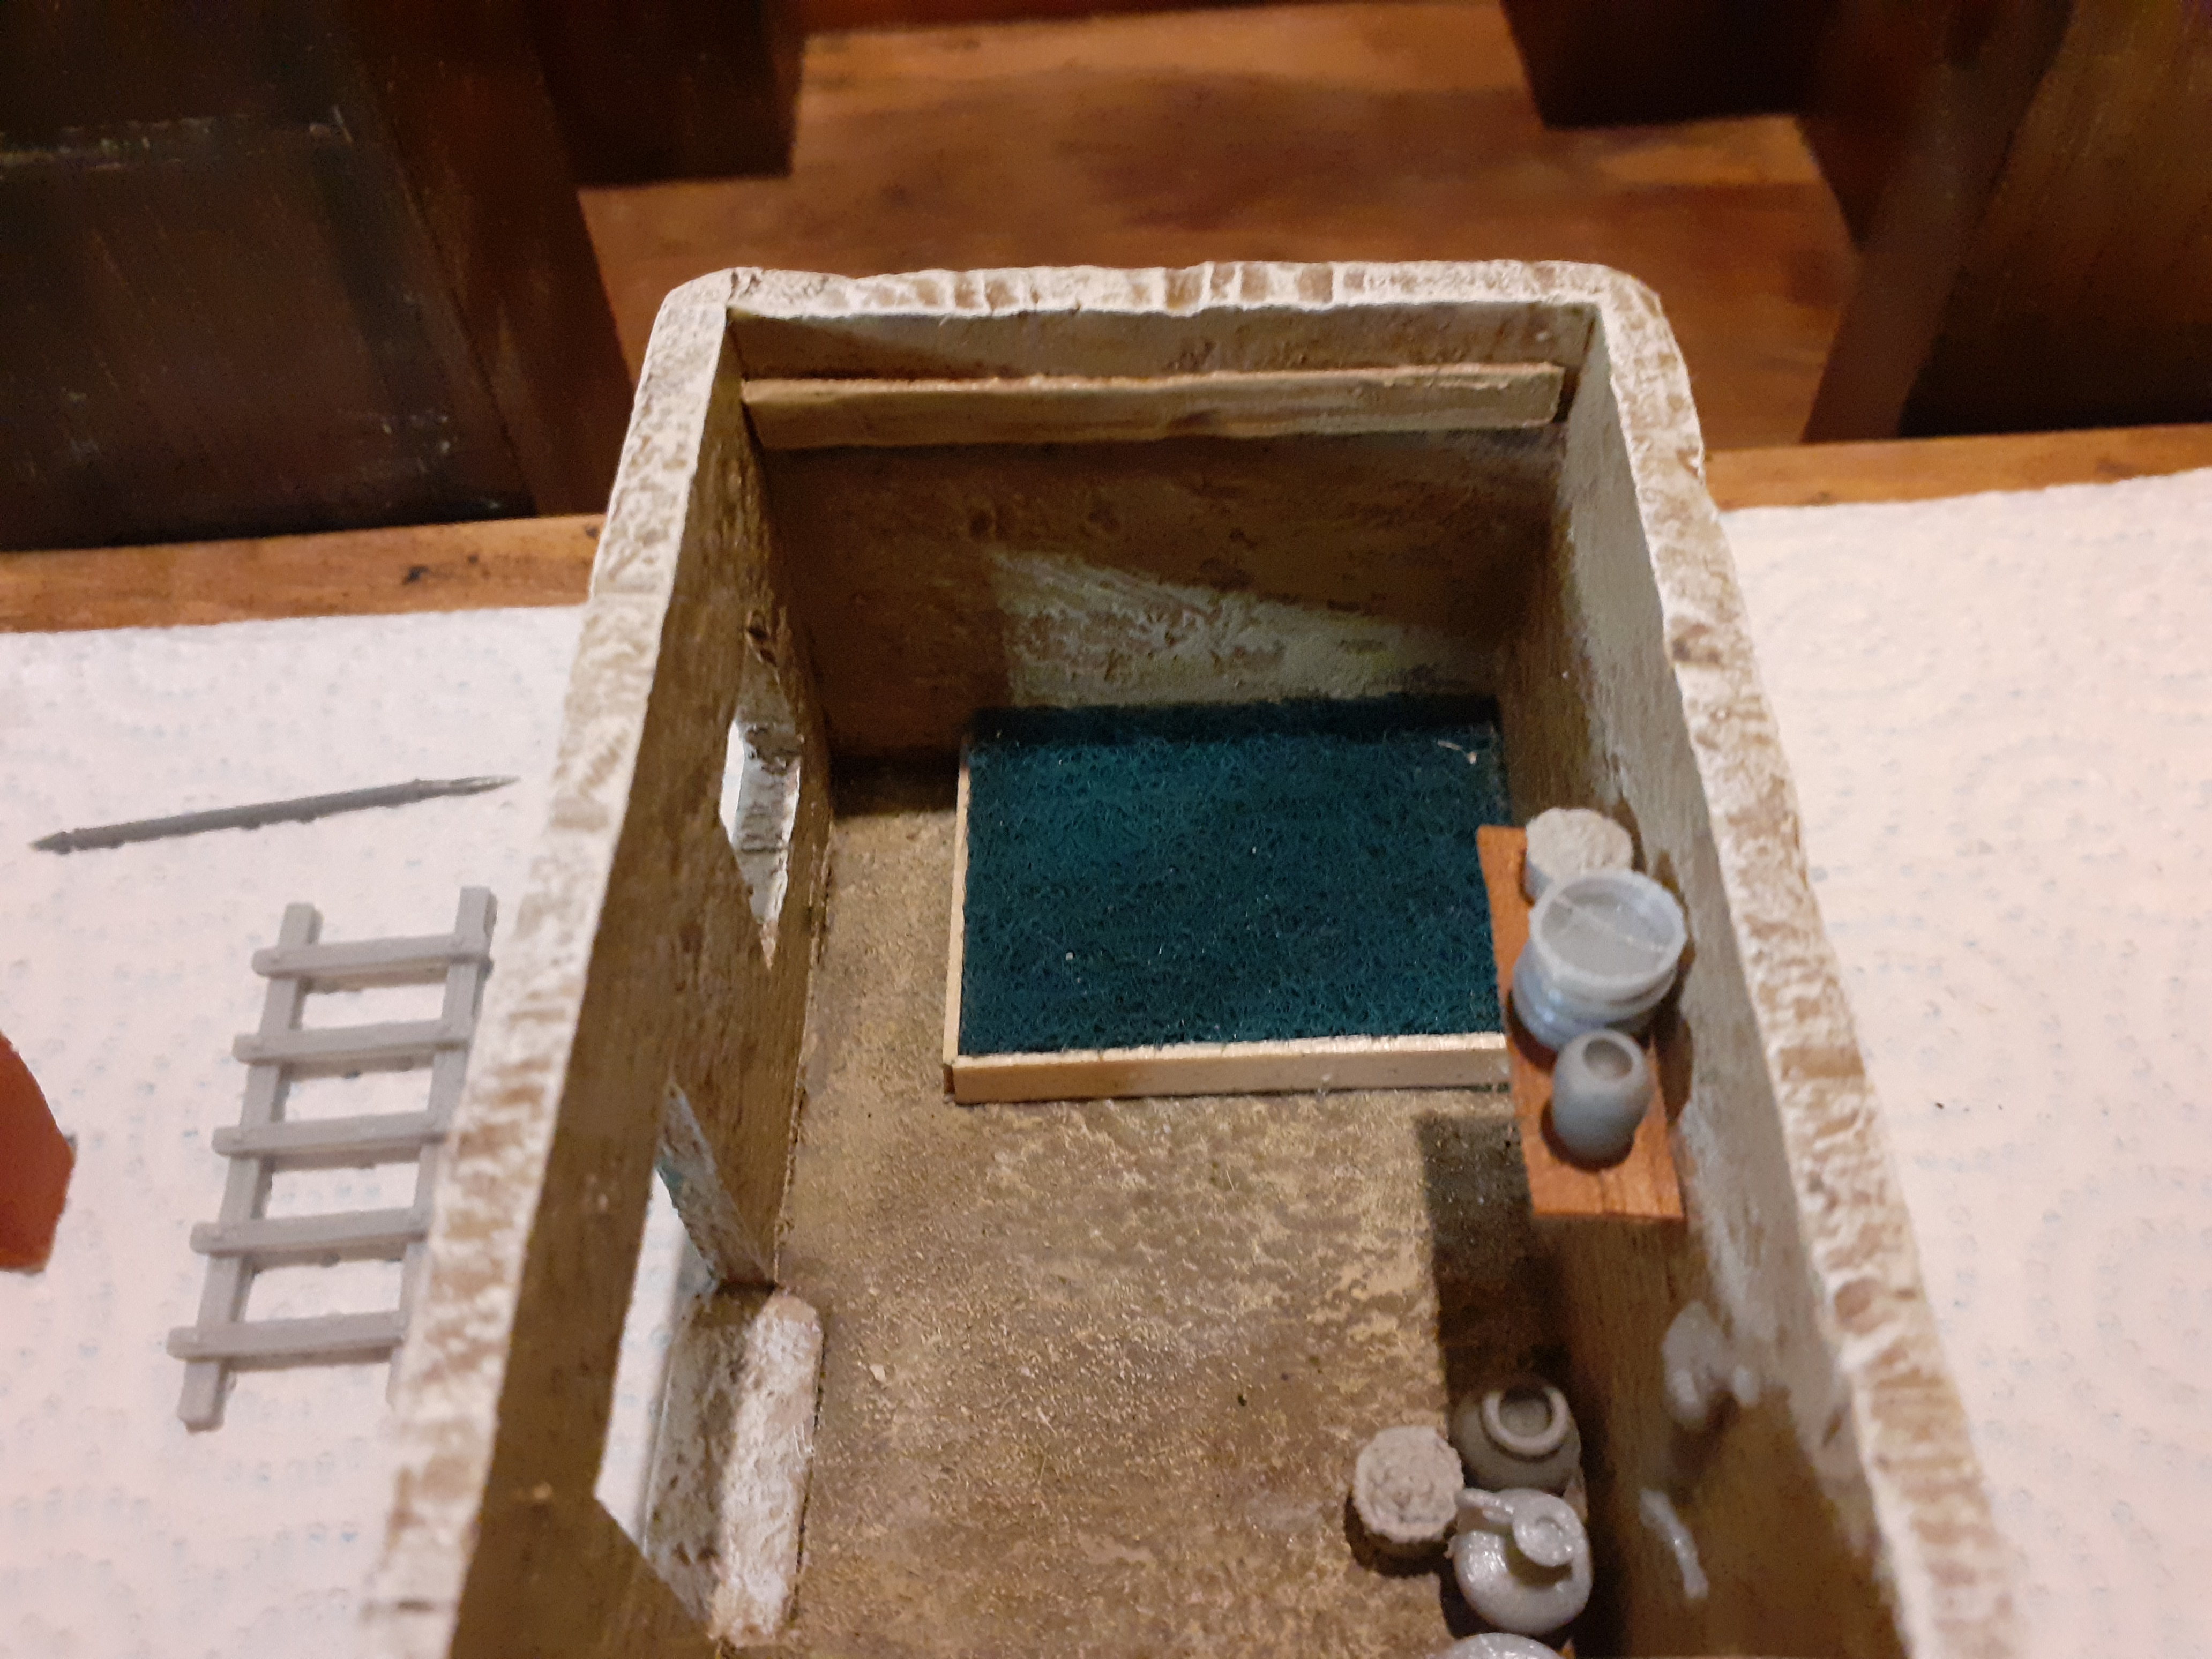 The bed is made from a couple of lollipop sticks with a Brillopad mattress. The shelfs are made from scrap wood with more Iron Gate Scenery accessories.
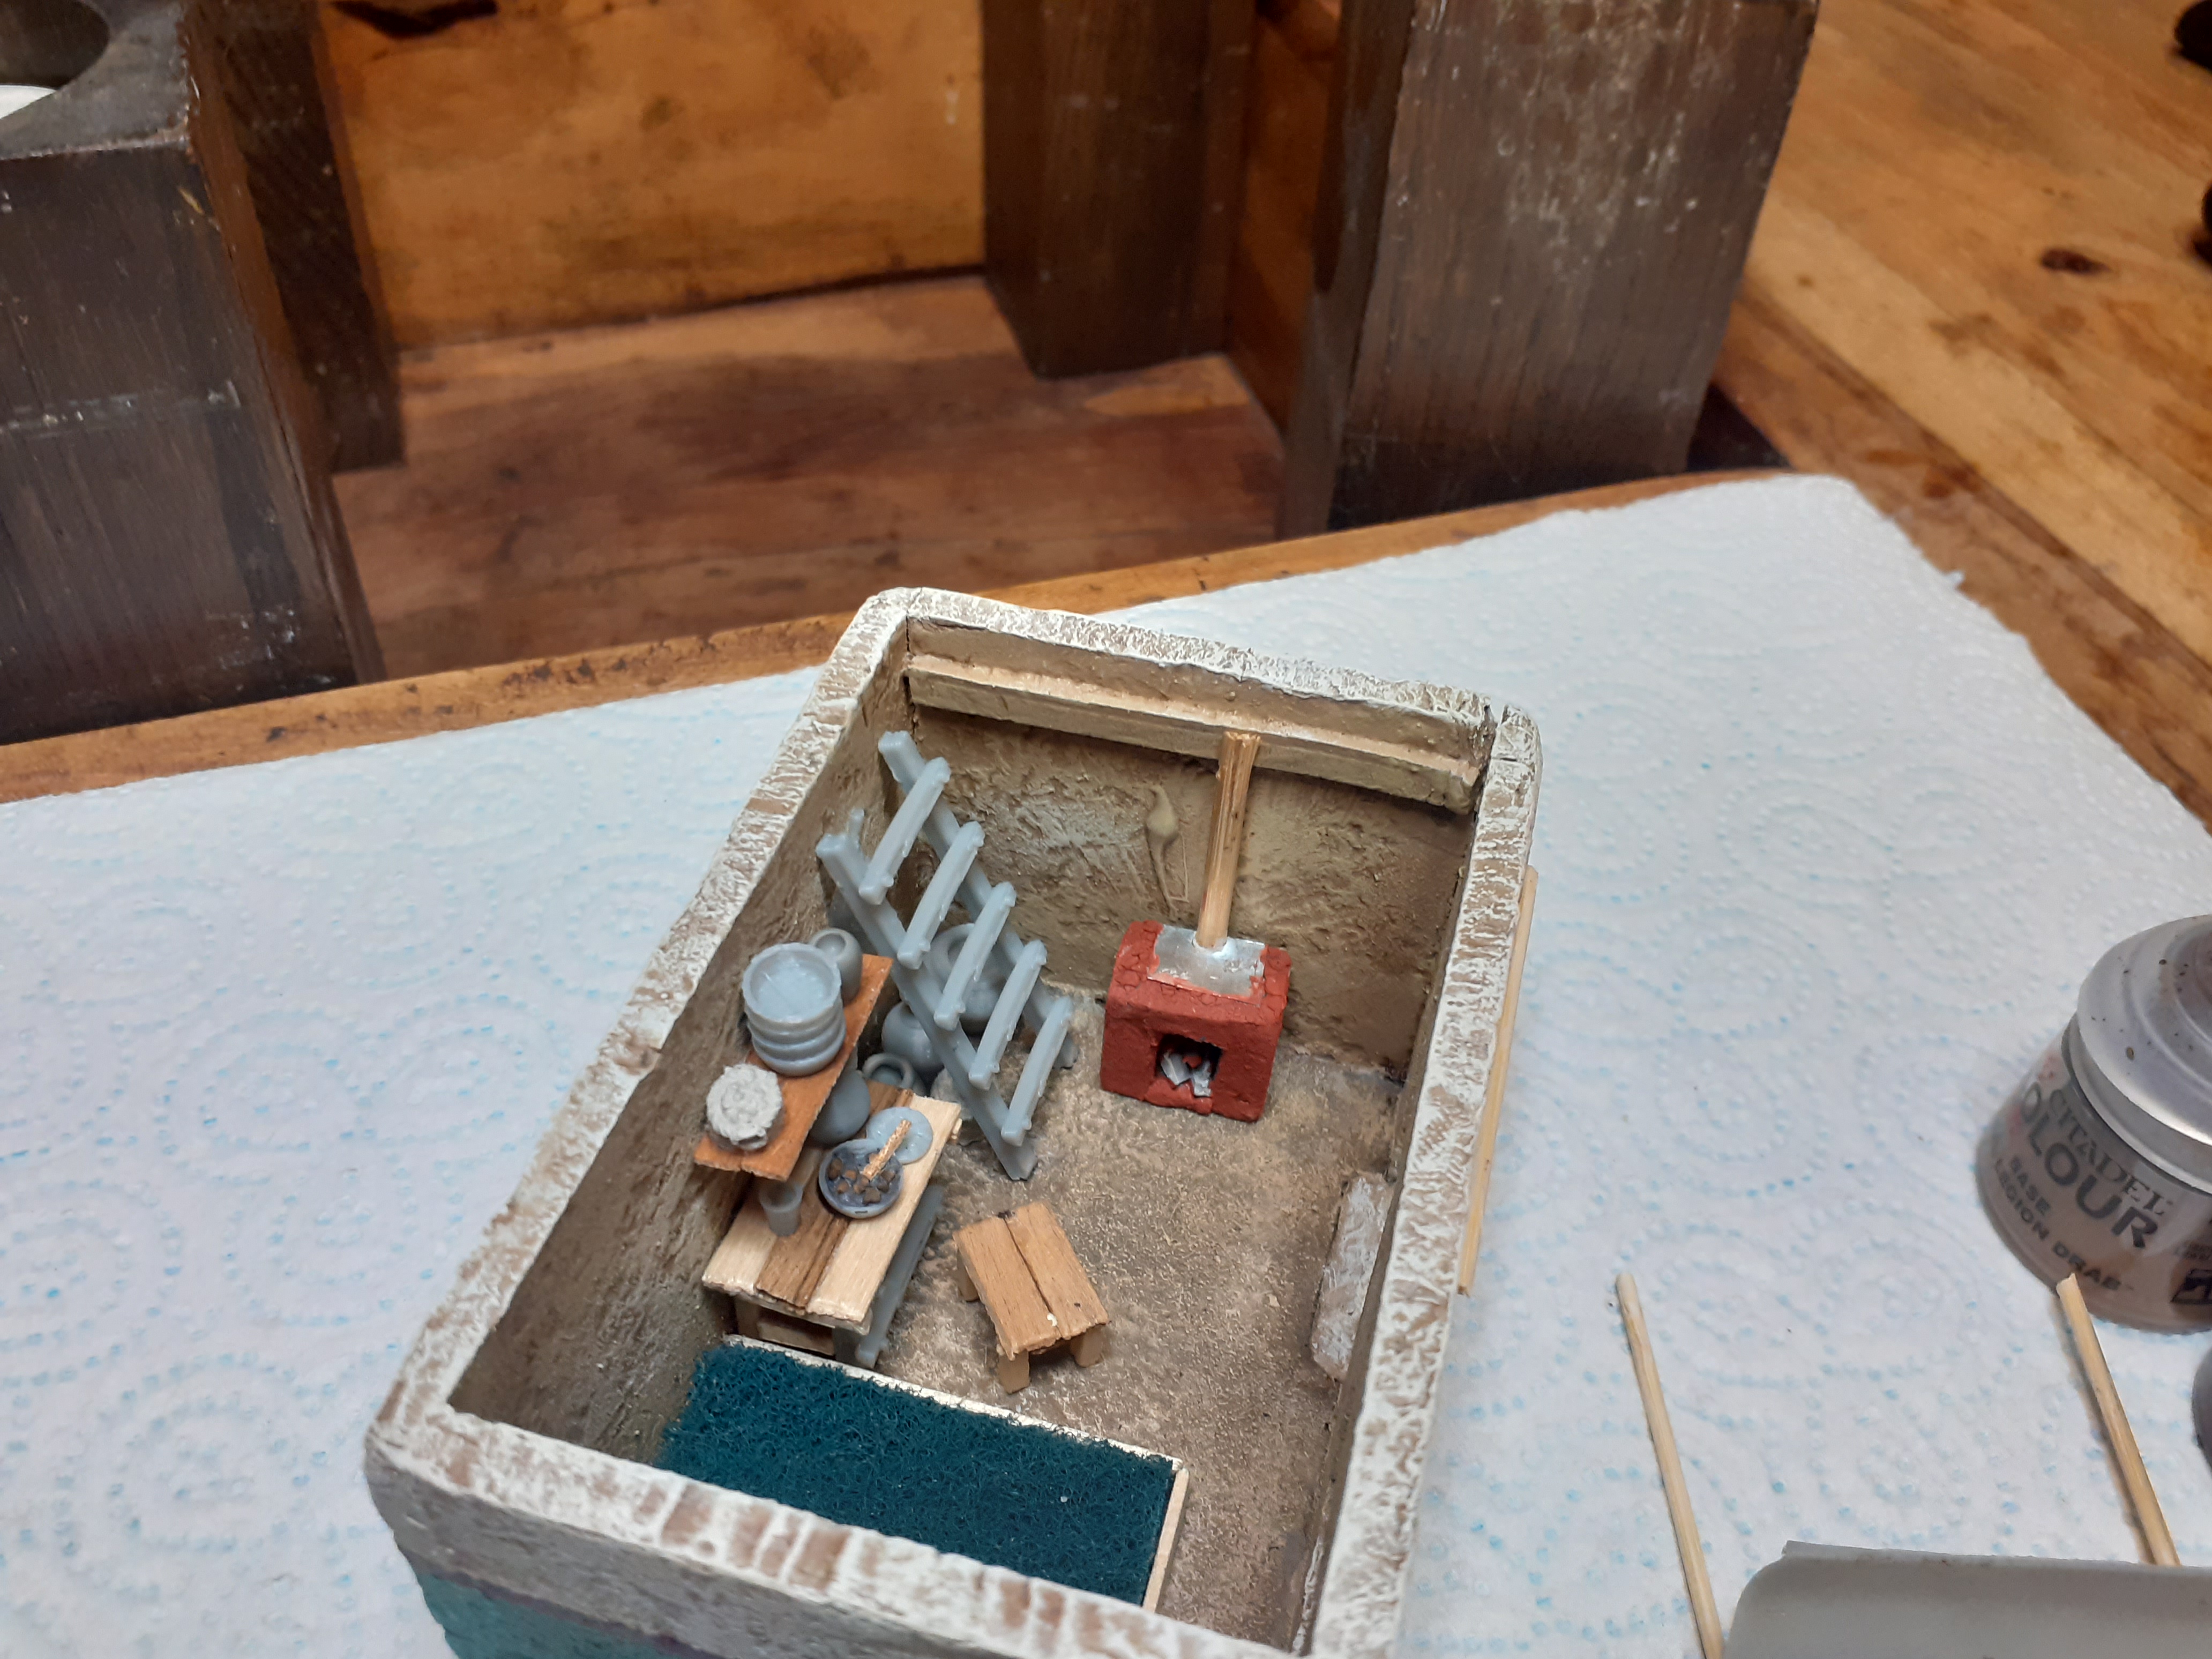 All the furniture in place,
 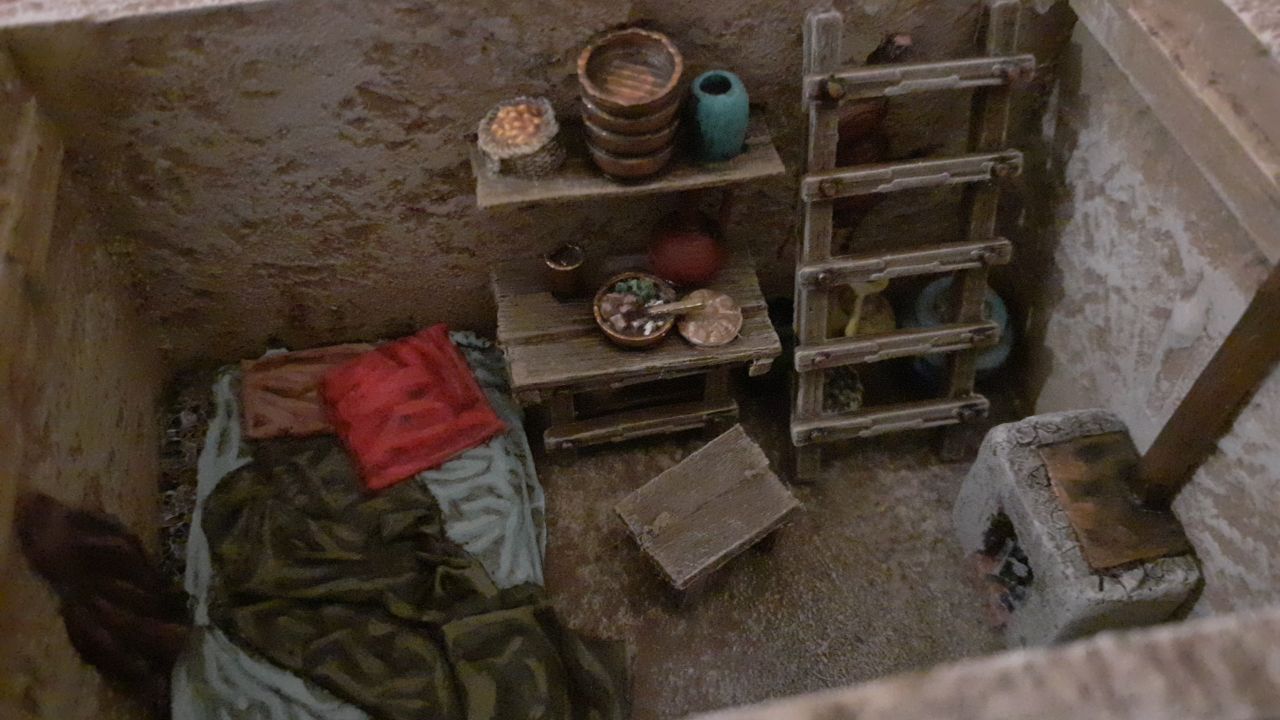 I added bedding and a hanging cloak from tissue materials soaked in glue, the cushions are also made from tissue paper folded over multiple times and pinched at the ends.
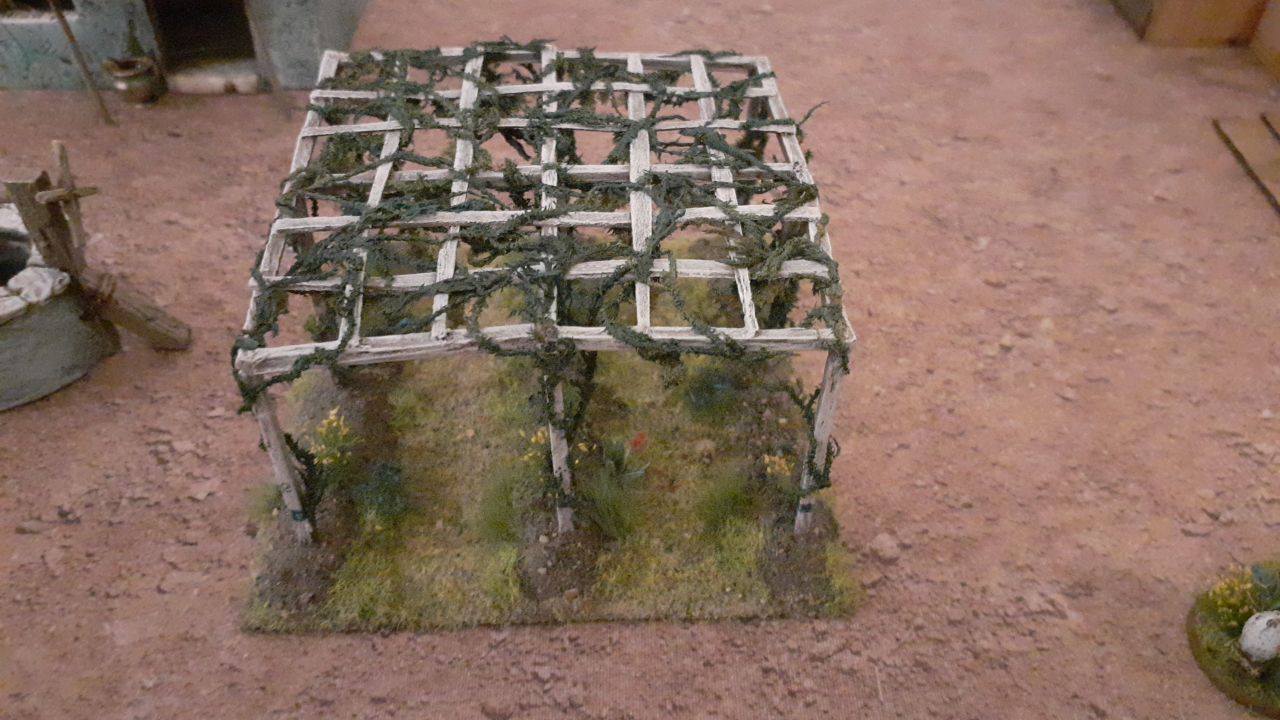
The Vineyard
In the first picture on the beehives post I showed the first stage of this build.
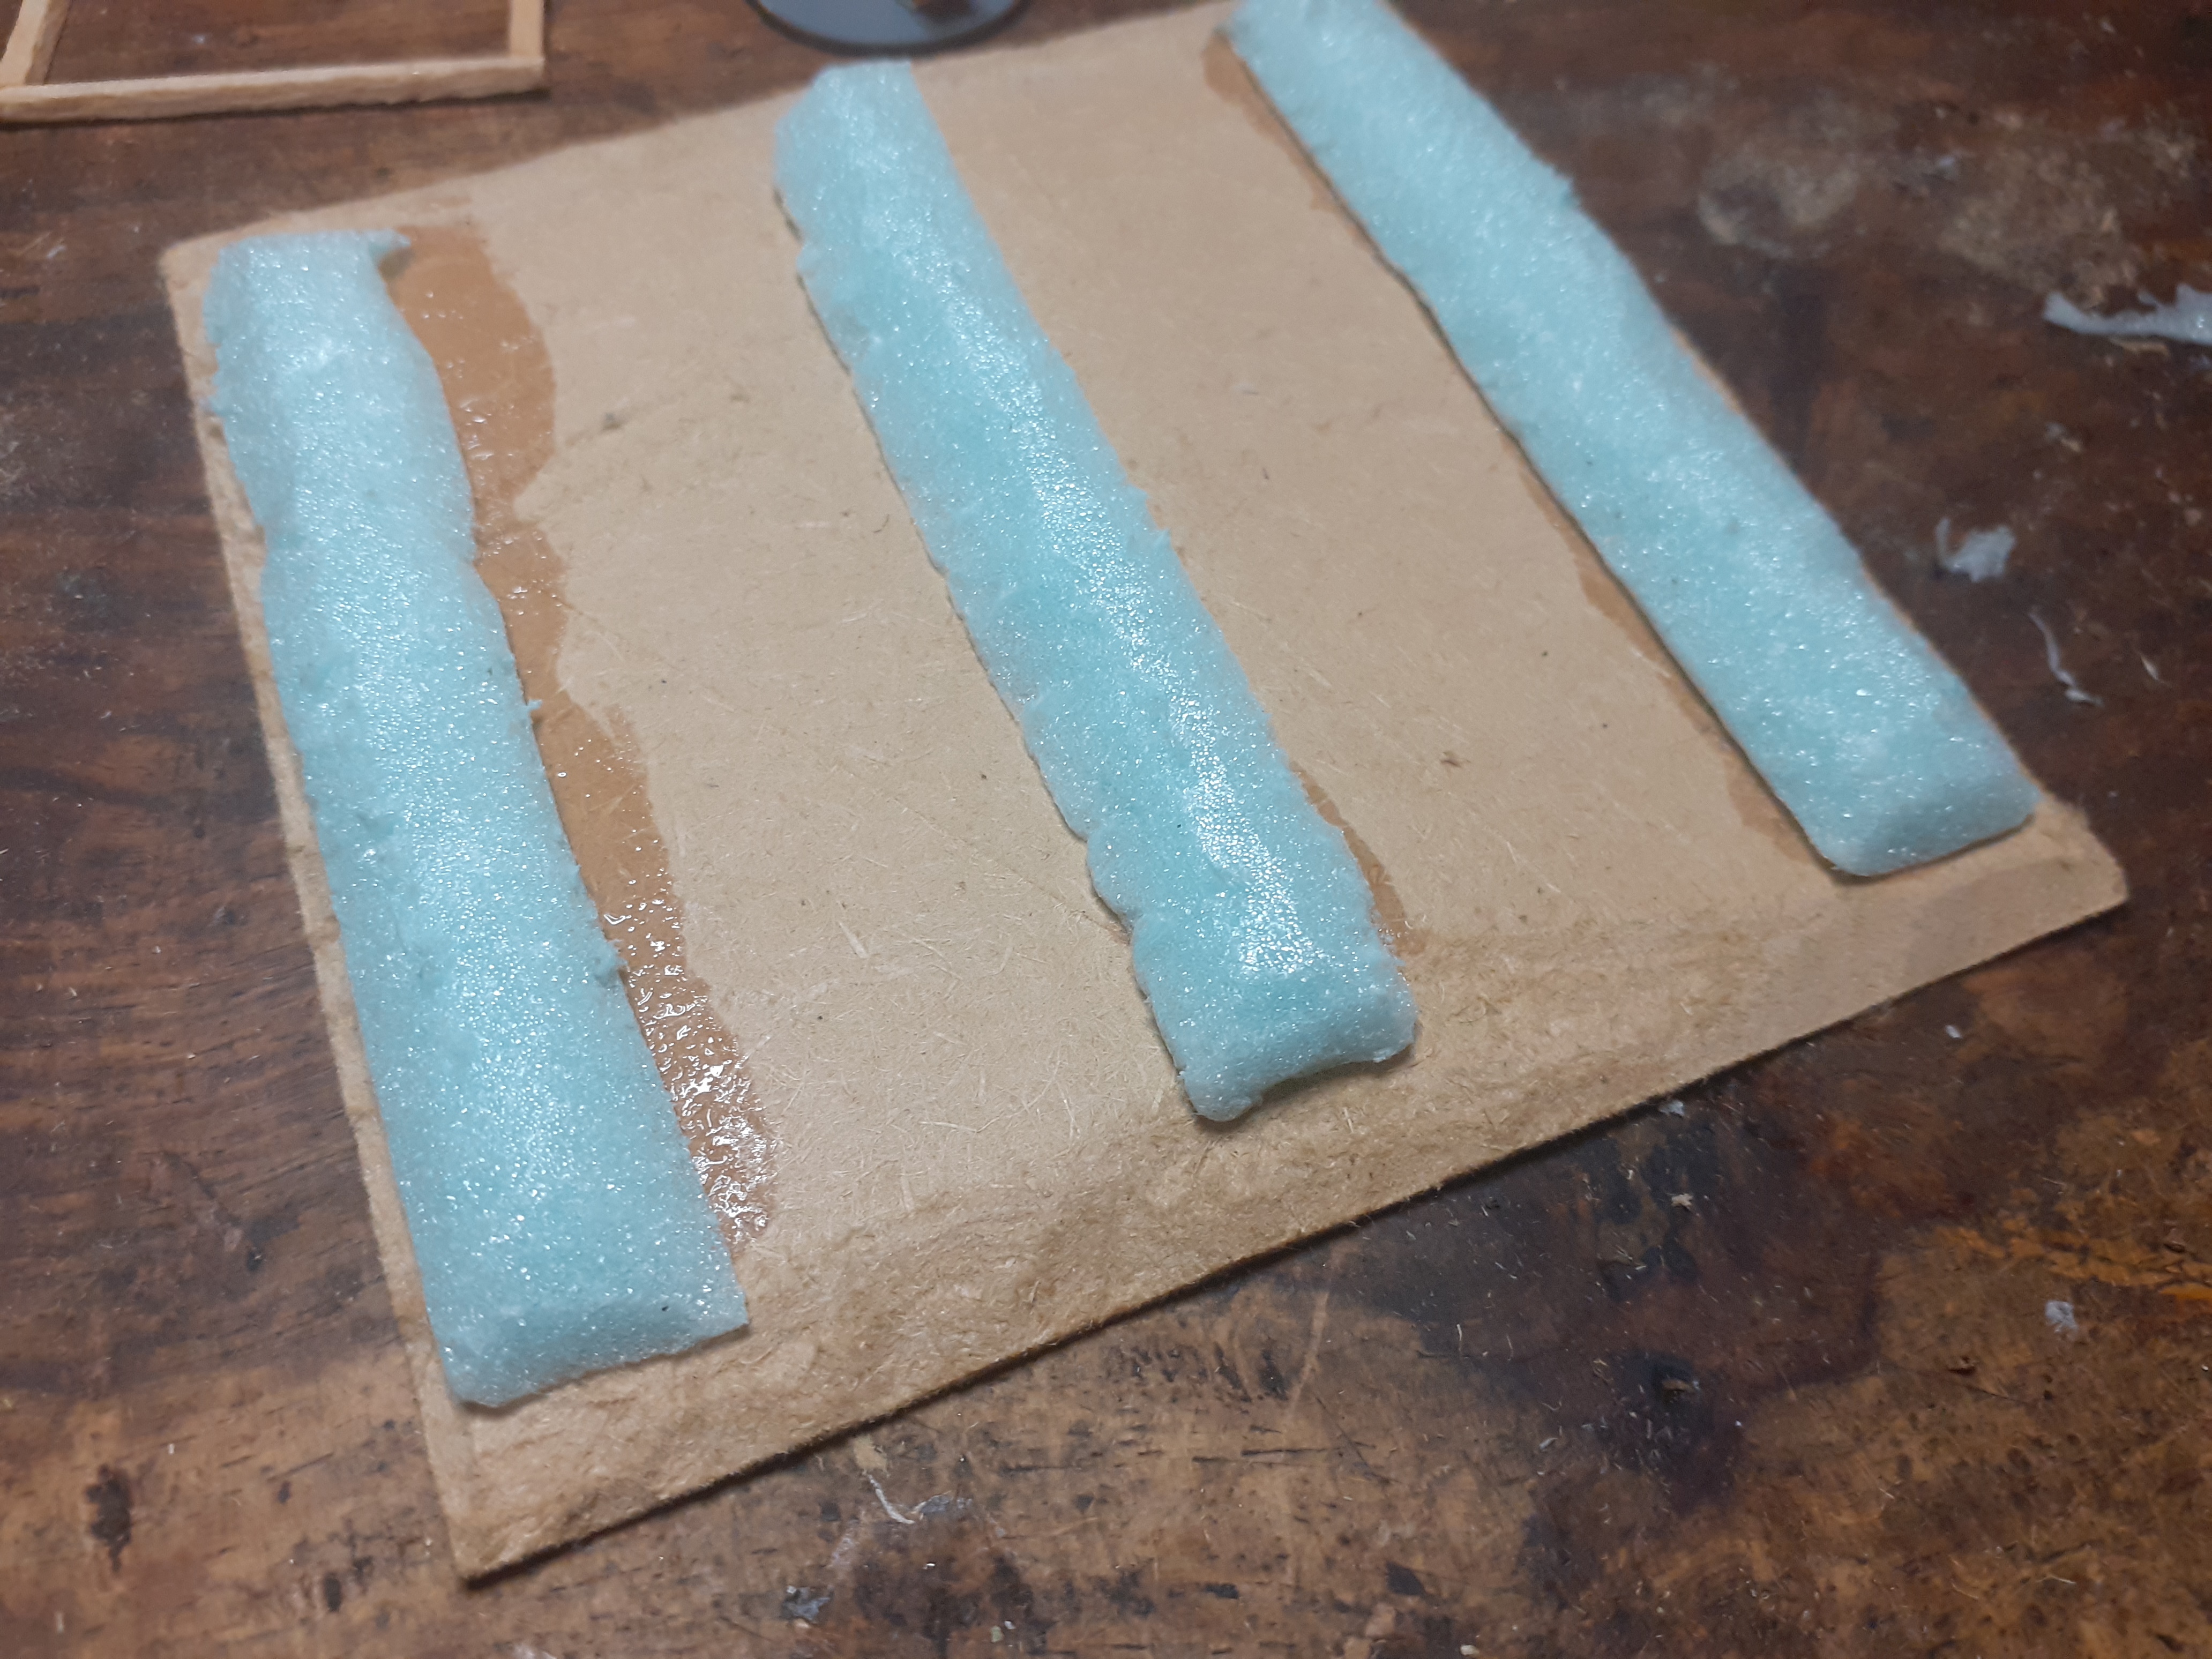 I realised that the height of the frames was a bit to low compared with my miniatures so I added a raised bed from 5mm blue foam. You will also see that I have chamferedthe edges of the base.
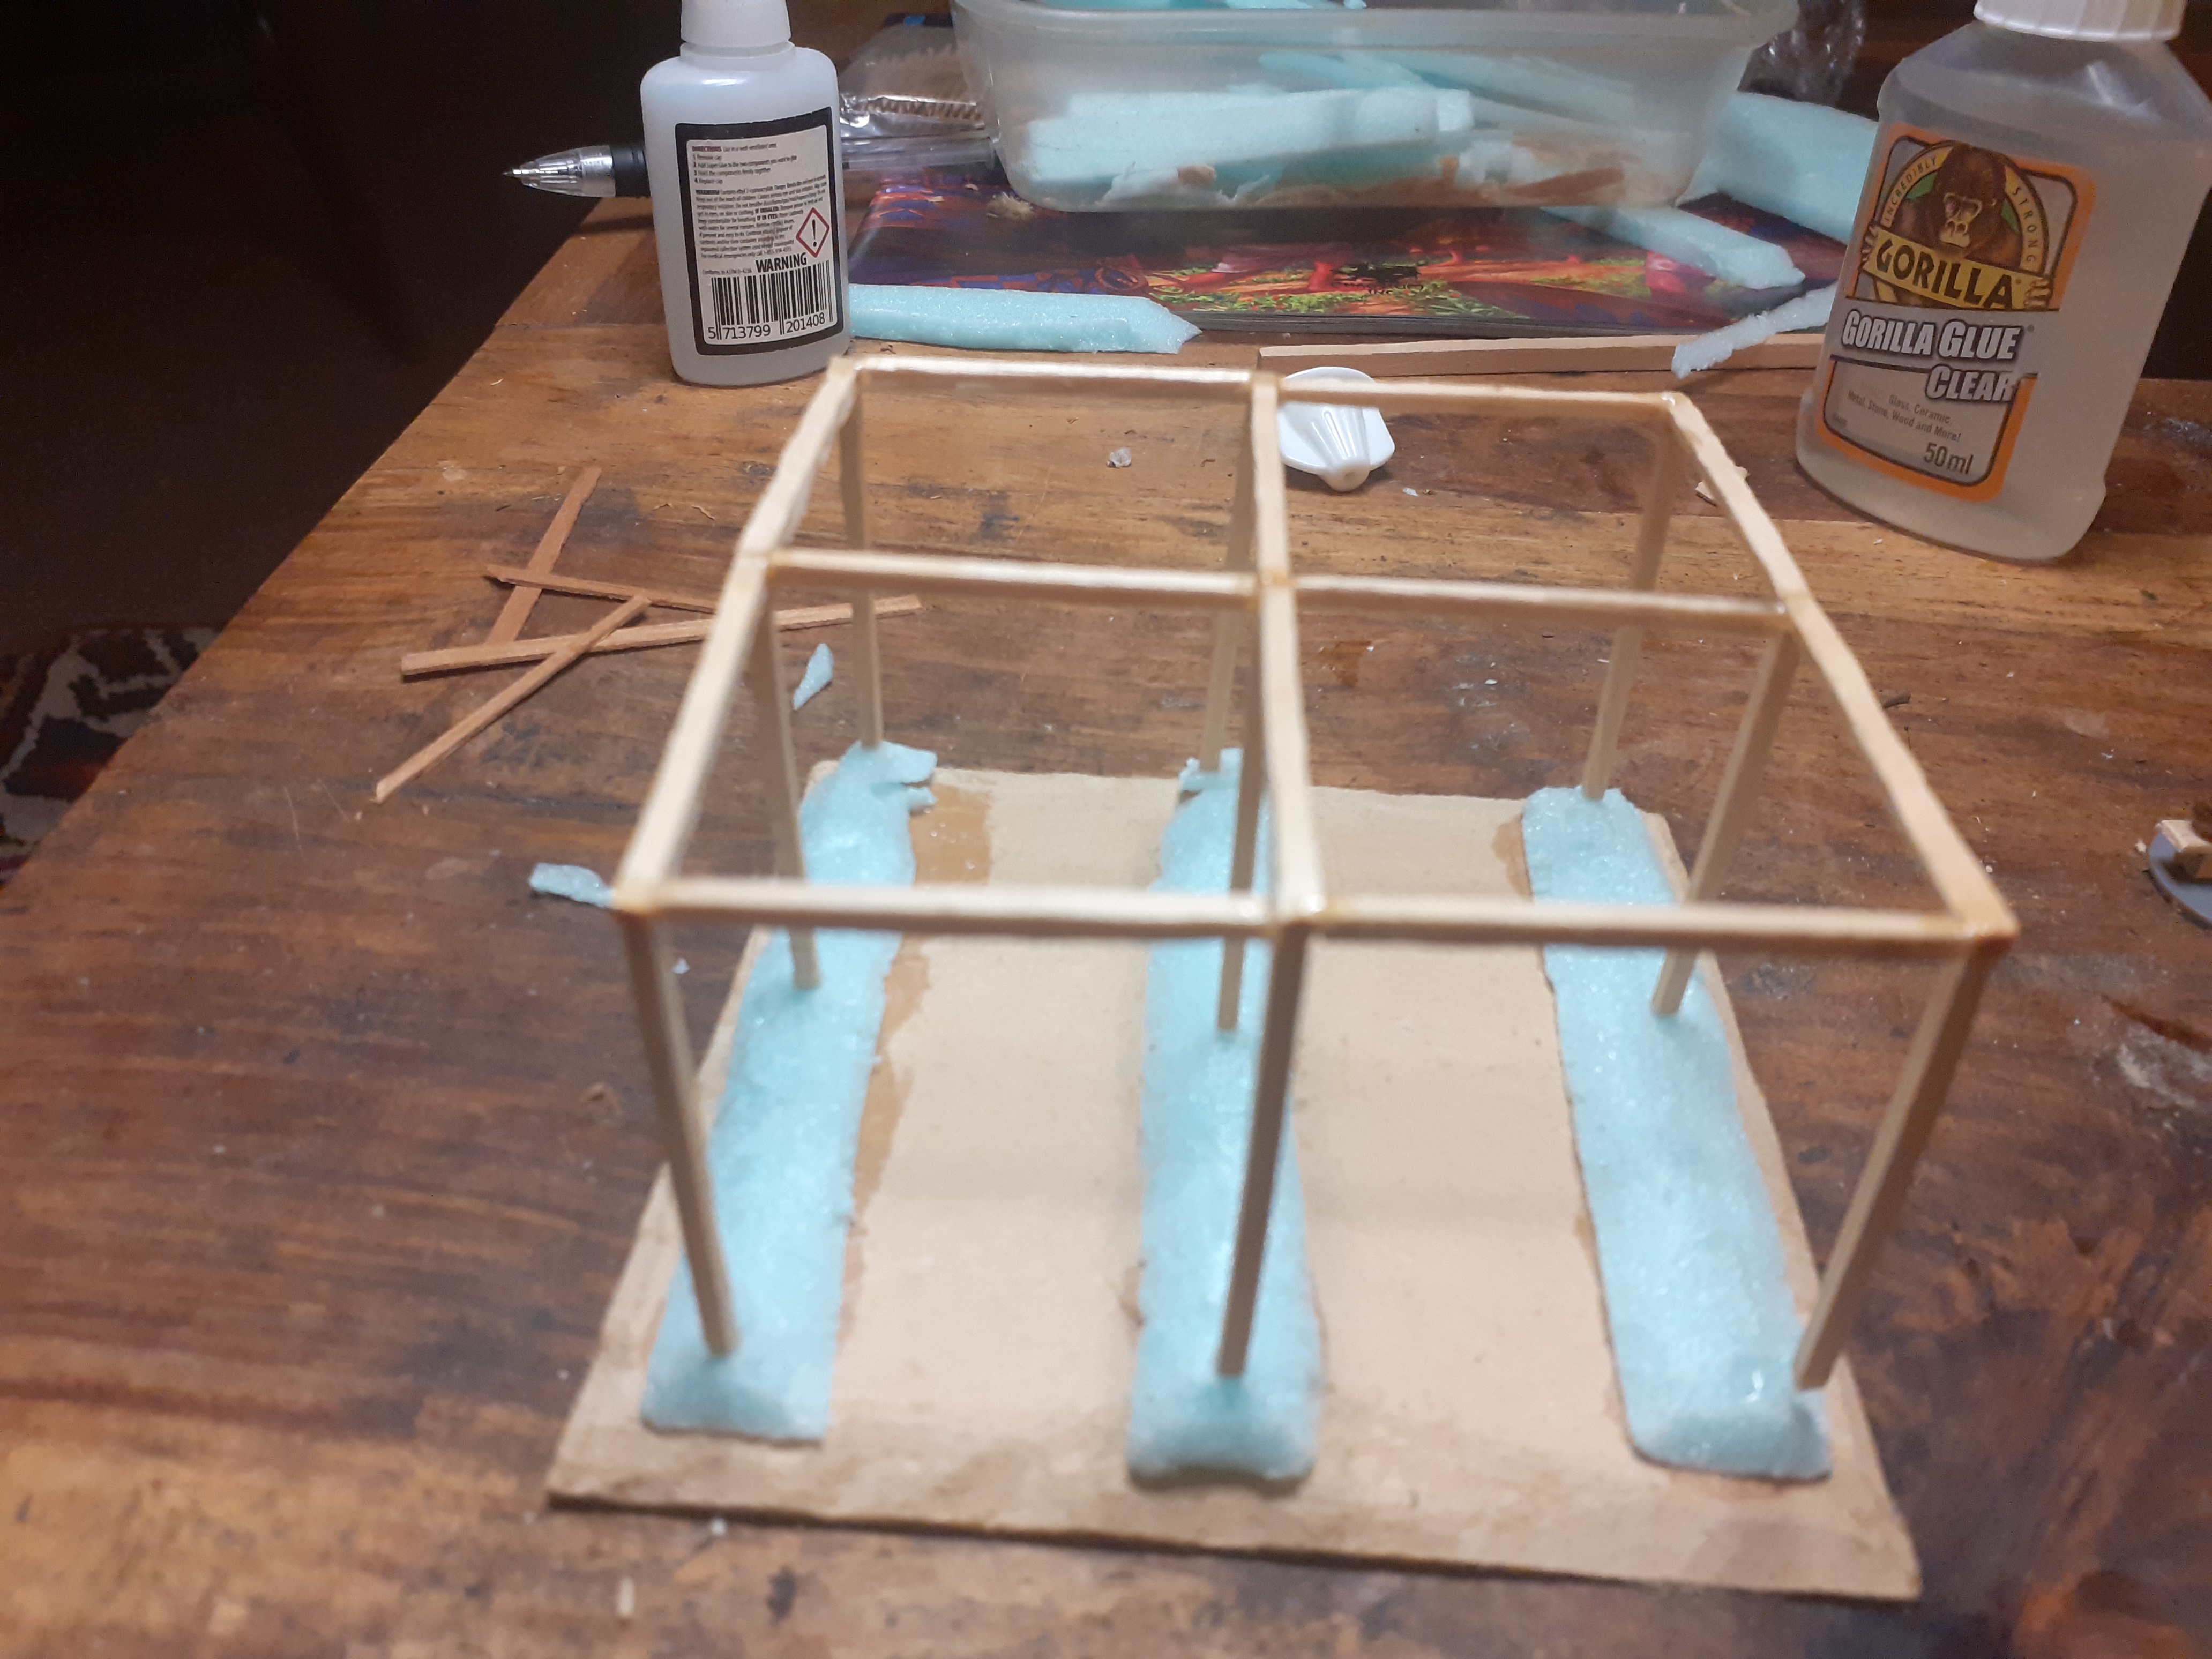 The framework built from crafting matchsticks.
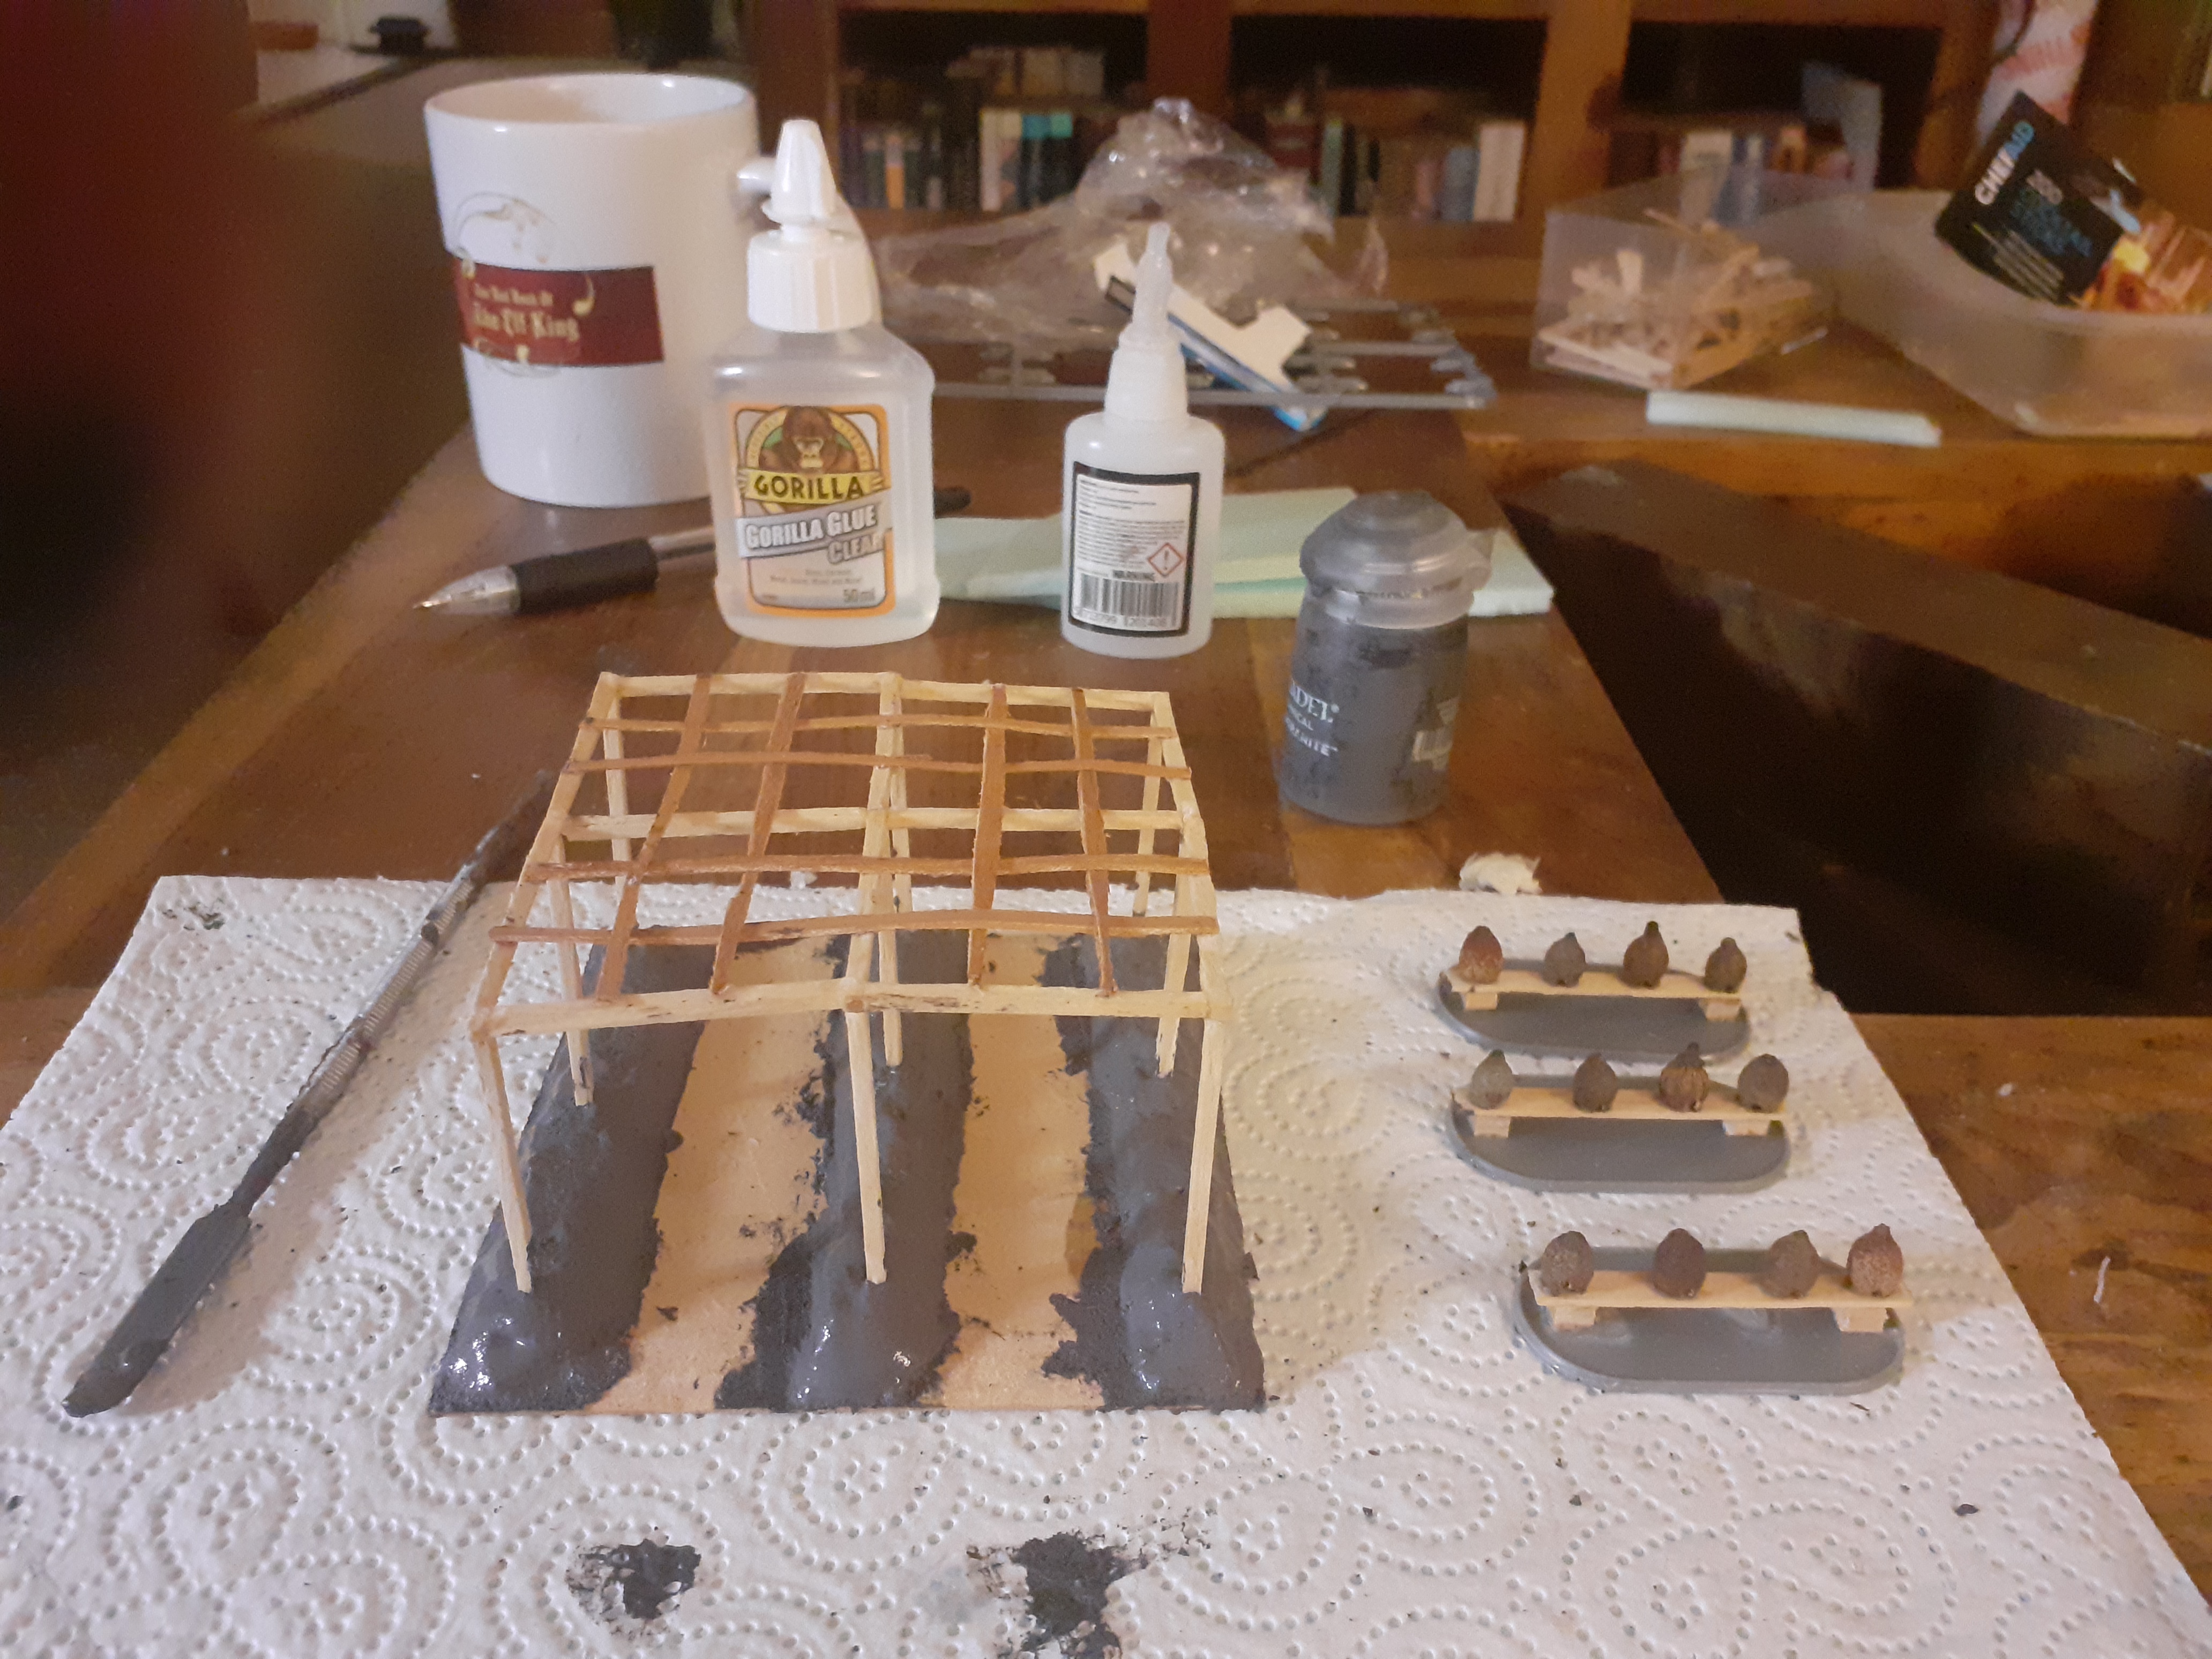 GW texture paint/paste applied to the beds and beehive bases.
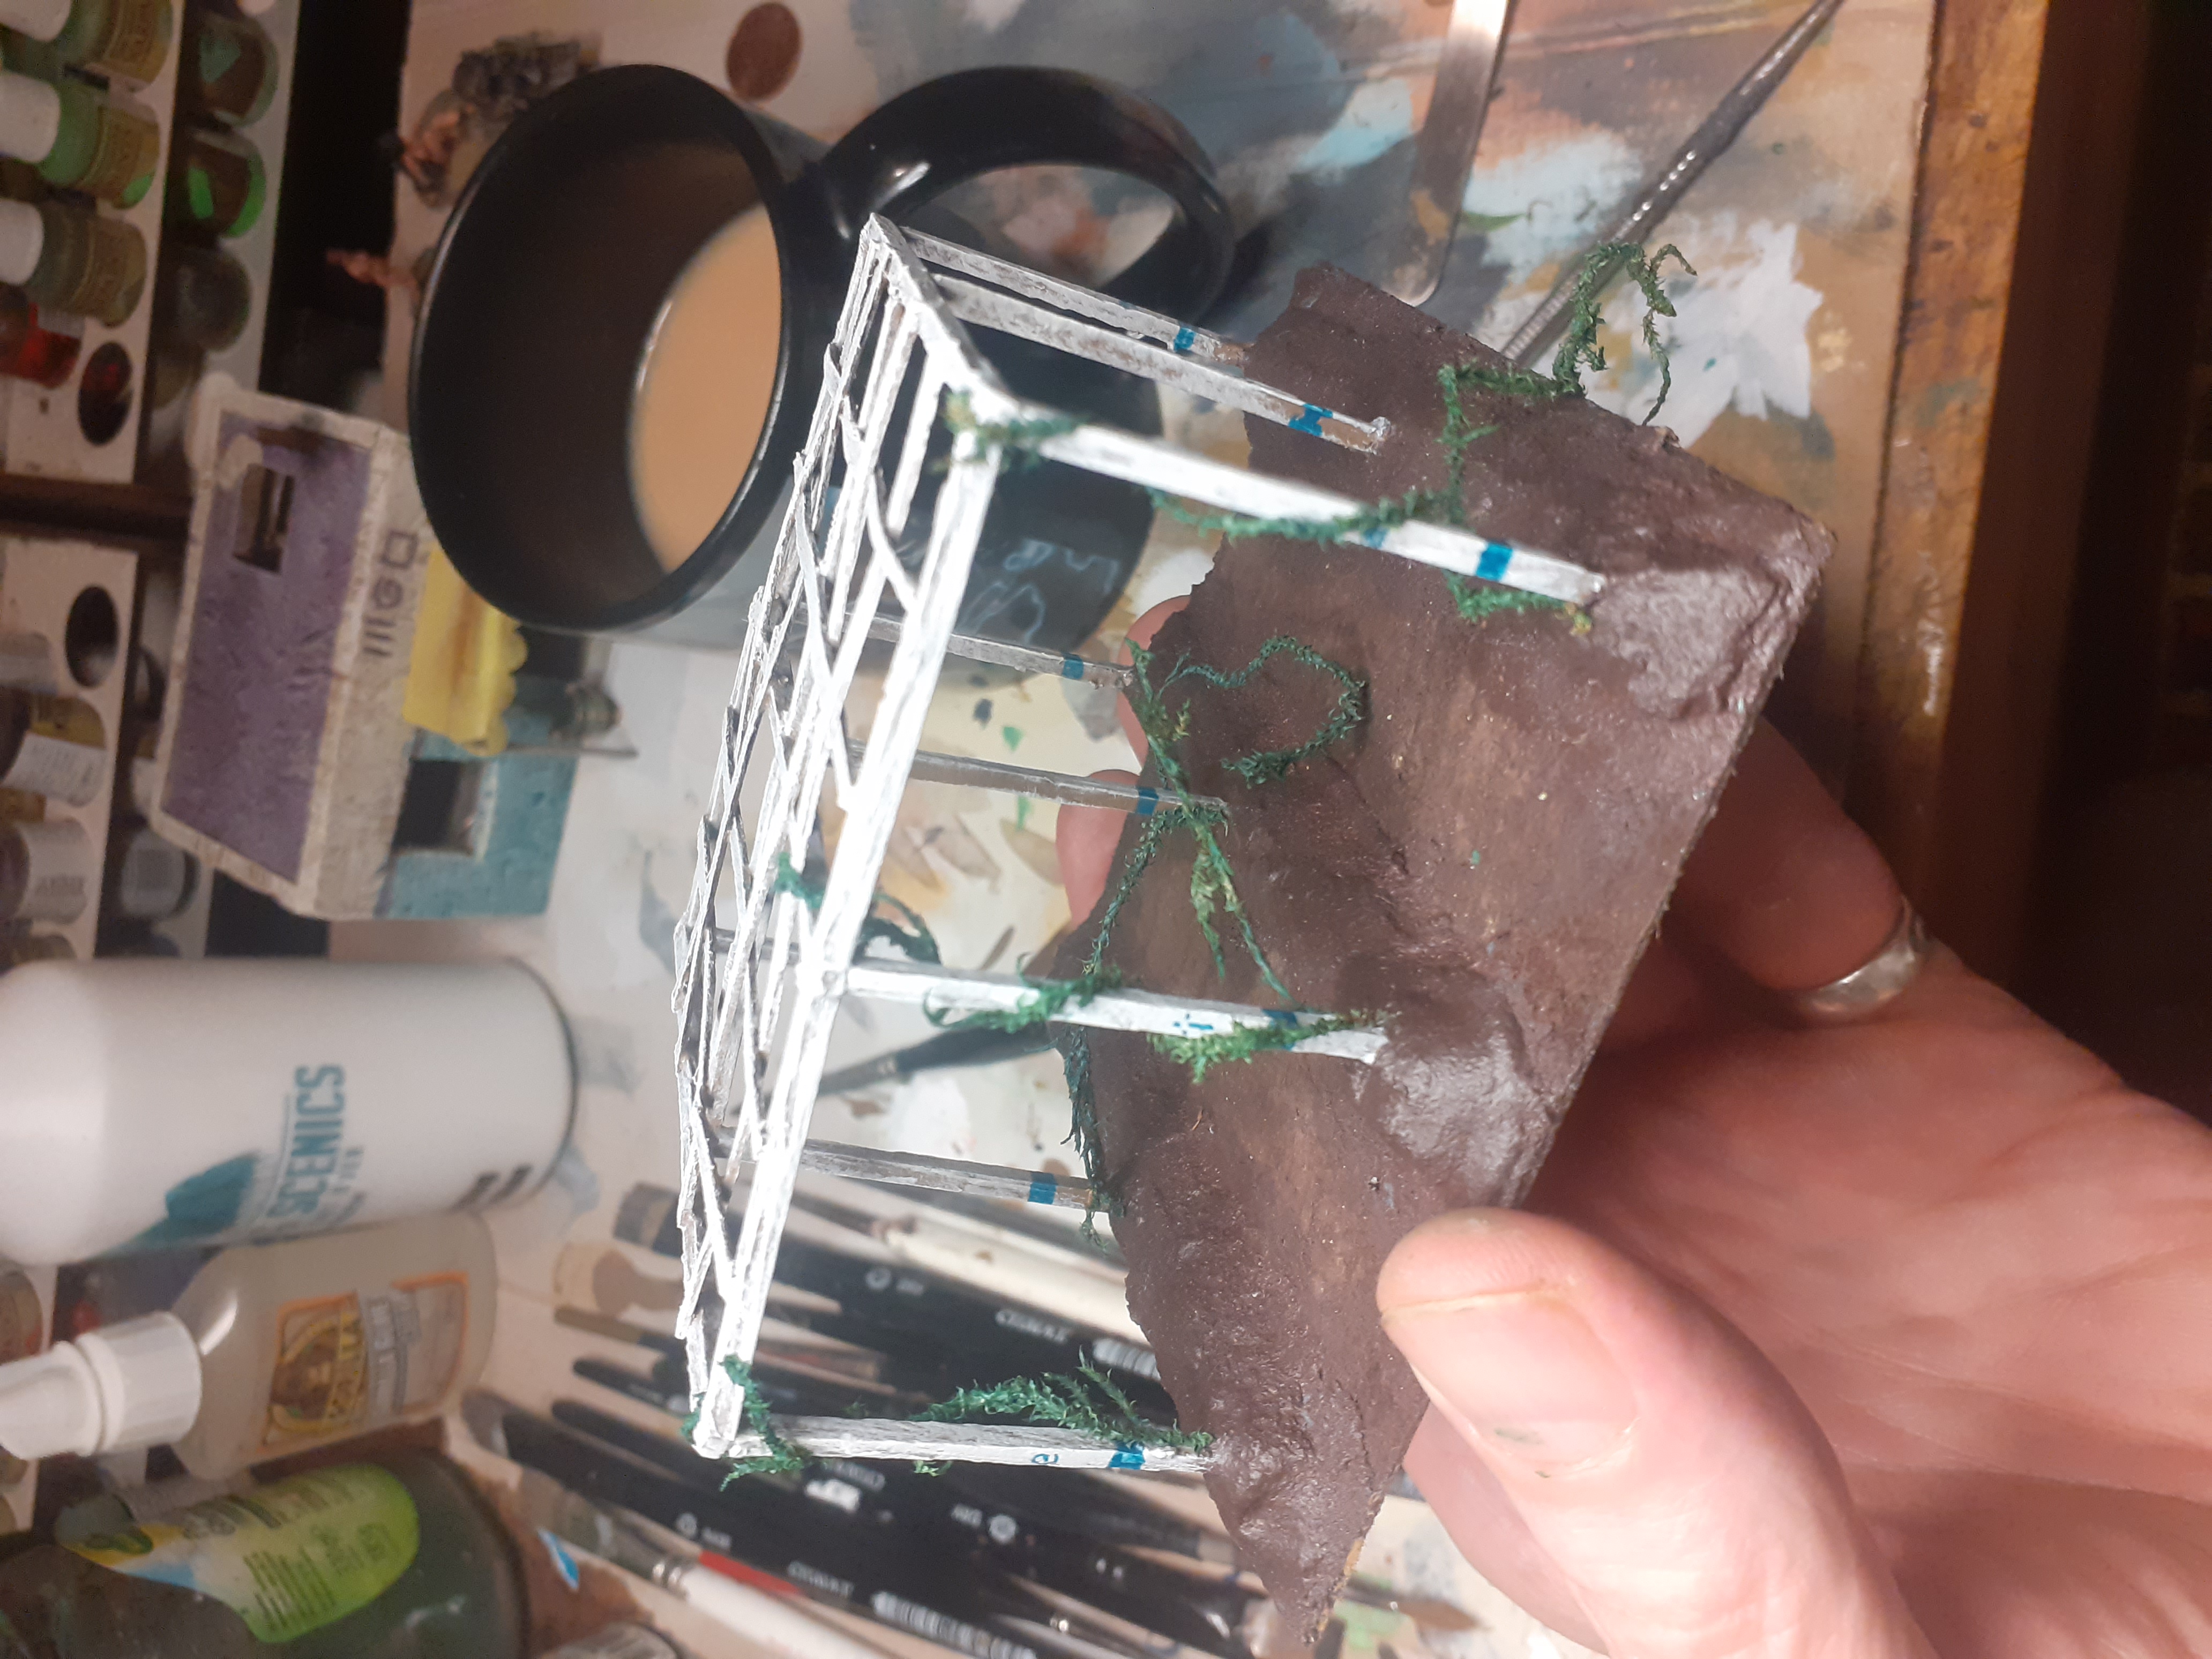 I painted the white wood work same as the beehives in previous post, I also seem to have lost the photo of me adding the trellis from a thine sheet of cigar box wood liner cut into thin strips and then interwoven to create trellis. I painted the base GW Rhinox Hide. The vines are made from some dried out flower pot moss liner, to revitalise it I mixed a dark green wash and smothered the moss strands in it. I then superglued these to the frames.
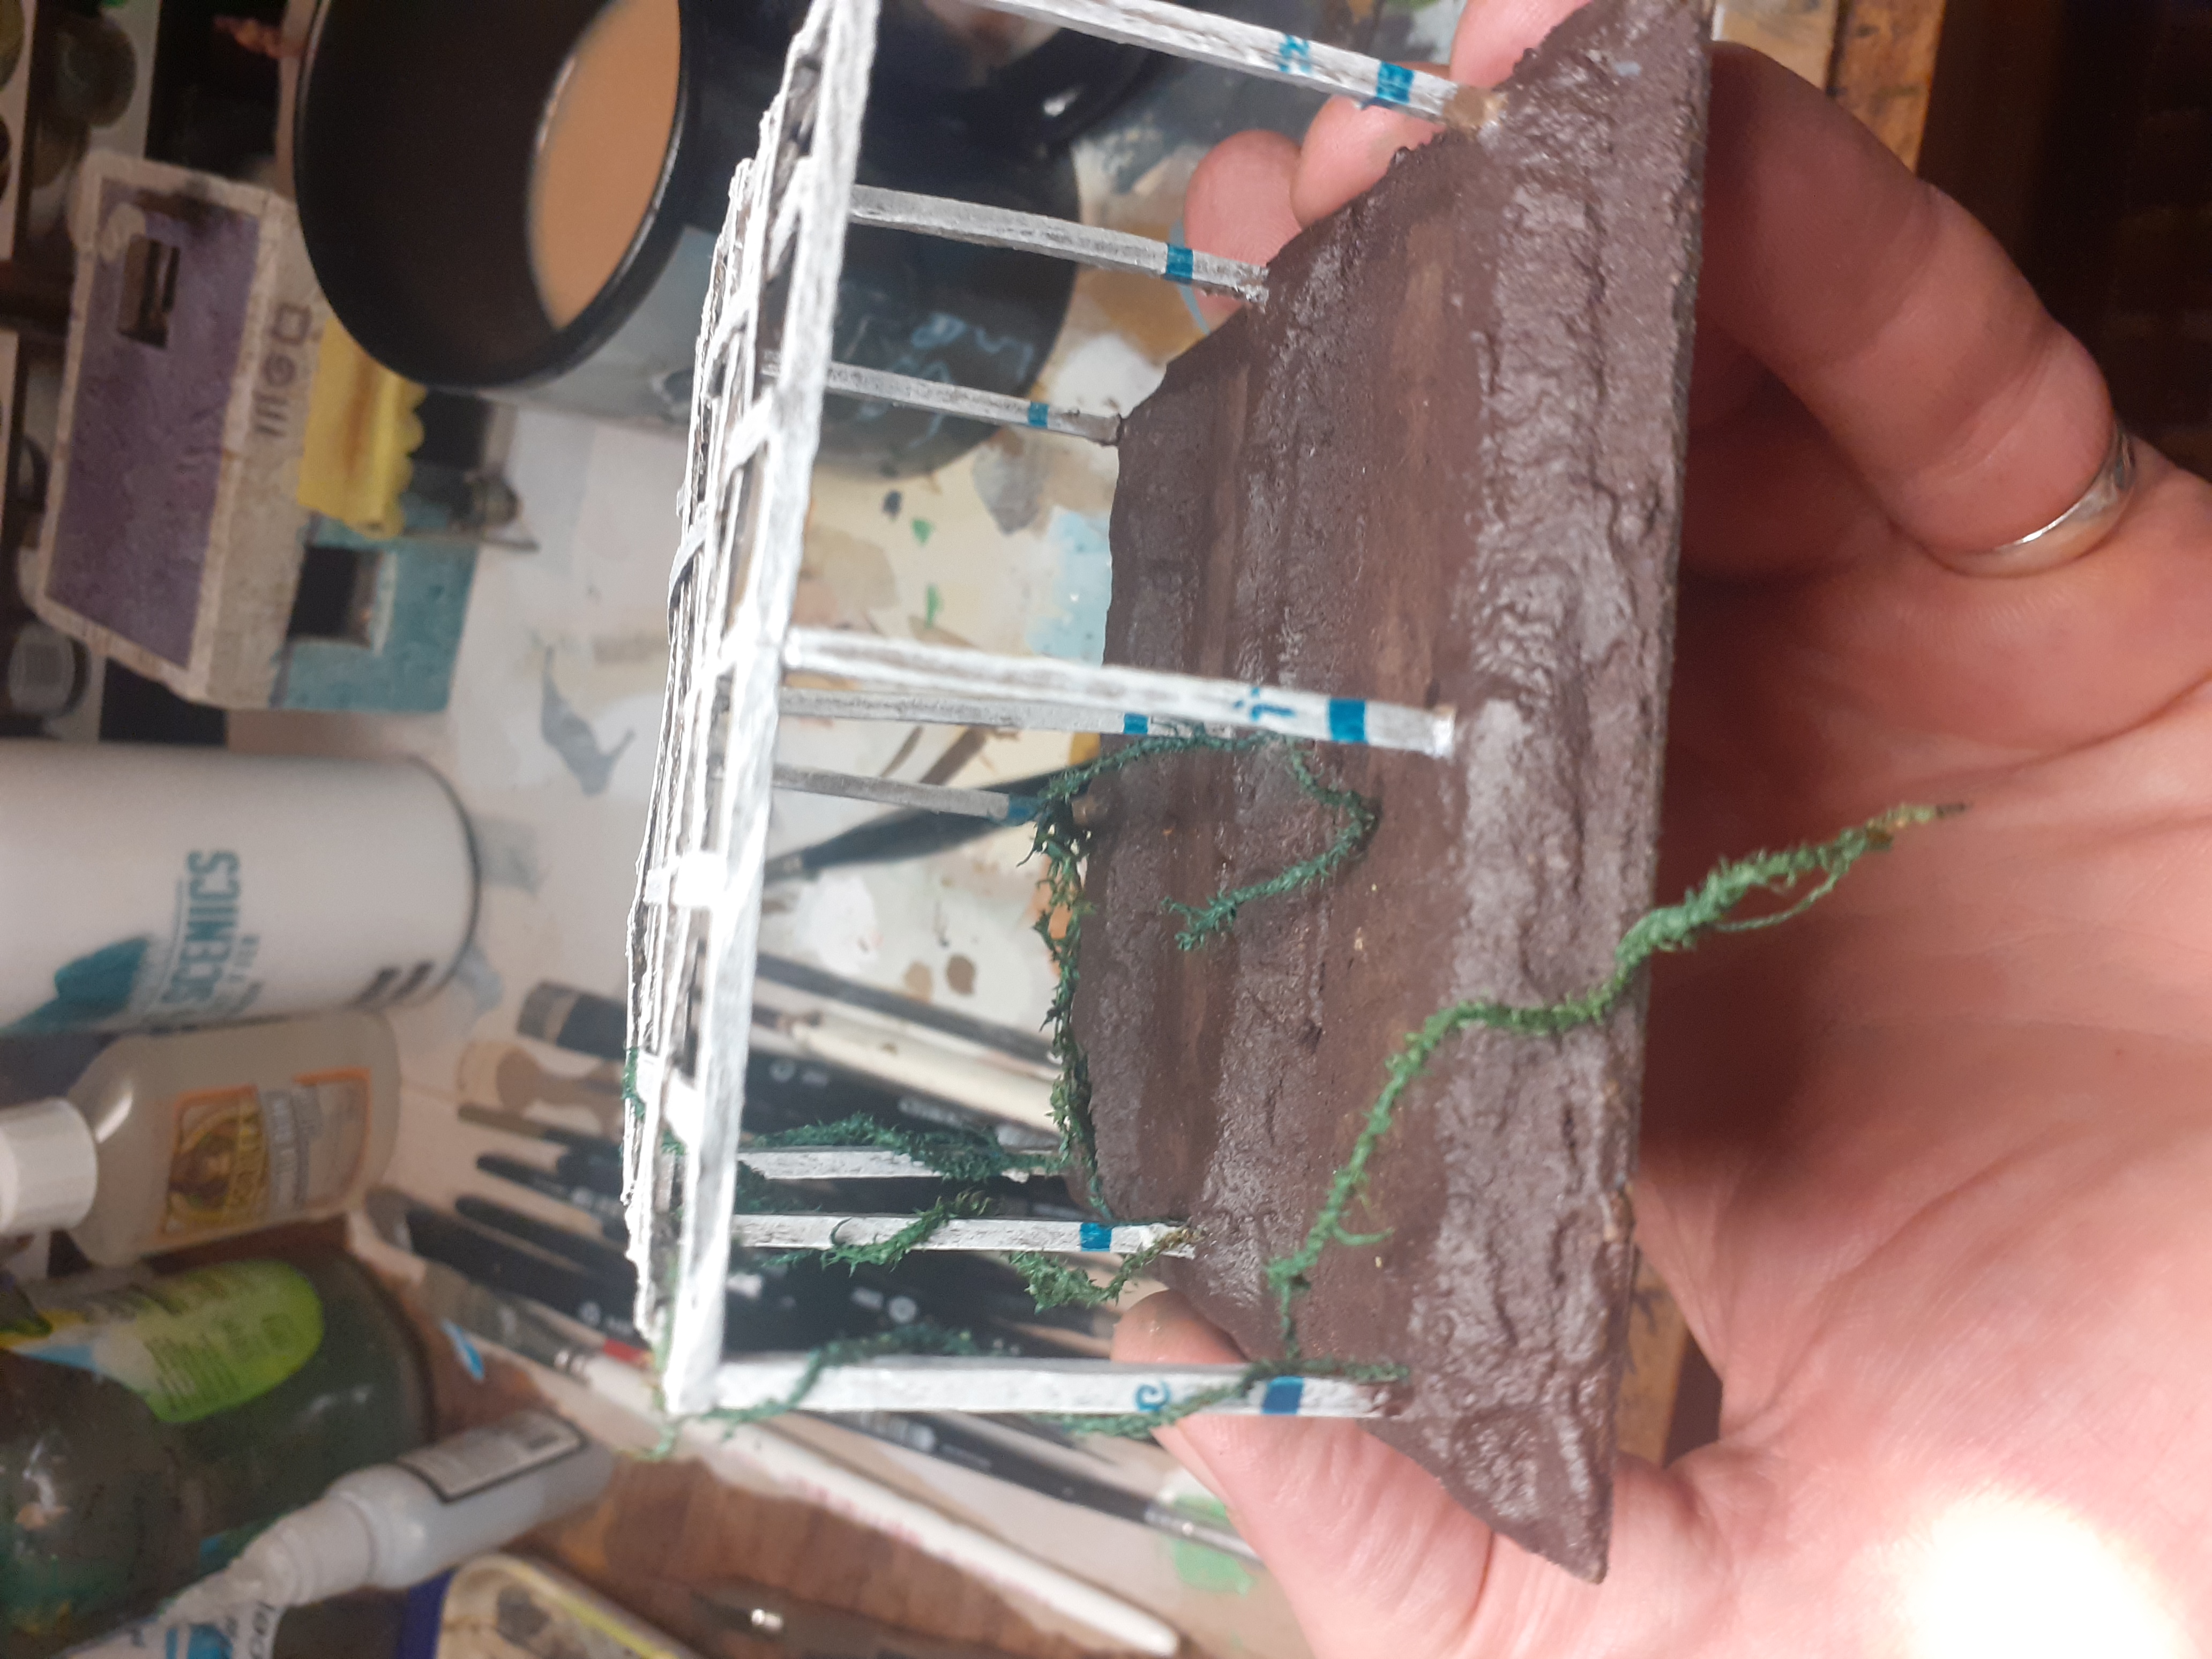 Then started to wind this around the frame and threaded through the trellis using tweezers and fixing ends with superglue, adding new pieces along the spread of the vines to create a realistic look. You can also see the runes for air, water and sun painted on to the frames to ago dome additional colour.
 For the bunches of grapes I used some green foilage foam broken in to suitable sized bunches.
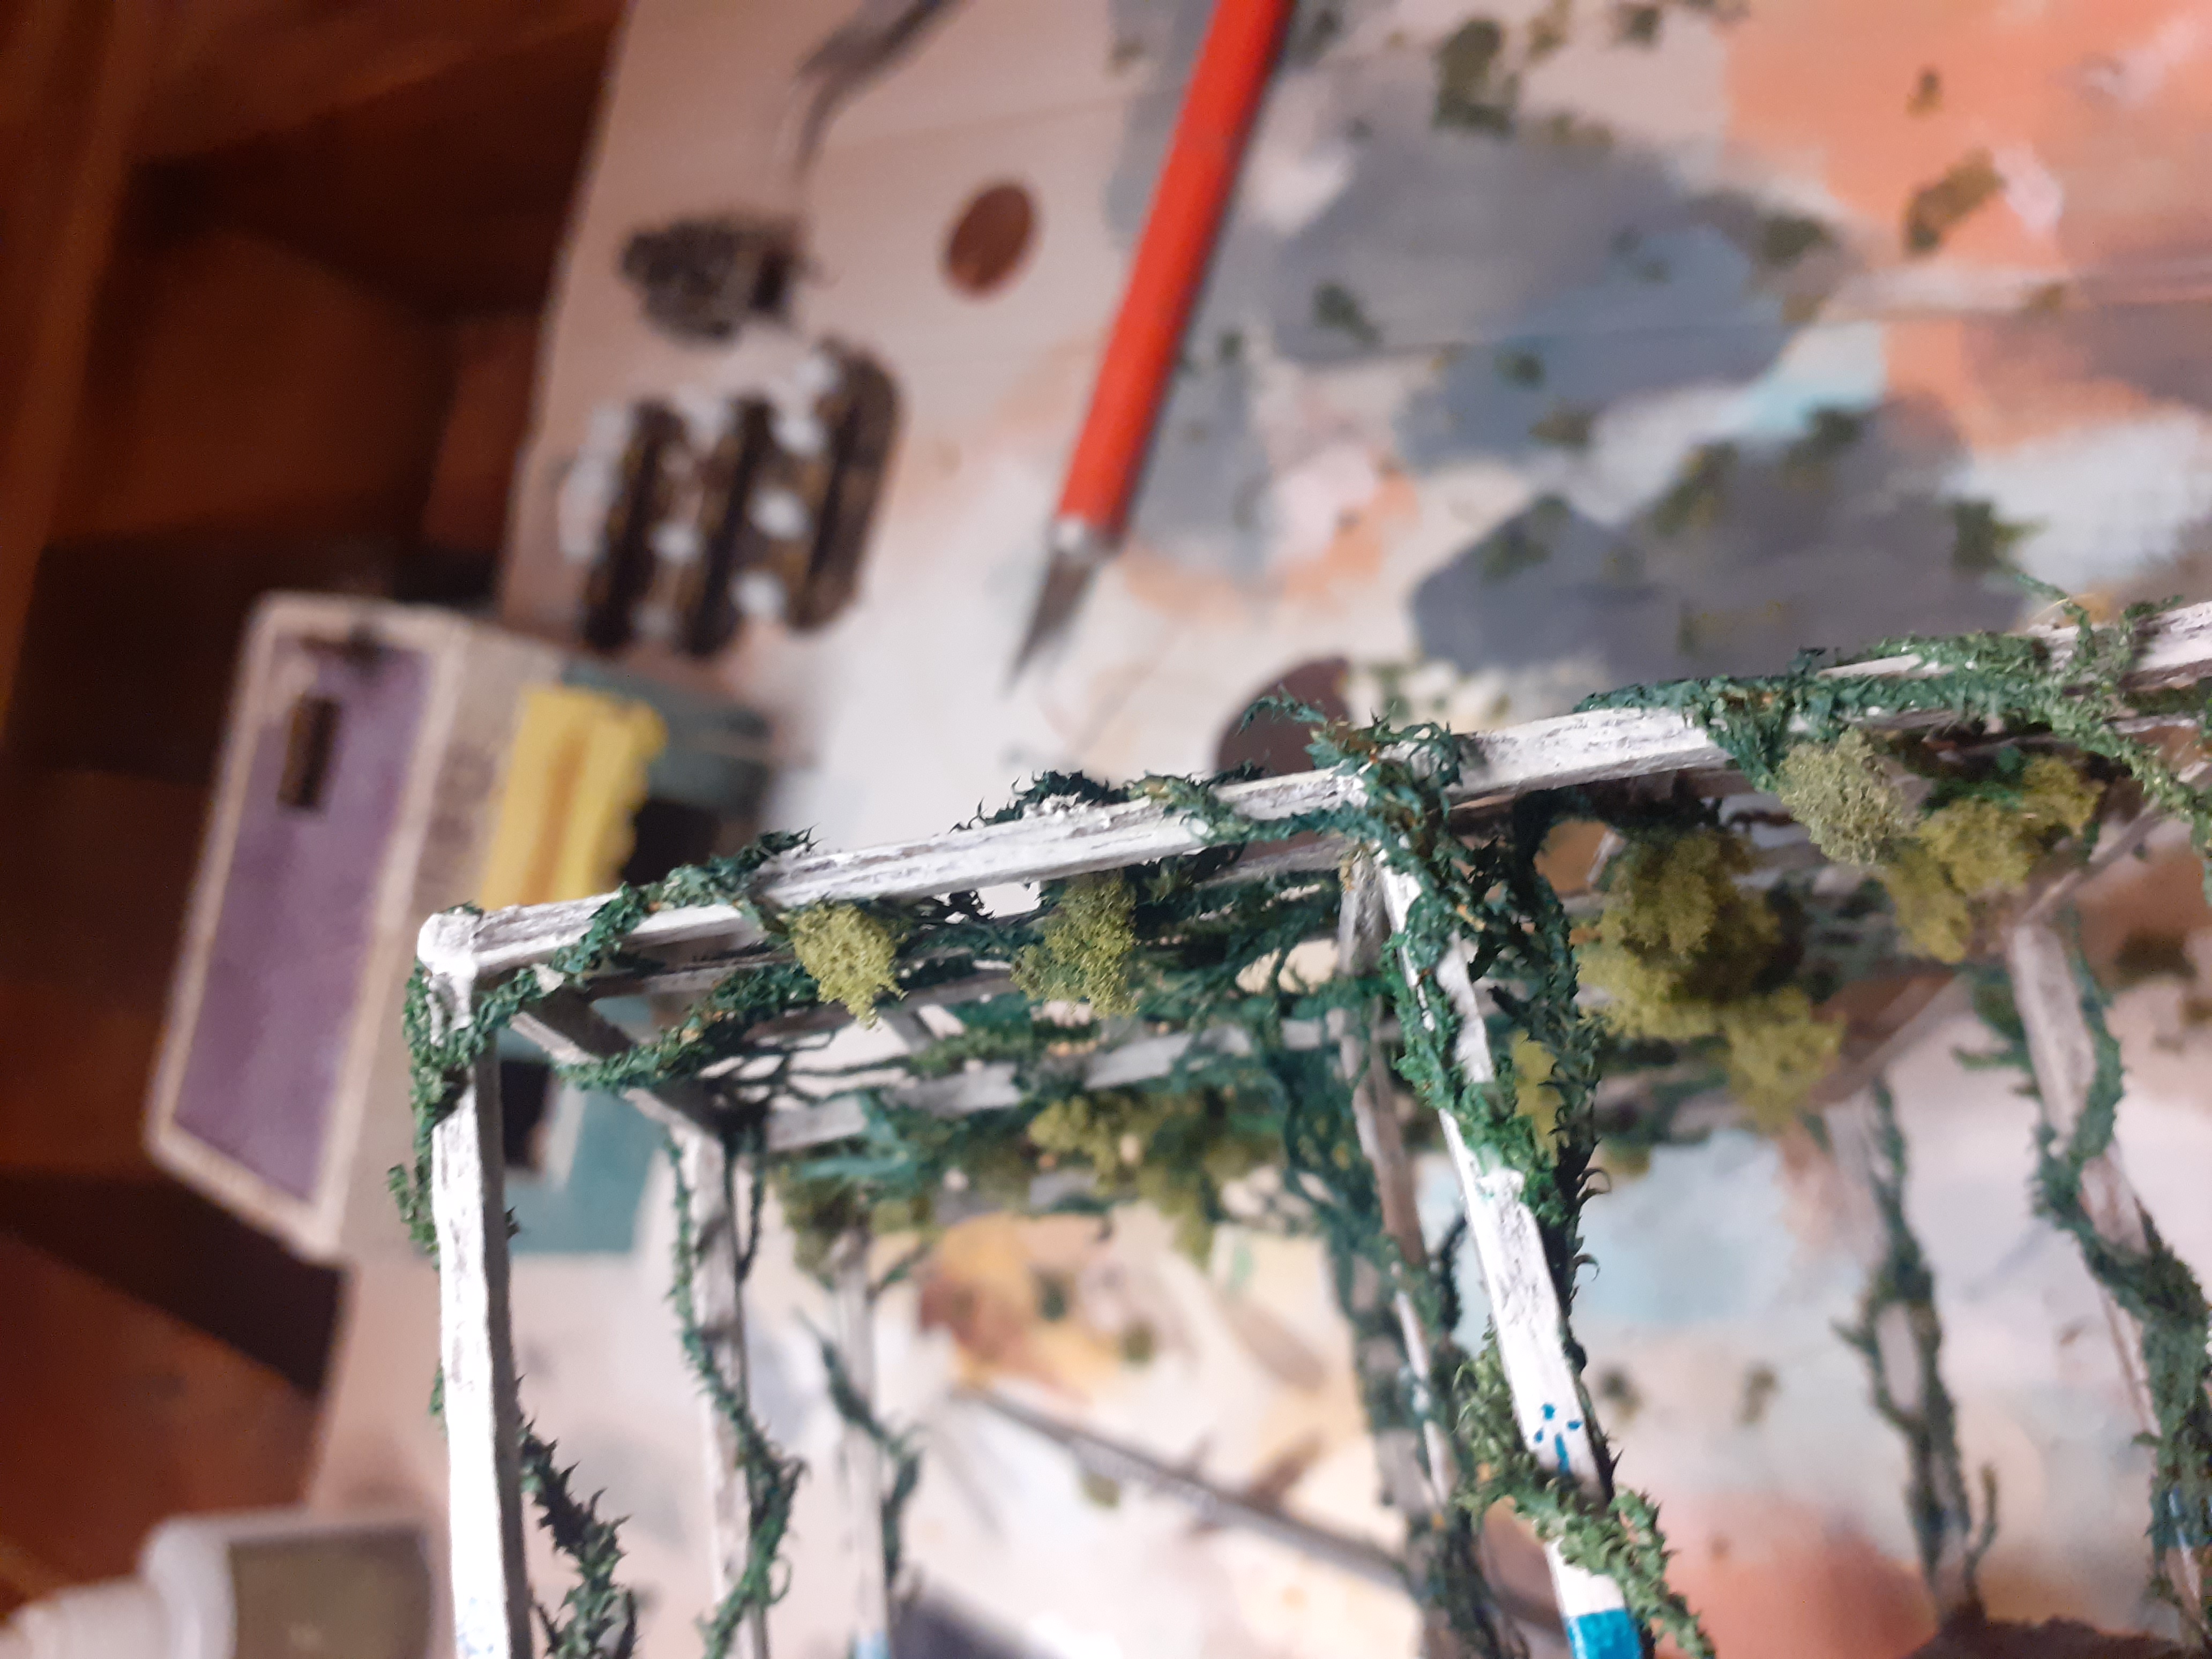 I then started to attach these to the underside.
 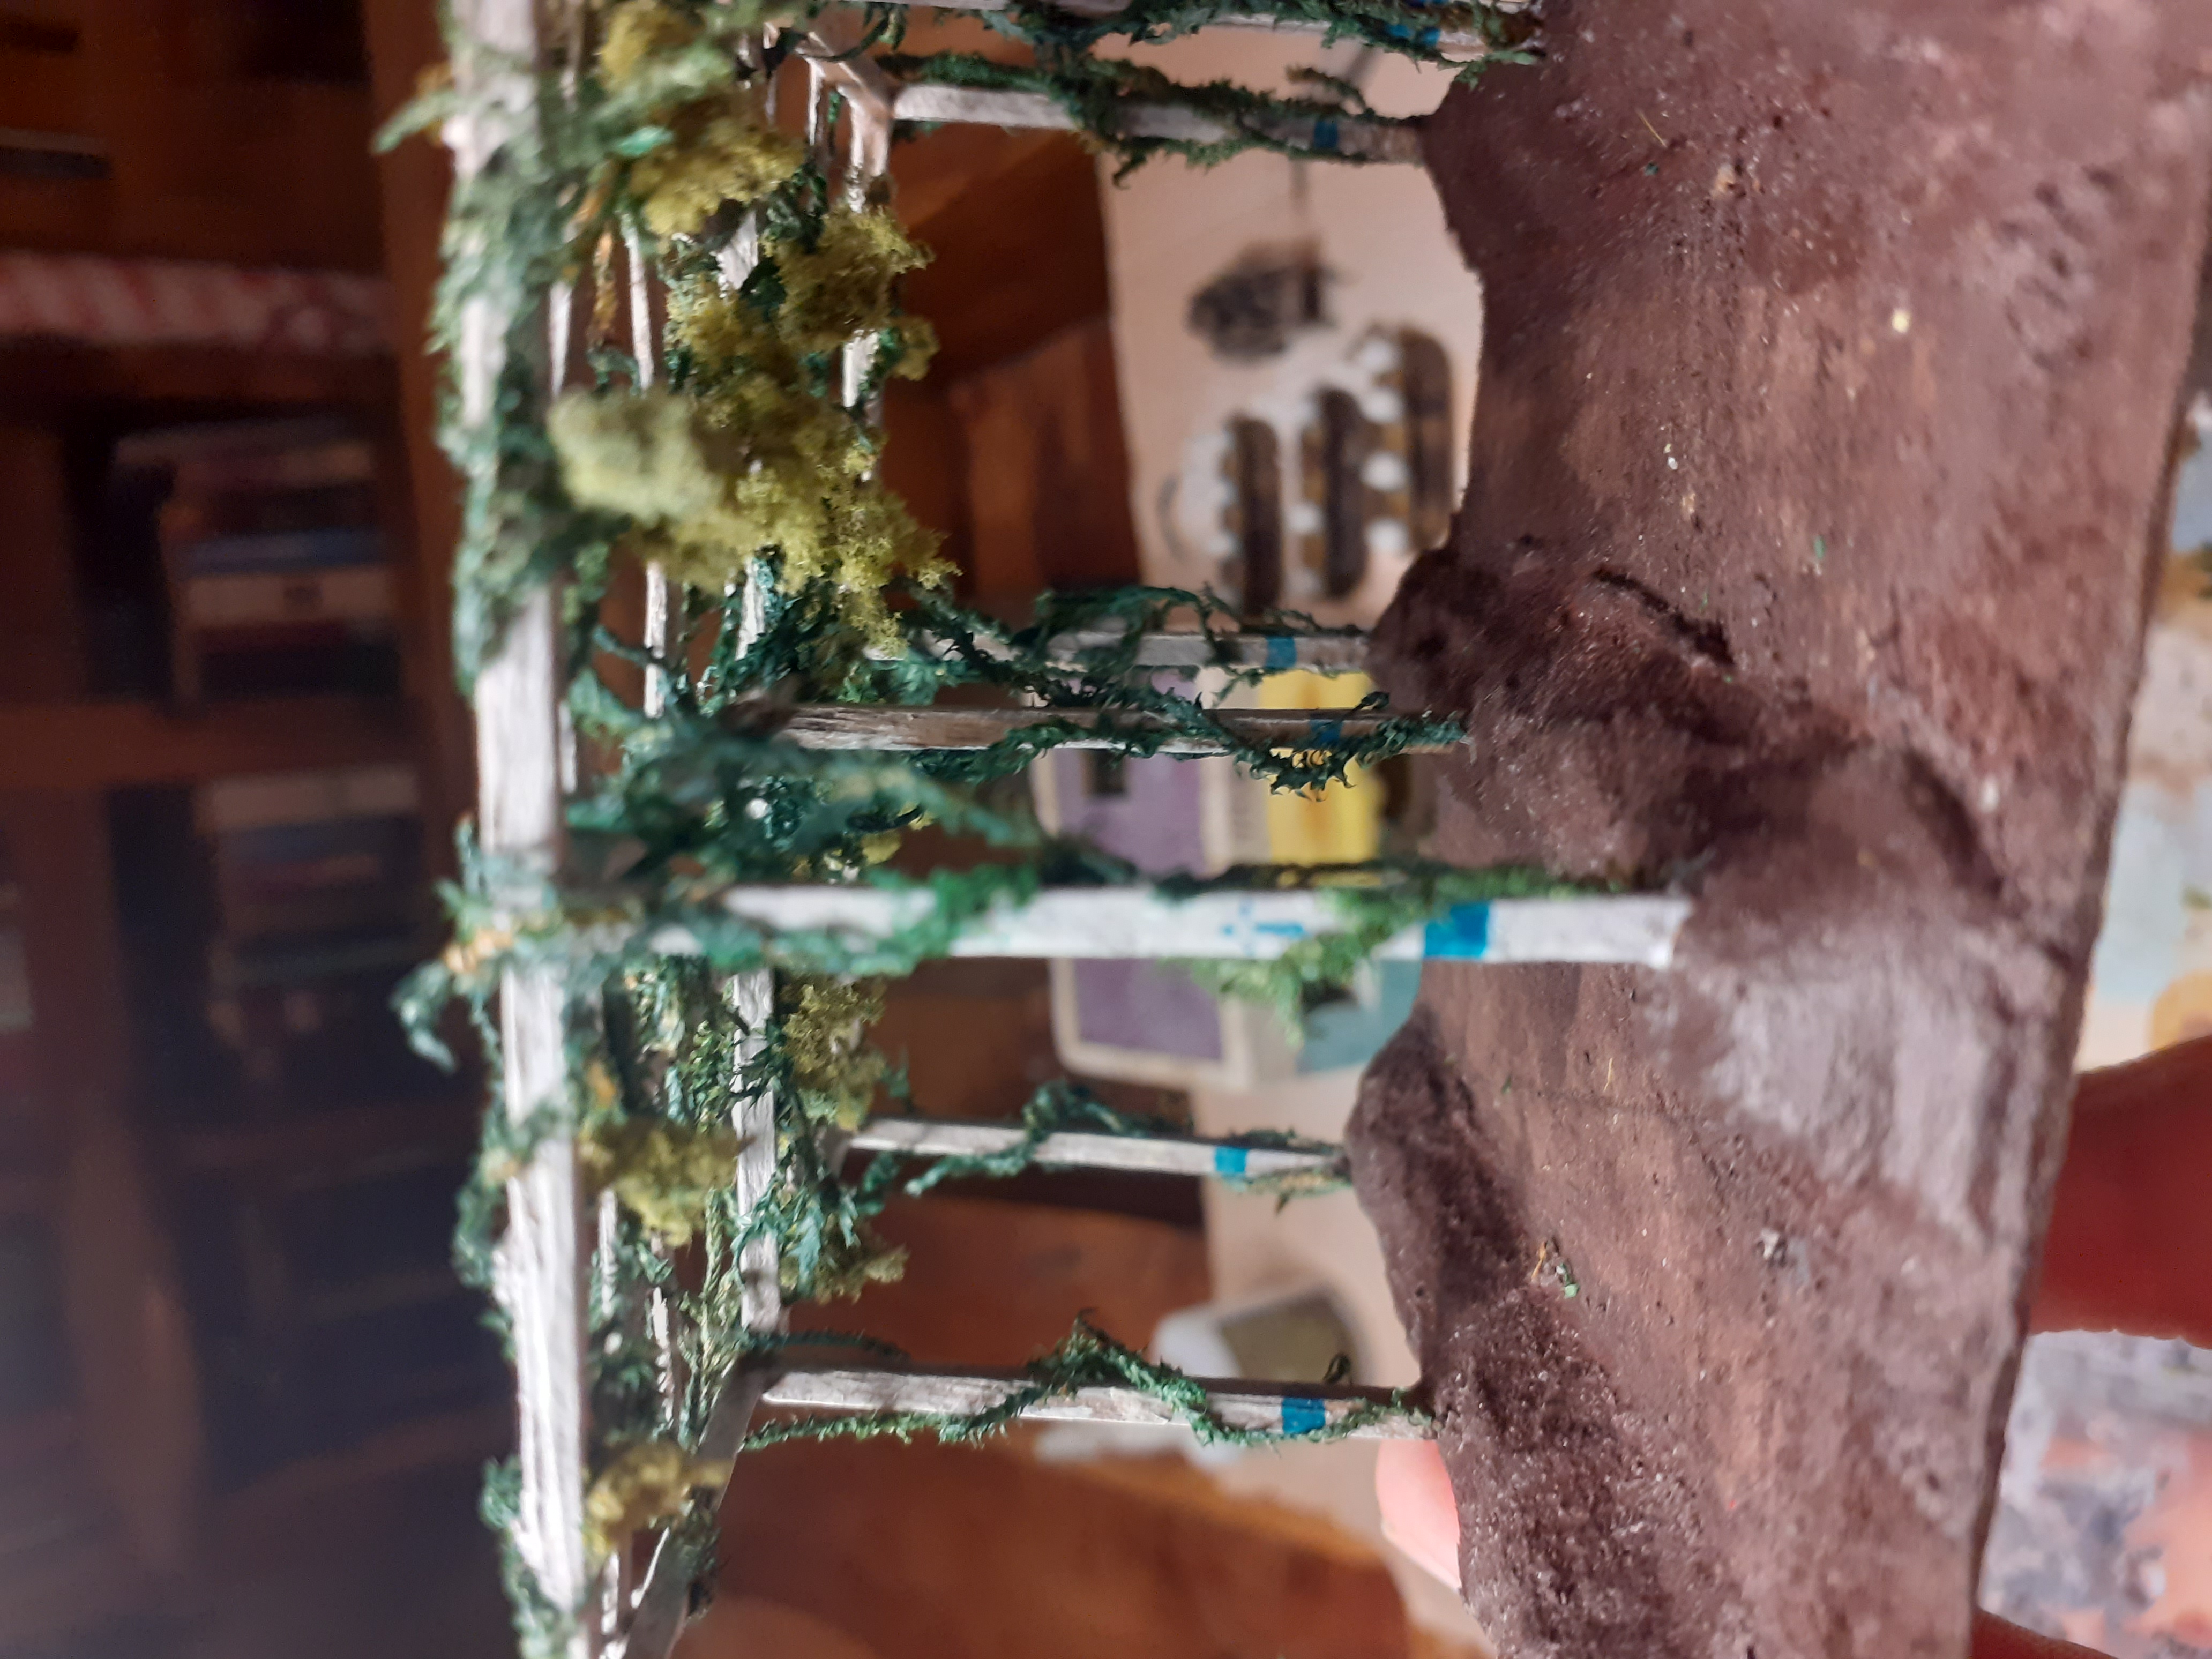 All done, after basing done, the model was generously sprayed with Testors Matt Varnish to fix all the grapes firmly in place.
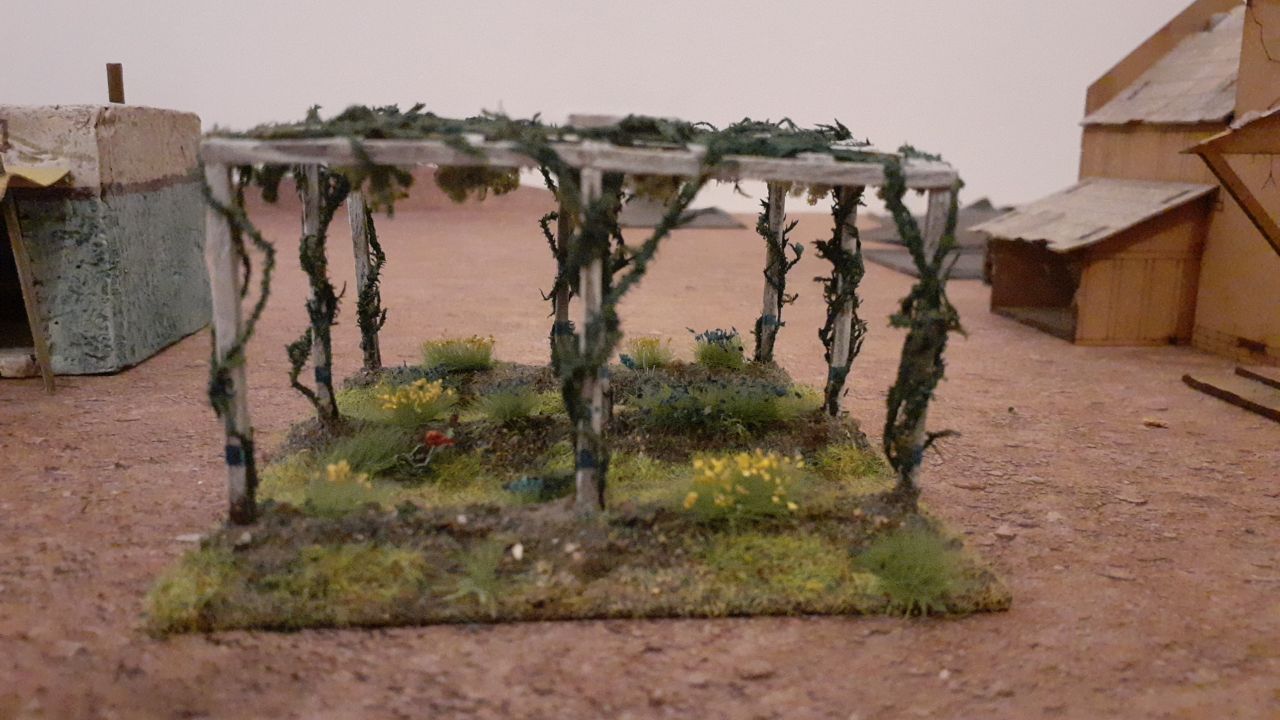 I used the same basing technique as for the beehives, except that I coveted the raised beds in Lukes Gaming Scenics Scrublands avoiding the larger stones and foliage.
 Building Beehives.
A while ago I promised to put up a guide as to how I built the scenery shown in my last post.
Unfortunately I temporarily lost access to my photos, but I have recovered them now.
So here is the first episode of three.
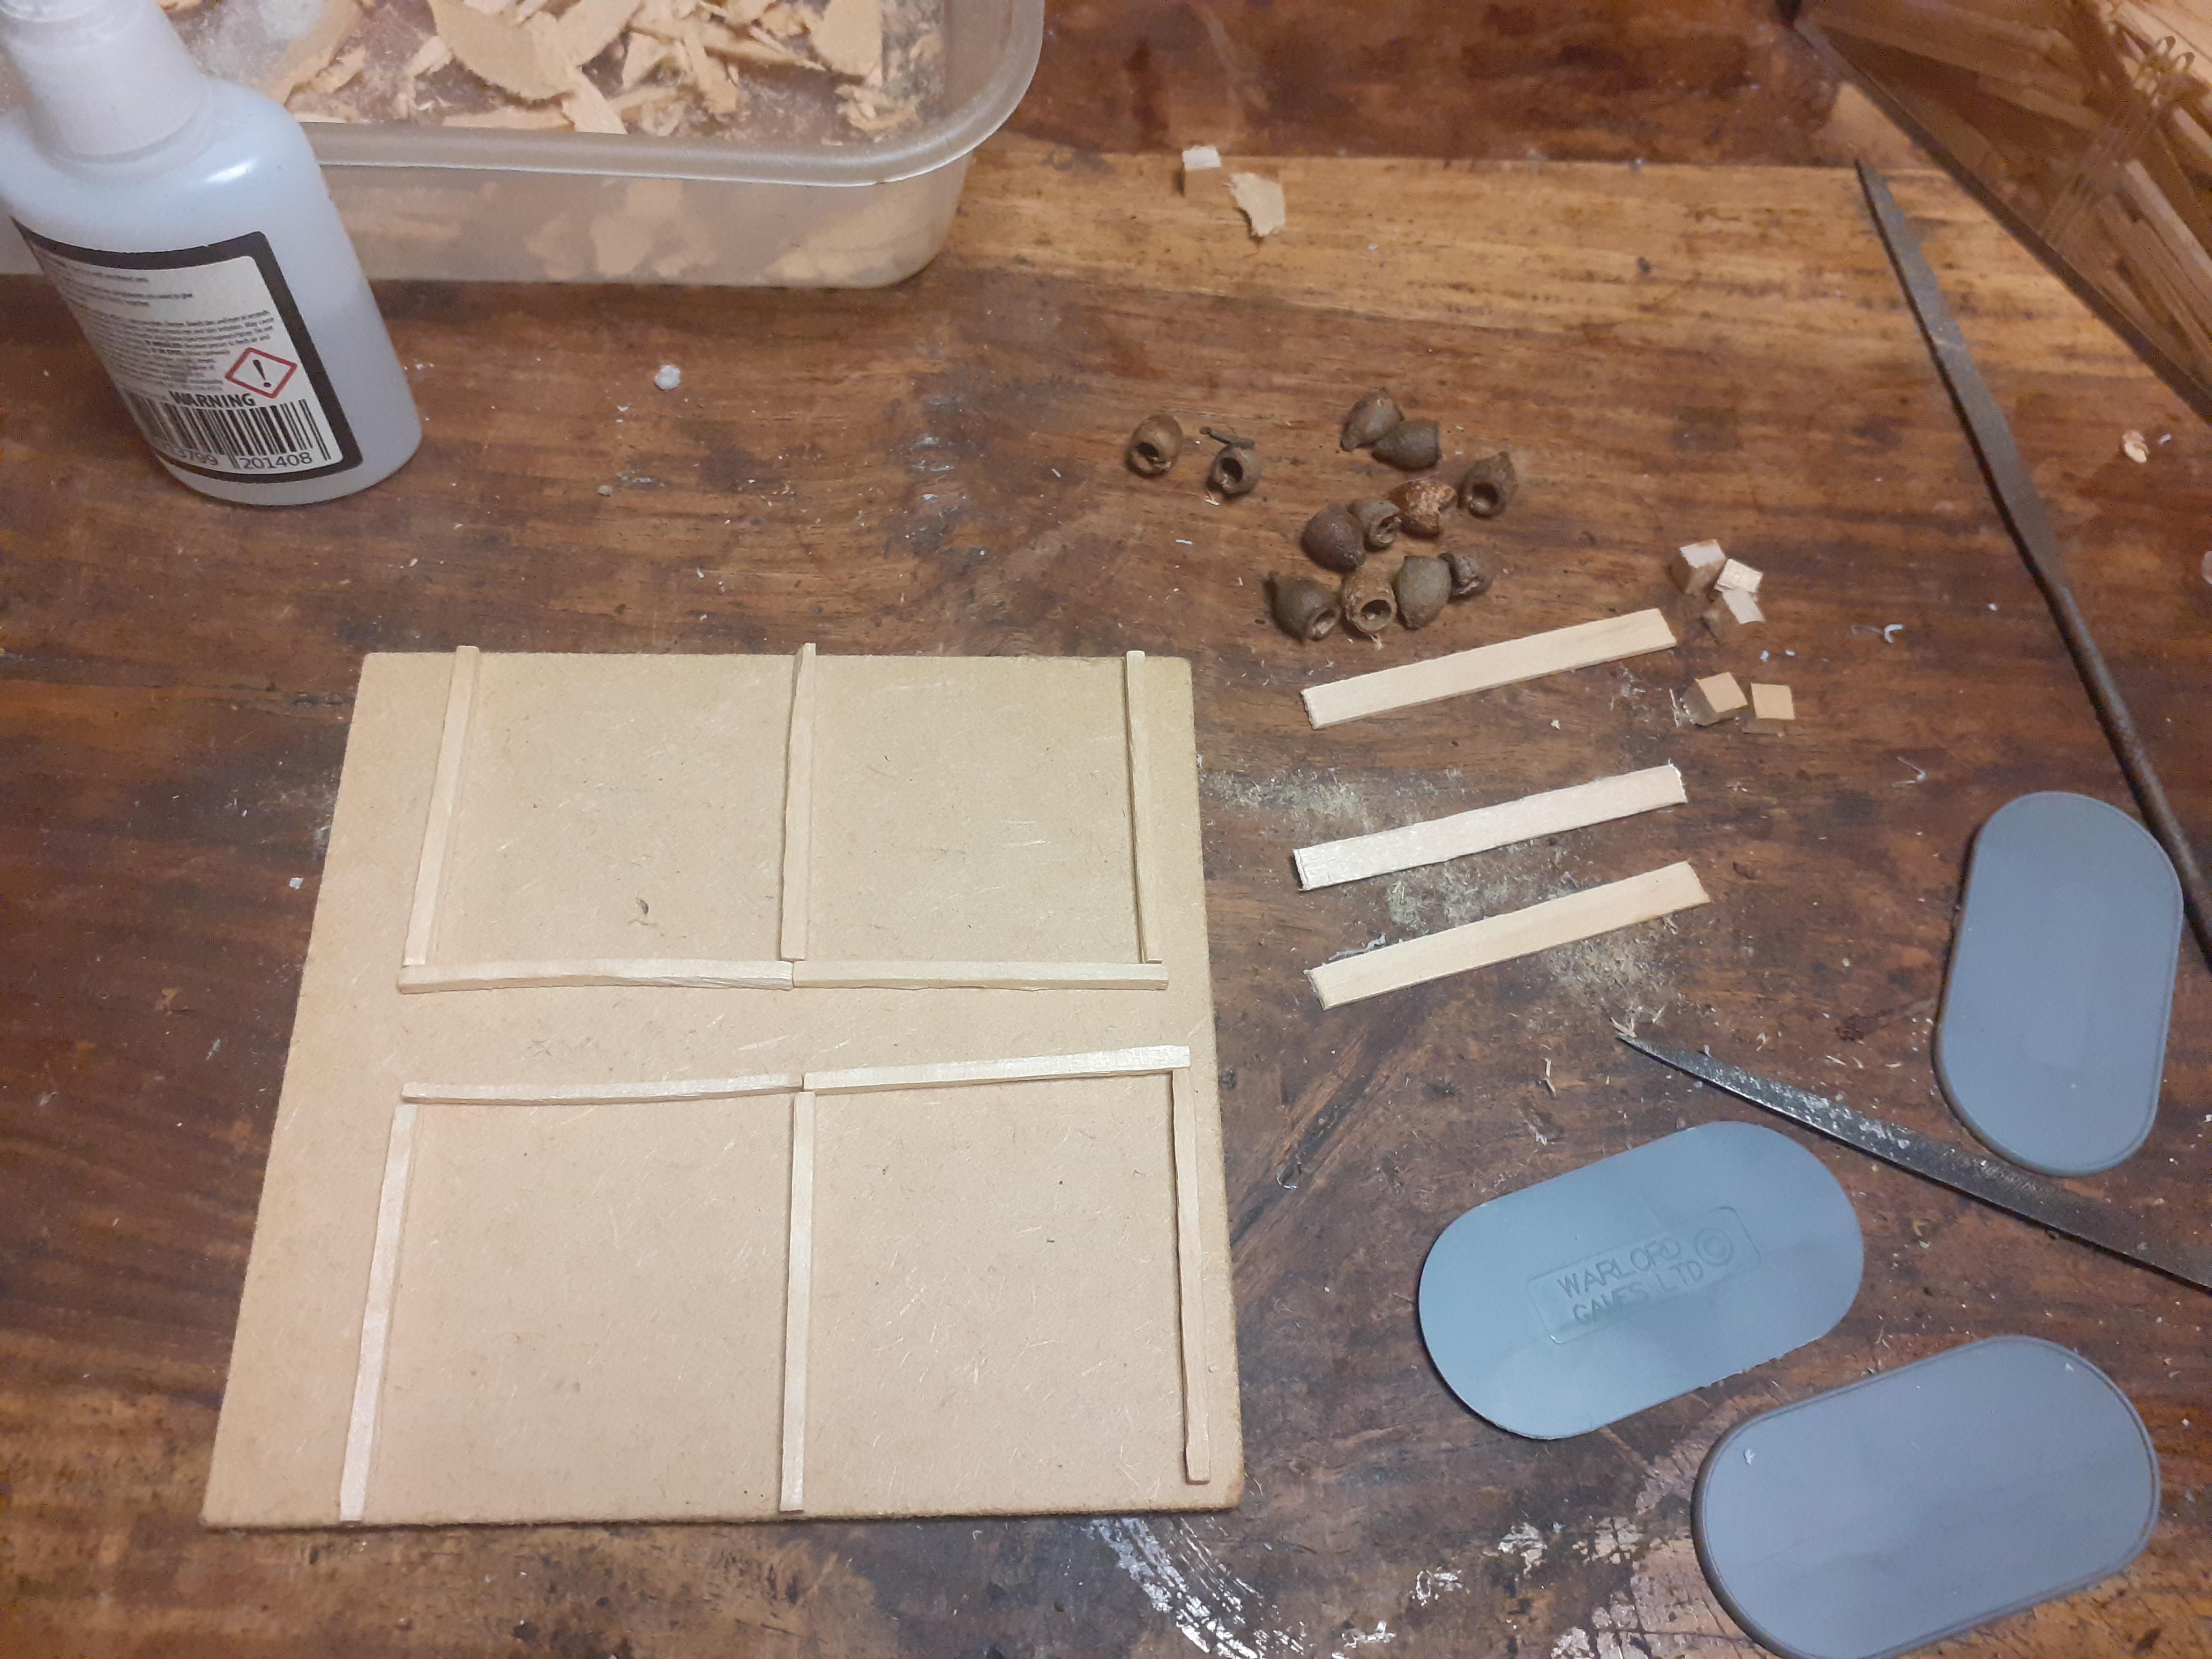 The materials I started with. I have also started to build the frames for the vineyard.
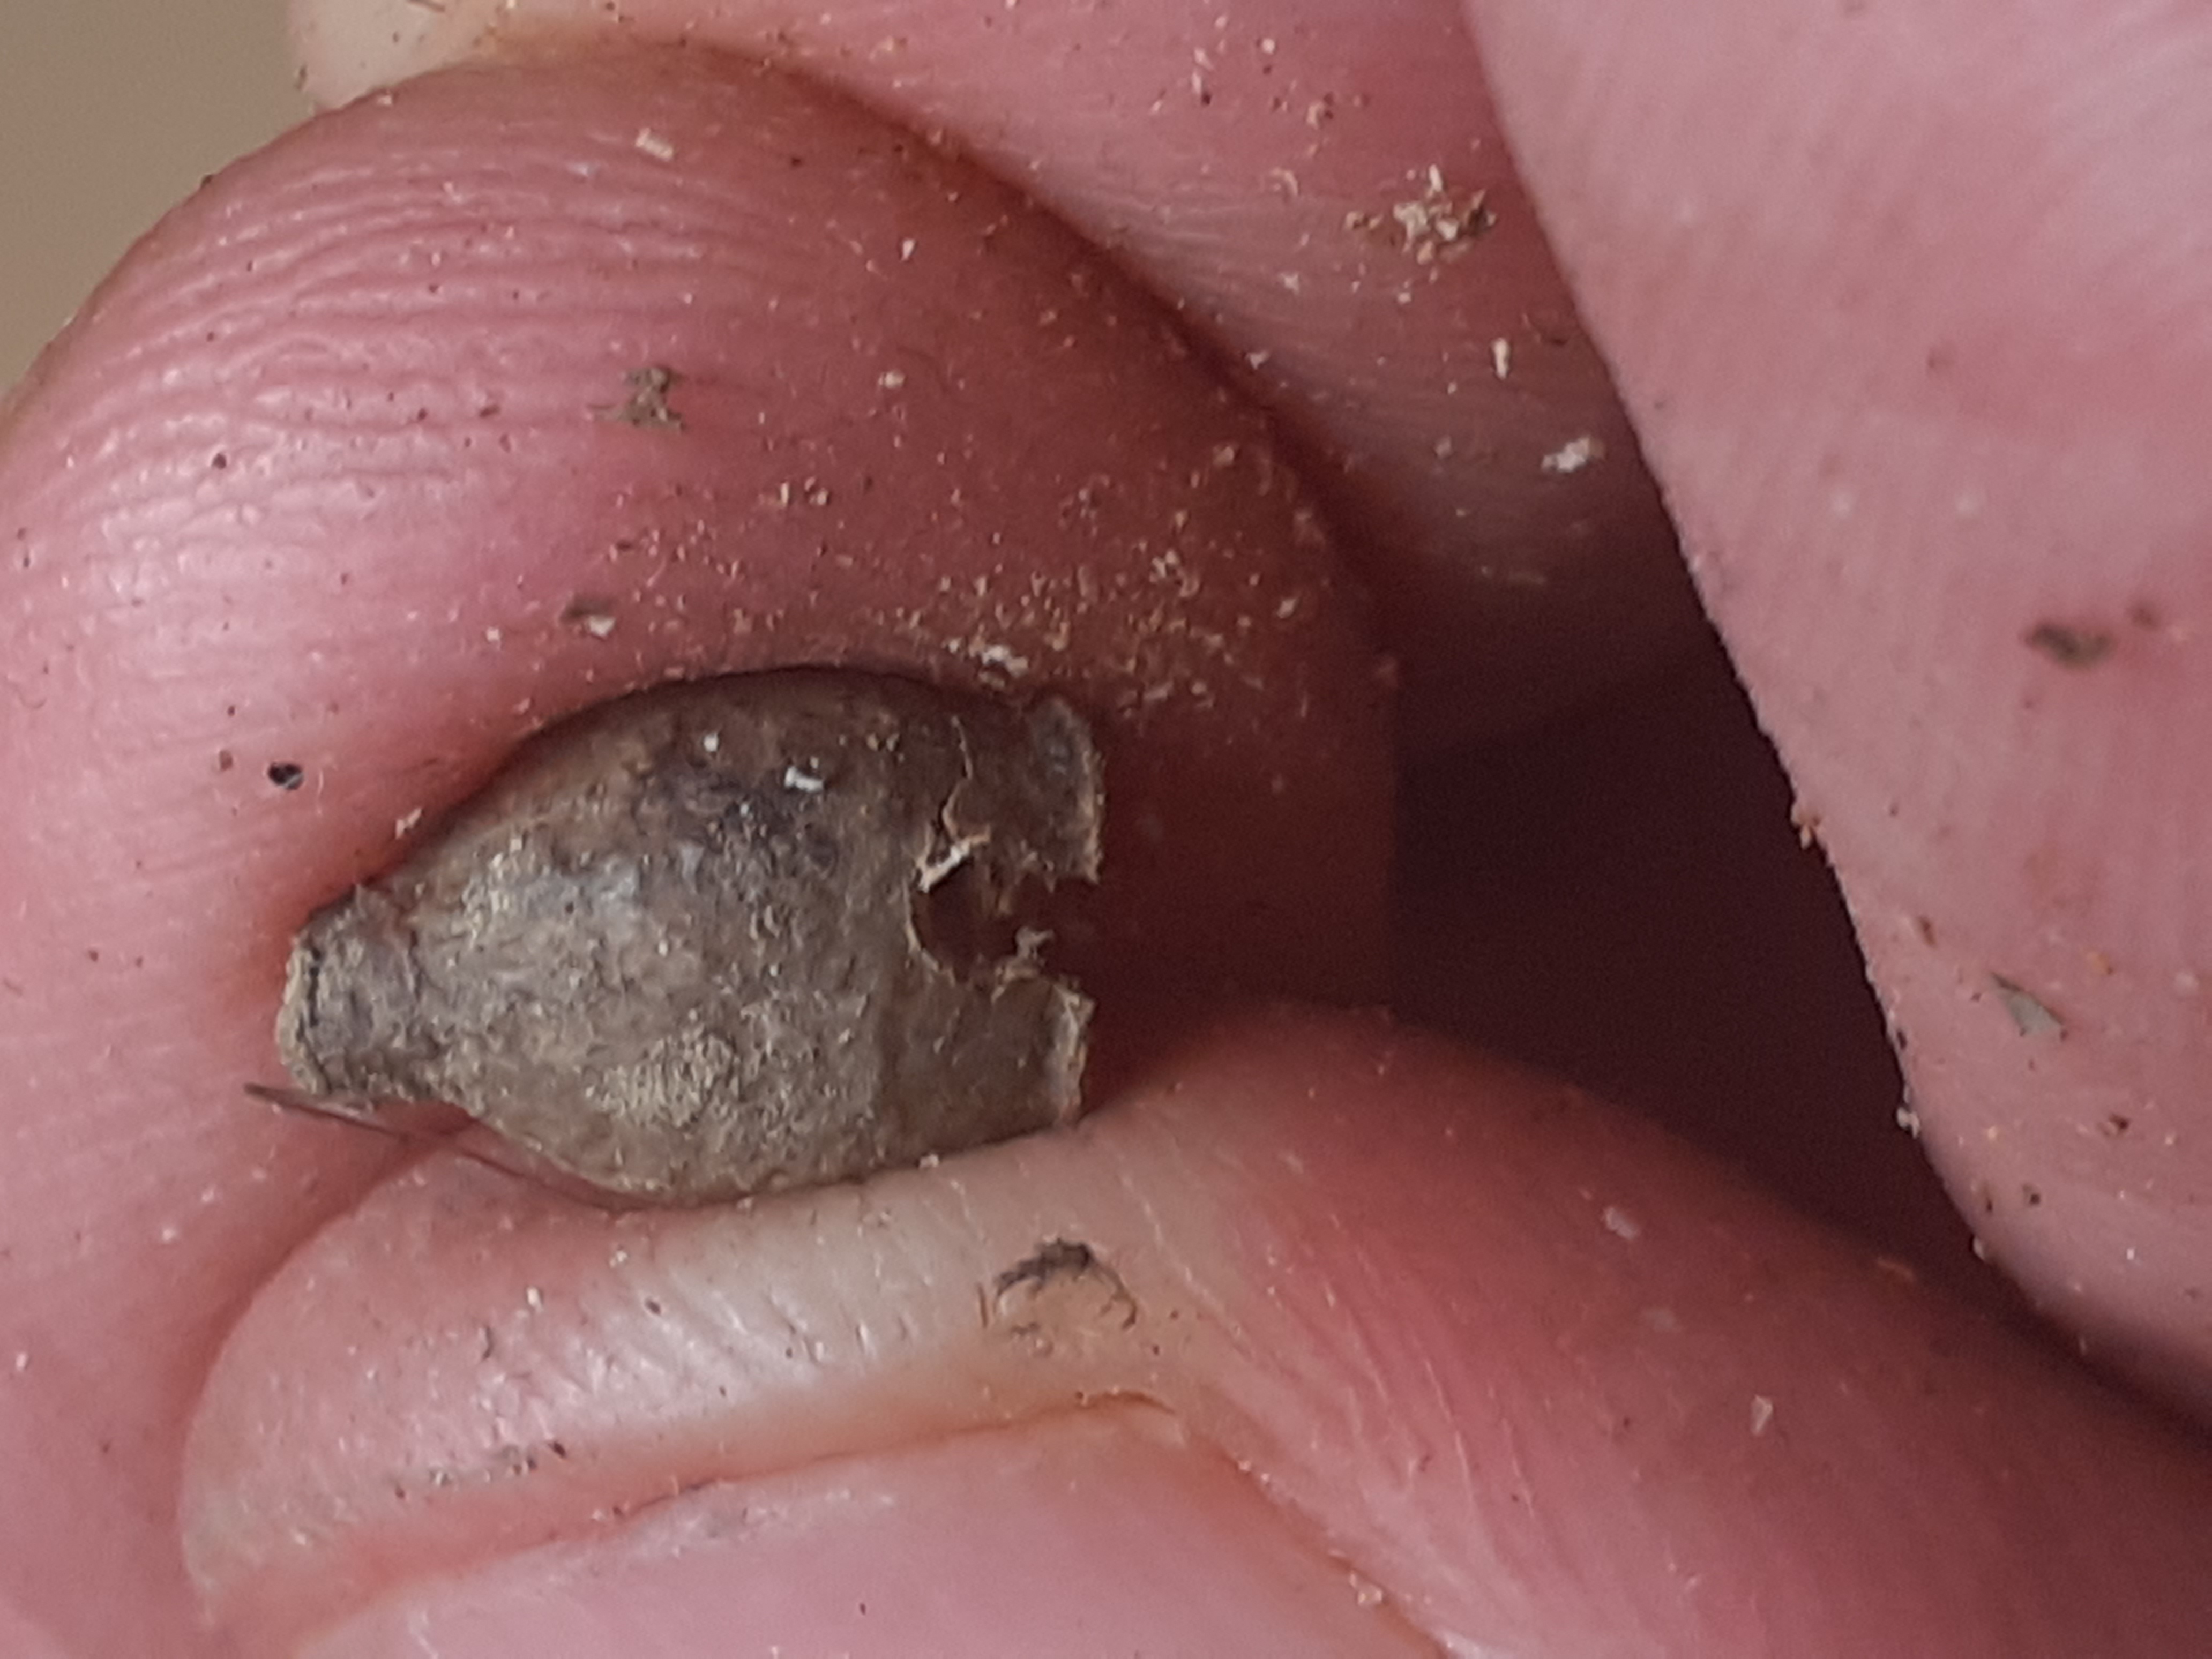 A seed pod, I collected these many years ago as I thought they might be useful, then when building my Glorantha scenery I had an eureka moment, and realised these with a small aperture at the bottom would make perfect beehives.
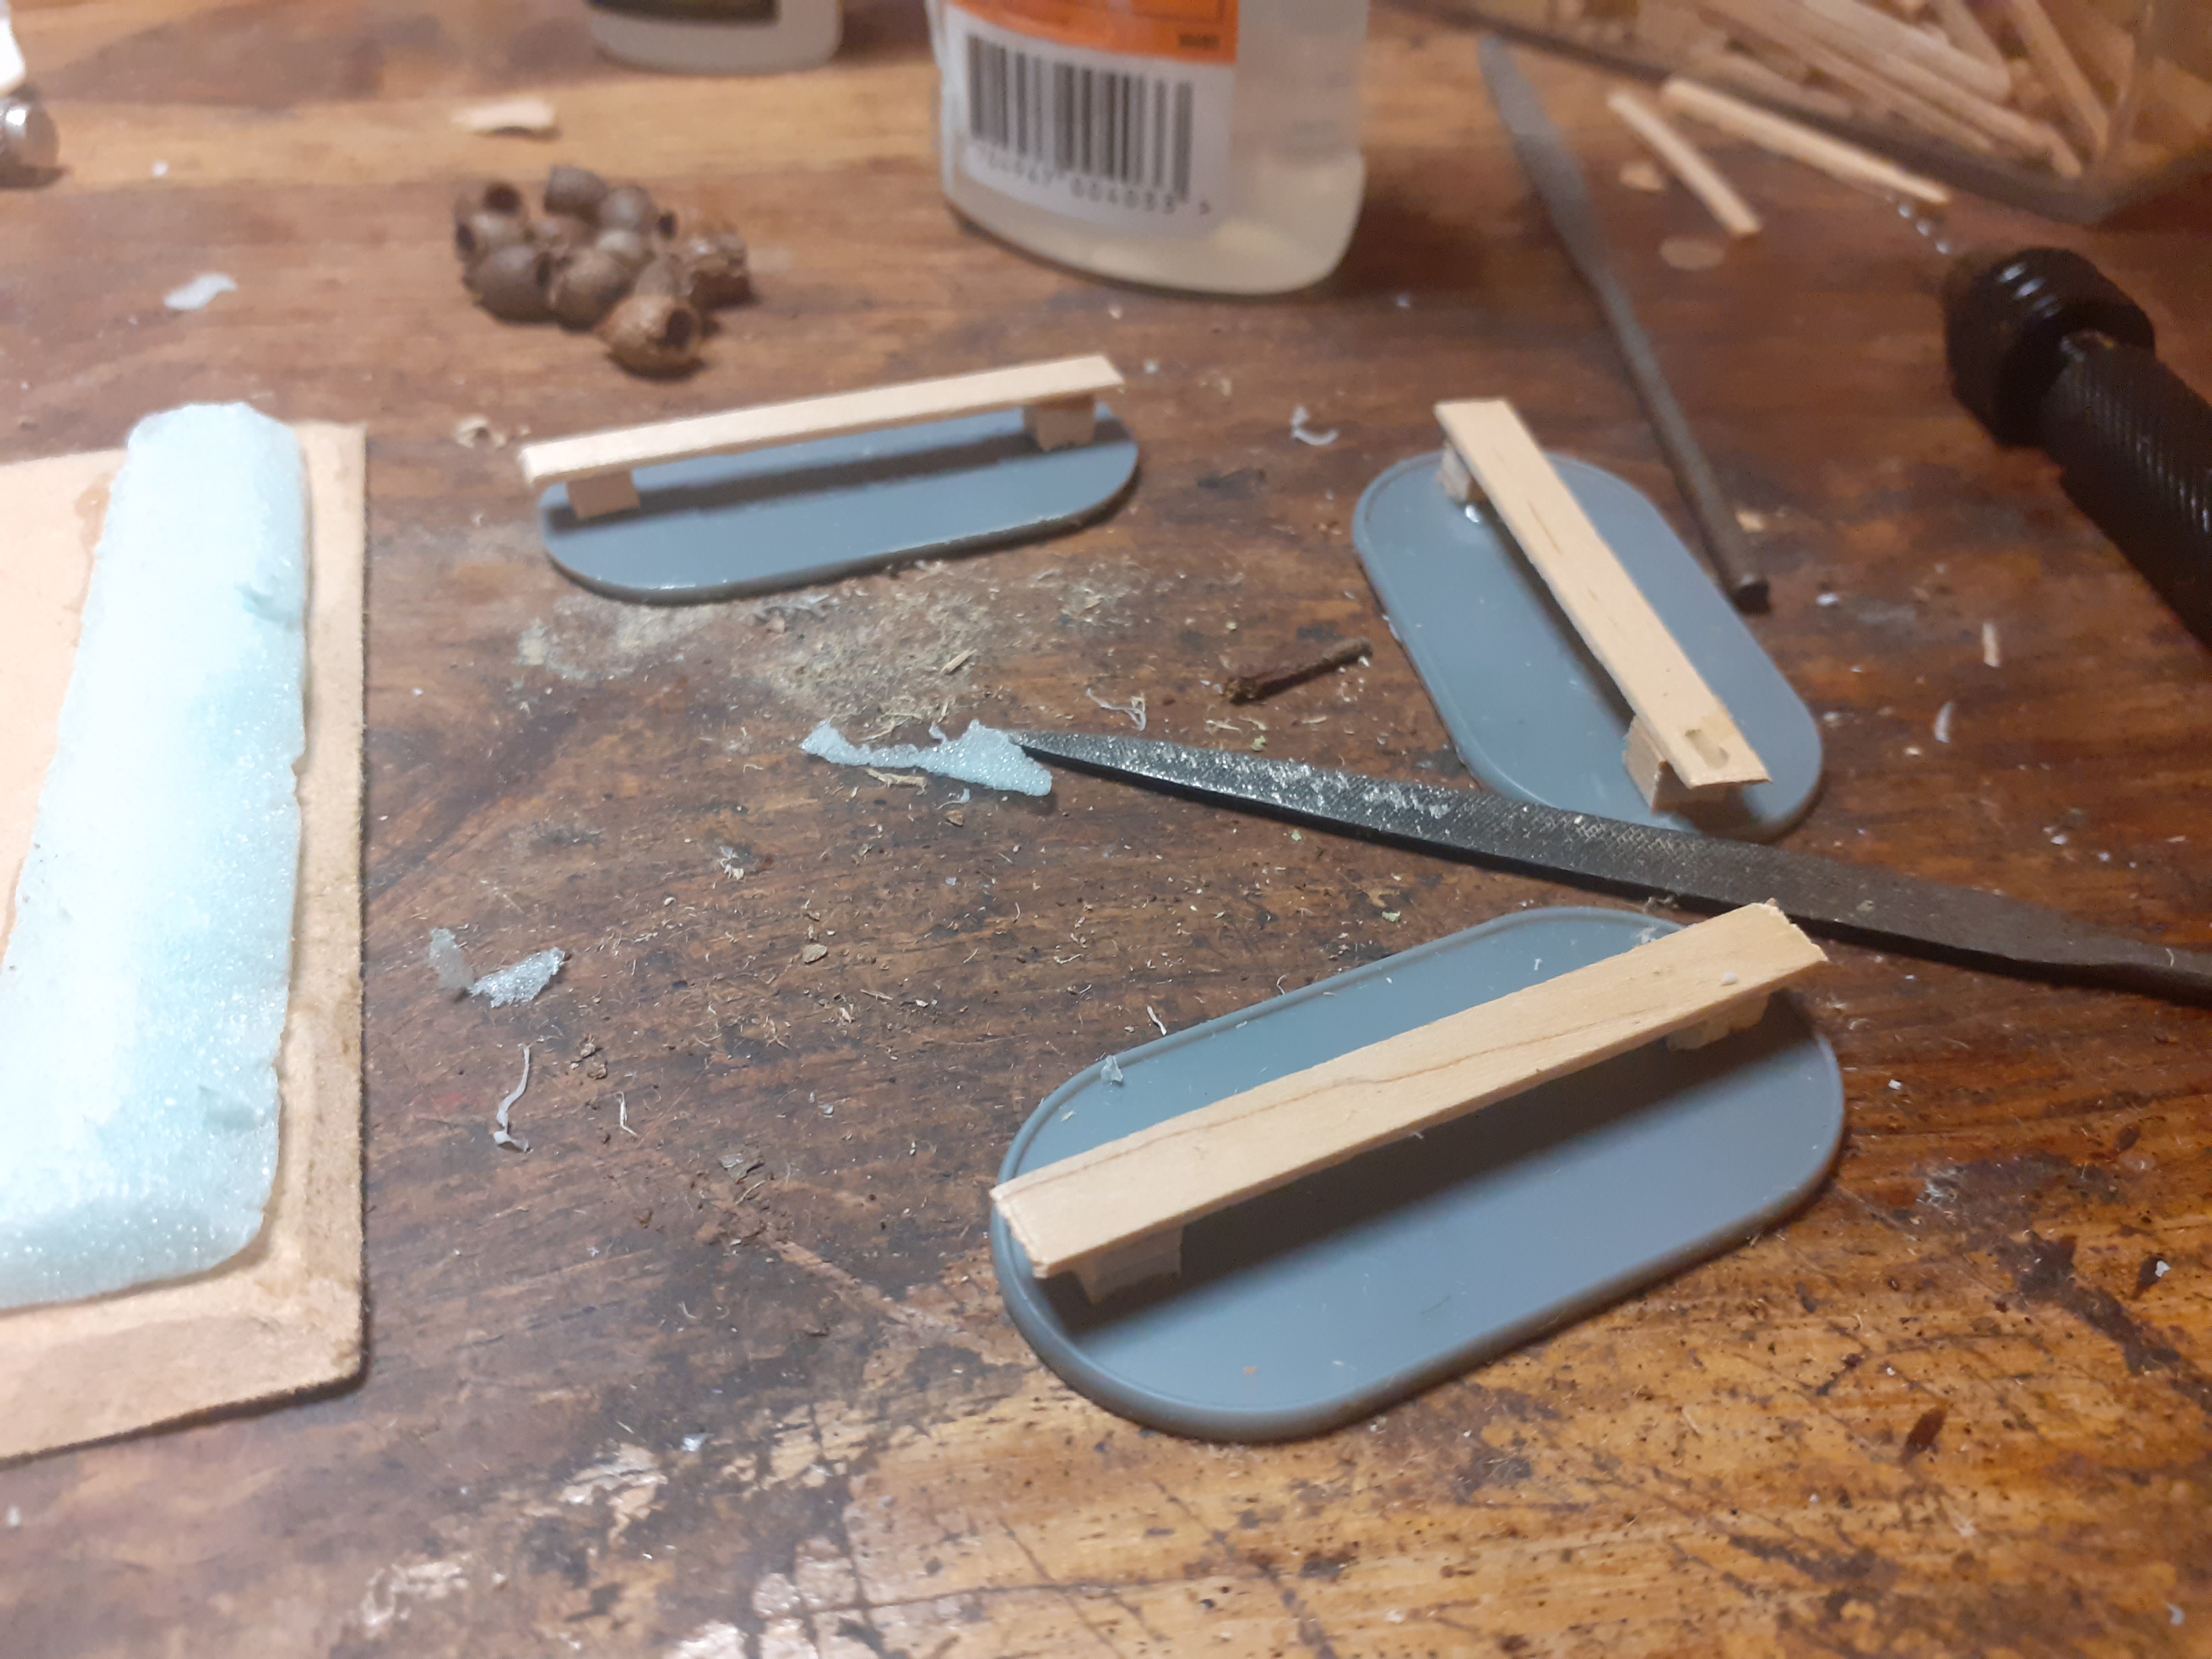 The benches for the beehives made from lollisticks.
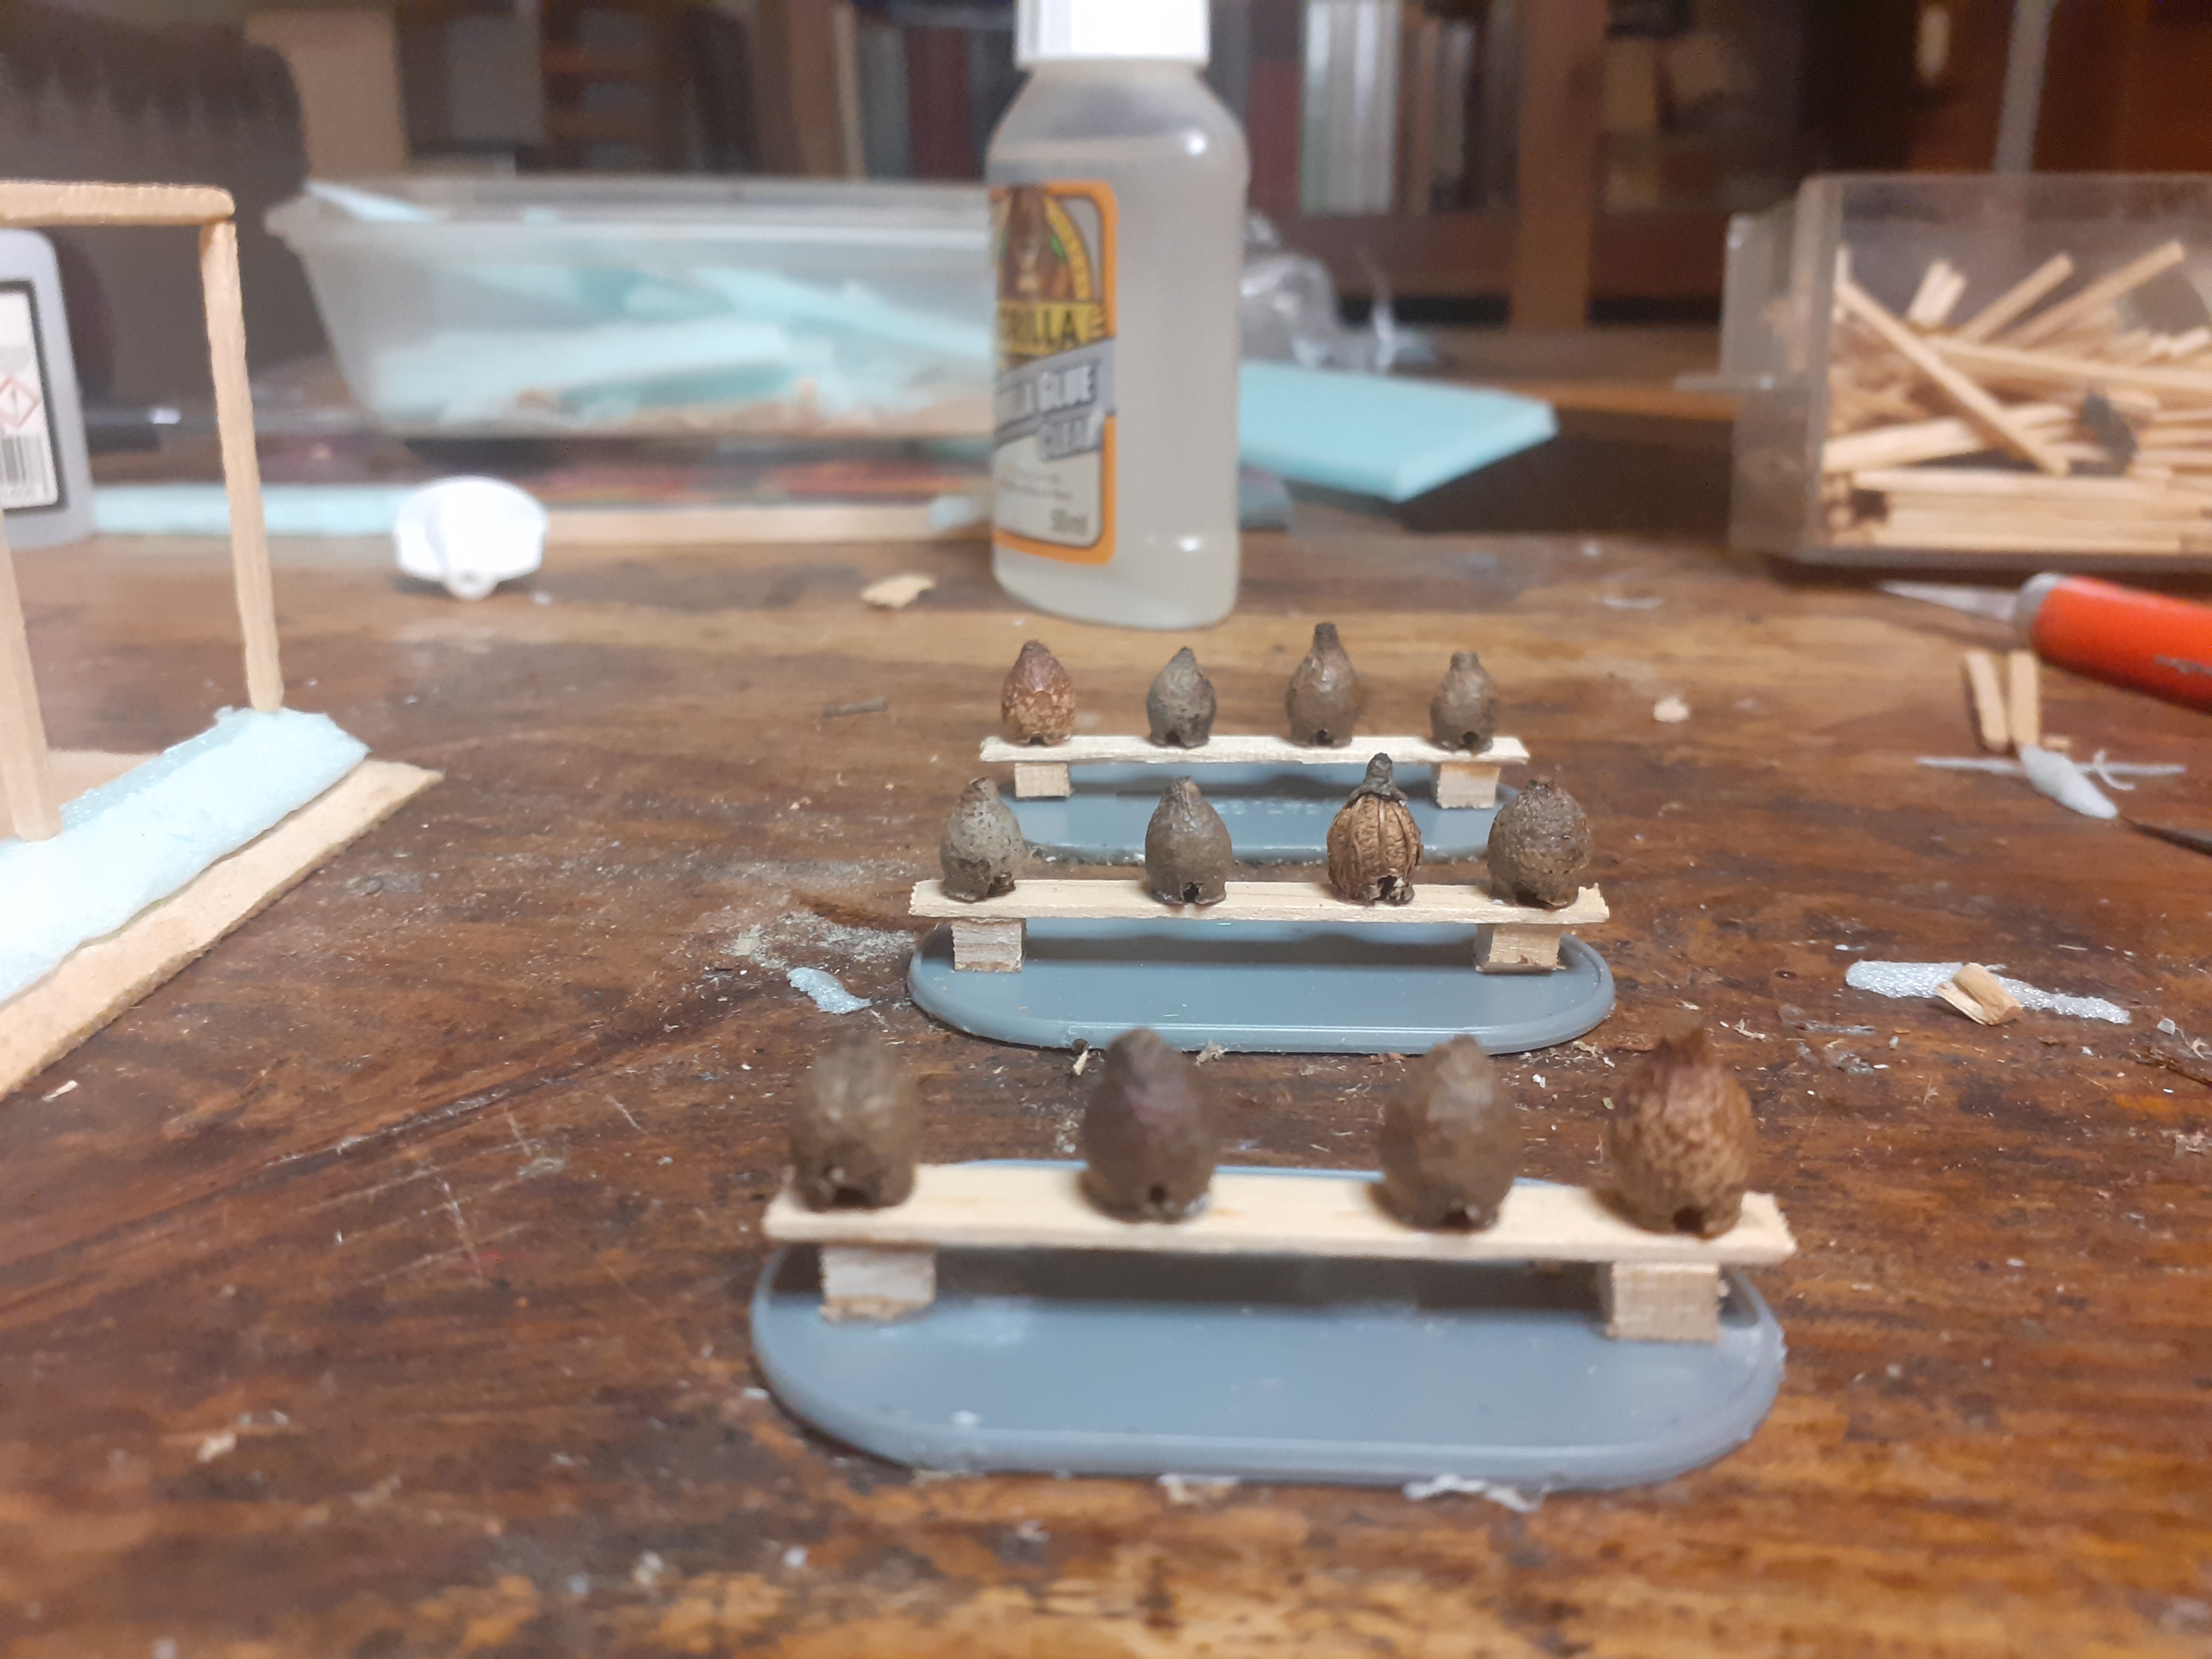 The beehives now glued to the benches.
 The beehives where then painted, sorry I have no painting photo's. The beehives where painted in Model Colour (MC) English Uniform and the benches in MC Ger. Cam. Med. Brown and then the whole model was coated in GW Agrax Earthshade. The Beehives where then dry brushed in MC Khaki Grey, and then adding White upto a final dry brush of pure white. The benches where dry brushed progressively from Army Painter (AP) Leather Brown to AP Skeleton Bone.
 One of the Seed Pods was damaged and I thought it looked like the wicher core to which the cob(?) had been added and would make a great damaged beehives. I applied one coat of GW Cobtrast Skeleton Horde followed by a coat of GW Contrast Guilliman Flesh. The Bases wfere painted inMC English Uniform, coated in PVA glue and dipped in Lukes Gaming Scenics Mediterranean Soil basing mix, since discovering his ranges of products this all I use for my bases, it is so easy to use and gives a great finish better than I can achieve with paint. After applying I then spray with Testors Matt varnish to fix the basing material. Finally I add a mix of tufts and flowers from my basing box.
I am still here
I have had a bad January for hobby not having picked up a paintbrush, so I decided to dive in to my favourite aspect of the hobby, scenery building.
This is where I feel truly creative and going back to the #warzan topic about art in the hobby, this is where I believe I create art.
I am just going to post the final builds but I have a load of photos to produce a how to guide for these items which I will post hopefully on Monday when I have some time off.
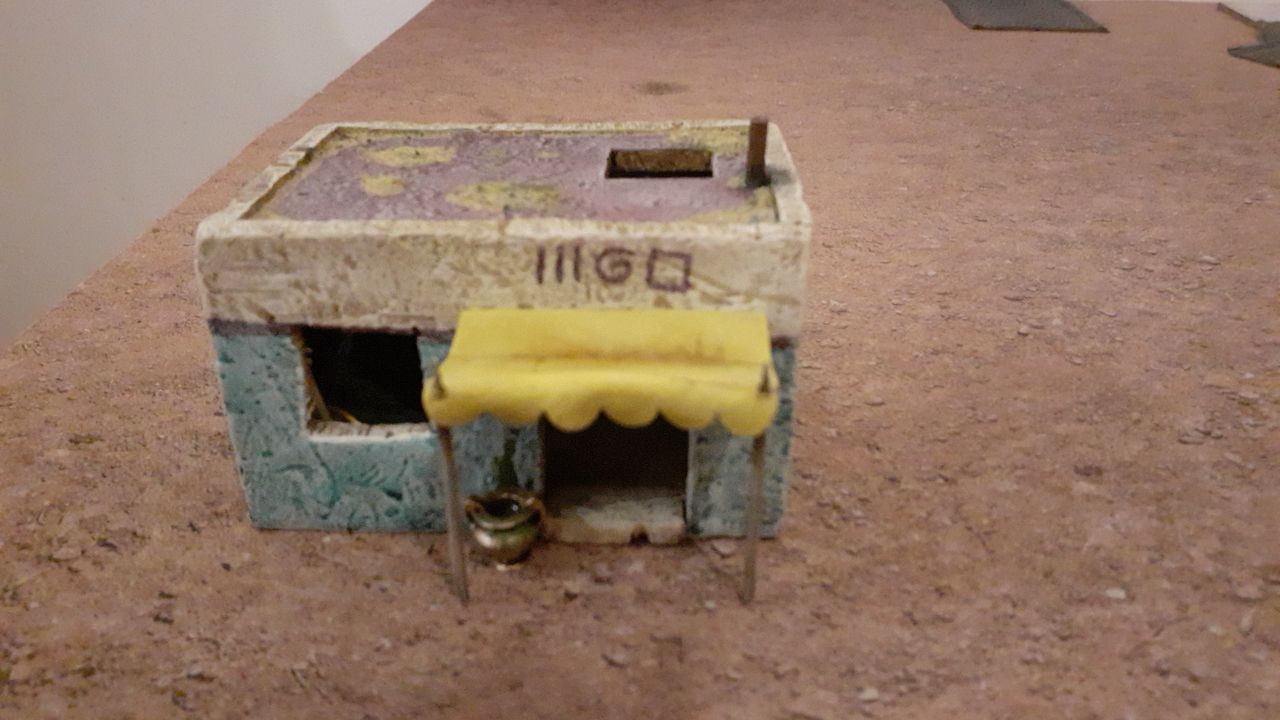 It started with a boring beige Adobe building that became this inspired by the art of the city in the RunequestStarter Set
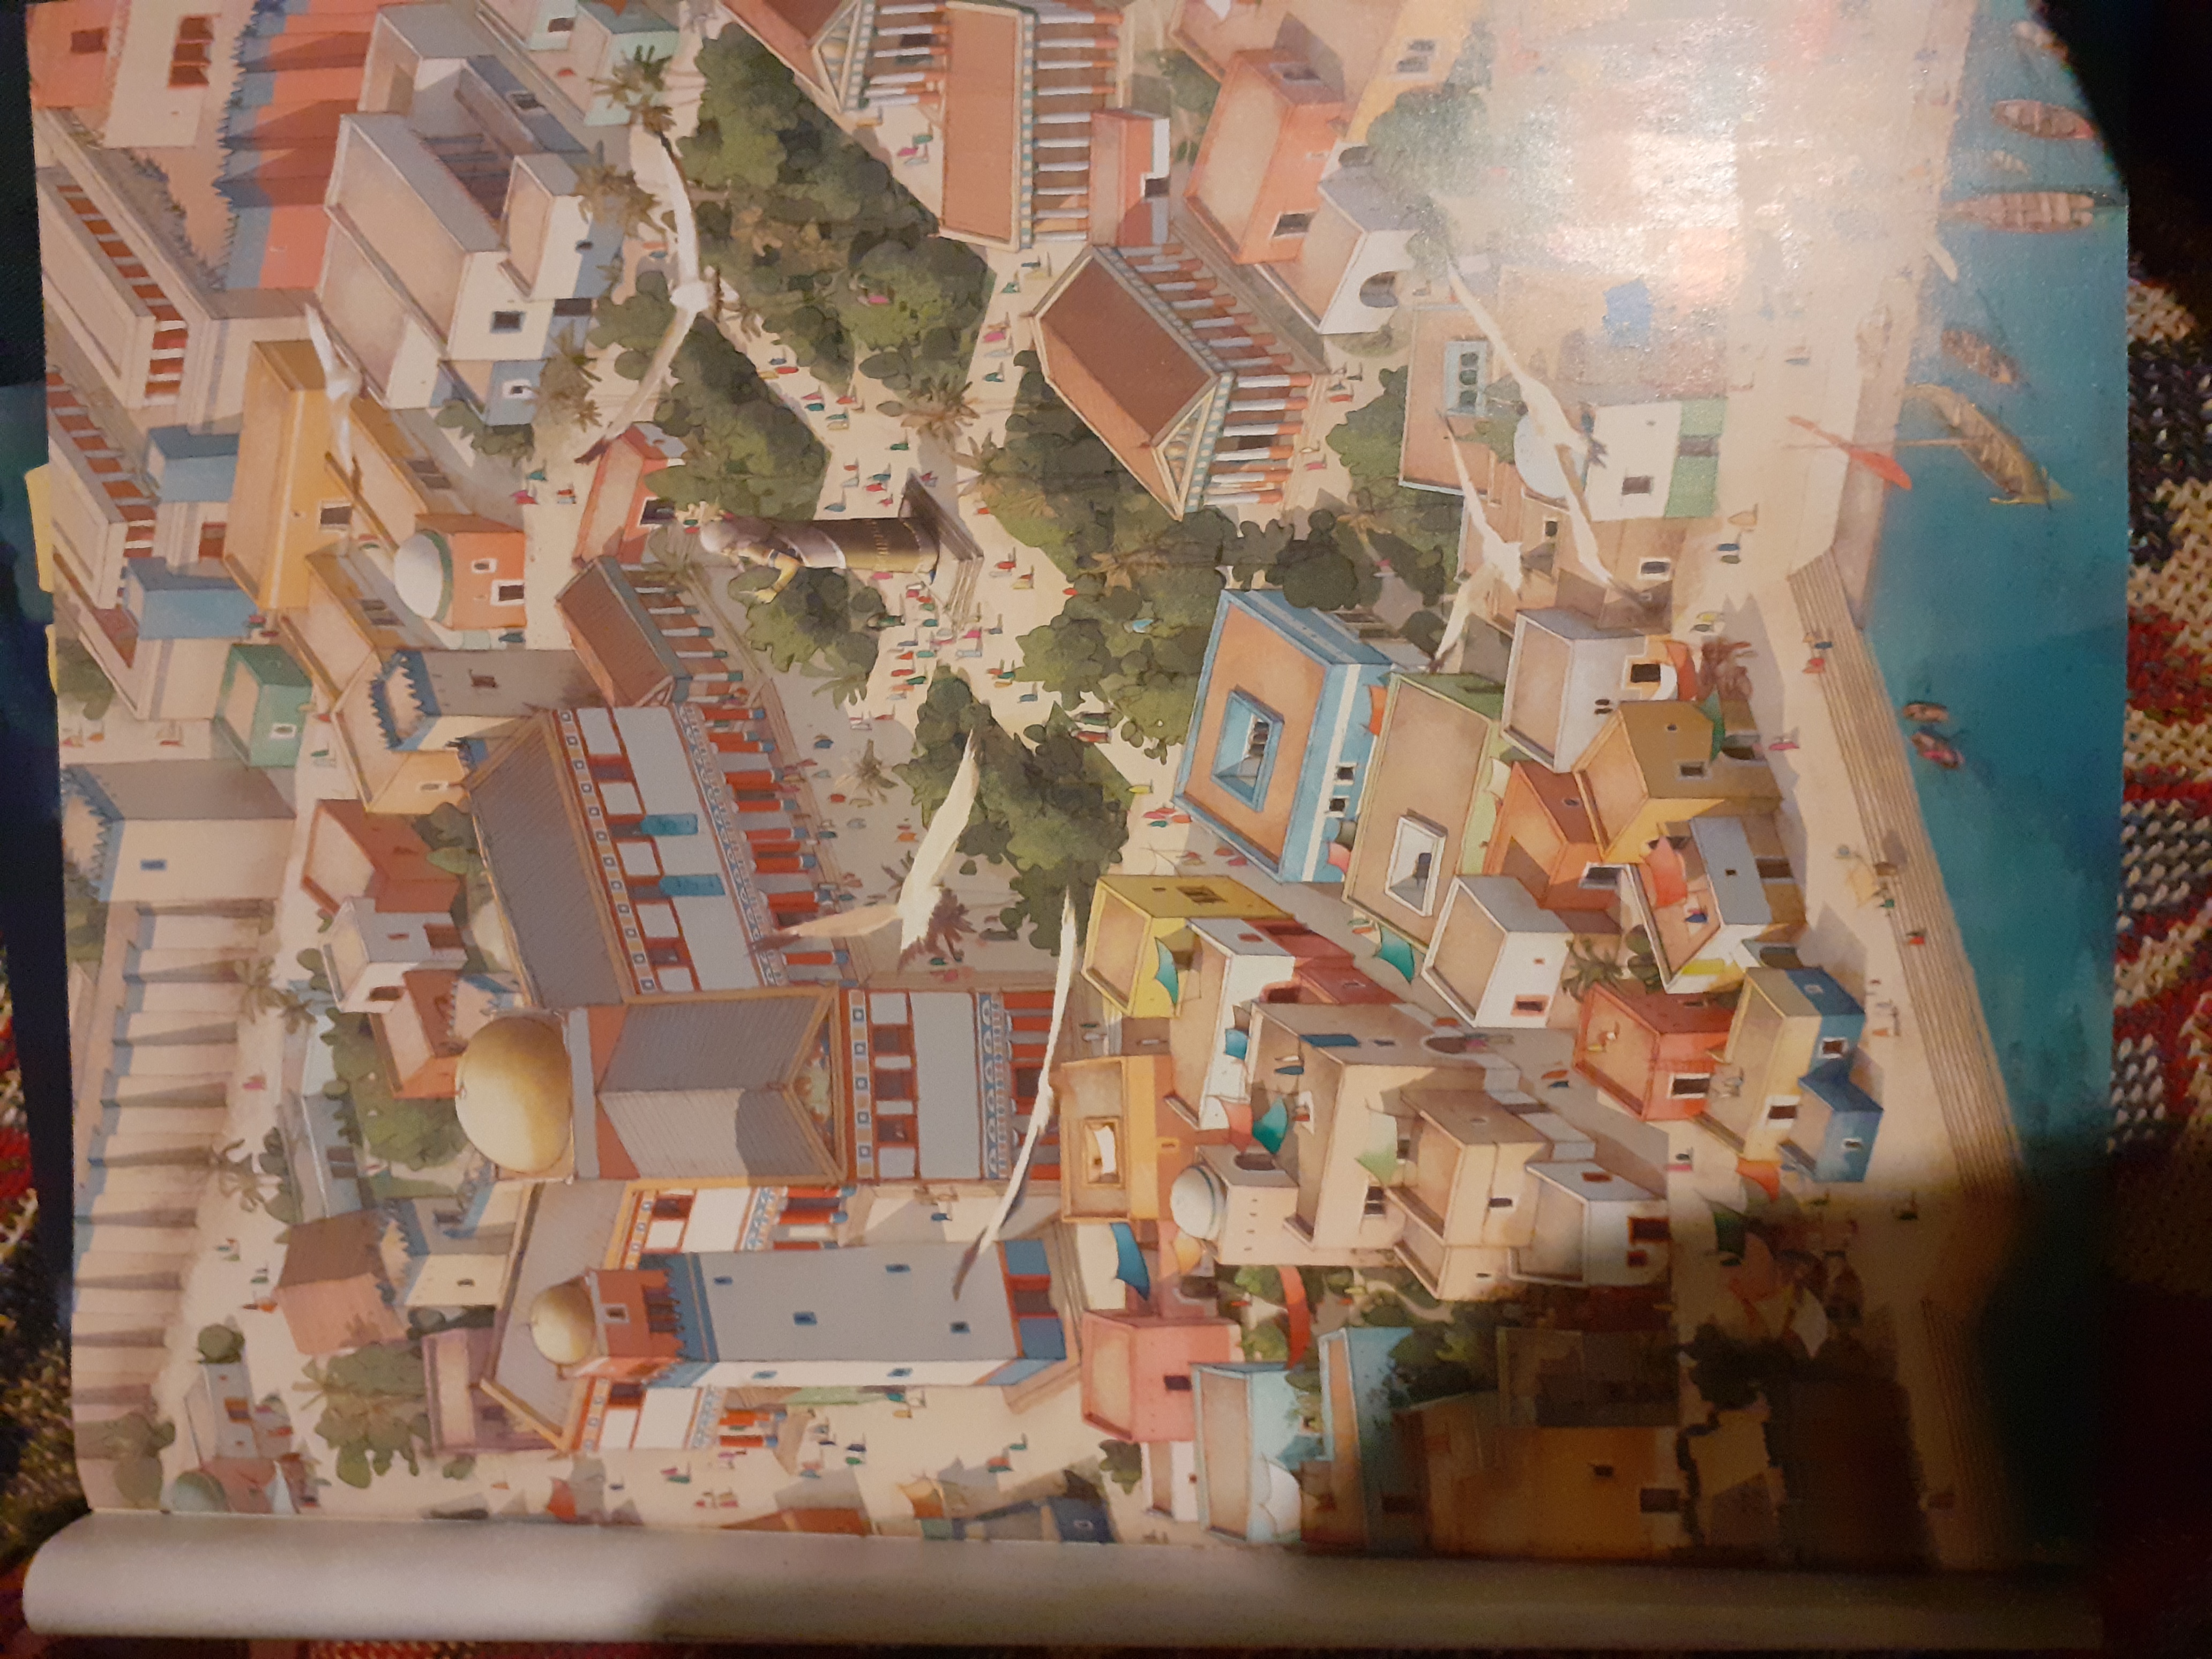 The art
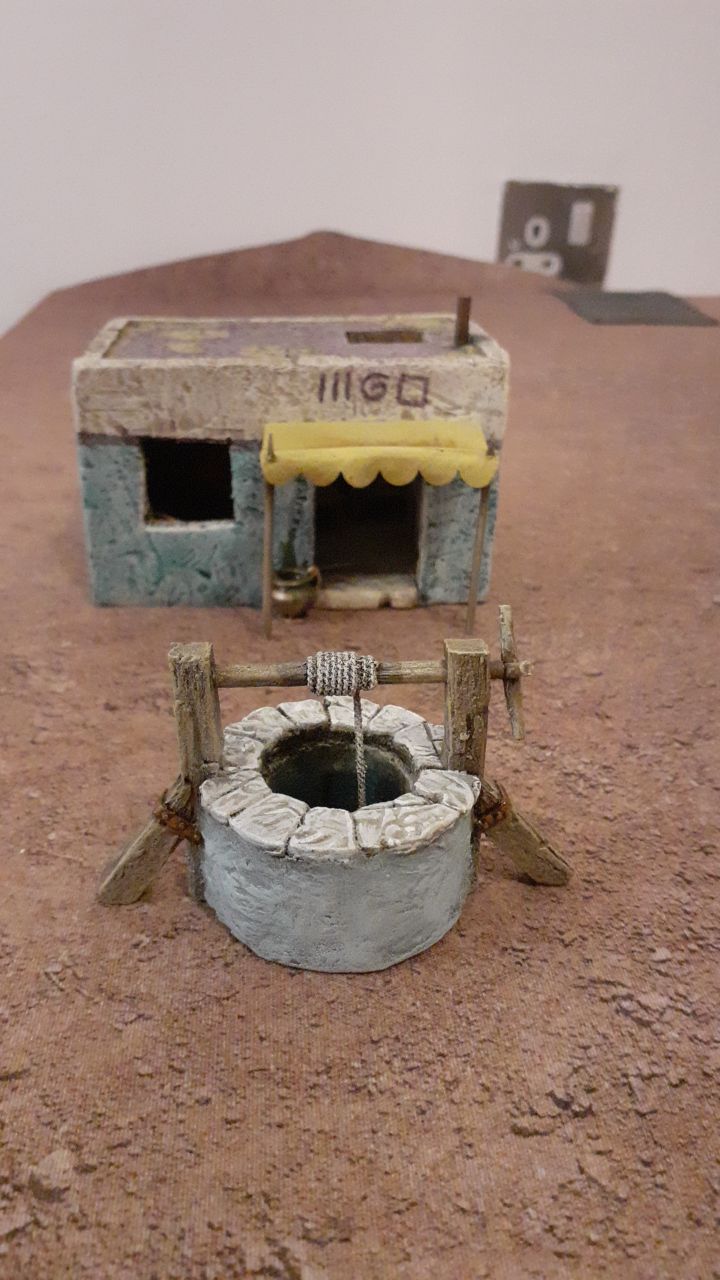 I then added this well from the Fenris Rubble City Kickstarter. I added polyfilla plaster to make it more in keeping with the setting.
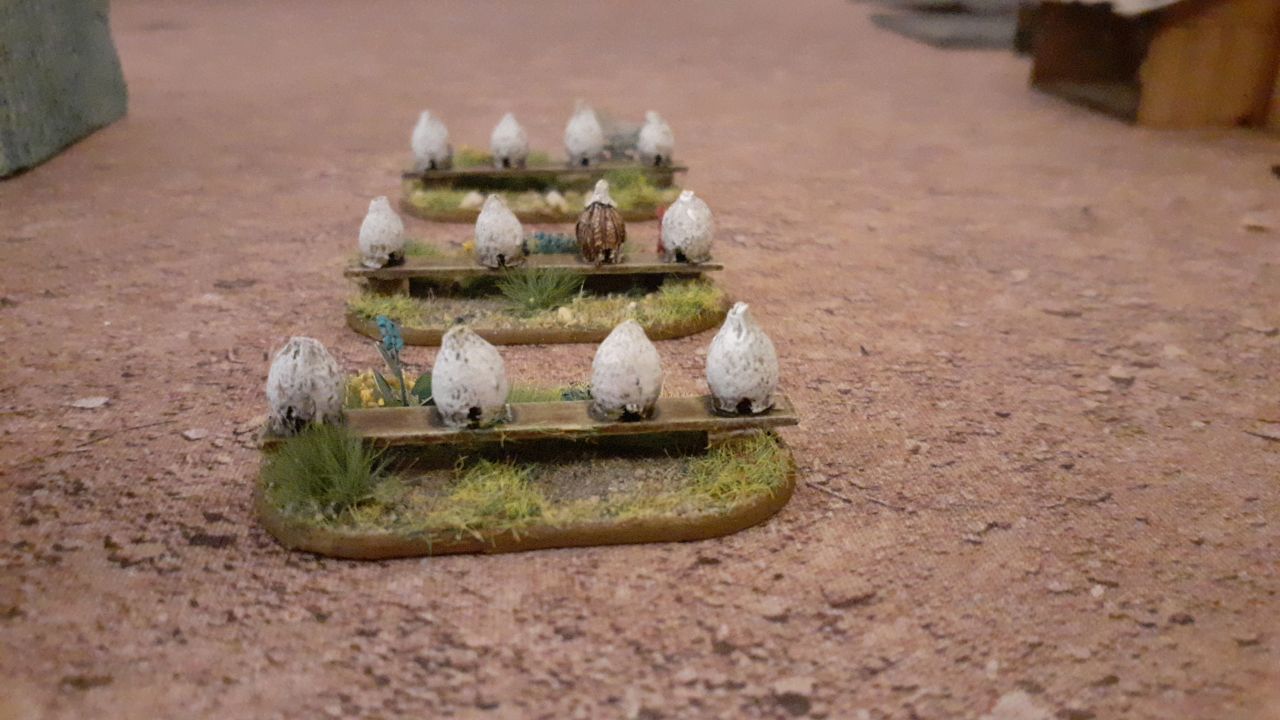 I then built these beehives, they are made from seed pods I pinched from Mums old Pot Pouri about 10 years ago as I thought they could be useful. I have had the idea of beehives for a couple of years and finally got inspired
 This is piece I am really proud of, it came out exactly as I envisioned it.
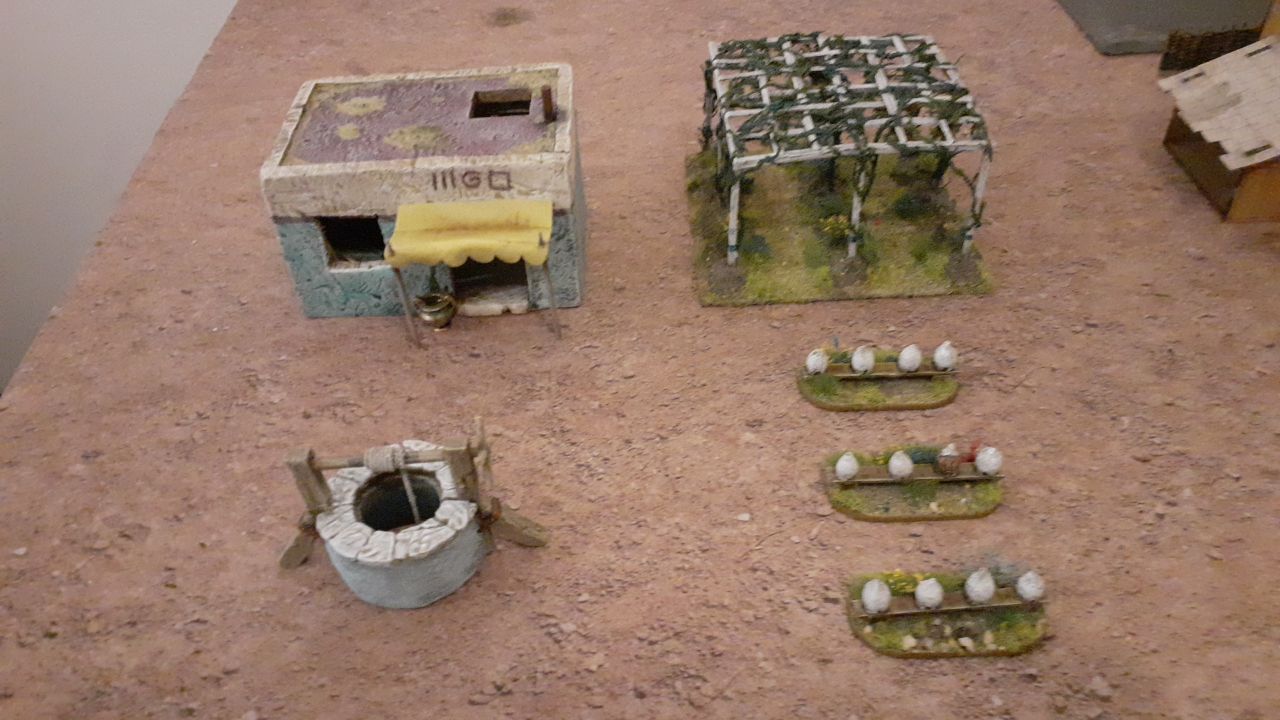 Everything together
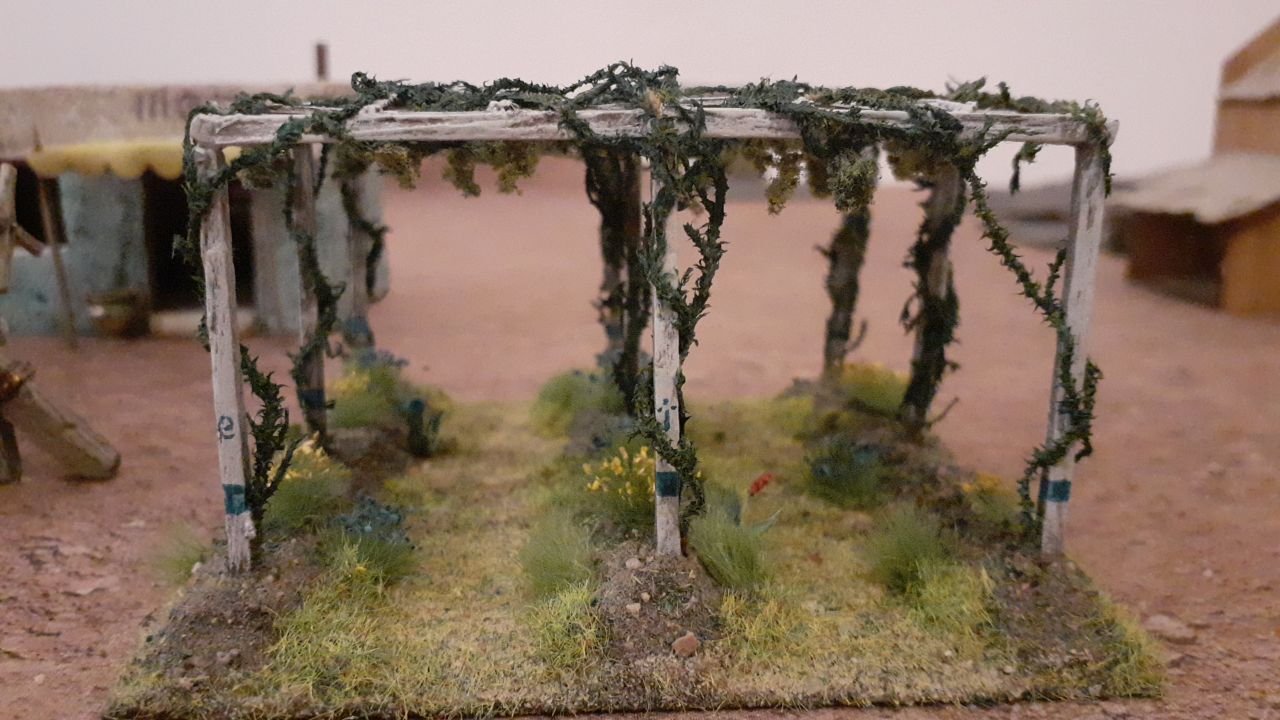
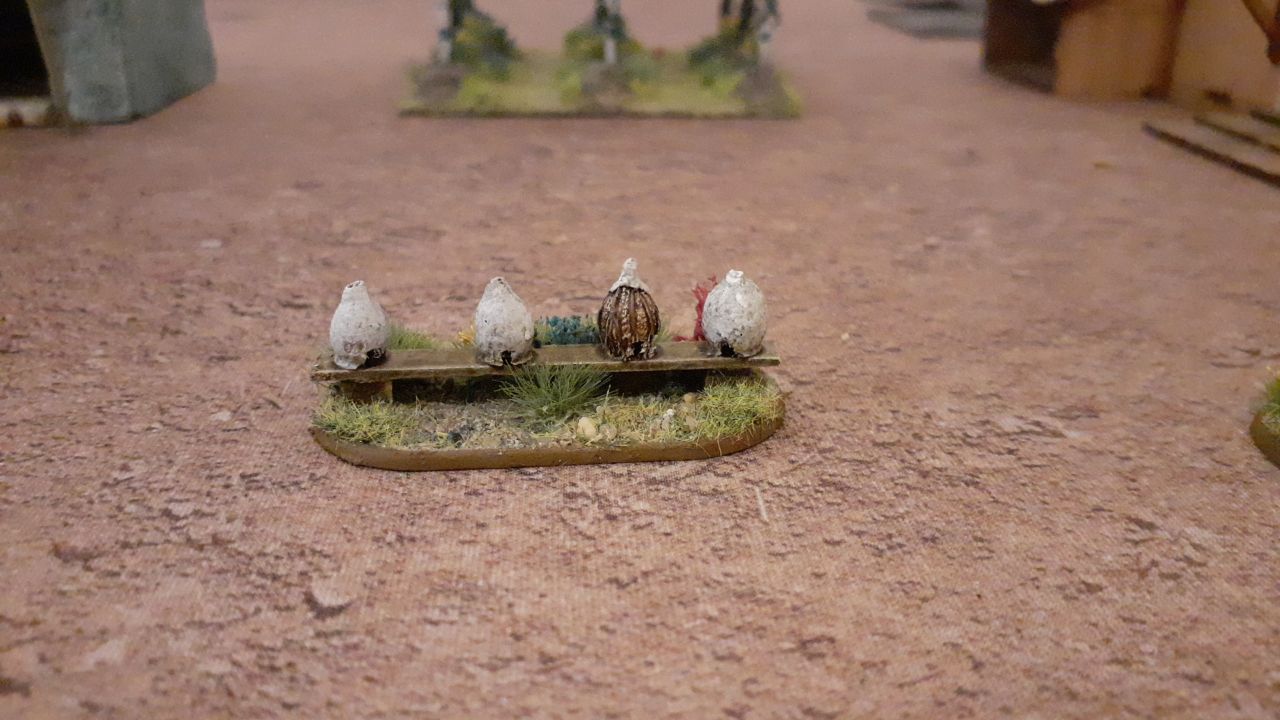 I had a damaged seed pod and it translated into an amazing damaged beehives with just paint
 The inside of the building, I tried to make it into a livable small space.
The Runequest Starter Set
I am afraid I need to correct Jerry, the new edition of Runequest has been out for a couple of years with some great supplements also being released.
I will look at what is available in future posts but I will only do one of these reviews post alongside a new painting/modelling post.
Yesterday I collected my Starter Set from my FLG, I have been waiting about a month since its release as the first shipment in the UK warehouse sold out within days and we have been awaiting a new shipment. I view this as a sign of Runequests apparent renaisance, more of this in a future post.
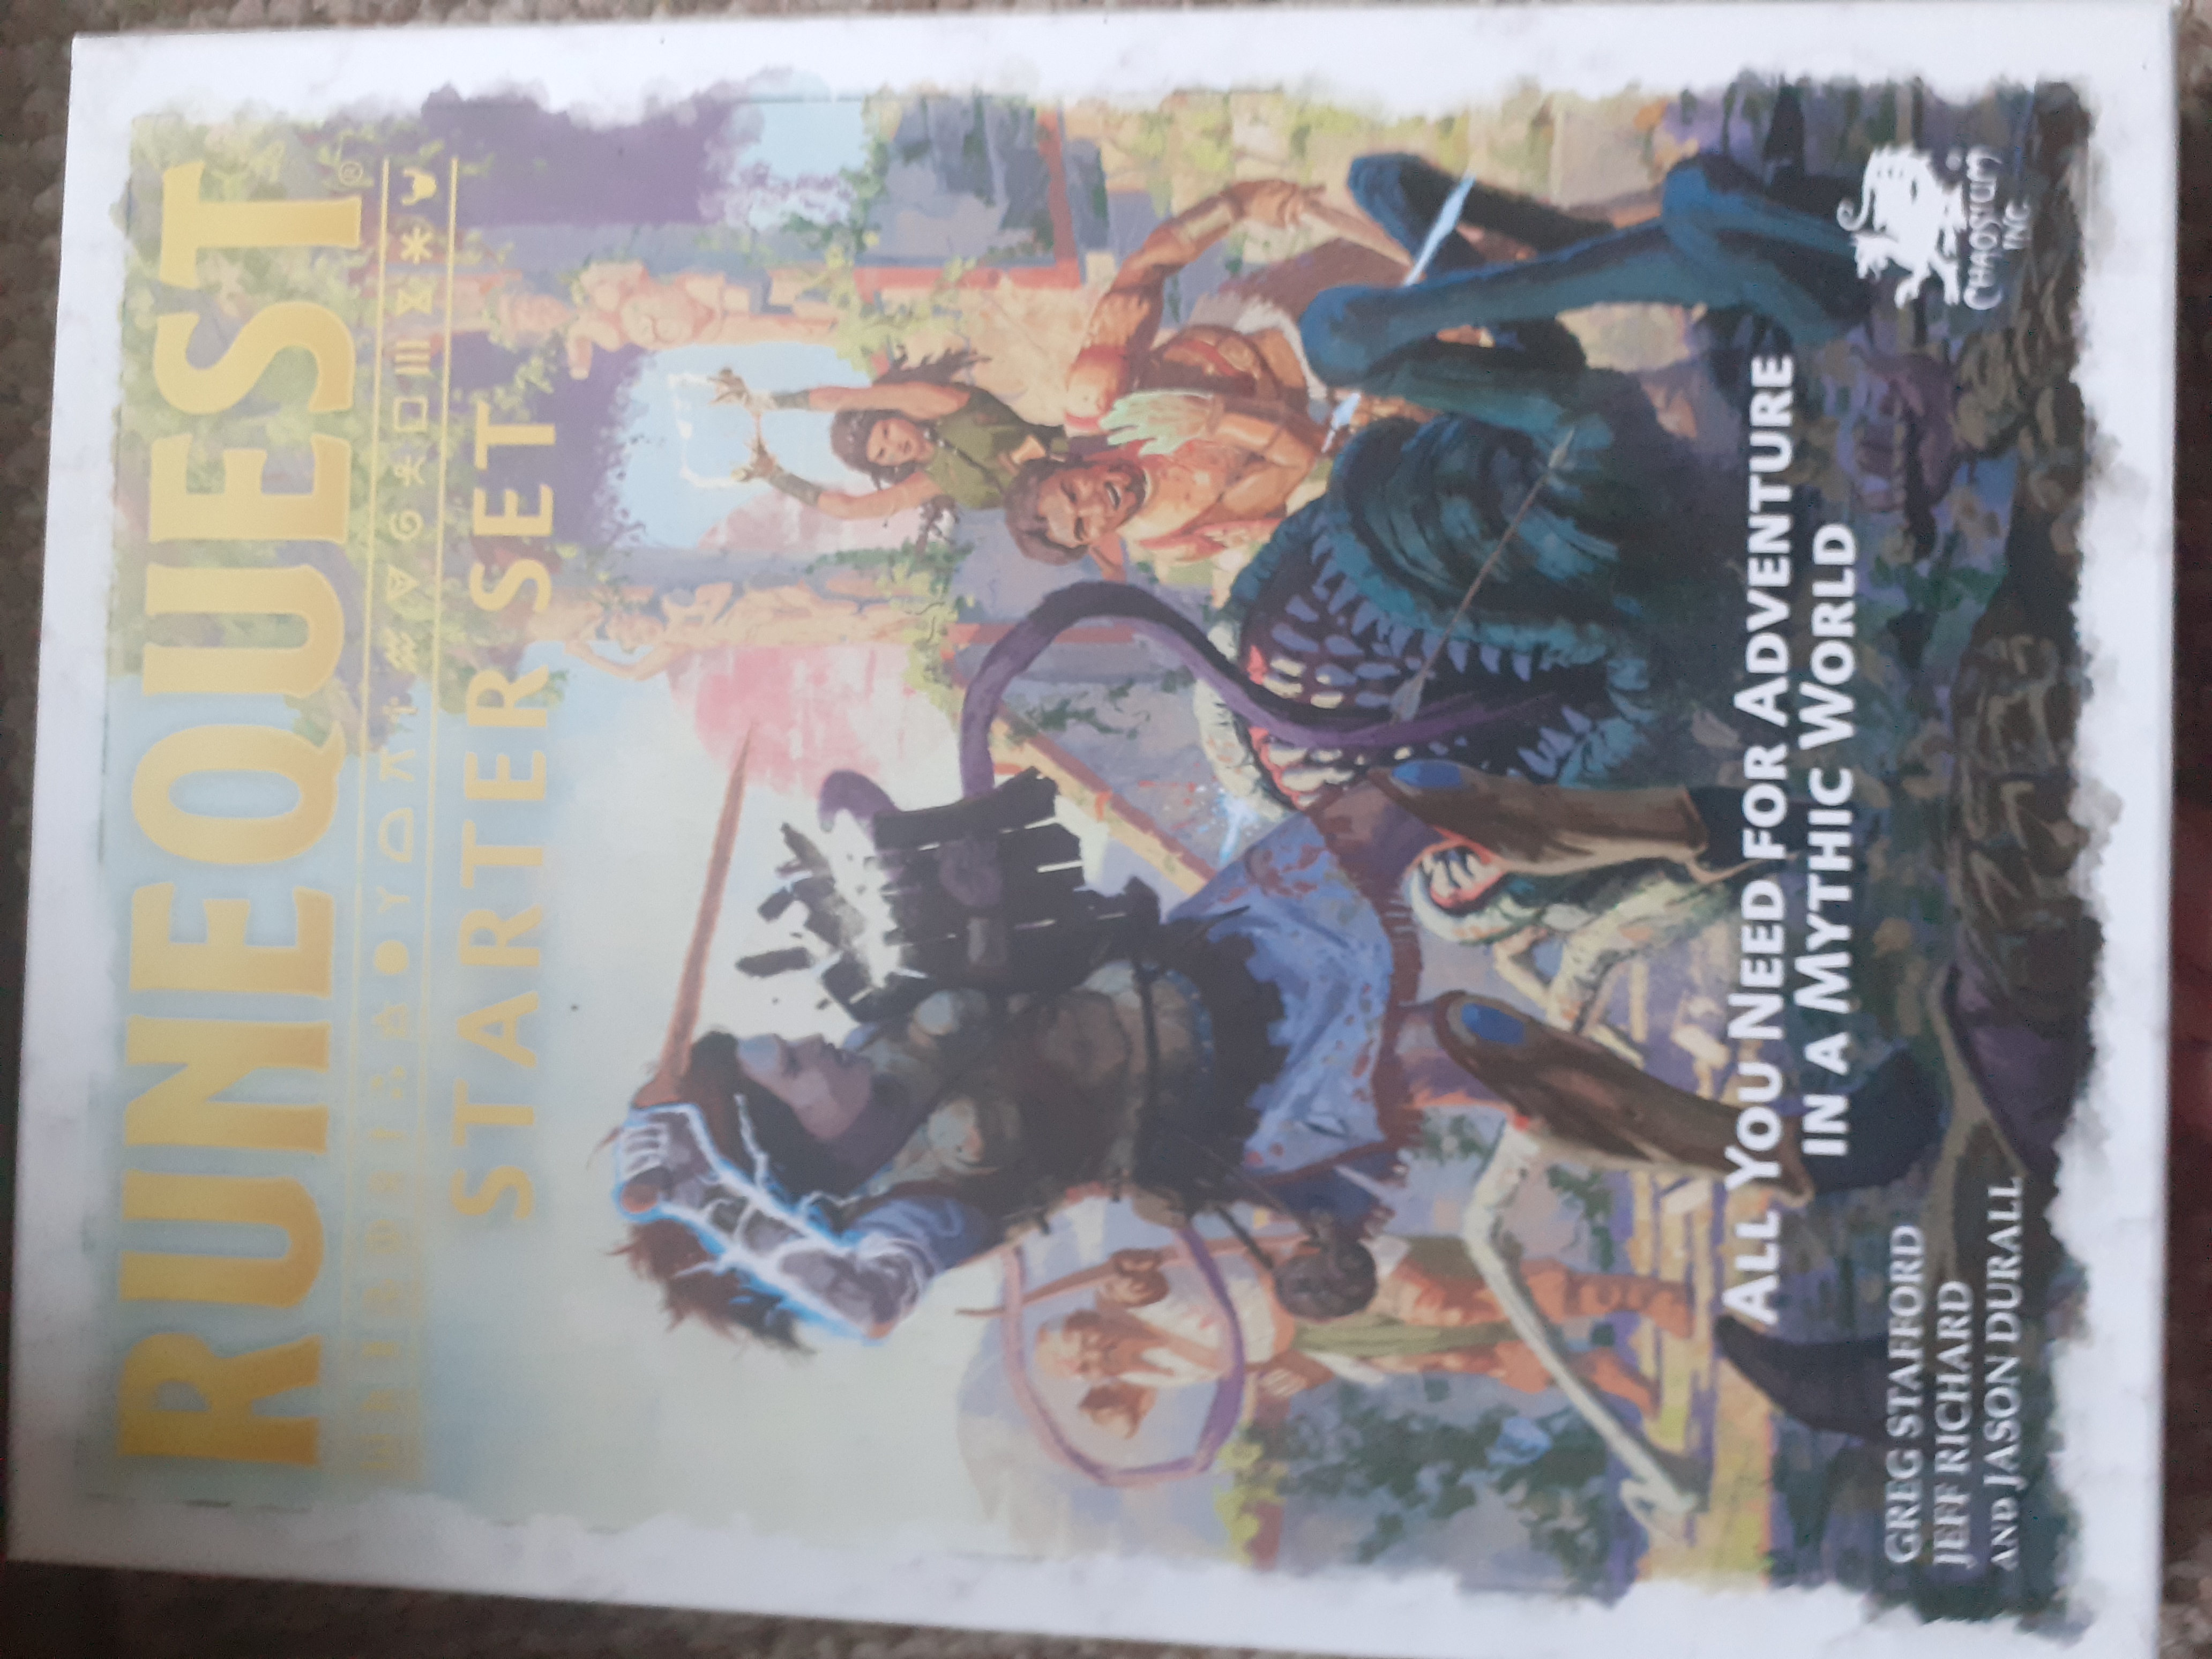 The box set, I love the box art and having a boxset with everything in it gives me a warm fuzzy feeling taking me back to days of yore.
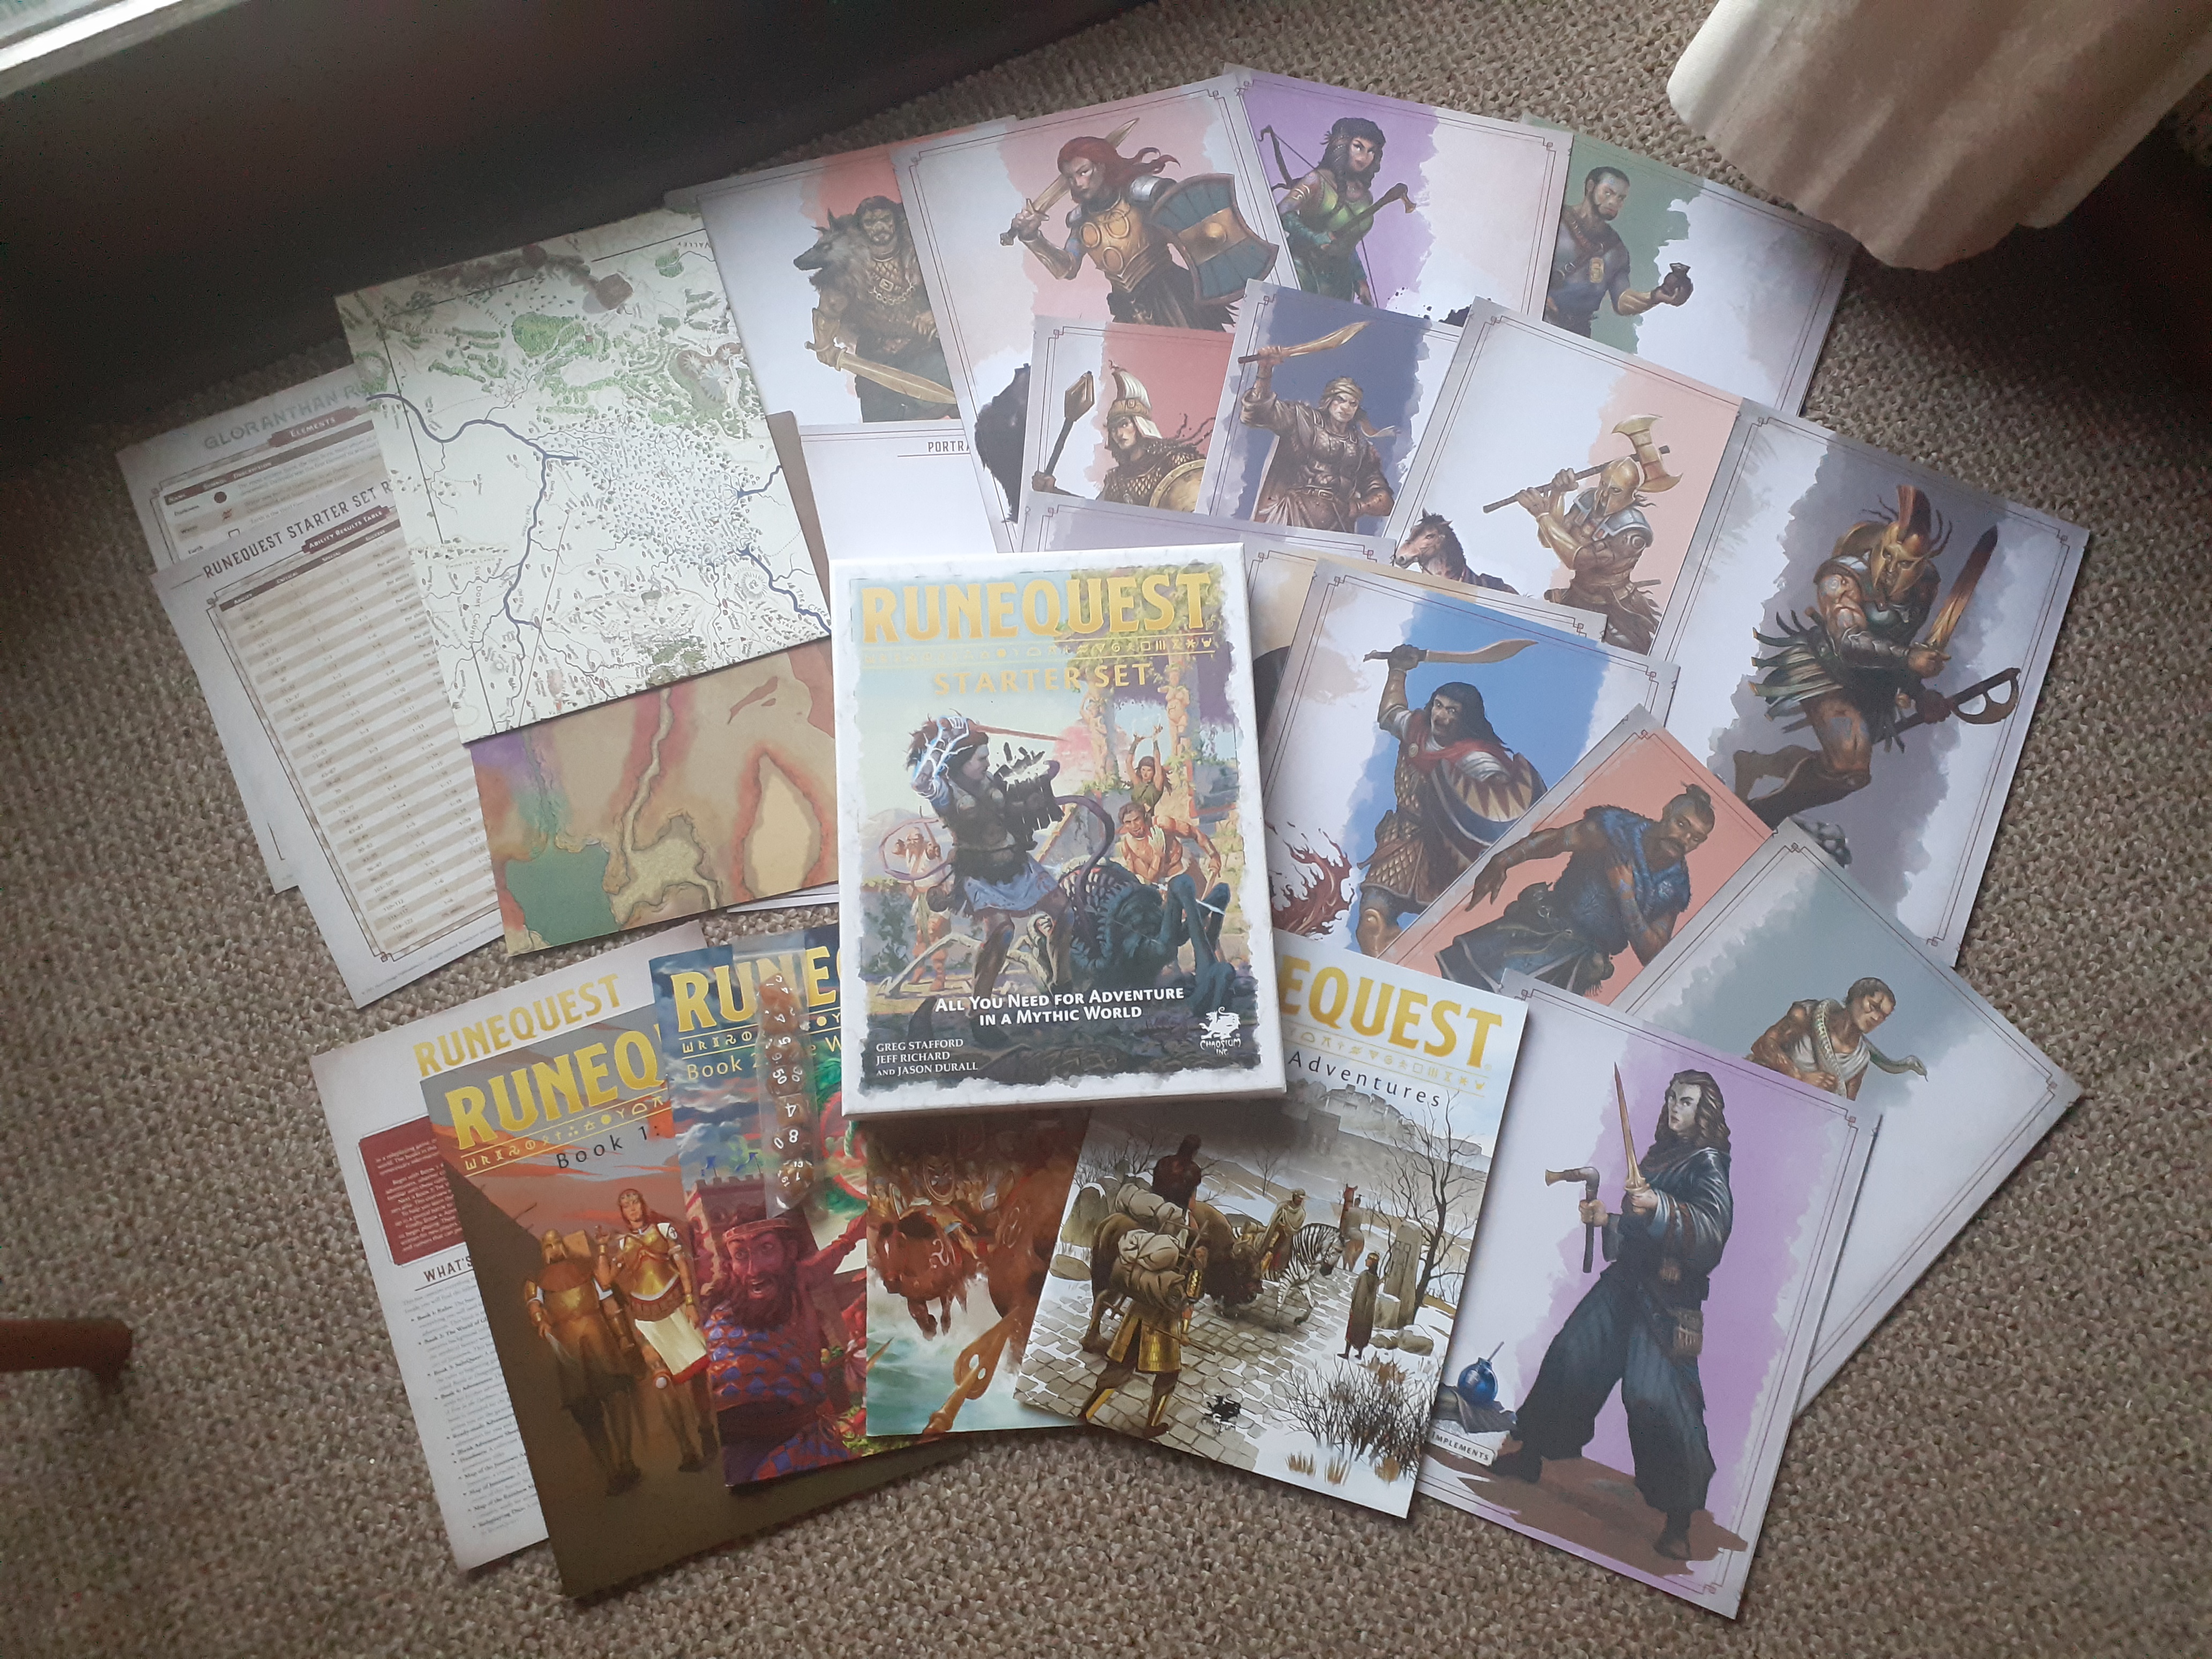 They certainly filled the box up: four paper back magazine style booklets of 60-80 pages each, two double-sided maps, two reference sheets, two blank character portfolios, 14 pre-generated character folios and some bronze coloured dice.
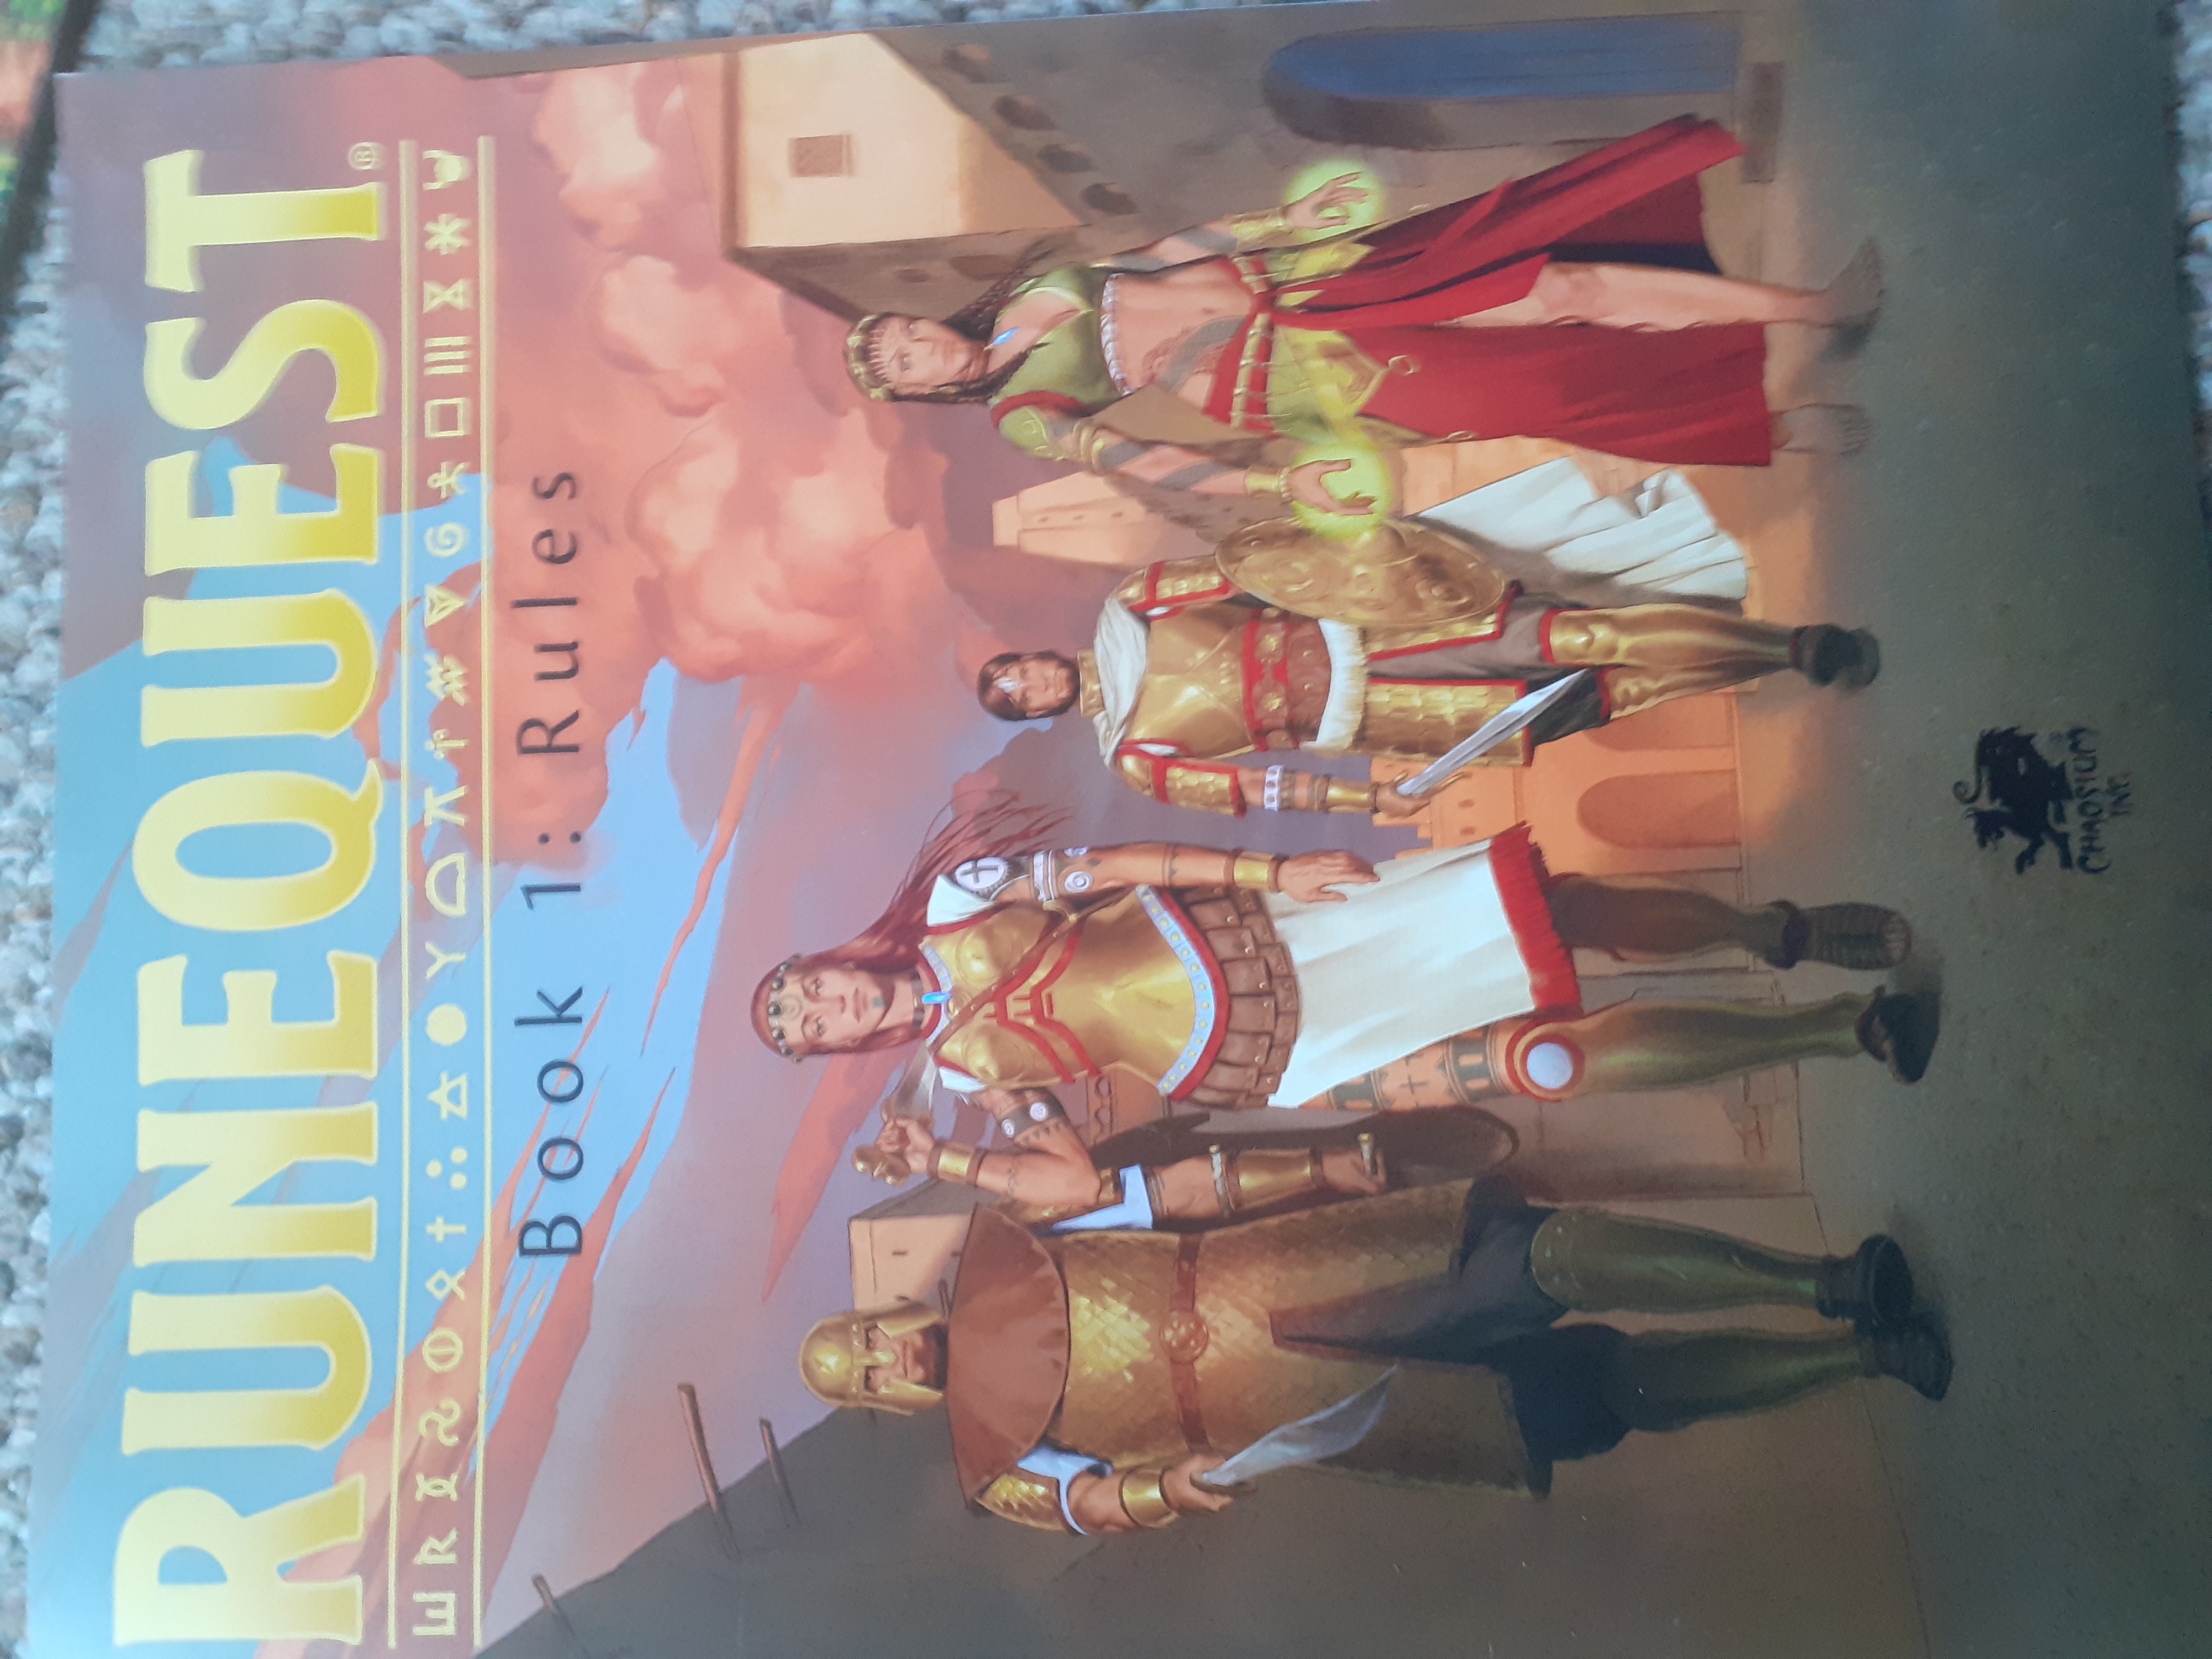 Book One: The Rules: A slightly reduced ruleset, leaving out character creation and some of the more complex rules.
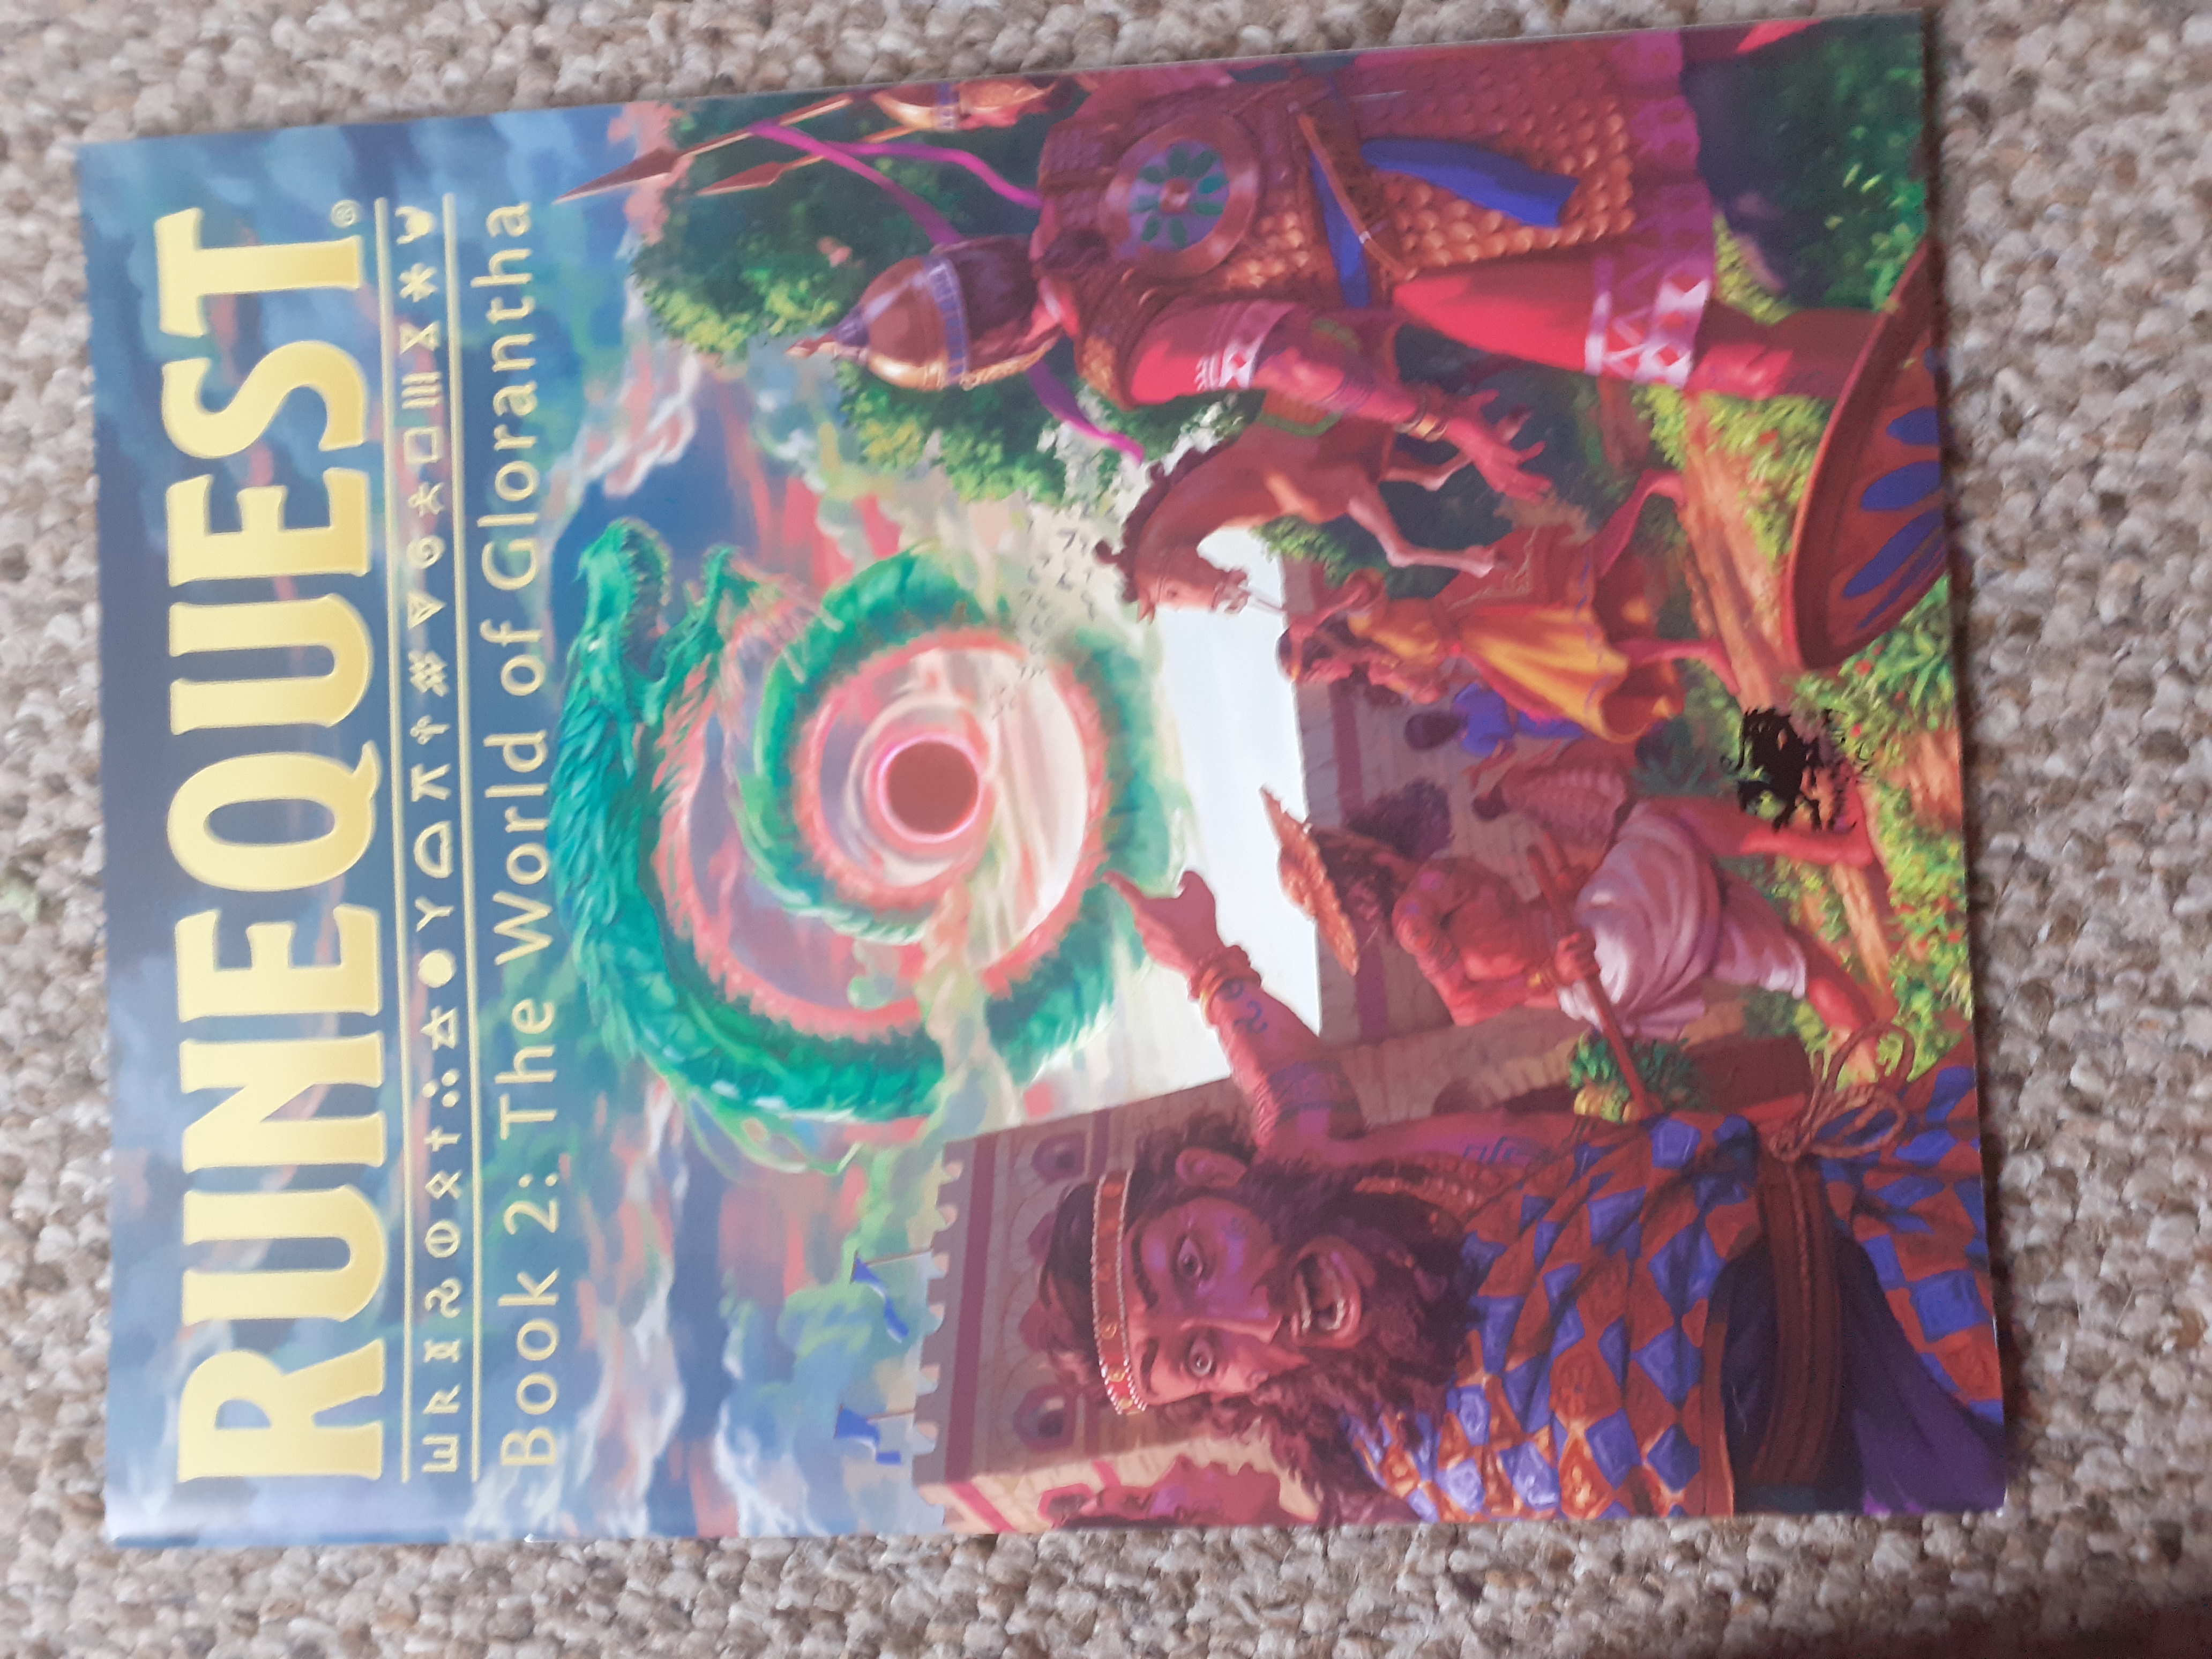 Book Two: The World of Glorantha: A primer to the world of Glorantha and some of the Personalities and Beasts that live there. The last portion of the book dedicates itself to the city of Jonstown where the starting adventures unfold.
 Book Three: Soloquest: this provides a fighting fantastic style adventure where you play Vasana, one of the many pre-generated player characters. It also acts as a preview to the adventures in the next booklet. The way the book it is written it teaches you the core rules of the game as you play ad well ad introducing you to an overview of what life is like in Glorantha.
 Book Four: Adventures: contains three adventures introducing different styles of game melee, investigation etc. All the adventures take place around Jonstown giving you a fully detailed location to explore. At the end of the book they have a fairly comprehensive guide of where to go next including lots of adventures seeds as well as published adventures.
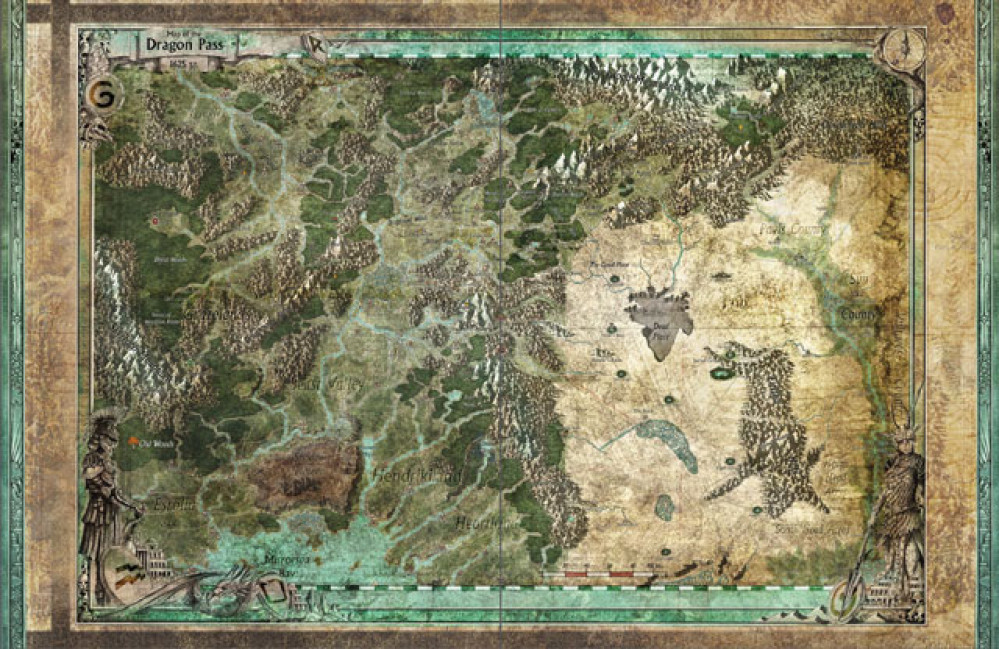
 The backs of all the booklets form a map of Dragon Pass the prominent location for Runequest
 I am very pleased with this boxset, it is incredible value at only £30.00. The artwork and presentation throughout is exceptional, and the fold out format of the character folios is very user friendly.
The source material and adventures also make this a good purchase for more experienced GM’s.
Fantastic product on first inspection I cannot fault it, I will update you on my thoughts as I progress through the booklets.
The Big Rubble
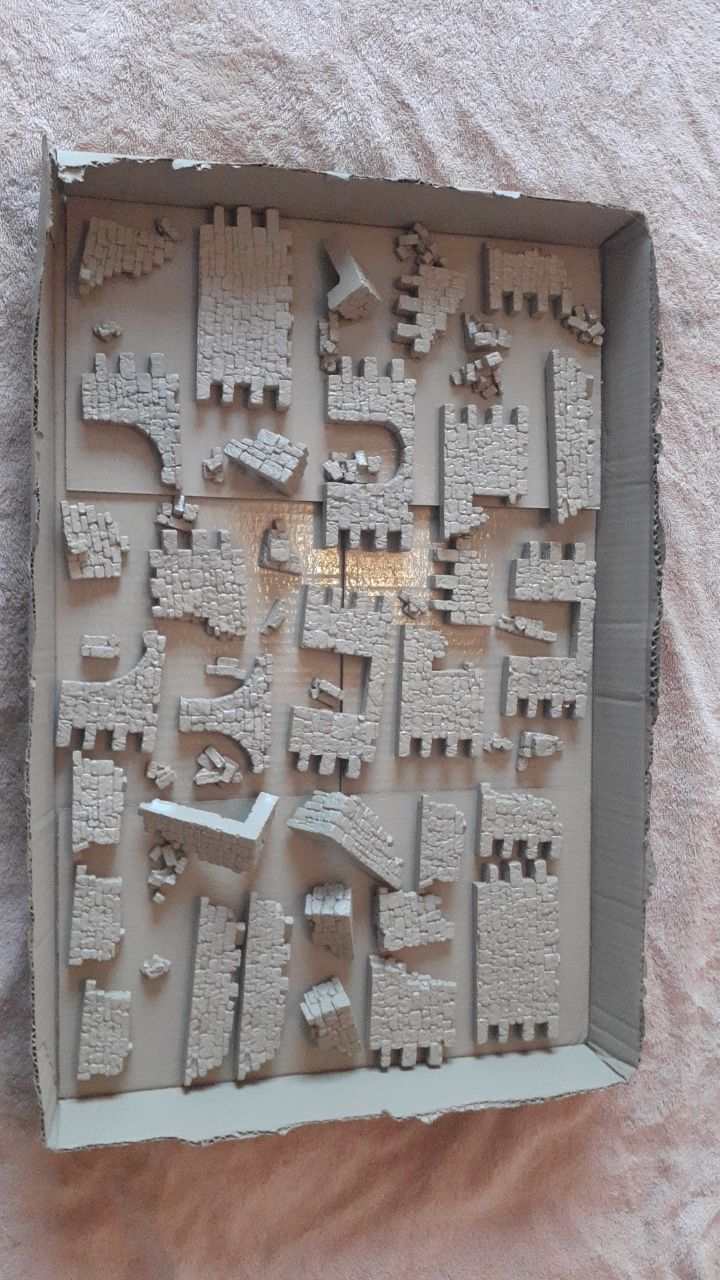 As I promised my self, yesterday I painted the Fenris Games Rubble City models. I started off with a Desert Yellow undercoat
 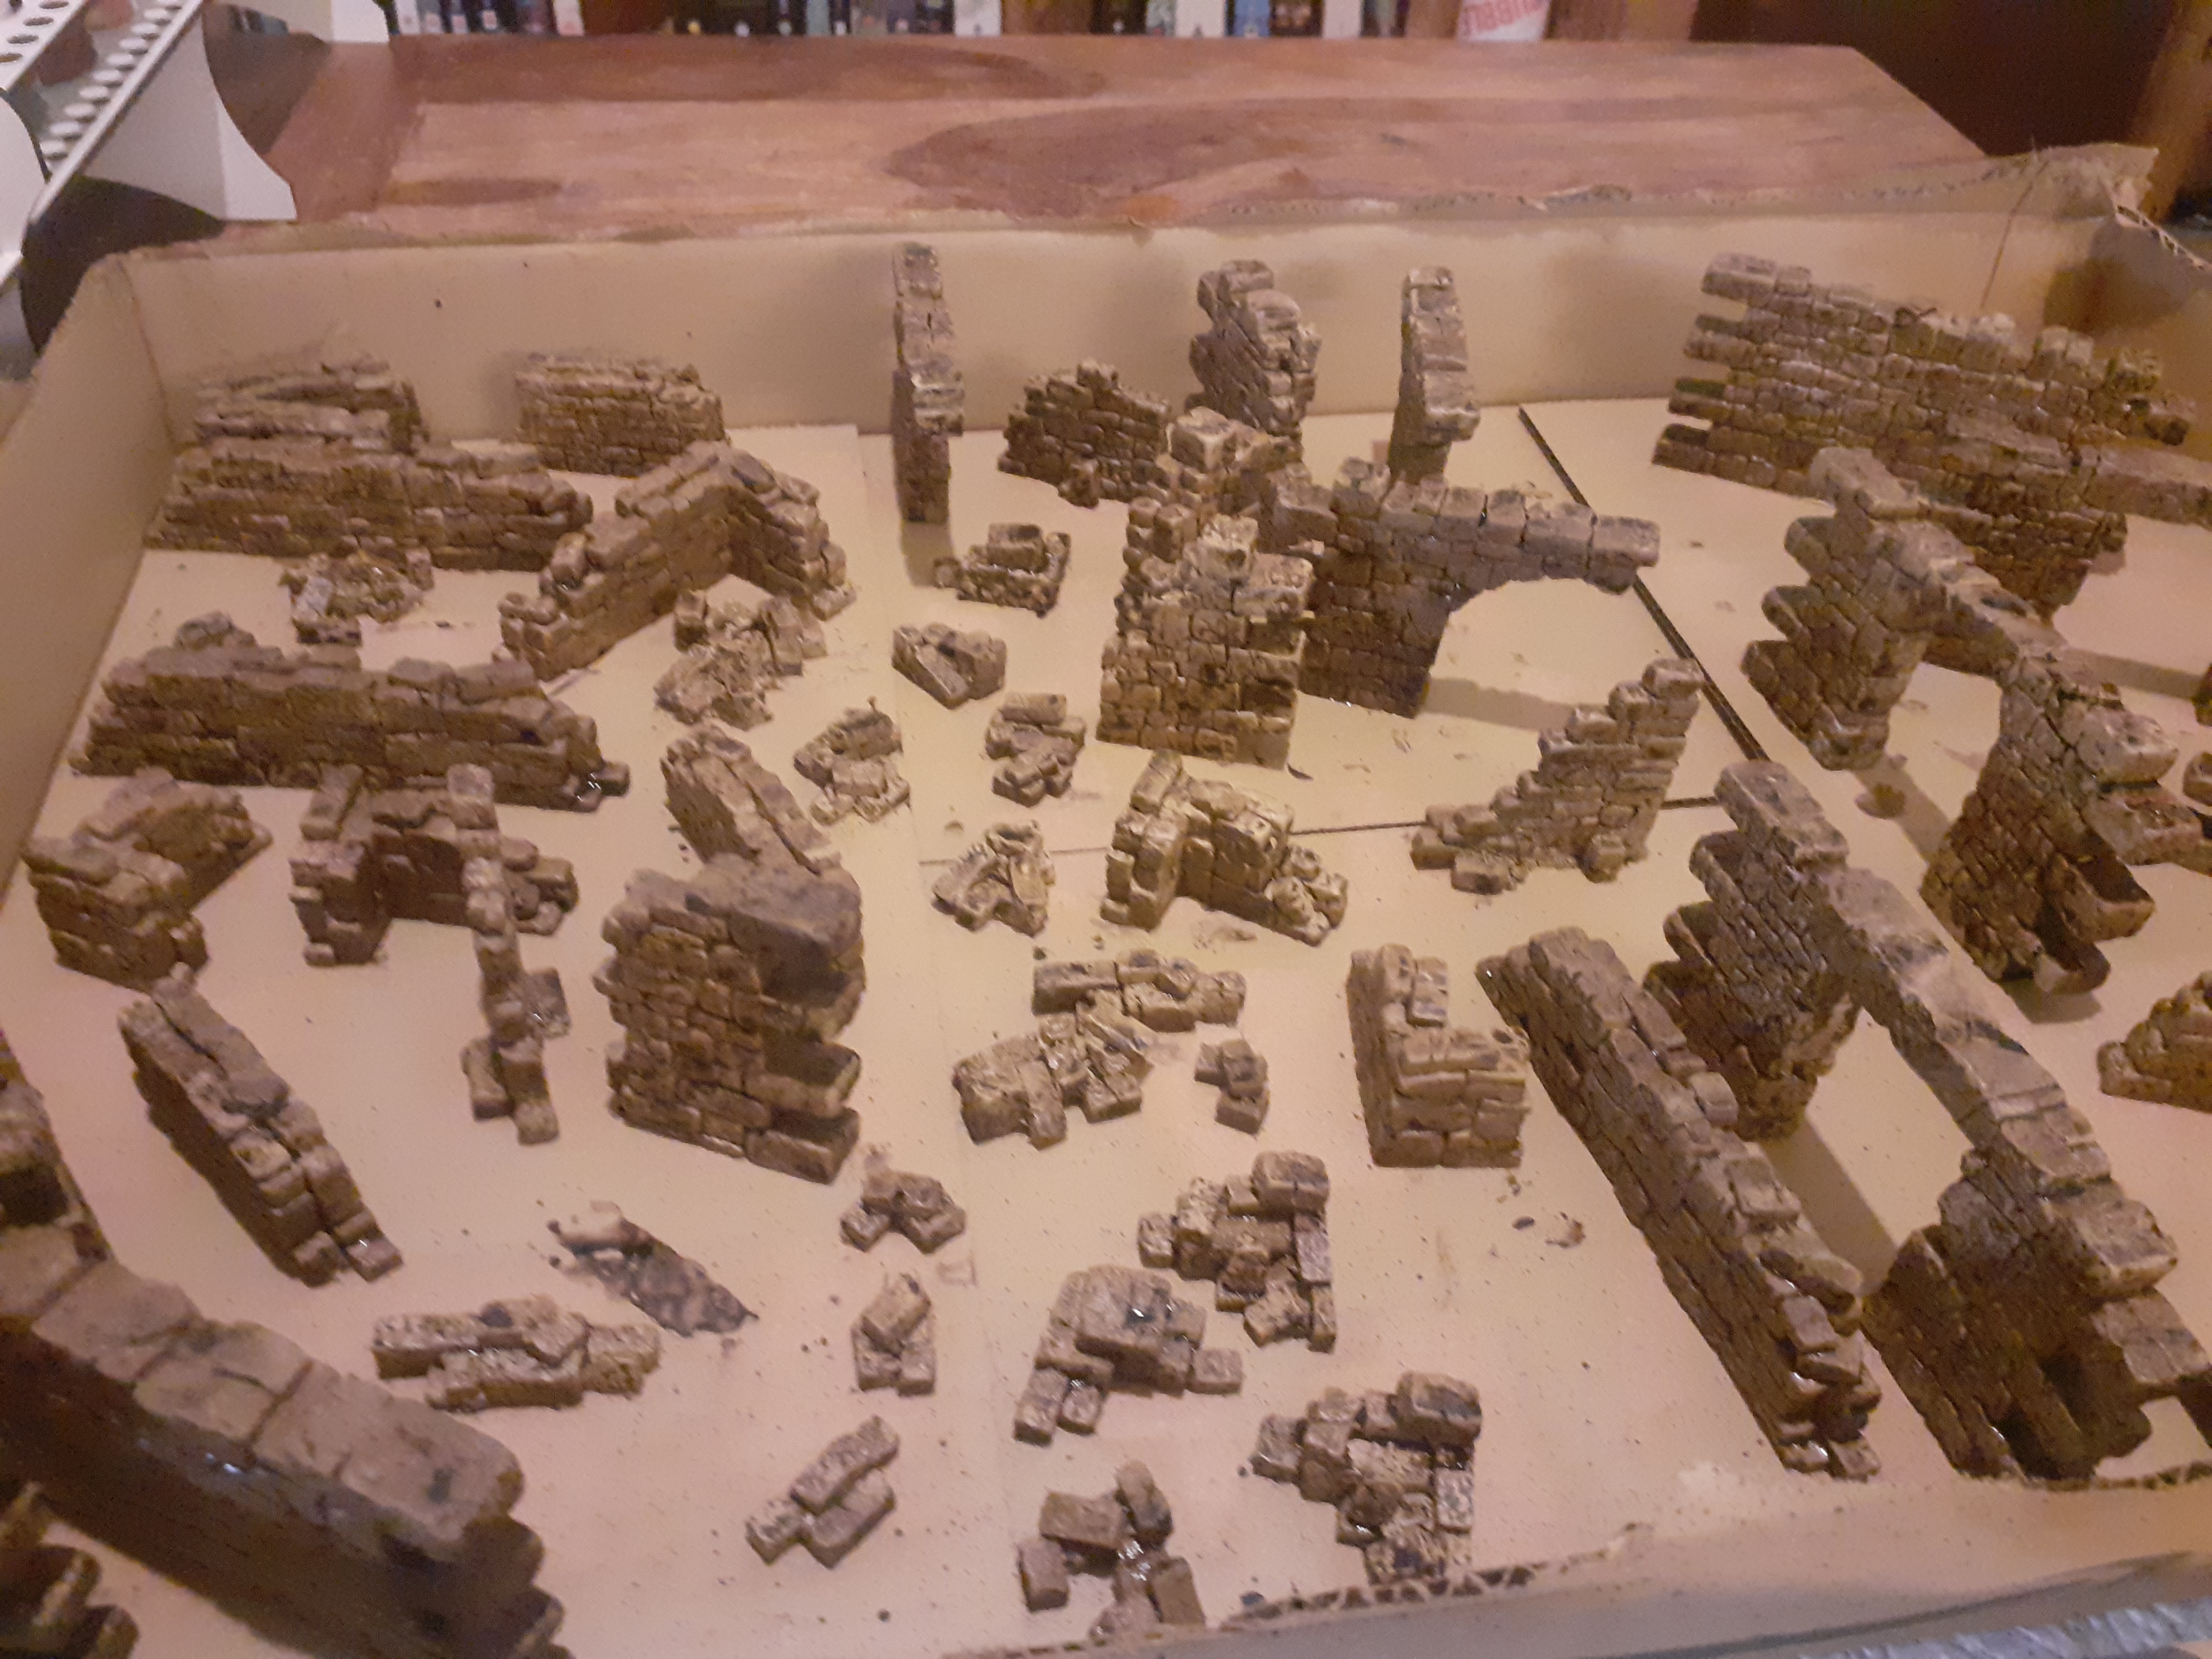 Given a wash of Agrax Earthshade ( I need to but this in wash in bulk before GW change their paints again?)
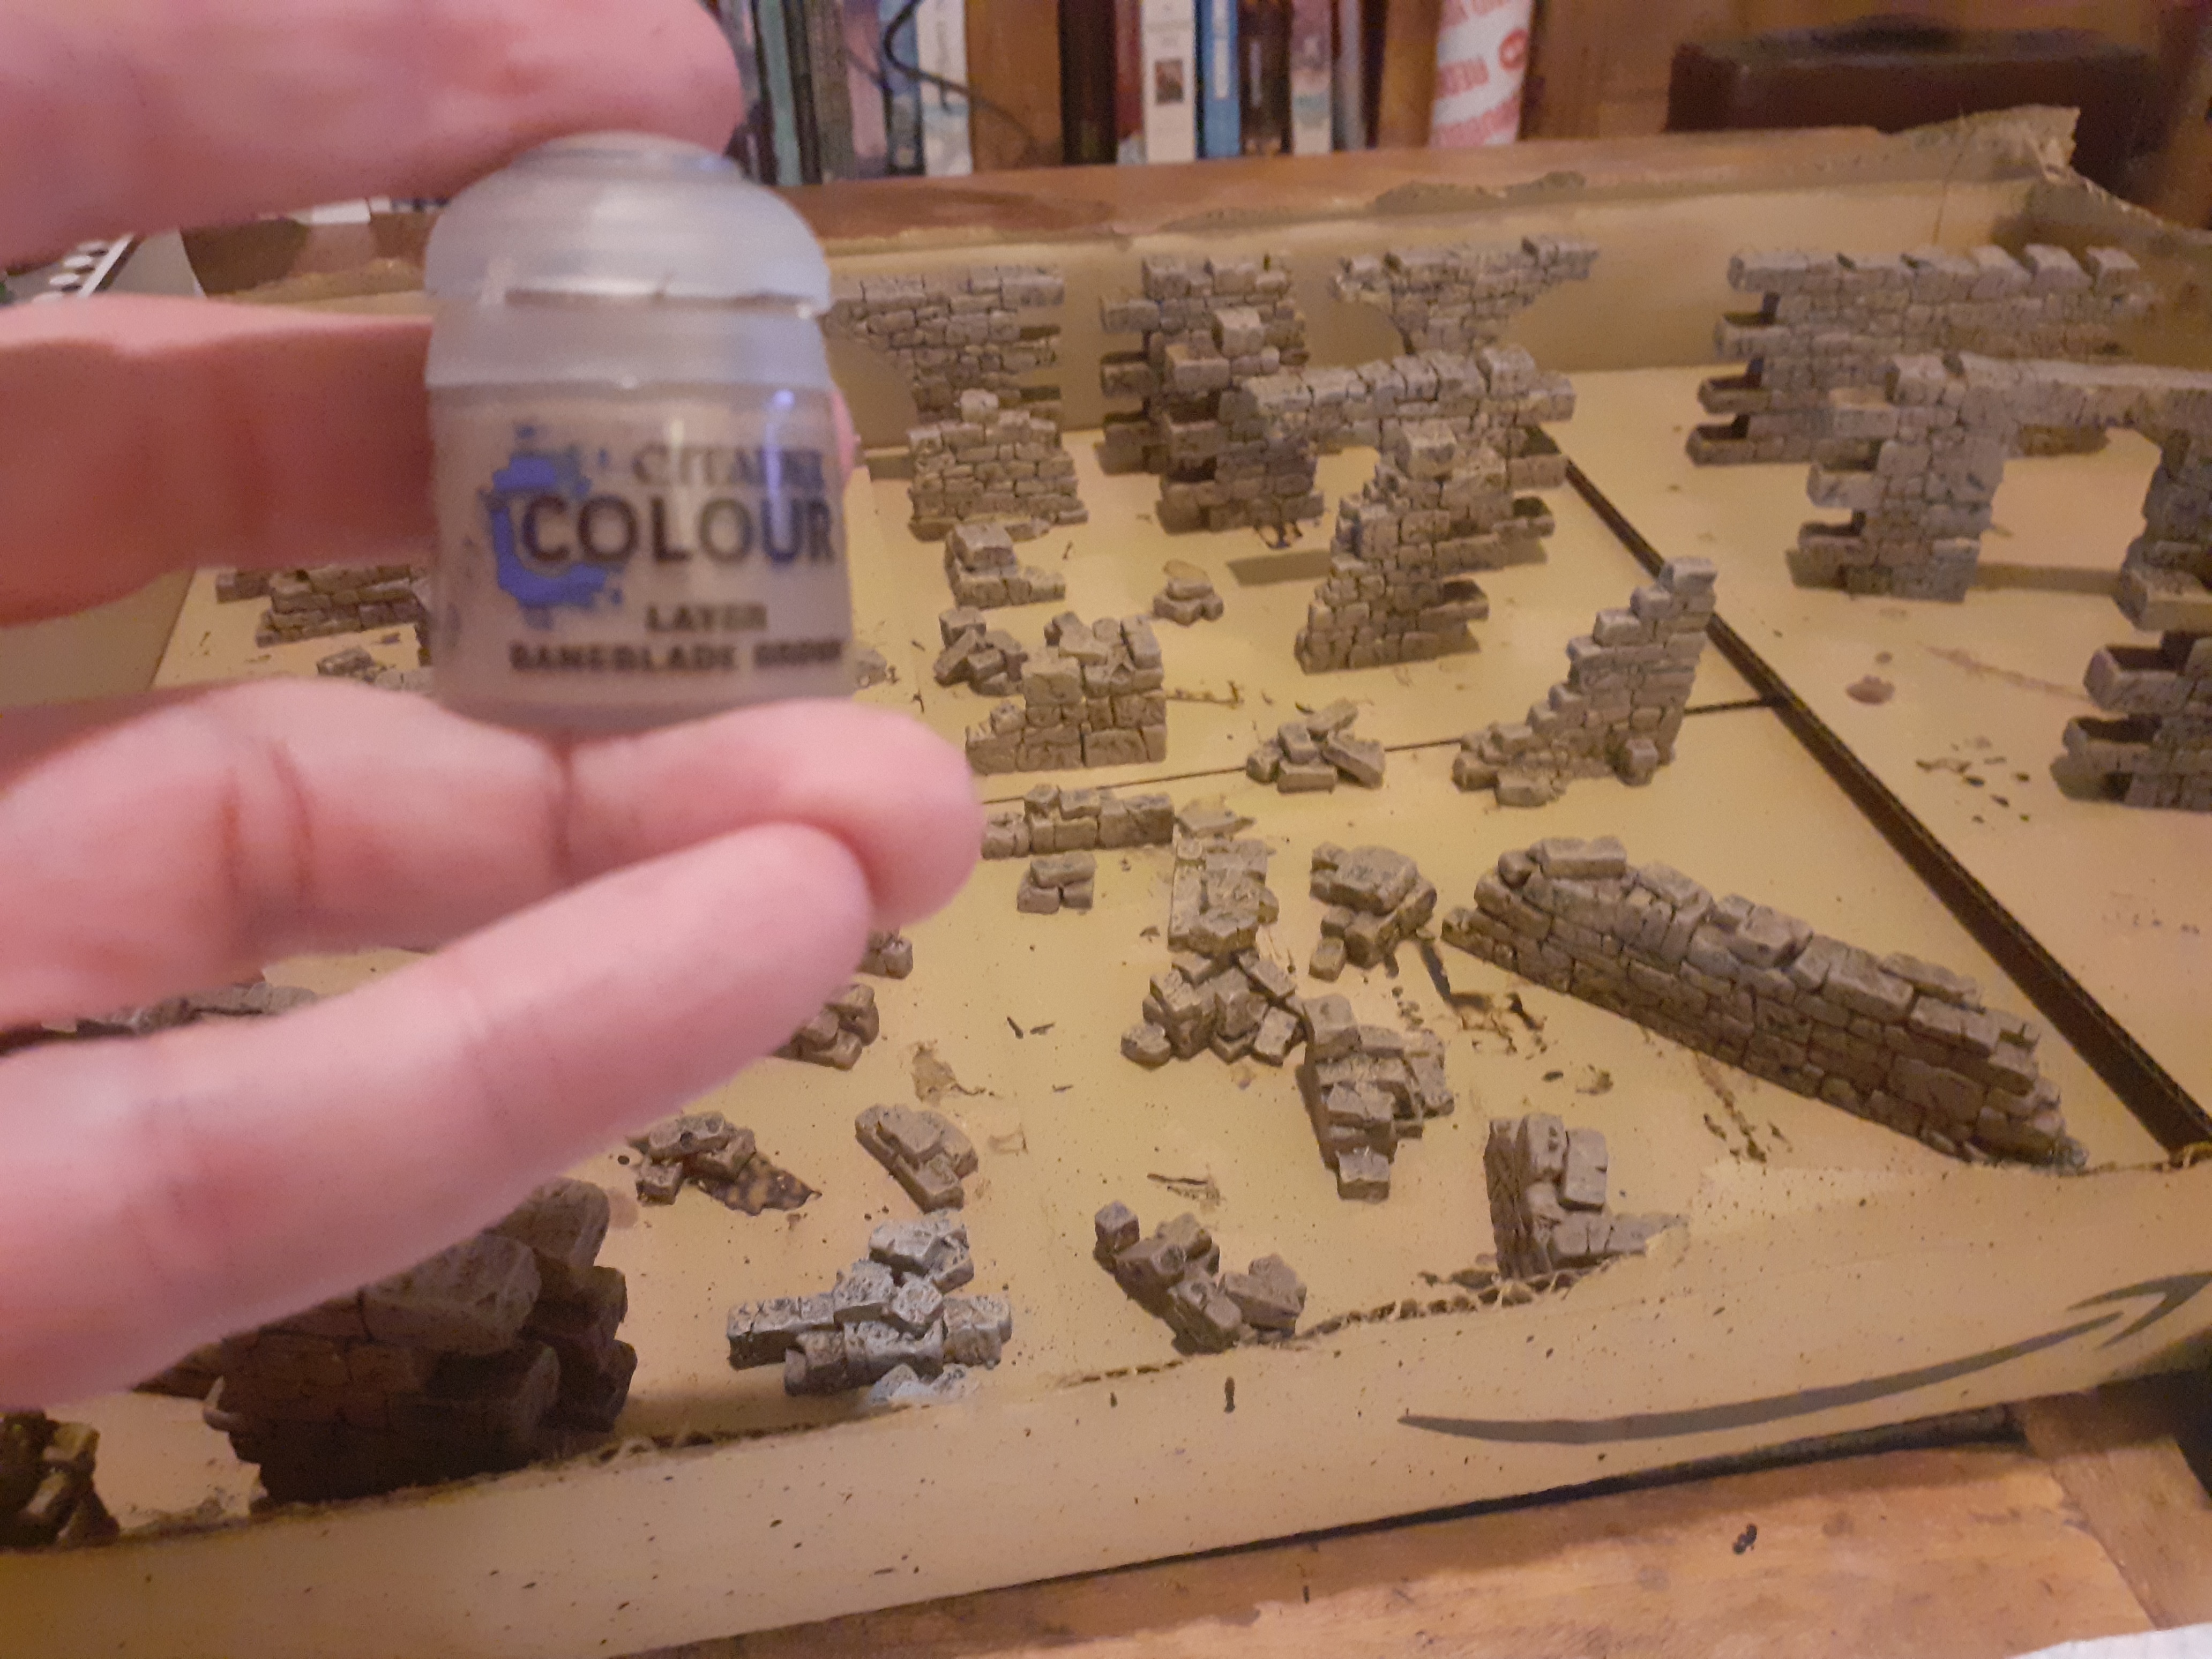 Followed by a drybrush of Baneblade Brown
 A drybrush of Celestial Grey
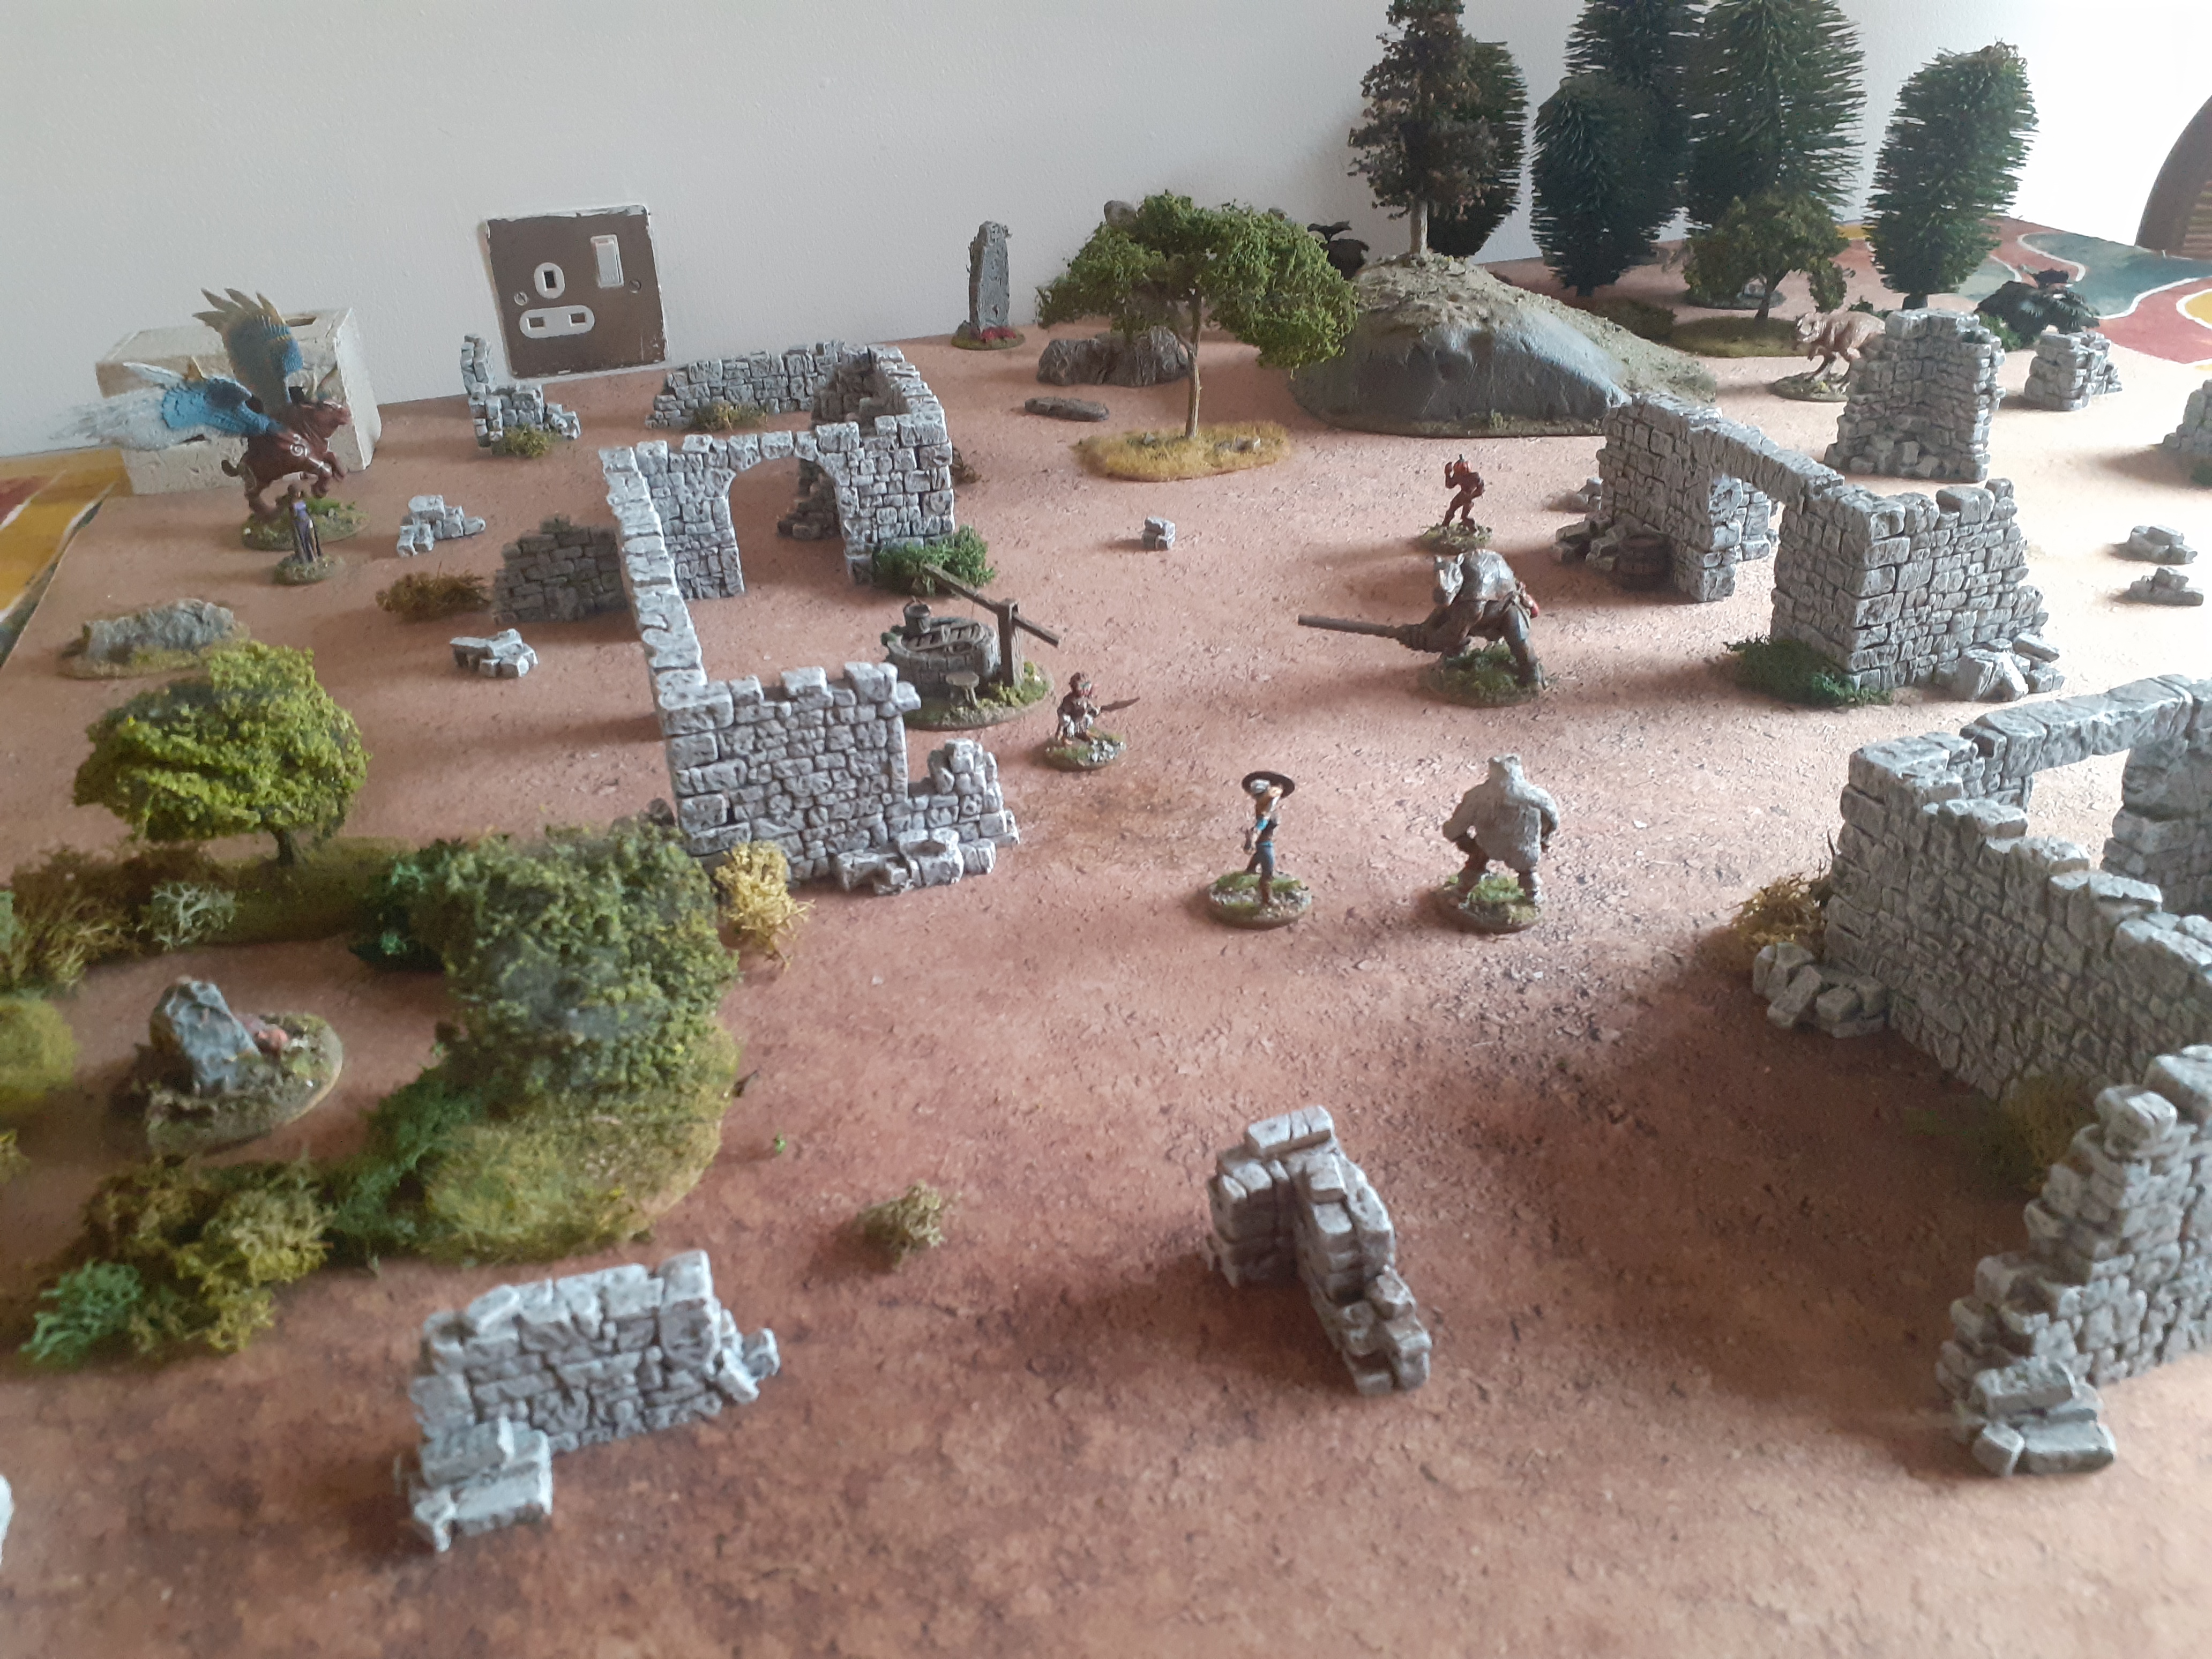 A drybrush of White Scar. These look a lot better than the plain resin but on my next weekend off ( a couple of weeks away) I intend to add washes and weathering


