

![Alternative Trench Crusade Miniatures? Trench Missionaries Review | Wargames Atlantic [7 Days Early Access]](https://images.beastsofwar.com/2026/03/unboxing-wargames-atlantic-trench-missionaries-coverimage-225-127.jpg)


Dreadball Spring Clean Hobby Challenge 2022


Recommendations: 567
About the Project
Spring Clean Hobby Challenge 2022 to deal with a largely unpainted game I've been ignoring for almost a decade: Dreadball. The goal is to get stuff painted fast and to a tabletop standard, not slow and to a high standard. I may pick some models to experiment with though.
Related Game: Dreadball
Related Company: Mantic Games
Related Genre: Sports
Related Contest: Spring Clean Hobby Challenge (Old)
This Project is Completed
First Batch Done (ish) (25/3/22)
I got a couple of hours in after work last night and was able to all bu paint the bases and apply transfers on a bunch of models. I’ll do that en masse later on, or as a time filler while waiting for washes to dry.
Anyway, here’s what i did.
- I tried to drybrush the blue highlights, but it wasn’t working. The area was too small and the brush was too big, and there wasn’t enough detail for it to catch on. I ended up badly painting on the two tones of highlight, following the earlier guide.
- I painted the corporation eyes with P3 Khador Red base. Normally I’d undercoat with white, but the old guys eyes don’t look vibrant and I’m trying to colour match so I skipped the undercoat.
- I did undercoat white the eyes on the Refbot. I then based them with Warcolours Pink 3, and painted a central dot of Pink 1 in to each as least-hamfistedly as I could.
- I then drybrushed the highlight on to the Z’zor bug people, following the Chitin guide from a couple of posts back.
- Their claws, teeth and horns were then painted with P3 Cryx Bane base, drybrushed with P3 Hammerfall khaki and washed twice with GW Nuln Oil
- The bug eyes were undercoated white, based with P3 Heartfire, and given a dot of P3 Cygnar Yellow
- The tree man was given a drybrush of Coat d’Arms Horse Tone Bay.
- The undead flesh was given its final highlight as a heavy drybrush, following the earlier guide
- I wasn’t quite ready to quit for the night, but didn’t want to start something new so I applied a few coats of white undercoat to the front arc of everybody, ready to take some red later.
That’s my Friday evening done. I’ve been at this a week and I have 12 models all but finished, and strong progress made on a whole lot more, and I don’t feel like I’ve really spent any solid time painting yet. Tomorrow I head back to the Marauders and the Asterians I think for a whole day of painting.
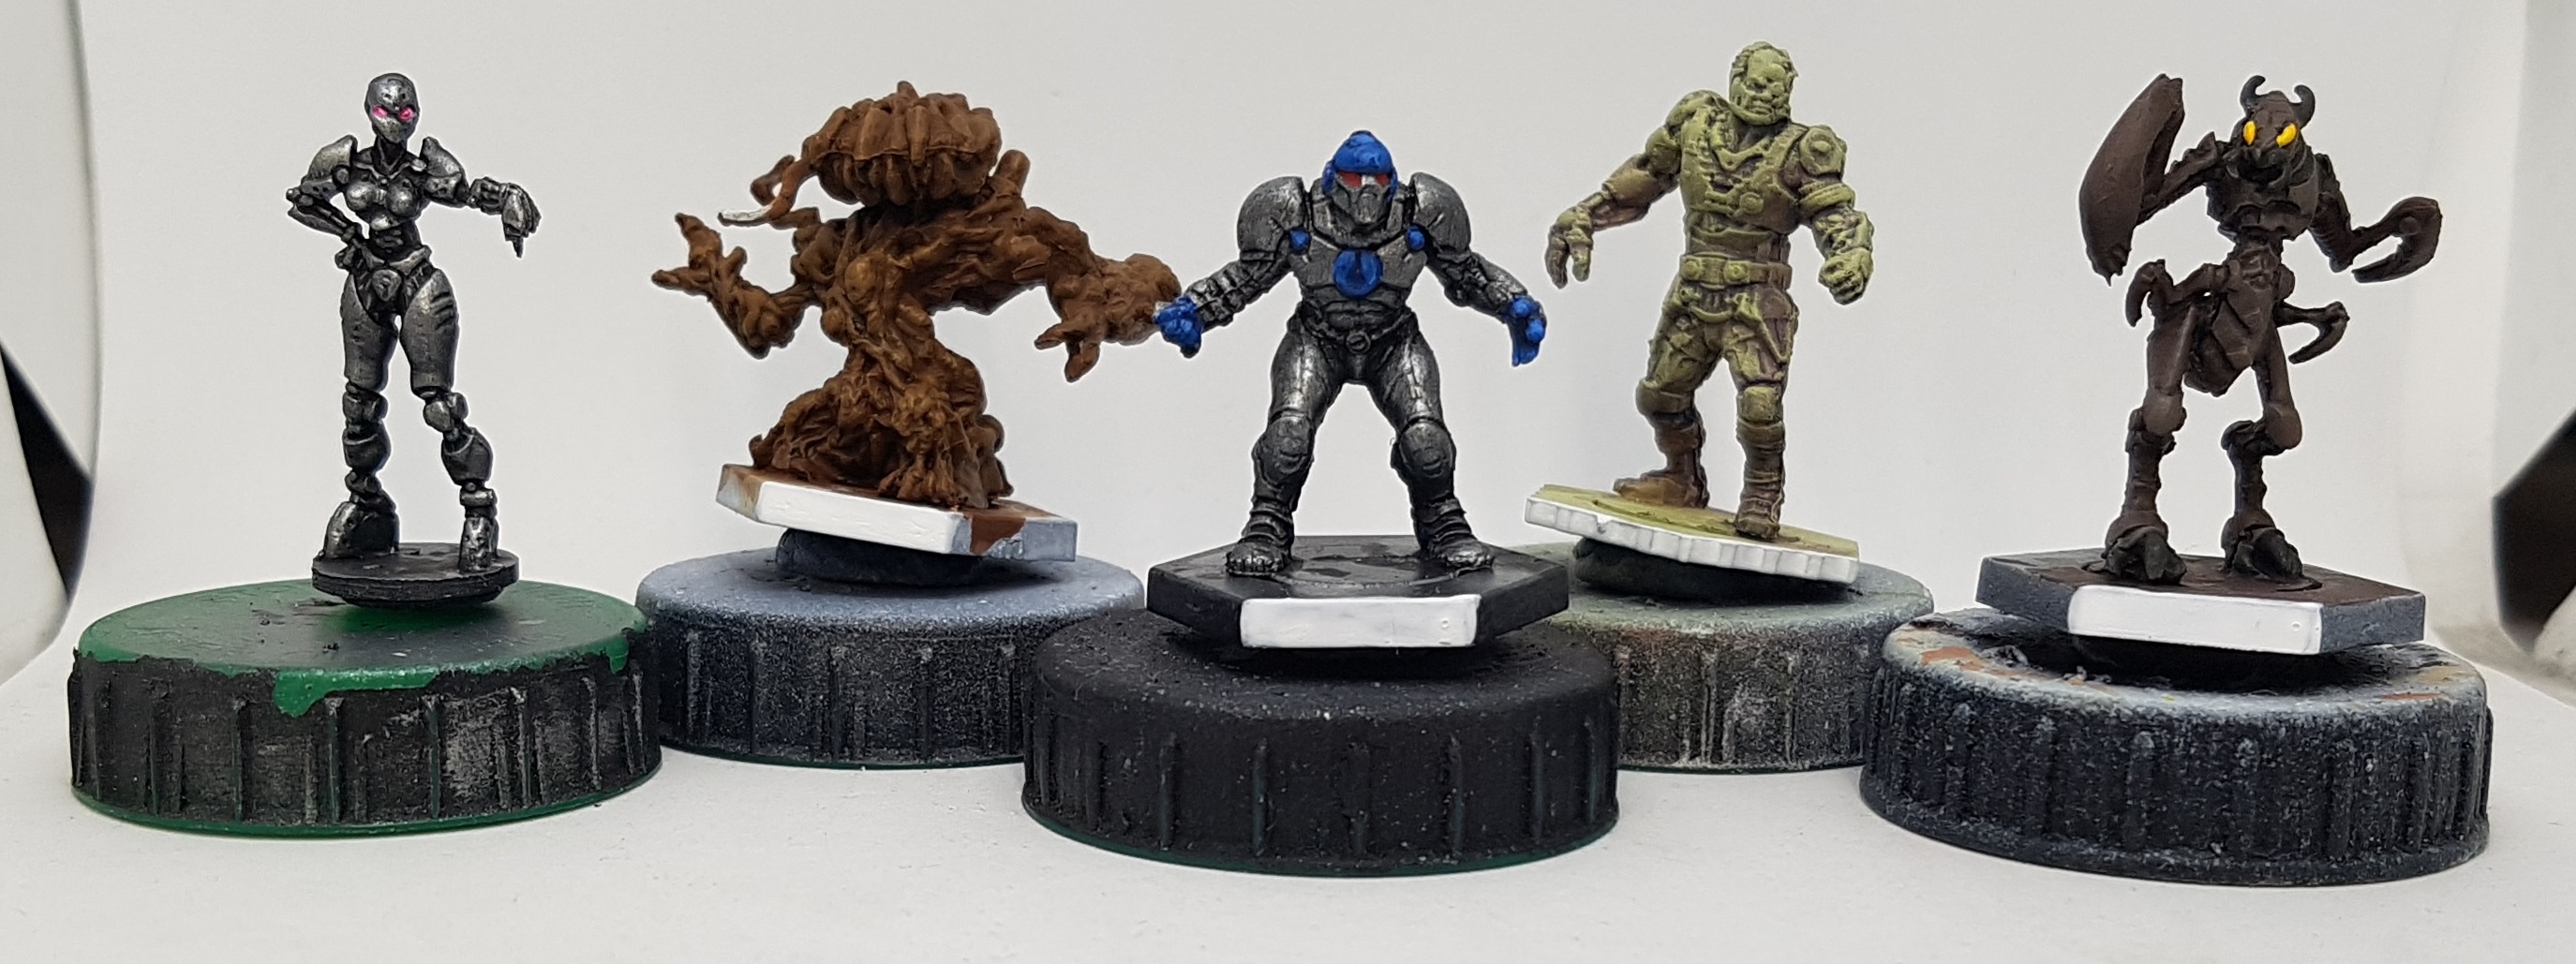 Once again, my camera hates me. They look much better in person. Or do cameras hate drybrushing, perhaps?
Marauders Day 1 (26/3/22)
Saturday was supposed to be a dedicated day of painting but I found between every colour, I’d get up and do some housework or DIY, to the extent I accidentally started demolishing my lean-to, which I wasn’t planning on starting yet. It was sheltering the last of the Ivy I spent most of last year trying to murder, and the ivy was growing happily inside it, so it had to be done.
So what painting did I do?
- I fished out my Marauders and Iron Ancestor and I did a targeted shade wash with P3 Sanguide Base. This was applied only to the recesses and edges where shadow would appear.
- I started mostly ignroing the Khador Red guide from earlier, and just using it as a suggestion. I applied a drybrush highlight using P3 Khador Red Base, and then a final drybrush highlight, trying just to catch the hard edges, using AK 11076 Pastel Peach
- Orc flesh was previously painted with VGA Goblin Green I think. My pot ran out or dried up ages ago, so I googled what it looked like, and grabed a “close enough” colour: P3 Iosan Green. This took 4-5 coats over the red
- The flesh was washed with P3 Gnarls Green. Normally, I’d mix in a burgandy as that shades green more realistically, but I hadn’t learned that when I painted the previous Orcs and I’m trying to colour match.
- They were then drybrush highlighted with P3 Bog Moss. I tried P3 Wyrm Green first, but it didn’t make uch of a difference.
- The black metals were painted with VGA 72754 Gunmetal, ashed with GW Nuln Oil, and drybrushed with P3 Pig Iron.
- The more silvery irons were painted with P3 Pig Iron, then washed with GW Nuln Oil before I called it a night and went off to read God Emperor of Dune. In the morning, they’ll lilkey get a drybrush highlight of p3 Cold Steel.
A productive Saturday. If I’m left to my own devices I hope to finish the Marauders and get the Asterians on my tray tomorrow. I have to run my first D&D session for over a month in the evening though, so I’ll need time to prep for that.
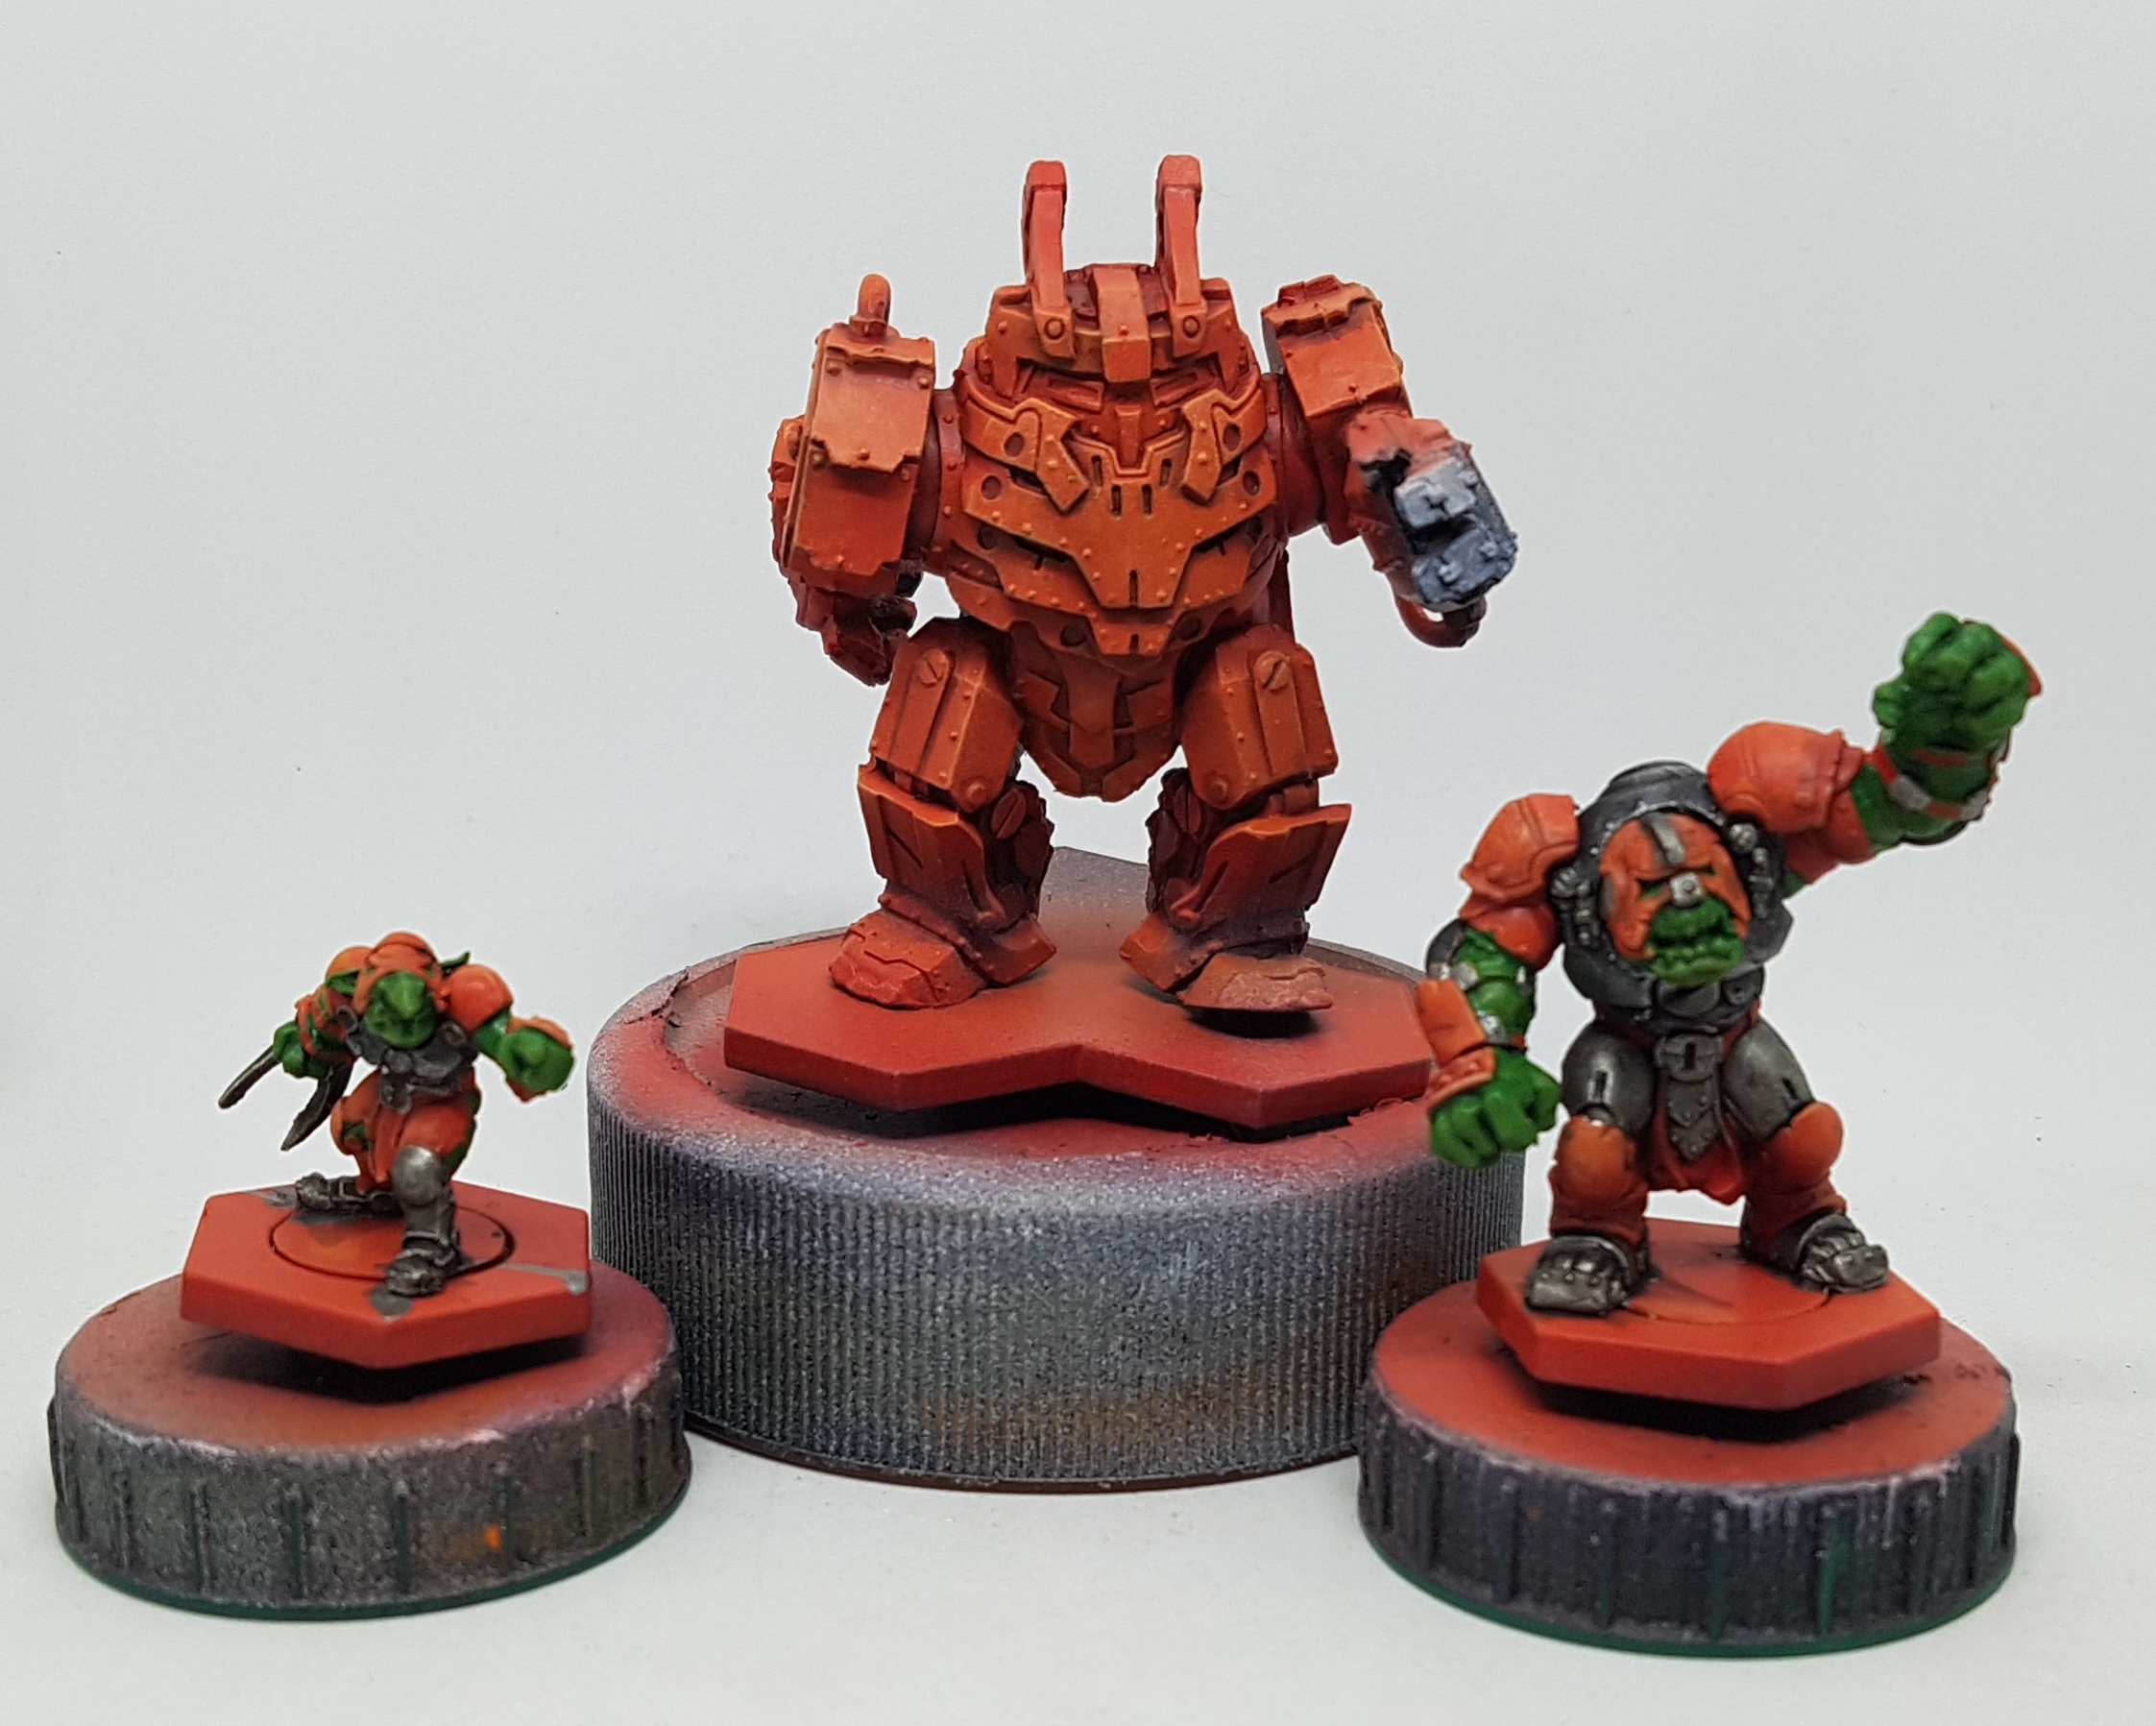 The Marauders, still in need of leather and basing.
Batch Painting Work Flow / My Desk (26/3/22)
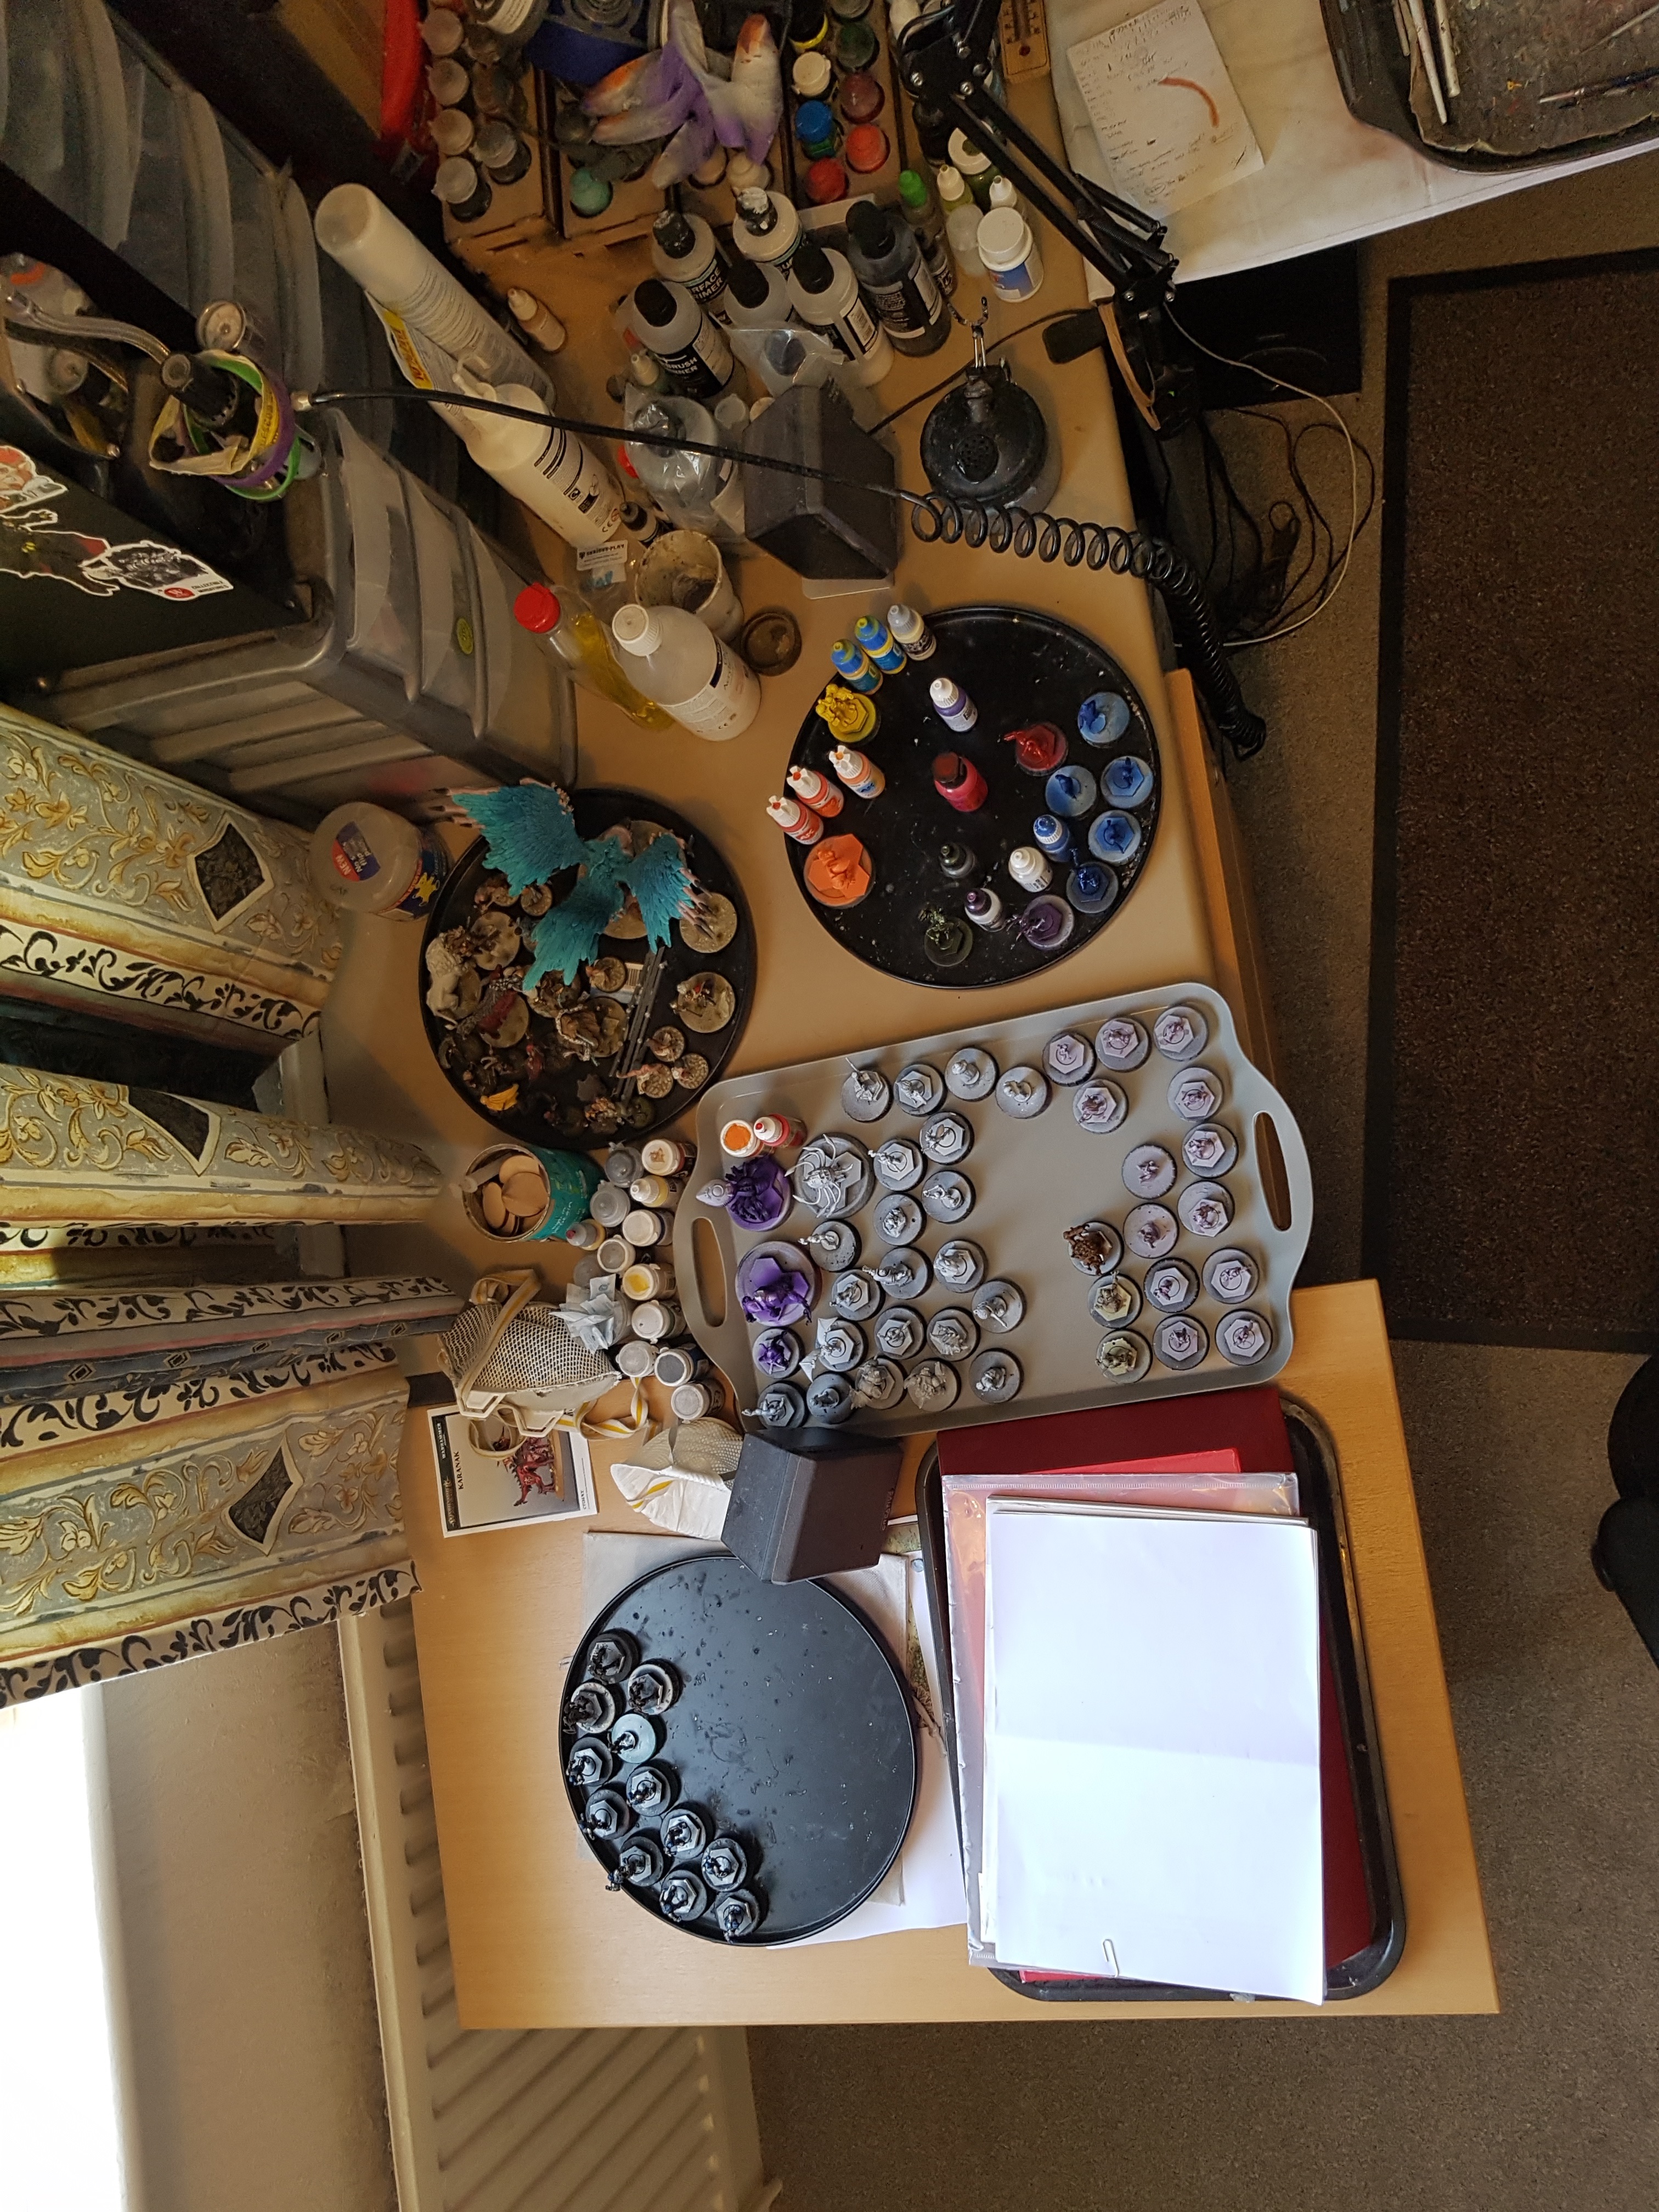
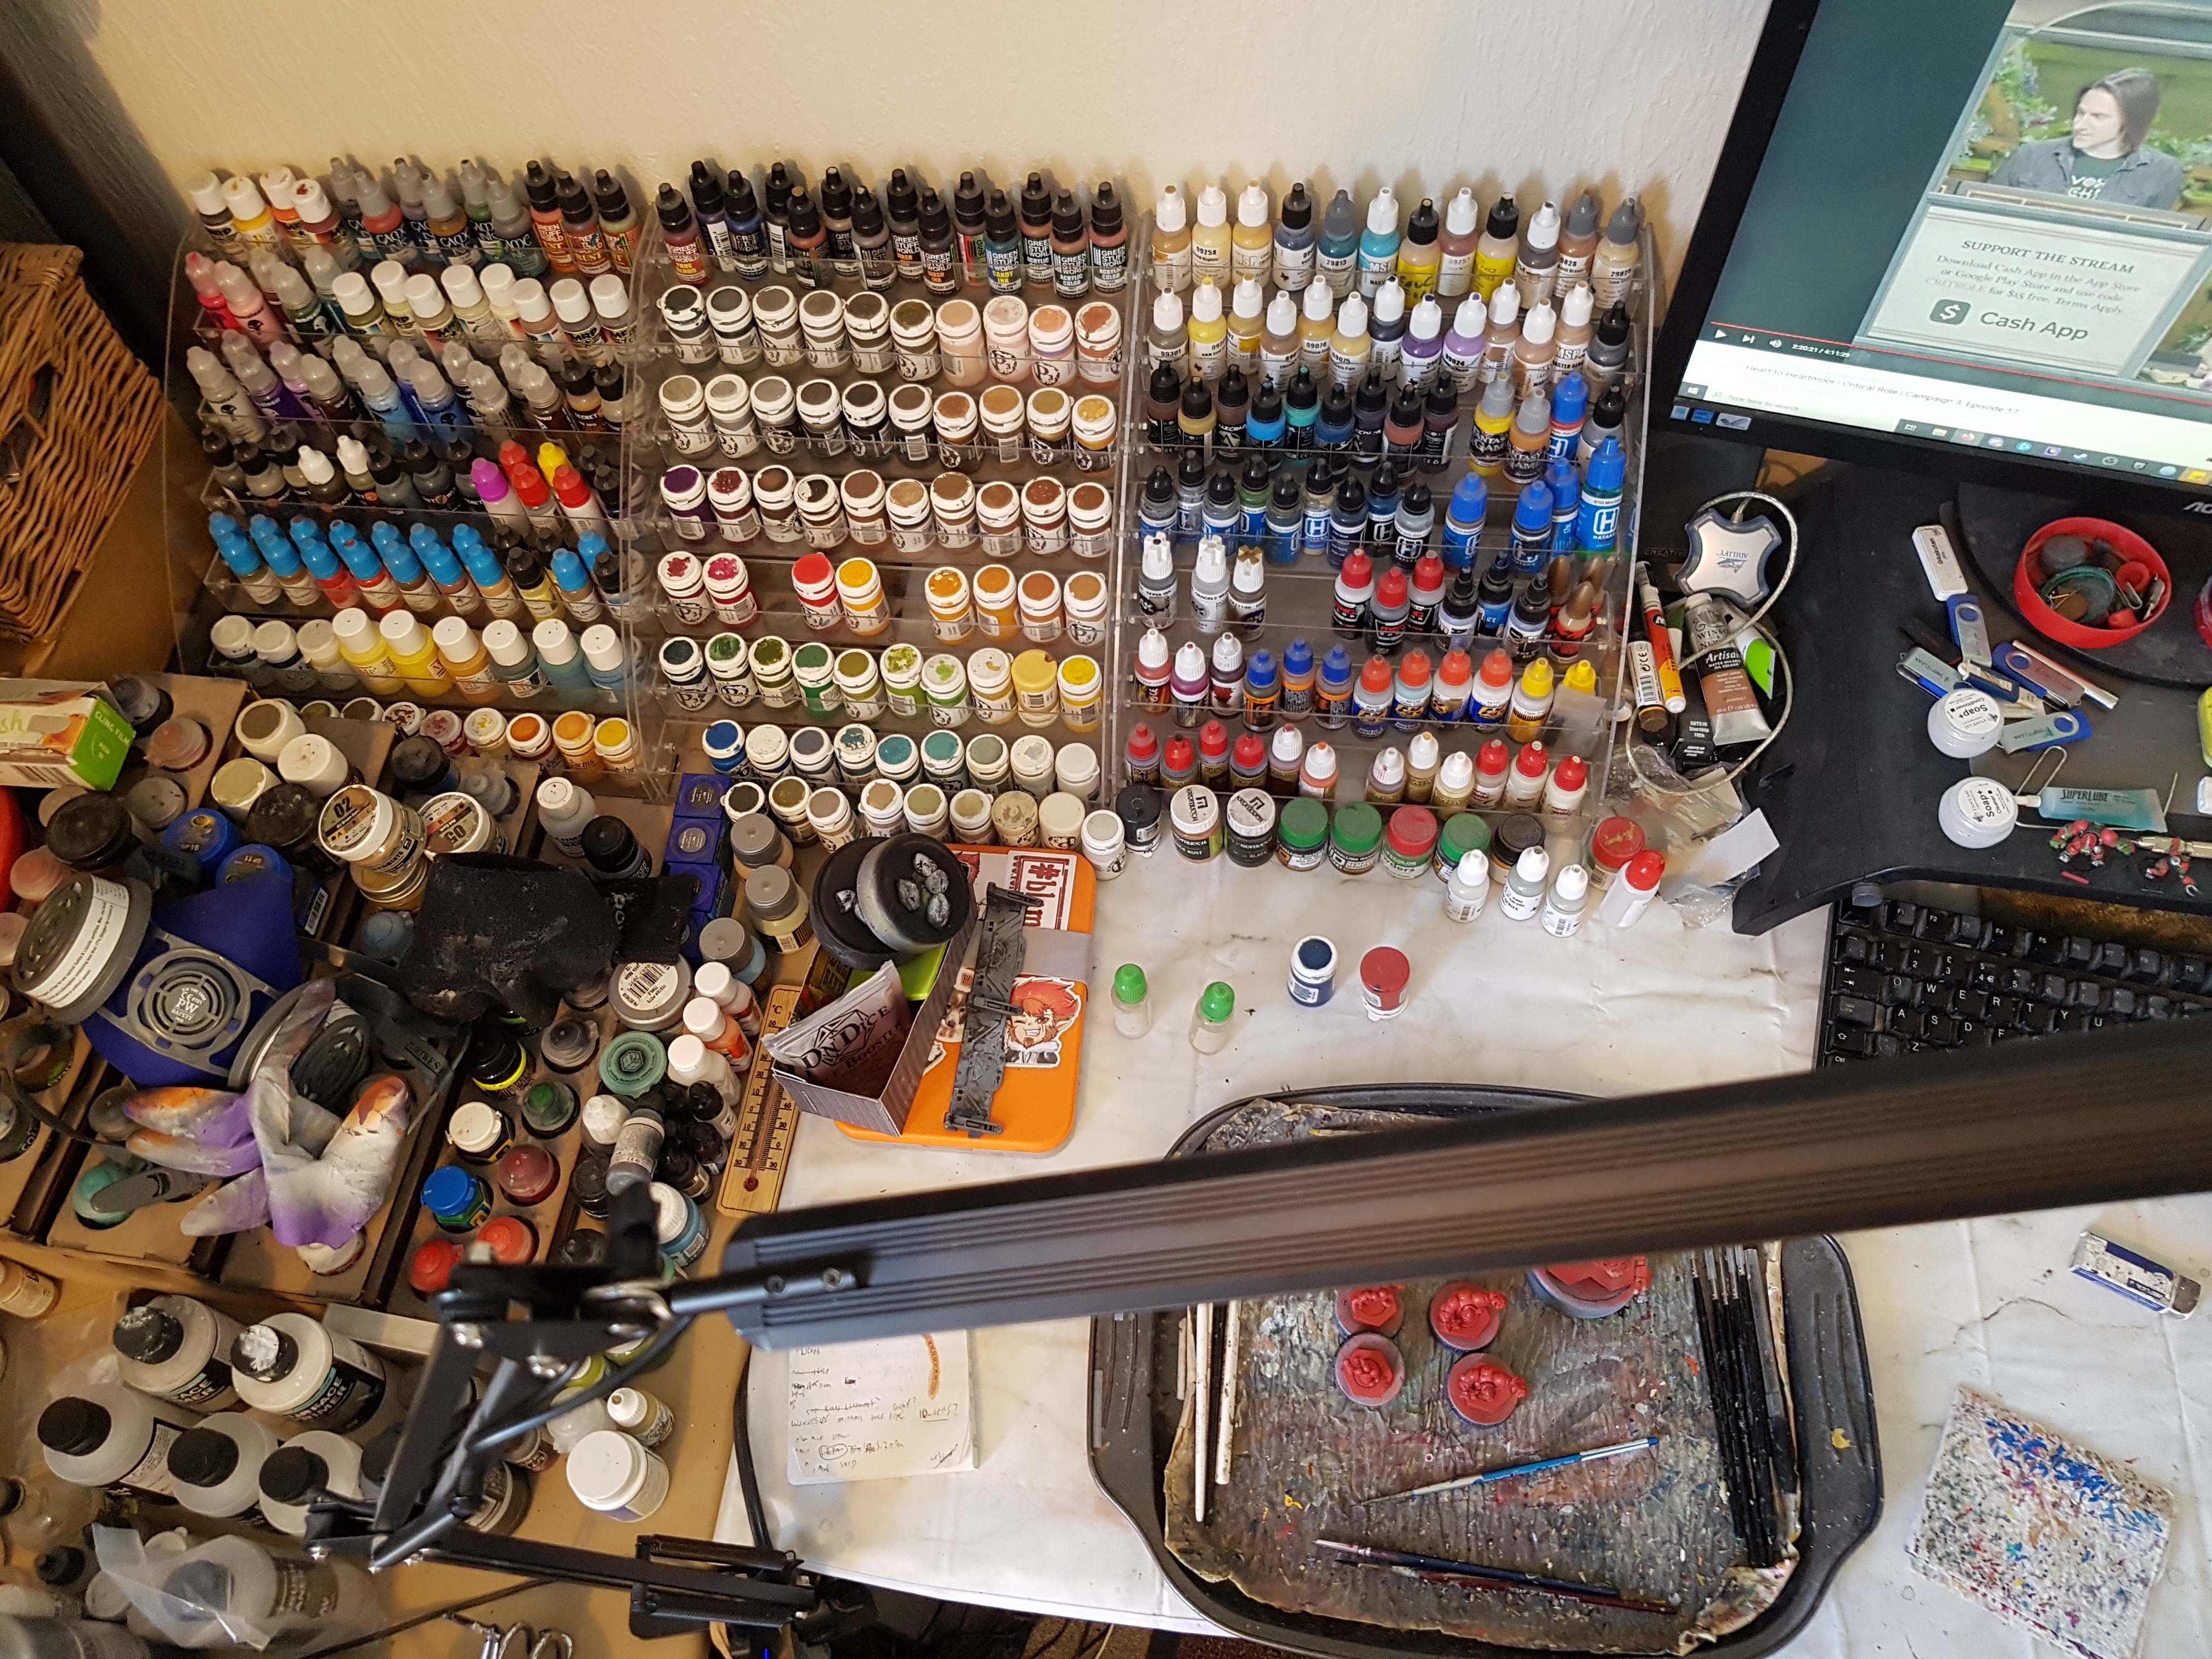
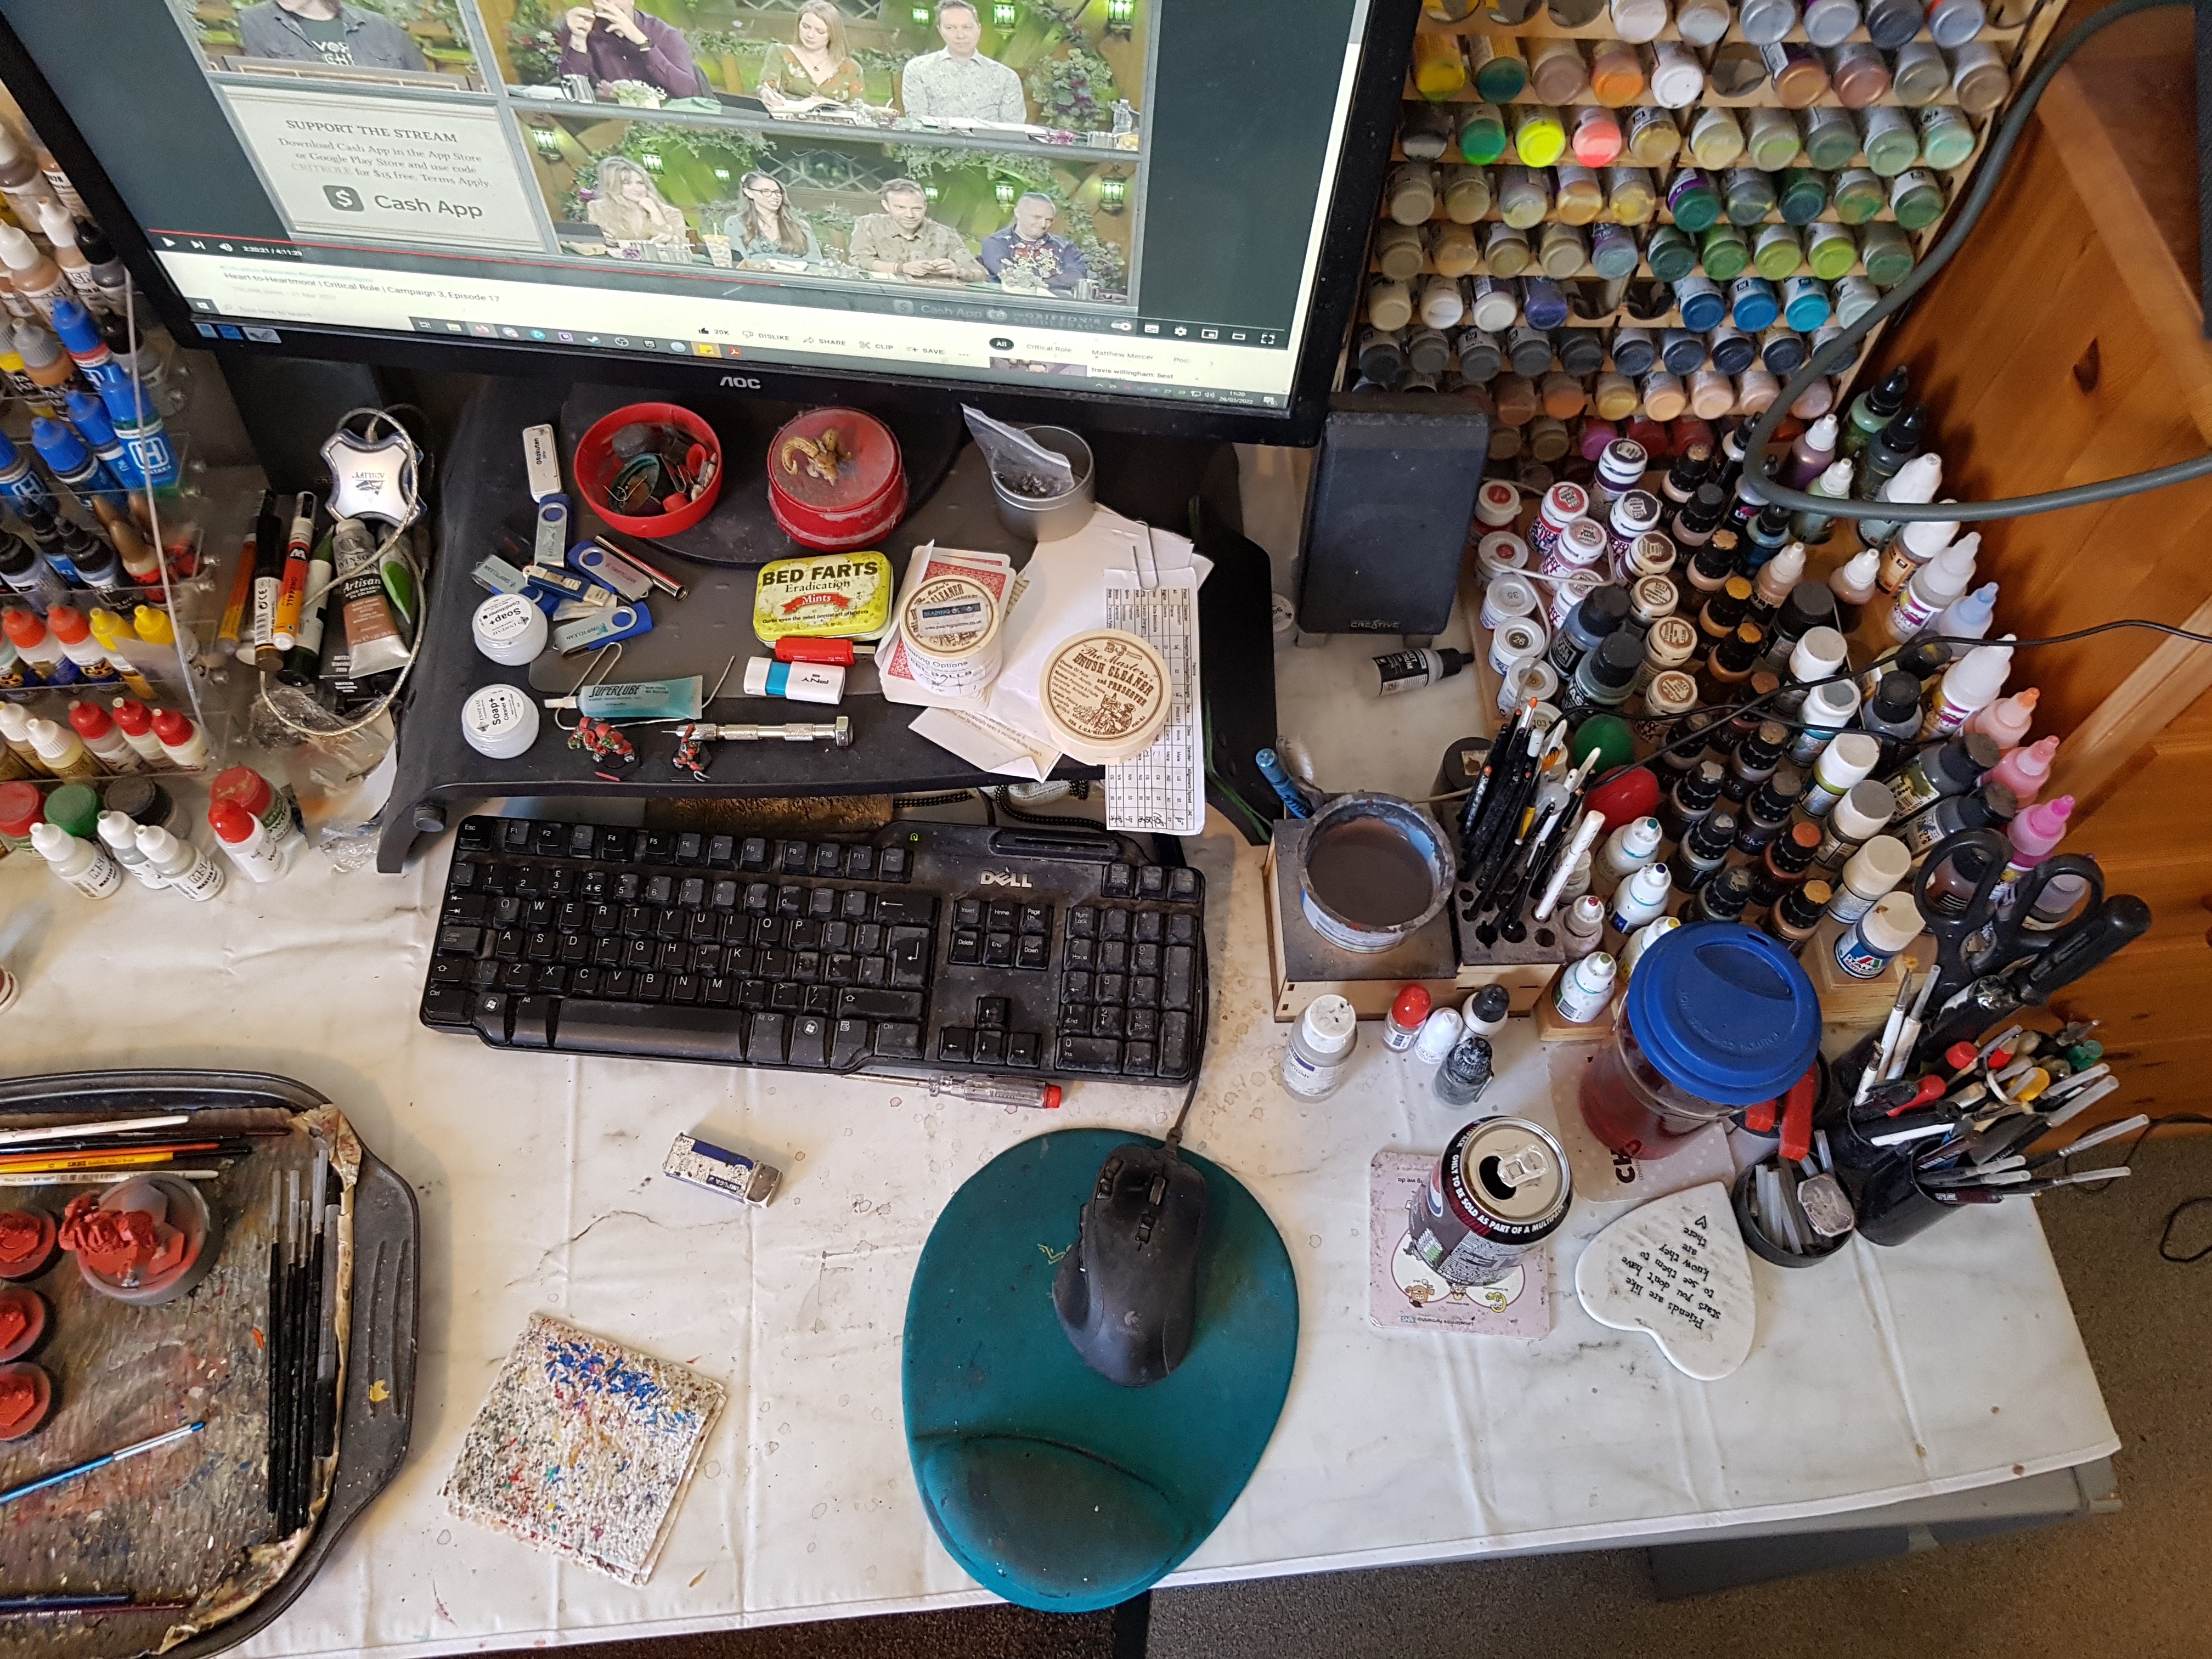
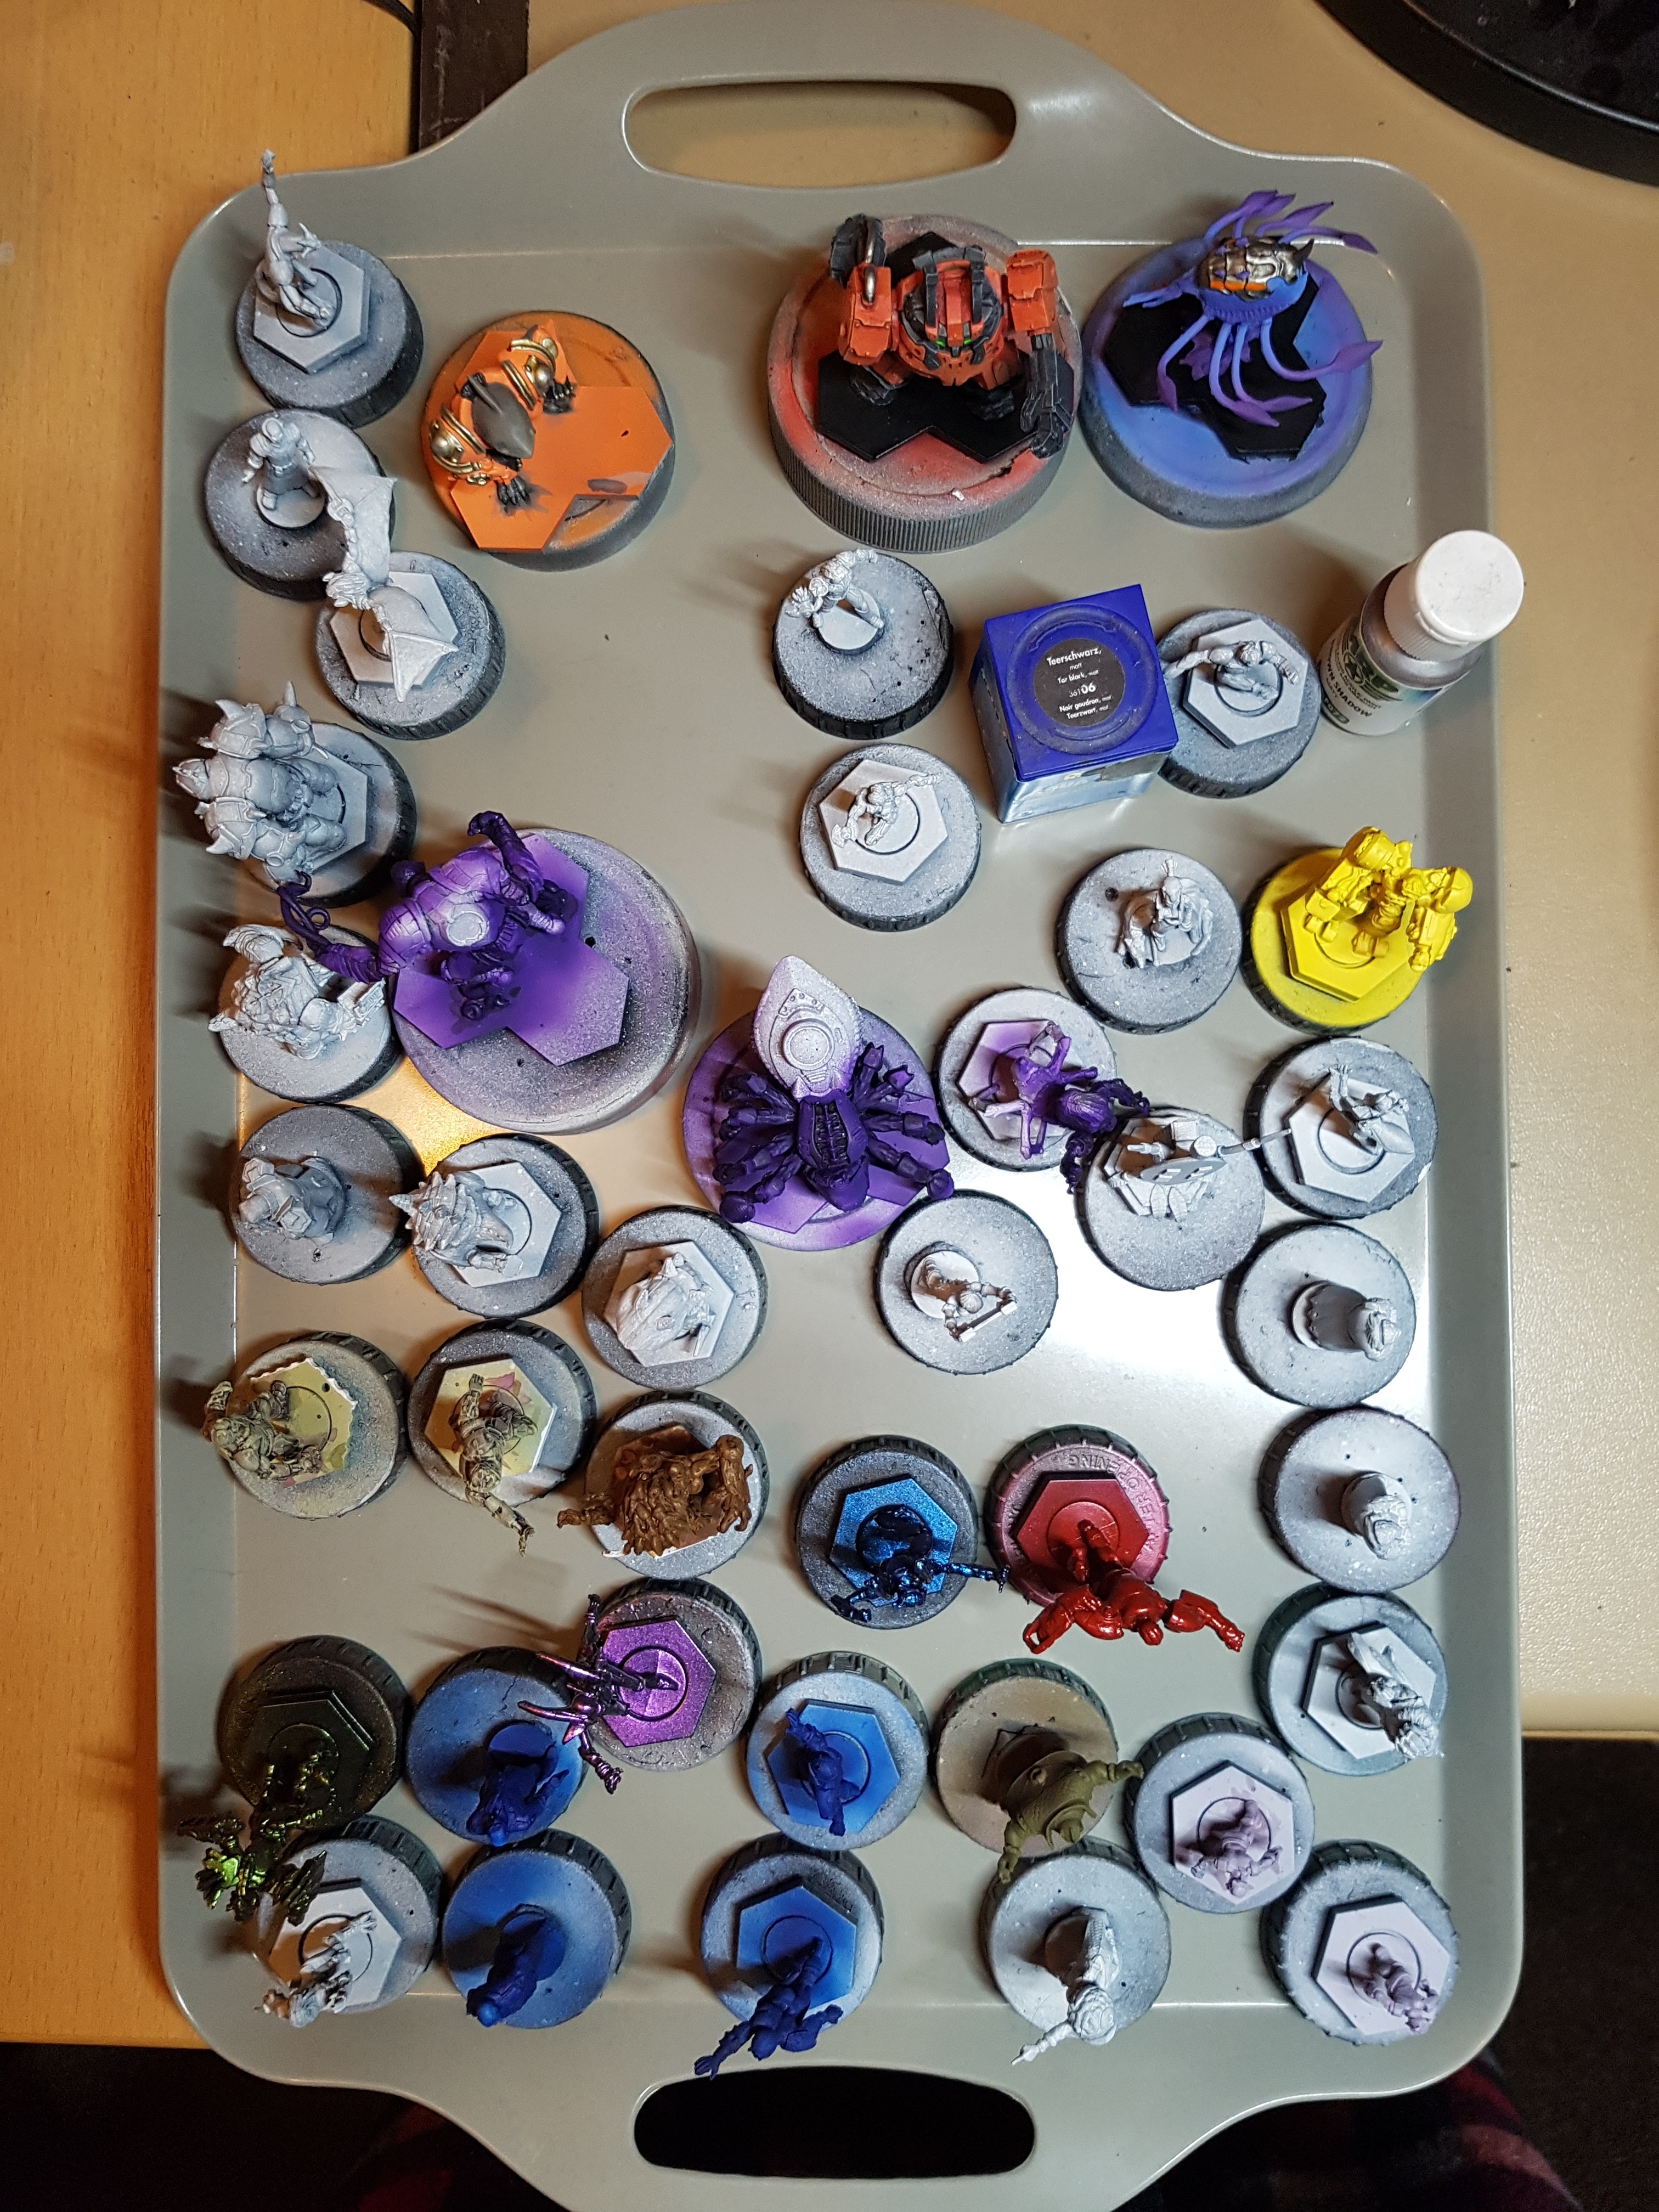
It occurred to me that if I’m making this project all about bulk painting, then maybe it’d help someone if I zoomed out a little and showed not just my current tray, but the state of my hobby space, especially how I keep it all organised and ready. So here are a few pics with some explanations as to what’s what. I have an L shaped desk arrangement and no good way to take an all encompasing pic, so appologies for this monster jigsaw image abomination.
The Key:
A. A covered tray full of the models I was half way through painting when I switched to Kingdom Death. The dust and sun are being kept off of them as it could be a few more months before I finish them off
B. The tray full of Dreadball minis that are done, but need basing, transfers, and some varnish before they’re finished. Over there and out of the way so my To Do trays don’t look so busy and I can see at a glance all the progress I’ve made. I’ll likely finish these off when I’ve done the last of my units
C. My main To Do tray. I keep swapping models off of this on to my active tray, so it’s got a little space on it. As I get more done I’ll probably move everything off the other To Do trays on to this big one.
D. My second To Do tray, with the models that still have the paint pots next to them as reminders for what paints I’ve used so far, as I may want those colours again when i get to them.
E. My completed tray. These guys need putting away, but I’ve been too preoccupied / lazy. Since taking this pic I’ve set up Kingdom Death: Monster in the spare room ready to play and taken the relevant models through.
F: My active tray. You can see the Marauders on it as I was working on them at the time.
As you can see, I do my painting in front of the computer, with web content such as OTT or Critical Role for company. I also have a bunch of painting guides and recipes stored on that computer, ready to access. I have 6 racks of paints all within line of sight and ease of reach. I could fill a 7th, but I don’t really have space, without starting to put things up against a radiator. if you zoom in you can see 2 orcs on my monitor stand. These are my reference pieces from my previous batch 5-8 years ago. I’ve also got a cheap plastic table cloth pover my paint area to protect everything from the splaces and spills. I cannot recommend this enough. I’ve also got a cheap rug under me to catch spills. Accidents happen. It’s unavoidable.
So everyhting is with reach, and organised by stage. Models with similar colour needs are grouped together, and I’m constantly reassessing that as I progress. It’s a little like an office desk. I have In and Out trays for my work.
If you have any questions about what anything is, or how I organise my stuff or my work, please ask.
 My workspace. Or, at least, a frankensteins monster of pics hoping to pass as my workspace
Here’s the idividual parts, in case that makes anything easier to look at. These should be a little higher rez, making it easier to zoom in and find that one embarrasing thing I still haven’t realised was in the shot.

Marauders finished (27/3/22)
Sunday was my D&D day. We’ve taken a month-ish off from my campaign between adventures while someone runs something short and different, to give us a break and give everyone a chance to deal with some down time. As such, I’ve not had a whole day to paint. I stopped mid afternoon to spend a few hours prepping and trying to get the whole adventure fresh in my mind as I’ve no idea how much or what they’ll do. Turns out I didn’t need to stop painting as only 2 of my 7 players turned up. The rest backed out last minute, or said they’d be running late but would be there, and then didn’t show up at all. Useless bunch. I wasted half my Sunday for no good reason.
Anyway, before that I pushed through and finished off my Marauders, and started work on the lady space elves (the Kalyashi). I sleeved up my KD:M cards whenever waiting for paint to dry. There’s a lot of cards and decks in that game!:
- I drybrushed P3 Cold Steel over the lighter iron areas I’d washed at the end of yesterday.
- I base coated the leather areas with P3 Bootstrap Leather, then washed them with GW Agrax Earthshade. They then got a drybrushed highlight of P3 Beast Hide
- The teeth were picked out with P3 Menoth White highlight
- Buckles were reclaimed with a little P3 Pig Iron where needed. This brings the Marauders to completion, ignoring bases and transfers so they’re added to my Completed Tray, to finalise later.
- I brought the Kalyashi over to my work tray and drybrushed on their flesh highlight colour: P3 Frostbite, P3 Morrow White, with a tiny bit of P3 Skorne Red and P3 Exile Blue. basically, the base colour, with some white mixed in.
- I’ve picked out a couple of reds for their armour to use next time I sit down. I want their red armour to look different to the Marauders armour, but still be a strong red. I’ve gone for a rich darker red from Vallejo as the base, but not had time to start applying it yet.
That takes me up to 18 models “done” in 9 days, 5 of which were spent at work, with progress made on a whole bunch more.
 The Marauders, ready for base painting and transfers
 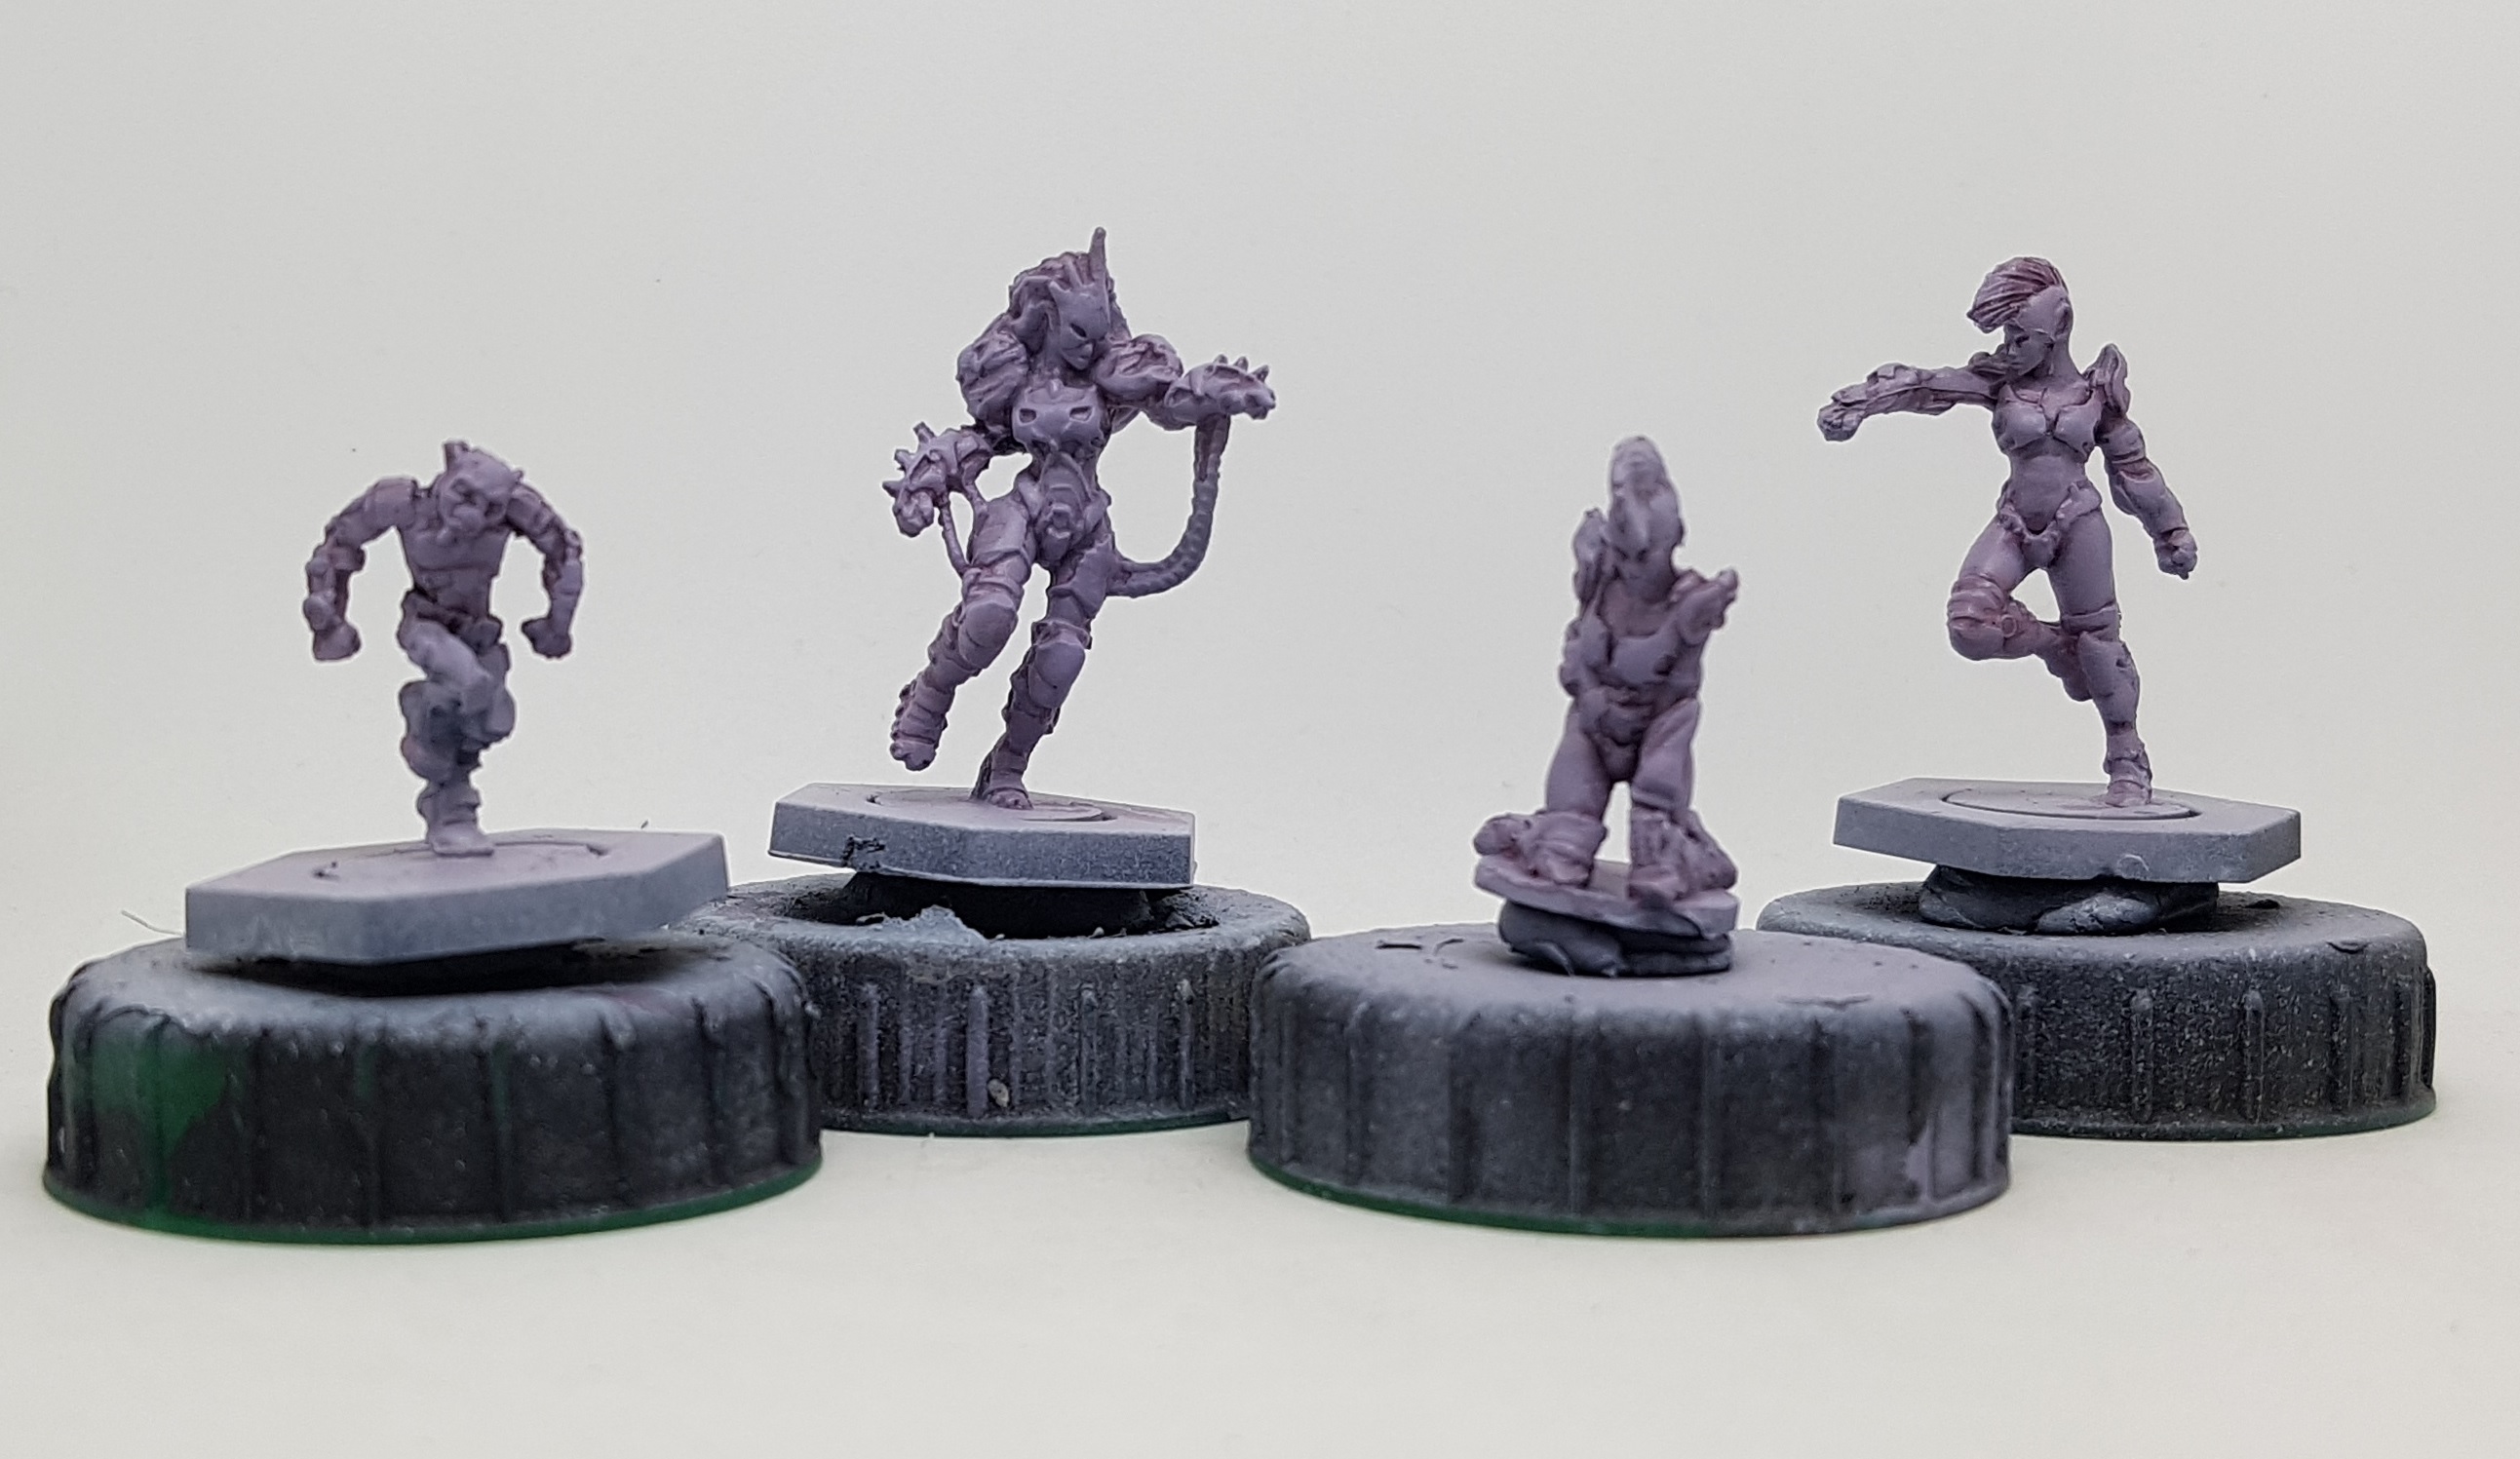 Kalyashi and Zee, with their flesh tones finished
Kalyashi Red (3/4/22)
I was away all weekend and busy most of the week so I got very little painting done last week. Only two evenings. In two hours on Monday I put down the first base colour on the red here. On Thursday in 2 hours I put down a second coat and a shade wash. Very little work was done, but progress was made. I’ve 3 evenings and the weekend free next week, so I hope to finish them then, and if I feel like it and have time, I might base and put transfers on everything I’ve finished and get them varnished. I can put some stuff away them and really see a difference in my work pile / in and out trays.
Base: VGC 72.012 Scarlet Red
Wash: VMC 70.859 Black Red with just enough black added to tint it, mixed with 3-4 drops of water and 3-4 drops of GW Lahmium Medium
I’m writing this from the future so I can tell you what I did next to finish this off, and show you those pics at my next weekly update:
Highlight 1: thinned VGC 72.106 Scarlett Blood (please note, it’s Vallejo that changes the way they spell Scarlet(t) between these paints, not me), brushed on.
Highlight 2: Drybrush of GW Wild Rider Red, only on the high points and edges it was safe to get to. Accidents were made.
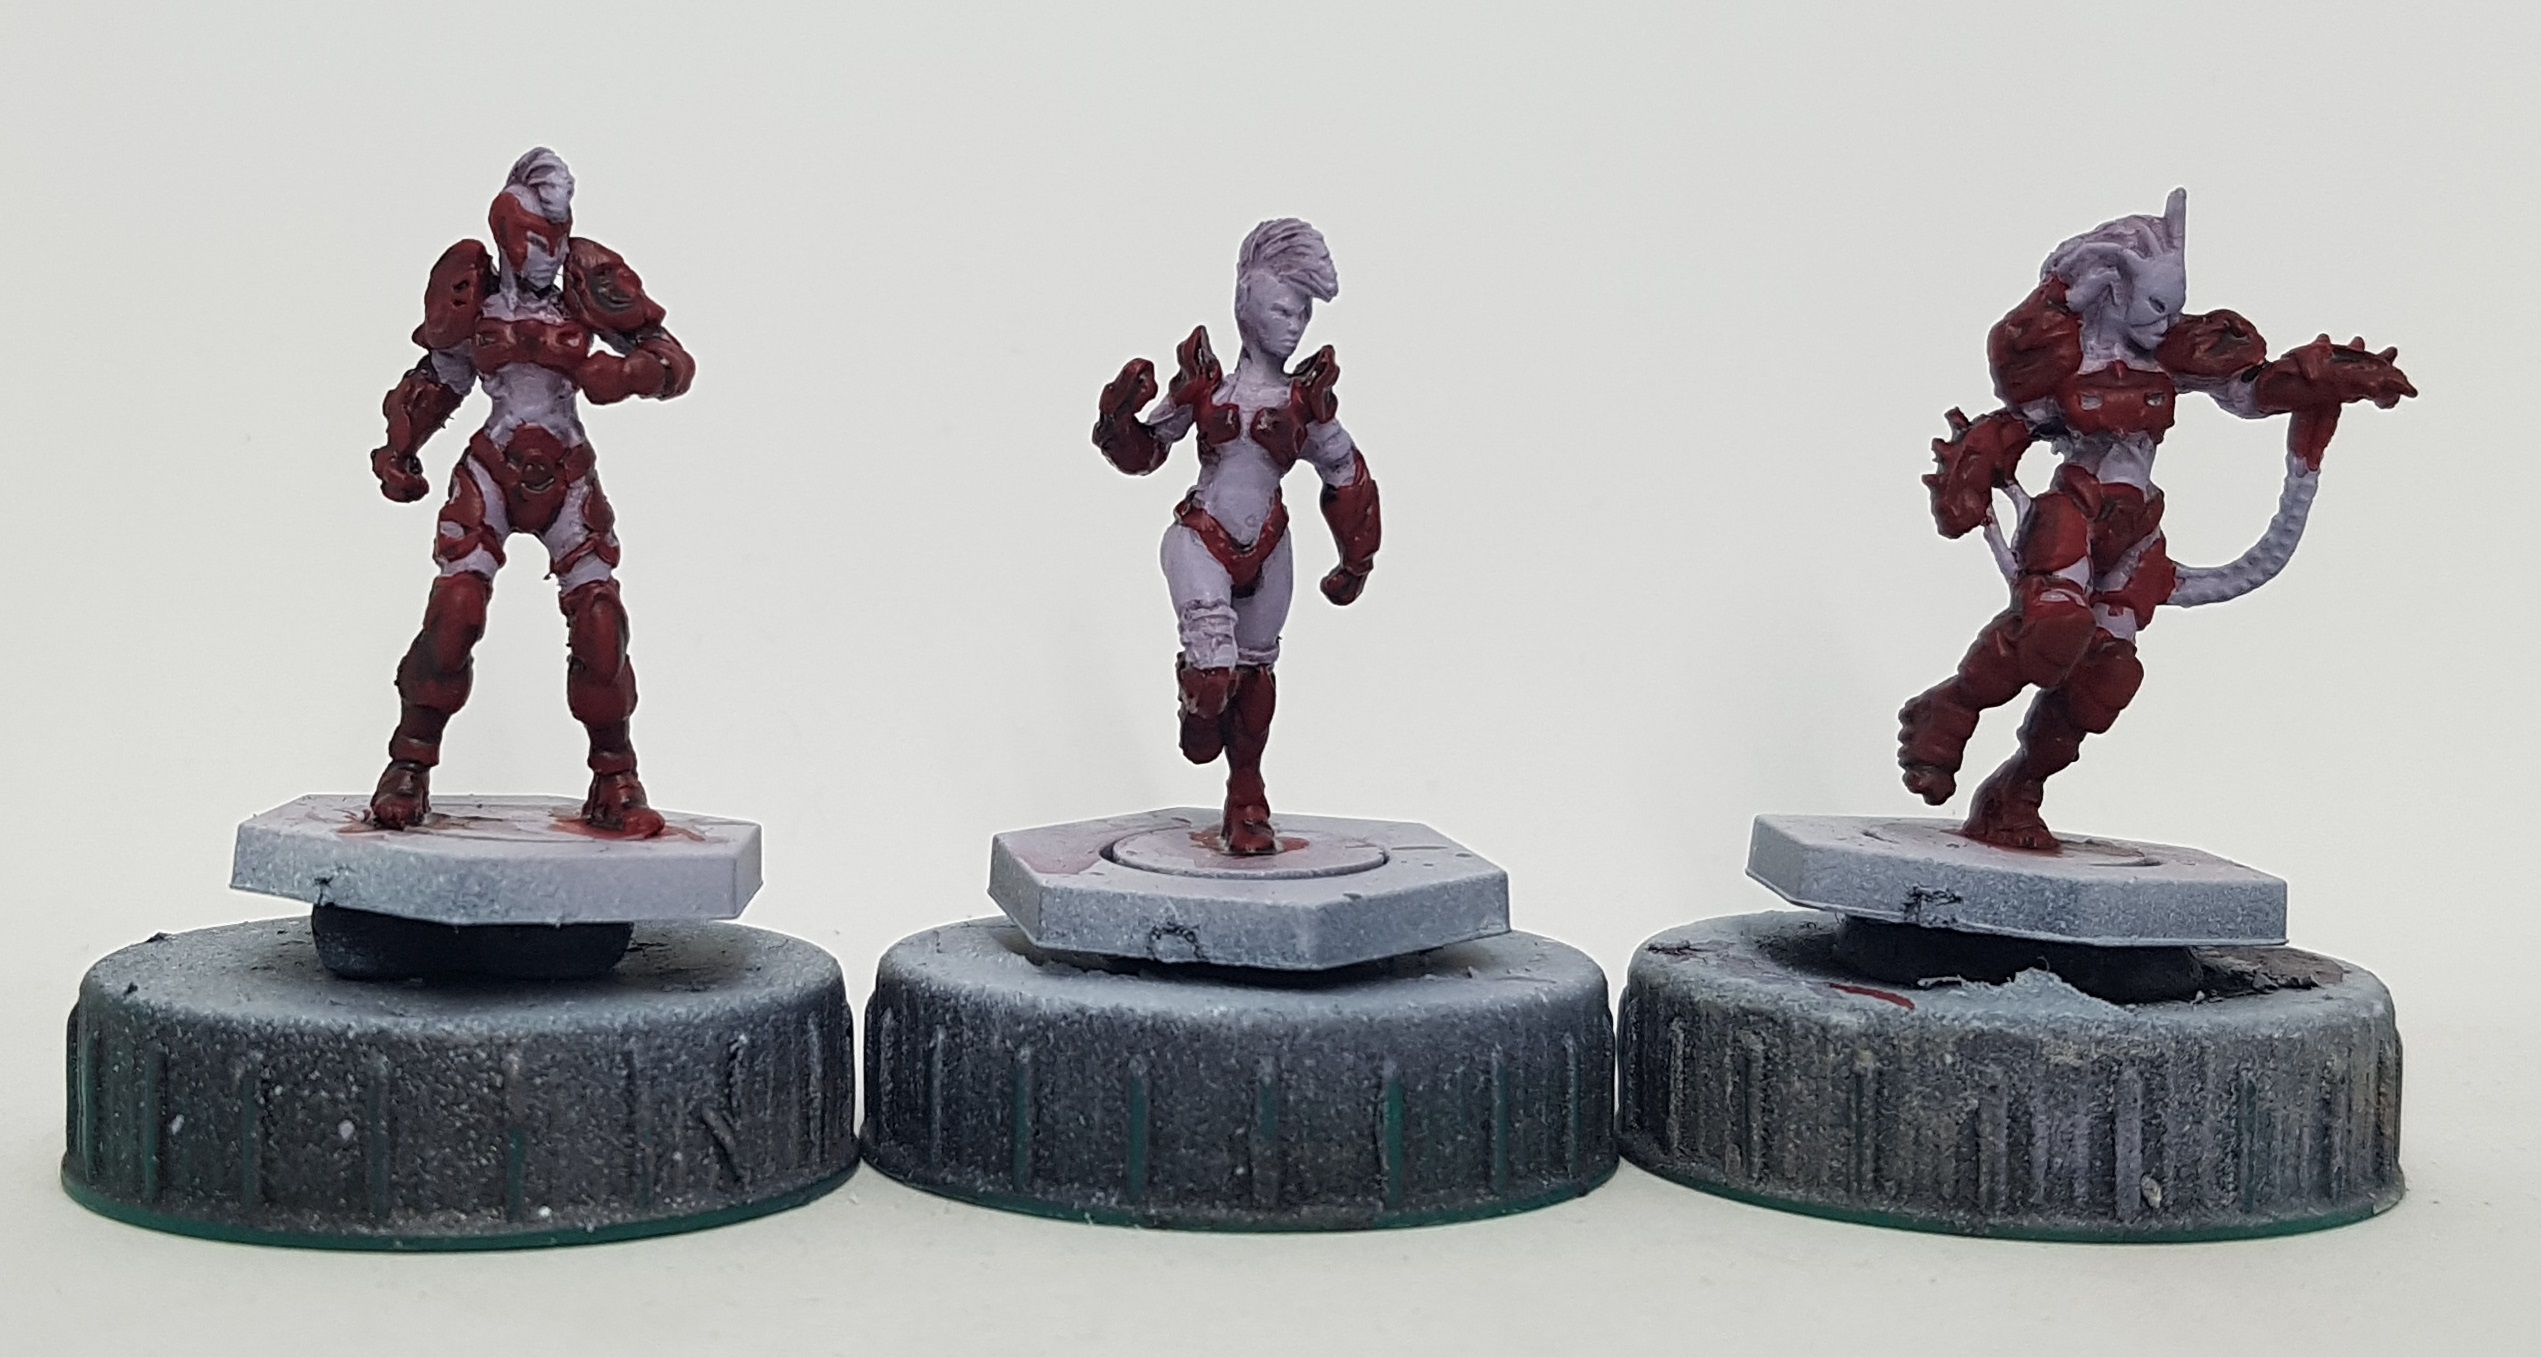 Two Kalyashi and their Star Player captain. The red is based and washed and awaiting highlights.
Teams Finished (9/4/22)
On Monday I finished of the red, as detailed in the previous post, and then set to painting the Kalyashi’s cloth, and the hair:
Cloth
Base: Reaper 09149 Mouldy Skin
Shade Wash: Reaper 09148 Ghoul Skin
Highlight Drybrush: Reaper 09150 Bloodless Skin
Hair
Base: 3:2 Reaper 09024 Amethyst & Reaper 09023 Imperial Purple
Shade Wash: GW Druchii Violet
Highlight Drybrush: Reaper 09024 Amethyst
Holy hell, guys! I’ve been using this projects system since day 1 and I’ve just discovered that if you hold down shift while pressing enter it doesn’t give you the forced double line space thing! Am I dumb? Is this a common feature in lots of software? I’ve always hated putting lists on here as double line spaced lists look so wrong. No more of that now!
Next up I started off my Saturday by finishing off the details, then painting the blue and gold on the team captain
Leather Straps
Base: VMC 70.995 German grey
Highlight Drybrush: P3 Hammerfall Khaki
Shade Wash: GW Nuln Oil
Iron
Base: P3 Pig Iron
Shade Wash: GW Nuln Oil
Highlight: P3 Cold Steel
Gold
Base: GW Retributor Armour
Shade Wash: GW Seraphim Sepia
Highlight Drybrush: P3 Solid Gold
Blue
Base: P3 Meridious Blue
Highlight 1: P3 Arcane Blue
Highlight 2: P3 Arcane Blue mixed with p3 Frostbite
Eyes and bases where then painted across everything I’d done so far that needed it. The red stripe on the bases was undercoated with white and painted red before I painted the black. t makes it a hell of a lot easier that way. Transfers were applied, and everything was varnished with gloss and then matt.
 The newly finished Corporation team
 The new models (your left) compared to the ones painted years ago (your right)
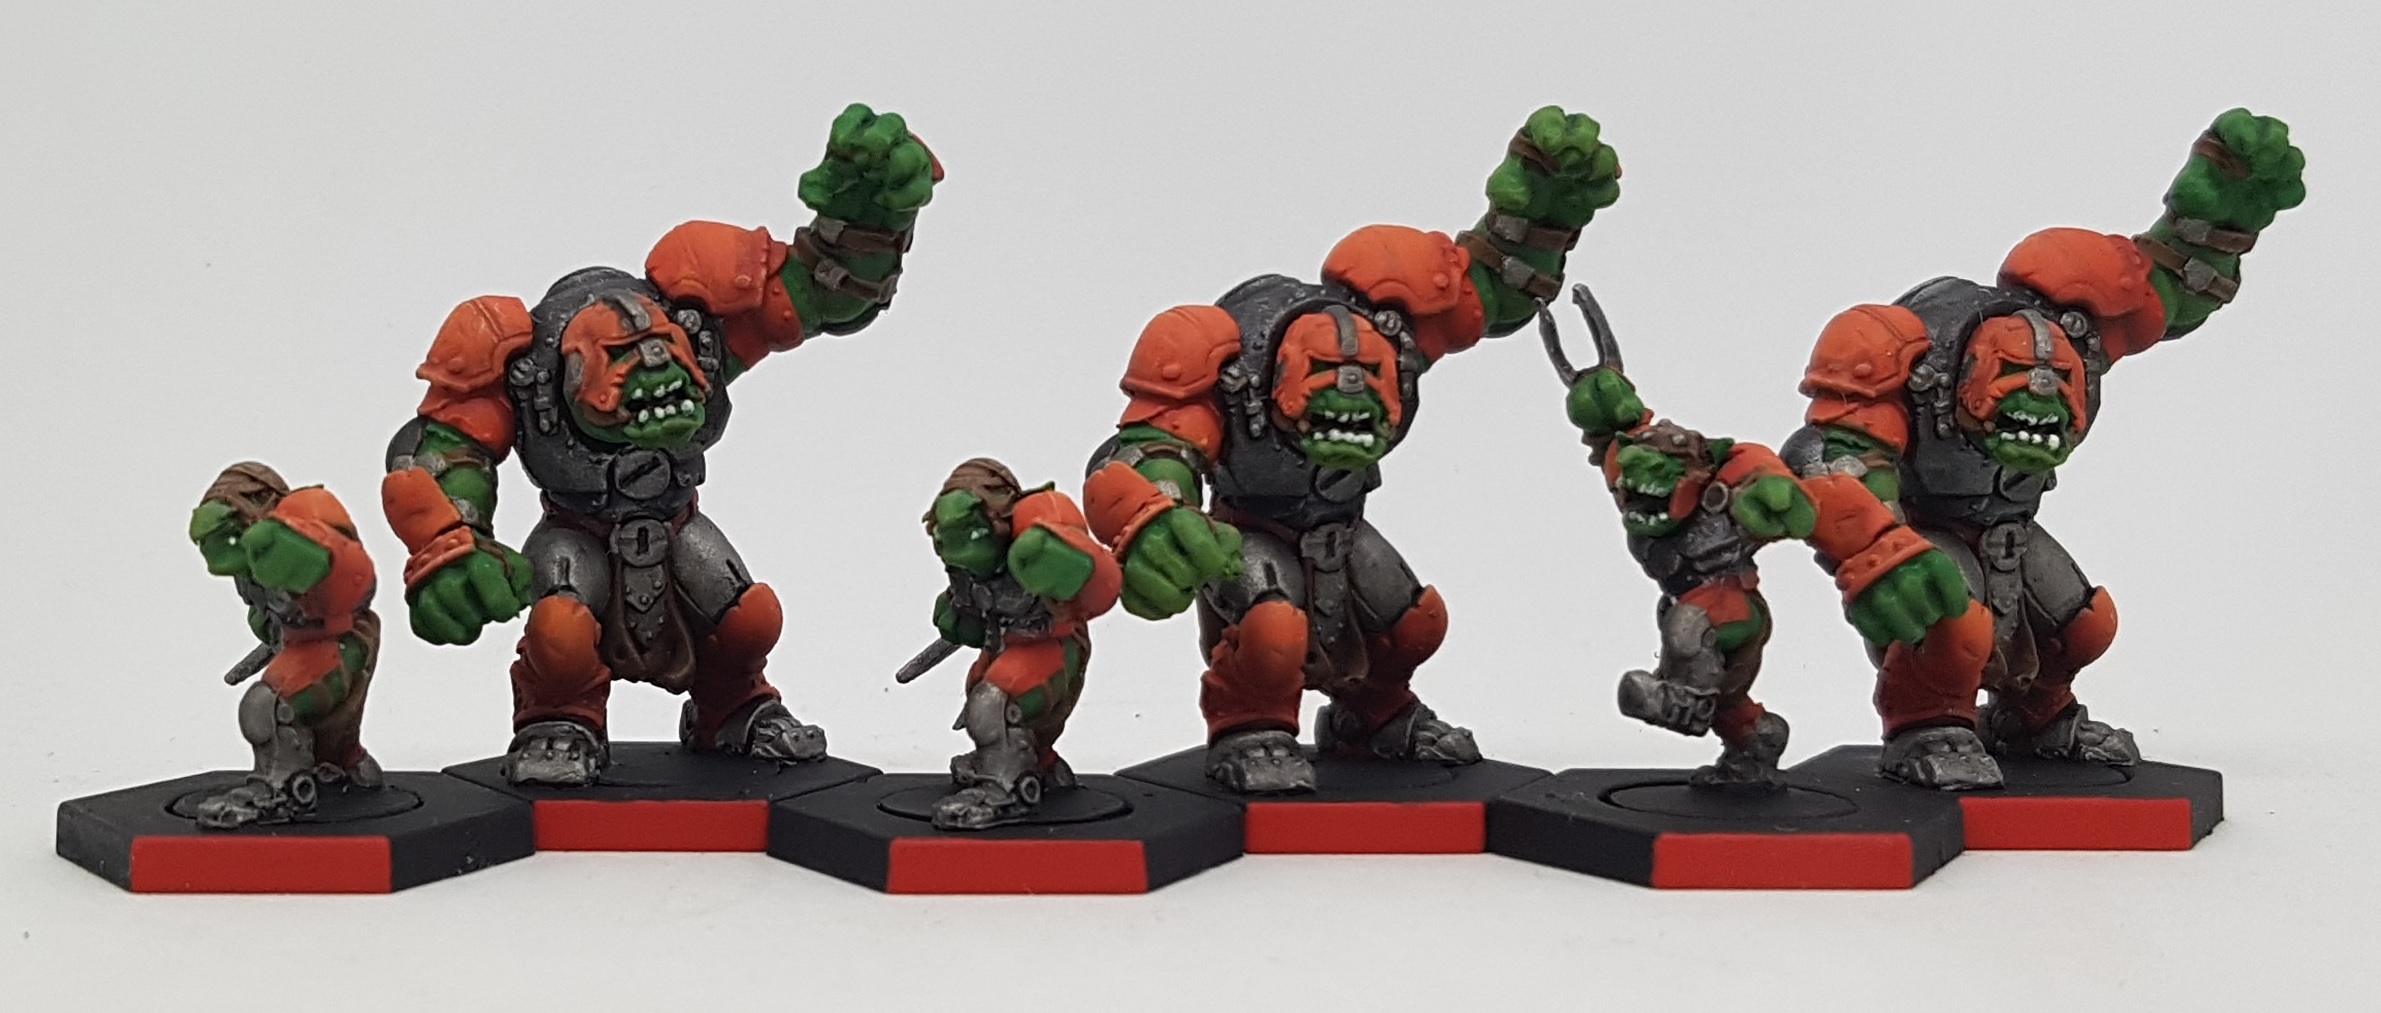 The newly finished Marauders team
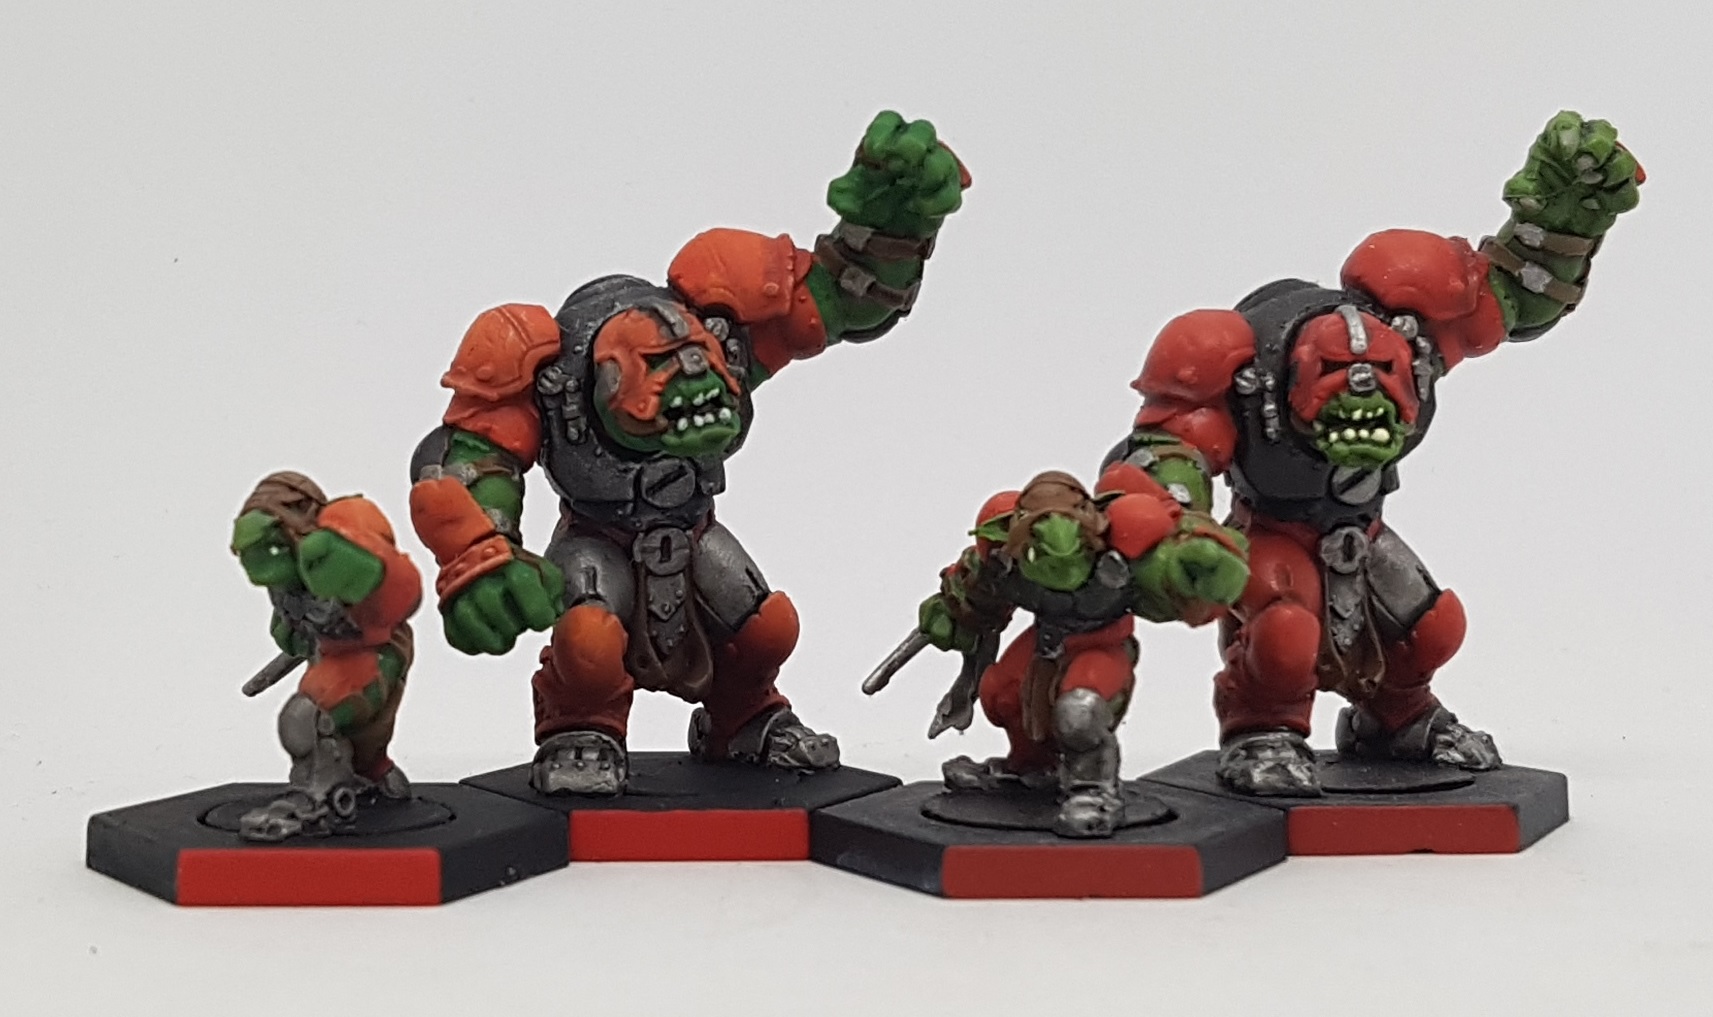 The new models (your left) compared to the ones painted years ago (your right)
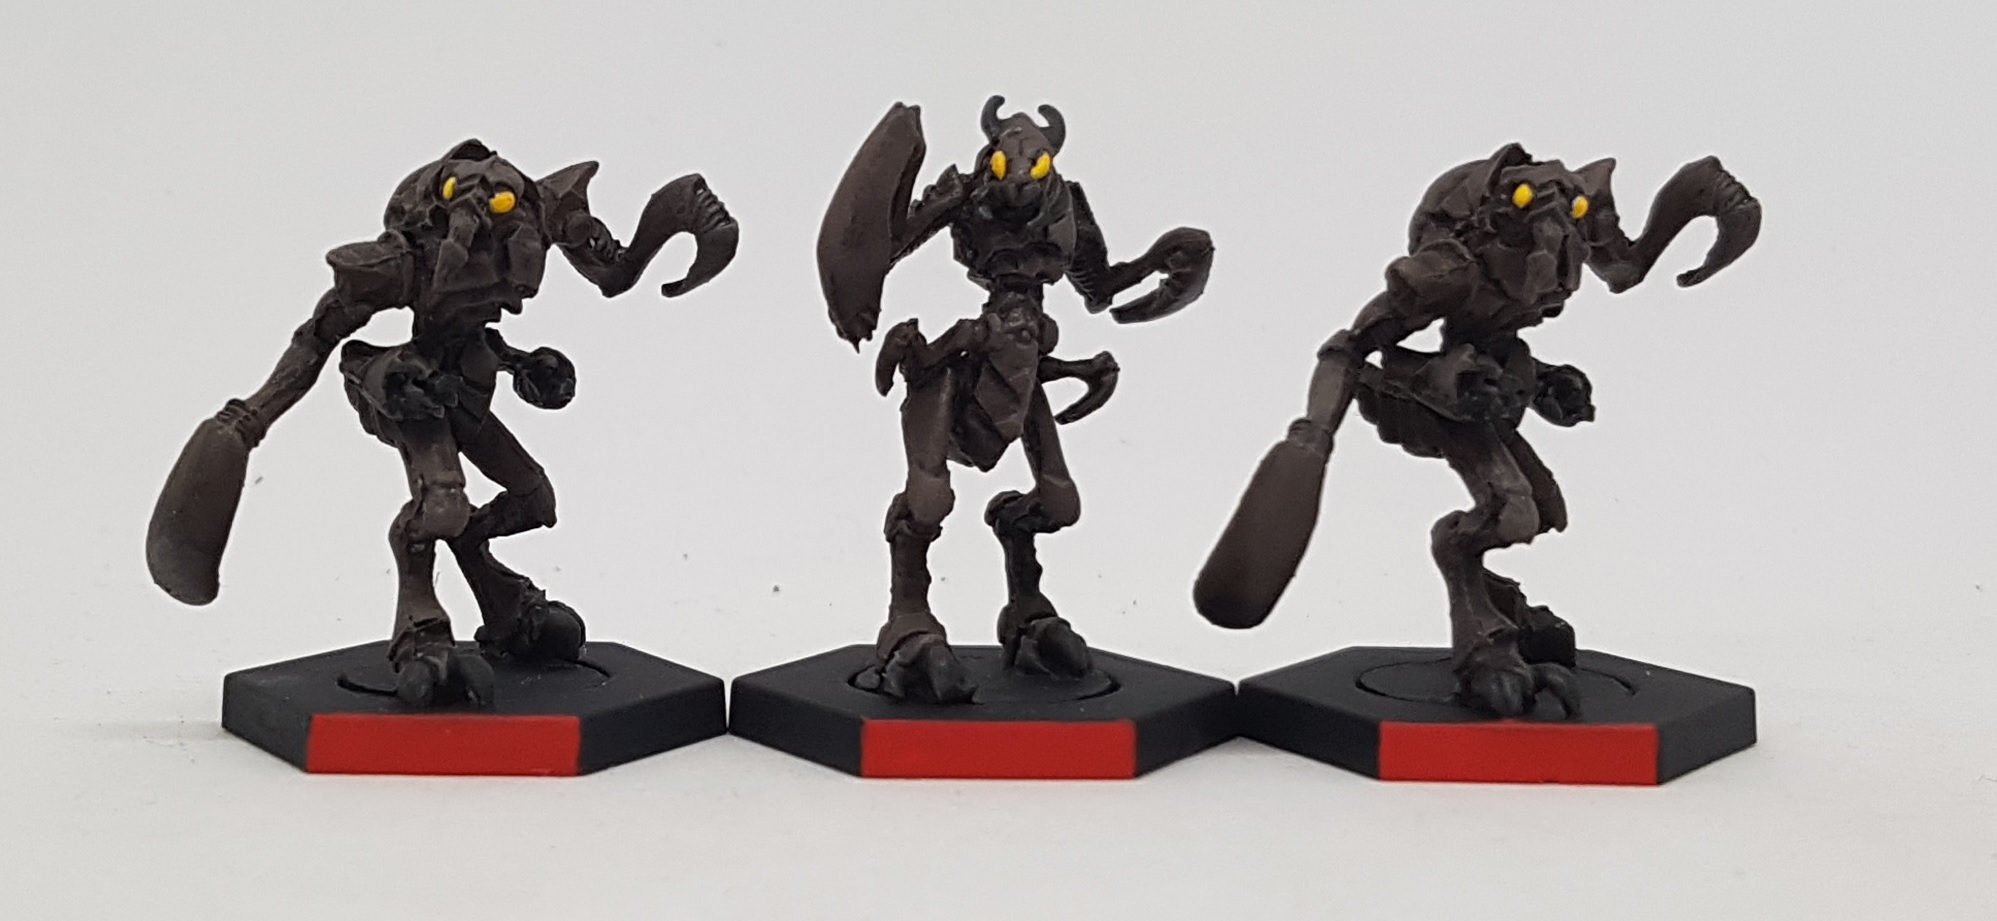 The newly finished Z'zor team
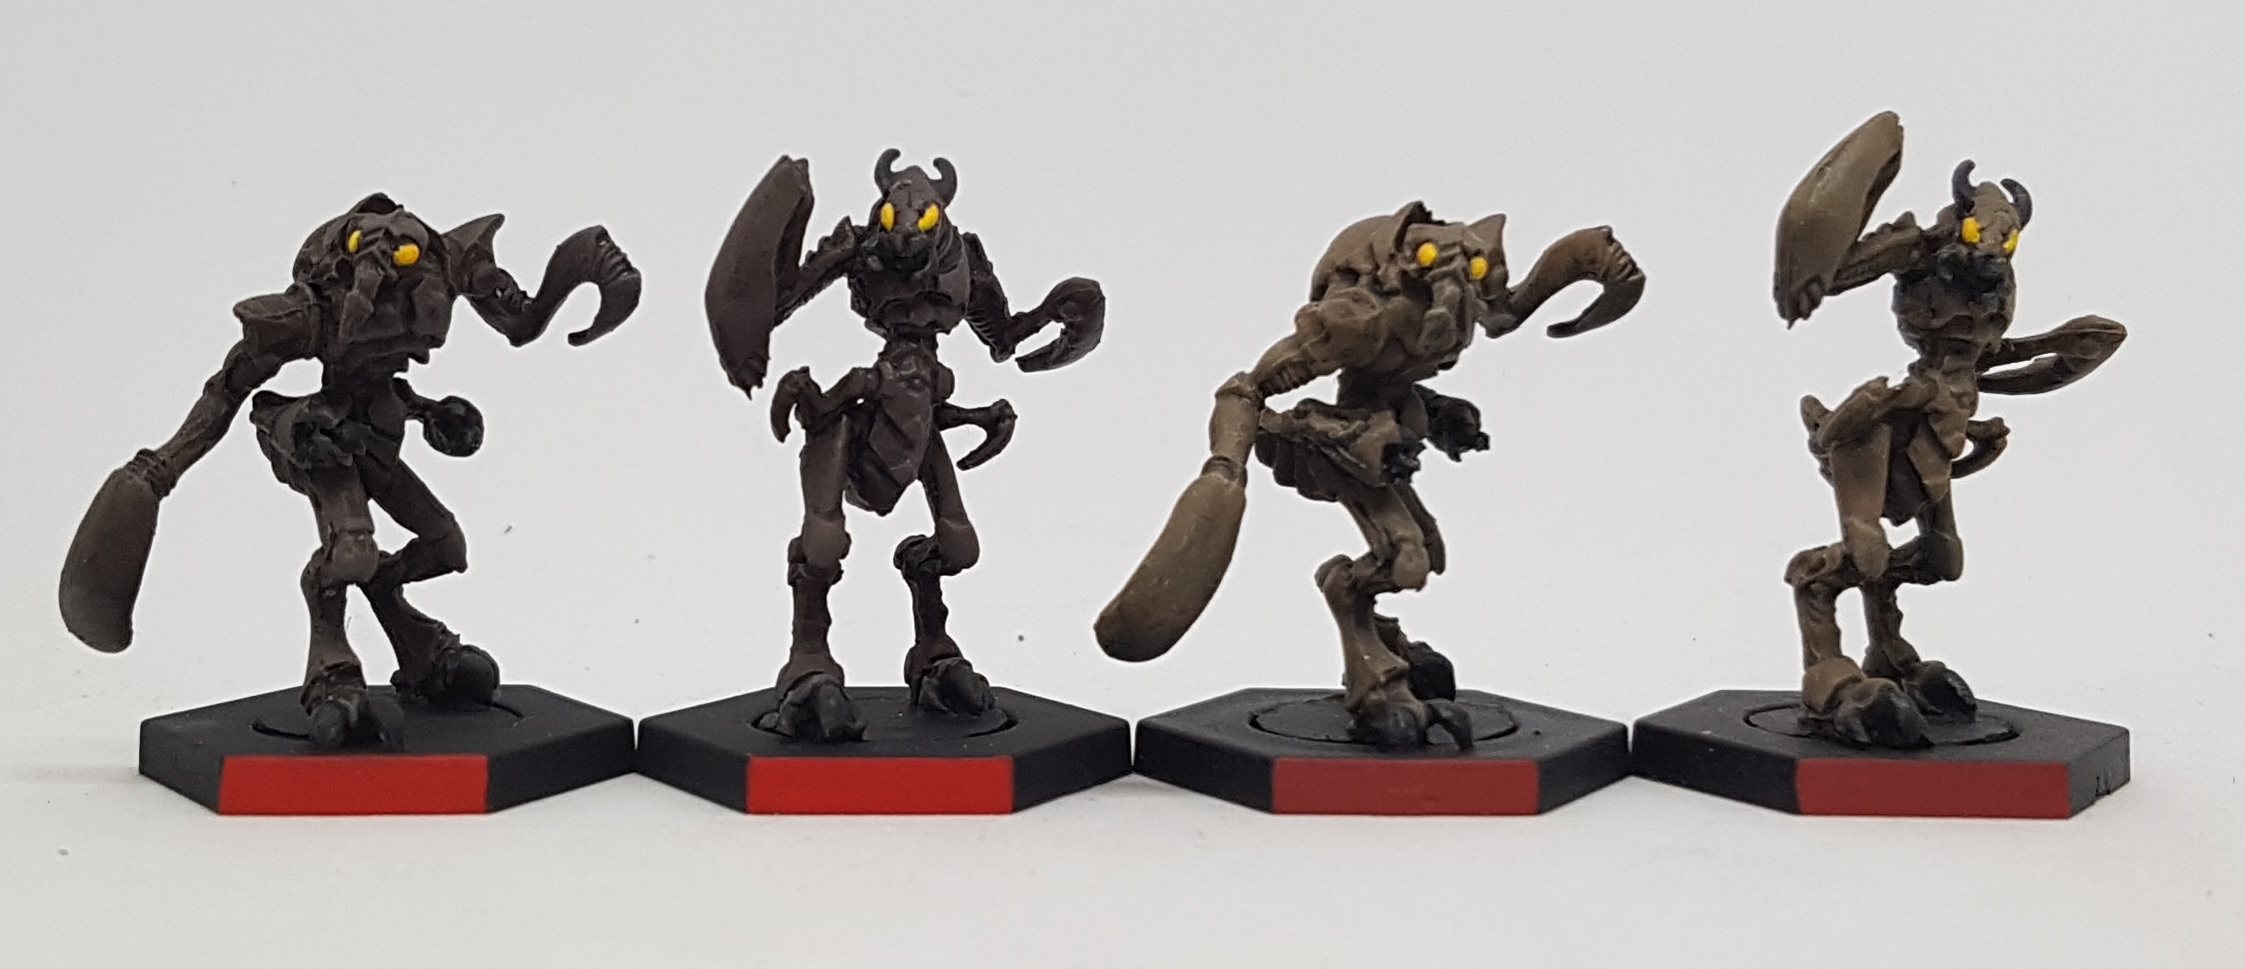 The new models (your left) compared to the ones painted years ago (your right)
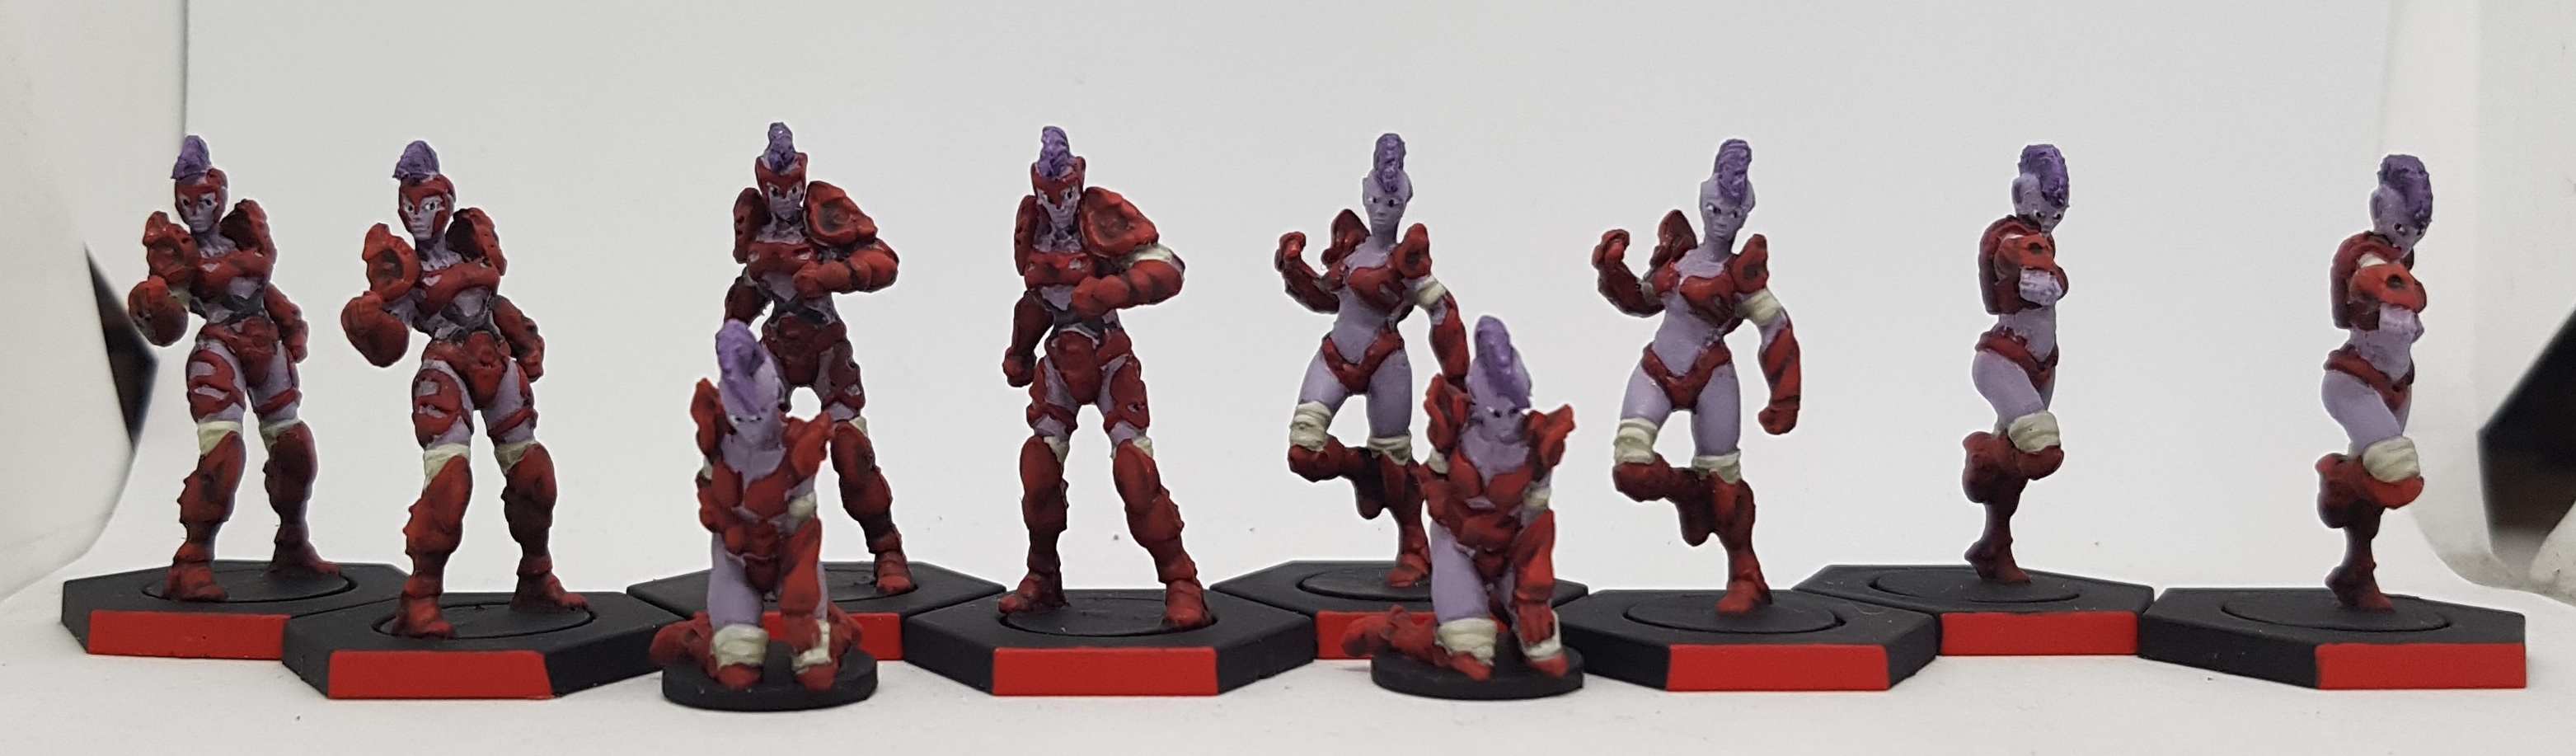 The newly finished Kalyashi team
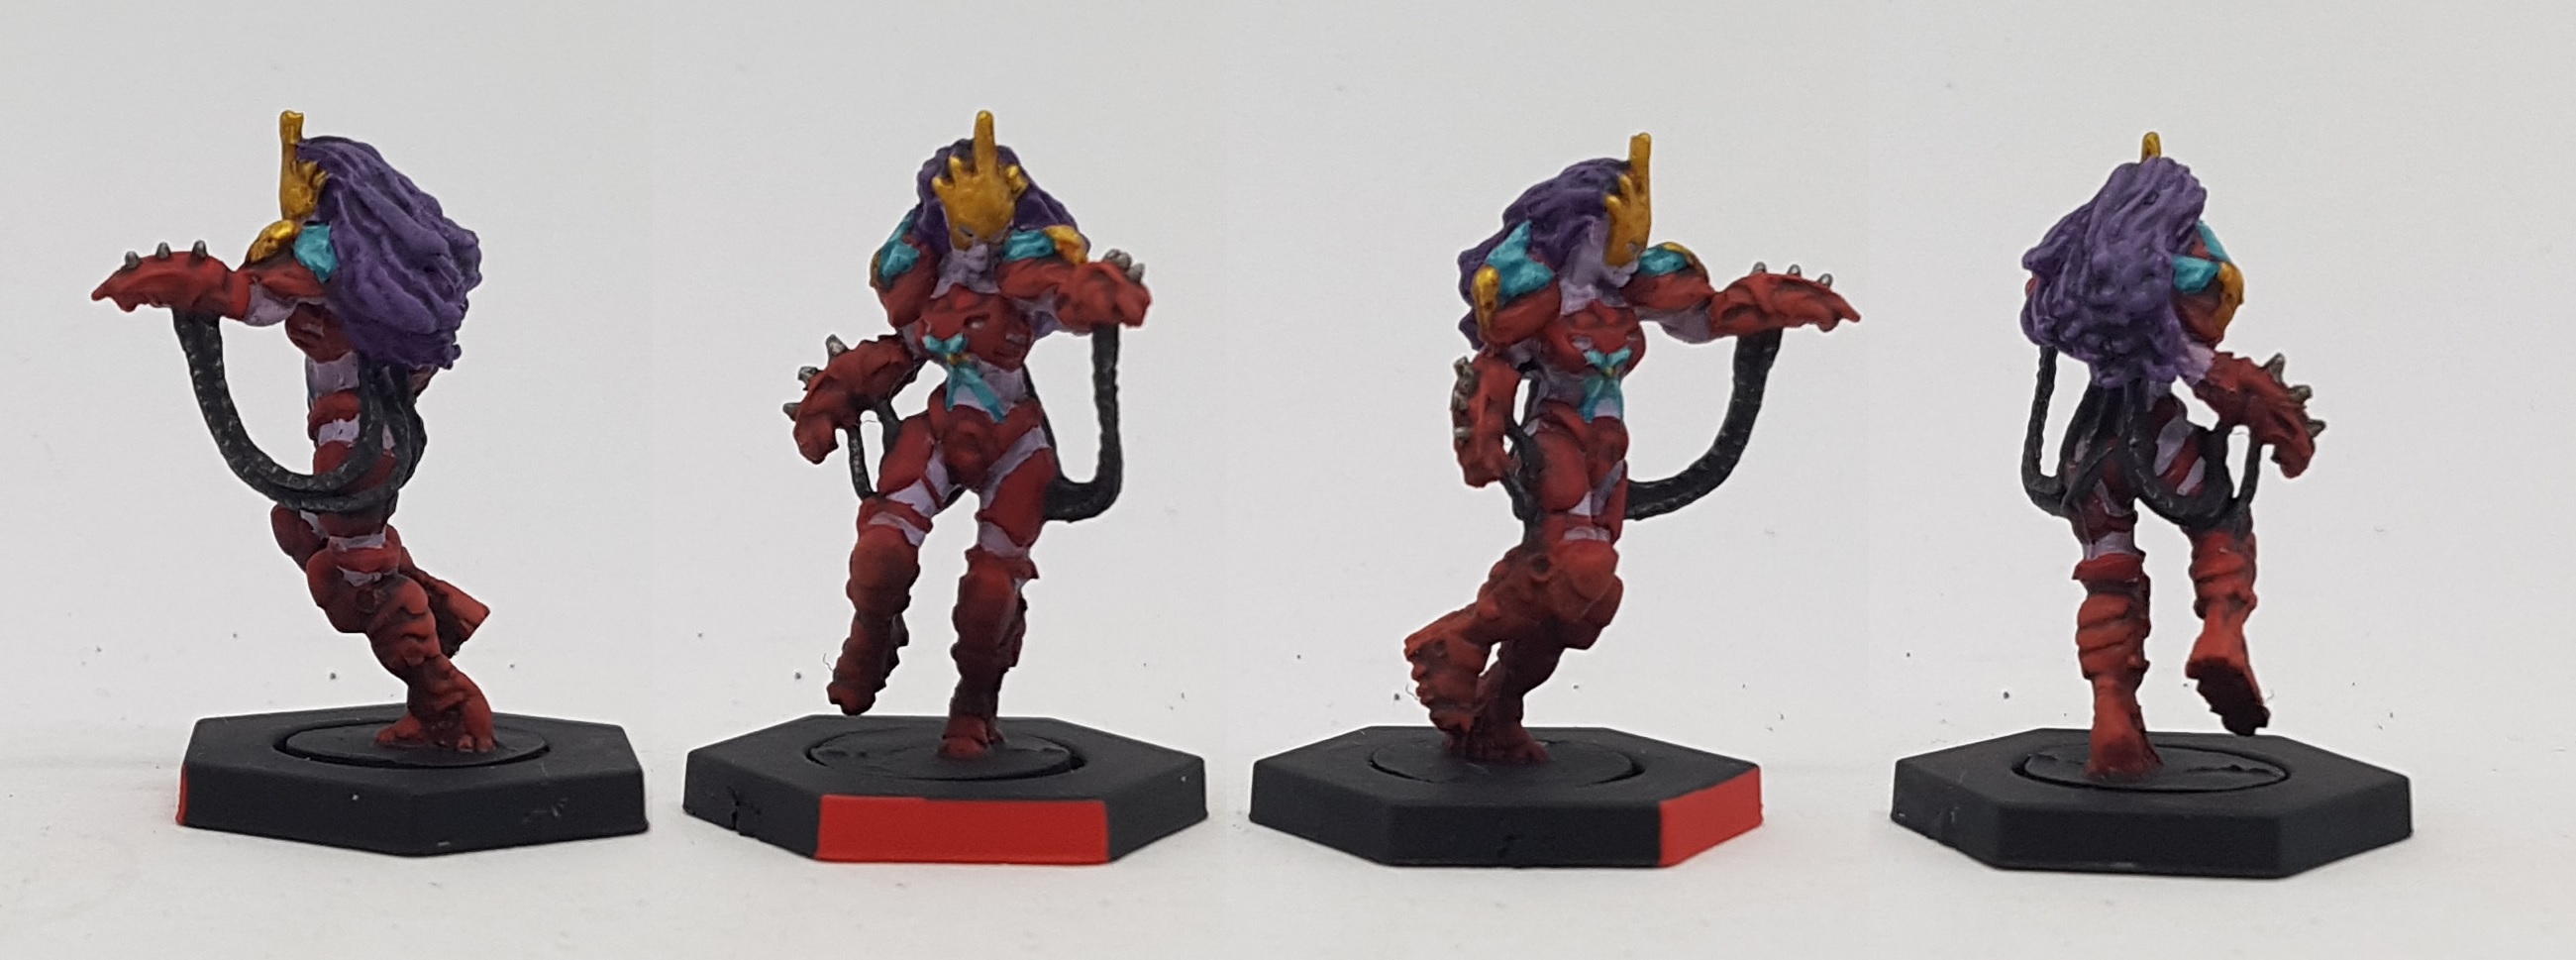 Kailasa. Here's an example of why old Mantic models get a bad reputation. See those blue parts on her shoulders? On the web shop they're clearly feathers, with good detail. On mine they're indistinguishable bumps on bumpy shoulder pads. The sculpt has good detail, but on the final model, it's a bit lacking and can be frustrating to work with. These space elves had lots of narrow fiddly bits I wasn't keen on painting
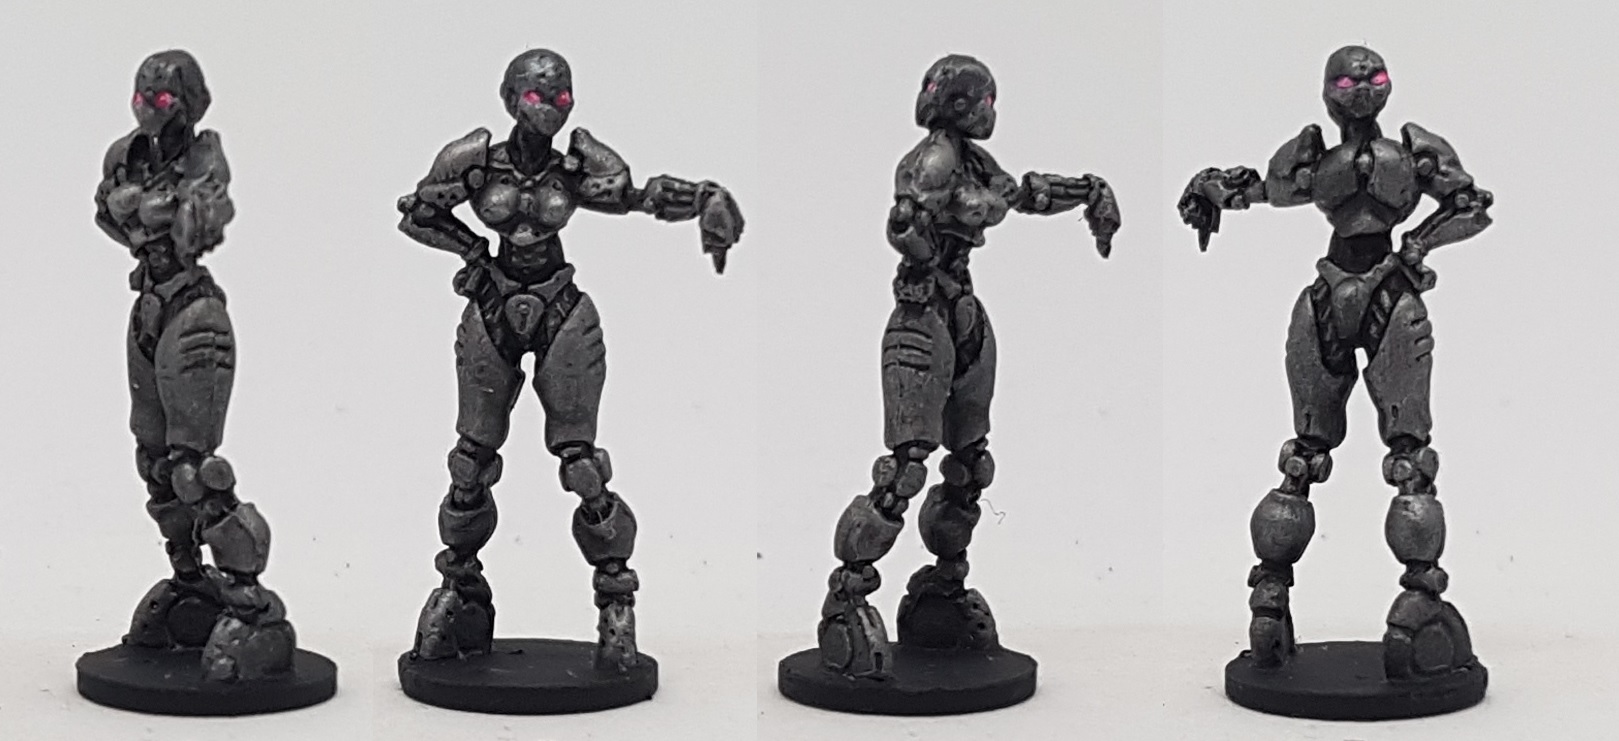 Refbot
While the airbrush was already out for varnishing, I thought I’d apply some base coats on a couple more models, now I’d decided how to paint them.
Chovar (Space jellyfish)
Base: 1:3 Pro Acryl Blue: Pro Acryl Faded Ultramarine
Highlight: Pro Acryl Faded Ultramarine
Purple base transition colour: Reaper 09024 Amethyst Purple
Purple heavier colour: 2:1 Reaper 09024 Amethyst Purple: Reaper 09023 Imperial Purple
Heavier shades of purple were added by mixing in more Imperial Purple
Coach Fergus (Frog guy thing)
Base: 2:2 Mr Paint Purple Shadow : Mr Paint Swamp Green
High 1: 1:2 Mr Paint Purple Shadow : Mr Paint Swamp Green
High 2: 2:4 Mr Paint Purple Shadow : Mr Paint Swamp Green
High 3: Mr Paint Swamp Green
All layers were airbrushed from progressively steeper angles, so as to leave previous layers showing .
At this point I called it a day and went and watched Logan for the first time. How comes the bad guys were willing to murder, main, enslave, kidnap, perform live human experiments, clone people and all sorts of other horrible and illegal things, but they drew the line at crossing the border illegally? What part of that is just too evil for them? Good film otherwise though. Probably the X-Men movie that’ll hold up the best long term. Everything after the second was a bit poop (First Class was OK) and I suspect the first 2 were only good because there wasn’t anything to compare them to at the time.
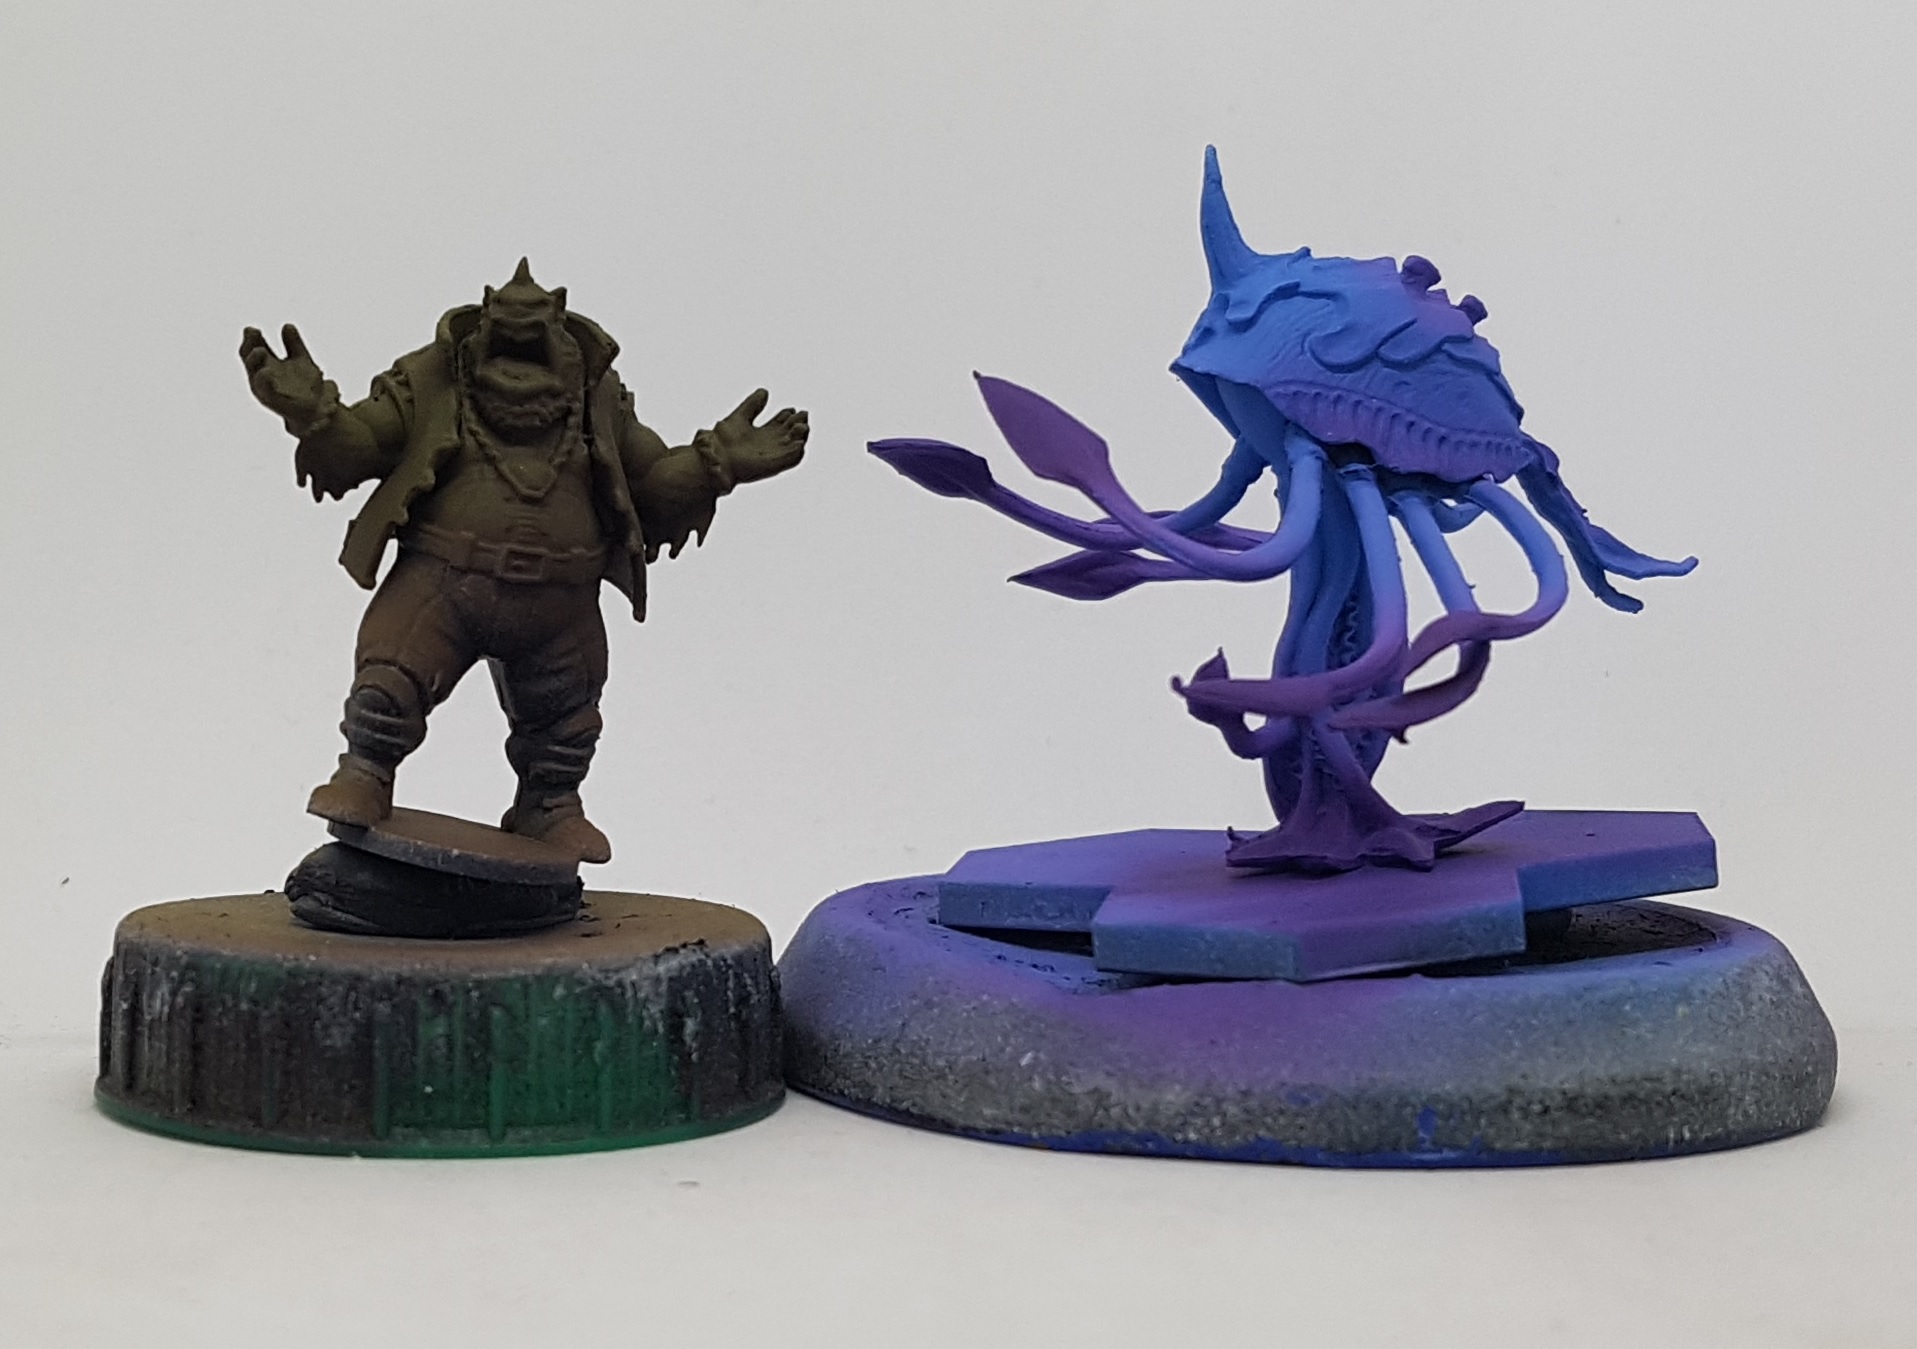 Some more airbrush prep work
Transfers (9/4/22)
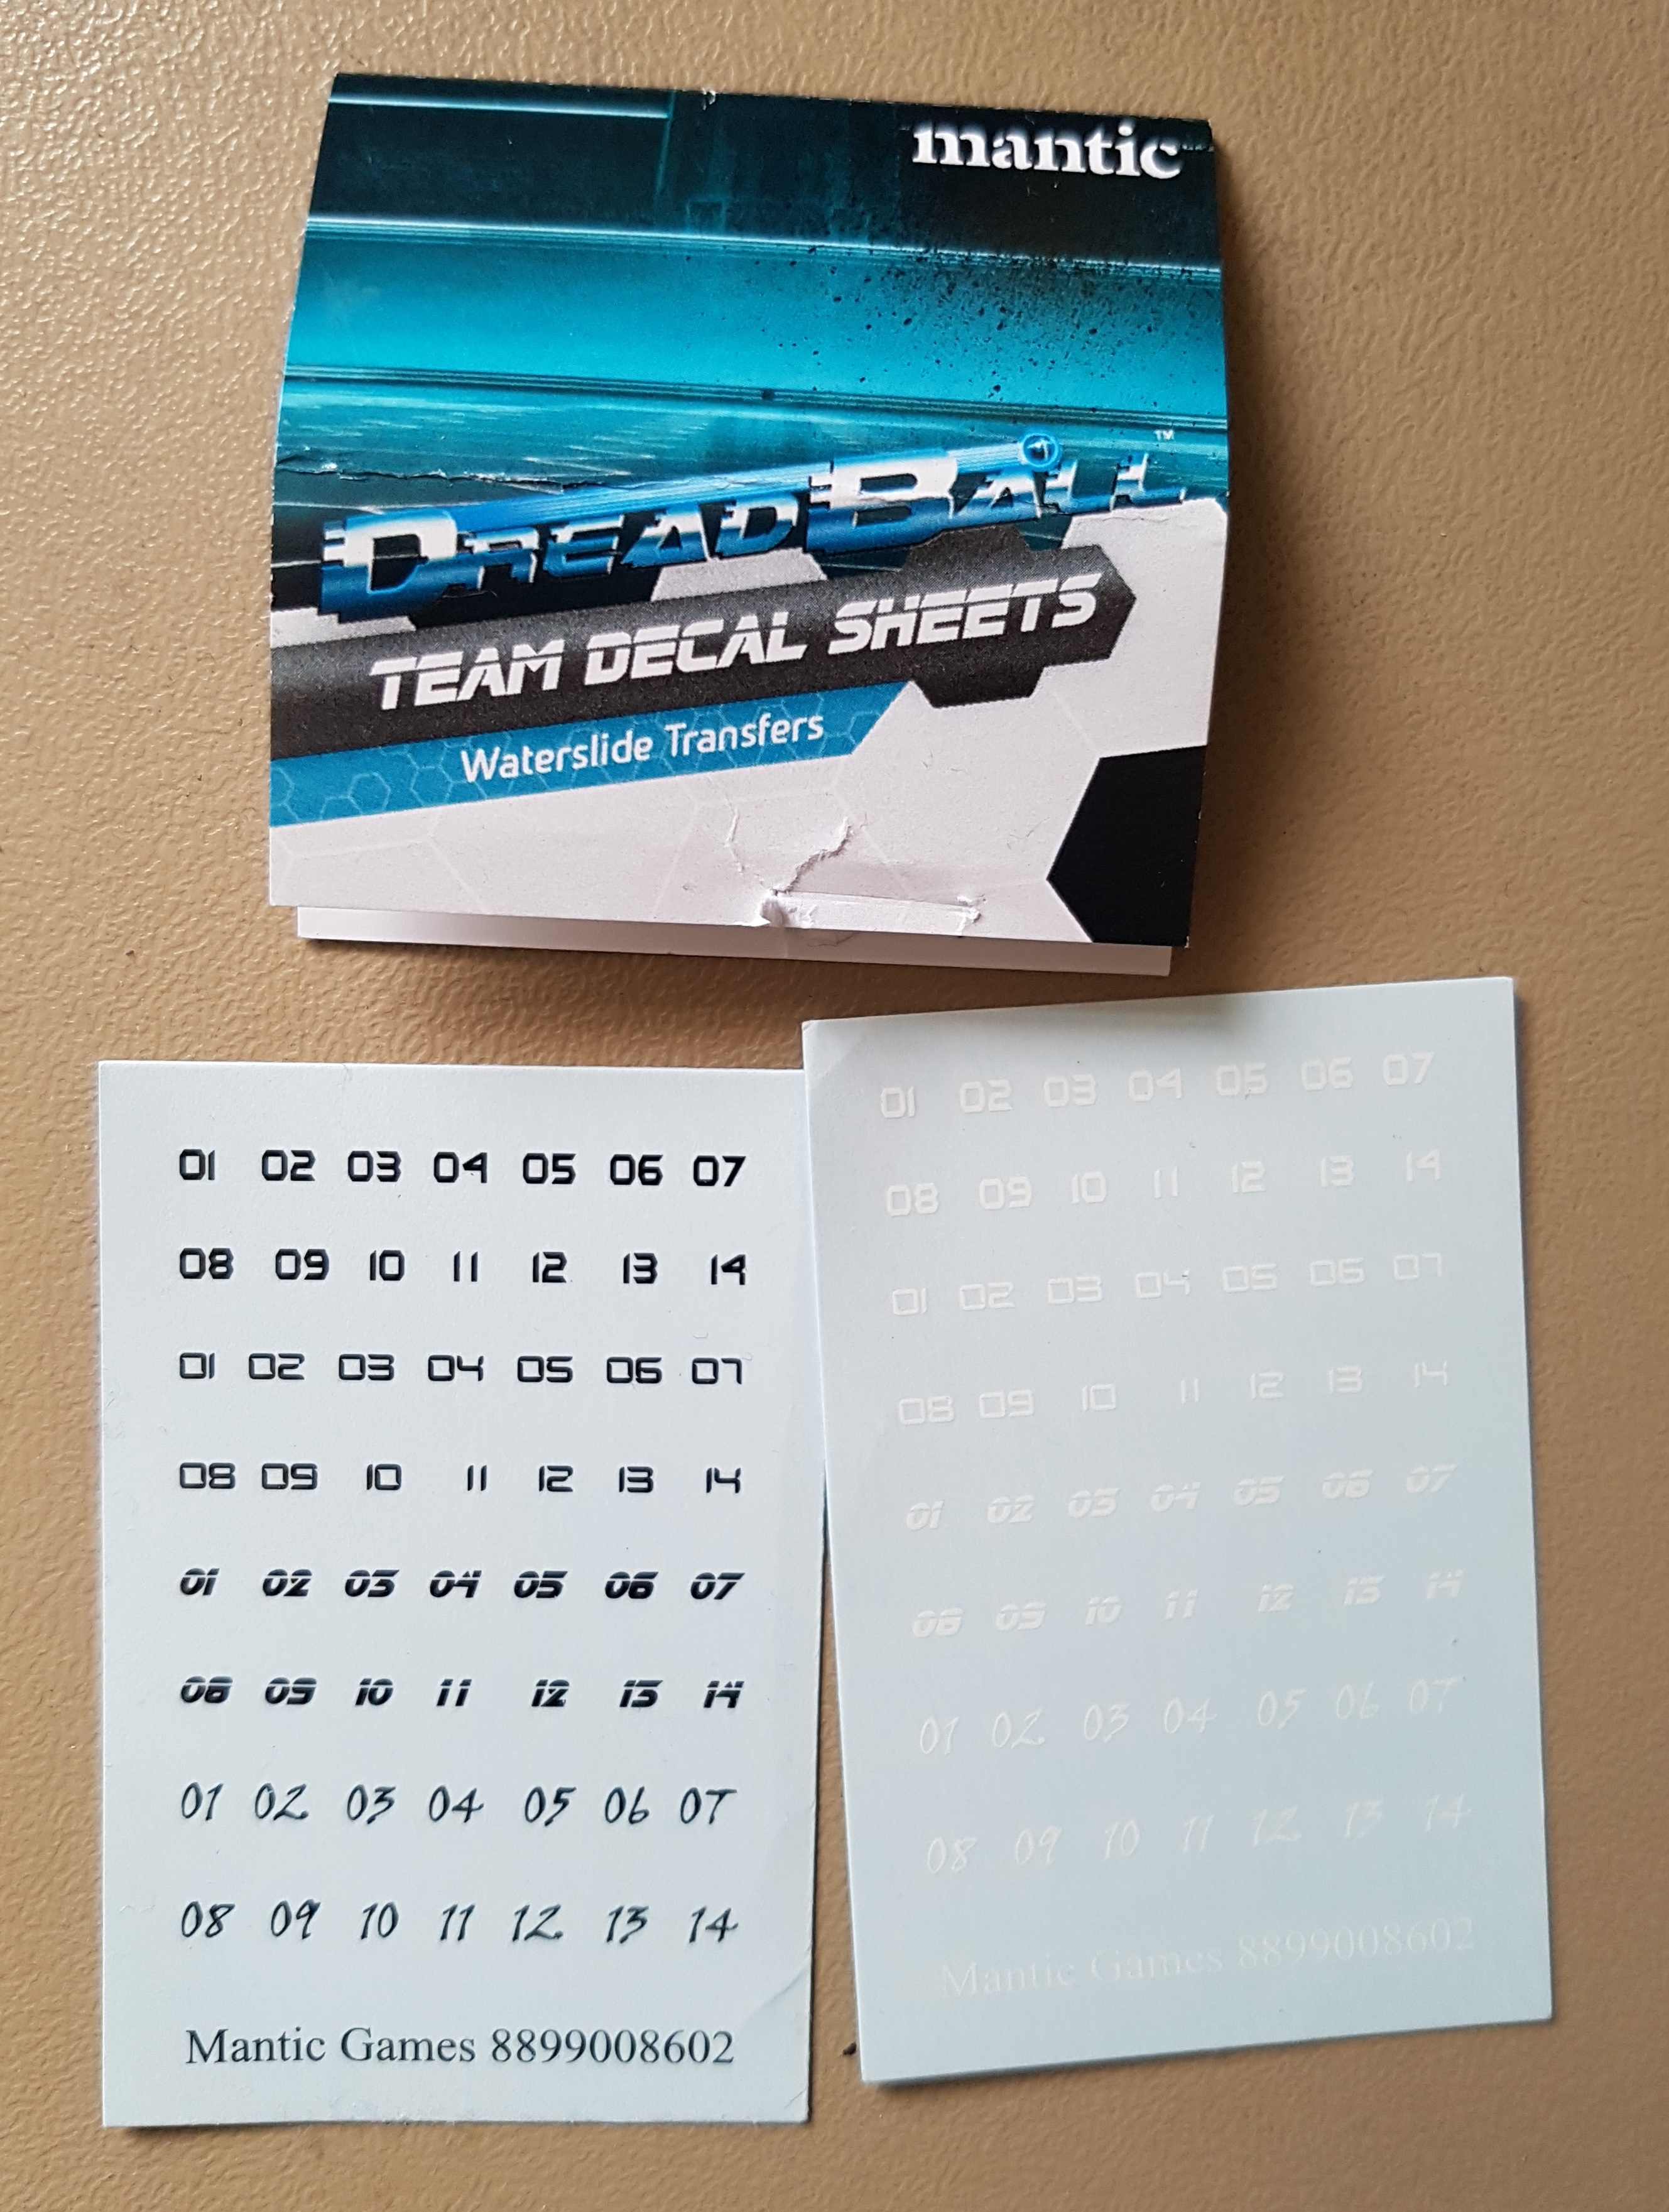
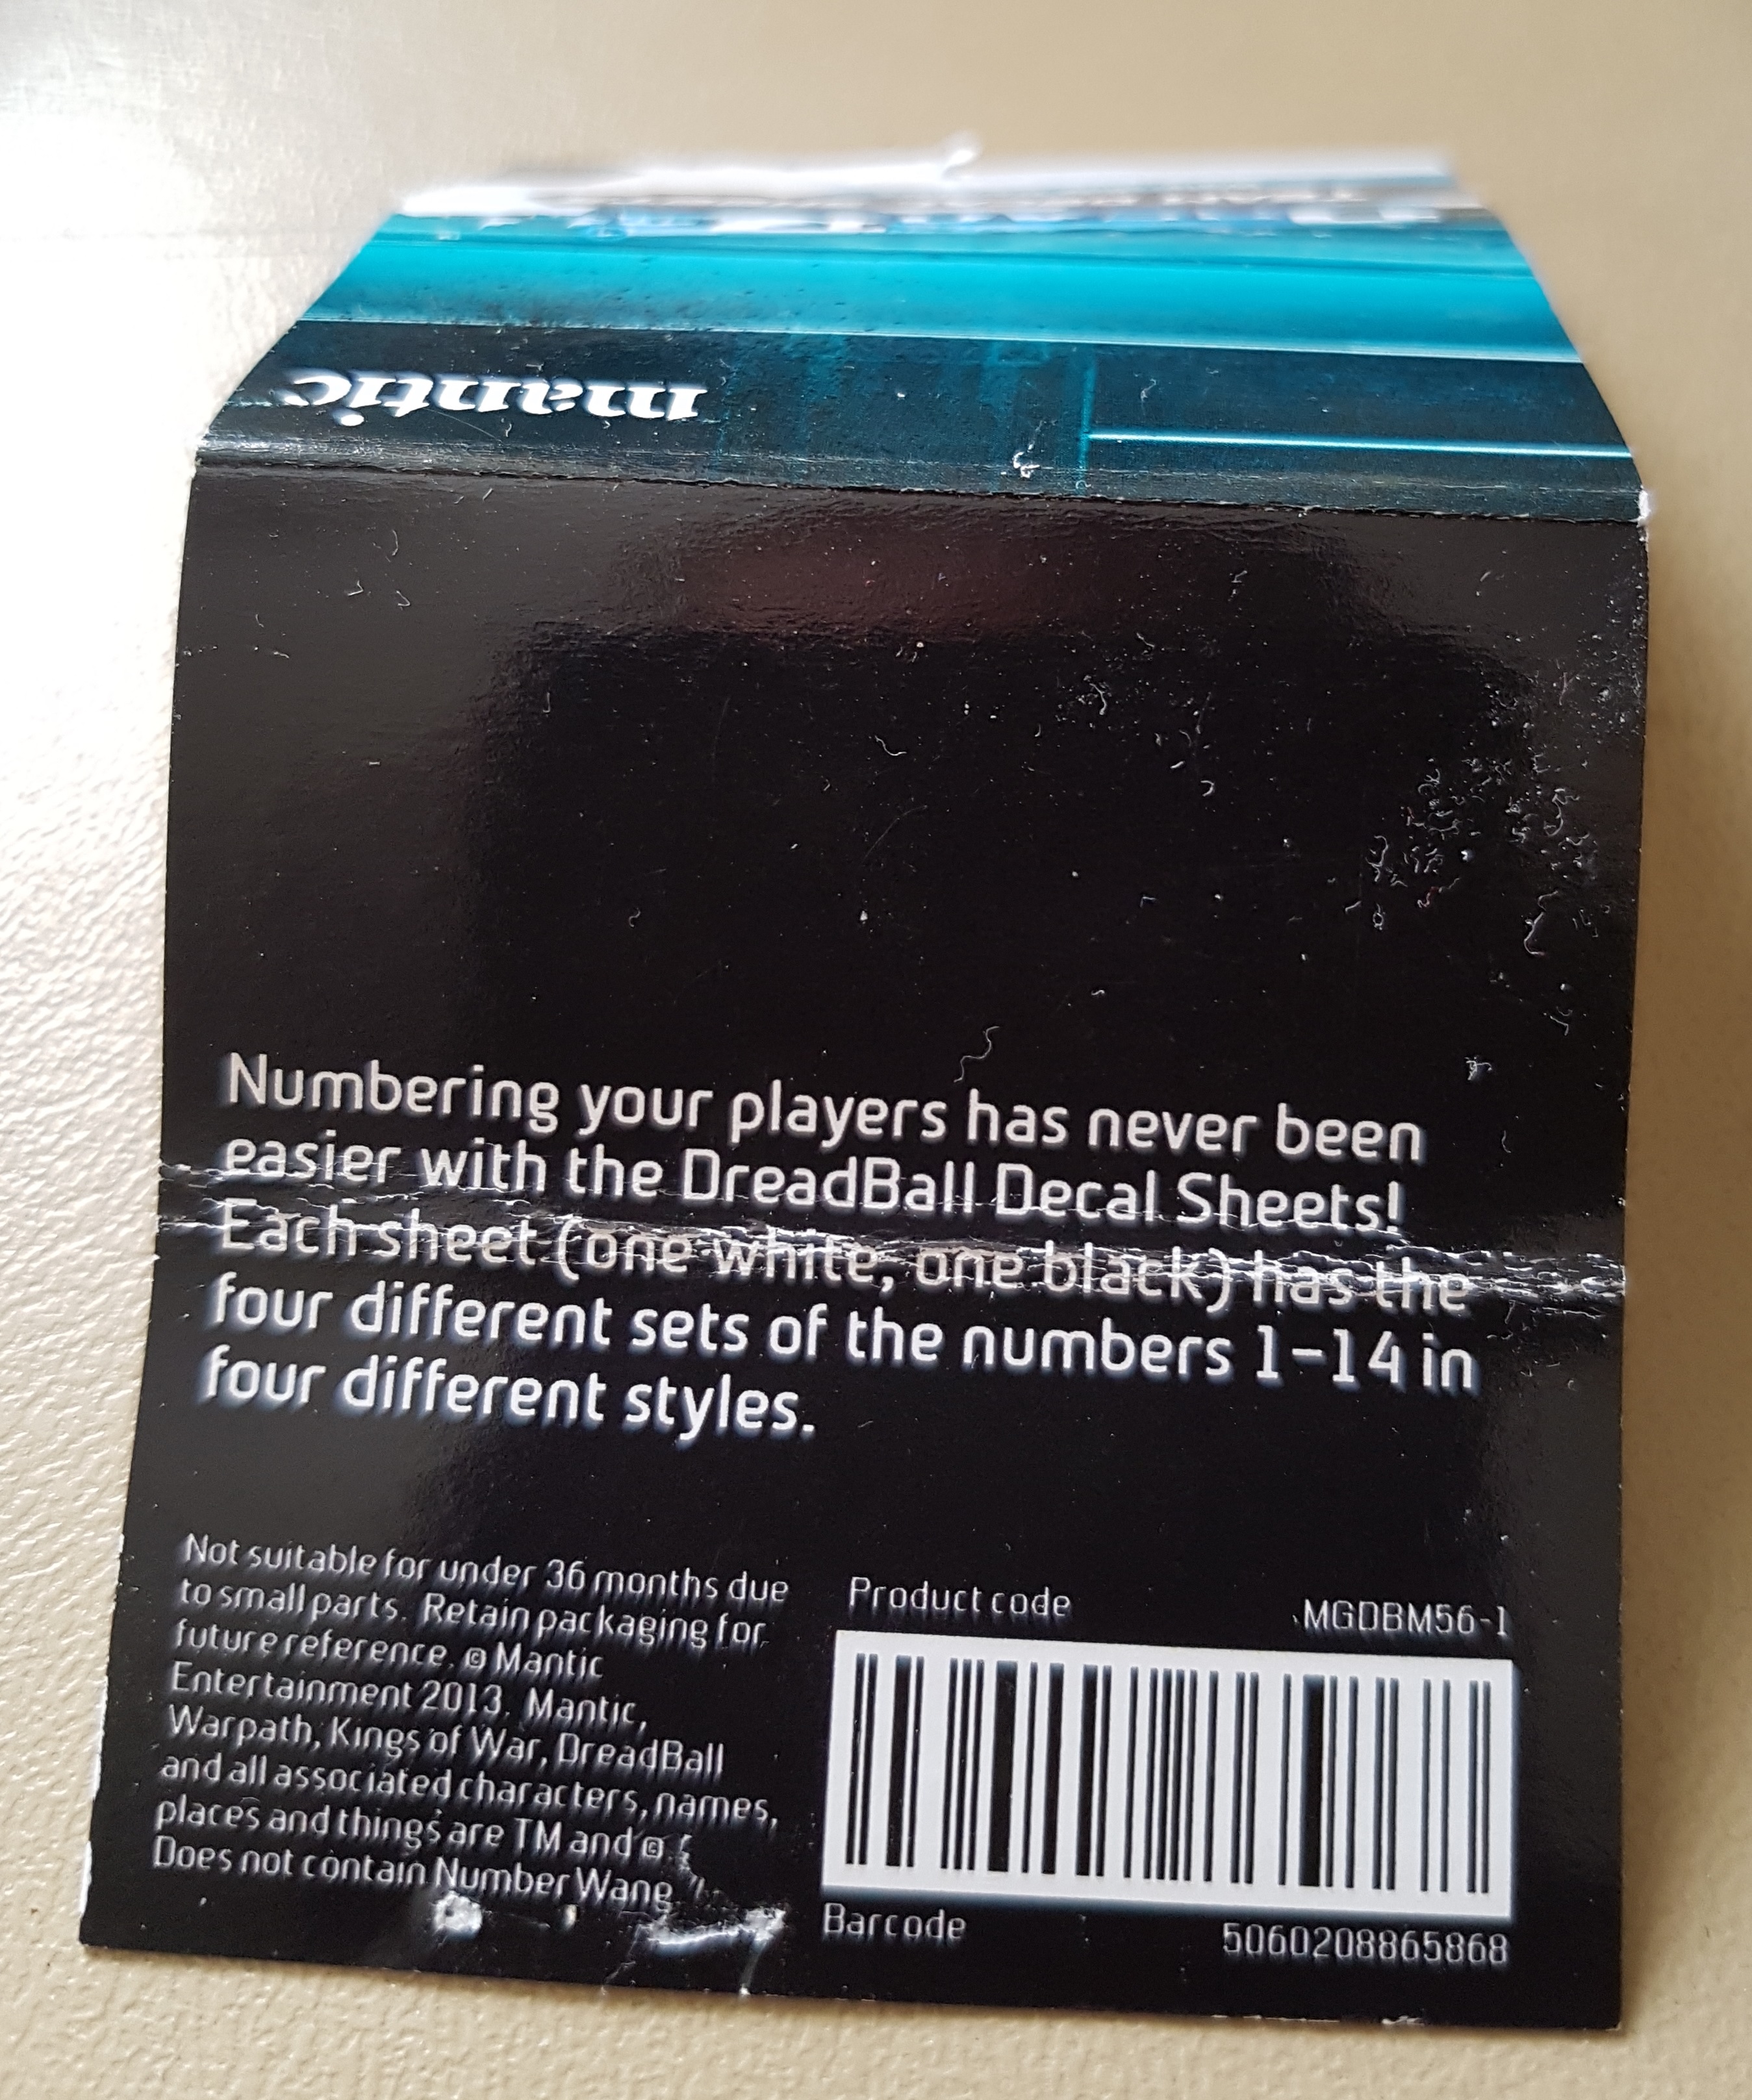
A quick word on transfers, in case anyone reading this is unsure how to use them.
Mantic sell transfers specific to this task. They’re small enough to fit nicely inside the little disks on the models backs. The packs contain enough black and white numbers to do 4 teams per sheet and I have 4 sheets. I think you just get 2 in a pack though. If you read the back of the label you can see how considerate they have been with them too. We all know about nut allergies and gluten and lactose intolerances these days, but no one thinks about numberwang intolerance. Numberwang is a common ingredient in many transfers, and Mantic have chosen not to use it and make it clear it is safe for the numberwang intolerant to use their product. For more information on Numberwang, click here.
First thing I did was brush on a little gloss varnish on the areas before I painted the bases. This meant it had plenty of time to dry. A coat of gloss will make it easier to move the transfers around, and protect the paint as I’m poking it with tools.
I gathered my tools together before I began. You’ll see made a dumb mistake that I quickly fixed. I used a white bottomed water dish for my white transfers, making them unfindable once they’re off the backing paper. You’ll want a wide shallow water dish for soaking the transfers in. I use an old hot chocolate tub lid.
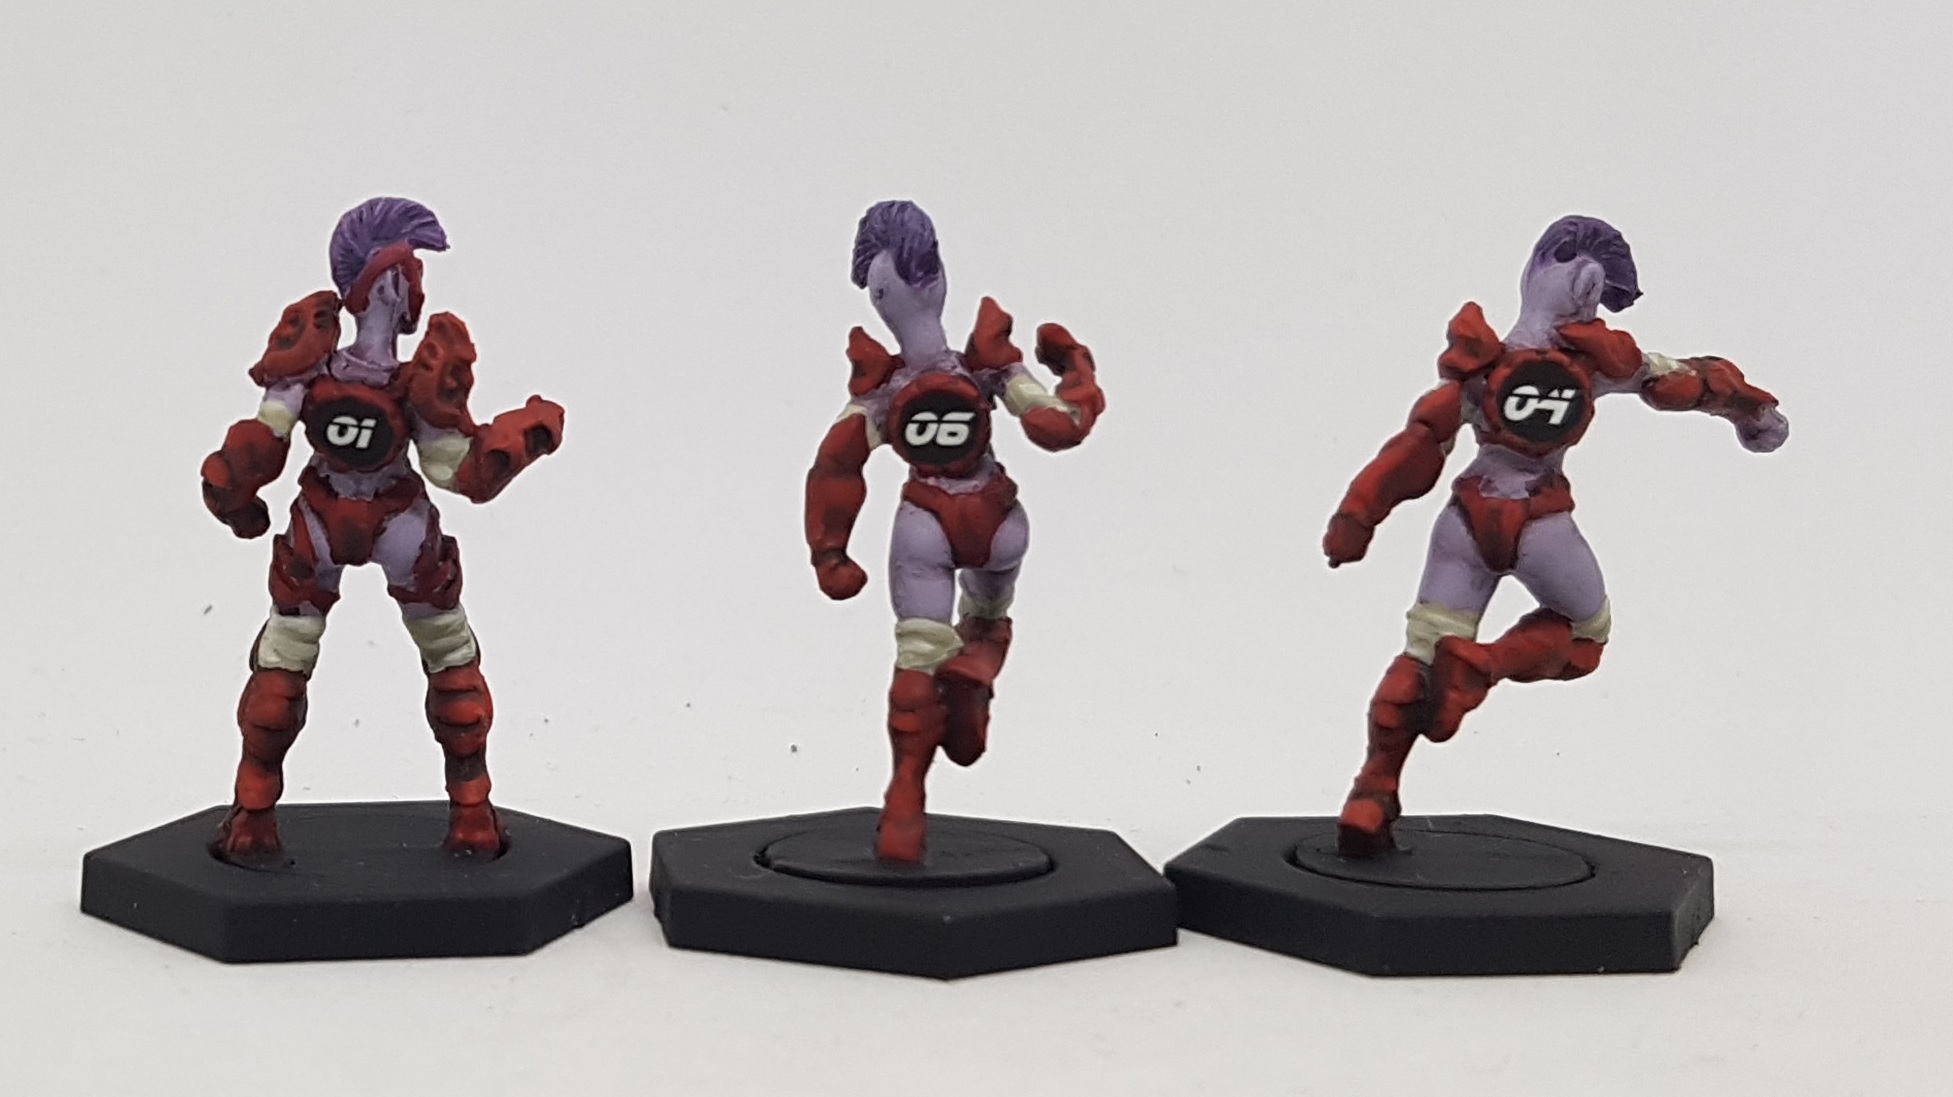
The transfers were cut off one at a time and soaked for 20-30 seconds. I got an old brush in each hand and dampened the surface to prep it, and then used both brushes to take the transfer off the paper once it was easy to move. I then lifted it out of the water carefully on whatever brush it stuck to, carefully draining excess water out of my brush on the side of the pot. Both brushes were used to apply it to the surface and line it up. Excess water could be drained off with the spare brush, if it was a problem. Once in place, the model was put on one side to air dry. I kept an eye on them though, in case a transfer shifted.
Once all transfers were applied and dry, a gentle coat of gloss varnish was applied over the top, to ensure they stayed in place. The models were then ready for a full varnishing.


The transfer sheets go up to 14 as the max roster size in Dreadball is 14. However, many teams will have the option of more models to pick from to build your team. As such, I found the sheets didn’t go high enough, and I had to hand paint on a few higher numbers. For the record, even I have trouble reading my own handwriting so as bad as this is, I don’t think I did a terrible job, for me.

Chovar, Sann-Gar, & Iron Ancestor (10/4/22)
With the teams varnished and put away, my work pile is looking a lot more manageable. Only 41 models, and a lot of them already have colour on them.
 My remaining models
With the last of my teams finished, it’s time to do something a bit more fun so I thought I’d finish off a few Giants that I’d already started.
First up, the Chovar Psychozoan.
Helmet
Base: P3 Pig Iron
Shade Wash: Januinevision’s Magimix
Highlight drybrush: P3 Cold Steel
Go Faster Stripes: Vallejo 72.008 Orange Fire
I don’t have the recipe for Januinevision’s Magimix to hand right this second, but I’m pretty sure it’s 6-8 parts GW Nuln Oil, 6-8 parts GW Agrax Earthshade, 1-2 parts GW Athonian Camoshade and 6-8 parts Lahmian Medium. It creates more of a dirty grimy colour than just a black or brown wash, and is a little thinner. Thanks, Januinevision.
Then the base was pained black, and they were put on one side to be bulk varnished later.
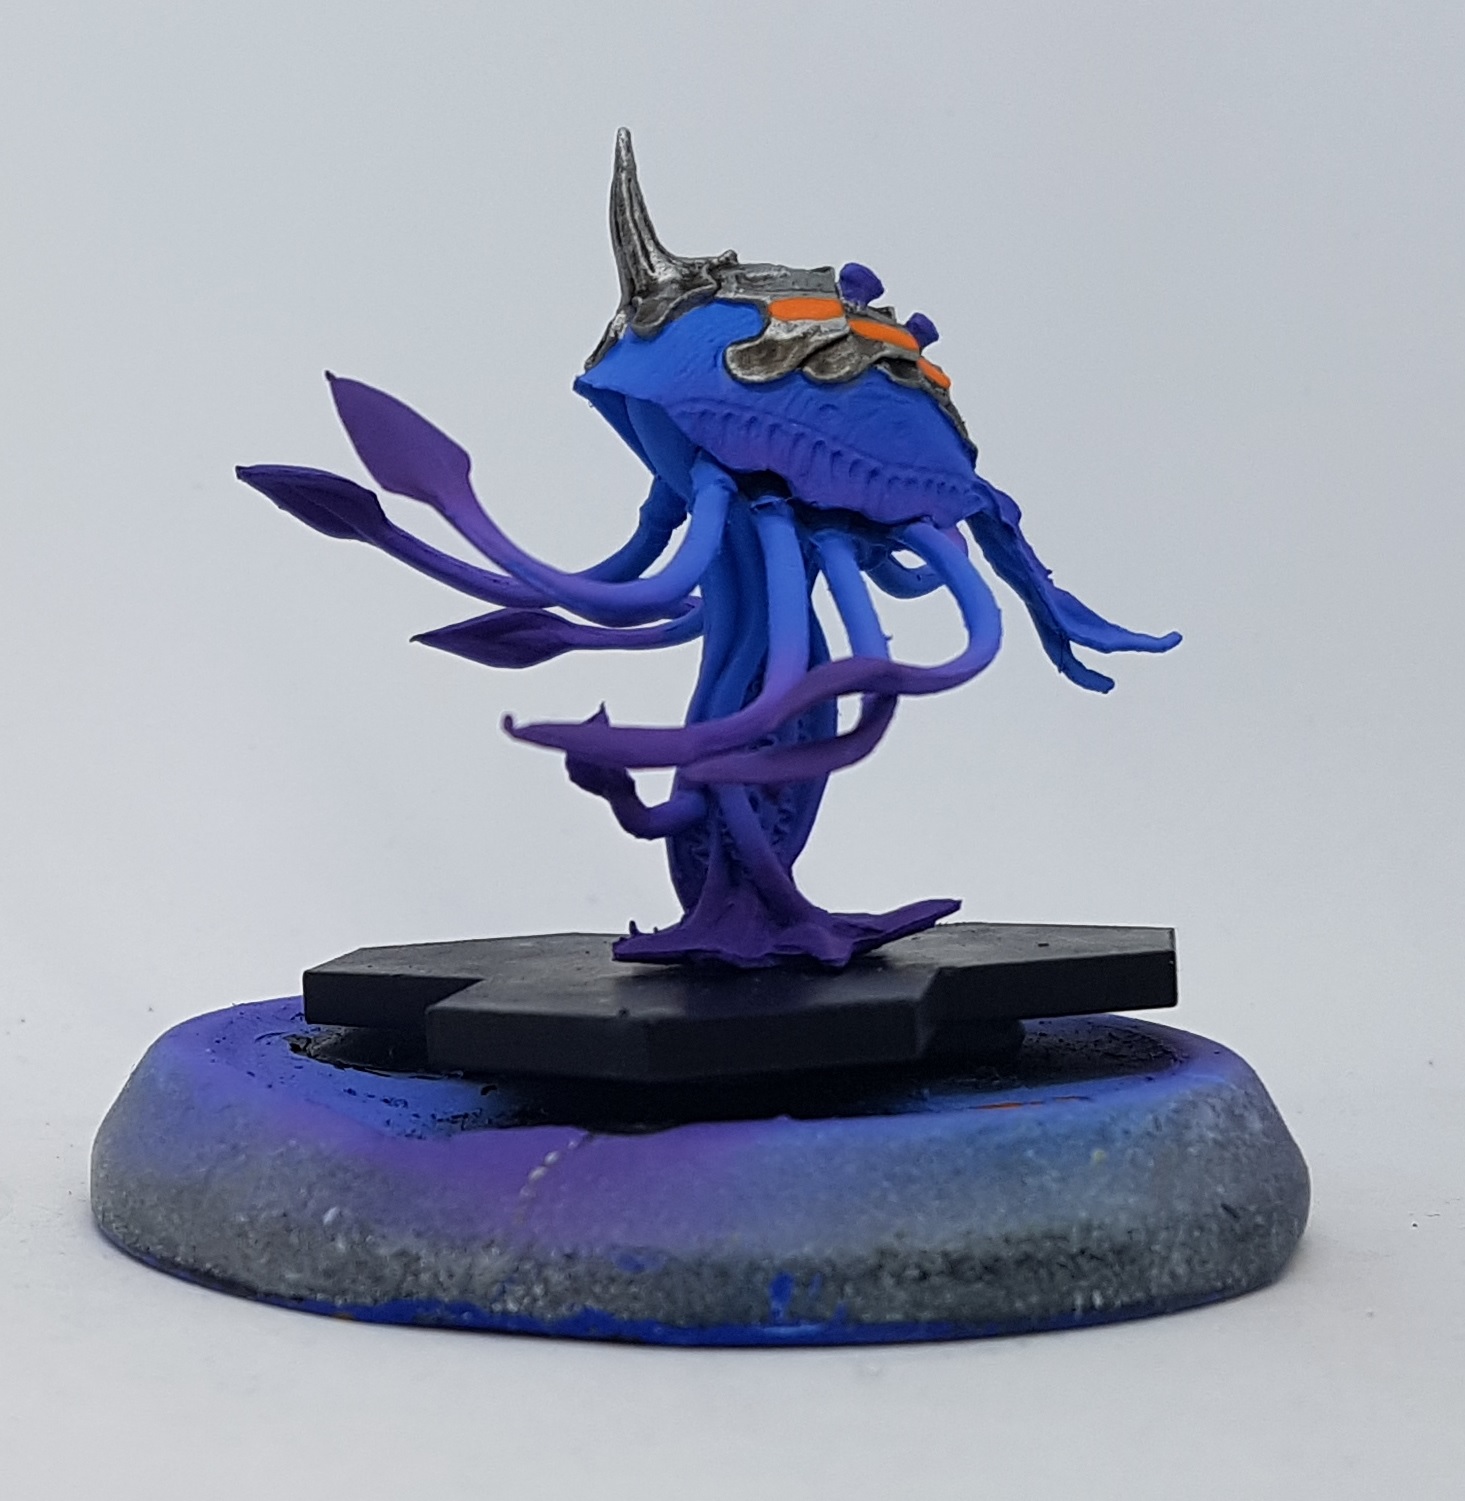 Chovar Psychozoan
Then I saw the Iron Ancestor and Sann-Gar staring at me. The Iron Ancestor was mostly done anyway, so why not paint the black on both at the same time?
Black
Base: VMA 71.054 Dark Grey Blue
Very Light Highlight Drybrush: P3 Frostbite
Shade Wash (San-Garr only): GW Nuln Oil
I was going to wash both, but I quite liked the Iron Ancestor as he was so didn’t bother.
Next, I painted the iron and the eyes on the mech, and the flesh on the shark at the same time.
Iron
Base: P3 Pig Iron
Shade: Jan’s Magimix, but just around the joins
Highlight: P3 Cold Steel
Green Eyes
Undercoat: Lightly thinned white
Base: VMC 70.737 Green Fluo
Shark Underbelly Flesh
Base: 1:1:to taste P3 Bastion Grey : P3 Midlund Flesh : enough white to lighten without turning it pastel
Shark Top Flesh
Base: P3 Bastion Grey
Wash: P3 Greatcoat Grey
Highlight Drybrush 1: P3 Bastion Grey
Highlight Drybrush 2: P3 Cryx Bane Highlight
Eyes: Any black
Toe Nails
Base: P3 Cryx Bane base
Highlight: P3 Beast Hide
Wash: GW Nuln Oil
Once the flesh was done, I picked out the silver:
Silver
Base: Vallejo 72.053 Chainmail
Wash: GW Seraphim Sepia
Highlight: TBD. probably a drybrush of more Chainmail, and then something lighter? Perhaps VMA Chrome if I’m feeling brave?
I think I need to revisit the orange and give it a bit more depth. Some pin washing with the darkest colour from the base range, and some careful drybrushing with the lightest colour should help.
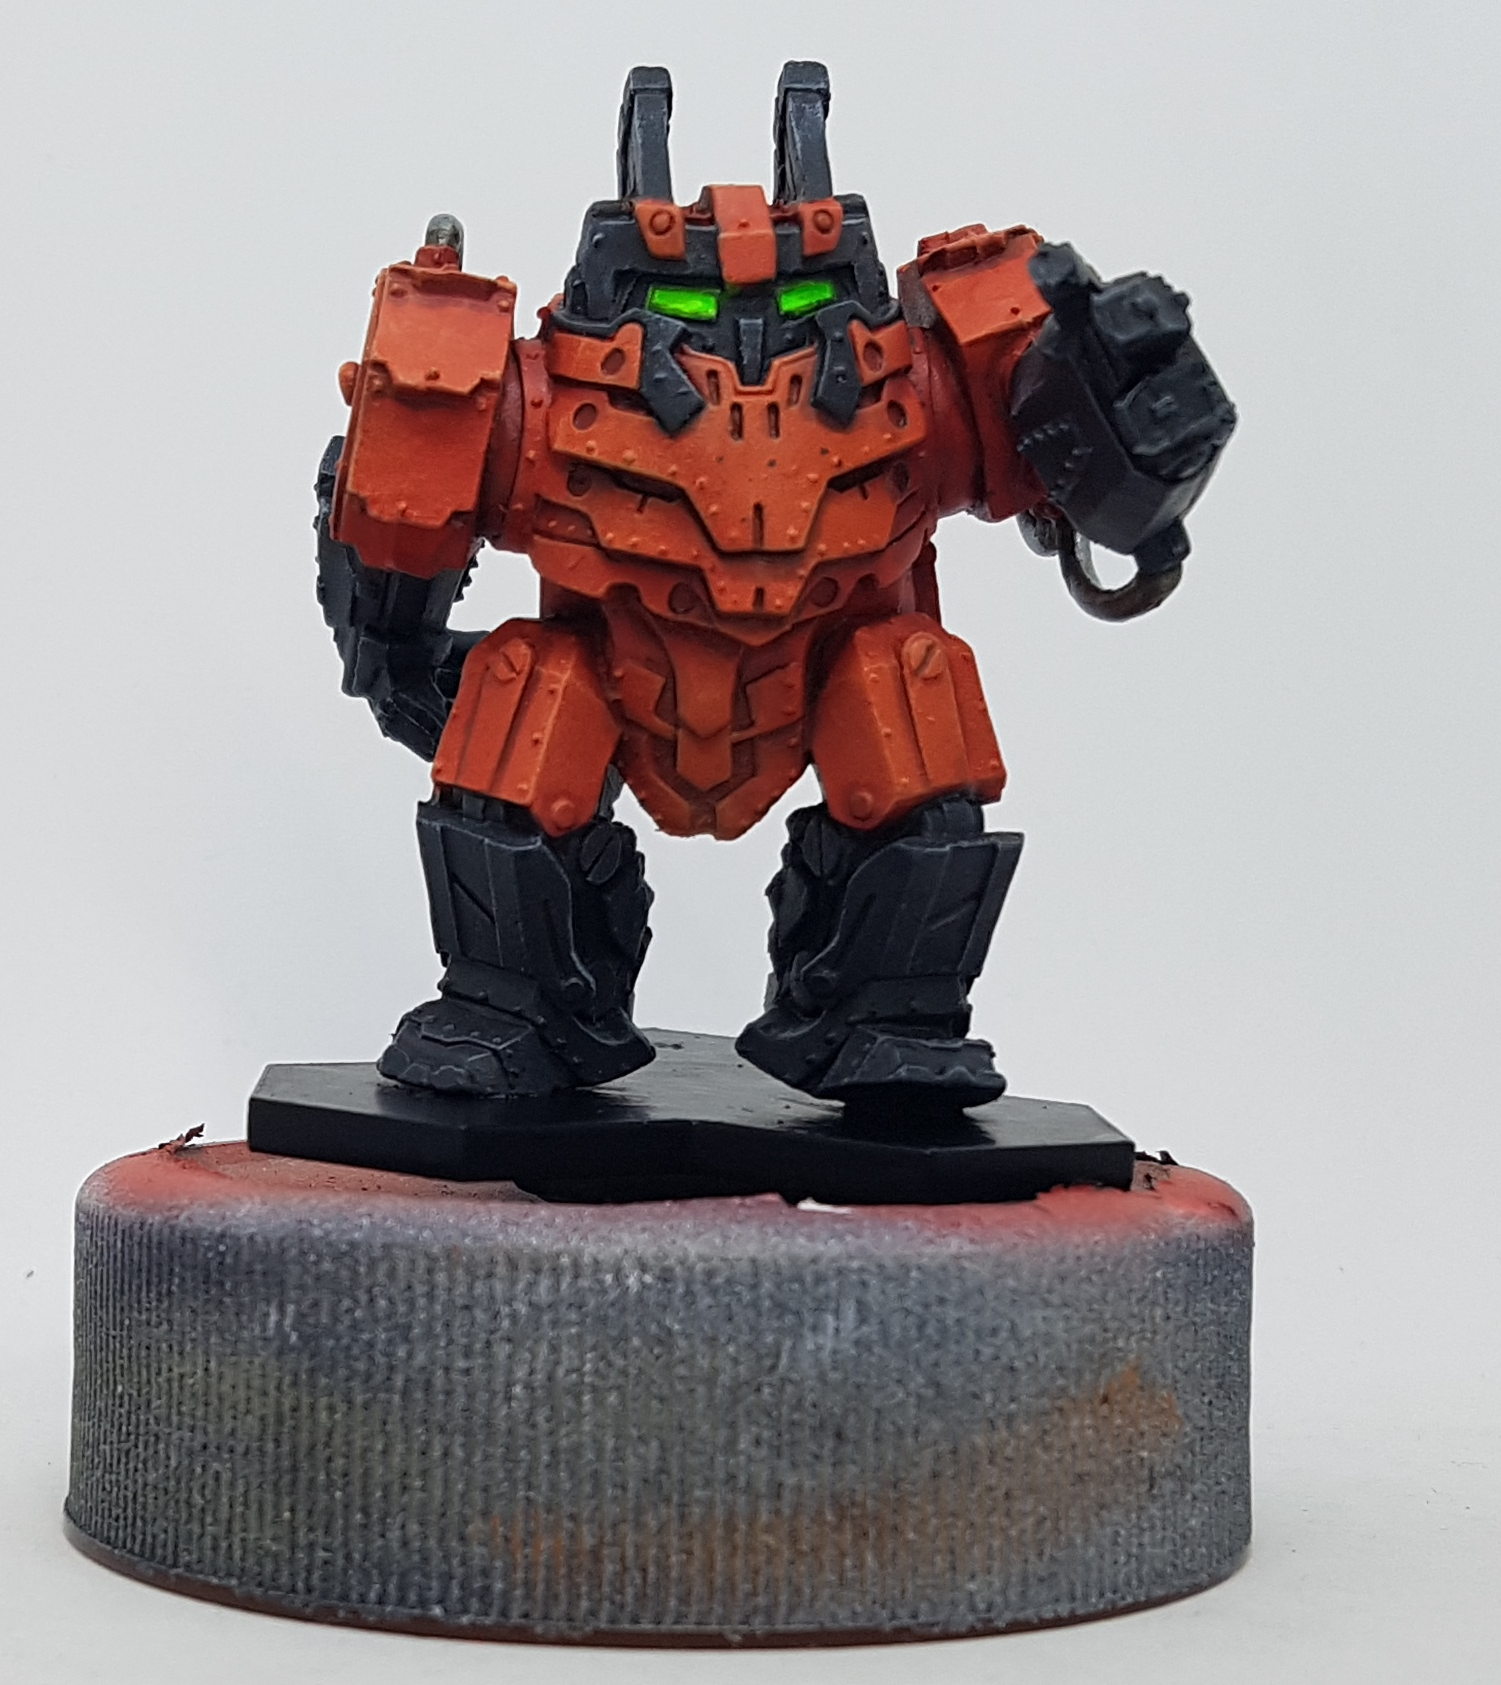 Iron Ancestor
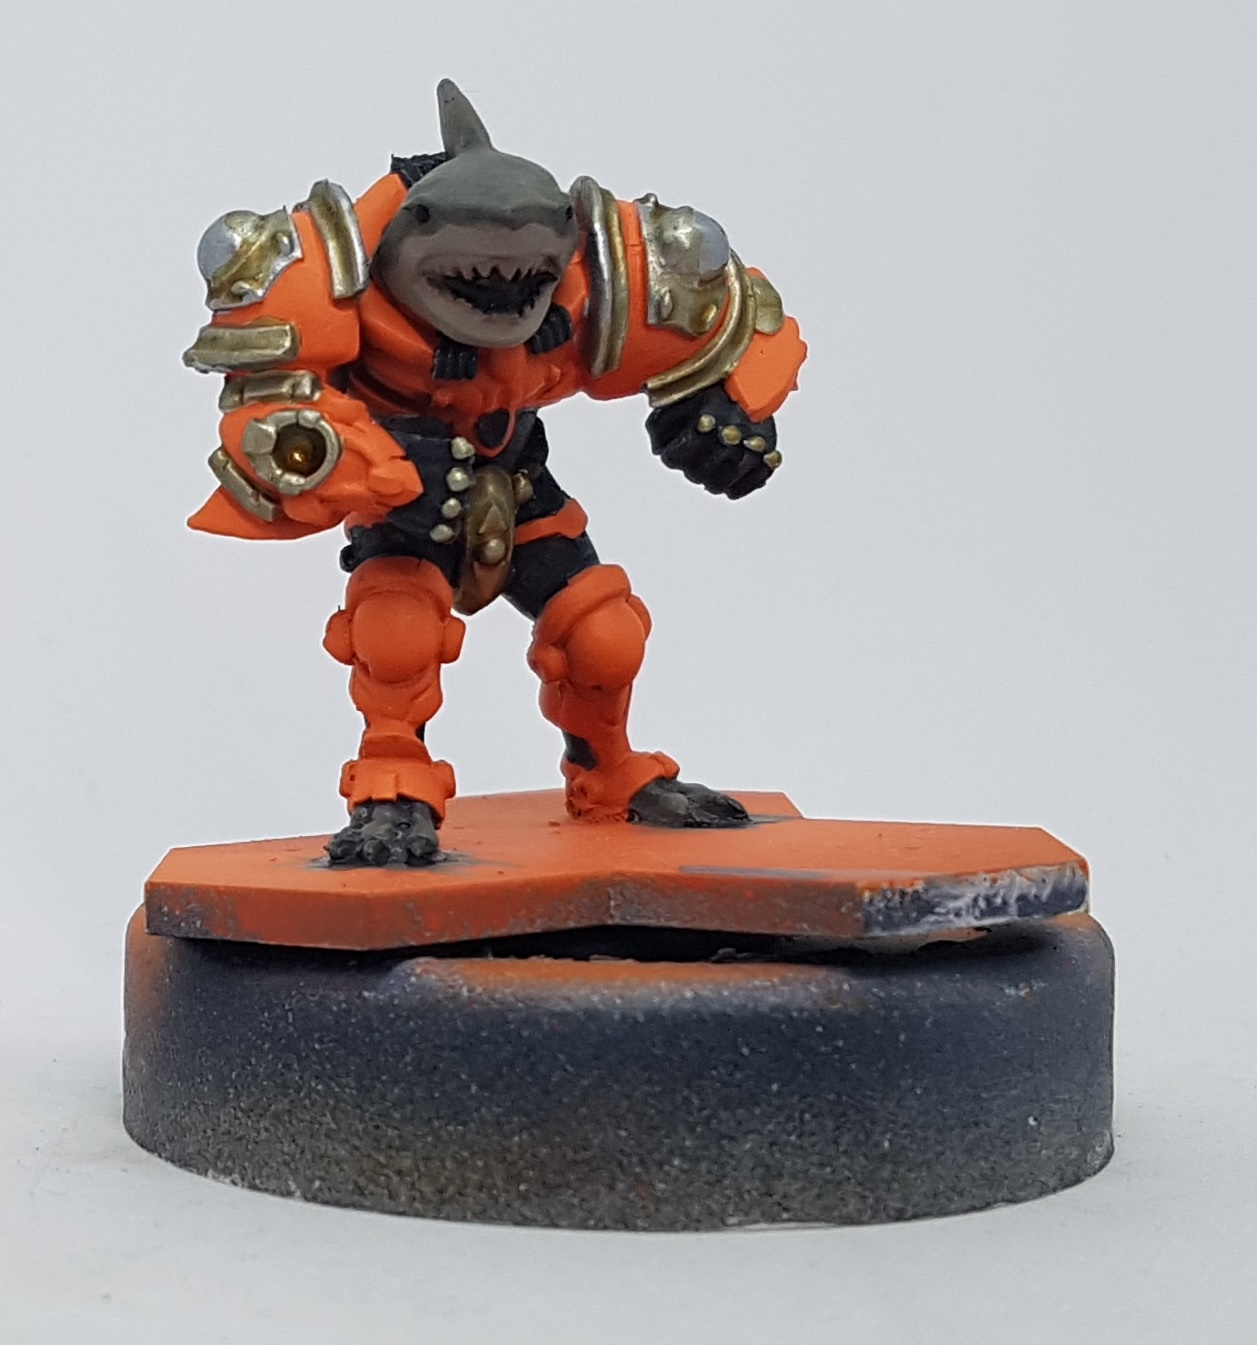 Sann-Gar
![StarCraft Tabletop Miniatures Game Pre-Orders Live Now [Updated]](https://images.beastsofwar.com/2026/03/starcraft-tmg-news-cover-600-338.jpg)


![Mounted US Cavalry On Kickstarter For Dead Man’s Hand! [Updated]](https://images.beastsofwar.com/2026/03/us-cavalry-main-600-338.jpg)


![Play WW2 Commando Operations With Butcher & Bolt [Updated]](https://images.beastsofwar.com/2026/03/relaunch-600-338.jpg)


