


Spring Cleaning – A-bad’un the Bit-smaller


Recommendations: 168
About the Project
With the release of the new Abaddon the despoiler model i had a thought, like any heretic chaos player in the late 90's I had a copy of the original somewhere, with that in mind I searched the house and found my old Abaddon model... after nearly 20 years he's overdue for a bit of a clean, and boy is there a lot of work to do...
Related Game: Warhammer 40,000
Related Genre: Fantasy
Related Contest: Spring Clean Hobby Challenge (Old)
This Project is Completed
Model comparison and the old figure
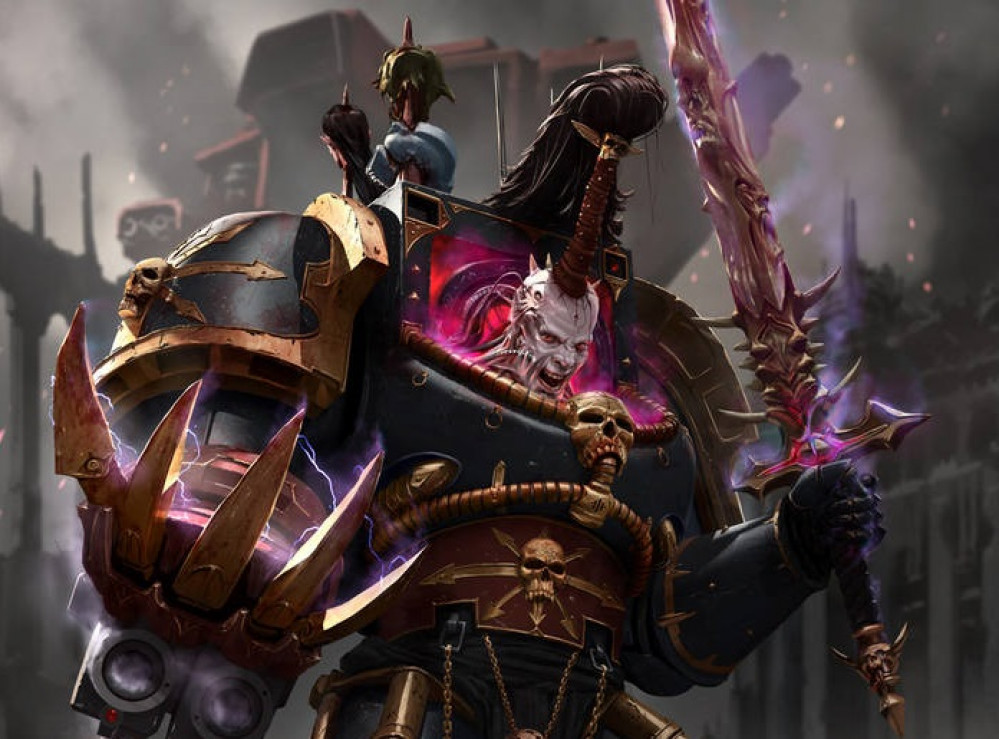
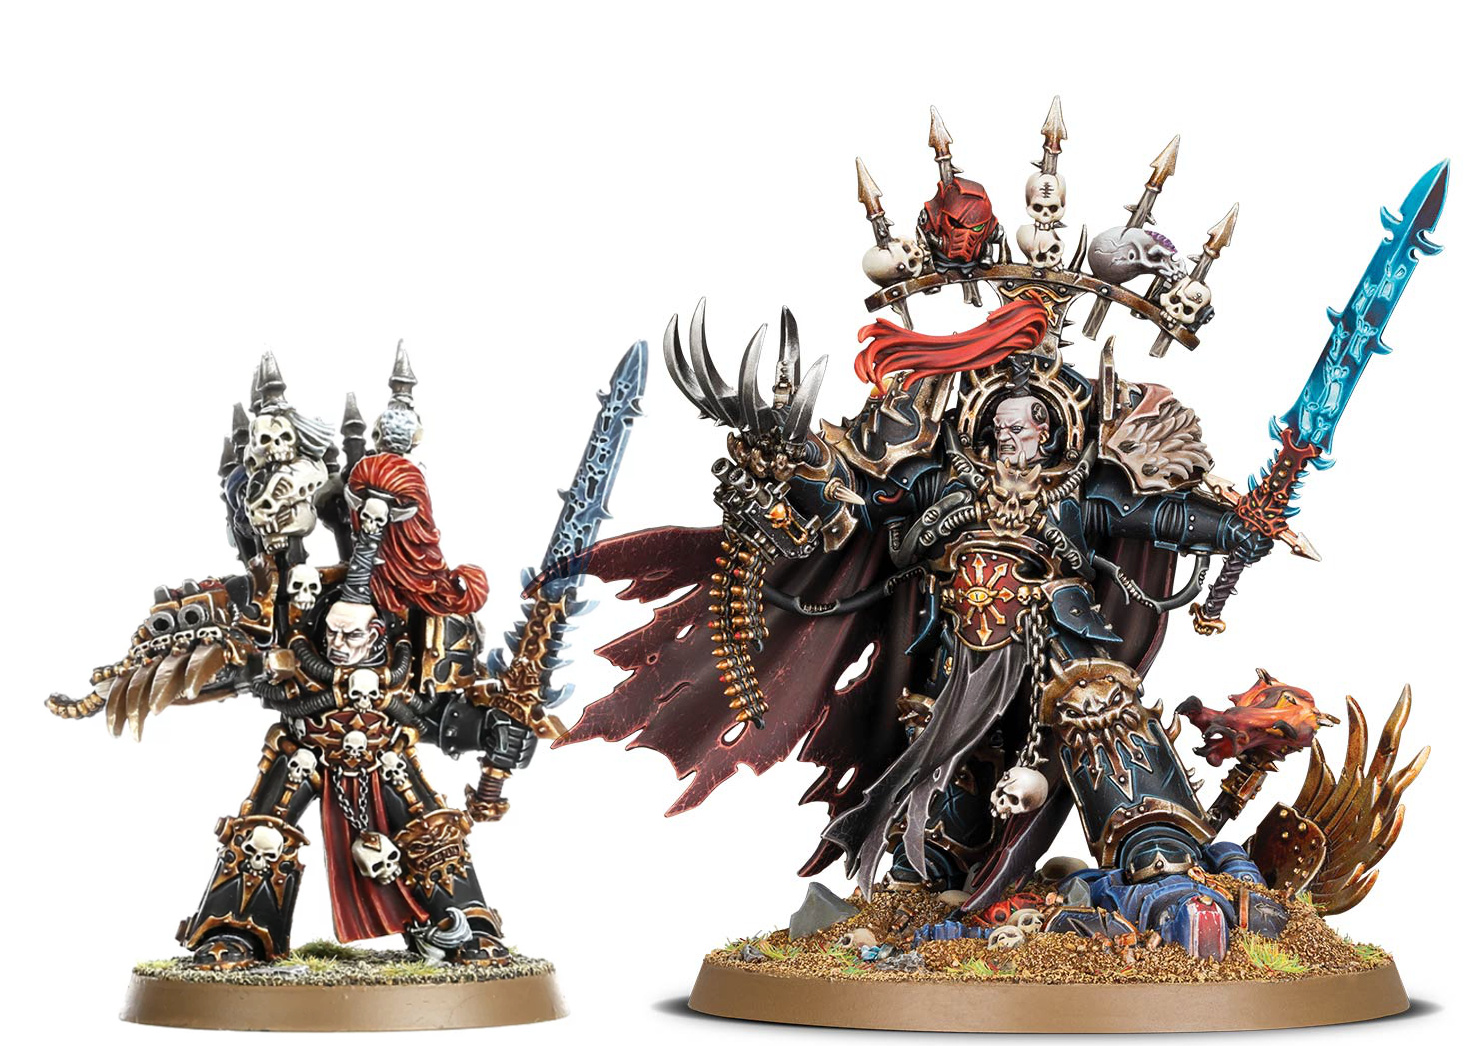 First of all lets look at the new model.... seriously after 20 years what has Abaddon been doing!!? Kicking ass and gaining mass by the looks of things, the old model in comparison just looks a bit lame... my mission is to jazz him up a bit.
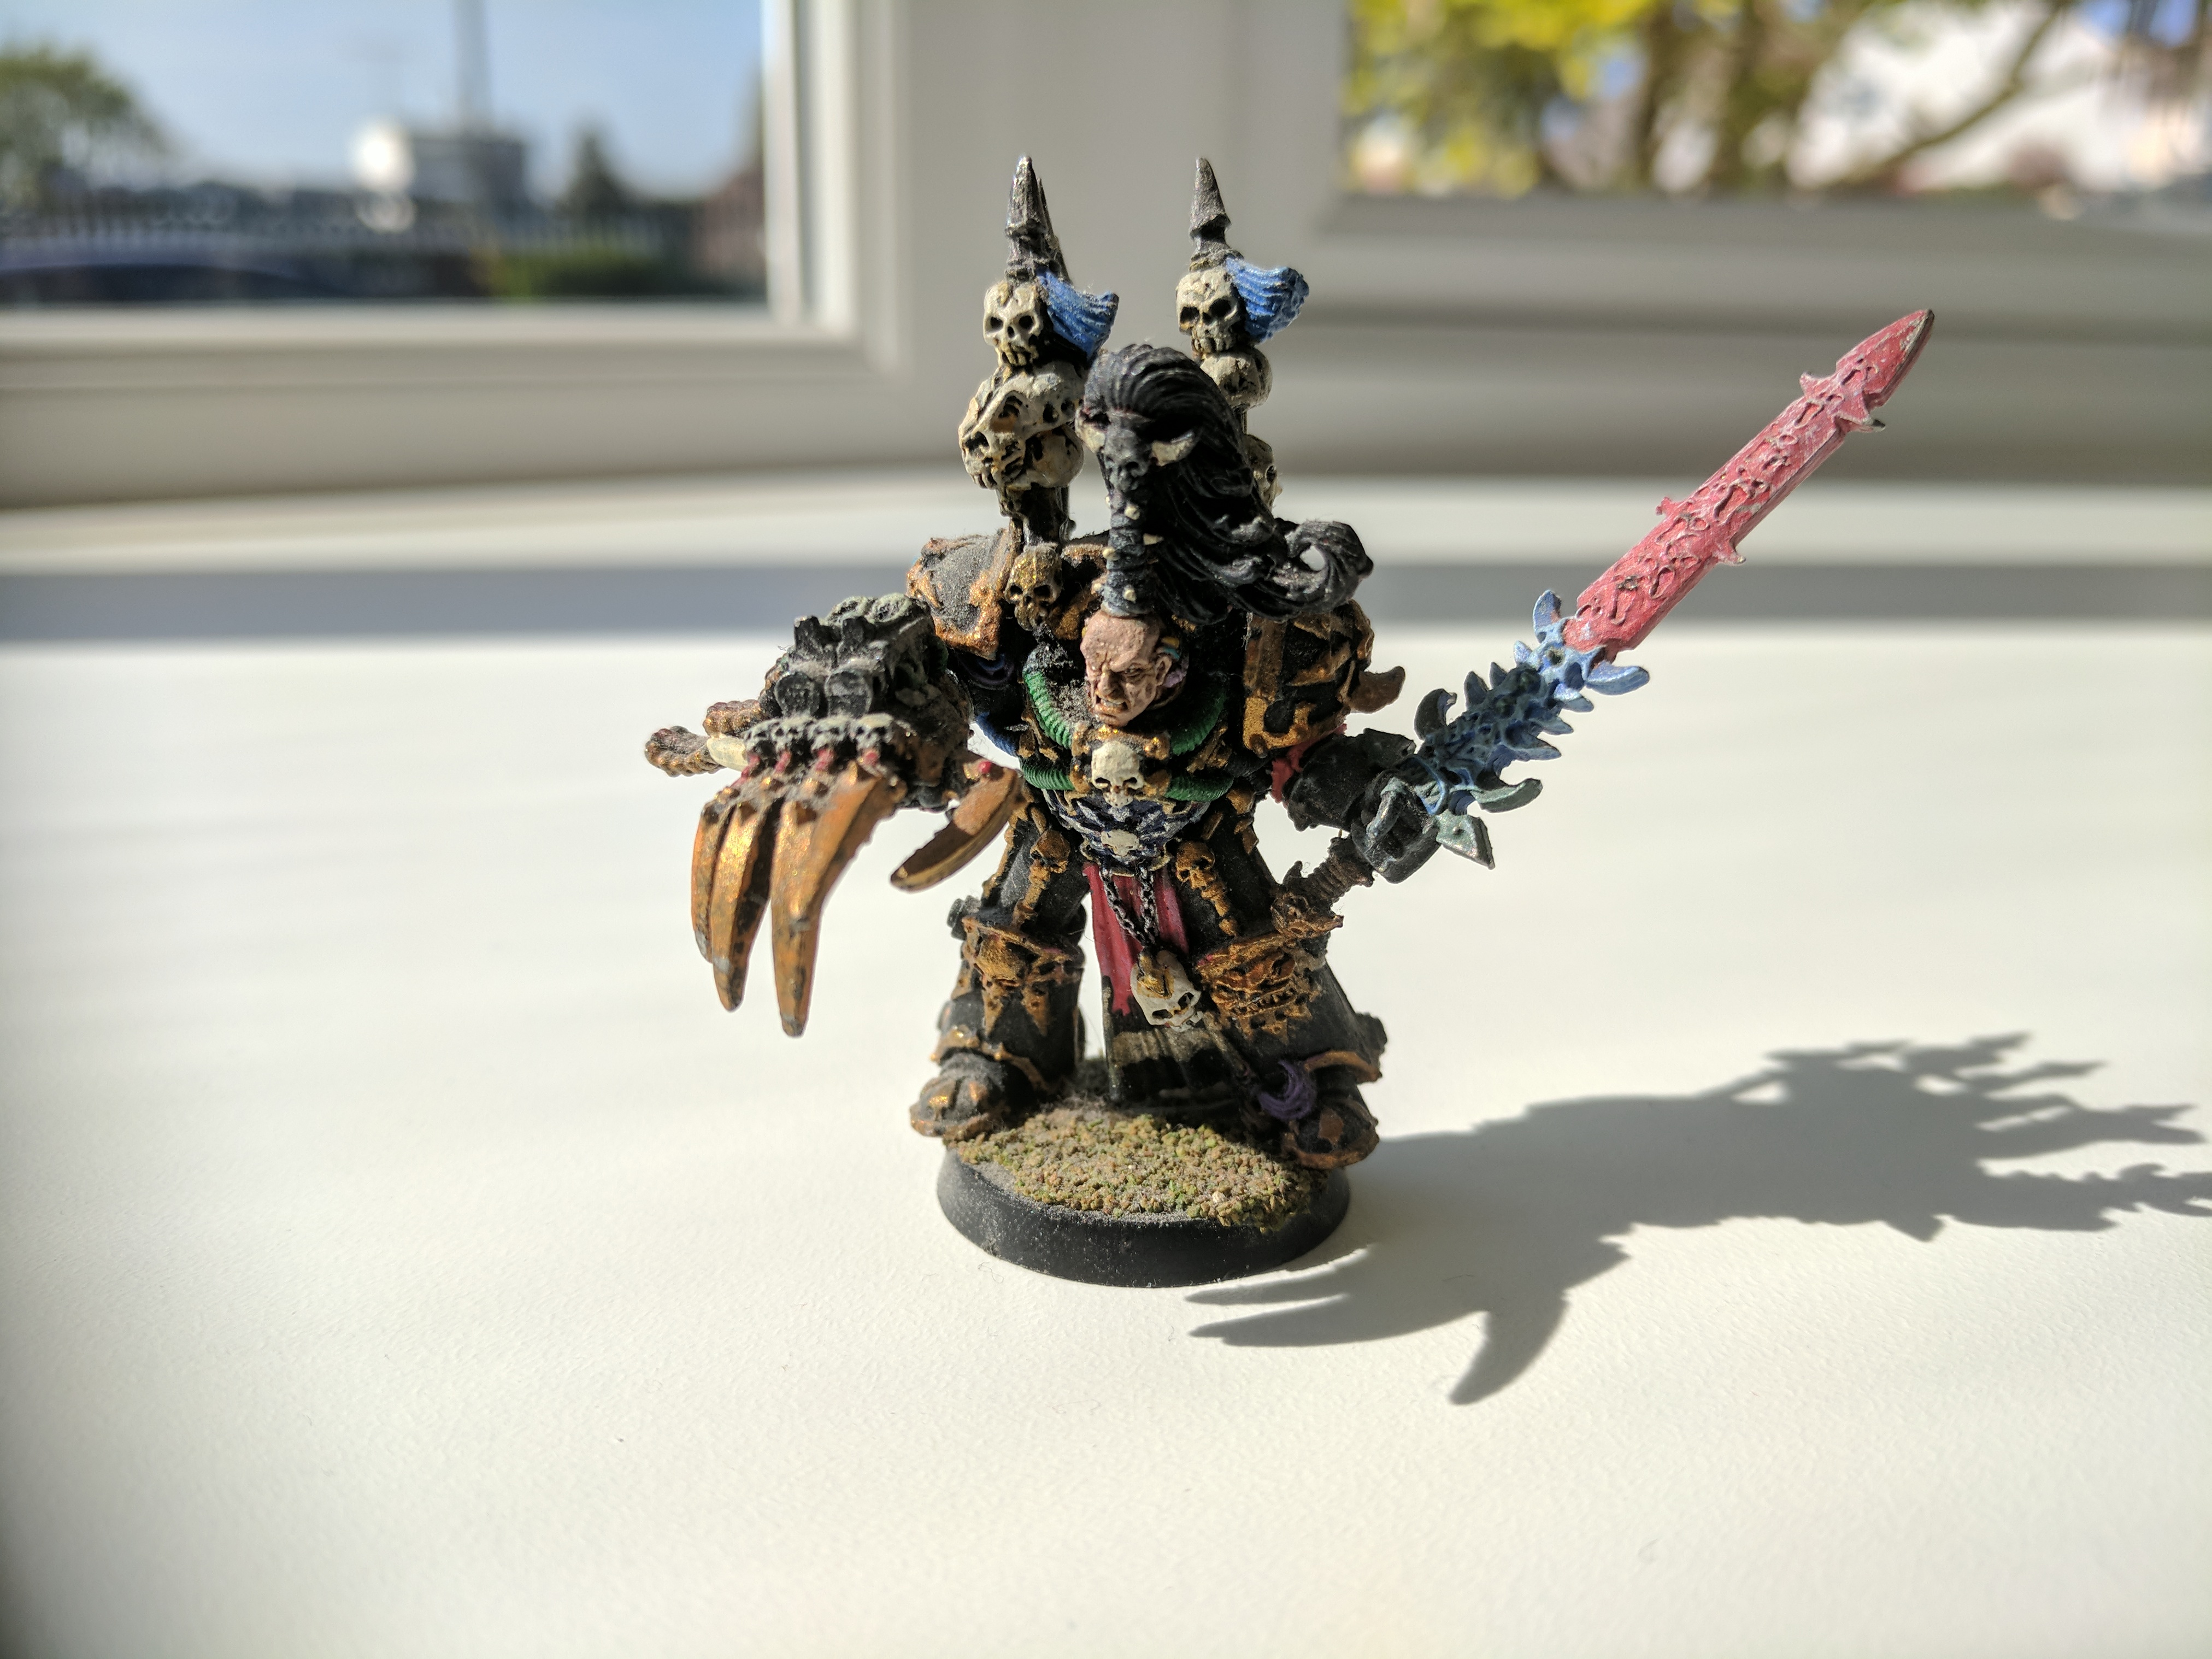 Ahh, the original, looking back at this paint job i have to admit it wasn't so bad despite being done 20 years ago, but in the name of progress the paint needs to go!
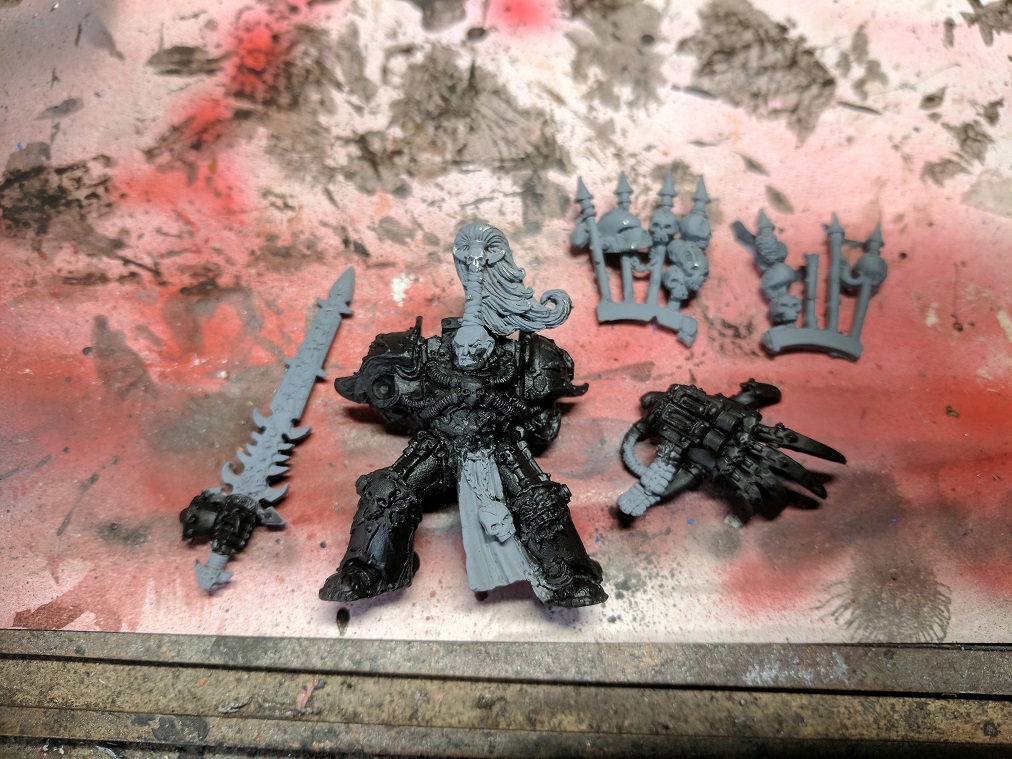
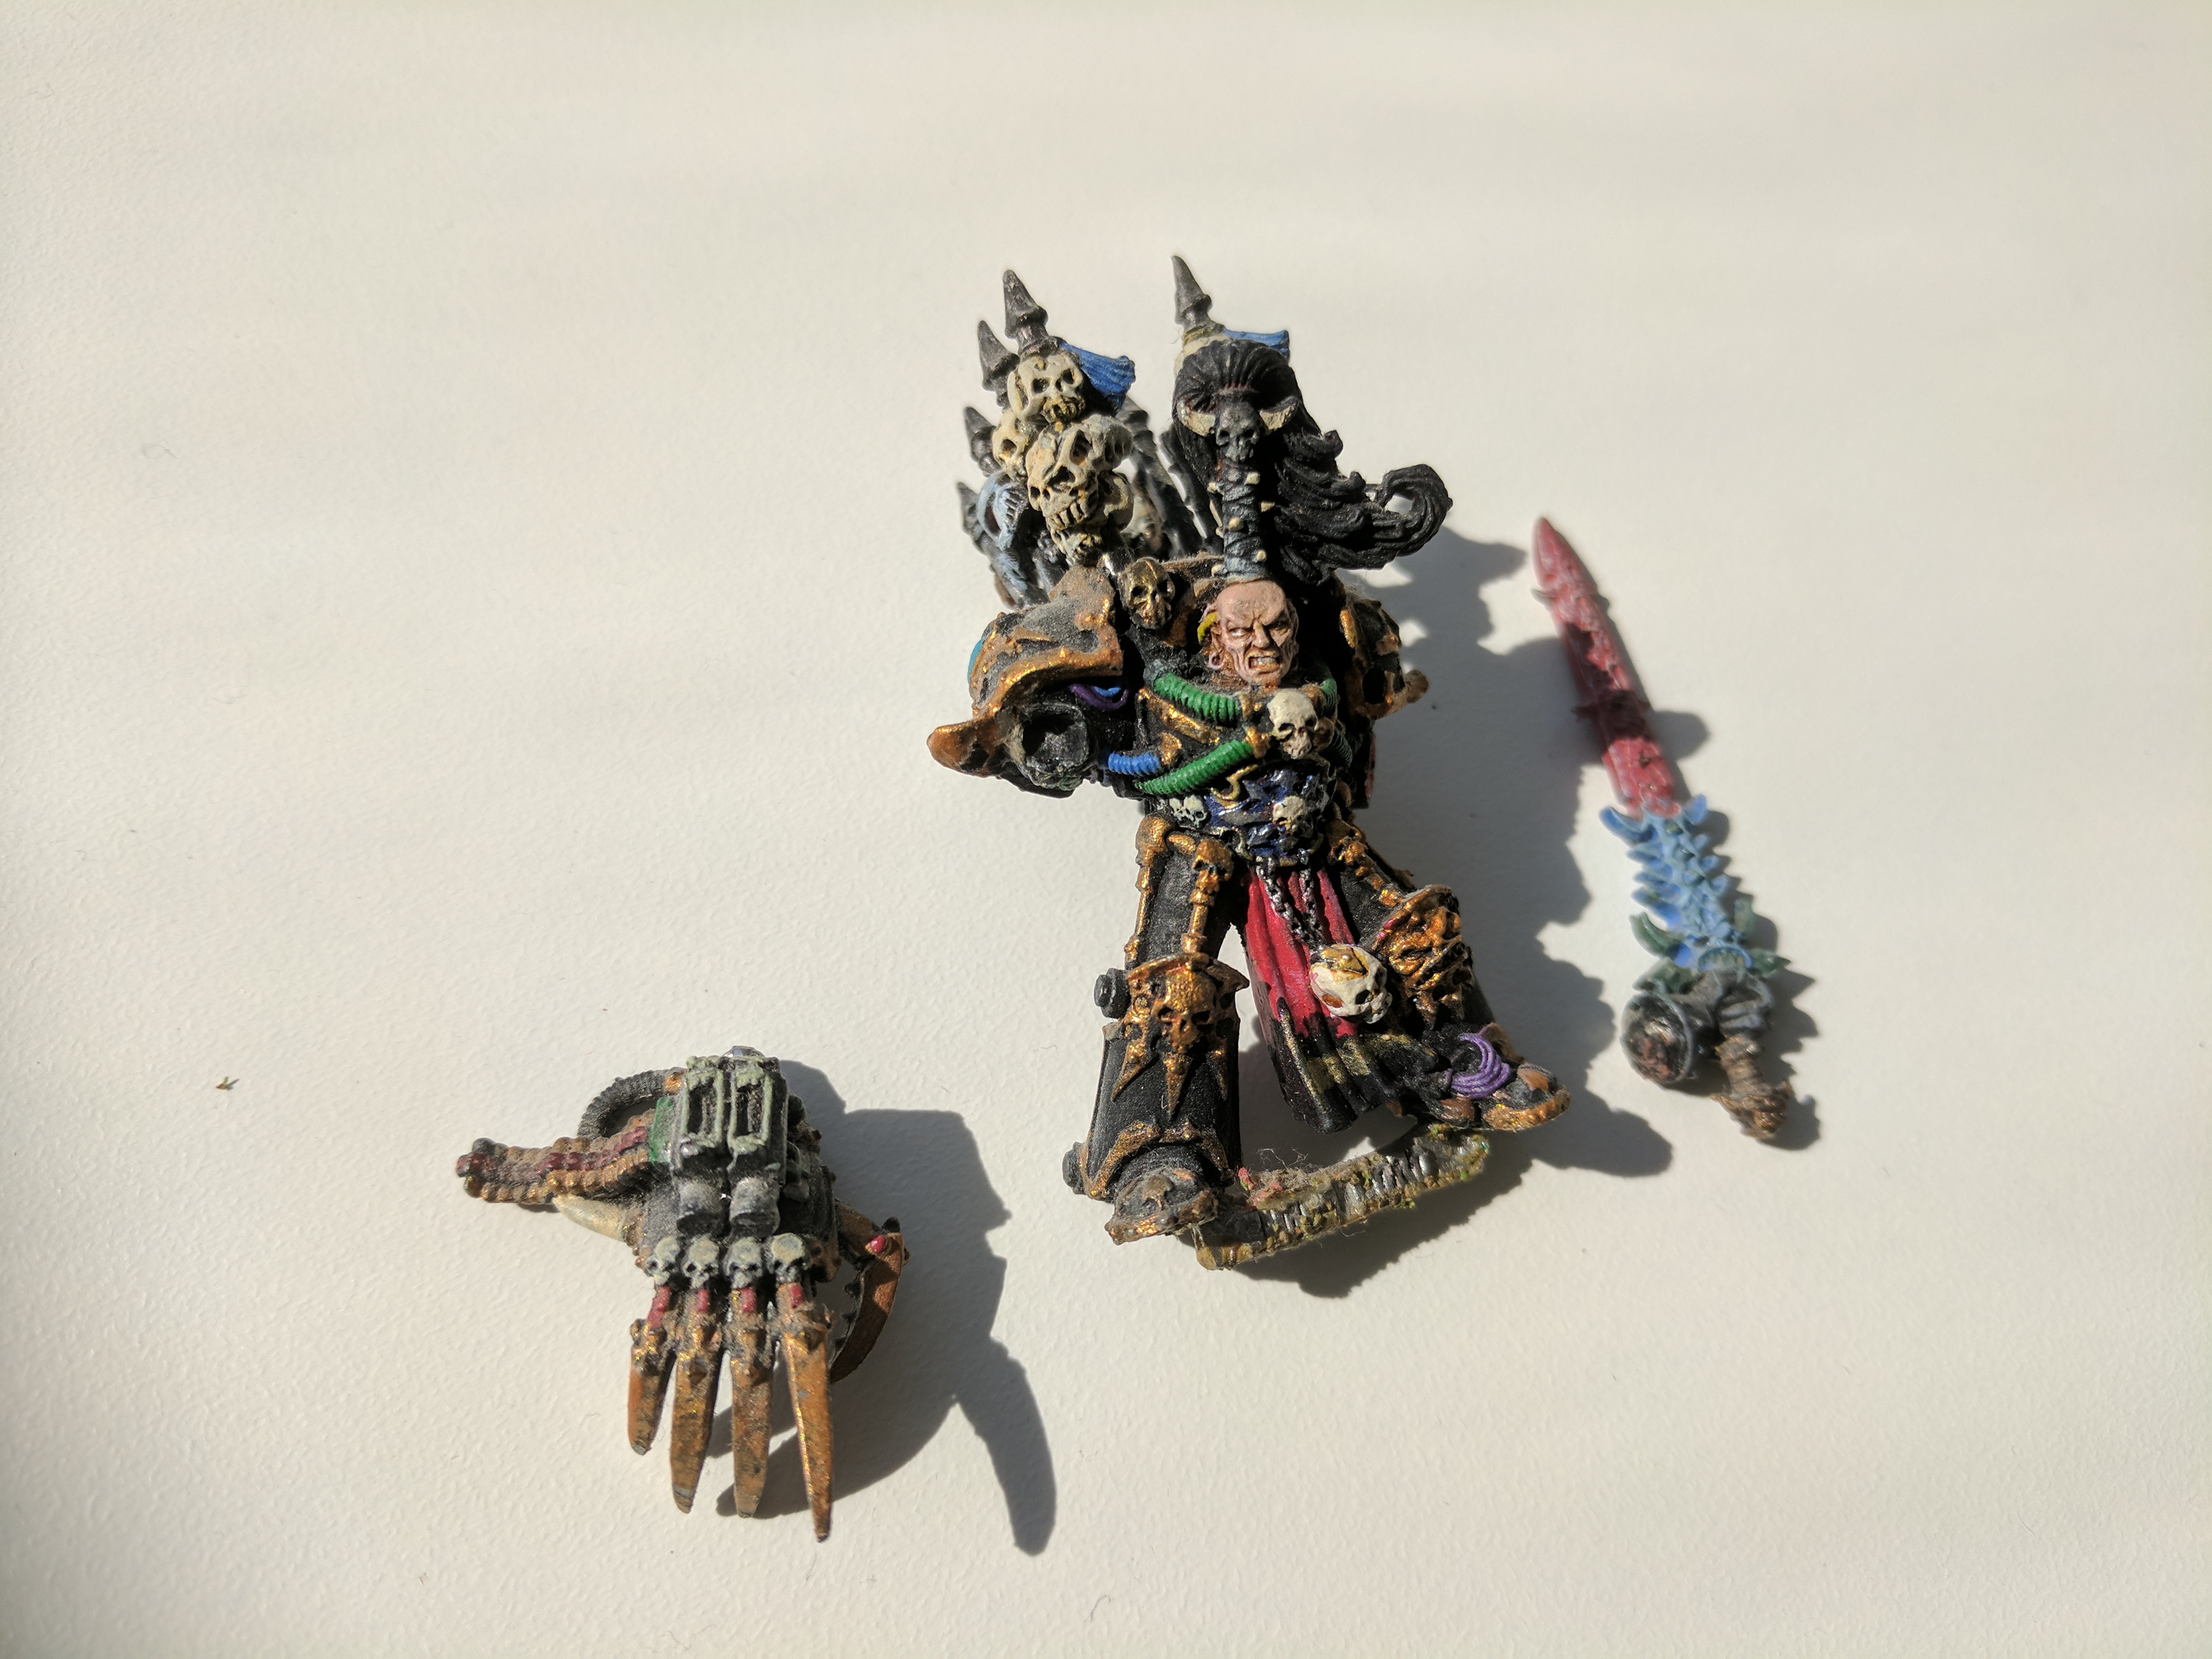 Broke up Abaddon into his basic components and got him prepped for a good clean, Nurgle would not approve!
 After a good long soak in the ultrasound cleaner, white spirits and an old brush worked wonders, stripping him back to his old metal and ready to receive the T'zeench gift of change.
Adjusting the pose
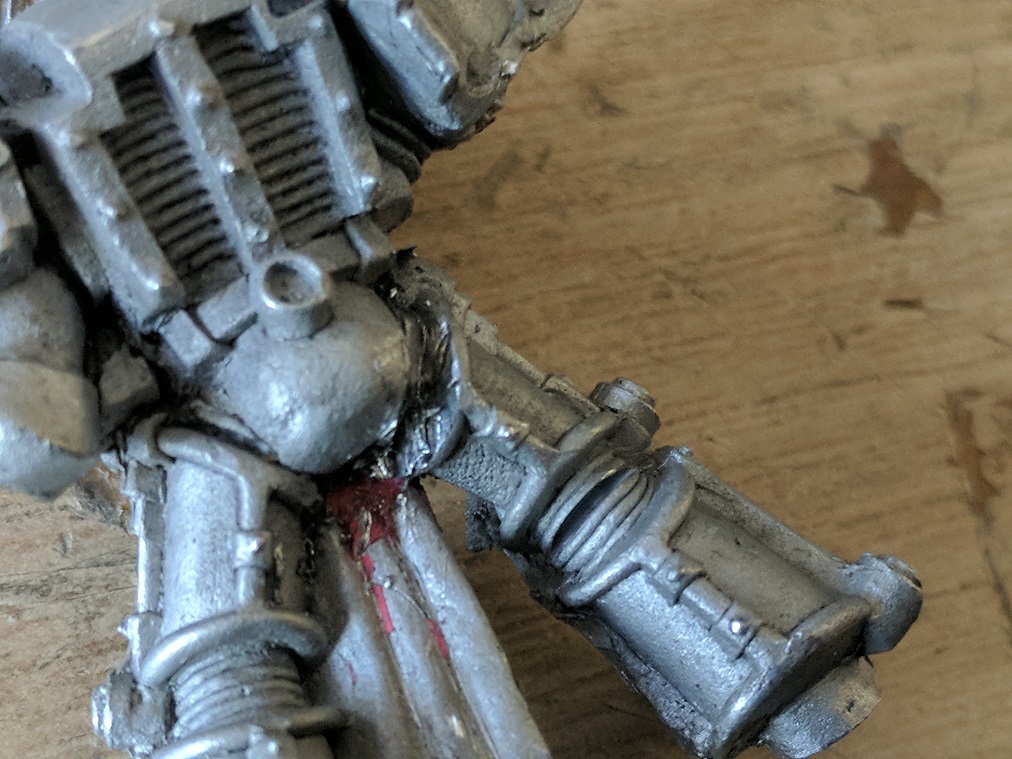 One problem with the original model is the generic pose which isn't that dynamic... the first thing i wanted to change was the general pose so one leg was raised slightly. Taking a hobby knife i cut away at the join between the hip and thigh...
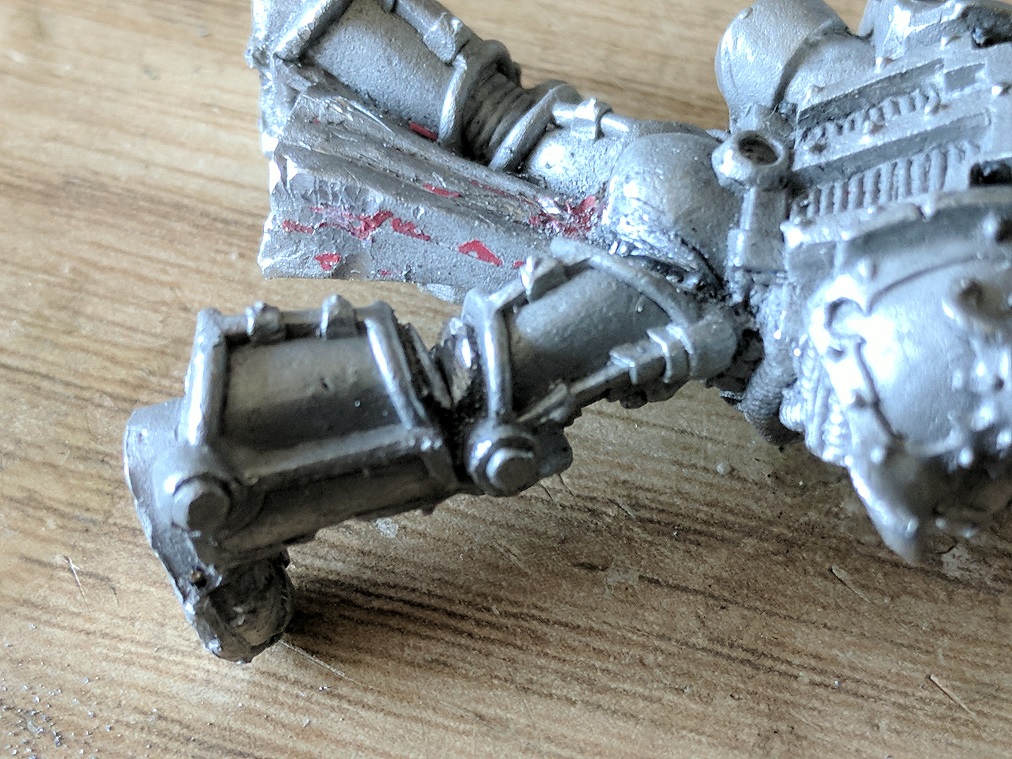 I did the same process with the section behind the knee, the final pose needs his knee bent so his foot can still be flat when hes re-based.
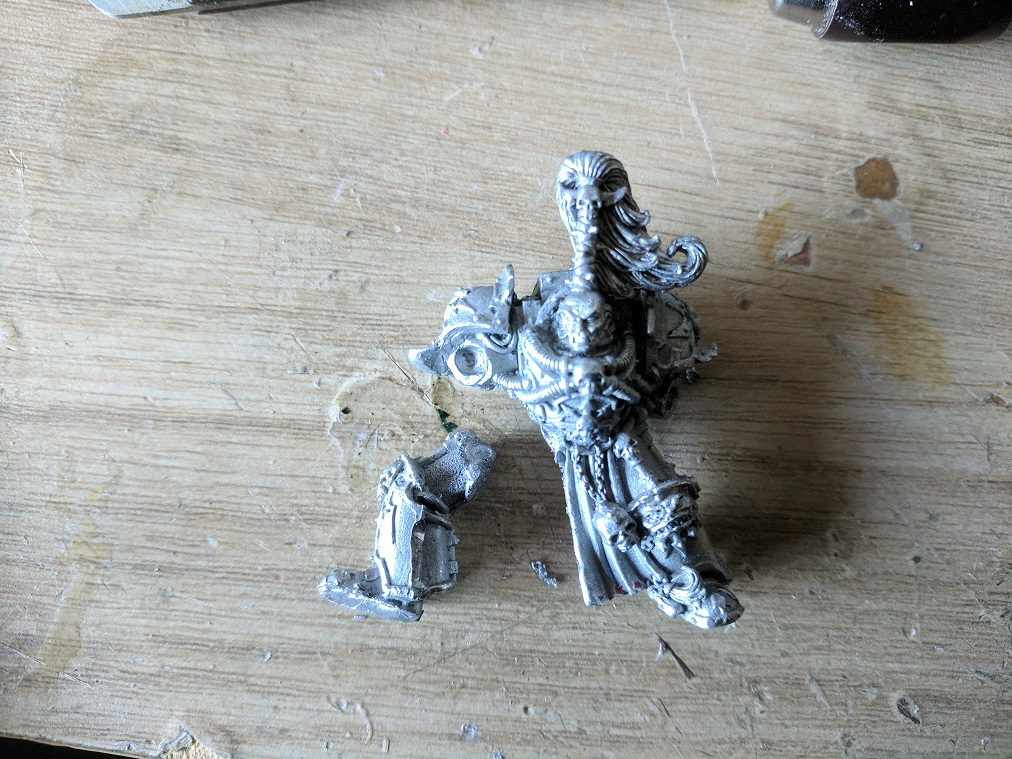 with a bit of encouragement the leg was removed without too much damage to the rest of the torso, with the leg free from the body it was much easier to bend the knee in the angle that i wanted.
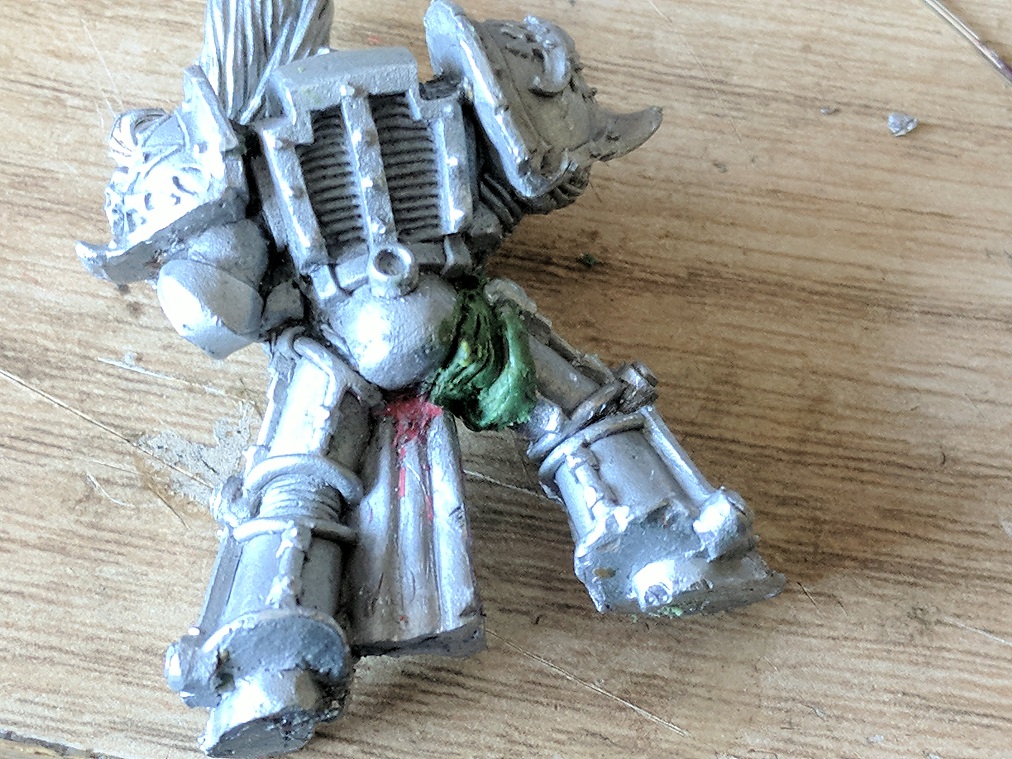 after reposing i re-attached the leg using super glue and rebuilt the missing section with some greenstuff.
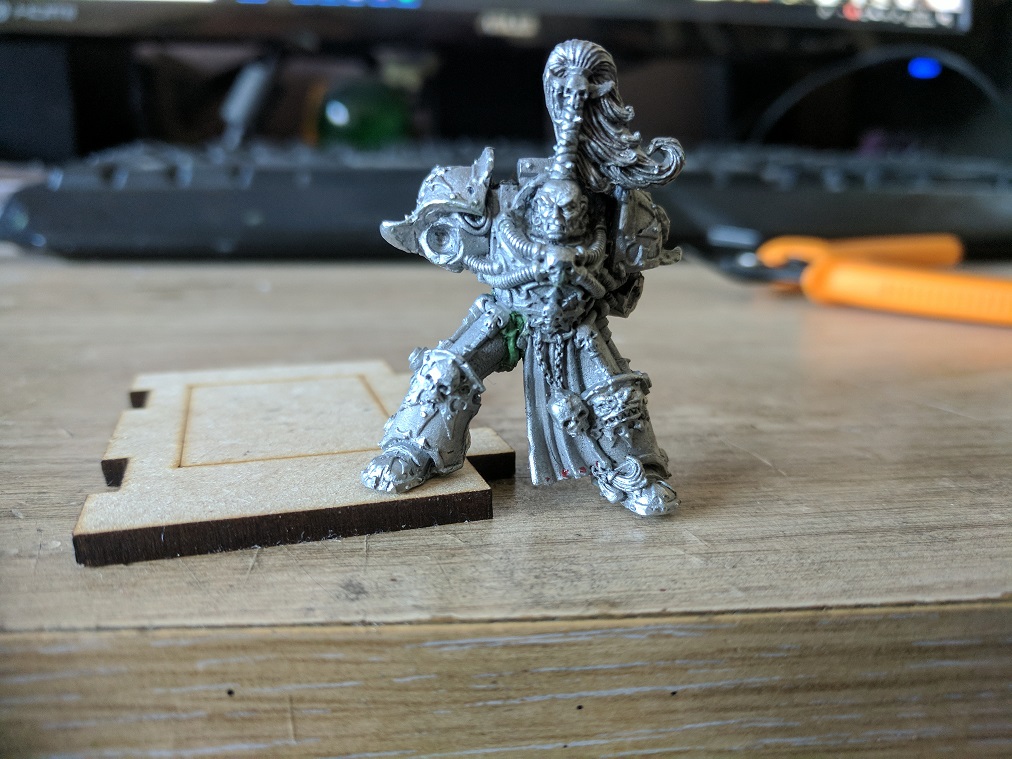 Before the greenstuff could fully dry I stood the model up and placed a 3mm off cut of MDF under the raised leg to make sure the leg remained in the right elevation.
The new paint job
 With the pose adjusted, it's time to start painting. Started off with a MIG grey primer then base coated all of the dark areas with 2 coats of thinned Abaddon black (quite fitting really) After stripping the model back i didn't want to loose detail by putting on thick layers of paint.
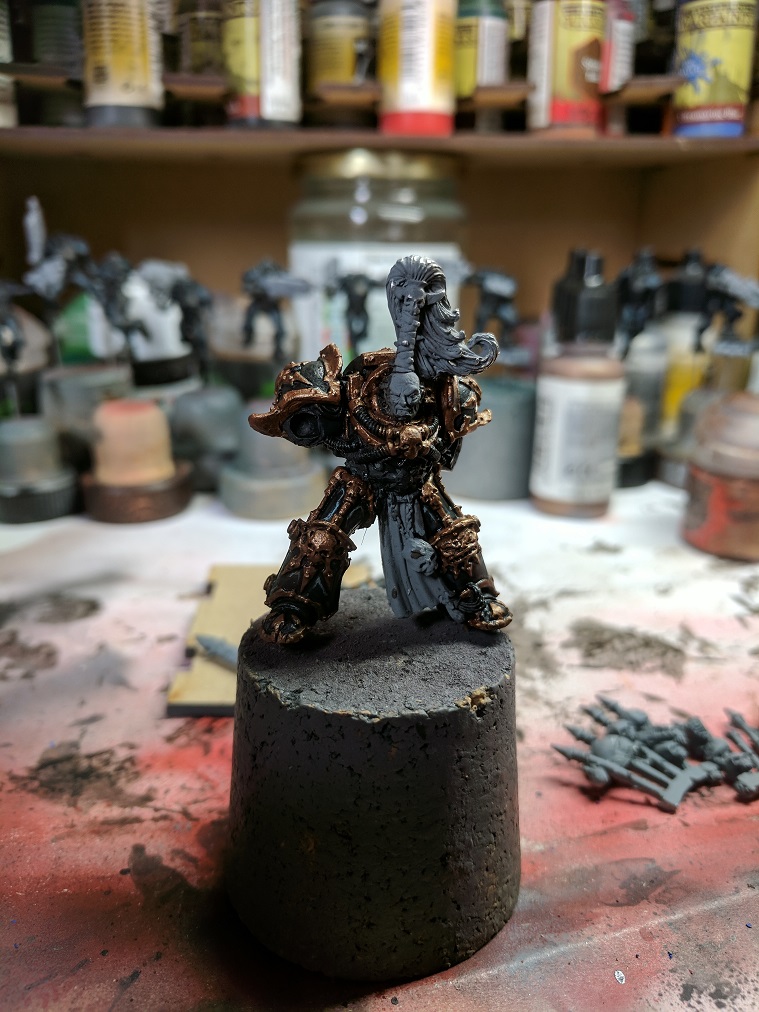 One of the problems with metal miniatures is that the paint easily rubs off corners and edges where they are handled, the best way to avoid this is to drill some small holes at the bottom of the miniature (usually the feet or somewhere which isn't going to be visible and then glue in two pins or metal rods, once they are secure you can fit the model to a cork for easy handling. Once Abaddon was secure i went round the mini and base coated all of the gold trim in Balthasar Gold followed by a wash of Agrax Earthshade
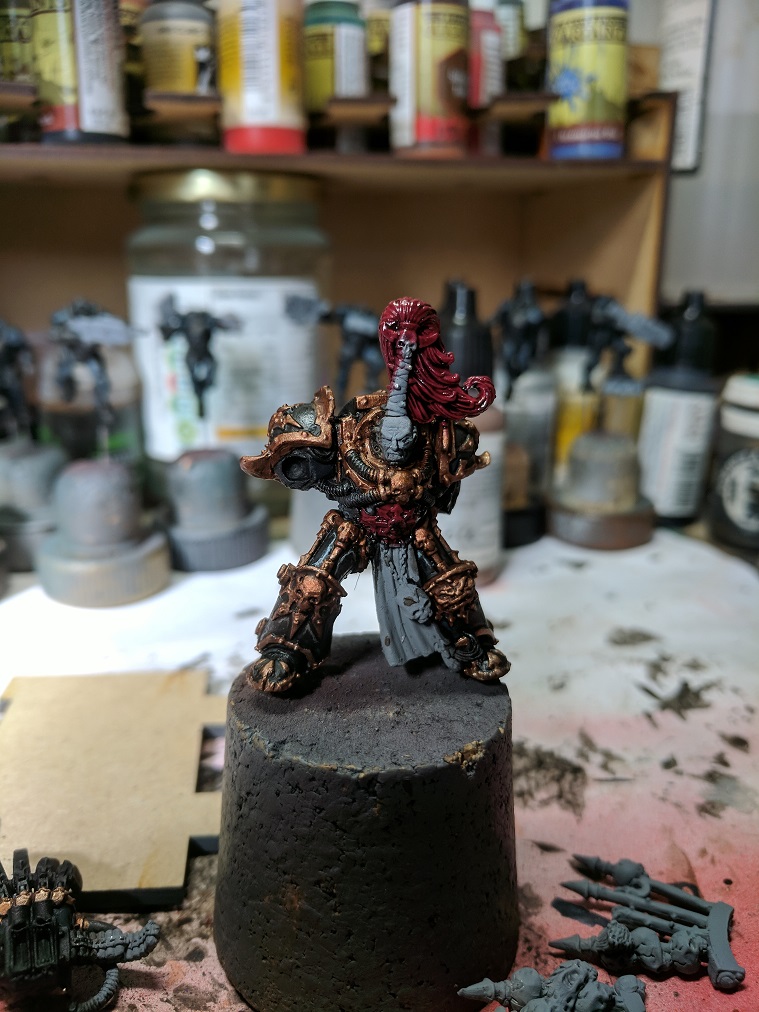 His hair and selected armour sections were base coated in Mephiston Red and then washed with Carroburg Crimson
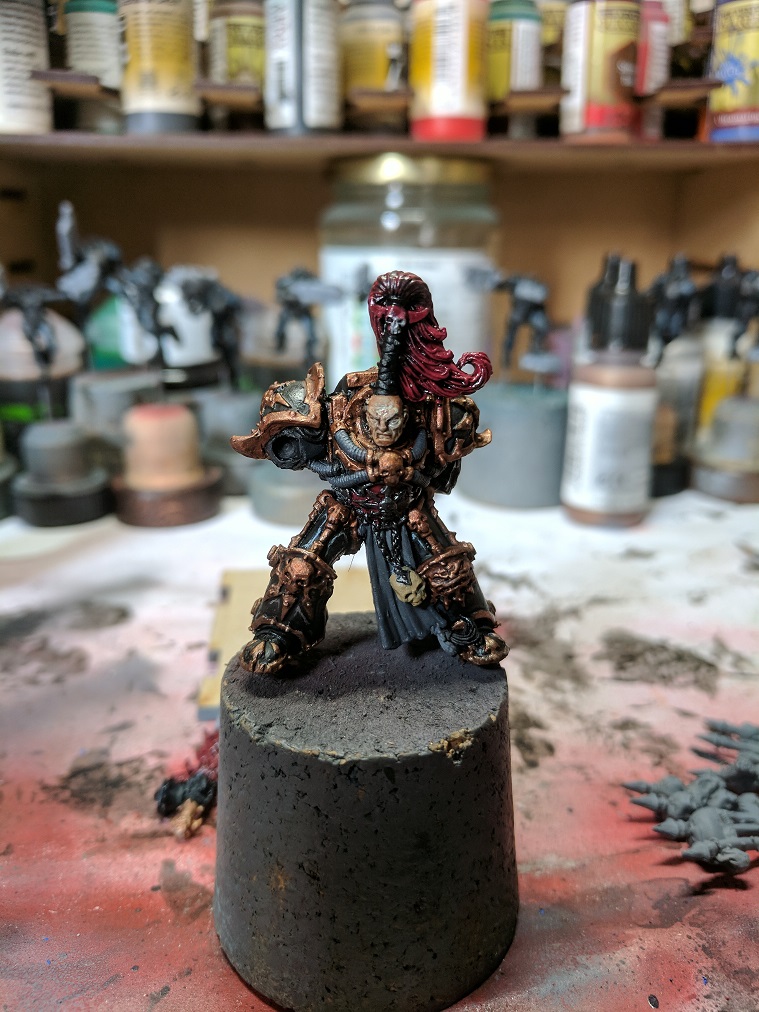 To finish base coating i did his tabbard (crotch robe) in Eshin grey, his head in Ionrach Skin and the Skull in Zandri Dust, followed by the appropriate wash, Nuln Oil for the tabbard, Reikland Fleshshade for the skin and Agrax Earthsahde for the skull.
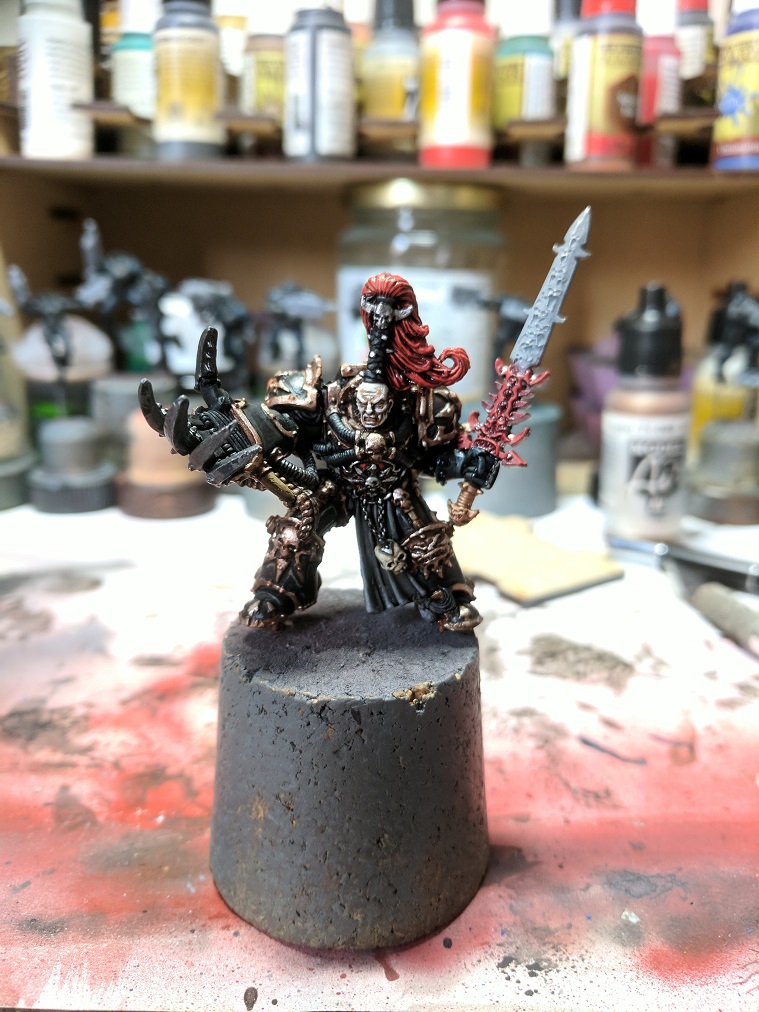 After applying all the base colours i re-constructed Abaddon with his power talon fitted in a different pose and went about adding the highlights to each colour - Black areas were highlighted in Dark Reaper, Red areas with Evil Sunz Scarlet and Wild Rider red, The gold areas done with Sycorax Bronze, skin was layered up with Deepkin Flesh and highlighted with Pallid Witch Flesh and the skull layered with Ushabti Bone and Sreaming Skull.
Painting Drach'nyen
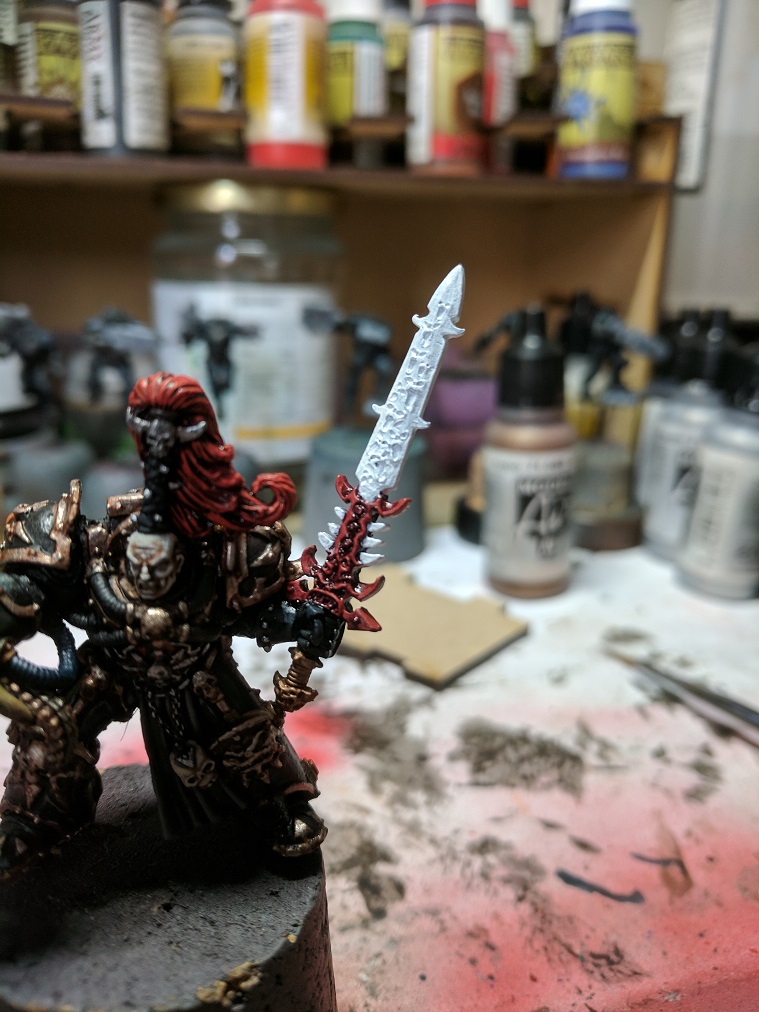 Starting things off, the colour scheme i'm going for requires a good solid white base, two thin coats of Ceremite white should do the trick.
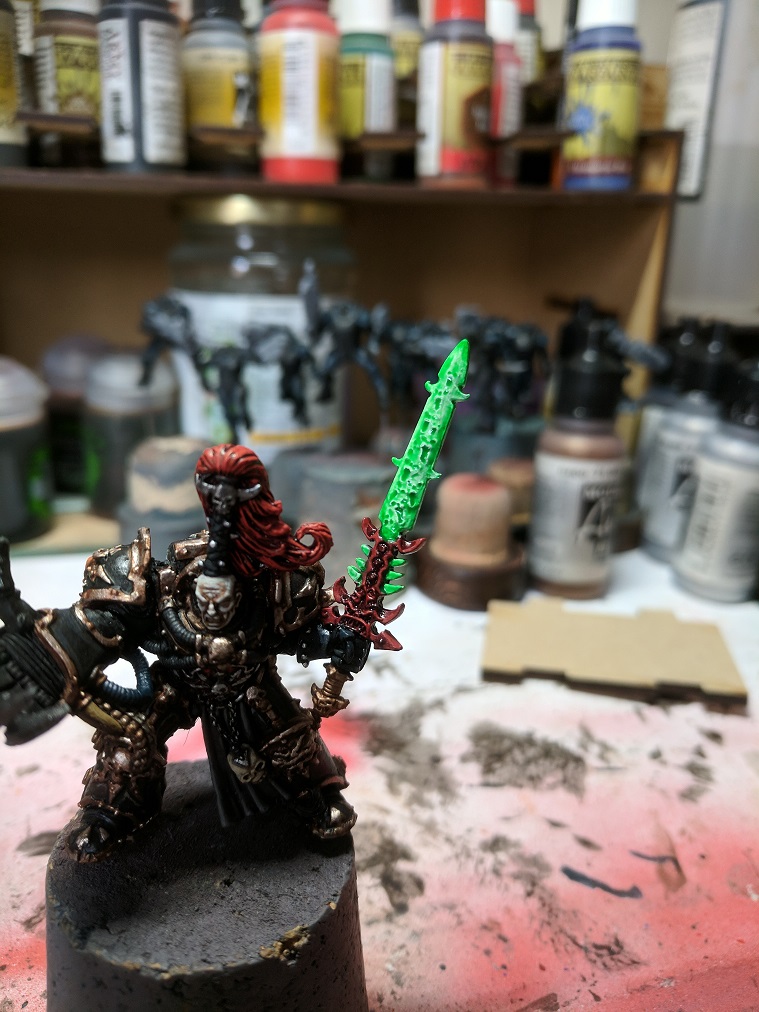 Drach'nyen is such an interesting blade and a simple blue red colour scheme doesn't seem to do the daemon sword justice, I wanted a more ethereal ghostly feel and GW Technical paint Hexwraith flame is perfect for this.
 I didn't want to loose the blue entirely so I added a little strip of Thousand Sons Blue down the middle of the blade and faded the edges slightly by applying water around the outside of the blue and blending it into the green.
 To highlight the screaming ghosts/souls i did a quick drybrush over the top of the sword blade with Gauss Blaster green.
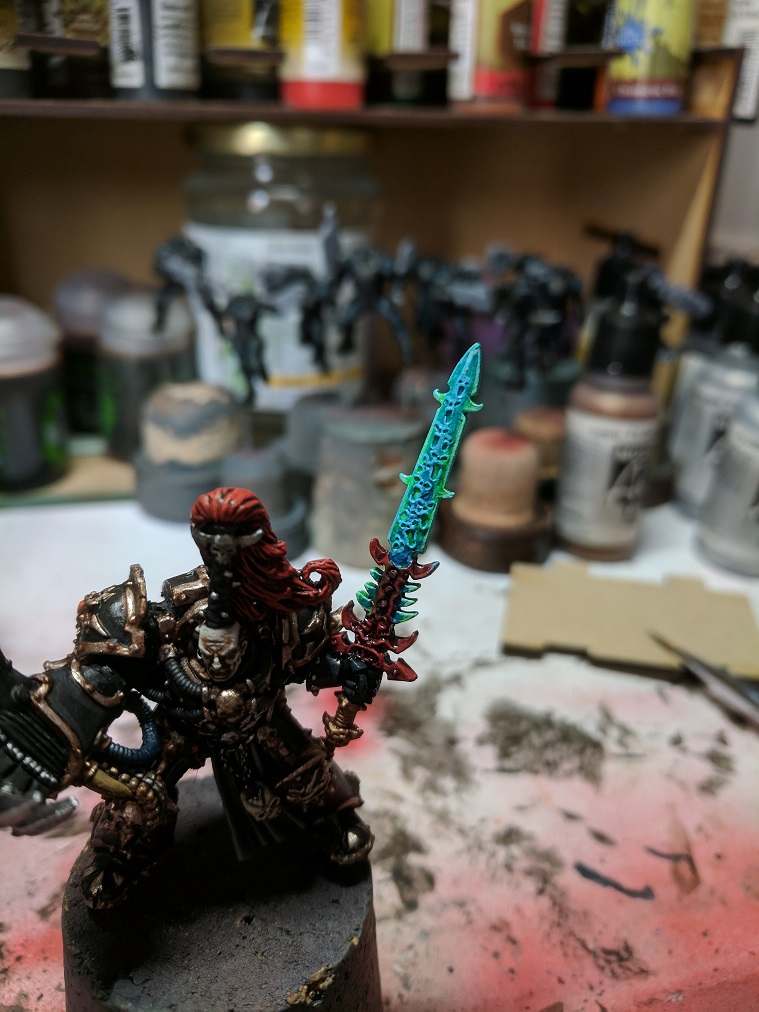 And then finished off the details with a edge highlight of Baharroth Blue and a little white, with that the blade of Drach'nyen is pretty much finished.
A base fit for a Badass
 Games workshop have come a long way with their thematic bases and even their base sizes, "back in teh day we ad lil bases, an we made do! not like you young'uns with your 35 and 40mm base options and moulded details! we had to make our own rocks!" The original base for Abaddon was tiny, it barely kept him standing, this of course would not do for a chaos lord, let alone the great despoiler.
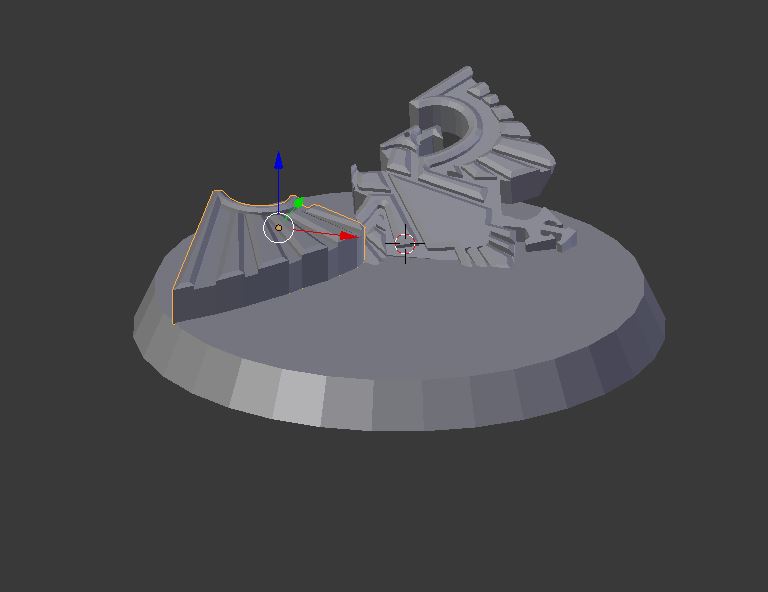 I wanted a base that was functional but also had a little story, so i opted for a 40mm base with a broken imperial eagle, after taking the time to bend Abaddons leg he needed something suitable to stand on after all. The base itself was a simple cylinder in Bender with a 3mm thickness, 40mm diameter and the top face of the cylinder resized to 38mm to give the bevelled edge. The imperial eagle was taken from thingiverse and then resized and modified in blender.
 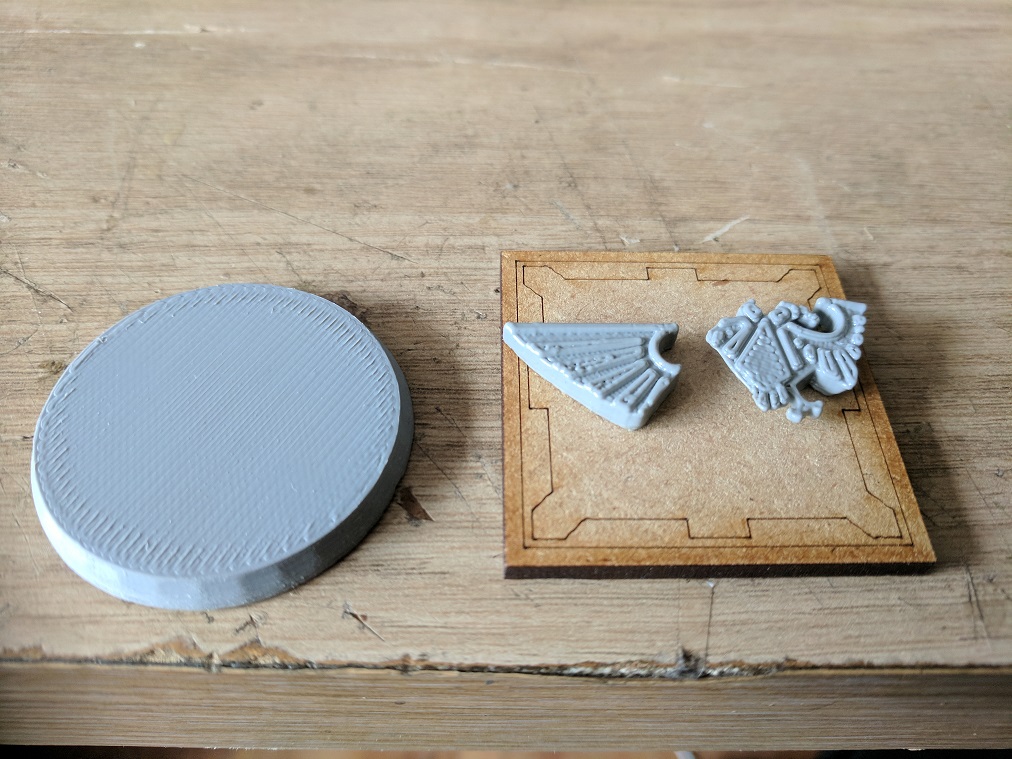 the base components after printing, i decided to print the sections off as separate pieces to give me the freedom of placing the body and wings in the best position.
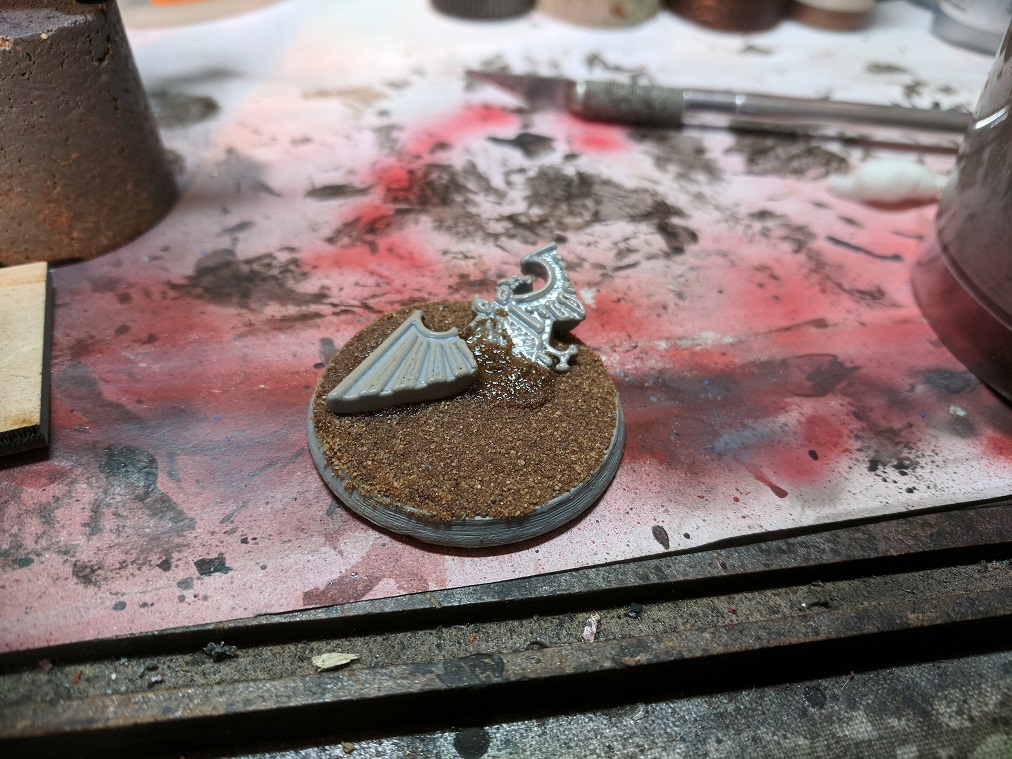 a simple covering of PVA glue and sand always gives a nice base texture but if you want something to look more like sand itself then i recommend using super glue and baking soda which gives a decent gritty texture.
 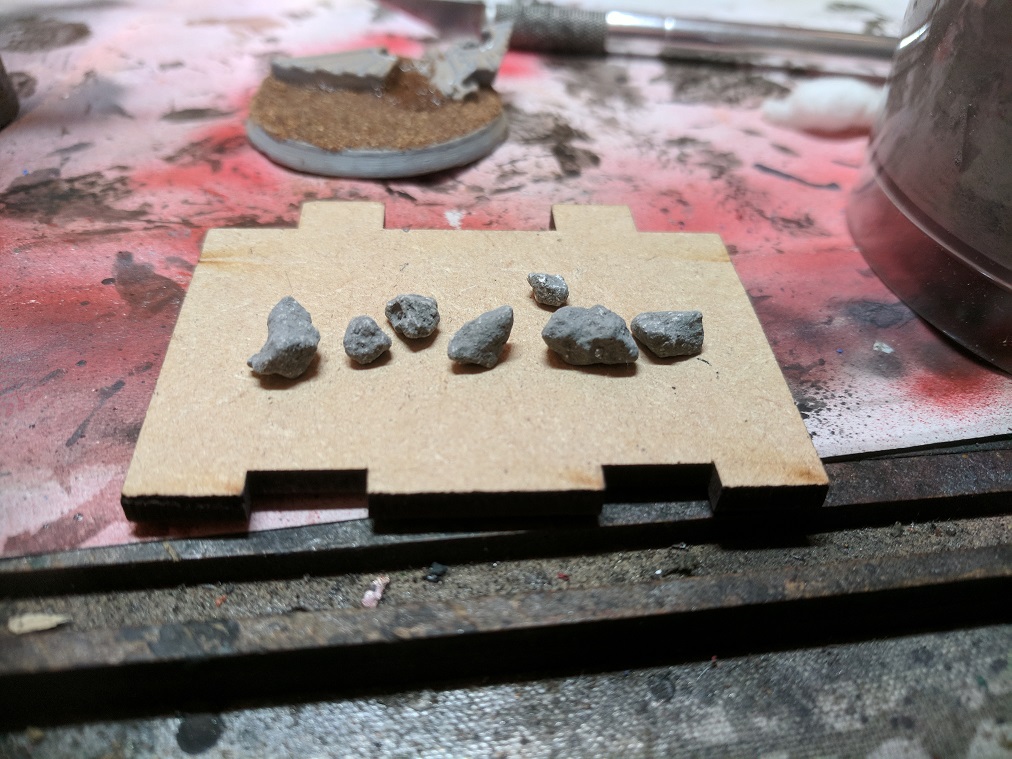 Also if you ever need a good substitute for big rocks then look no further than a bag of cheap cat litter, just make sure the cat hasn't used it first.
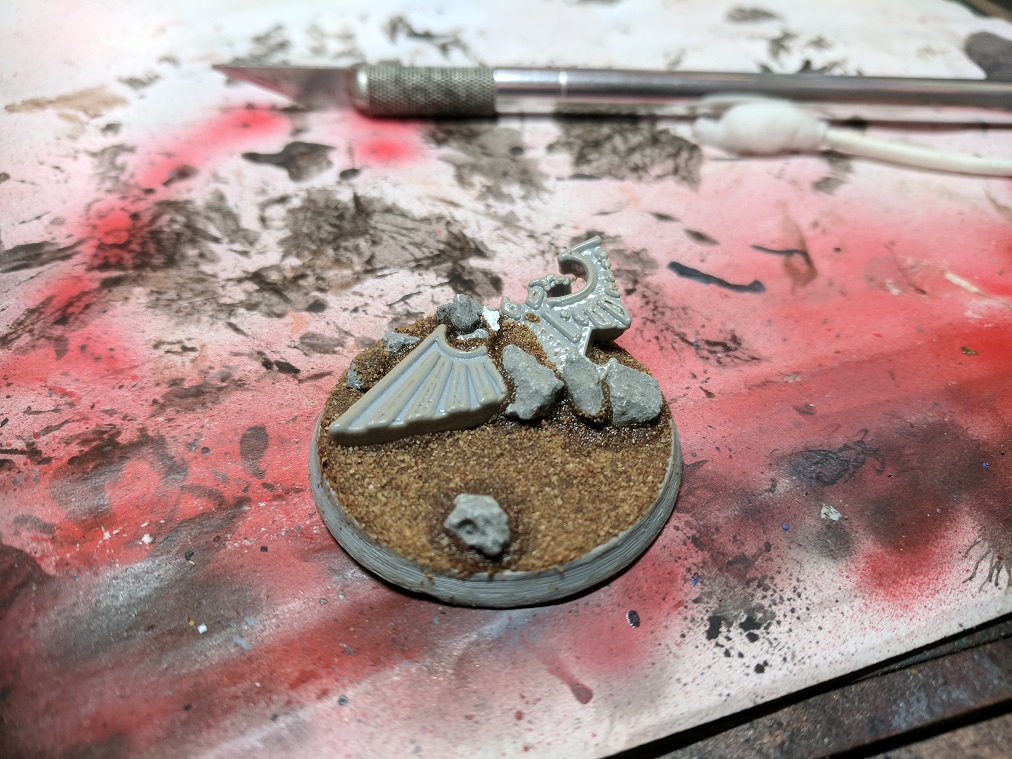 I applied the stones in a fairly uniform pattern, i wanted to give the impression that the eagle was maybe positioned on a wall which has long since collapsed and toppled on top of the fallen icon.
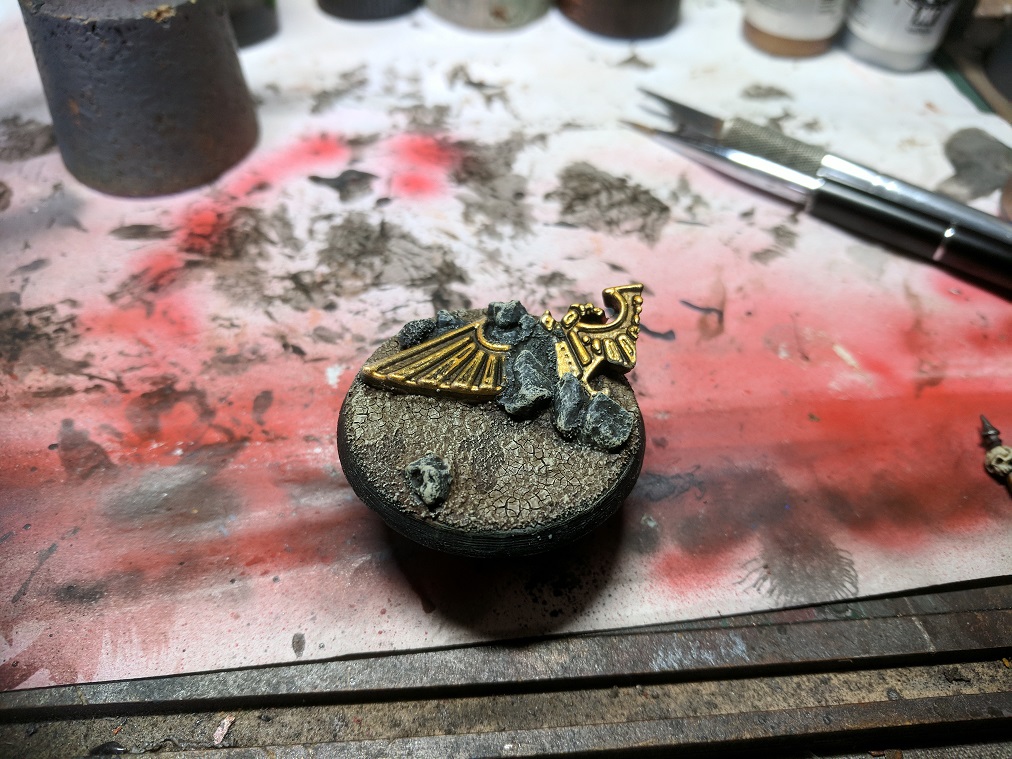 i applied some aggrellan earth technical pain to the base and gave it a few hours to dry, then went back and washed the whole base in agrax earthshade wash.
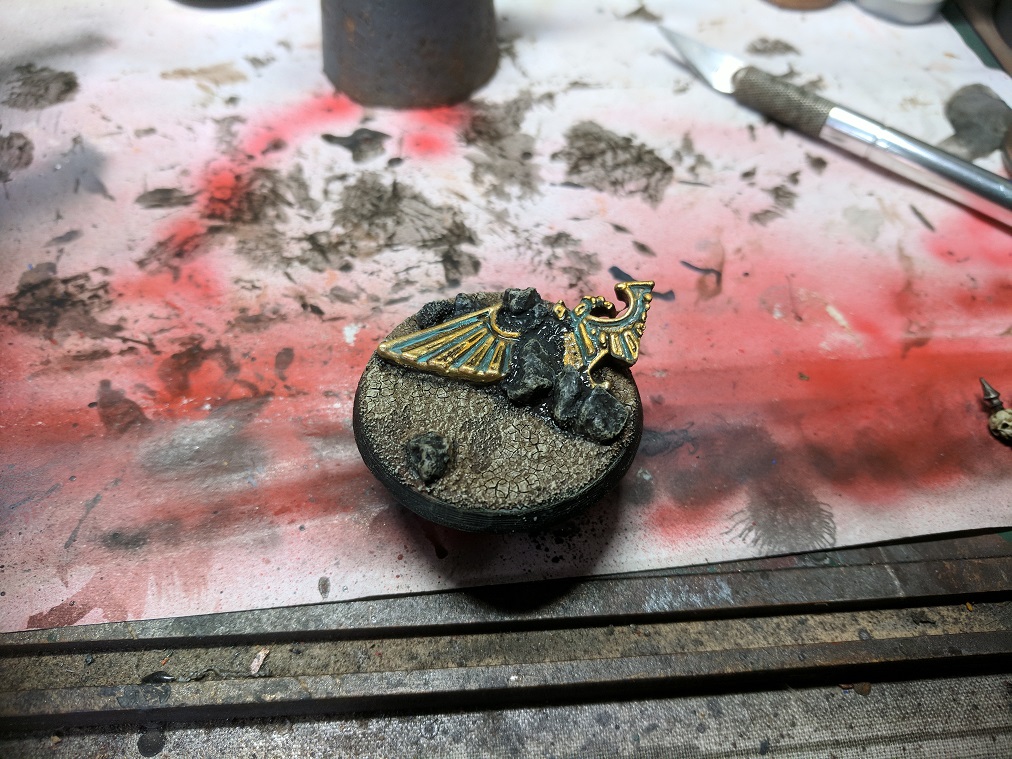 Finally drybrushed the whole base with a light cream such as terminatus stone, added some nihilakh oxide to the recesses of the eagles wings before brightening up the raised areas with retributior gold.
Cant you just leave your trophies on the mantelpiece!?
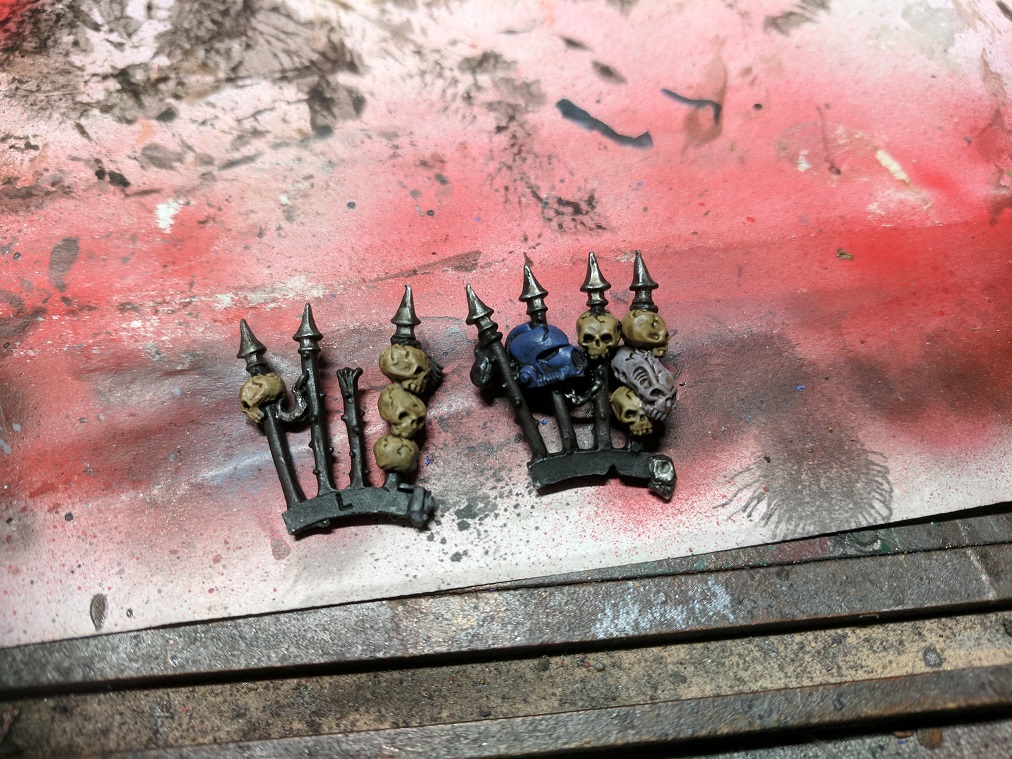 I left the trophy rack off the model on purpose, there is a lot of little details on these bits which would be very difficult to reach if they were assembled at the start, it's far easier to apply a solid base coat and wash while they are separate and then finish off with highlights after they have been attached. I base coated the skulls in zandri dust and the genestealer skull in sDaemonette Hide and with the return of Roboute Guilliman (Robot Girly-man) the space marine helmet of course needed to be a Ultra Smurf Marine.
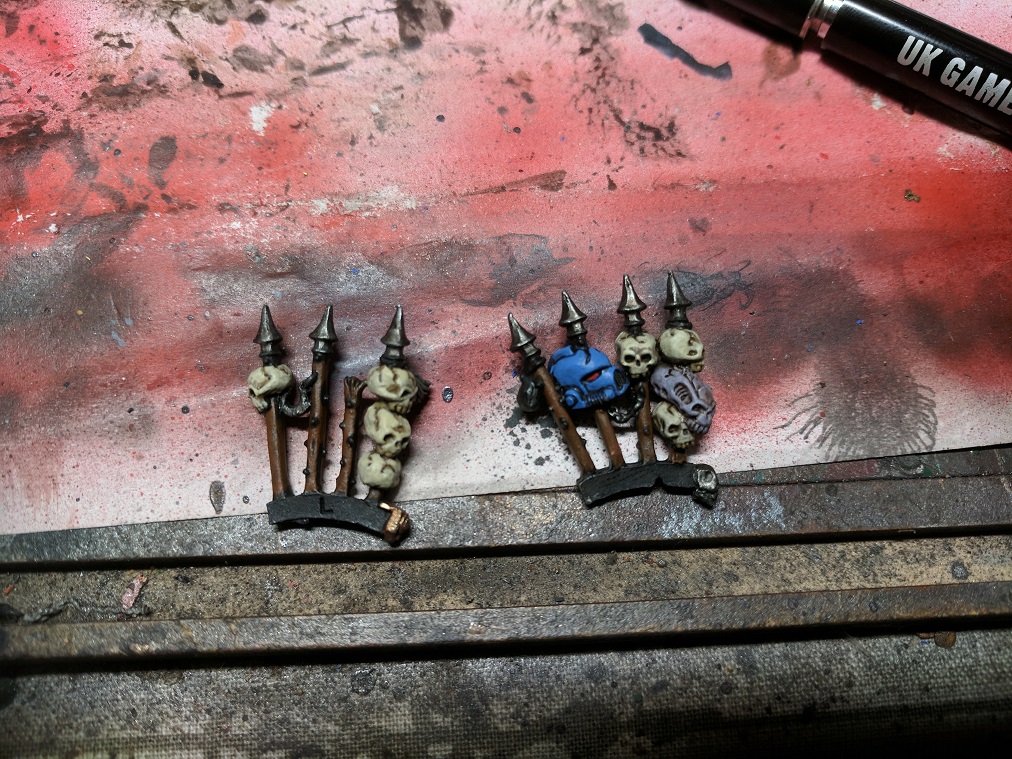 I first thought the spikes were metal but looking at them now i can see the top of one appears to be splintered and studs are present in a few of the poles (no doubt a Slaanesh fashion statement) so i decided to give them a brown colour, rhinox hide followed by some gorthor brown followed by a wash of agrax. Skulls were layered with ushbiti bone, helmet done with Ultramarine blue and the genestraler skull in Slannesh grey
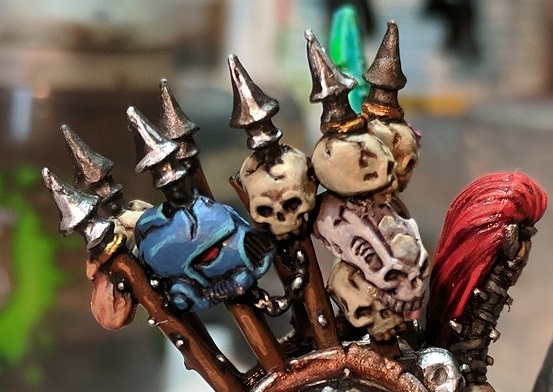 Once the base colours were done I could then glue the racks on and one they were in place i finished up with some edge highlights, at the back of the row of spikes there is a small sack i painted this up following the standard colours for flesh (Bugmans glow, cadian fleshtone, reikland fleshshade and finished off with kislev flesh), i wanted it to look like some small pouch made from some poor guard's skin.
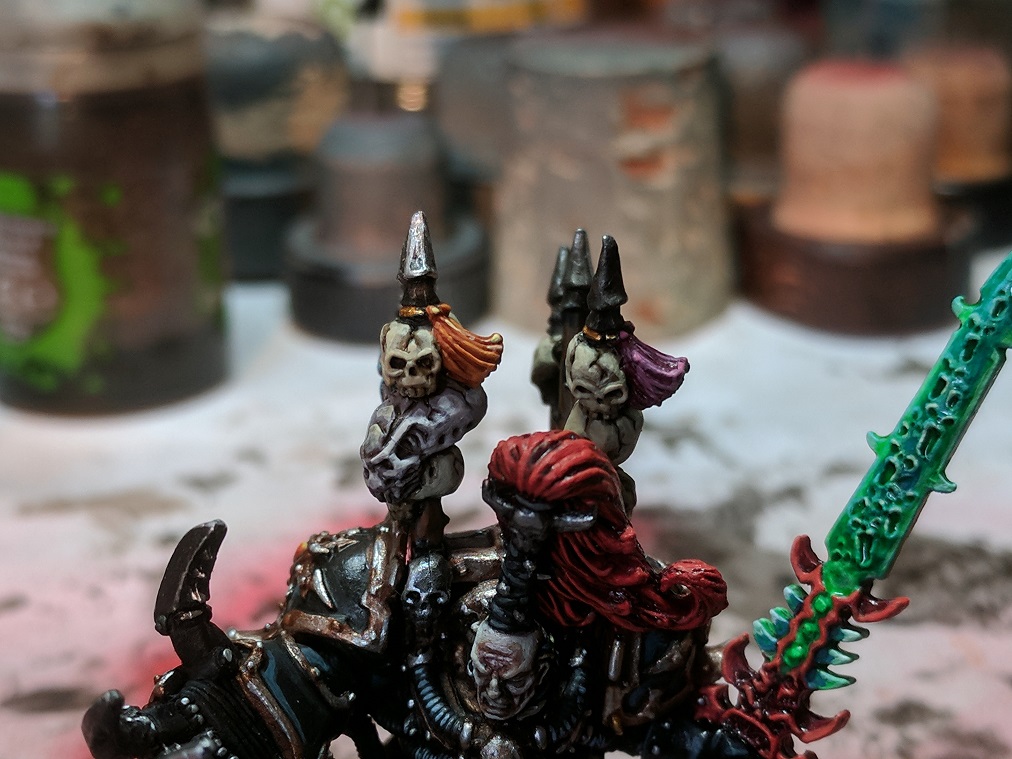 The last part of the rack was the rack tassles (obviously another Slaanesh fashion choice) they needed to be different and a bit more vibrant than the surrounding colours so i went for a really bright orange and trashy pink.... SKULLS FOR KHORNE.... TASSLES, STUDS AND CHAINS FOR SLAANESH
The Eye of the Terminator Armour
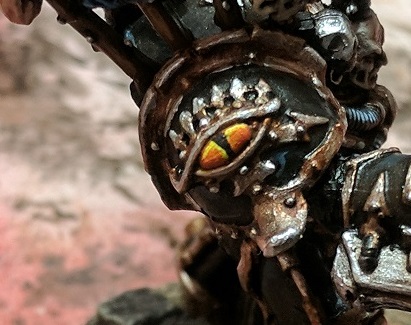 I couldn't remember what colour the gem was supposed to be on the right pauldron so i settled on an orange shade to look similar to the eye of Horus.
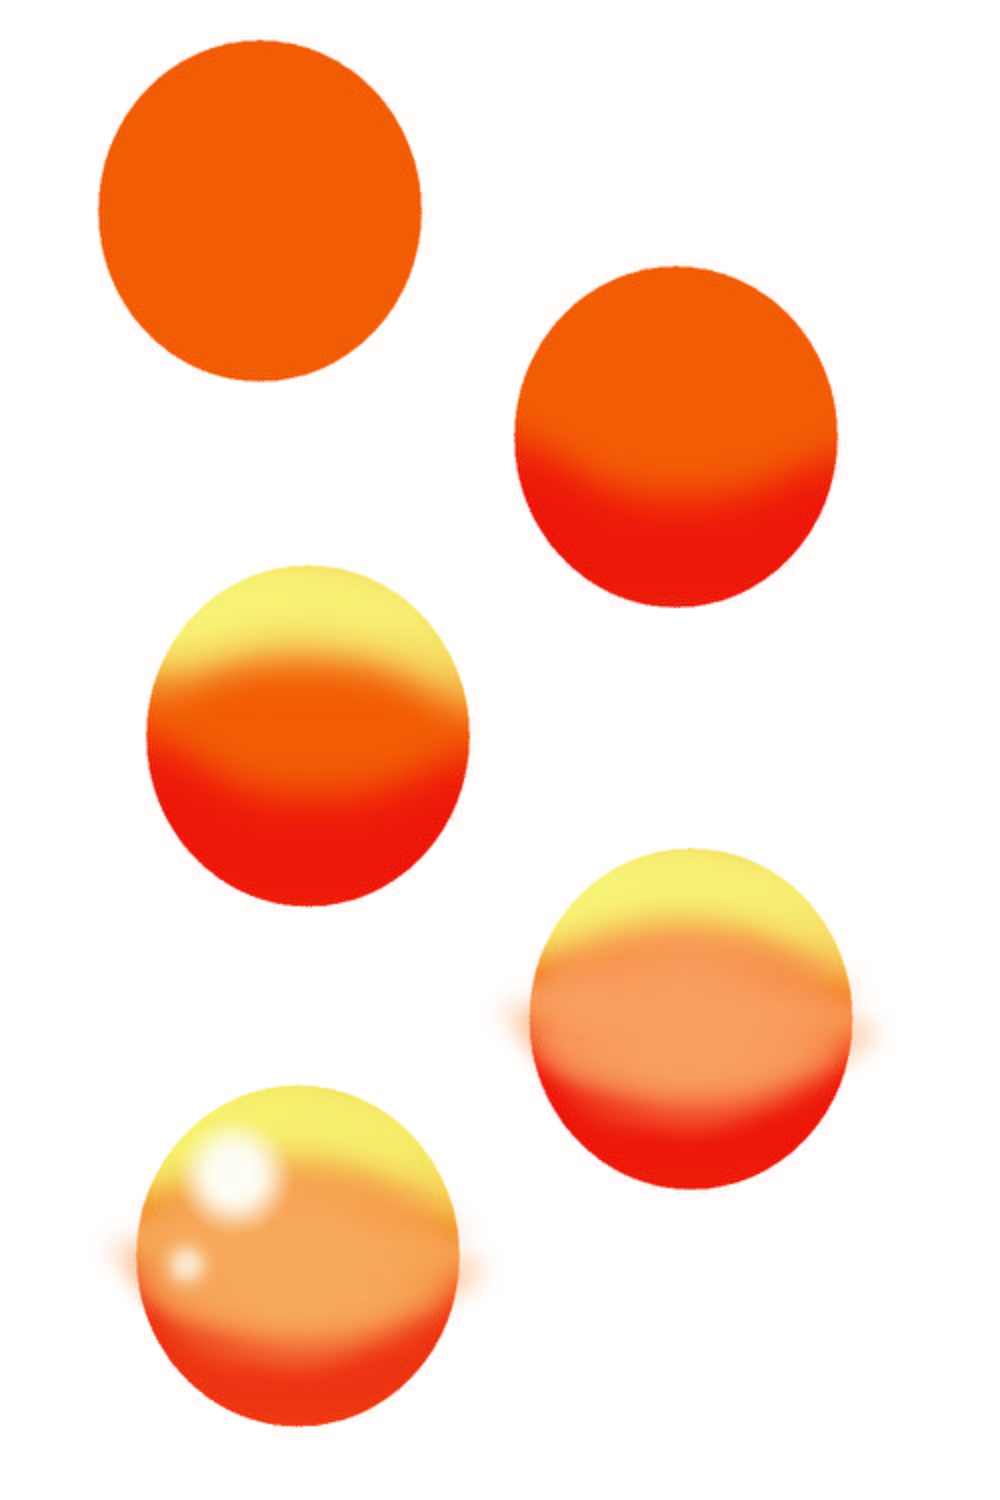 Usually i just paint gems in a single colour or use a gemstone technical paint but this time I tried a different approach. I started off with a solid orange base colour (jokaero Orange), around the bottom of the oval i added a strong orange/red (Evil Sunz scarlet) shade and then followed up by painting a light pale yellow to the top of the oval (Dorn Yellow) then added a small strip of a bright fiery orange around the centre (Troll slayer orange or Fire Dragon Bright) then to tie all the colours together i went over with a yellow glaze. The final touch was to add in a black stripe making it a bit wider towards the top then added some more Dorn yellow around the edges.
For the Dark Gods
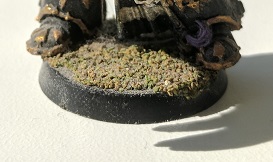
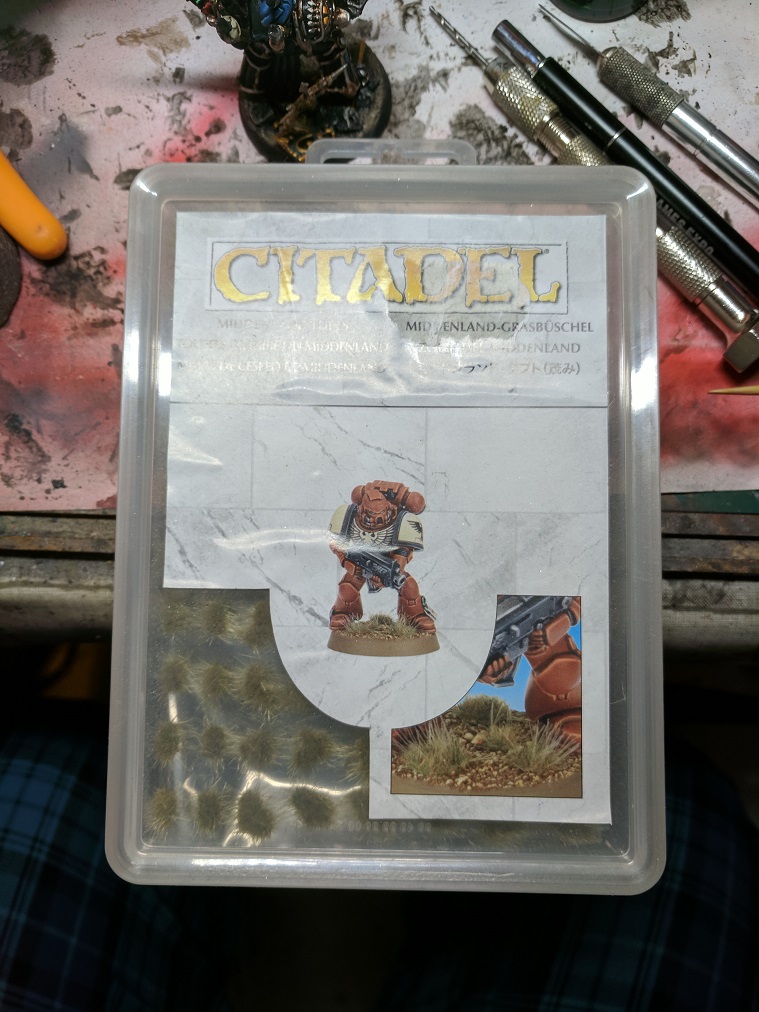 I also had a very very old pack of grass tufts in my hobby box, i figured this would be a good time to use a couple and add a little more detail to Abaddons base
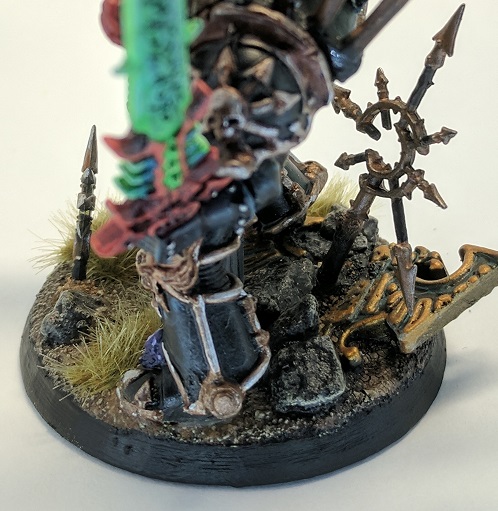 one icon was placed at the front of the base and the second larger icon was placed at the rear impaling the heart of the imperial eagle, with the grass tufts applied this project should now be done.


