


The Emperor Protects ~ Adepta Sororitas ~ A Sisters of Battle Project


Recommendations: 959
About the Project
***** THE EMPEROR PROTECTS ***** I've been a backstage member since 2012 and have never shared anything I've made. (HOW VERY DARE I?) After being one of the lucky few to acquire the Sisters of Battle box I thought it would be cool to attempt to track my progress of putting this brand new army (for me) together before they are let loose upon the battlefield to unleash fire and faith upon the heretics. Original project goal achieved. Limited Edition Sisters of Battle Starter Box complete! Stay tuned for incoming pile of shame purging & painting. YES!
Related Game: Warhammer 40,000
Related Company: Games Workshop
Related Genre: Science Fiction
This Project is Active
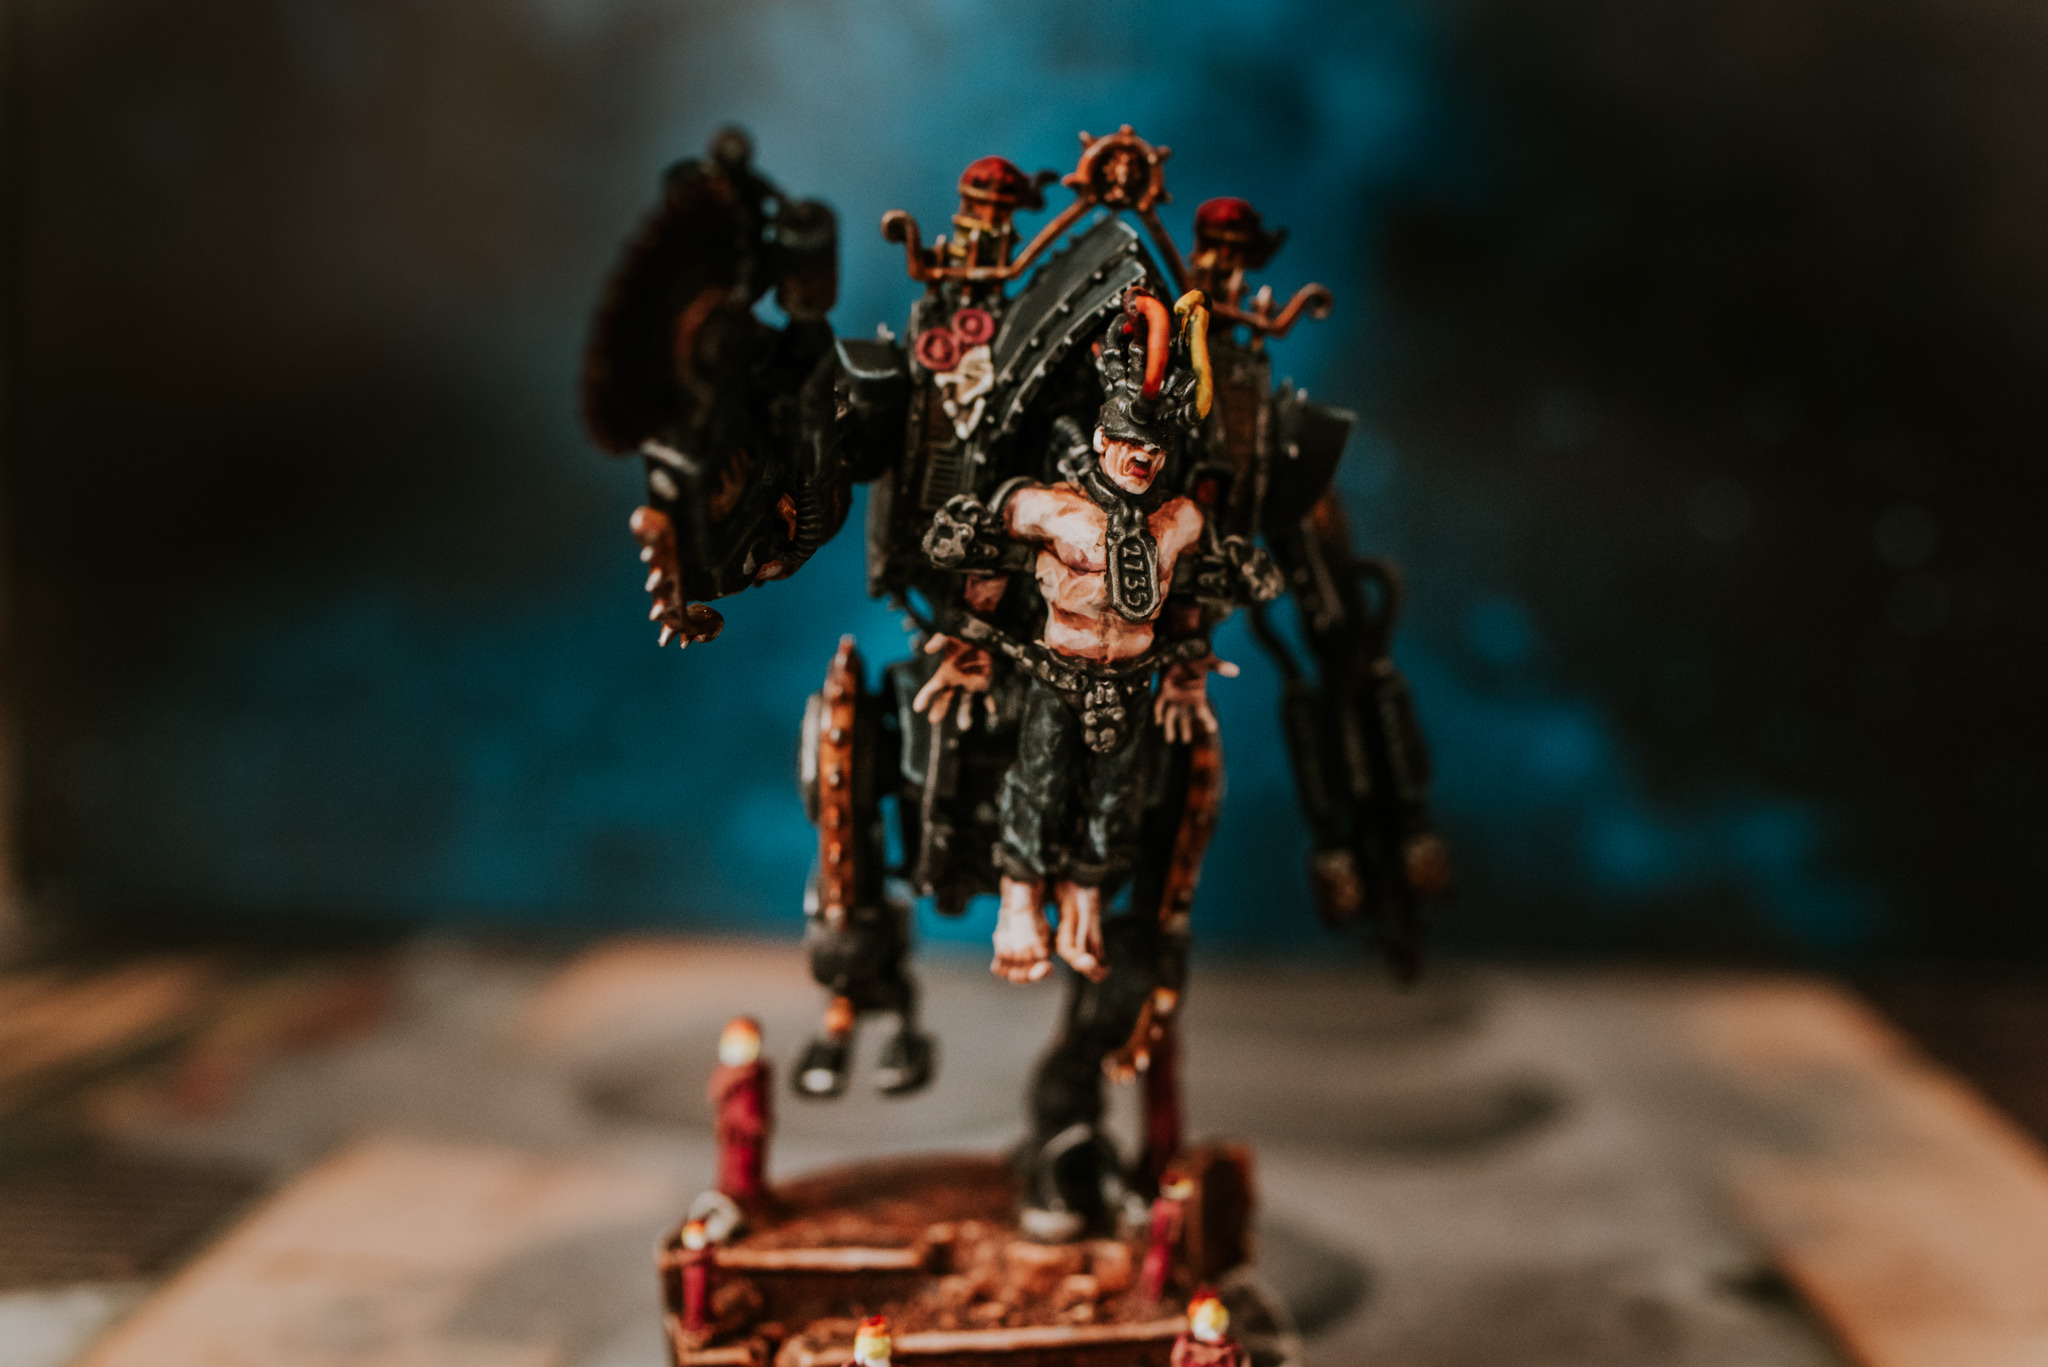
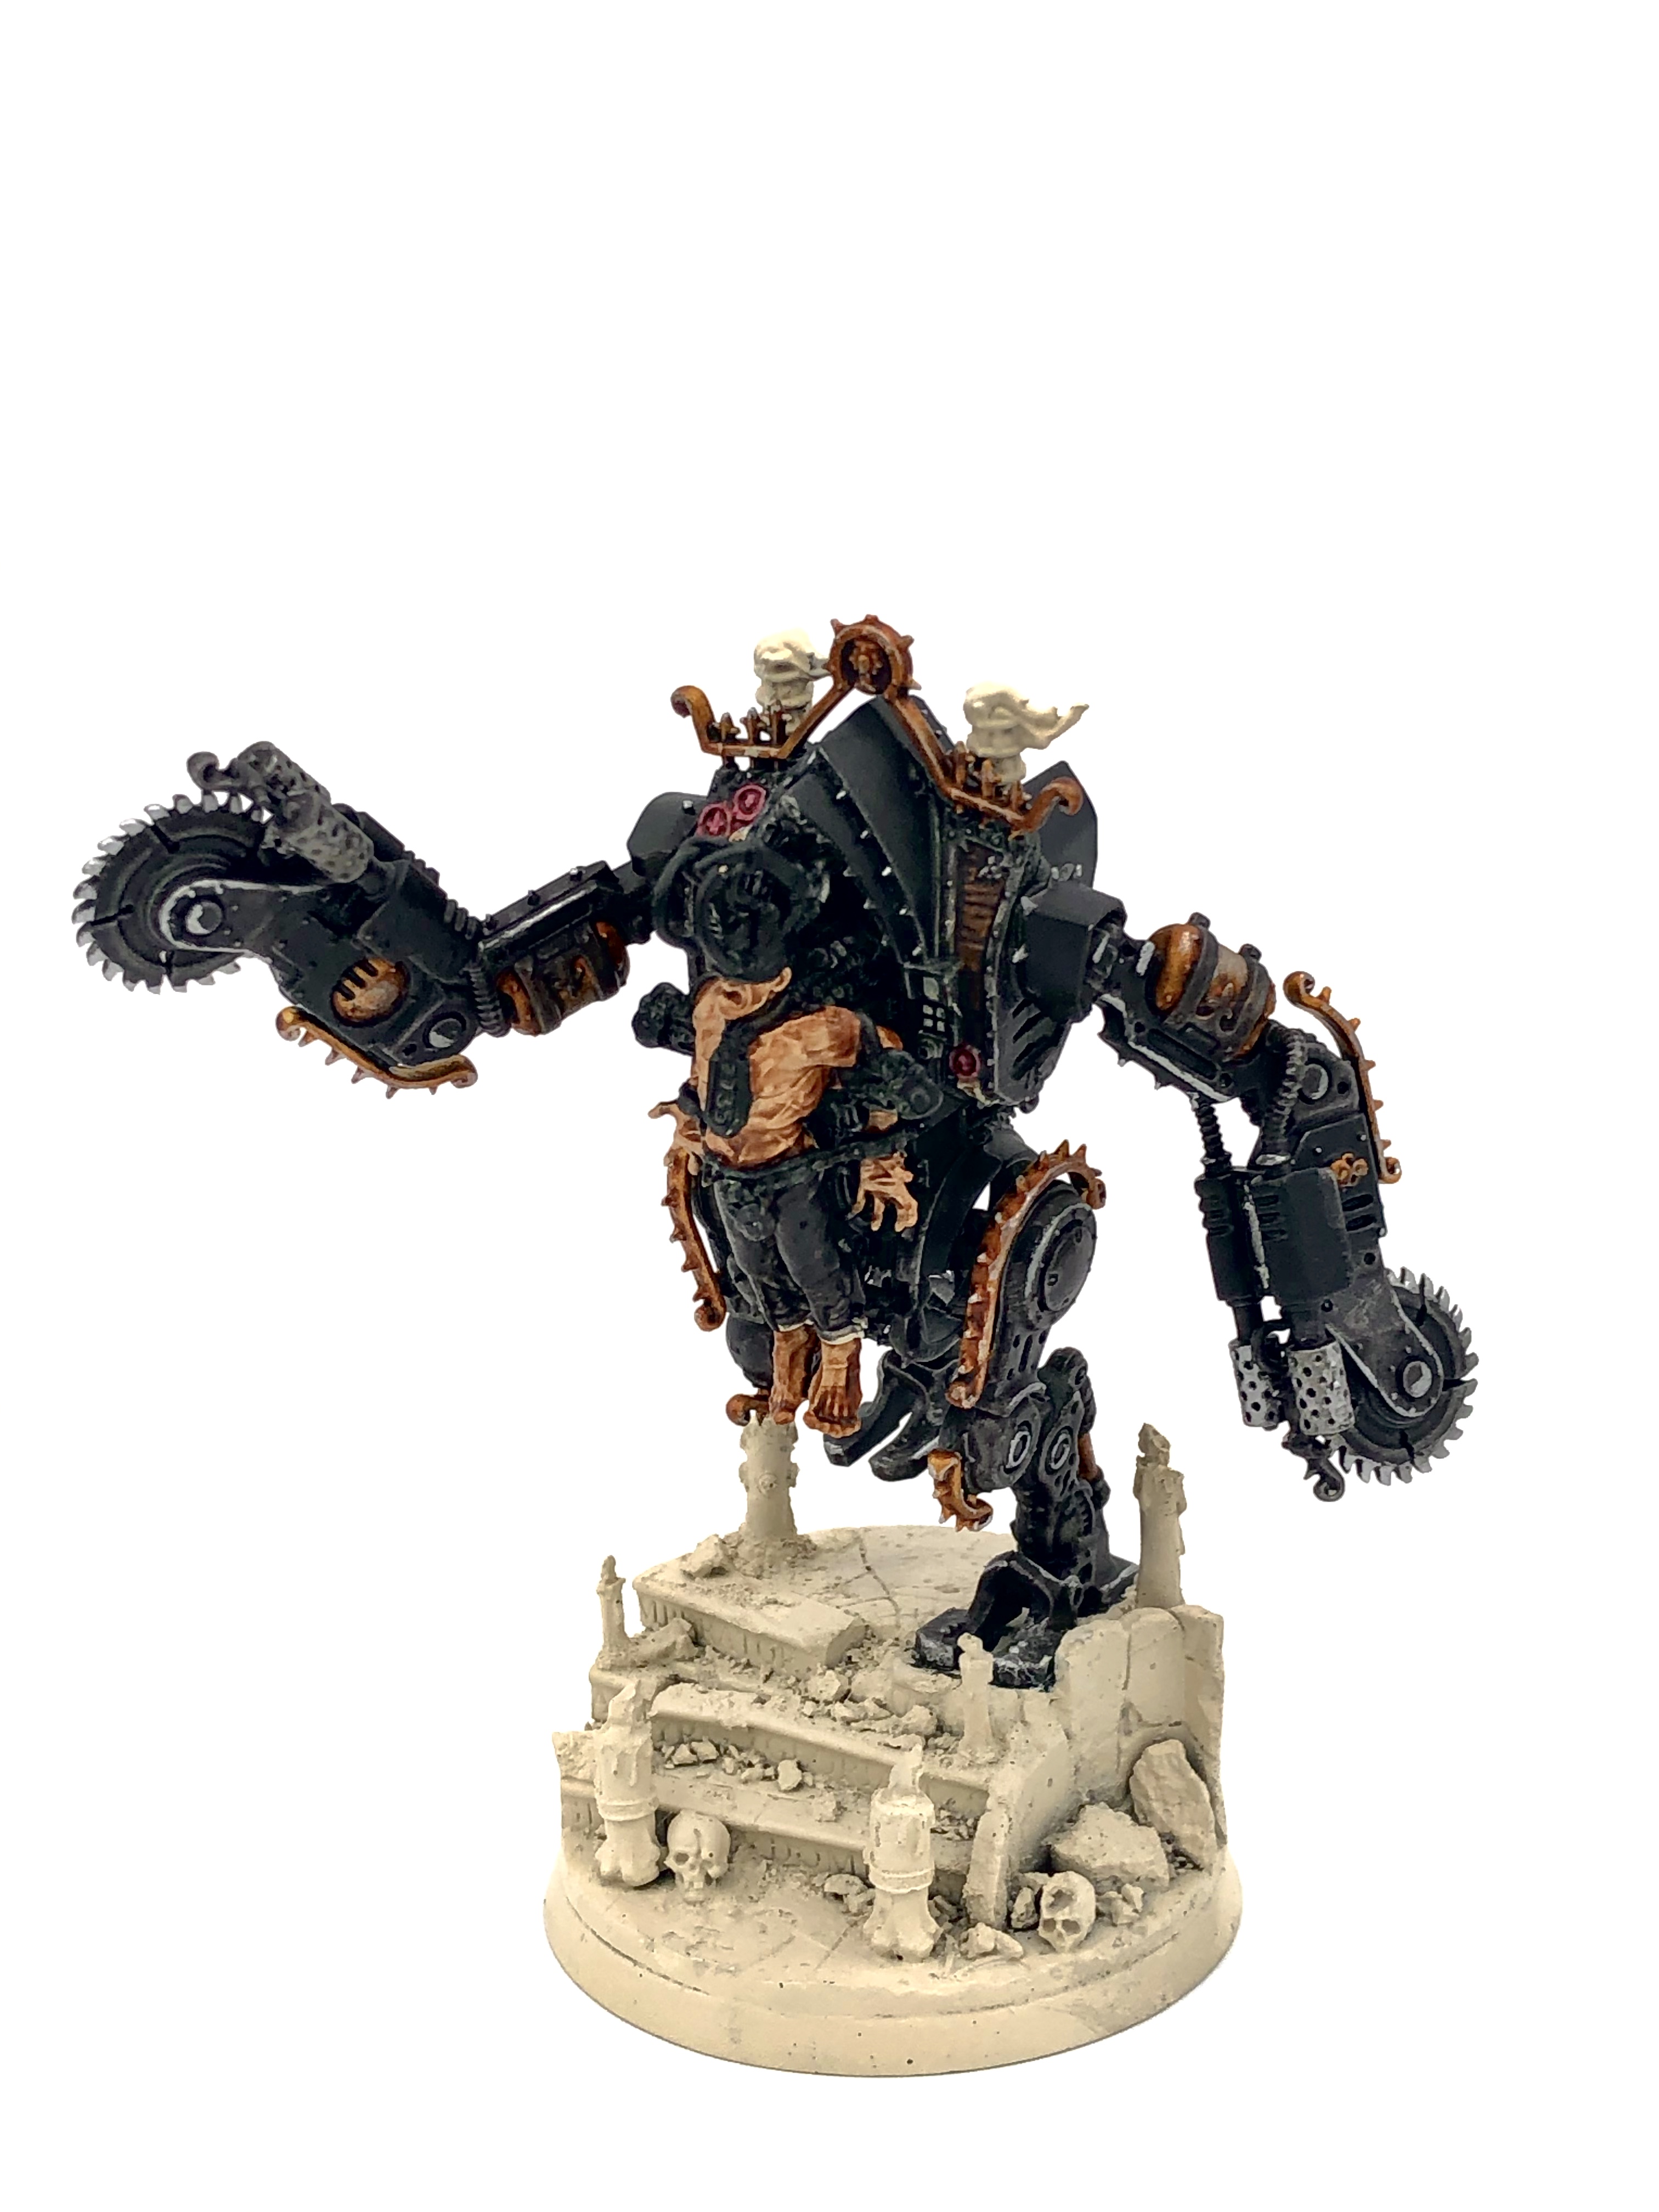
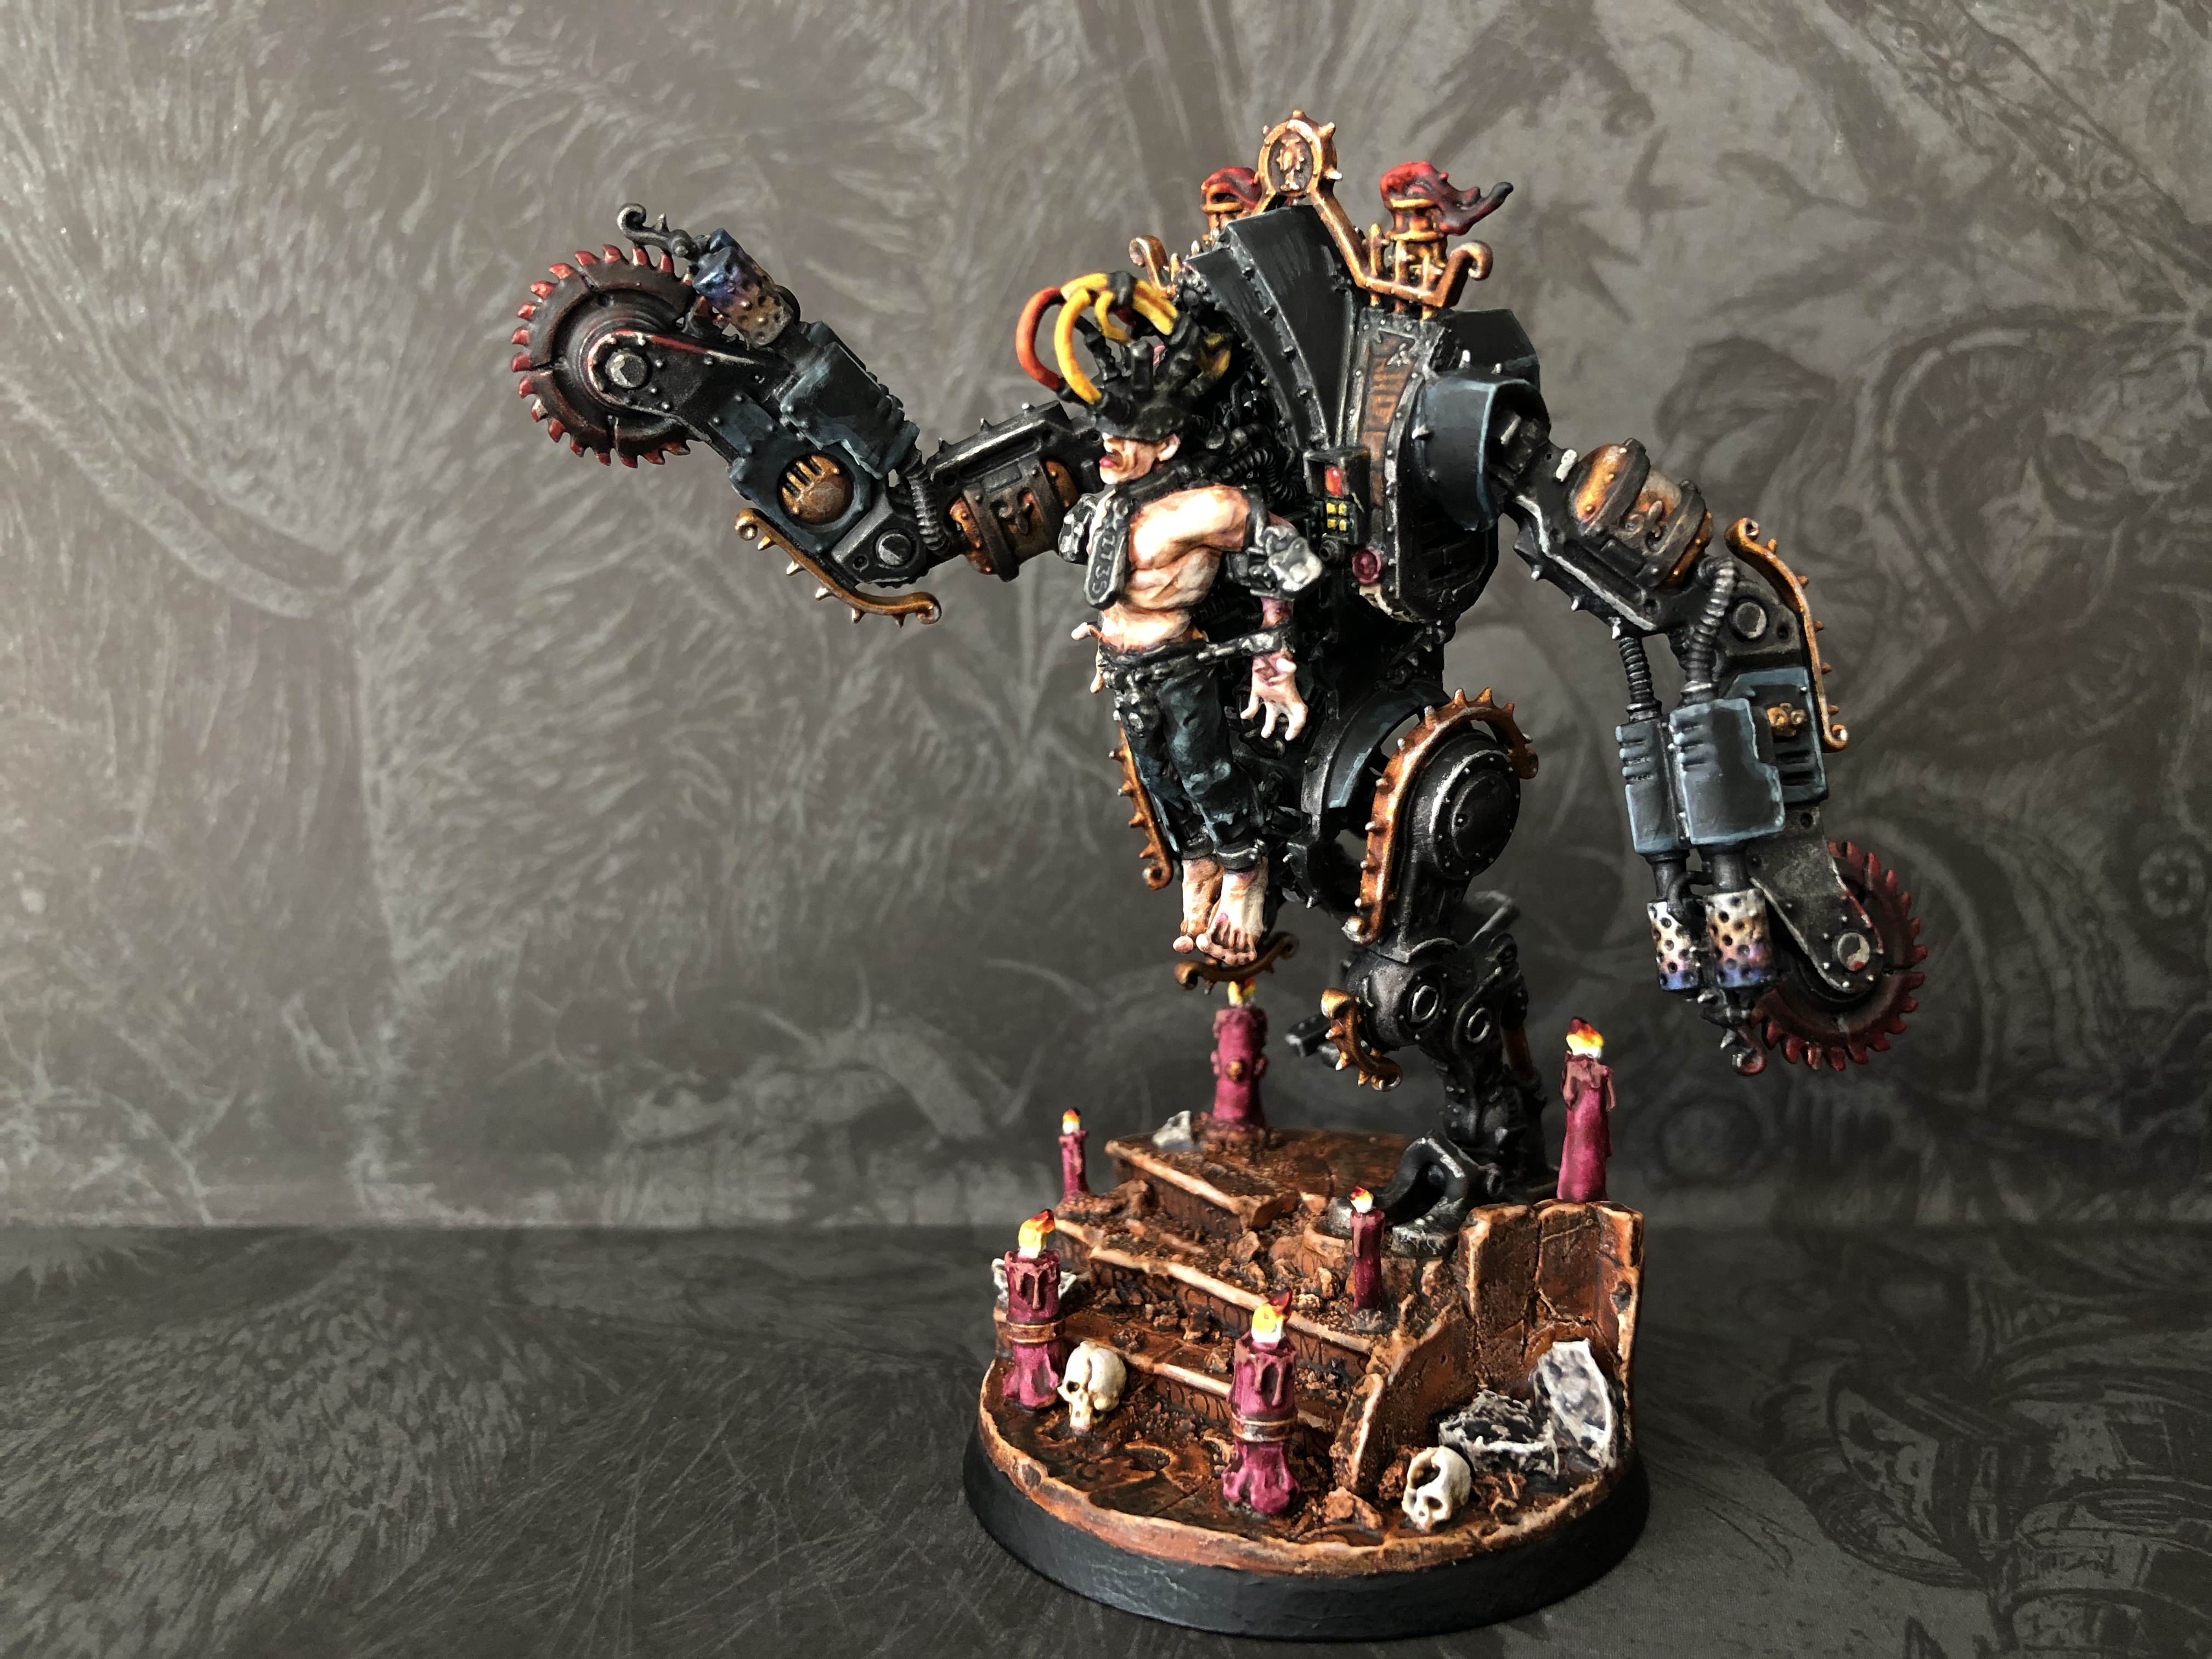
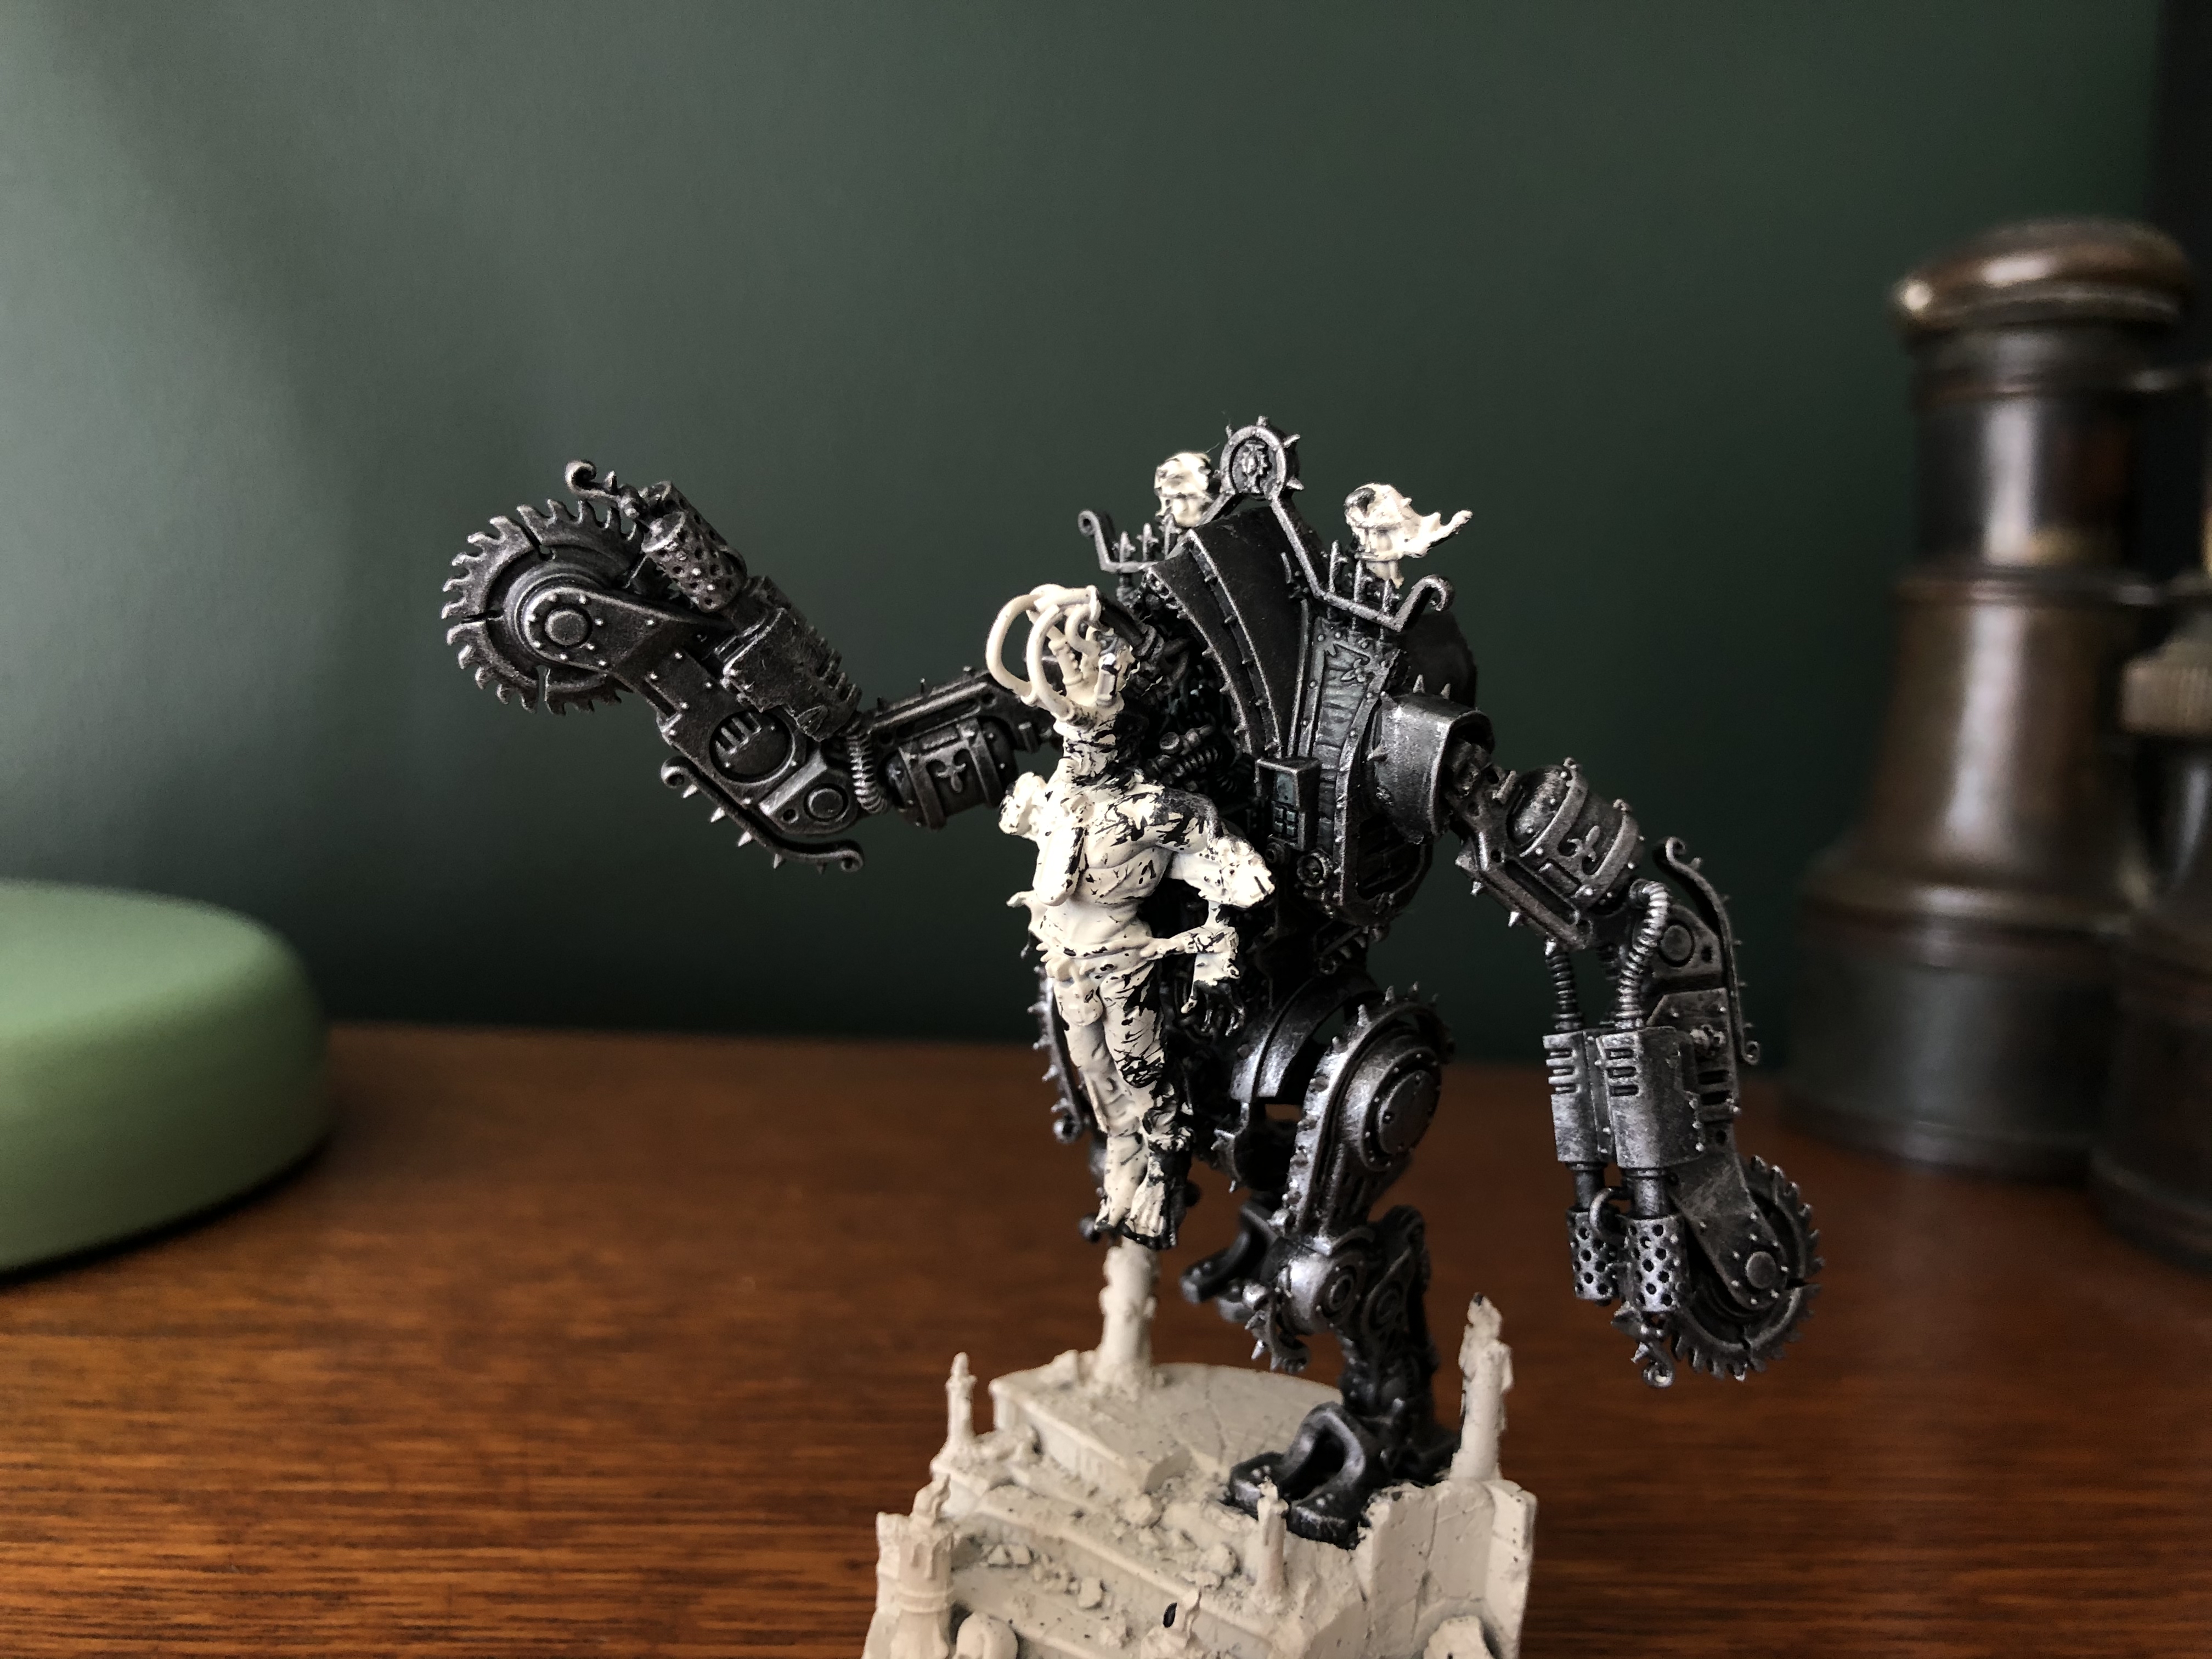
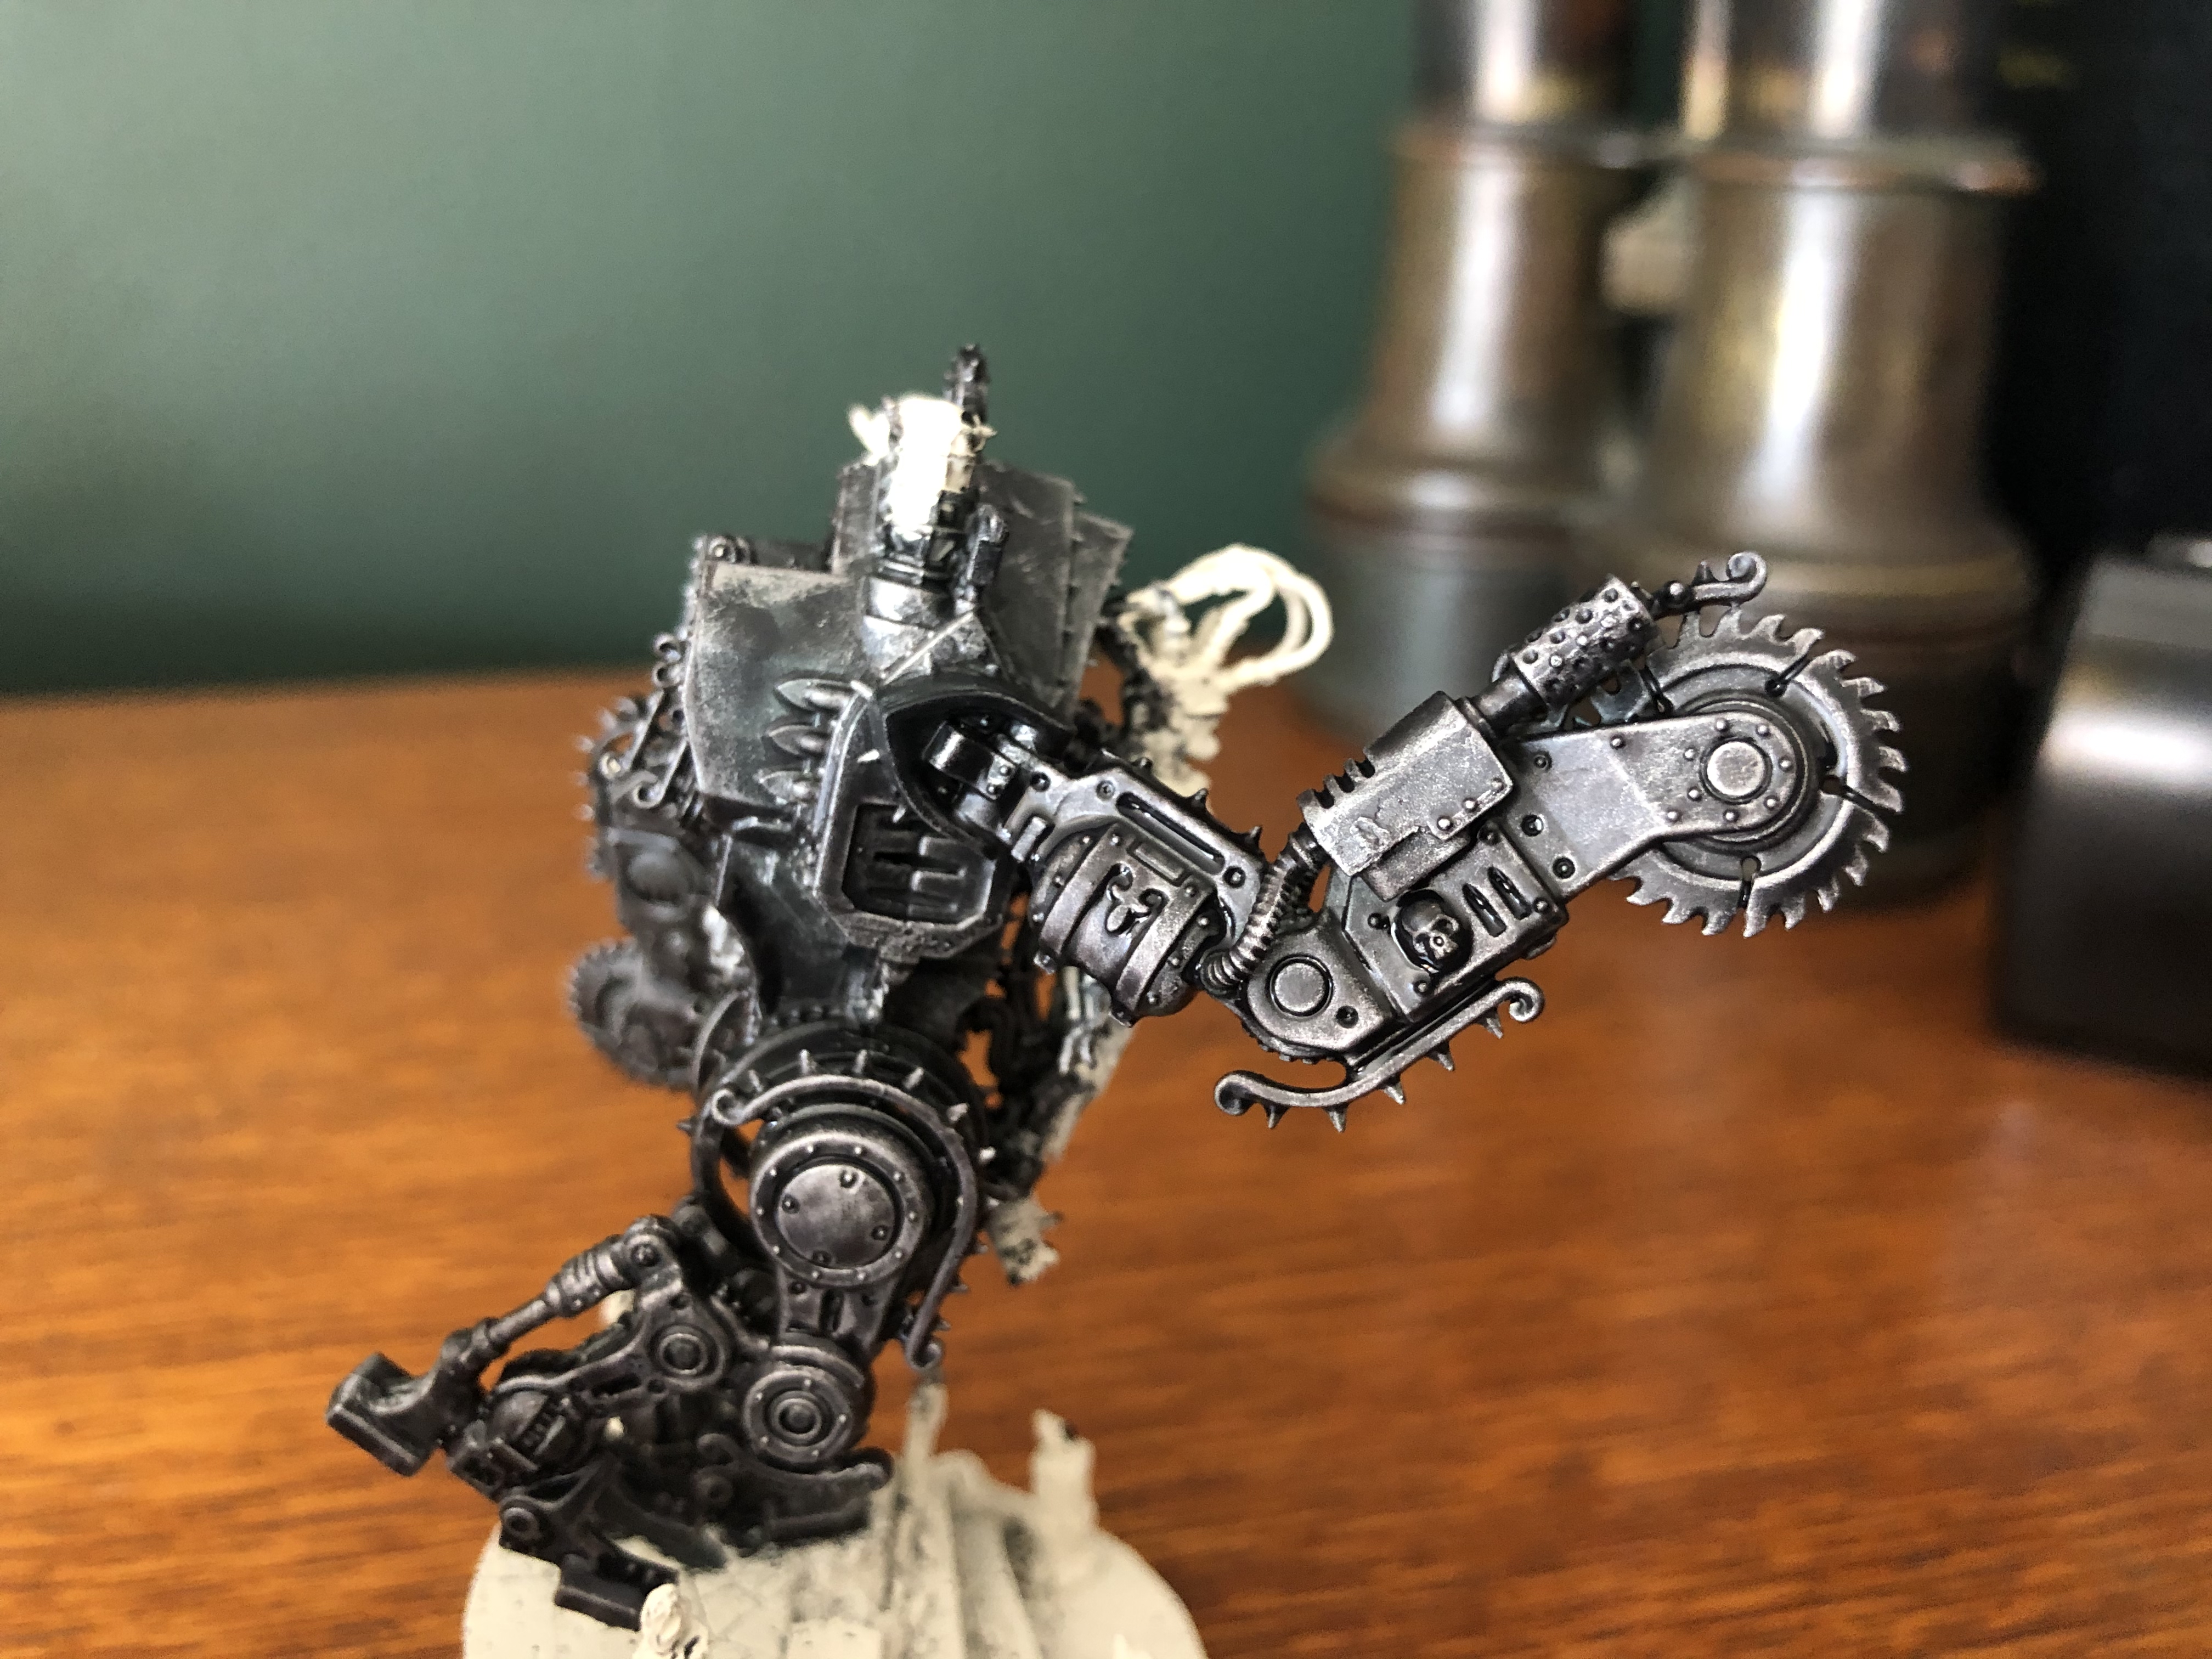
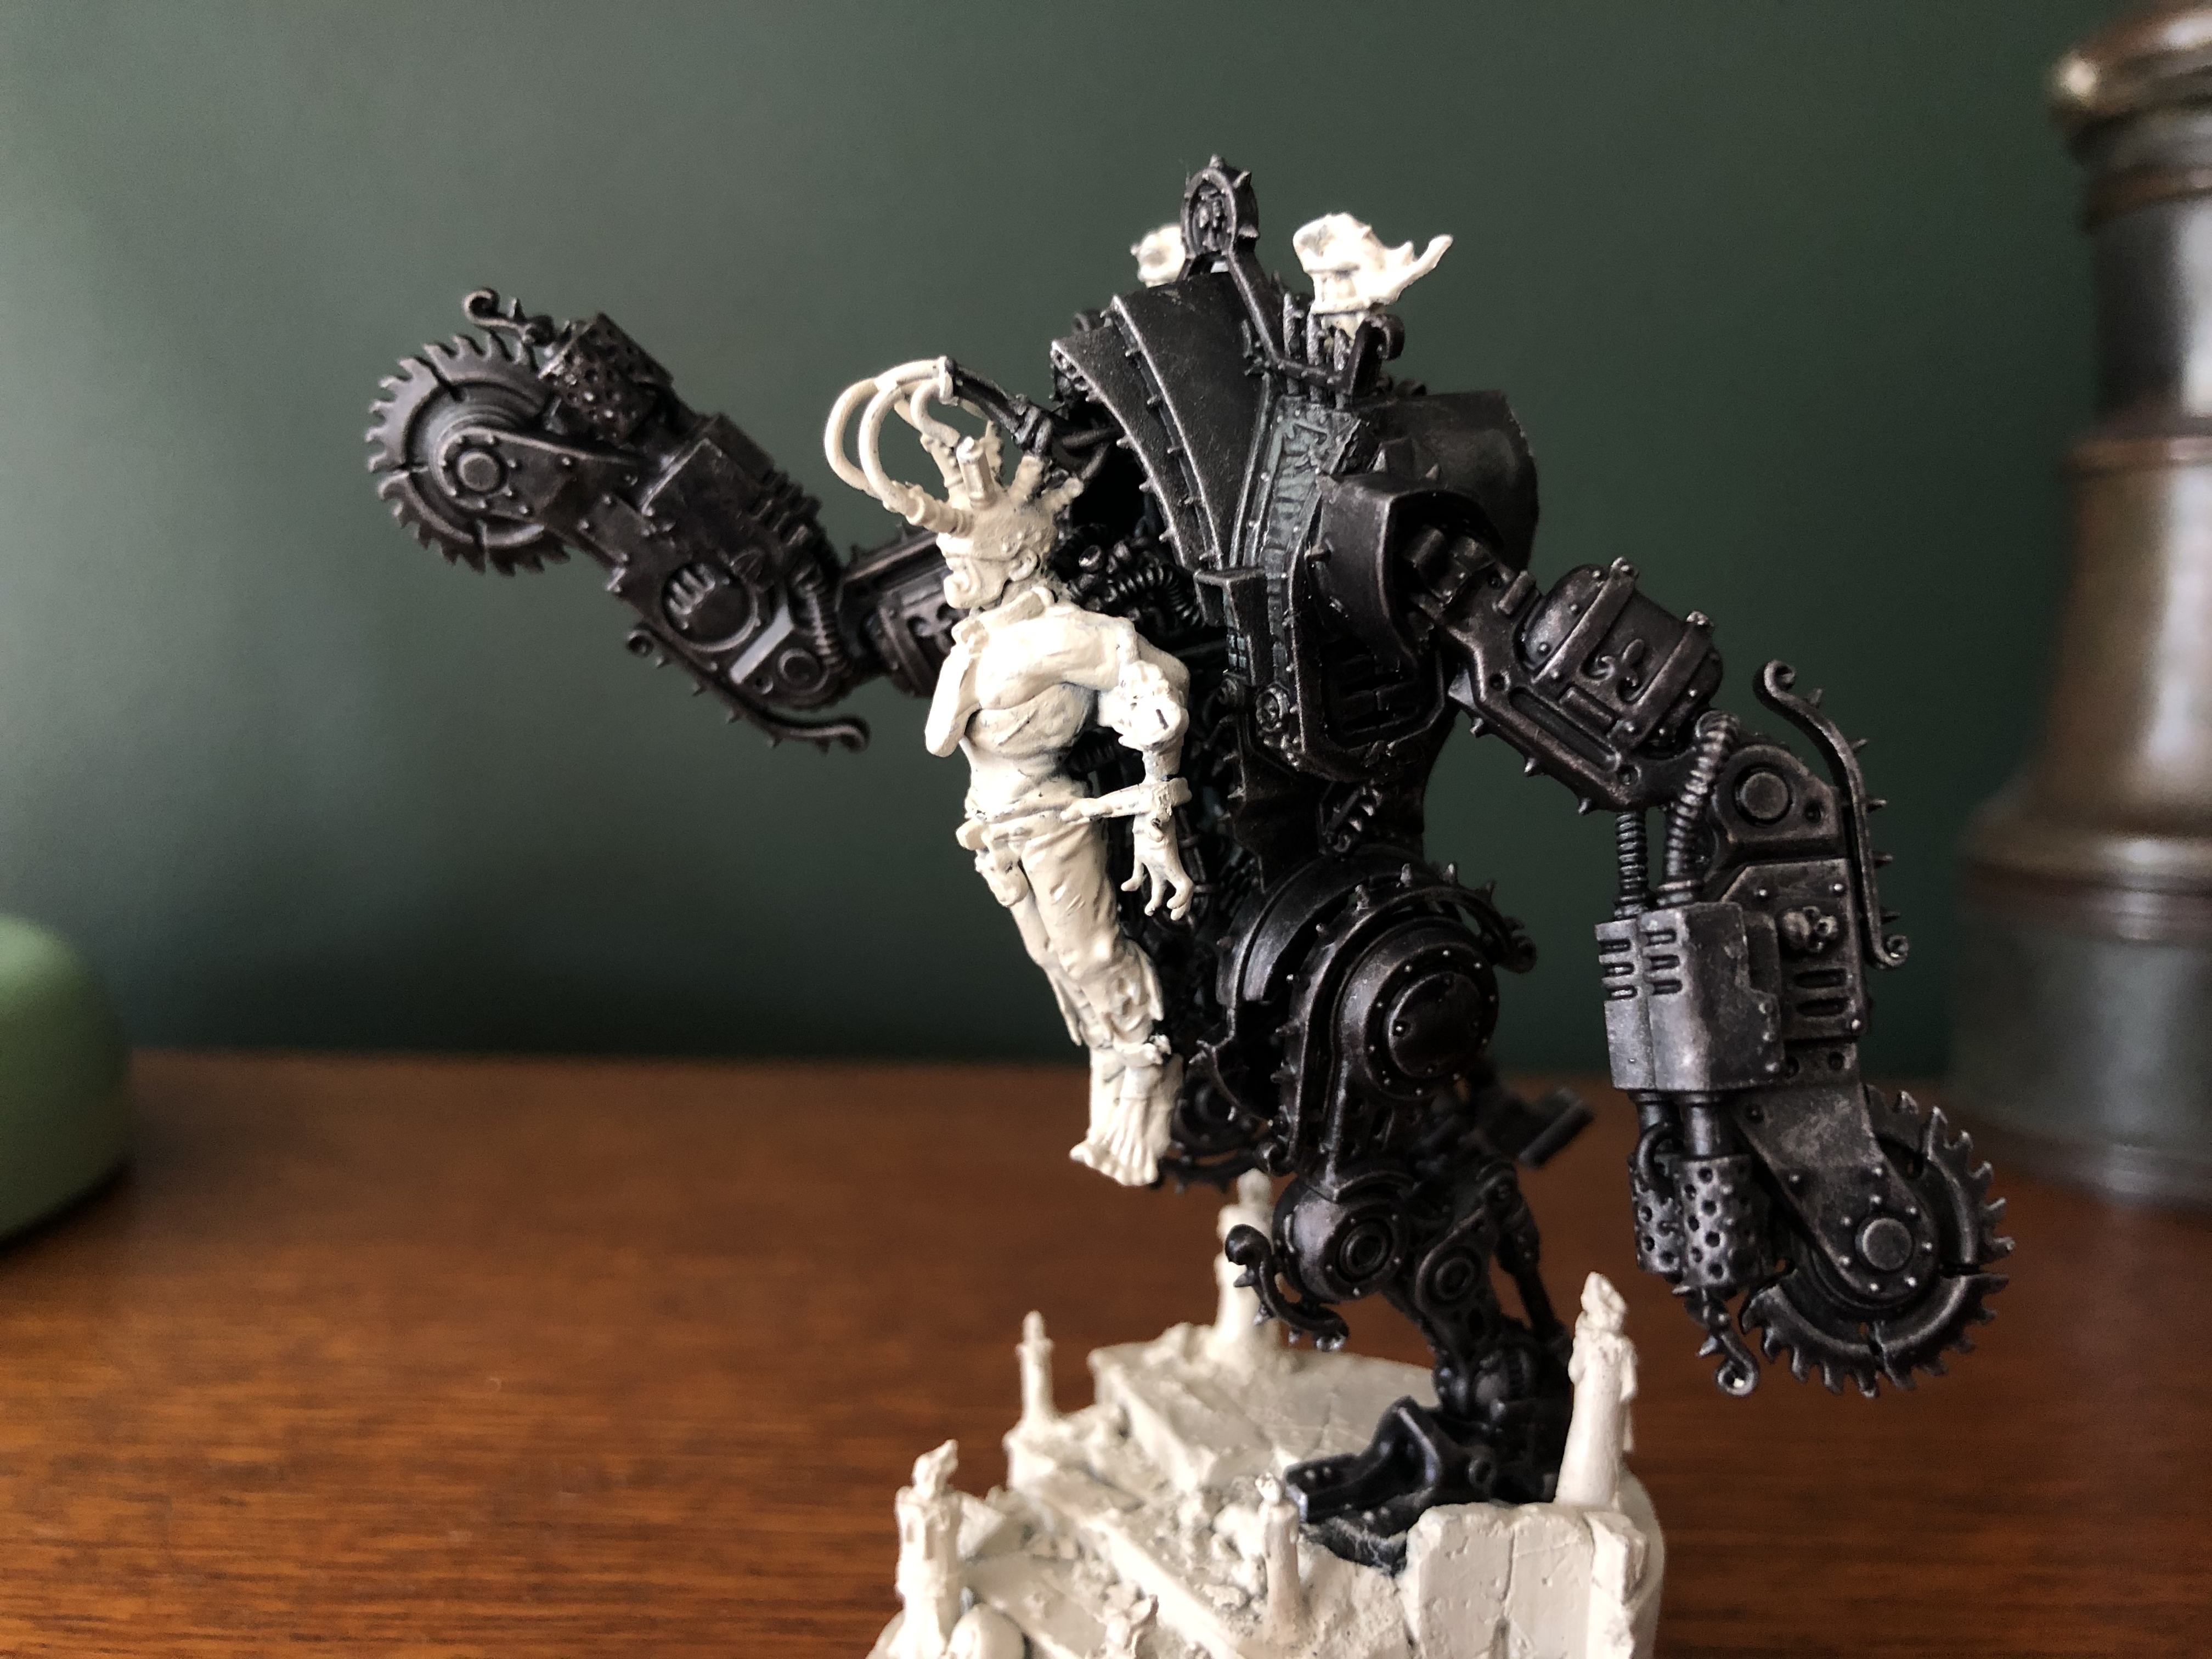
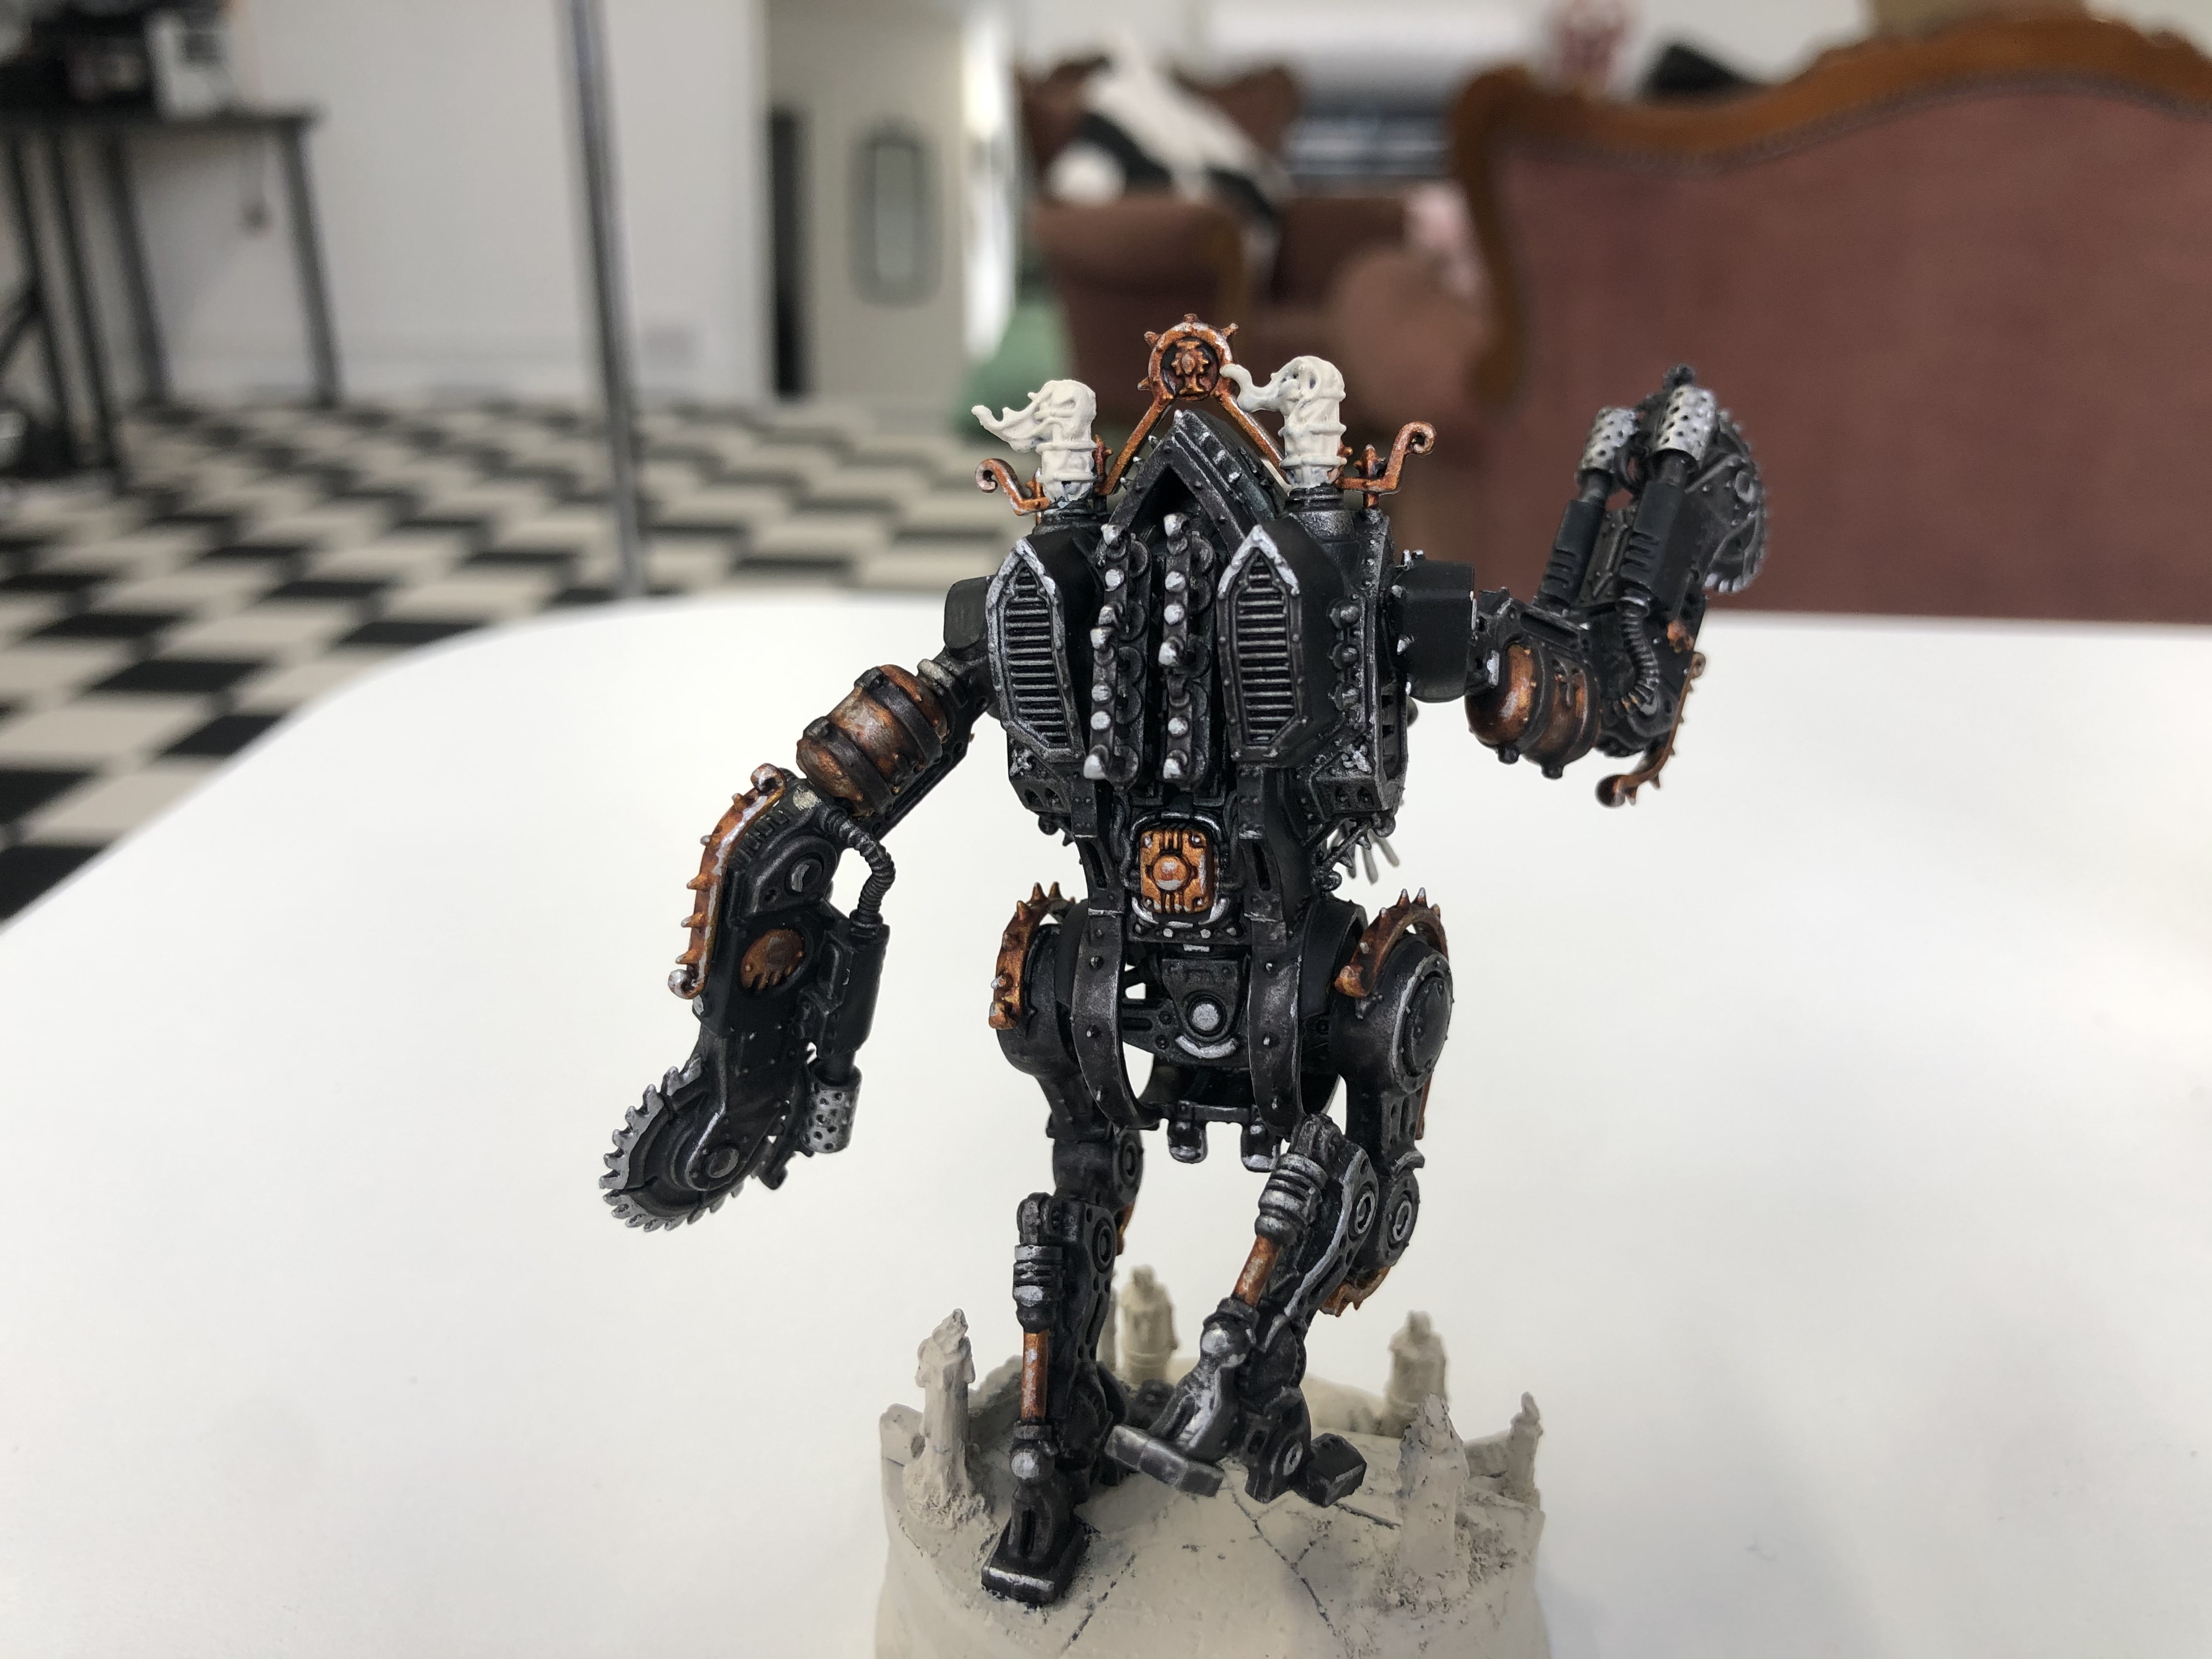
THE EMPEROR PROTECTS ~ PENITENT ENGINE COMPLETE
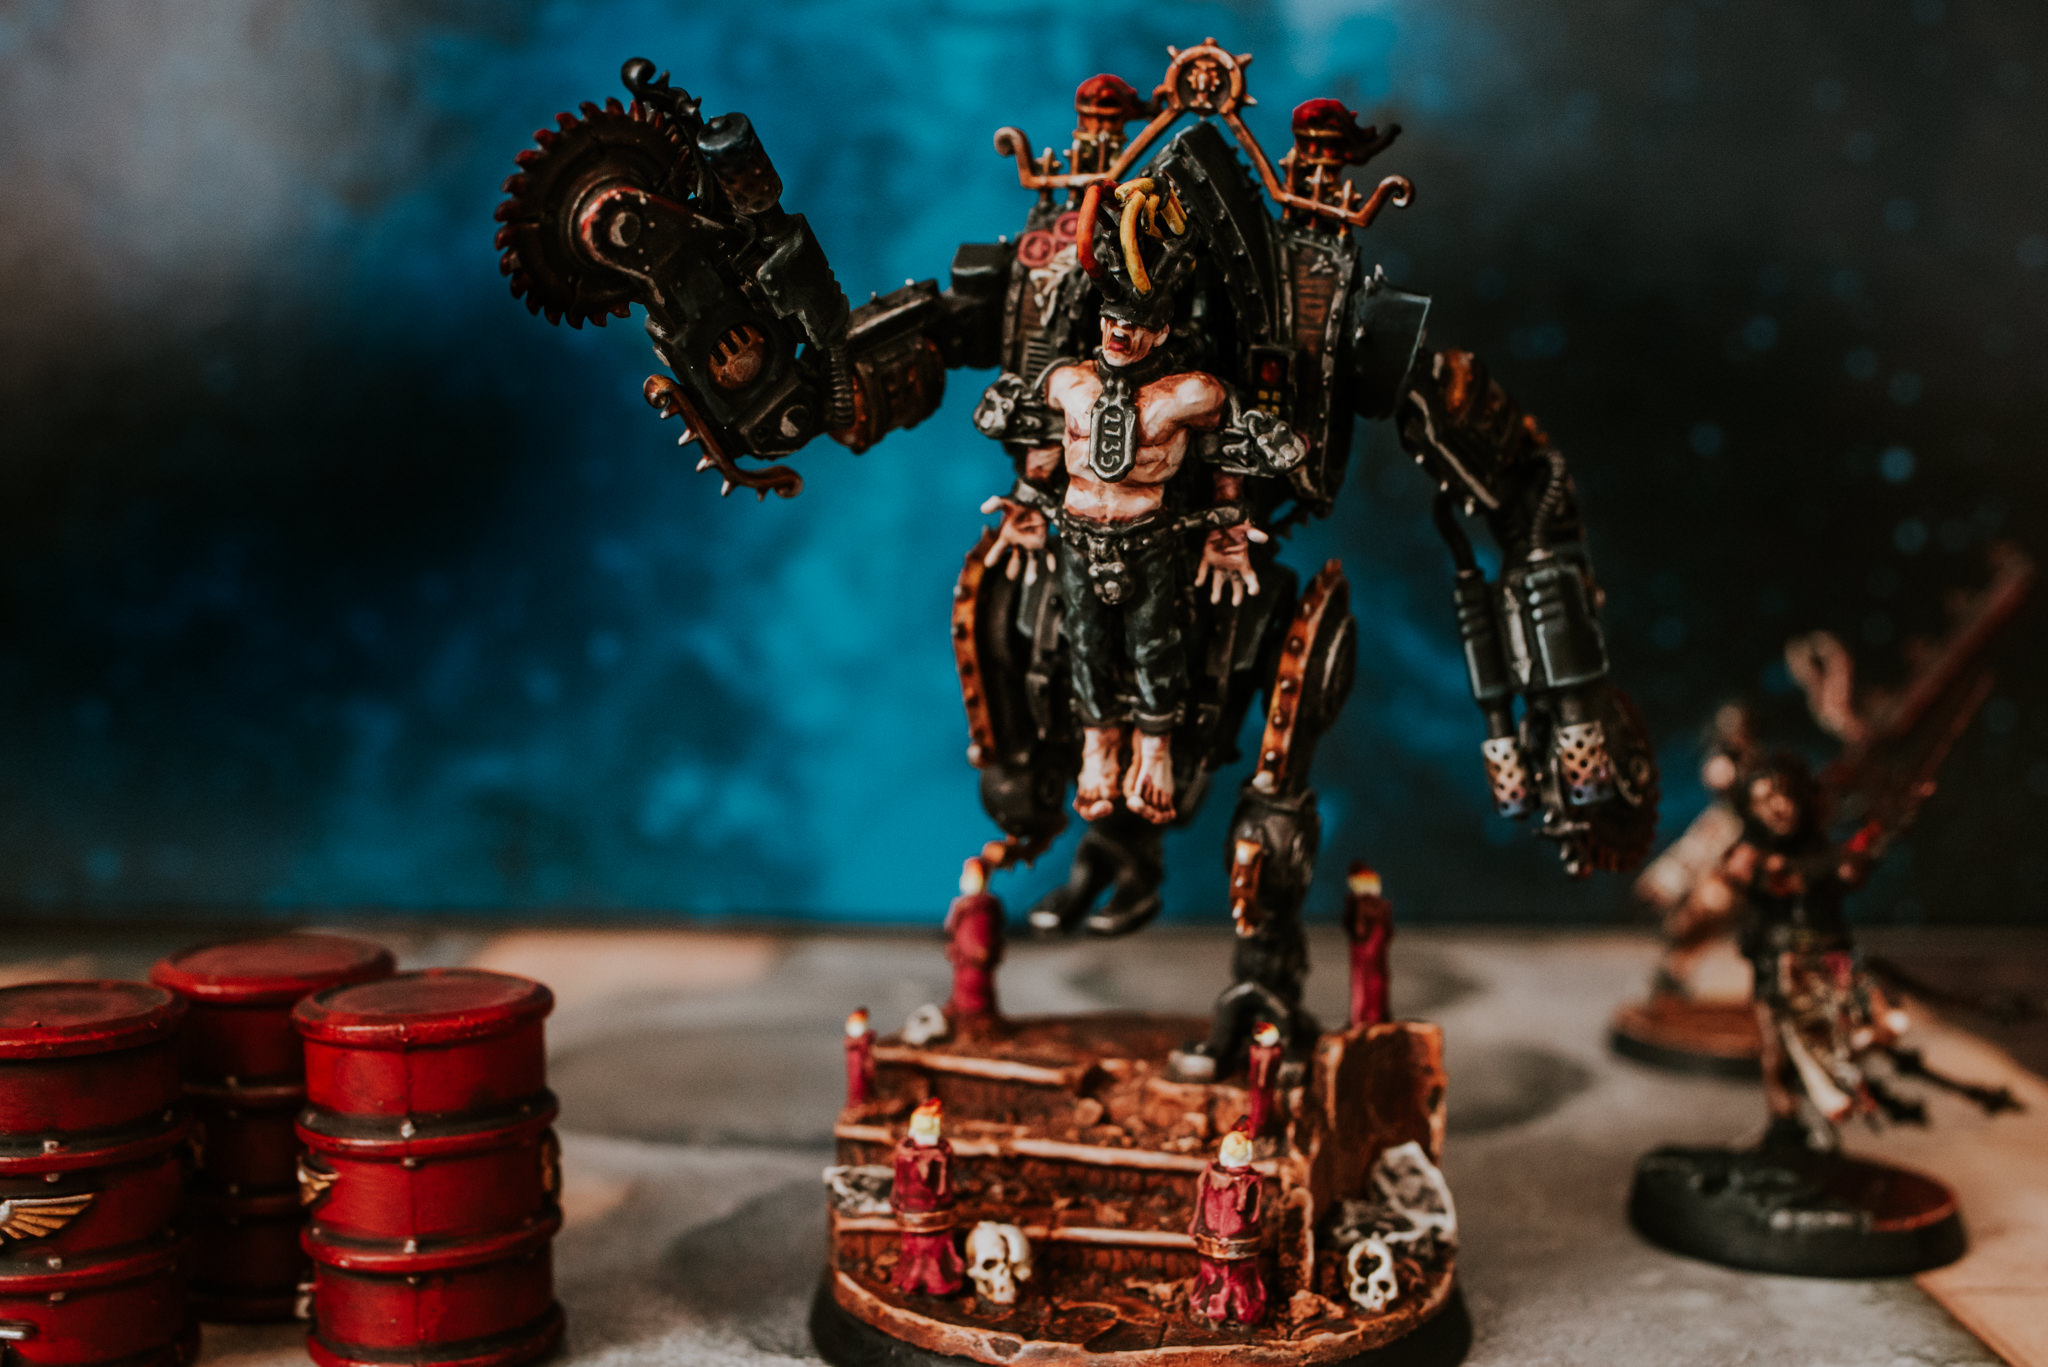


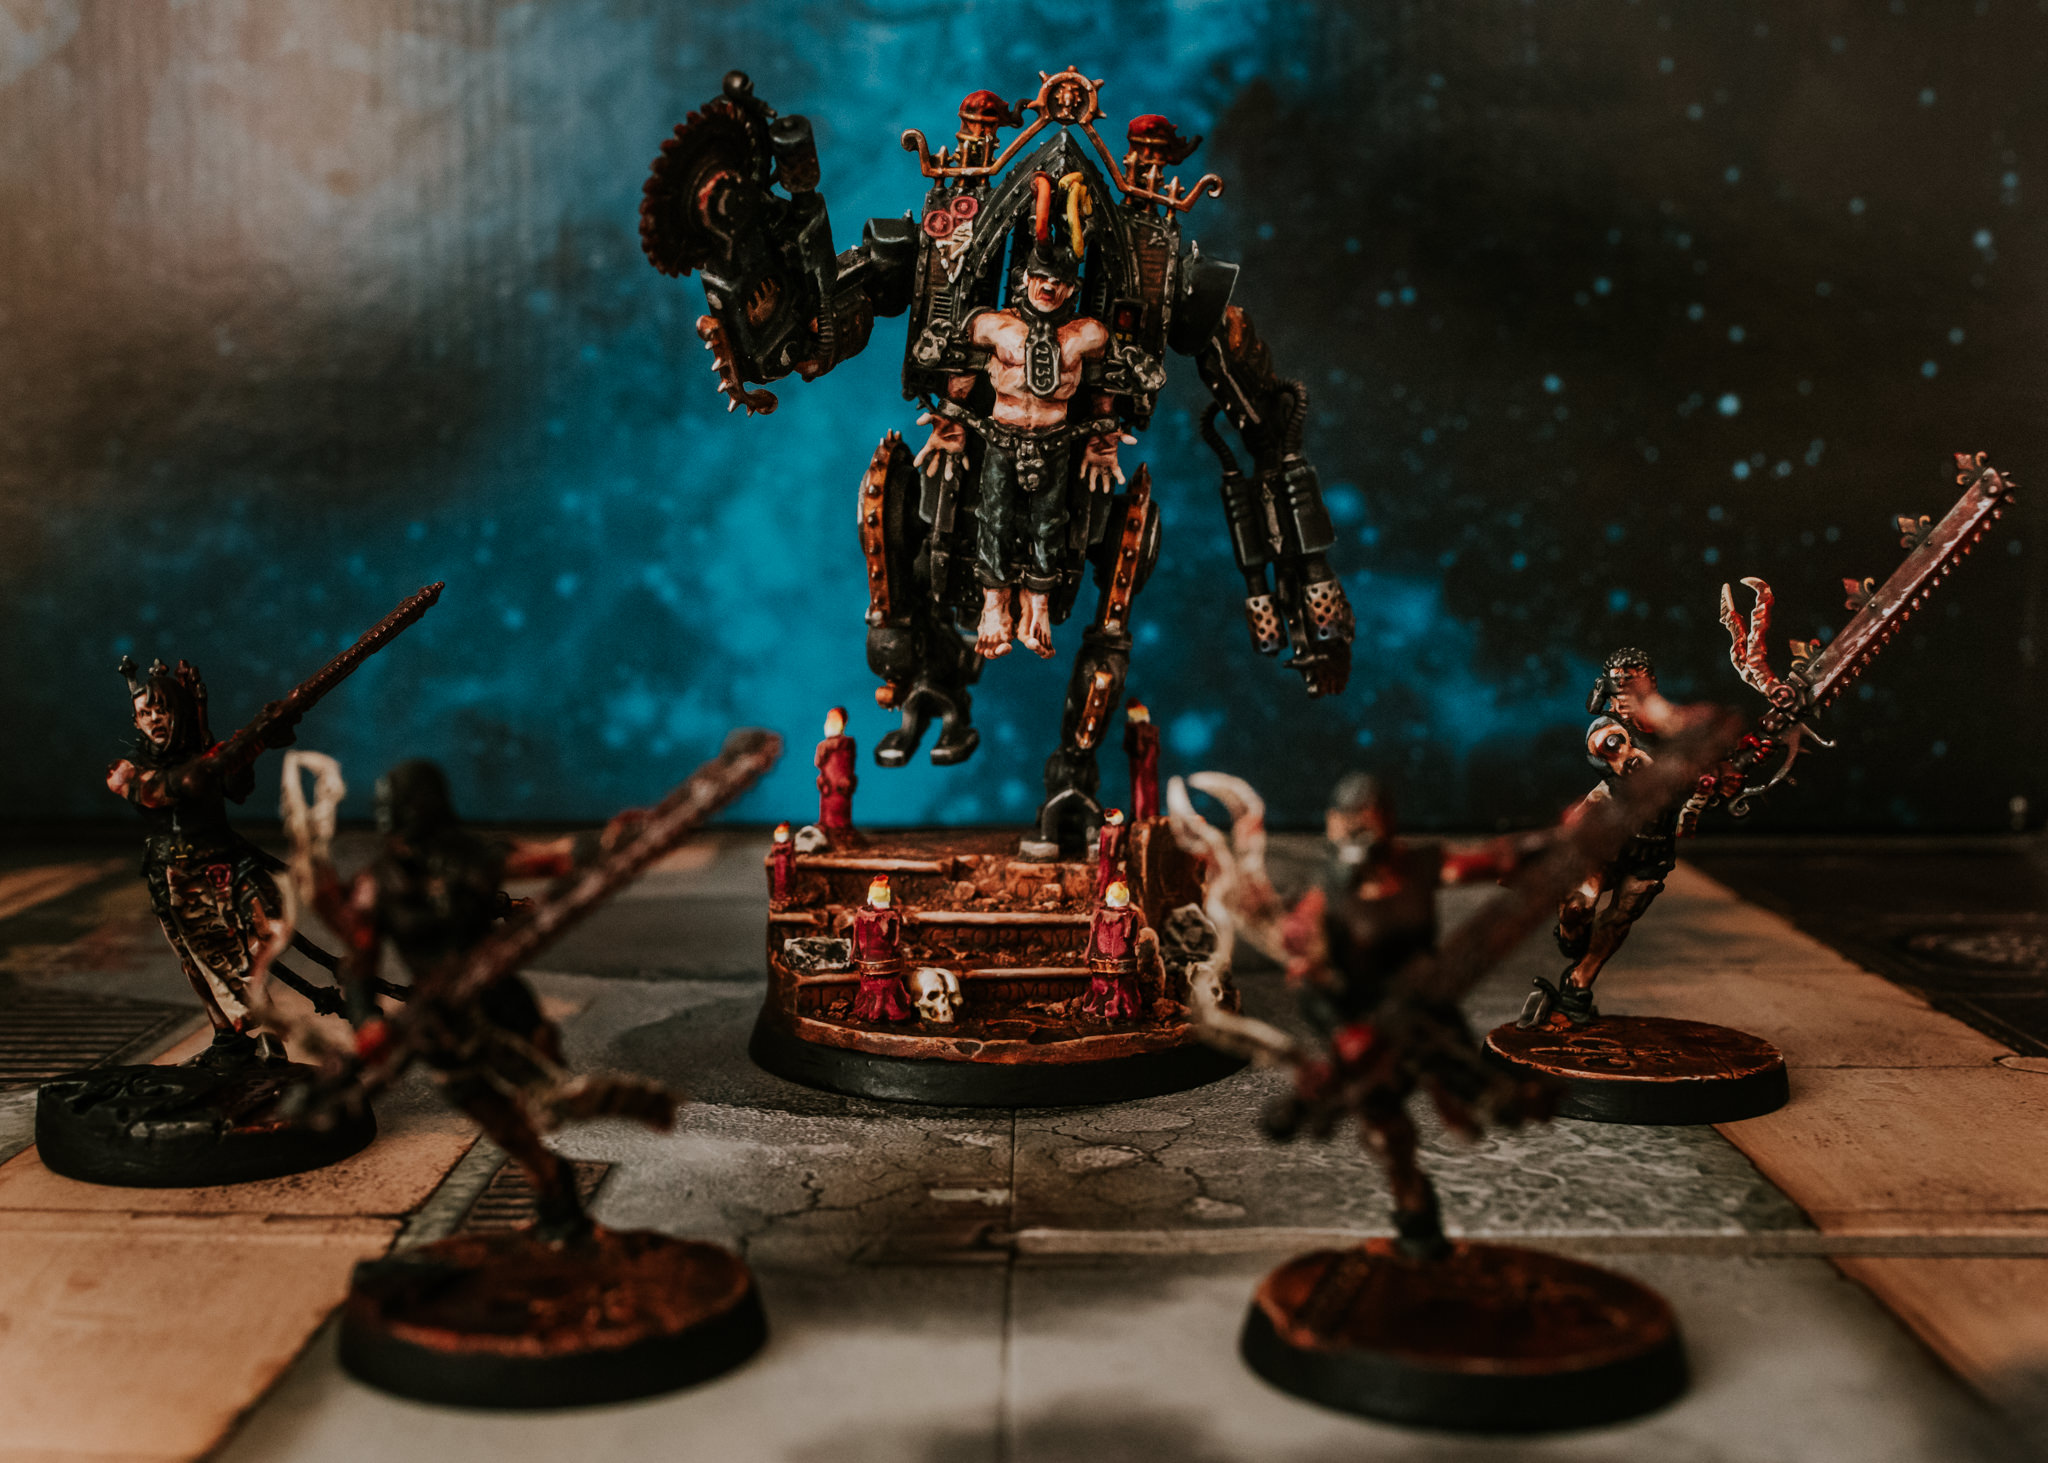
BIG BOY DONE
*****
Two updates in one day. Well why not. Don’t forget to check out part two of my guide to painting the Penitent Engine below as it took a while to write up haha. This model has been so fun to paint & I already want more. Initially I planned to make it more grim dark bloody like the Repentia but after getting to the painted stage I was too happy with it to bloody it up so went with minimal blood.
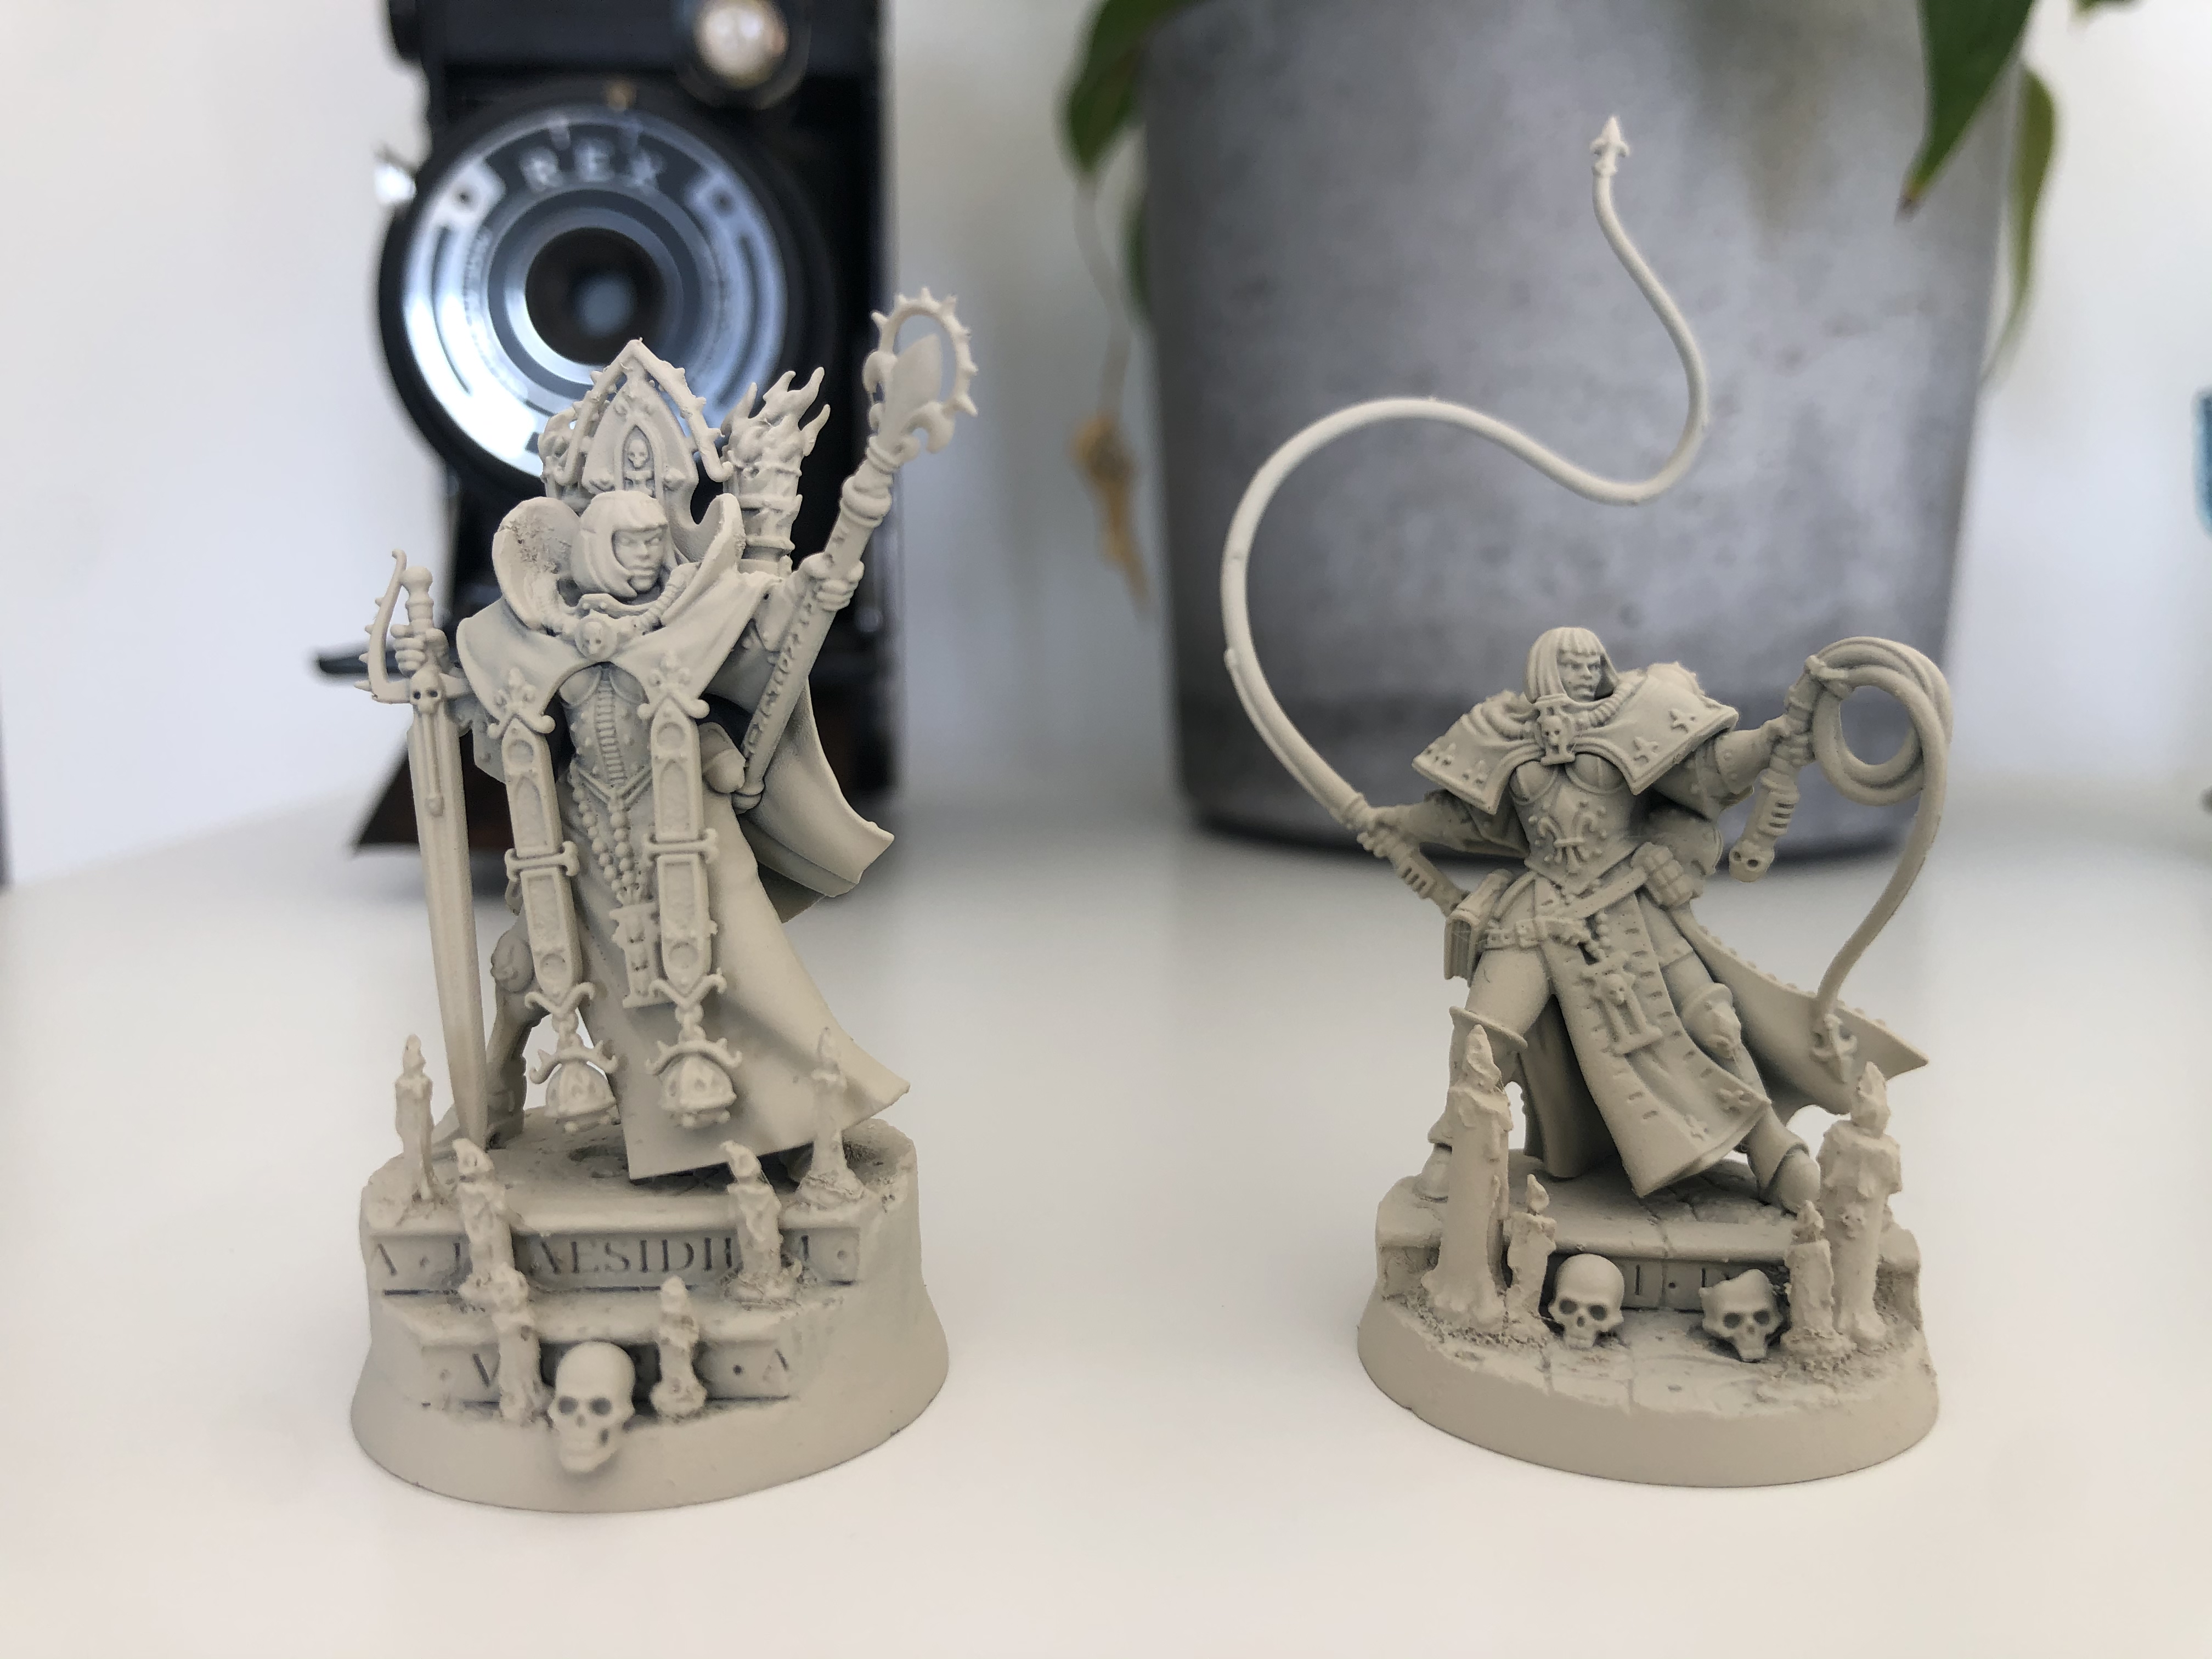
So… What’s next Eternity Gate? Well I’m gonna be tackling my Canoness & Repentia Superior. To take a break from writing guides I’m just going to paint these two ladies & share the final results. After all they will be painted exactly like all of my other Sisters of Battle & you can find those guides below. I love sharing the step by steps with you guys but it’s pretty time consuming so I’m just gonna relax, crack on some On Table Top & paint for pleasure.
One thing to note, I have decided not to paint the Arco-Flagellants I have from the box. The main reason is there’s only three & I will never field them. Looking at their rules I’m not sure why I would take them over Repentia but I might get a few more off eBay at some point & paint a full unit. Just hardly seems worth it painting three. haha. Anyway that’s it for a little while until the grand unveil of my HQ units. Whoop!
Much Love
Eternity Gate
HOLY FLAMING SAWING GOODNESS ~ A PENITENT ENGINE PAINTING GUIDE ~ PART 2
LET’S FINISH THIS BADASSERY
*****
I hit the wood elements & purity seals with a layer of Wraithbone. On the wood I then used two coats of Contrast Snakebite Leather before finishing it off with a Nuln Oil wash. For the parchment I used Agrax Earthshade & on the wax seals Contrast Volupus Pink. I then finished the purity seals with a 005 Black Micron Pen for the text & a final edge highlight of Wraithbone.
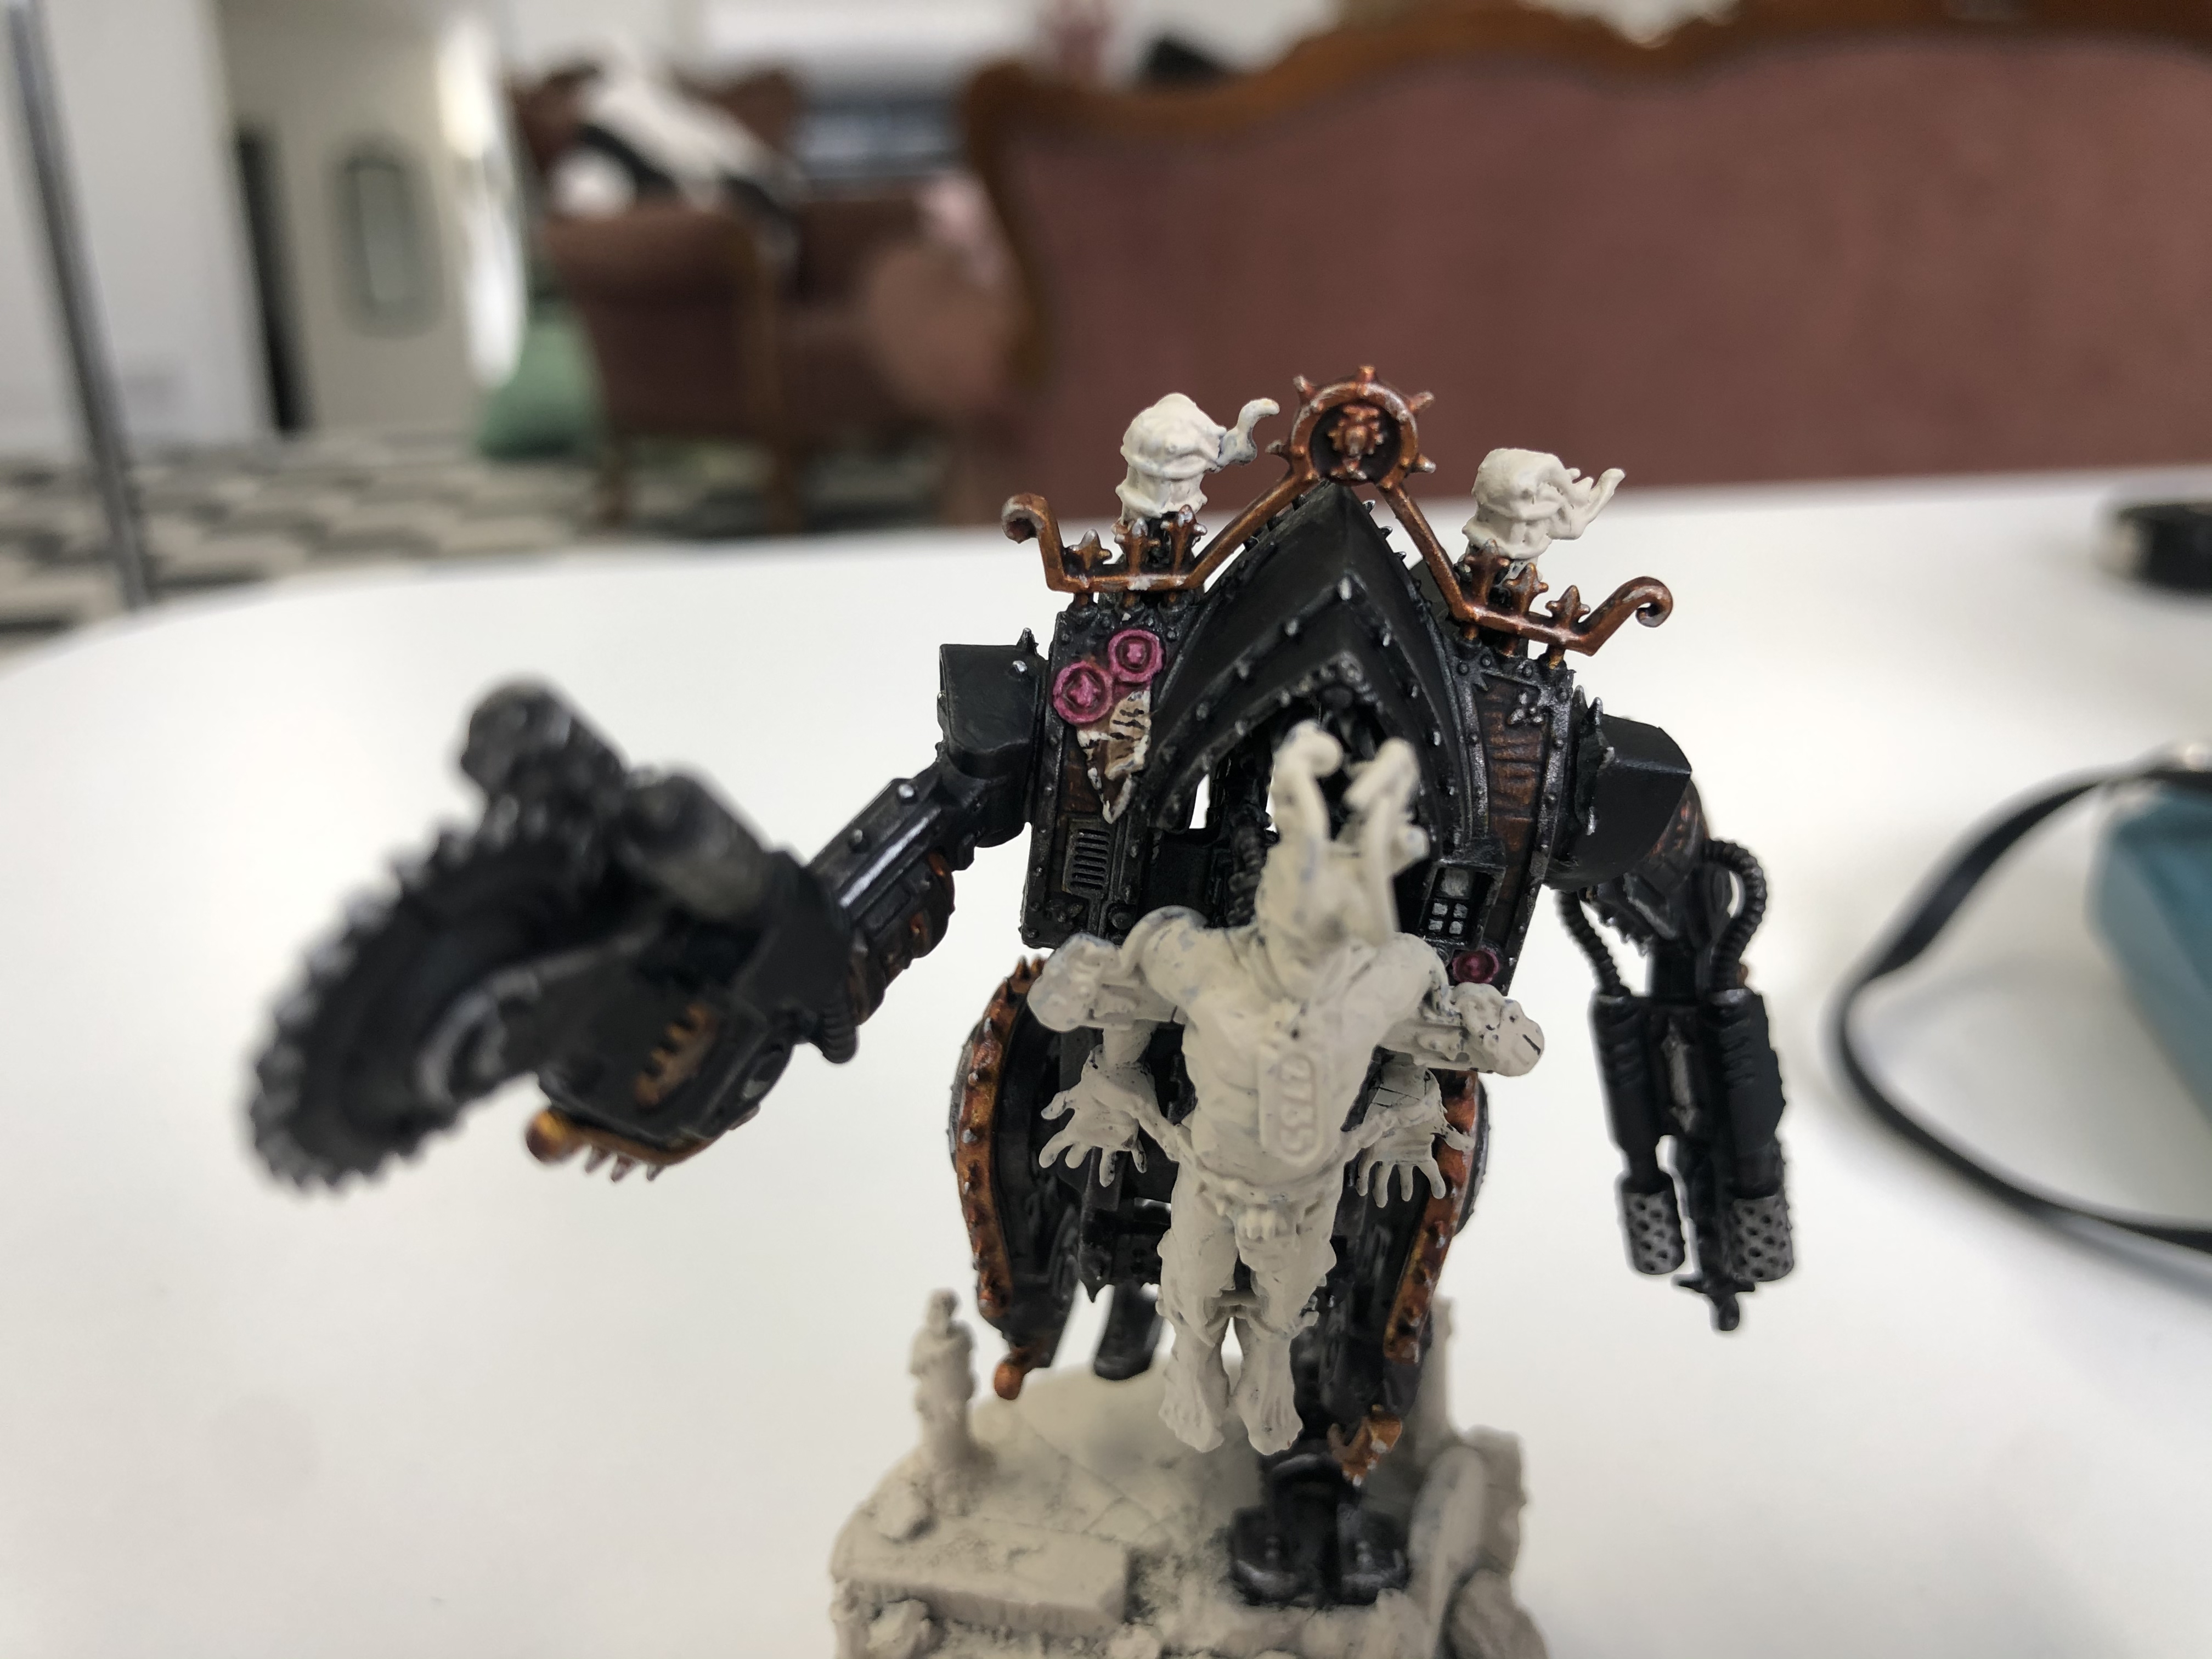
For the skin of the unfortunate soul attached to the Penitent Engine I used Contrast Guilliman Flesh. For his trousers I applied two coats of Basilicanum Grey. I then used Contrast Black Templar on all the chains, Locks, attachments & crazy helmet.

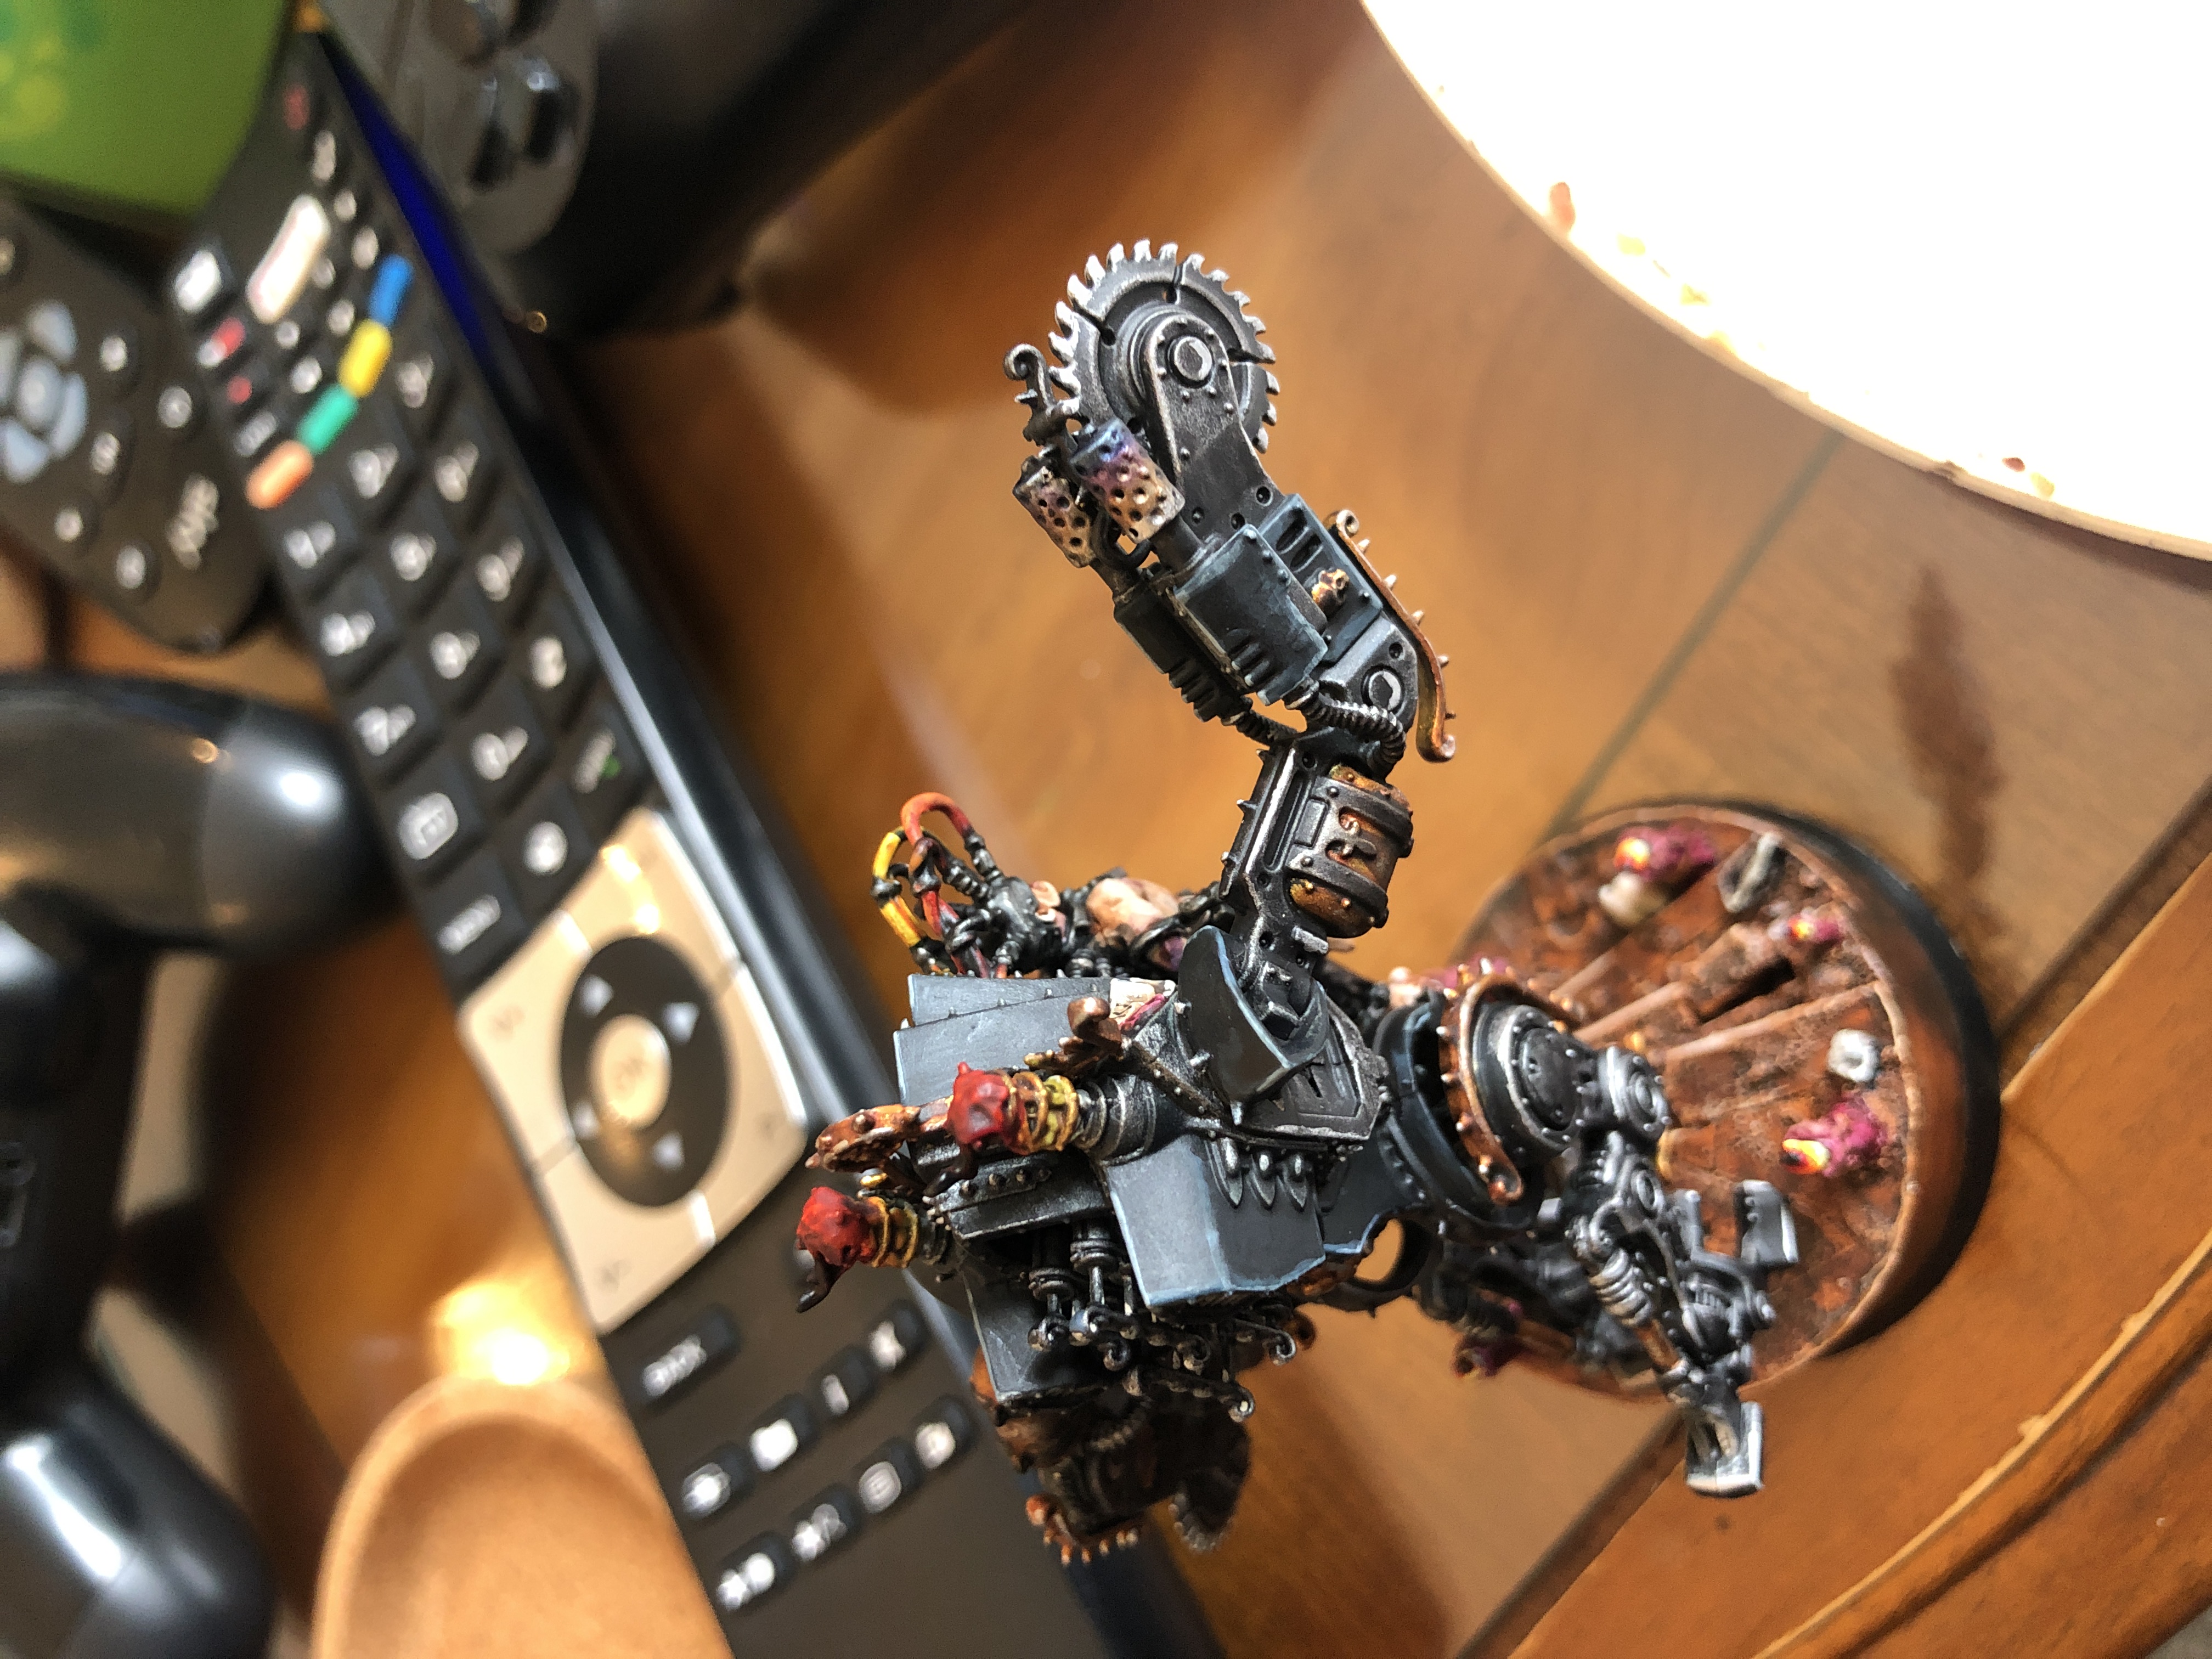
BLACKS
*****
To highlight the black panels from earlier I used my standard black highlighting method. Firstly using Dark Reaper on the edges in thick lines. Afterwards I used Thunderhawk Blue to apply a thinner highlight. Finally I mixed a 1:1 Thunderhawk Blue to White Scar mix and picked out the very edges of the panels. When all the black highlights had dried I made a glaze of 10:1 Contrast Medium & Black Templar & went over all the highlights from the previous steps.

THE BASE
*****
For the base I used Contrast Gore-Grunta fur followed by a Kindleflame drybrush & a Wraithbone edge highlight. I then used a glaze of 10:1 Contrast Medium & Gore-Grunta Fur over all this previous highlights to blend them together. For the rocks I applied Contrast Basilicanum grey & Contrast Skeleton Horde on the skulls. I finished them off with a highlight of Wraithbone.
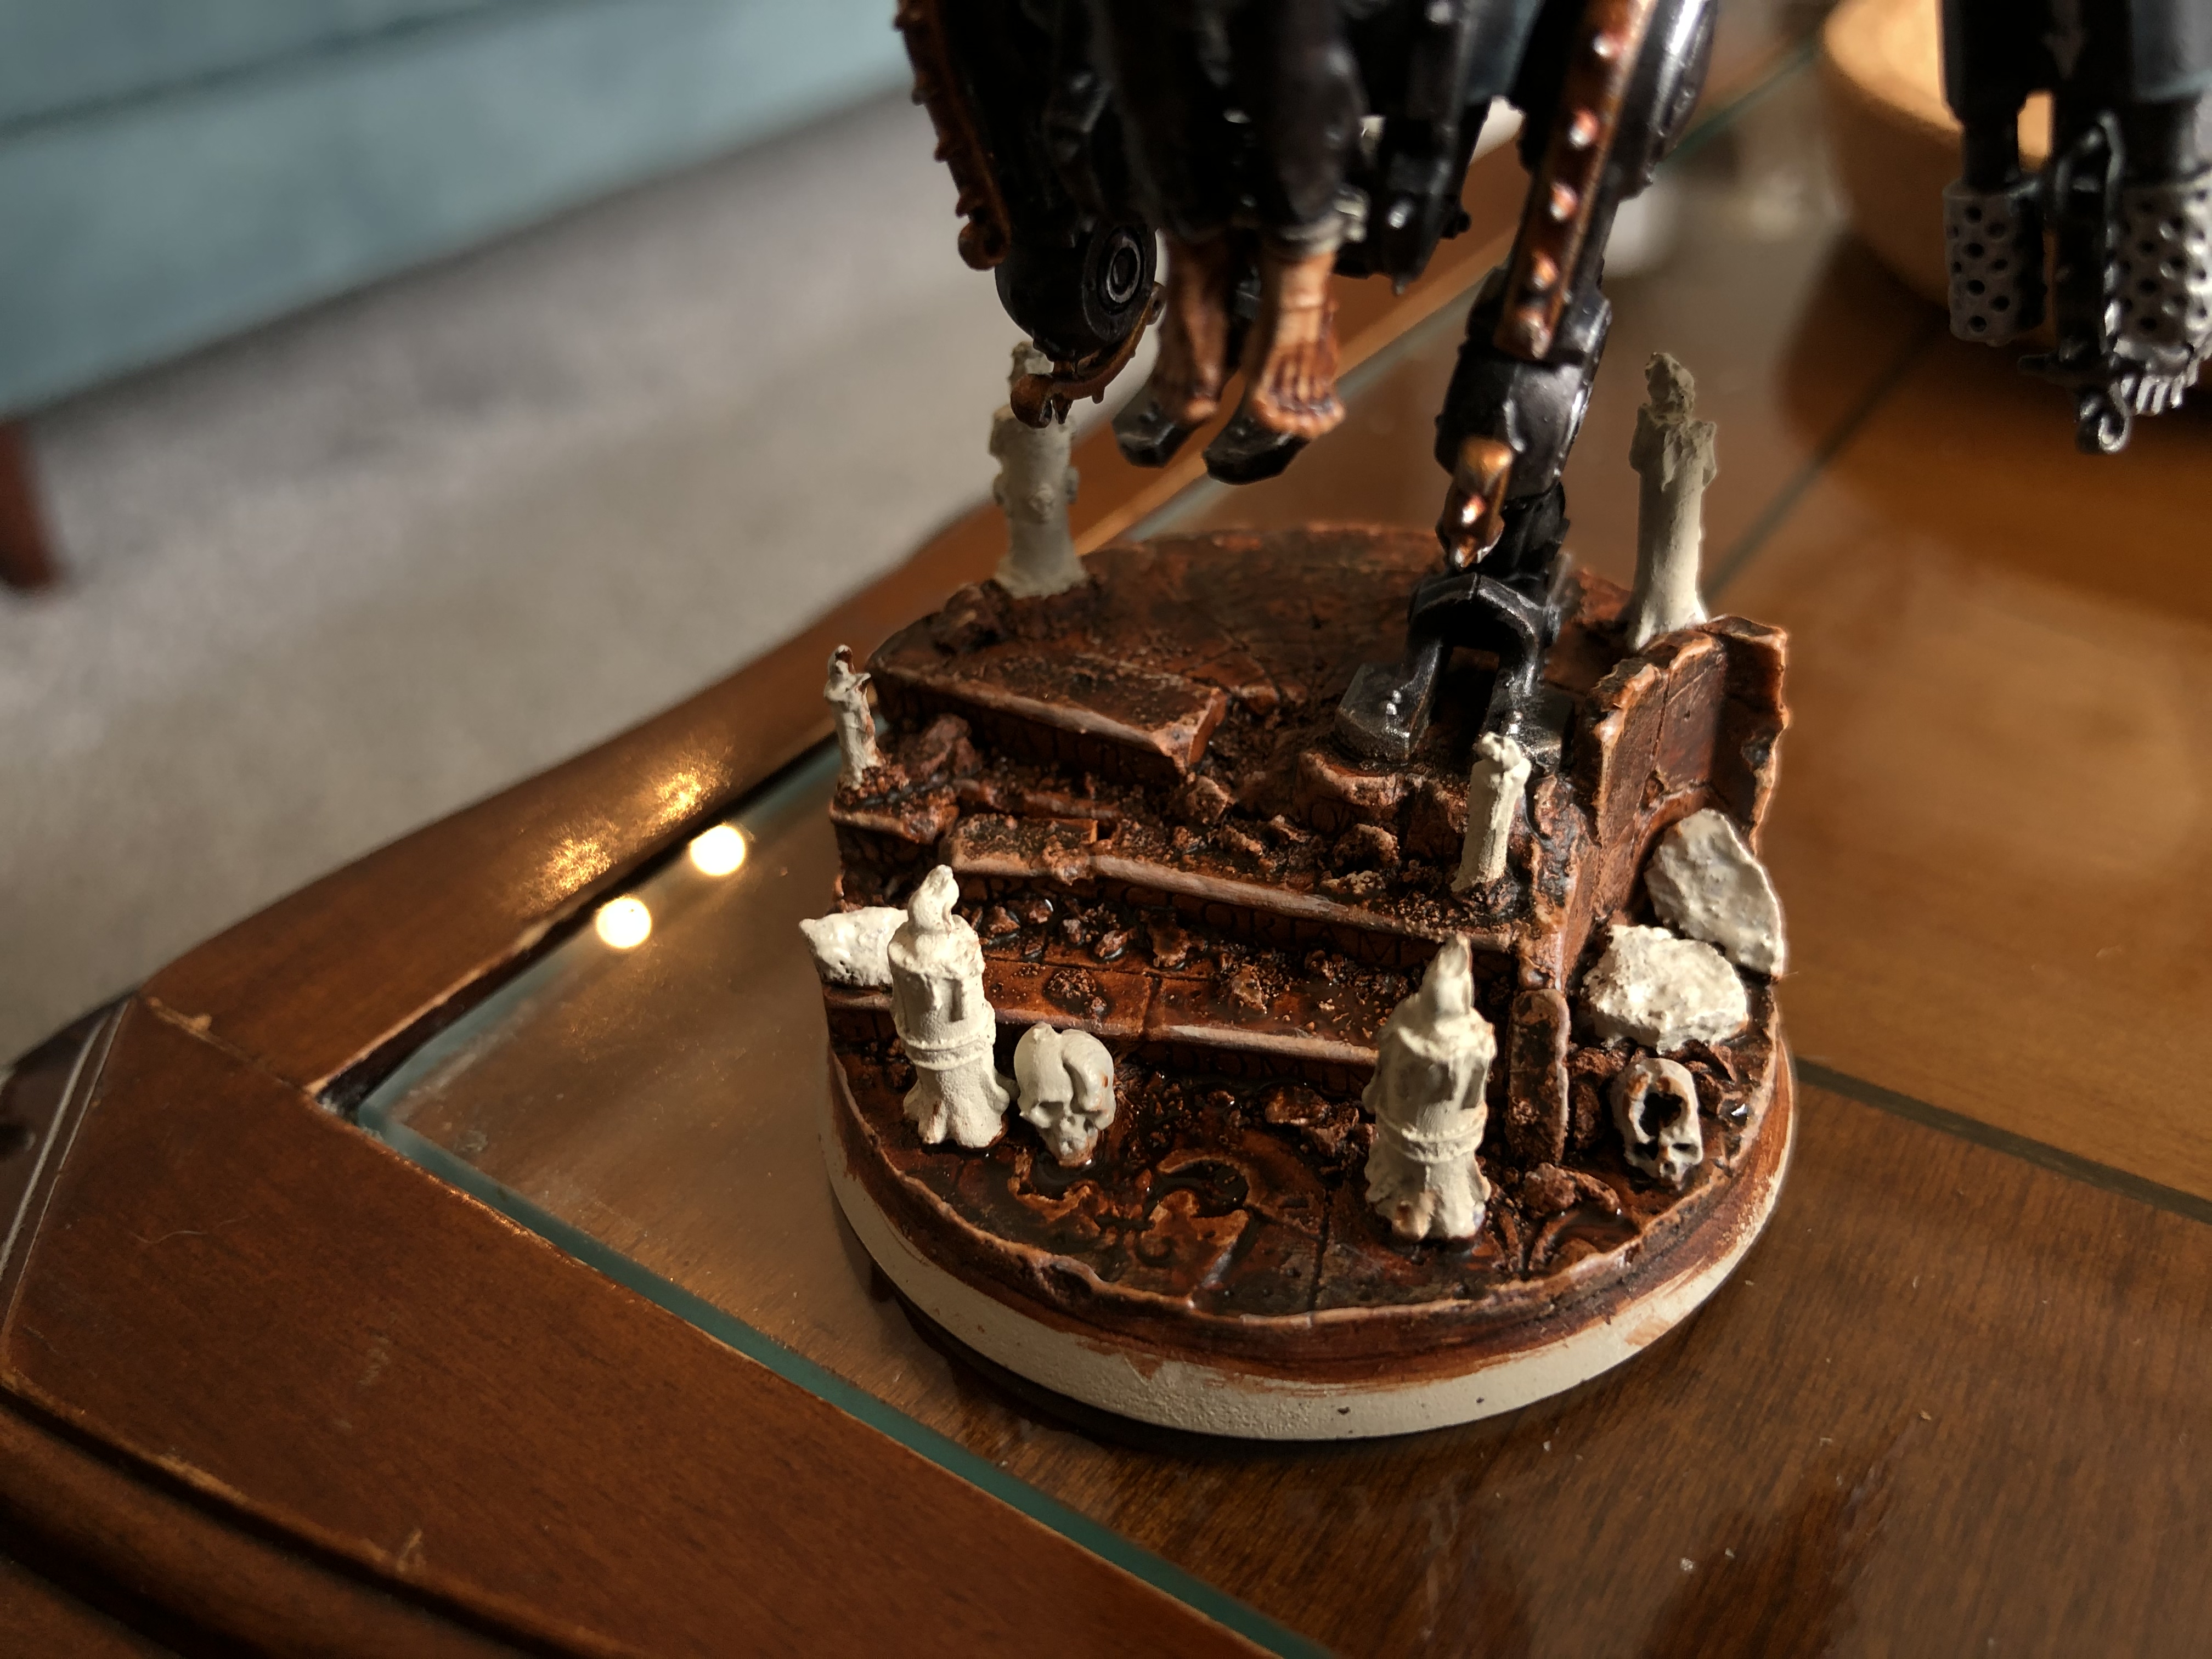
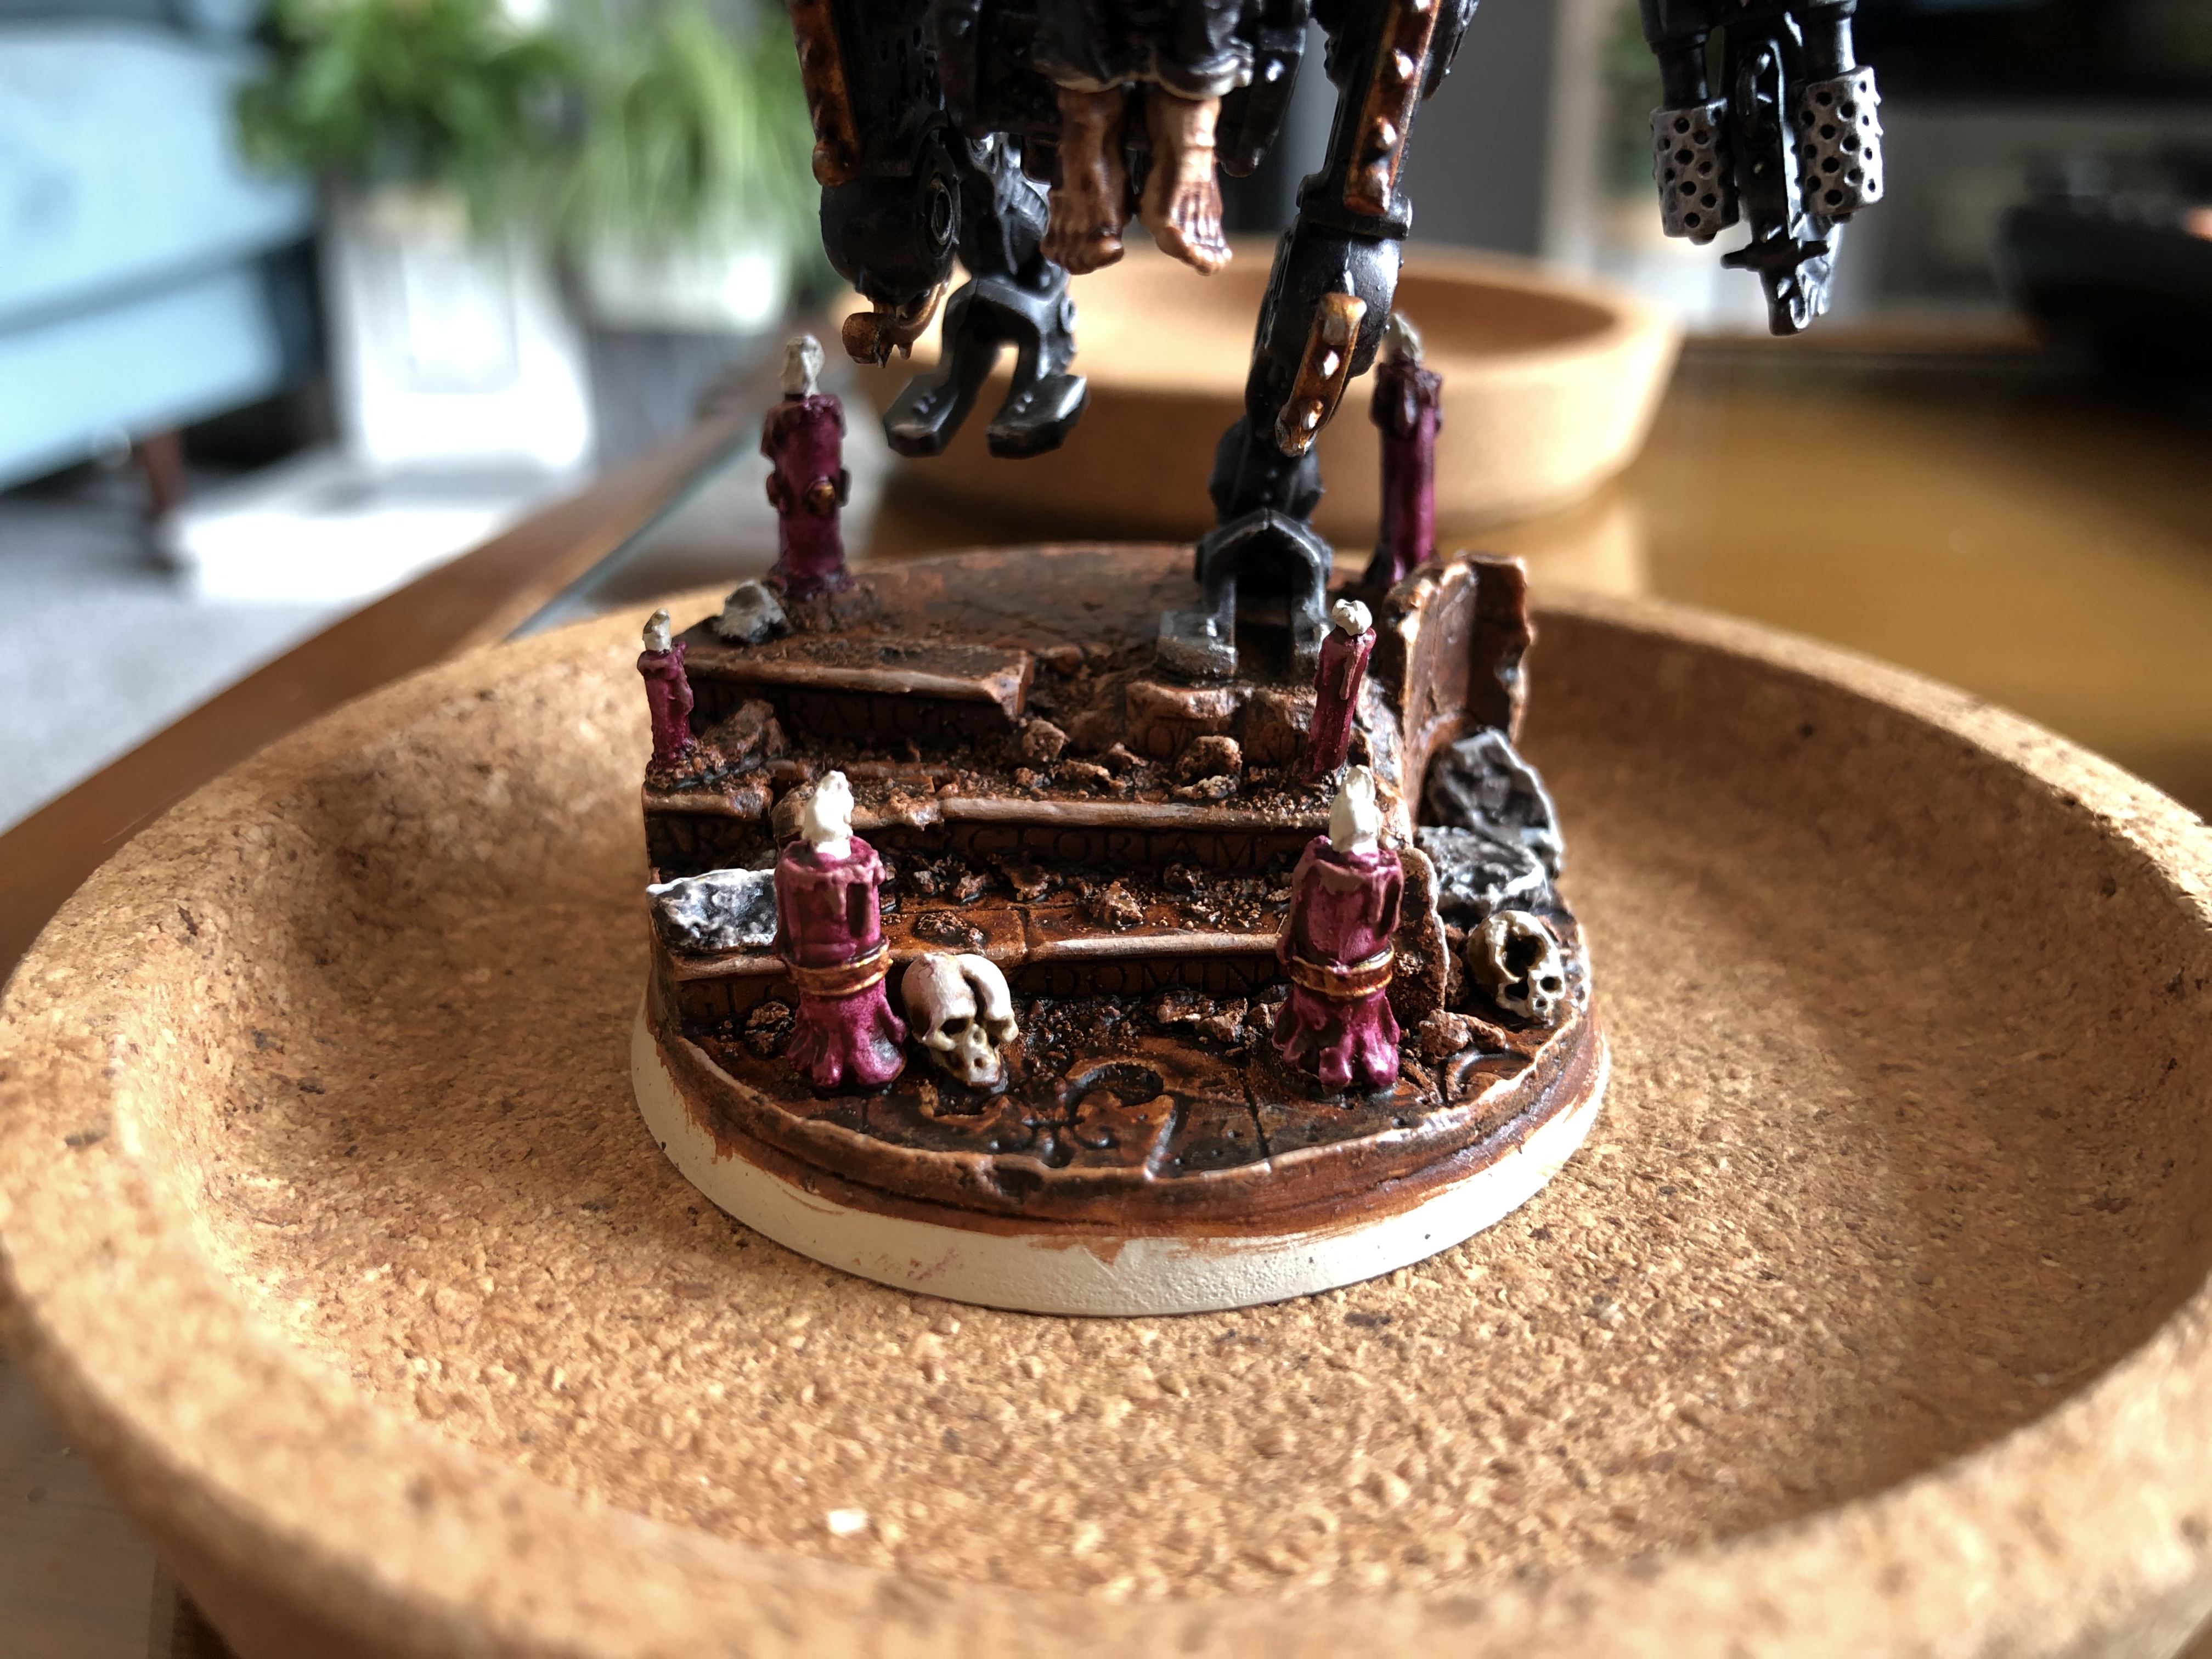

THE FLAMES
*****
For the candles I applied a single coat of Contrast Volupus Pink followed by a highlight of Bugmans Glow. For the details on the candles I used Liberator Gold with a wash of Guilliman Flesh. On the flames I began with a layer of White Scar, Then added Army Painter Daemonic Yellow, Troll Slayer Orange, Contrast Blood Angels Red, Contrast Flesh Tearers Red & finally a black dot of Abaddon Black. Each consecutive layer leaving a bit of the previous below to create that flaming gradient. I also applied the same effect to the flame stack on top of the Penitent Engine. For the flame stacks I followed up with a wash of Nuln oil to give a more smokey feal. I then used Liberator Gold to Mark out the metallic bits on the stacks and washed them down with Guilliman Flesh.
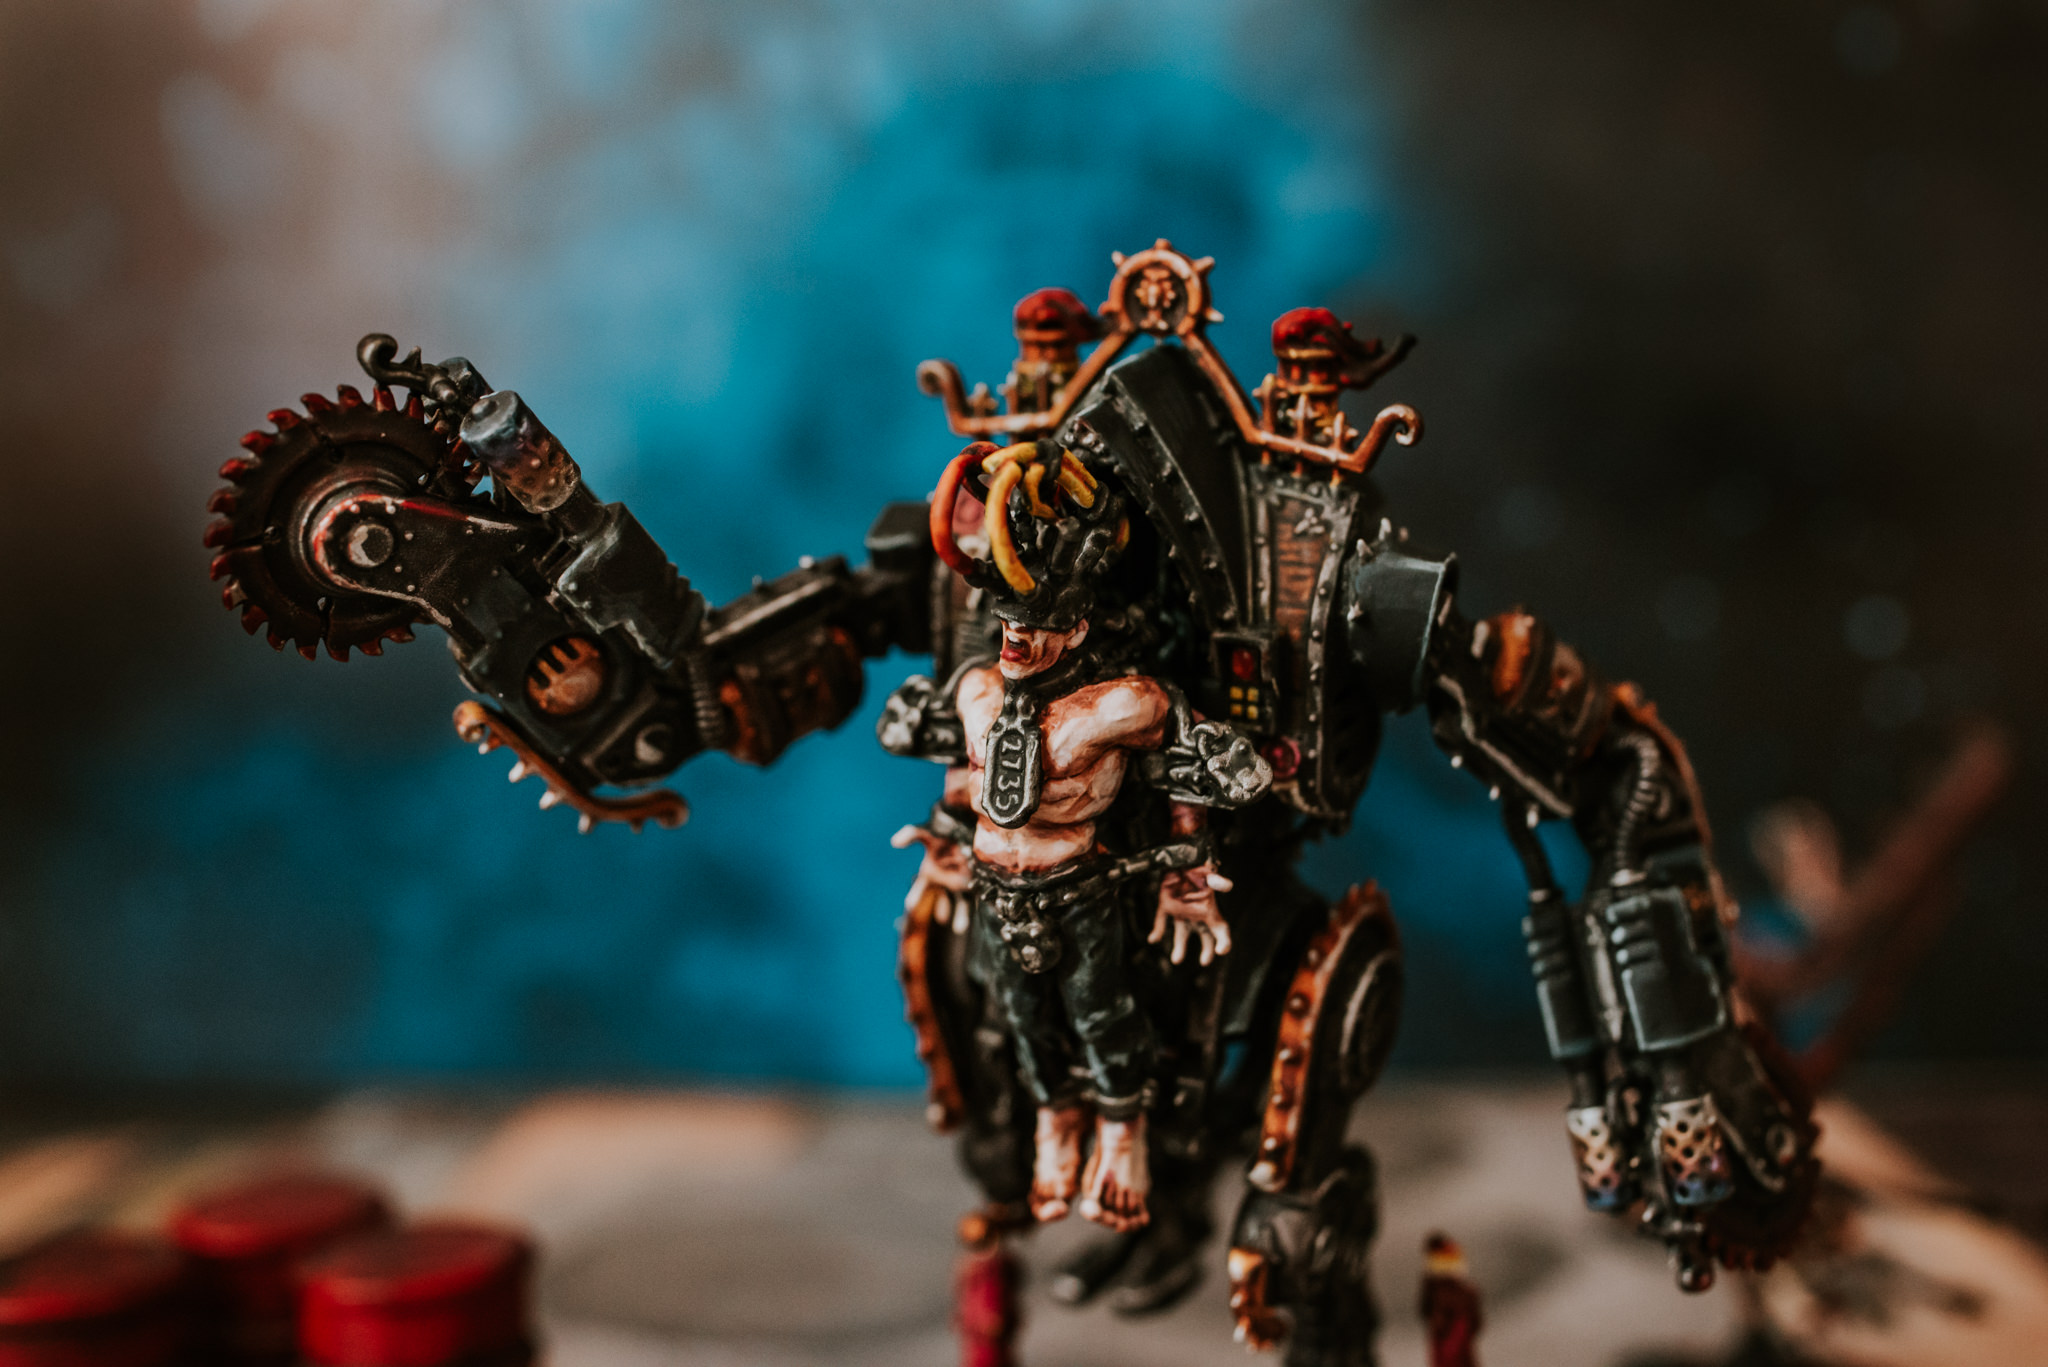
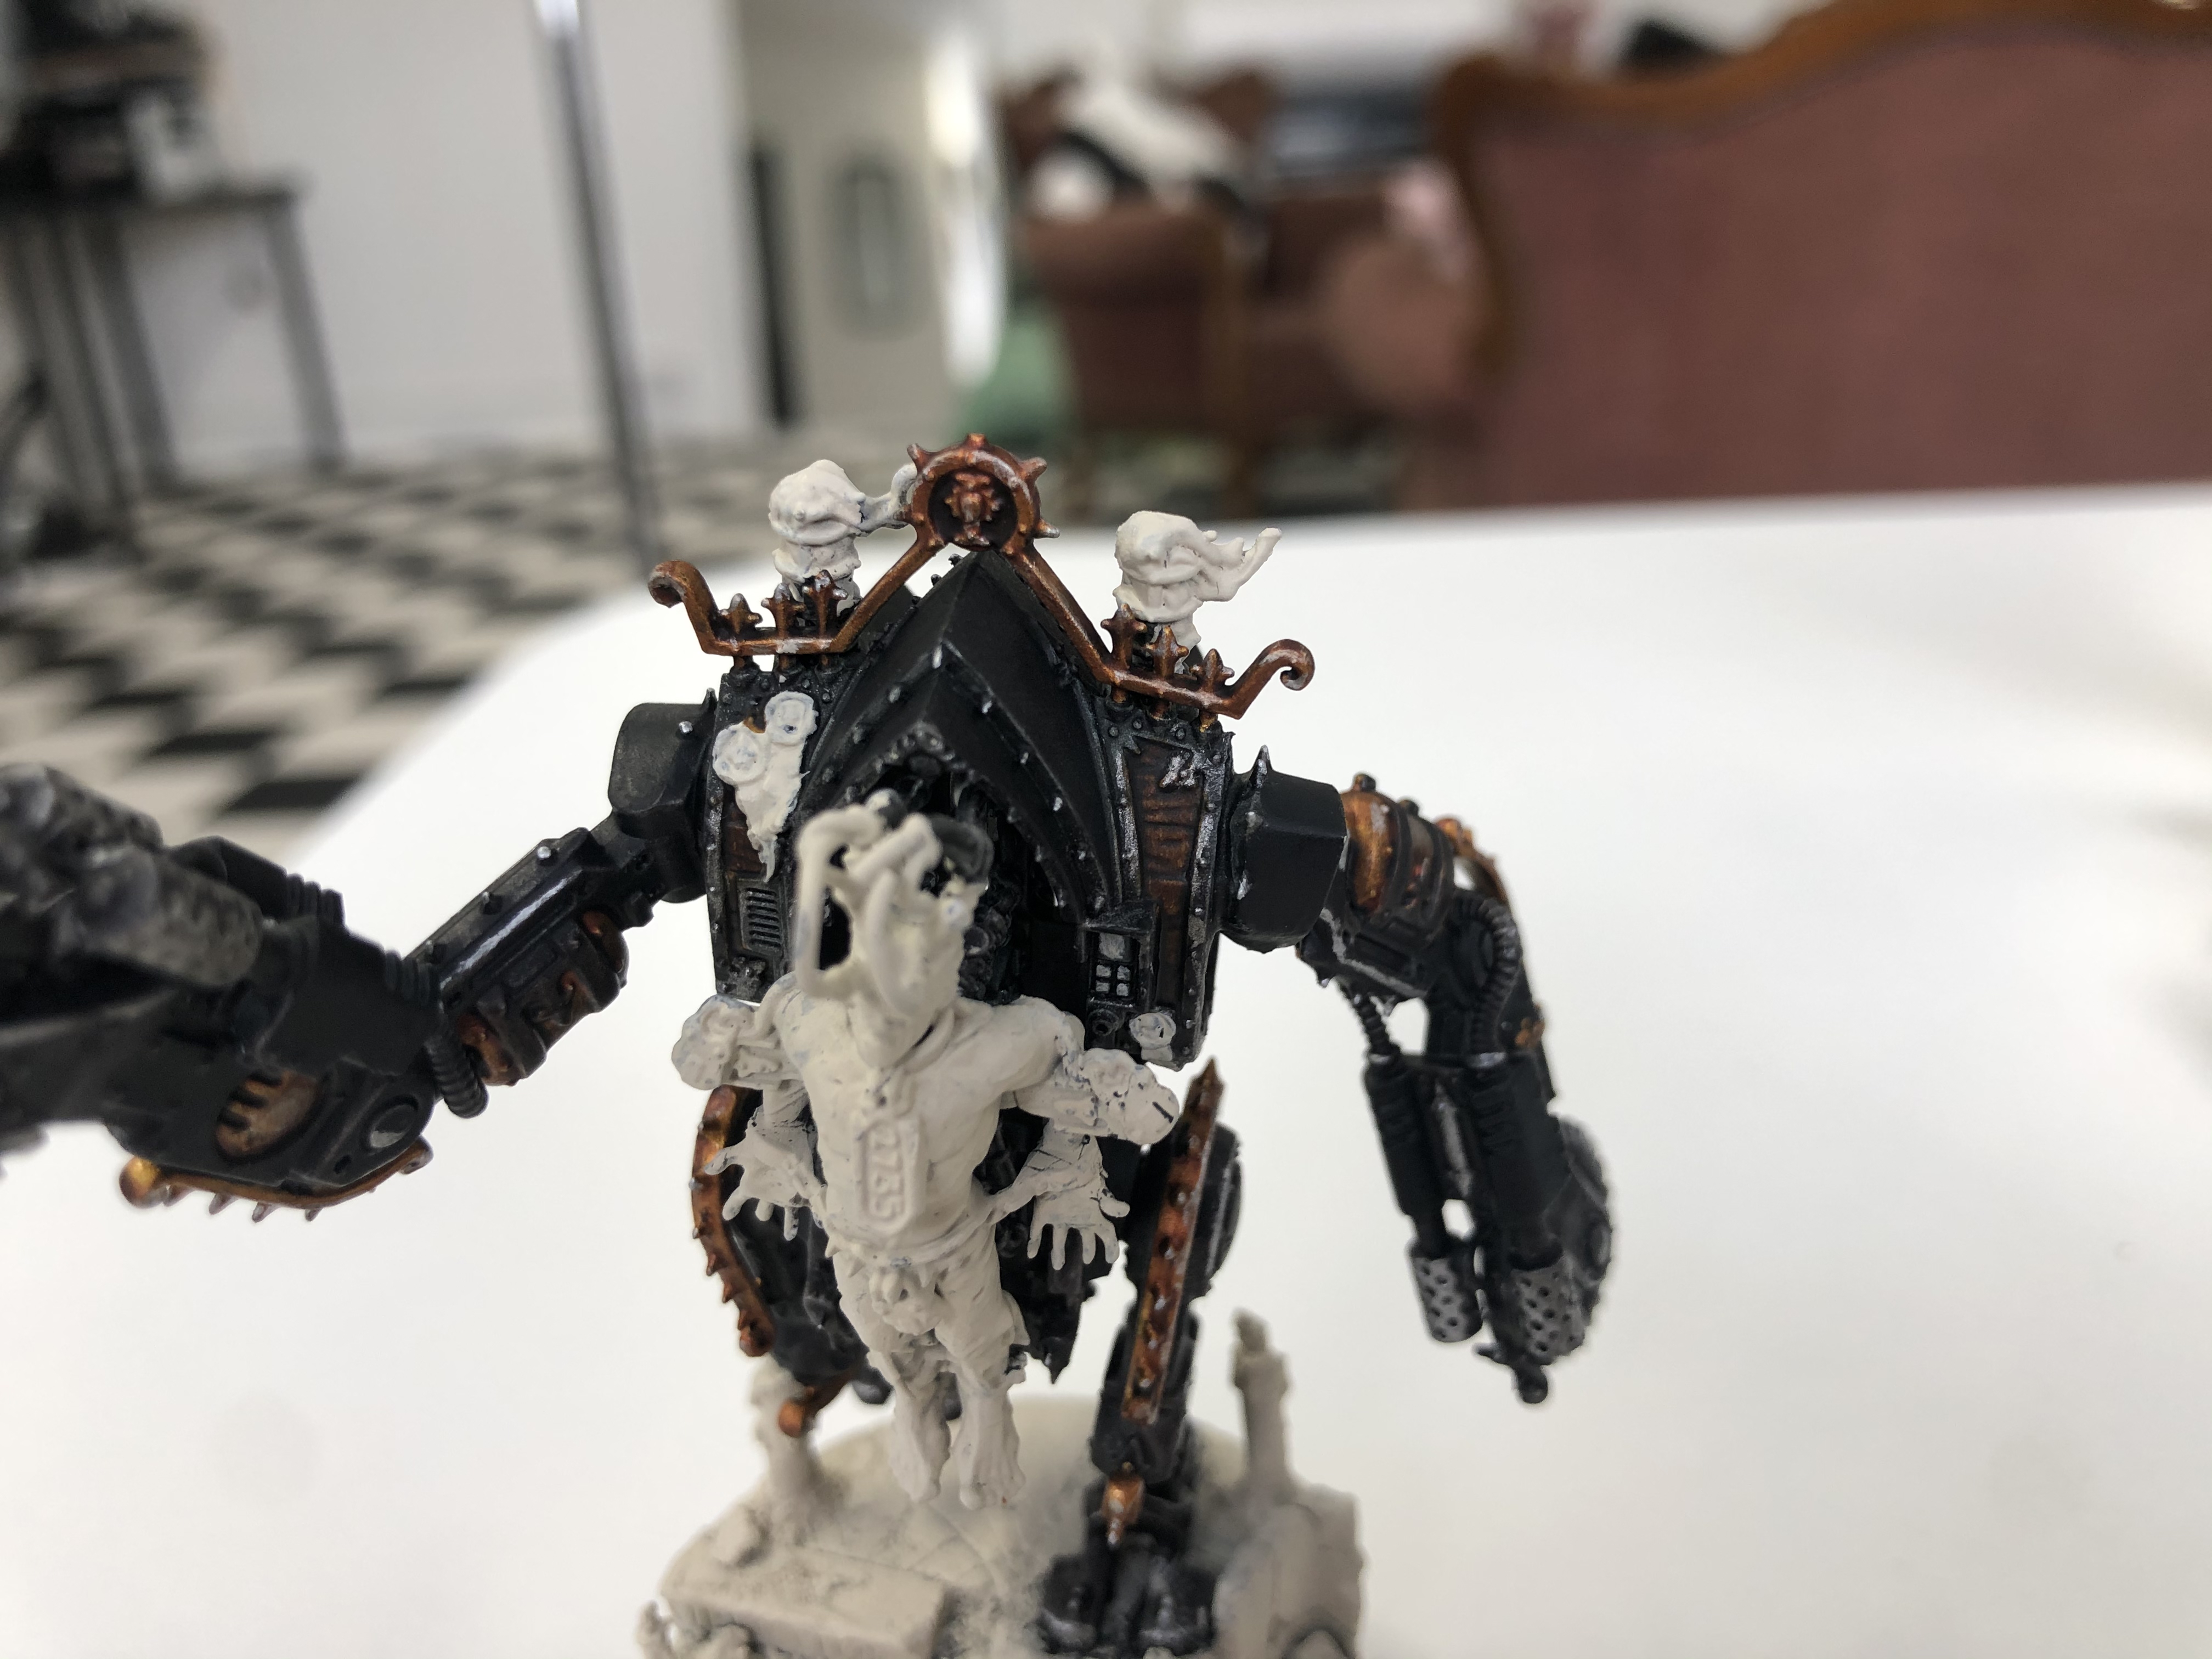
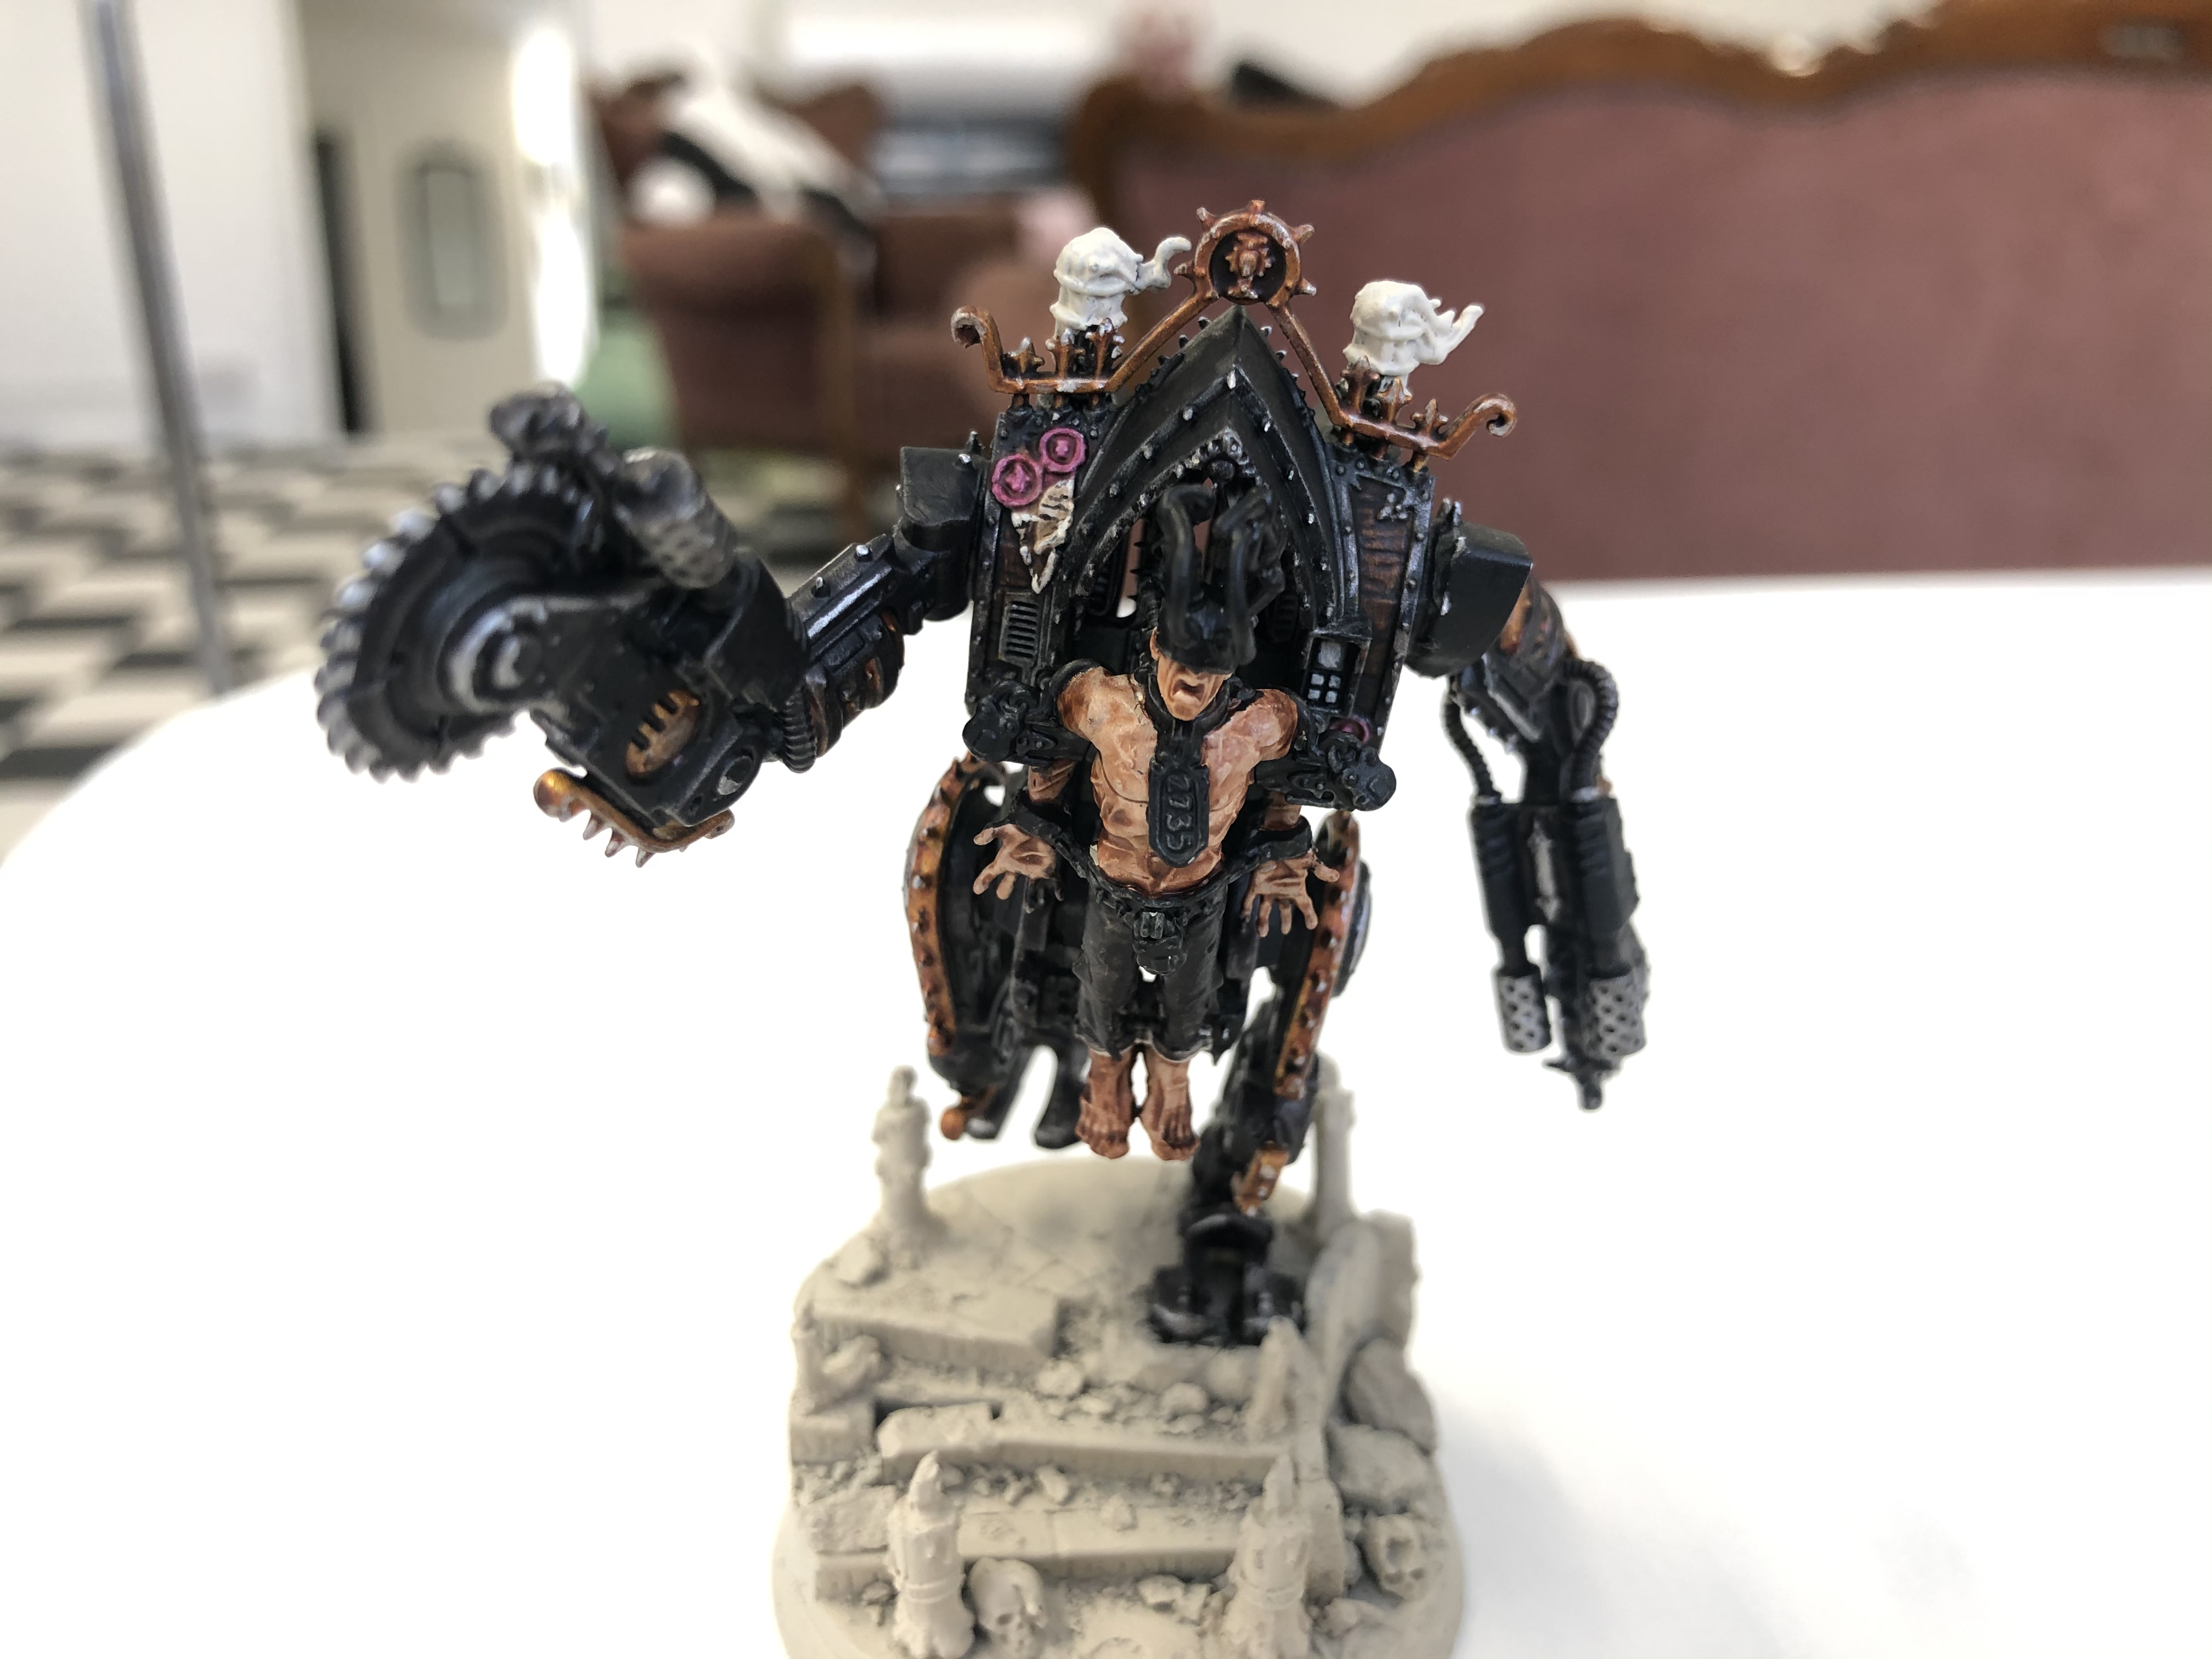
THE SKIN
*****
For the skin I mixed a 1:1 mix of Army Painter Barbarian Flesh & White Scar & built up the more raised portions of the flesh. I then added more white scar to the mix and picked out the higher points before finishing off with pure white scar for the top most skin like the nose and upper shoulders. I also applied White Scar to the teeth & Volupus Pink to the lips. I then used watered down Army Painter Purple tone to apply bruising around all of the locks & restraints where they dig into the flesh.
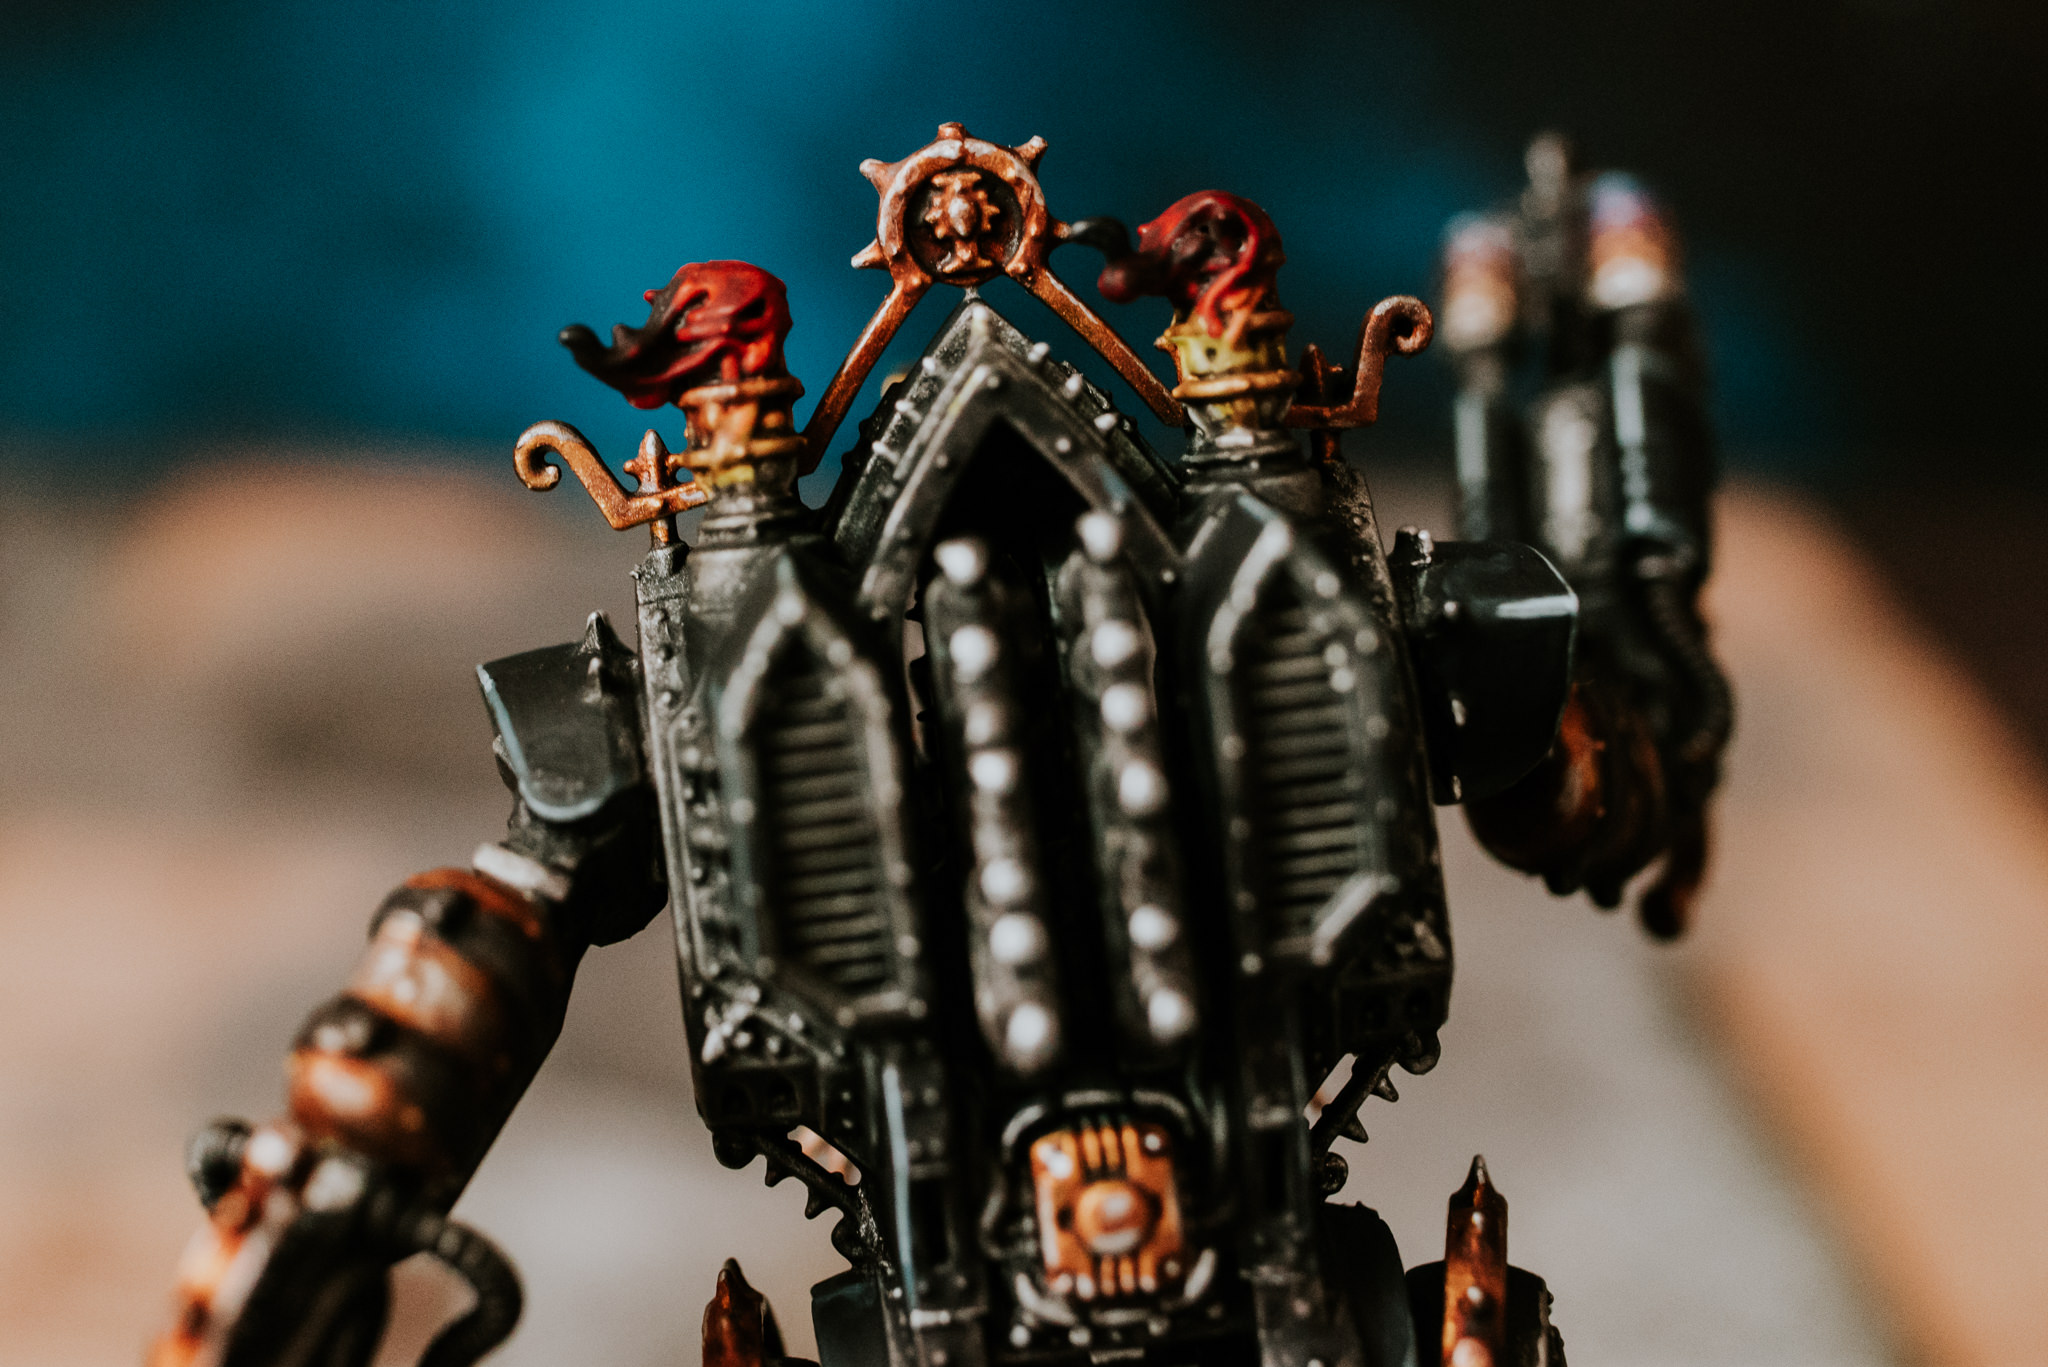
HELMET ACTION
*****
For the locks & pipes I used leadbelcher followed by a wash of Nuln Oil. For the topmost pipes going into the helmet I applied a coat of Wraithbone before painting one with Contrast Blood Angels Red & one with Contrast Iyanden Yellow. I highlighted the red one with Troll-Slayer Orange.
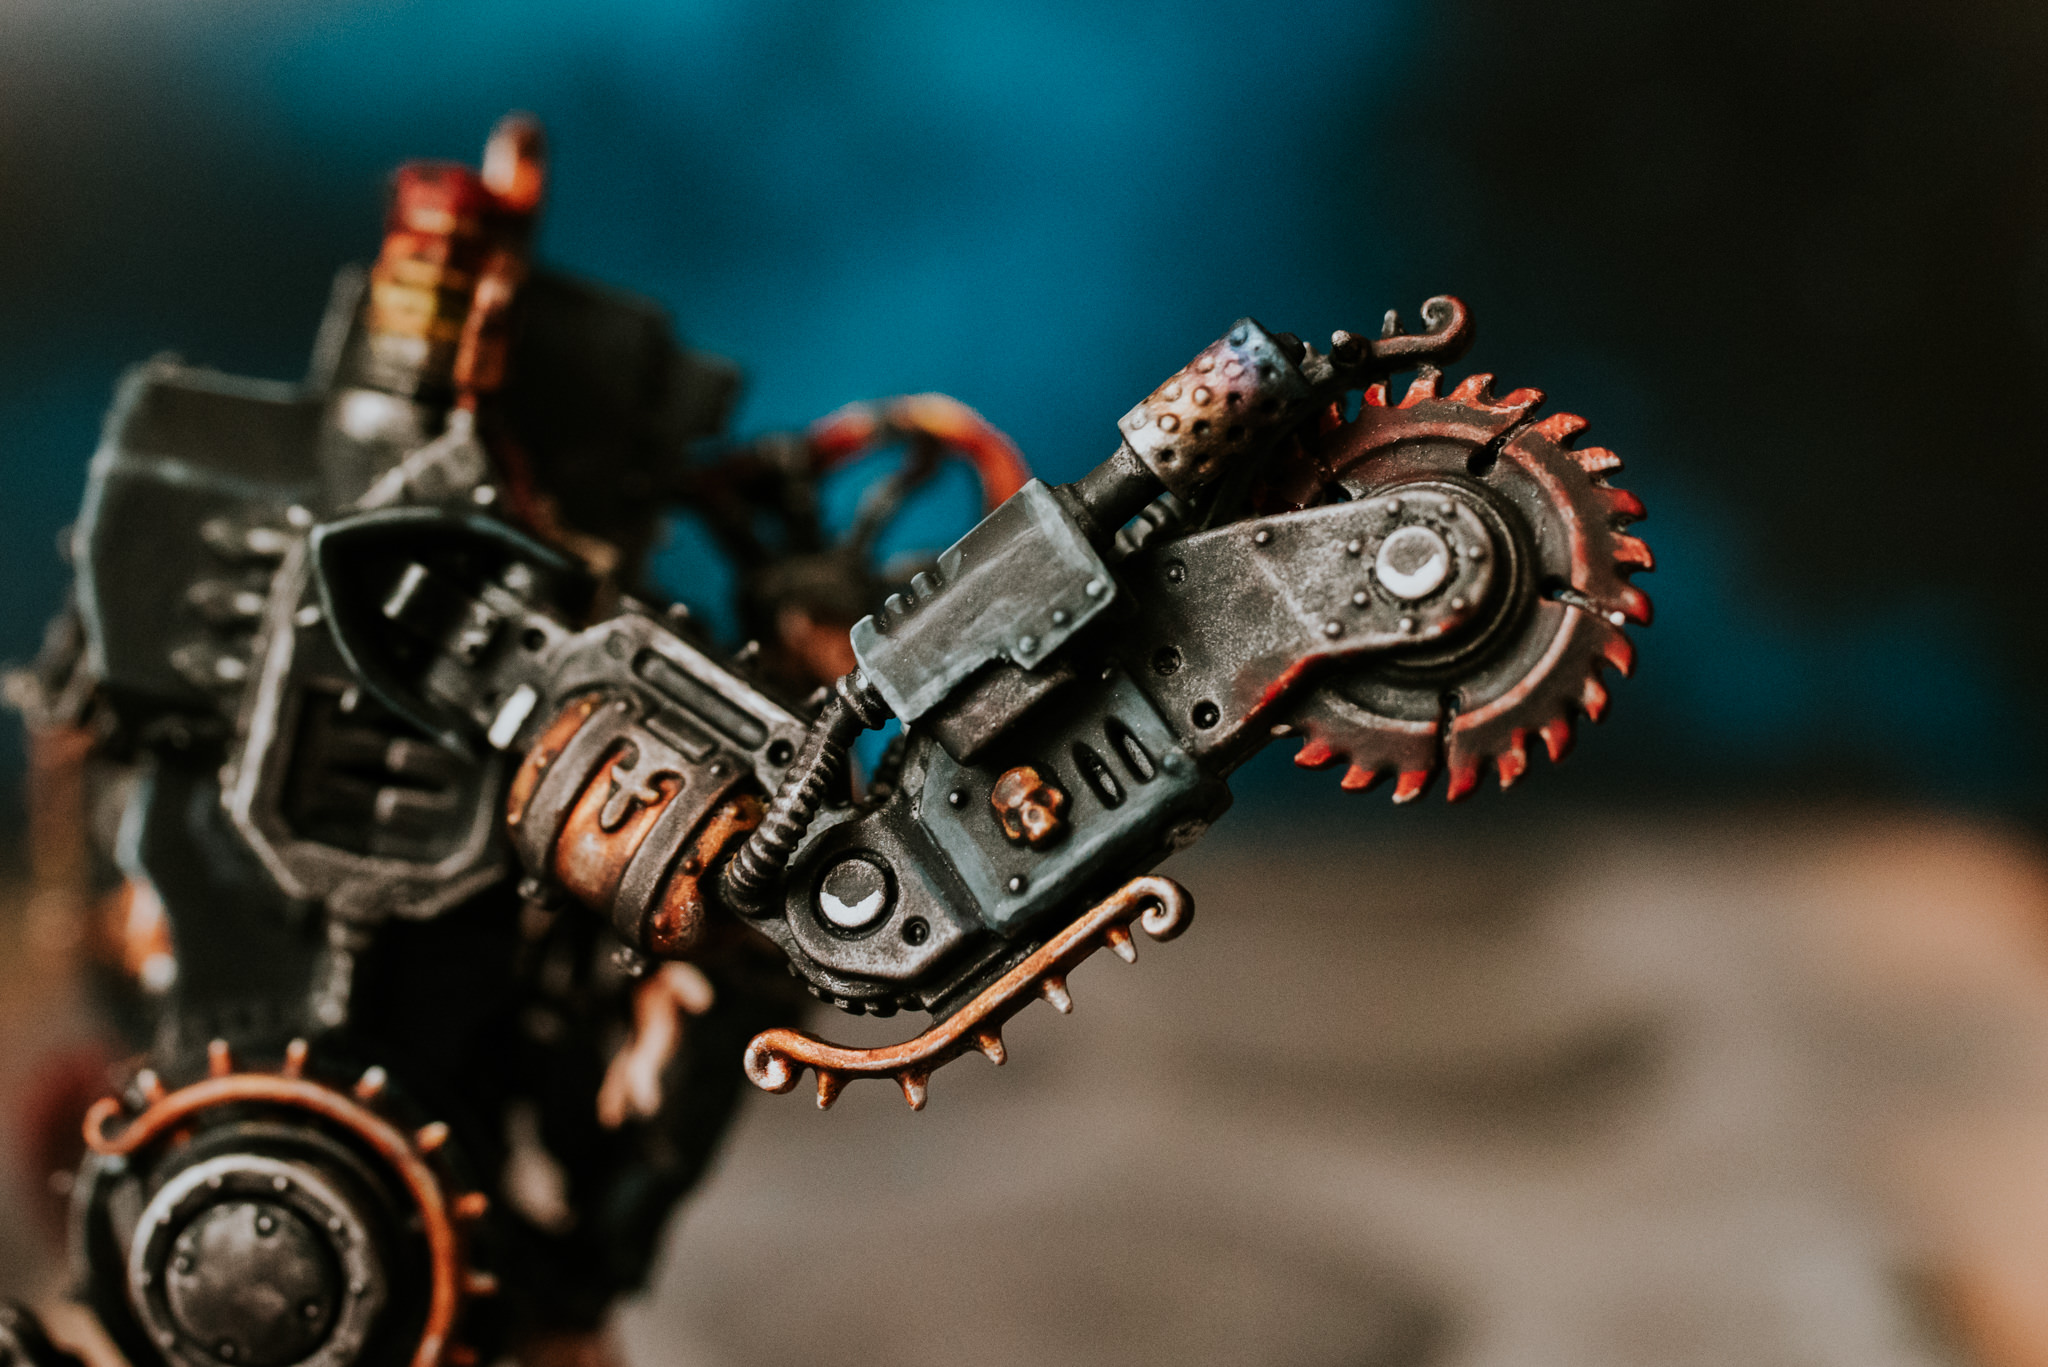
HEAT EFFECTS
*****
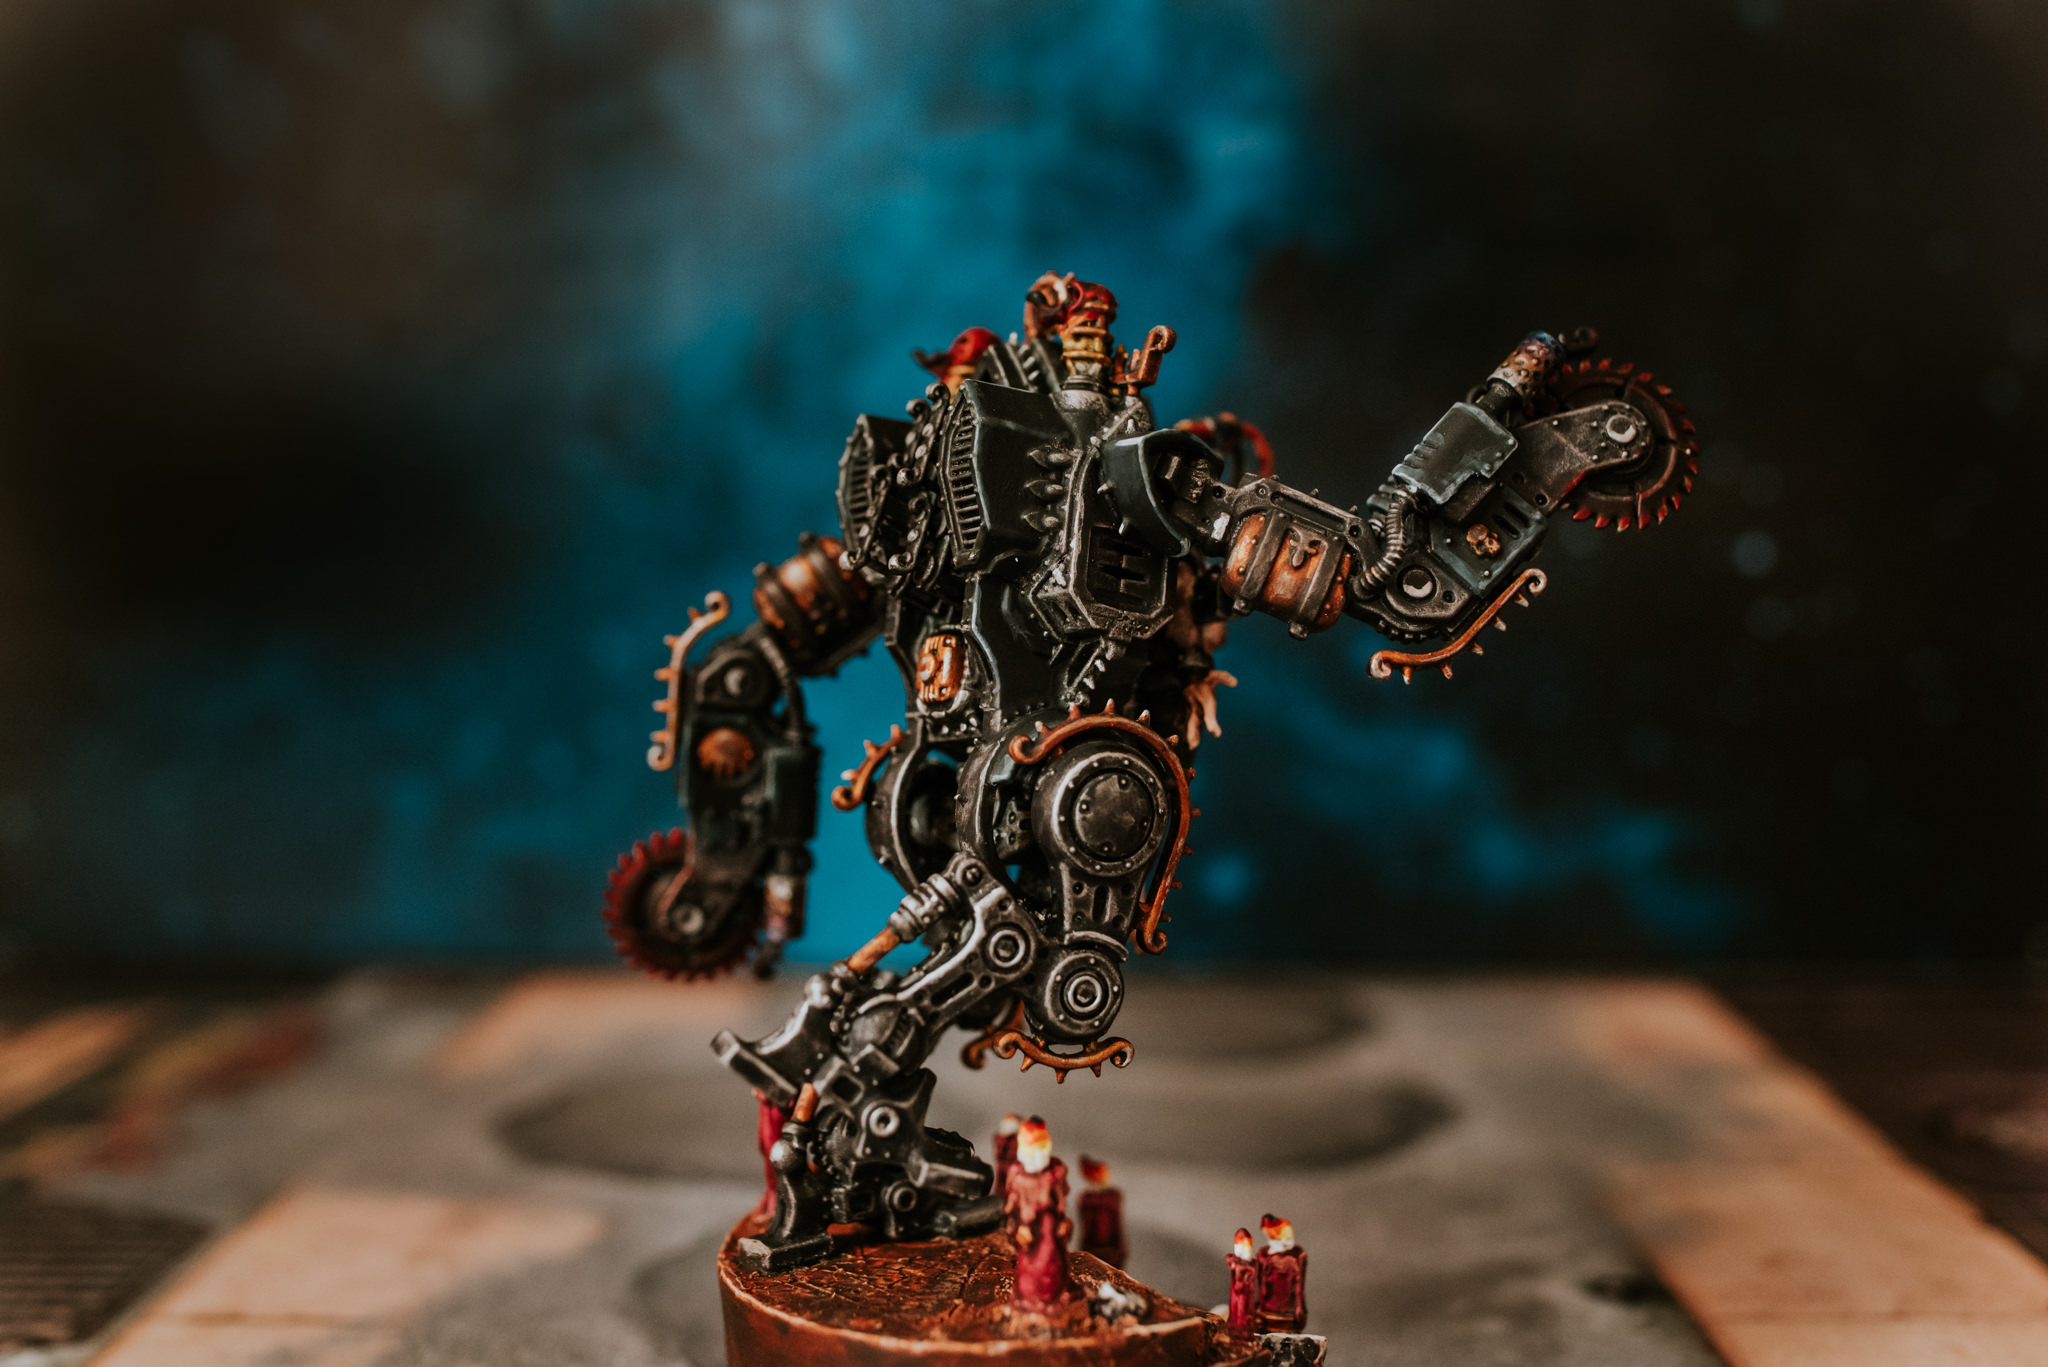
I’ve never tried heat effects before but I’m chuffed with how these came out. On the barrels of the flamers I applied a ring around the middle of each barrel with Army Painter Flesh Wash. I used a stippling technique and built up the colour over three layers. When that had dried I used Army Painter Purple Tone & applied another ring further up the barrel again with three layers to build the colour up. Finally I used Army Painter Blue tone for the very end of the Barrels. You should be left with an awesome heat effect gradient like you see in the pics.
BLOOD
*****
Finally I used Blood for the Blood God on the edges of the circular saws washed down with Agrax Earthshade to give the dry blood effect.
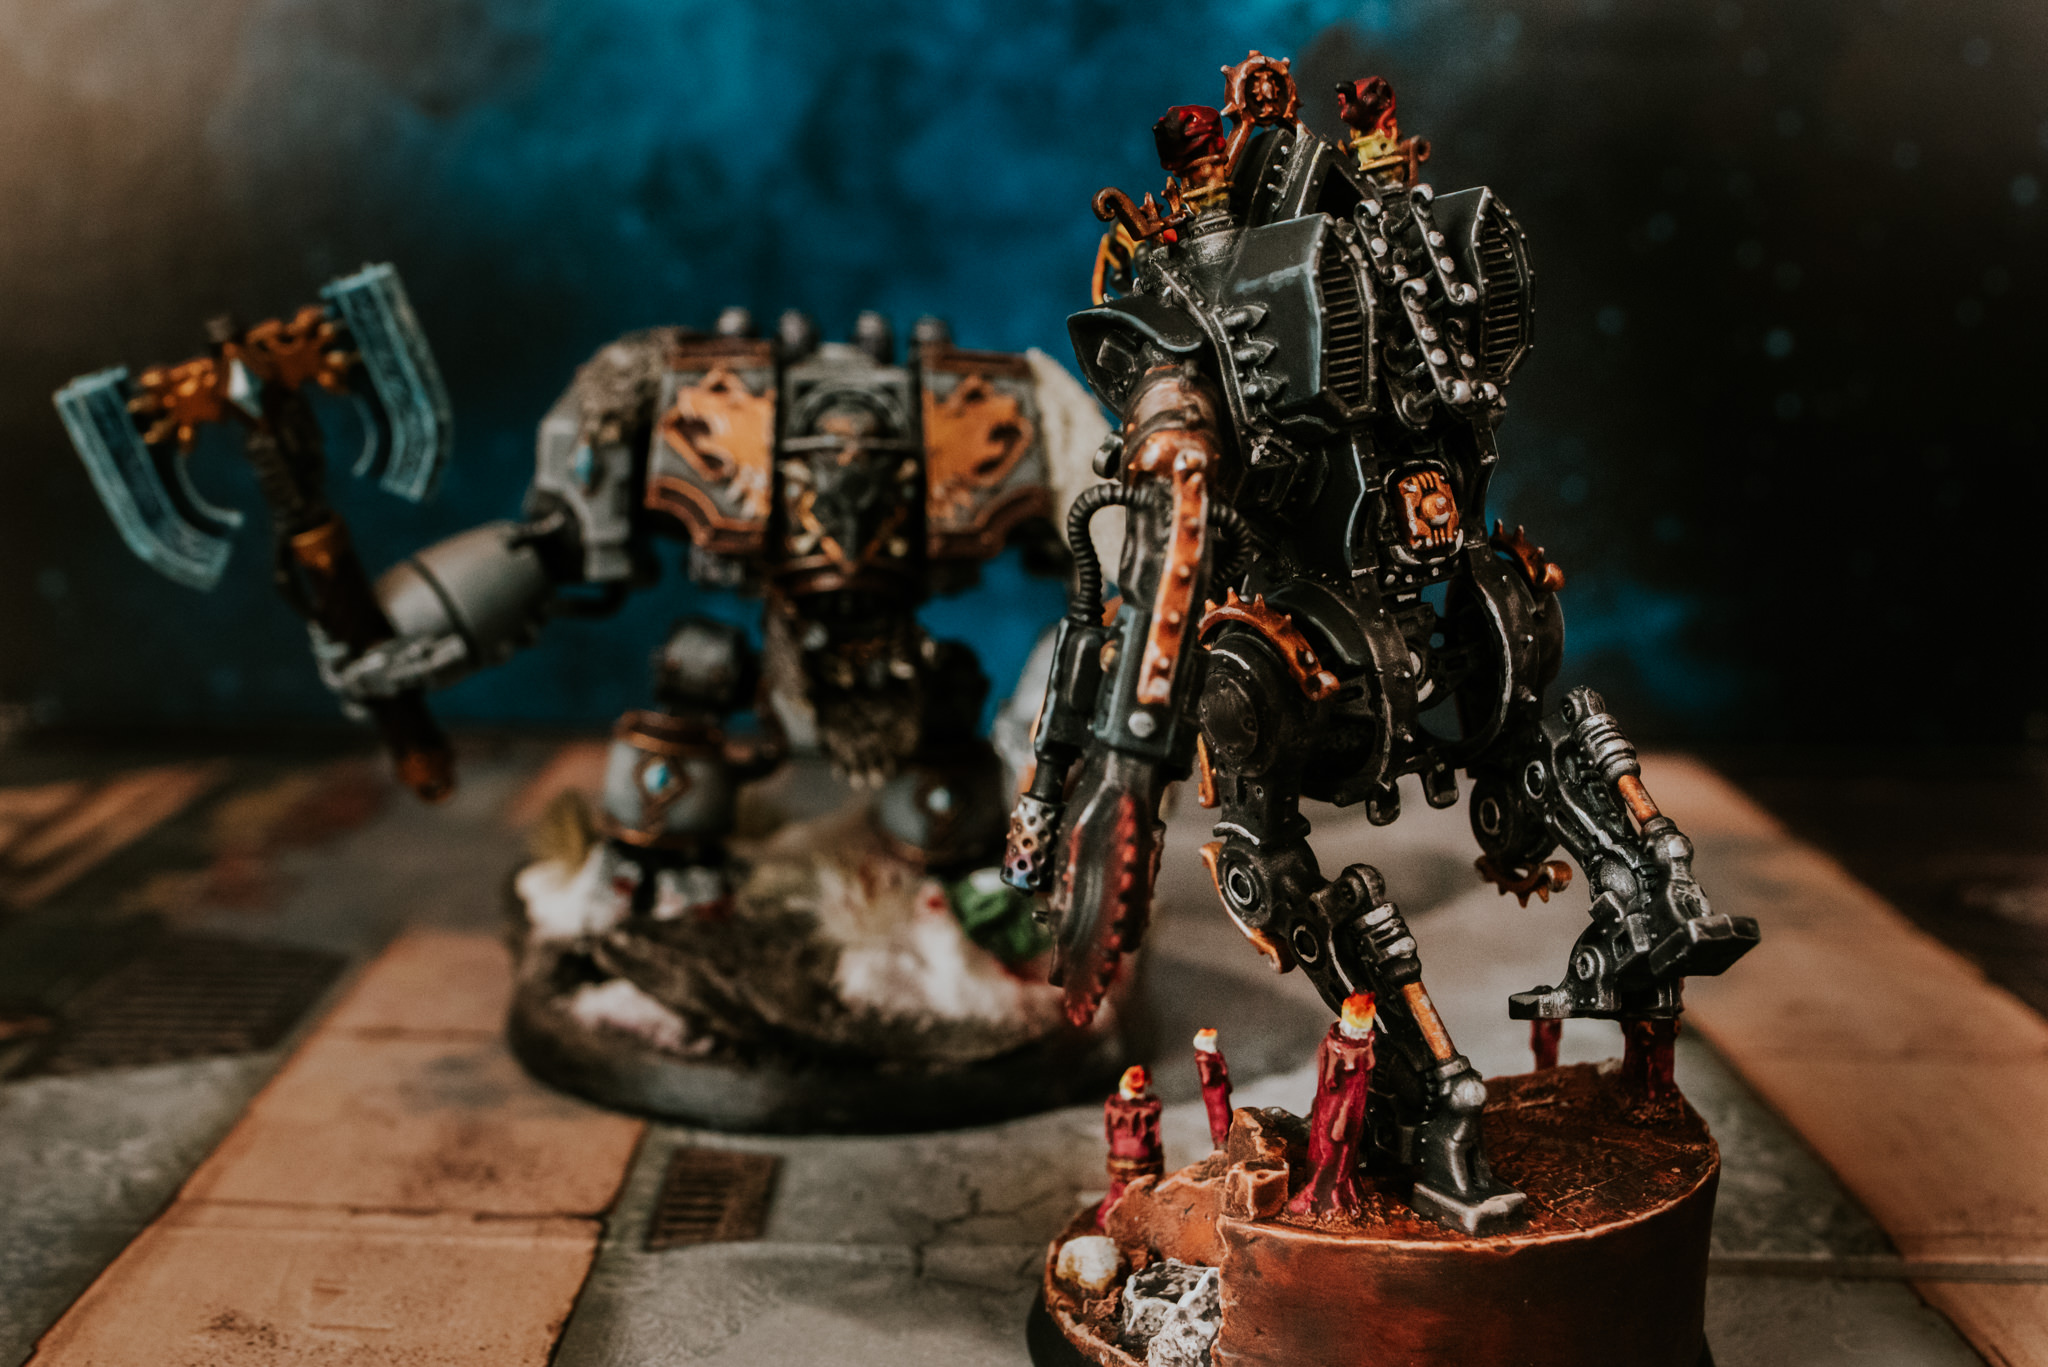
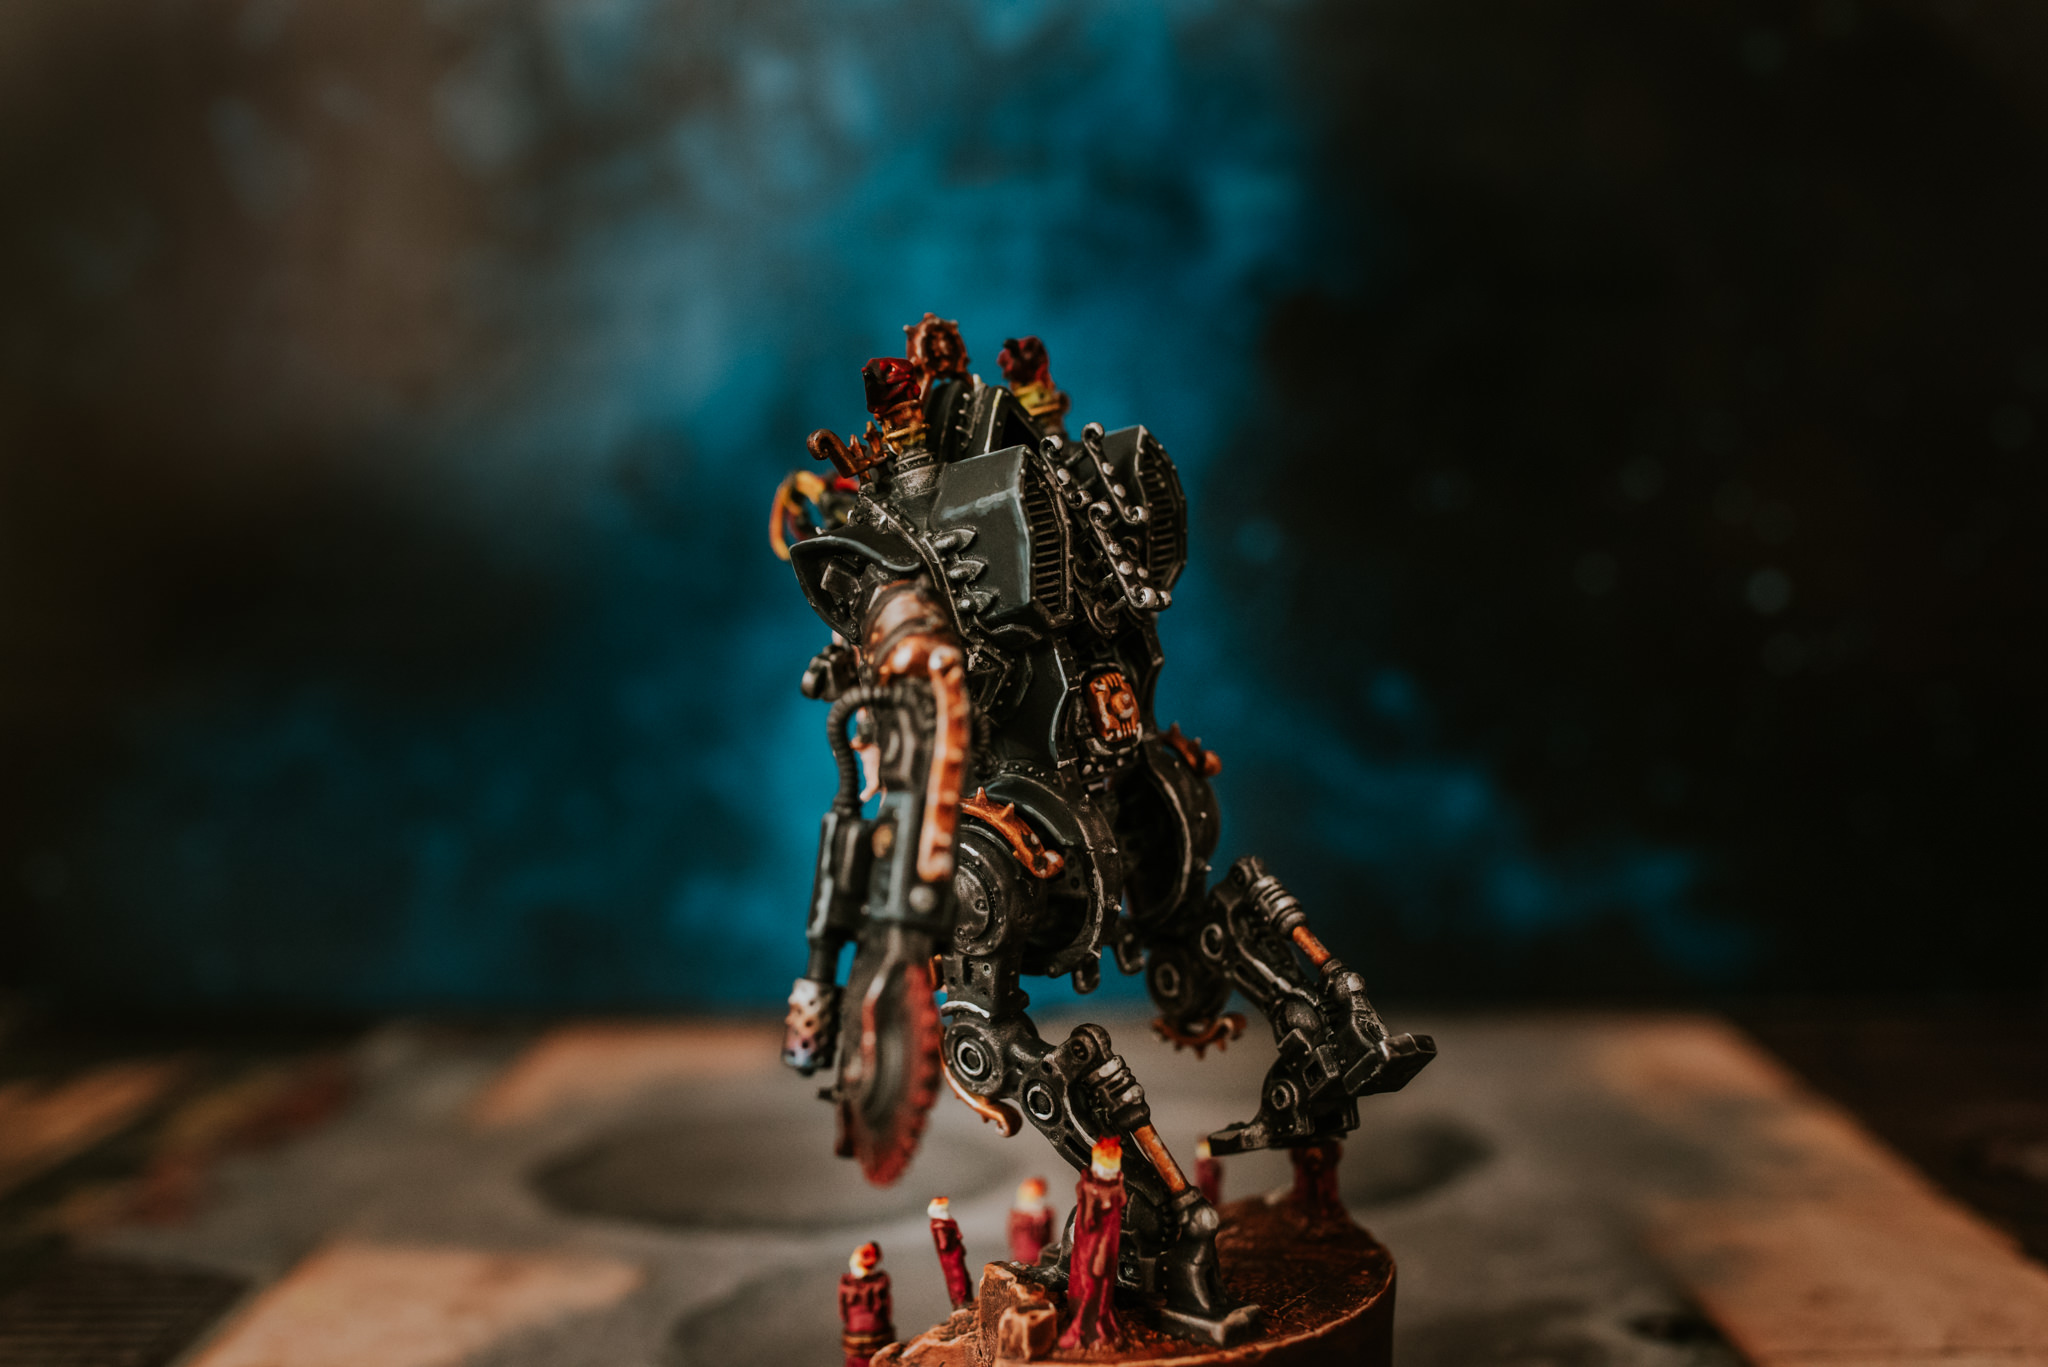
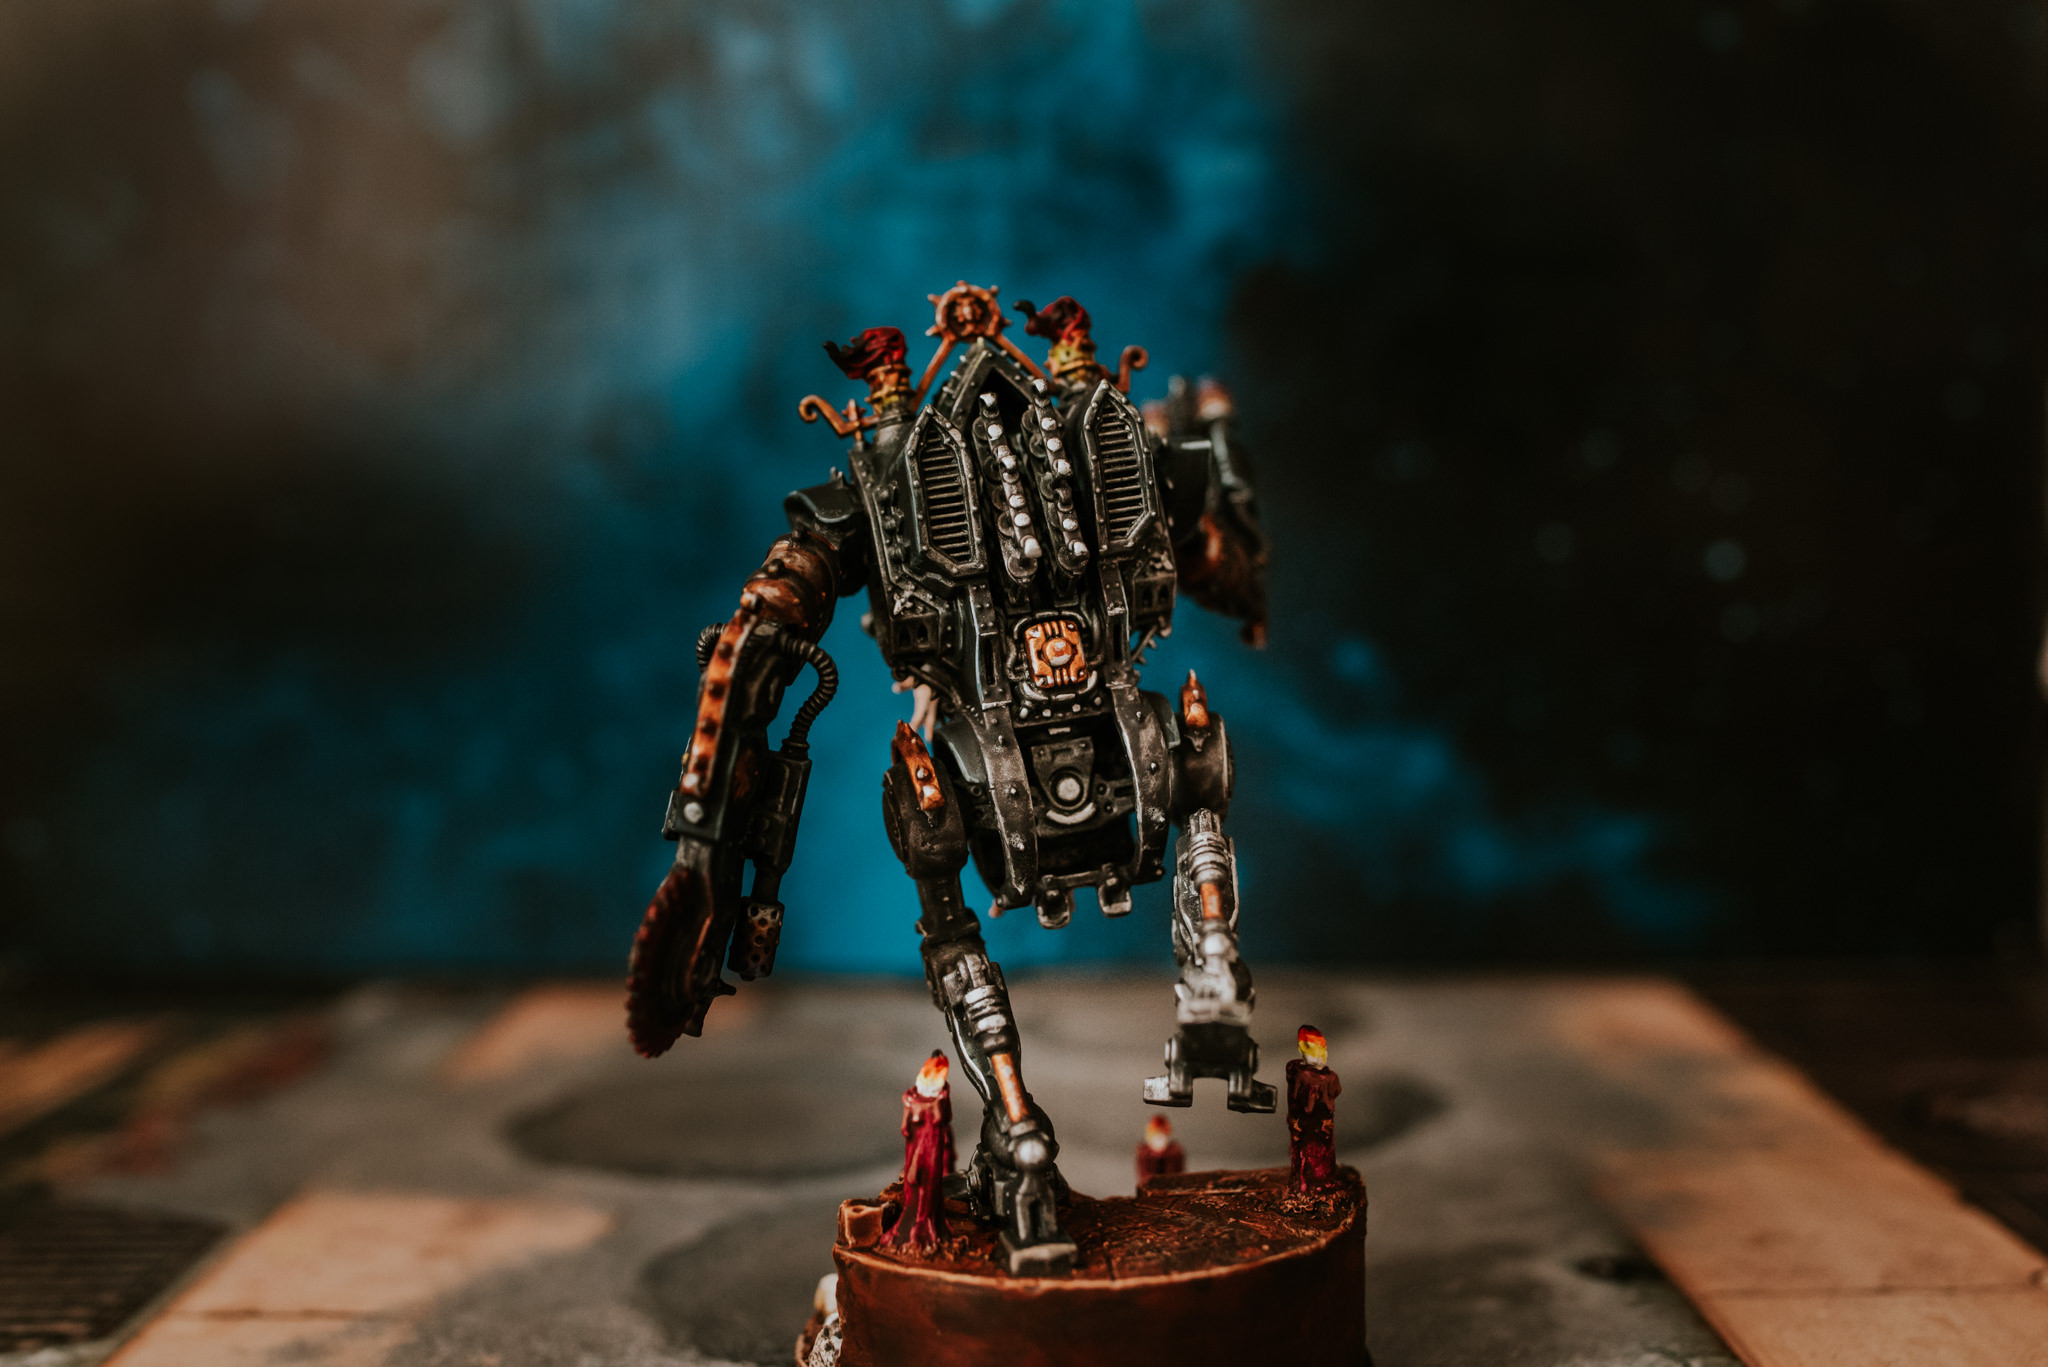
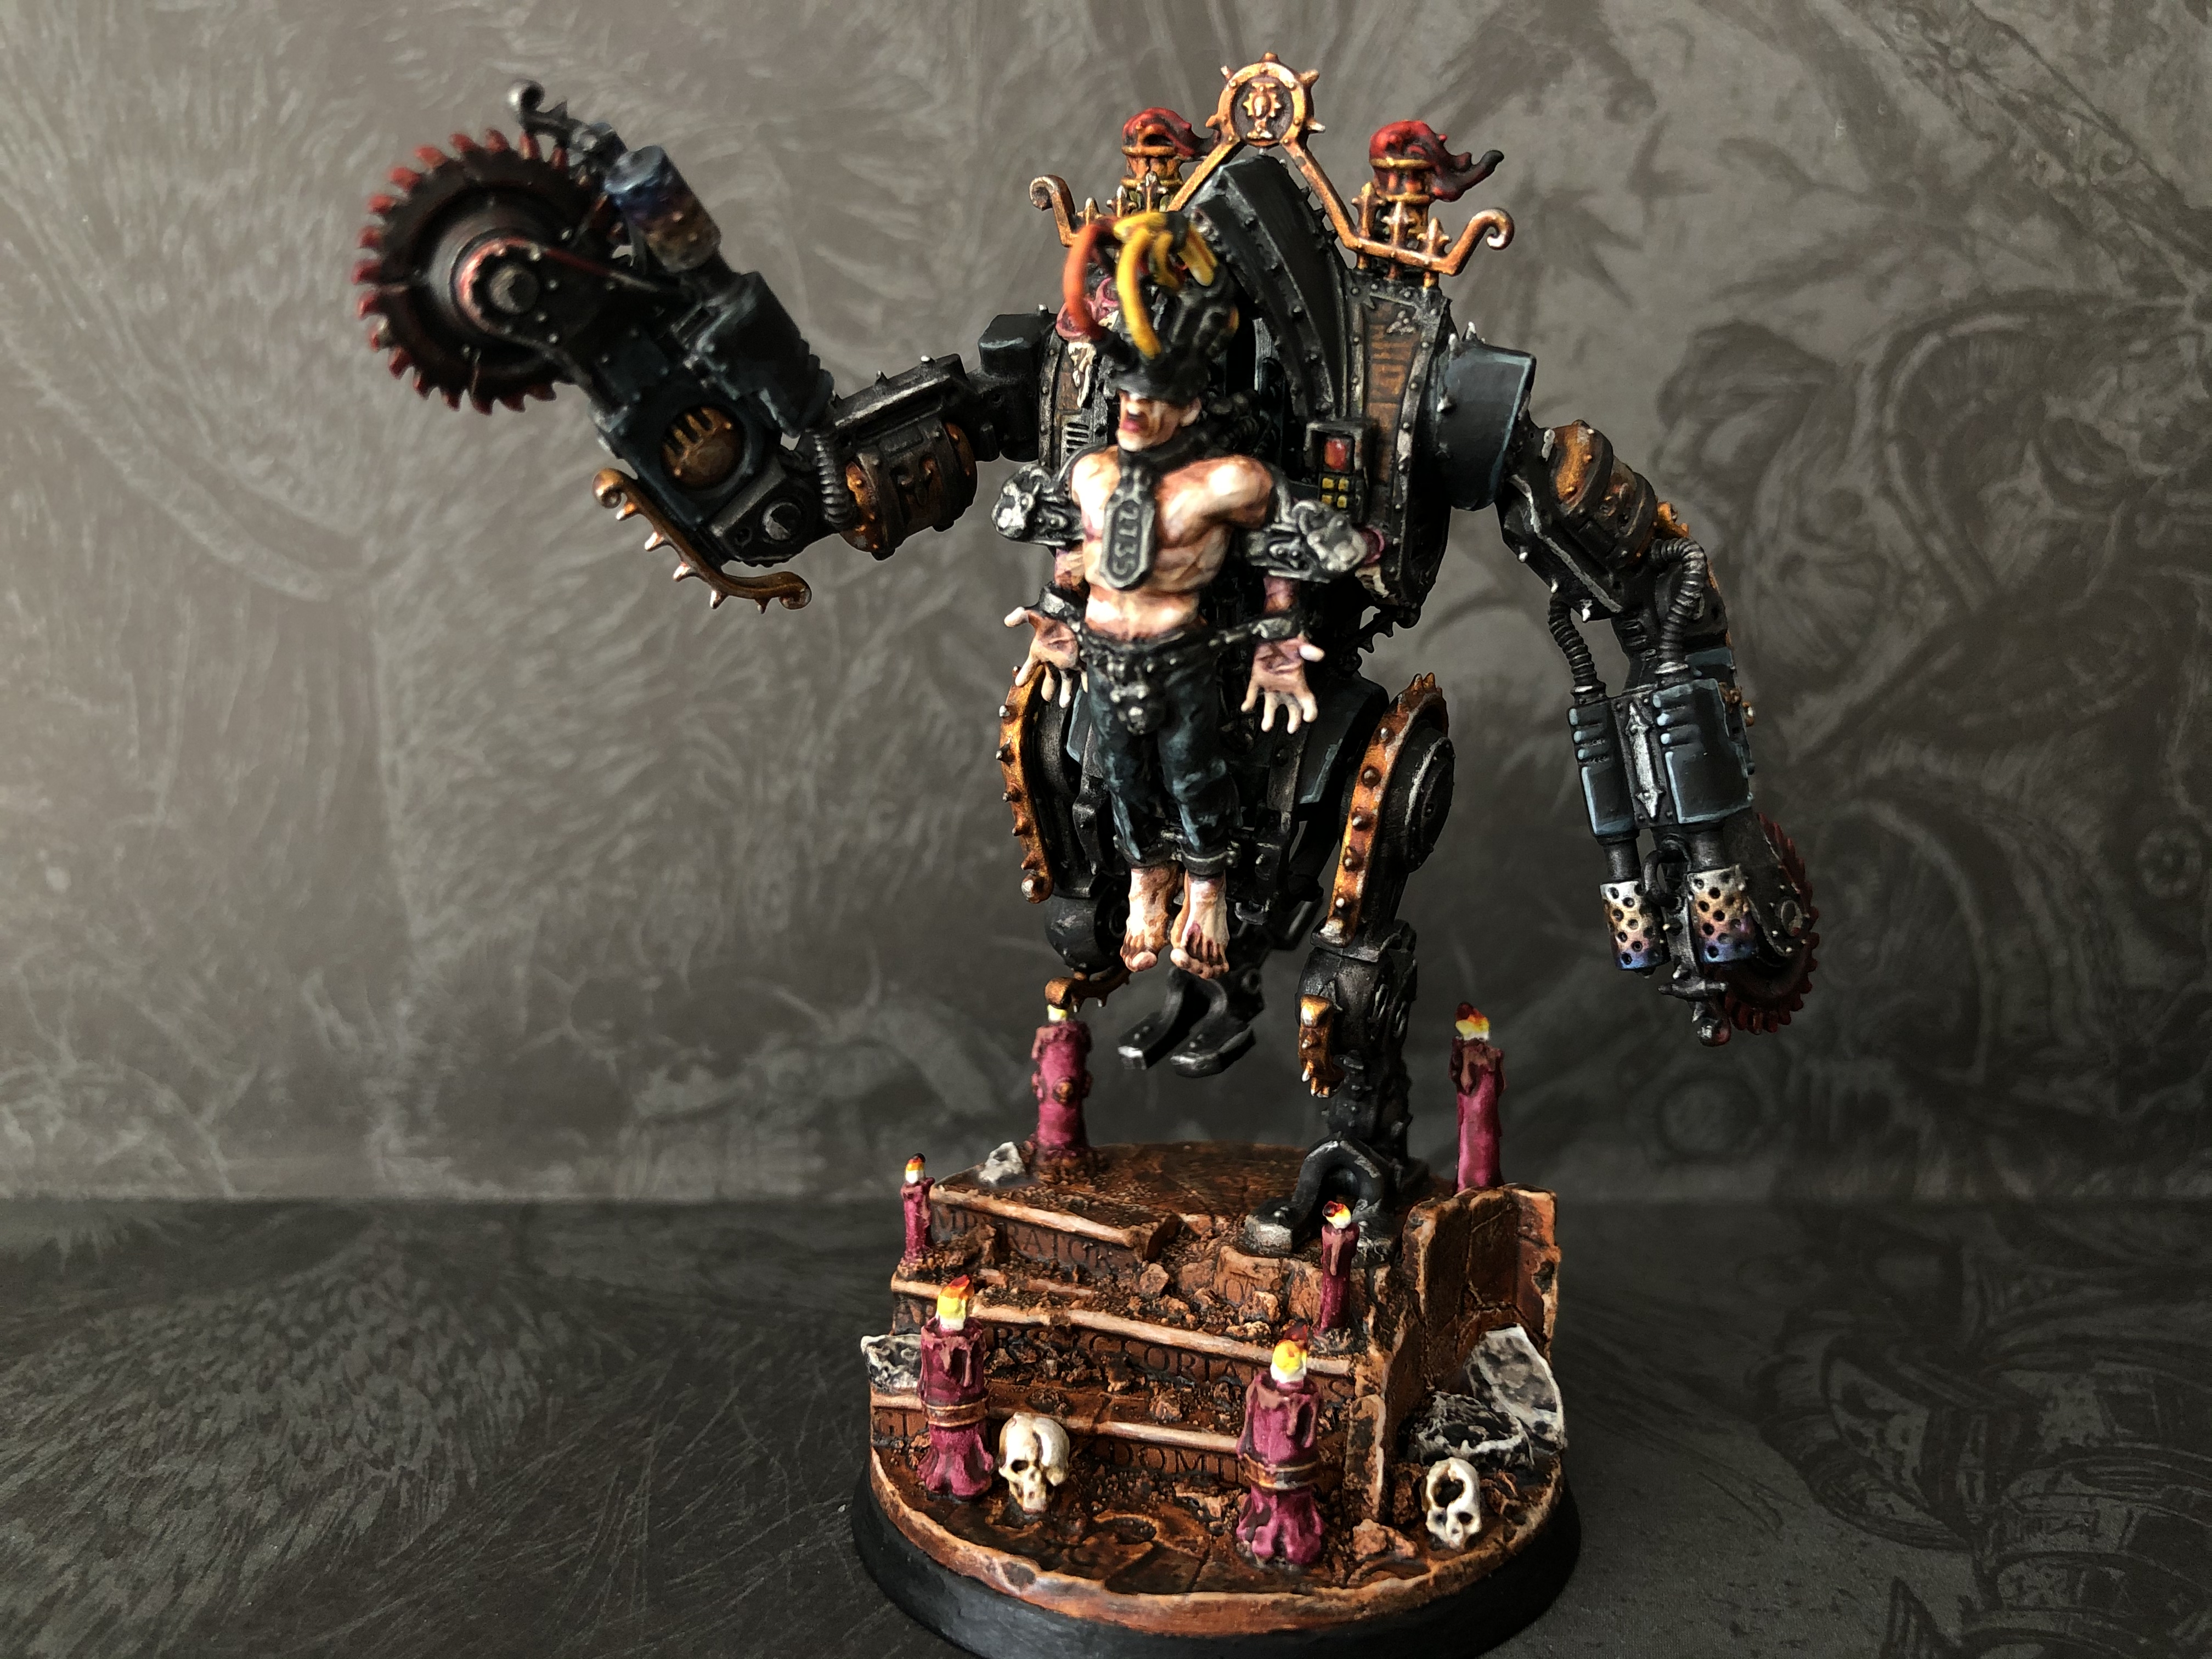
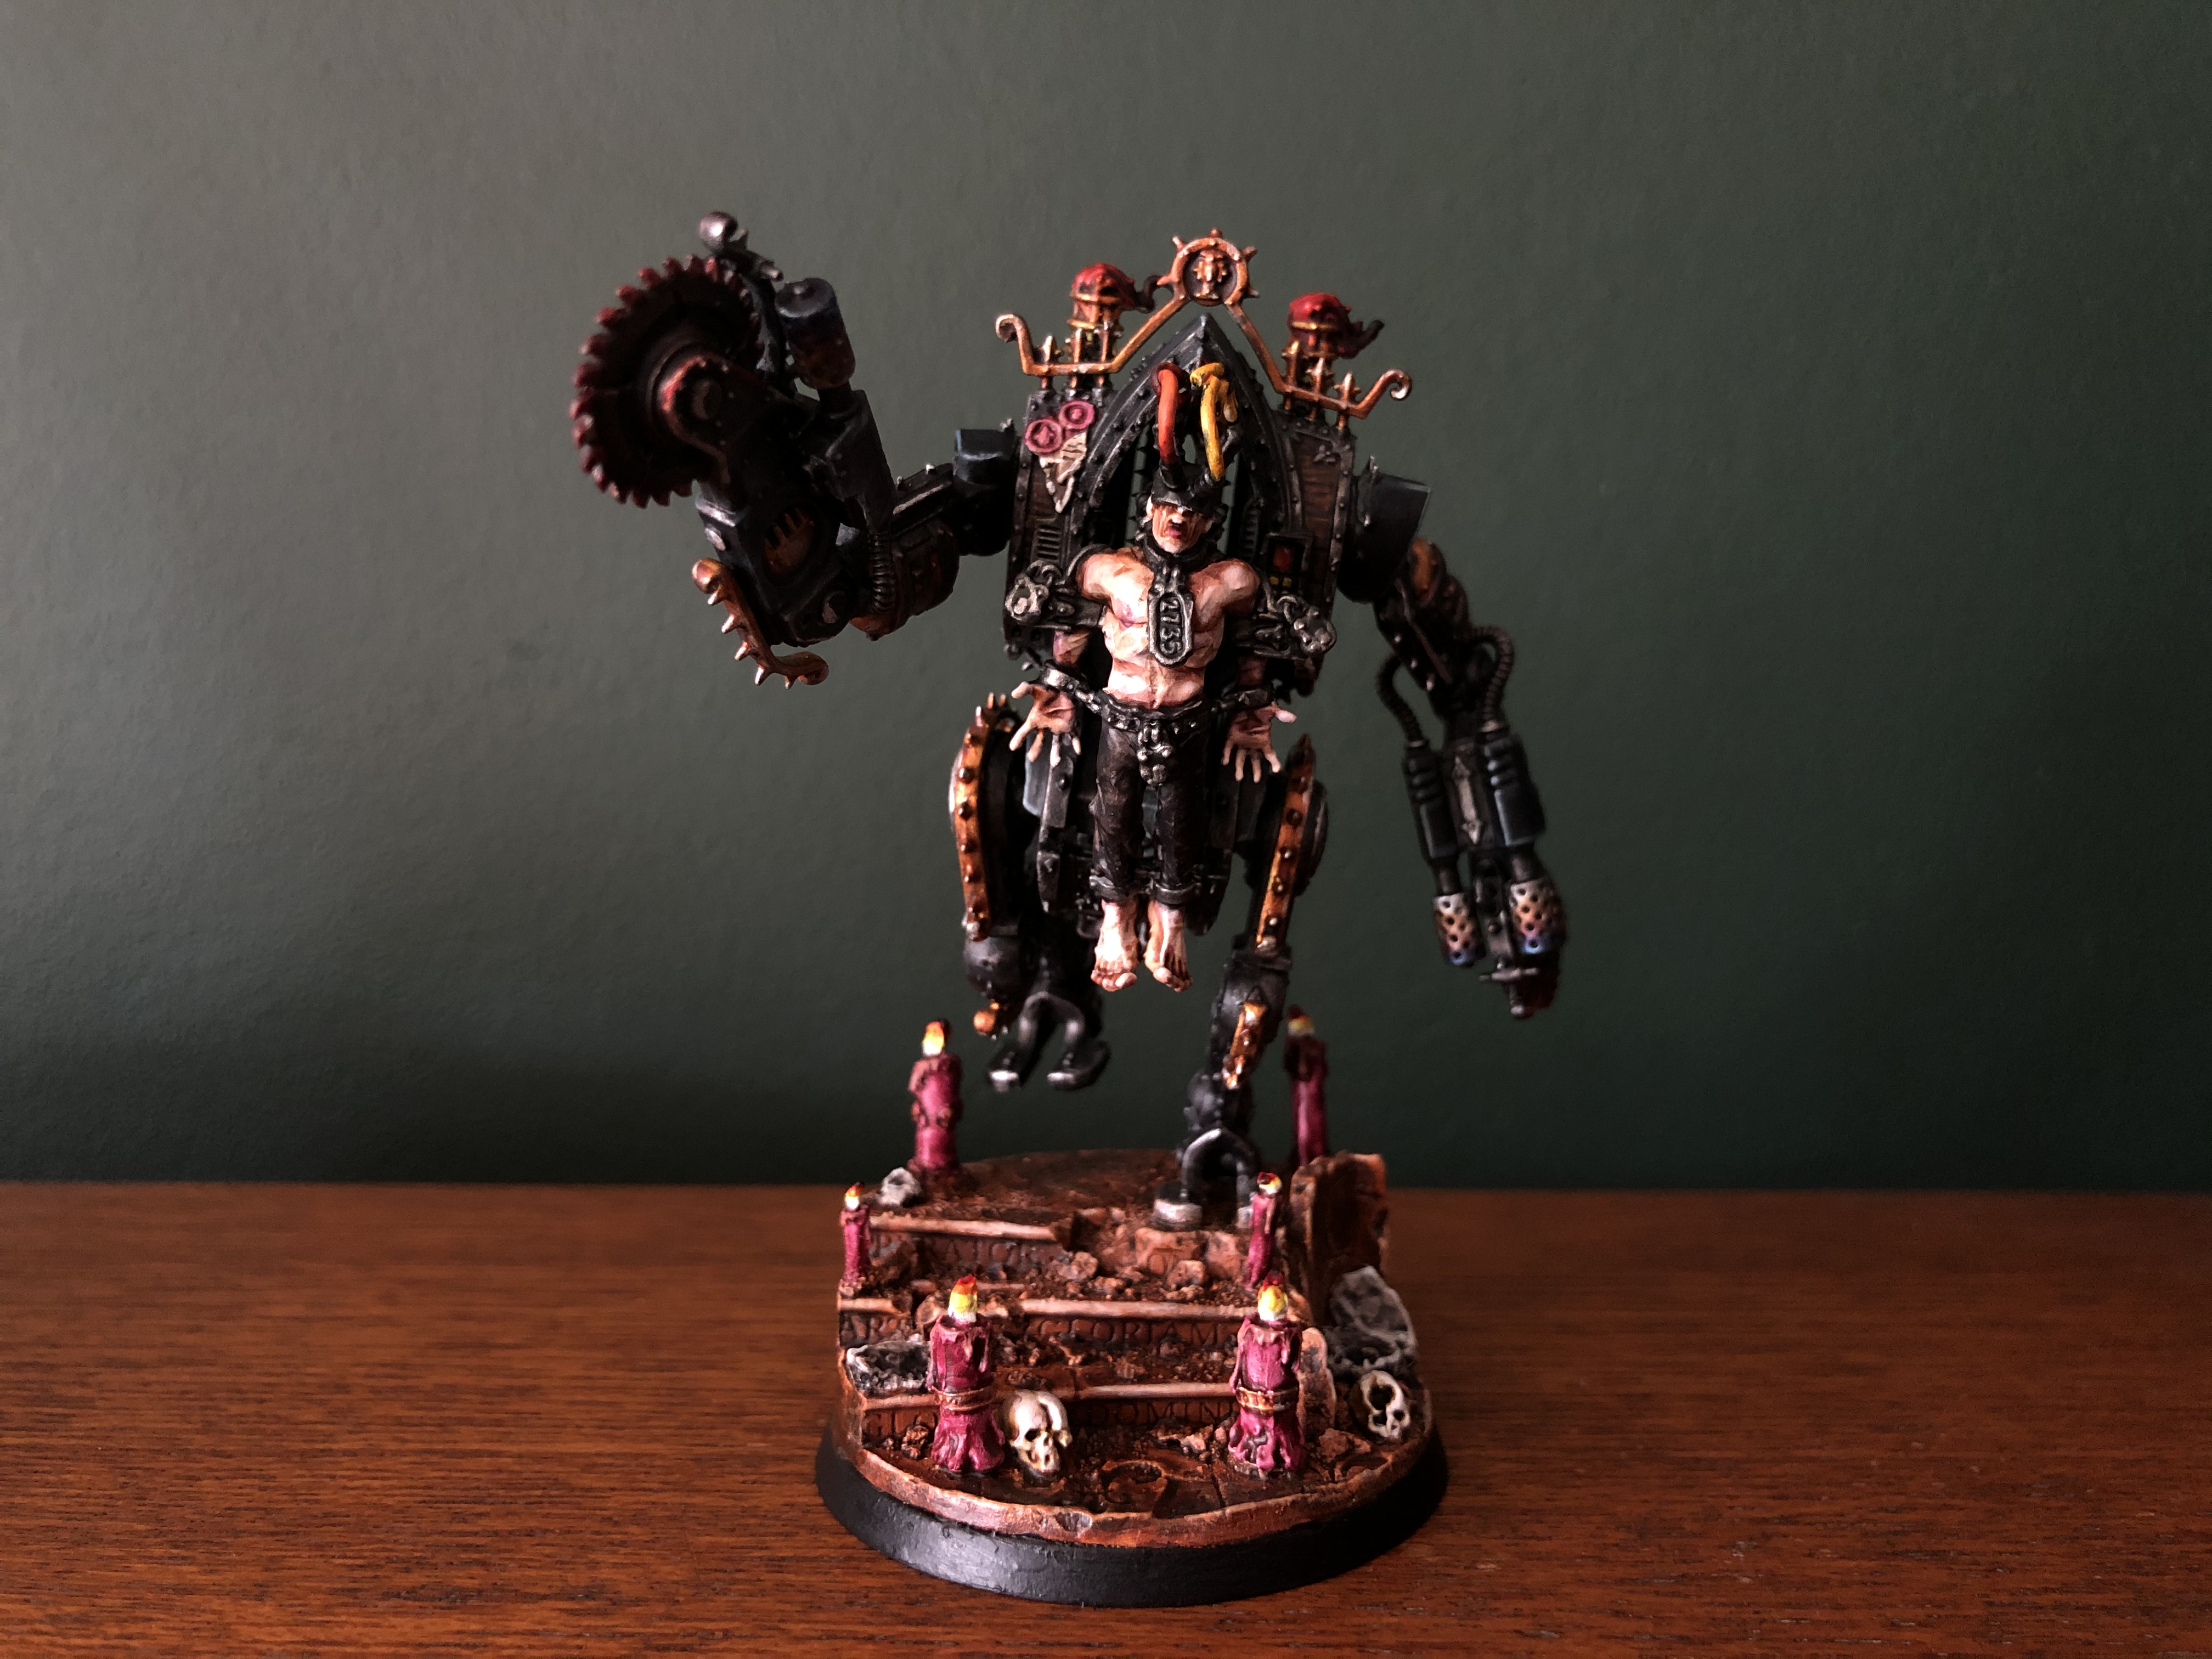
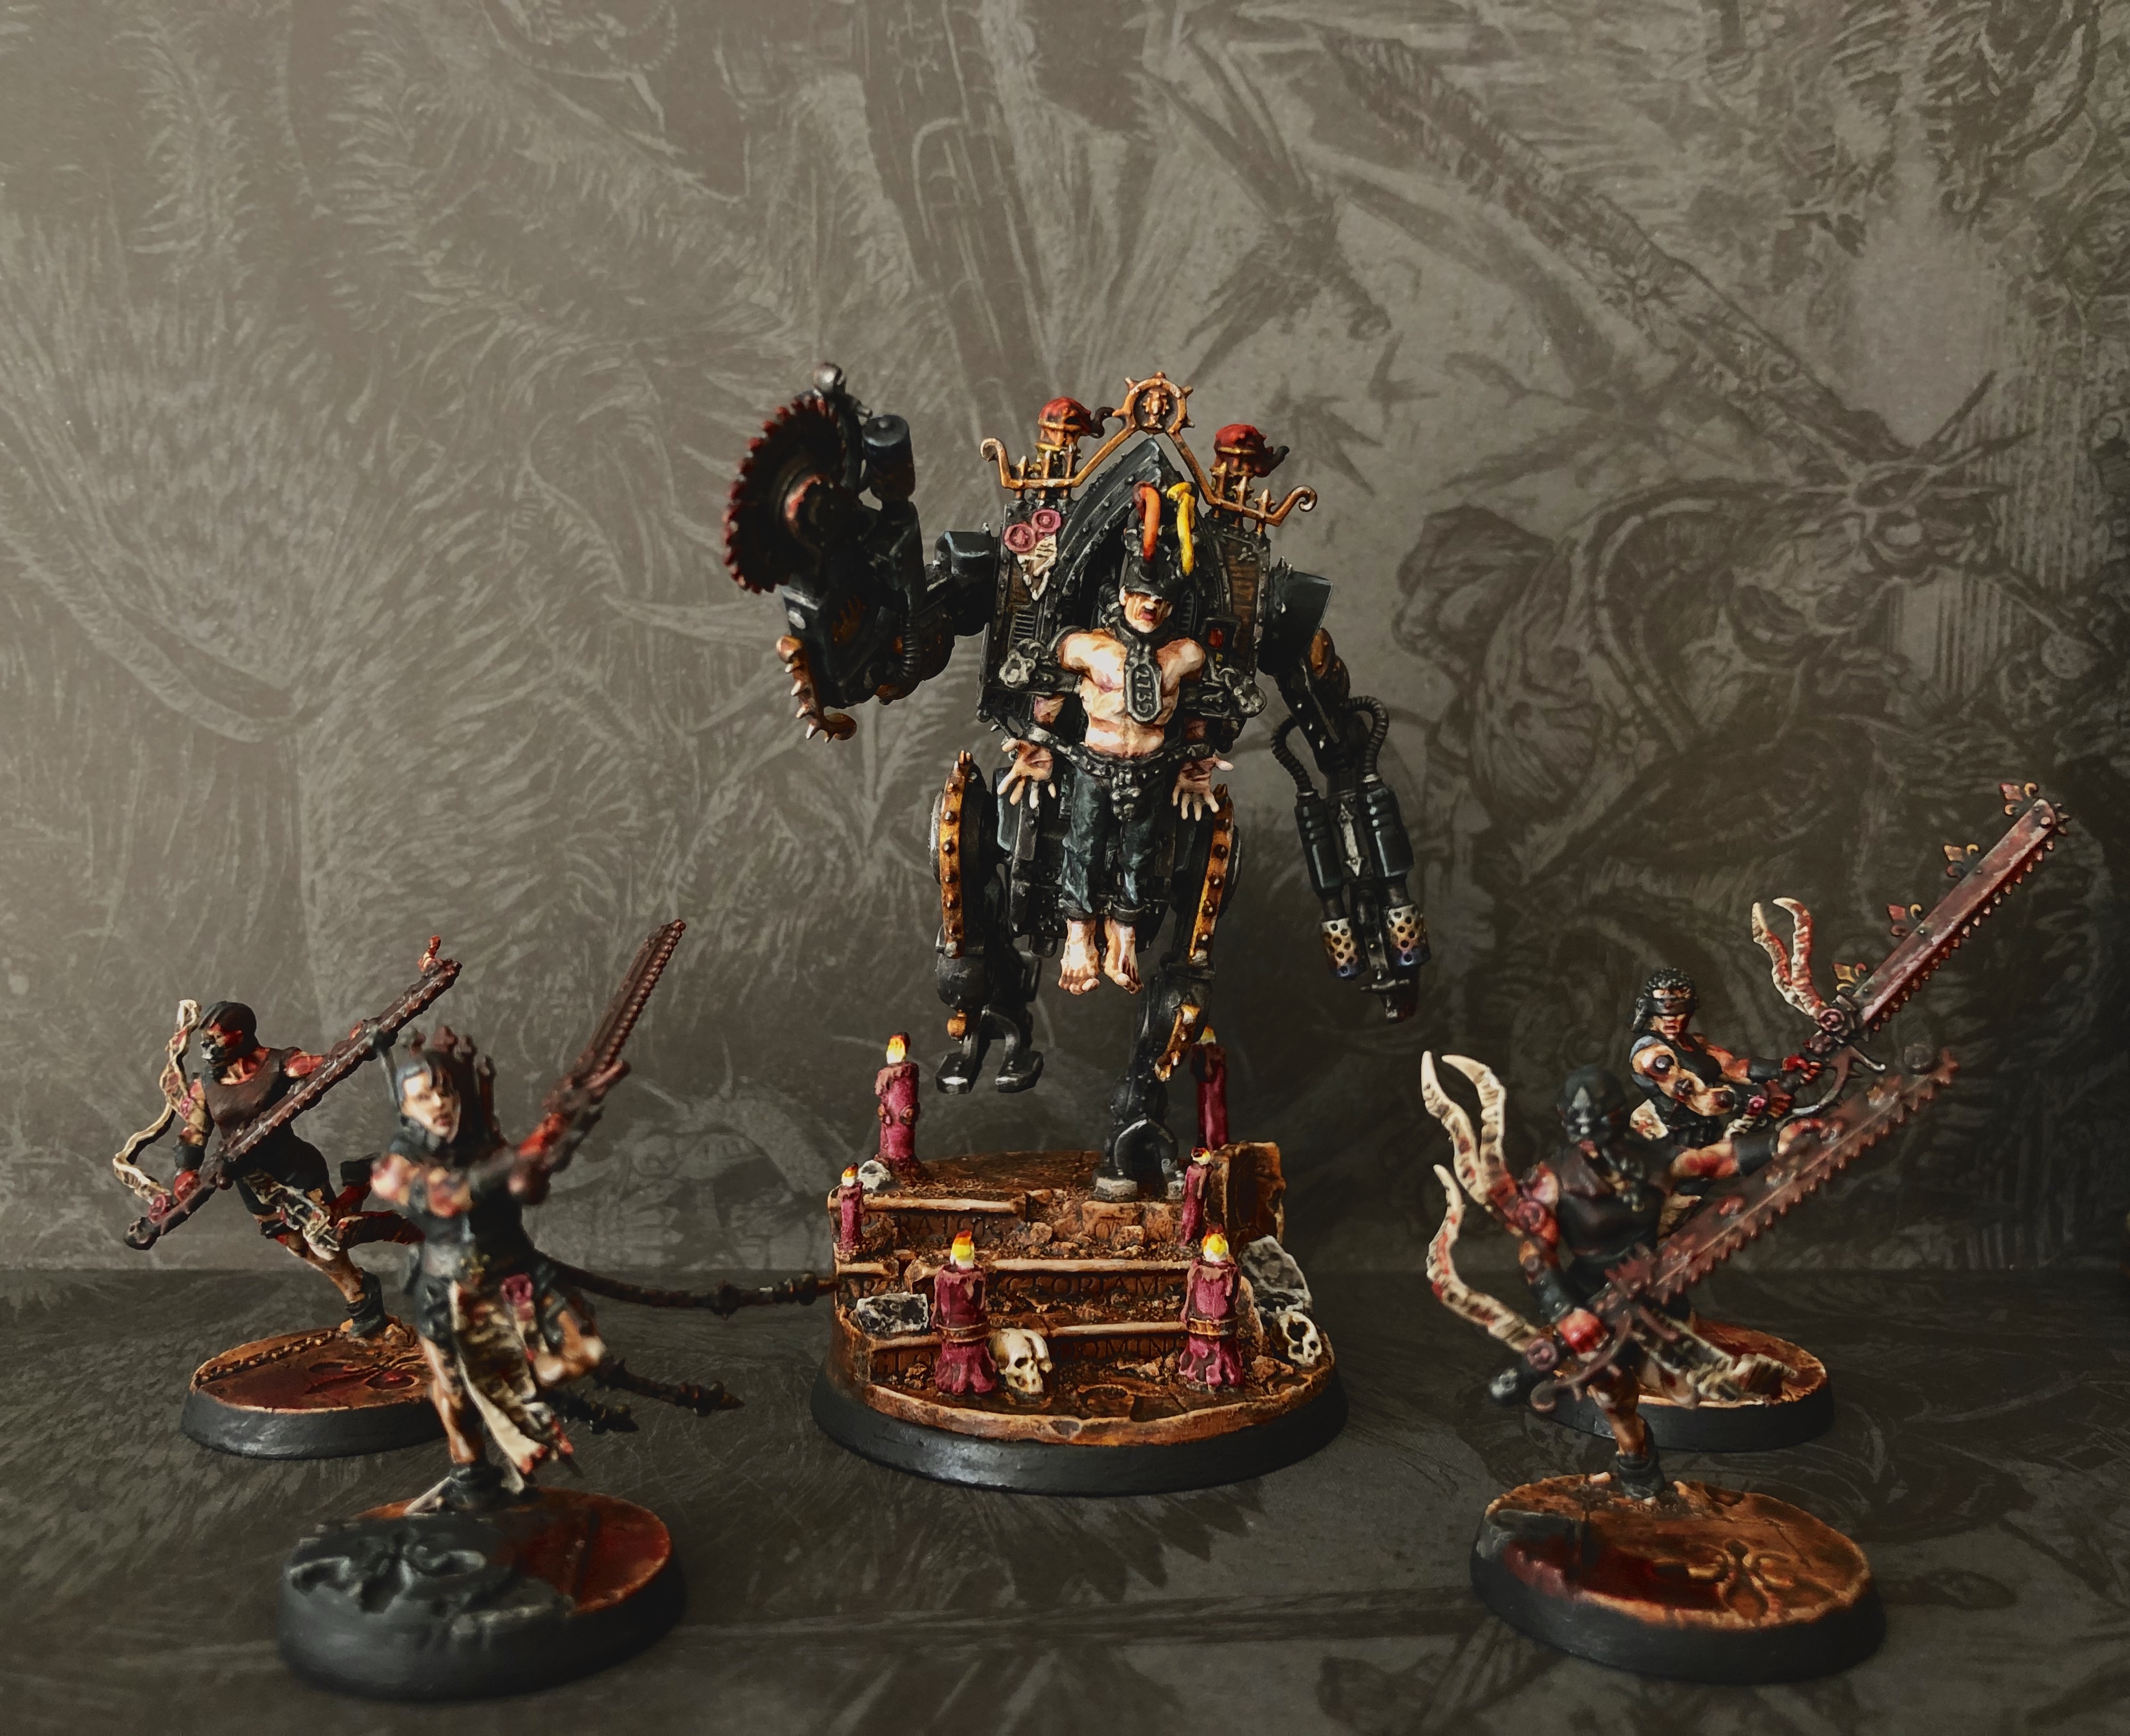
PENITENT ENGINE COMPLETE
*****
Awwwwh yeah put that in your pipe & smoke it. Actually don’t plastic is highly toxic. Man am I chuffed with the results of this bad boy. I’m actually not too far off completing my box set now with just the HQ’s & Seraphim to go. “Proper” pics are of course coming up next along with what’s next on the paint table.
Hope you enjoyed this guide & I’ll see you in the next one.
Much Love
Eternity Gate

HOLY FLAMING SAWING GOODNESS ~ A PENITENT ENGINE PAINTING GUIDE ~ PART 1
THIS ONE WAS BLOODY FUN
*****
Hello there lovely people. I’m back & have been busy paintning up my Penitent Engine from the Sisters of Battle limited edition box set. I know Lloyd wanted to see this one finished so here it is in all it’s gribbly glory. YES! Without further ado it’s paint list time. This is probably the most colours I have used yet but much of the process is exactly the same as my other painting guides. i’ll no doubt have to post this in multiple parts so lets get started.
PAINT LIST
*****
• WRAITHBONE
• CONTRAST BLACK TEMPLAR
• LEADBELCHER
• ARMY PAINTER SHINING SILVER
• CONTRAST BASILICANUM GREY
• RETRIBUTOR ARMOUR
• CONTRAST GUILLIMAN FLESH
• CONTRAST SNAKEBITE LEATHER
• NULN OIL
• AGRAX EARTHSHADE
• CONTRAST VOLUPUS PINK
• 005 BLACK MICRON PEN
• DARK REAPER
• THUNDERHAWK BLUE
• WHITE SCAR
• CONTRAST MEDIUM
• GORE GRUNTA FUR
• KINDLE-FLAME
• CONTRAST SKELETON HORDE
• BUGMANS GLOW
• ARMY PAINTER DAEMONIC YELLOW
• TROLL SLAYER ORANGE
• CONTRAST BLOOD ANGELS RED
• CONTRAST FLESH TEARERS RED
• ABADDON BLACK
• ARMY PAINTER BARBARIAN FLESH
• ARMY PAINTER PURPLE TONE
• ARMY PAINTER BLUE TONE
• ARMY PAINTER FLESH WASH
• CONTRAST IYANDEN YELLOW
• BLOOD FOR THE BLOOD GOD
• ARMY PAINTER ANTI-SHINE

HERE WE GO AGAIN
*****
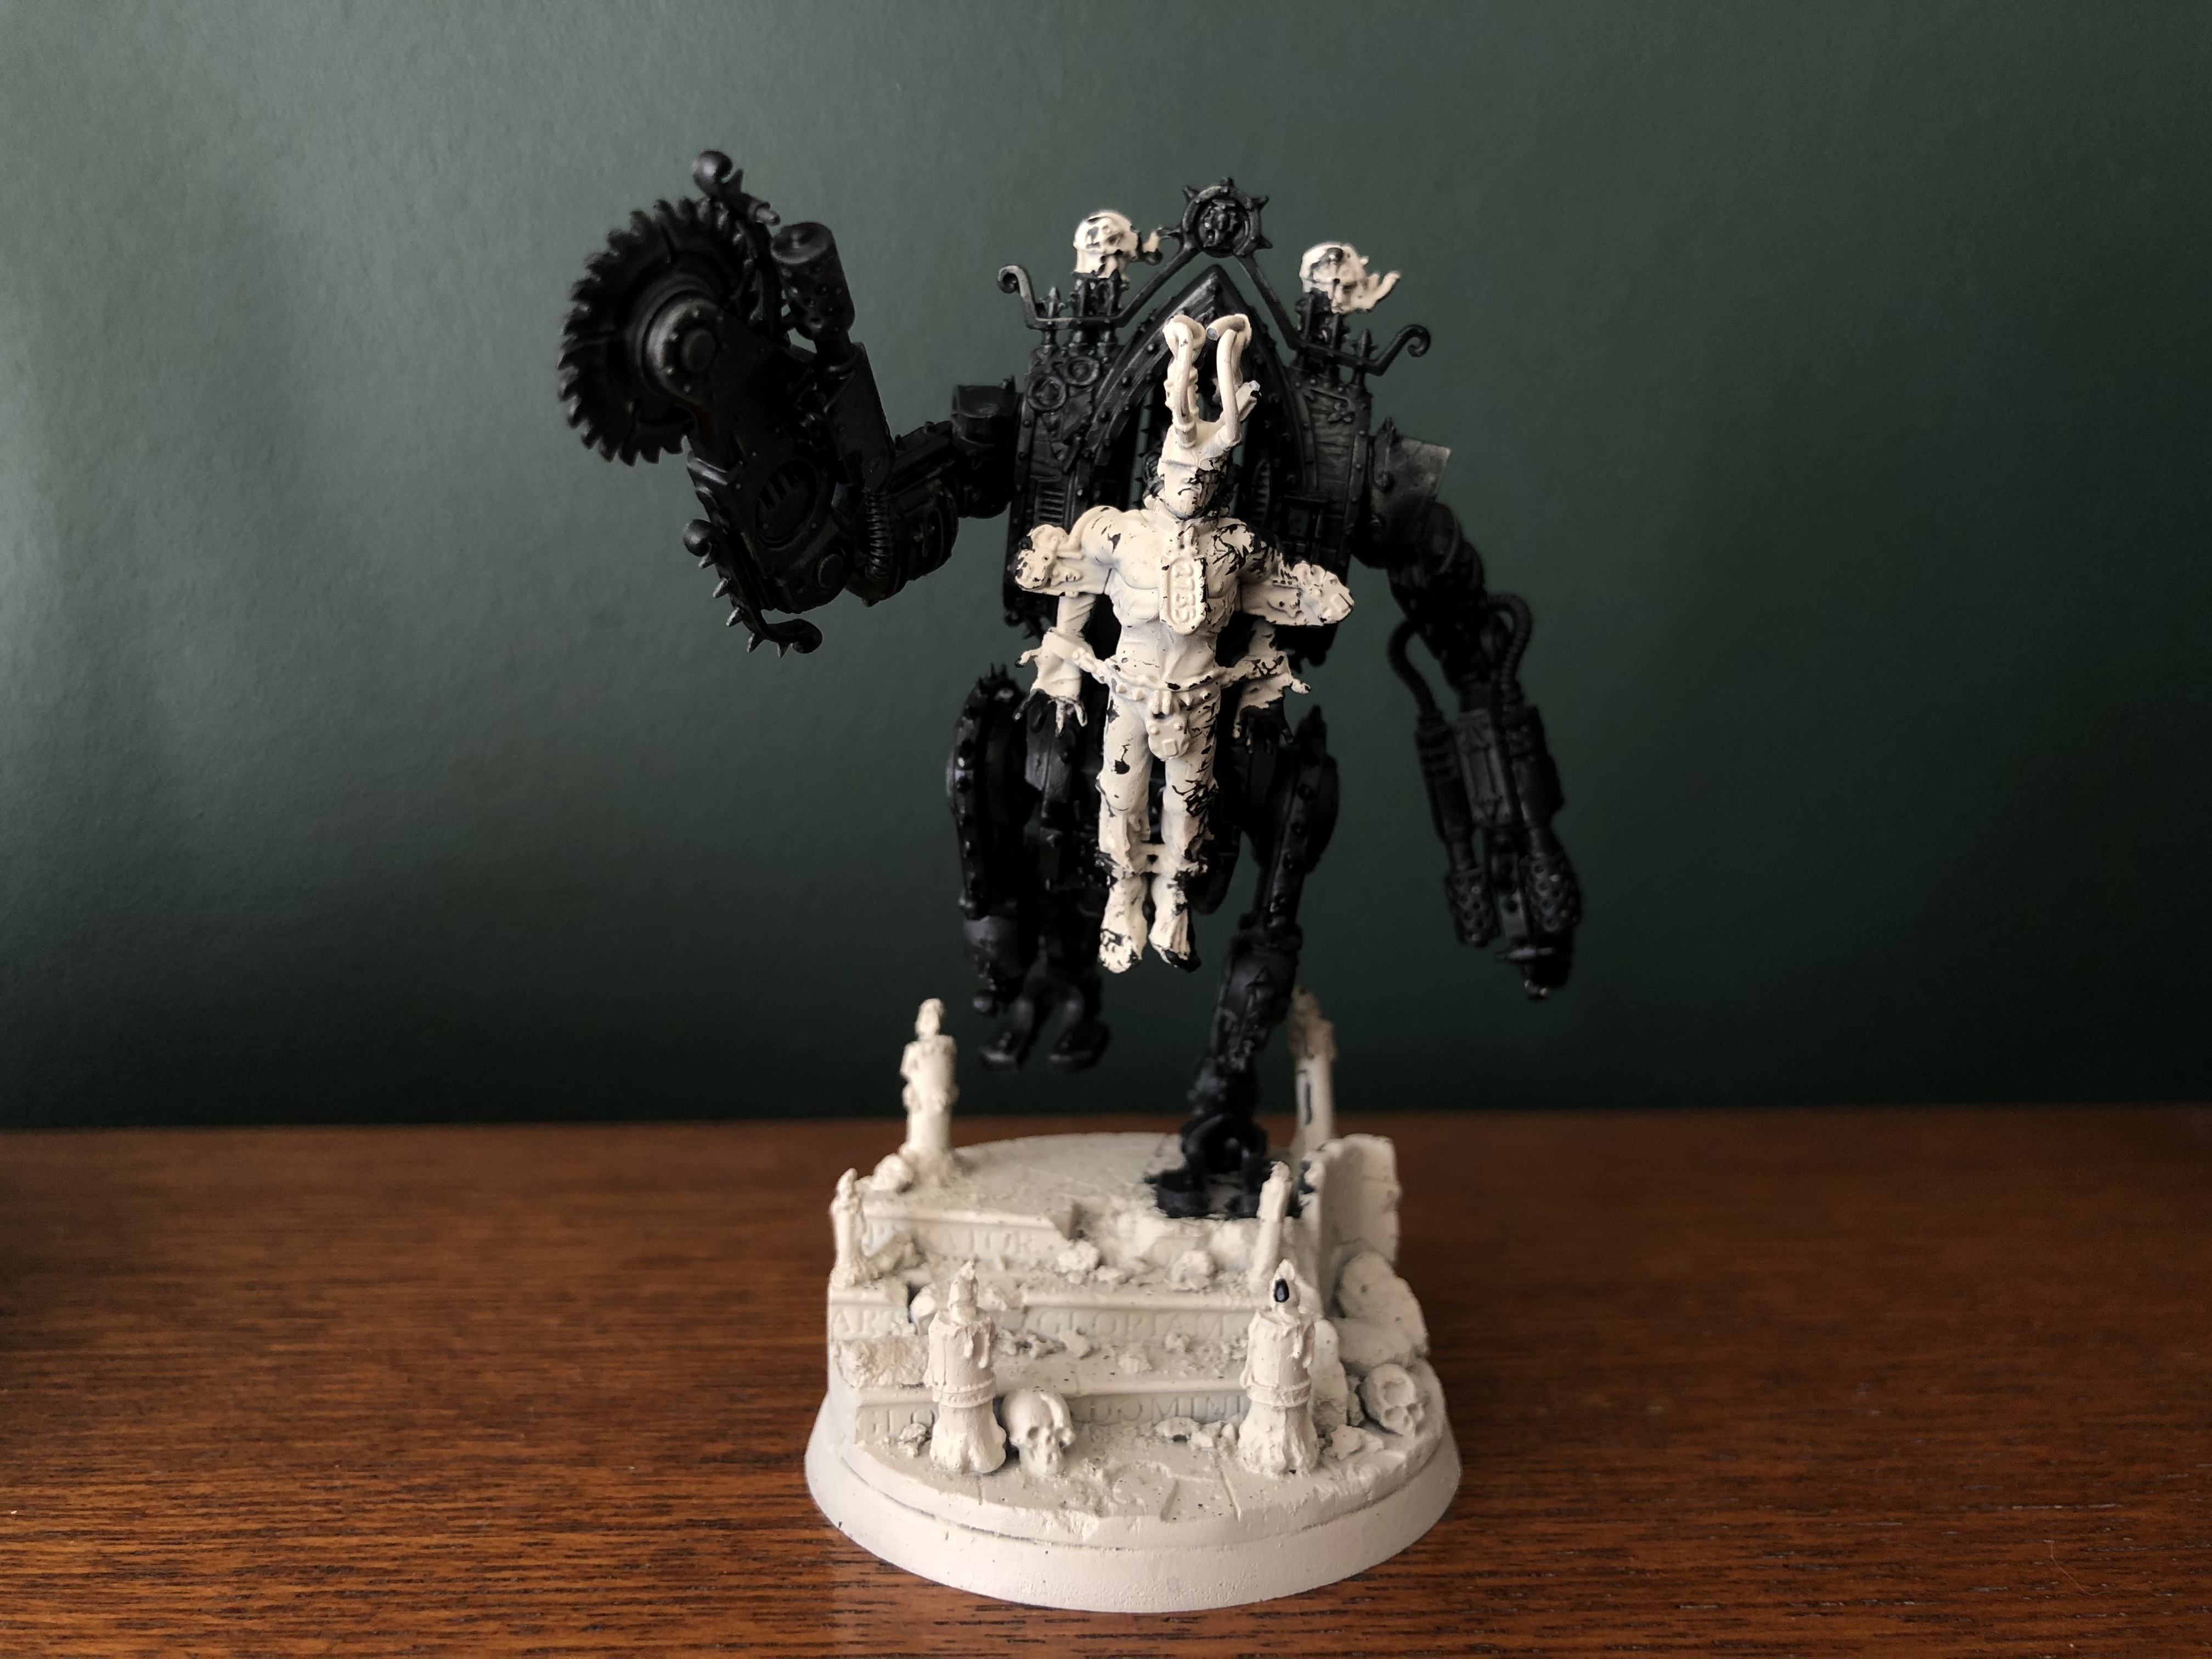
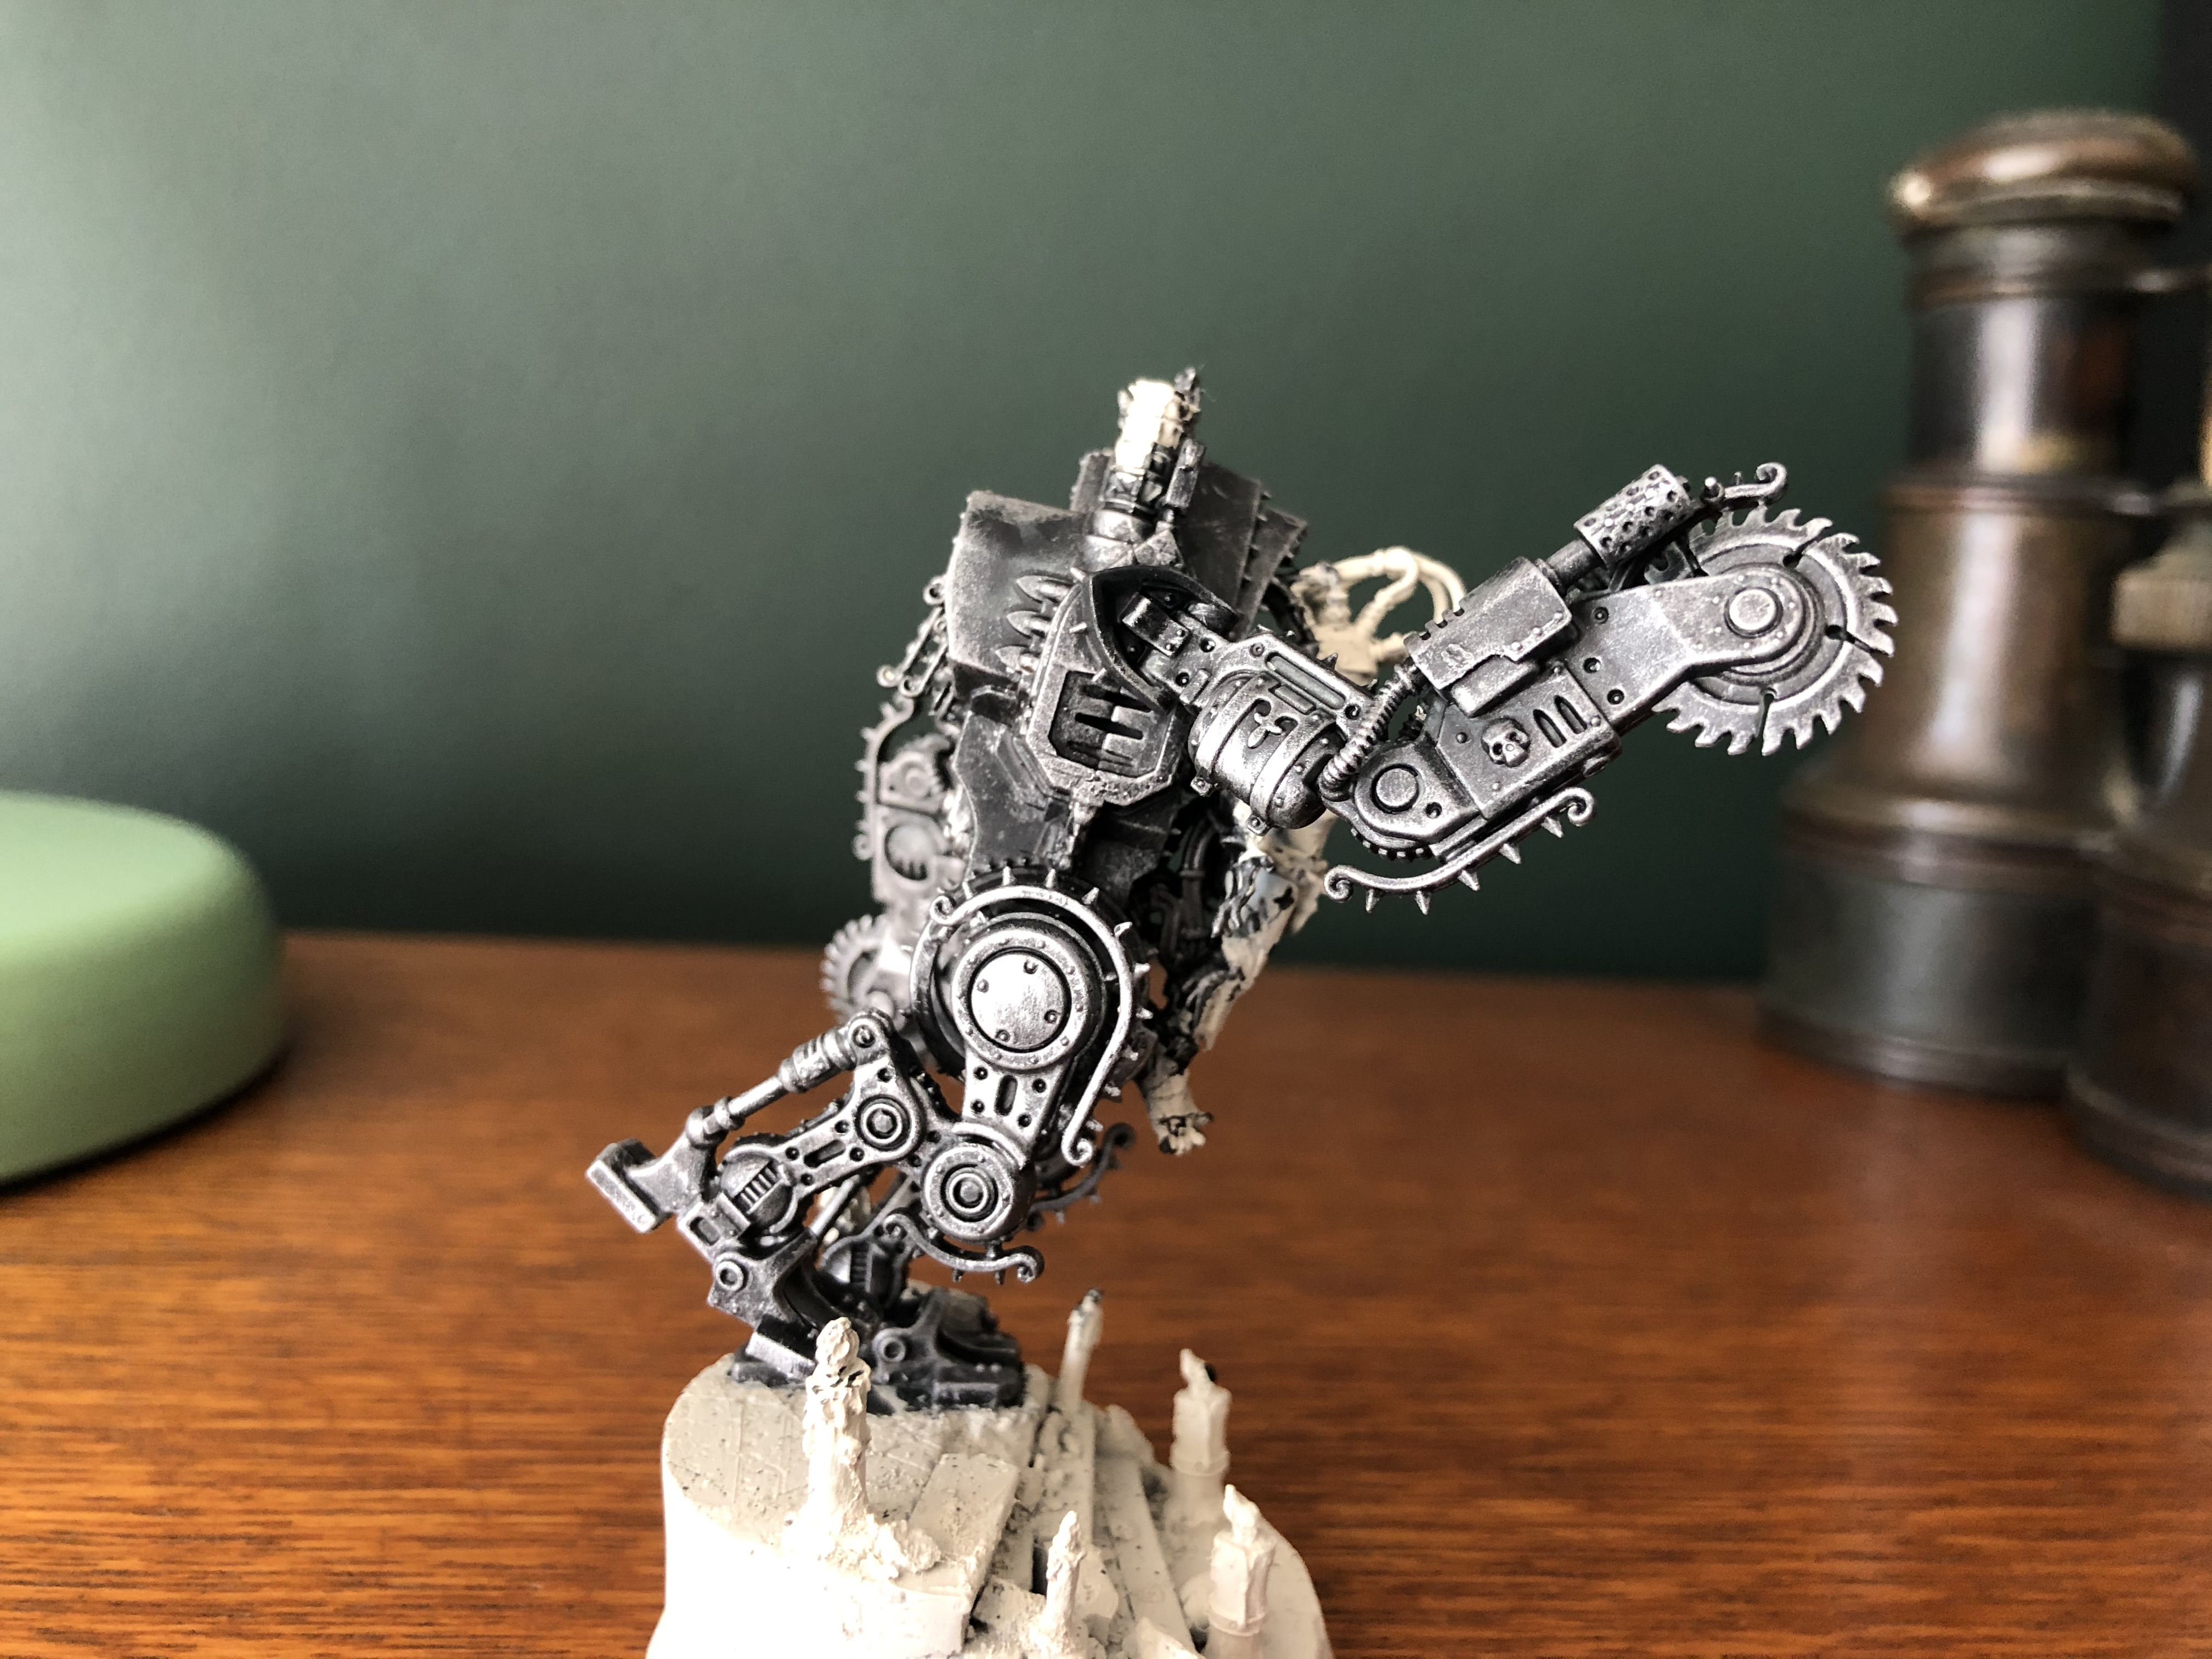
I began with a Wraithbone base as always before applying a single coat straight from the pot of Contrast Black Templar. I applied this all over the main Chassis of the model. Once this had dried I gave all the black a drybrush of Leadbelcher. After this I used Army Painter Shining Silver to apply a highlight to the more raised parts of the metallics & then used Contrast Basilicanum Grey to apply a glaze & give that metal that lovely muted matt feel.


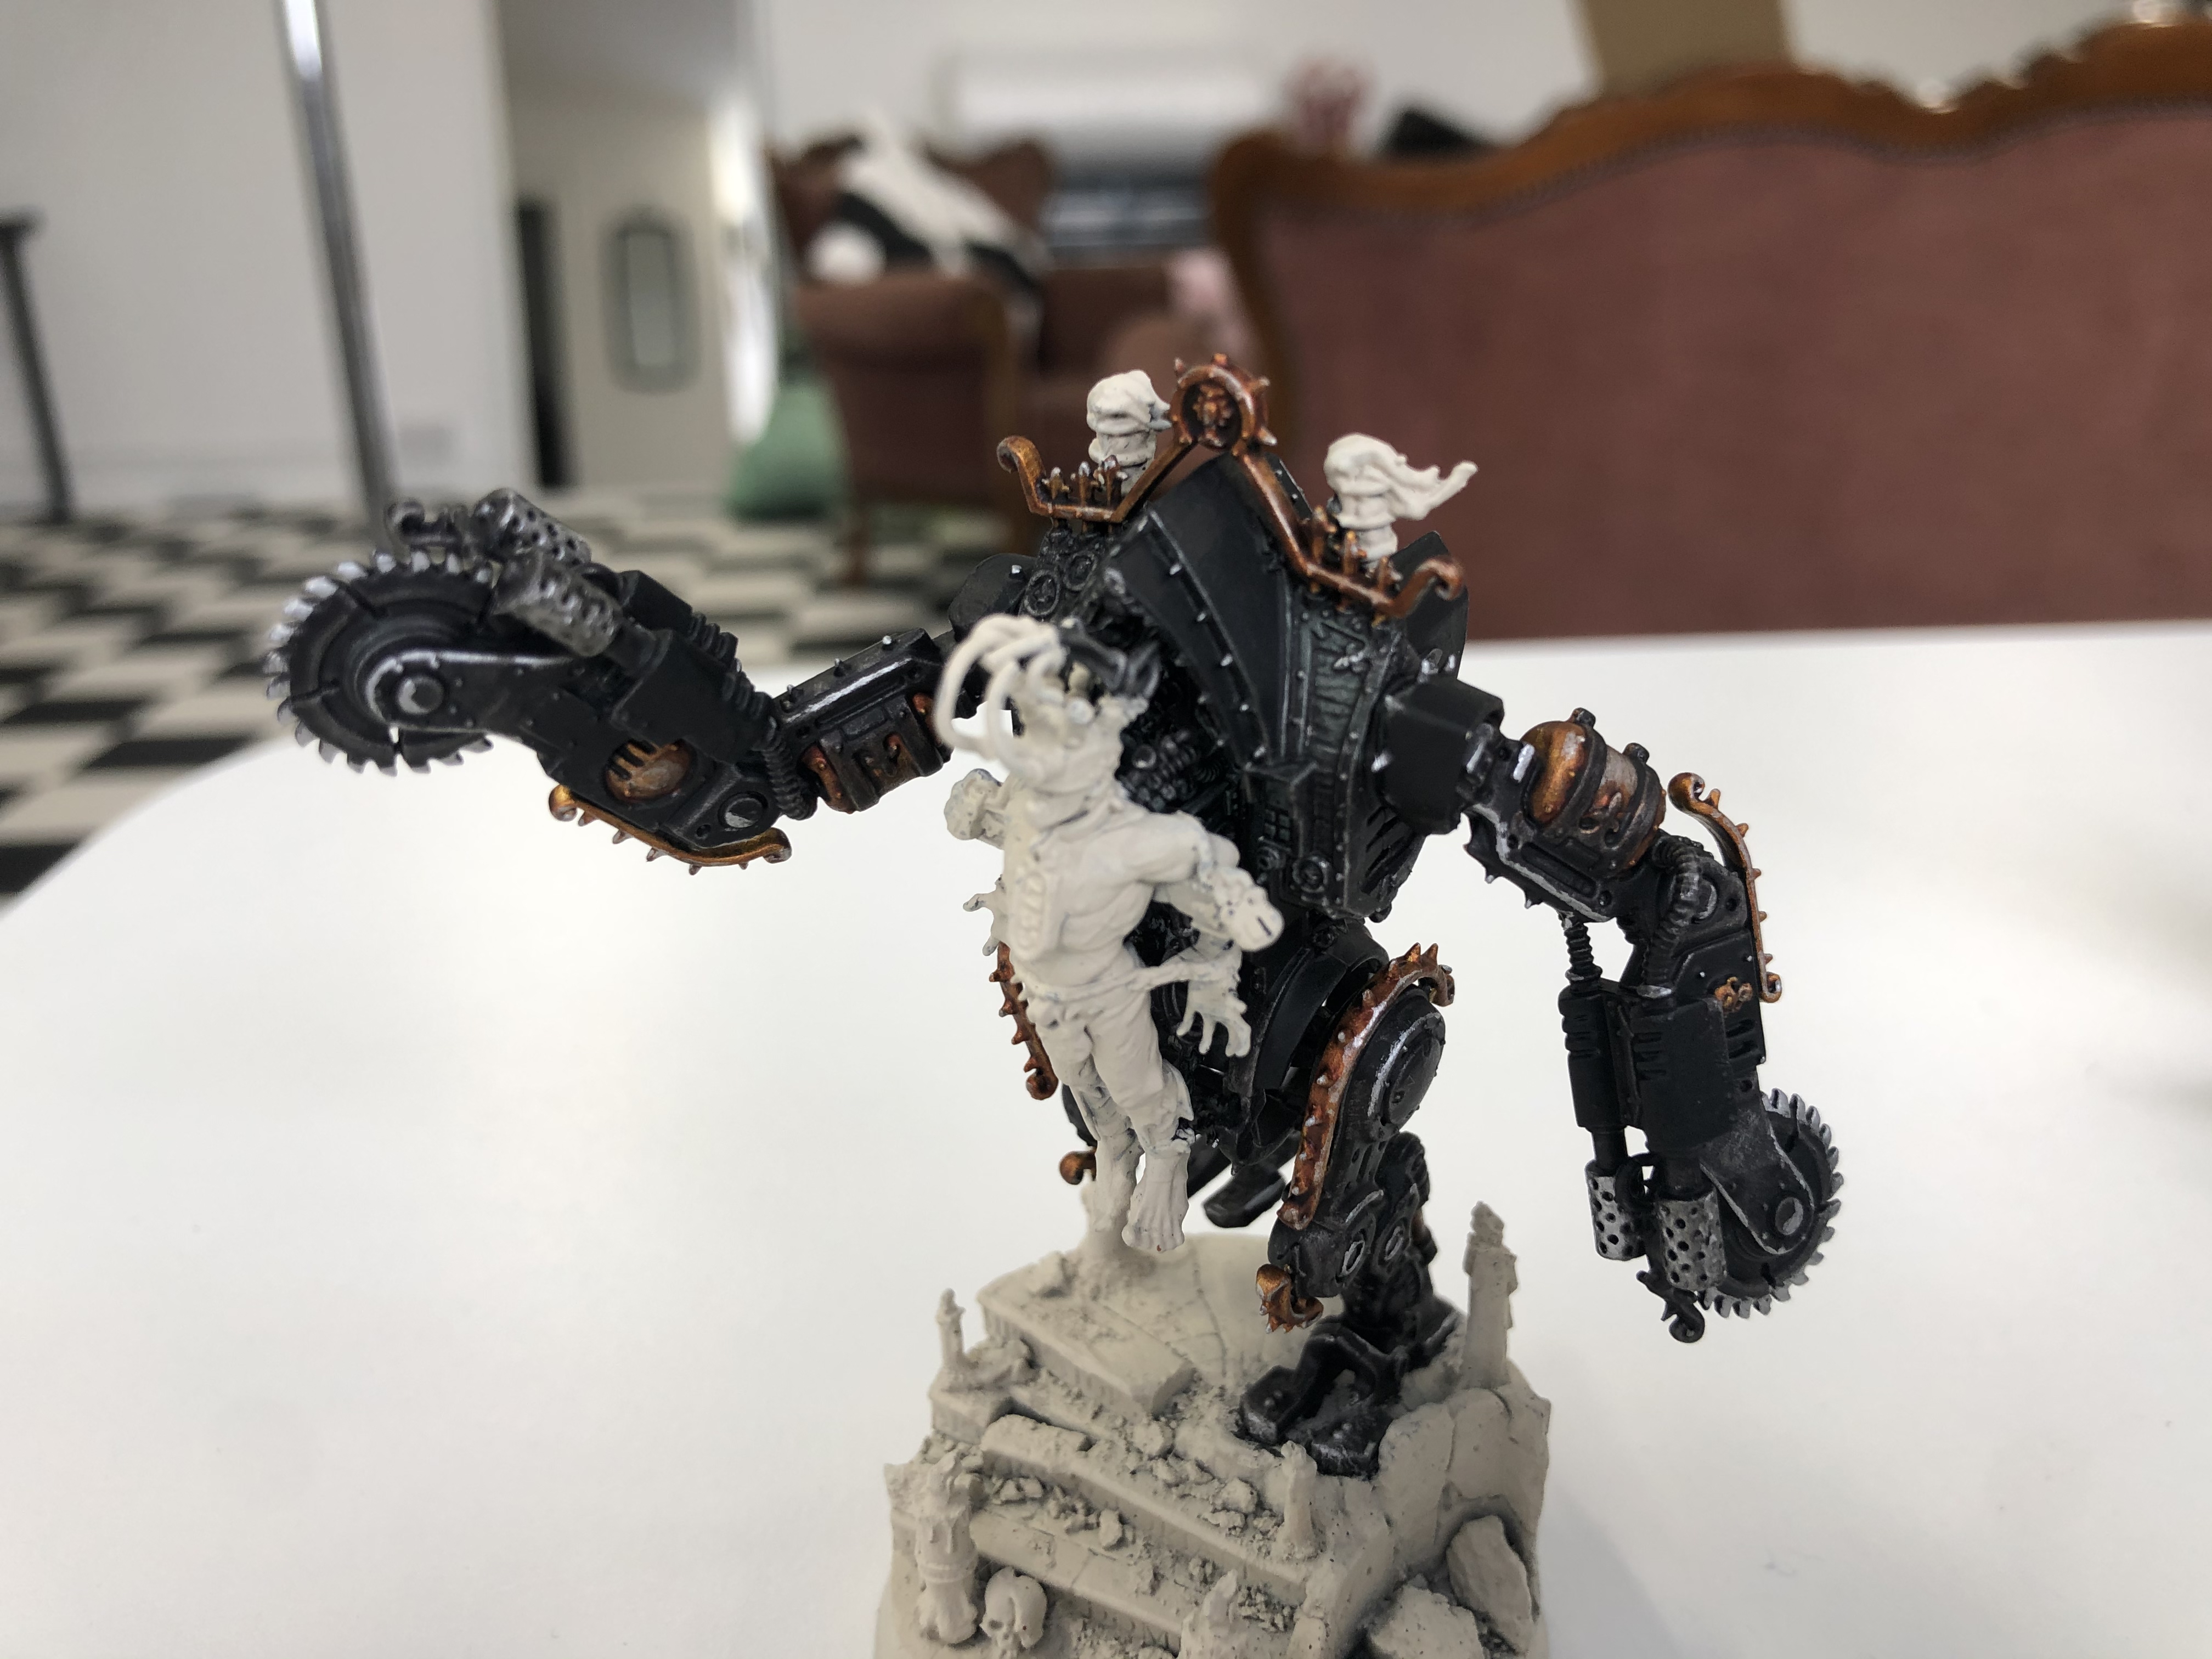

I then went over all of the panels on the model with Contrast Black Templar & applied Retributor Armour to the gold details like fuel tanks, hydrolics & other bits & pieces I thought would look funky. When that had dried I went over the gold with Contrast Guilliman Flesh. A final highlight of Army Painter Shining Silver was then applied to both the silver & gold sections of the model. With that the metallics were pretty much complete.
I’ll leave it there for this one but stay tuned for Part 2 of my Penitent Engine painting guide coming in the next day or two. YES.
Much Love
Eternity Gate
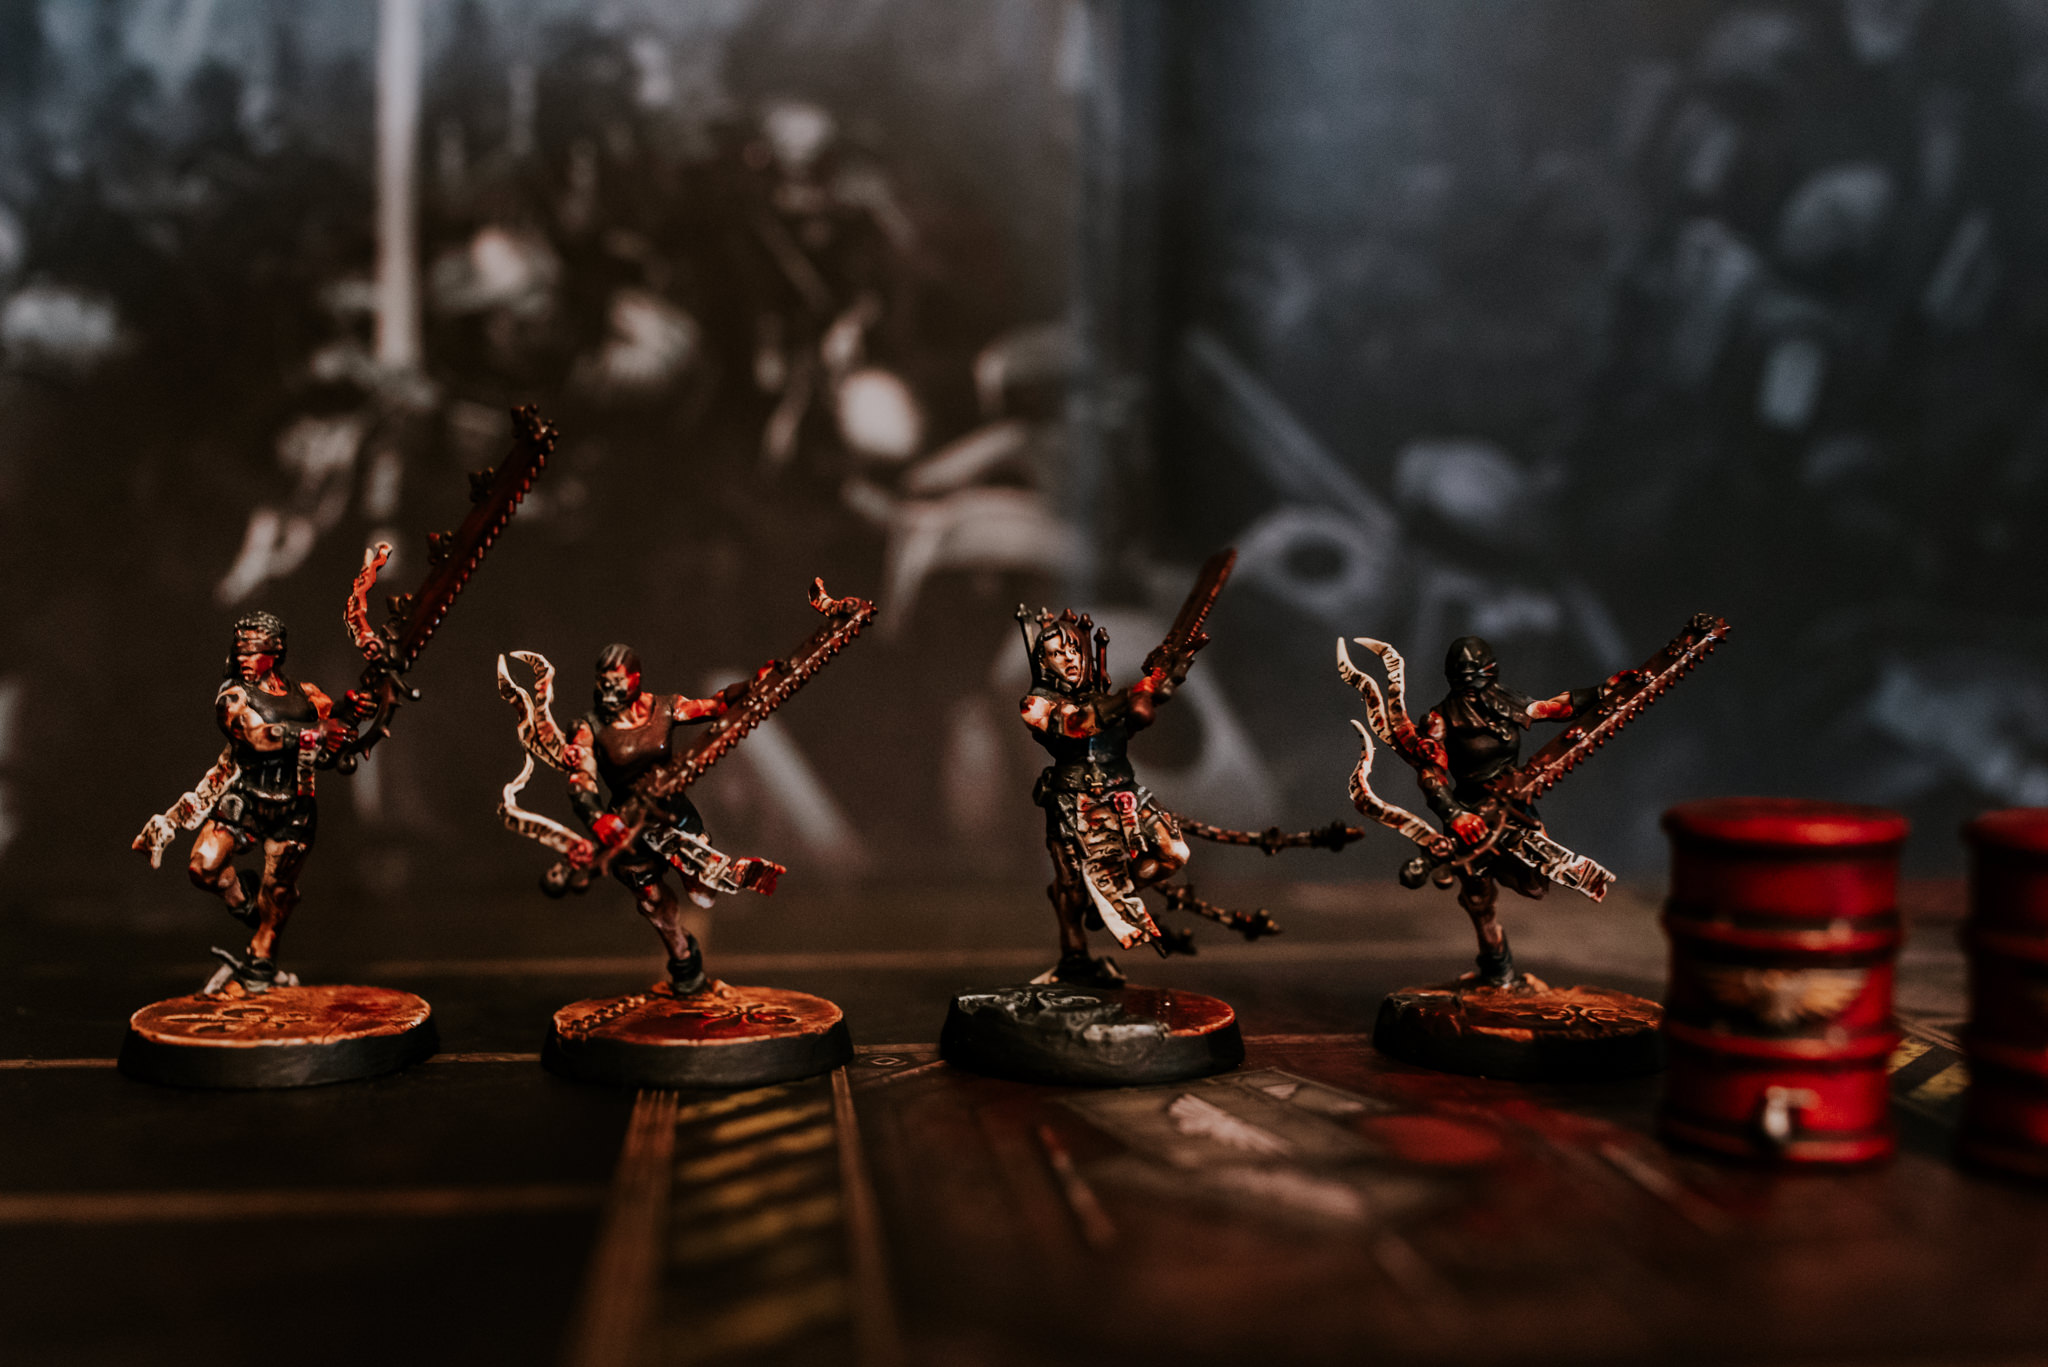
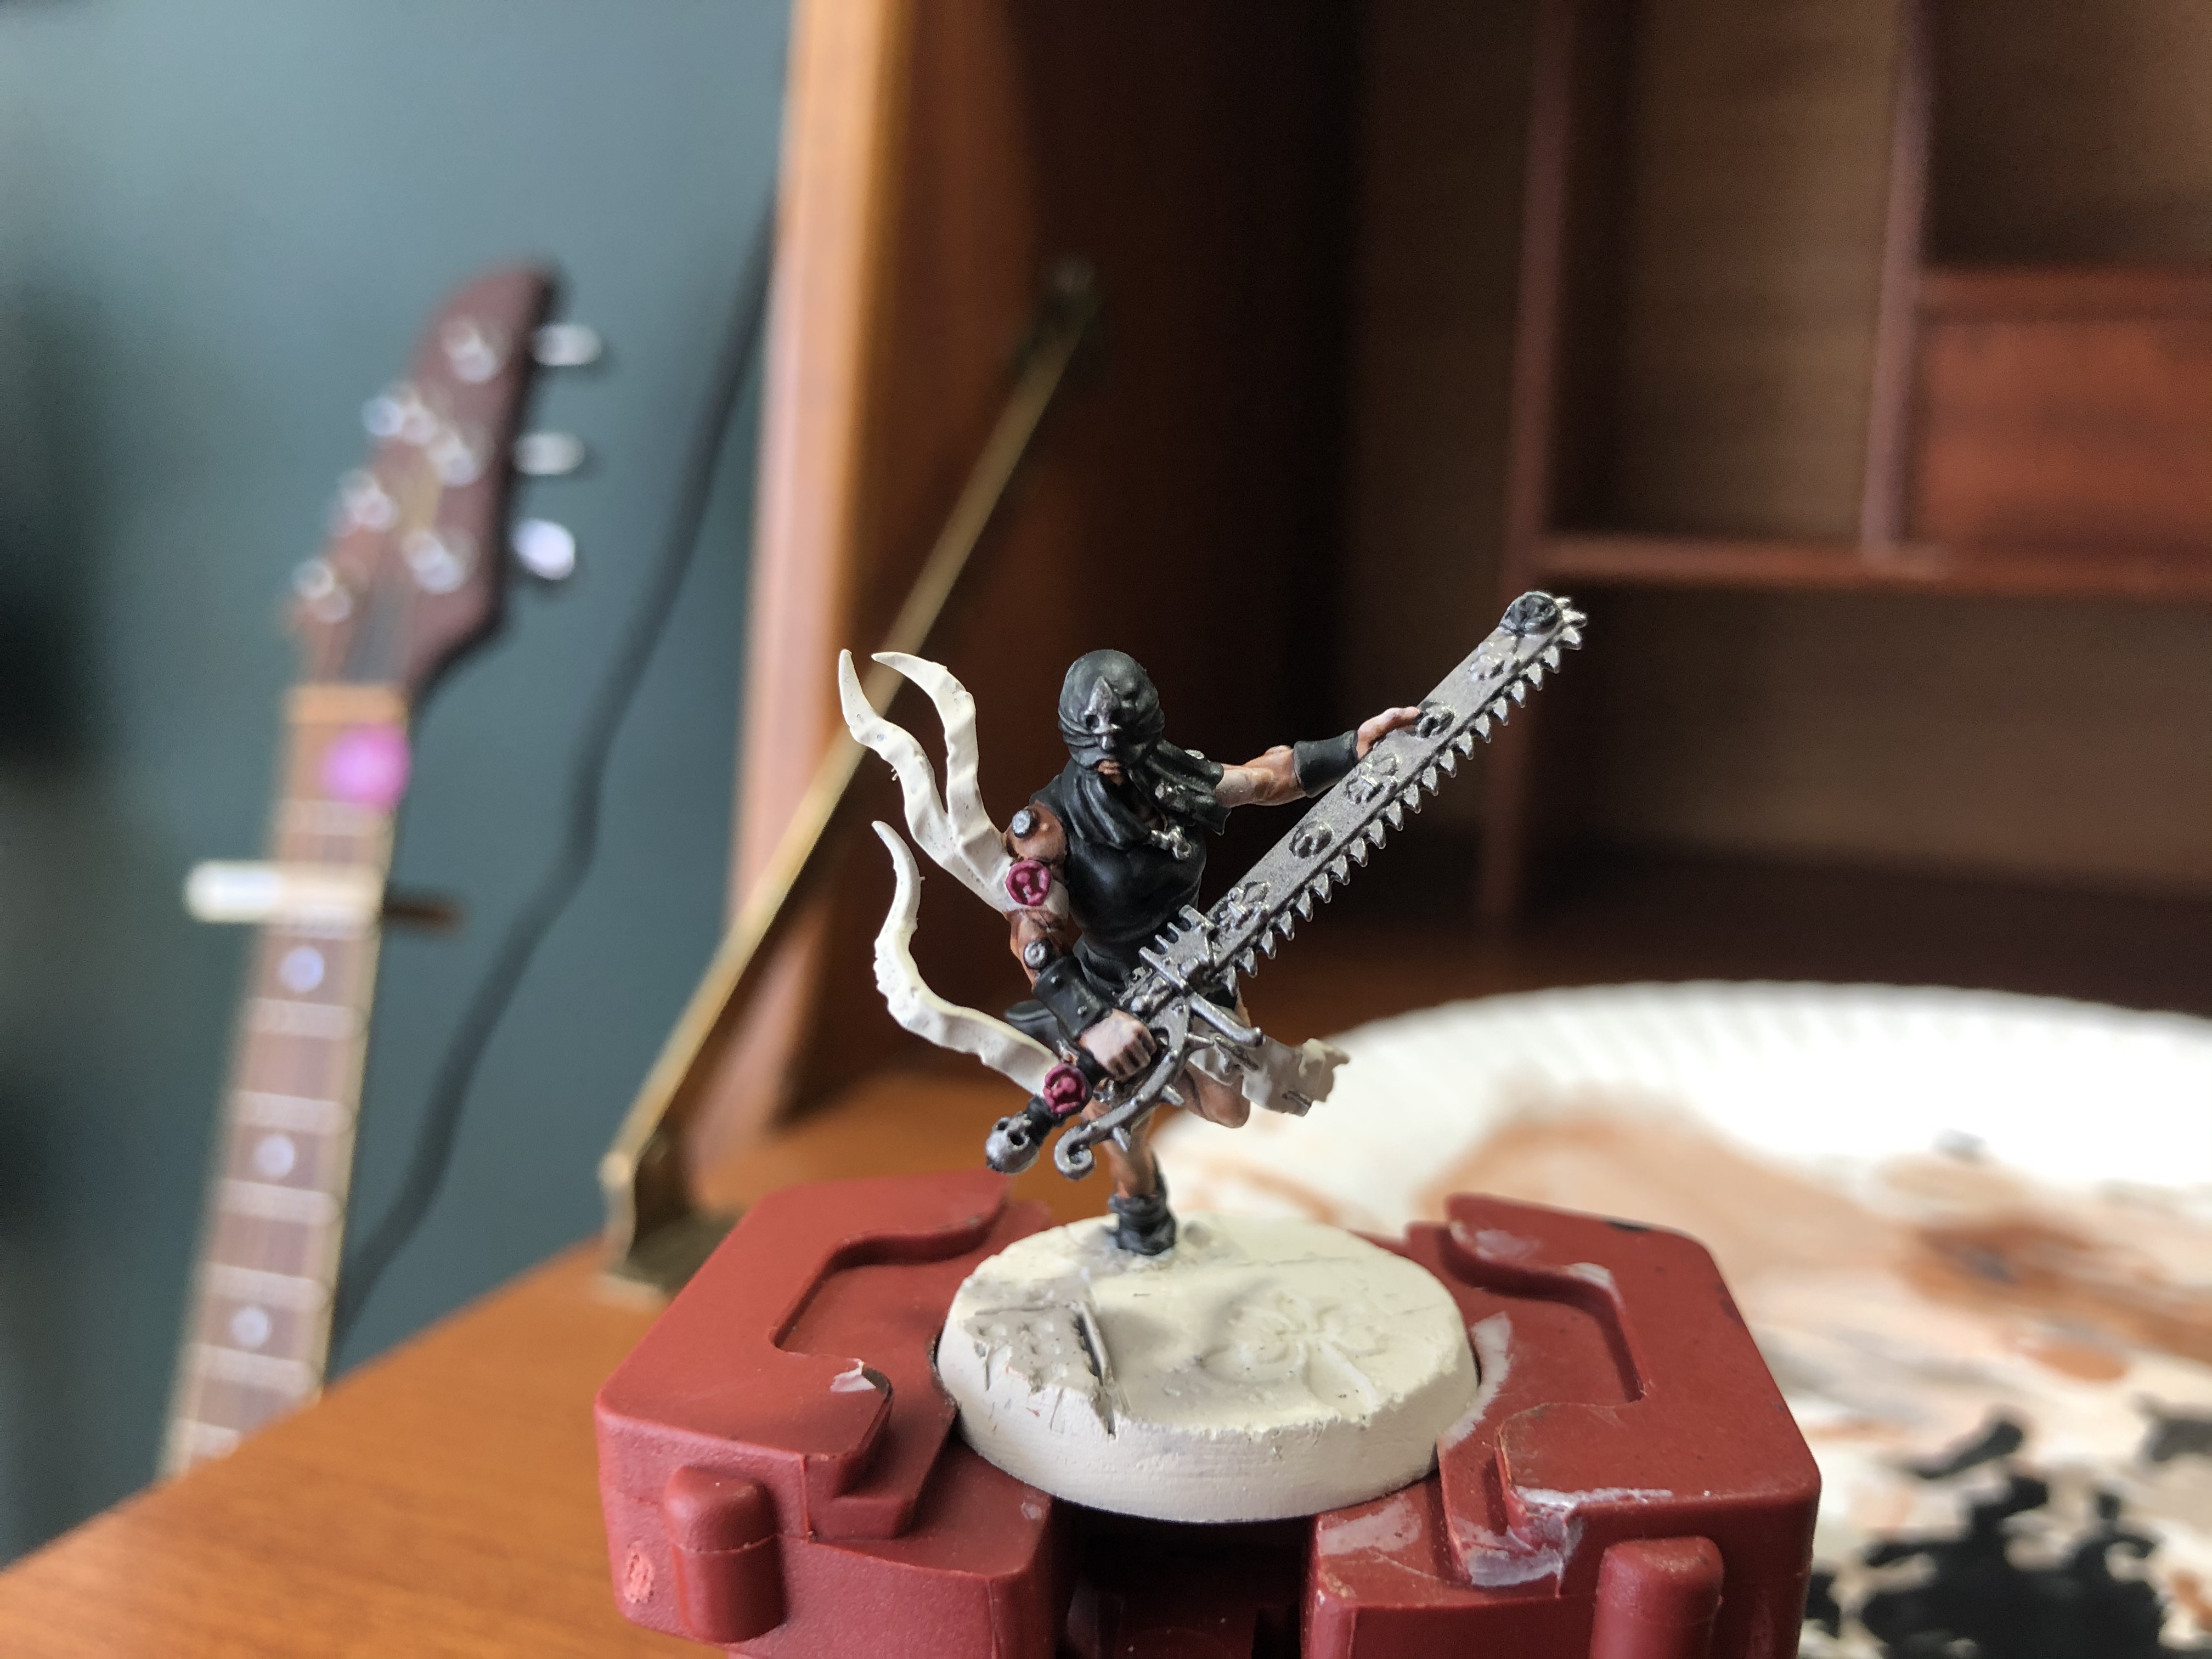
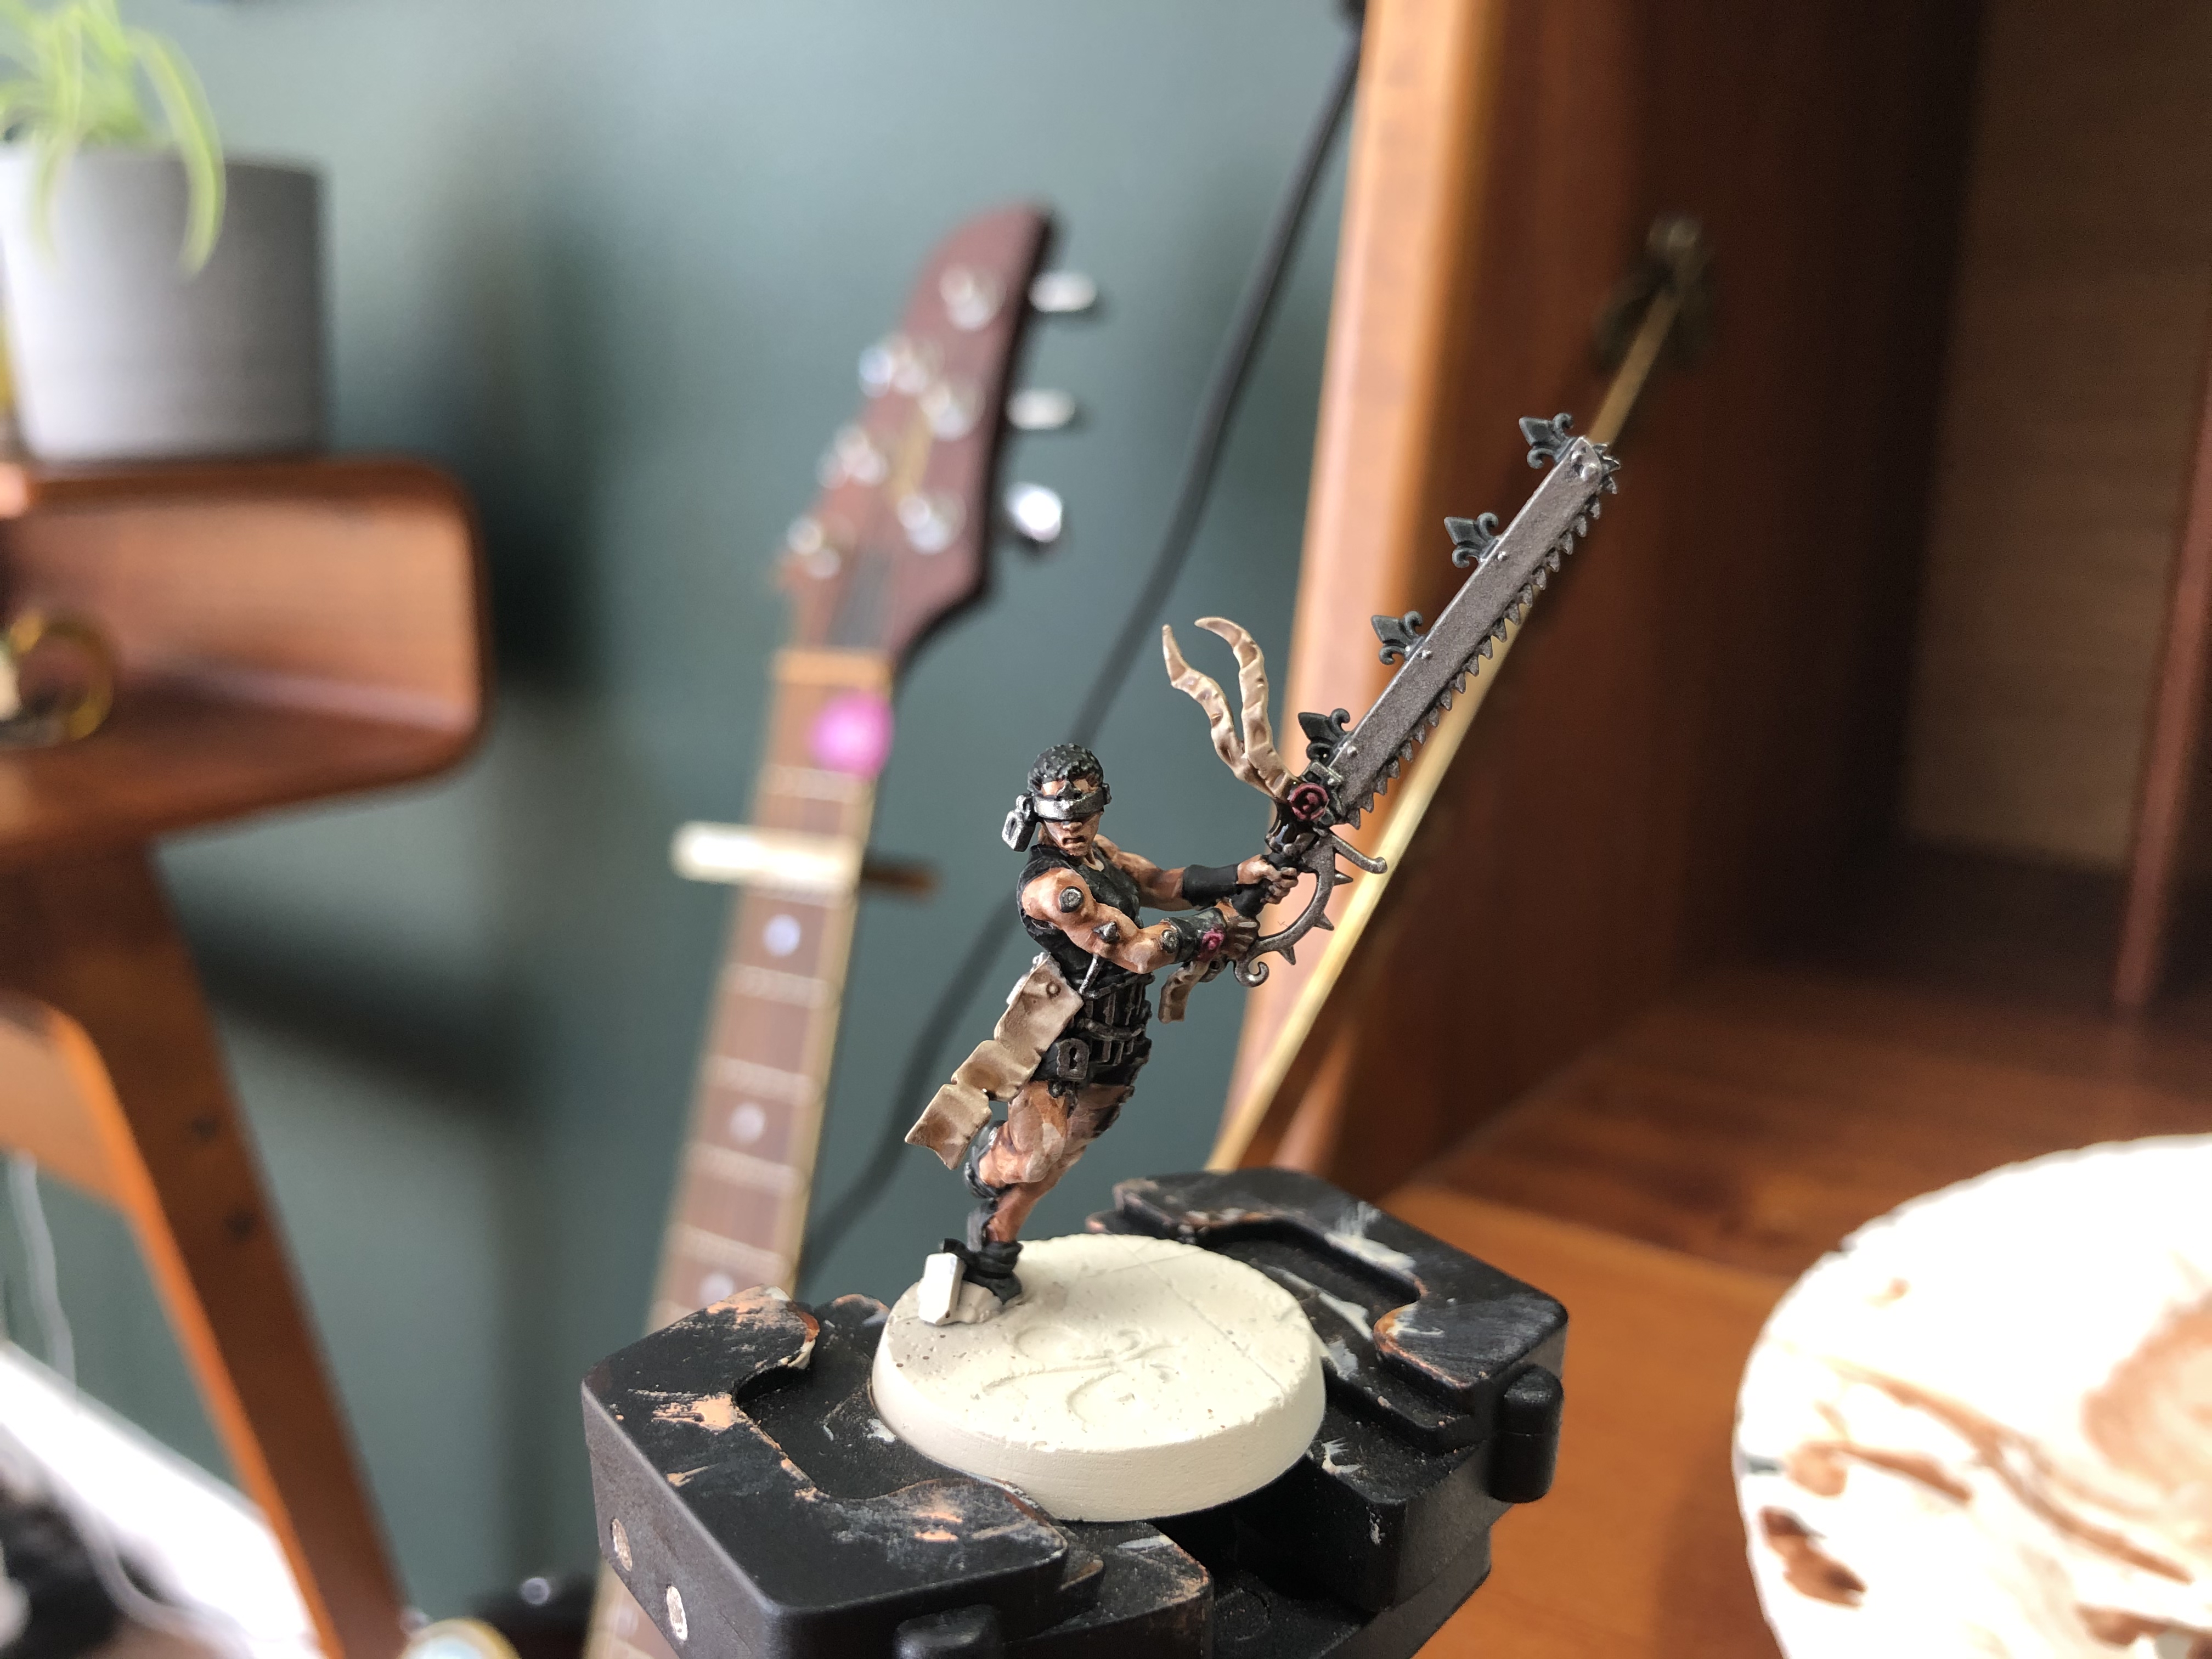
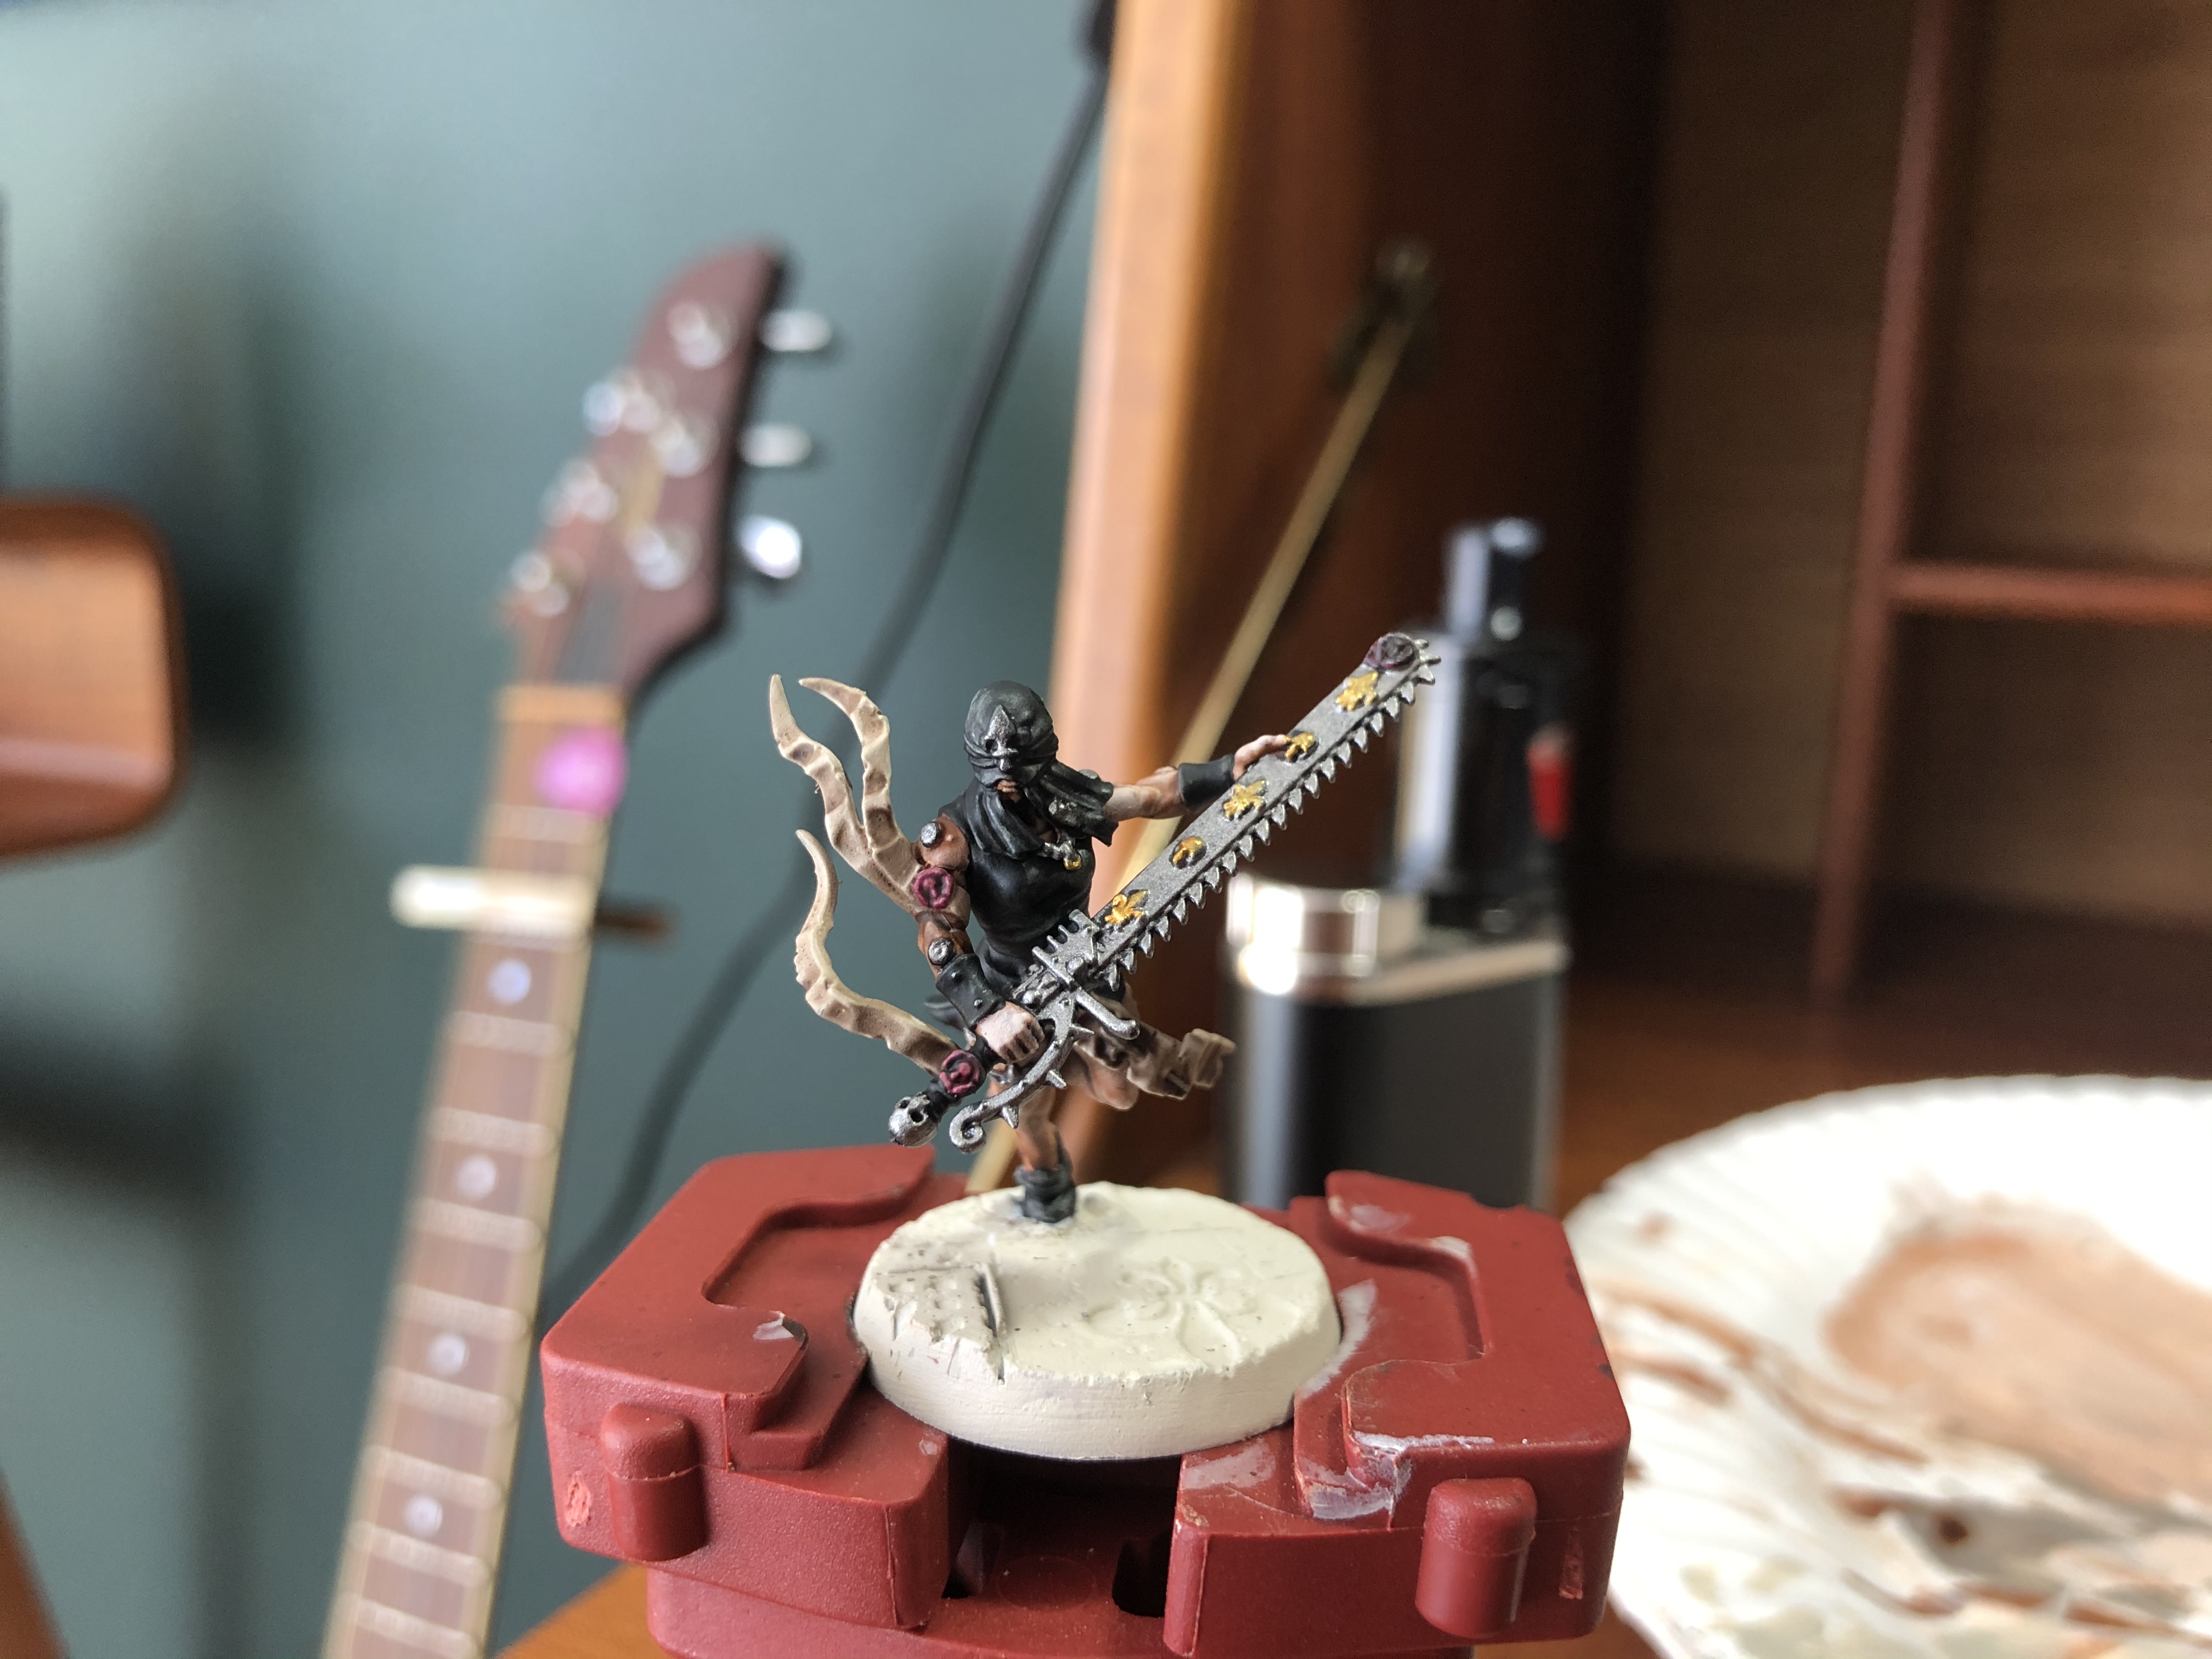
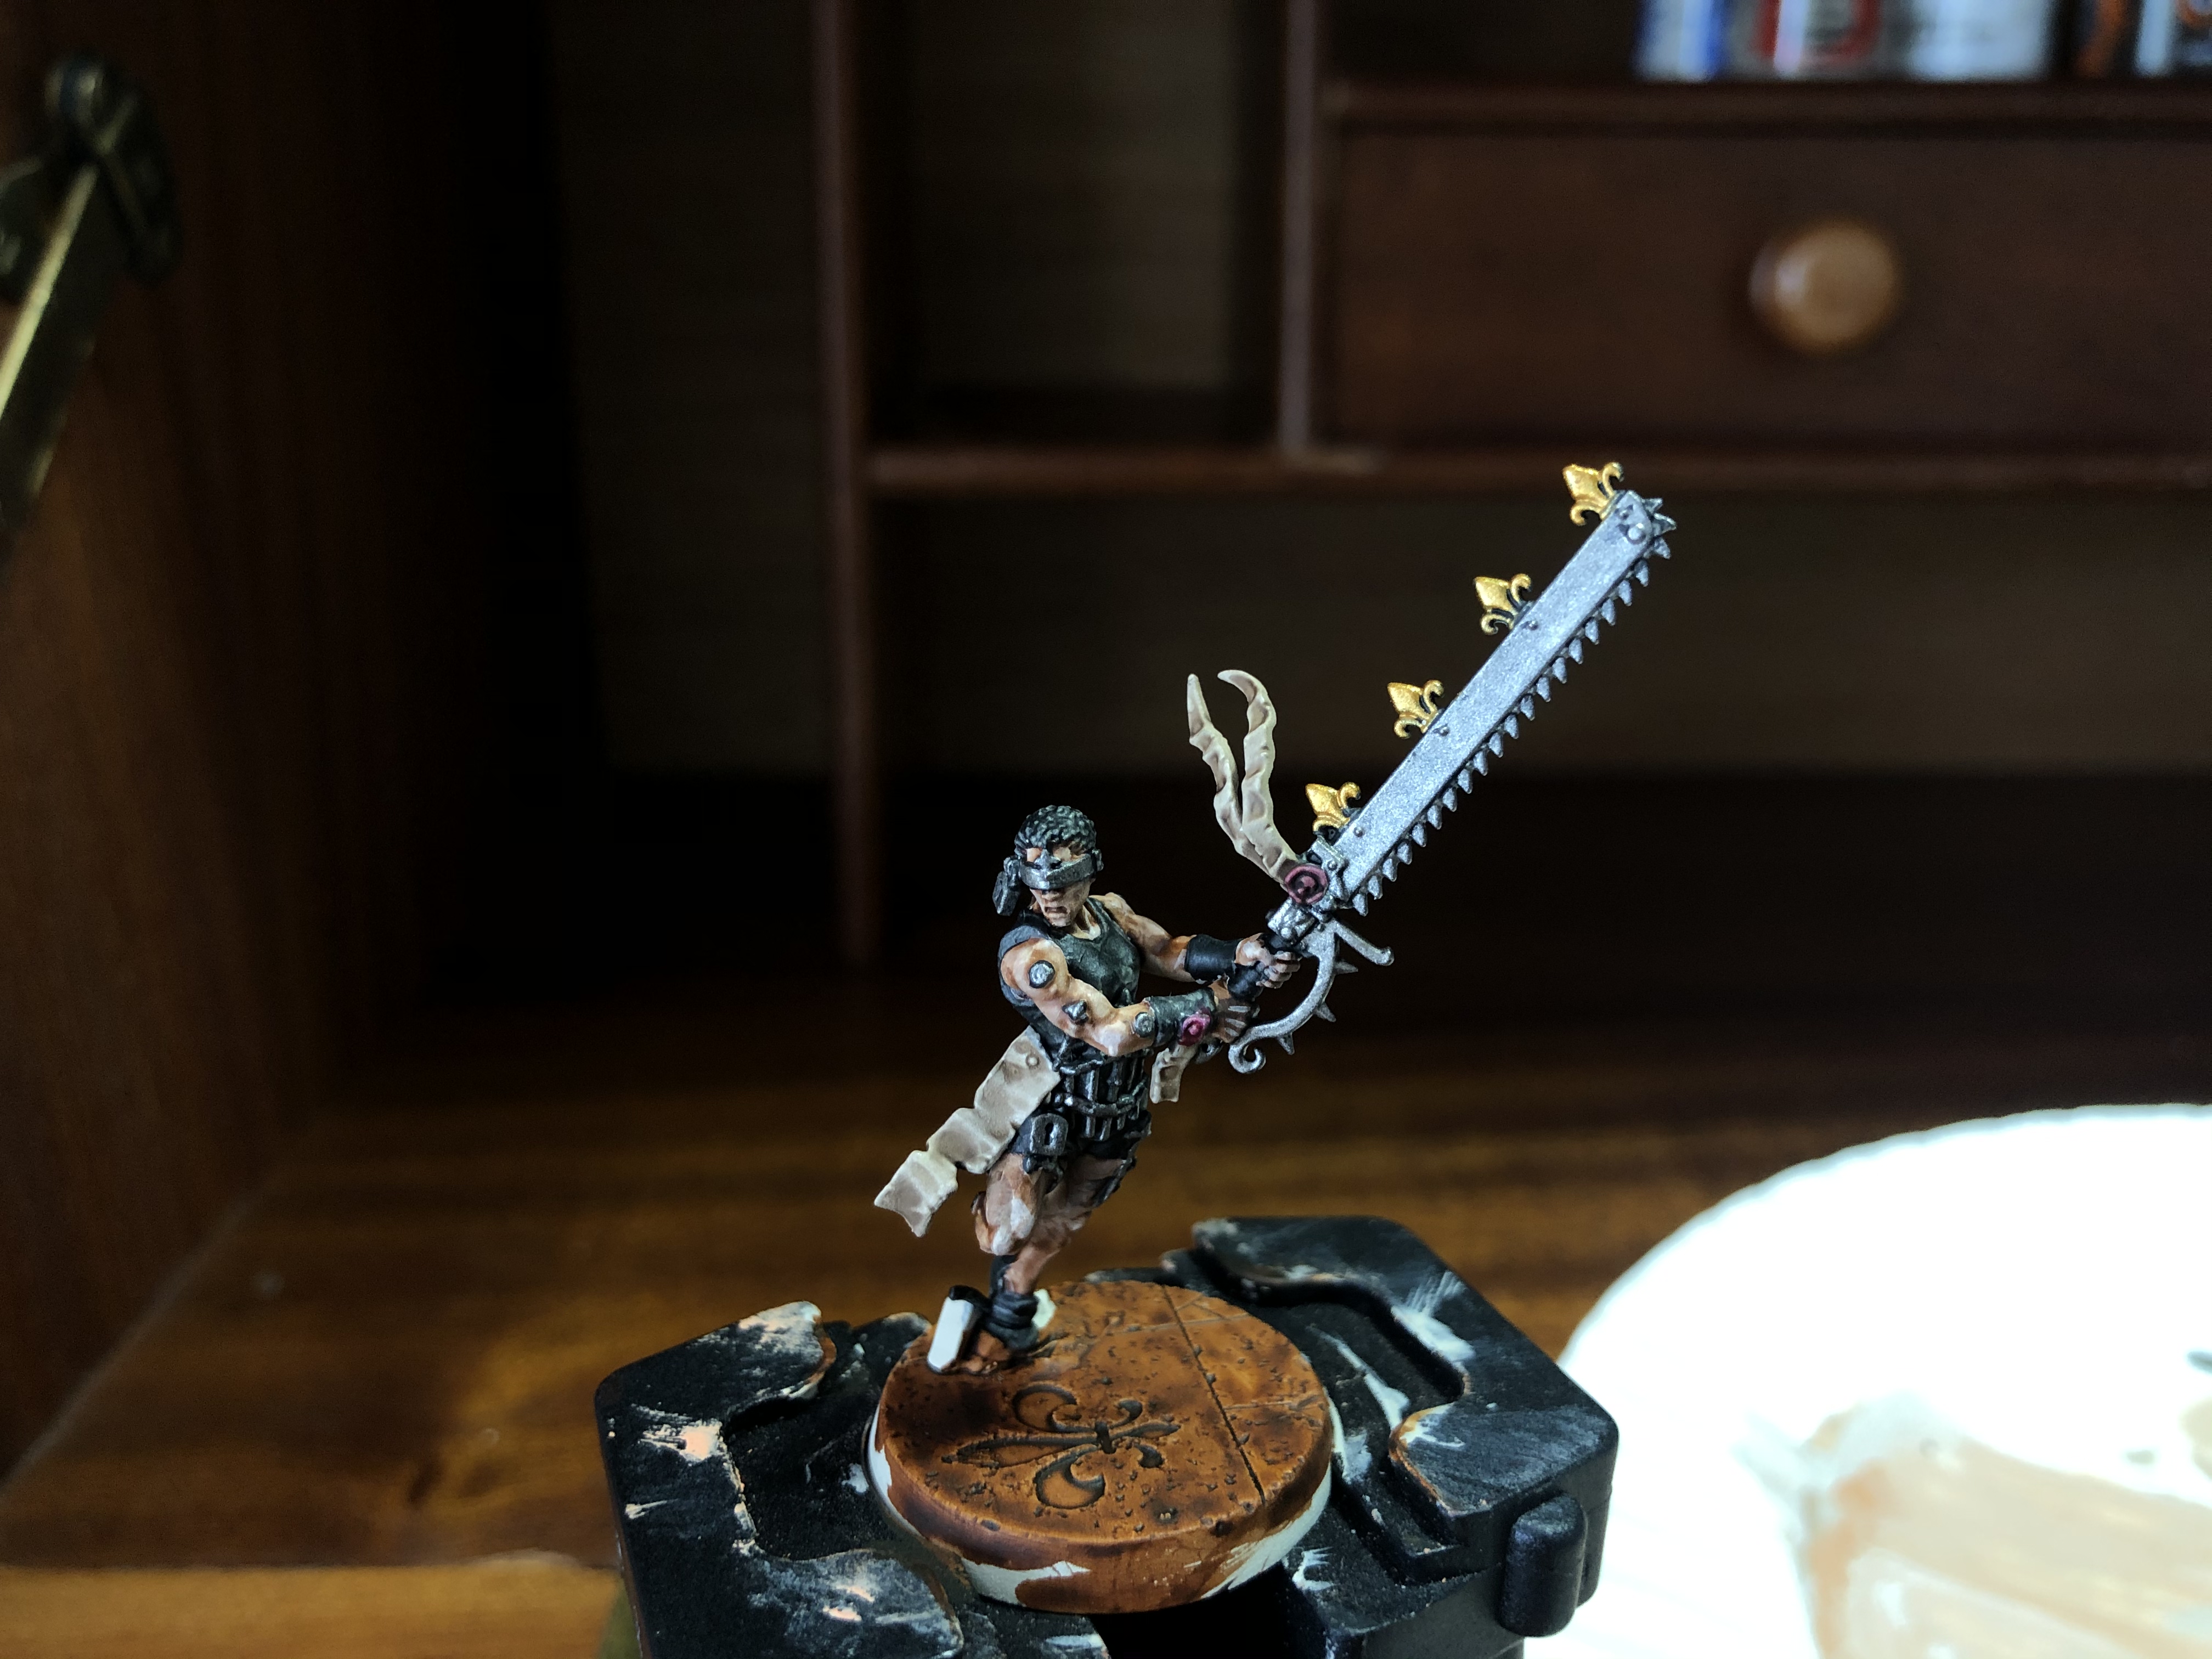
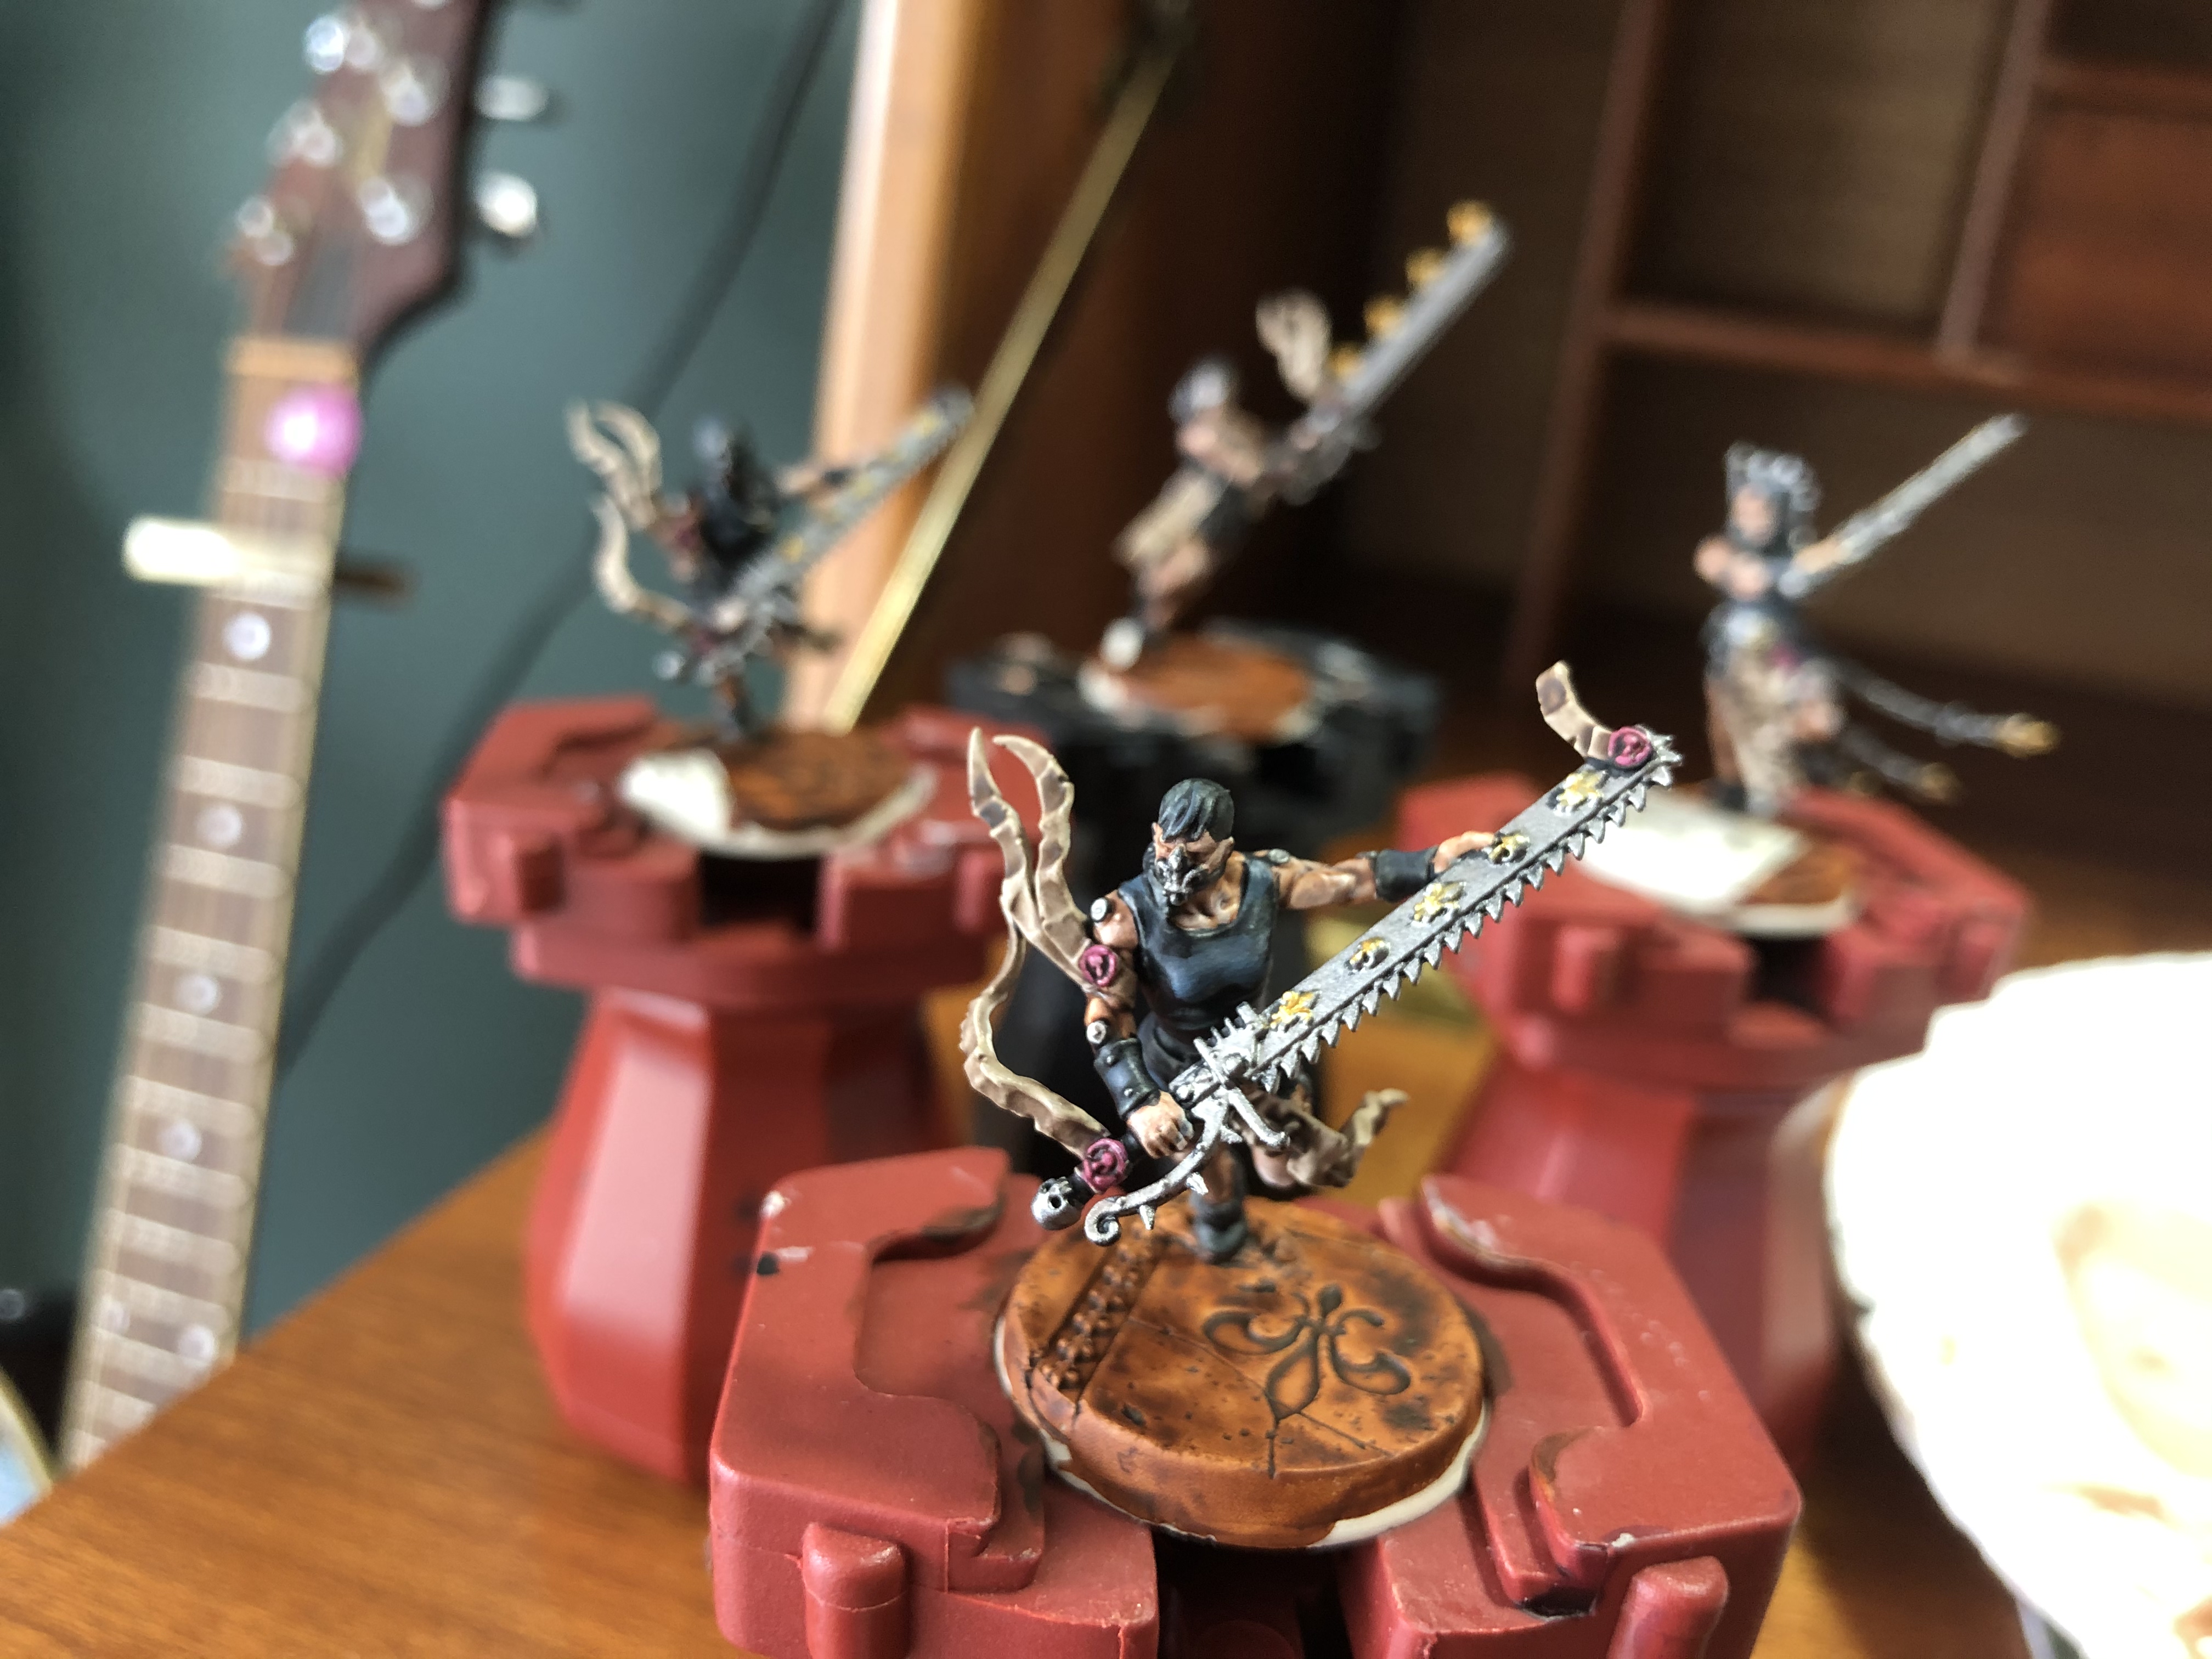
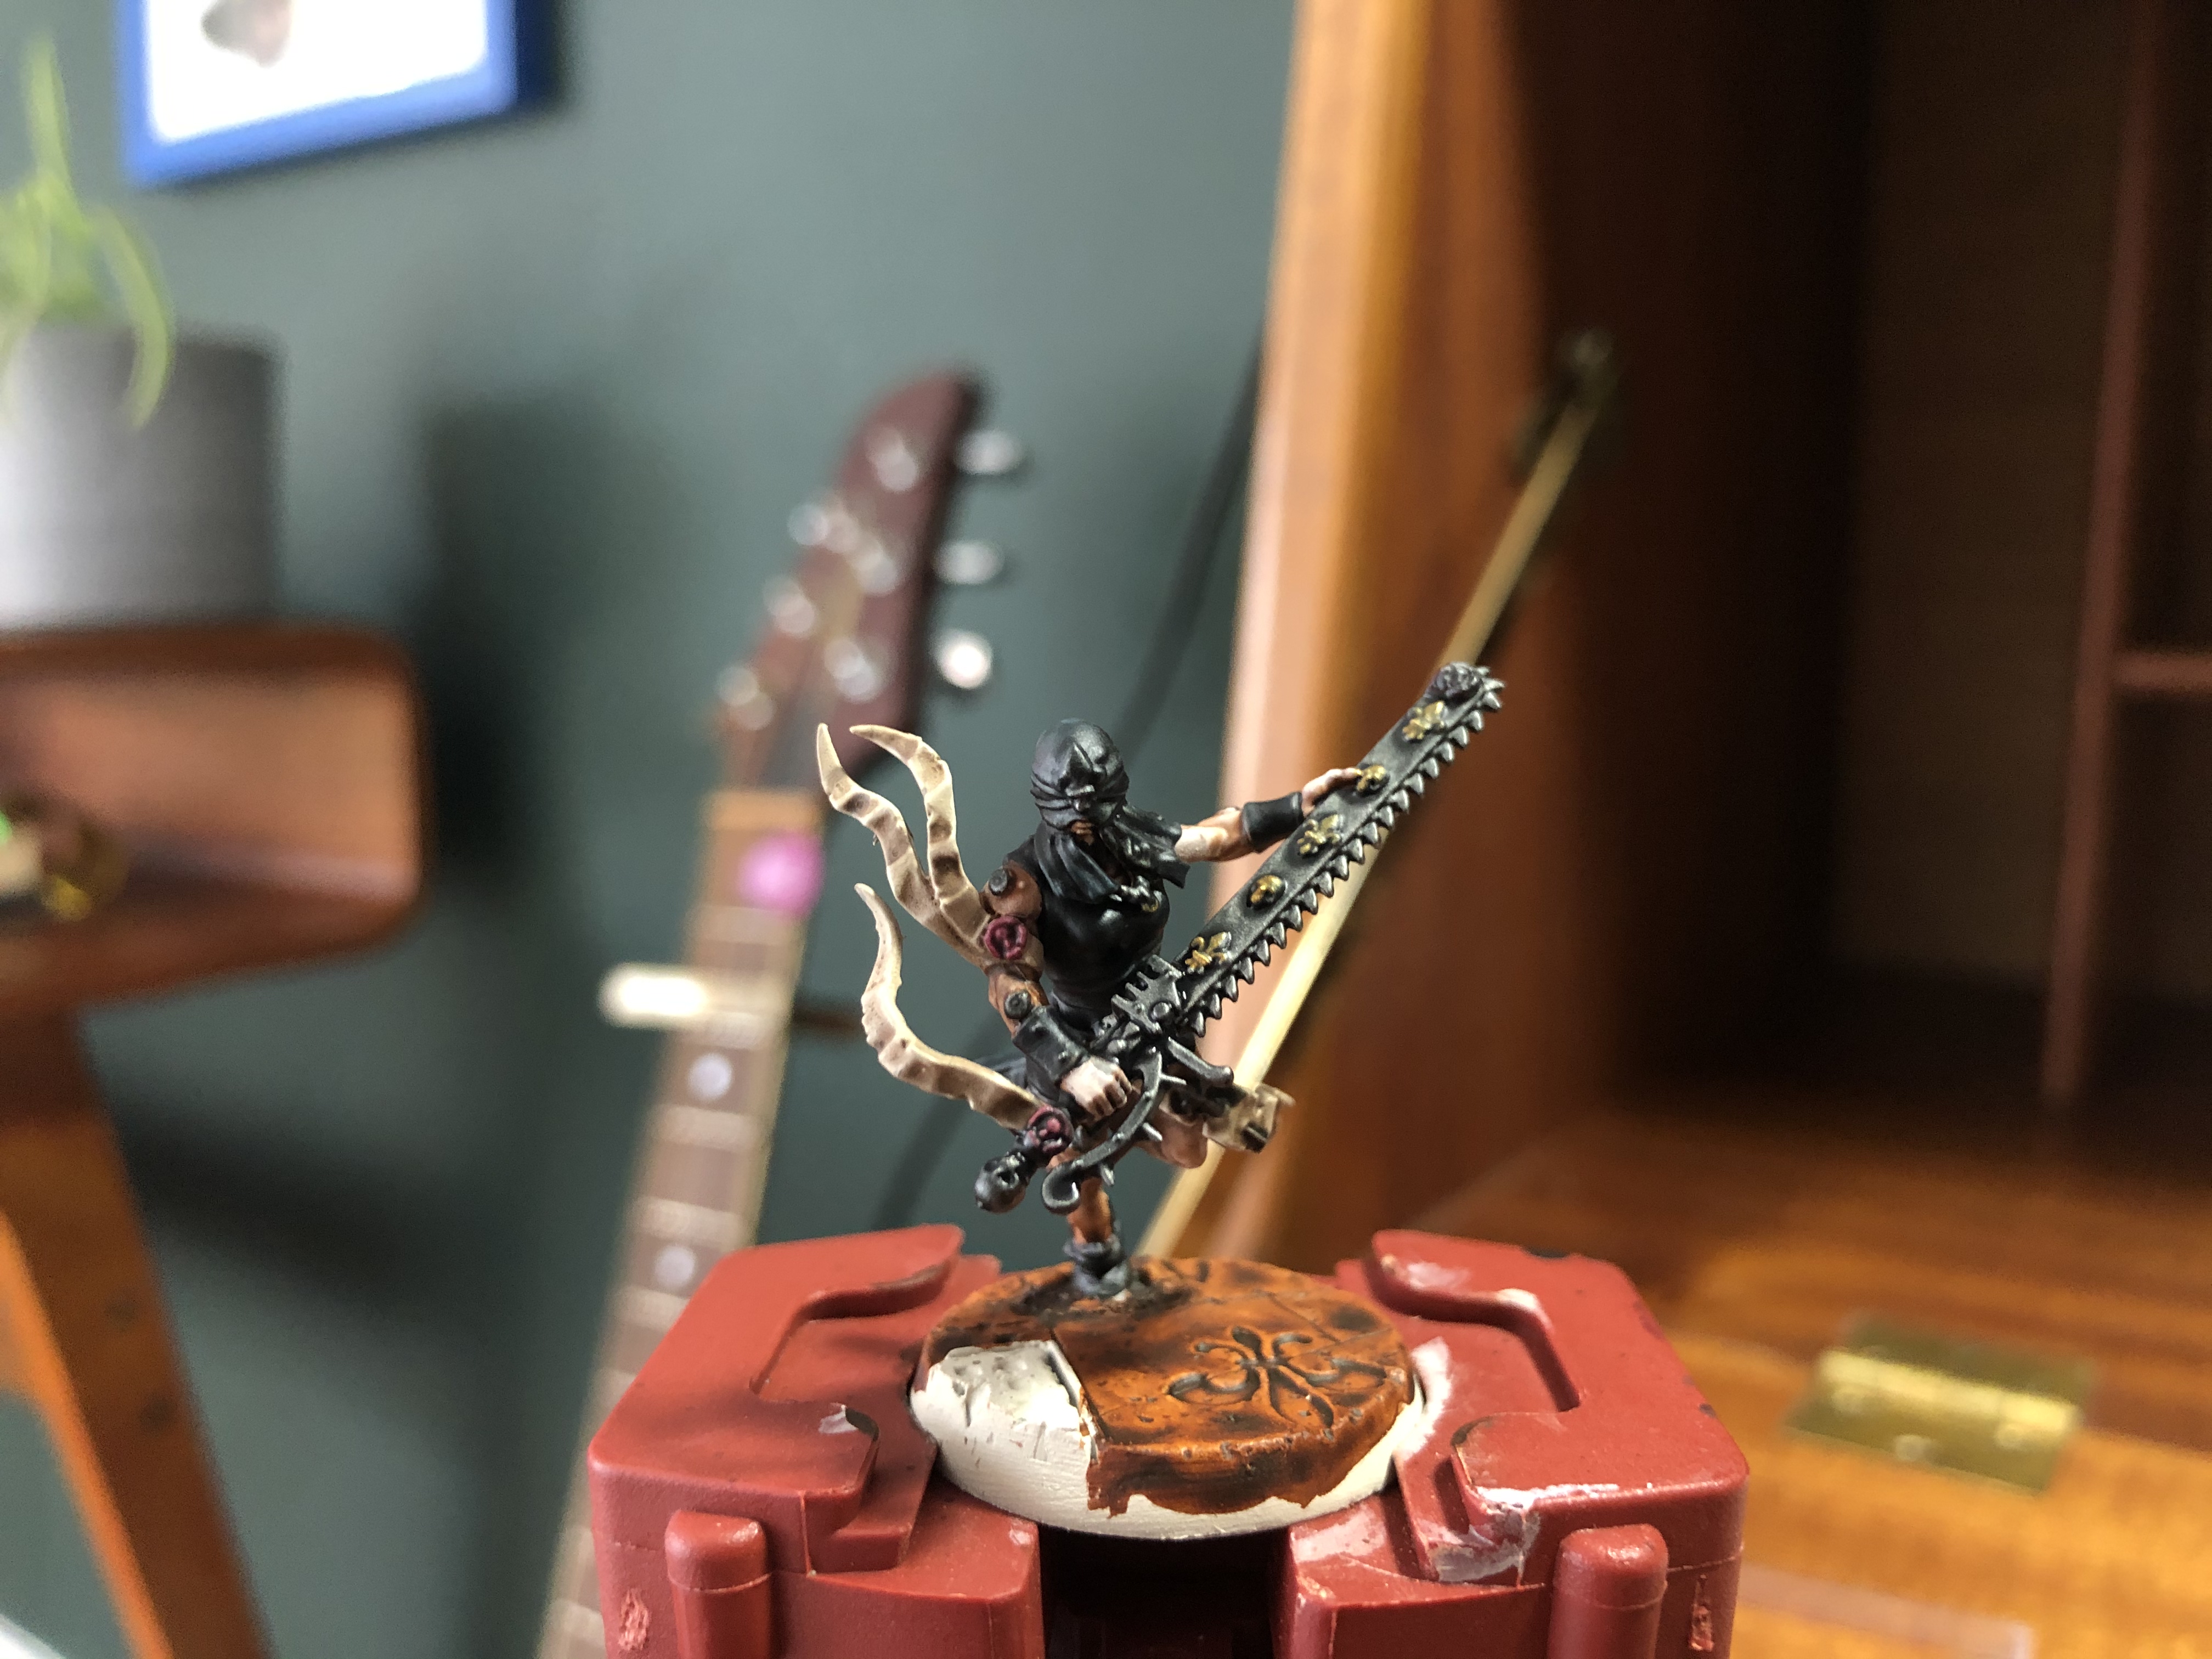
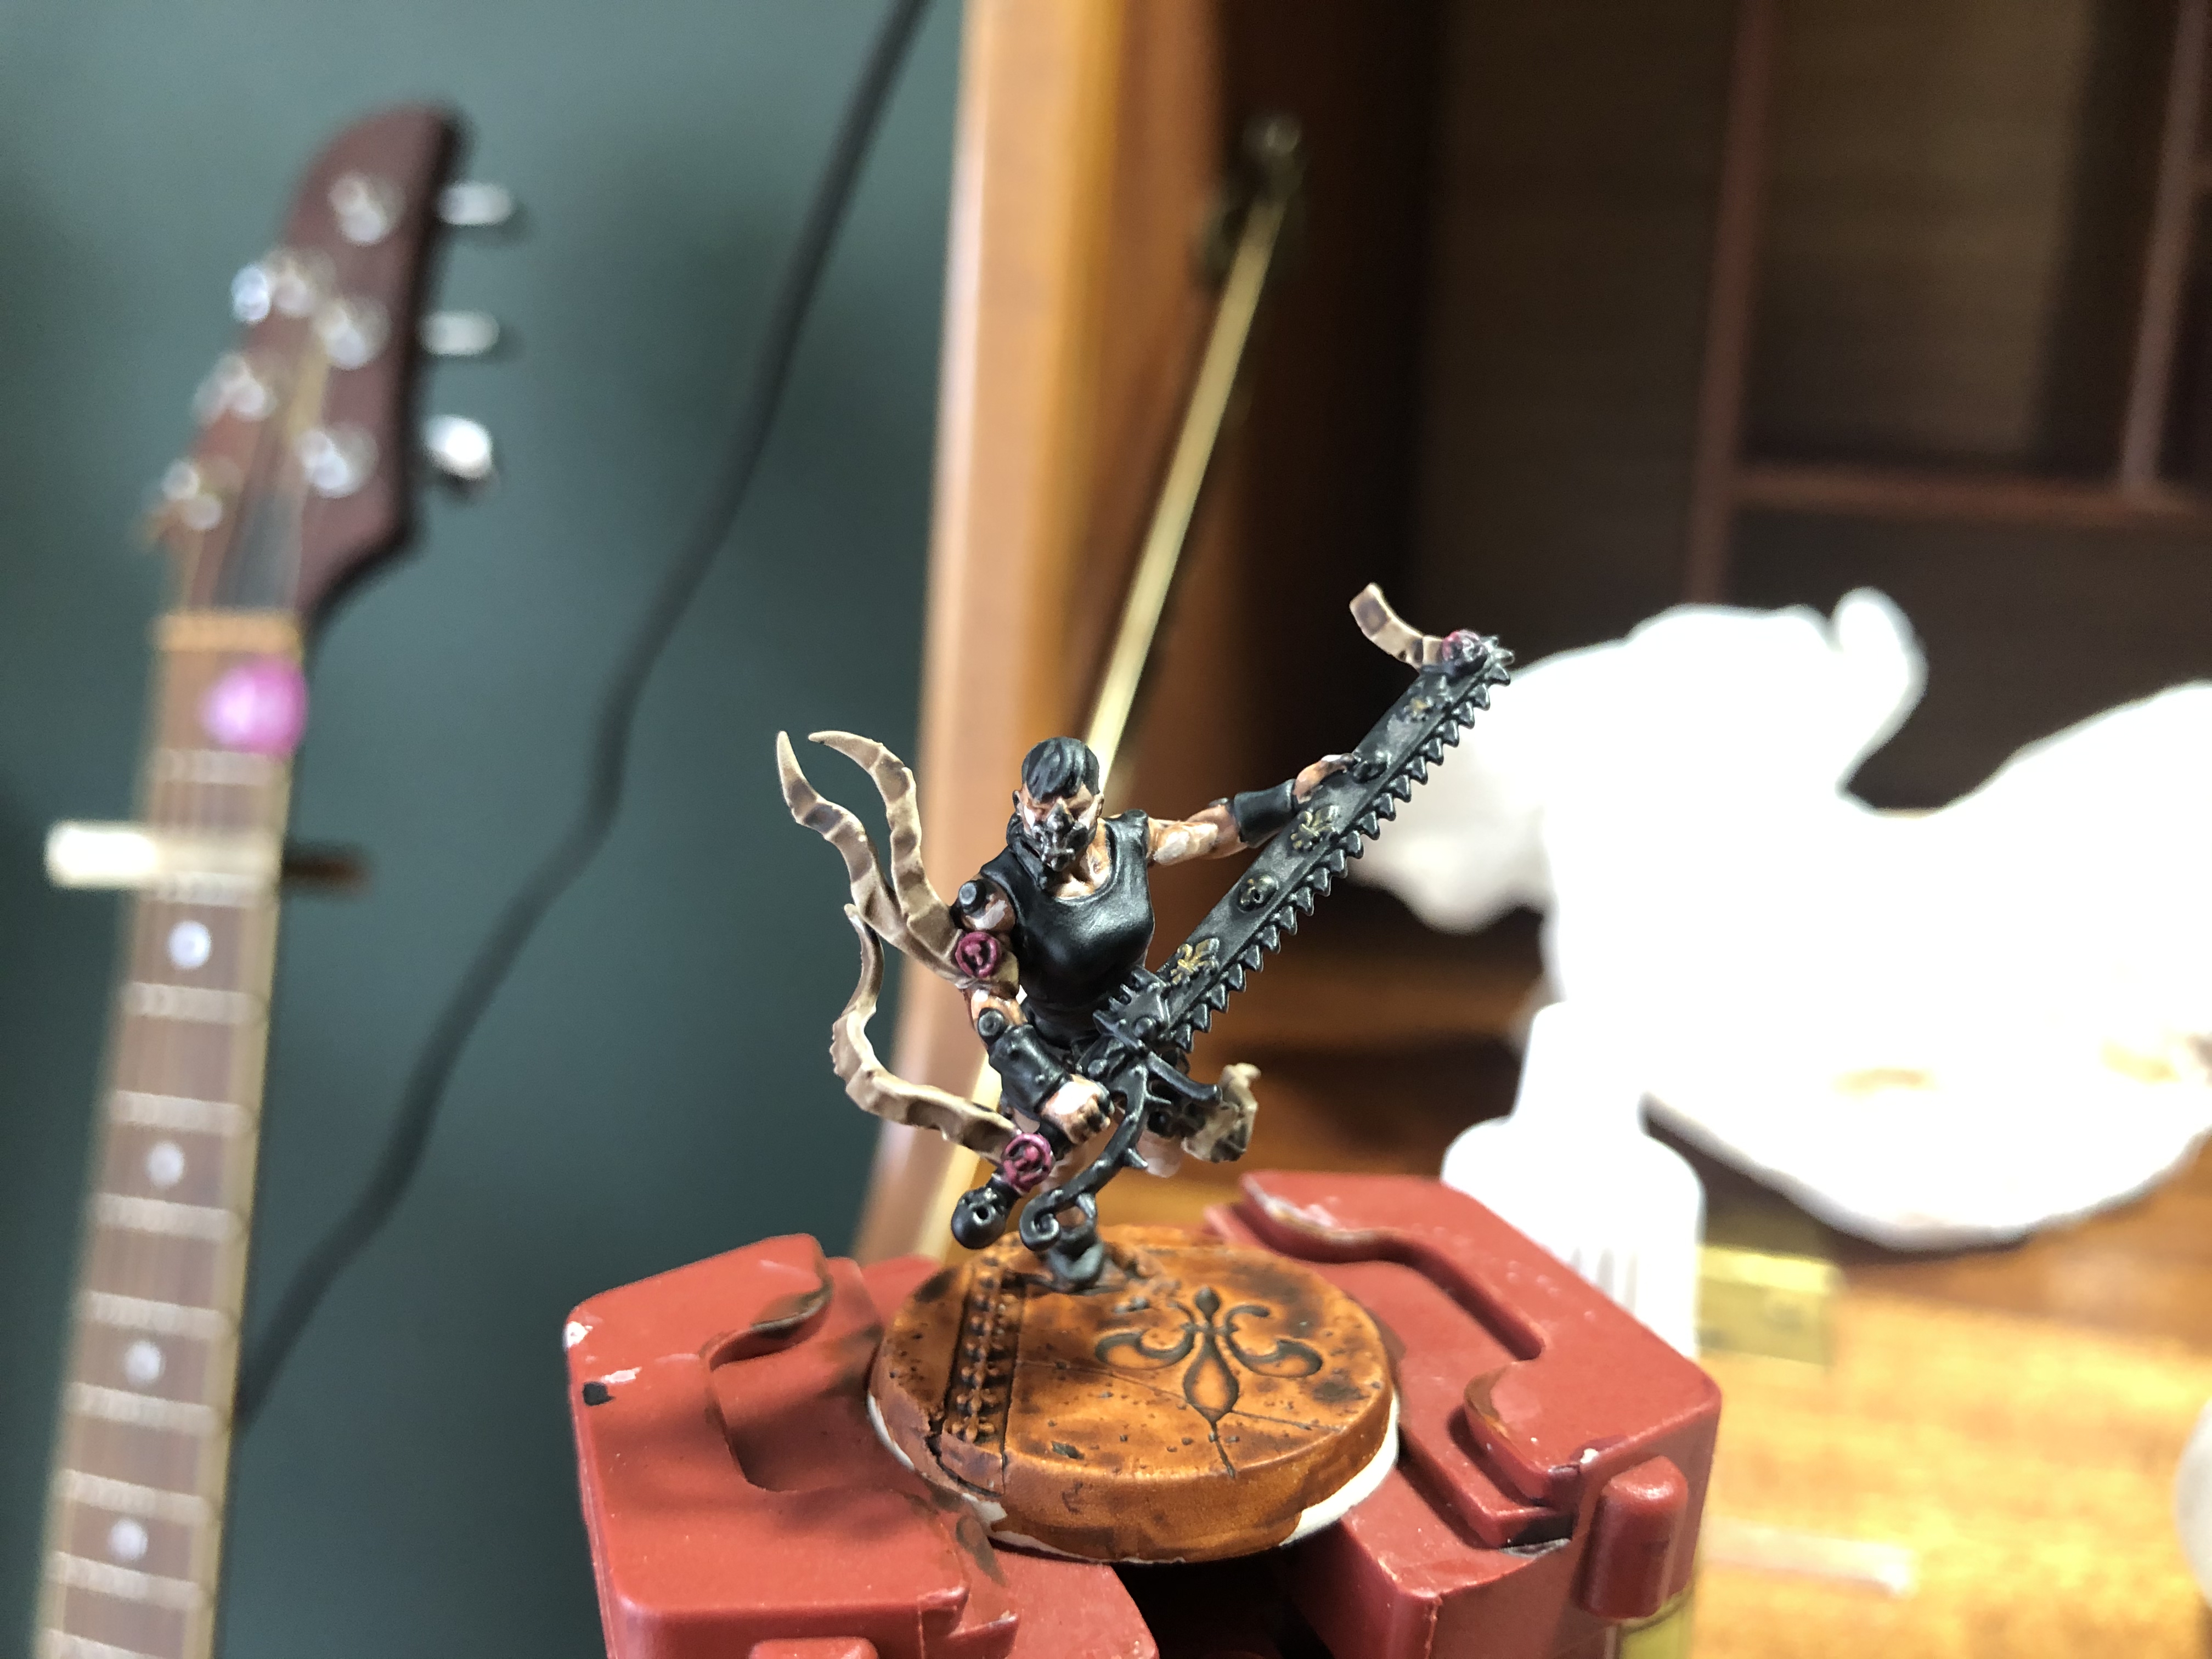
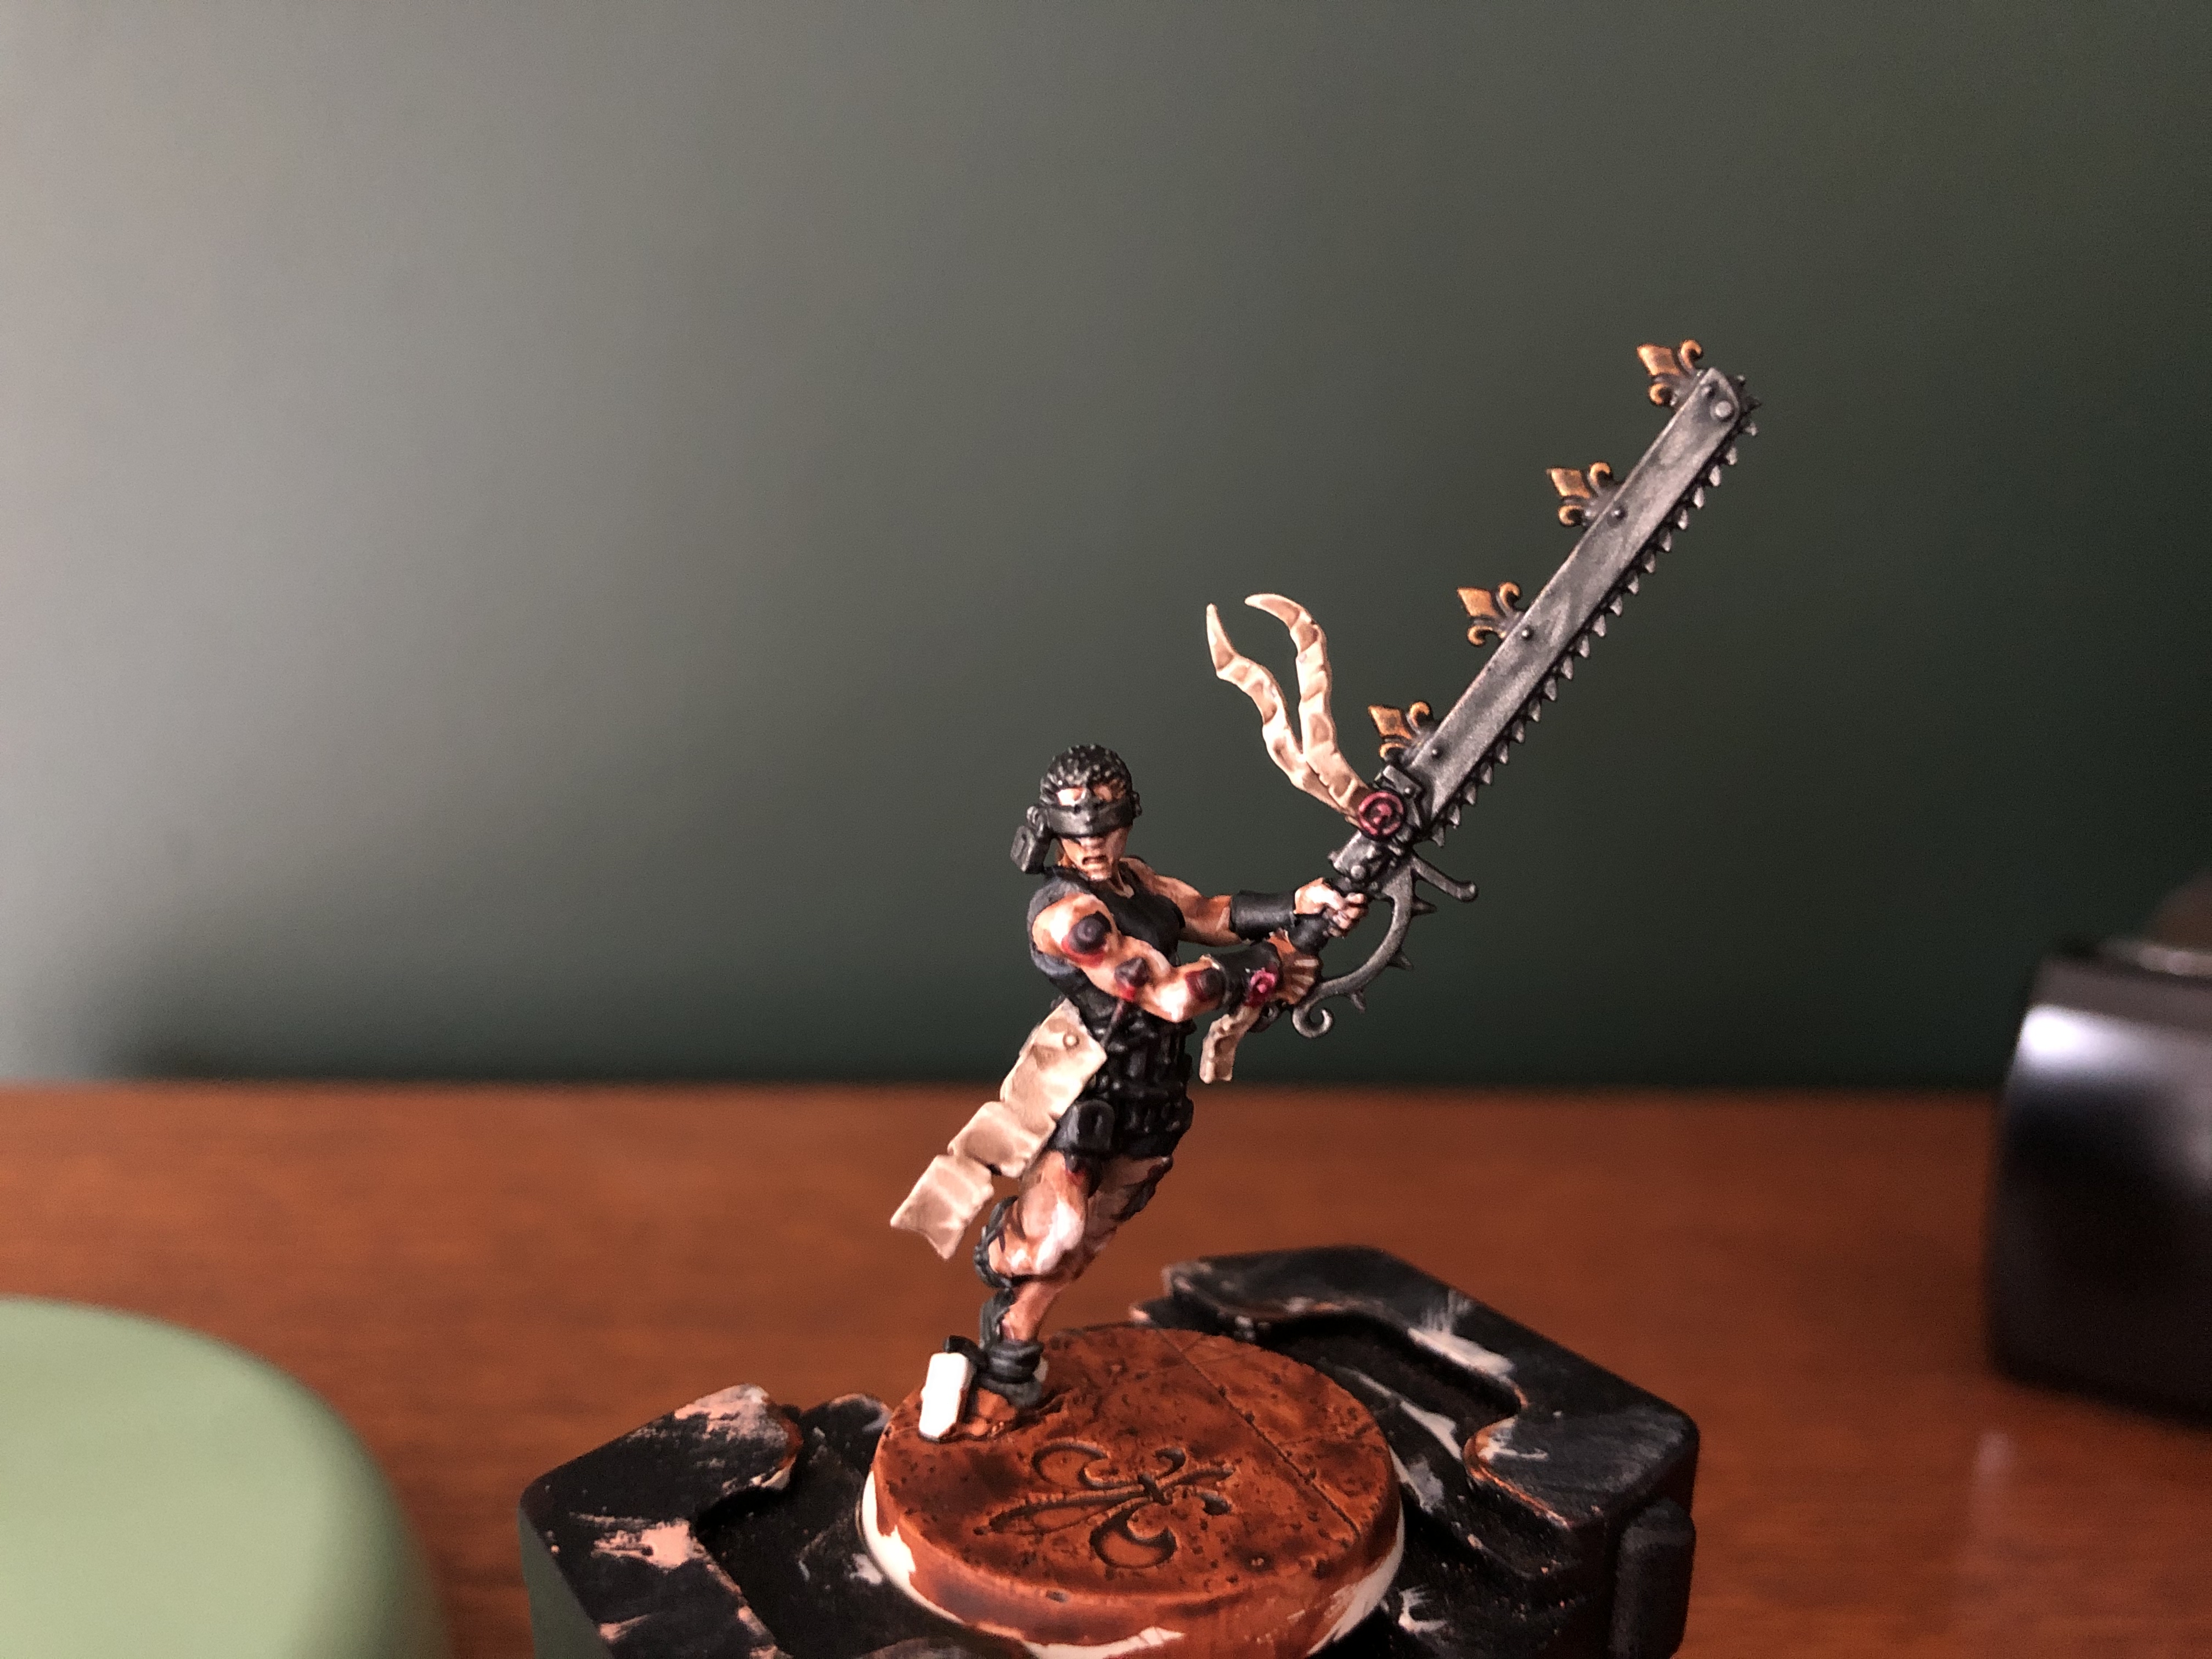
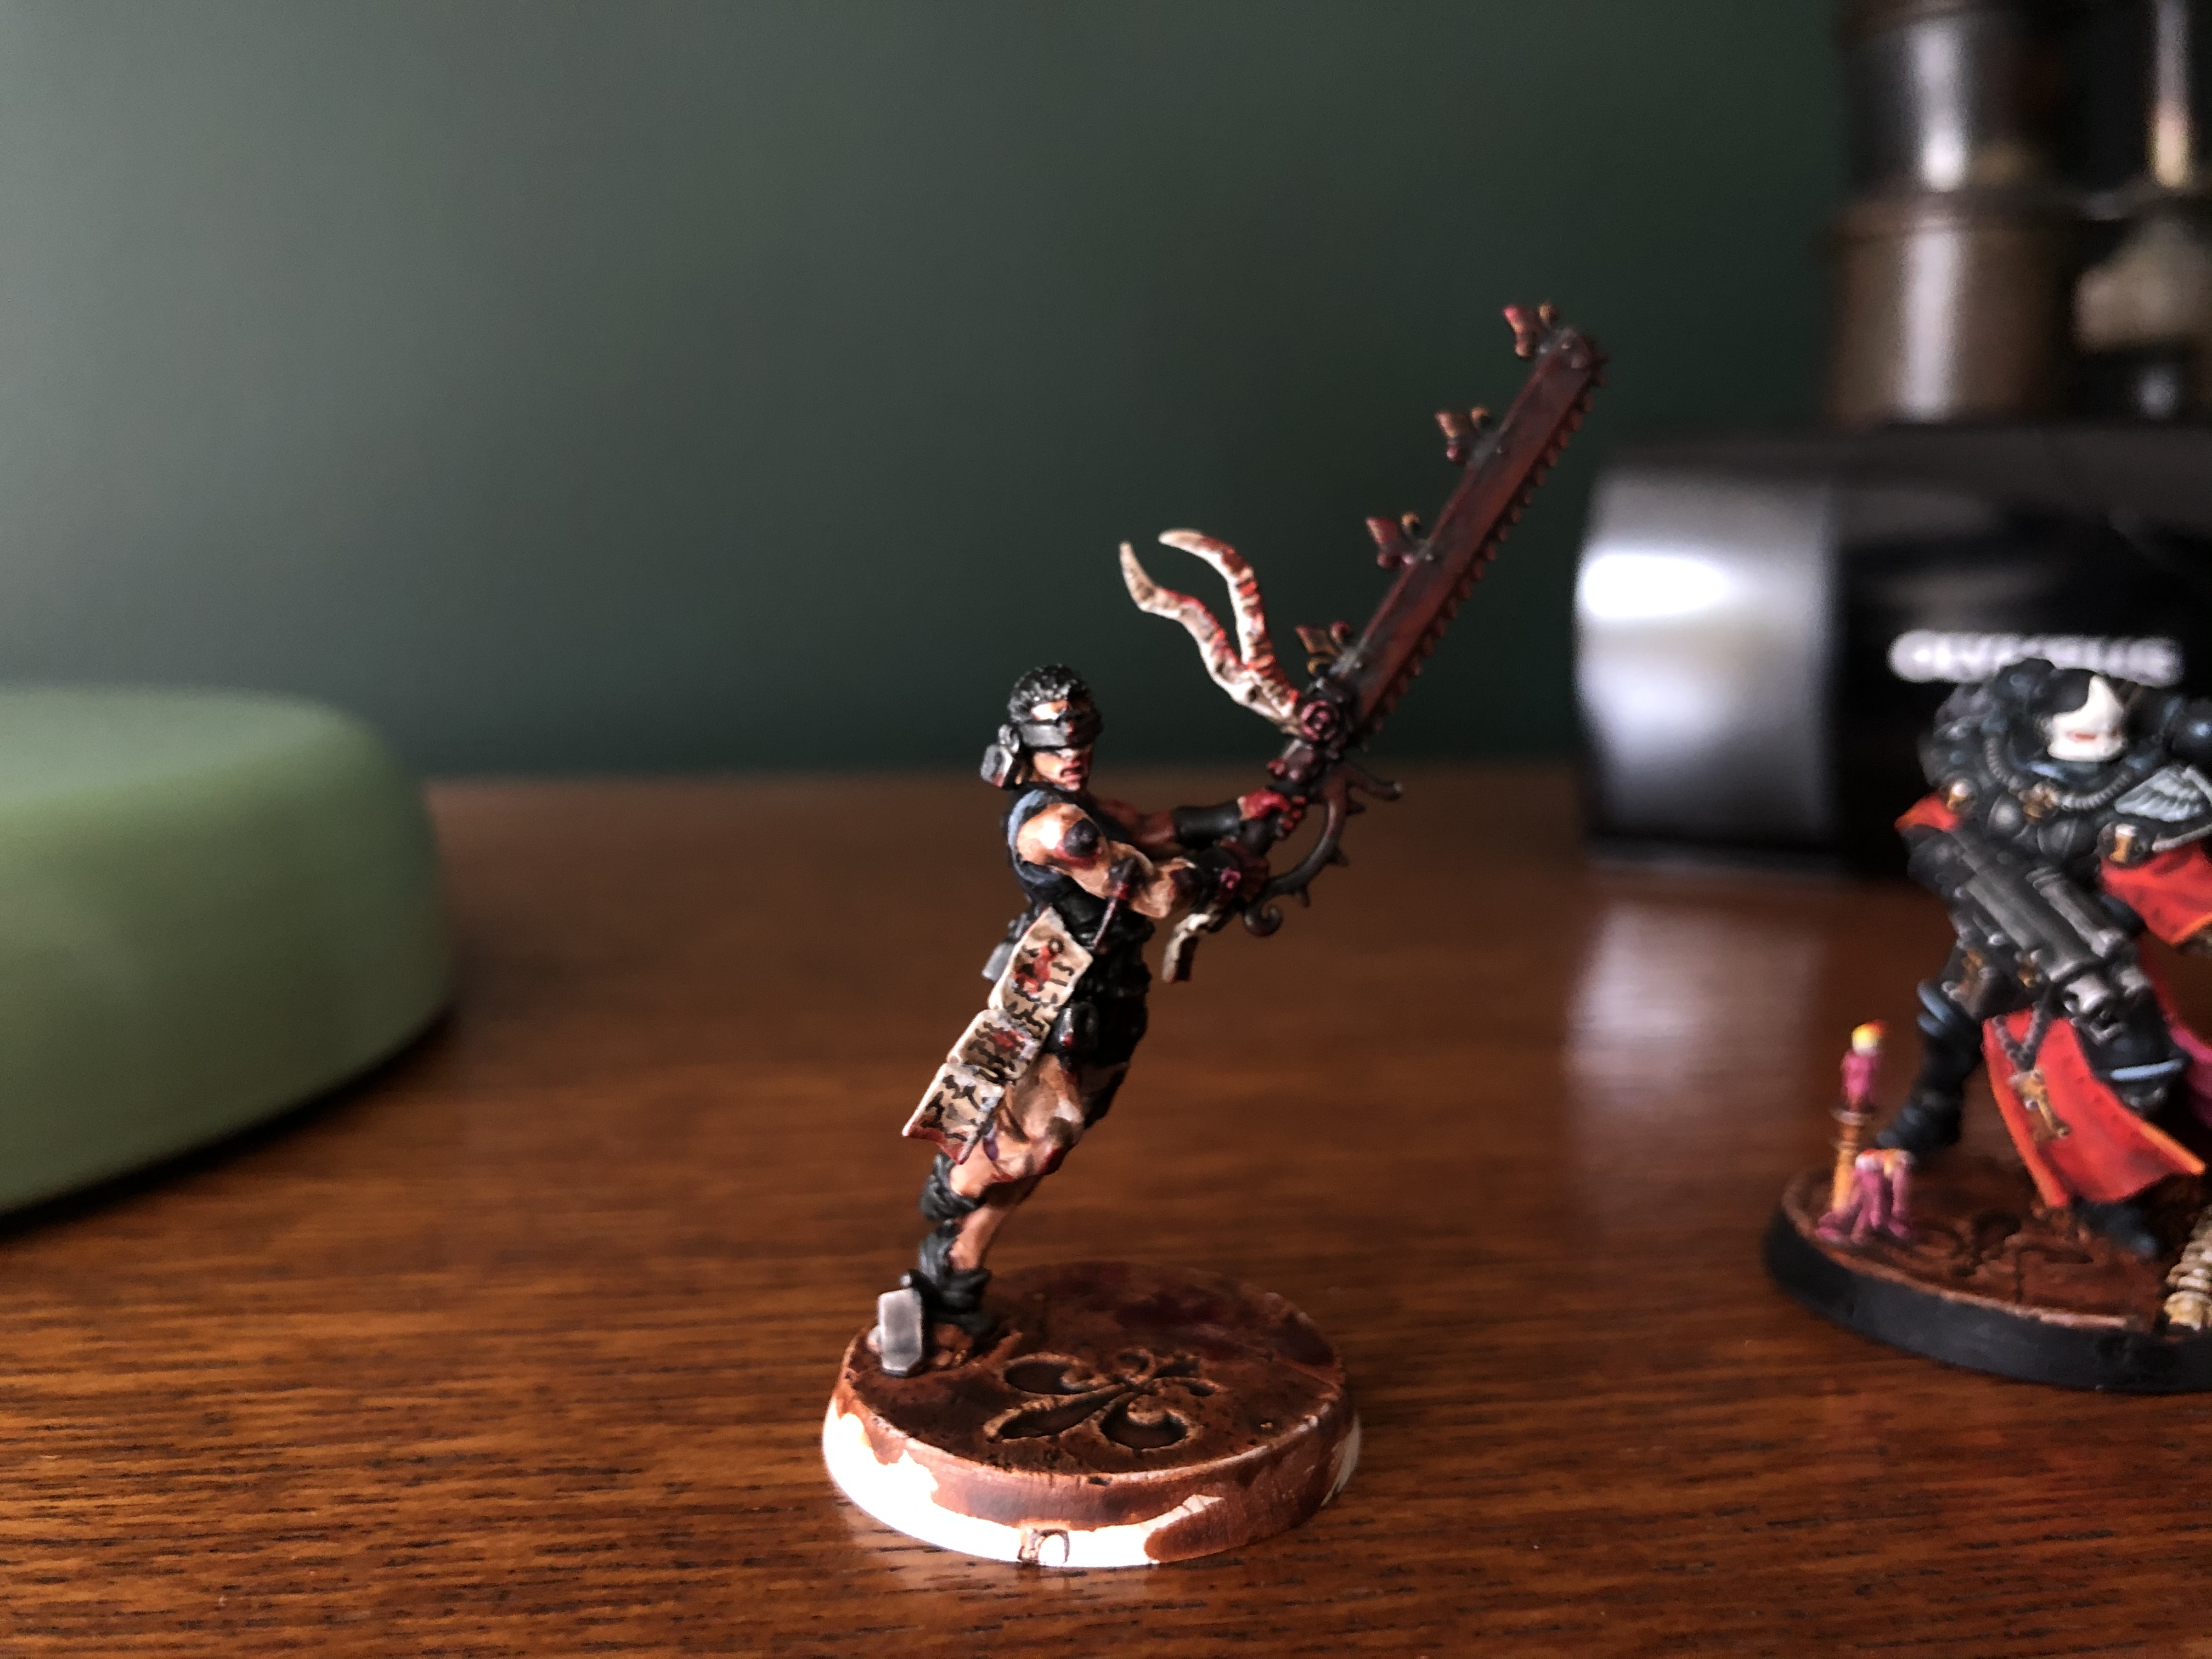
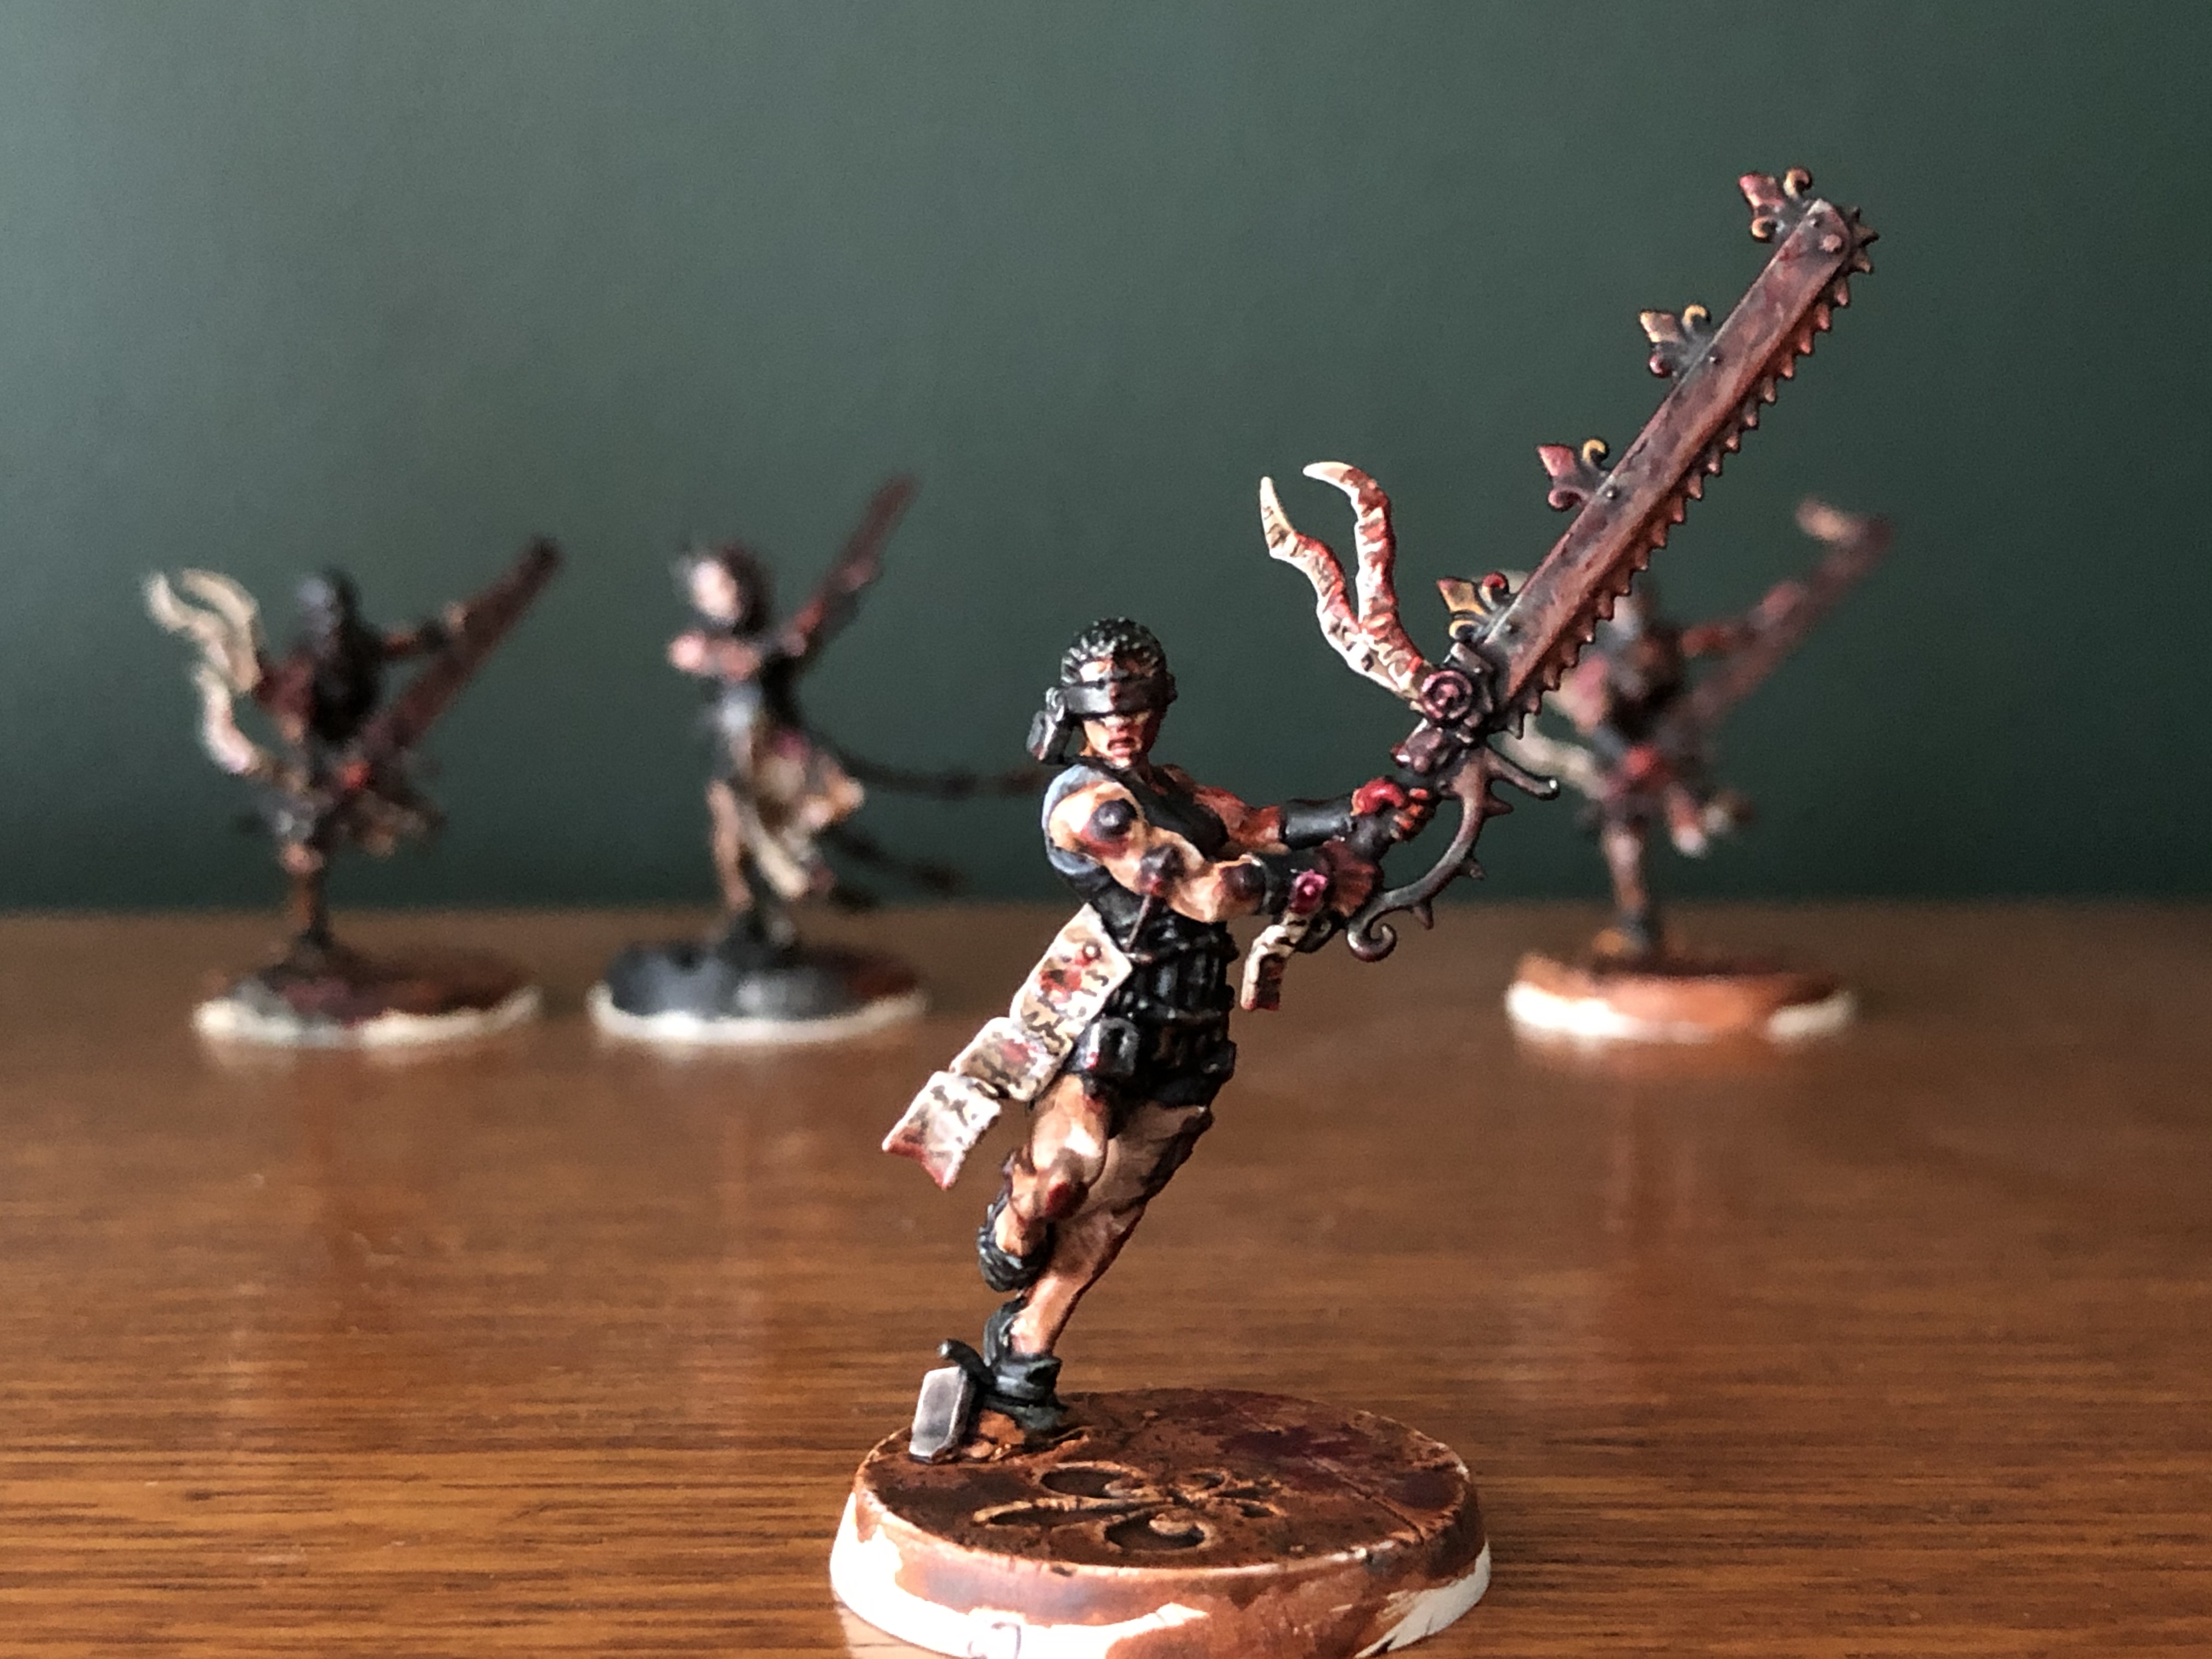
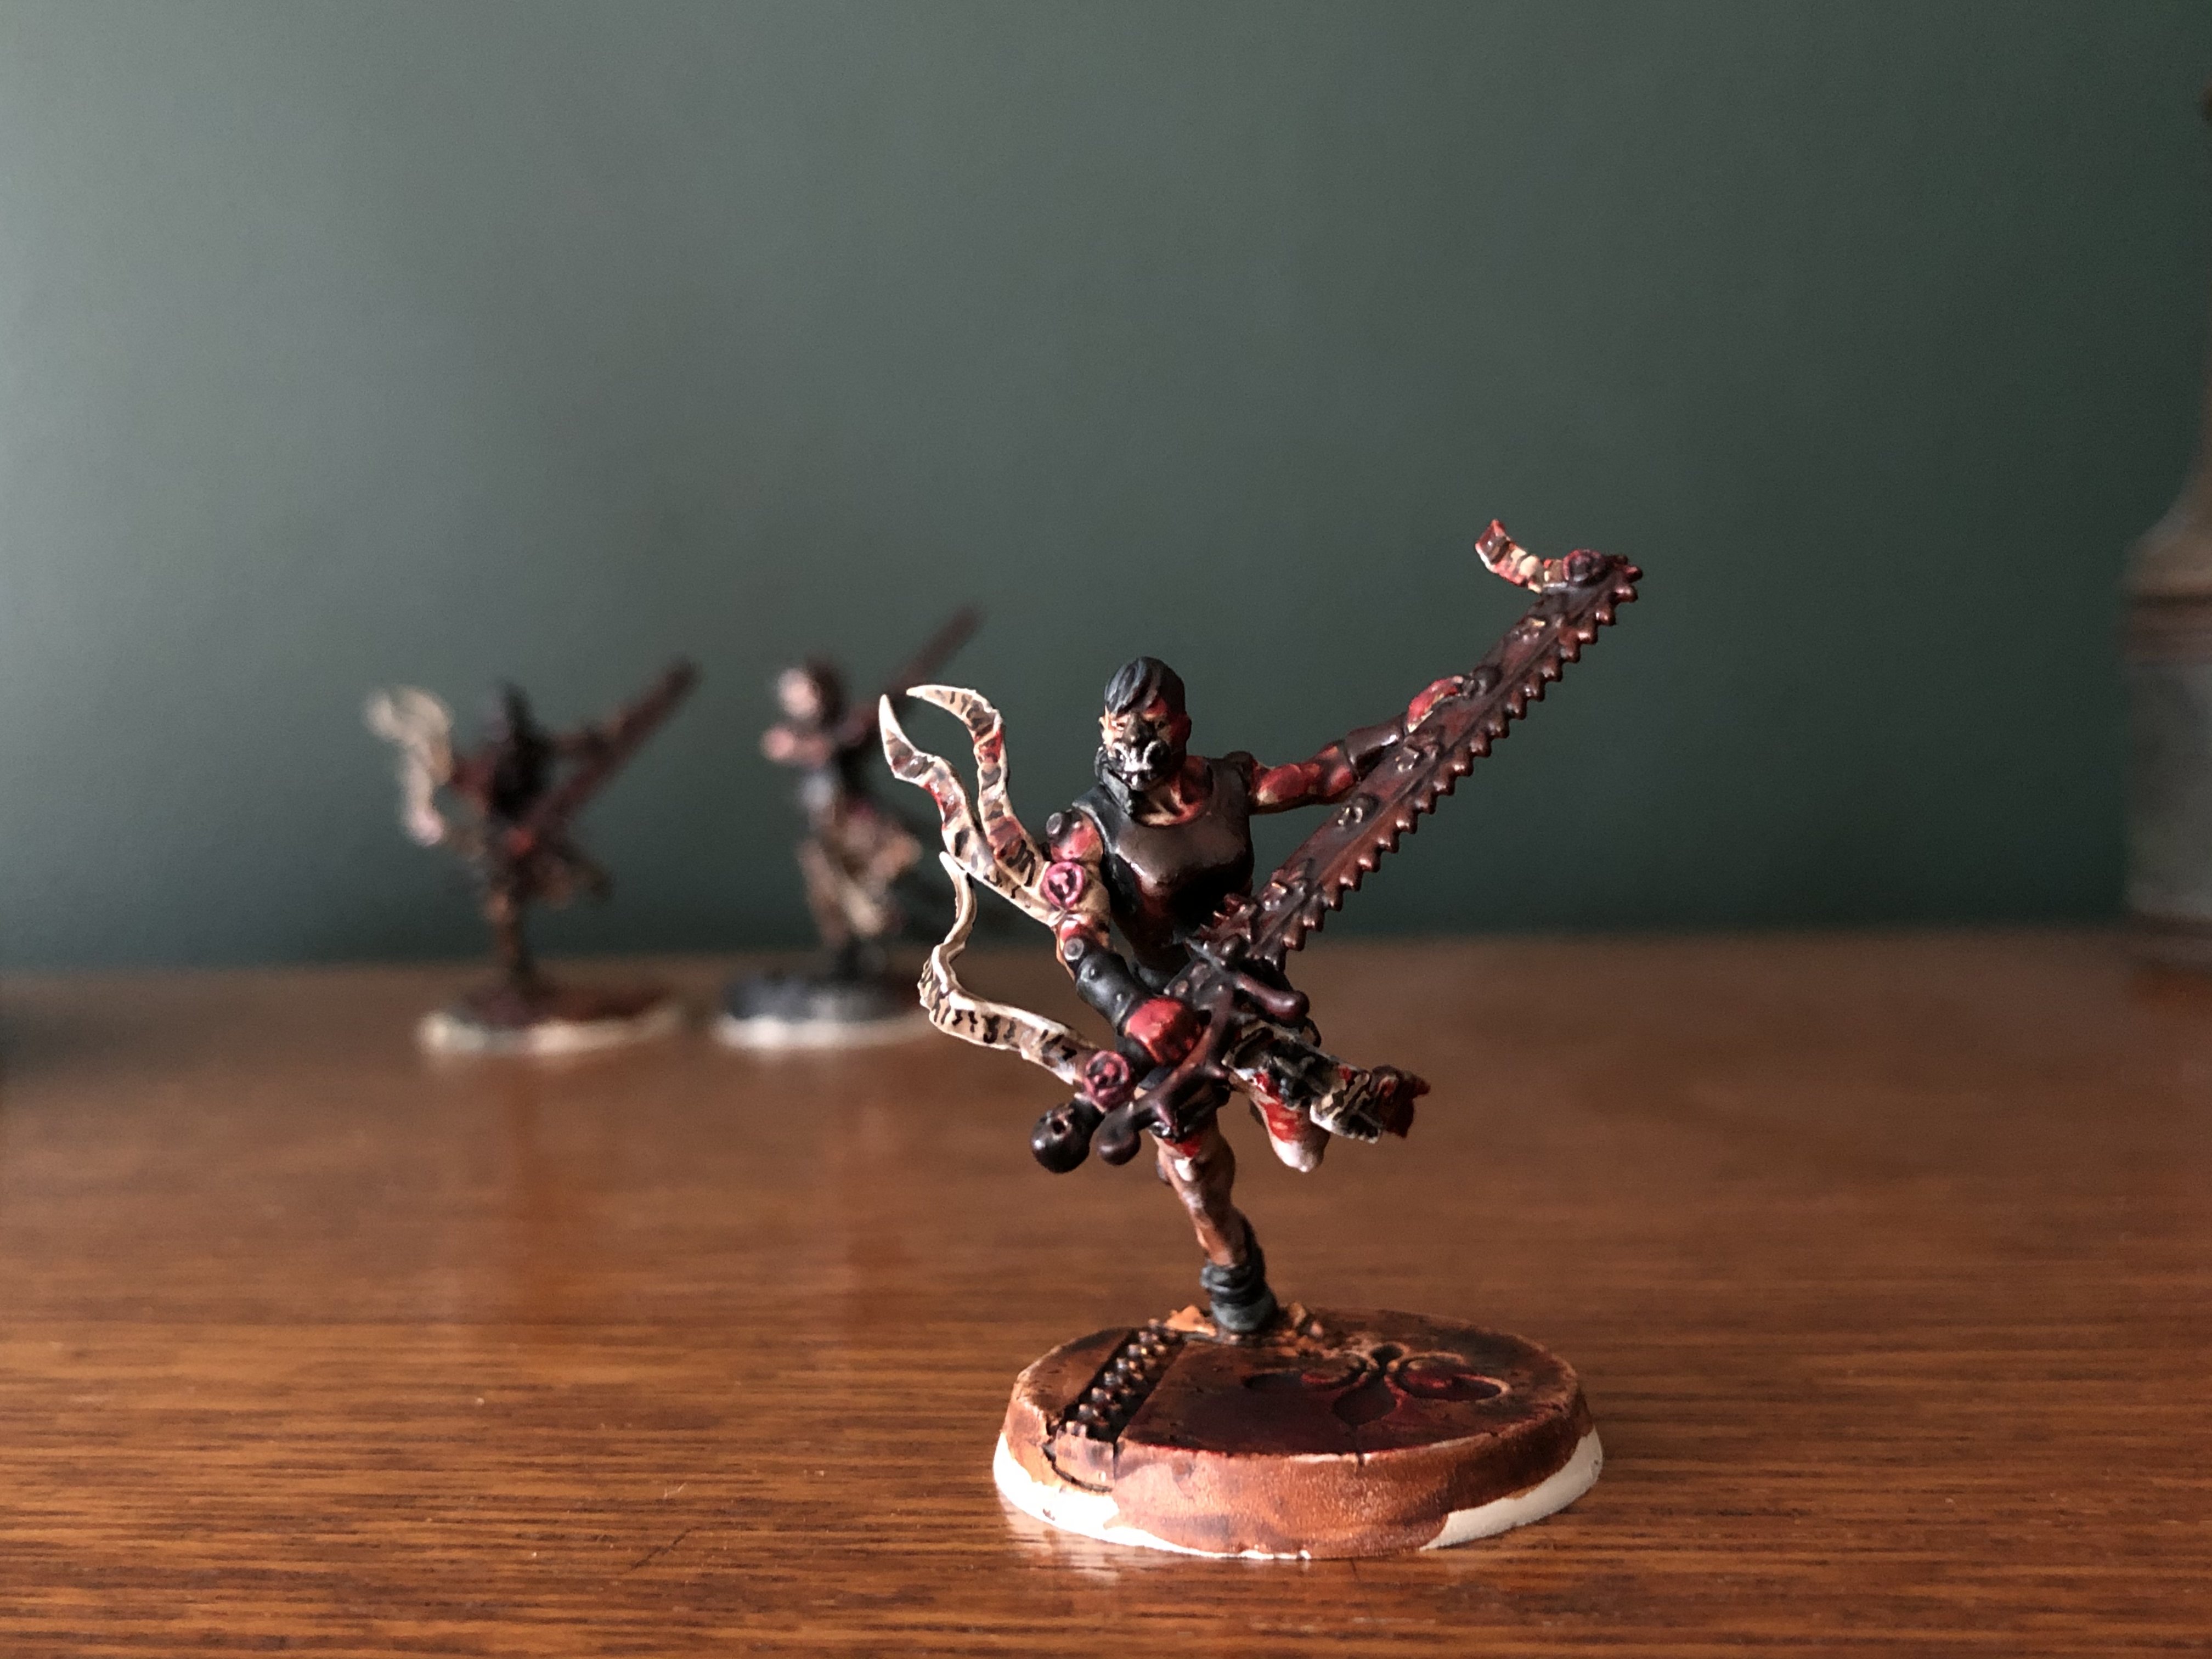
THE EMPEROR PROTECTS ~ REPENTIA COMPLETE

PURGE
*****
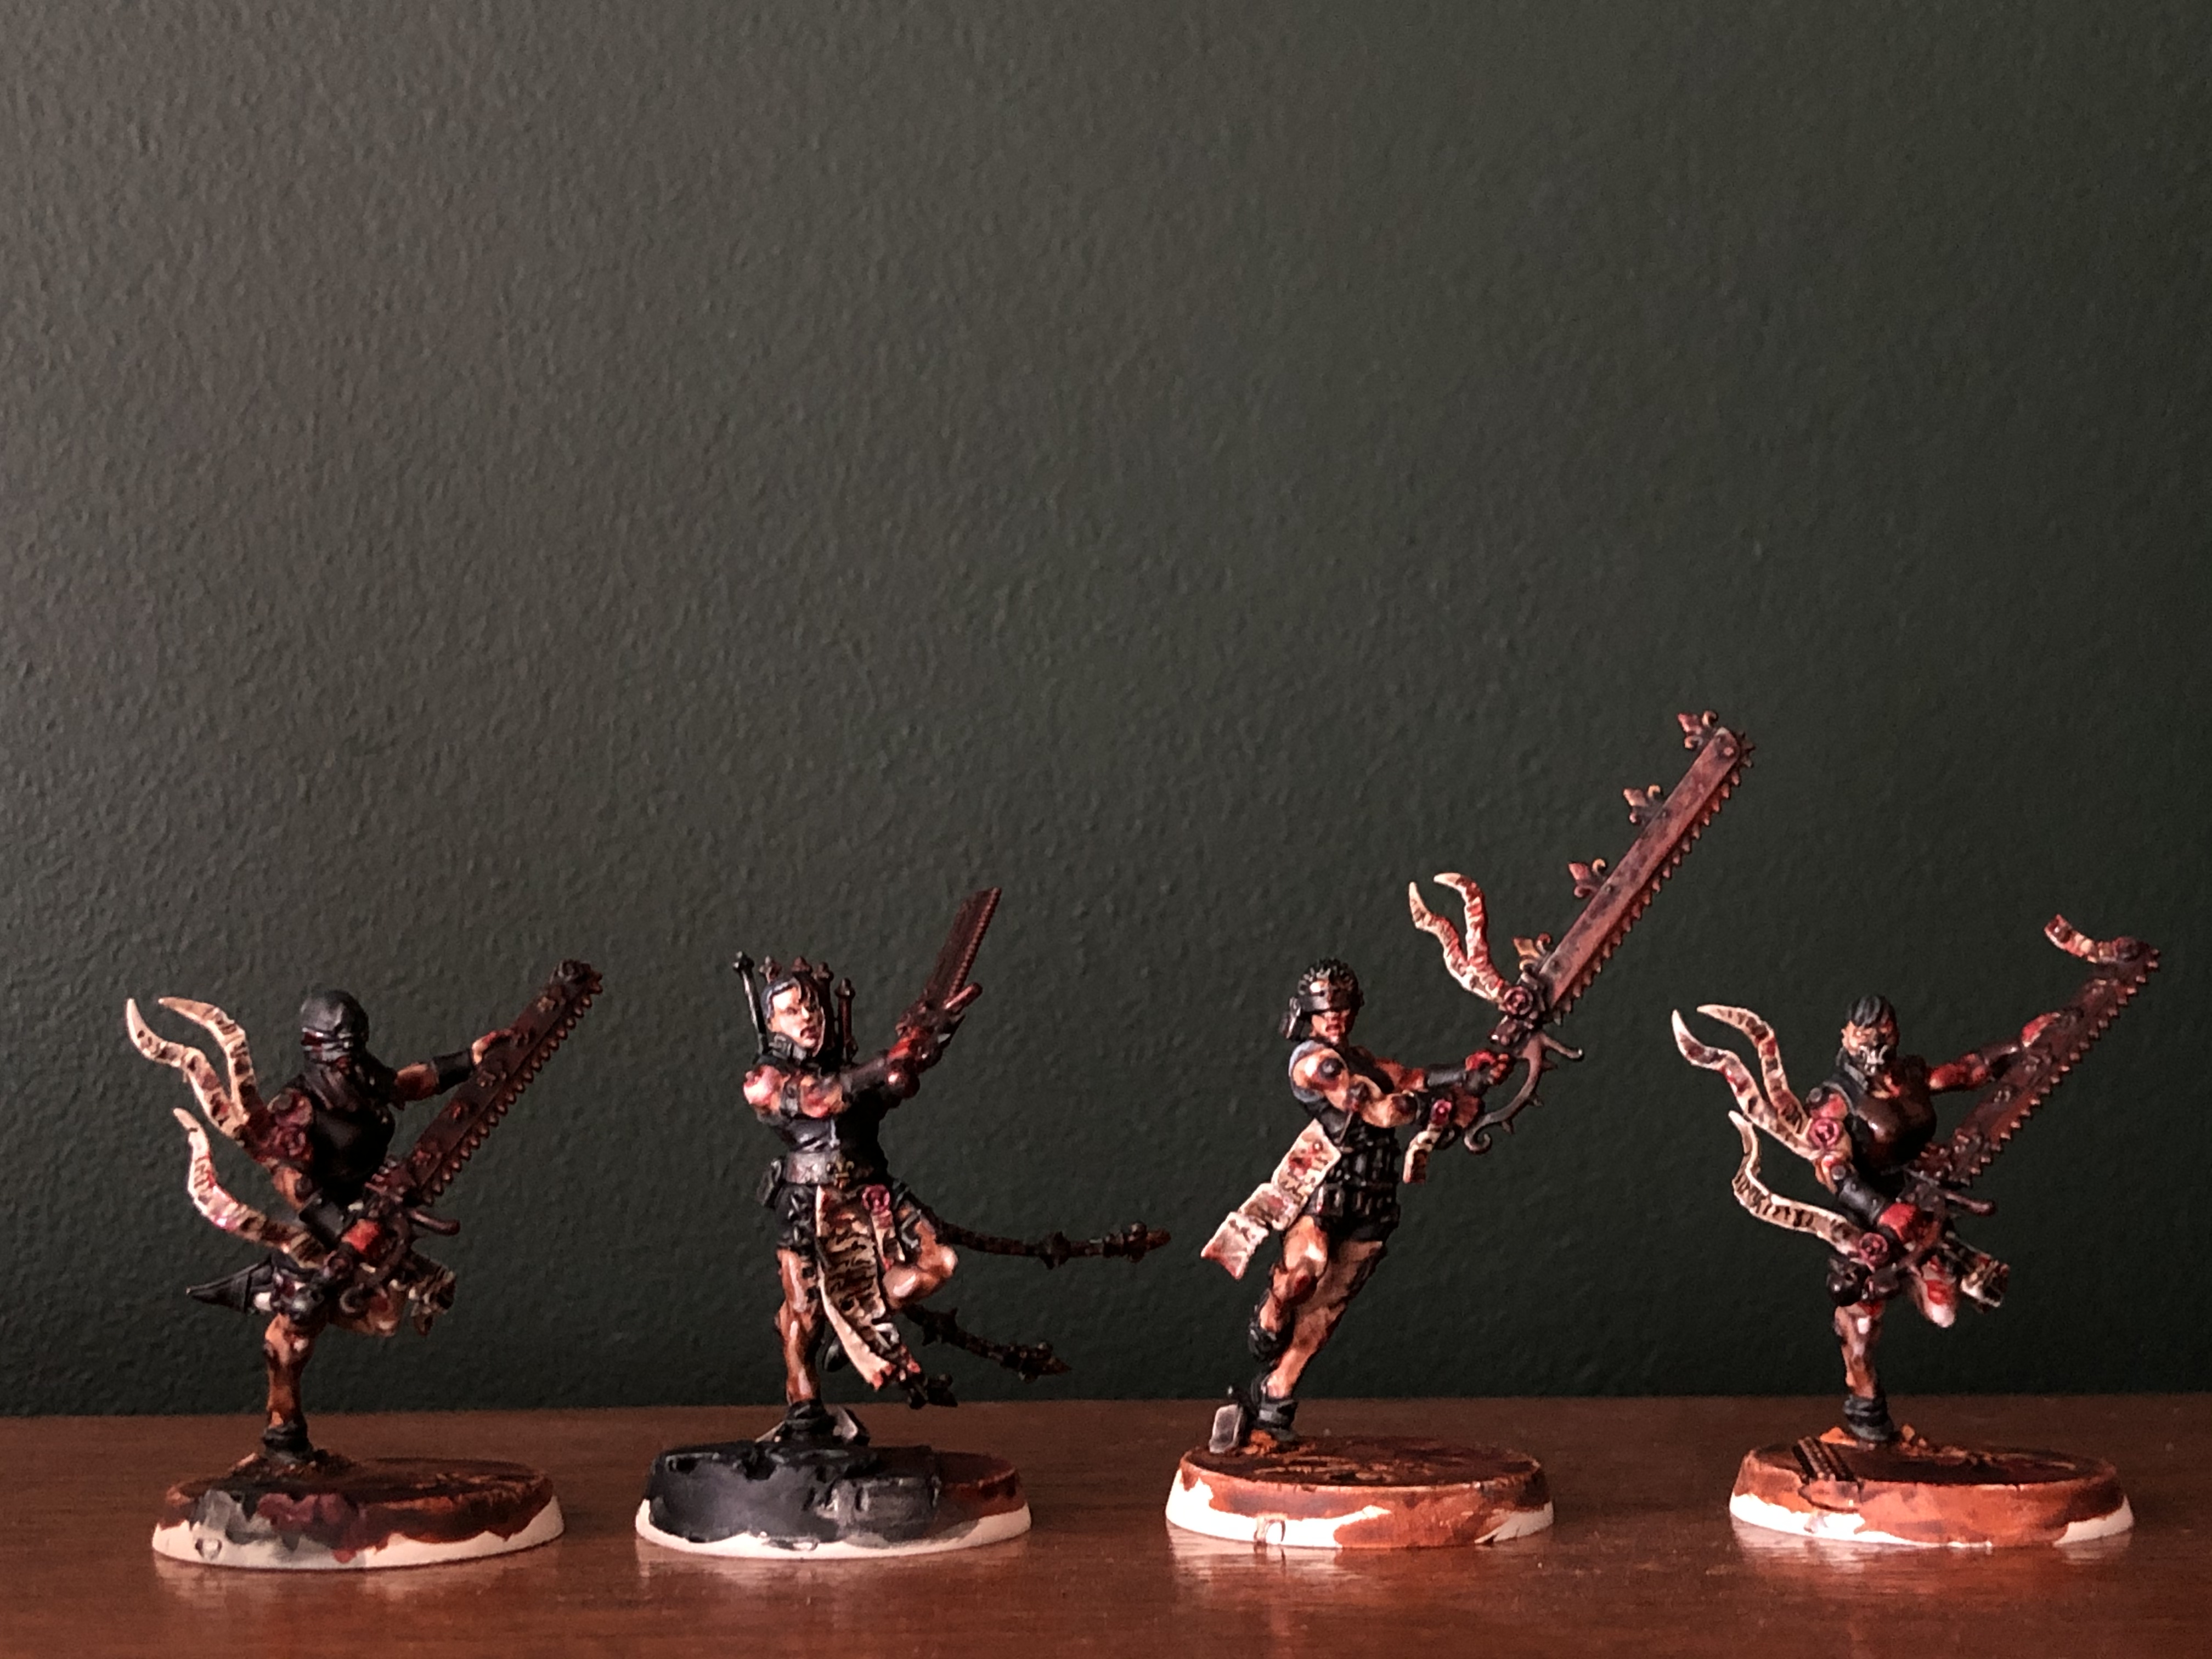
Awwwwwwwh yeah! coming at ya like a ball of awesomeness here’s my completed unit of Repentia. Had an absolute blast painting these ladies & I already want tons more haha. The addiction is real. Here’s some obligatory badass photos to celebrate.


NEXT ON THE PAINT TABLE
*****
Strap yourselves in. Full Penitent engine painting tutorial coming soon.
Much Love
Eternity Gate

EAT. SLEEP. REPENT. REPEAT ~ A GUIDE TO PAINTING REPENTIA ~ PART 2
ALL BLACK EVERYTHING
*****
Right no intro this time. For the paint list see my previous post. Let’s just crack on. Yes! I began by applying a layer of Contrast Black Templar to everything that’s metal & cloth. Leaving the parchment & being careful not to get any onto the skin parts of the model.
I then applied a layer of Leadbelcher to all of the metallics on the models like the awesome Evicerator Chainsword, Power armour ports & spikes that are driven through flesh (Nice) I then hit the wax of the purity seals with a layer of Volupus Pink & the rest of the parchment with some good old Agrax Earthshade. I finished off the Evicerator details with a layer of Retributor armour & applied a coat of Contrast Gore-Grunta fur to the base.
I then hit the black with a highlight of Dark Reaper followed by a further highlight of Thunderhawk Blue before muting them down with a 50:50 mix of Contrast Medium & Contrast Black Templar. I used that same glaze to go over all of the metallics including the gold. I wanted it to be a lot more muted than the bold grandeur of the battle sisters.
Ok let’s get whacky with the washes. I applied a watered down mix of Army Painter purple wash to all of the power armour plugs and tears across the battle sisters flesh to give the skin bruising. I further emphasised this with a 50:50 mix of Contrast Medium to Flesh Tearers Red applied to the same spots as the purple wash but more focused to the skin defect itself.
While this dries I did the eyes (if they had them) with a line of White scar and dot of Abaddon black. I then used Contrast Volupus Pink got the lips. I then used a trusty black 005 Micron pen for all the parchment text & highlighted the parchment edges with Wraithbone.
For the base I applied a dry-brush of Kindleflame followed by an edge highlight of Wraithbone. Then I used a 50:50 glaze of Contrast Medium to Contrast Gore Grunta-Fur to tie the highlights together. For the emblems & grates I used Contrast Black Templar. Then when that was dry I dry brushed the metallics with Leadbelcher & highlighted the black emblems with Dark Reaper & Thunderhawk Blue. I also used Basilicanum Grey on any larger rocks under the feet of the Repentia before highlighting those with Wraithbone. That’s the bases done!


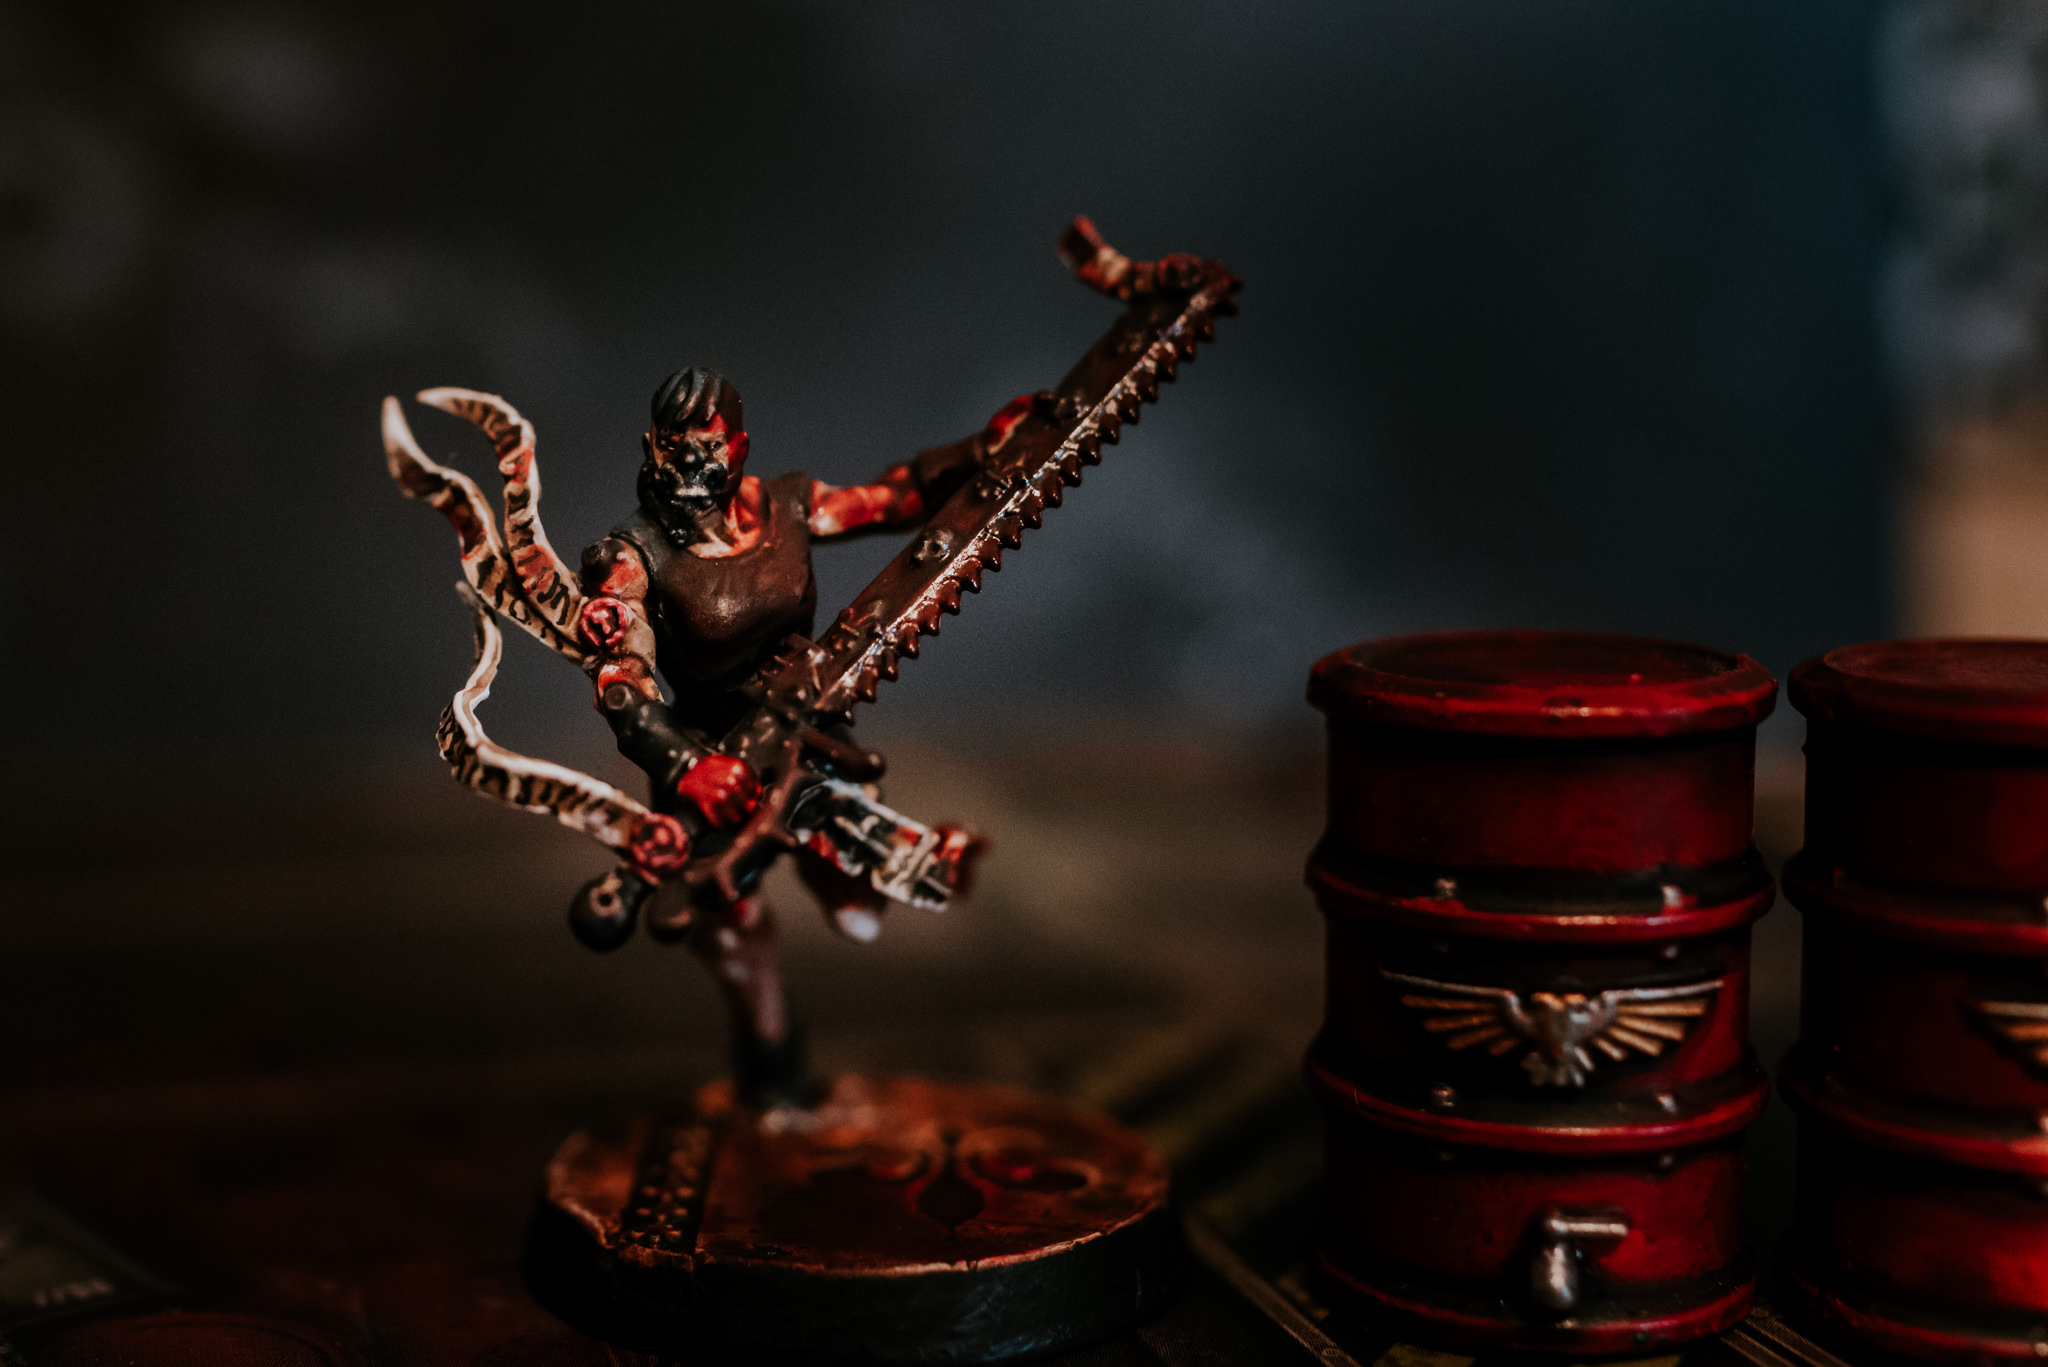
BLOOD FOR THE BLOOD GOD
*****
Yes now it’s time to fully grim darkify these ladies. I began by using Blood for the Bloody God & applying it to the Evicerator. I used a mix of stippling & even wiping off excess with my fingers to create the gory effect. I focused the blood where the giant chainsword would impact & the spatter onto that side of the Repentia’s body.
Those of you who’ve used Blood for the Blood God will know it dries glossy but I wanted more of a matt & dark gritty dried blood effect. Once the coat had dried I applied a glaze over the blood with Agrax Earth Shade & when that had dried applied a final highlight just to the edges of the chainsword using Contrast Blood Angels Red. With that they were done & looking absolutely badass.

REPENT
*****
That concludes my painting guide for the Repentia & like I said before I really enjoyed painting them. I will be hitting these models with a coat of Army Painter Anti Shine too but I’m toying with idea of following that up with a tiny bit of gloss varnish applied to some of the blood like the pools on the floor just to bring a little sheen back.
Hope you guys enjoyed the guide. Badass proper photos coming up next as per usual. Plus of course with an announcement of what’s next to hit the paint table. YES!
Much Love
Eternitygate
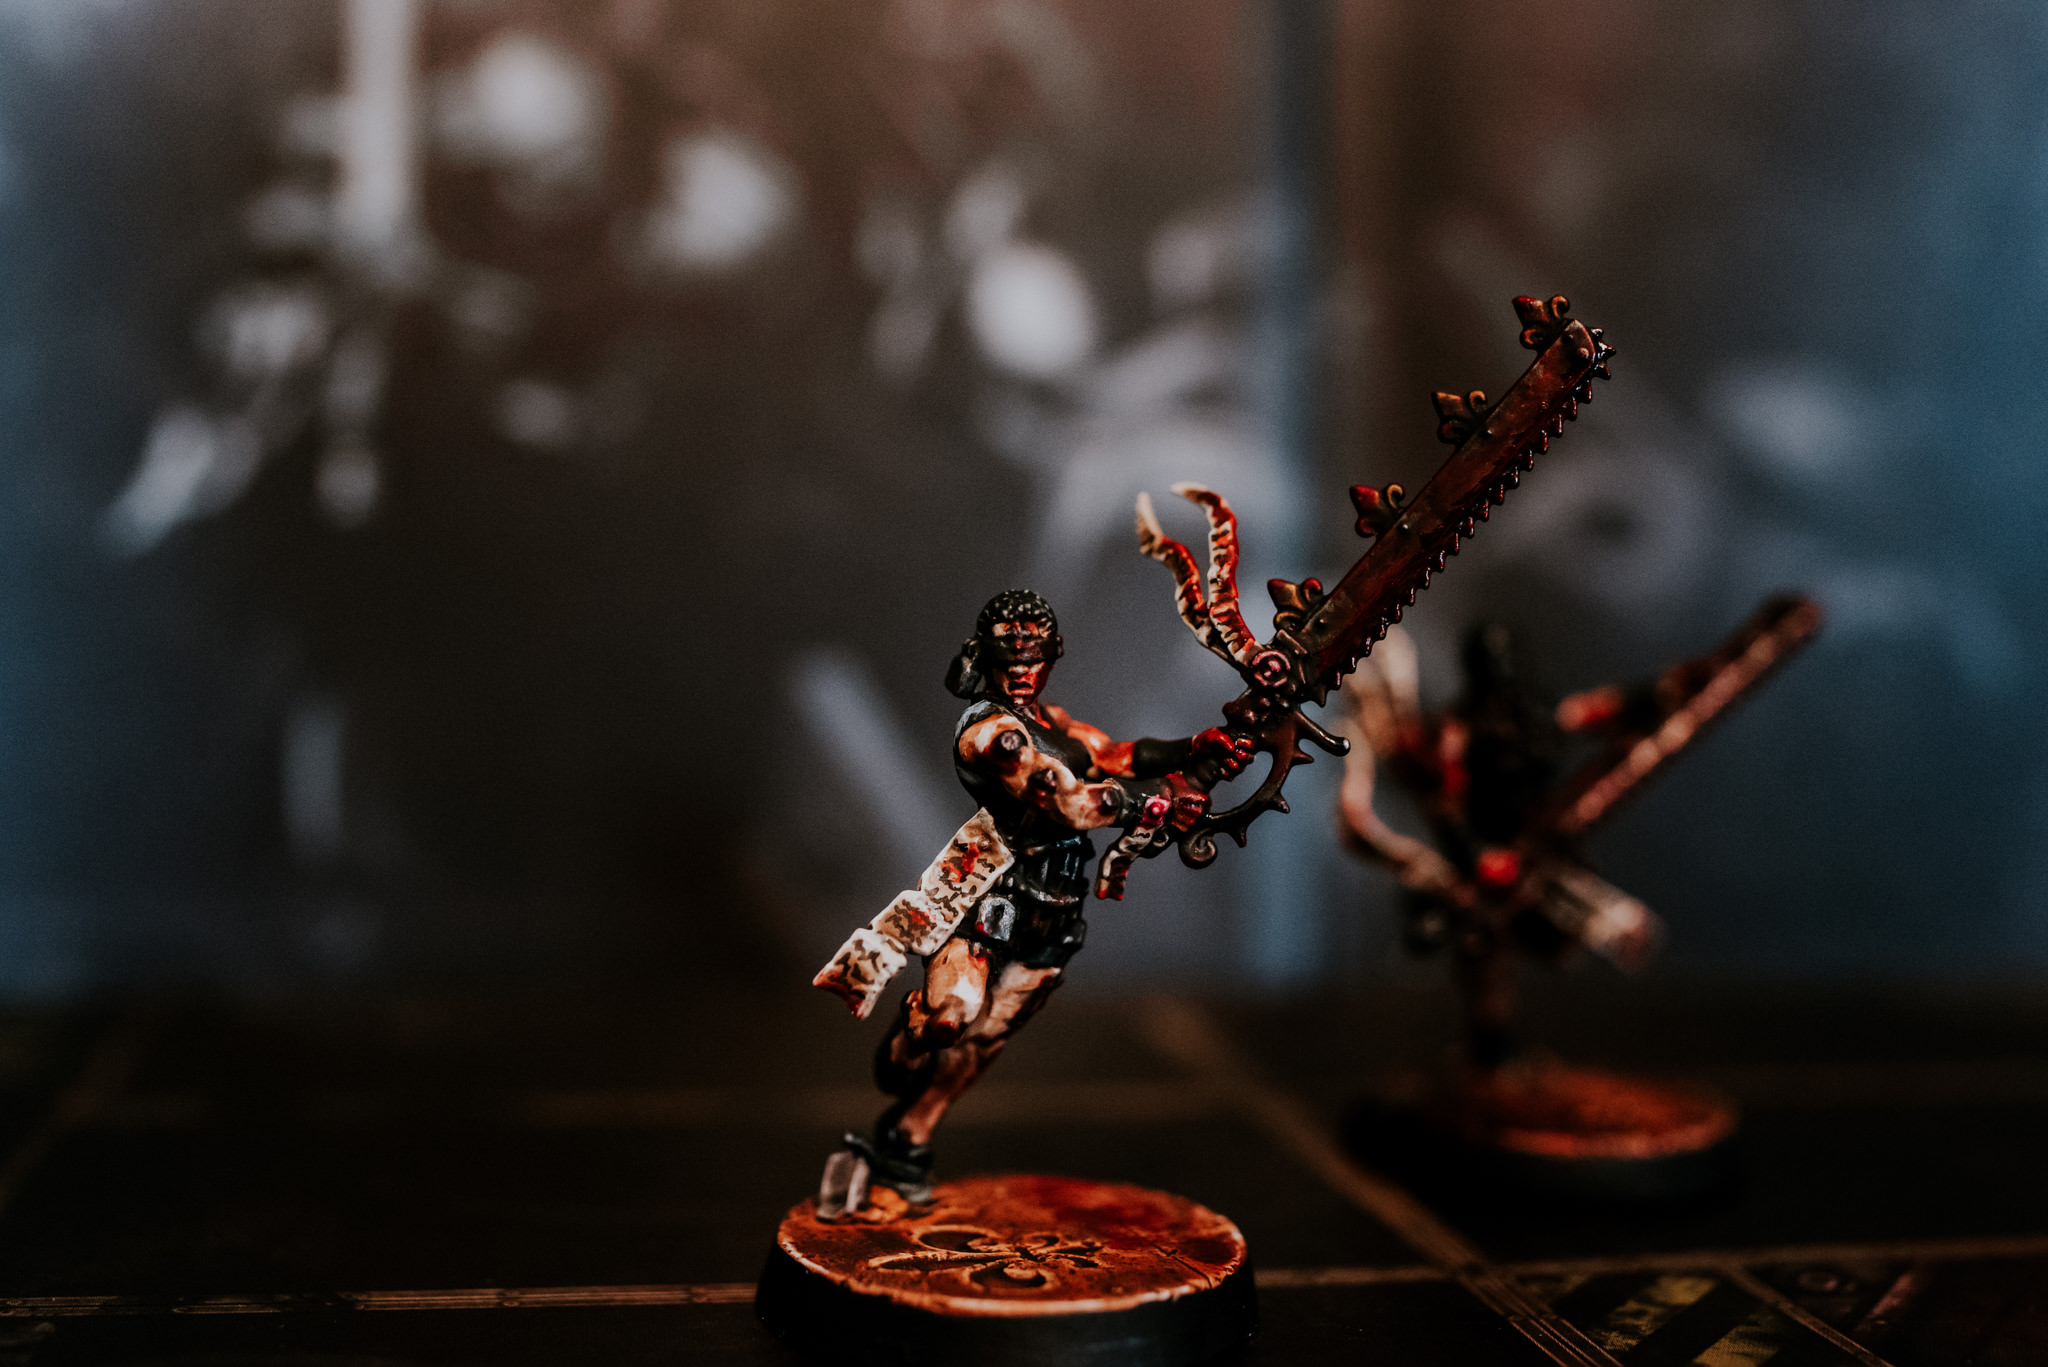
EAT. SLEEP. REPENT. REPEAT ~ A GUIDE TO PAINTING REPENTIA ~ PART 1

GRIM DARK CONTRAST
*****
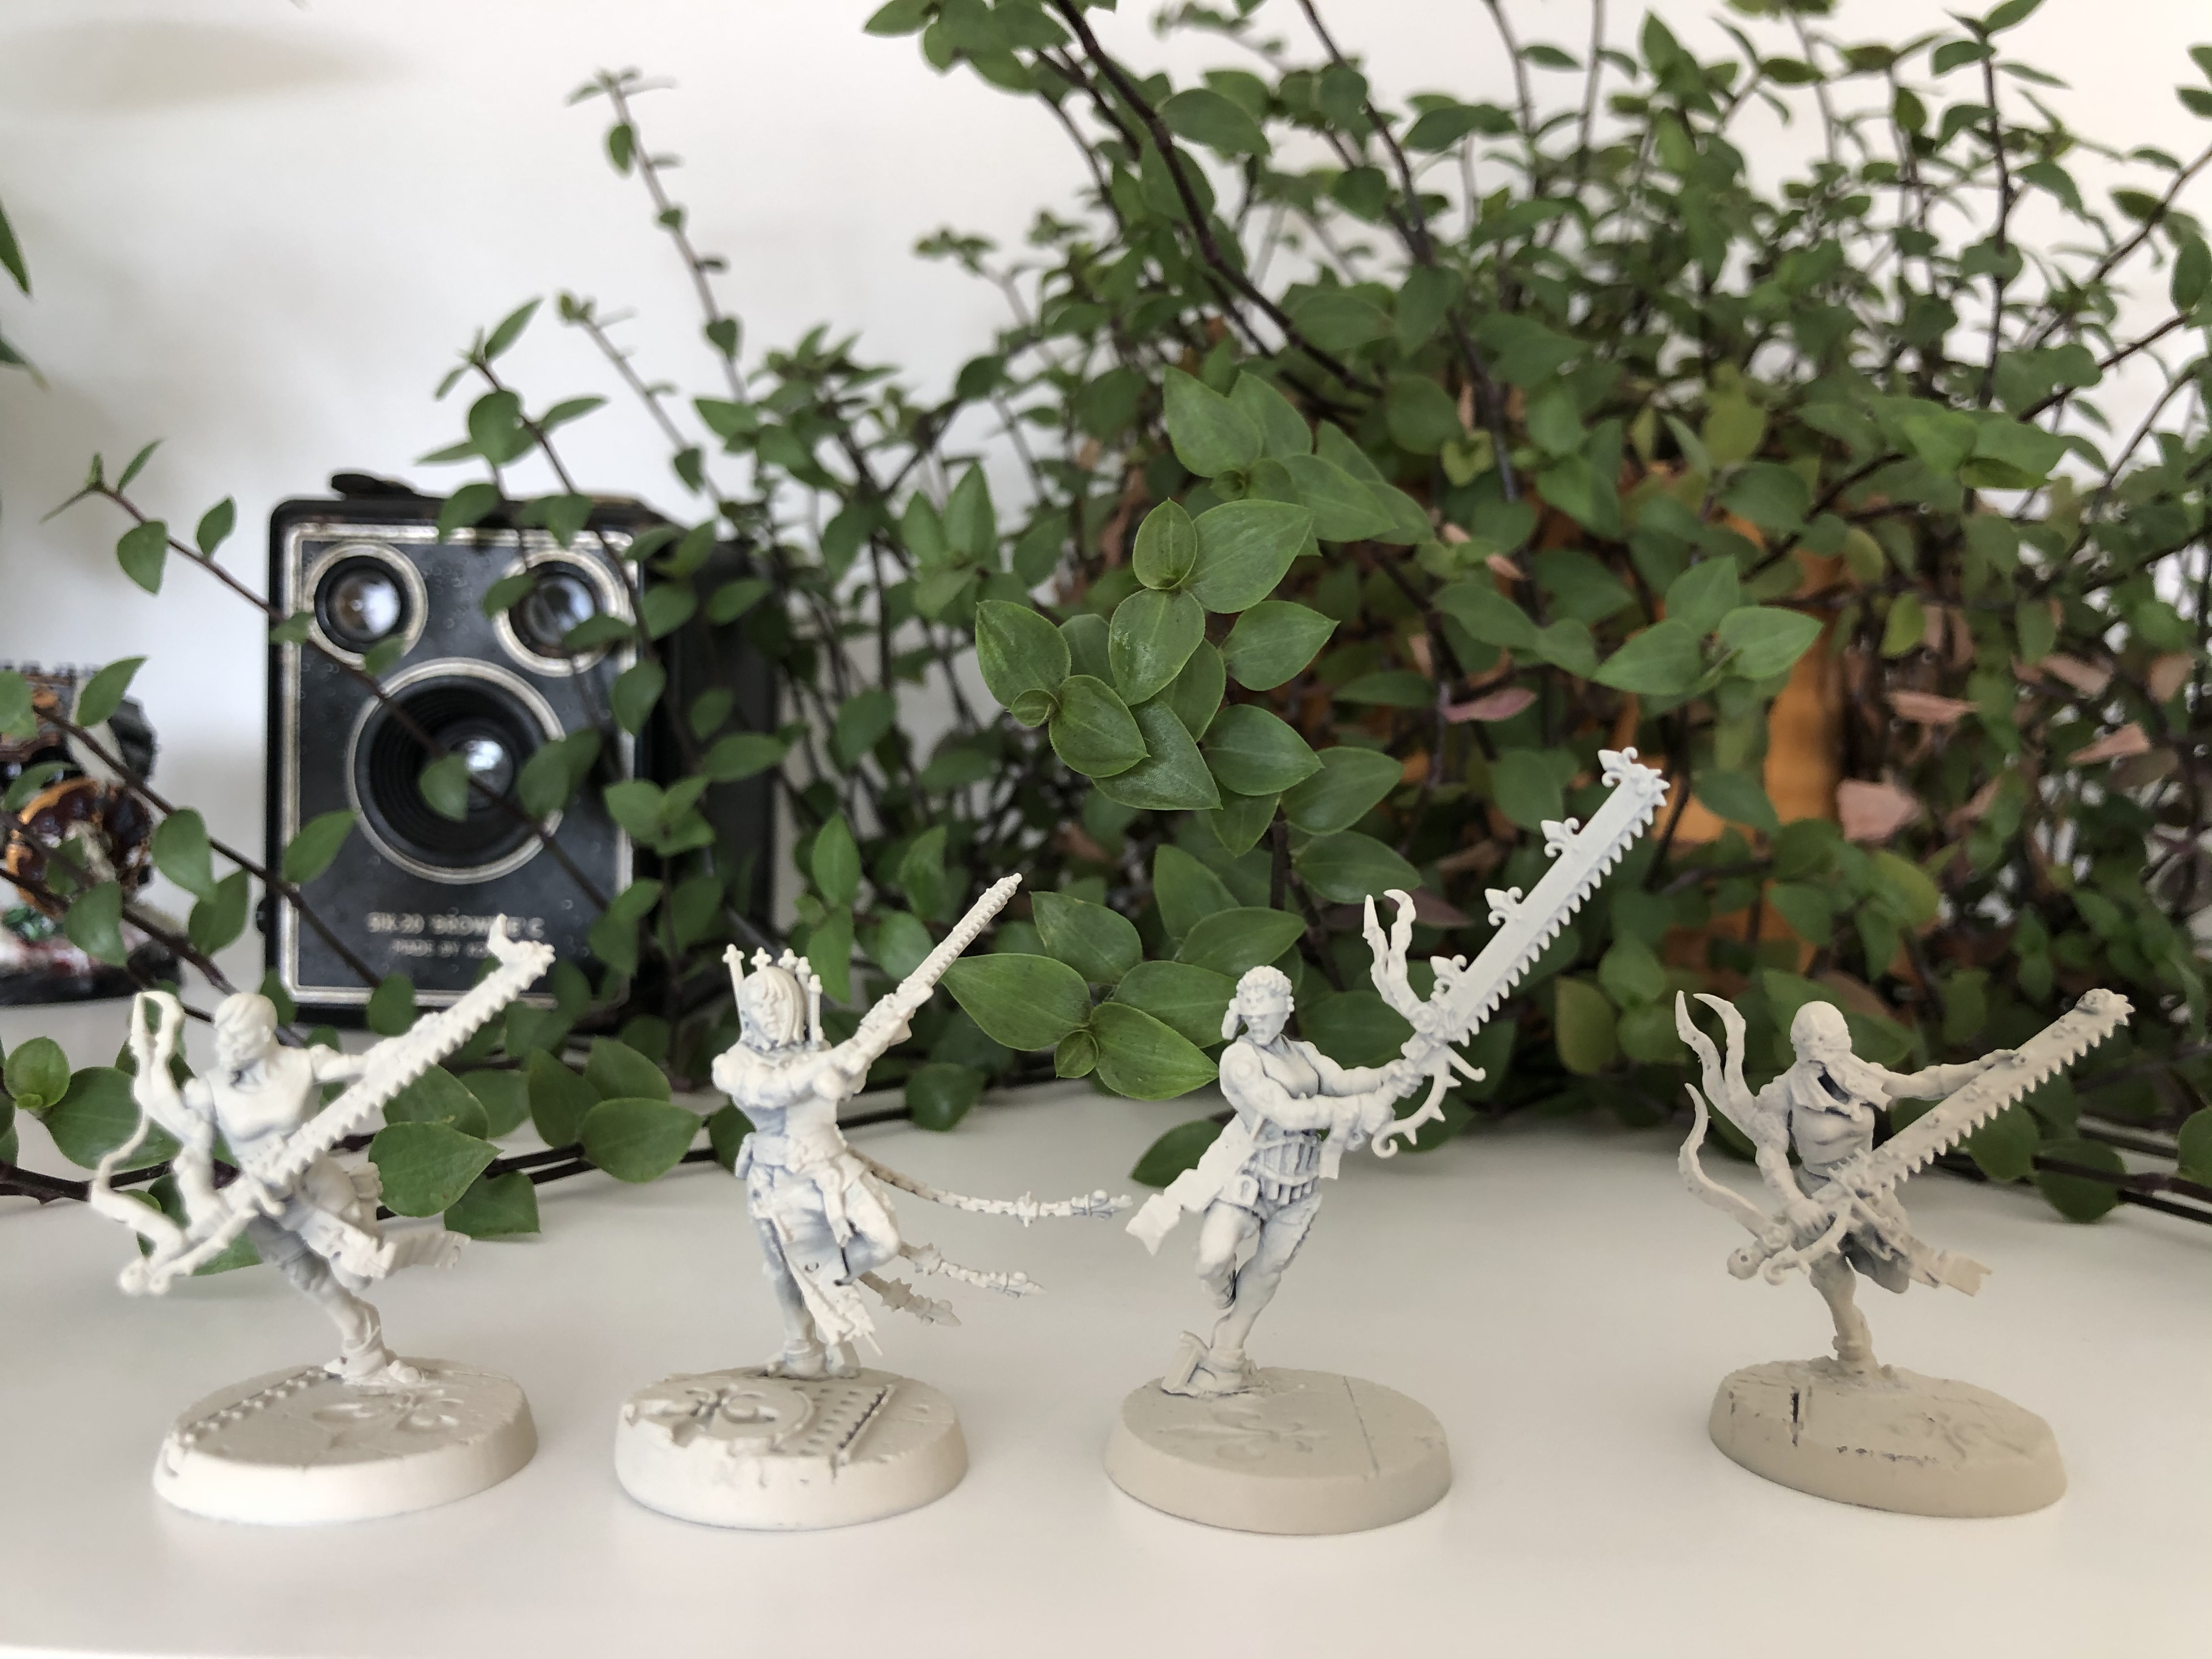
Ey up lovely people. Wowza have I been busy on the painting front. I’ve actually finished my bloody (and I mean bloody) Repentia in one fell swoop. Perhaps it was the motivation of that golden button feature for my Sisters of Battle on XLBS. Either way I’ve got the full guide written up with all the steps & I’ll be sharing it right here more than likely in multiple parts as it’s a biggy.
Honestly though these ladies were so much easier to paint that the standard sisters. Mainly because there was less edge highlights. But also because they all have a somewhat more open stance allowing easier access to details etc. Firstly I have to share a pic that gave me the inspiration for my Repentia. These ladies were painted up by a talented chap called Jon Swain & I adored their dark & gritty feel. I didn’t have much to go on in the way of emulating their look so I just rolled with it. I really wanted my Repentia to provide a stark contrast to the more clean paint jobs of the normal sisters. Like they’re at the forefront of the battle taking names & claiming skulls for the emperor.
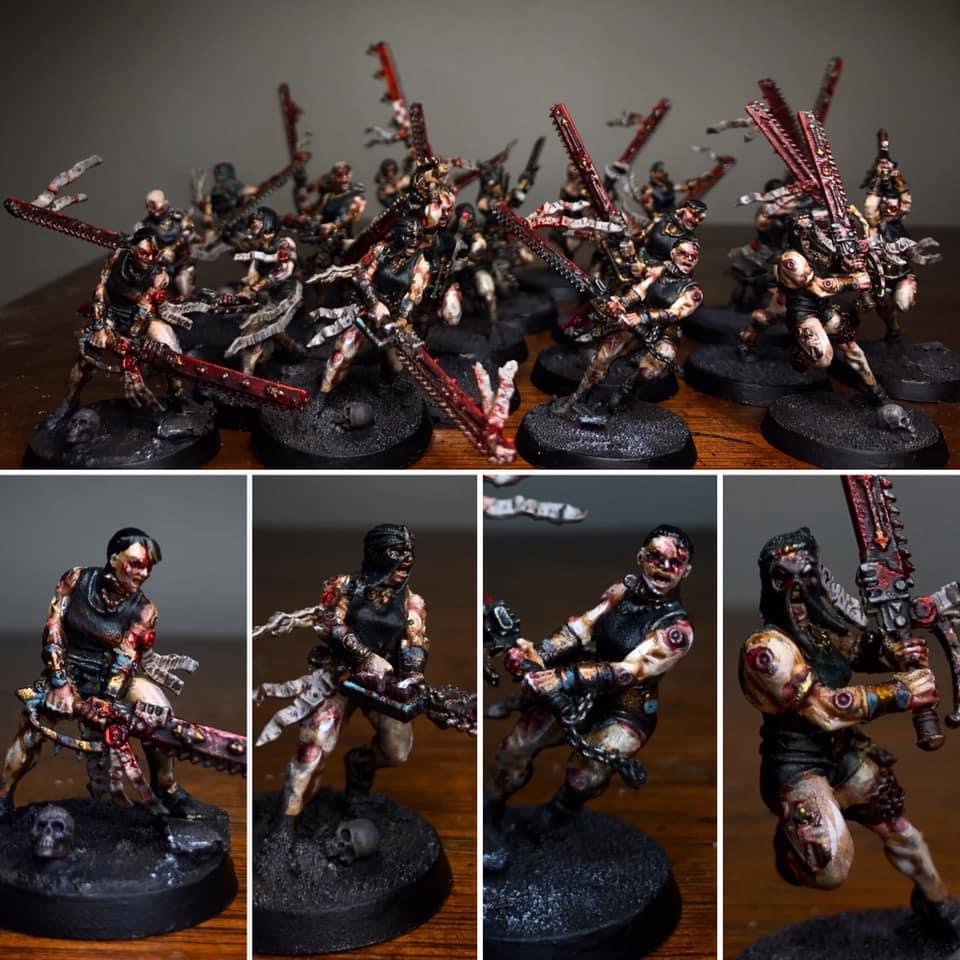
Again the above pic isn’t mine (I wish it was) but just like above I wanted their clothes to be black along with their hair (a contrast to the white) & to use tons of washes that were painted loosely onto the models open sores and implants. Finally to tie into the red of the cloth on the battle sisters I wanted to use a plethora of bloody spatter across both models and base to tie them into the rest of the holy assembly.
Yo Eternity Gate. Quit yo jibber jabber. Let’s begin. PAINT LIST INCOMING. BOOM!
PAINT LIST
*****
• WRAITHBONE
• CONTRAST GUILLIMAN FLESH
• RAKARTH FLESH
• WHITE SCAR
• ARMY PAINTER BARBARIAN FLESH
• CONTRAST MEDIUM
• CONTRAST BLACK TEMPLAR
• LEADBELCHER
• CONTRAST VOLUPUS PINK
• AGRAX EARTHSHADE
• RETRIBUTOR ARMOUR
• CONTRAST GORE-GRUNTA FUR
• DARK REPEAR
• THUNDERHAWK BLUE
• ARMY PAINTER PURPLE TONE
• CONTRAST FLESH TEARERS RED
• ABADDON BLACK
• 005 BLACK MICRON PEN
• KINDLEFLAME
• CONTRAST BASILICANUM GREY
• NULN OIL
• BLOOD FOR THE BLOOD GOD
• CONTRAST BLOOD ANGELS RED
• ARMY PAINTER ANTI-SHINE


LET US BEGIN
*****
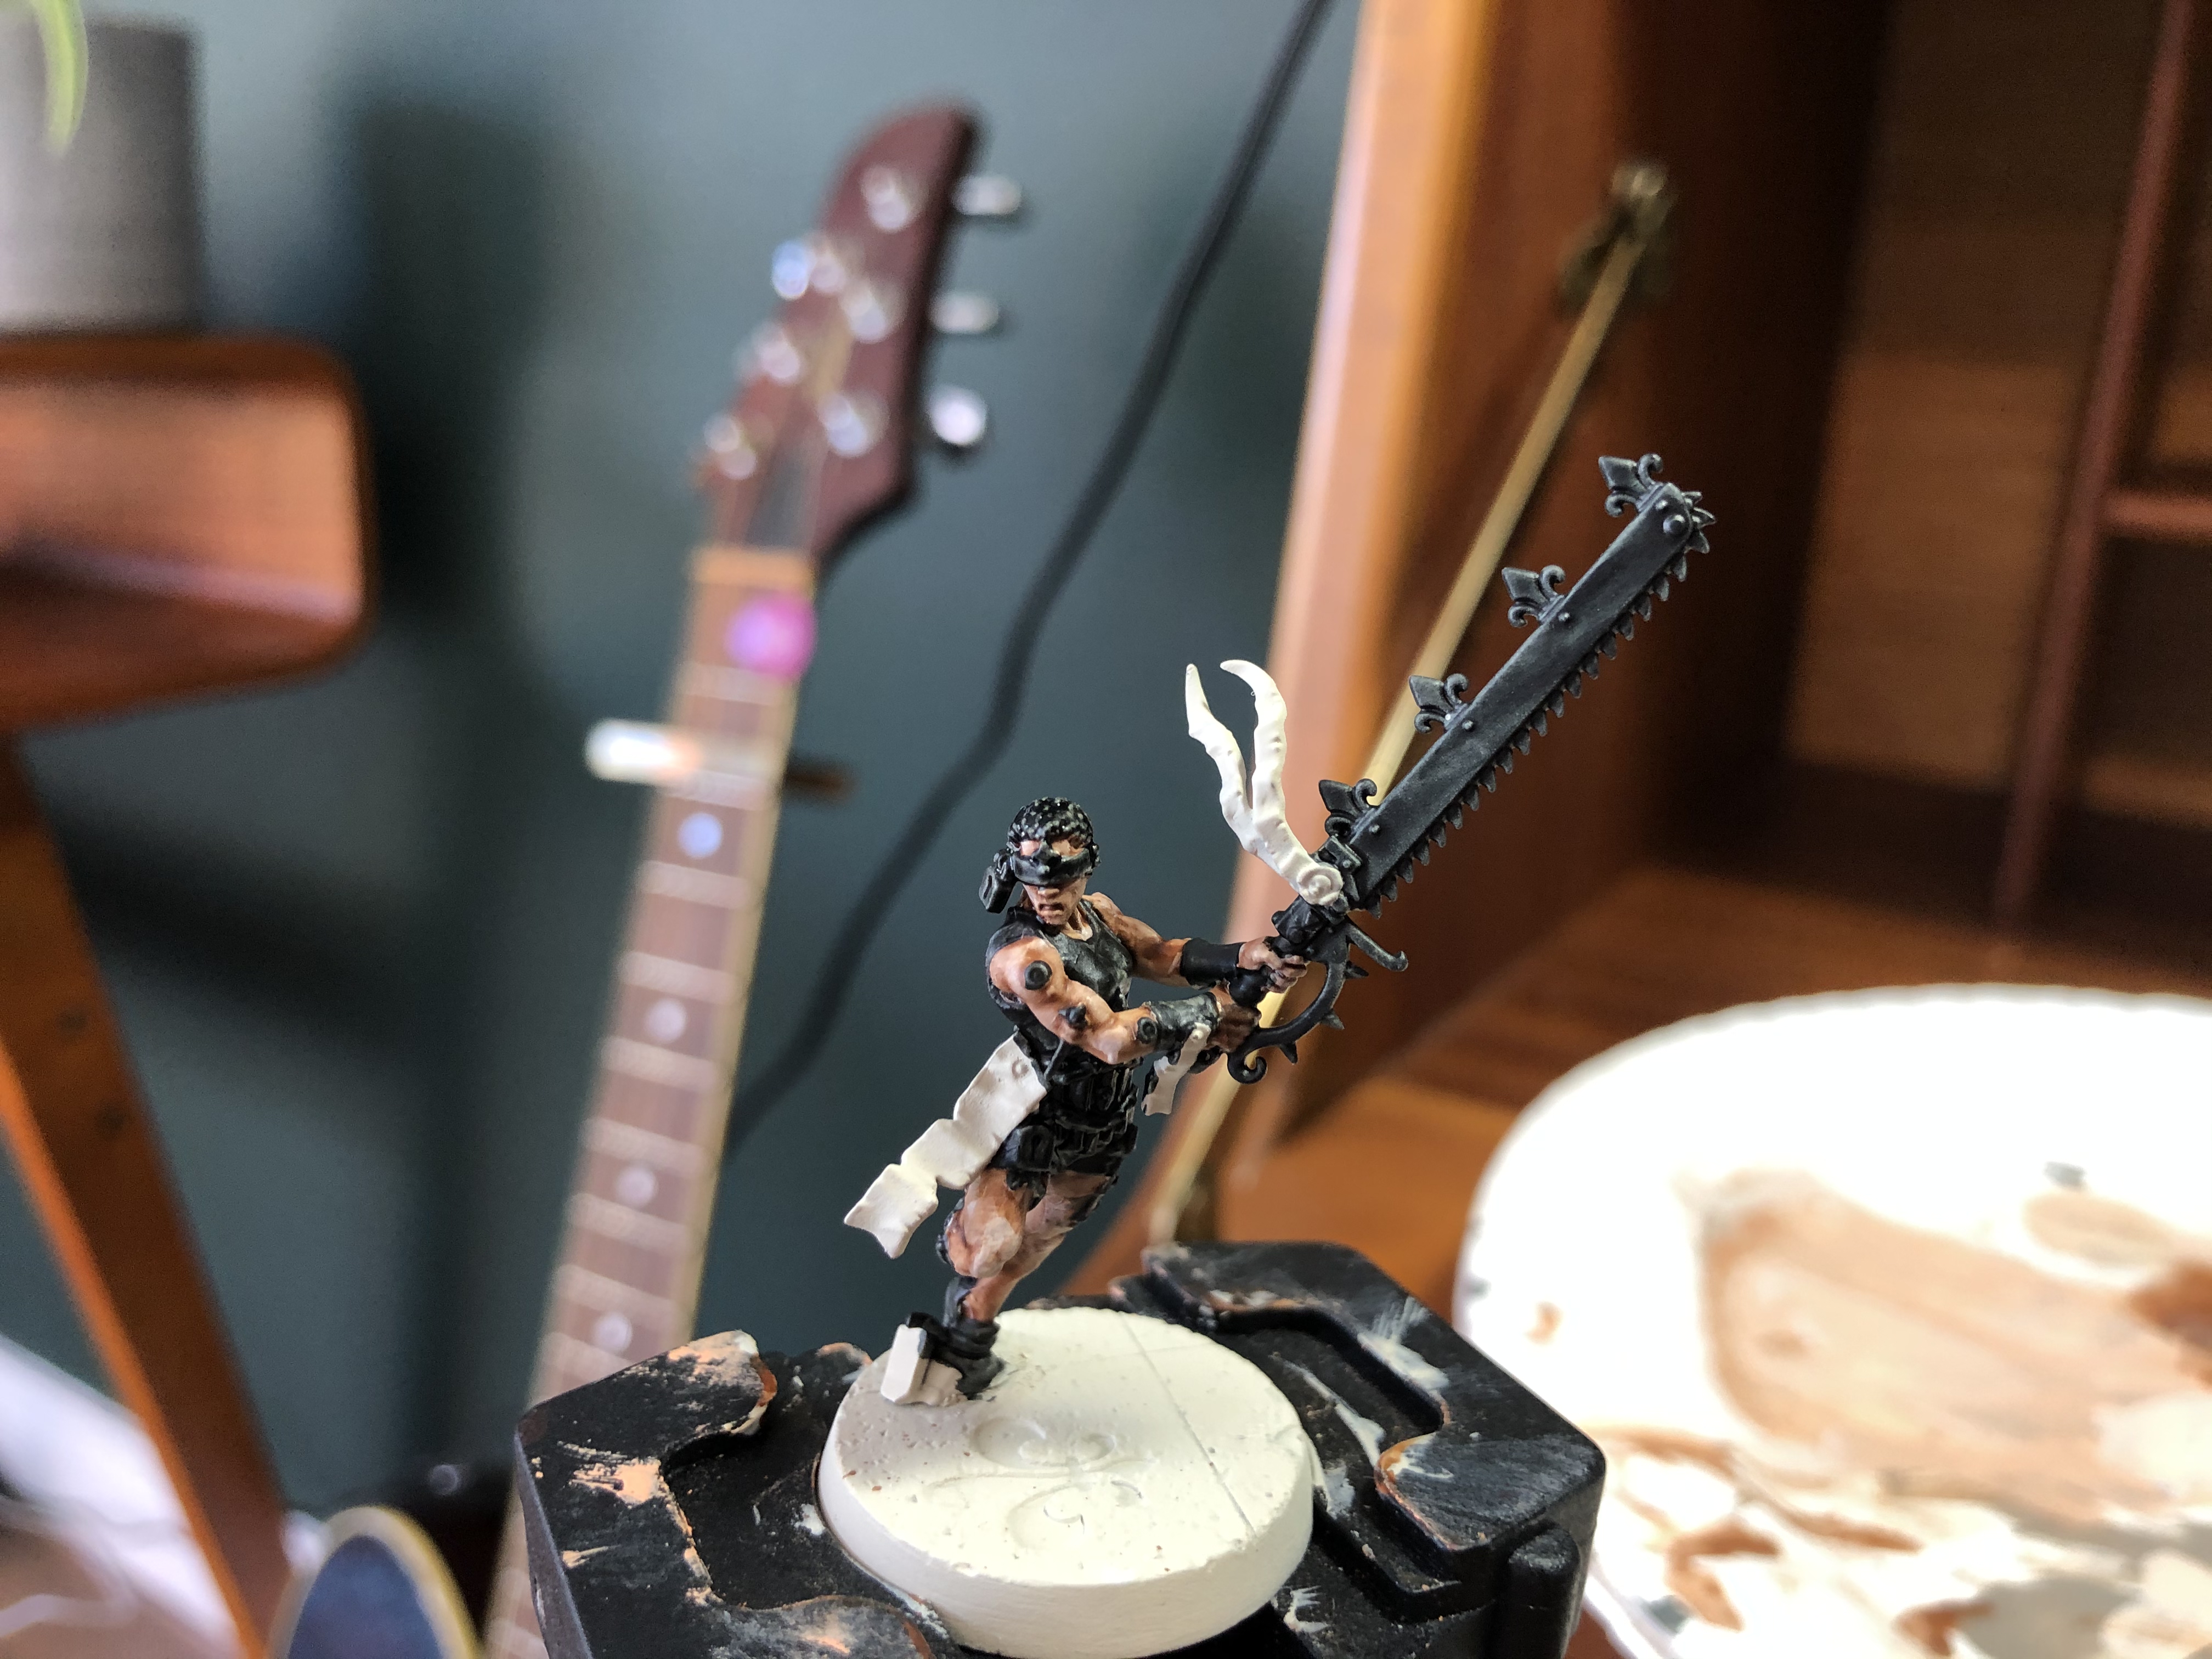
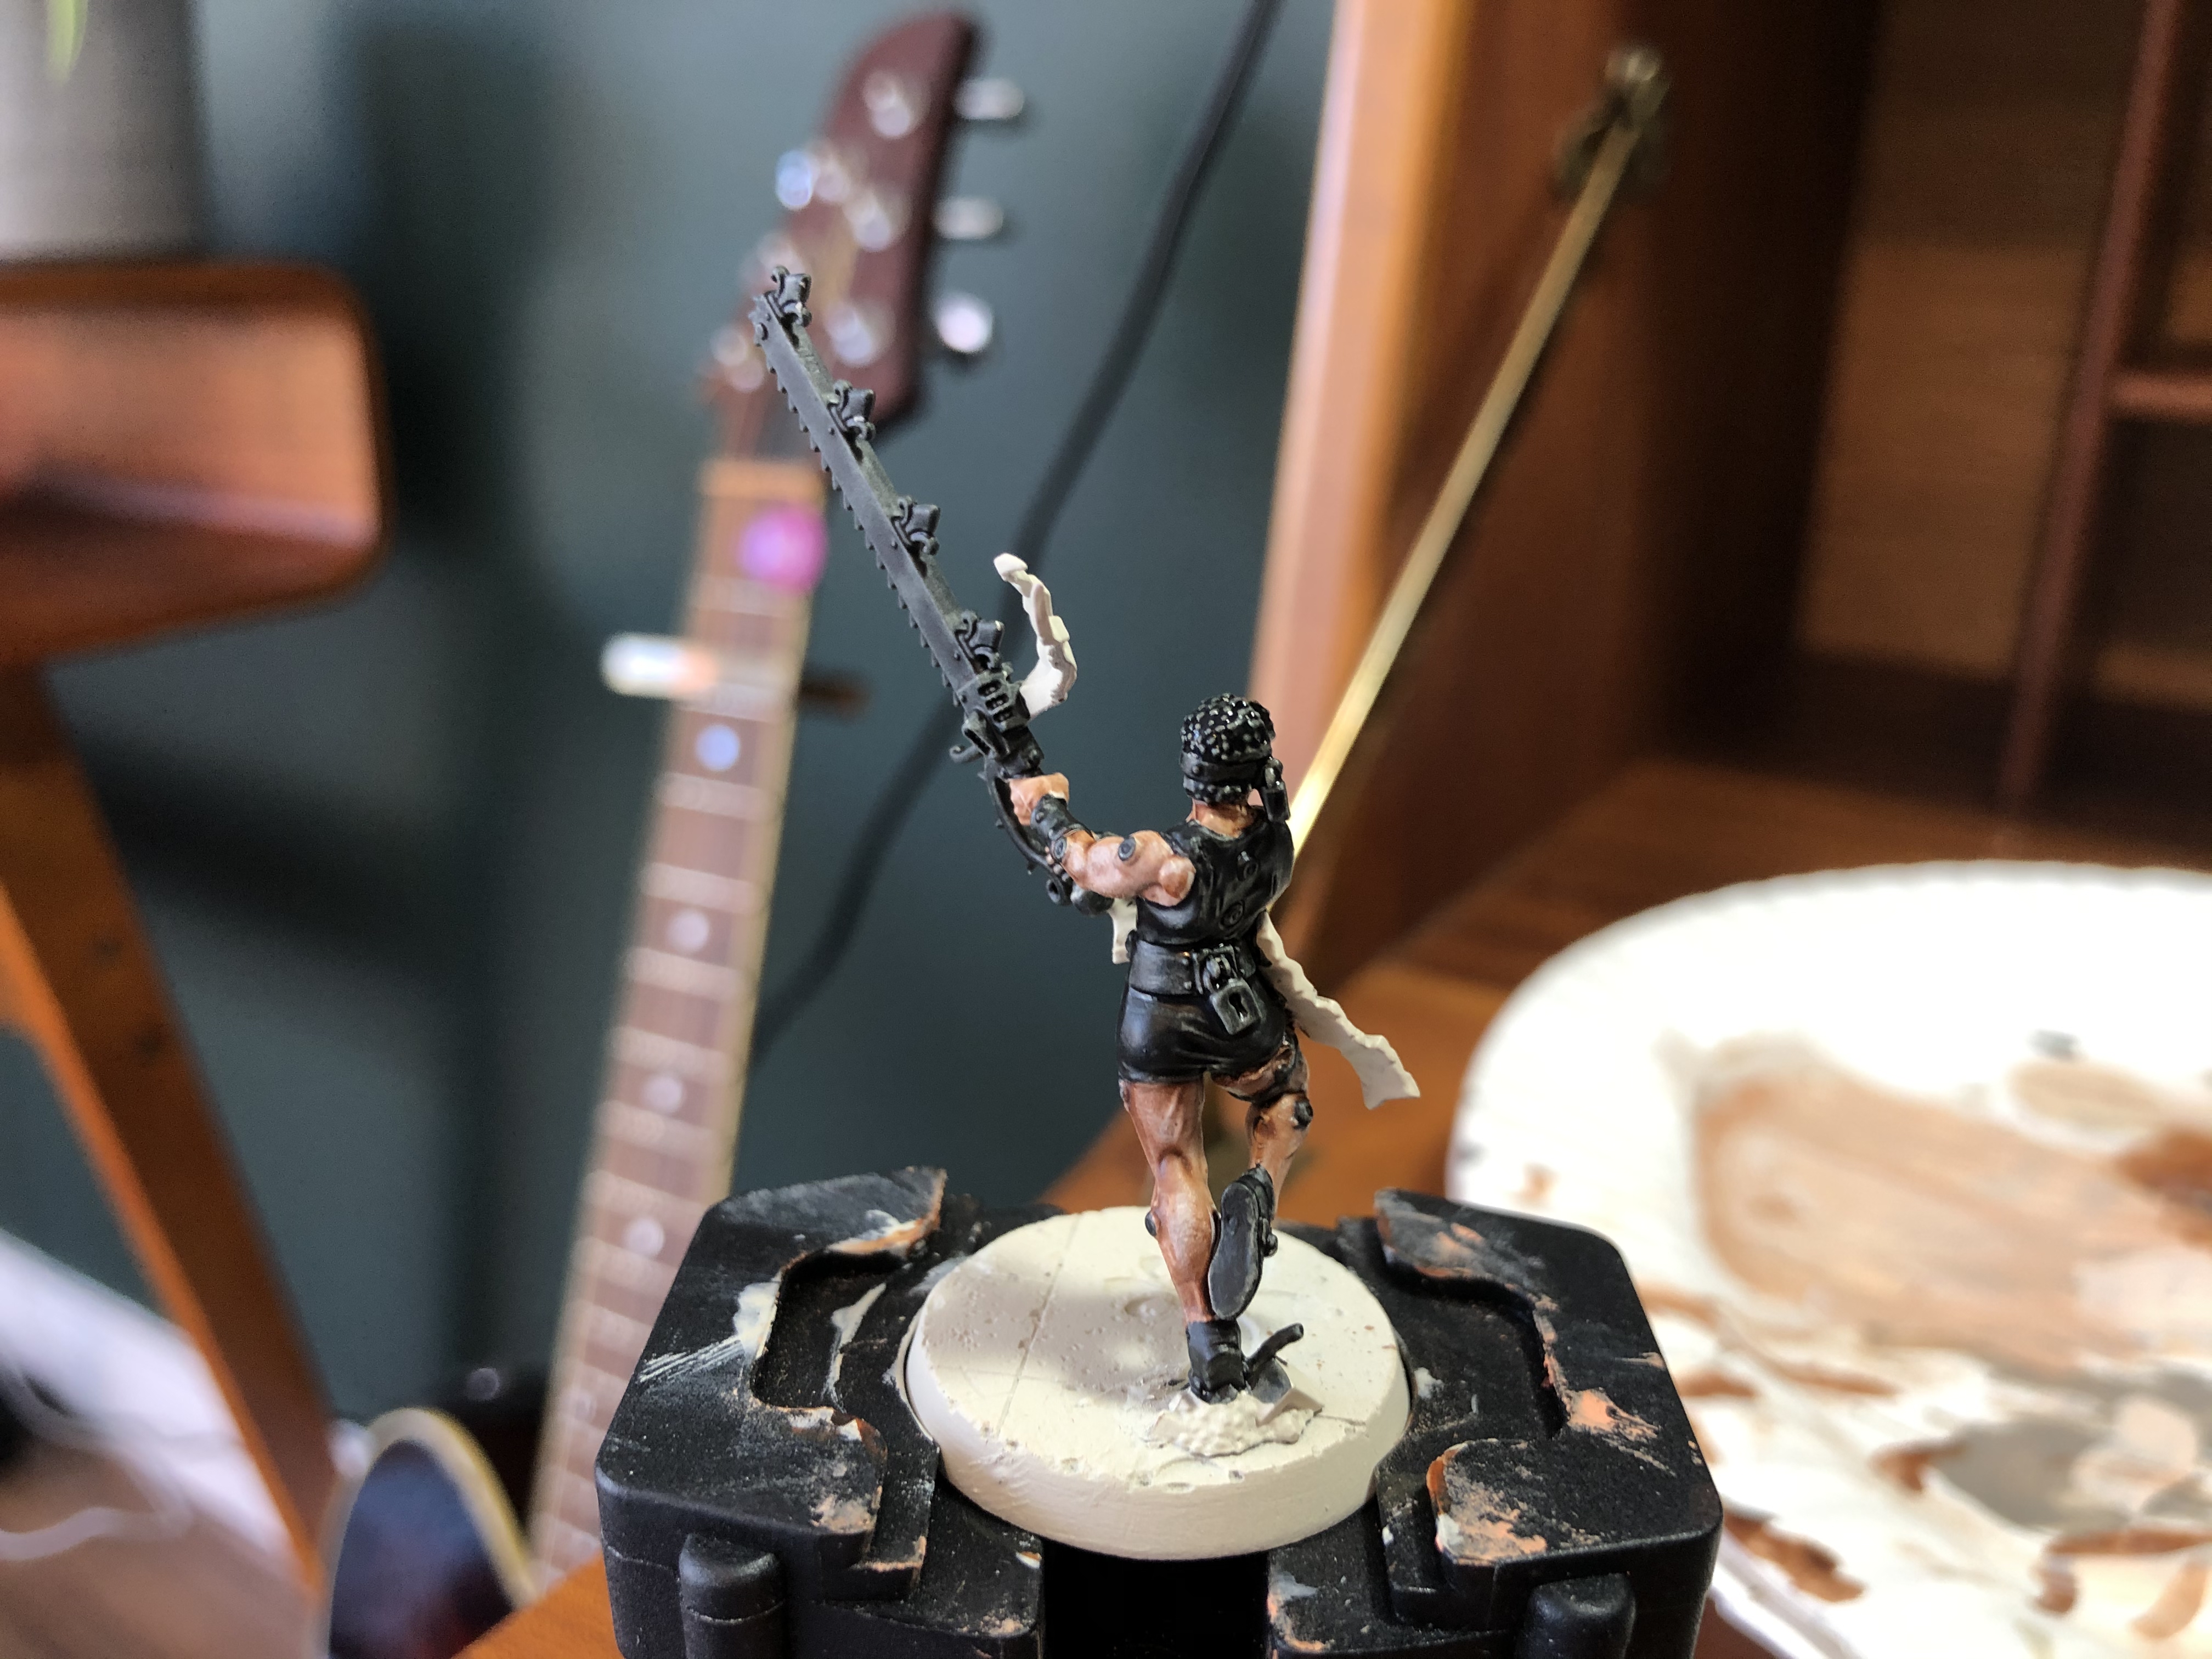
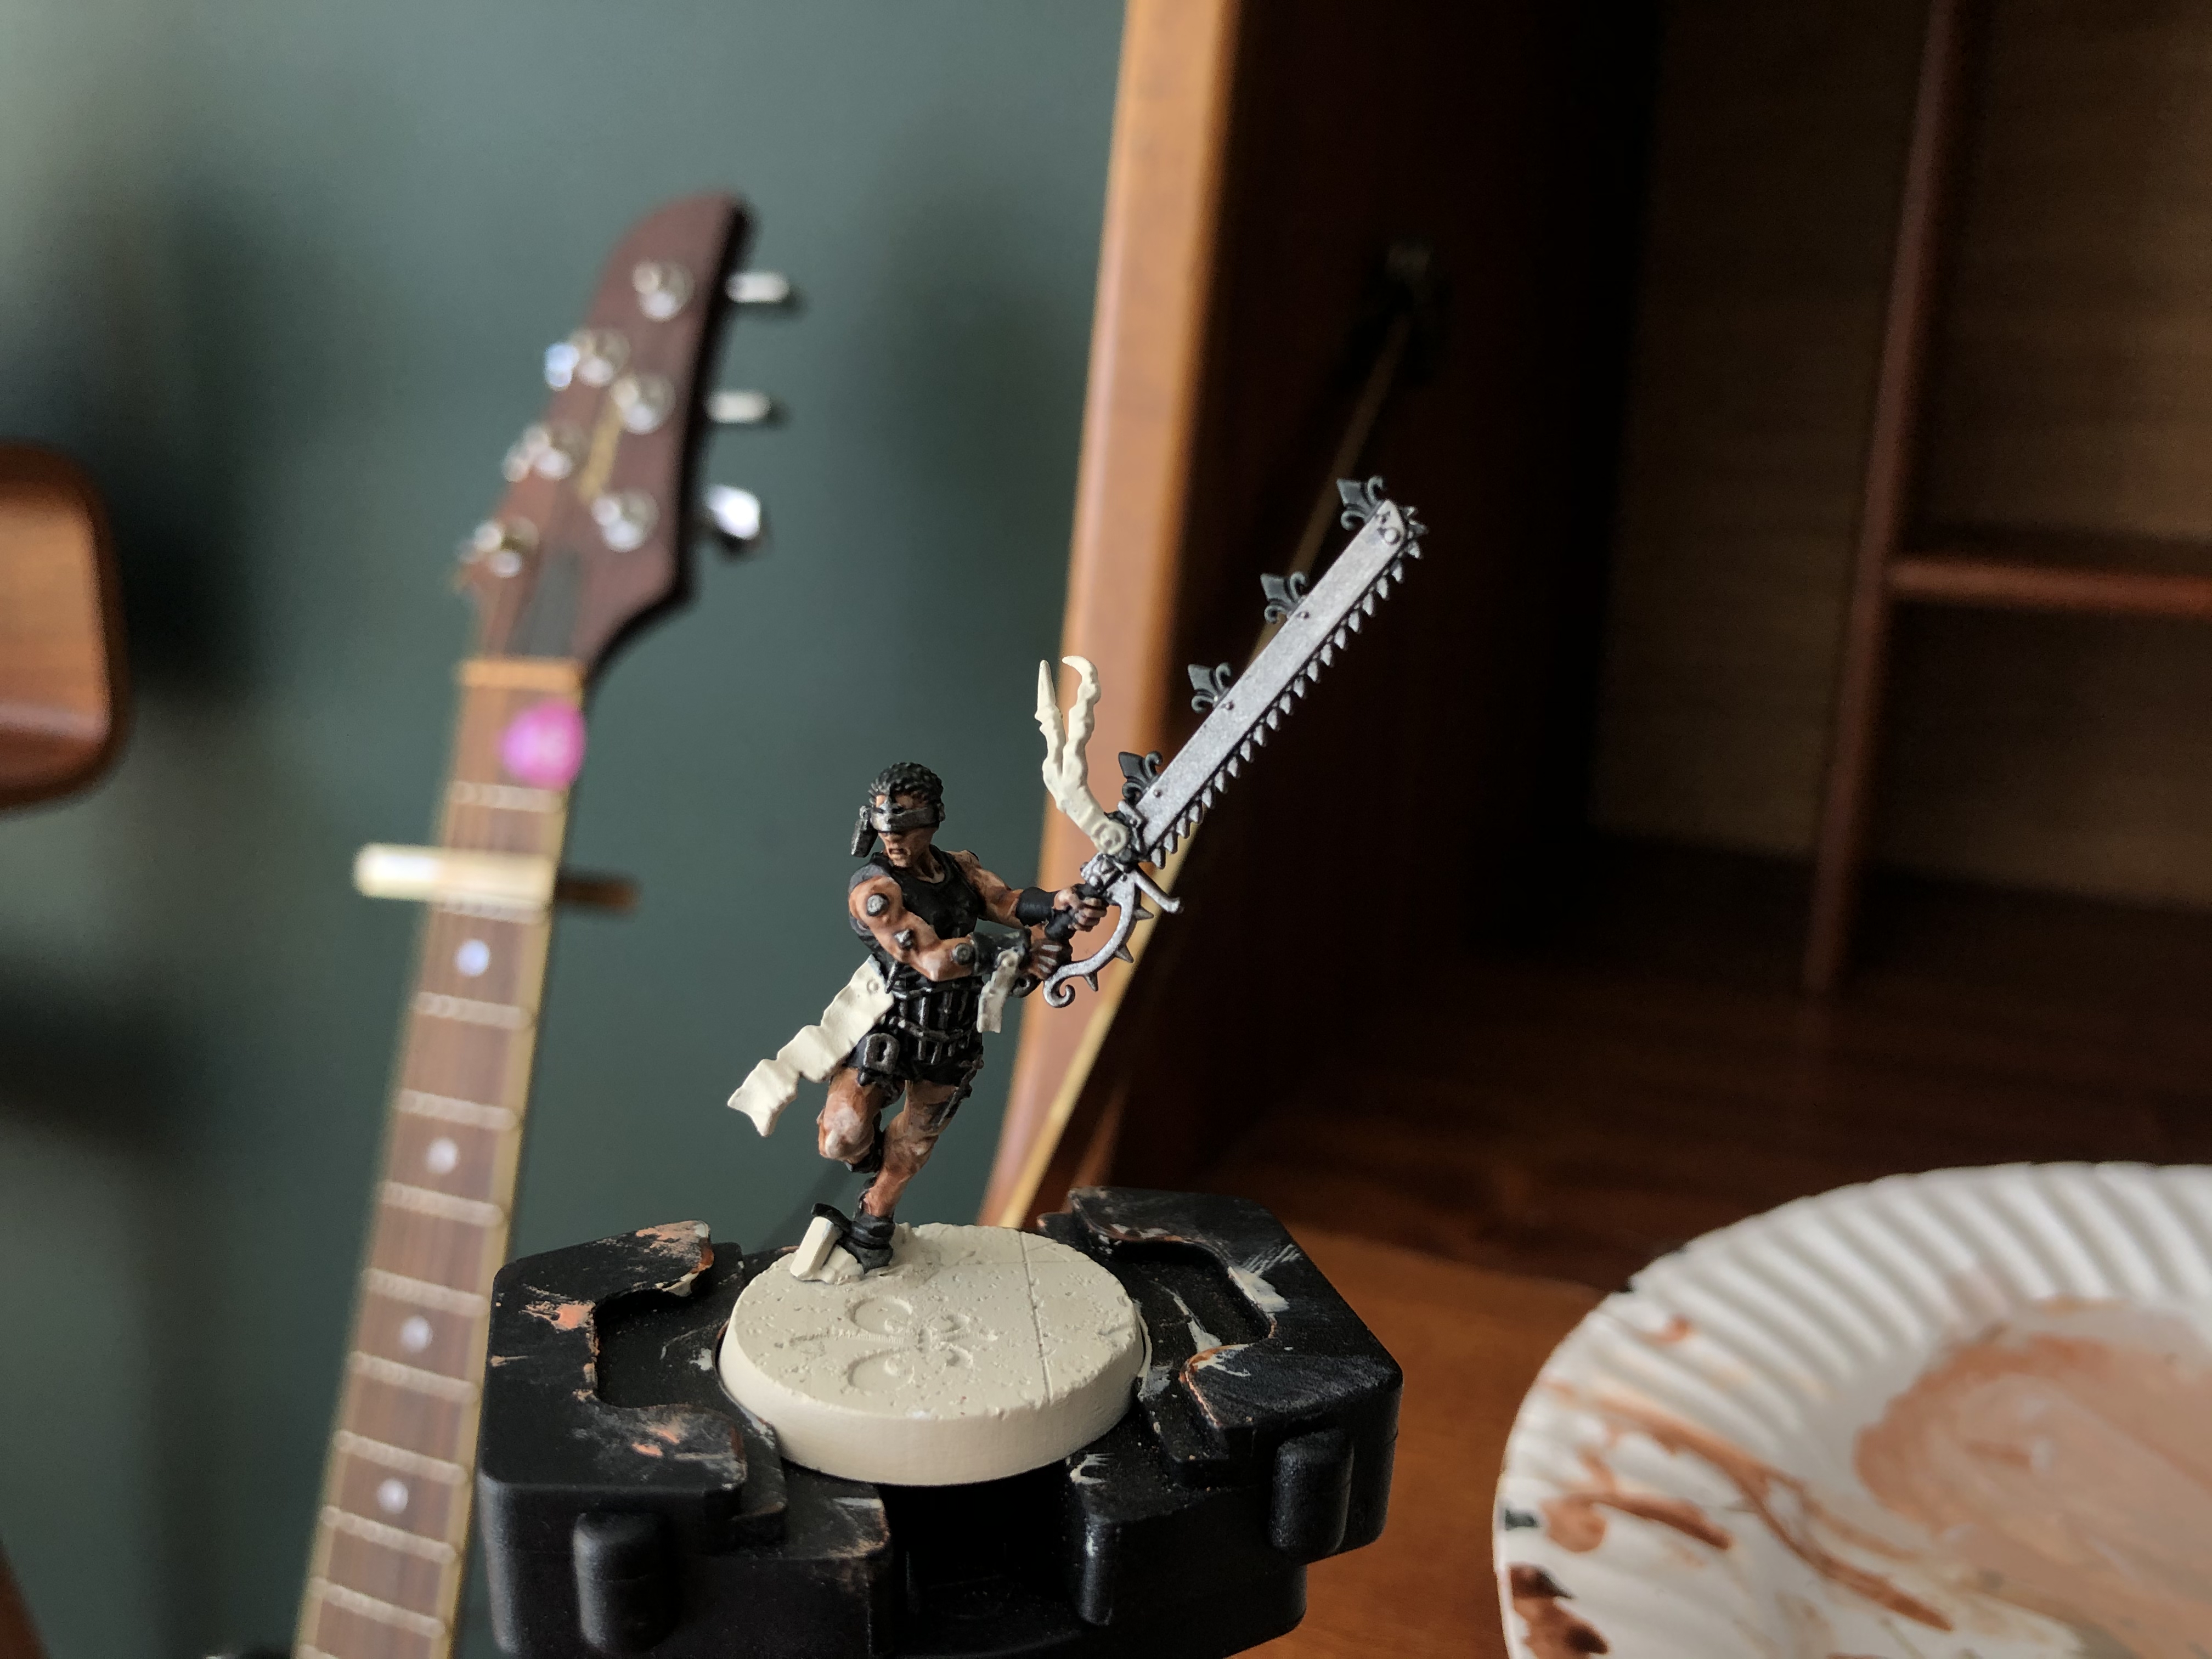
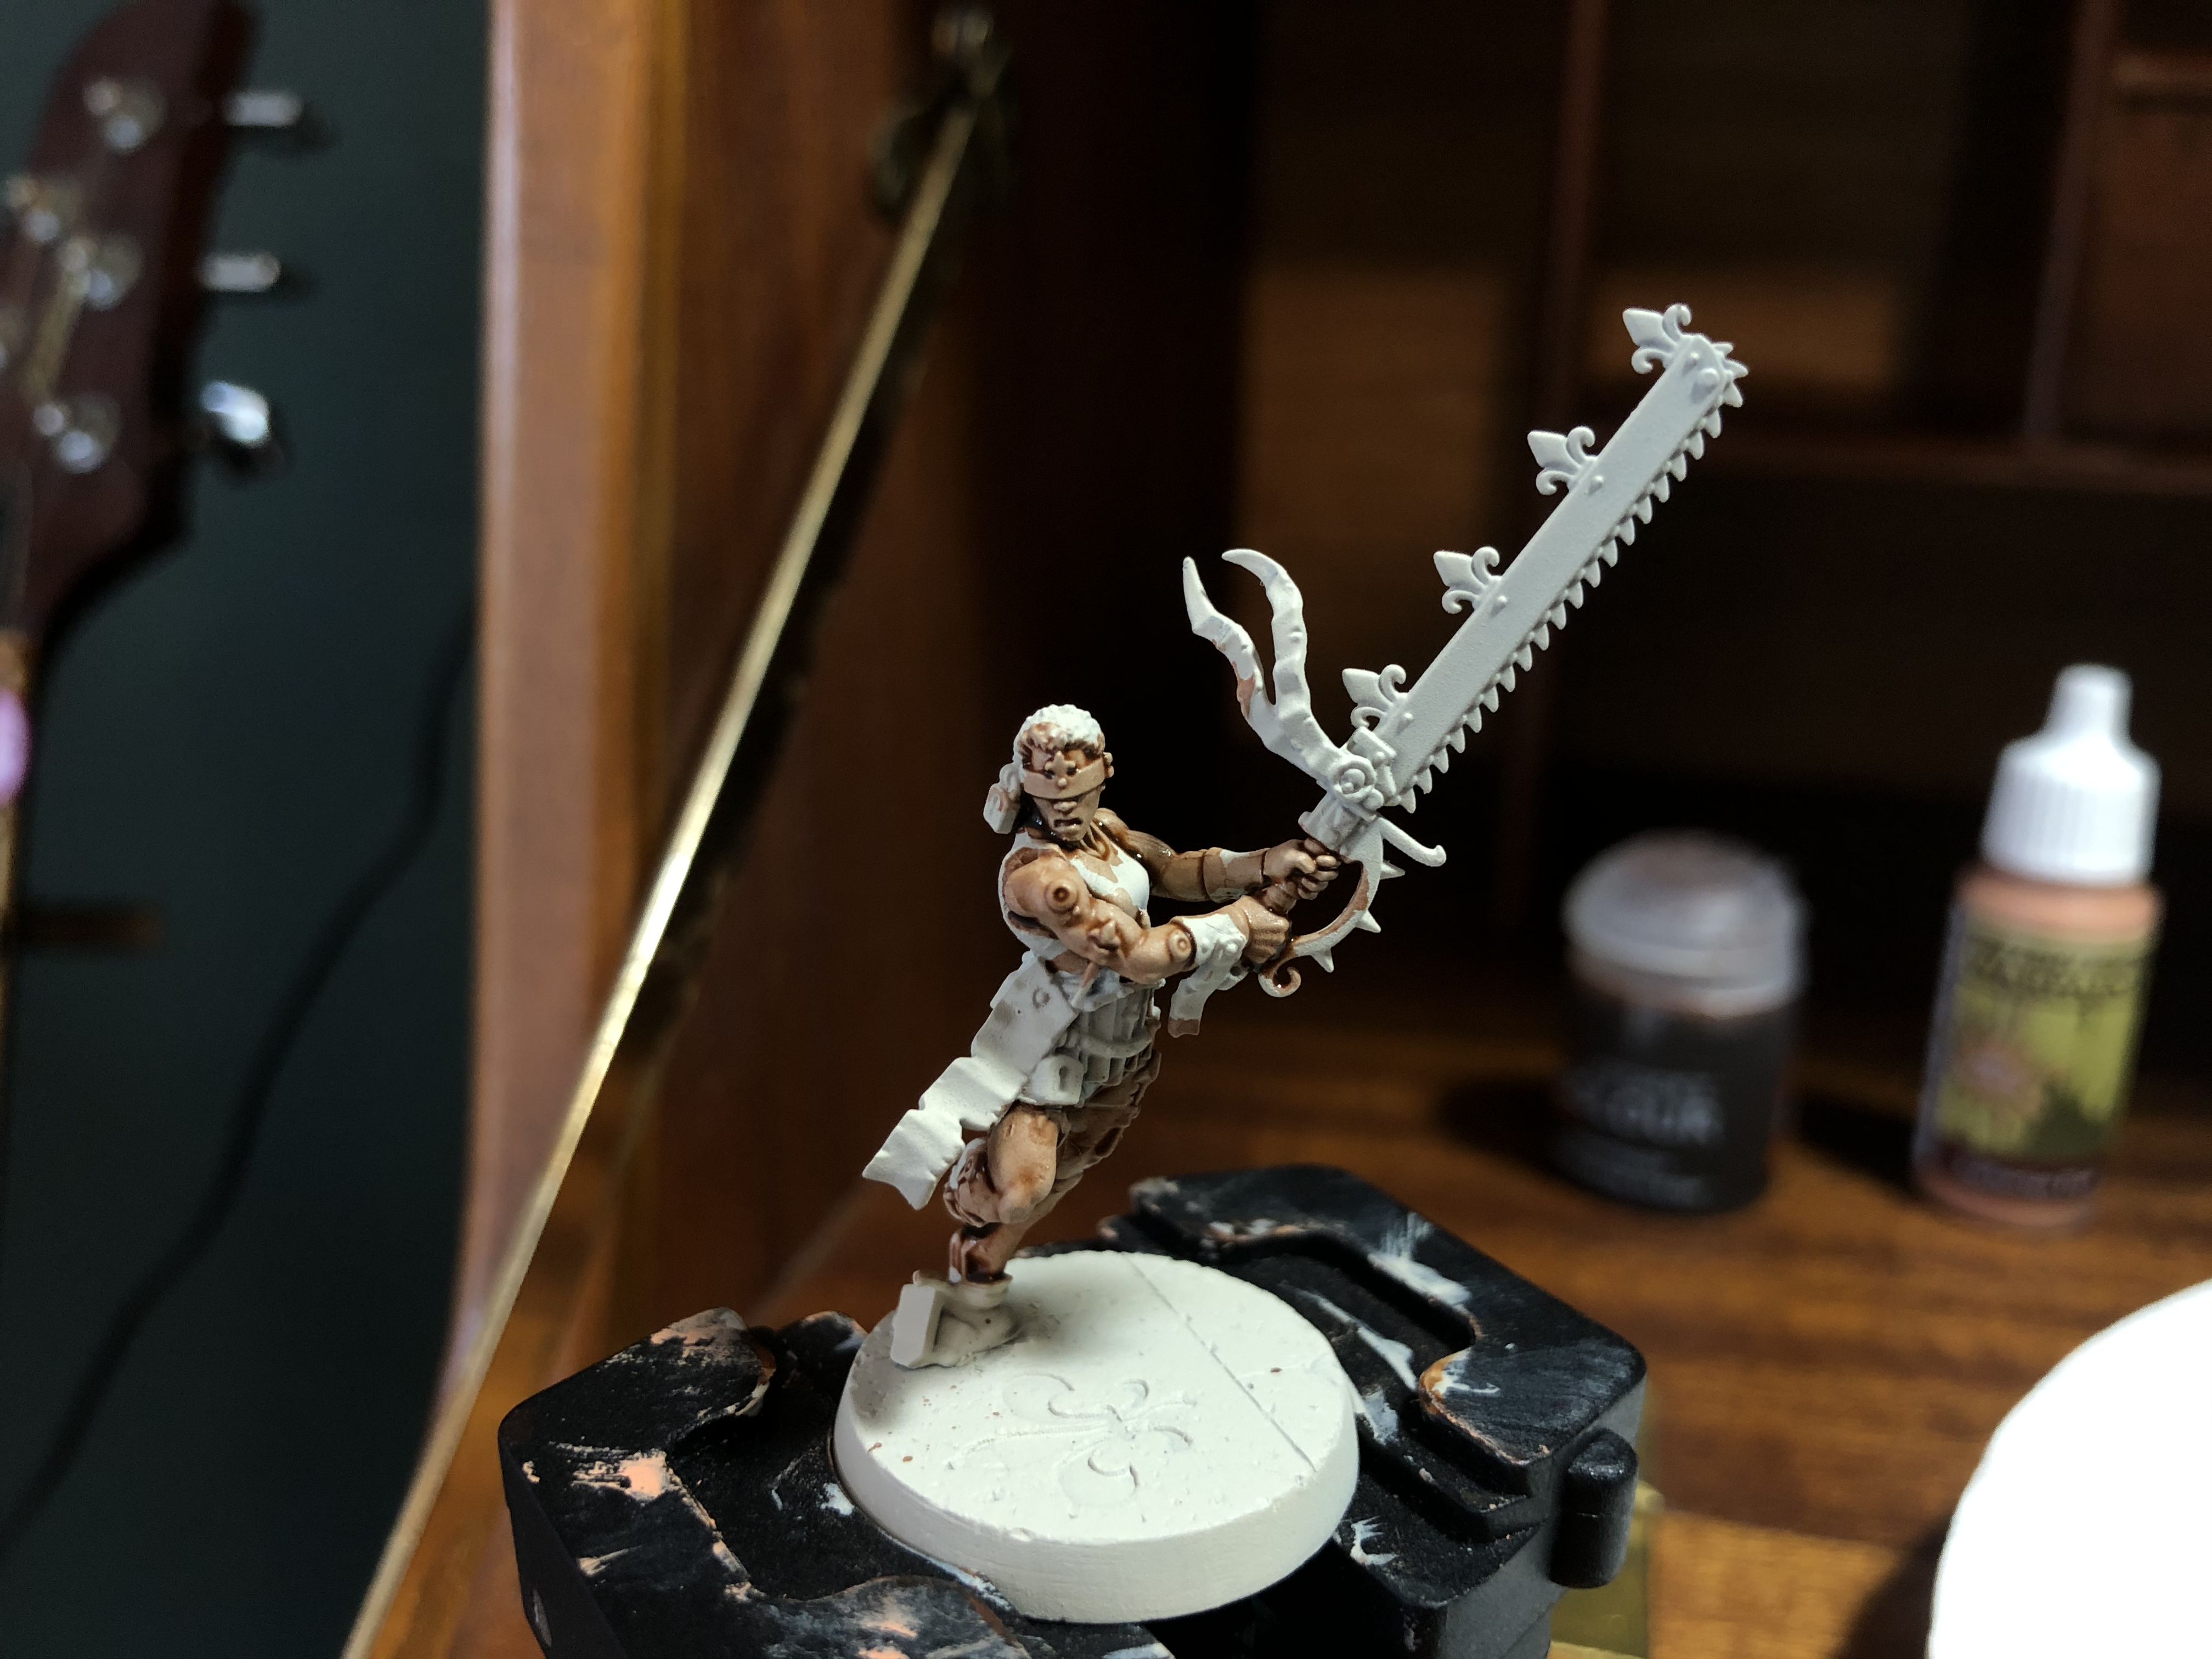
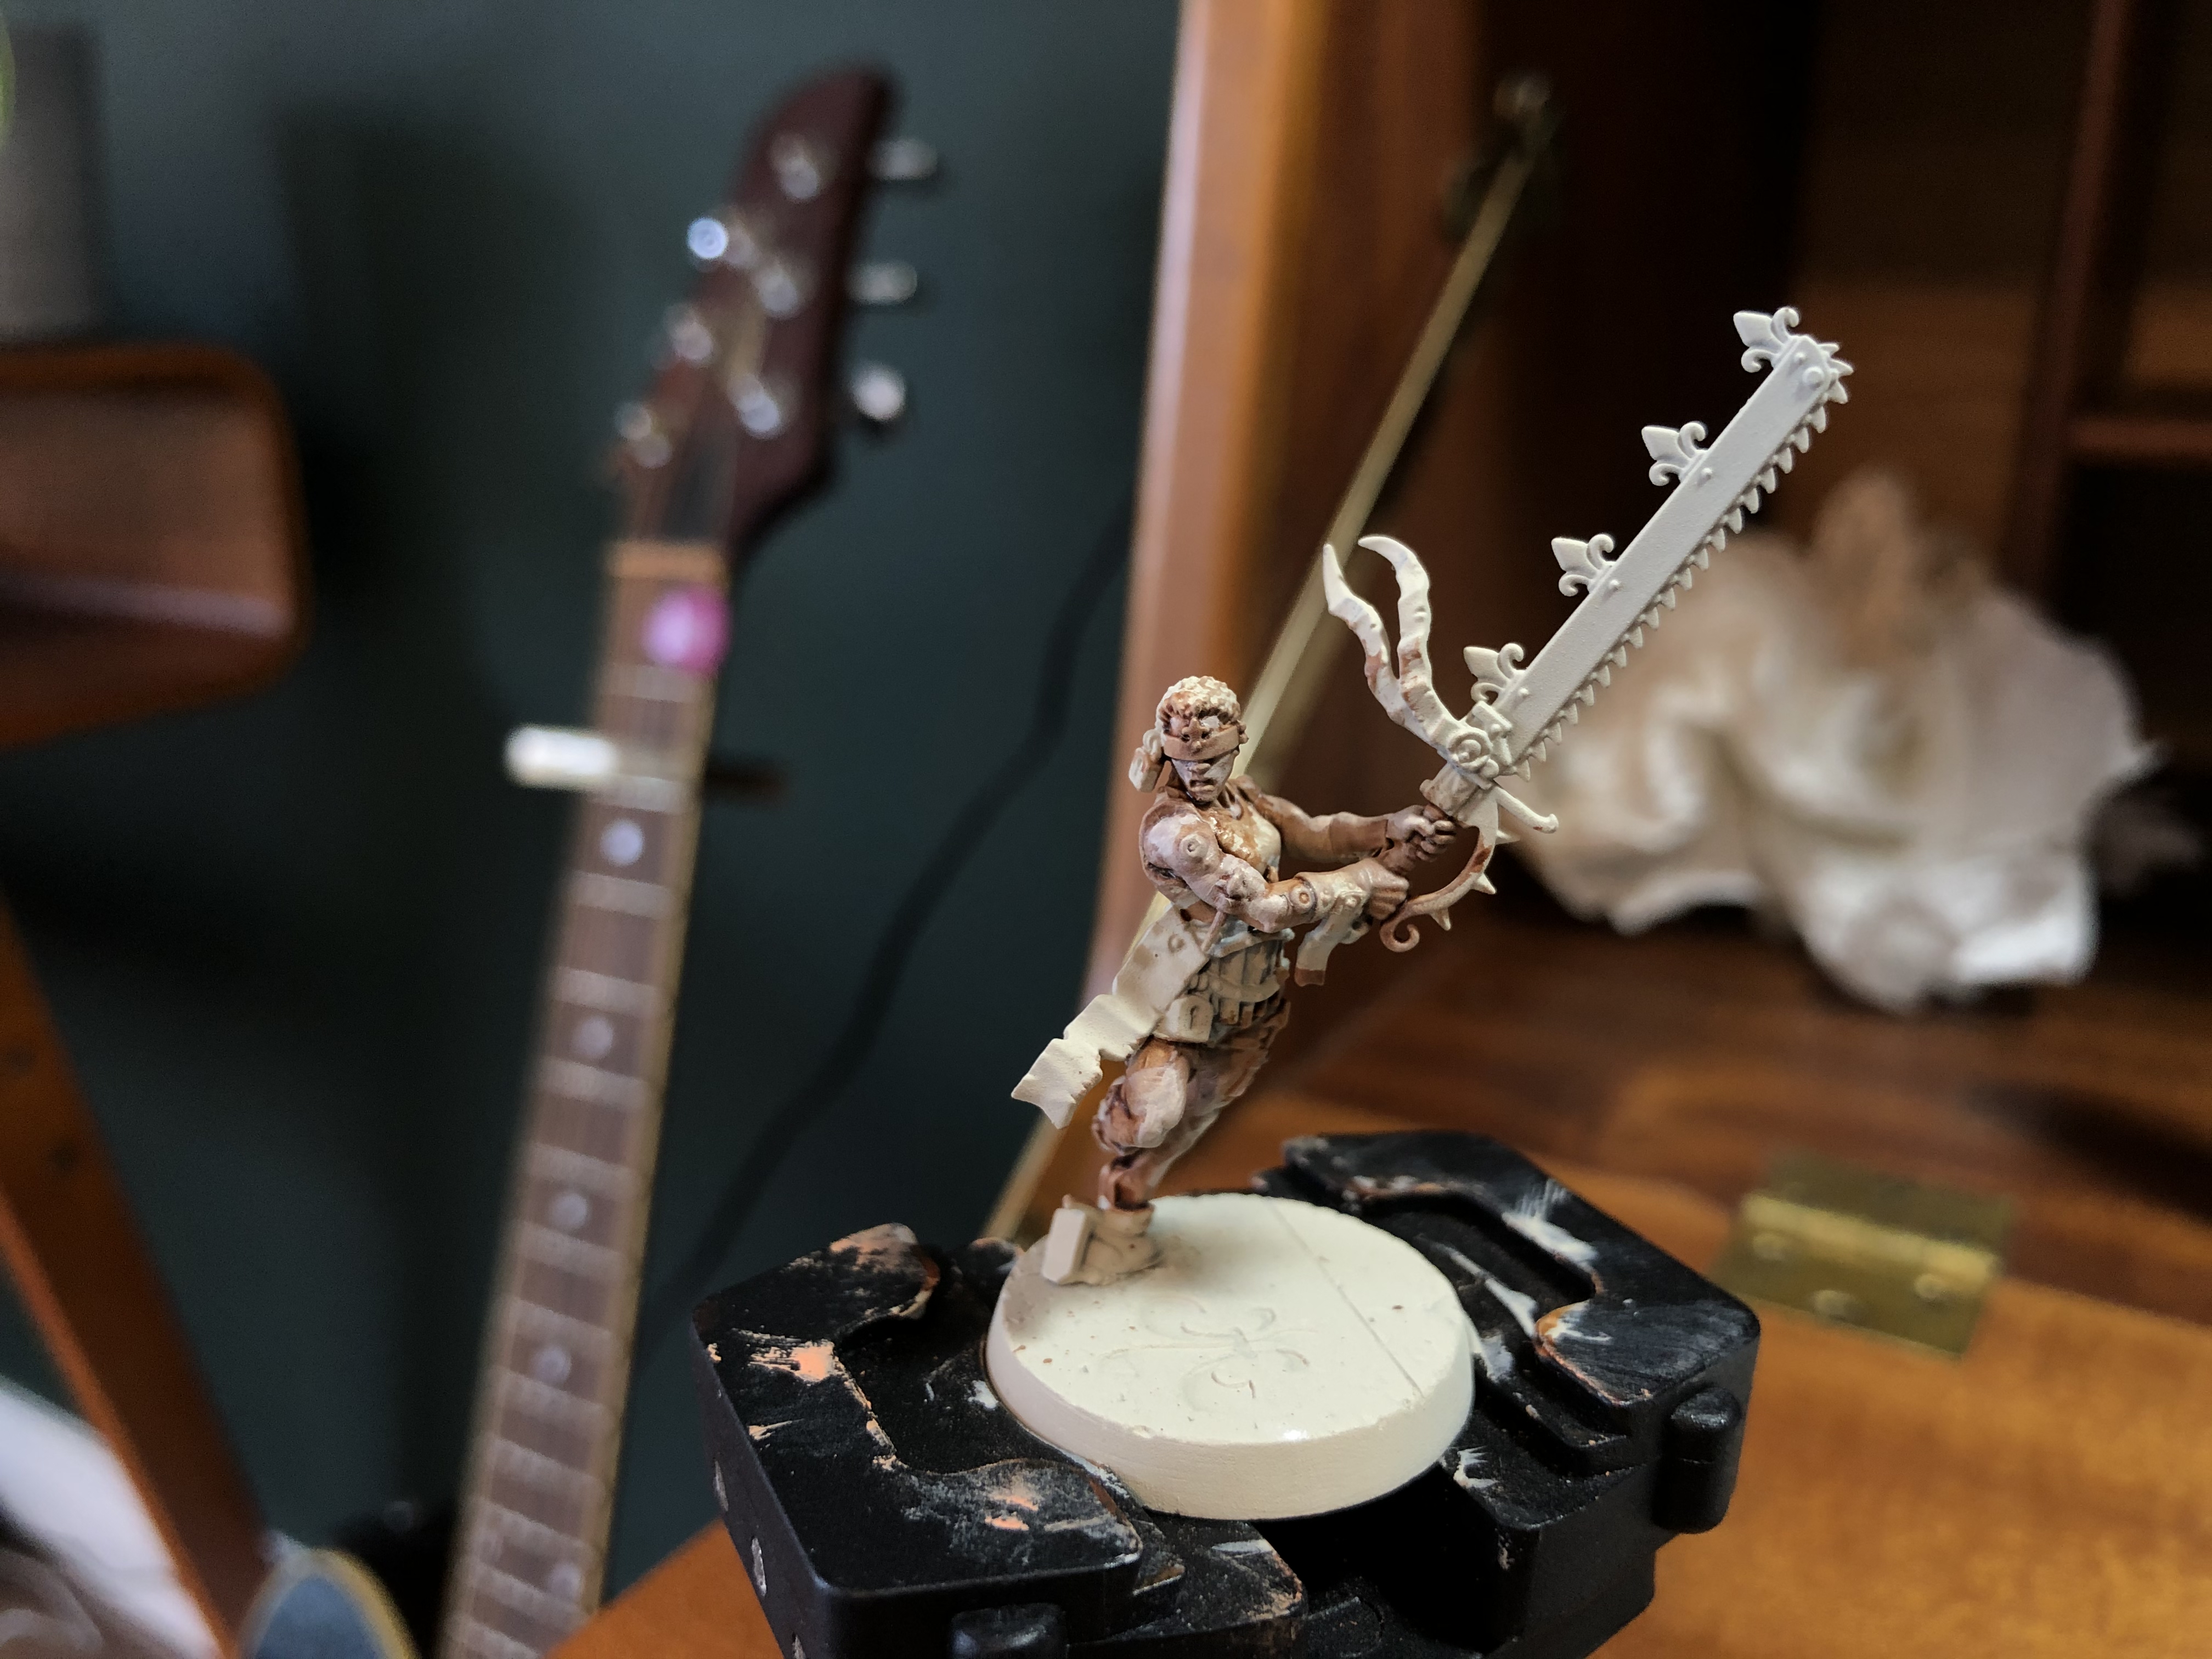
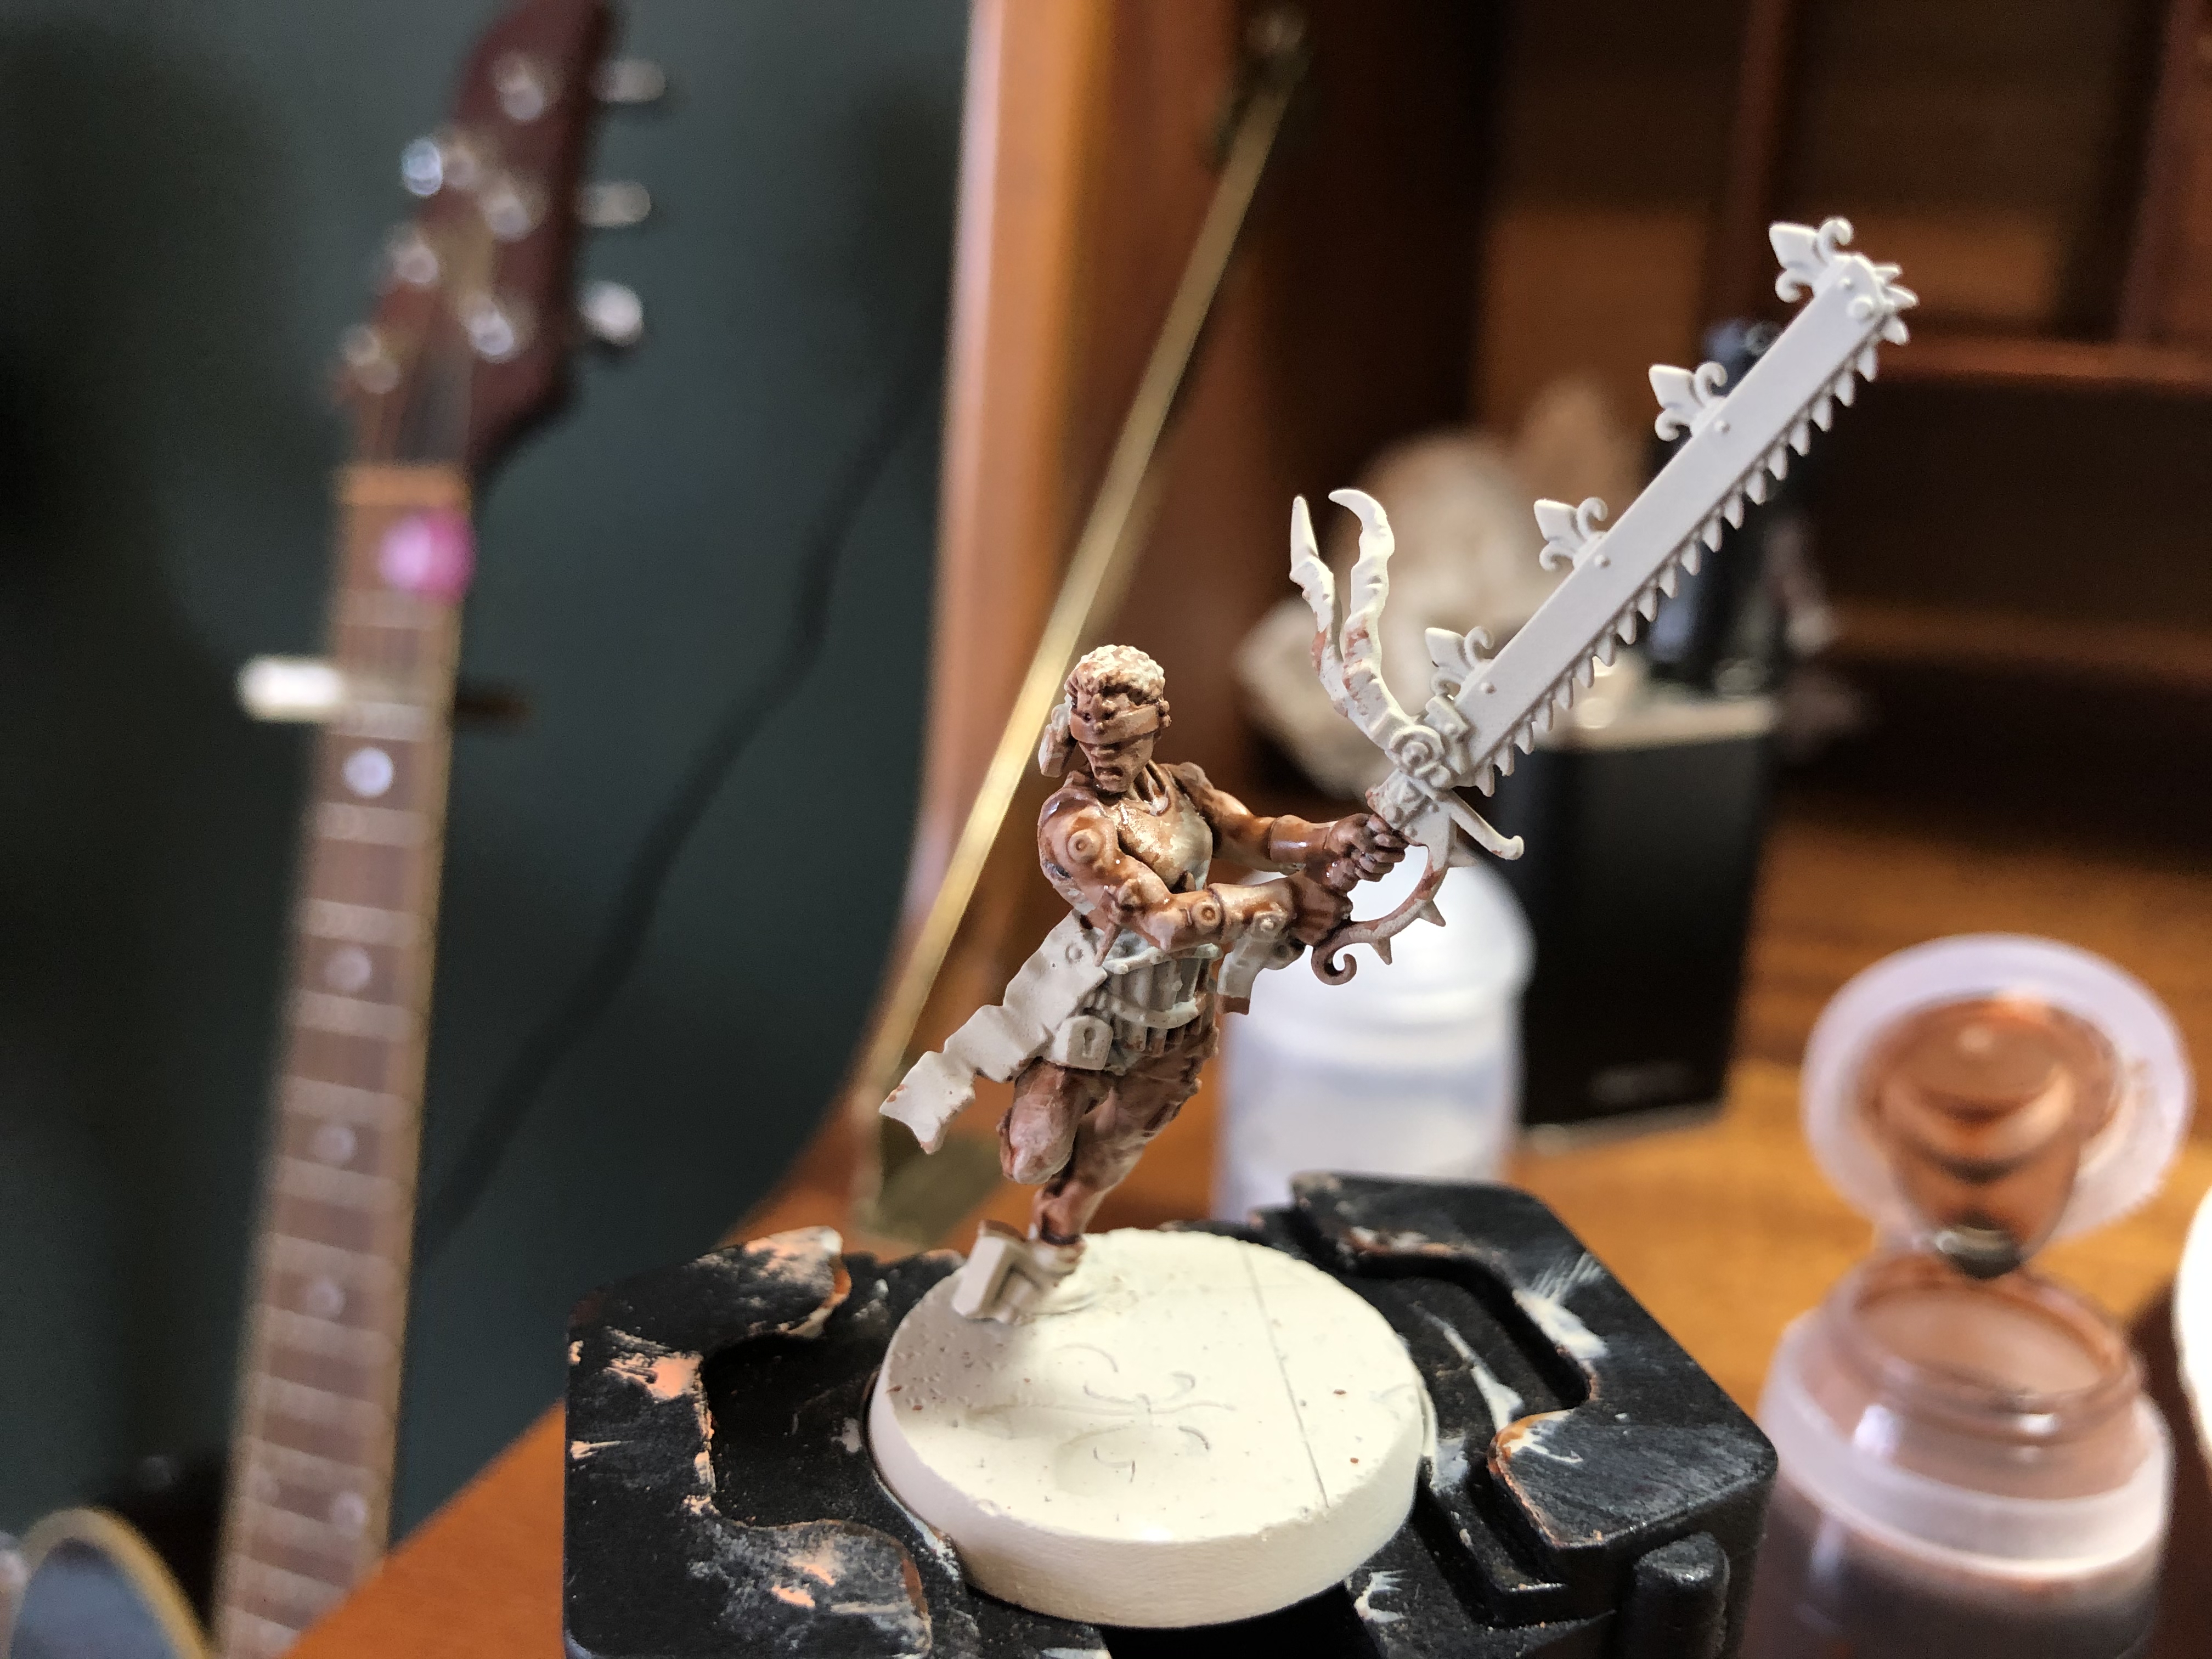
Like always I began with a base coat of Wraithbone spray. As the flesh takes up the biggest part of the model I began with this. First I added one thick coat of Contrast Guilliman Flesh to all the skin parts of the model. While this was still wet (controversial I’m sure) I then dry brushed all the skin with Rakarth flesh. Again while this was drying I mixed 50:50 Rakarth flesh to White scar and applied a lighter dry brush to the more raised sections of the skin. I then added to this mix a couple of drops of army painter Barbarian flesh & more White scar and dry brushed again this time even lighter.
I then mixed a 10:1 White Scar & Army Painter Barbarian Flesh mix and used my brush to pick out the highlights across the skin like the most prominent muscles and face. I then left that to dry & mixed a 5:1 glaze of Contrast Medium to Guilliman flesh and applied that over all the highlights to tie them together. That’s the skin done! Easier than I thought.
GIVE ME SOME SKIN
*****
Honestly I really loosened up my painting style with these to get that grittier feel right from the start. Don’t be afraid of making the odd mistake and miss-highlighting. That heavy contrast just adds to the grim dark look we are going for. Yes! I’ll leave it there for part one. Next we will be tackling all kinds of awesomeness across the model. As always I’m sharing the process exactly in the order I did it in so forgive the jumbled order at times.
See you on the next one very soon.
Much Love
Eternity Gate
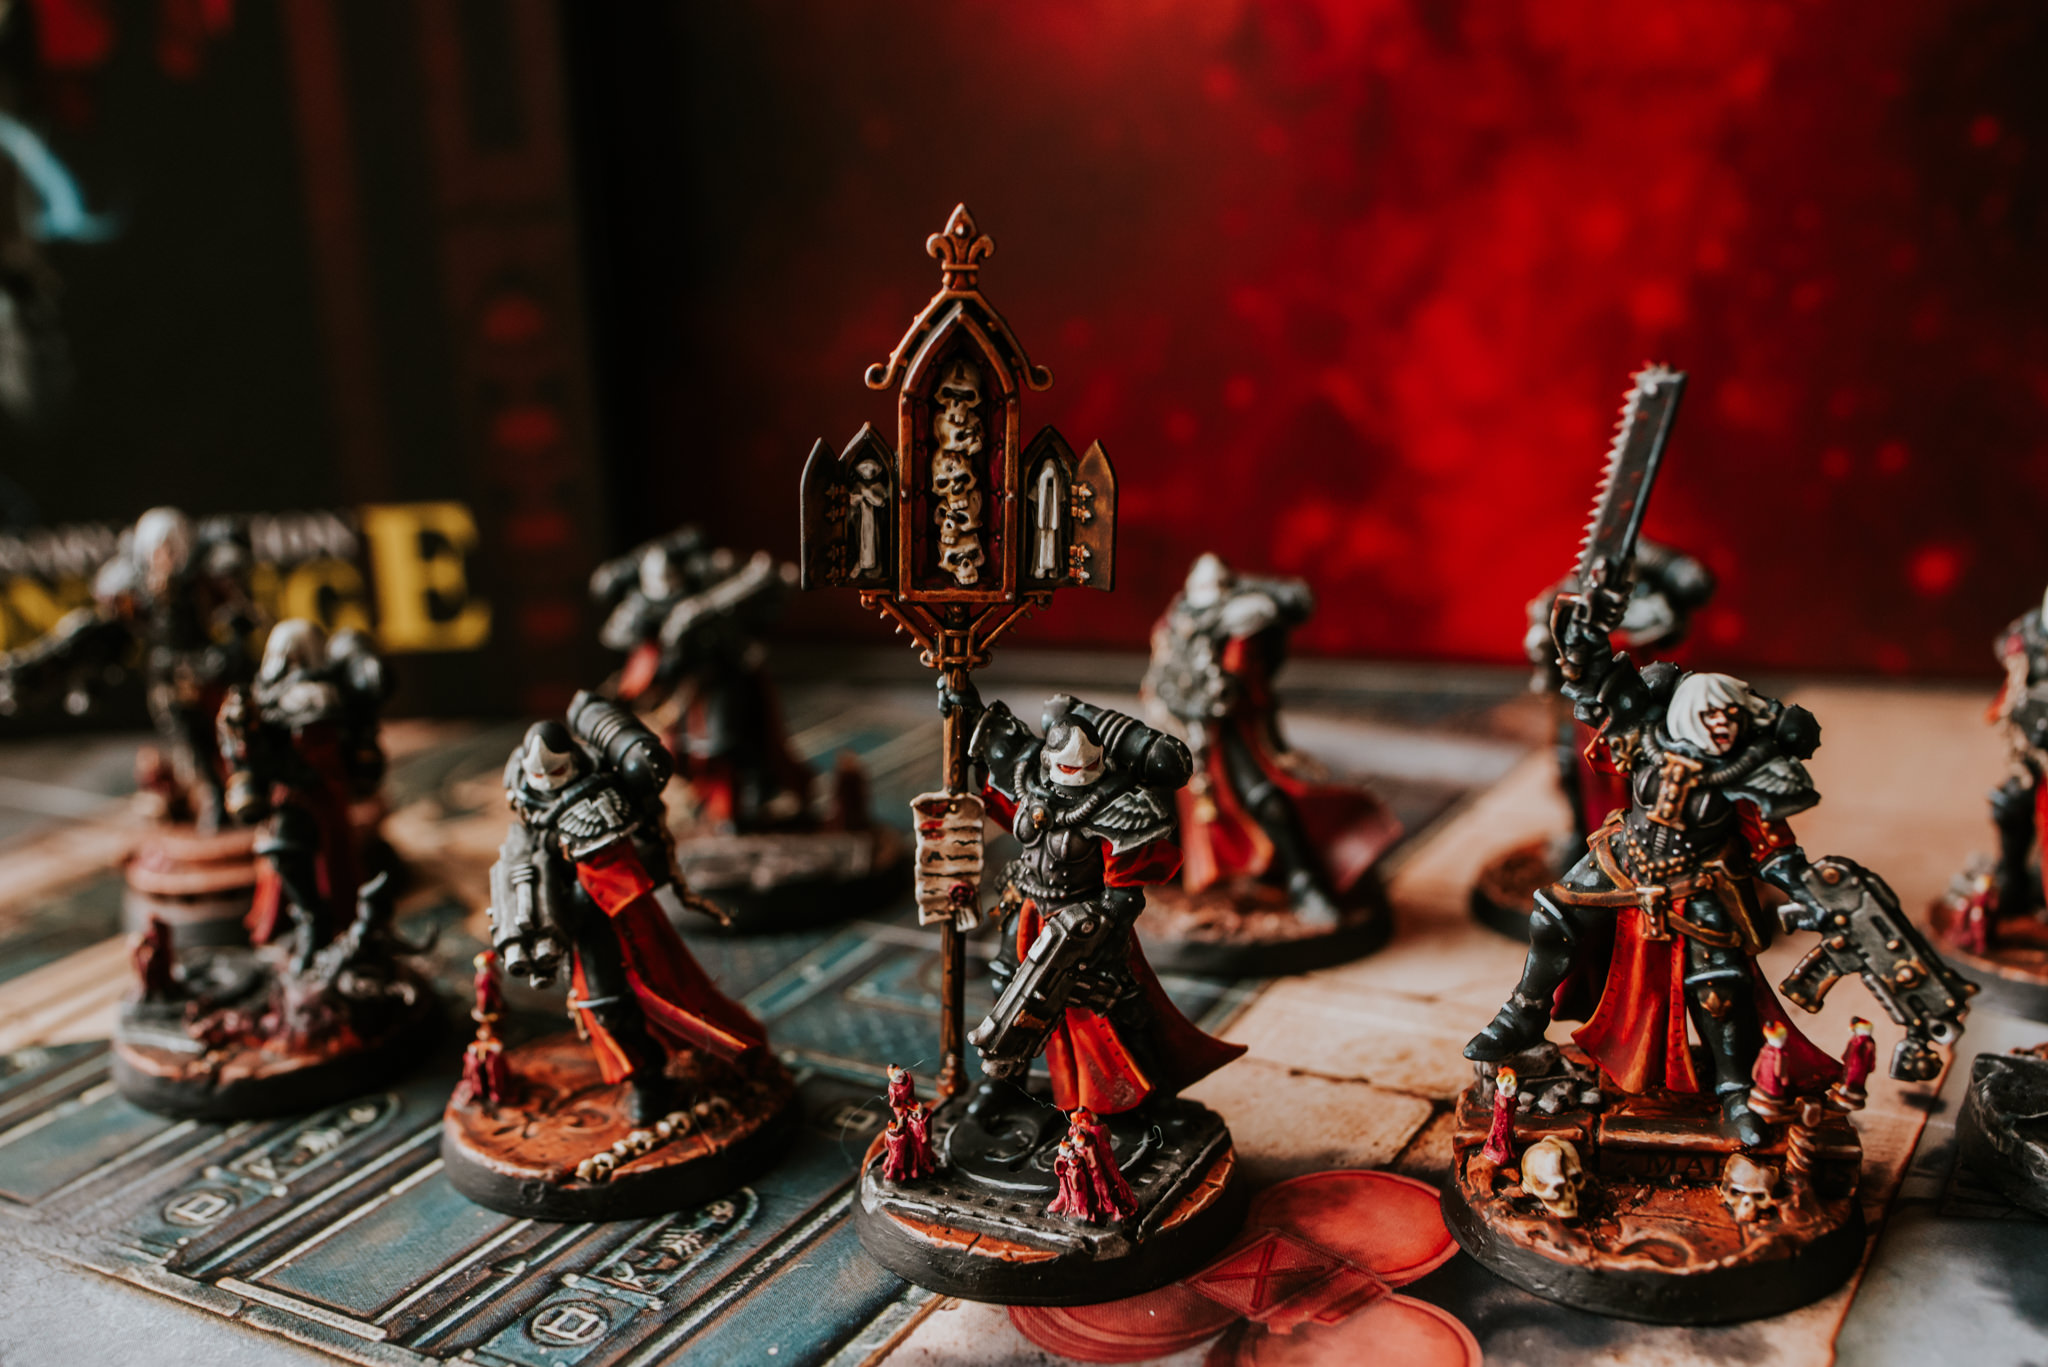
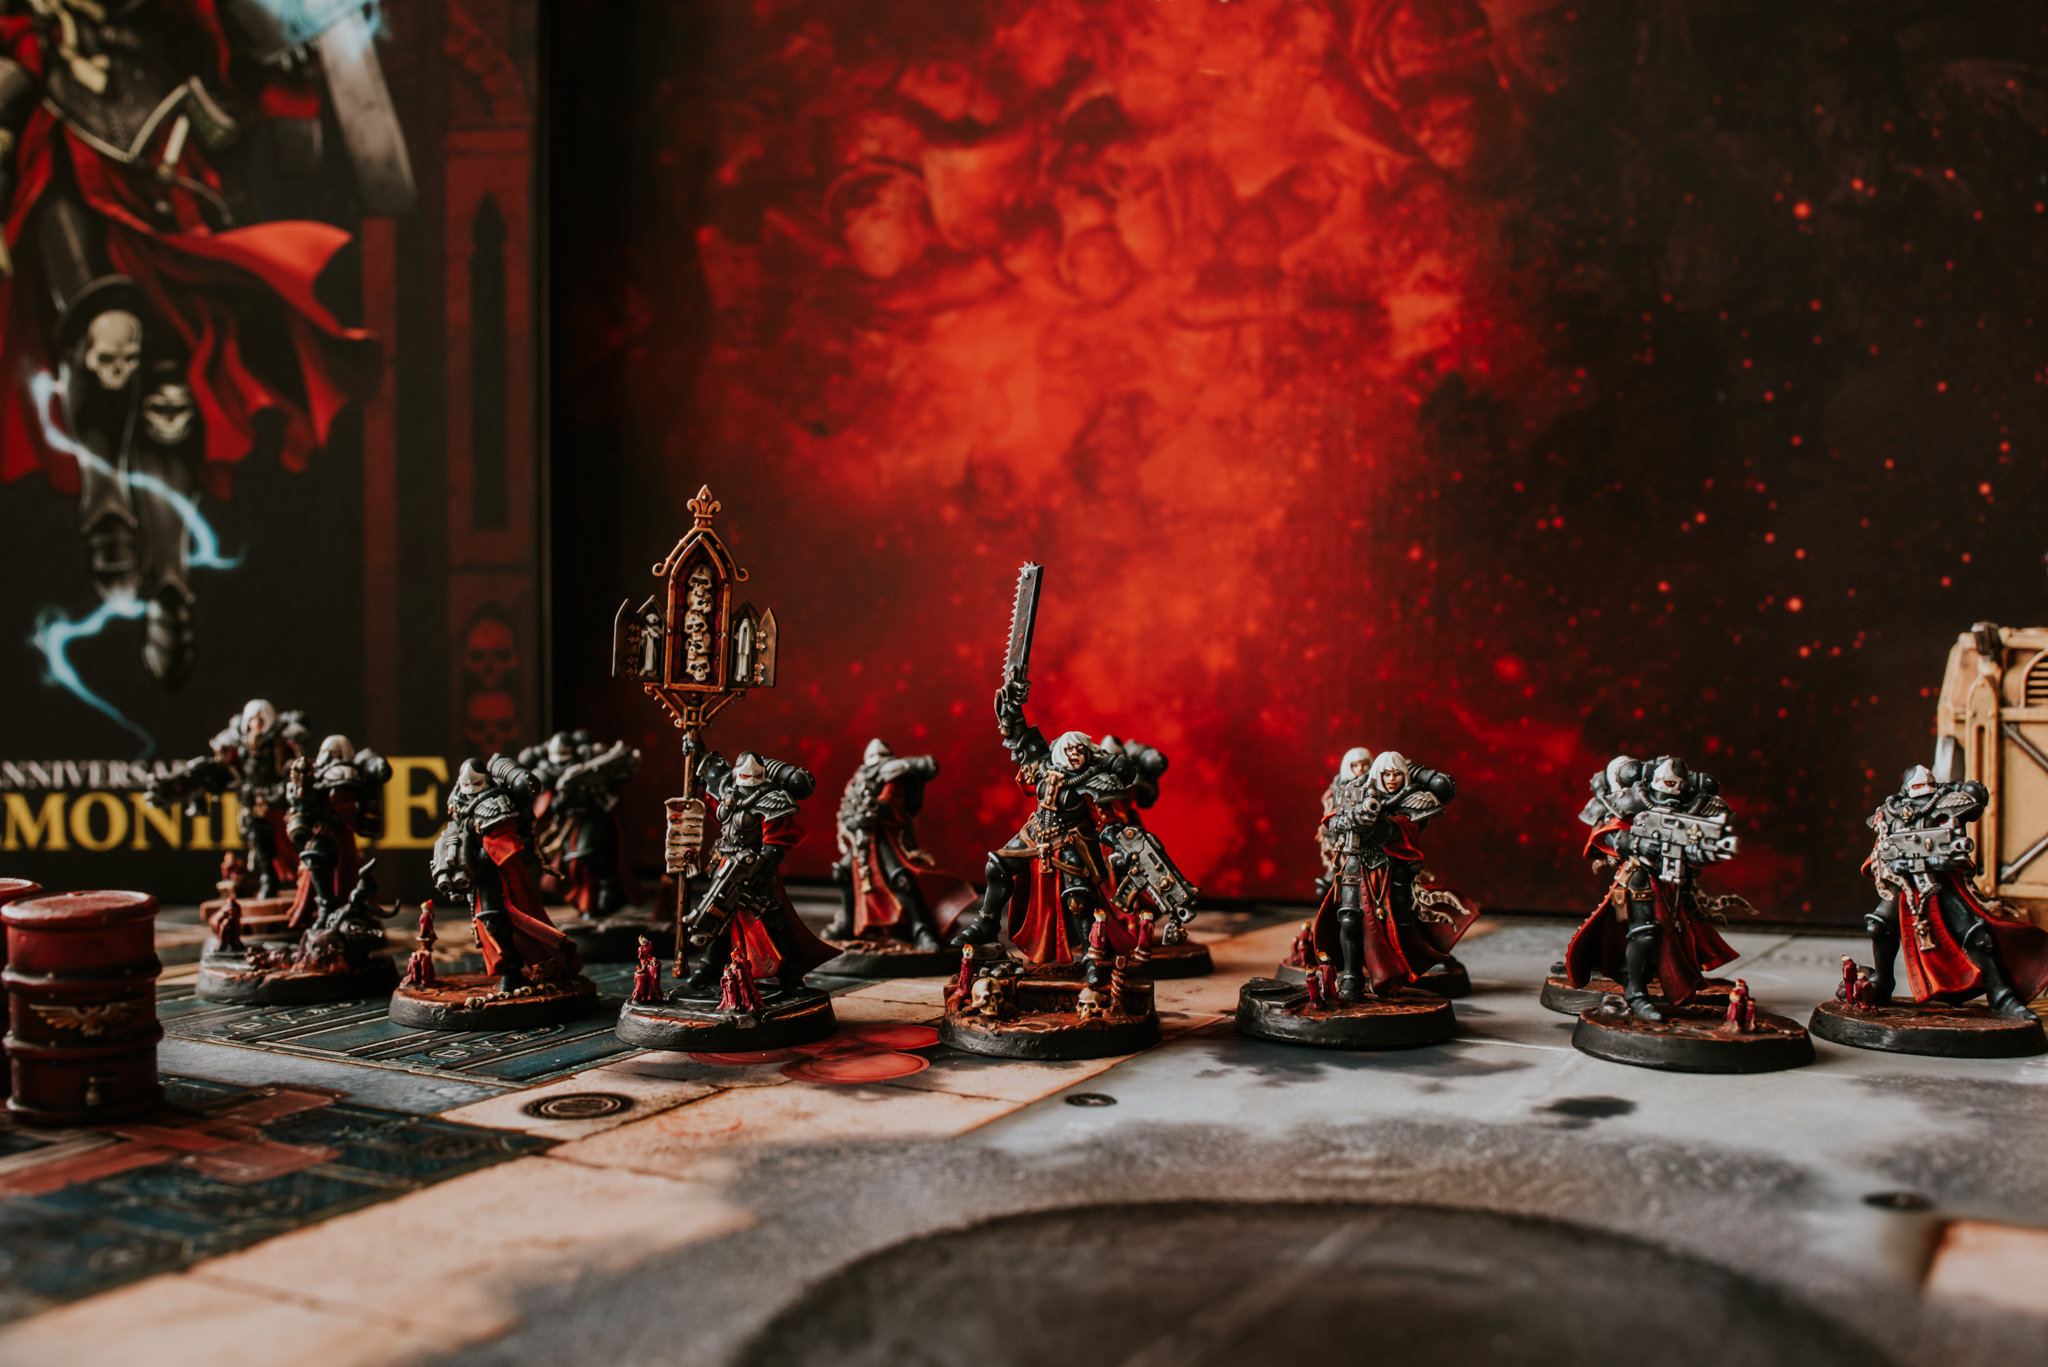
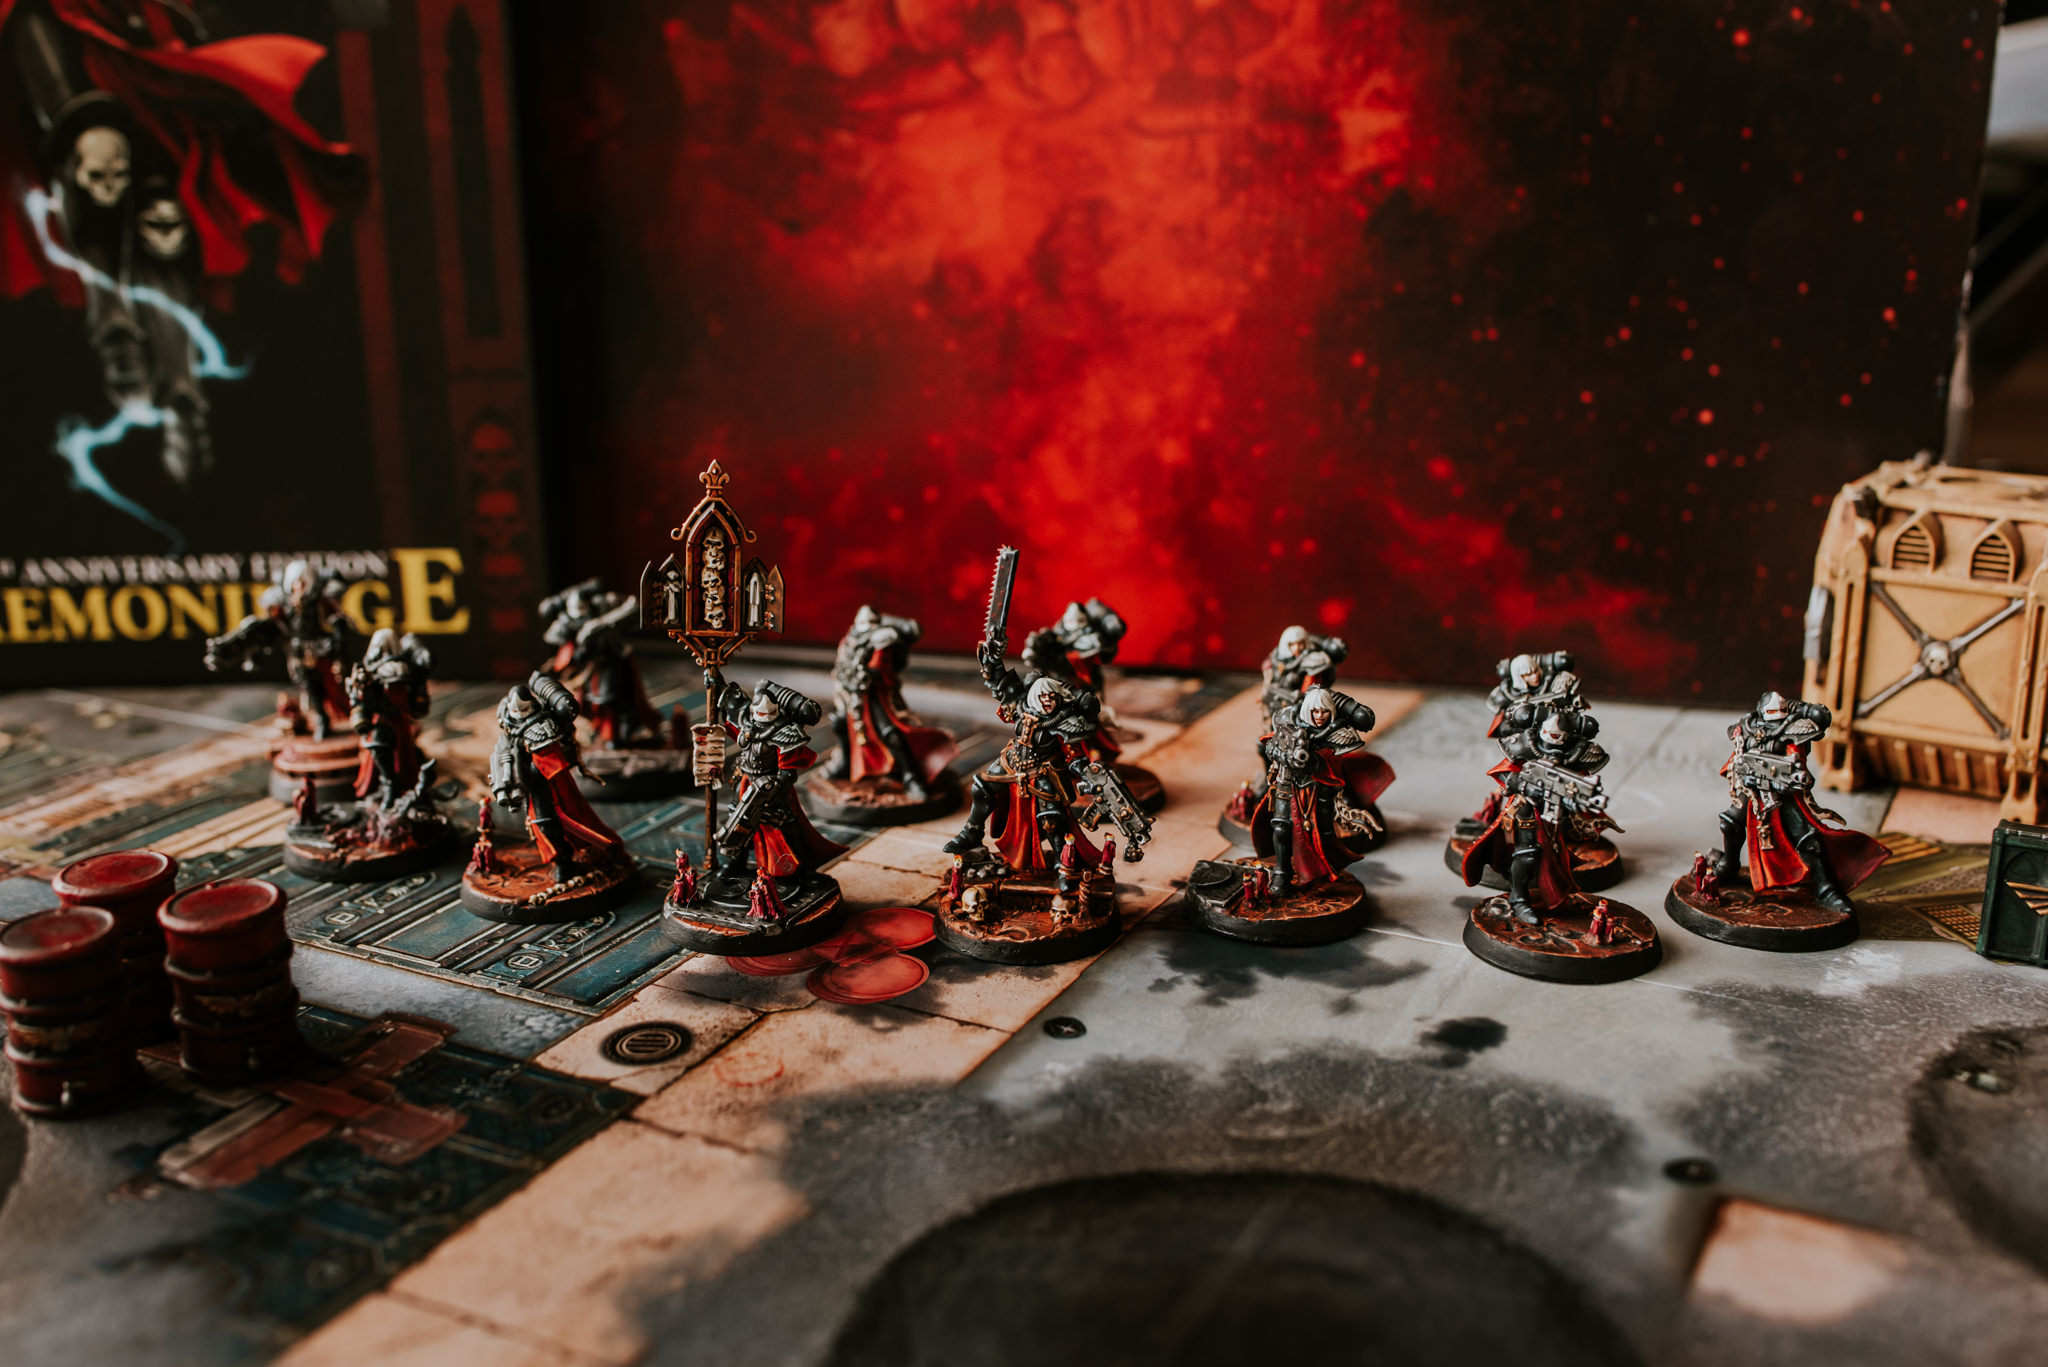
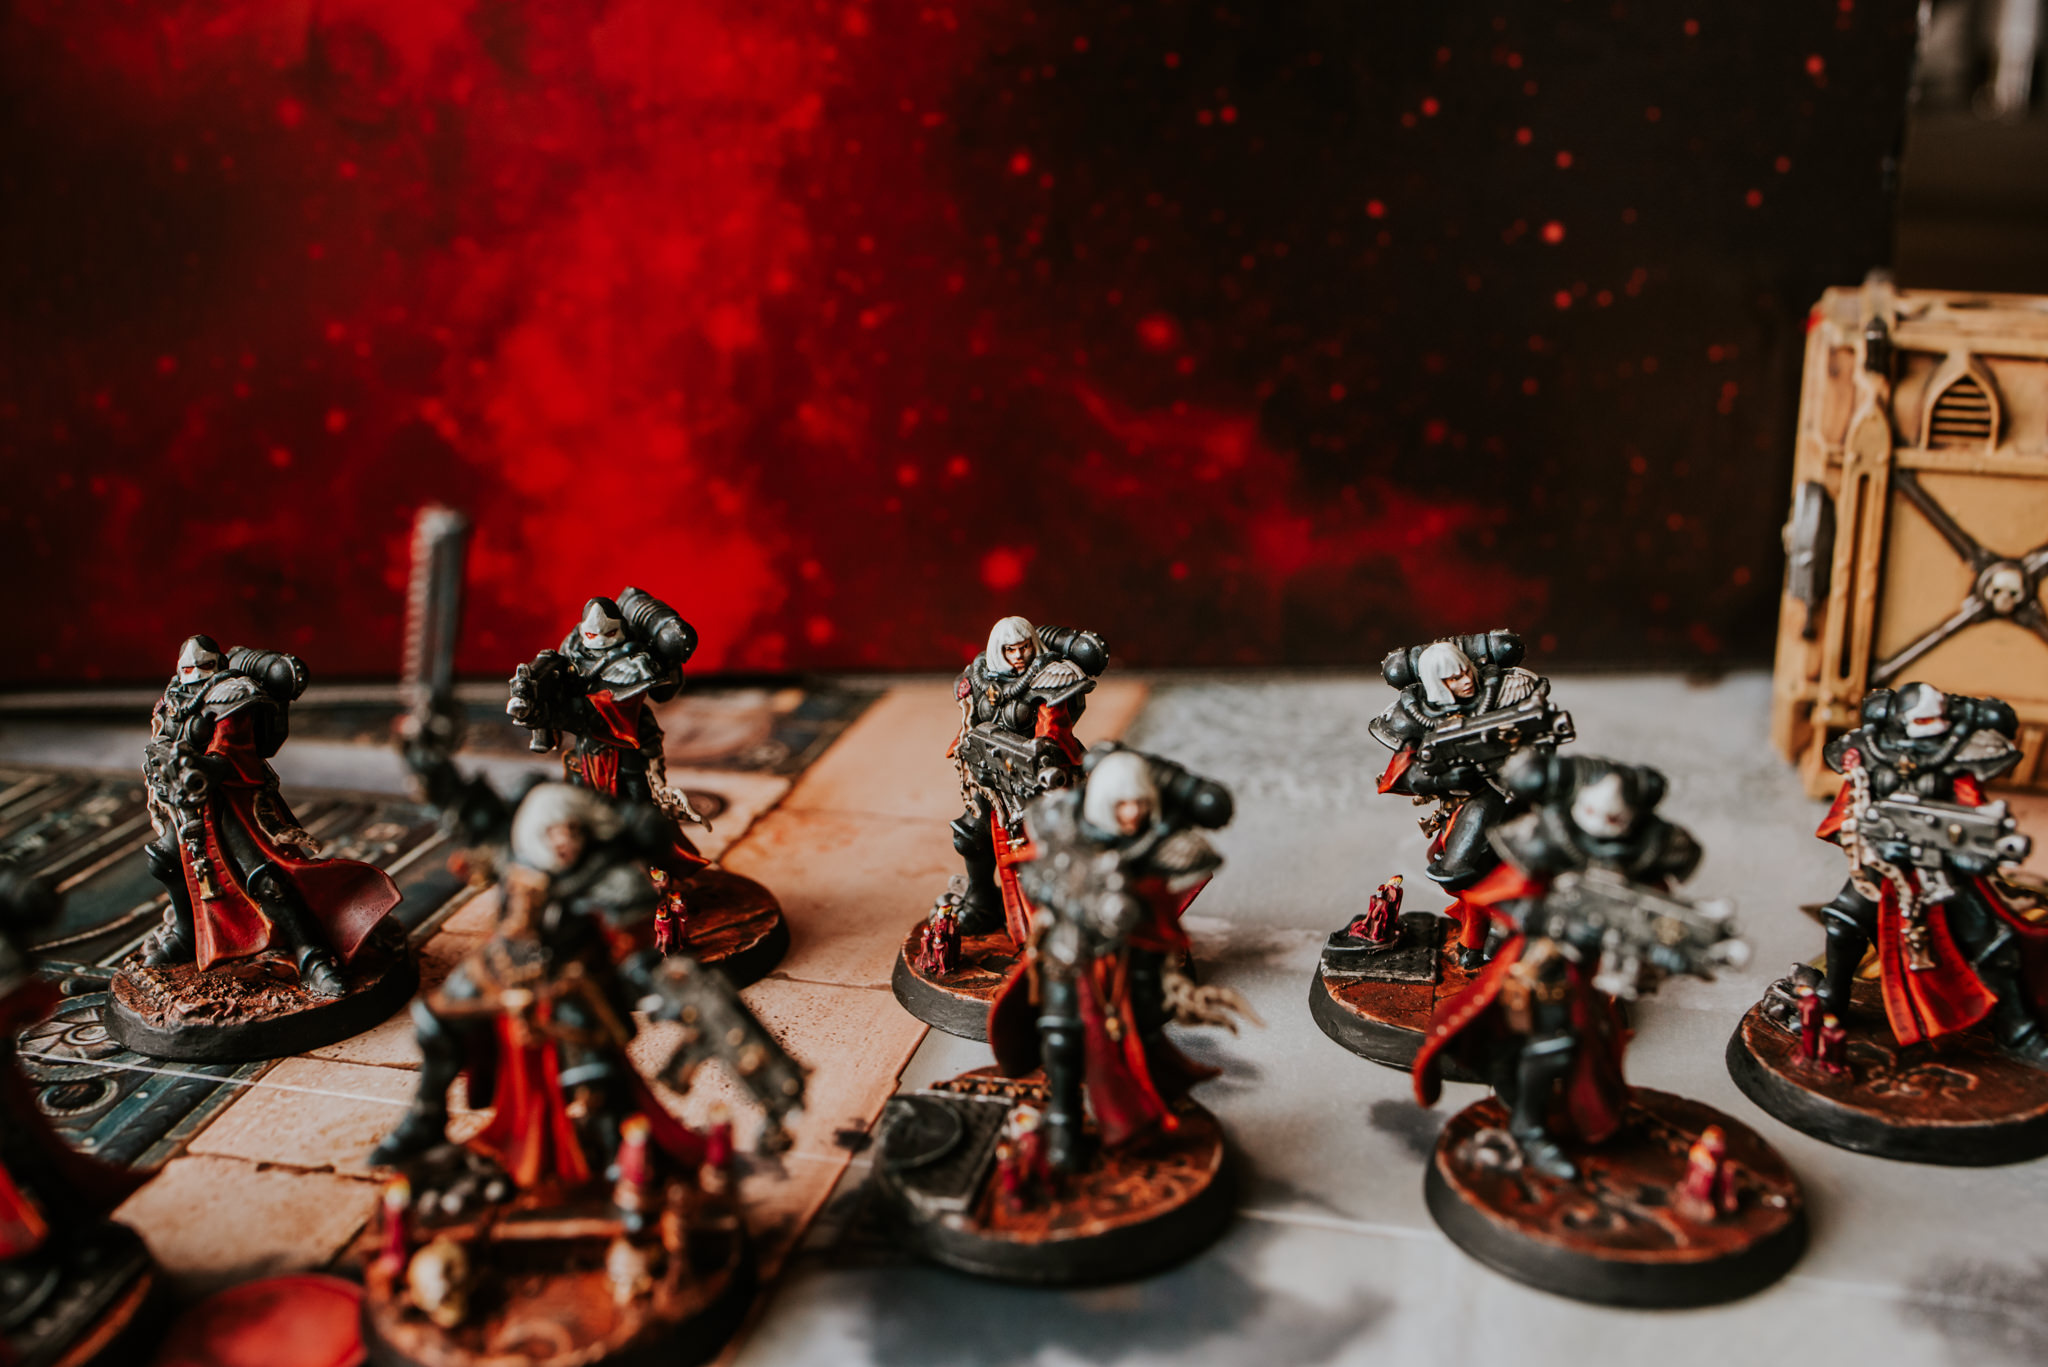
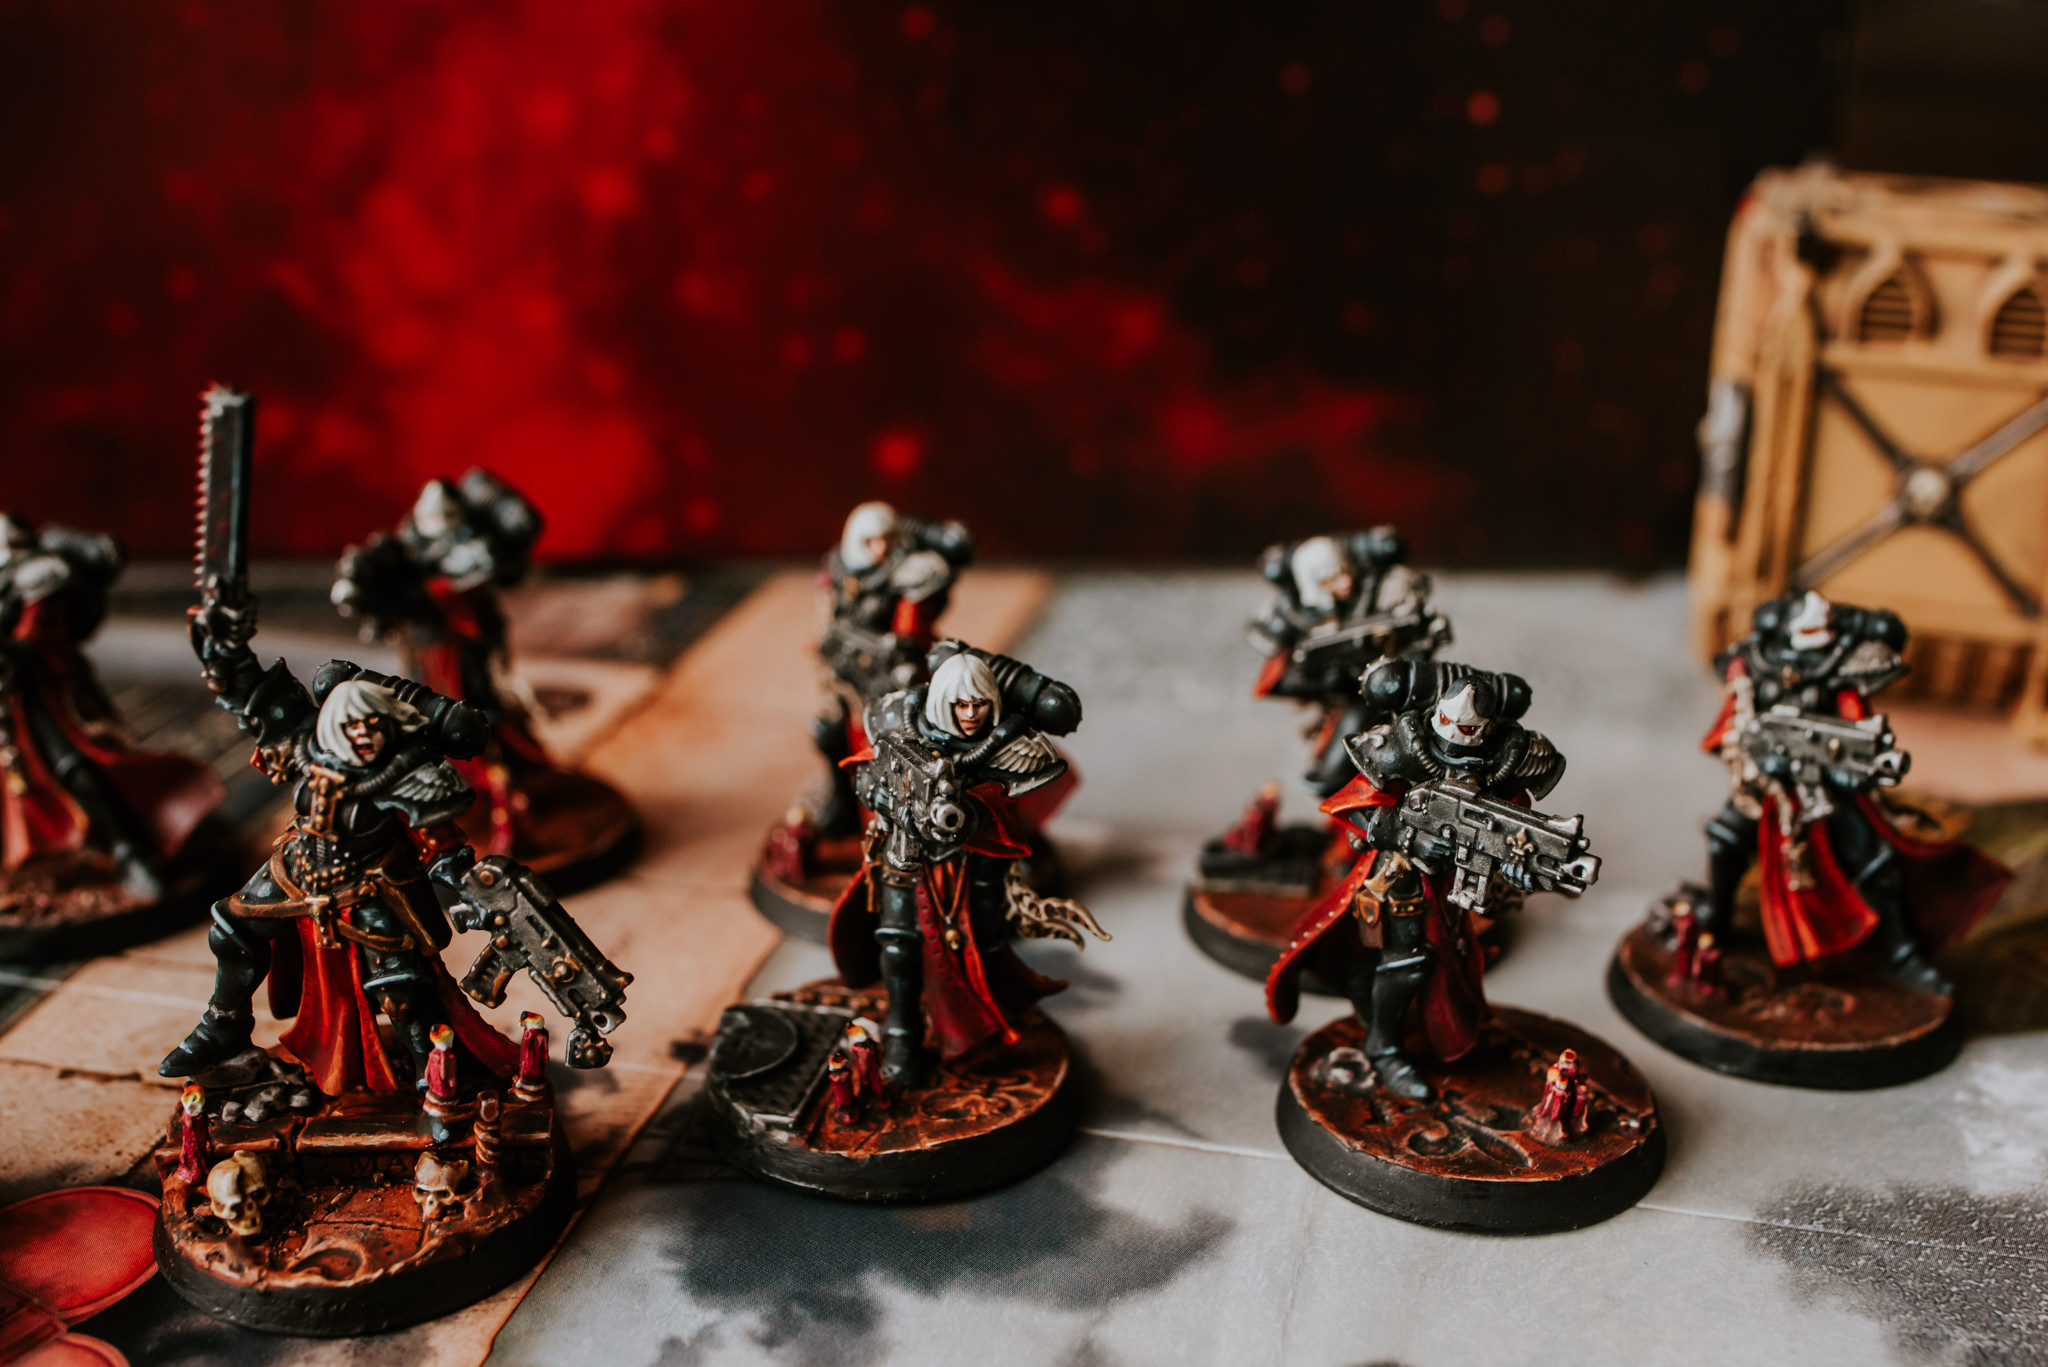
THE EMPEROR PROTECTS ~ ADEPTUS SORORITAS SQUAD 1 COMPLETE

NOW THINGS ARE GETTING EXCITING
*****
Wow I have to say when I assembled the full squad of Sisters like that it gave me a little tingle in my special place. So chuffed to have my first Battle Sister squad painted & read to purge in the name of the Emperor. It’s been such an awesome road painting these ladies & of course I have tons more to come. It’s been even more satisfying sharing every single painting step with you guys who are along for the ride so thank you for all the up votes it’s bloody lovely. Without further ado here’s my first 13 (random number I know) painted Sisters of Battle. YES!

NEXT ON THE PAINT TABLE
*****
EAT. PURGE. REPENT. REPEAT.
Full Repentia painting guide coming soon.
Much Love
Eternity Gate

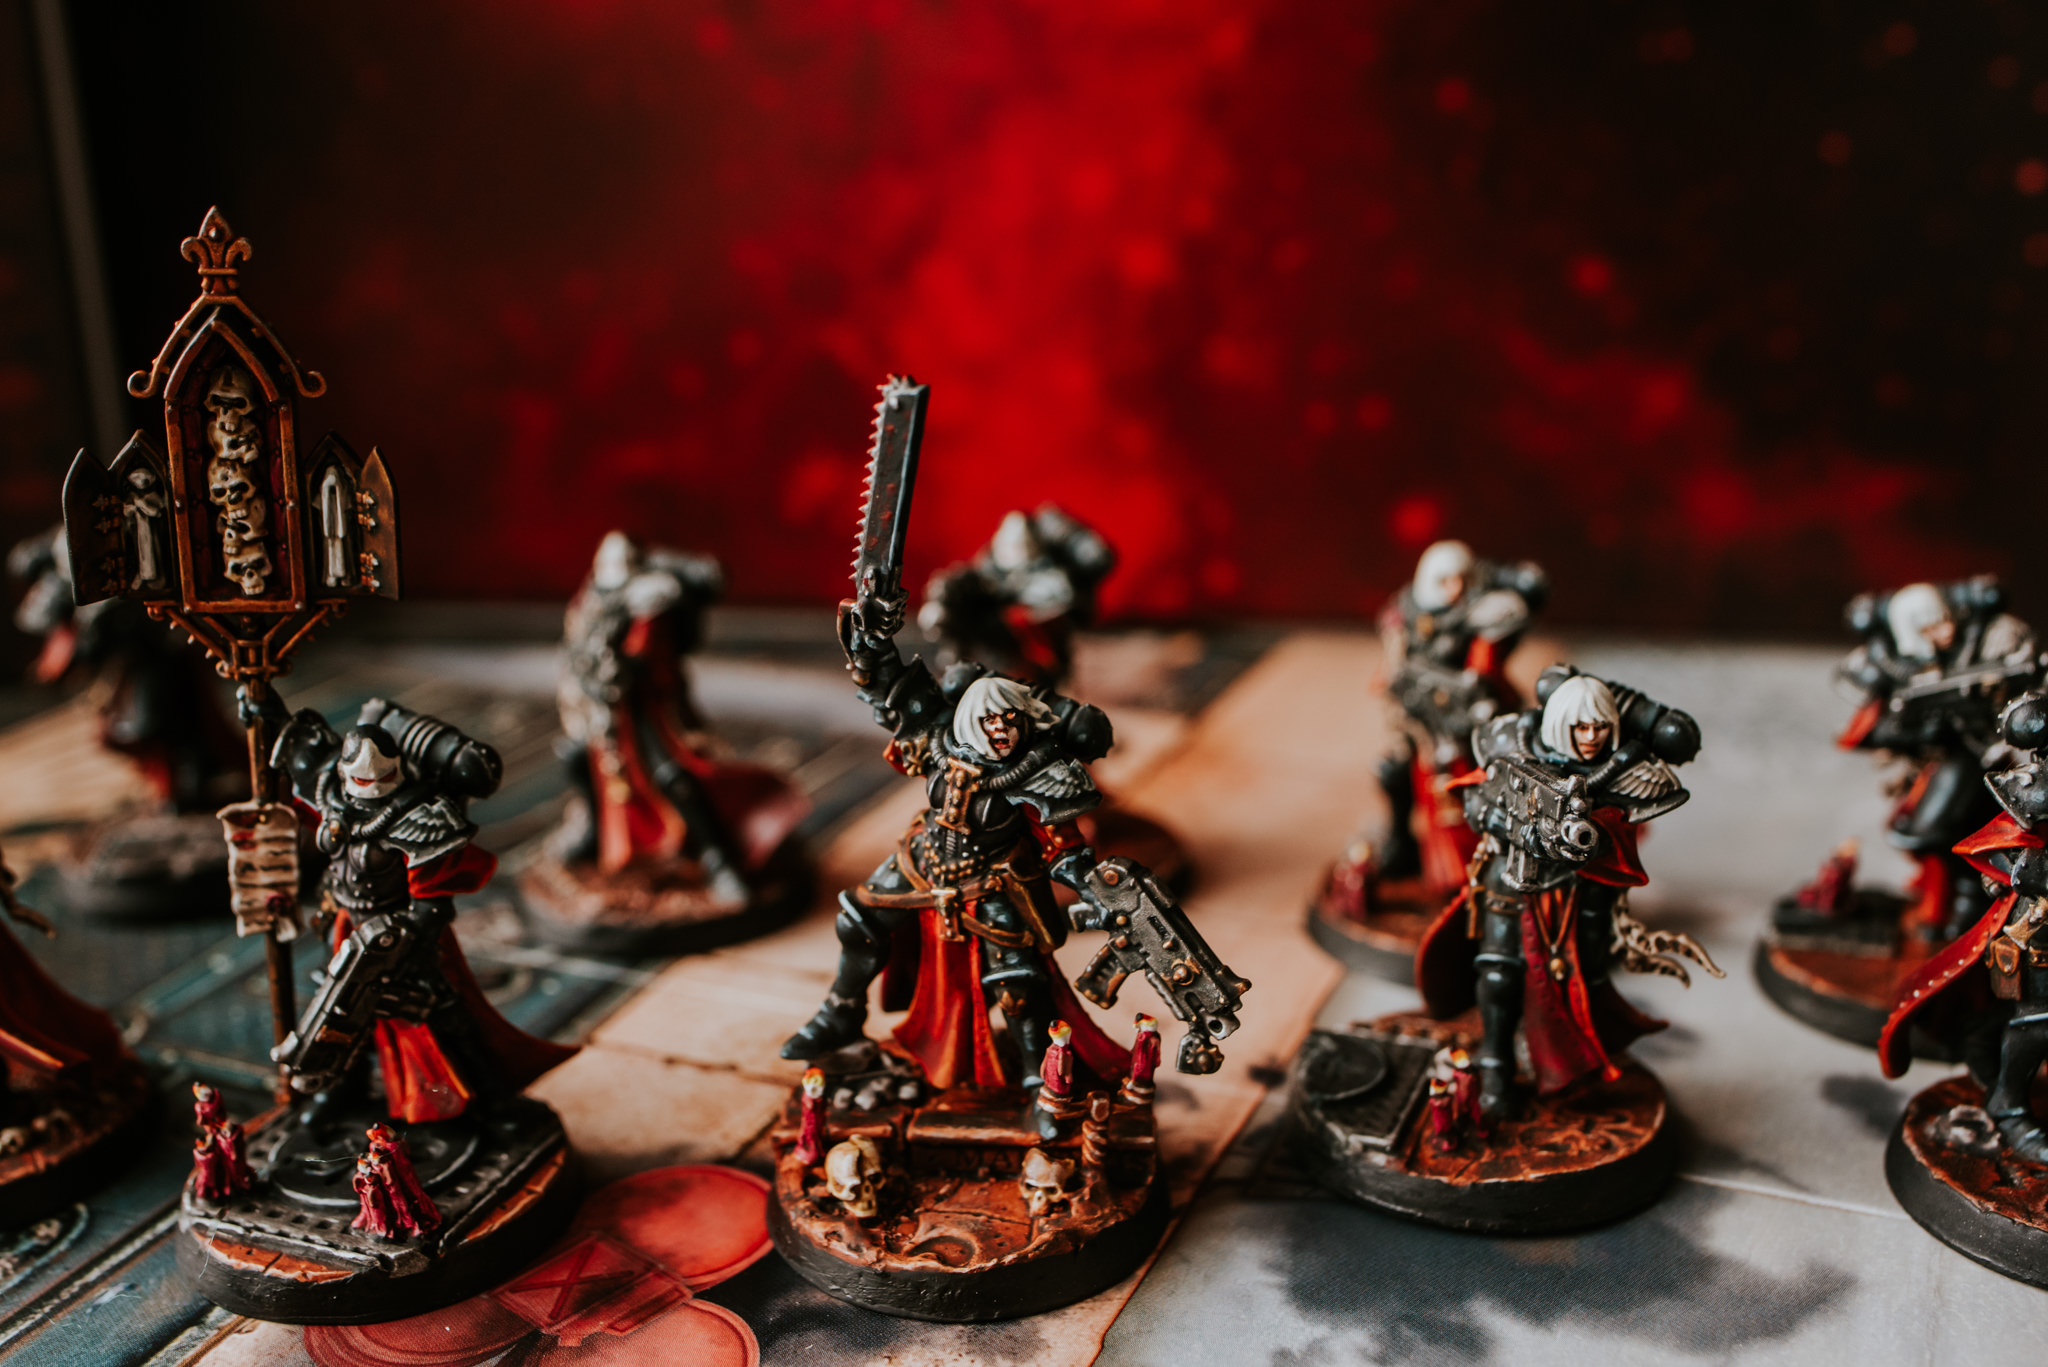
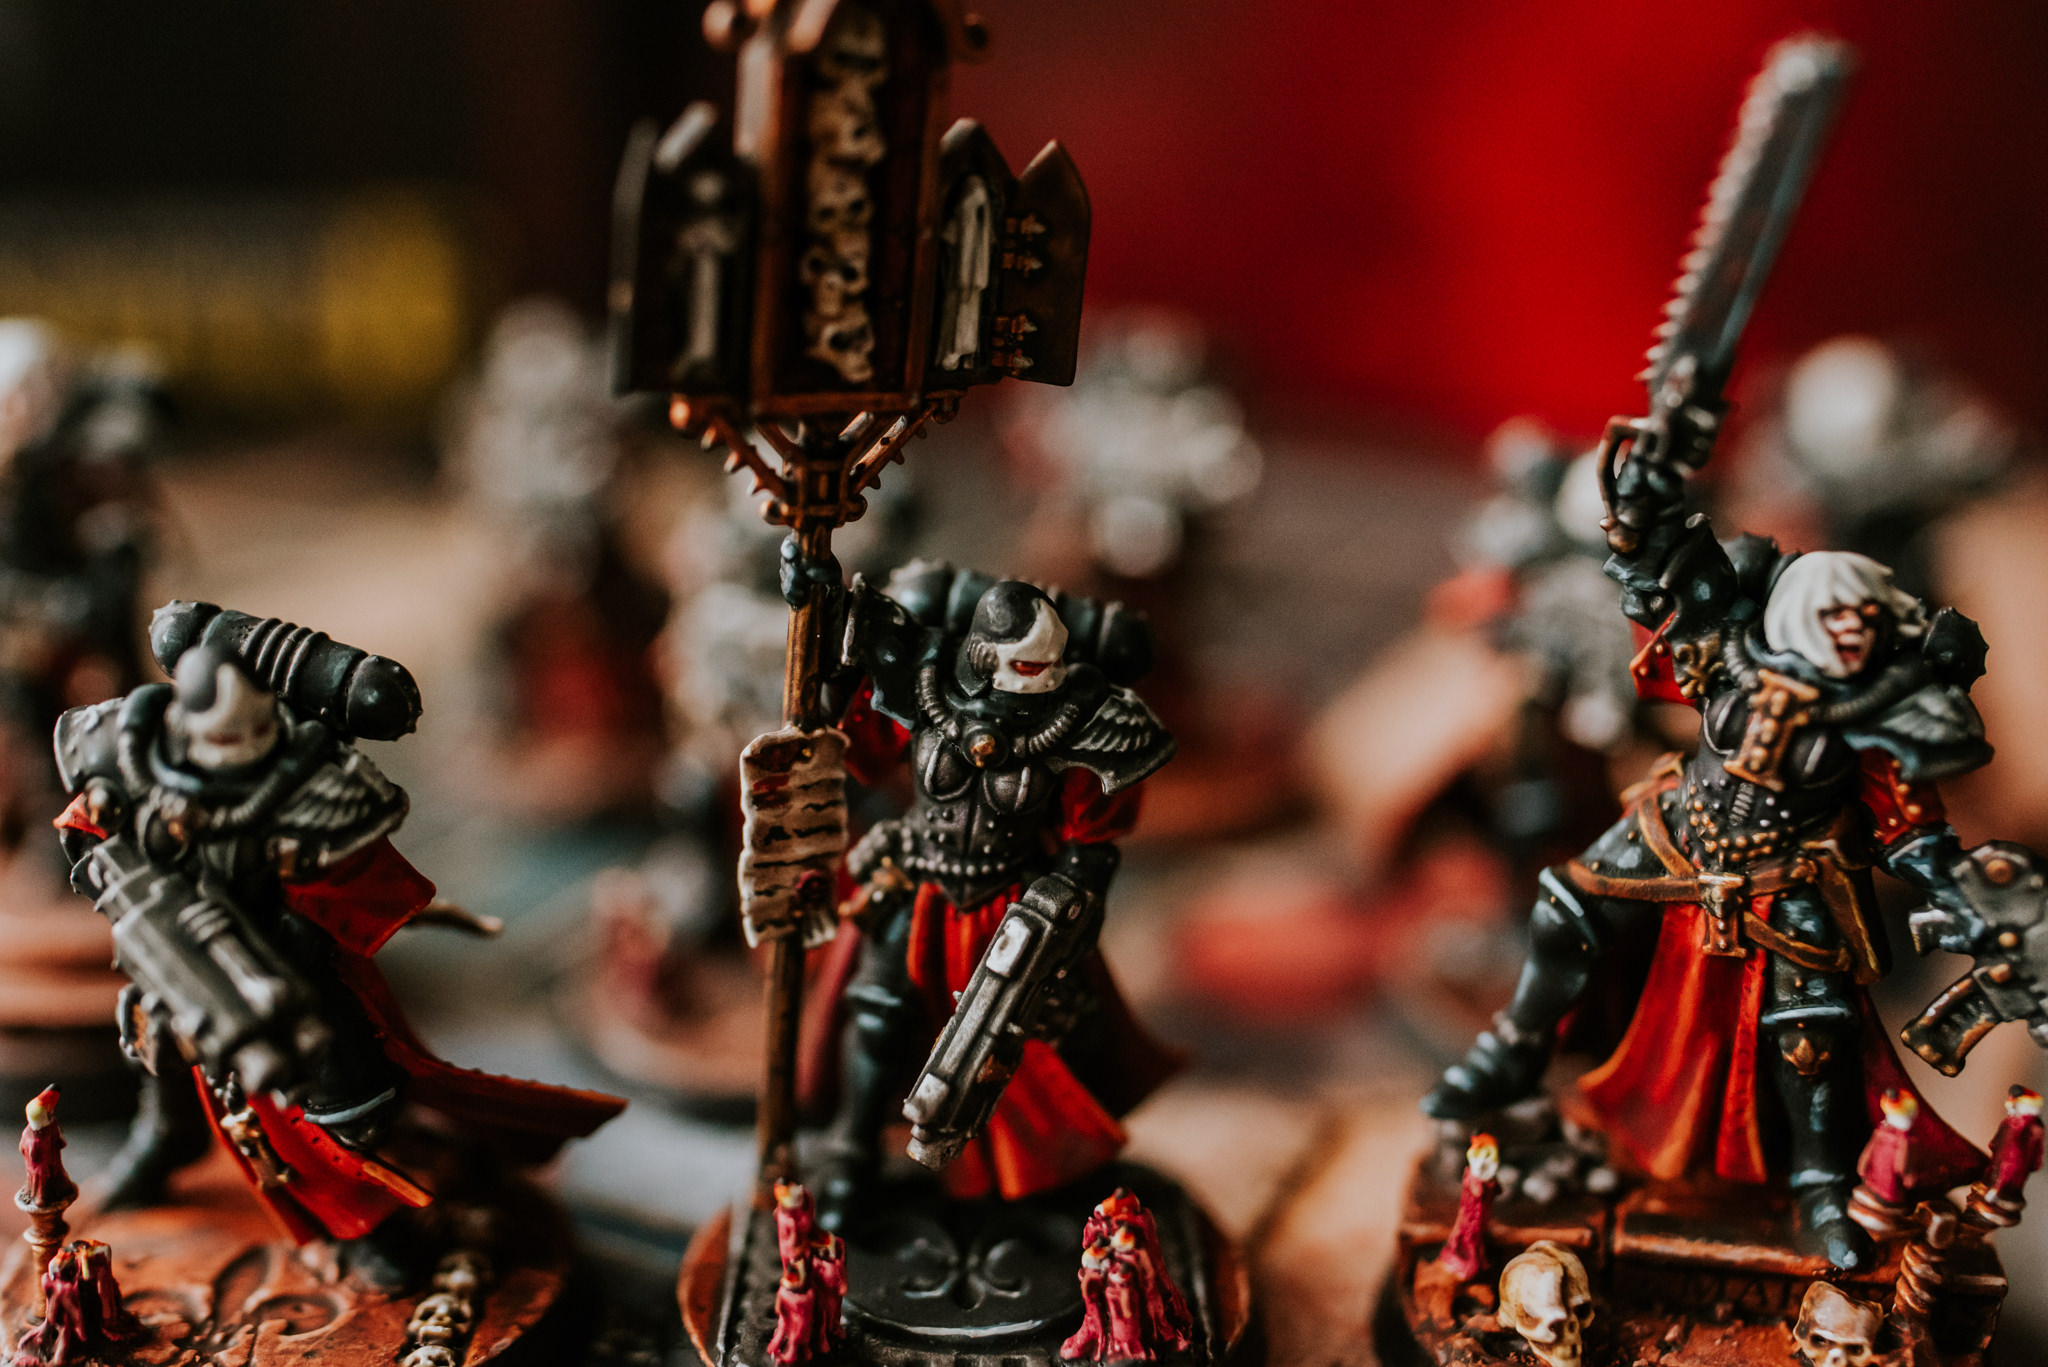
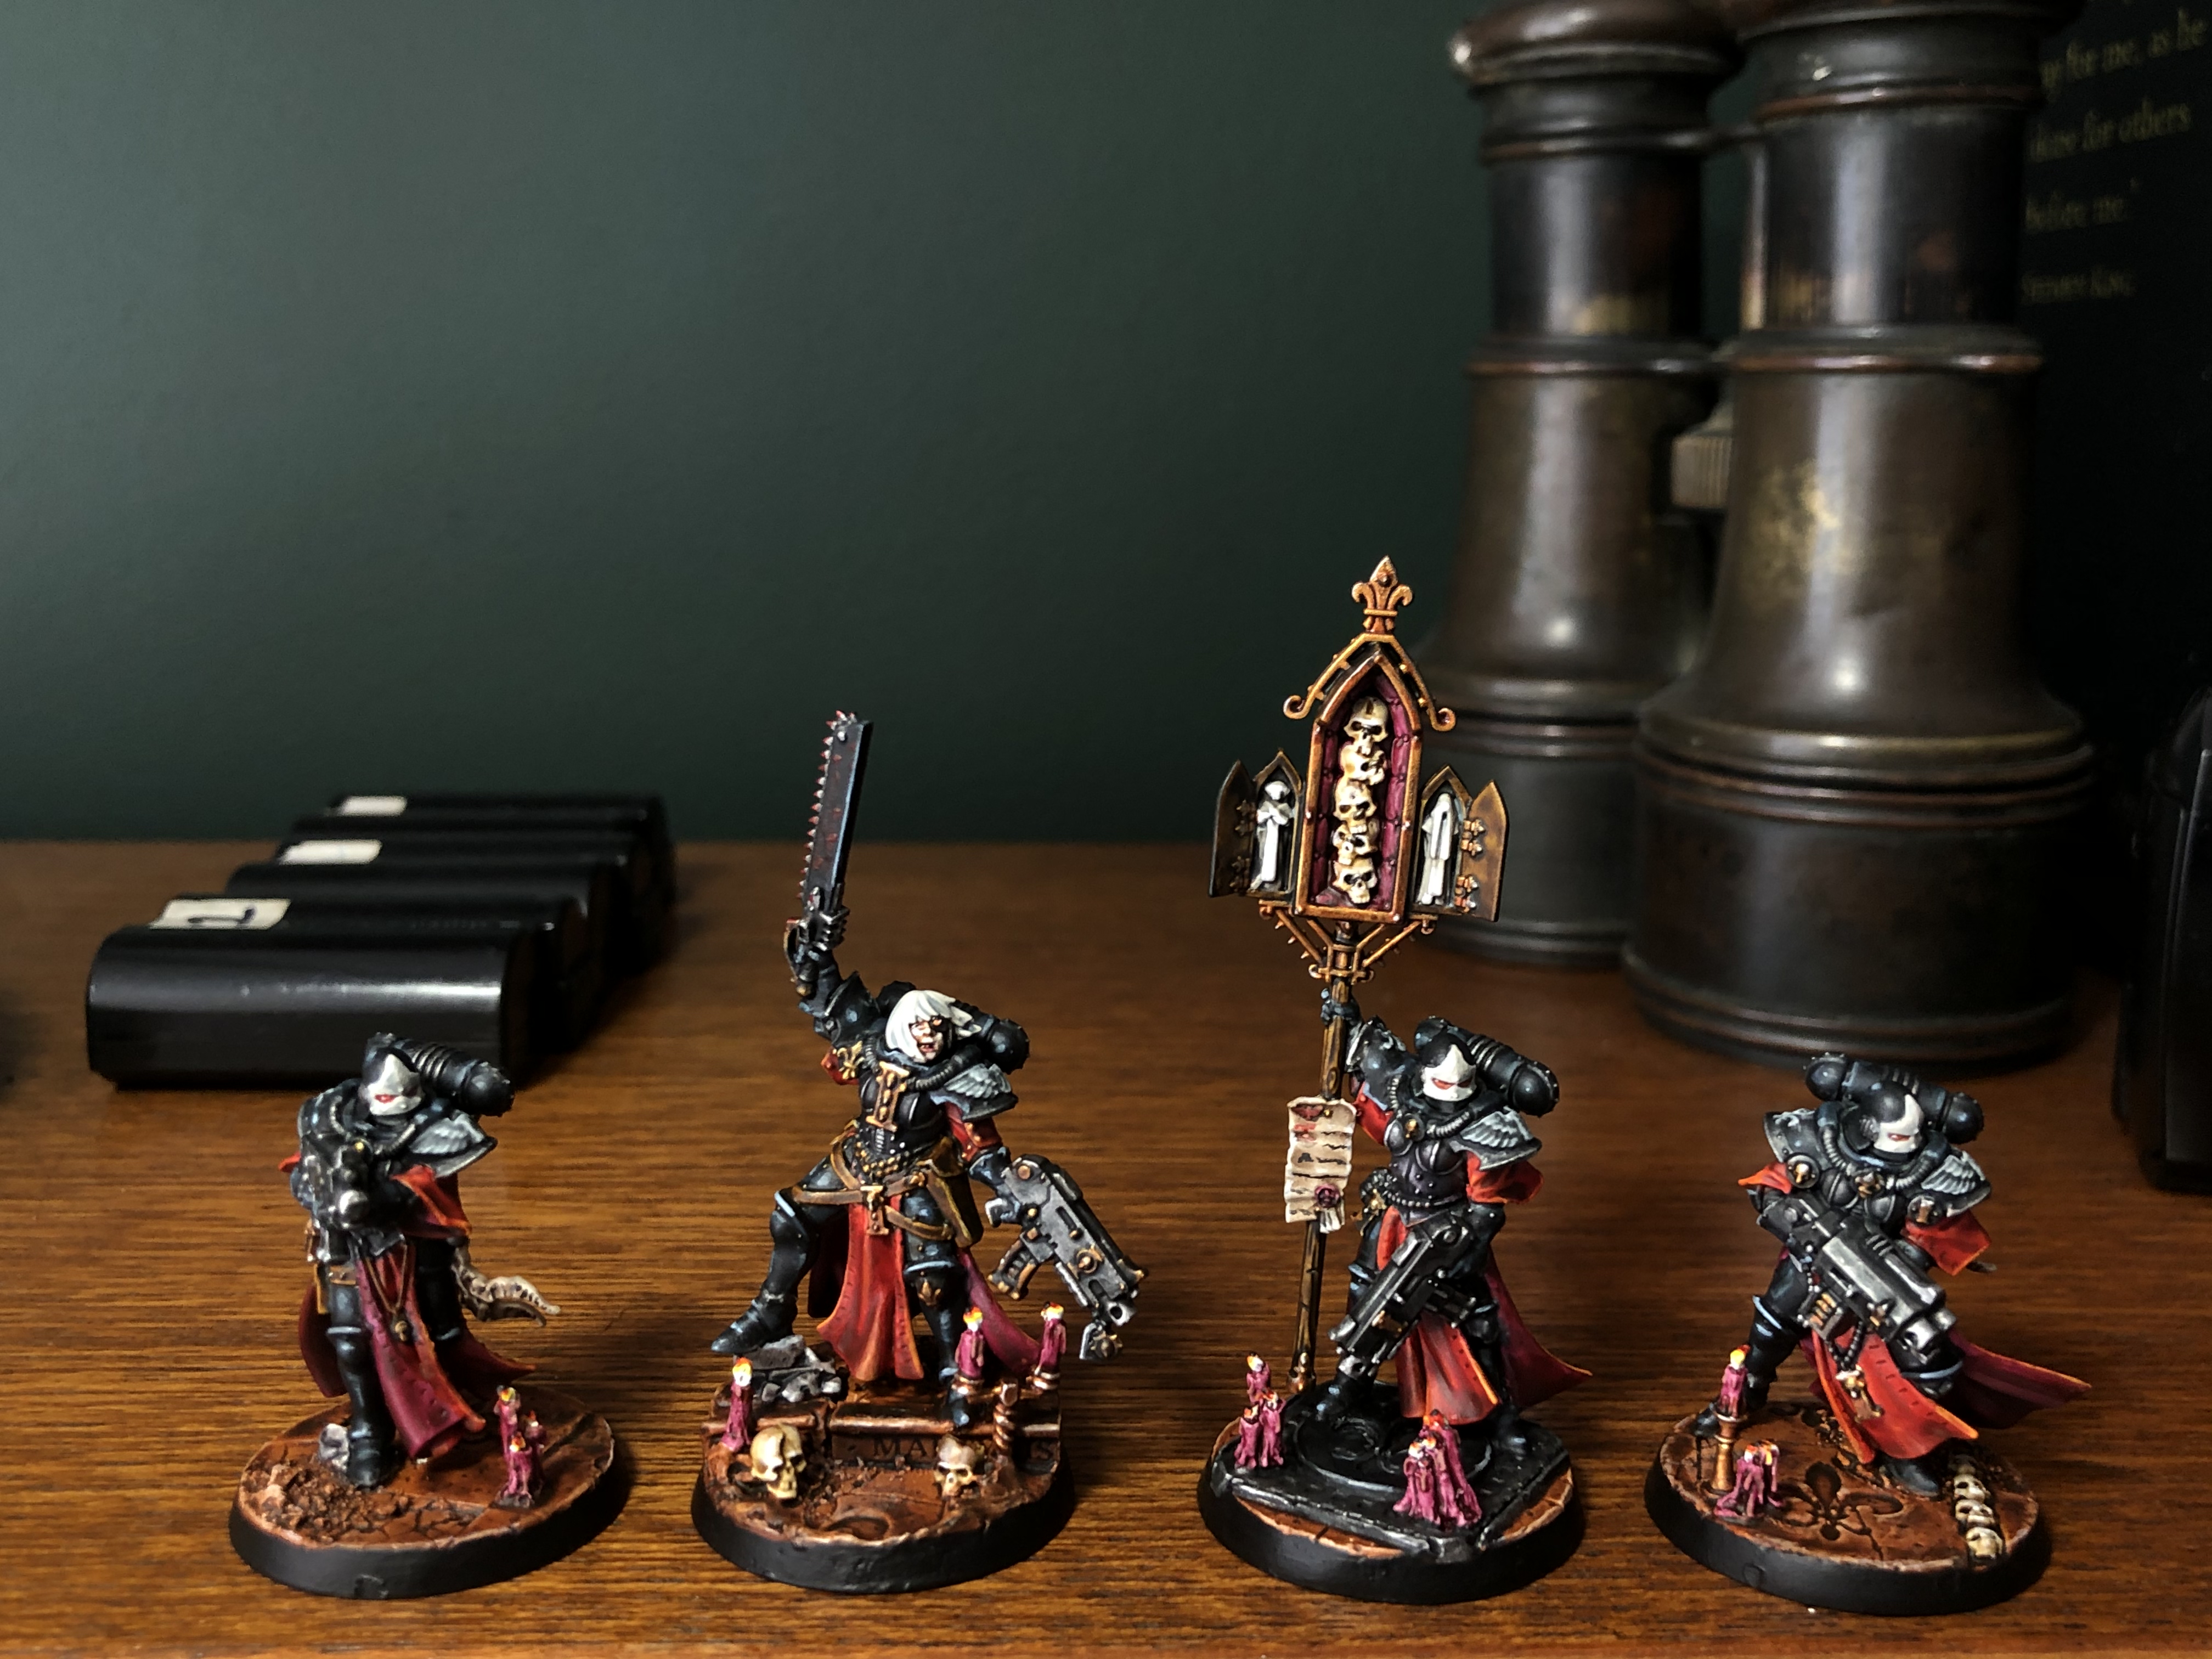
SKULLS ON A STICK BABY ~ PAINTING THE SIMULACRUM

LET’S FINISH THIS BADASSERY
*****
Ok guys as promised today I’m posting my guide to painting the Sororitas Simulacrum. Finishing the banner bearer will close out painting my first squad too. YES! So let’s get on with it. Whoop!
PAINT LIST
*****
• WRAITHBONE
• VOLUPUS PINK
• CONTRAST SKELETON HORDE
• CONTRAST SNAKEBITE LEATHER
• CONTRAST BASILICANUM GREY
• AGRAX EARTHSHADE
• CONTRAST APOTHECARY WHITE
• CONTRAST BLOOD ANGELS RED
• ABADDON BLACK
• RETRIBUTOR ARMOUR
• NULN OIL
• WHITE SCAR
• GUILLIMAN FLESH
• LEADBELCHER


SIMULACRUM
*****
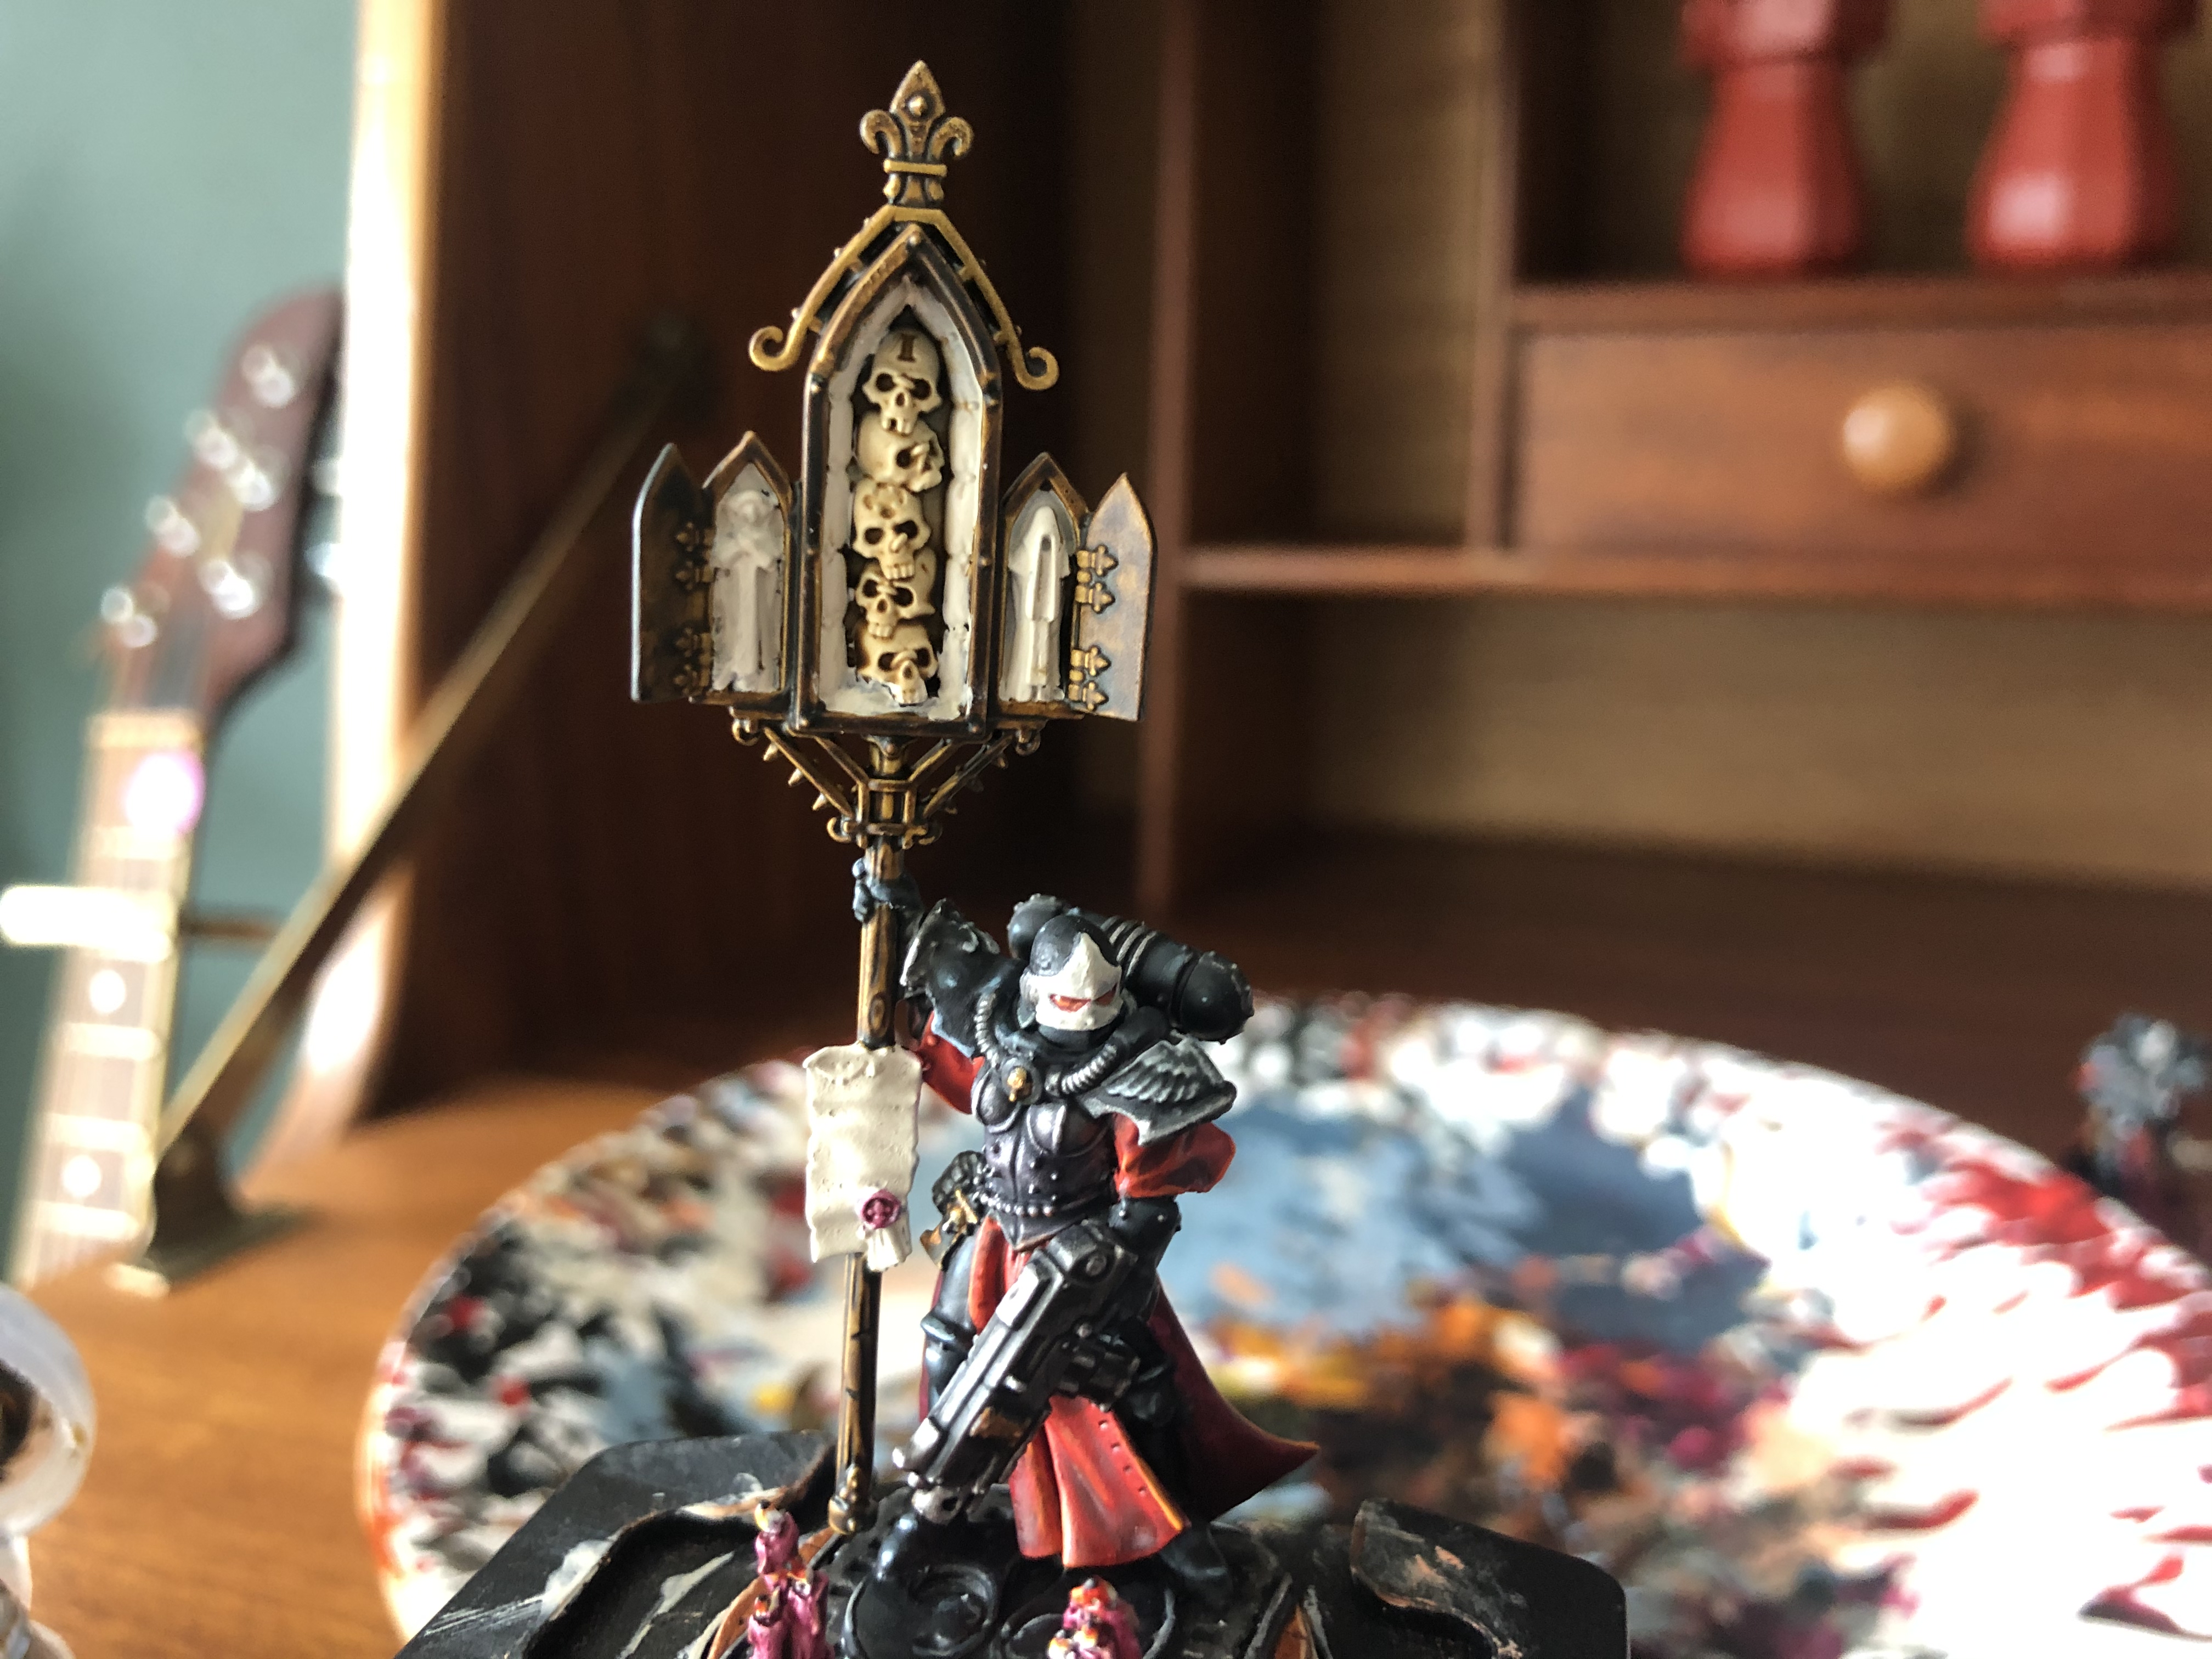
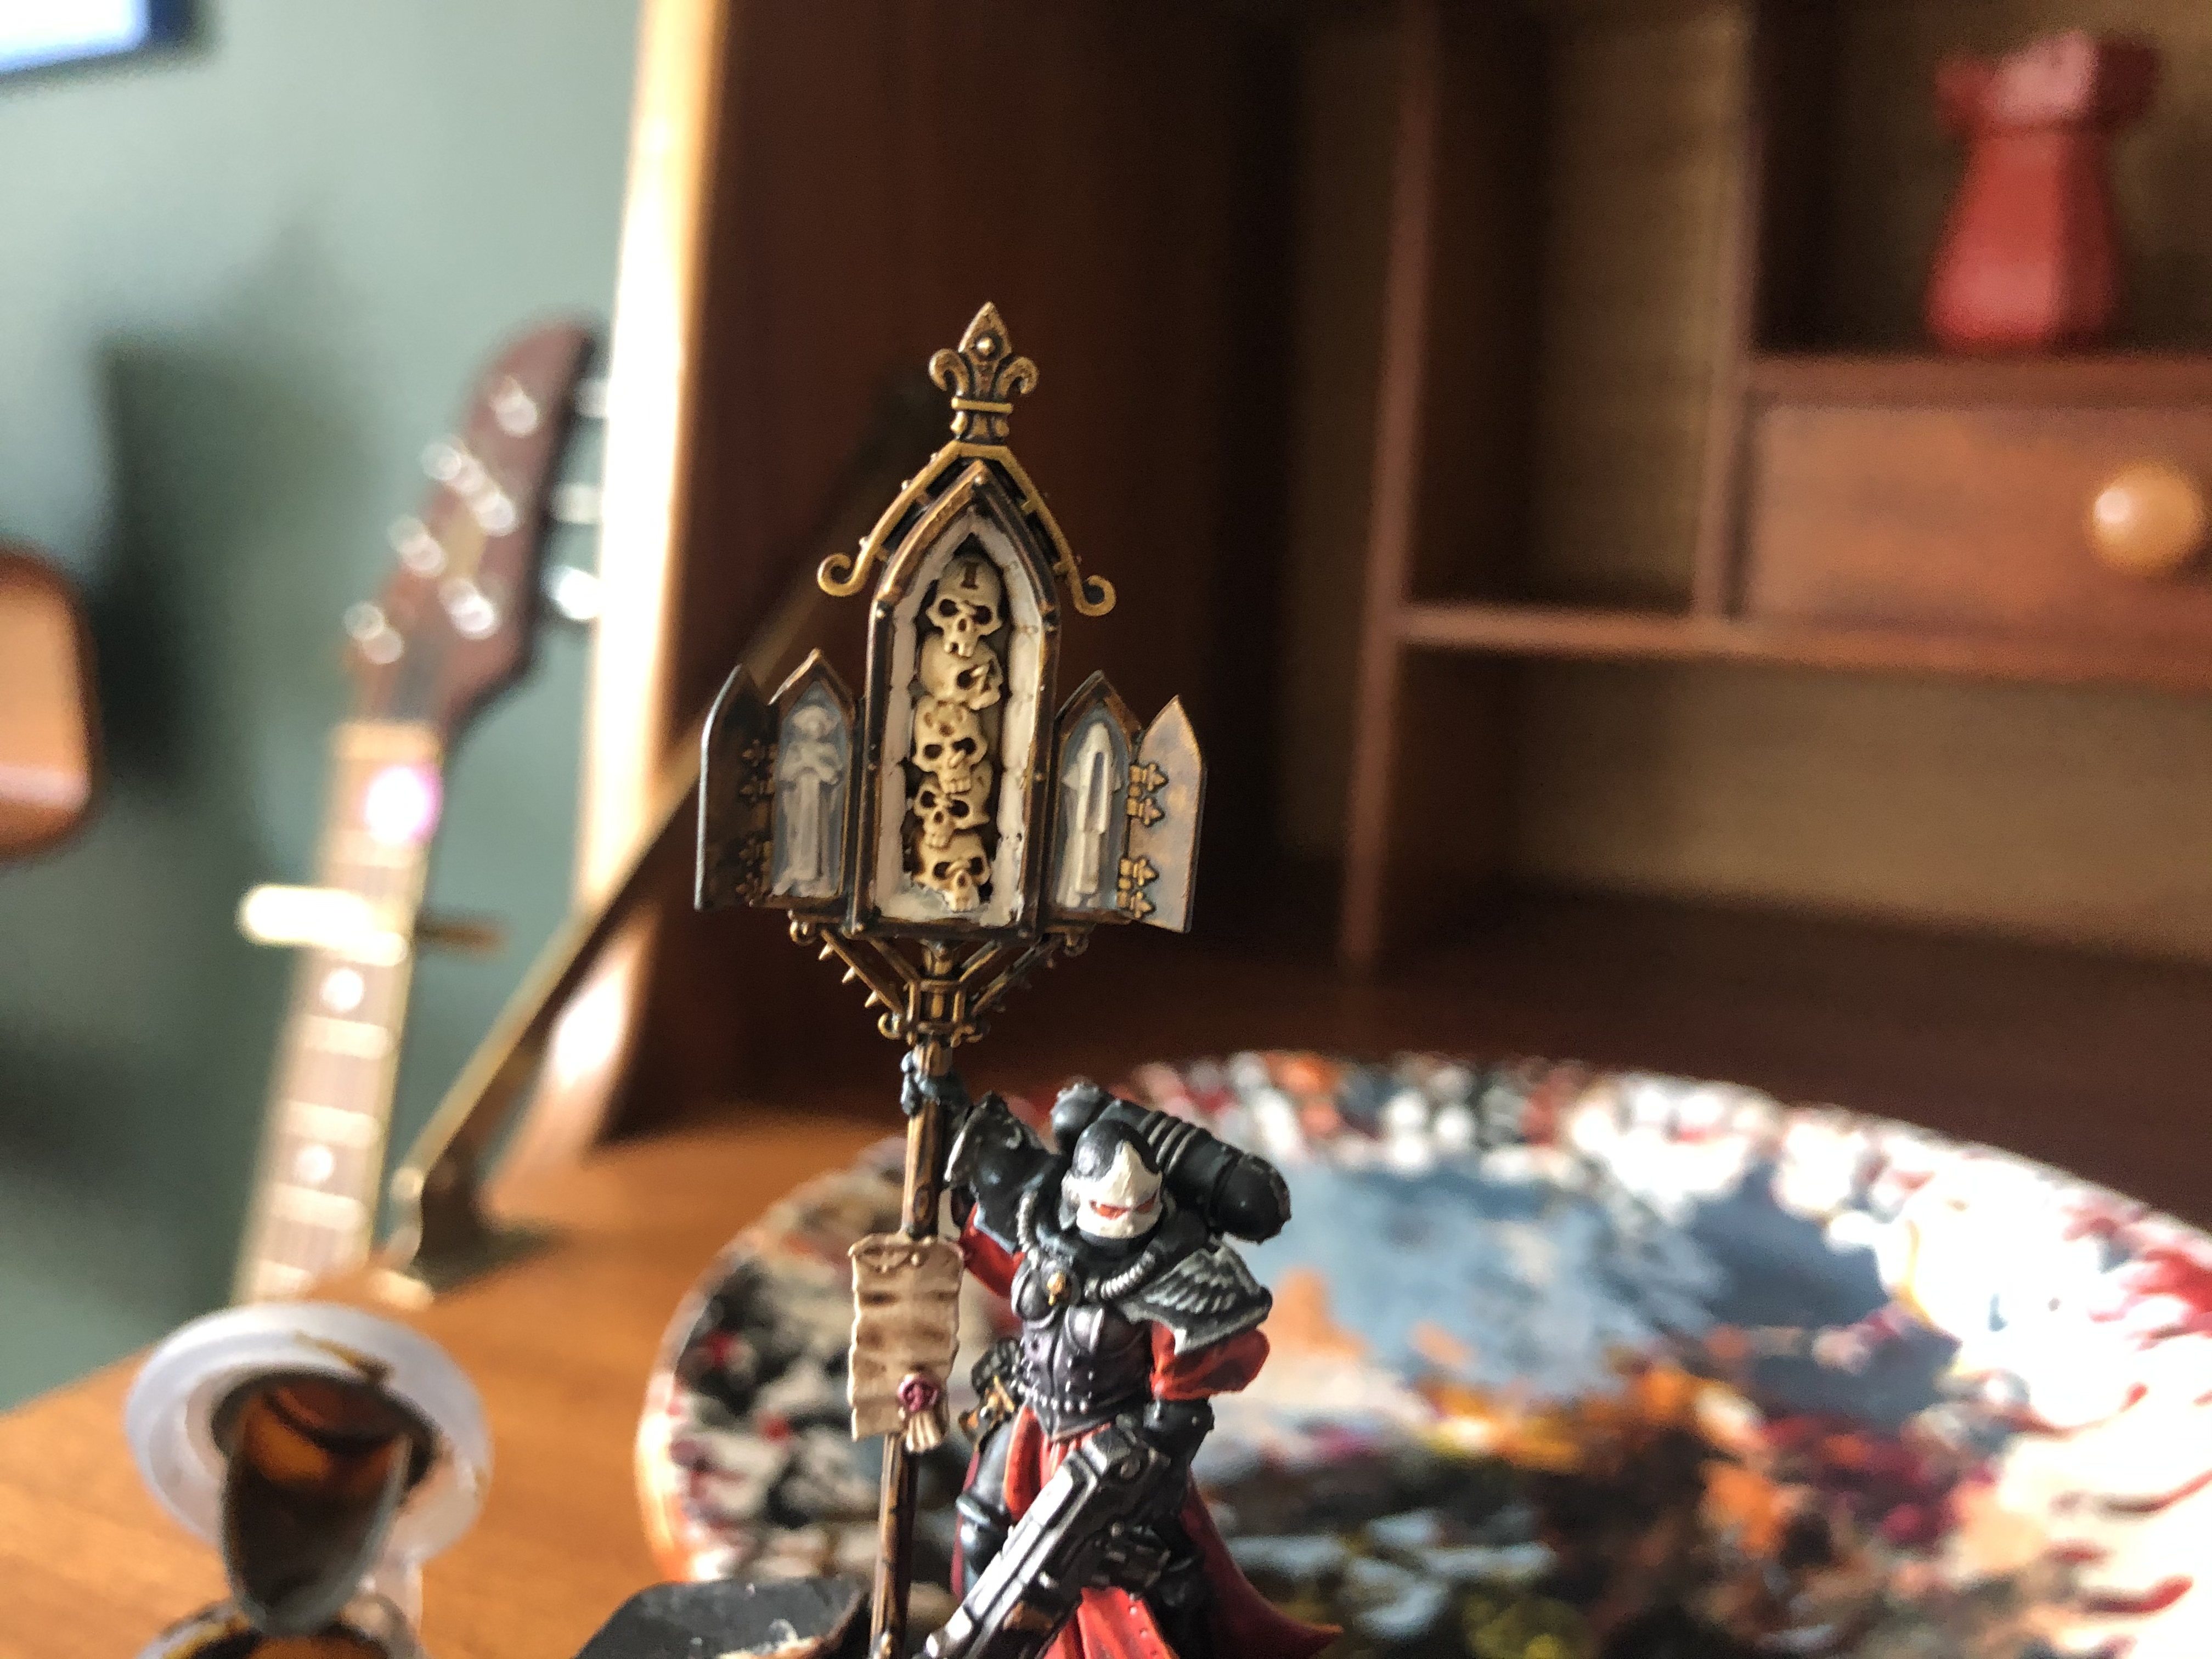
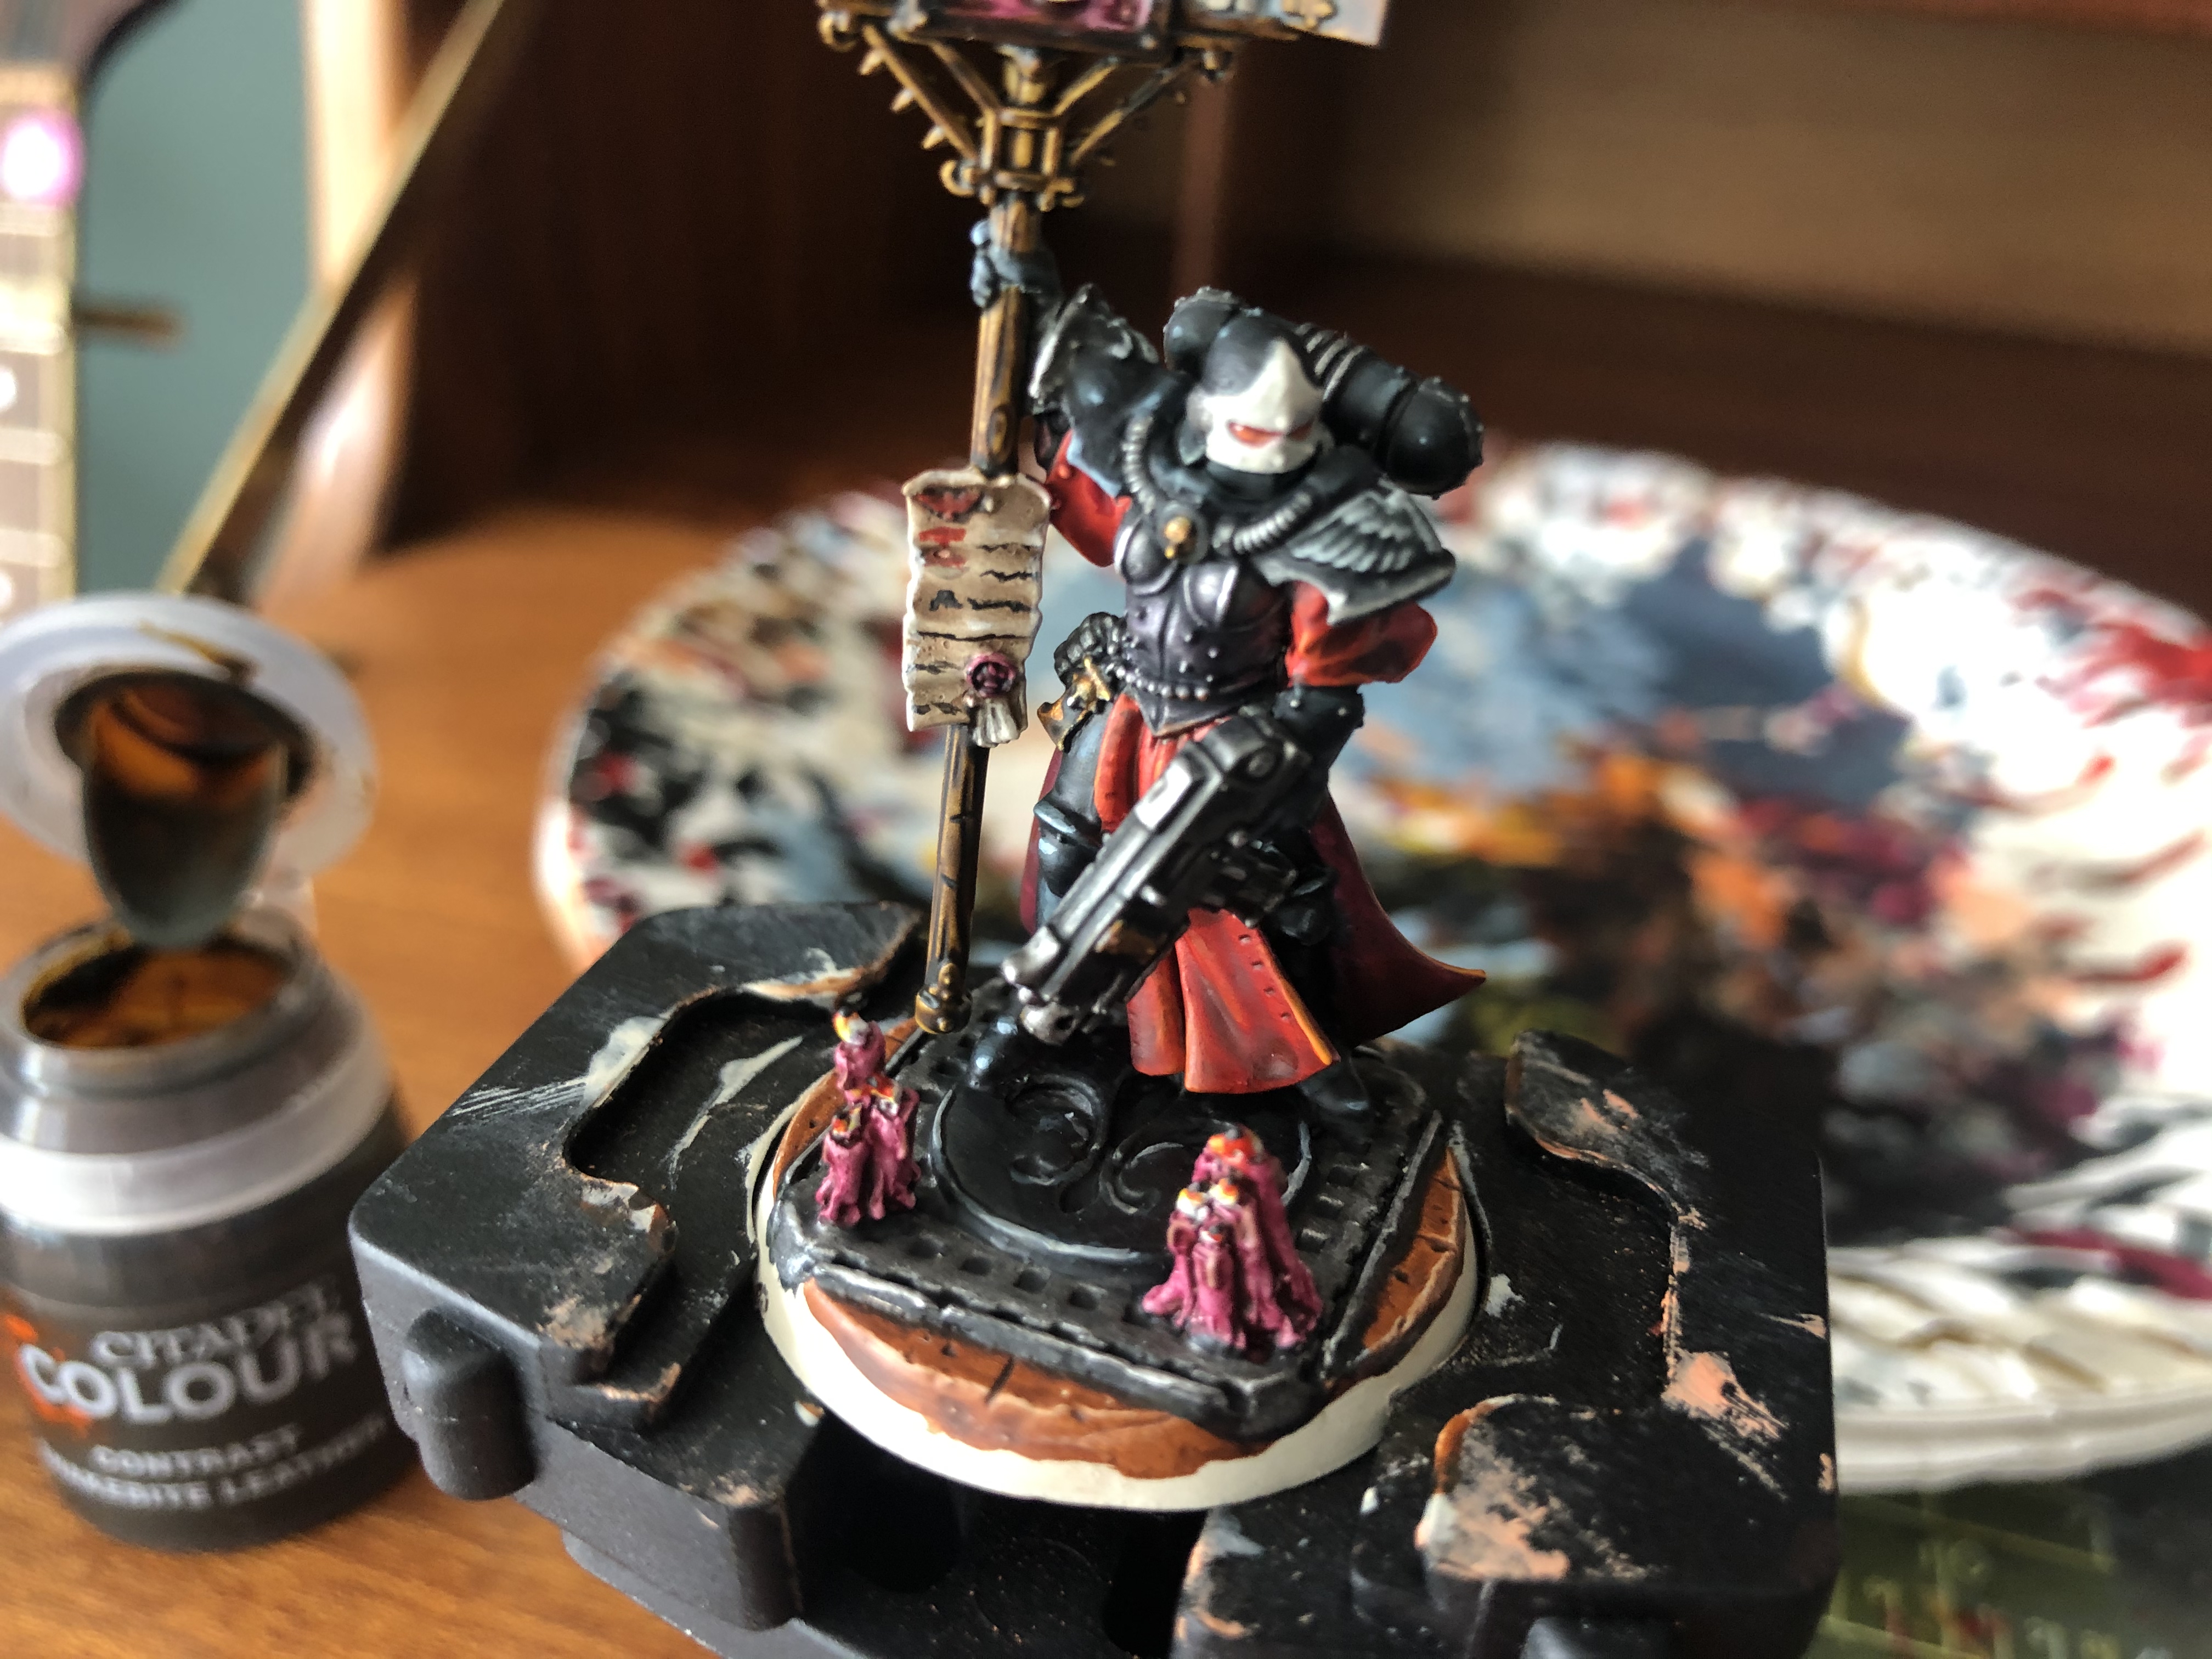
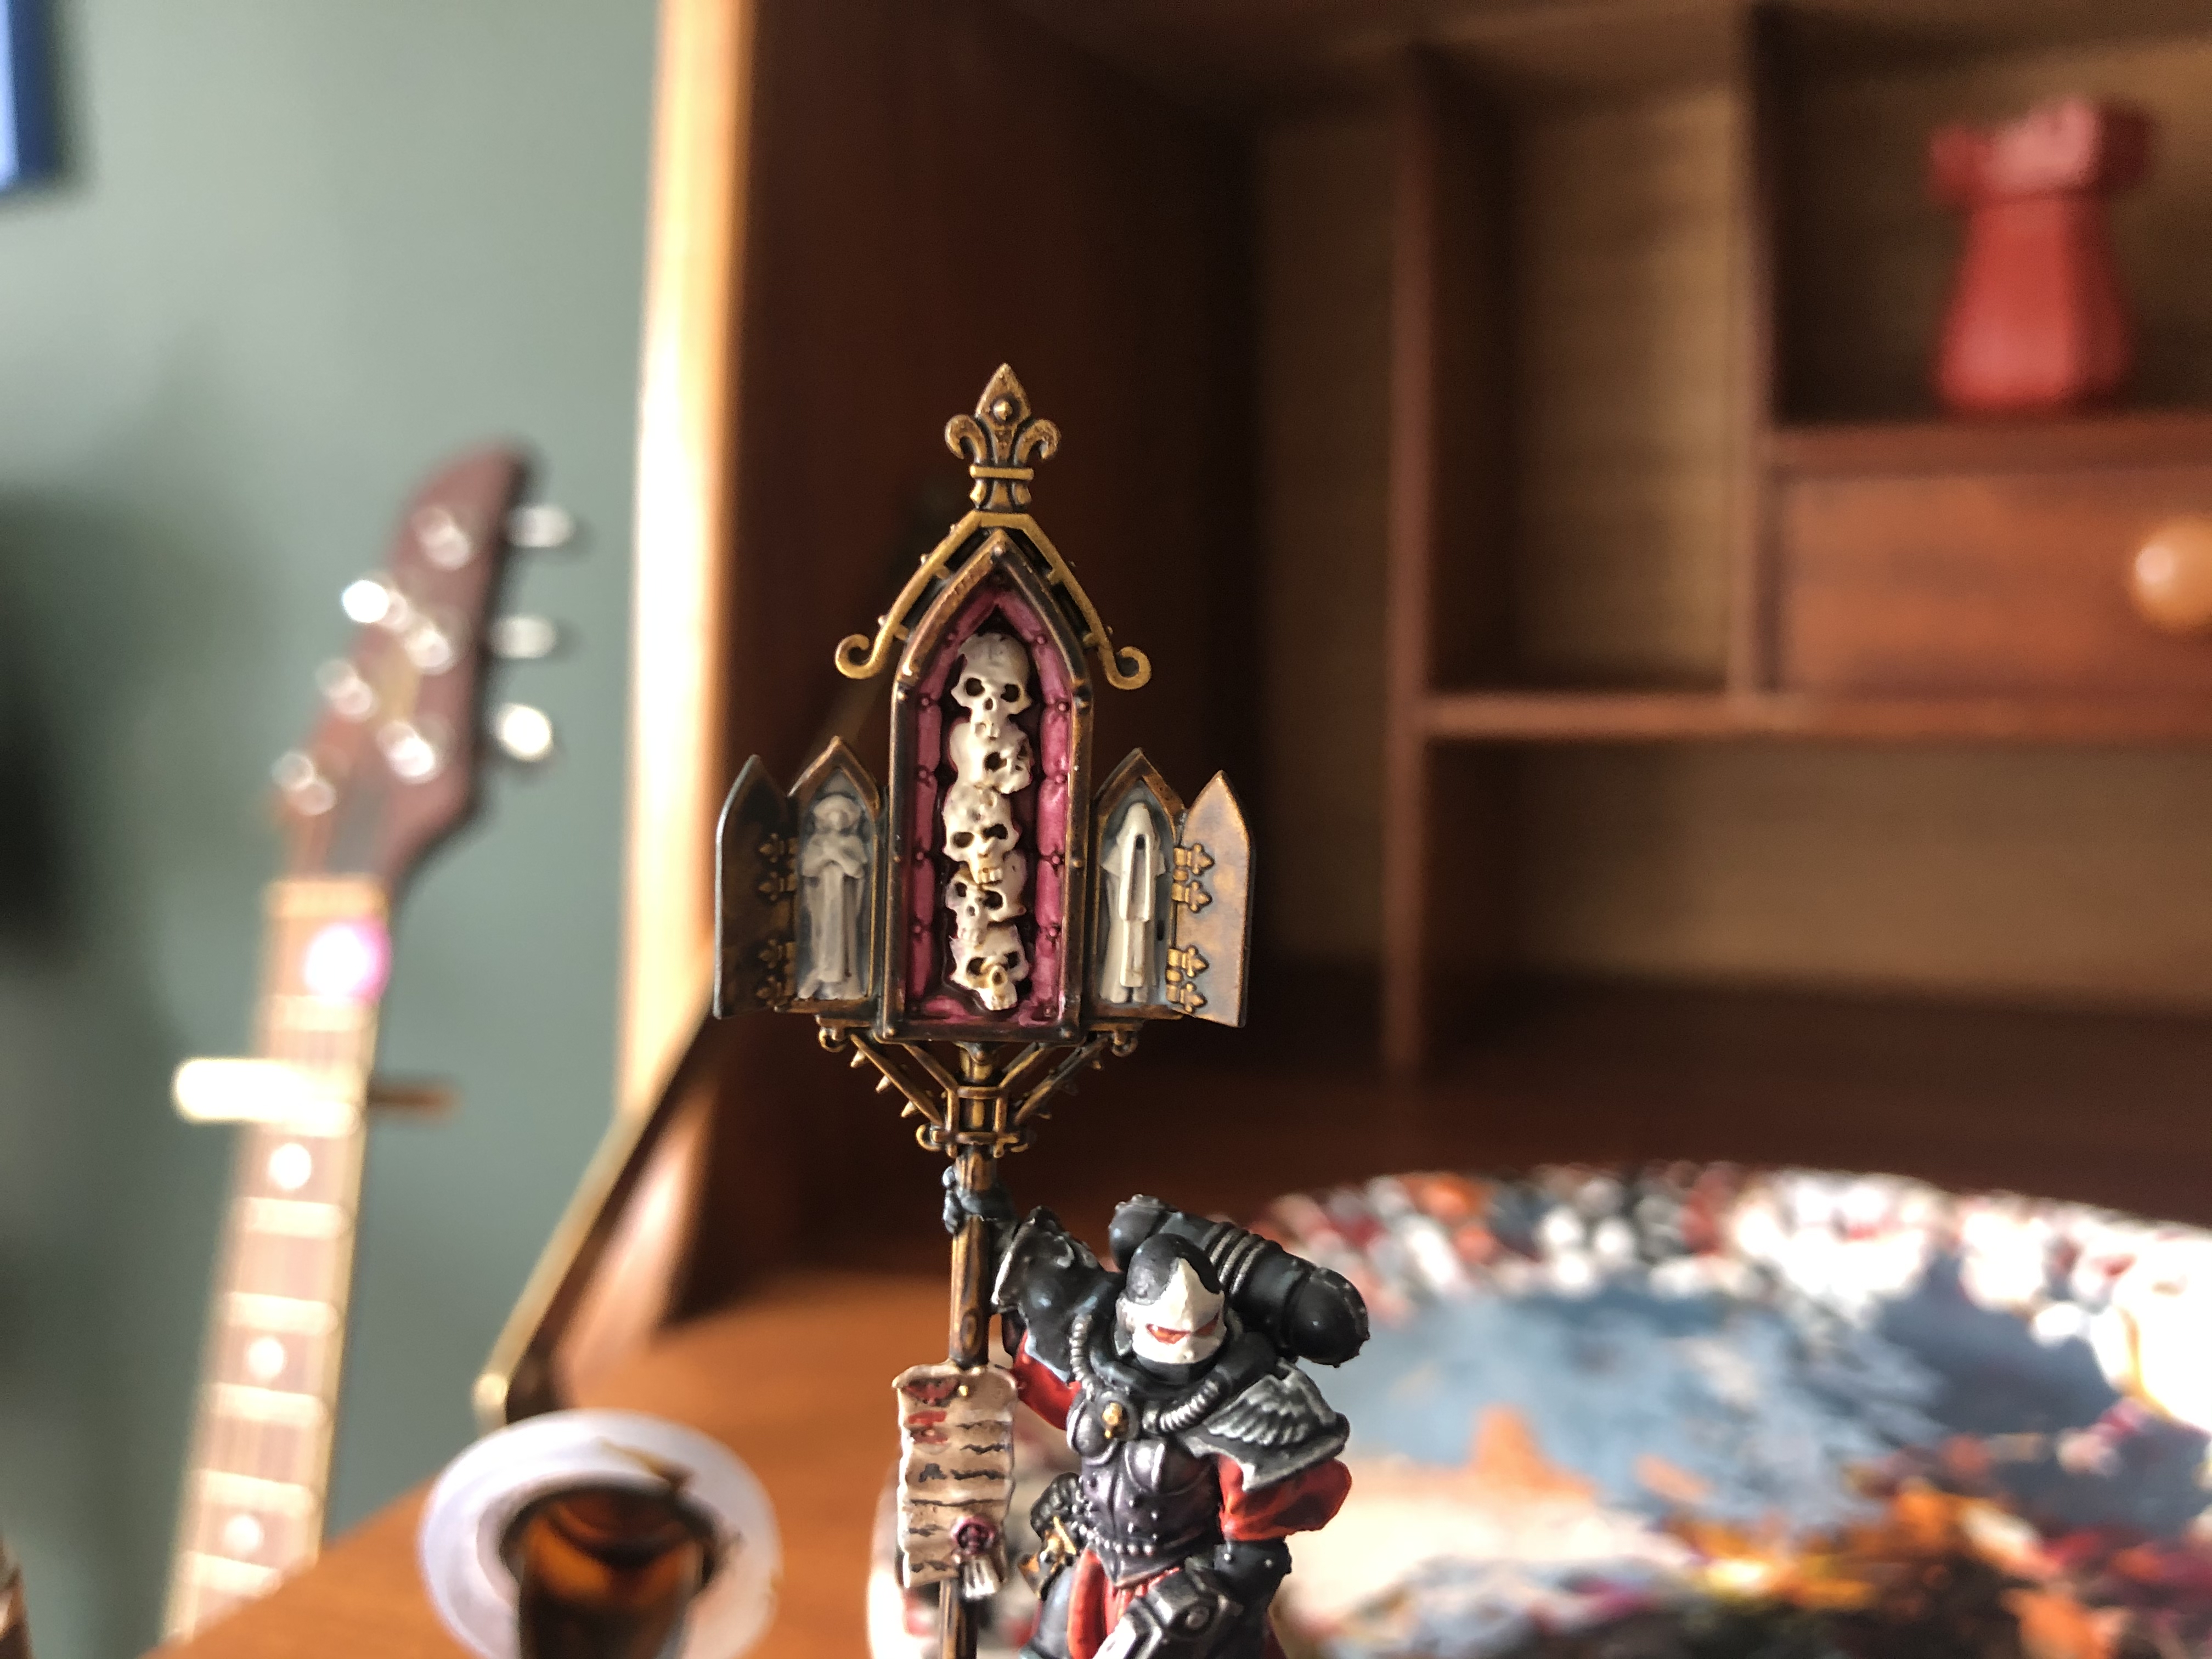
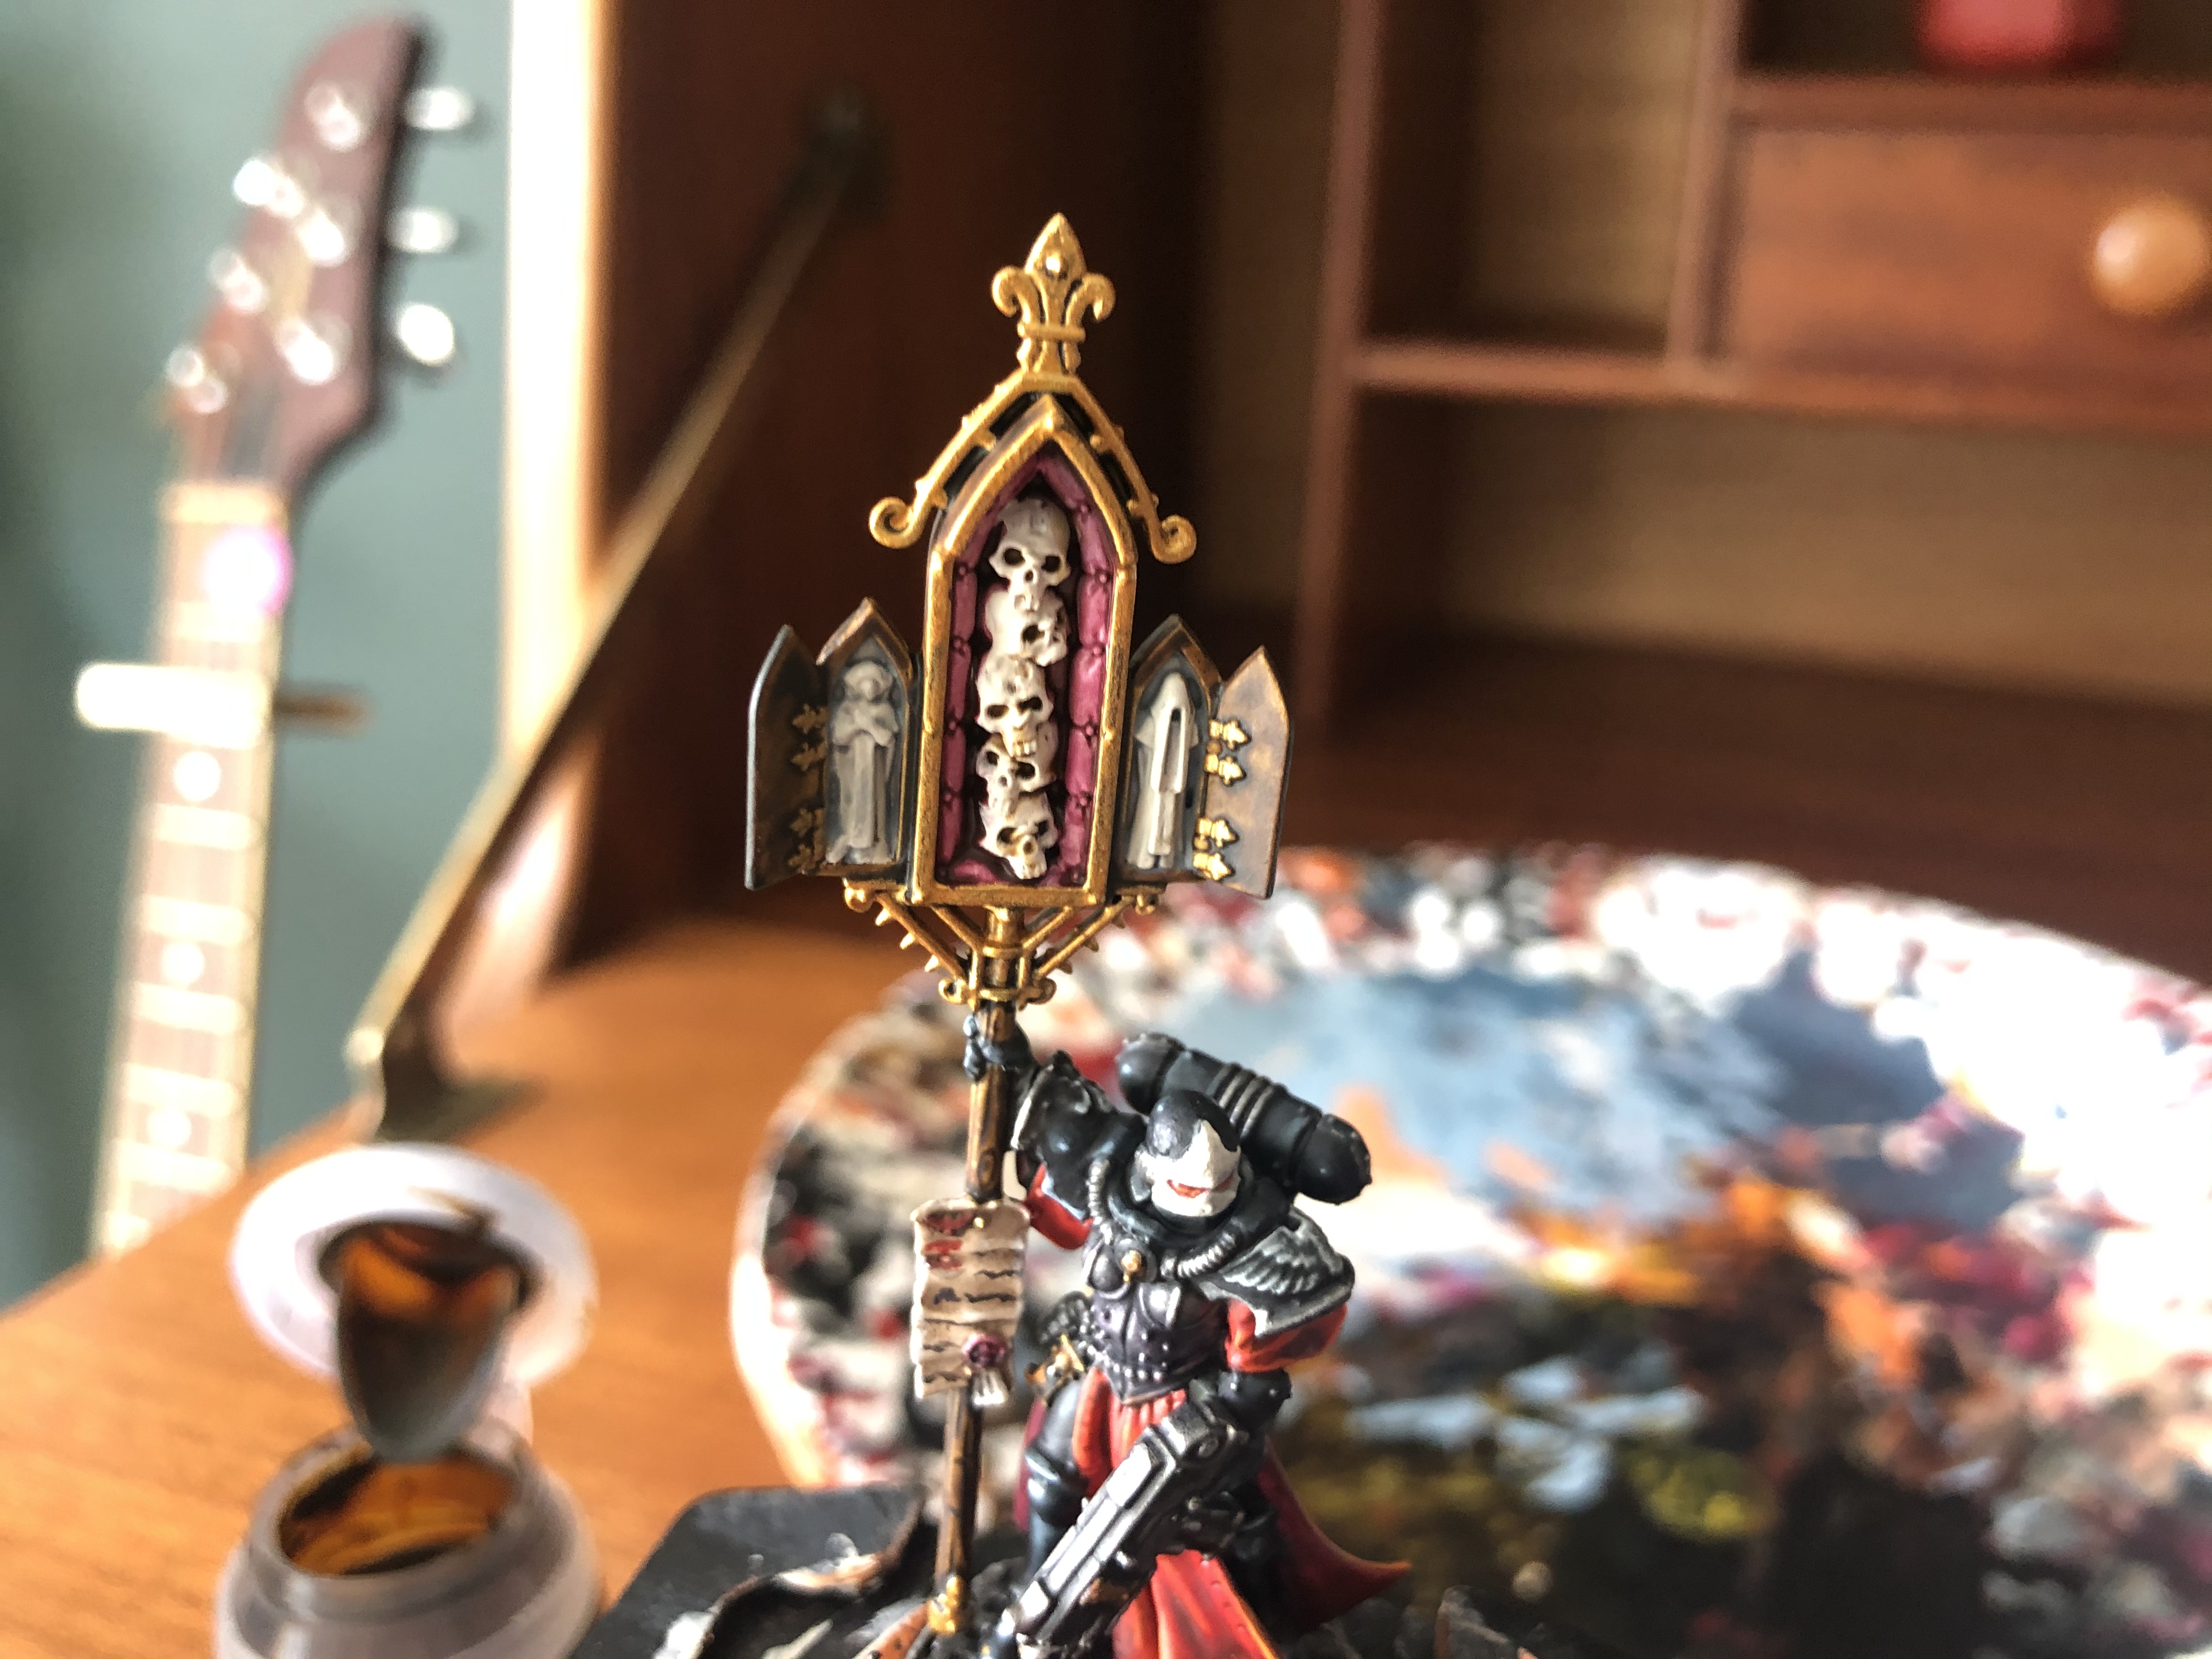
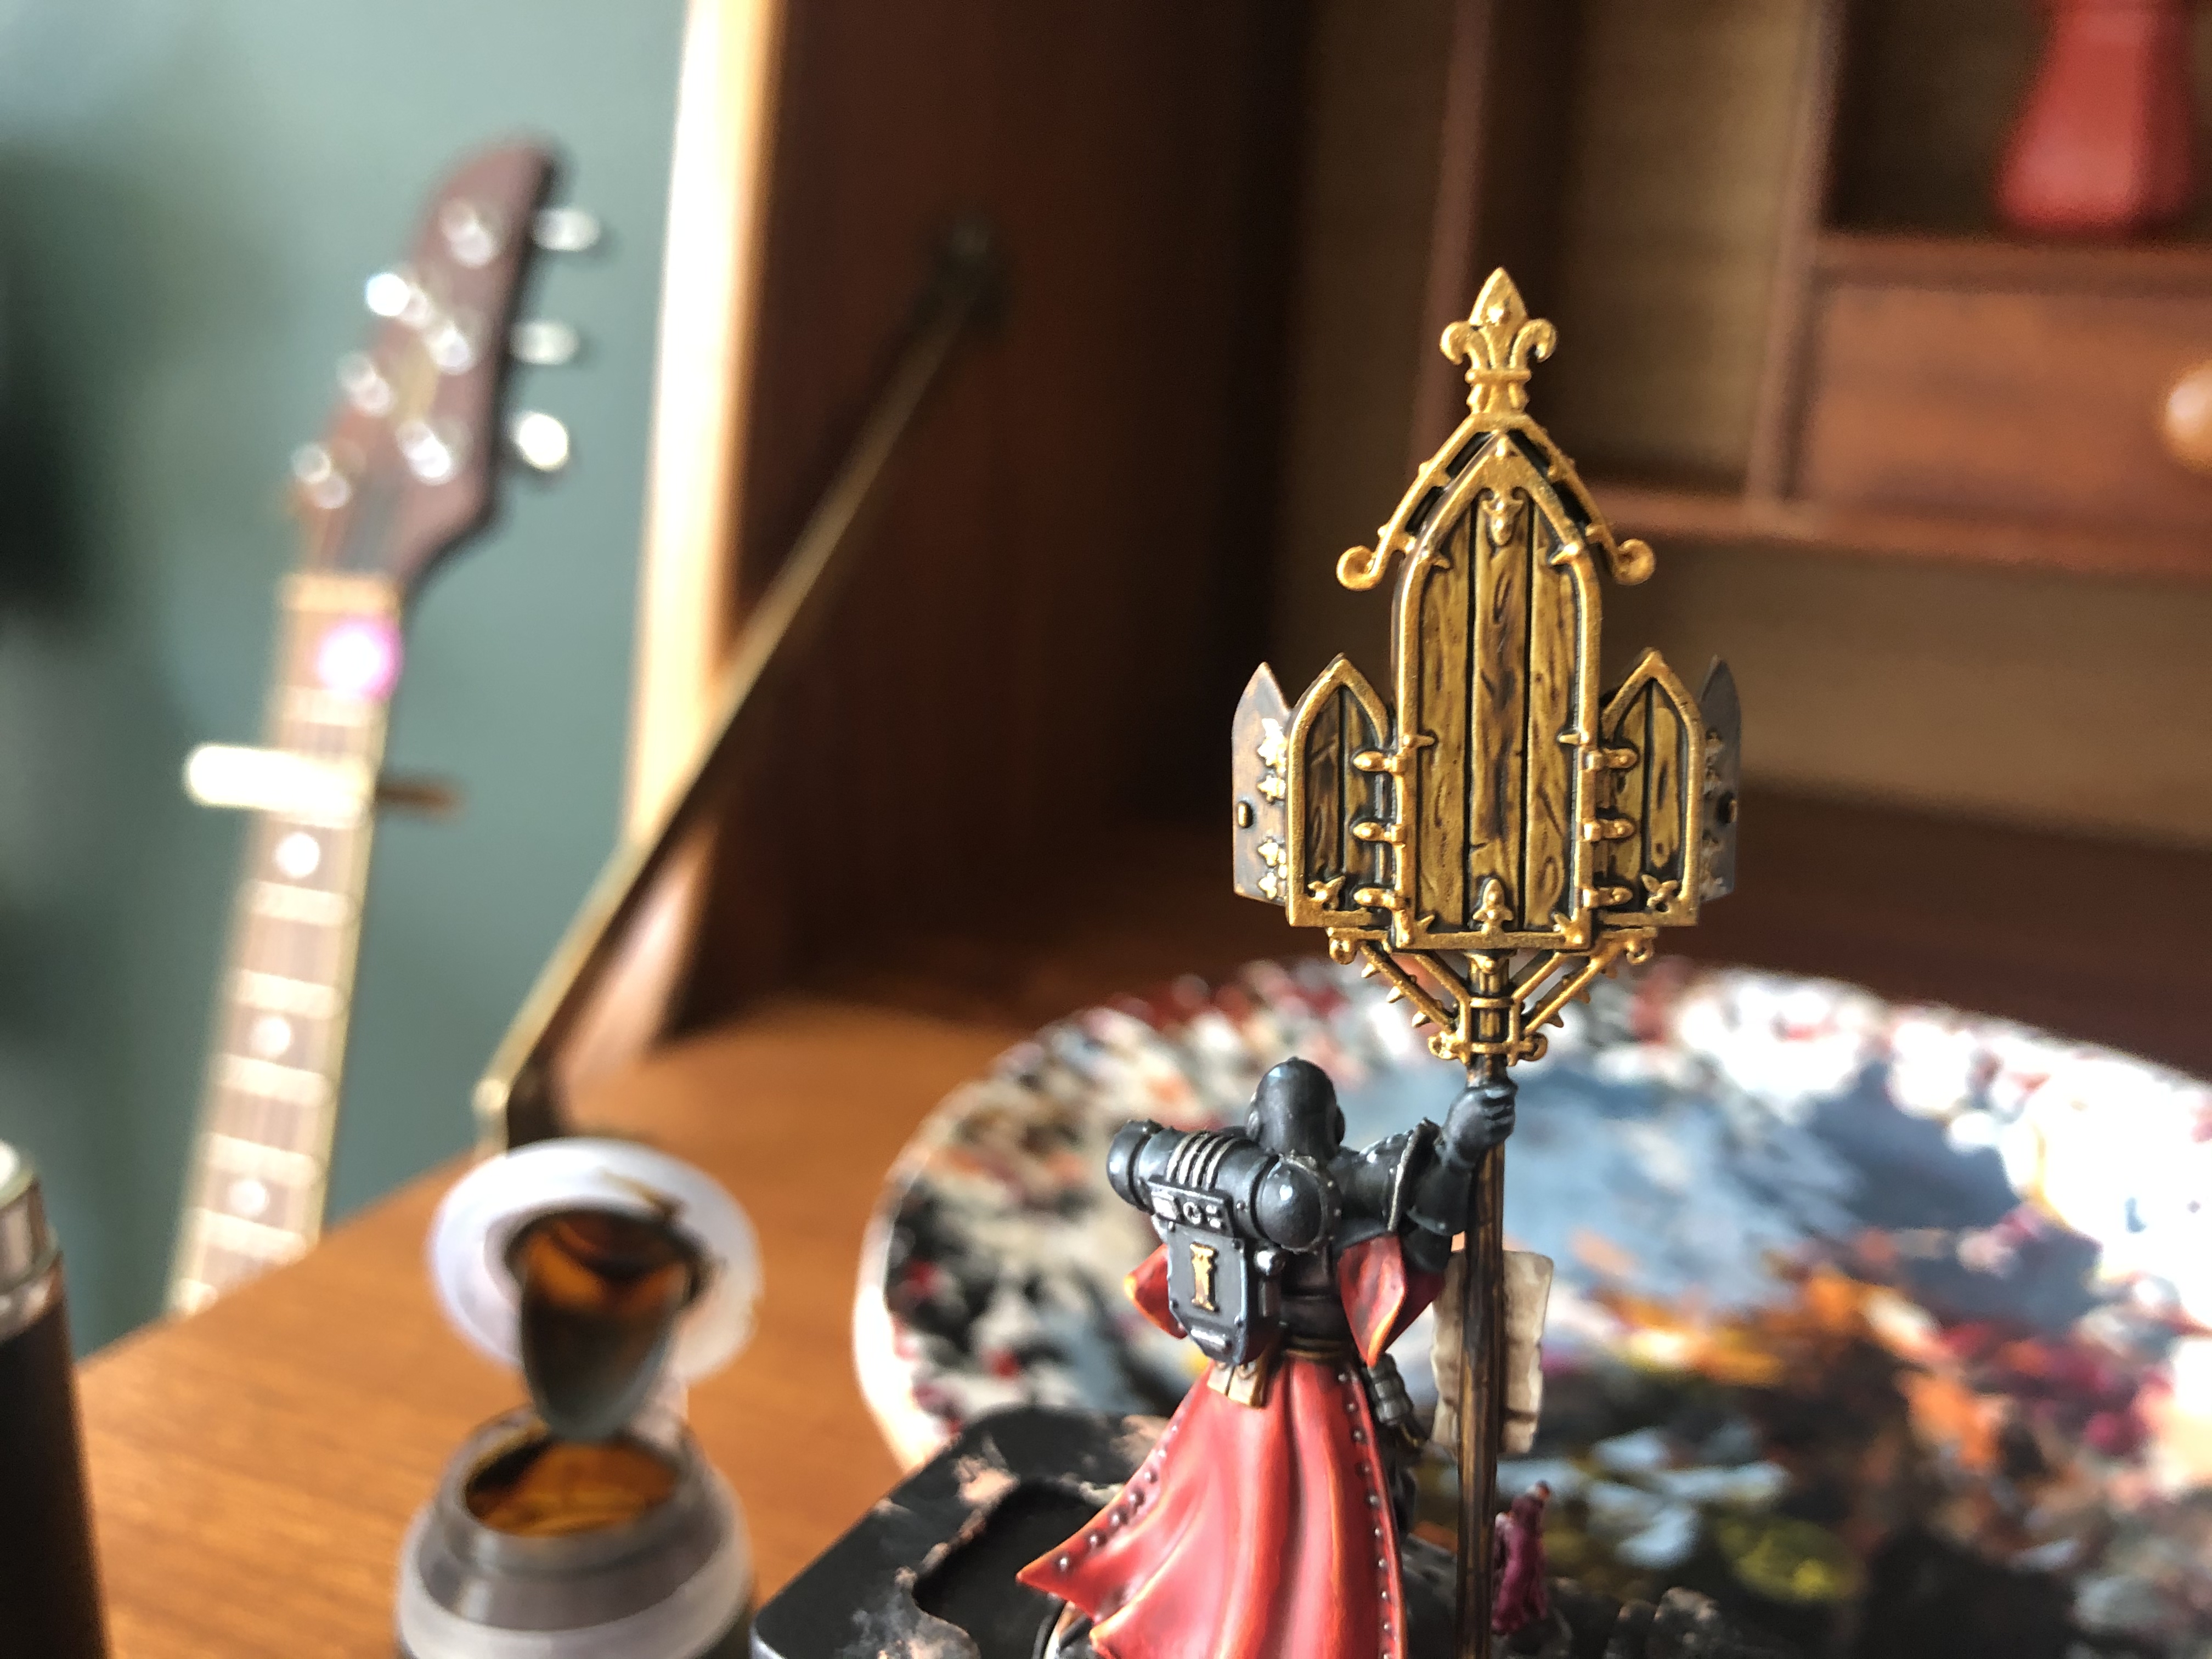
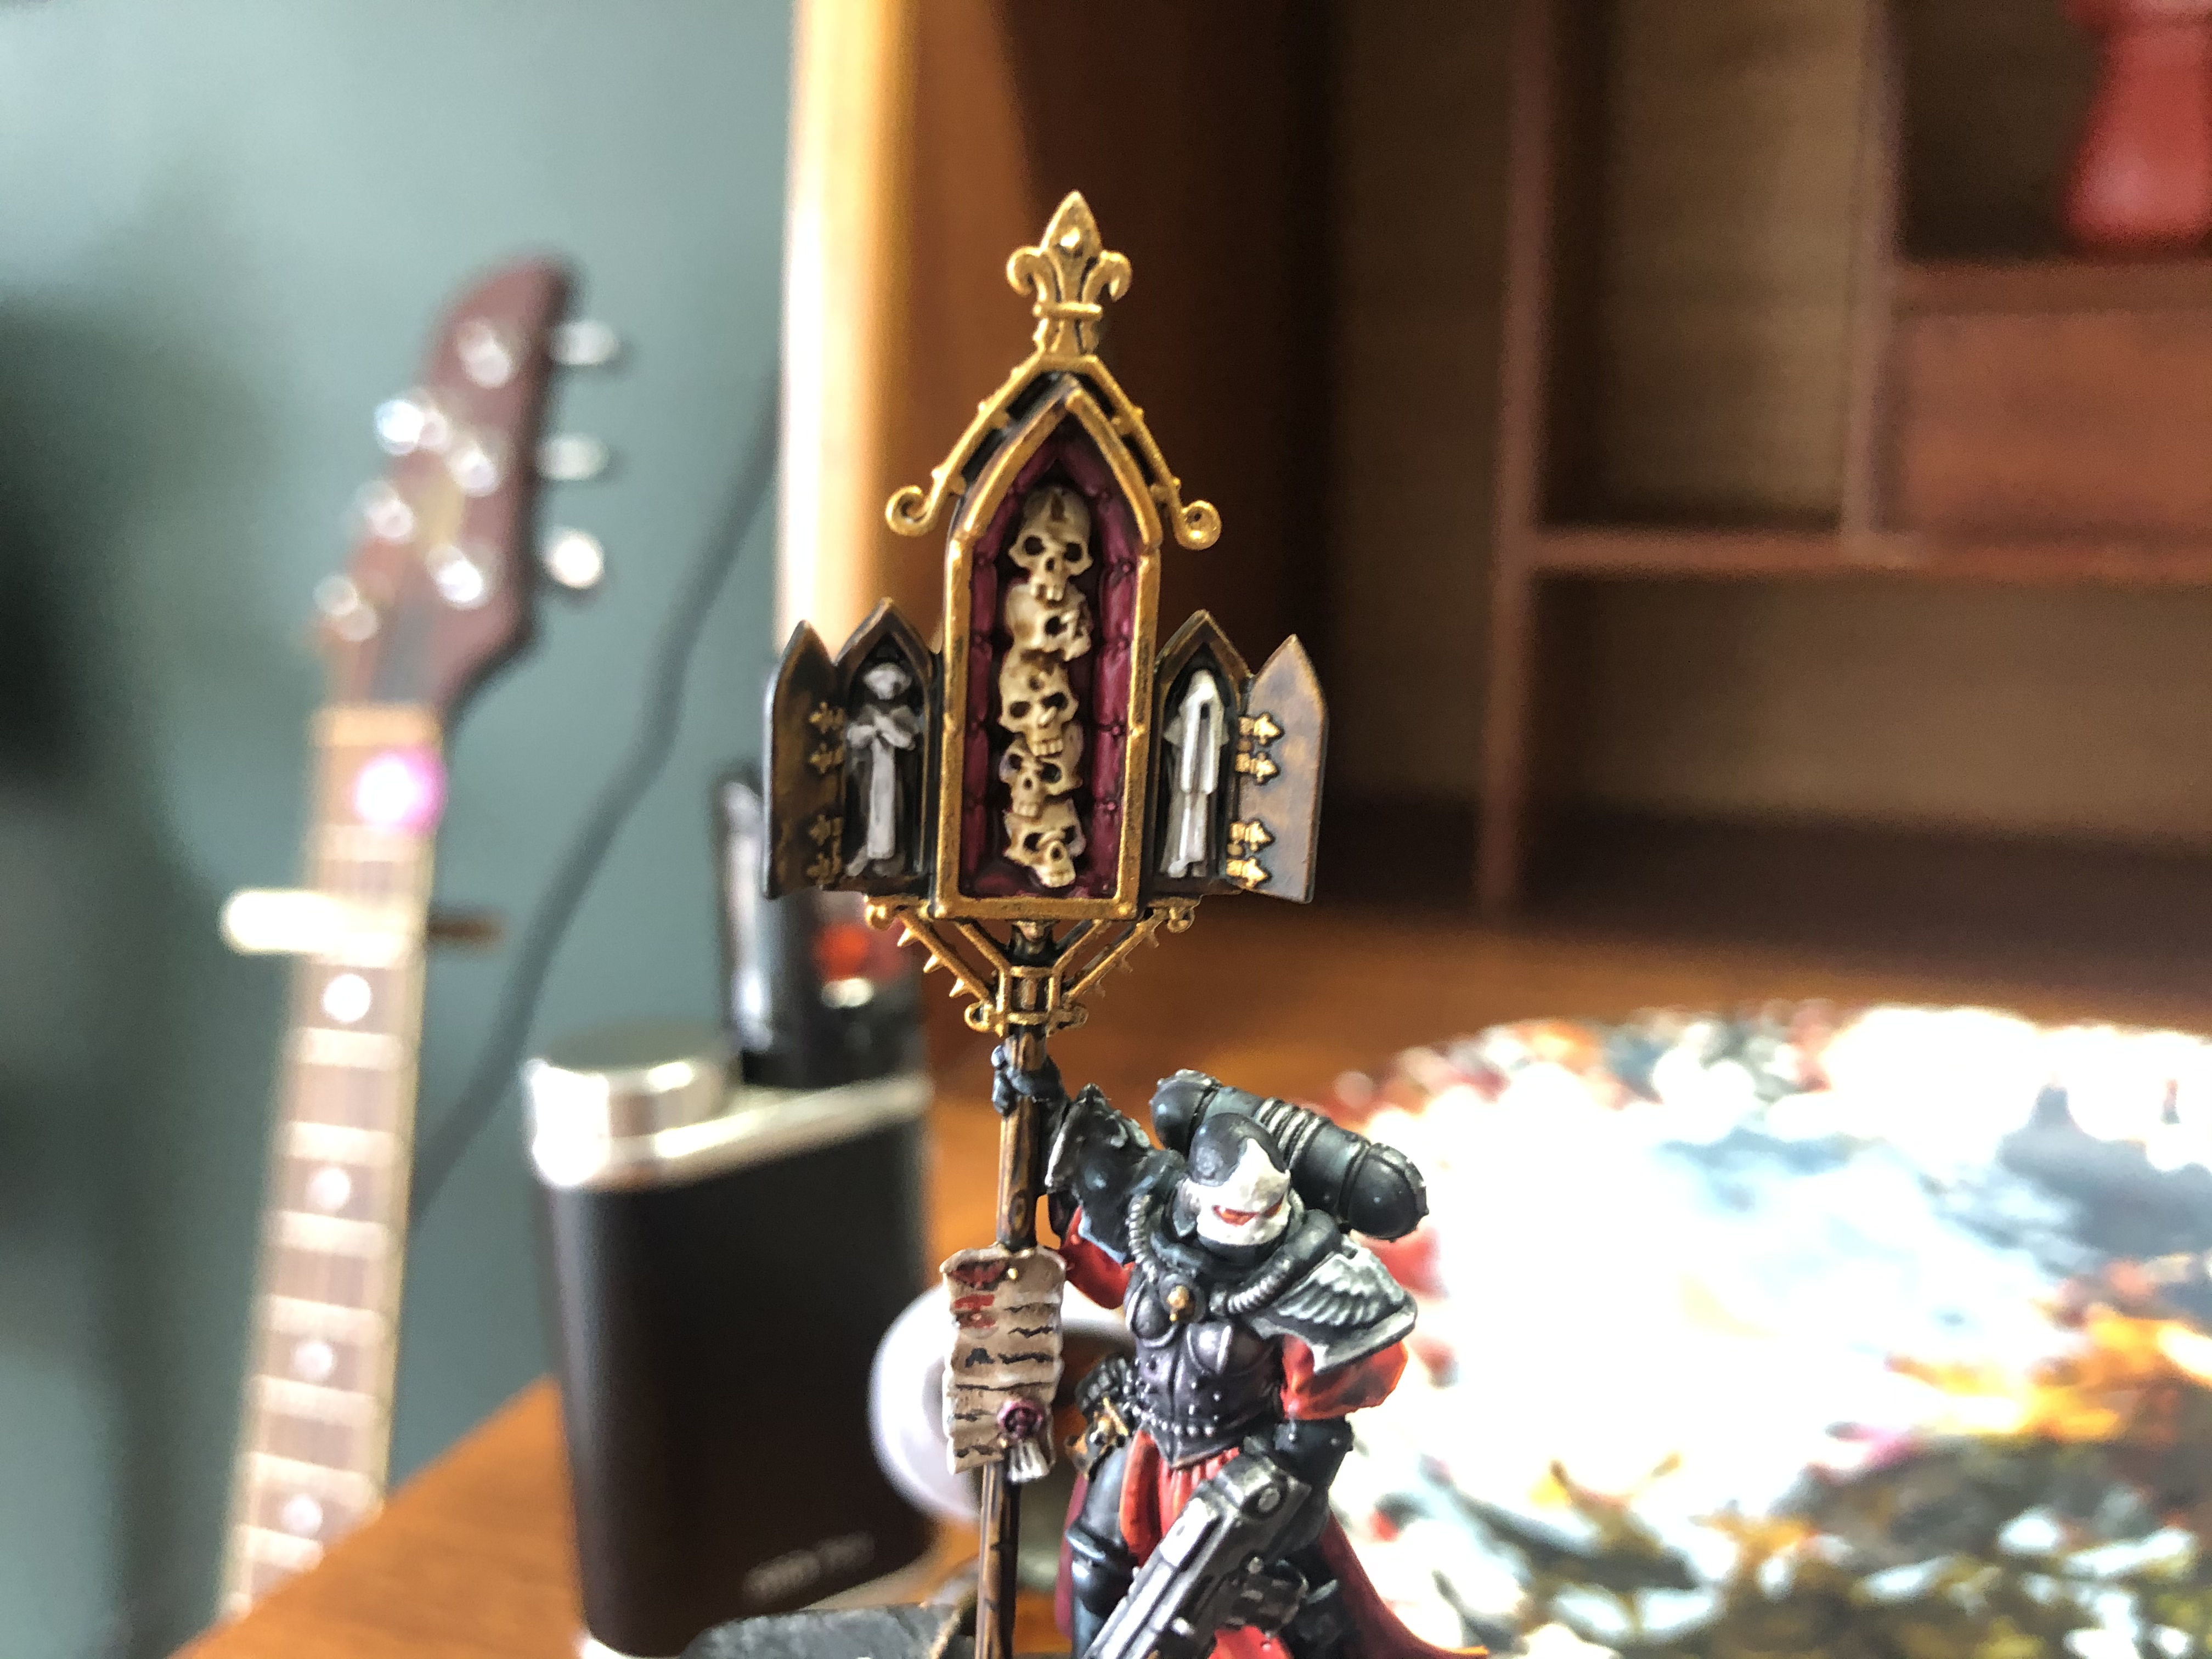
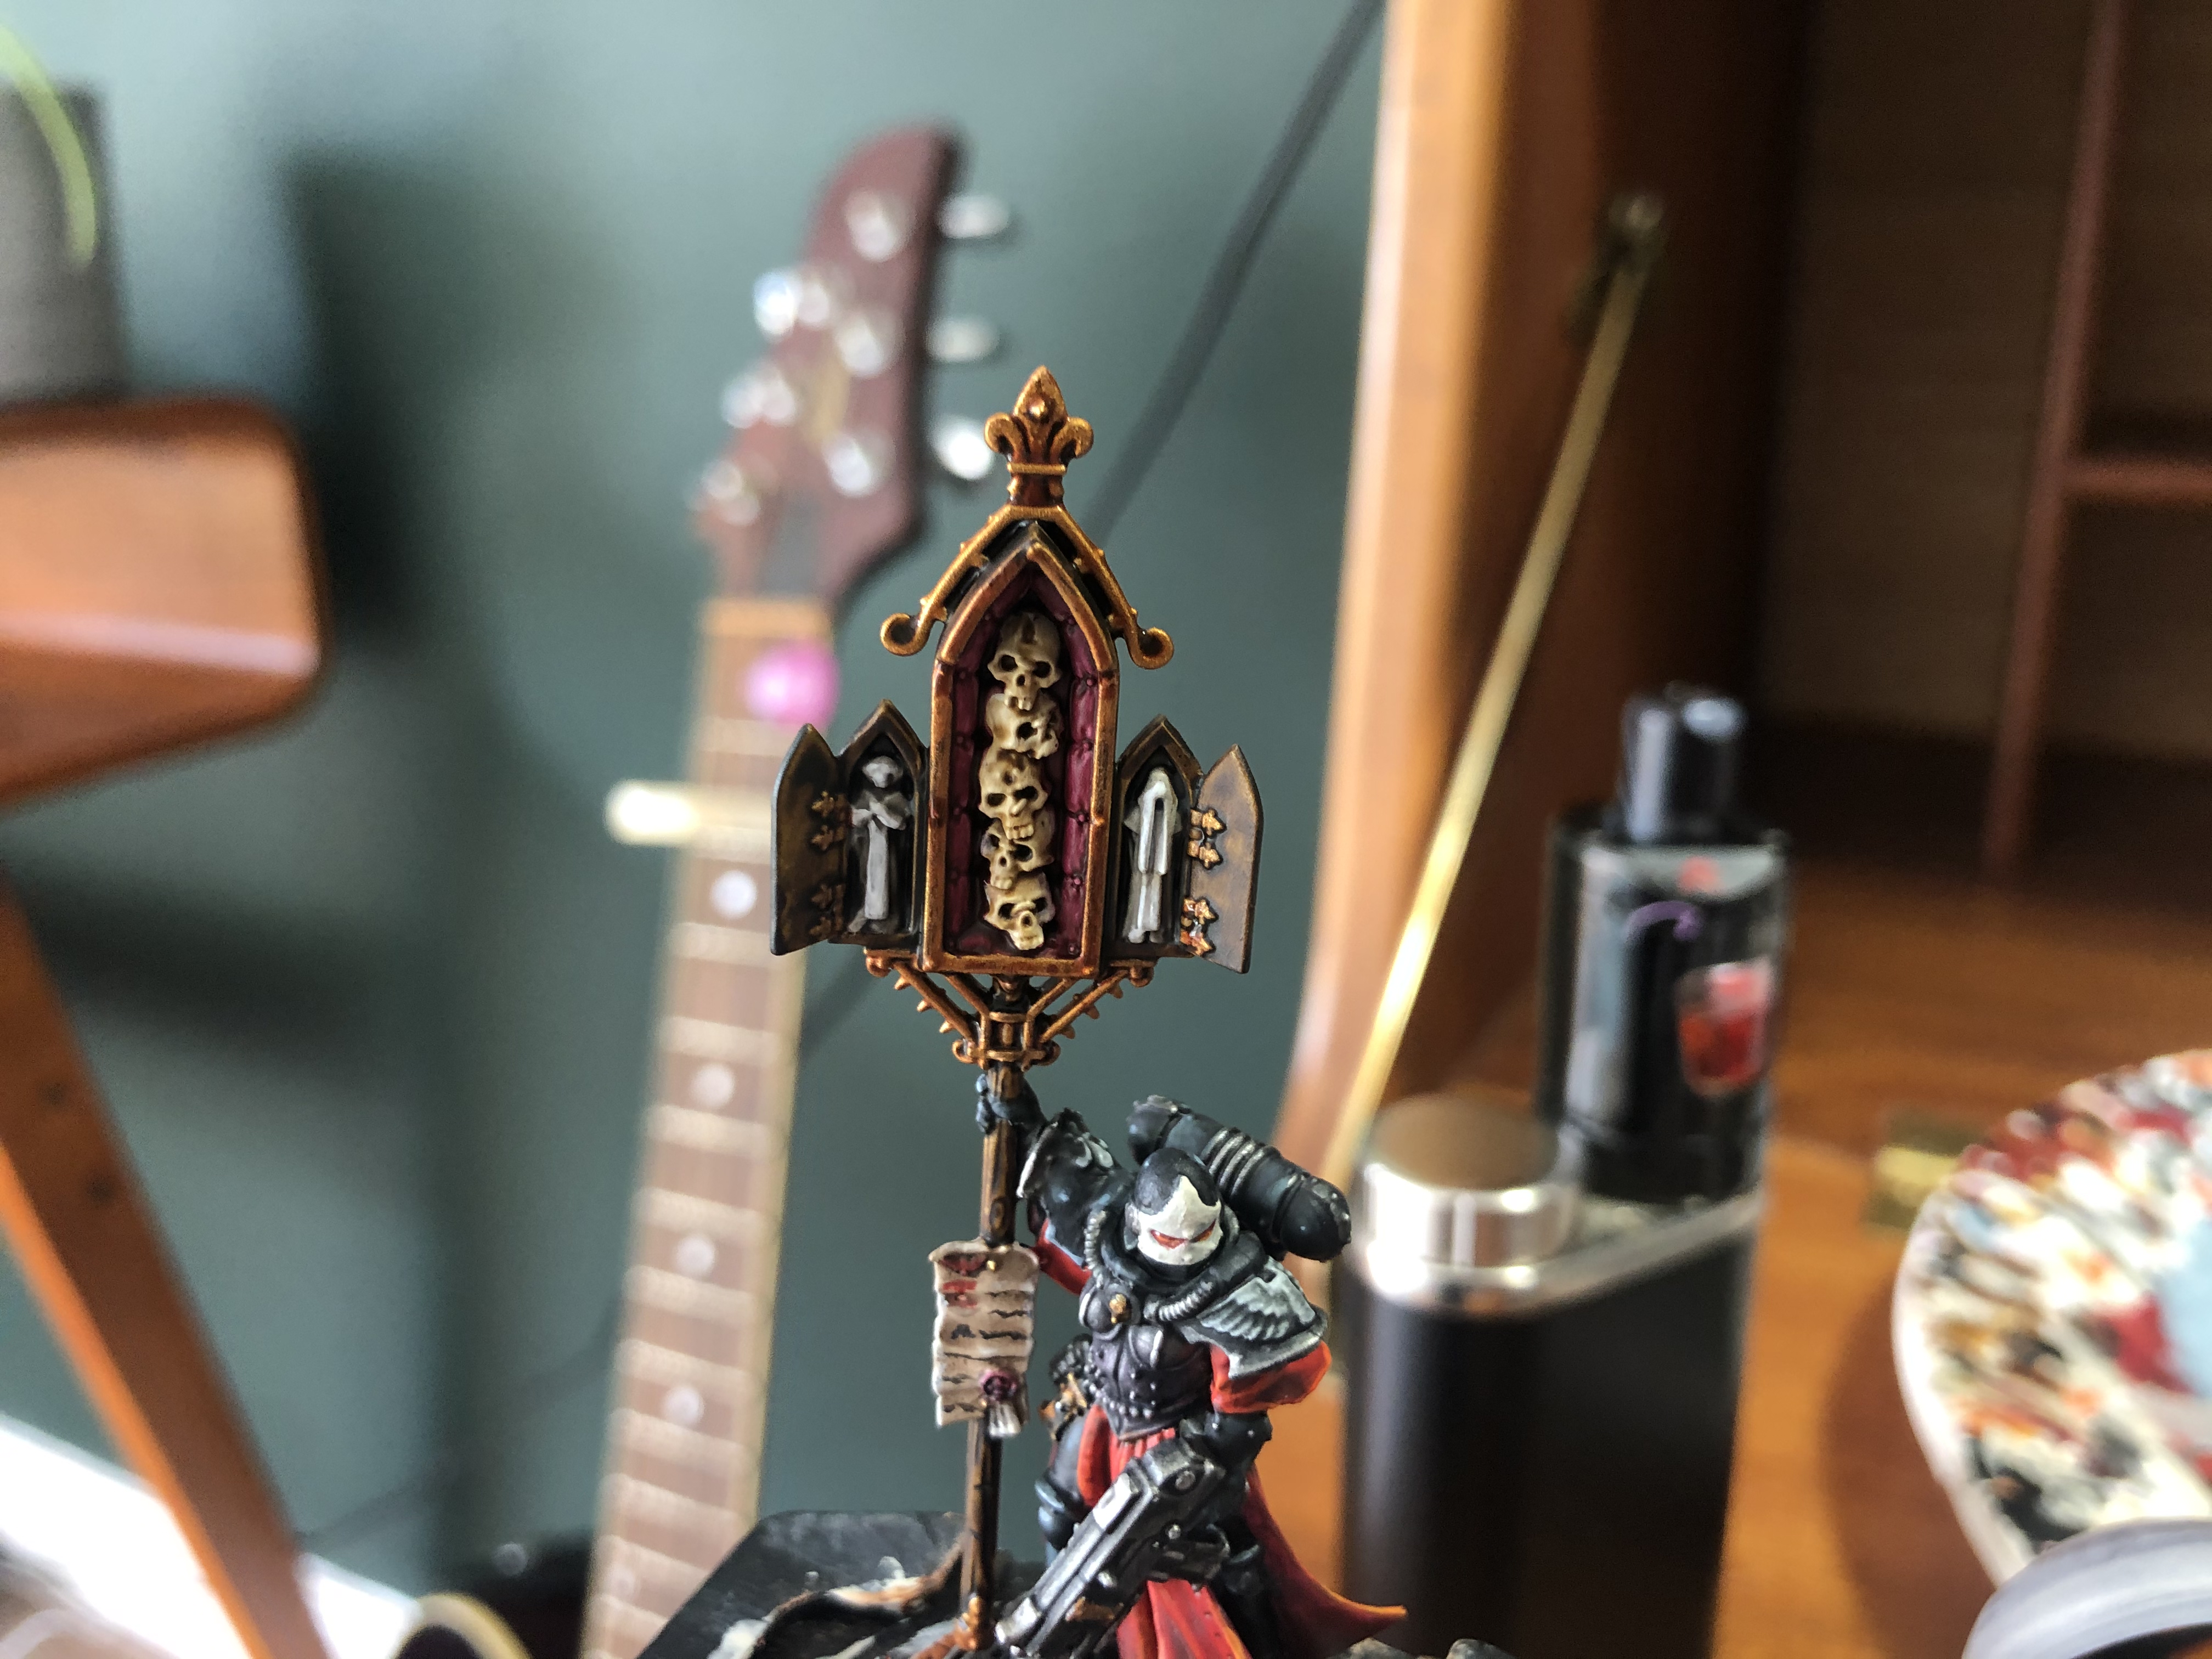
I began by painting the entire banner with Waithbone. Then hit the purity seal wax with Contrast Volupus Pink & the skulls with Contrast Skeleton Horde.
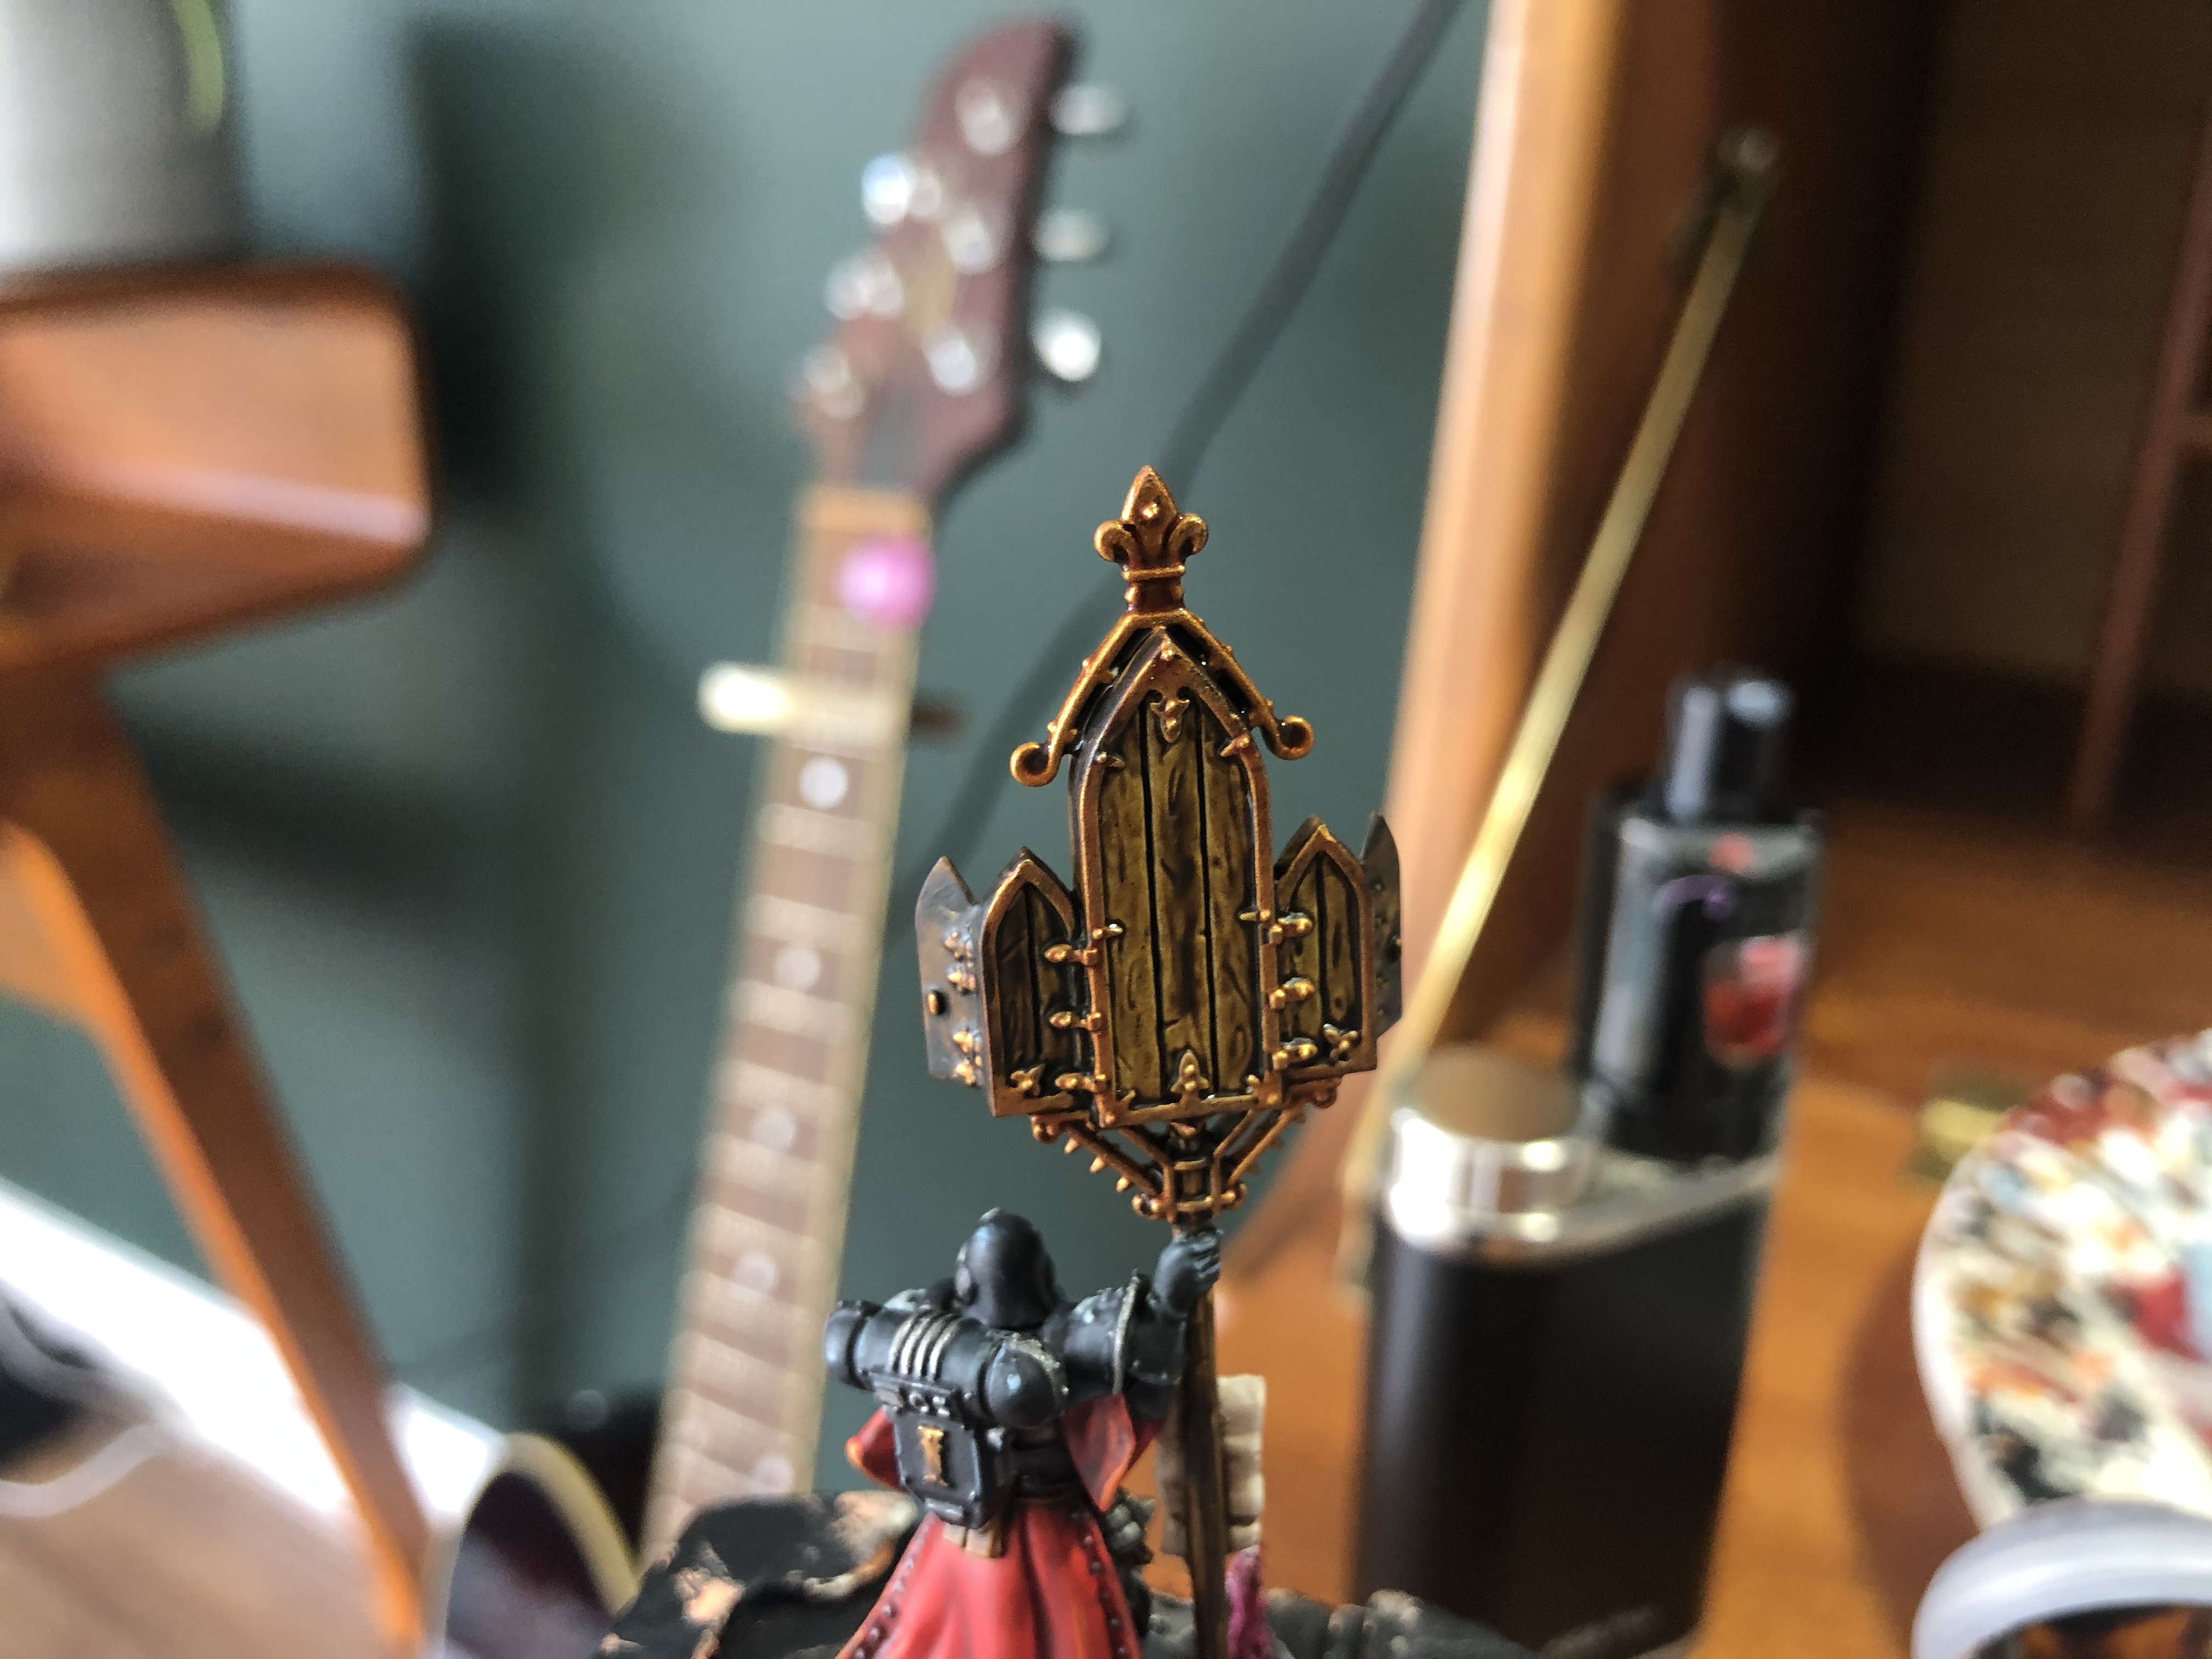
After that it was time to paint all that wood. As I wanted the shade of brown to be slightly different to the leather on the model I mixed a 50 : 50 mix of Contrast Snakebite Leather & Contrast Basillicanum Grey to create a darker tone of brown & applied a single coat.
While the wood was drying I hit the parchment with Agrax Earthshade & gave the little statues a layer of Contrast Apothecary White. After that I hit the purity seal with an extra highlight of Wraithbone to separate it from the rest of the scroll. Then it was time for text which for once in my life I left the Micron Pen in the drawer & used a brush instead. Firstly I used Contrast Blood Angels red to write a letter I for Inquisition followed by Abaddon Black for the rest of the text. Awwwwh yeah free-handing like a boss… well kind of. I finished off the scroll work with an edge highlight of Wraithbone.
I then used Contrast Volupus Pink for the cushioning behind the skulls. Then it was onto those badass metallics. For this I used retributor armour on all the fillagree & details like hinges etc. While this was drying I went back to the statues & gave them a wash of Nuln Oil before finishing them off with a highlight of White Scar. As a shade for the gold I used Contrast Guilliman Flesh. Honestly this contrast paint over gold is an absolute dream! Yes!
I then highlighted the skulls with Wraithbone & White Scar before using leadbelcher shaded with Nuln oil on the hooks that attach the skulls to the banner. Finally Leadbelcher was used to apply a final highlight to all that gold awesomeness.
BOOM
*****
That’s it! with the Simulacrum painted that’s my final four standard Sisters in the bloody bag. My next post will be more badass pics showing off my army progress far & the entire squad in all it’s glory. Of course it will also include a little teaser of what’s hitting the paint table next.
See you on the next one
Much Love
Eternity Gate


