


![Perfect Call Of Duty-Style Miniatures? Wargames Atlantic’s Operators Review [7 Days Early Access]](https://images.beastsofwar.com/2026/02/unboxing-wargames-atlantic-operators-coverimage-225-127.jpg)


Resolution 2020: Clearing the pile of shame


Recommendations: 1190
About the Project
One of my 2020 resolutions is to clear my pile of shame. Unless the models are for an existing project, I will document my work on them here.
Related Genre: General
This Project is Completed
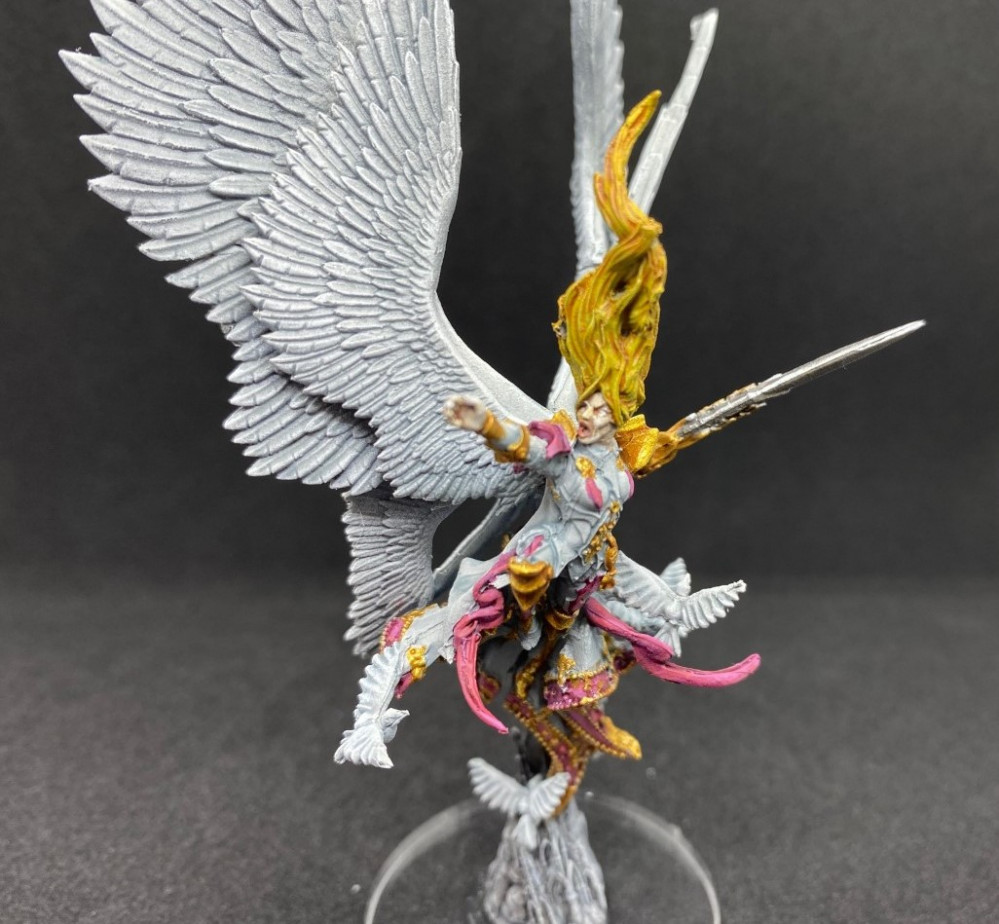
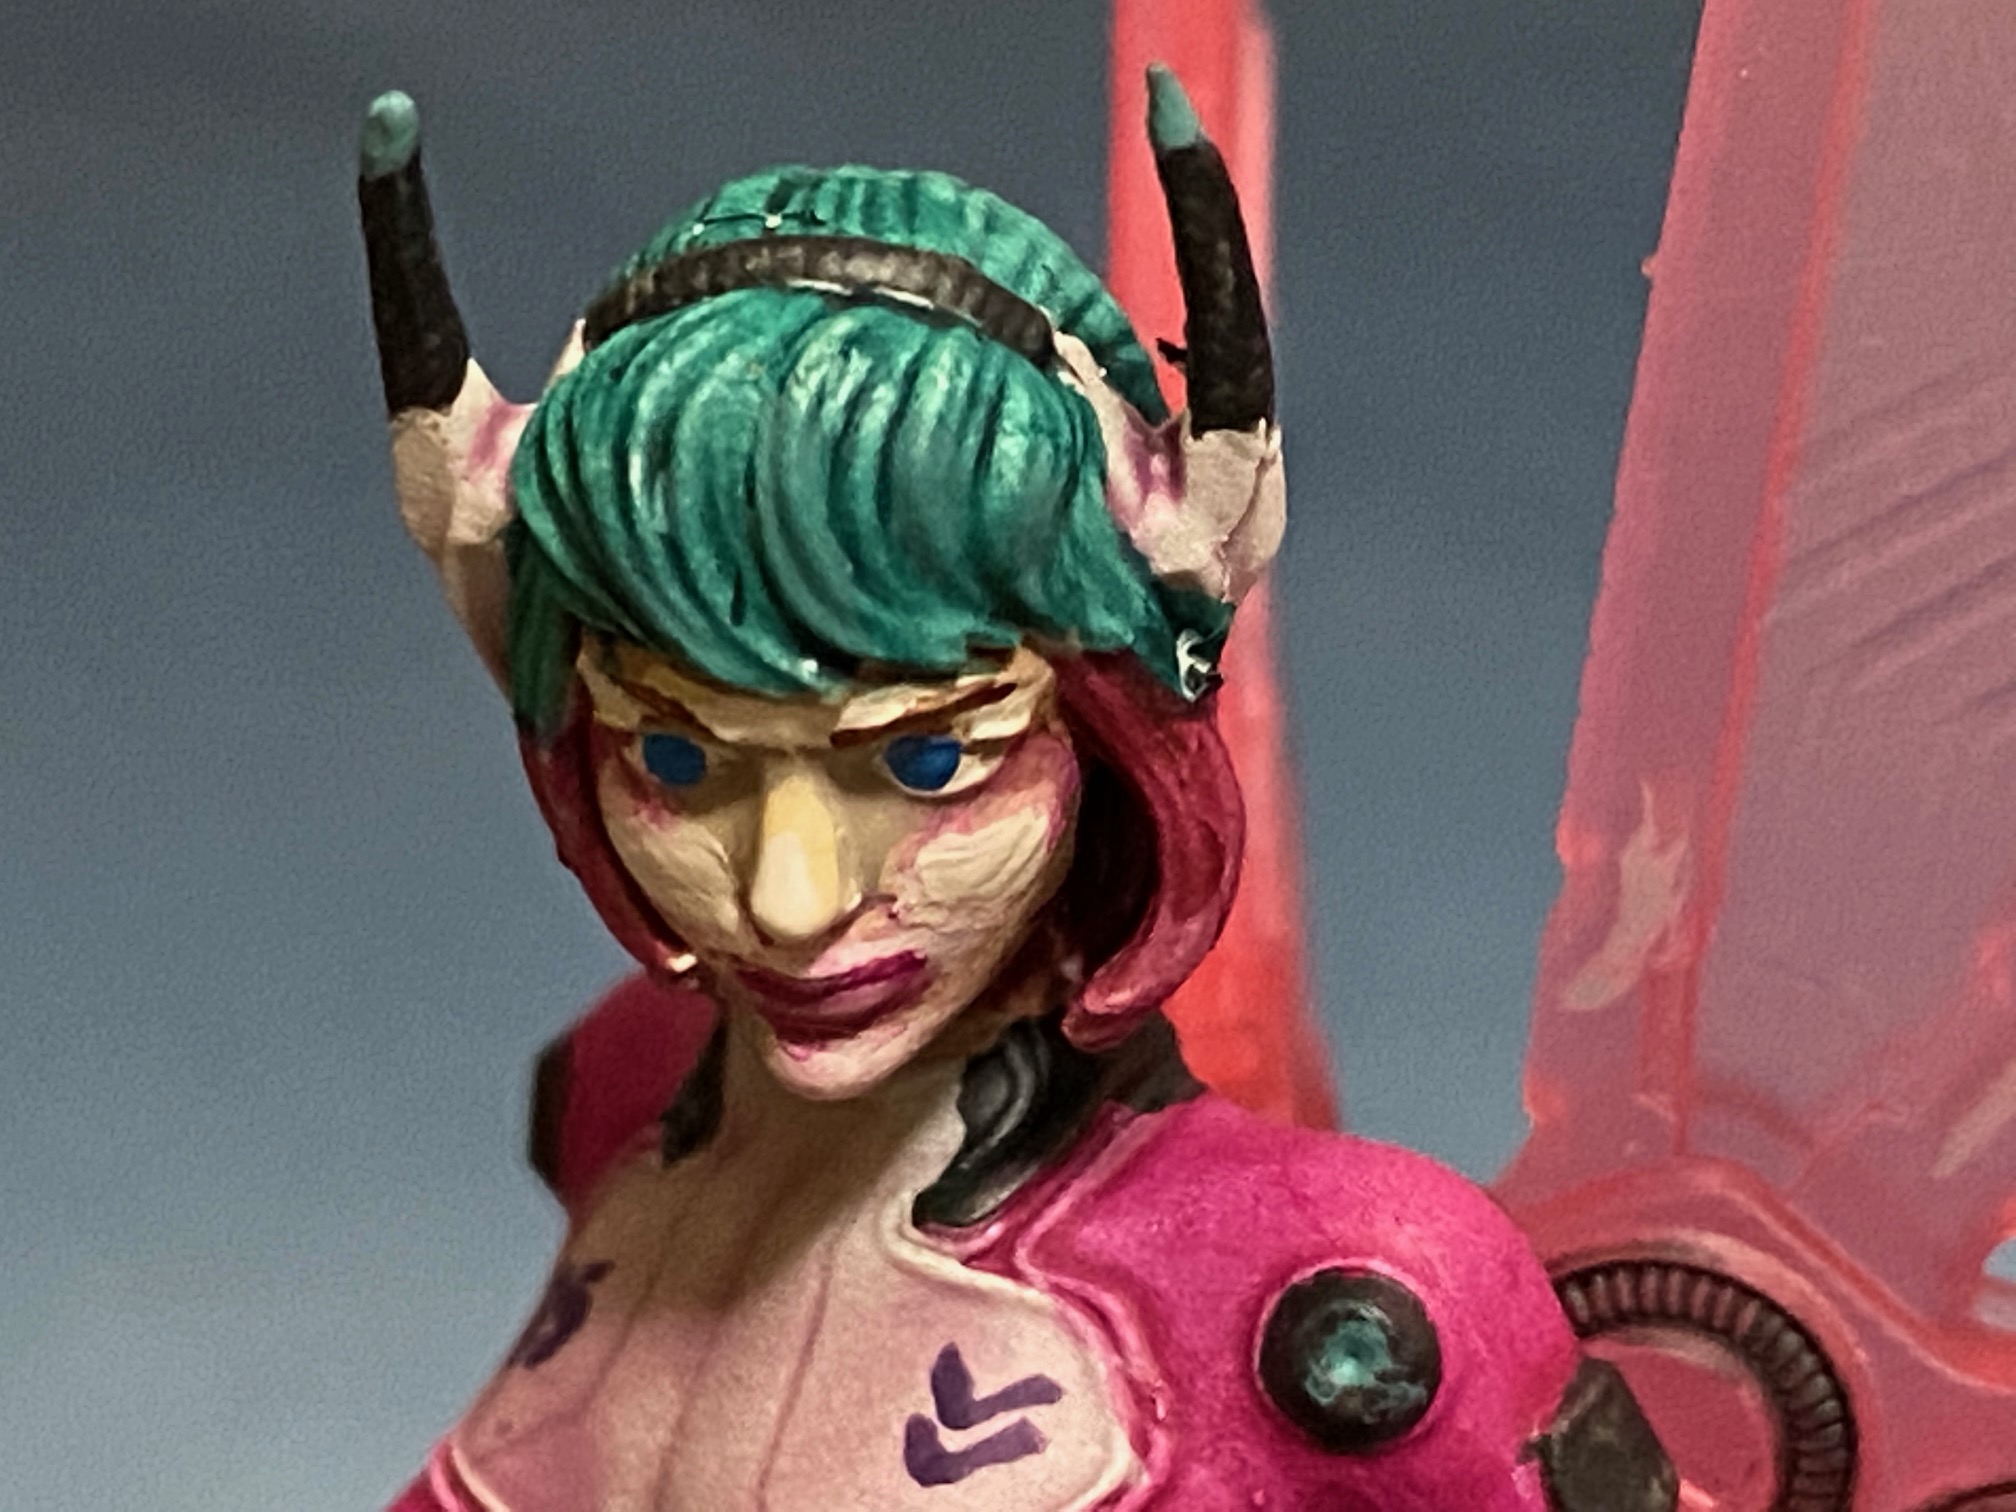
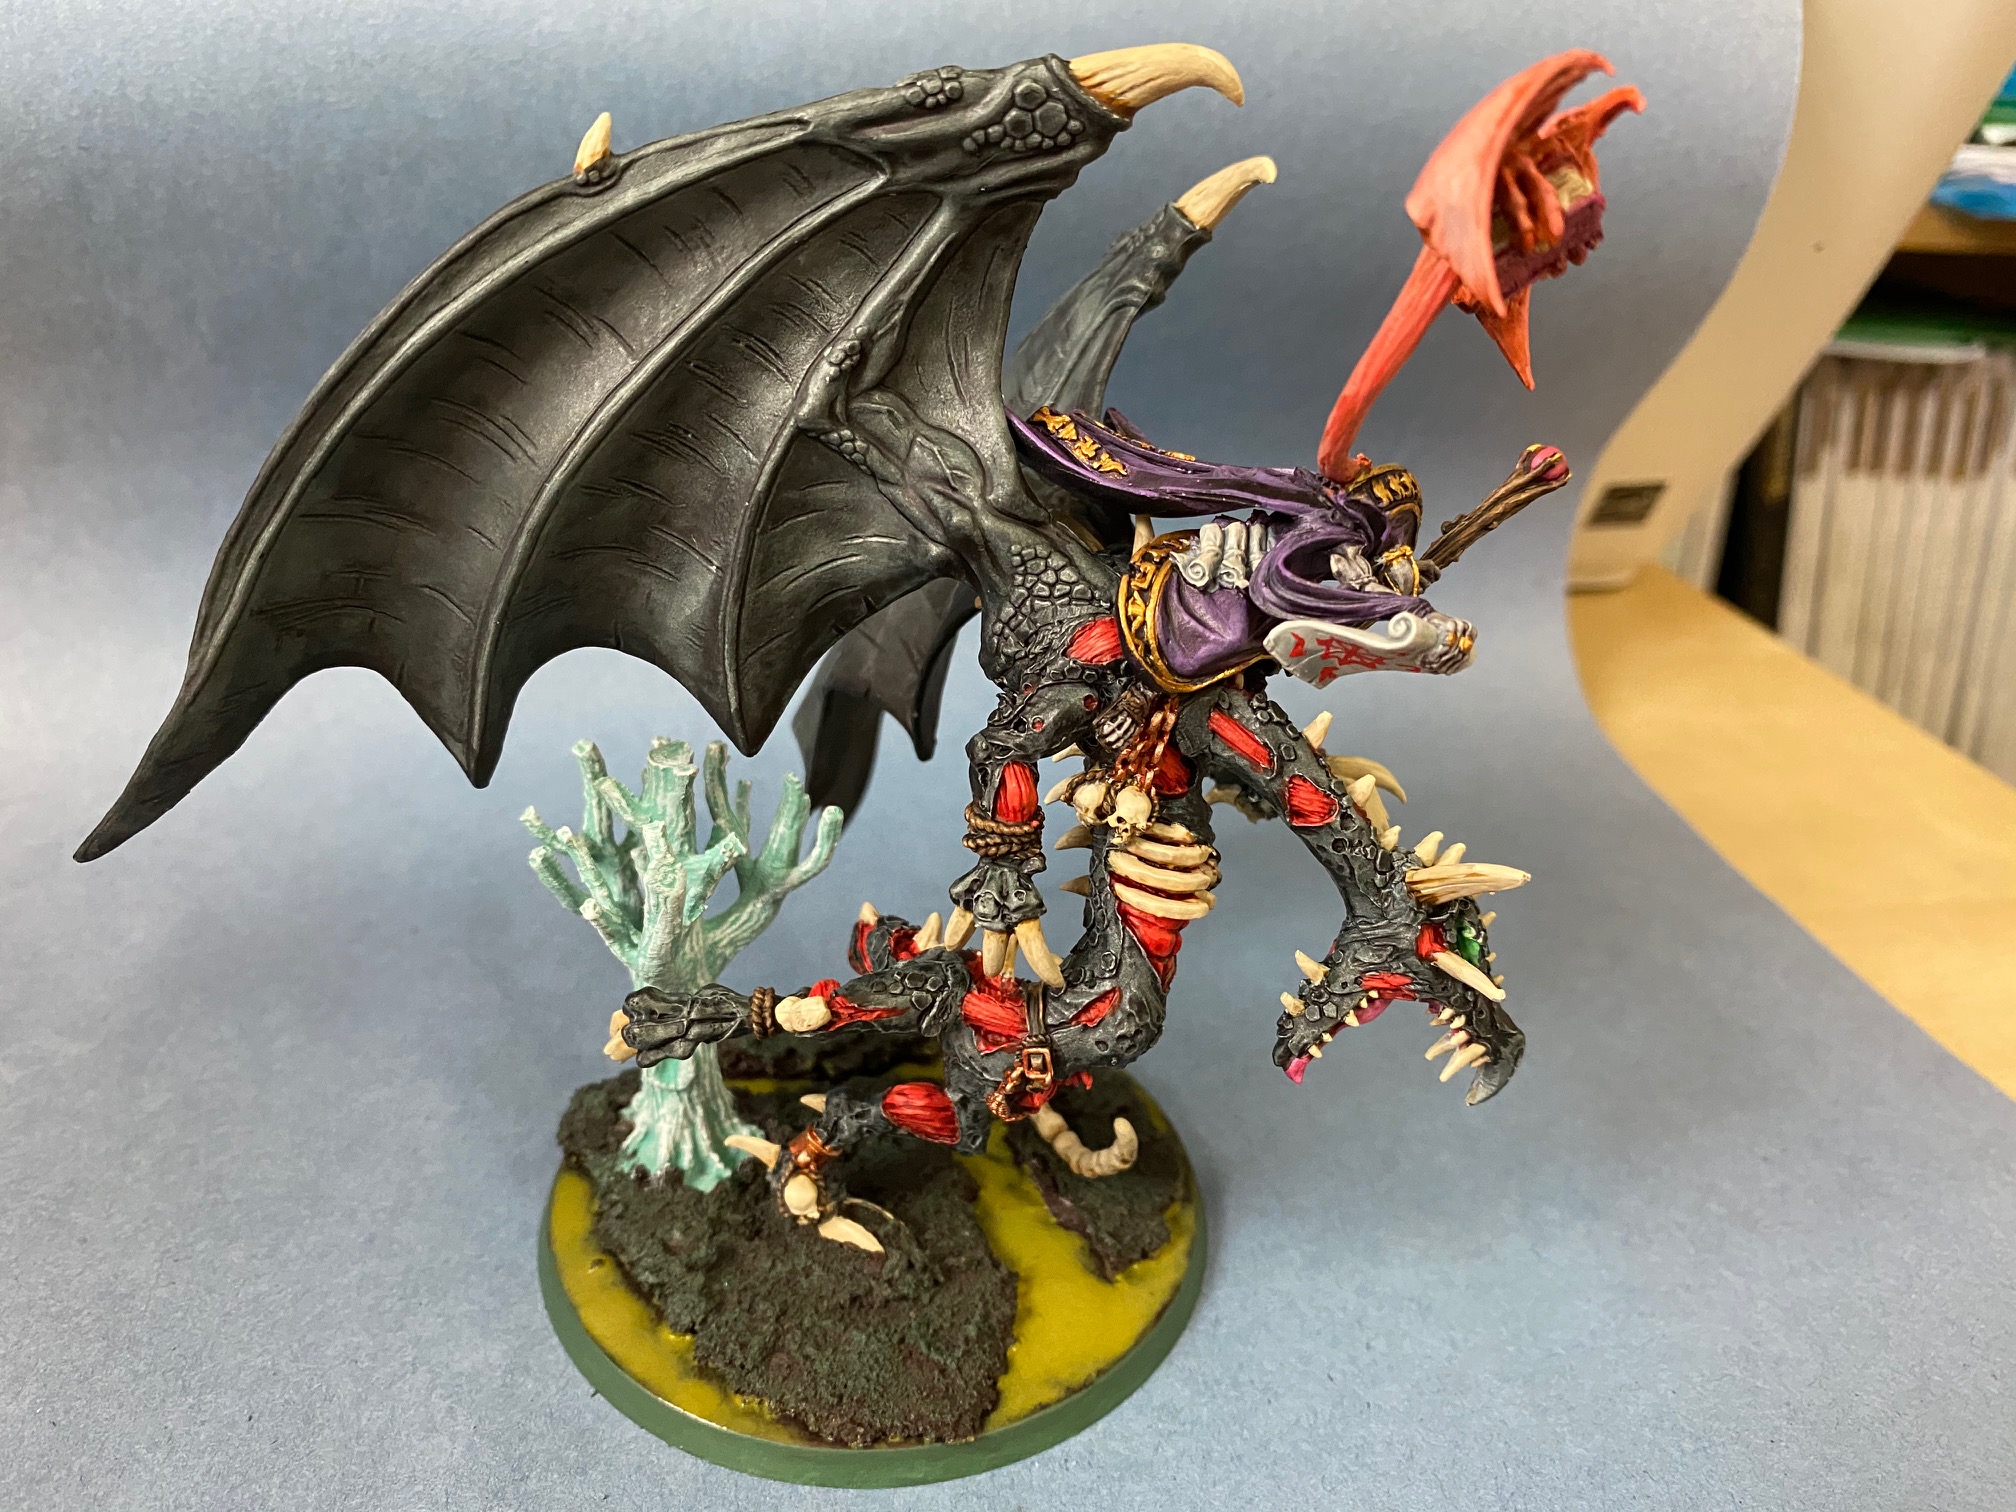
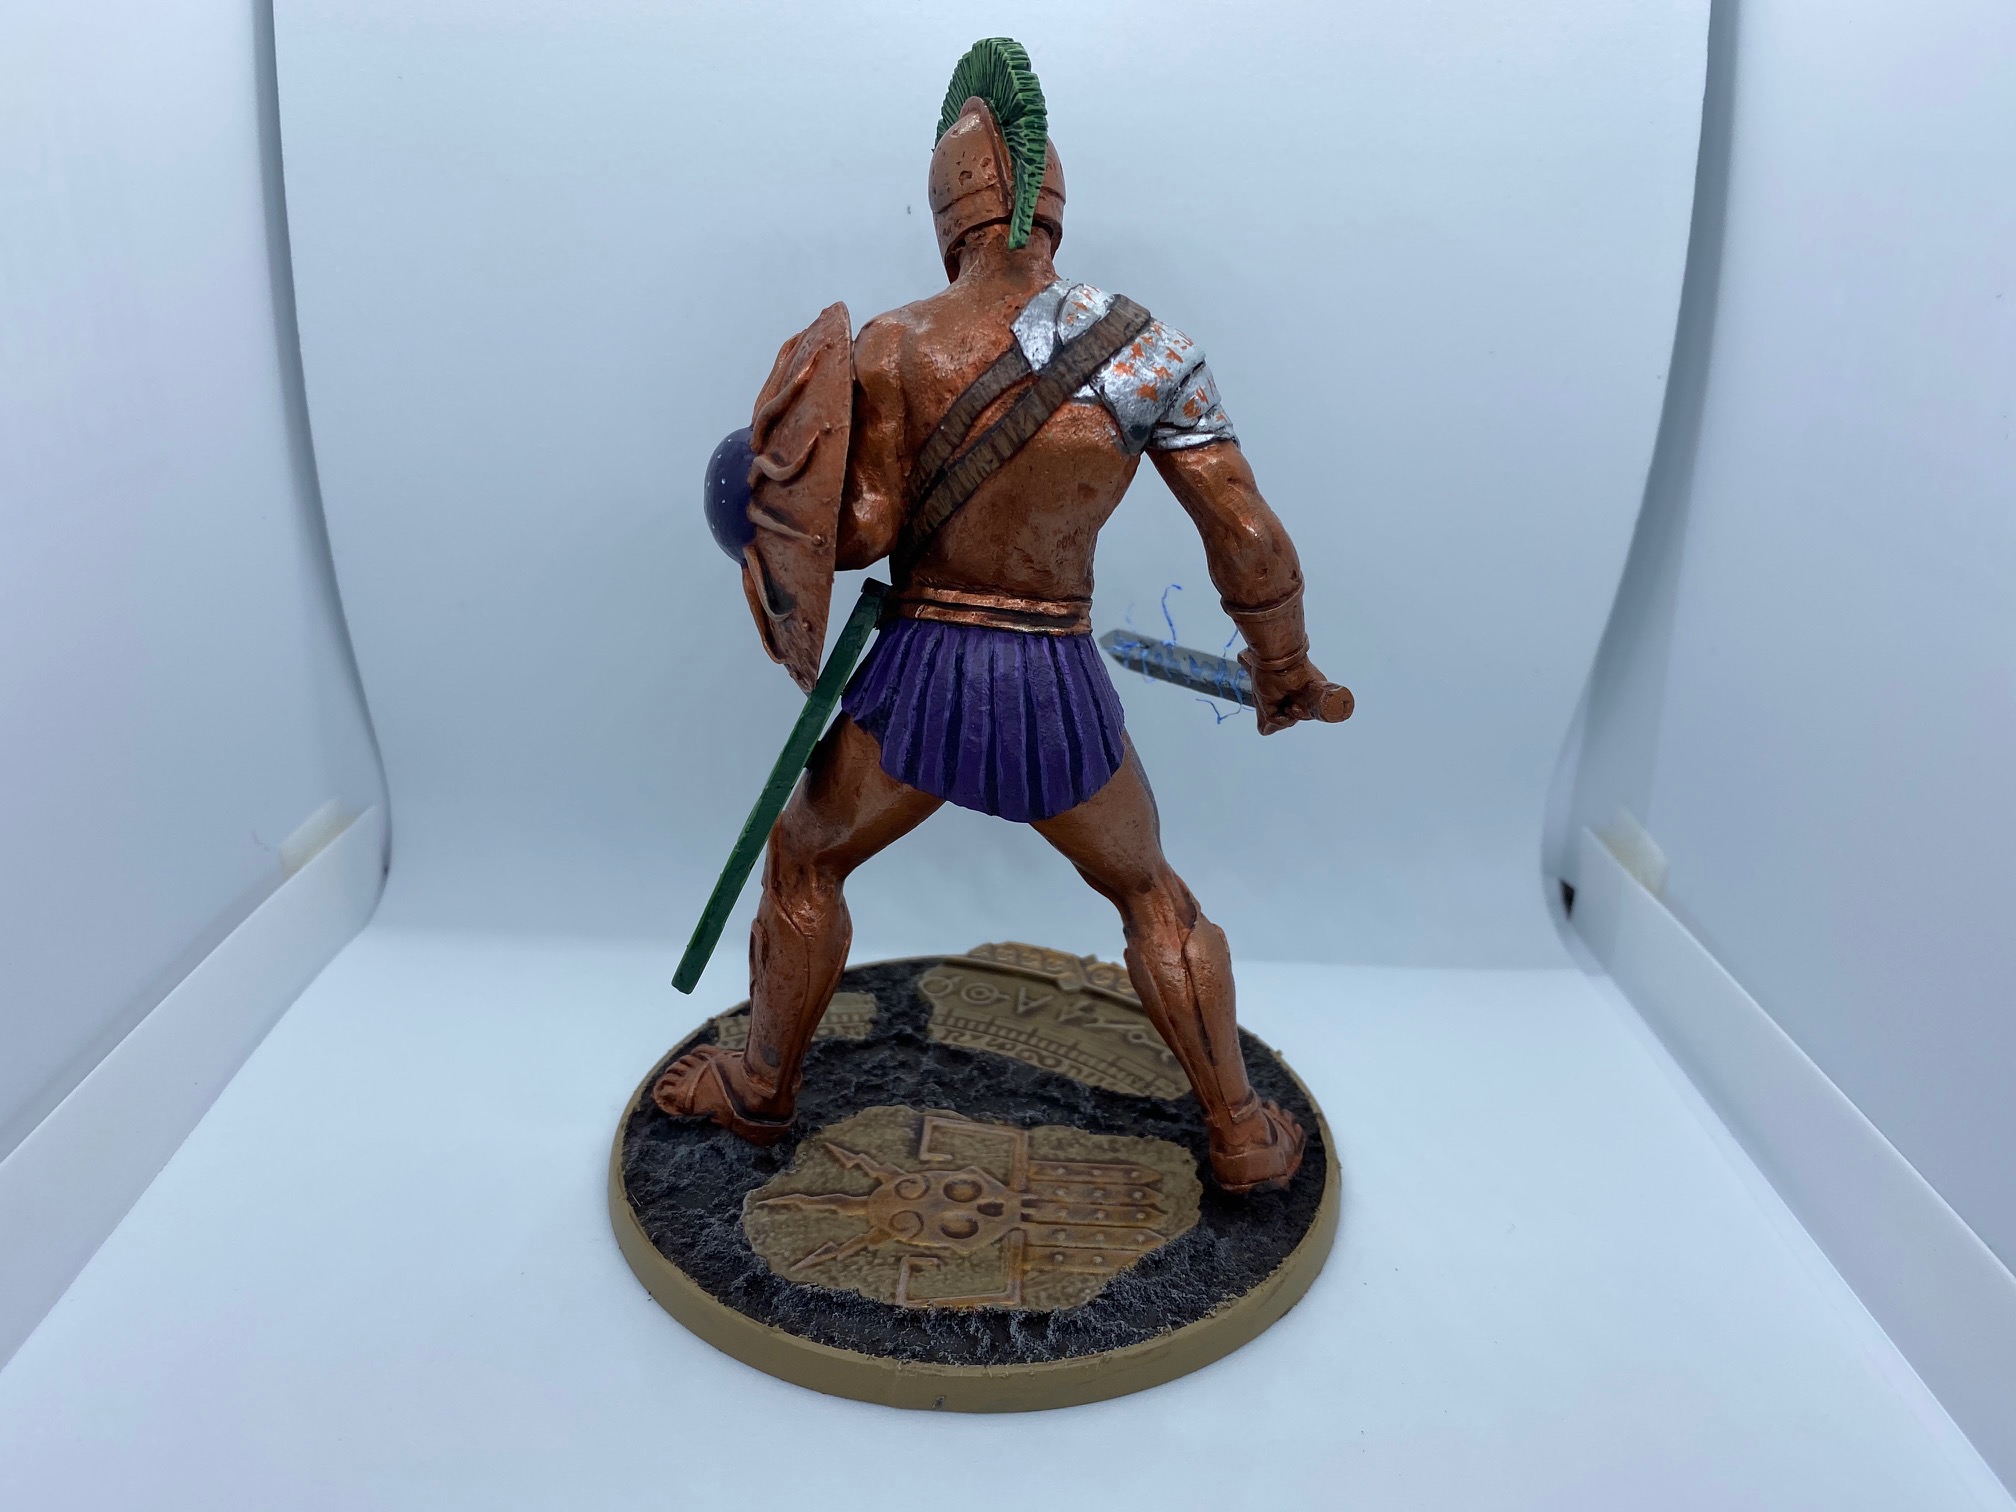
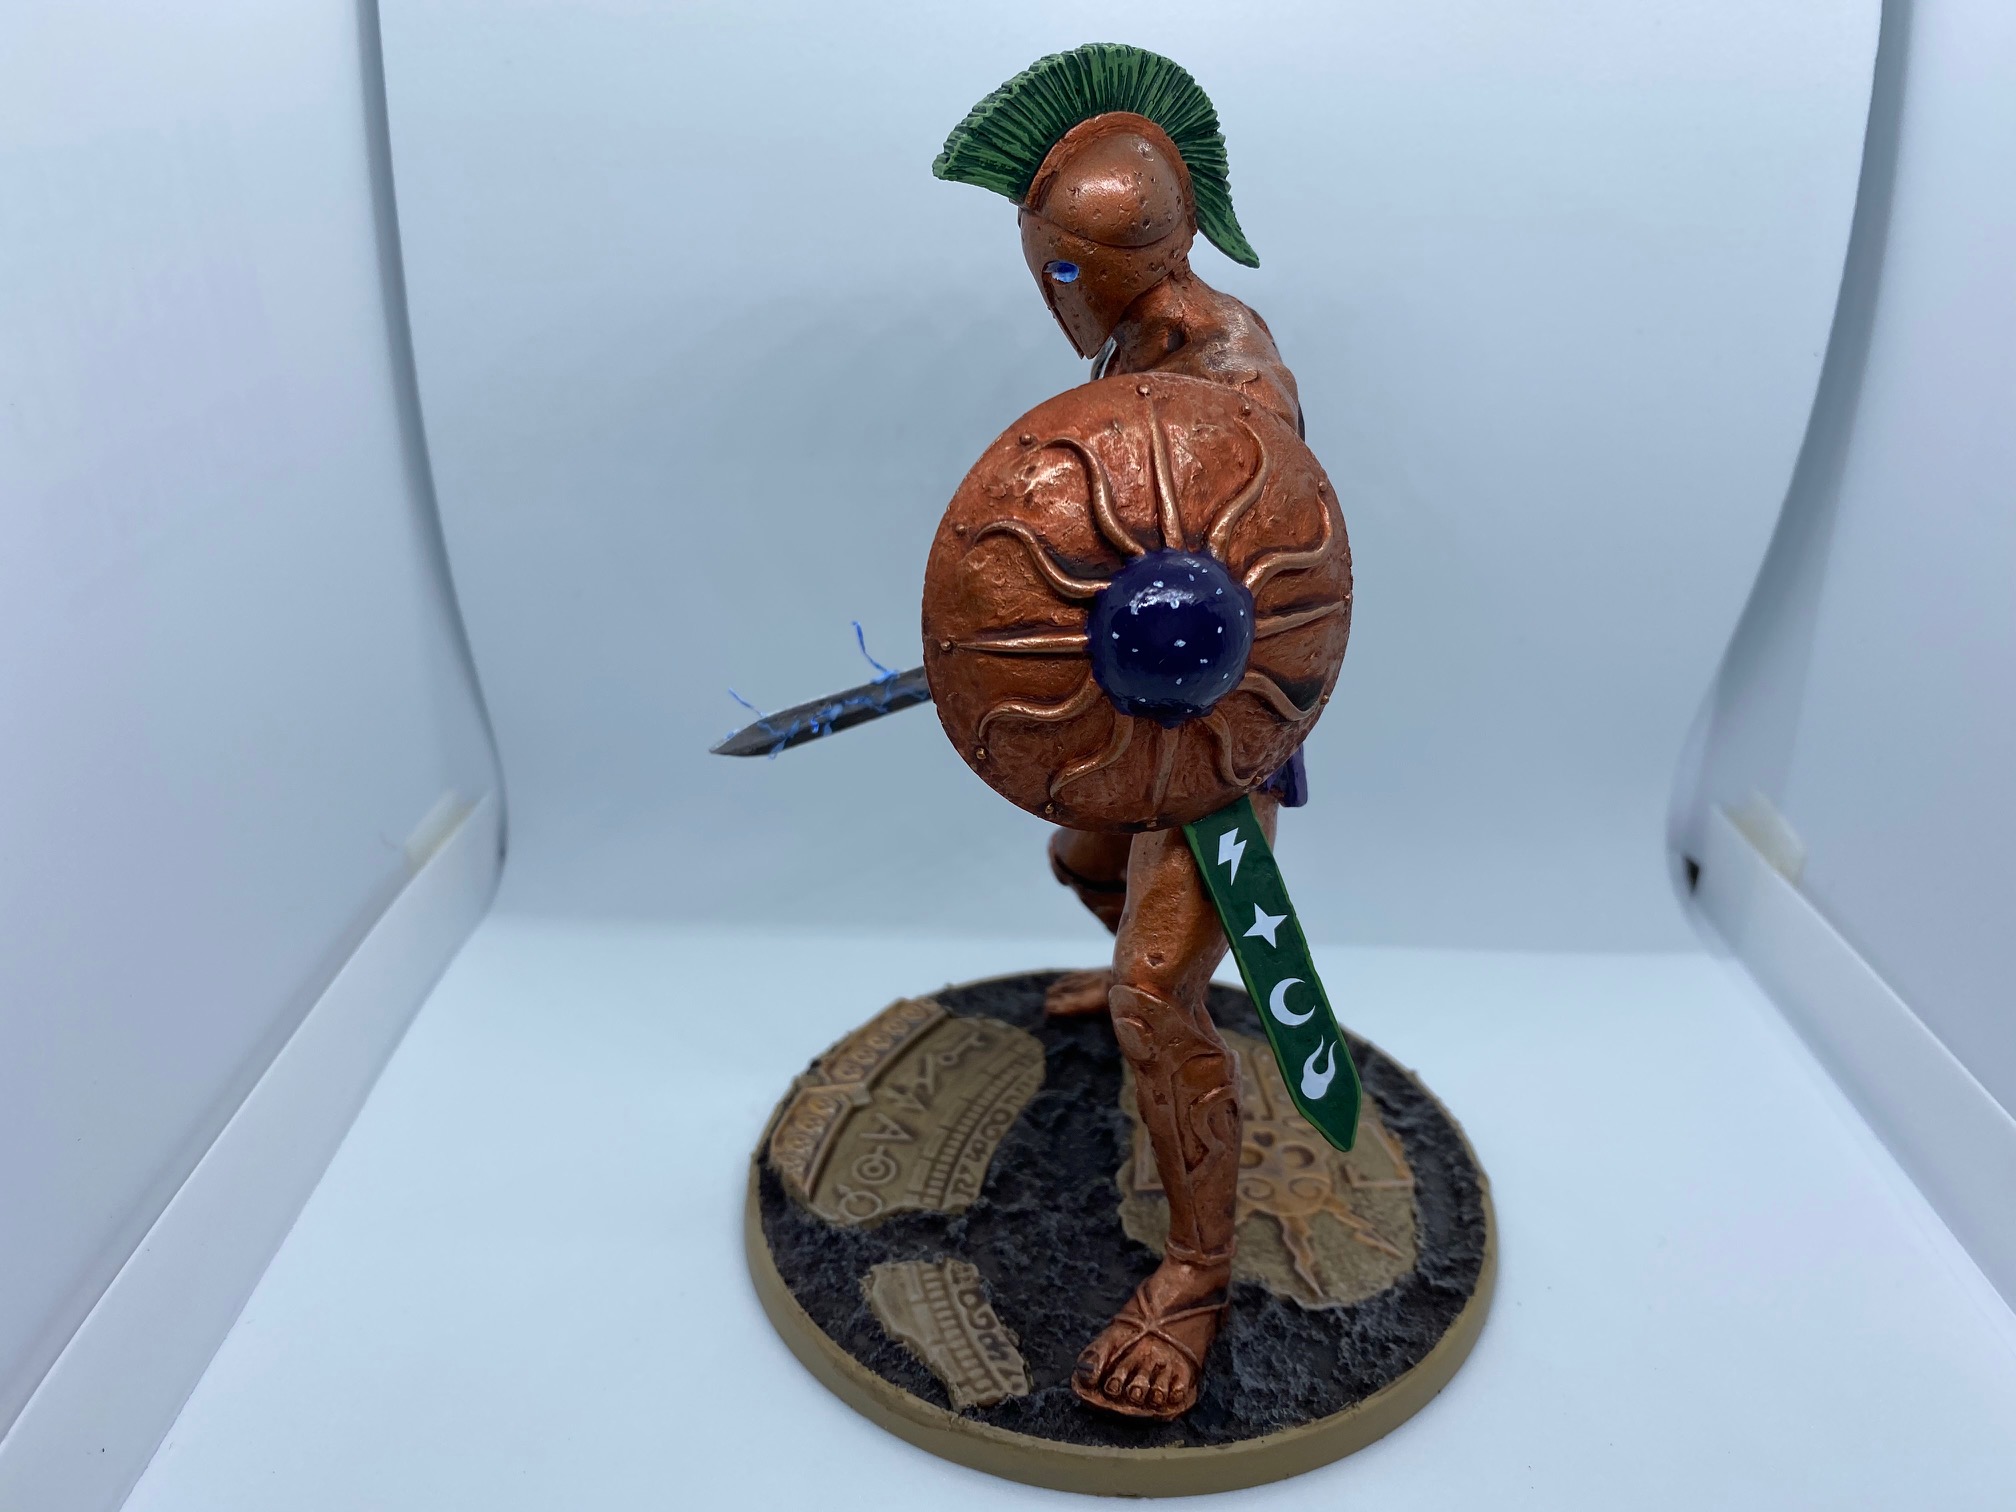
Red Belle - Ouroboros Miniatures

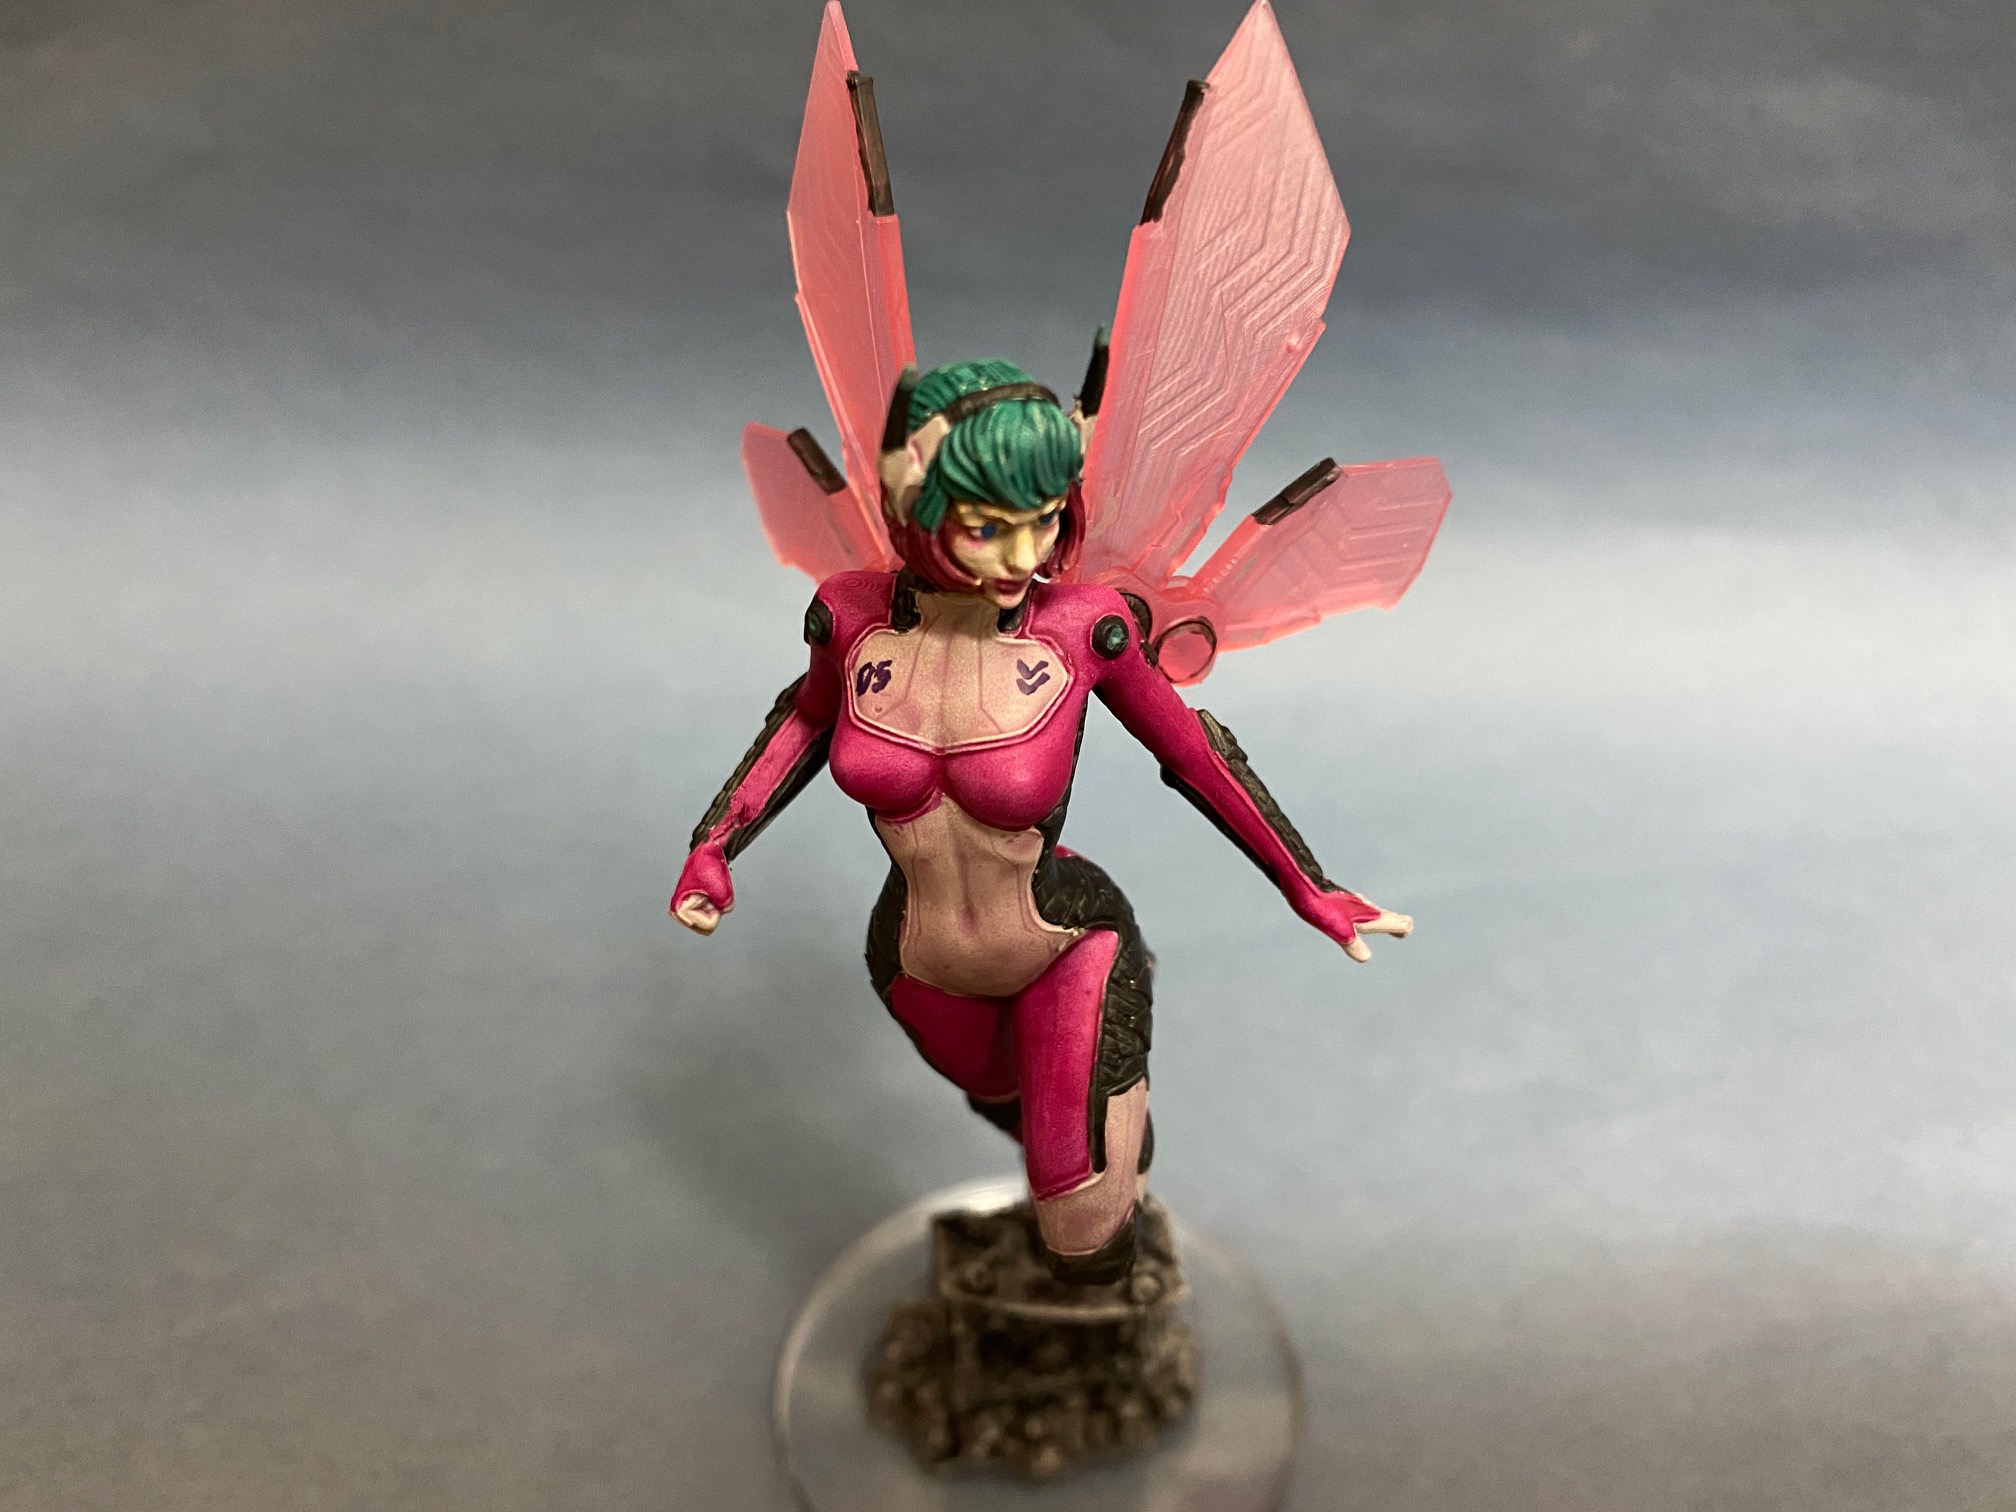


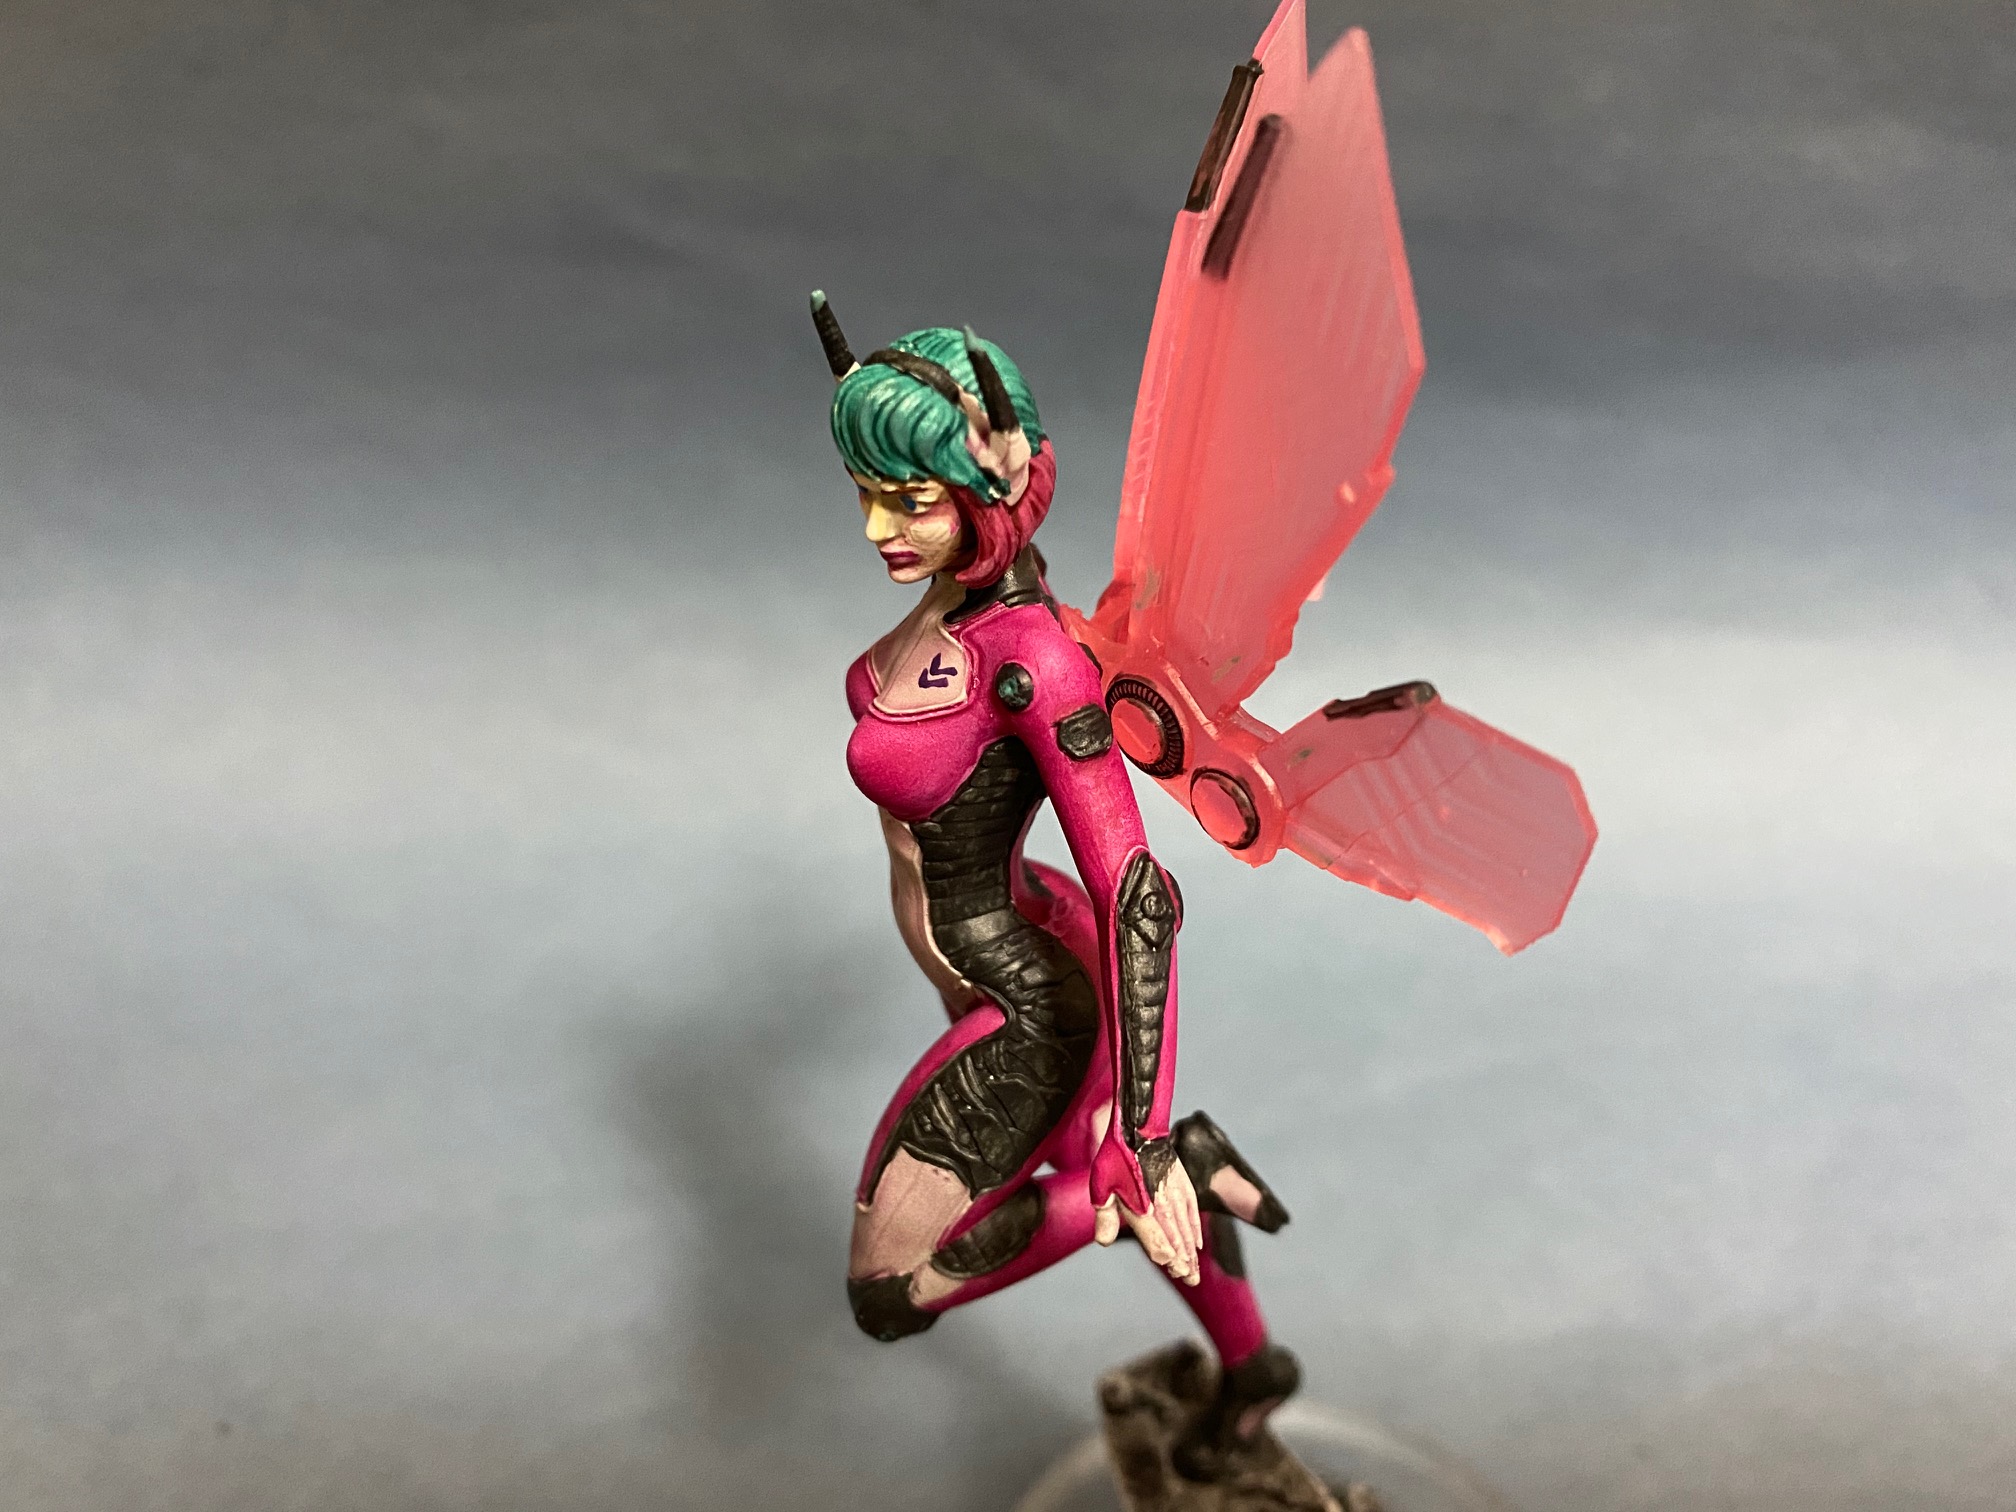
This is Red Belle, a miniature I got from a Kickstarter back in 2019. The model is now available directly from Ouroboros Miniatures. I felt like trying out a 75mm miniature for a change and just painting a model for display.
The wings came in a clear red resin, so I left them off the model until the very end. The rest of the model was assembled and then undercoated with three different colours to achieve a zenith highlight. First I painted the concrete base with Storm Vermin Fur. Then I sprayed the rest of the model with Grey Seer. Finally I sprayed Wraith Bone from directly above the model.
The pale areas of the body suite were painted with a 6:1:4 mixture of apothecary white:volupus pink:contrast medium. This gave me a nice off-white effect with just a hint of shading in the recesses.
The pink areas of the body suite were painted with a 1:1 mixture of warlock purple and lahmian medium. This was applied in two thin coats which gave me a very even coverage.
The remaining dark areas of the body suite were simply painted in corvus black.
The face was painted rakarth flesh, washed in the recesses with reikland fleshshade, then highlighted with flayed one flesh followed by pallid wych flesh. Her eyes were painted with pallid wych flesh and then the irises were painted in with teclis blue and the eye brows painted on with mournefang brown.
Left over paint on my wet pallet that I used for the pink areas of the body suite were applied sparingly as eye shadow and to her lips. I took most of the paint on eyes off again with a wet brush and they tidied up the edges with pallid wych flesh.
The top of the hair was painted with terradon turquoise and the bottom half with volupus pink.
A mixture of 2:1 grey seer and terradon turquoise was used for the glow effect on her joints, the wings and the tips of her antennas. It was als used sparingly as a highlight on her hair.
Xereus purple was used to paint the chevrons and numbers on her chest.
The concrete was painted with basilicanum grey and they drybrushed longbeard grey.
Finally the wings were glued in place and the model transferred on to a clear perspex base using gorilla glue two part epoxy resin.
Skaven Endless Spells
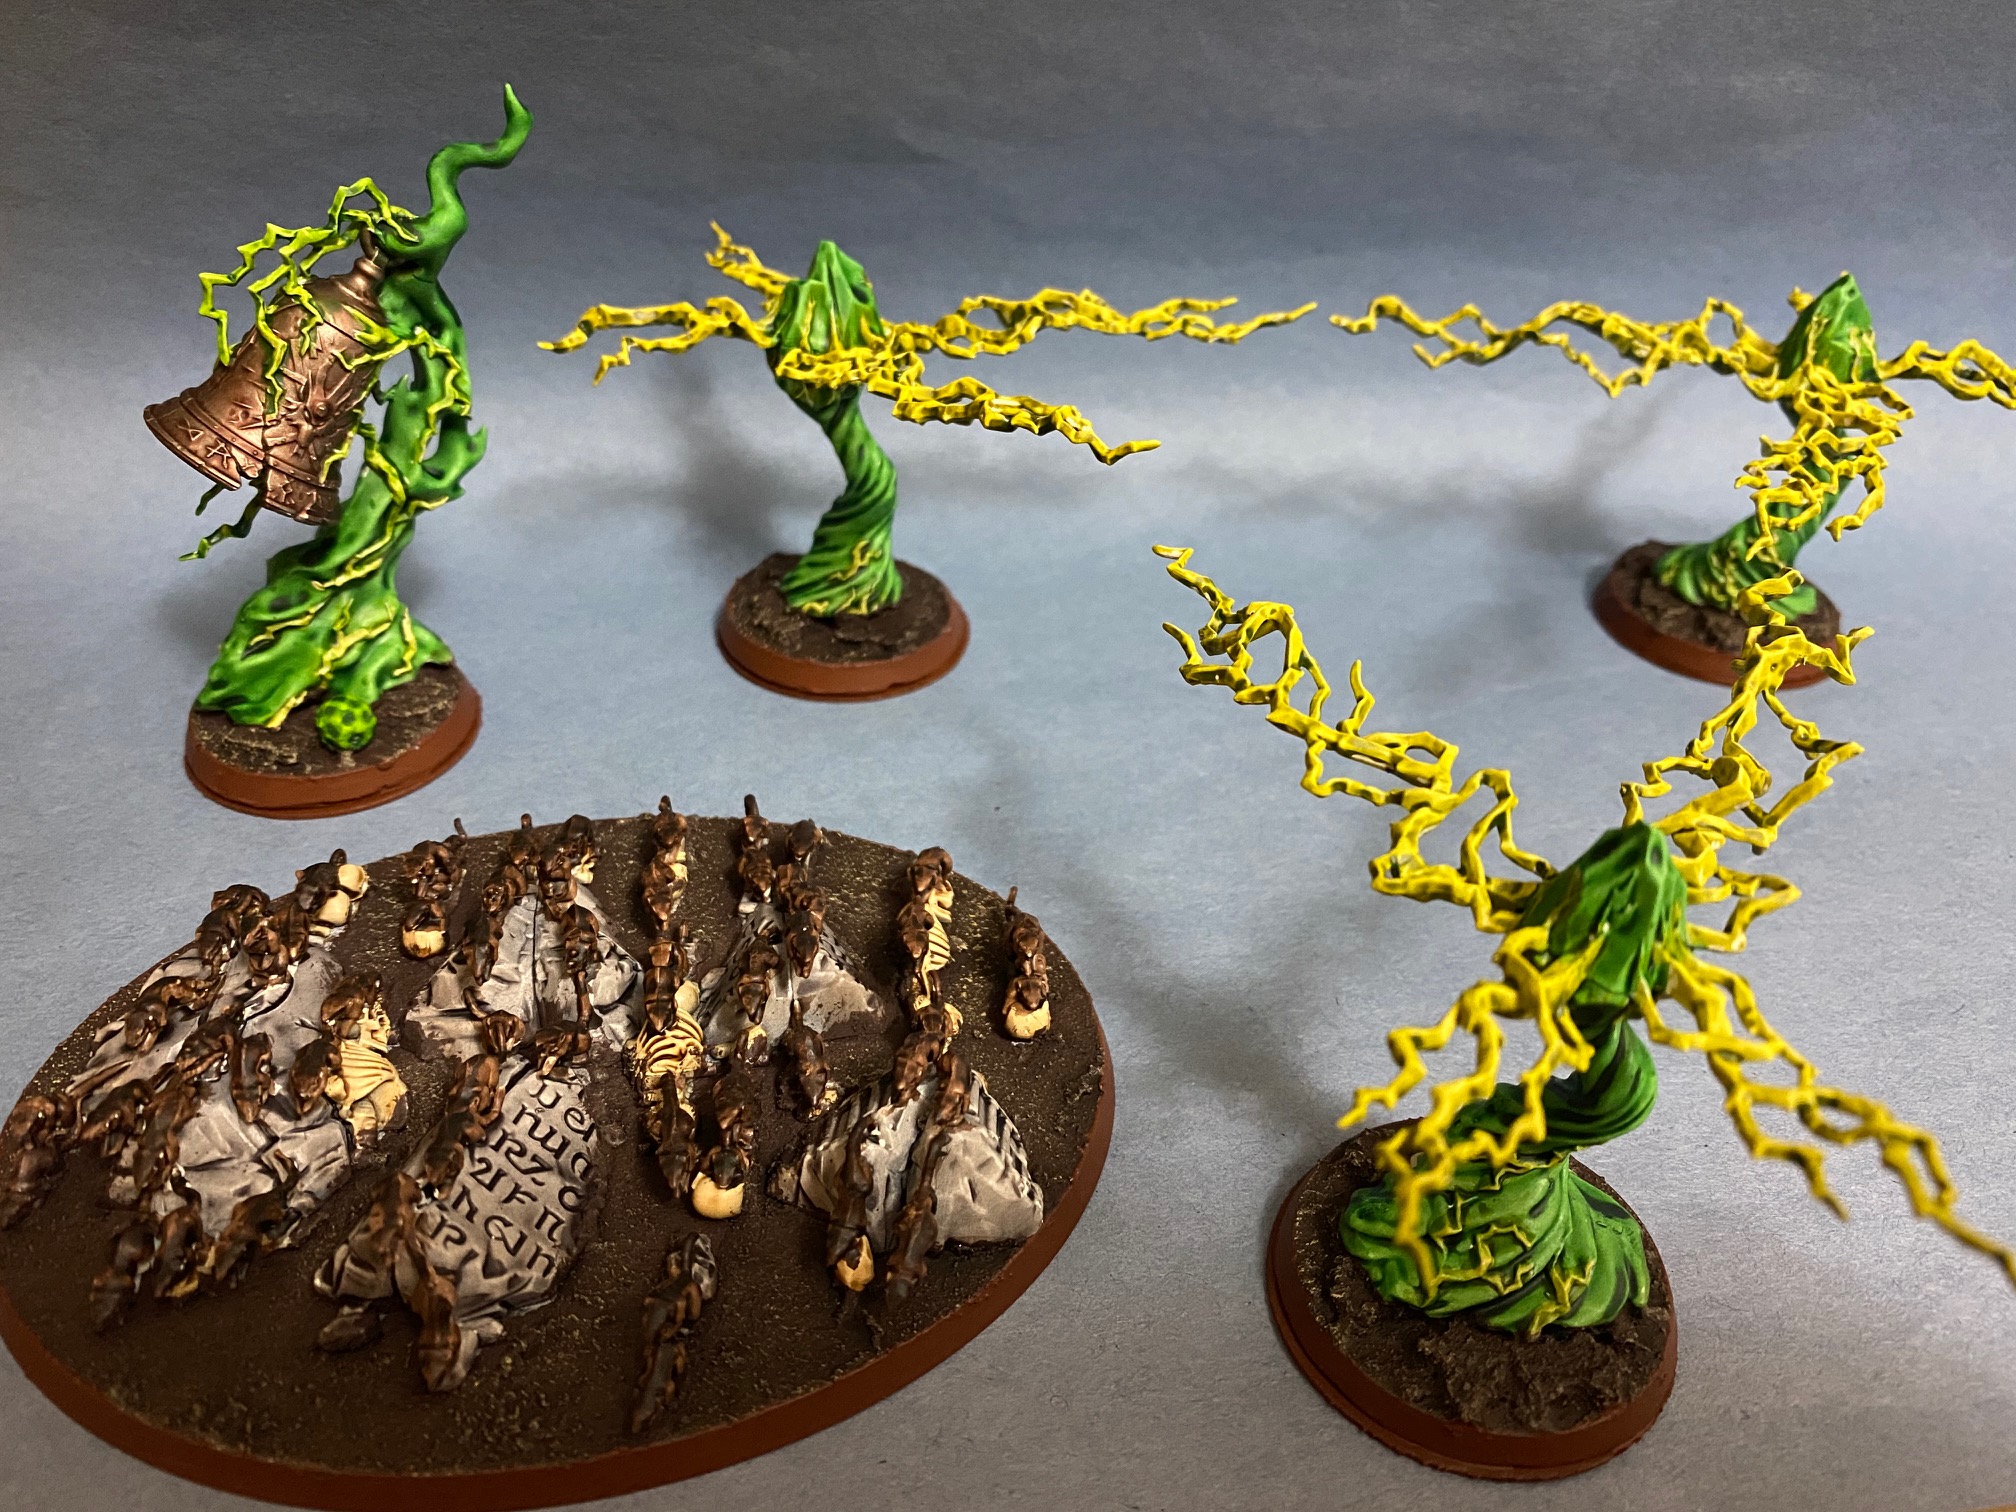
These models all started with a wraithbone undercoat. The bell was painted leadbelcher and then with darkoath flesh. The skeletons were painted skeleton horde, the stones were painted basilicanum grey, and the rats were painted wyldwood.
The smoke was painted ork flesh, and the lightning was painted a 1:1 mix of warp lightning and iyanden yellow.
My Skaven models all have the same bases. I used cork pieces to make a cracked earth with some bases having beads on to represent warpstone pieces. I then used them to create moulds and I cast bases in resin as required. To paint them I first apply stirland mud. Once dry I drybrush with underhive ash then apply a was of agrax earthshade. The edges of the bases are painted mournefang brown.
The warpstone on the base is painted waagh flesh, then two coats of moot green are applied on the raised edges. A dot of 1:1 moot green and flash gitx yellow is applied as a highlight on each corner. Finally the whole piece of warpstone get a wash of biel-tan green.
Skaven Gnawholes
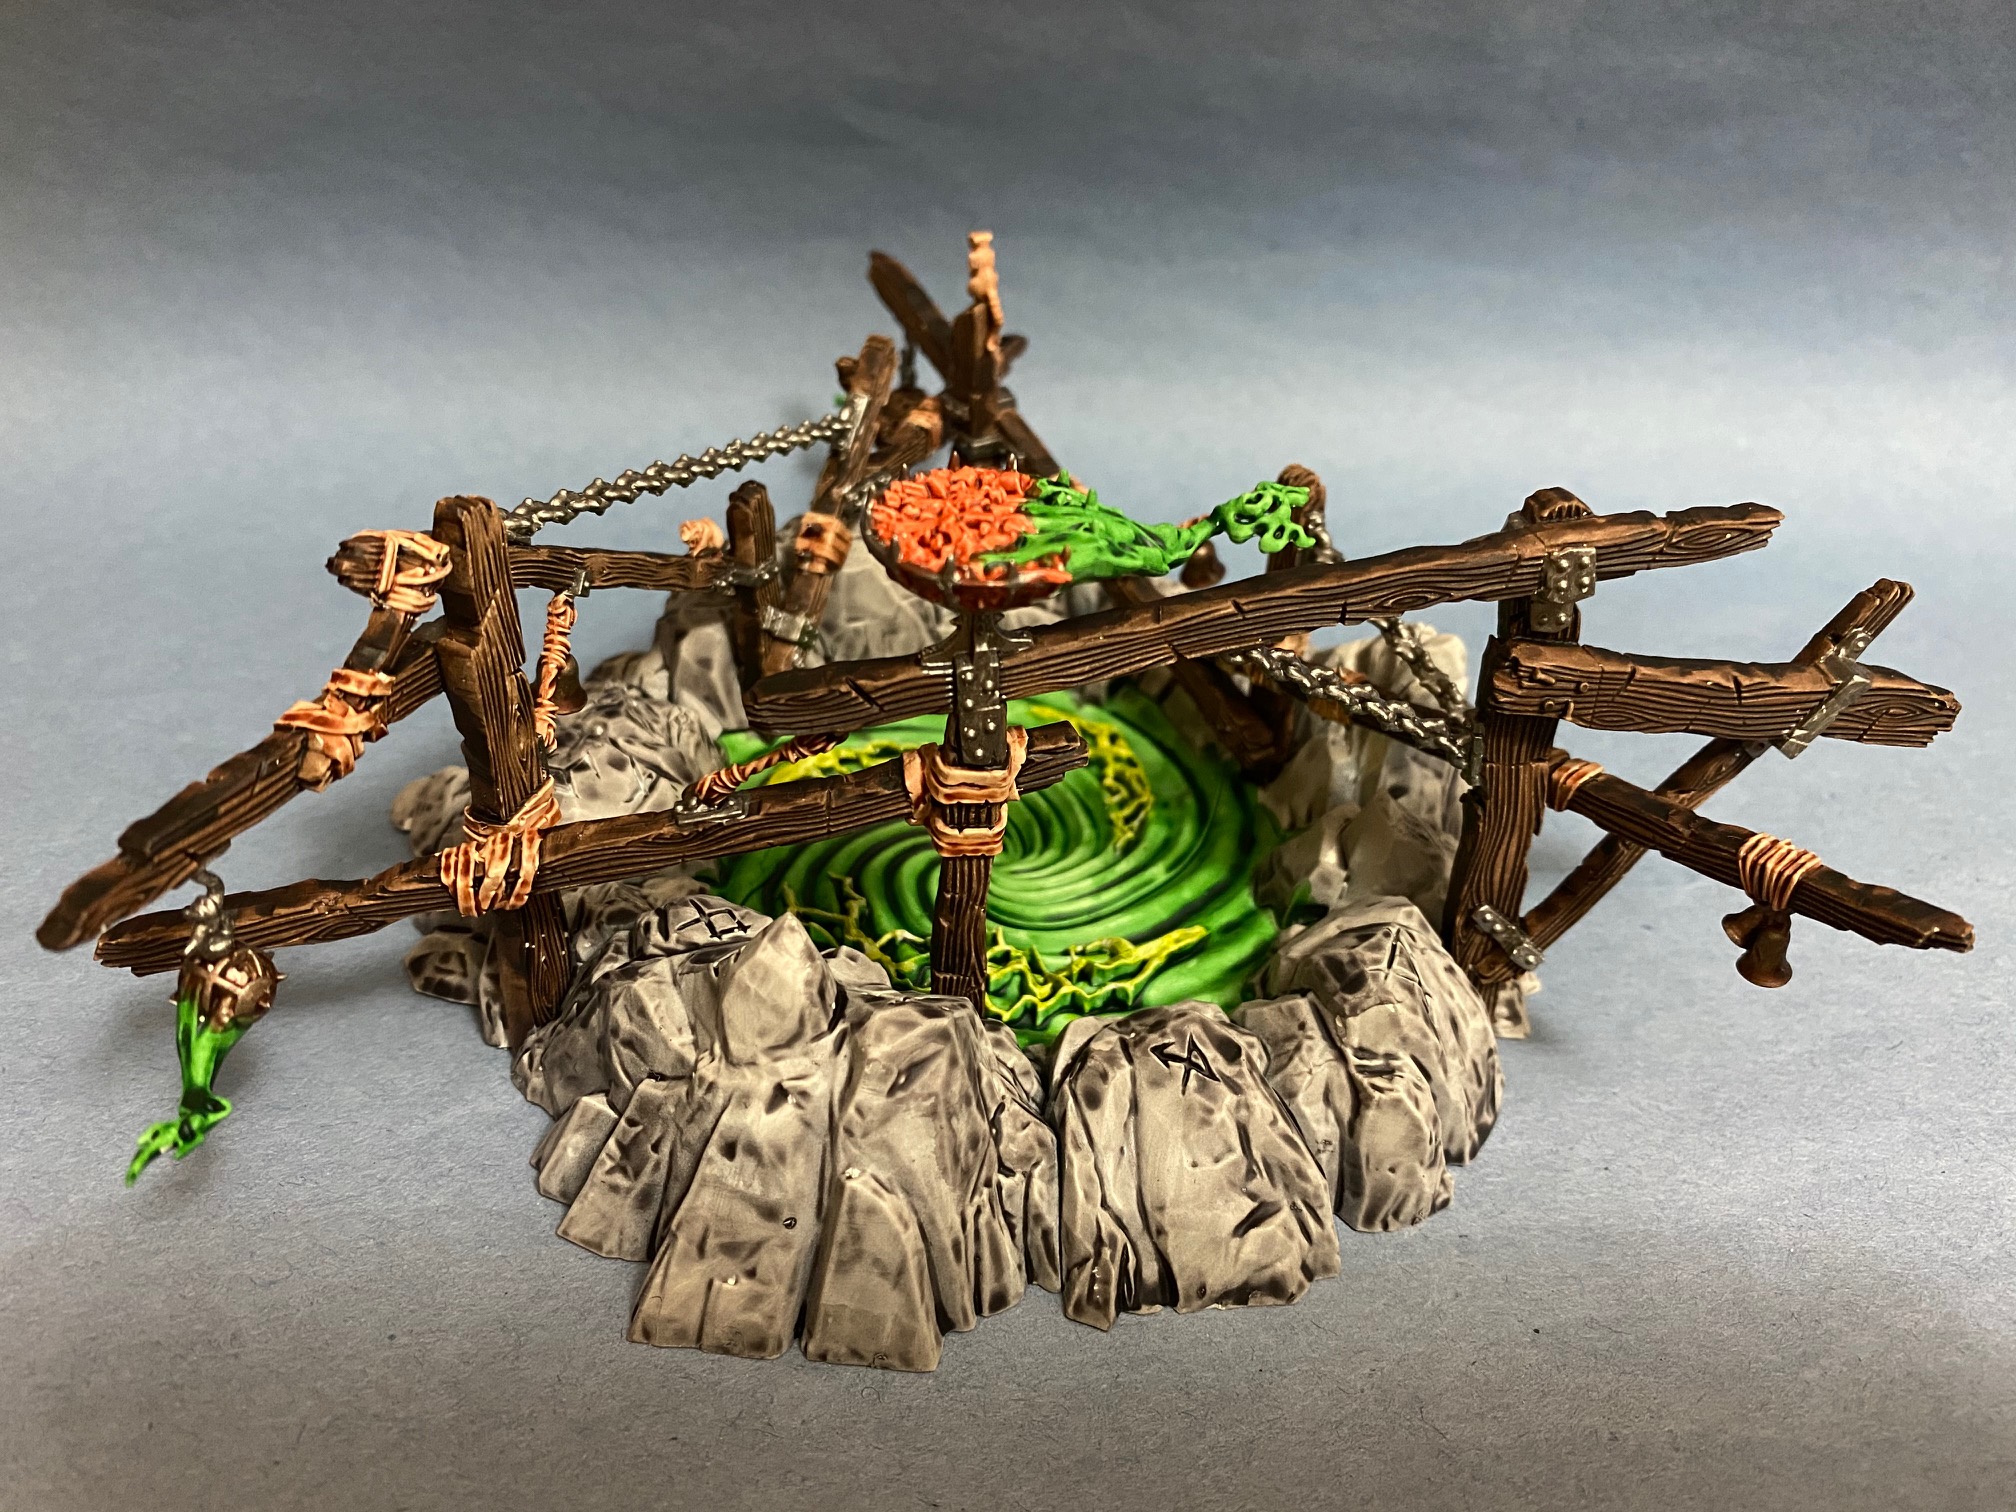
I painted the full set of three of these, but they all look the same so only photographed the one.
These are really time consuming to assemble and paint for terrain kits. The wooden beams are quite fiddly.
When you build them if you follow the instructions exactly you encounter two problems. One is that each set of beams has either a censer or brazier on them with smoke. If you put these on as you go you will find that the smoke from these all point in the wrong direction once the terrain piece is fully assembled (like mine does). It is better to leave these to the end so you can apply them with a consistent direction.
The second problem is that each terrain piece has three beam sections which are installed to make the Skaven symbol when the terrain is viewed from above. If you follow the instructions you end up with three identical terrain pieces, but looking at the box art you can see that the terrain was designed so that all the different beam sections are interchangeable. This allows you to have three unique looking terrain pieces. Unfortunately the instruction book does not make it obvious that this is possible.
As for painting the terrain pieces, I basically used the same colour scheme as the Skaven Endless Spells (see my last post in this project).
Zacharias the Everliving
Zacharias is done. He got his own project for the Spring Cleaning Challenge, which you can find here: https://www.beastsofwar.com/project/1501741/#snav
K47 Hornet and British AMPs
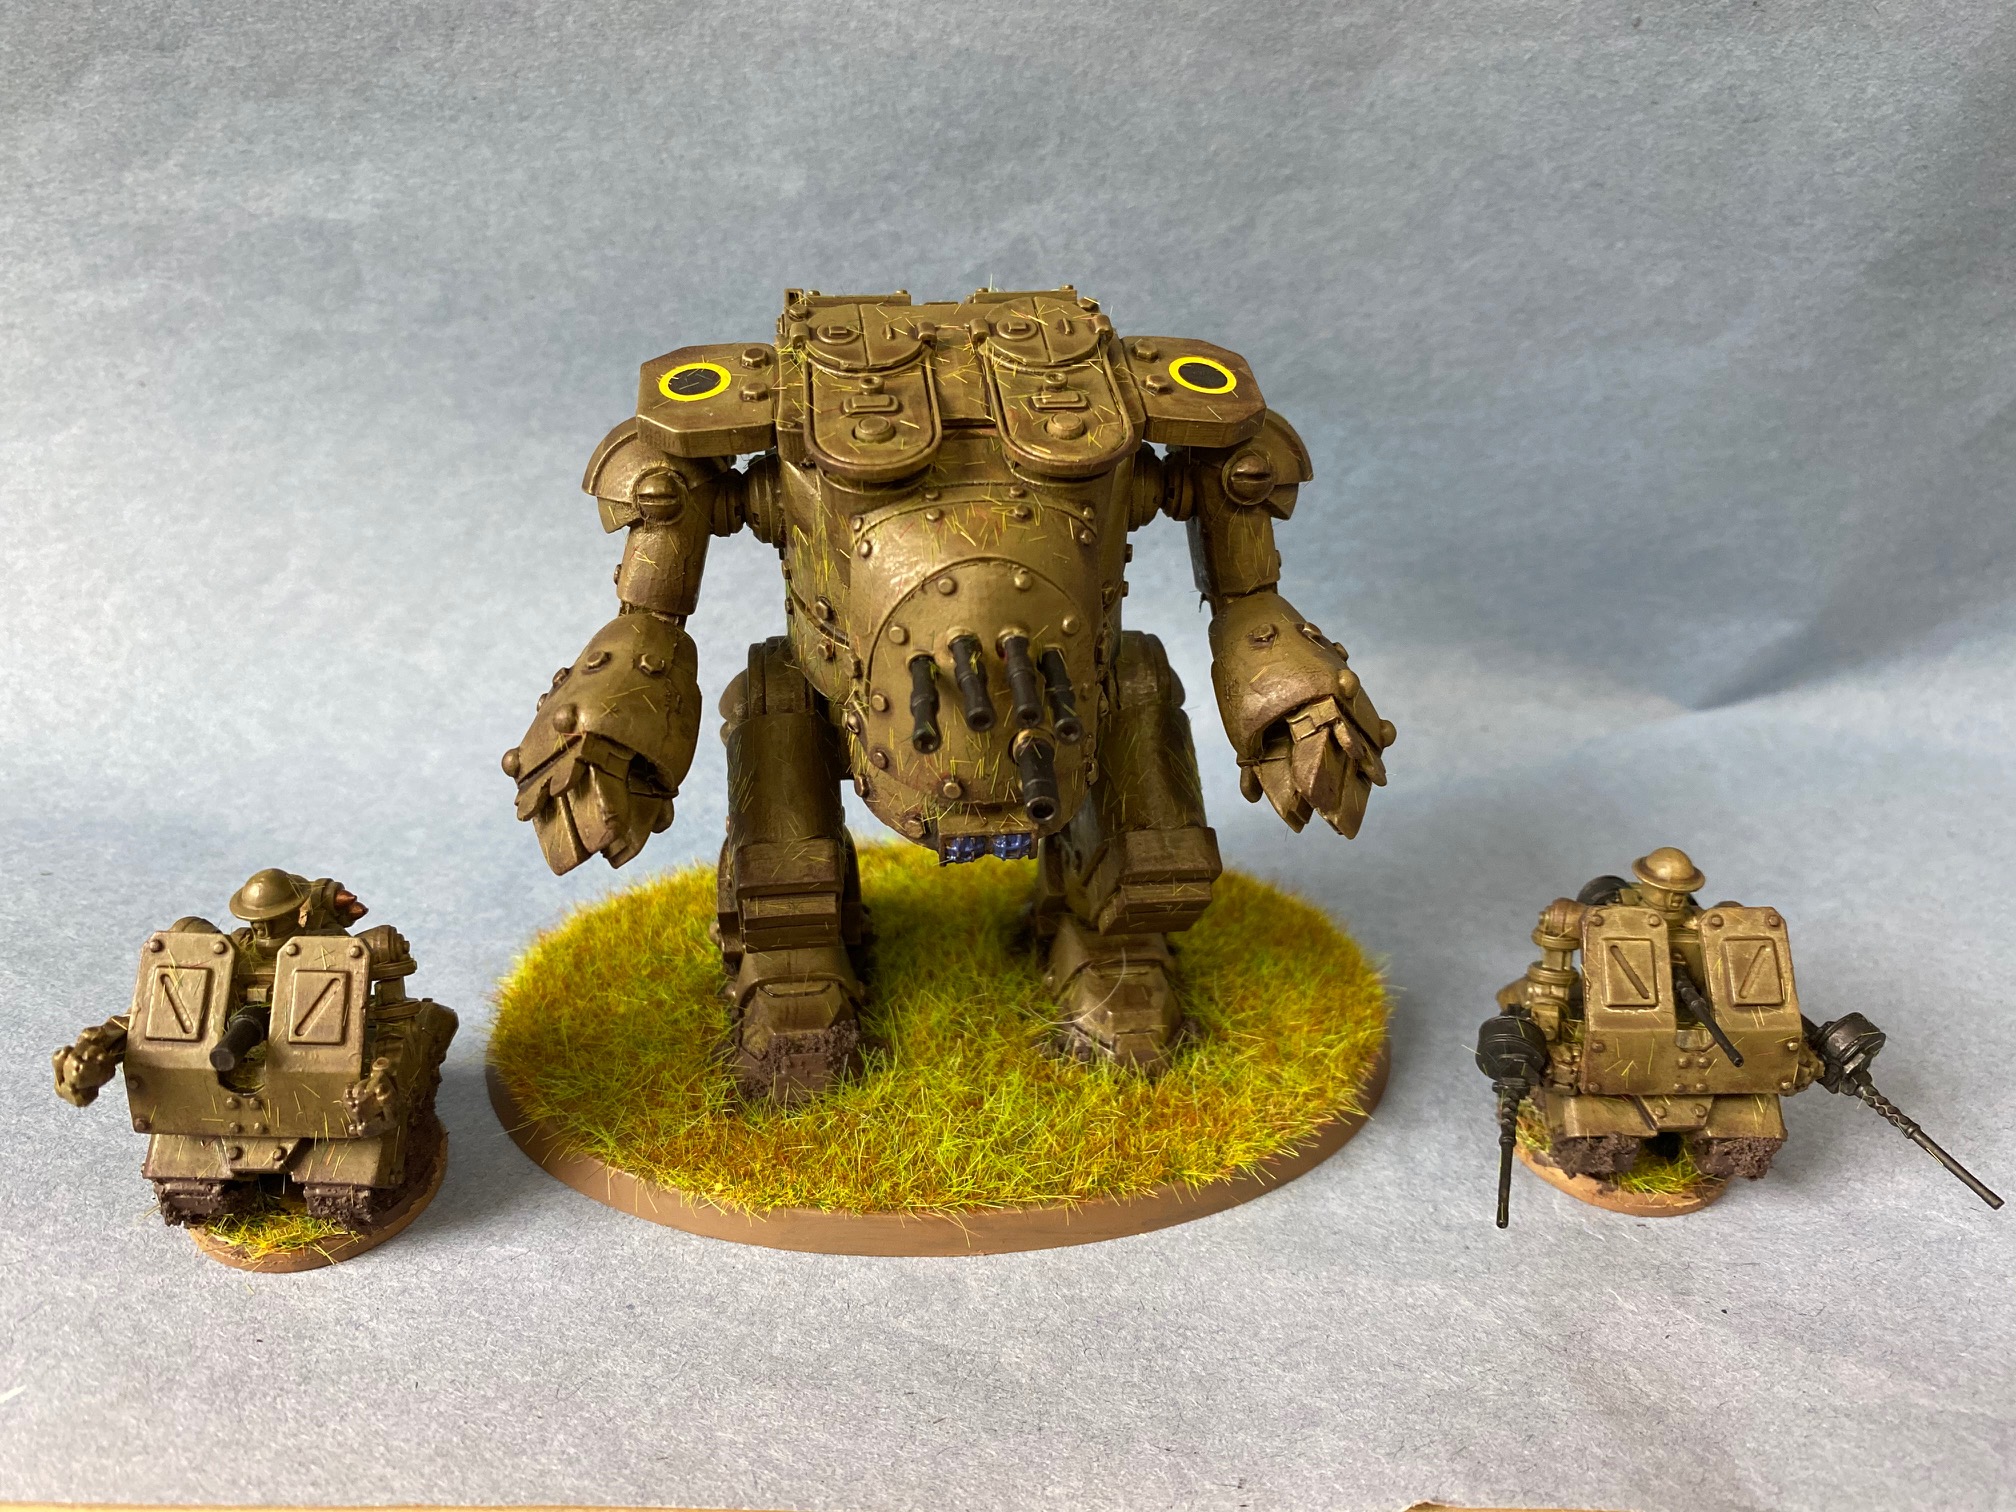
These models started with an undercoat of zandri dust. They were then painted death world forest with treads and weapons picked out in abaddon black. Brass was picked out with balthasar gold. The entire model then got an all over wash of agrax earthshade.
The Hornet then had decals applied.
For weathering rhinox hide was sponged on very lightly. I focused on areas closer to the ground and extremities that are more likely to get knocked and chipped as the vehicle moves around.
The lights were painted with mordian blue.
The bases were painted with steel legion drab. Stirland mud was applied around the feet and tracks to simulate mud.
Finally a static grass applicator was used to add static grass to the bases.
Ymir from Mythic Battles


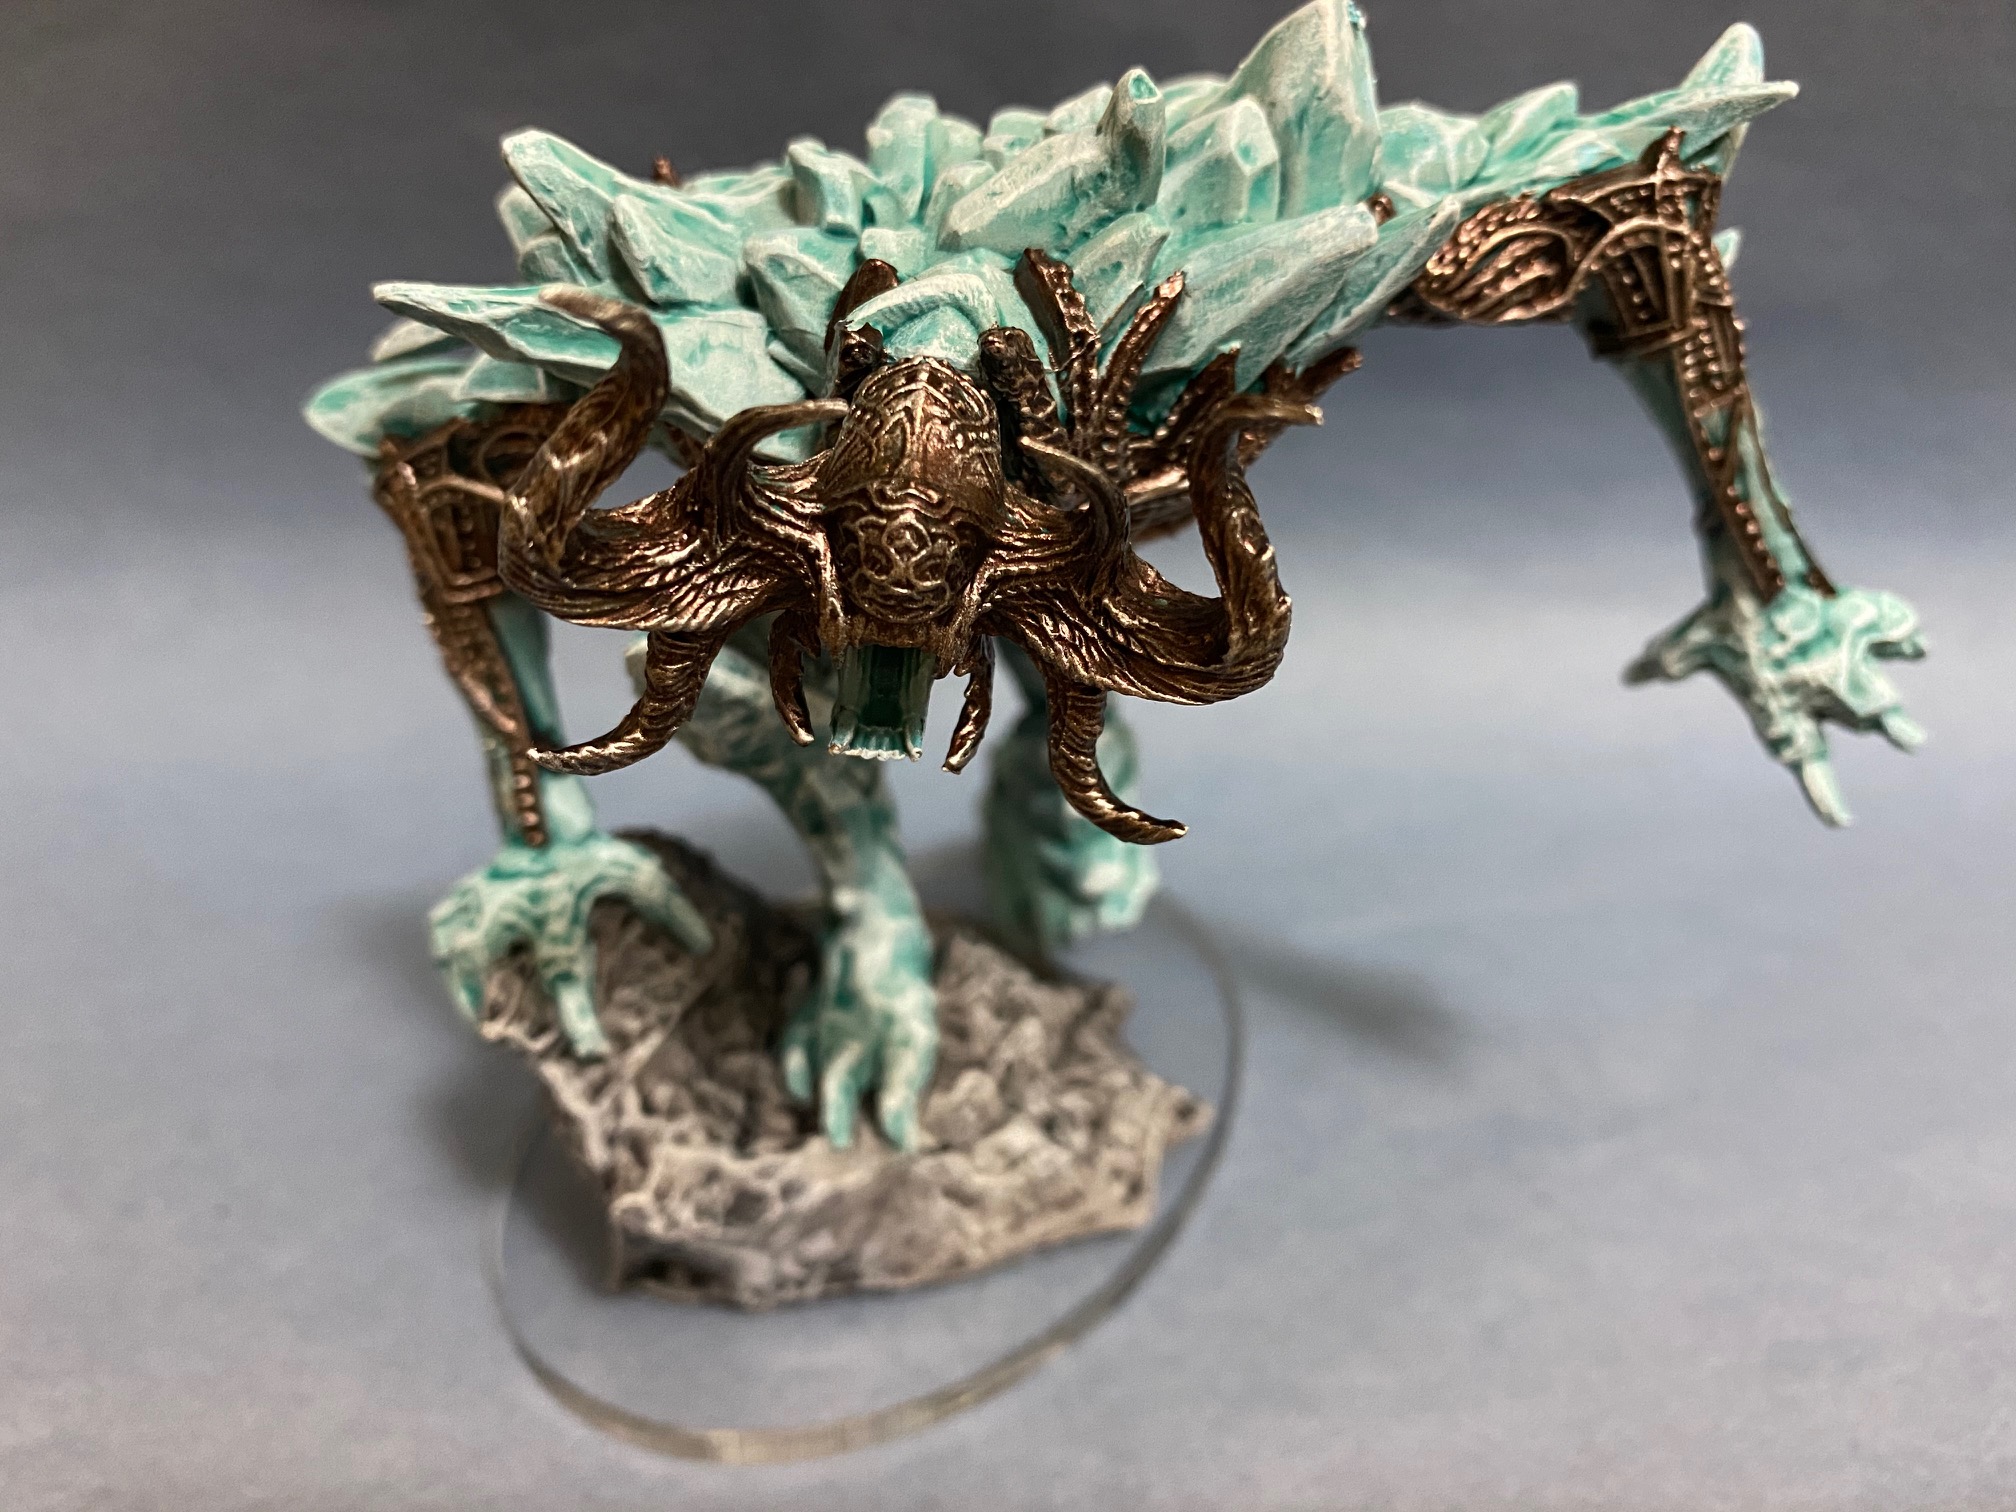

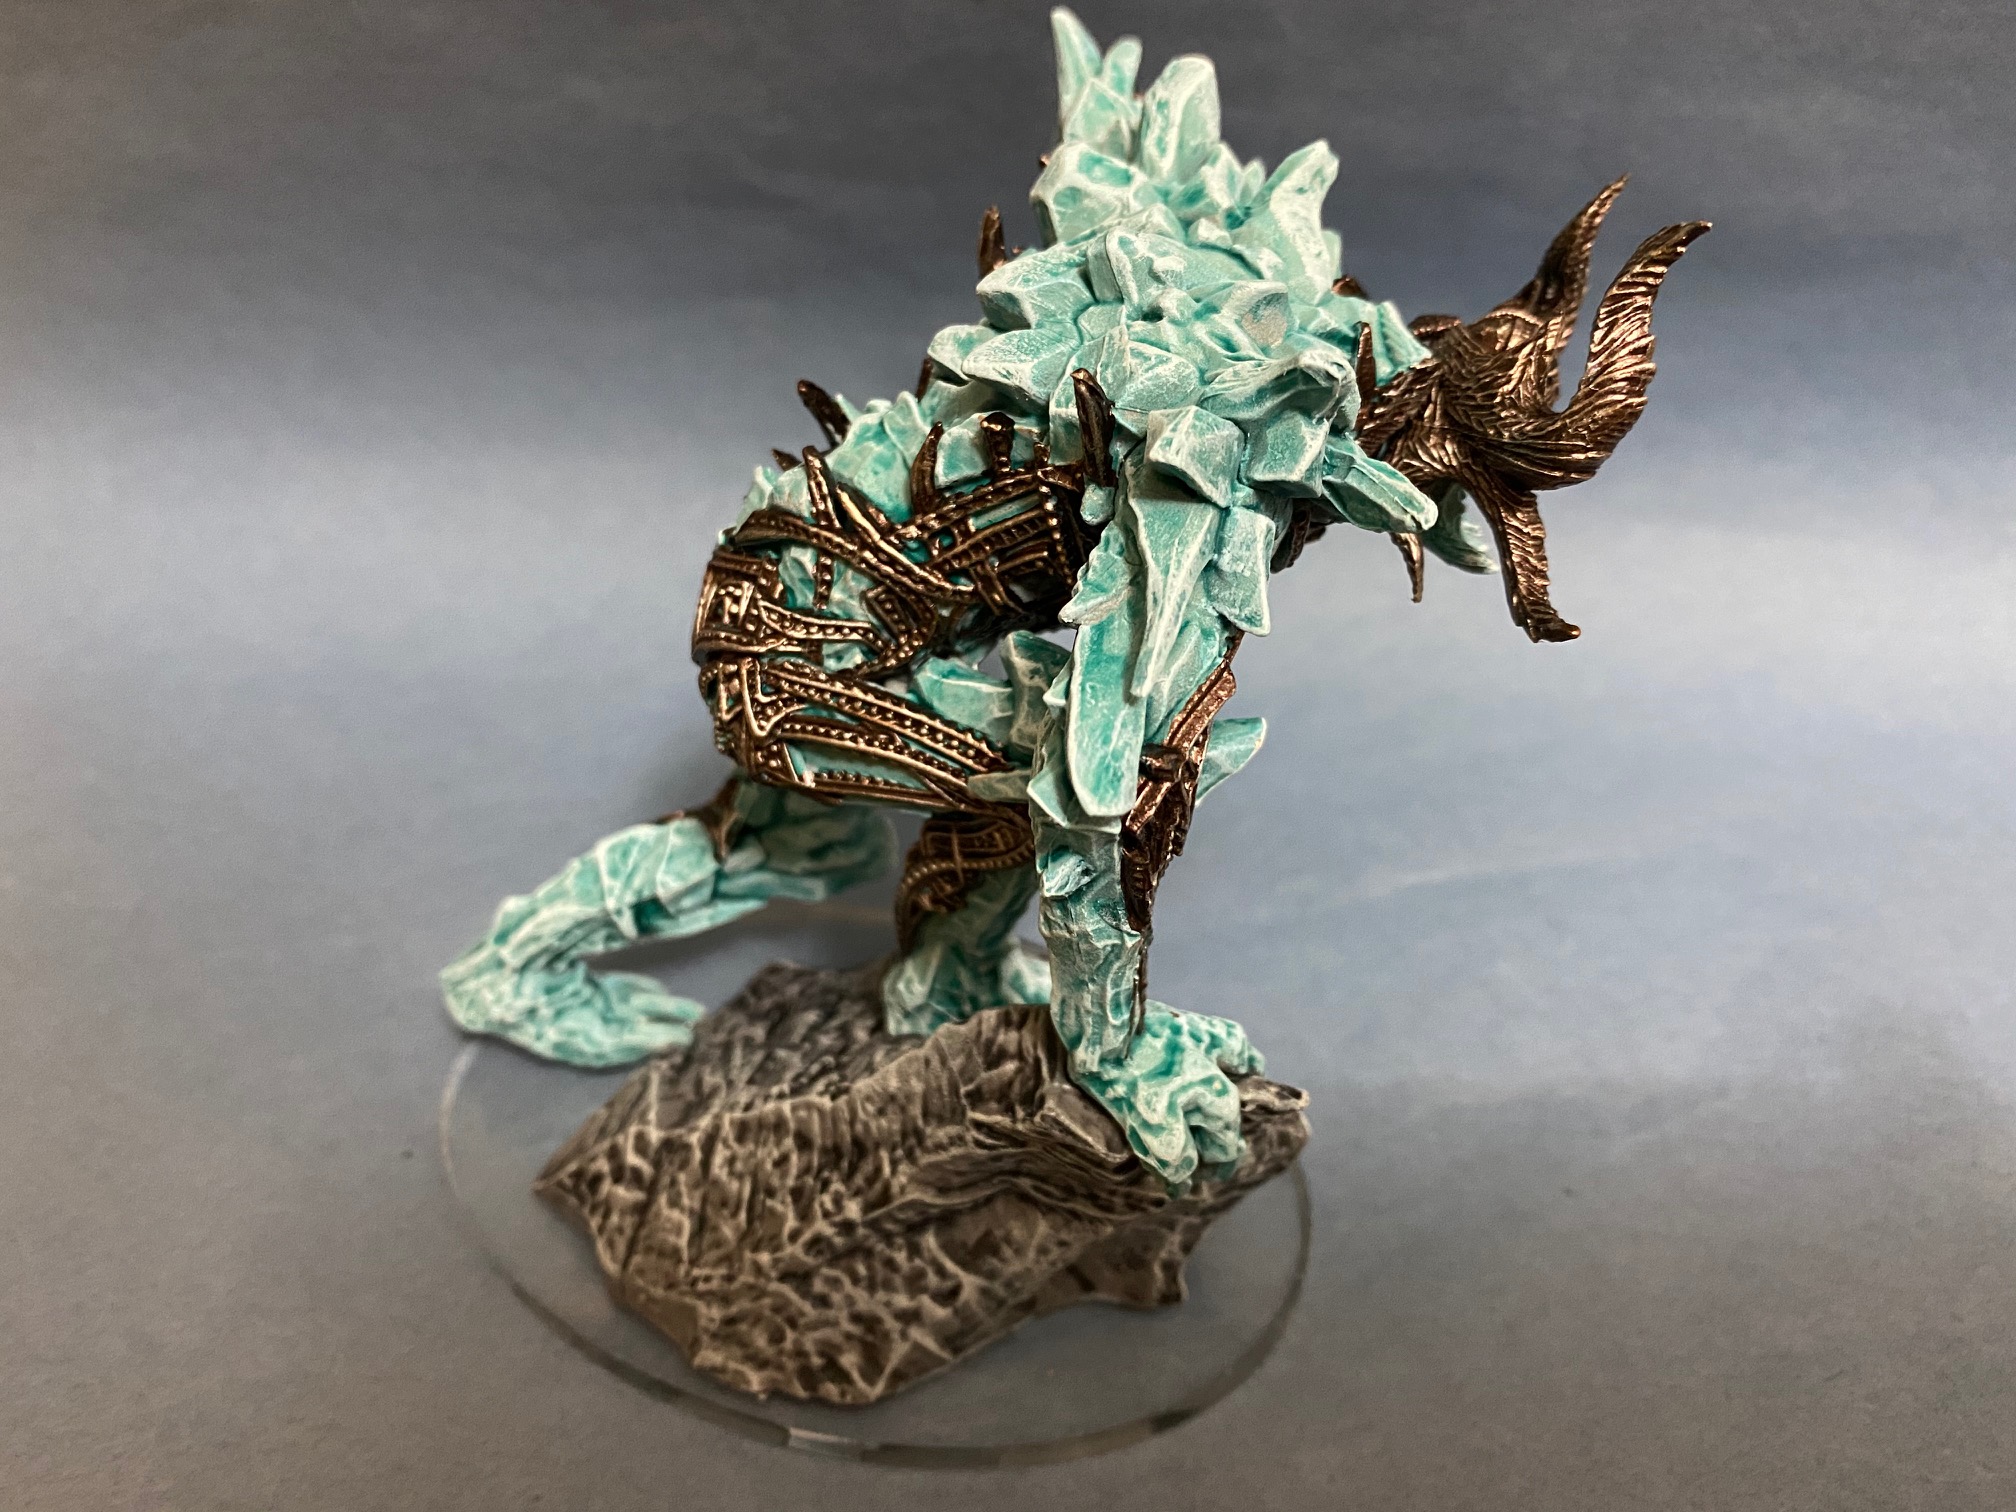
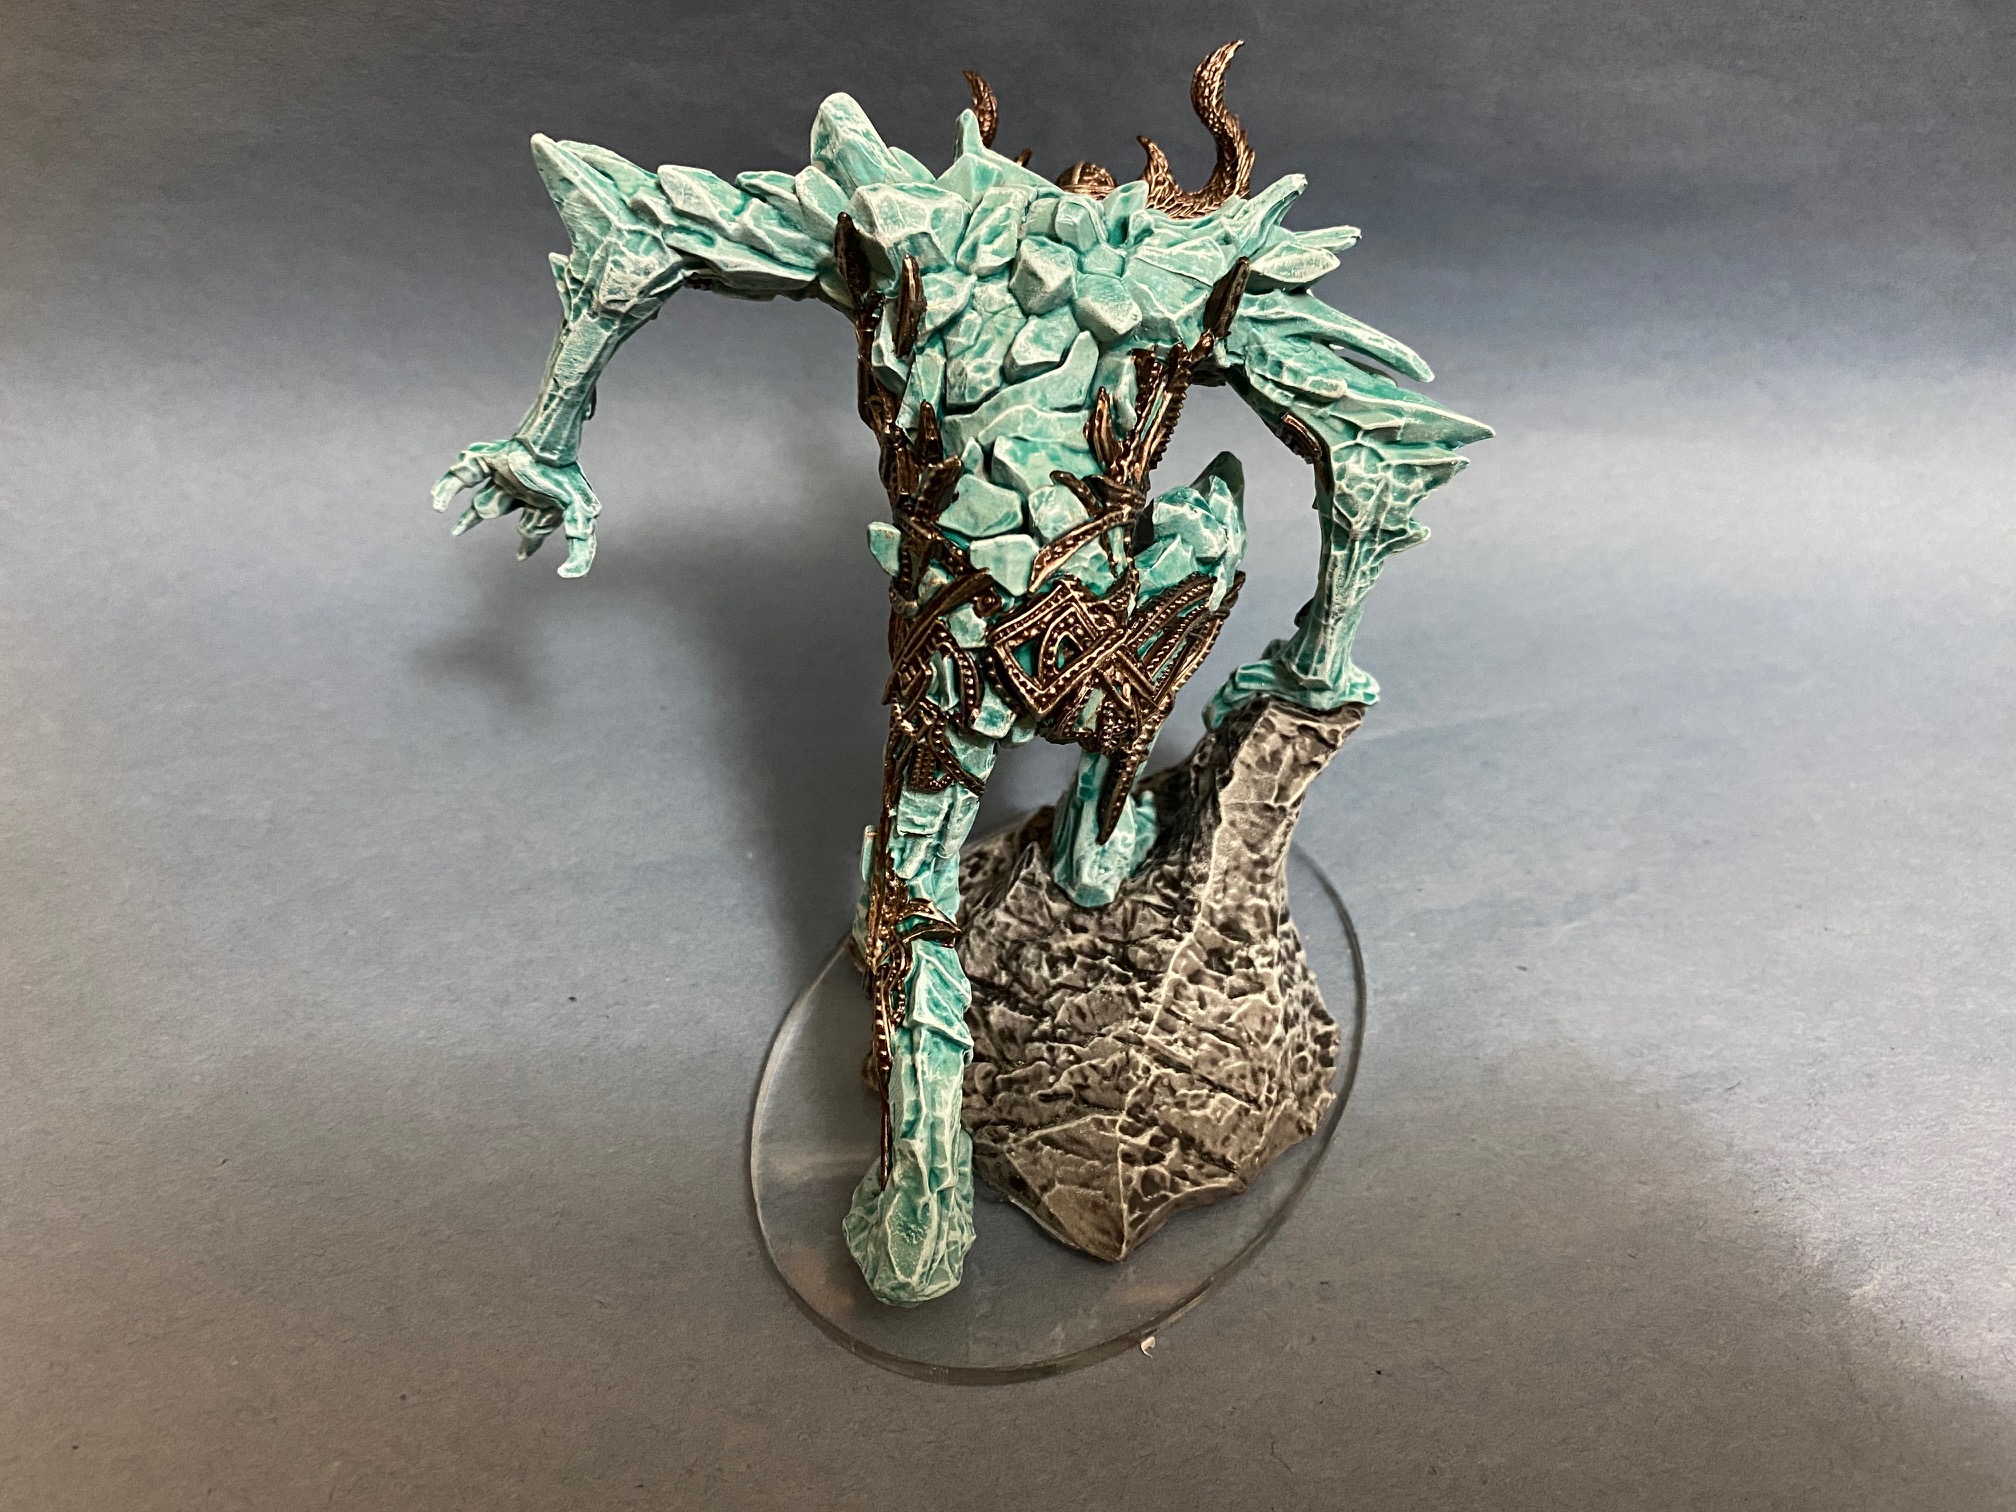
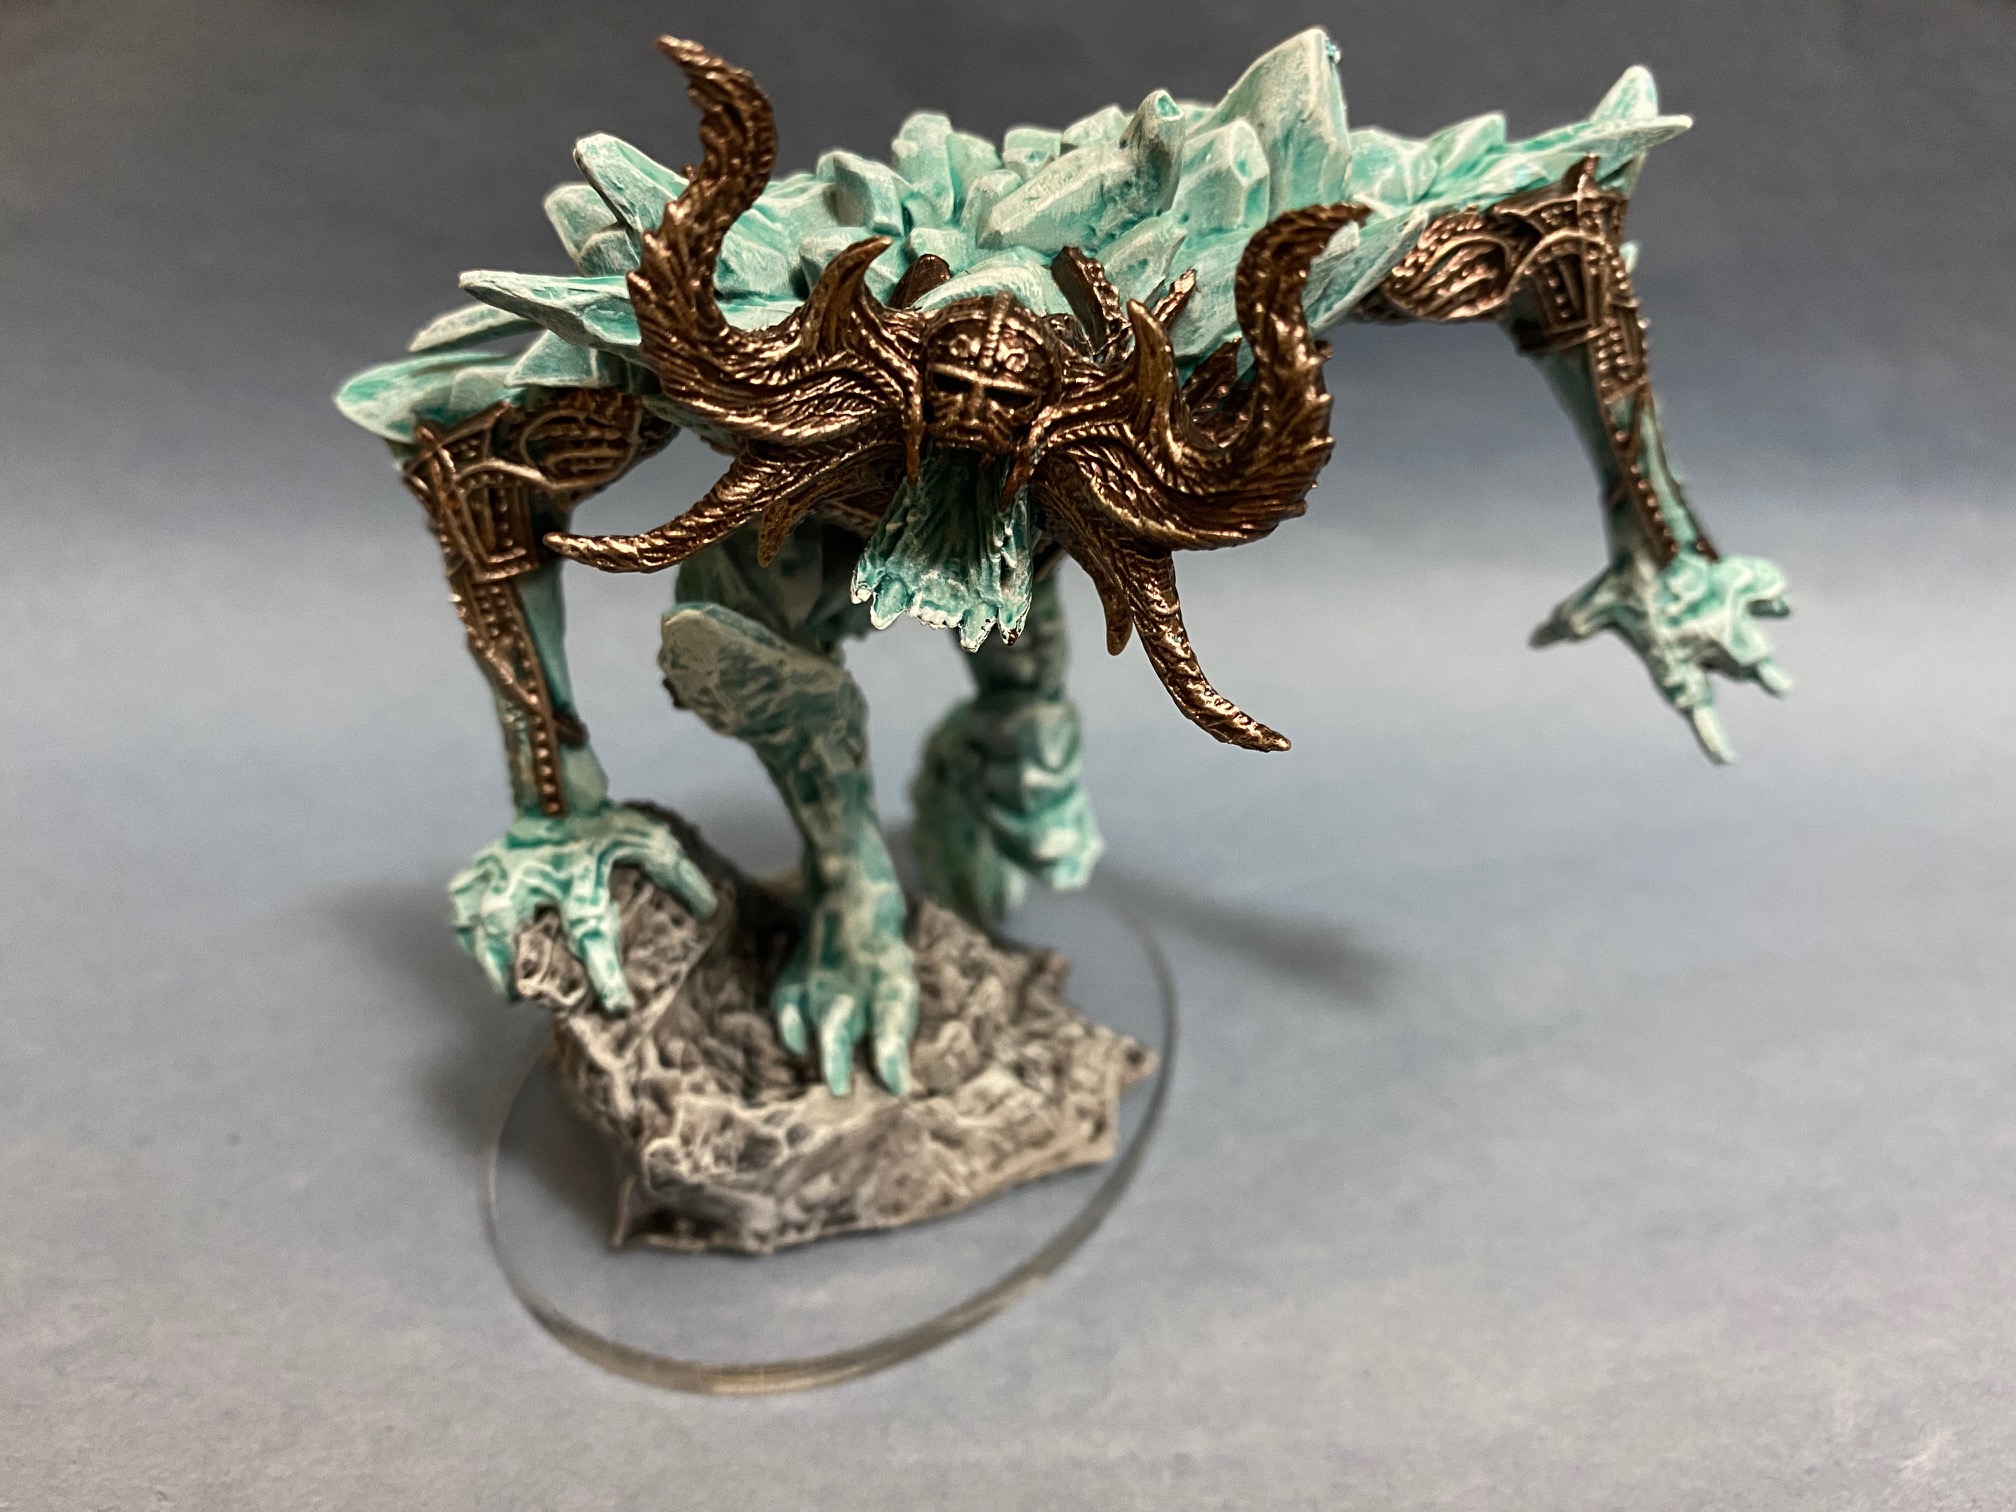
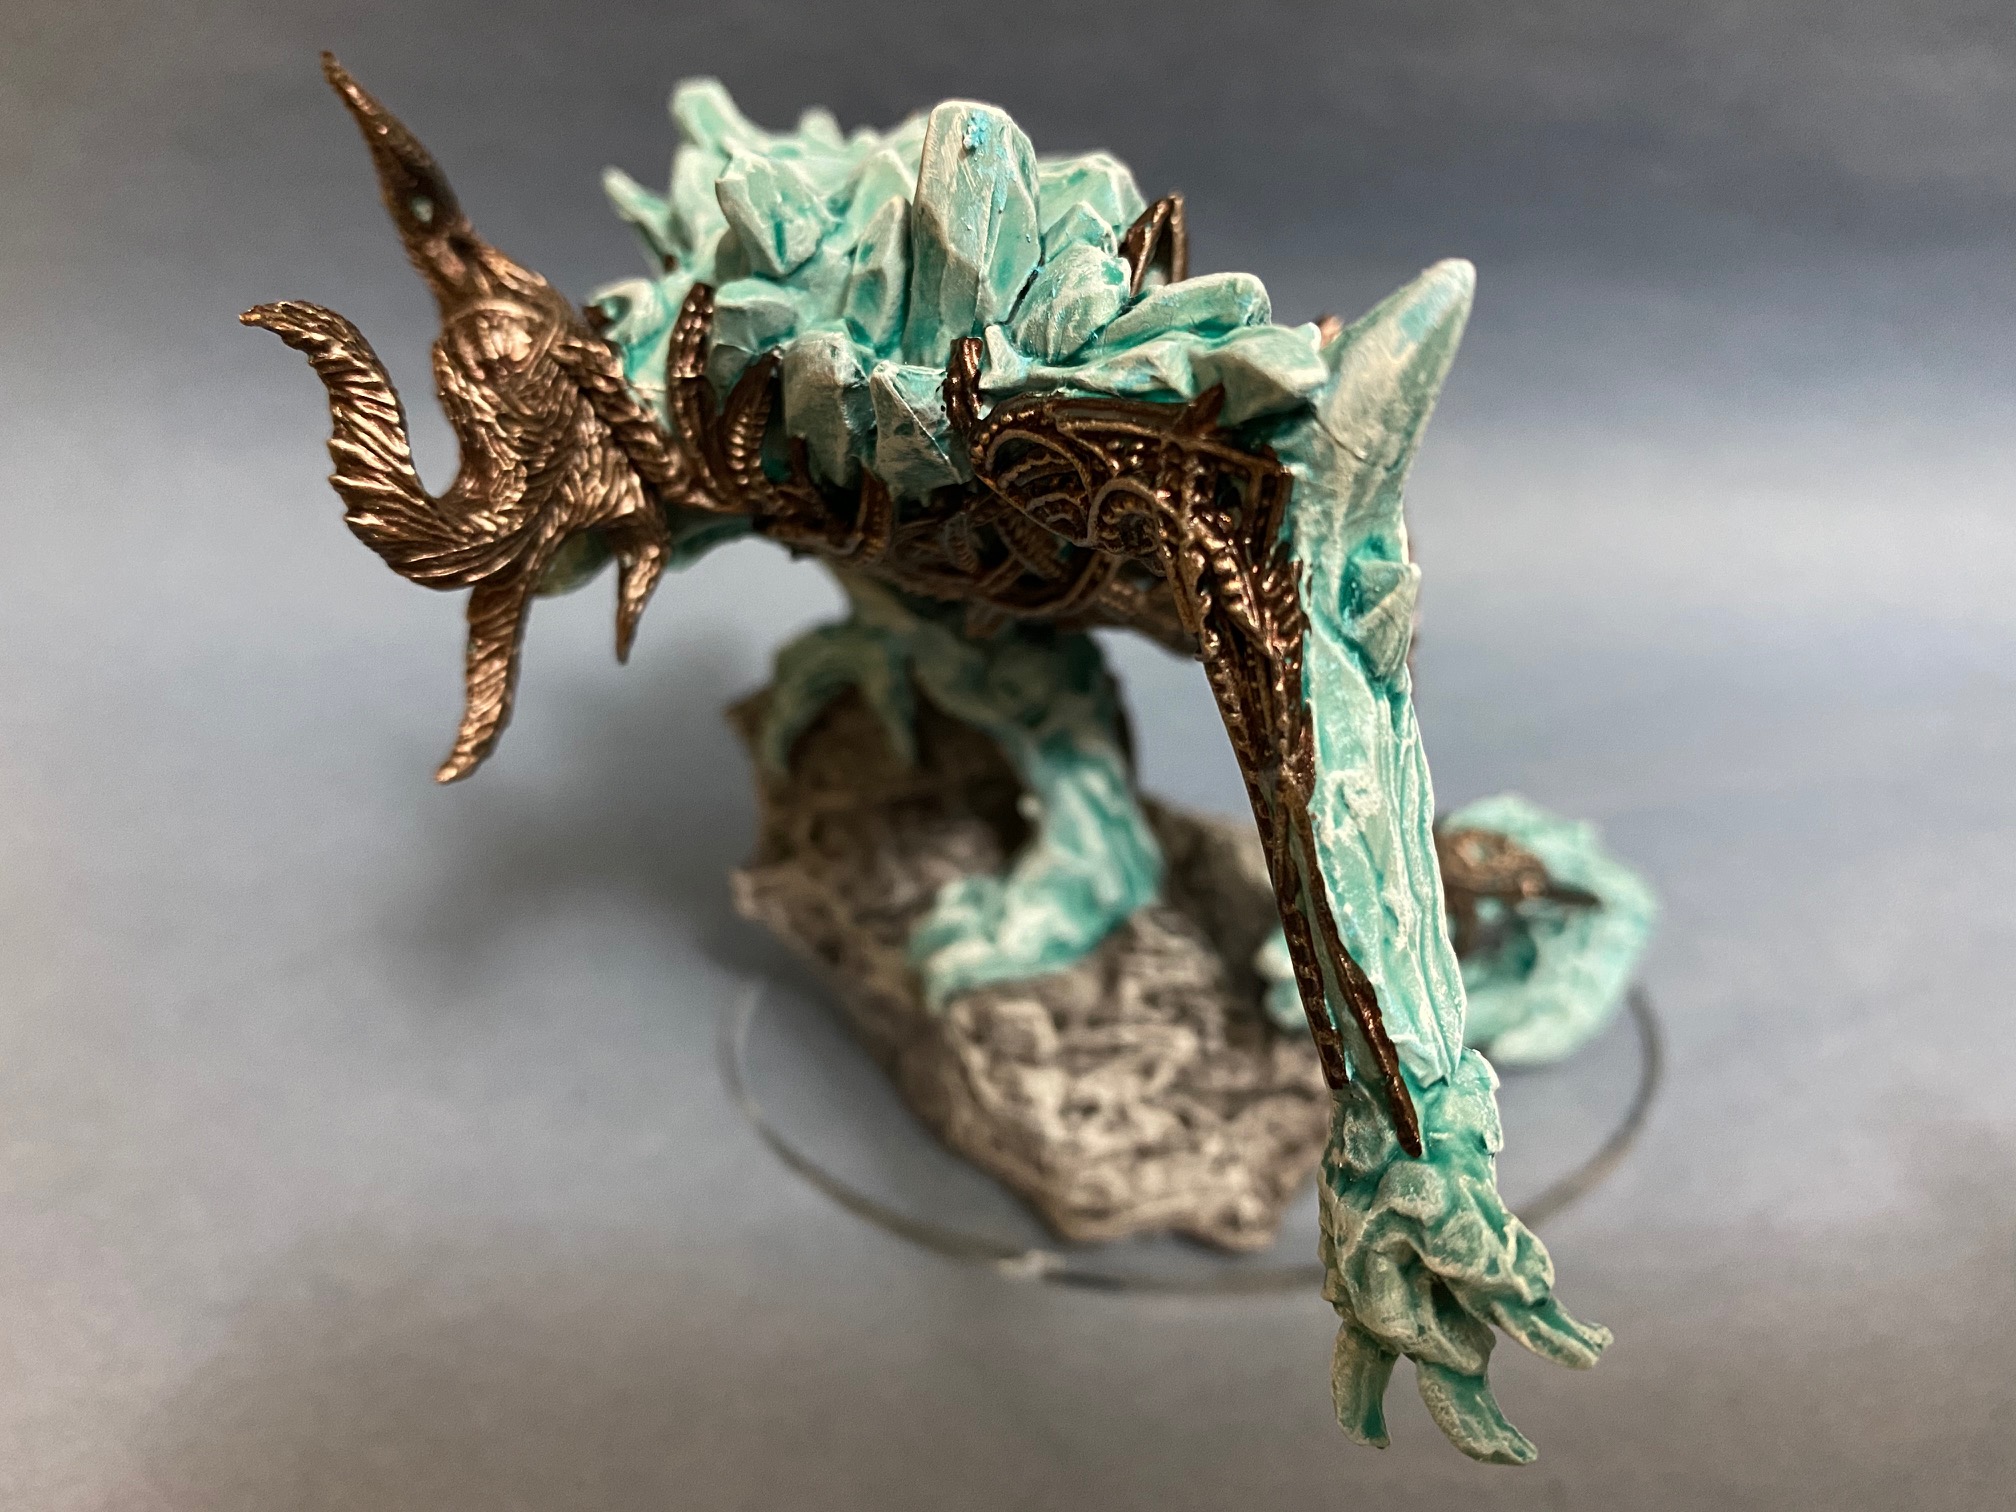
Ymir comes with two head options. Not sure which I prefer but they can be swapped out so I can change them out as I want.
Ymir was undercoated with greyseer and then zenithed with wraithbone.
Ymir was painted with aethermatic blue all over. Then he was drybrushed skink blue, followed by etherium blue and finally praxeti white.
His metalwork was basecoated warplock bronze, then drybrushed brass scorpion, runelord brass, then finally runefang steel.
The rock was painted basilicanum grey and then drybrushed longbeard grey.
Flesh Eater Courts
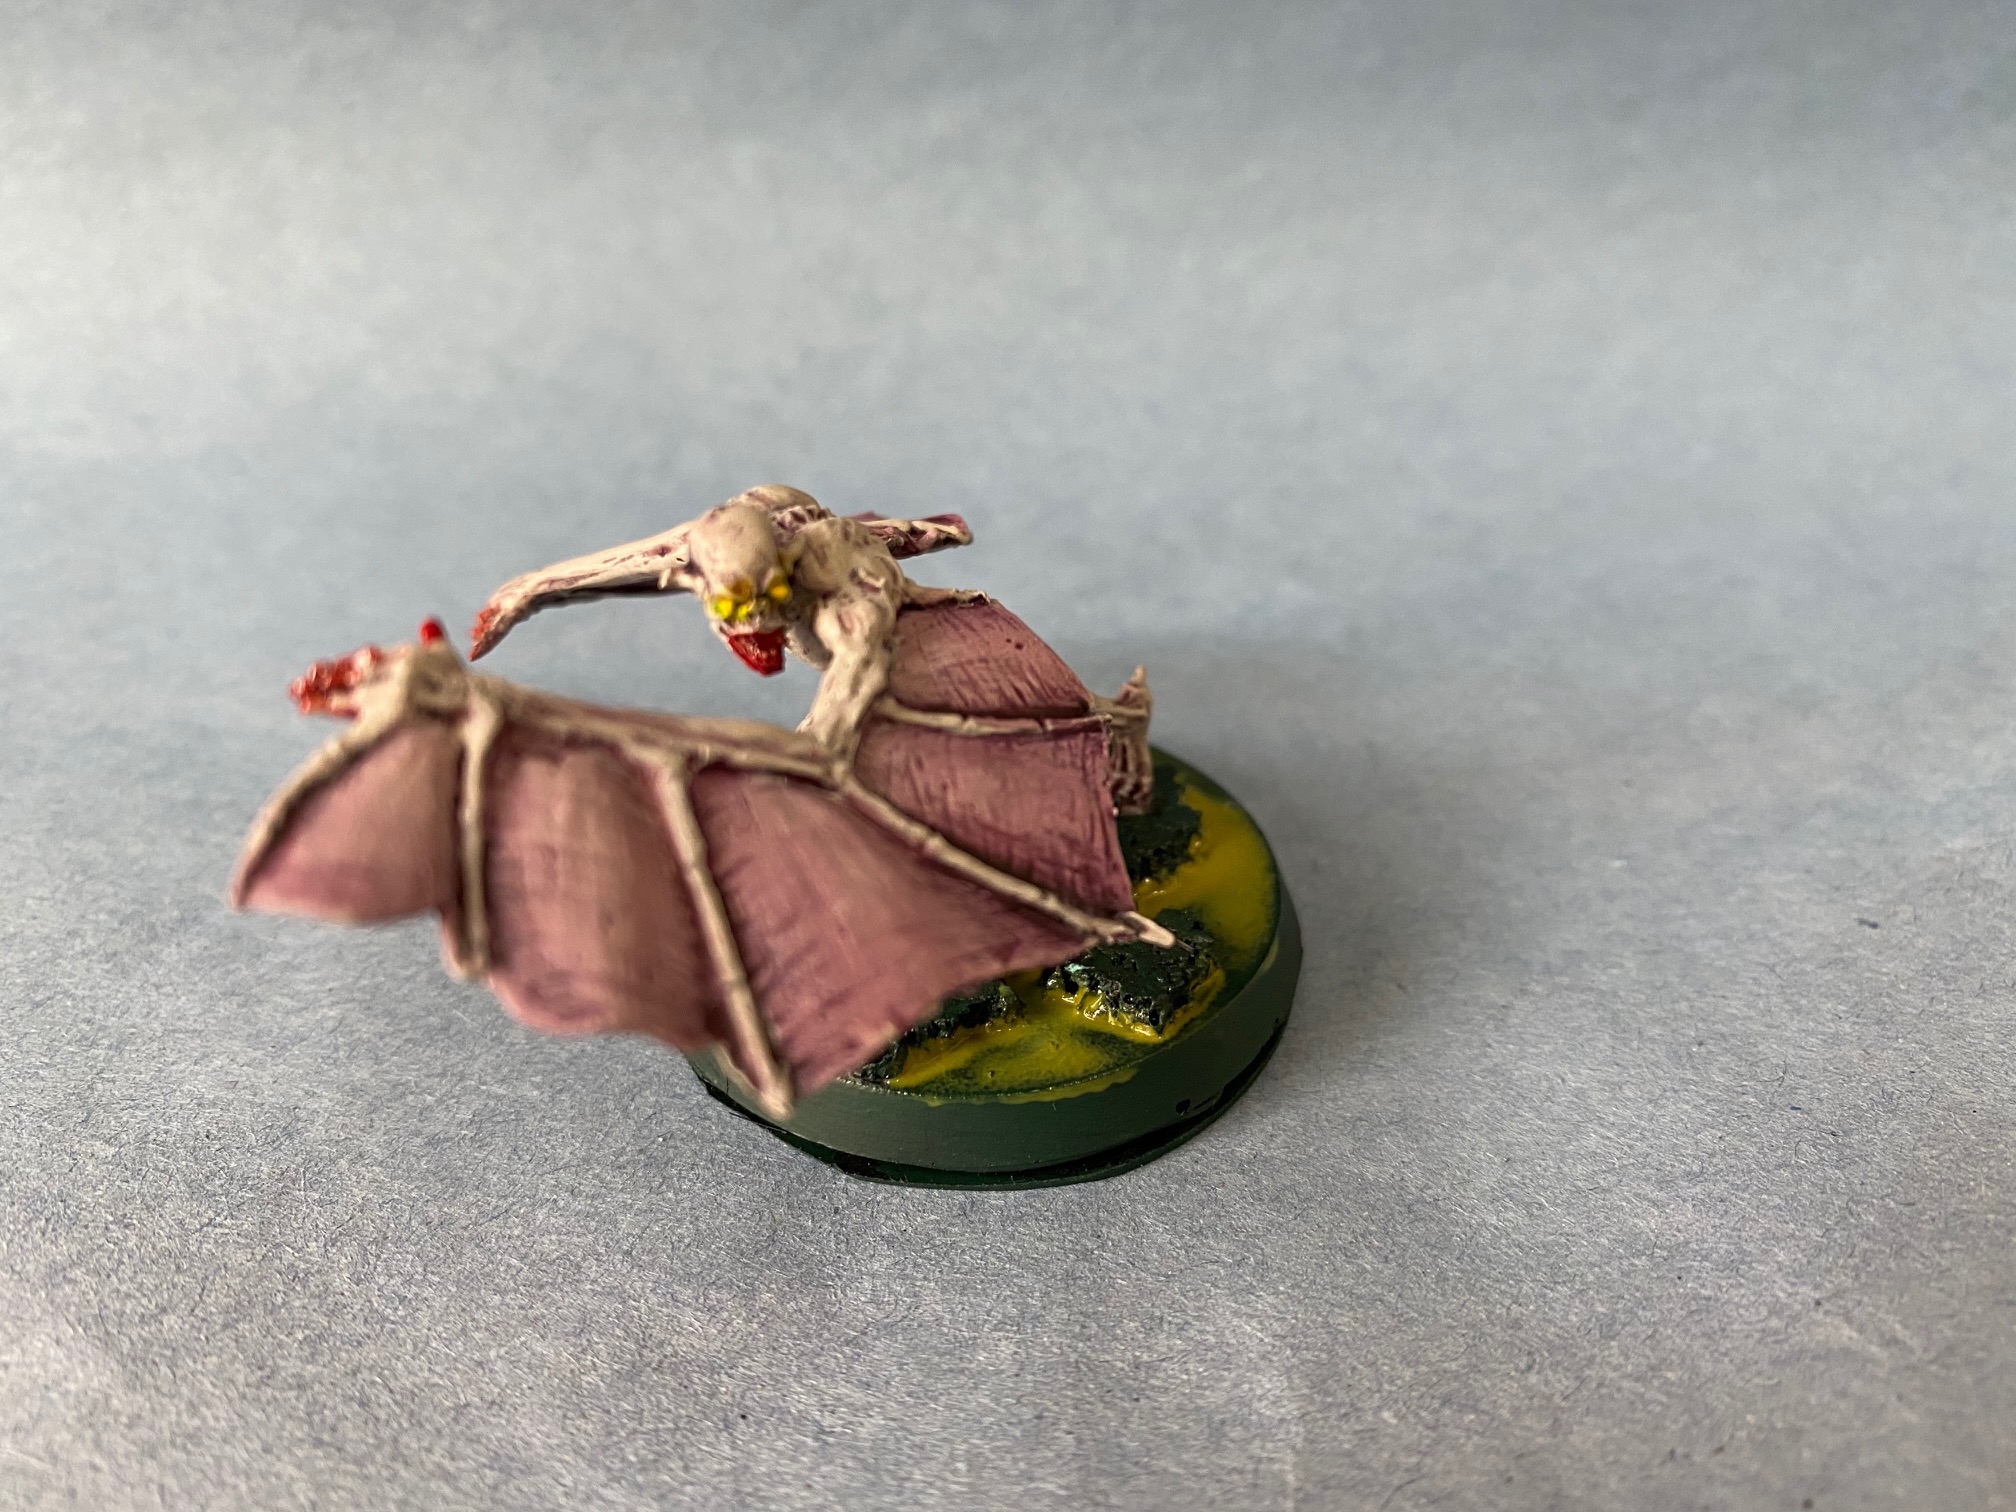

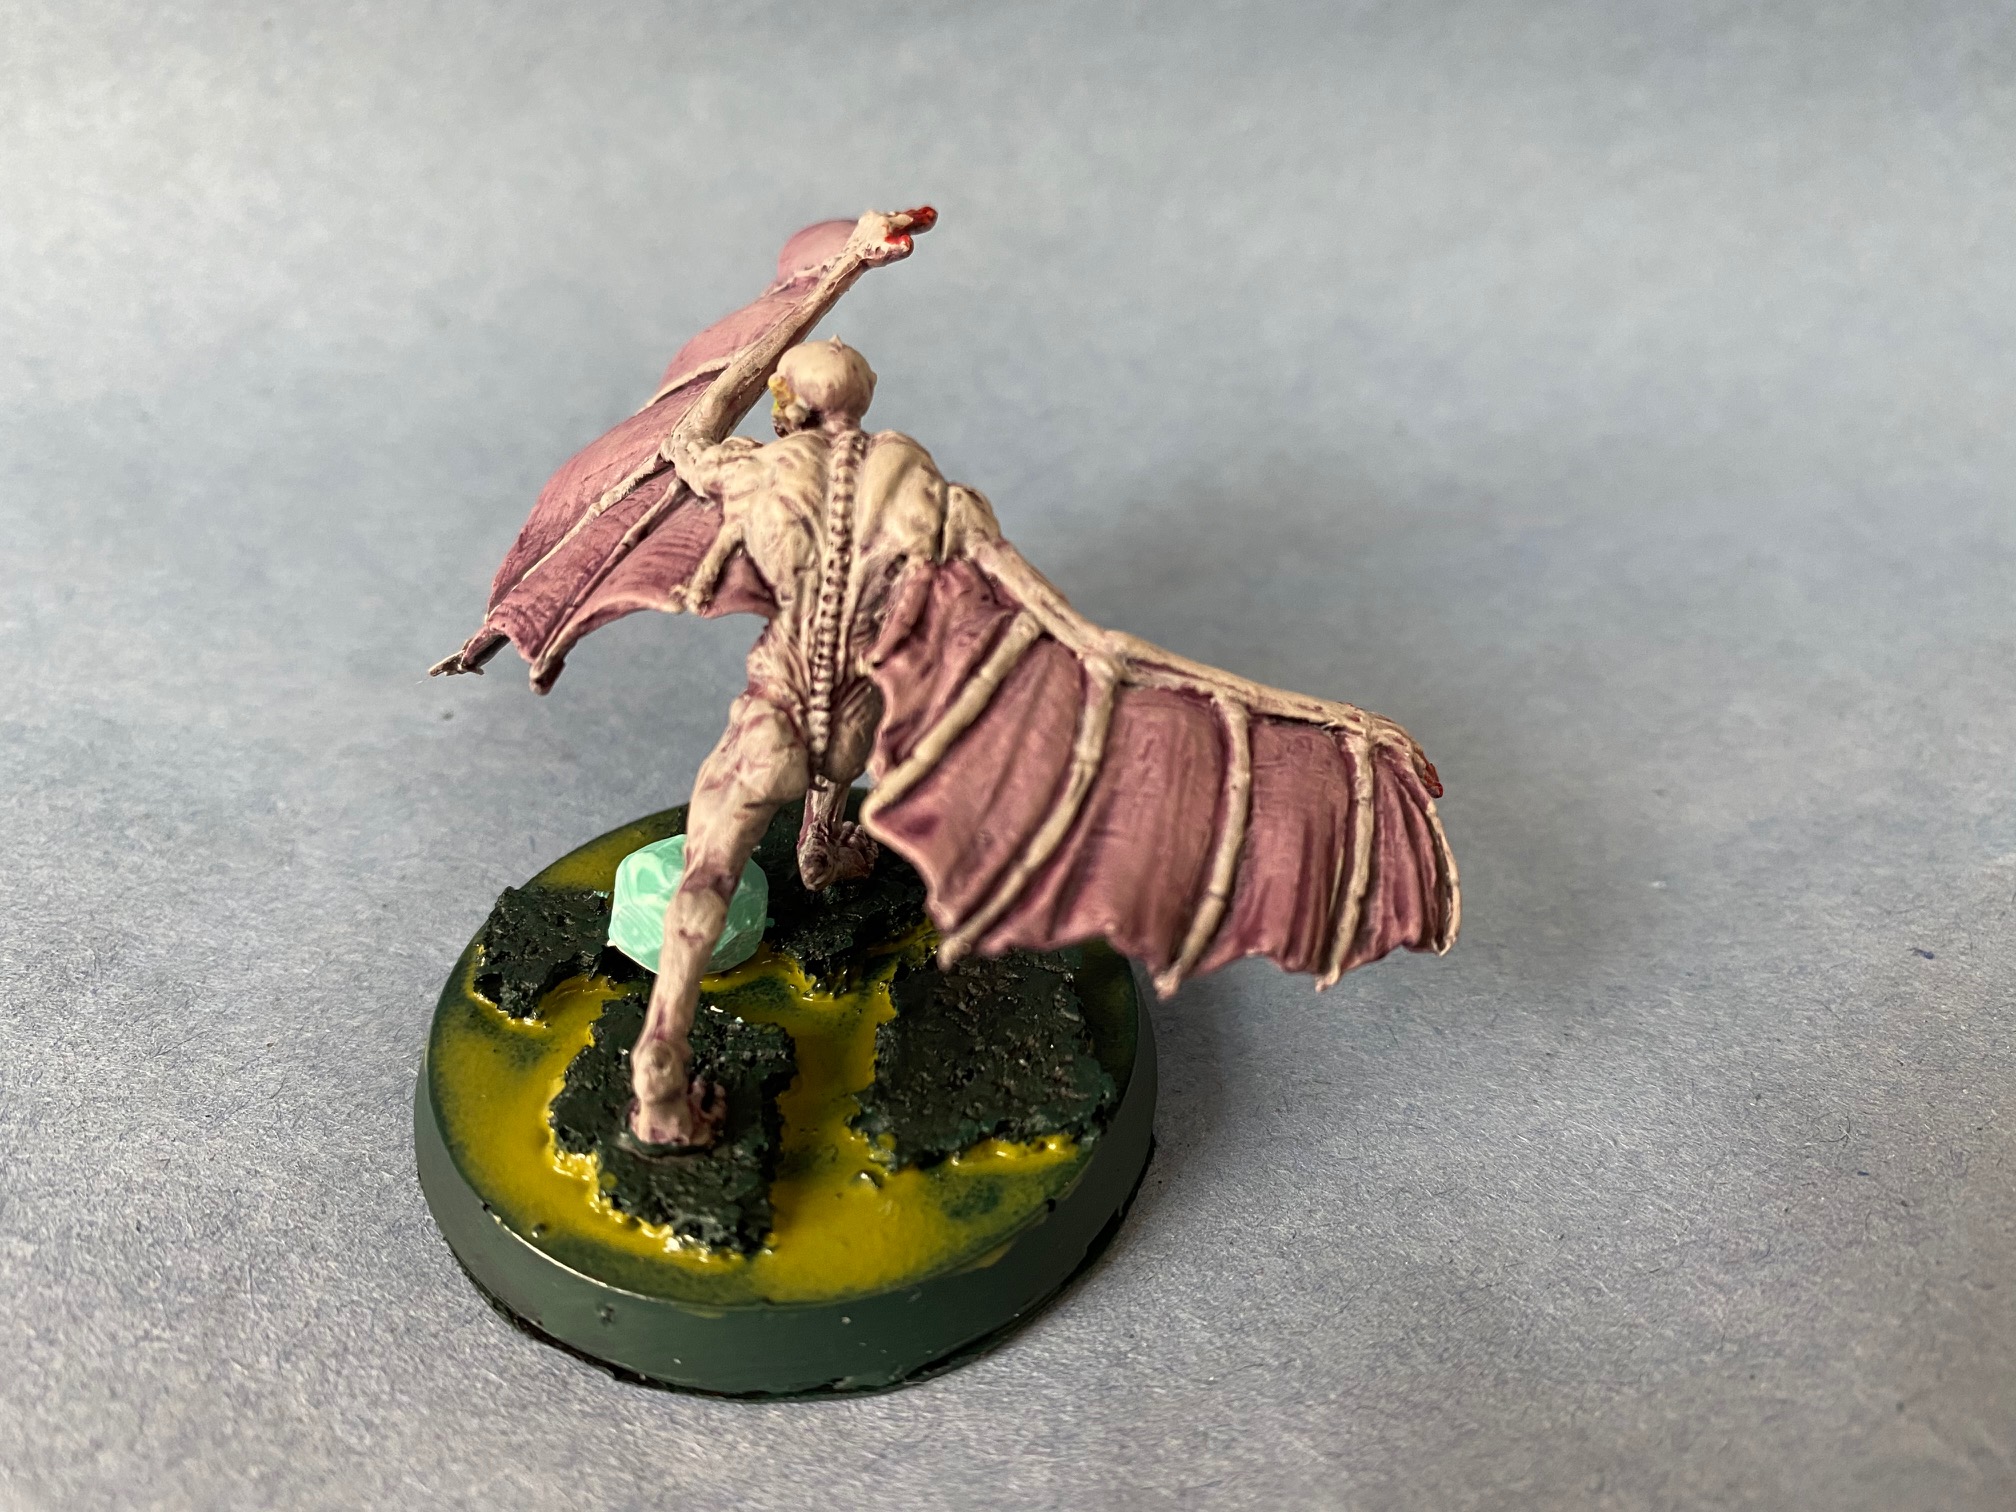
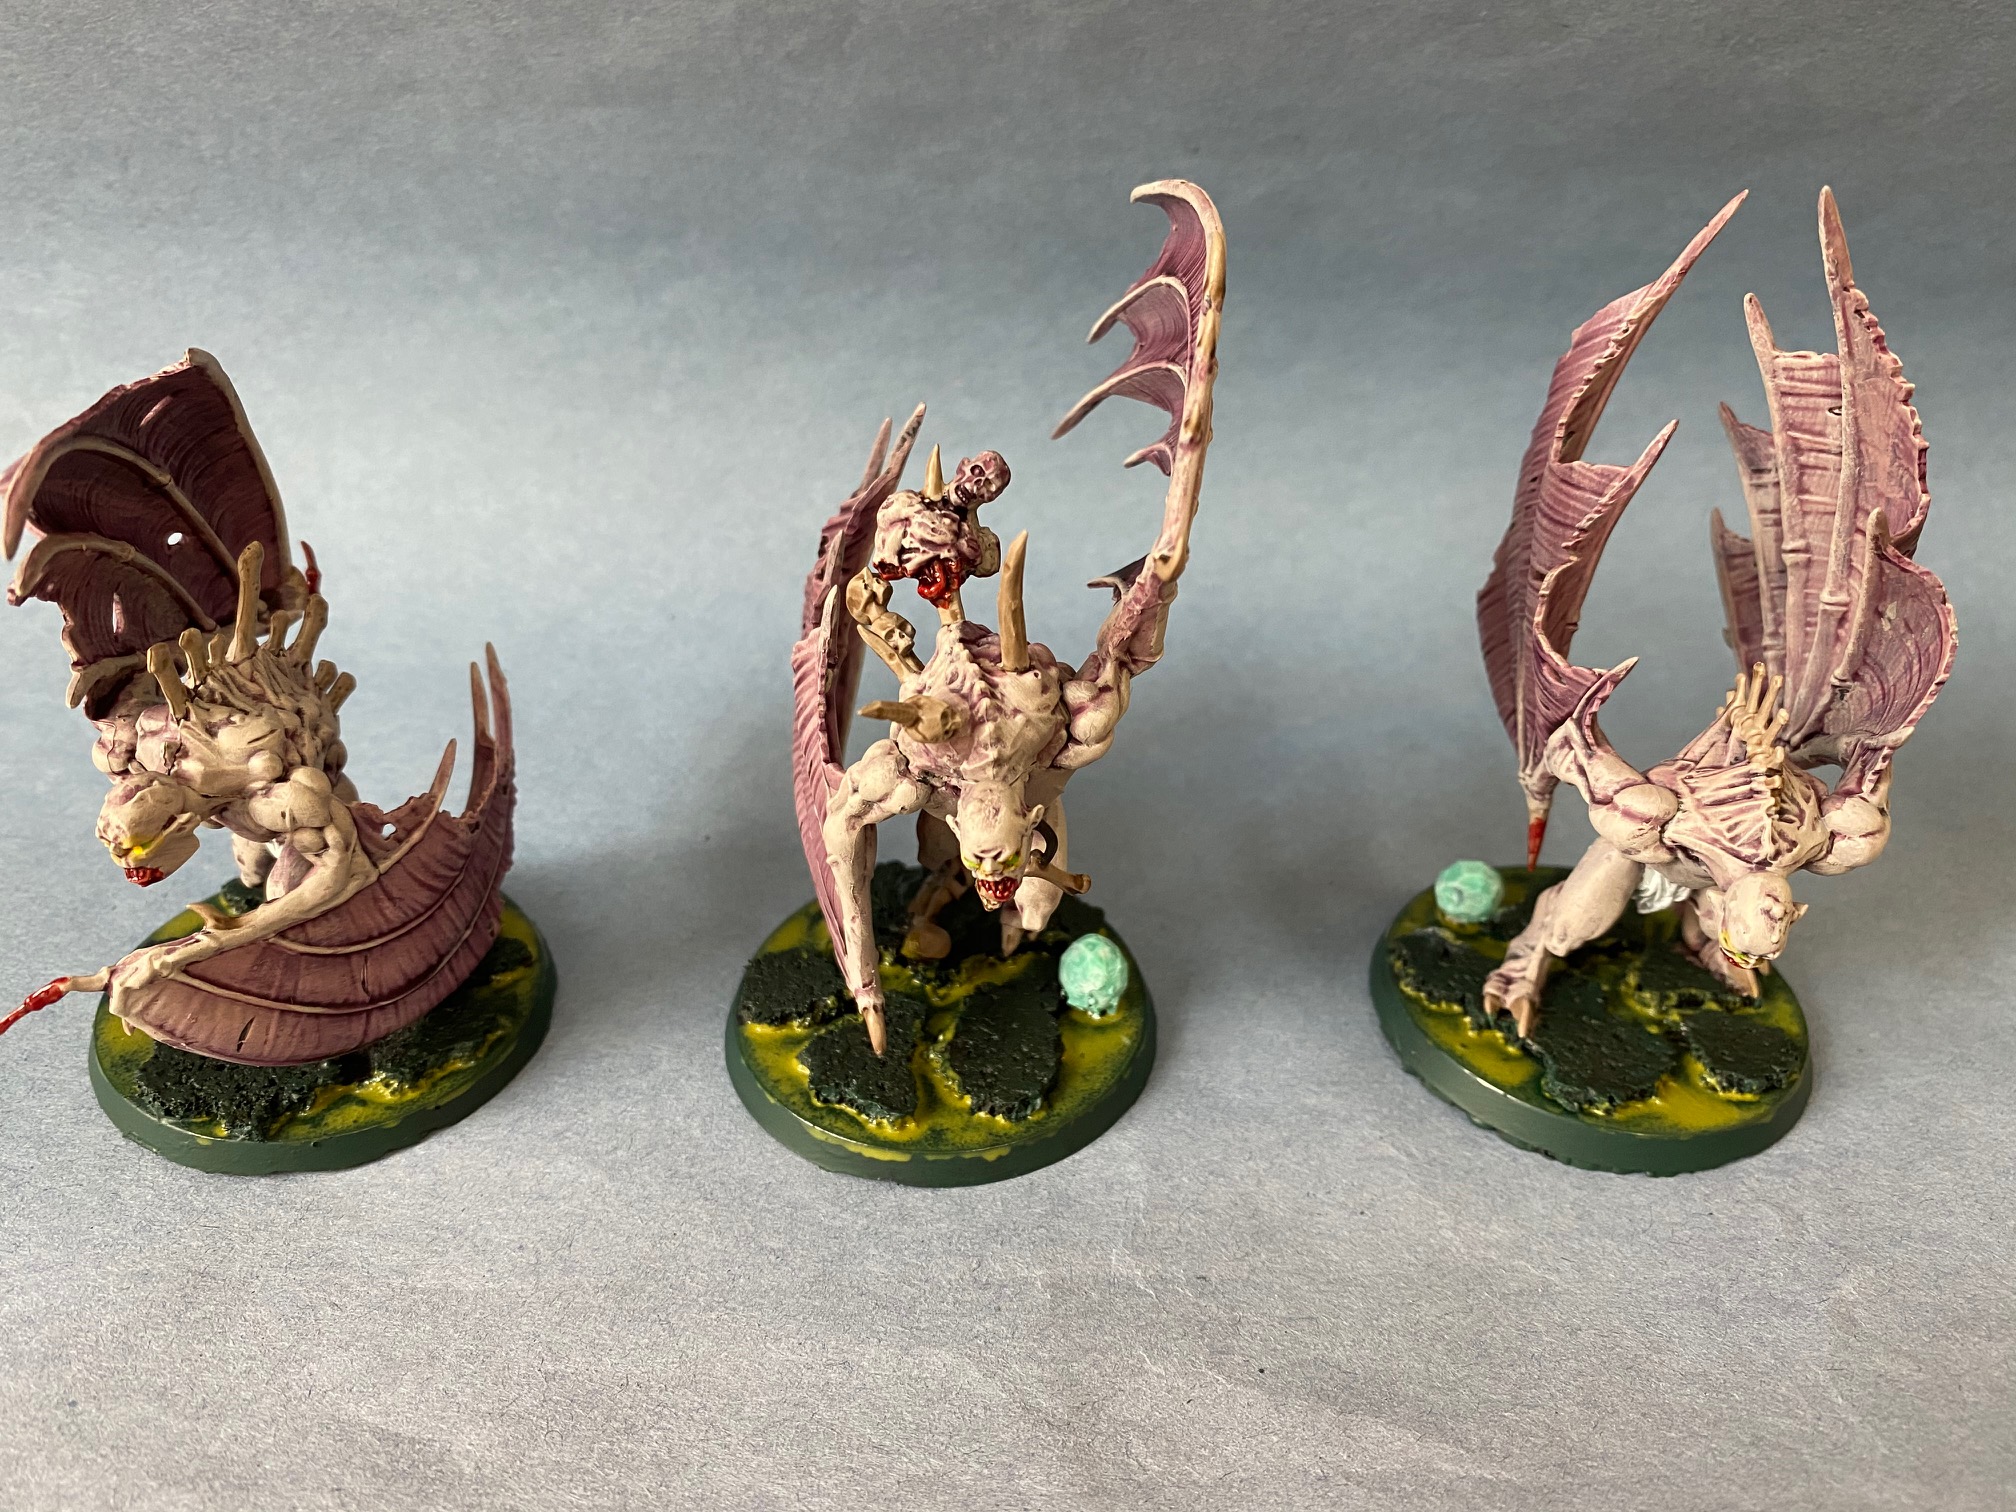
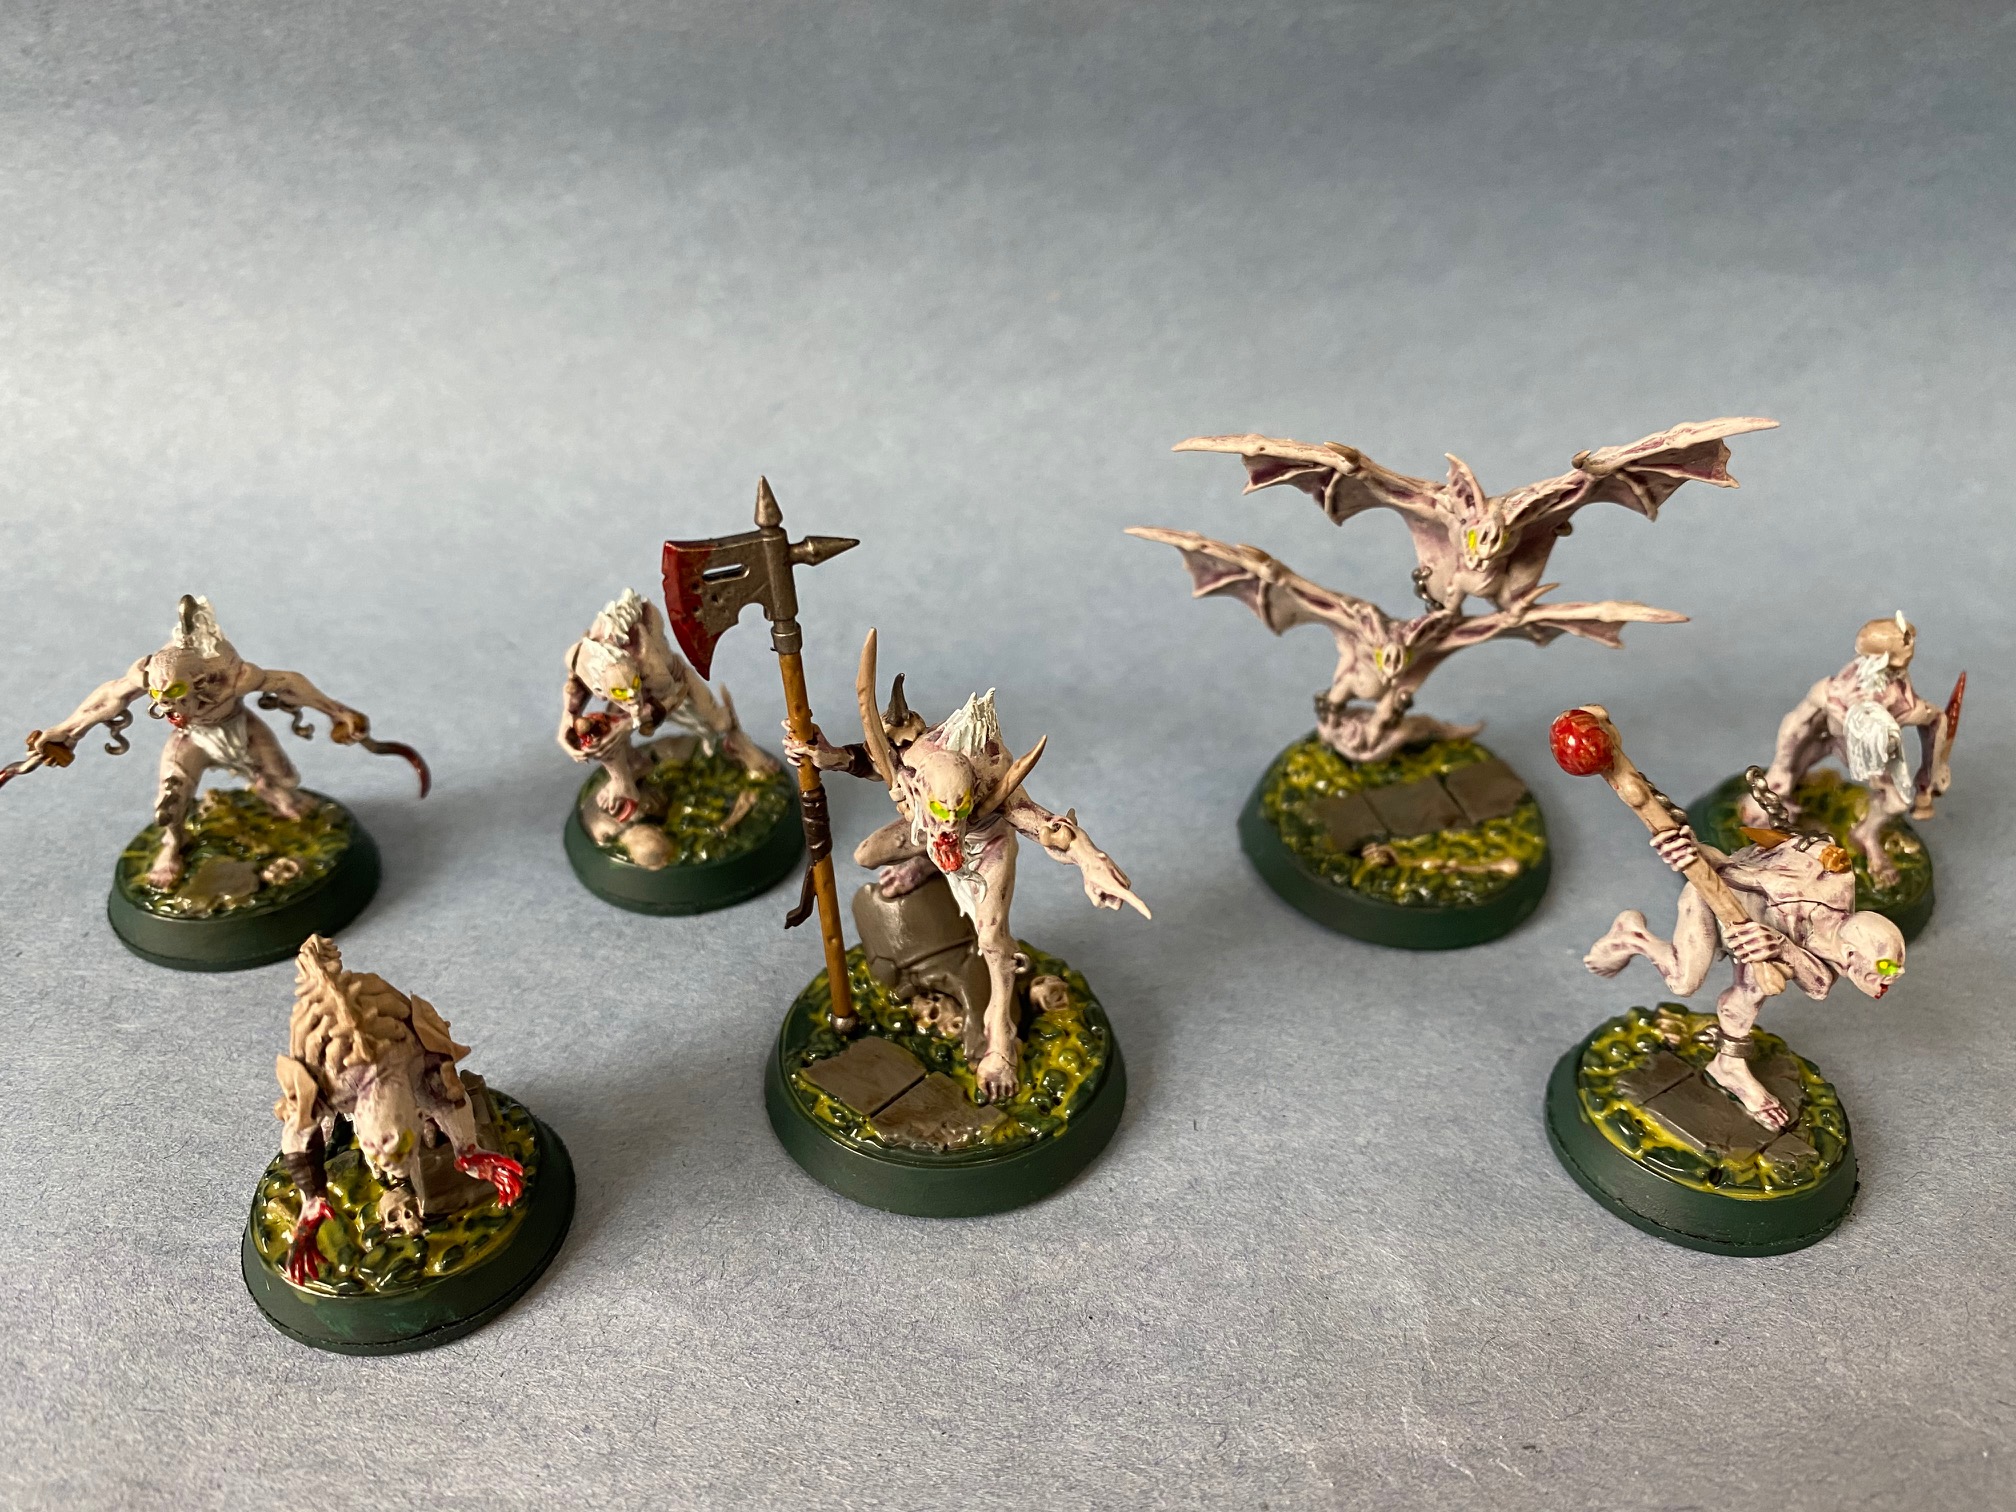
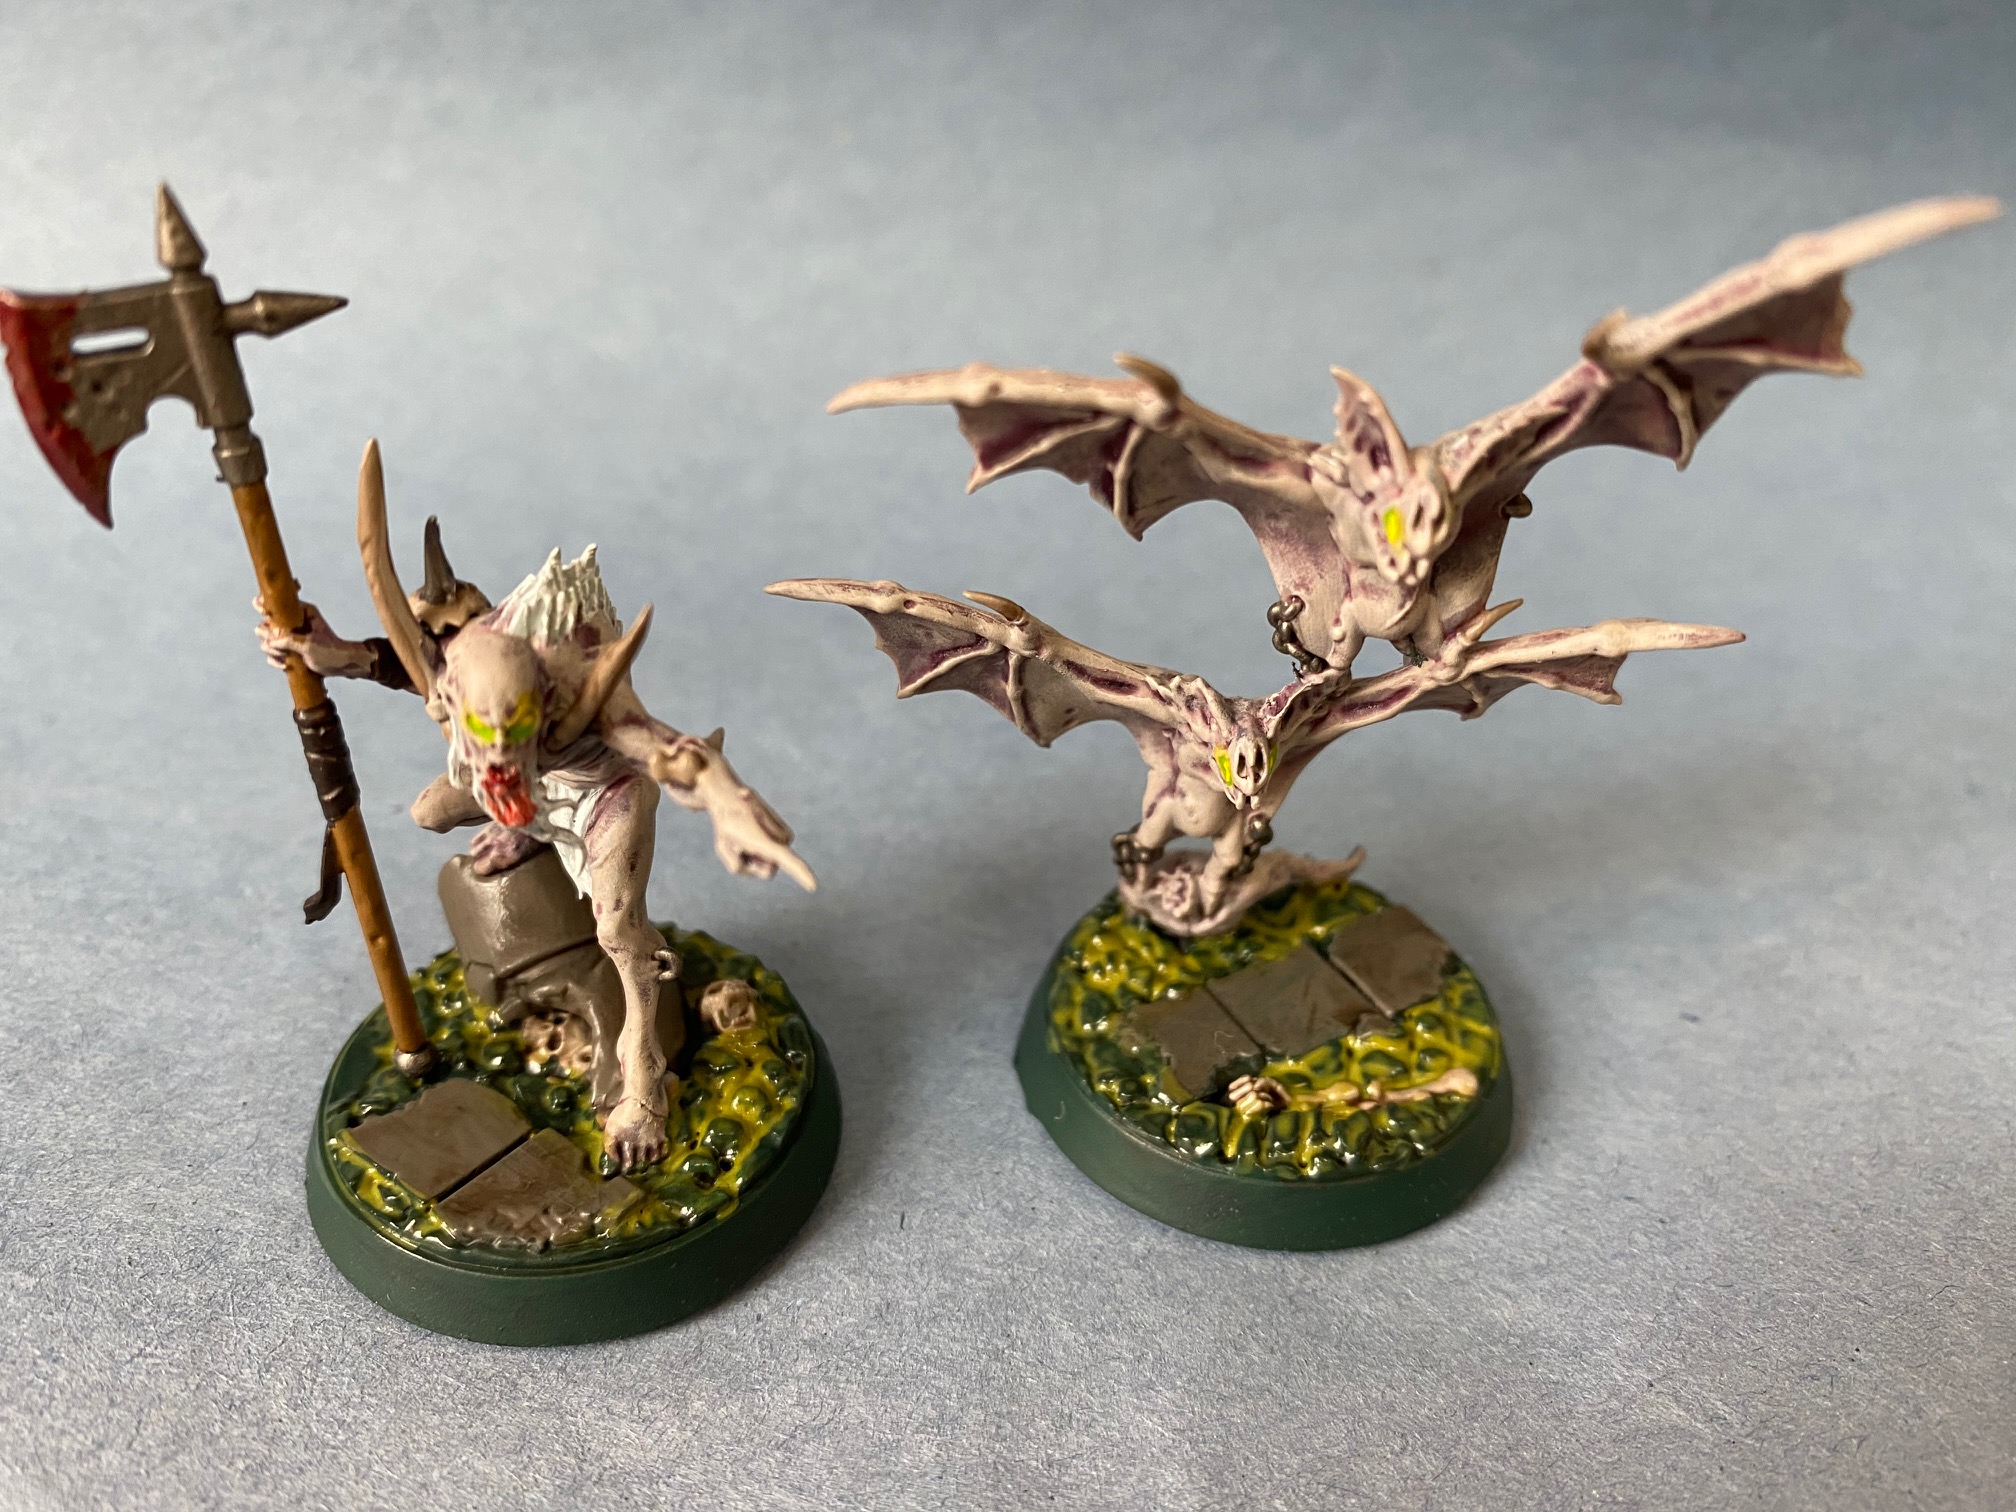


It’s been a very long time since I last did batch painting on this scale, but with all my Felsh-Eater Courts models using the same colour scheme it made sense to do them all at once.
The models started with a Chaos Black undercoat. They were then base coated with Rakarth Flesh and washed with a 50:50 mix of Corroburg Crimson and Druchii Violet. Once the wash was dry they were drybrushed with Rakarth Flesh followed by a 50:50 mix of Rakarth Flesh and White Scar. The wing membranes then get another wash of 50:50 mix Corroburg Crimson and Druchii Violet.
With the flesh (i.e. 90% of the models) now done it is now time to pick out the details. Bones were painted Rakarth Flesh, wood XV-88, leather Rhinox Hide, metal Leadbelcher and hair Celestra Grey. All these areas except the hair and metal were then washed with Agrax Earthshade. The hair was highlighted with White Scar. The metal was washed with Nuln Oil.
The eyes are painted Moot Green, allowing the paint to fill the entire eye socket area. The centre of the eyes are then picked out Flash Gitz Yellow and then the eyes and surrounding area are glazed with Lamenters Yellow.
Blood for the blood god is applied liberally on hands, “weapons”, and mouths.
The bases are painted Caliban Green. Any bones are painted Rakarth Flesh and stones painted Stormvermin Fur. Then the raised areas are given a Agrax Earthshade wash. The lower areas are painted with Nugle’s Wrot. The soulepods are painted White Scar then washed with Nihilakh Oxide.
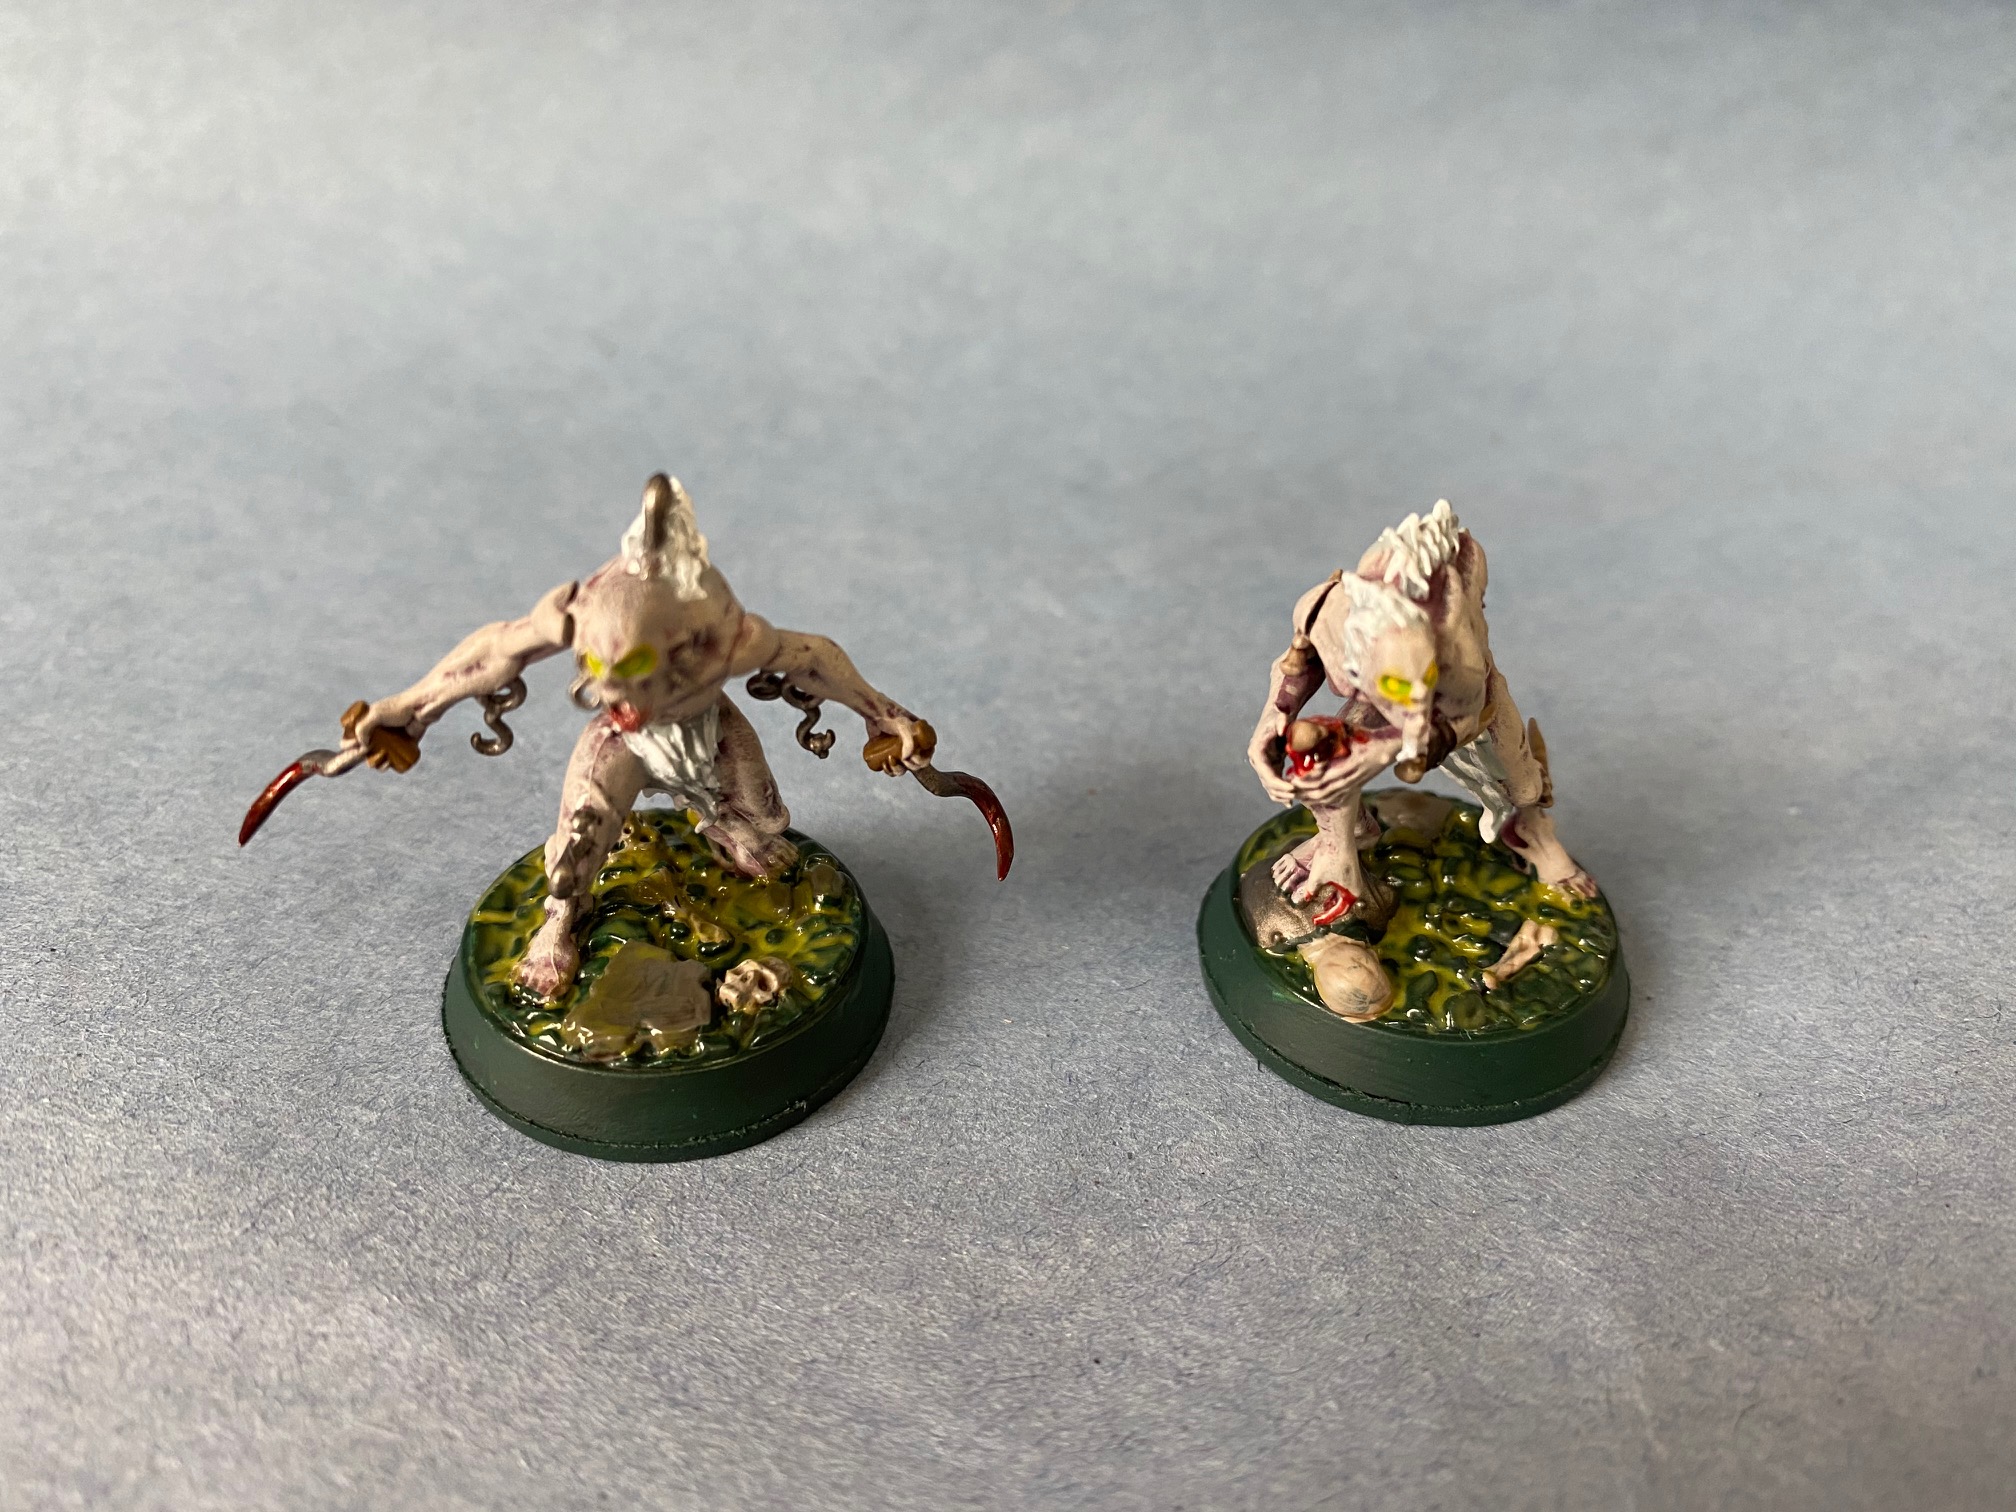
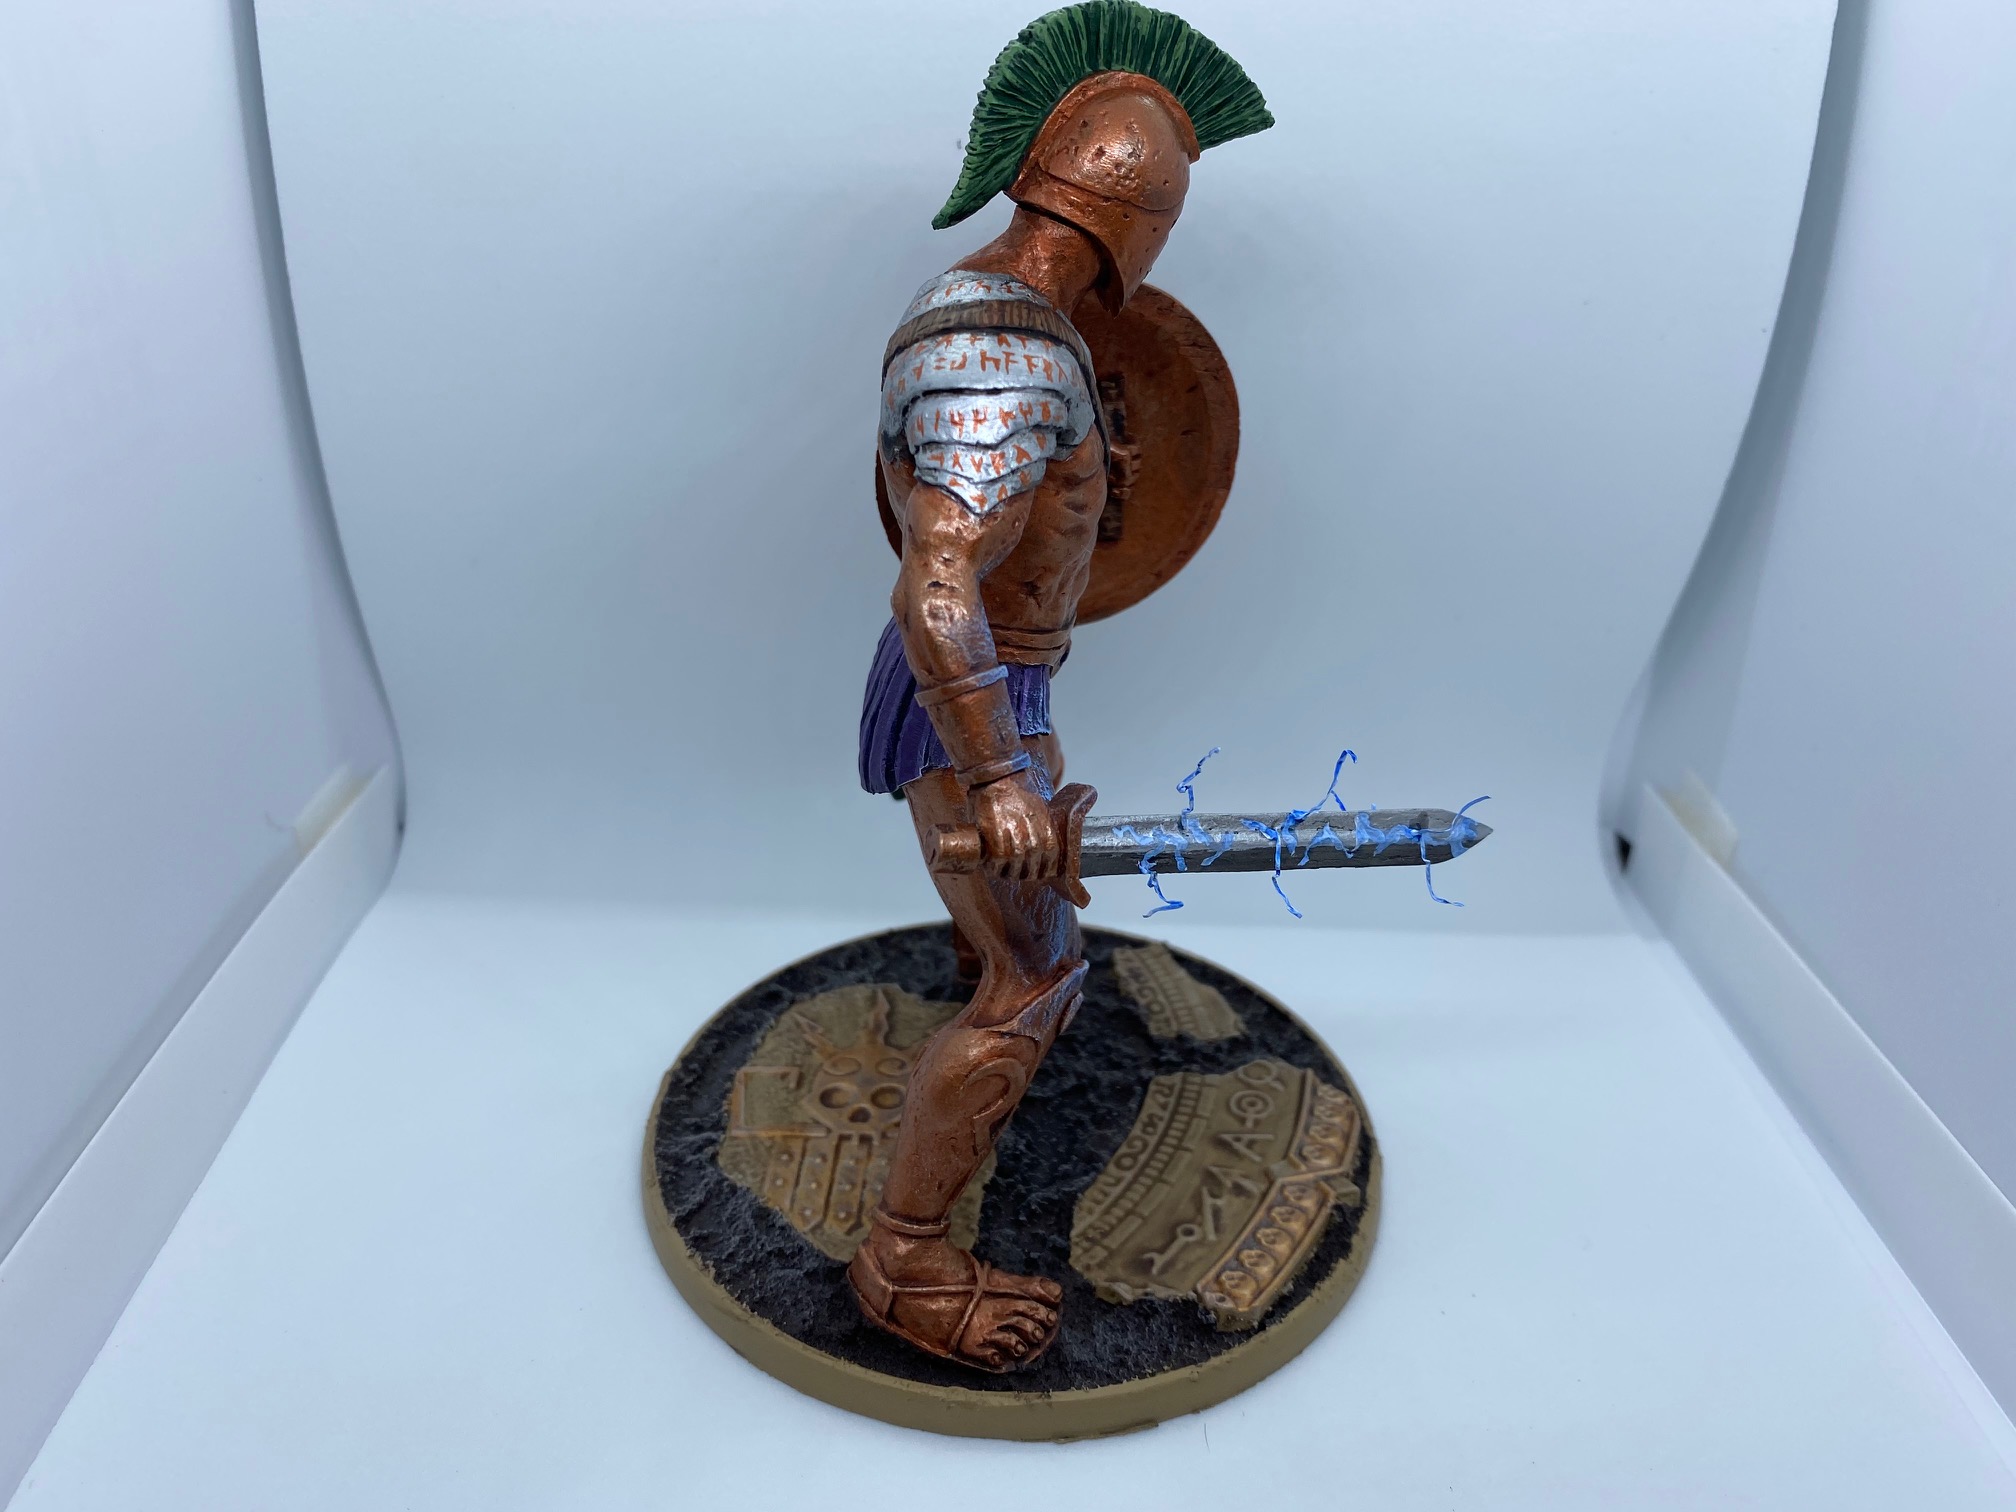
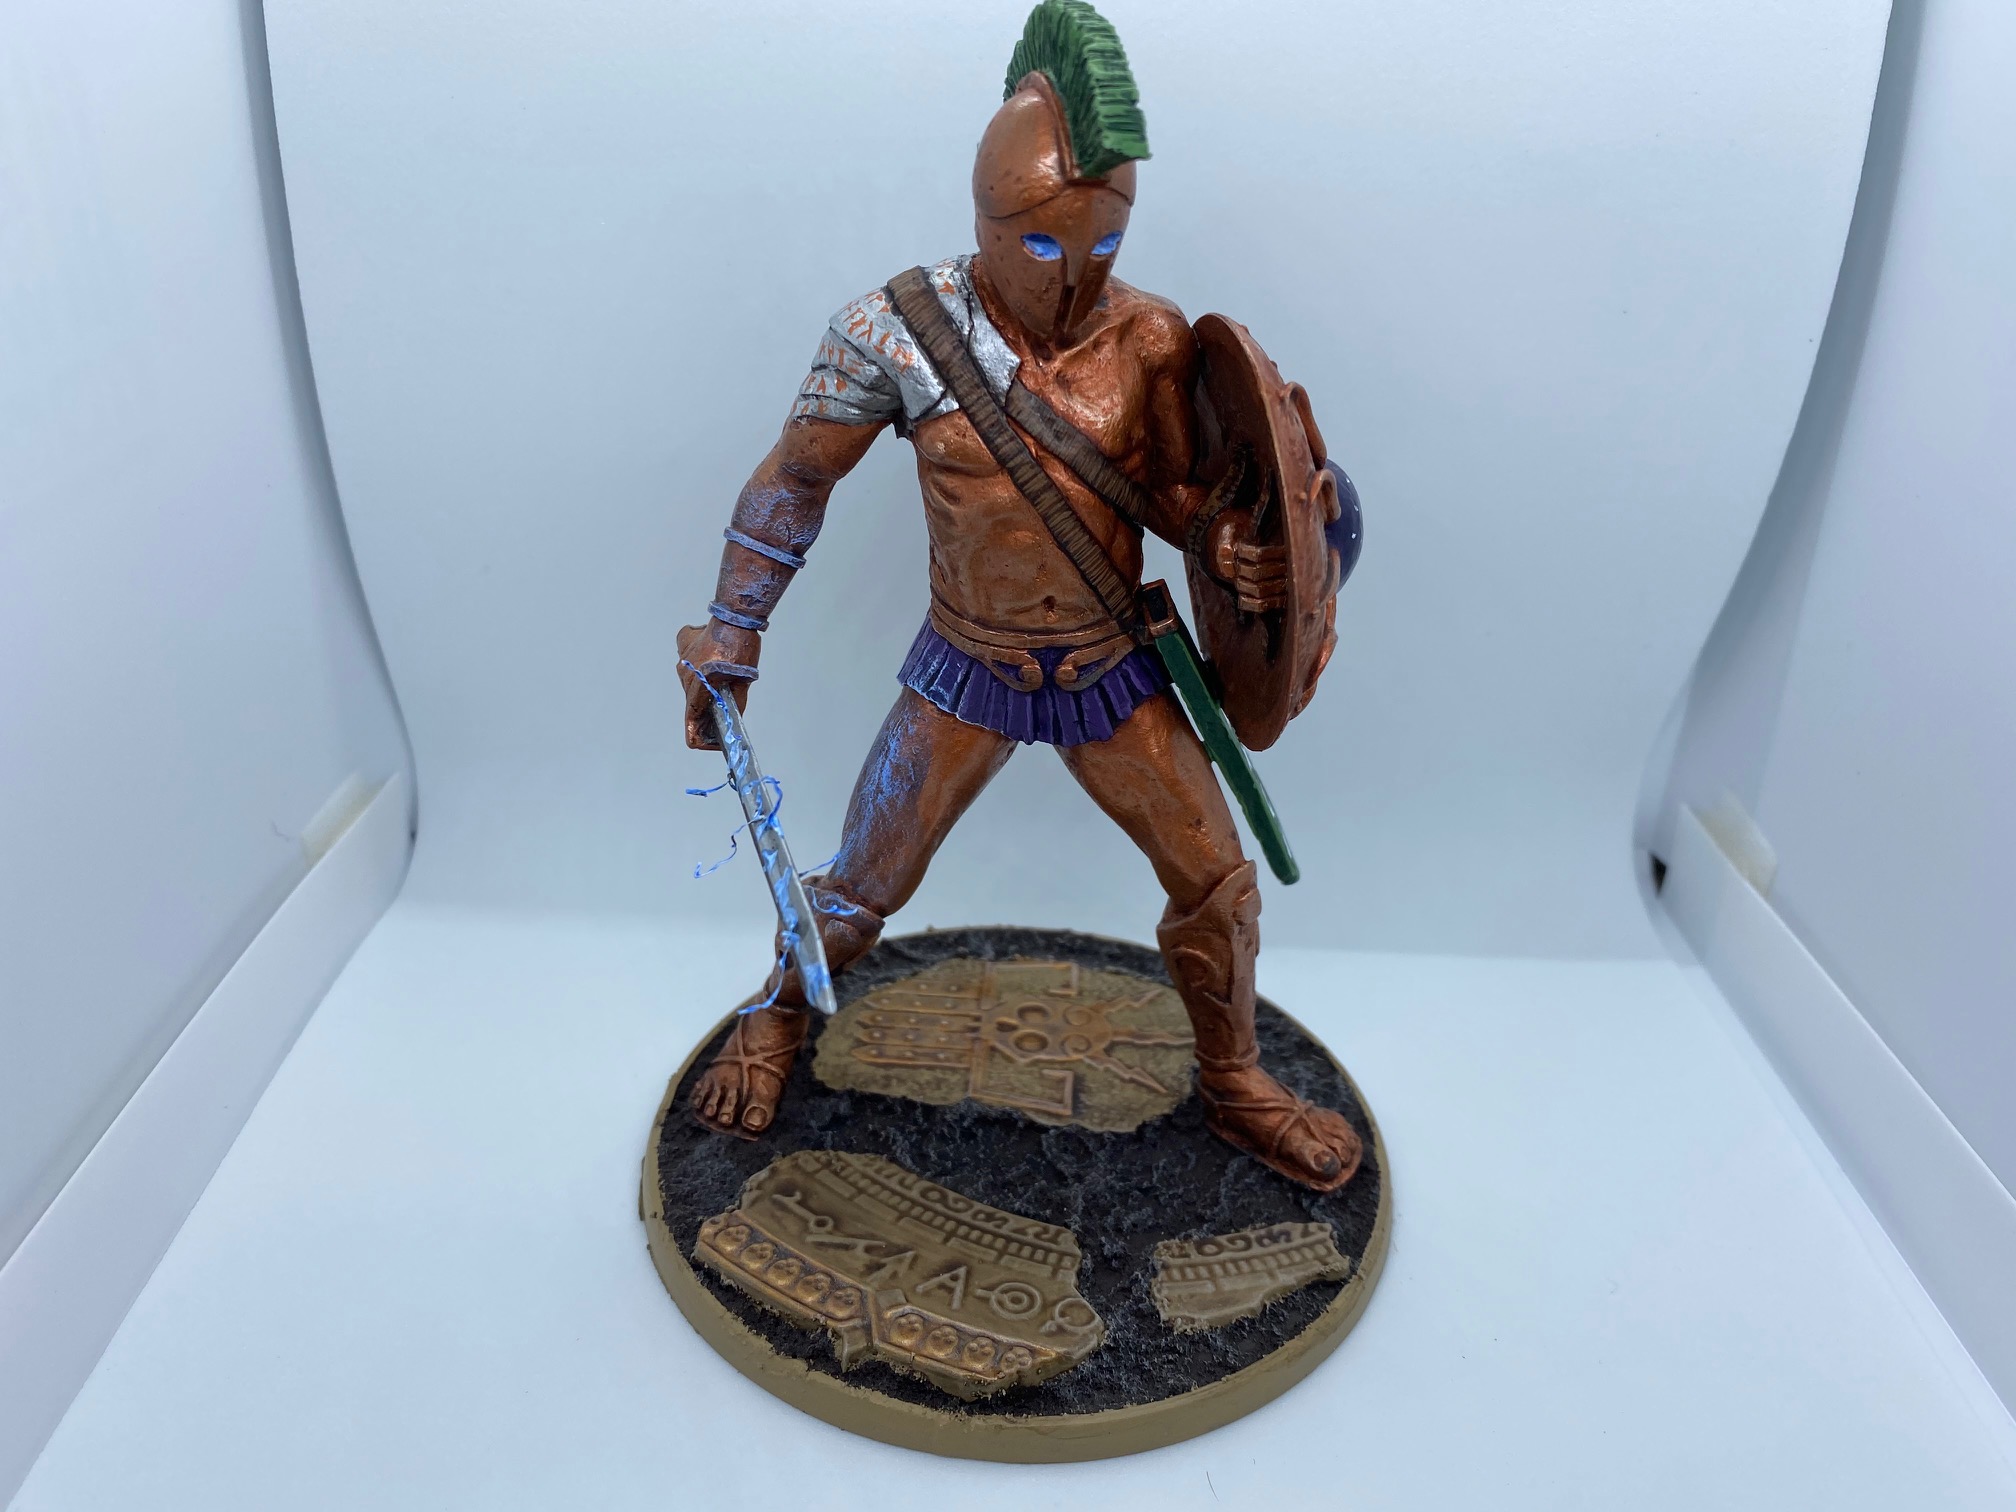
Goblin vampire and Talos
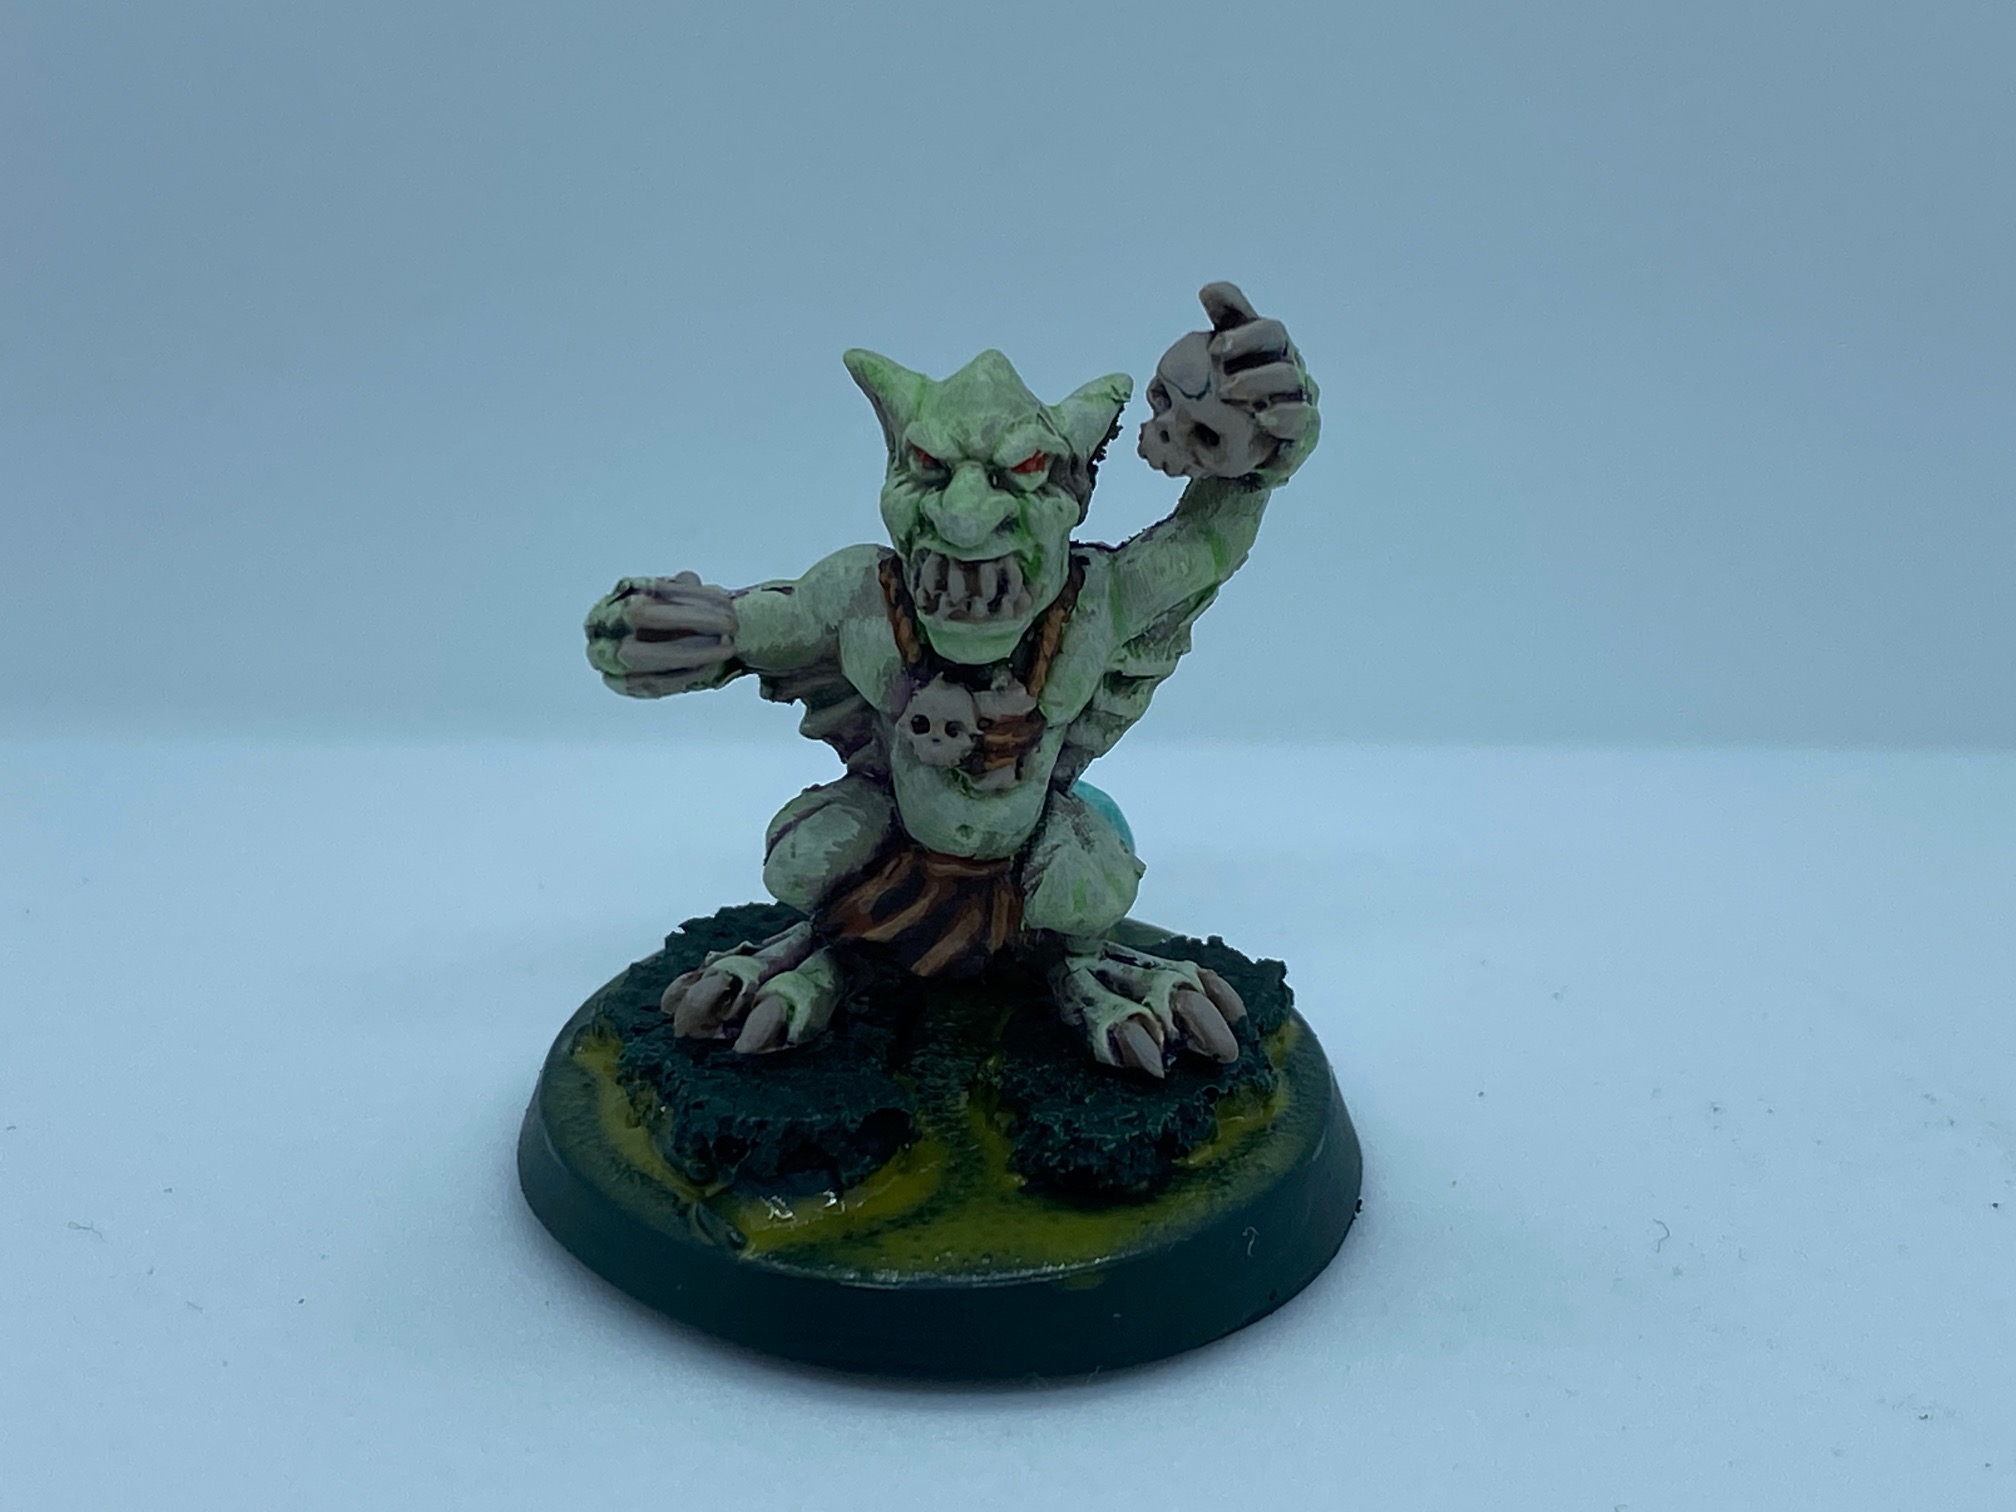
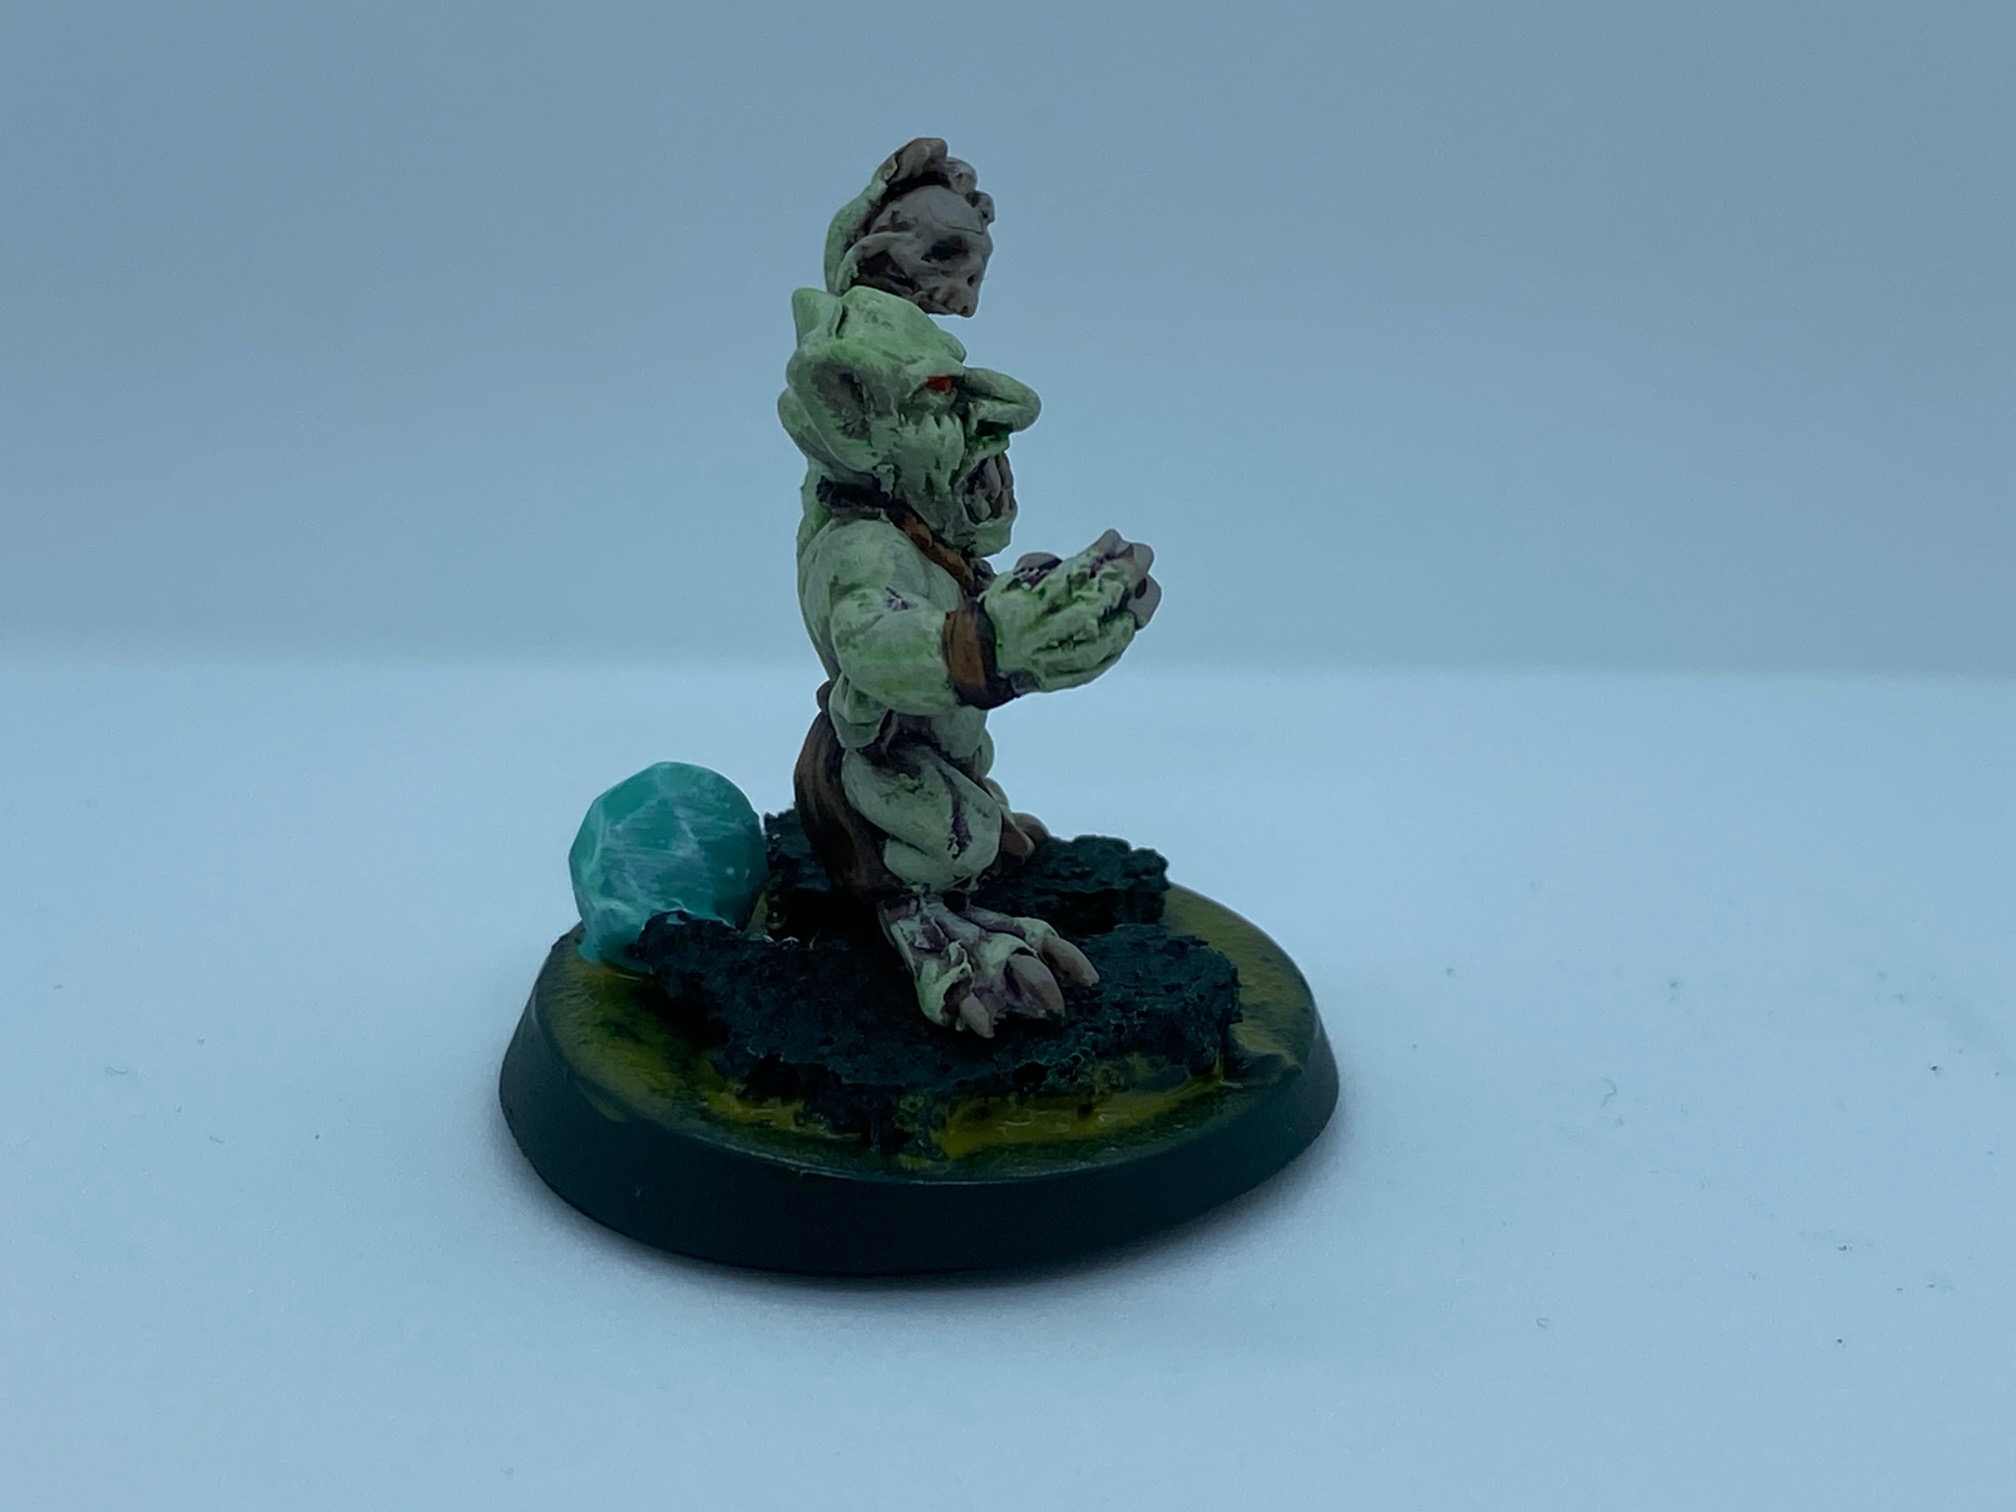
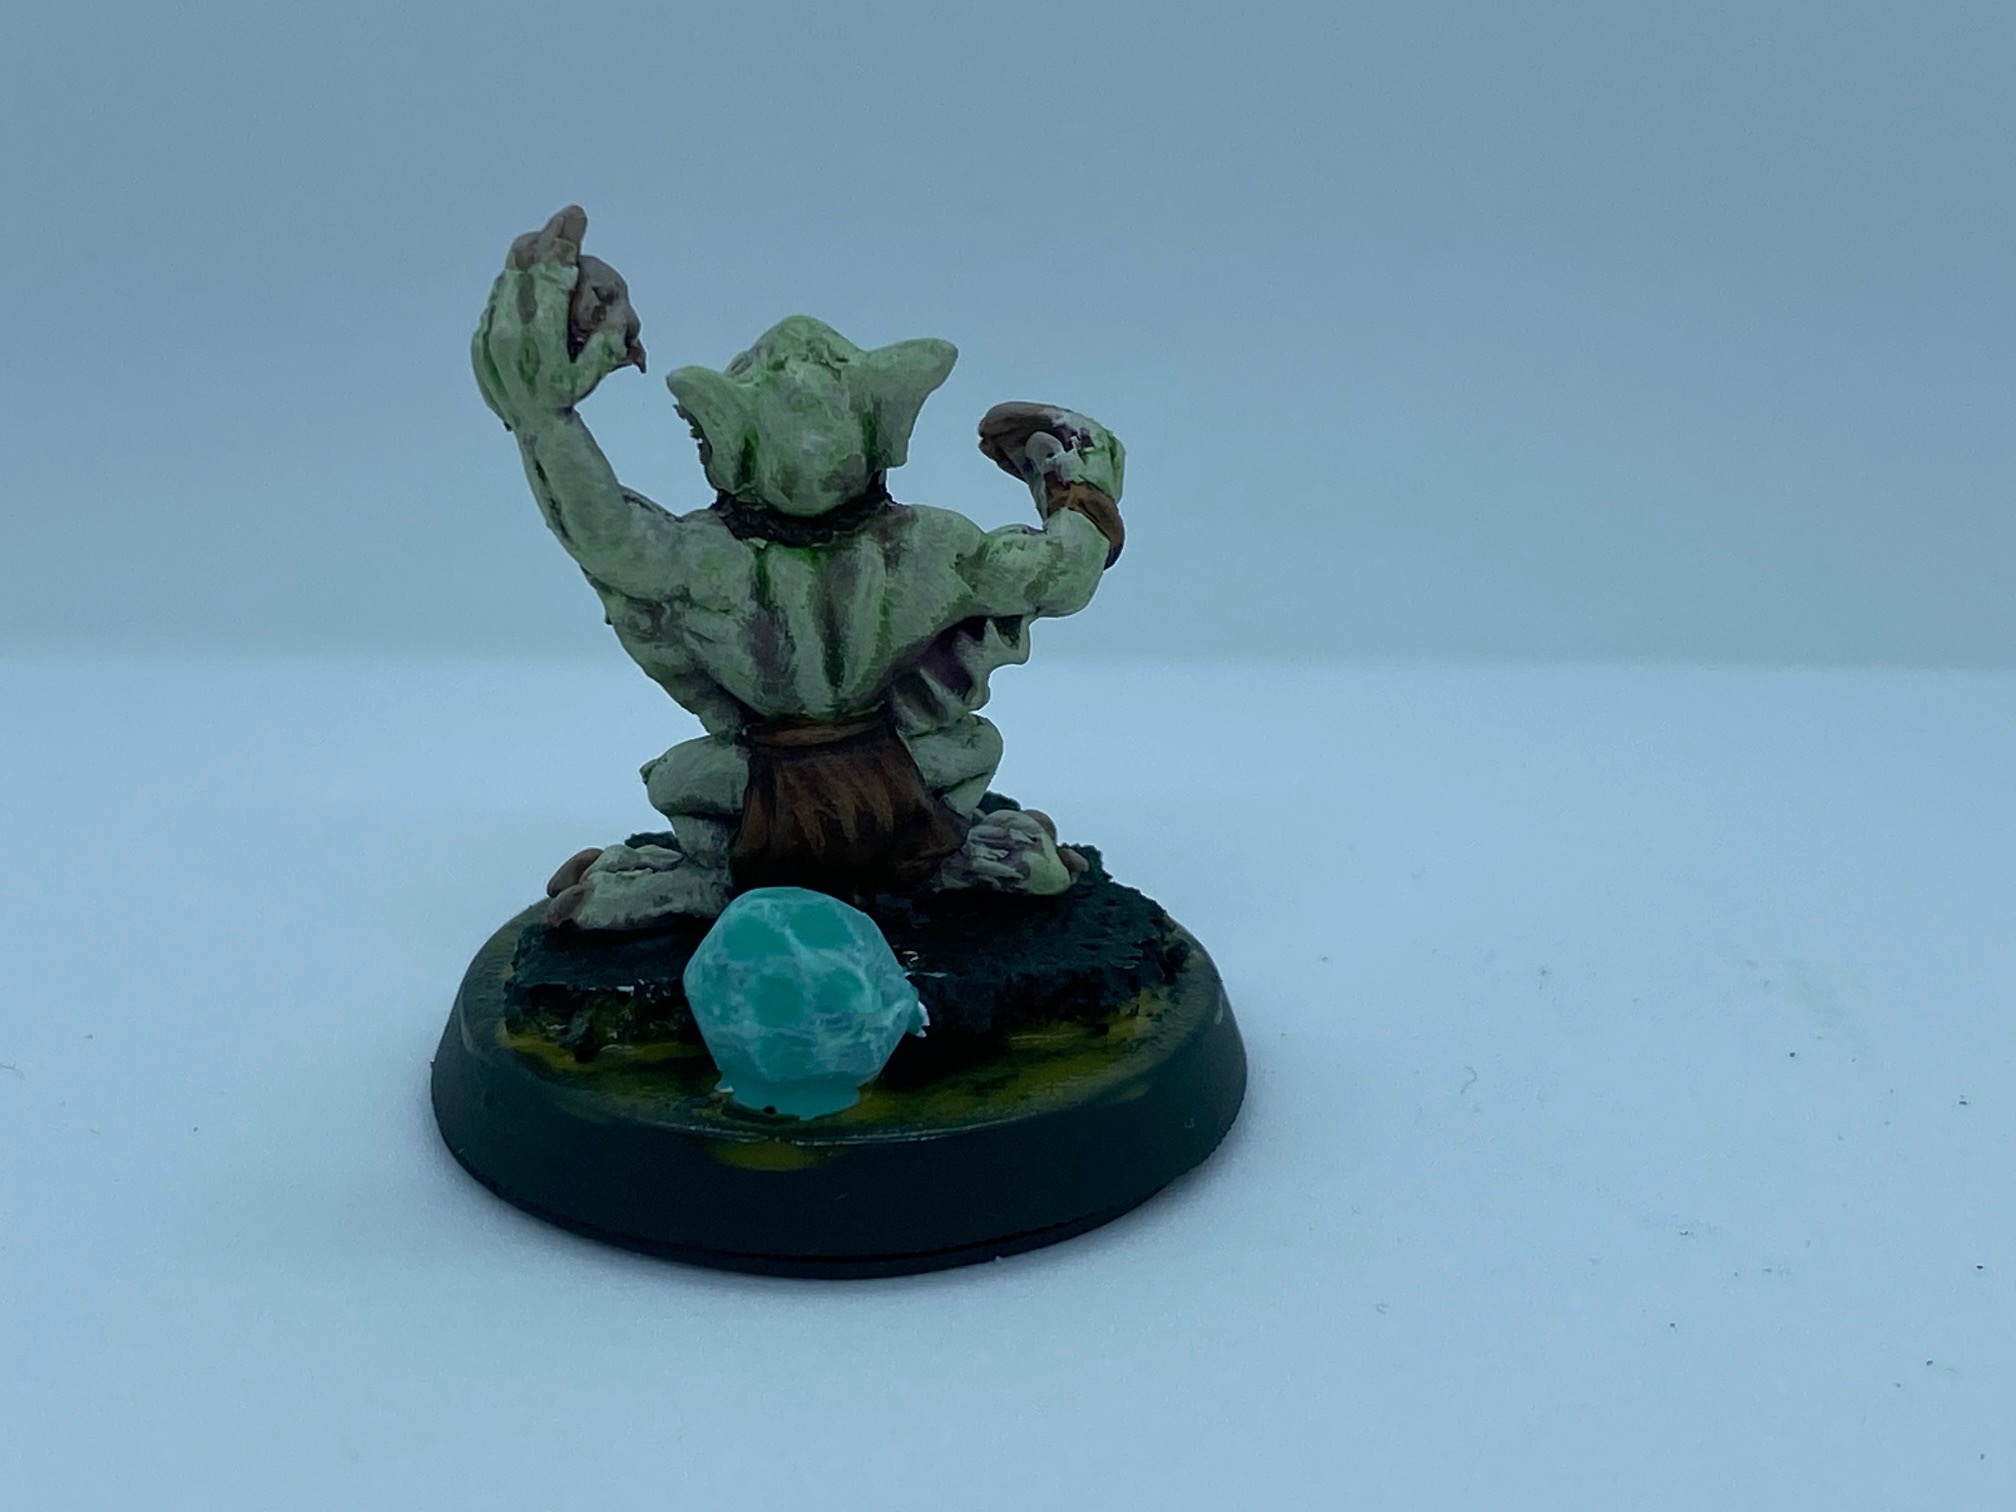
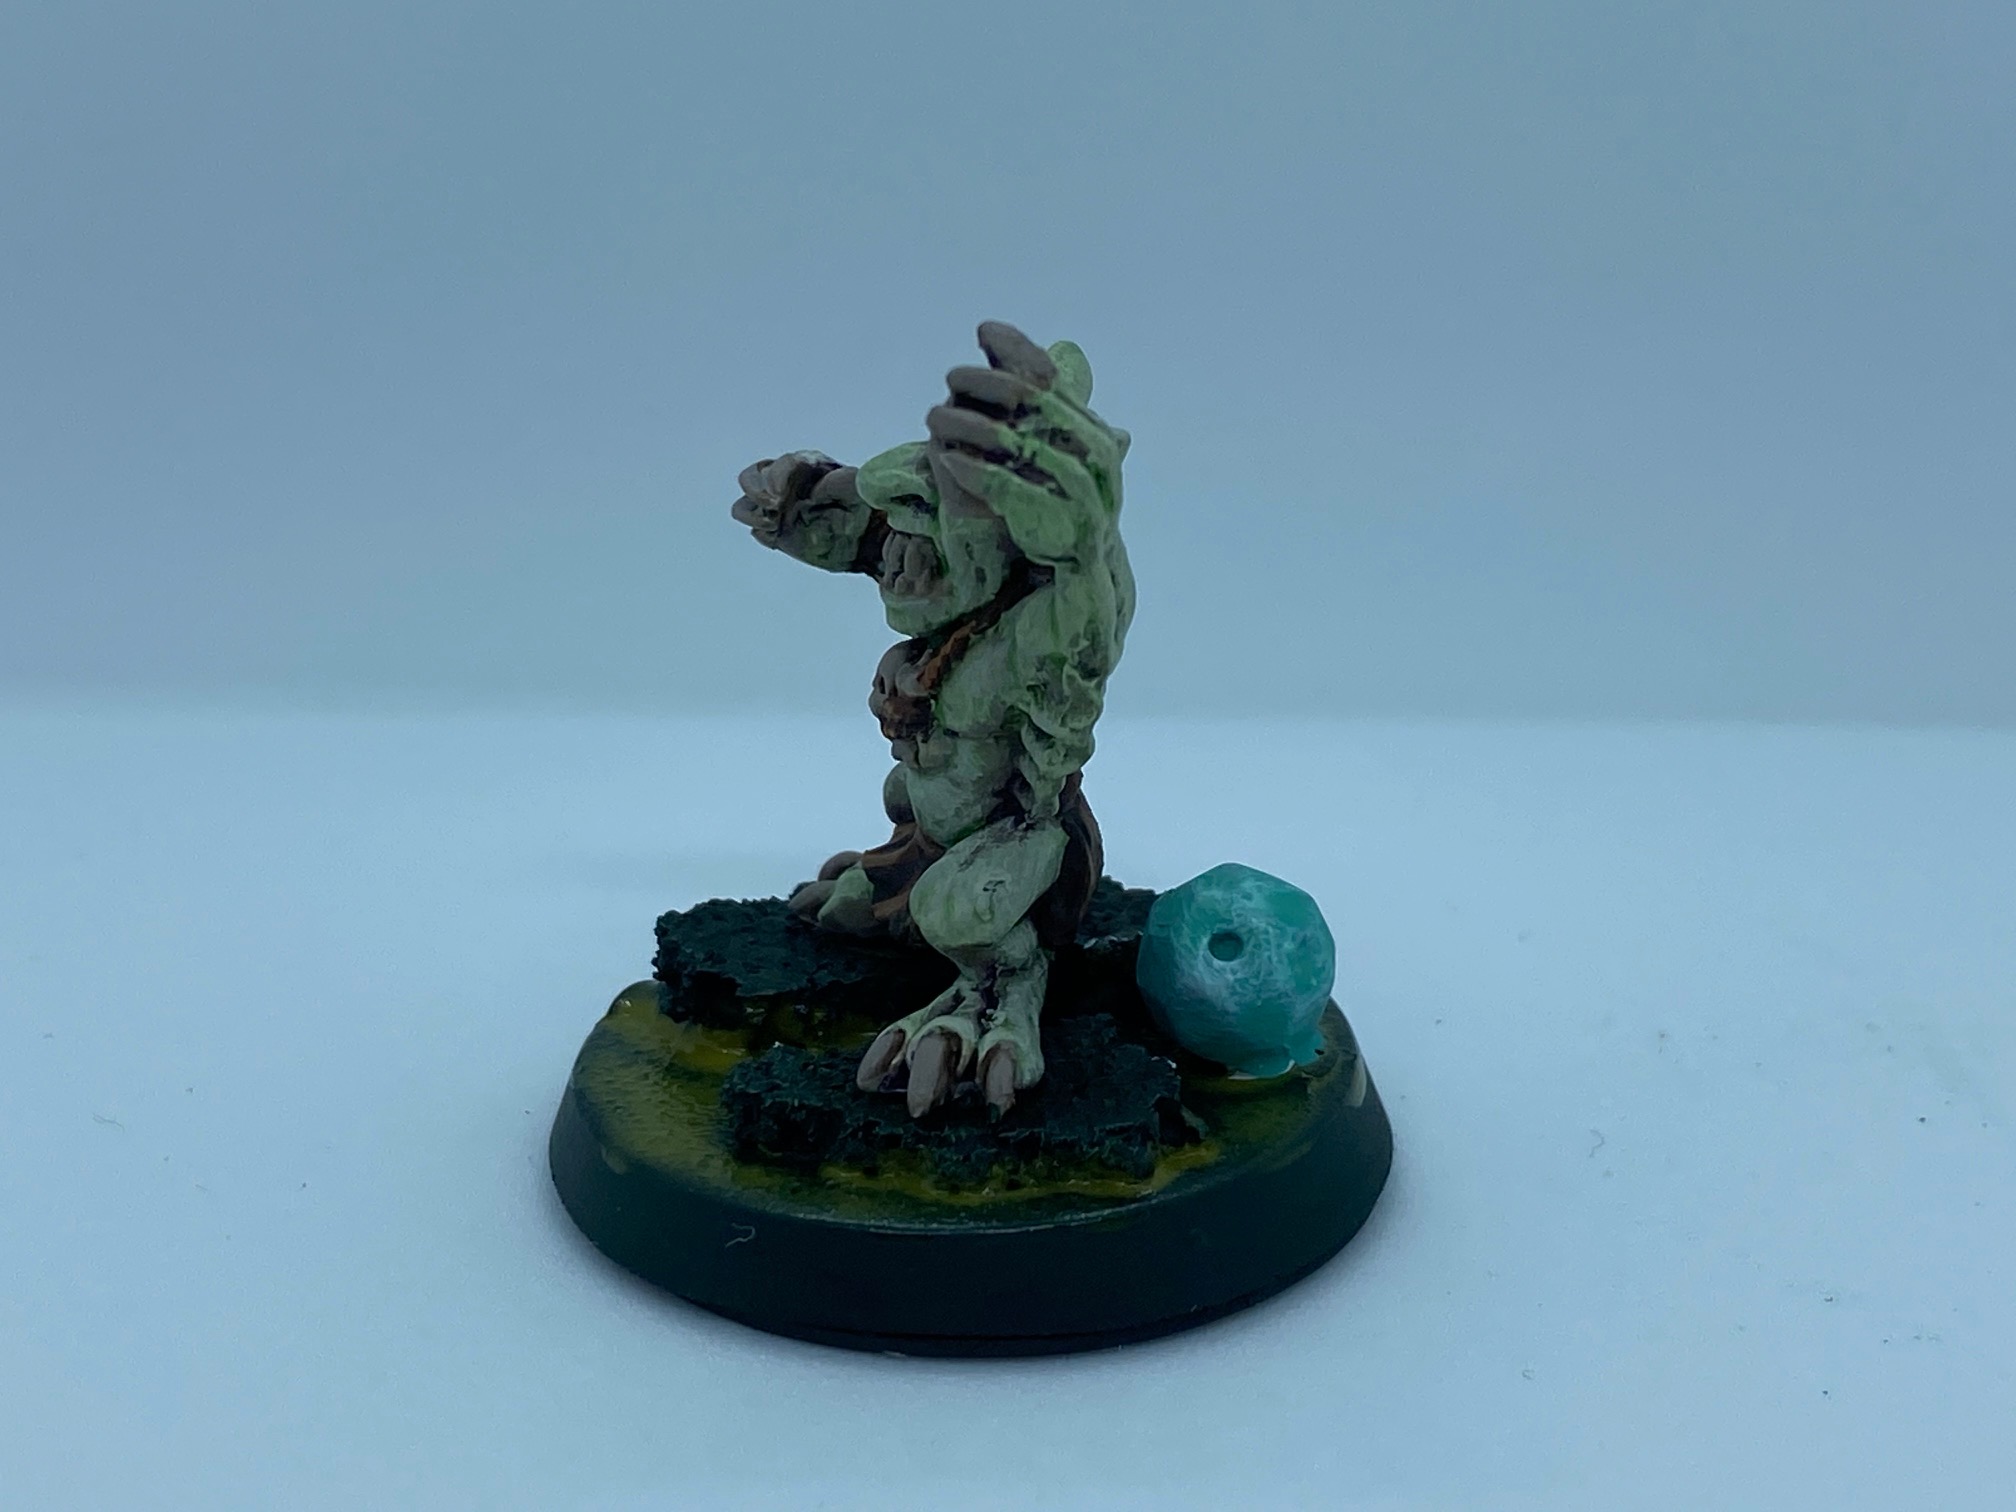
I picked both these models up at Salute 2019. The goblin vampire is painted in exactly the same way as the Flesheater Courts models in my previous post, except after the skin was finished he got a glaze of waywatcher green.
The Talos was undercoated with chaos black spray. The bronze was painted screaming bell, washed with reikland fleshshade, then highlighted with hashut copper followed by sycorax bronze.
The purple was painted naggaroth night, washed druchii violet, then highlighted with xereus purple followed by genestealer purple.
The sword was painted leadbelcher, washed with nuln oil, then highlighted with ironbreaker followed by runefang steel.
The green was painted waaagh! flesh, washed beil-tan green, then highlighted goblin green, followed by skarsnik green.
The leather straps were painted rhinox hide, washed with agrax earthshade, then a cracked leather effect was (hopefully) achieved using fine lines of doombull brown followed by deathclaw brown.
The lightning effect was achieved by supergluing on small pieces of metal scourer, painting them white scar then applying a glaze of guilliman blue.
The base was liberally applied with stirland battlemire. The edges and stone slabs were painted with zandri dust. The gold patterning on the slabs were painted retributor armour, then the whole base was given an agrax earthsade wash. It was finished off with a tyrant skull drybrush all over, then a drybrush of golden griffon just over the gold.


![Zenit Miniatures’ Samurai Warlords Now Live On Kickstarter [Updated]](https://images.beastsofwar.com/2026/02/samurai-warlords-launch-main-600-338.jpg)

