


![NO Weekender Or Cult Of Games XLBS This Weekend [Updated]](https://images.beastsofwar.com/2026/03/No_Weekender_and_XLBS_this_Weekend-225-127.jpg)


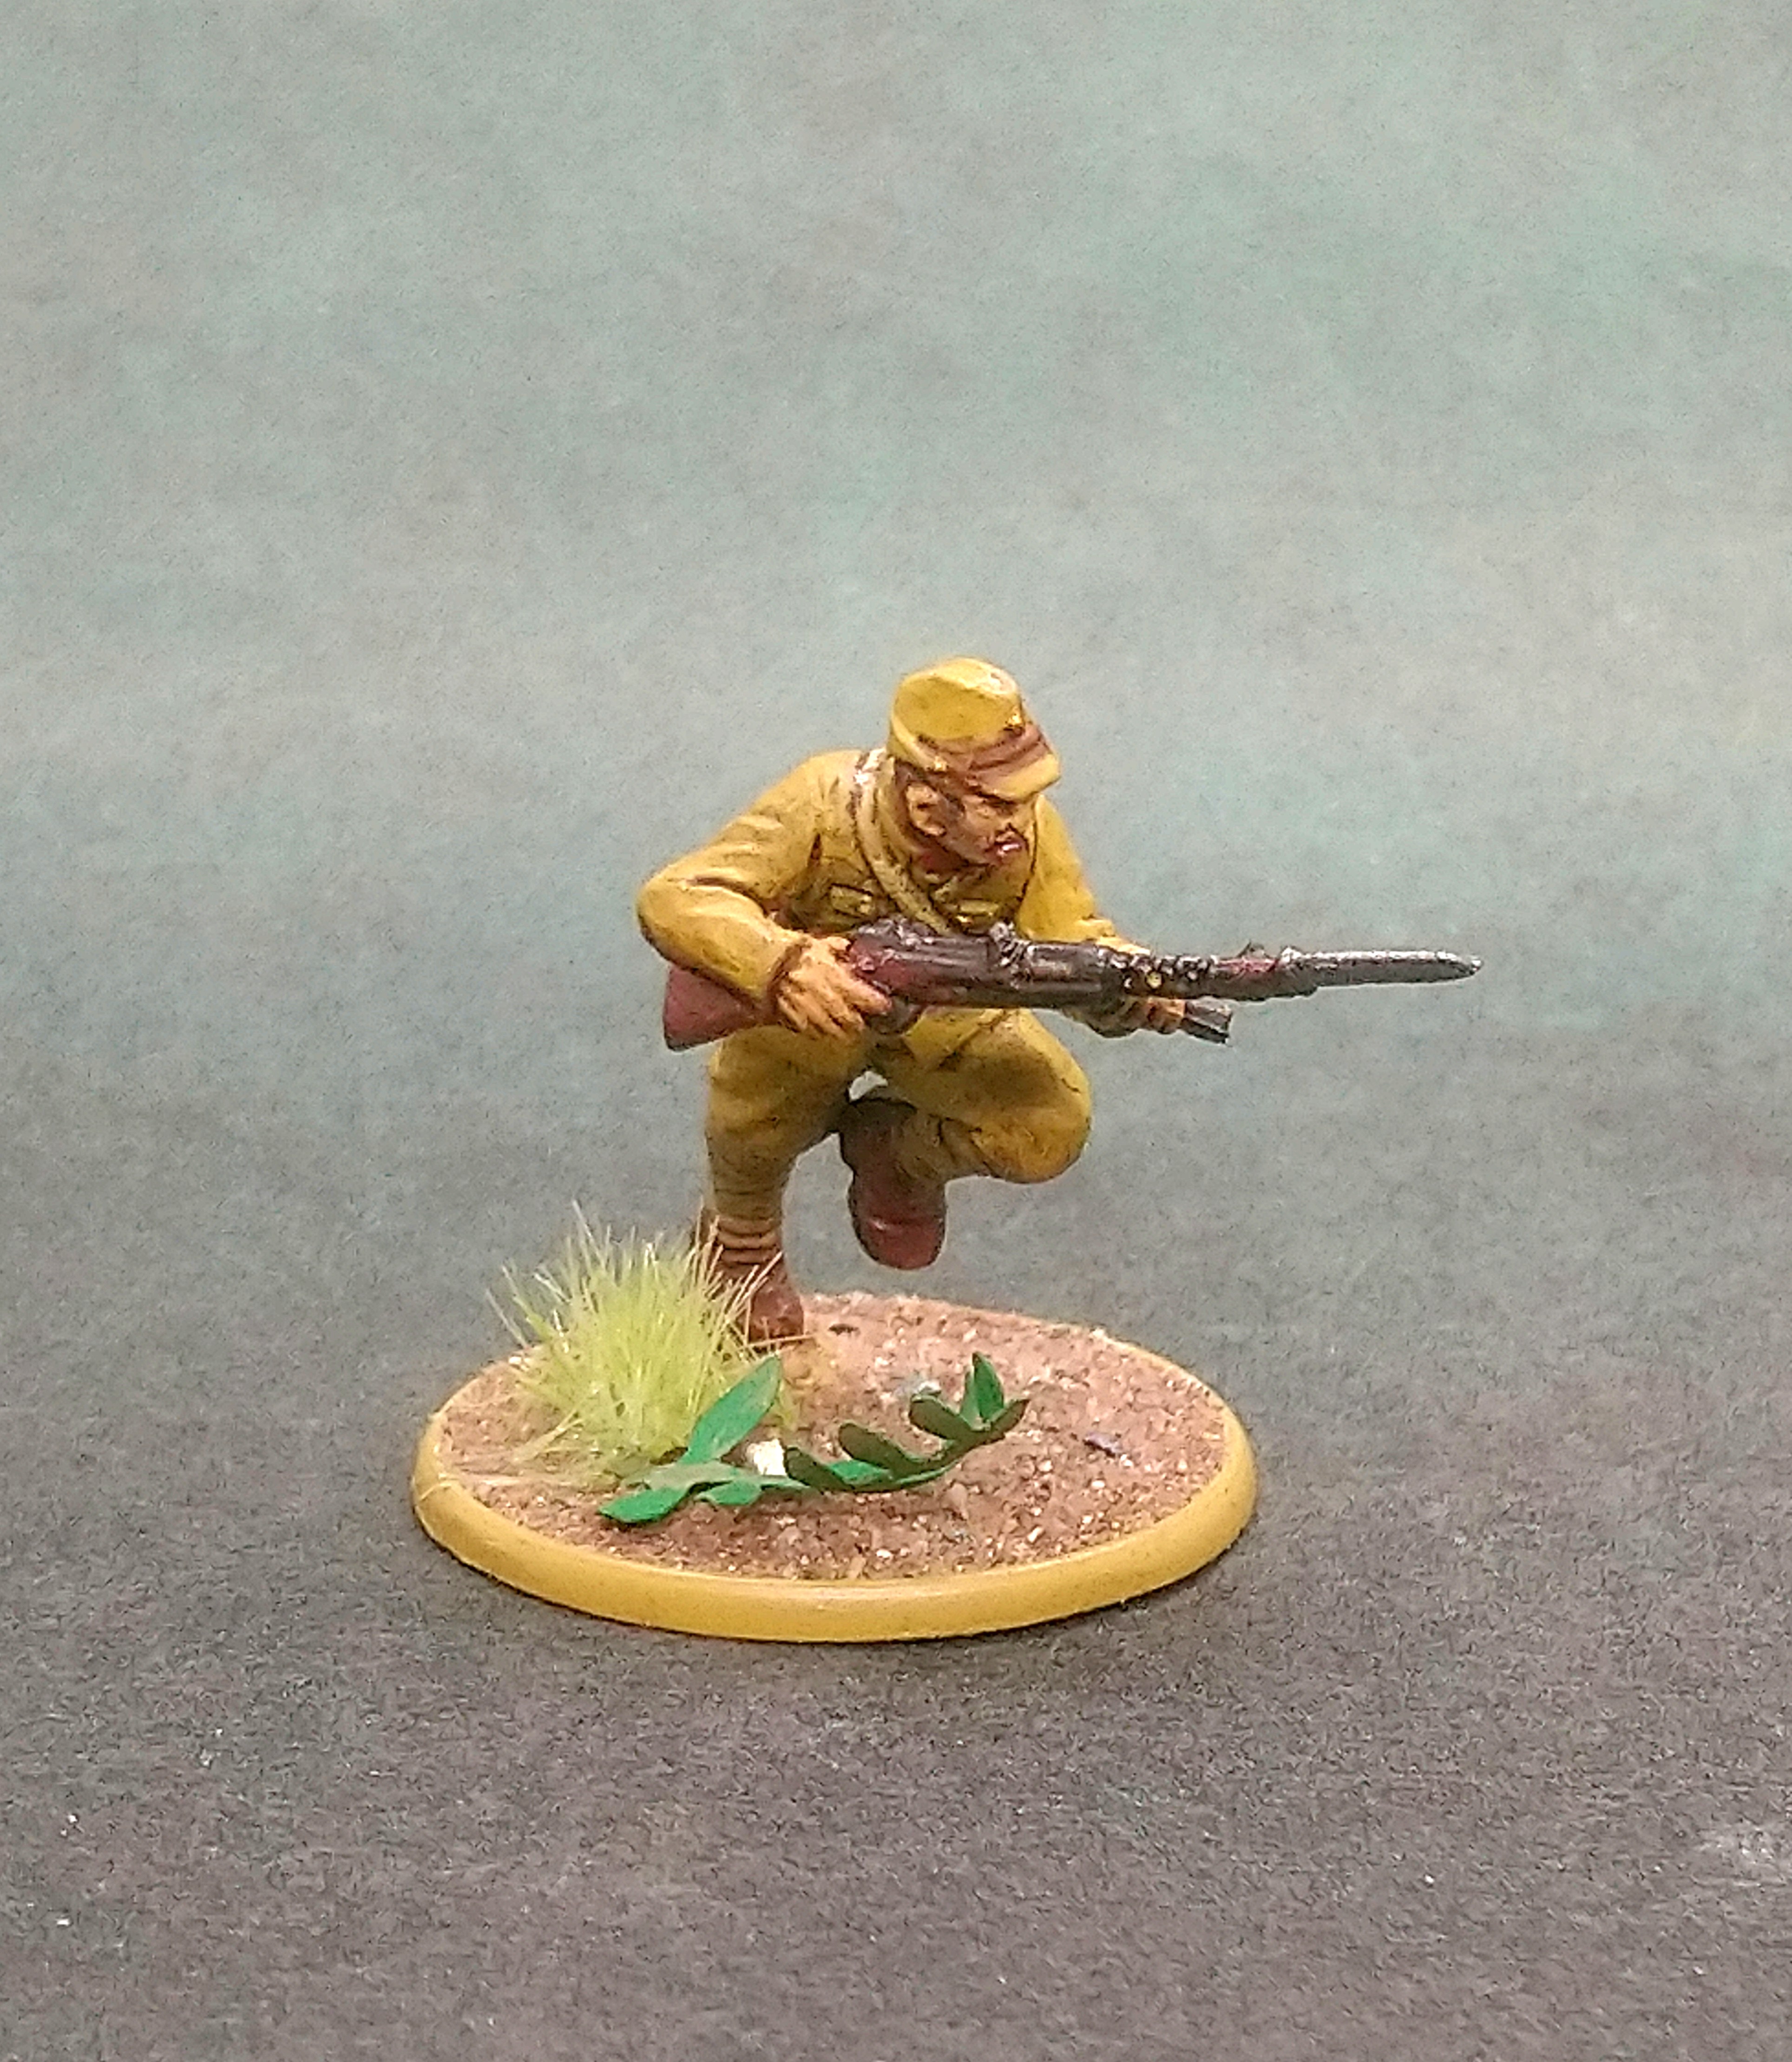
Bolt Action Japanese 1000pts army


Recommendations: 843
About the Project
Watching The Pacific TV box set with my son and seeing all the gorgeous US Marines Andy Zeck has painted made me reach for some old project ideas to get into some Pacific WW2 action. I have friends who have plans for desert British and British Burmese theatre bolt action armies, so fighting Japanese troops would fit fairly well as opponents. I will eventually paint up my own US marines but feel i can get the Japanese project underway faster. Including an FT17 is my deviation from historical accuracy and the list building in the game. The FT17 is a WW1 tank, the Japanese had some, but by WW2 they were just used for training and yet my army have gotten one and are desperate enough to field it.
Related Game: Bolt Action
Related Company: Warlord Games
Related Genre: Historical
This Project is Completed
List Building
After i built my tank i started to look at my list again. No decisions fixed, but i knew for my three infantry units to become 4, which is my most likely change, i would need another NCO.
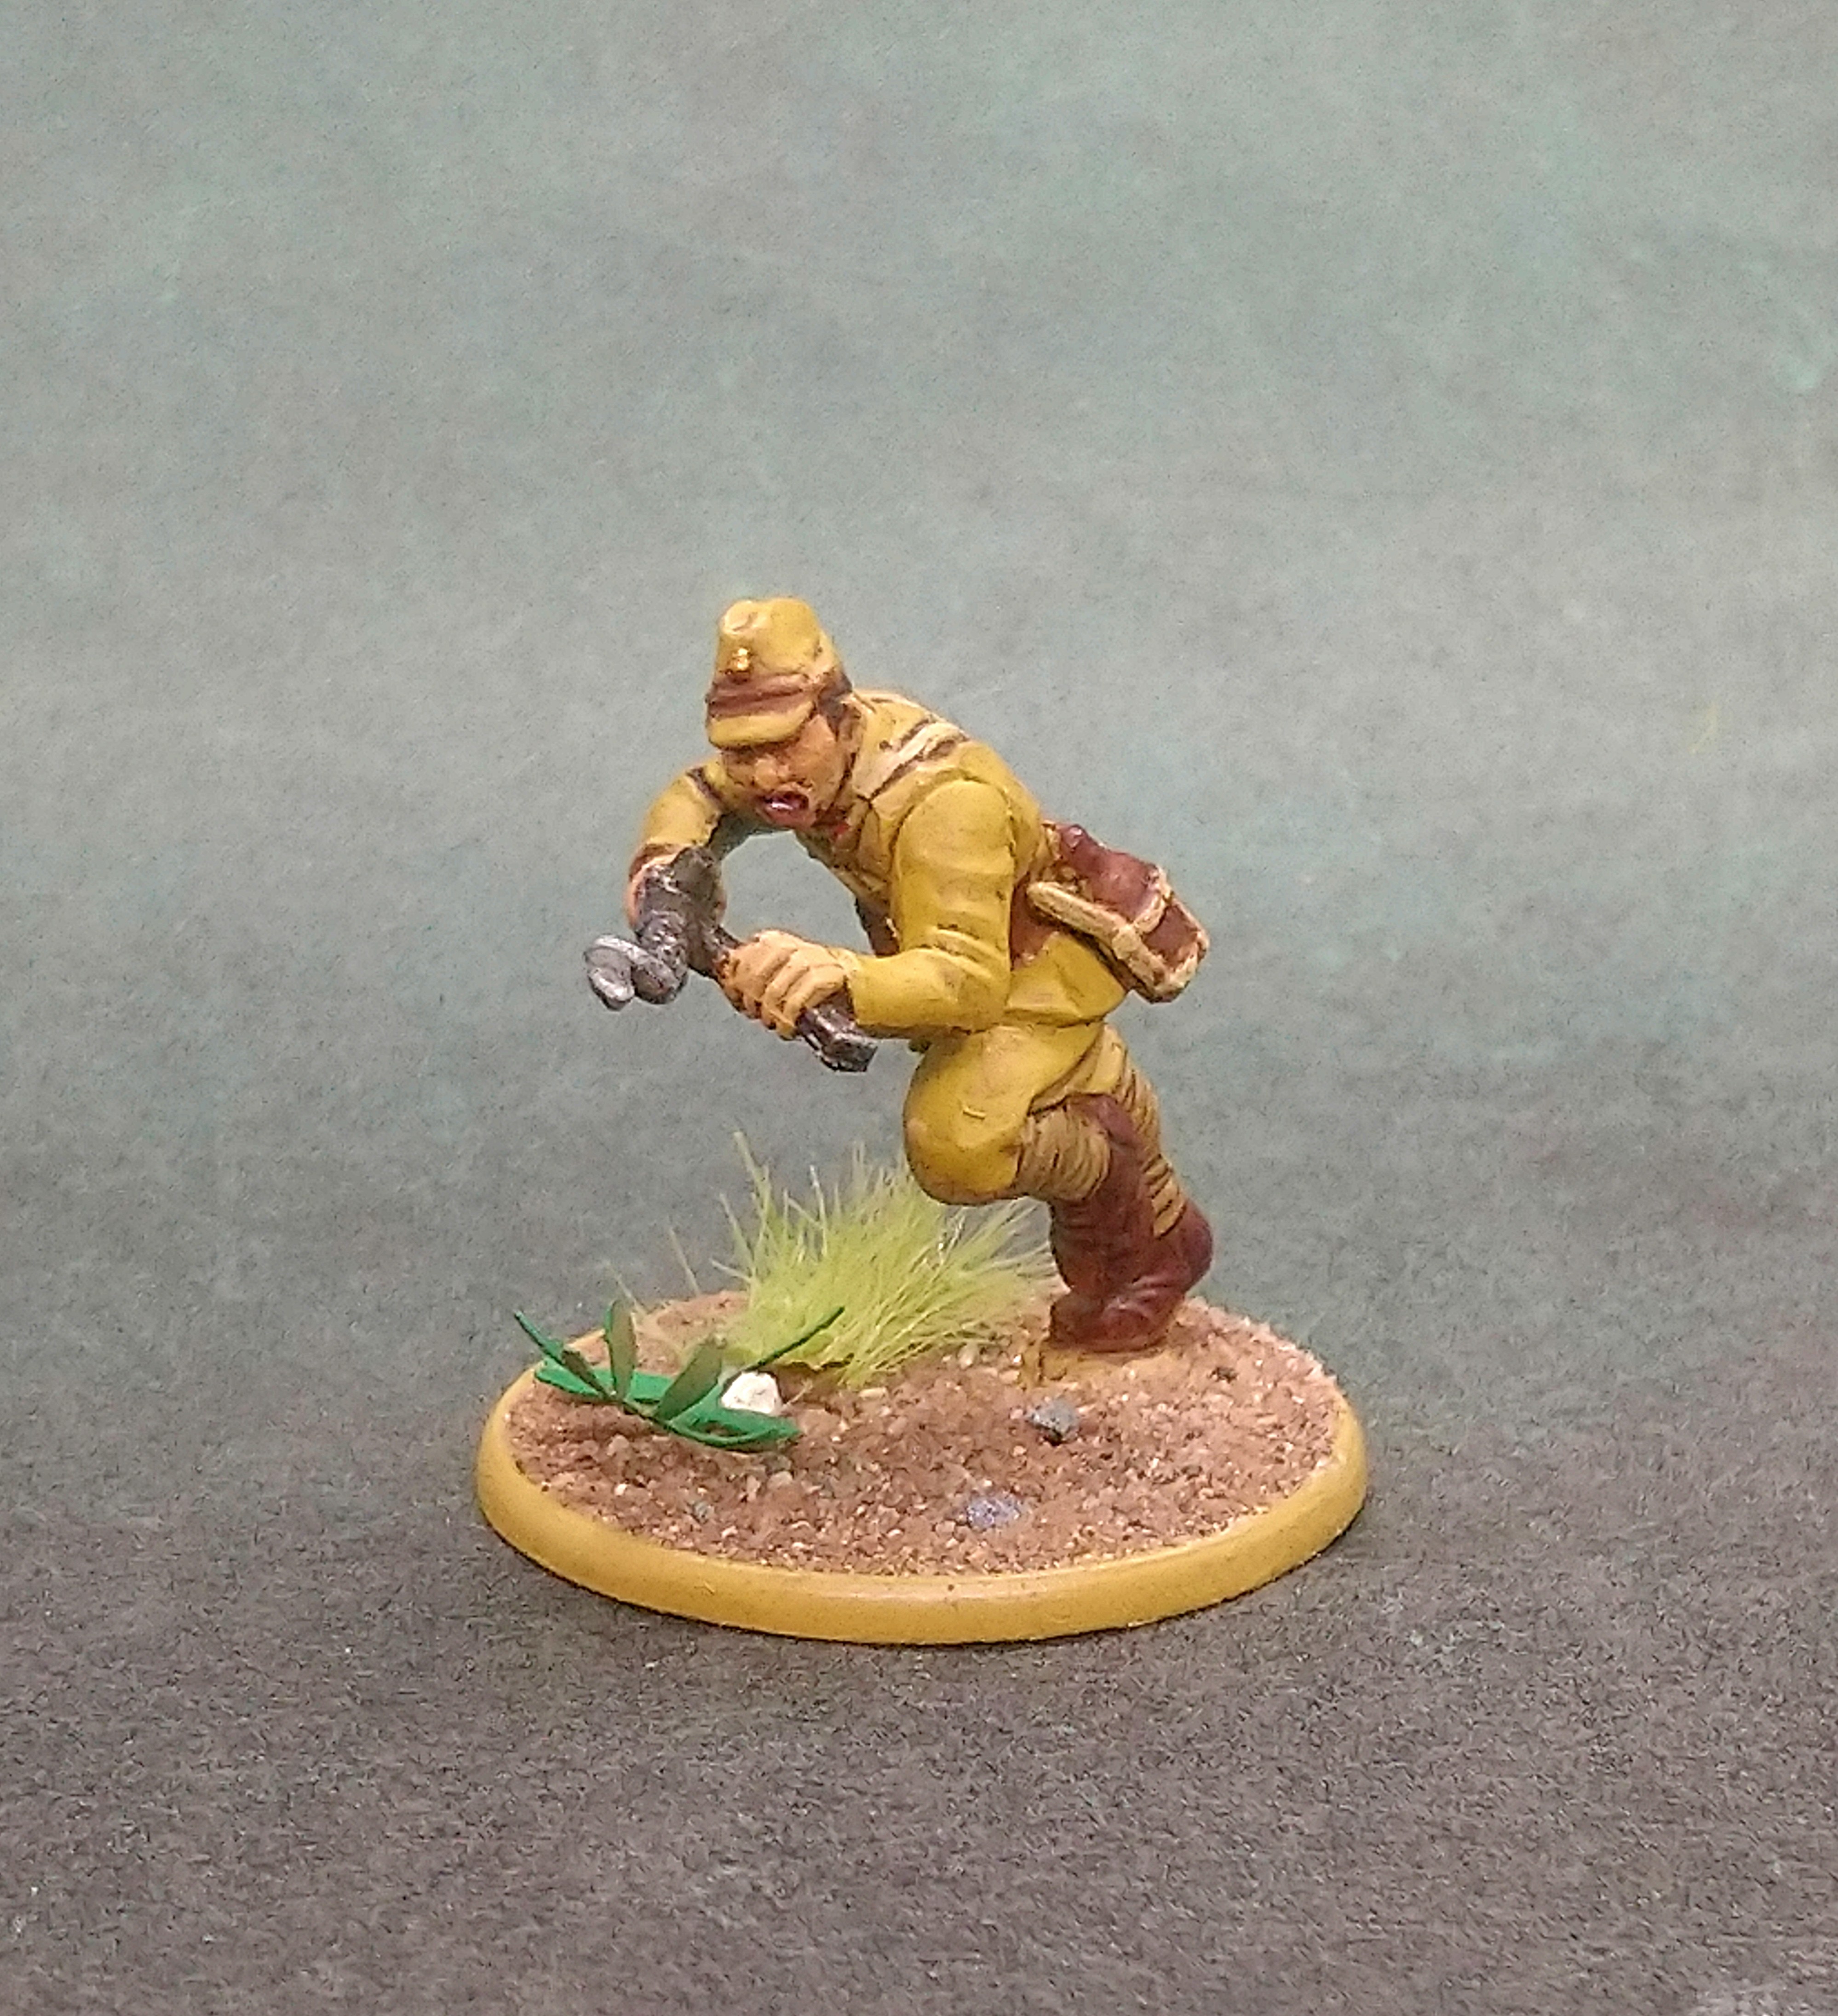
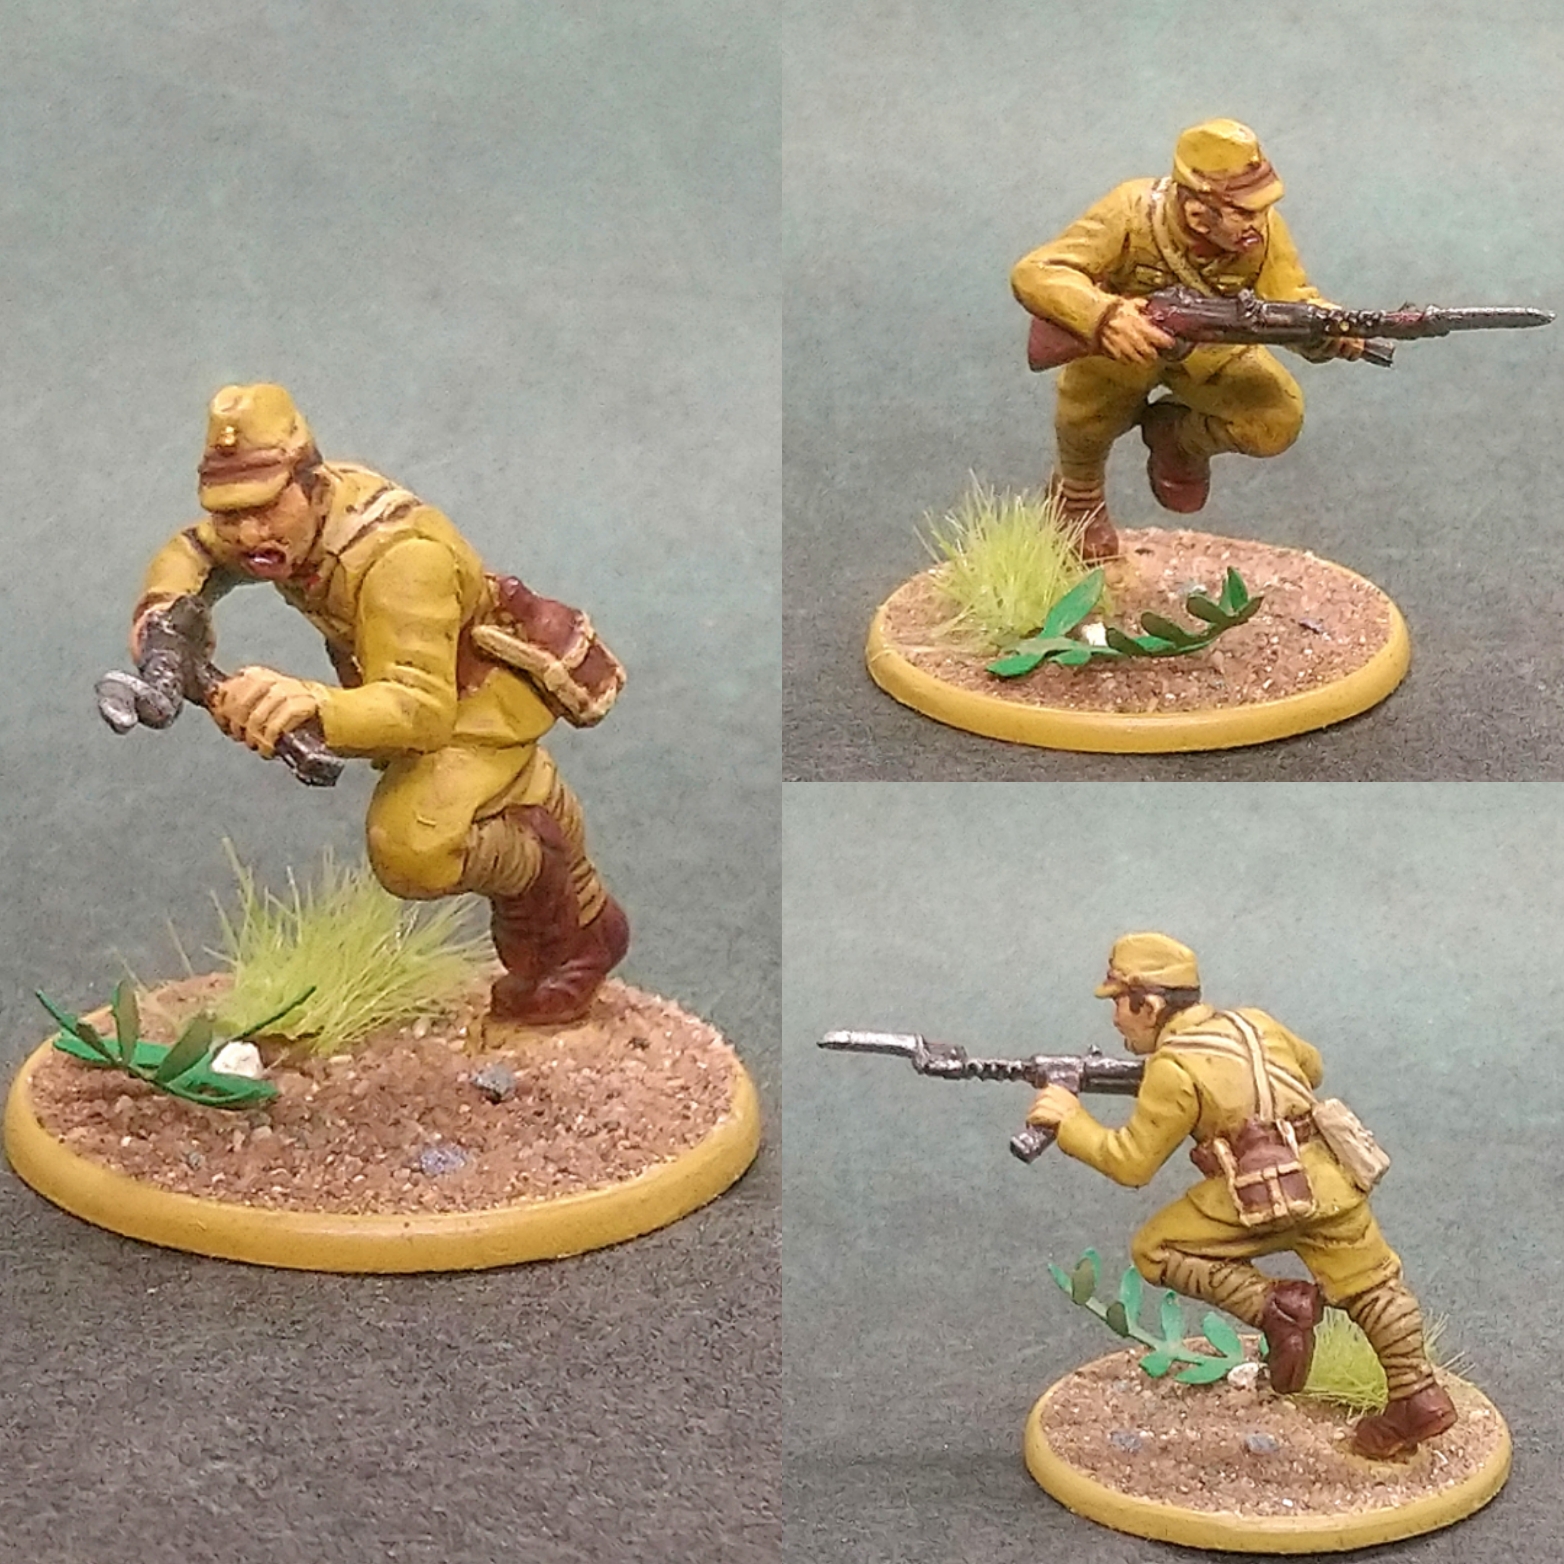
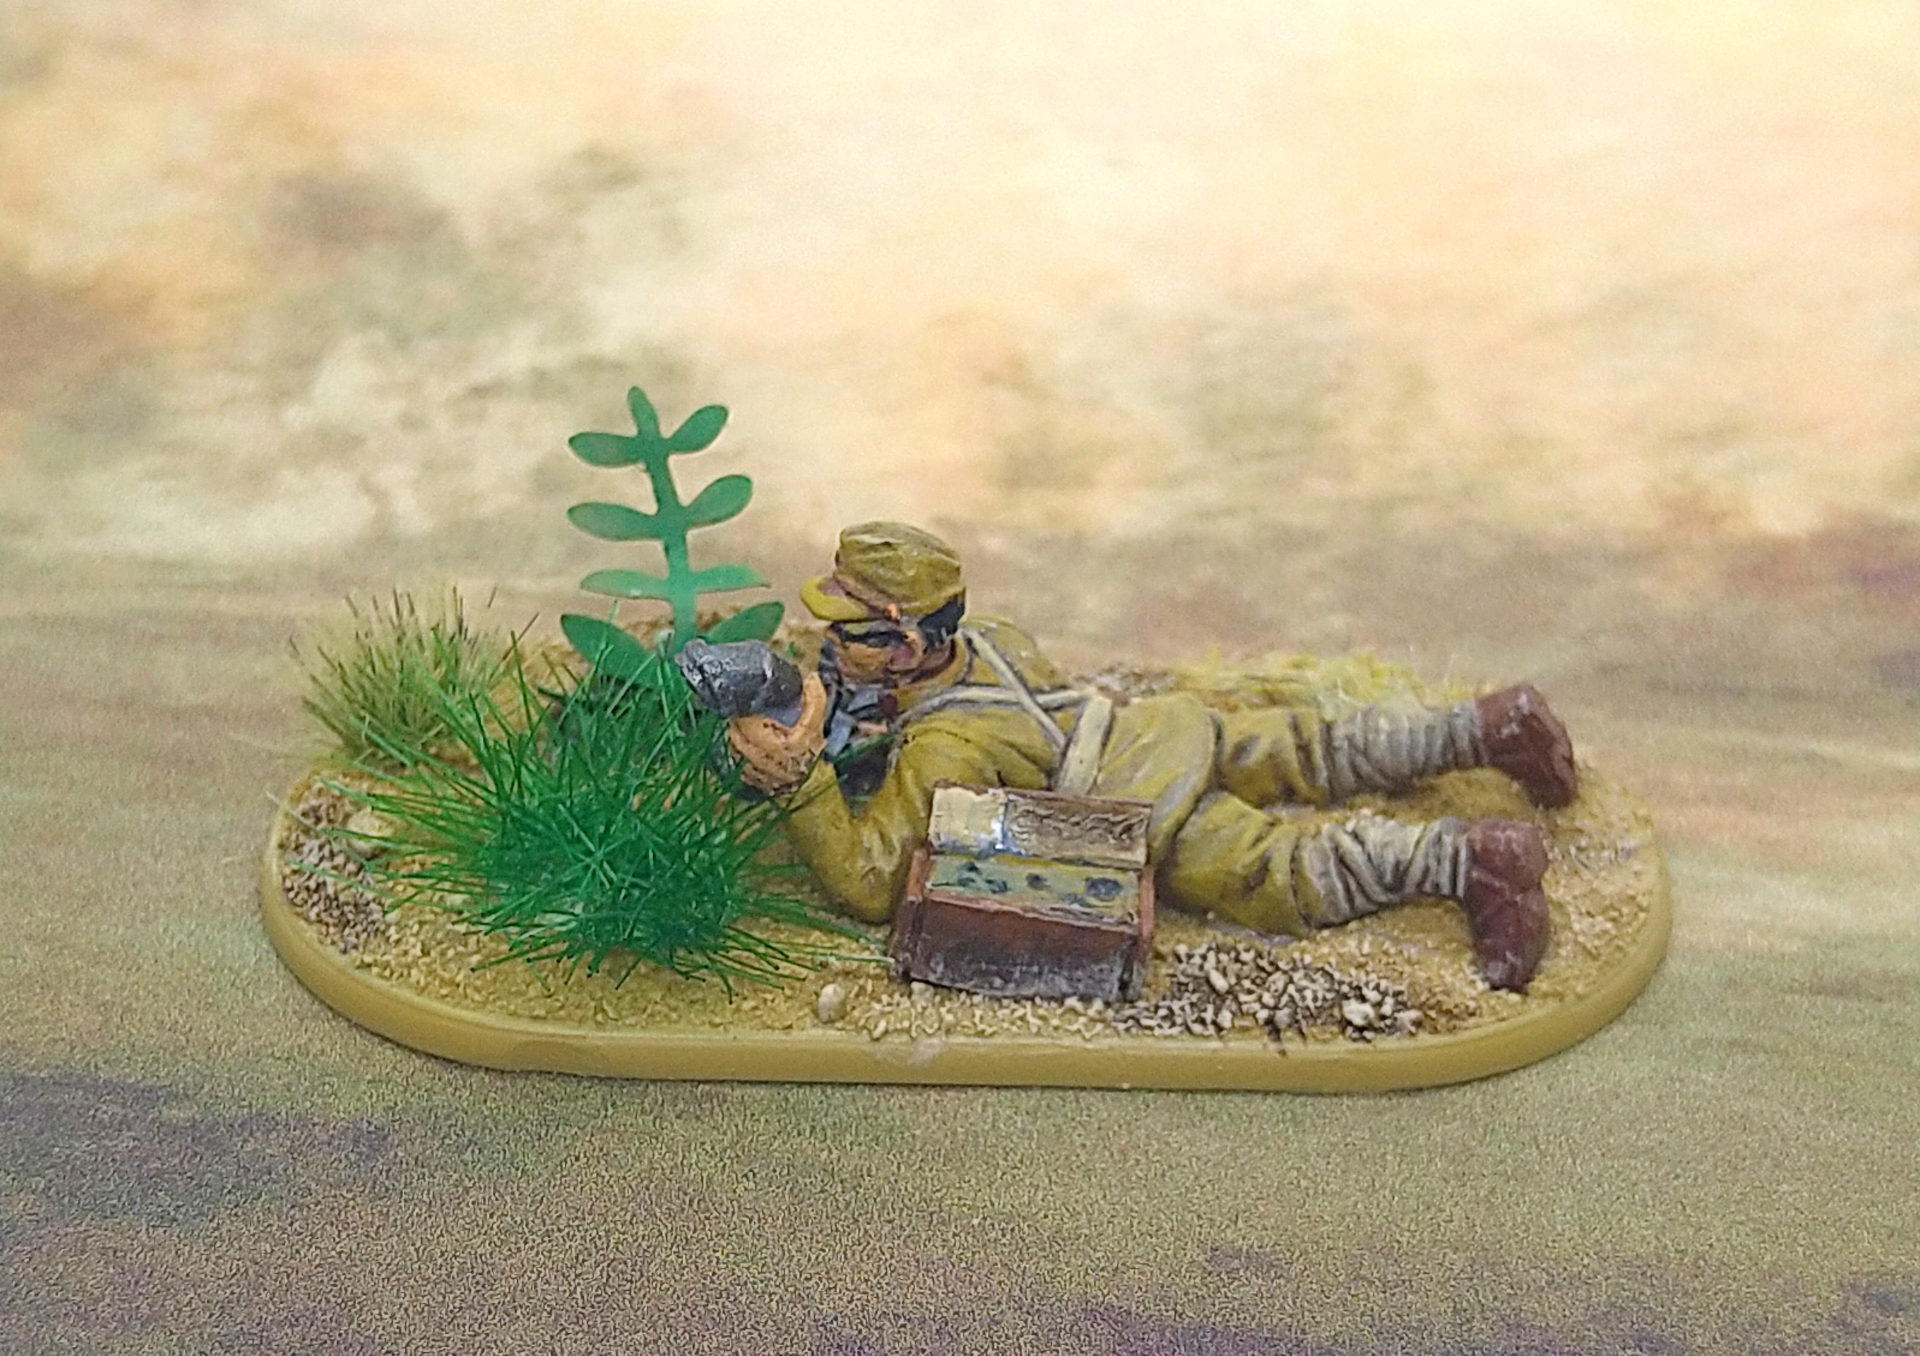
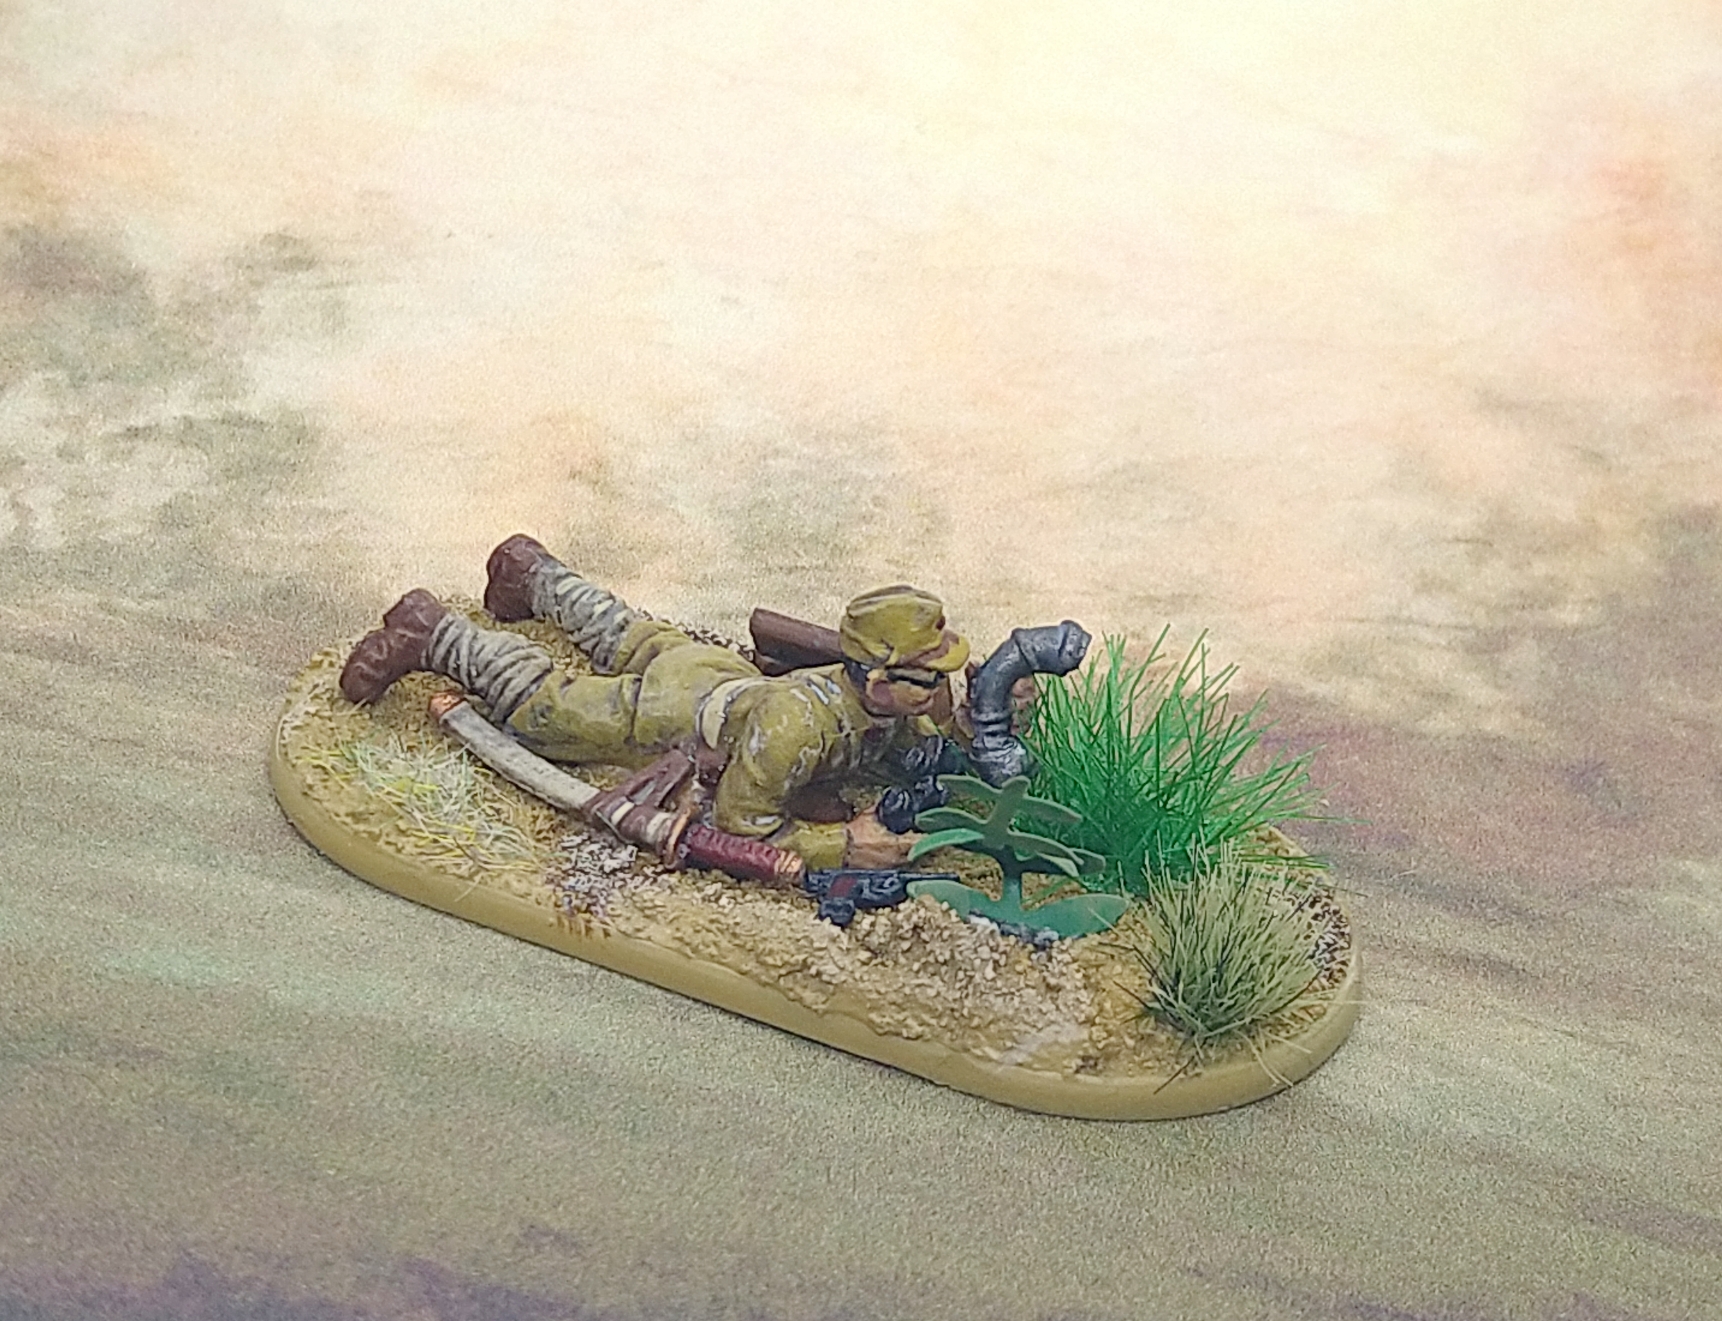
Sniper - finished
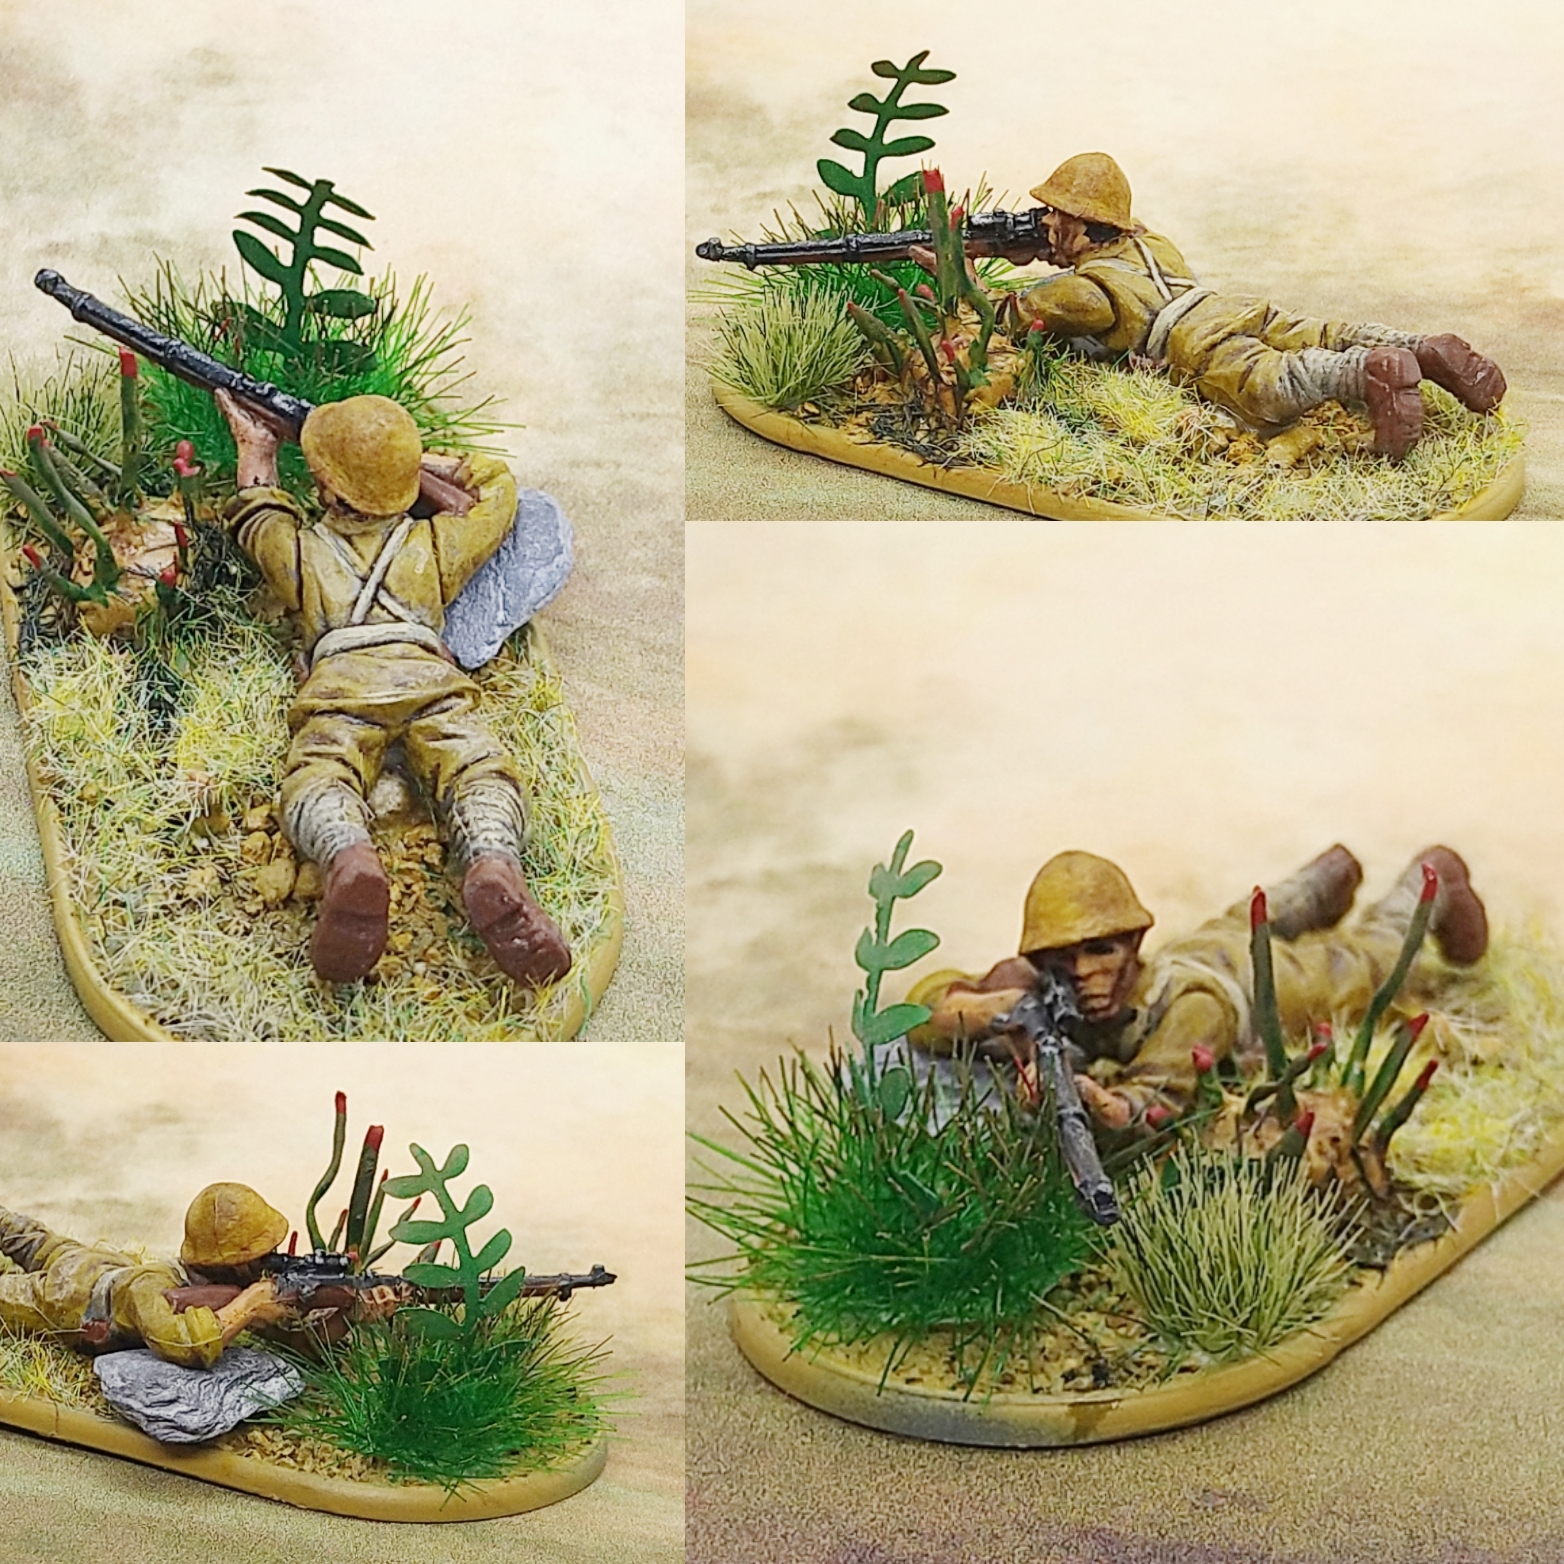
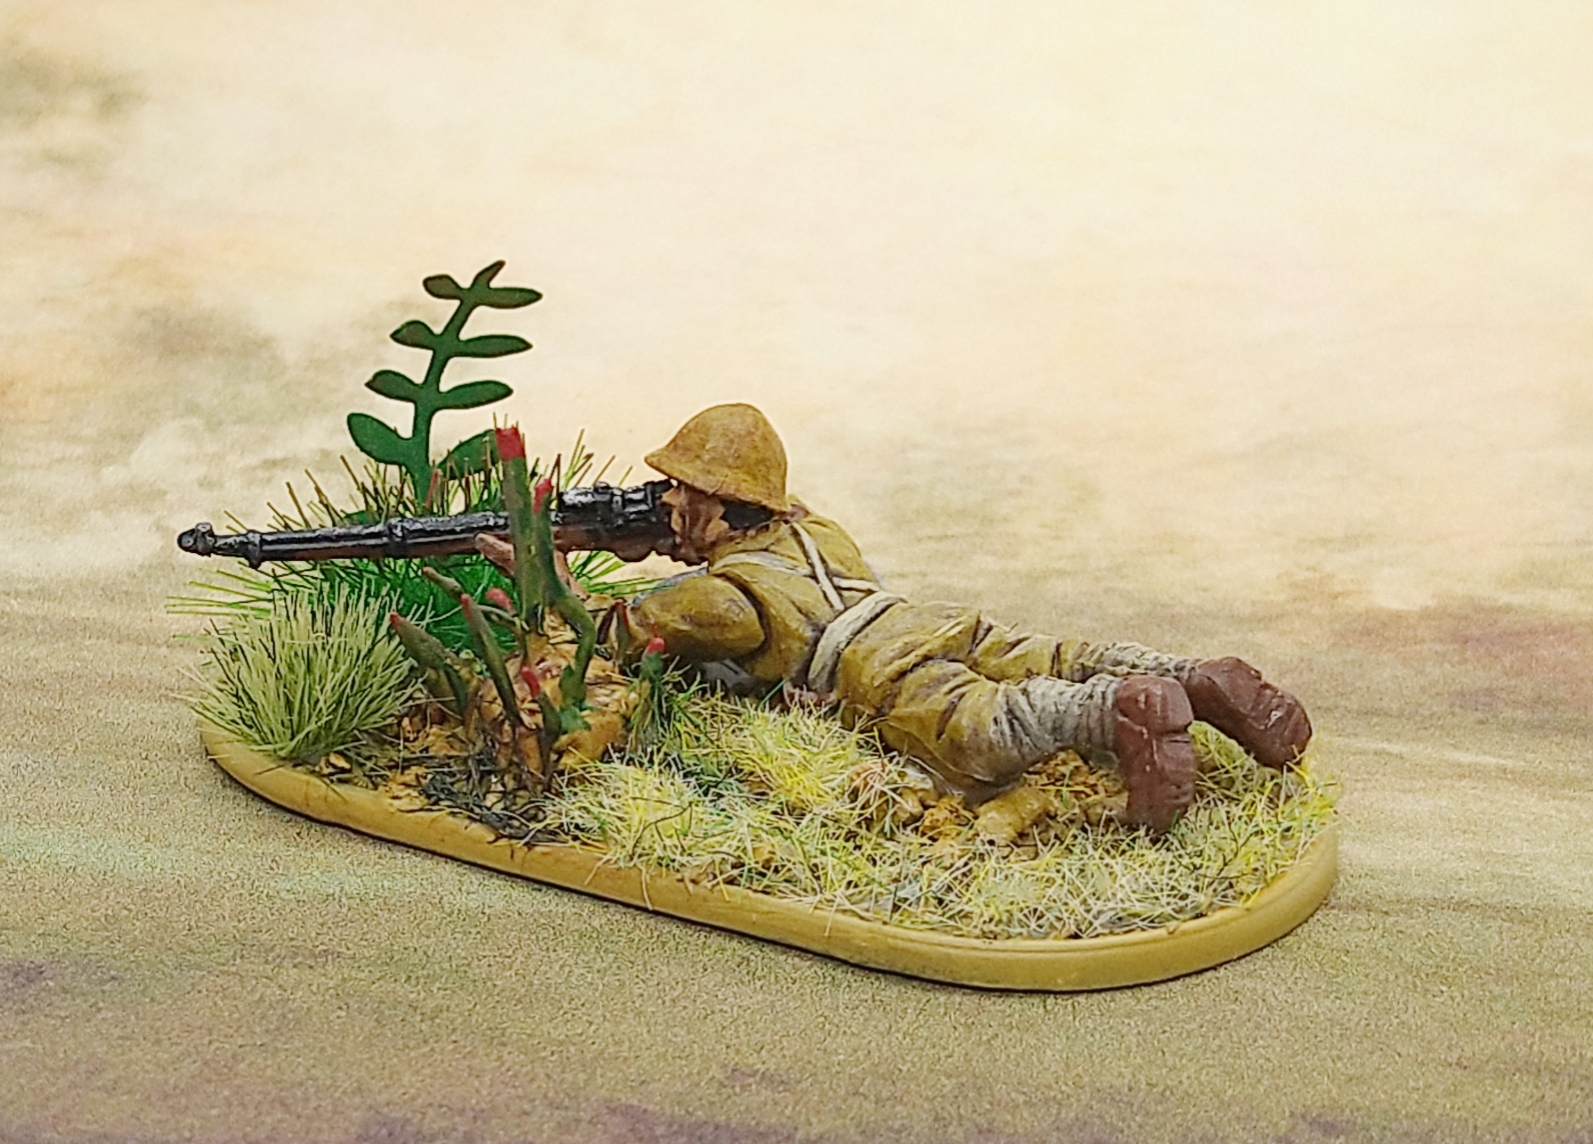
Finally got back to this guy.
The scope looks good on the side. Glad I researched the scope and took a moment to set it in as historically accurate a spot as I could.
Had a ton of fun with the base.
I think I will go back to all the basing on the whole army and add a load of dying grass.
The weird plant on the sniper’s left is made from metal shards from the sprue of another kit, plunged into blue tac, super glue covered to harden and set then primed and painted. It looks durable enough but I think I will be careful with it.
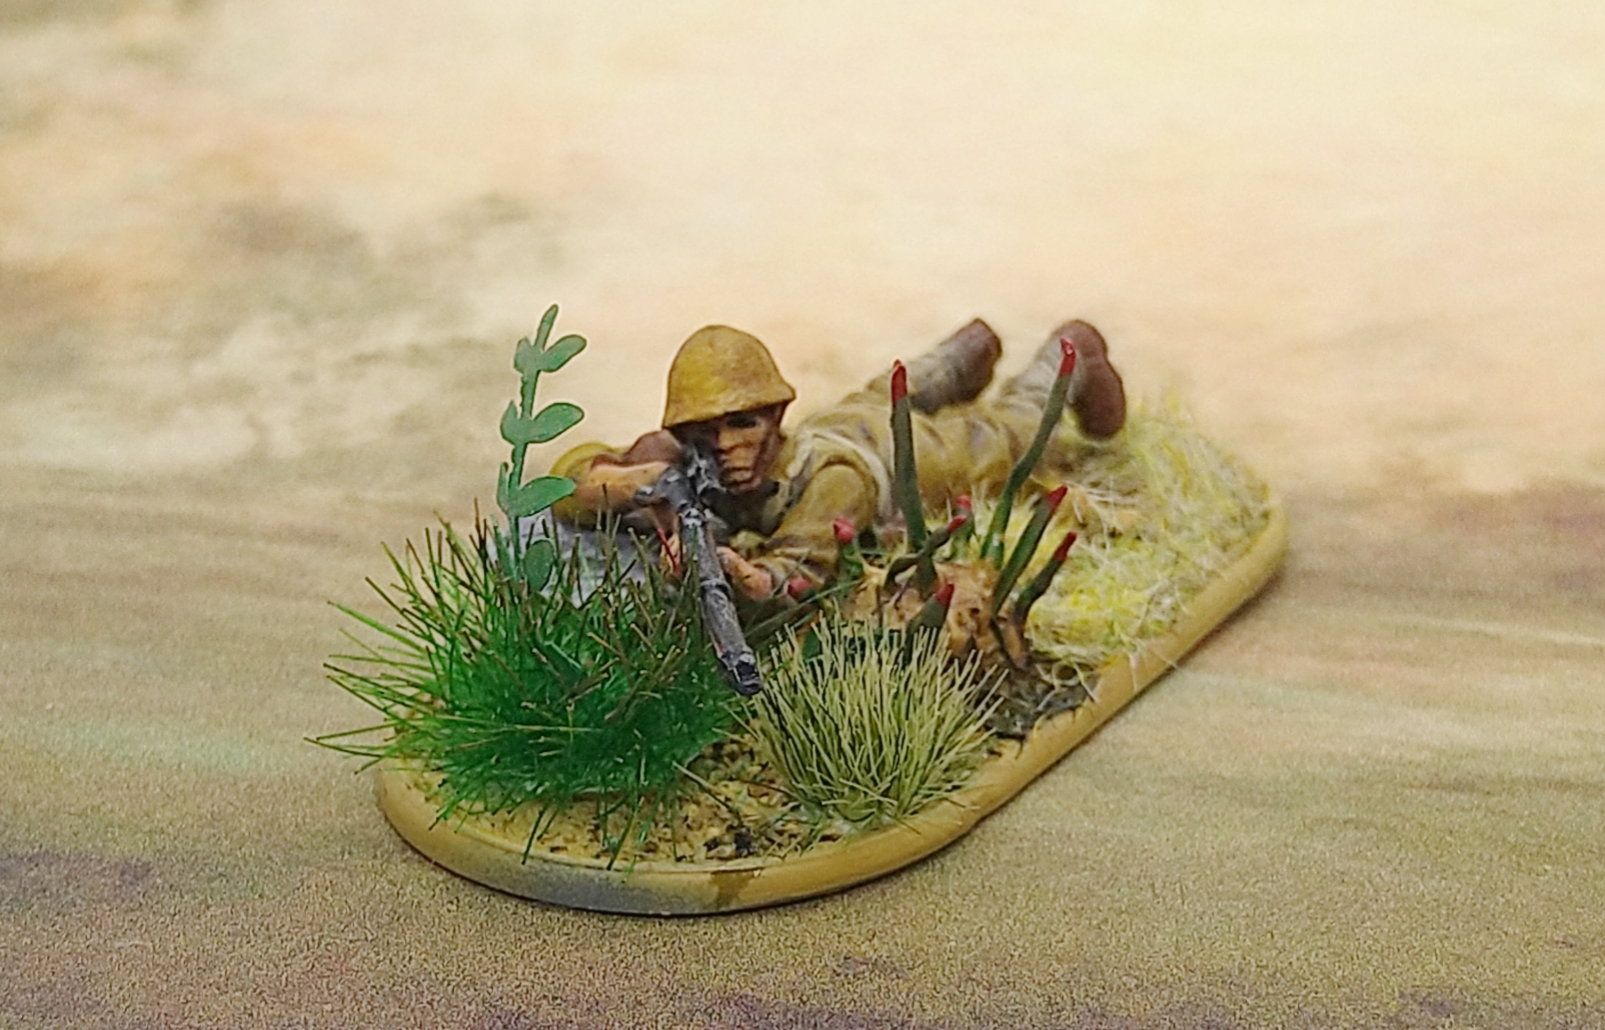
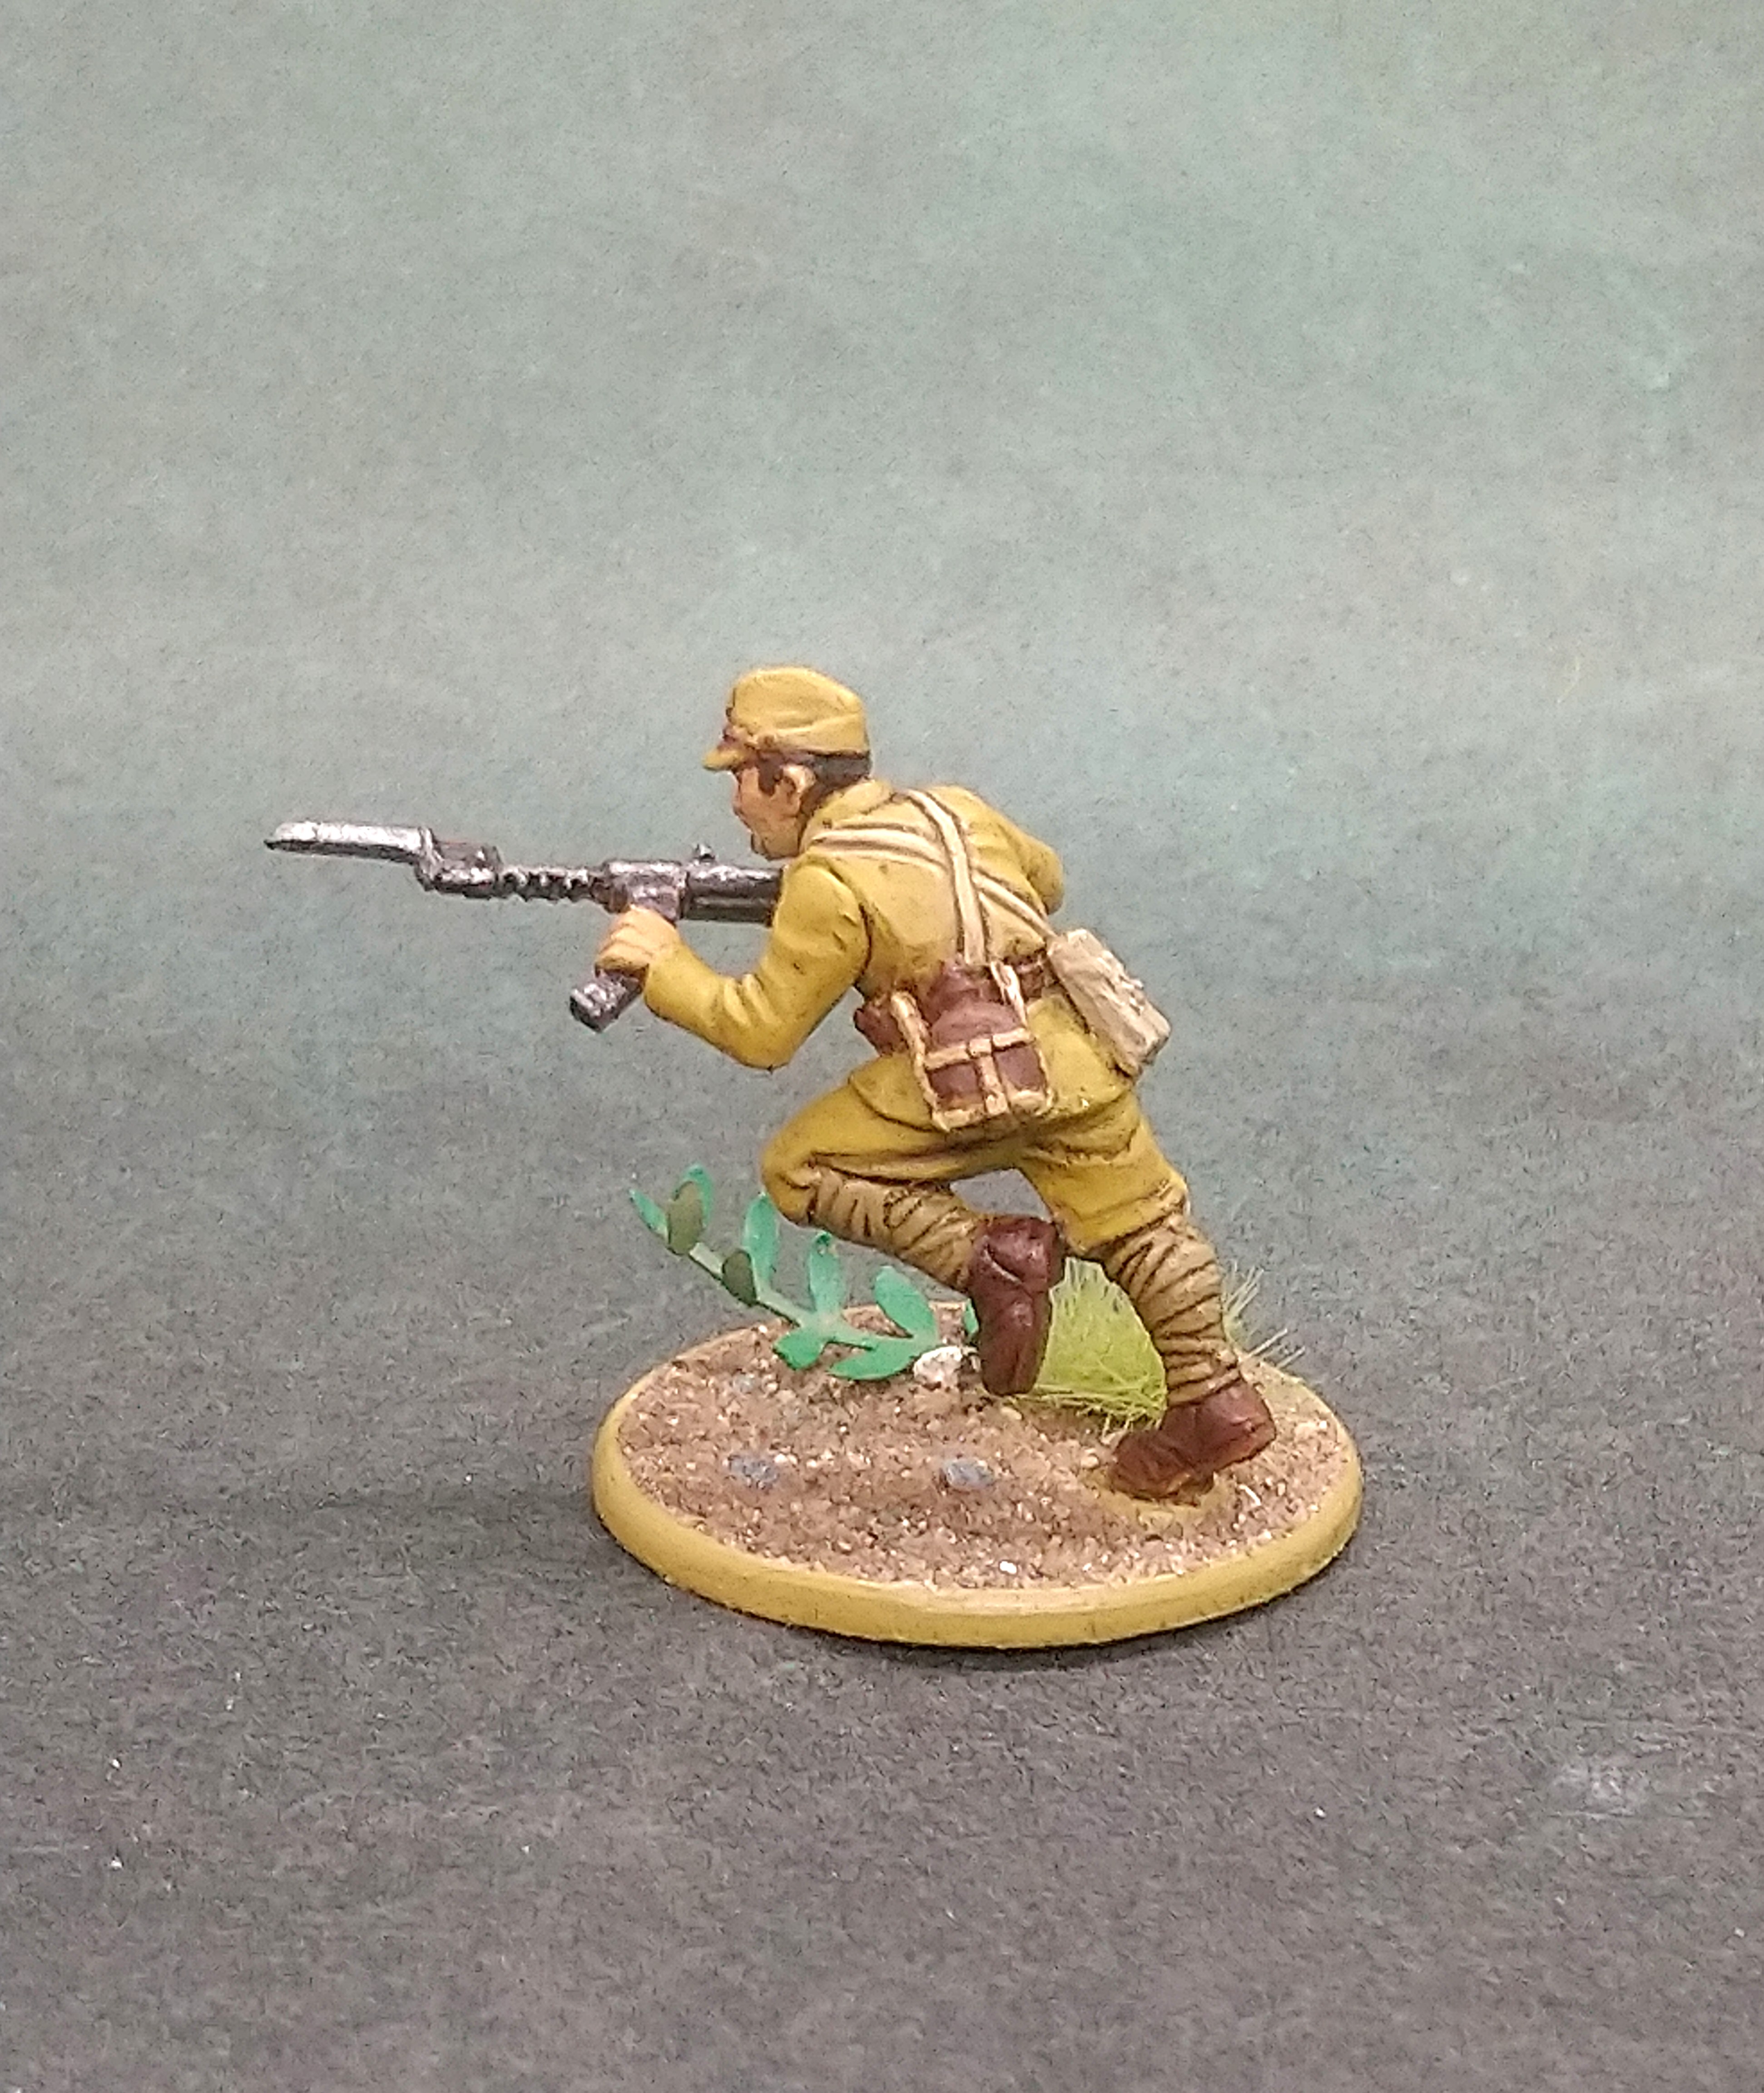
Radio Fail - recovered.
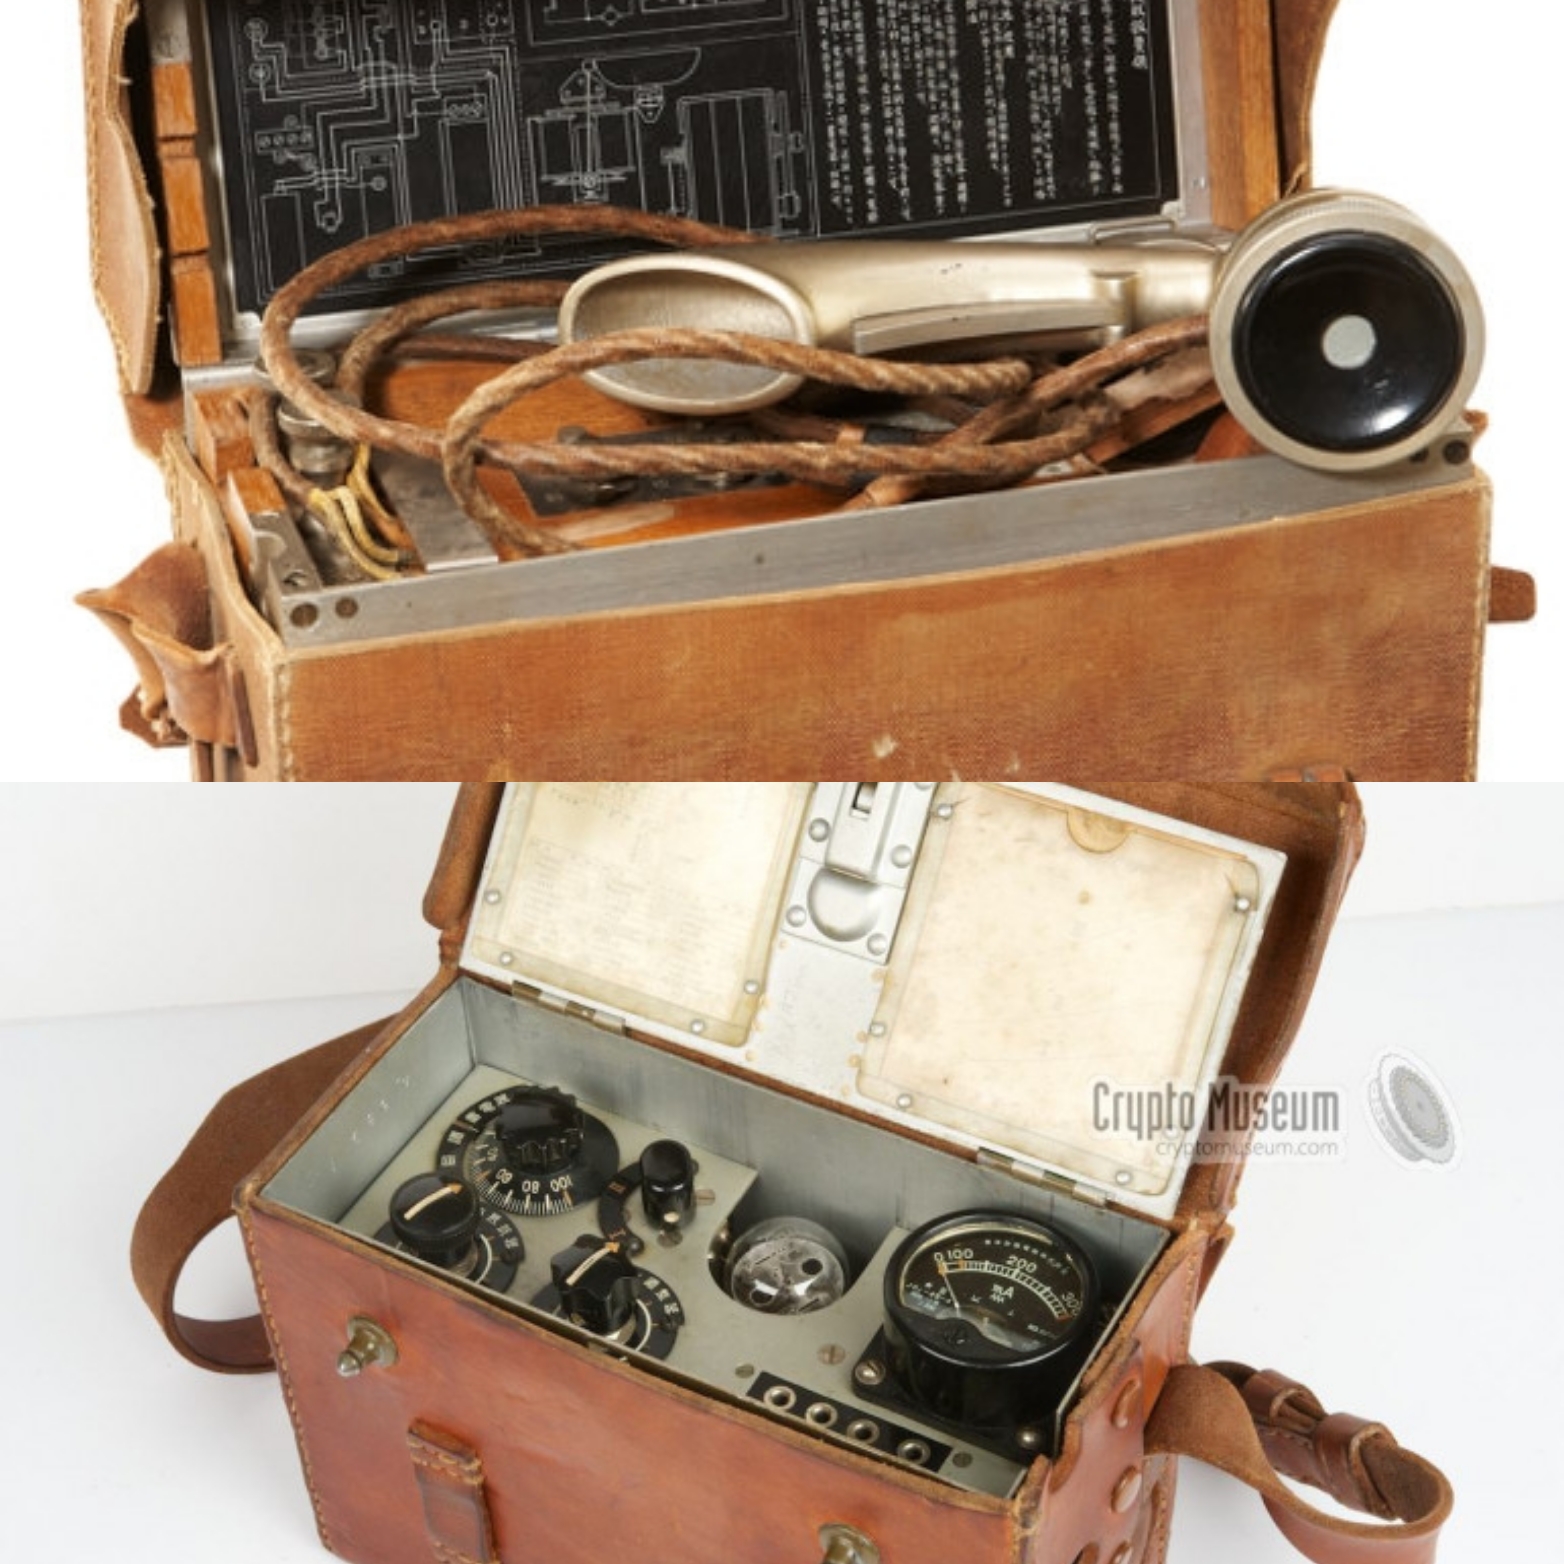
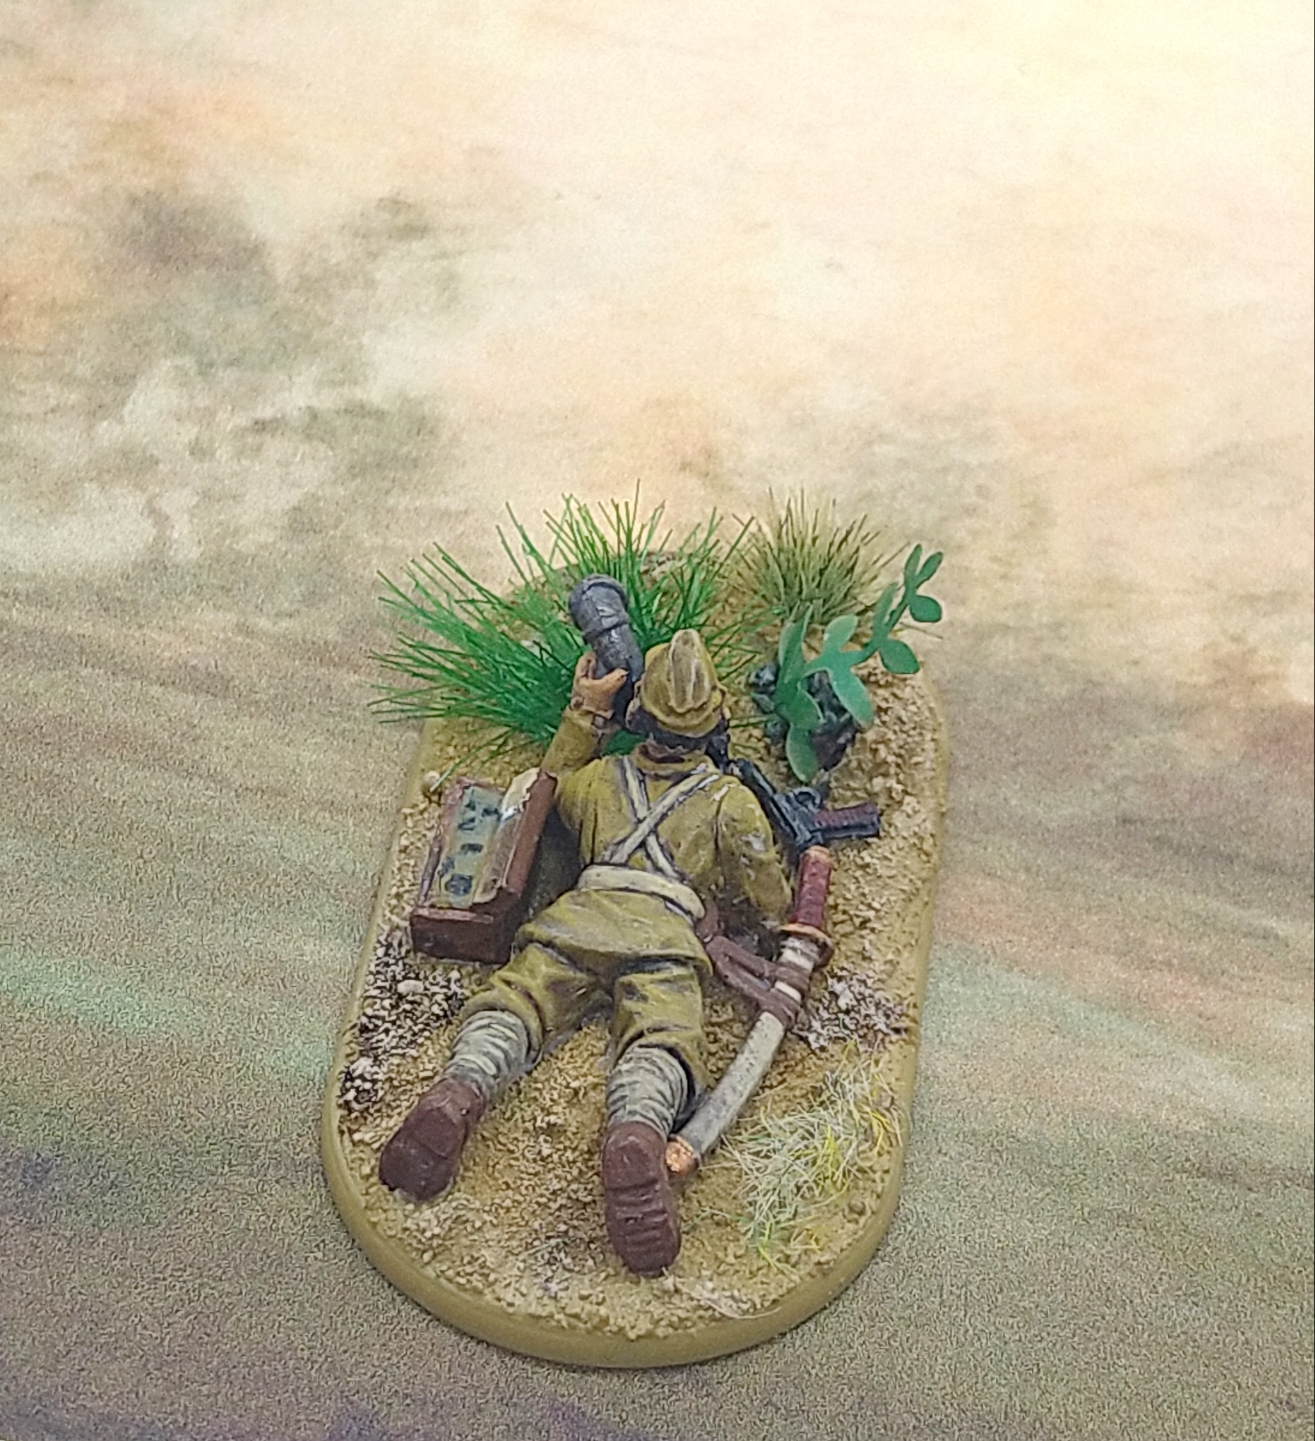
I thought that my radio set effort was too small, but by cladding it with some card I think it looks OK.
The mic is made from a cut up Oathmark Heavy Infantry Dwarf war horn.
I am using him as just a sniper spotter for now, but the radio makes it possible to make a FOO to call for artillery and air support in a future list.

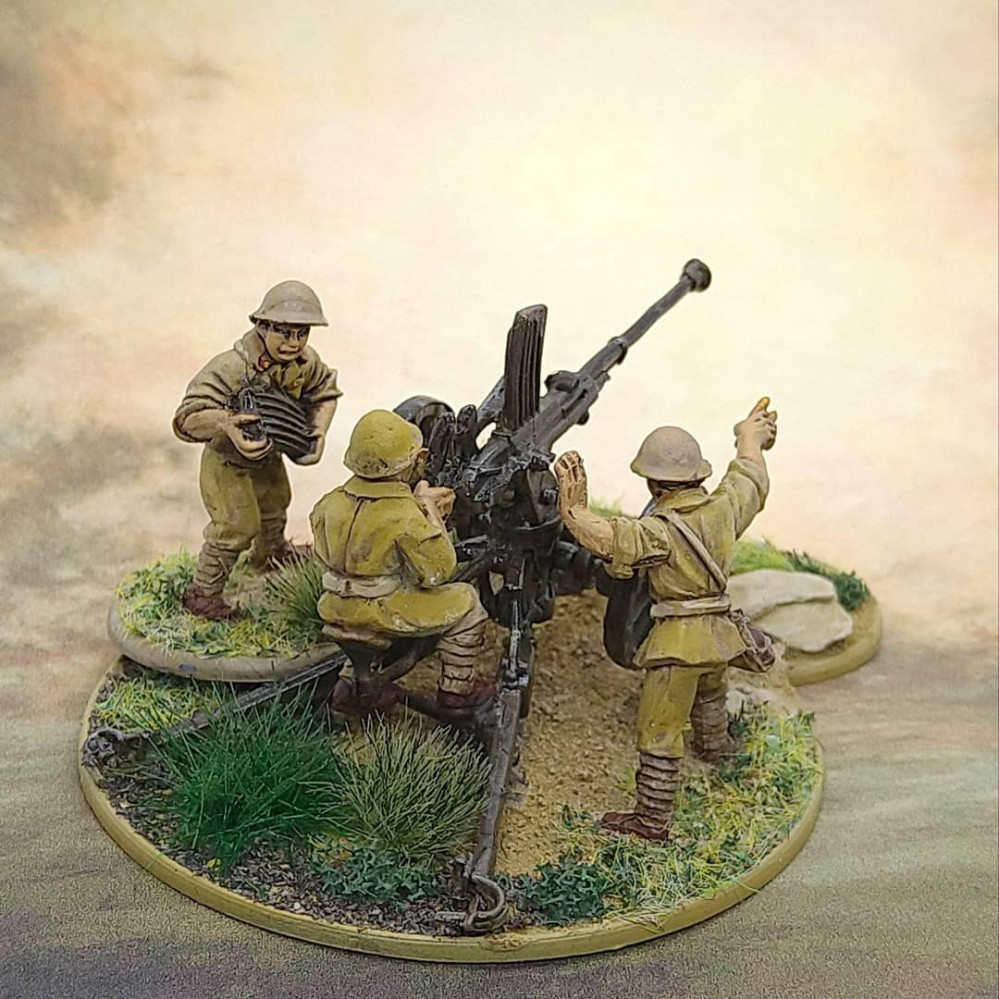
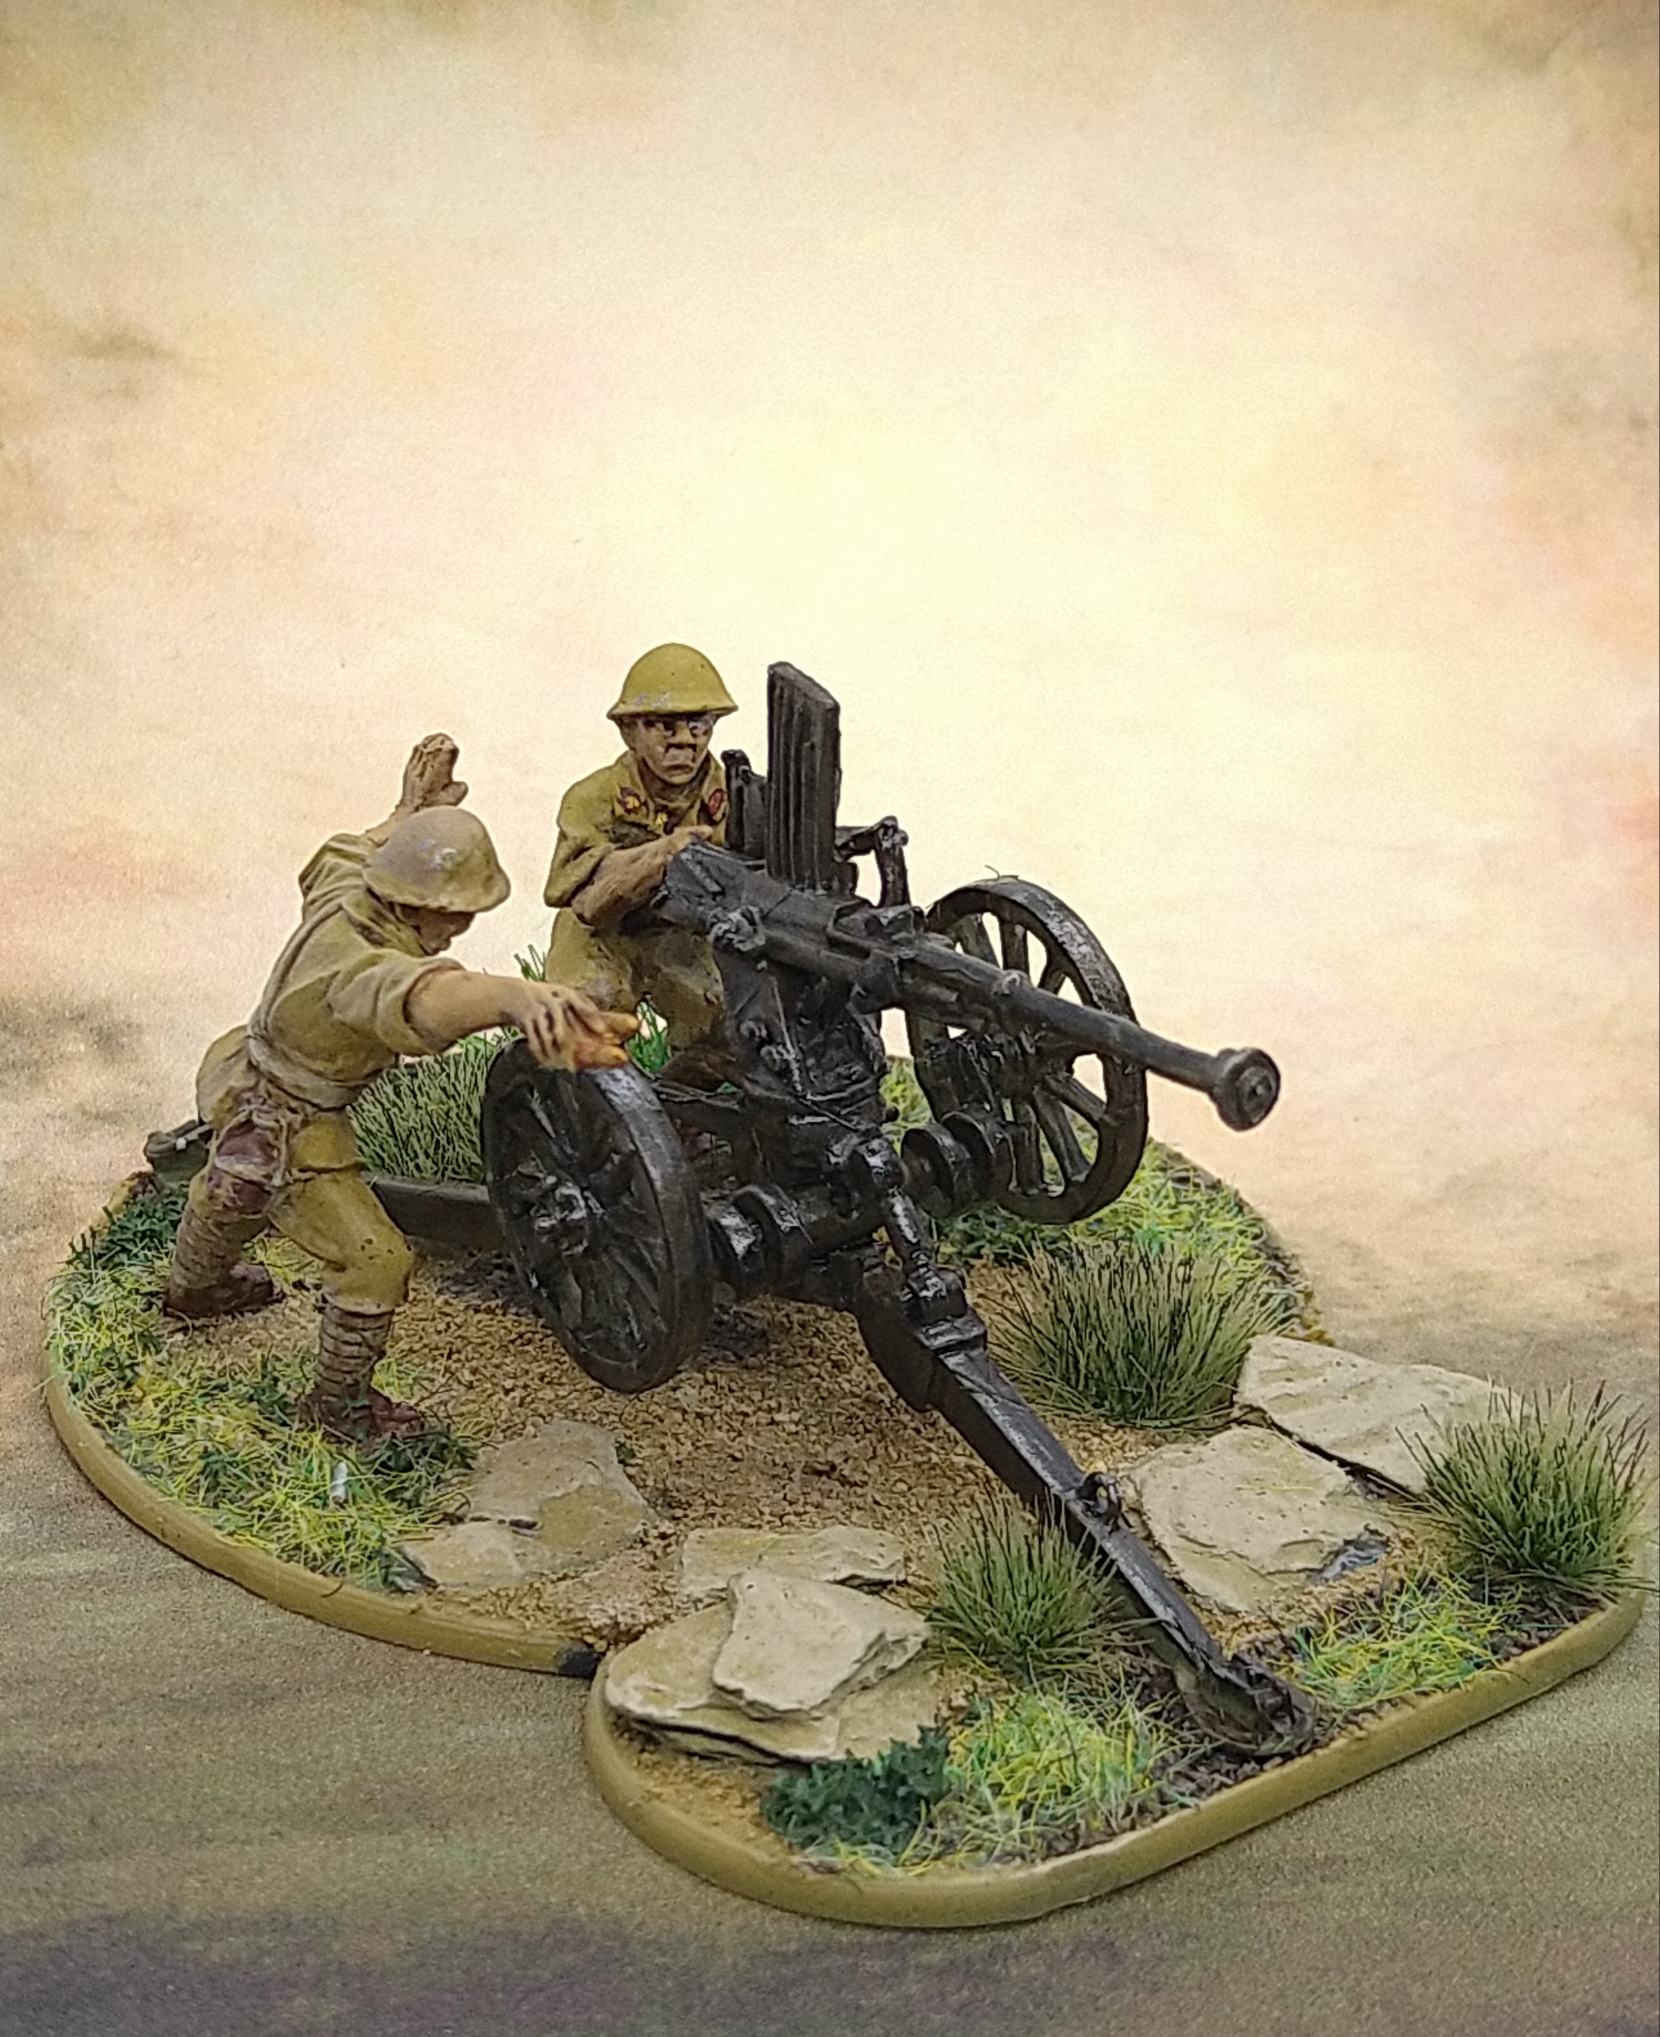
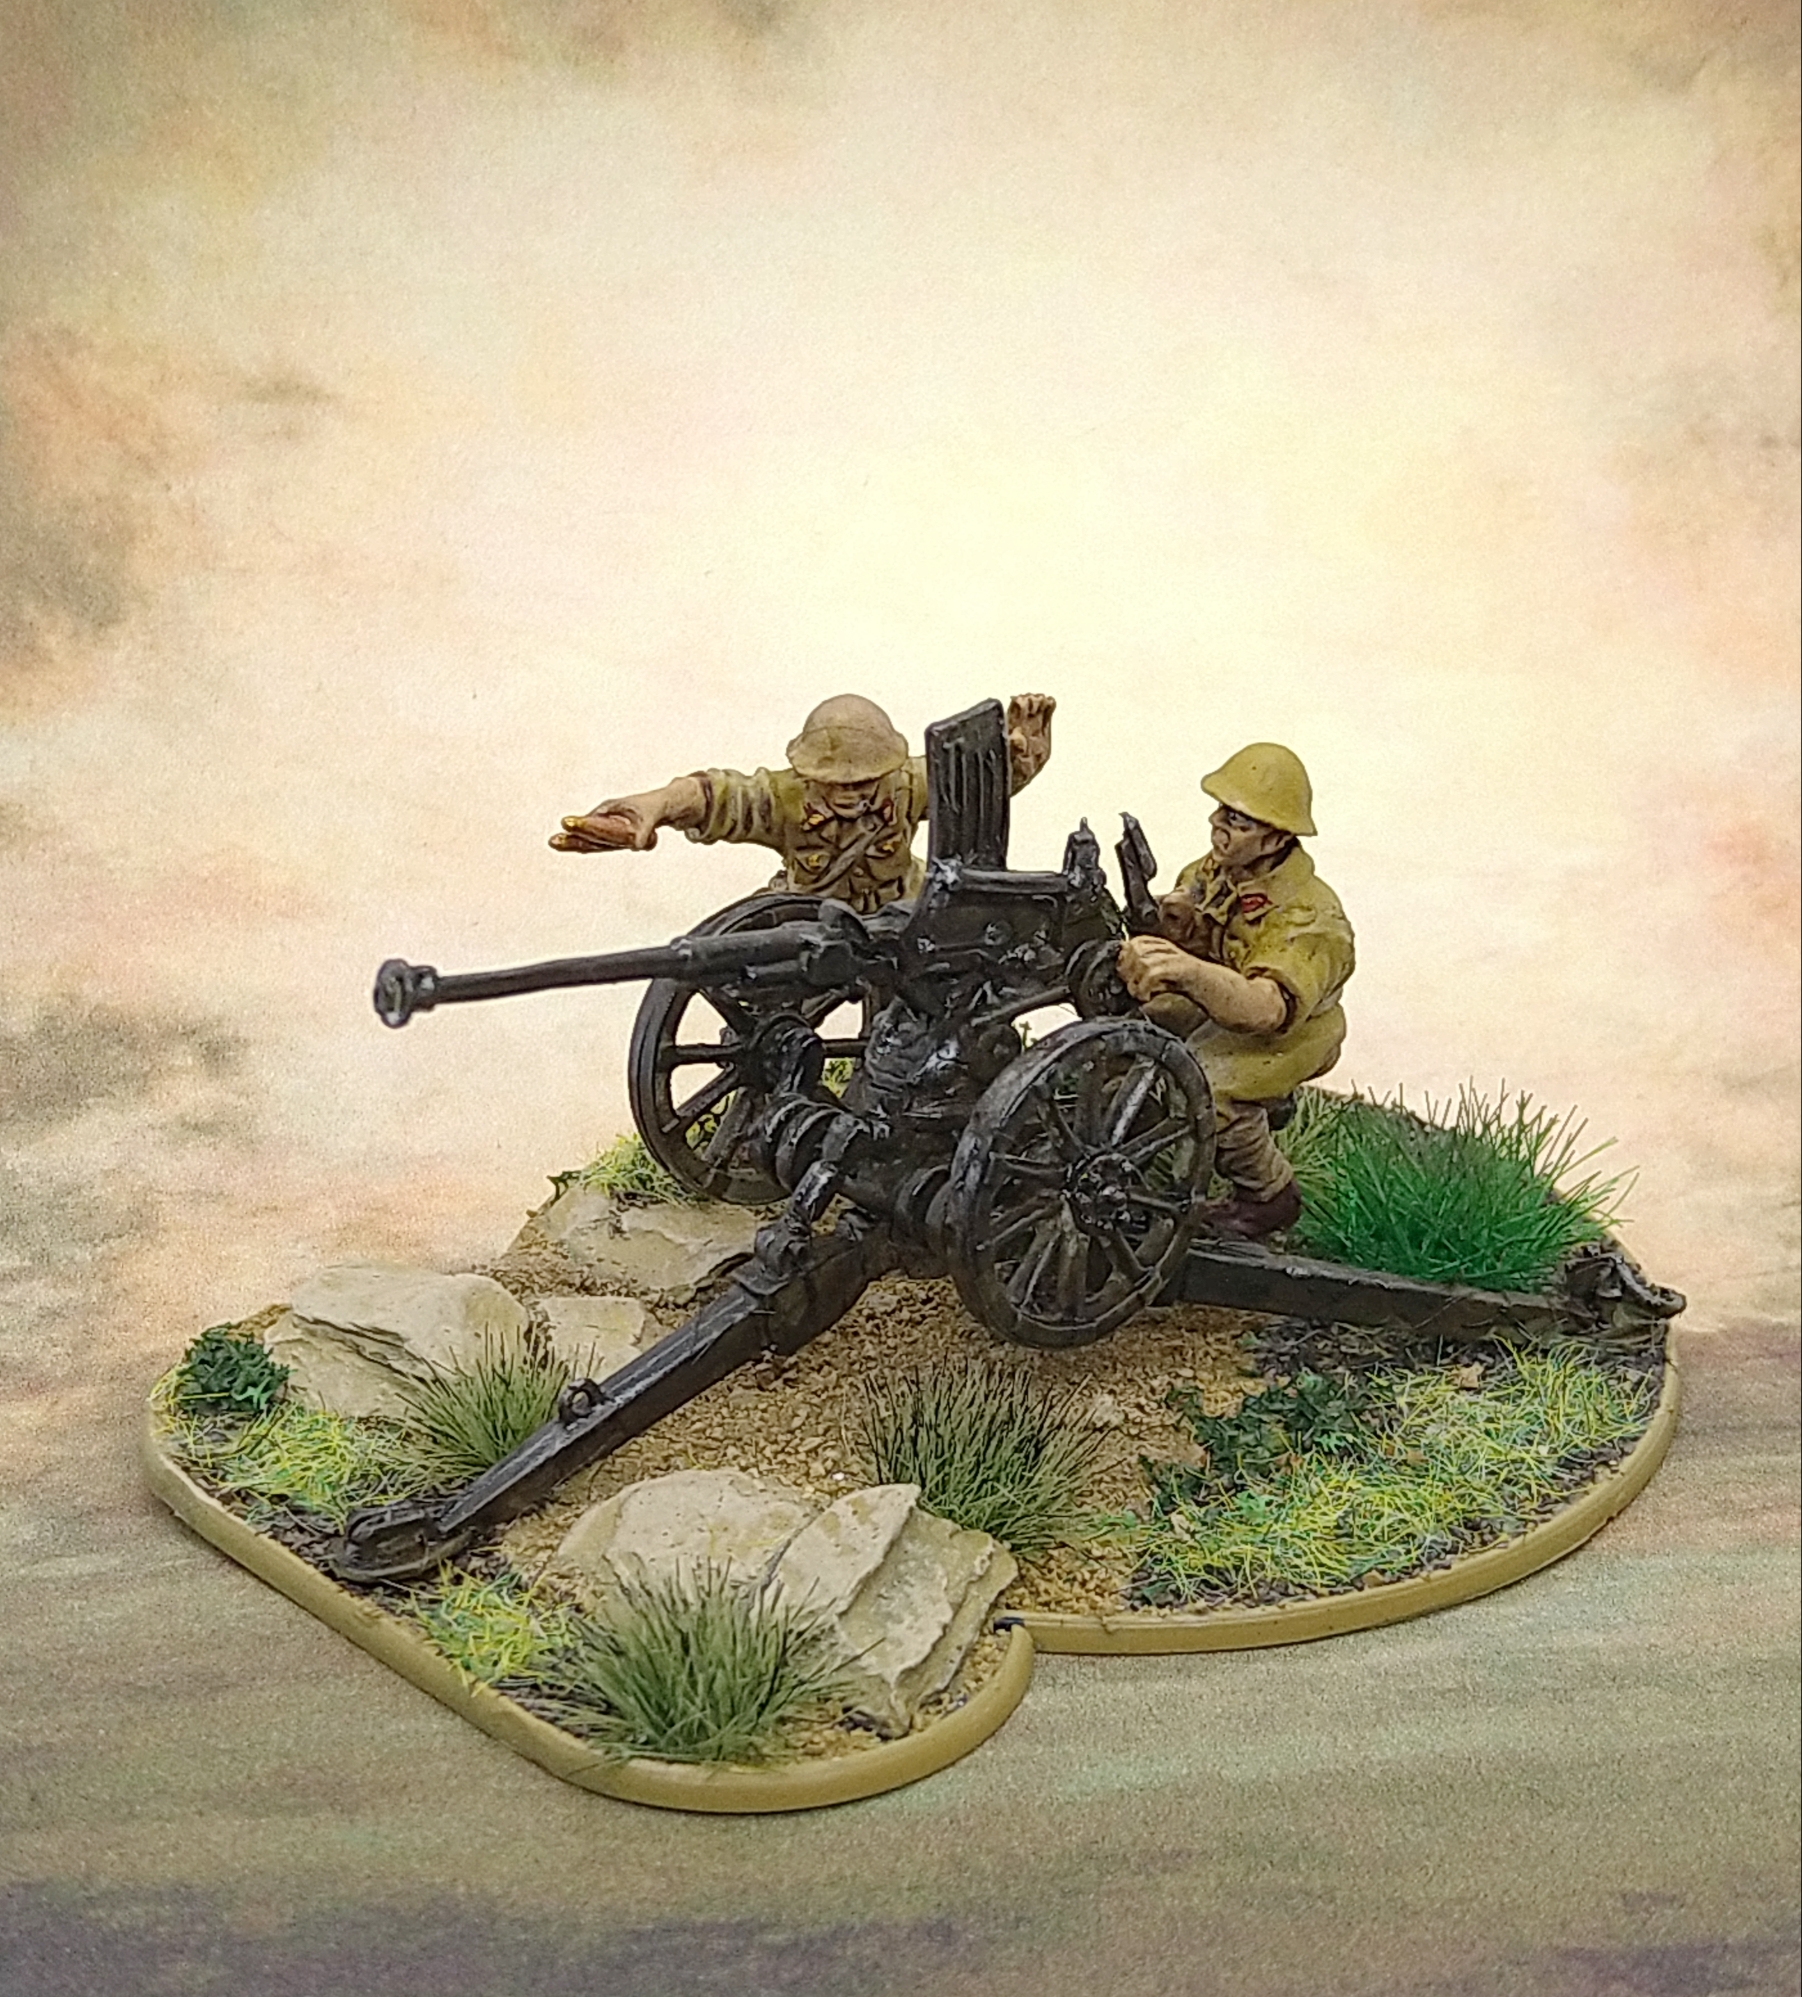
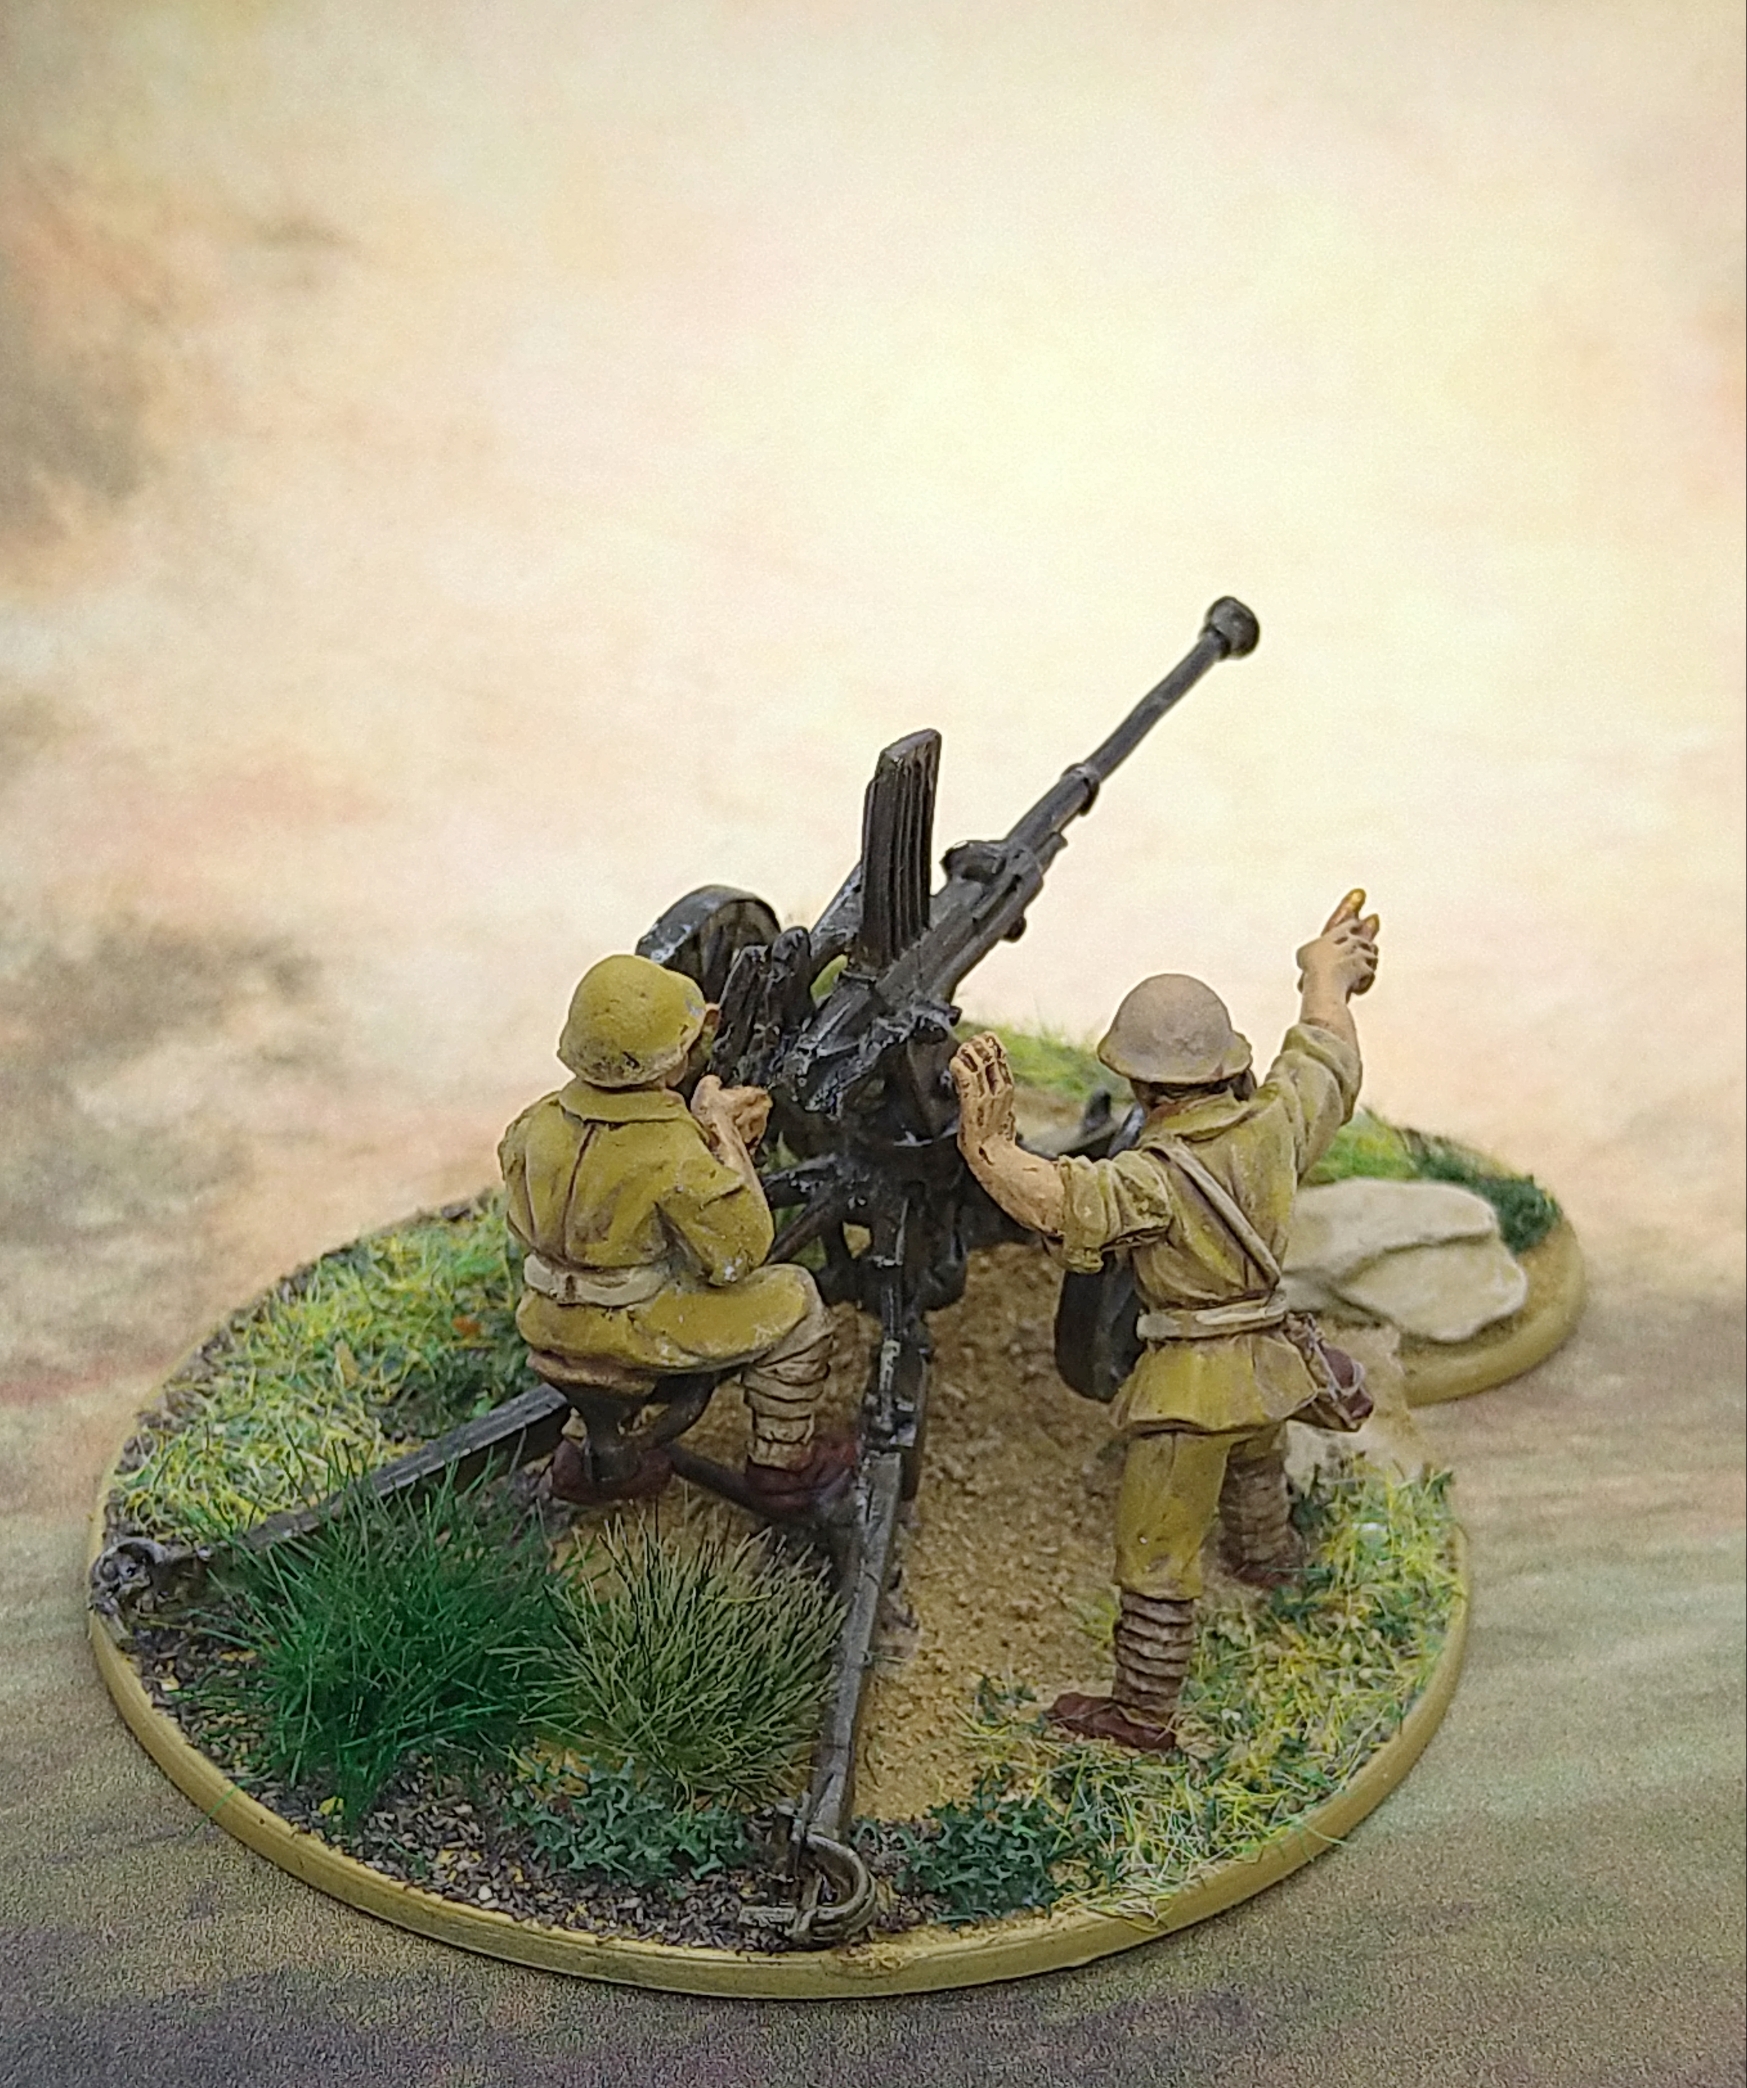
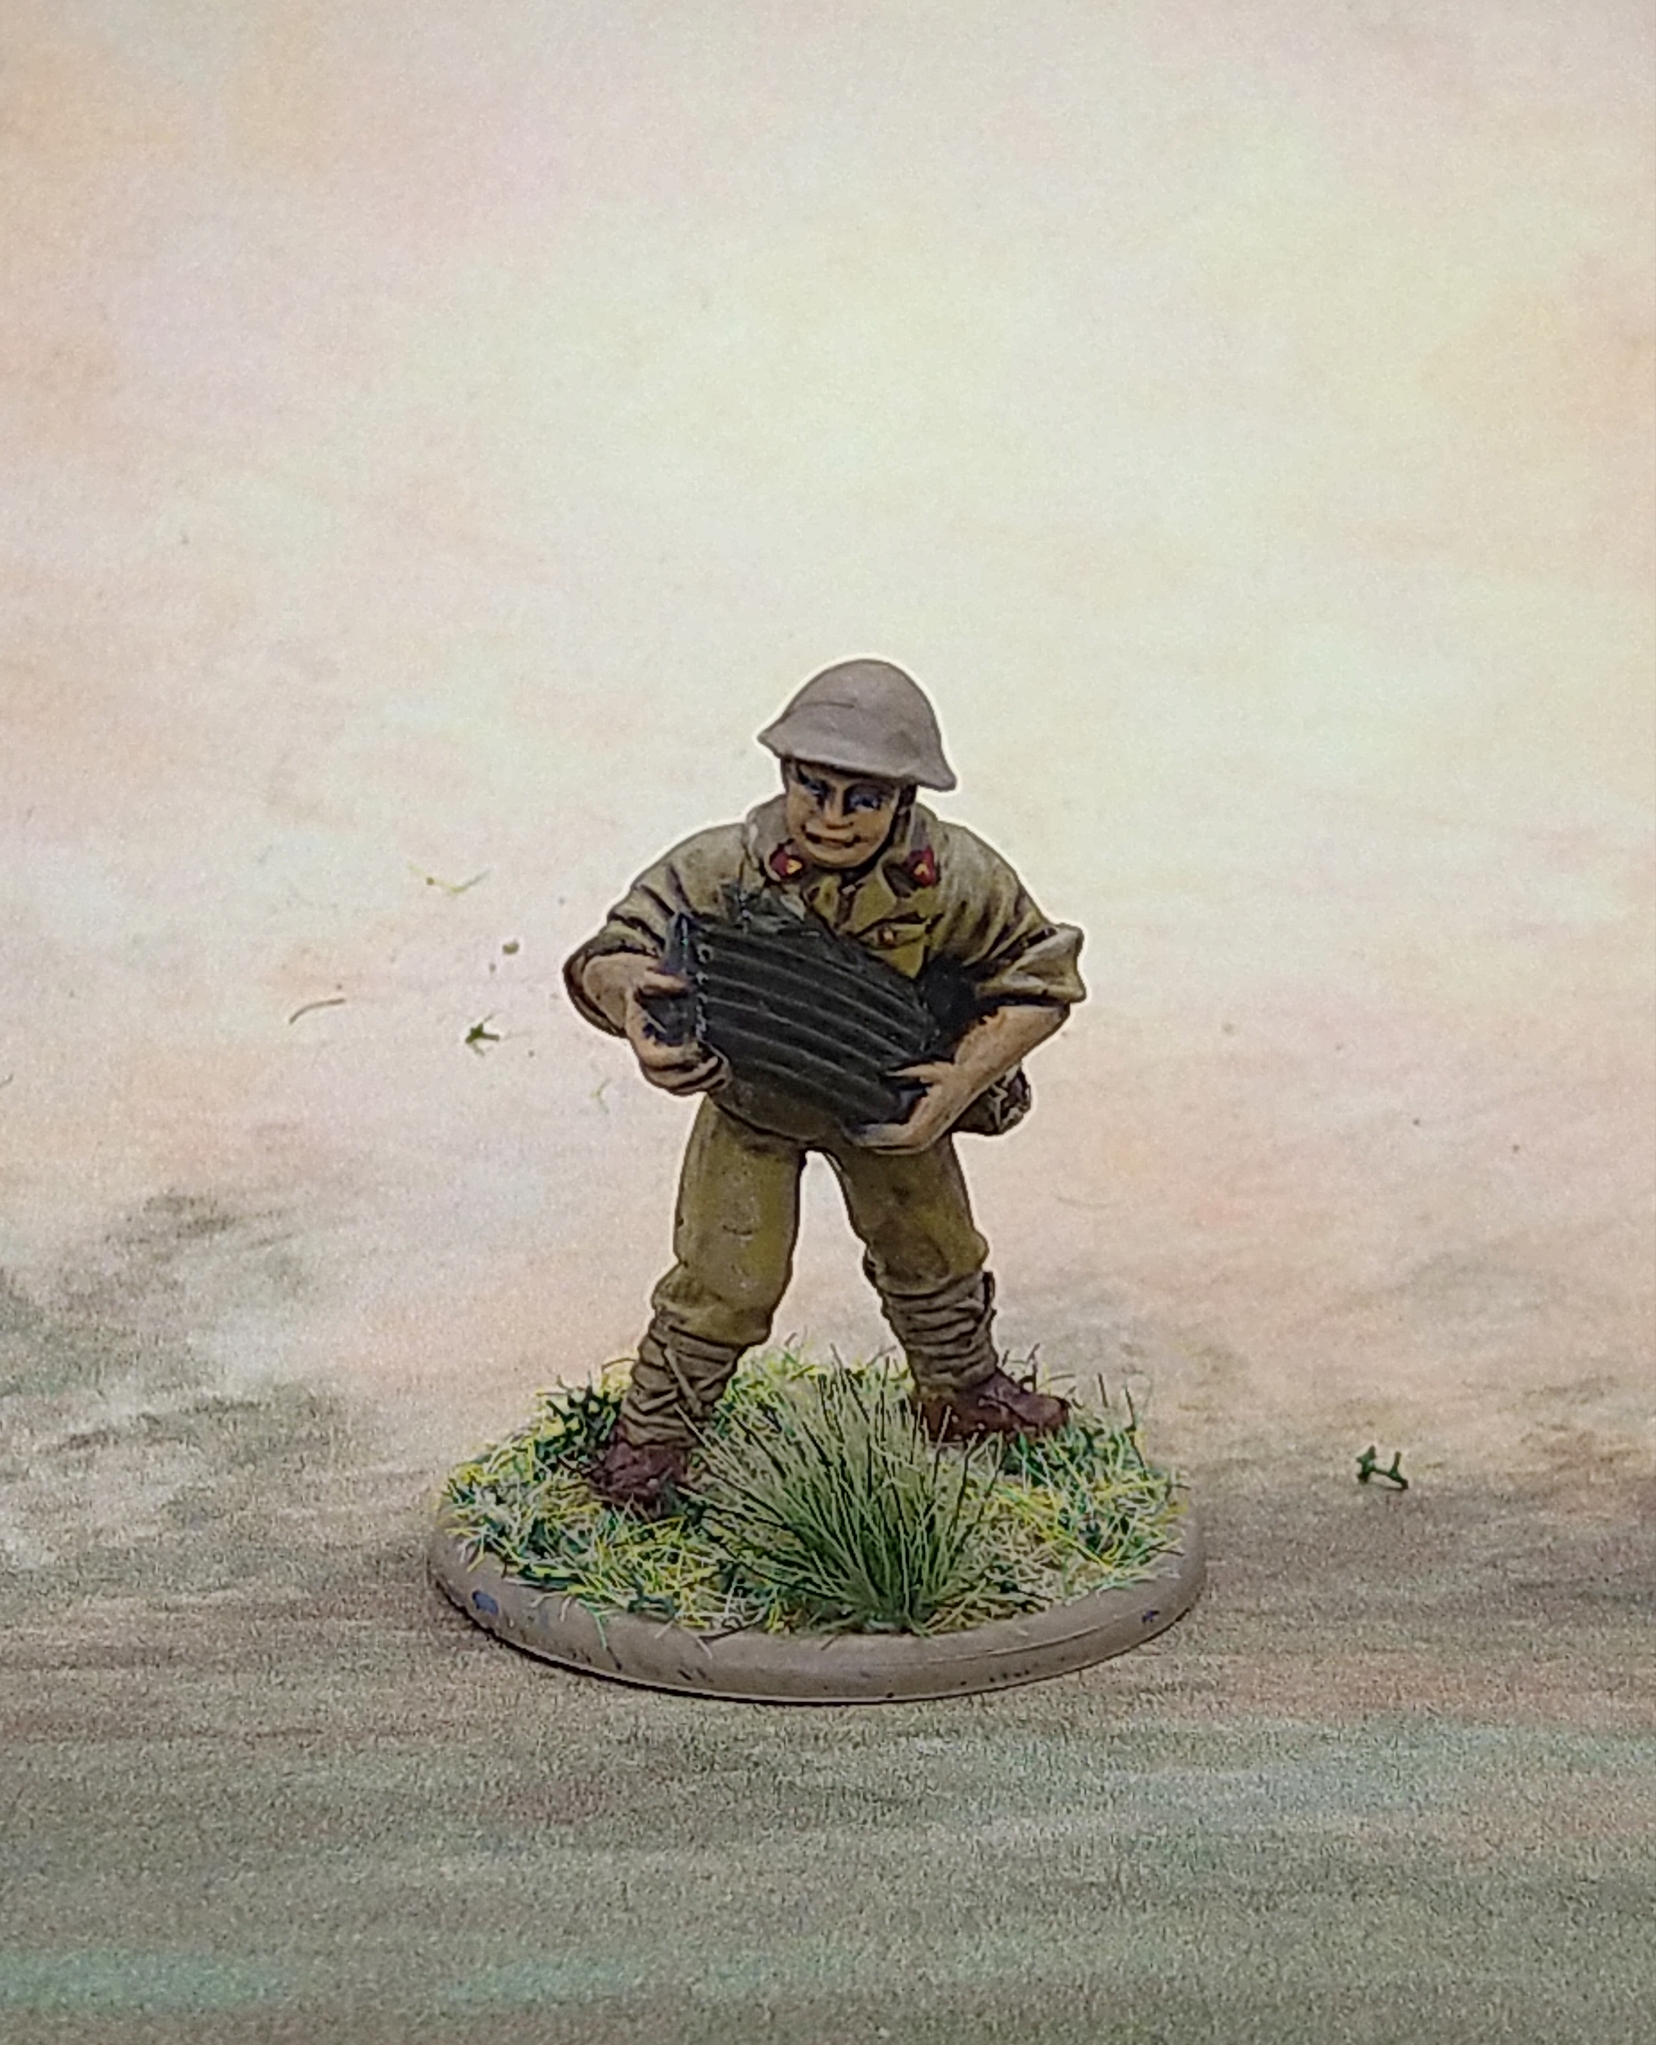
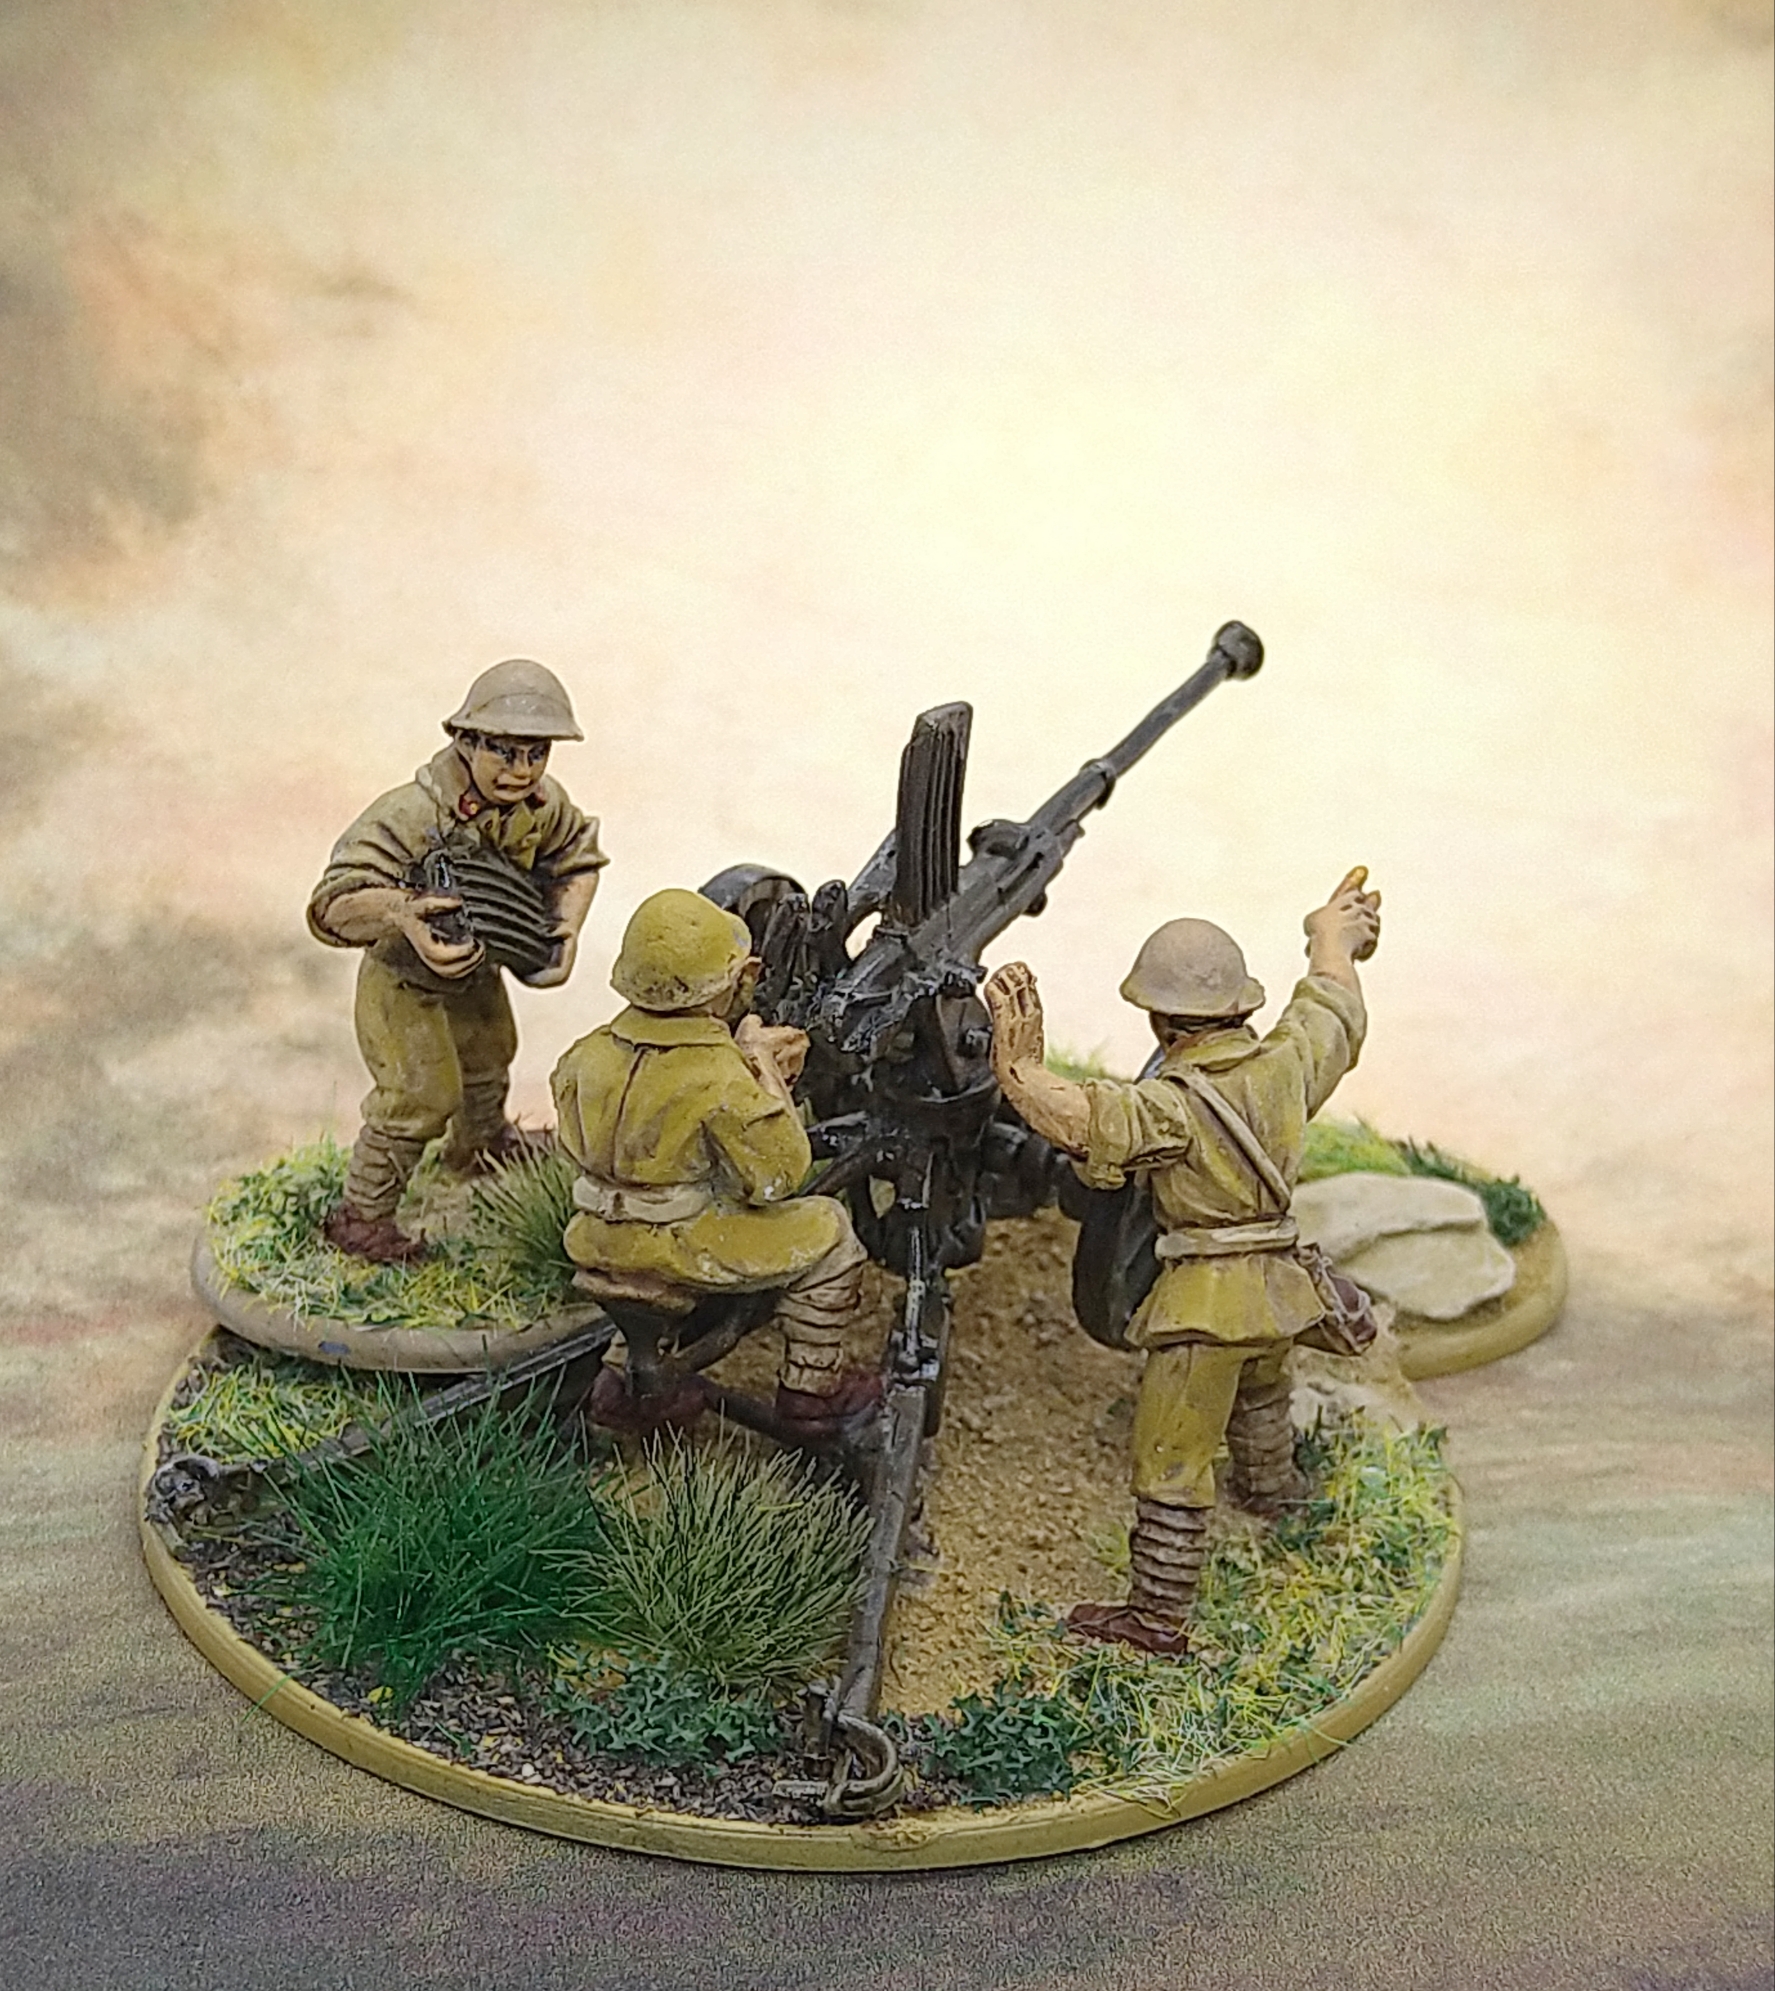
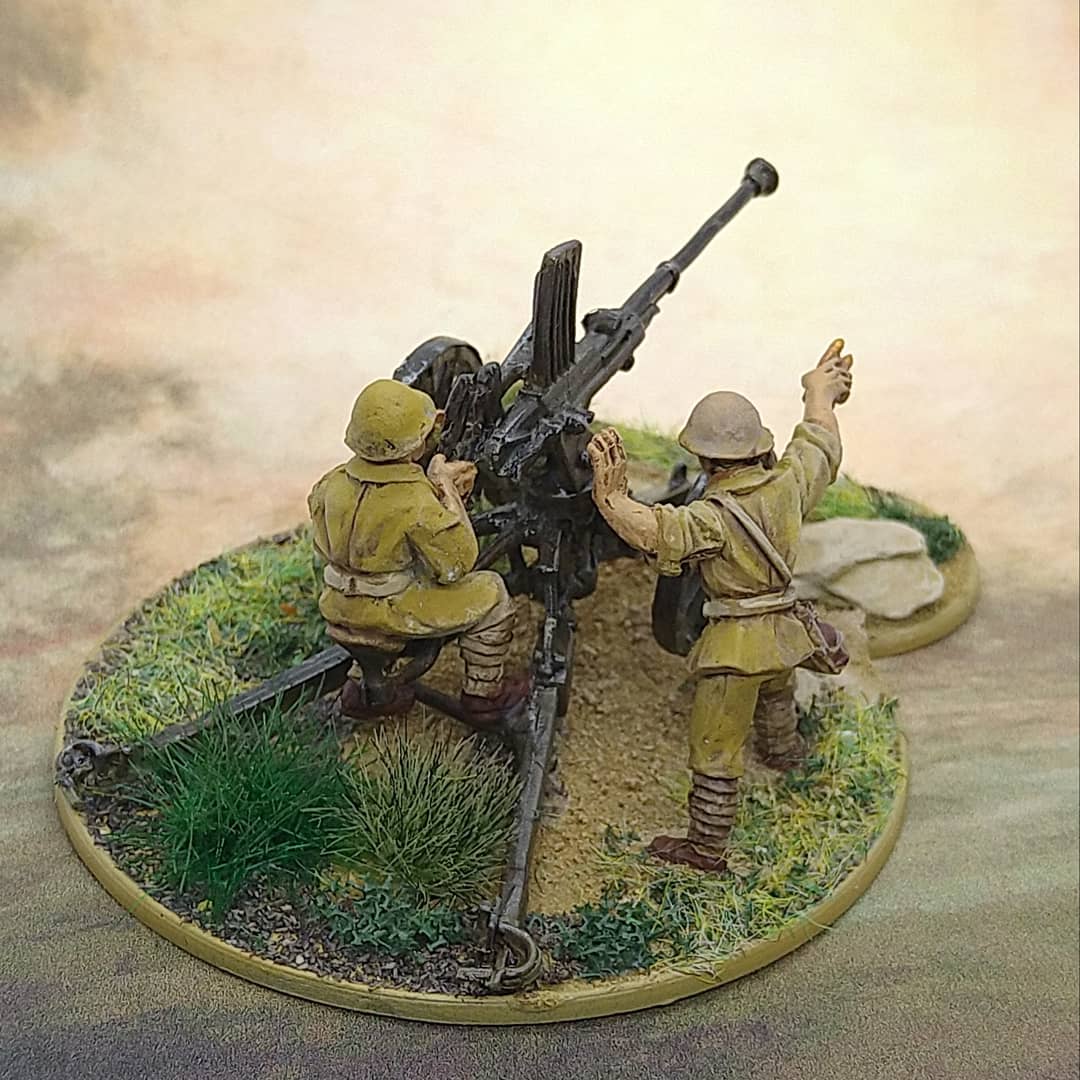
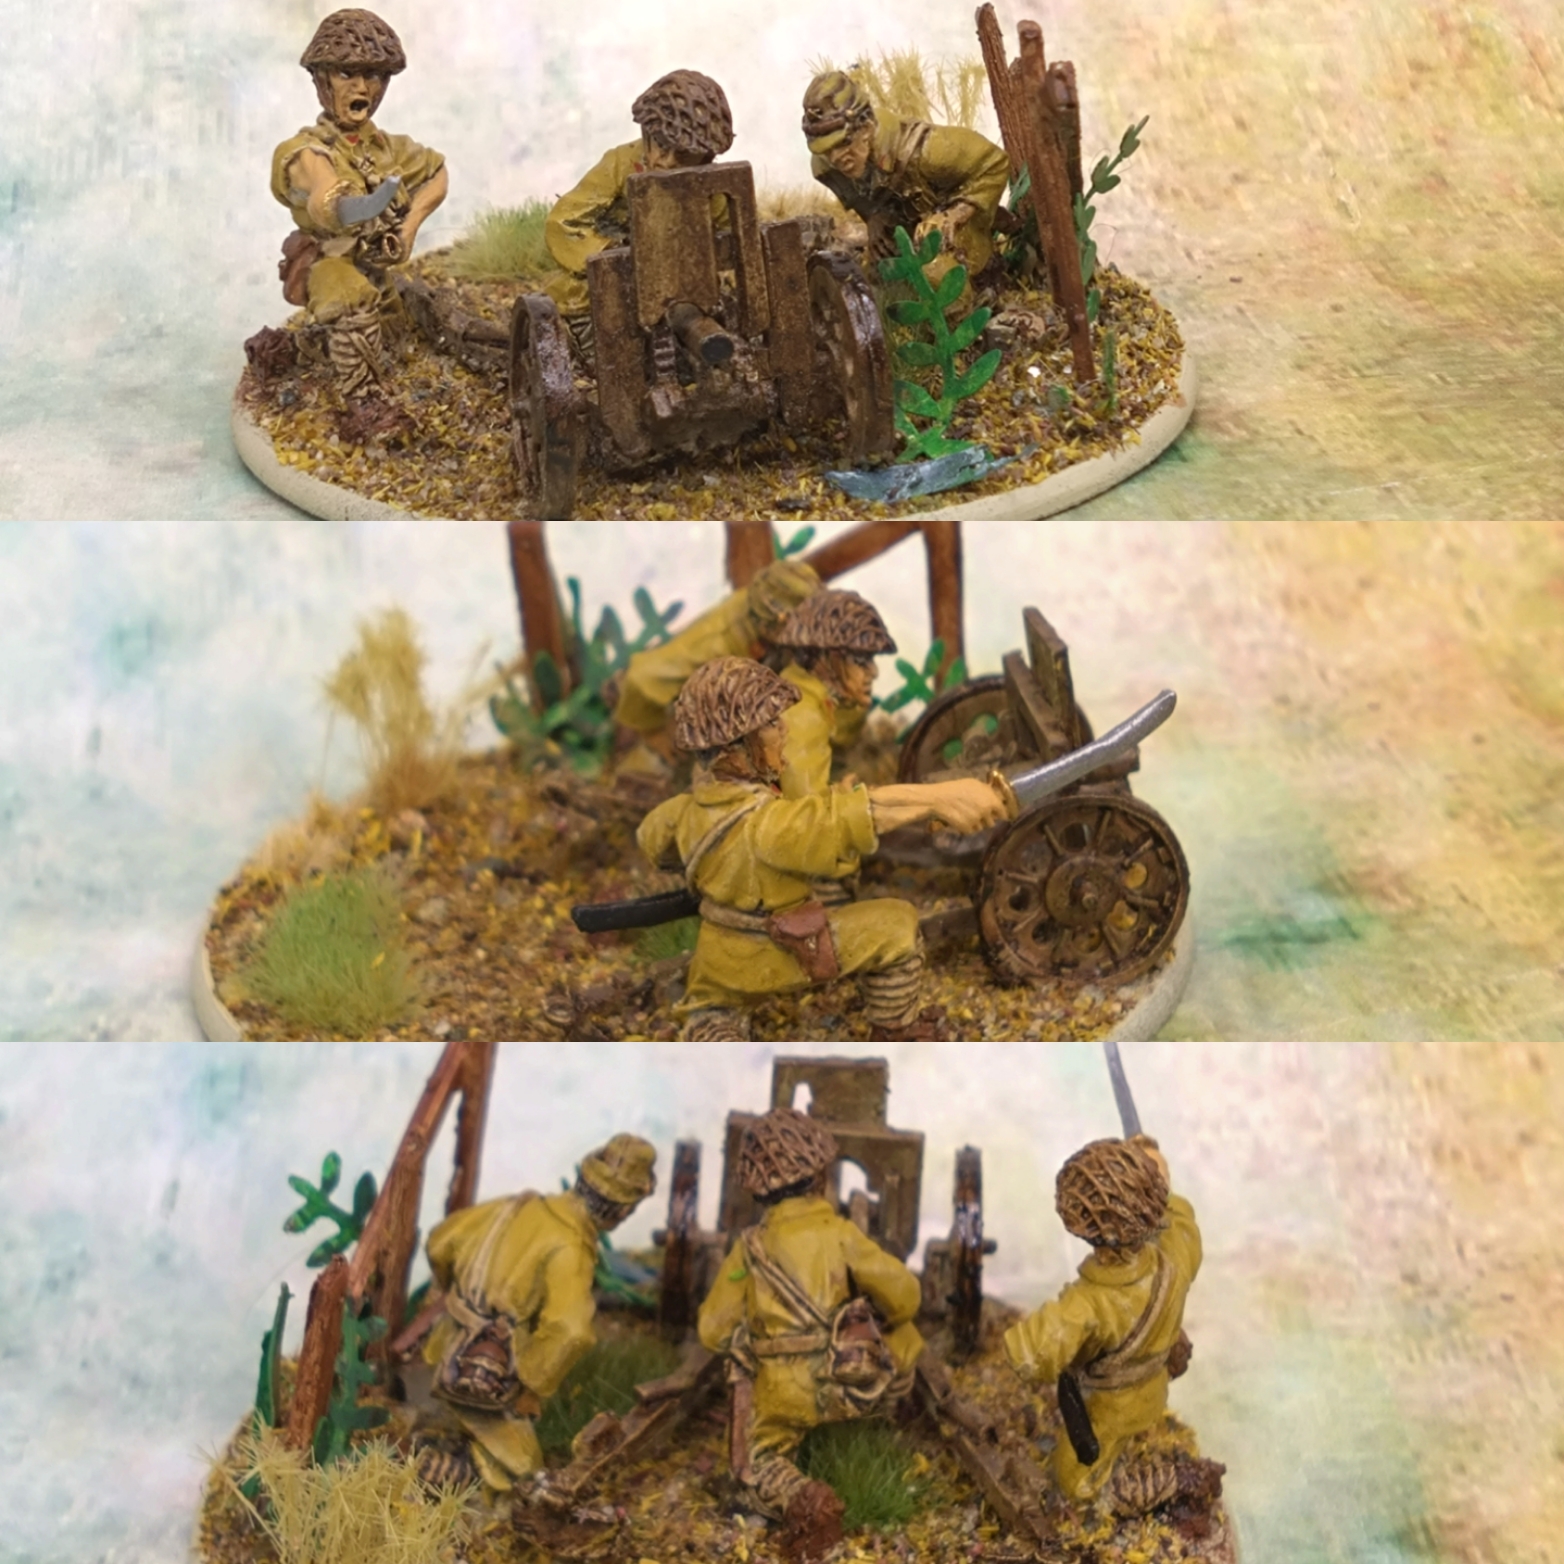
Type 98 20mm Anti-aircraft gun... Mixed emotions
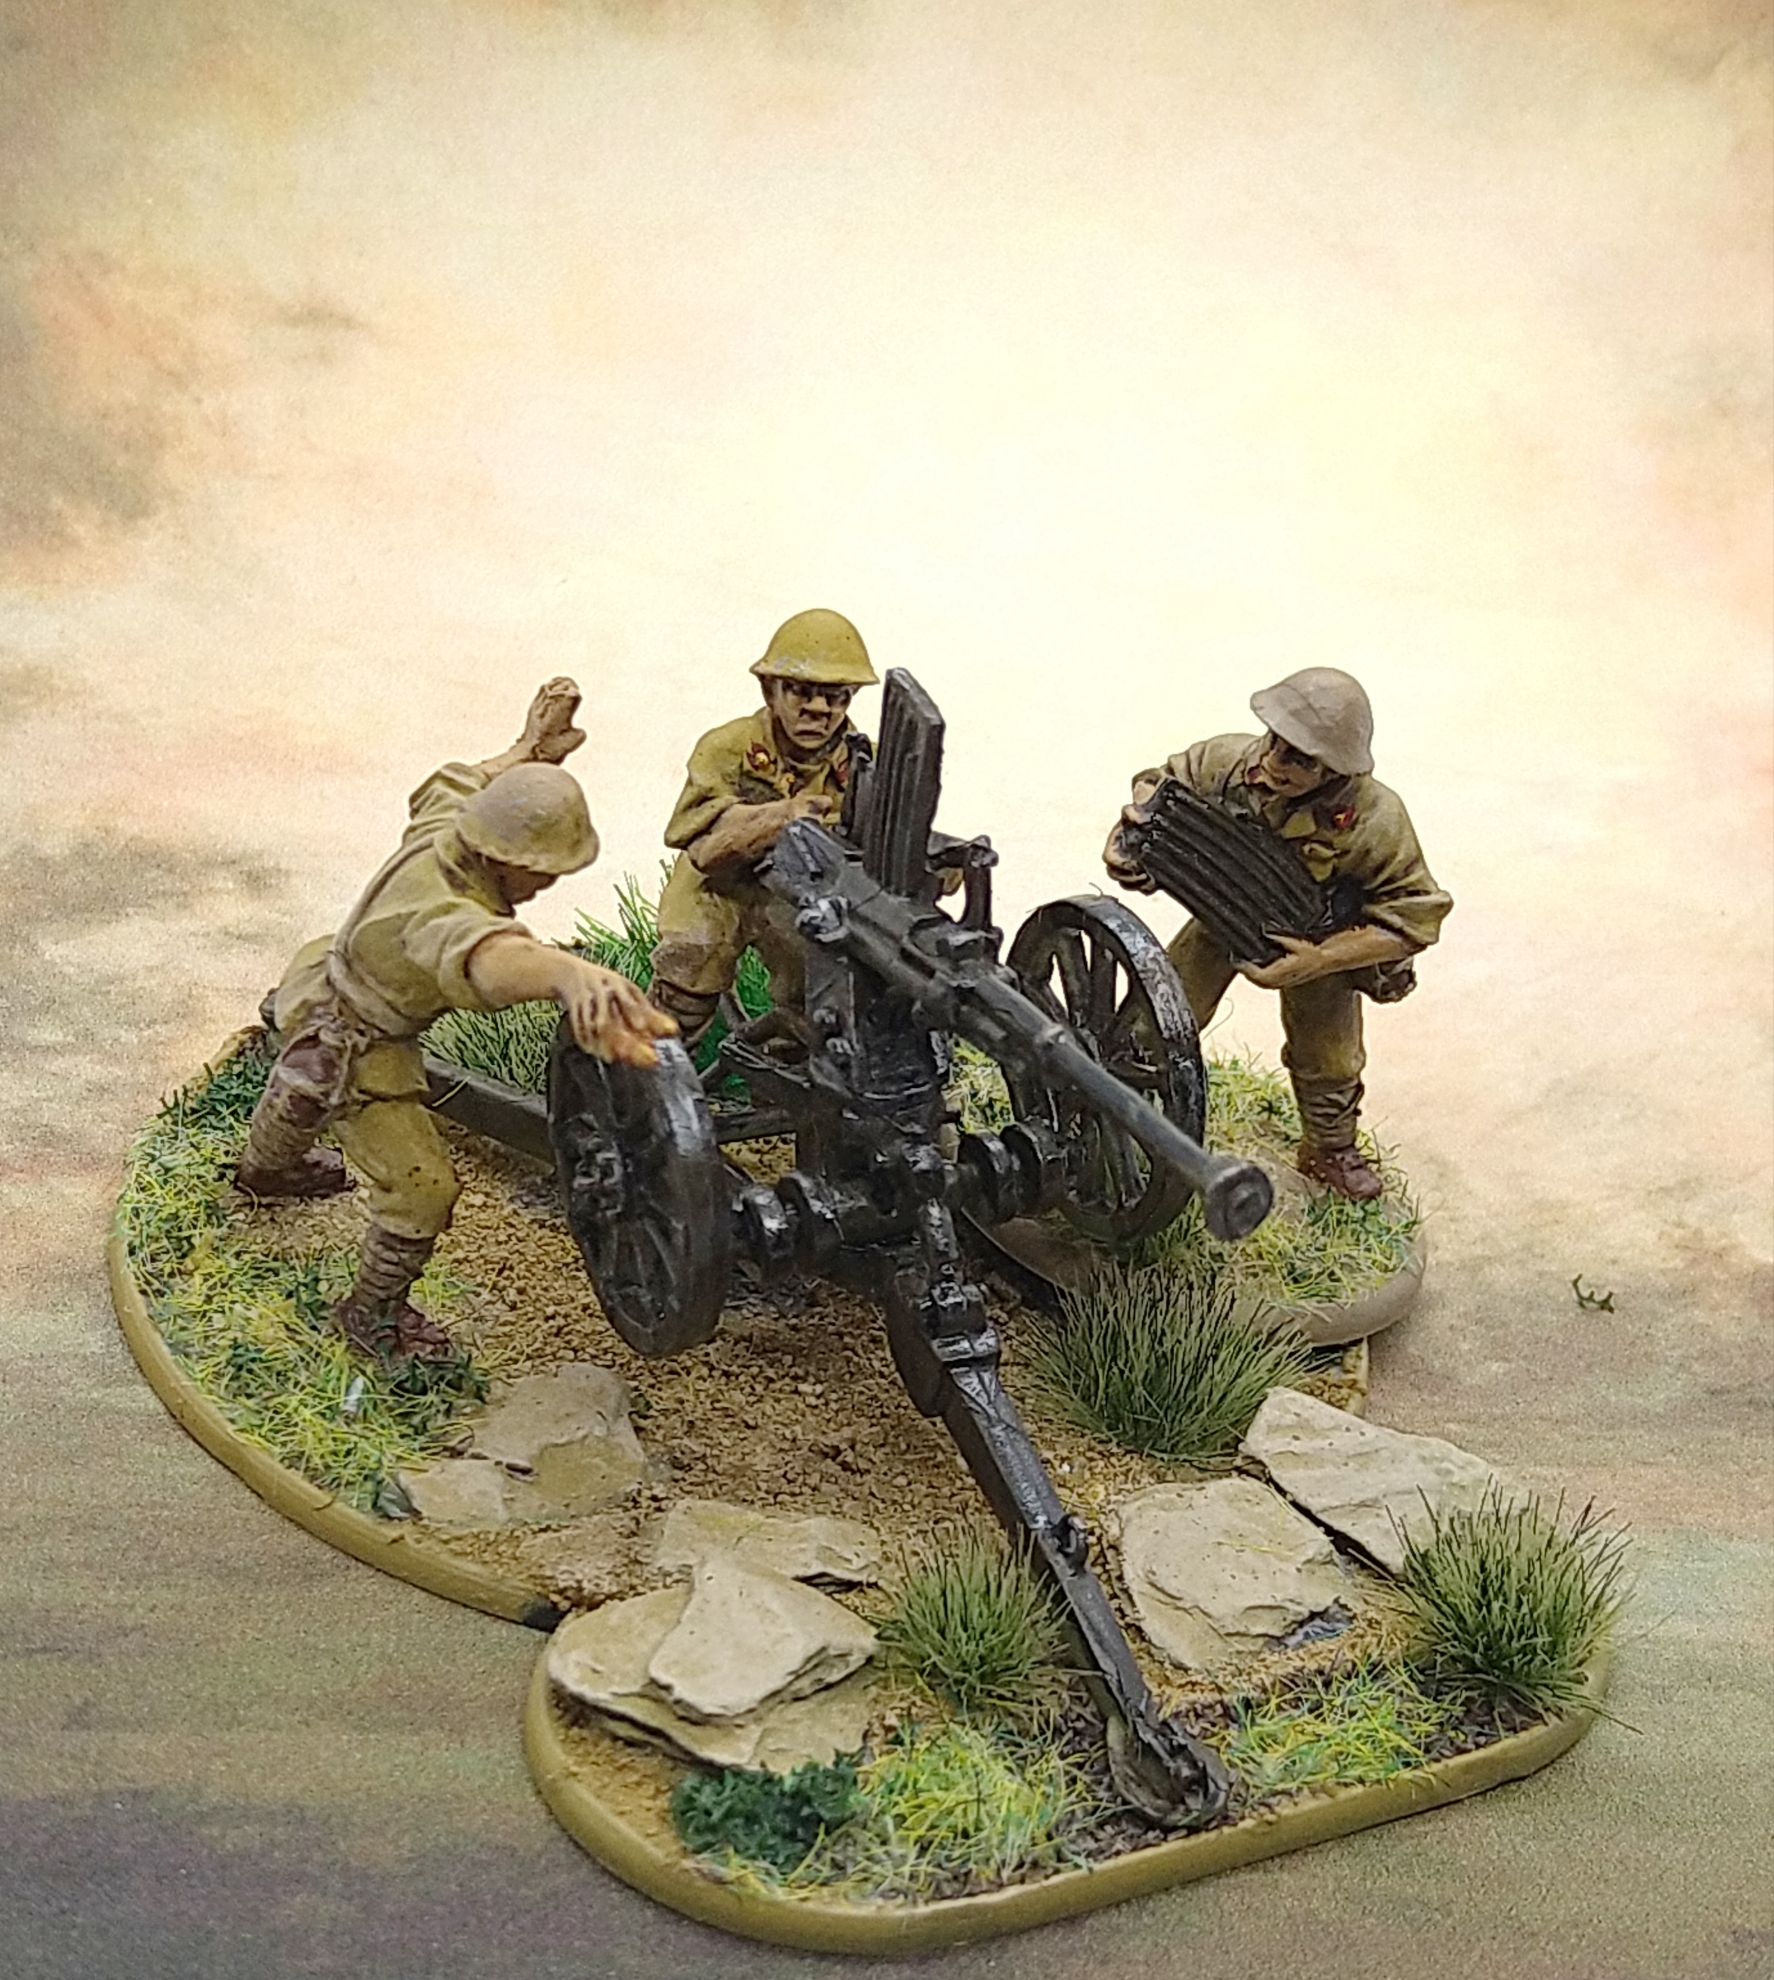
Didn’t enjoy building this.
This metal model was Ok to clean up and prepare but the instructions were very inexact. You were required to attach the two recoil legs at the rear to the central core… But you couldn’t really do that without gluing the cross beam that connects the legs at the same time. This wouldn’t have been that awkward, but to up the difficulty the central core of the gun platform is not resting on the floor so everything had to be supported underneath, at hopefully the right height, for everything to marry up. Even with activator spray this proved tough.
There was also the fun of getting the arm cranking a wheel on the gun to be correctly angled on the body of the gunner, whilst him needing to be sat on a seat that attached separately. I didn’t do a good job of this and needed to fill in a gap in the gunner’s left arm at the shoulder join point. It’s a bad fill job by me, but I have tried to photo from angles where it isn’t that obvious.
The base in the box wasn’t big enough for it to take the total footprint of the gun, so I improvised an extension with a 20×50 base and used glue plus the basing of big stones across the join to get it together.
For most of my other gun teams I just glue them to the base. If I need to show wounds I can just hang red loon bands around their heads so I know they are under strength. This time I figured I will have one removable mini and two permanent. The likelihood is that the enemy will either focus the gun immediately and destroy it, or they will ignore it and only shoot it as a last resort if nothing more threatening is in range. With that in mind I wasn’t interested in putting the extra basing consideration that it may have taken to get the last standing crewman to be separate as well.
Used the basic paint scheme. The Vallejo Japanese uniform colour for the shirts and trousers with Morghast Bone for the belts and webbing. Vallejo flat brown for canteens and the boots this time.
The gun was an experiment I am happy with. Deathguard Green base with a Cryptek Armourshade Gloss shade over the top. Came out a nice military hardware green brown.
Completed
Once I finished my 20mm gun and had nothing left in my pile of shame related to Japanese Bolt Action, I decided to call this done. (I will get that last bit of trouser and elbow I spotted on the gunner after photos were taken, but after that I am done…)
I may revisit this in the new normal once I actually get to play this list out. If some extra minis are bought and painted I may share my findings and explain my purchase, but until then thank you for the comments and likes. It all helps chip away at the dark side of lockdown.
Happy Hobbying.
Type 94 Tankette
 Japanese Type 94 Tankette. Probably terrible in game, with it only armed with a machine gun, but I think it's cute and wanted it as an option for my force.
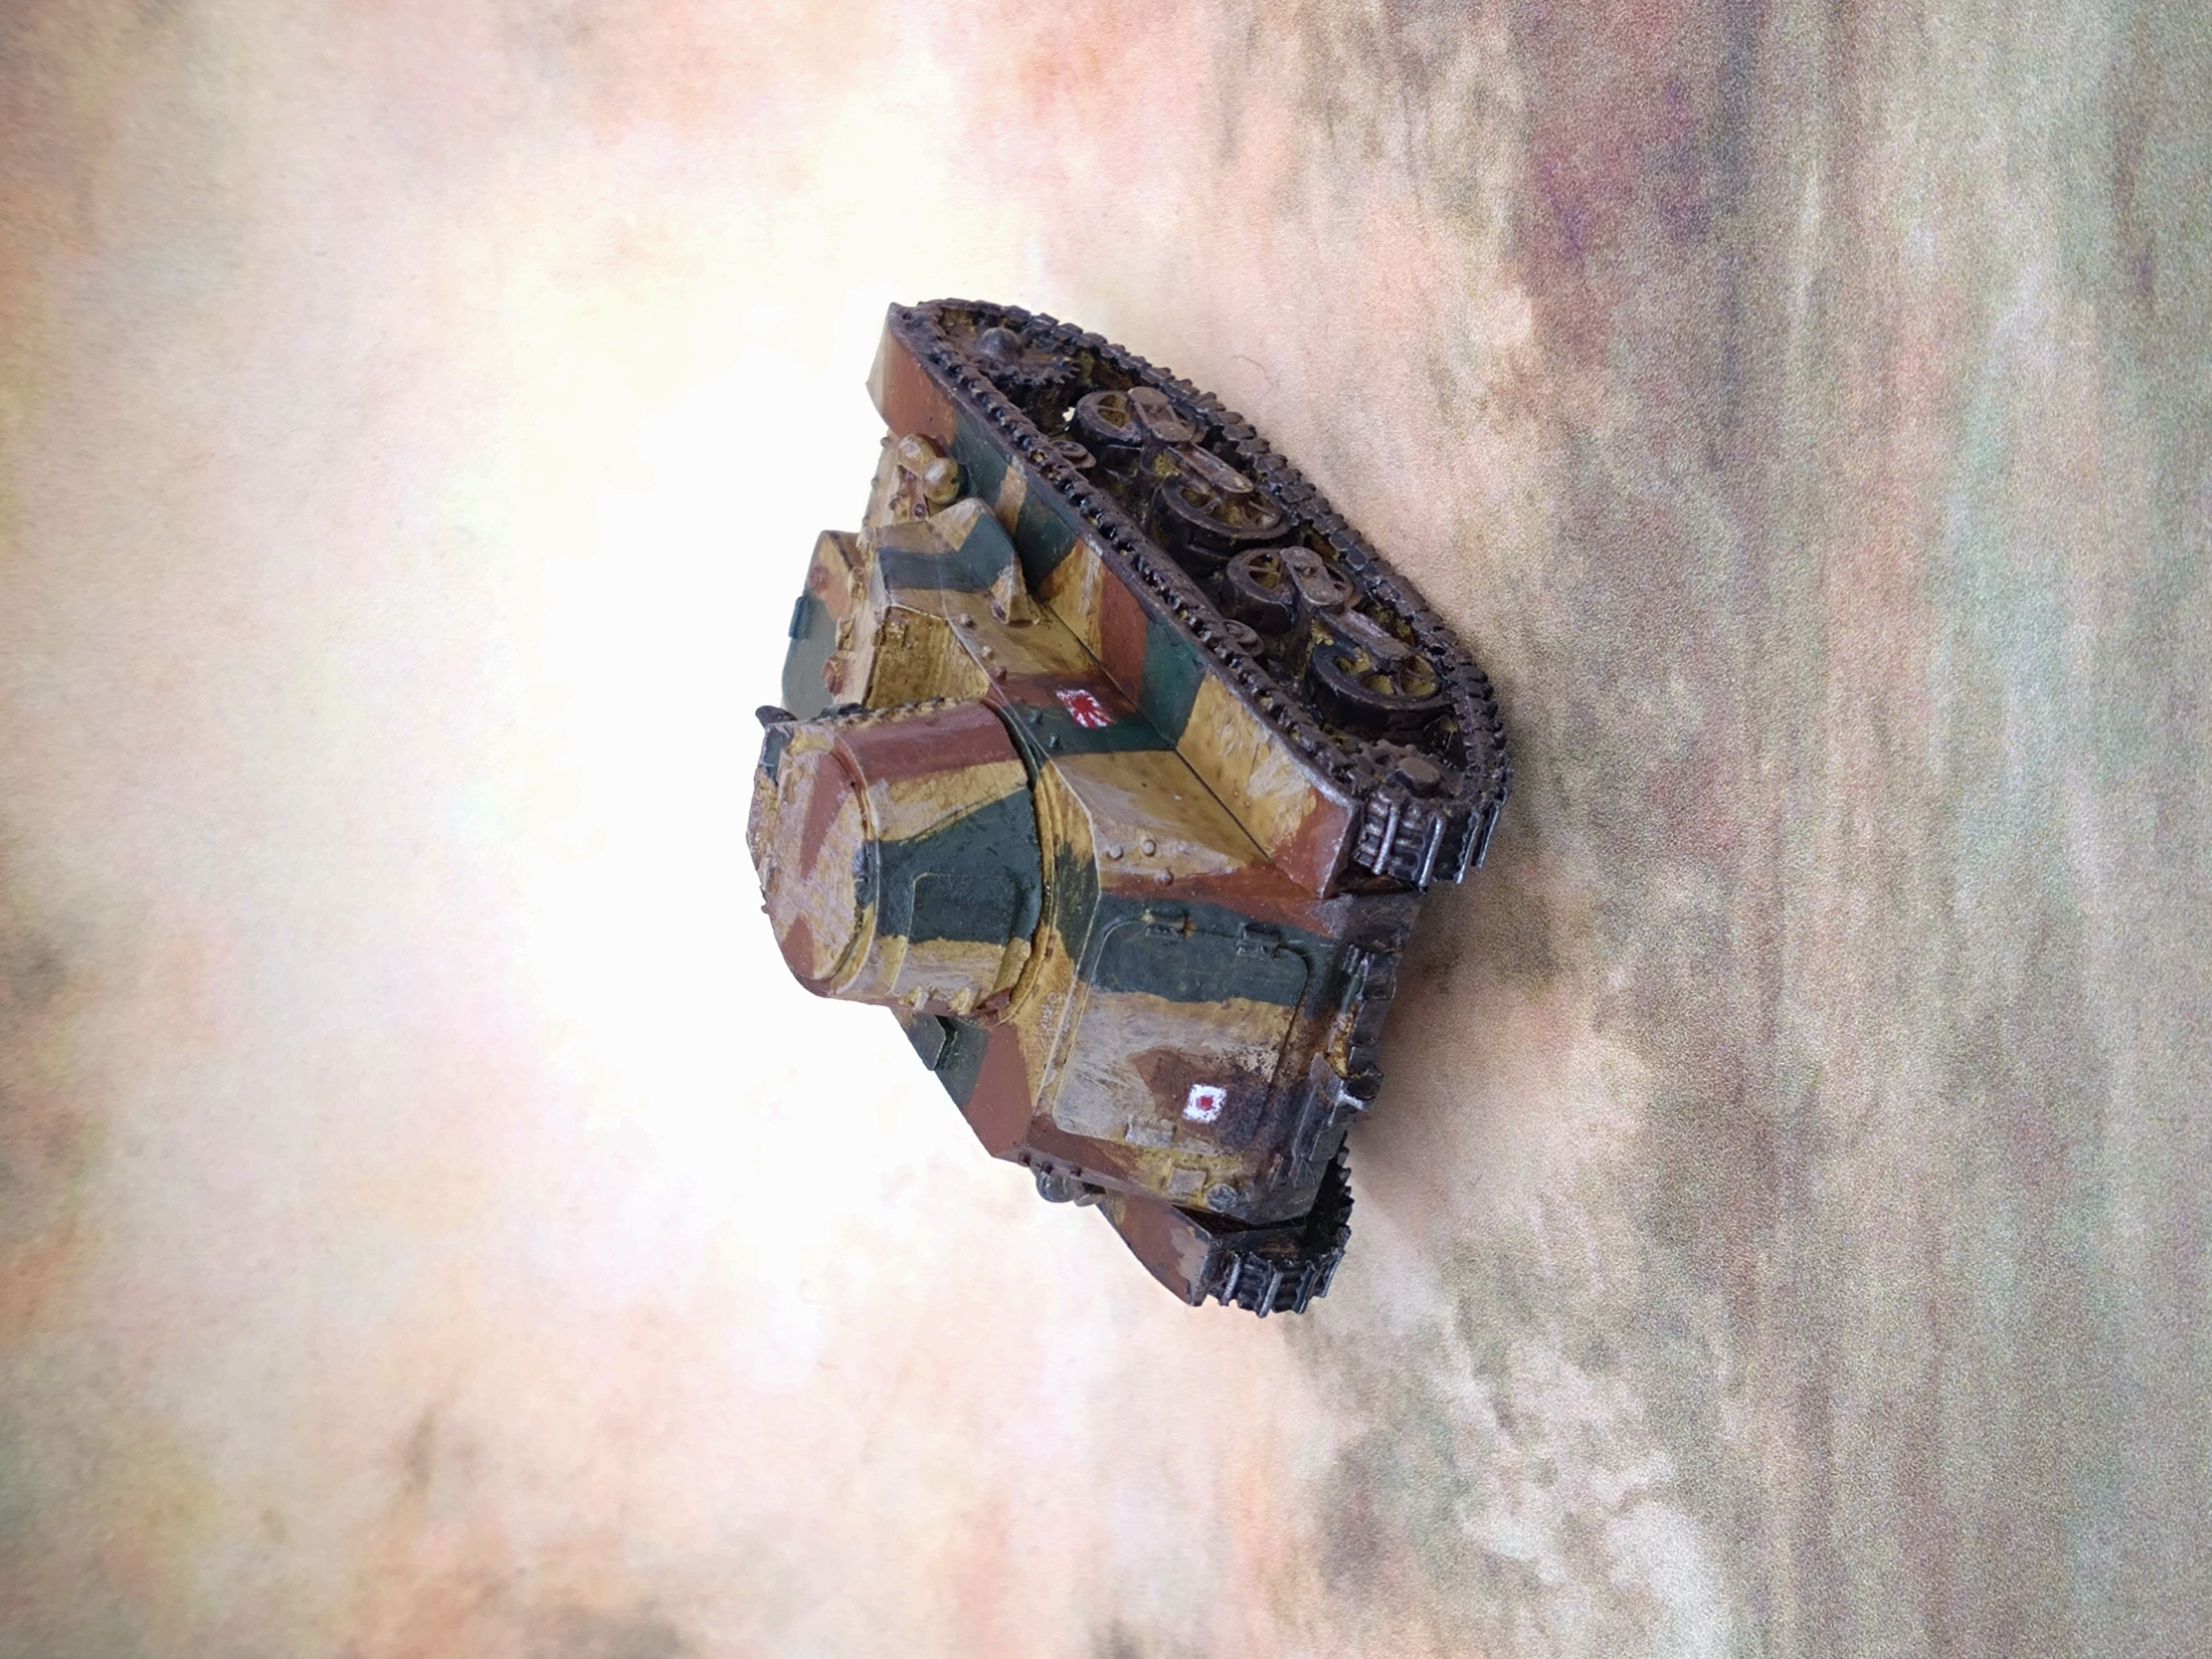 I used the same colours as my other vehicles and am happy with the result. I couldn't find my transfers so painted some flags of my own.
 The tank looked tiny so I looked online to check for scale... And it was so small it could fit on the back of a Sherman and be carted off as a war trophy.
More. 70mm Infantry gun
 Finally built this. I hope it's built right, but a lack of assembly drawing had me checking Google images until I think I got it right. This kit taught me a few lessons and somehow I regressed and ignored a couple of lessons I had already learned as well. (Painted them once stuck down, put basing materials down before I had finished). Gluing the wheels on meant that I had to raise the body and I should have used the activator spray for ease of assembly. The paint job should blend in with my current sets. Elements of the basing were fun to make.


