


![1918 Spring Offensive Wargame | Full Rules Overview with John & Gerry (WW1 Tabletop Game) [7 Days Early Access]](https://images.beastsofwar.com/2026/03/unboxing-warfulcrum-games-1918-spring-offensive-review-coverimage1-225-127.jpeg)


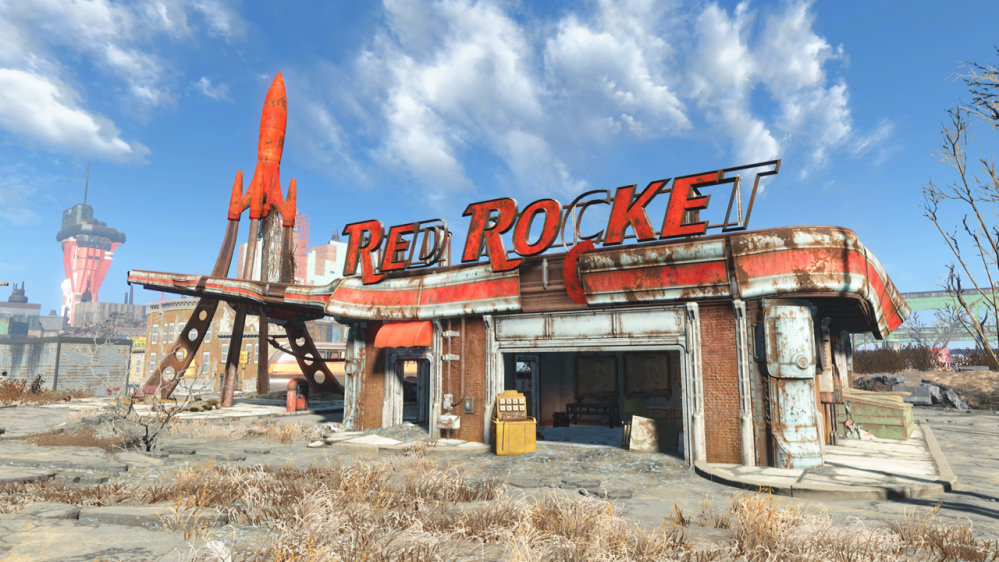
Red Rocket 3D Printed


Recommendations: 450
About the Project
This is my journey of printing painting and dressing the Modiphius Red Rocket 3D Garage and the ups and downs of using a 3D Printer.
Related Game: Fallout: Wasteland Warfare
Related Company: Modiphius Entertainment
Related Genre: Science Fiction
This Project is Active
A whole lotta' roofin' going on - Part two
Welcome back all.
On with the roofs.
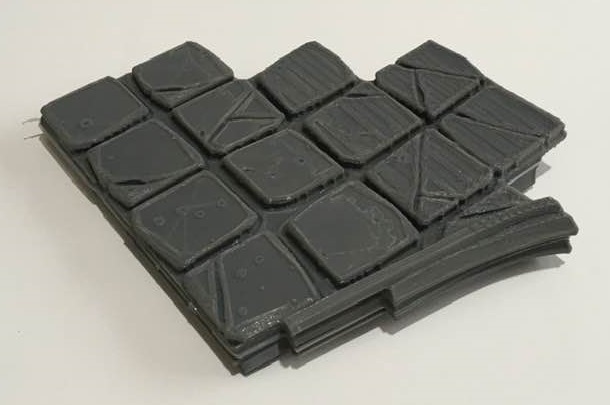
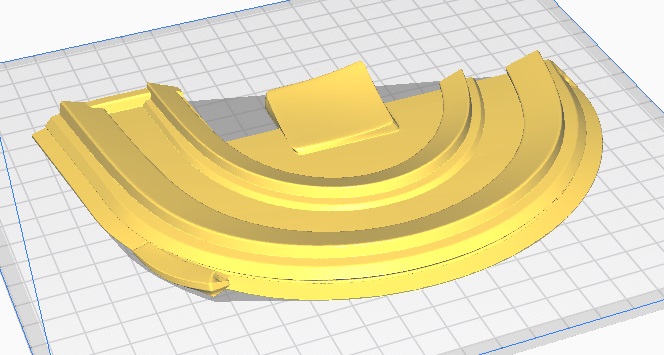
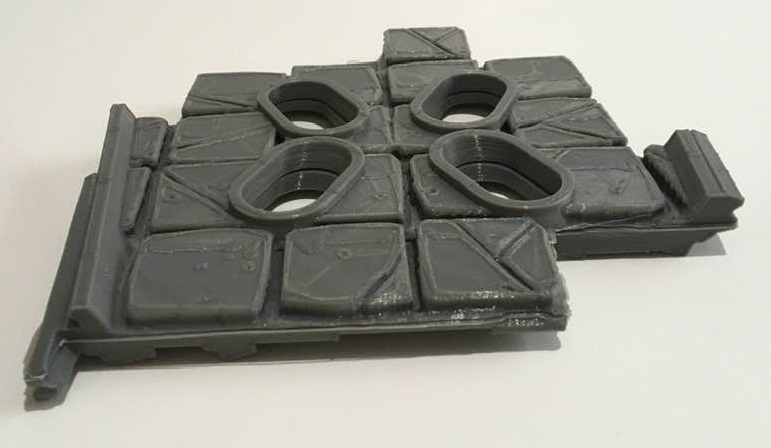
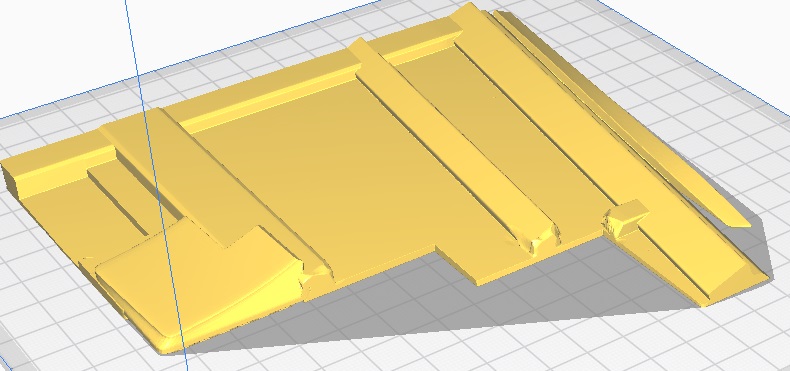
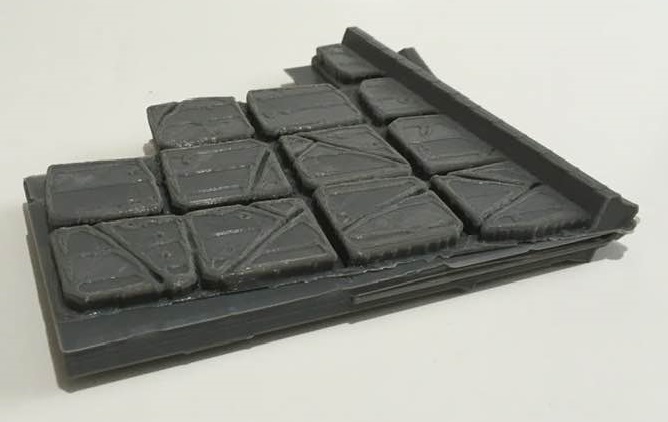
Starting with this roof (which required a small support on the rear tab).


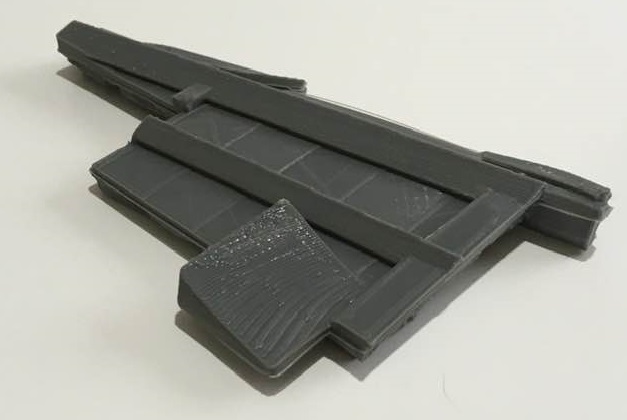
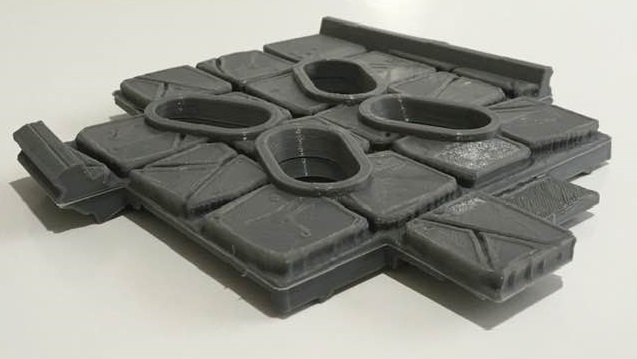
Next comes one of the rear roofs that will attach to the building roof. This (and the next roof) angle about 5 degrees towards the back, so that the entire canopy will slope back towards the building.


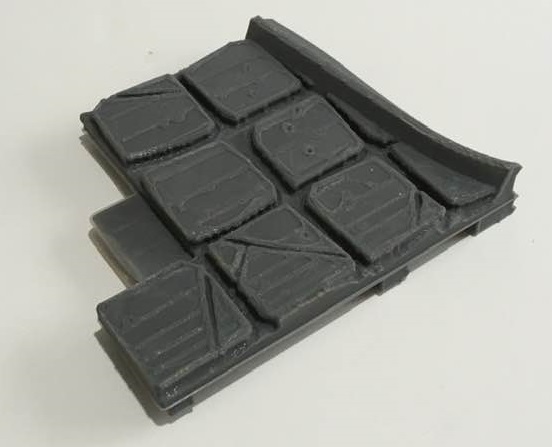
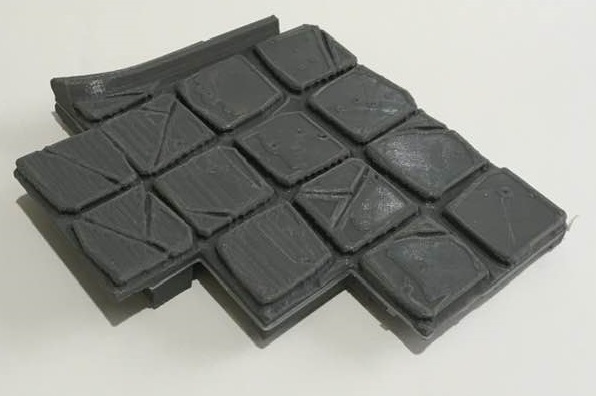
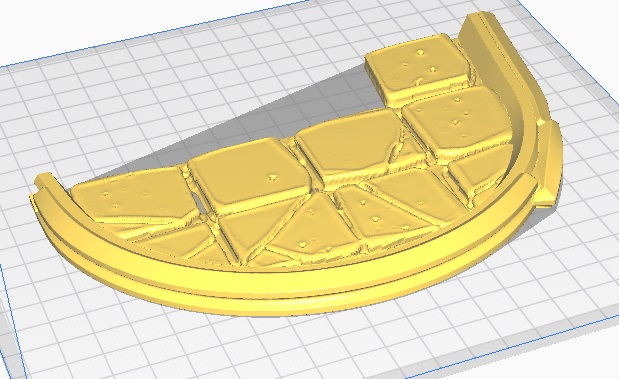
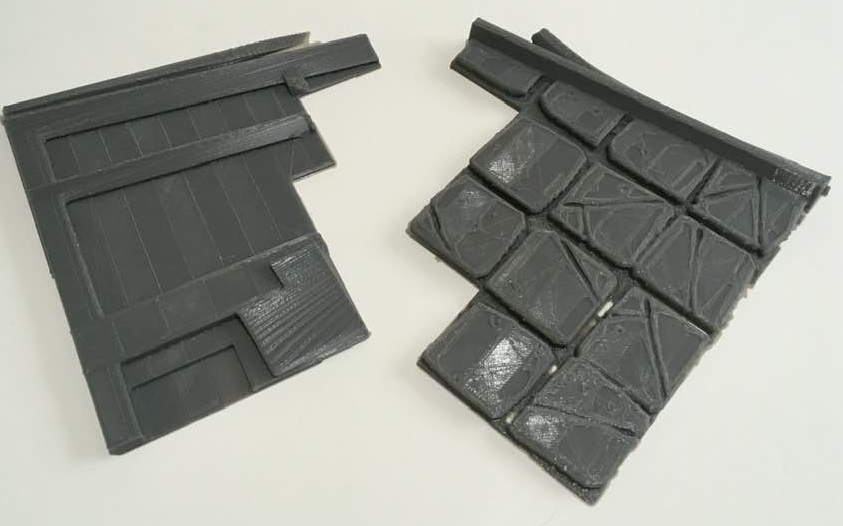
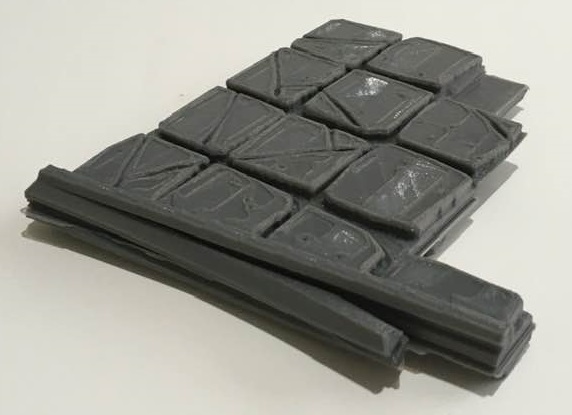
And here is the last roof for the canopy section.
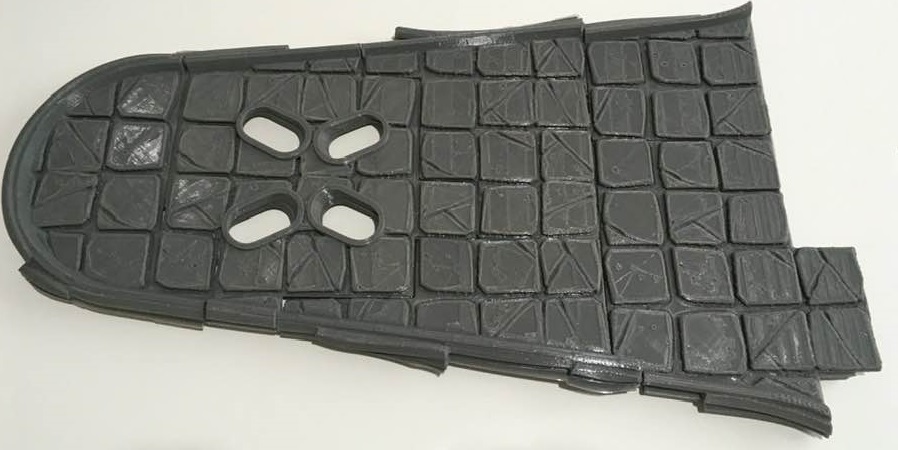
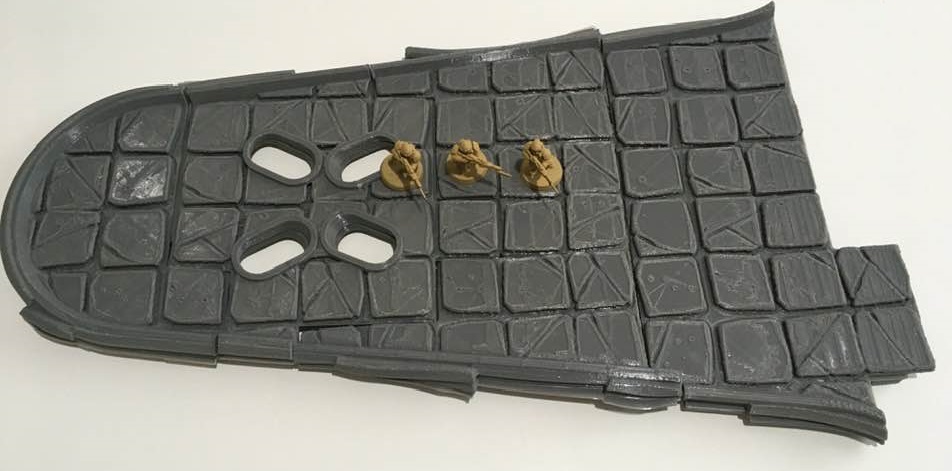
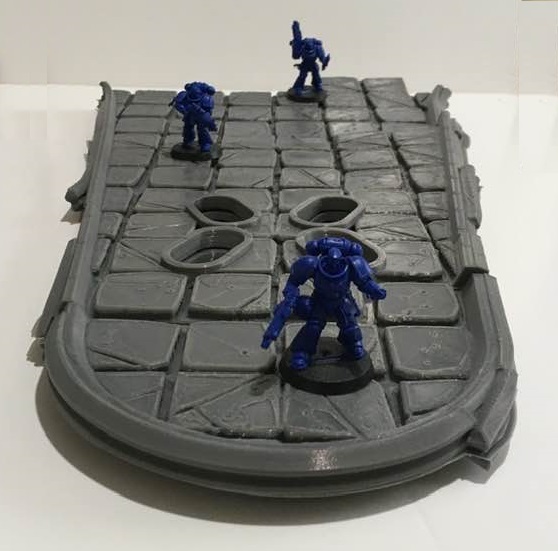
So, there are all of the the canopy roof parts. Put together they look like below (the total length of this canopy is 18″/46cm or 19″/48.5cm if you include the rear left tab.
The next blog post will show the roof sections for the top of the building.
Catch you later folks.
A whole lotta' roofin' going on - Part one
Once again time to start with a song. Replace Shakin’ with Roofin’ and here we go..
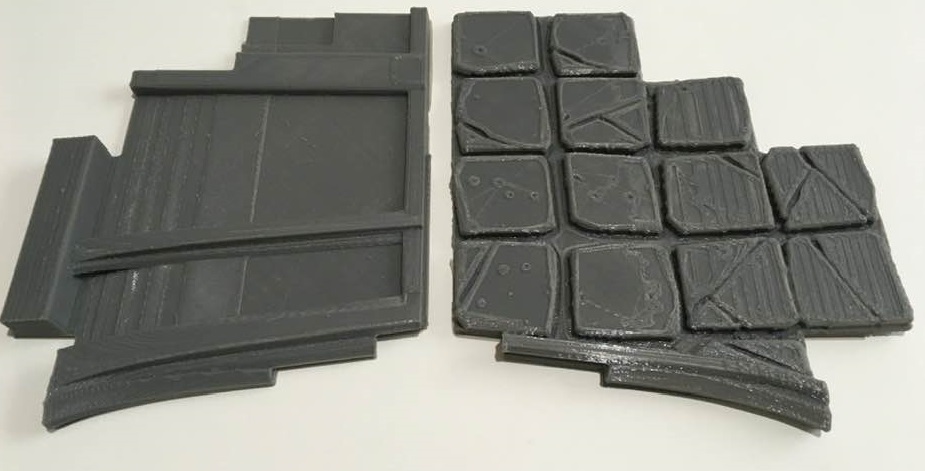
I may have been away for a couple of weeks but I have used that time to print out the entire roof (all 14 pieces).
As this blog would be a massive picture post I have decided to split this particular entry into 3 parts.
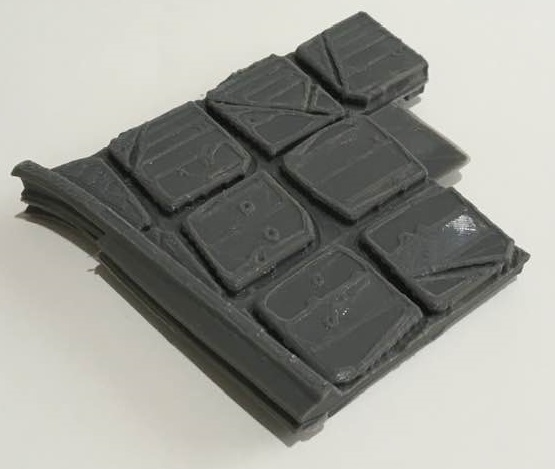
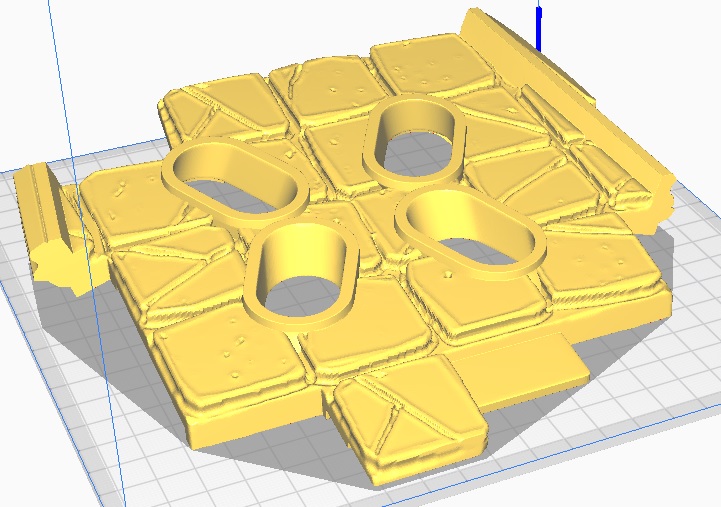
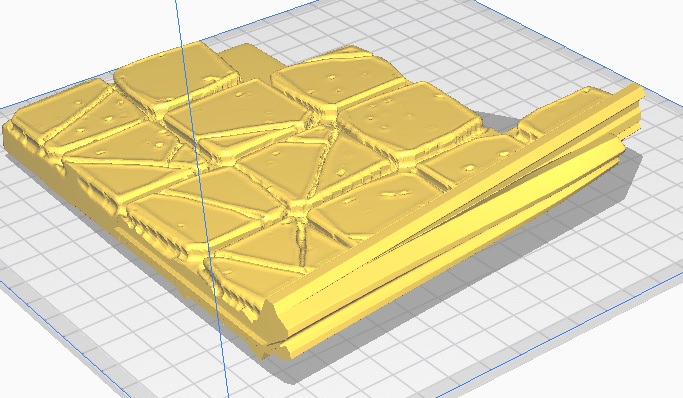
Below are the first batch of roofs.
I forgot to add a support at the tab on the back of the lower part. However, it still fits despite looking a bit untidy (this won’t show once the two halves have been glued together)


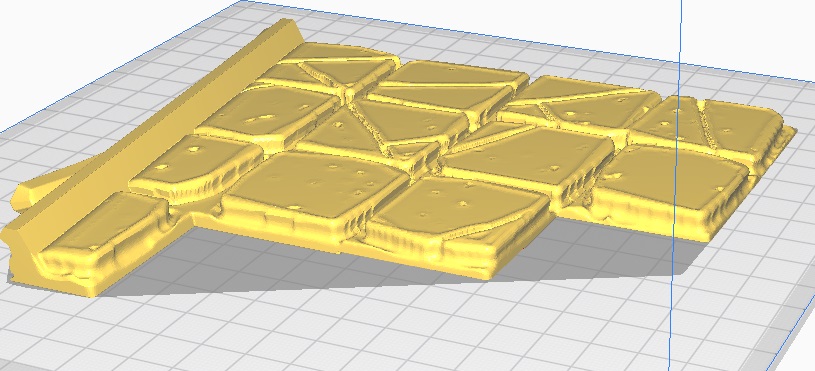
Next up comes the roof section that the Girder supports fit through.

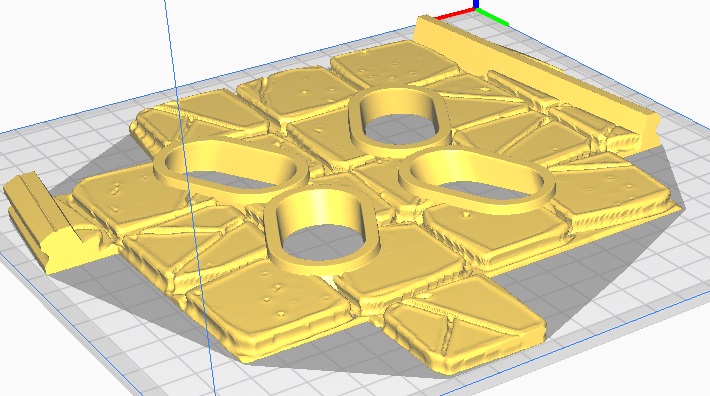
Here is the third roof section.
That’s all for part one.
I’ll be back tomorrow with part two.
Catch you all later folks.
Up on the Roof
To Start with this time, a musical interval…
I am now ready to start on the eight large roof sections.
Having played around with these in the Cura 3D printer slicer program, I have decided on a plan of action.
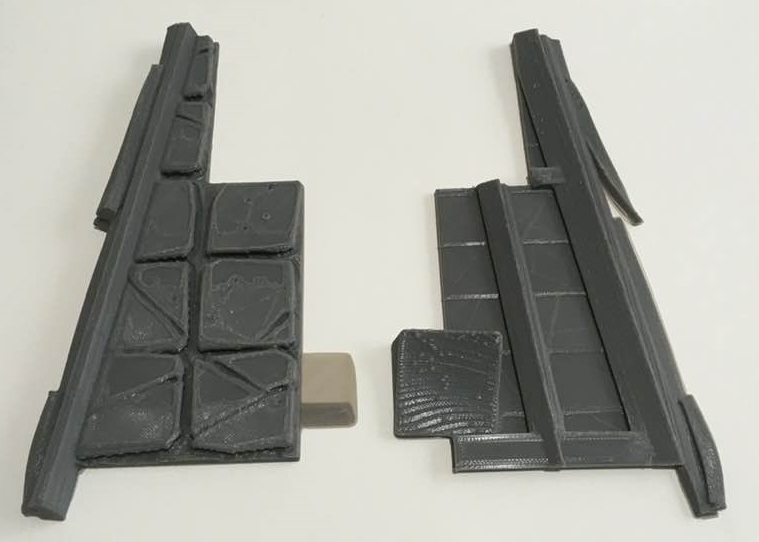
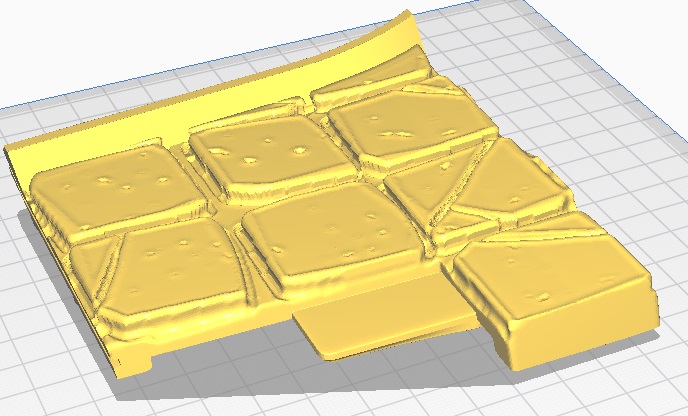
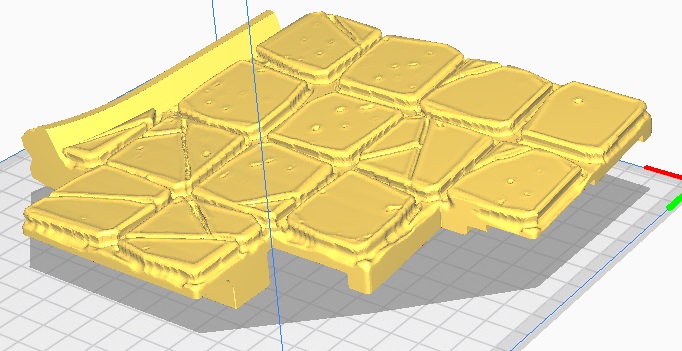
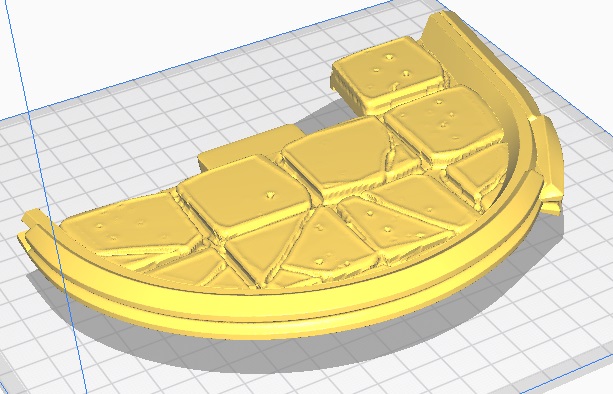
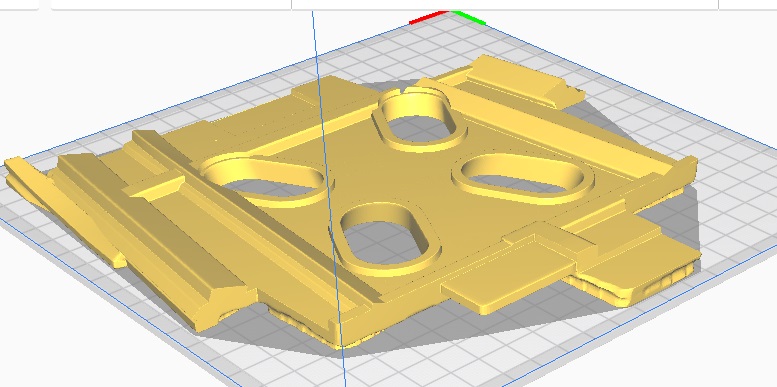
Below is the first roof piece ‘Roof A’

Any orientation that this model is set at would require extensive supports.
This would not only mean that the print time would be extremely long. It would also use a large amount of PLA Filament, that would be in effect waste.
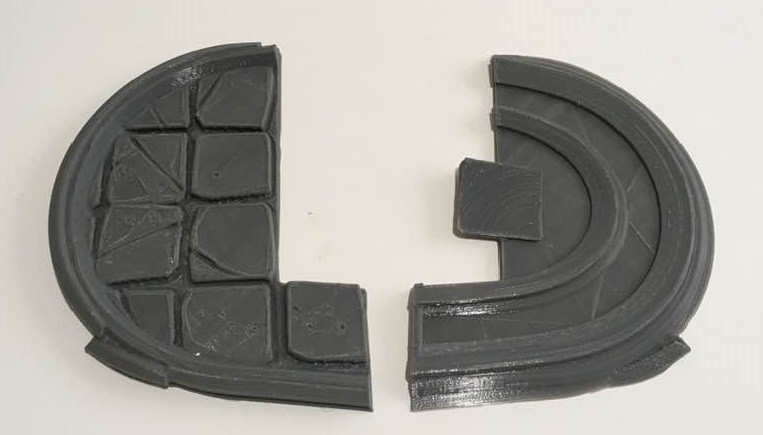
So my answer is to Split the roof Horizontally, giving me two flat surfaces that can be stuck together.
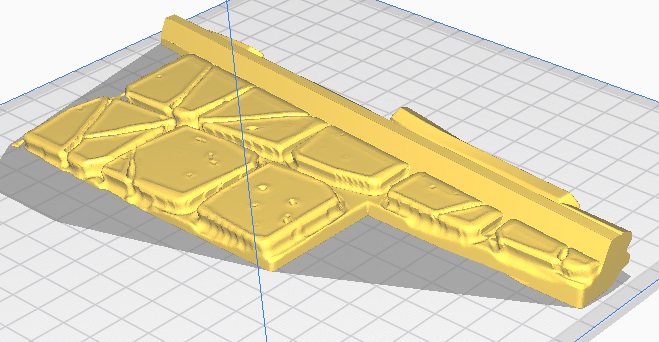
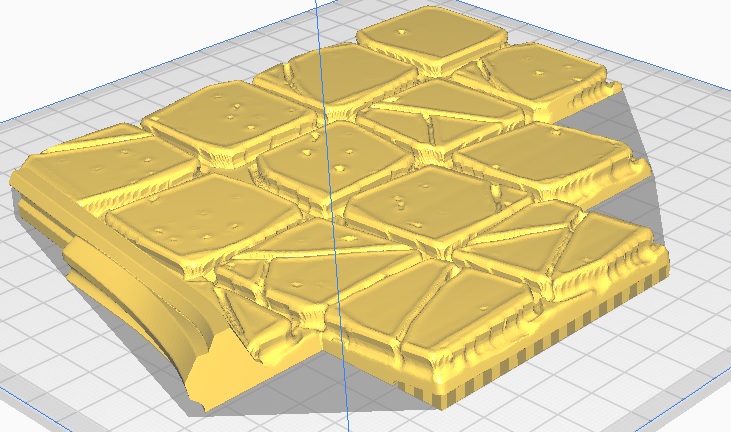
The first thing I need to do is to determine the height of the model. To do this I select the Scale tool and look at the Z (vertical) Height this is 39.5569.

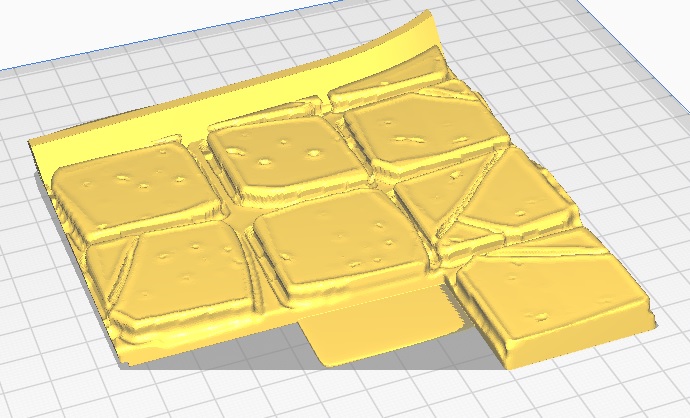
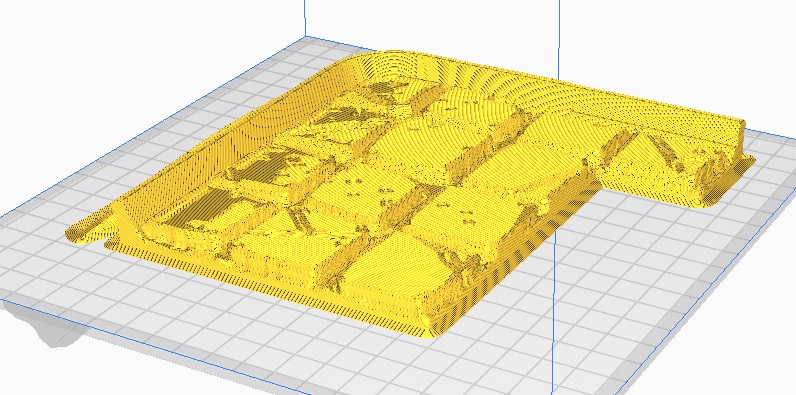
Then Selecting the Move tool I sink the model down below the build plate by -25mm. This means that only the model shown above the build plate will print.
Sunk & Preview both shown below.

Once I am happy with this I save the stl file making sure it is marked with ‘RoofATop’ and then move onto the Bottom.
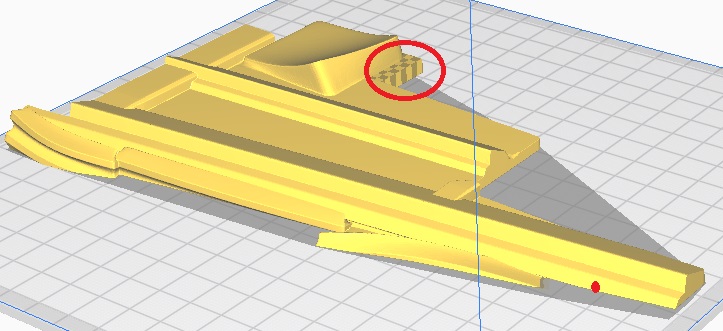
I now rotate the model (insuring that the orientation mirrors the Top side).
As the total Z (vertical) Height was 39.5569 and I will already be printing the top 14.5569mm,. I do a quick bit of subtraction and sink the newly orientated model to -14.5569mm,which will print the 25mm remaining model.
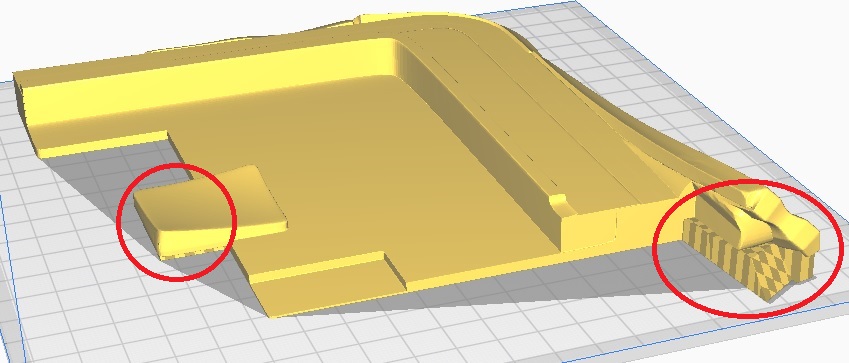
Upon inspection, I realise that a couple of small supports will be required (positions Ringed Below.
Again I save the stl file, making sure it is marked with ‘RoofABot’
And it’s back to the printer. Results to follow.
Catch you all later folks.
Edit: I forgot to mention that I would be printing these with a 0.25mm layer height.
Fixing the Un-fixable
Despite my best efforts I have not been able to get the Girder B to print without failing.
There are two options here.
First is to continue on in the hope that it will eventually print out.
The second, find a work around and here it is…
I have decided that in order to progress with this build I would print the upper section out separately, then glue them together.
I will go into details in the next post As I will be using the same technique to print the roof sections and assemble them.
I have, however, not been idle, below are the Billboards.
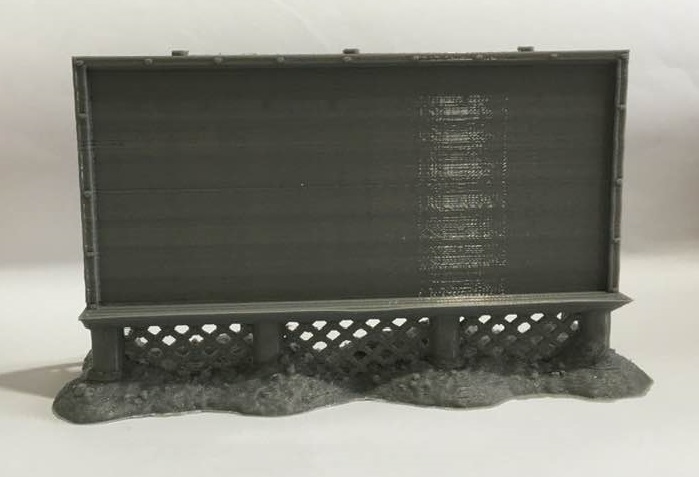
As mentioned before, these are Available from Printable Scenery.
Two of these were printed in a 0.25mm layer height and scaled to fit the Printed Billboard Posters.
I have also Started Printing the Roof Sections and I will follow with another blog in a few days time.
I haven’t forgotten the Red Rocket Signs, I will return to them later on.
Until next time folks.
And now for a word from our Sponsors
As mentioned in the last post, despite not actually printing anything I was busy with a couple of other items on my project list.
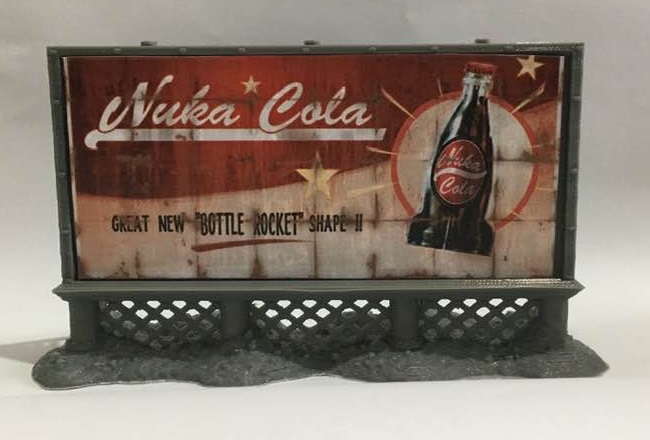
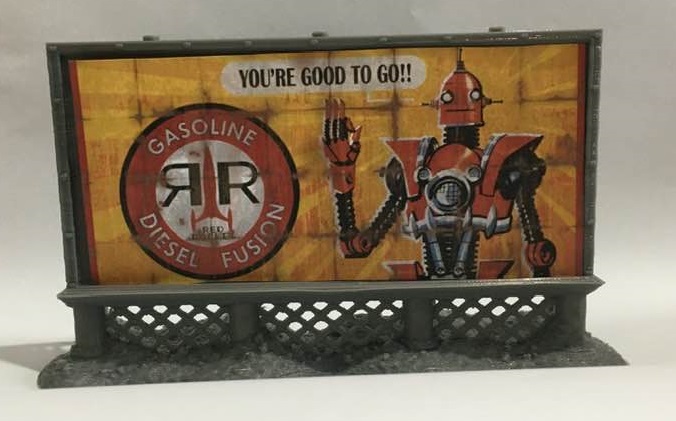
I wanted to use posters and billboard posters in this project. I have printed out the two large billboard posters and a selection of smaller posters.

I will print out two billboards that I have from printable scenery (one from their recent kickstarter ‘Brave new Worlds’, and one free from their website link here)
I also decided to do a colour test for the walls, Red Rocket and Girders (using the failed Girder B print)
The Primer Spray paints I used were all from the Army painter range and were as follows:-
- Walls (Skeleton Bone)
- Red Rocket (Pure Red)
- Girder (Leather Brown)

They seem to have come out well.
Back to the printing.
The Ups and Downs of 3D Printing

Well, it’s been a mixed bag of results.
The first girder came out fine (The Treeman Supports Girder A).

Now… as the title says ‘the ups and downs of 3D printing’.
As well as Girder A went, Girder B has been a nightmare.
The print failed 4 times (below are a couple of the fails)
Once a support failed; and the other three times the actual Girder itself detached from the build plate (the last time 6 hours into the print).
I decided to stop trying to print the model and changed to another model I have previously successfully printed. This was in order to see if it was the settings and/or support that was the problem (and that failed too by detaching).
When this happens there is usually one of several possibilities.
- The Build plate is not at a sufficient temperature
- The Plastic melting temperature is too low/high
- The Build plate is no longer correctly aligned
- There is insufficient model and/or support touching the Build Plate.
I checked all of the above and it was none of those.
I was a little perplexed, and must admit was at a loss for a time. So I did what I normally do when me and technology have a difference of opinion. I walked away and did something else (more on that in the next post).
About a day later it occurred to me that I had greased the two runners where the printer head travels side to side. And I had a ‘I wonder if’ moment.
So I took a piece of plain paper and placed it on the build plate and gently rubbed my hand over it. There was the problem a small bit of grease was on the build plate causing the print to lose adhesion.
I cleaned the grease off with isopropyl alcohol and tried to print a test piece…It worked! Cue the music…
I will get back printing Girder B soon. Until next time folks.
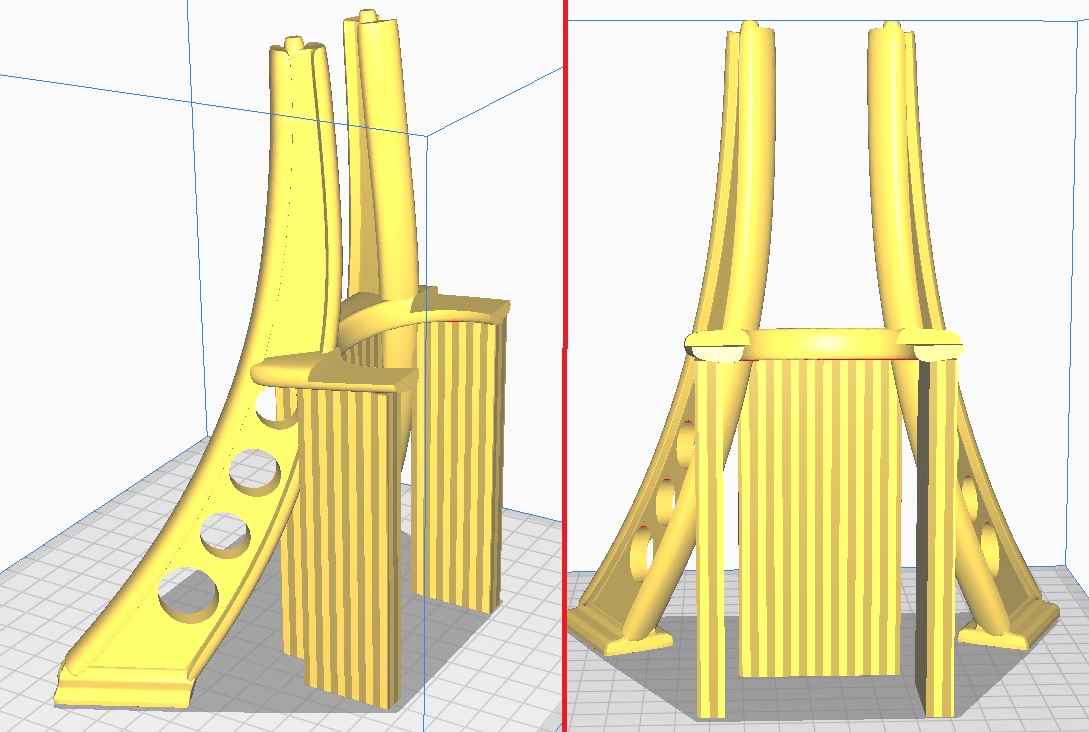
We're Girder make it
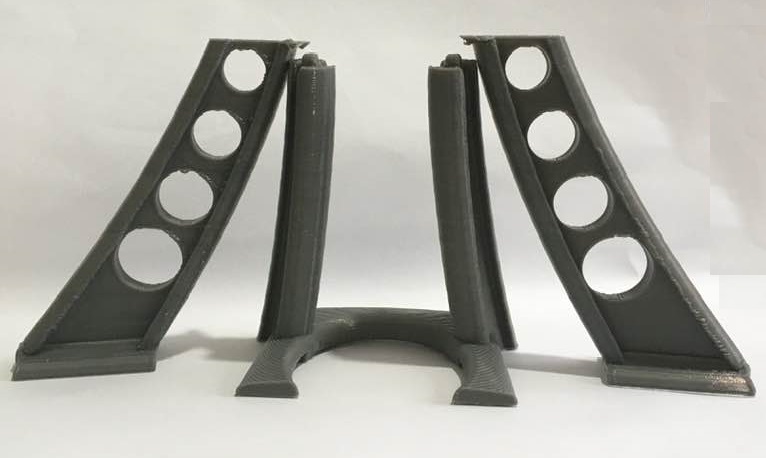
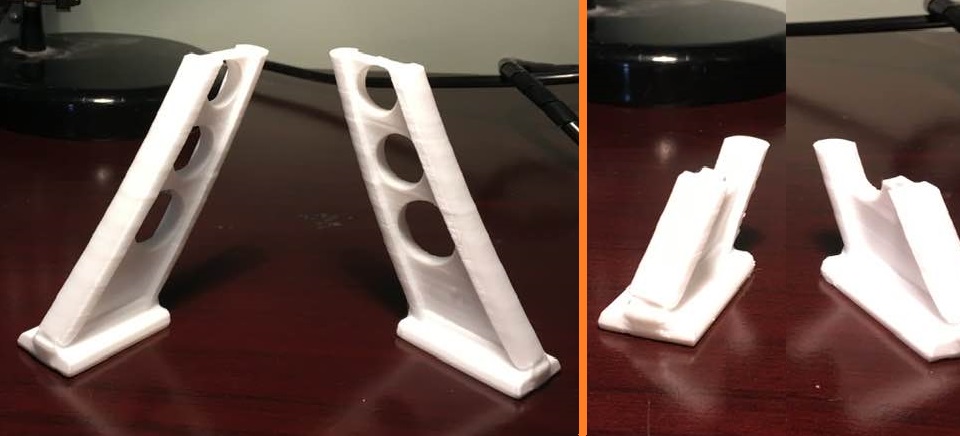
Now come the Girders that help hold up the Red Rockets Roof and which the Red Rocket itself will sit atop.
I thought the Rocket was big but these are even bigger, coming in at a massive 199mm.

To print these I will need 3 Supports (as shown below).
The print will be at the 0.25mm layer height and will take 9 hours. That means a total print time of over 18 hours to print both parts.
Once these are done I will move onto the Red Rocket Signs.
Treemen really rock the Rocket!
And here is the Red Rocket itself (The Treemen come to admire the lesser known White Rocket)
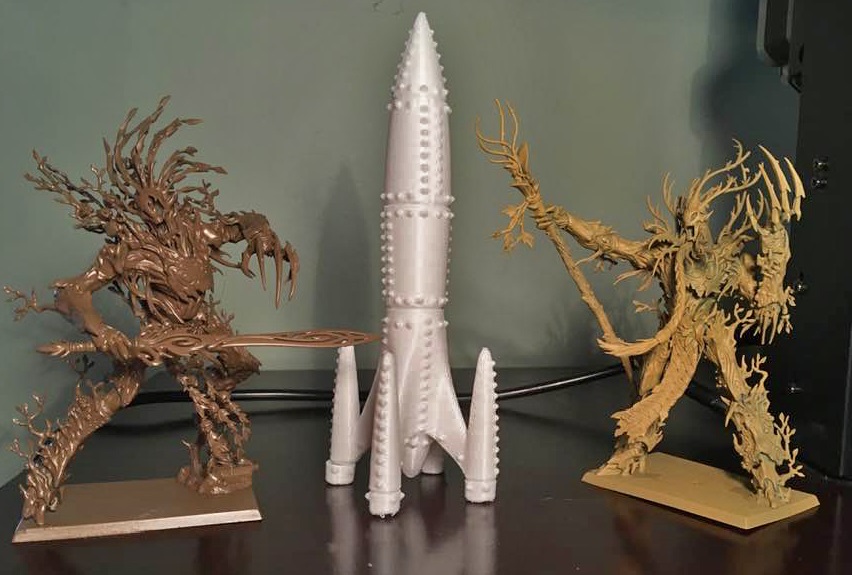
One of the Rocket bases snapped off when I was removing the supports (my fault as I was a bit rough). Nothing that a bit of superglue wont fix.
Next up are the two girders. Details to follow.


![StarCraft Tabletop Miniatures Game Pre-Orders Live Now [Updated]](https://images.beastsofwar.com/2026/03/starcraft-tmg-news-cover-600-338.jpg)


