


![NO Weekender Or Cult Of Games XLBS This Weekend [Updated]](https://images.beastsofwar.com/2026/03/No_Weekender_and_XLBS_this_Weekend-225-127.jpg)


Tuscany Hill Village Terrain Build


Recommendations: 1109
About the Project
I started this project some time ago. It's a slow burner. But I've decided to turn it into a project so that I have a reference point but also to get some help along the way. This is my attempt at trying to recreate an Italian Hilltop village in 15mm....
Related Genre: Historical
This Project is Active
Piazza Shops
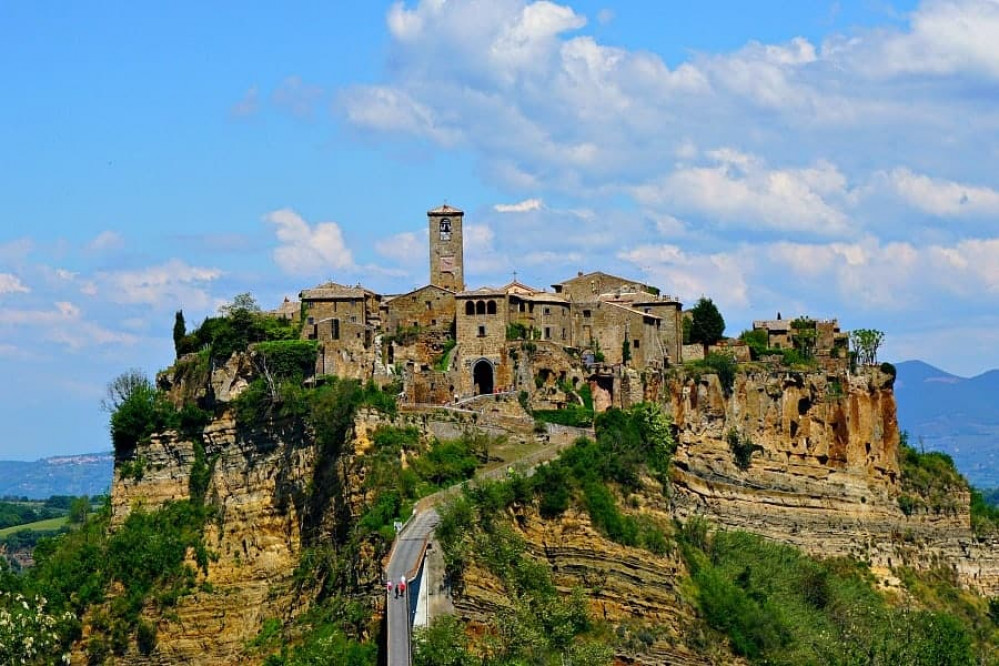
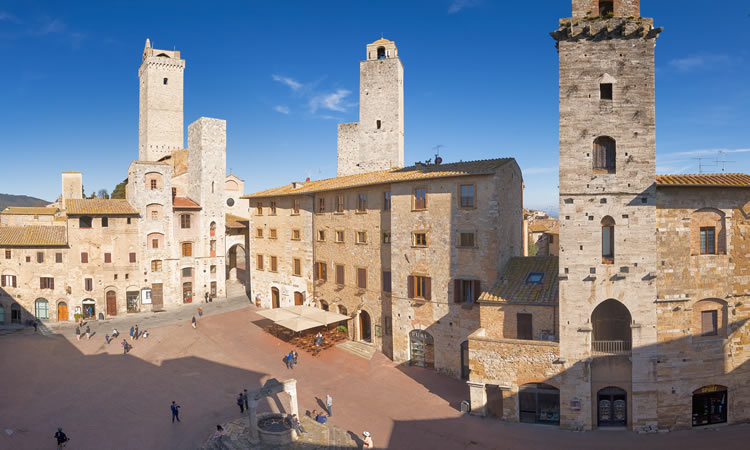
The heart of every good medieval village is the town square, or in this case, the piazza. This is where life in the village is lived and I want to give it a little character. Looking at reference photos (below) there is a wide variety of buildings and architecture even within the same village, so I think I have quite a lot of flexibility here as to what I design.
Looking at my ‘plan’ I need two buildings, the first I want to look like a pair of shops and the second a cafe.
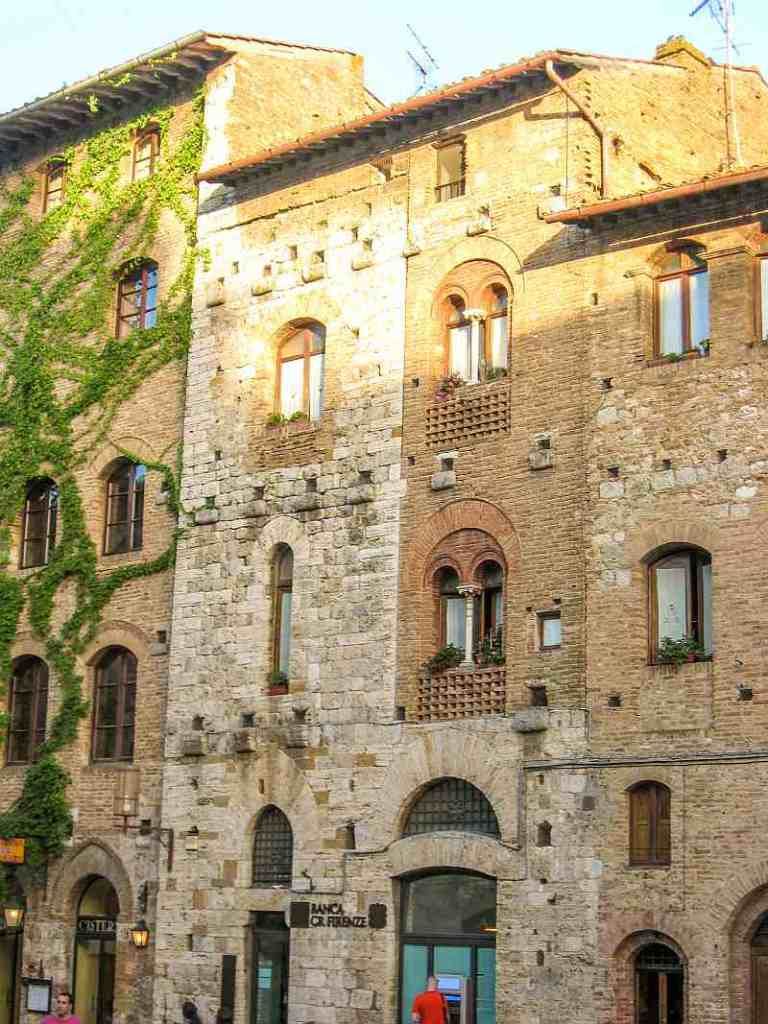
For the shops, I’ve seen a photo (below) of a building that has clearly had an extension added post medieval period. I want to recreate this and have the upper level that looks like it has been added later. Once 3d printed in physical form, I plan to put a brick look onto top, just to add some visual interest.
For the cafe, I want an arched area where the tables would be located – somewhere for the patrons to sit out of the sun. You can just see an example of the arched look I want in the first photo above.
 A building that has had an extension at a later point to provide some more 'upward' living space
Again, using FreeCAD, I’ve built each floor as a separate level. Doors and windows are designed separately and then placed into the cut outs I make in the walls. This greatly speeds up the design process.
Below you can see my designs for the shops and then the cafe
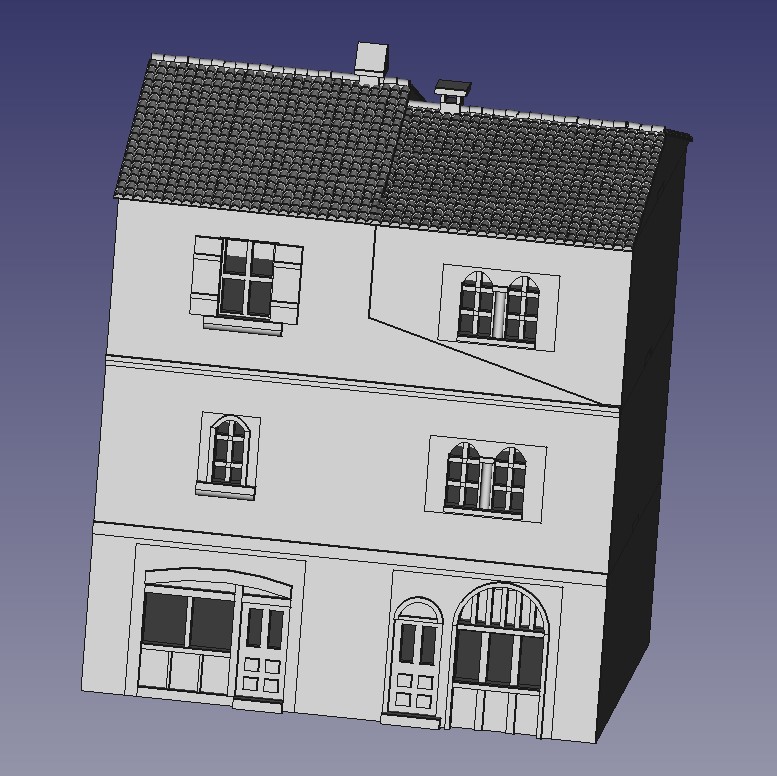 Shop Design
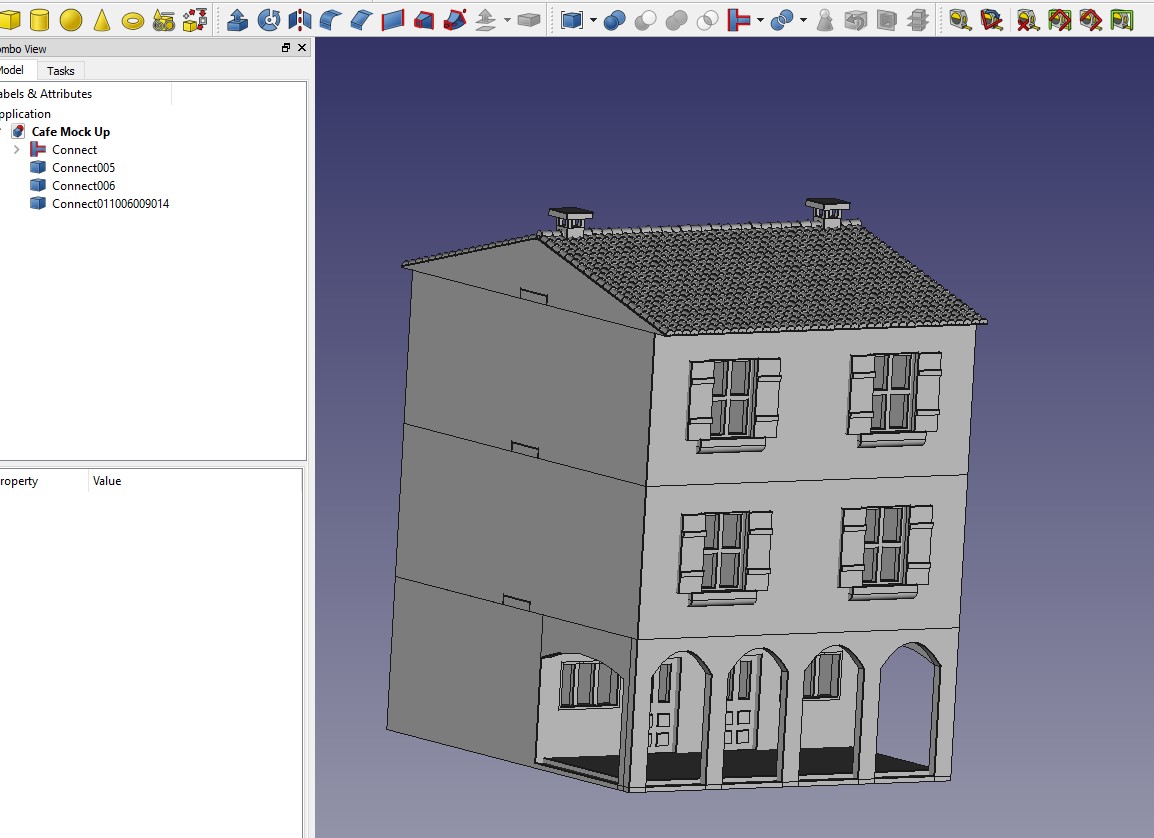 Cafe
CafeTowers
Towers were common in medieval Italian villages. I’d imagine to provide some sort of vantage point should the village come under attack. It also adds to the changing skyline so I definitely want to design something that will replicate this. It will also provide somewhere for snipers to go….
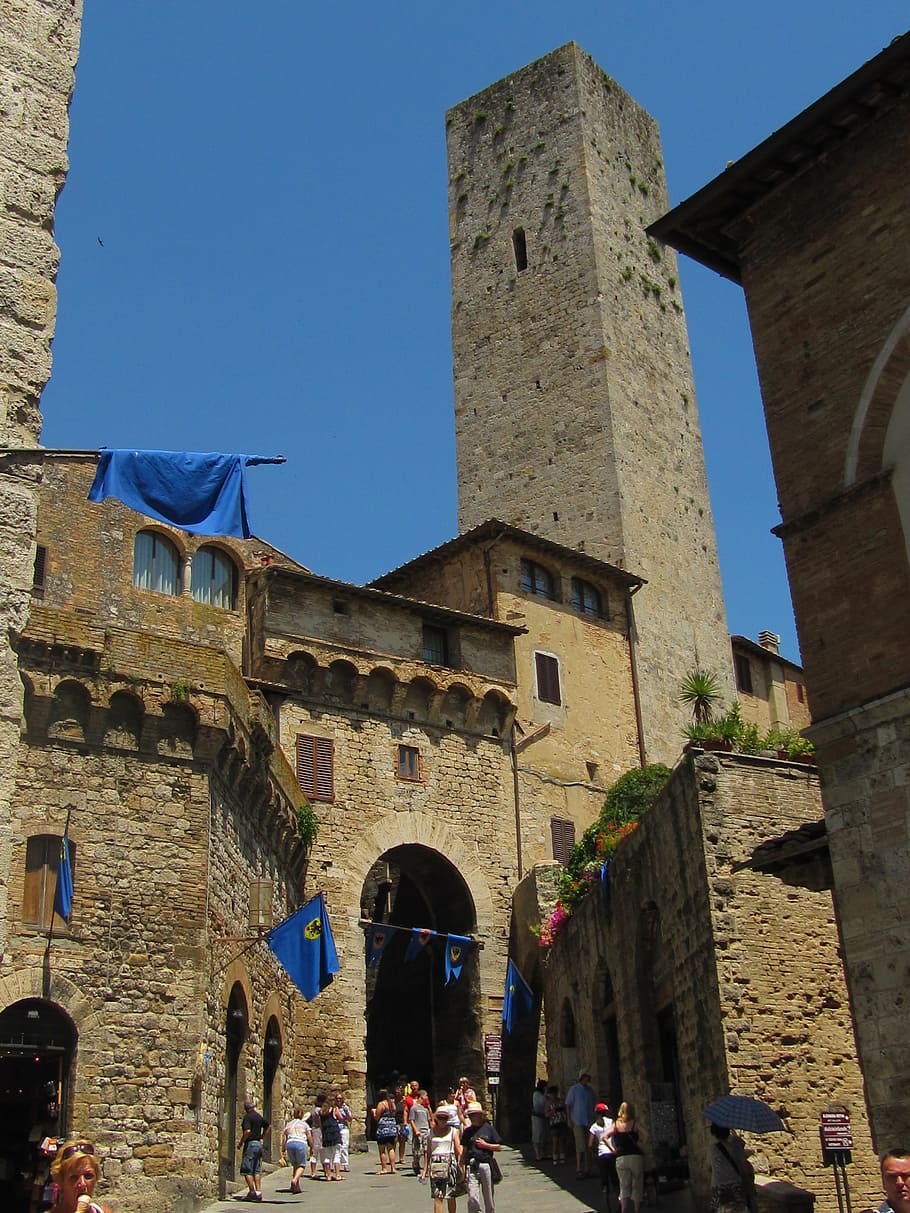
Given the small footprint of the village, I want to get the most out of my tower so will incorporate a house into the design. Looking at reference pictures, this seems entirely reasonable
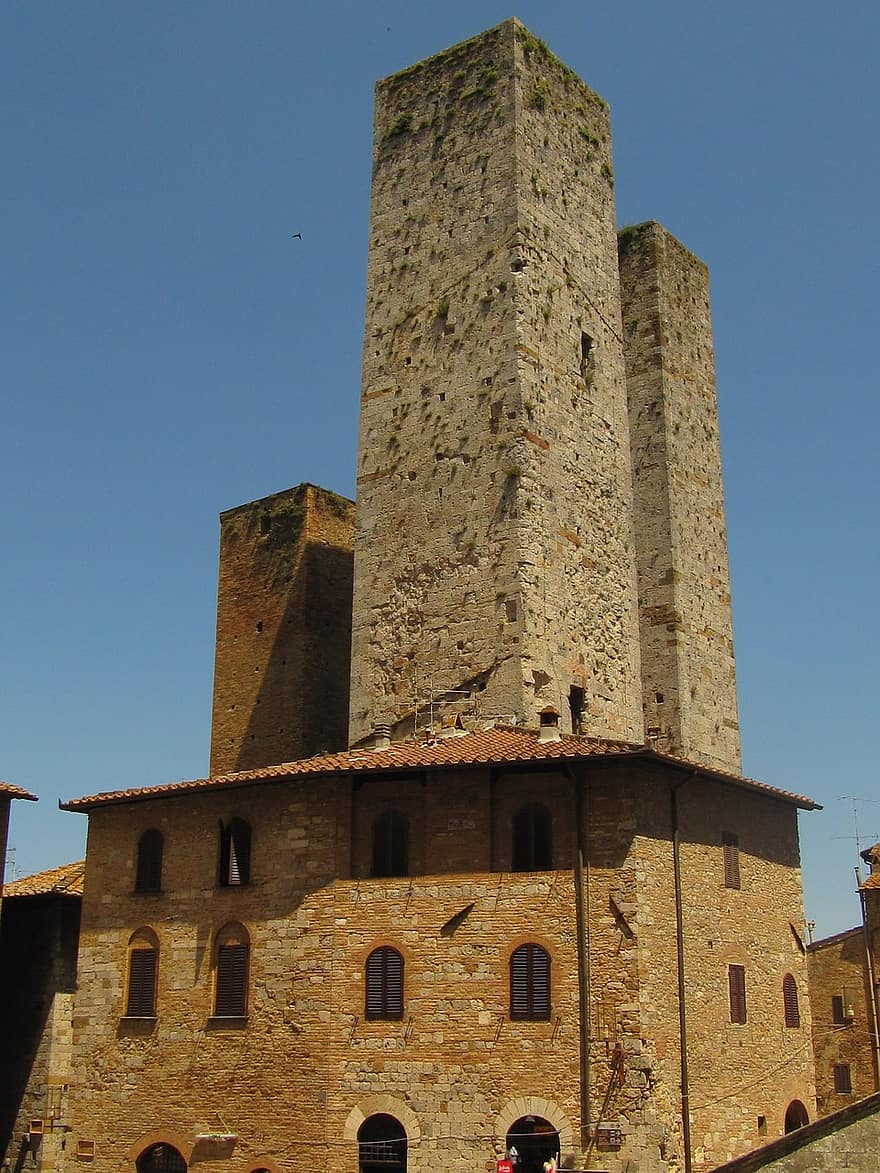
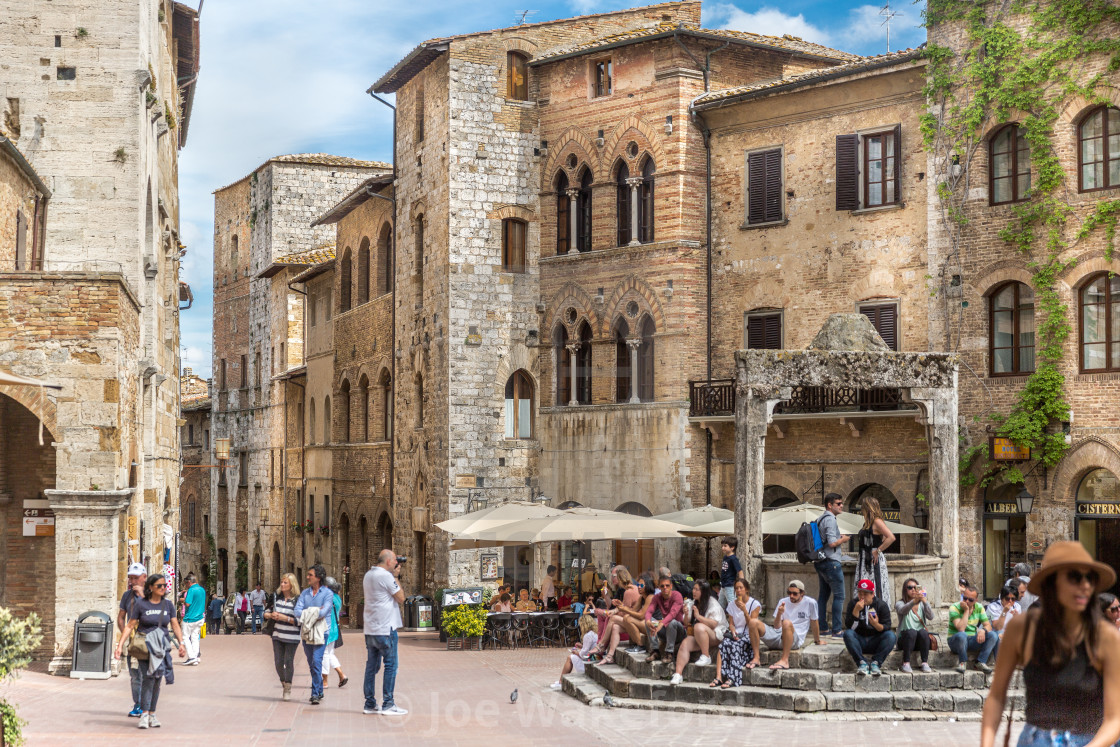
 San Gimignano's main square - my main reference village
I’ve designed the upper part of the house to be separate to the tower, while the ground floor is a single piece. Each part of the tower separates should you want to put units onto each floor. Hopefully, the little ledges running around the tower will help cover up the joins.
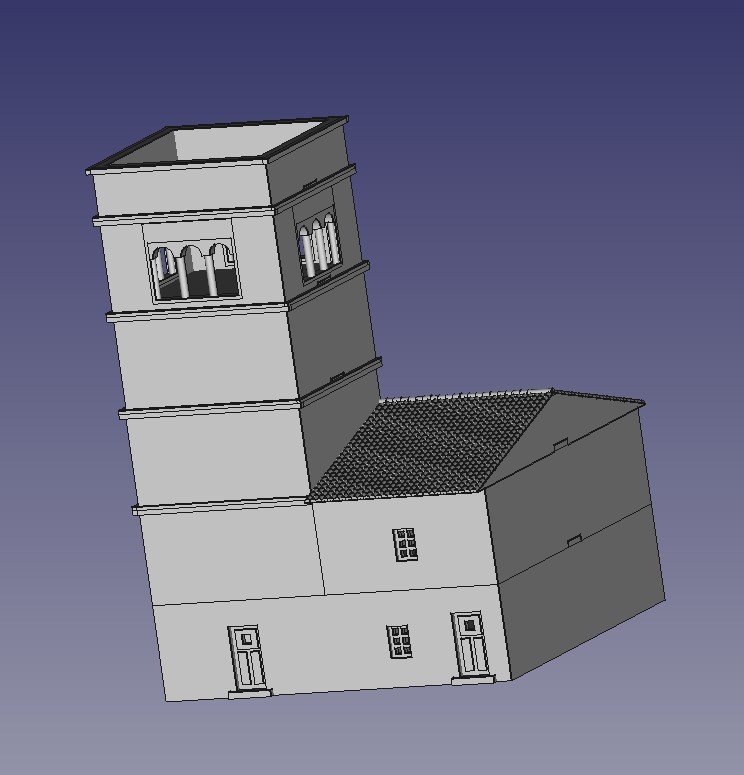 Front of the tower
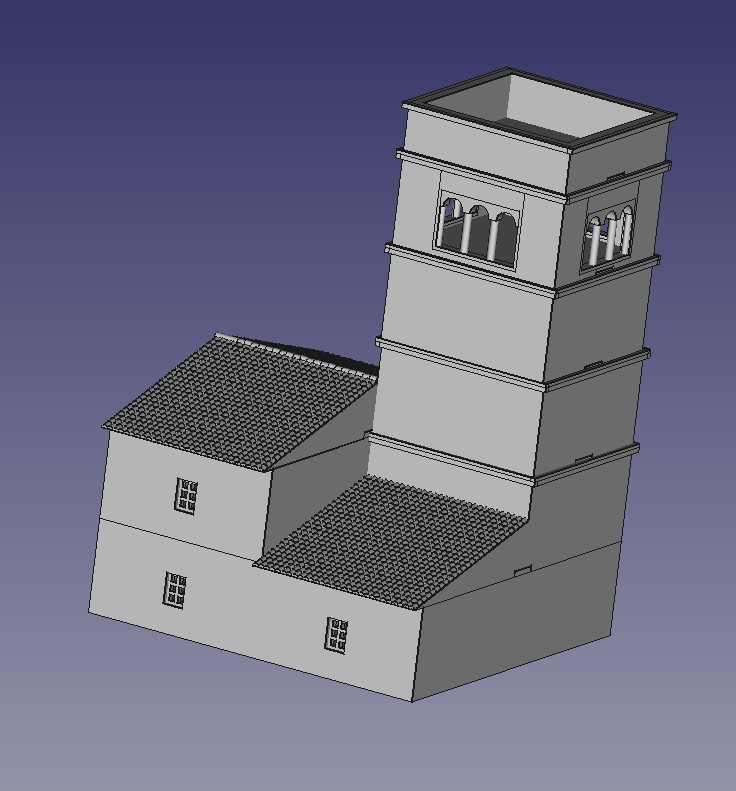 Tower rear
The Gate House
With the village planned, I now have the list of buildings I need and their dimensions. Time to get designing in FreeCad.
I’ll start with the gate. Most medieval hill villages were also defensive points and the tight packed houses and buildings also served as walls. Gates sealed off the main parts of the village so that when needed, the village could be turned into a ‘castle’.
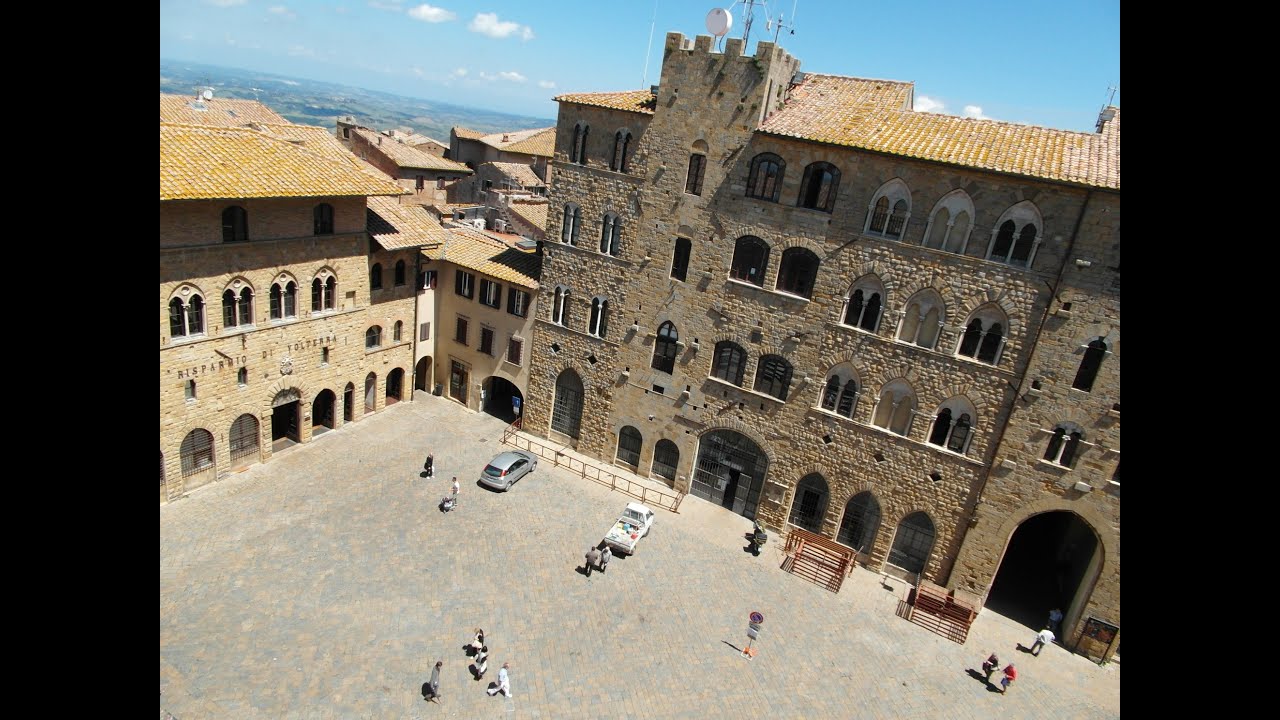
I’ve been looking at some reference pictures (below) and you can see that the gate is often just an extension of the surrounding houses.
To keep things simple, I can use part of the basic house that I have designed previously and add in the gate. I also need to make the gate wide enough for the gaming pieces to pass through. This means that the gate will not be strictly to scale but as this is for gaming purposes, I’ll allow it.
I’ve designed the gate to be modular, with the gate itself separate to the over gate defenses. This then attaches to the house. Most of this is reversible although I’ve had to design two versions of the house to accommodate a left and right sided gate.
I’ll need three of these for the village, two left sided and one right sided.
 Front side of the gate
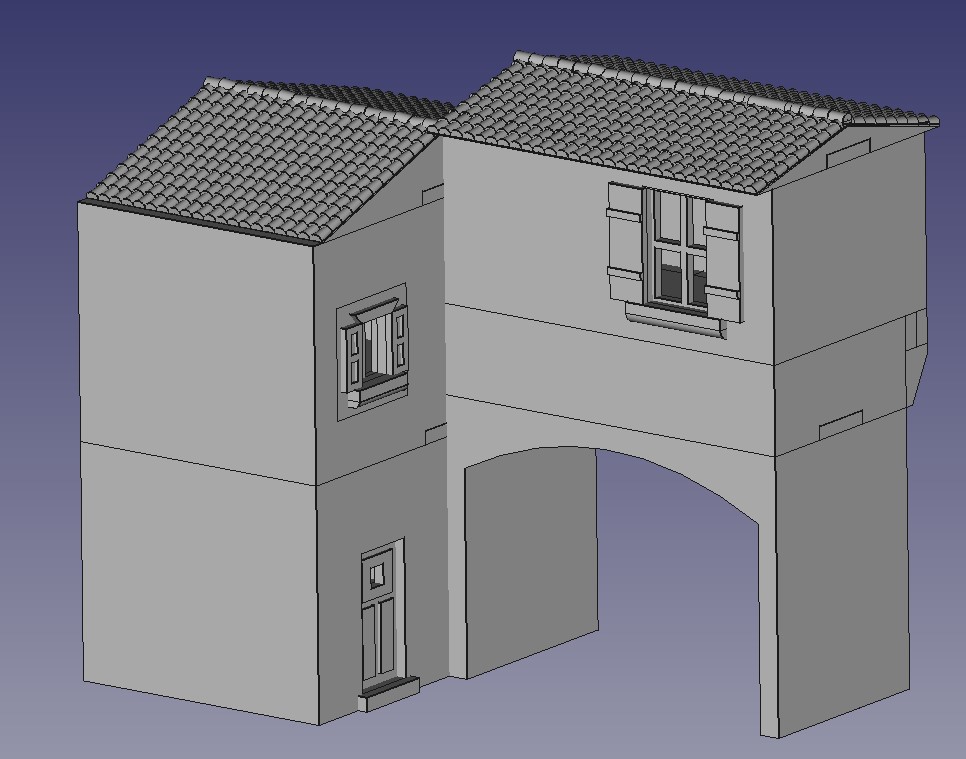 Internal side to the gate
Town Planning
Now that I have designed the basic house in FreeCad and I’m comfortable that 3d printing will deliver what I want, I need to draw up some plans for the actual terrain. This will allow me to design the buildings to the space available.
This is a terrain piece rather than a gaming board build and so it needs to be small enough to allow space around the outside but big enough to actually game in. This means some compromises. Firstly, it will need to be a representation of a hill village rather than a fully blown village. It will also need to be able to take the gaming pieces, in this case 15mm Flames of War. This means that some of the features, such as the gate, will need to be large enough to accommodate a tank, something medieval Italian builders didn’t have in mind!
So, armed with a trusty piece of large paper, some cut out foot prints of proposed buildings and a reference tiger tank, I’ve set about squeezing as much into as little space as I can.
Here’s the process:
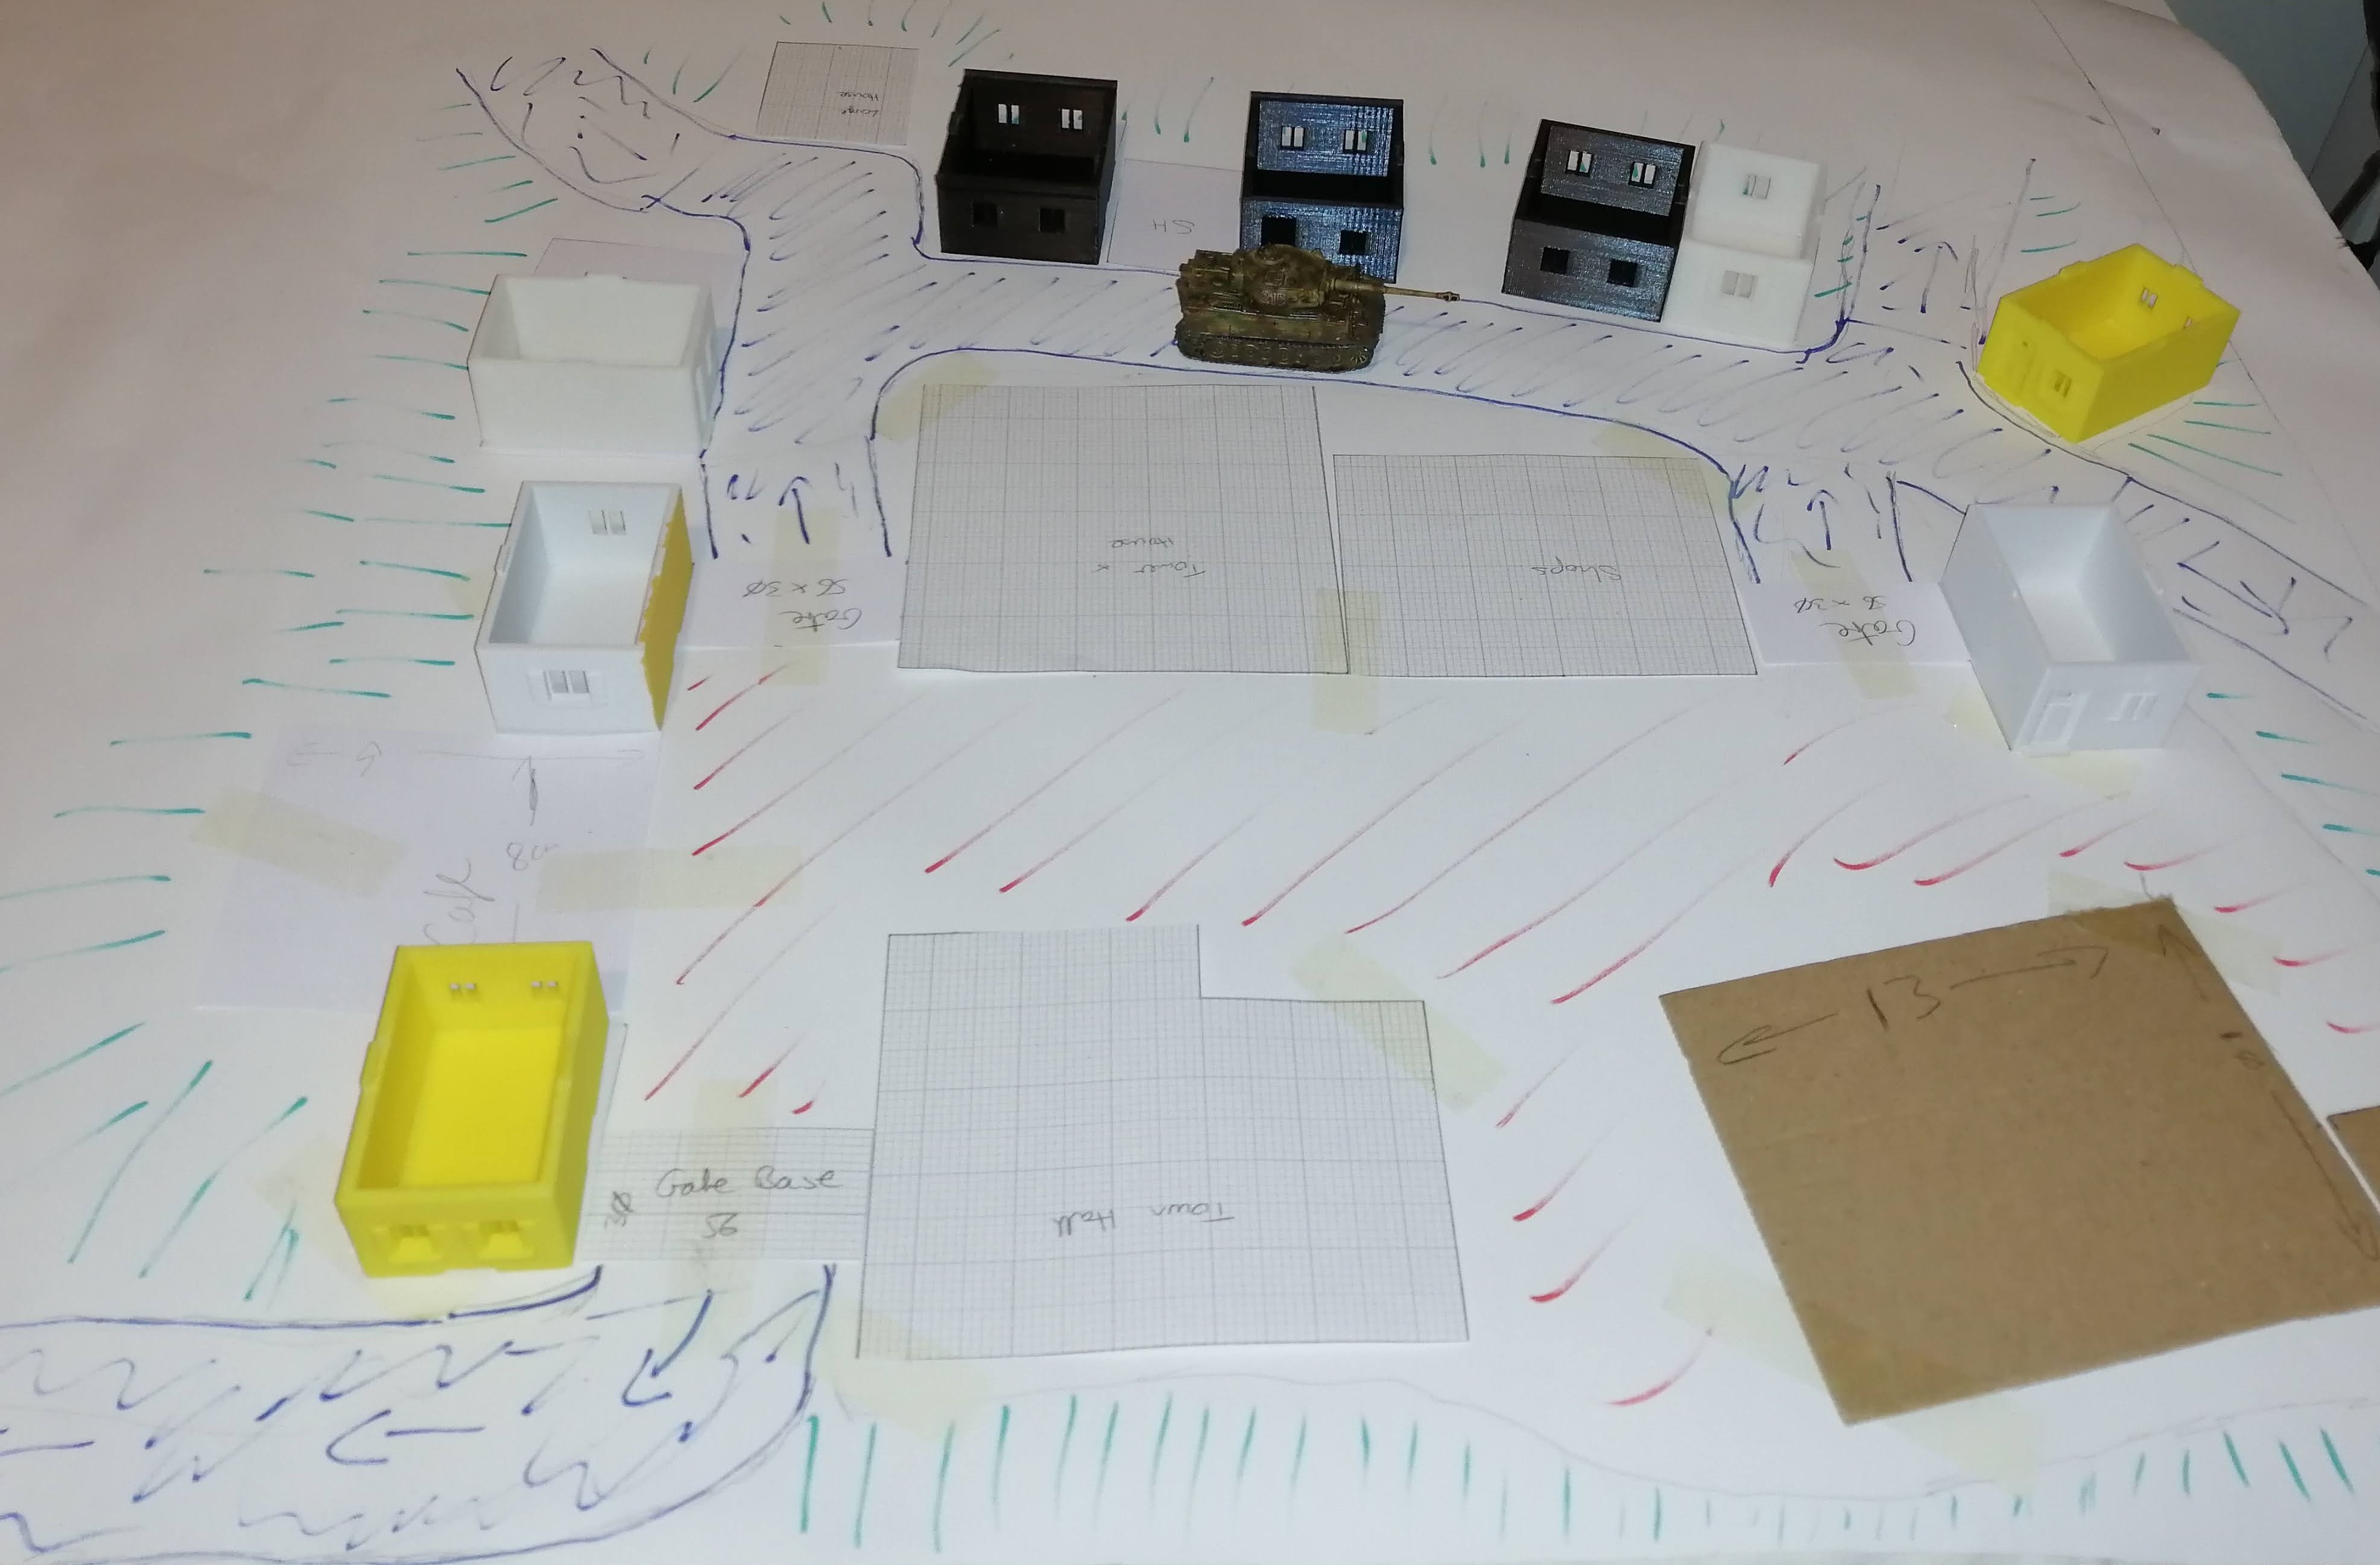 My eventual layout
My aim is to create a central piazza which will also be the highest part of the village. This should be accessed via gates and in my mind, I envisage a simplified version of San Gimignano (picture below). To one side of the piazza, I would like a street of houses, but at a lower level, to try and create the tiered perspective. Ideally I would like this street to run all the way around but there won’t be space for this. As it stands, the design above is looking close to being 2ft by 2ft, which is already going to dominate a 6×4 table!
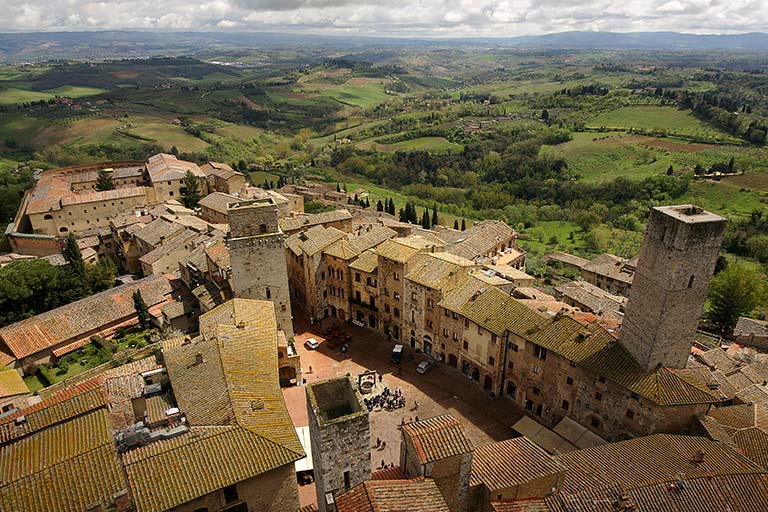 The Piazza of San Gimignano
Below is the plan view of what I need to build. In addition to the houses that are already designed, I think I will need the following (with the colour coded box in the plan view),
- Gate and gate house (black boxes)
- Tall buildings with shop fronts on the ground floor and/or ‘cafe’ area (green and pink boxes)
- Bell tower (orange box)
- Town hall (purple box)
- Church with bell tower (brown box)
The roads are the black squiggles, the piazza the red squiggles and the green squiggles will be the rock face/ grass banks of the side of the hill.
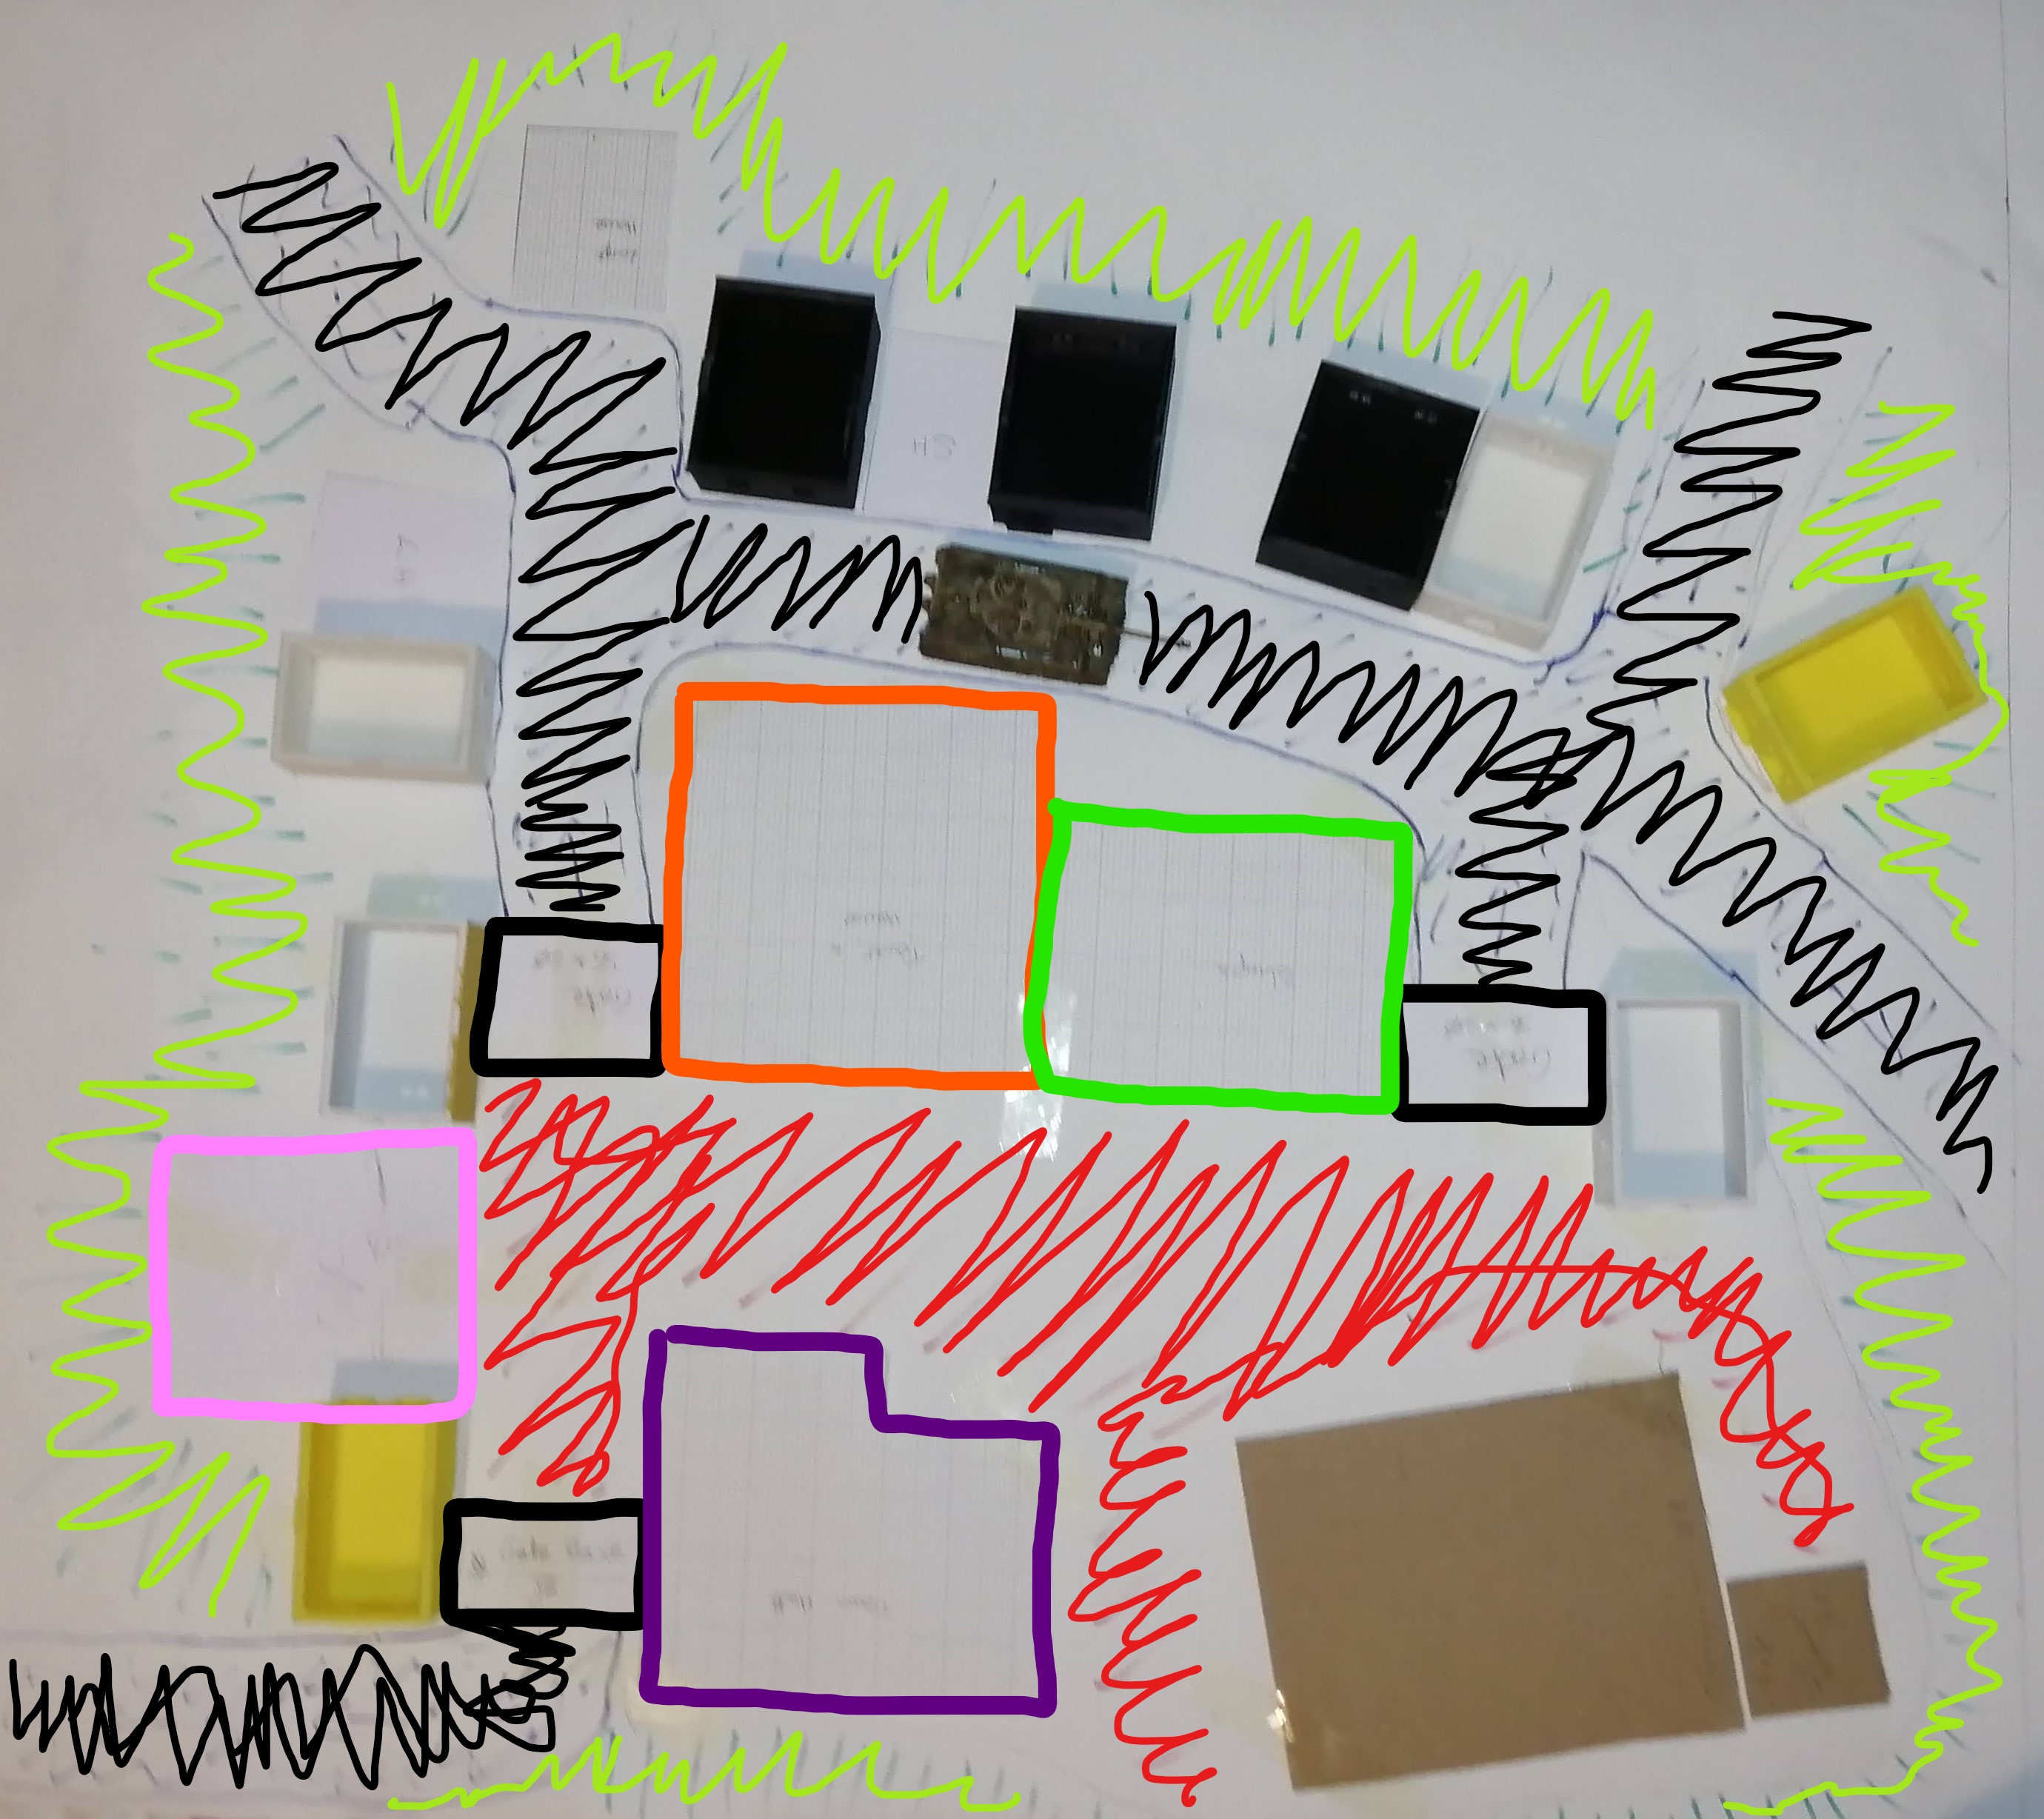 This was not made by a 5 year old - honest!
The Basic House
I’m going to need a few houses to flesh out the village. I plan to create a modular approach of two different sizes. One smaller house, being 4cm wide and a larger one being 5cm wide. I’ll create a number of different floors for both which will allow different height buildings.
I’m aiming for the sort of look that you can see on the left side of this street:
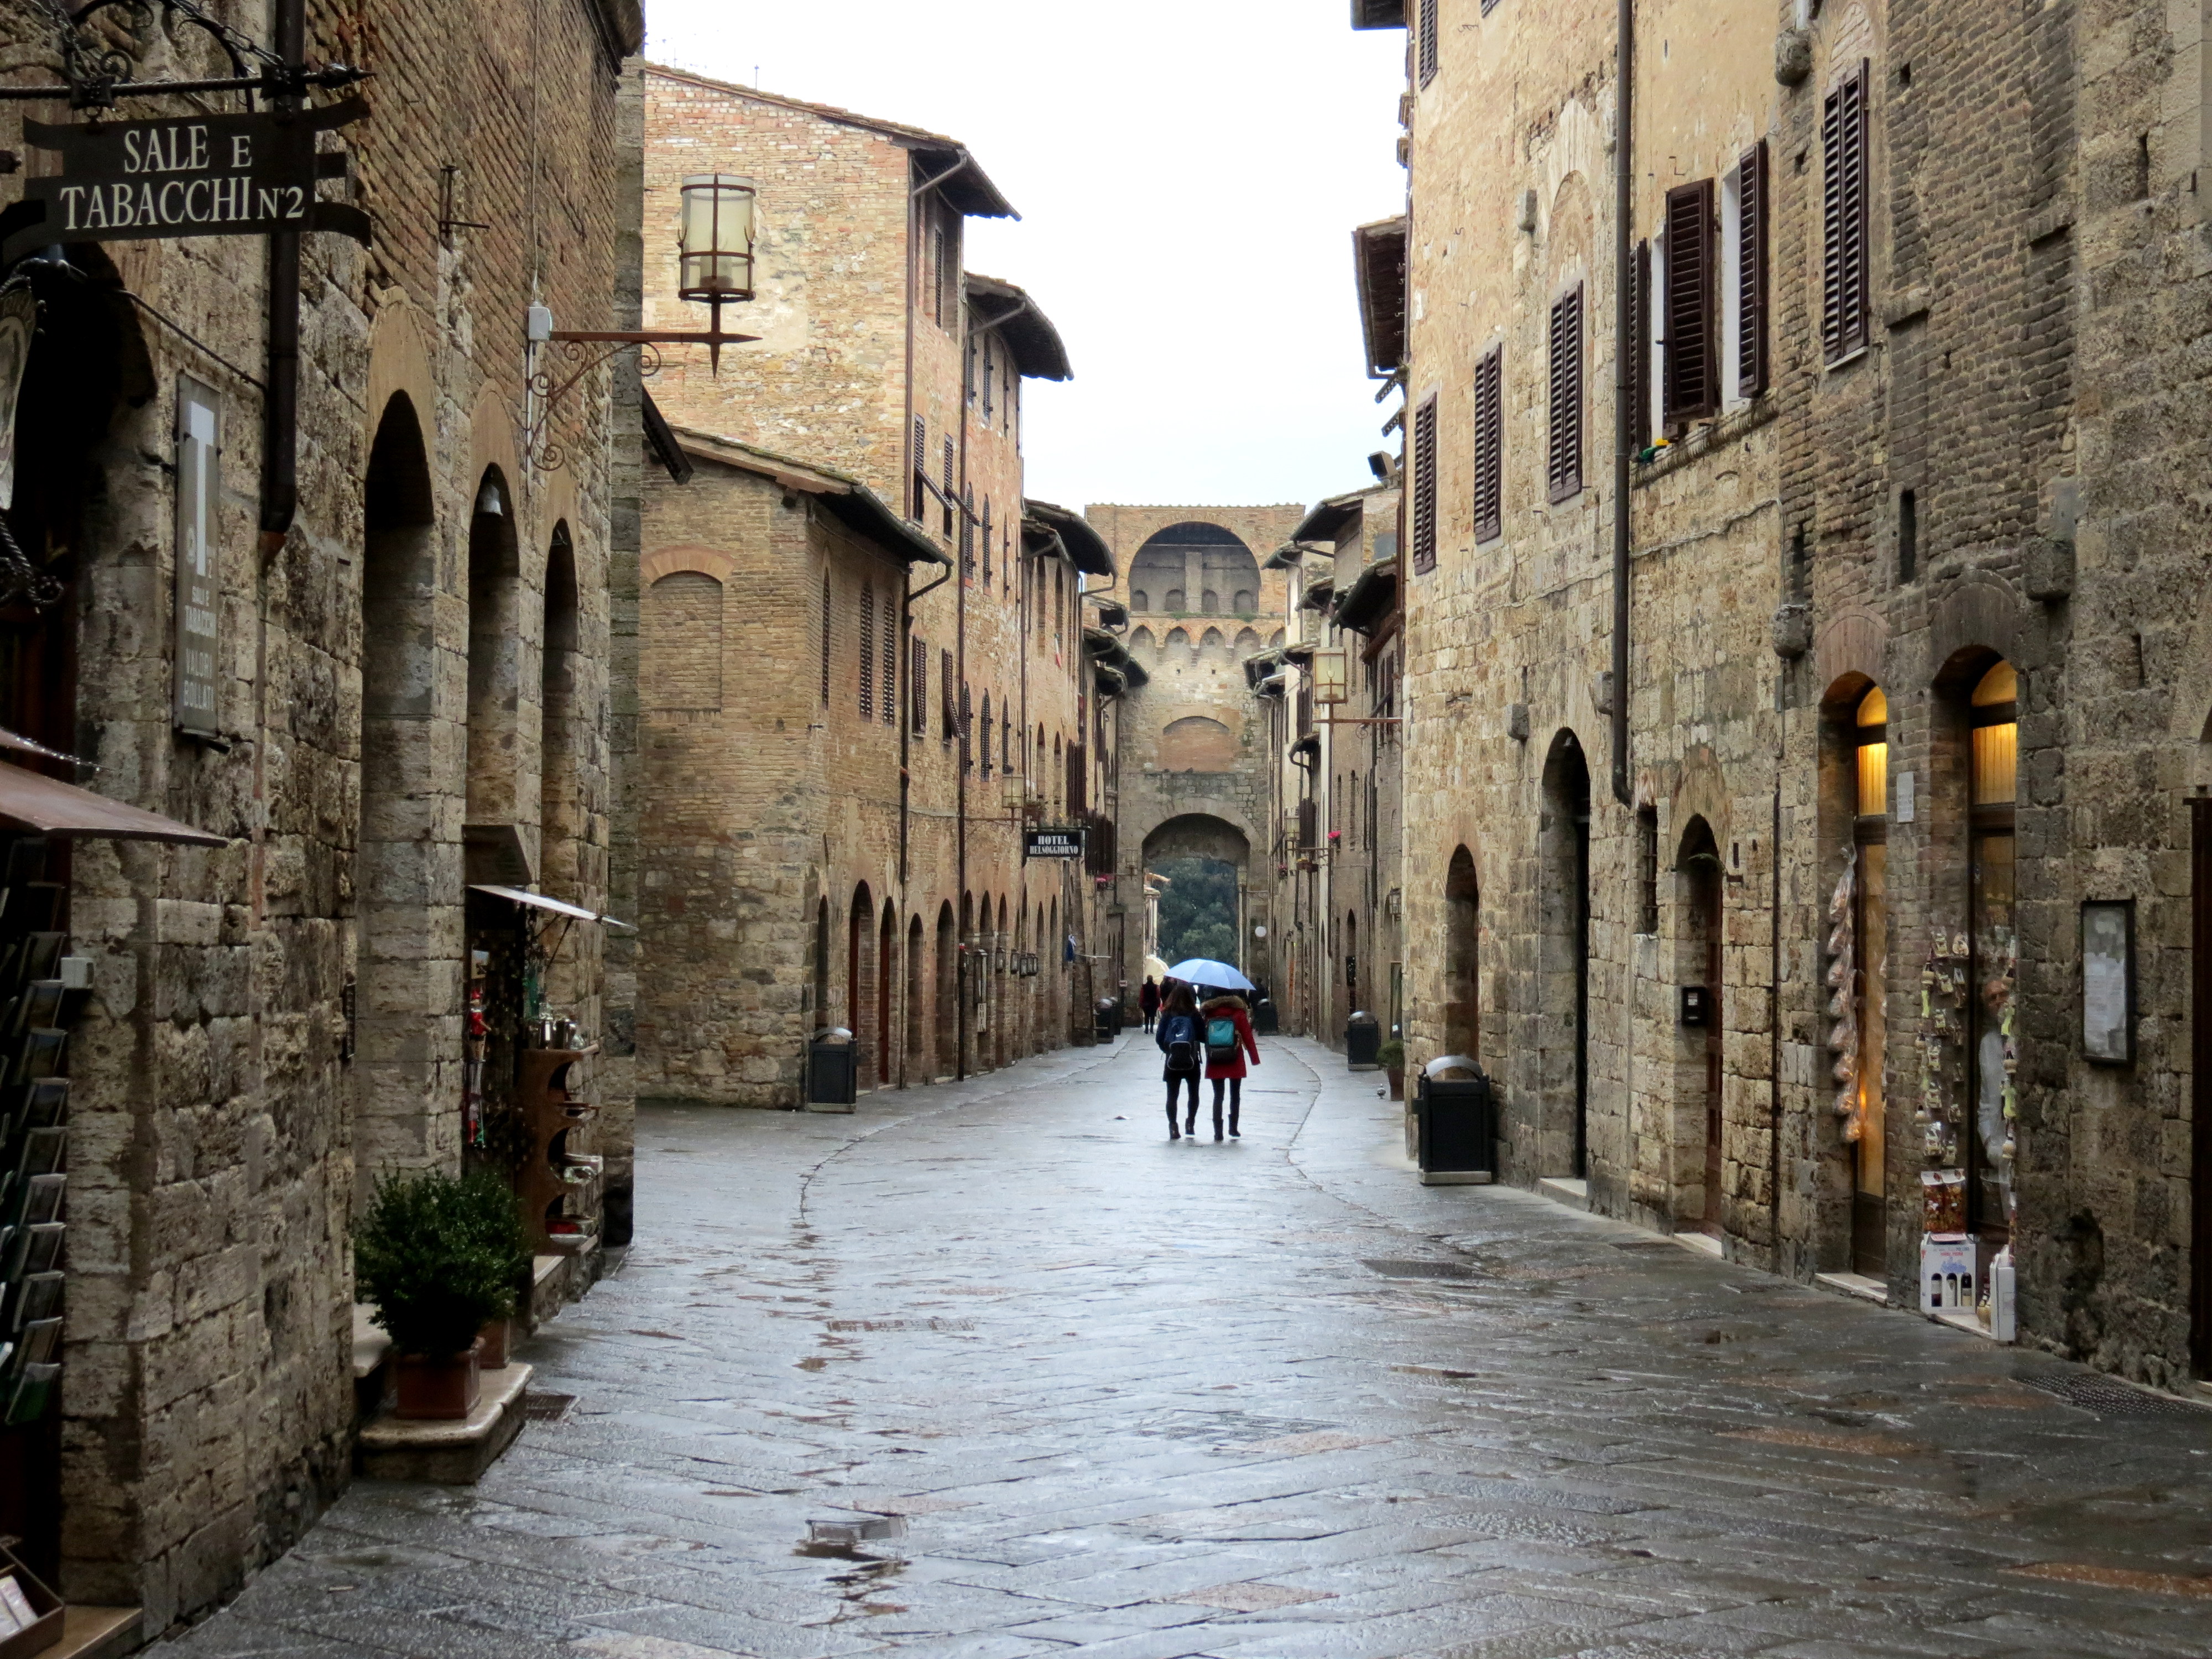 You can see the variation of height and facade on the street scene
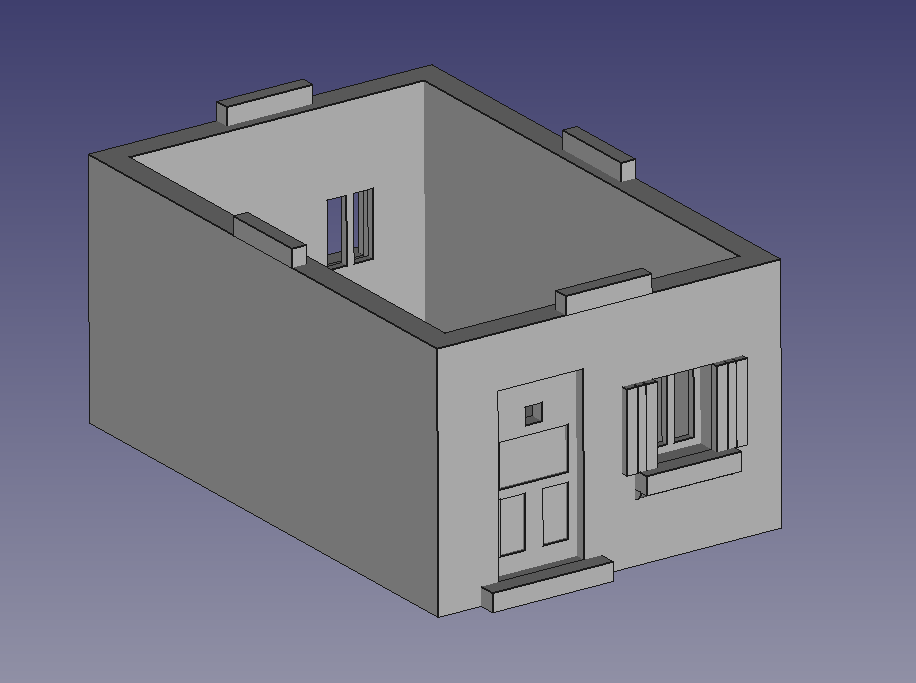
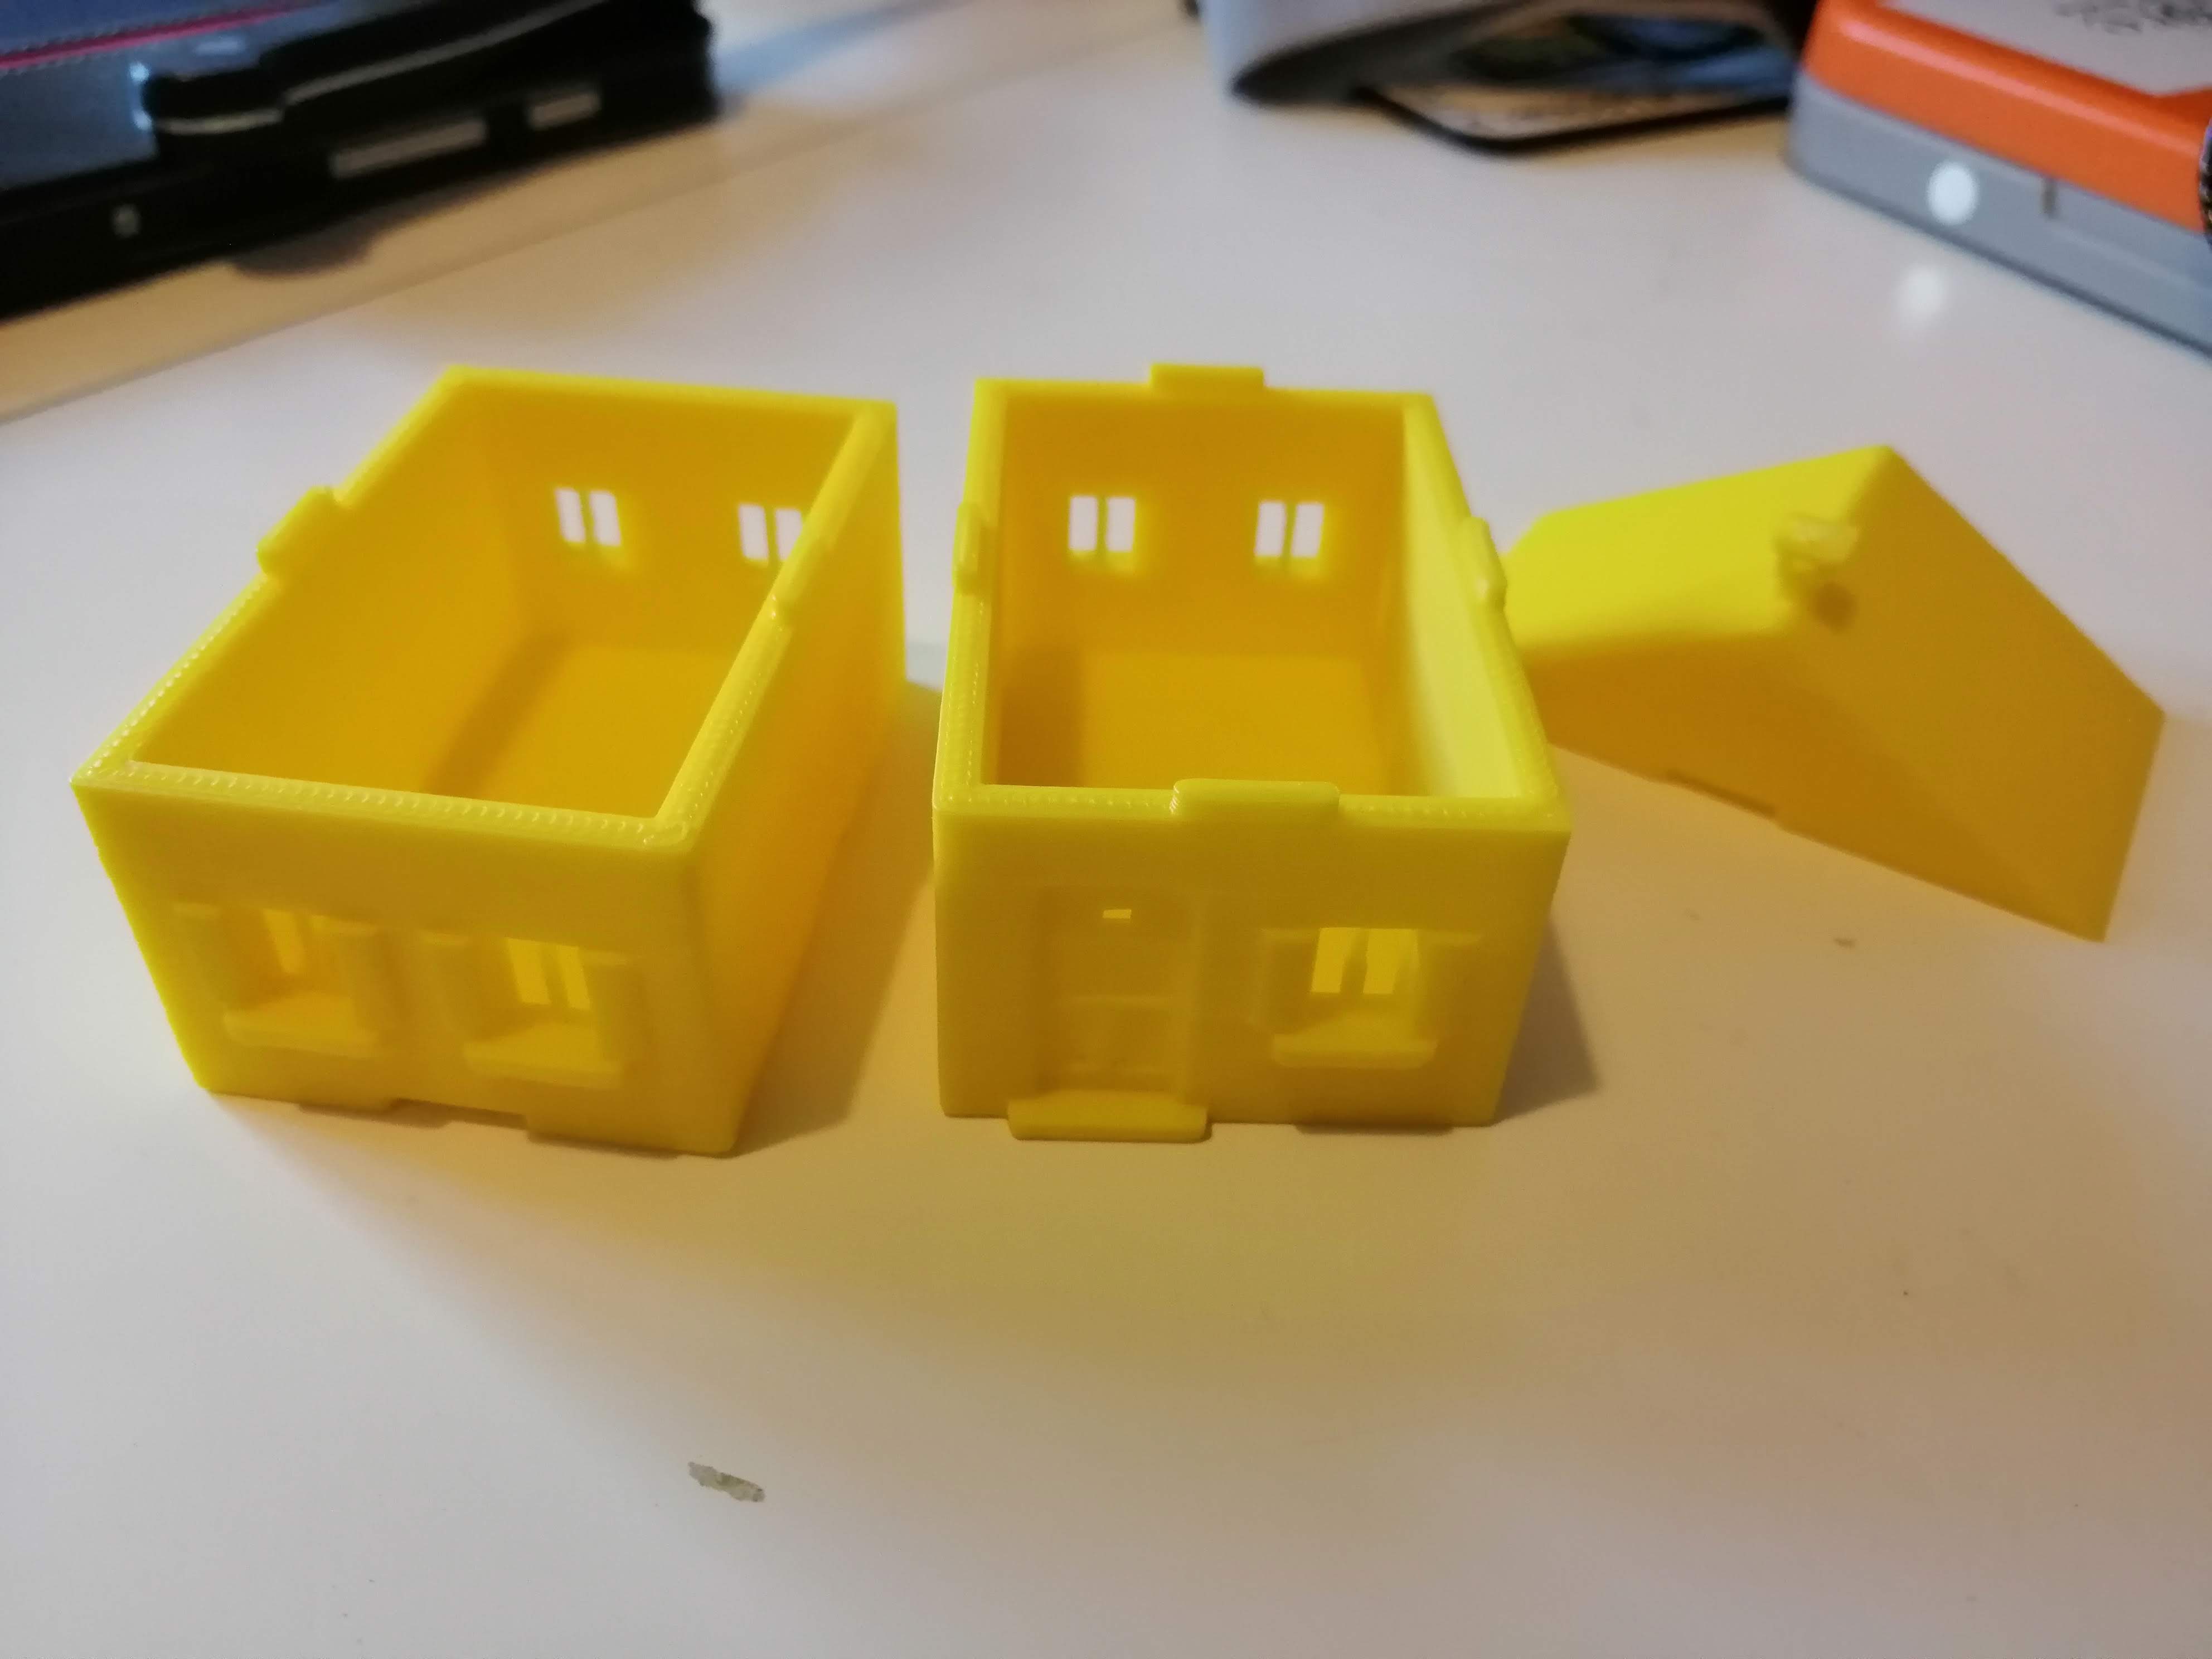
I’ve designed a simple approach to ensuring each floor remains in place when stacked. A 1cm long, 2mm high ridge along the top of each side wall will interlock with a corresponding gap in the base of the upper floor. You can see the ridges on the top of the walls in the first picture below
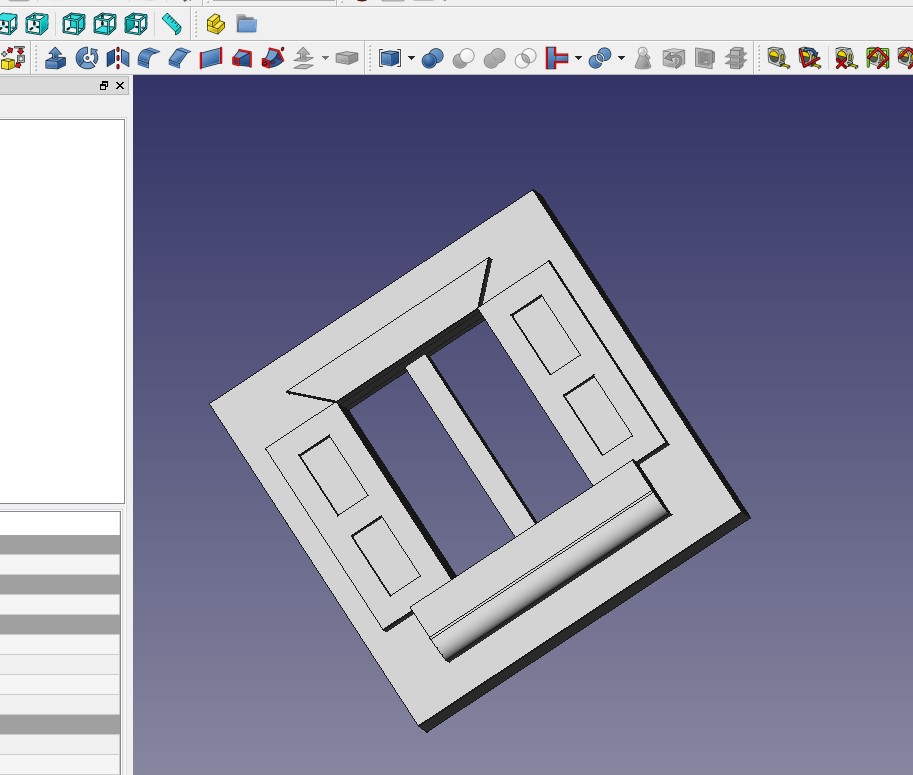
To create each floor, I make a box and hollow out the middle. To add doors and windows, I punch holes through in the relevant places, as in the first picture below.
Doors and windows and then made separately and created in blocks that are the same size as the holes punched through the walls. This allows me to create a number of different, interchangeable doors and windows to mix up the architecture but without having to recreate them every time.
In the third picture, you can see that slotting the doors and windows into the holes creates the finished floor. The CAD software merges everything together.

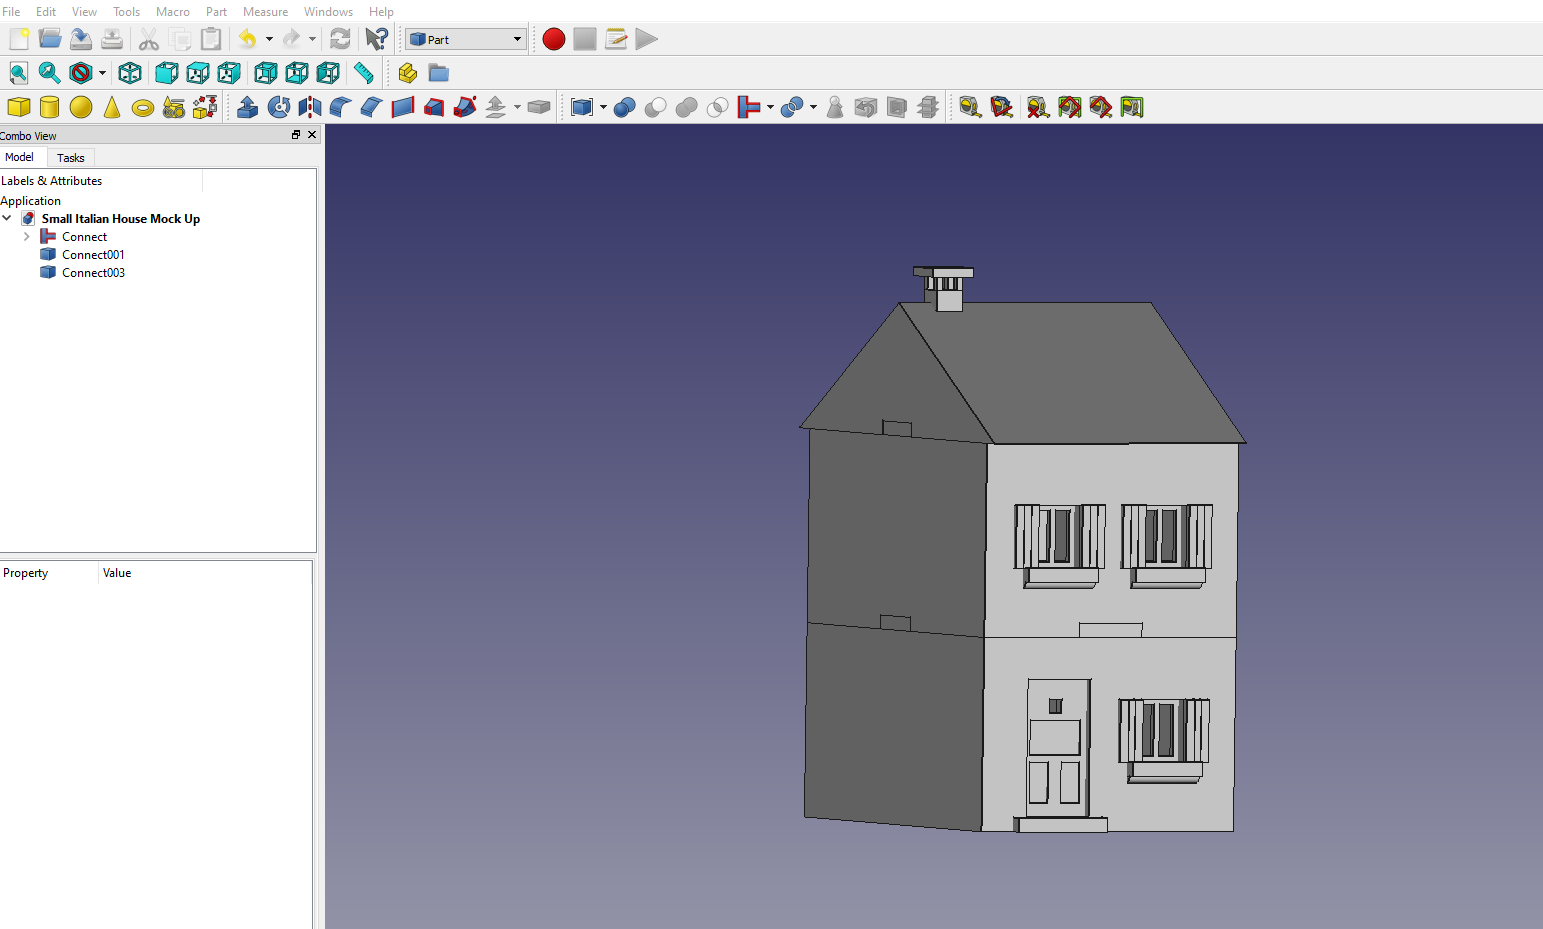
Repeating the process a number of times allows you to build a number of different styles of floors which can be built into houses. Below is a mock up of what the finished houses will look like
 A typical (virtual) Tuscany street scene
Choosing the printing medium
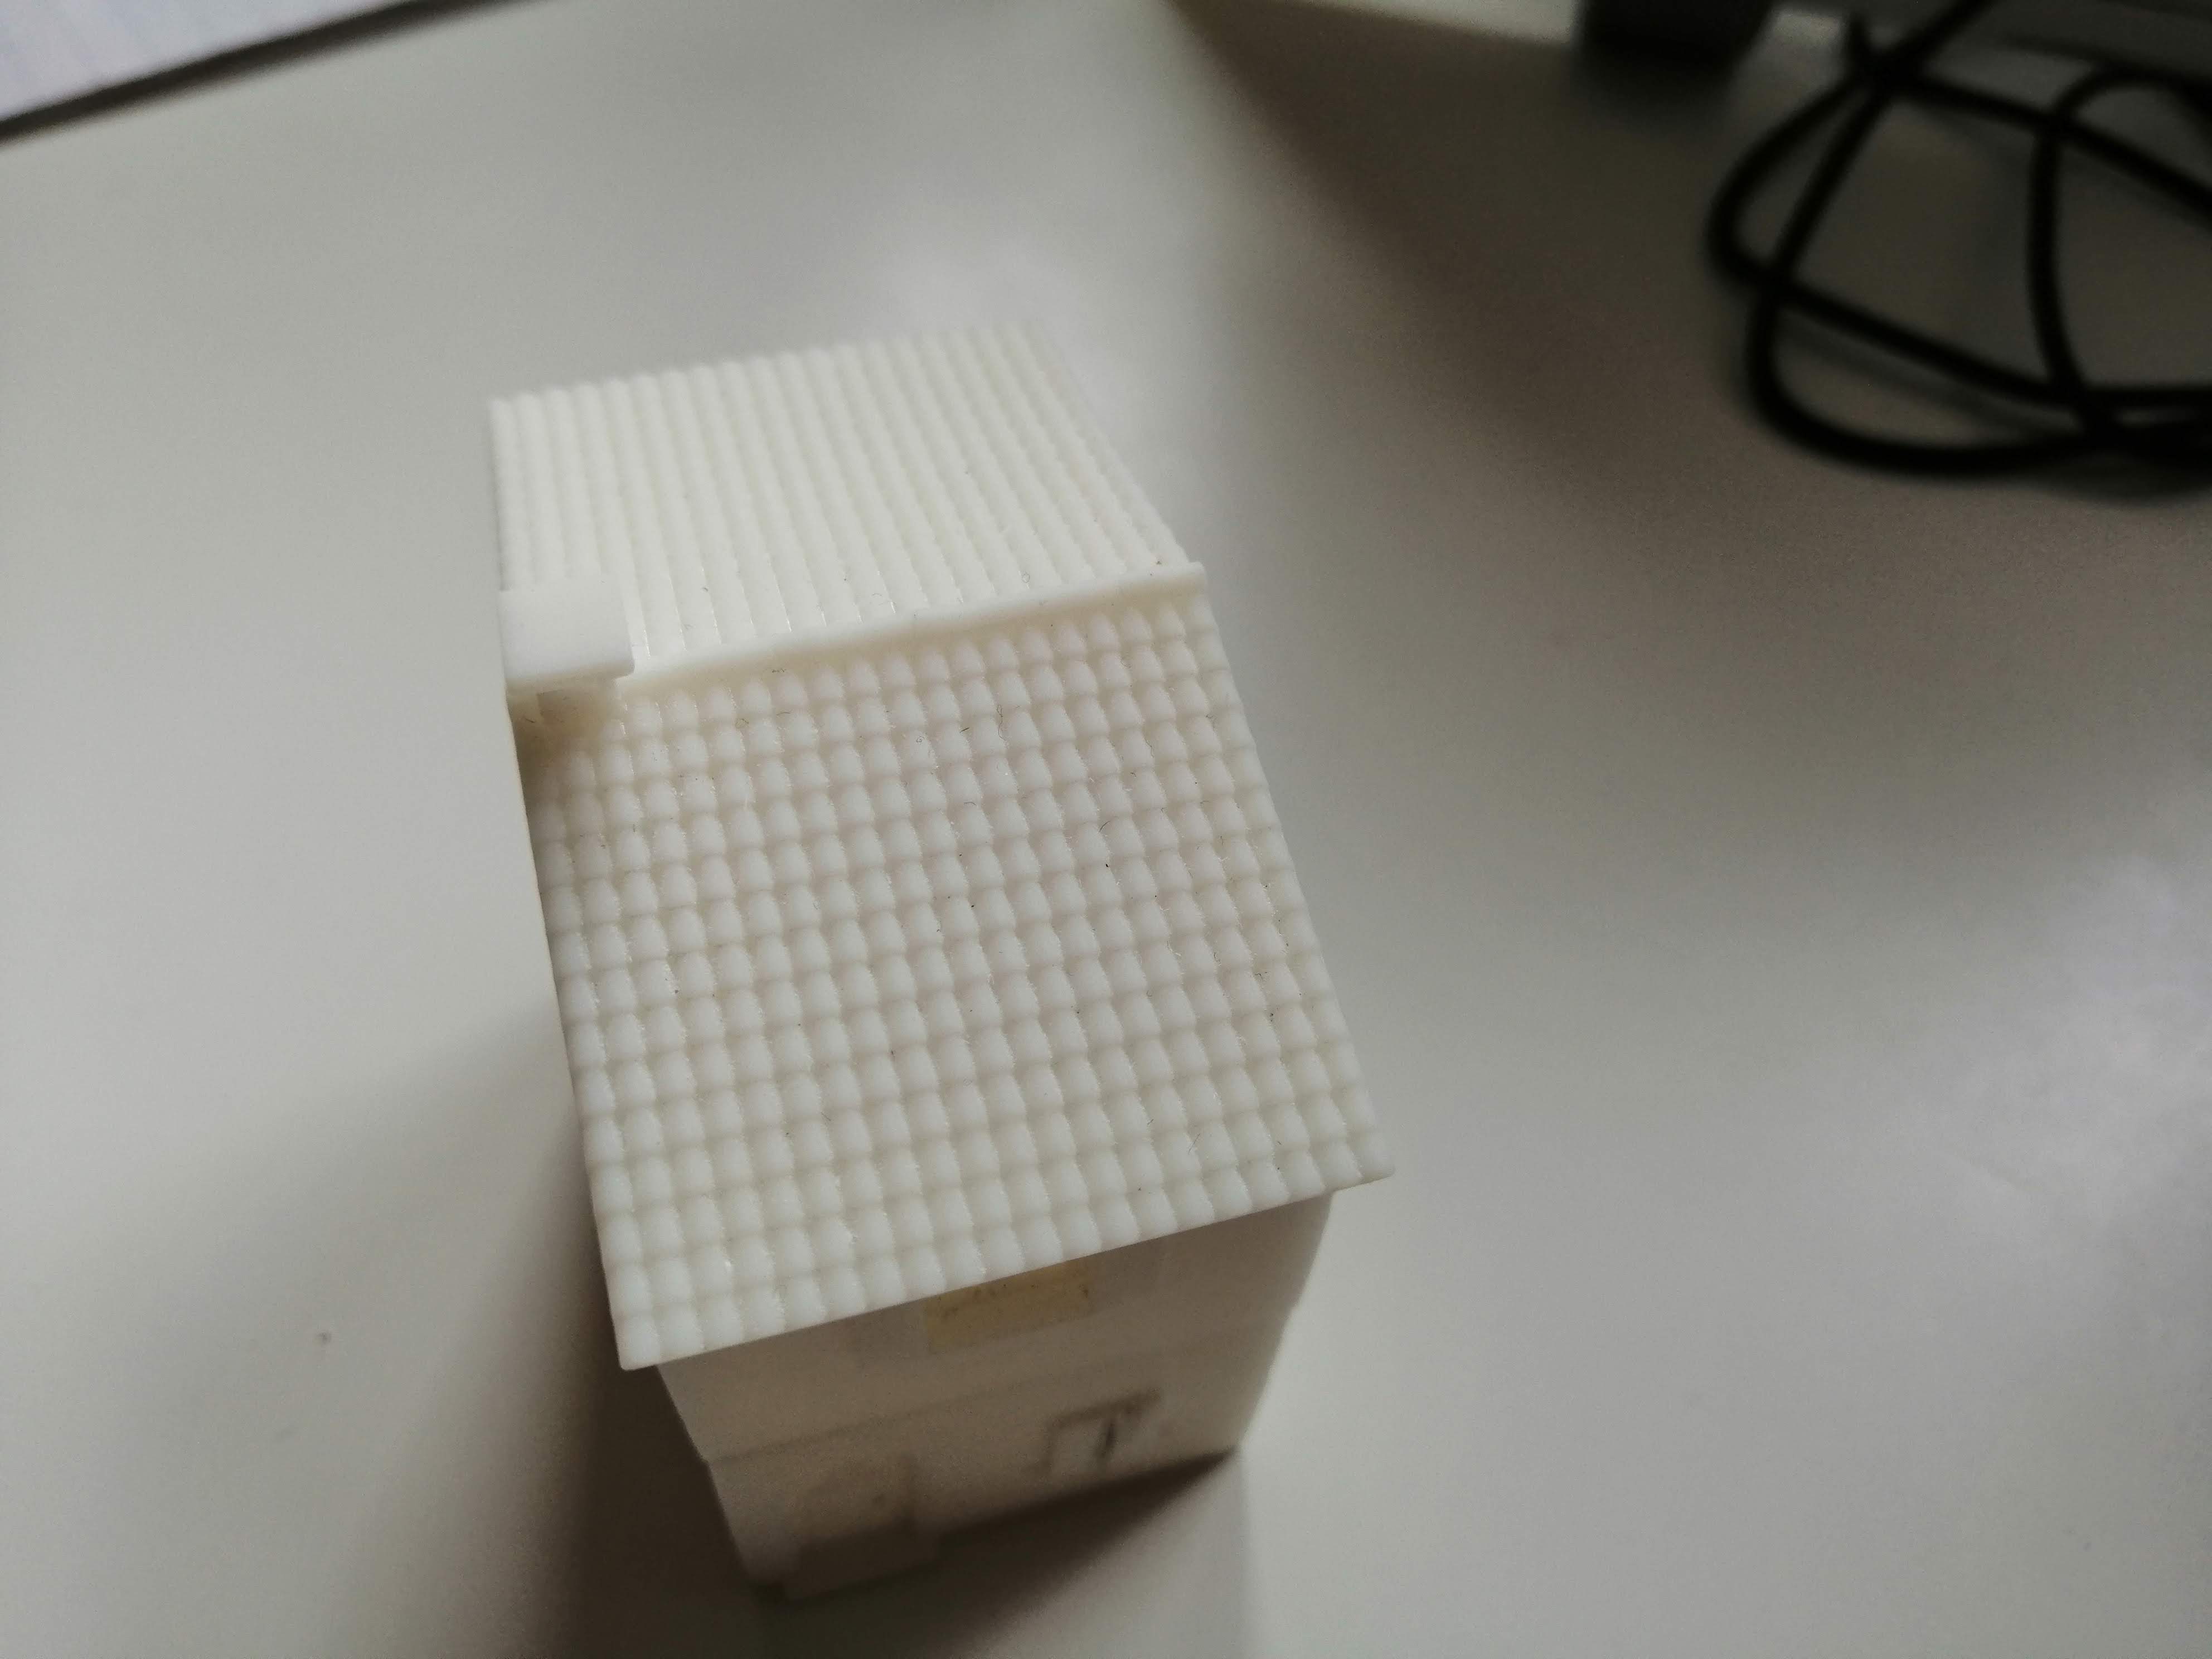
In the last project update, I had designed a simple Italian house and given it a monk and nun roof. I now needed to get this printed off to see how it looked.
Using the Treatstock website, I was able to upload the files and selected the cheapest option, in this case an fdm print. I think this is where the printer extrudes the plastic, printing from the bottom up. Here’s the result


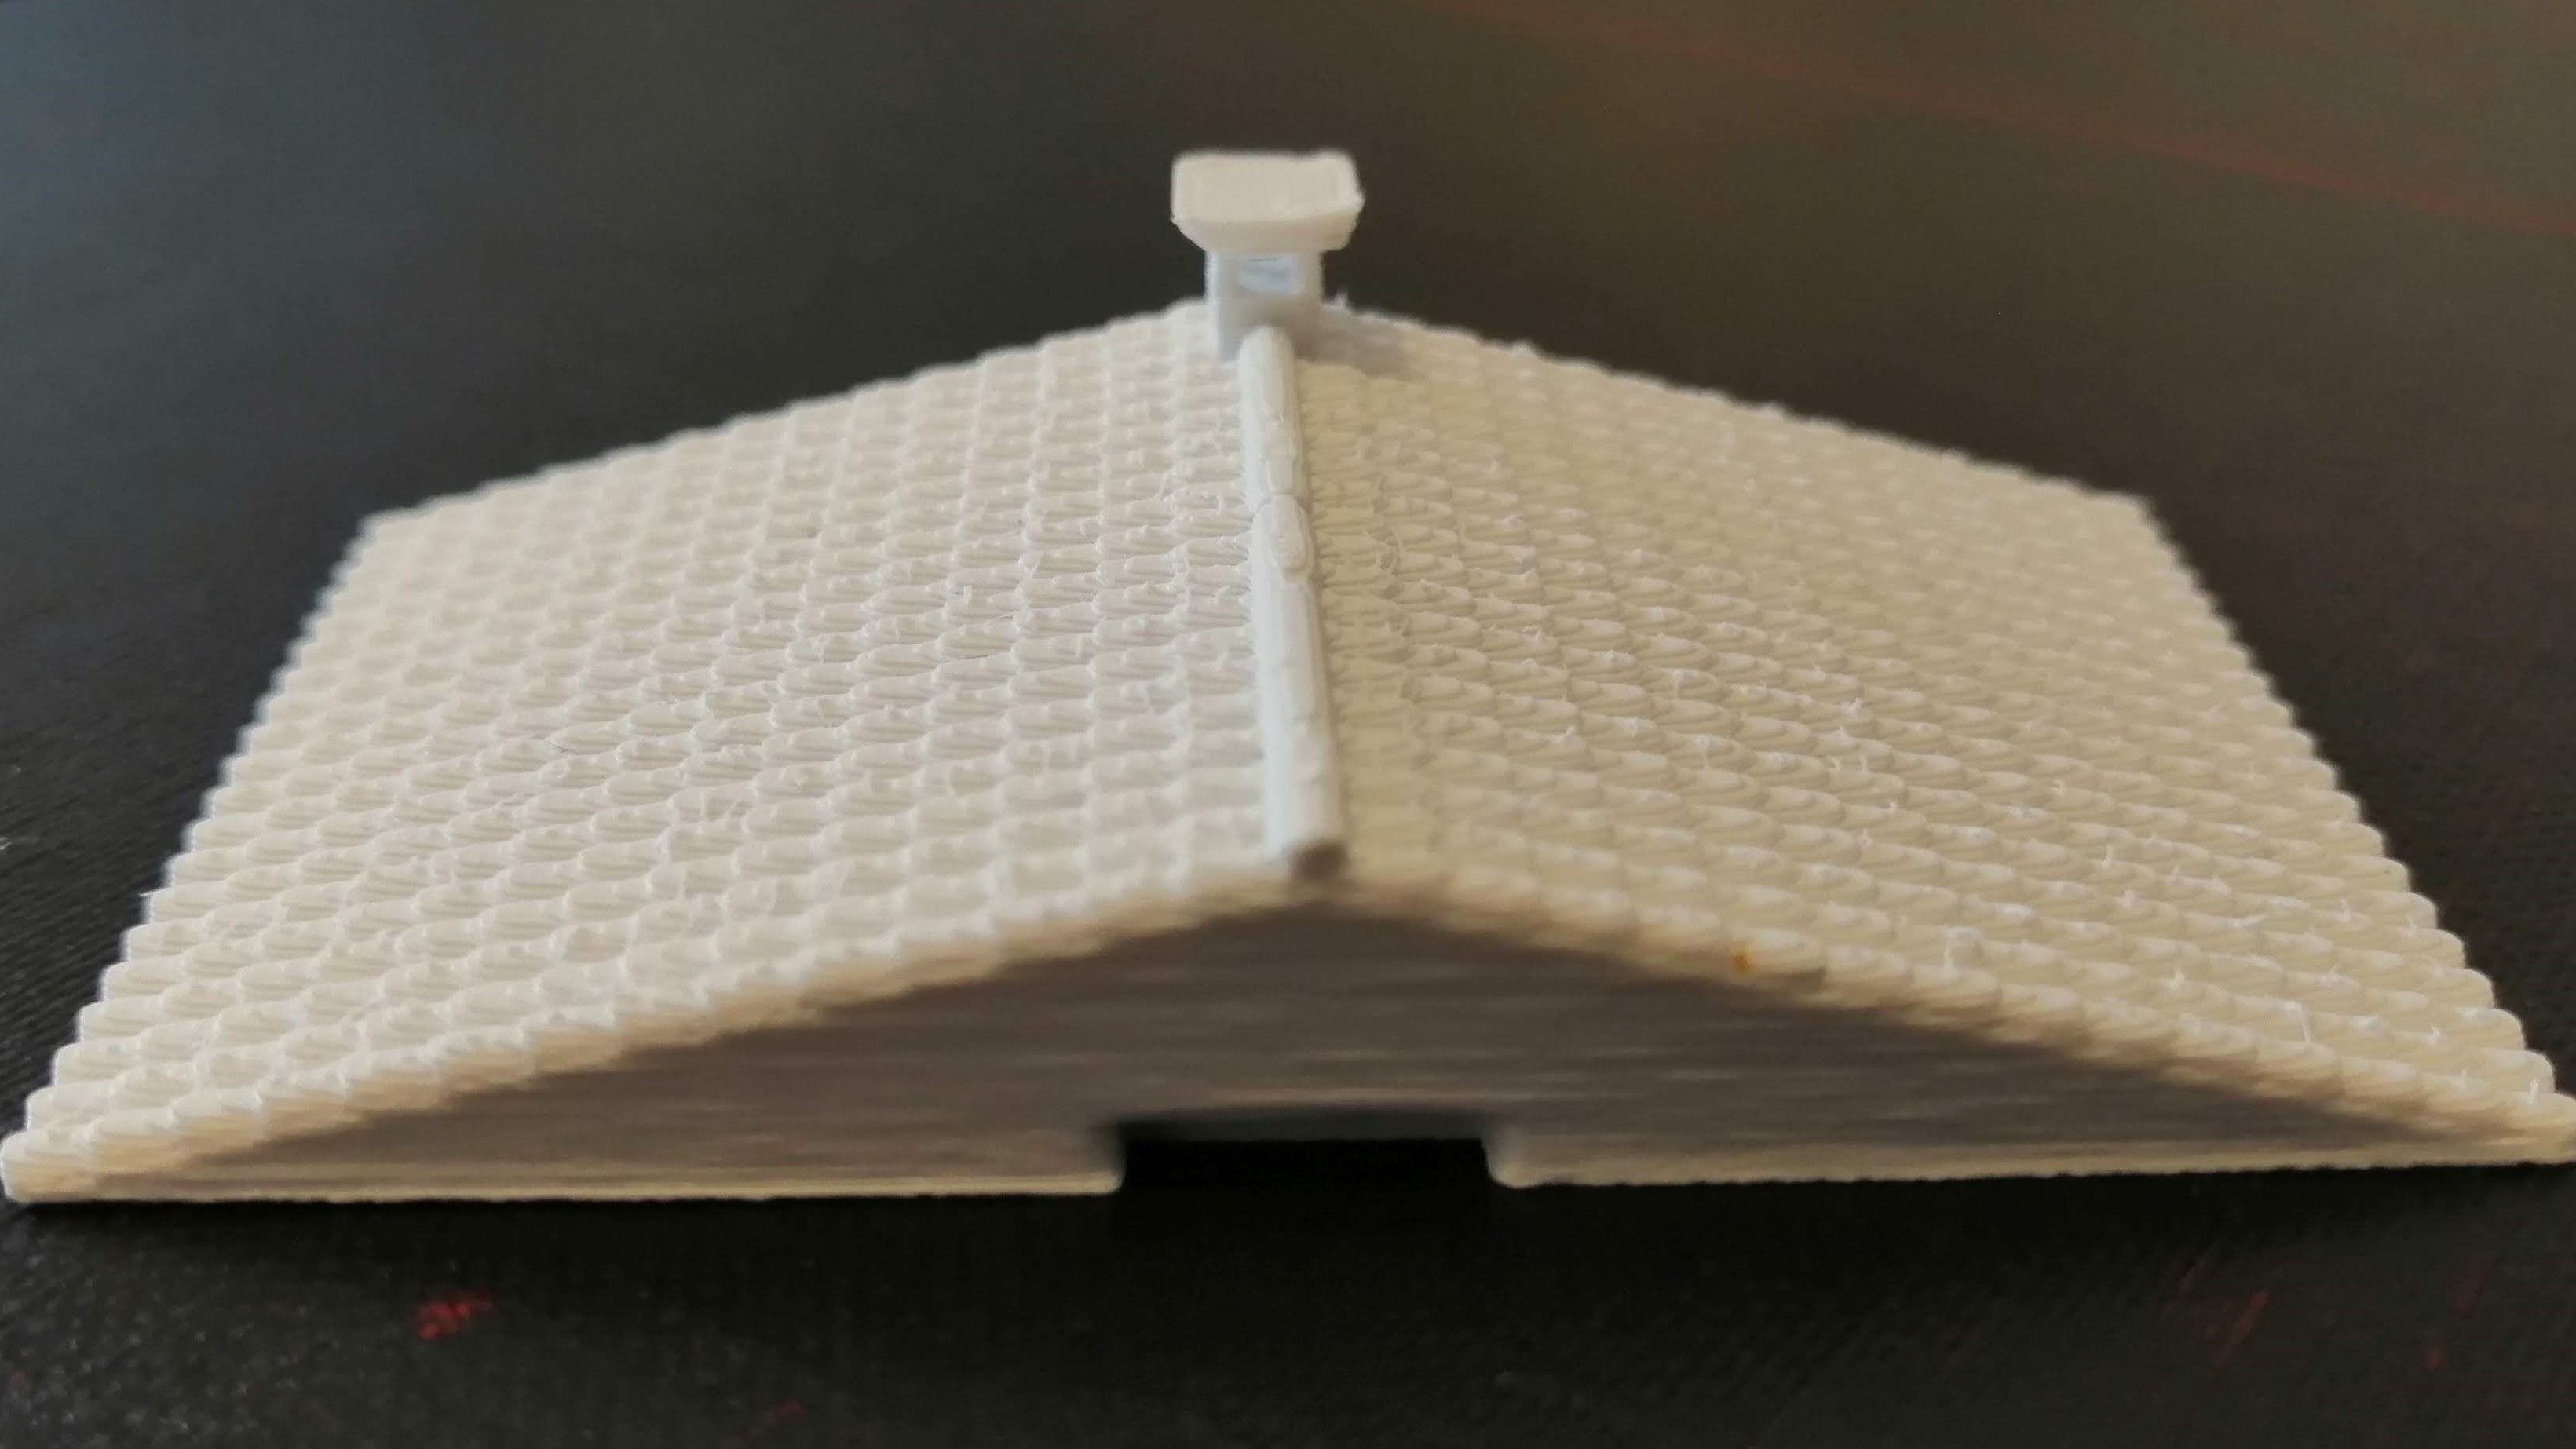
As you can see from the above, the stepping that is common in fdm printing is really noticeable in the roof tiles. So much so, I don’t think this printing technique is going to work for the roof, although it is less noticeable for the walls and other features of the building.
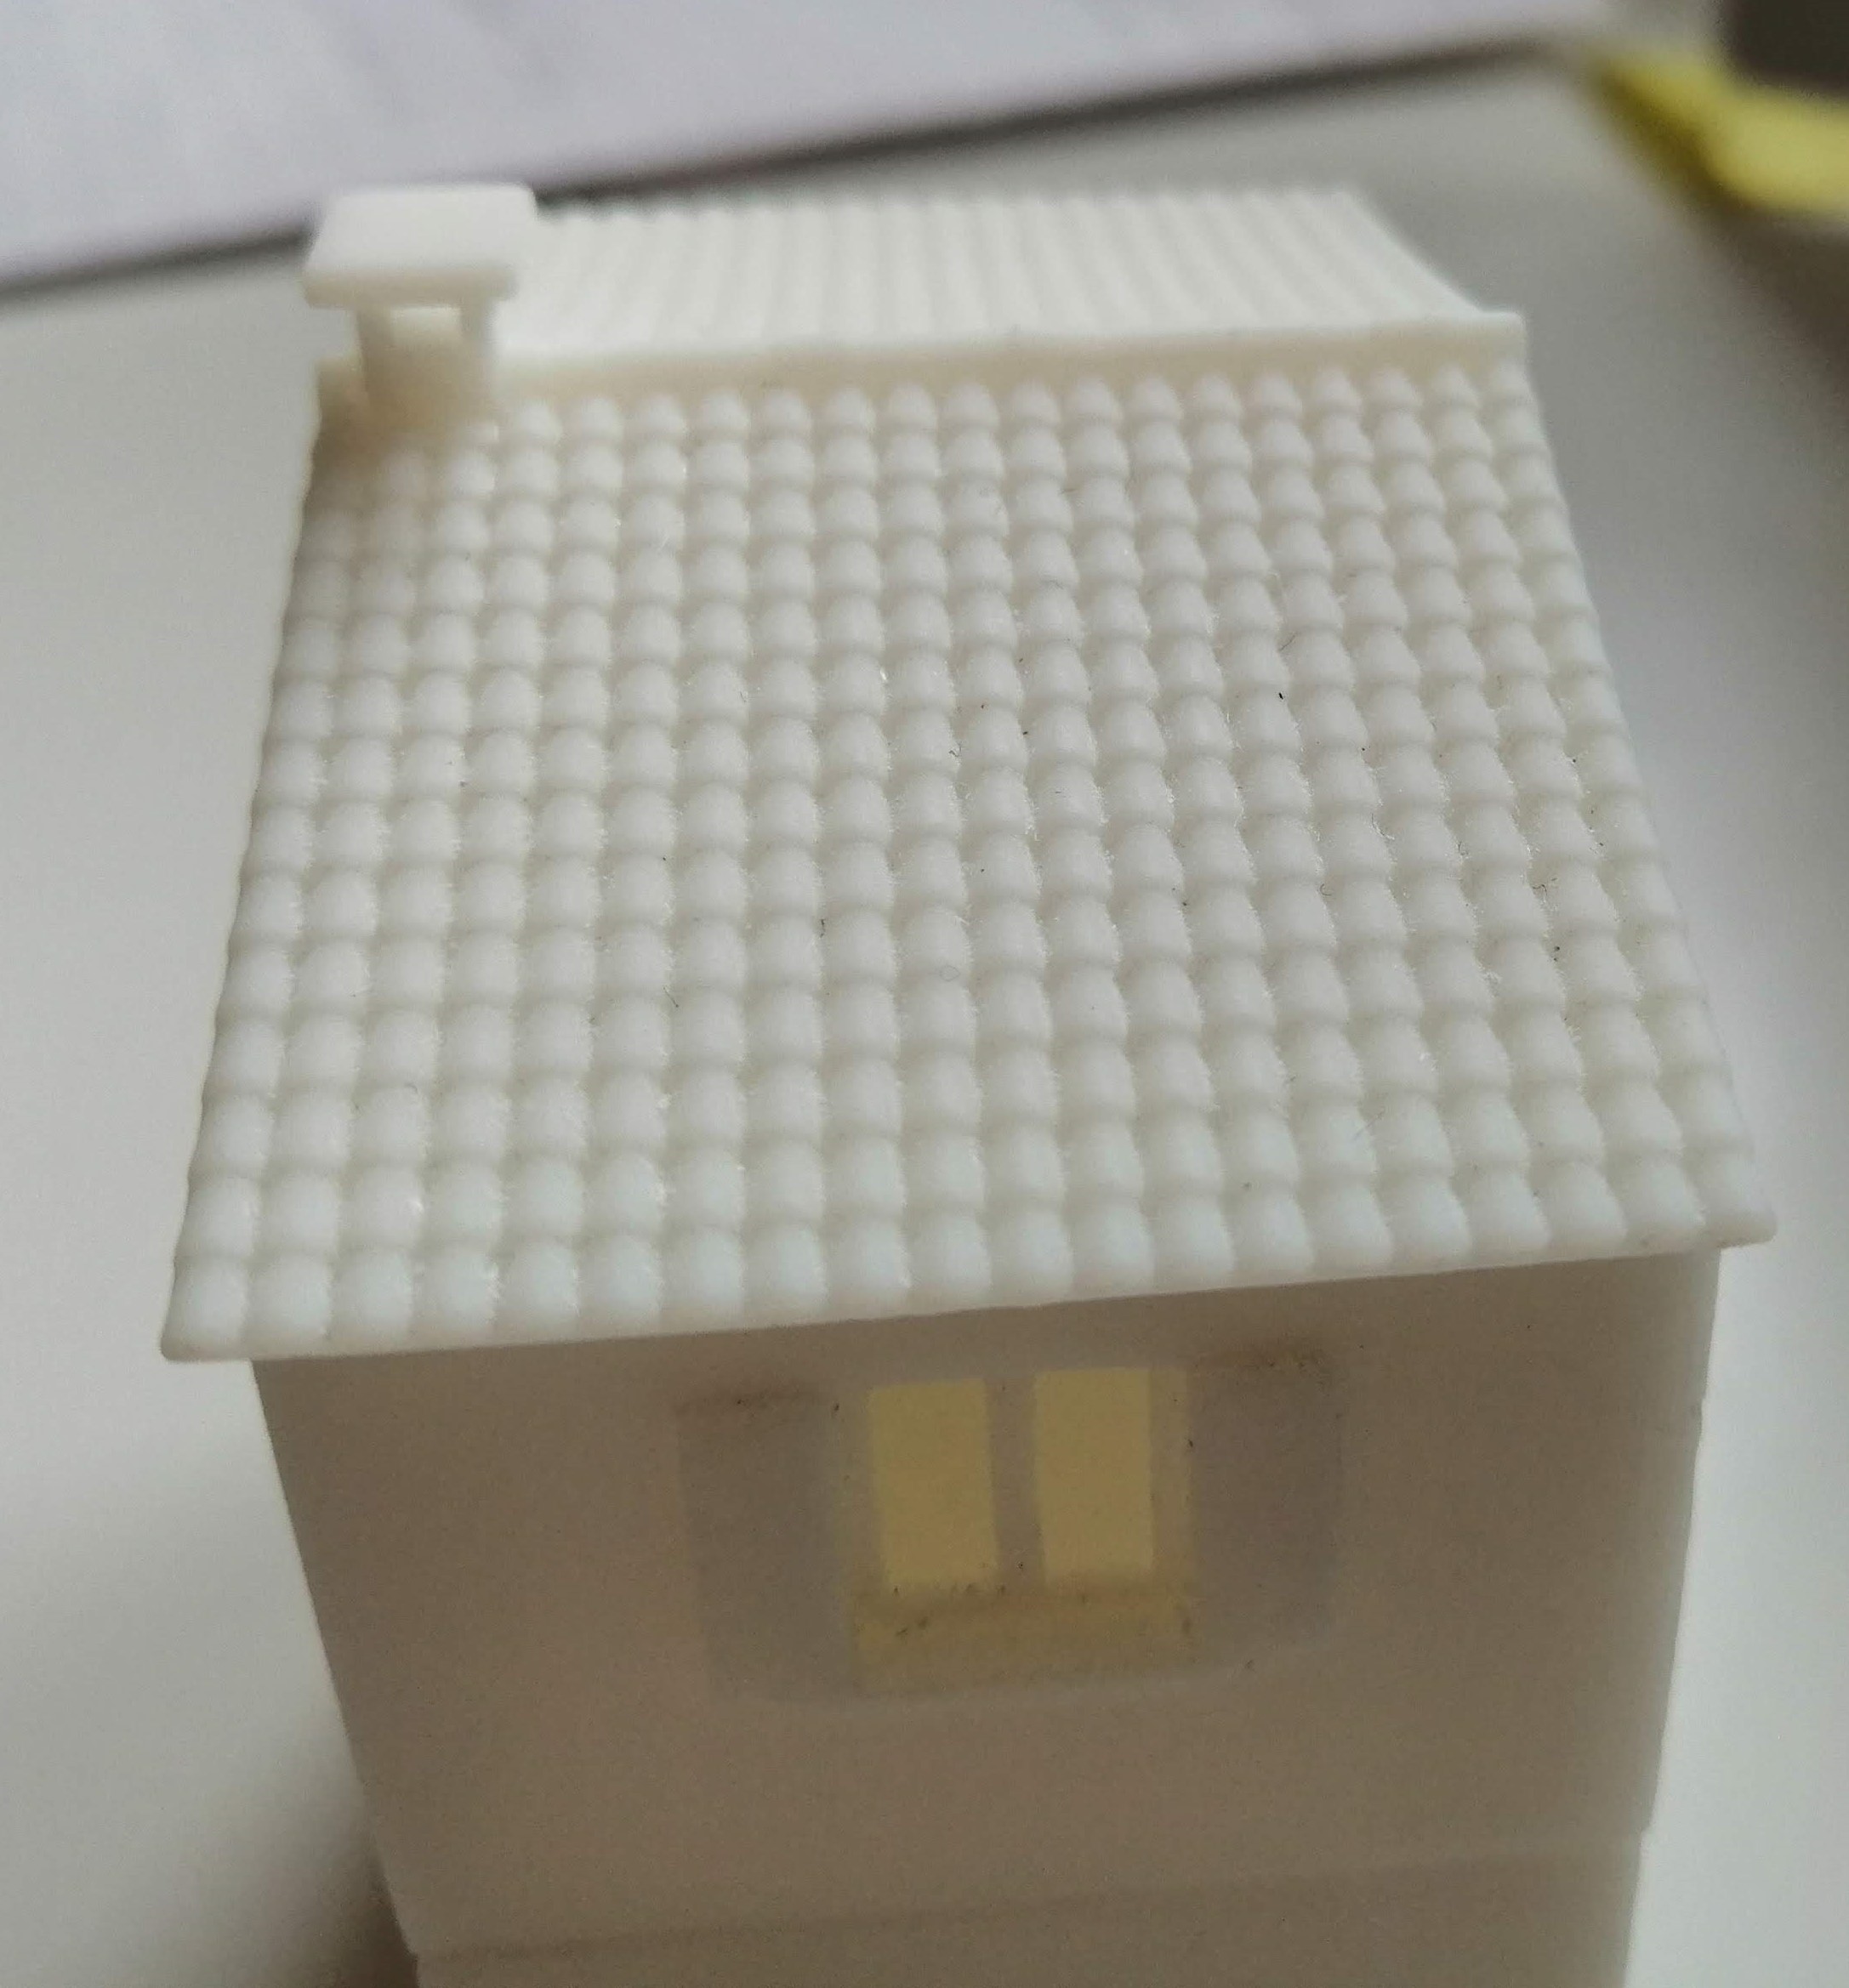
Returning to treatstock, I ordered up a resin version. This was almost twice the price, which may get expensive for a whole village, but as a one off test piece, it was ok.
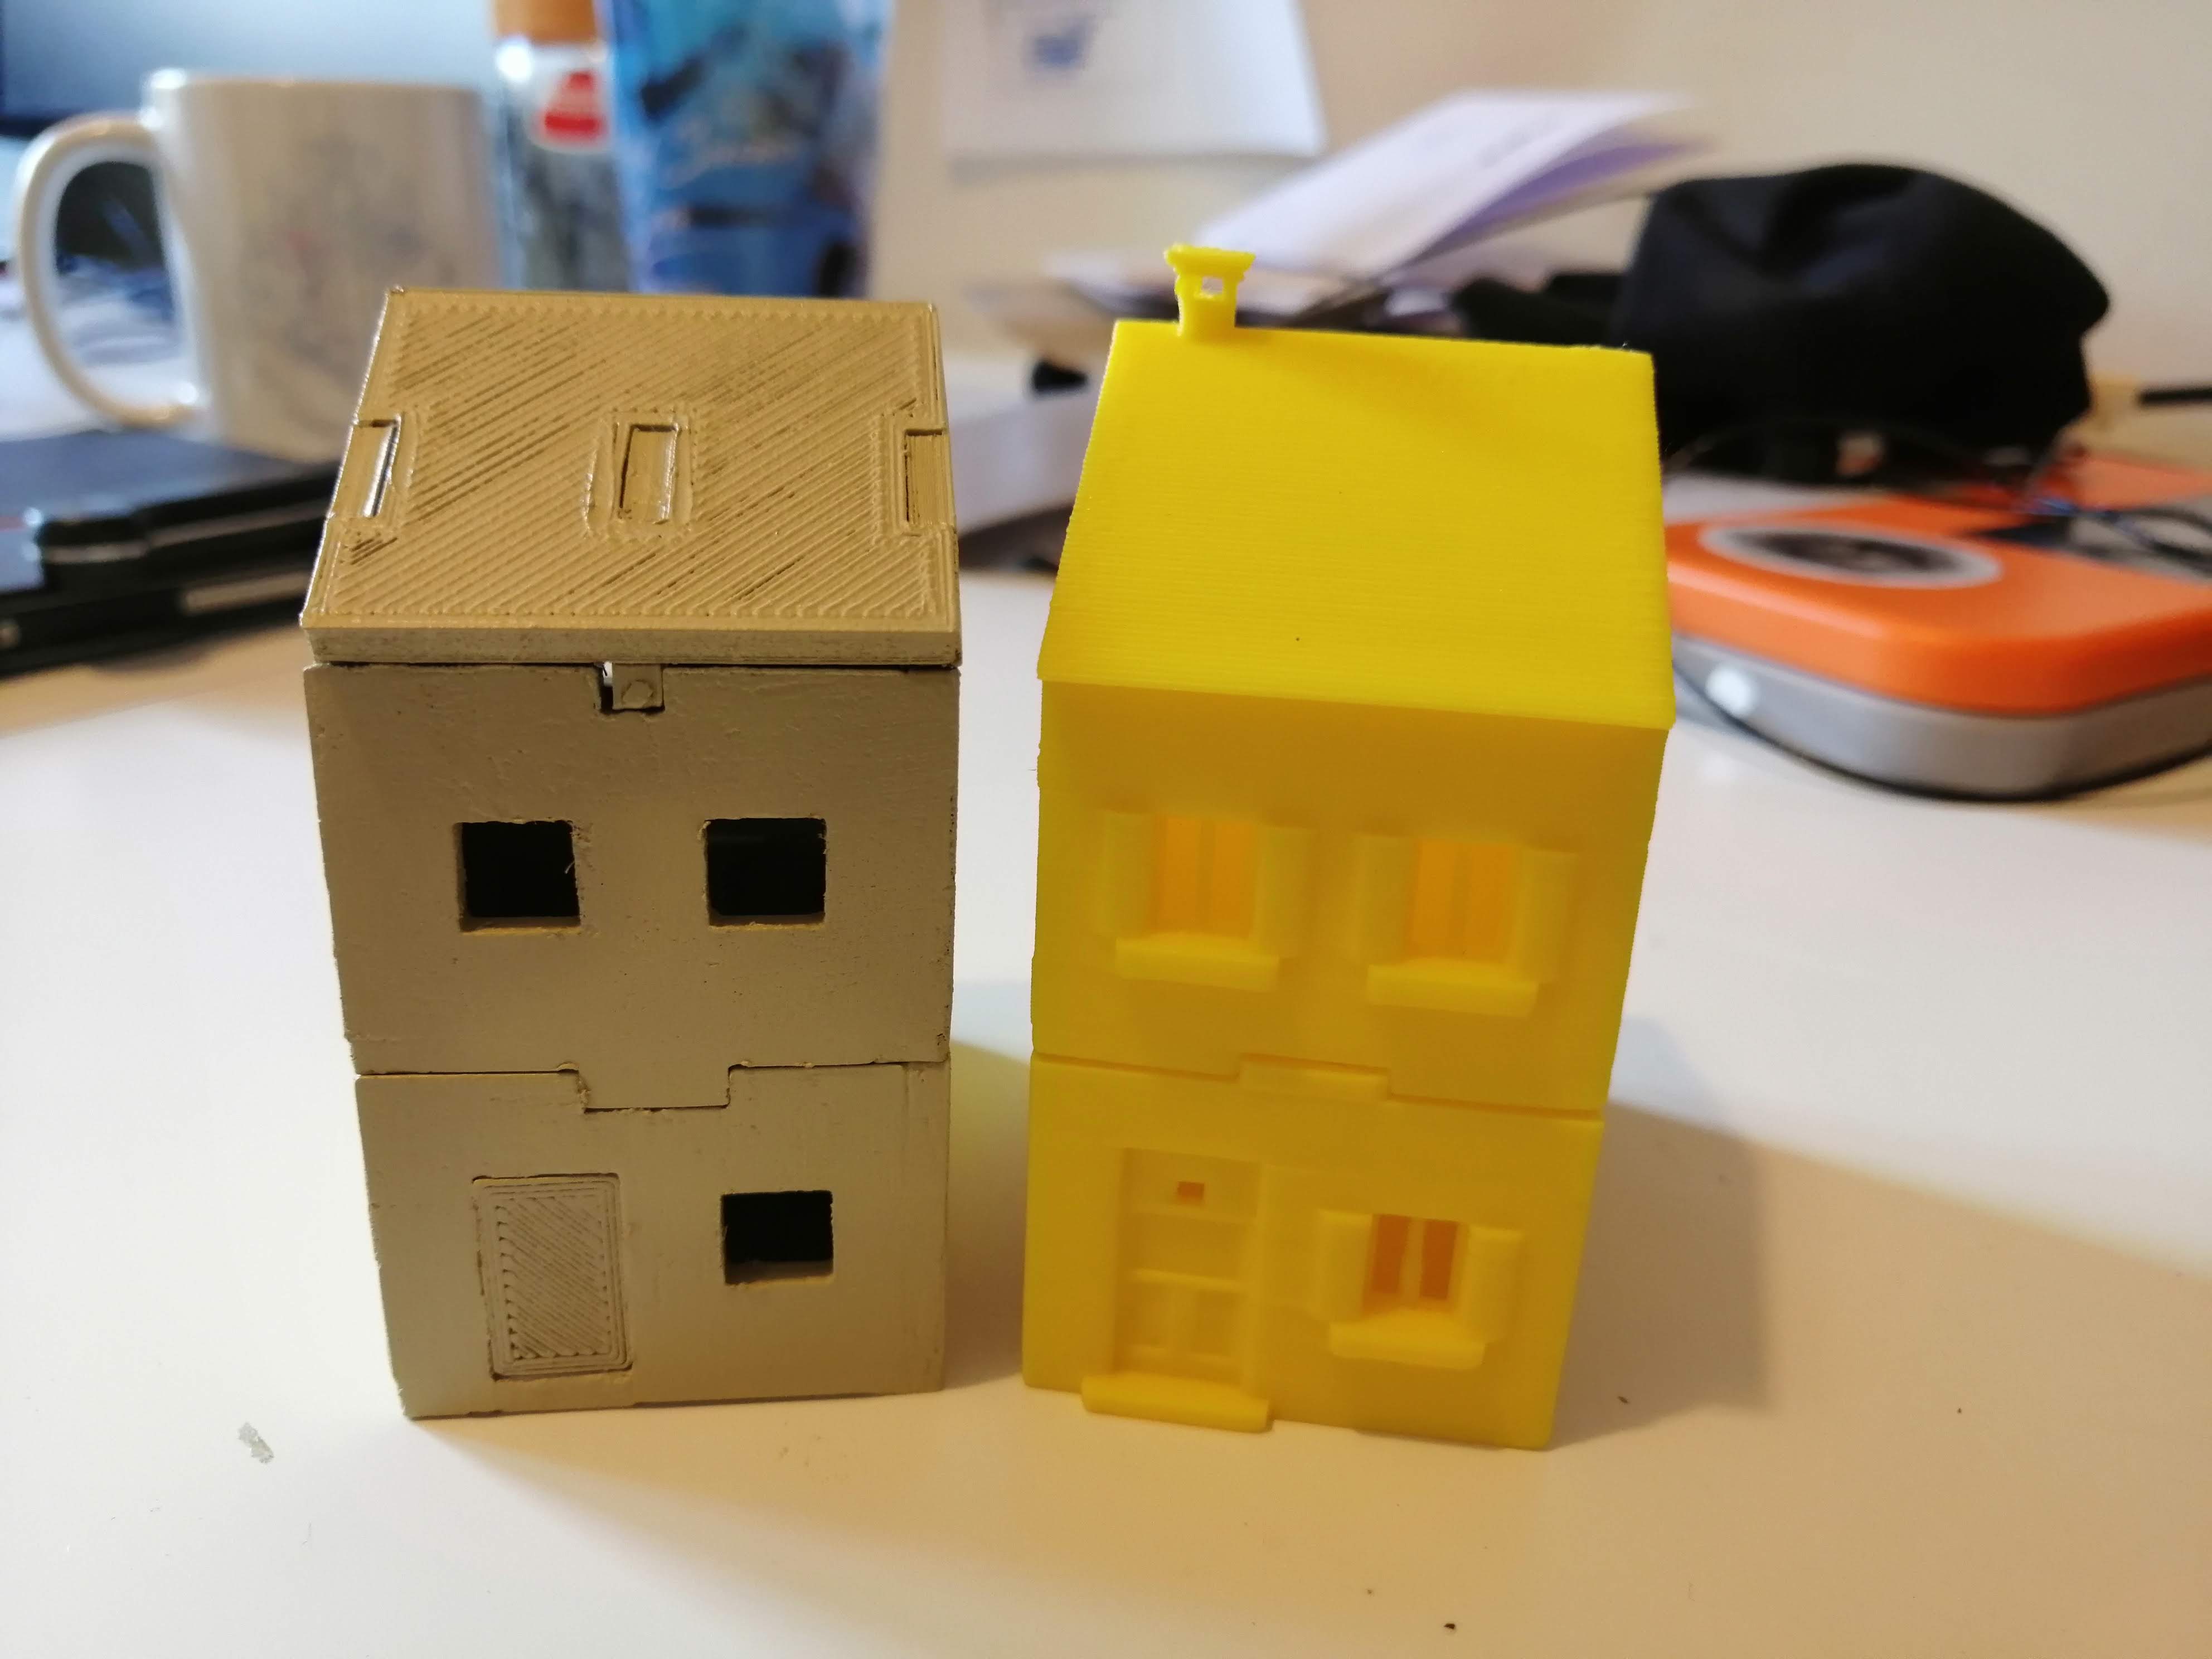
You really notice the difference between the two printing methods when you put the two roof pieces next to each other
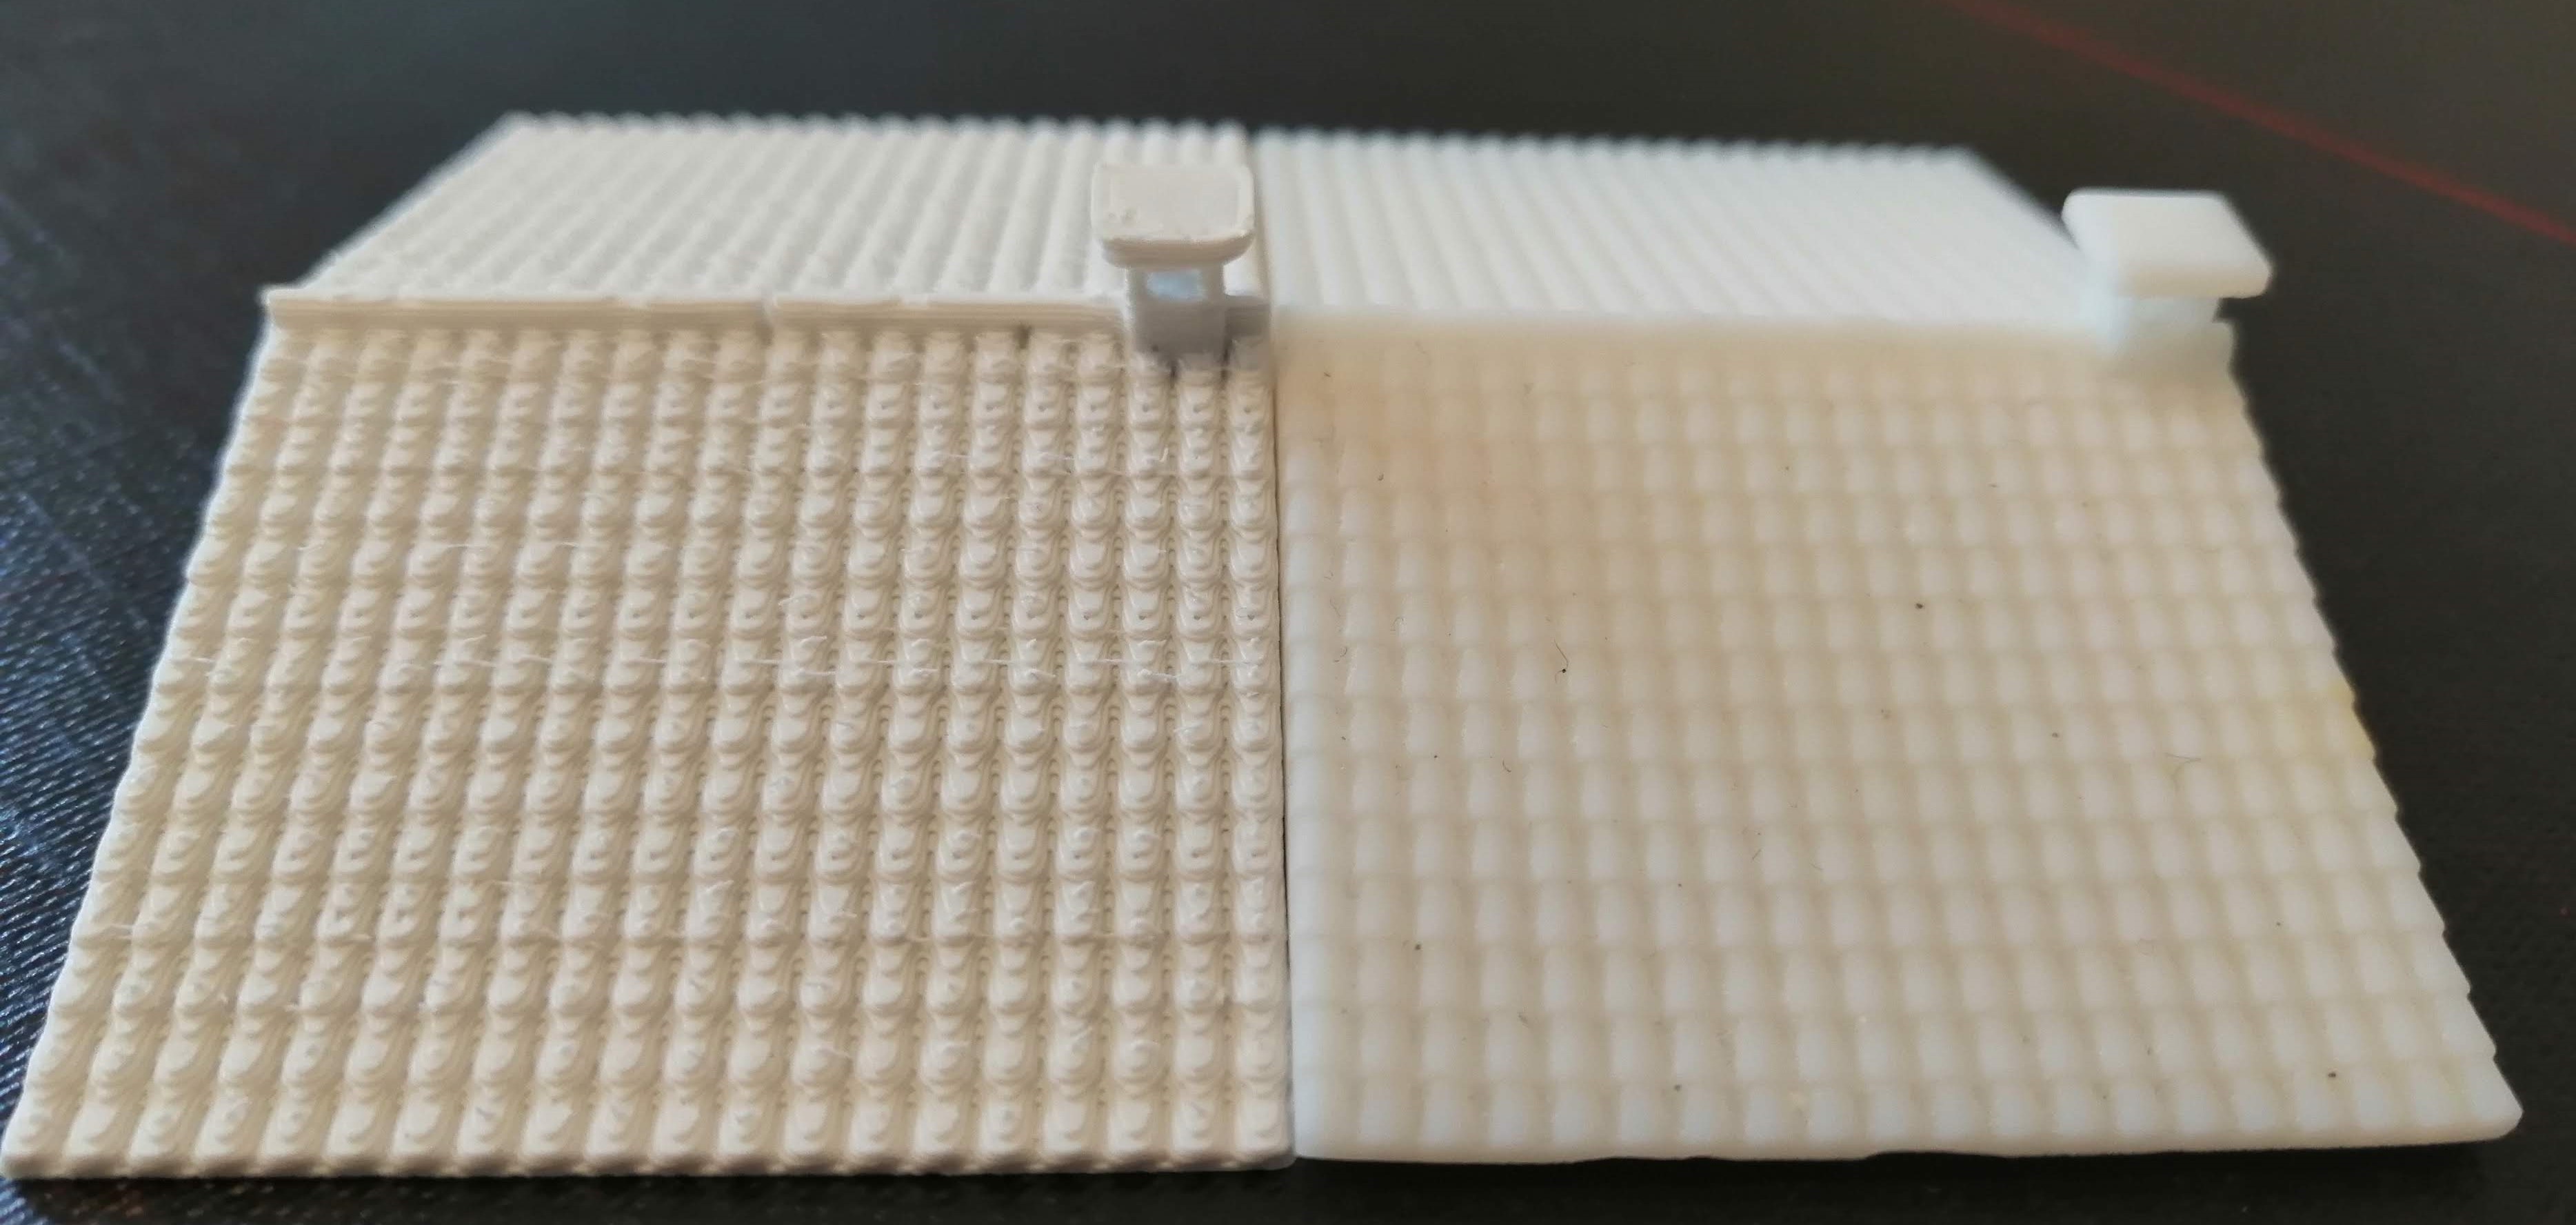
So clearly resin printing for the roof to get the clarity. To keep the cost down, I can always print the building itself in fdm and then just the roof in resin.
The only problem that I have now is getting texture onto the walls. I don’t fancy trying to model individual bricks, render etc as this will likely take too much time so I have a couple of options,
- Add the texture after the models have been printed by using some textured card
- Figure out if there is some software out there that will allow me to ‘wrap’ texture around the buildings. Apparently Blender might be able to help, so I will take a look at that
But at least now I can start modelling more buildings in 3d for the village.
The Pantile Paradox
I’ve been carrying out some research on the roof tiles used in Tuscany as getting these right will go a long way to getting the overall look at feel. What I have found is that older tiles are ‘barrel’ tiles arranged in a pattern apparently called ‘Monk and Nun’. Here’s an example:
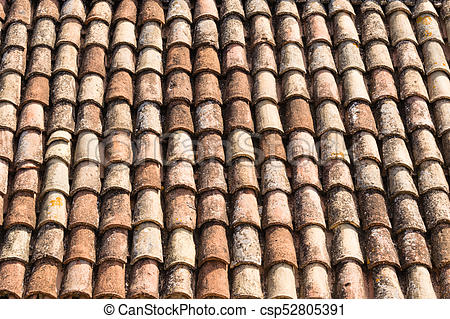 Monk and Nun tiling
Looking at my plastic sheet of roof tiles, I see that this is apparently pantile roof tiles and not monk and nun. The difference being a flat strip between each barrel section rather than close packed barrels.
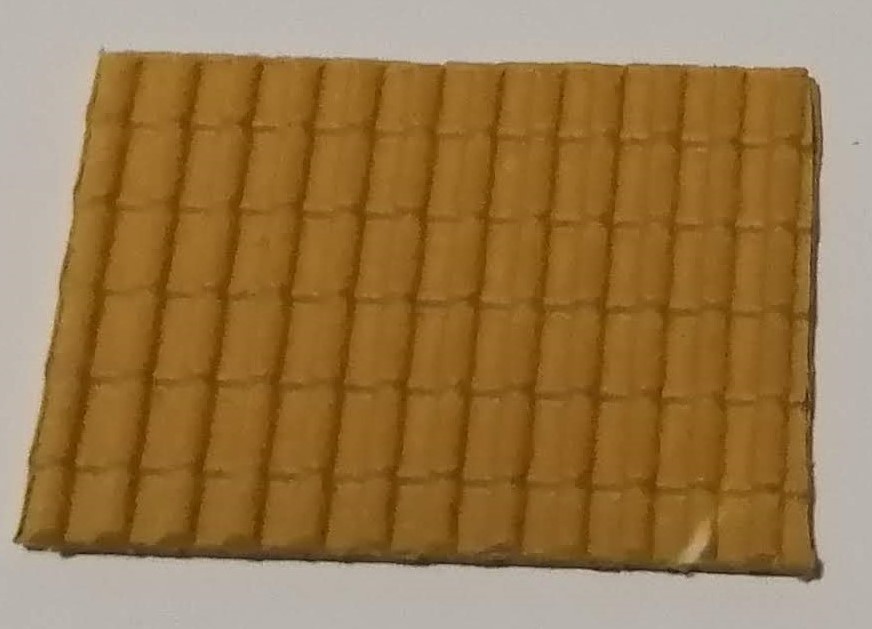 My 'pantile' plastic sheets
Now the easiest option would be to just glue the plastic sheet onto the models. The difference between pantile and monk and nun is not that great. But, if you’re going to do something, you may as well do it properly.
I can’t find plastic sheets that are barrel tiles, so I’m going to have to model these in FreeCad and attach them to each model.
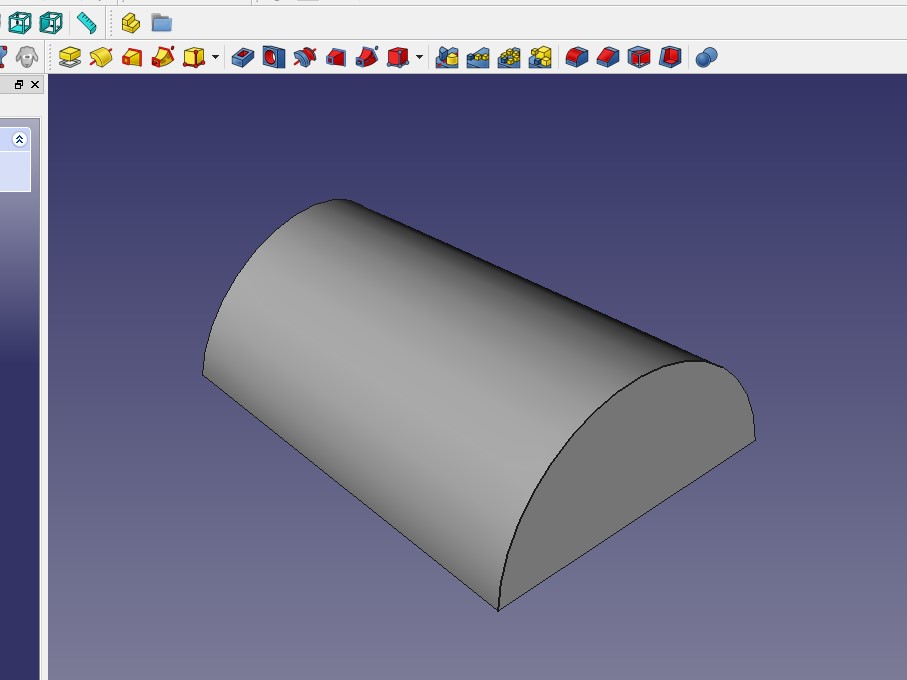
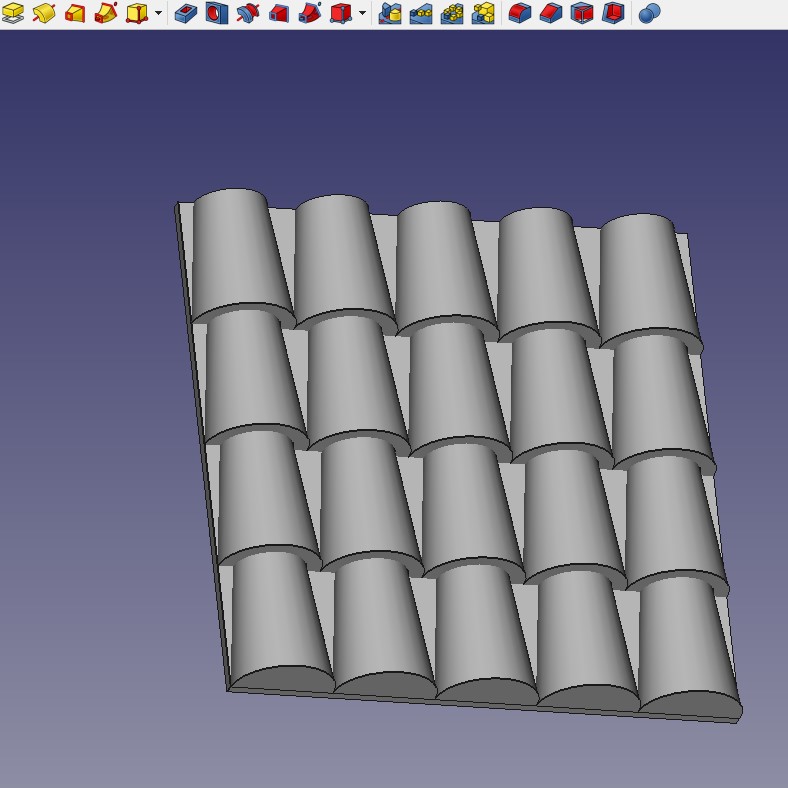
To do this, I’ve made a cone, cut it down the middle and chopped the top off. I’ve then created a thin sheet and stuck multiple copies of the cone to the sheet. Multiple sheets can be stuck together to cover the rood before printing.
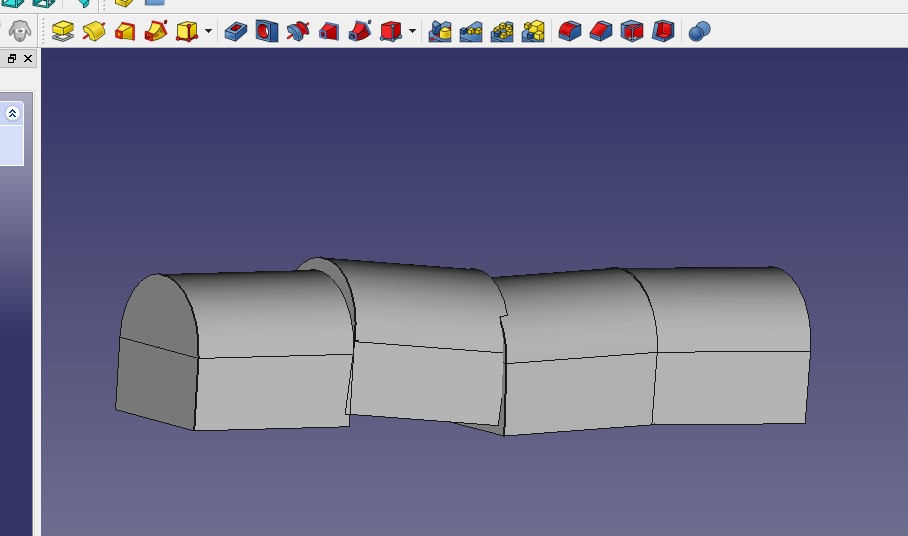
For the ridge tiles, I’ve created half cylinders and stuck them to small blocks. I’ve then arranged them slightly out of line to create a more haphazard arrangement.
I now need to add this to my FreeCad model of the building I used in the last project update. I’ve also adjusted the model as well. I’ve lowered the roof pitch and removed some windows. I’ve also had to extend the roof outward to create the eaves.
Adding the tile sheets to the roof took some time to the alignment. But I’ve now got a library of different sized roof tile sheets that should make future buildings quicker.
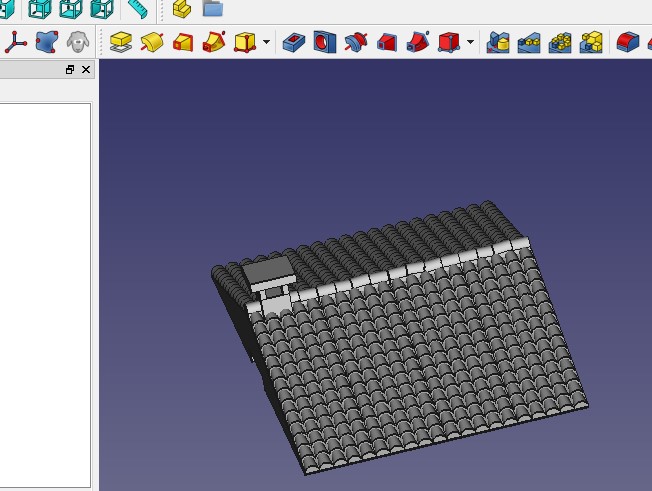 The new roof
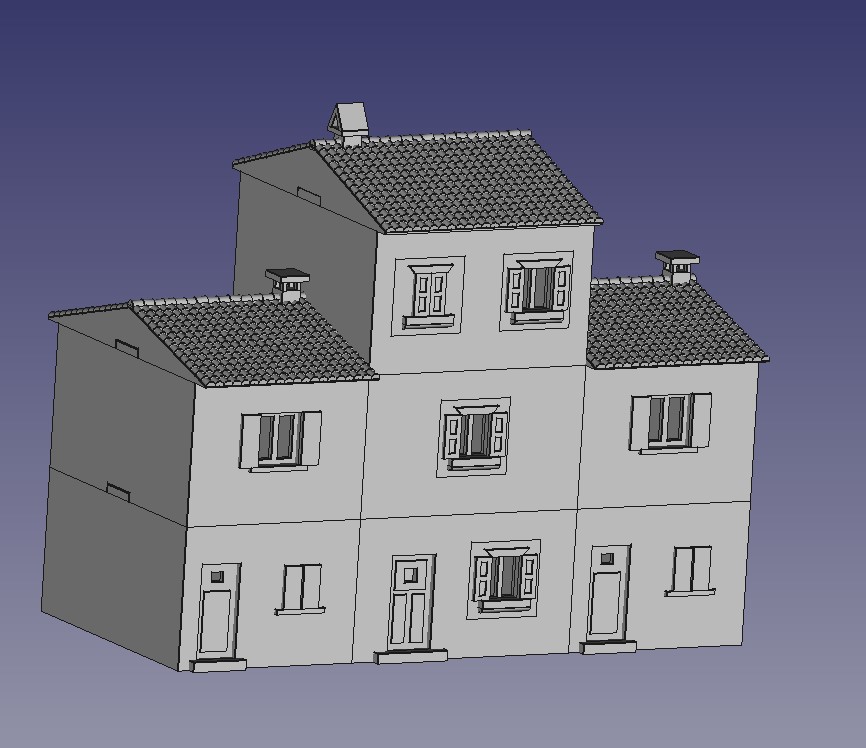
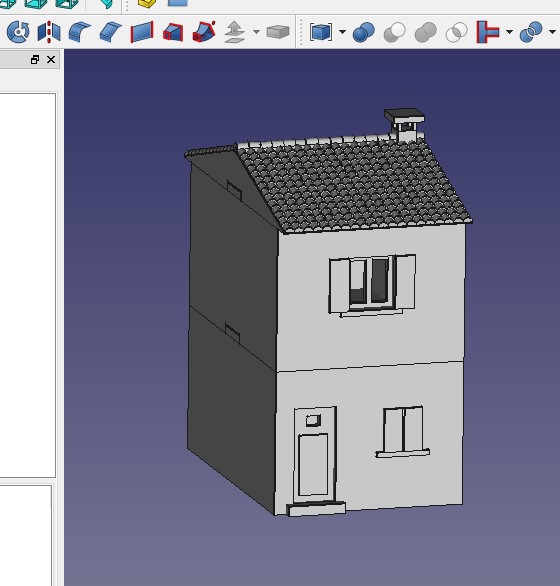 A mock up of the new building design
A Journey into FreeCad
FreeCad is a exactly as its name suggests, a free to use CAD package that offers a lot of options. I tried out some other tools suggested for 3D design but FreeCad seemed the most powerful yet still allowing me to do something without taking a 3 month tutorial package just to get started.
I also considered Blender but as this was aimed more at 3D modelling for animation or computer games, I decided against it. After all, I want to design buildings rather than humanoid figures and CAD seems the better option.
FreeCad is a little quirky at times but I found it quite quick to get to grips with making boxes that can be cut down into buildings. I want to be able to access the inside of the buildings to put unit stands on so each floor needs to be detachable but I am not modelling any interior as, at 15mm, this is not necessary and will also get into the way of the models.
For my first attempt, I opted for a basic Italian town house. A two storey building with a roof. Here are the designs that I drew up
 Ground Floor
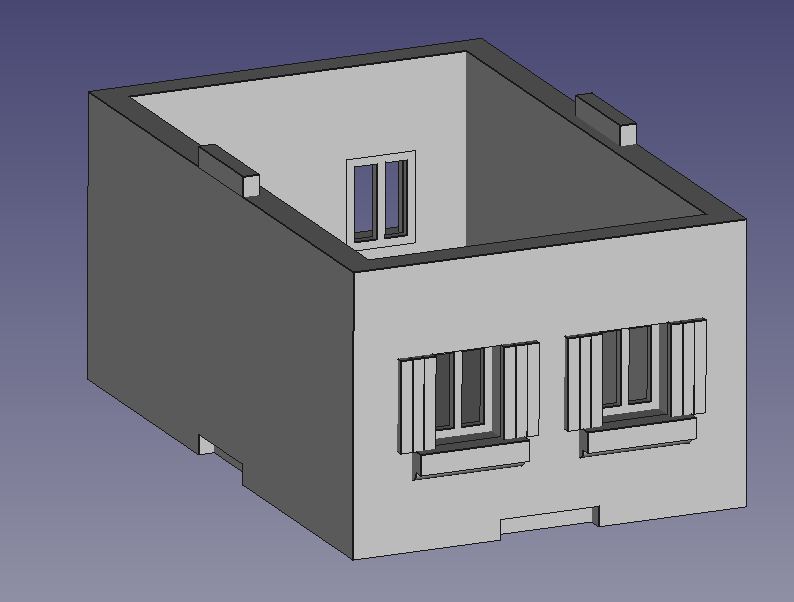 First Floor
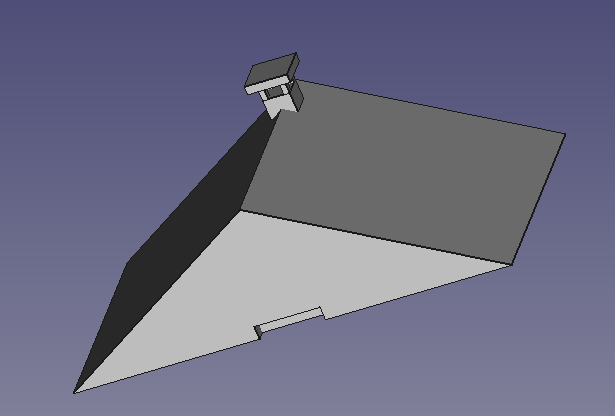 Roof
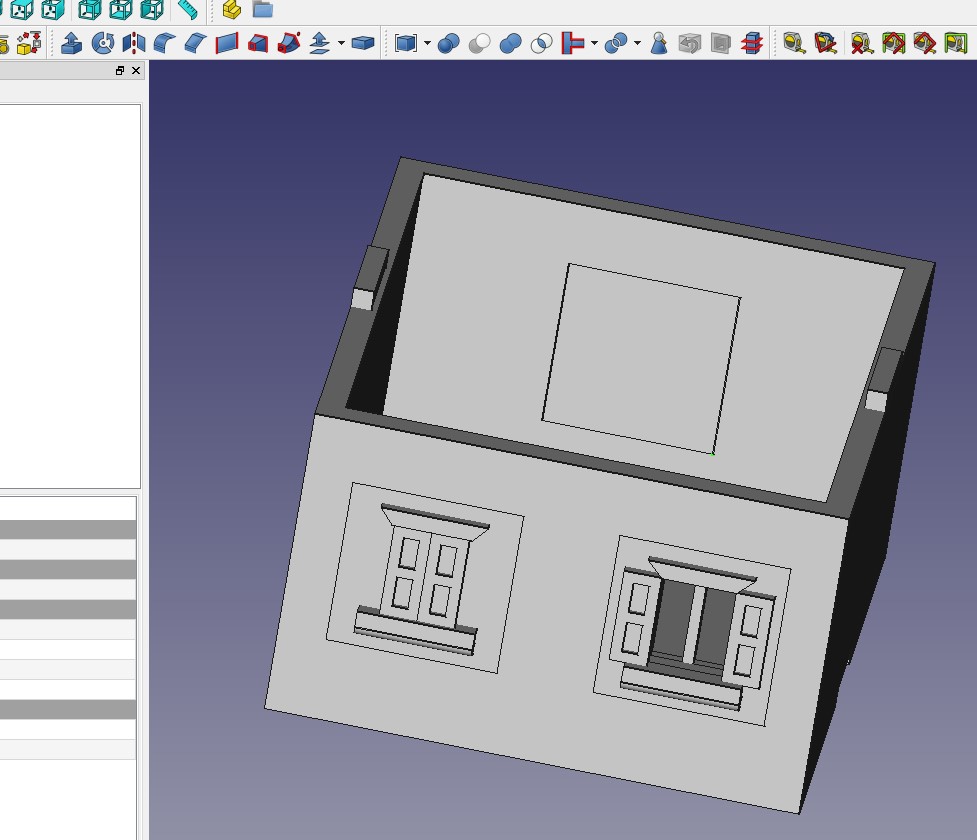
RoofThe advantage of this approach over the ‘flat pack house’ is that I can virtually put the elements together to see if they will fit, like below
 The three separate building floors put together
I was then able to export this as an STL file and uploaded it to some software that checked it for 3d printing and corrected any problems. This gave me my file STL.
Using Treatstock, I received a price of around £8 plus postage to get this printed and, about a week later the below arrived.
 My new 3d printed model
This is a vast improvement over the mdf and flat pack versions. As you can see from the next picture, the flat pack printed version is on the left and the new 3d printed model looks far superior.
 Flat pack vs FreeCad design
FreeCad is far more accurate and I can now design the detail into the model, such as windows, detailed doors etc. I therefore think I have found the way forward with getting the buildings I need to set off my Italian hill village.
I do need to adjust the design for the model that I have printed. The roof pitch is probably too steep and I could reduce the number of windows, but that can be worked.
I can now use this model as a test piece for texturing options and colour while I design some more buildings.
3D printing does seem to be the way forward!


