


Hot wire pen for hot wire cutter


Recommendations: 55
About the Project
I made a hot wire cutter. But while thrilled with the ability to cut foam, I was less than impressed with the finish on the cut pieces.
Related Genre: General
This Project is Completed
I made a hot wire cutter
I made a hot wire cutter, for cutting styrofoam (https://www.beastsofwar.com/project/1570235/)
It started out as a one-day build, but kind-of got a bit out of control. The end result was actually quite pleasing. And I happily cut multiples strips of styrofoam to test out making planks of wood.
But something strange started happening.
When drawing pencil-lines across the surface of the “virgin” styrofoam – the outer face of the foam that hadn’t yet been cut – the result was nice, deep, sharp lines. Sure, they look at bit “chunky” but that only adds to the slightly cartoon-y style I seem to have been developing in recent weeks.
But when I drew across the “planks” I’d cut, the lines were much less clear, and the surface of the foam had lots of little rips and tears in it.
When painted up, the end result wasn’t too bad.
But it really didn’t look as nice and crisp as the first plank that started this whole project off
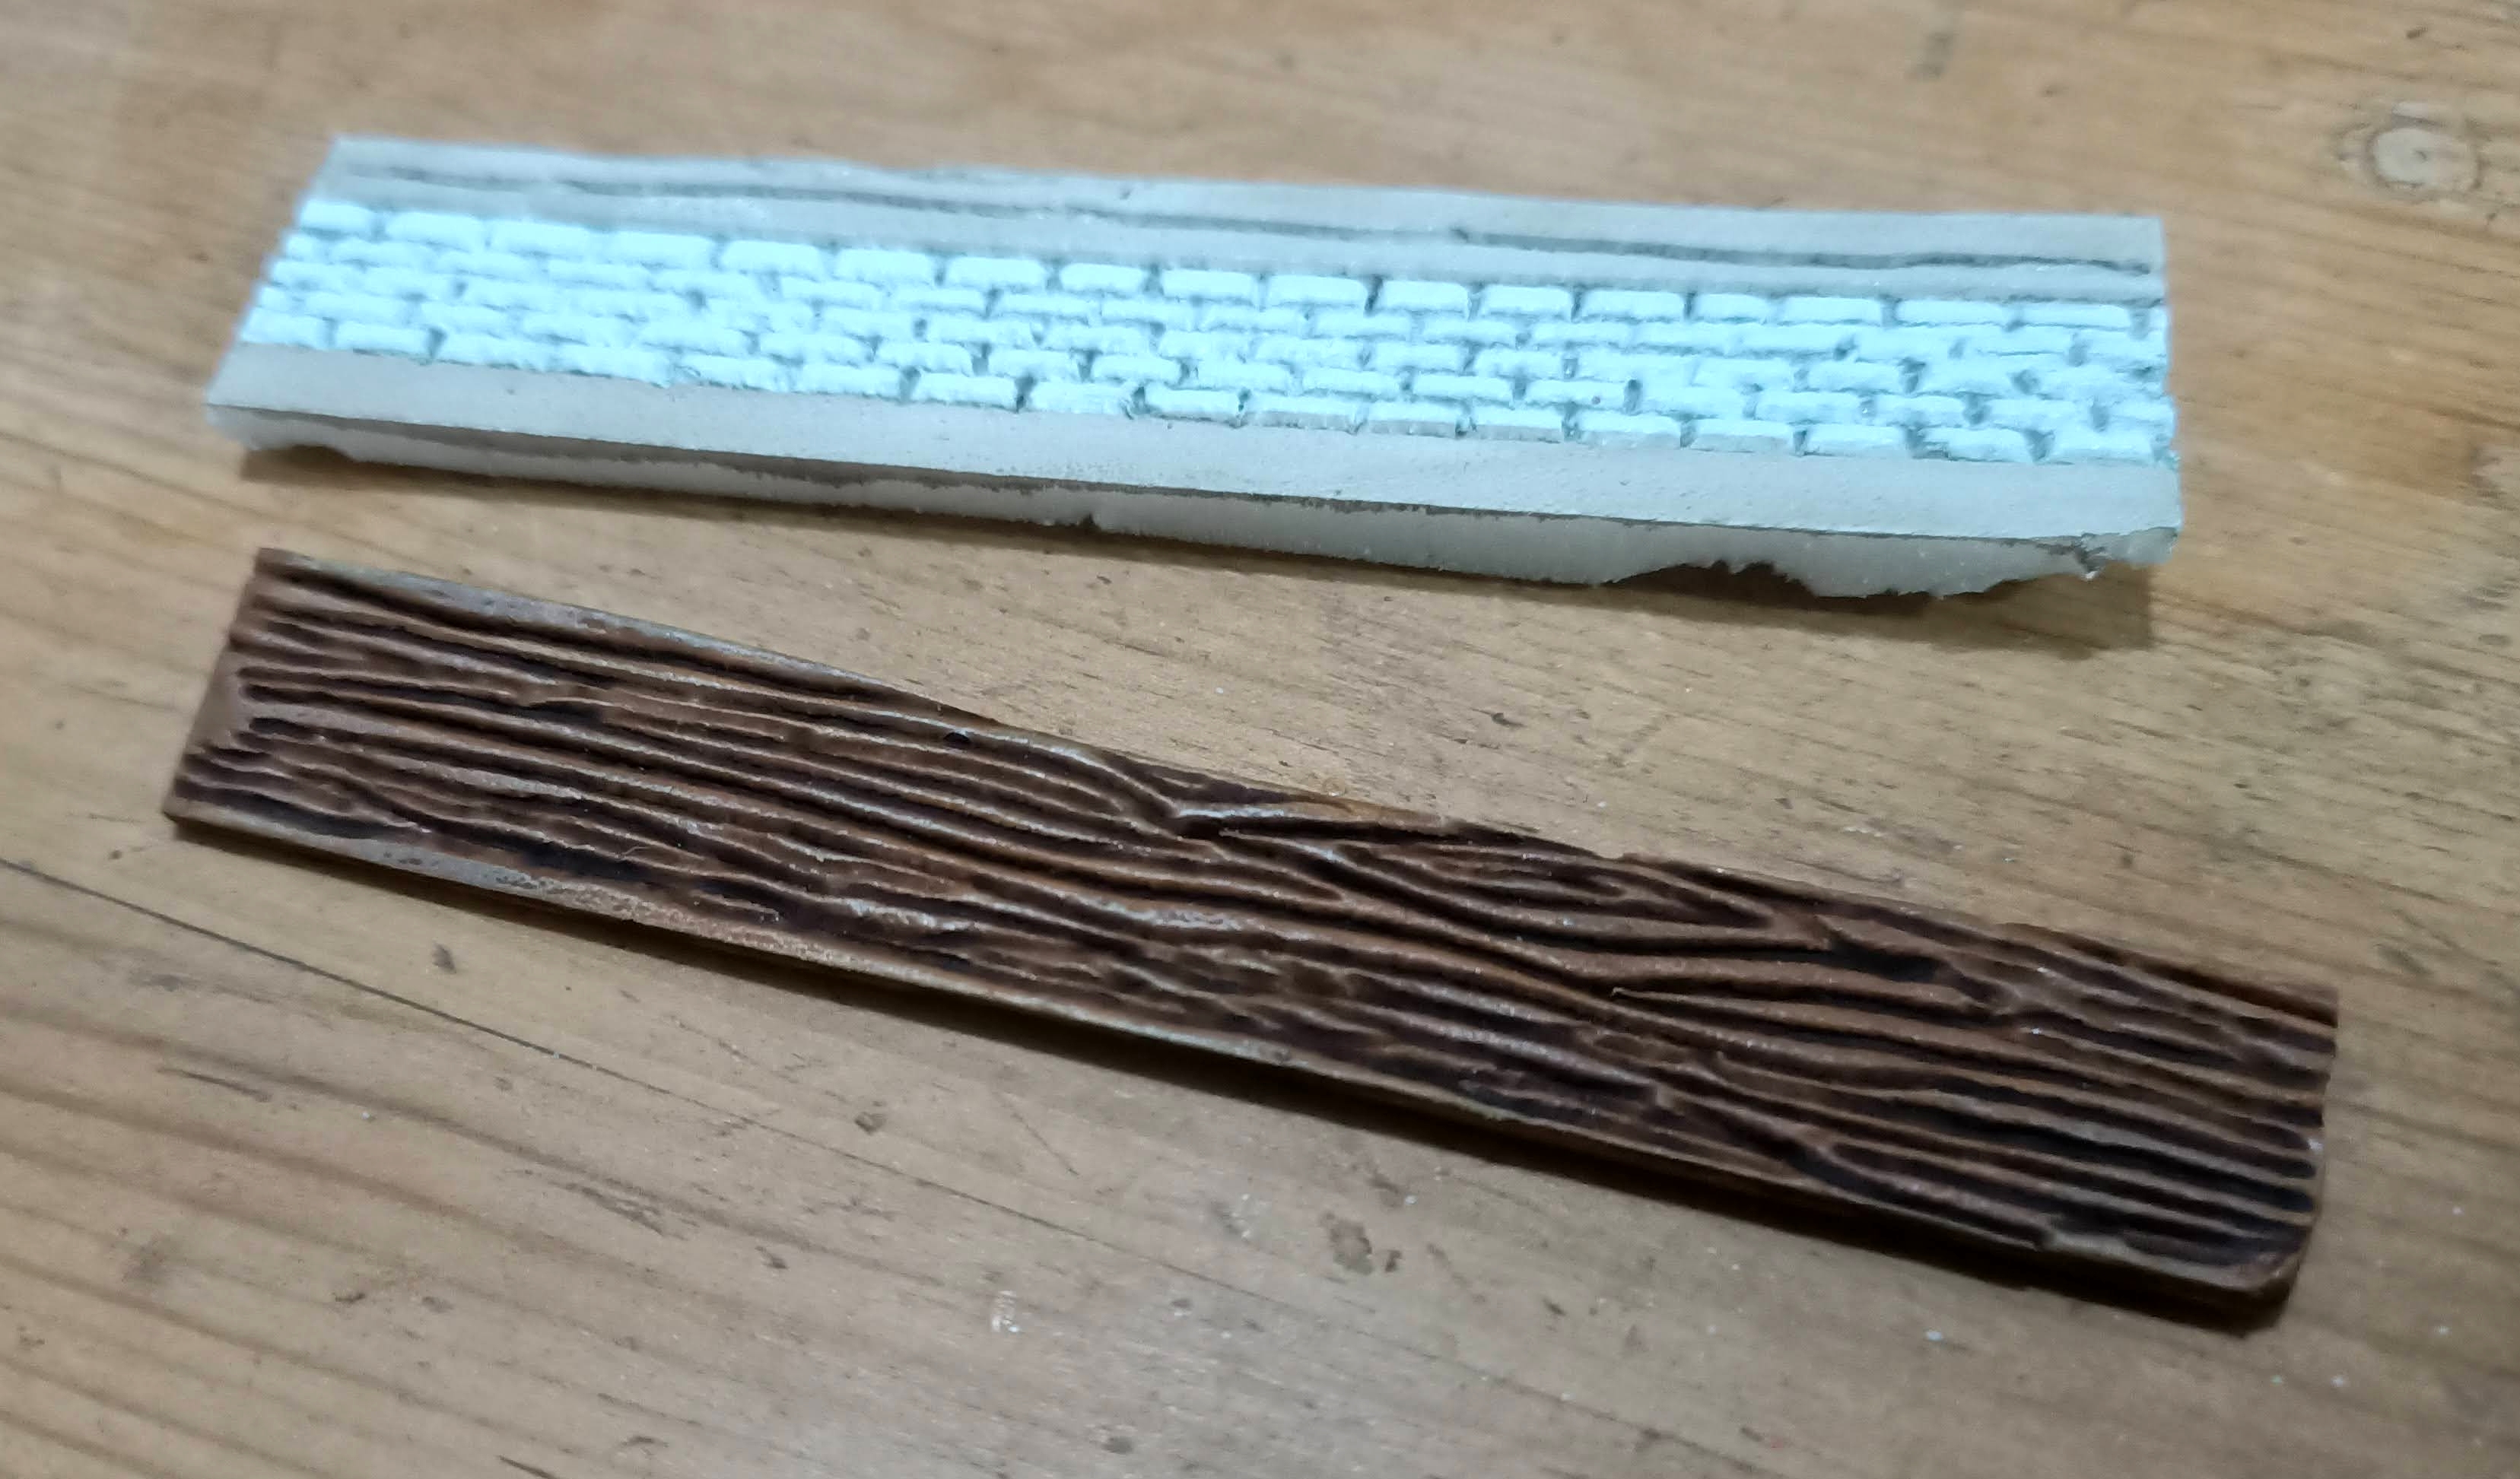
The newer planks looked much more like old, slightly rotten wood, with the grain broken in lots of places. They still looked like wood – just not quite the nice, crisp, slightly-cartoon-y planks that got me so excited about this project in the first place.
After asking around on the forums, the general consensus is that tearing is just something that happens with styrofoam. It can be mitigated by scoring with a knife before drawing but it’s still something that can’t be entirely eliminated.
So I came up with a plan…..
Using the existing power supply
I’d already invested more time in my hot wire cutter than I had hoped to. But I also had a variable power supply that could be used for any project, not just a hot wire.
And given that the hot wire is literally just a wire with a DC current running through it, and given that most of my electronics projects in the last six months have involved taking simple designs and trying to make them as small as possible, I figured that a tiny little hot wire shouldn’t be difficult to acheive.
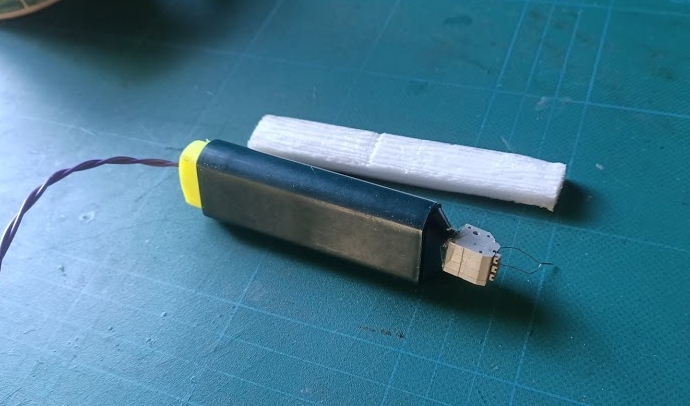
So I took a highlighter pen, cut the end off and hollowed it out. Then I got out the Mr Muscle and a load of kitchen roll and cleaned up all the flourescent yellow ink that got everywhere. A hole in the bottom meant I could run a couple of wires through the body of what was once a pen.
These wires were then connected to a quick-release wire terminal block.
I had no idea how I was going to fashion a nib, other than it was most likely going to involve (yet more) vape-coil wire. But knowing that I’d likely need to change the nib (or even replace the wire if it burnt out easily) I thought it best to use a terminal block to connect it to the wires, so the vape-wire could be removed easily if necessary.
I made a small loop of Nichrome wire and pressed the centre-point with a pair of pliers, to make the bend as sharp and as tight as possible.
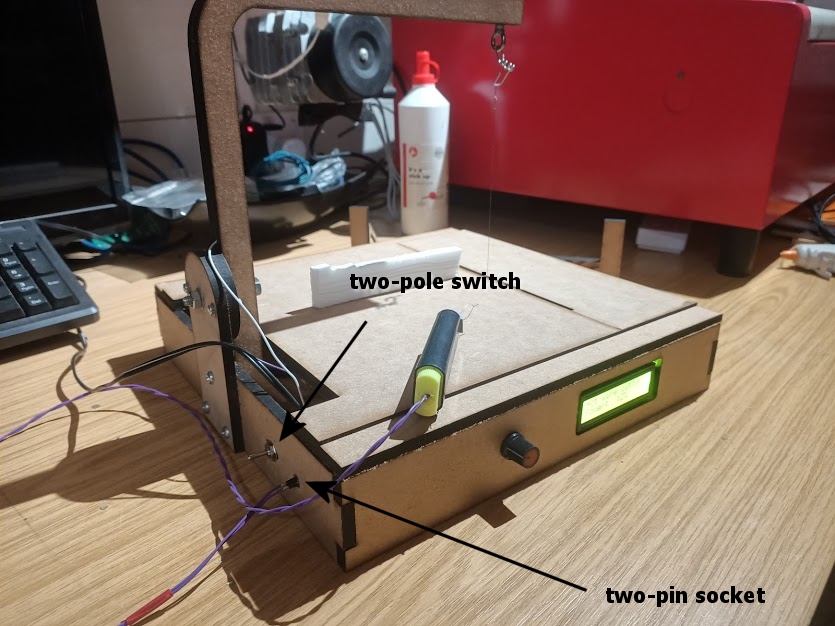
I then added a two-pole switch at the back of the frame and a two-pin socket. A few minutes re-wiring and the switch could now direct power either to each end of the frame (for the hot wire) or to the two pins on the back of the base.
By plugging the “hot pen” into the two-pin socket, I could power it from the same circuit I build for controlling the hot wire.
I tried the hot wire cutter, to make sure I hadn’t knackered the circuitry for the power supply, then flicked the switch.
Fzzzzt, pop! What’s that smell?
The nib of the pen glowed bright orange, then white, then split, then sparked, then nothing. Except a big plume of smoke.
It turns out that only a tiny amount of power is needed for the pen! I usually run the hot wire at between 40% and 70% from a 9V supply. But even at 40%, this was far too much for the tiny coil loop in the pen nib.
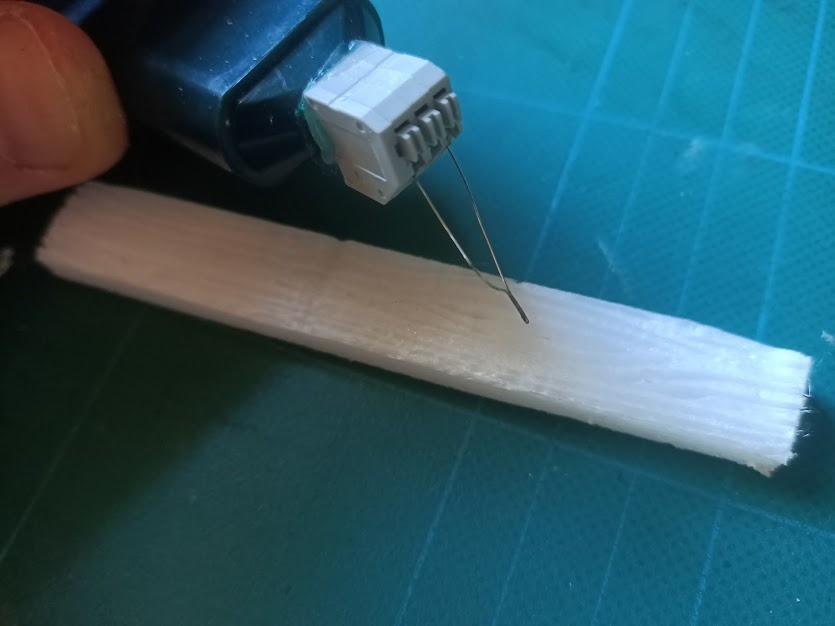
With a bit of experimenting, I found that I could “draw” on the styrofoam with as little as 4% power. Around 8%-10% gave a nice, broad line. At just 15% the nib started to glow.
It turned out to be a good job I put the easy-to-change wire terminal on the hot pen after all!
Testing the "hot pen"
I was surprised at how well the pen worked, straight away. I put no planning into the nib, for example, just squashing some vape-coil-wire with pliers and hoping it worked. And it did!
I had to play with the power settings to find the right range (4% to 15% seemed to be the absolute minimum and maximum values for the working range). But once these had been worked out, I was creating all kinds of wood grain effects!
At the lowest power setting, the wood grain could be drawn very tightly together, with quite thin lines. As the power was increased, the width of the line also increased.
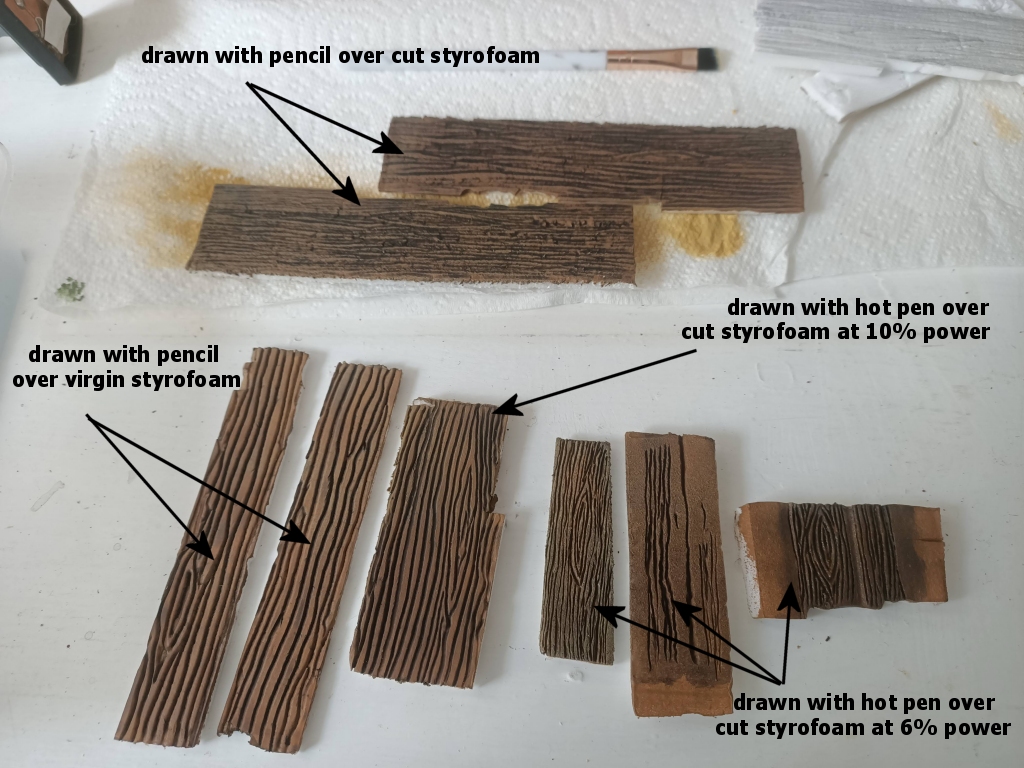
In the photo above all the “planks” have been painted the same way:
- Primed with Coat D’Arms “smelly primer”
- Painted with Coat D’Arms “leather brown”
- Washed with Army Painter water-based Quick Shade Strong Tone
- Drybrushed with Coat D’Arms “putrid brown”
I felt that the thinner lines (drawn at 6% power) looked more realistic after being painted. But I actually preferred the slightly thicker lines (drawn at 10% power) – they looked closer to the original pencil over “uncut” styrofoam that got me so excited about this project in the first place.
Yes, it’s a slightly cartoon-y look – but I’ve spent months trying to fight the cartoon style, yet all of my minis end up that way; it’s just the way the paint comes out of my brush – so I’m learning to embrace it, instead of trying to fight it all the time!
I’ve no idea just yet how I’m going to use the hot pen with a ruler to create straight lines (for brickwork, for example). But for now, I’ll just have to content myself making lots of foam-based wood effects!


