
![Pure Sci-Fi Nostalgia! War Rocket Review | Hydra Miniatures [7 Days Early Access]](https://images.beastsofwar.com/2026/02/unboxing-hydra-miniatures-war-rocket-coverimage-225-127.jpg)


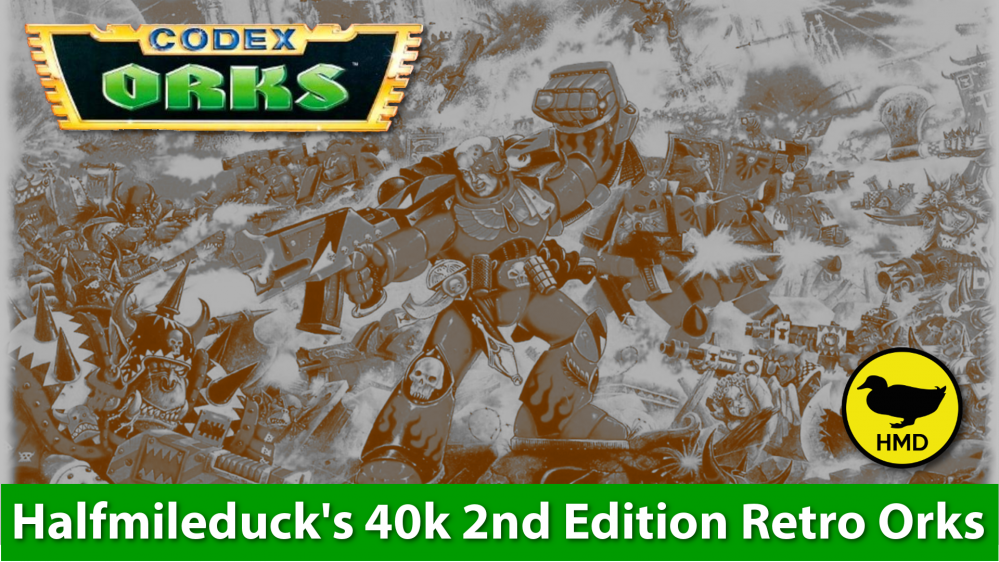
Retro 40k Duck Style


Recommendations: 430
About the Project
A middle aged man attempts to relive his youth via the means of going back to his 2nd edition Orks, cheaper than a sports car!
Related Game: Warhammer 40,000
Related Genre: Science Fiction
This Project is Active
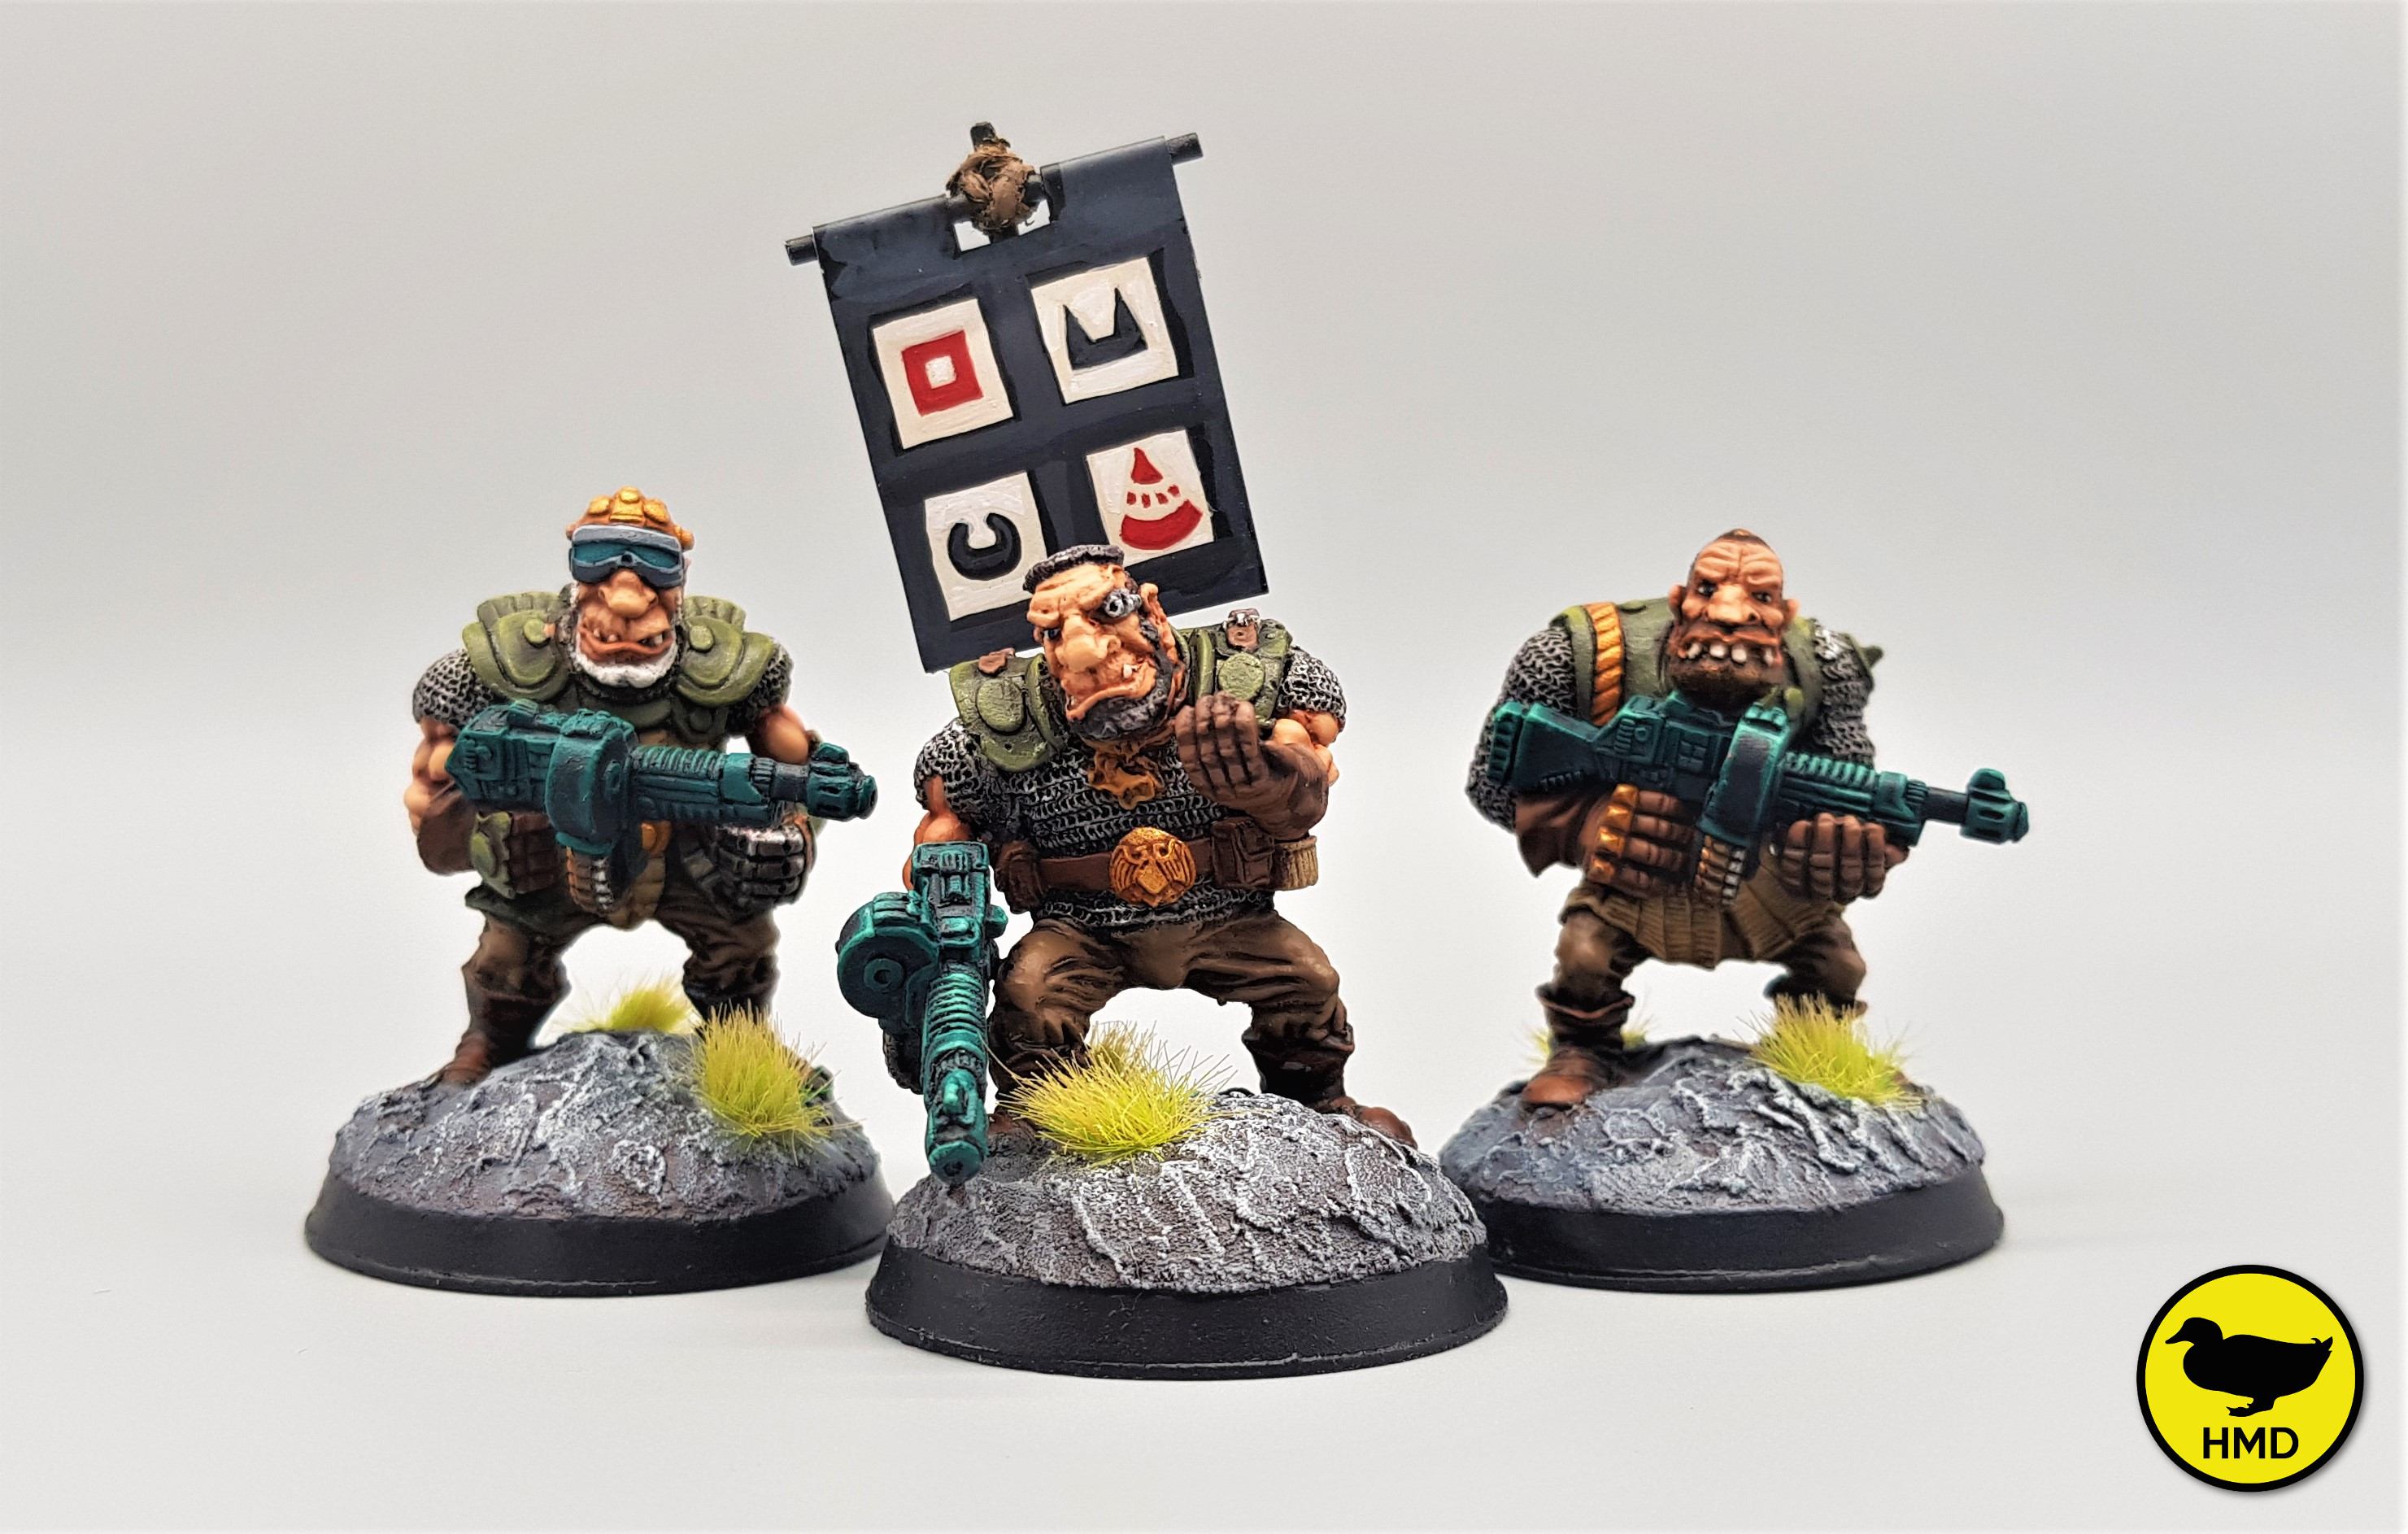
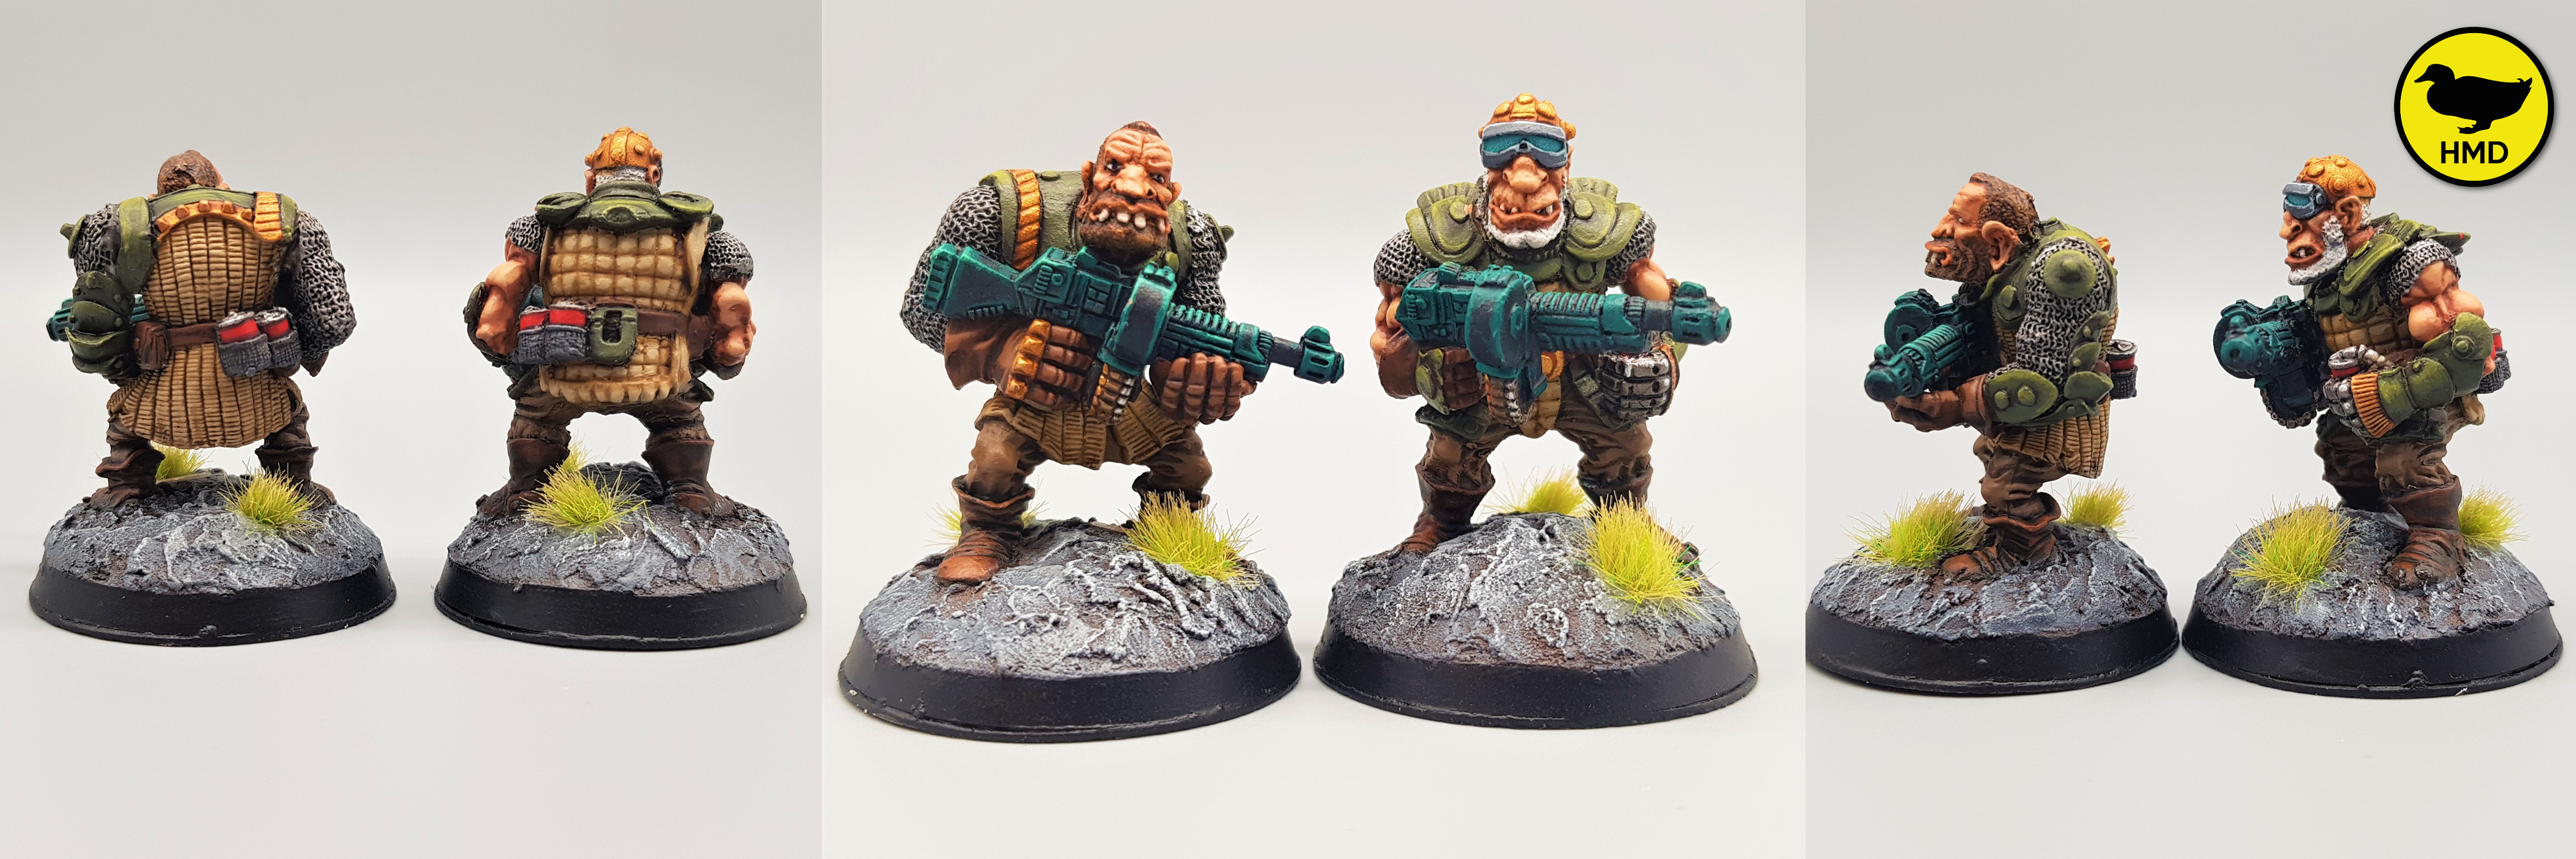
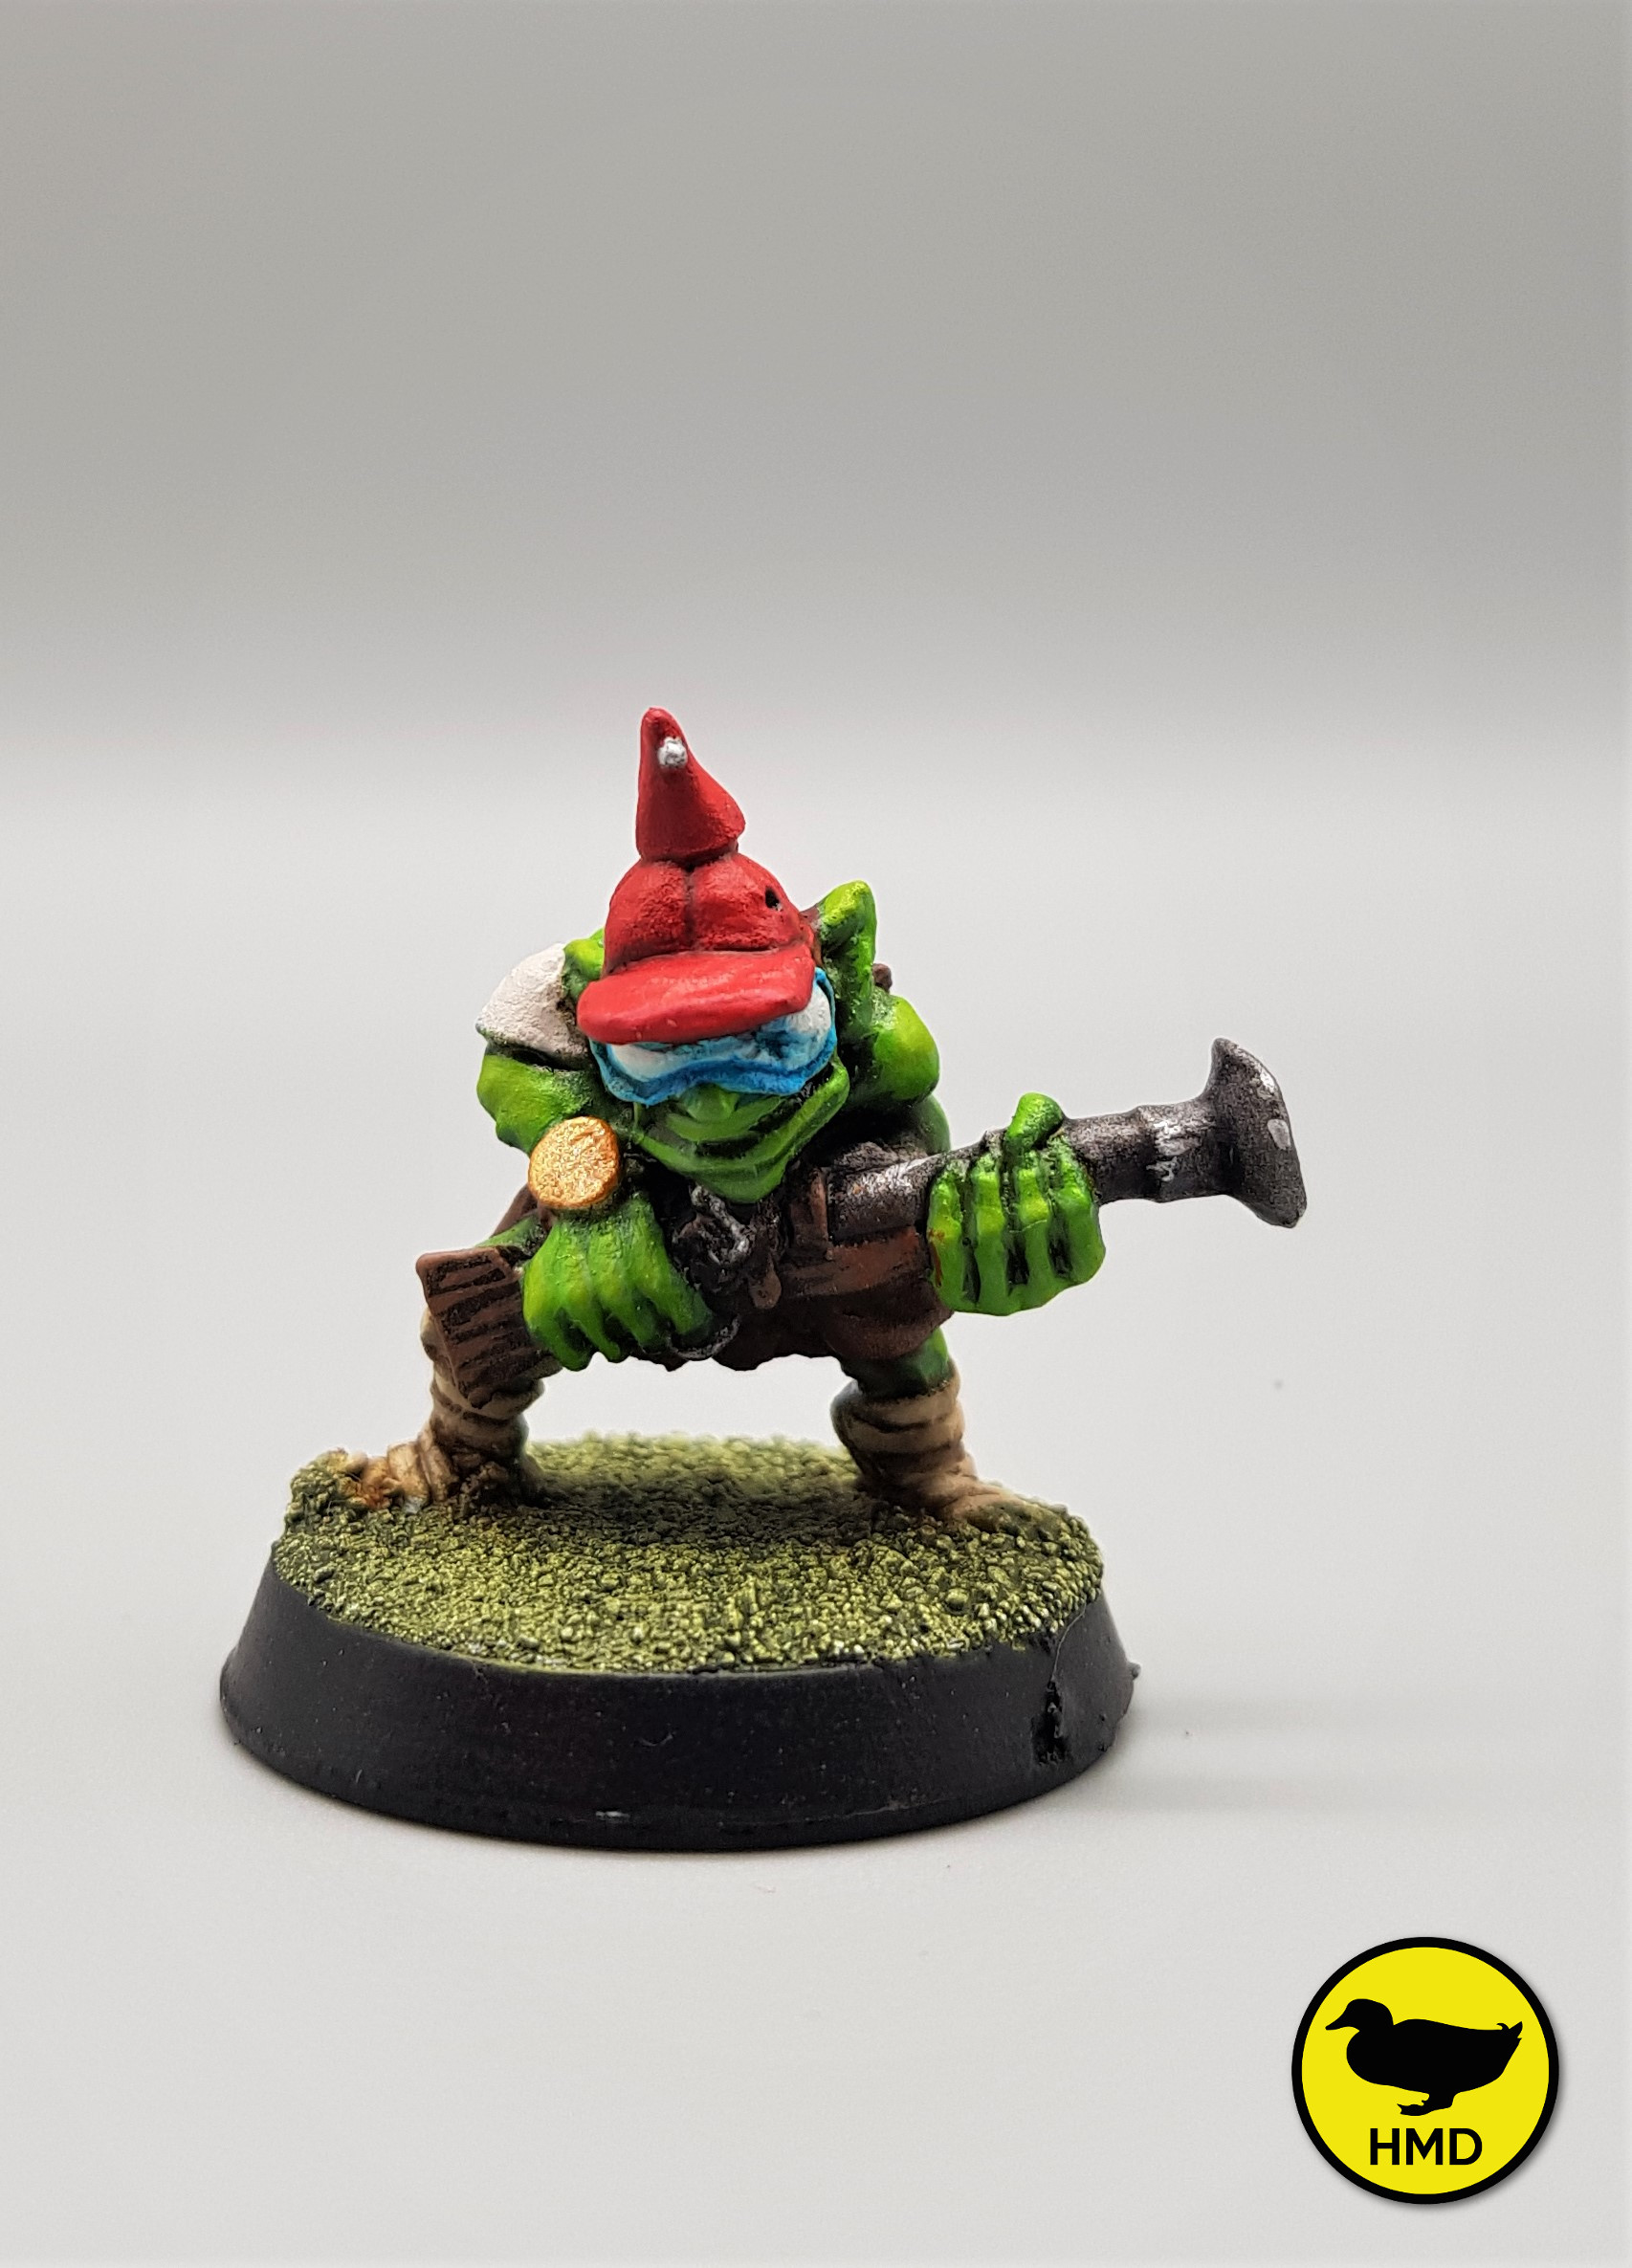
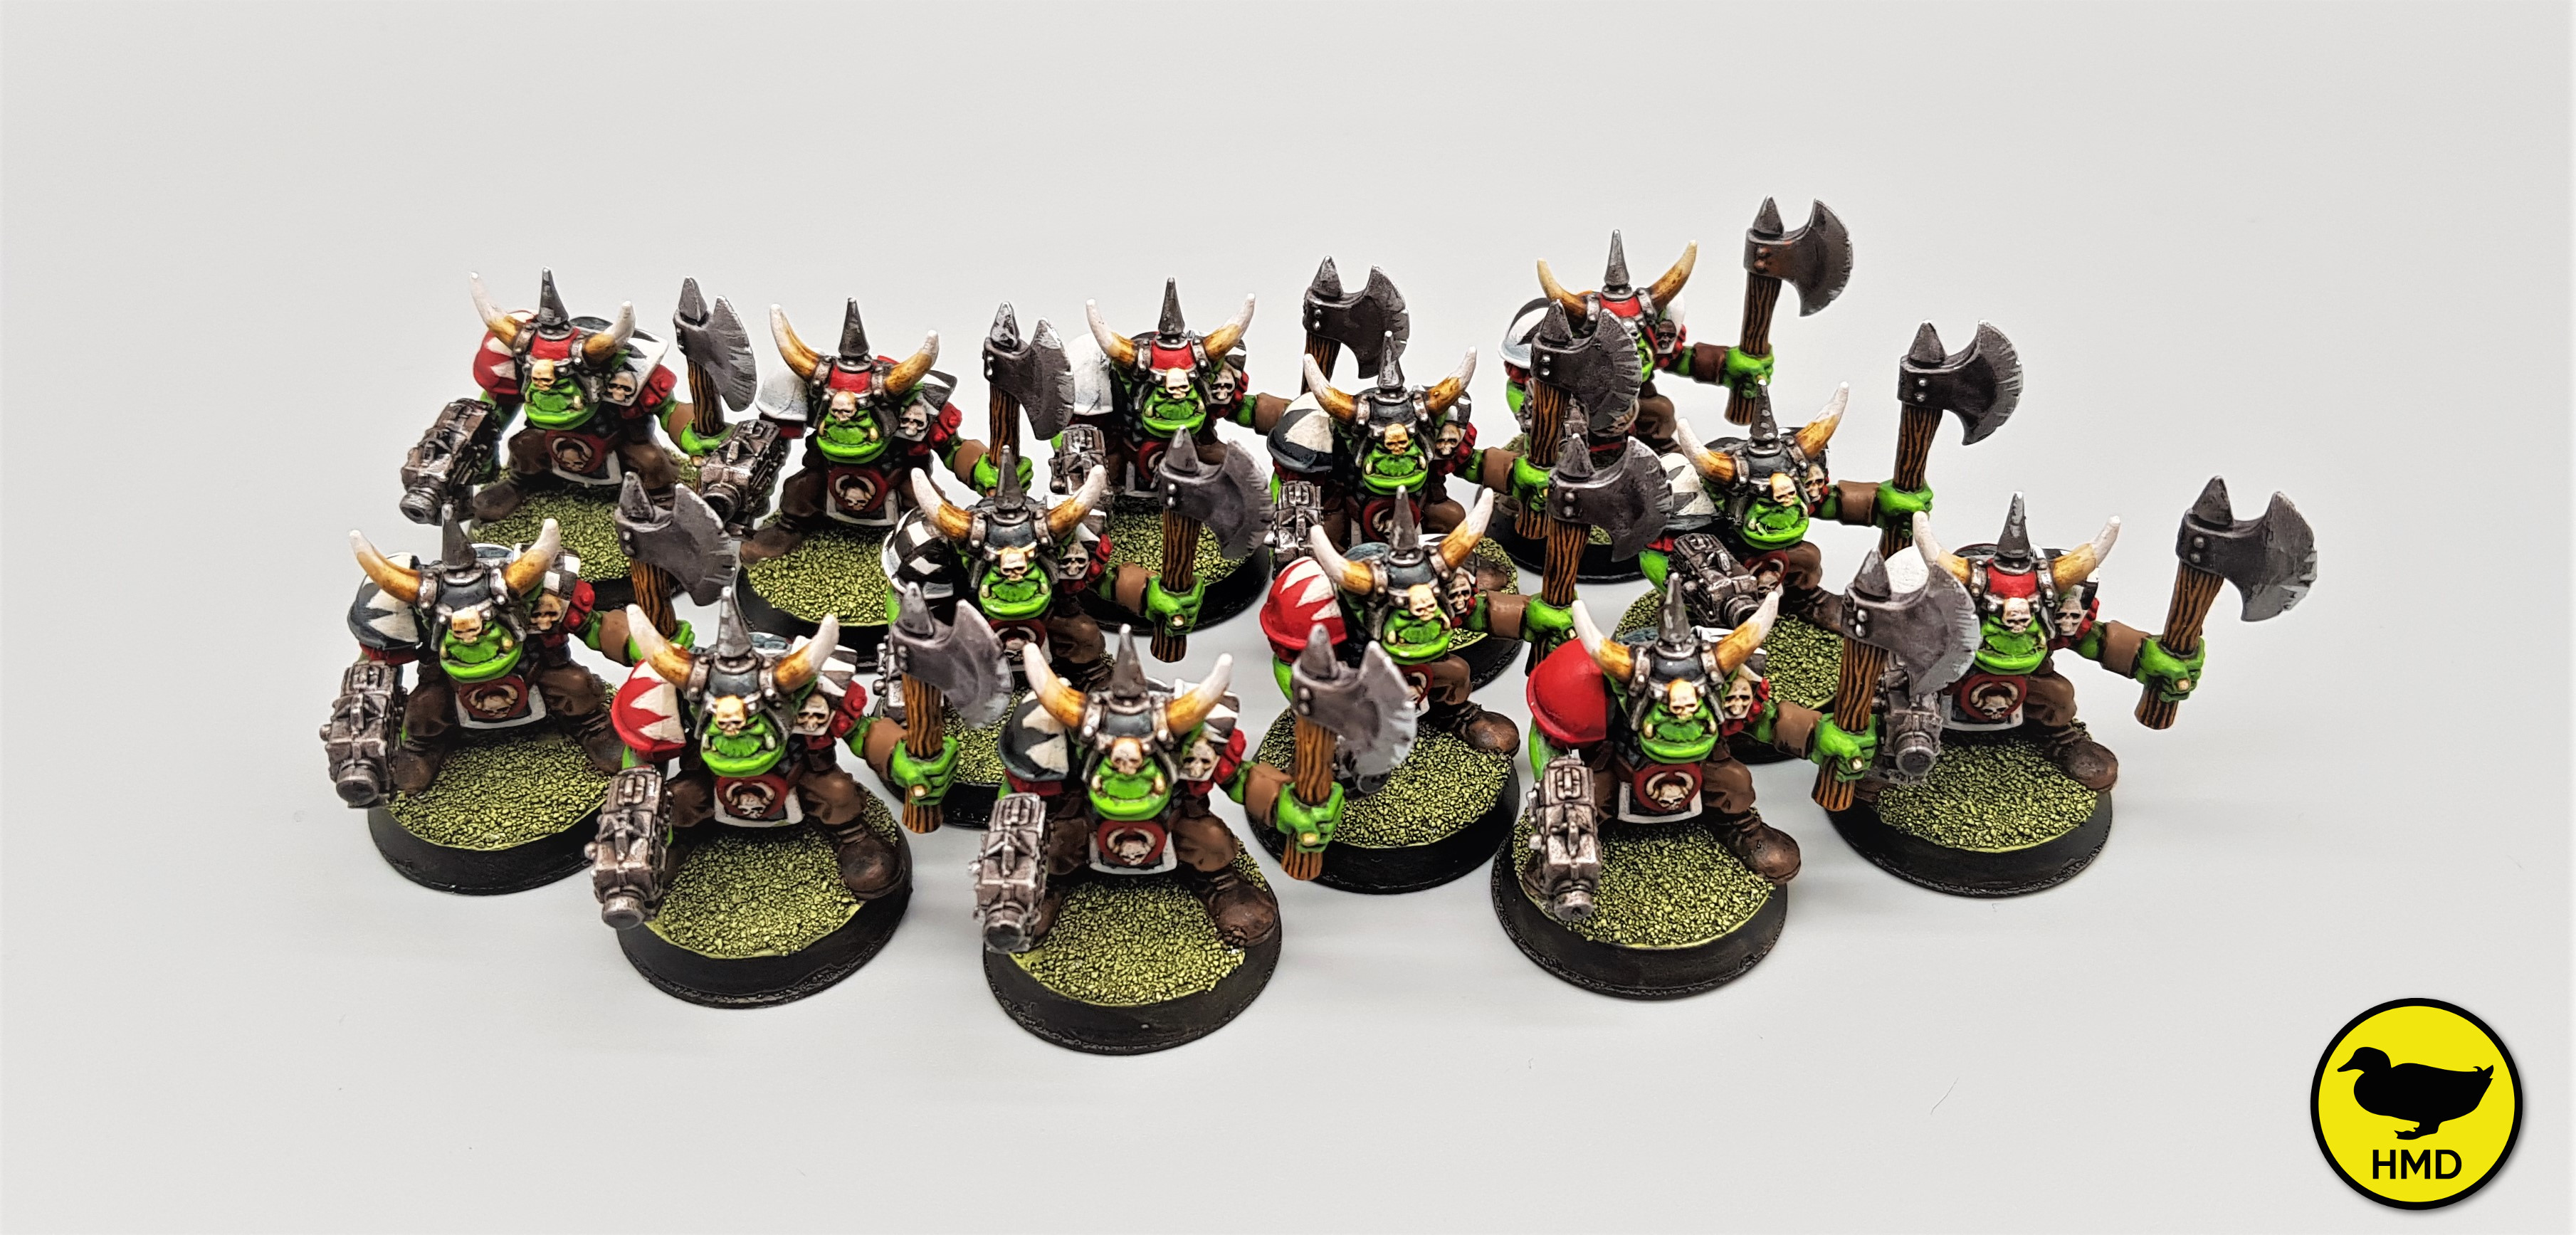
Command Squad Time
So back in the 90’s Orks were BS3, yes they were and they also were allowed to take Ogryns – oh yeah! So I found 3 old metal GW Ogryns in the loft of shame, stripped them and have restored them and an old Ork Warboss (given to me by a very kind old friend) to their rightful glory for use as my Command Squad.
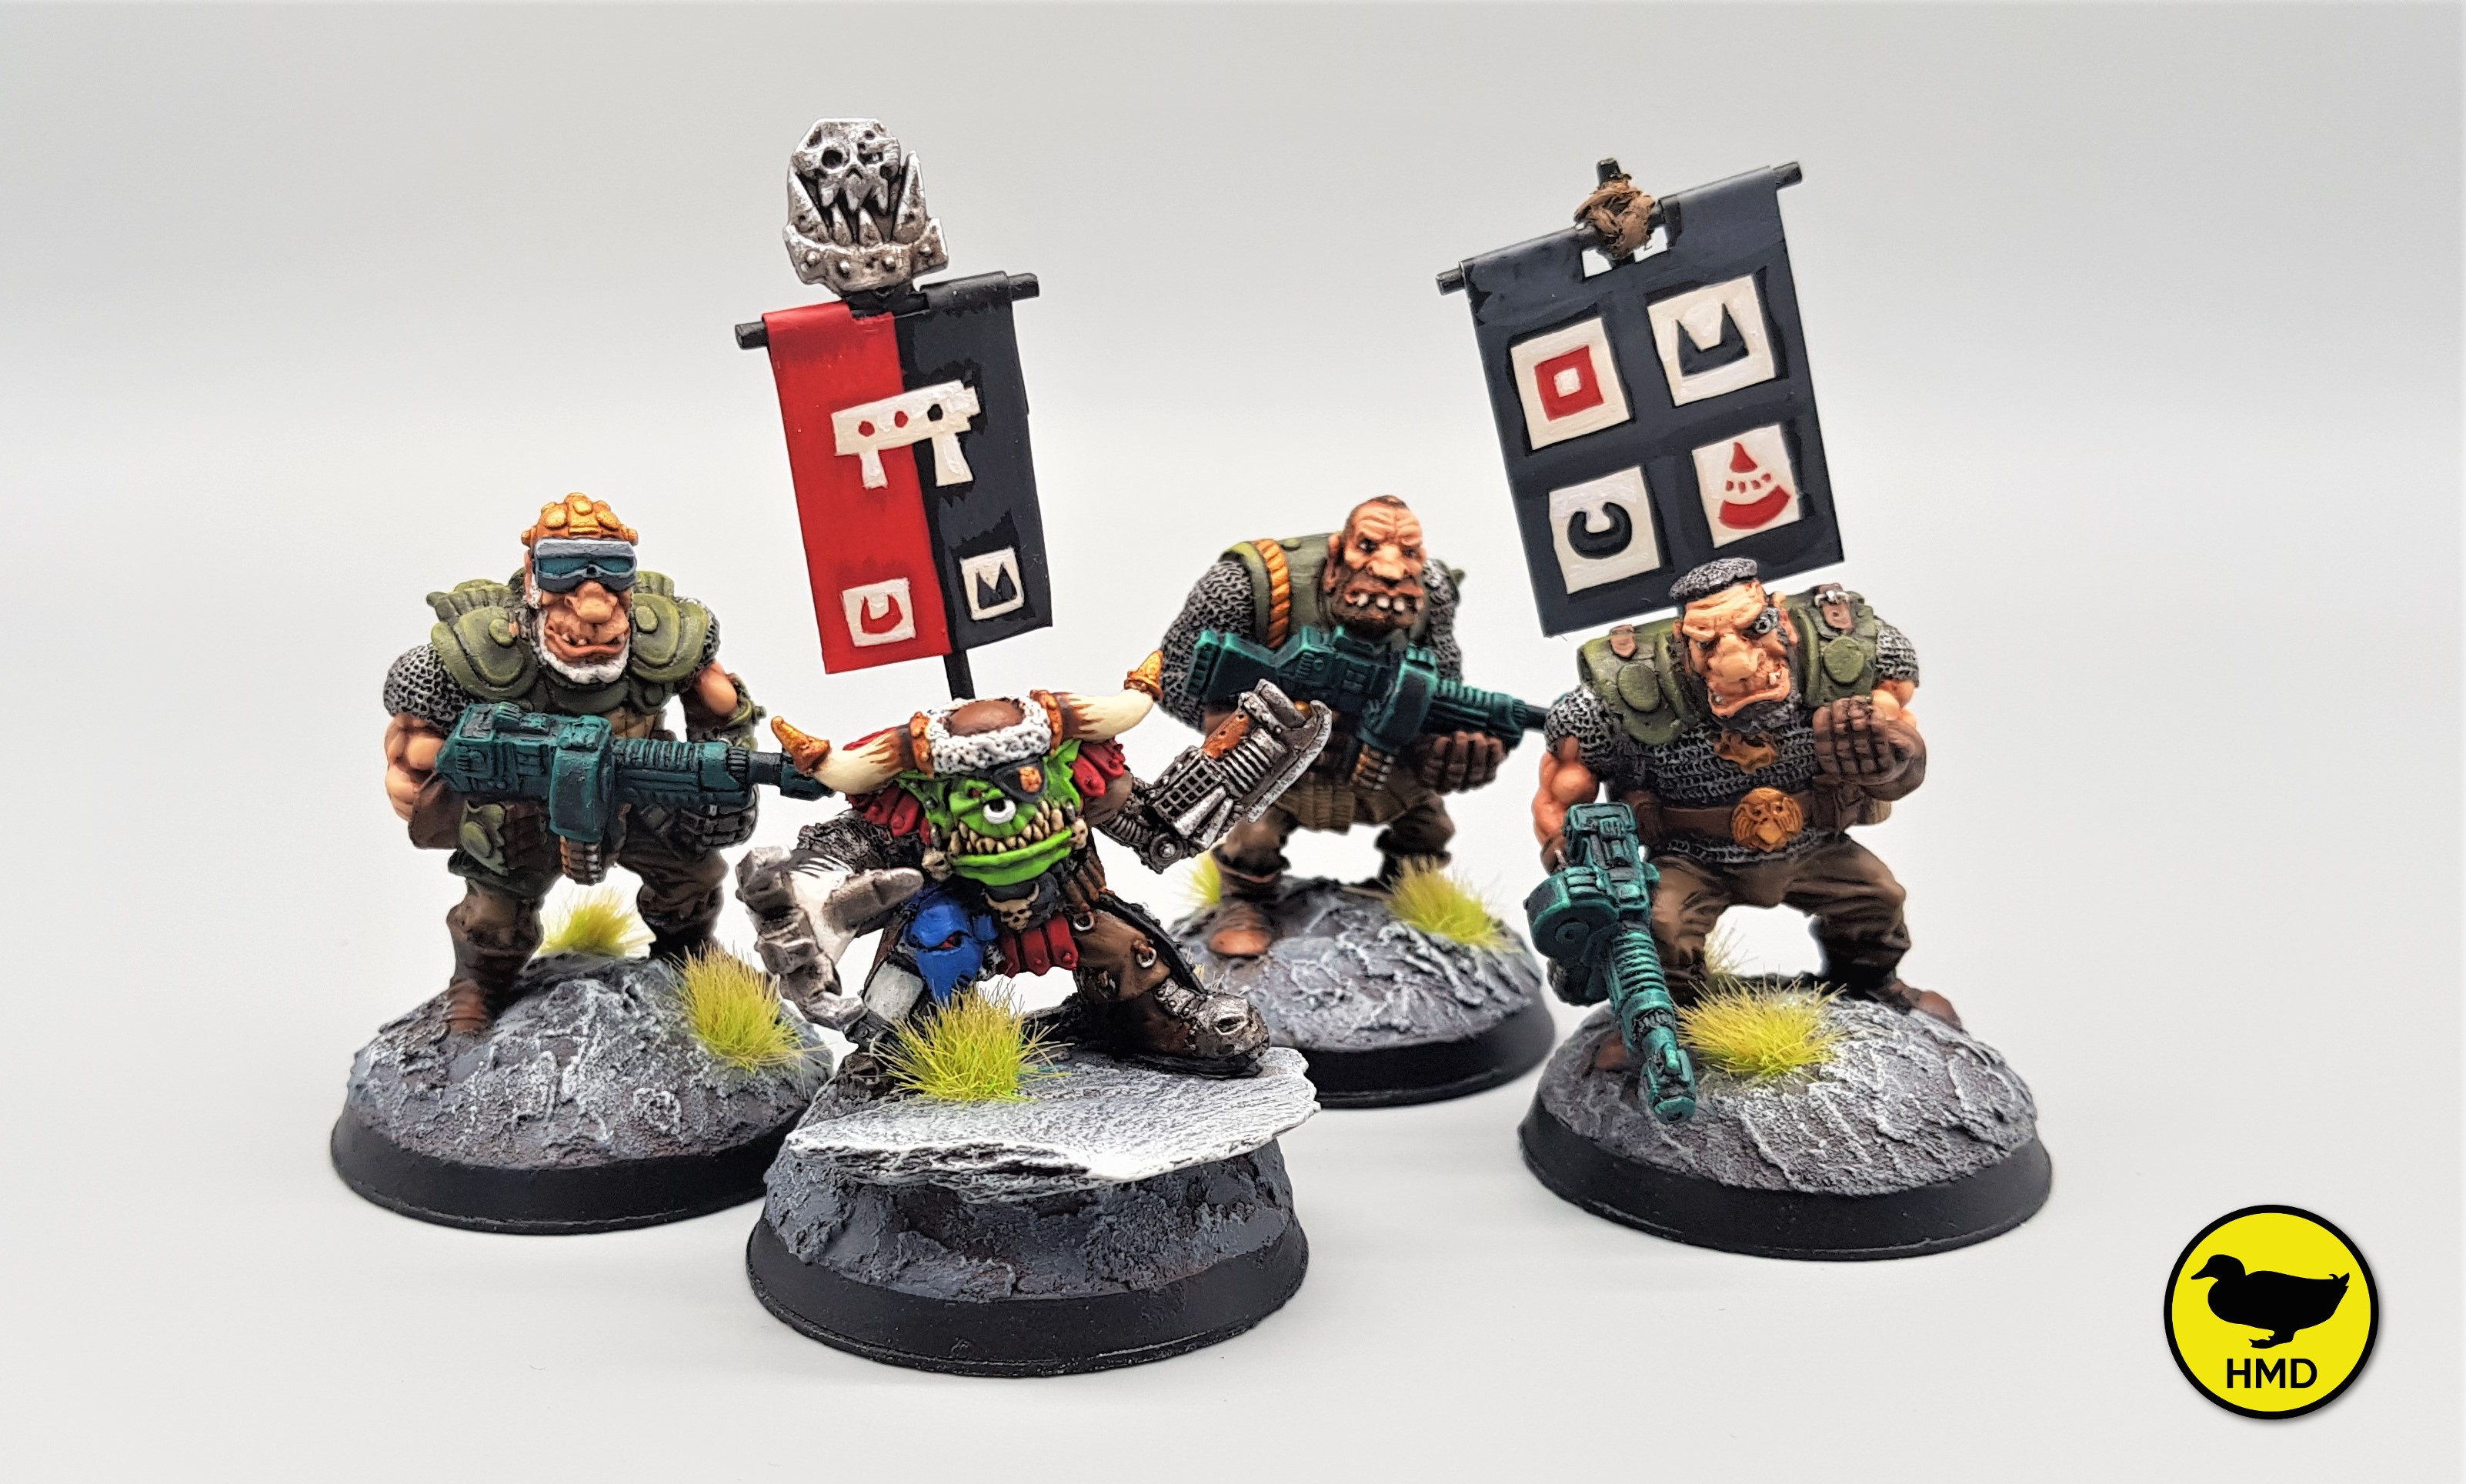
I really enjoyed painting these retro character models, really took me back to what first got me into the hobby. I’m running short of retro Orks and want to add more to the project, but need to source a few extra bits, but please be patient, I will be adding to the project in the future, it just might be a while before my next update. In the mean time, thank you for looking and I hope that you have enjoyed.
HMD
Jungle Trees
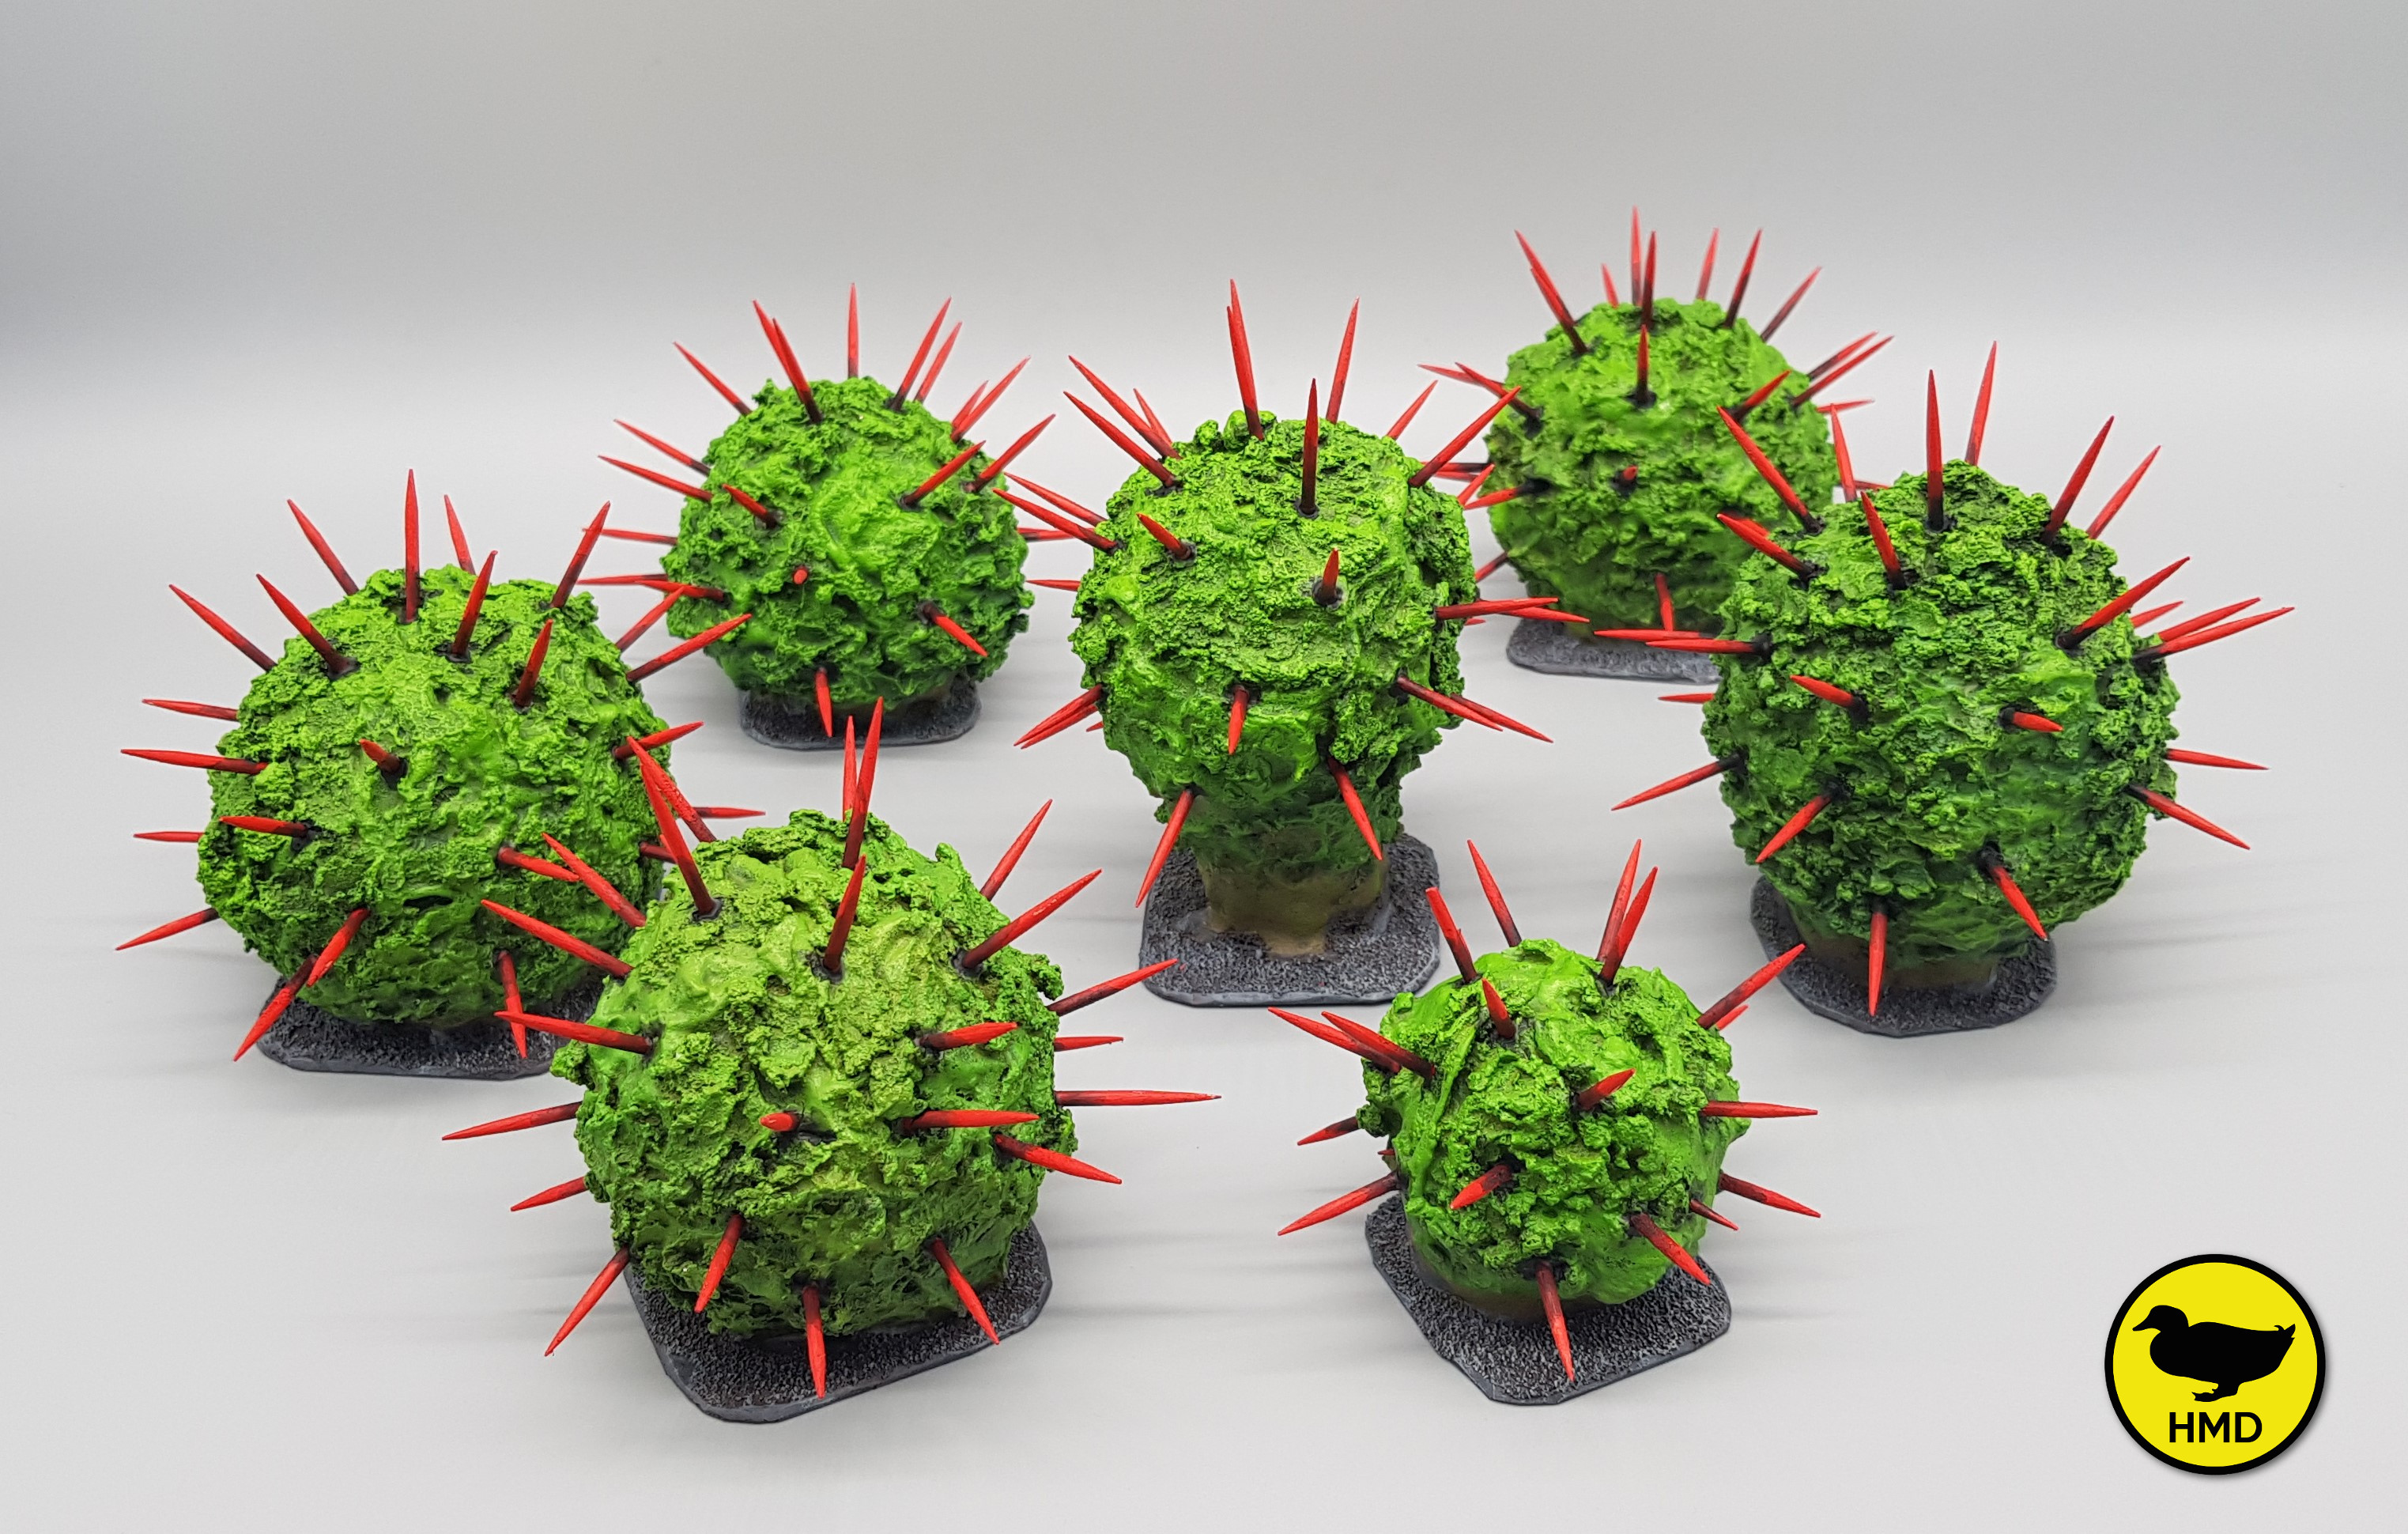
And here are the finished trees, I hope that you like them. I’m starting on a couple character models next and can’t wait to share progress. Hope that everyone made the best of the holiday period and has a better 2021 with more hobby time. Cheers!
HMD
Happy New Year
Hello World,
Long time no update, but rest assured I have been working on some more retro Orks over the holiday period, in addition to the obligatory meat selection and minced pies.
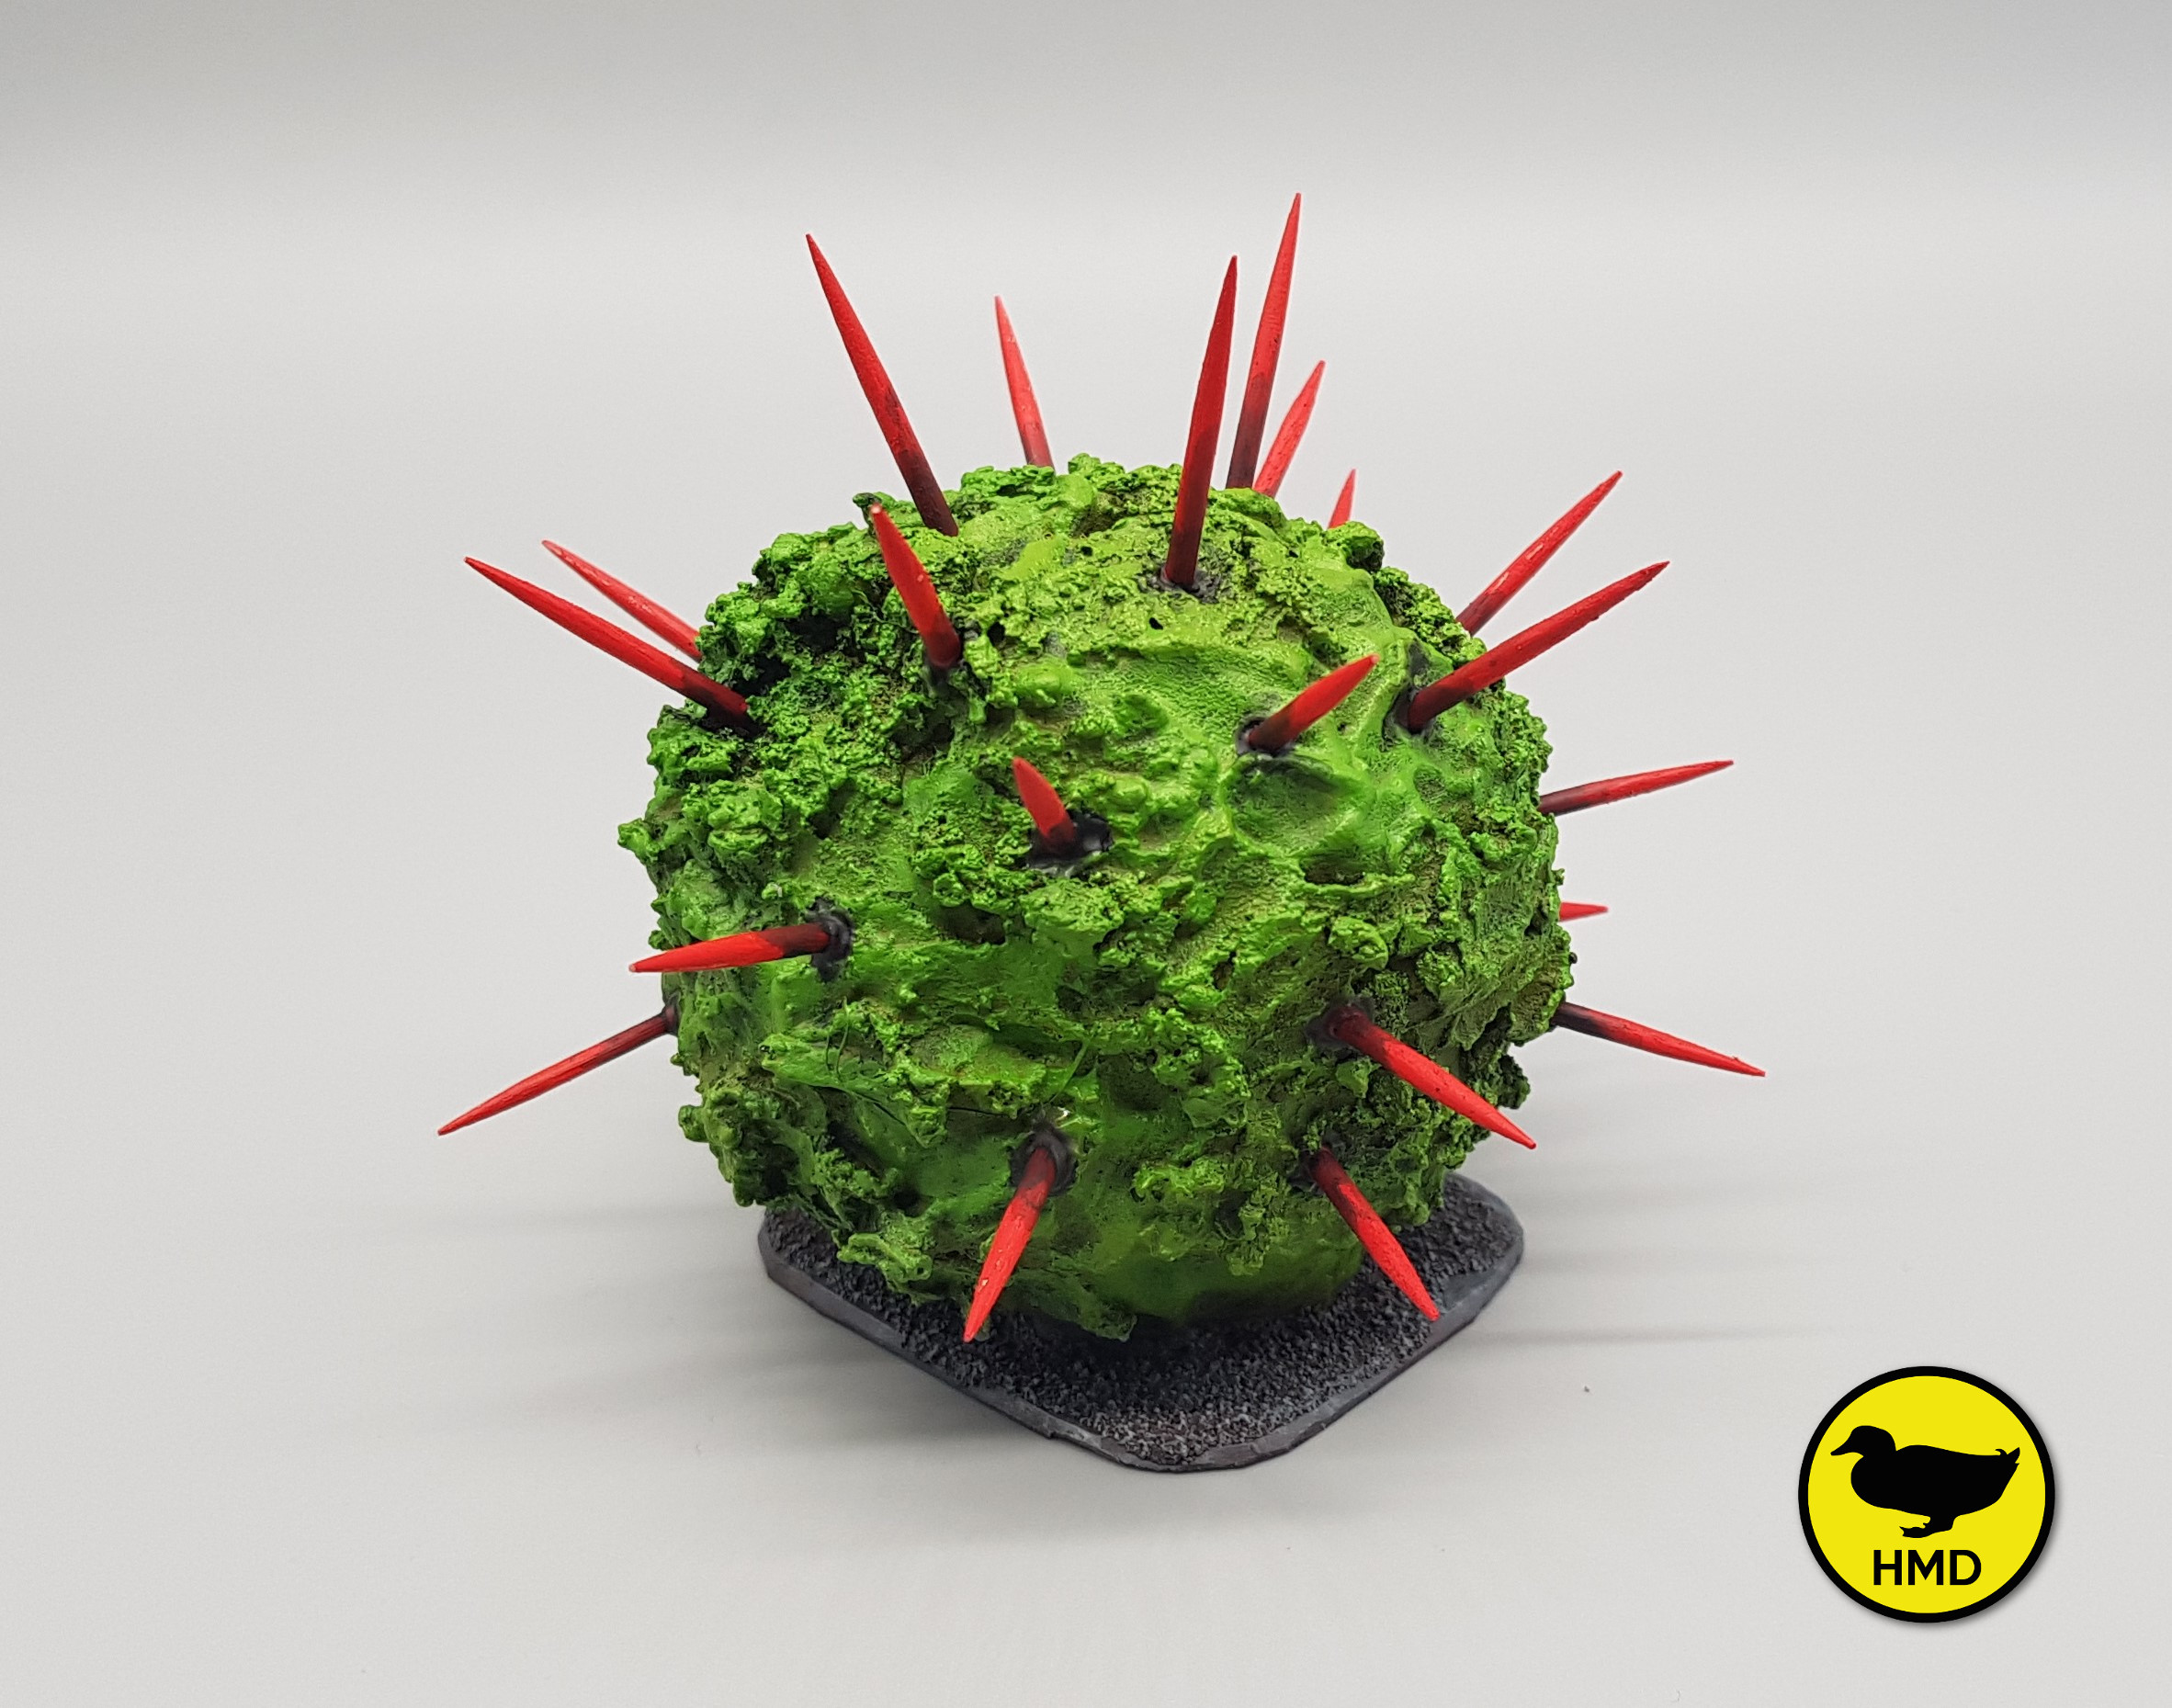
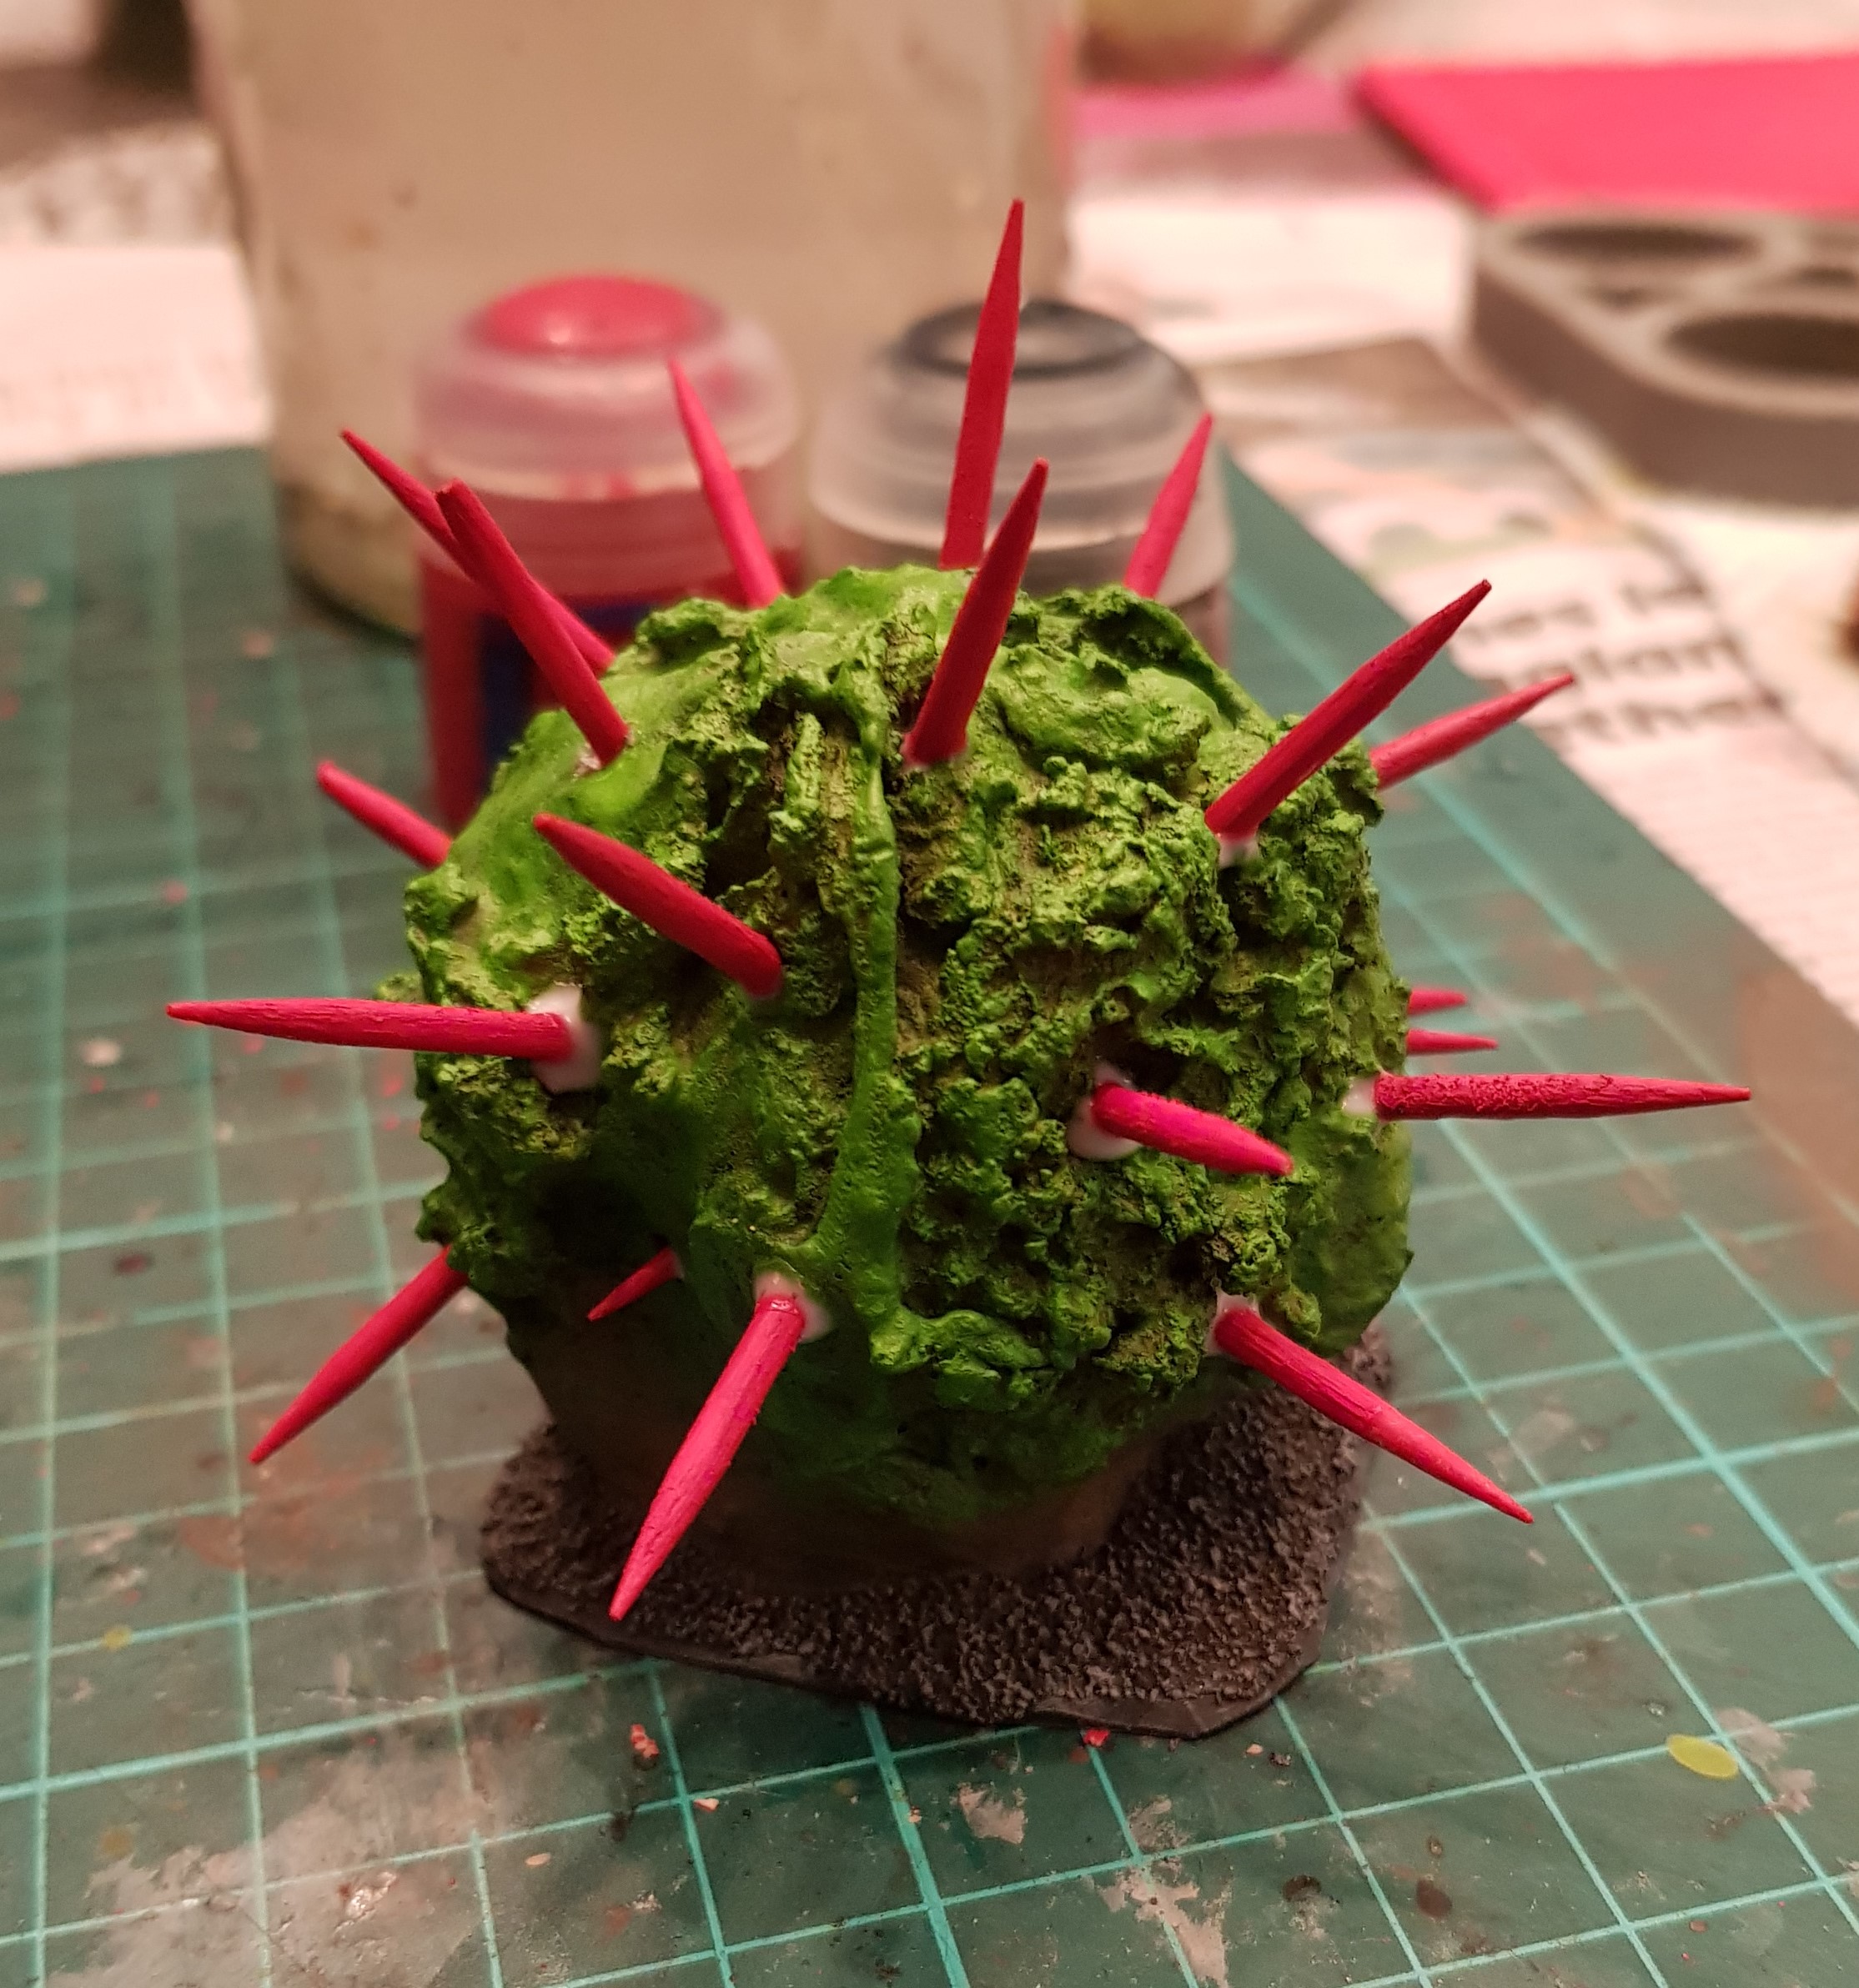
I wanted to add some period terrain to go alongside the models that I have done and what says 90’s 40k better than retro spikey Jungle Trees? I wanted to share my process with you here.
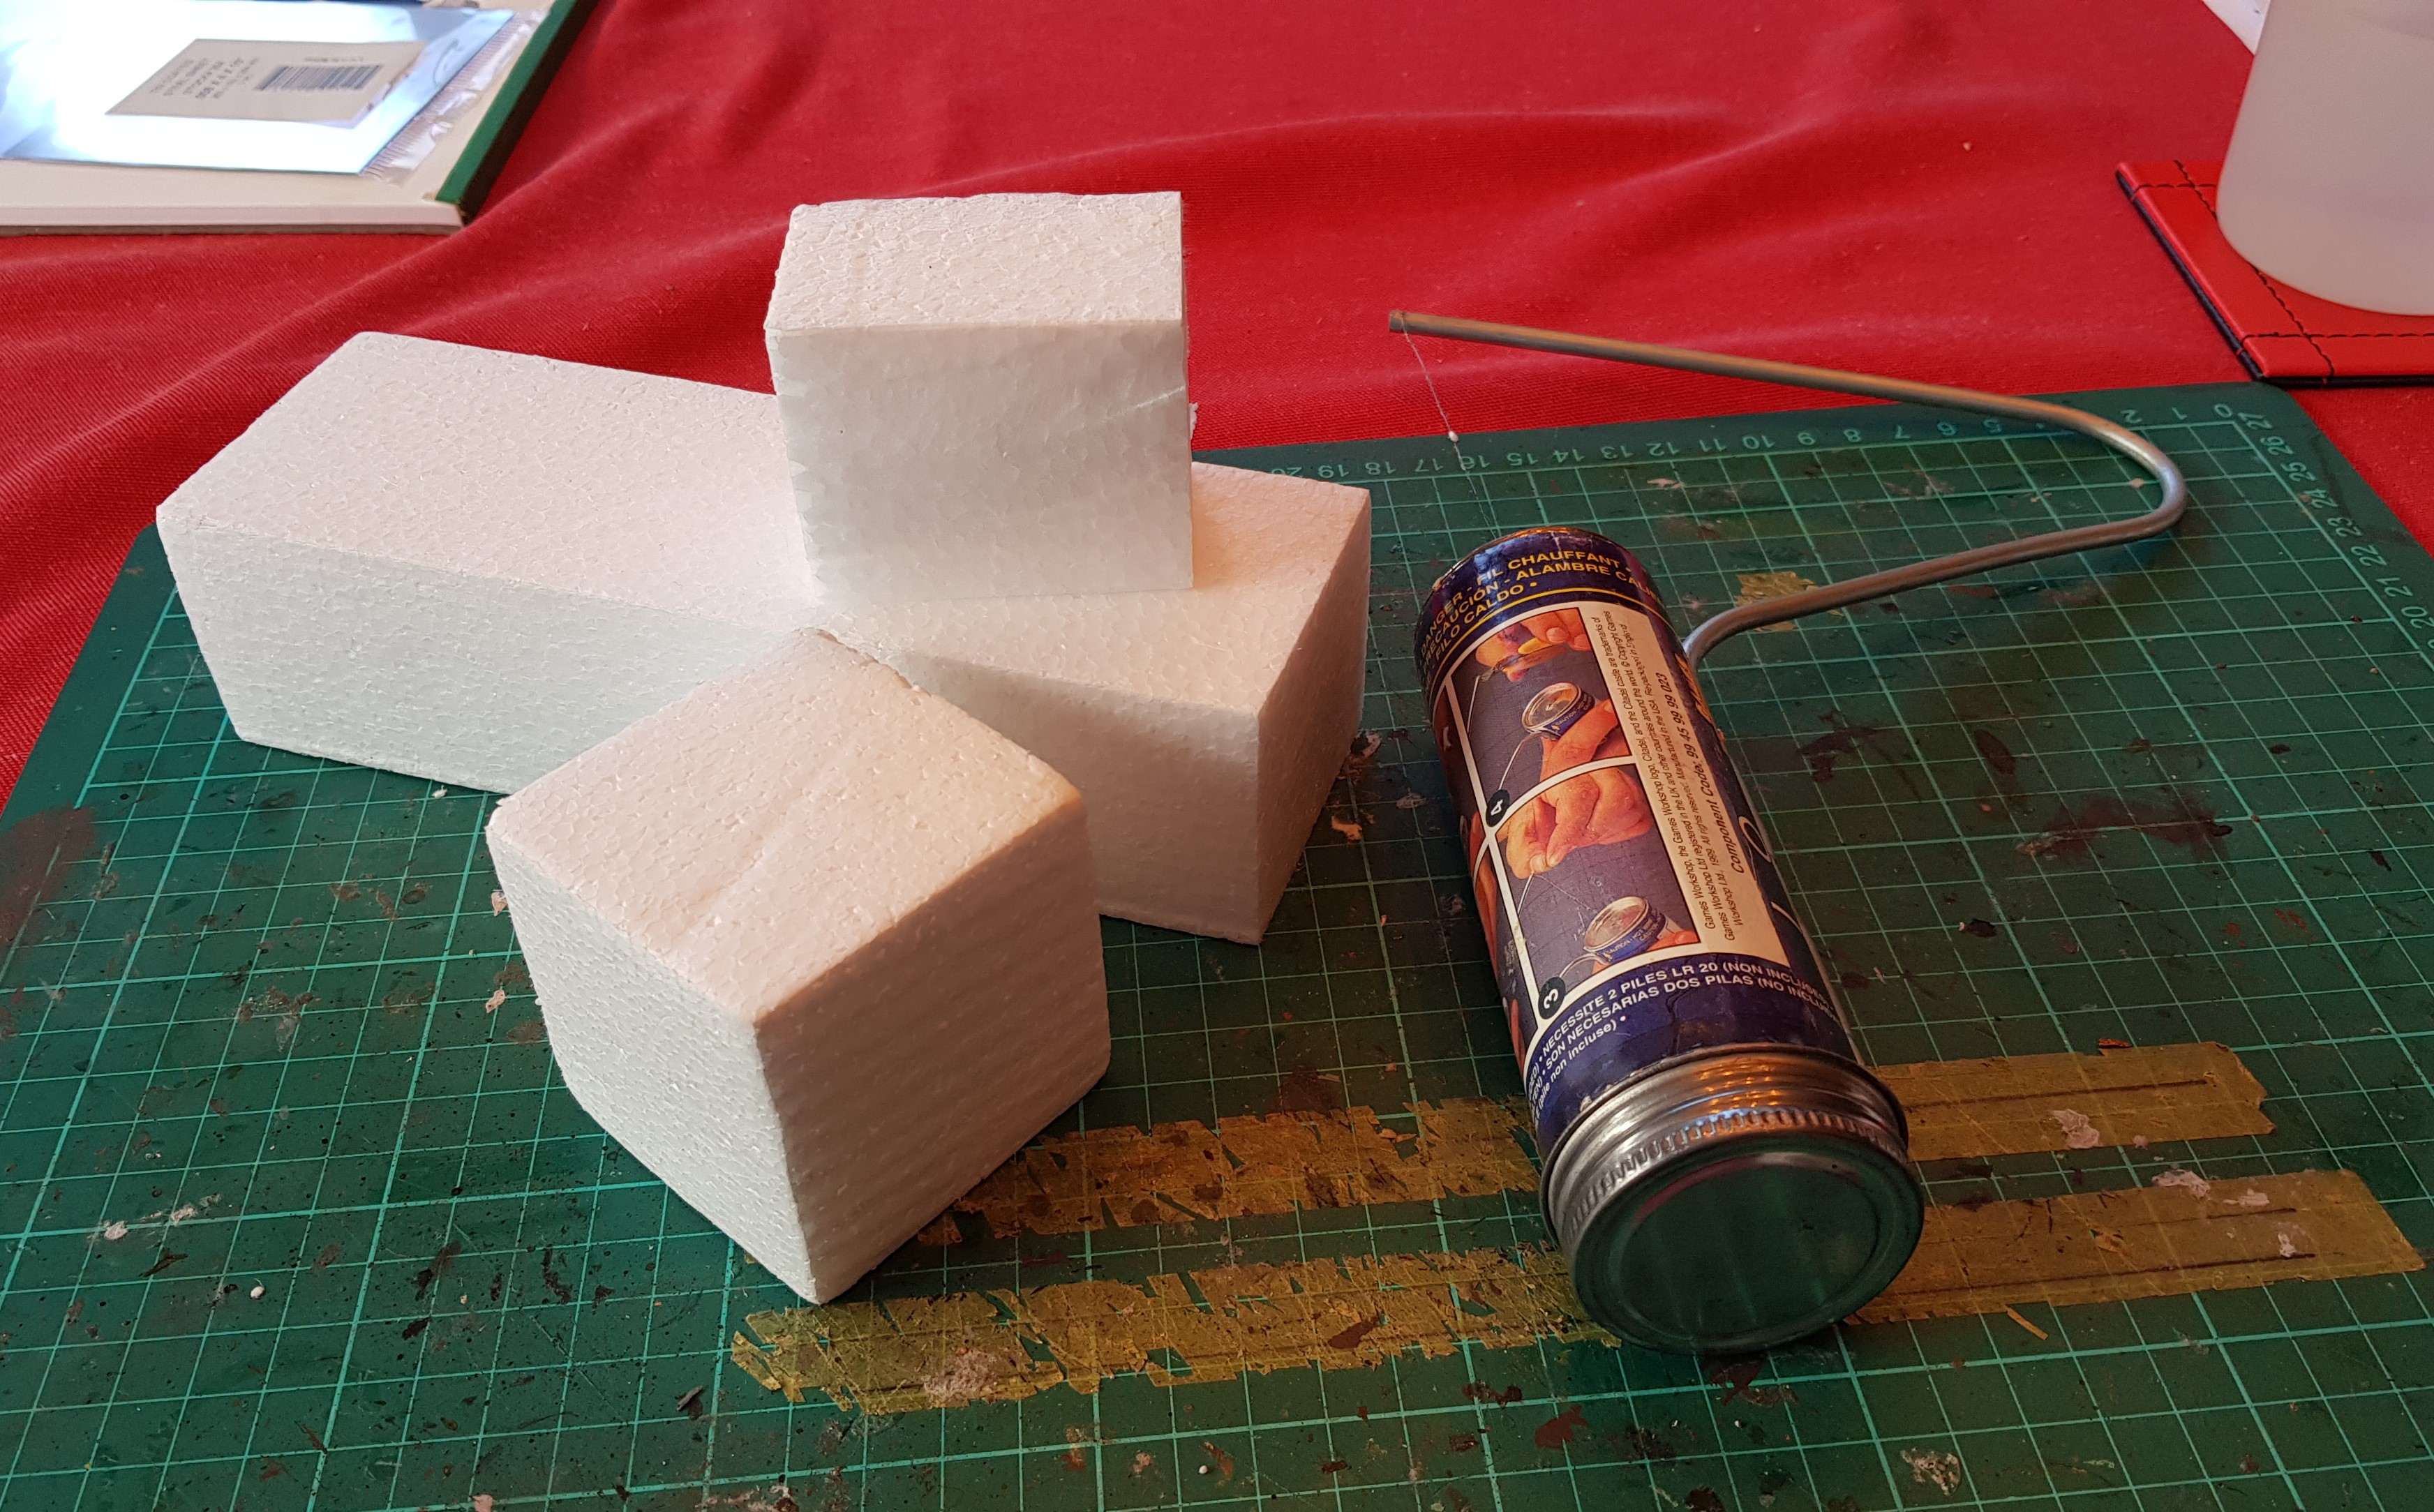
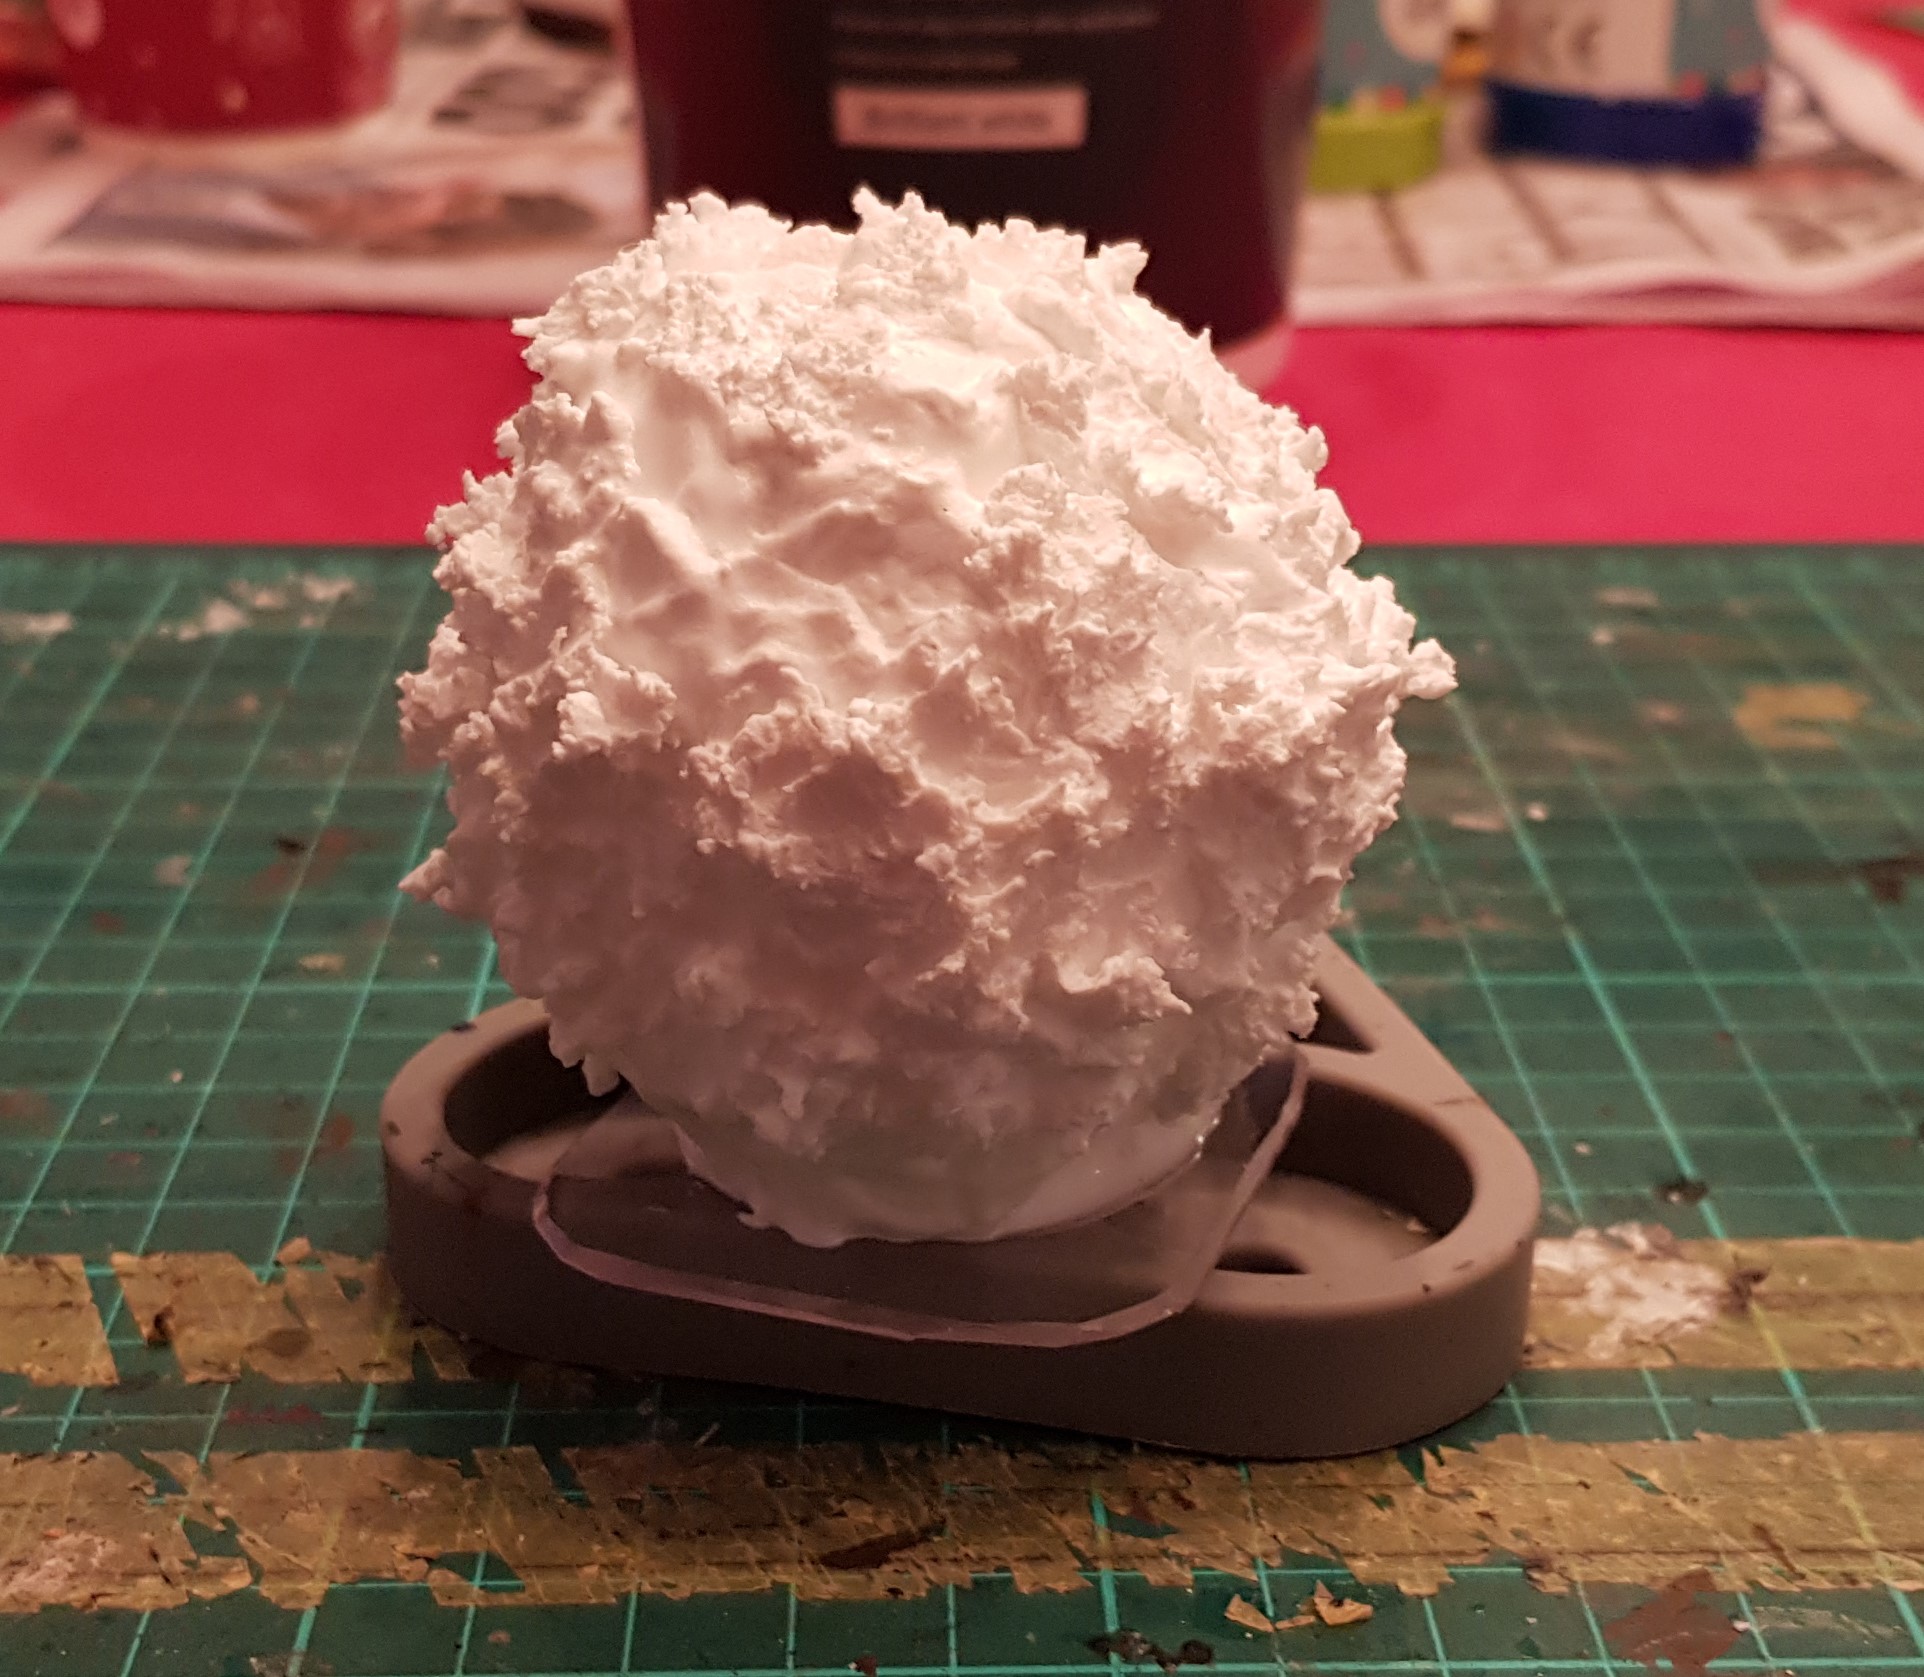
First up I grabbed my extremely old, but trusty hot wire cutter and some expanded polystyrene blocks I have been hanging onto for ages.
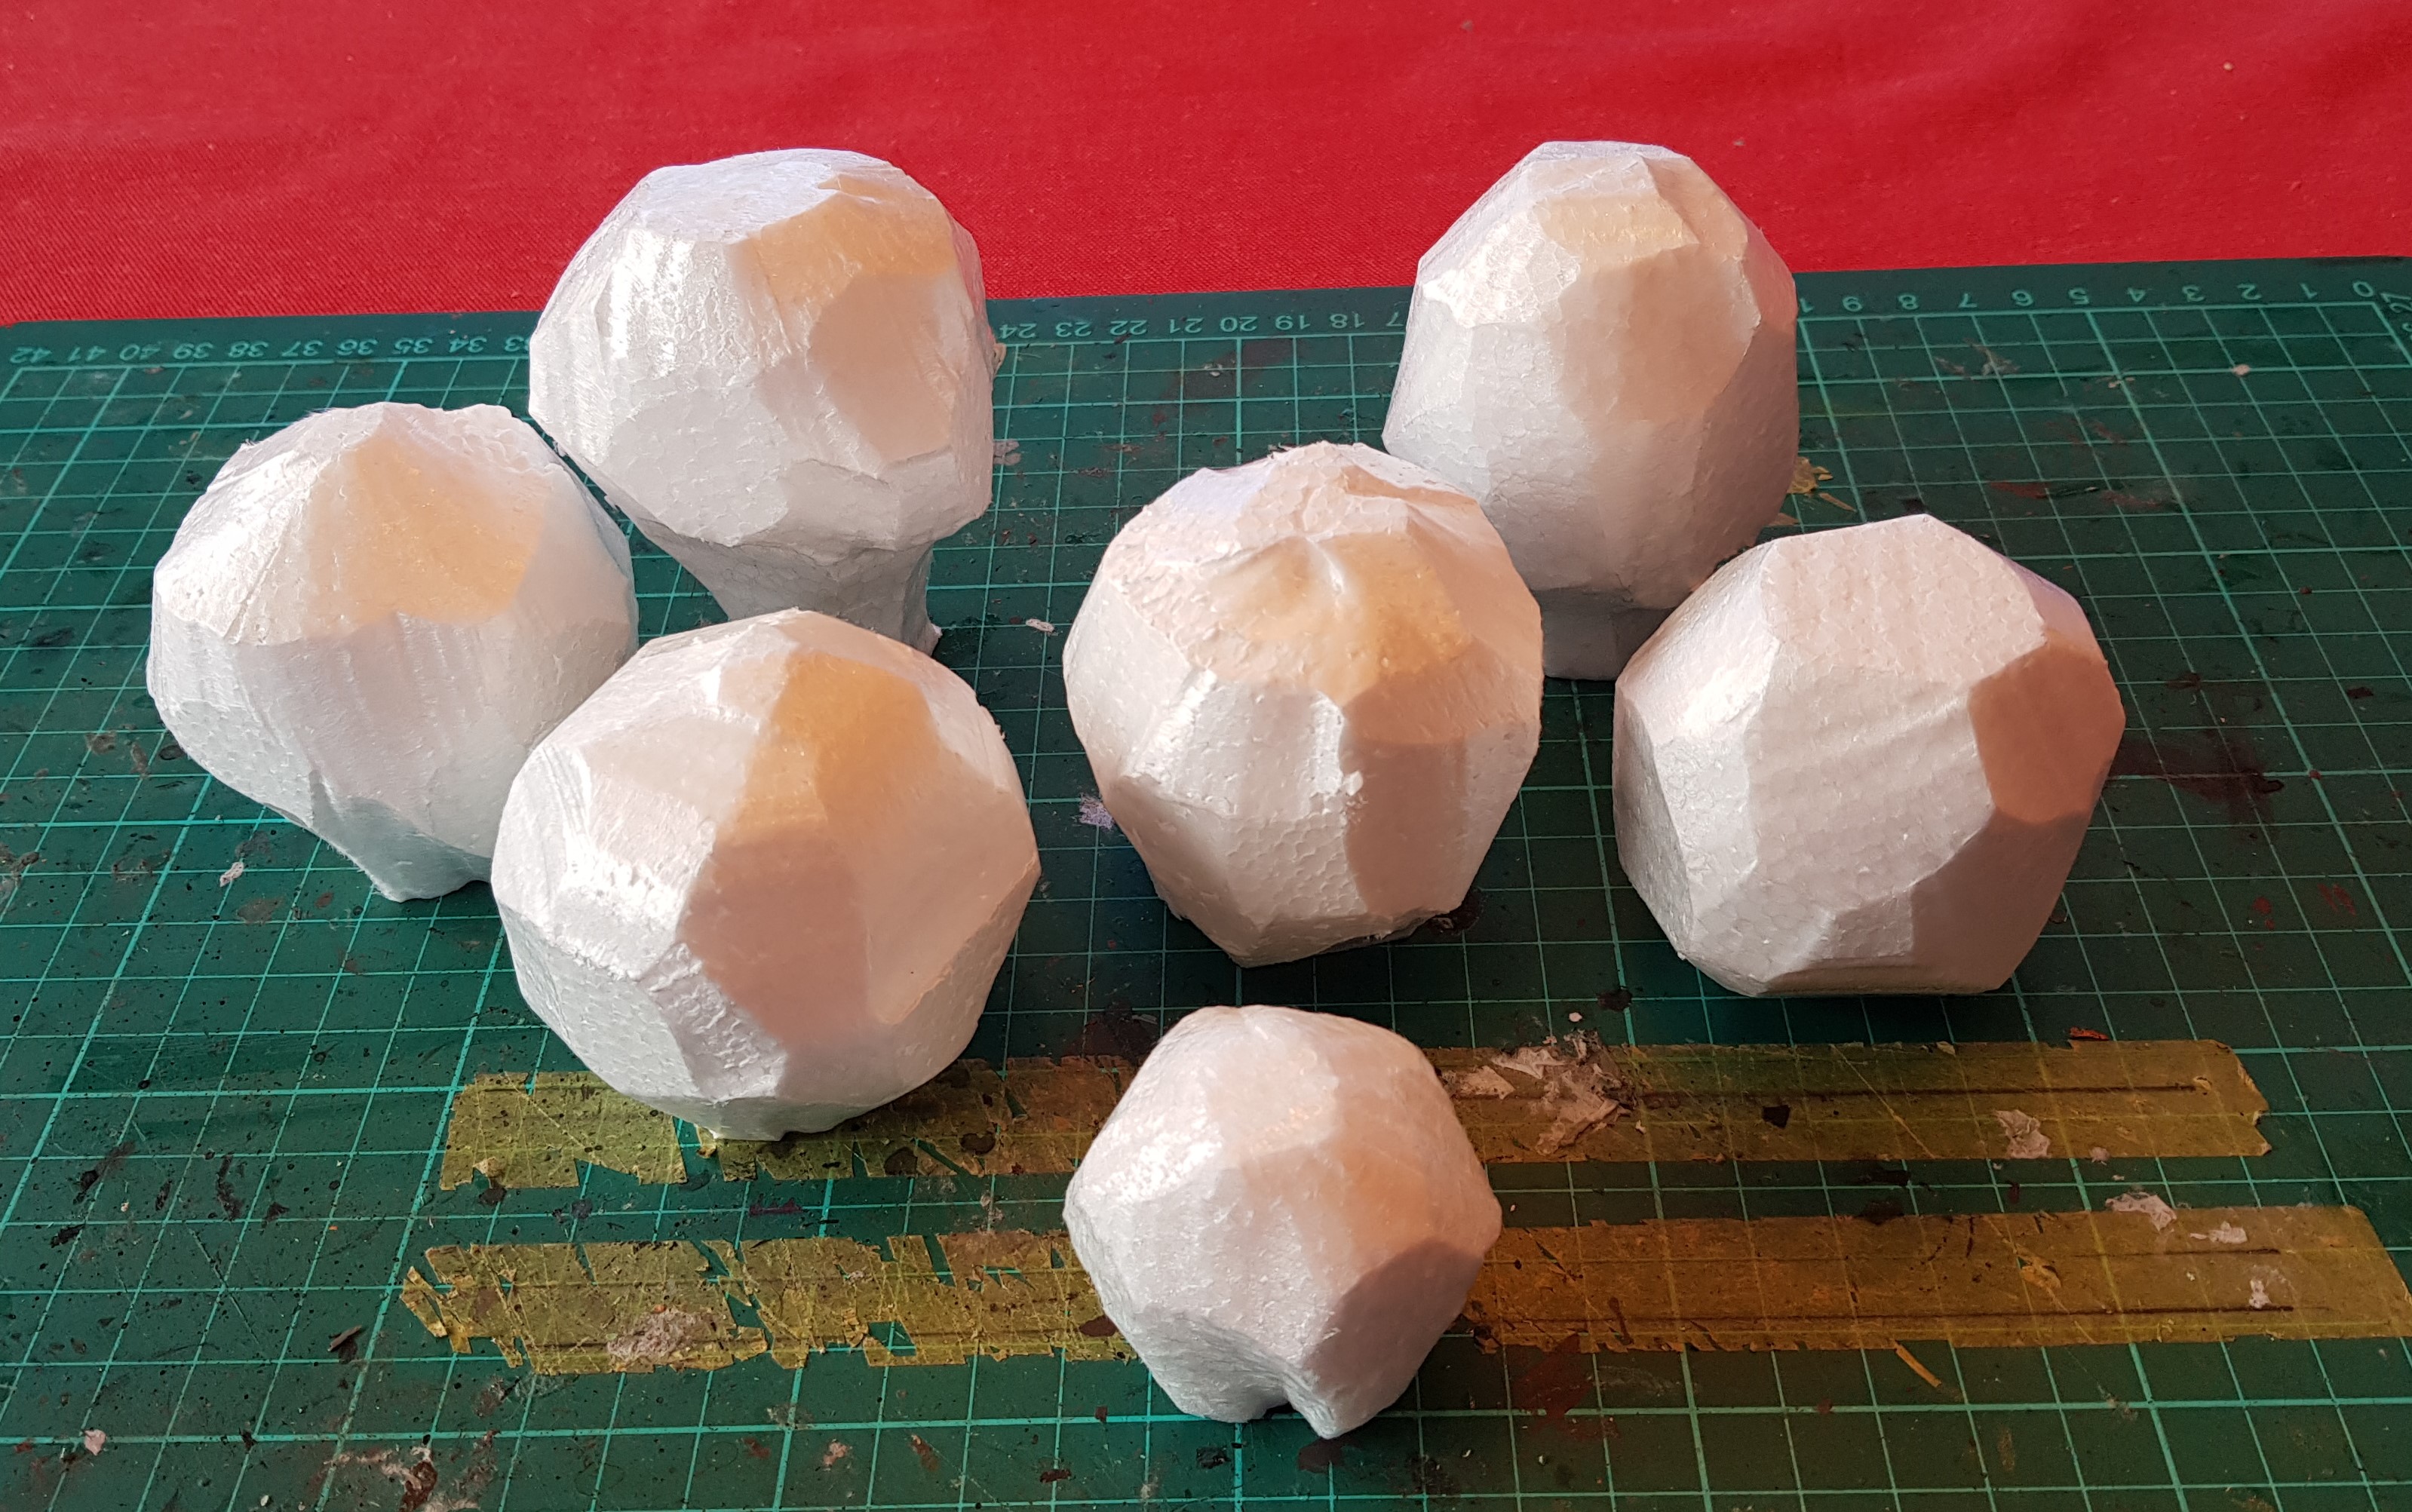
These are then shaped into roughly the size and shapes that I wanted. I did not want them all being exactly the same sizes, so I tried to vary heights and shapes a little.
Next step involved creating my own custom jungle plant foilage – this is basically a 1:1 mix of cheap PVA glue and quick drying filler, this is then daubed (you can’t really brush it) on to the polystyrene balls, this takes a bit of time and I go back and spike up the mixture during the drying process to add some asymettry to the mixture, so it doesn’t just dry all smooth.
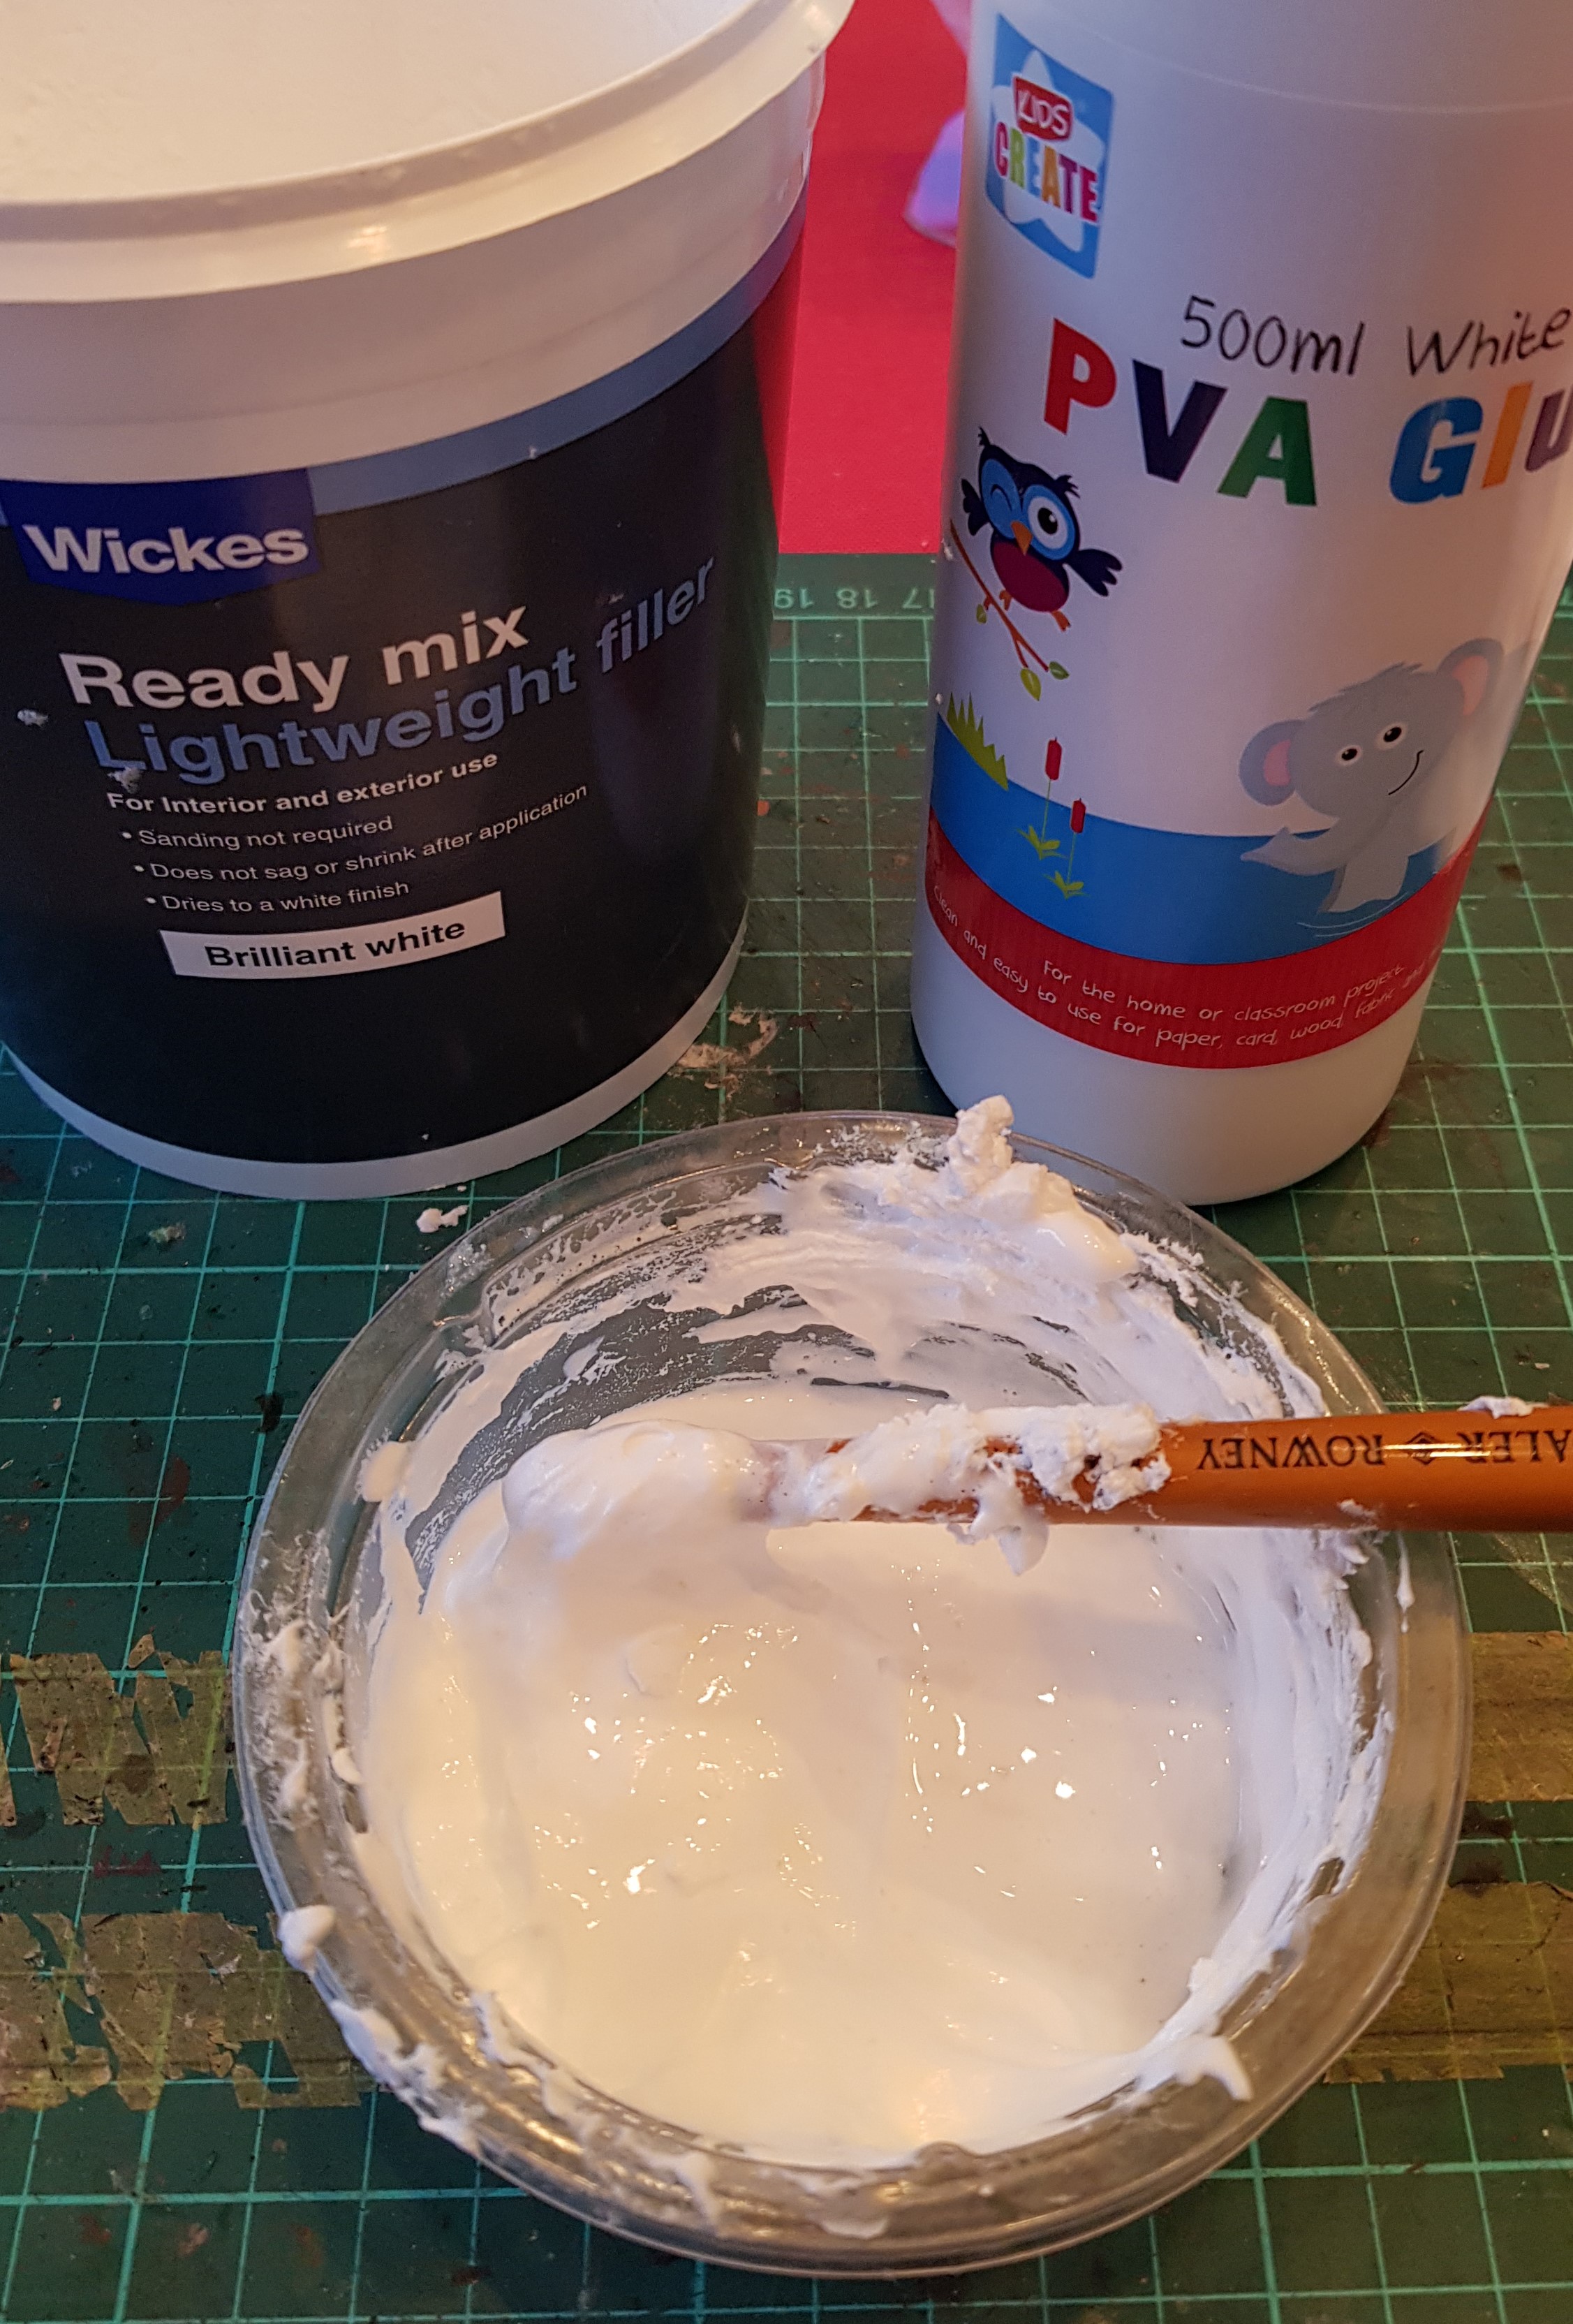
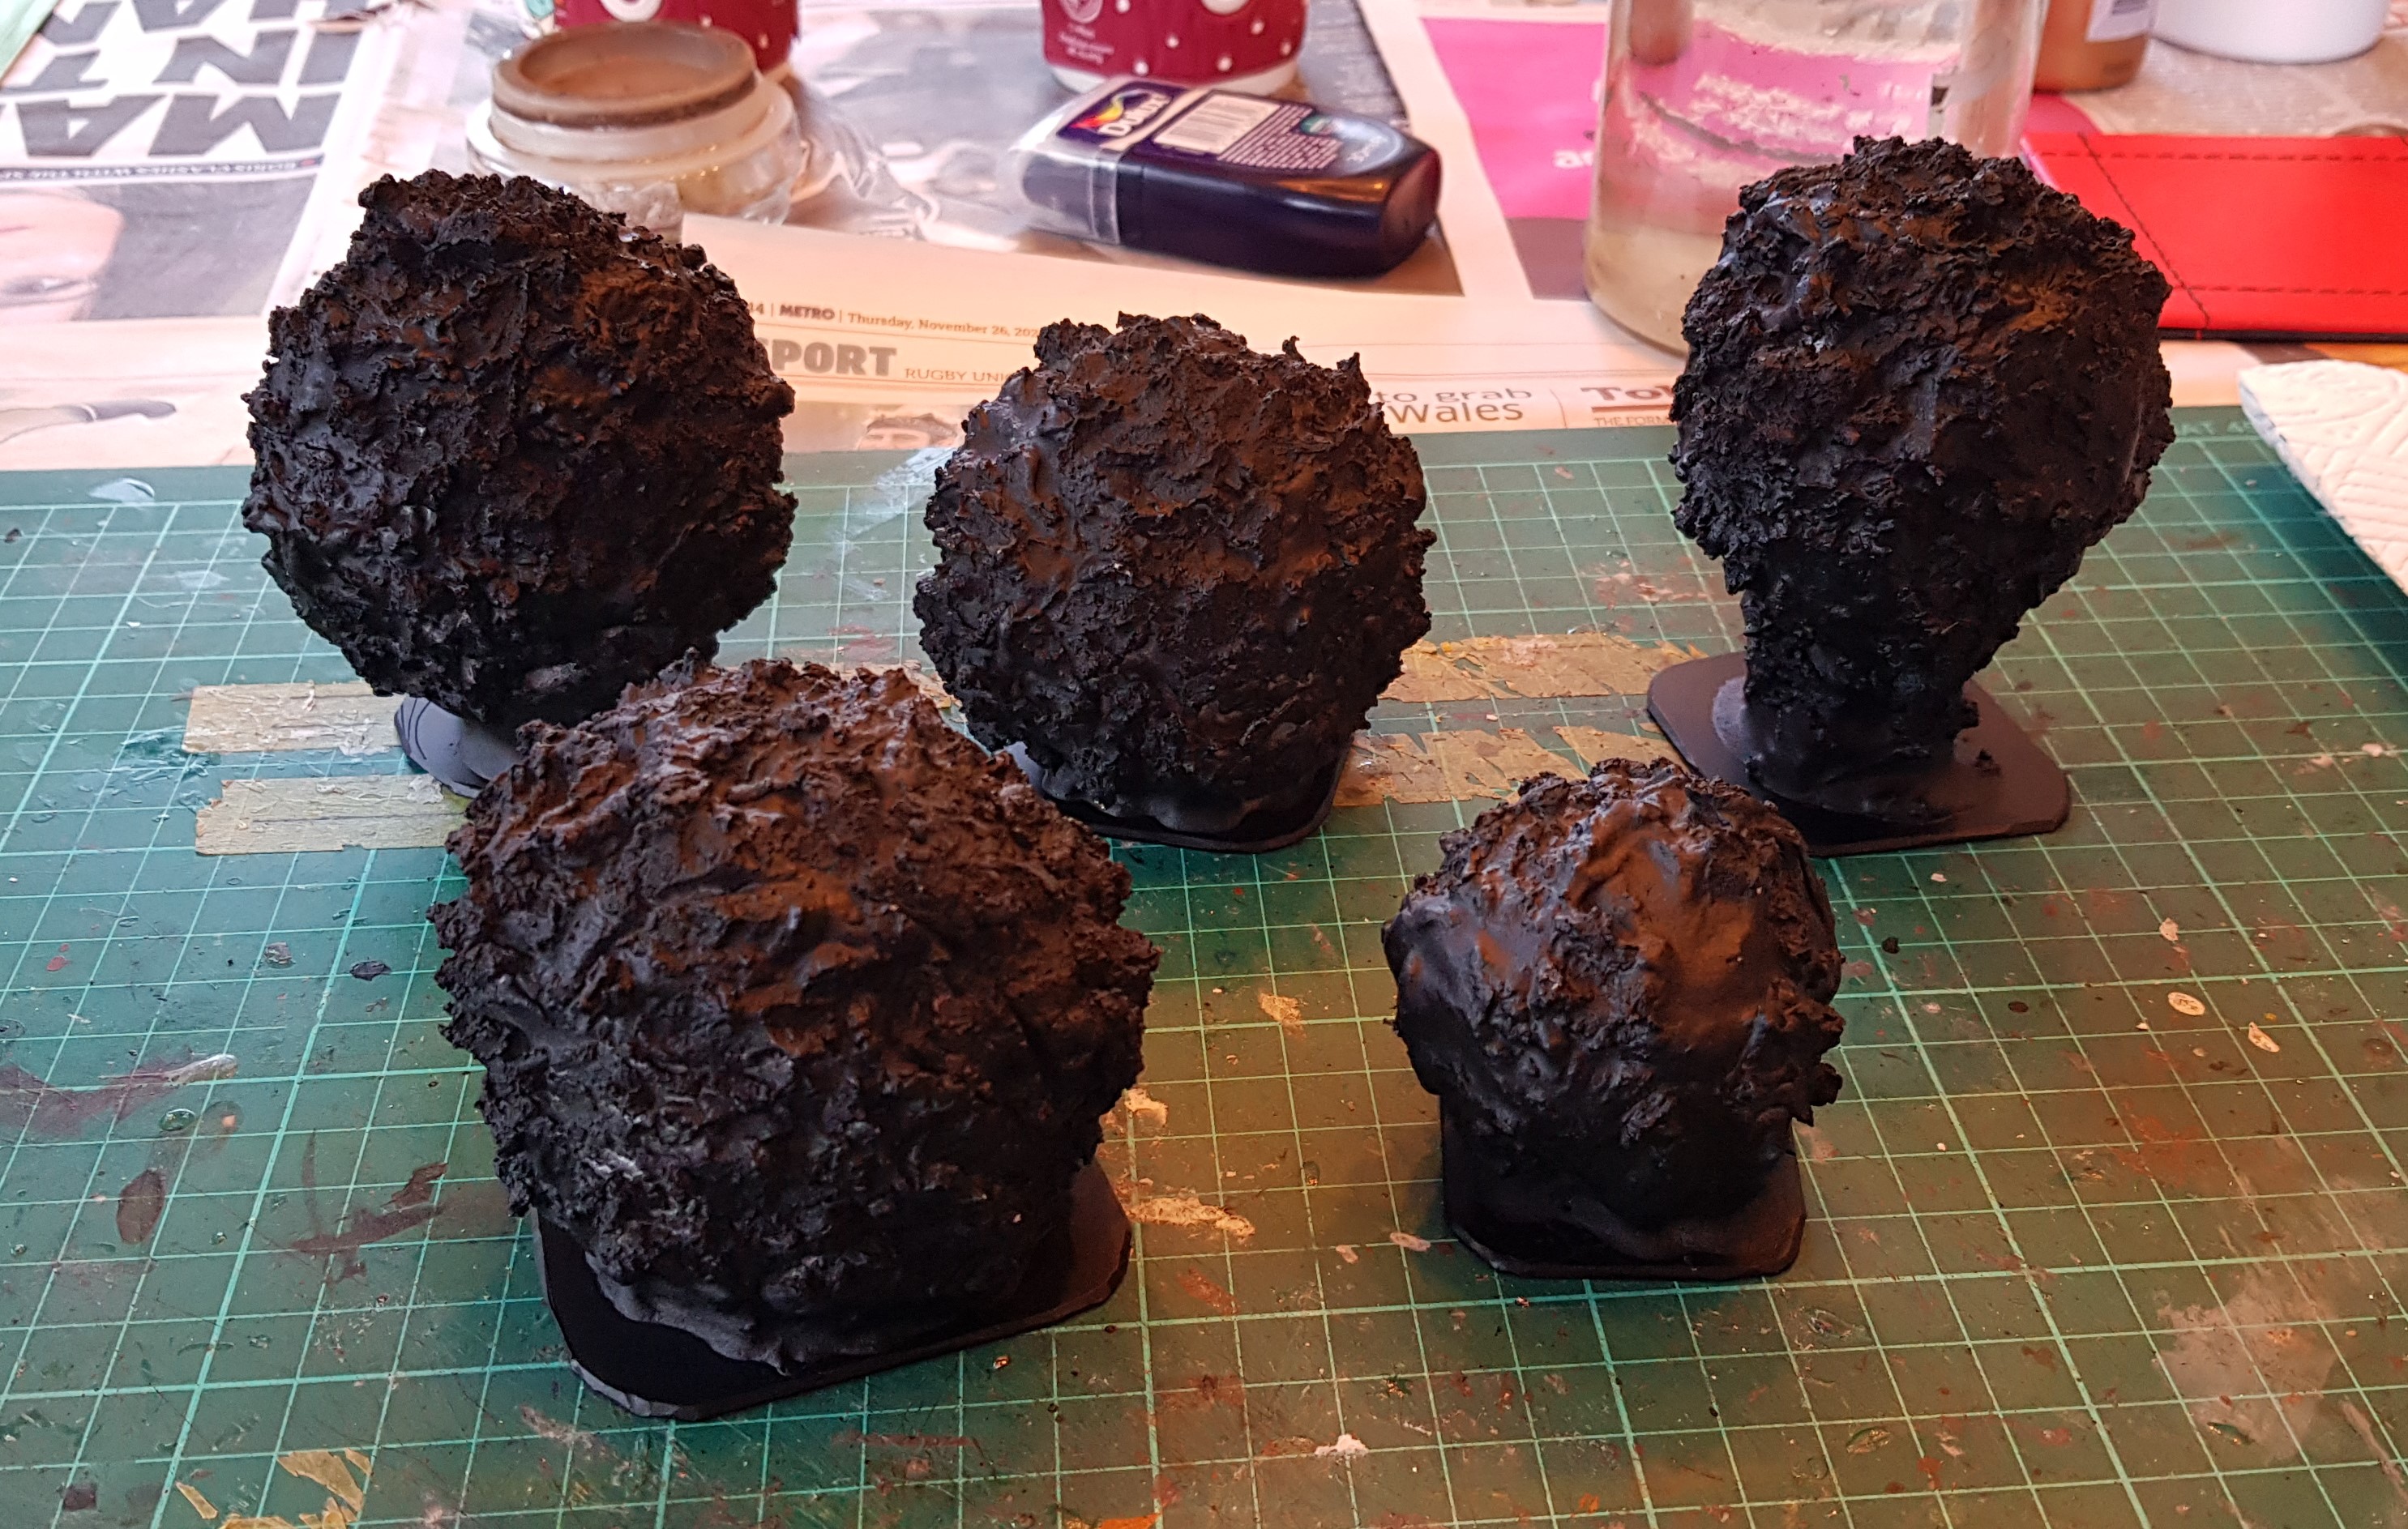
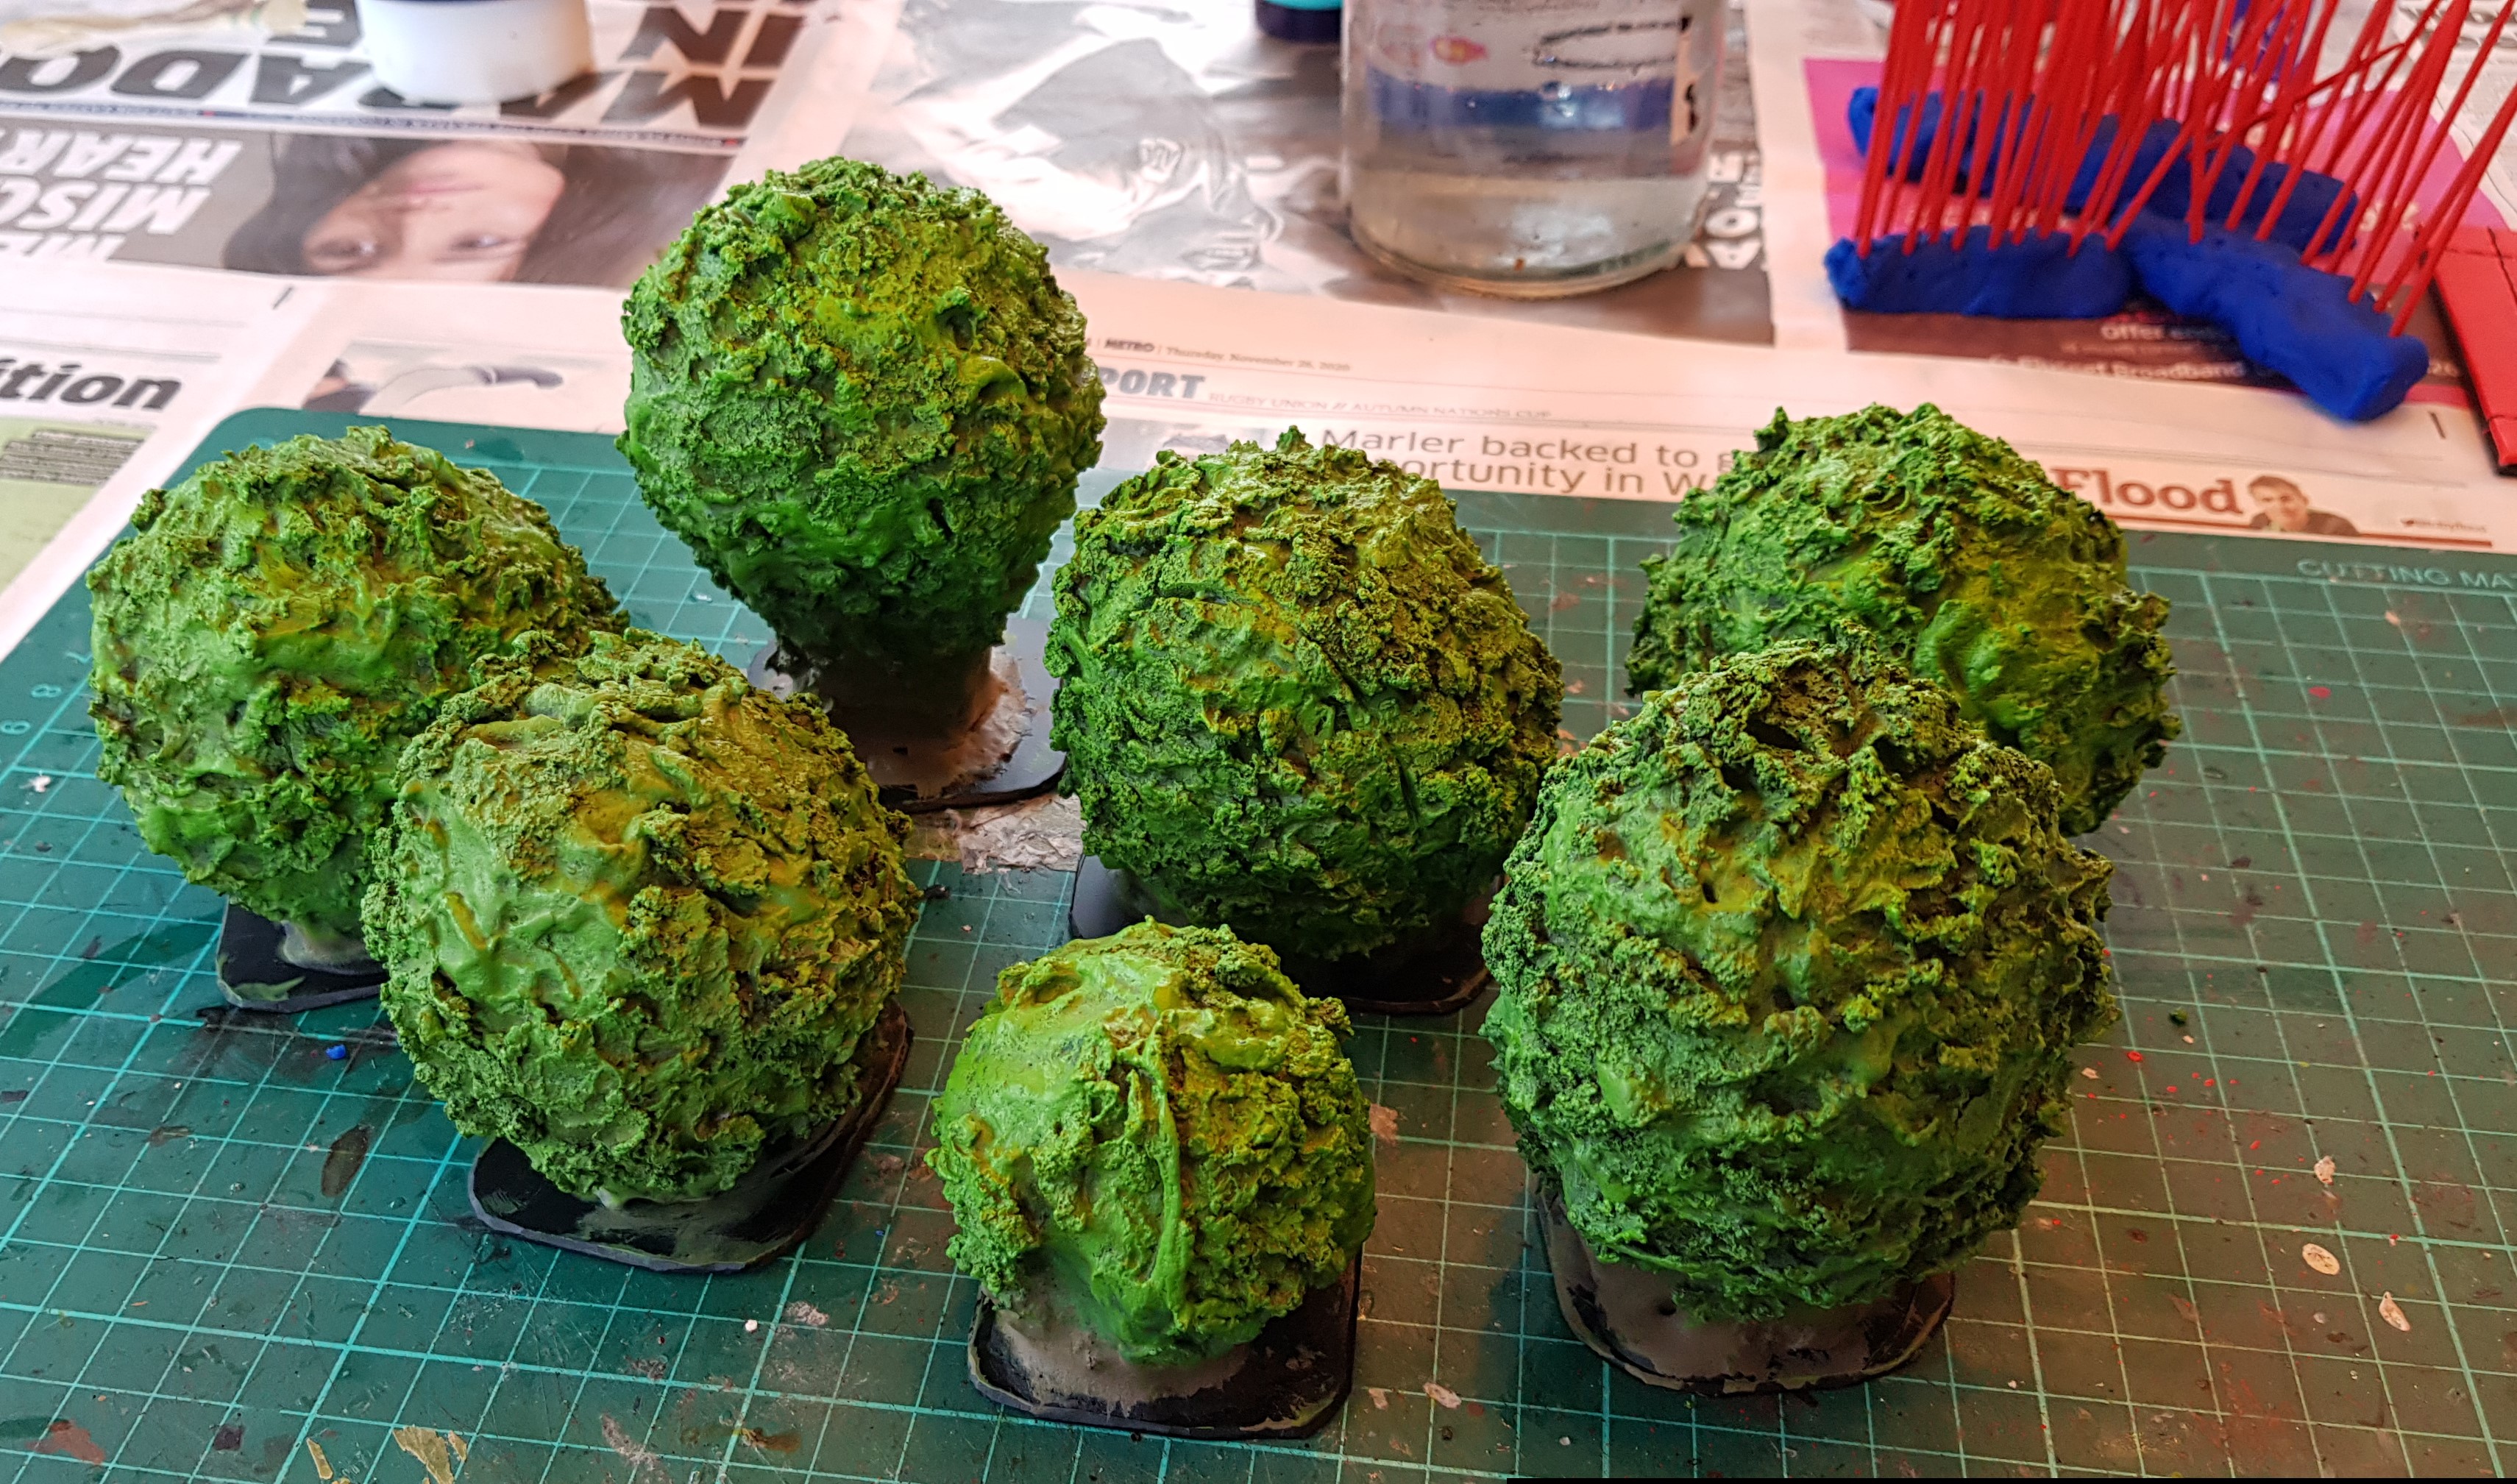
This gets left for 24 hours to dry and then gets hit with a black rattle can primer. The filler/PVA mix protects all the polystyrene to prevent it being destroyed. Then it is a simple case of drybrushing the colours you want. I went for a classic GW bright green.
In the background of the second picture the eagle eyed among you will notice the red spikes in progress!
The red cocktail sticks are then stuck and PVA glued into Jungle tree balls.
After the glue is dry, I painted in some black towards the base of the red spikes and that was pretty much that. Really simple, but can’t wait to get these onto the table for my second edition games.
Grot, Grot, Grots....
This week camp Duck has been beavering away on yet more (you guessed it), mono-pose Grots – n.b. one chap has lost his Spikey Hat. This successfully brings me up to the 40 Grots from the original 2nd edition starter box.
I also found 2 metal Rogue Trader Grots, so painted these up as well, as a slight relief from the monotony.
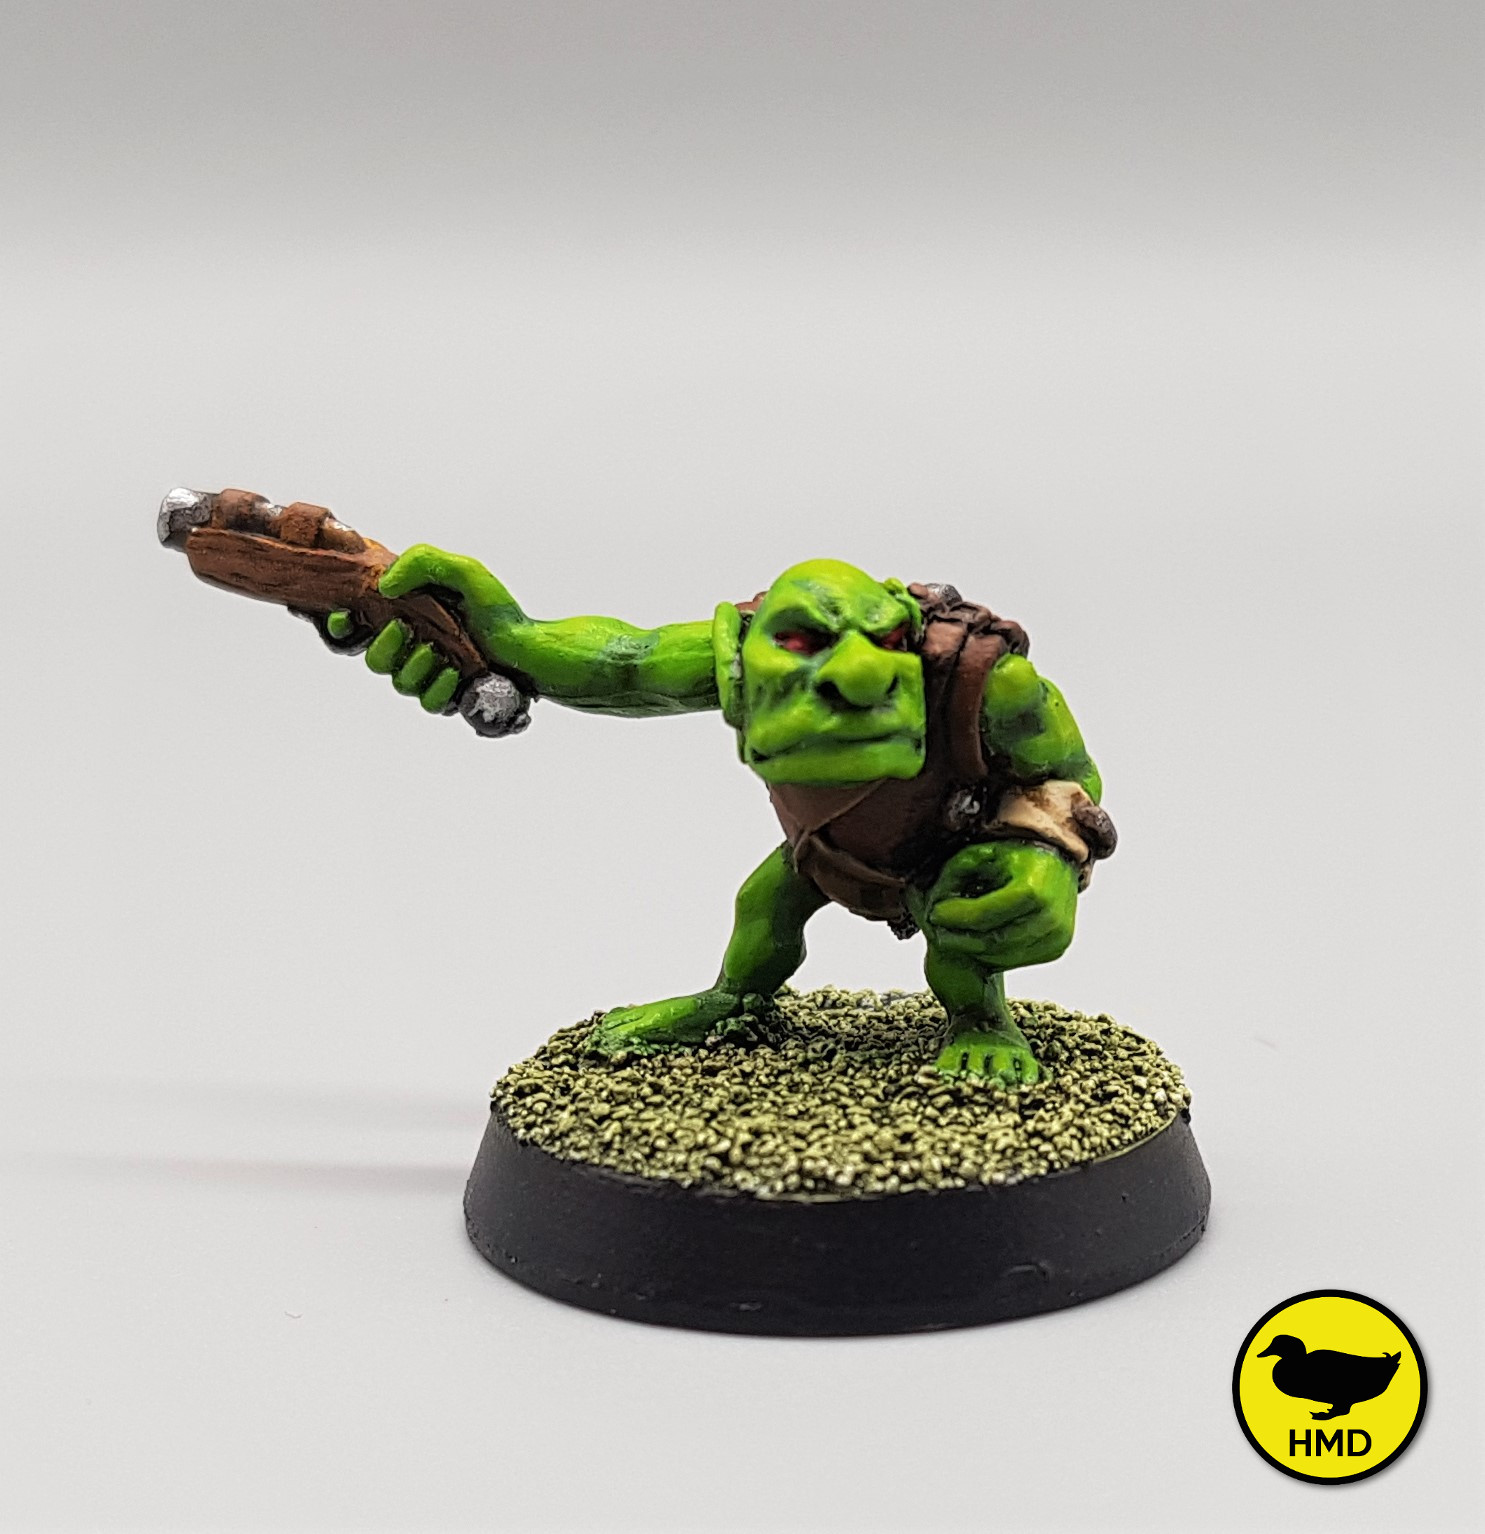
And here is the Grot of the hour!

The eagle eyed among you will notice that I have changed the basing style on this batch. I wasn’t a massive fan of the green sand and while strictly speaking that was the 90’s style, I personally prefer the newer urban basing, so will be going with that from now on. Just not 100% sure if I should rebase all the original stuff – what do you think, is it worth it or not?
Finally here is a group shot of all my Grots. Next up a Warboss and possibly an elite unit. Still managing to get time to hobby and will keep updating as progress is made. My aim is for a game post Lockdown 2.0. Here’s hoping!

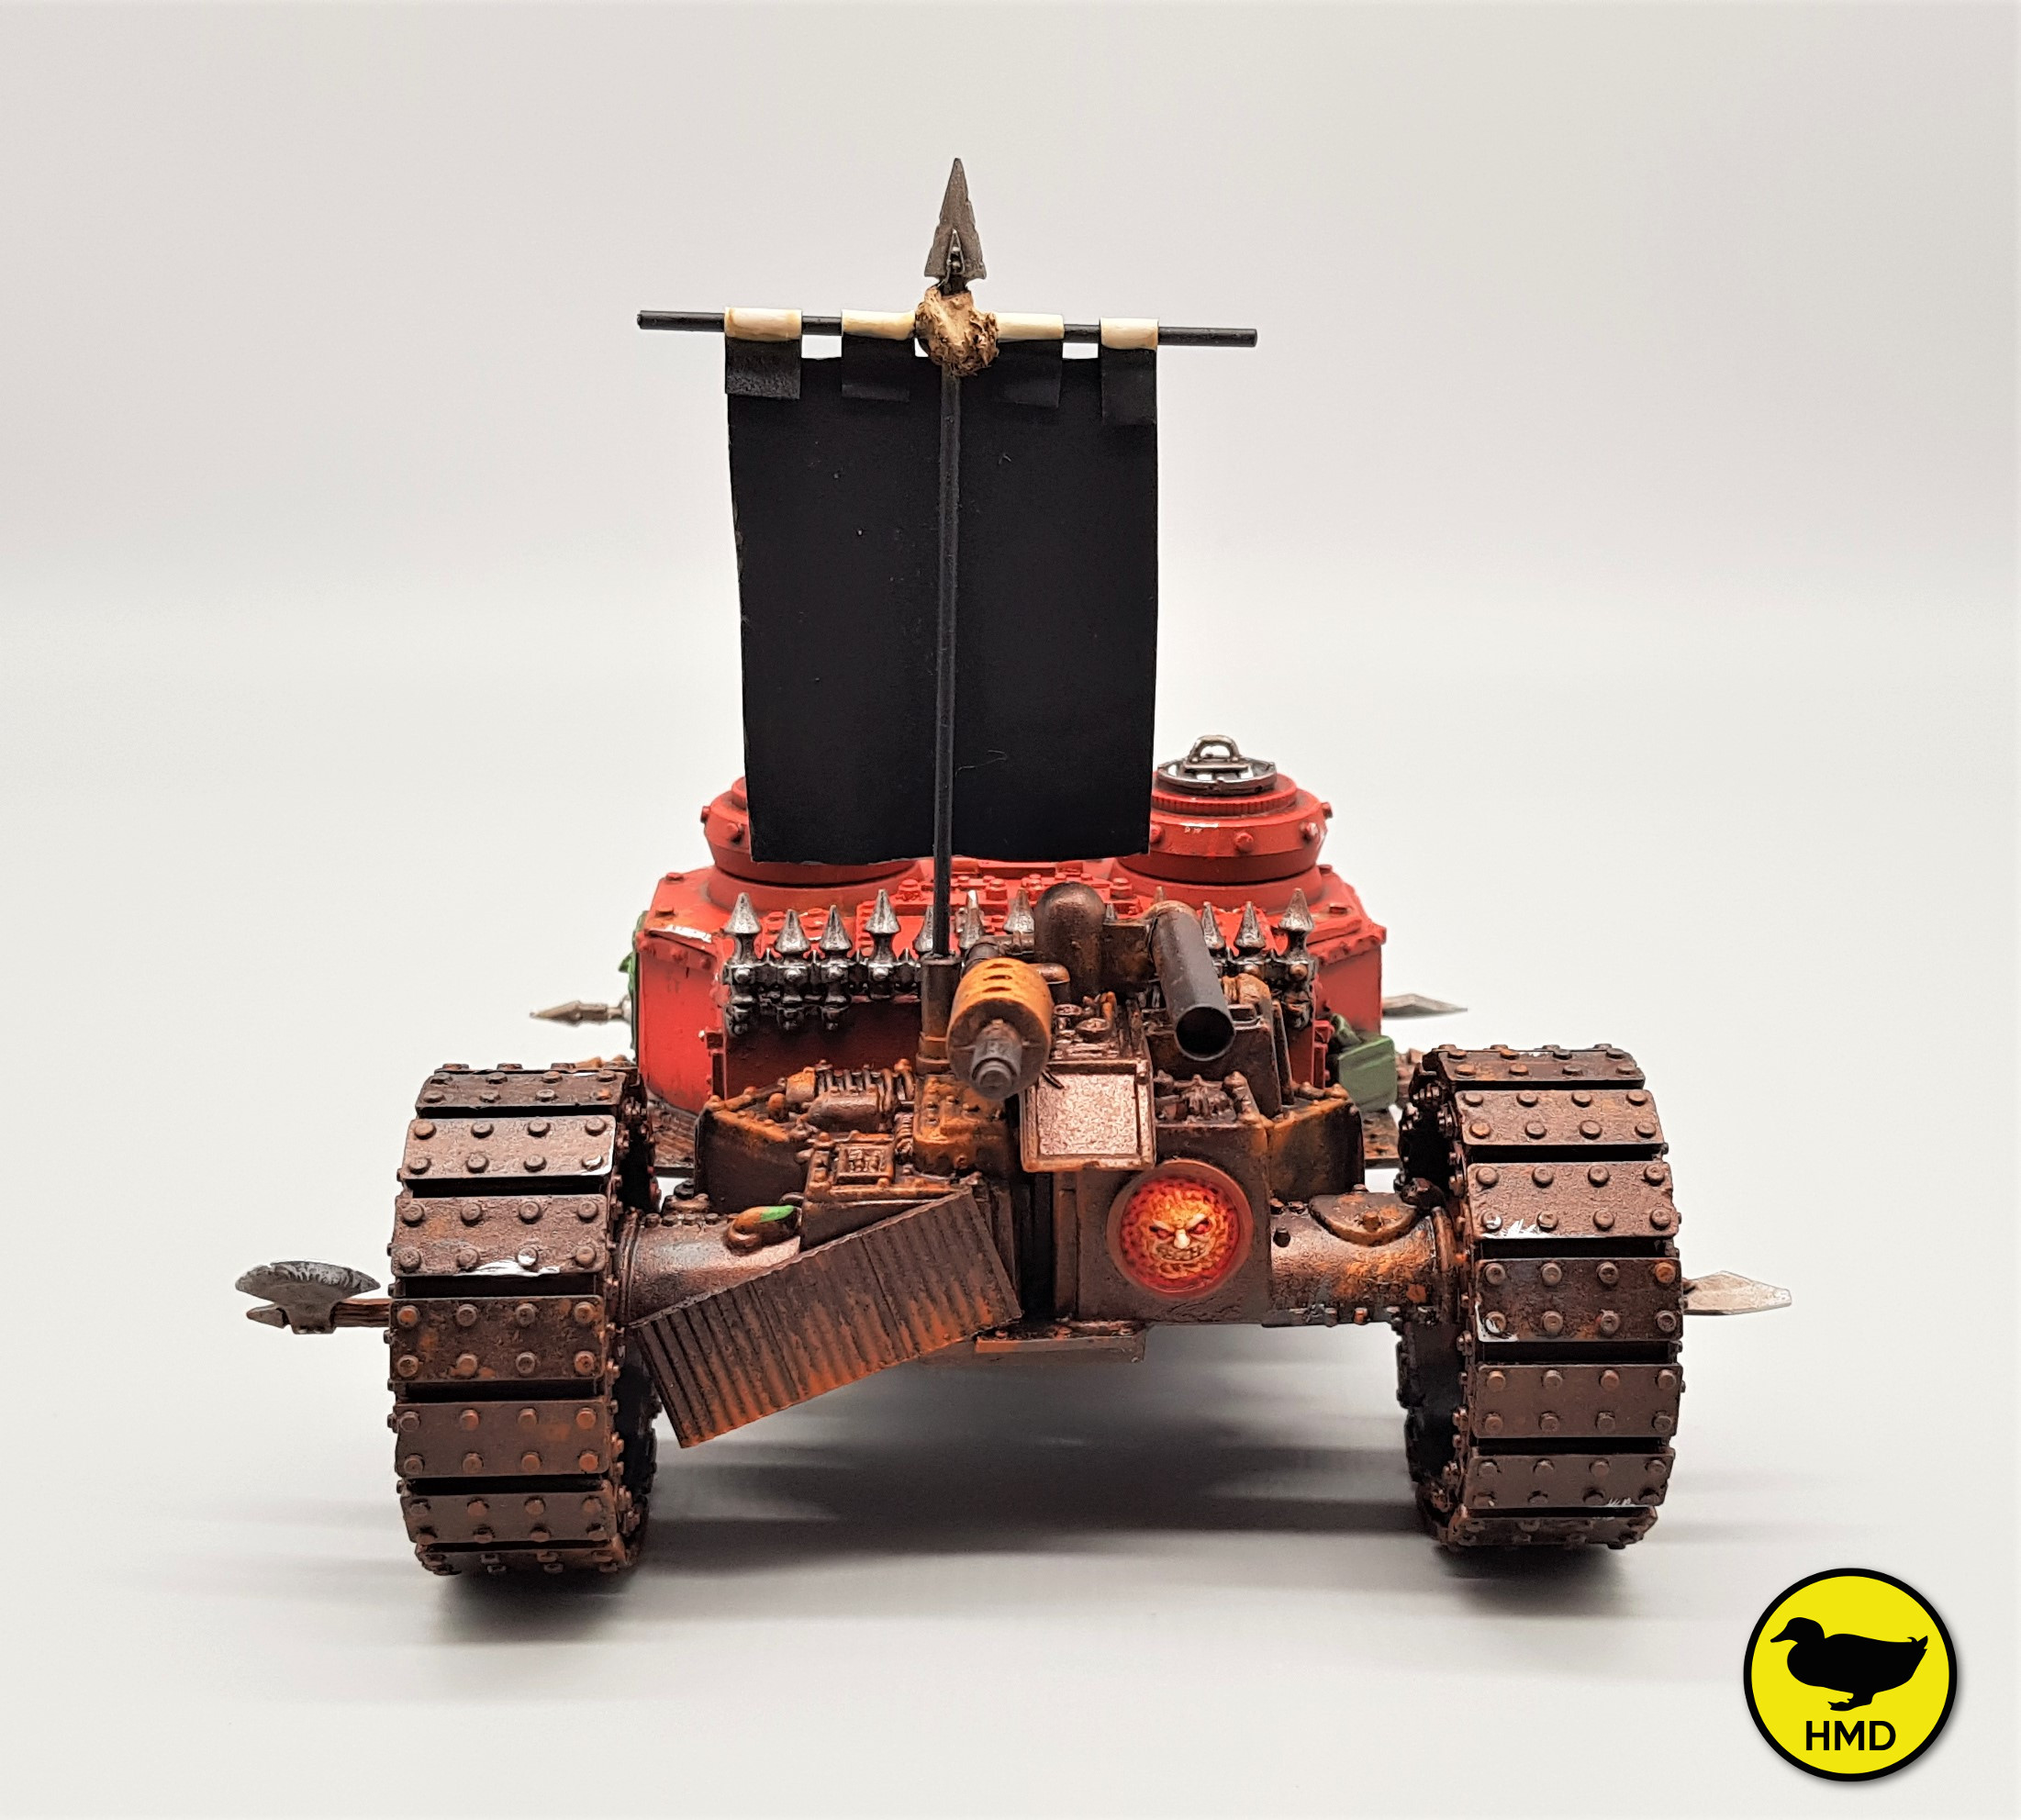
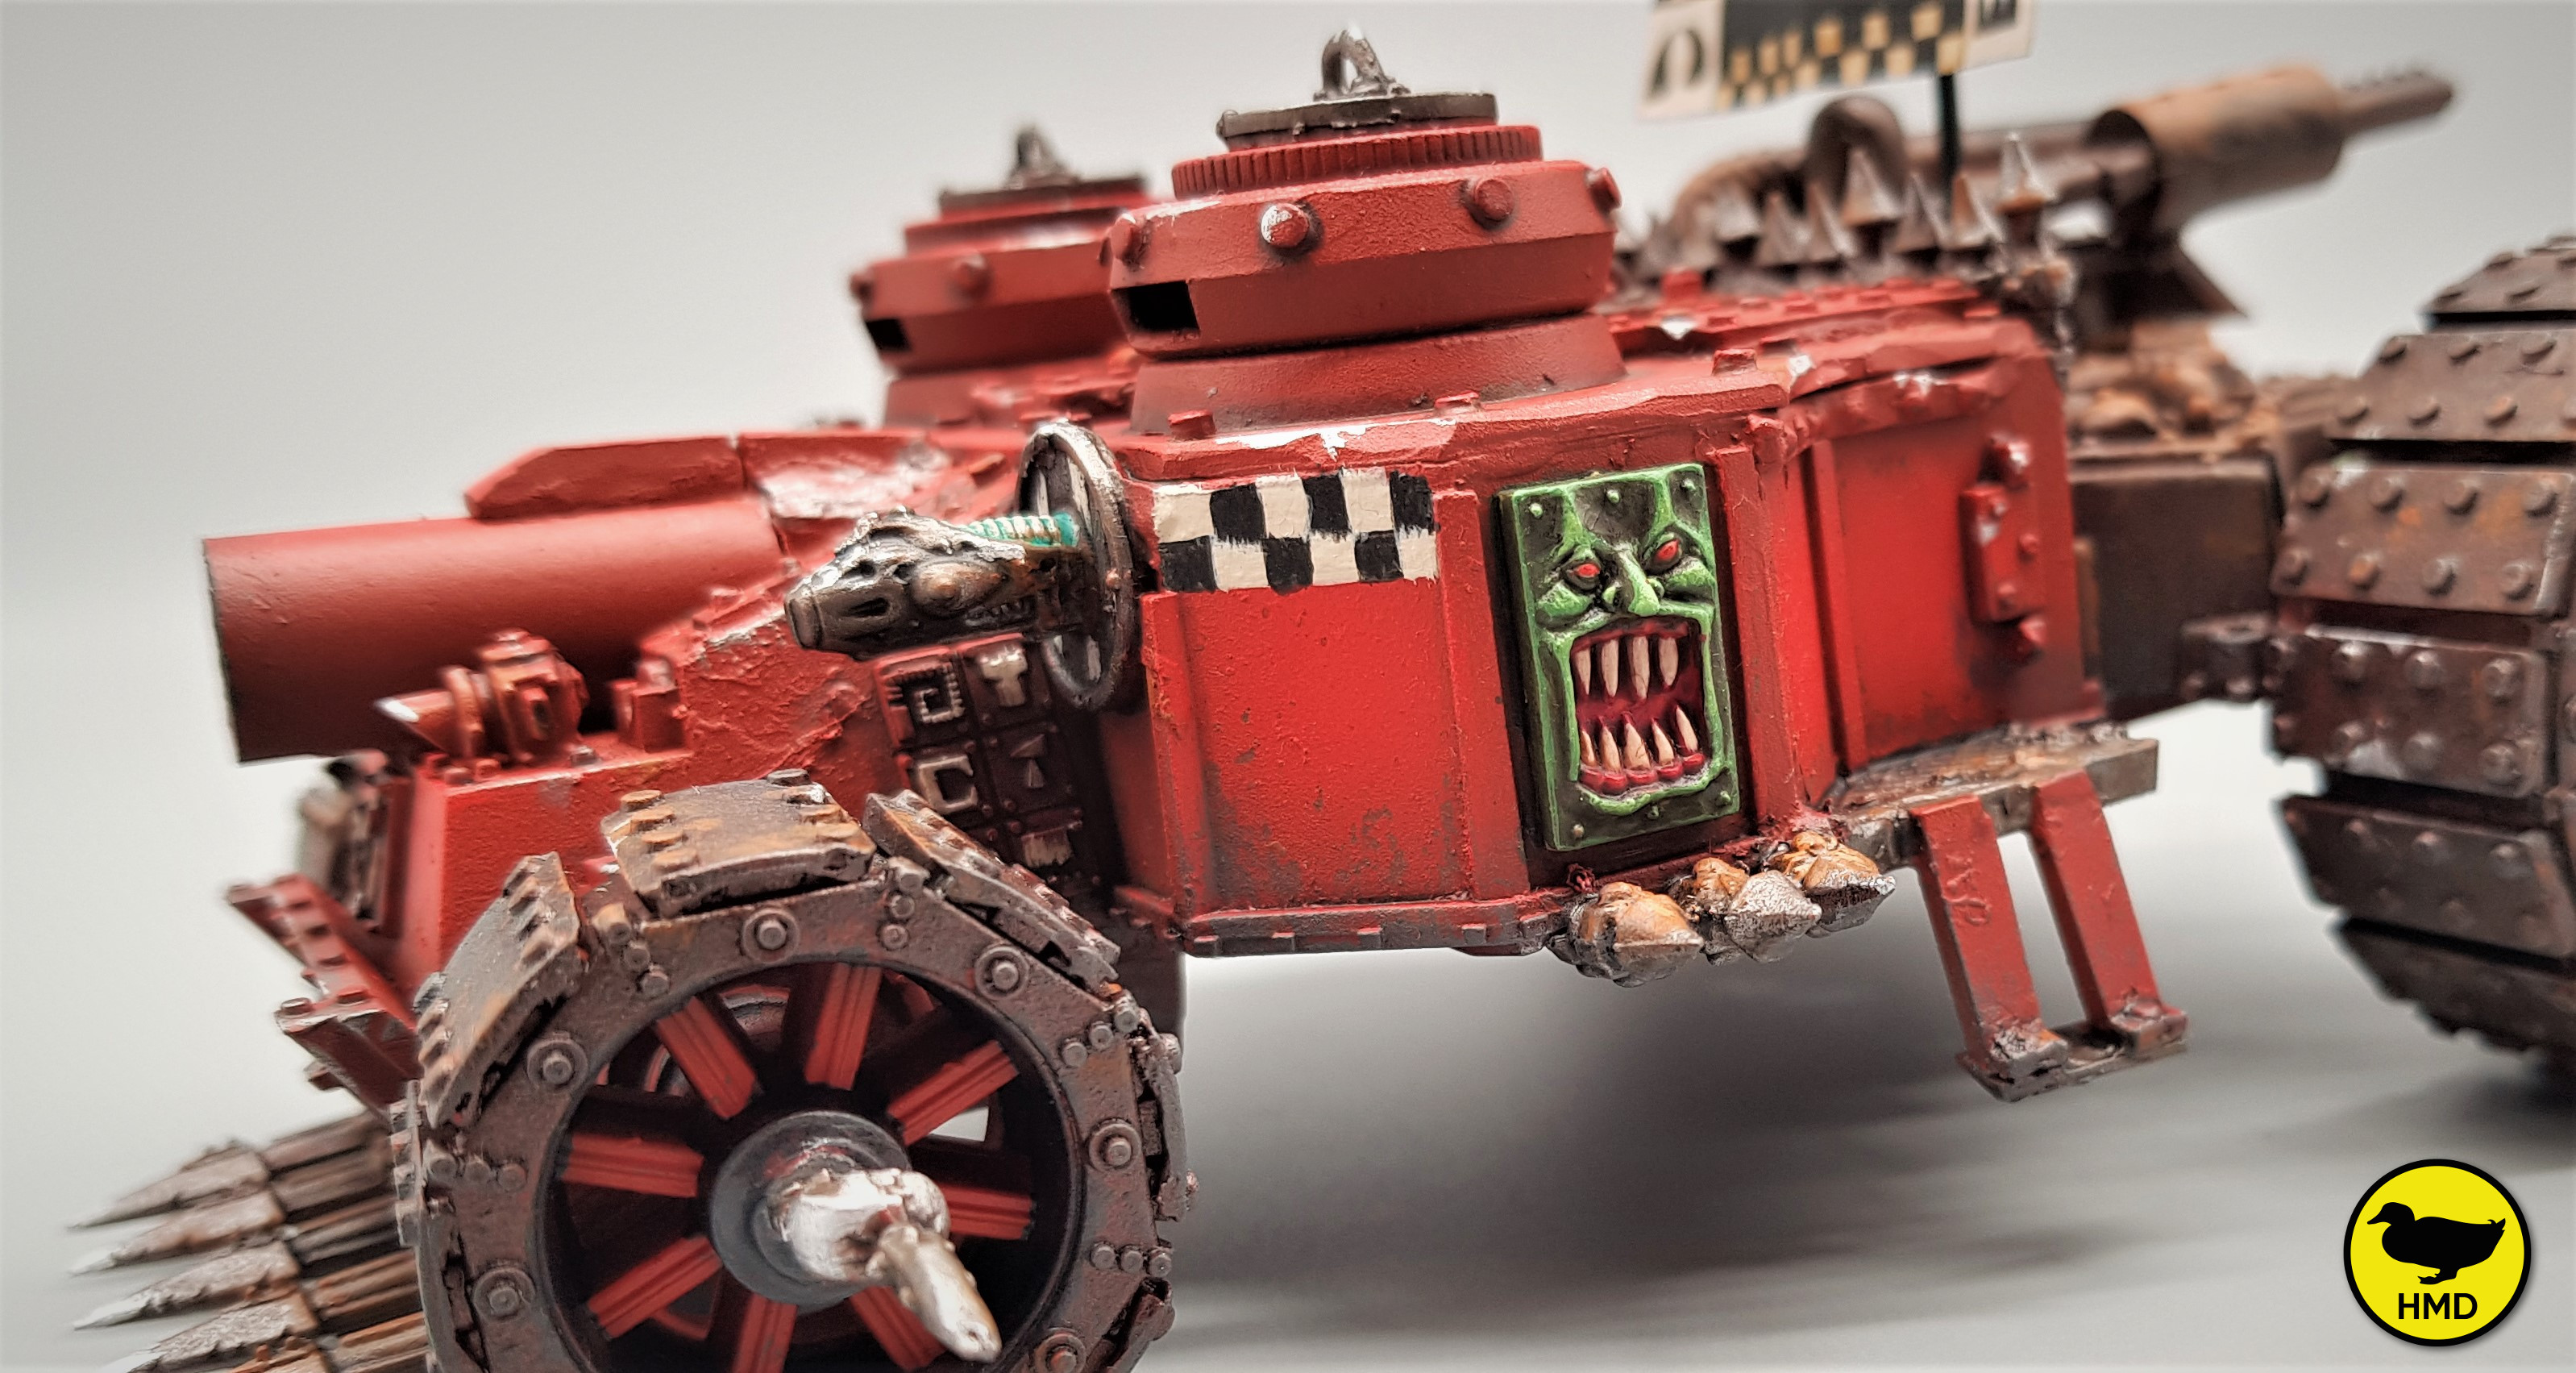
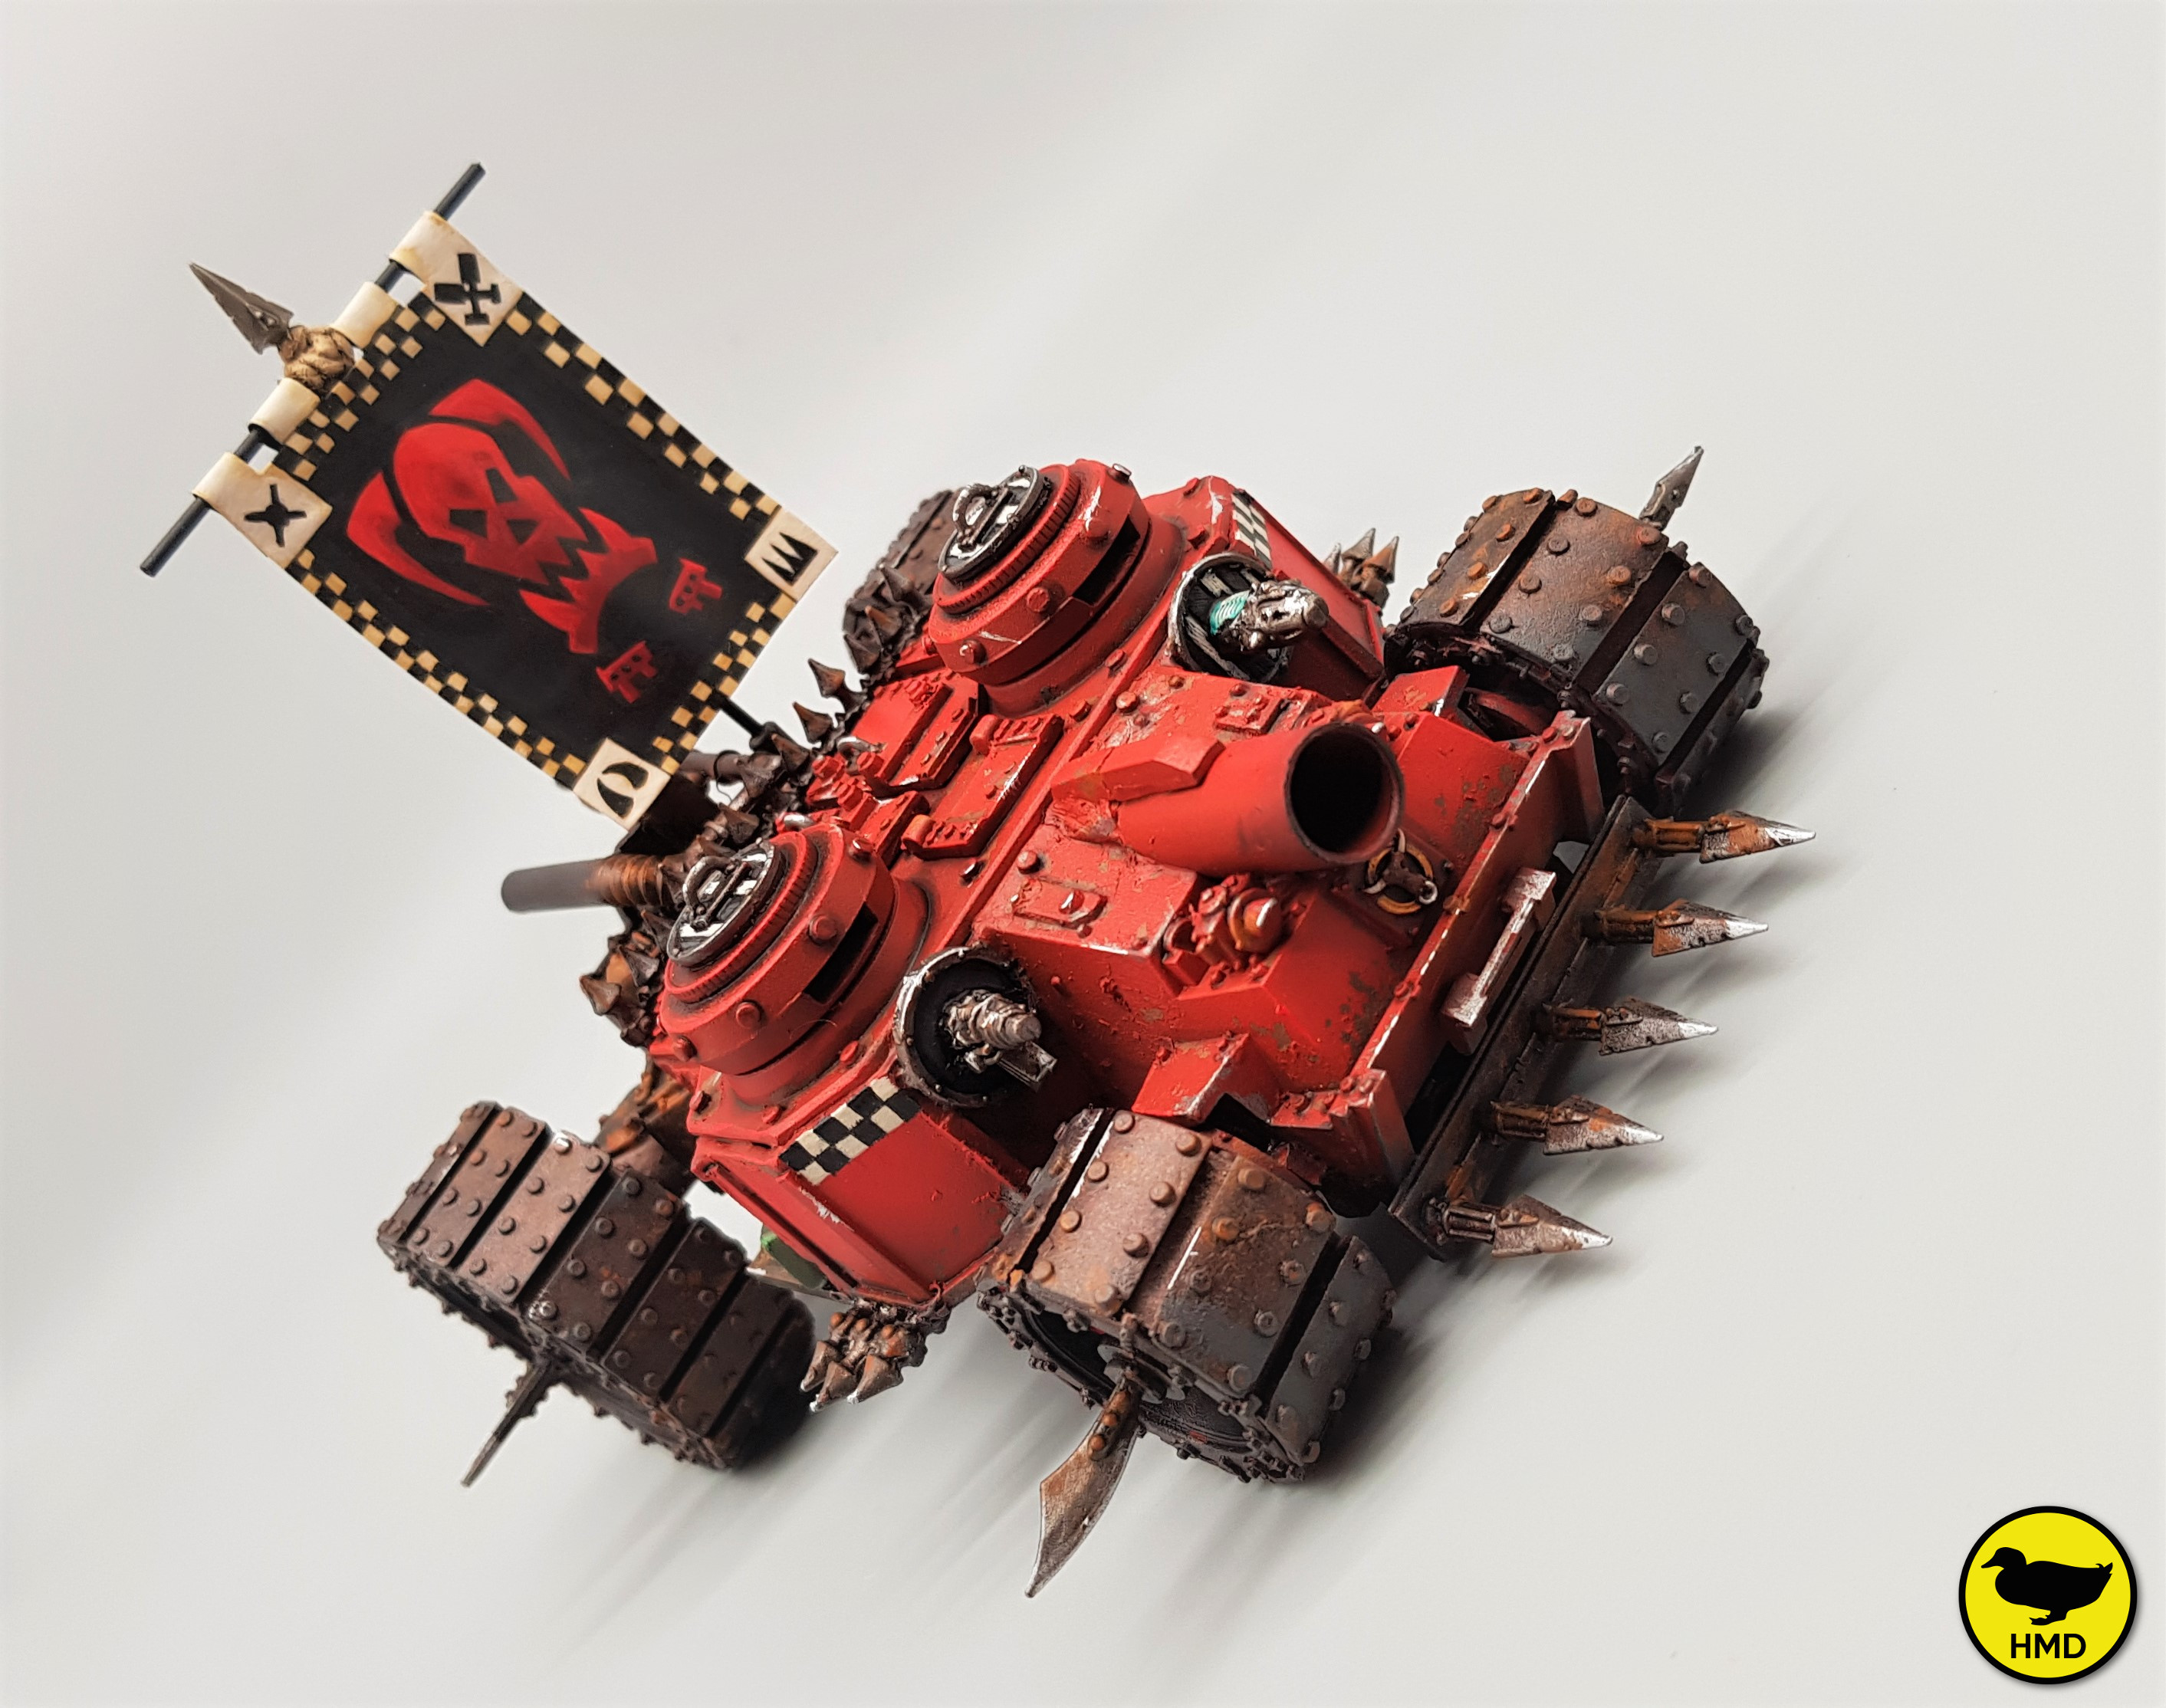
30 Years in the making (Part III)
So that is it. It’s taken me 30 years, but this project has finally gotten the Ork Gobsmasha completed and I’ve certainly learned a few things about weathering and free hand painting. I hope that you have enjoyed these updates and here are the final finshed product photos.


I hope that you guys like the work and as always I look forward to reading your comments and getting your feedback. Next up I have a Rogue Trader Warboss to add to the force and I need to brave the next batch of 40 mono-pose Gretchin (aaargh!).
Stay safe and many thanks for looking!!!
30 Years in the making (Part II)
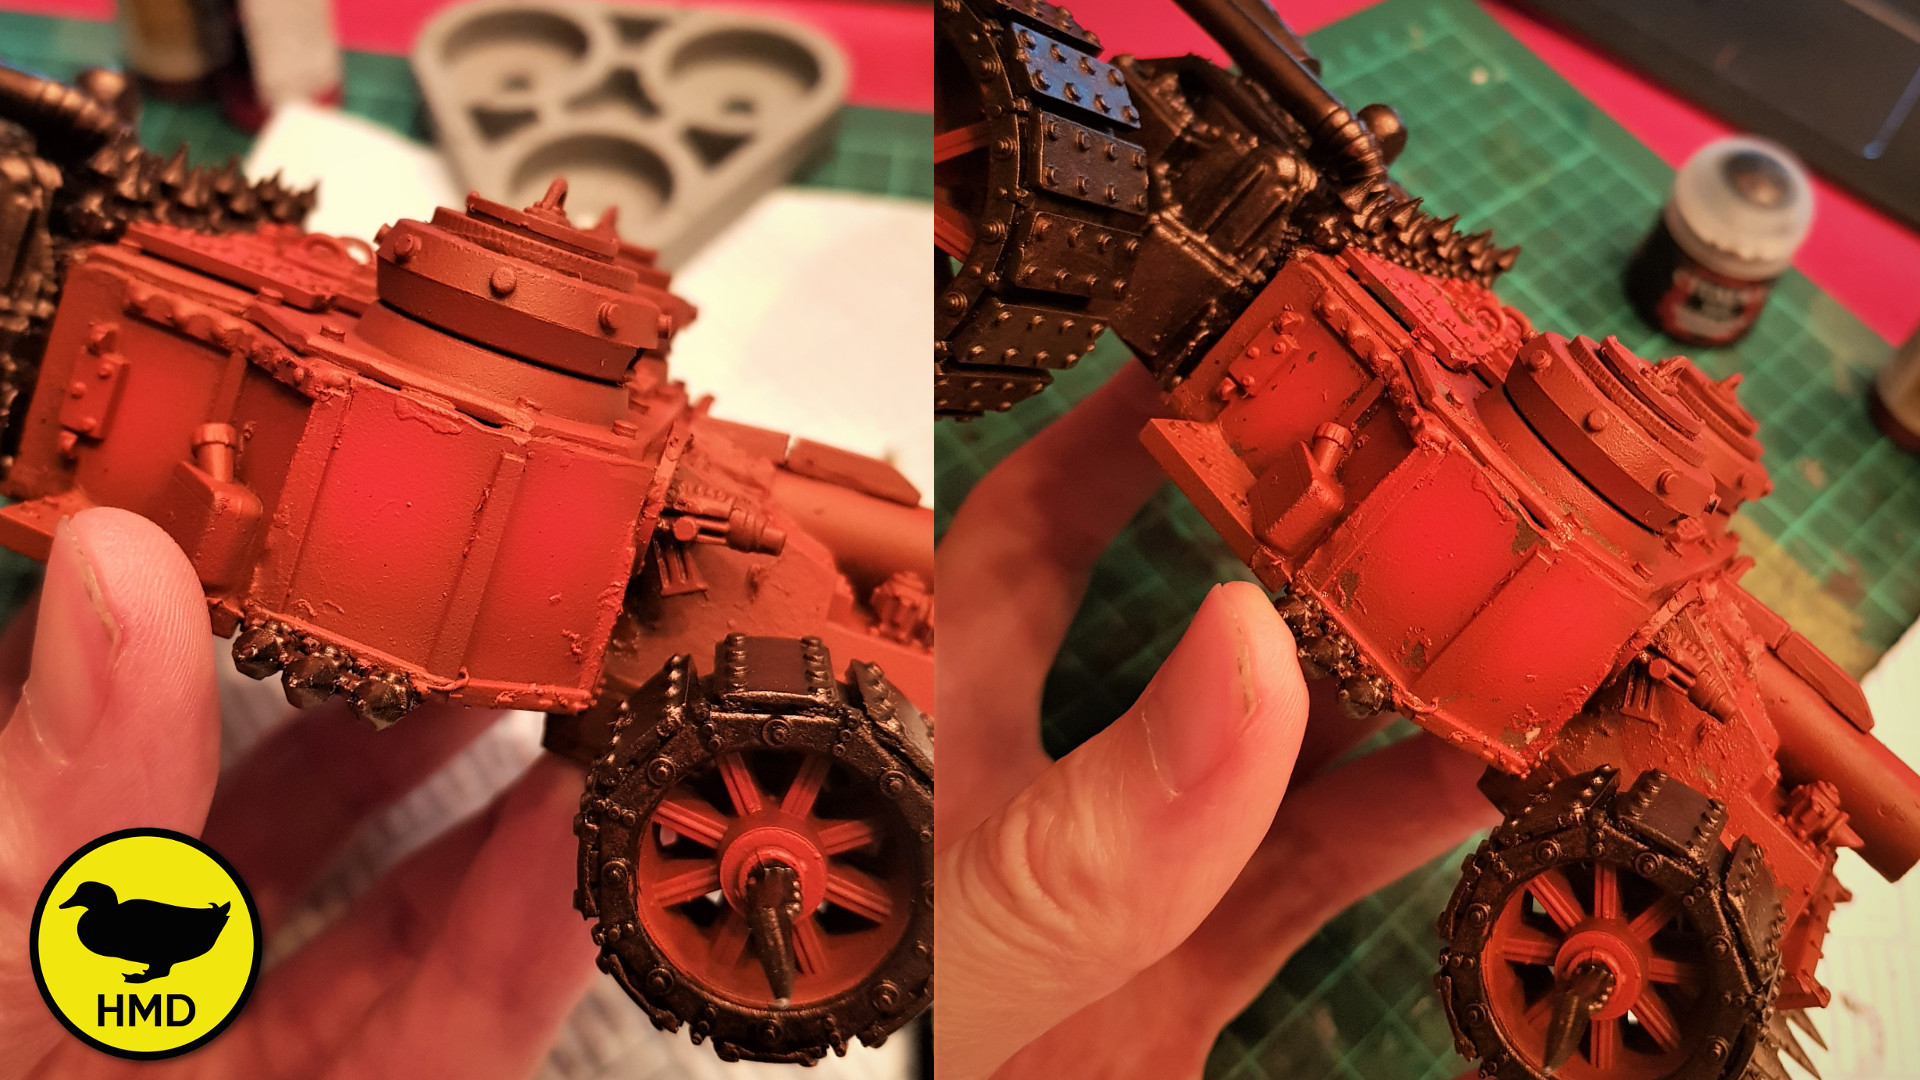
So by the time that I got around to trying to weather the paintwork that I had so carefully applied with the airbrush, probably around 12 hours had passed and I was a little apprehensive that the hairspray would not reactivate, but it was fine. I simply applied some clean water and dabbed at it with a cocktail stick and the surface paint I had applied (both by airbrush and normal brush) came right off revealing the chocolate Brown below.
For next time, this would probably work better with a lighter paint colour, the red is very close to the brown and so the effect isn’t obvious, but I do like it none the less, as it leaves paint build up near the rust, which I think looks better than painting the rust over the base coat, which is what I would probably normally do.
Anyhow, the left hand picture is before scraping, the right is after.
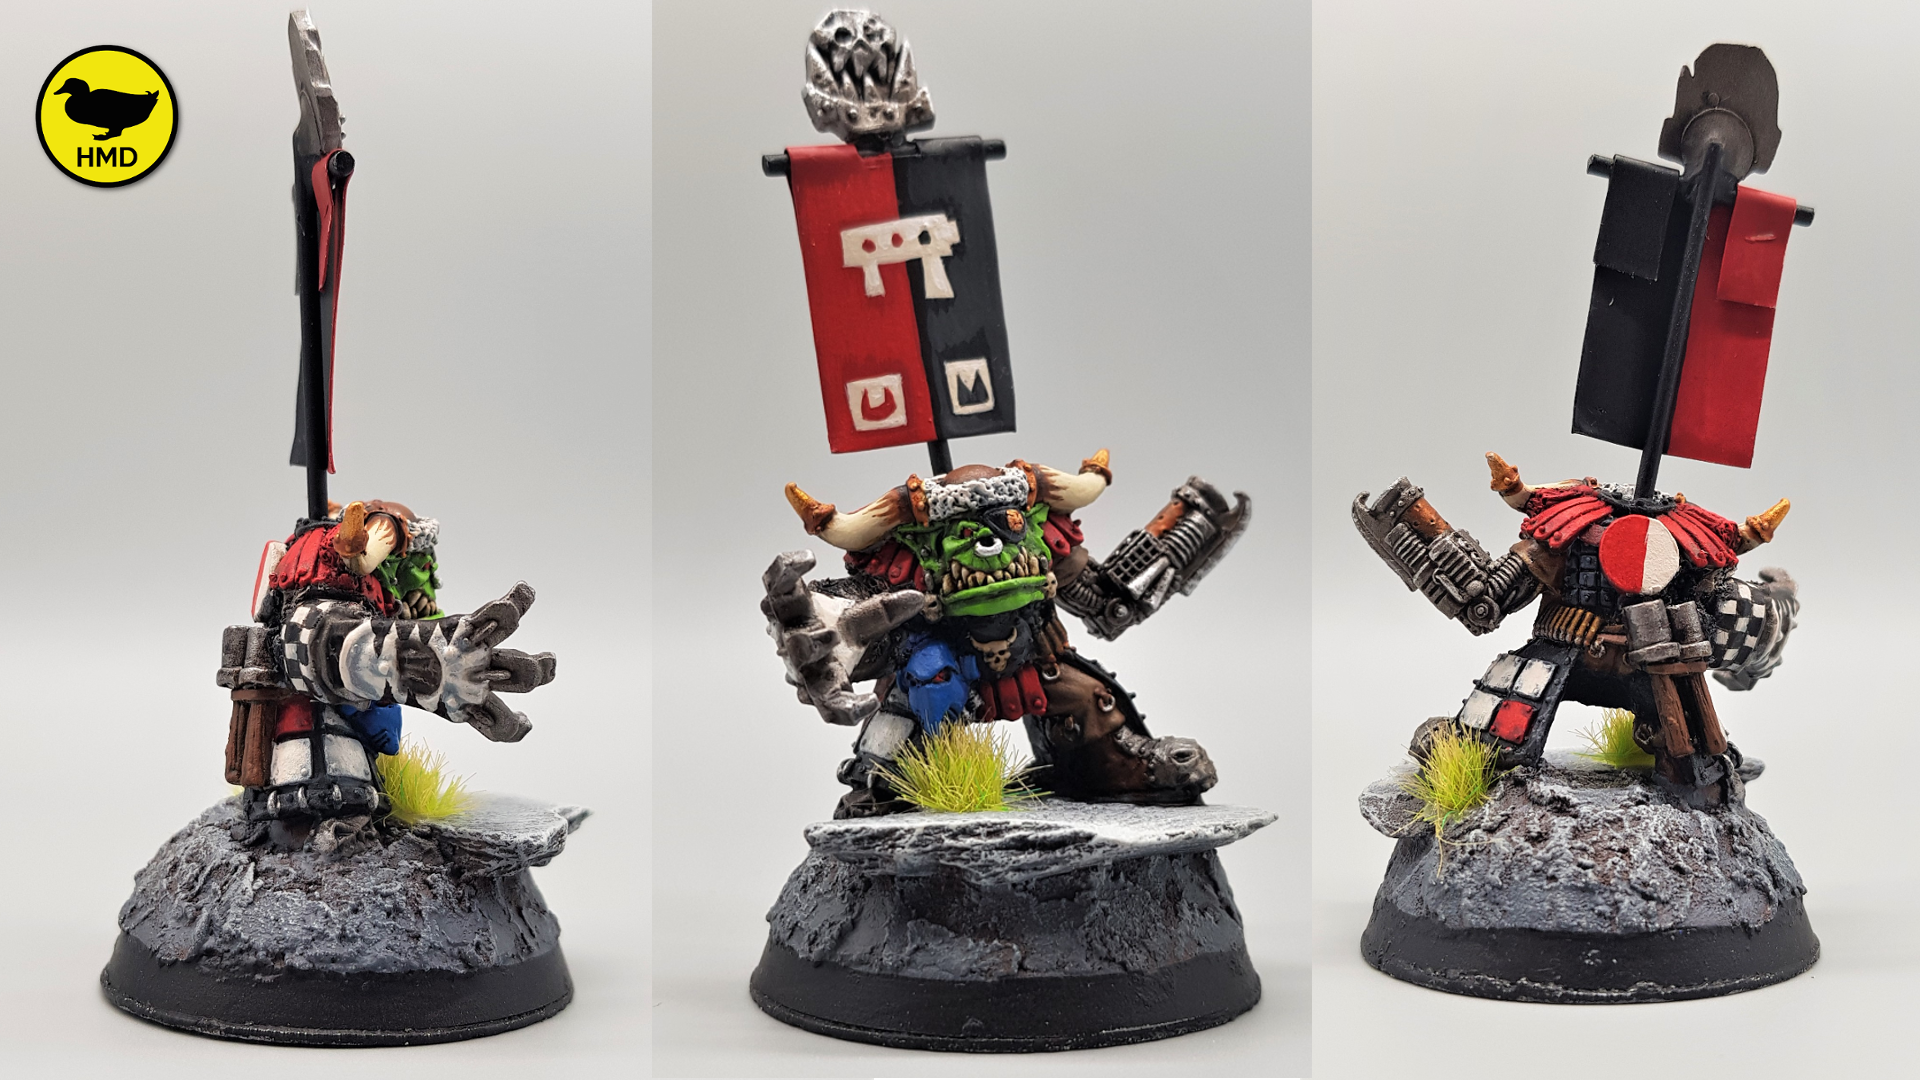
I then spent the rest of the evening applying recess shades, classic Ork chequer board patterns and detailing the wagon and was pretty happy with the result. I hit it with a coat of matt varnish to seal everything in and then only one task remained…… the banner.
Now I have never really painted a banner before. I’ve certainly never made a banner from scratch, but after a bit of internet searching and YouTube watching I decided to opt for Gerry’s suggested approach of win bottle tin film.
This involves taking the thin tin film found around the lid of a winebottle and re-purposing it for a banner. It’s a really good material as it can be bent easily and cut with scissors or a hobby knife.
I also had to decide on a pattern and opted for a simple Orky skull with some more chequerboard glyphs.
This montage shows you how I went about turning the wine bottle tin into my Orky flag……
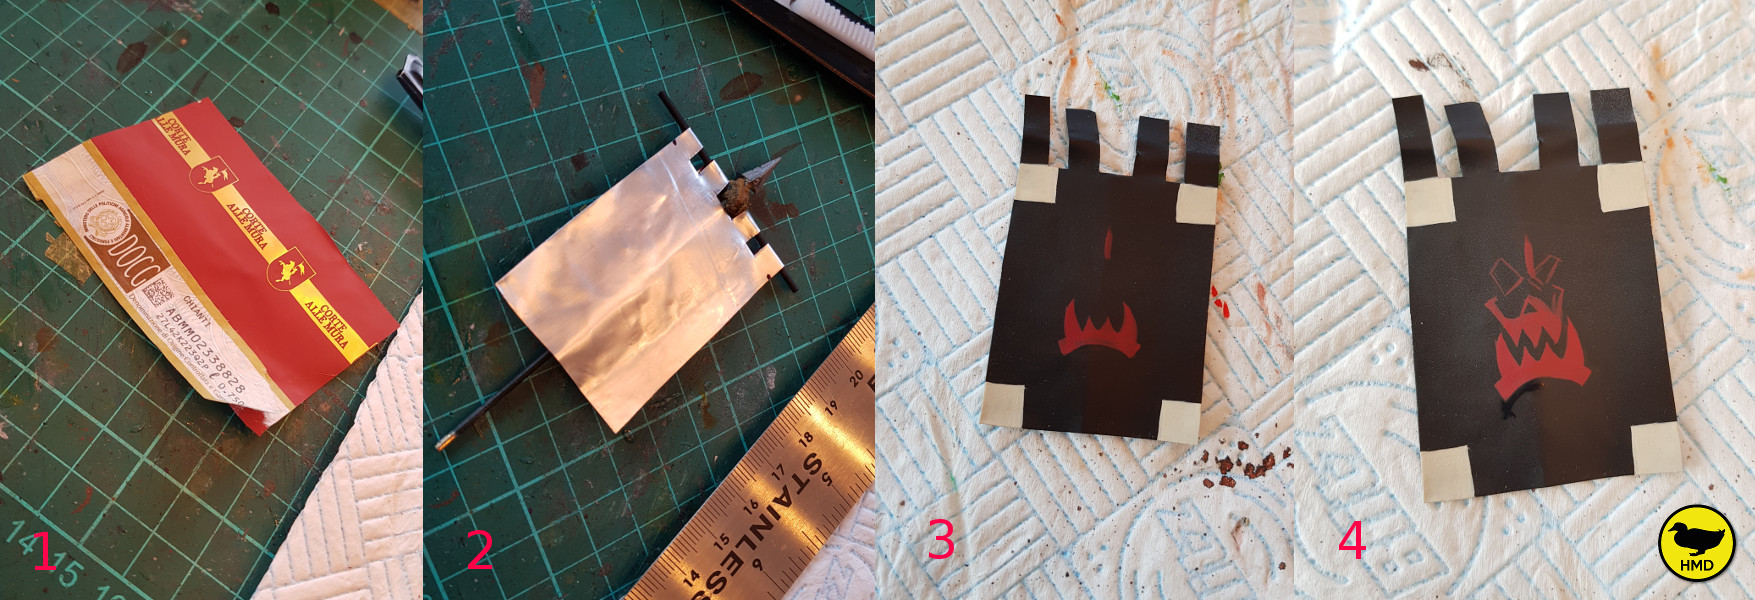
In 3, I have primed the banner black and then started by boxing in the 4 corner quadrants for my glyphs. I figured this would help me keep the forthcoming freehand design in the centre of the banner.
In 3 and 4 you can see how I tried to put this together. I made numerous mistakes and just went back in with black to adjust until I got the lower jaw the way I liked it.
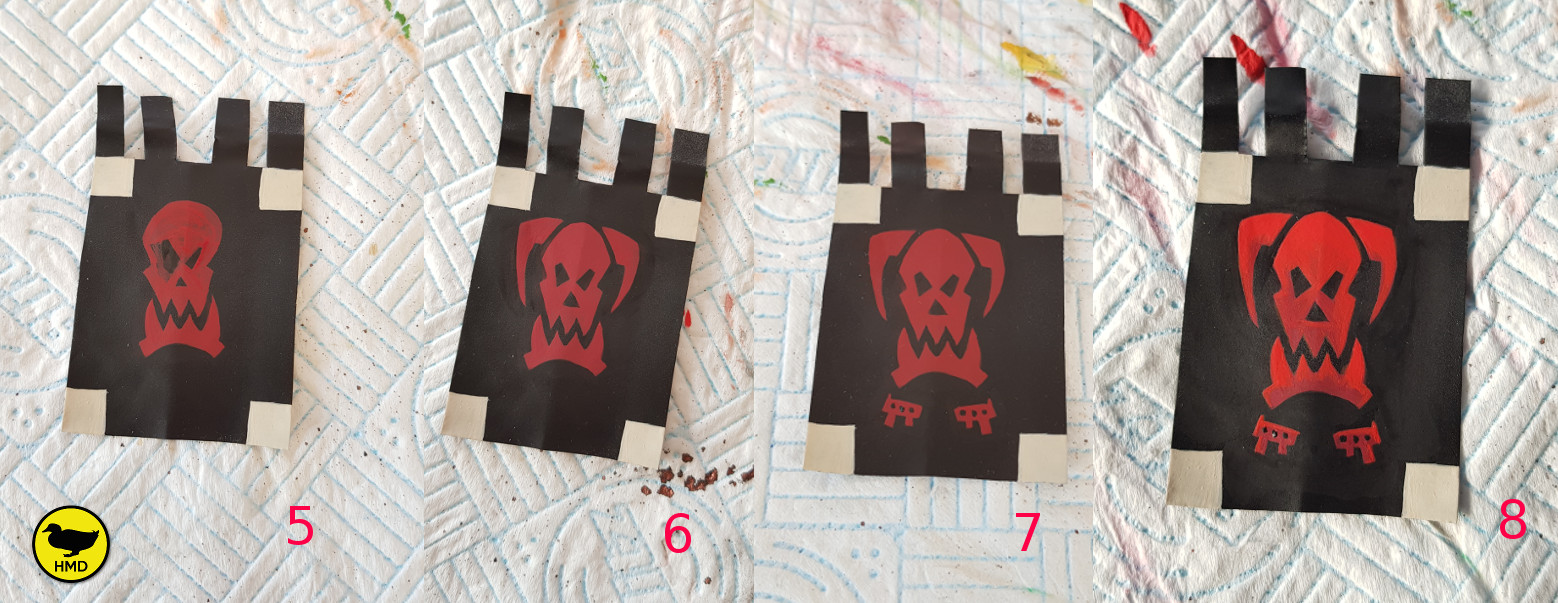
As you can see in 5, I went back and forward a few times until I got the eyes the right size and in the correct position to give the right feel that I was looking for.
After that I worked in the horns (6) and the shoota’s at the bottom (7). I then added a stark highlight in (8).
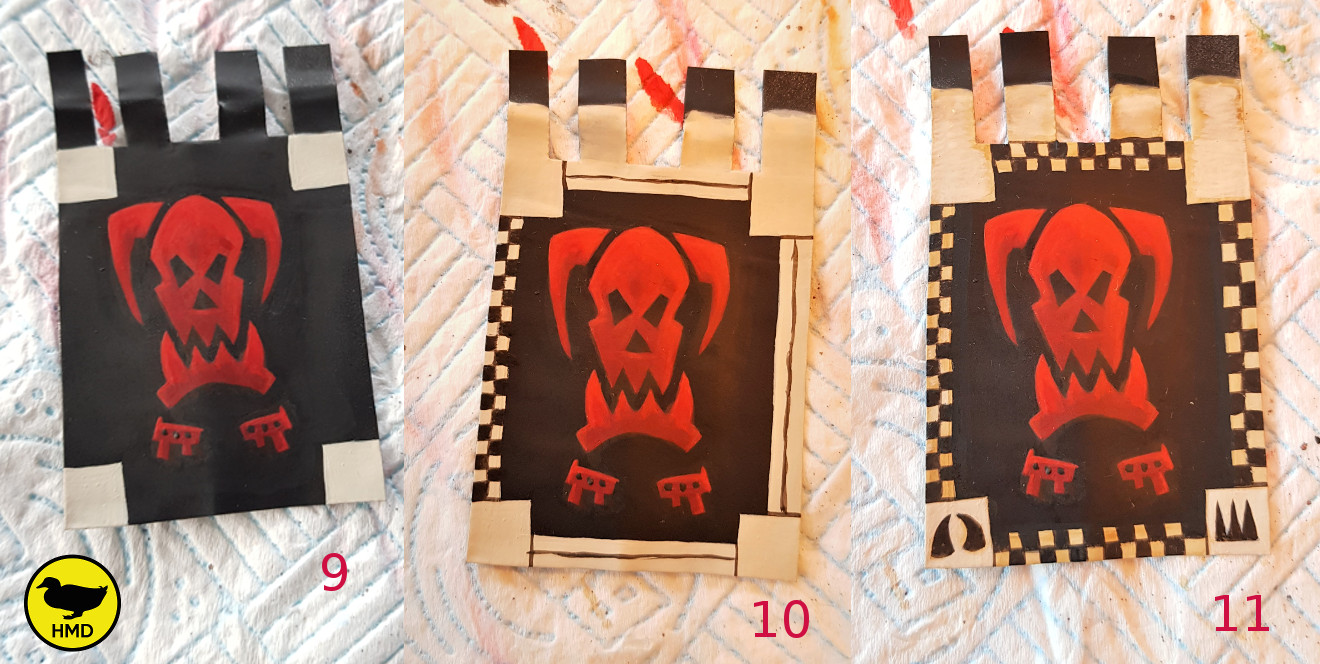
I then applied a couple of targeted red glazes (9) to blend the transition and smooth everything out before tidying up (again) with black. Finally I added Wraithbone borders and more chequerboards (10) and some Orky glyphs (11).
Building and painting the banner took nearly as long as the tank itself to be honest with you, but it was the first time that I have really challenged myself with freehand and I expect something that will be required again with these 2nd edition Orks as everyone seems to have a banner!
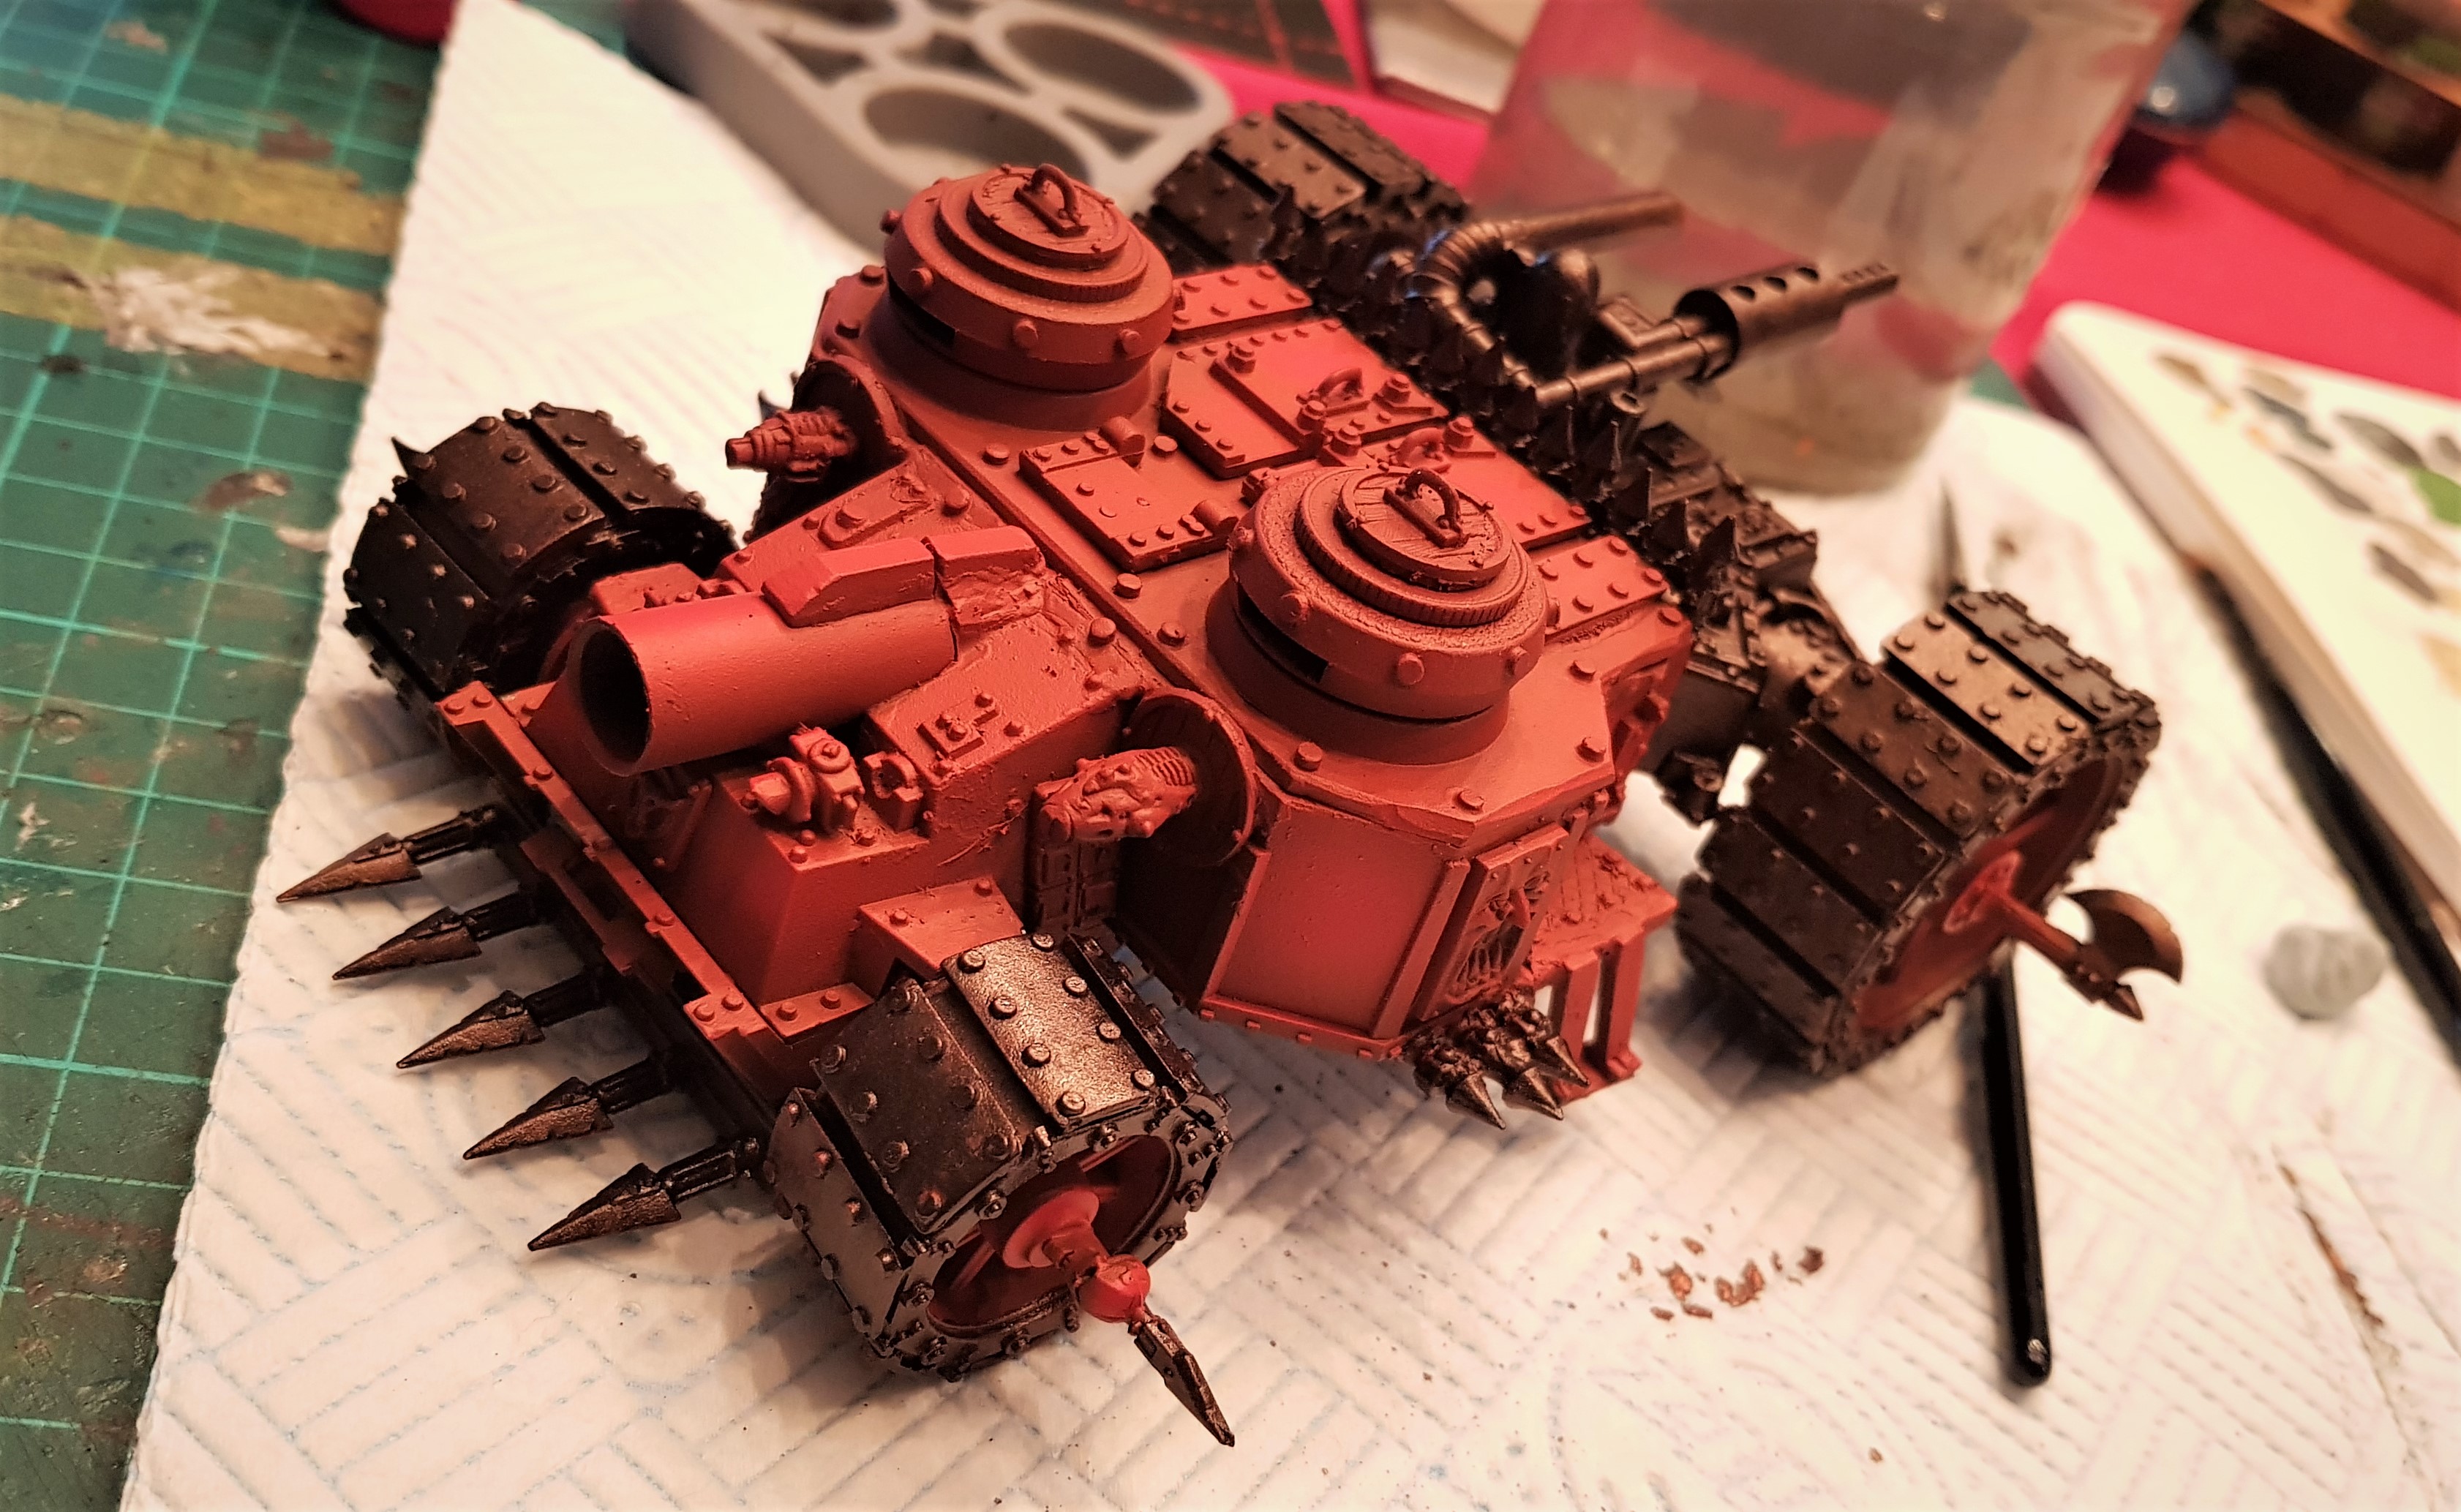
30 Years in the making
Remember these:
Following my serach of the ‘Loft of Shame’ I discovered a project that I started back in the early ’90s. I remember getting one of the original Ork Battlewagon kits, but being somewhat disappointed by it’s lack of firepower when compared to my friends exciting Space Marine Land Raiders and Predators. Following receipt of WD 131, my opinion of the humble Battlewagon kit was redefined by the legend, Tony Cottrell’s epic Gobsmasha conversion. This adds a Battlecannon (Yes that is a school Berol pen lid) and protection, while trading off Ork transport capacity (they can walk!)
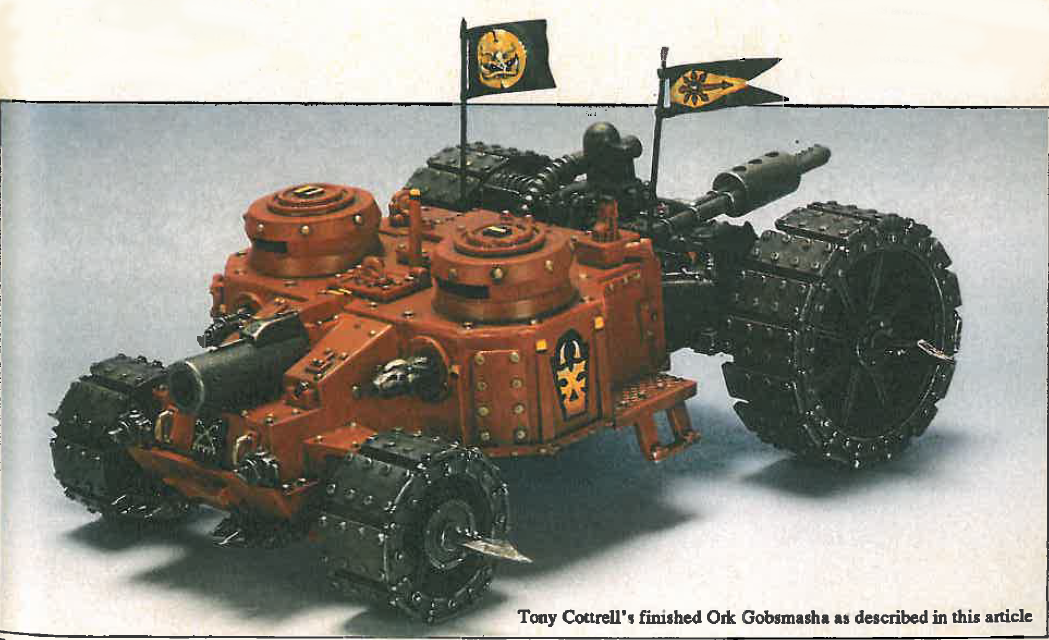
Unfortunately 12 year old me, wasn’t quite up to his skillz and 30 years of neglect had left my ‘smasha feeling a little the worse for wear. When I tried to strip the 30 year old brushed on primer off the model, the cardboard perished and the whole thing fell apart!
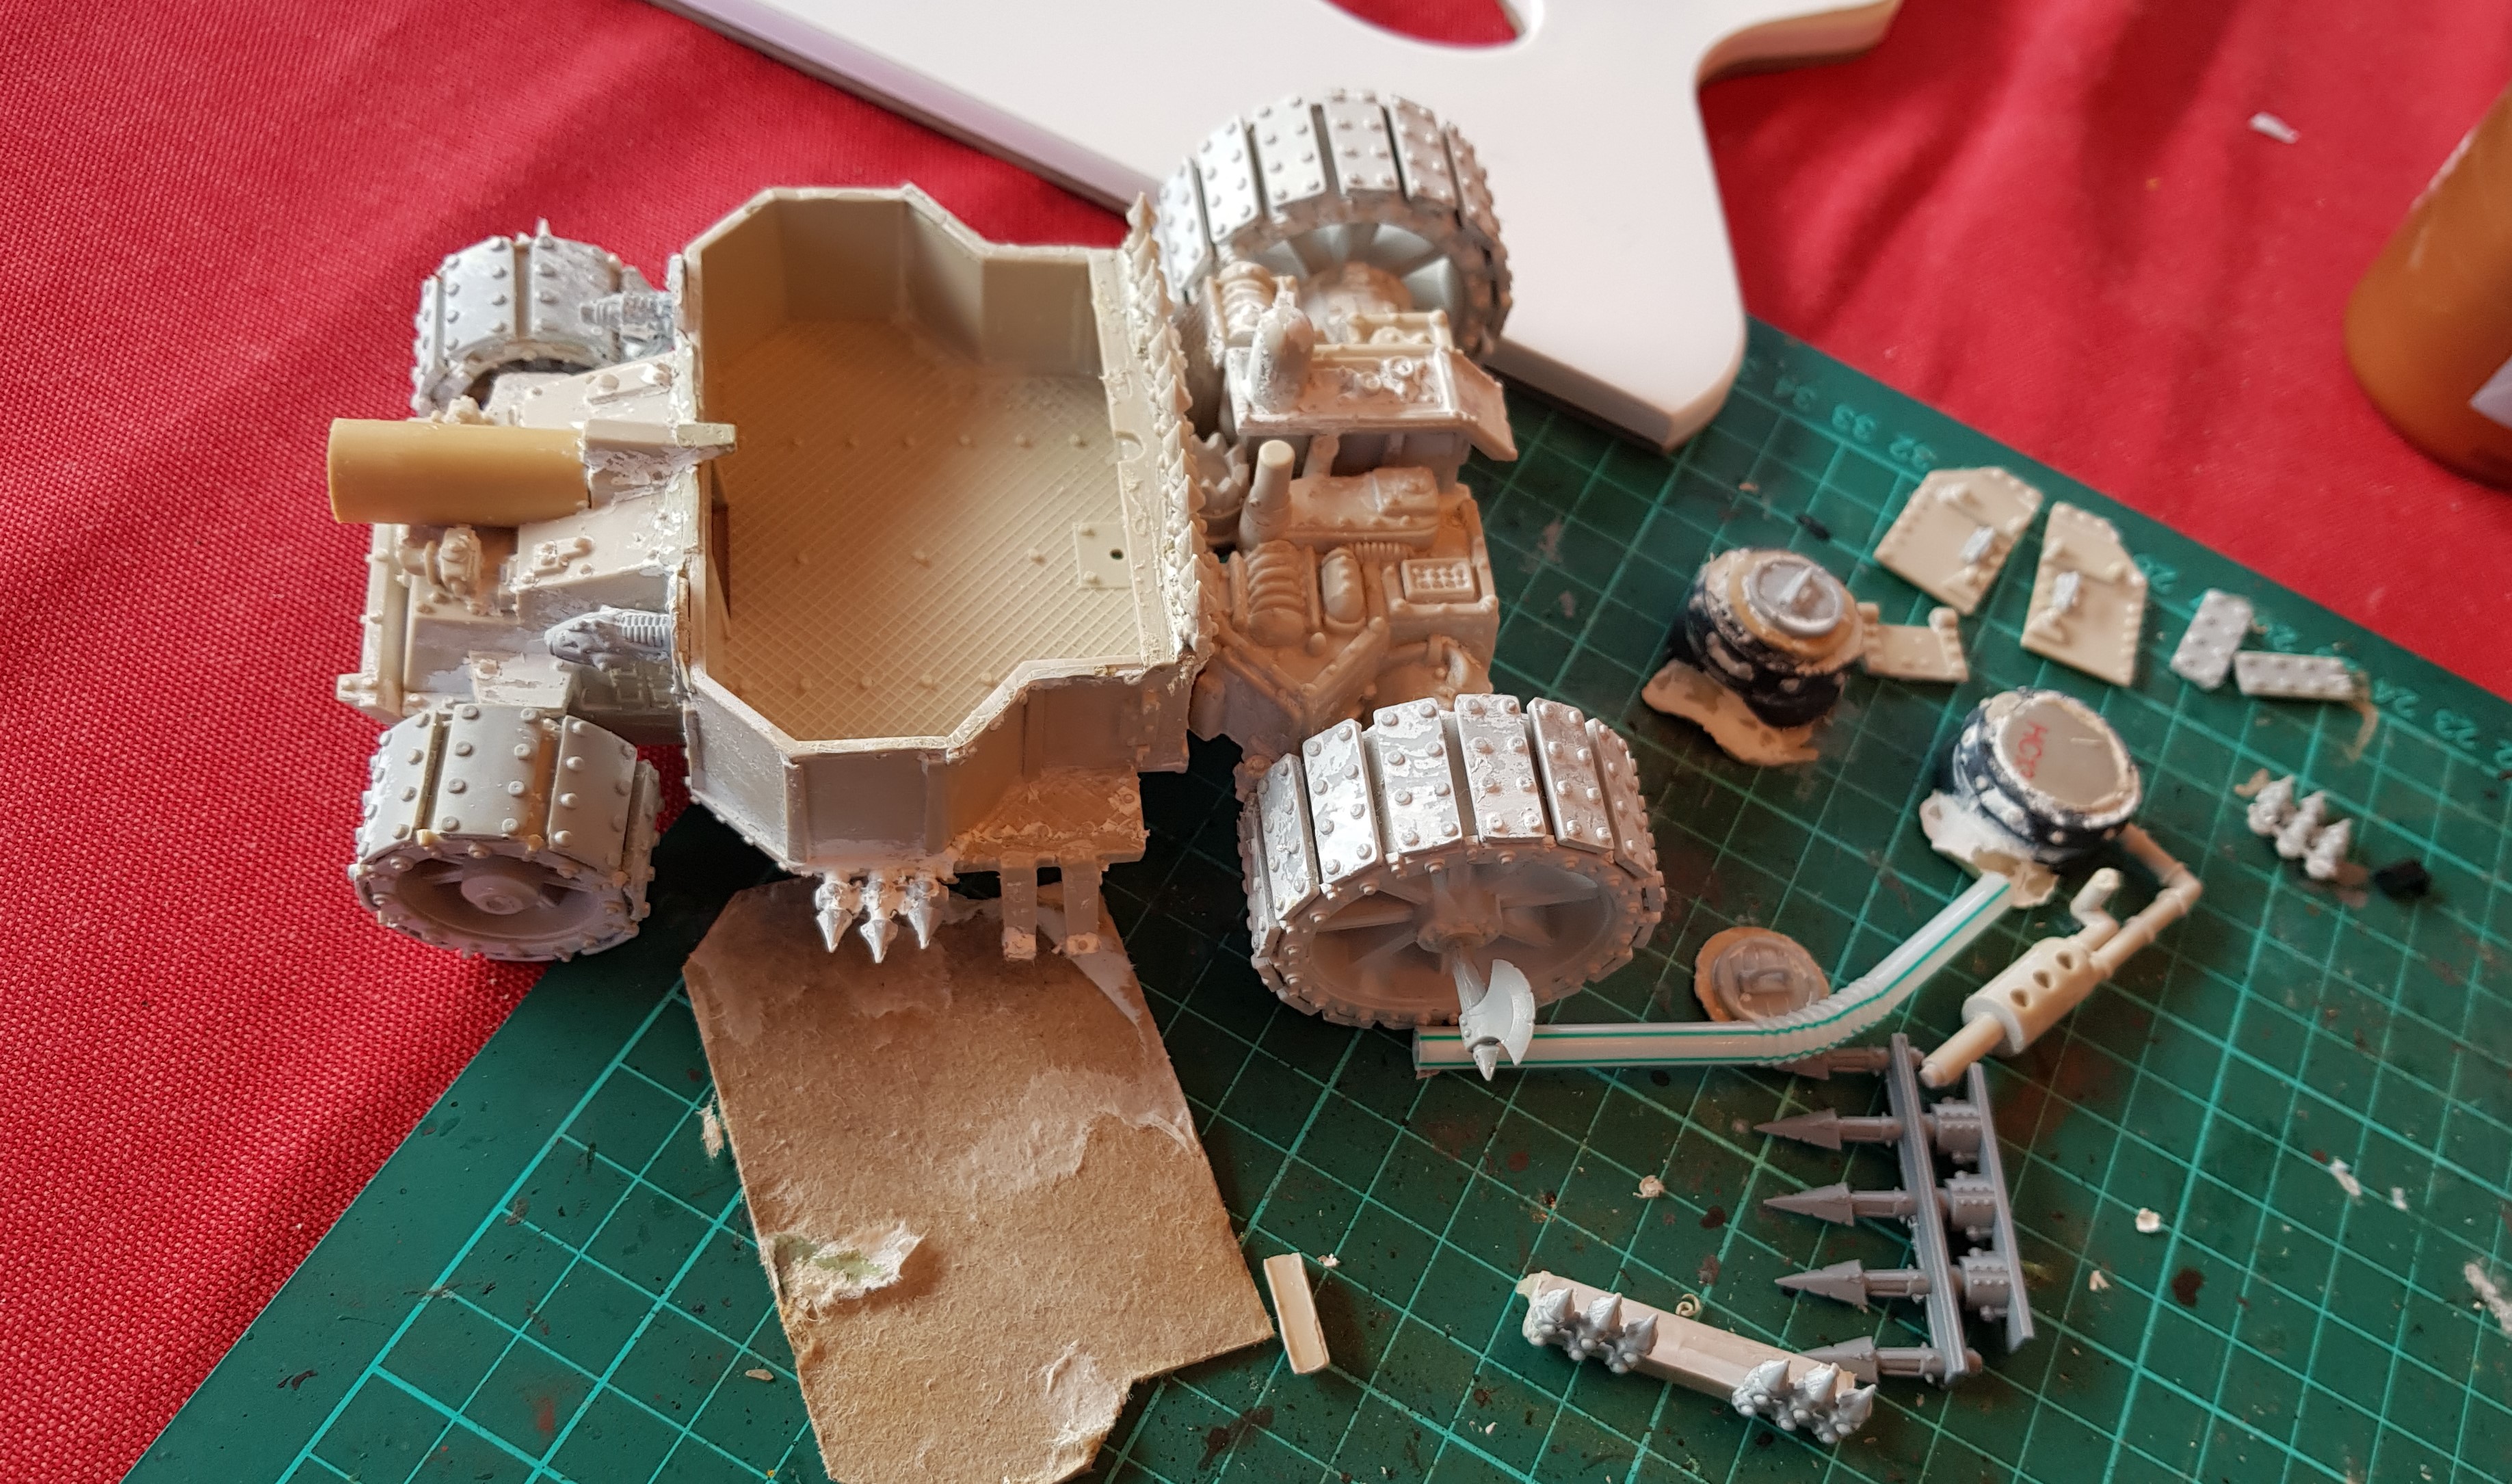
This left me with the task of rebuilding the basis of the model, which was surprisingly simple, plasticard construction, turrets made from 3 slotta bases, exhaust made from the 30 year old bendy drinking straw and as per the original box art, the addition of a Massive banner, as everything and everyone in 2nd edition seems to have a banner!
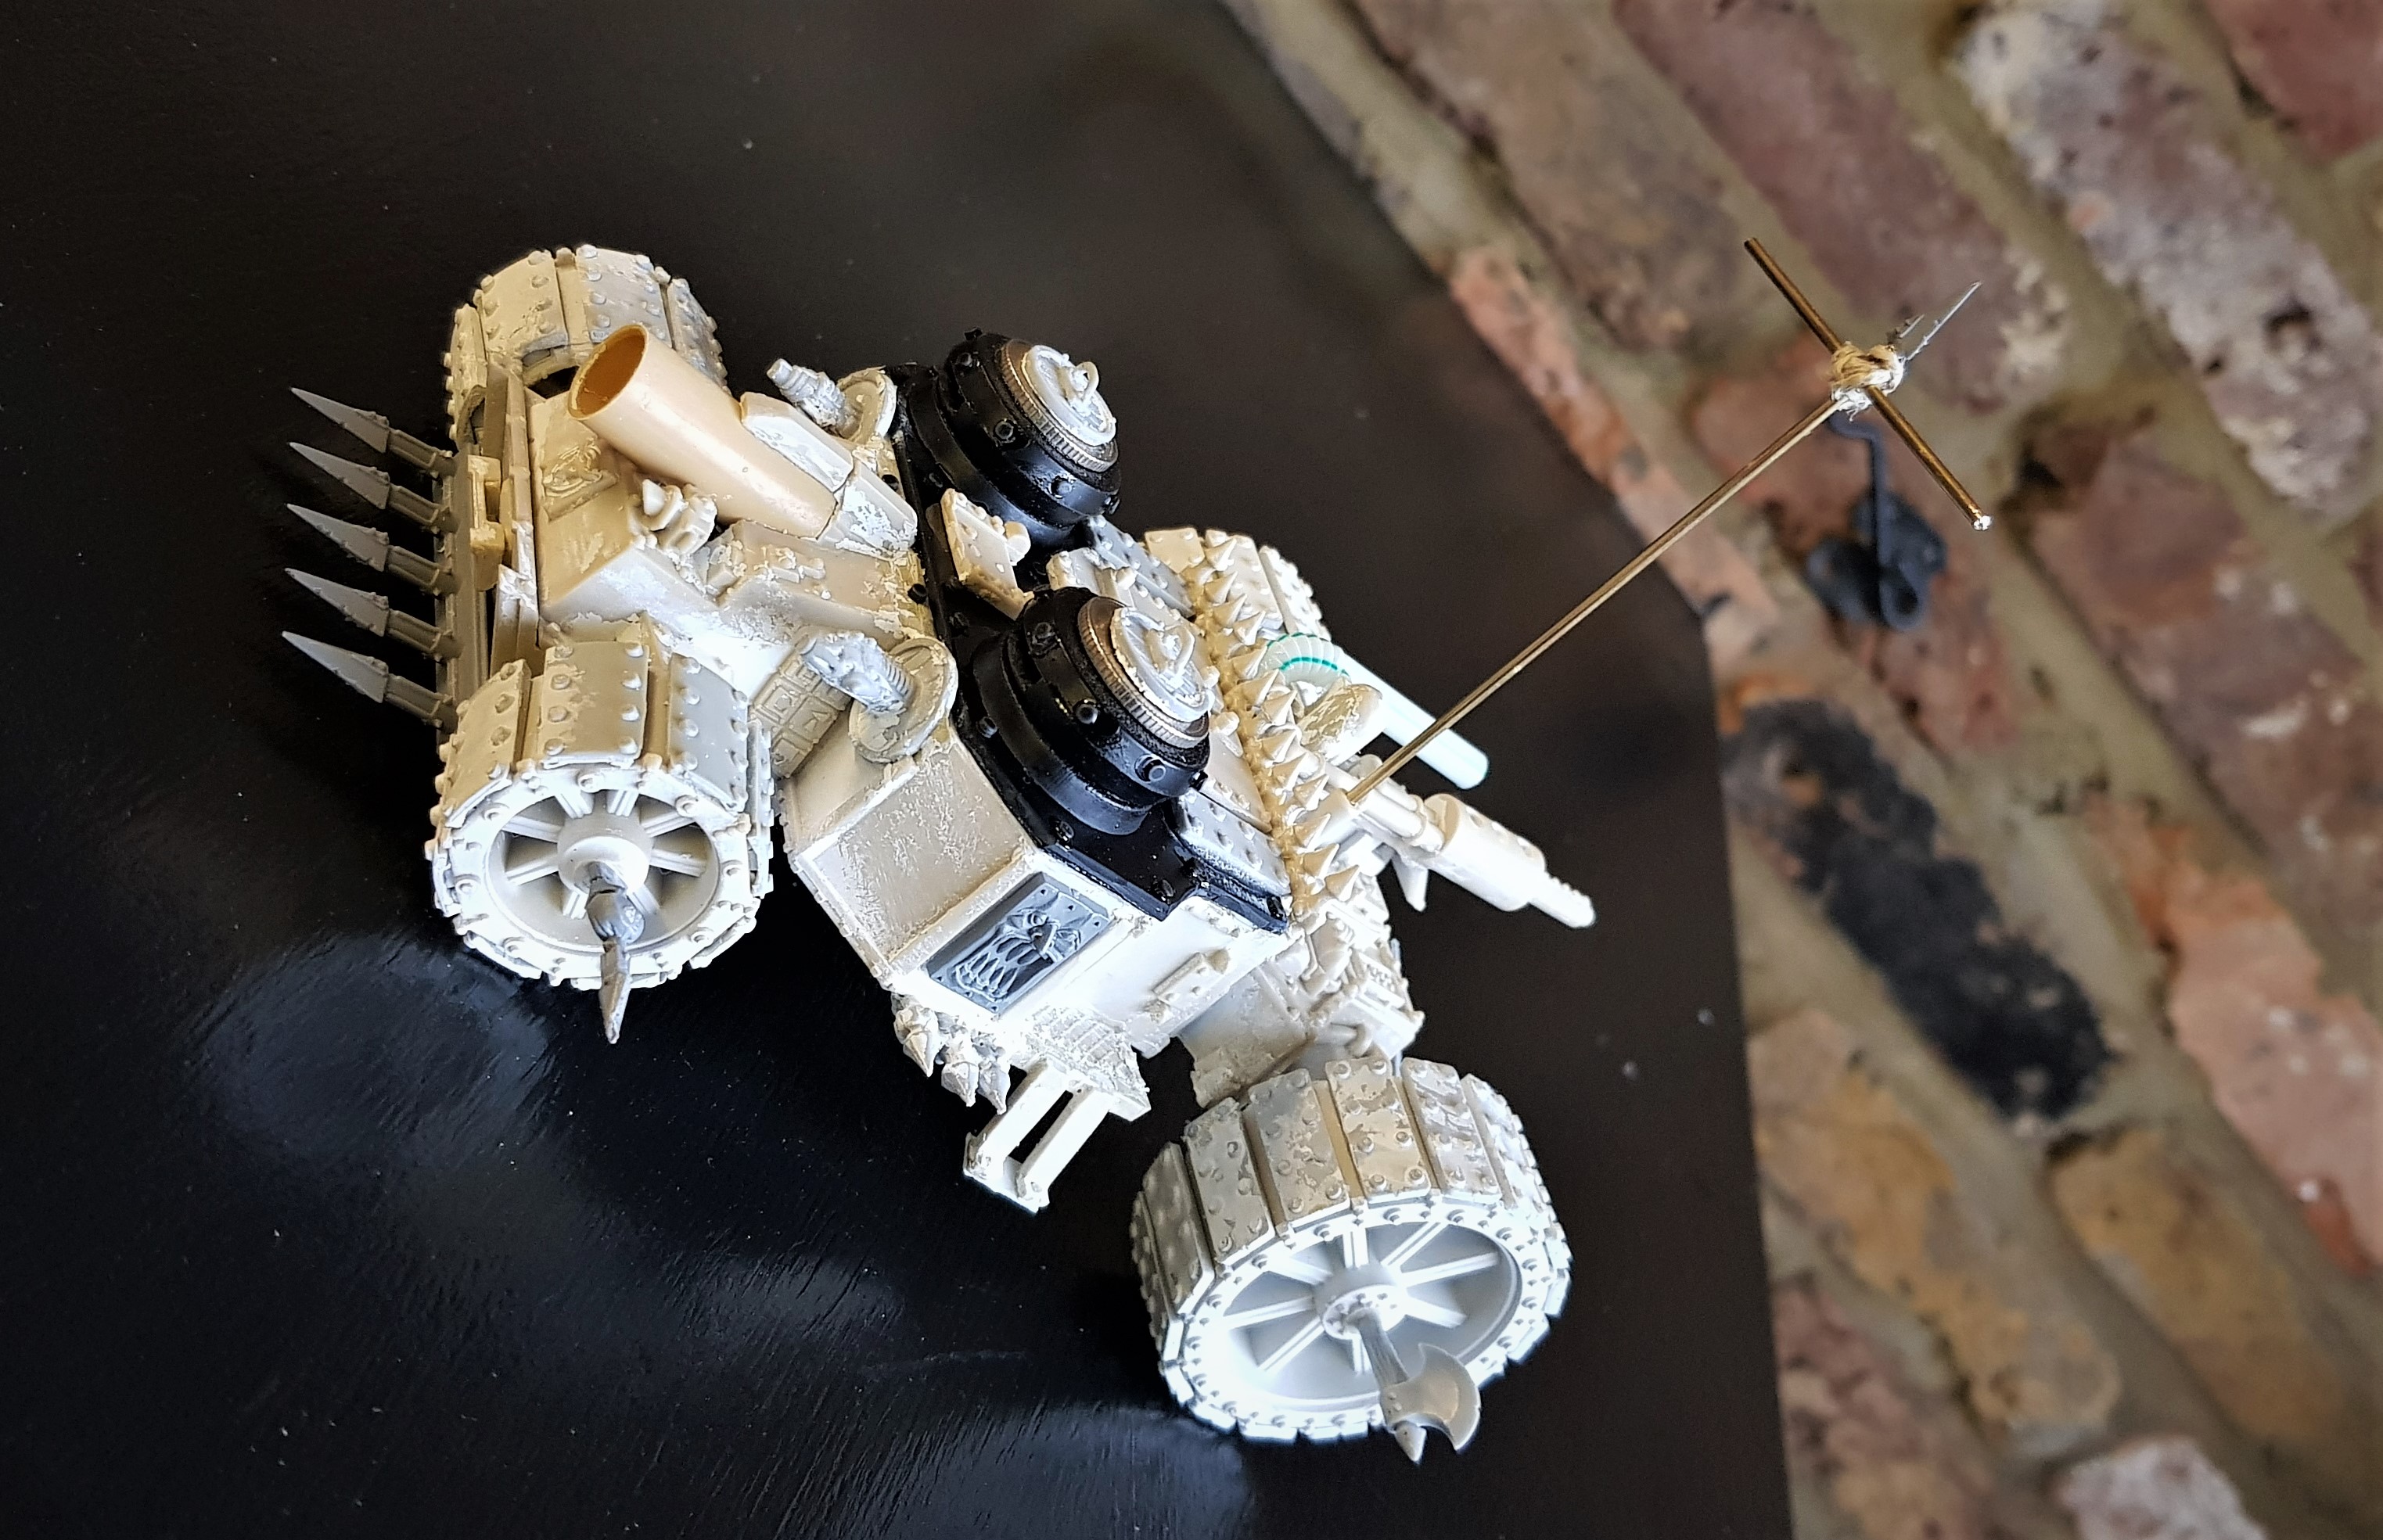
For painting, I wanted to stick to something that closely resembled Tony’s original paint job, but I also wanted to try out the hairspray technique as I’ve never really tried that sort of thing before. So I started with a light prime in Grey, followed by airbrushing a chocolate Brown all over the tank, leaving it looking a bit like a large Dairy Milk Ork vehicle.
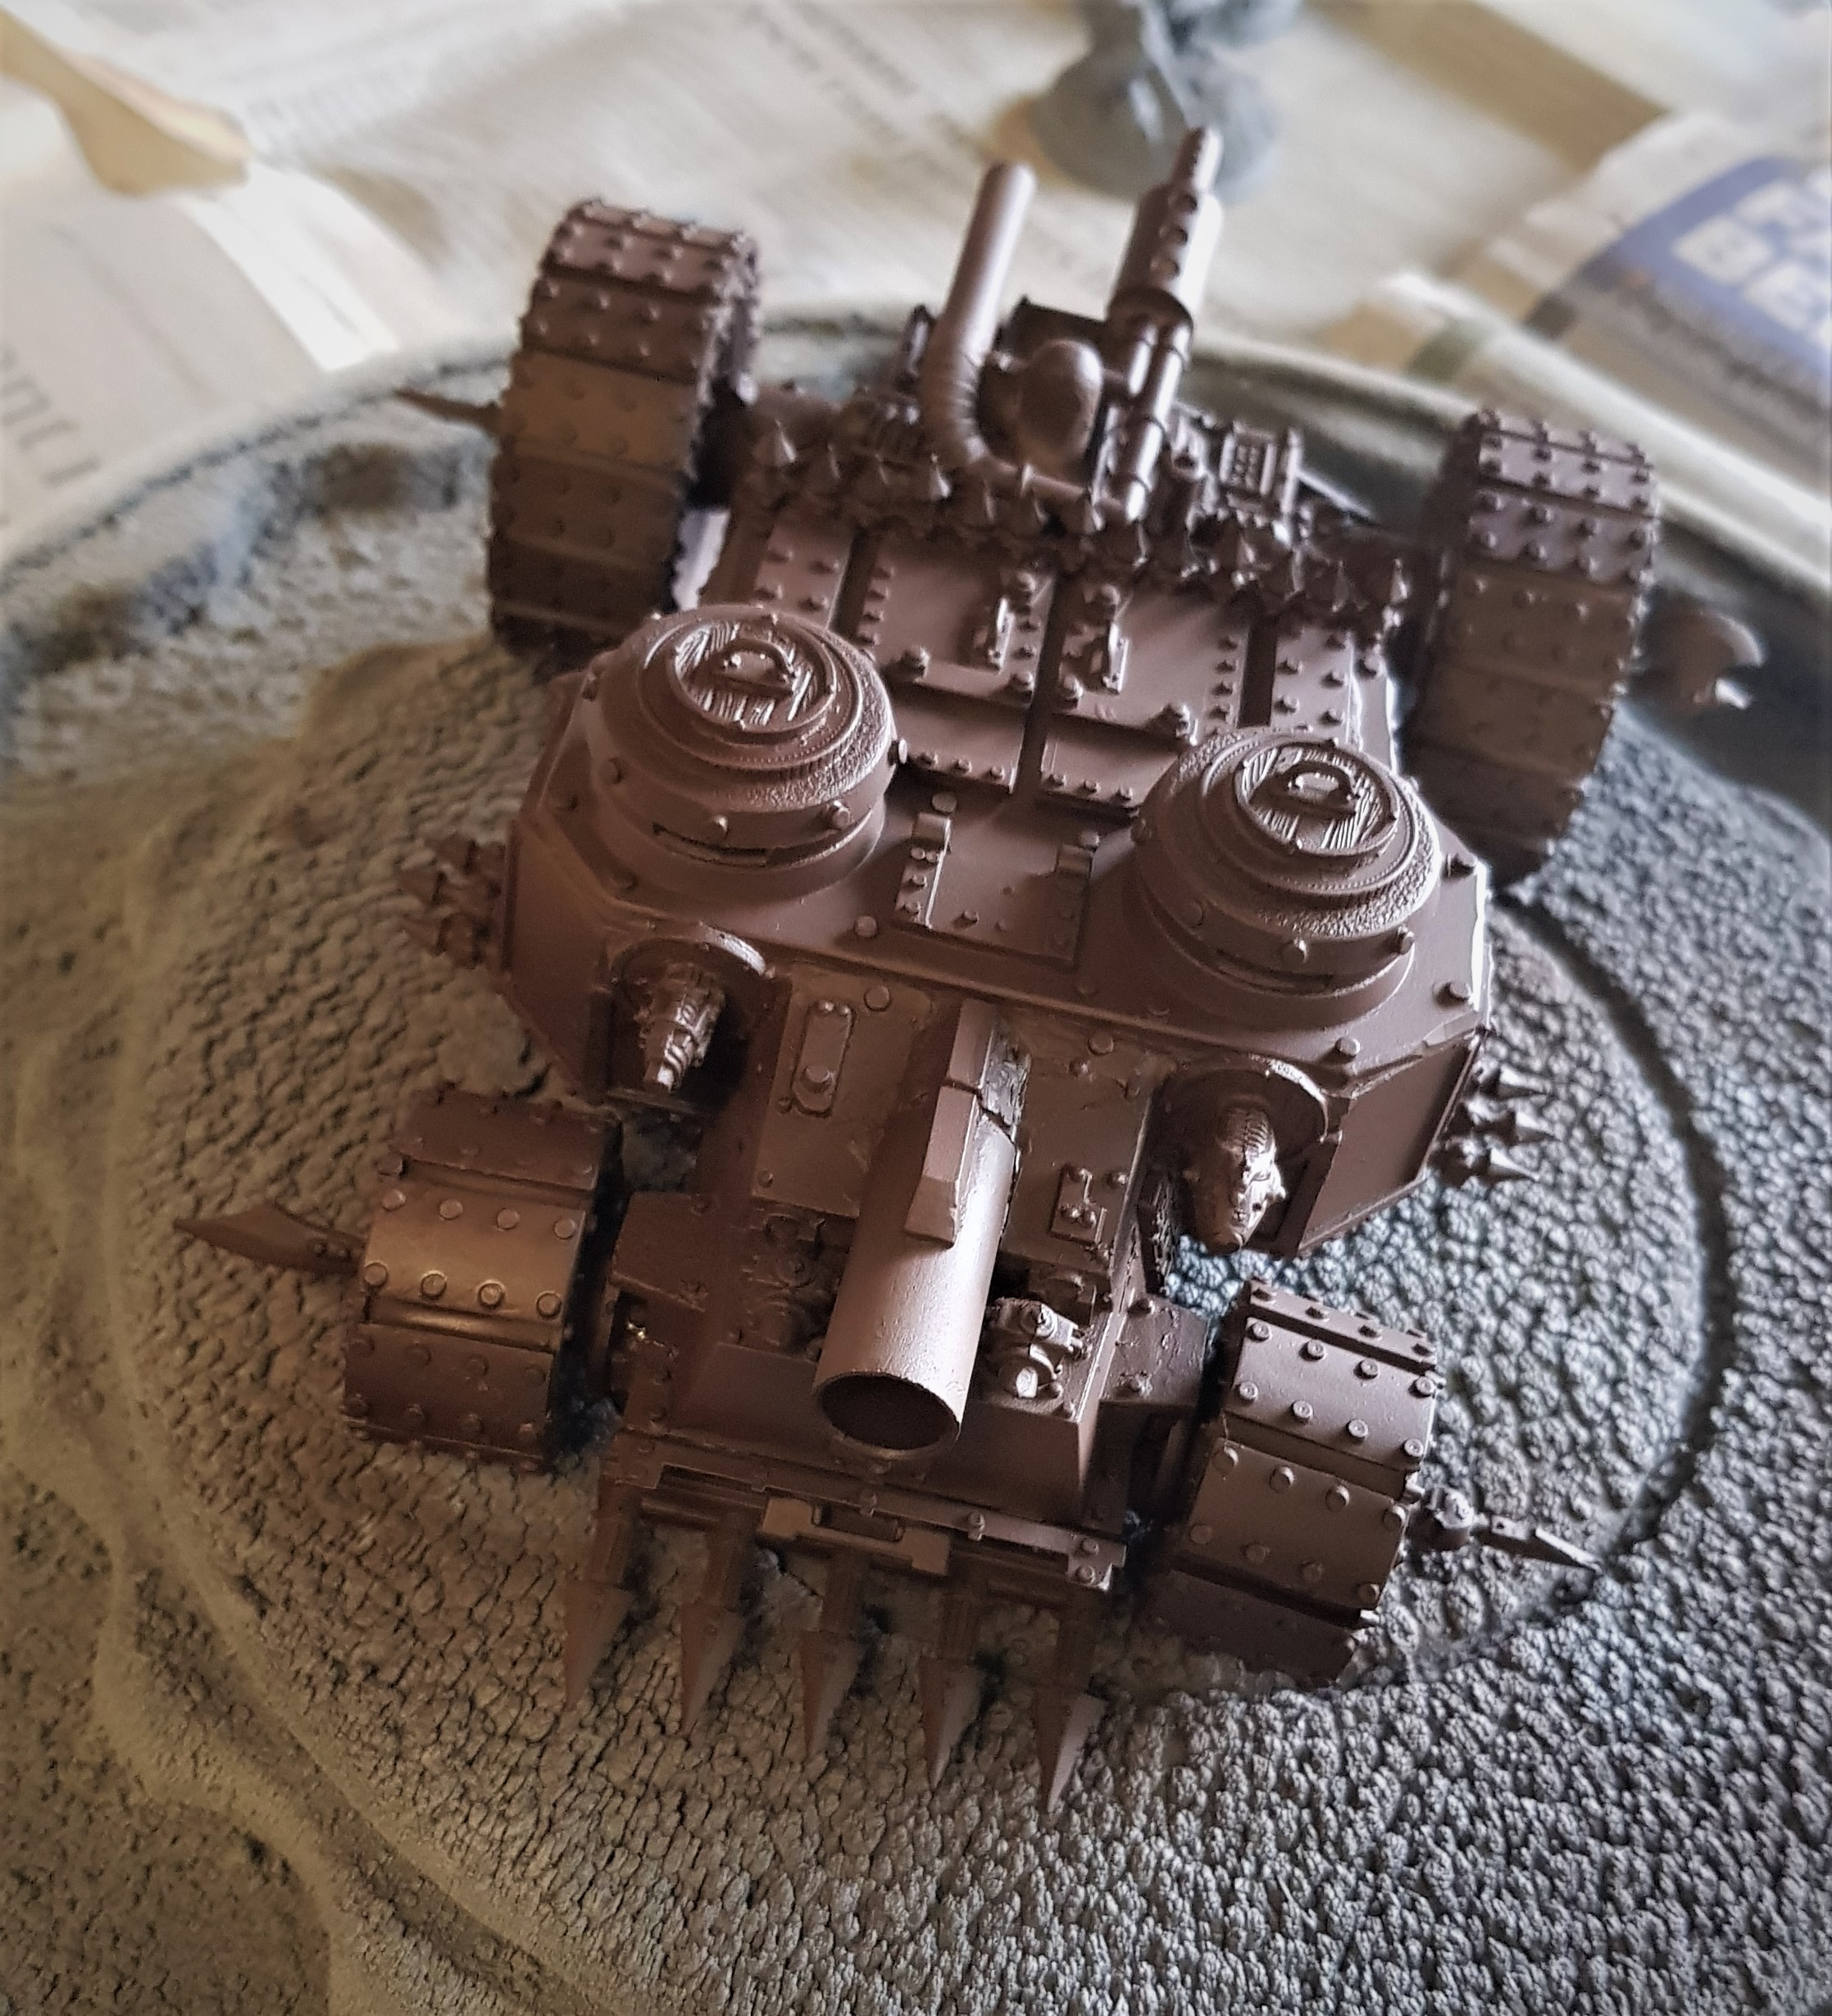
Next up I sprayed the whole thing with two coats of matt varnish to seal in the Brown and then 2 heavy coats of the cheapest hairspray that money can buy. After leaving that to dry for a bit I hit the tank with three thin coats of Vallejo Model Air dark red and then a gently highlight of VMA light red for a gentle panel highlight. I didn’t want to airbrush too light a colour as I wanted a more subtle highlighting effect on the tank. I then brushed painted on a tin bitz colour to the mechanics and engine part of the tank at the back. I wanted to see how the hairspray technique worked on both airbrushed and hand painted acrylics.
At this point I’d sunk a good few hours into getting the tank basic paint done and it looked like this.
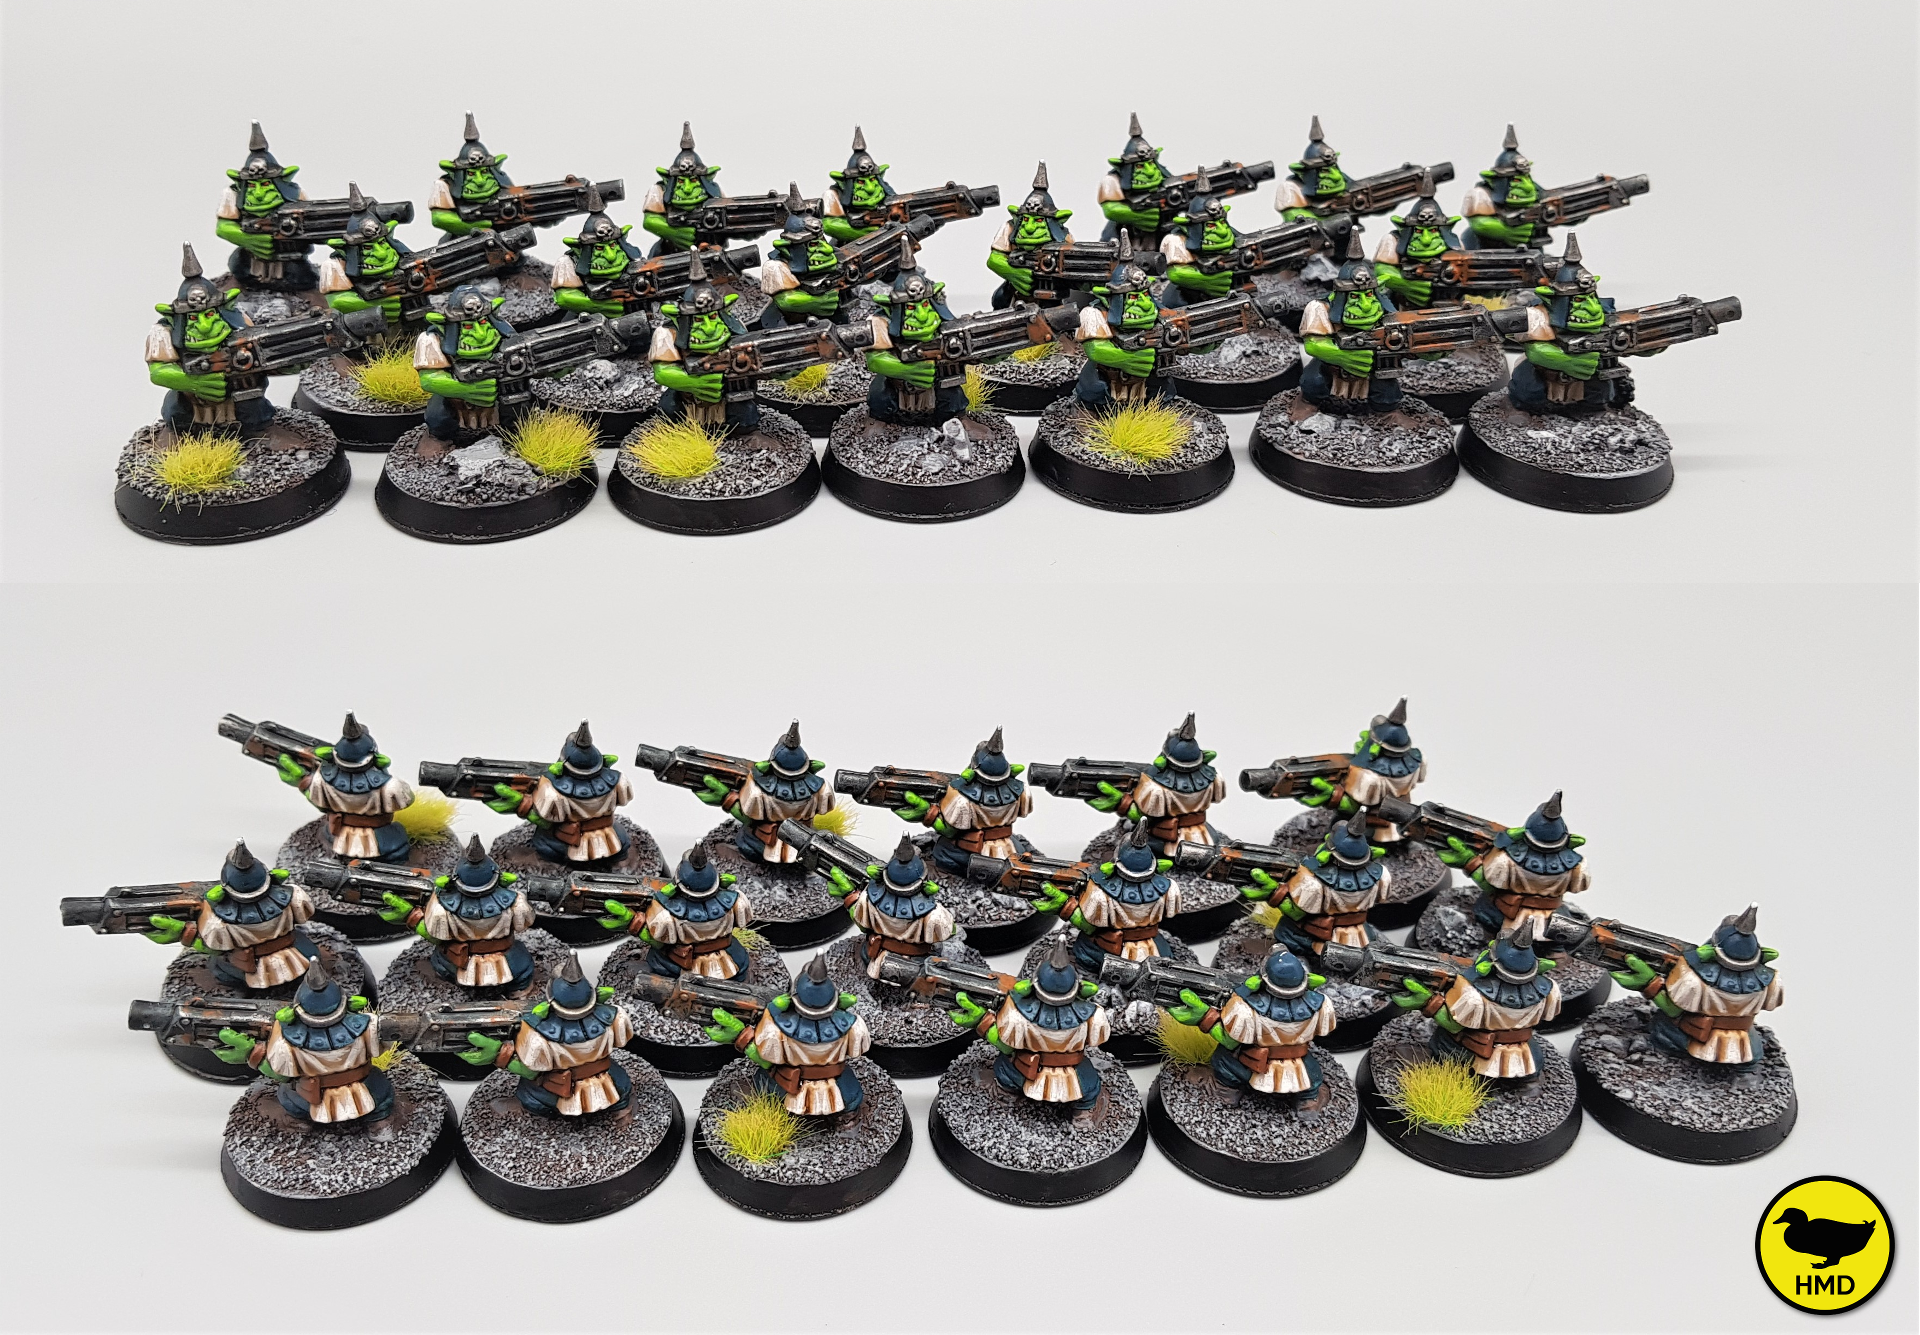
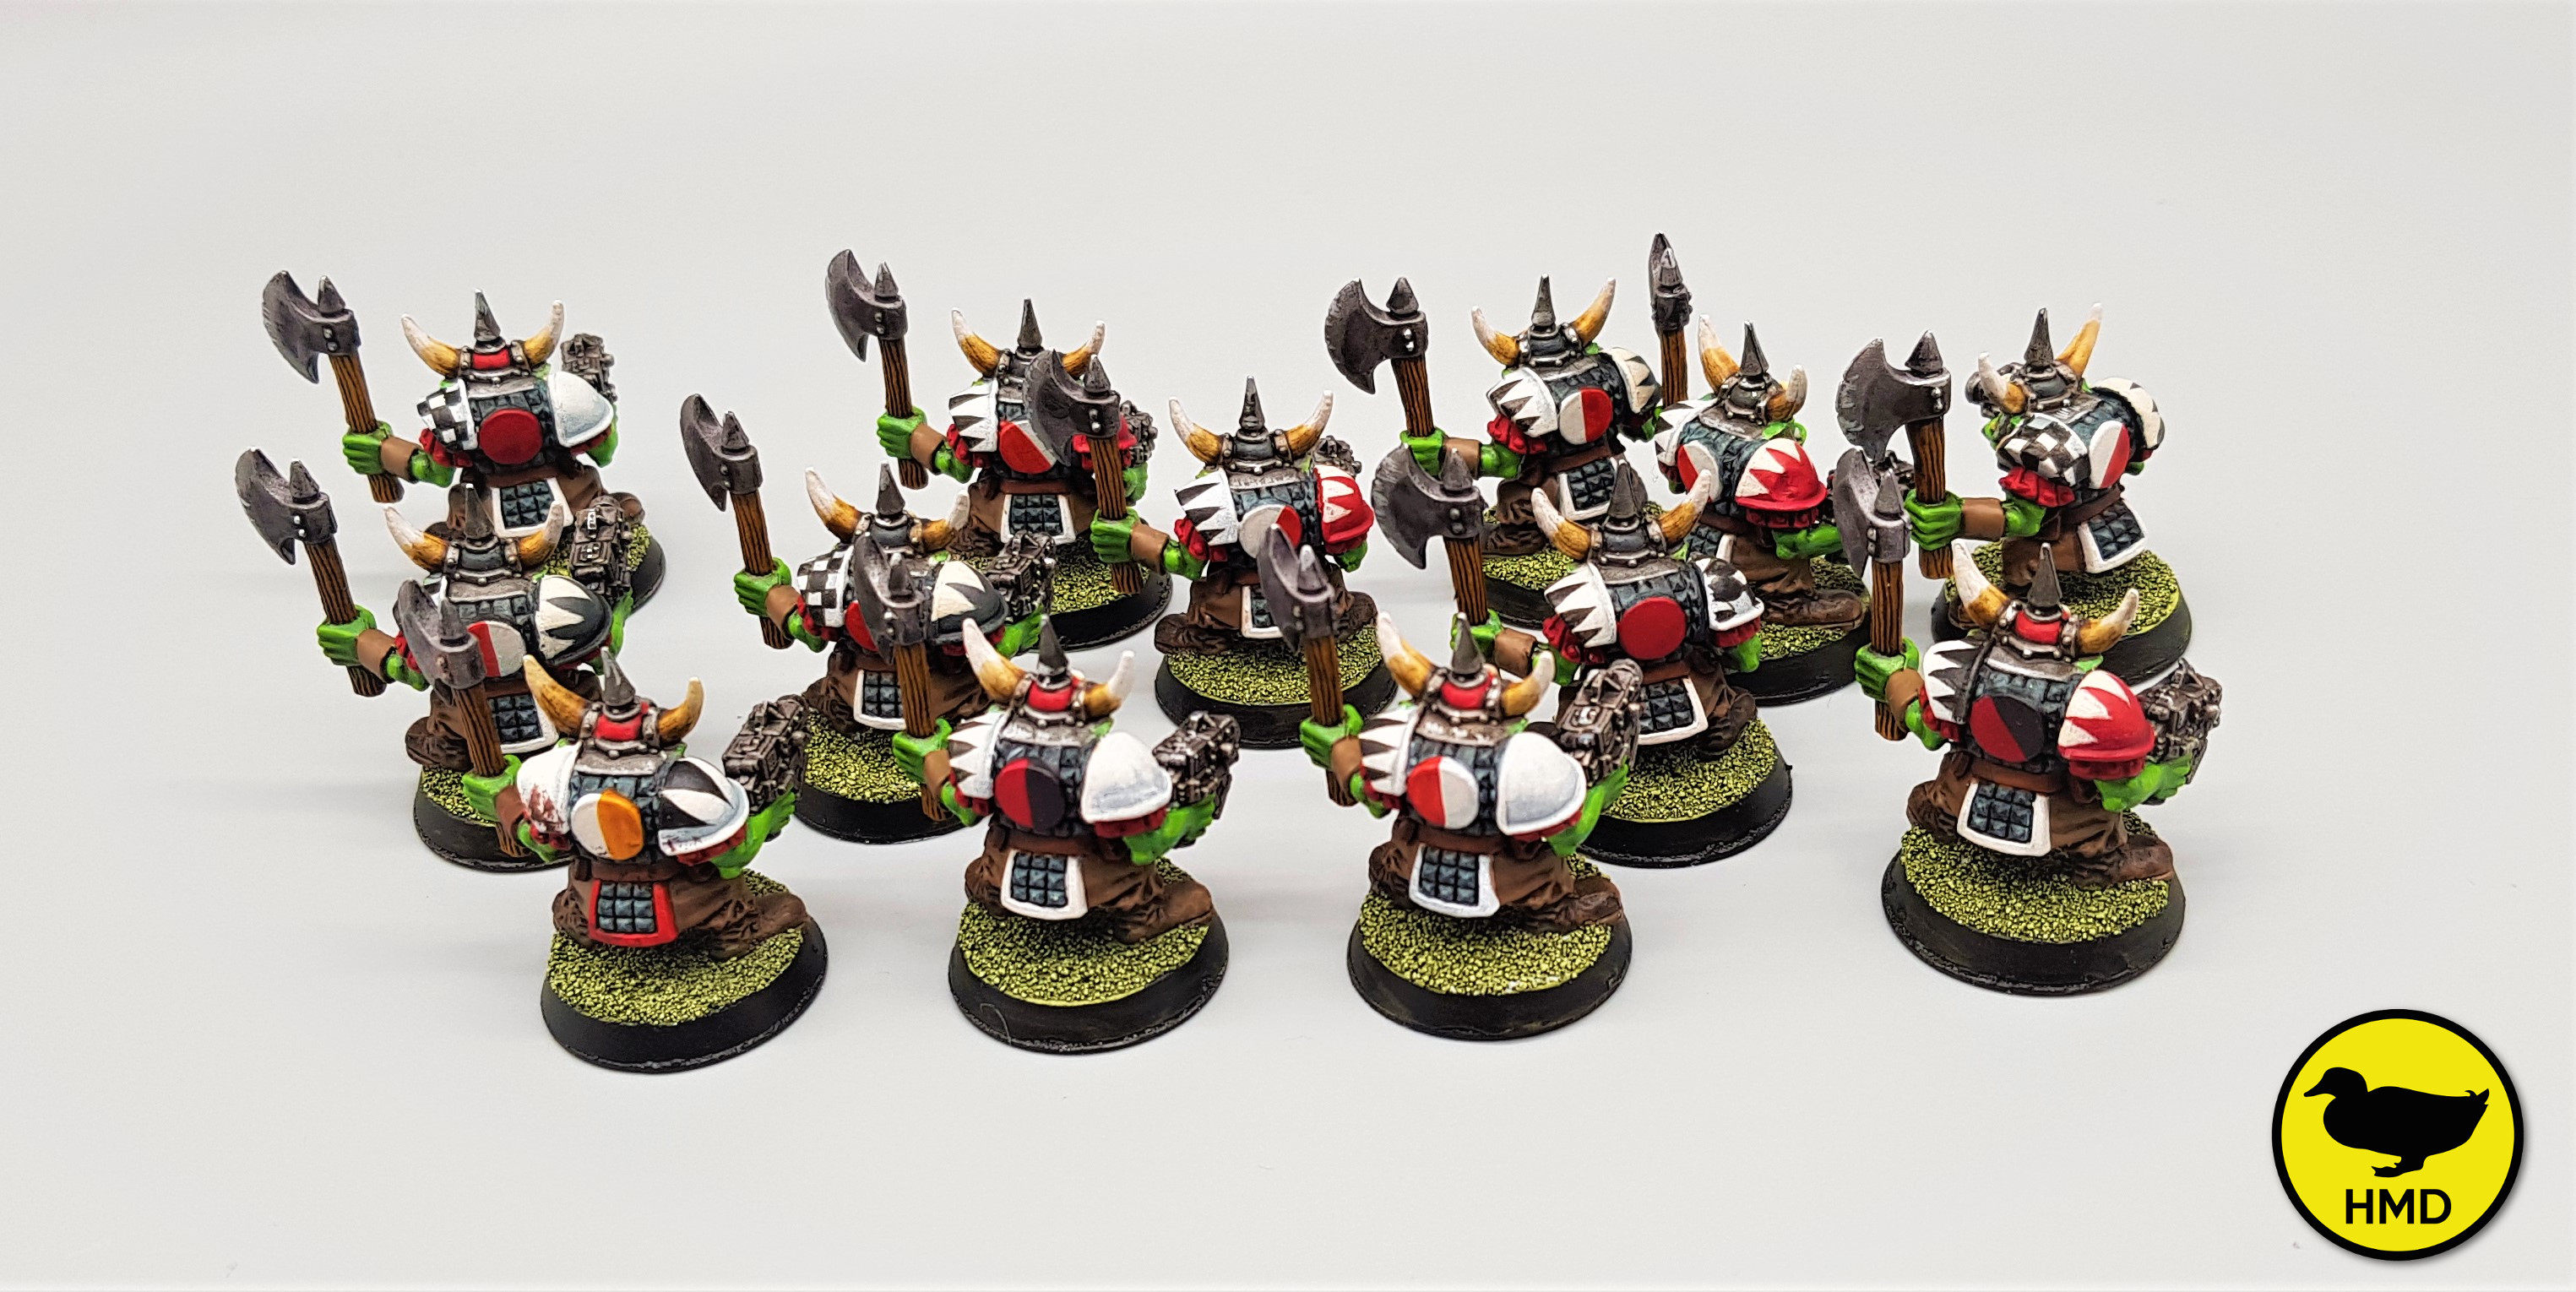
The Boyz swell
So a quick update for you. As mentioned last time, a few more Orks were required in order to bring the number of Boyz up to a reasonable sized squad, so I decided to try and put together the number of models that were in the original 2nd edition boxed starter. Unfortunately I was missing a large number of Shoota arms, as they obviously never got glued on back in the 90’s.
Luckily @midlifewarhammer gifted me a large collection of retro Ork figures, which I proceeded to uncerimonously proceeded to “de-arm”. These got a quick strip (for more information on the process I use see my LoTR ‘stripping’ project).
They then got the same paint job as the previous batch, but that now gives me 20 mono-pose Goff Ork Boyz, so I can hopefully play through the starter missions that come with the 2nd edition starter mini-campaign.
And for the Lloyd shot…..


![Zenit Miniatures’ Samurai Warlords Now Live On Kickstarter [Updated]](https://images.beastsofwar.com/2026/02/samurai-warlords-launch-main-600-338.jpg)