


![Alternative Trench Crusade Miniatures? Trench Missionaries Review | Wargames Atlantic [7 Days Early Access]](https://images.beastsofwar.com/2026/03/unboxing-wargames-atlantic-trench-missionaries-coverimage-225-127.jpg)


“Sorry About The Mess”


Recommendations: 305
About the Project
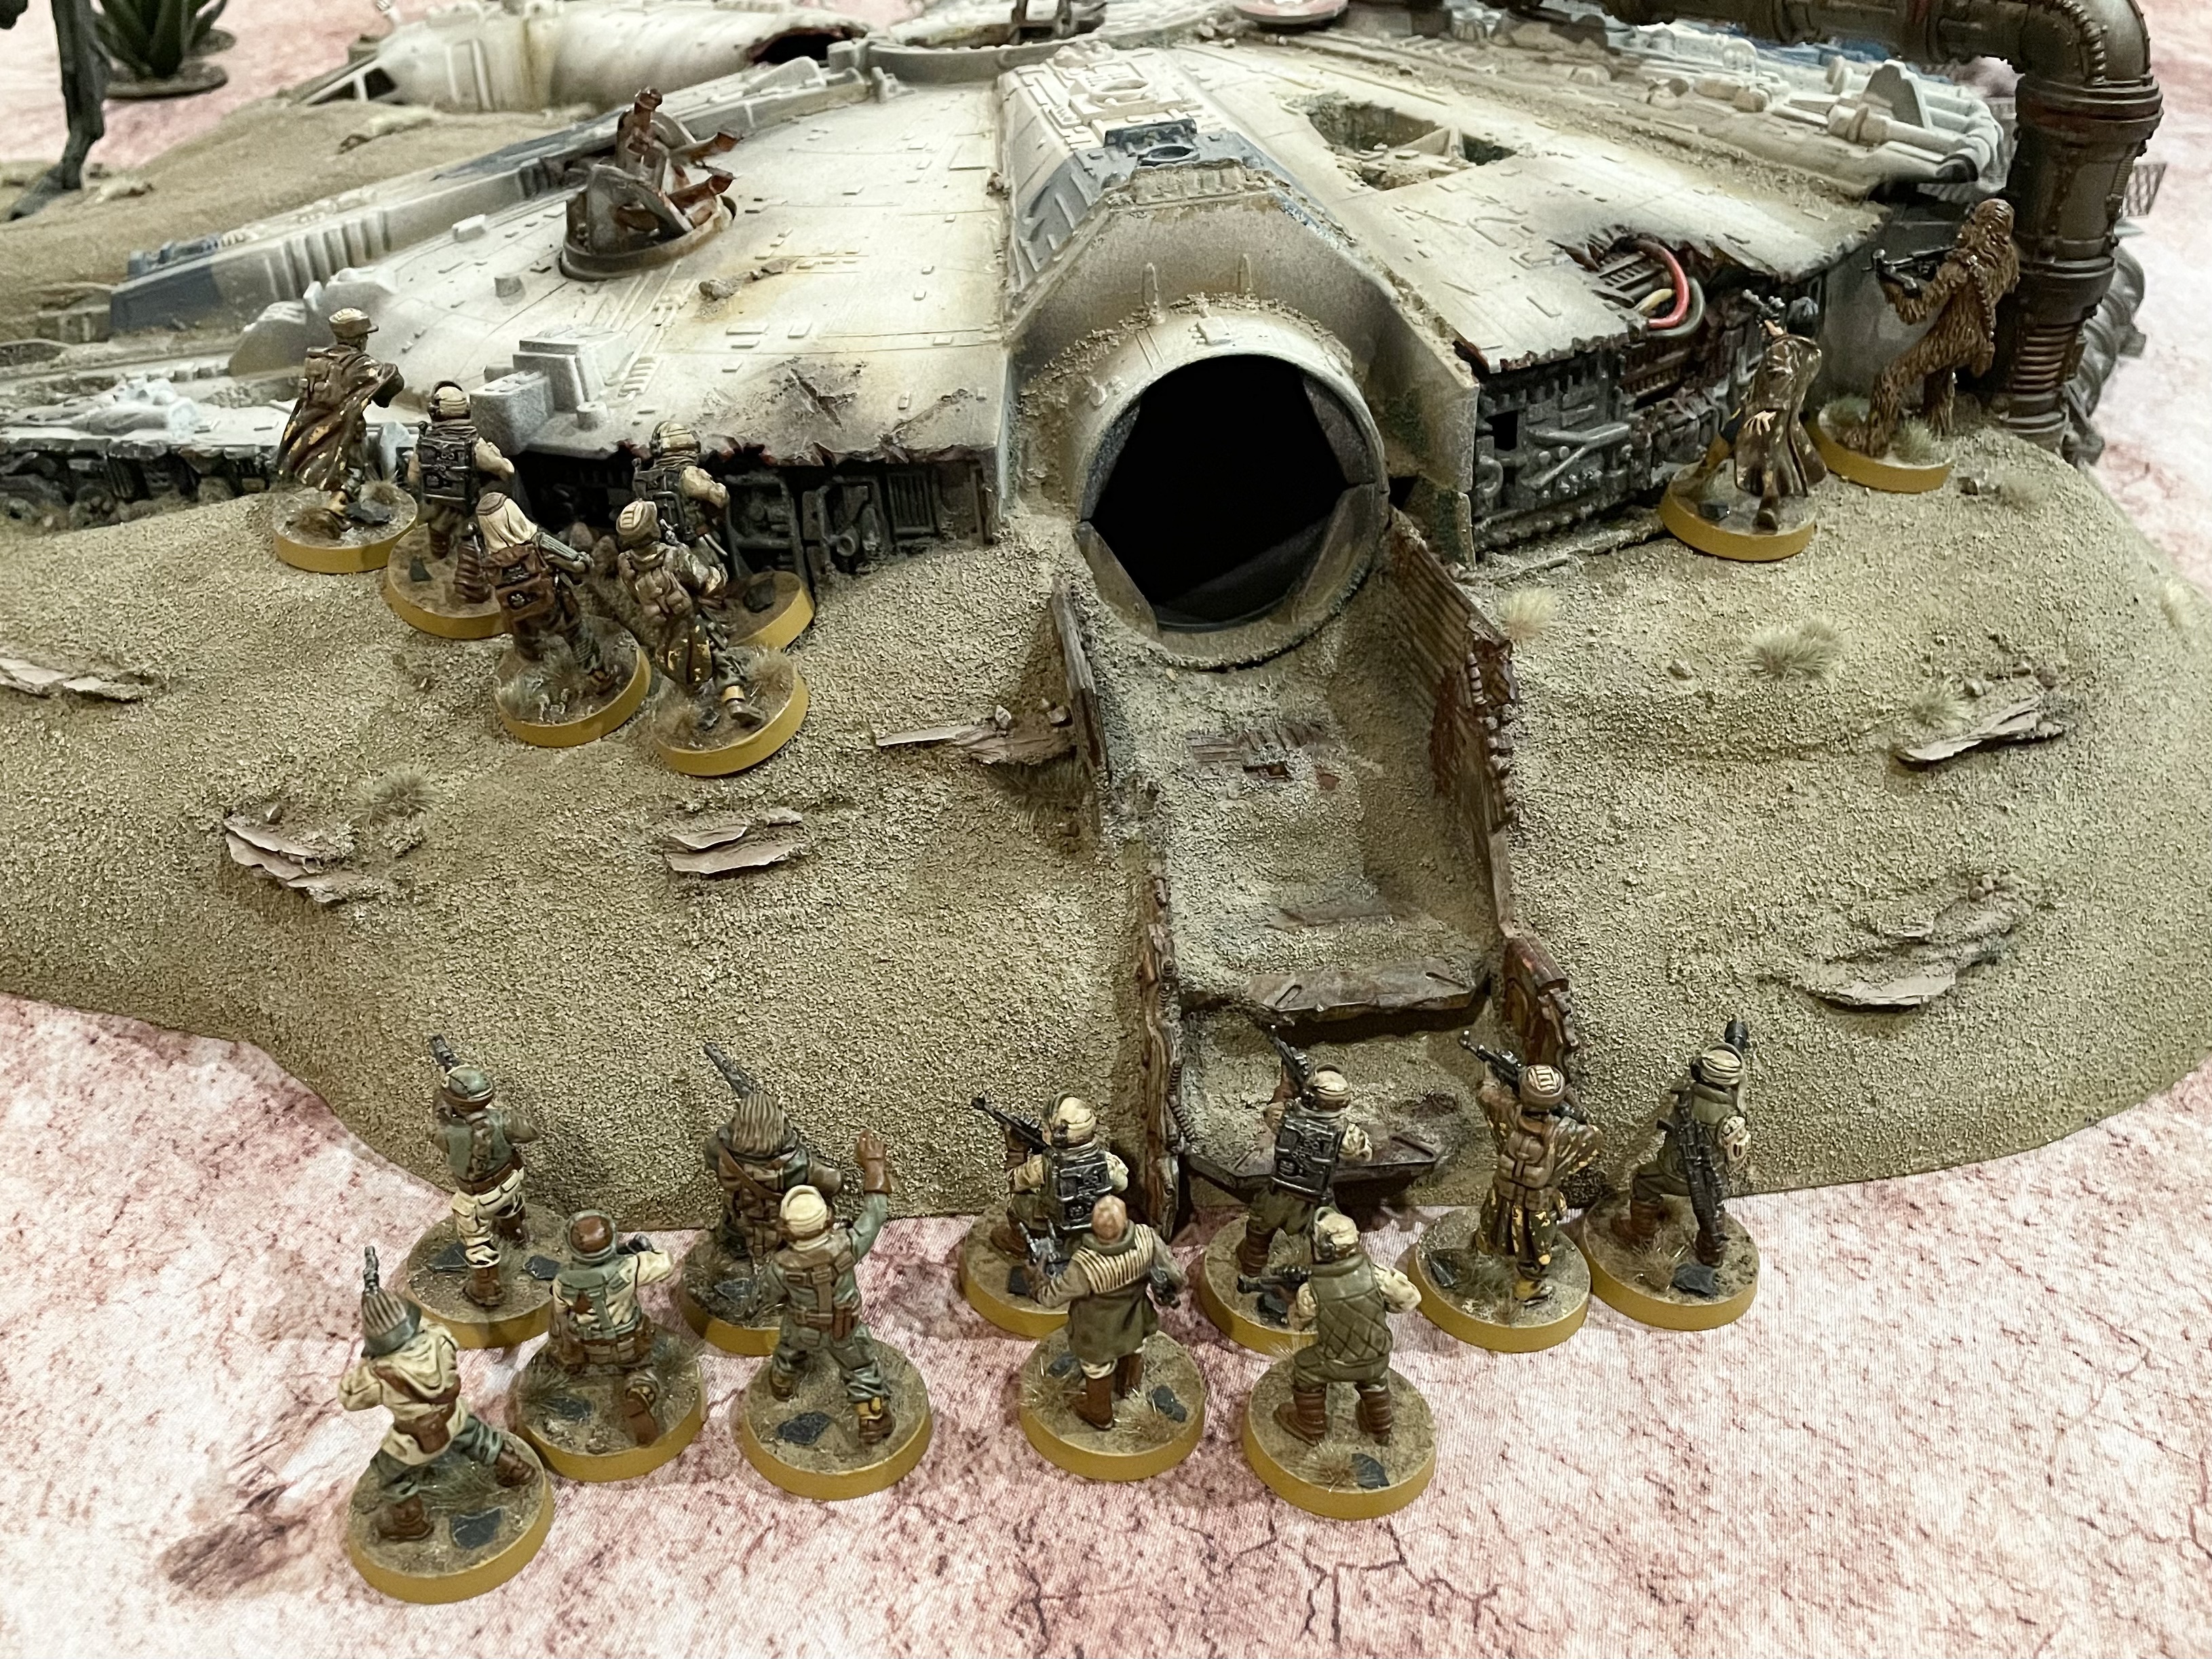
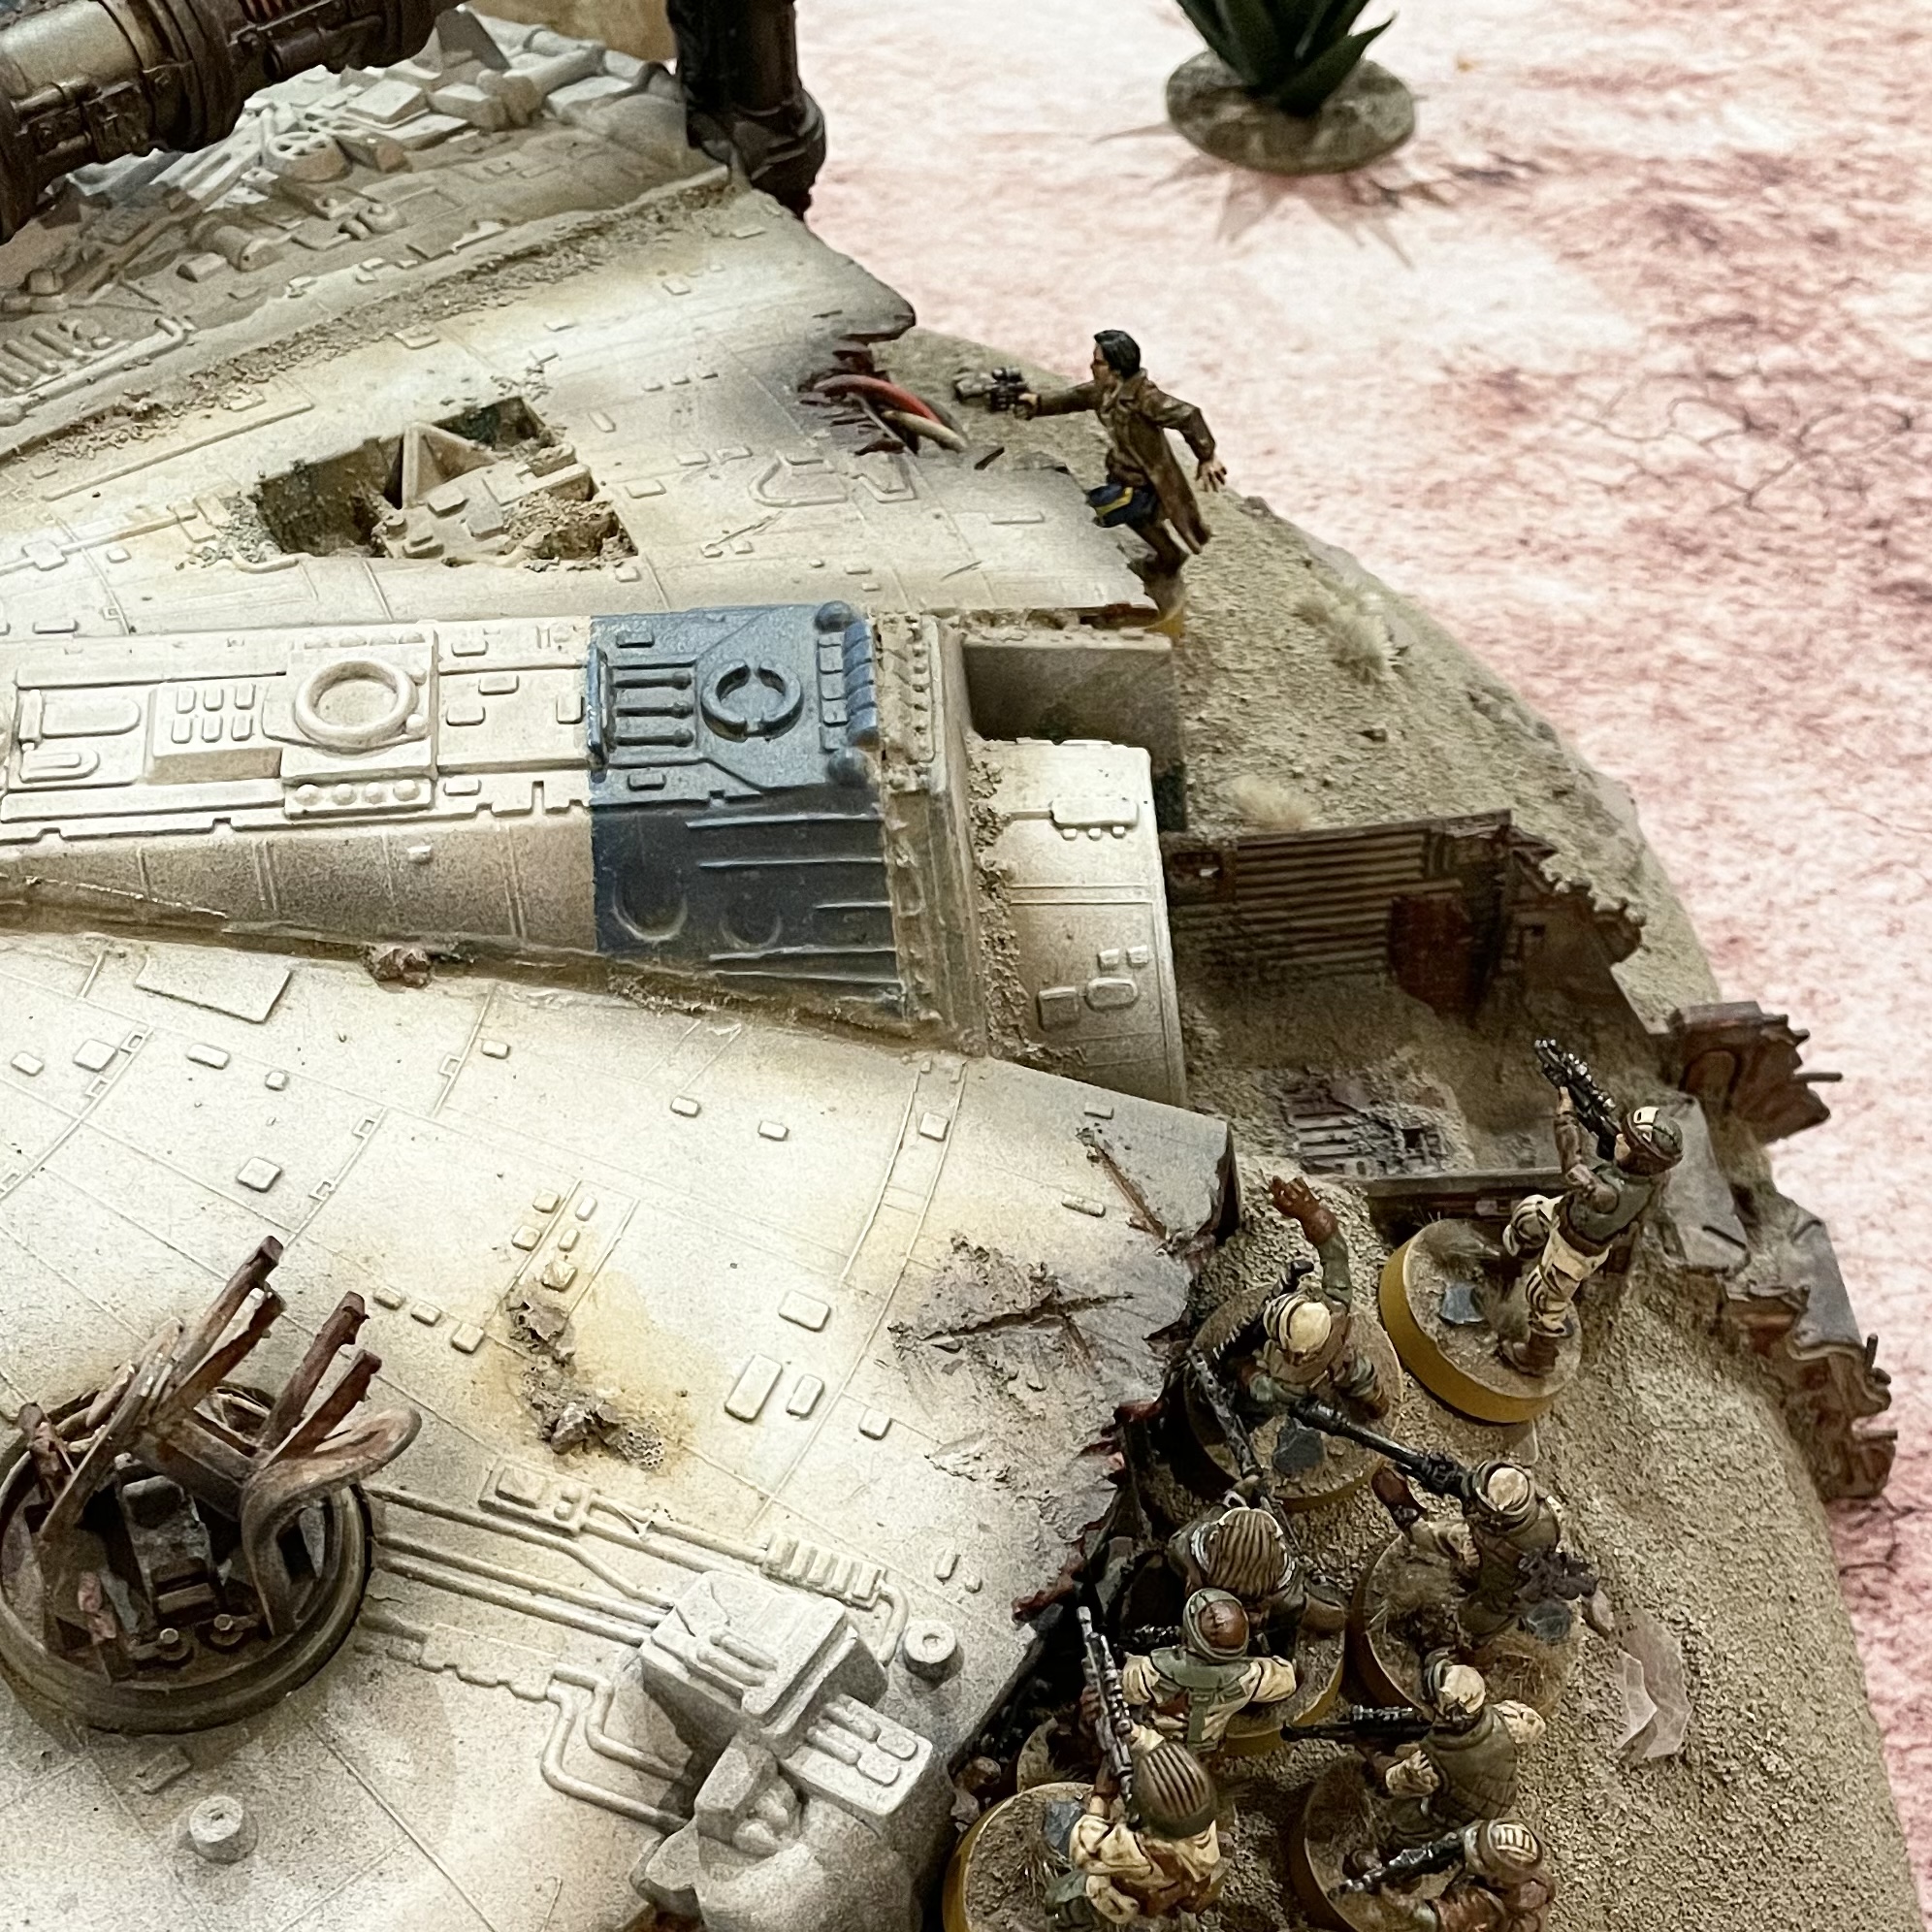
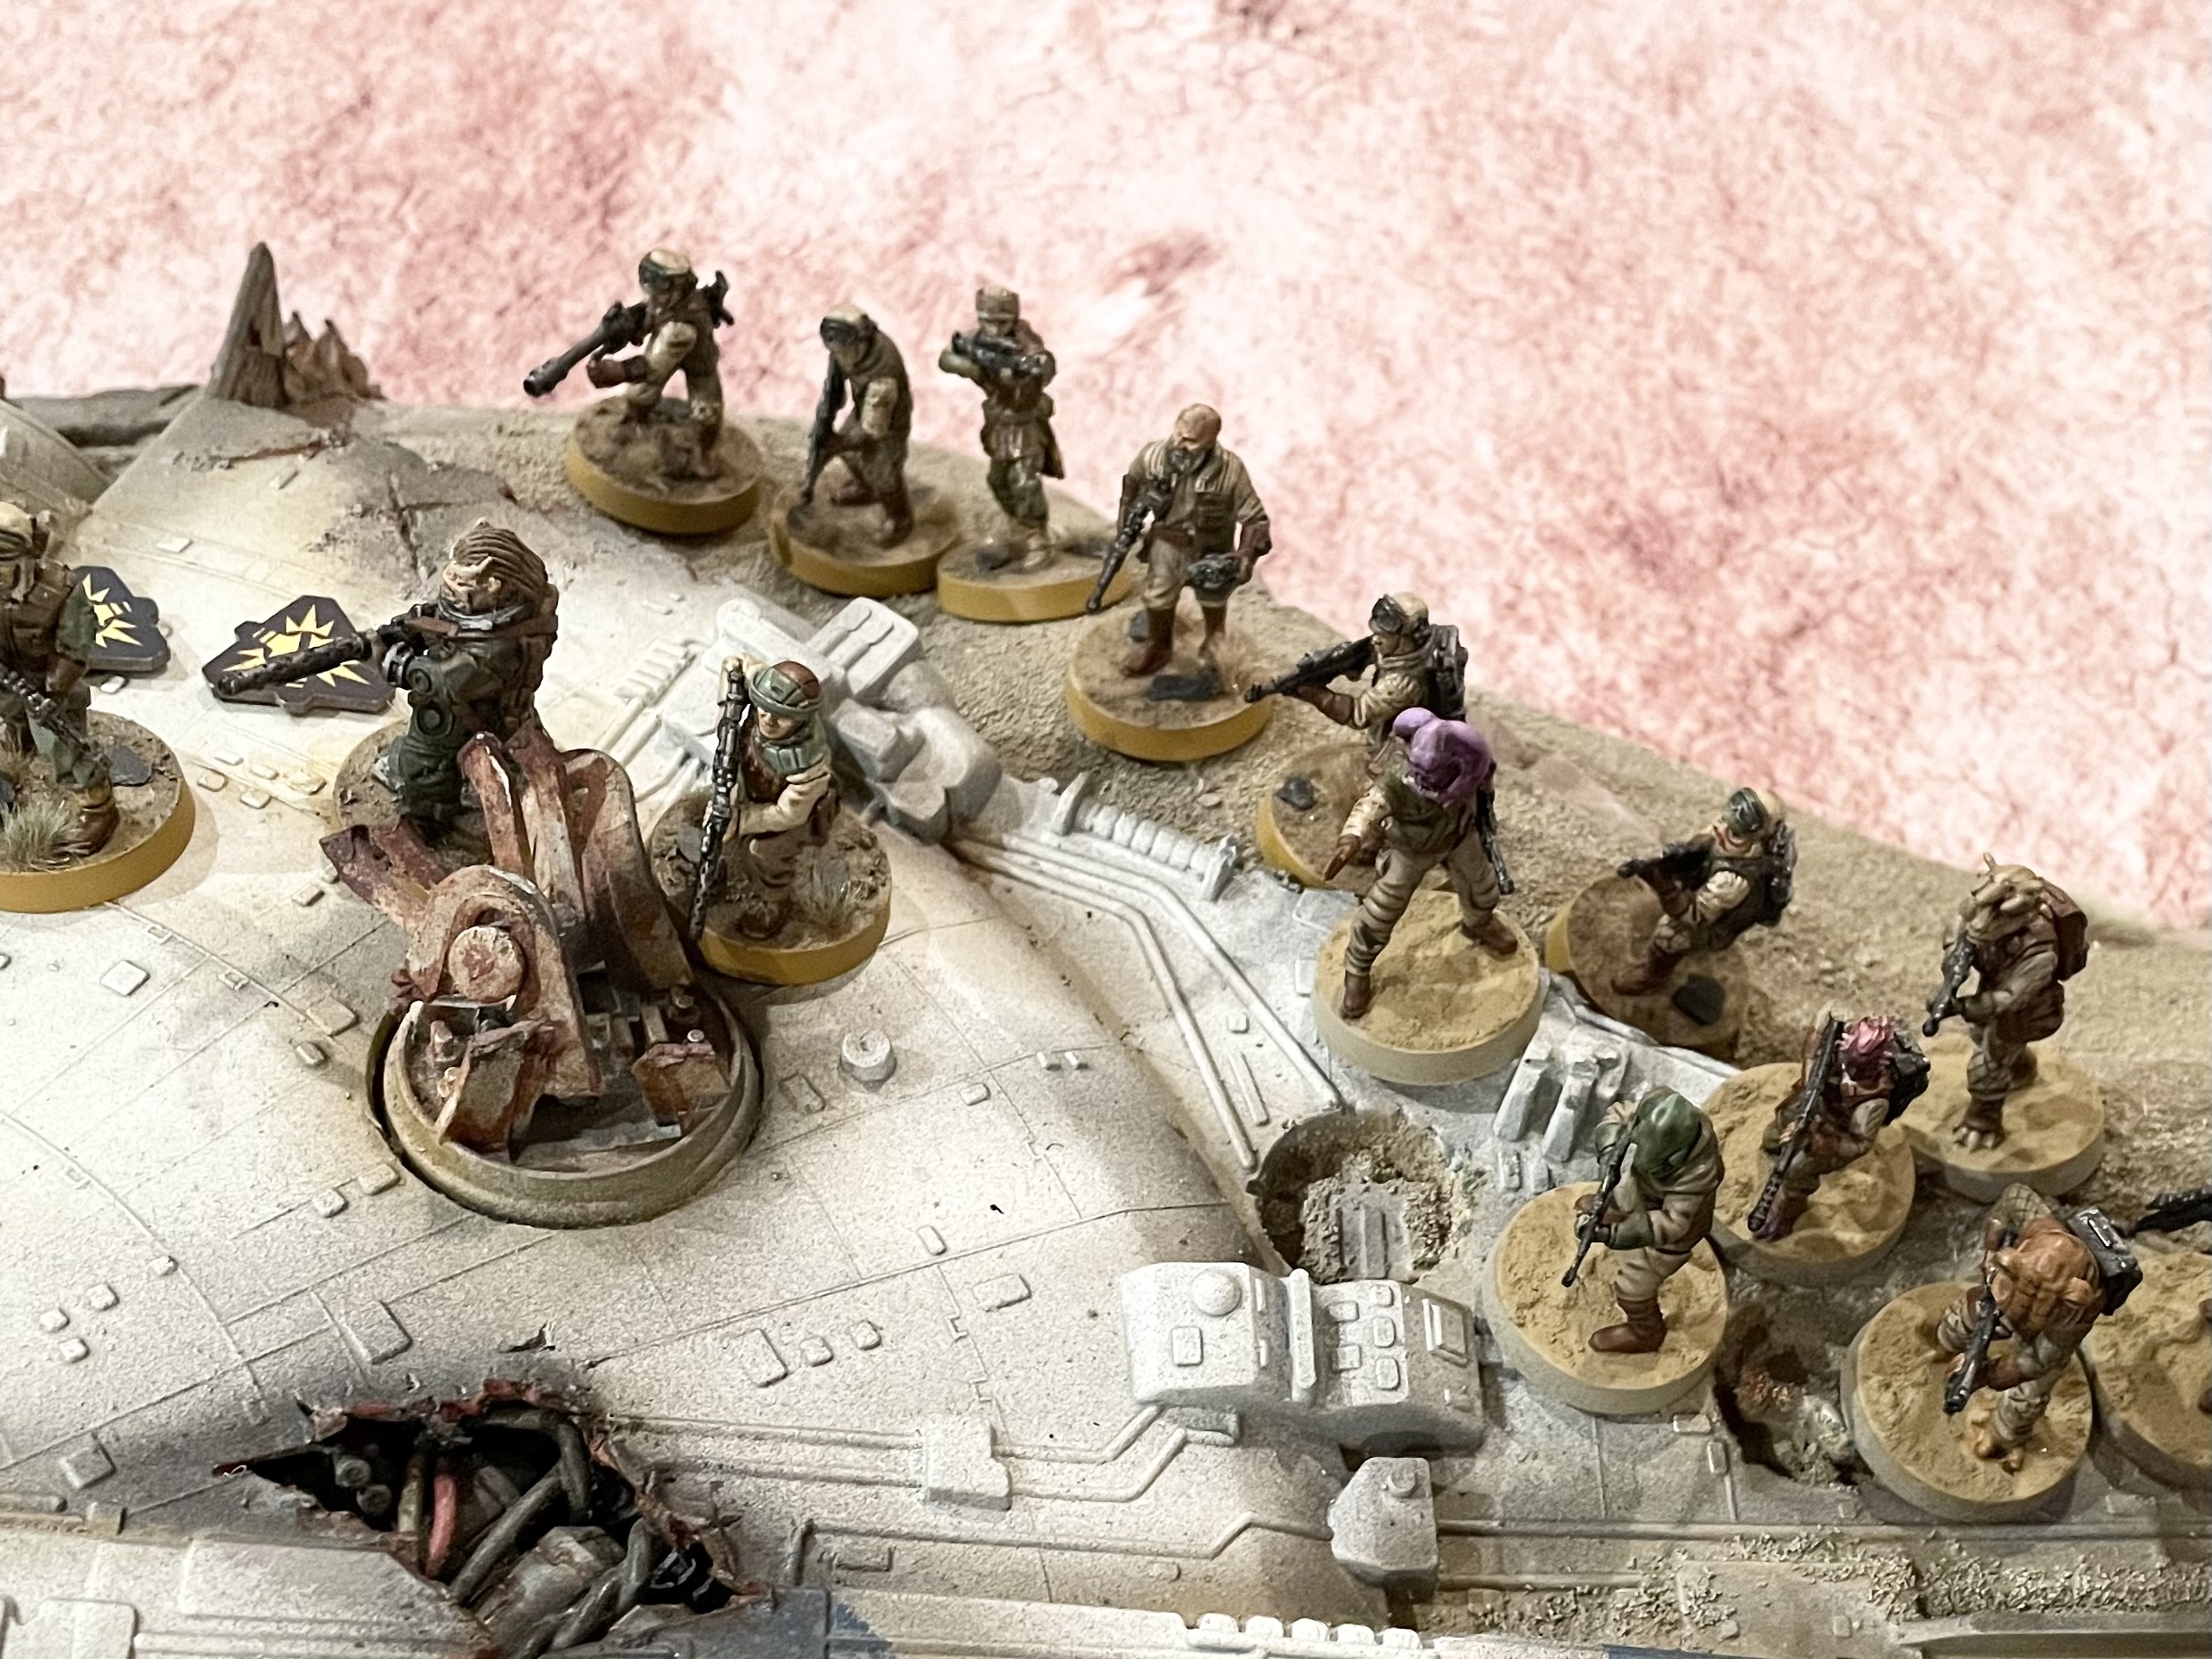
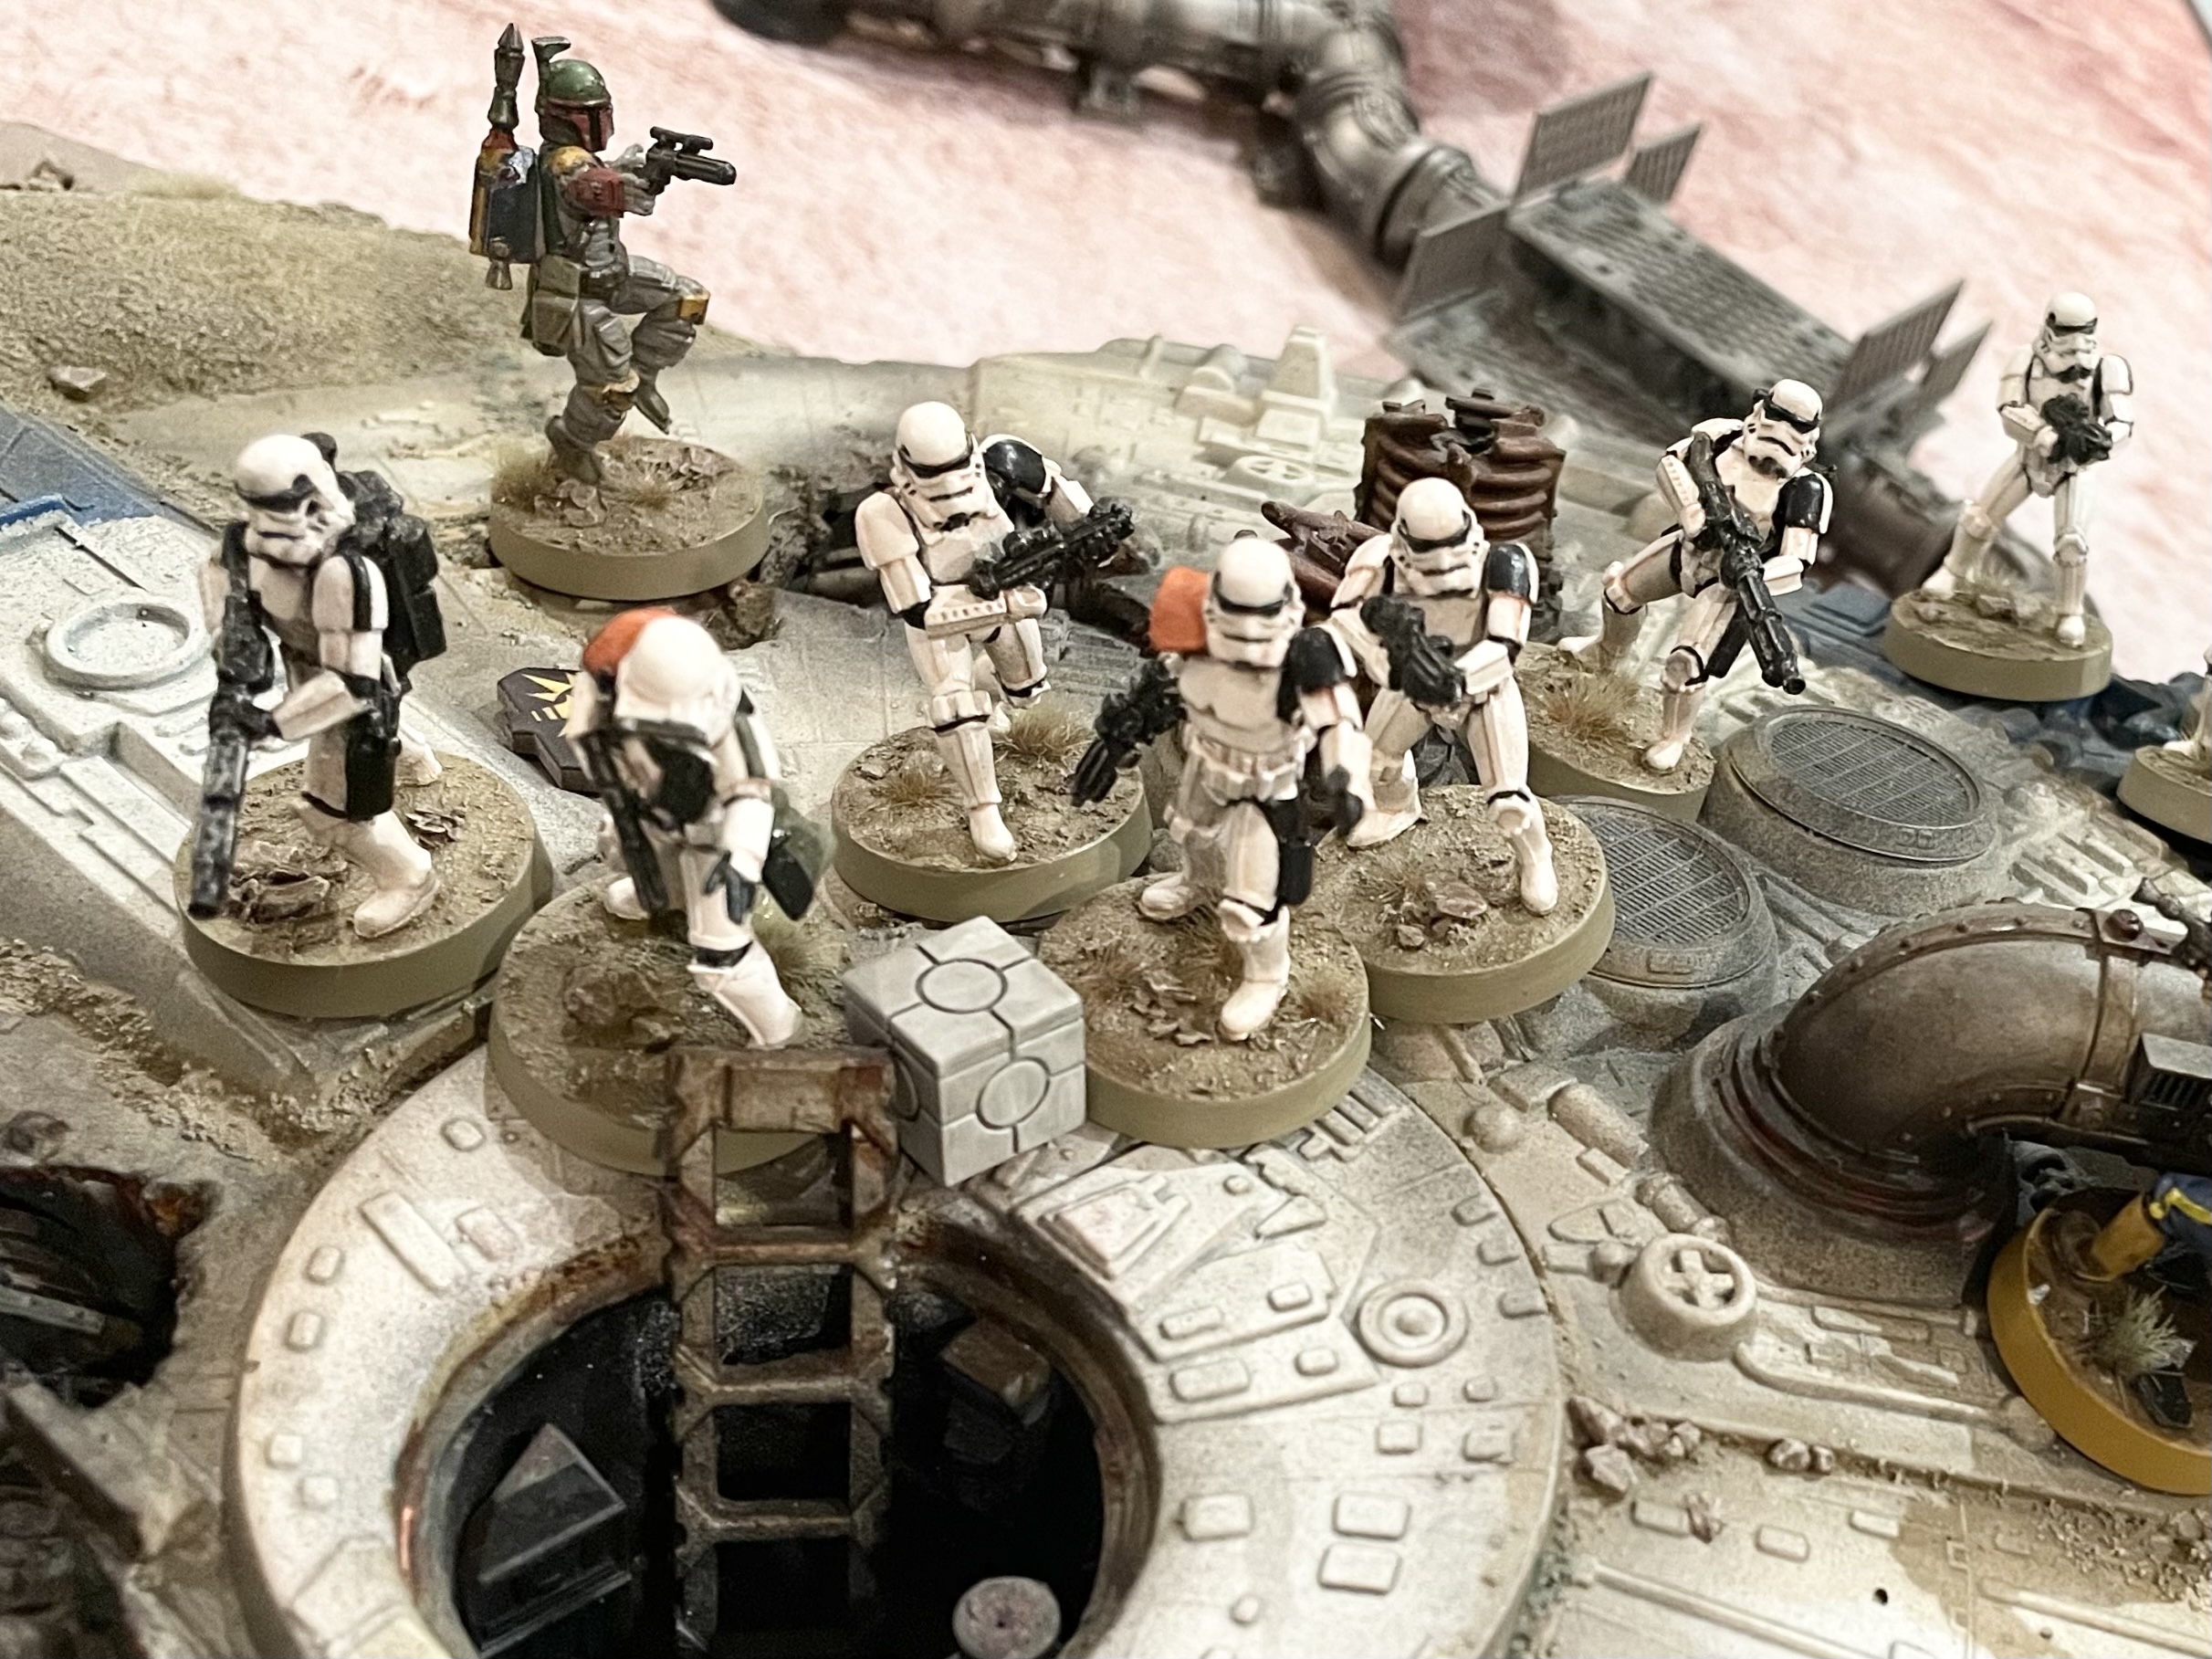
Join us for another Star Wars Legion battle report as Boba Fett attempts to claim the bounty on the infamous smuggler Han Solo!
Related Game: Star Wars: Legion
Related Company: Fantasy Flight Games
Related Genre: Science Fiction
This Project is Completed
Turn 2 - Command Phase
With multiple units now in range, the battle was poised on a knife edge. Was it time for a decisive first move or to hold you’re nerve and wait for the opponent to show their hand?
The Imperials played ‘Push’ for two pips, giving them a good chance of winning activation this turn.
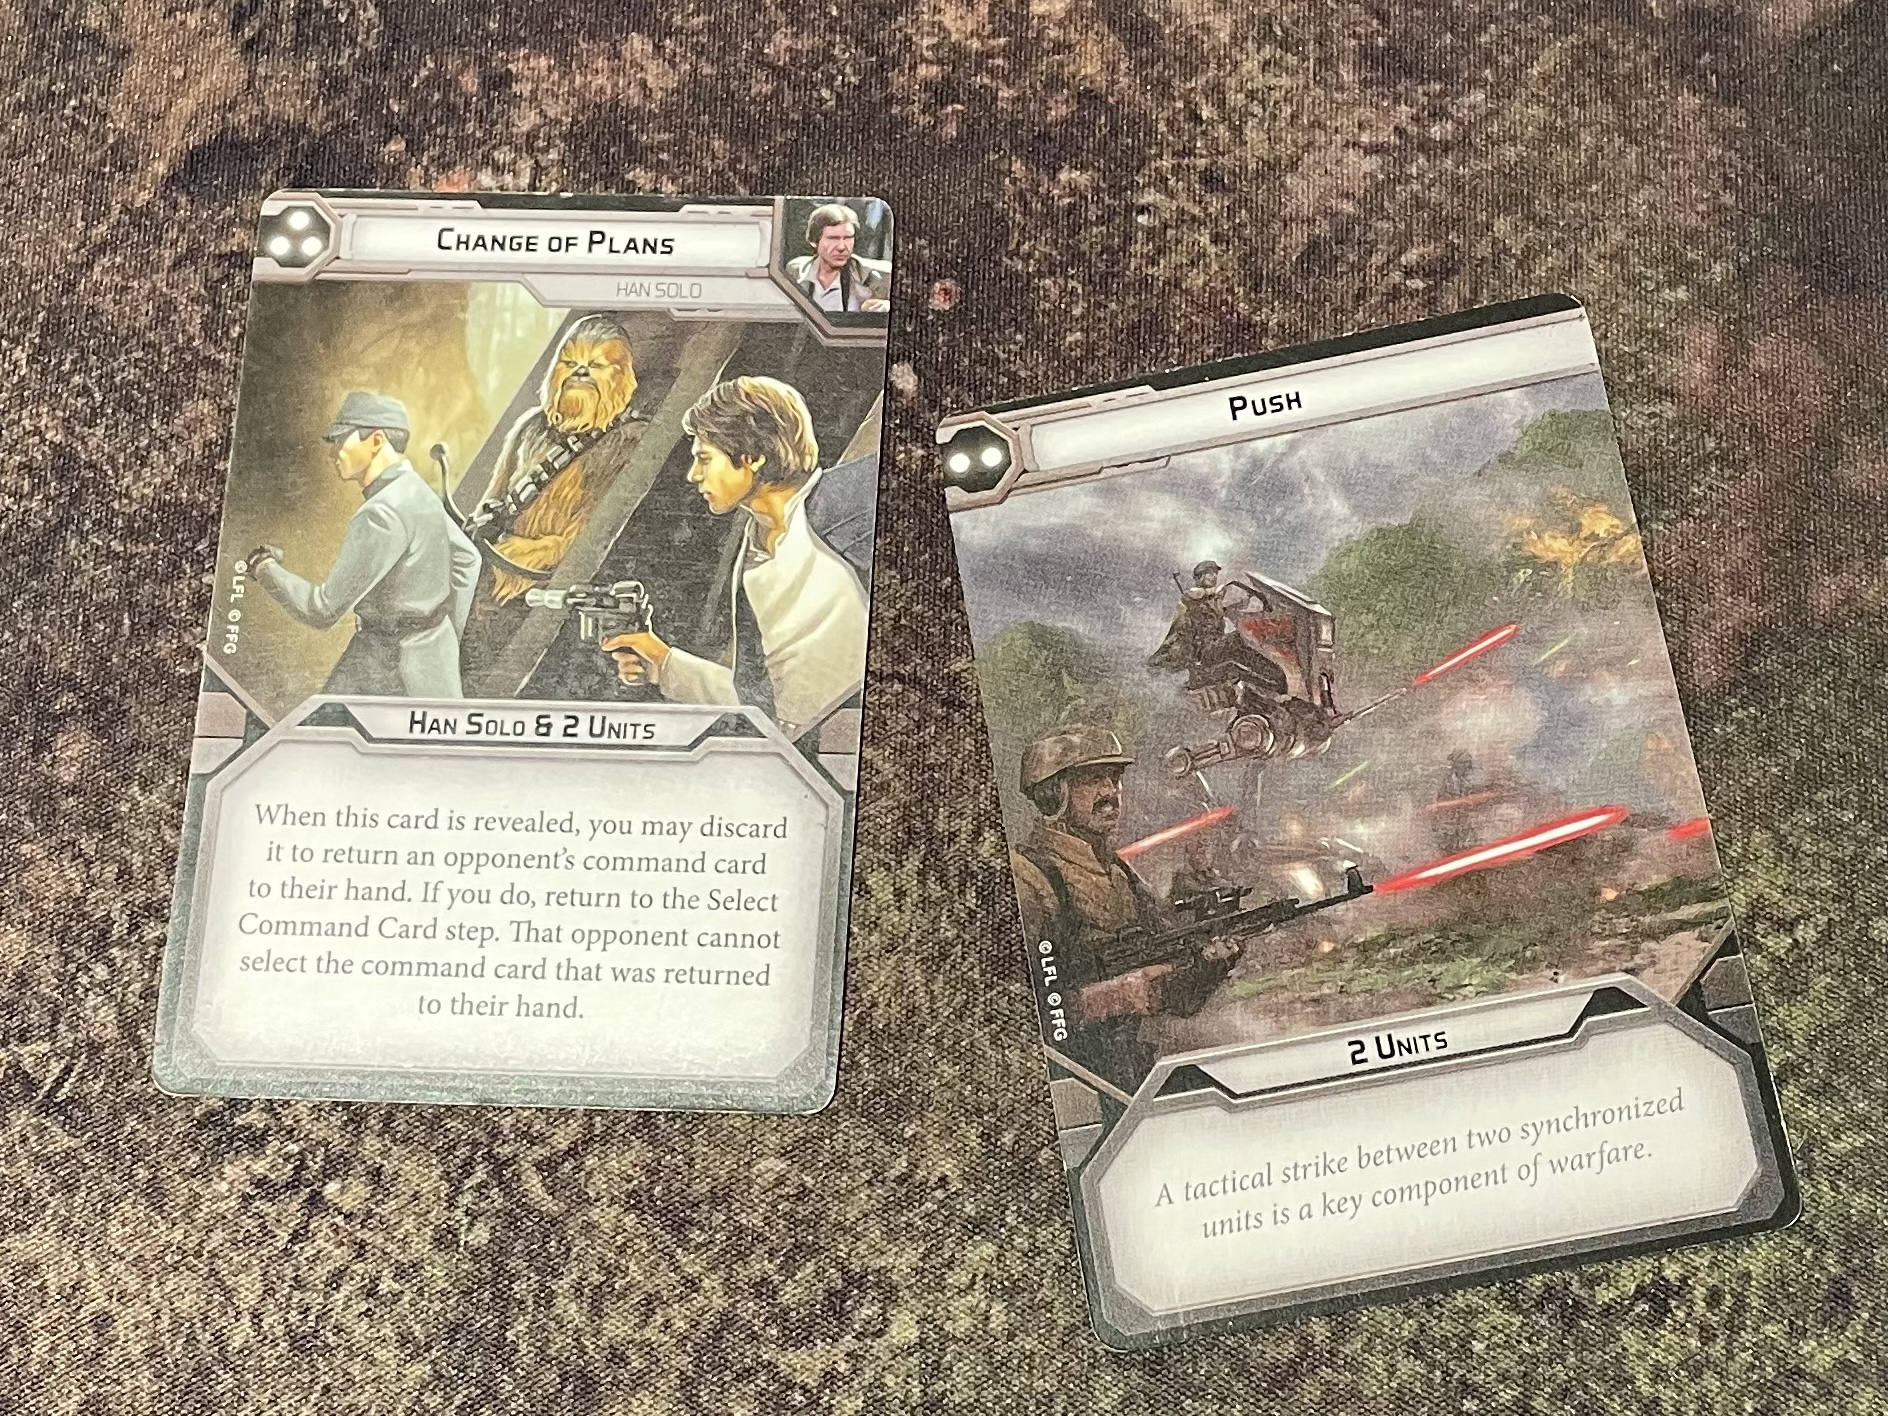
Han however played “Change of Plans”, meaning the rebels would activate second, but giving them the opportunity to force the Imperial commander to change his card. But the Rebels were content to hold their position and let the Imperials make the first move.
It was the Scout Squad and the At-St who would receive the orders this turn. Allowing the Scouts to seize the initiative while the Walkers firepower could be unleashed when it was most needed.
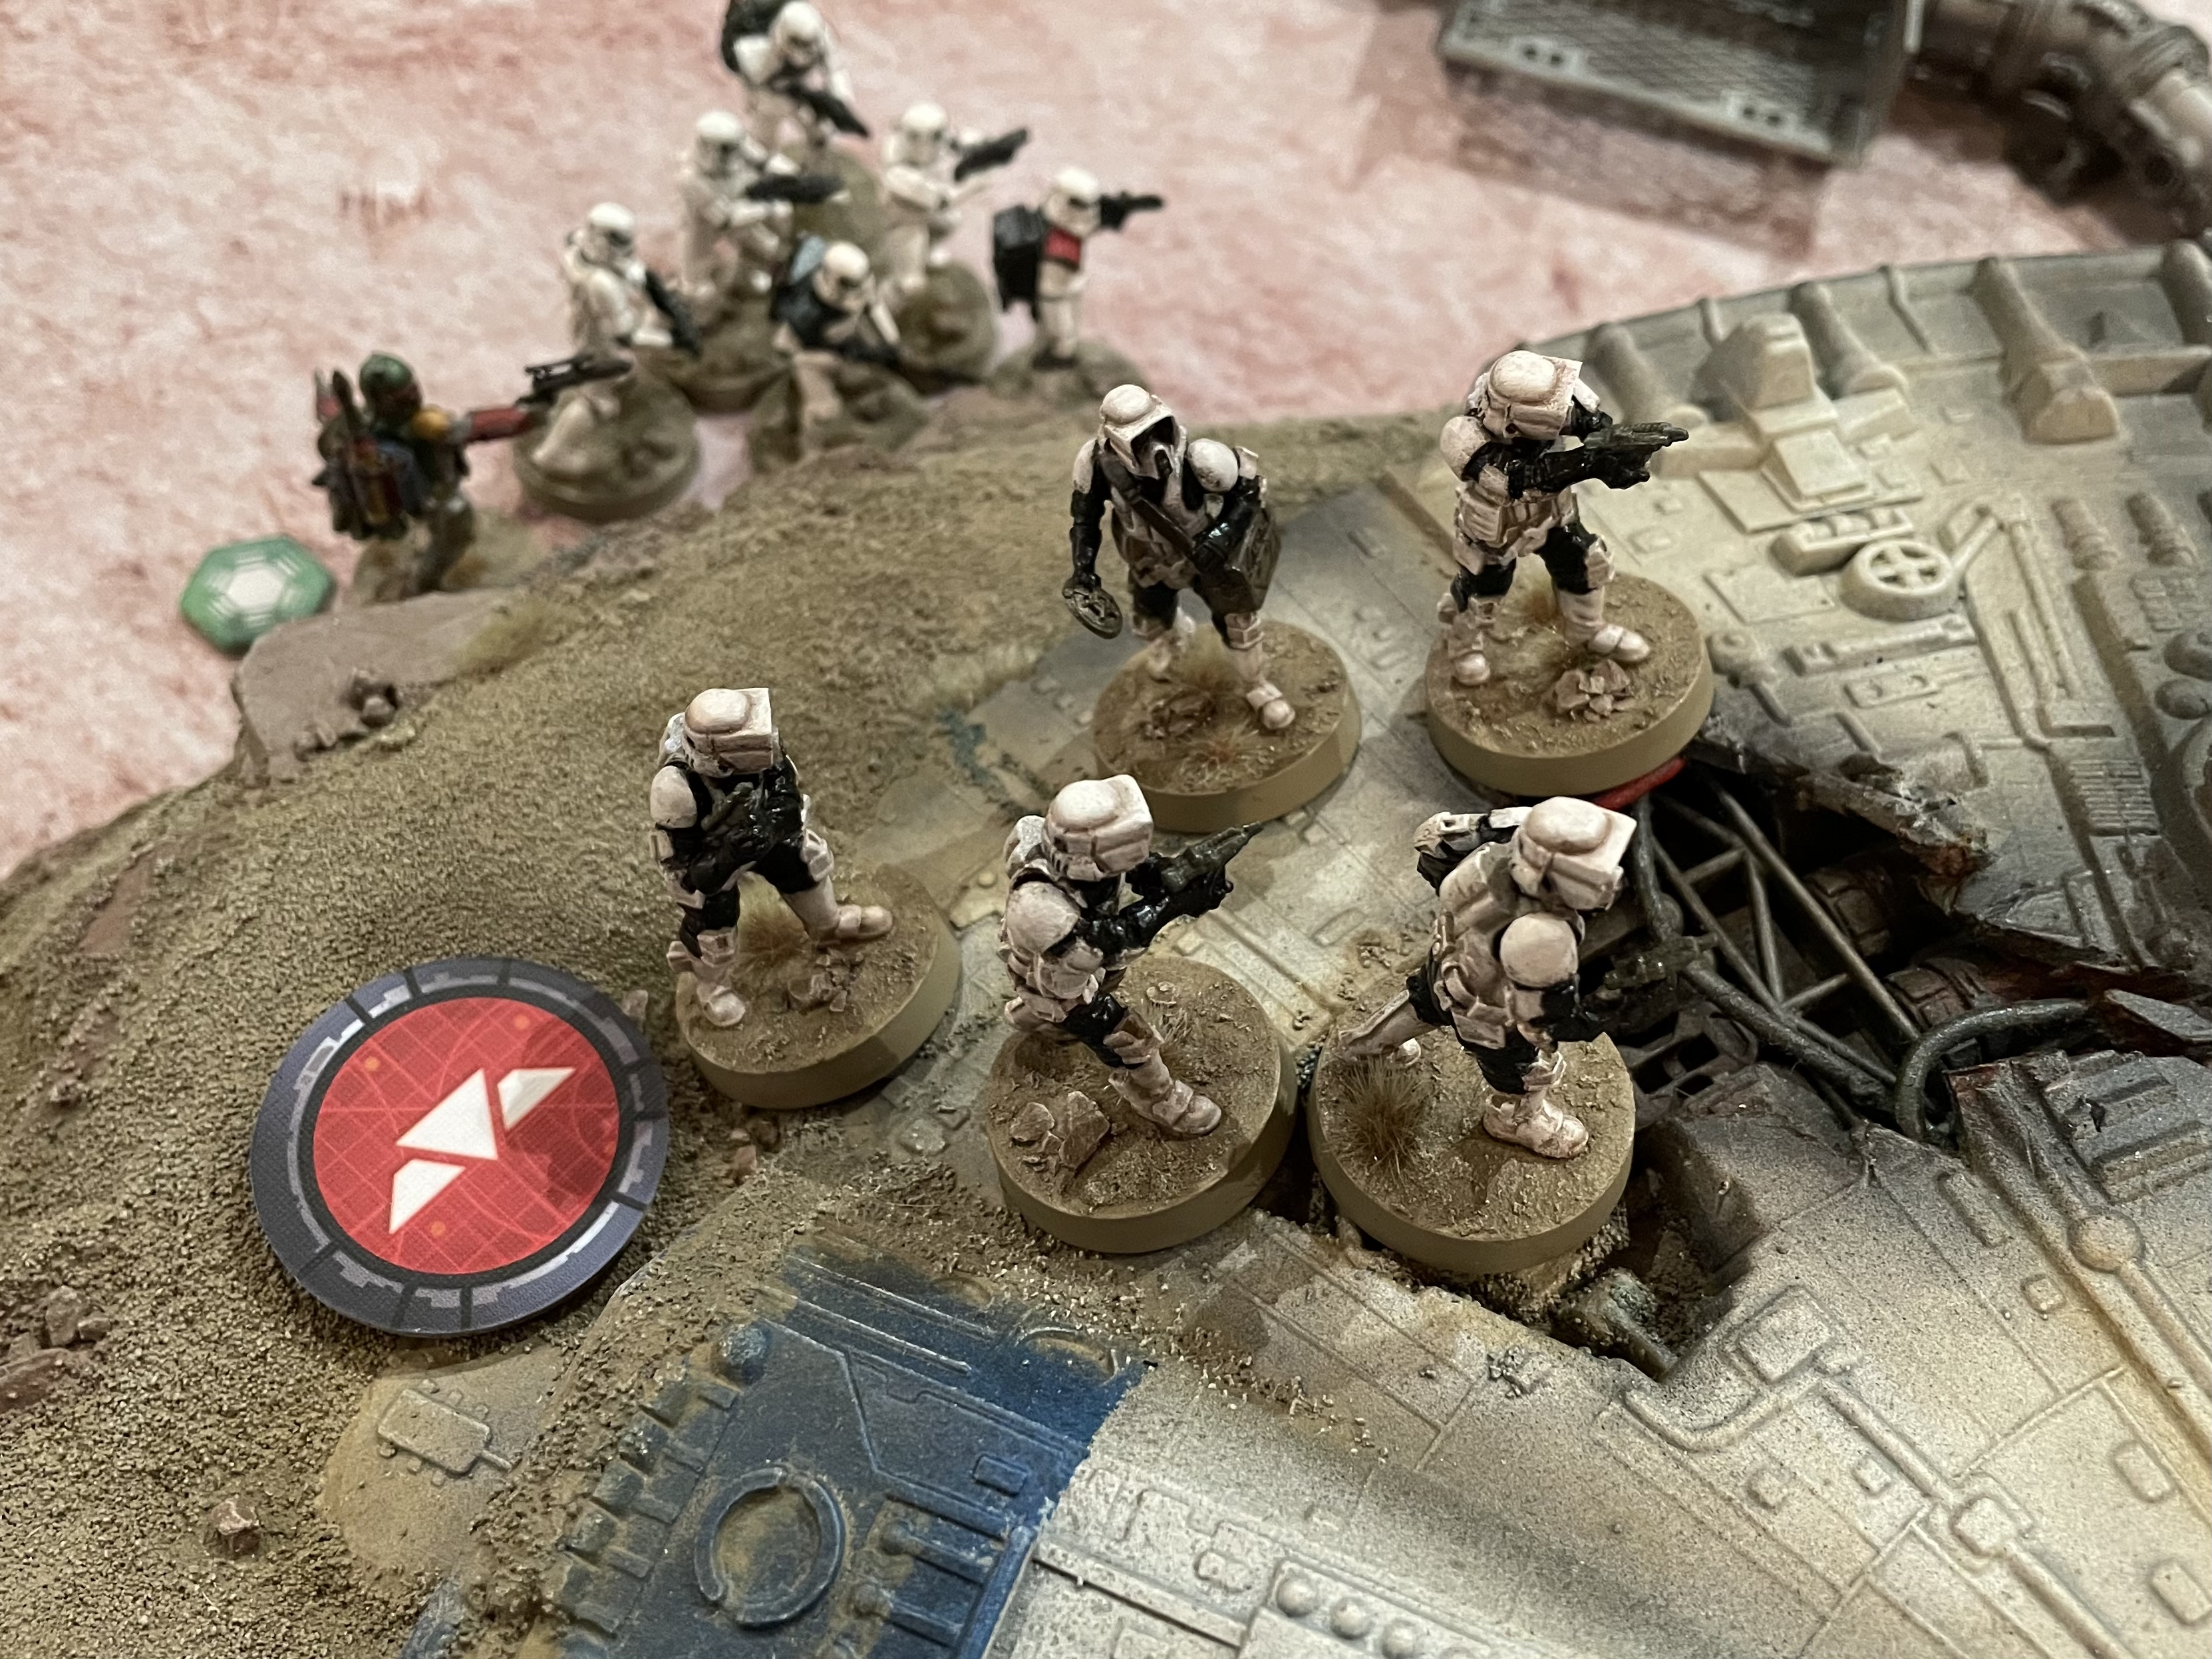
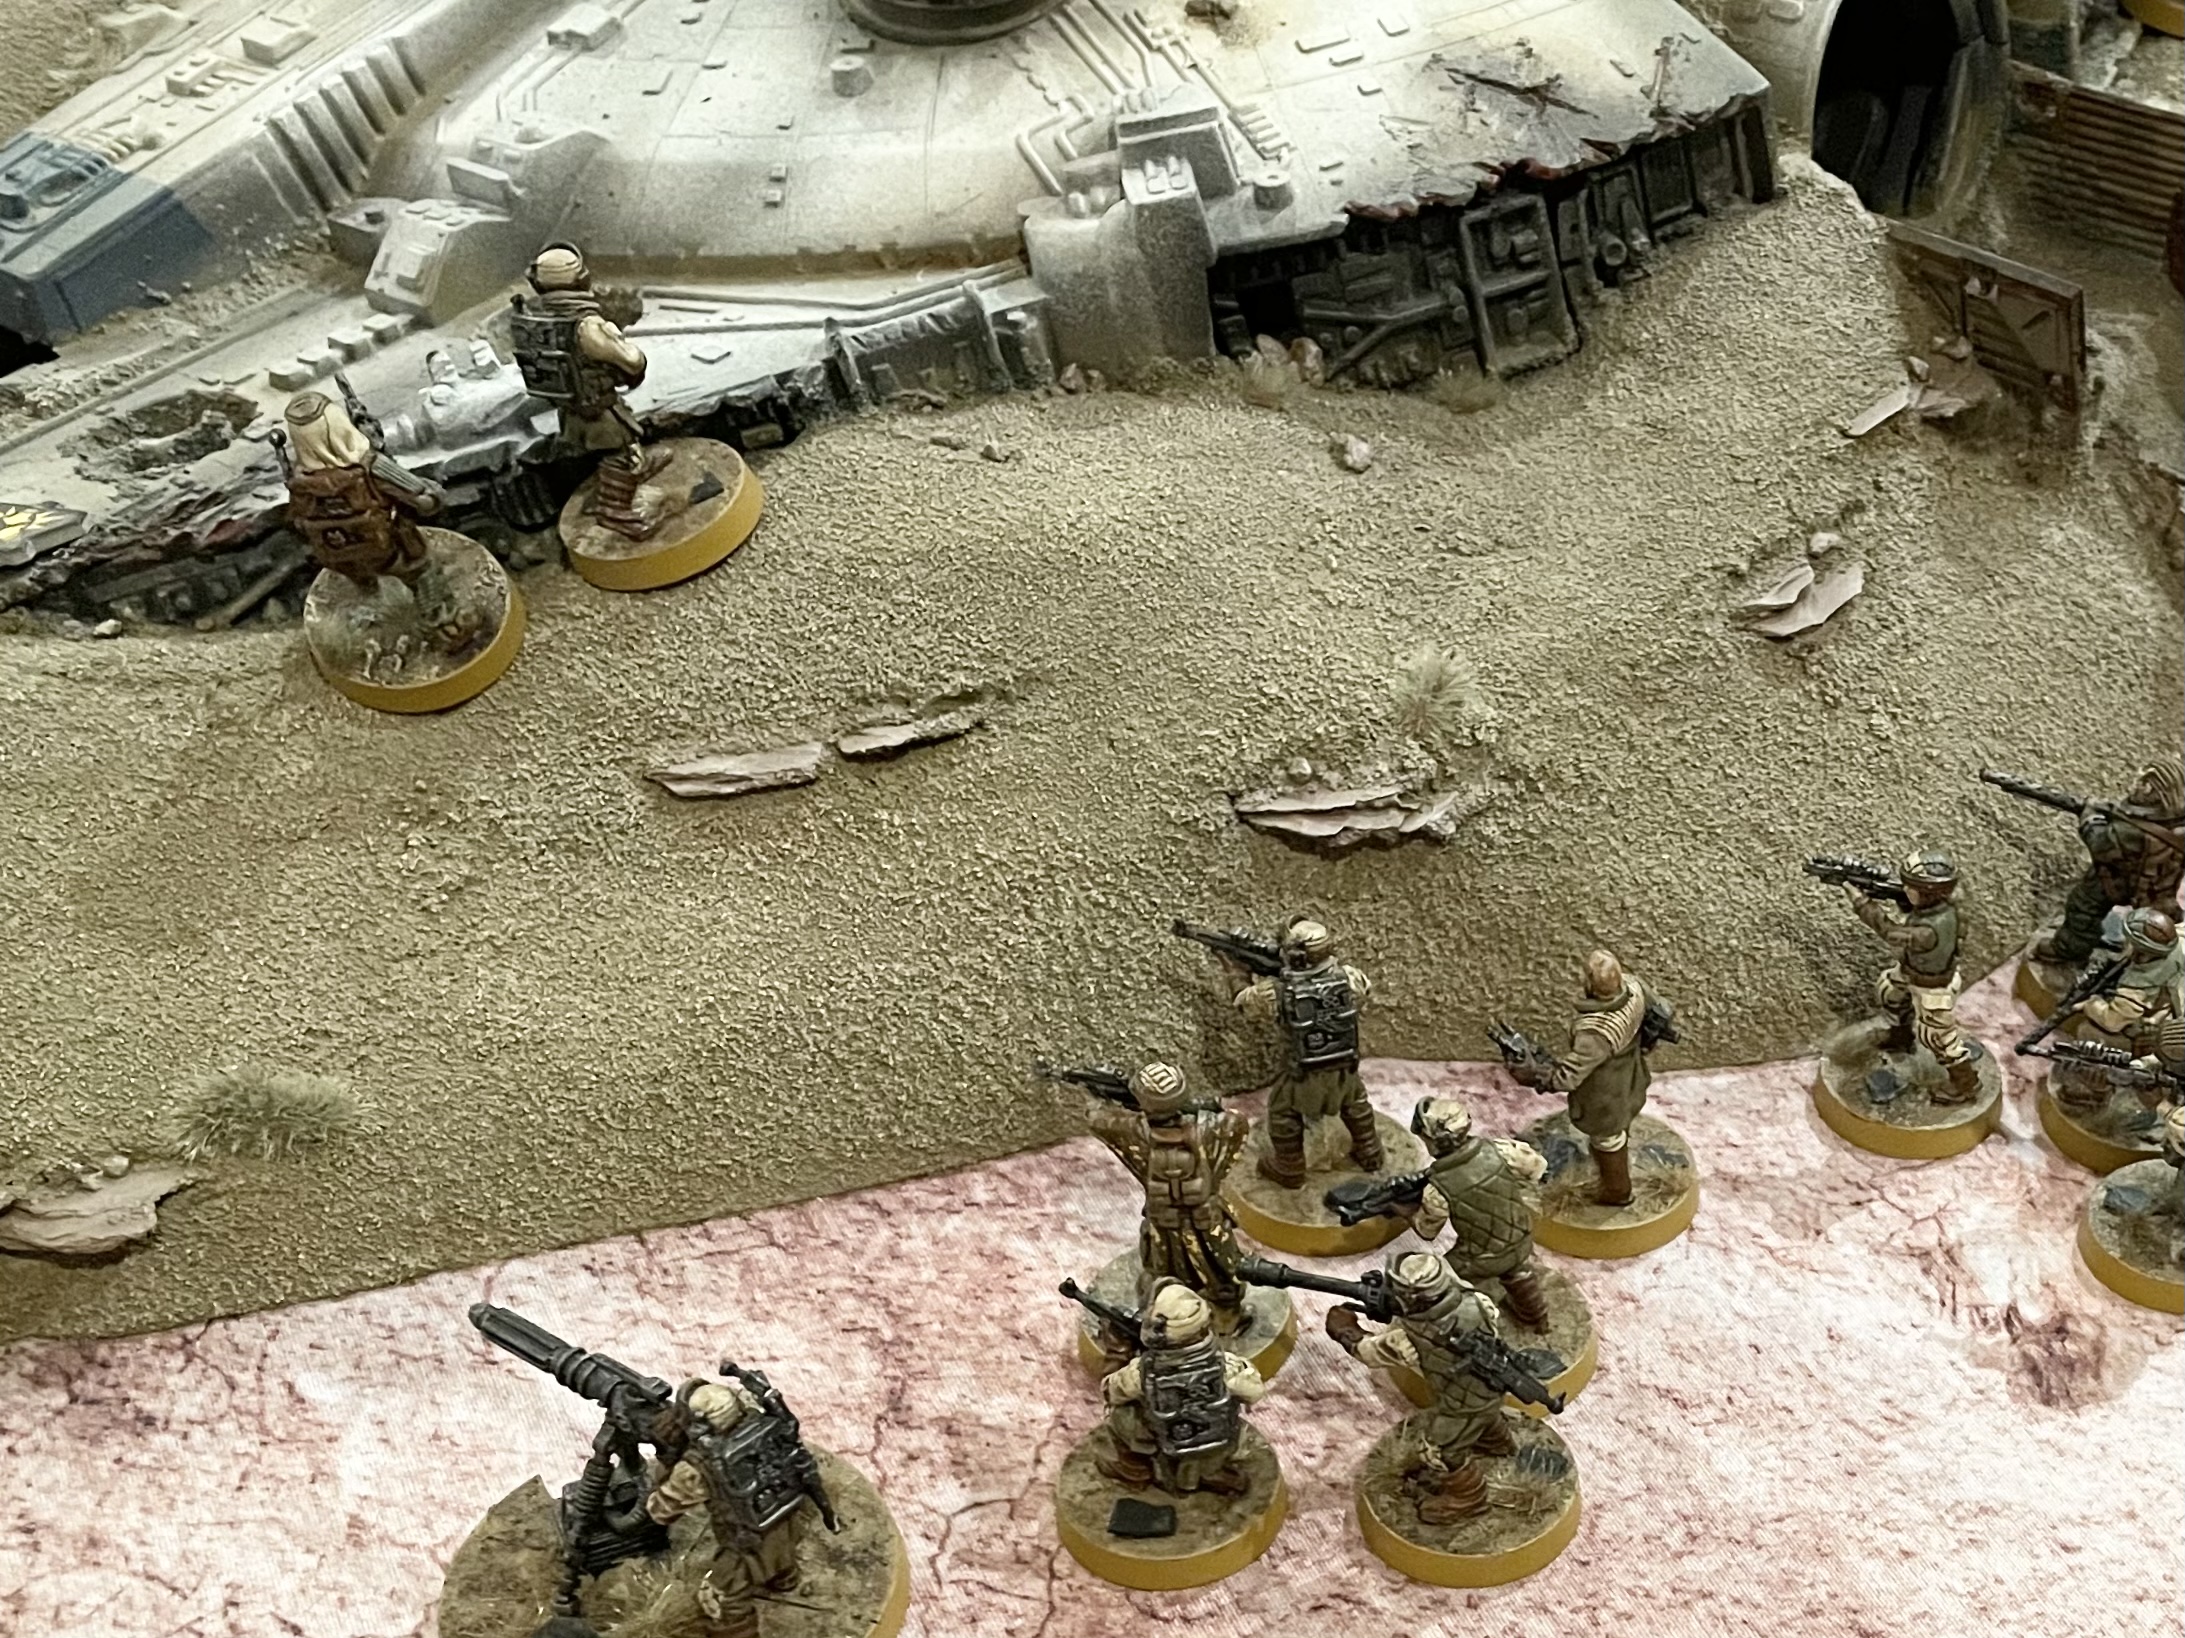
As per the cards conditions, Han received the first order, while the second was issued to Bistan and his unit of Pathfinders. The third order was placed on the Veterans on the Southern flank, who in turn coordinated a further order to the MKII blaster turret.
Turn 2 - Activation
Having won first turn the imperials immediately opened fire with the AtSt. The ion hit from the previous turn reduced the Walker to a single activation, and receiving a second hit could render the Walker inoperable this turn.
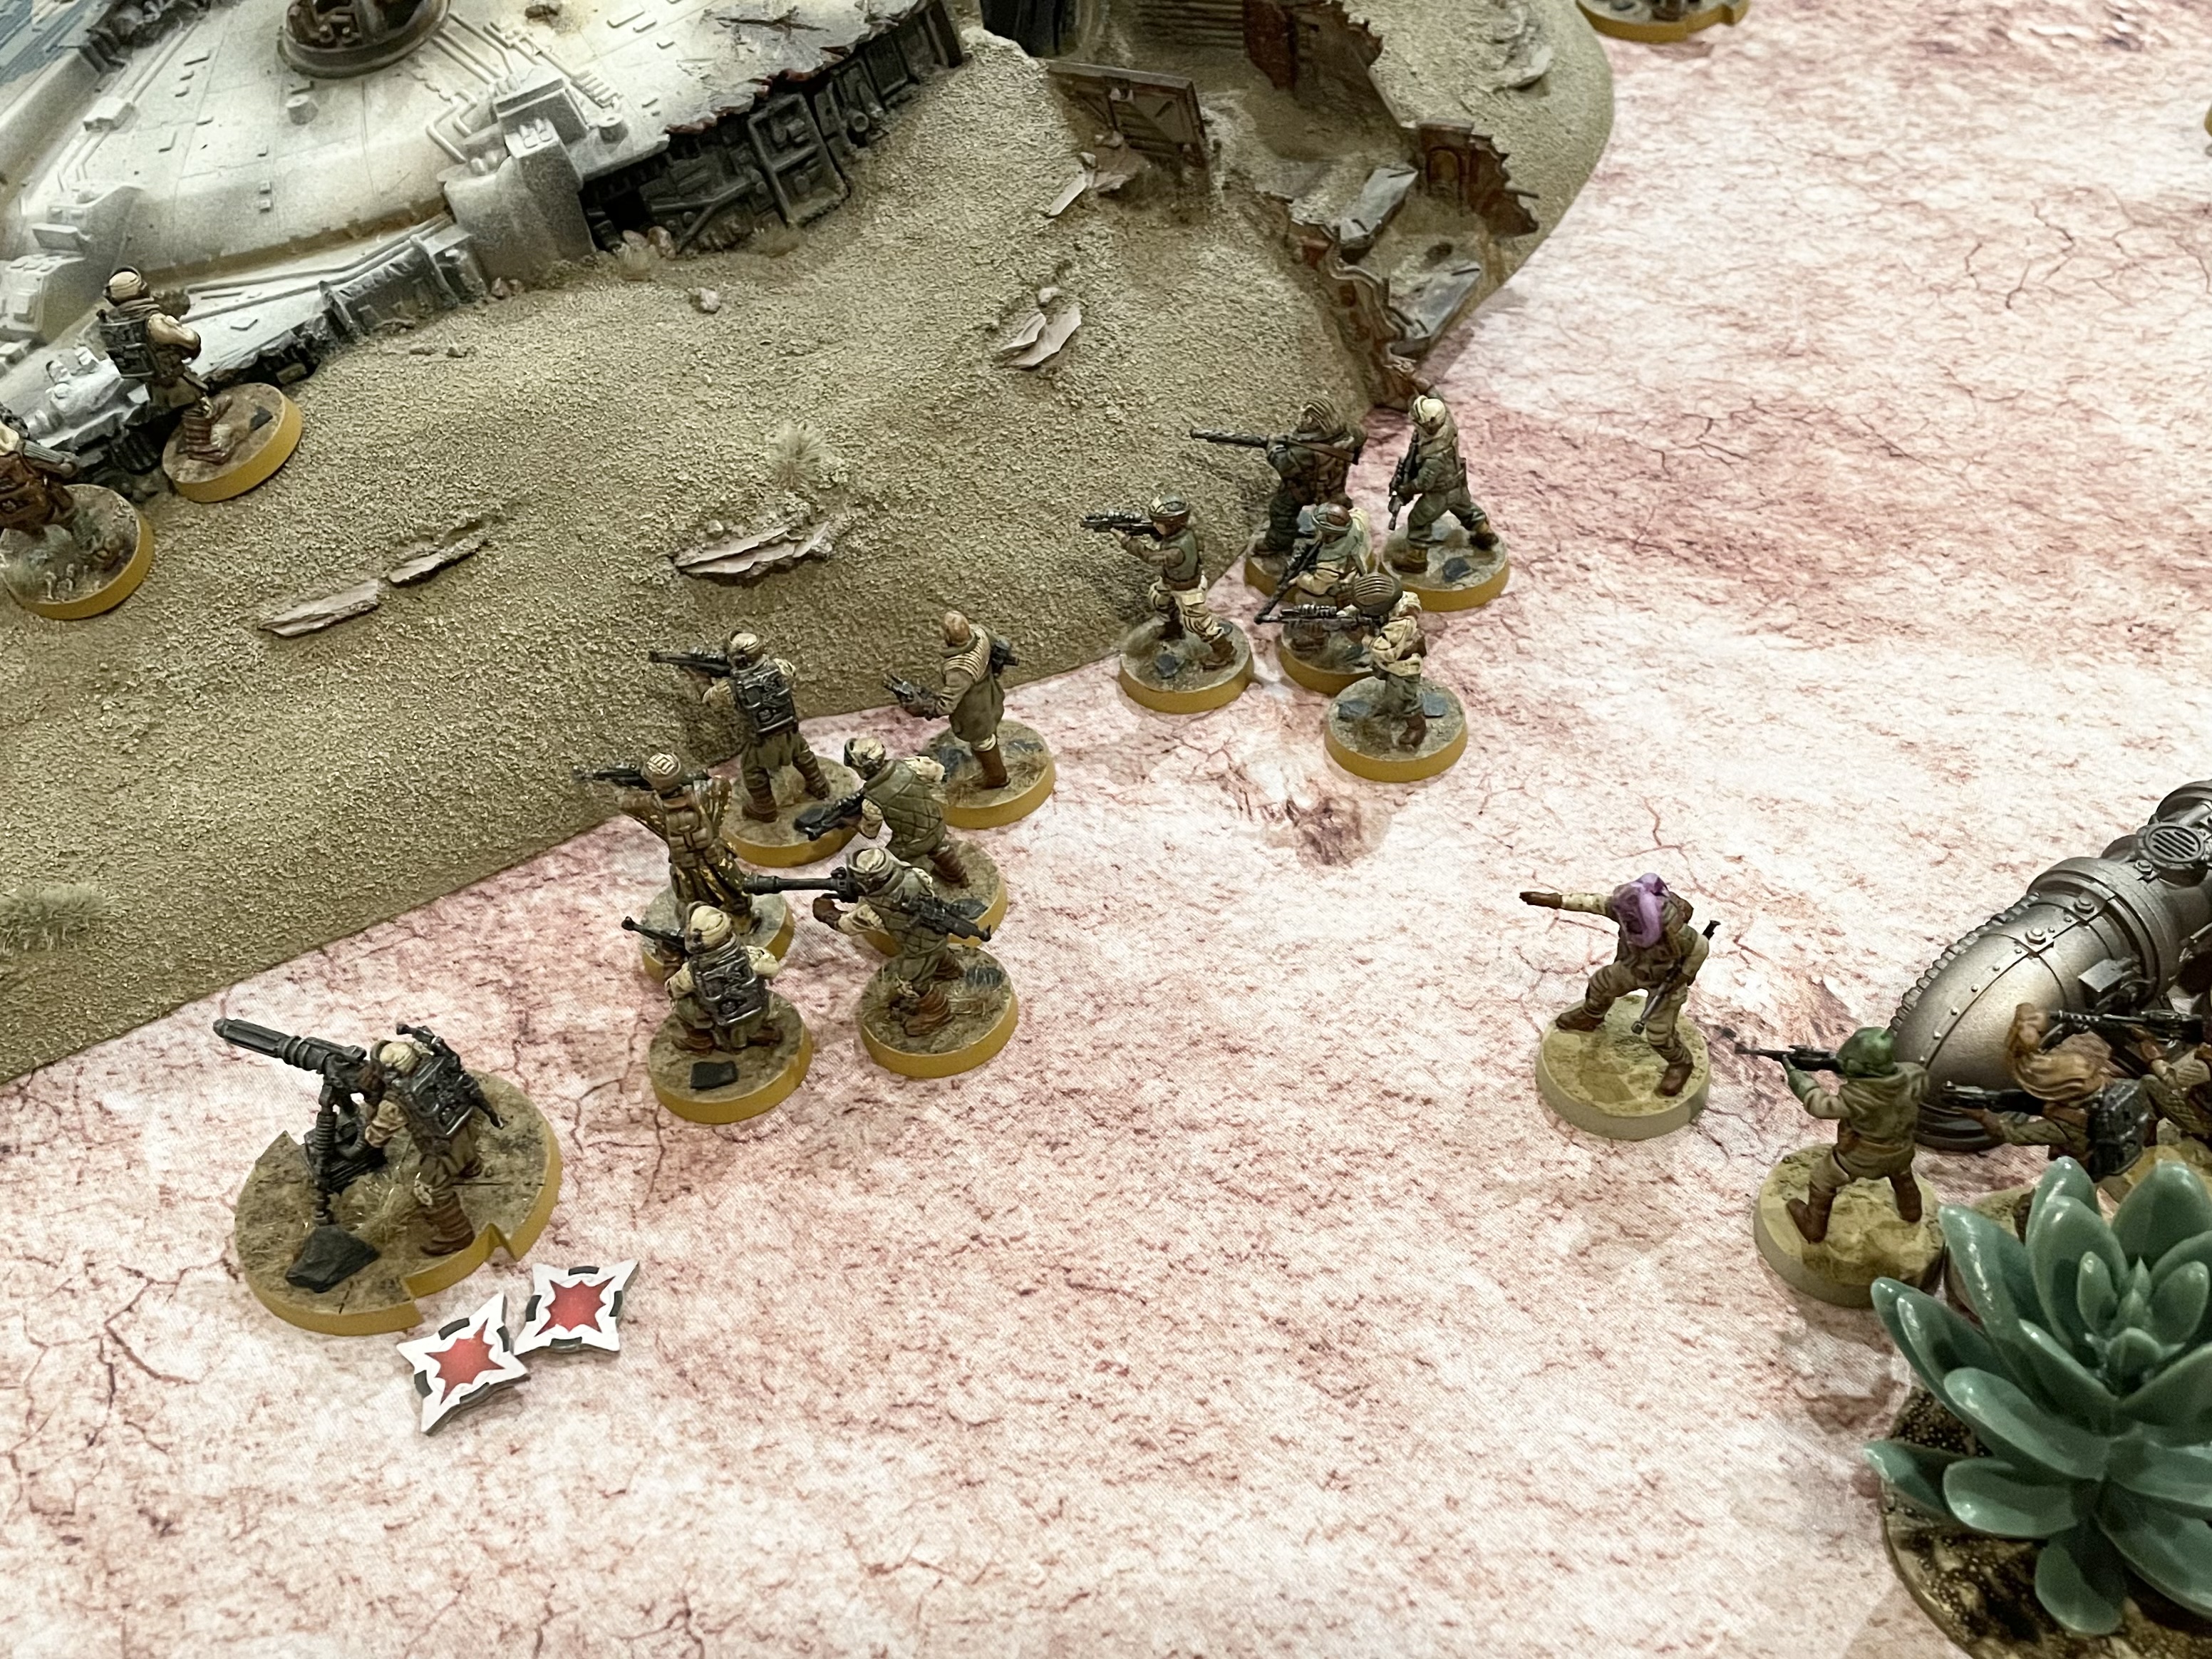
As the linked targeting array had already given the Walker an aim token it opted to fire, repeating the shot of the previous turn. Again its attack was less impressive than it could’ve been, killing two veterans this time and putting a second wound on the turret.

The rebels returned fire on the Walker with every available unit. Most notably Bistain’s ion gun and the Mercenary ‘Snrak’ with a P13-M Disruptor in his squad. The Walker had an abysmal round of saves and suffered a punishing 9 wounds, as well as a further ion token and became immobilised by the damage!
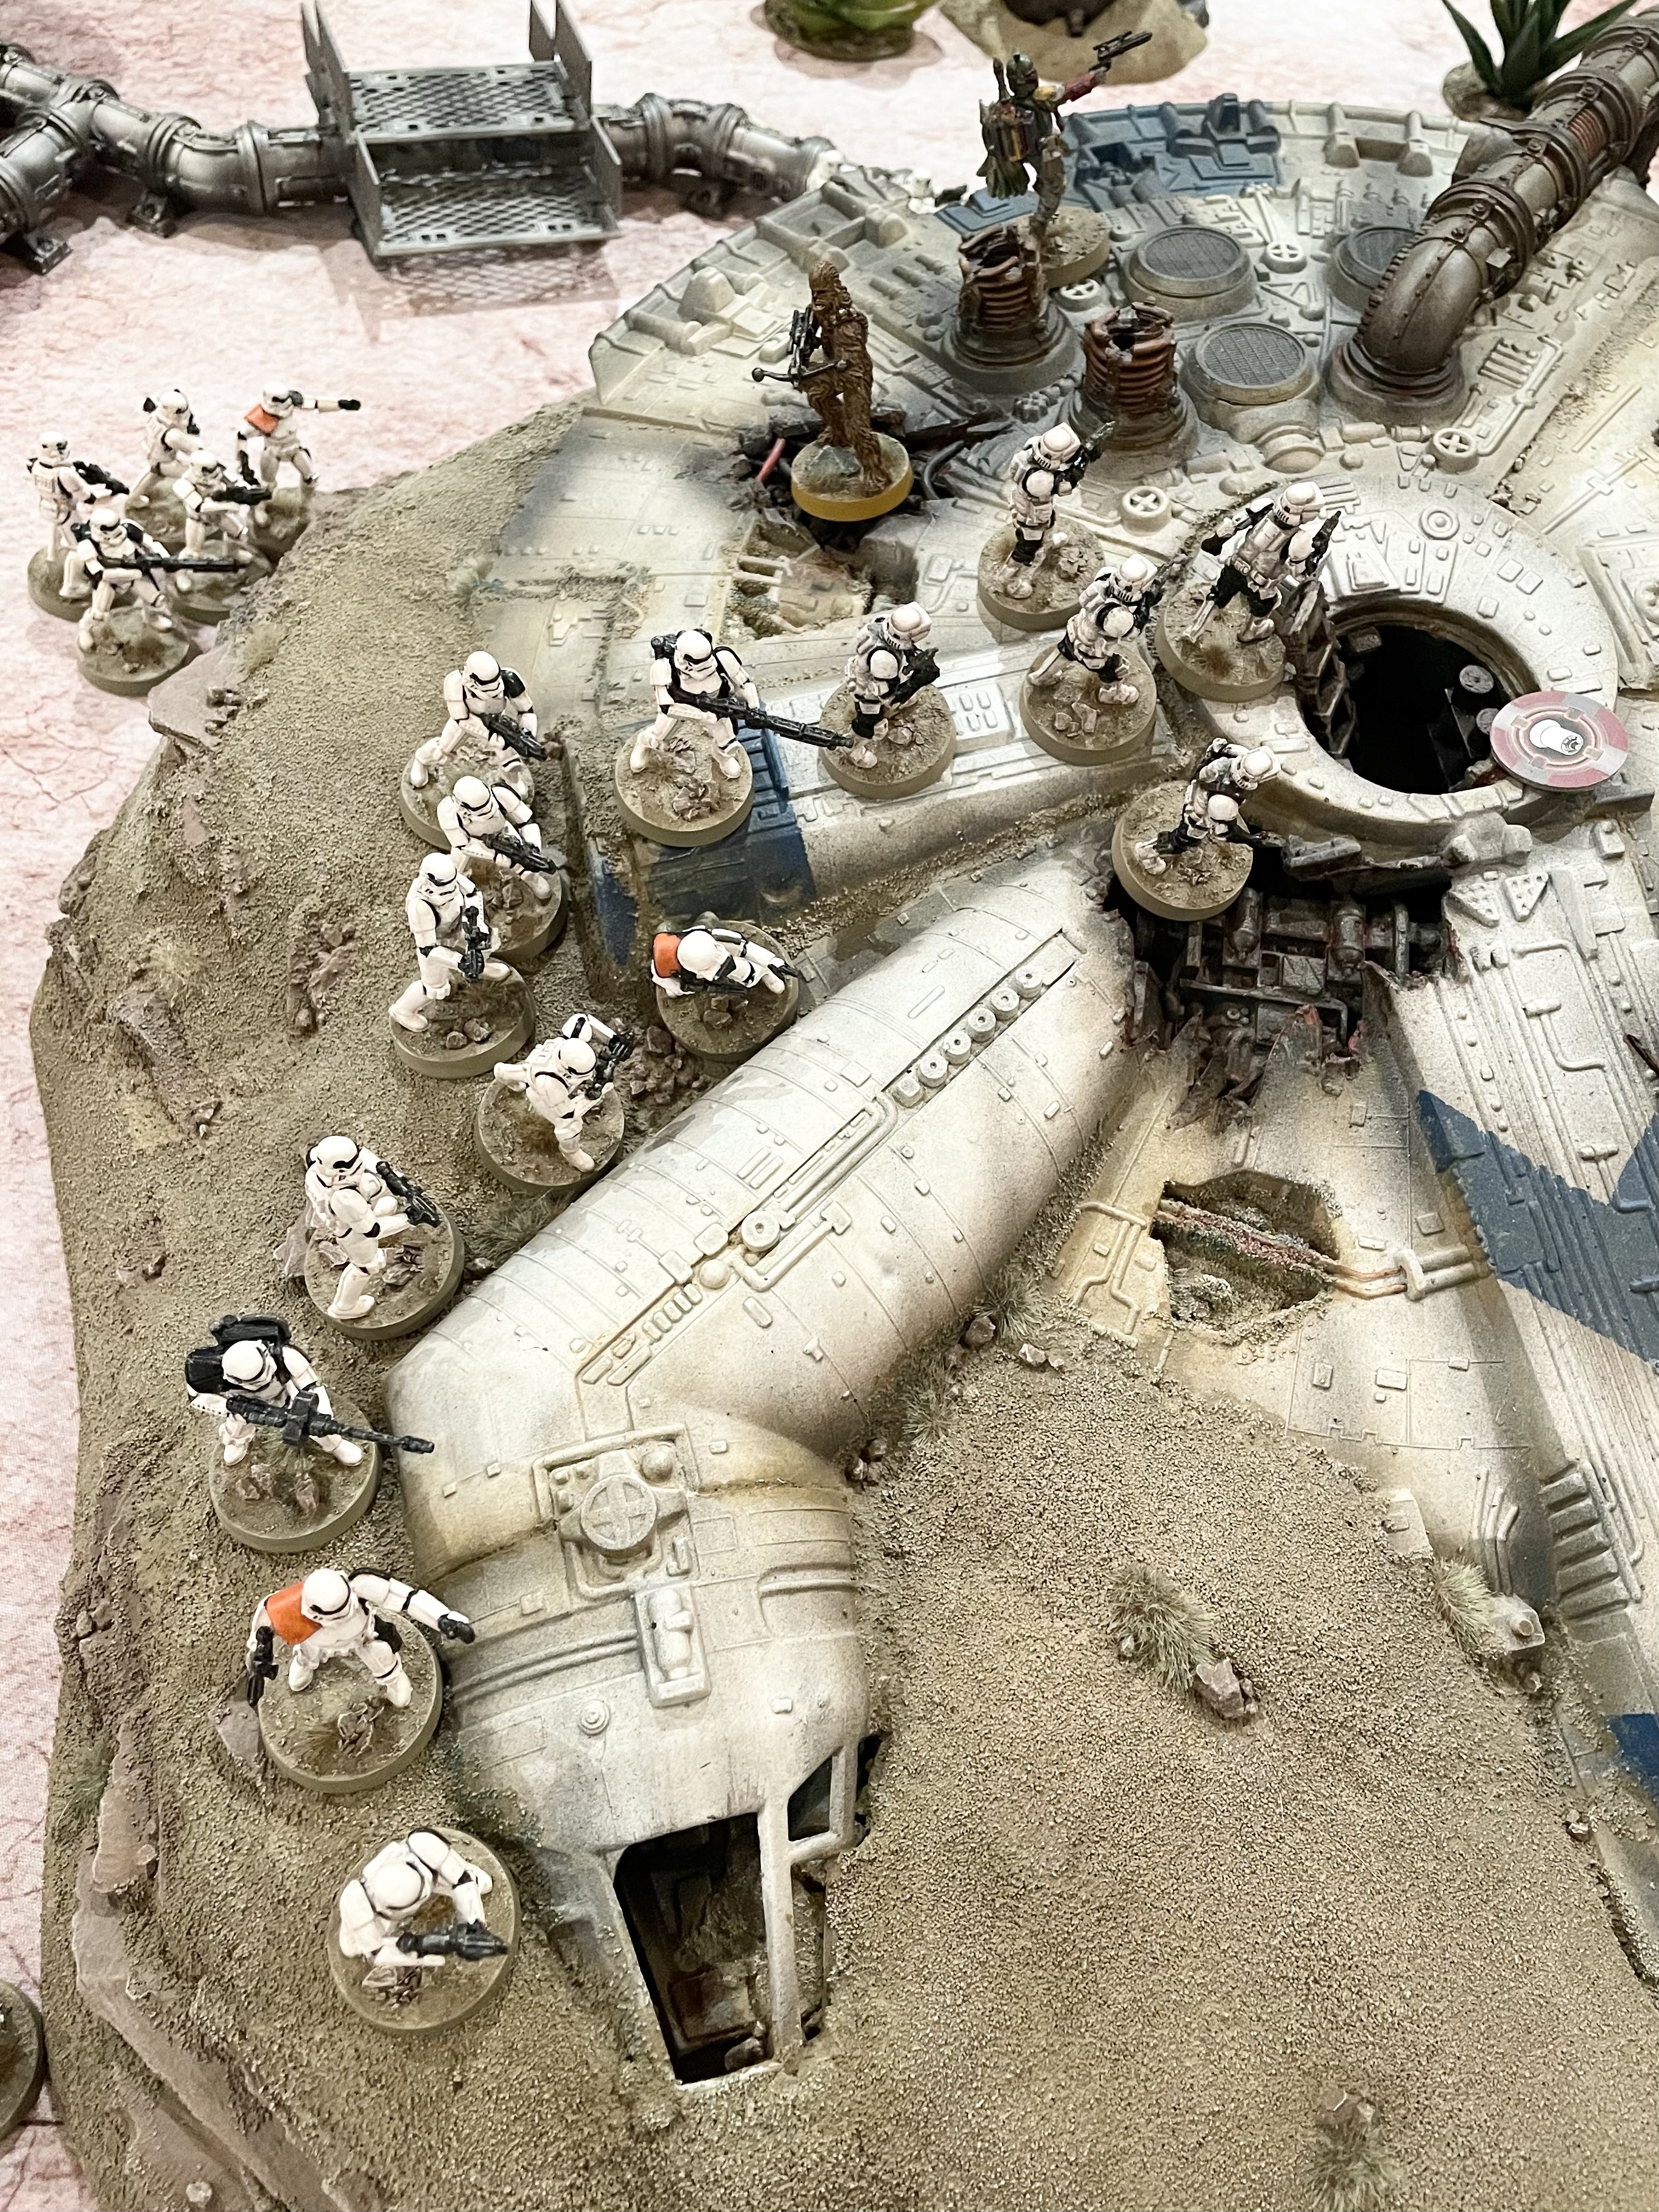
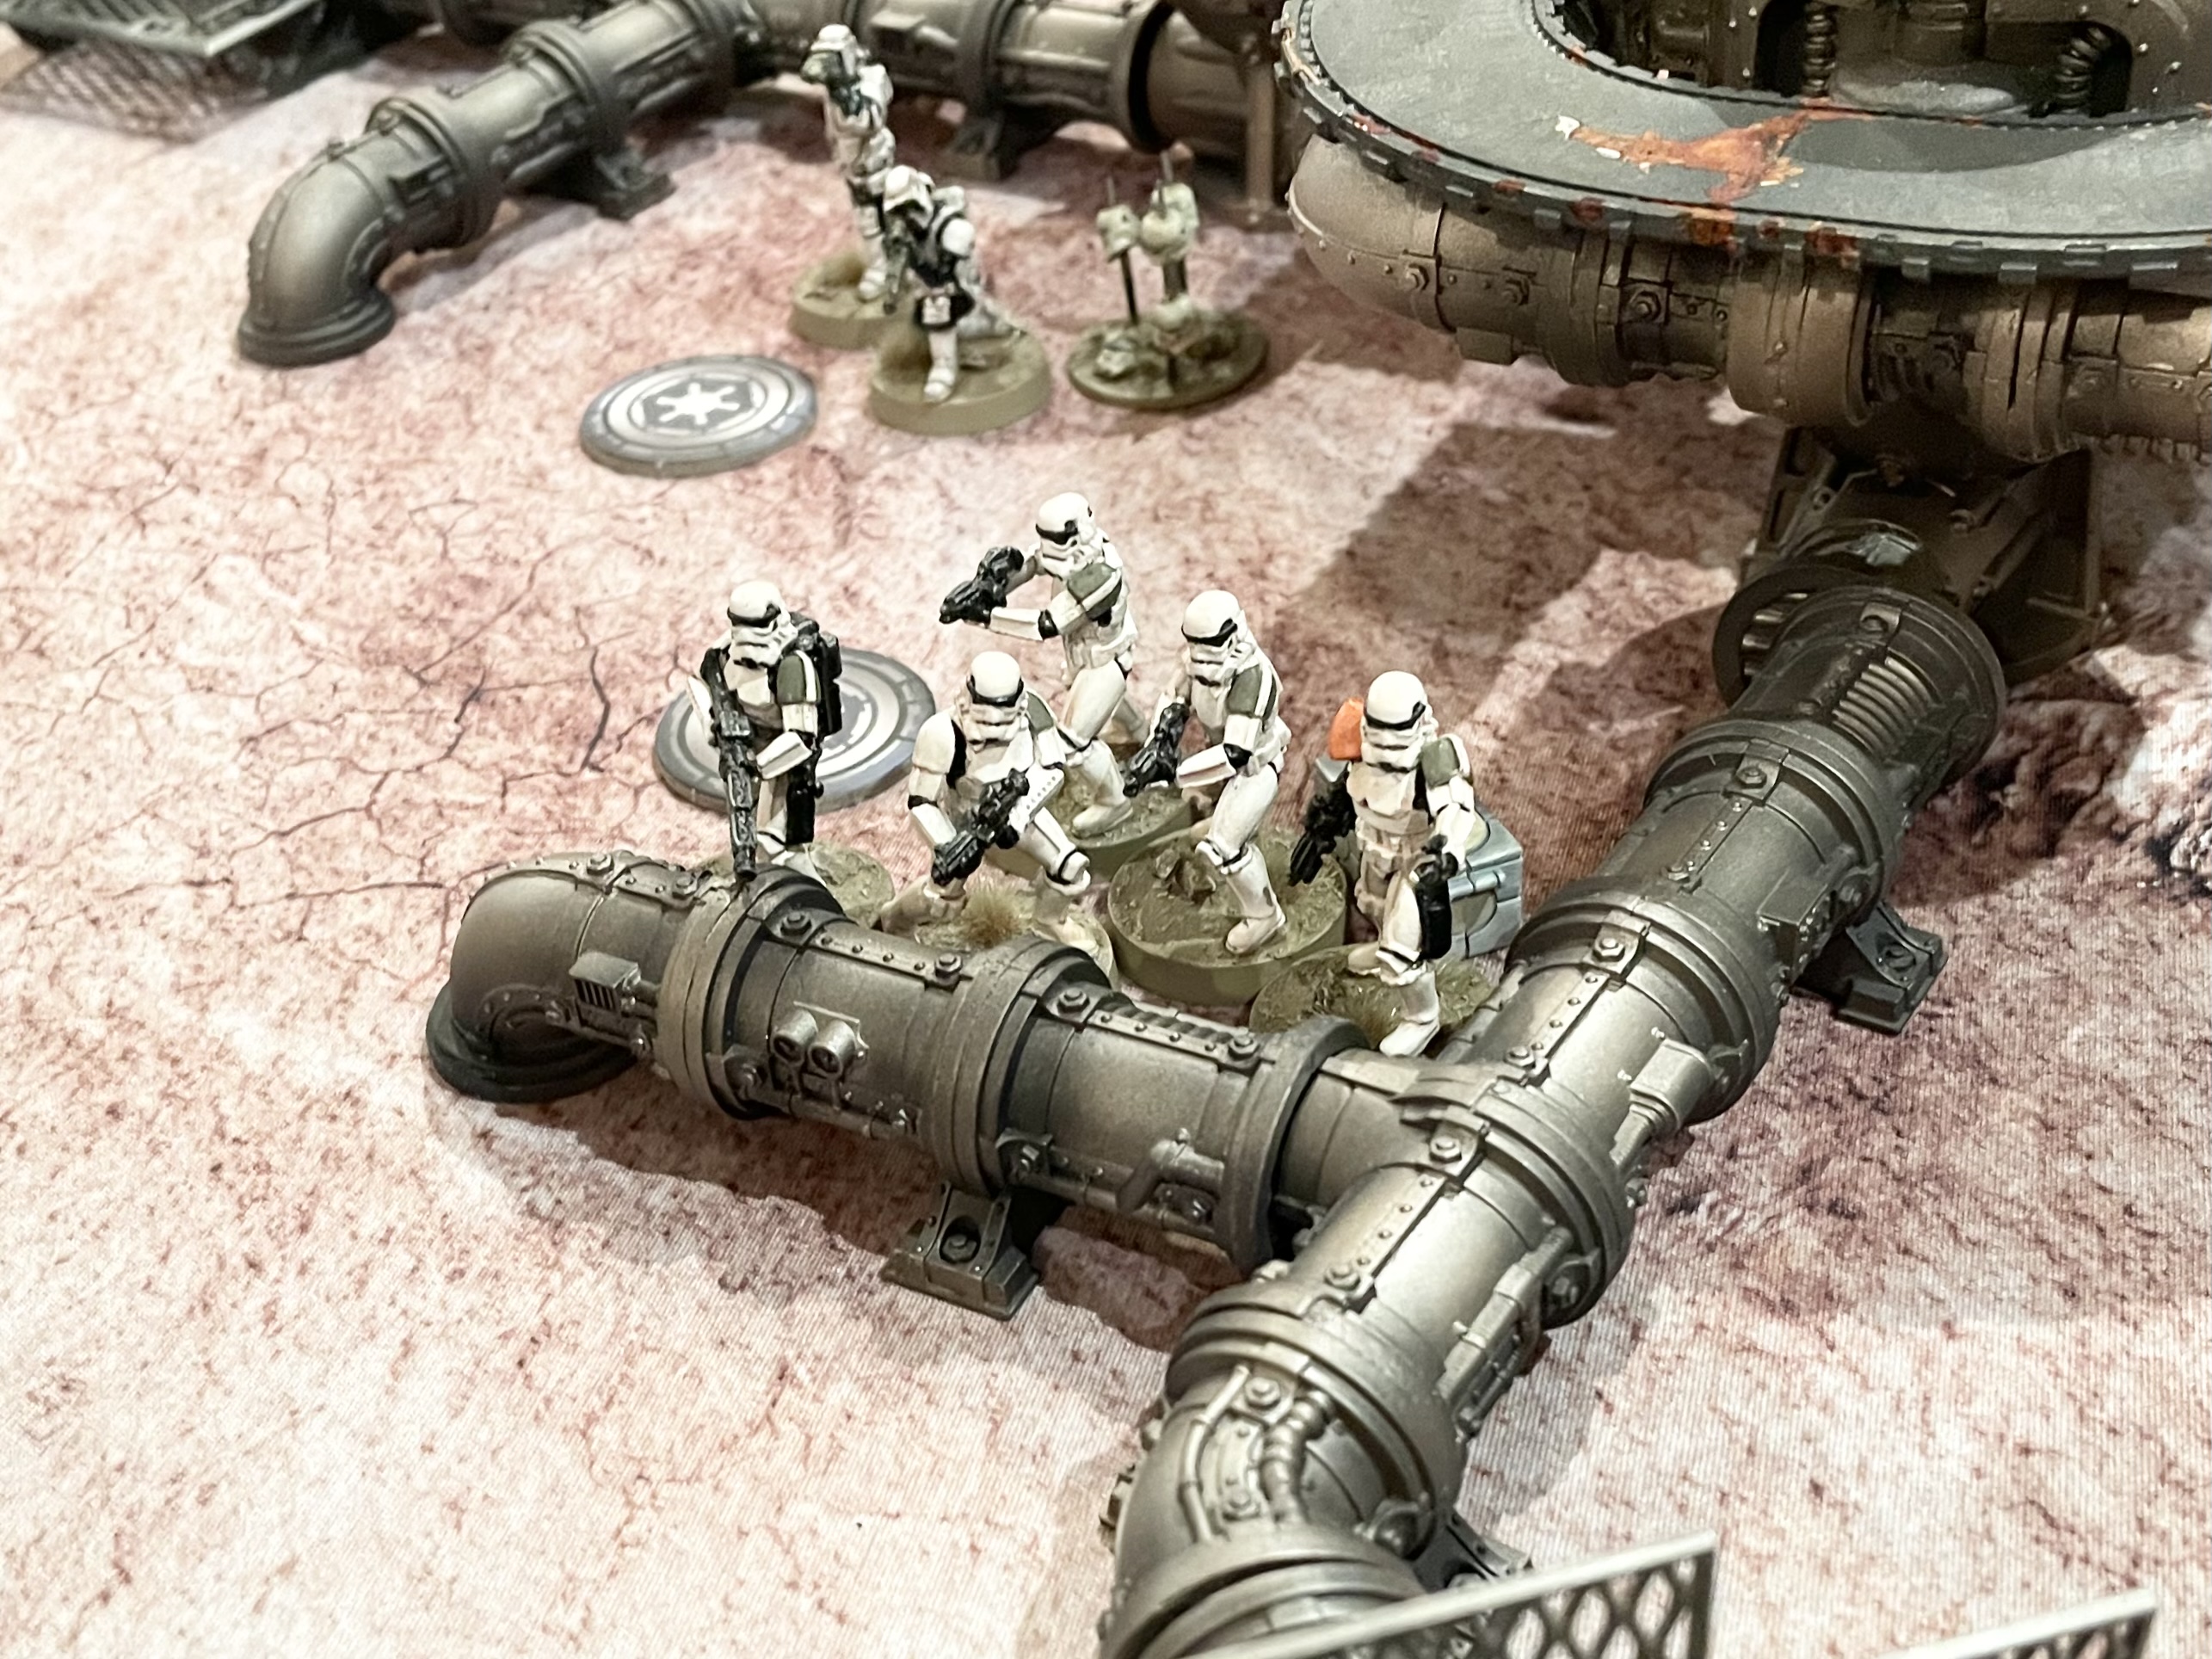
The Stormtrooper Squad with the Astromech opened fire on Pao’s unit, felling two, while the droid did what it could to patch up the damaged Walker. Fett now entered the fray, jet packing onto the wreckage to gun down three more of the pathfinders. However, Pao was canny enough to have ‘Prepared Supplies’, allowing the unit to dodge one of the hits and saving a member of his crew.

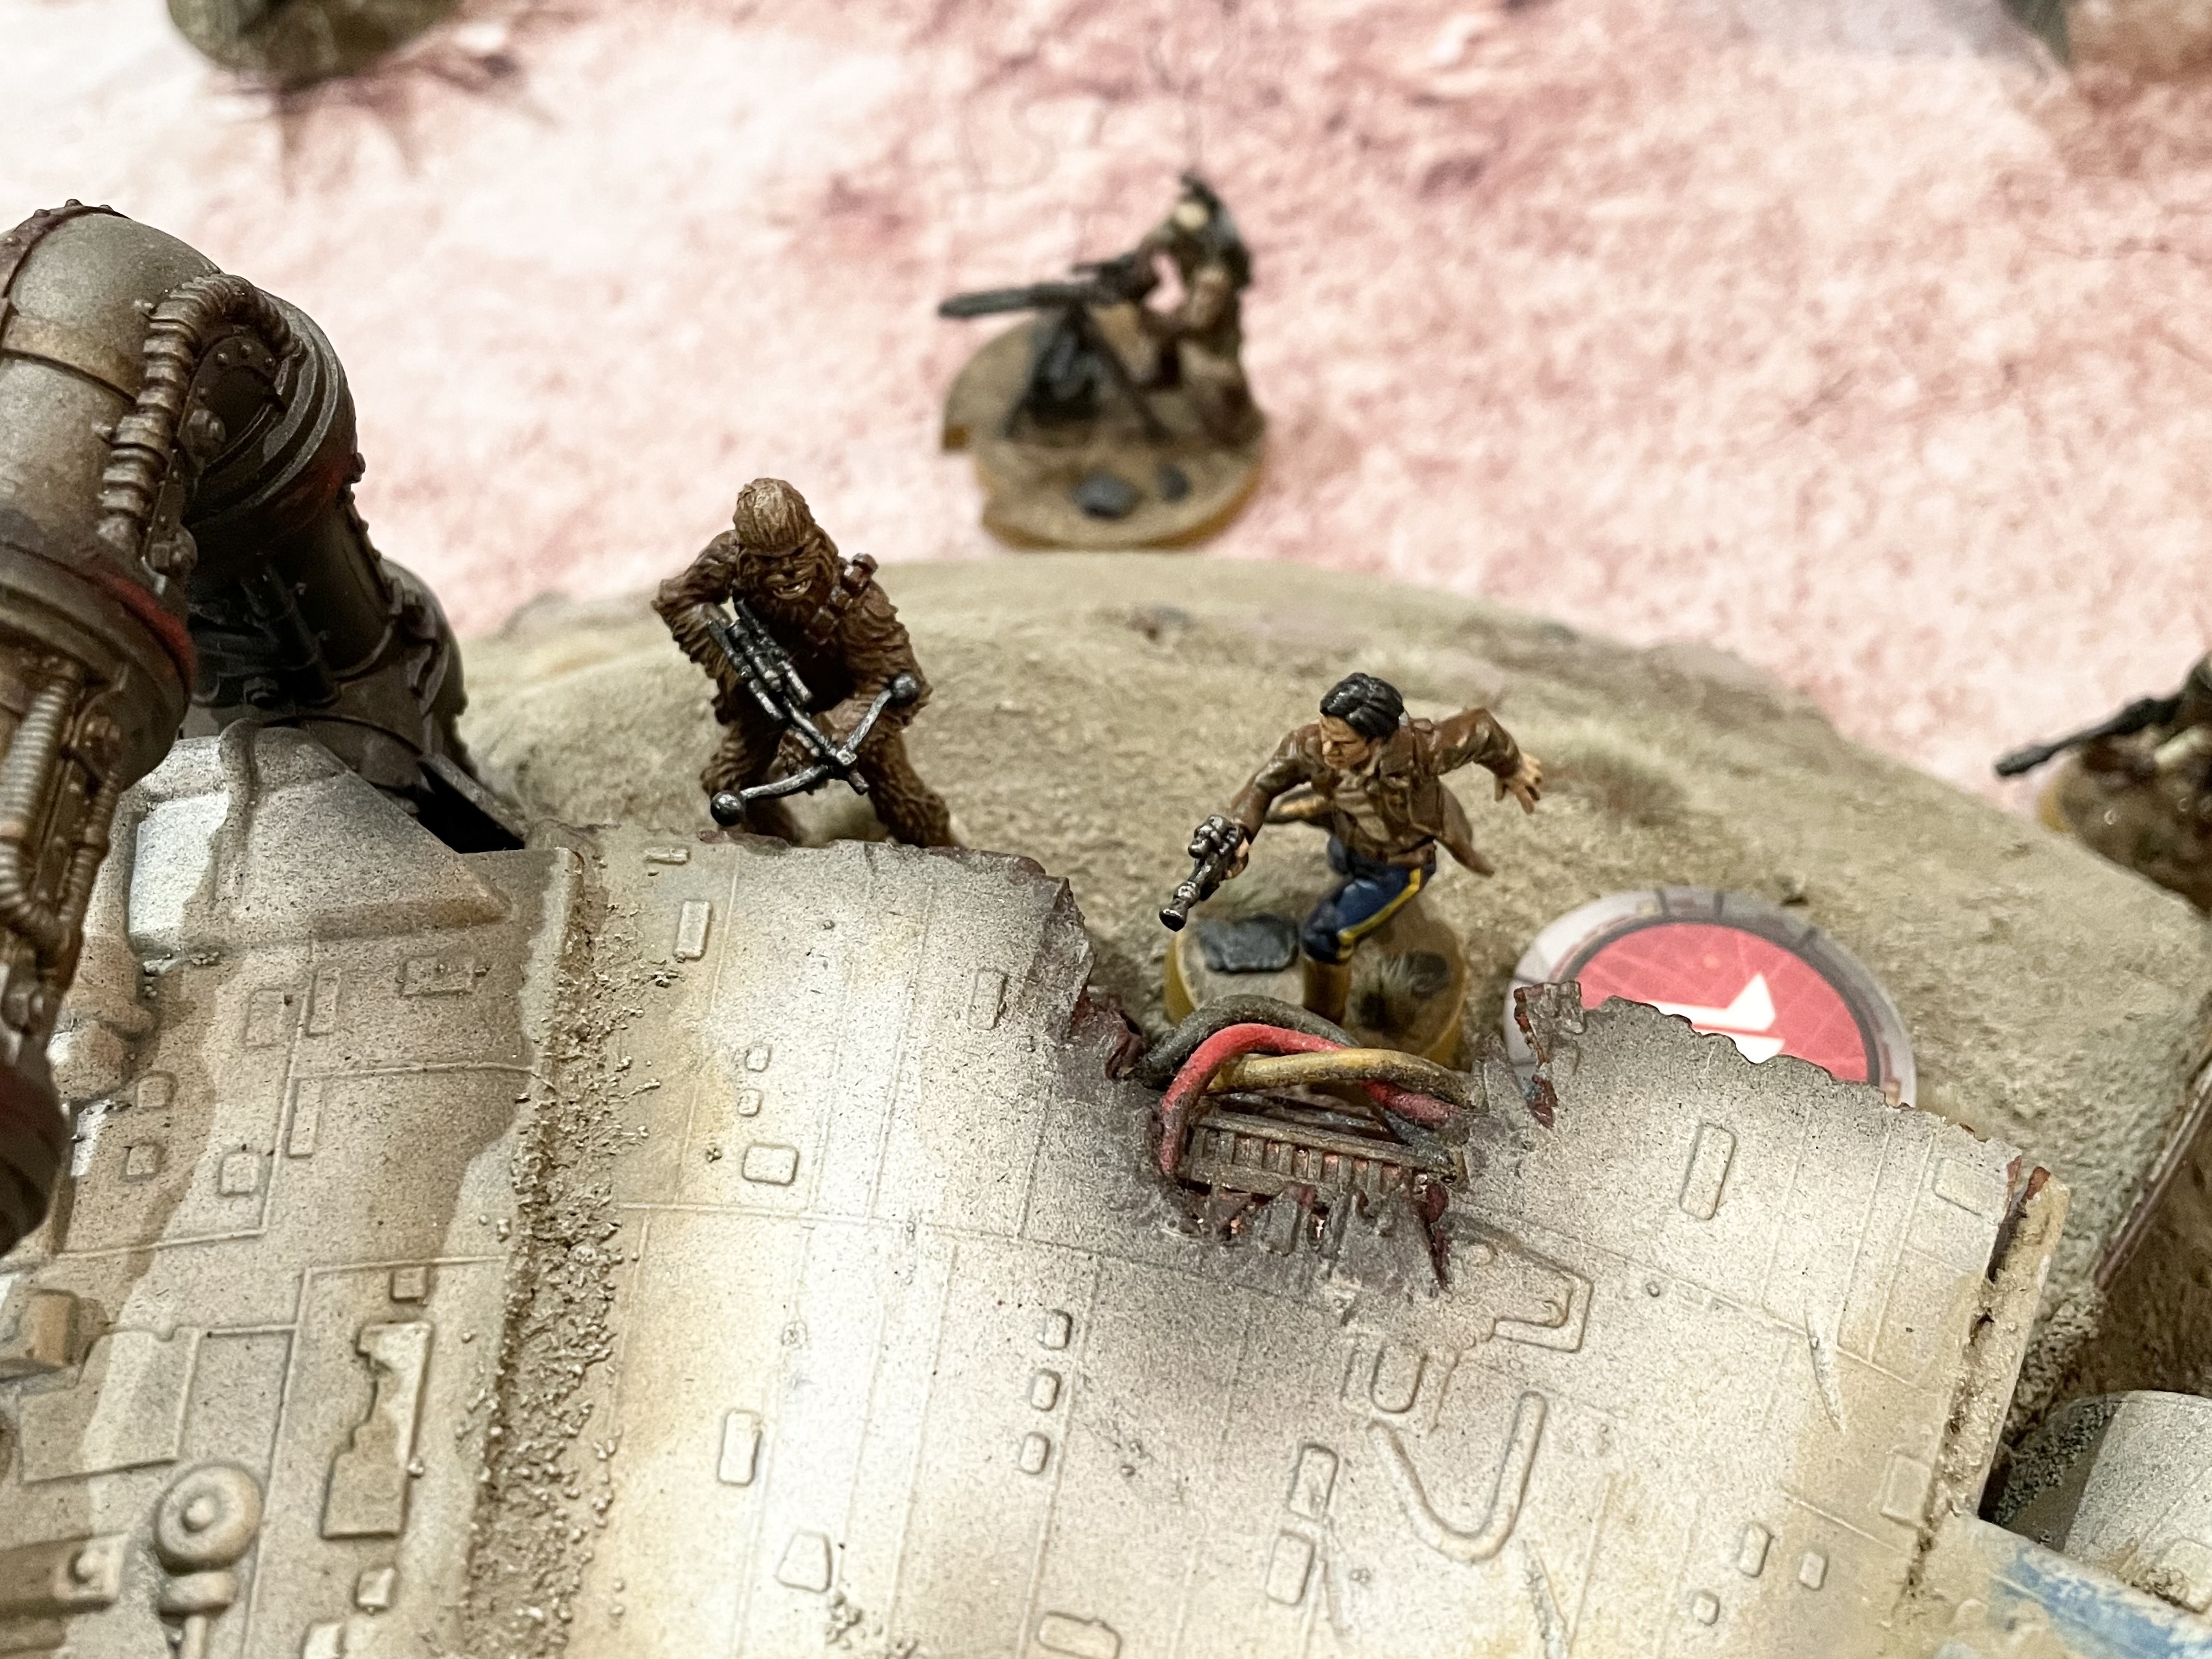
Amidst the fire fight that was erupting across the prow of the YT-1300, the Scout Squad deployed a second mine before moving back out of range of the blast. They then detonated the first mine they had laid, catching both Han and Chewee in the blast! Chewee took the brunt of the damage, suffering two wounds while Han escaped harm due to his ‘Uncanny Luck’. Both heroes suffered two Suppression tokens, due to the effects of the mine.

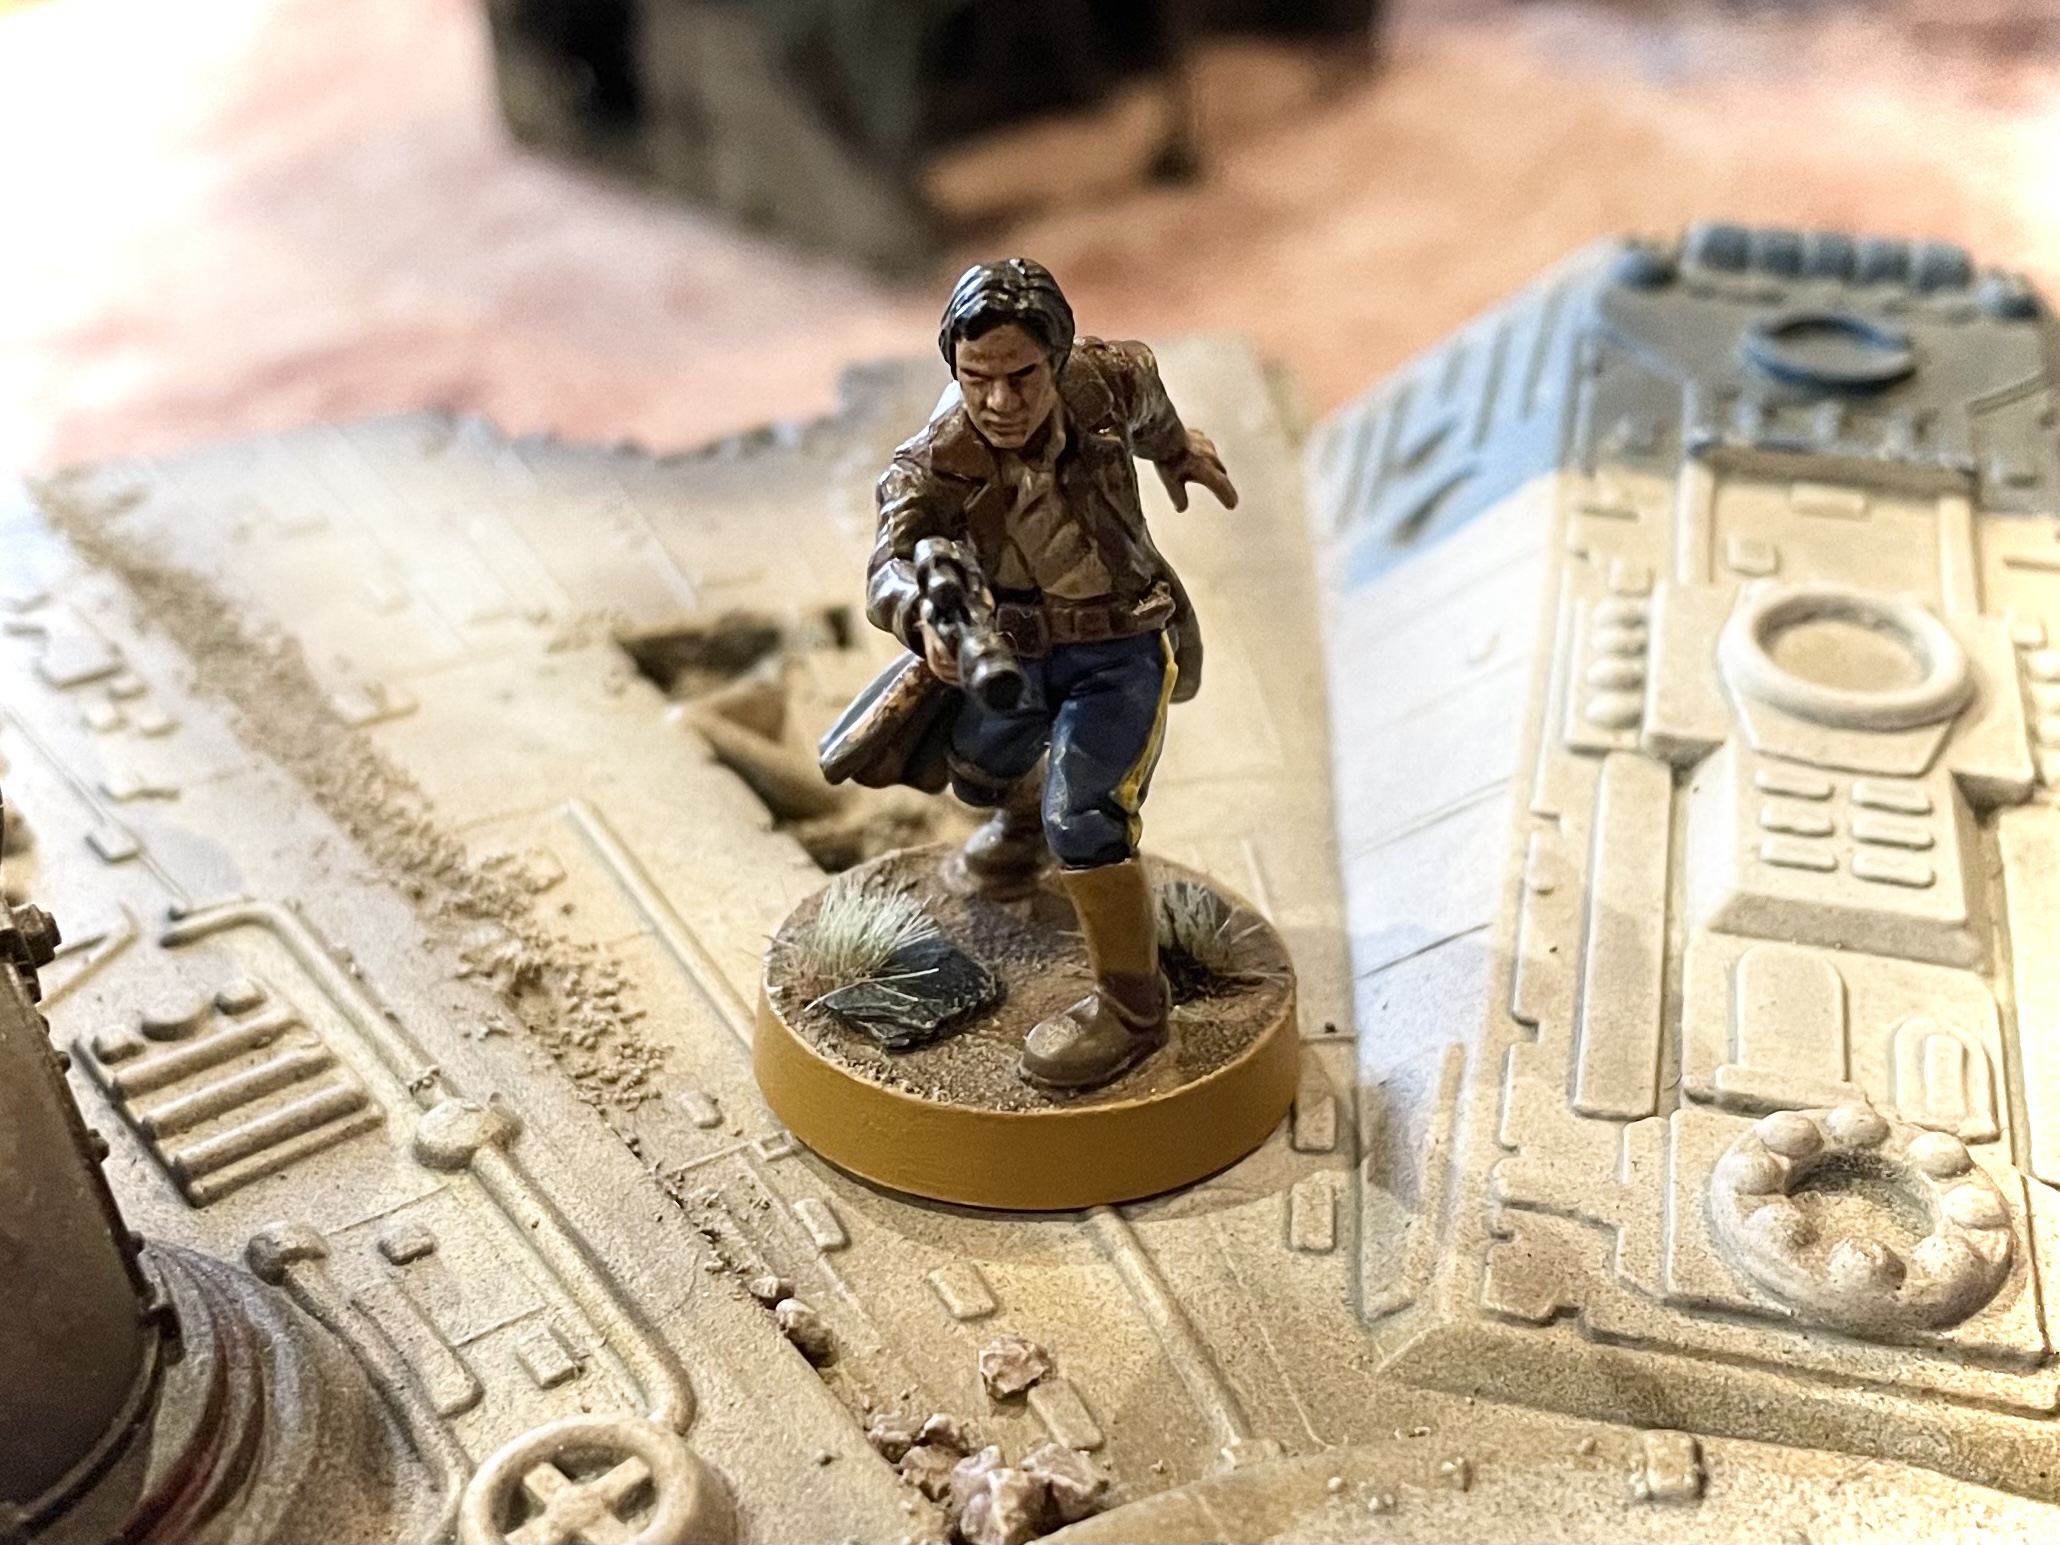
Too stunned to participate in the turn, Chewee had no choice but to keep his head down, taking a dodge action but also giving a dodge to Han due his ‘Teamwork ability’. Han made an advance from cover, opening fire on the Scouts and Boba Fett using his ‘Gunslinger’ skill. A single scout was felled while Fett suffered a wound. The scoundrel clearly thought better of this brash move as he immediately ran back into cover!

The Ship Troopers secured the objective on the Rebels Norther flank, before breaking cover to move towards the Southern side of the battle.

Turn 3 - Command Phase
Battle had been fully joined and gaining the initiative now could prove decisive. Predictably, both players opted for a 1-Pip card. The Imperials played the standard ‘Ambush’, while the Rebels played ‘Sabotage Communications’.
It was the Empire players turn to make the roll off, which was won for the second time this game.

Once again it was the At-St who received the order as there was little chance it would survive the turn. There was still hope that it would finally have a decent round of shooting and take something out!
As the conditions of the Rebel card were that a Special Forces unit must receive the order, it was placed on Bistan’s Pathfinders squad. This card also reduced the number of orders placed by the opponent to one, to a minimum of one. But as only one order was issued by the imperial player this turn, this had no benefit to the Rebel player.
Turn 3 - Activation
Immobilised and with only two wounds remaining, not to mention the ion token, the At-St made what was likely to be its final activation. It used its Twin Light Blaster Cannon and concussion grenade launcher to target Pao and the remaining Pathfinder, robbing the unit of cover and finally wiping them out! The Mortar Launcher and Twin Blaster Cannon used their longer range to target the Veteran Squad for a third time, failing to wound but dual suppressing the unit.
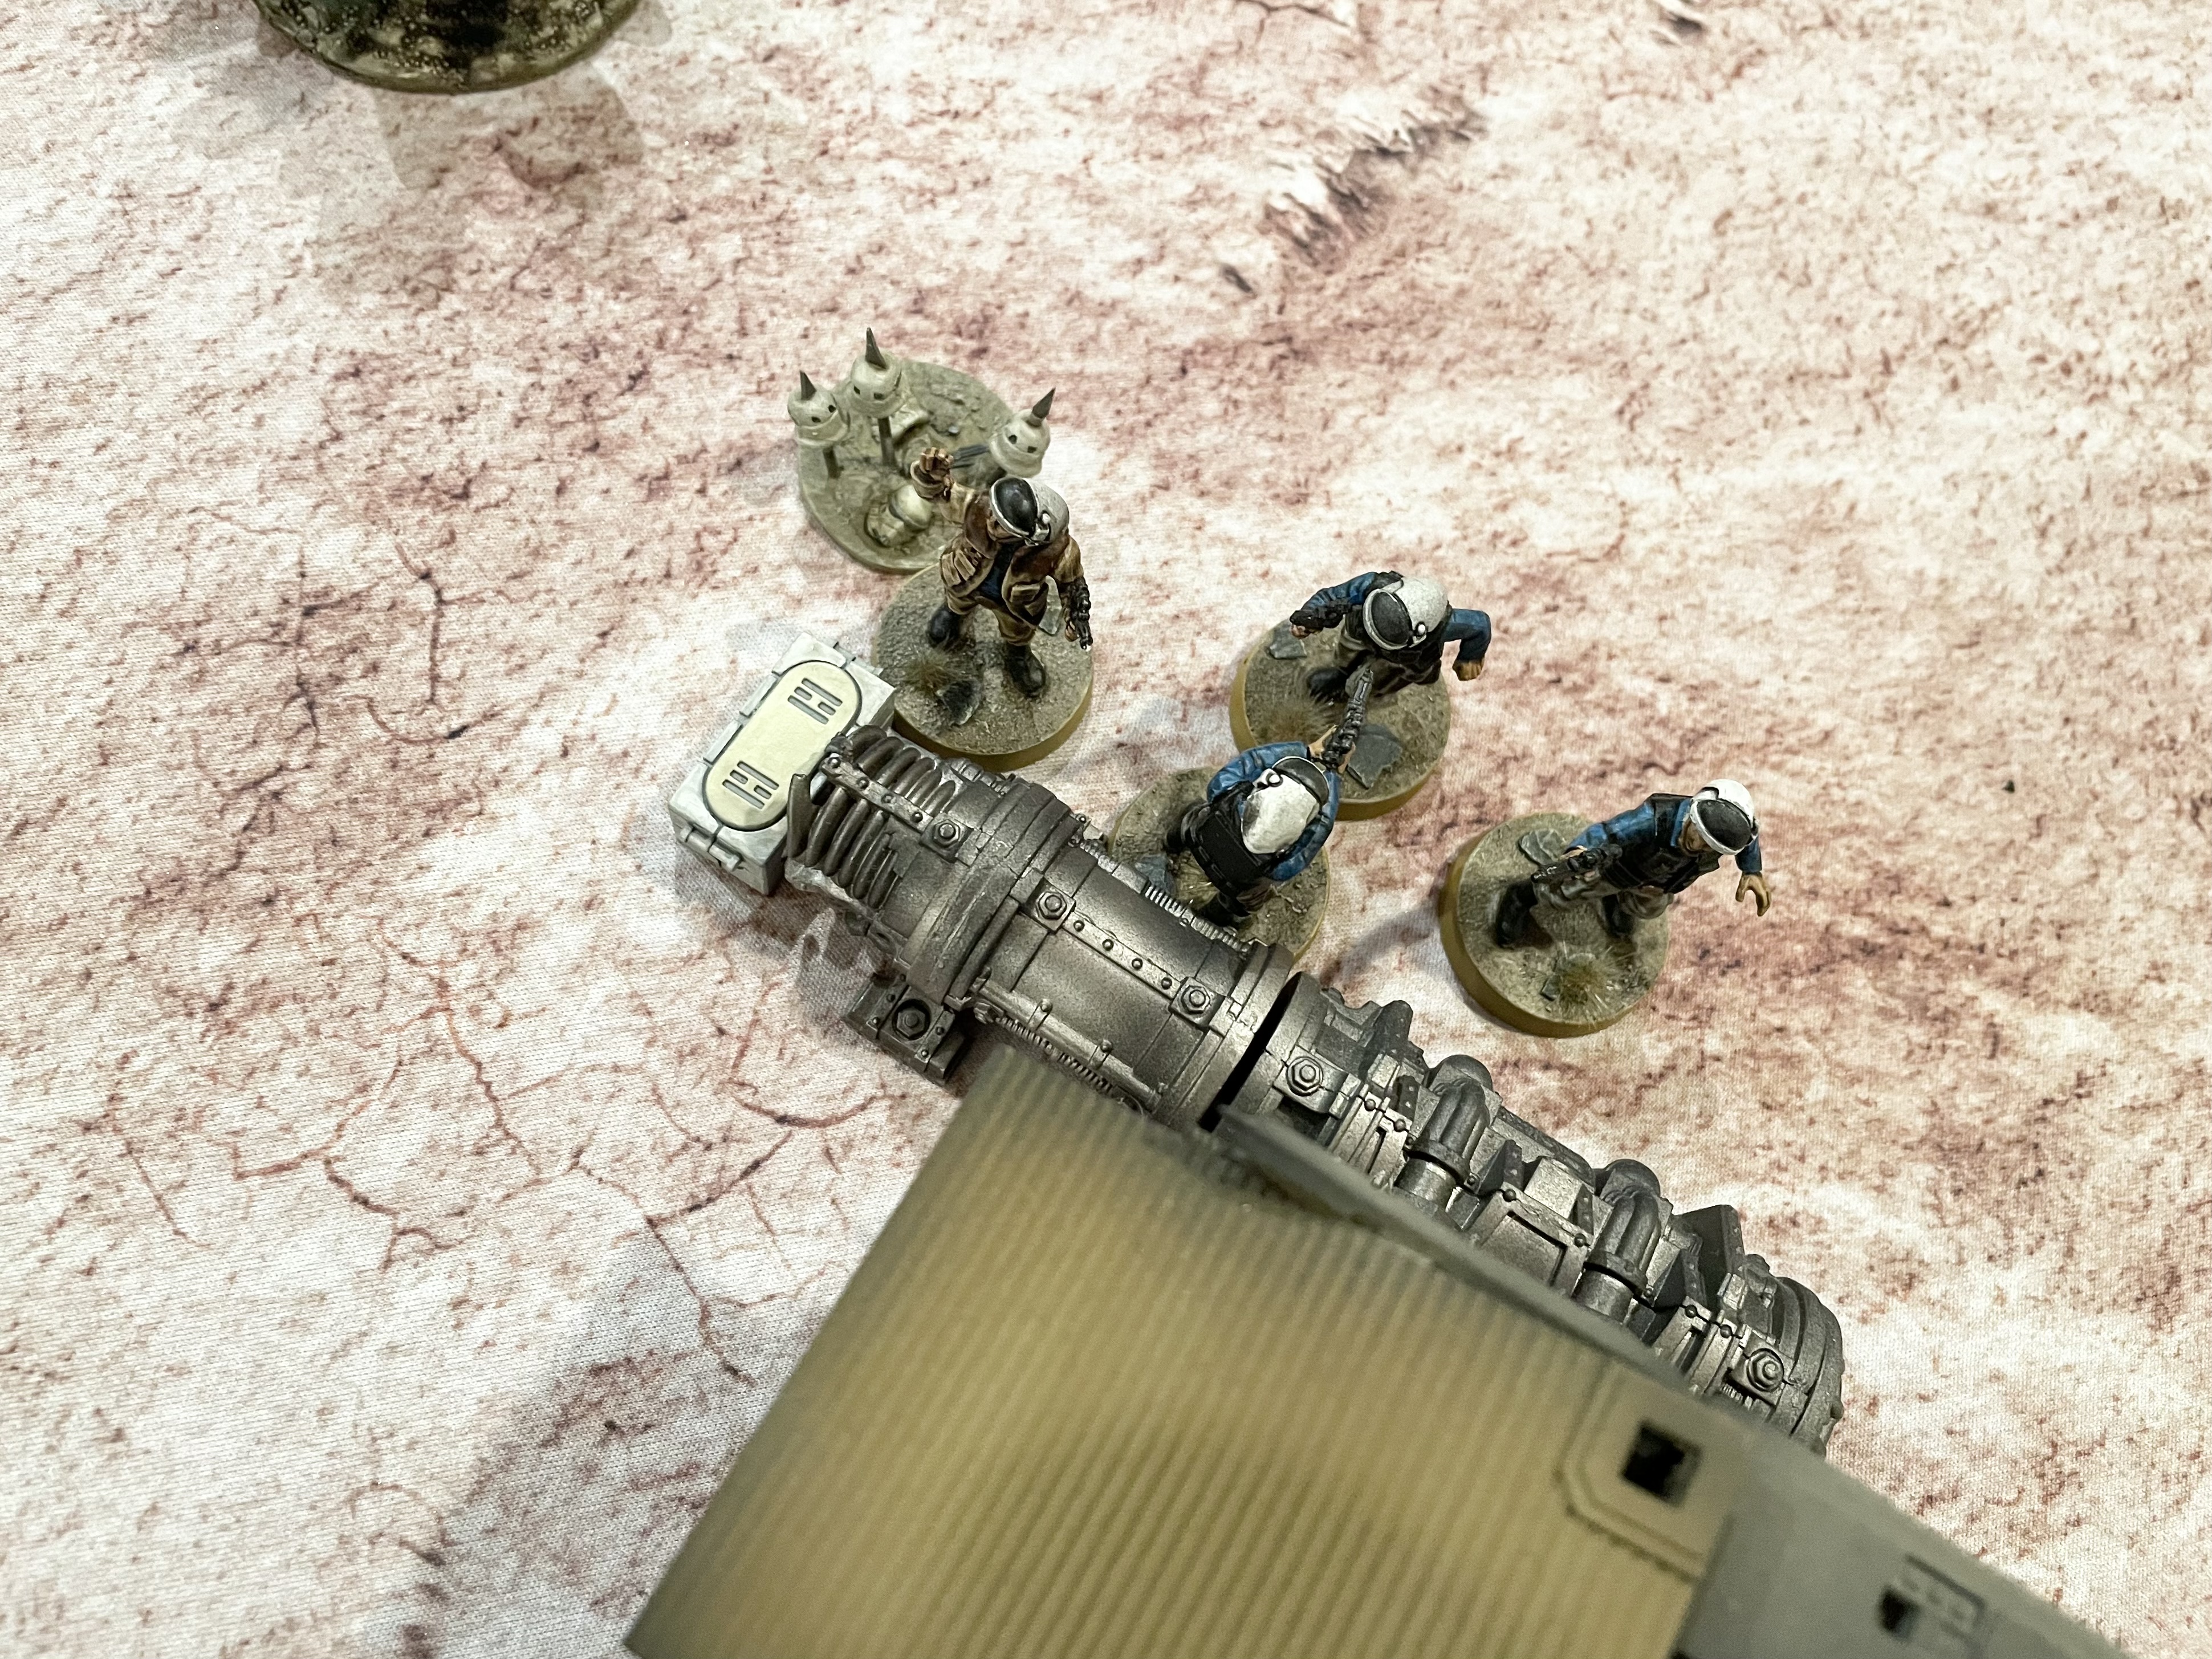
Drawing from their orders pool the Rebels activated a Core unit, placing the Northern MKII blaster turret on standby, covering any attempt to outflank by the gathering Stormtroopers. But the imperials, pulling a special forces unit, repositioned the Scout Sniper Team and took a long range shot at the turret. A perfect hit caused two wounds and knocked the turret out of Stand By!

An early pull of a HQ token by the Rebels meant Solo was forced to activate earlier than planned. Thanks to the Steady ability, he was able to pull the same trick as last turn, this time breaking cover to the North in order to gun down a couple of approaching Stormtroopers. More importantly this meant placing a suppression on the Reinforcement unit who were poised to knock out the blaster turret. Han then used his second activation to dive back into cover.

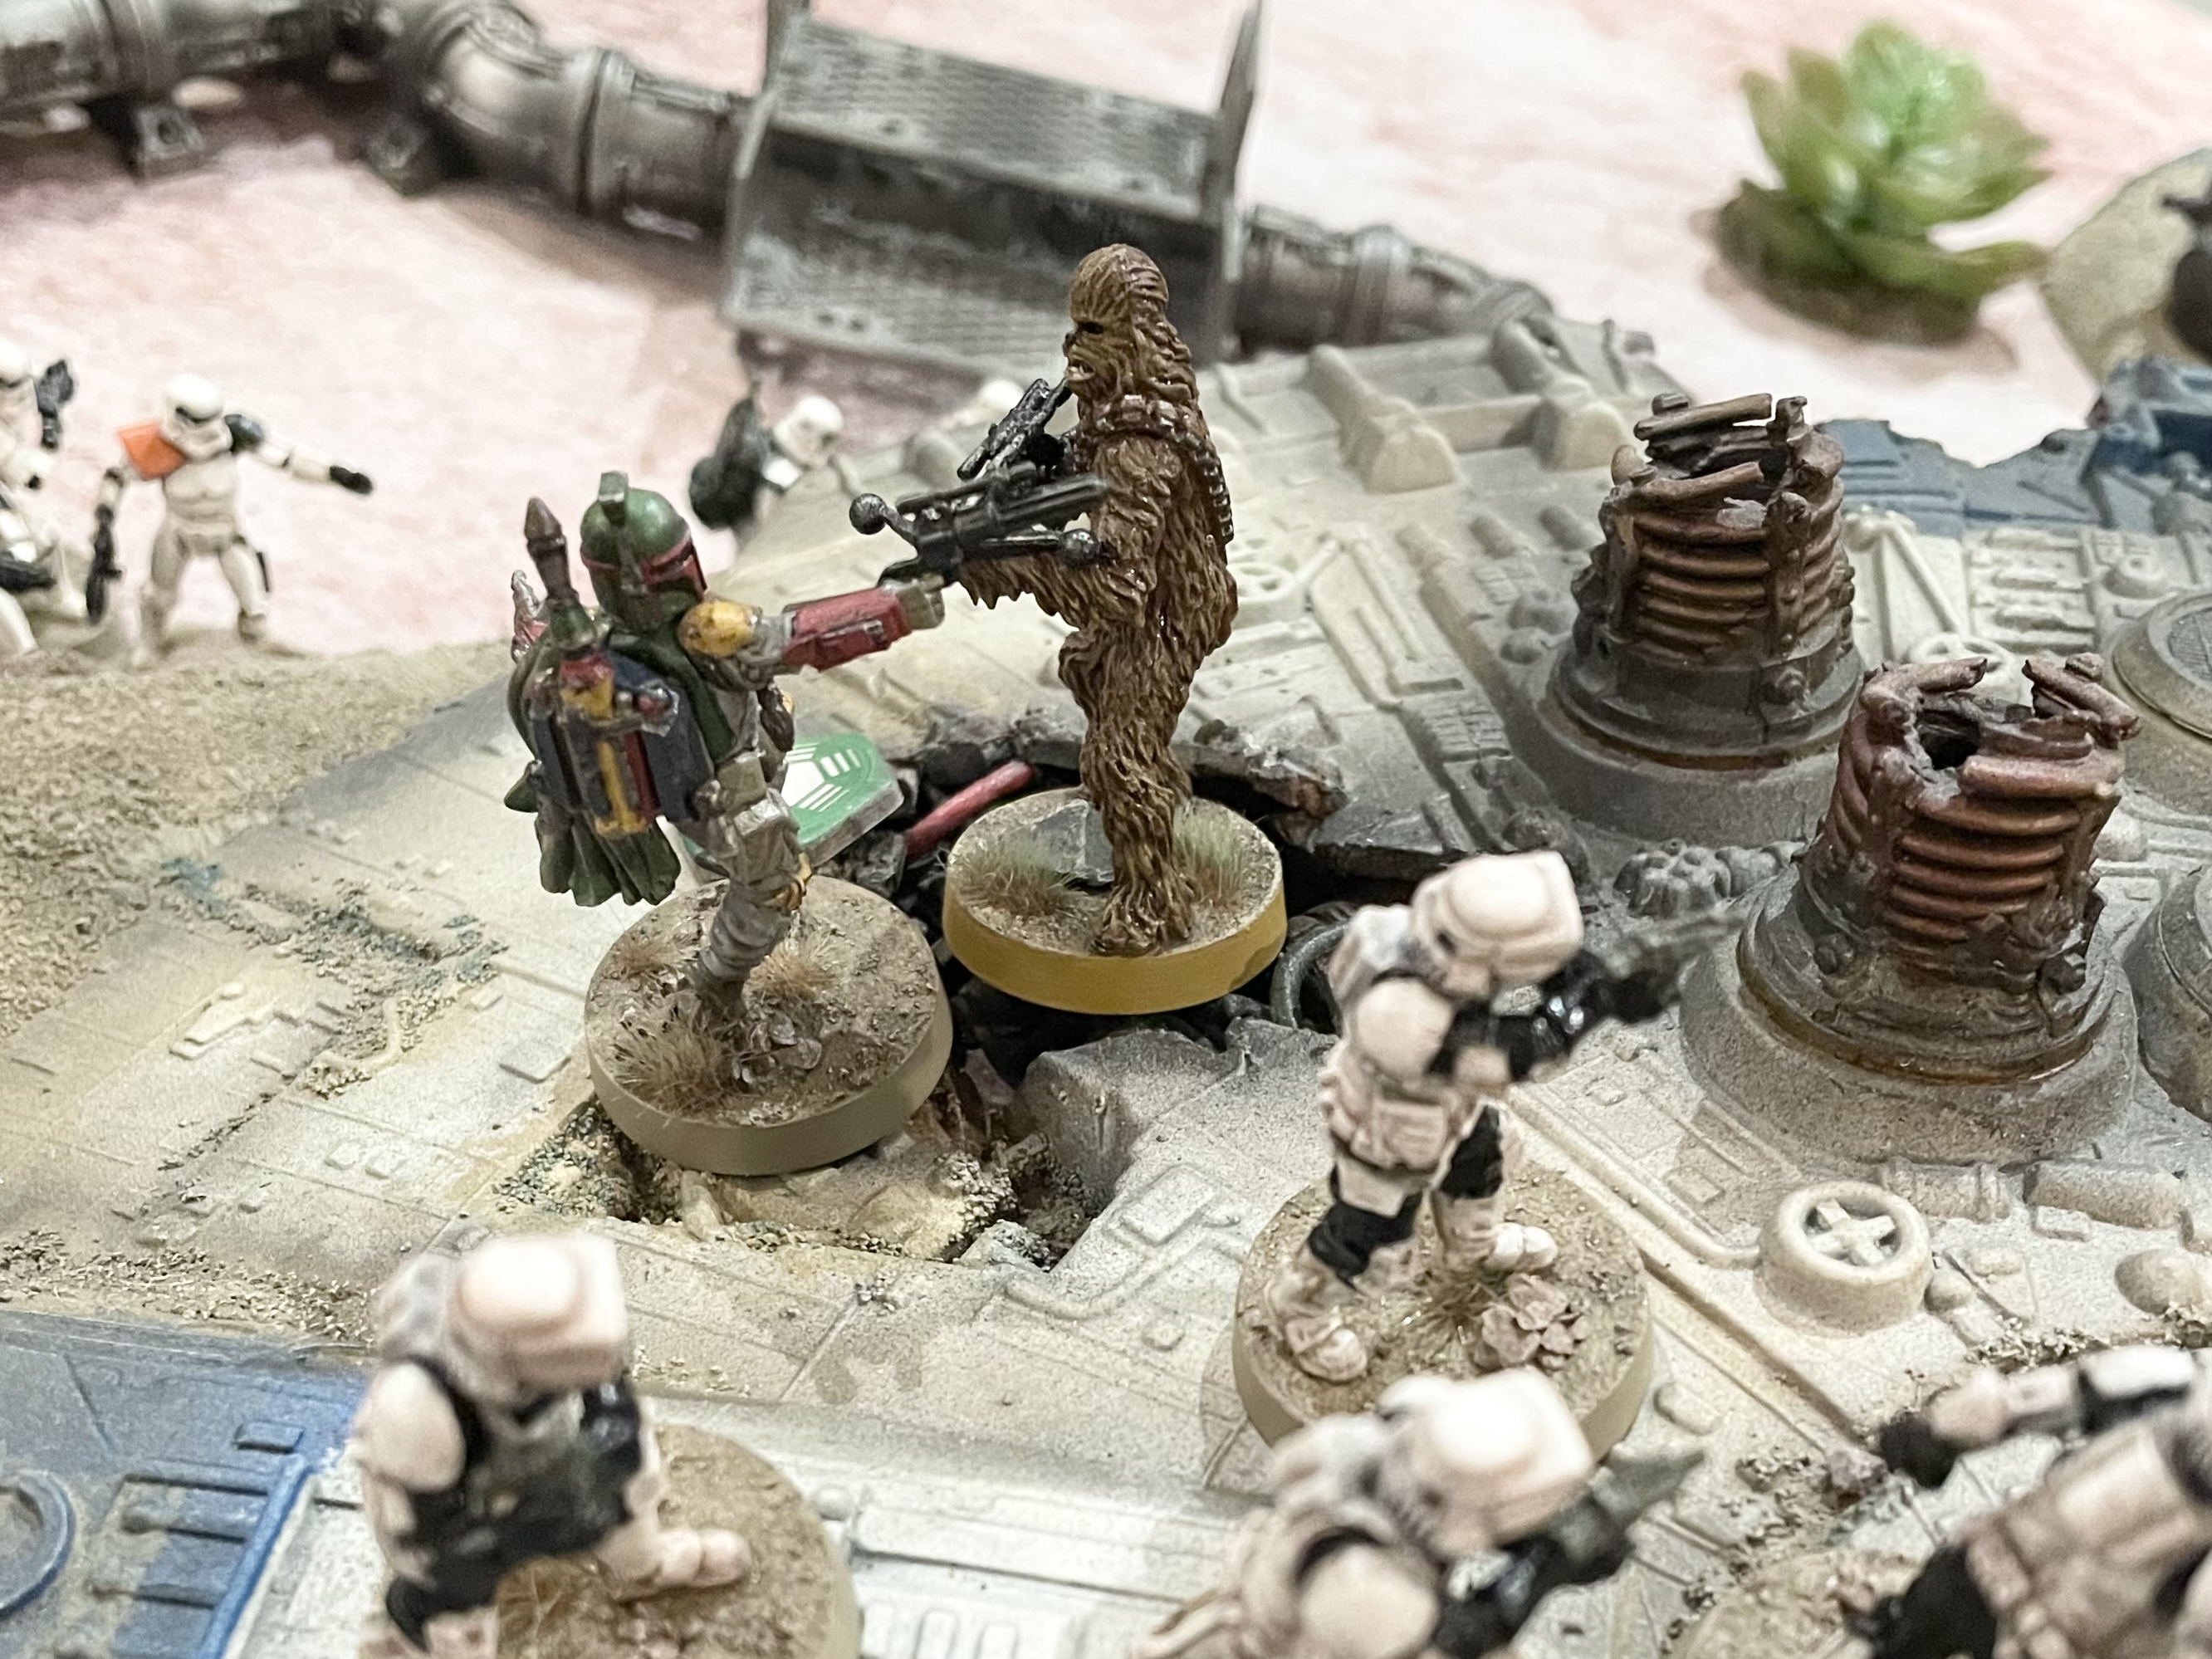
Again the imperials pulled a special forces order, leaving them no choice but to activate the remaining Scouts squad. Throwing caution to the wind they moved into base contact with the central objective but instead of claiming it, opened fire on a hapless Chewbacca, causing a brutal six wounds! This caused the Wookiee to loose his cool and brake cover, charging Boba Fett!..

.. but Wookiee claws are no match for Bescar steel and Fett disengaged the Wookiee unharmed, leaving him to face a Billy of laser fire from the approaching Stormtroopers. Unfortunately this also took Fett into the line of enemy fire and he suffered two more wounds from Pathfinder and Veteran shooting.
On the Southern side of the table the Stormtroopers with the Astromech wiped out the turret that had faired so well against the At-St. But it was ‘Snrak’ and his band of alien mercenaries who took the prize this turn, felling the At-St with their blasters.
Turn 4 - Command Phase
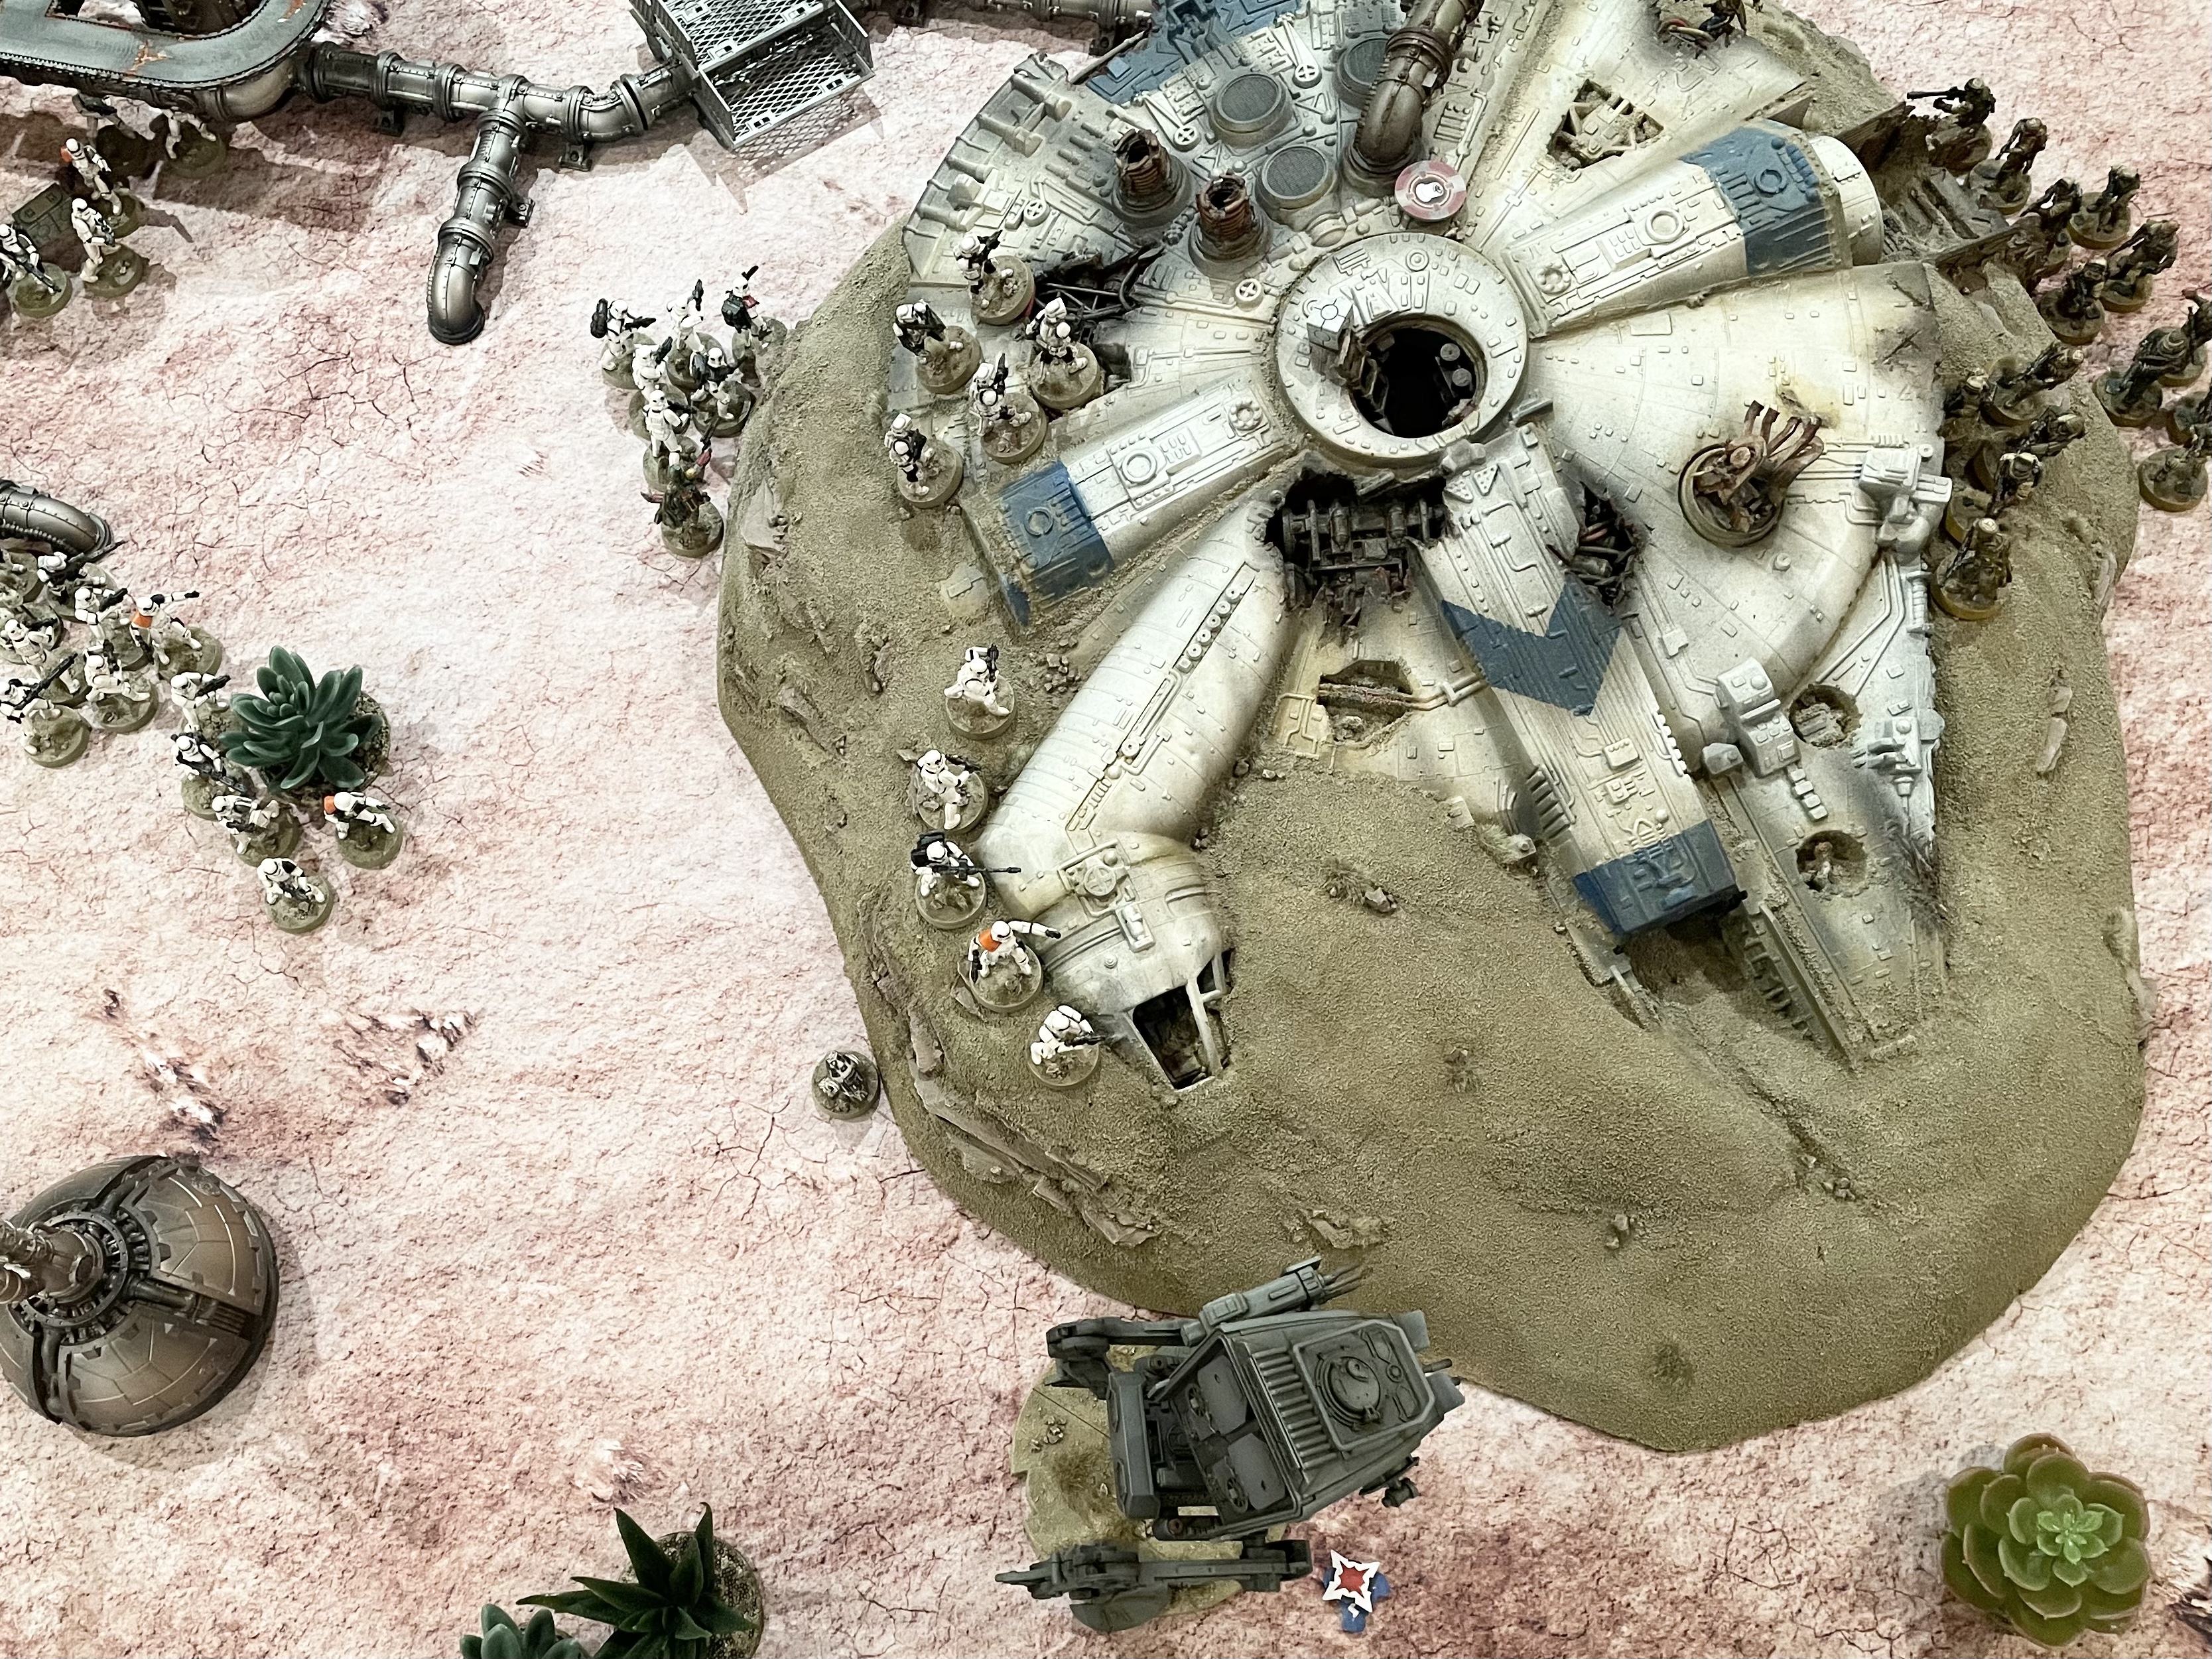
Going into turn Four, the Empire was looking firmly in control of the battlefield. Though they had suffered the loss of the At-St and Fett had suffered a couple of wounds, casualties among the ranks of Stormtroopers were minimal. More importantly, the Rebels held only a single objective, while the Imperials held two and the scouts were in contact, though not yet claiming, a third.
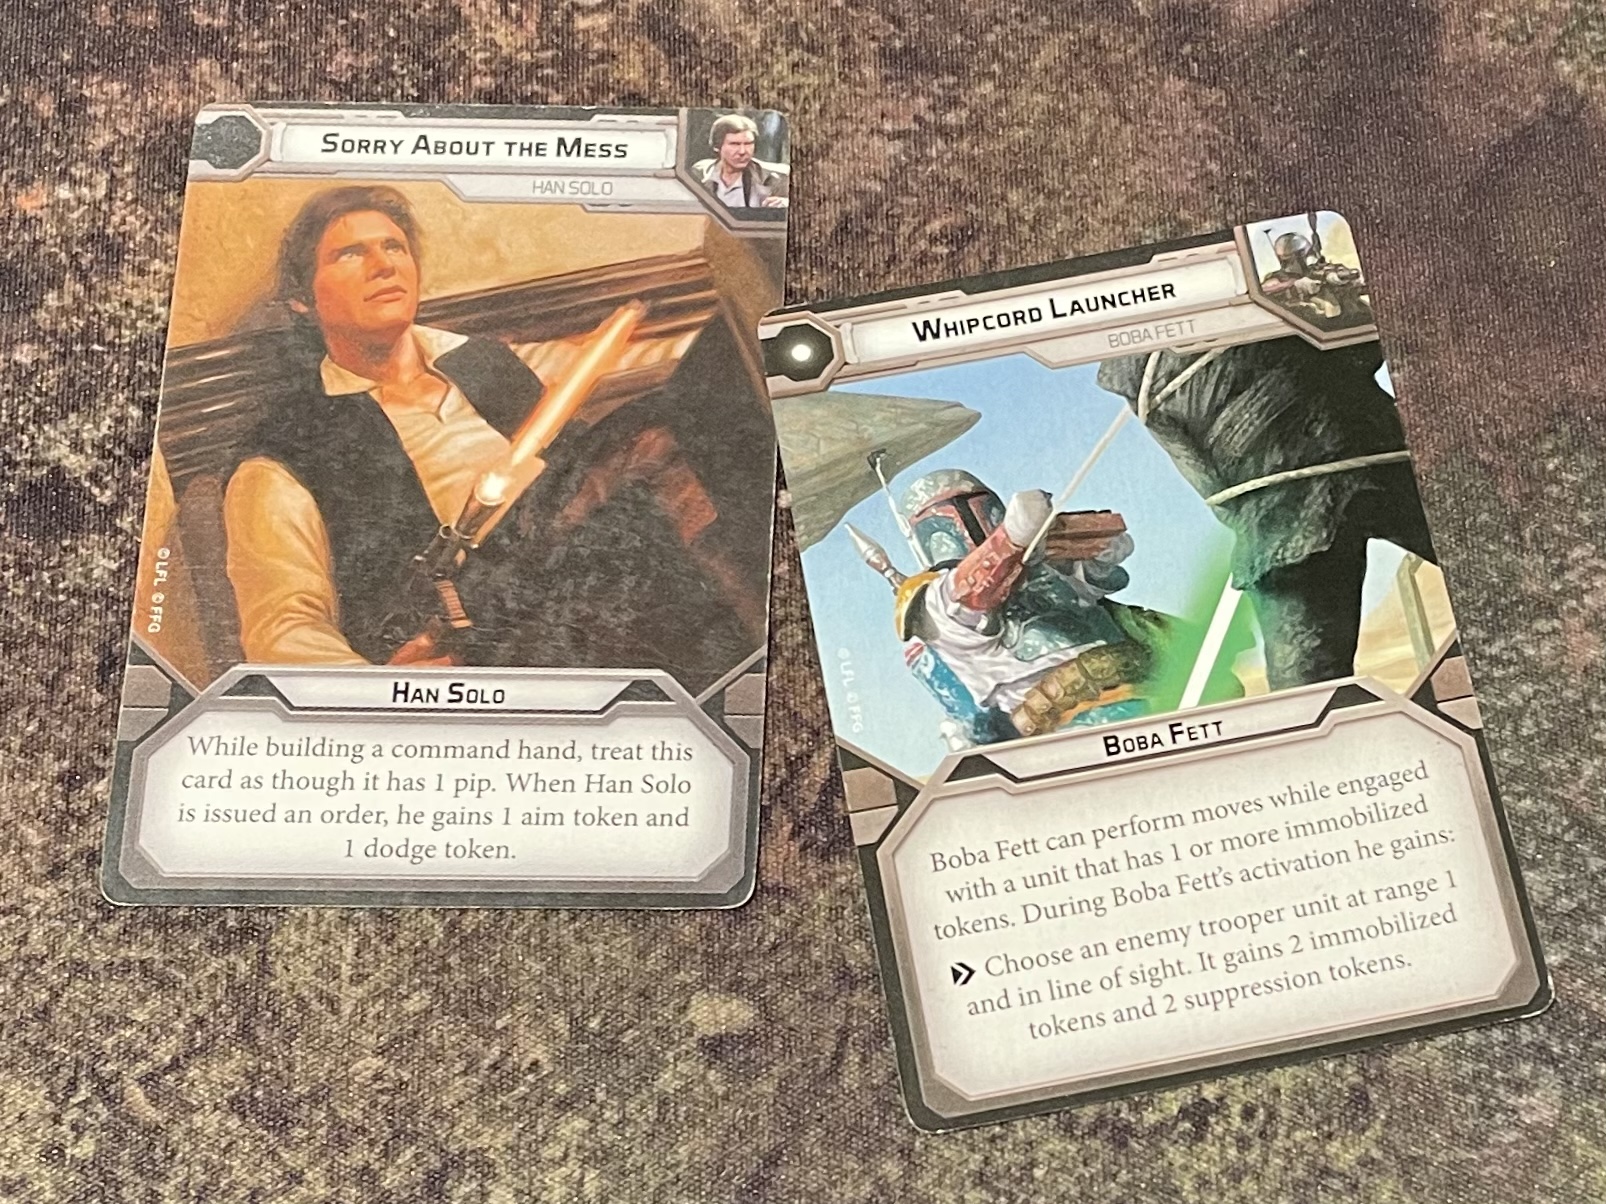
In a bid to steal initiative and close on his quarry, Fett now played his one pip card, ‘Whipcord Launcher’. But Han was one step ahead of him, playing the only zero pip card in the game, “Sorry about the mess”!
This was an automatic win of initiative for the Rebels, with the title of the card proving a portent of things to come…
Turn 4 - Activation
Seizing the initiative, Solo waisted no time, vaulting onto the structure of the wrecked YT-100 and using the combination of his ‘Gunslinger’ and ‘Steady’ skills to target the Scout Squad and Fett. Two Scout’s went down while the Bounty Hunter suffered two hits with pierce two. Fortunately Mandelorian armour is invulnerable, offering additional protection against Piercing weapons. The armour absorbed some of the damage, but when the dust settled Boba was left with a single wound remaining!
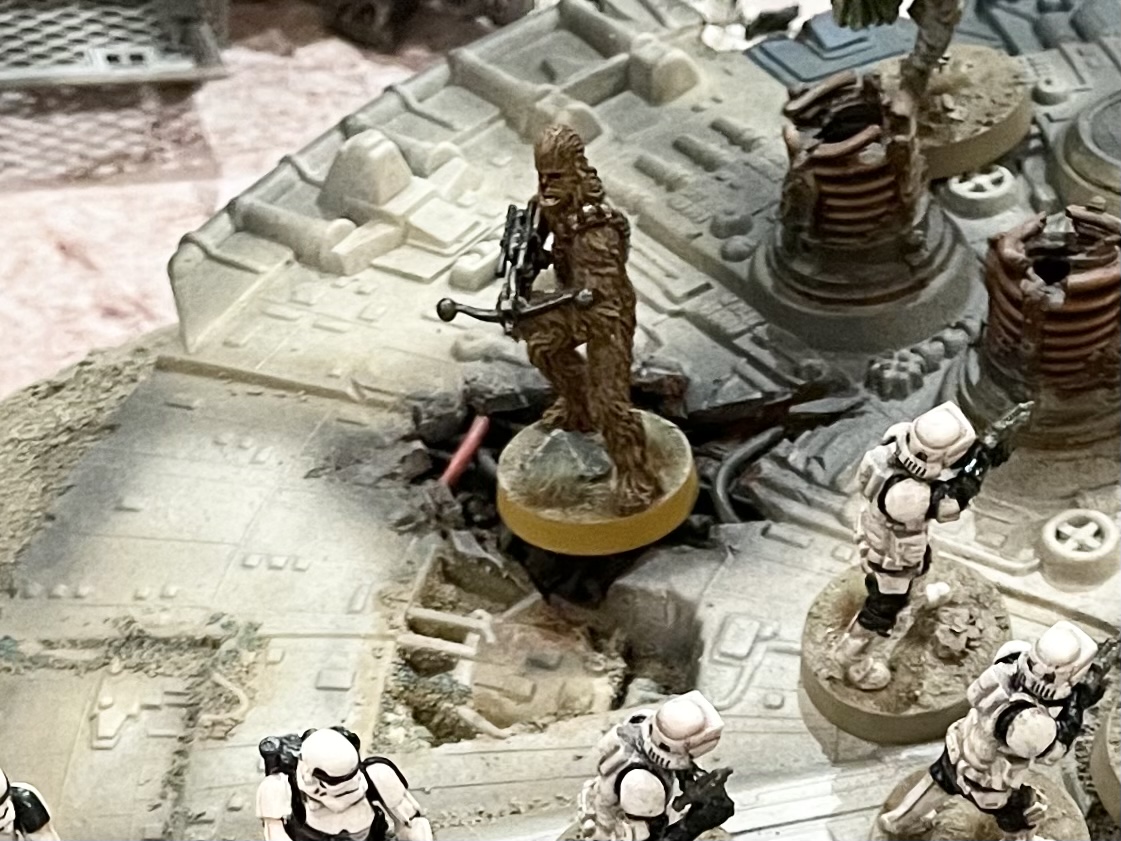
With the hapless scoundrel running back into cover for a third time, Fett instead targeted his Wookiee counterpart, binding the beast with his whipcord launcher before opening fire as he jet packed back to cover.
Chewee was down to his last wound but had received two dodge tokens from Han, due to their teamwork ability (one from the order card and a second thanks to ‘up close and personal’). He also had ‘Emergency Stimms’ for just such an occasion. But Fett’s aim was true, scoring five out of five shots. Two were dodged, allowing for three saves, all of which were failed! The stimms negated two more hits but it still wasn’t enough as the final shot felled the beast.
With Han and Fett both activating early, and with Chewee and the At-St defeated, the remainder of the turn fell to the Stormtroopers and Rebels who exchanged fire as they pressed hard on the centre.
Bistan’s unit targeted the Imperial Scouts but failed to get a kill. However the scouts failed to clear the two suppression tokens they had picked up and with only a single activation, could only claim the objective, but not move away with it!

On the Northern side of the table both the MKII Turret and Commando Sniper team were taken out by unusually accurate fire from the Stormtrooper squads!
The Shiptroopers made it to a second objective, claiming it for the Rebels which lead to some serious rules checking but in this scenario, it turns out multiple objectives can indeed be grabbed by a single unit!
Turn 5 - Command Phase
With Stormtroopers amassing around the wrecked craft, the Rebels needed a ‘Reckless Diversion’ to take the heat off Solo and the Pathfinder’s. They also needed to take out the scouts before they retread with the central objective!
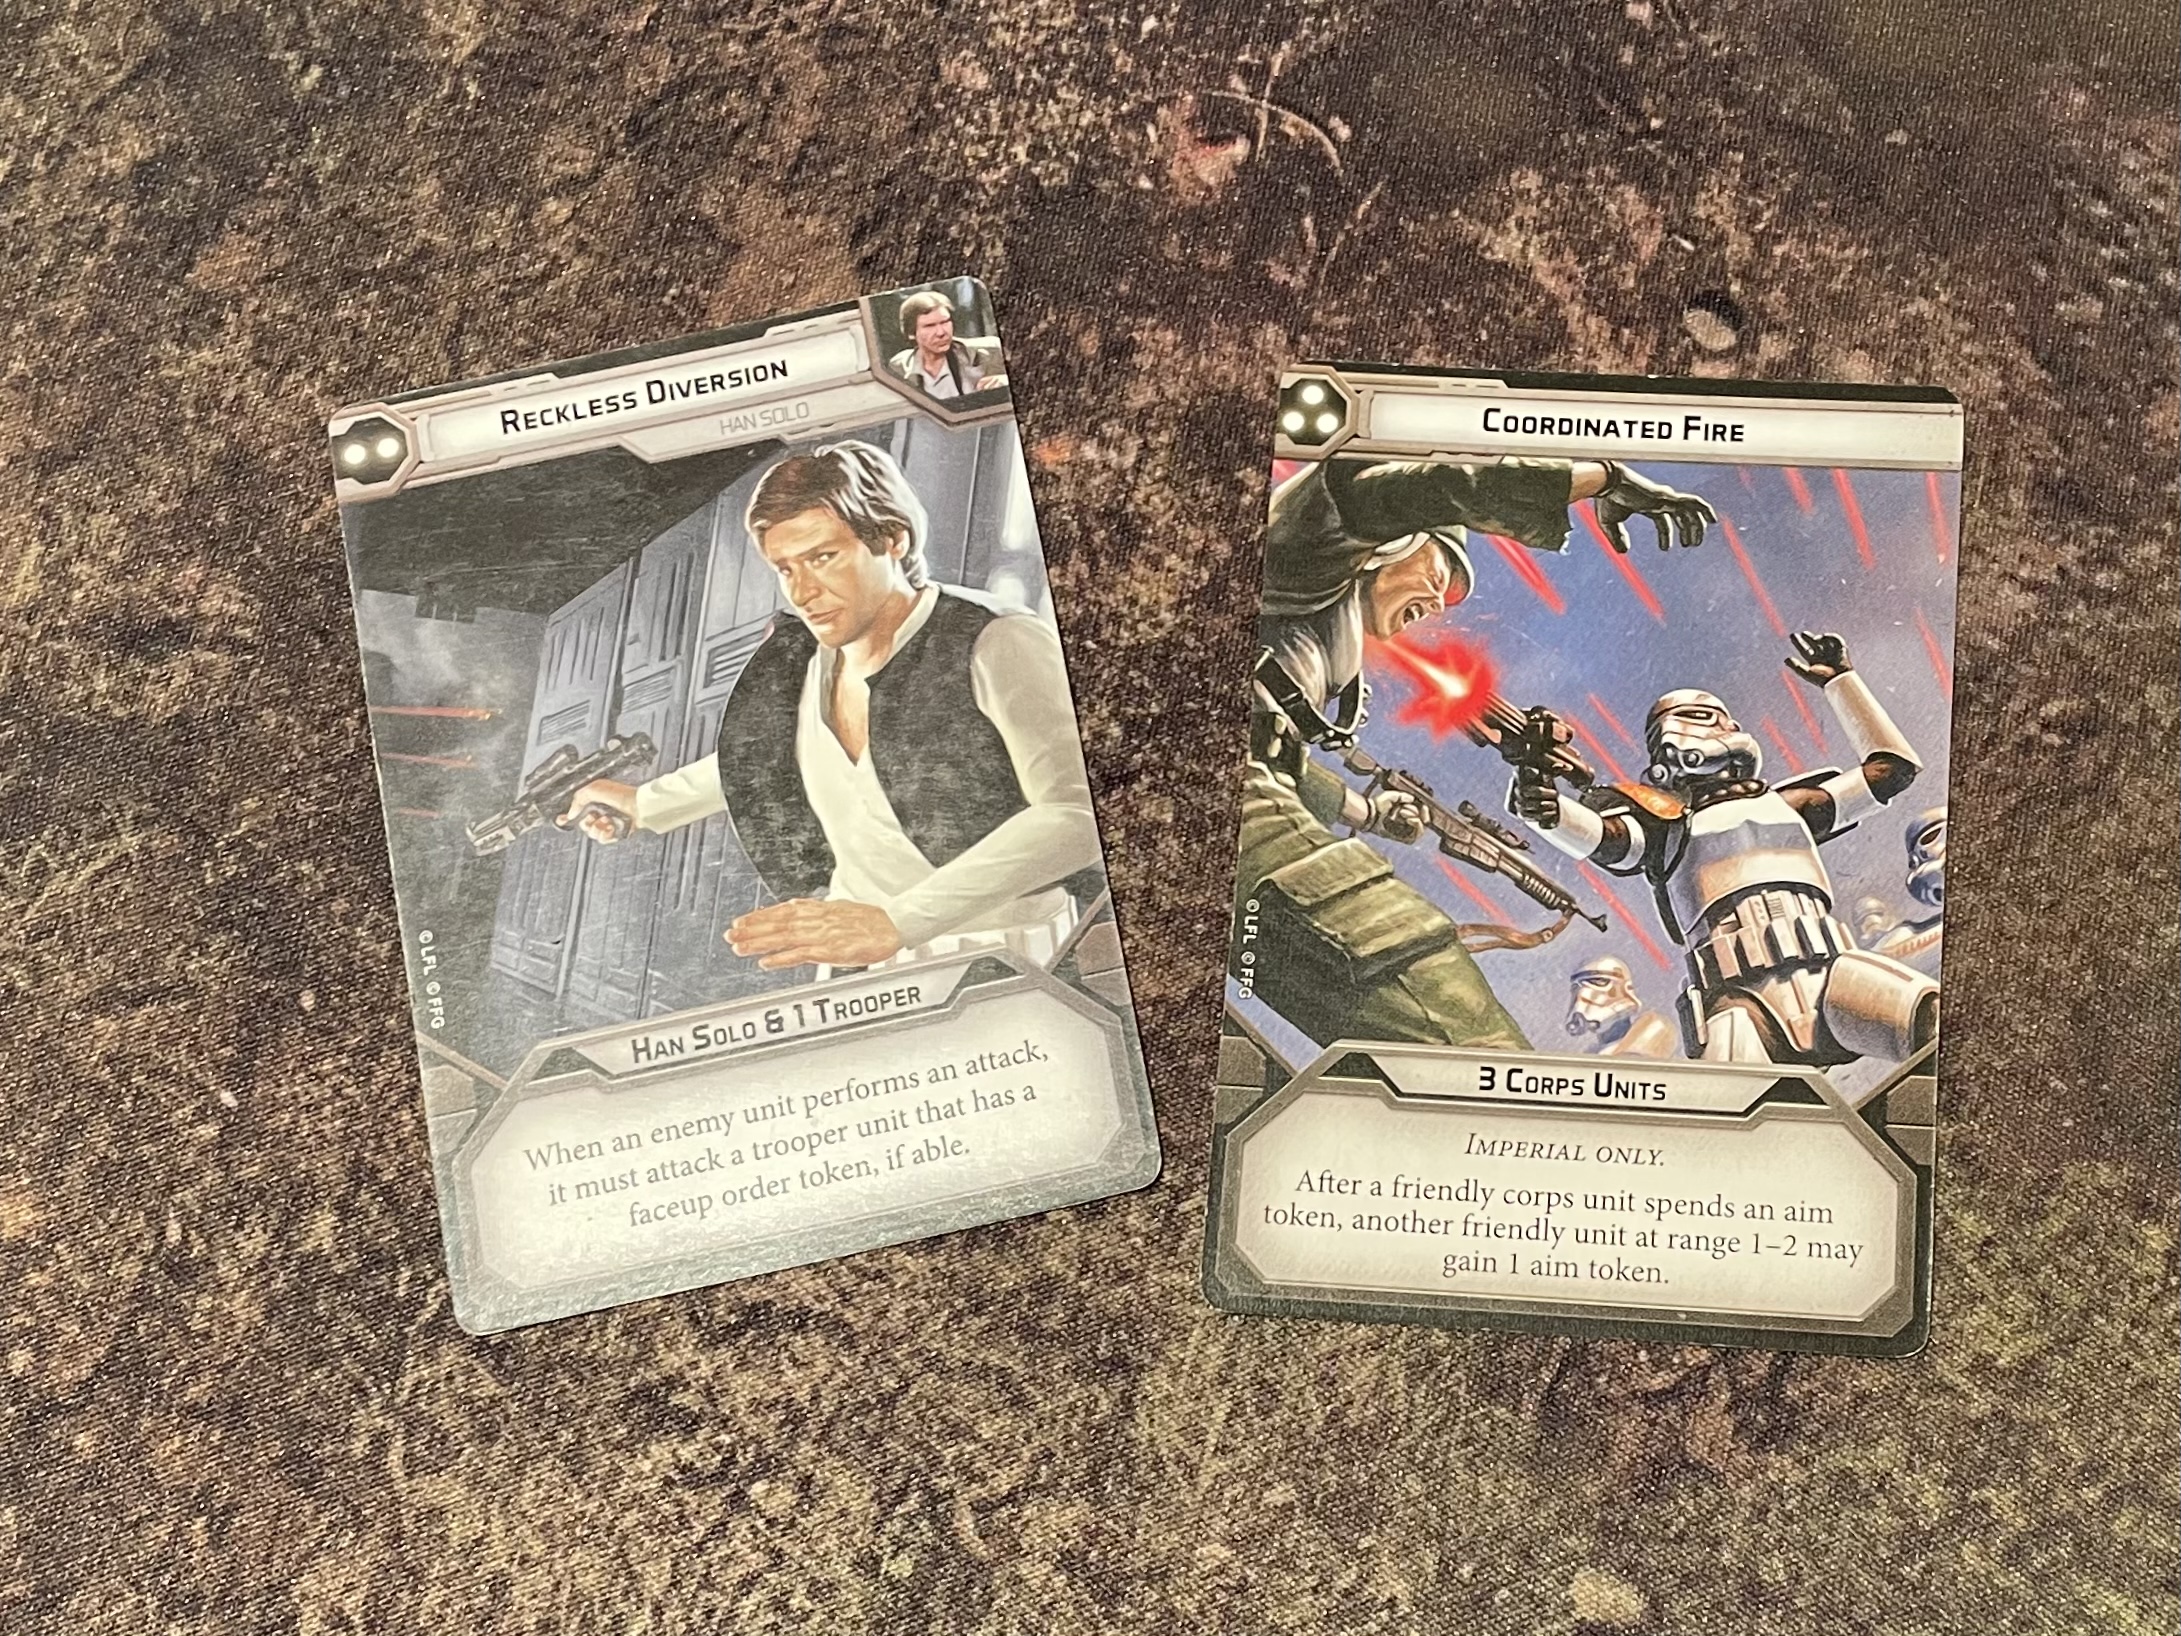
The Imperials for their part, opted to capitalised on their superior numbers by playing ‘Coordinated Fire’.
This meant that the Rebels won priority and by placing a face up order token on the Veteran squad, the Imperials fire would be drawn in that direction.
Turn 5 - Activation
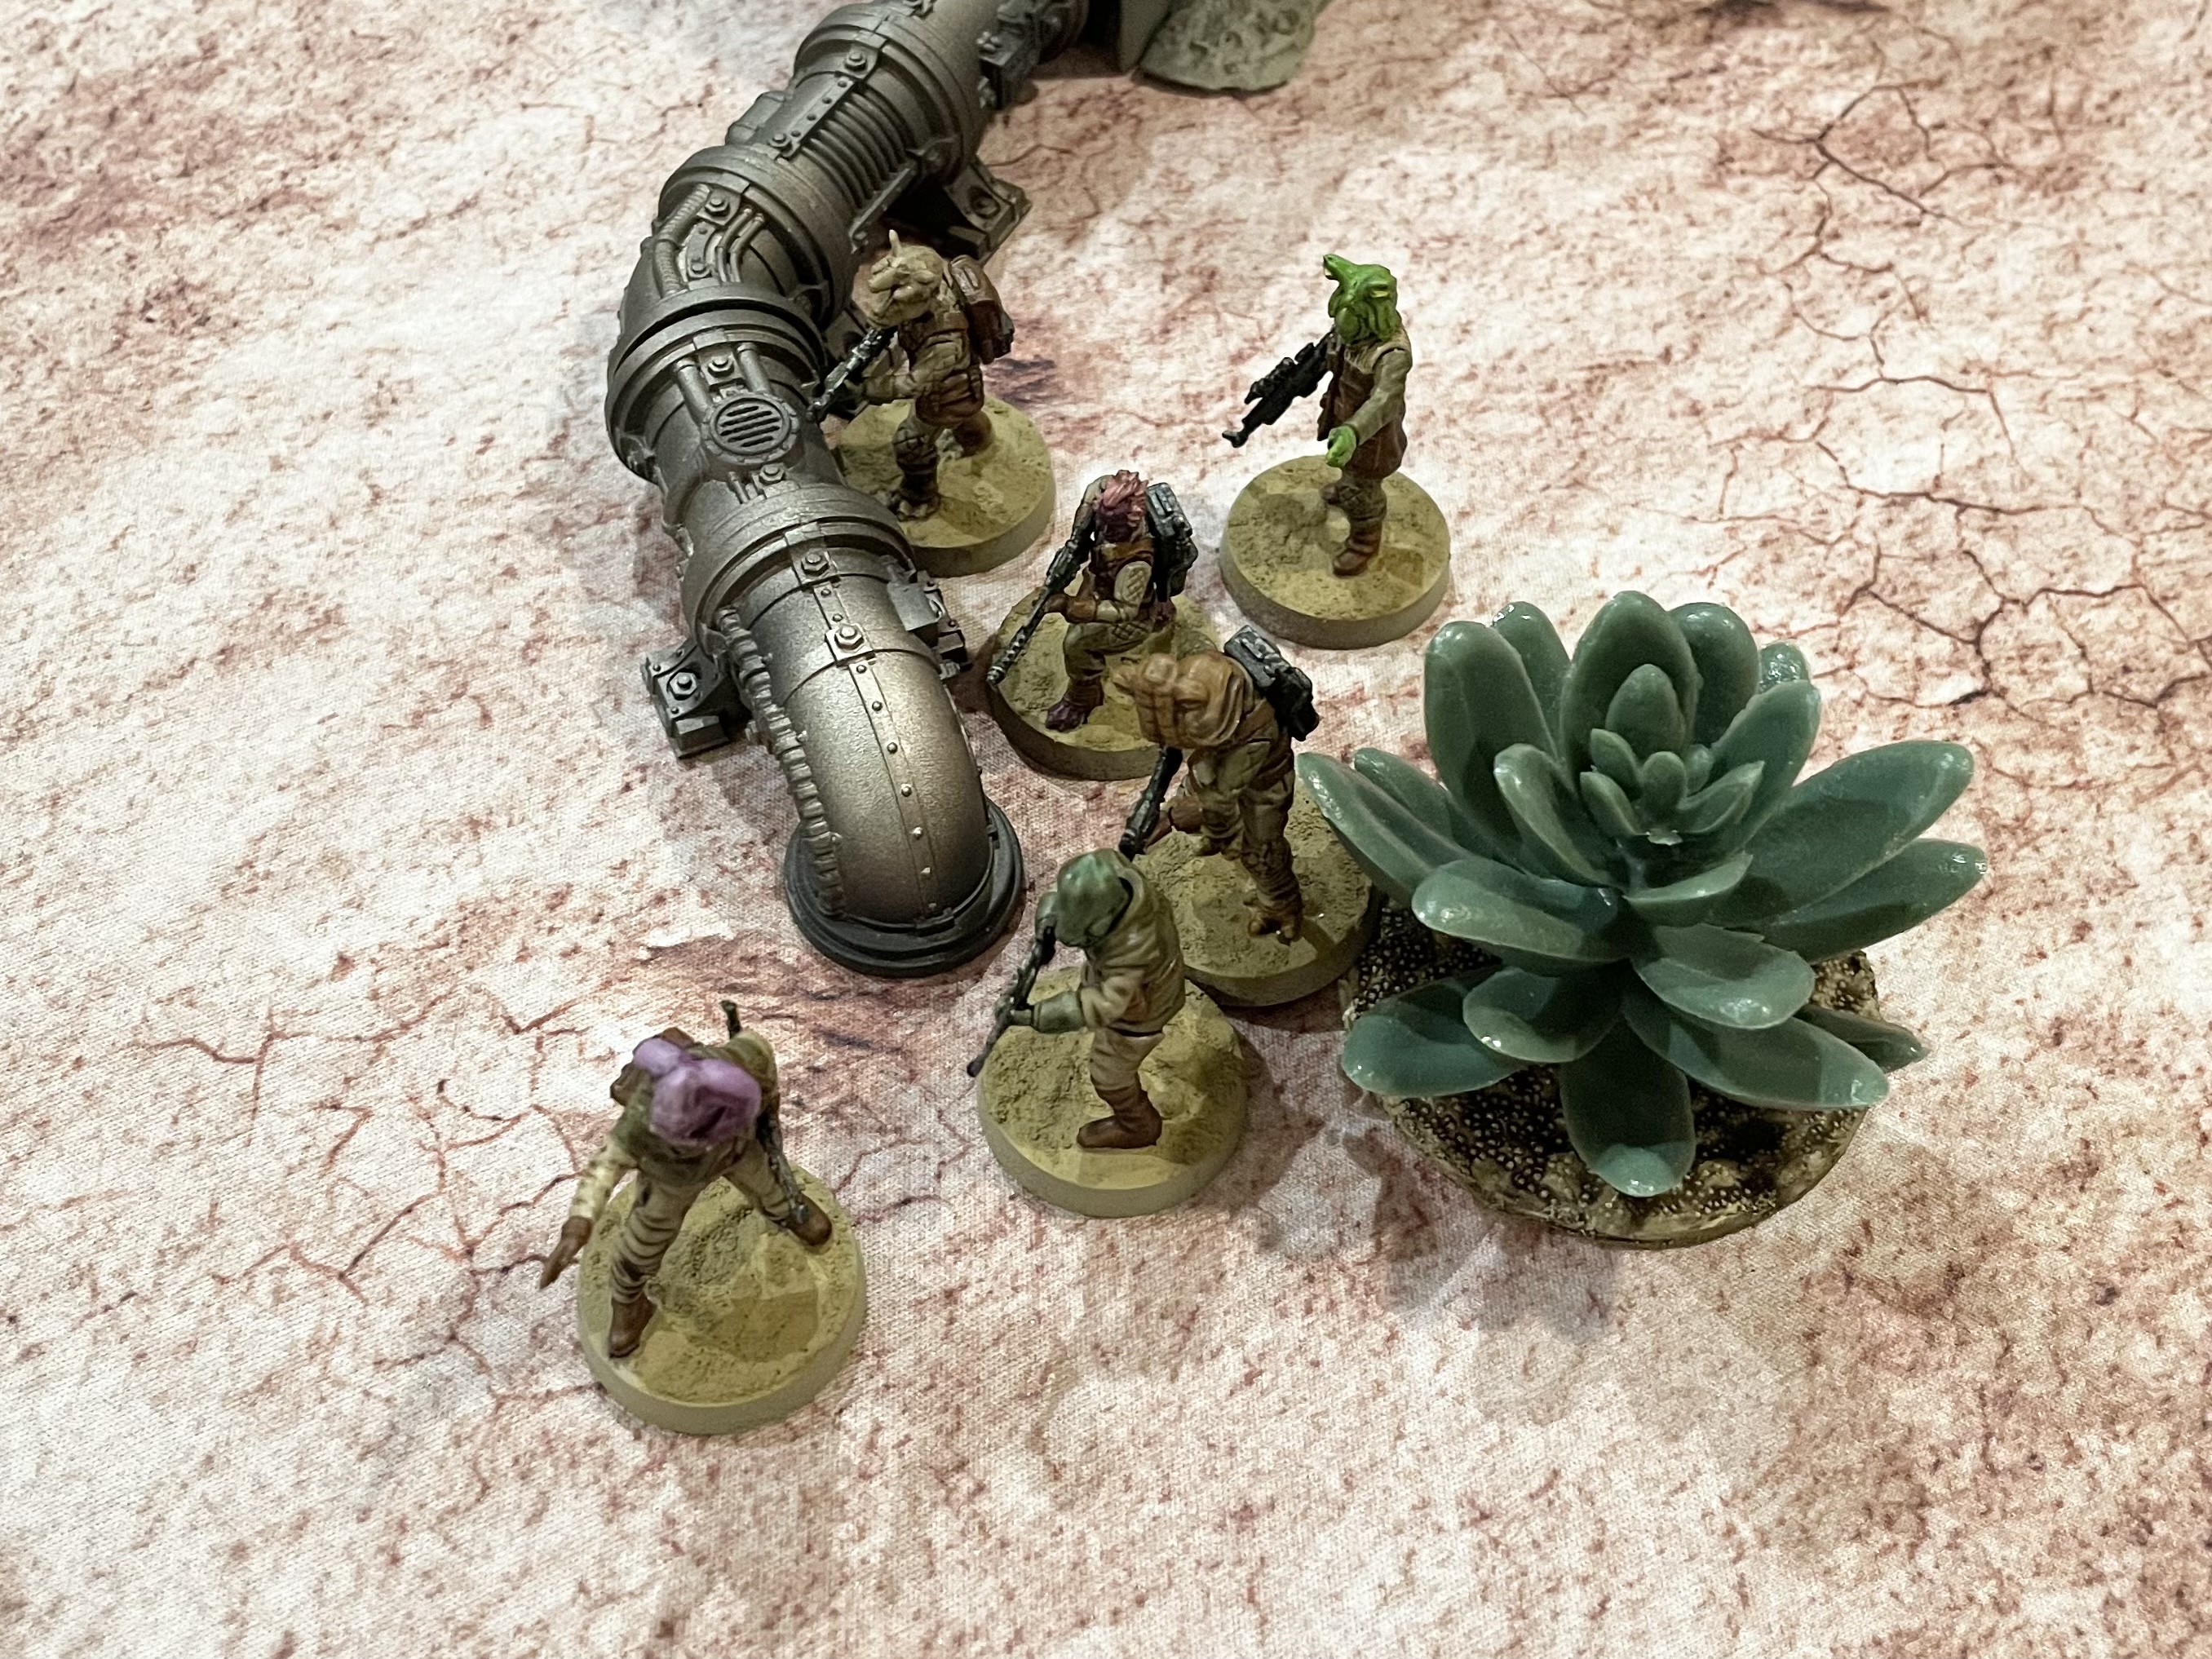
One of the new abilities that has cropped up with the release of the Mercenary factions is the ‘Independent’ key word. This offers Mercenary units a perk when they begin an activation phase without a face up order token. The Pyke Syndicate, having ‘Independent – Dodge’ were able to begin this turn with a dodge in place.

Boba Fett, also now classed as a Mercenary, has ‘Independent – Dodge or Aim’, allowing him to choose each turn what green token he begins with. With only a single wound remaining, Fett opted for a Dodge token, but upon activation, used his ‘Emergency Transponder’ to also gain an aim token.

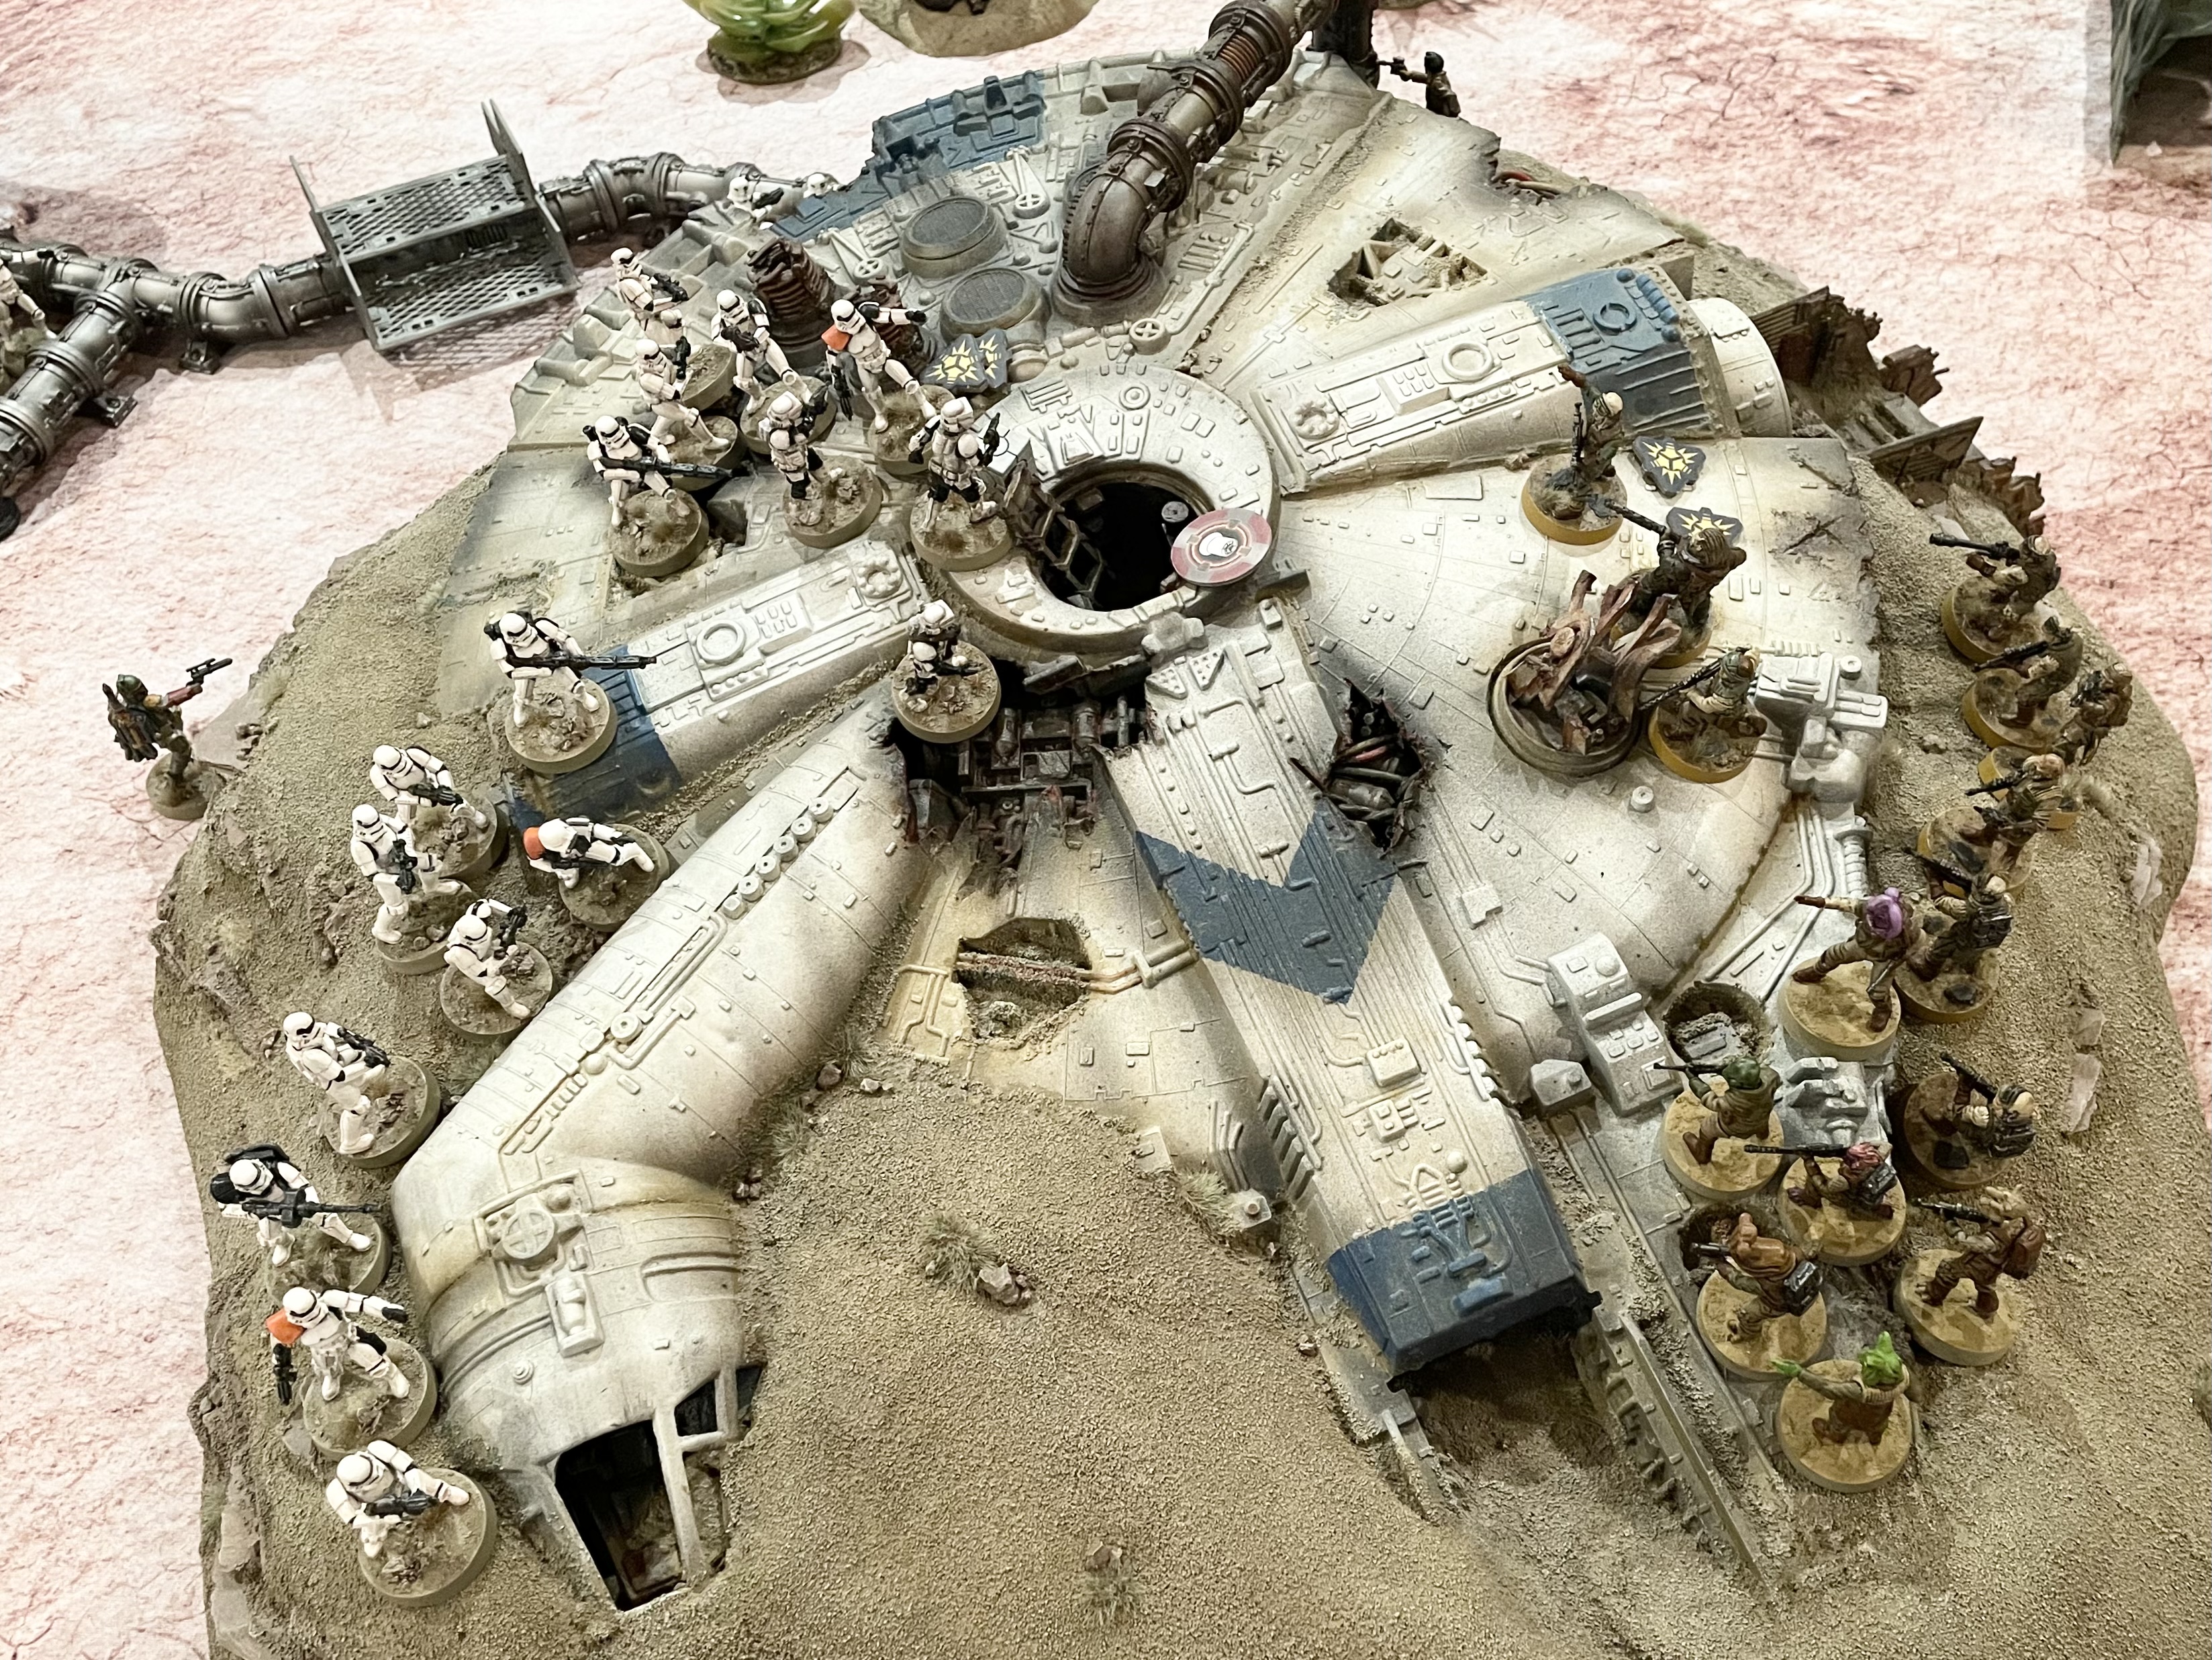
Taking first activation, and drawing core token from the order pool, Snrak’s unit waisted no time opening fire on the Scouts. Their aim was true and all three of the remaining Scouts went down!

The multiple units of Stormtroopers converging on the table centre, now attempted to wipe out as many rebels as possible. Due to the Rebel command card in play however, they were forced to target the Veterans with the face up order token where possible. Over the course of the turn the veterans were reduced to a single man!

Han did his best to thin the ranks of the advancing Stormtroopers, along with supporting fire from Bistan’s squad. But their strength of numbers and higher armour made it seem like there was no end to their advance and they finished the turn with two units in base contact, though not claiming the objective.

![StarCraft Tabletop Miniatures Game Pre-Orders Live Now [Updated]](https://images.beastsofwar.com/2026/03/starcraft-tmg-news-cover-600-338.jpg)


![Mounted US Cavalry On Kickstarter For Dead Man’s Hand! [Updated]](https://images.beastsofwar.com/2026/03/us-cavalry-main-600-338.jpg)


![Play WW2 Commando Operations With Butcher & Bolt [Updated]](https://images.beastsofwar.com/2026/03/relaunch-600-338.jpg)


