

![Perfect Historical Wargame Objectives! Victrix Treasures & More Reviewed [7 Days Early Access]](https://images.beastsofwar.com/2026/02/unboxing-victrix-treasures_-chests-_-market-stalls-coverimage-225-127.jpg)


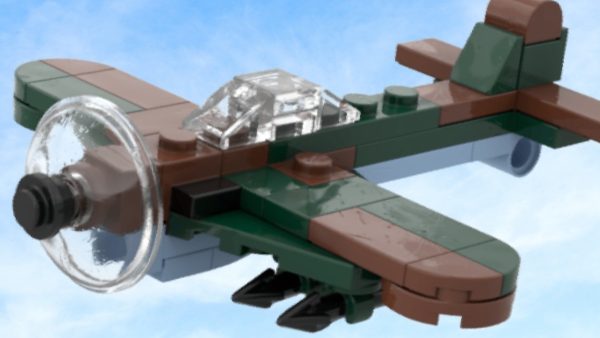
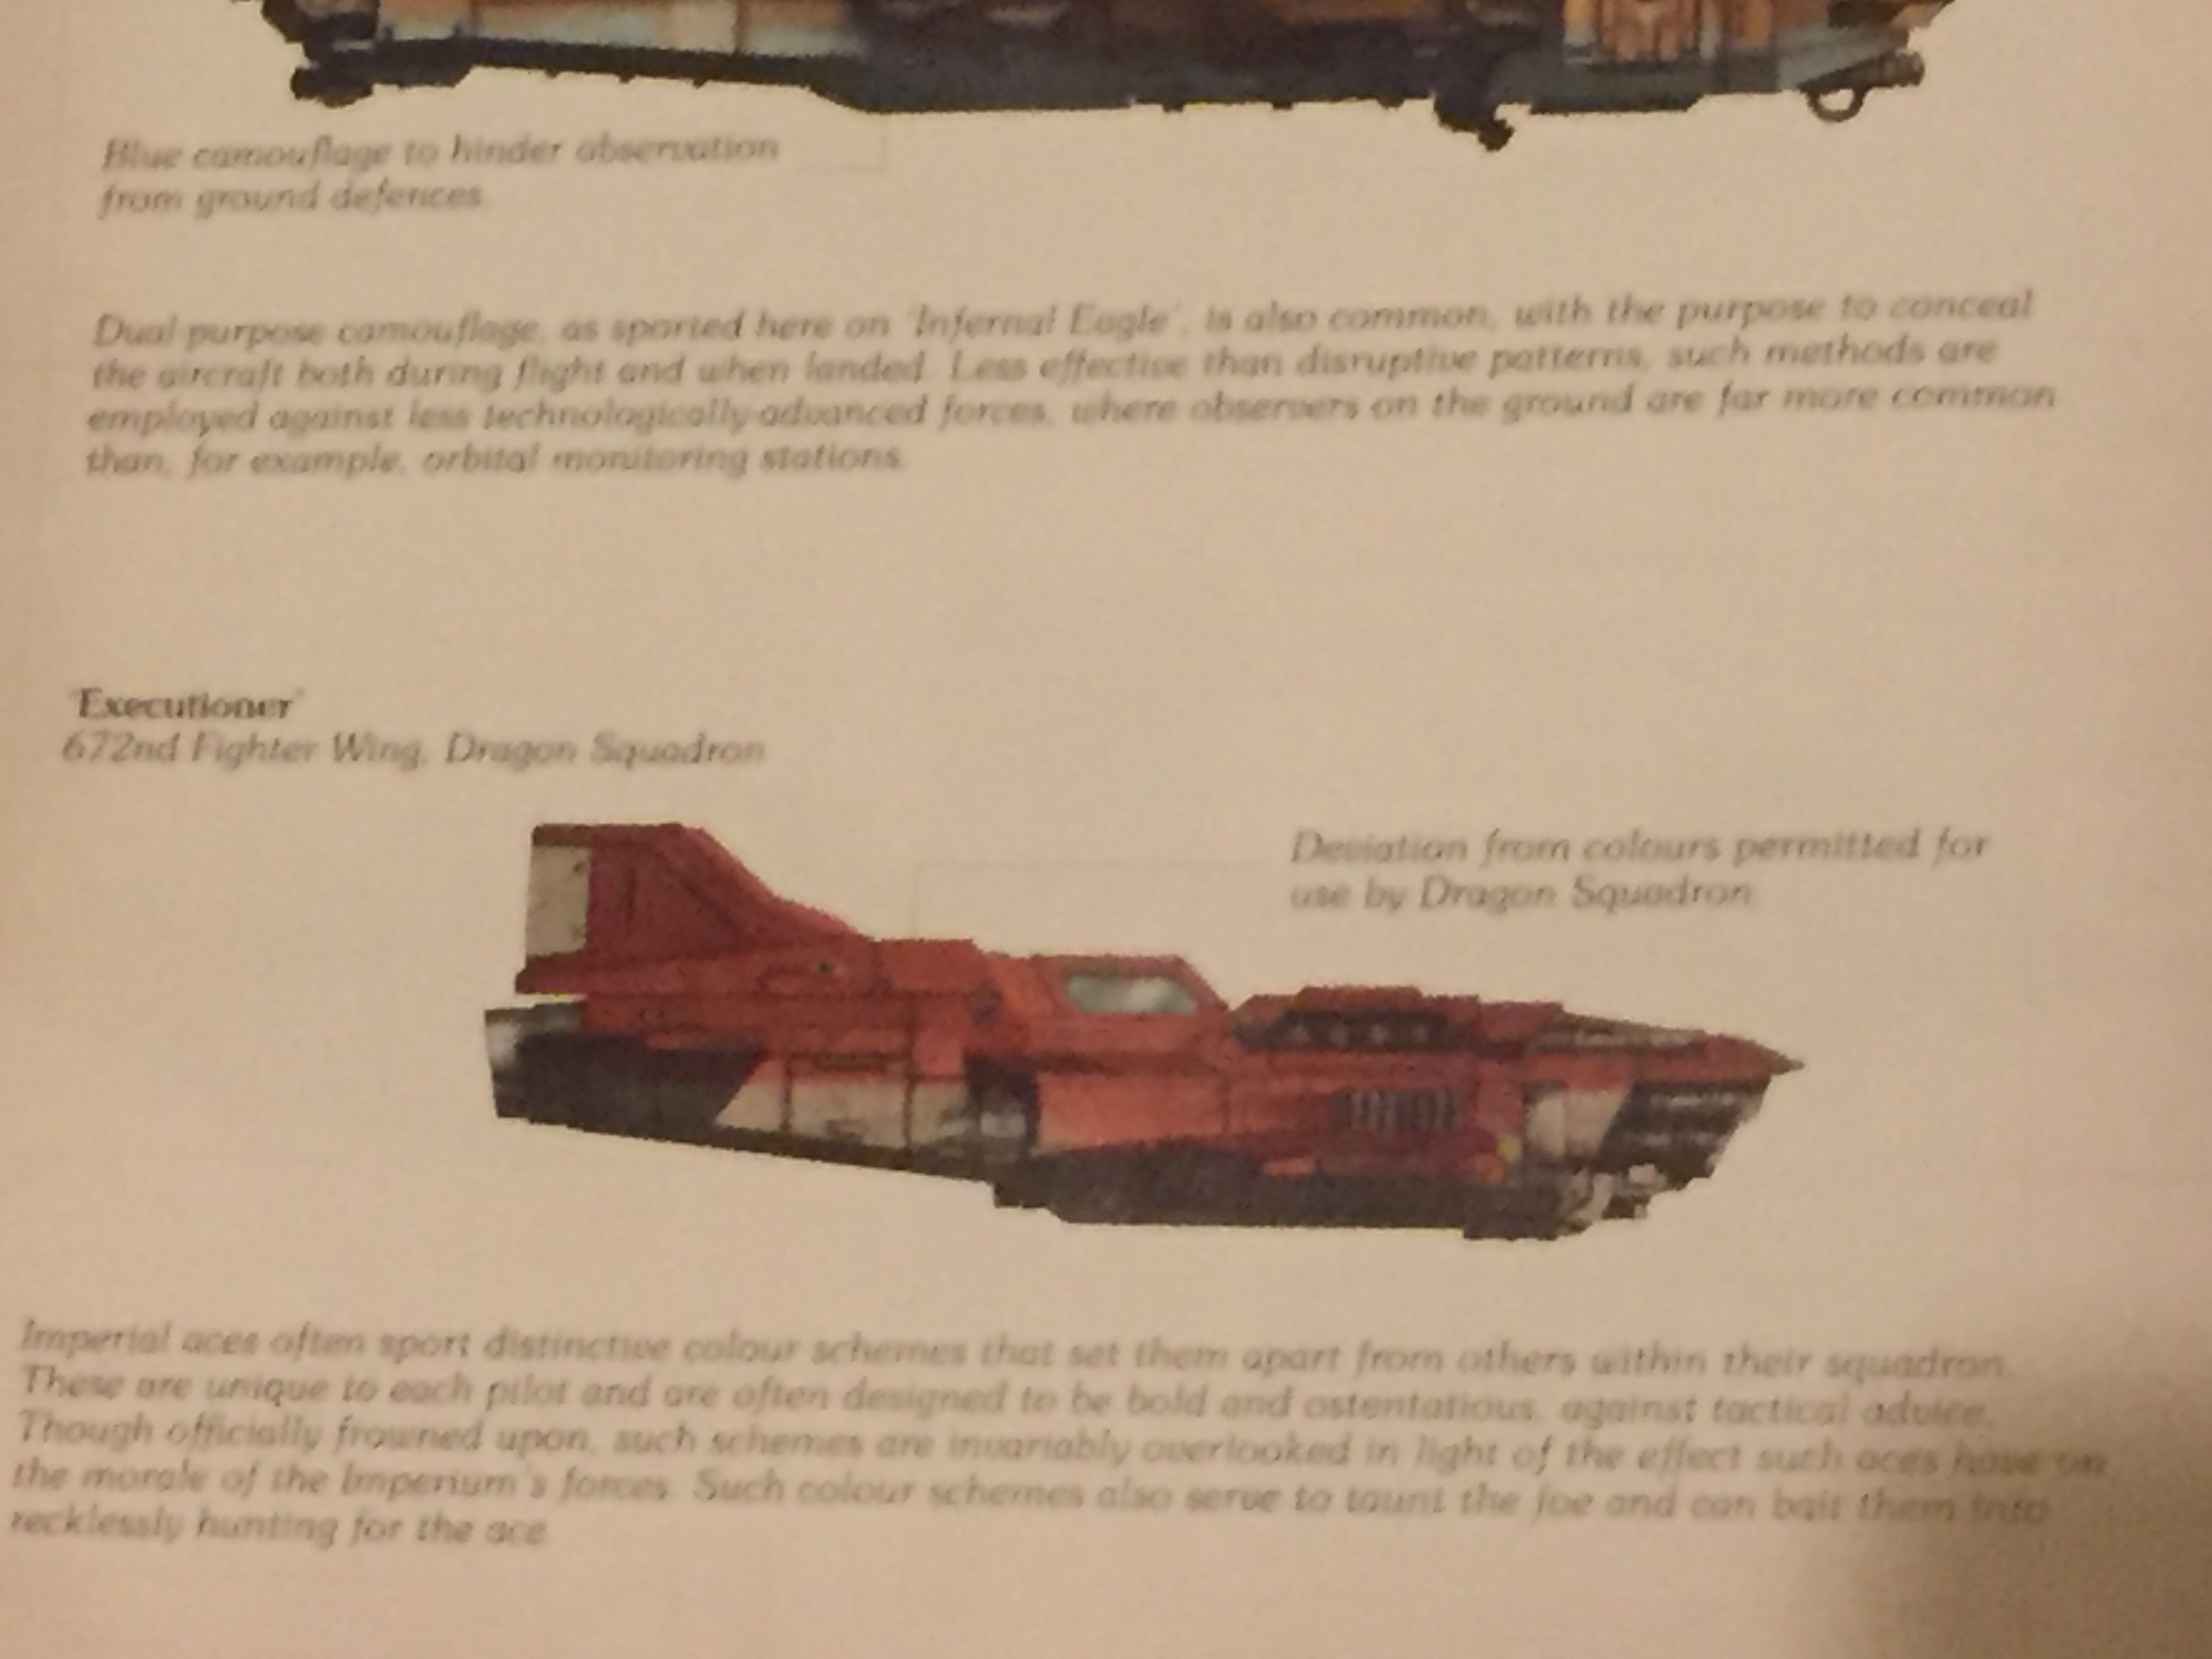
672nd Fighter Wing, Red Dragon Squadron Imperial Navy – “The Red Baroness” (SPRING CLEAN CHALLENGE 2021 by Zebraoutrider)


Recommendations: 220
About the Project
Time for a new Astra Militarum project. This time I’m taking to the skies with some fast air support for my various tank divisions for Warhammer 40K. This project initially involves the preparation, construction and painting of a Forge World Lightning Strike Fighter and a Forge World Heavy Thunderbolt Fighter. As with my usual style, I will be customising the craft and their pilots so that I have a couple of unique pieces to capture my interpretation of “The Red Baroness” and her “wing-woman”. This is a slow-burn project towards the eventual BOW/OTT Spring Clean Challenge 2021.
Related Company: Games Workshop
Related Genre: Science Fiction
Related Contest: Spring Clean Hobby Challenge (Old)
This Project is Completed
Project Inspiration
As with all my projects I need inspiration. I’ve also learned from 2020 to not be over ambitious as it can affect my motivation to complete large scale projects. I’ve still got two active projects open-ended, but really enjoyed painting up Commander Glofski’s Tank Squadron last year as the Spring Clean Challenge, that I’m creating a new project which will require similar effort and won’t drag on. Hence, after reading an article on the Warhammer Community website on Imperial Navy Heroes, I have dug out my latest unmade models to join my collection – Forge World’s Lightning Strike Fighter, Thunderbolt and a couple of Necromunda characters to convert into the pilots…
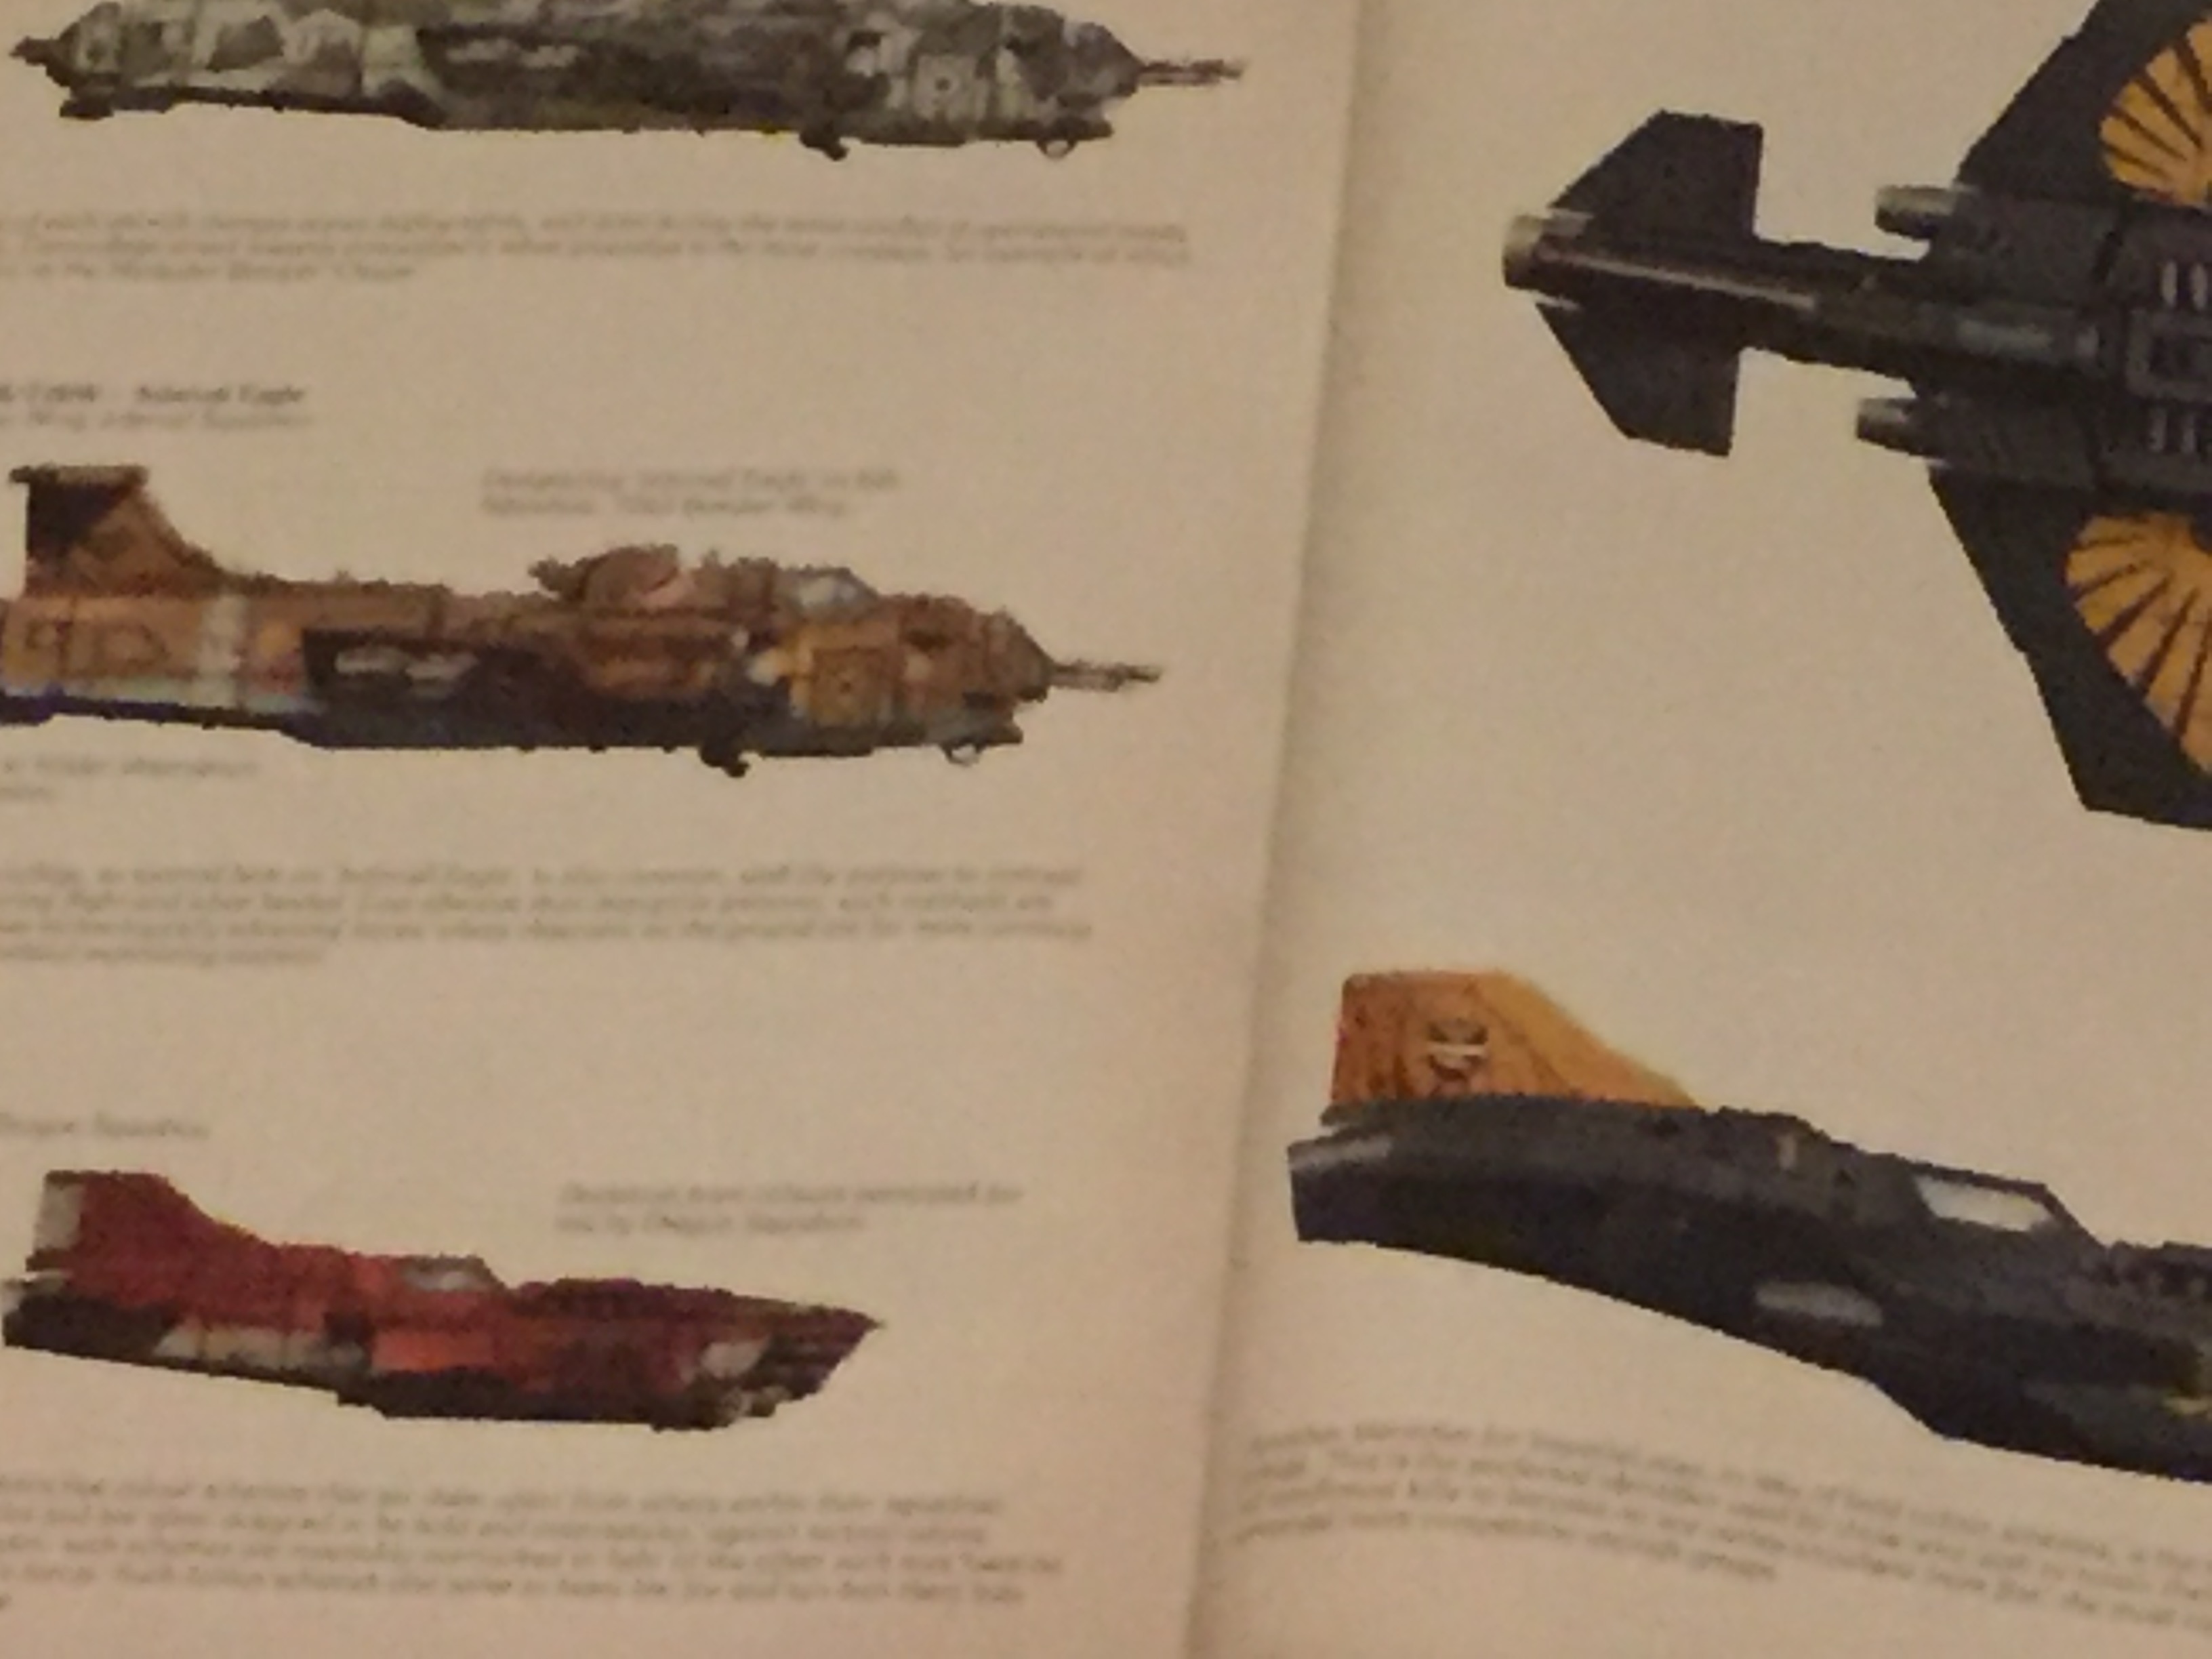
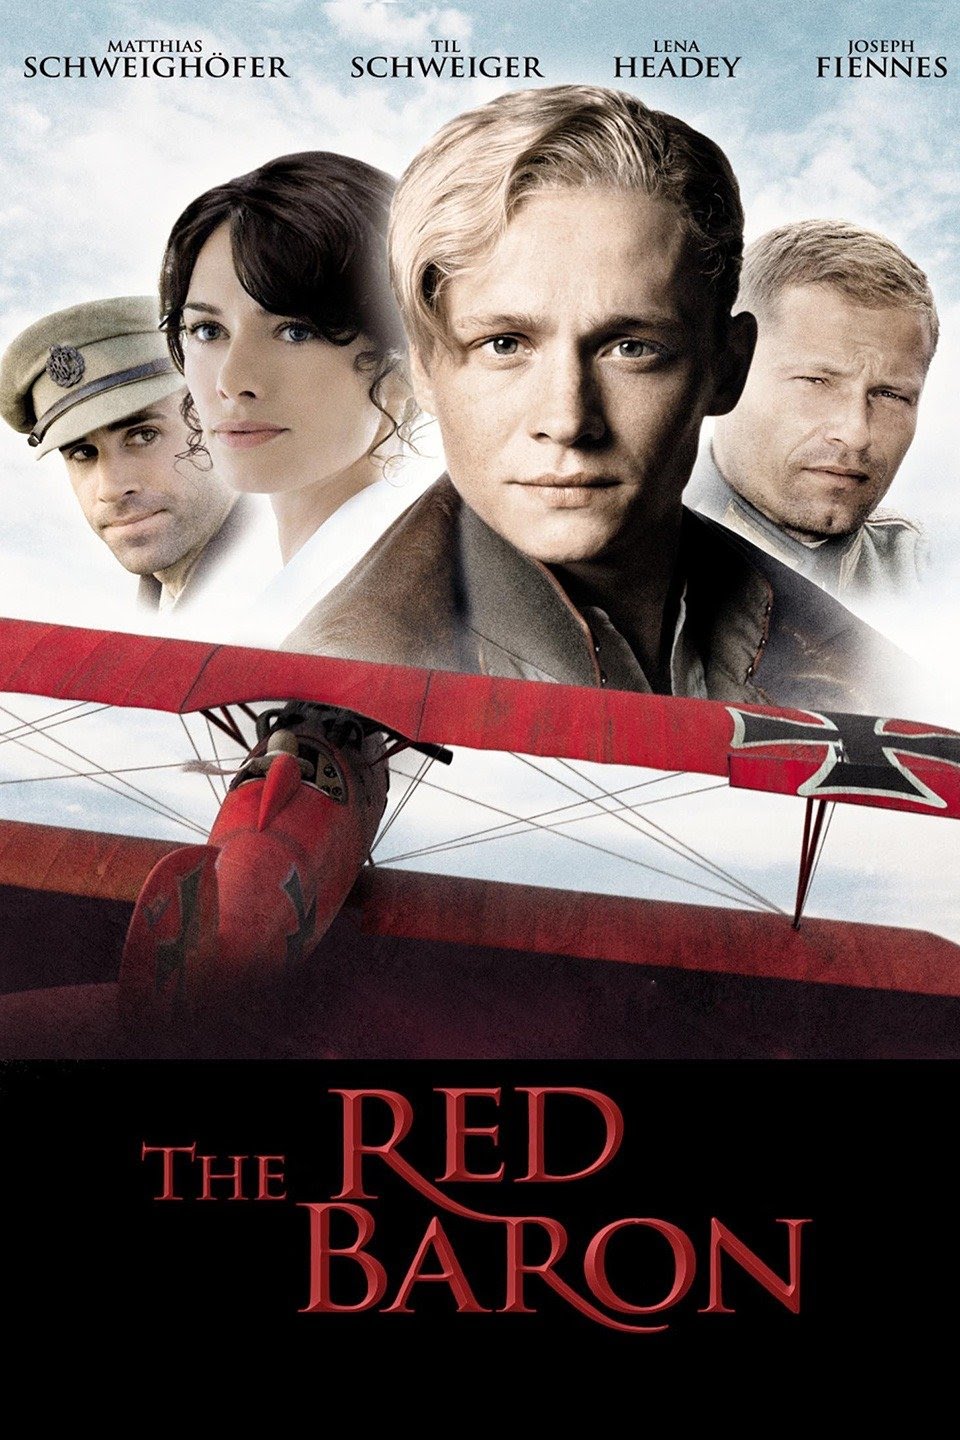
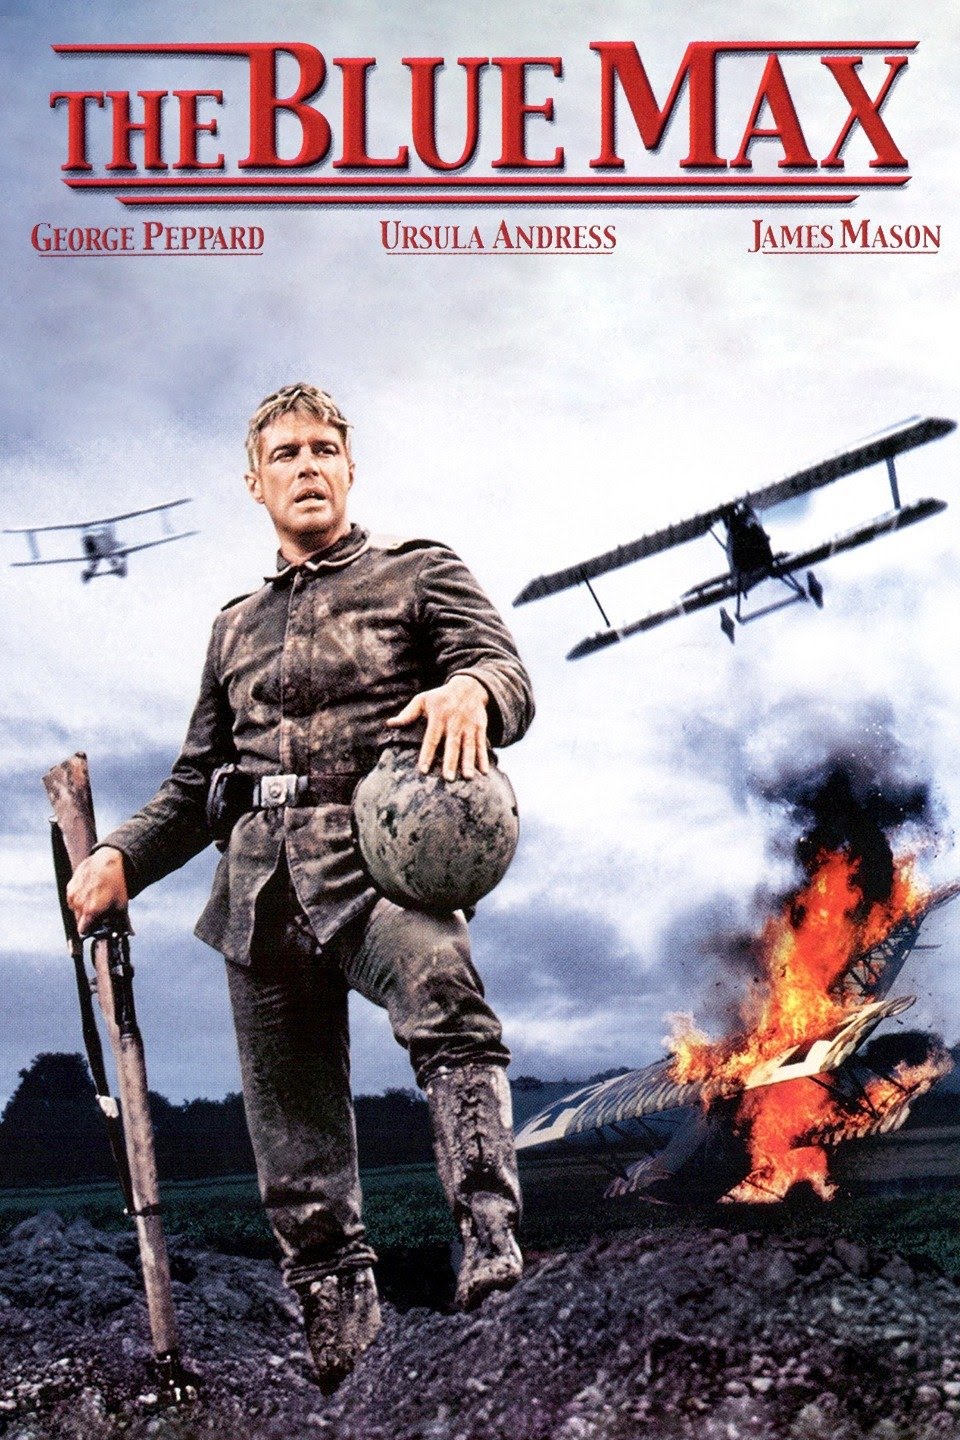
 Inspiration has come from the graphic novel by Wayne Vansant (2014) on the history of the Red Baron, but also from the WW1 films of the Red Baron and the Blue Max. Further inspiration came from reading about a couple of fighter pilot aces in a White Dwarf article that actually was geared towards the Aeronautical Imperialis (small scale/epic) GW game.

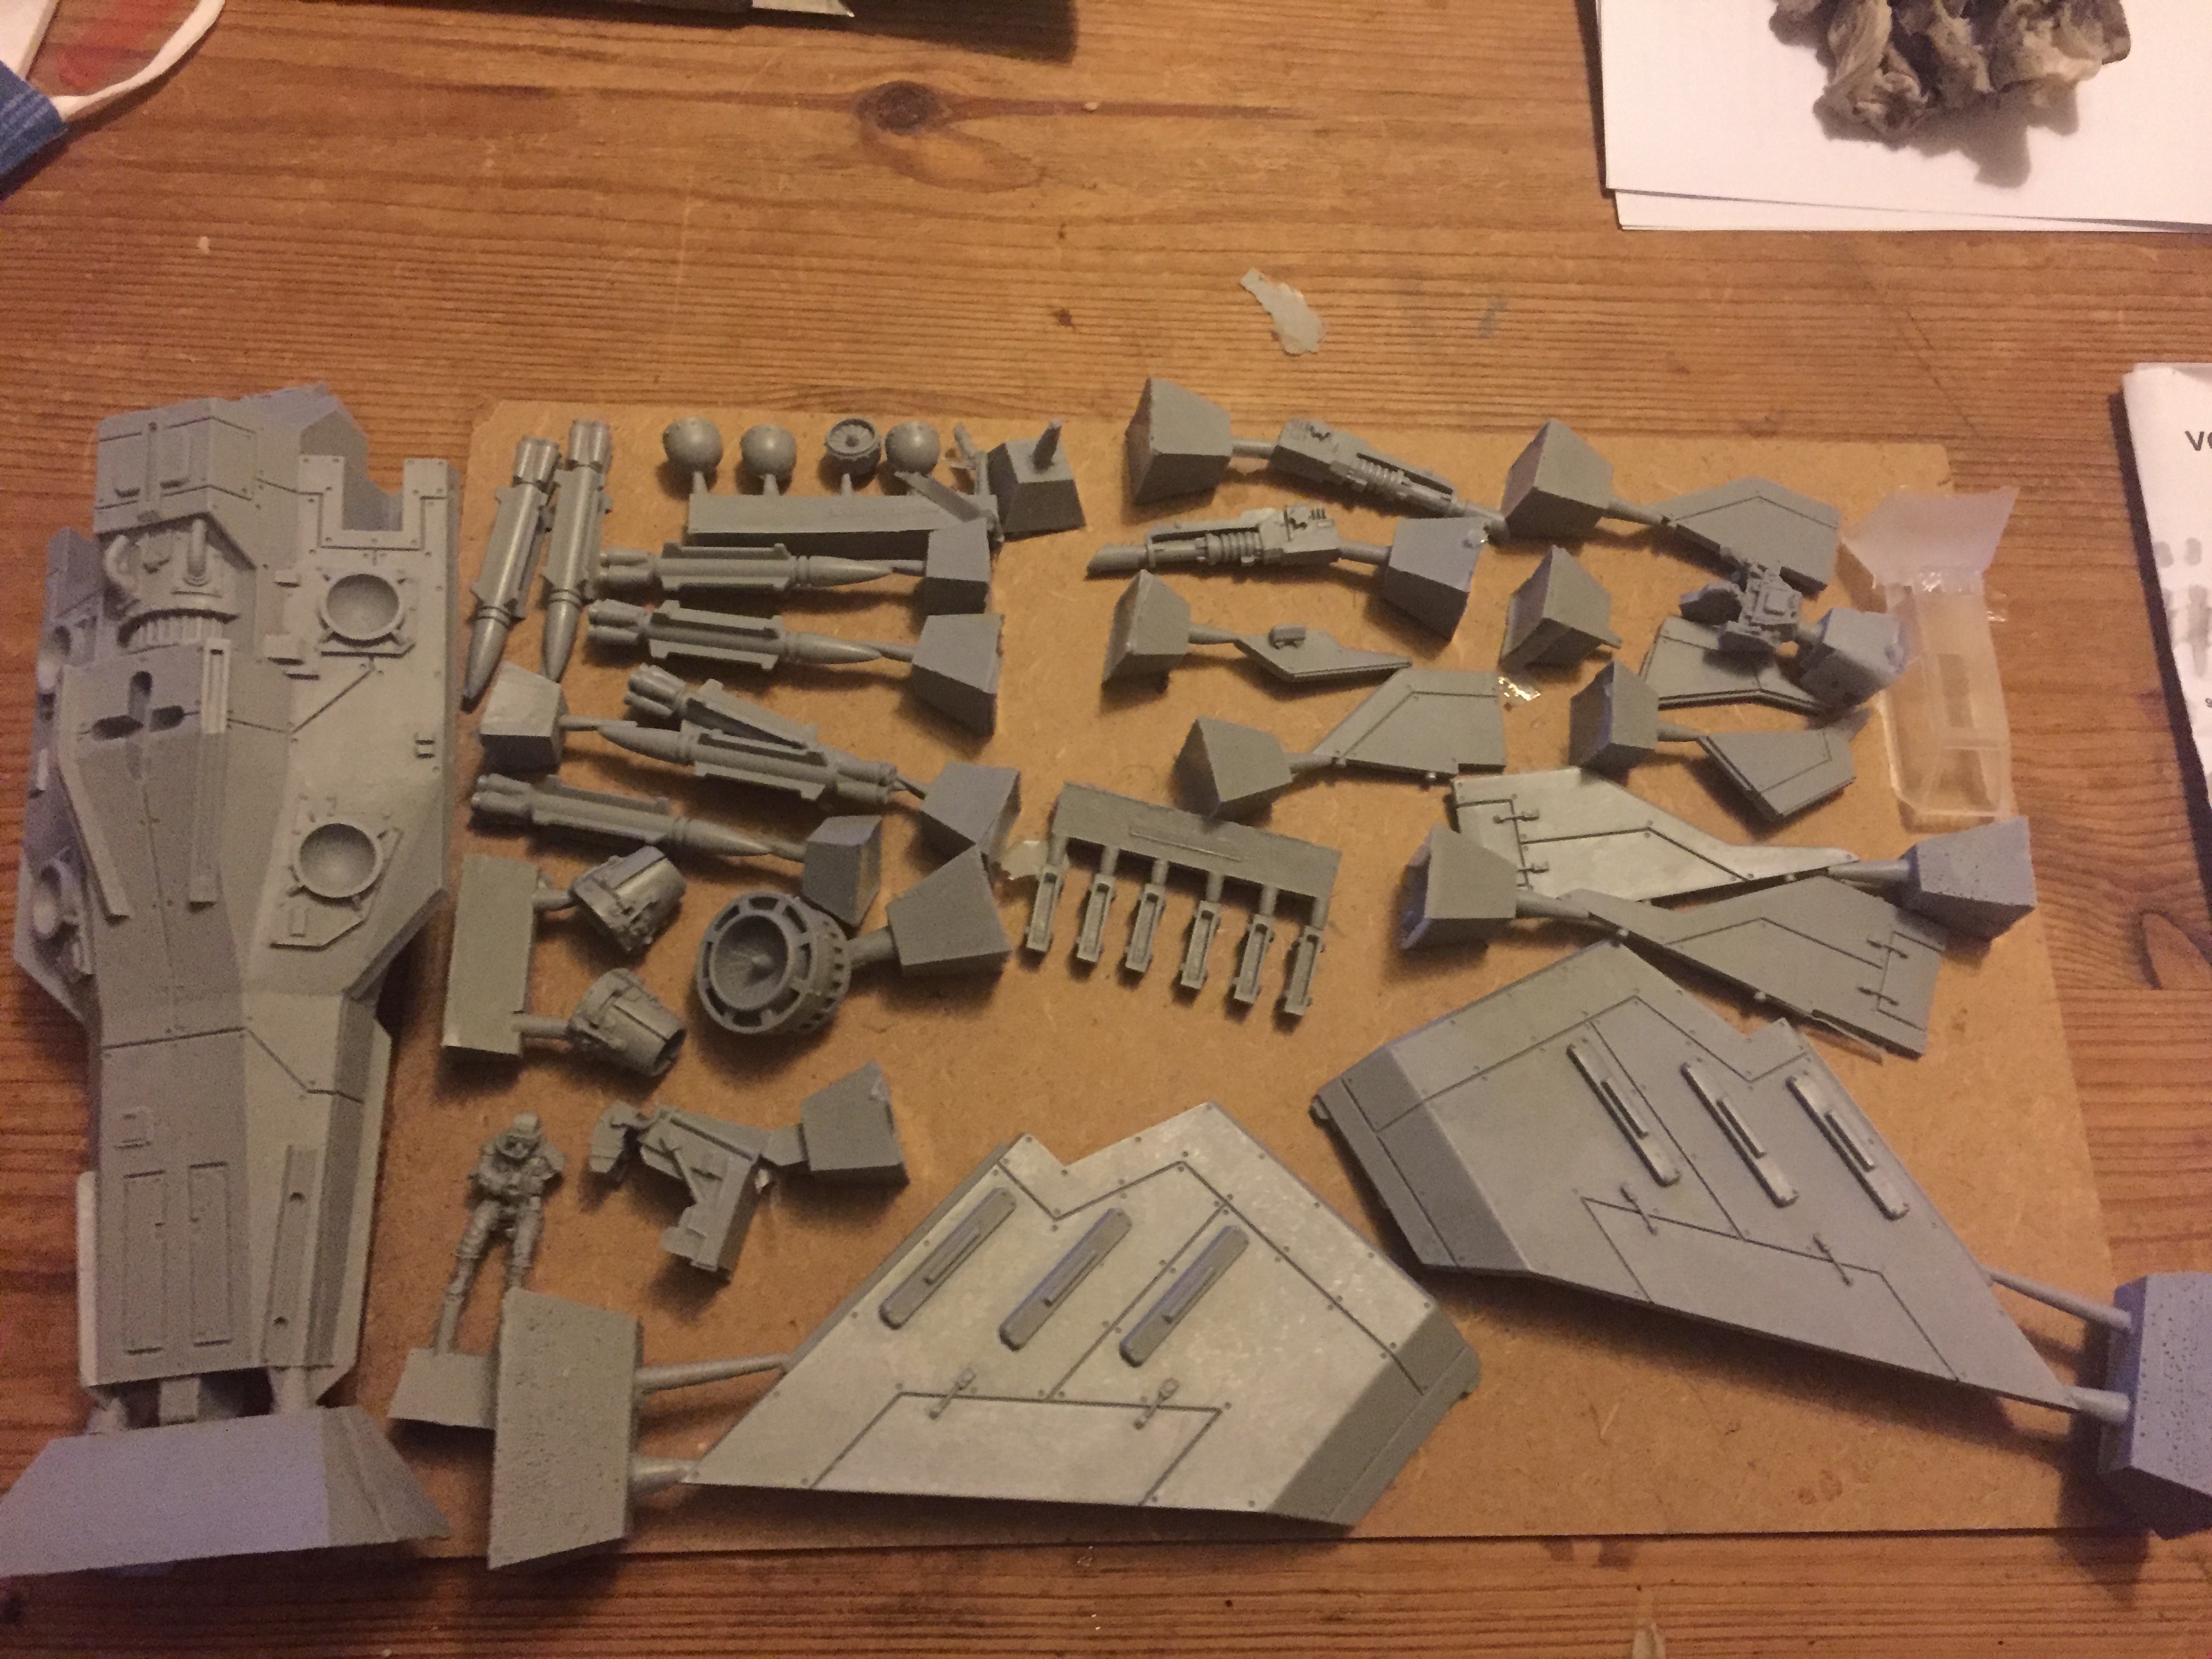
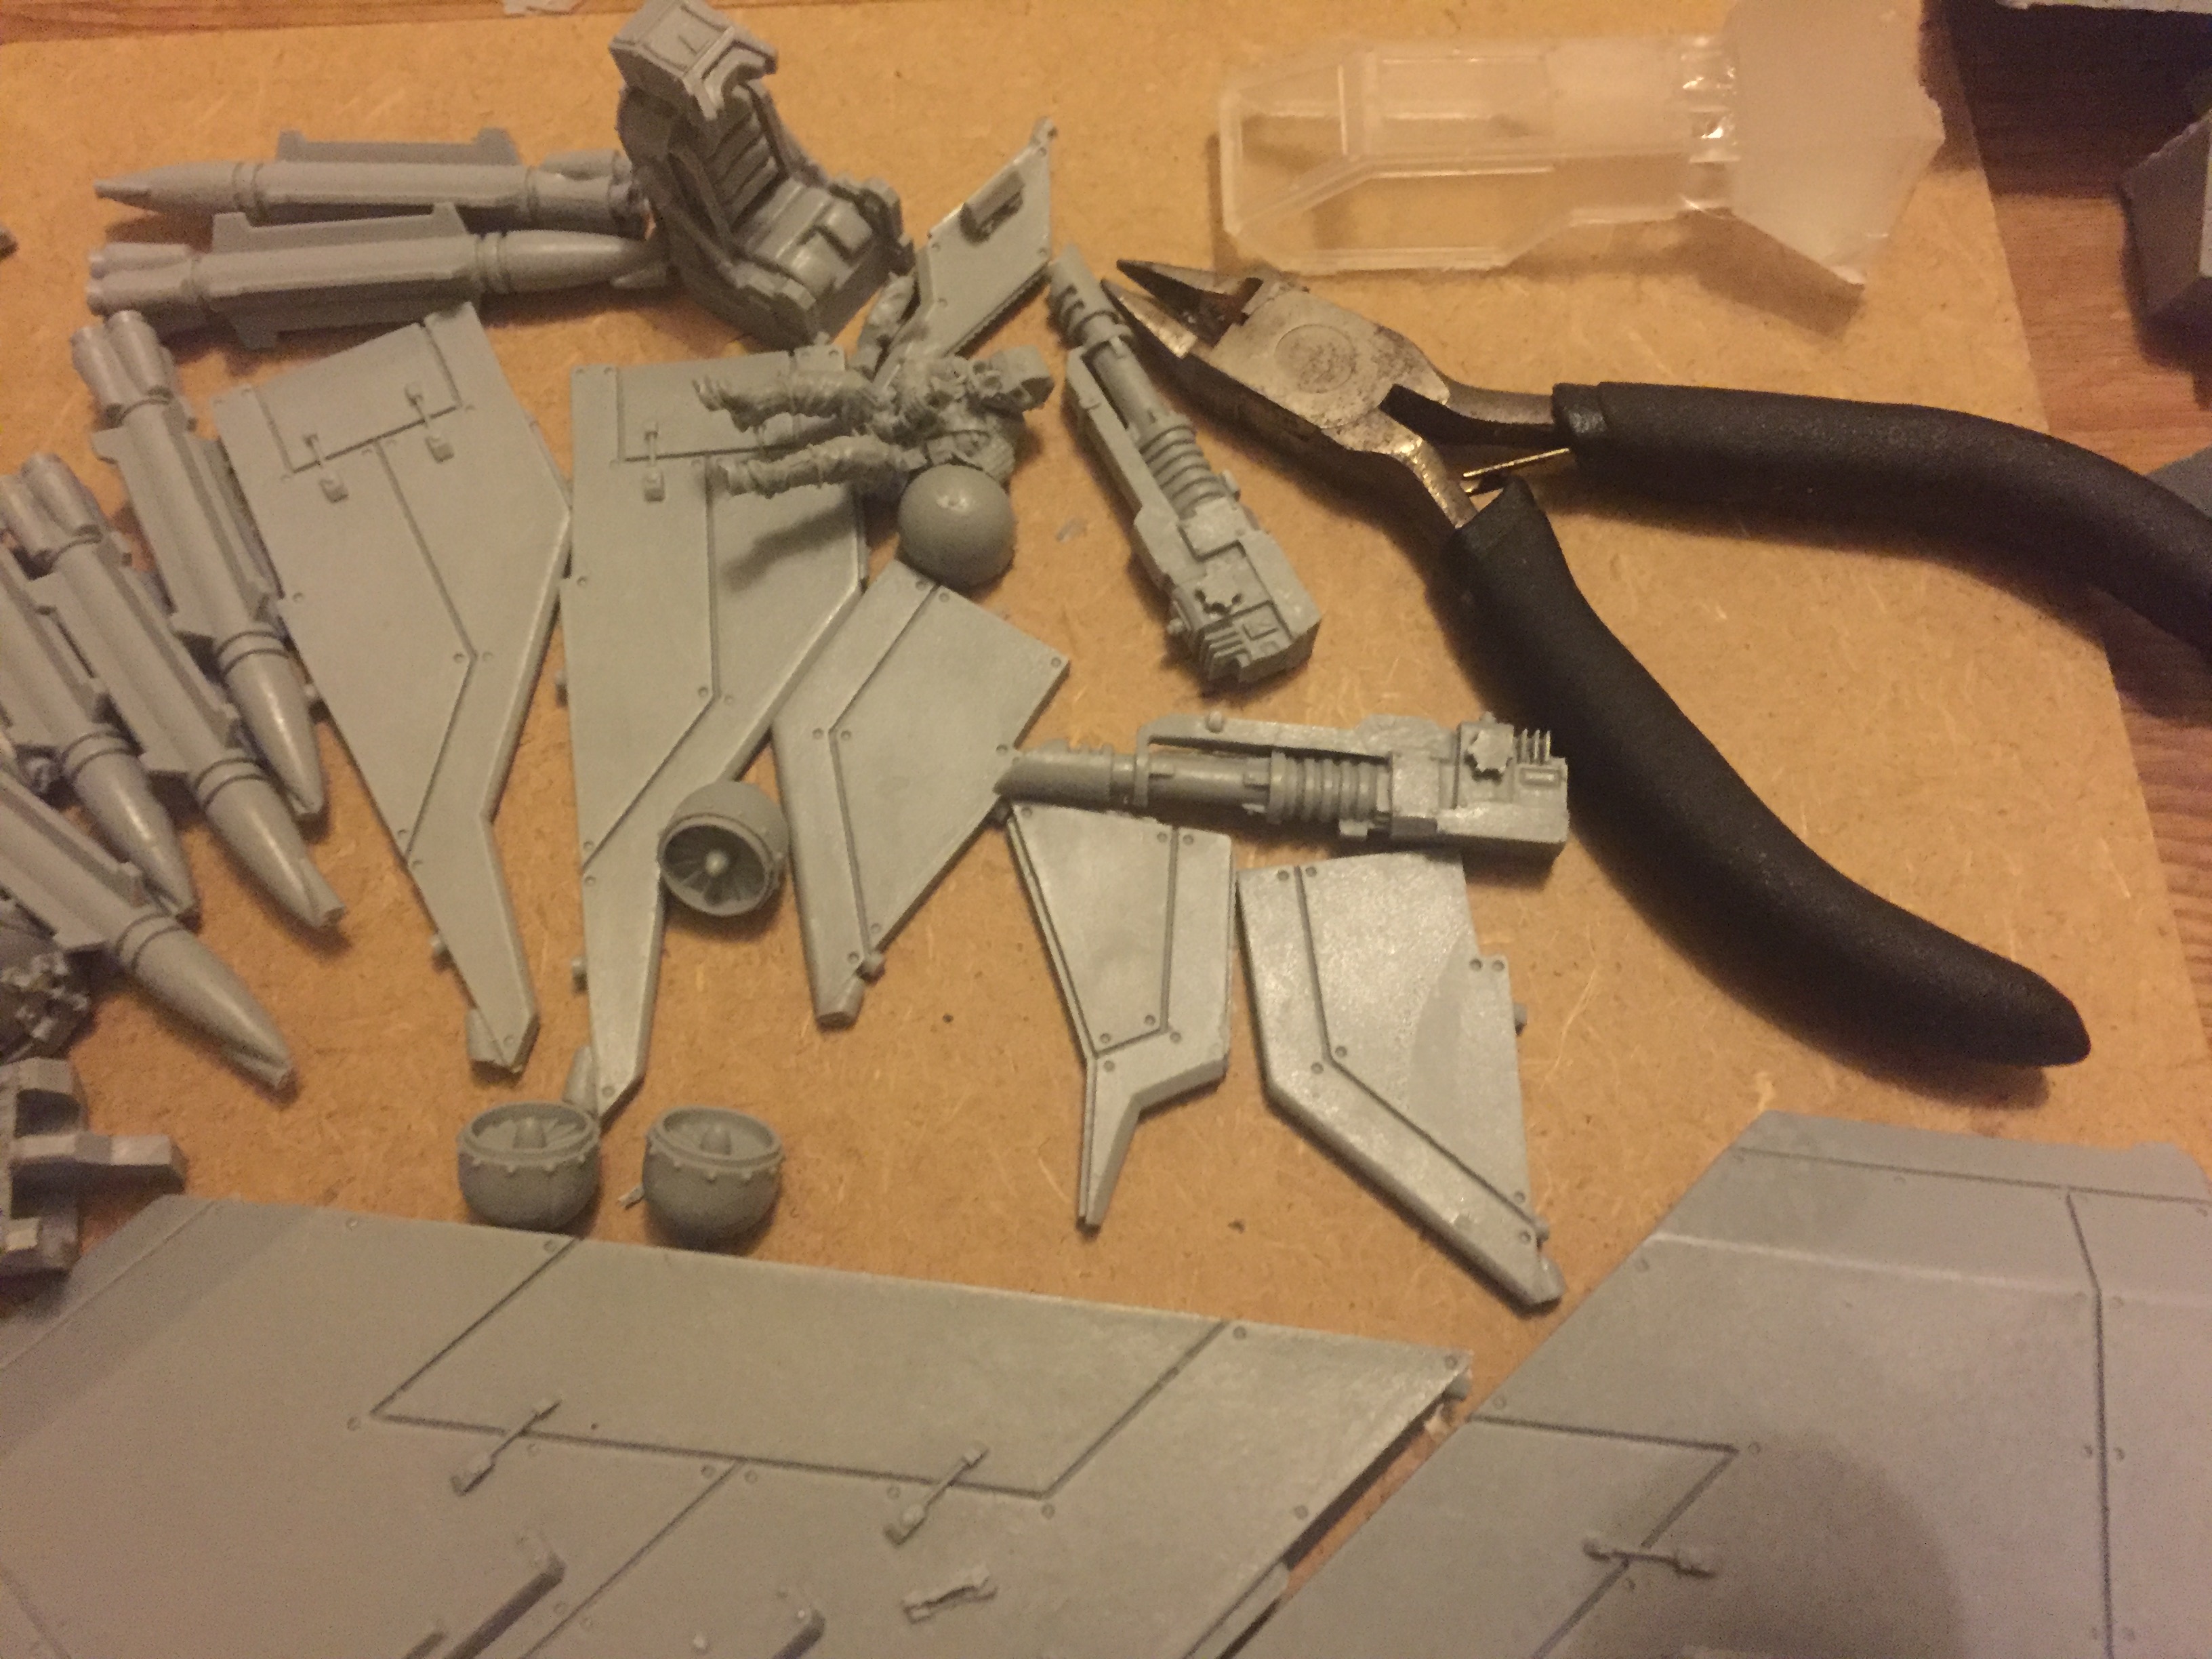
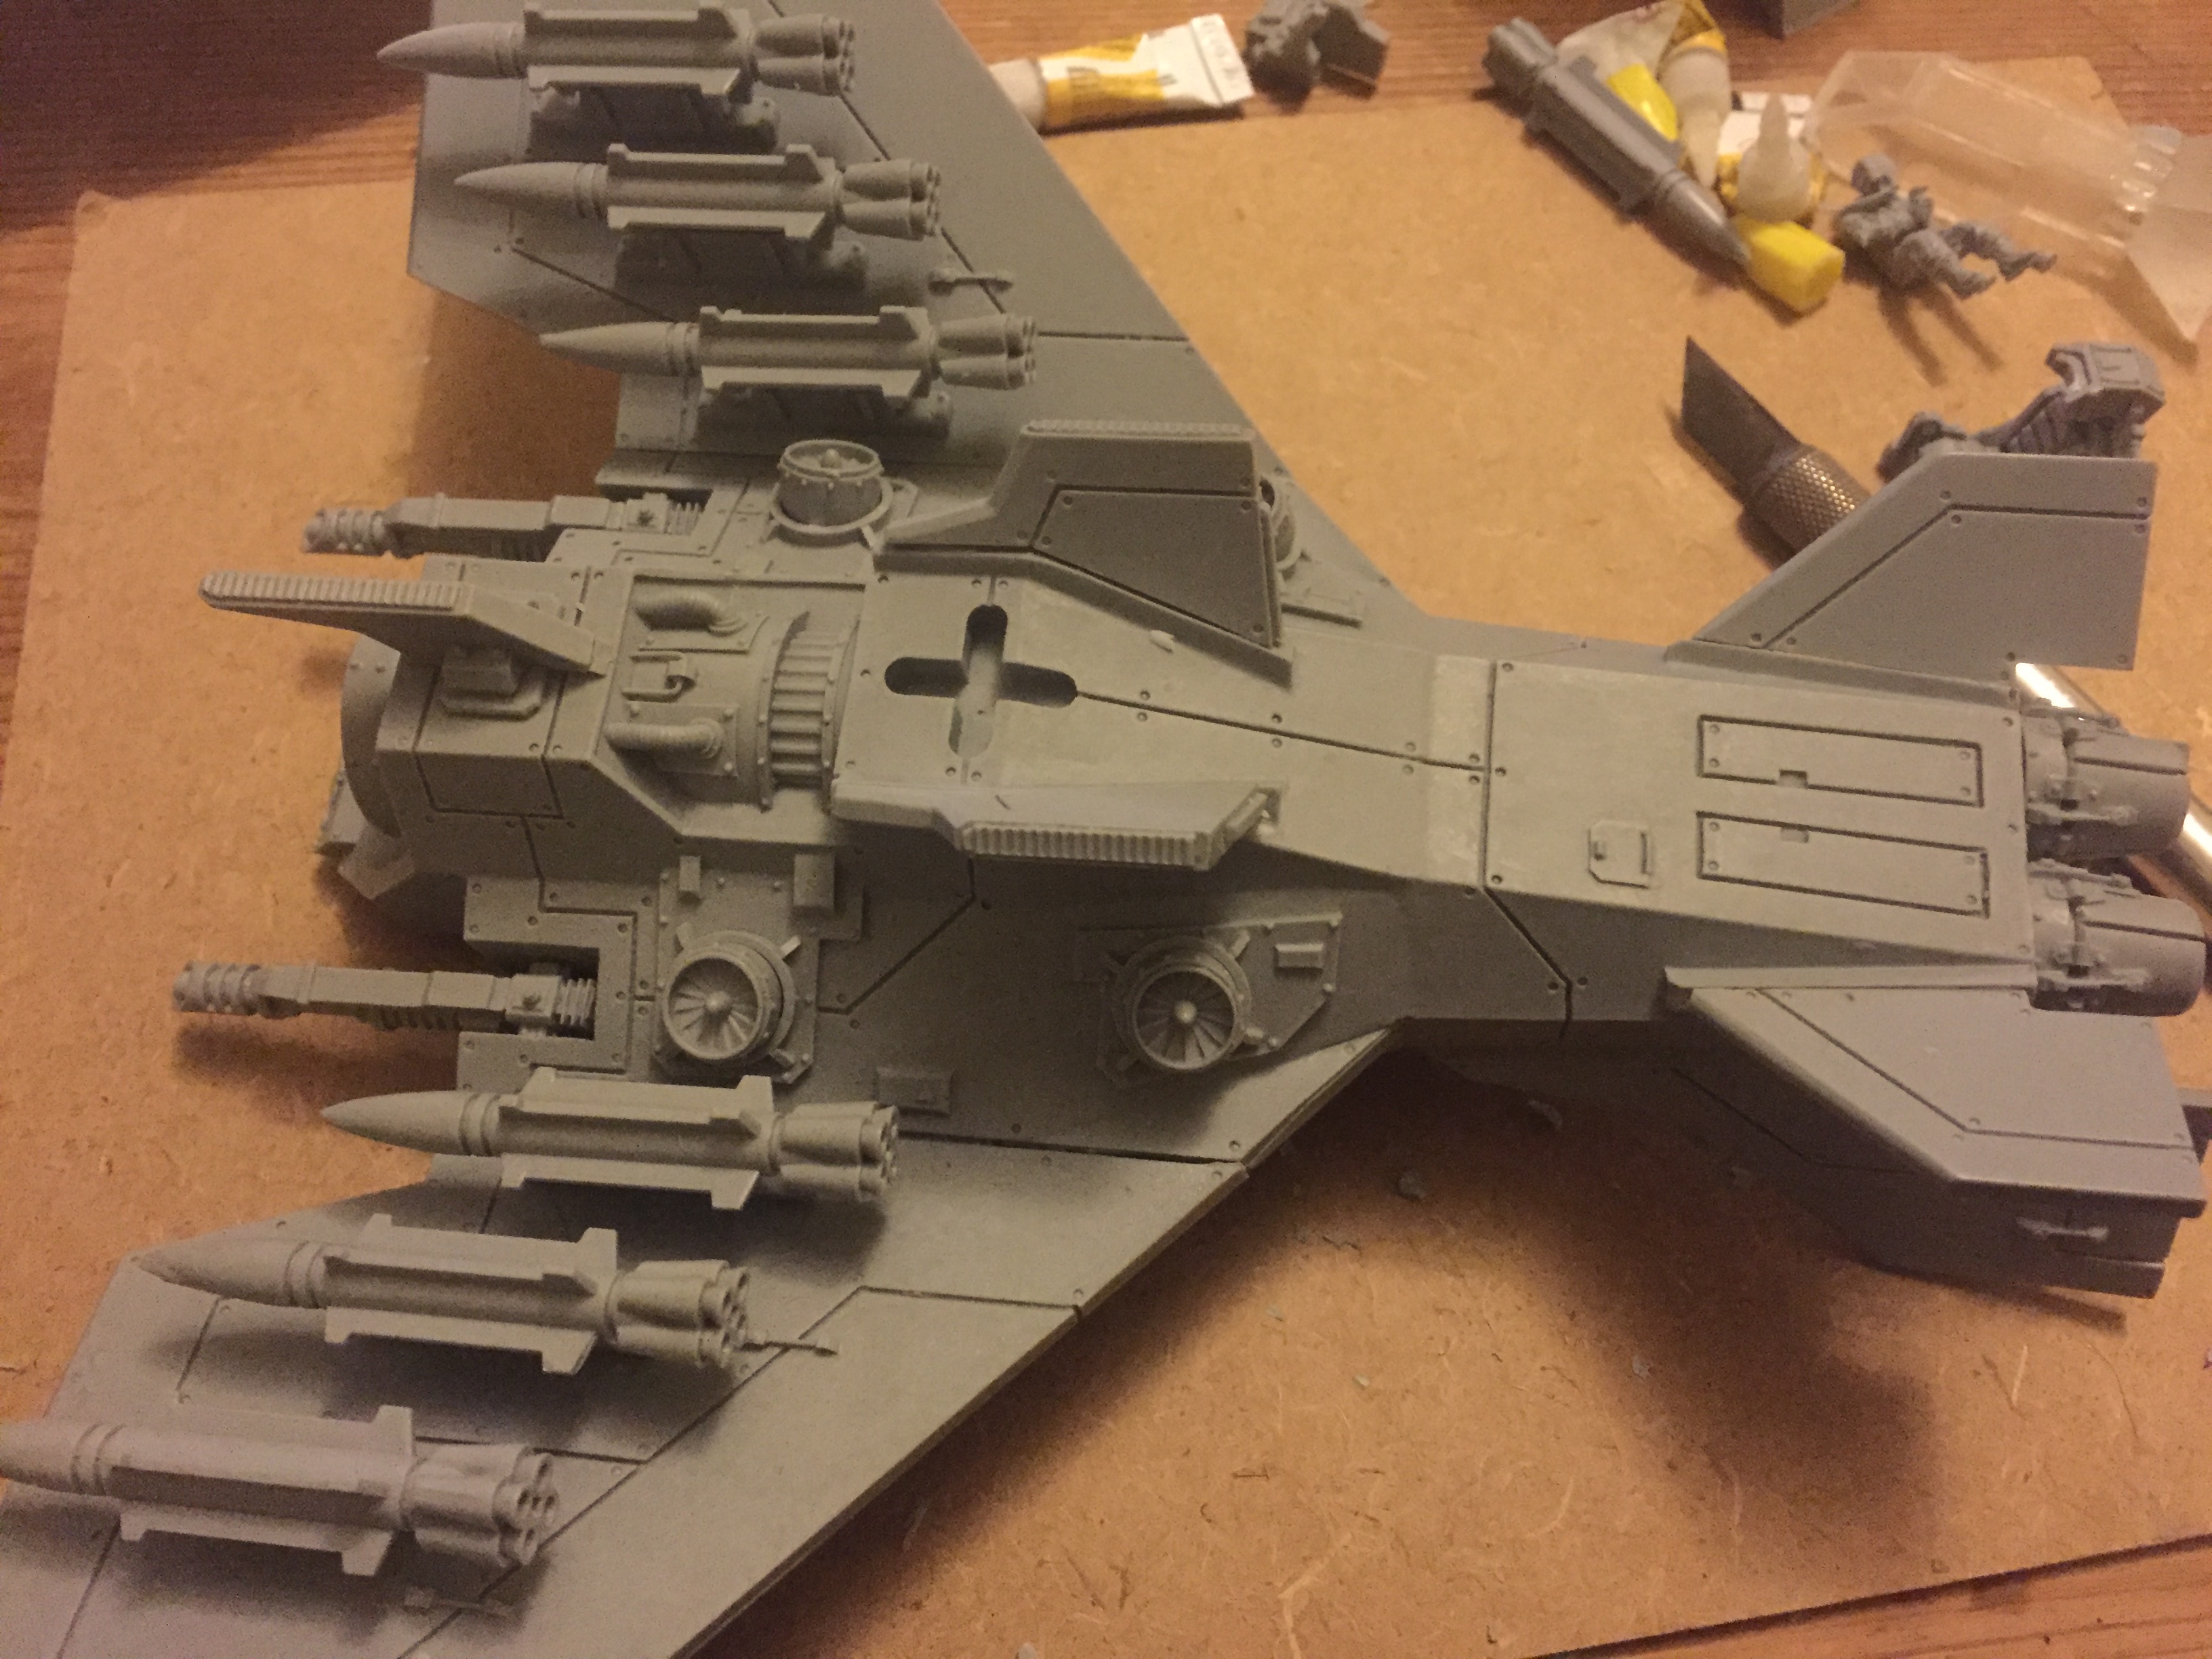
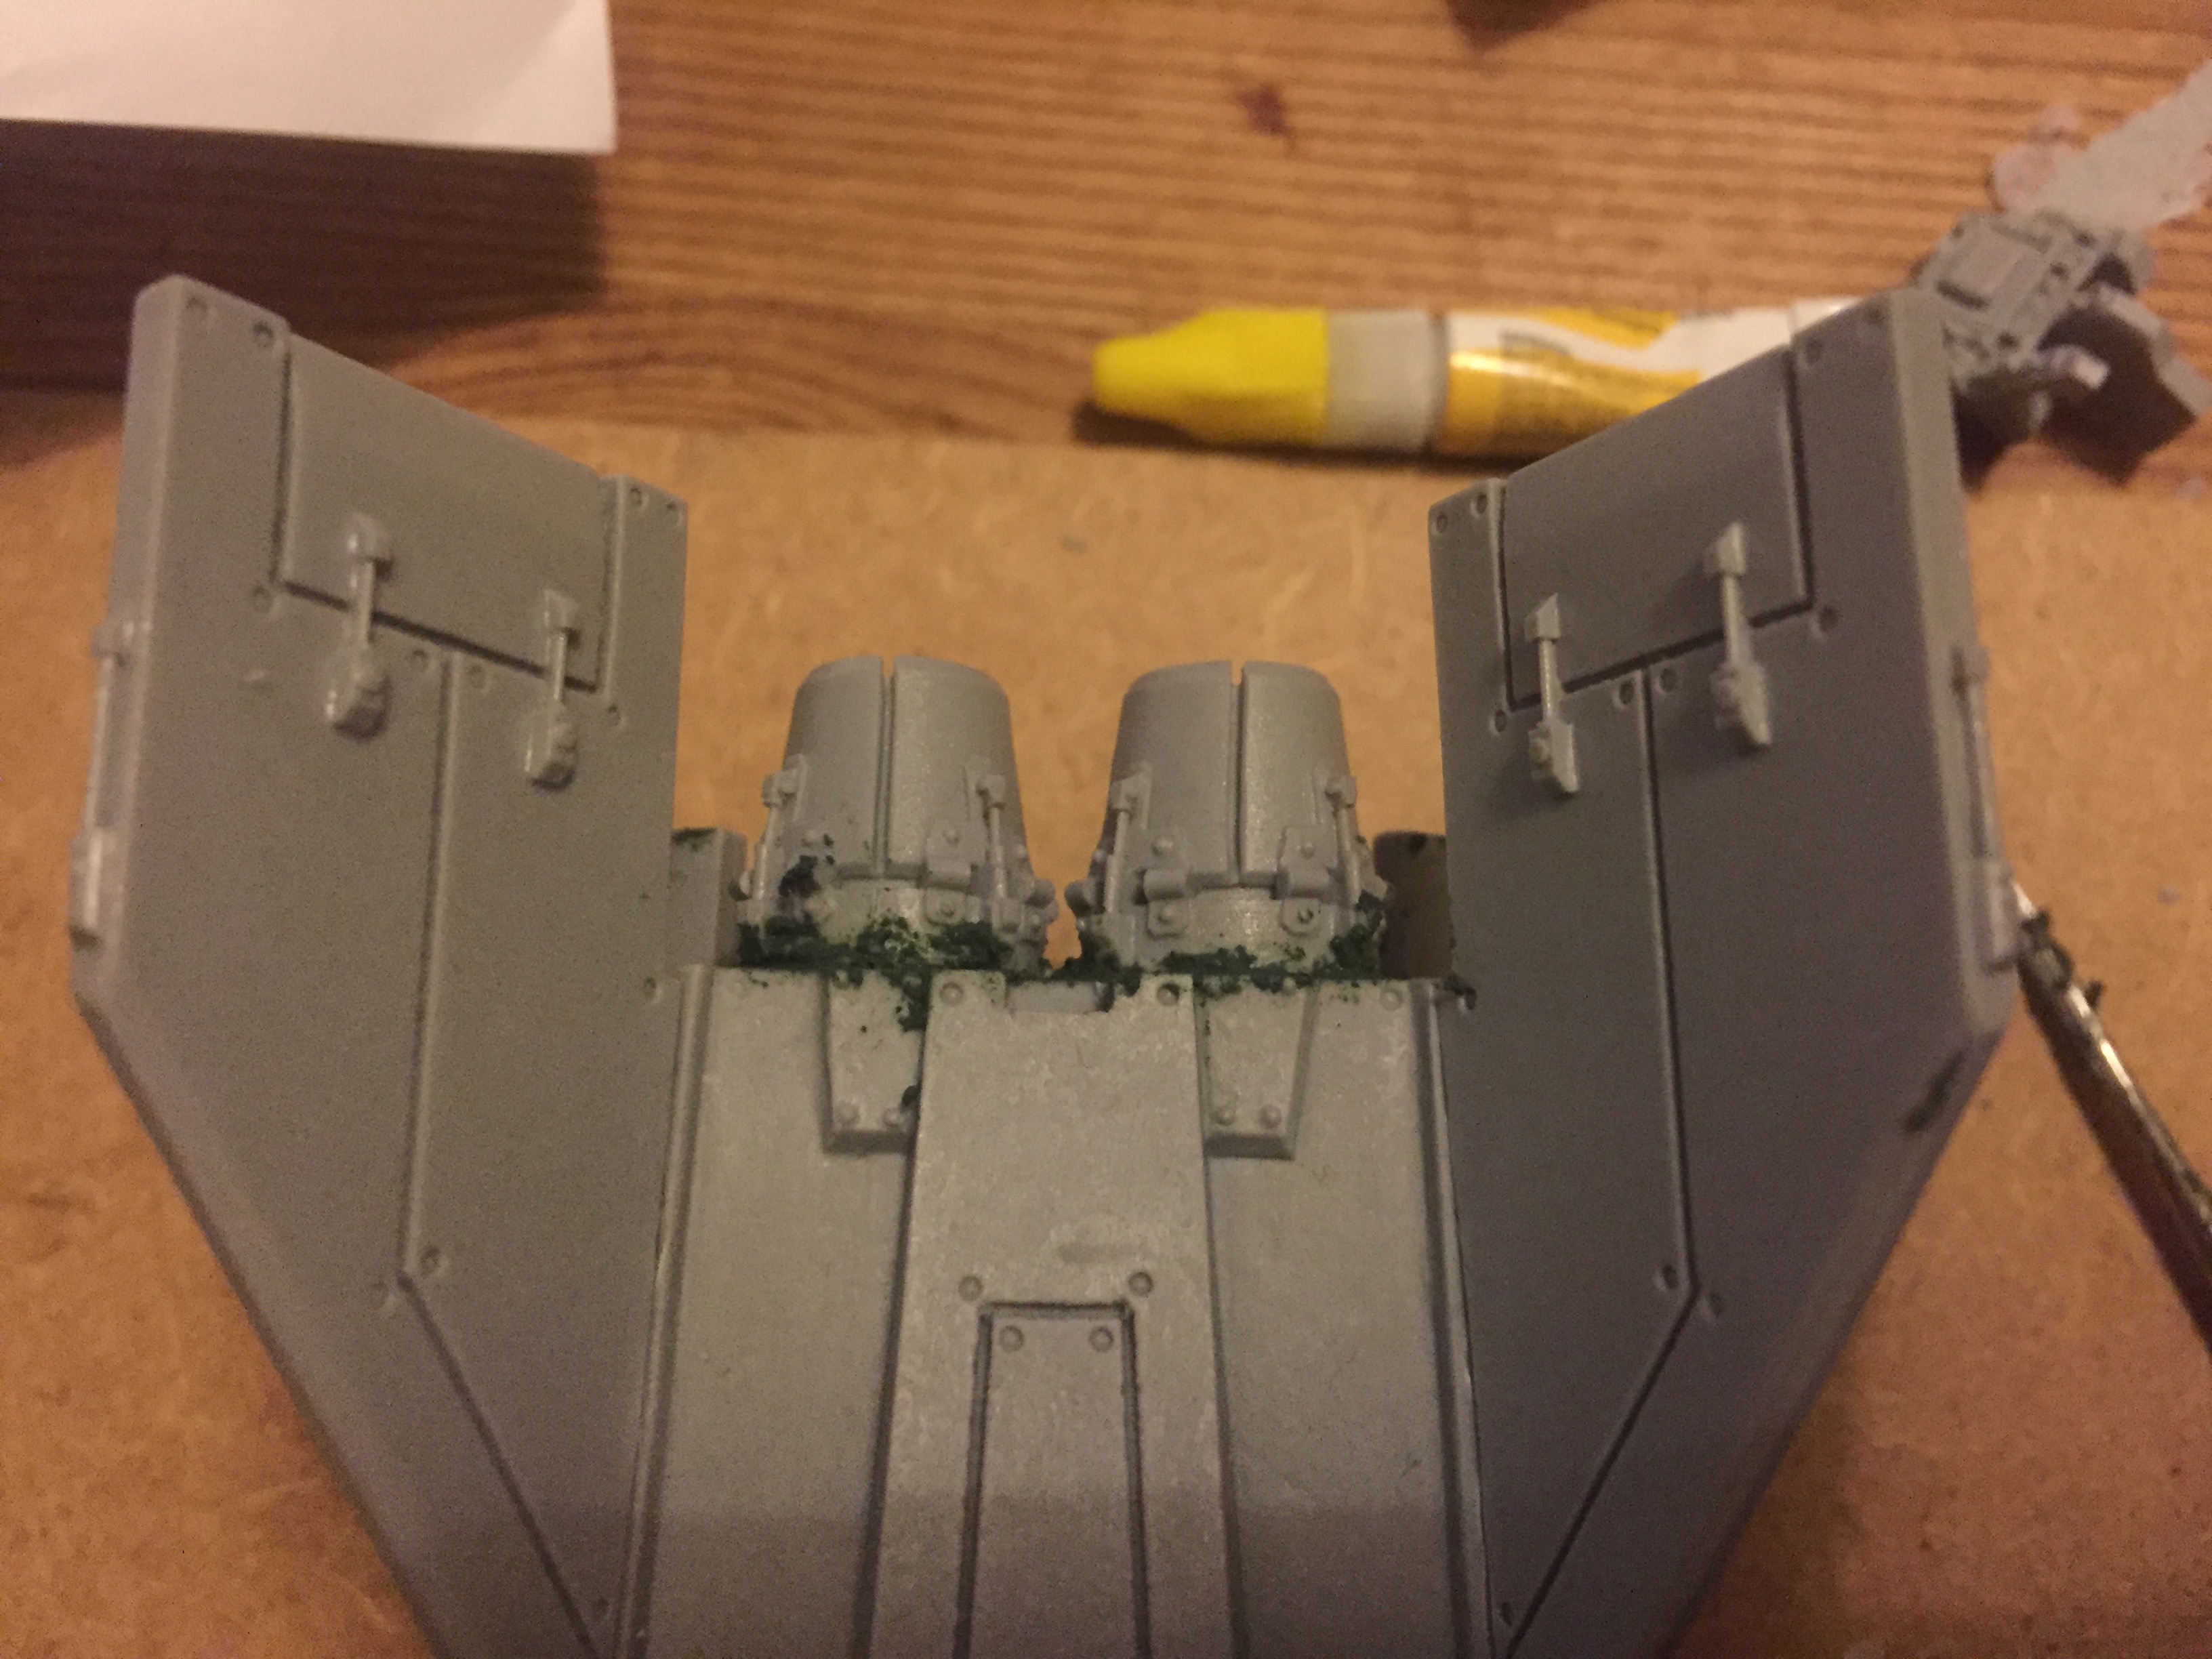
Voss Pattern Lightning - Out of the box
First up in this 2021 Spring Challenge is the Voss Pattern Lightning. Accordingly to the 40K fandom, this is a much faster fighter than the Thunderbolt and the version available through Forge World is the ‘newer’ build. I can only find the older version with different wing configuration on eBay at exorbitant prices (or on sites which make me think they must be counterfeit as they are far too cheap!) Anyhow, this is a 19 part kit and the solid parts mean that there is little warping of the resin components.
As with all resin models, it’s necessary to wash the parts in soapy warm water to remove the mould grease and to rinse the parts and dry. Now one could ignore this, but it will affect the painting of the constructed model even with spray under coats. It’s also a useful task as you can check all parts are present and that there are no defects. I discovered my kit came with an extra hellstrike missile… something for my bits box for free ?.
 Voss Pattern Lightning - Out of the box
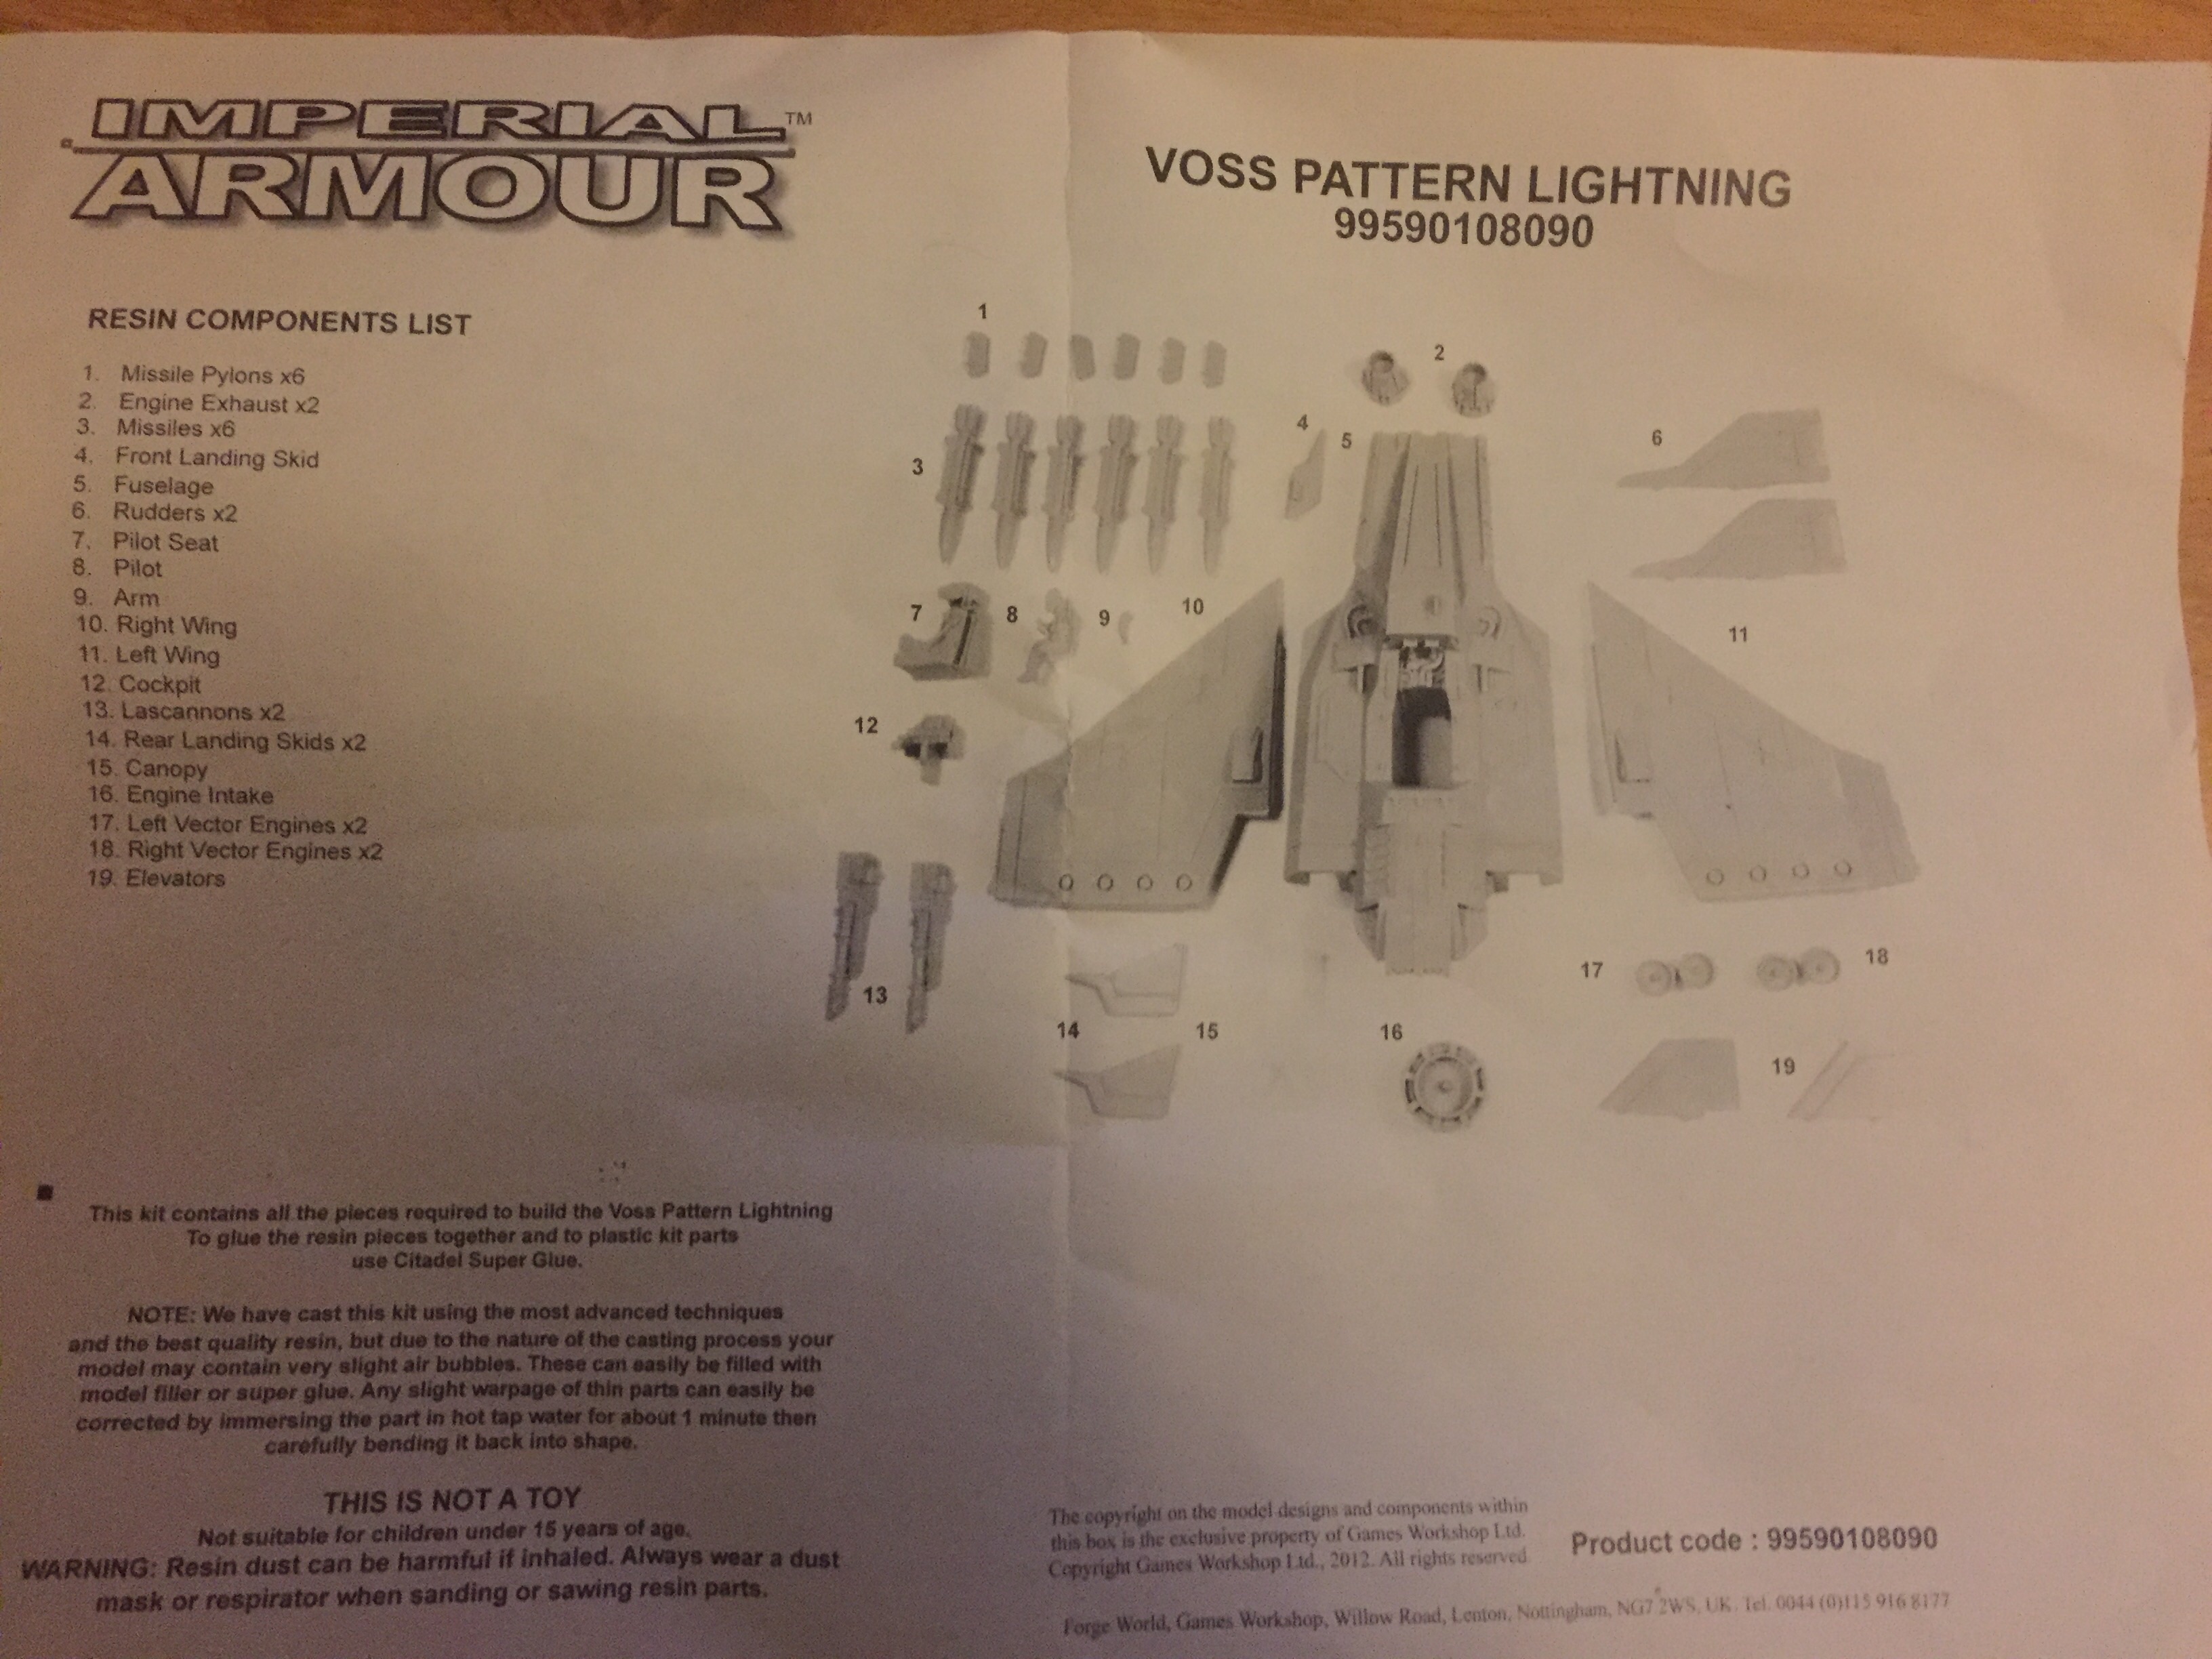
Having cleaned and left to naturally dry over a couple of days, the next phase will be to remove the excess flashing and resin off cuts that are created in the manufacturing process. There’s a lot of of excess resin sprue bits to remove… ?
Project Time taken:
Reading and figuring out instructions and checking all components for defects: 1 Hour
Cleaning components: 1 Hour
Natural Drying: 48 Hours
Sitting in awe at components: 72 Hours
Voss Pattern Lightning - Preparation of Components
So, next up is the preparation of the components. I would suggest carefully looking at how the excess sprue connects with each piece to ensure that you don’t clip off too much or damage the fine detail of the component. Double check before cutting the parts.
I used a Citadel pair of clippers throughout this process but where there were large chunks of sprue I cut from different sides until the excess snapped cleanly off. Once all excess chunks were removed (I could keep them as battle debris for basing?), I could then revert to a modelling knife to carefully slice back any further excess to ensure a smooth finish to both the external appearance of the components and the hidden tabs that will glue into the various recesses as the construction builds.
Take your time in the preparation here! This kit cost £89, and unlike any Lego kit, they don’t throw in spare components.
 Preparation of components - take your time and double check you are not damaging the detail before you make the first cut!
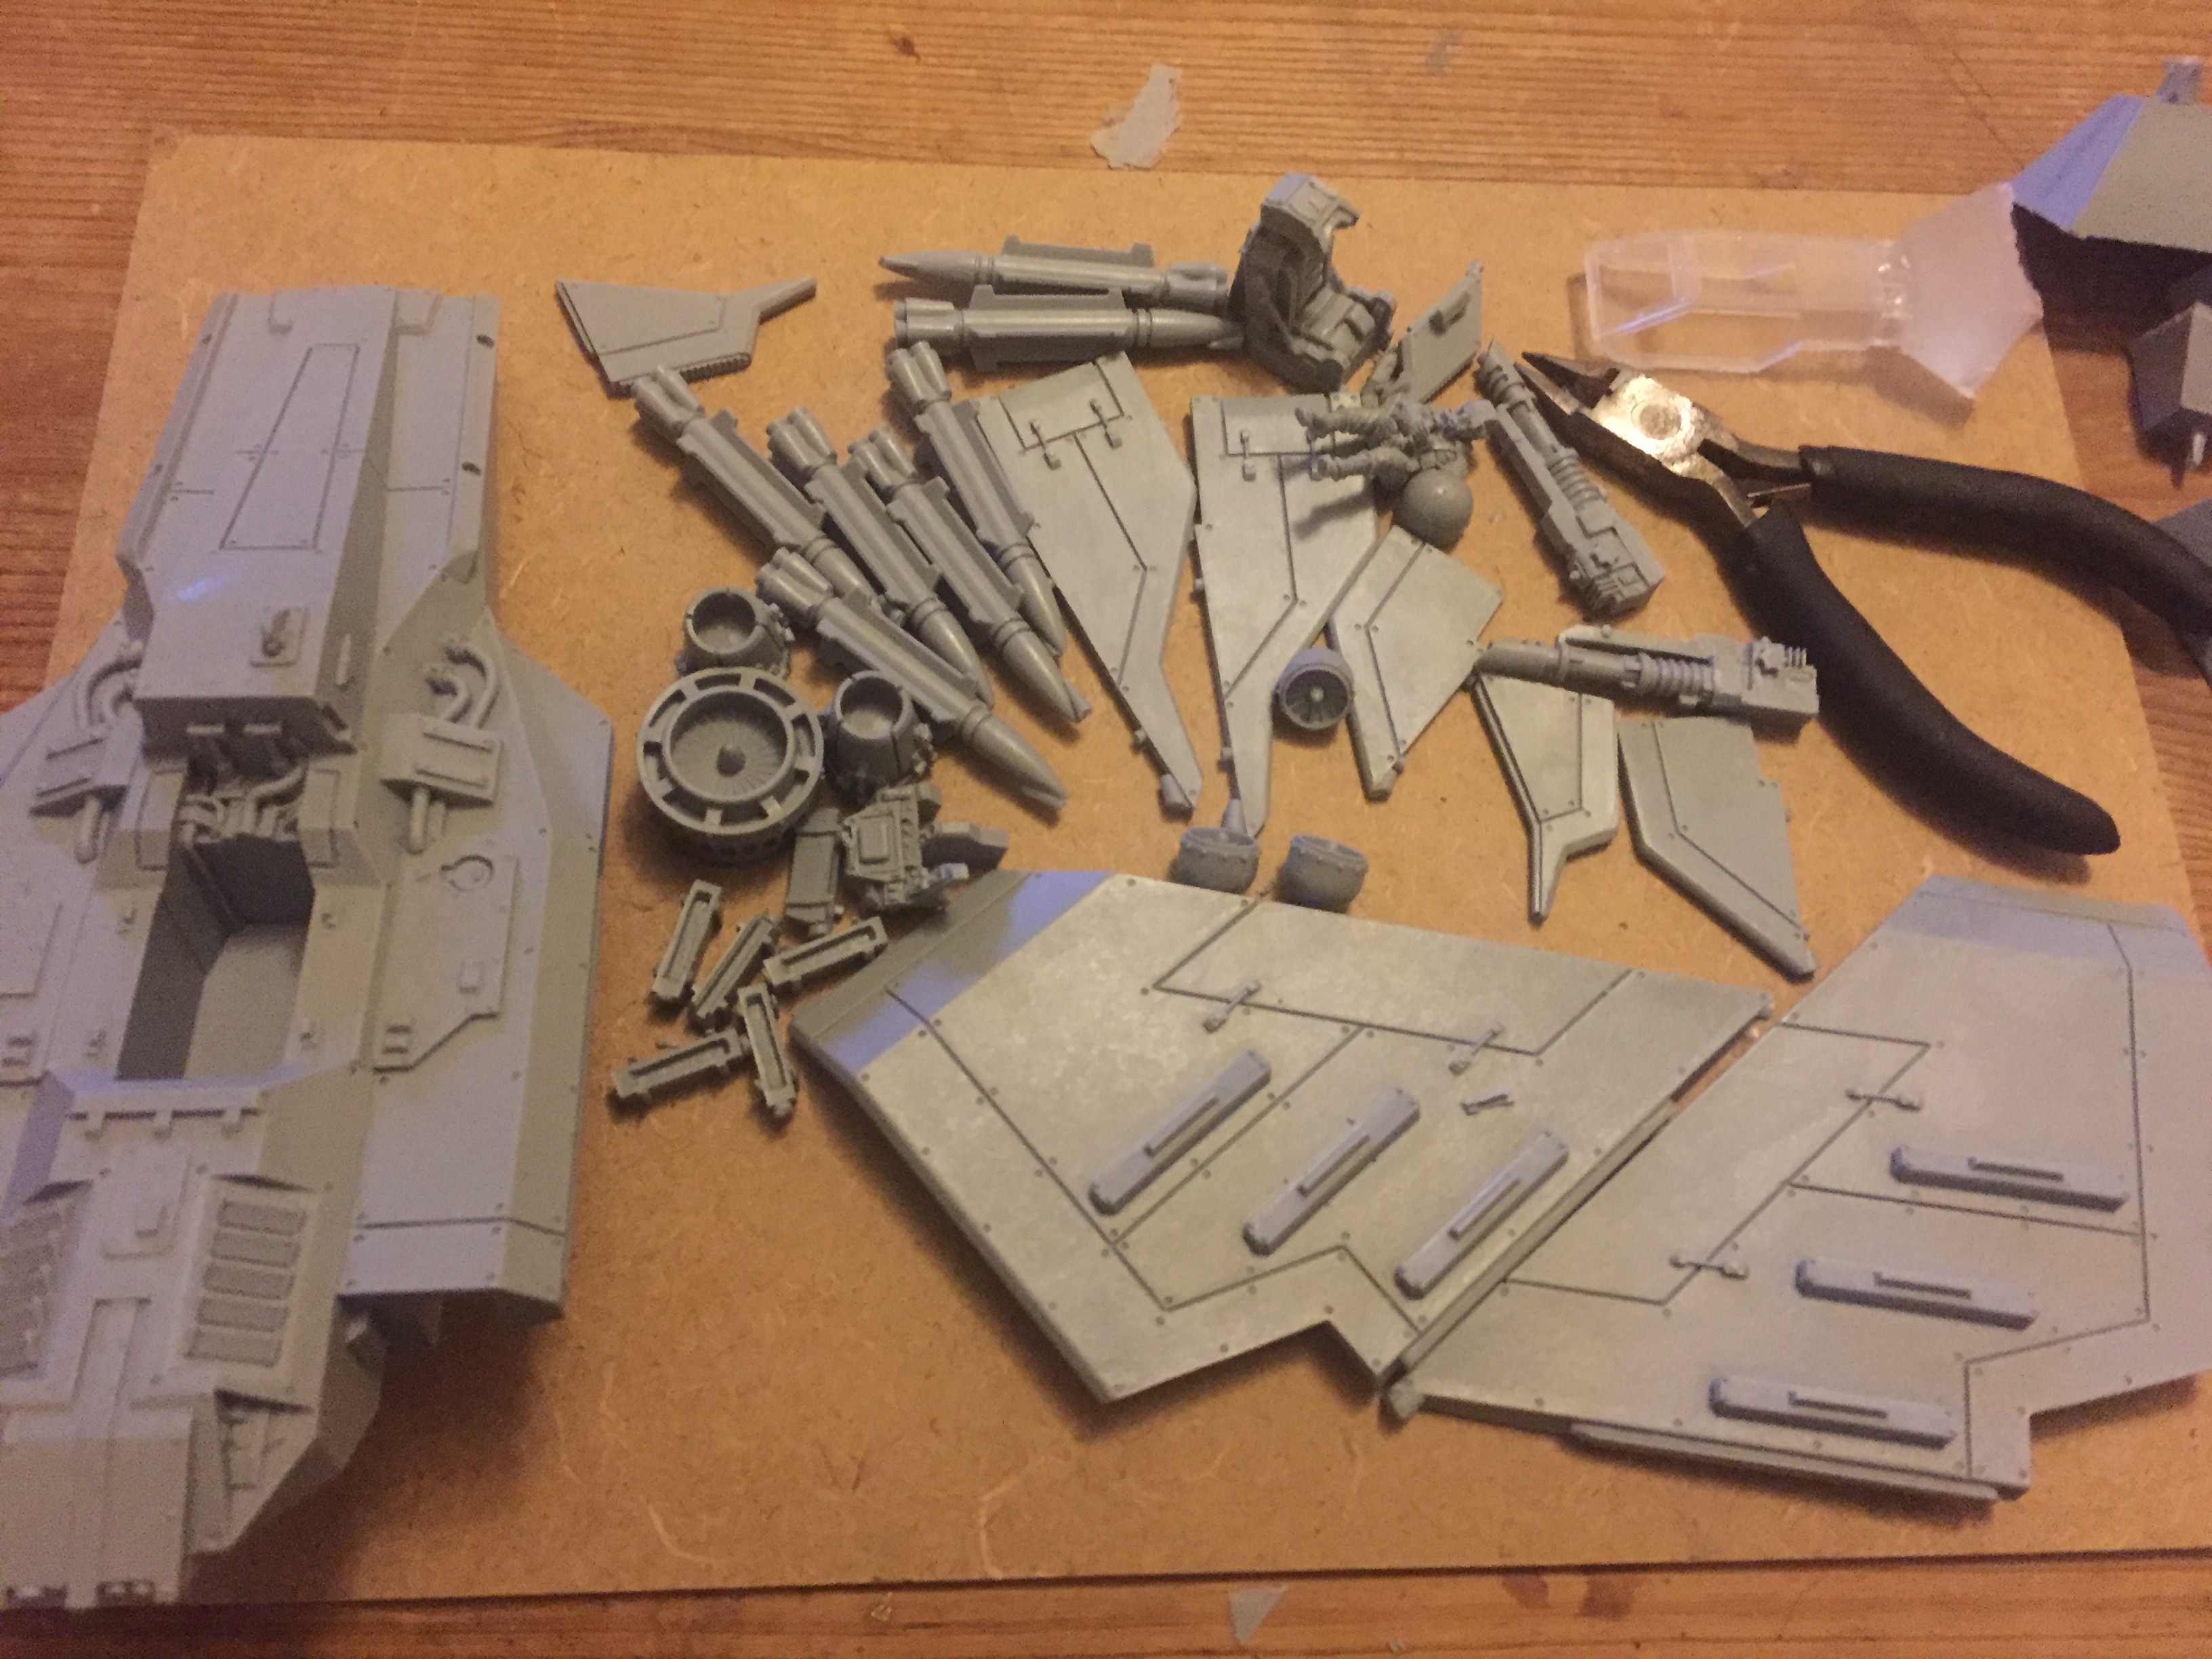
Time taken:
Cutting/Clipping of Excess Sprue (including careful checking of each cut) 1 Hour
Fine cutting of excess around tabs and external detail 1 Hour
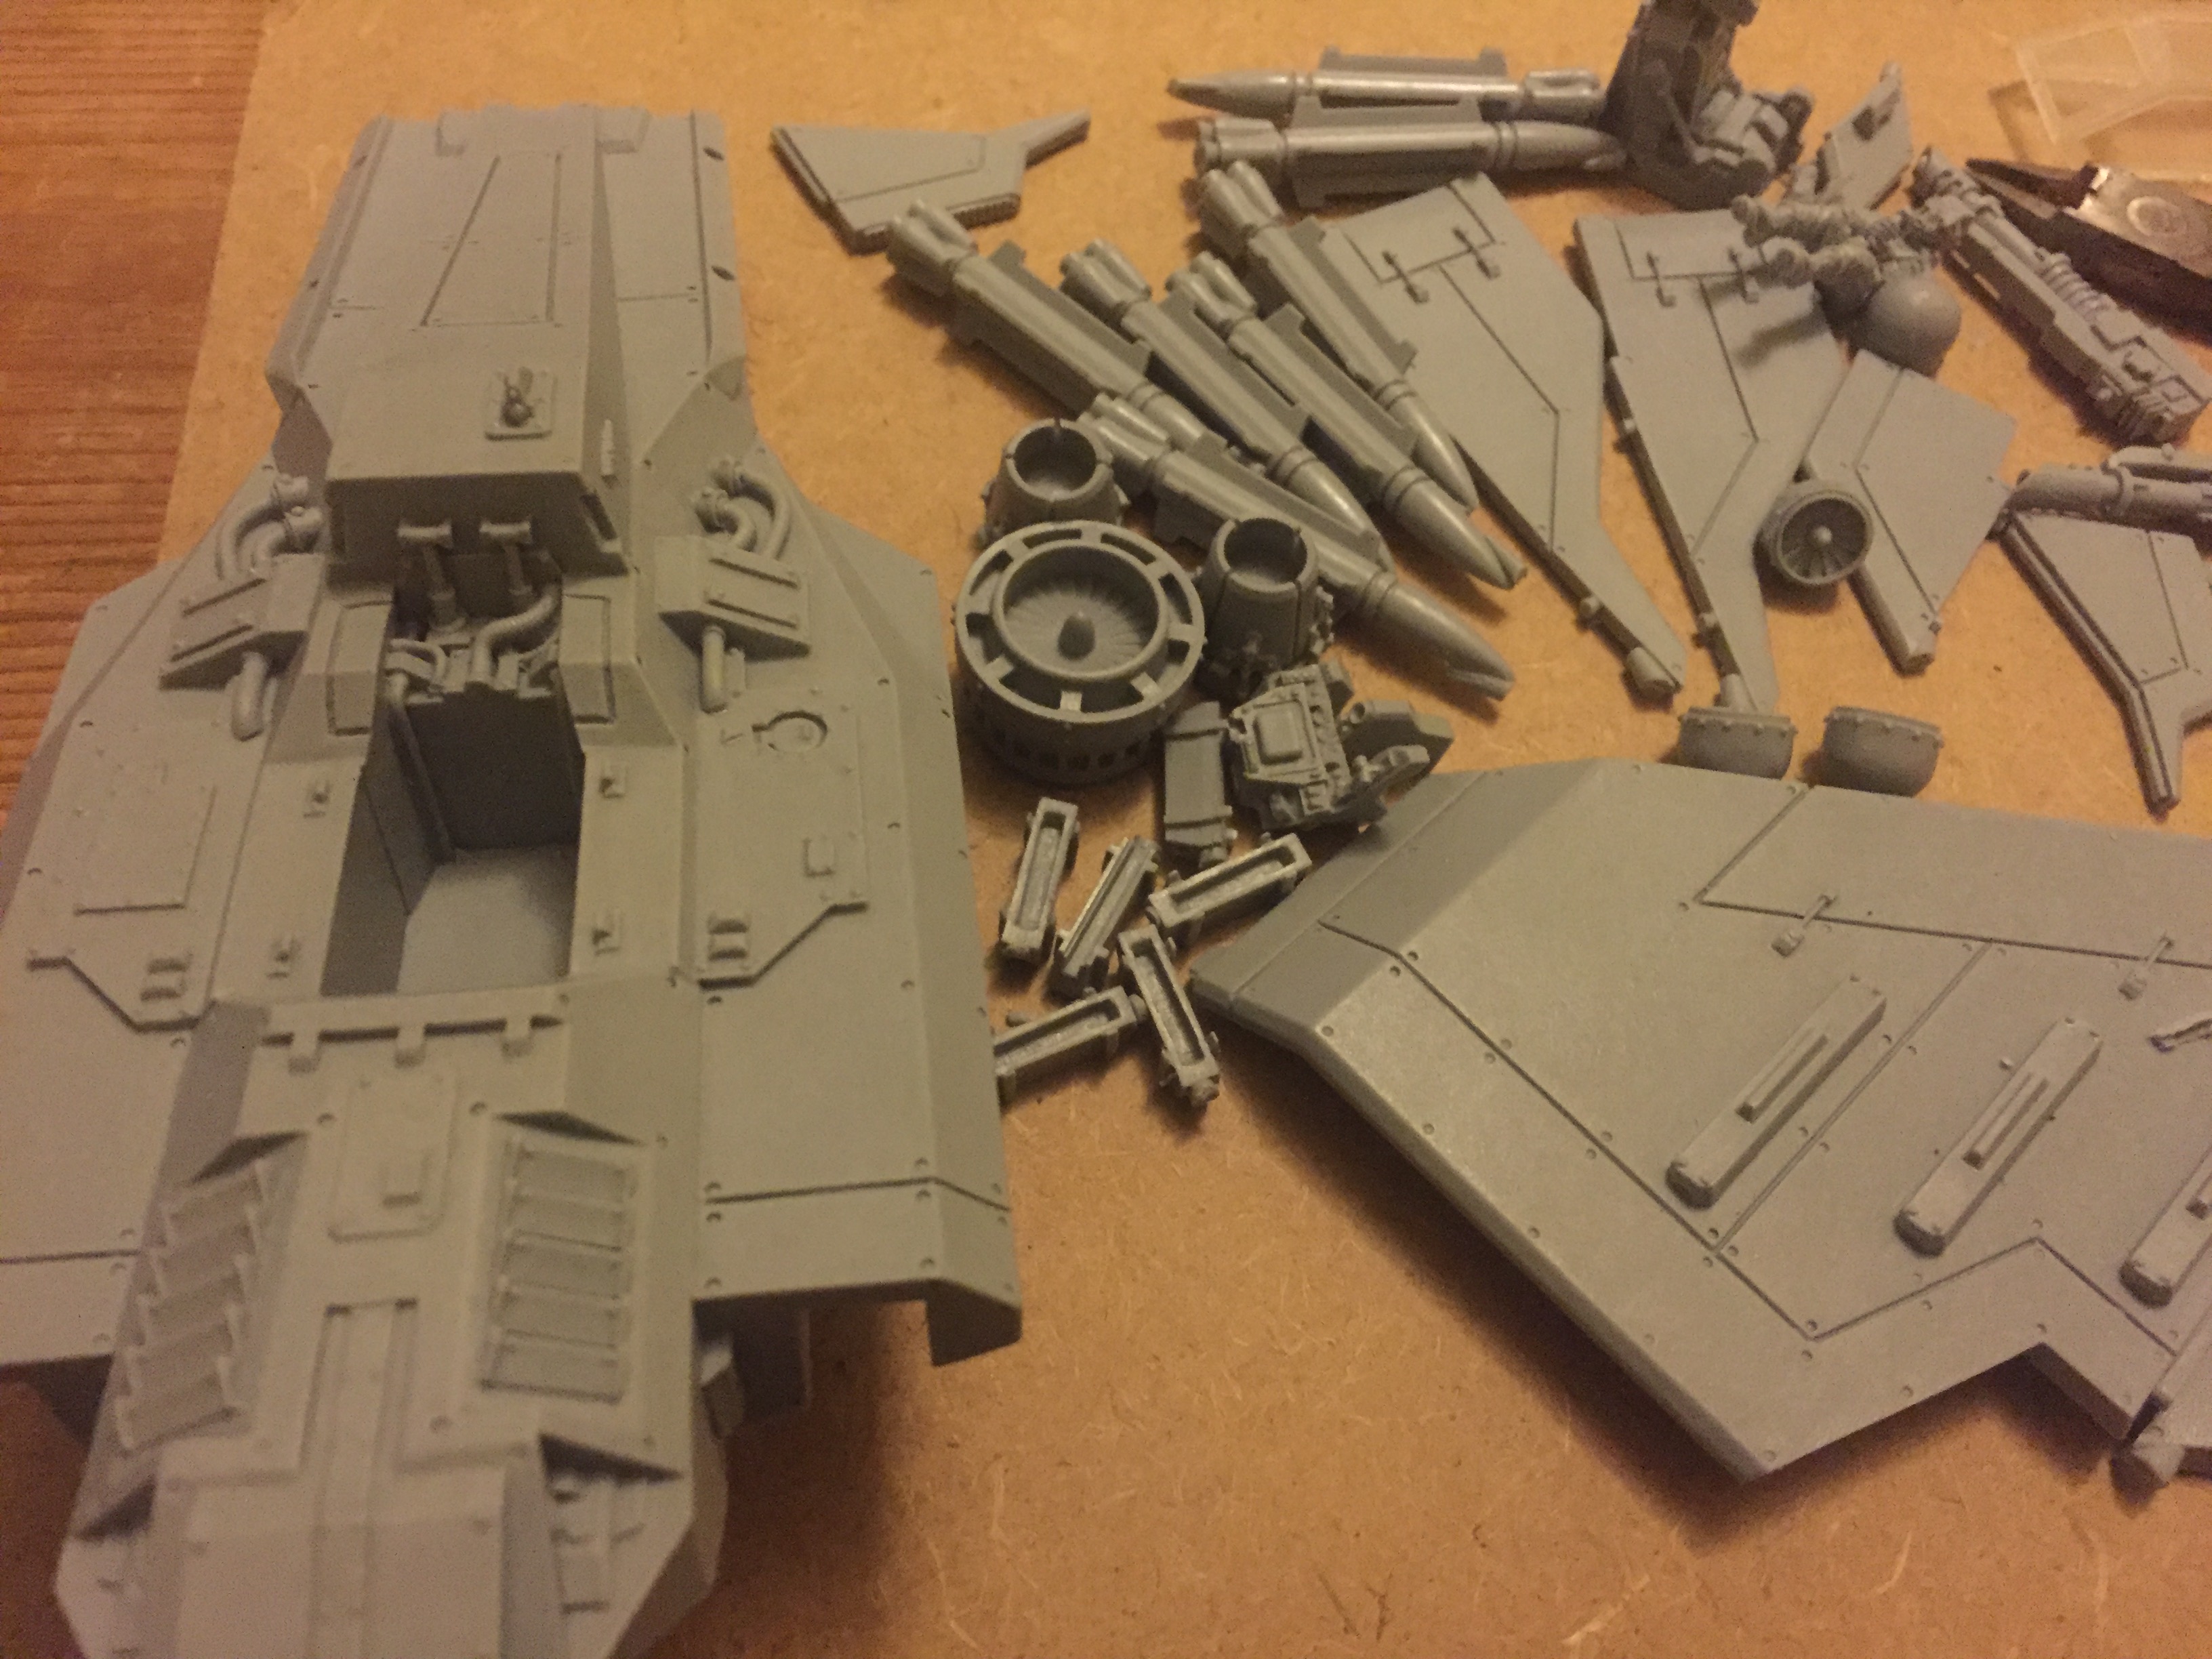
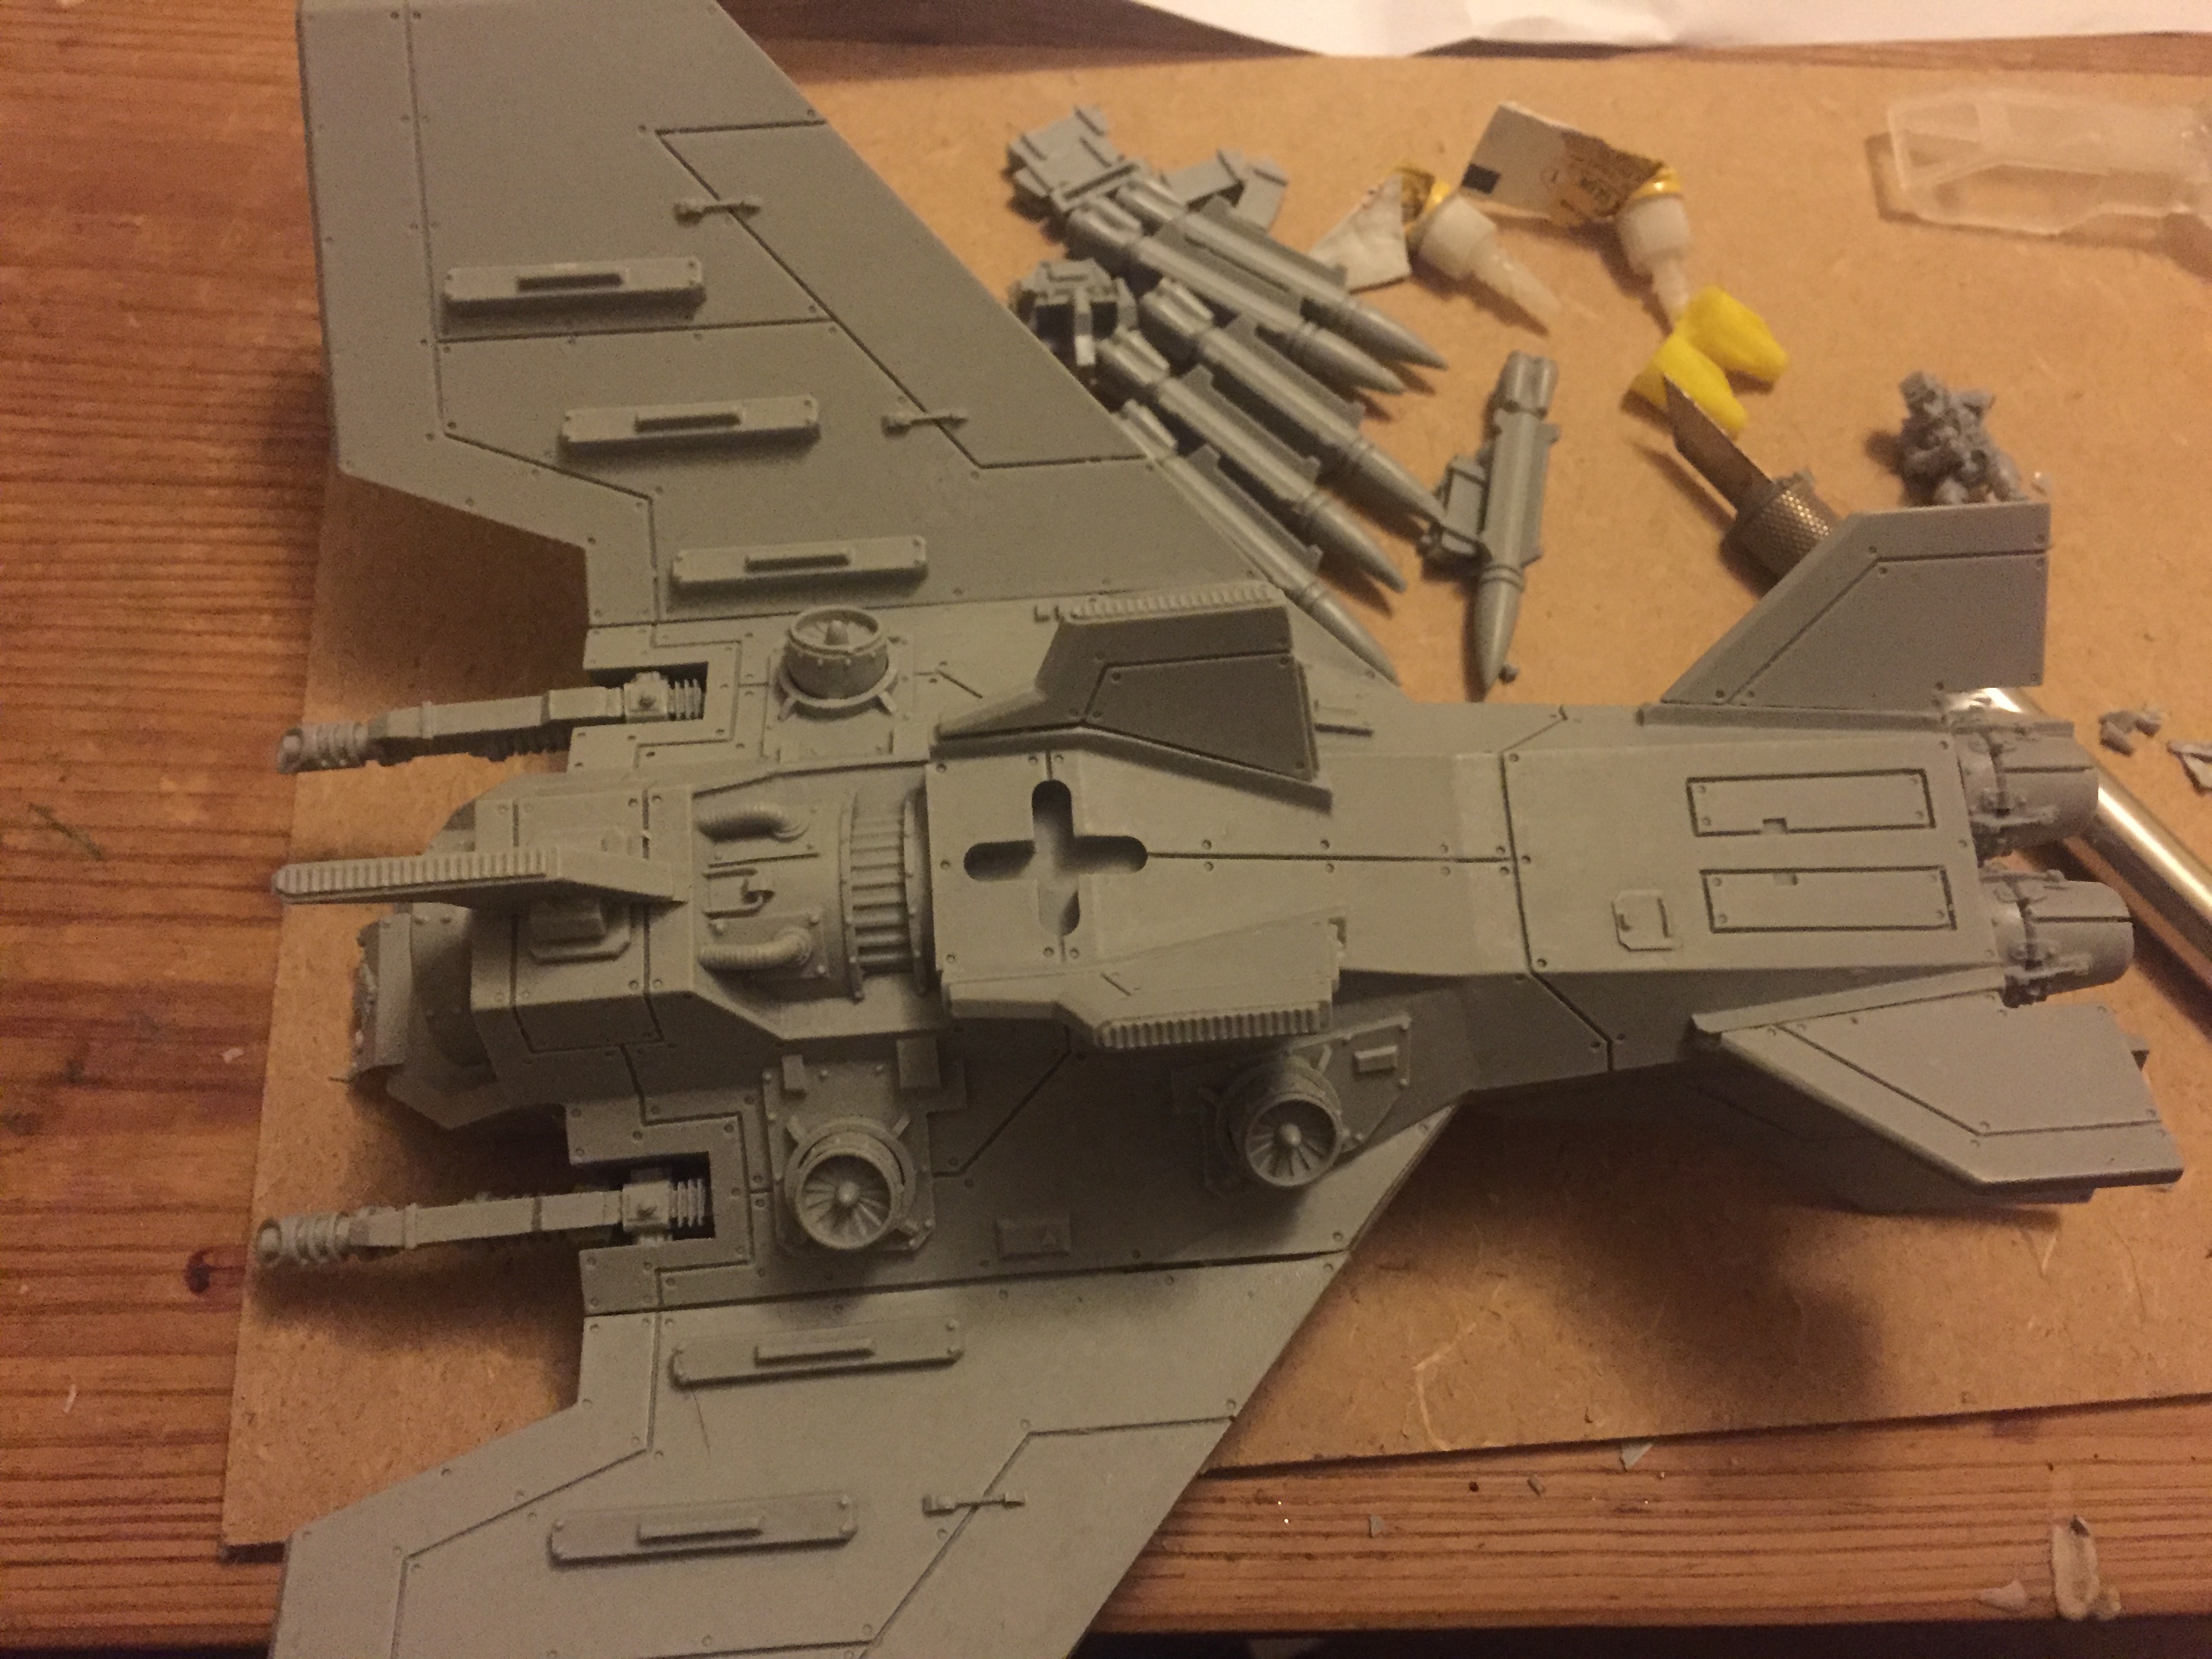
Voss Pattern Lightning - Construction
Now comes the best part… construction! I’m using Citadel super glue. This is a box of five 0,5g gel tubes and at £5 for the box, you can get cheaper on the market and indeed I used two full tubes on the core construction of the Voss Pattern Lightning. On a plus side, you do use all the glue and none goes to waste which can happen with larger liquid bottles or tubes that go hard as the glue cures once opened.
 Expensive, but no waste and solid bonds created.
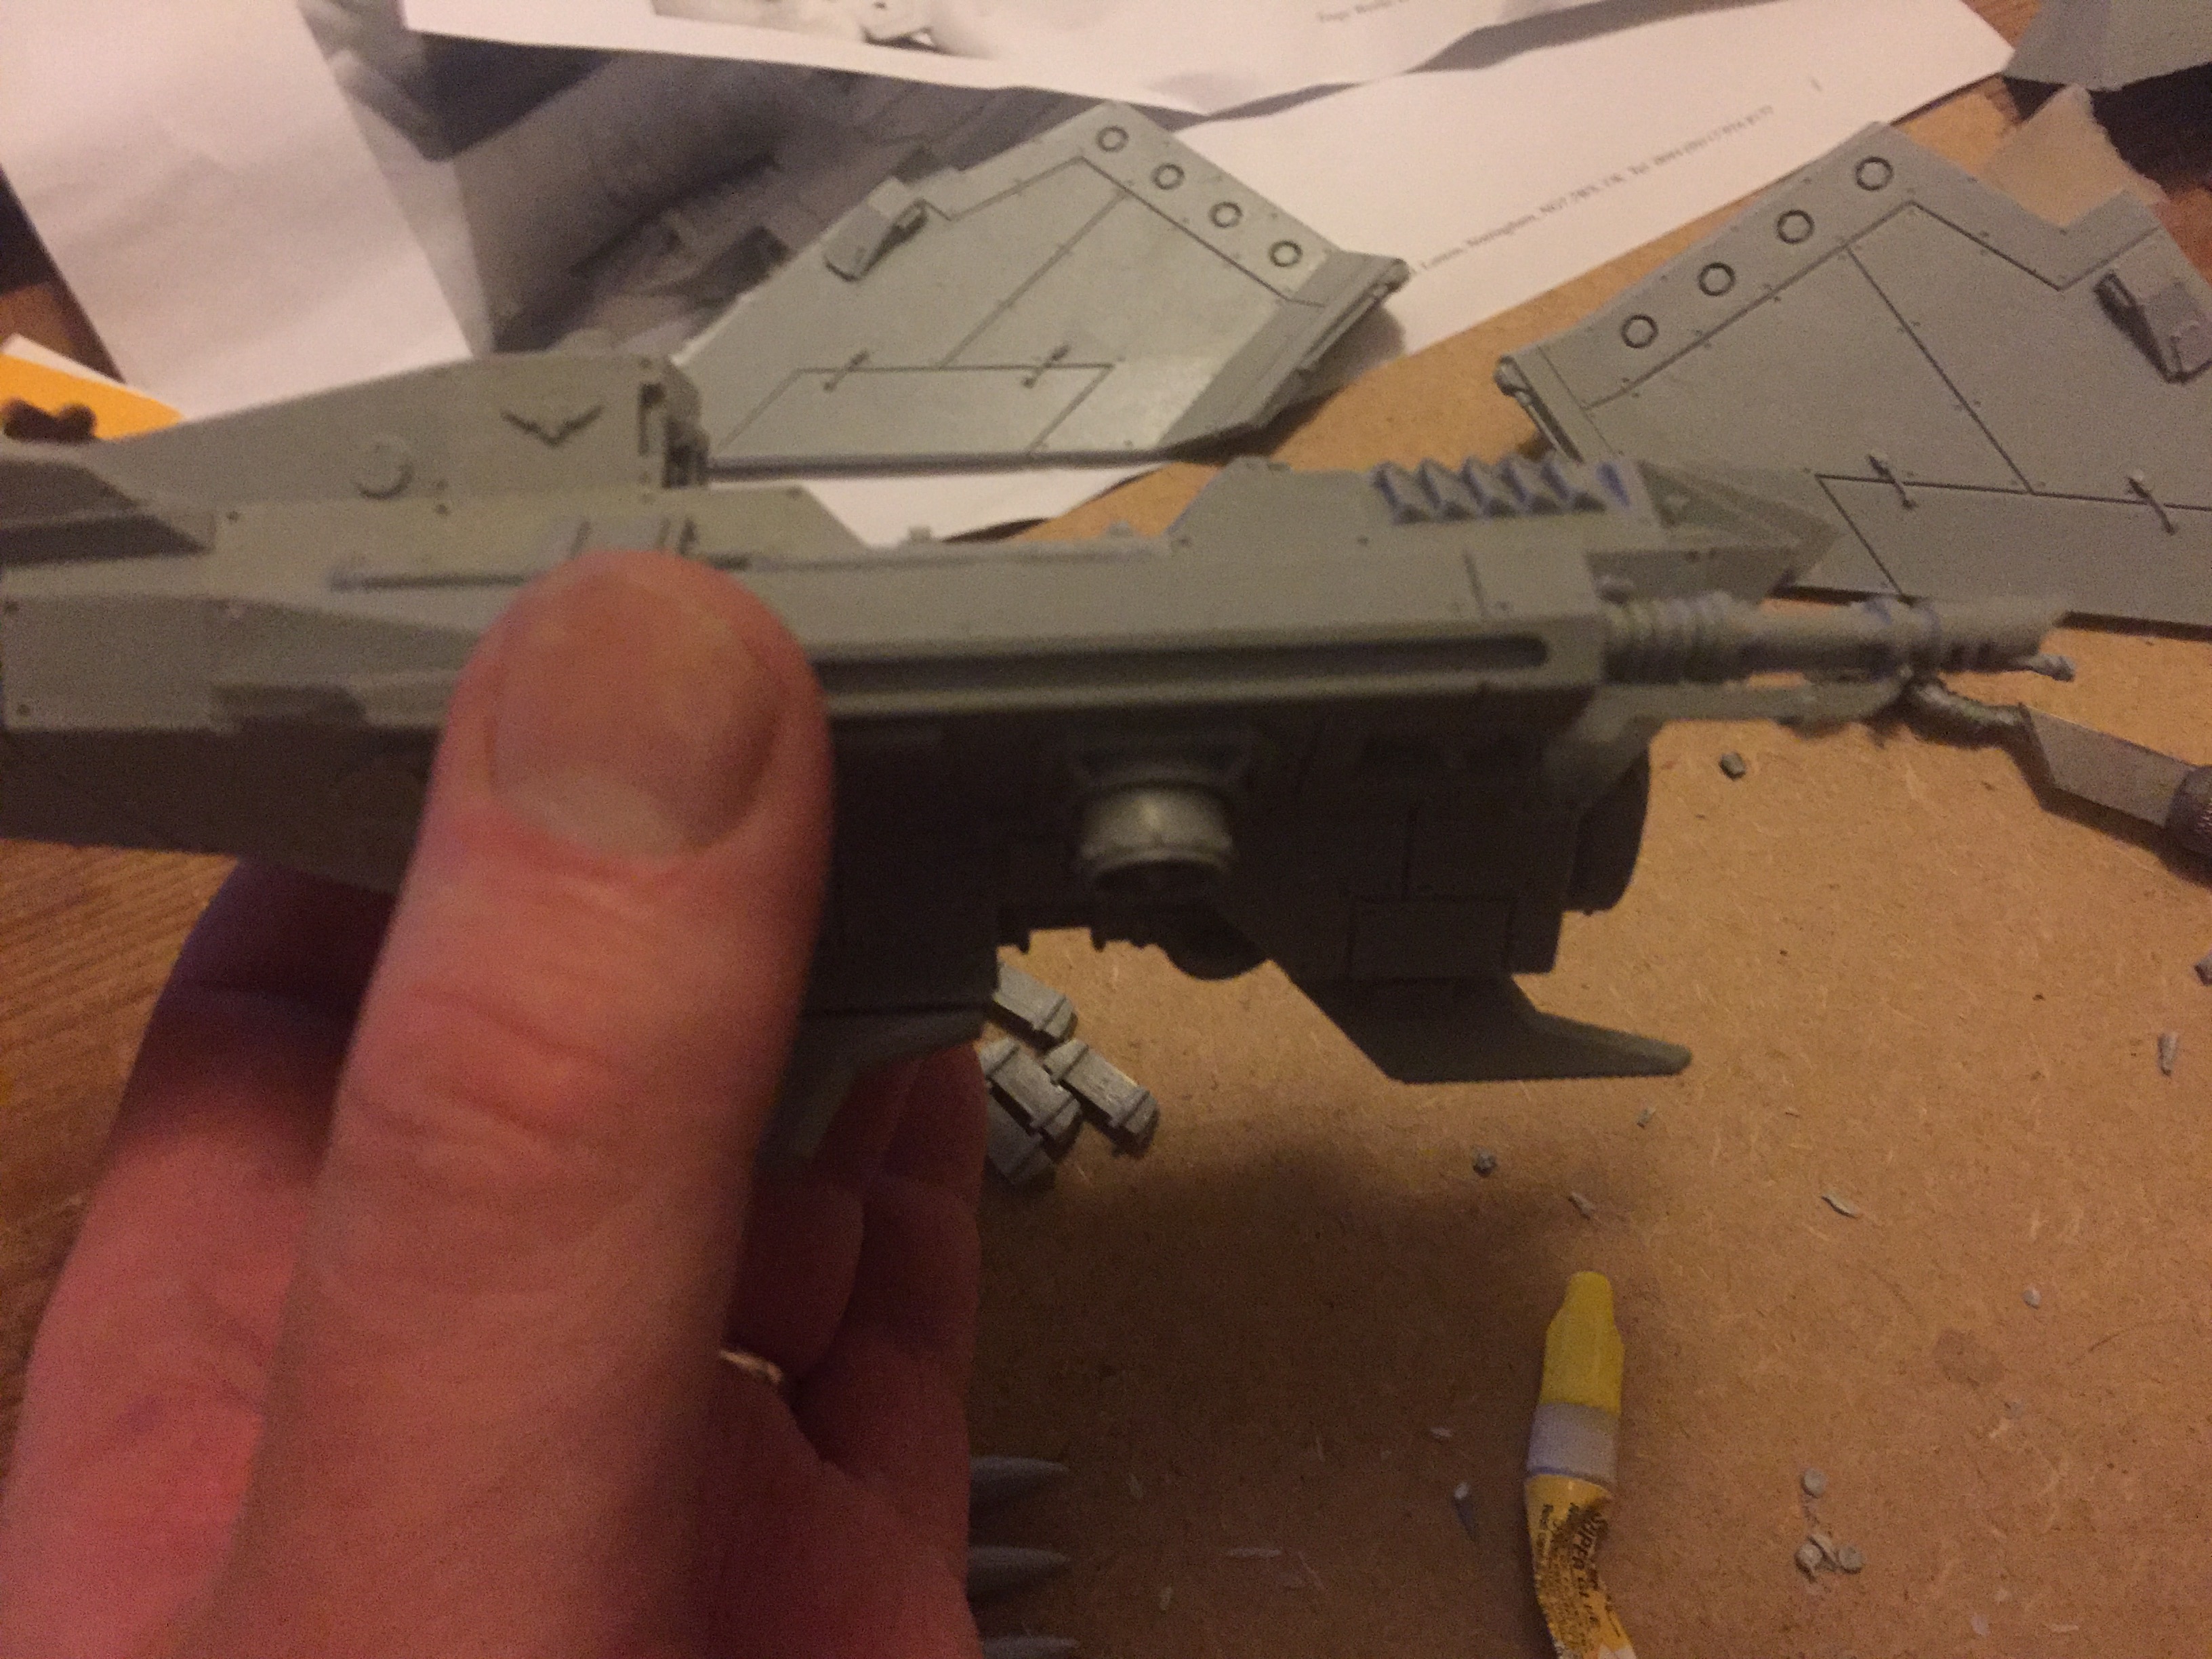 Before using the glue, marry up the components to ensure they fit correctly and carefully adjust as required with a modelling knife and check fit again before gluing. Hold together for at least 60 seconds (without shaking). This kit does not require extra pinning of the components.
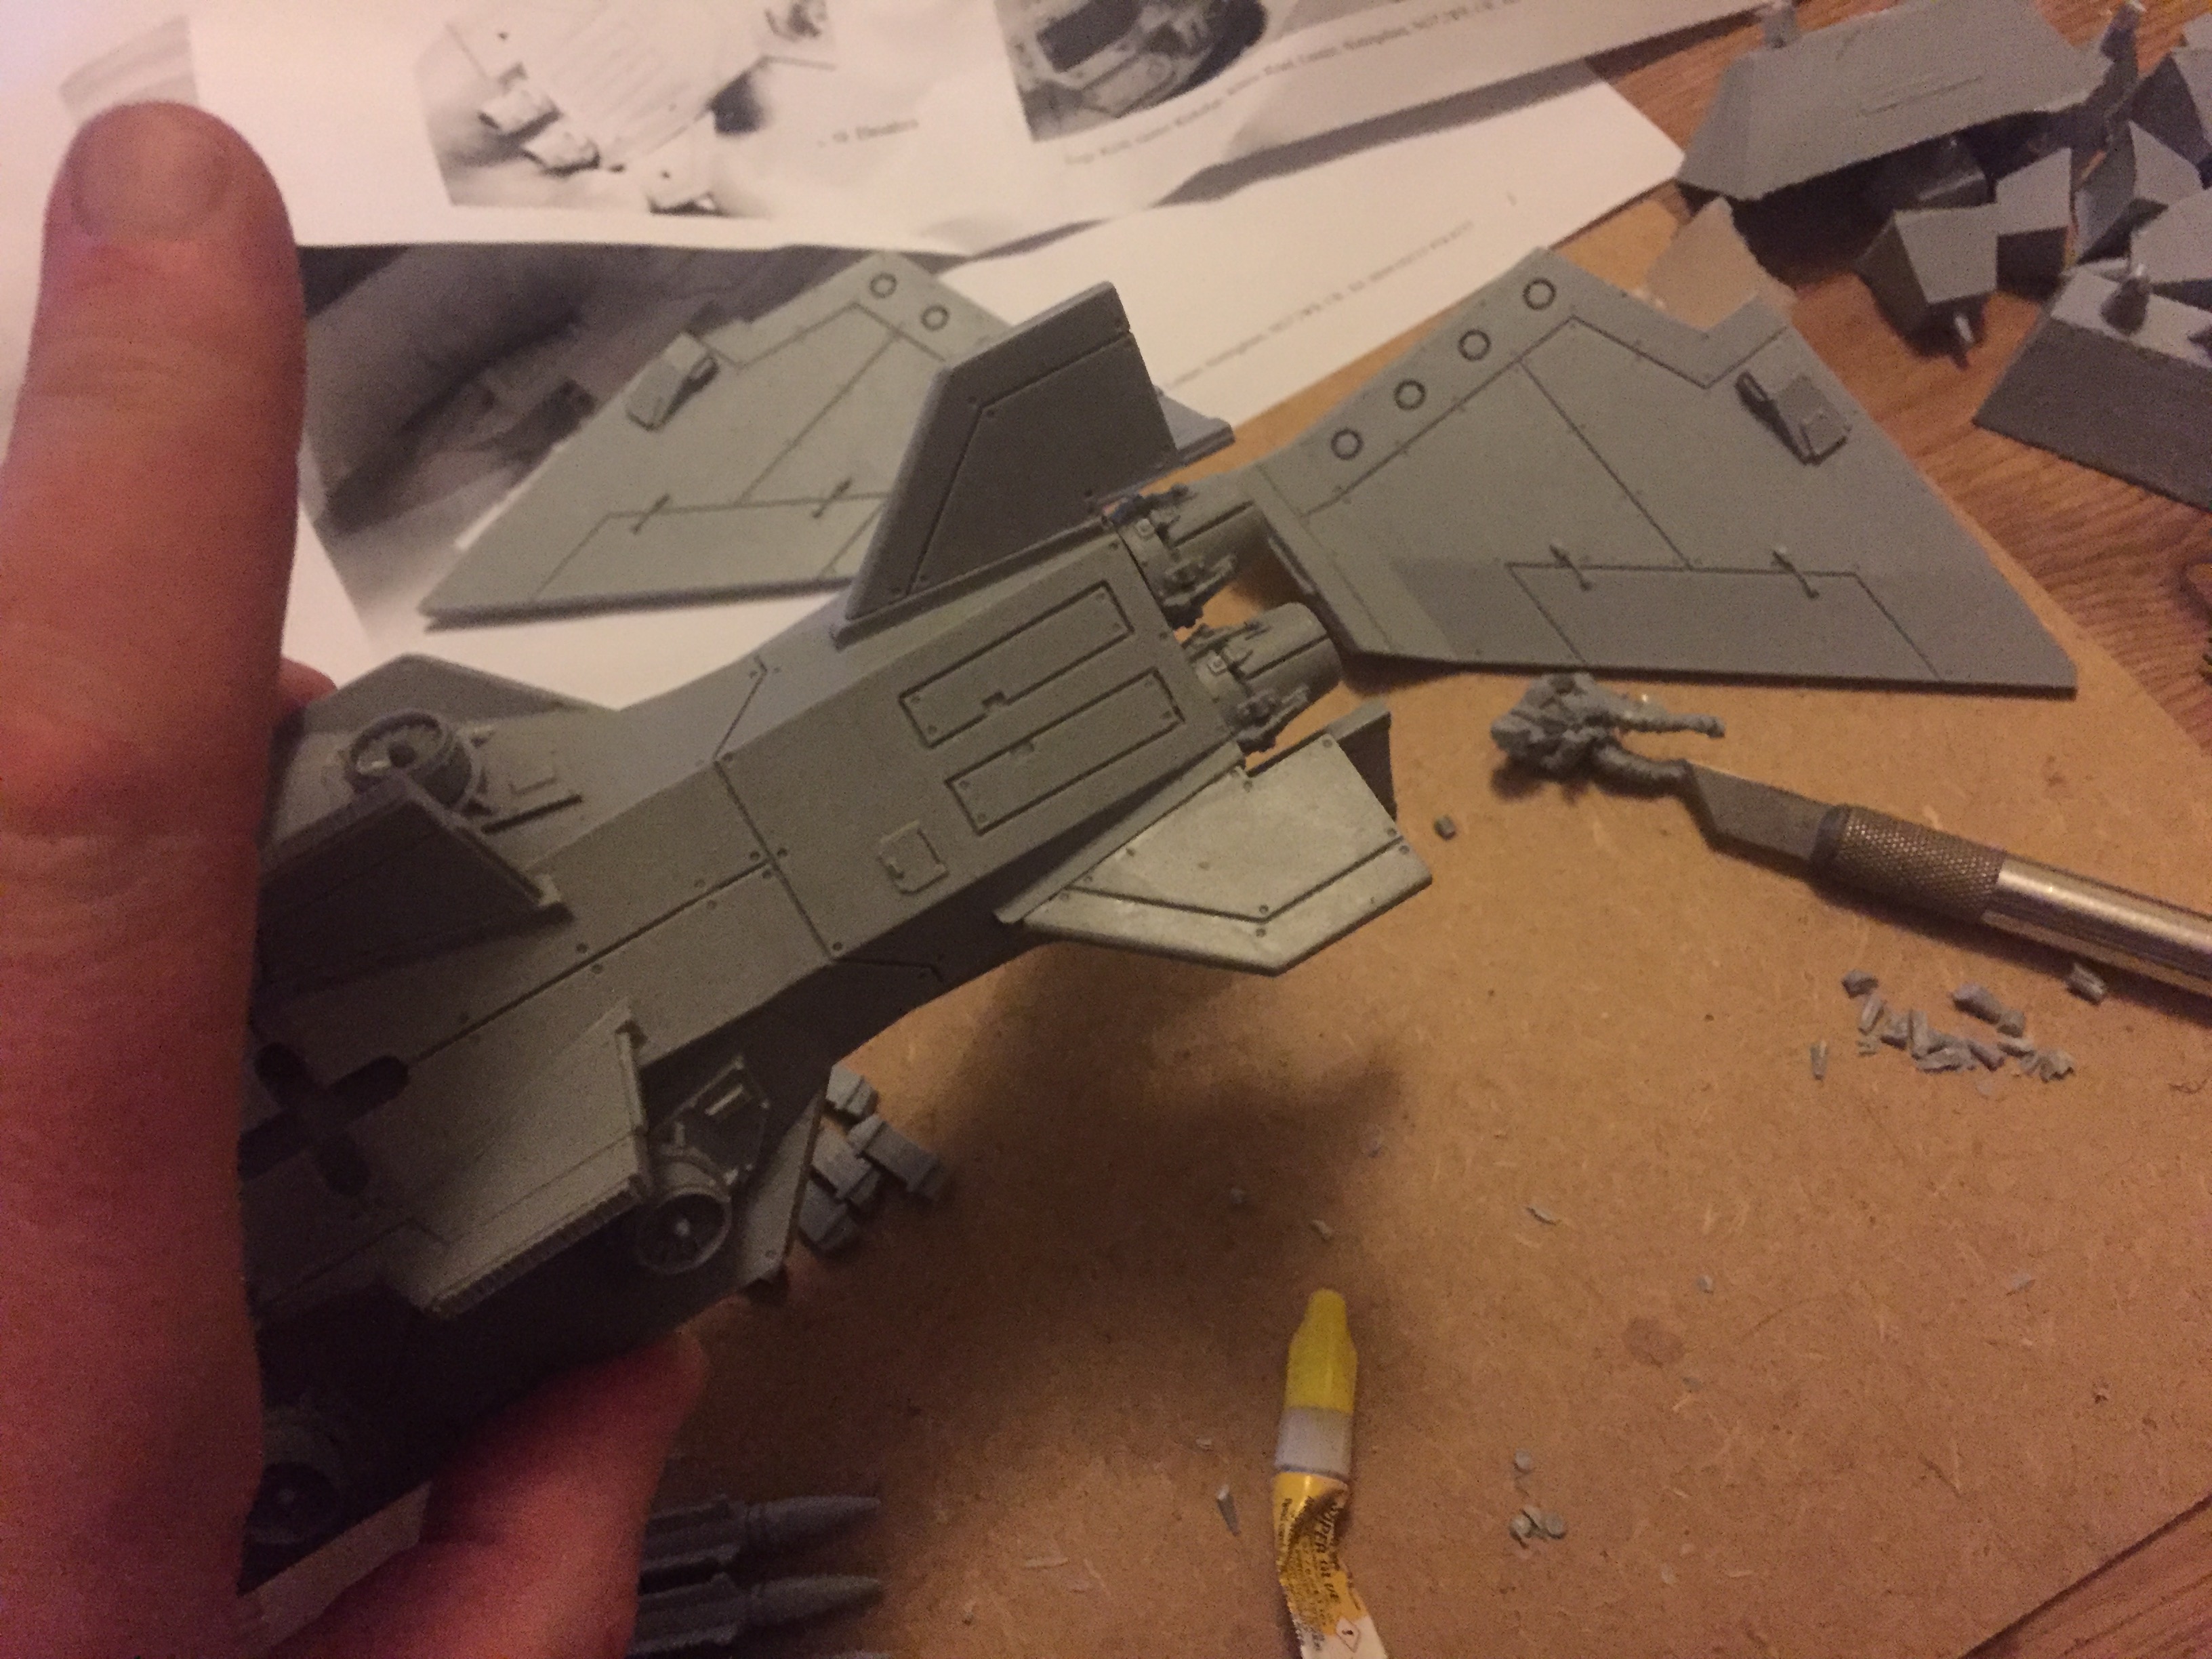
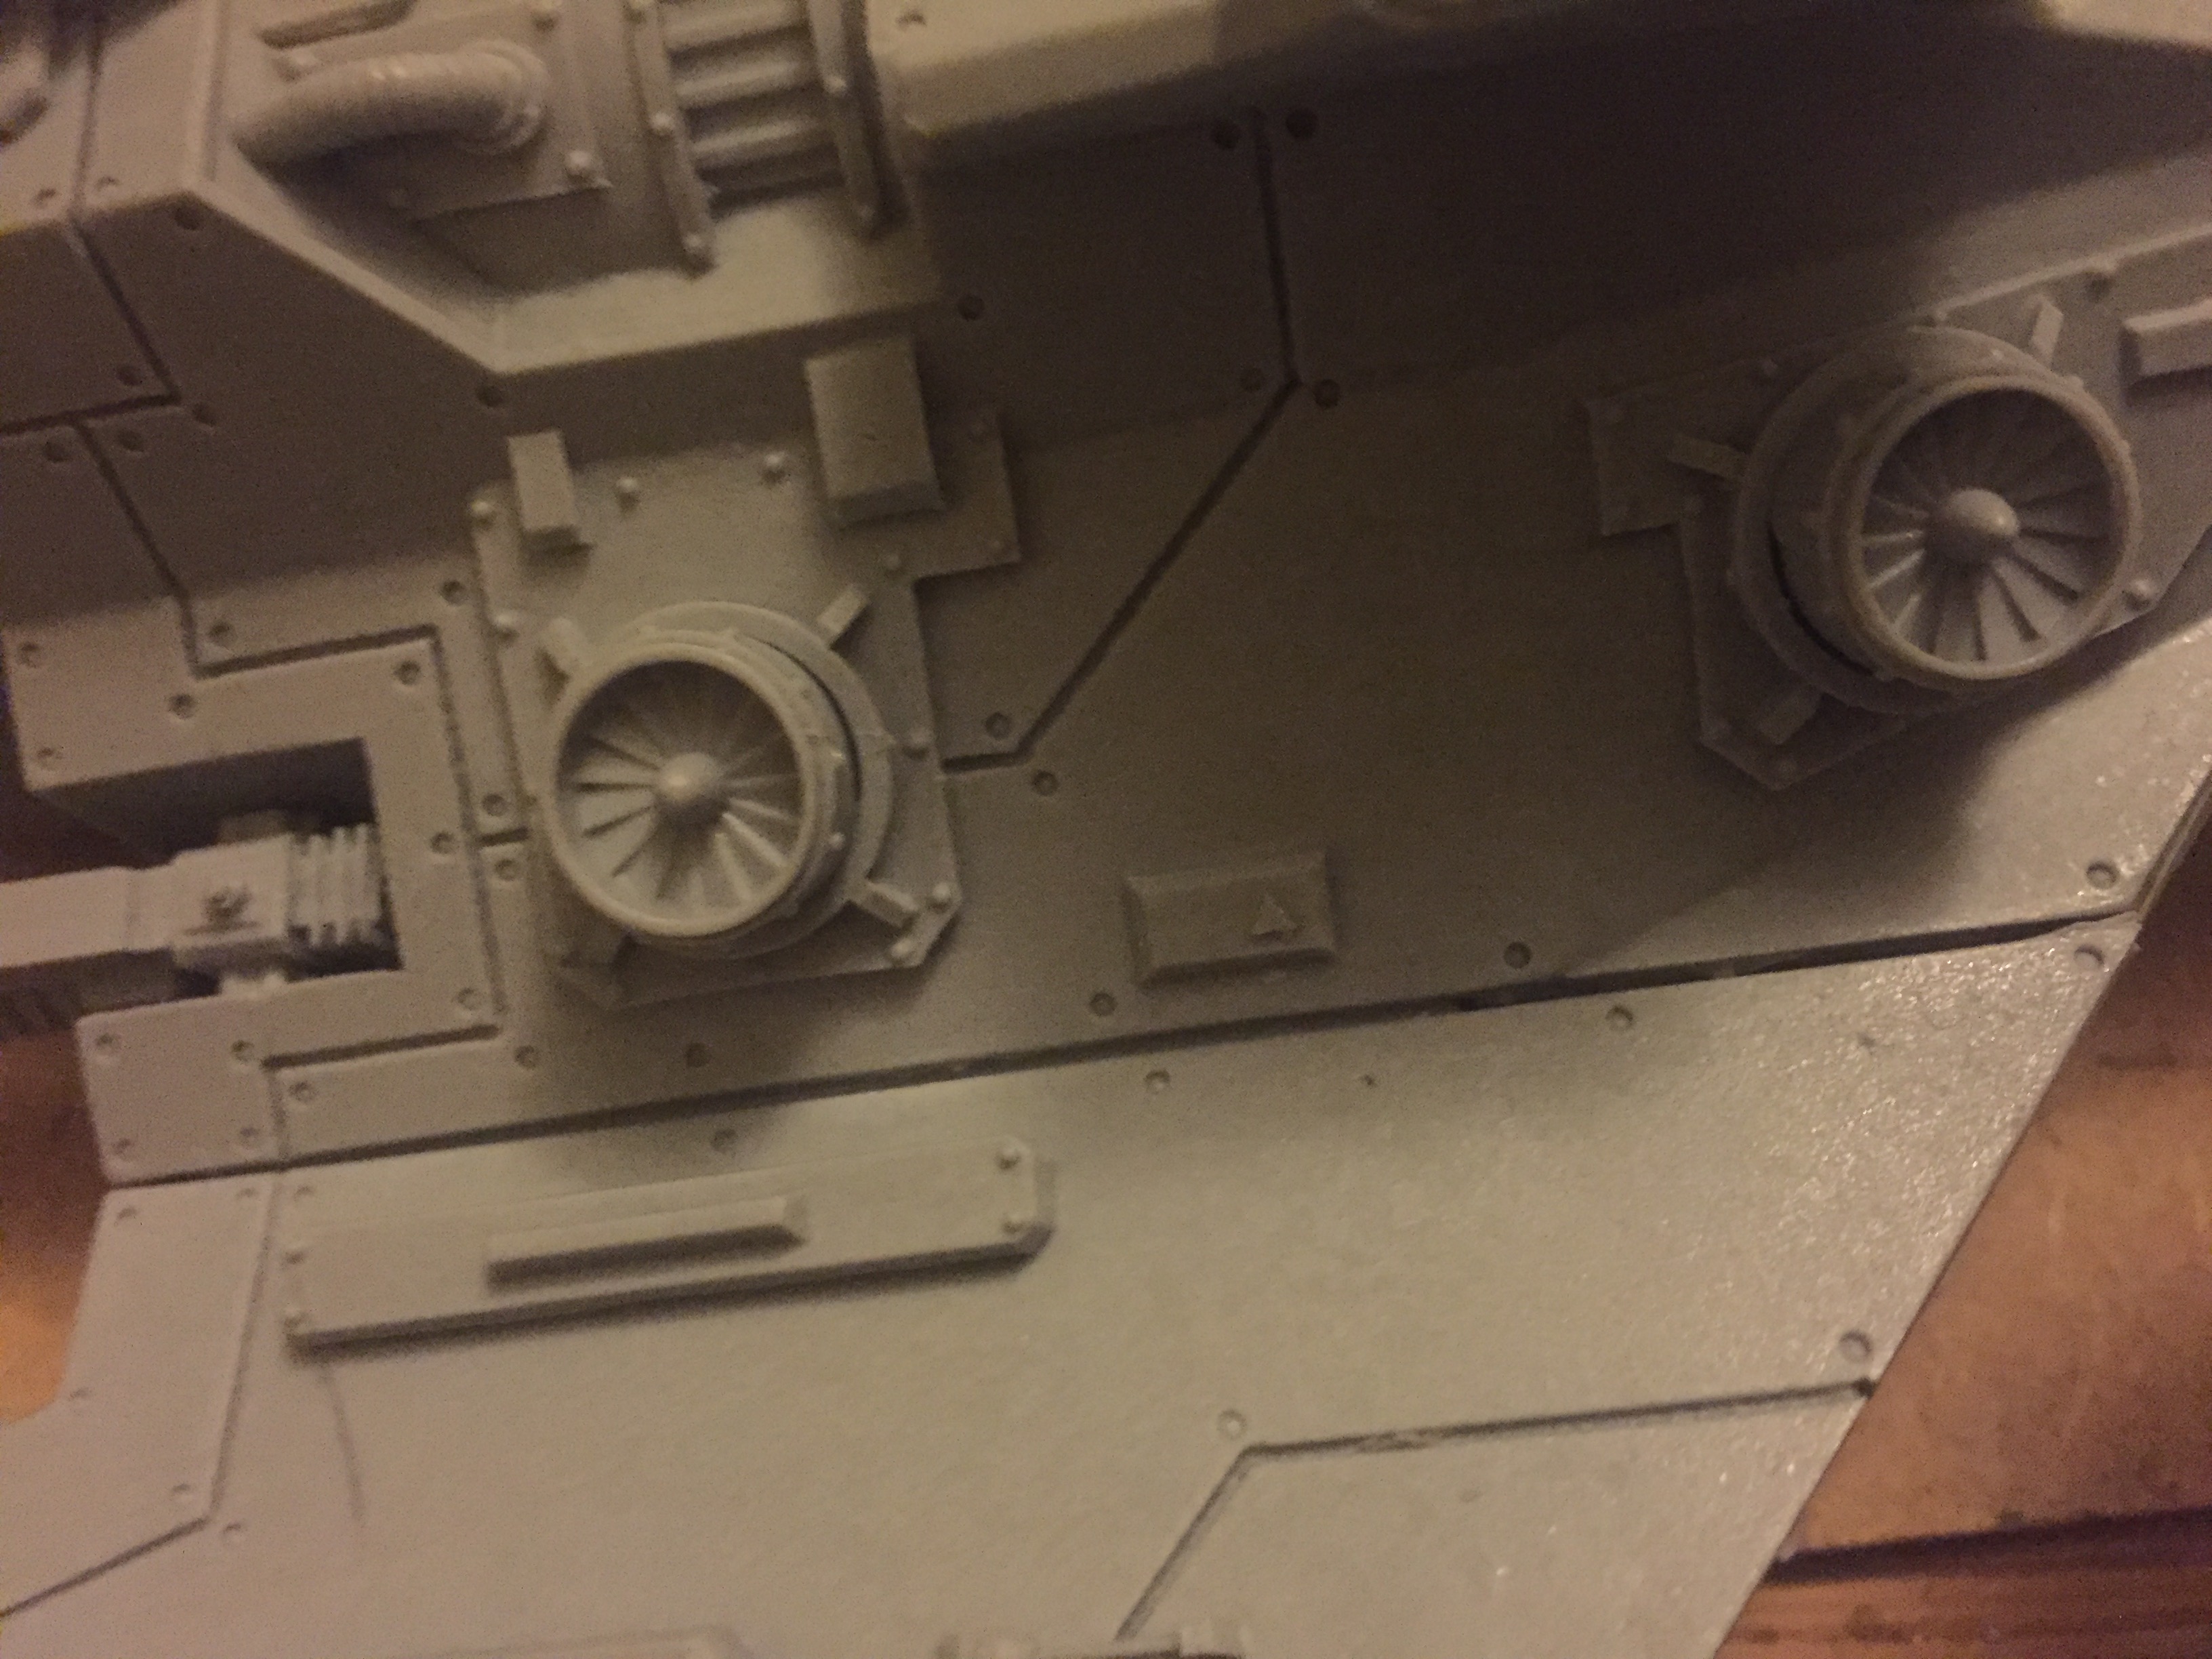
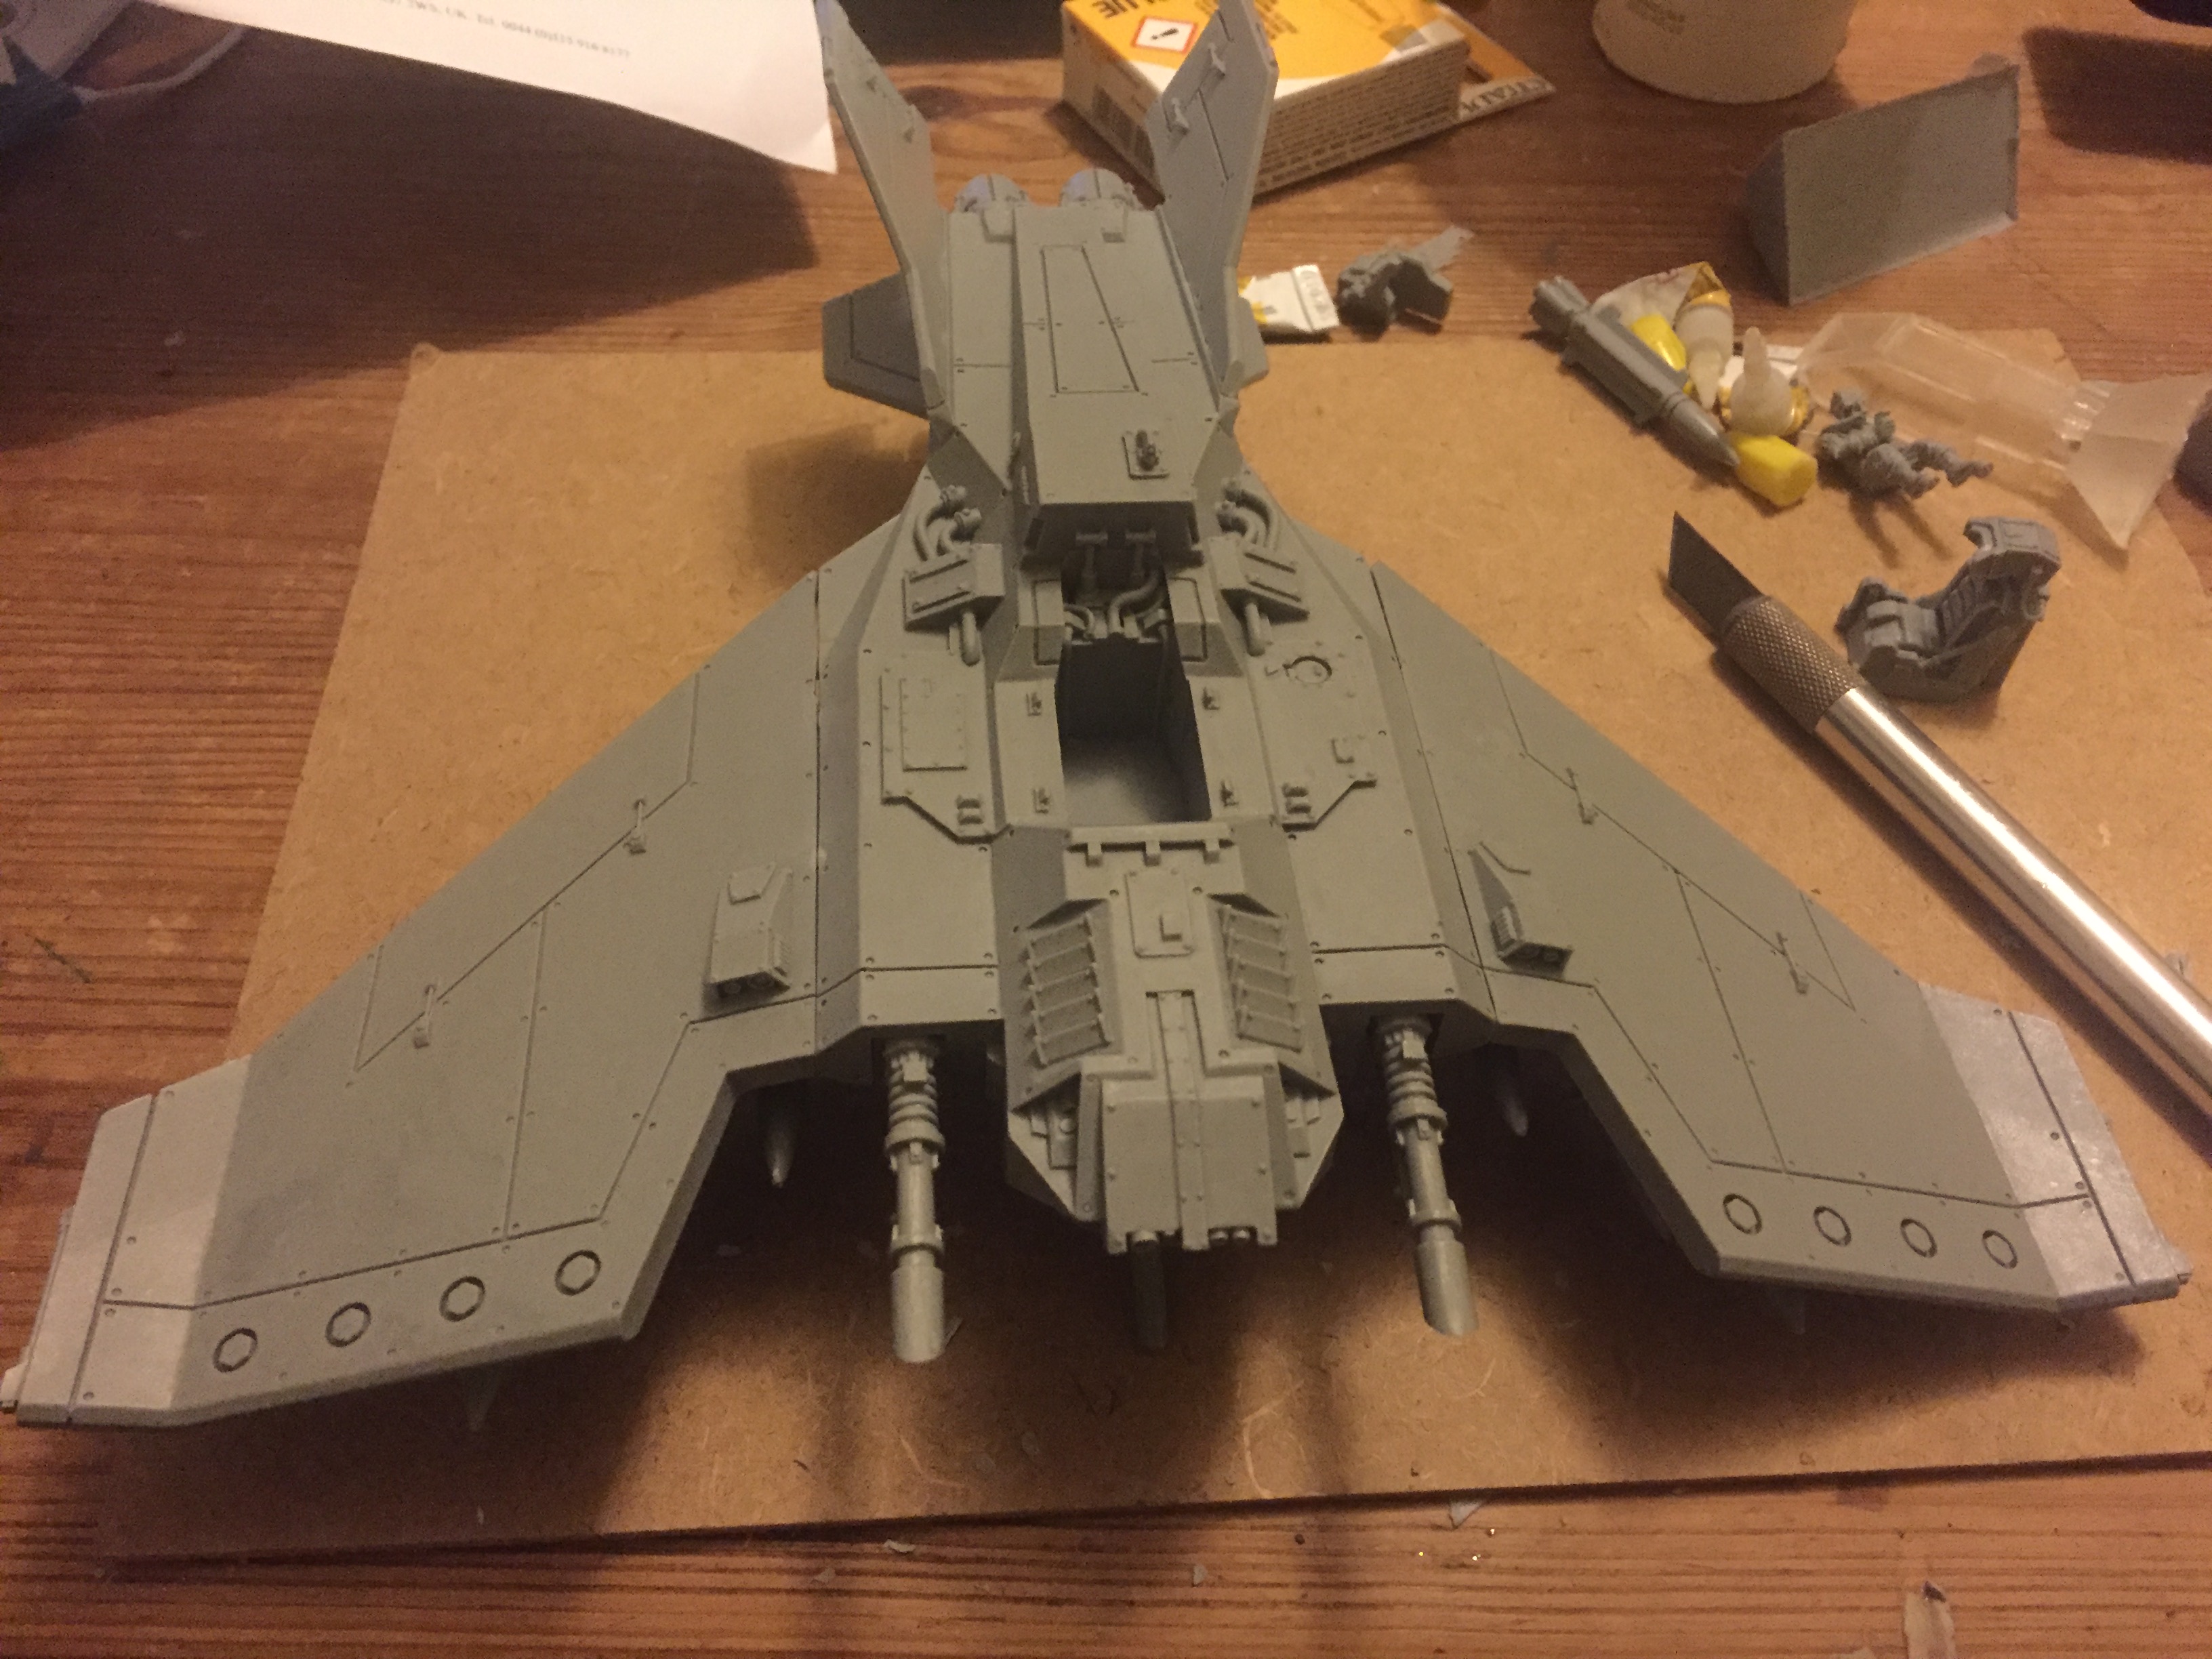
One typical issue with resin kits (especially in my experience with FW kits) components don’t always perfectly fit. This means you will need to use some liquid green stuff to fill the gaps that are created. Now these are only 1-2mm gaps and so using a dental/sculpting tool, it’s fairly easy (with a still hand) to fill the gaps without destroying the detail.
The rear exhausts, the top side of where both wings attach to the main body of the Voss Pattern Lightning, and one side of the underneath of the wing needed some attention. Again, take your time.
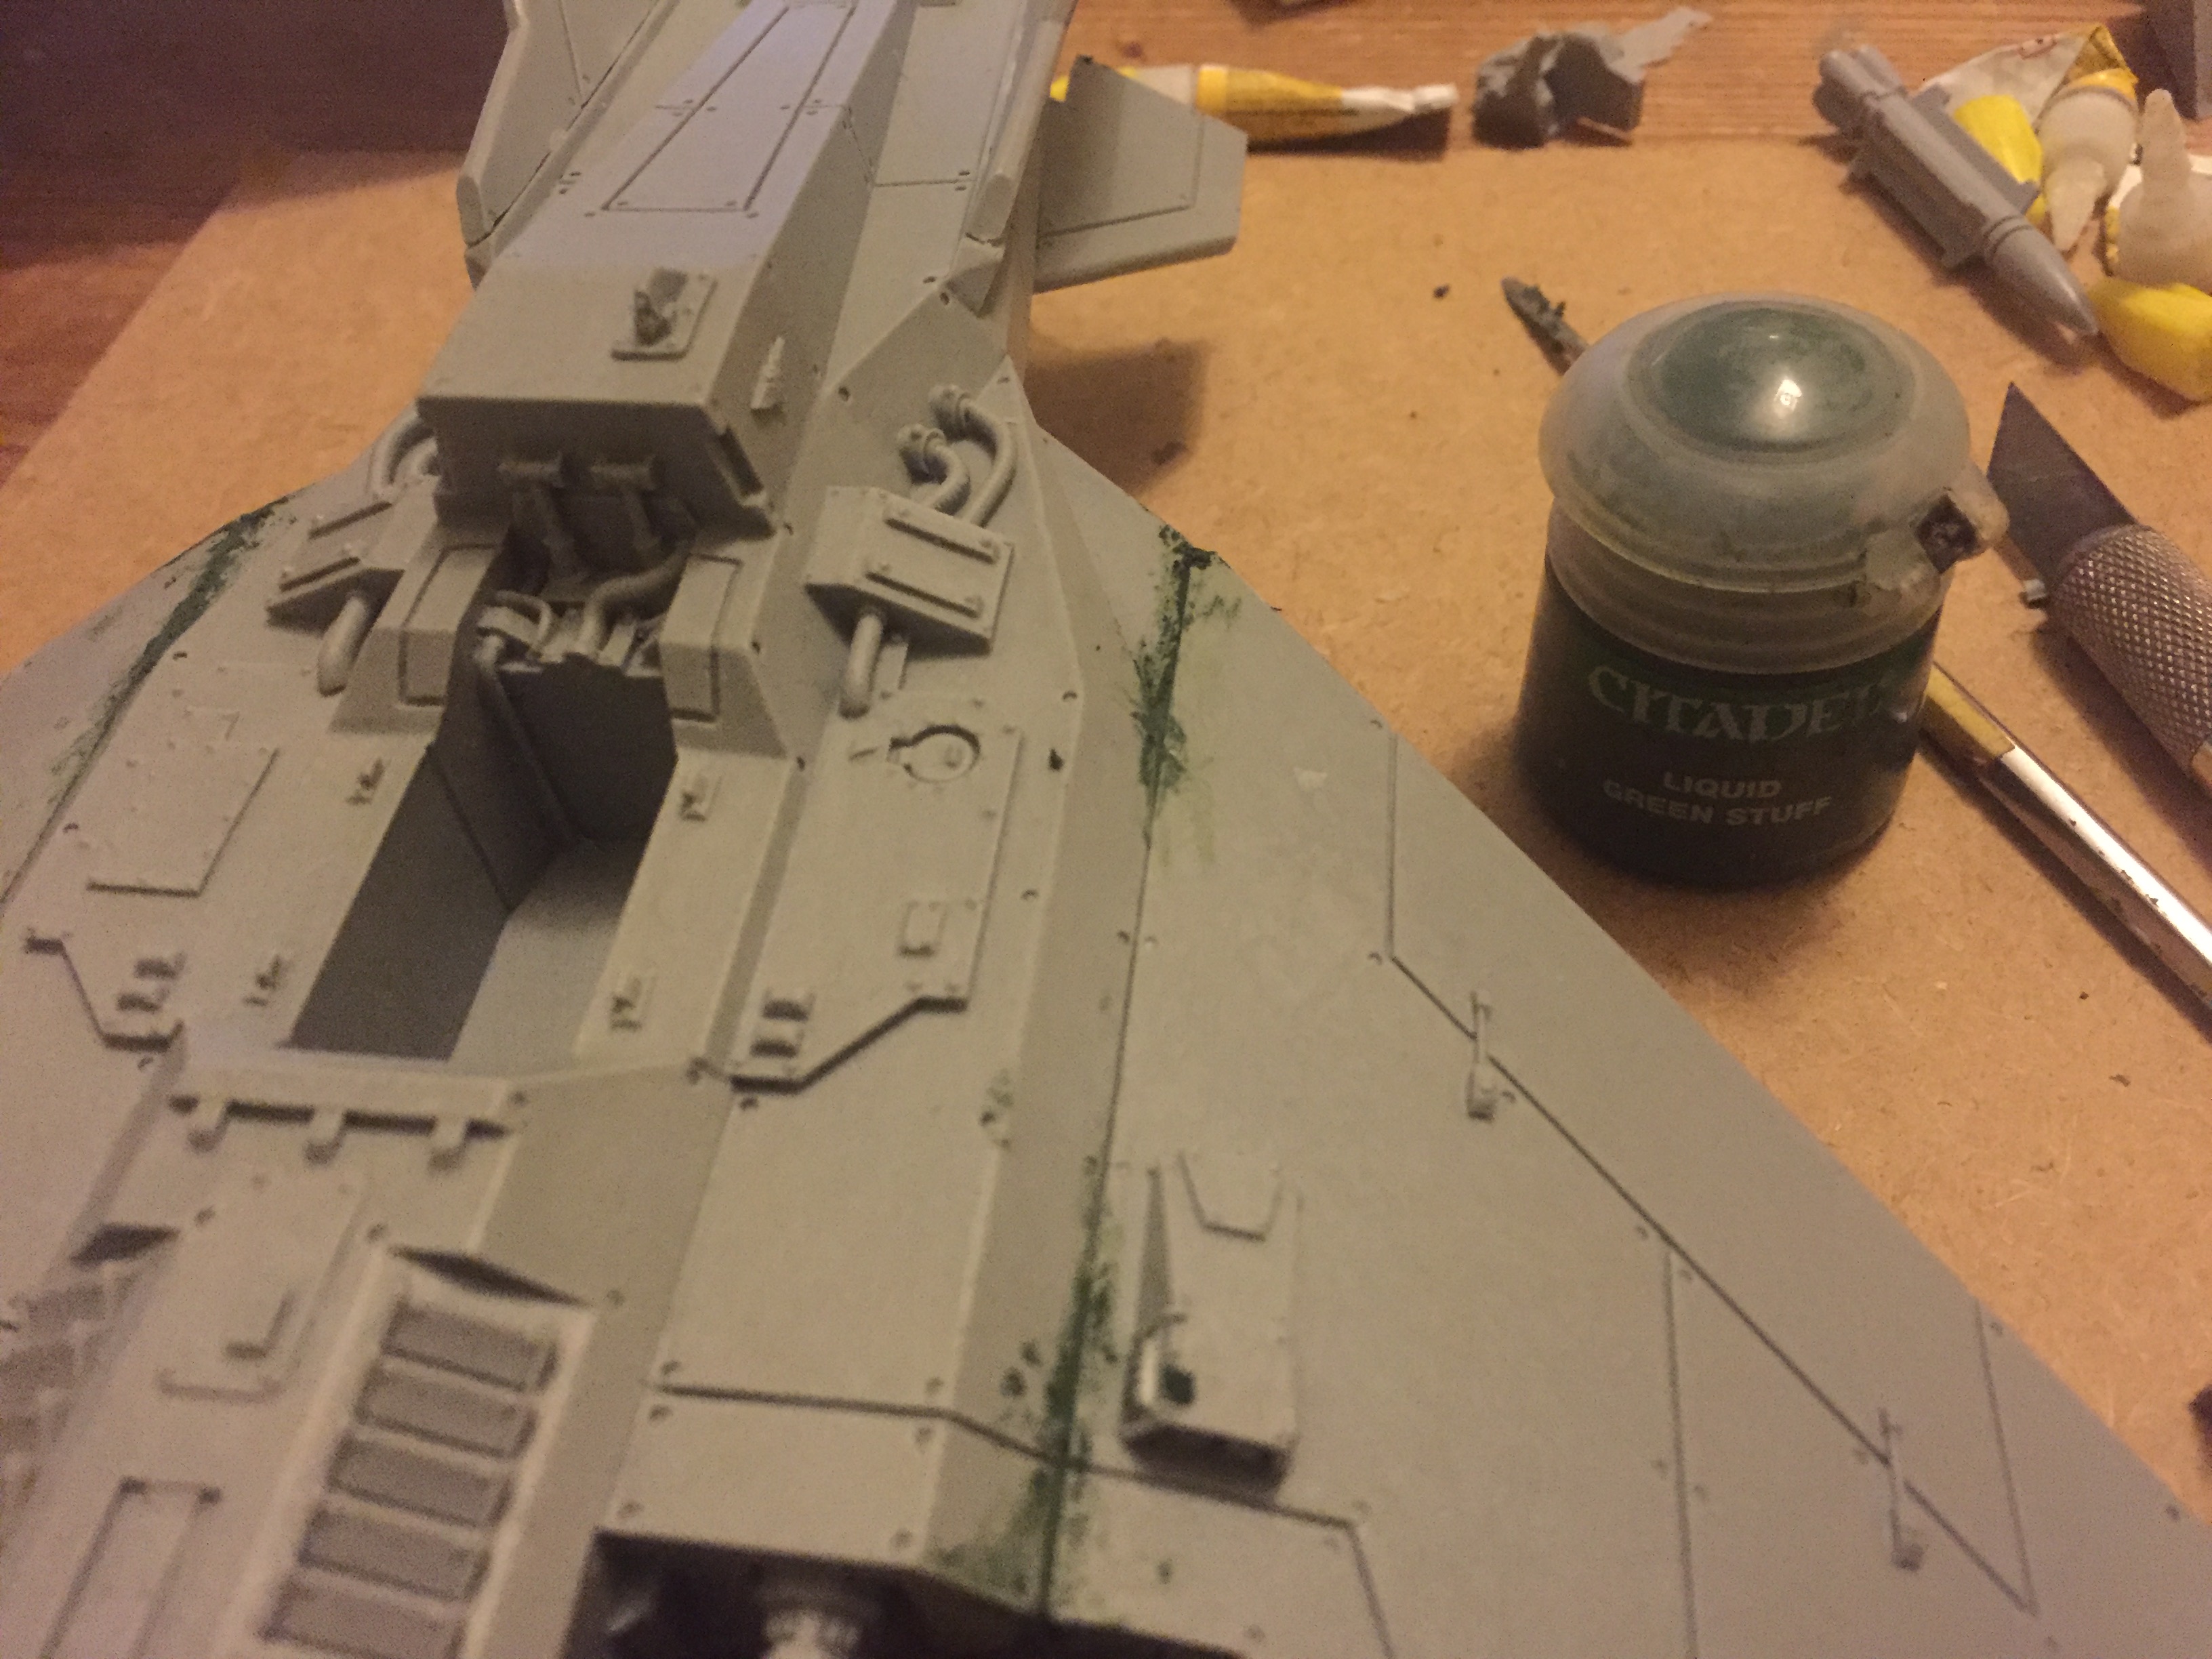 Use liquid green stuff to fill gaps - I’ve again used a Citadel product in this instance.

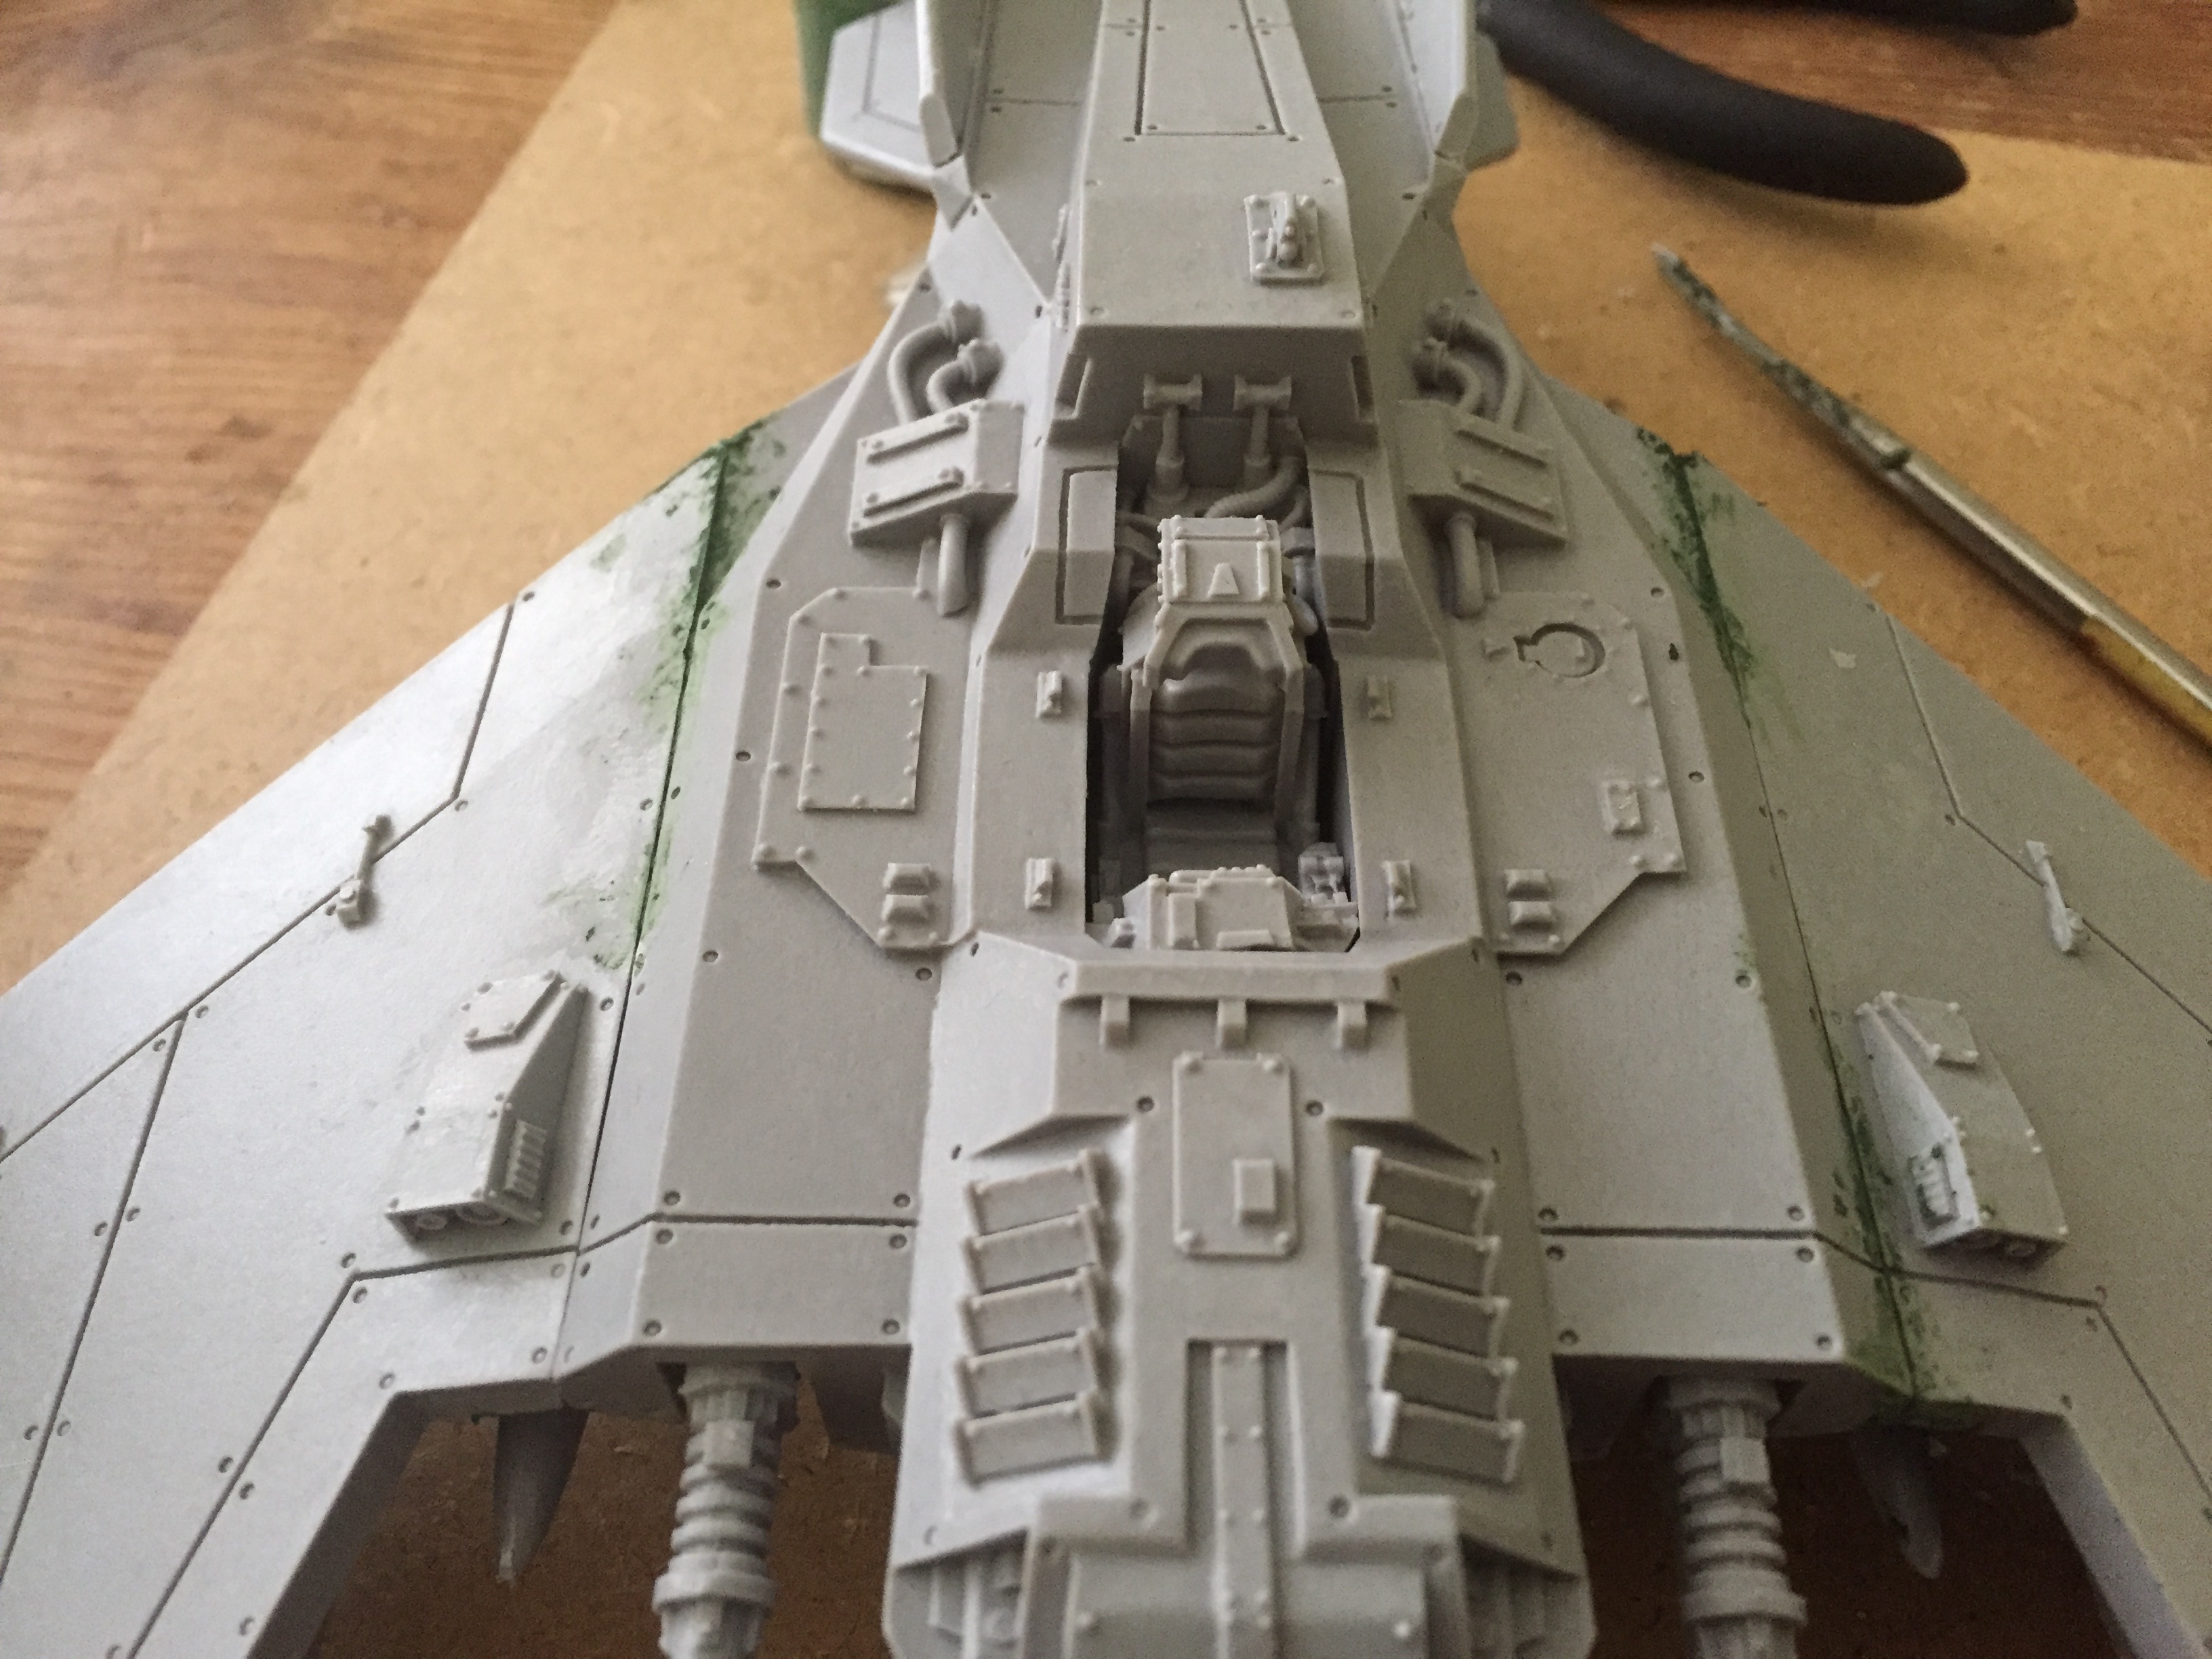
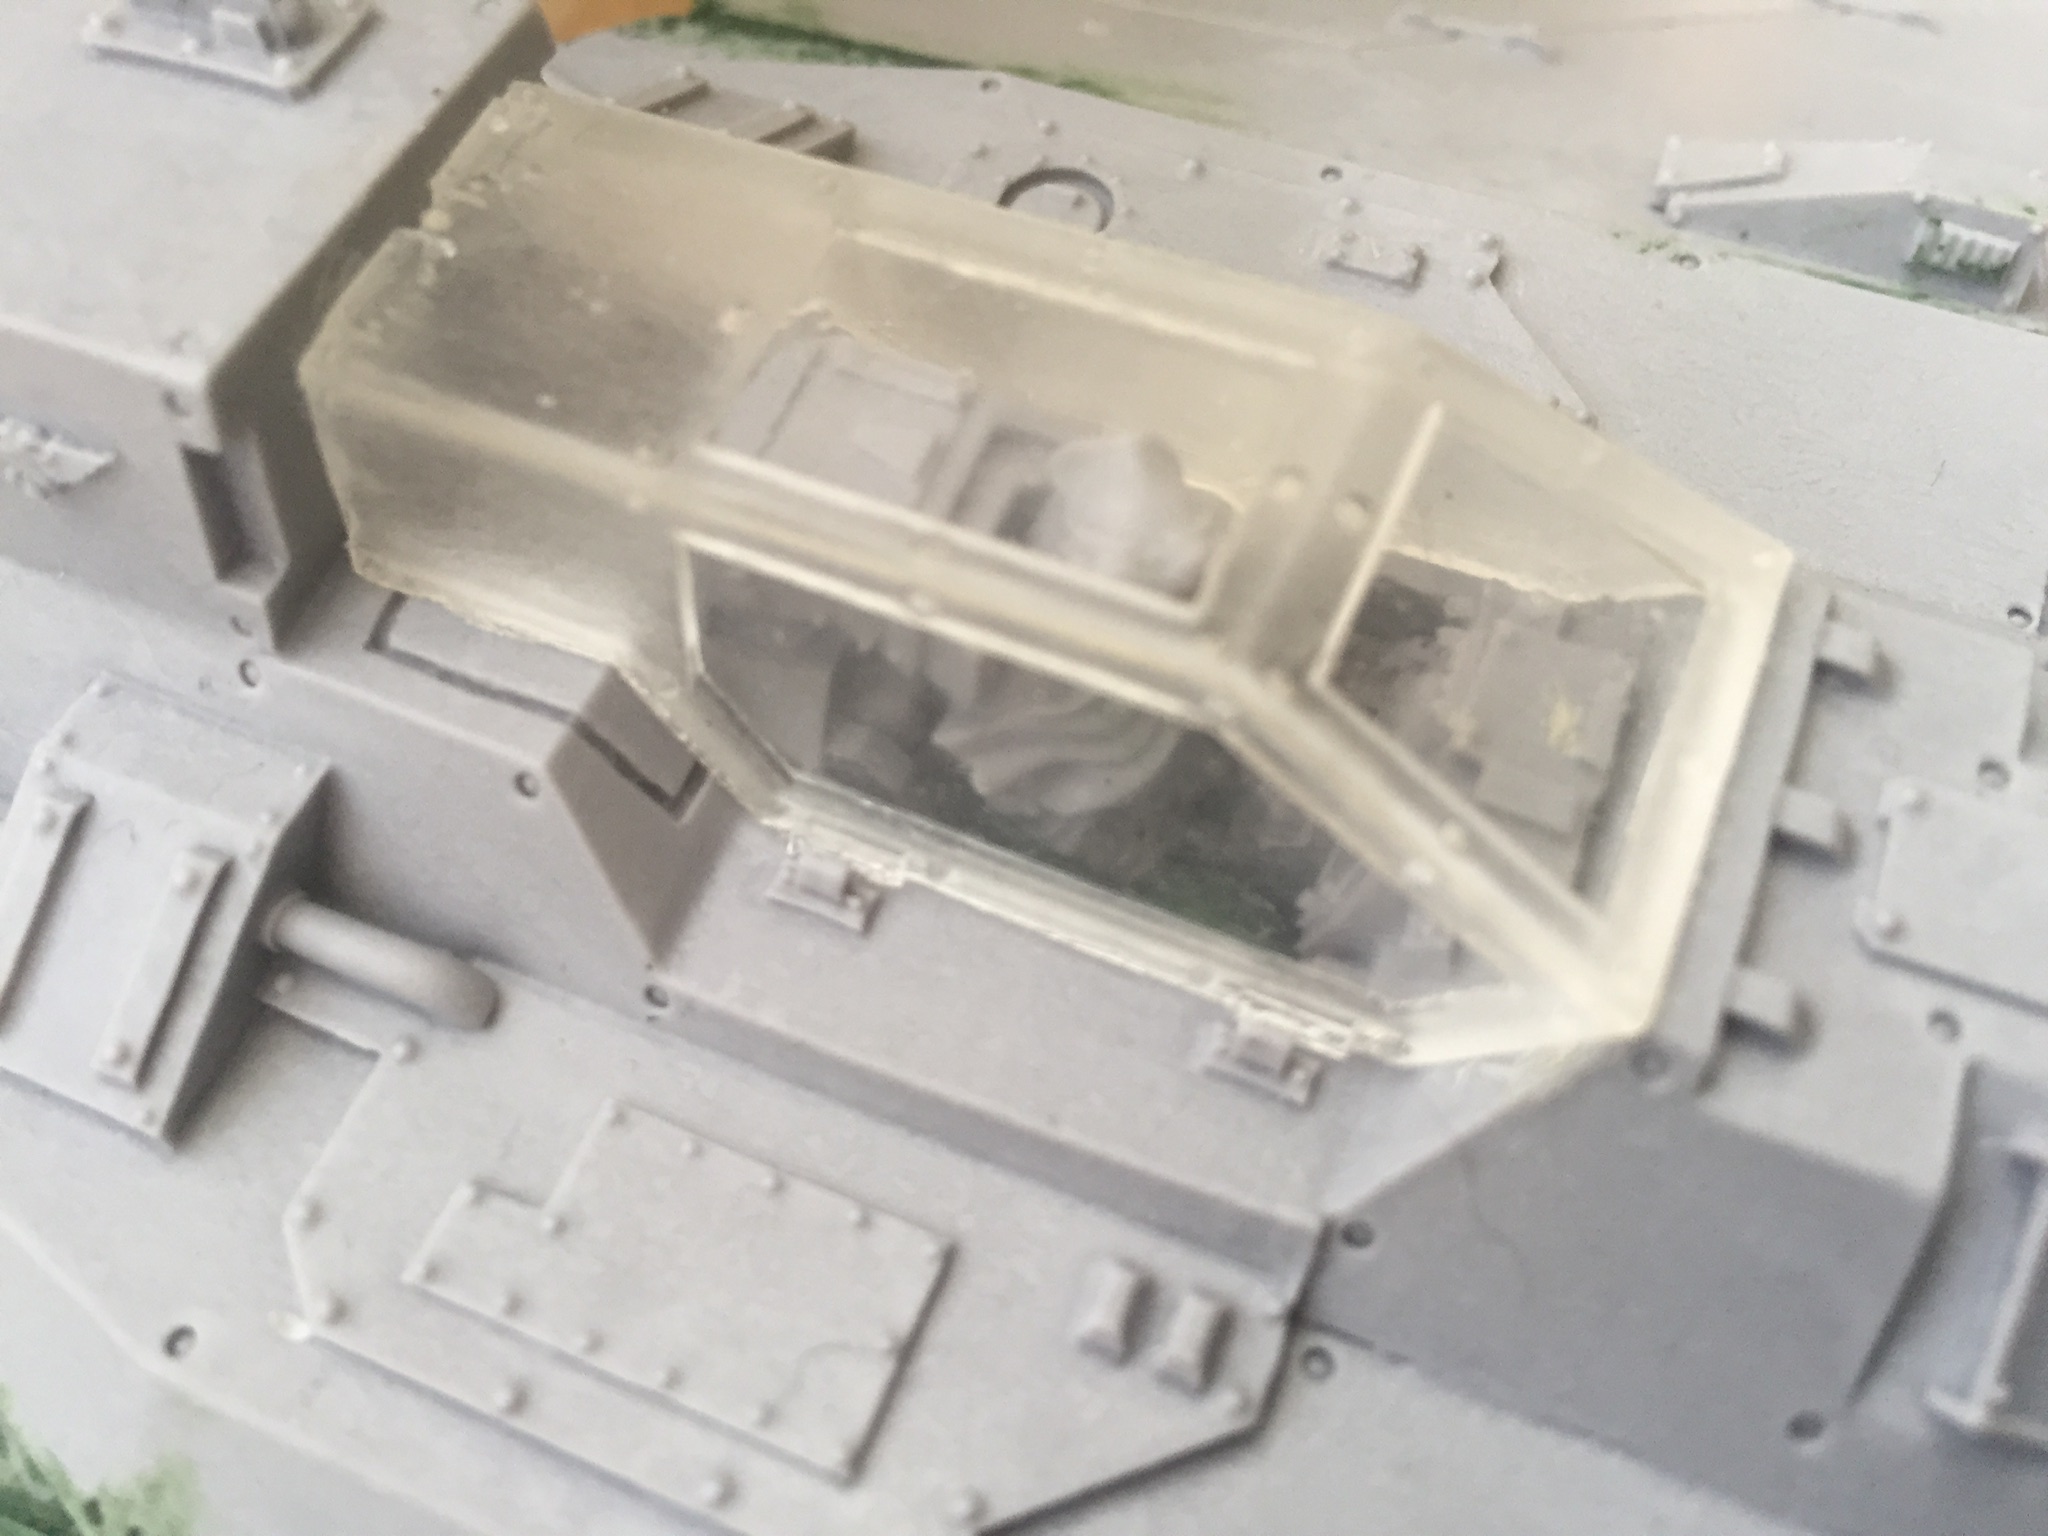
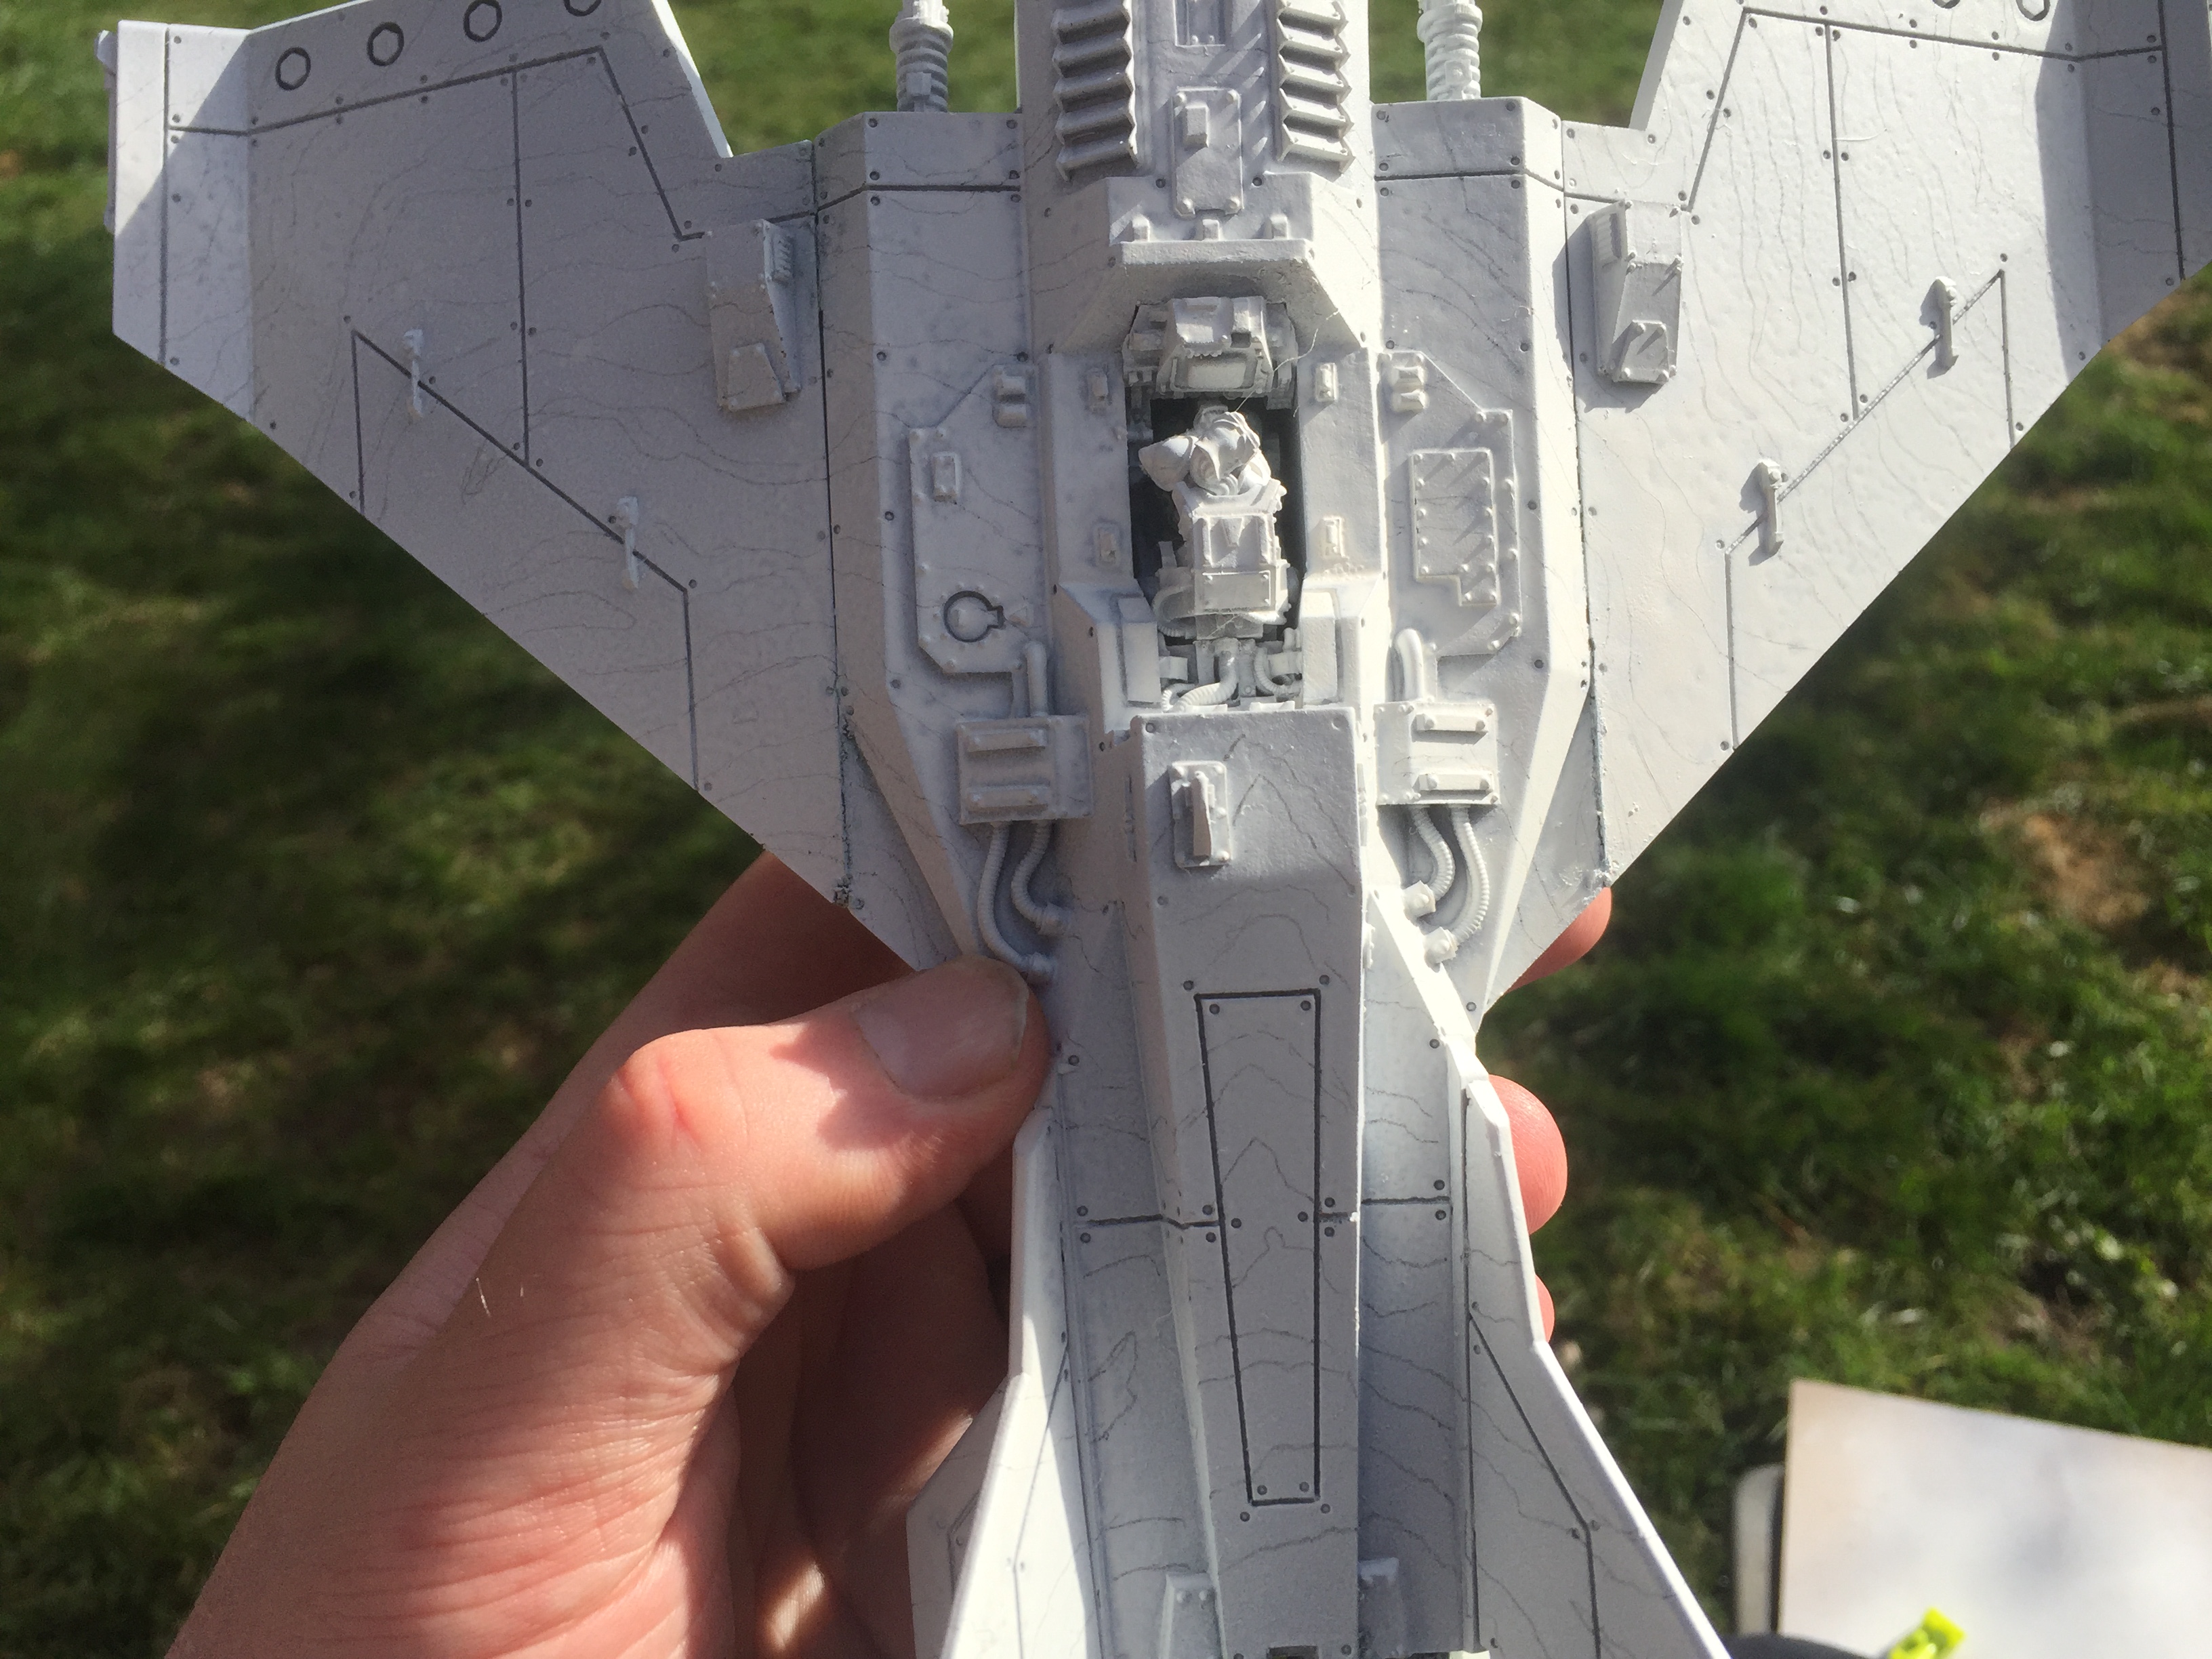
Note, the pilot’s seat has not been glued in, but has had the excess filed down to ensure a snug fit. I will be removing it to make a customised pilot which I will glue into the seat before reinserting back into the main body of the Lightning. The canopy will remain detached and painted separately until the very end once the craft and pilot have been painted.
Time taken:
Construction (gluing) 2 Hours
Gap filling with green stuff and drying time 1 Hour
Voss Pattern Lightning - Kit-bashed Pilot
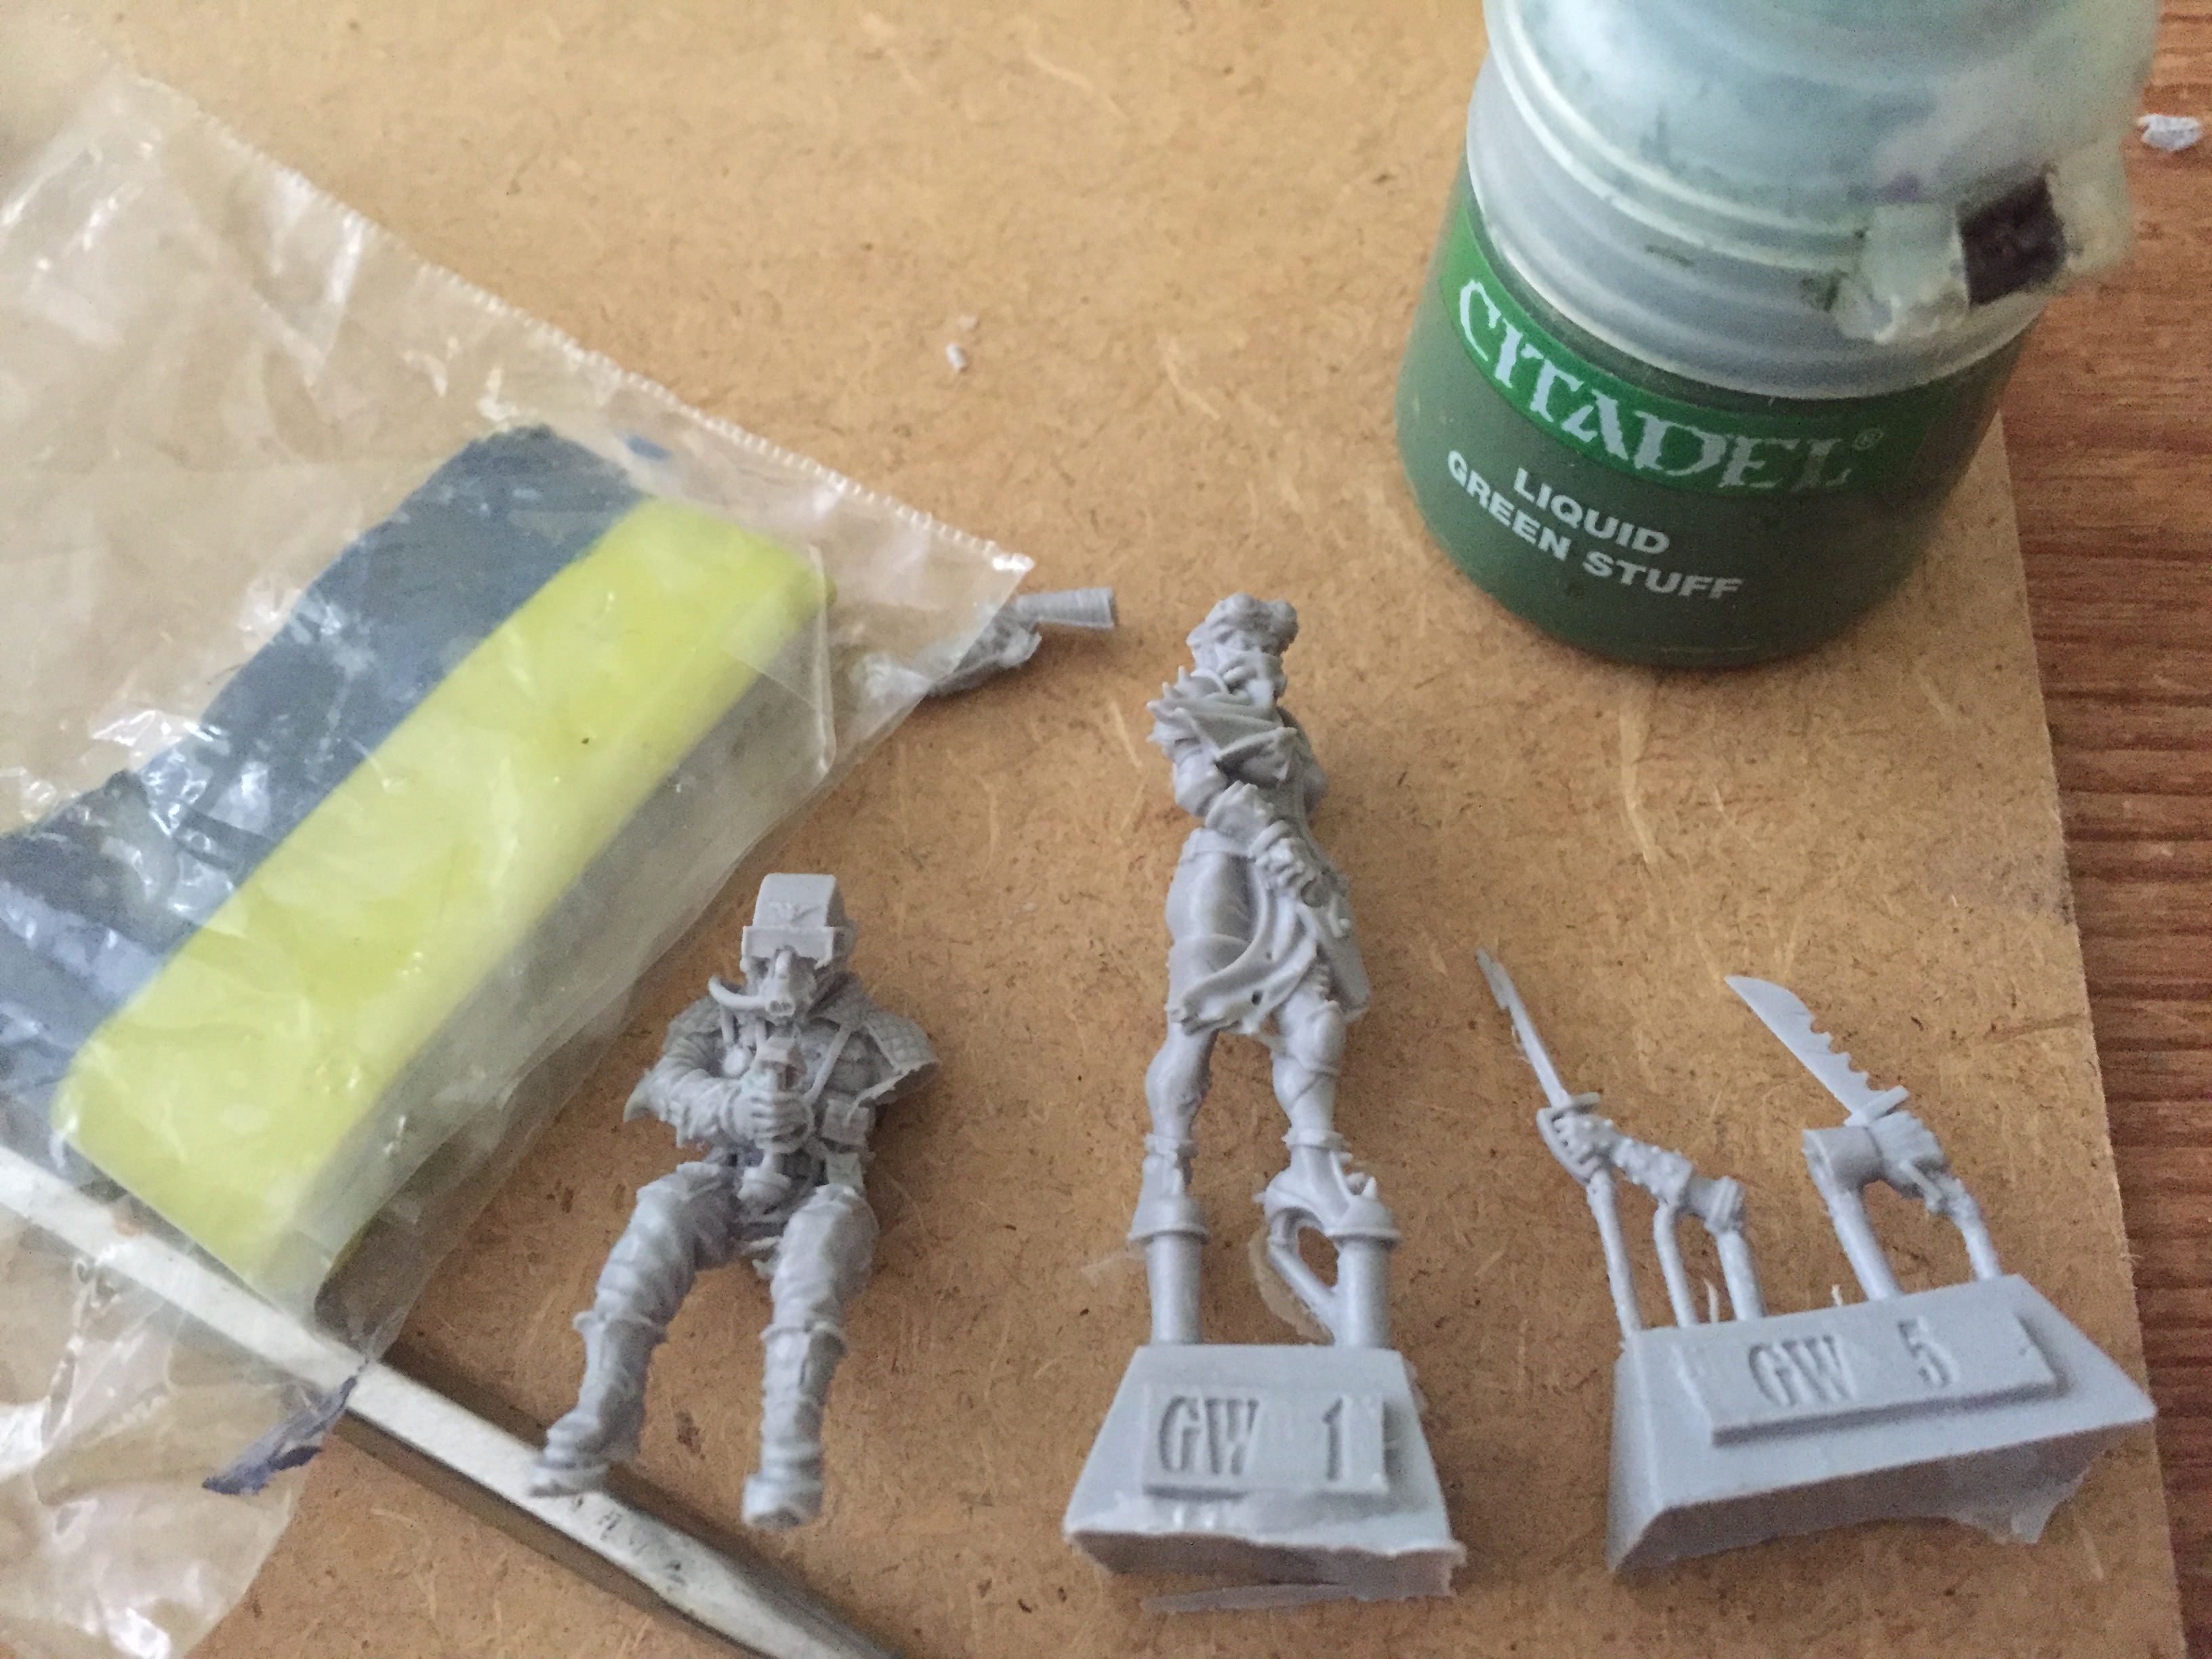
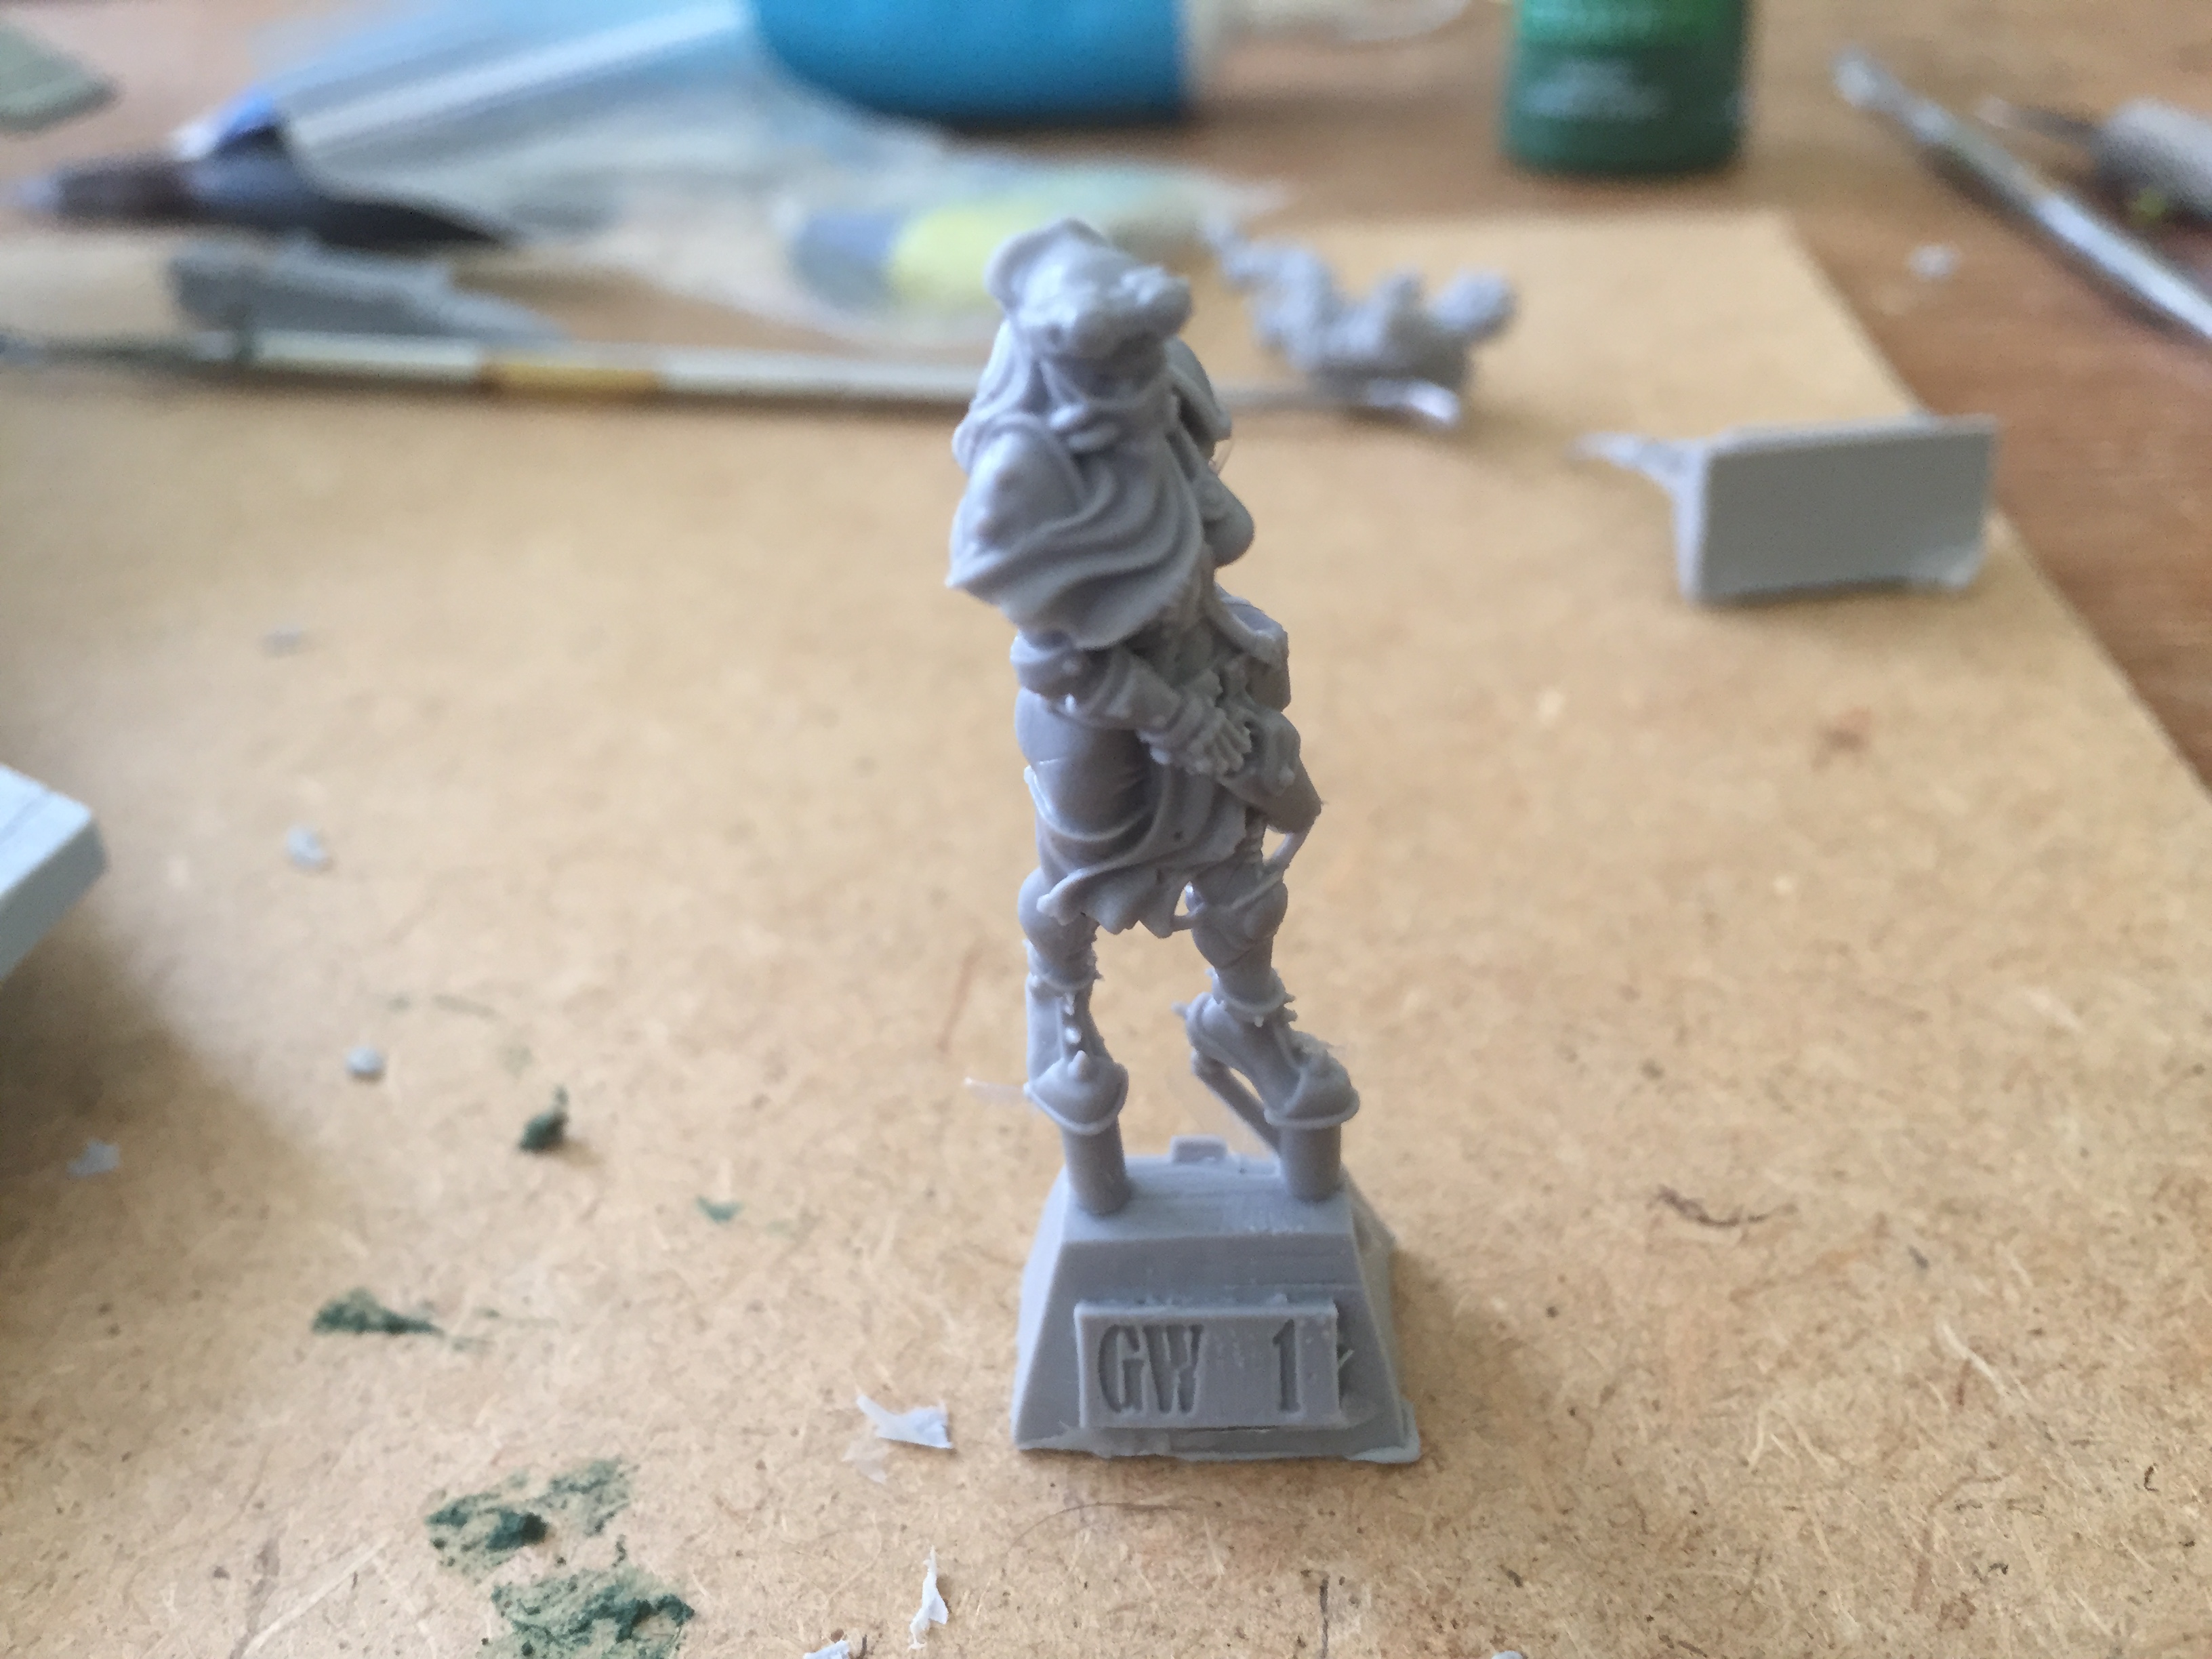
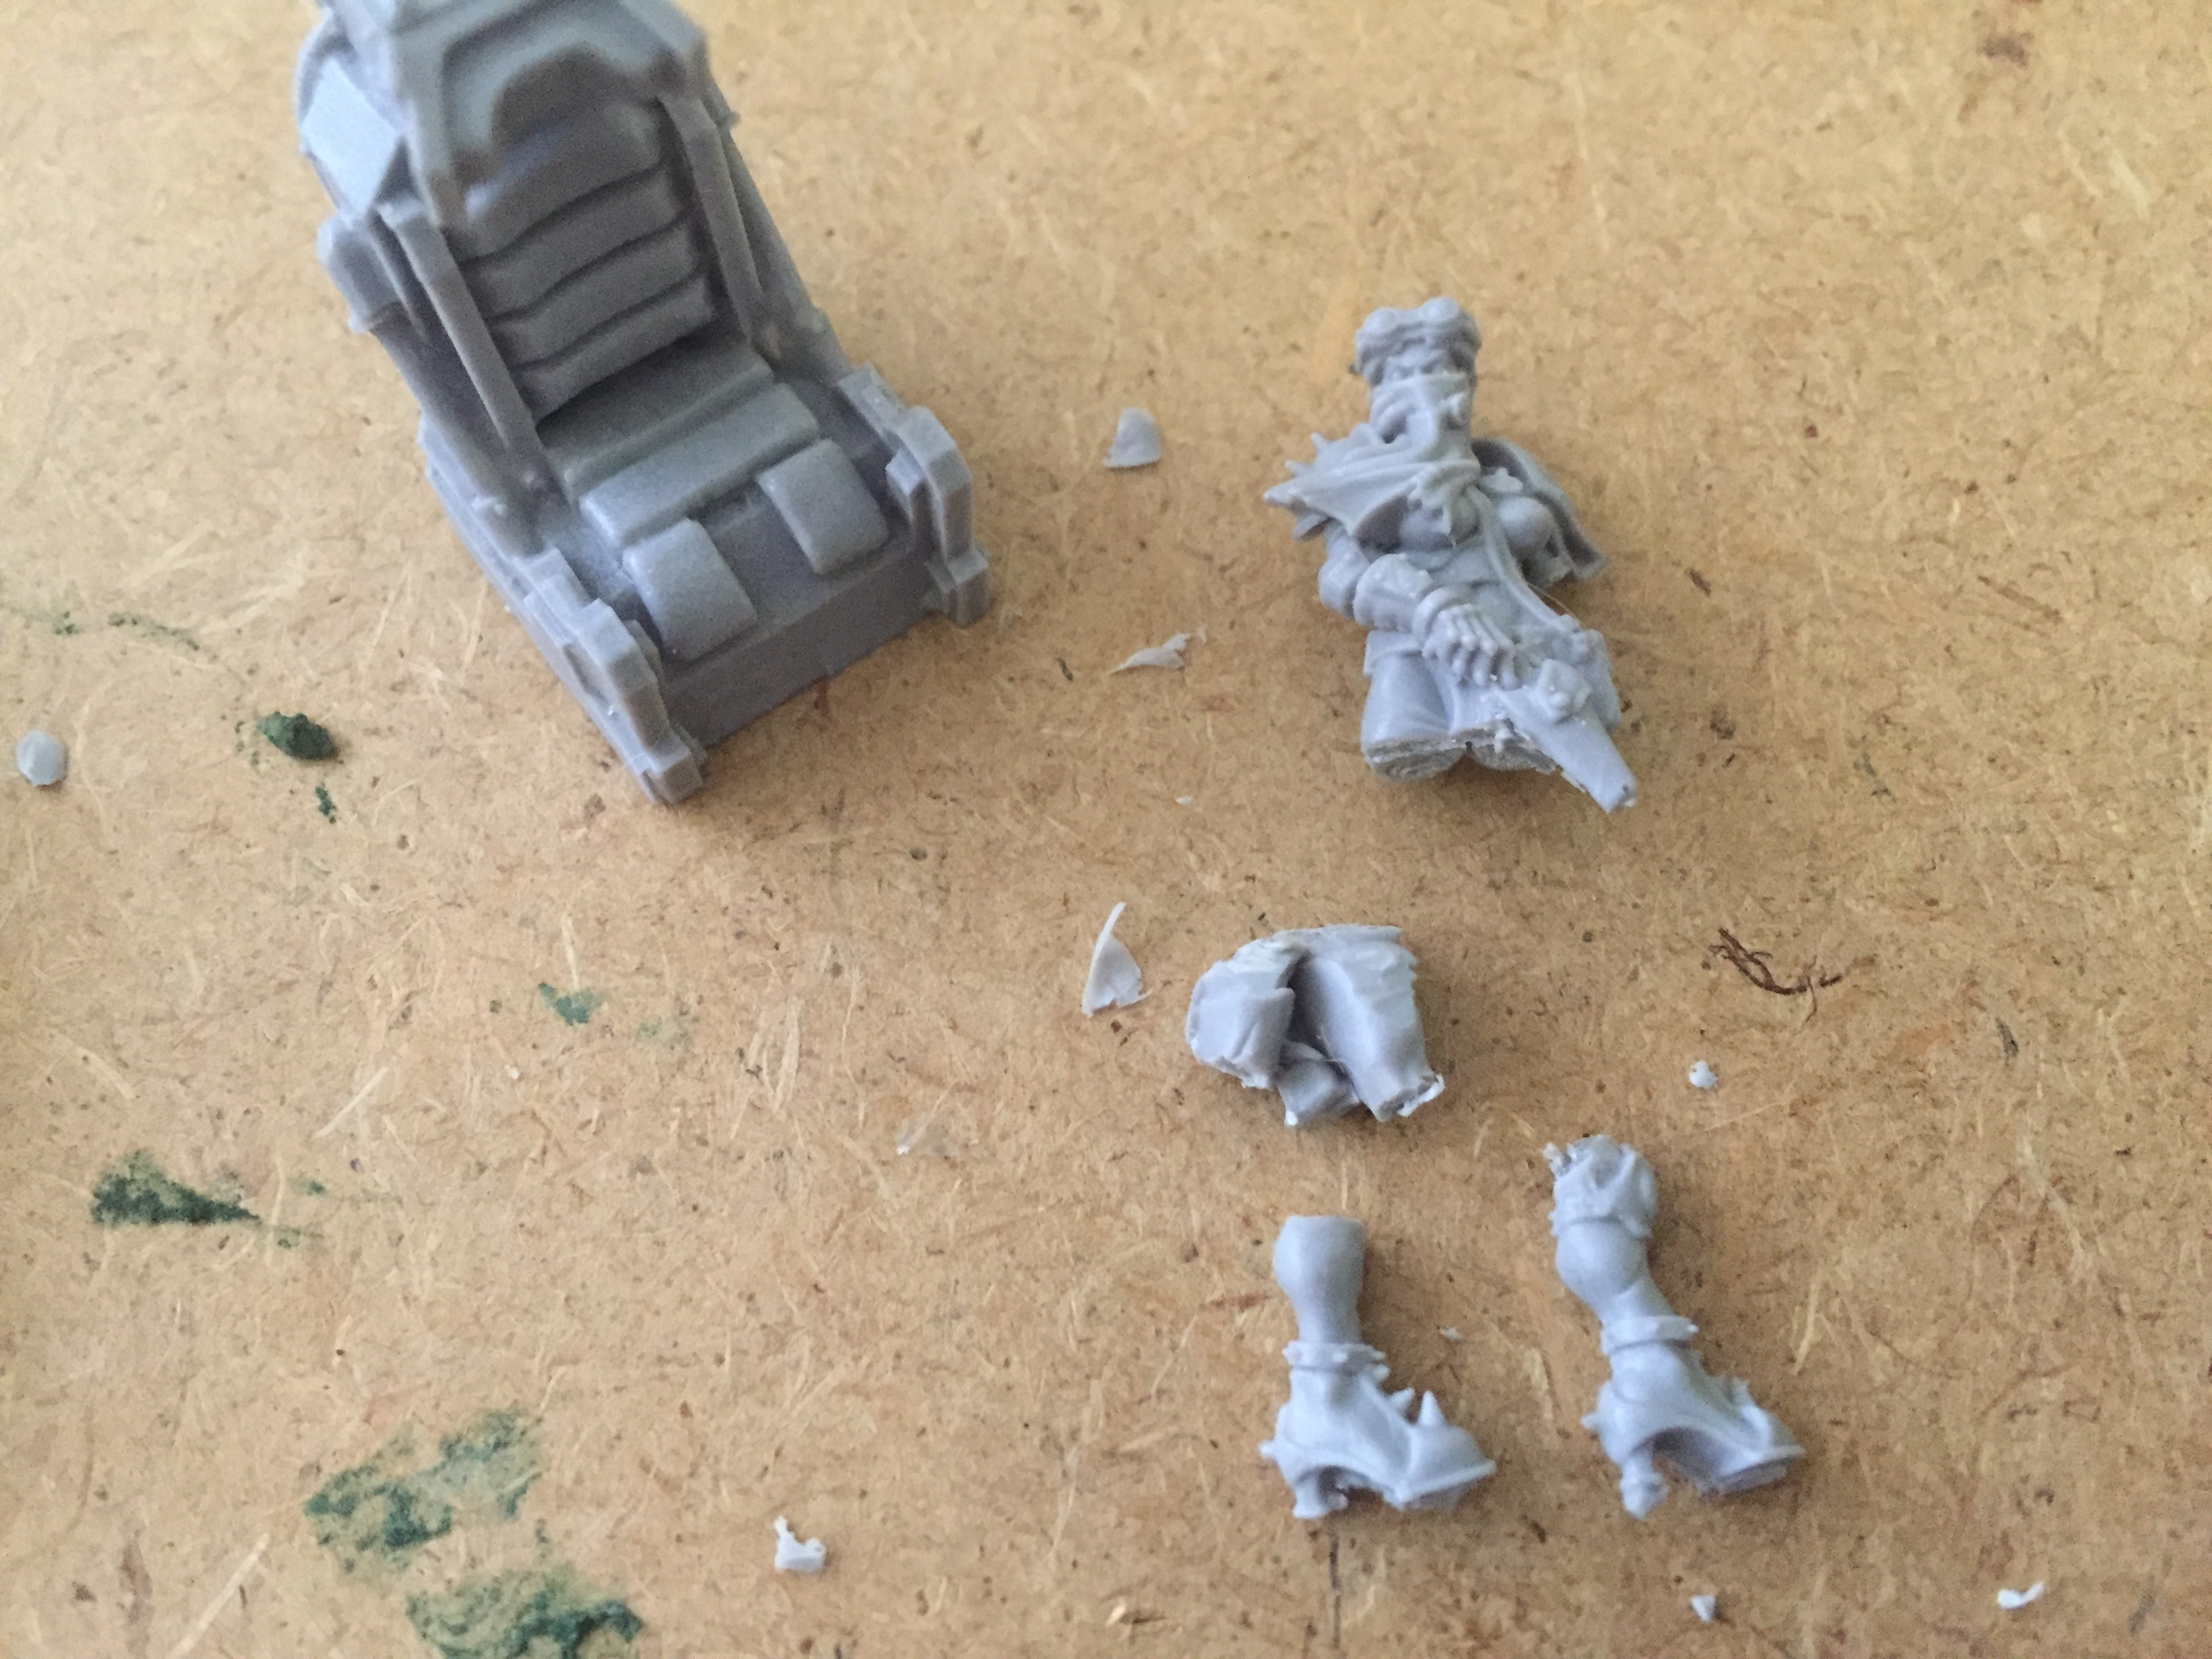
I like to customise my models and so for the Voss Pattern Lightning I’ve decided to ditch the current pilot (looks like an Elysian) and I’m going to hack apart a Necromunda FW Hired Gun to reposition from standing to sitting. This means out with the liquid green stuff again and the two-part green stuff putty to recreate the bits I have to remove to enable the repositioning. Sculpting tool at the ready.
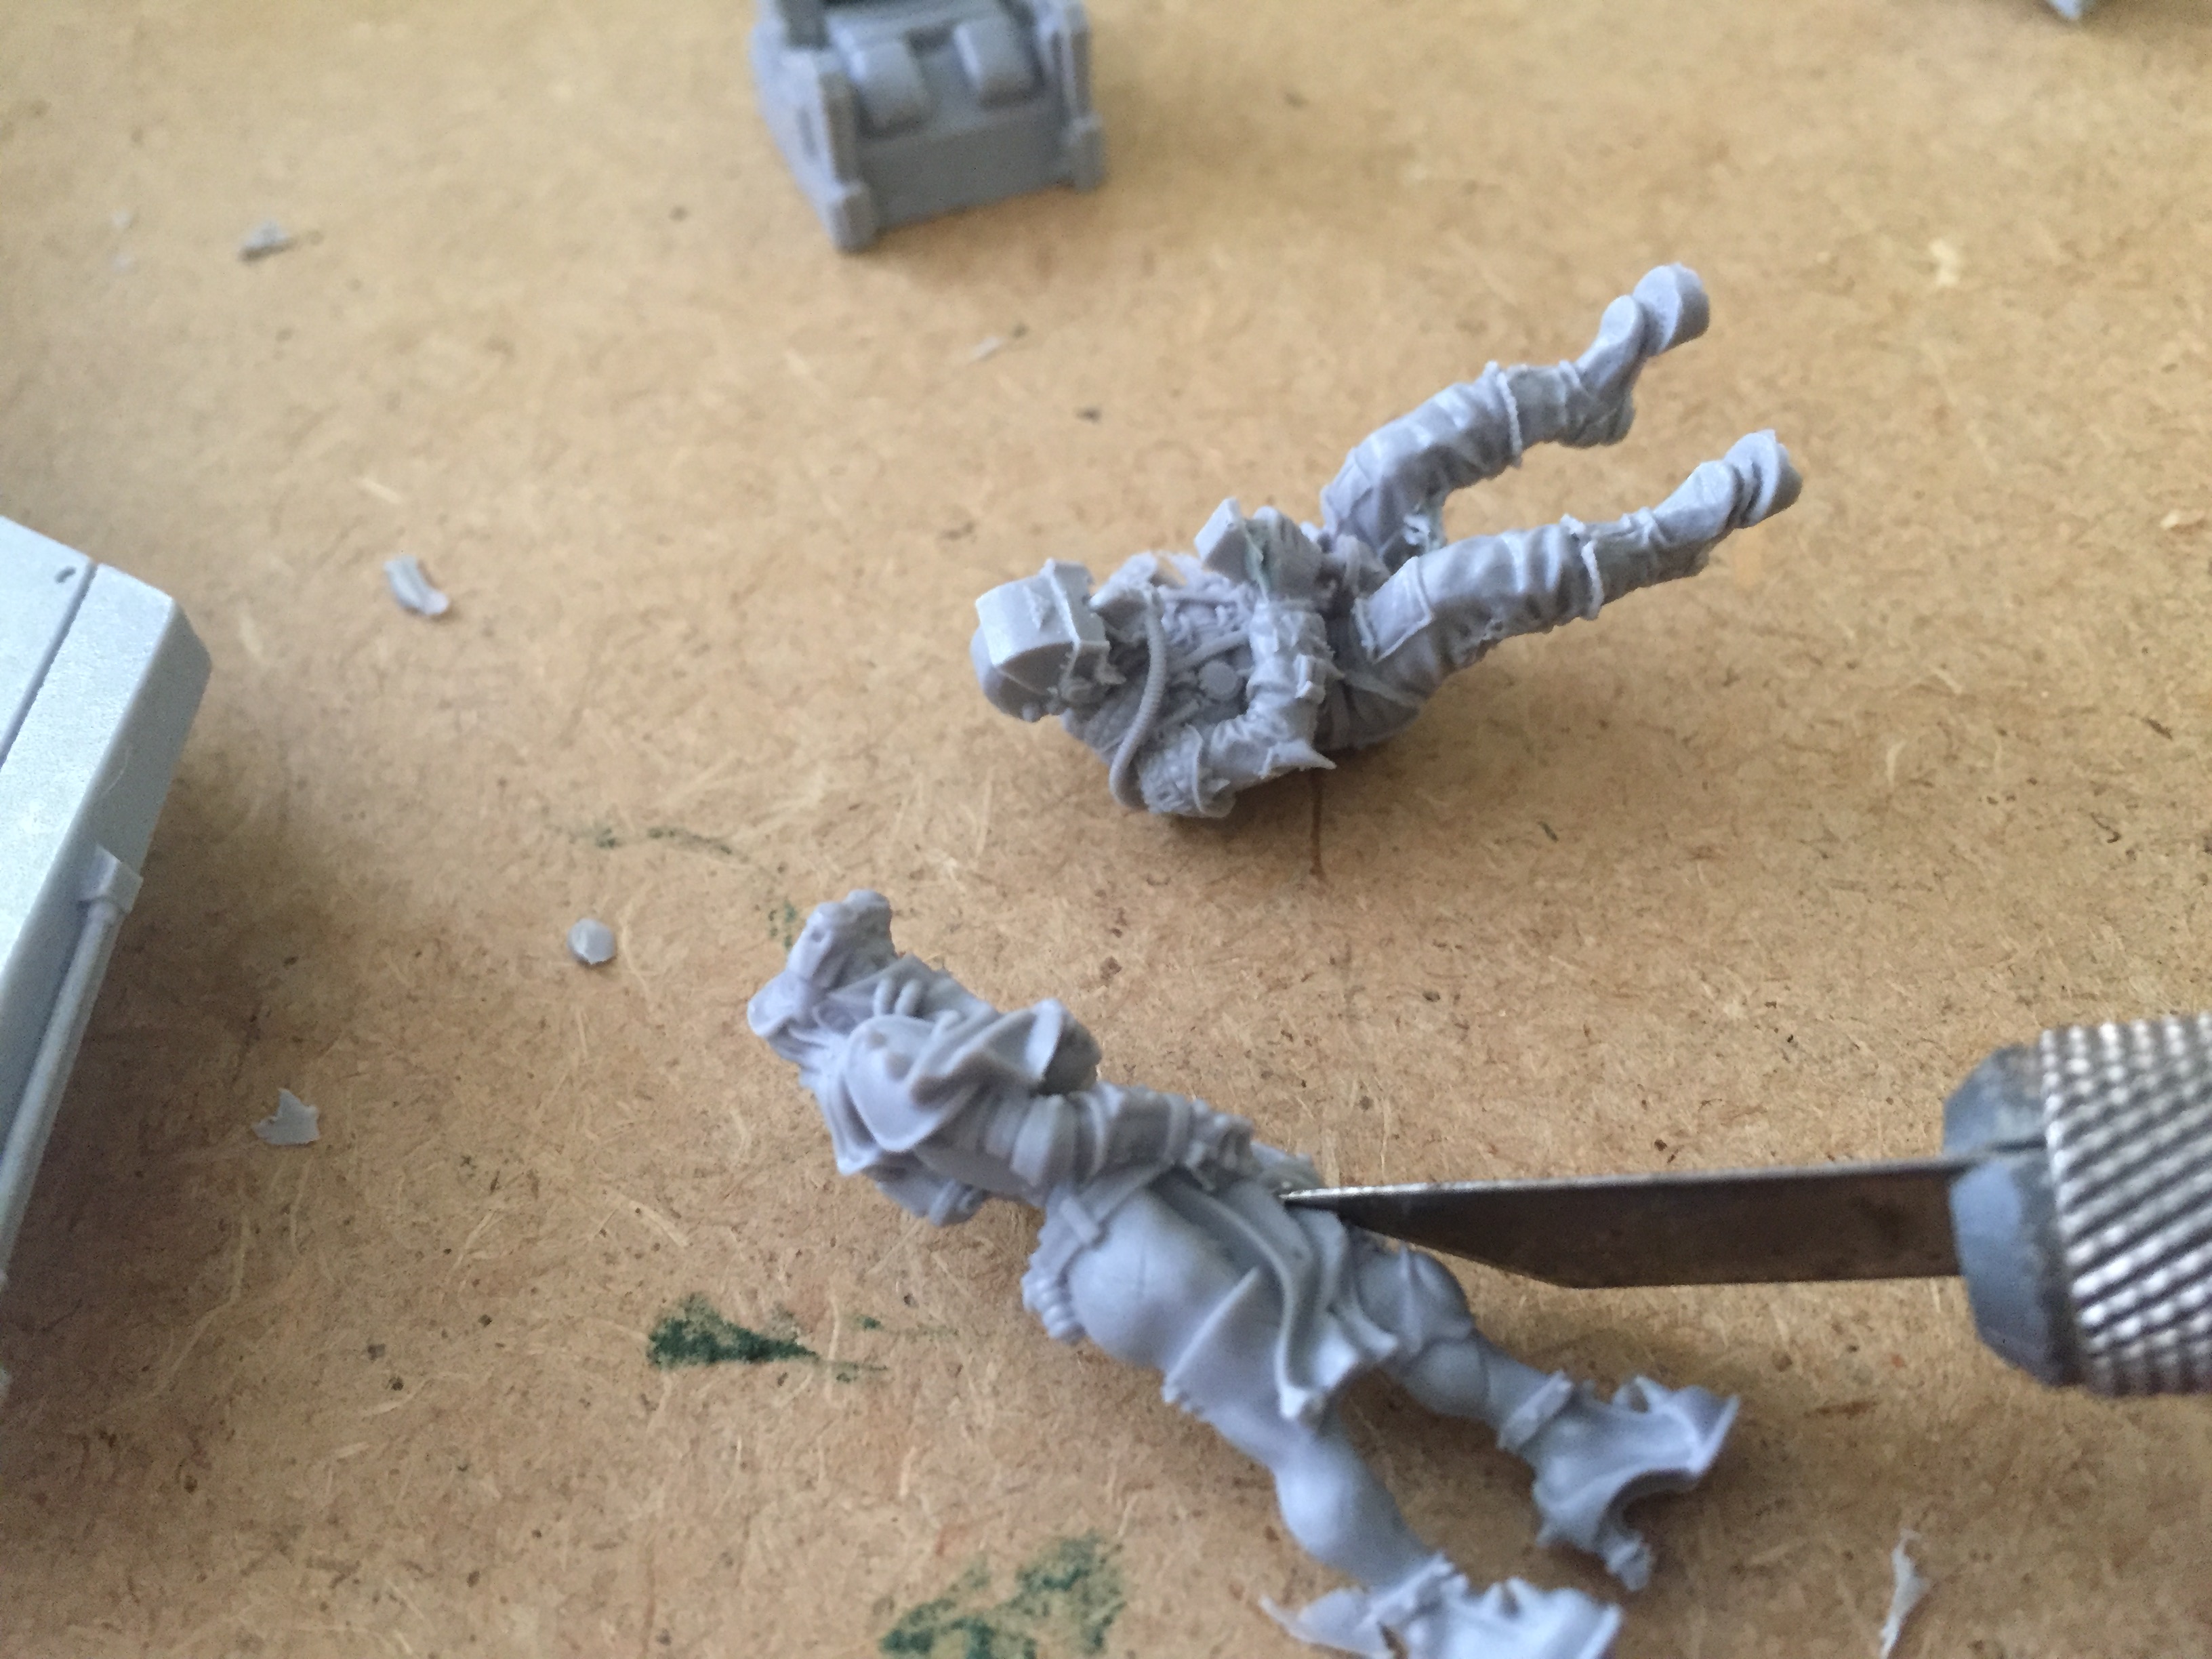
I needed to chop the Hired Gun at the knees and waist, but also needed to remove her buttocks to reposition the legs and resculpt with green stuff. I’m not too worried about the cosmetics as she will be part hidden from the waist downwards once installed in the cockpit. The right arm is in a similar position to the original pilot while the left arm will have the dagger removed and will also be added and glued in place using tweezers once the pilot is installed (just like the instructions if using the original pilot).
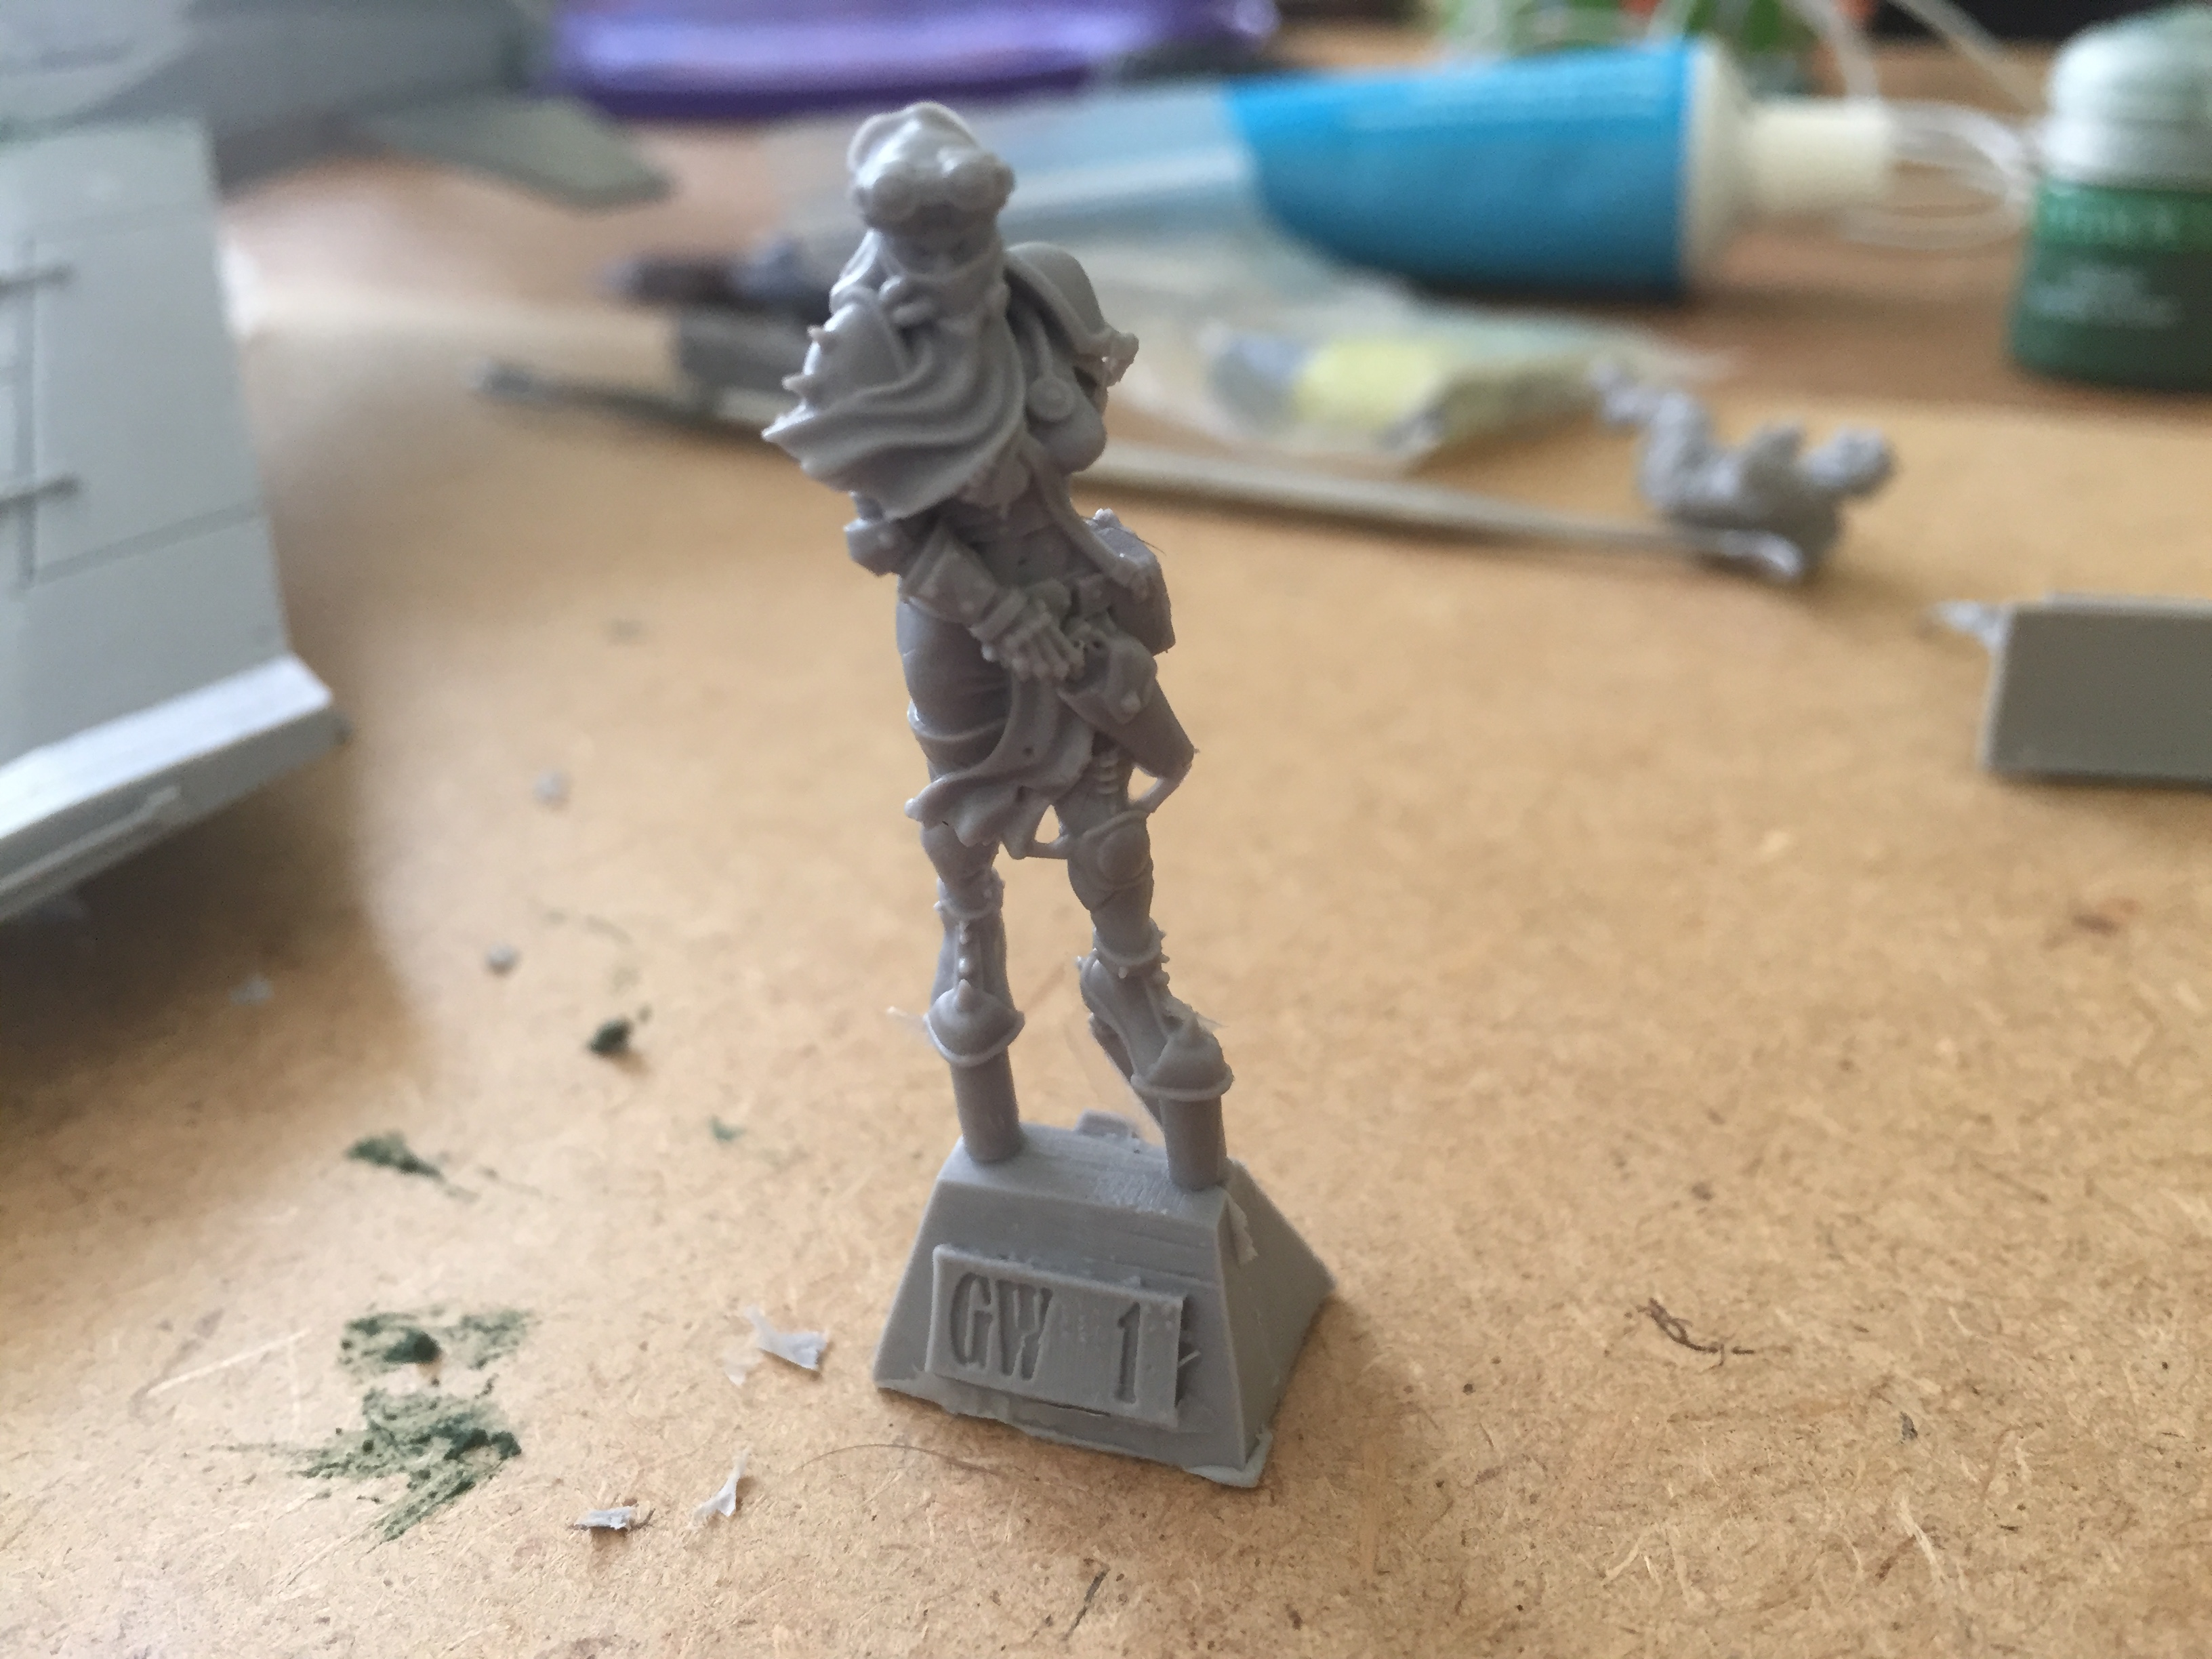
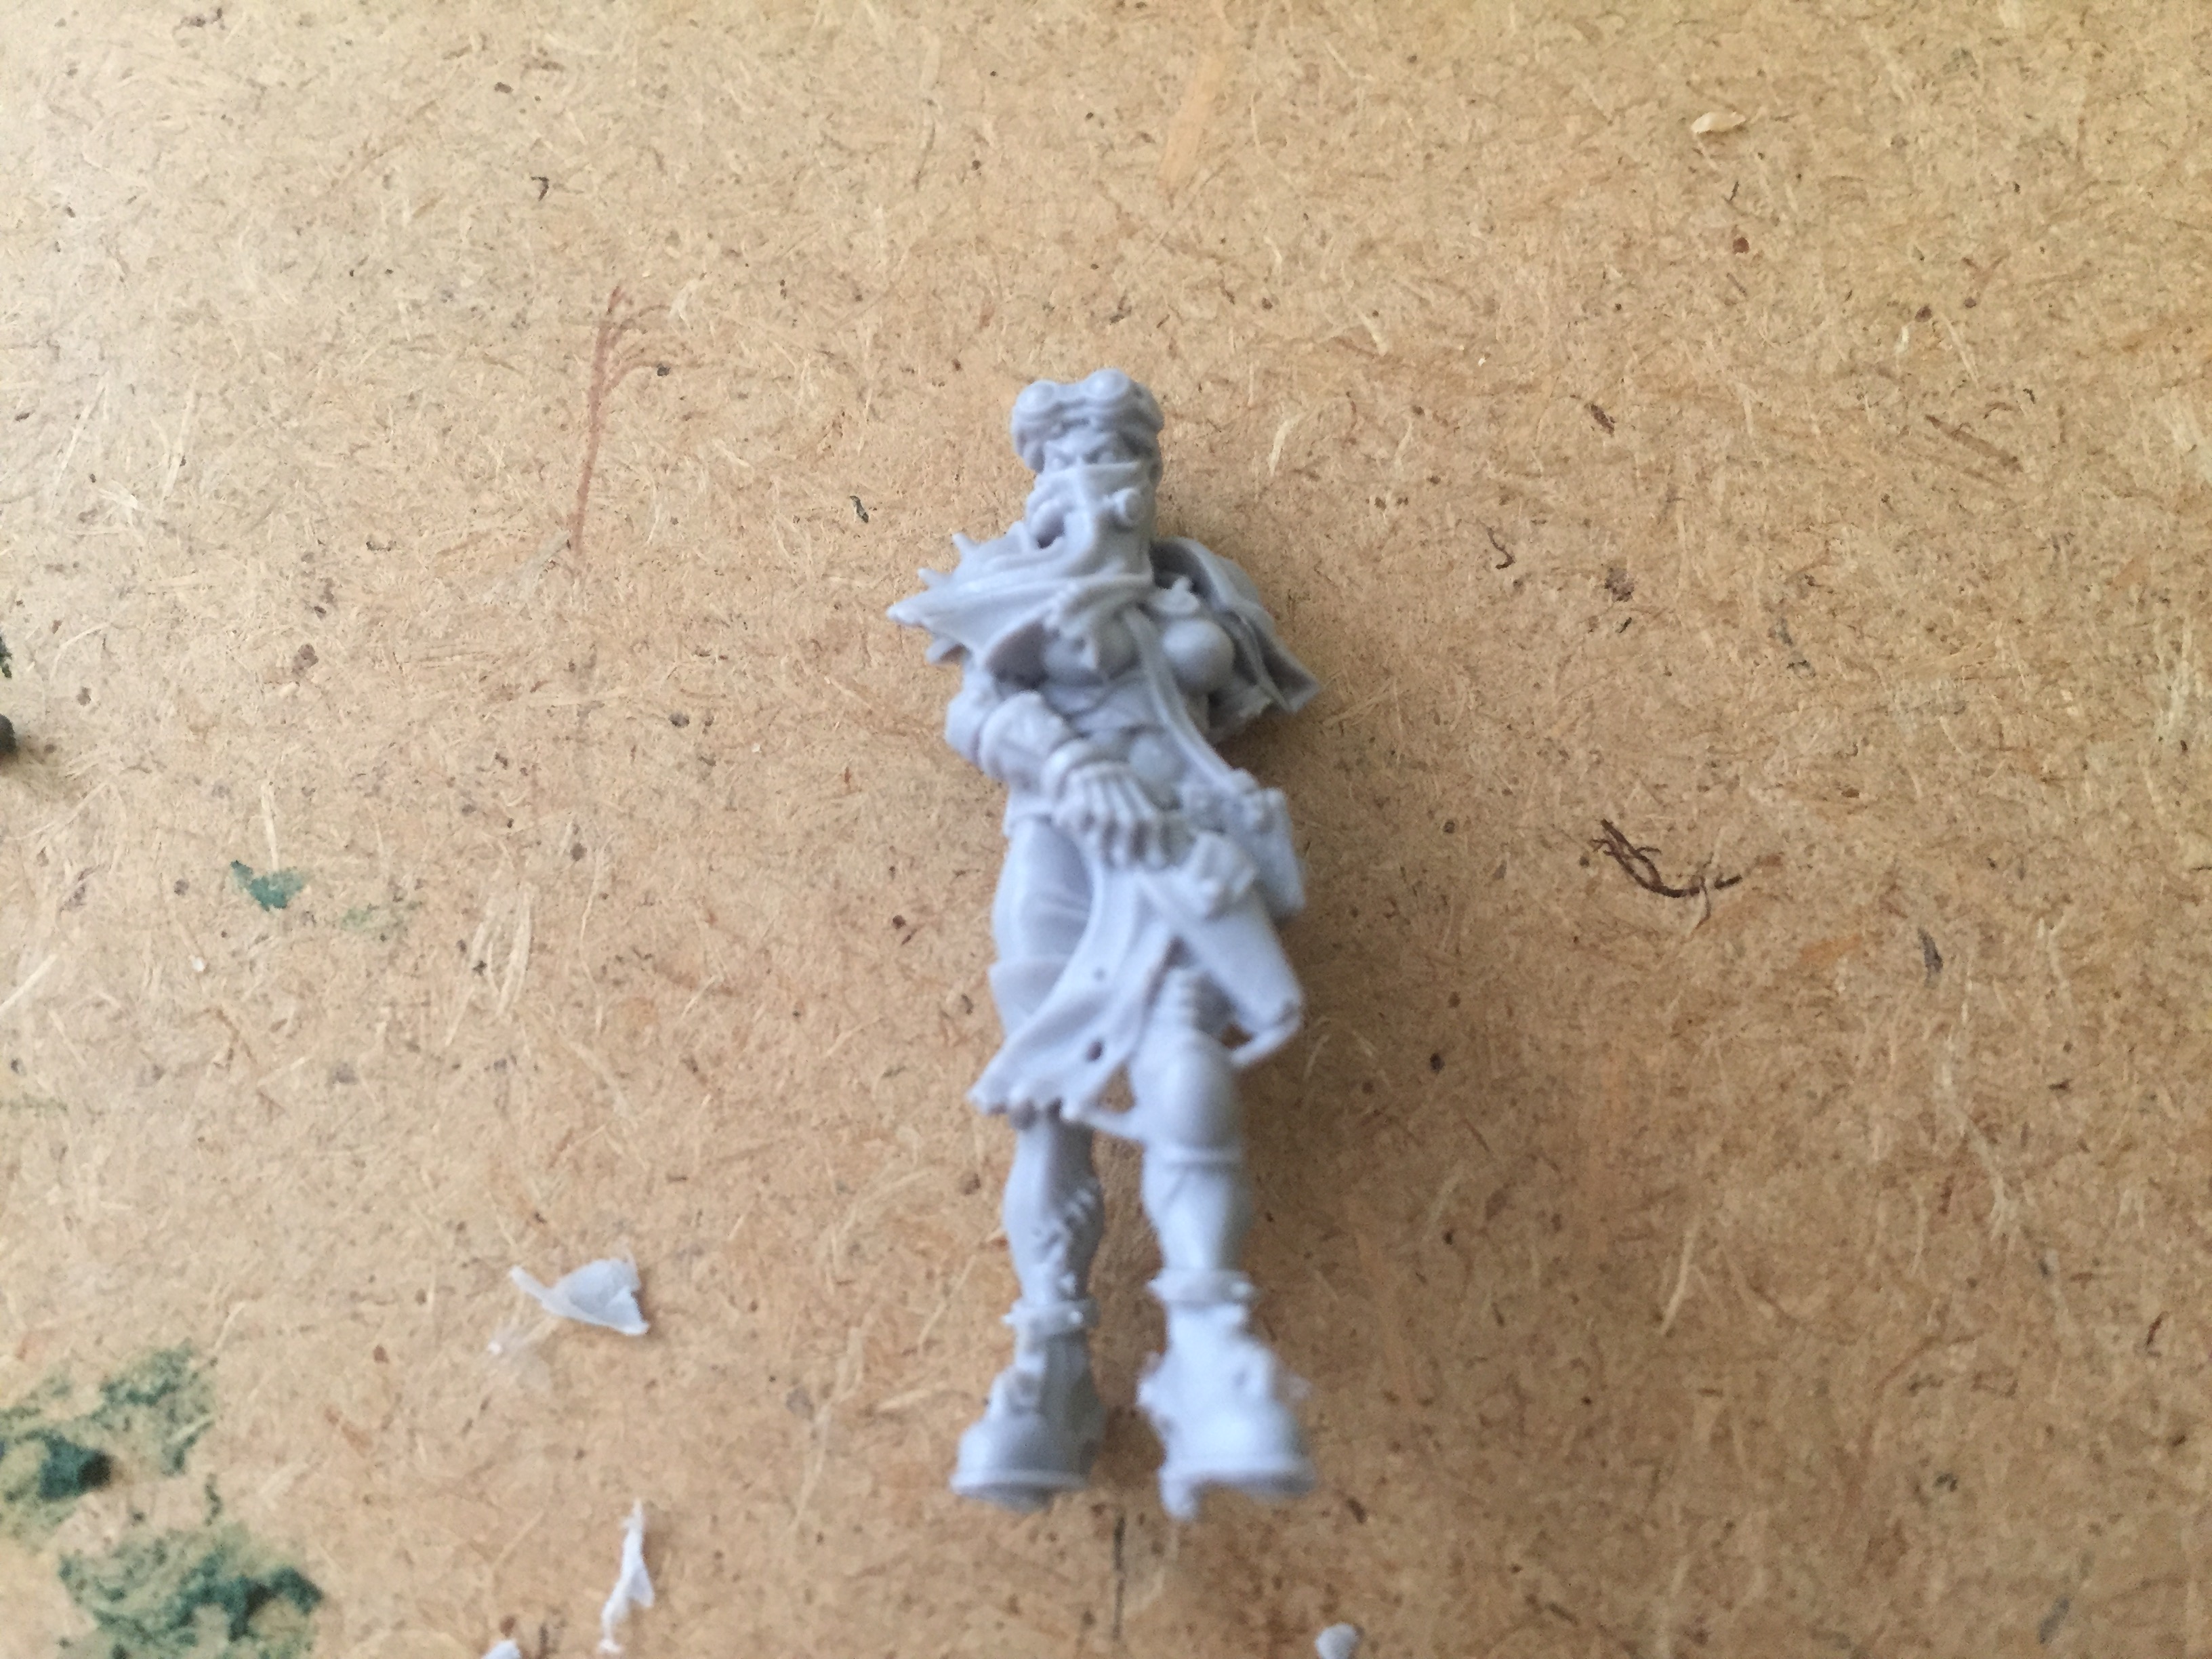
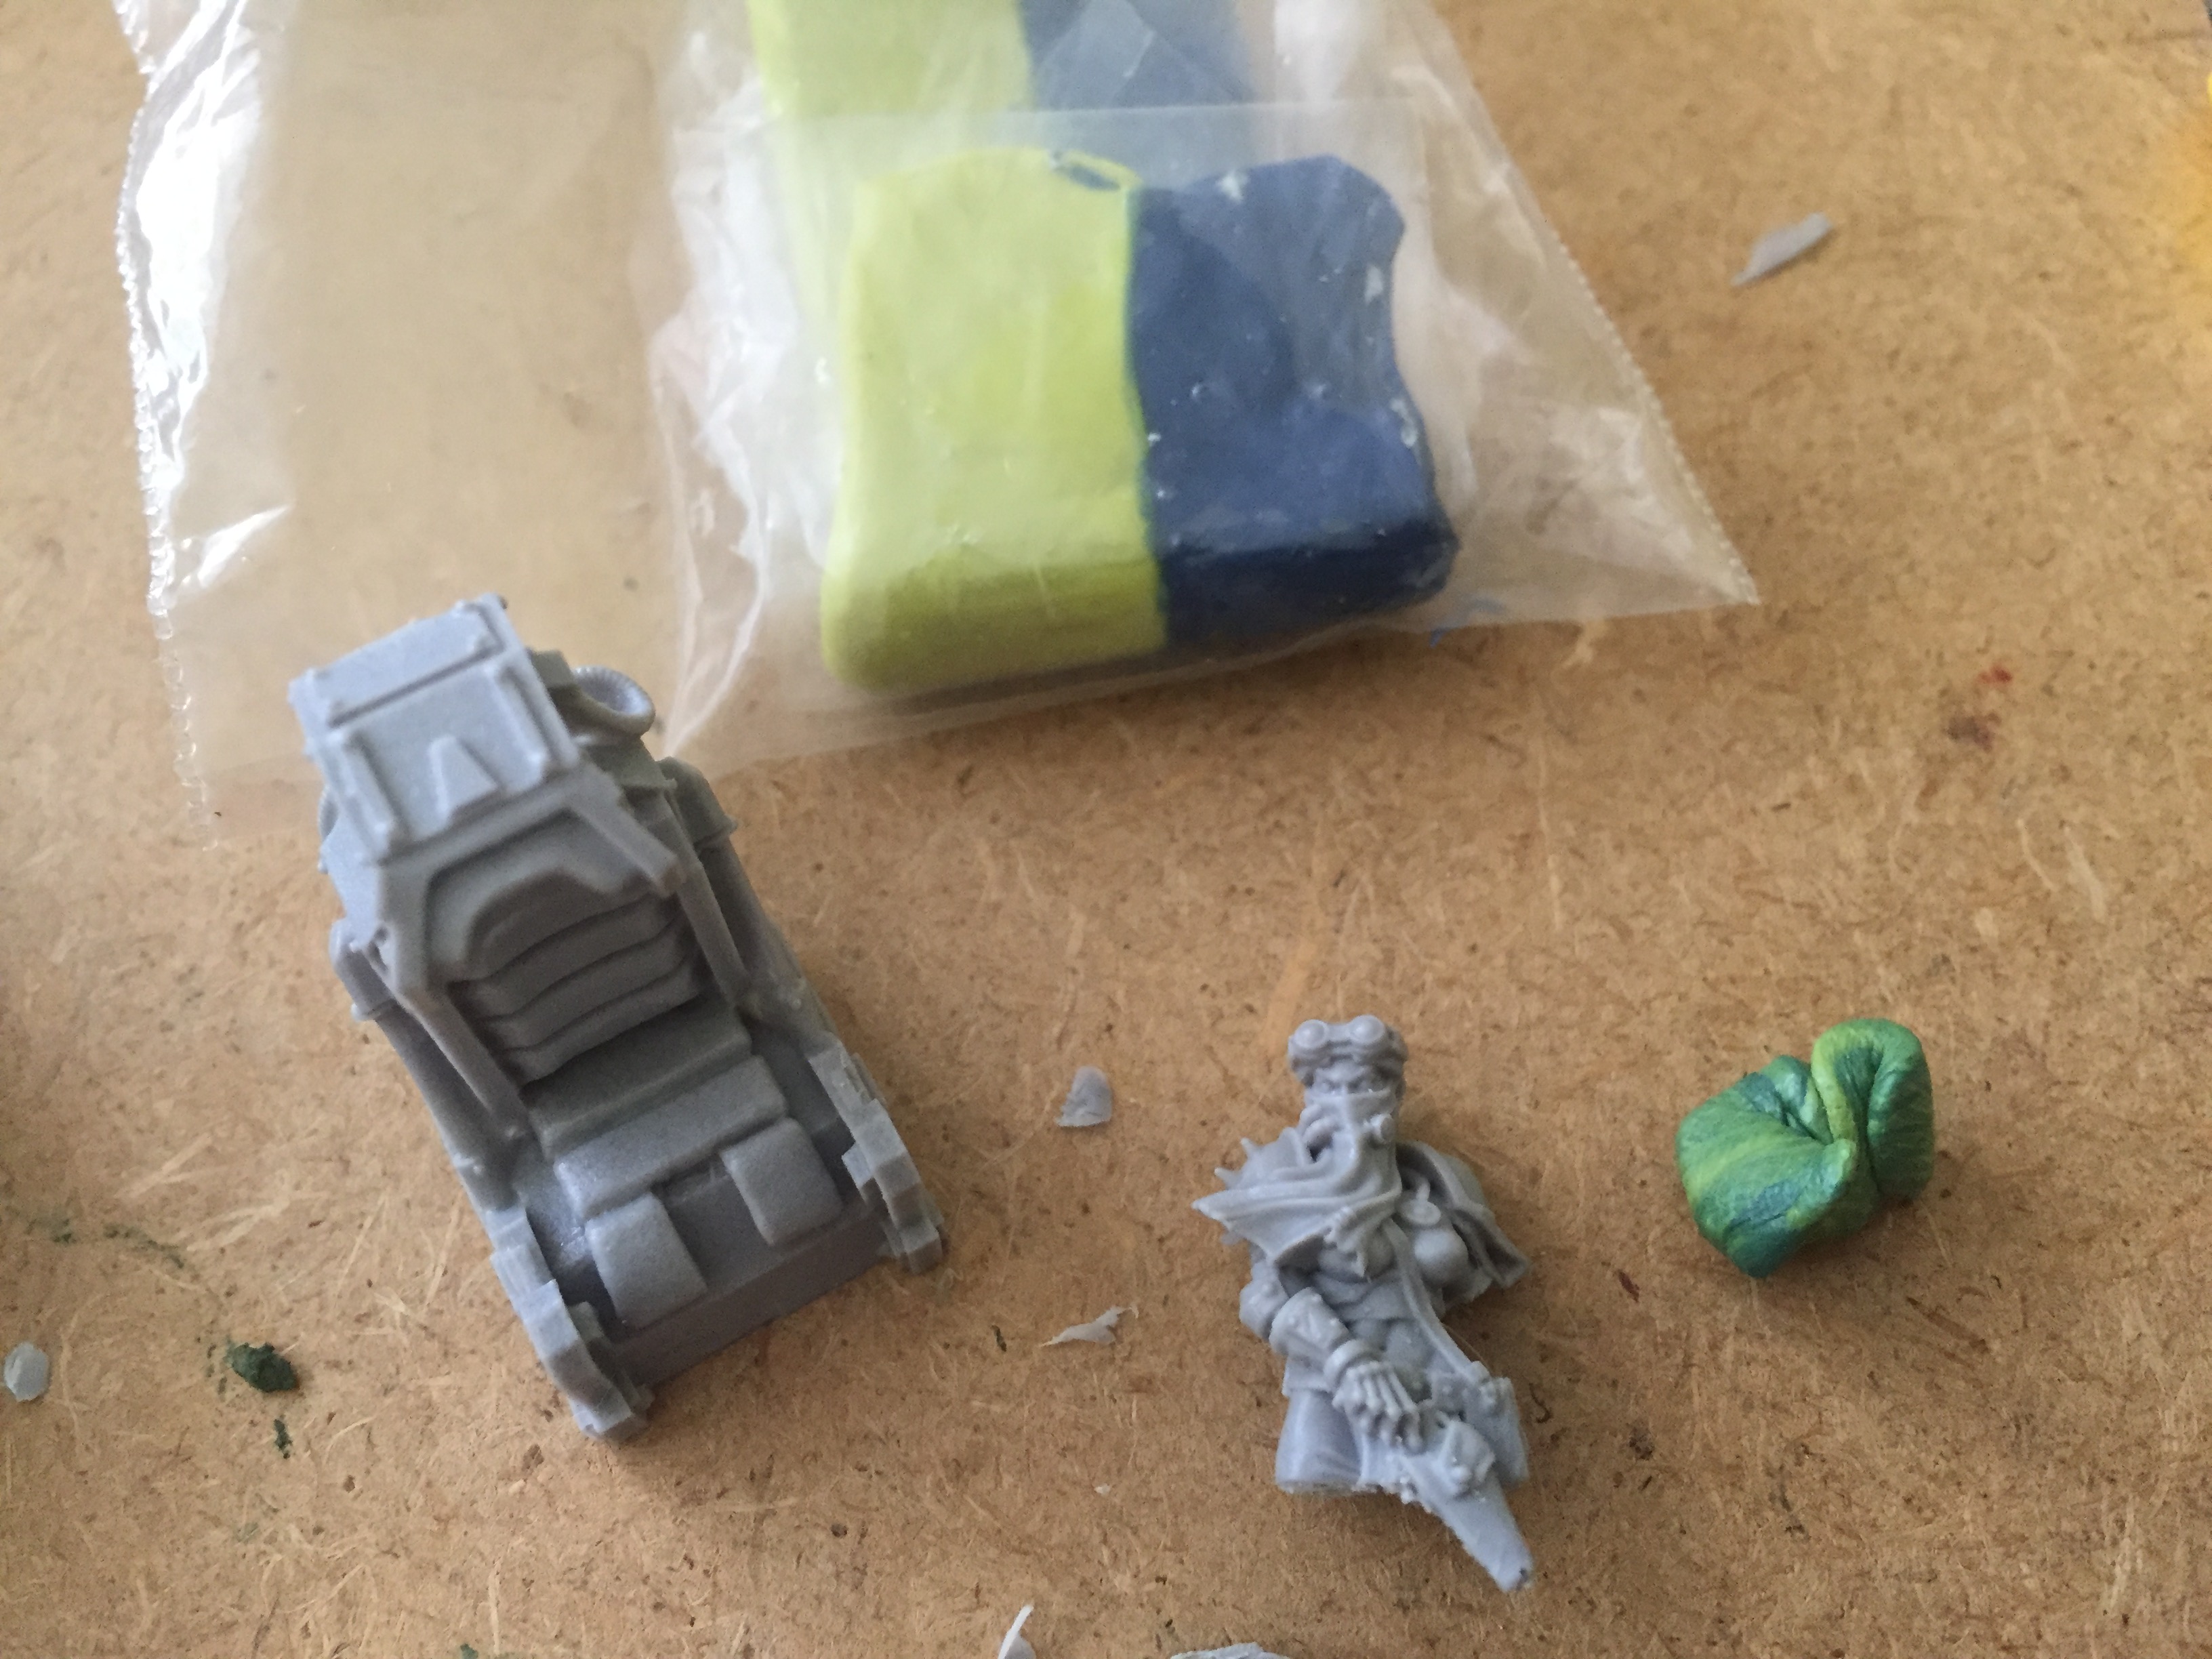
 The new pilot has been repositioned and fixed into the original seat which will be fitted into the cockpit along with the control panel and the Hired Gun’s left arm once the green stuff has fully dried over night.
 Next up will be to install the pilot into the cockpit and prepare for painting.
Time taken:
Construction of new, kit-bashed pilot including resculpting legs 1 Hour
Drying time for green stuff putty 24 Hours
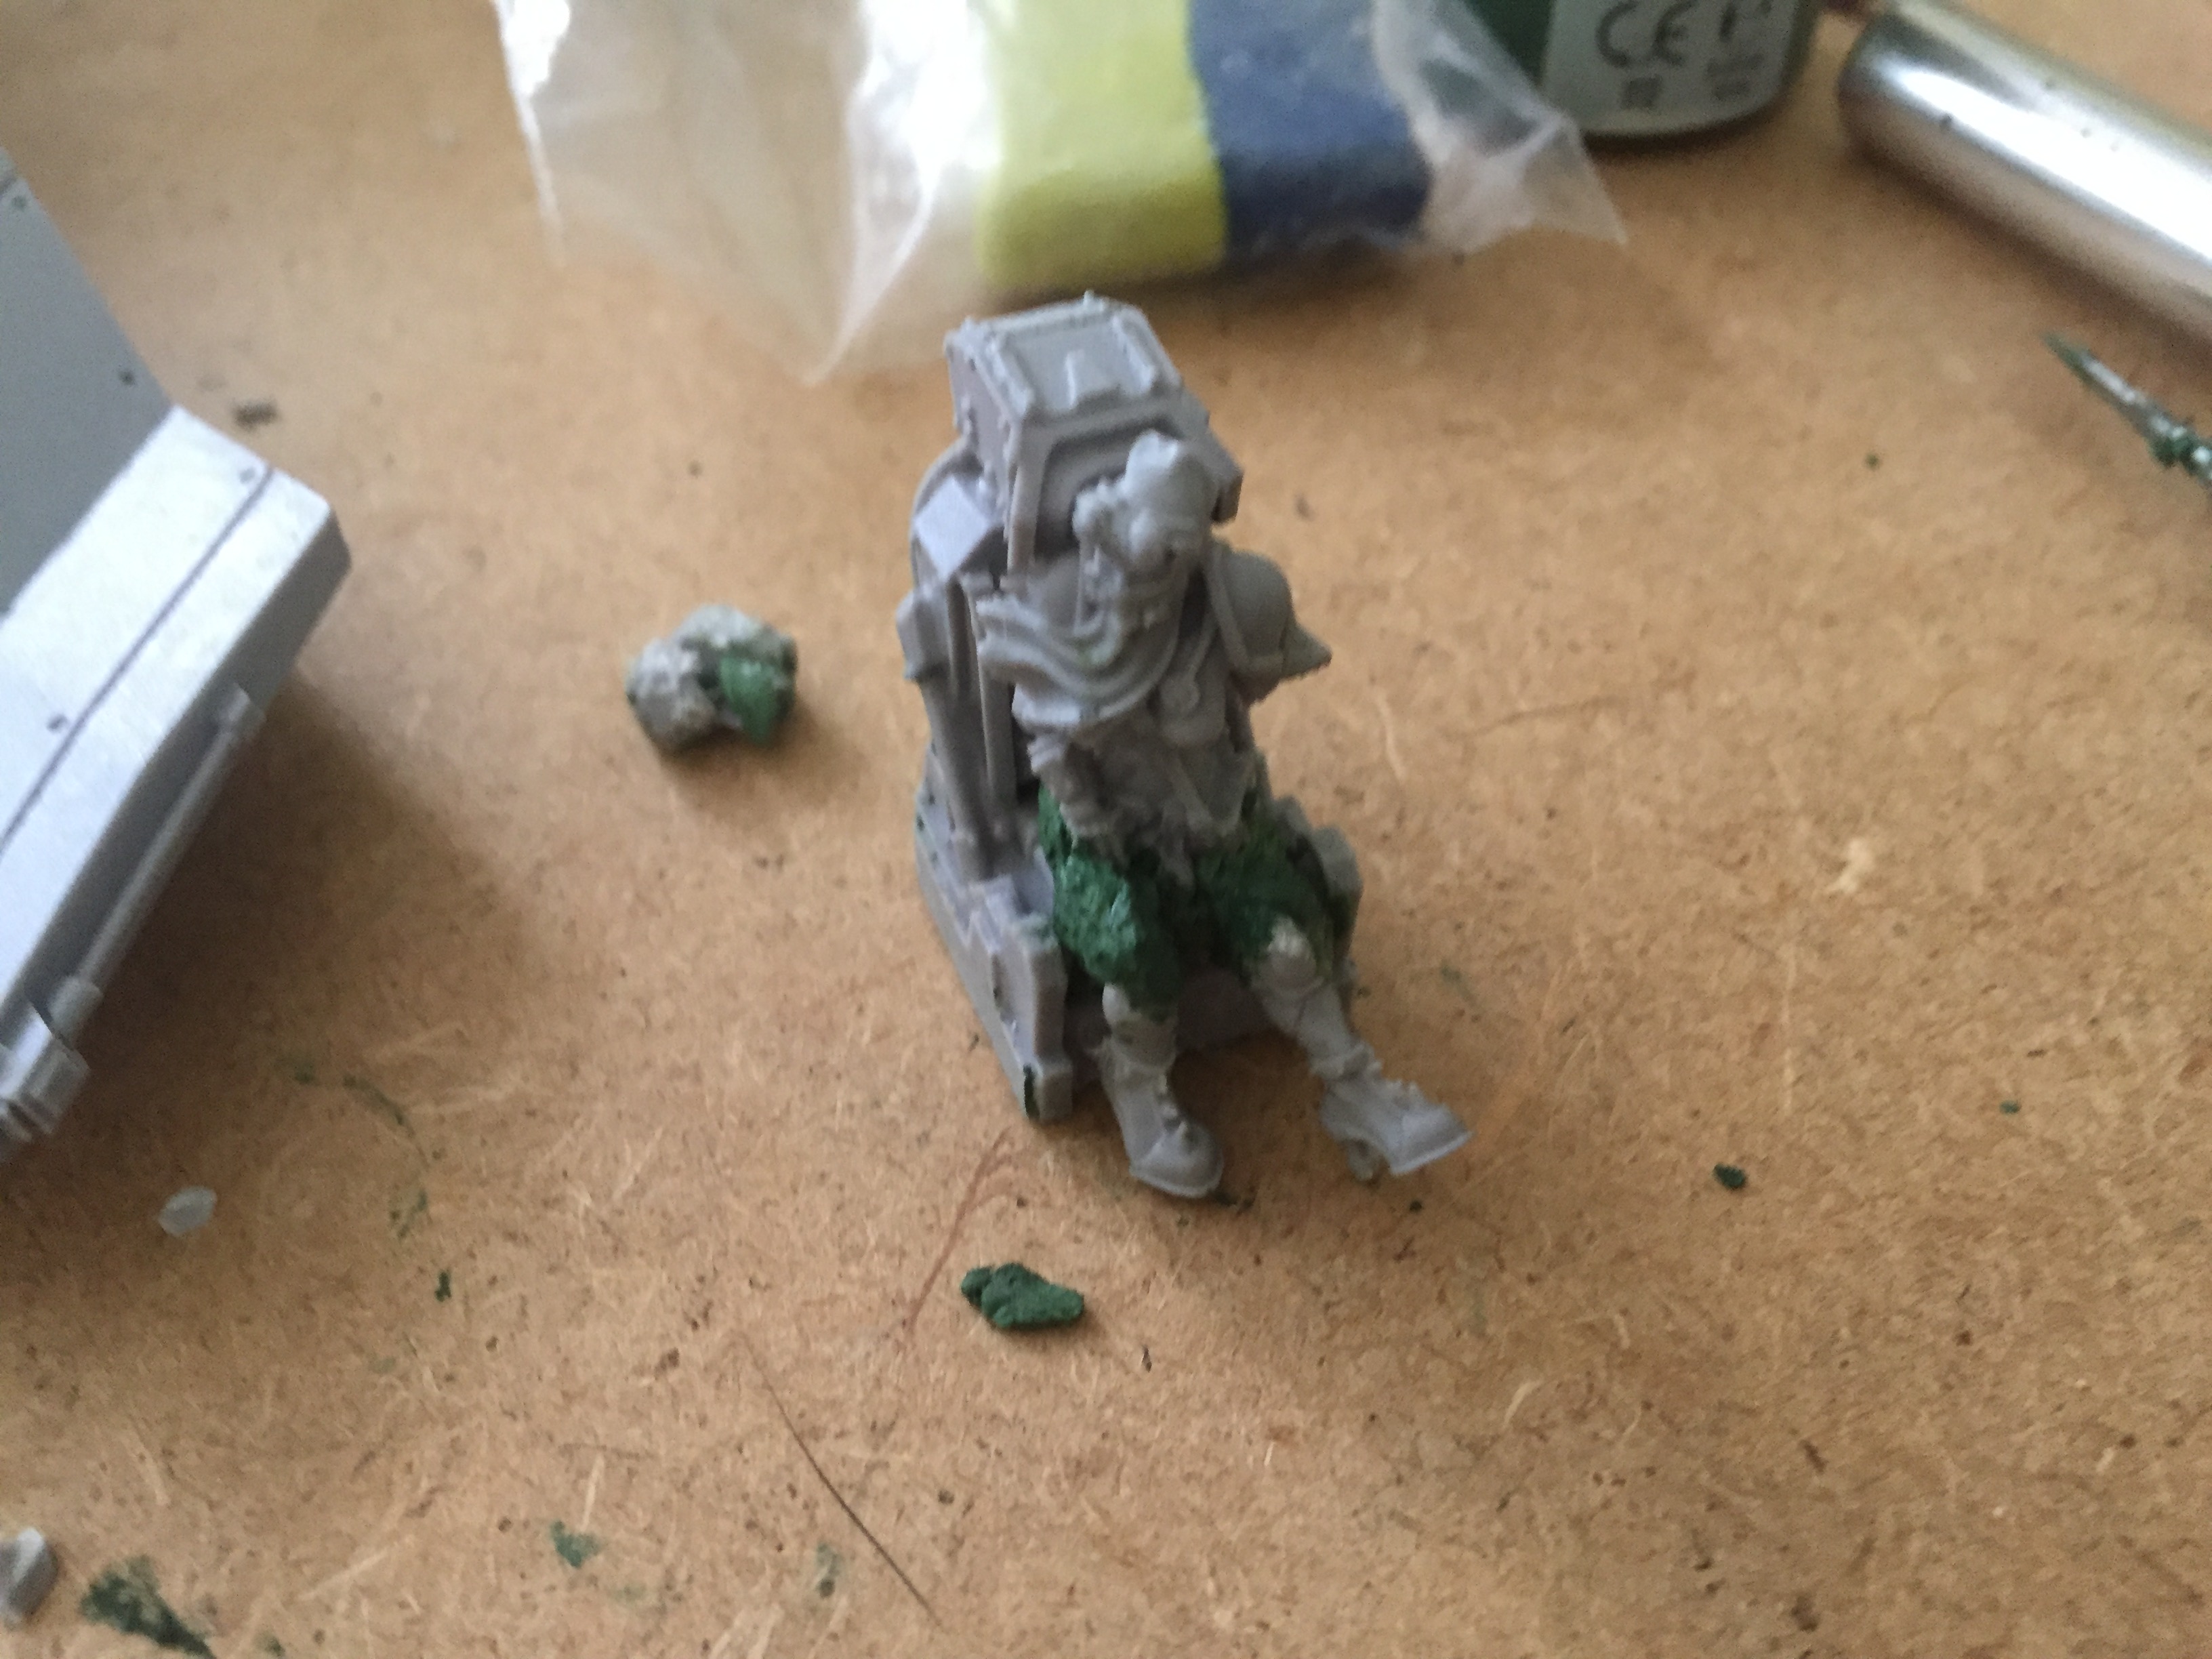
Voss Pattern Lightning - Pilot on board and Undercoating
Installing the pilot was a little bit more tricky than I had imagined and this was largely due to ensuring the display panel could be inserted and pushed down correctly to enable the cockpit roof to be fitted. However with a bit of brute force, superglue and tweezers to secure the left arm, she was finally installed!
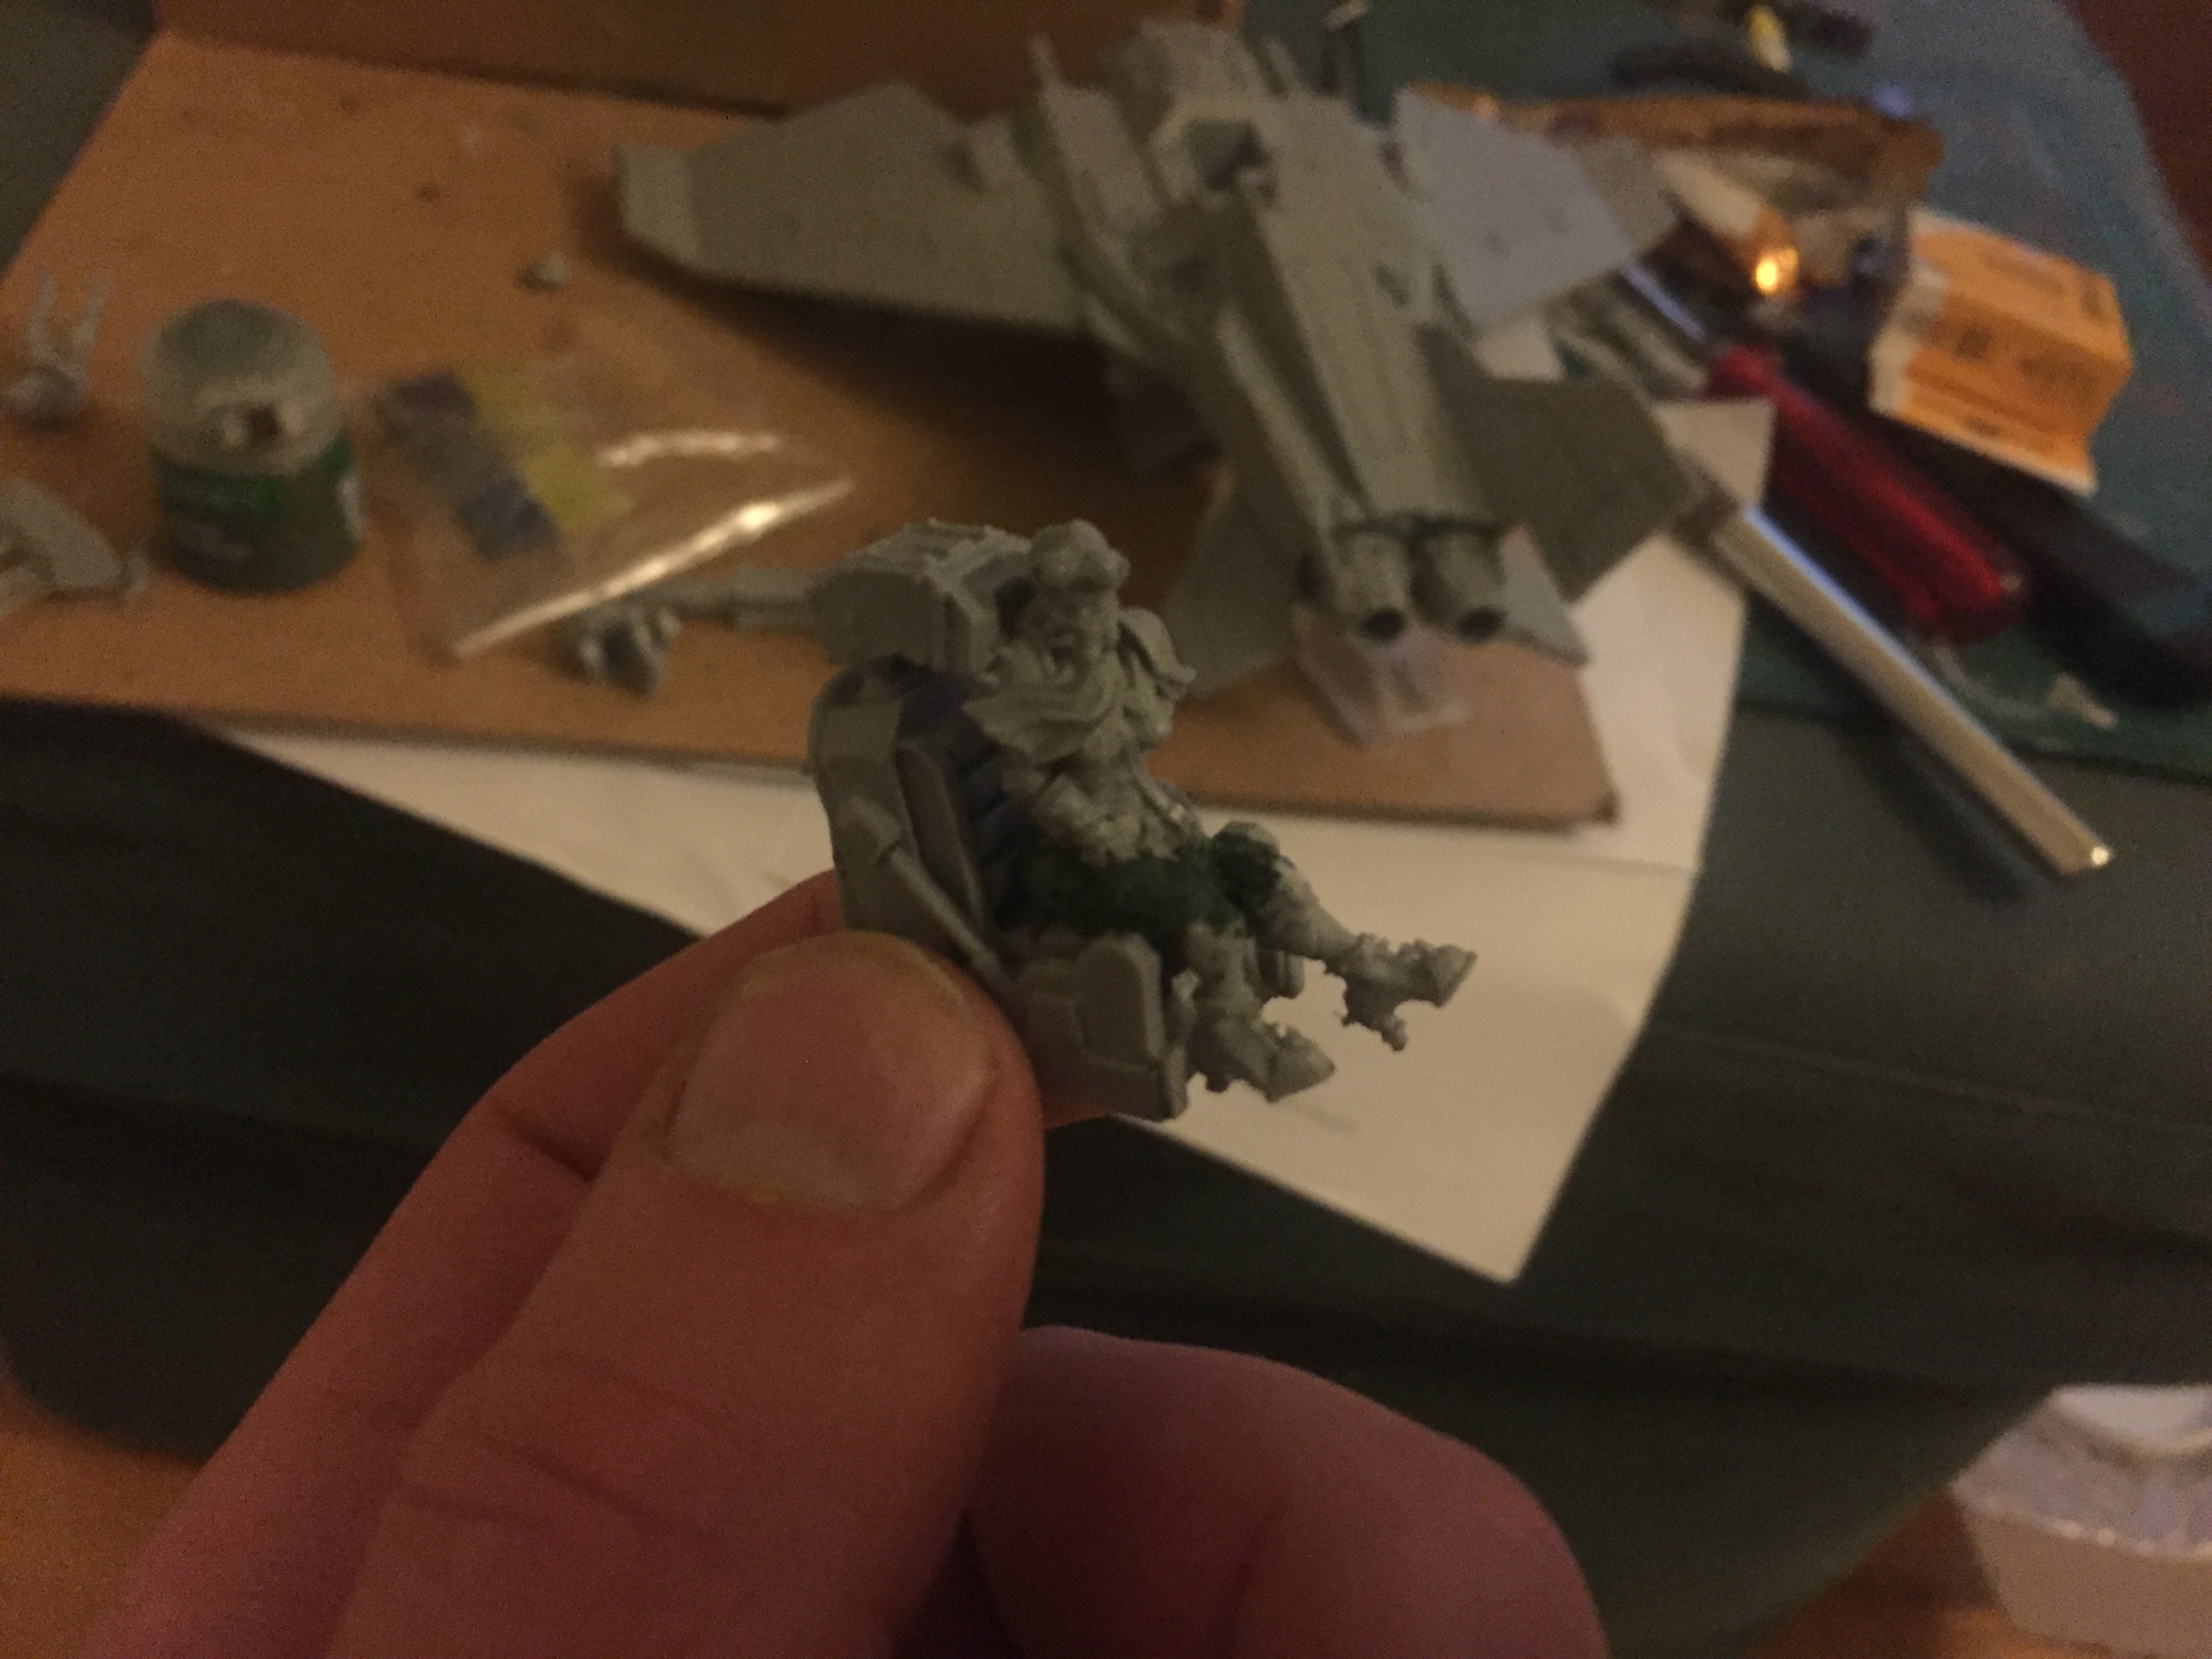
 The ‘Hired Gun’ becomes the pilot and will be painted in situ.
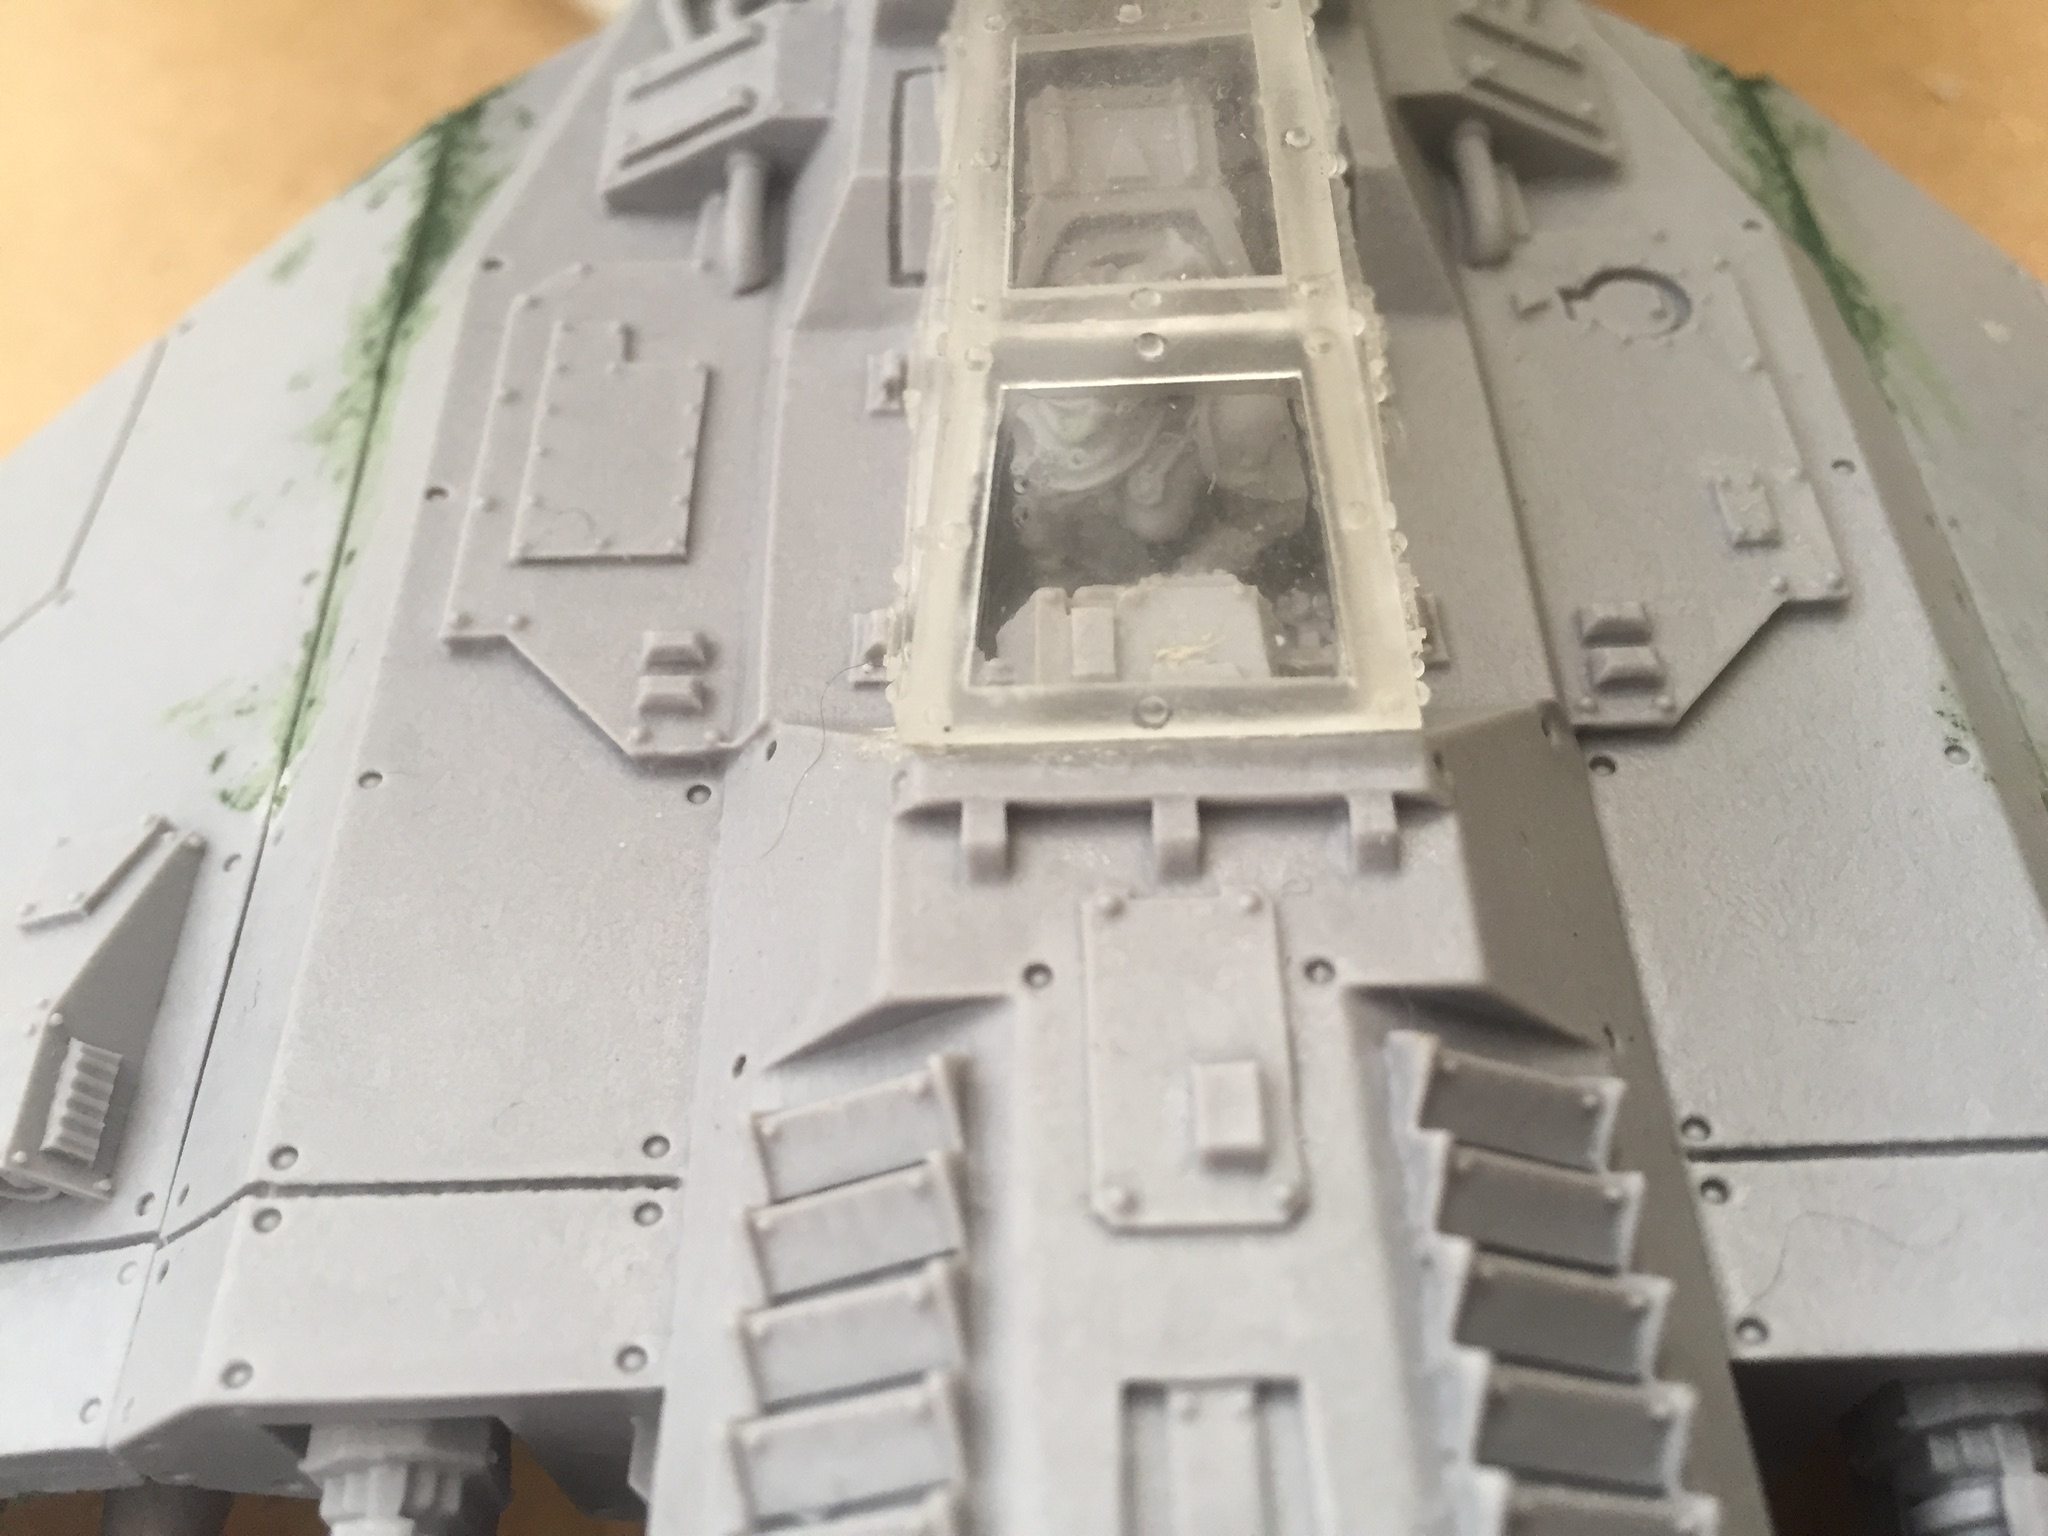
Painting the Voss Pattern Lightning could now begin and this means undercoating with a Matt spray paint. I contemplated using black as this will provide appropriate shading in the recesses, but as I want to use fairly striking shades of colour, I opted for a white undercoat. I’m using Plastikote Matt White because 1) it’s served me well in the past and 2) it’s half the price of Citadel Paint Spray cans.
Make sure you spray in a well ventilated room or as I did – outside. Liberally spray the underside first at a distance of around 6 inches and leave to dry for around 30 minutes before turning over the model and spraying the top. I suggest spraying from various angles to ensure all areas are covered. Again leave to dry.
Note, the cockpit roof was not stuck down during the construction and will be painted separately.
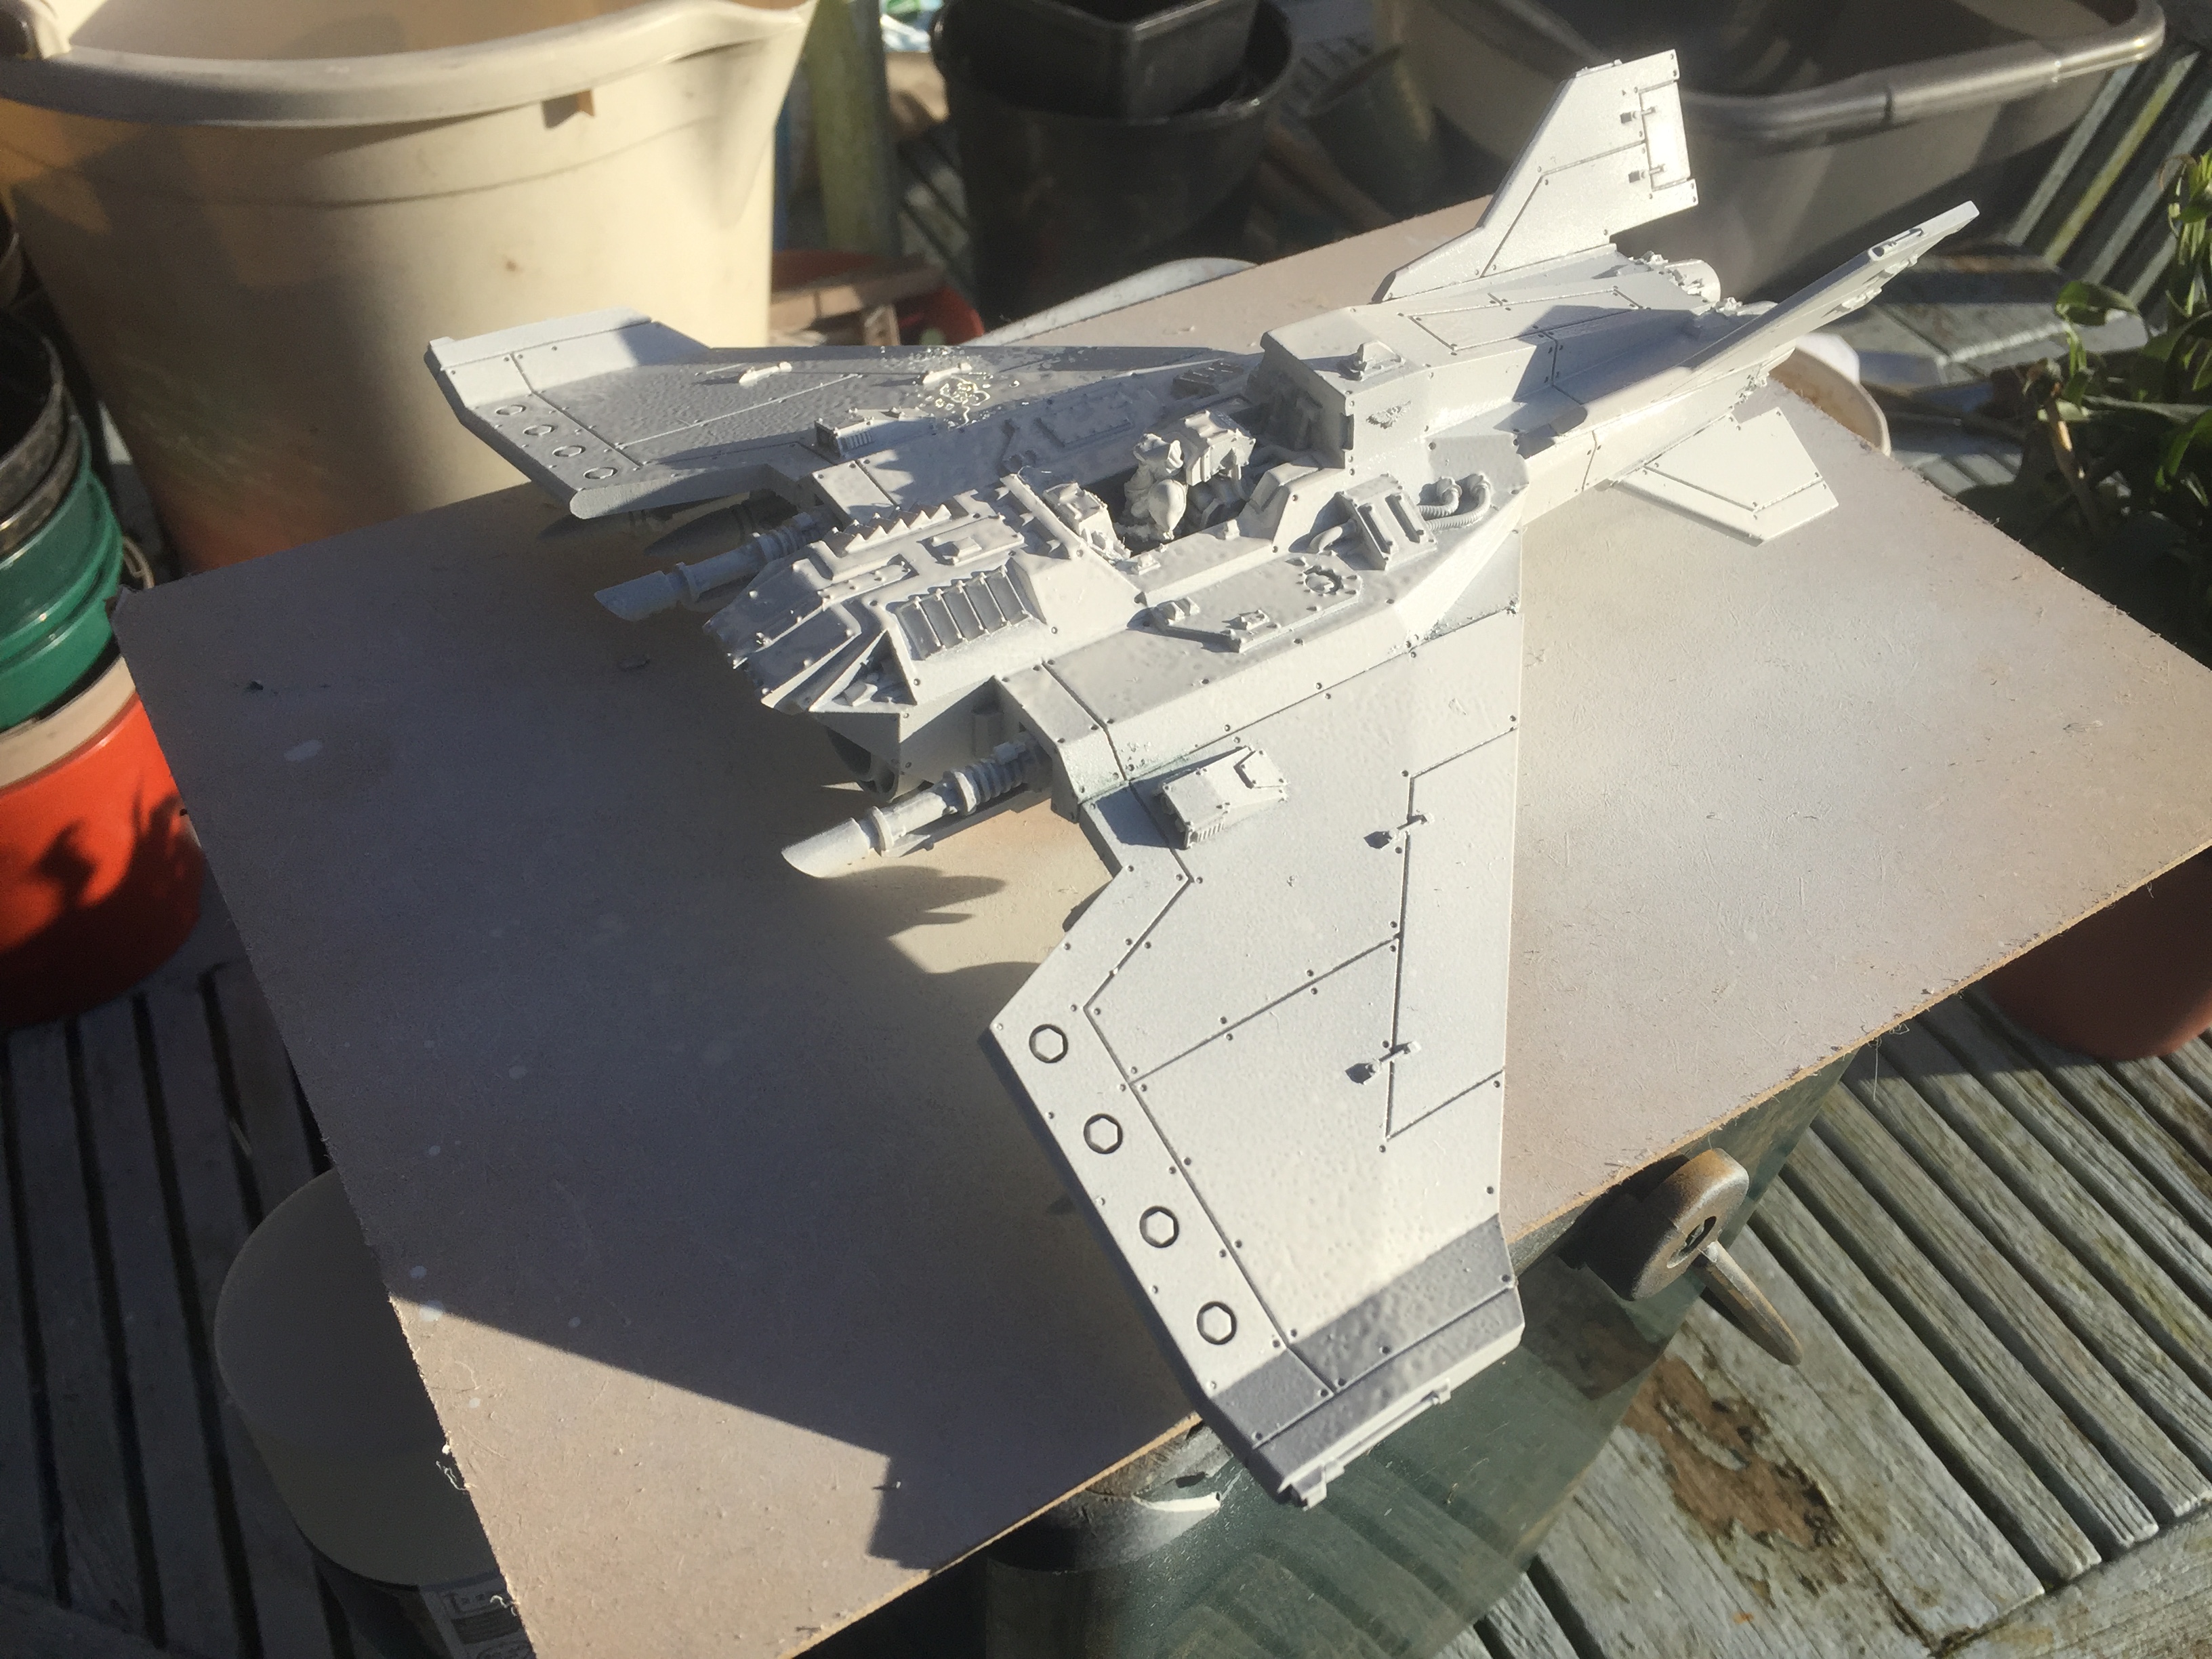 Undercoated and ready for the layering of colour and freehand designs.
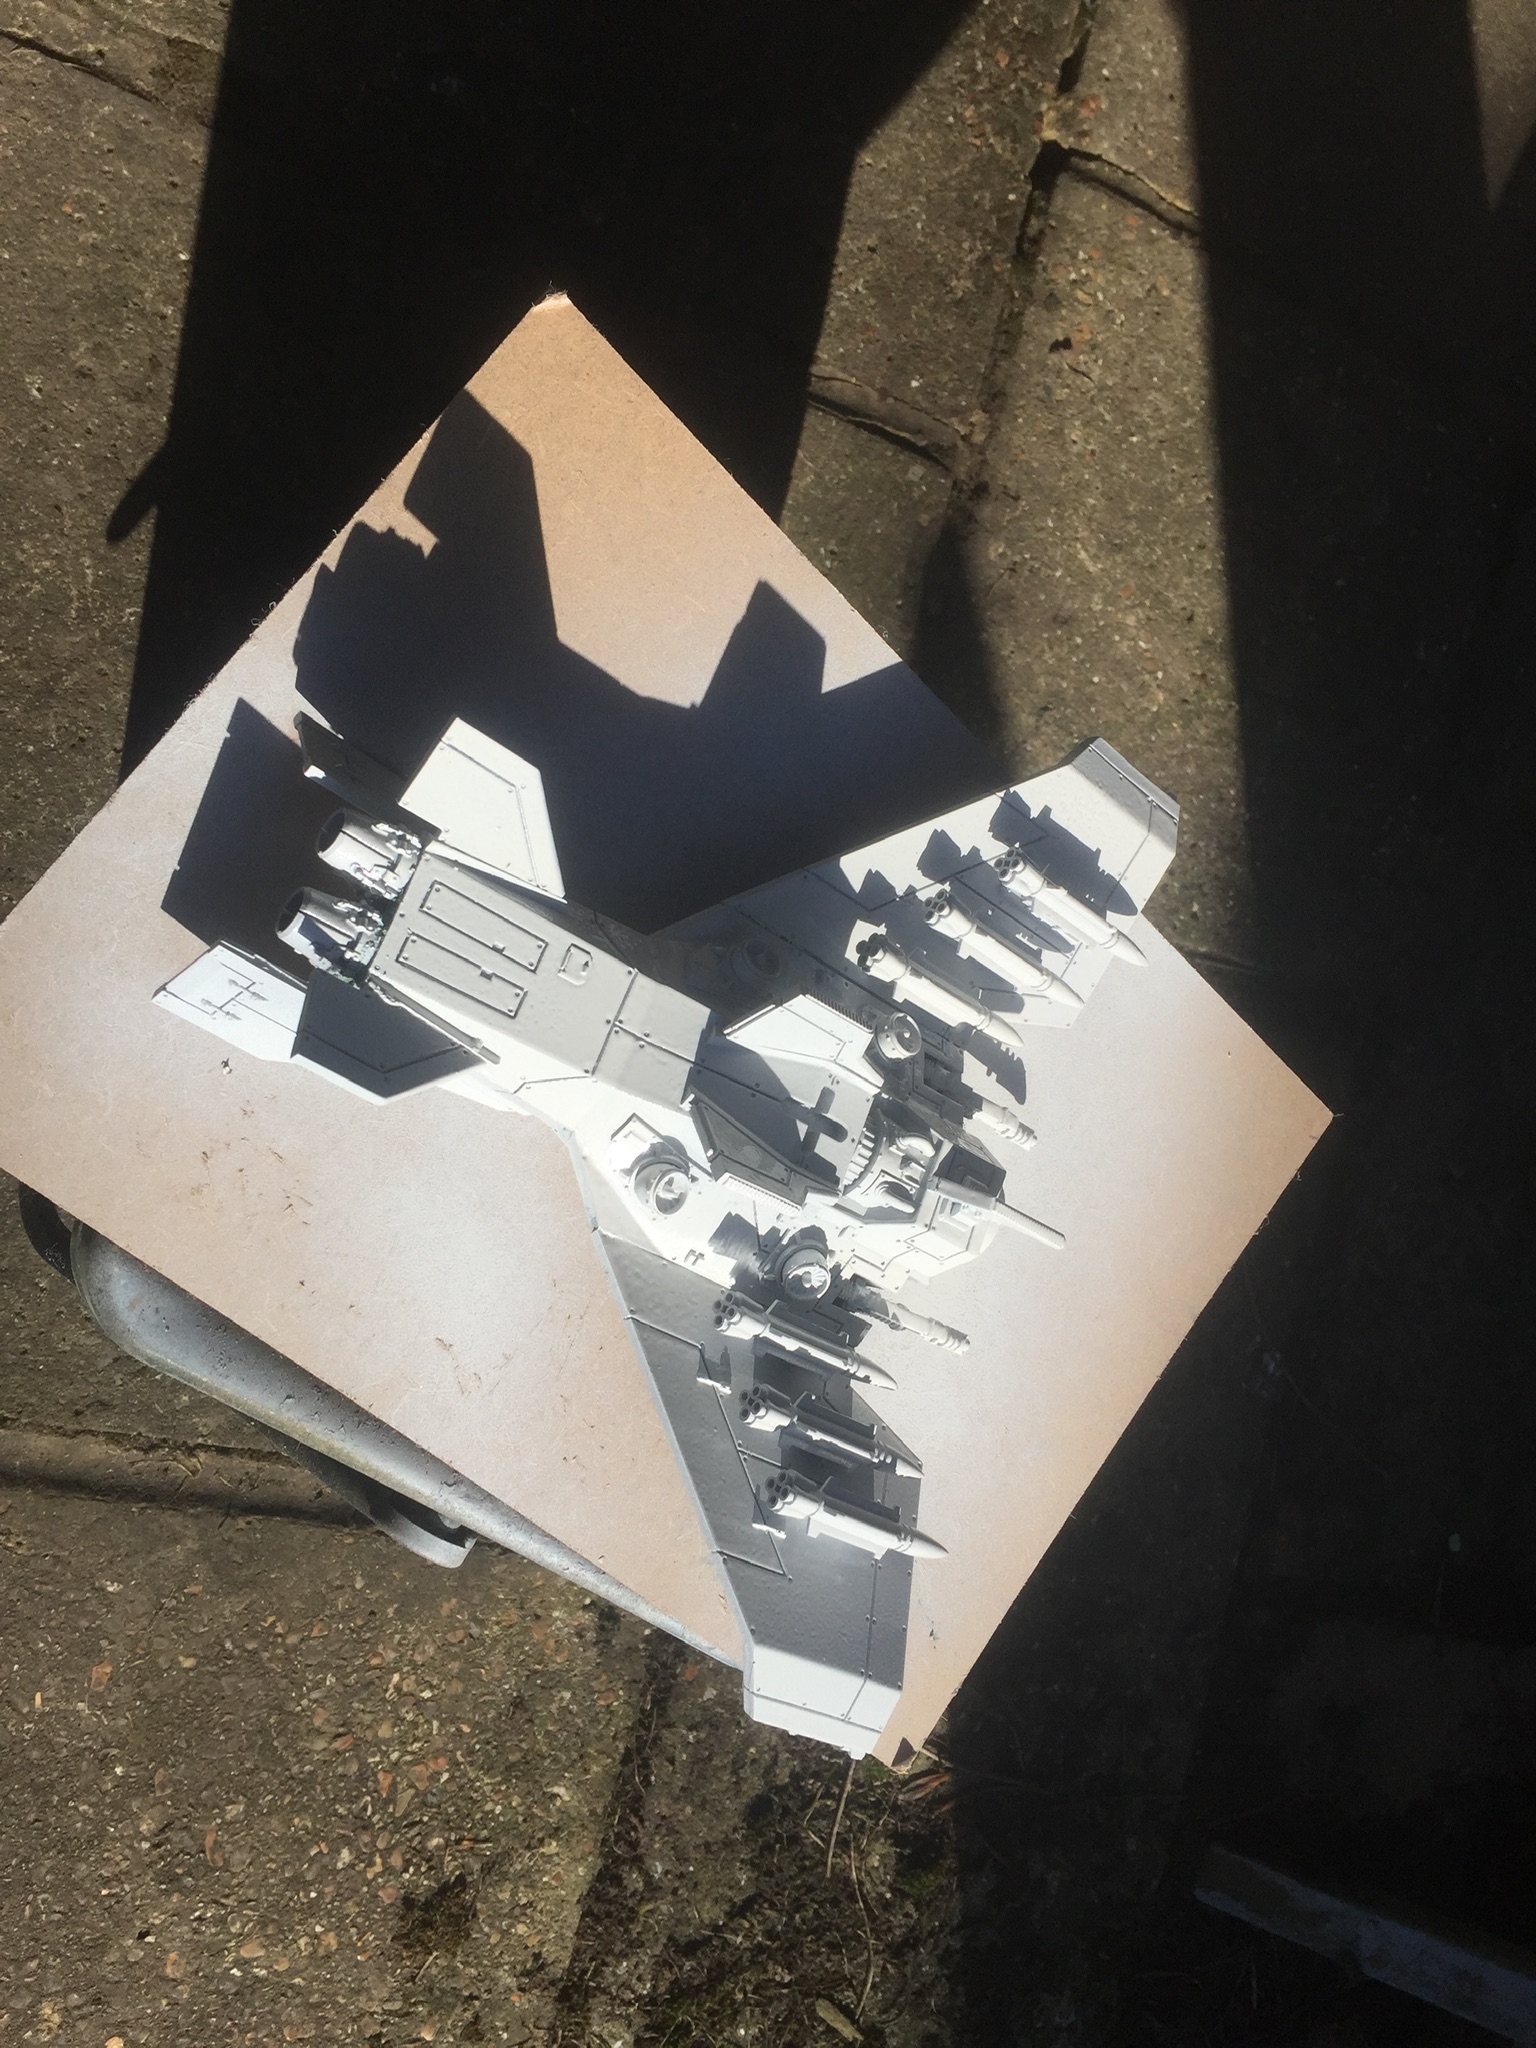


Next up will be to add colour and freehand designs to bring the Voss Pattern Lightning Fighter to life…
Time taken:
Pilot installation in cockpit 30 minutes
Undercoating including drying time 1 Hour and 30 minutes
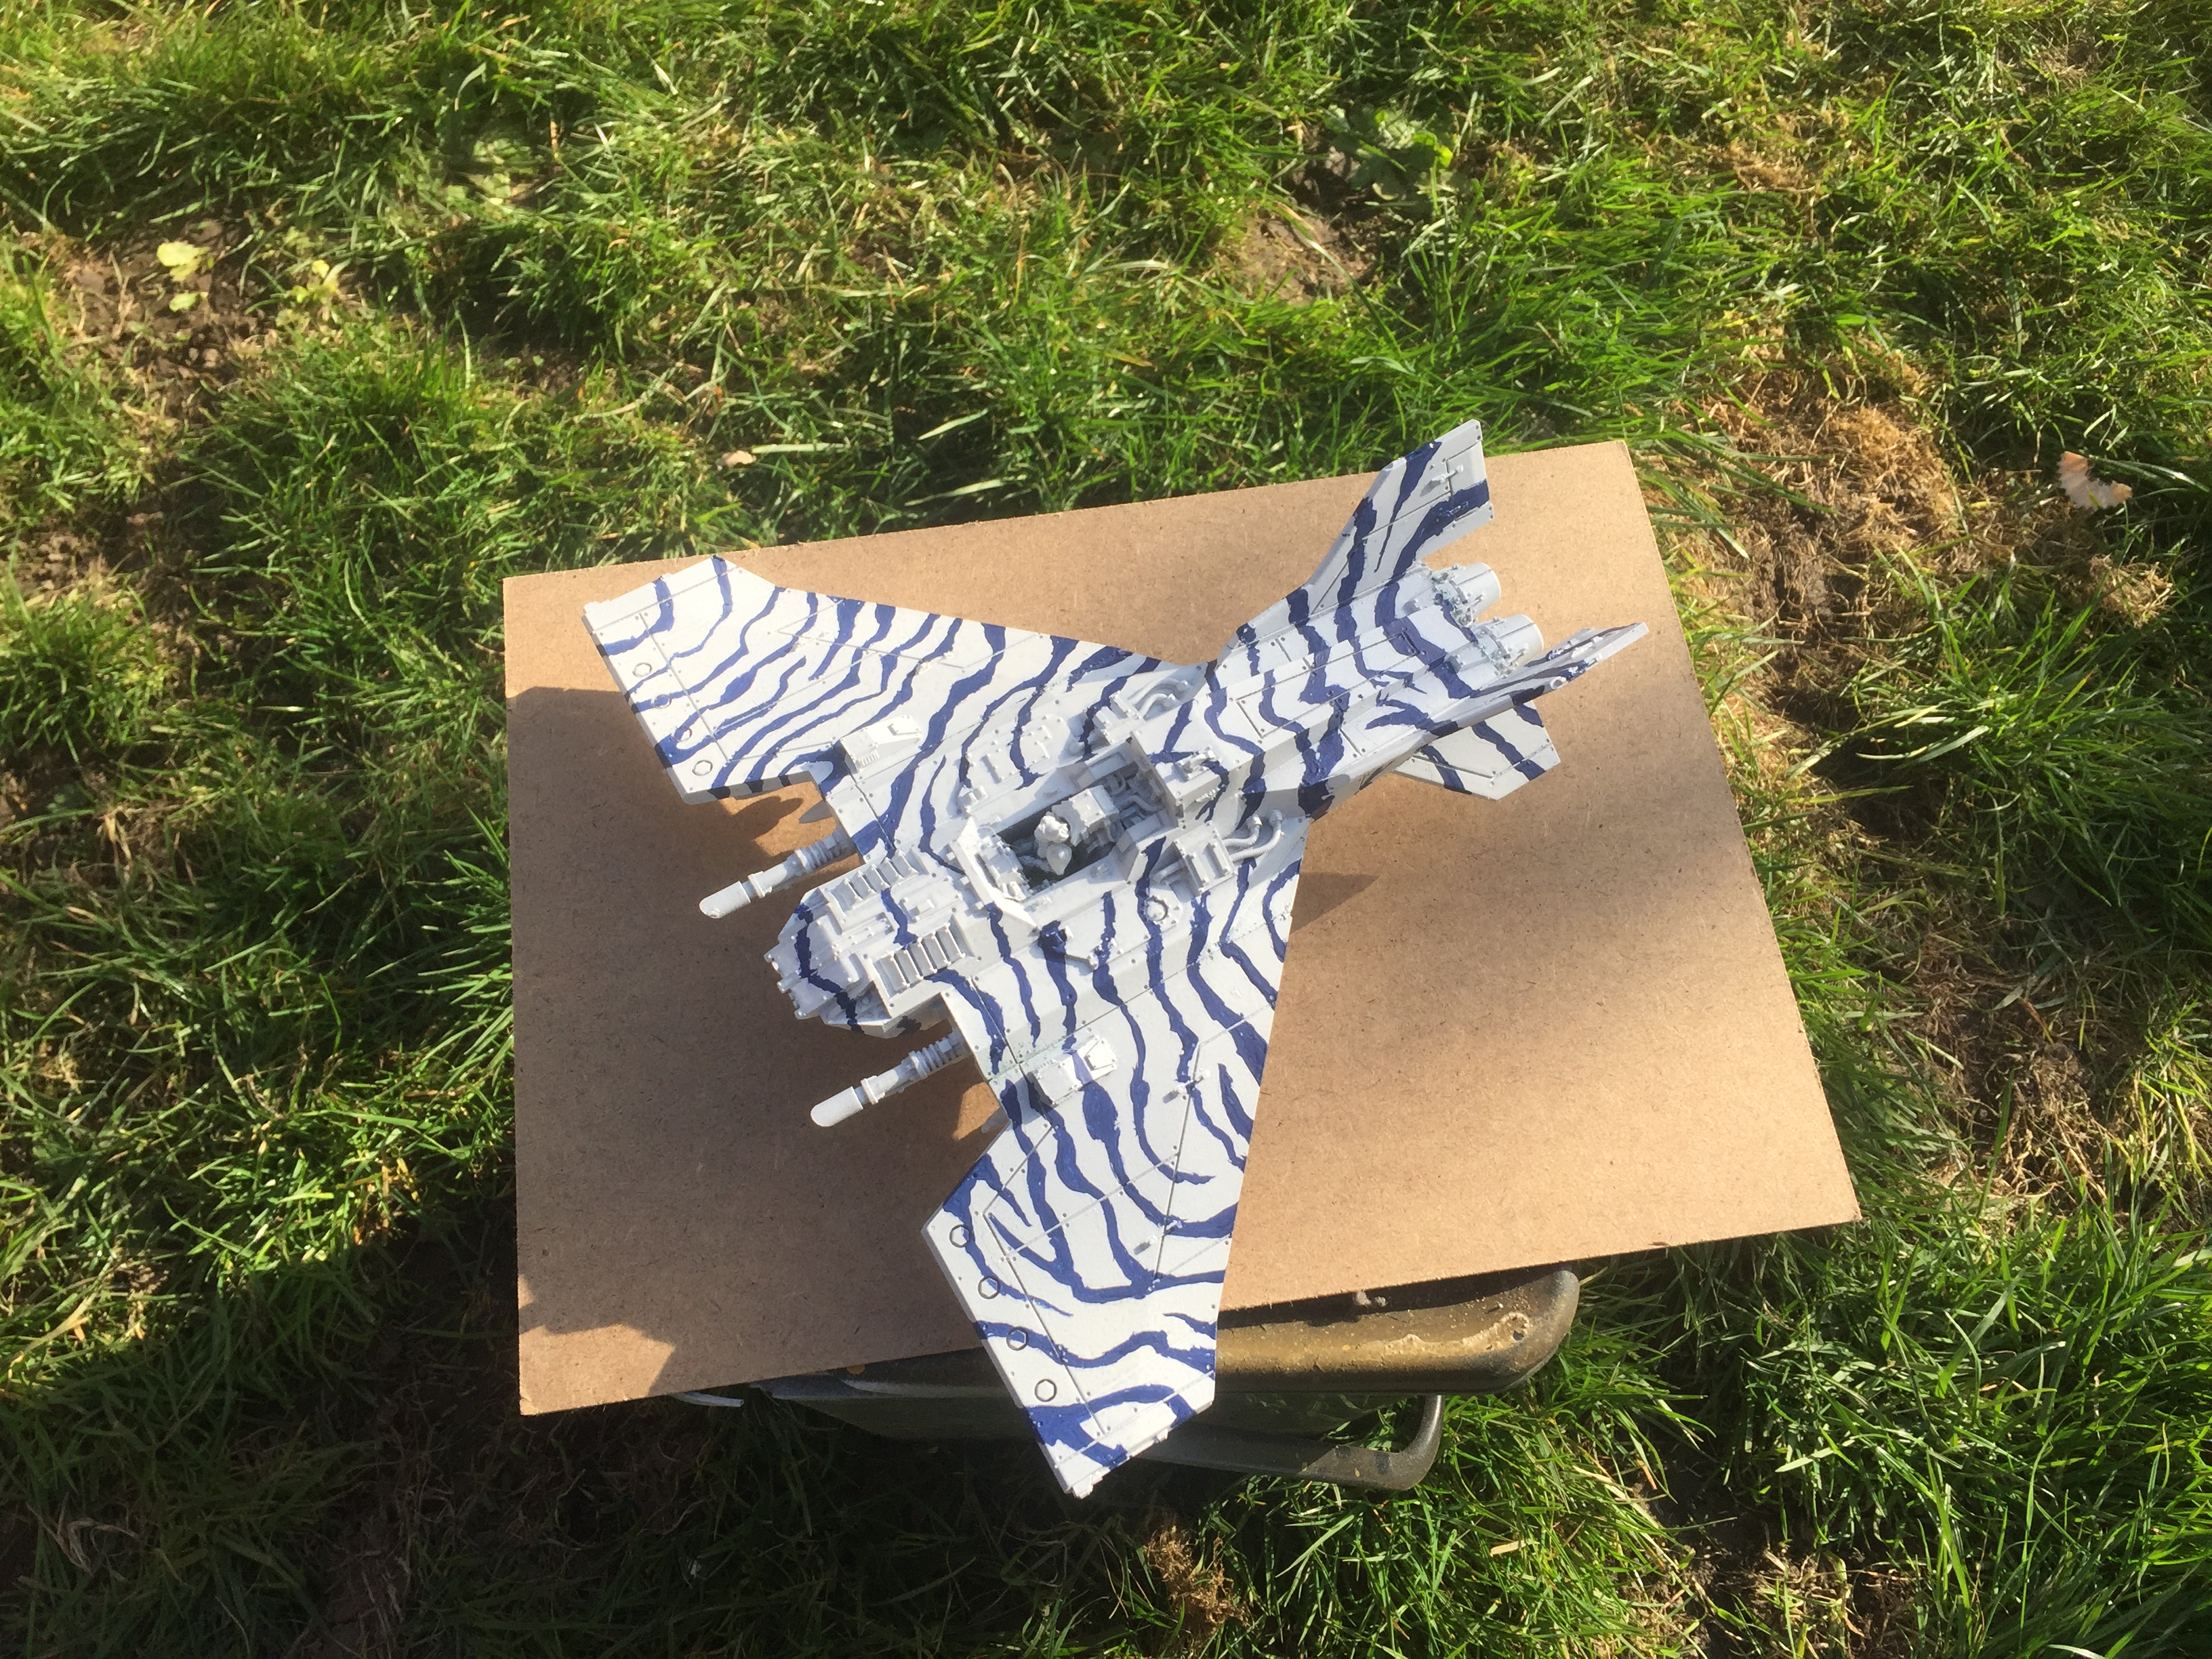
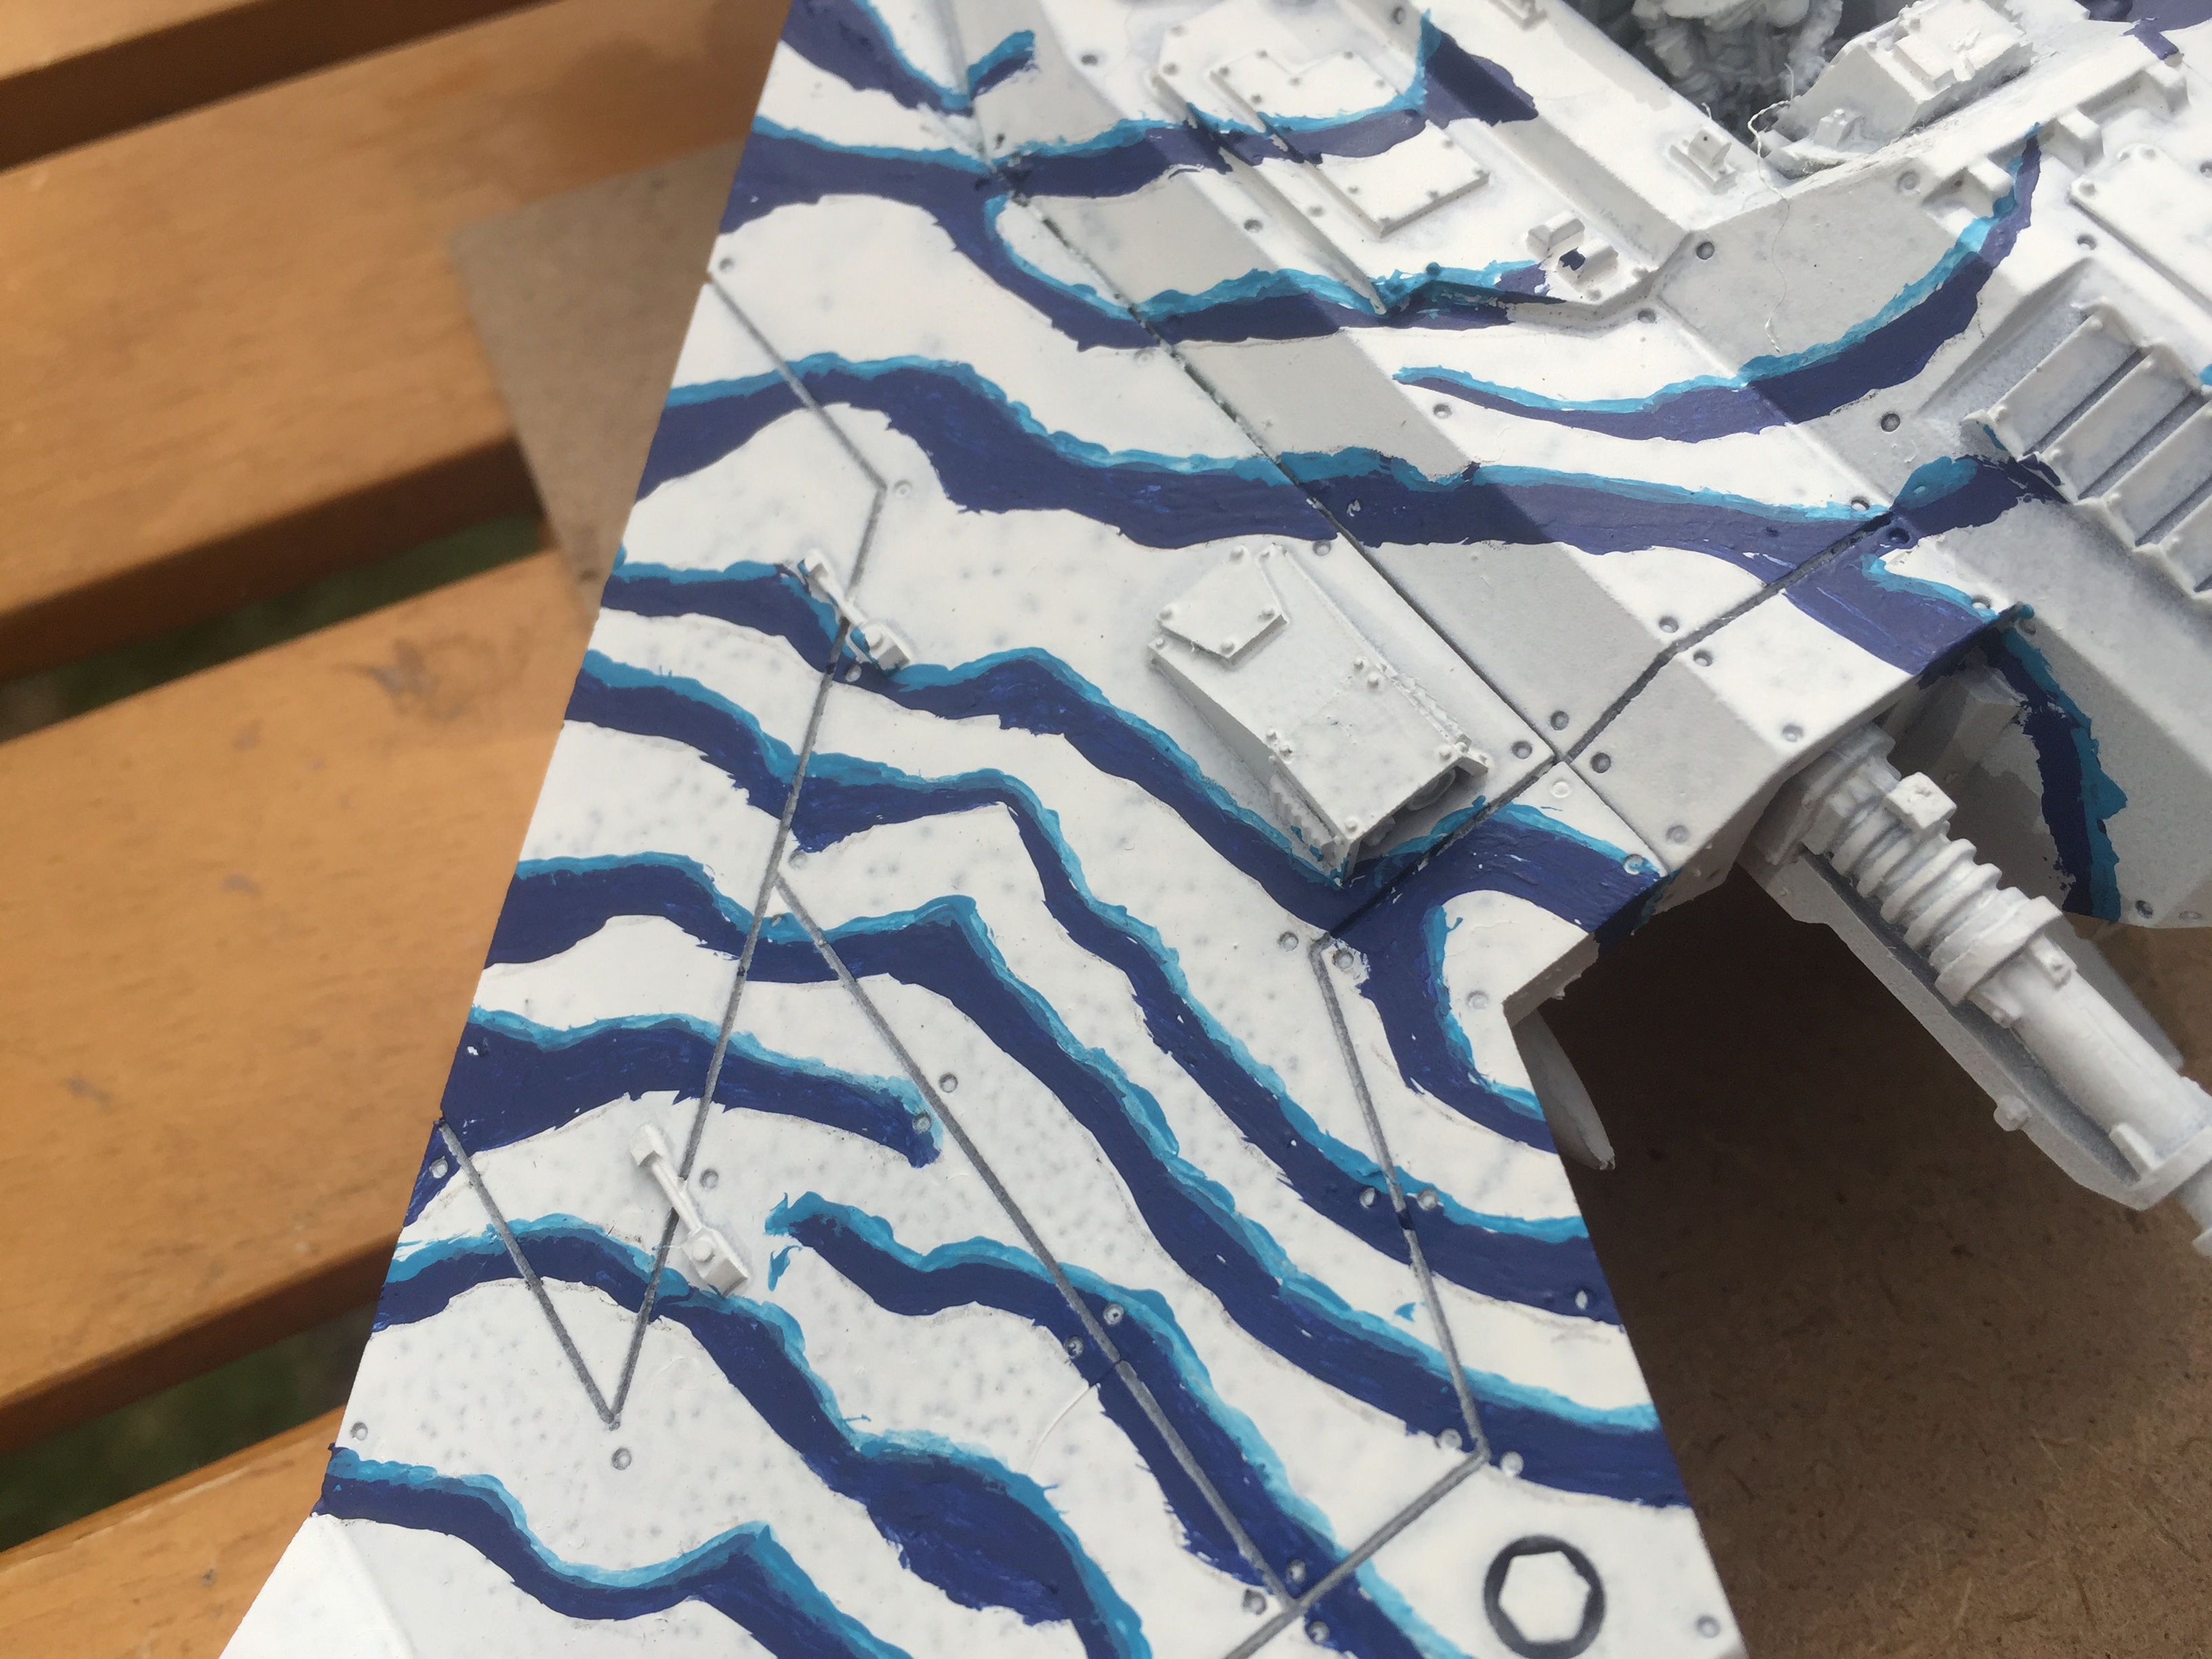
Voss Pattern Lightning. - Zebra stripes camouflage base layer
I’ve decided that the Voss Pattern Lightning will be the wing partner to the Thunderbolt and scouting ahead like an outrider. The original Red Baron’s Squadron had multicoloured fuselage with each pilot able to customise their plane almost akin to a knight and their bespoke heraldry.
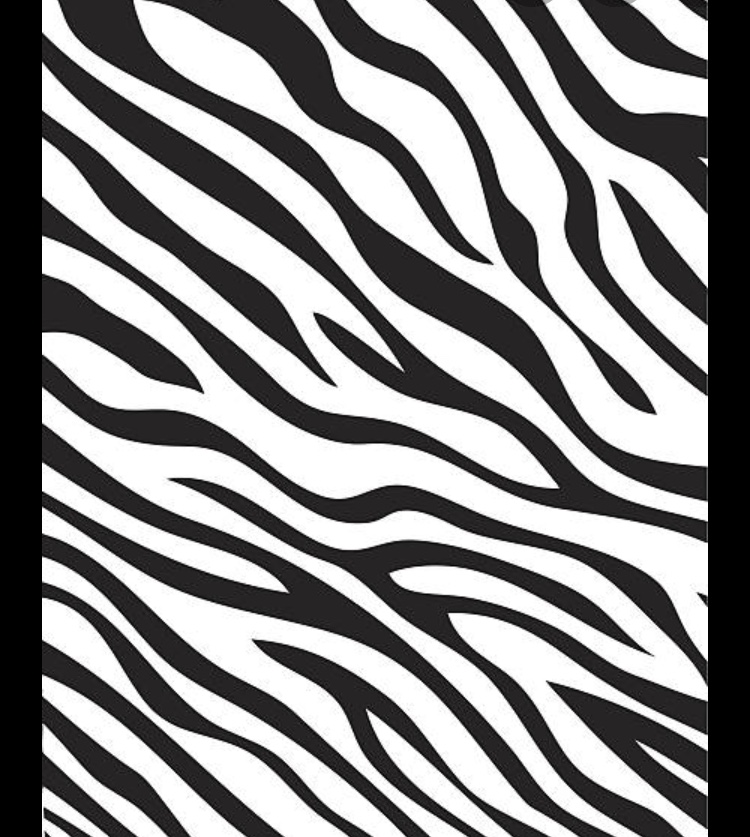
So, for the Voss Pattern Lightning I’ve decided on a zebra pattern for the upper side of the wings.
First of all I selected an appropriate image of a zebra skin pattern from the Internet and used that as a guide to drawing, with a sharp fine pencil, the stripes onto the wings.
Once the drawing was complete I selected Citadel Macragge Blue paint as the initial base colour for the zebra stripes. This fighter will be my interpretation of ‘The Blue Max’.
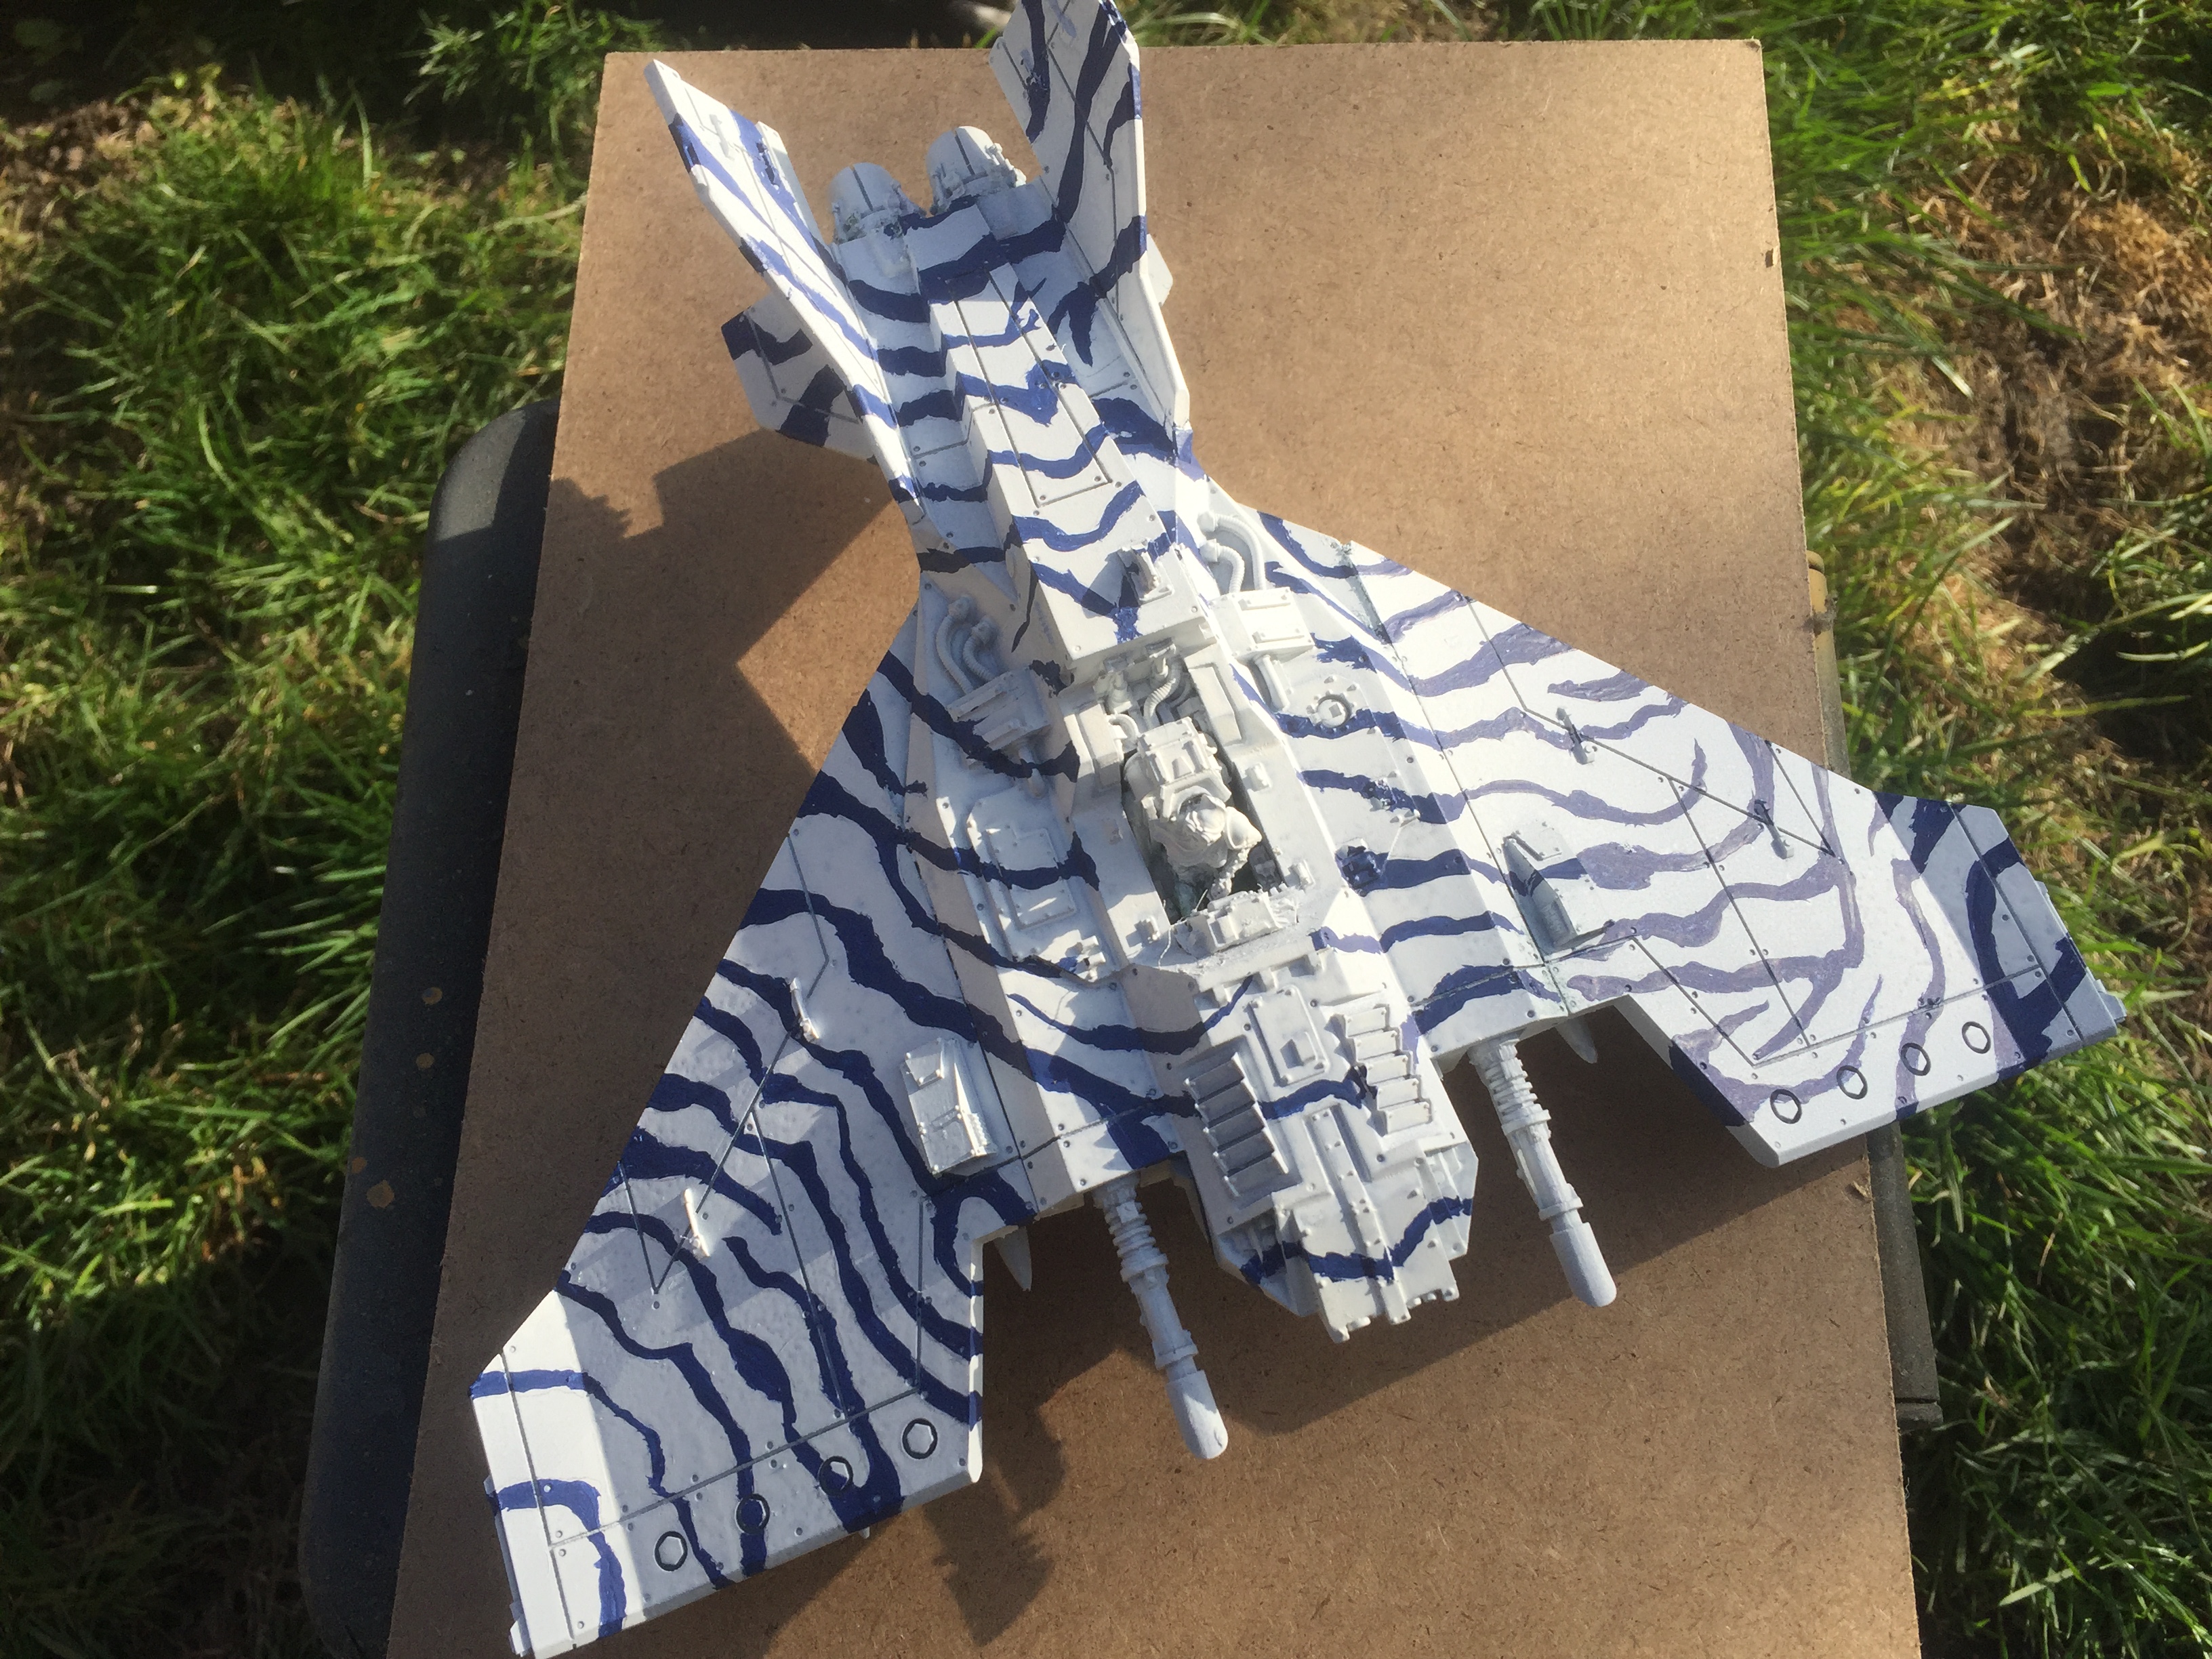 Base layer of zebra stripes applied to wings and upper fuselage.
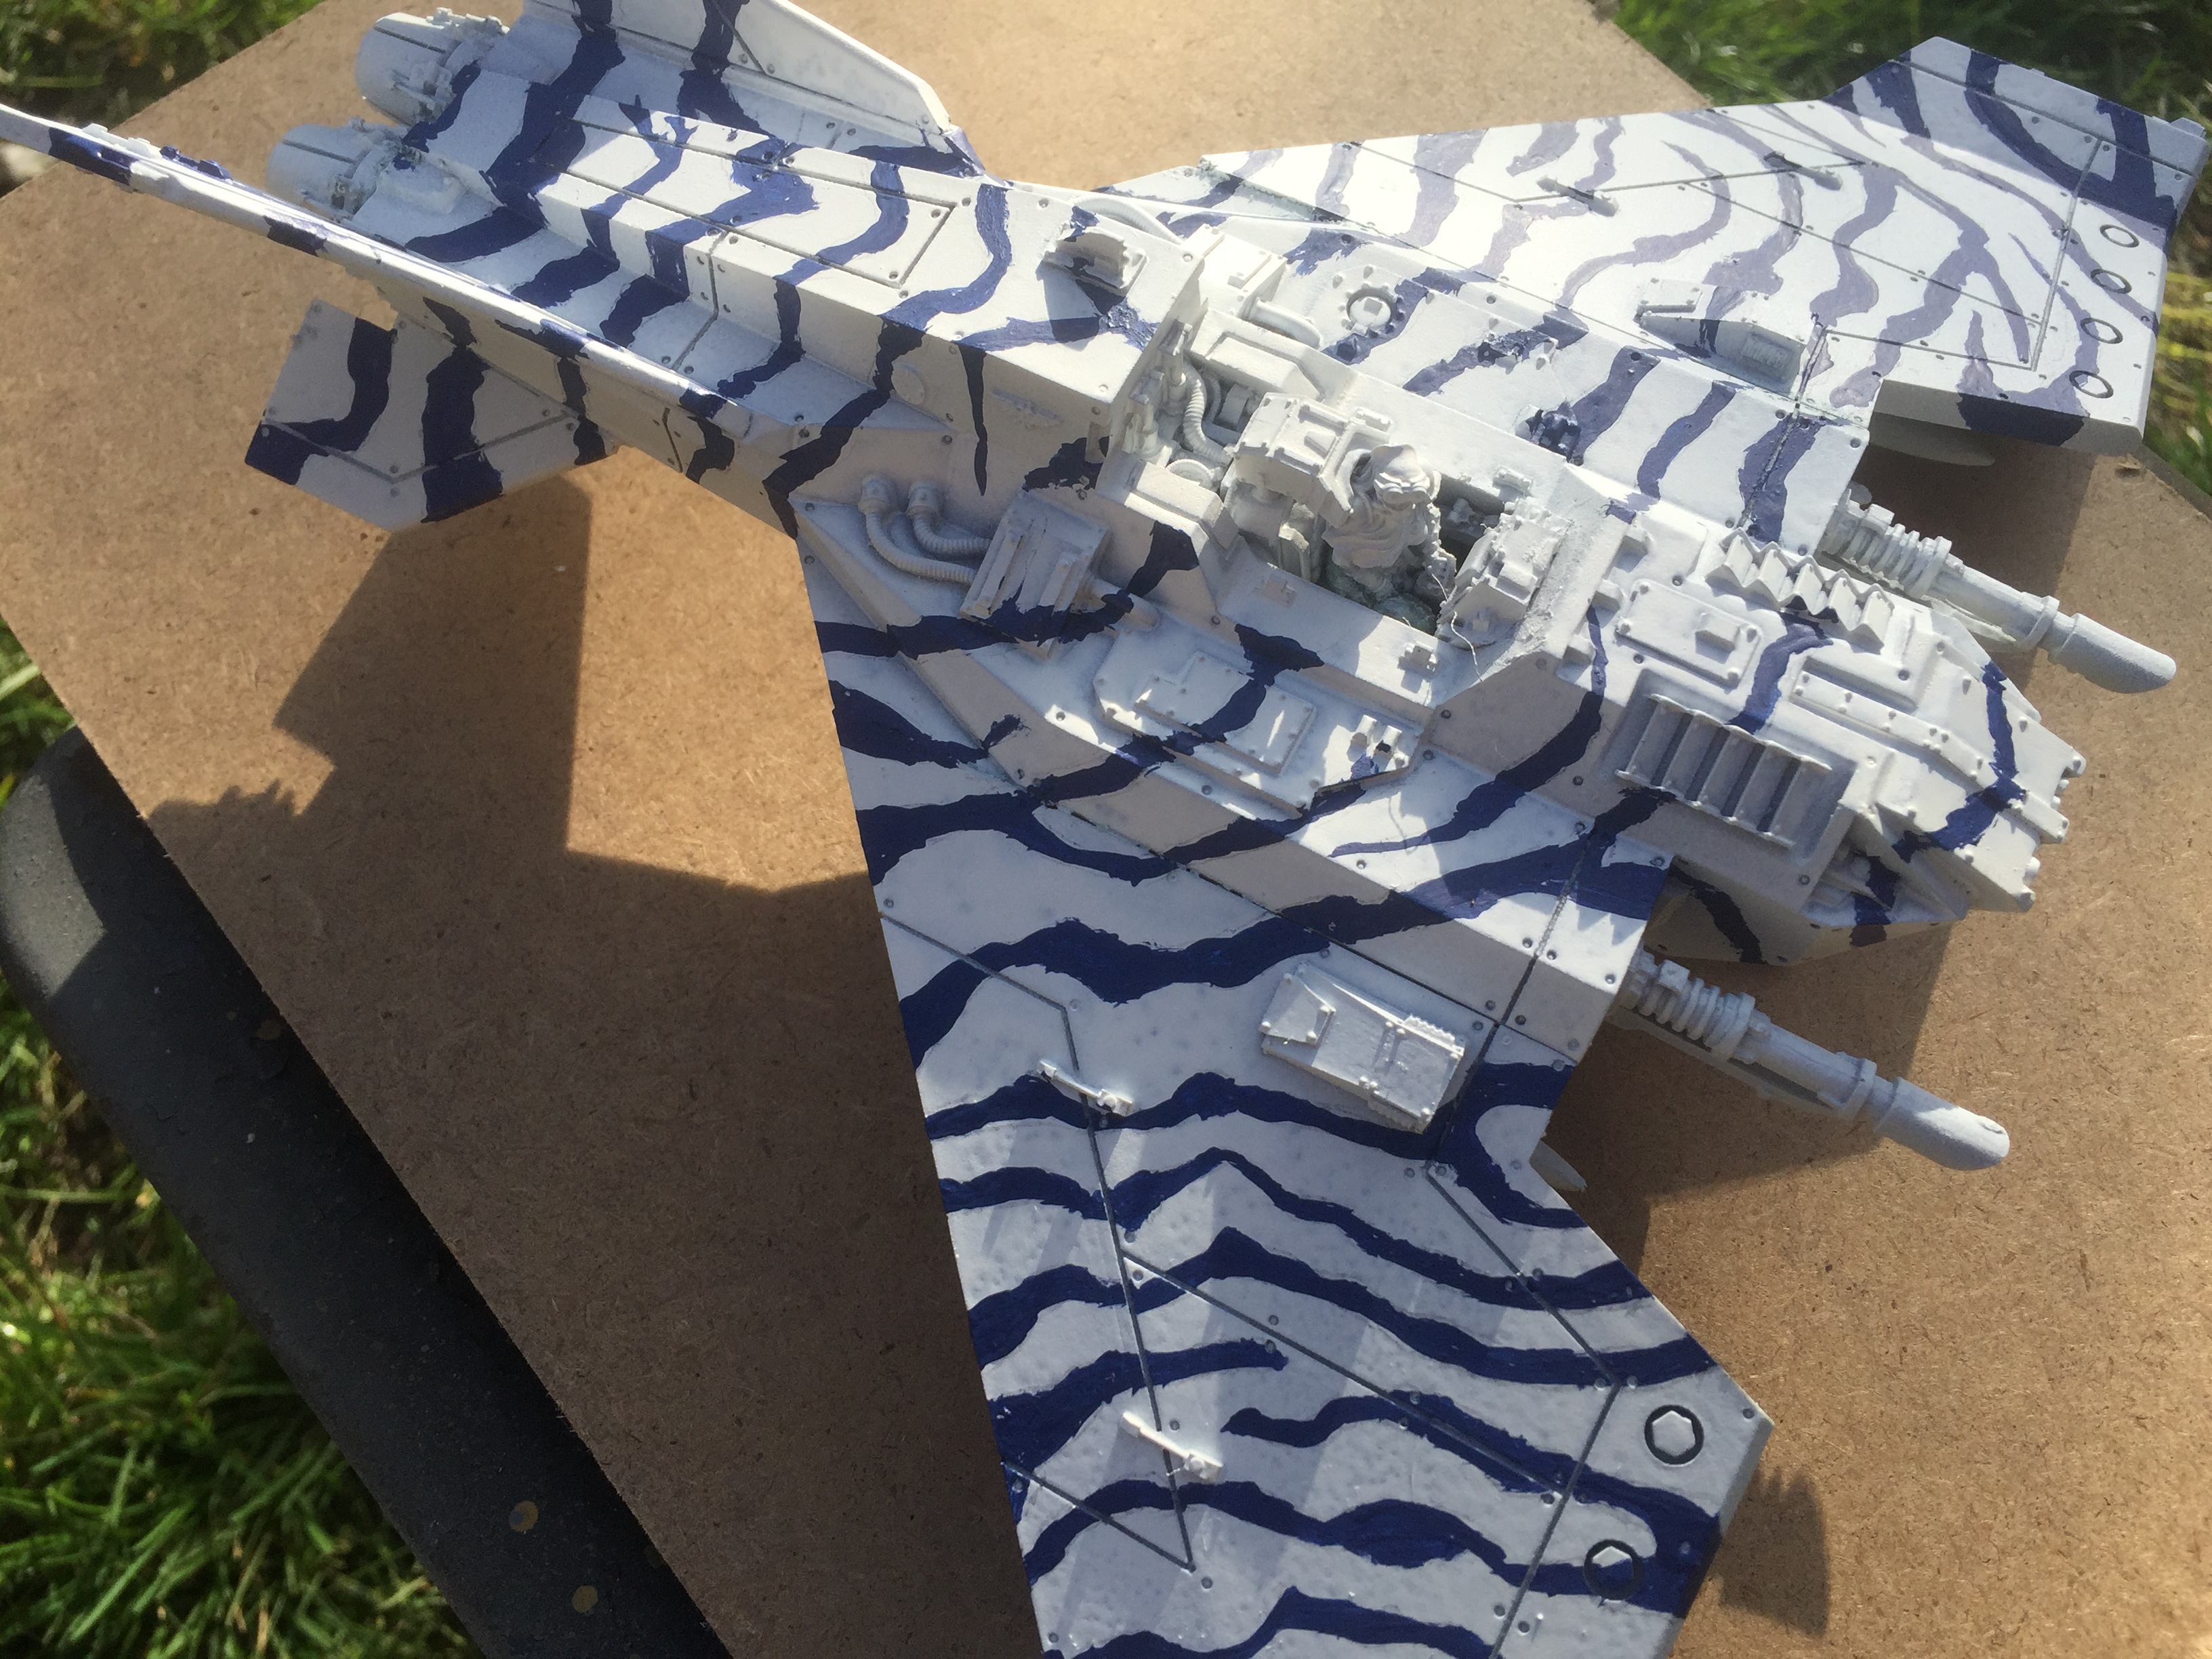
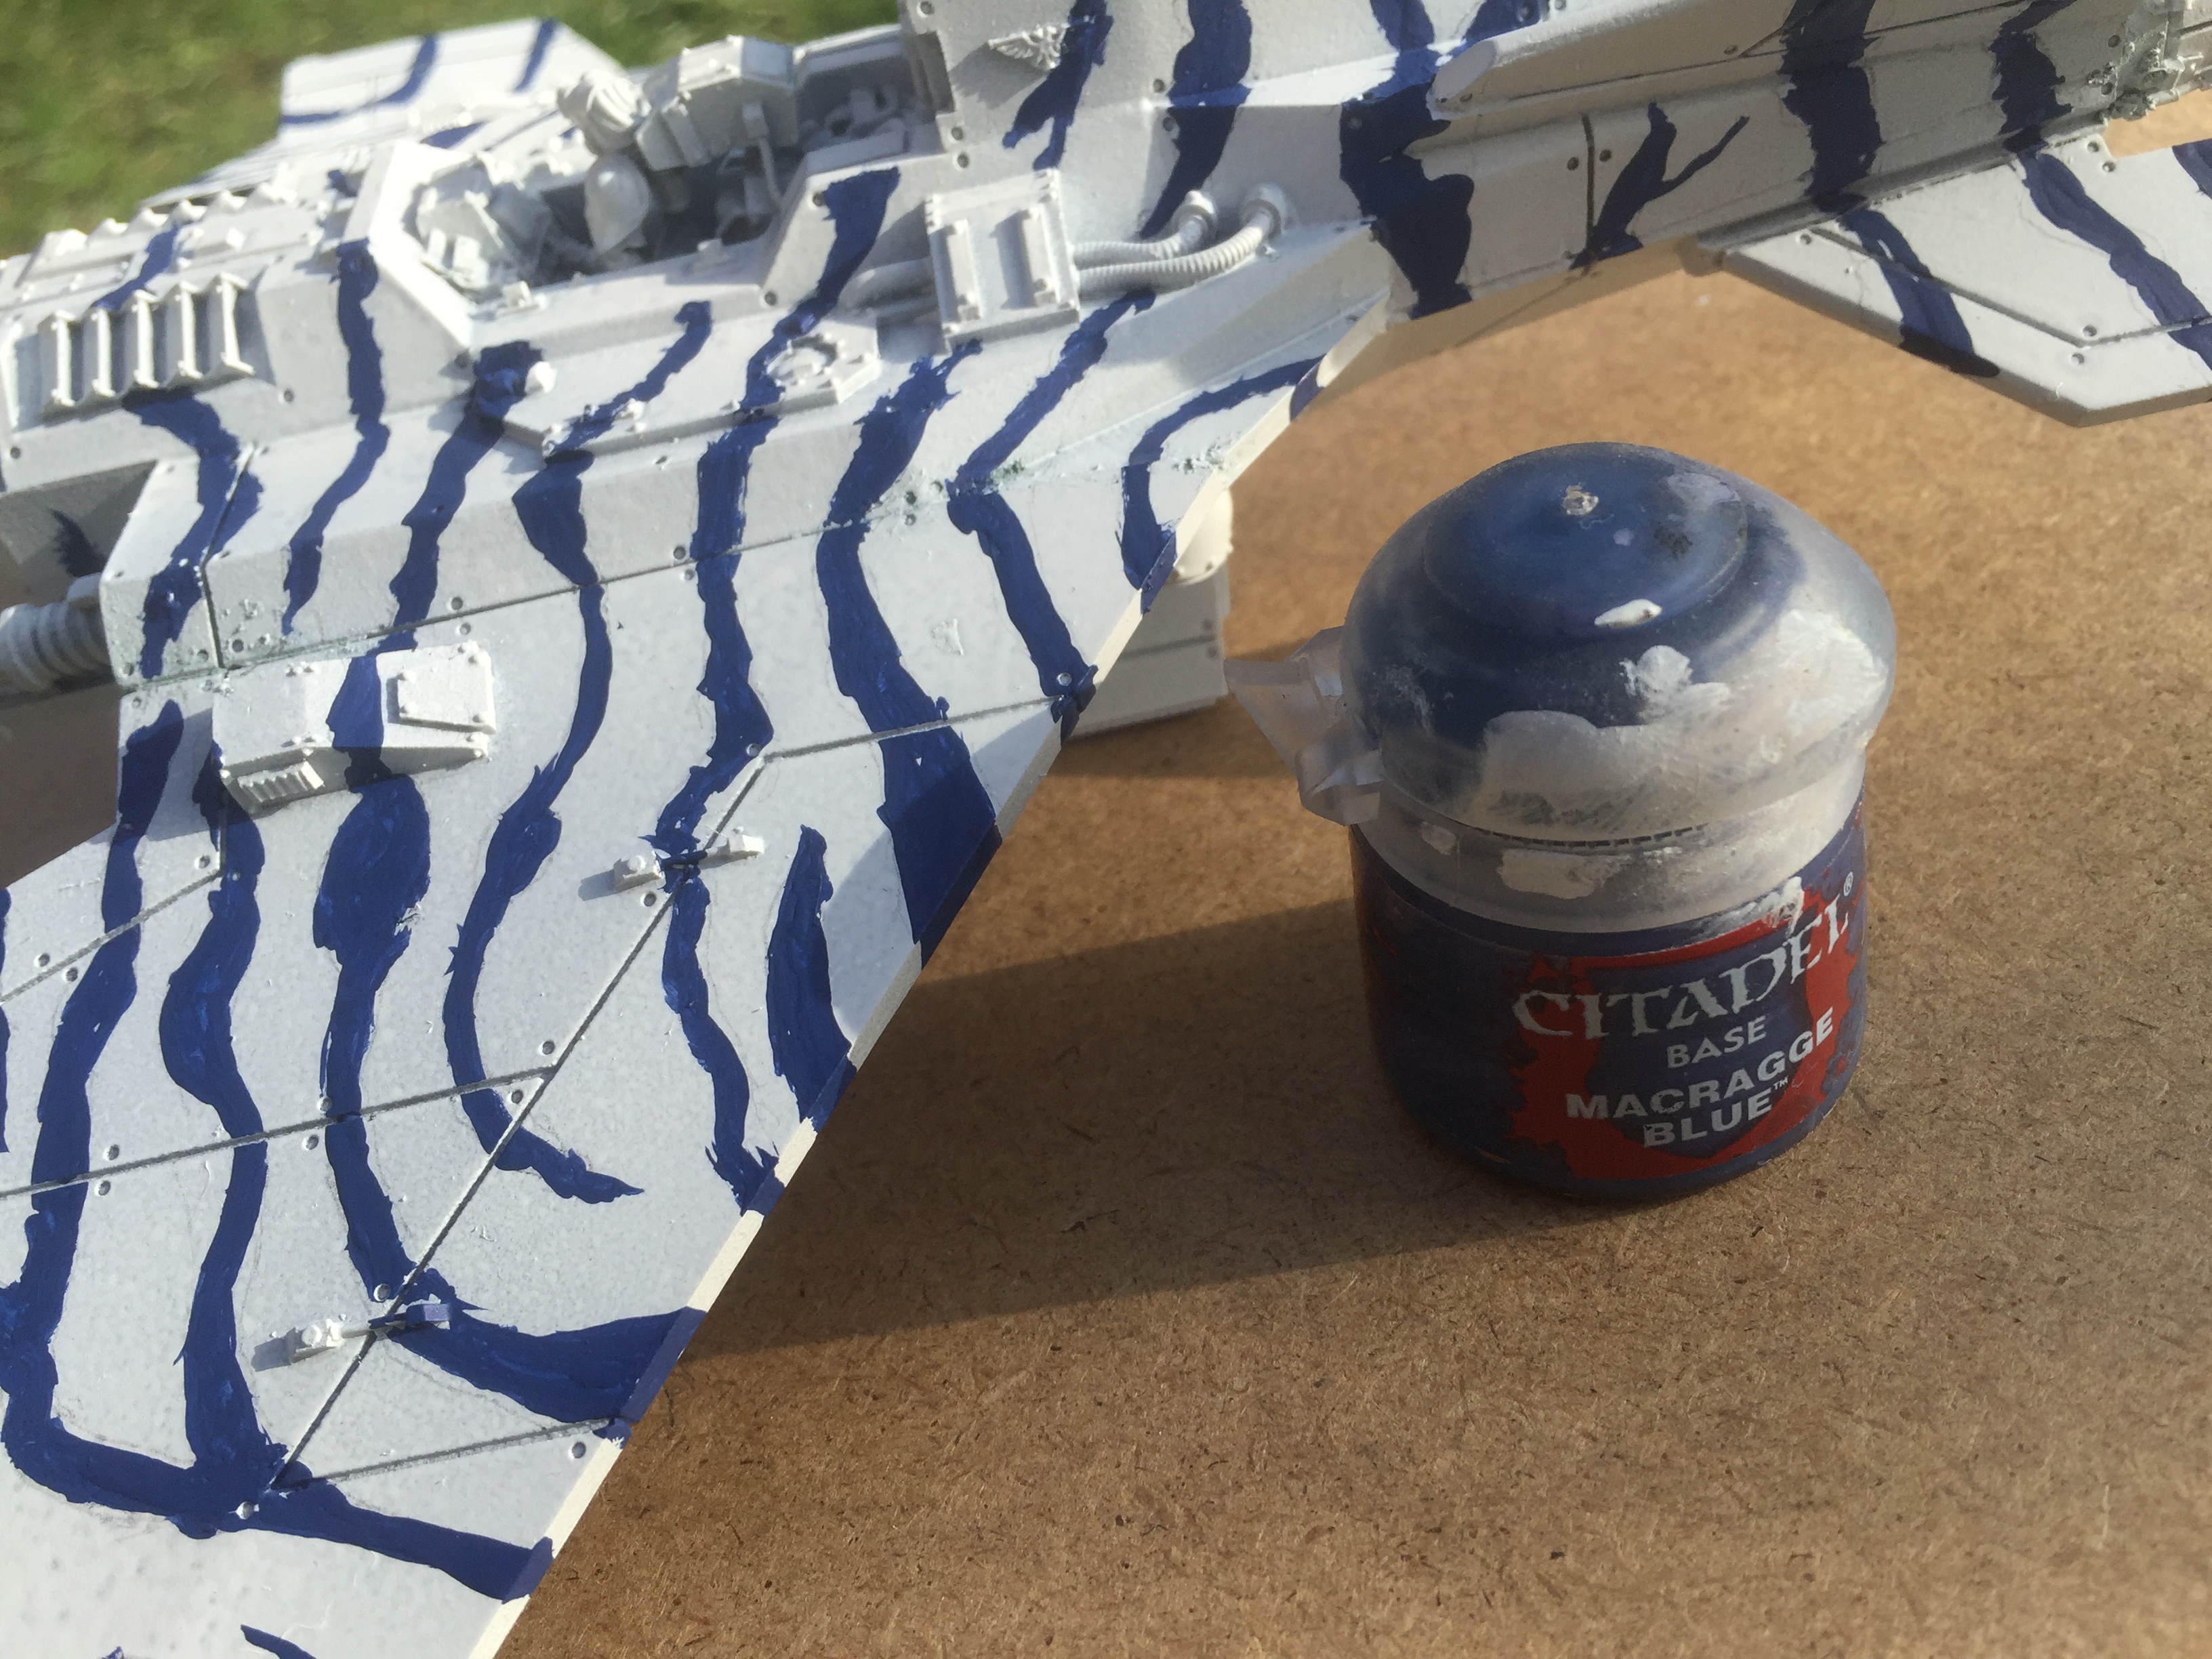
Next up will be to get a 3D effect into the stripes with further layering and highlights.
Time taken:
Drawing zebra stripes 1 Hour
Painting base layer of stripes 1 Hour
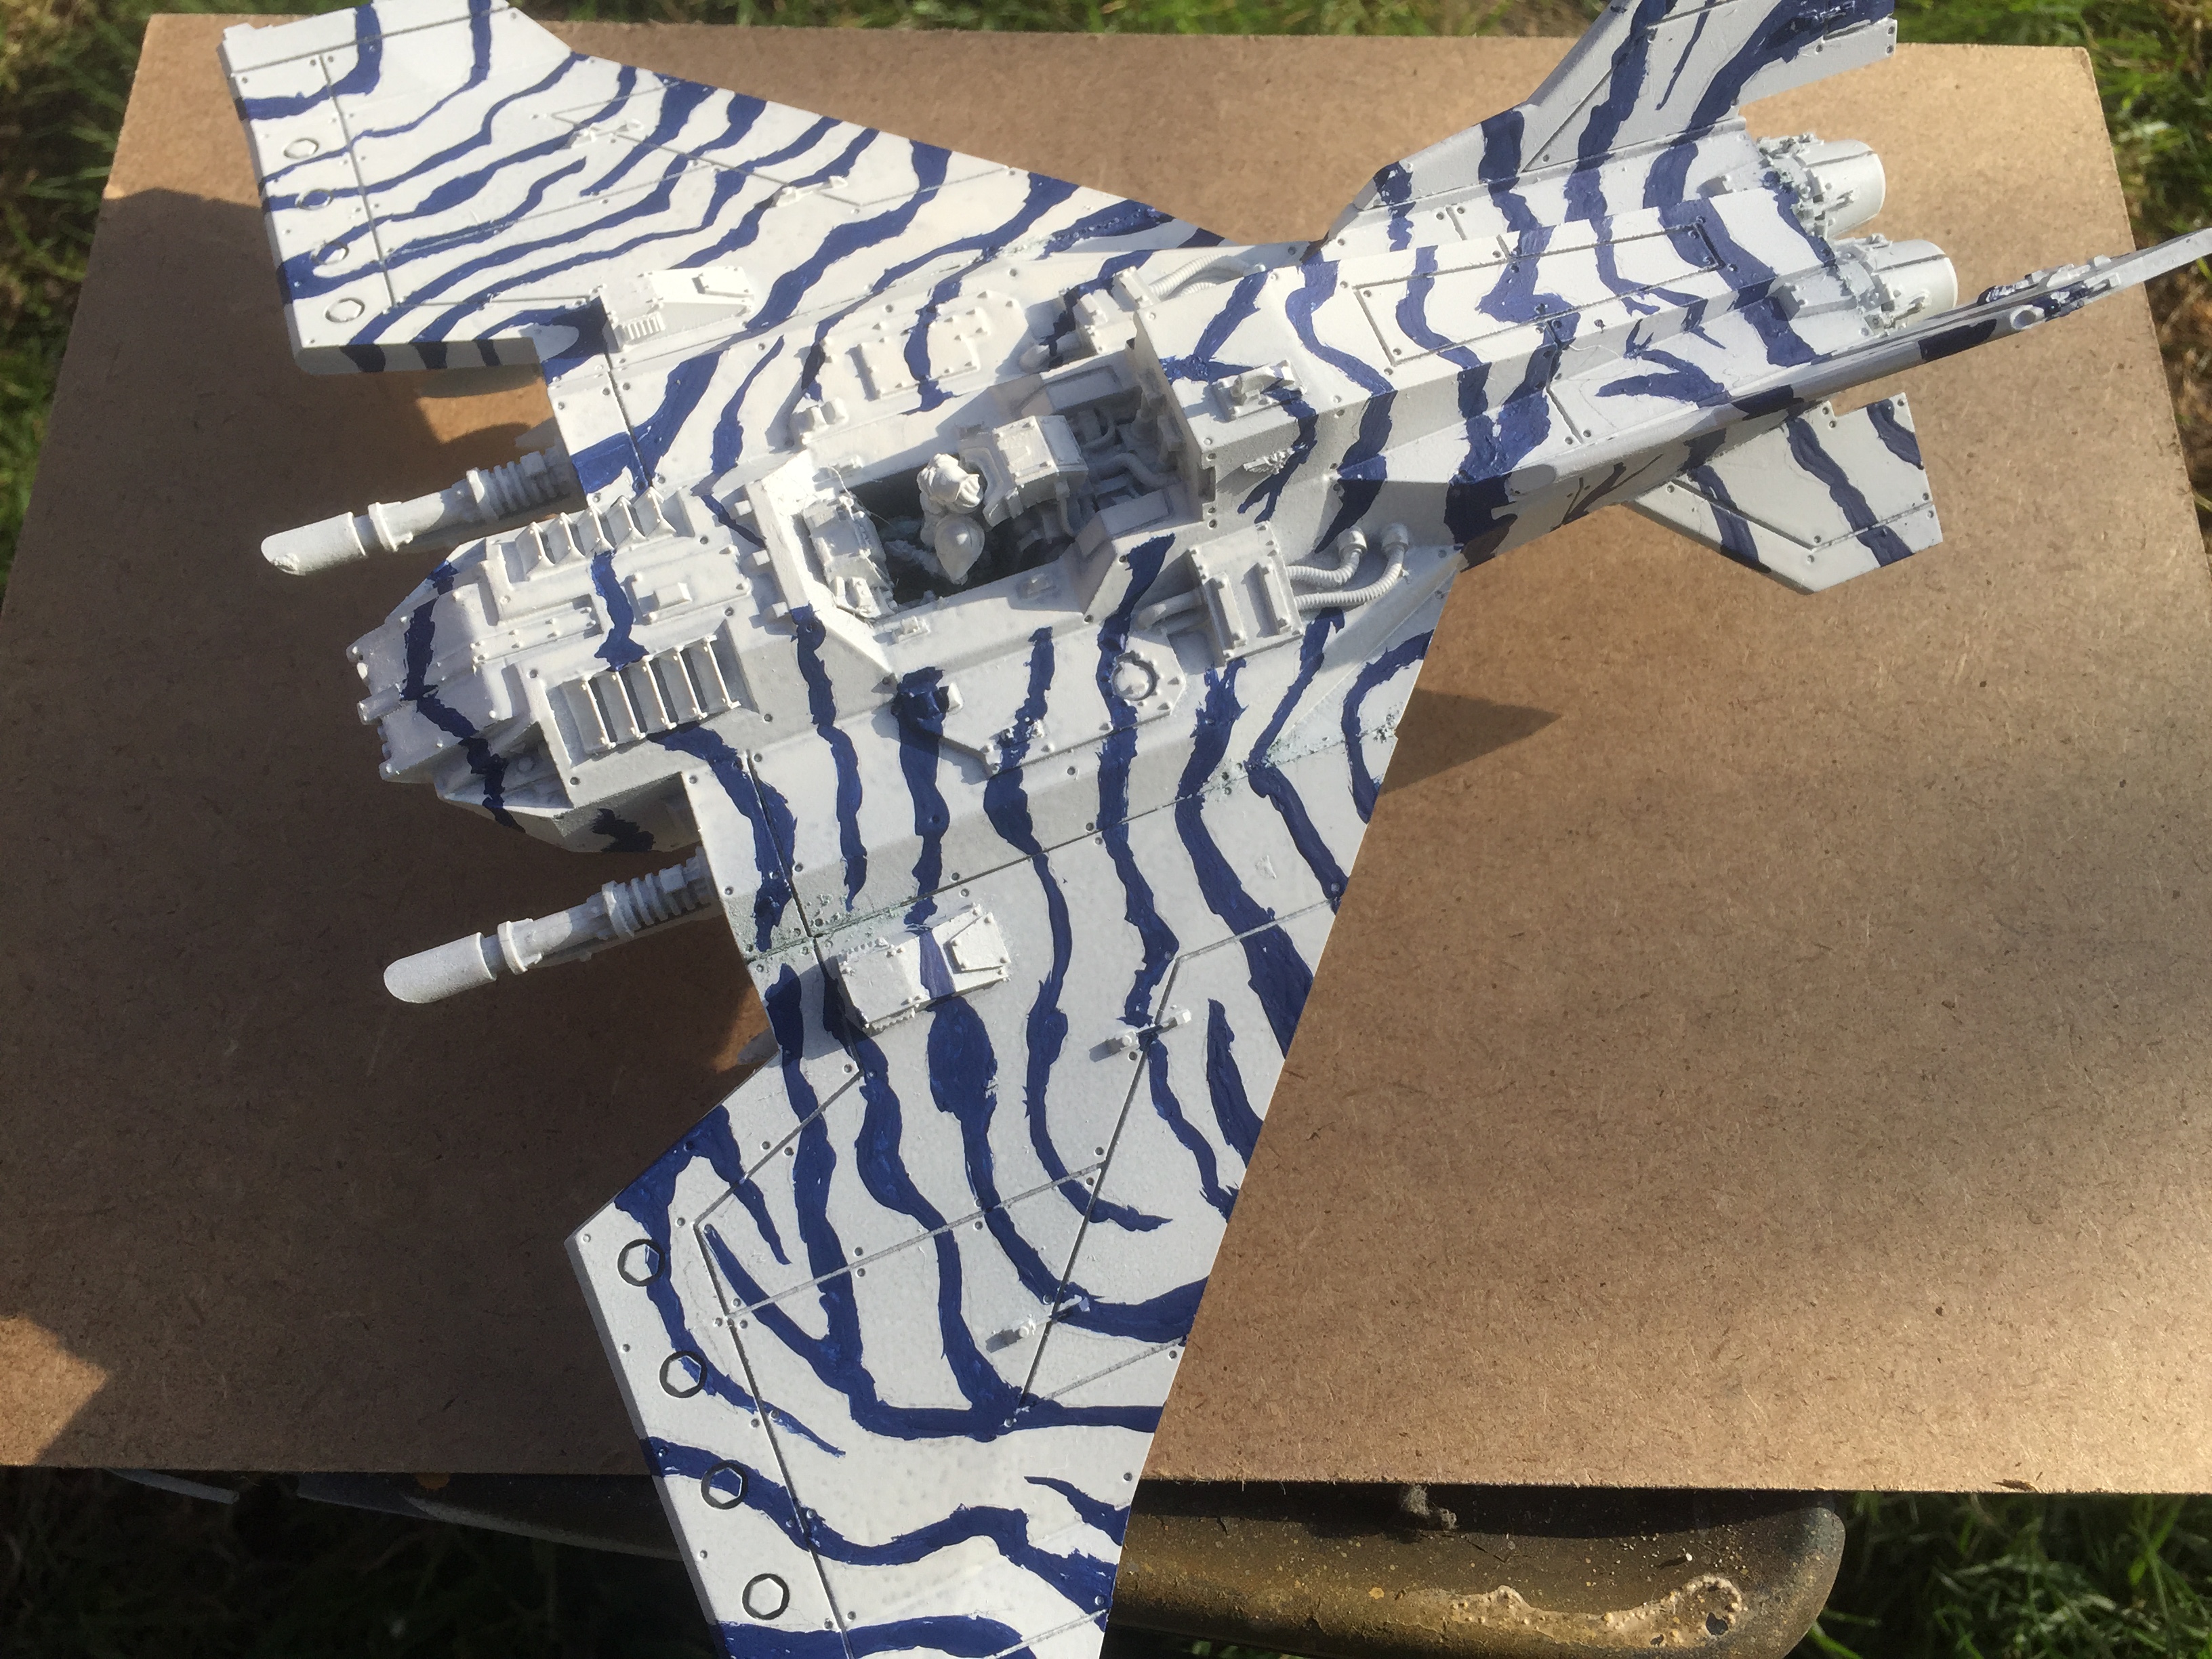
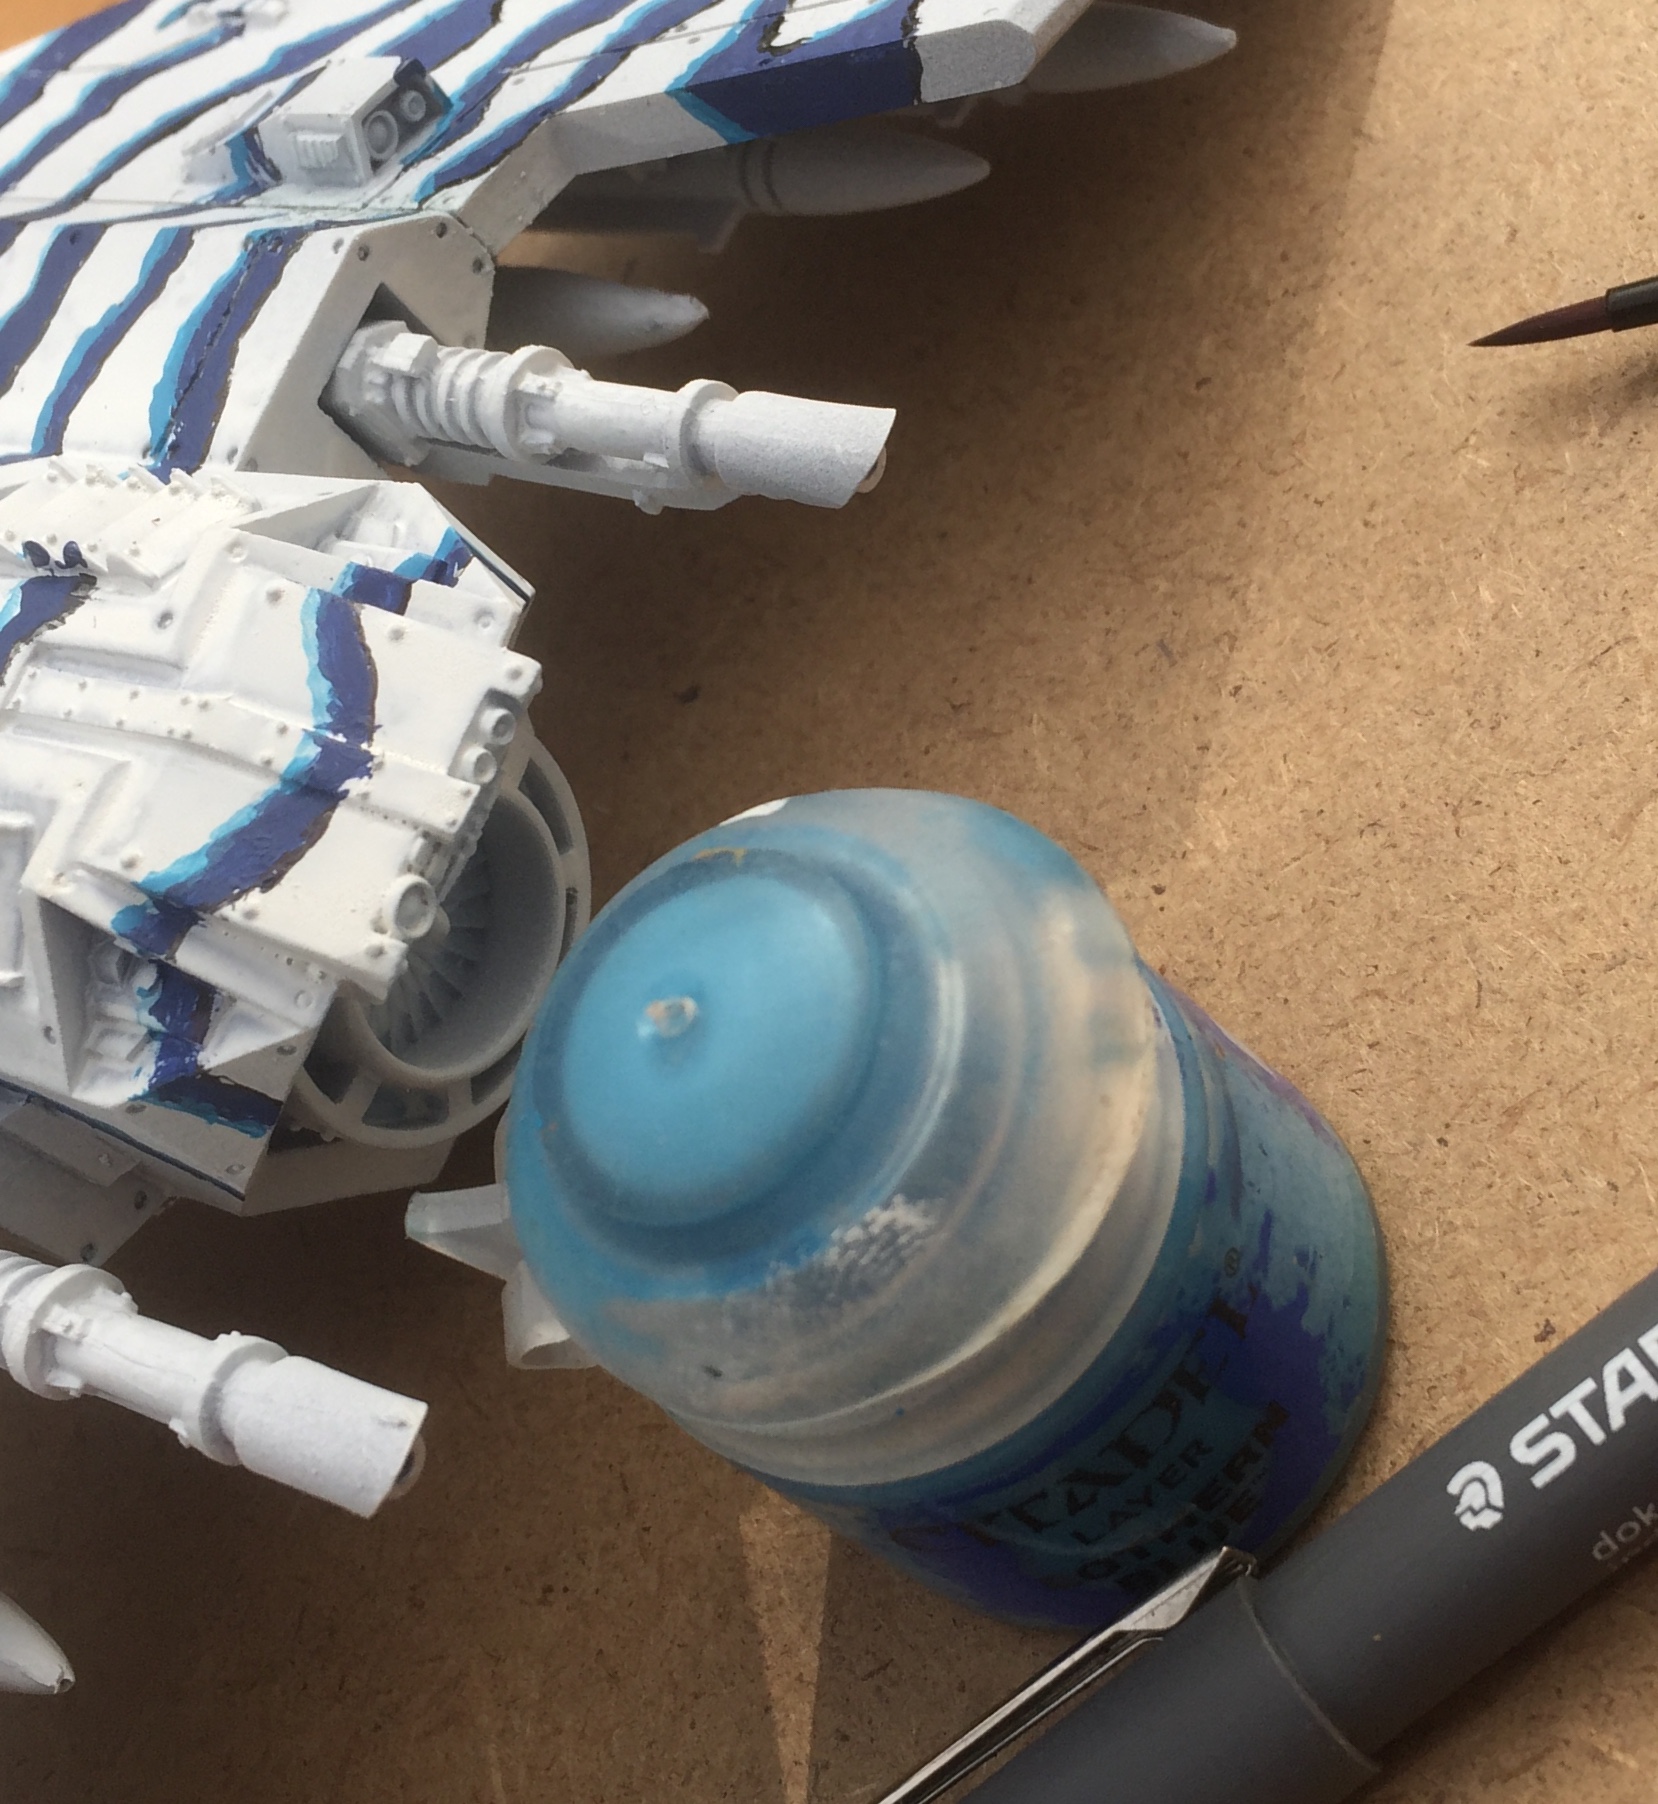
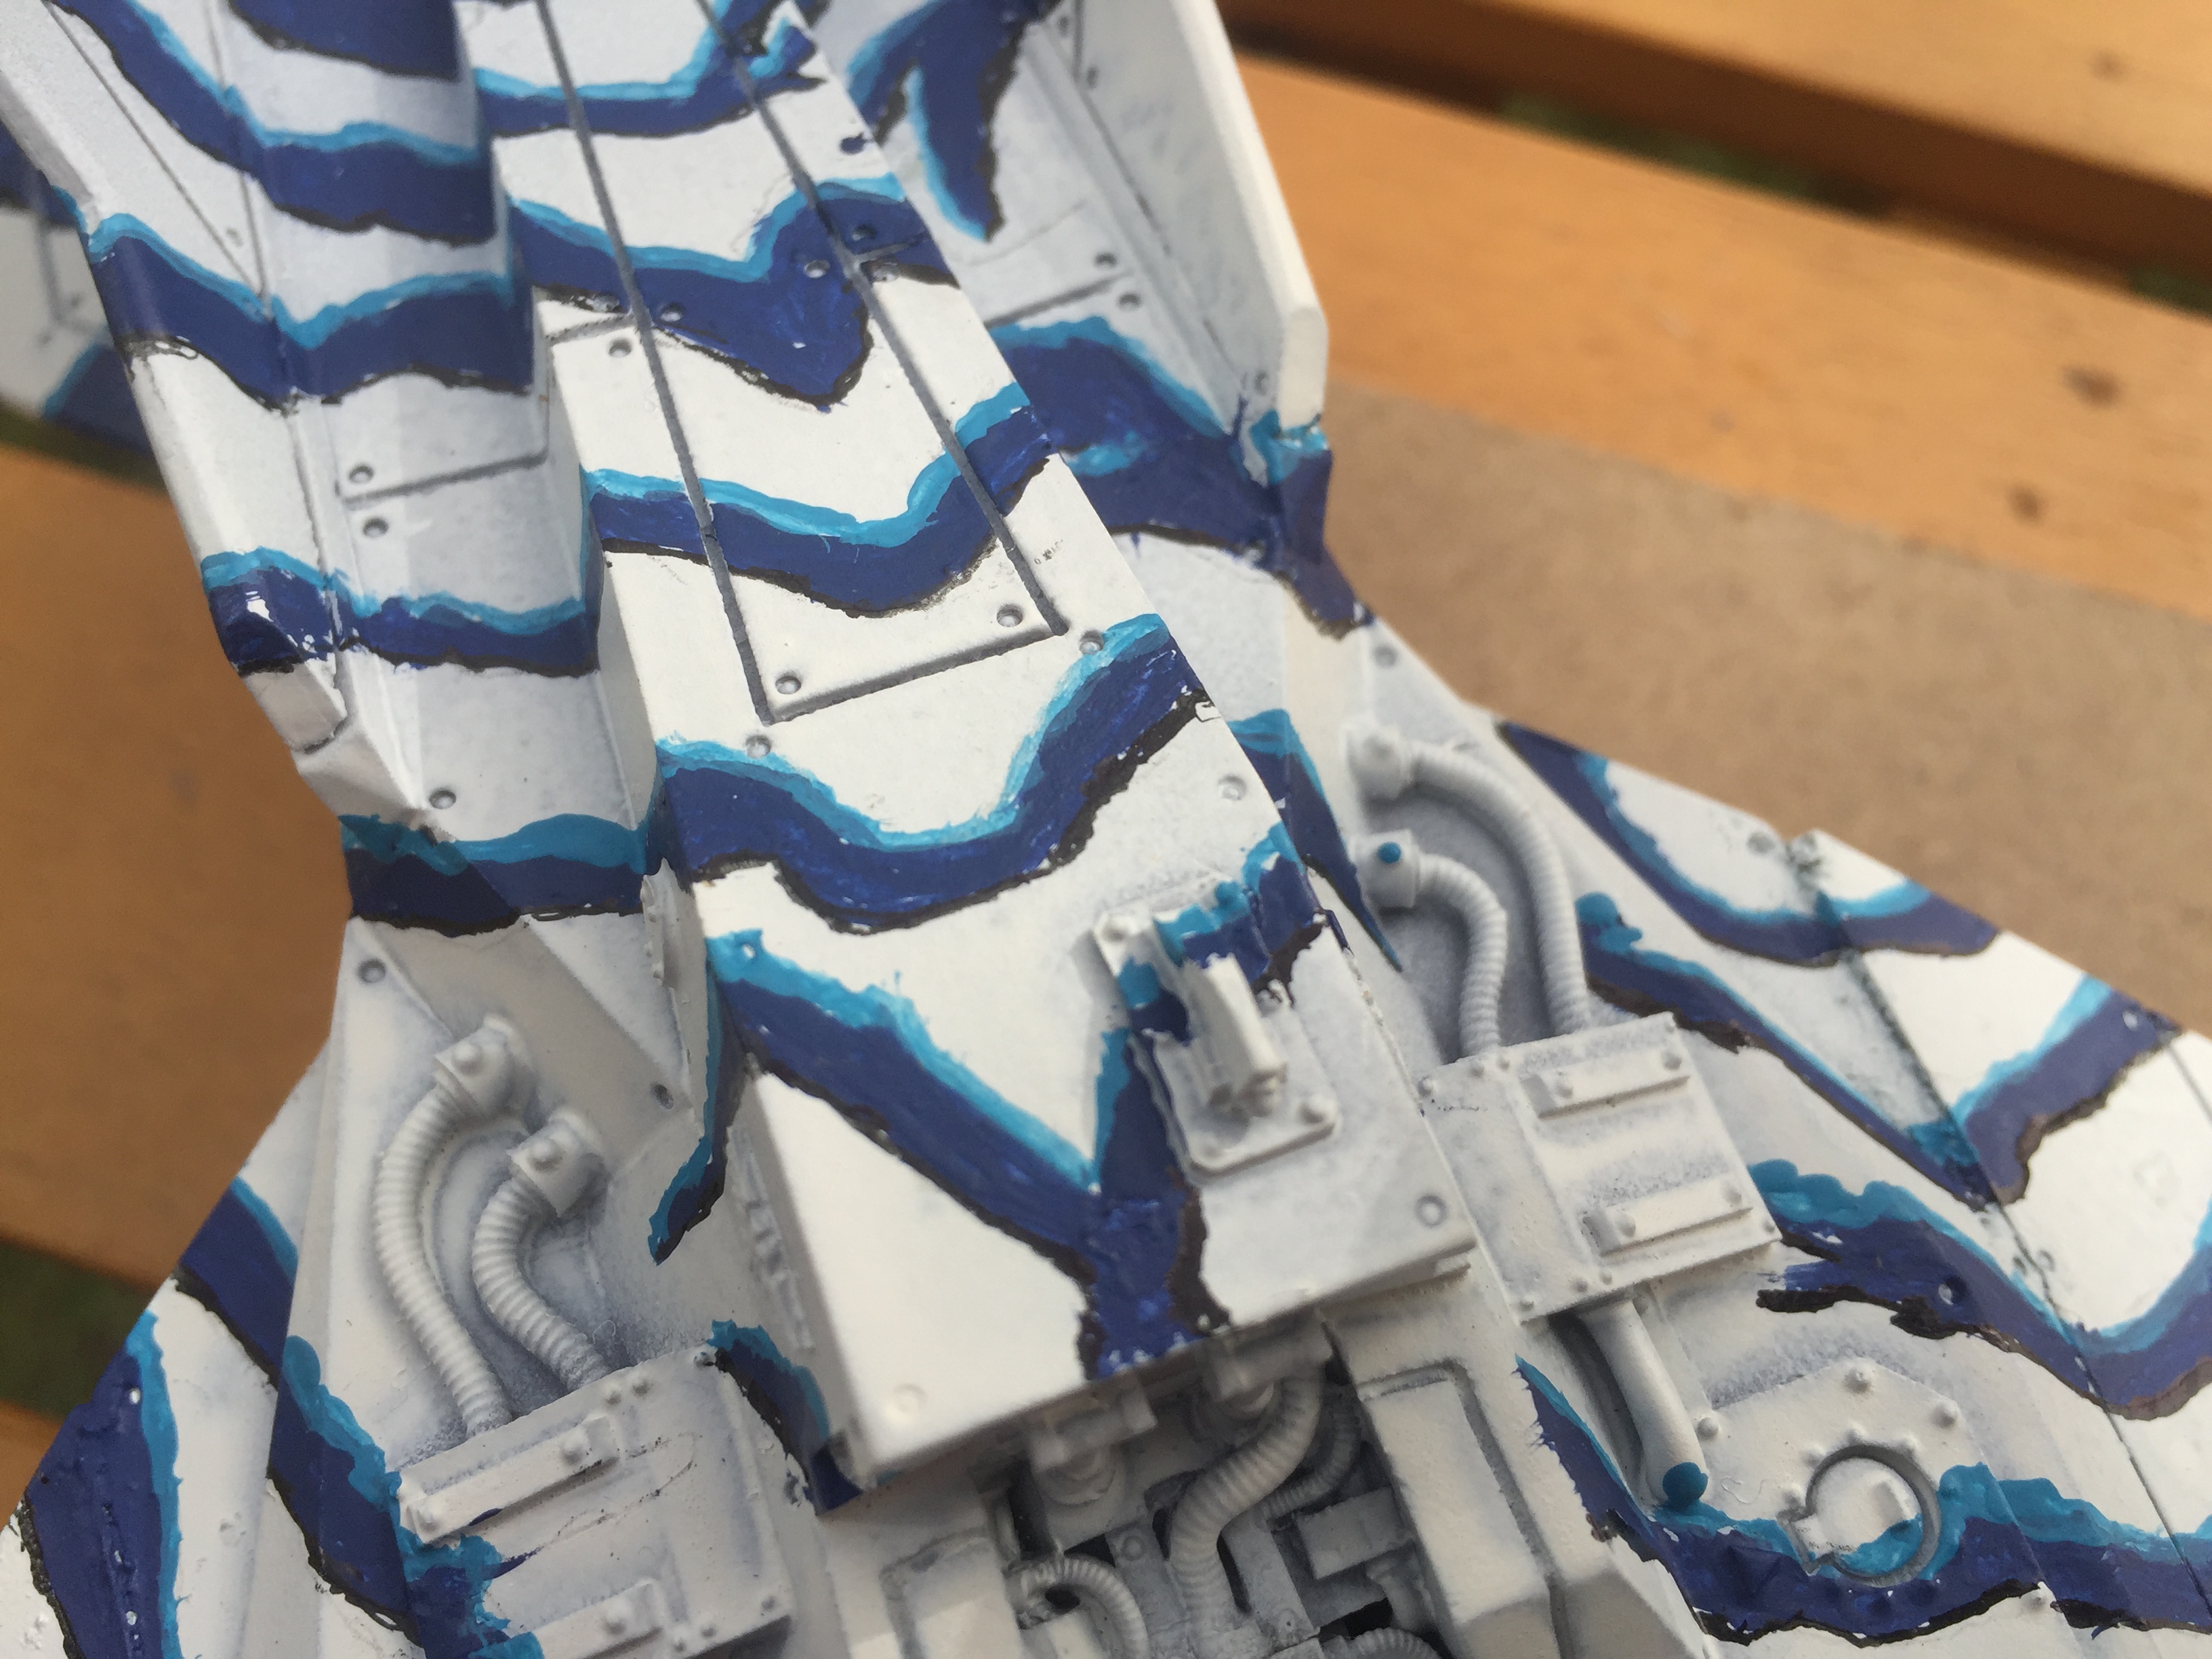
Voss Pattern Lightning - Zebra stripes camouflage highlights
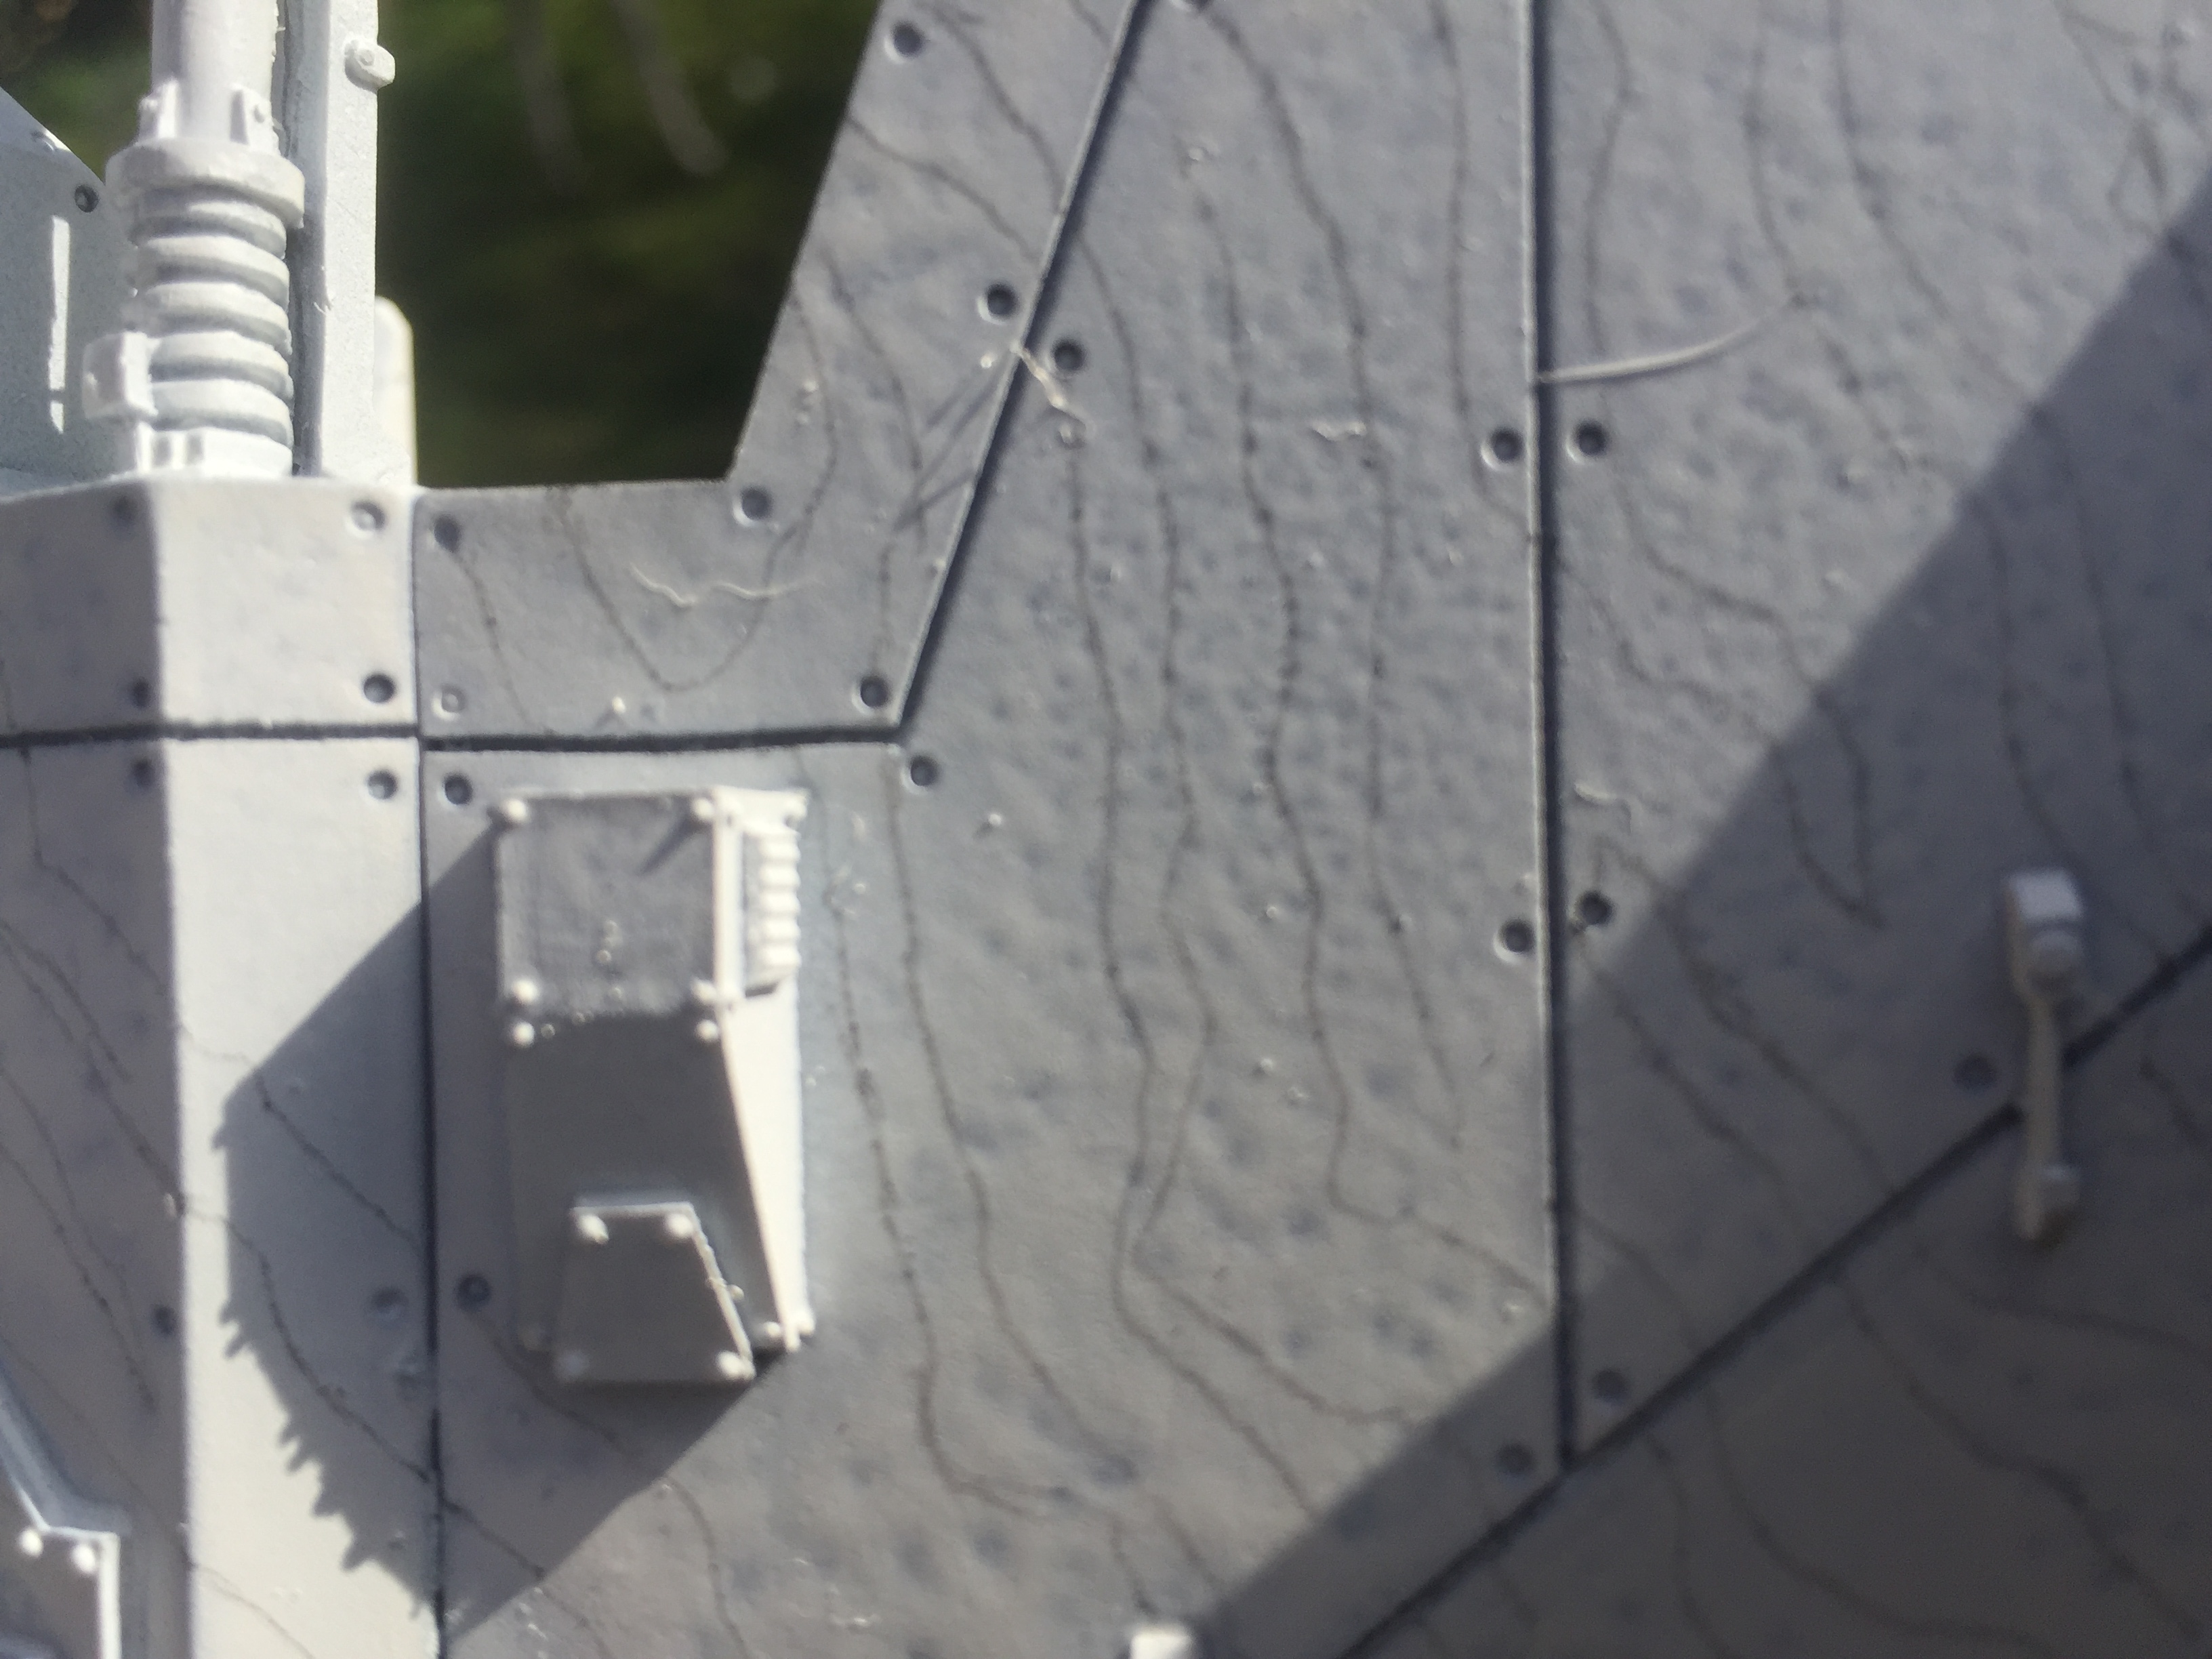
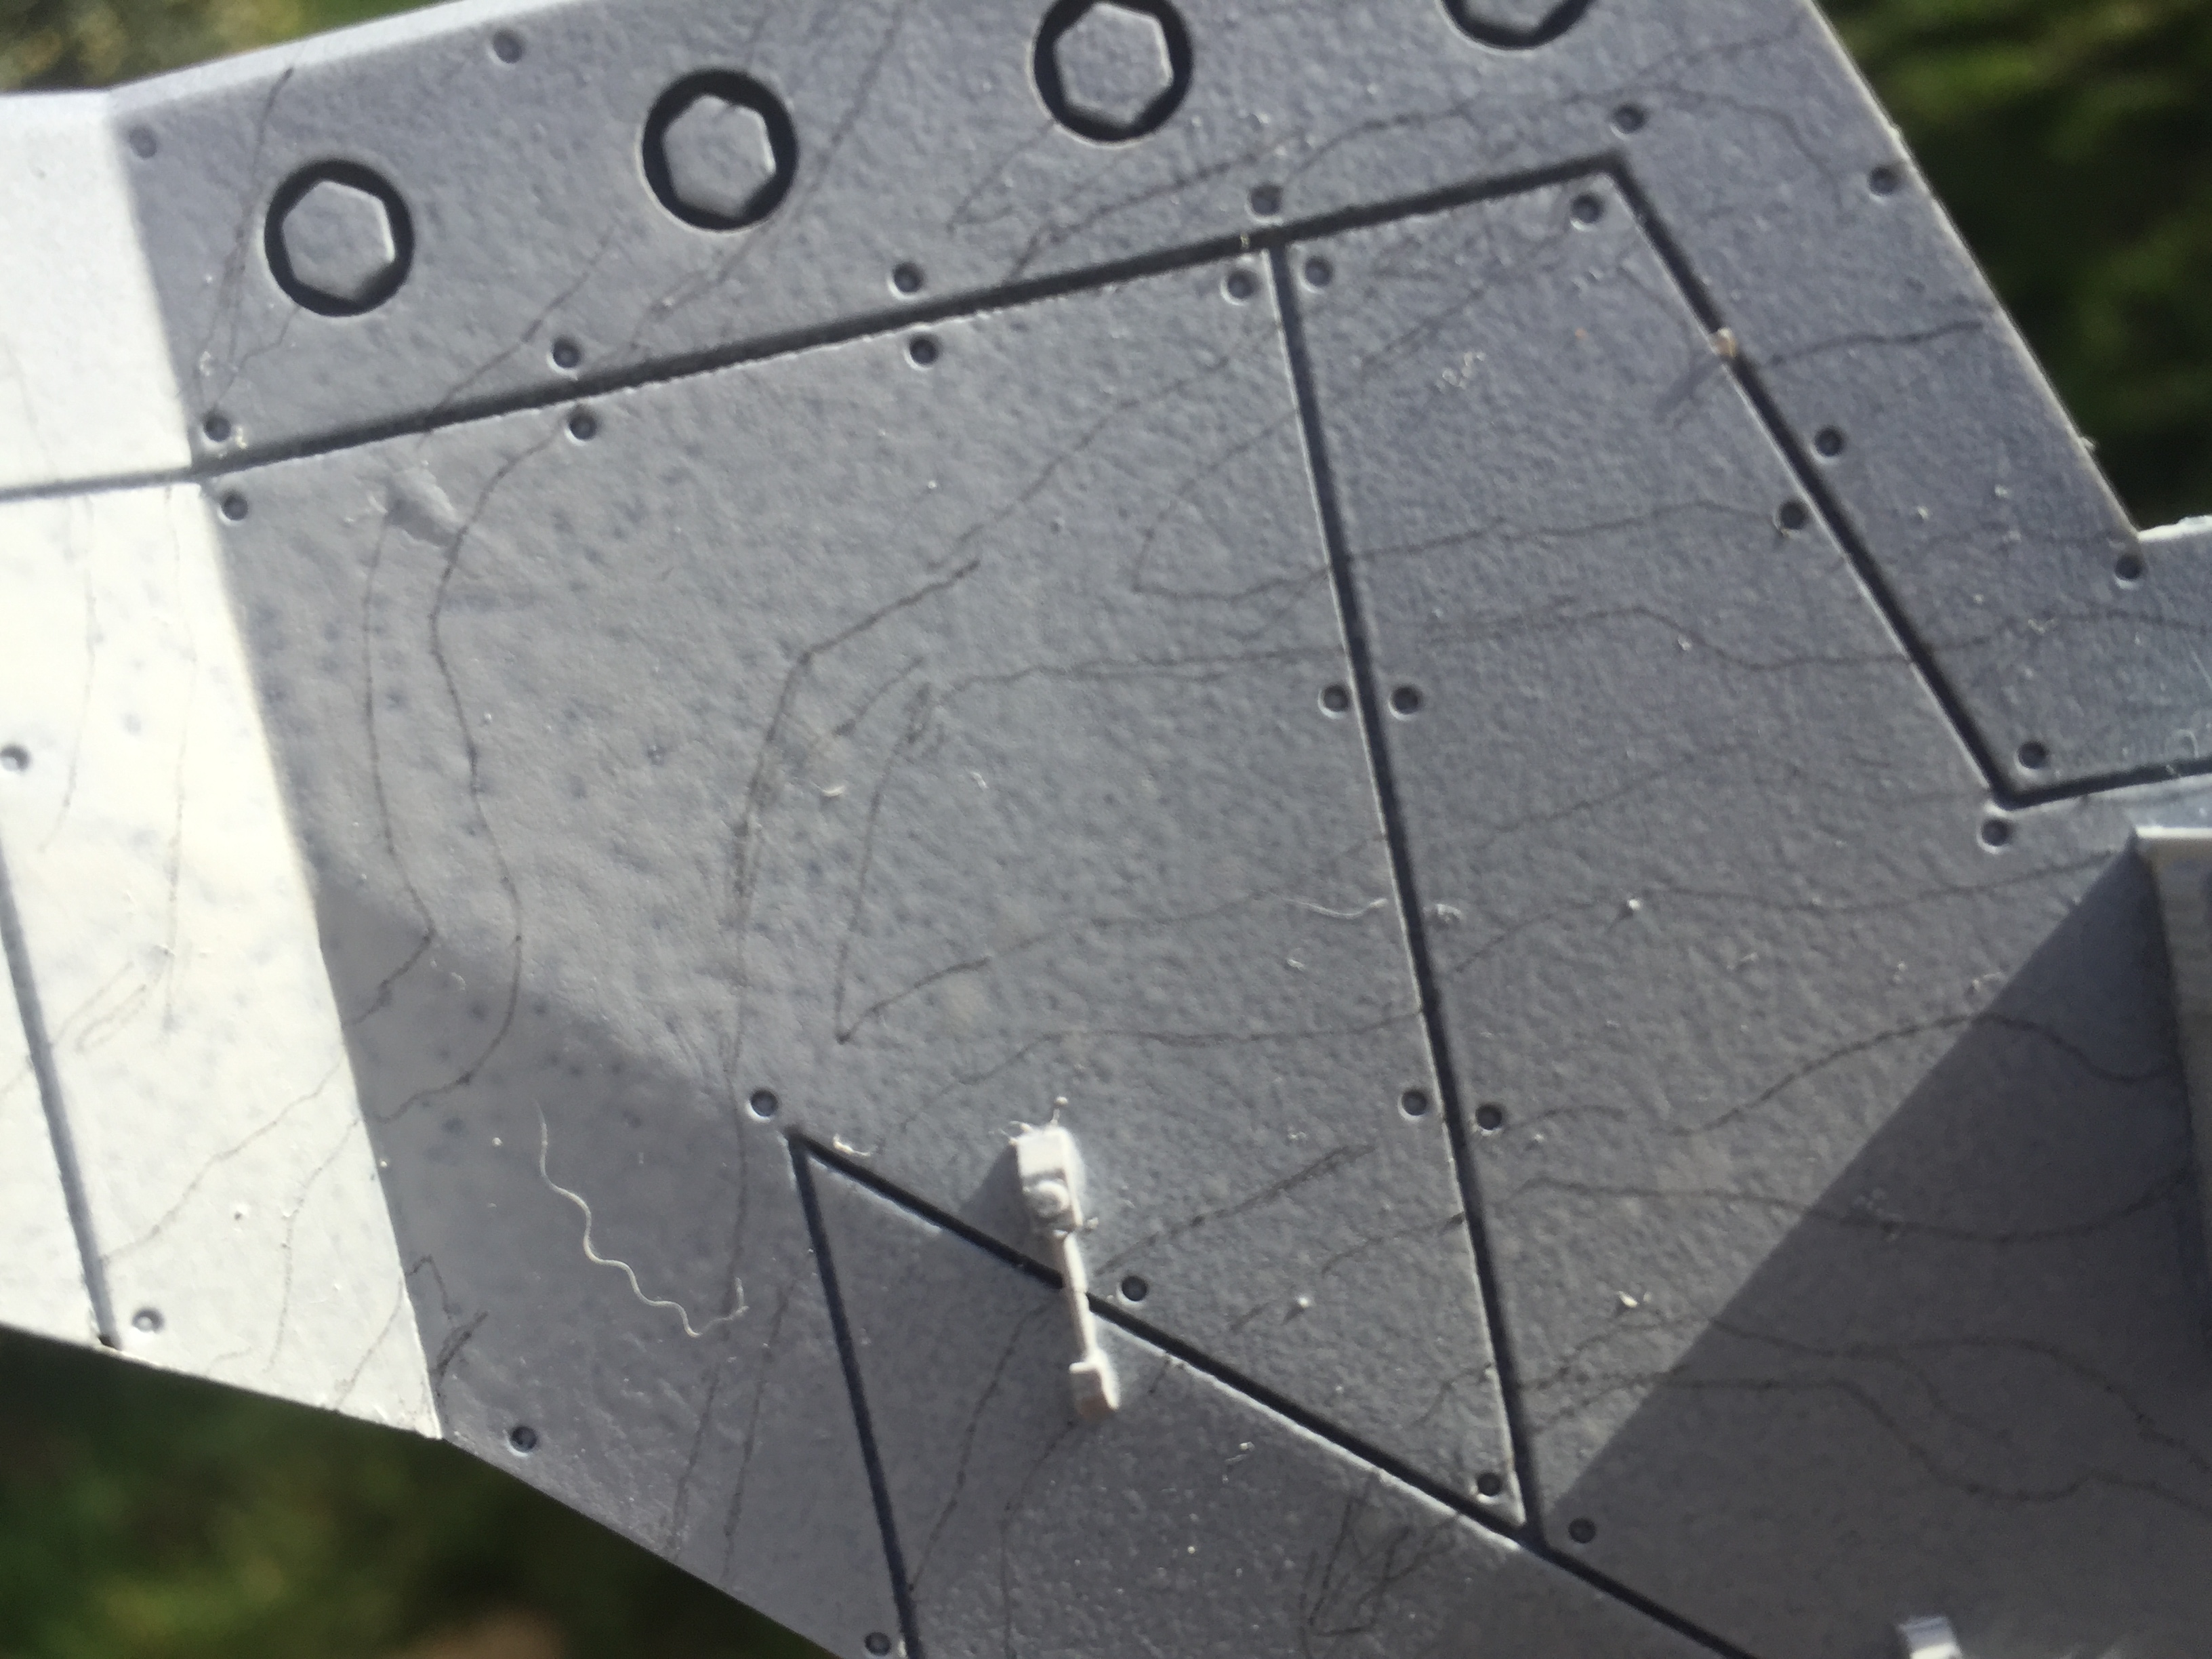
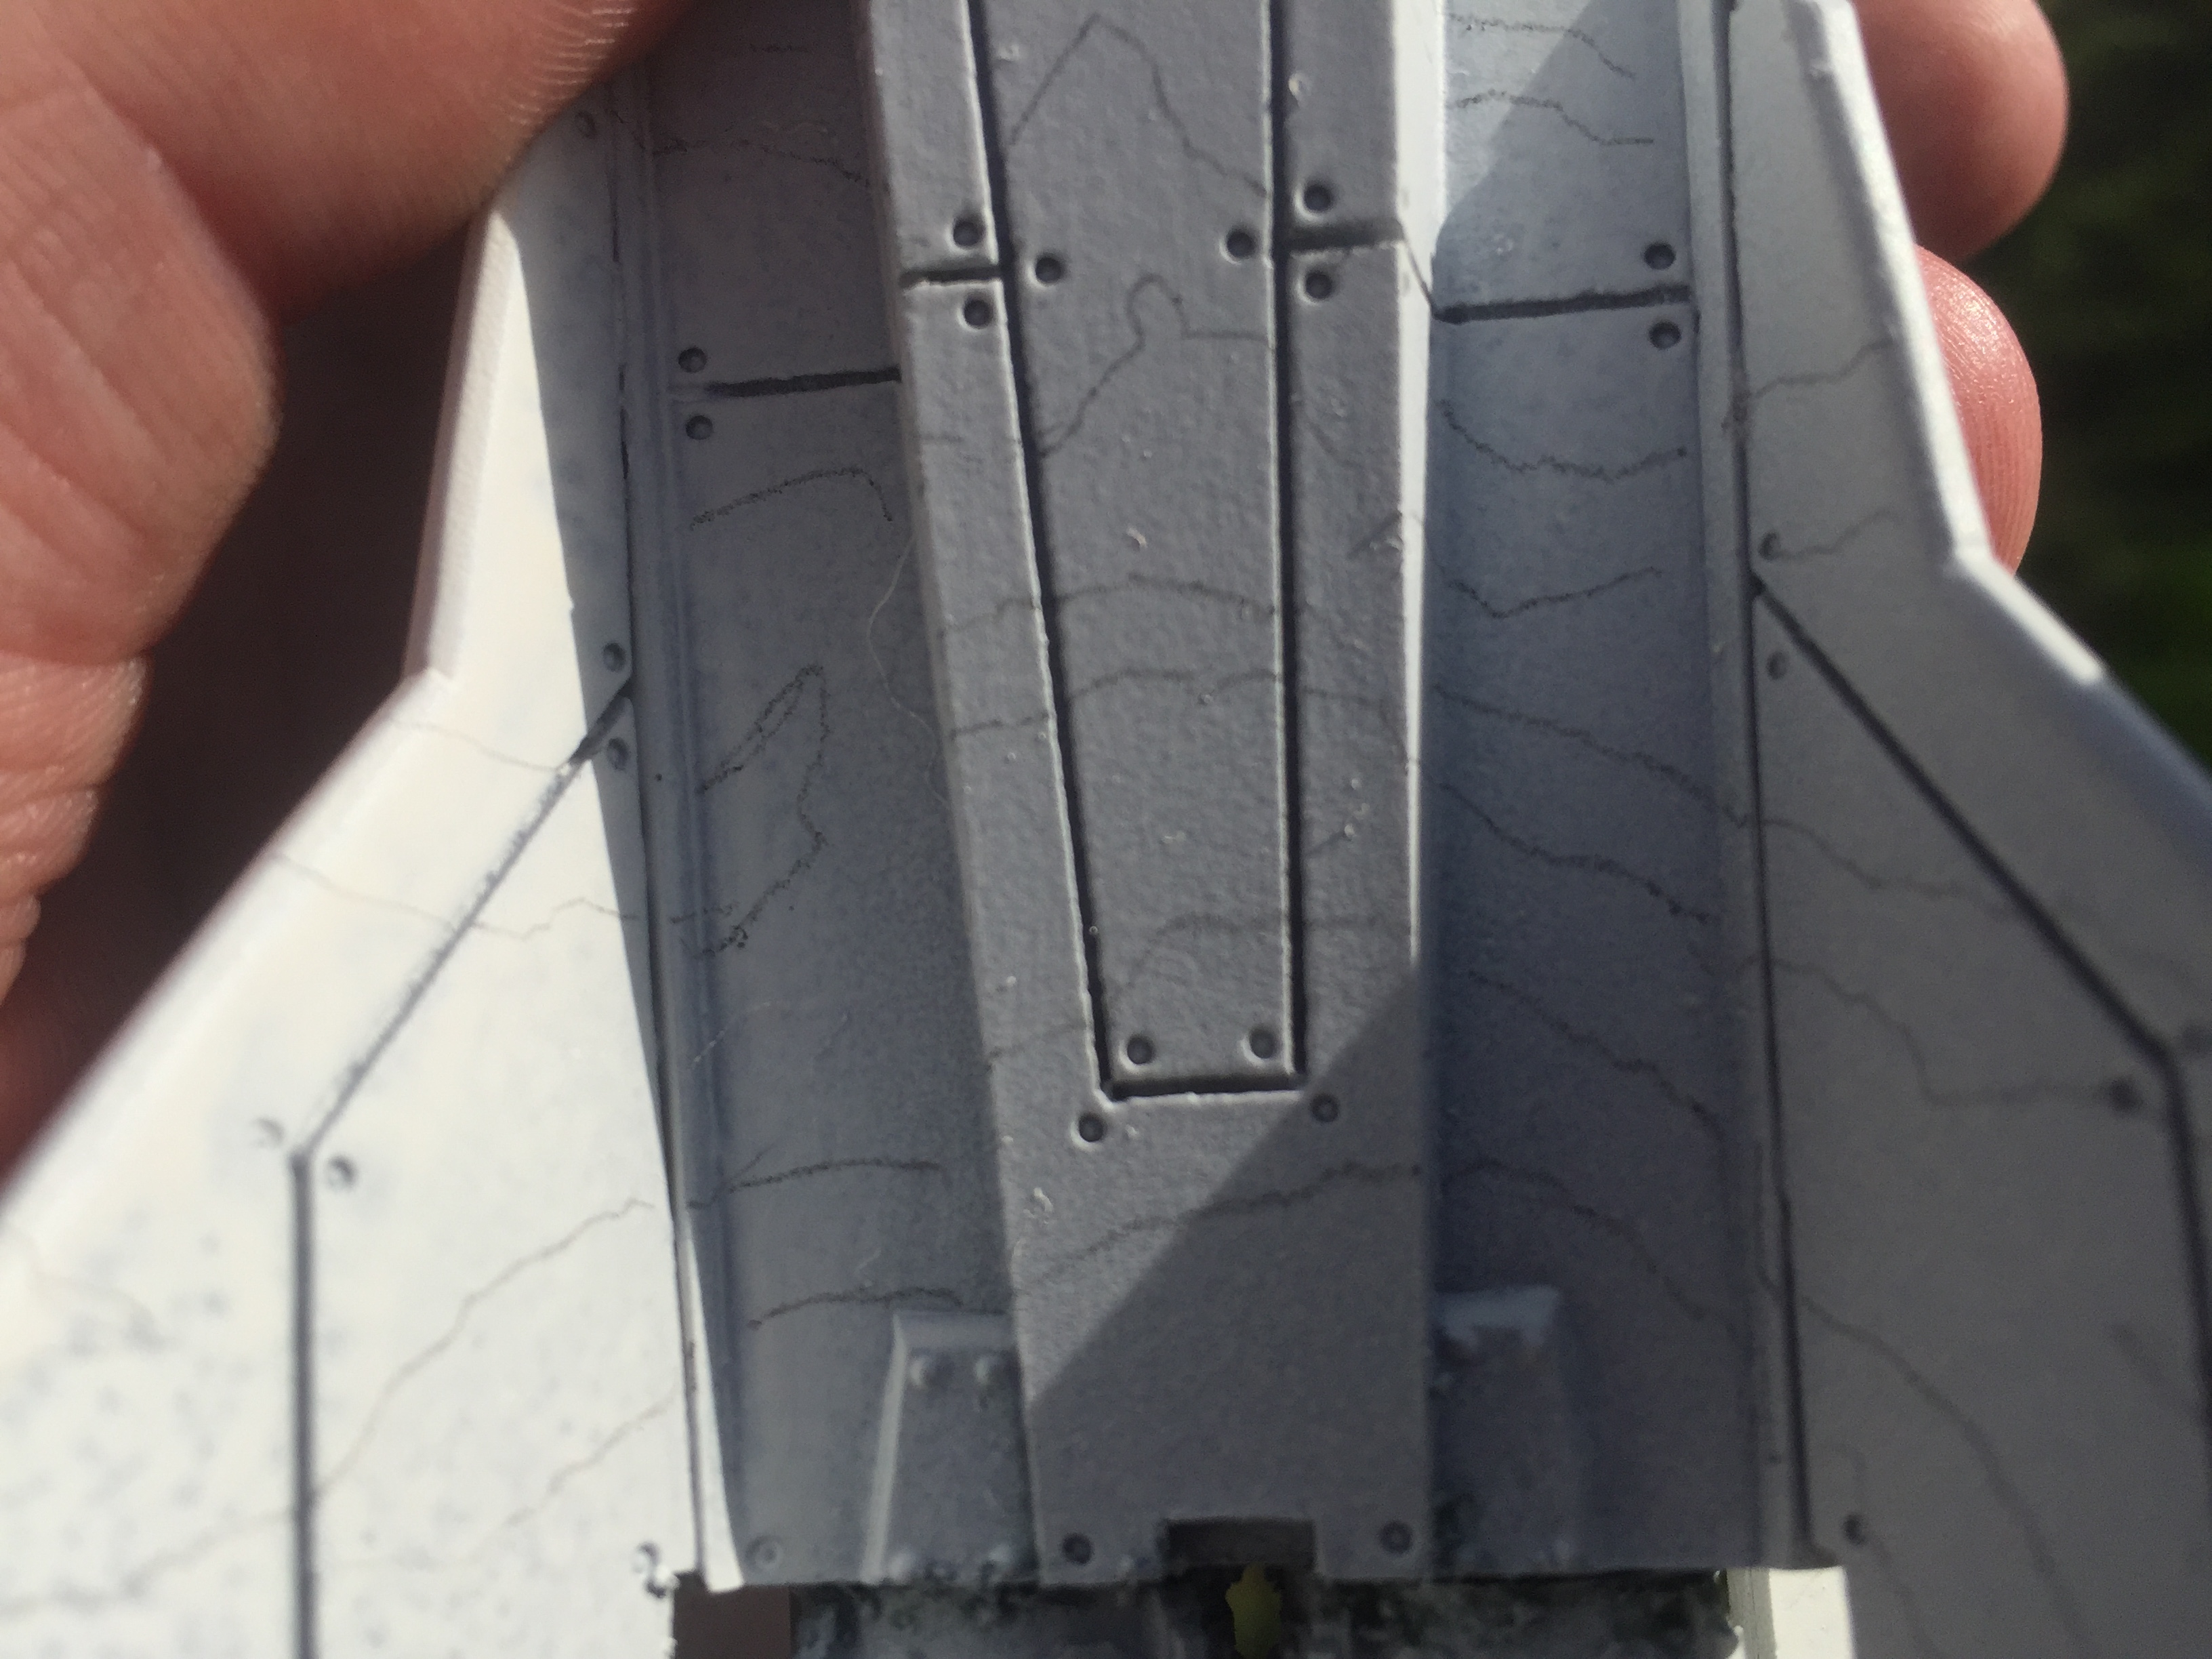
The next painting challenge for me was to make the zebra stripes 3D. Now this is not an easy trick when painting 2D, so I used a technique whereby I painted one side of each stripe with a light border and the opposite with pure black.
I used Citadel Lothern Blue for the light highlight, while I used a very fine (0.1 nib) black permanent ink pen to define the dark border.
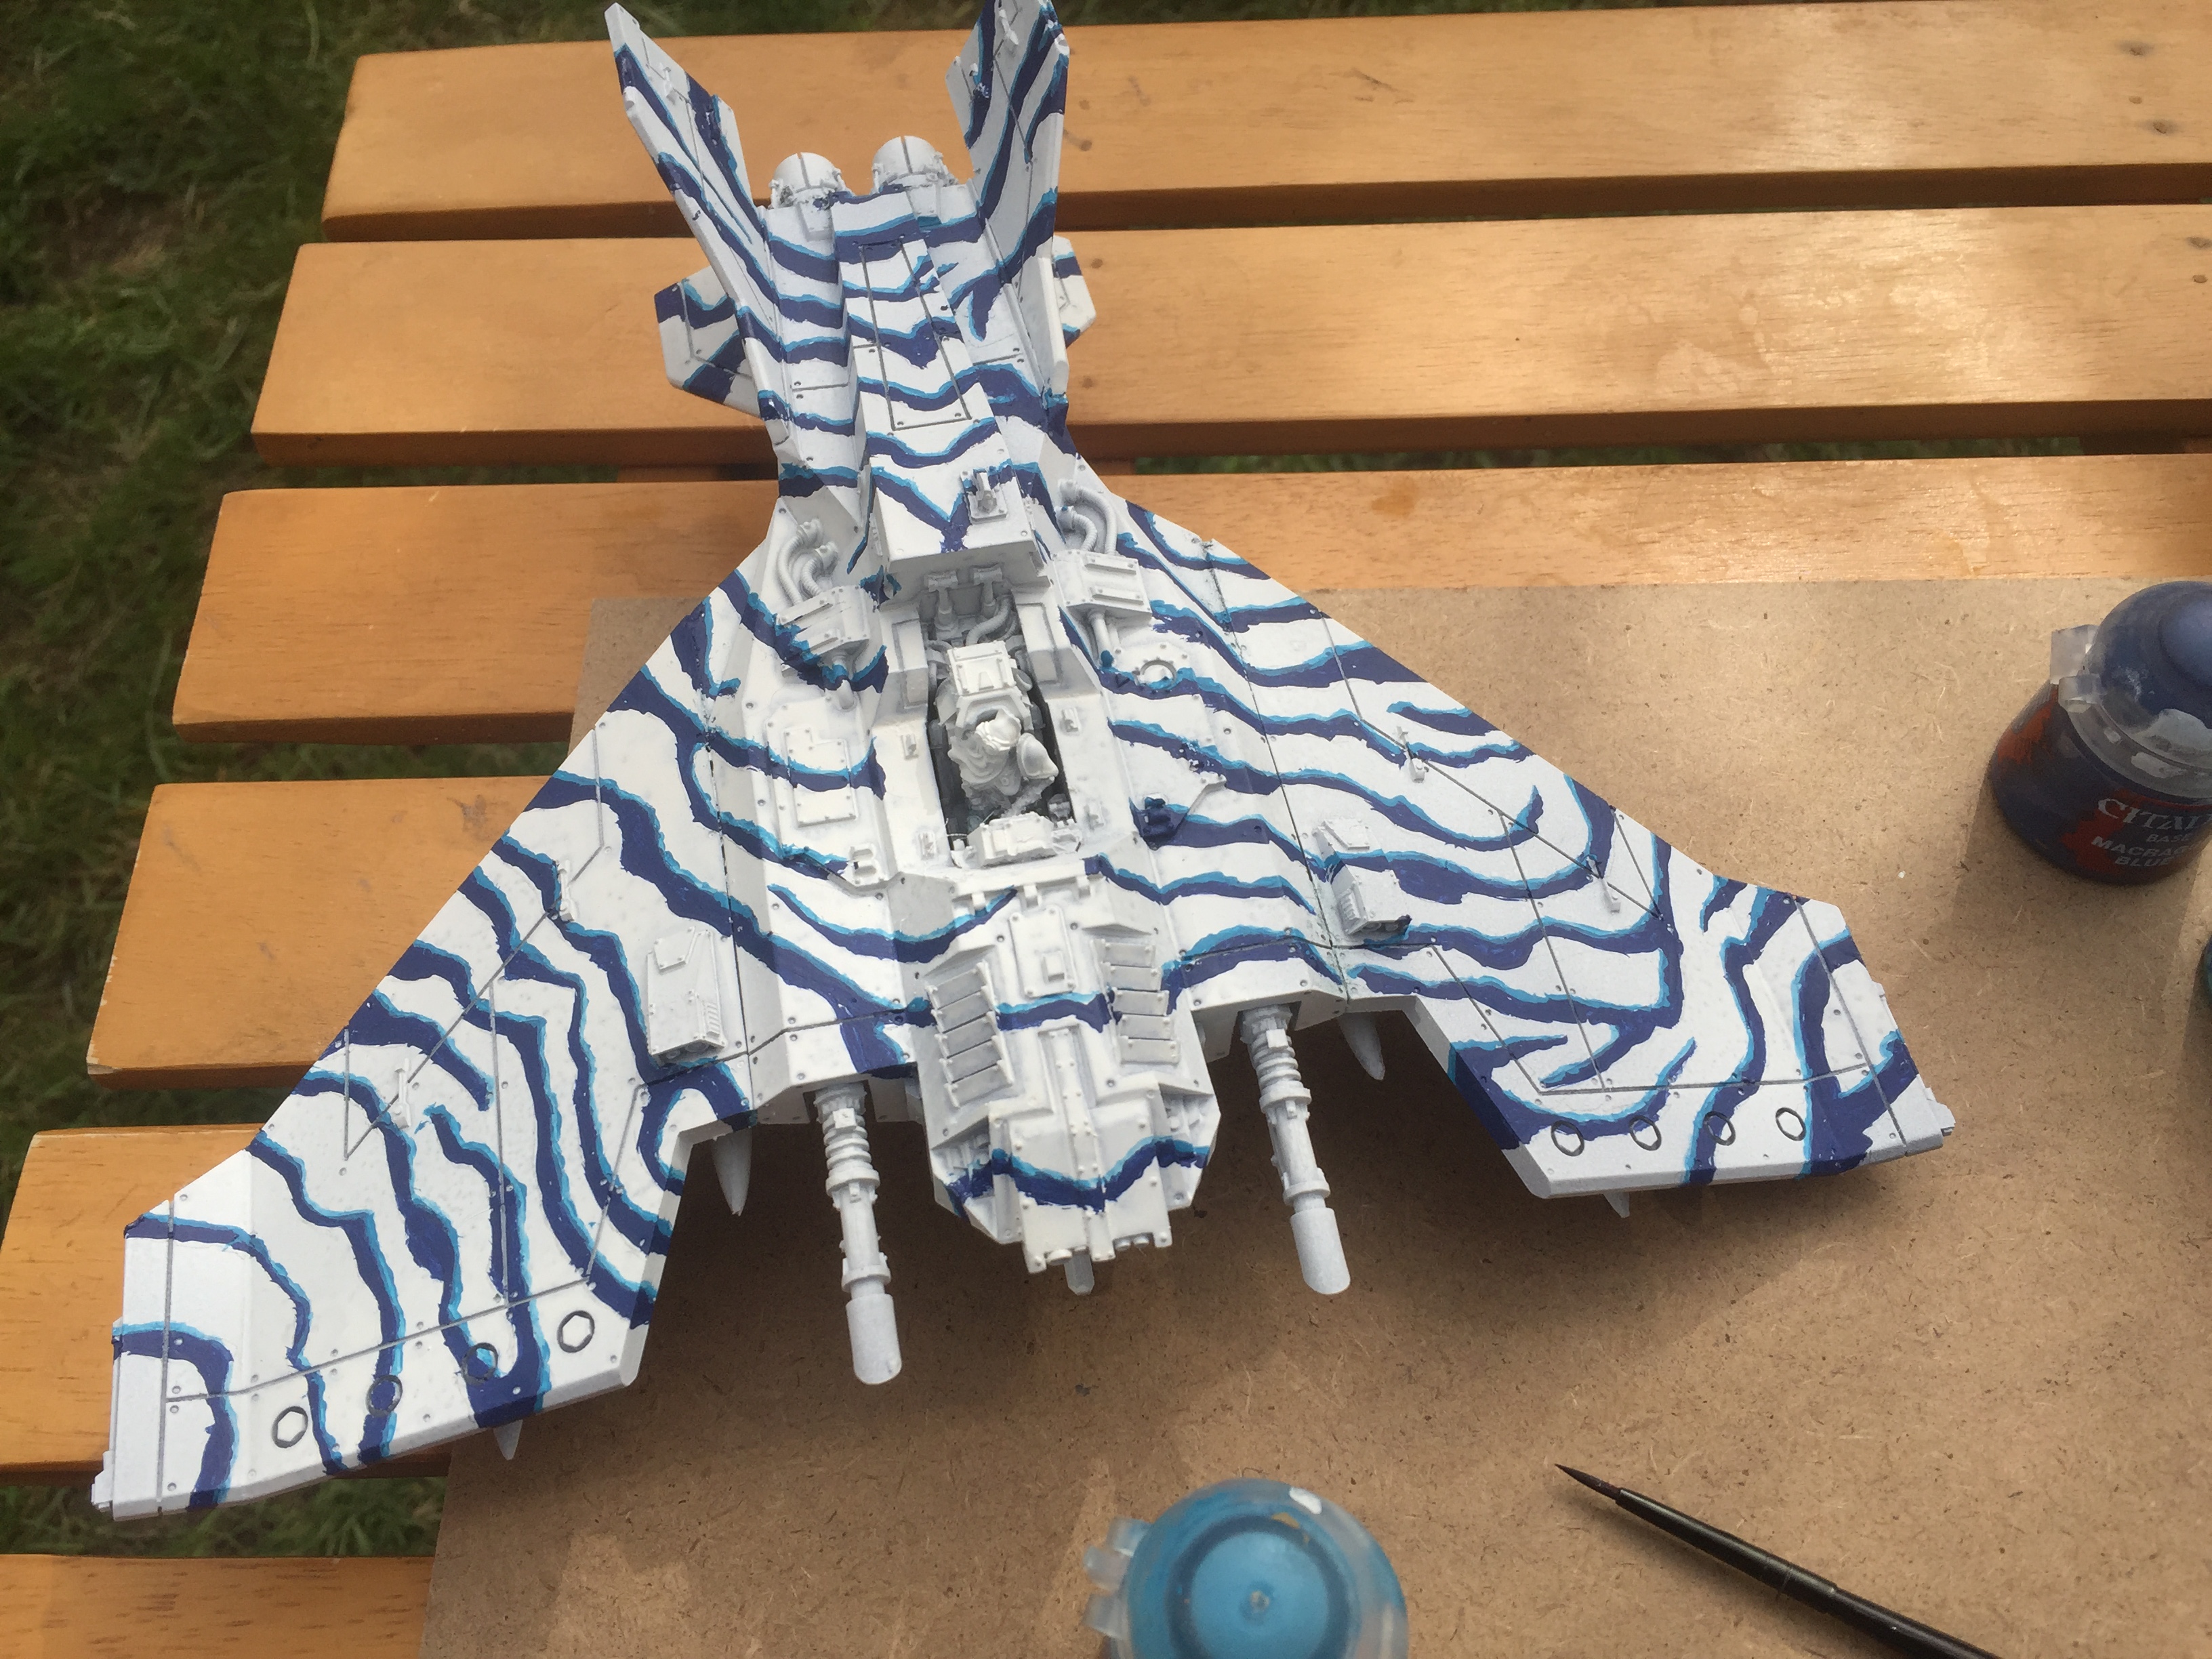 Light blue highlights applied with a detail brush (fine tip).
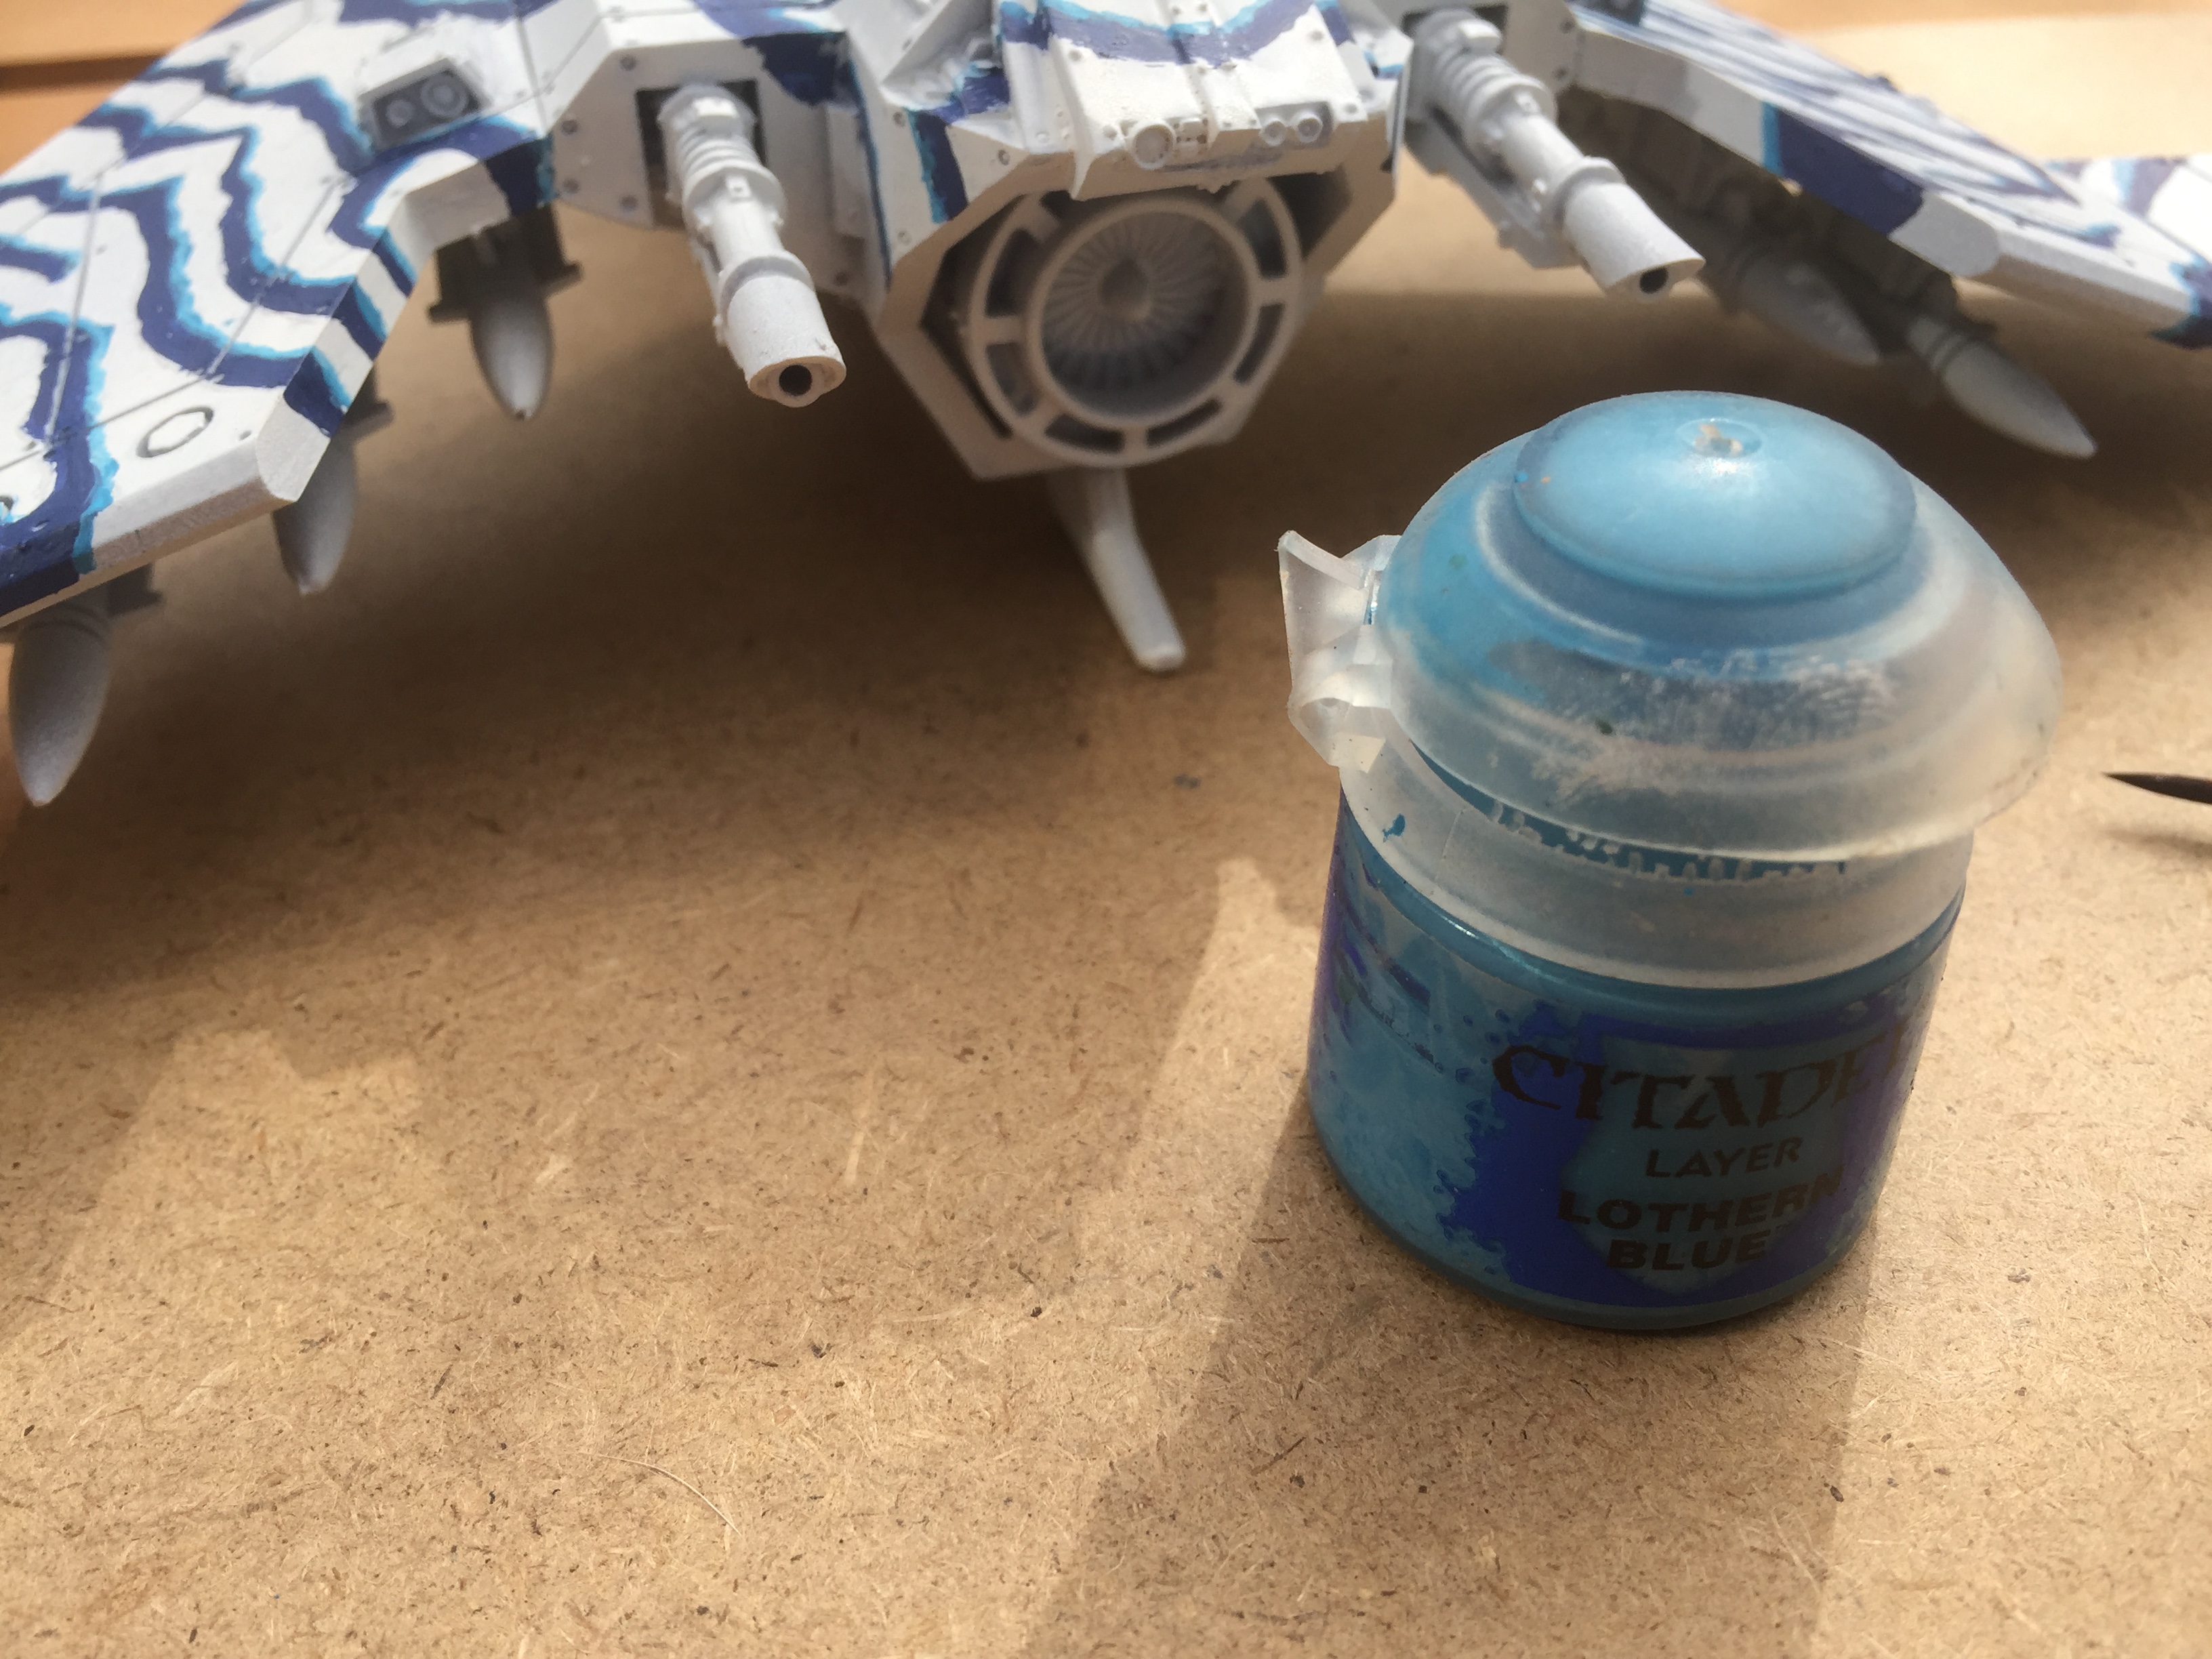
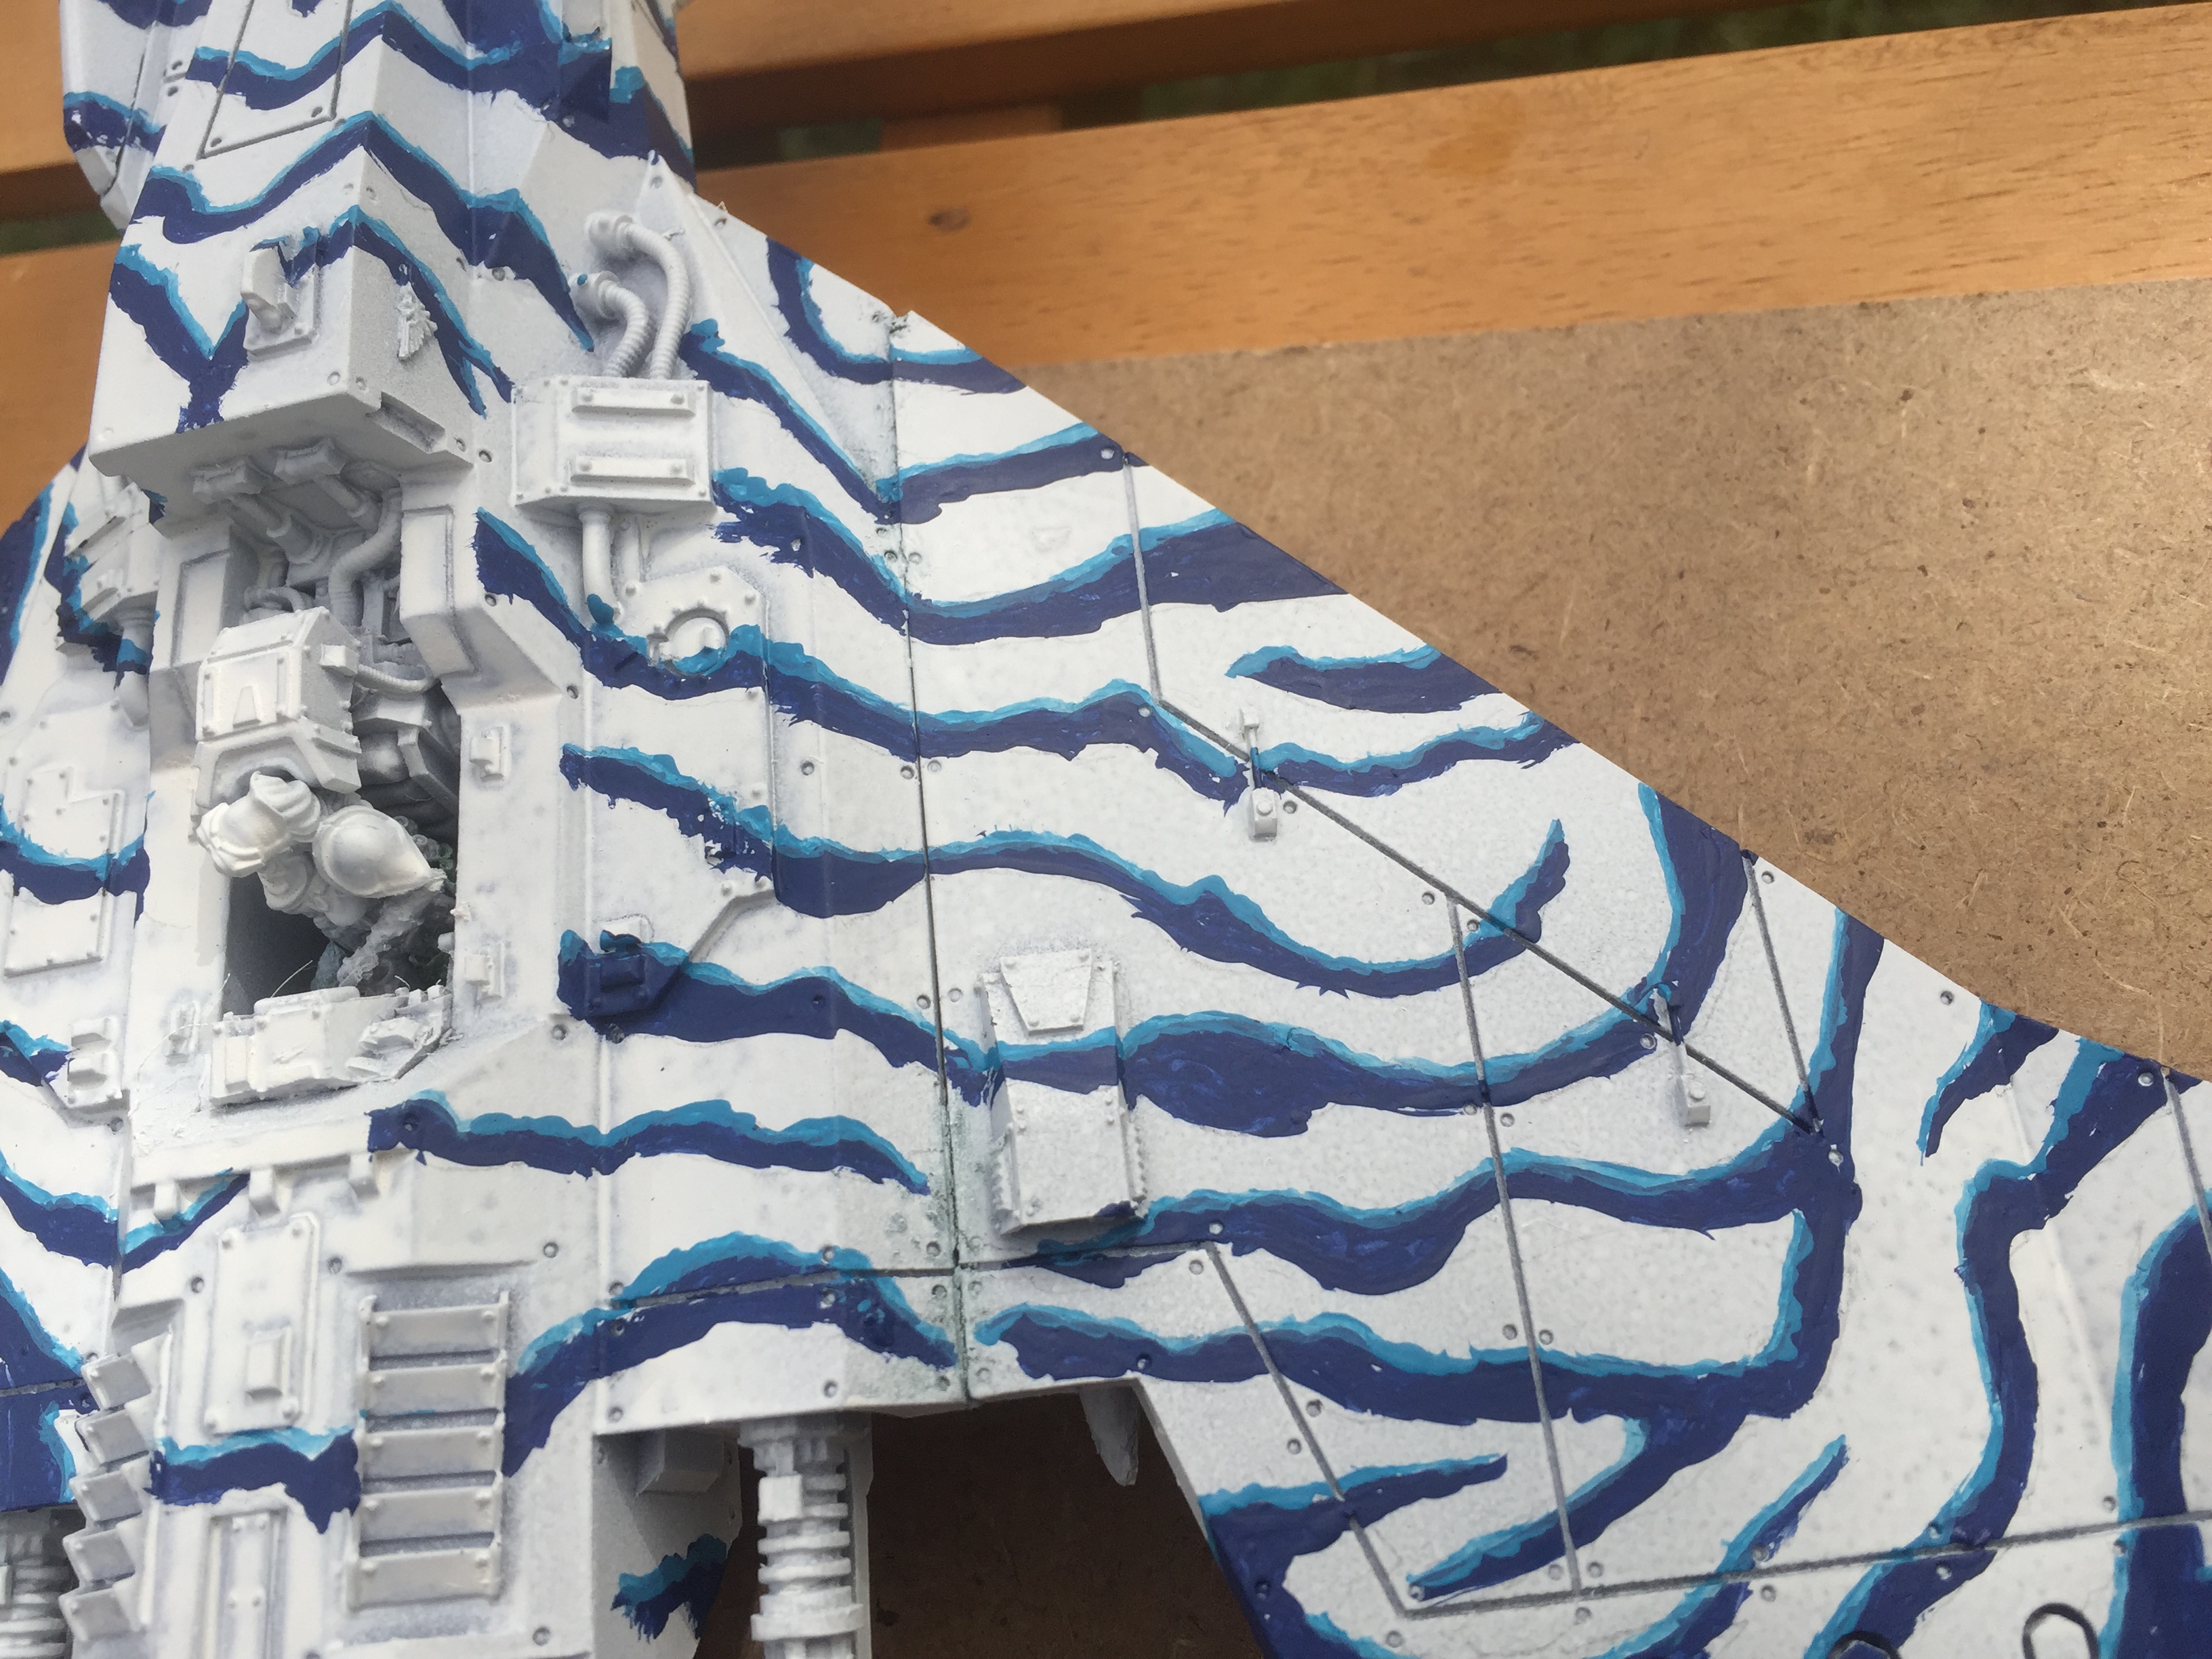


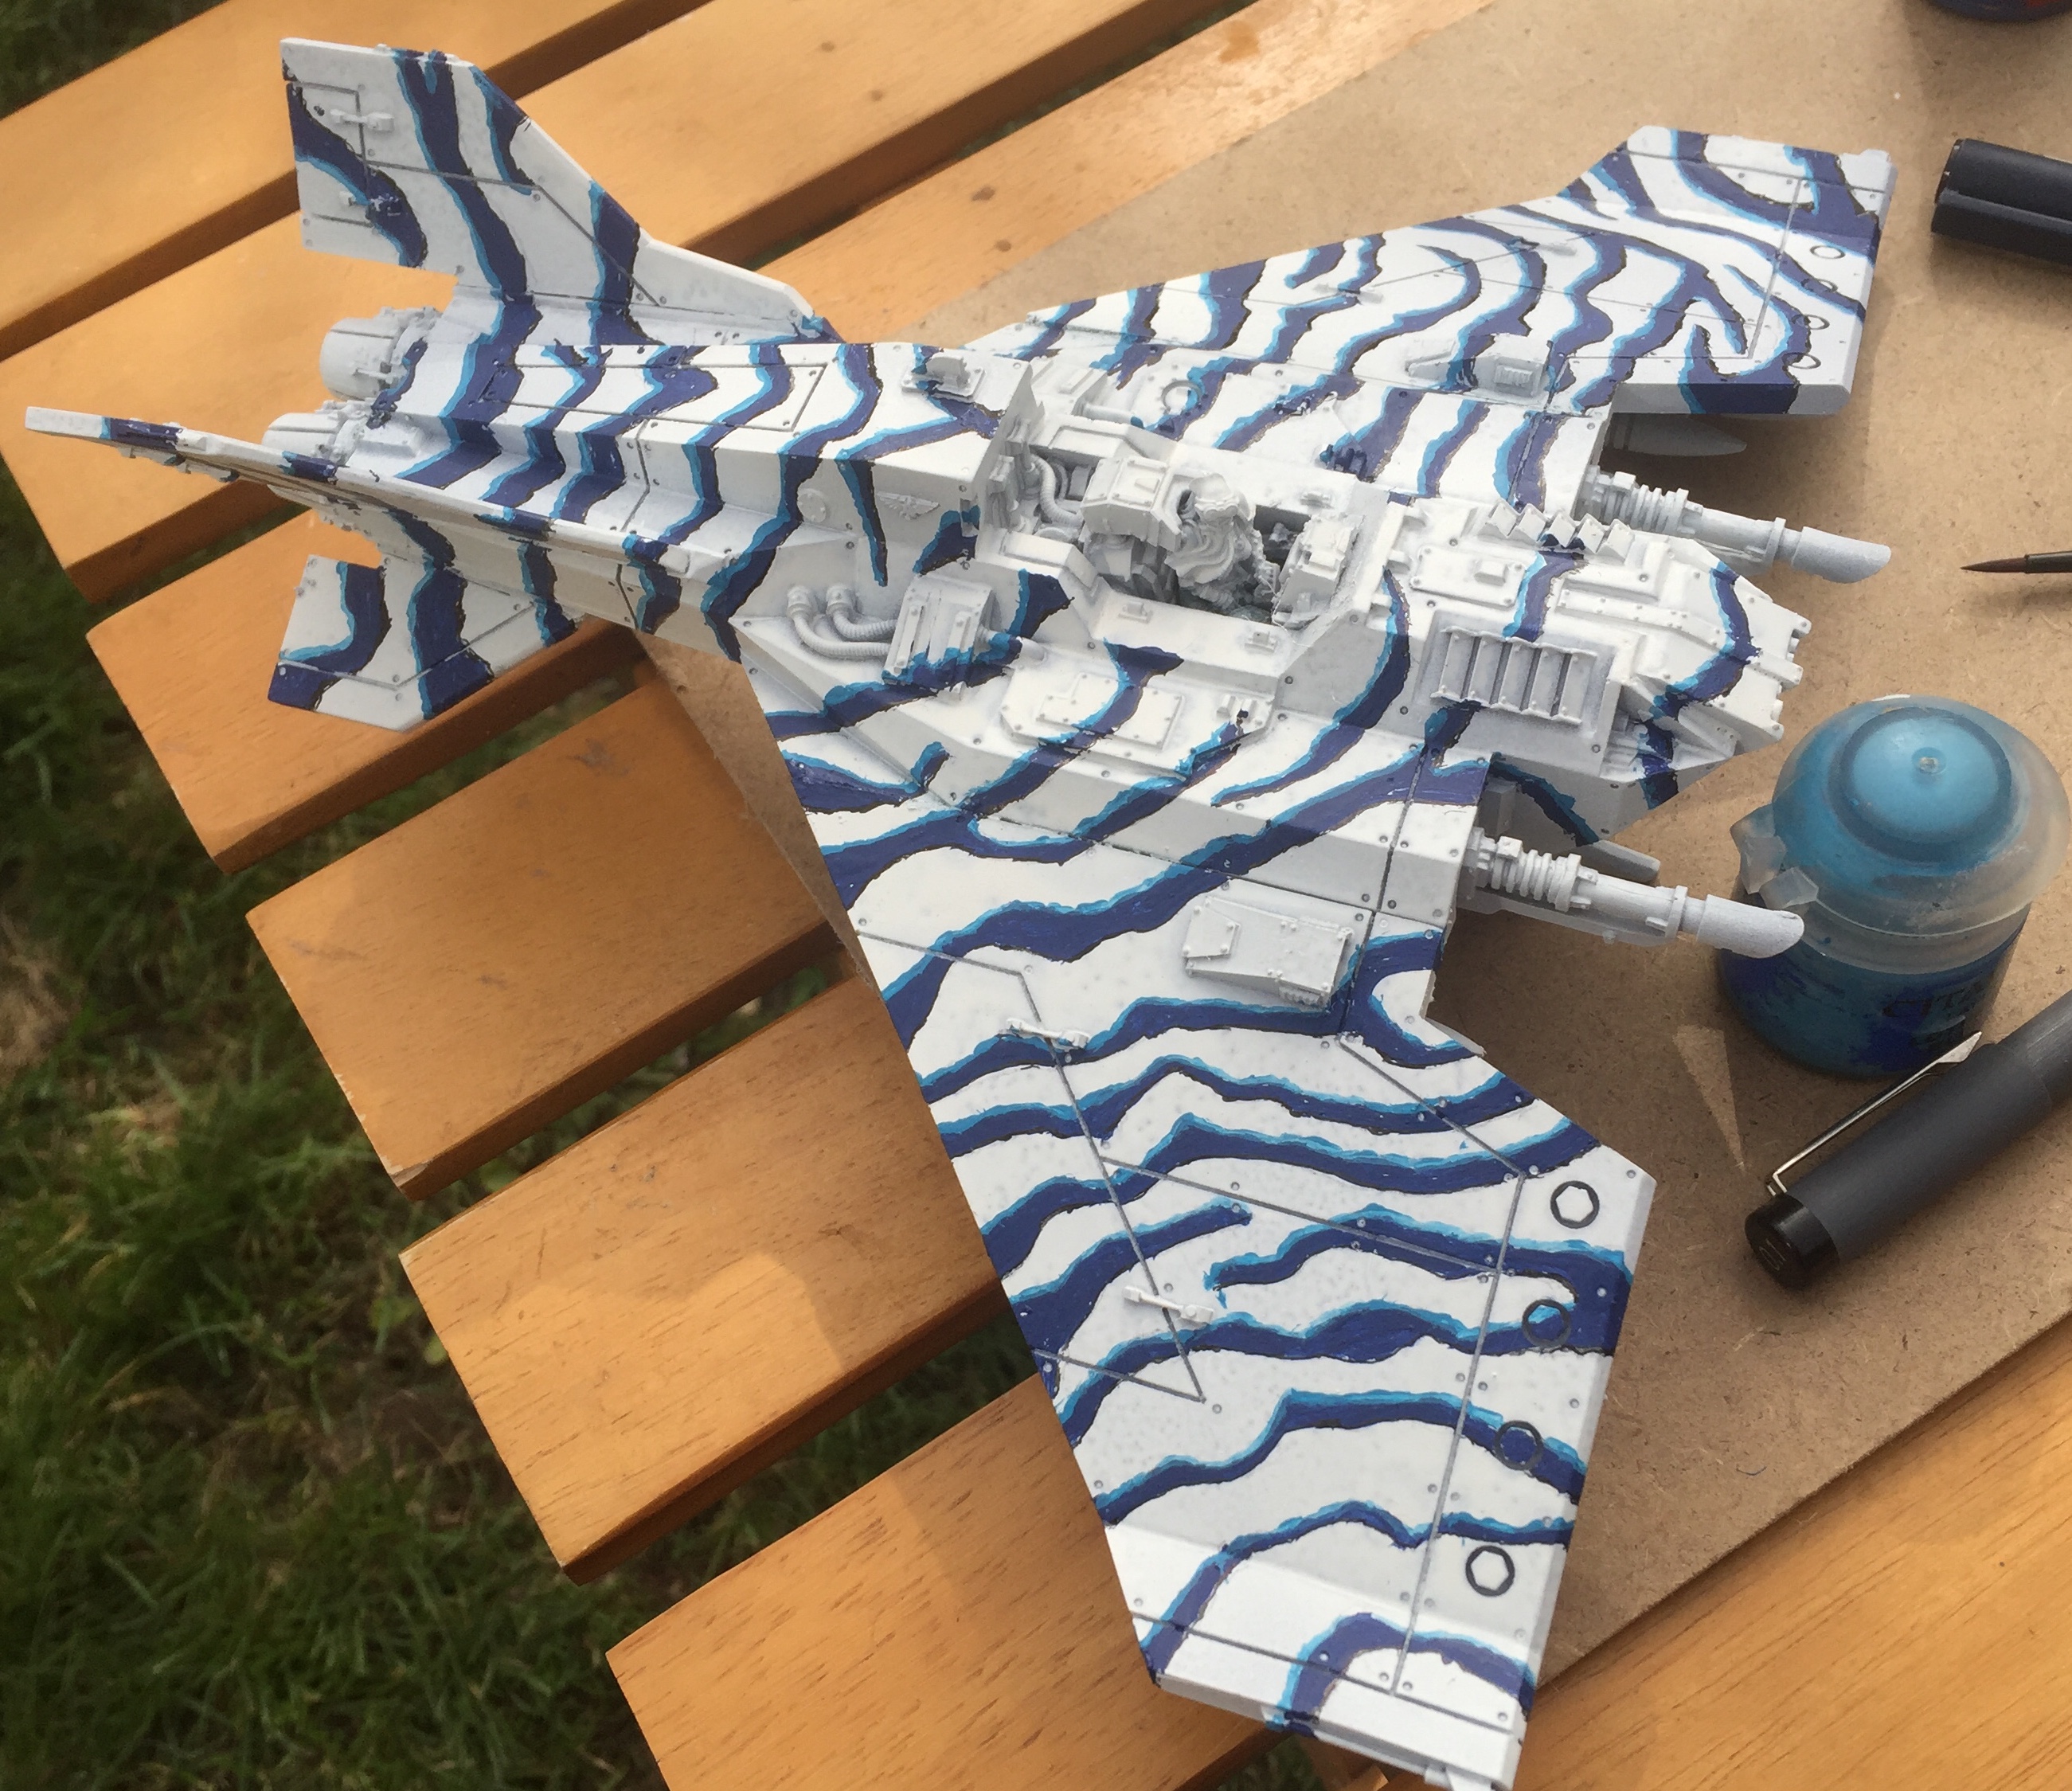 Dark highlights applied with a fine black, permanent pen to contrast the lighter Lothern Blue colour used.
 Okay, so I’m happy with the overall effect of the stripes. I know as I progress, they will get toned down when I introduce oil and dirt washes and weathering. Next, I need to focus on the metalwork such as the weapons, front engine, exhausts and VTO engines.
Time taken:
Light Blue painting of zebra stripes highlights 45 minutes
Fine black line detailing of zebra stripes 45 minutes