


![NO Weekender Or Cult Of Games XLBS This Weekend [Updated]](https://images.beastsofwar.com/2026/03/No_Weekender_and_XLBS_this_Weekend-225-127.jpg)


Spring Clean Challenge: If I build it – will they come


Recommendations: 320
About the Project
Last year the Spring Clean Challenge pushed me to DO something with my mountain of lead. But I still have a large “hill” left to do something with. So, I was wondering, as I have numerous “Skirmish” style rules and figures, perhaps a skirmish table might be the push I need to get THEM painted as well. I also recently acquired Mel the Terrain Tutor’s book and wanted to test out some of his ideas. So this is where we are this year. If I build the table, will the figures come to play? Let’s see how it goes.
Related Genre: General
Related Contest: Spring Clean Hobby Challenge (Old)
This Project is Completed
Landscaping Part 3
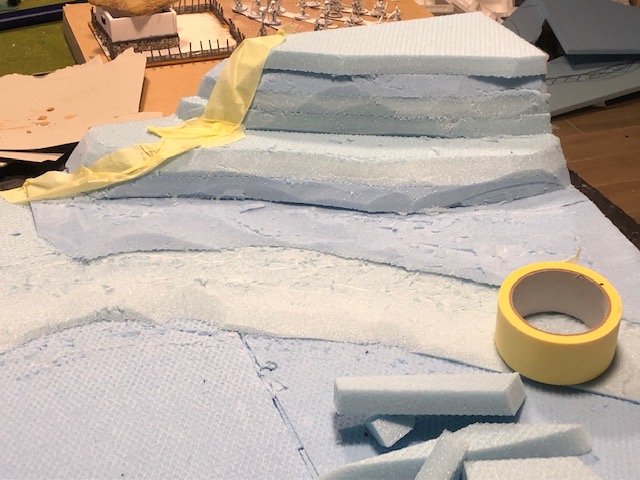
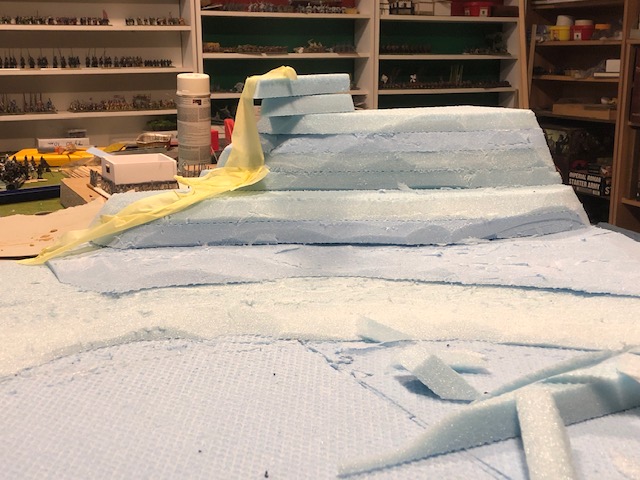
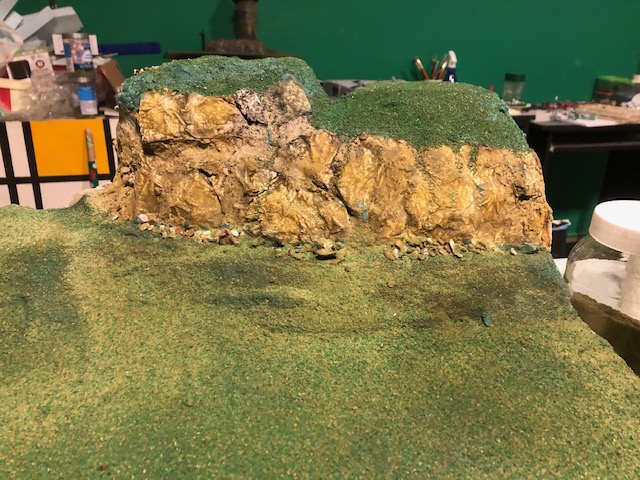
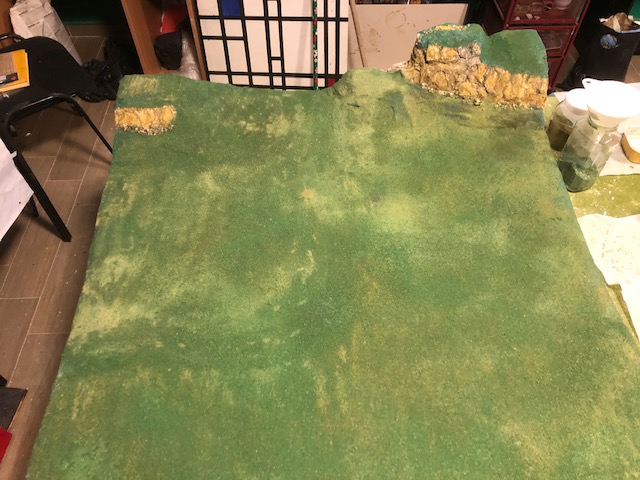
Been a delay since the last update – sometimes real life can interfere with things! So, where am I with the general layout of the table? So far, the base is now all in place. The table has the high r=ground on one edge, fairly flat area on two, and small hills on the opposite side to the higher ground as in the pictures.
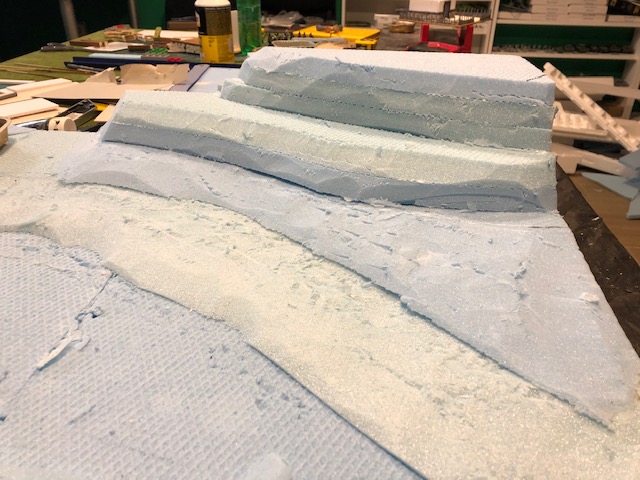
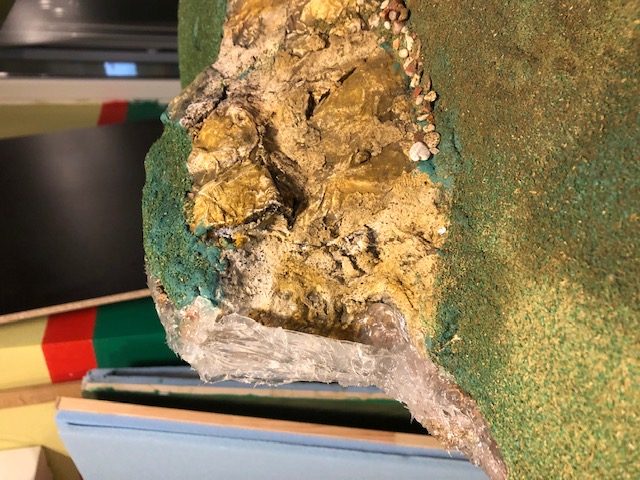
But I then started to think about adding some more features, and to Strat to learn some new skills, which was one of the main drivers fro the Challenge anyway. So I’m back to thinking about a water effect. However, I don’t want this to be on the main play area, so thought a nice idea would be to add a waterfall on the high ground.
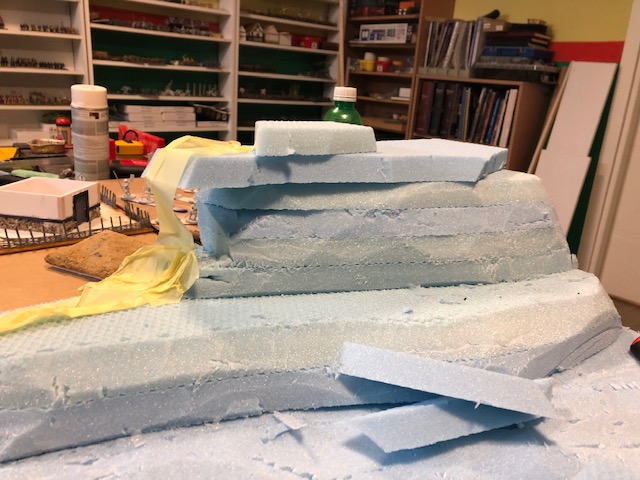
To this end I added eve more height and the tape in the pictures is approximately where the waterfall will be placed.
While this will be mainly for the look of the thing, it would still be possible for someone to be on the high point – like a sniper etc. – so it still has some play value.

The final water effect is not yet resolved but will not be a massive thing.
However, this means I have to learn some techniques. I have no access to water terrain materials here, but I did see somewhere on line (it might have been Luke’s site or Mel’s – can’t recall) a way of using clear bathroom filler as a substitute, so that’s my next step. I am sure I can get the tubes of clear acrylic here, so some practice will be required. I’ll post my attempts on here.
In addition, I need some cliffs/rocks. I don’t have rock moulds either, but did see the way of using tin-foil, stoat’s the next step in my terrain building skill-set. I’ll post a separate blog on that side of things as well.
Finally, I want to coat the entire board with some form of surface to make it robust, and I have in mind “scuptmould” type materials. Again I will make this myself – I do know Luke has a video on this, and I will also check Mel’s terrain book.
So, lots of learning and experimenting coming up.
Landscaping Part 3
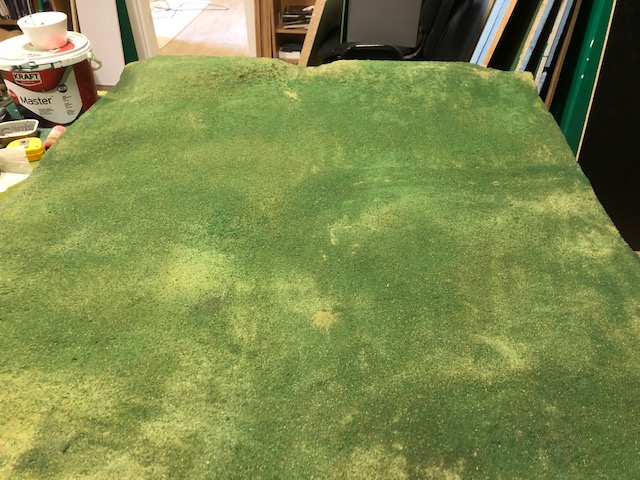
Been a delay since the last update – sometimes real life can interfere with things! So, where am I with the general layout of the table? So far, the base is now all in place. The table has the high ground on one edge, fairly flat area on two, and small hills on the opposite side to the higher ground as in the pictures.

But I then started to think about adding some more features, and to start to learn some new skills, which was one of the main drivers for the Challenge anyway. So I’m back to thinking about a water effect. However, I don’t want this to be on the main play area, so thought a nice idea would be to add a waterfall on the high ground.
To this end I added even more height to the ground itself and the decorator’s tape in the pictures is approximately where the waterfall will be placed.
While this will be mainly for the look of the thing, it would still be possible for someone to be on the high point – like a sniper etc. – so it still has some play value.


The final water effect is not yet resolved but will not be a massive thing.
However, this means I have to learn some techniques. I have no access to water terrain materials here, but I did see somewhere on line (it might have been Luke’s site or Mel’s – can’t recall) a way of using clear bathroom acrylic as a substitute, so that’s my next step. I am sure I can get the tubes of clear acrylic here, so some practice will be required. I’ll post my attempts on here.
In addition, I need some cliffs/rocks. I don’t have rock moulds either, but did see the way of using tin-foil, that’s the next step in my terrain building skill-set. I’ll post a separate blog on that side of things as well.
Finally, I want to coat the entire board with some form of surface to make it robust, and I have in mind “scuptmould” type materials. Again I will make this myself – I do know Luke has a video on this, and I will also check Mel’s terrain book.
So, lots of learning and experimenting coming up.
Sōhei Monk's dojo
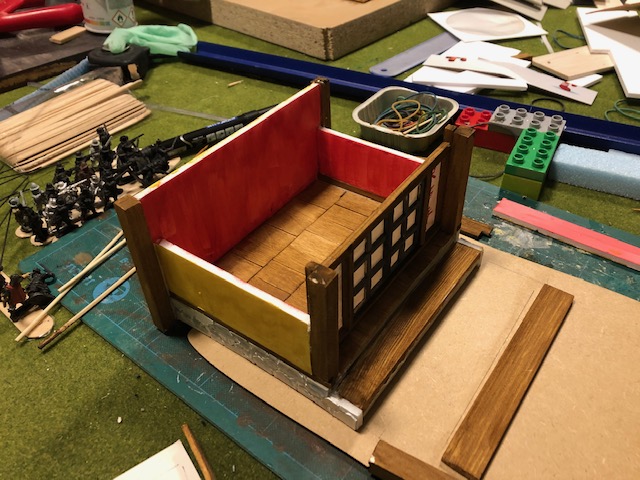
While waiting to decide how to tackle my three skill deficits (sculptamould, tinfoil cliffs, and water) I made another building. This time it’s a kind of dojo/temple for the Sōhei Monks I have to play Test of Honor or Ronin.
The construction will be fairly typical, I think, main walls constructed with foam core, but as I had some off-cuts of wood and some balsa wood, I thought some experimentation was in order.
The main materials were:
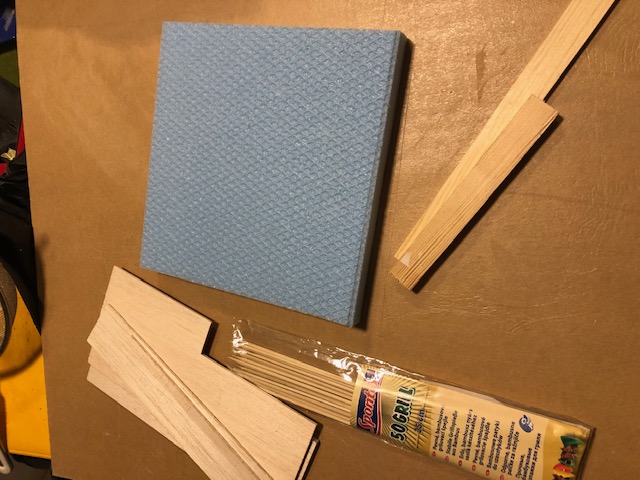

I started with a block of blue foam approximately 20×20 cm. I didn’t;t measure it at the time it was an off-cut that “Looked right” for the figures. I had already some random prices of balsa and the “tongue depressors” were to be the flooring.
All the wooden pieces were brushed over with the Sepia wash to give a “natural” wood effect. No other paining was done to the balsa except the wash.
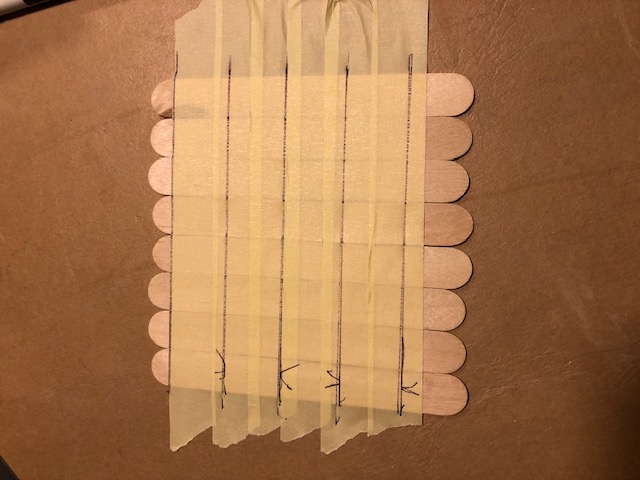
The sticks were taped together (either across) and a steel ruler was used to draw the parallel lines across the sticks which were then cut through with a craft knife (Use a sharp one, change the blade as necessary).
These were glued down to the blue board to create an “off-set” flooring. Each alternate row being off set and the “half” board removed from one side, replaced on the other side to make the effect. This will be clear in the pictures below.
The wooden steps were made from two off-cuts of wood strip I had used for a completely different task in the house.
The main walls were made from foam core (5mm) and glued in place with white glue. They were held with elastic bands until the glue set.


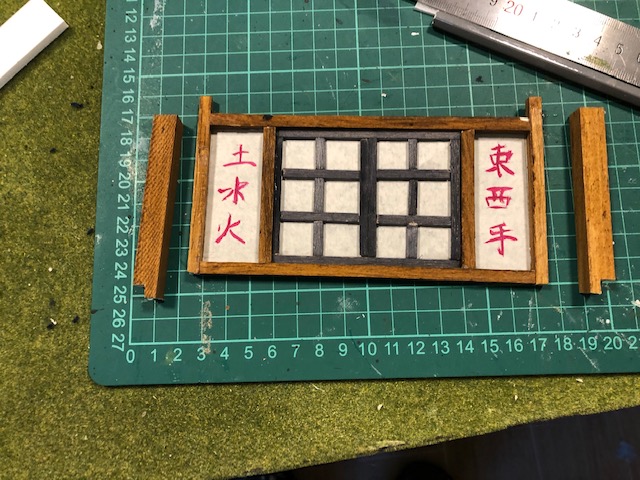
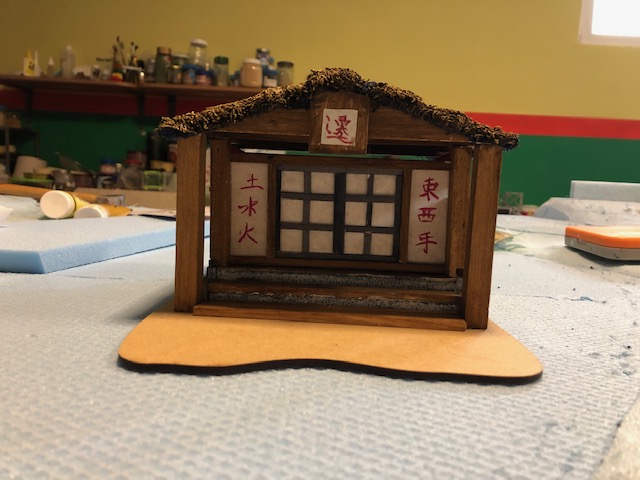
I wanted to make a simulation of a typical Japanese wood and paper door, and to do this I made a simple frame from balsa wood and colored it black. The paper was some light “tracing” paper (or something close to it) that I have had for years. It was naturally an off-white colour.
The Kanji are taken from a book of Kanji I had and have no real significance, I just liked to look of them. From memory they are a couple of characters for West and South winds and some numbers.
This was glued to the front of the dojo with supporting balsa uprights.
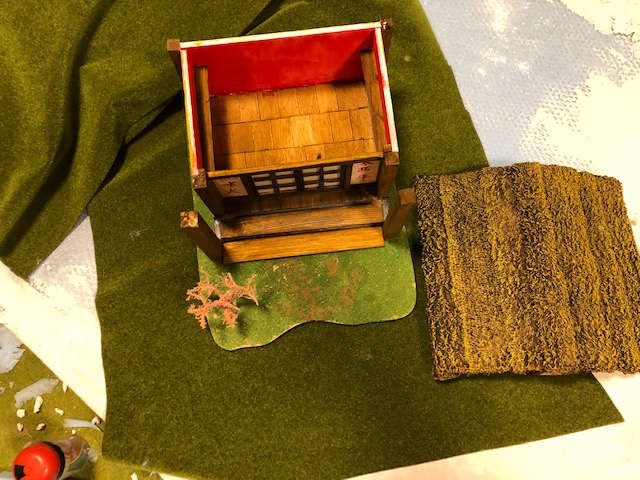
Next up was the roof. I used card from a box as the base and cut it across the corner joint so that it formed the angle of the roof. I had measures an approximate height for the roof, but mainly this was by eye as to what looked ‘right’. The roof was supported by balsa inserts as I wanted to to be removable for play.
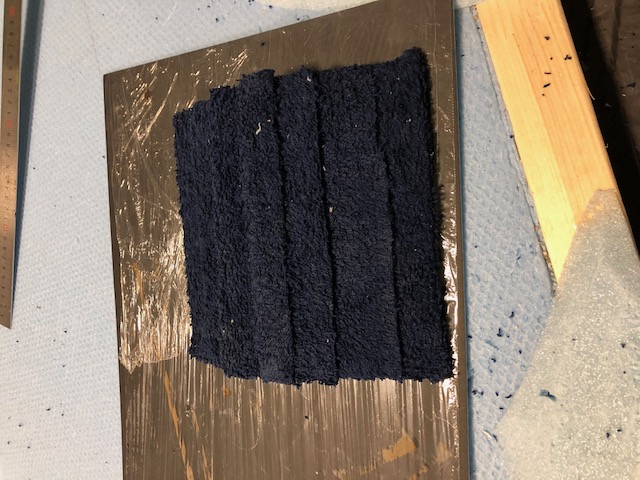
Once this was dry, I used an old hand towel to make a “thatched” roof. The towel was cut into strips and glues down with PvA, starting from the bottom and overlapping slightly up the roof. A final piece was glued down on the ridge f the roof. This was left to dry completely before the next step.
Once dry, a dilution of PvA and water (approximately 50/50) was brushed onto the towel roof and I used an old stiff hair brush to give an impression of thatching.
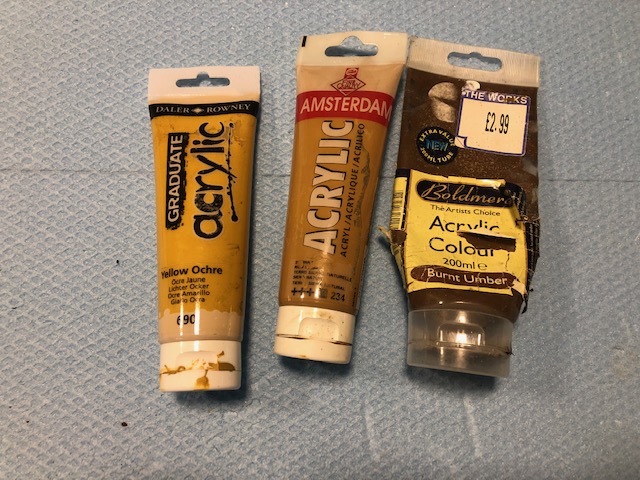
Once THIS had dried, the roof was painted with a dark brown acrylic paint, followed by successive dry-brushing of lighter paints. These were cheap paints for a “pound shop” I have had for a long time and purchased in the UK. I can’t remember from where anymore.
The paints I used were:
Brown – Burnt Umber
First dry brush – Raw Sienna
Final dry brush – Yellow Ochre.

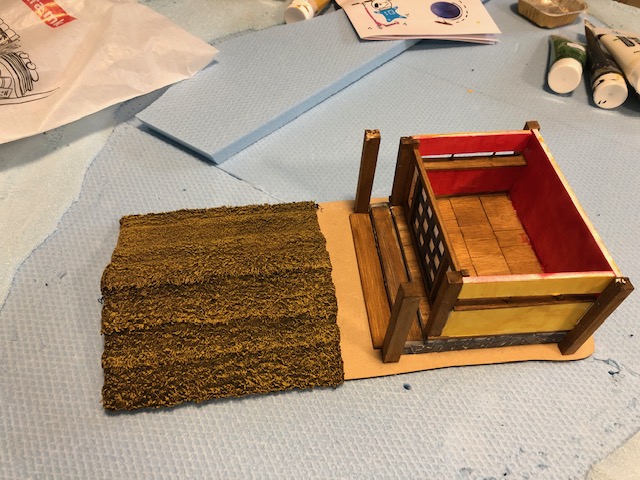
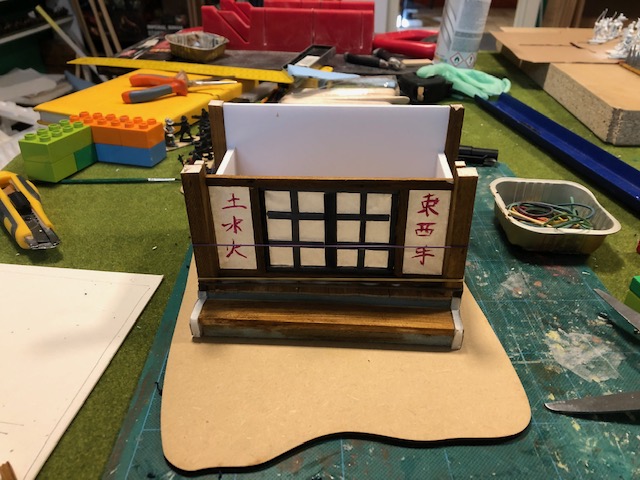
Putting it all together I added two columns at the entry to the dojo to help support the roof, and finished the sides with some cut up card to simulate rocks. These were painted with black and grey acrylic paints.
The walls were also painted with artist acrylics and maybe not authentic, but the yellow and red combination felt right.
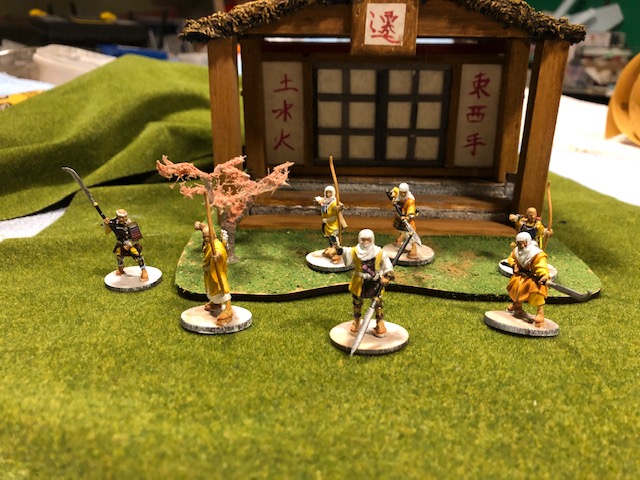
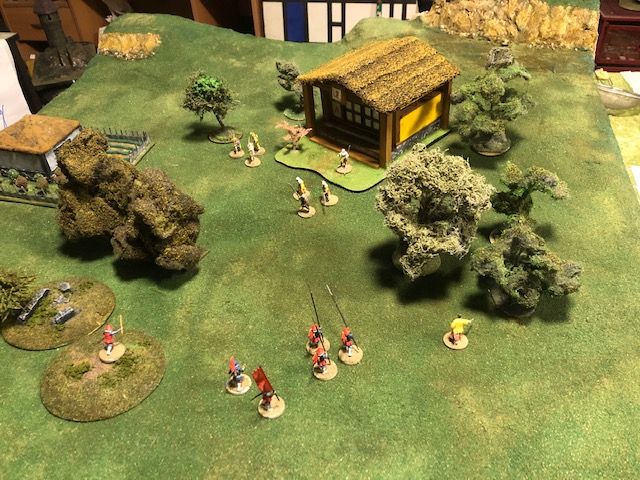
The final pictures show the addition of a cherry blossom and some flocking. I want to find a small “Buddha” of similar statue for inside the dojo/temple and if I find one, I will probably make a small plinth for it to rest on.


The miniatures in this final picture are the Sōhei set from Test of Honor (first edition) – not sure these exact figures are still available. I might show these in more detail later if anyone is interested. I need to finish off the basing and final touches, but wanted to show the building in situ, as it where.
Thanks for reading.
 Defend to the Death!
Skills learned
So after a long time (Life can be a B**ch) I have got to the end of the project and just a quick post on the subsequent skills I have tried to learn during this project.
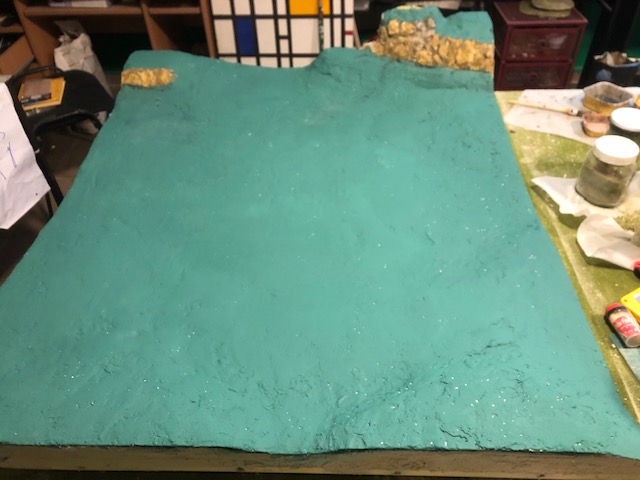
I followed the basic concept for Skuptamould which Luke at Geek Gaming posted on YouTube quite some time ago, with a small digression. In his video he dries the papier mâché mix, but I just immediately used it by adding plaster powder to the “gloop”.

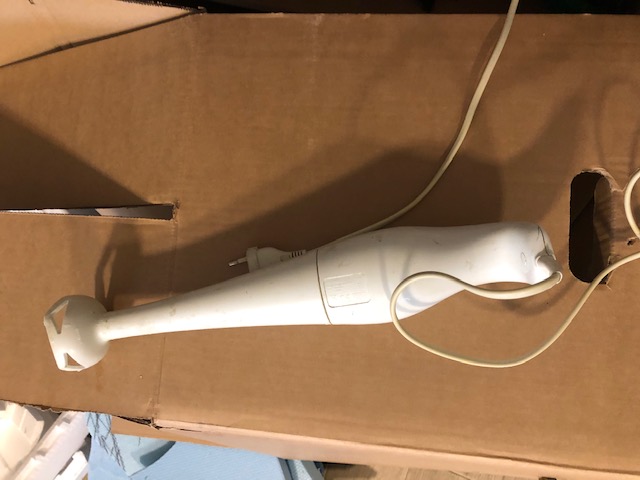
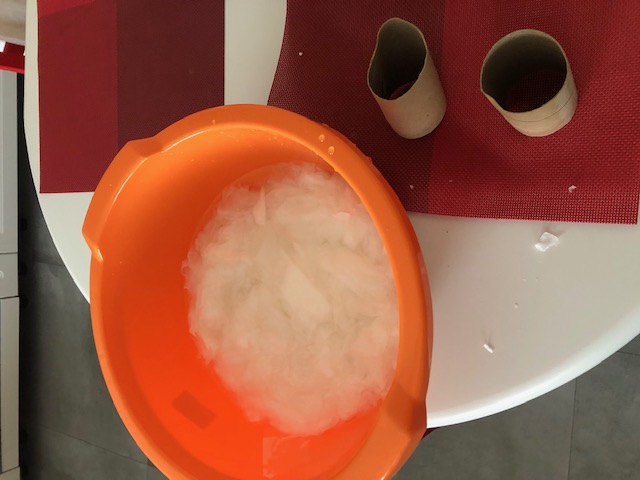
The process is simple. Take a couple of toilet rolls and break them down into small pieces. Put them in A LOT of water and mash them using some form of mixer. I had an old hand held chopping/mixing tool which works well.
Keep chopping up the paper until it’s a mush. At this point you can take it out of the water and dry it off if you want to make a supply for later. I did not do this as I was using the mix immediately.
I took out the paper with a sieve and added an equal amount of player. (I only had wall plaster, but I’d imagine Plaster of Paris or another product would work as well). This was mixed to form a mush similar in texture to “cottage cheese (adding more water as required).
This final mix was spread on the board with a trowel tool and left to dry. One amount of papier mâché mix did a small section of the board as seen in the picture below
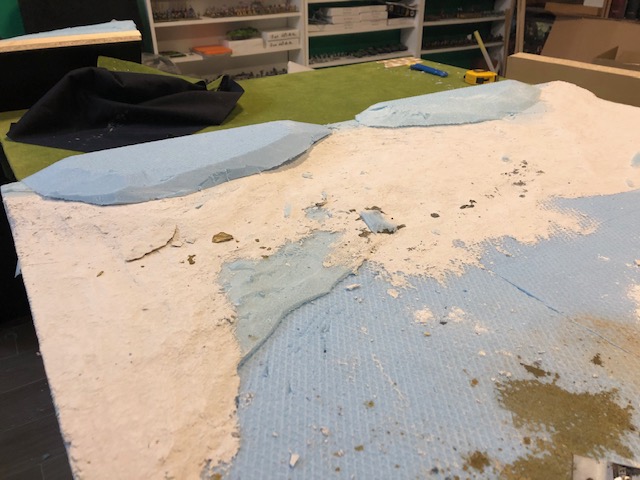 Initial "Skulptamould" mix
The work continued until the entire board was covered and it was also used to cement in place the rock faces. (see additional post on the plaster rocks).
Making rocks
The second skill I wanted to learn was making plaster rock faces. As I do not have access to rubber moulds, I went down the aluminum foil route and had a couple of walk throughs to get the process as good as possible. (Unfortunately I forgot to photograph my final attempts, but the following pictures should give a good idea of the process).
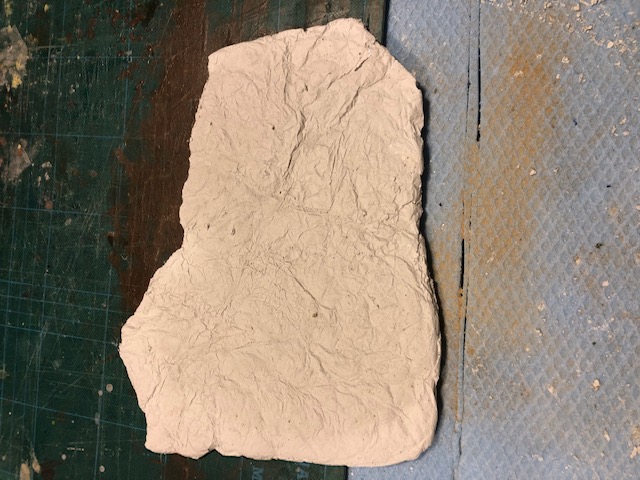
Essentially it requires making a form out of several layers of tin-foil (I used 7 layers) glued with PvA glue to hold the shape. The foil is scrunched up then unfolded to make the “rock shapes” and my final attempt included depressing the foil in places to make more depressions in the foil. (My first attempt was too flat, as the pictures show).


The formed sheet was supported by a layer of “cat-lit” although sand would work just as well. A mixture of plaster was made, which I would say was the constituency of double cream, and pours into the foil mould. I banged the table several times to get most of the air bubbles out.
The plaster set fairly quickly. But I’d recommend leaving it for a few hours. When taking the plaster out the mould, it broke up anyway, but this is not really an issue as I used the smaller pieces when making the rock face.


Painting the rocks is a personal choice, but I tried both the usual “black/grey” approach and one with more colors. This was heavily diluted acrylic paints with a final black wash. I’d recommend experimenting with off cuts to see what works well for the look you are after.


The final picture is the rock face in suture on the board.
Making rocks
The second skill I wanted to learn was making plaster rock faces. As I do not have access to rubber moulds, I went down the aluminum foil route and had a couple of walk throughs to get the process as good as possible. (Unfortunately I forgot to photograph my final attempts, but the following pictures should give a good idea of the process).
Essentially it requires making a form out of several layers of tin-foil (I used 7 layers) glued with PvA glue to hold the shape. The foil is scrunched up then unfolded to make the “rock shapes” and my final attempt included depressing the foil in places to make more depressions in the foil. (My first attempt was too flat, as the pictures show).


The formed sheet was supported by a layer of “cat-lit” although sand would work just as well. A mixture of plaster was made, which I would say was the constituency of double cream, and pours into the foil mould. I banged the table several times to get most of the air bubbles out.
The plaster set fairly quickly. But I’d recommend leaving it for a few hours. When taking the plaster out the mould, it broke up anyway, but this is not really an issue as I used the smaller pieces when making the rock face.

Painting the rocks is a personal choice, but I tried both the usual “black/grey” approach and one with more colors. This was heavily diluted acrylic paints with a final black wash. I’d recommend experimenting with off cuts to see what works well for the look you are after.
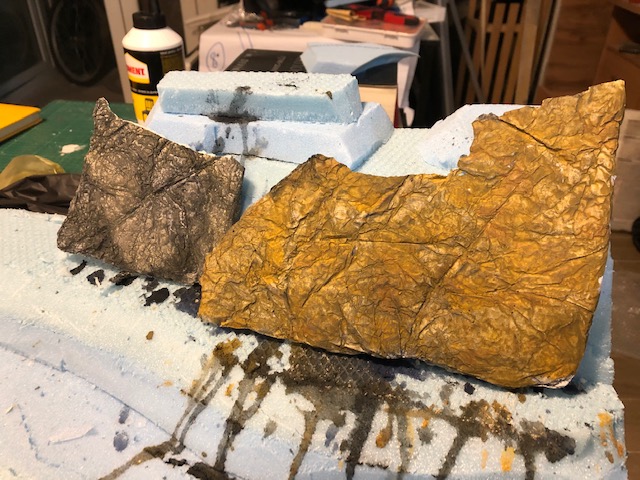
The final picture is the rock face in situ on the board.
Making water
The third skill I tried to learn was water effects. Again as I was unable to obtain the propriety water effect materials, I used instead the acrylic material used in bathrooms for sealing washbasins/baths etc.
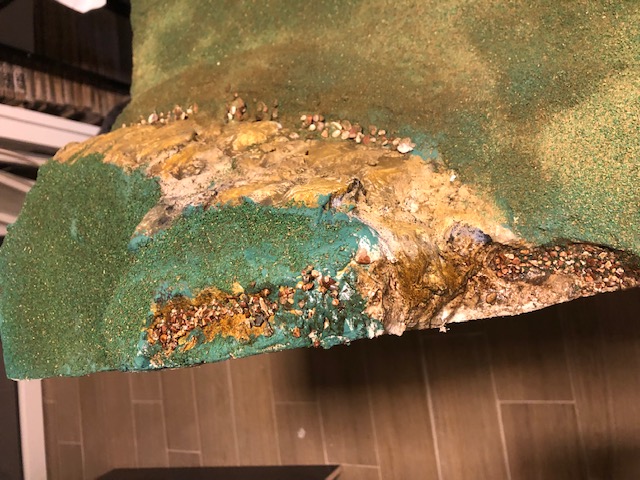
The small area where I wanted to have the effect was prepared quite simply. The “river” was filled with small rocks (glued in place with PvA) and when dry I simply used soft tone varnish to dampen down the rock colors and create a “brownish” surface for the water effect.
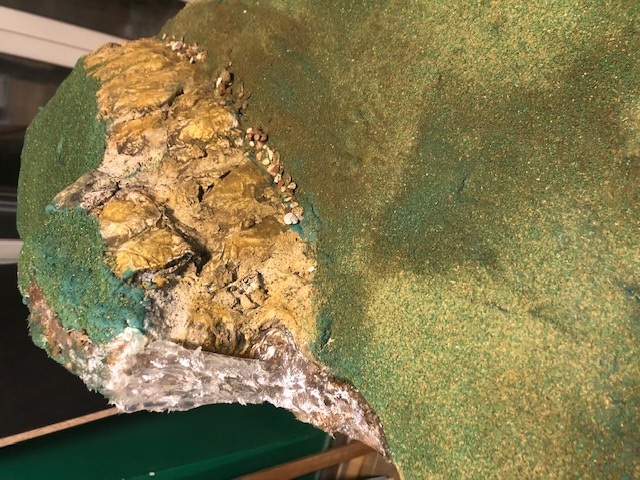
The waterfall was prepared by cutting a small piece of plastic from a figure pack and ‘gluing’ it in place with the acrylic. (See pictures)
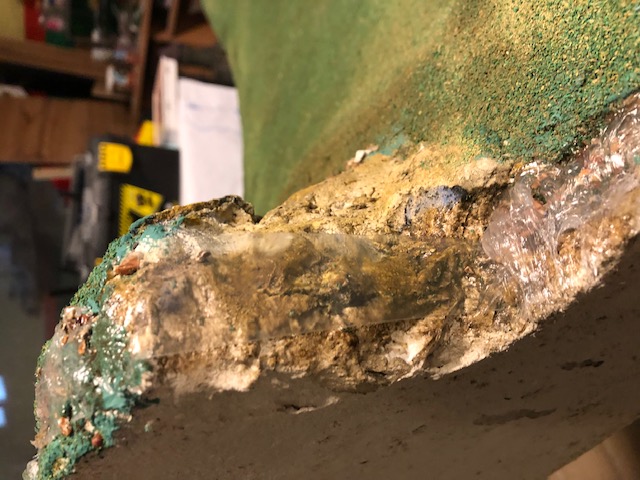
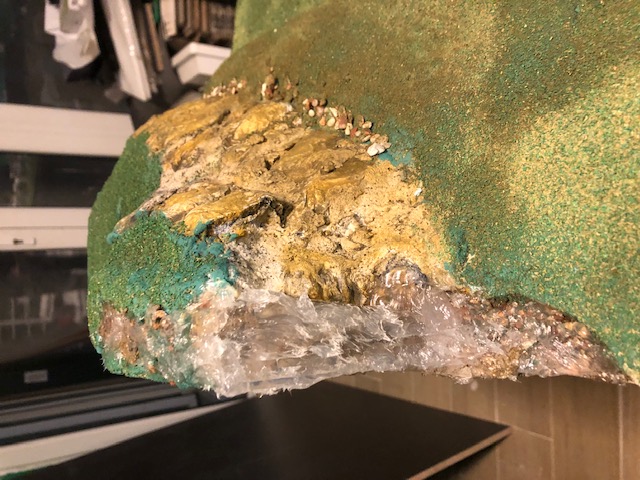
Finally, additional acrylic was pasted on the river and stippled to make a kind of foaming effect where the waterfall landed on the lower area. Some white paint was added for a highlight and “foam” to finish it off.
It’s not fantastic, but as it’s only there for ambiance and not for any practical wargaming purpose, I’m happy enough with the result.
The final board
So, the board was completed by covering the raw surface with the Skulptamould mix and adding rocks and water effects. The entire “grass” area was painted with a household emulsion pain in green, and this was then flocked with my home-make flock in various shades of green and brown.
The cliffs were painted in watered down sepia and ochre paints, and then a final wash of black.
The water effect was done after all the other stages has been completed.
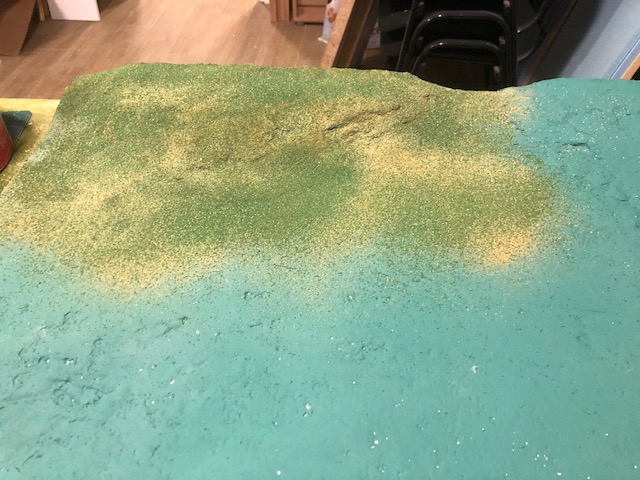
The table surface was them allowed to dry and a final PvA / water mix (approx 1:9) was sprayed over the entire board to seal in the flock. I did not add trees etc. as I intent to use the board for different scales so did not want to push the look too far in one direction.
There follows a few pictures of the bard using different skirmish/small battle games. Ronin; Bolt Action Saga, and LaSalle

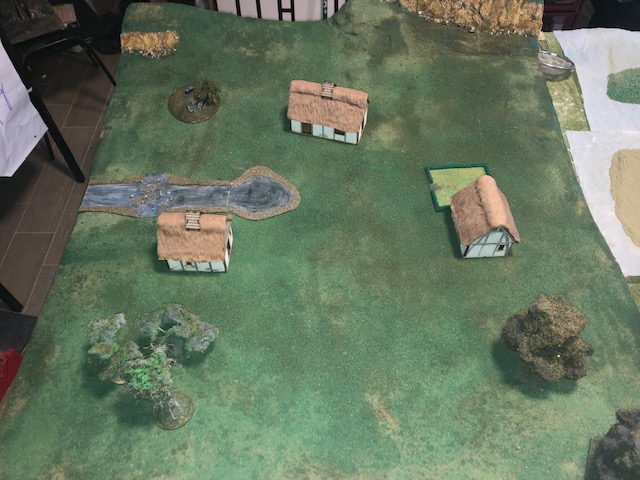
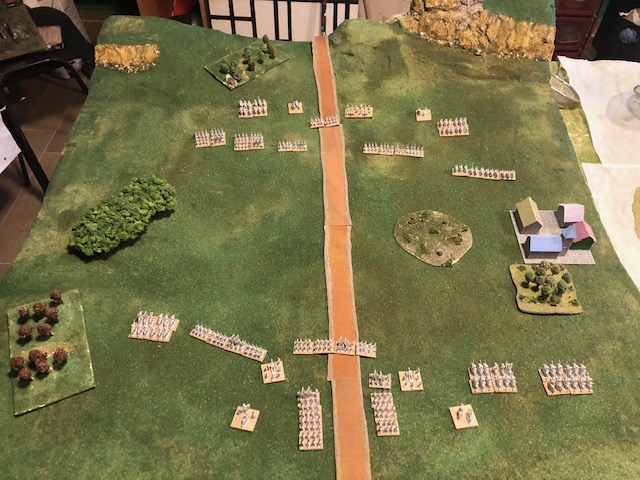
The final picture shows some SYW 10mm figures as yet unpainted. But now I have a board, there’s no excuse not to paint them up.
Thanks for watching this small project. And good luck to everyone


![StarCraft Tabletop Miniatures Game Pre-Orders Live Now [Updated]](https://images.beastsofwar.com/2026/03/starcraft-tmg-news-cover-600-338.jpg)


