


Necrothrall does Marvel Crisis Protocol


Recommendations: 1593
About the Project
In this project I'll be taking my fledgling steps into Marvel Crisis Protocol. I'll be trying out some techniques and paints I've never used before. Wish me luck.
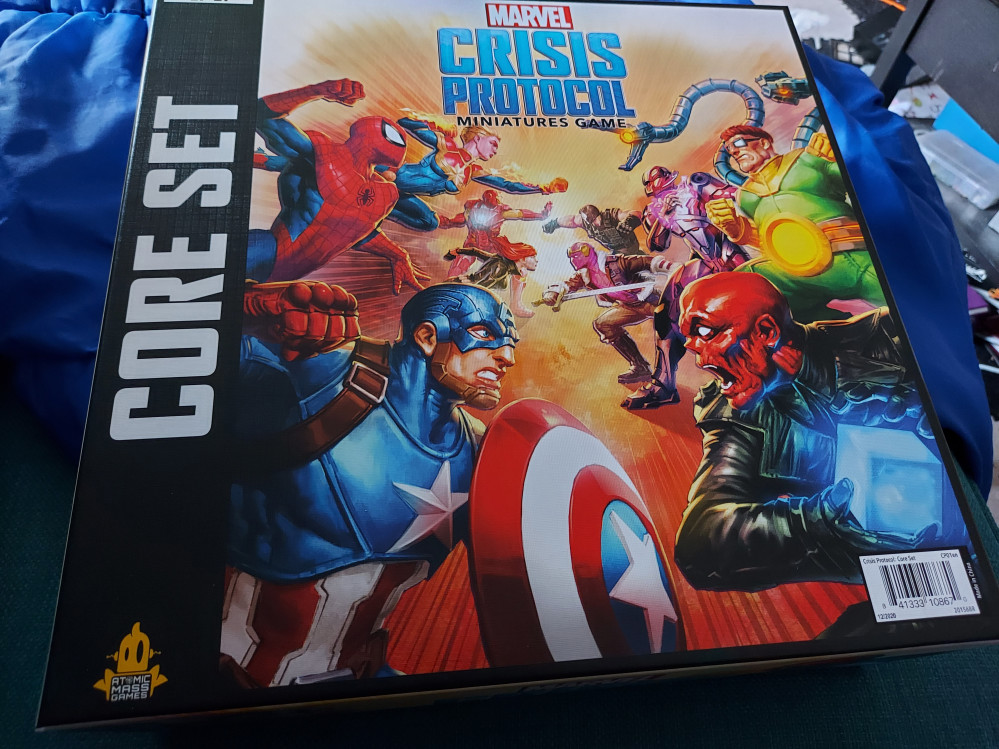
Related Game: Marvel Crisis Protocol Miniatures Game
Related Genre: Science Fiction
This Project is Active
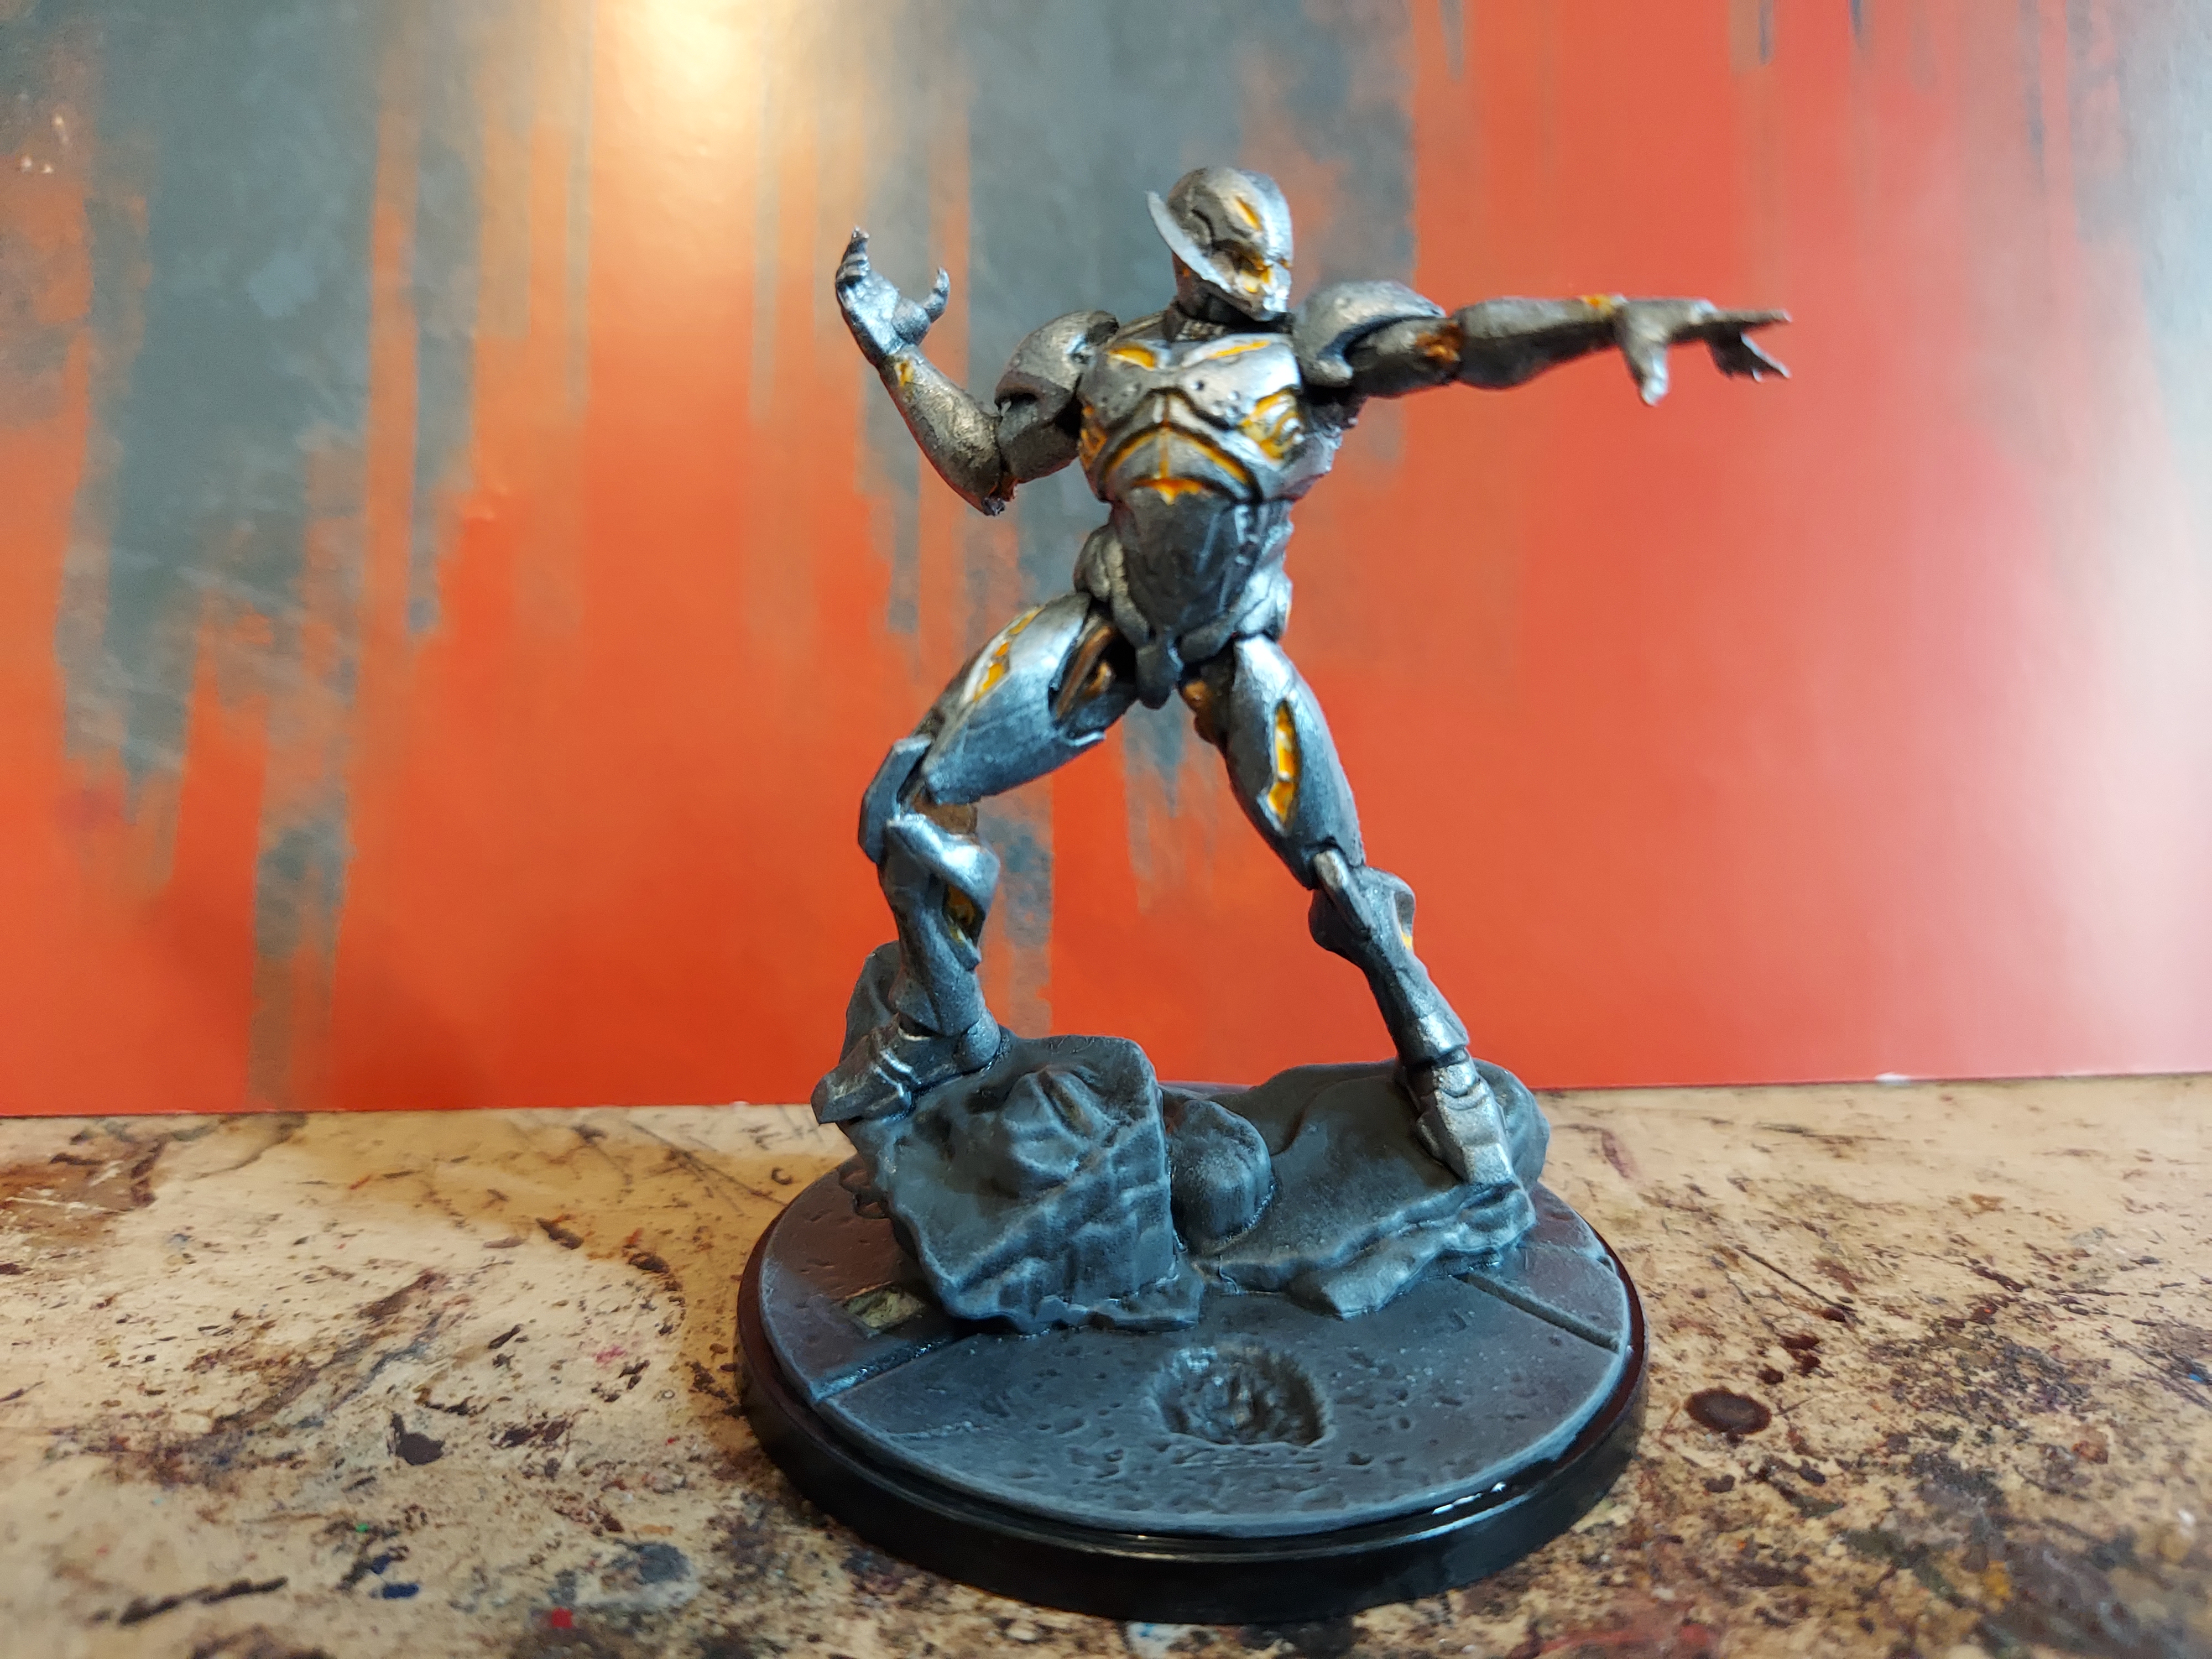
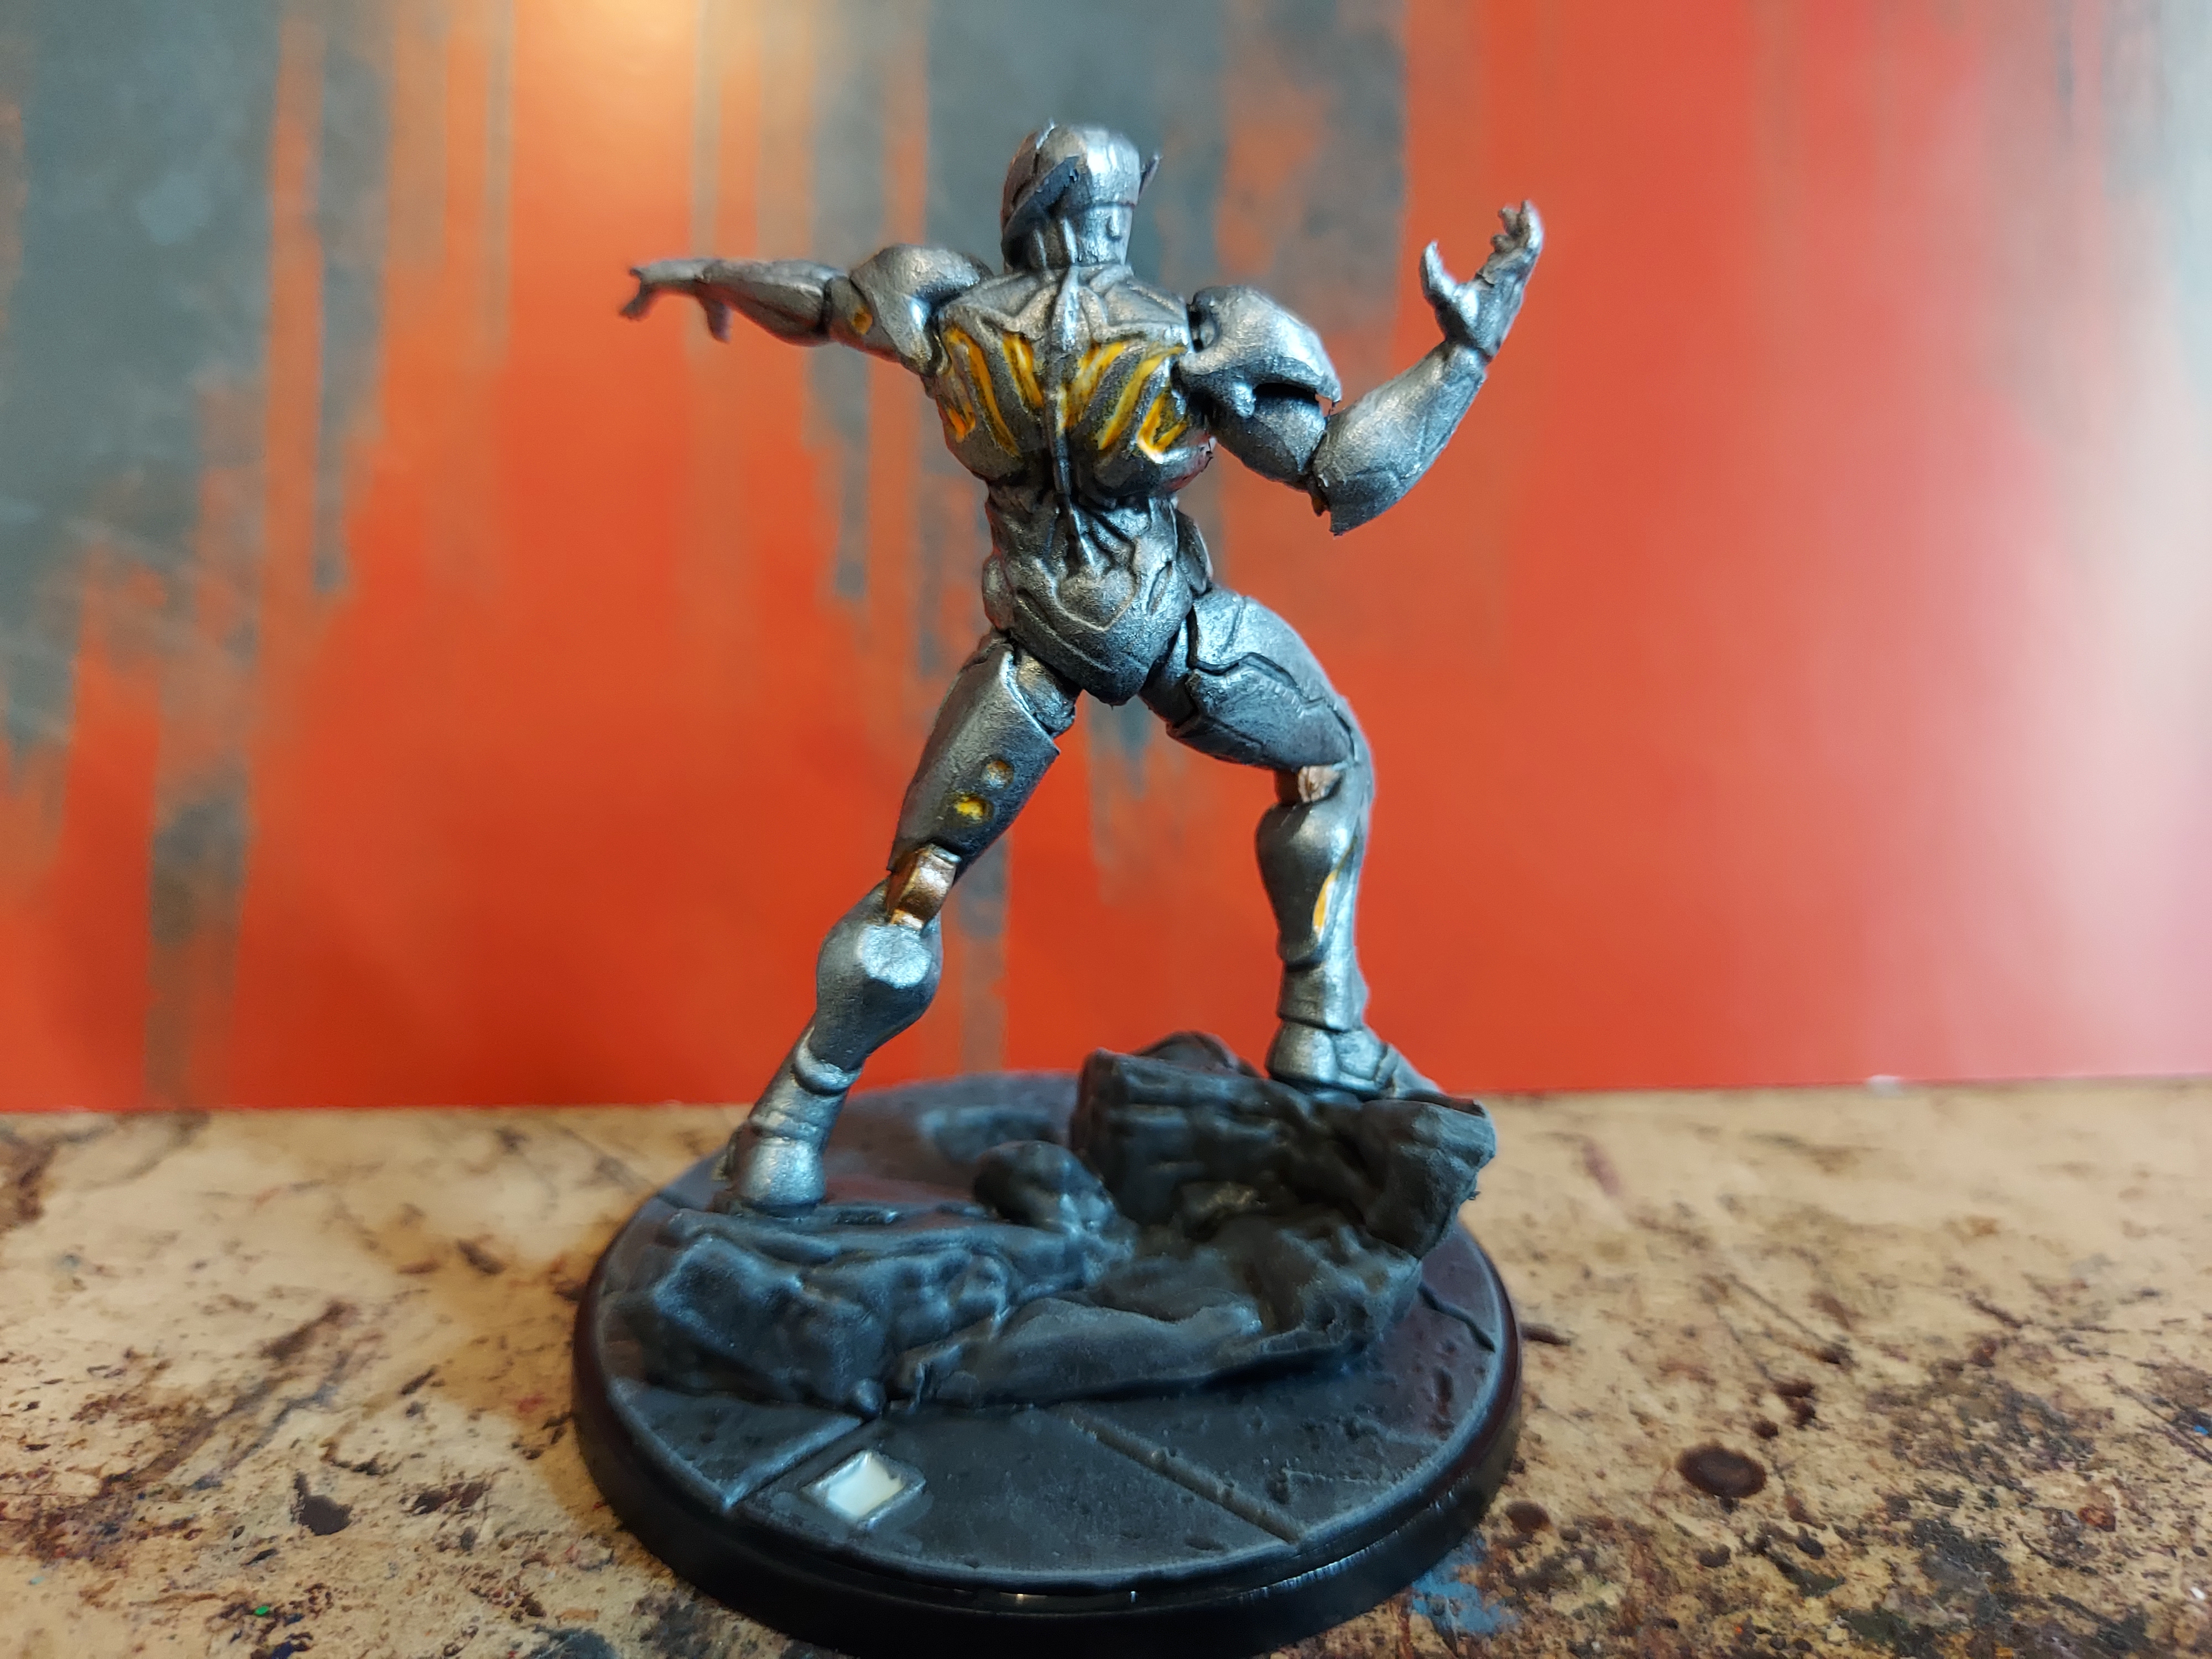
Ultron part 2
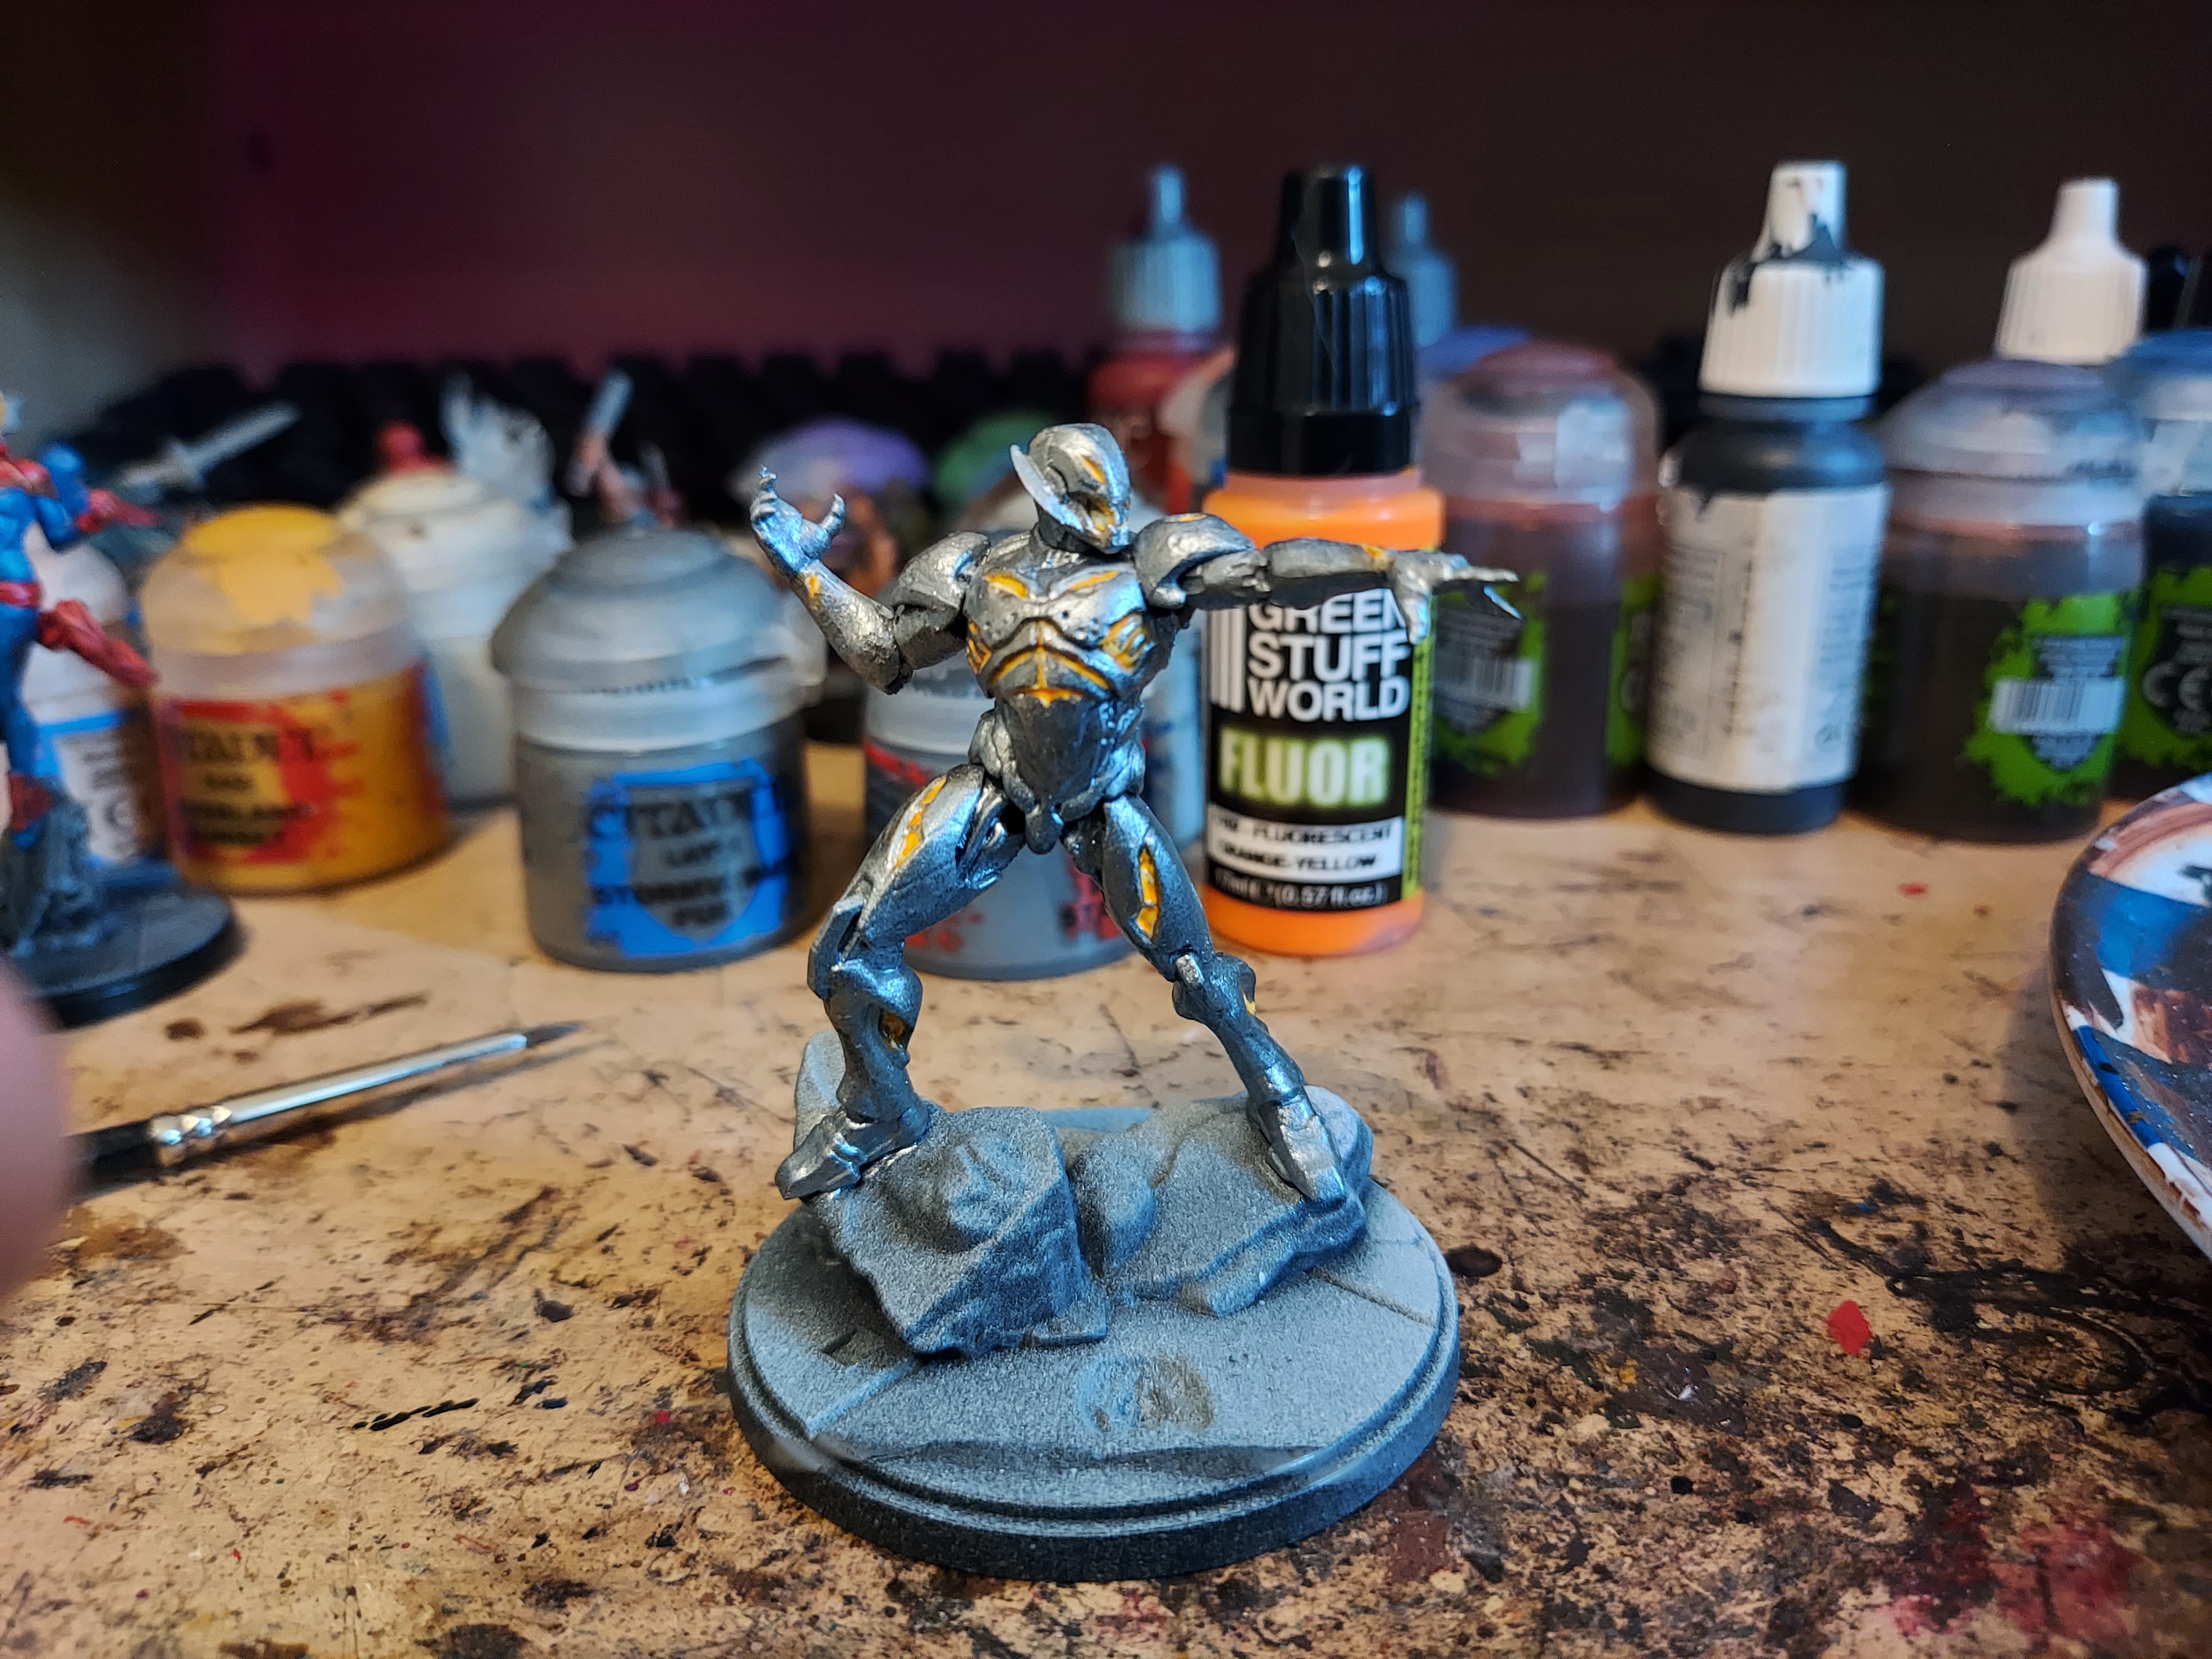
For his armour I used chainmail from vallejo. I darkened down the cracks with some nuln oil, making sure to avoid the orange bits.
I toyed with the idea of doing him chrome but deemed it a bit bright when I saw it on my pallet.
So with his armour done I just needed to paint his base. There were a couple of lights sunken into his base, so I painted those with a fluorescent white.
All in all I think Ultron was the quickest to paint despite being the biggest.
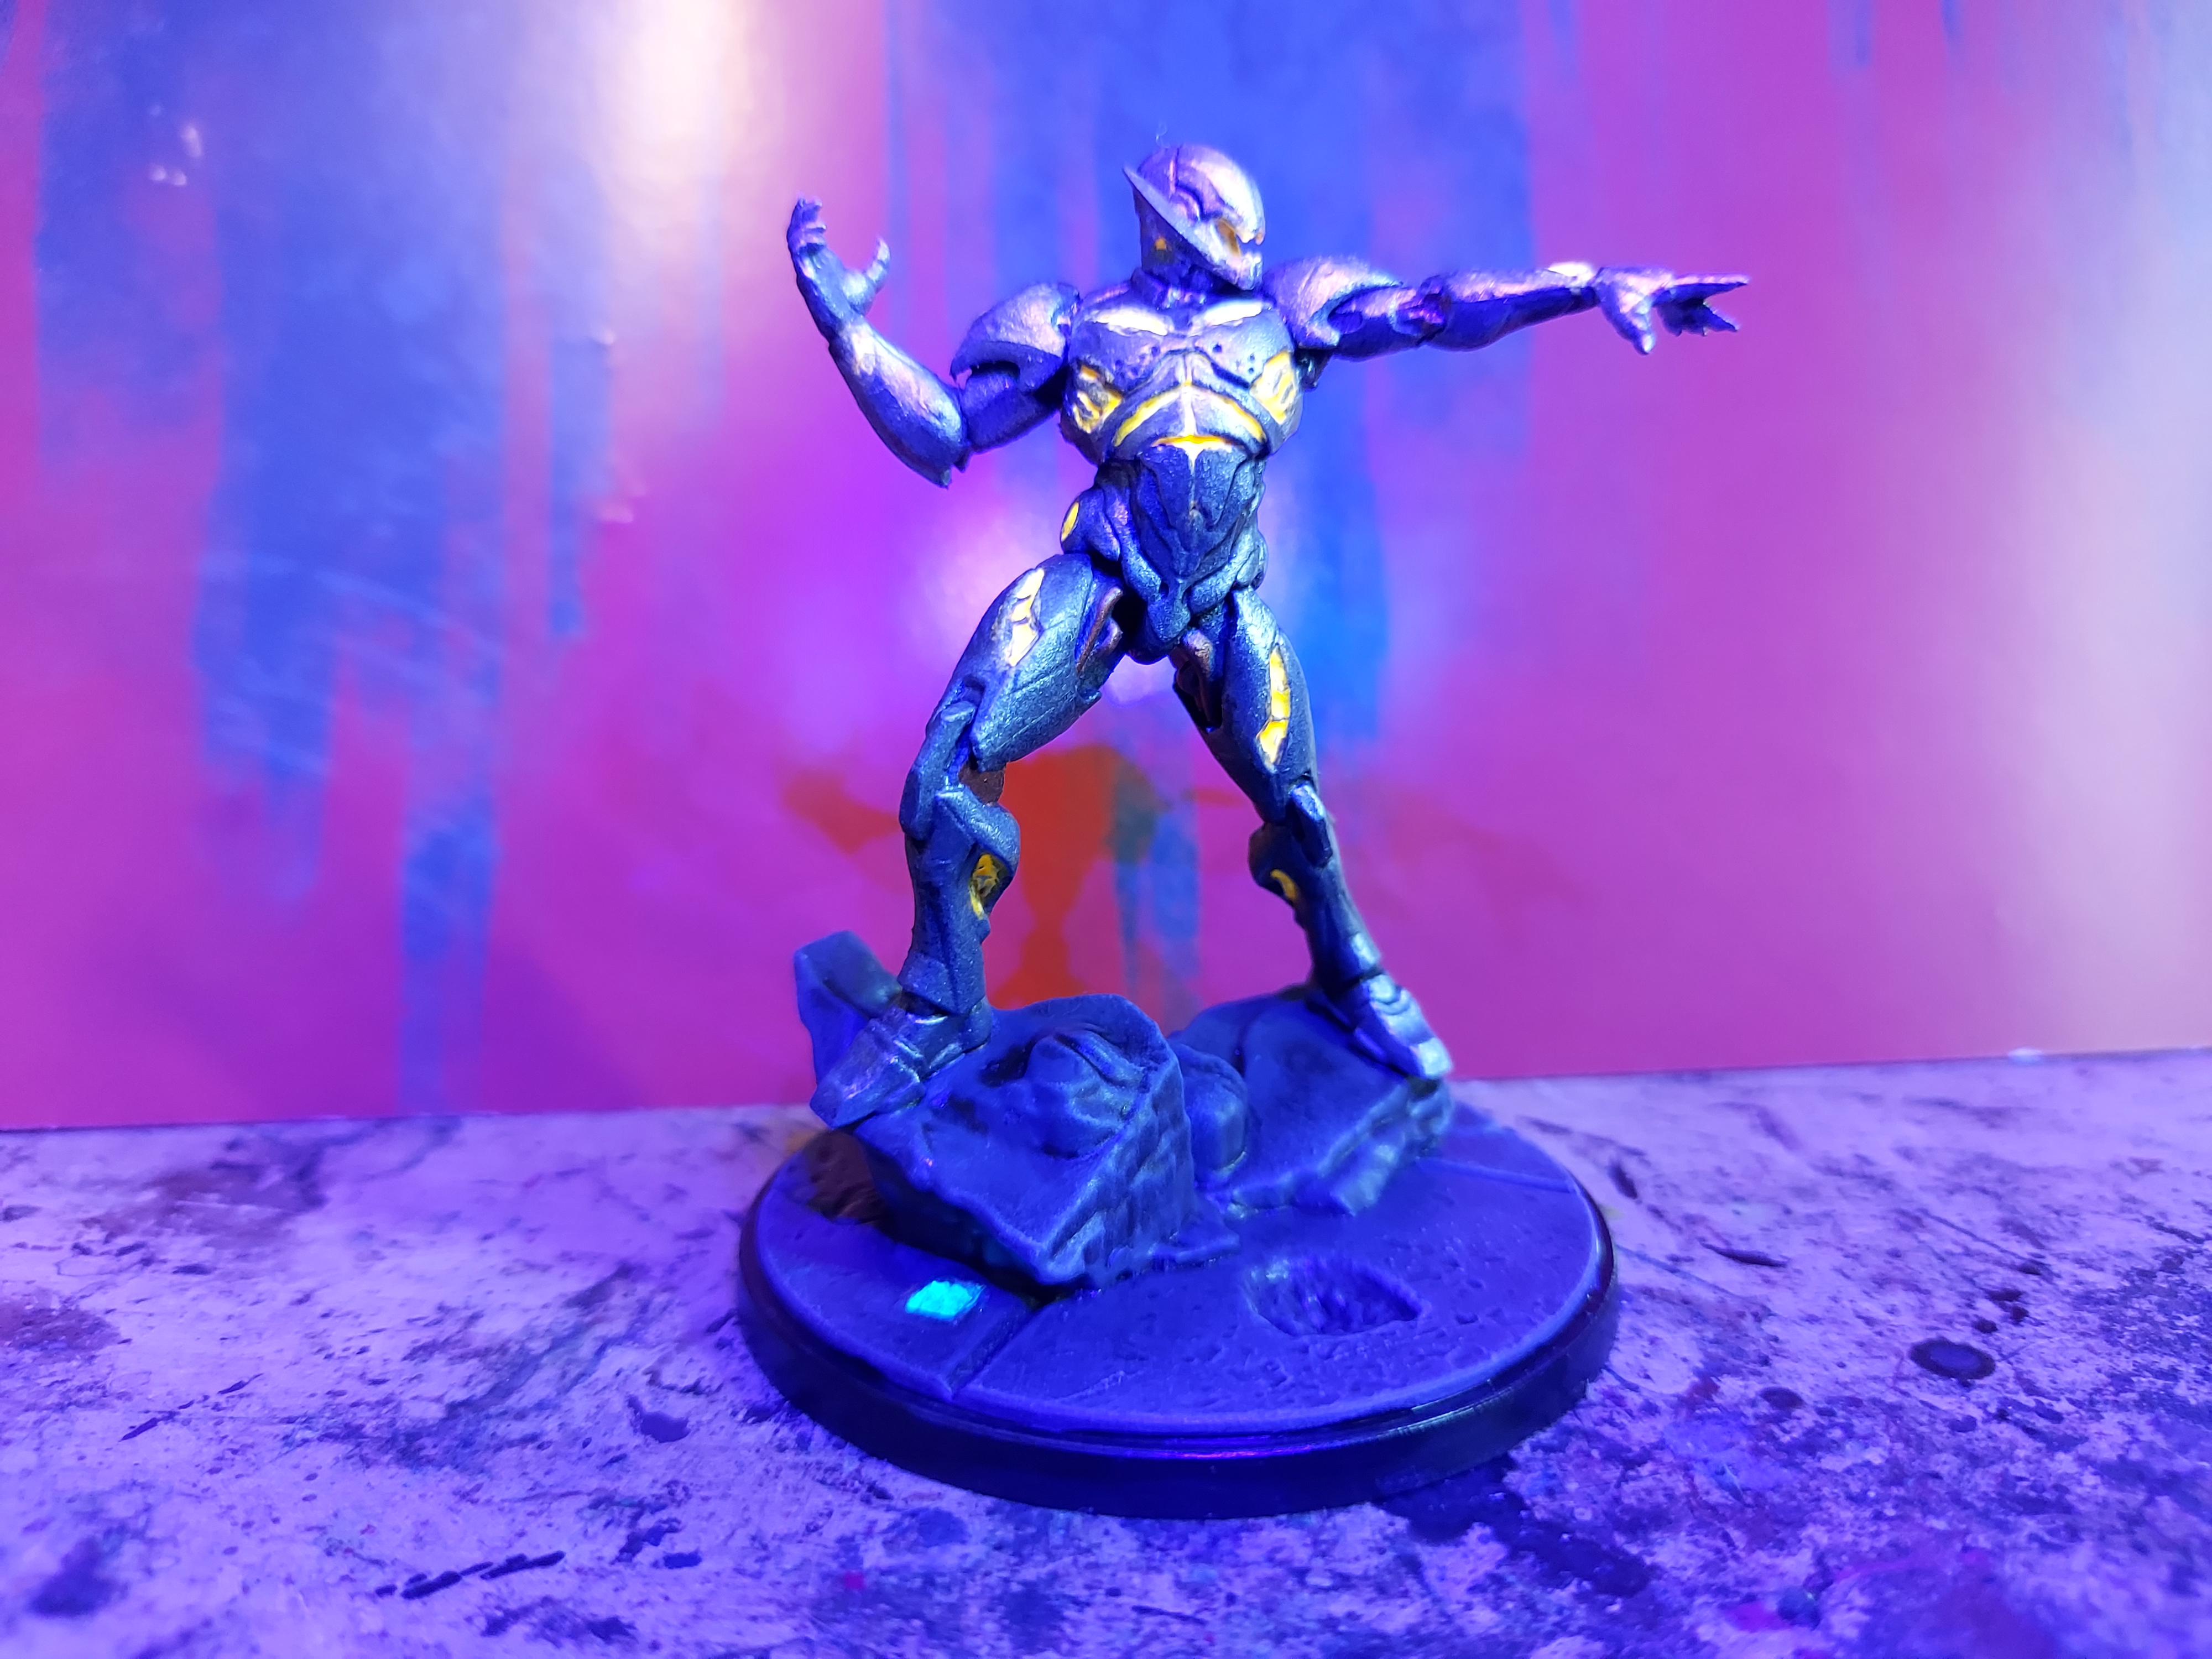
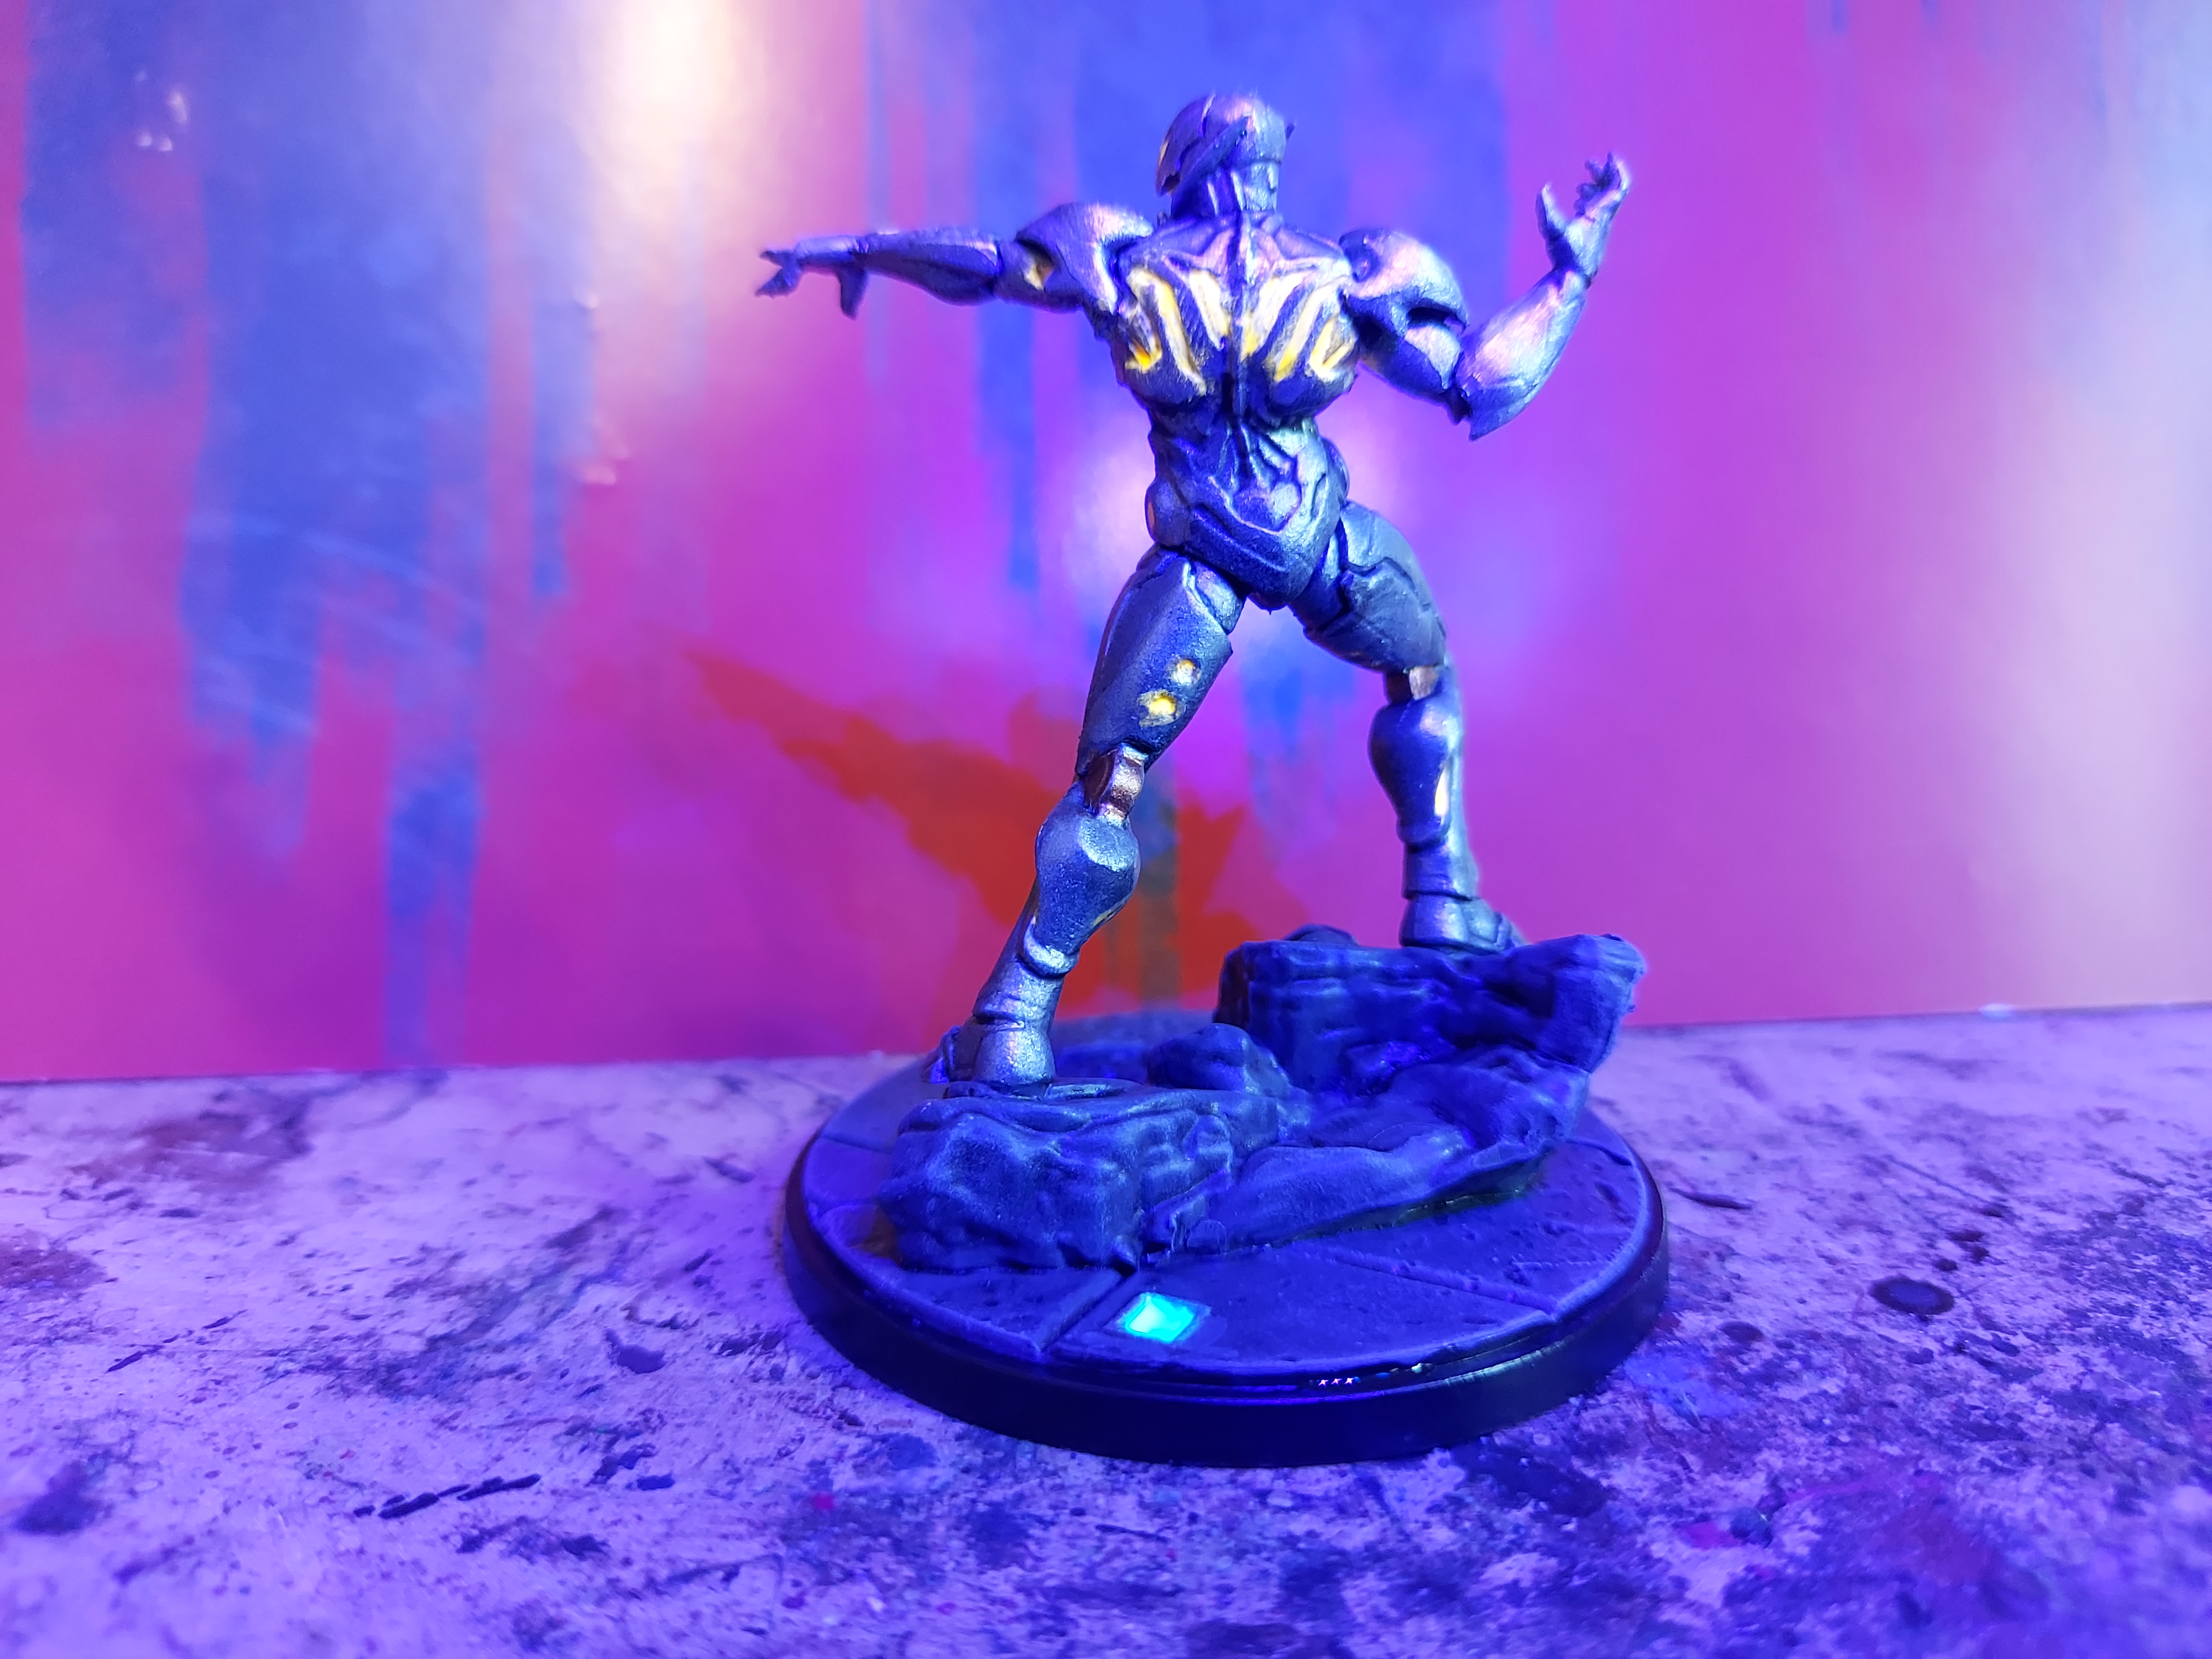
Ultron part 1
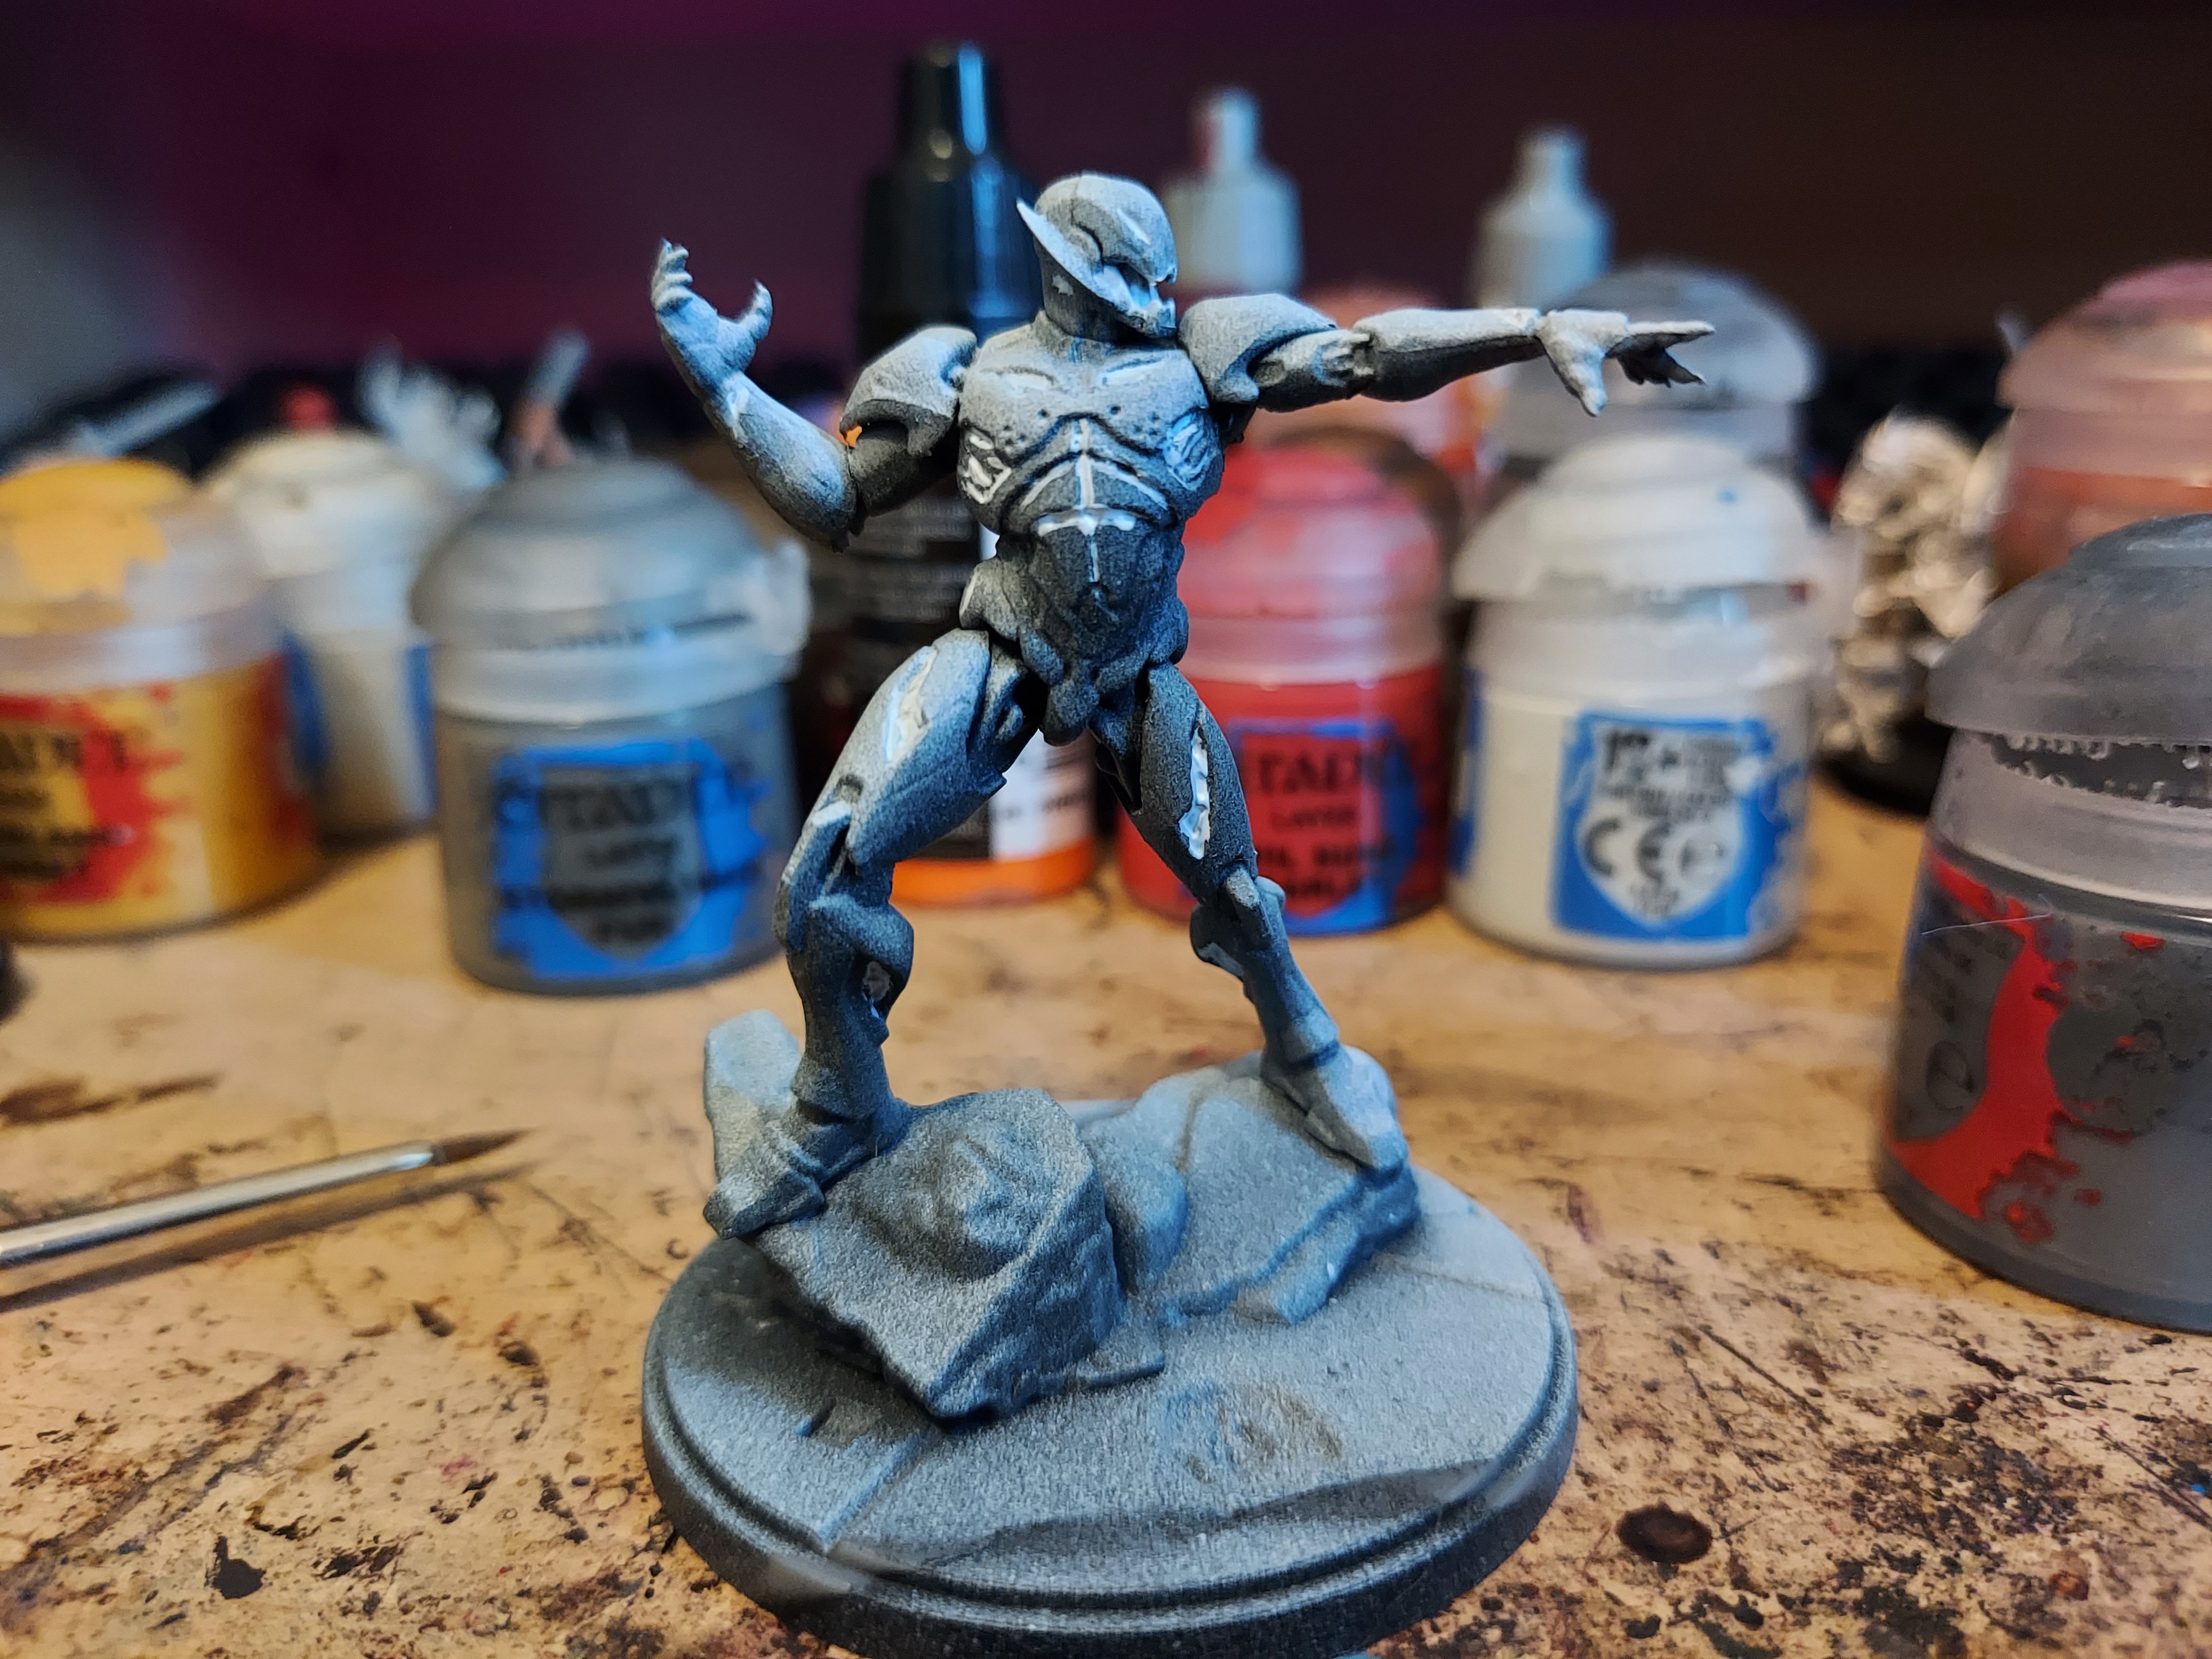
I started Ultron by taking a slightly different approach by starting with the glowy bits. I painted all the bits I wanted to glow with white.
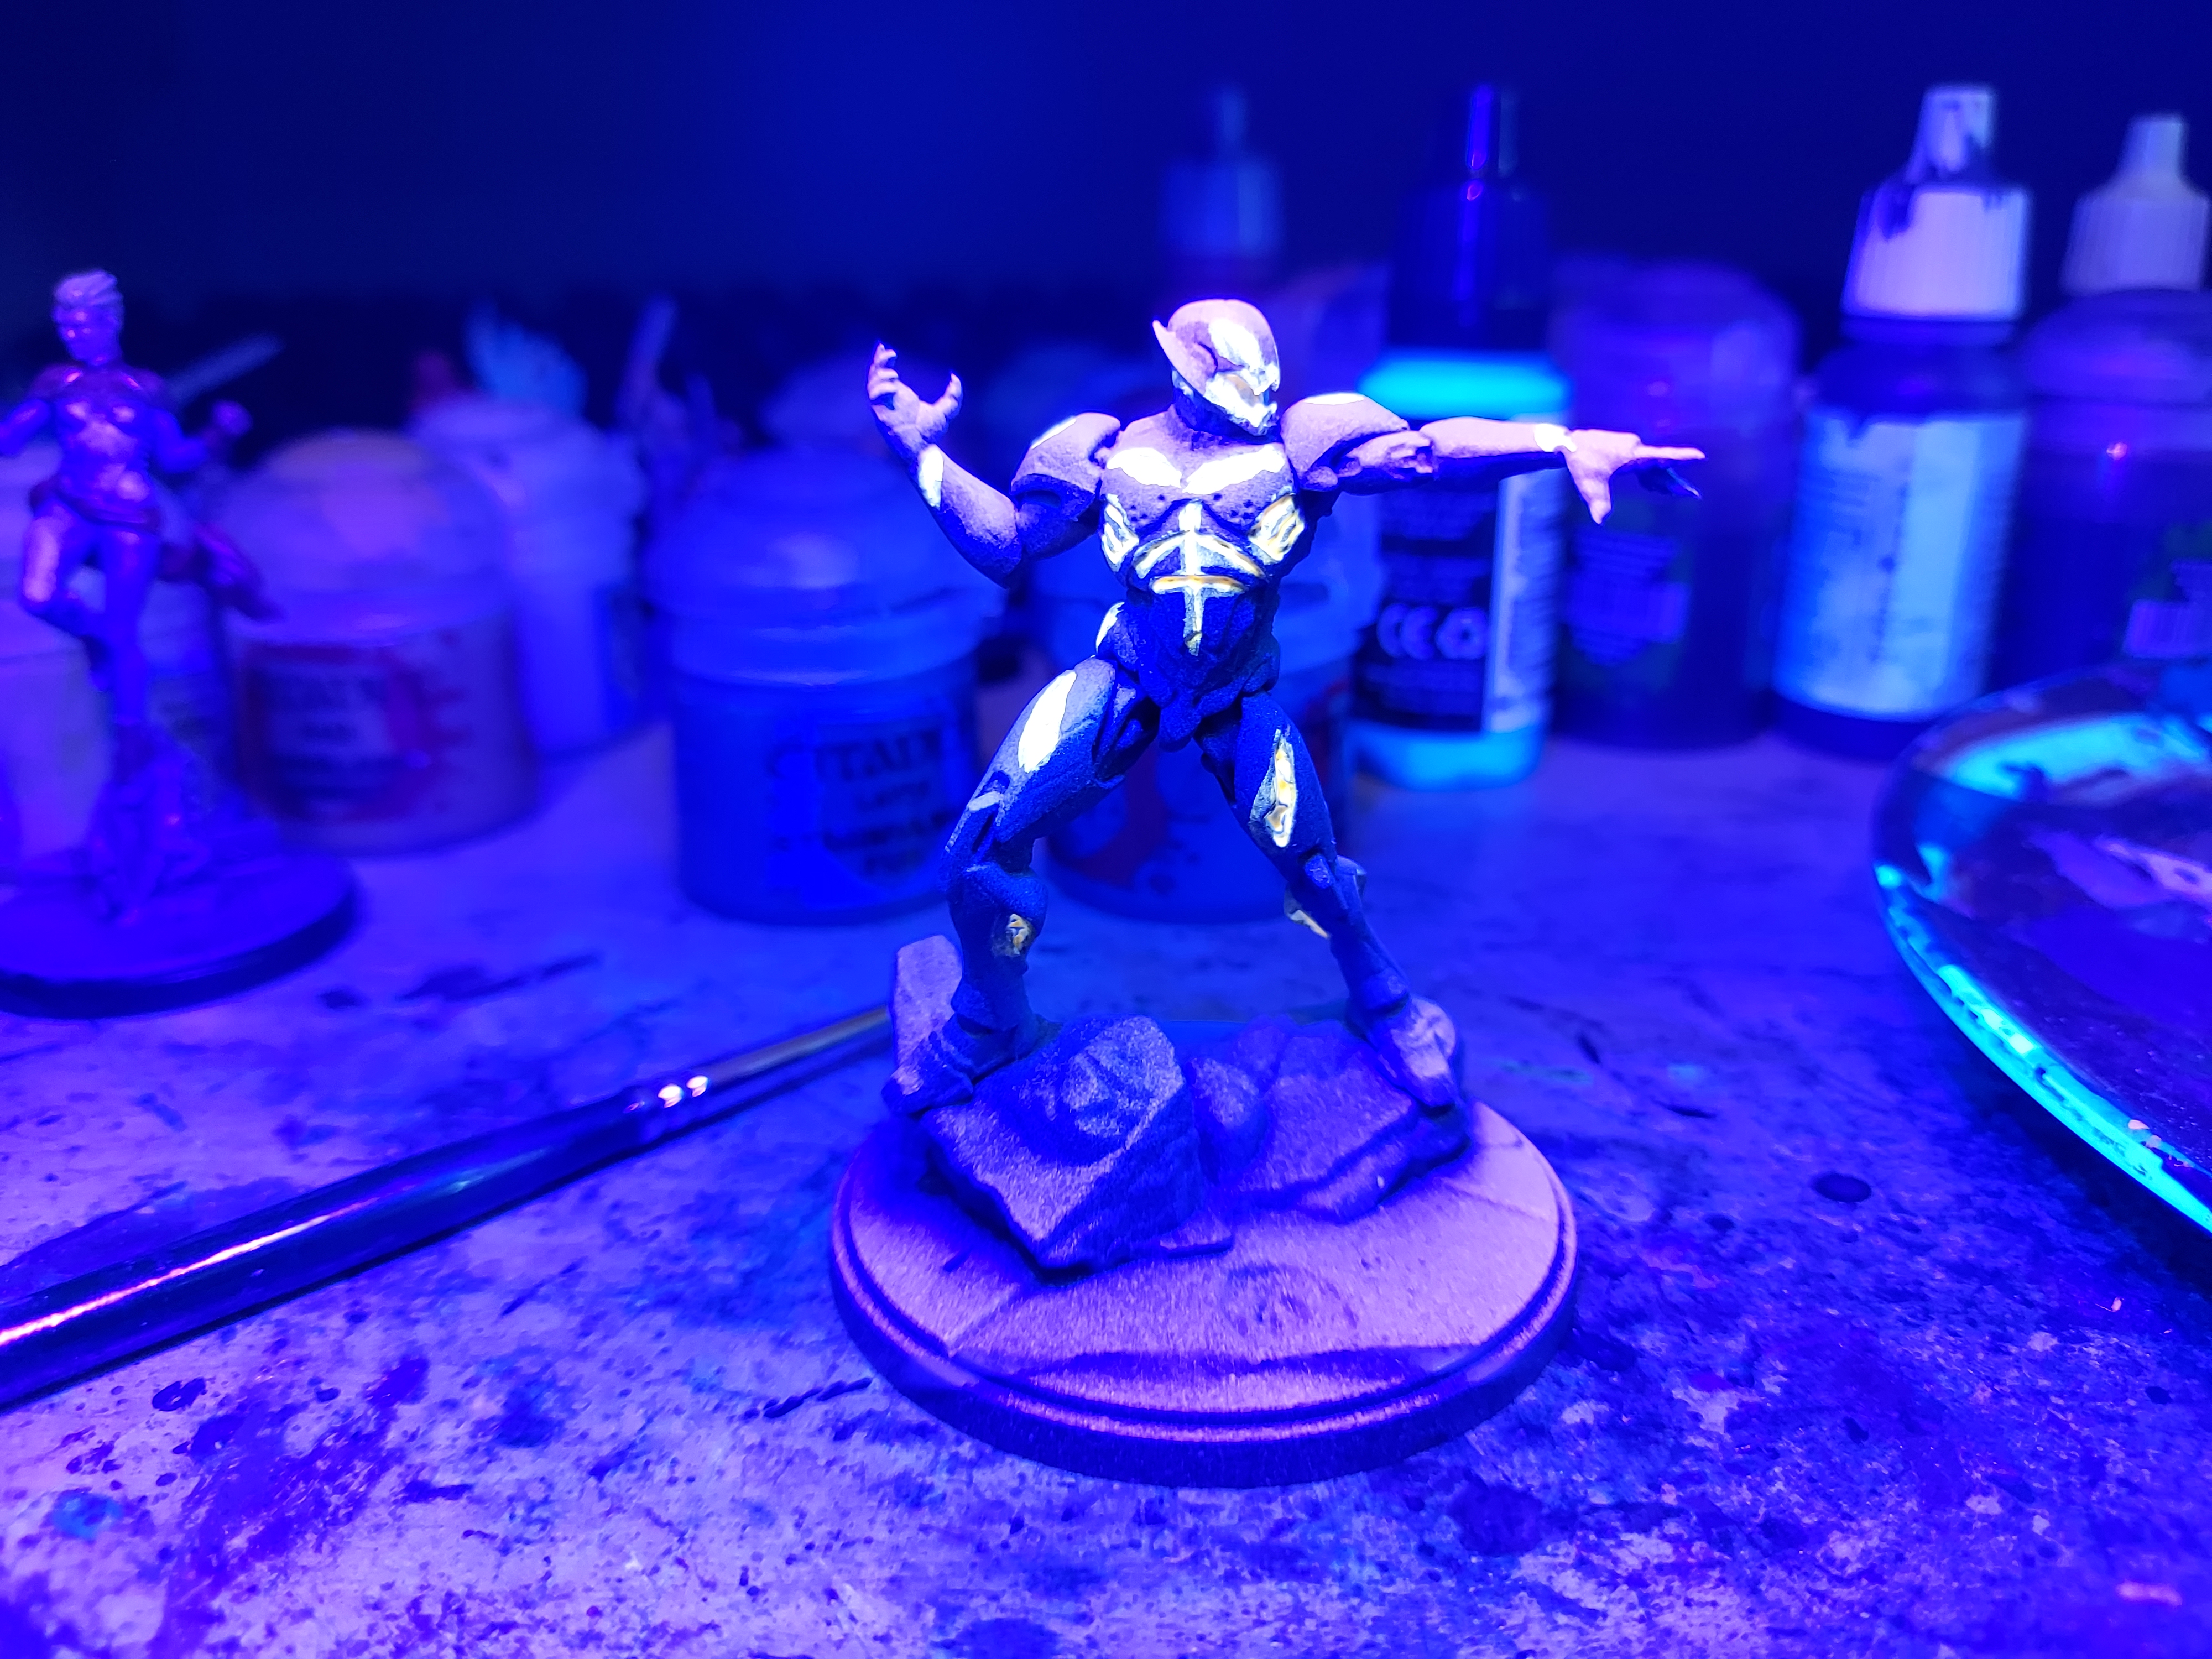
Next I gave all the white bits a couple of coats of fluorescent orange. Then I hit him with a black light to see how he glowed.
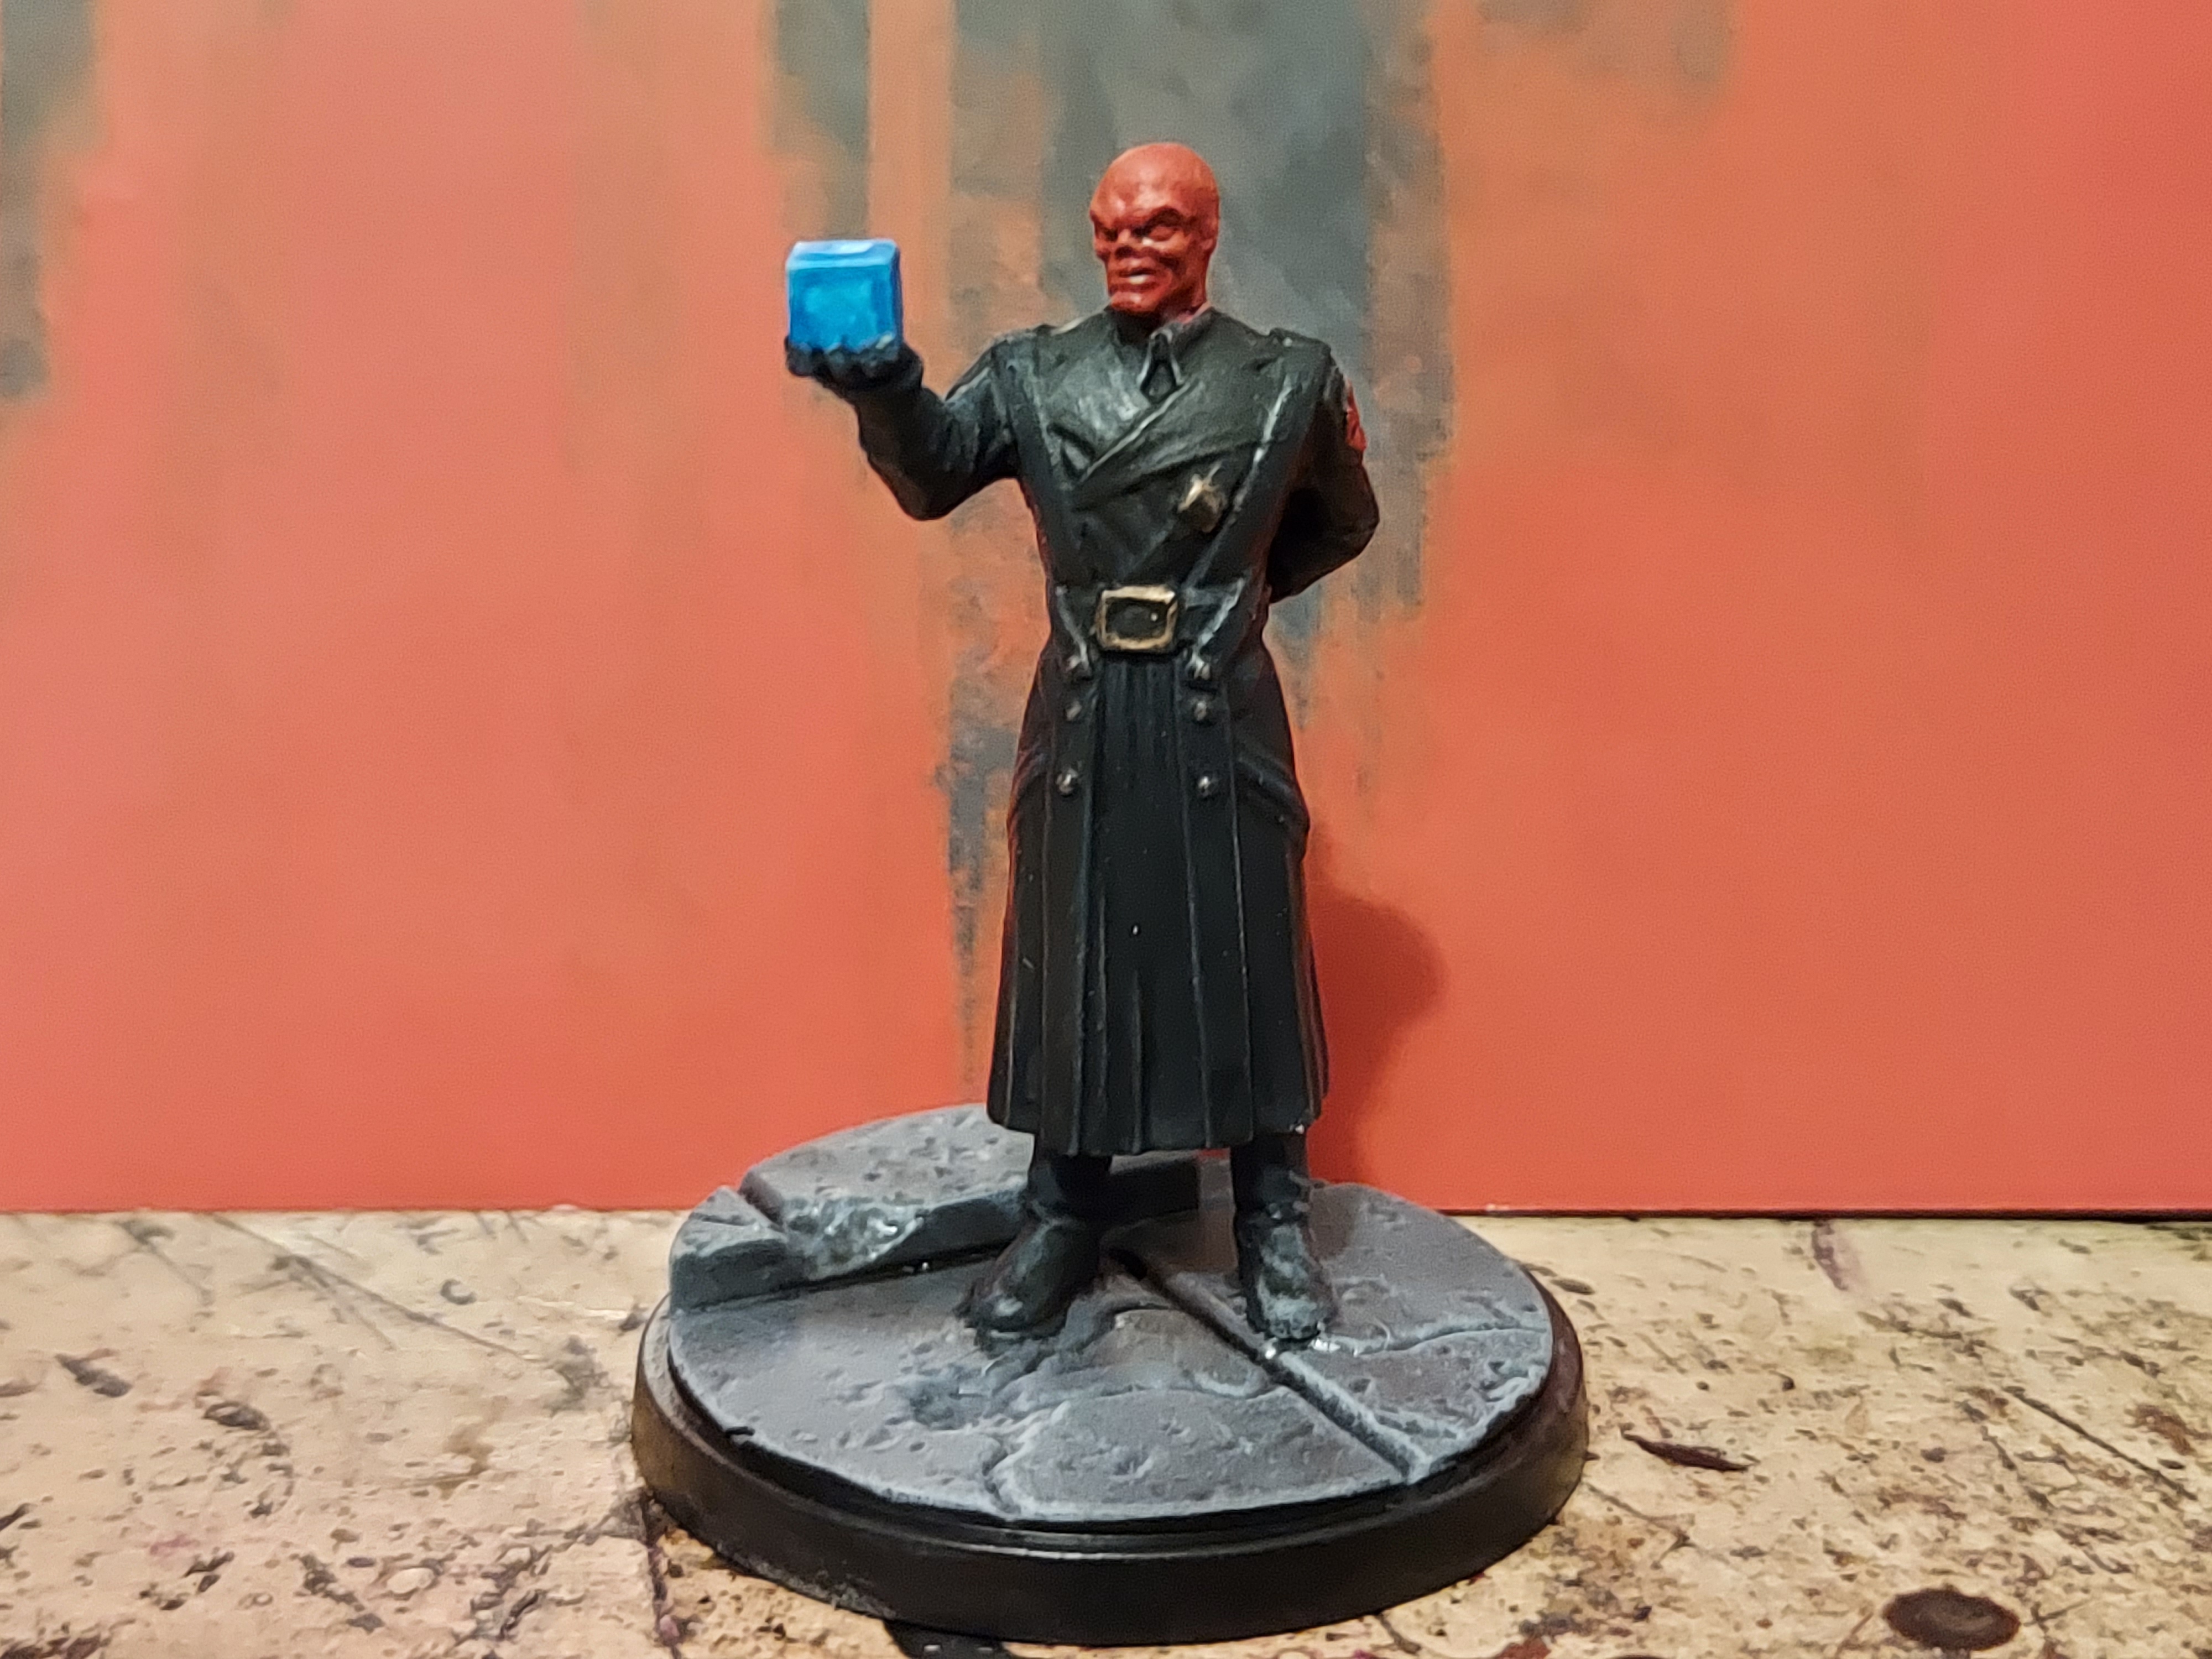
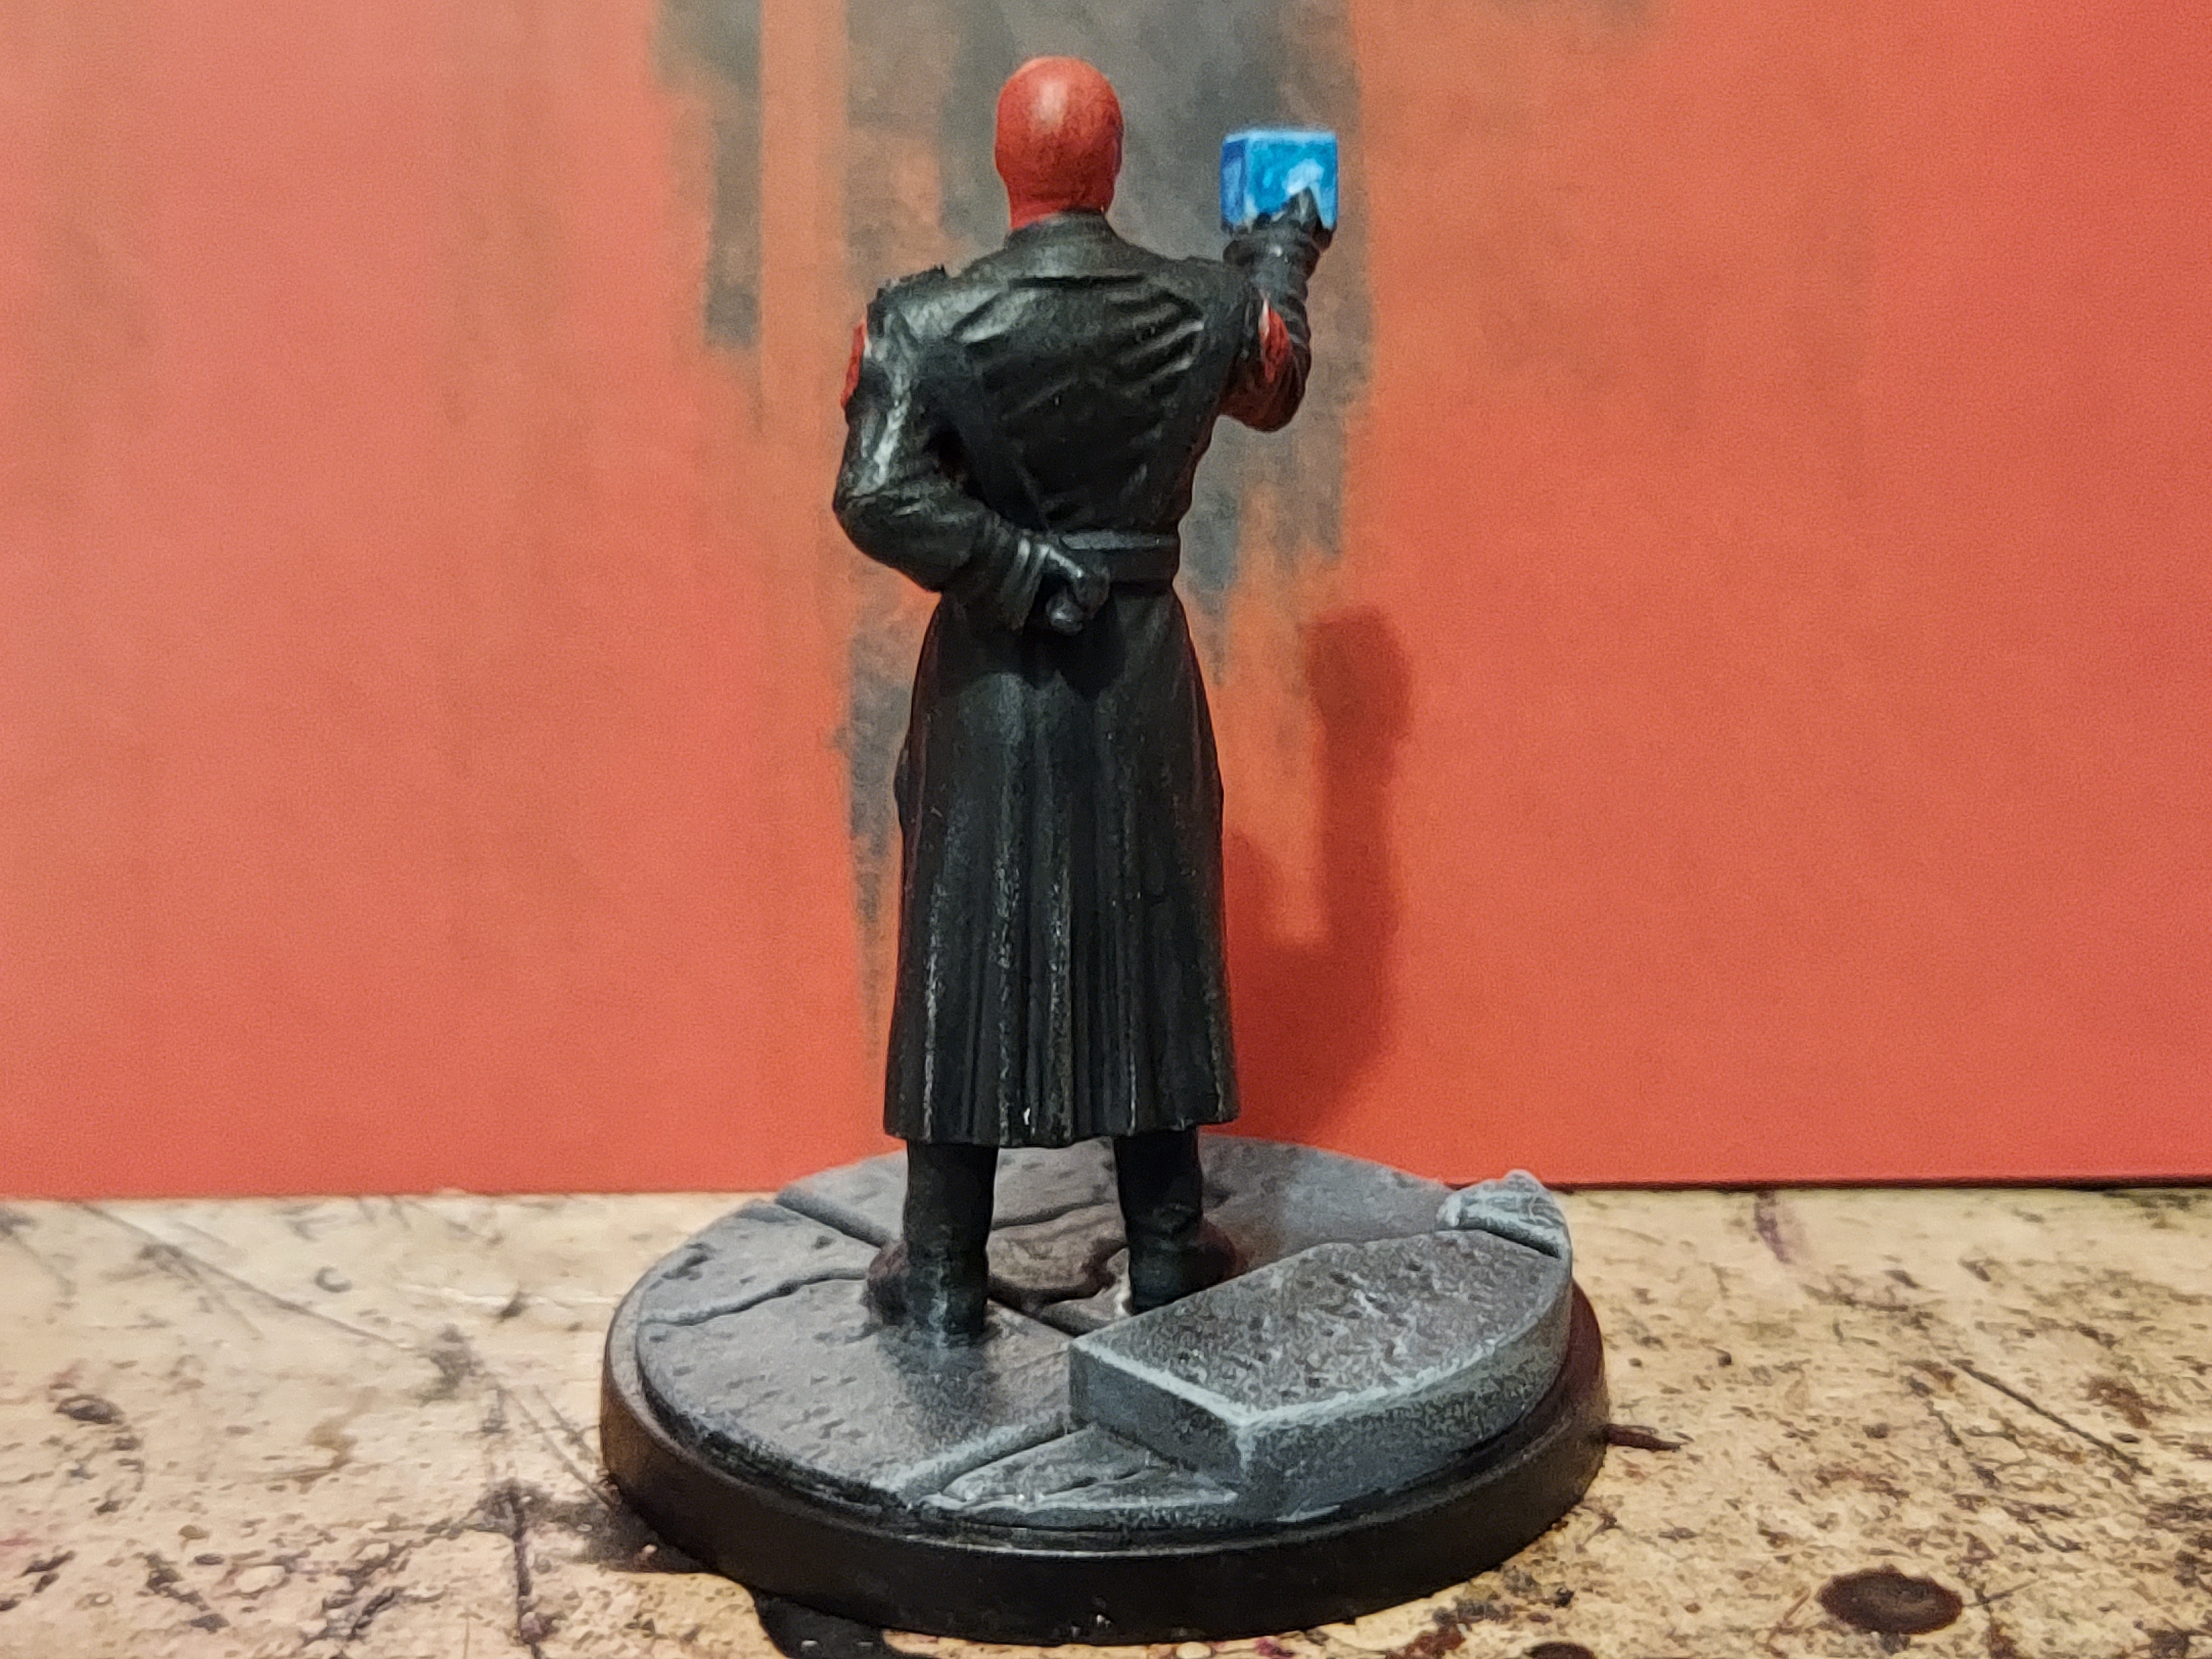
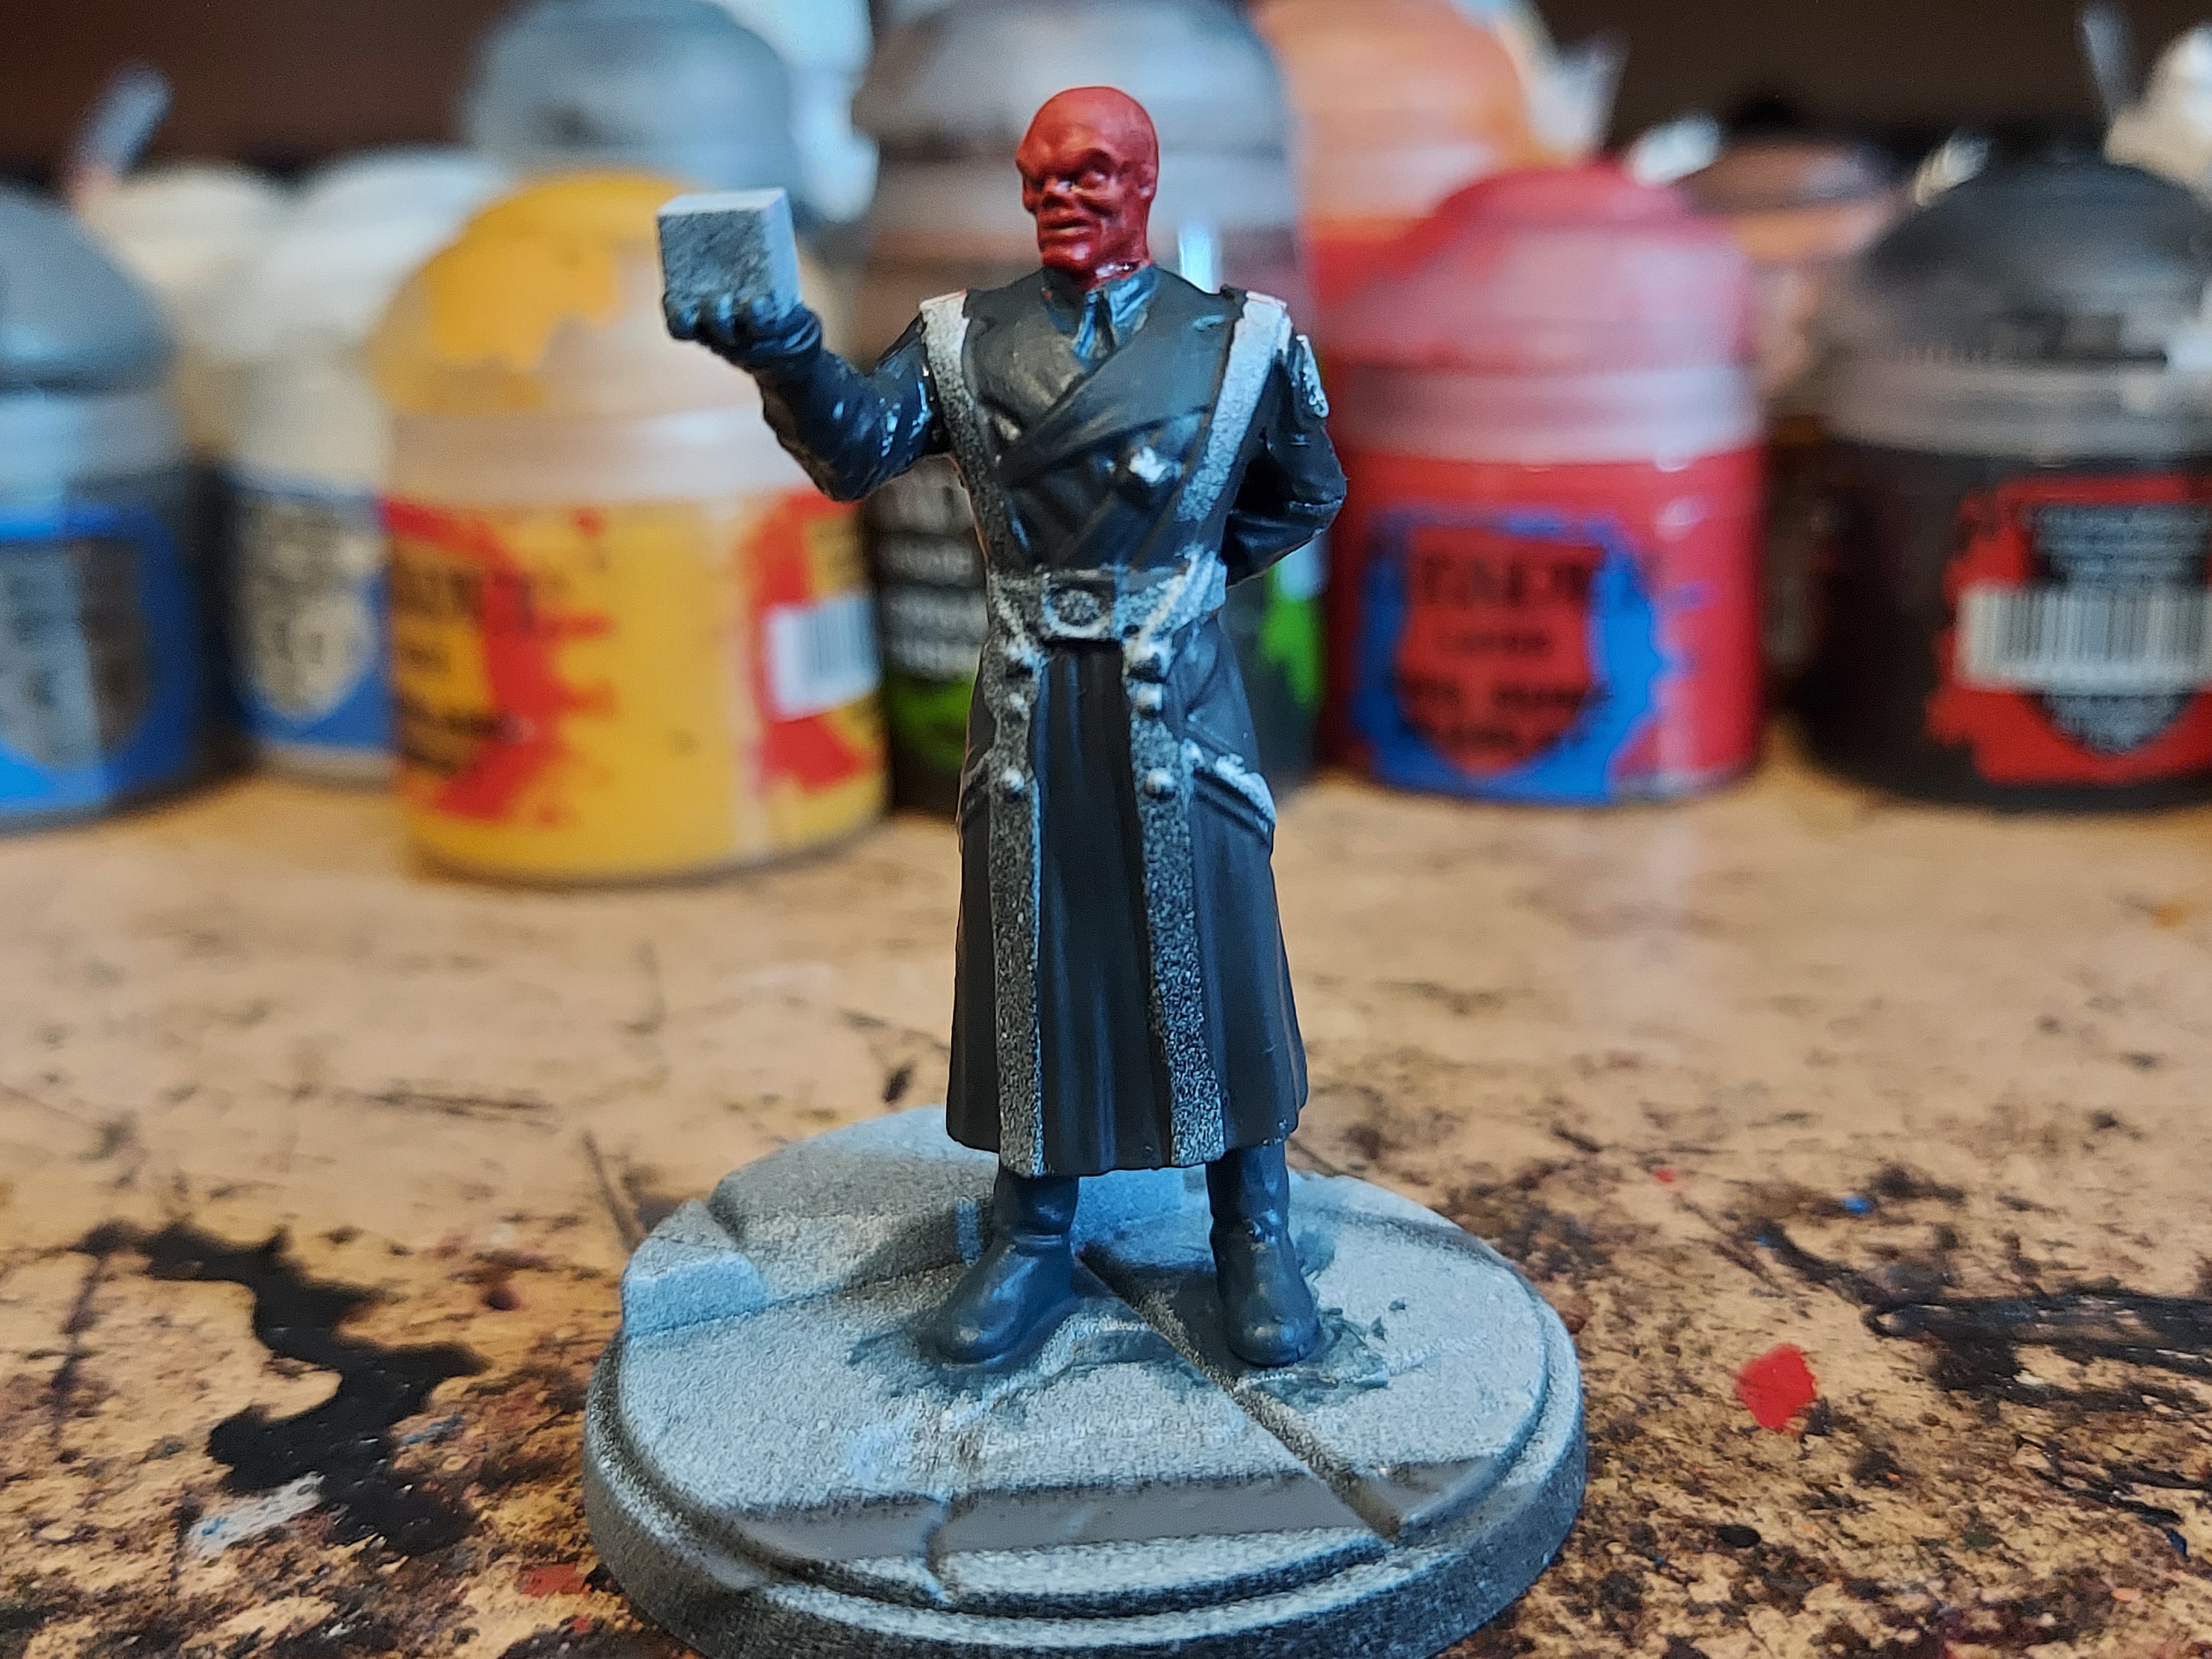
Red Skull part 2
So I got the dark reaper back out and used it on all the straps.
I gave all his garments three washes of nuln oil. This really darkened them down. I then tackled the cosmic cube. I gave it a coat of Ulthuan grey, then put a small circle of white in the middle of each face of the cube.
This is the point where I got over enthusiastic and forgot to take any more work in progress shots.
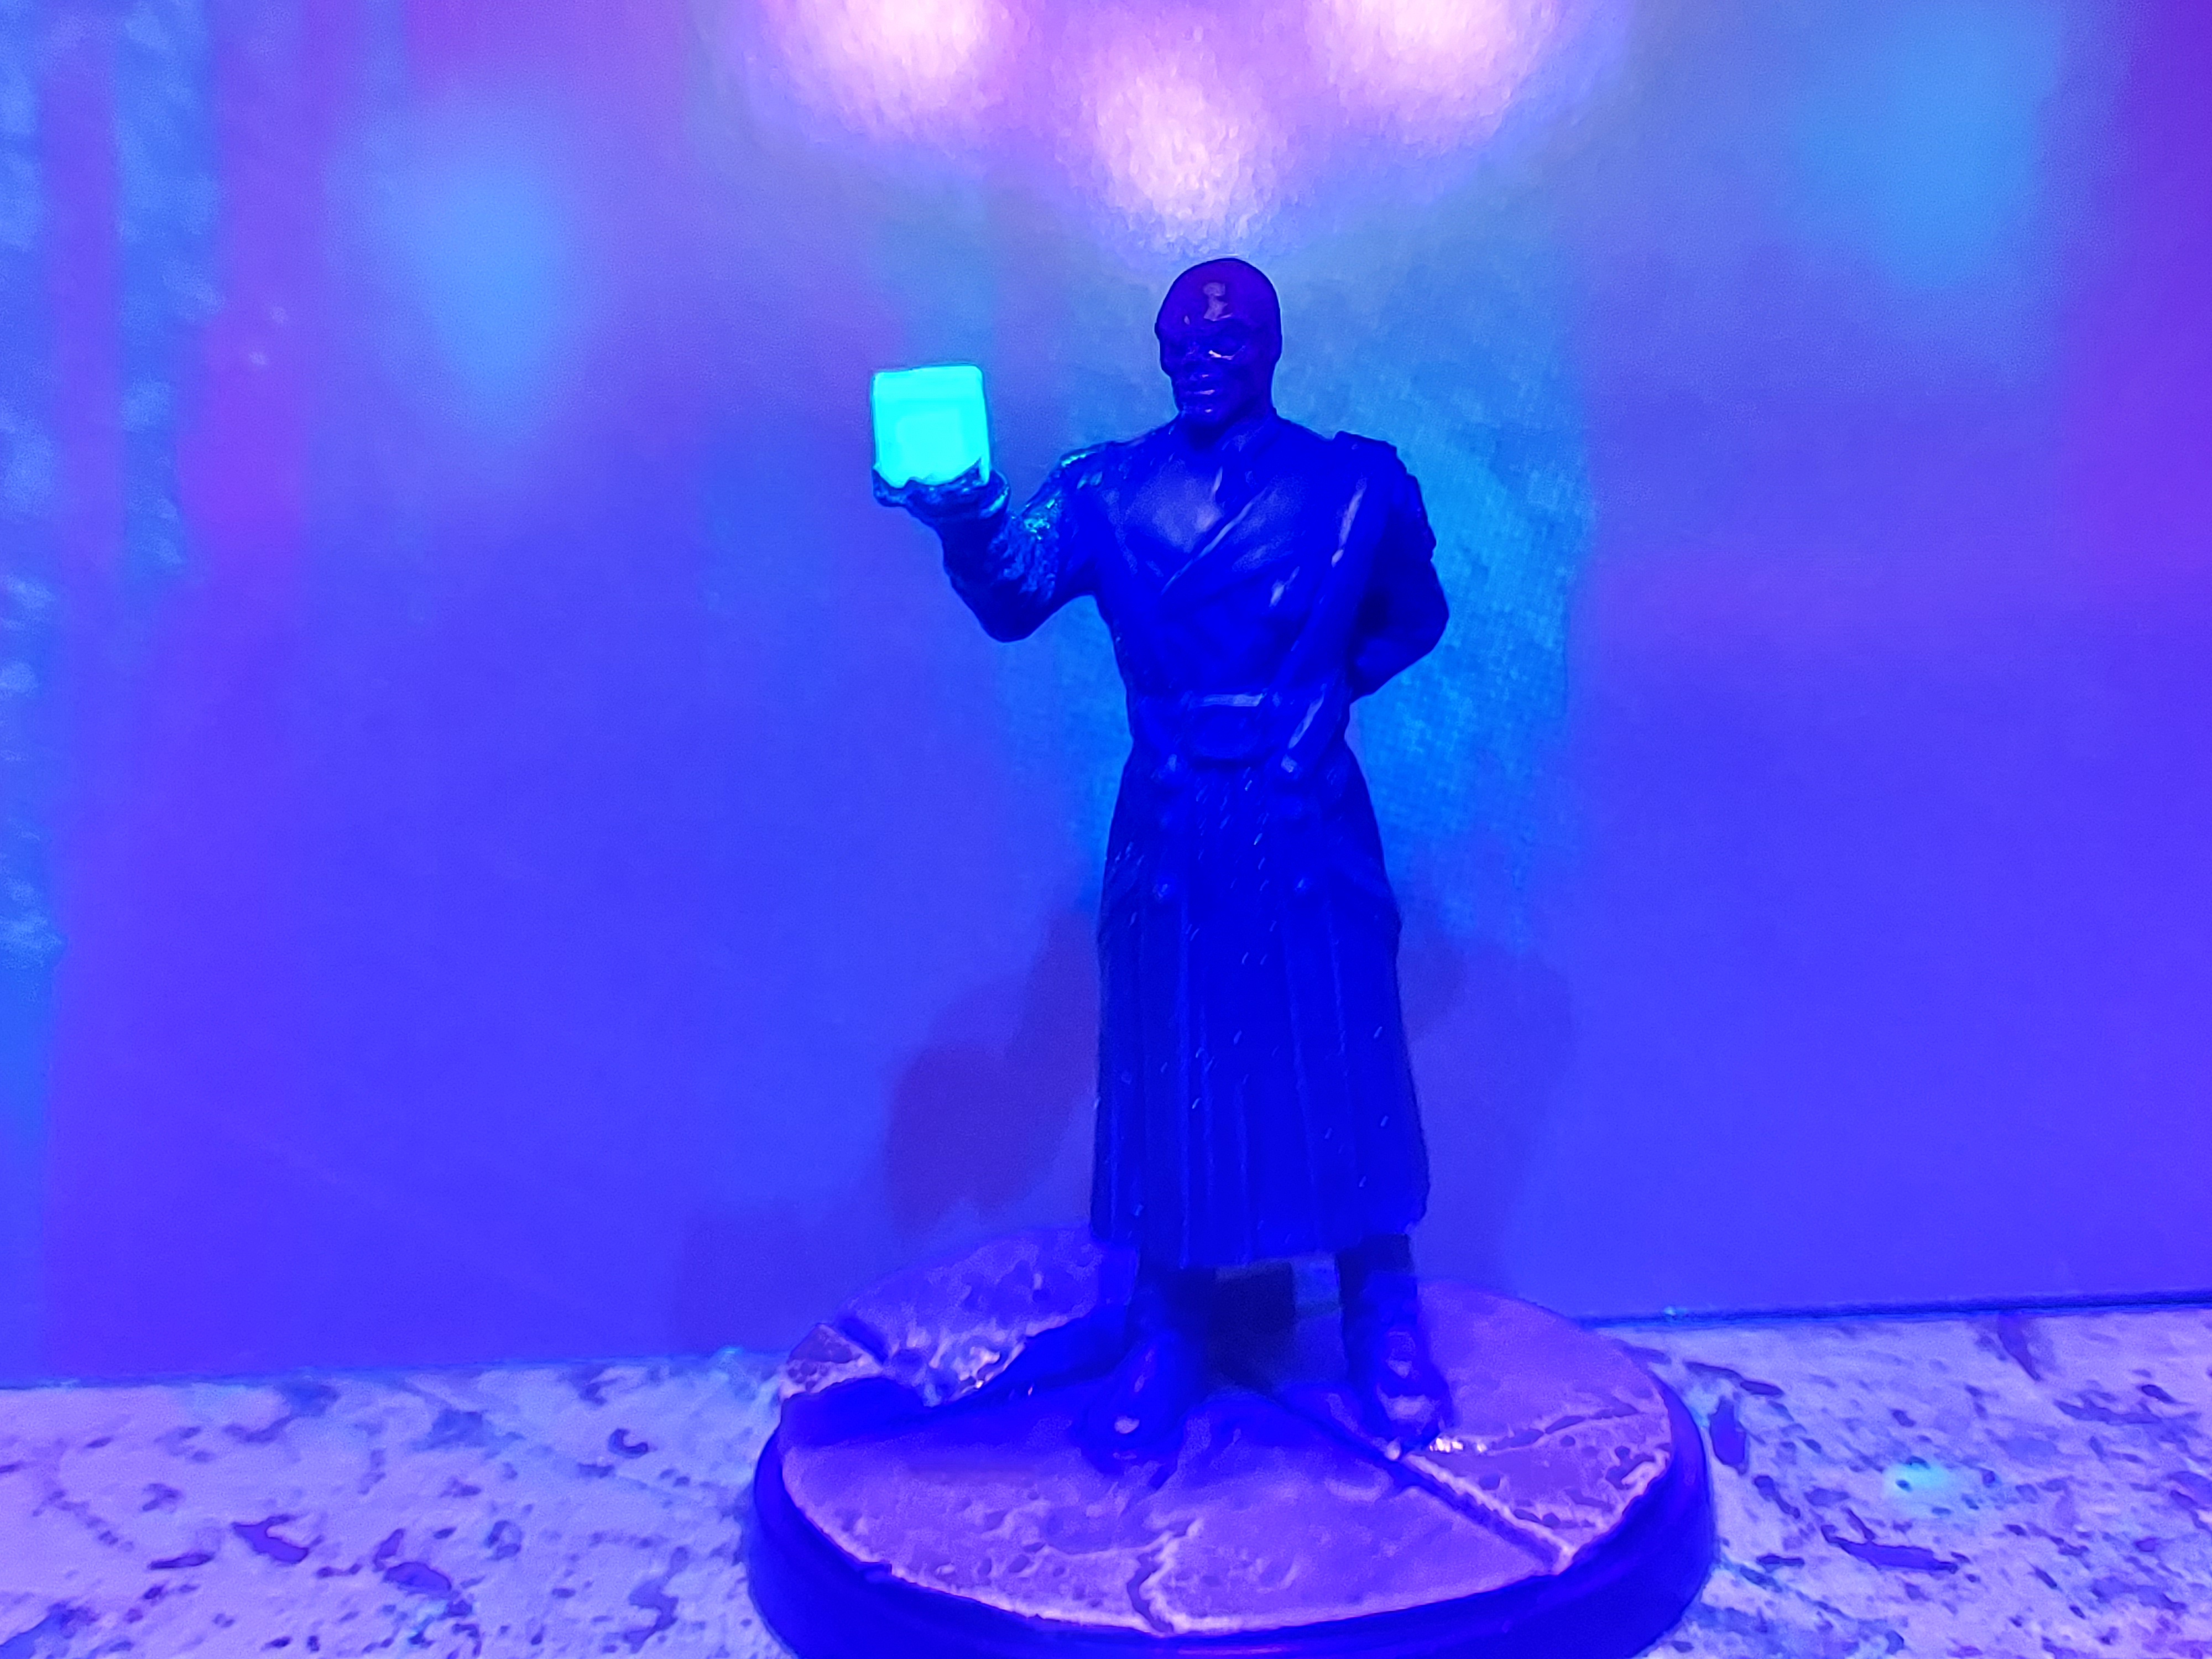
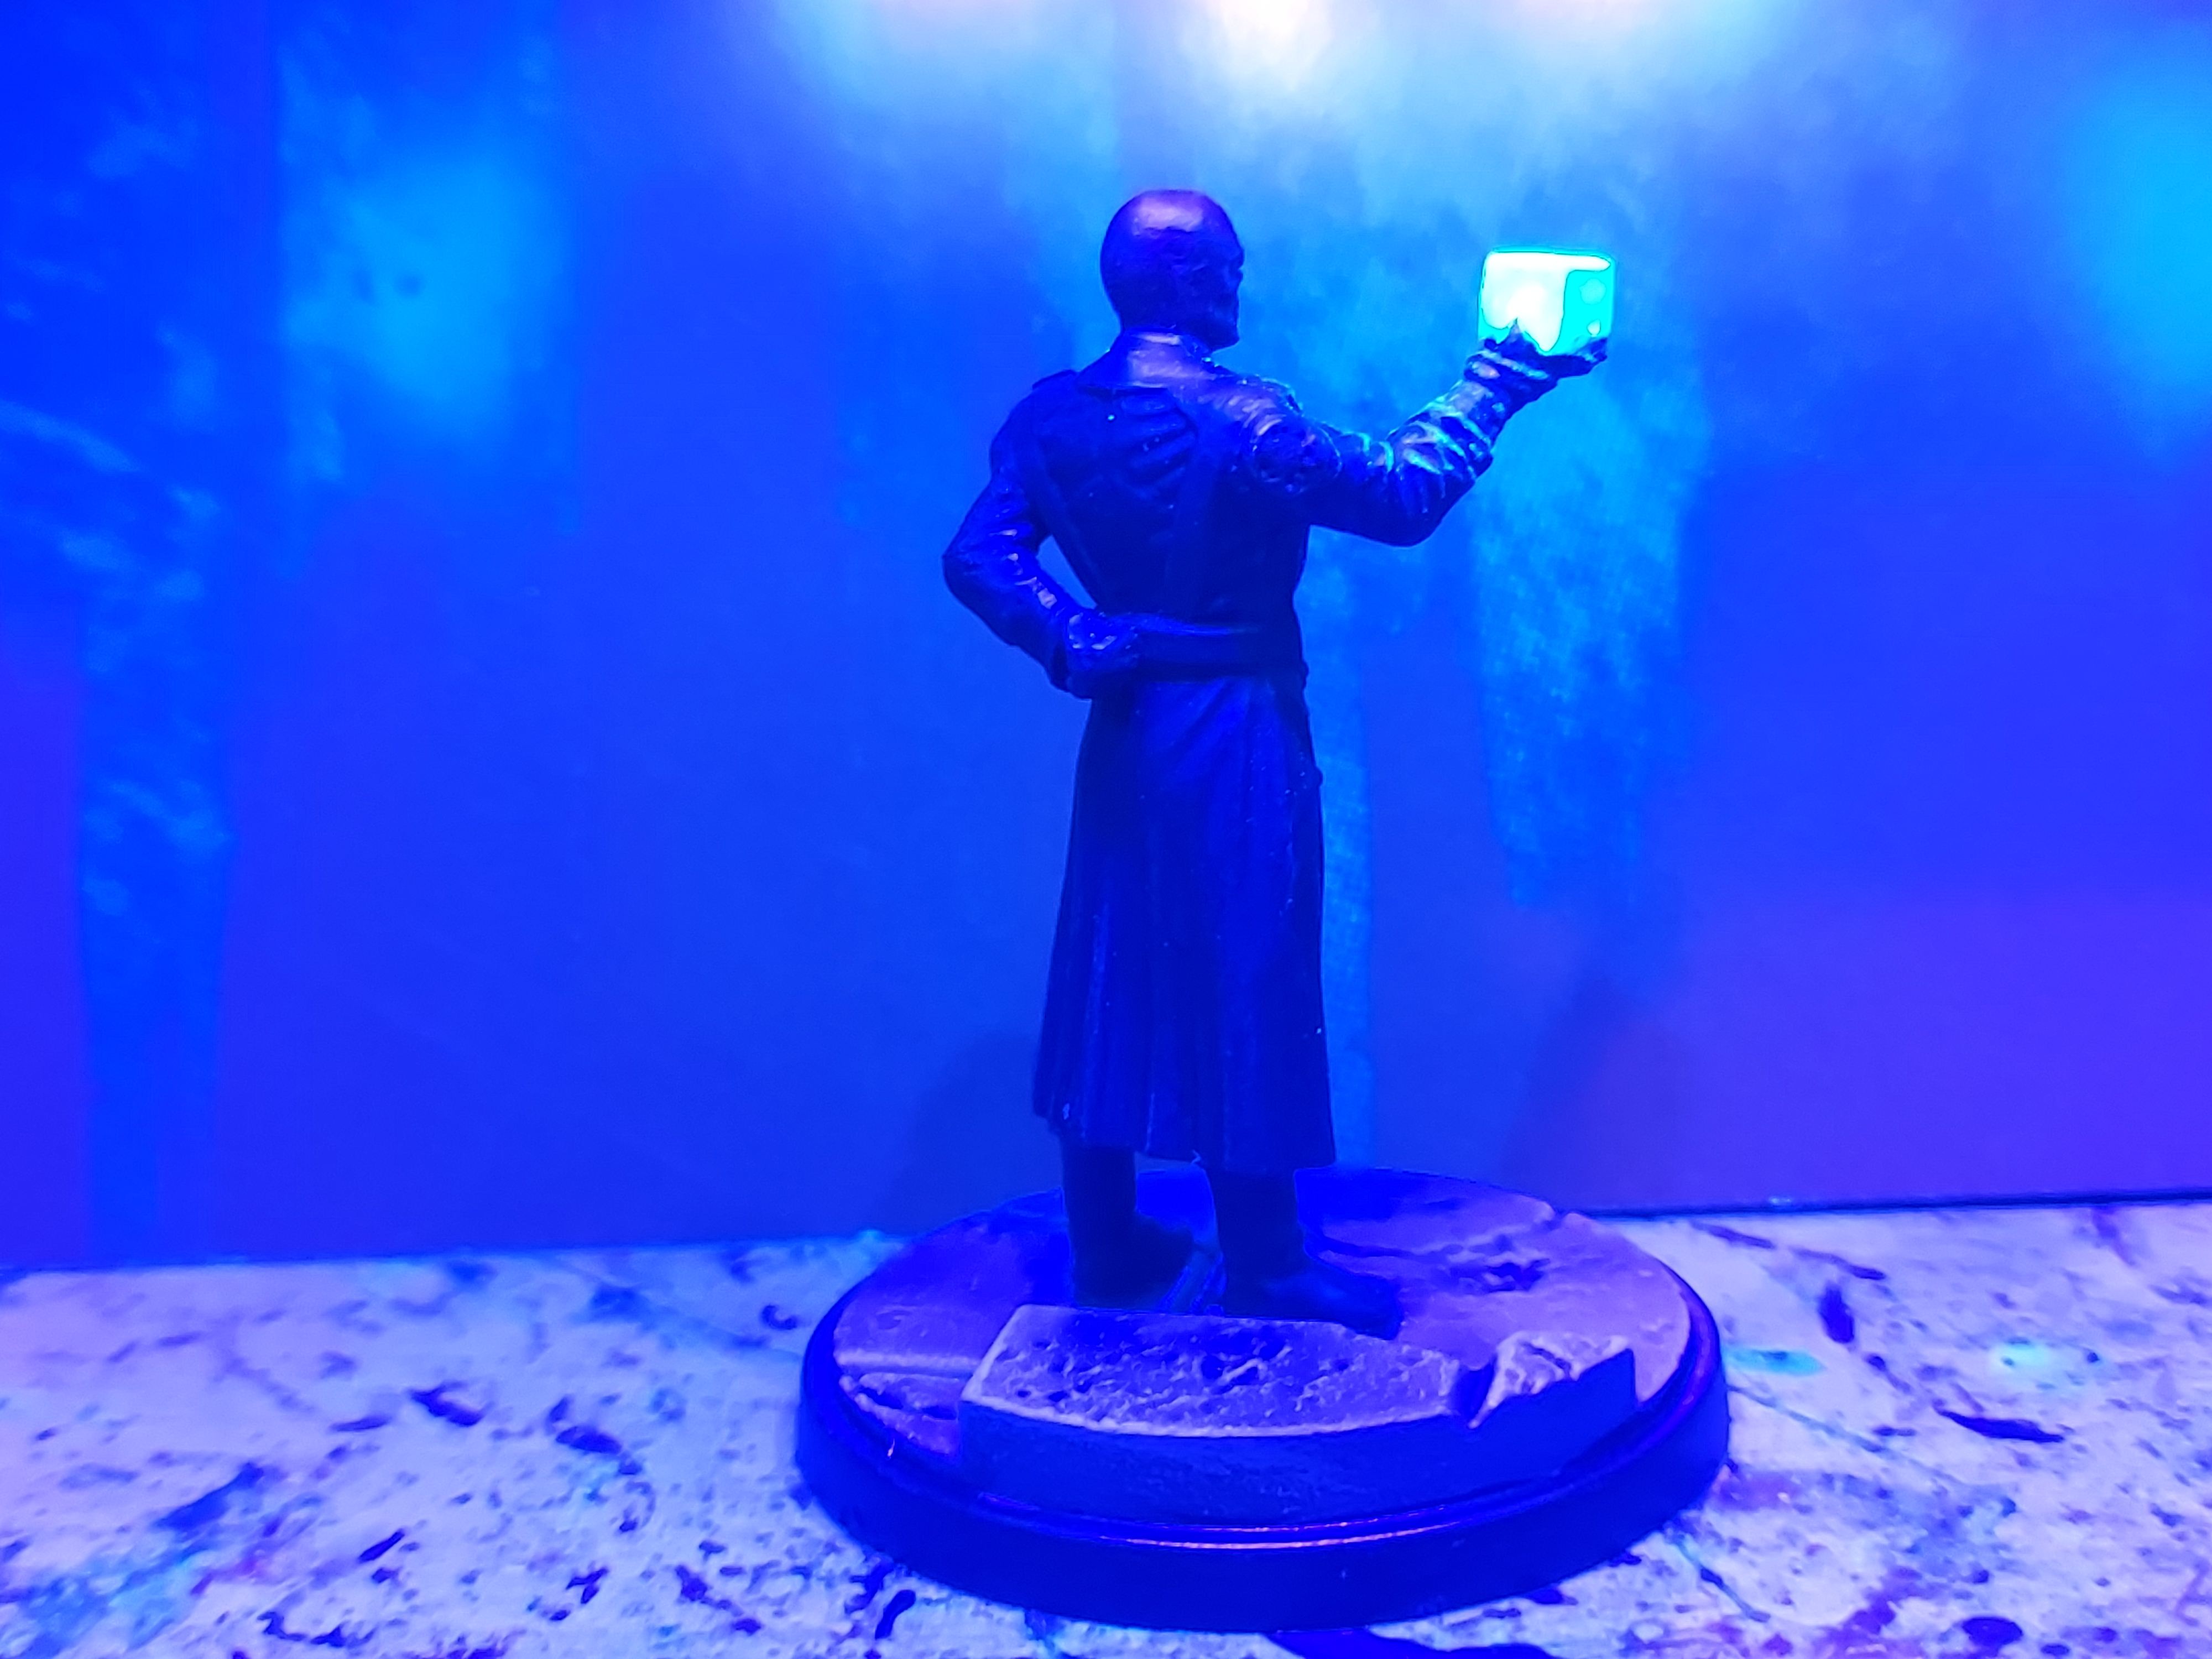
So next I had a play with some fluorescent paints. I thought my blue was a bit dark so I mixed in some fluorescent white to lighten in it. I was a bit worried that either they wouldn’t mix, or wouldn’t fluoress any more, but after checking with a black light I needn’t have worried. I applied my new light blue fluorescent paint over my white circles. Once that had dried I went round the rest of the cube with the fluorescent blue.
I used a brass to pick out his buckles and buttons. I dulled them down with a wee bit of nuln oil. Then I did his base.
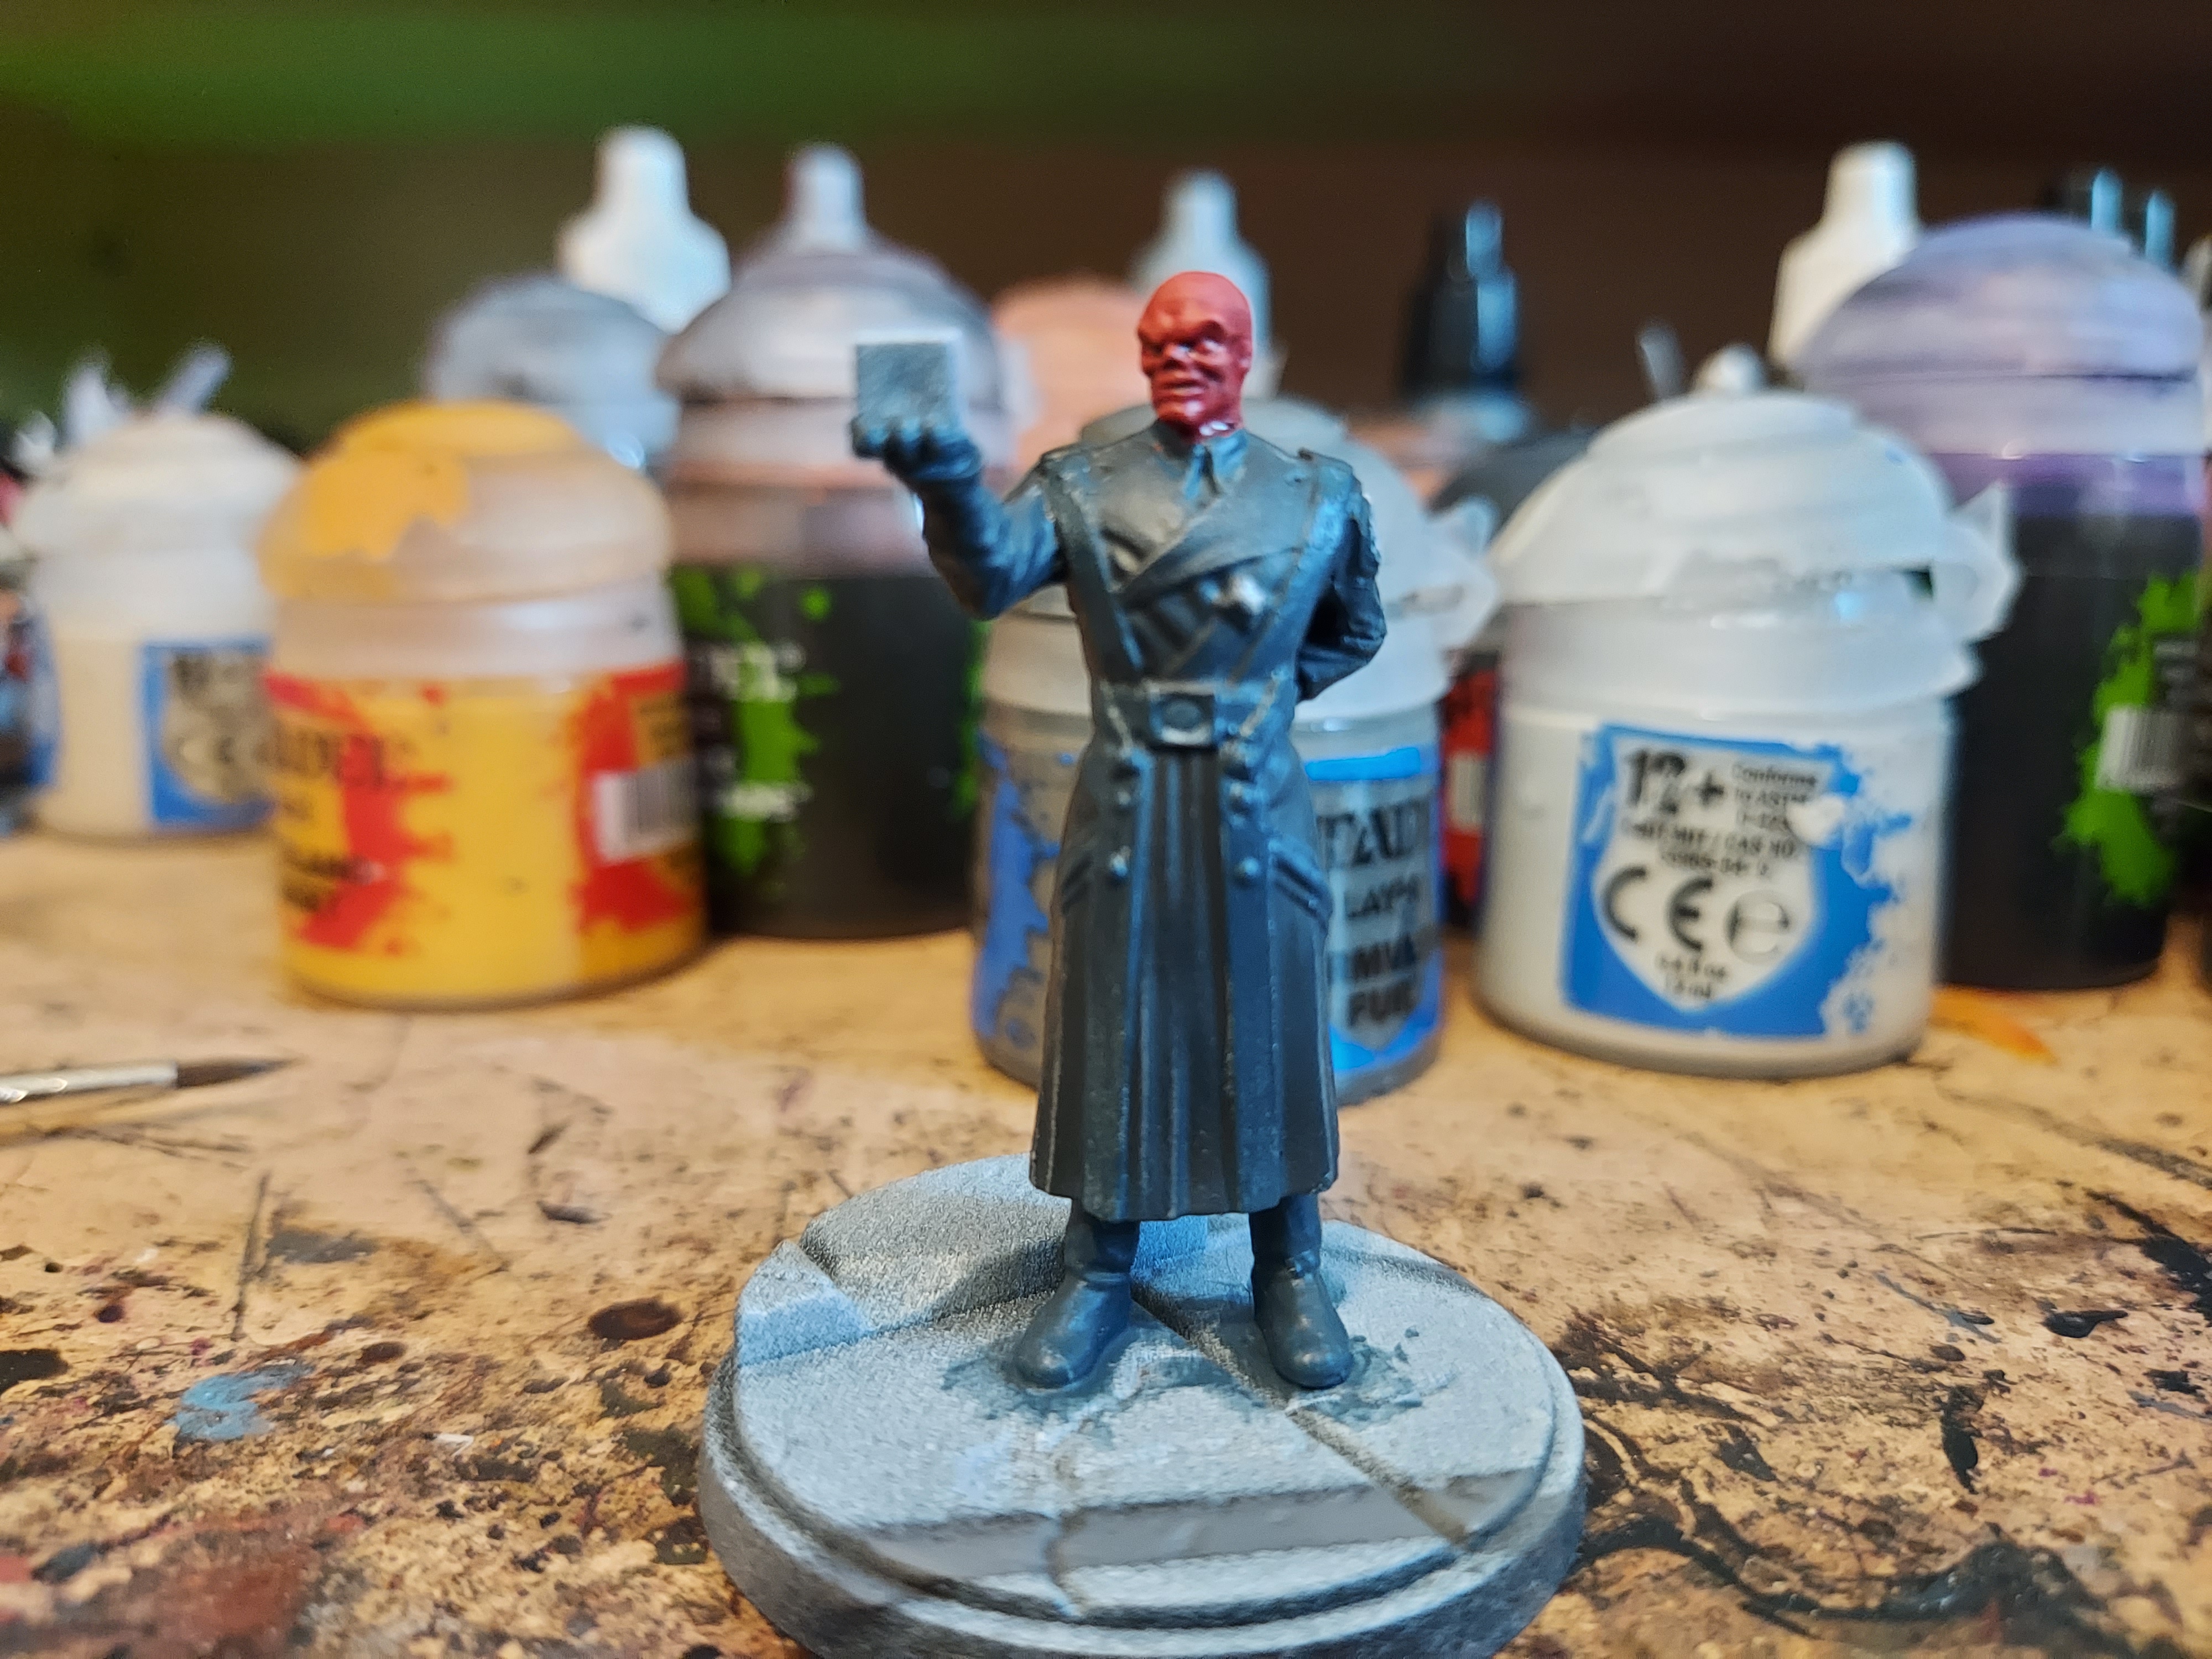
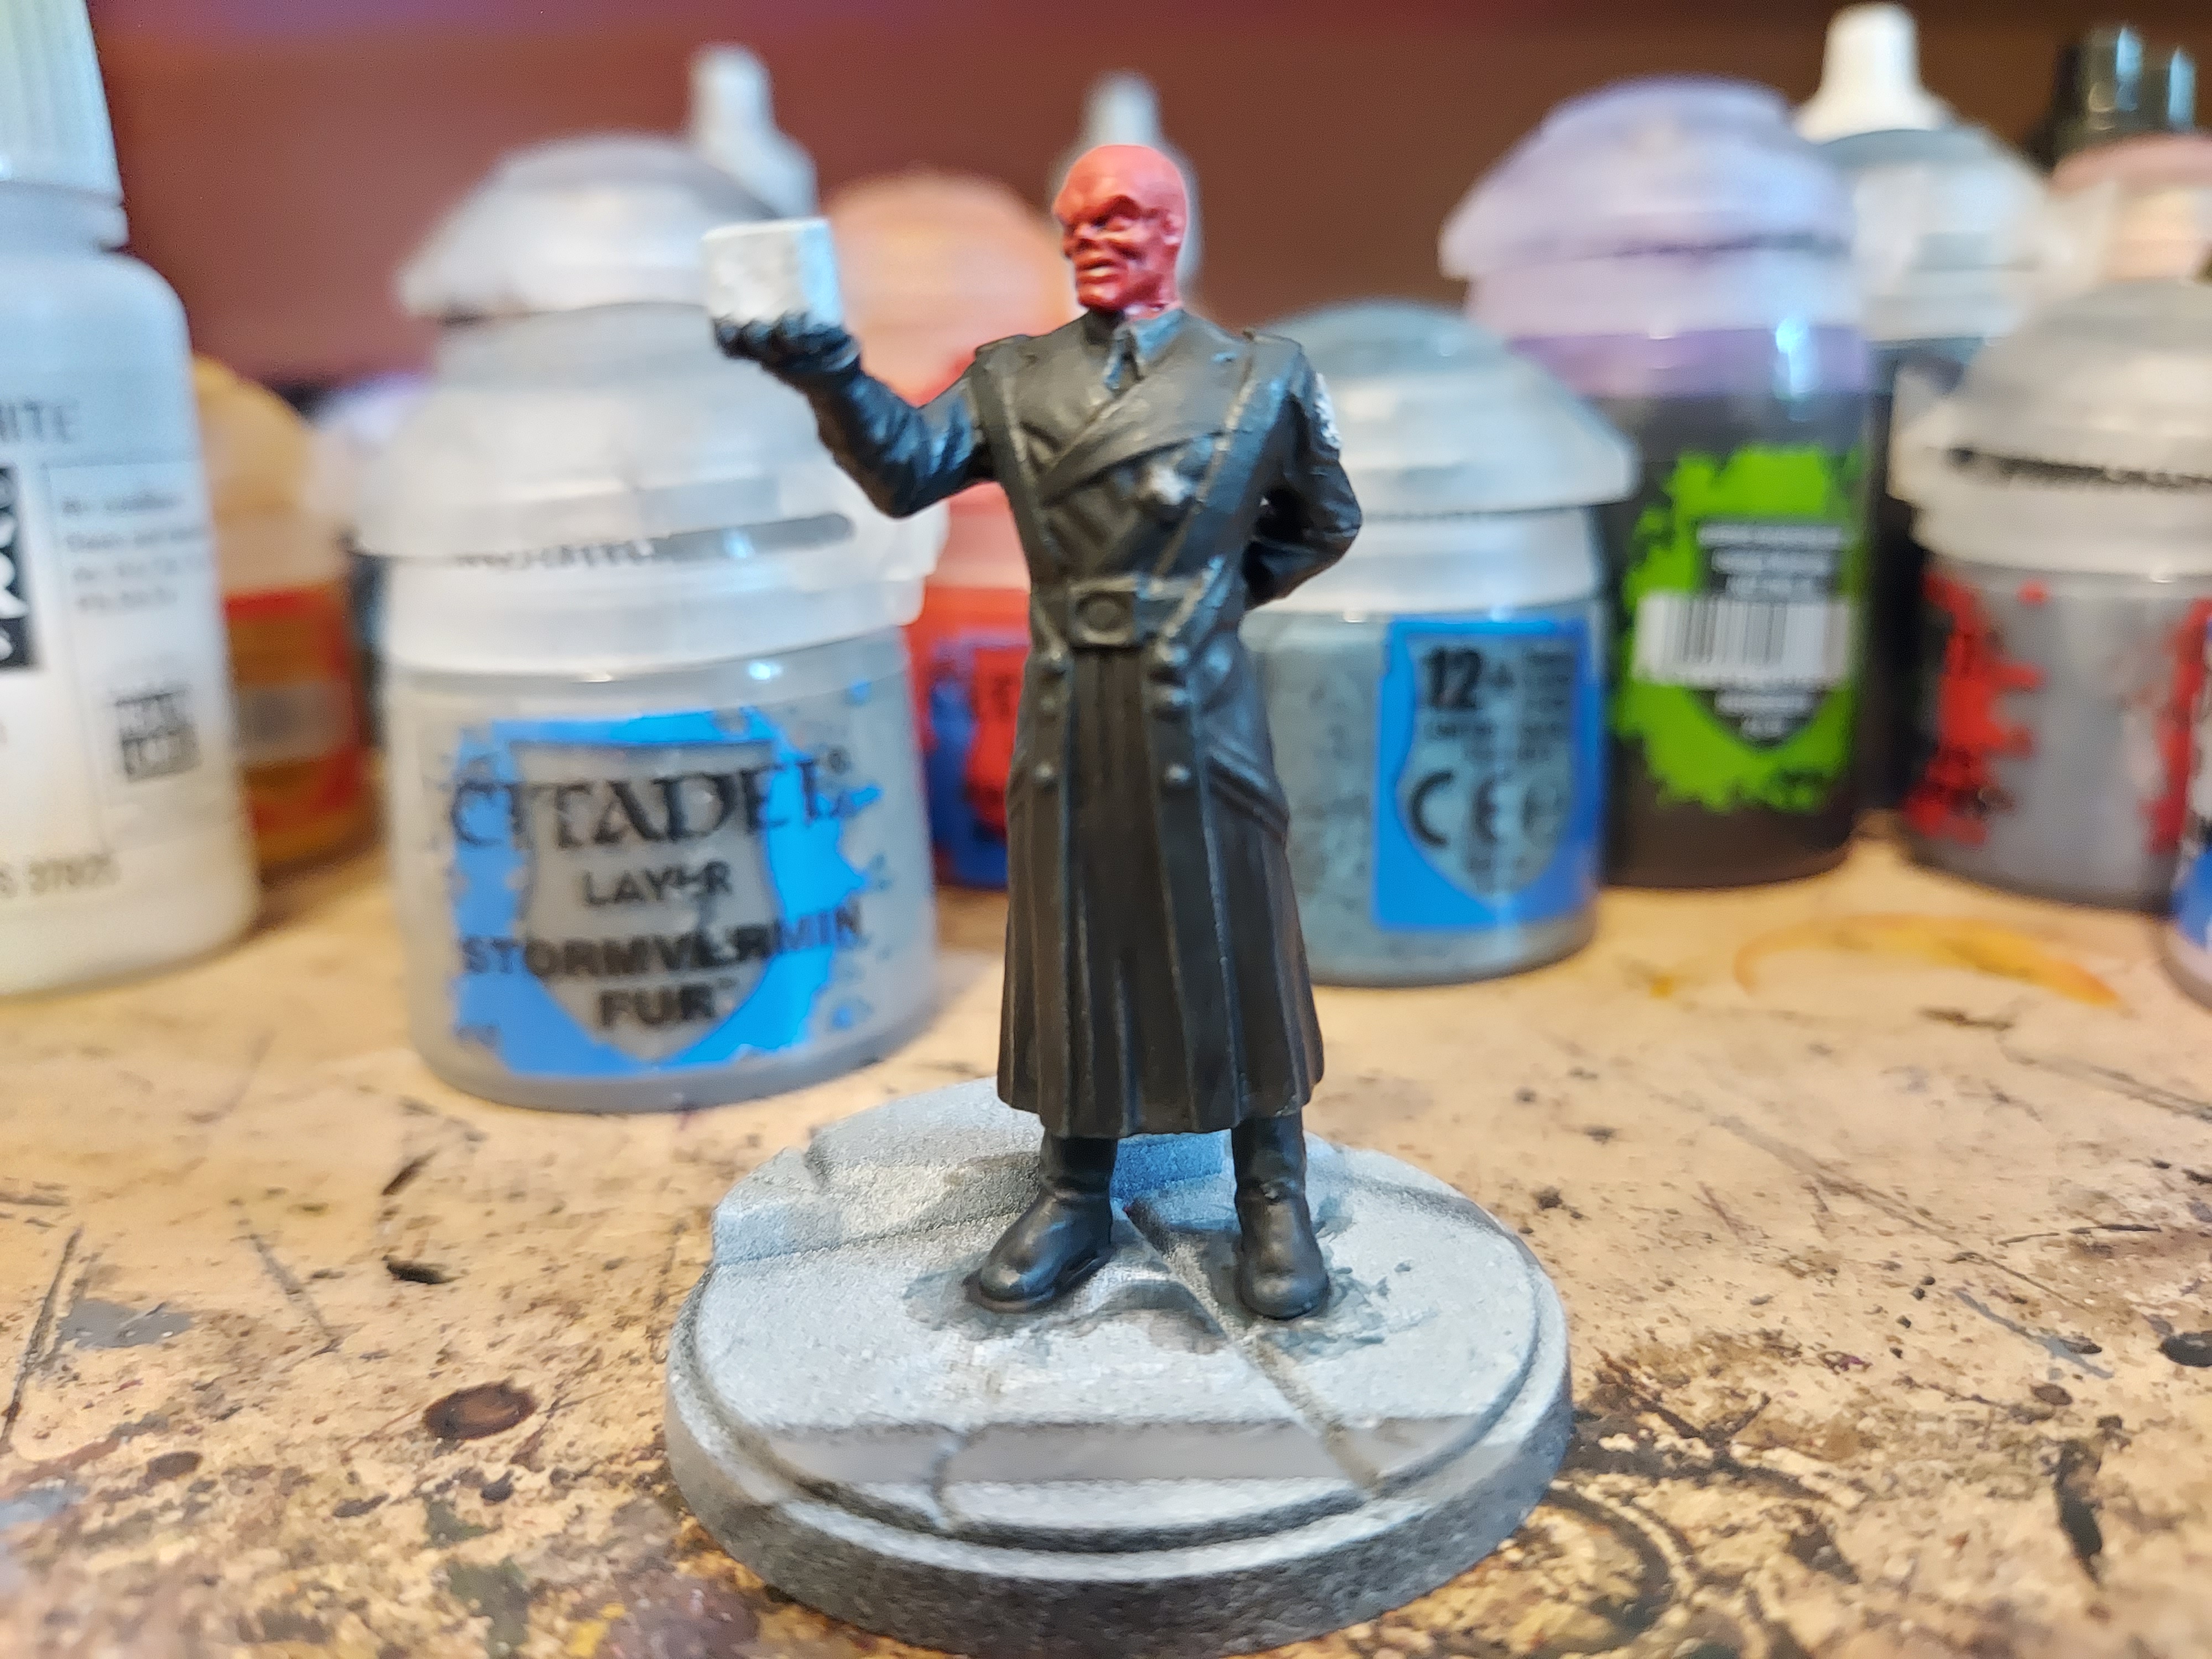
Red Skull part 1

What better way to start Red Skull than his red skull. For this I used Evil Sunz Scarlet, which was washed with druchii violet. Then I drybrushed the same red in again to bring the colour back up. Then I highlighted the face with a drybrush of orange and then a final very light drybrush of yellow.
Now I started blocking in the shirt, gloves and boots with dark reaper. Next I blocked in the coat with German Grey from Vallejo. The coat was given a drybrush of stormvermin fur, then a light drybrush of Ulthuan grey to highlight the folds.


