


Hunting in the Darkness – KD:M


Recommendations: 813
About the Project
An attempt to get my Kingdom Death collection painted. Survivors, Monsters and maybe some extras.
Related Game: Kingdom Death: Monster
Related Company: Kingdom Death
Related Genre: Horror
This Project is Active
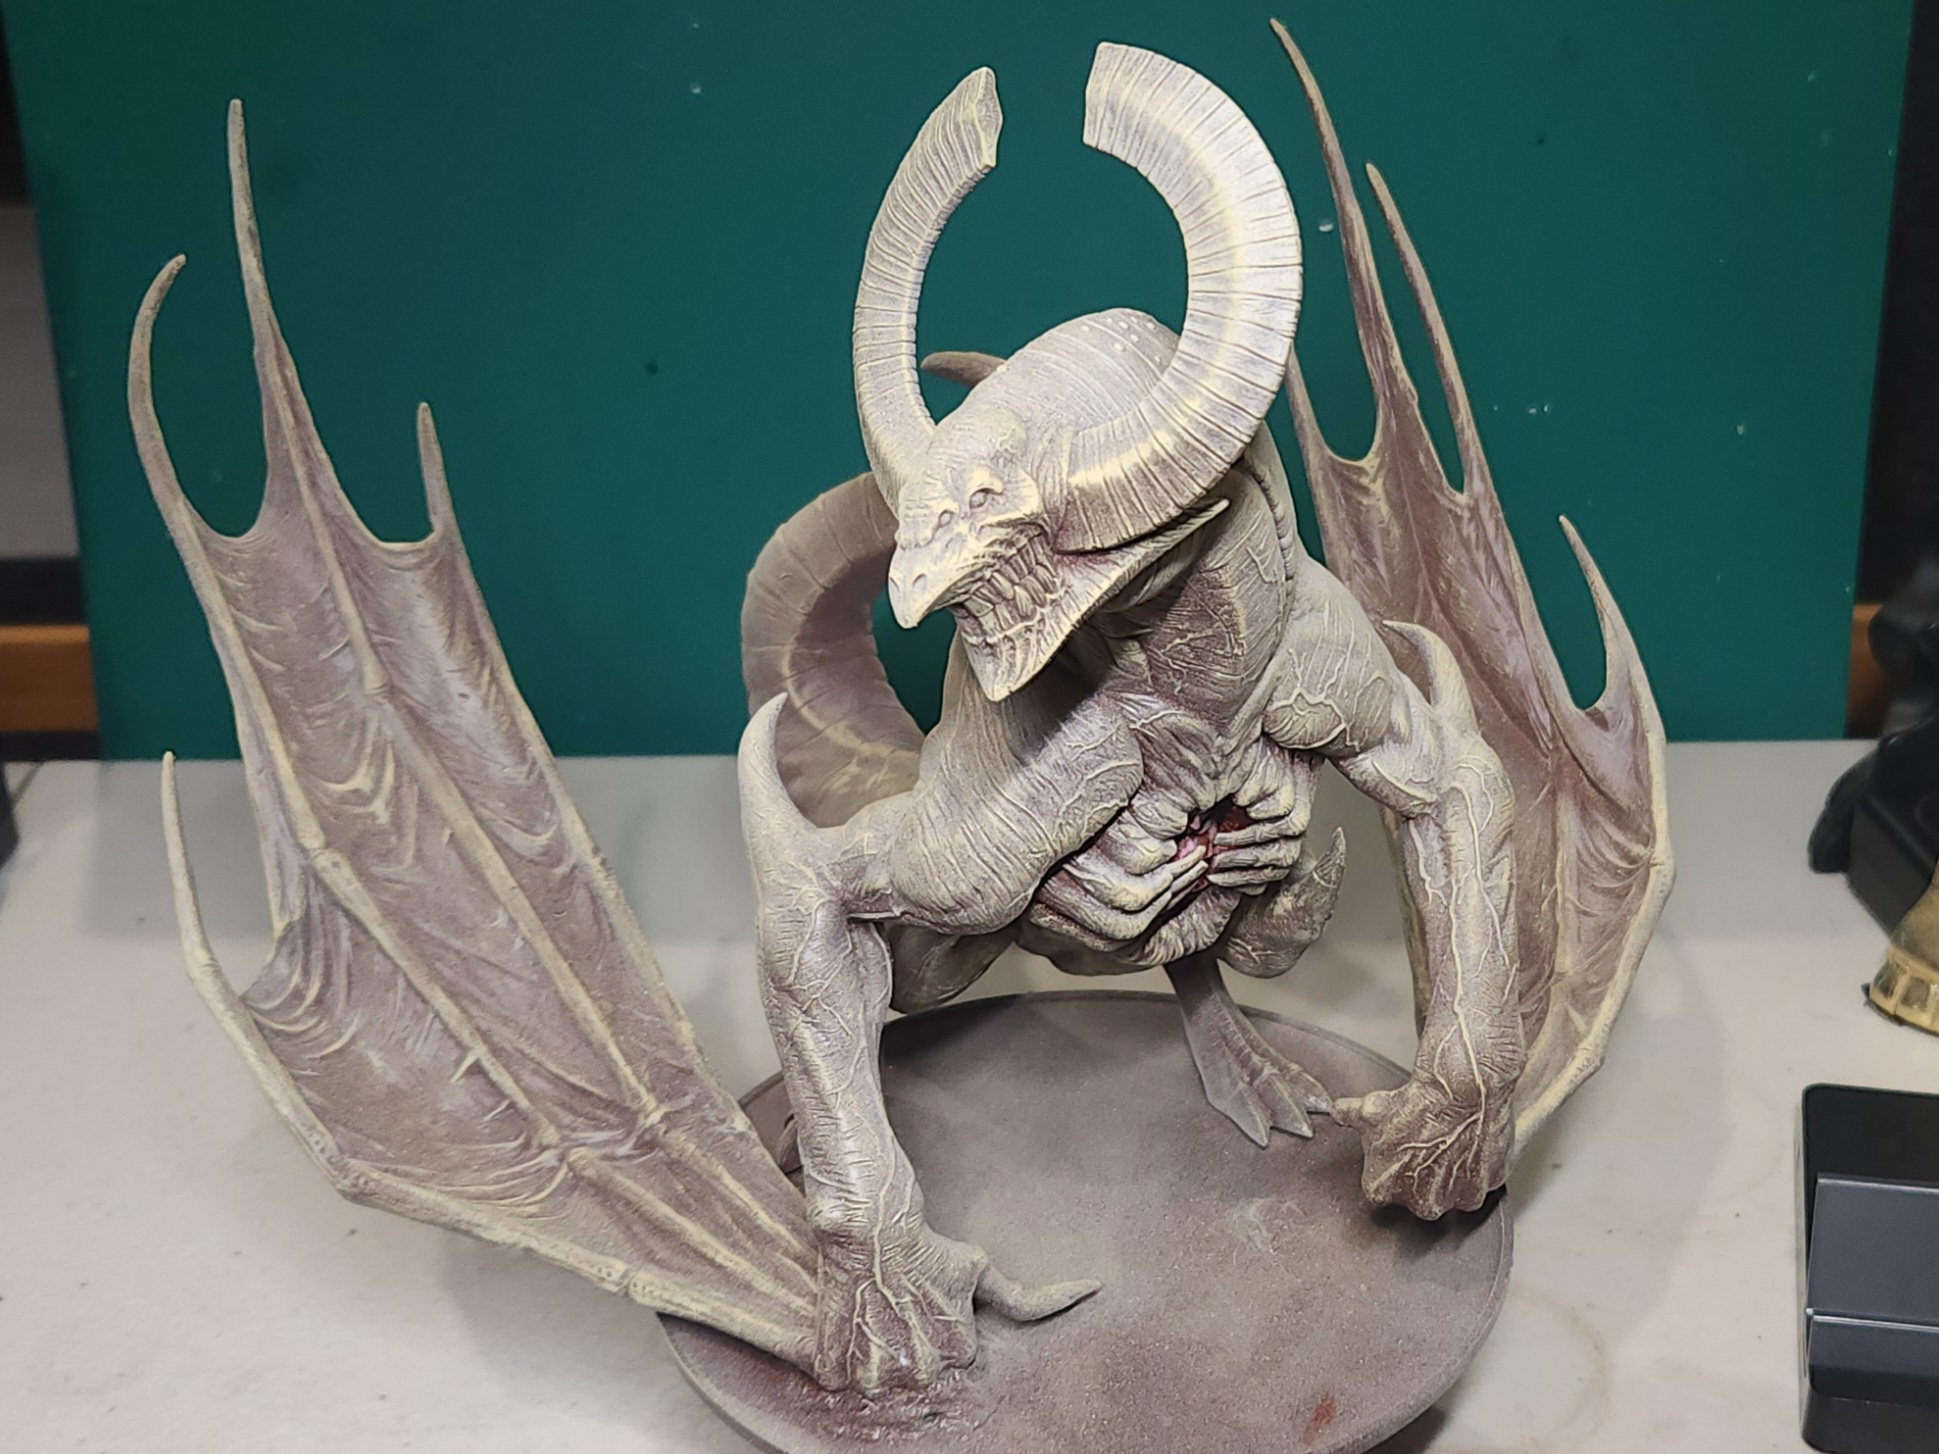
28 Mar 25: Final details
Getting close to the end of this piece, but the clock is ticking down…
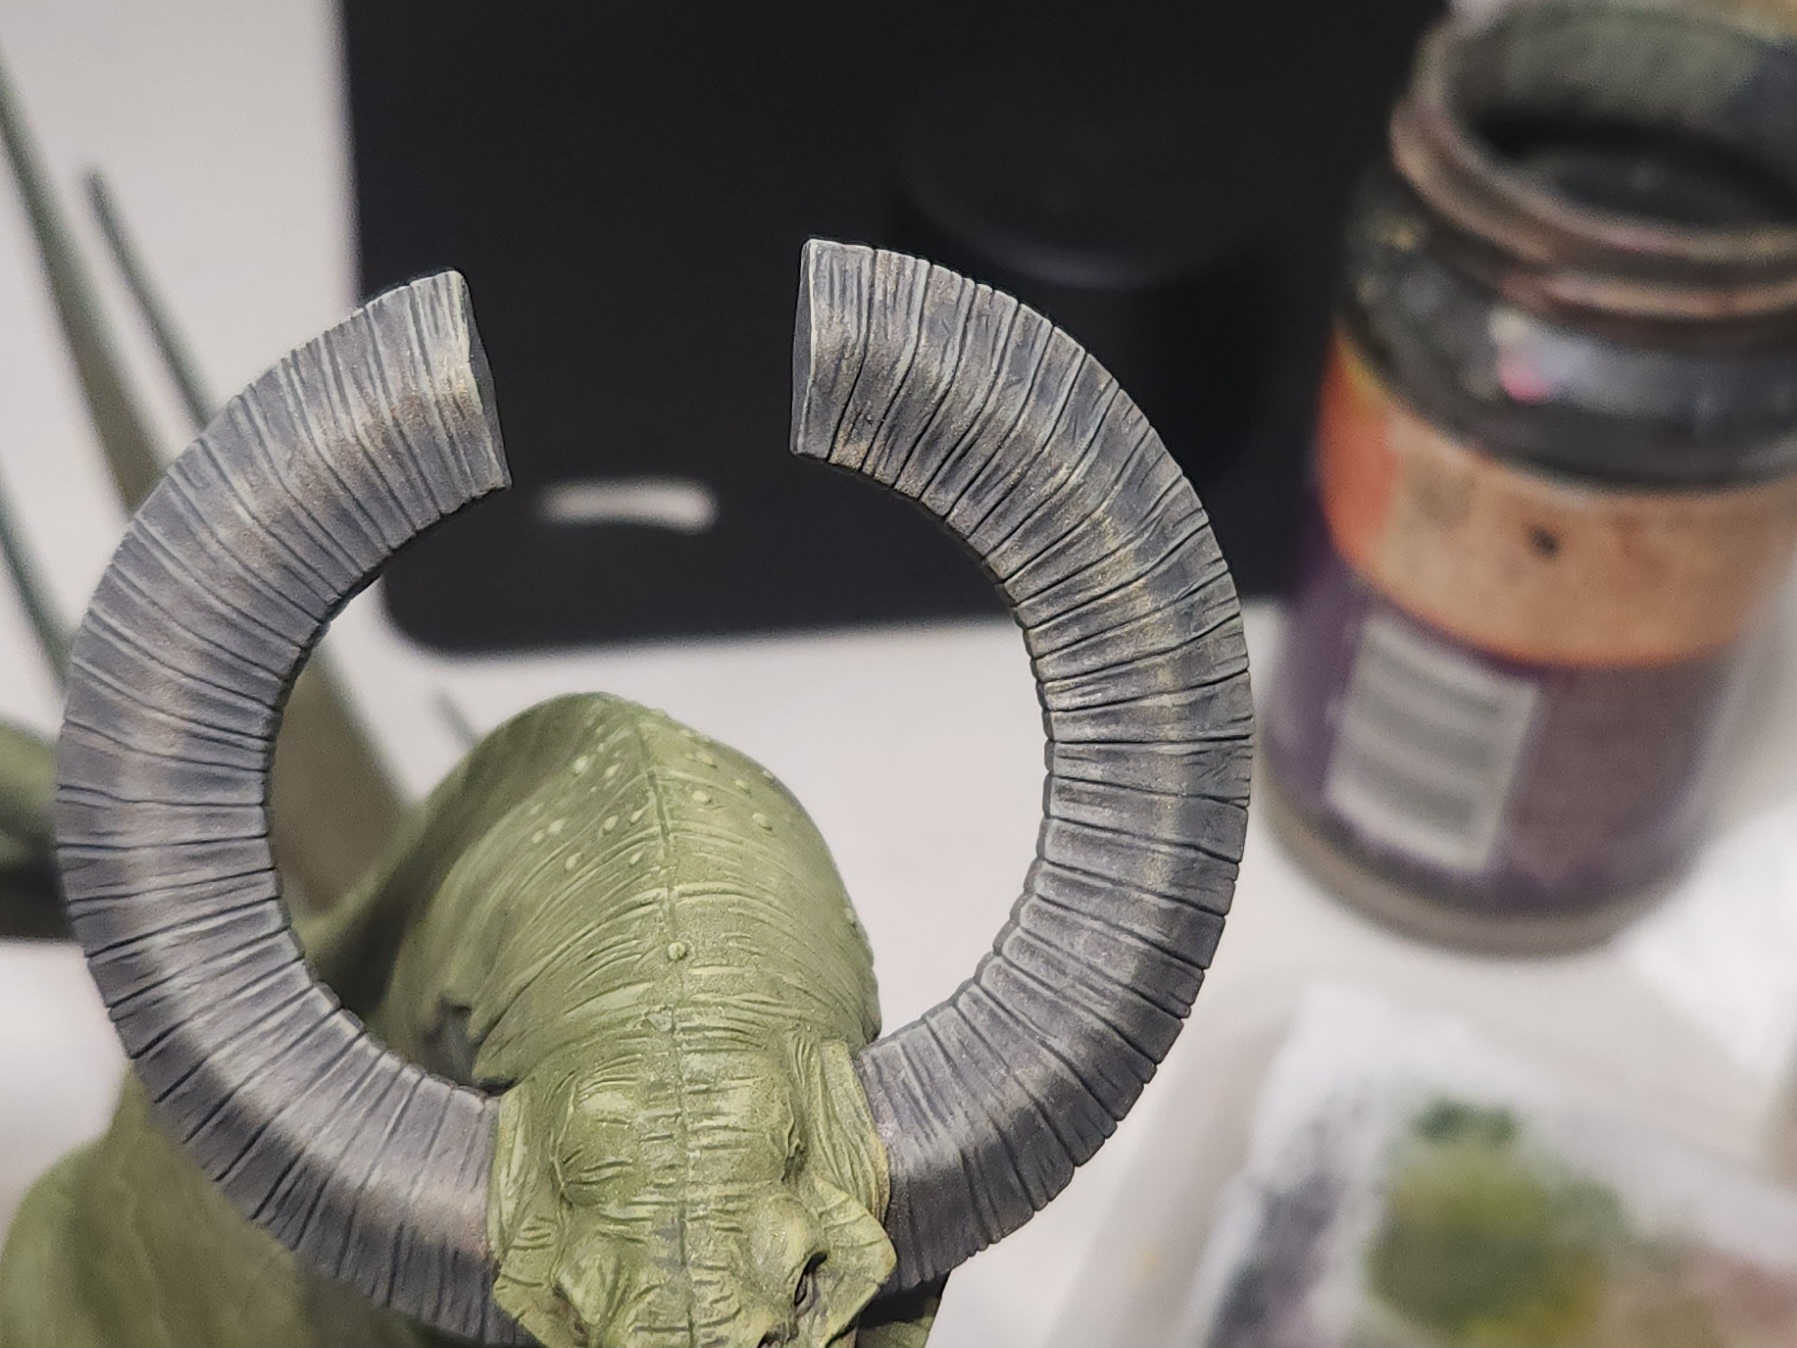
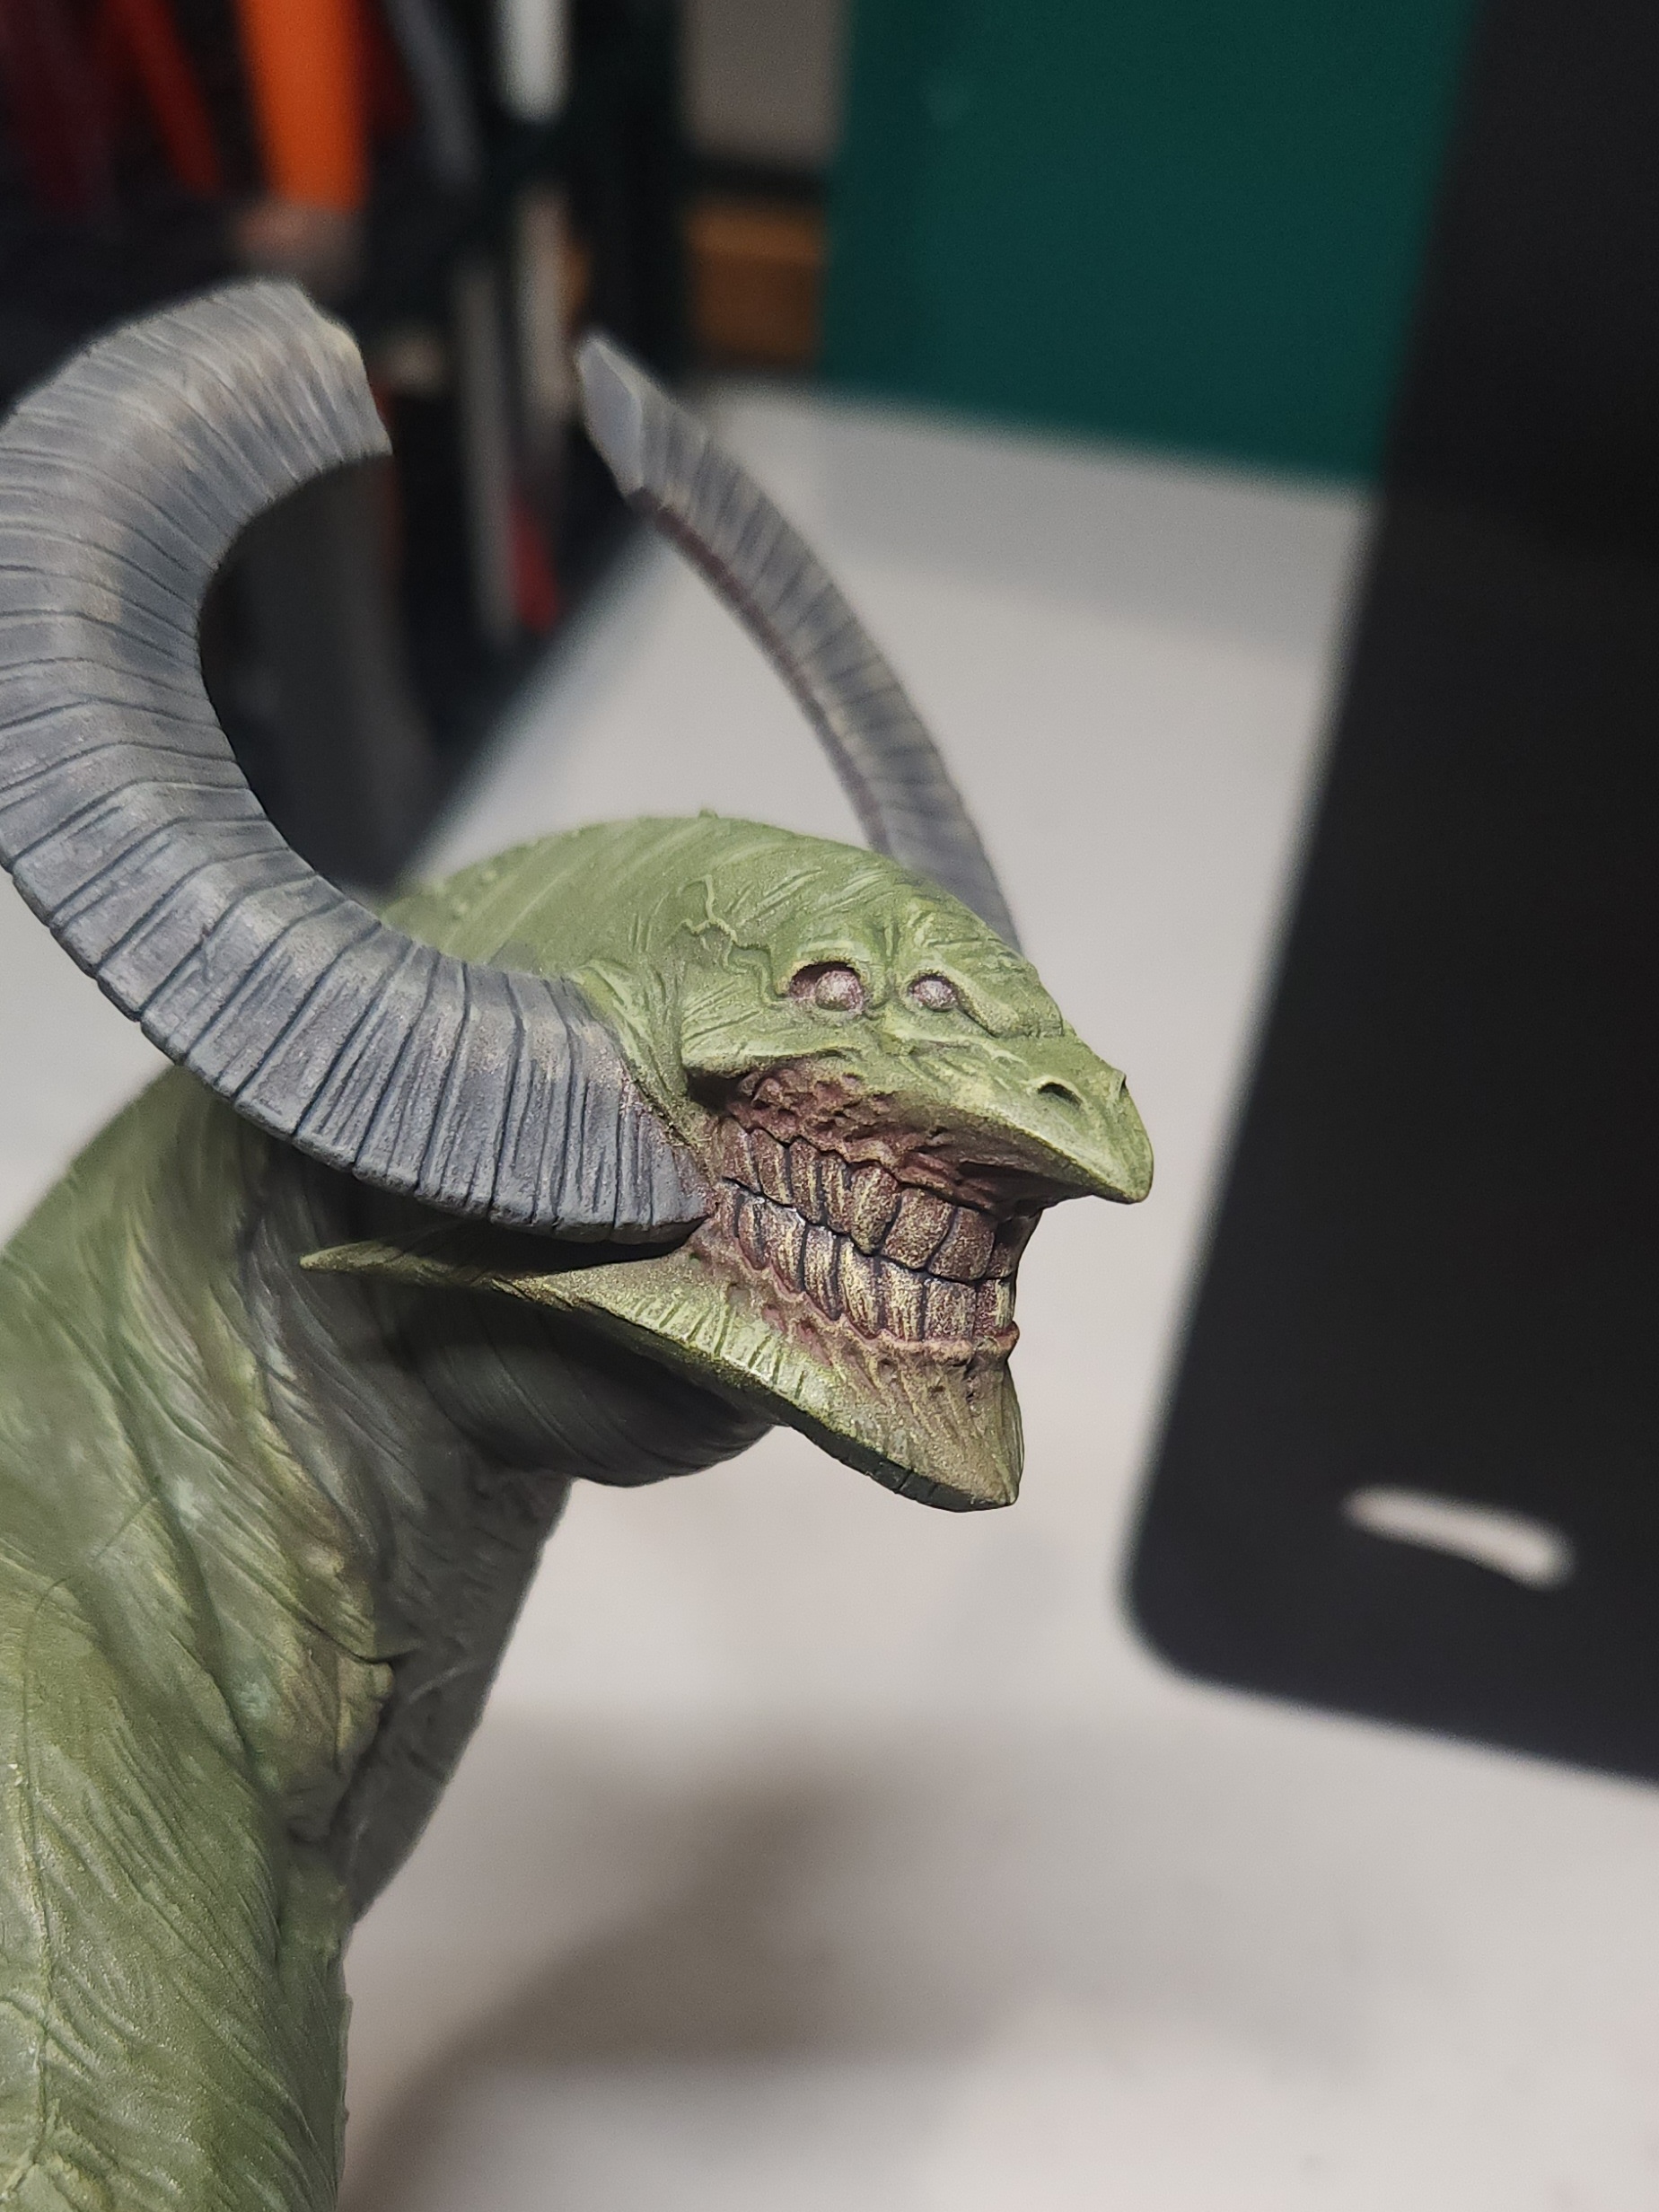
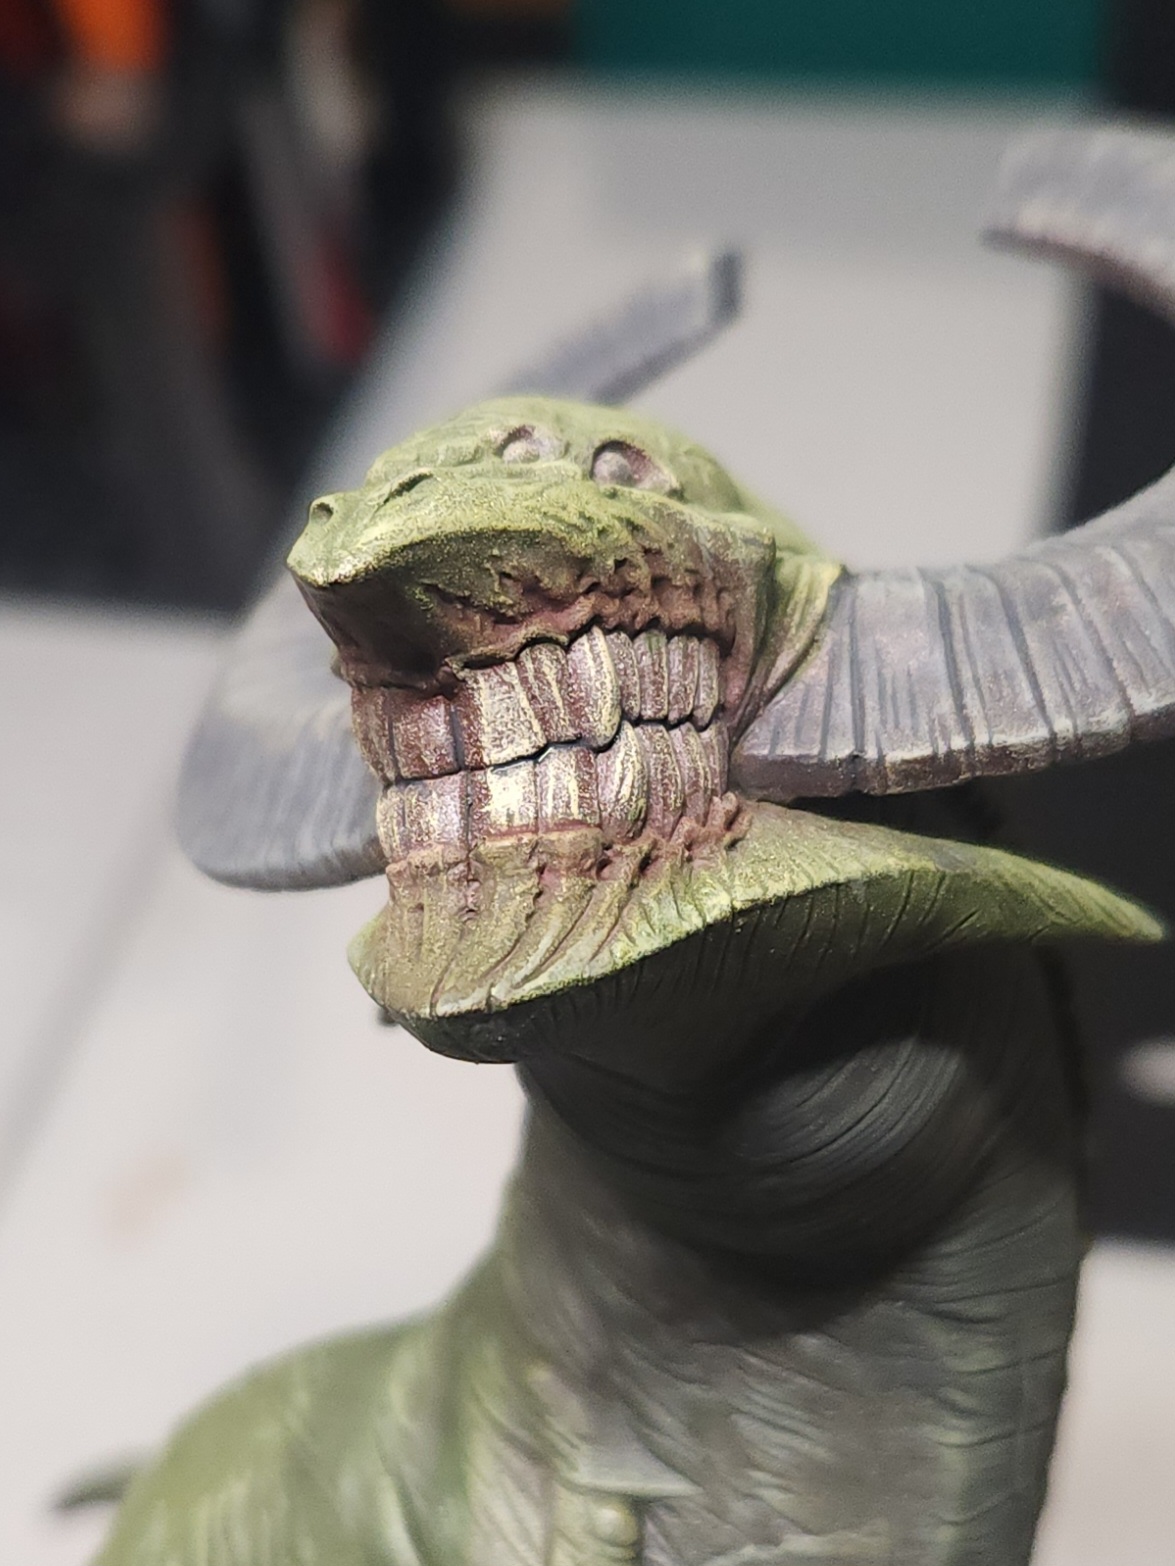
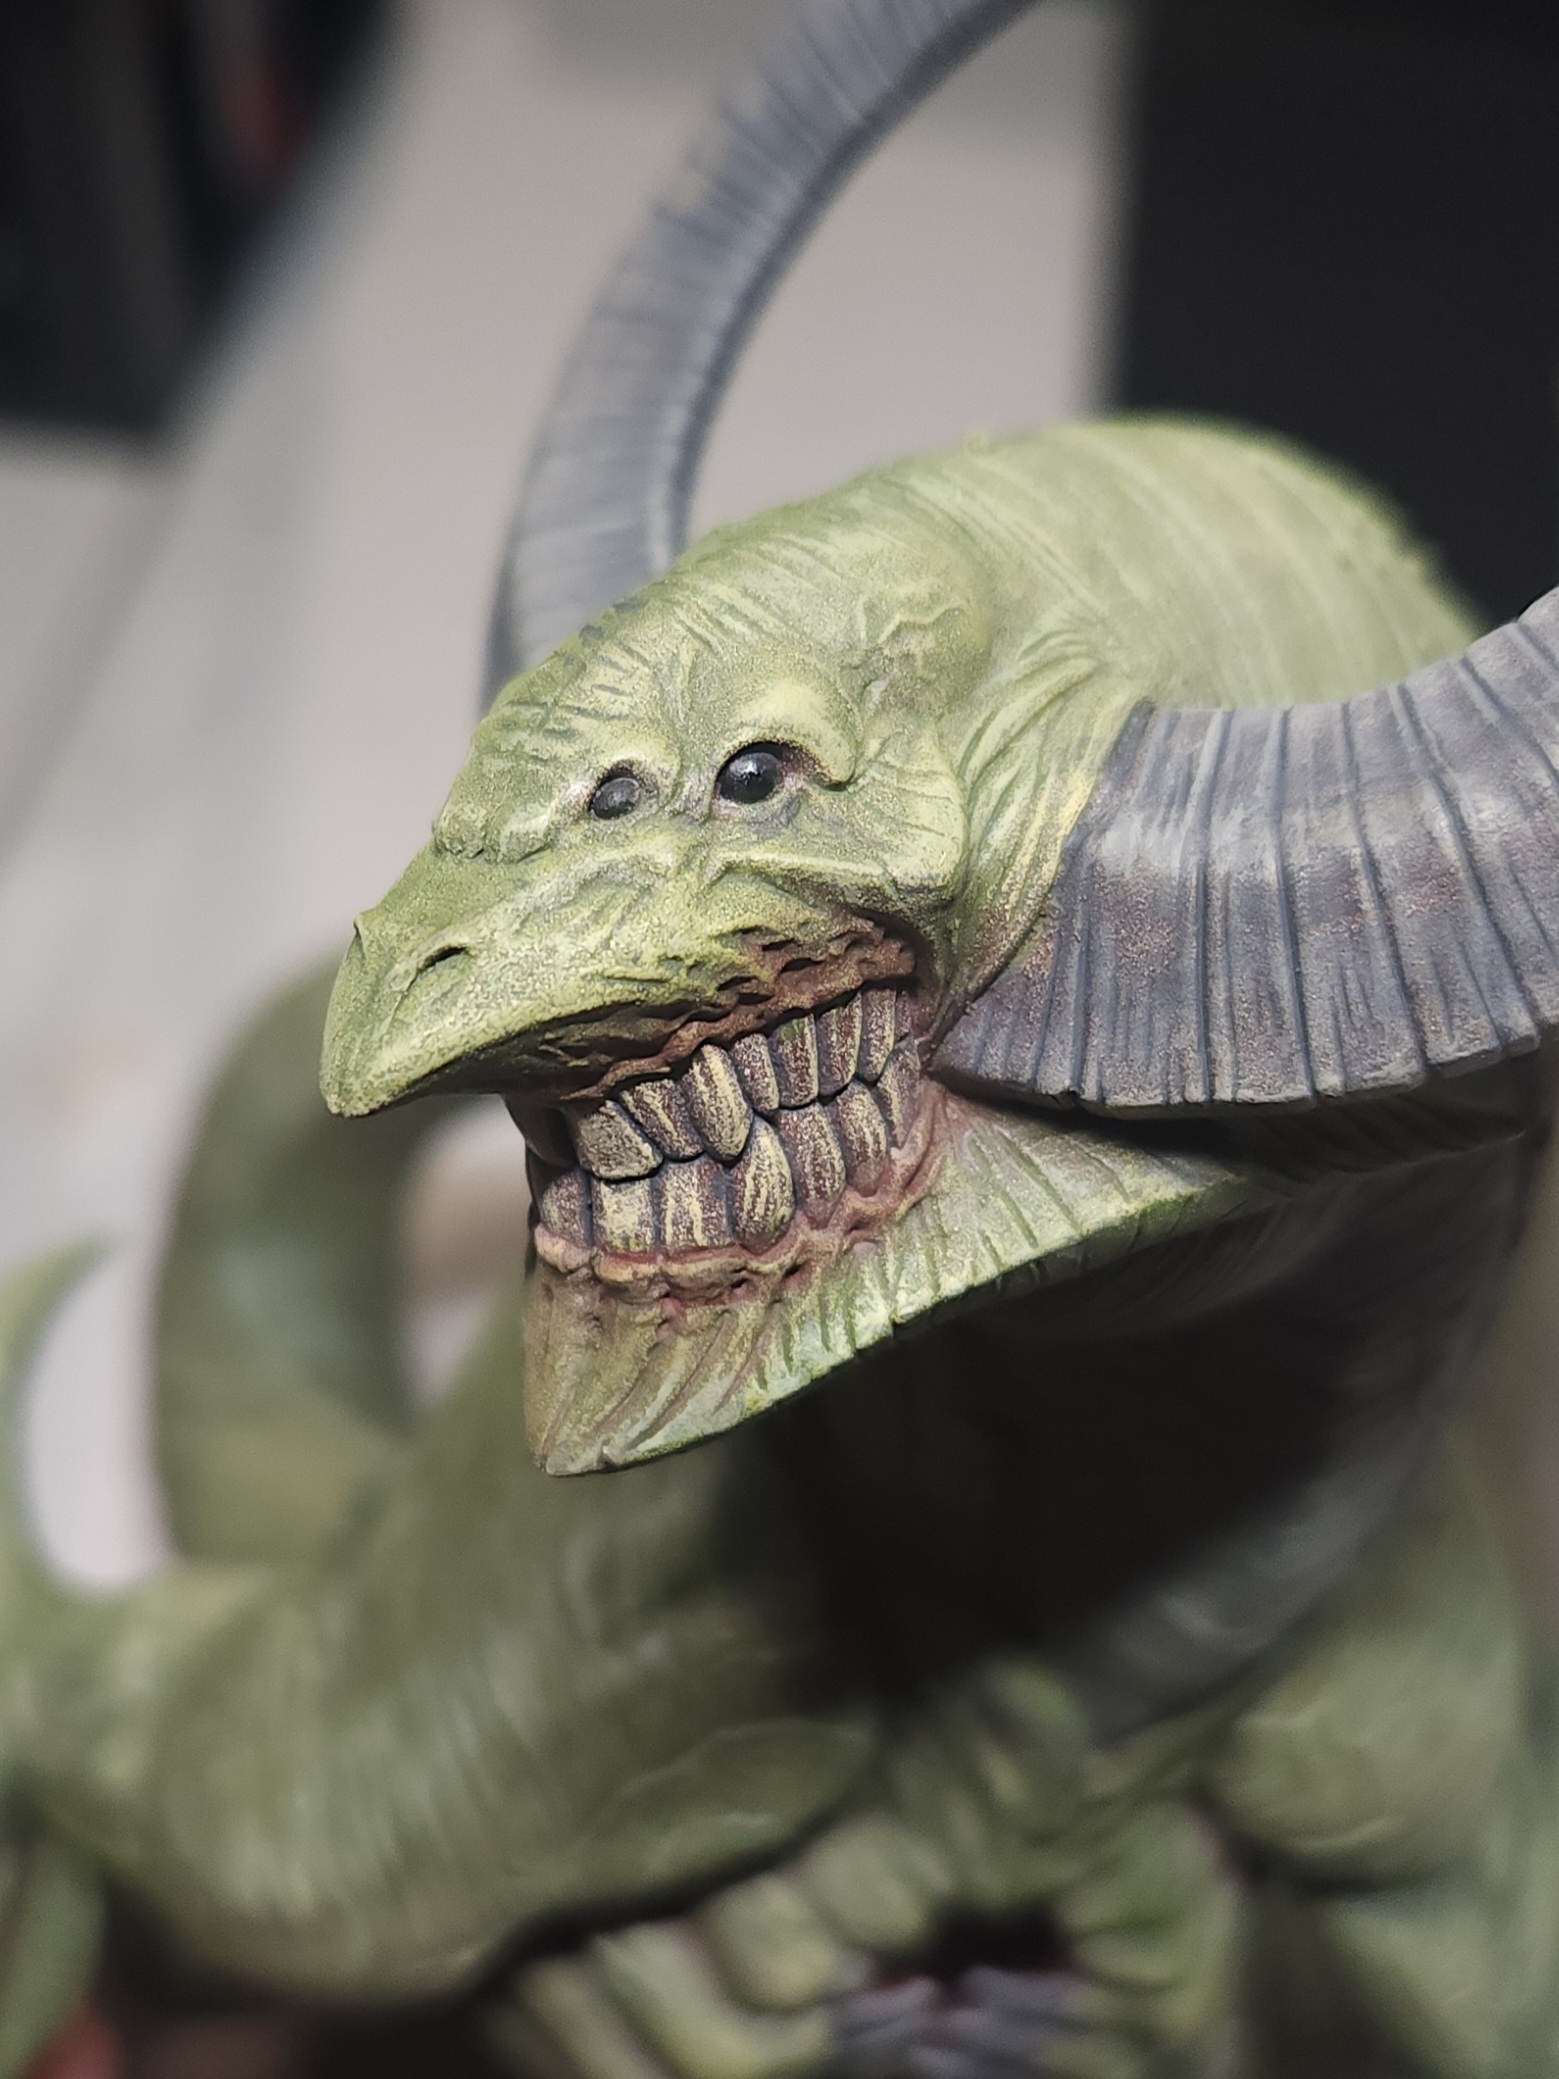
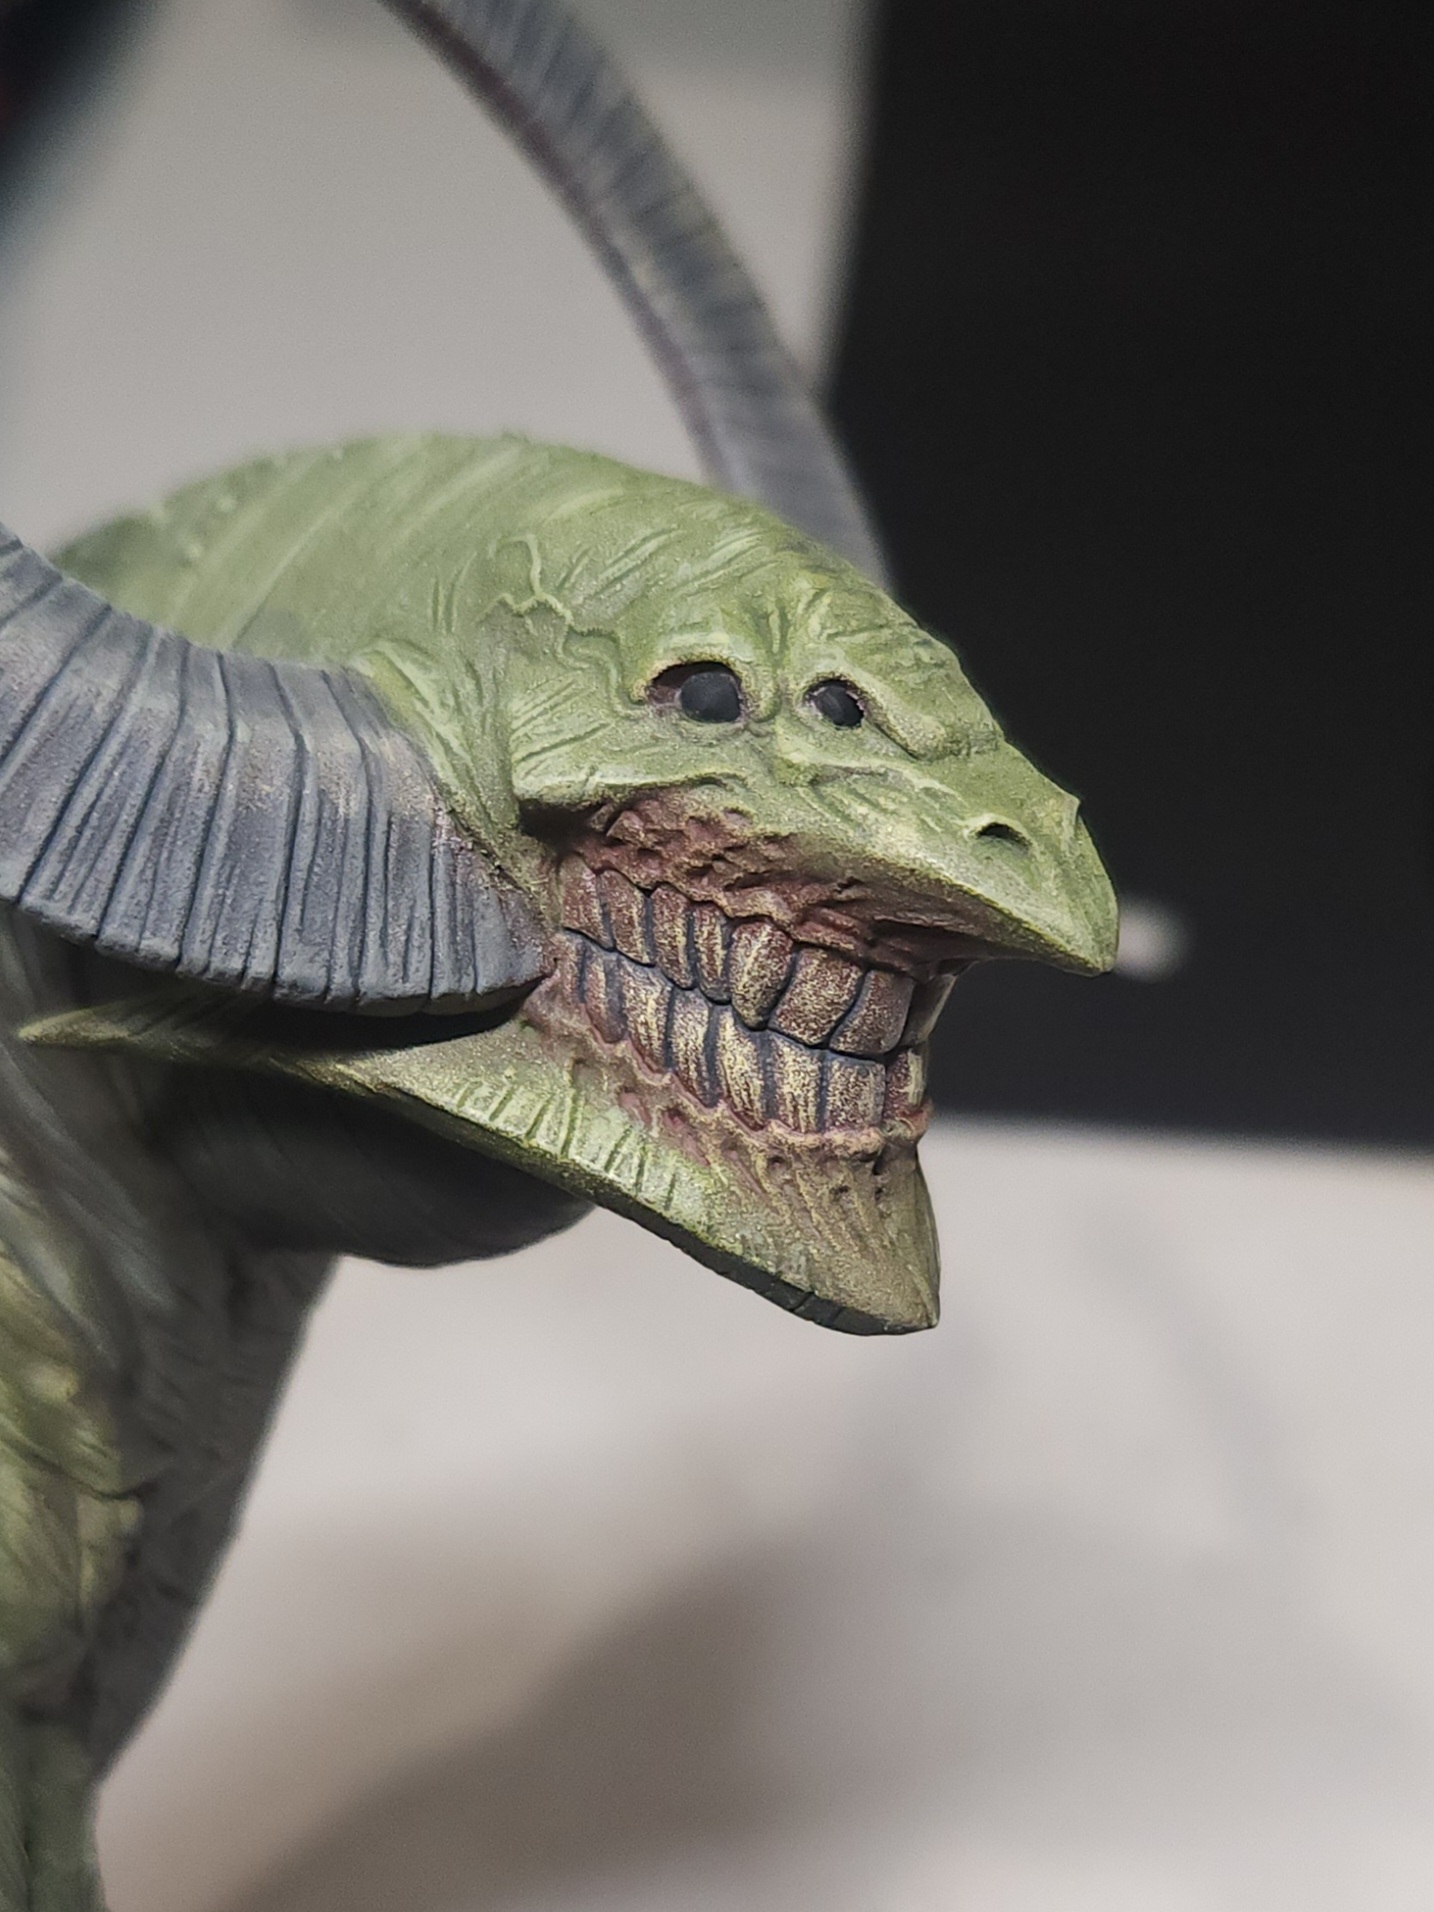
The teeth are glazed with Army Painter Warcolours Yellow then finished with Vallejo Buff along the tips and biting edges.
The eyes have a fine point of Vallejo Ivory for light points. I’ve given them a coat of gloss varnish as well to give the wet look eyes should probably have.
29 Mar 25: Time is almost up!
It’s the 29th of March and submissions close about 330pm the 2nd of April in my time zone.
That means, technically, I have two nights to complete the work, photograph, edit and submit it.
The second night would have to be for photography and editing. Work takes up each of the day hours, so no time available then.
I explain all this, so as to indicate the pressure I was feeling to finish the basing quickly. I had to get it done, fast but good. I have only tonight to do it.
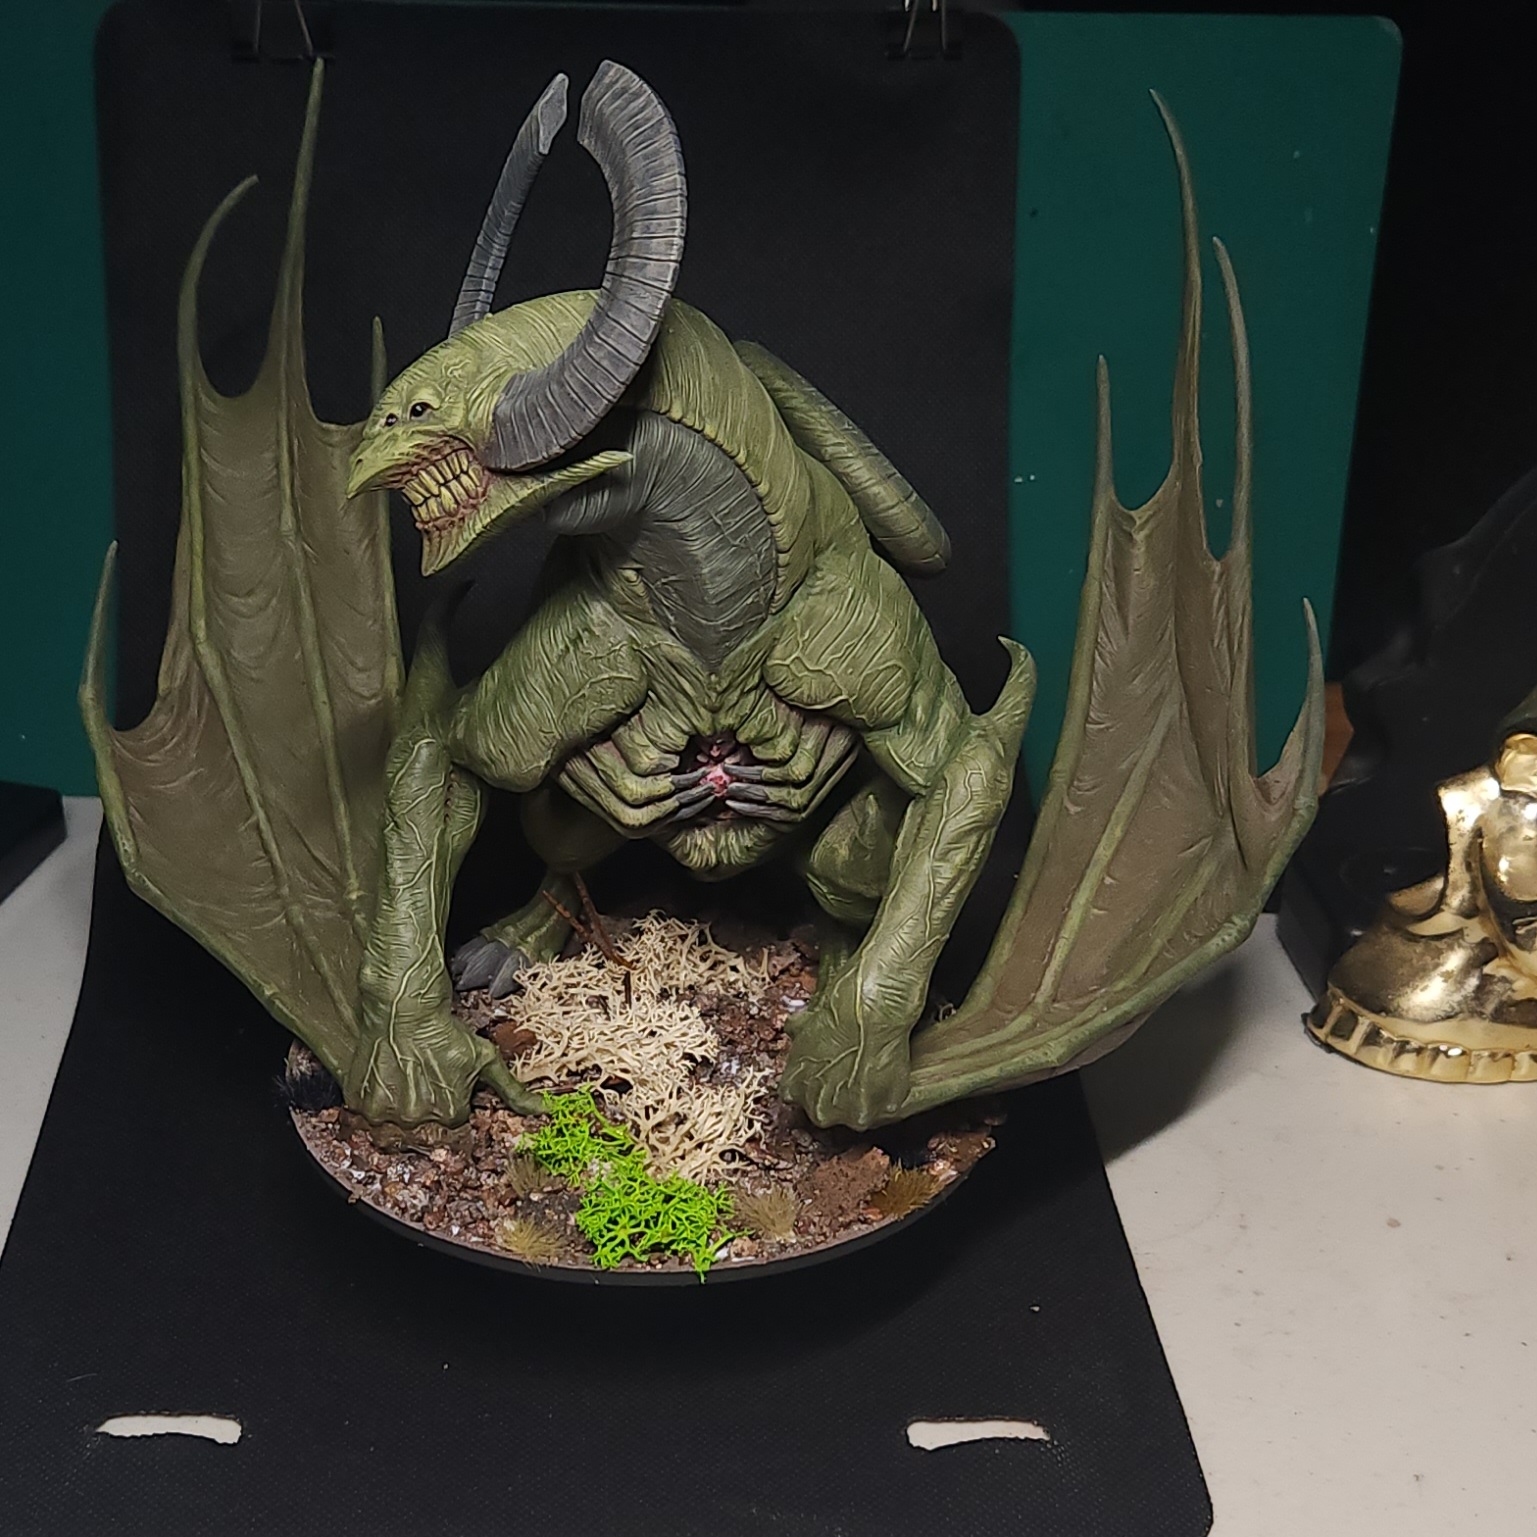 Spoilers: I got there in the end!
Originally, I had planned to use some of the Kingdom Death official bases, cut up and worked into the base with putty. Then use other basing materials to build around them.
But cutting the bases was proving to take more time and effort than I felt was available. I had another idea, though I would rather have had more time to execute it.
I took a mix of various grits and threw them into a little packing box. To that was added a piece of paper-thin cork sheet that I’d ripped into random size pieces.
I then sprayed that mix with a Matt Black, Army Painter Chaos Red and Citadel Wraith Bone. After each spray, I would stir the mix and shuffle it around. Ordinarily, I would have allowed each colour to get touch dry before the next spray, but I didn’t have time. I wasn’t particularly worried about full coverage either.
Before it had even dried properly, I scraped it all into a plastic bowl and took it inside. Then I threw some PVA into the bowl and mixed it up. With deliberate patience (that I wasn’t feeling at all) I spread this all around the base.
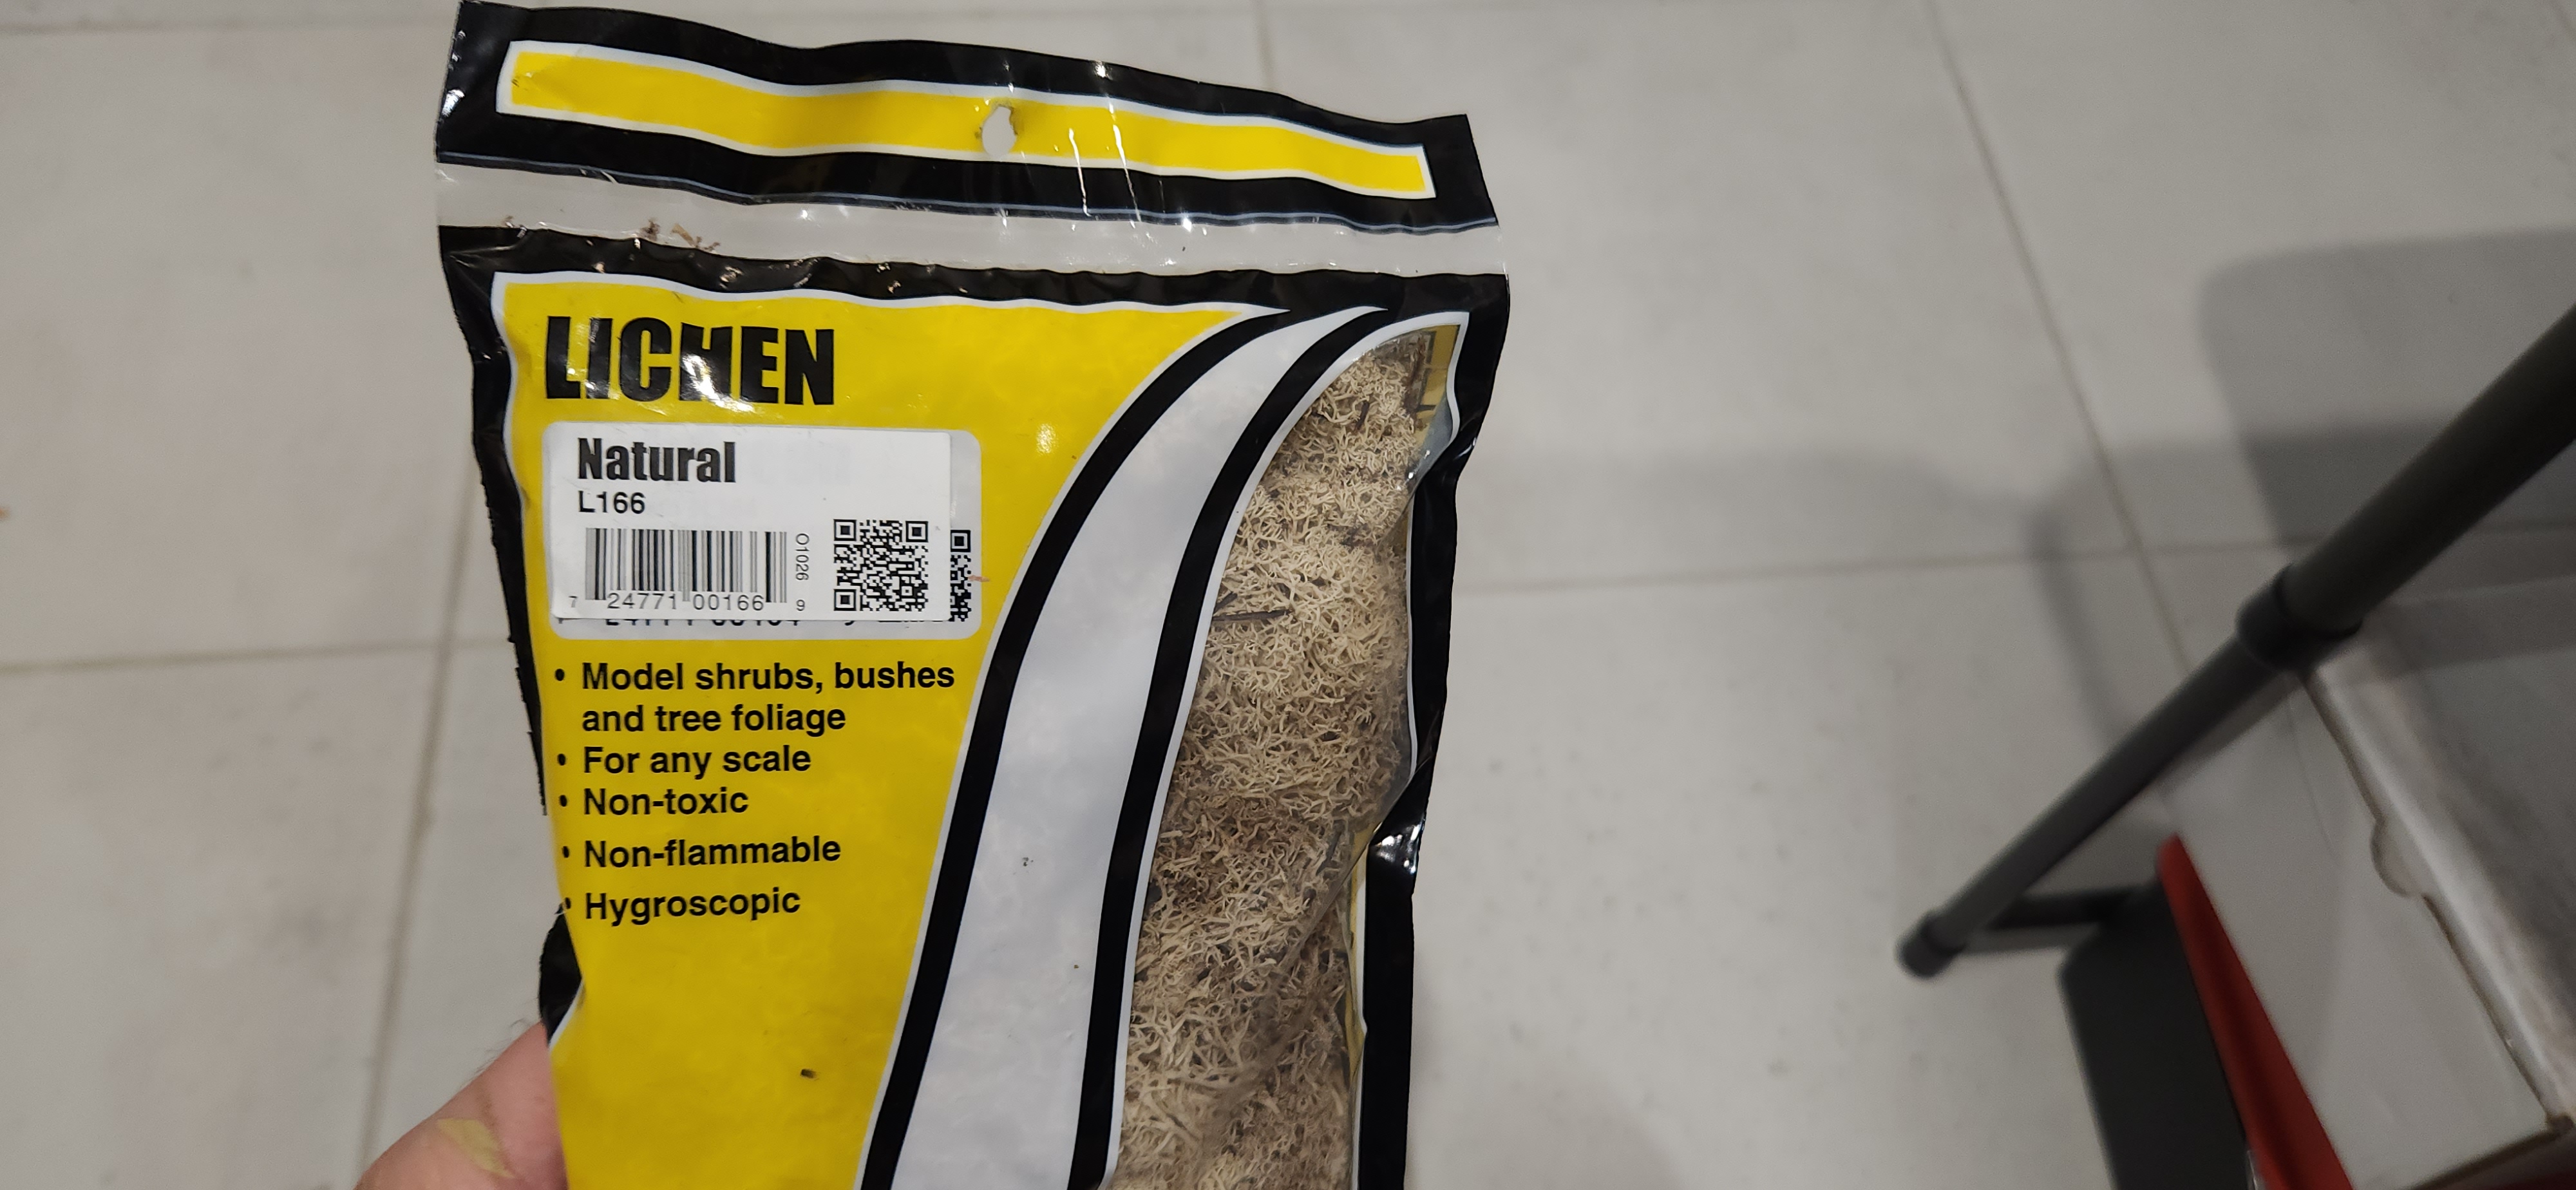
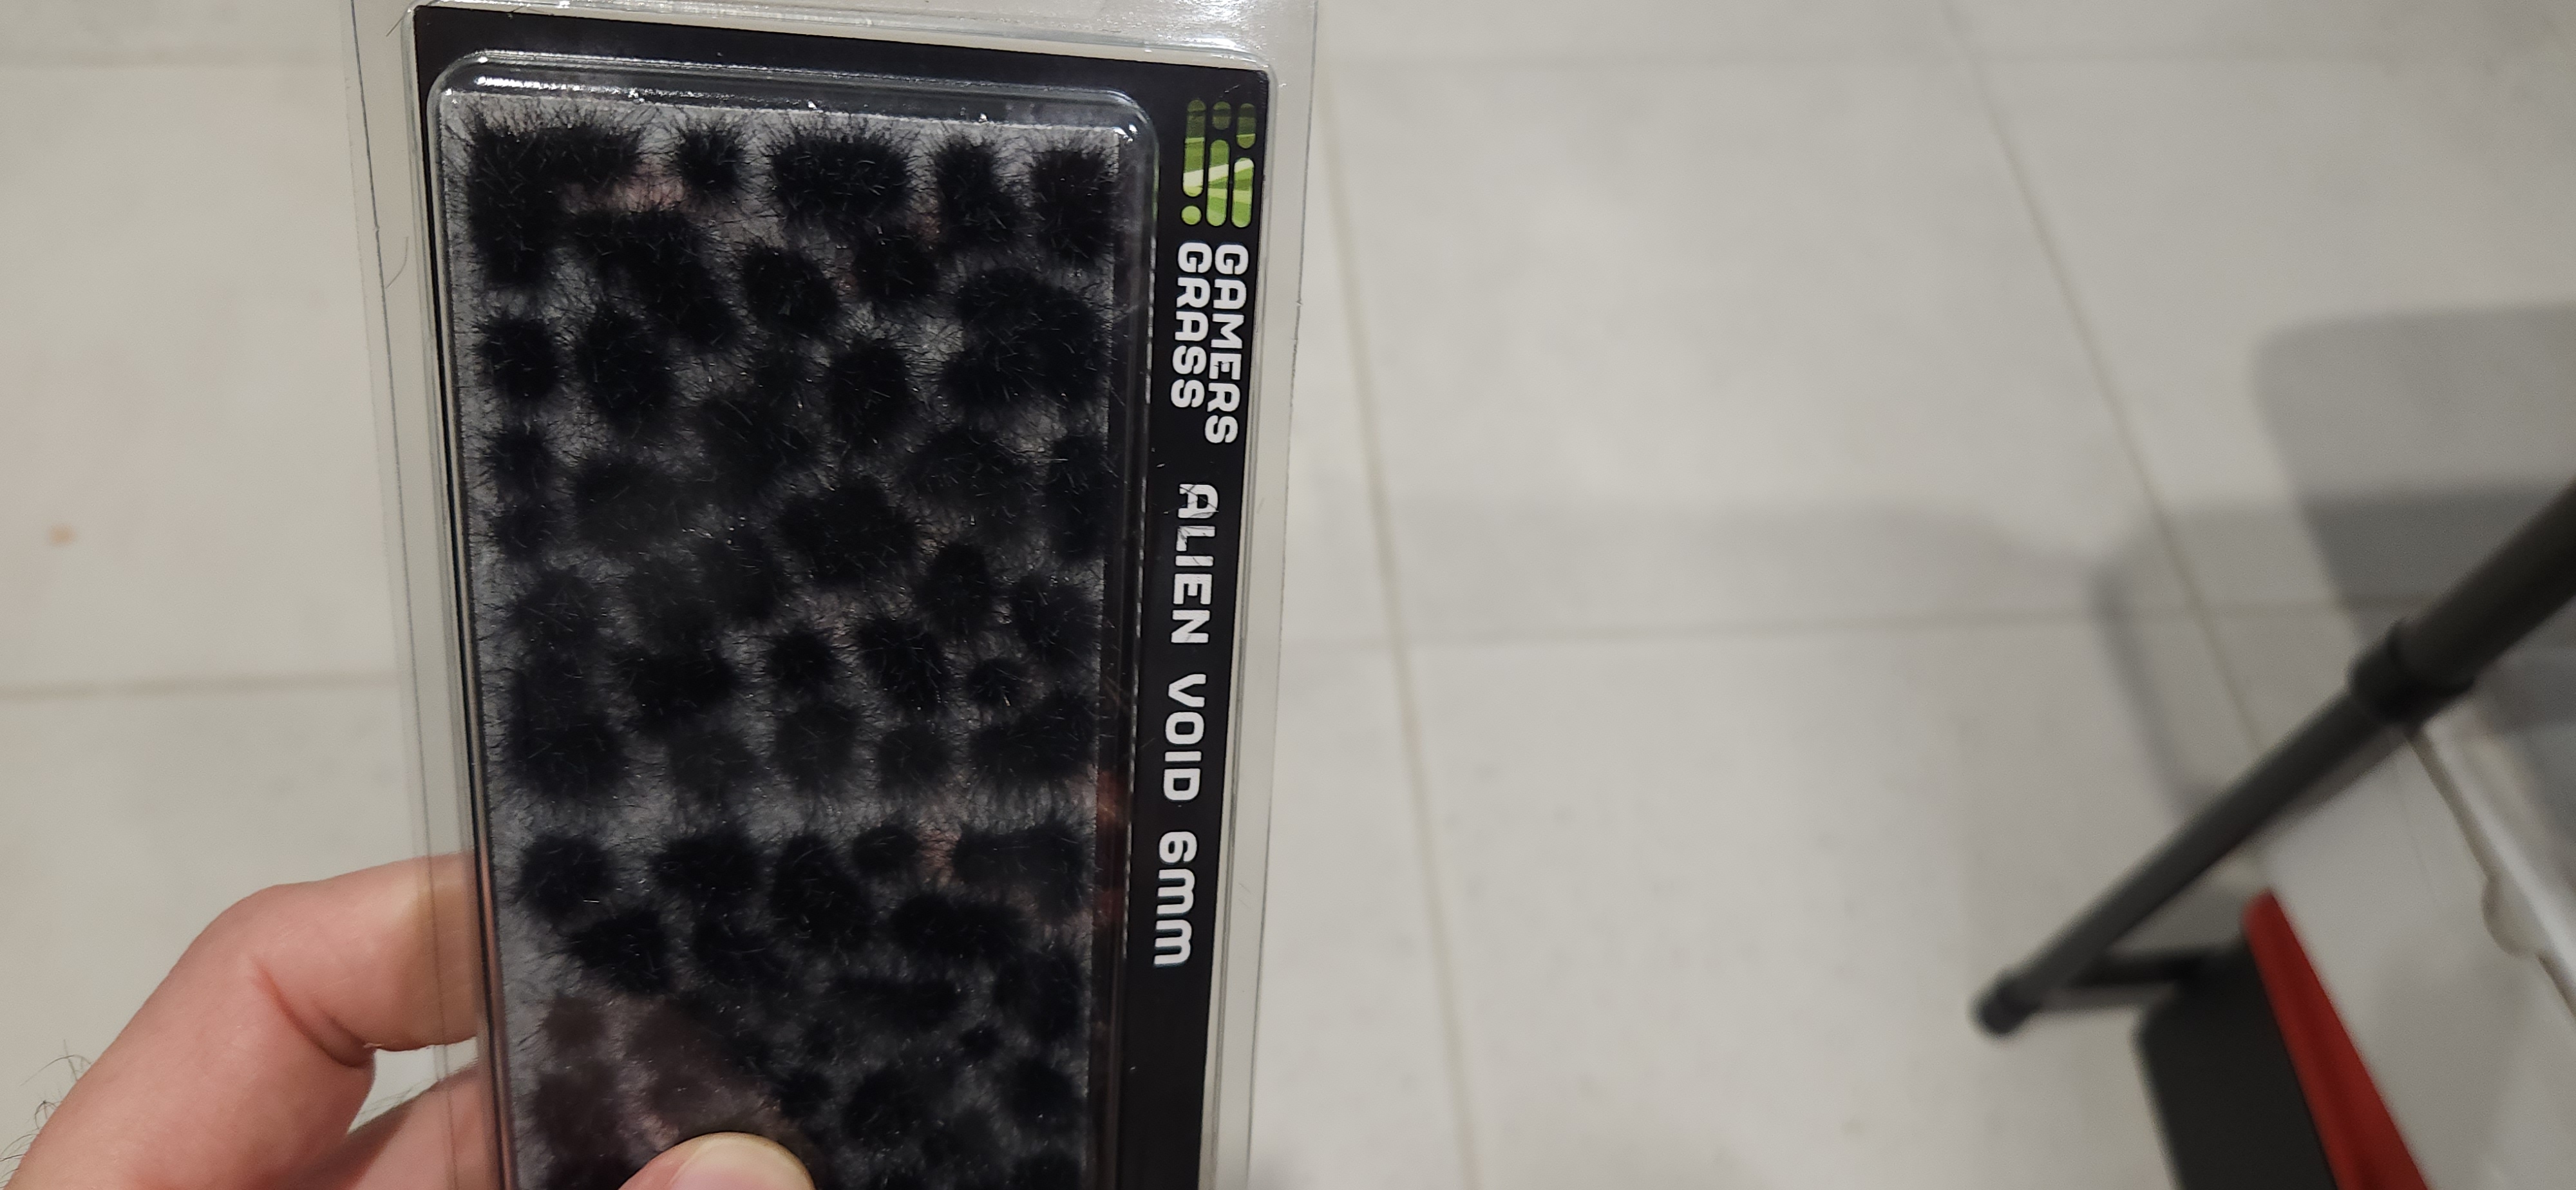
I felt that it still needed more, so I grabbed some lichen and tufts in various colours. Just recently I’d been to a semi-local hobby store and grabbed some extra pieces for this project.
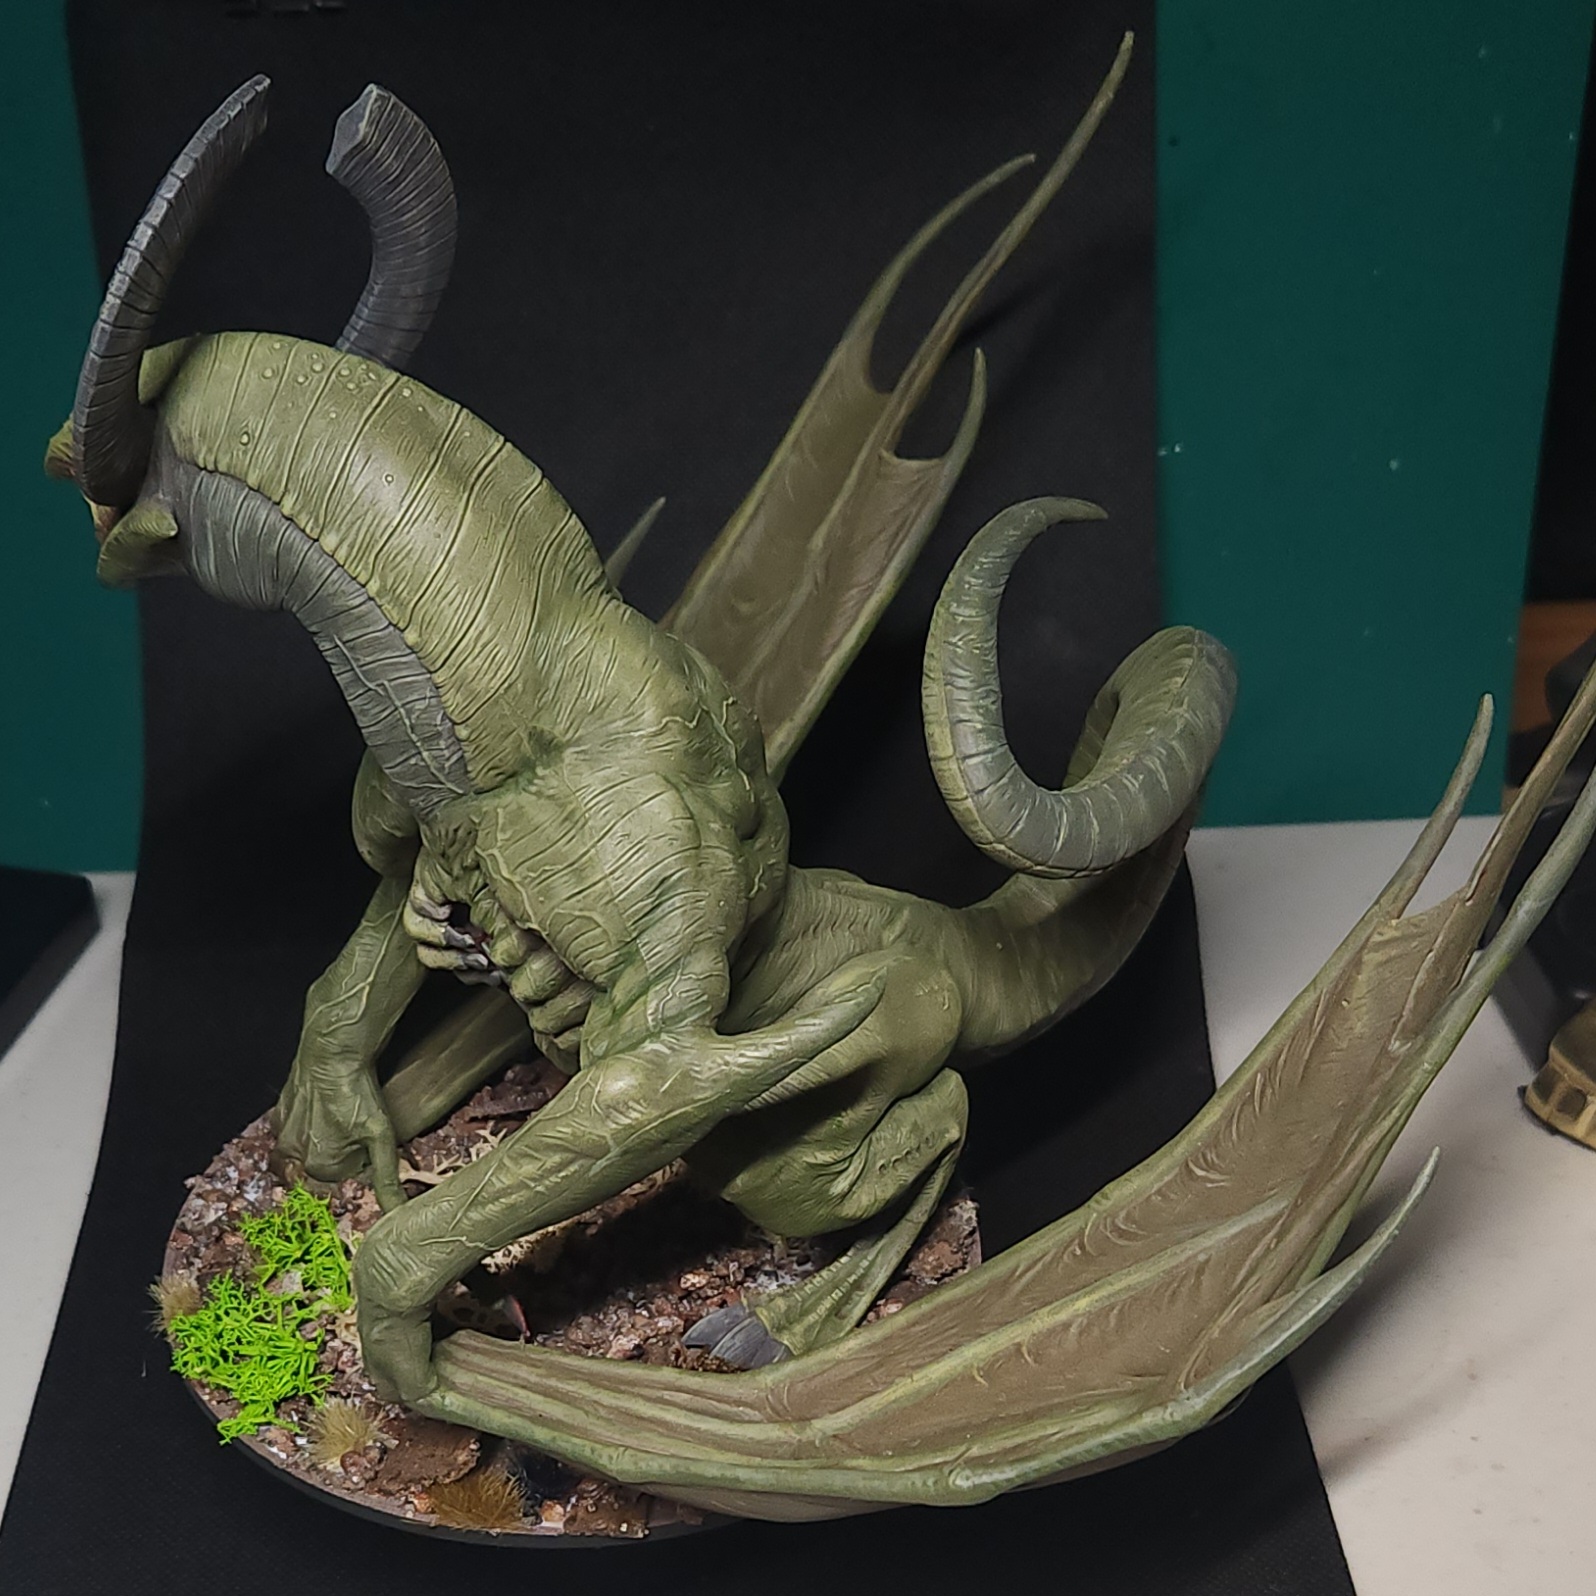
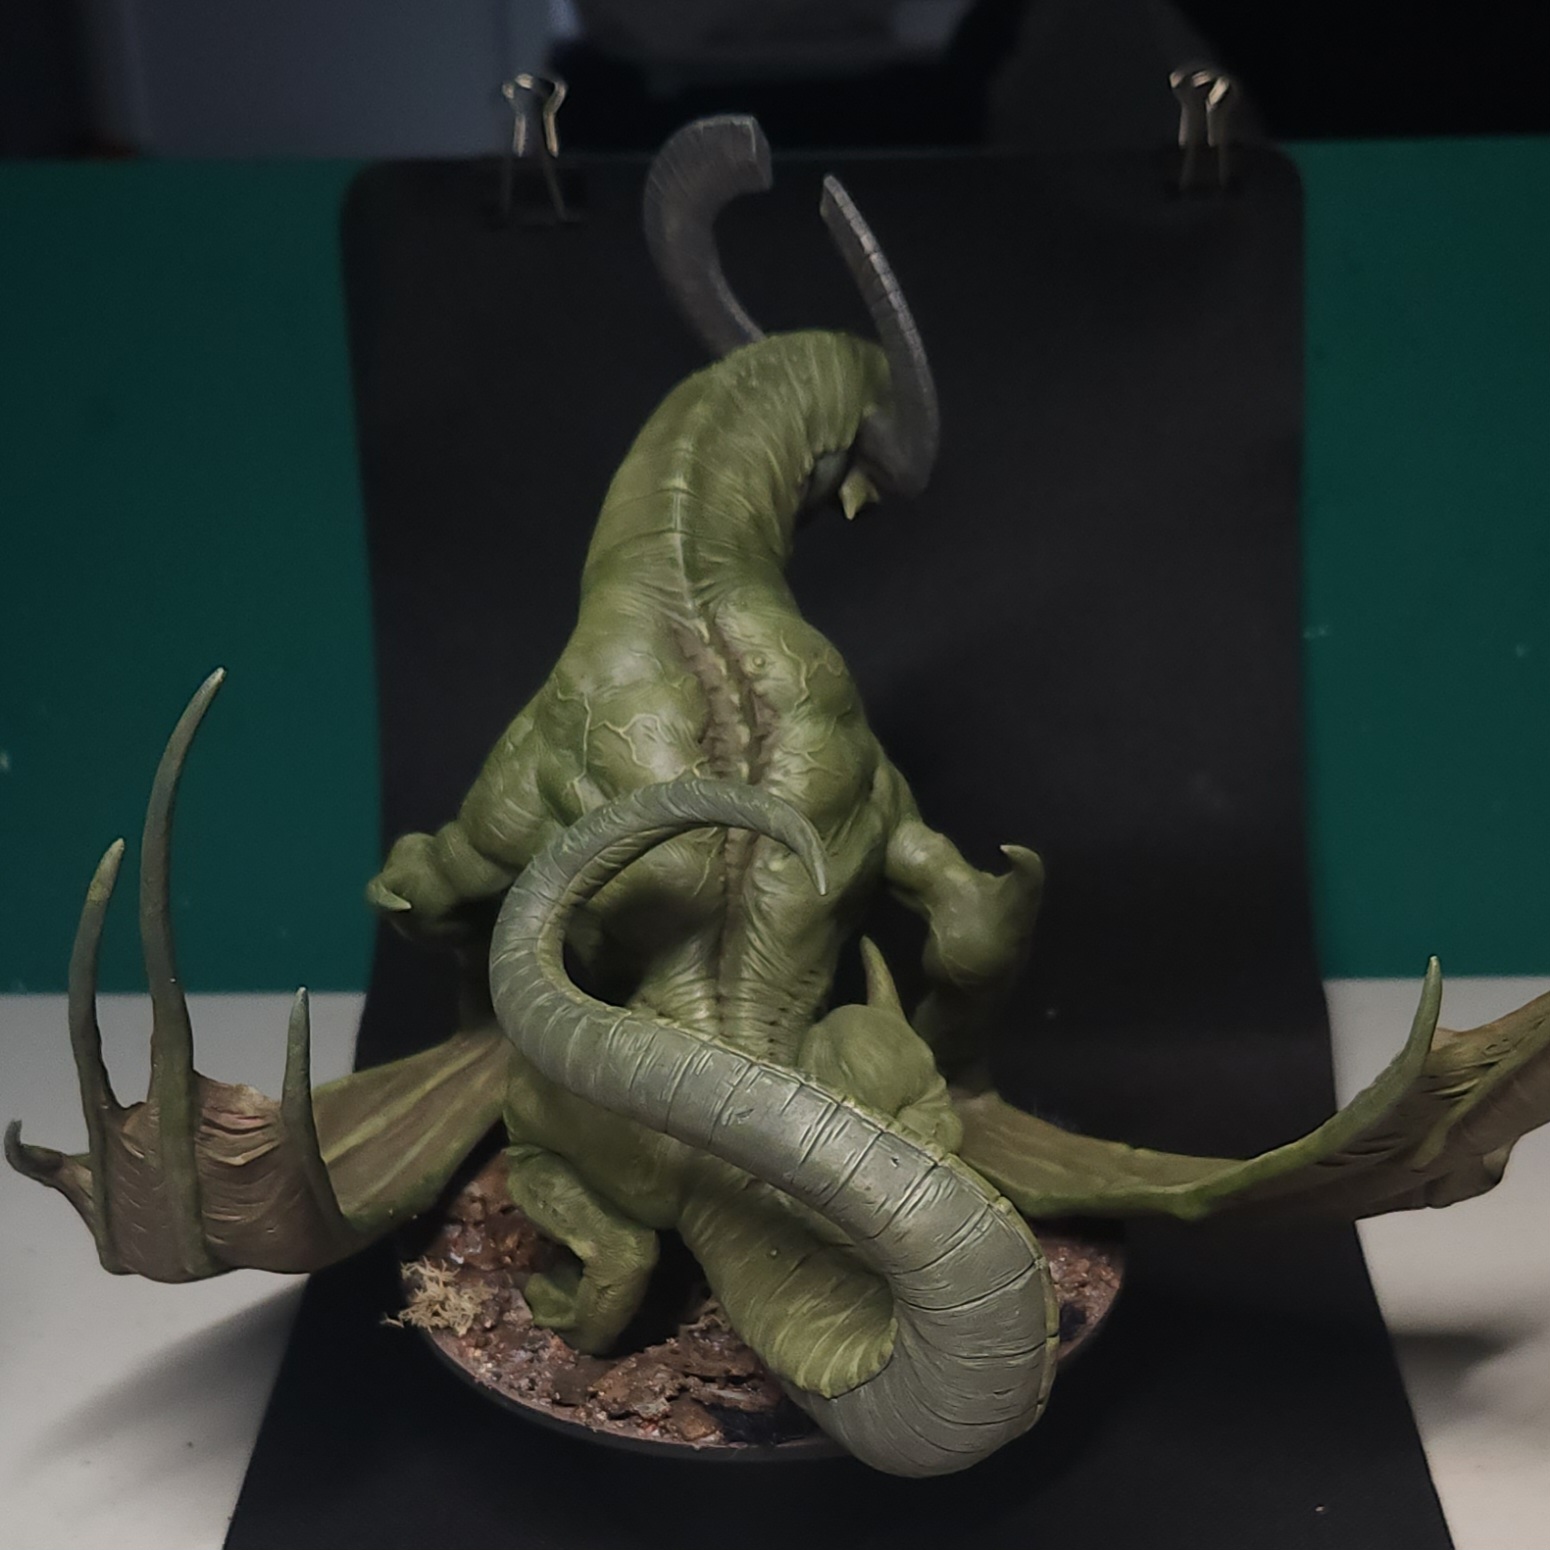
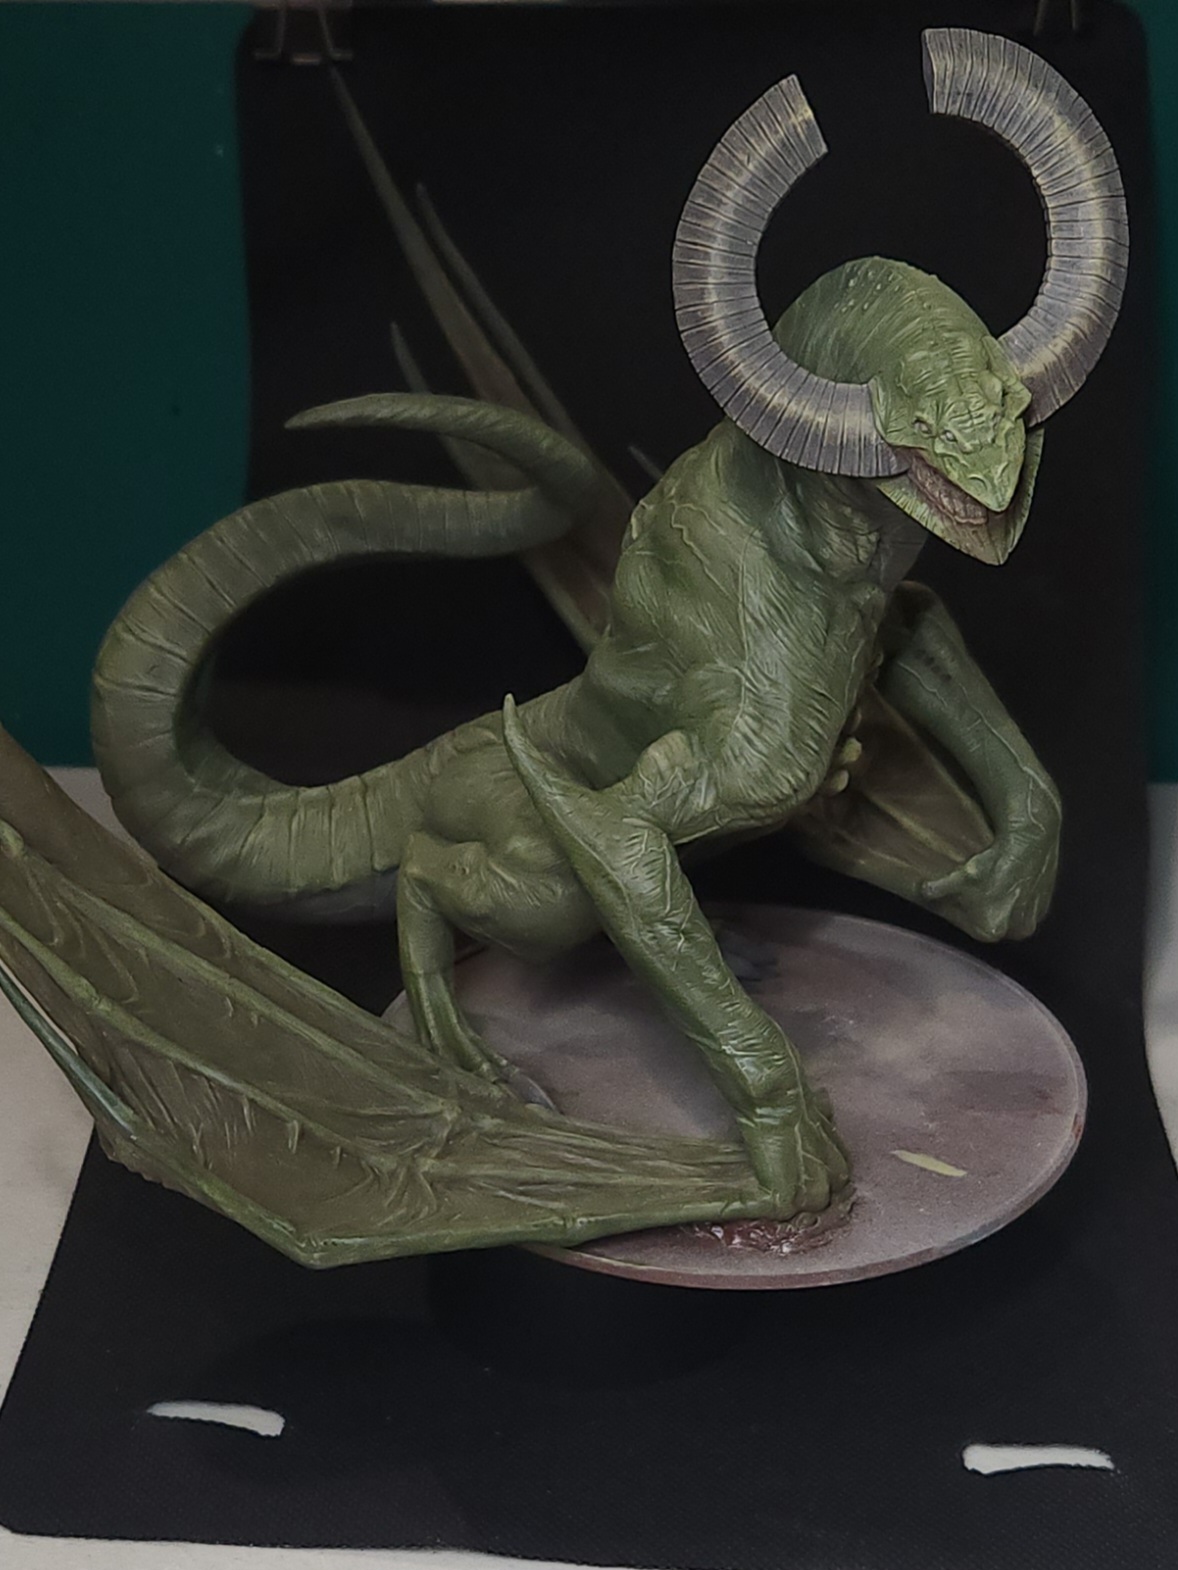
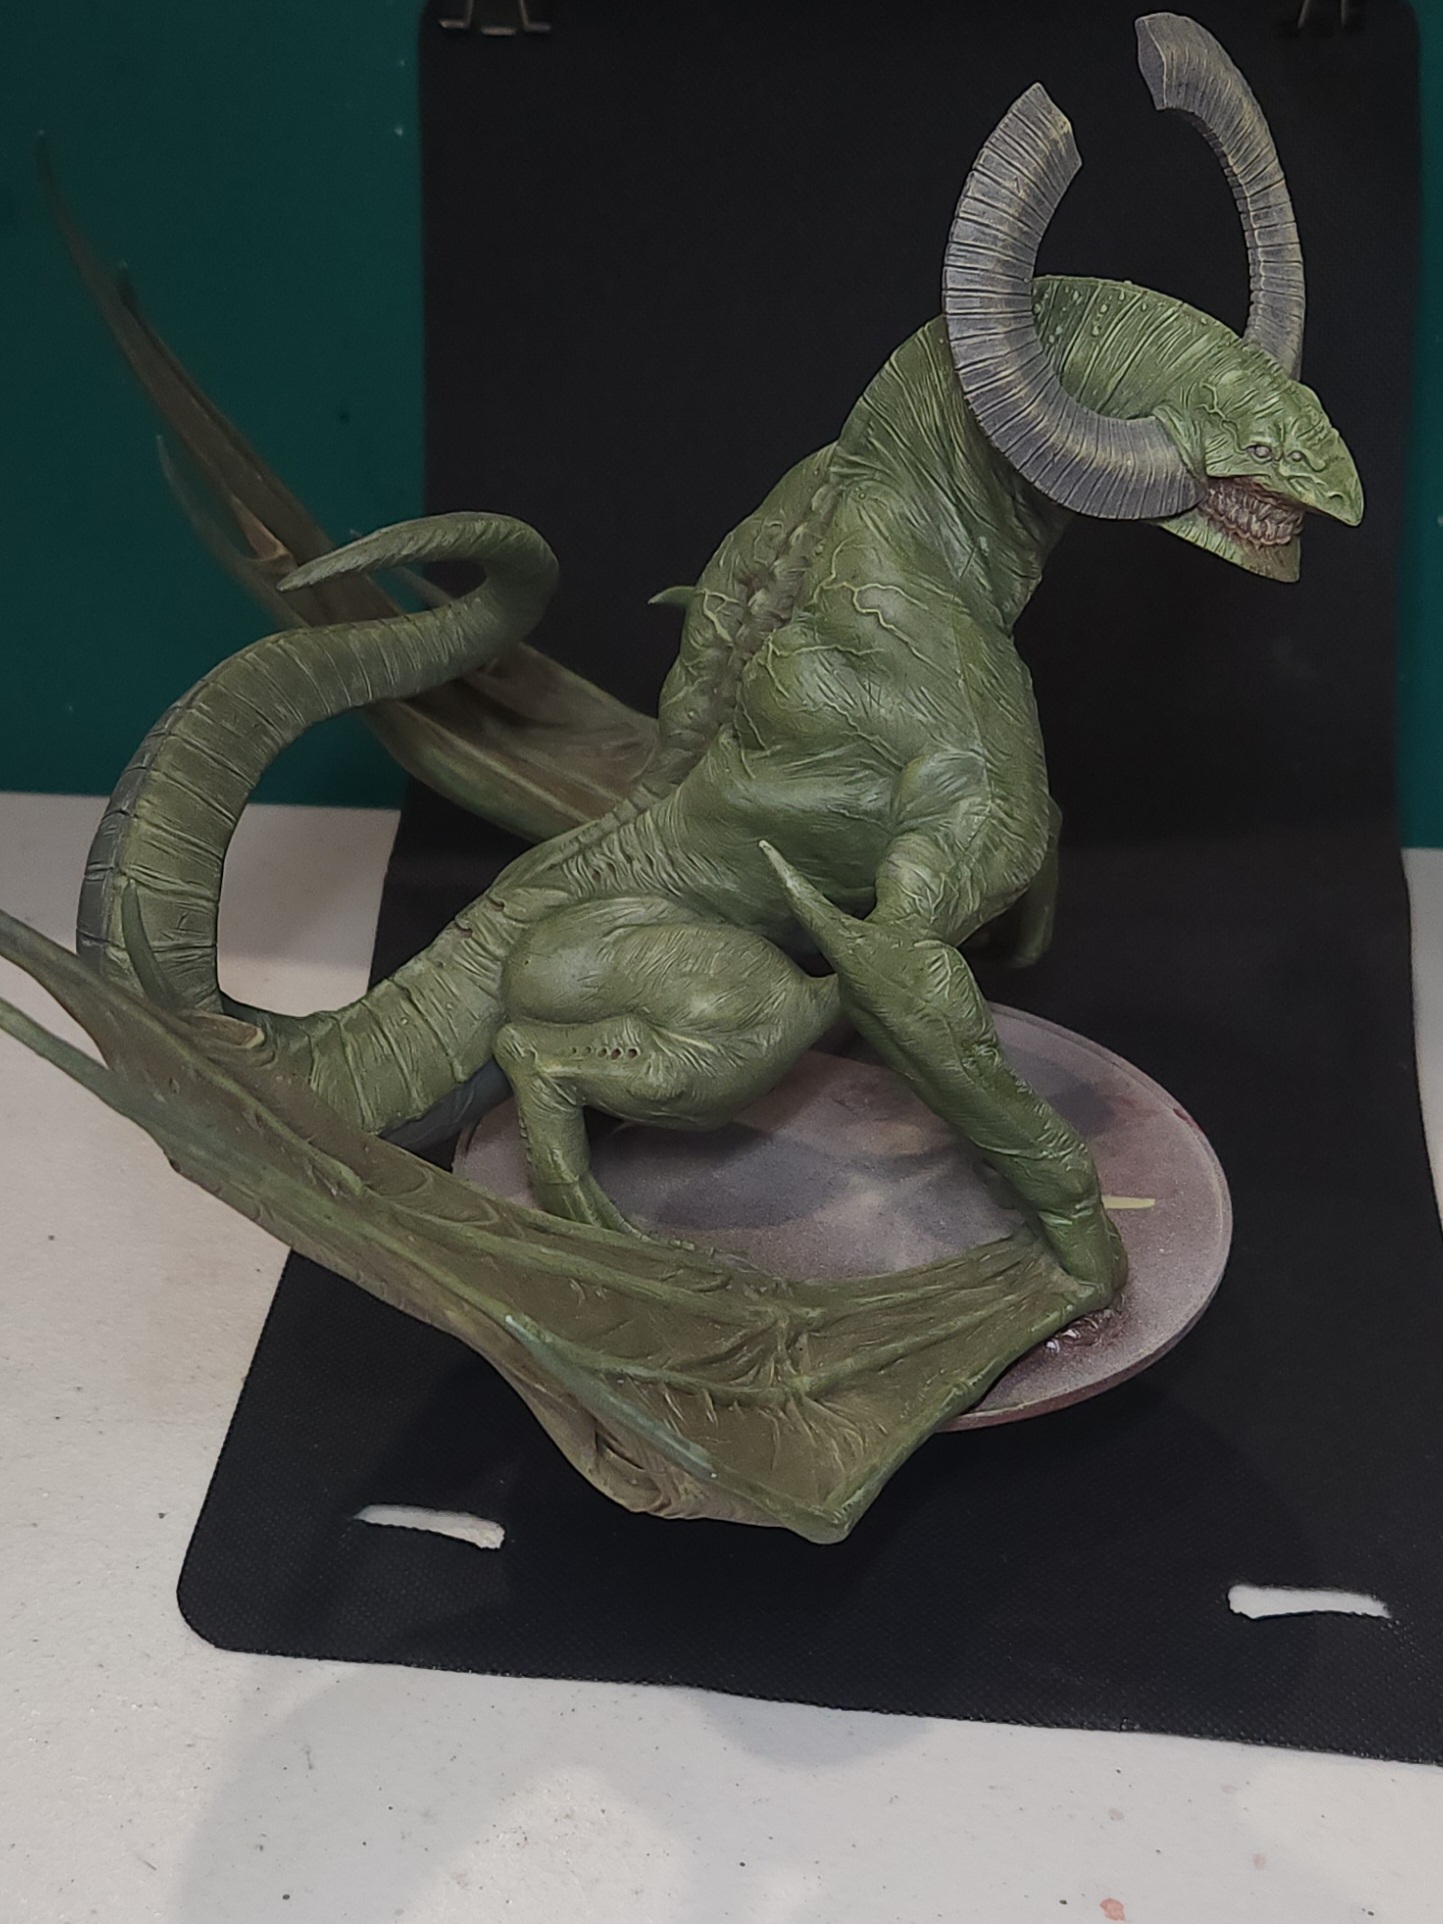
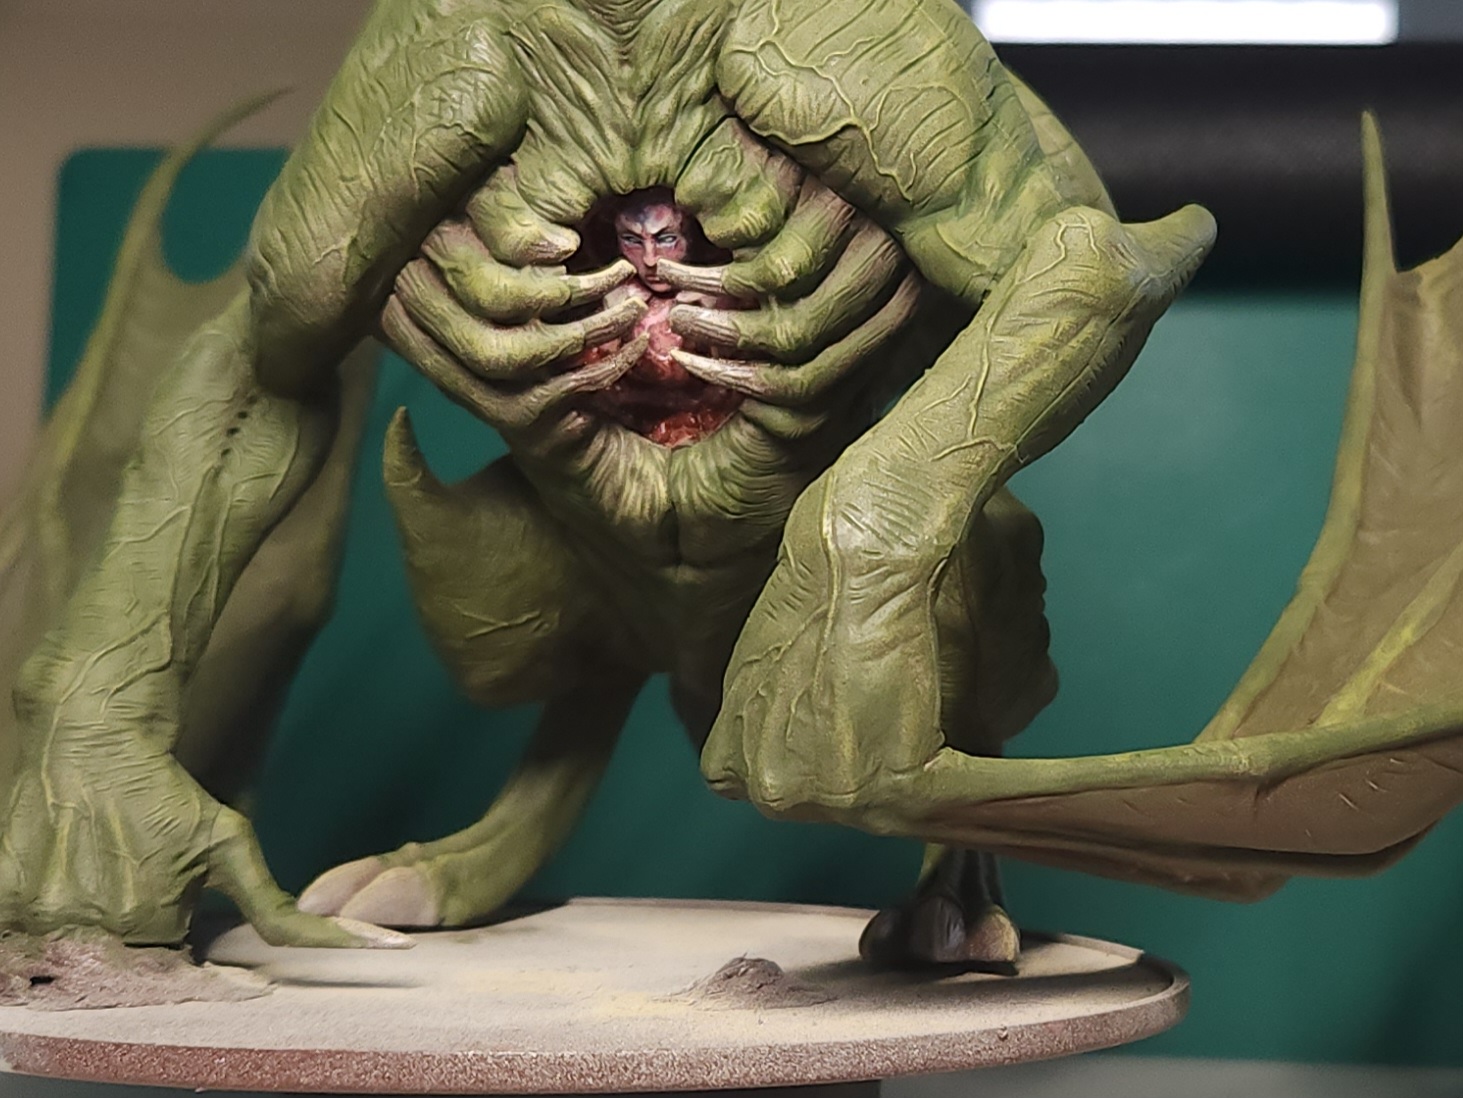
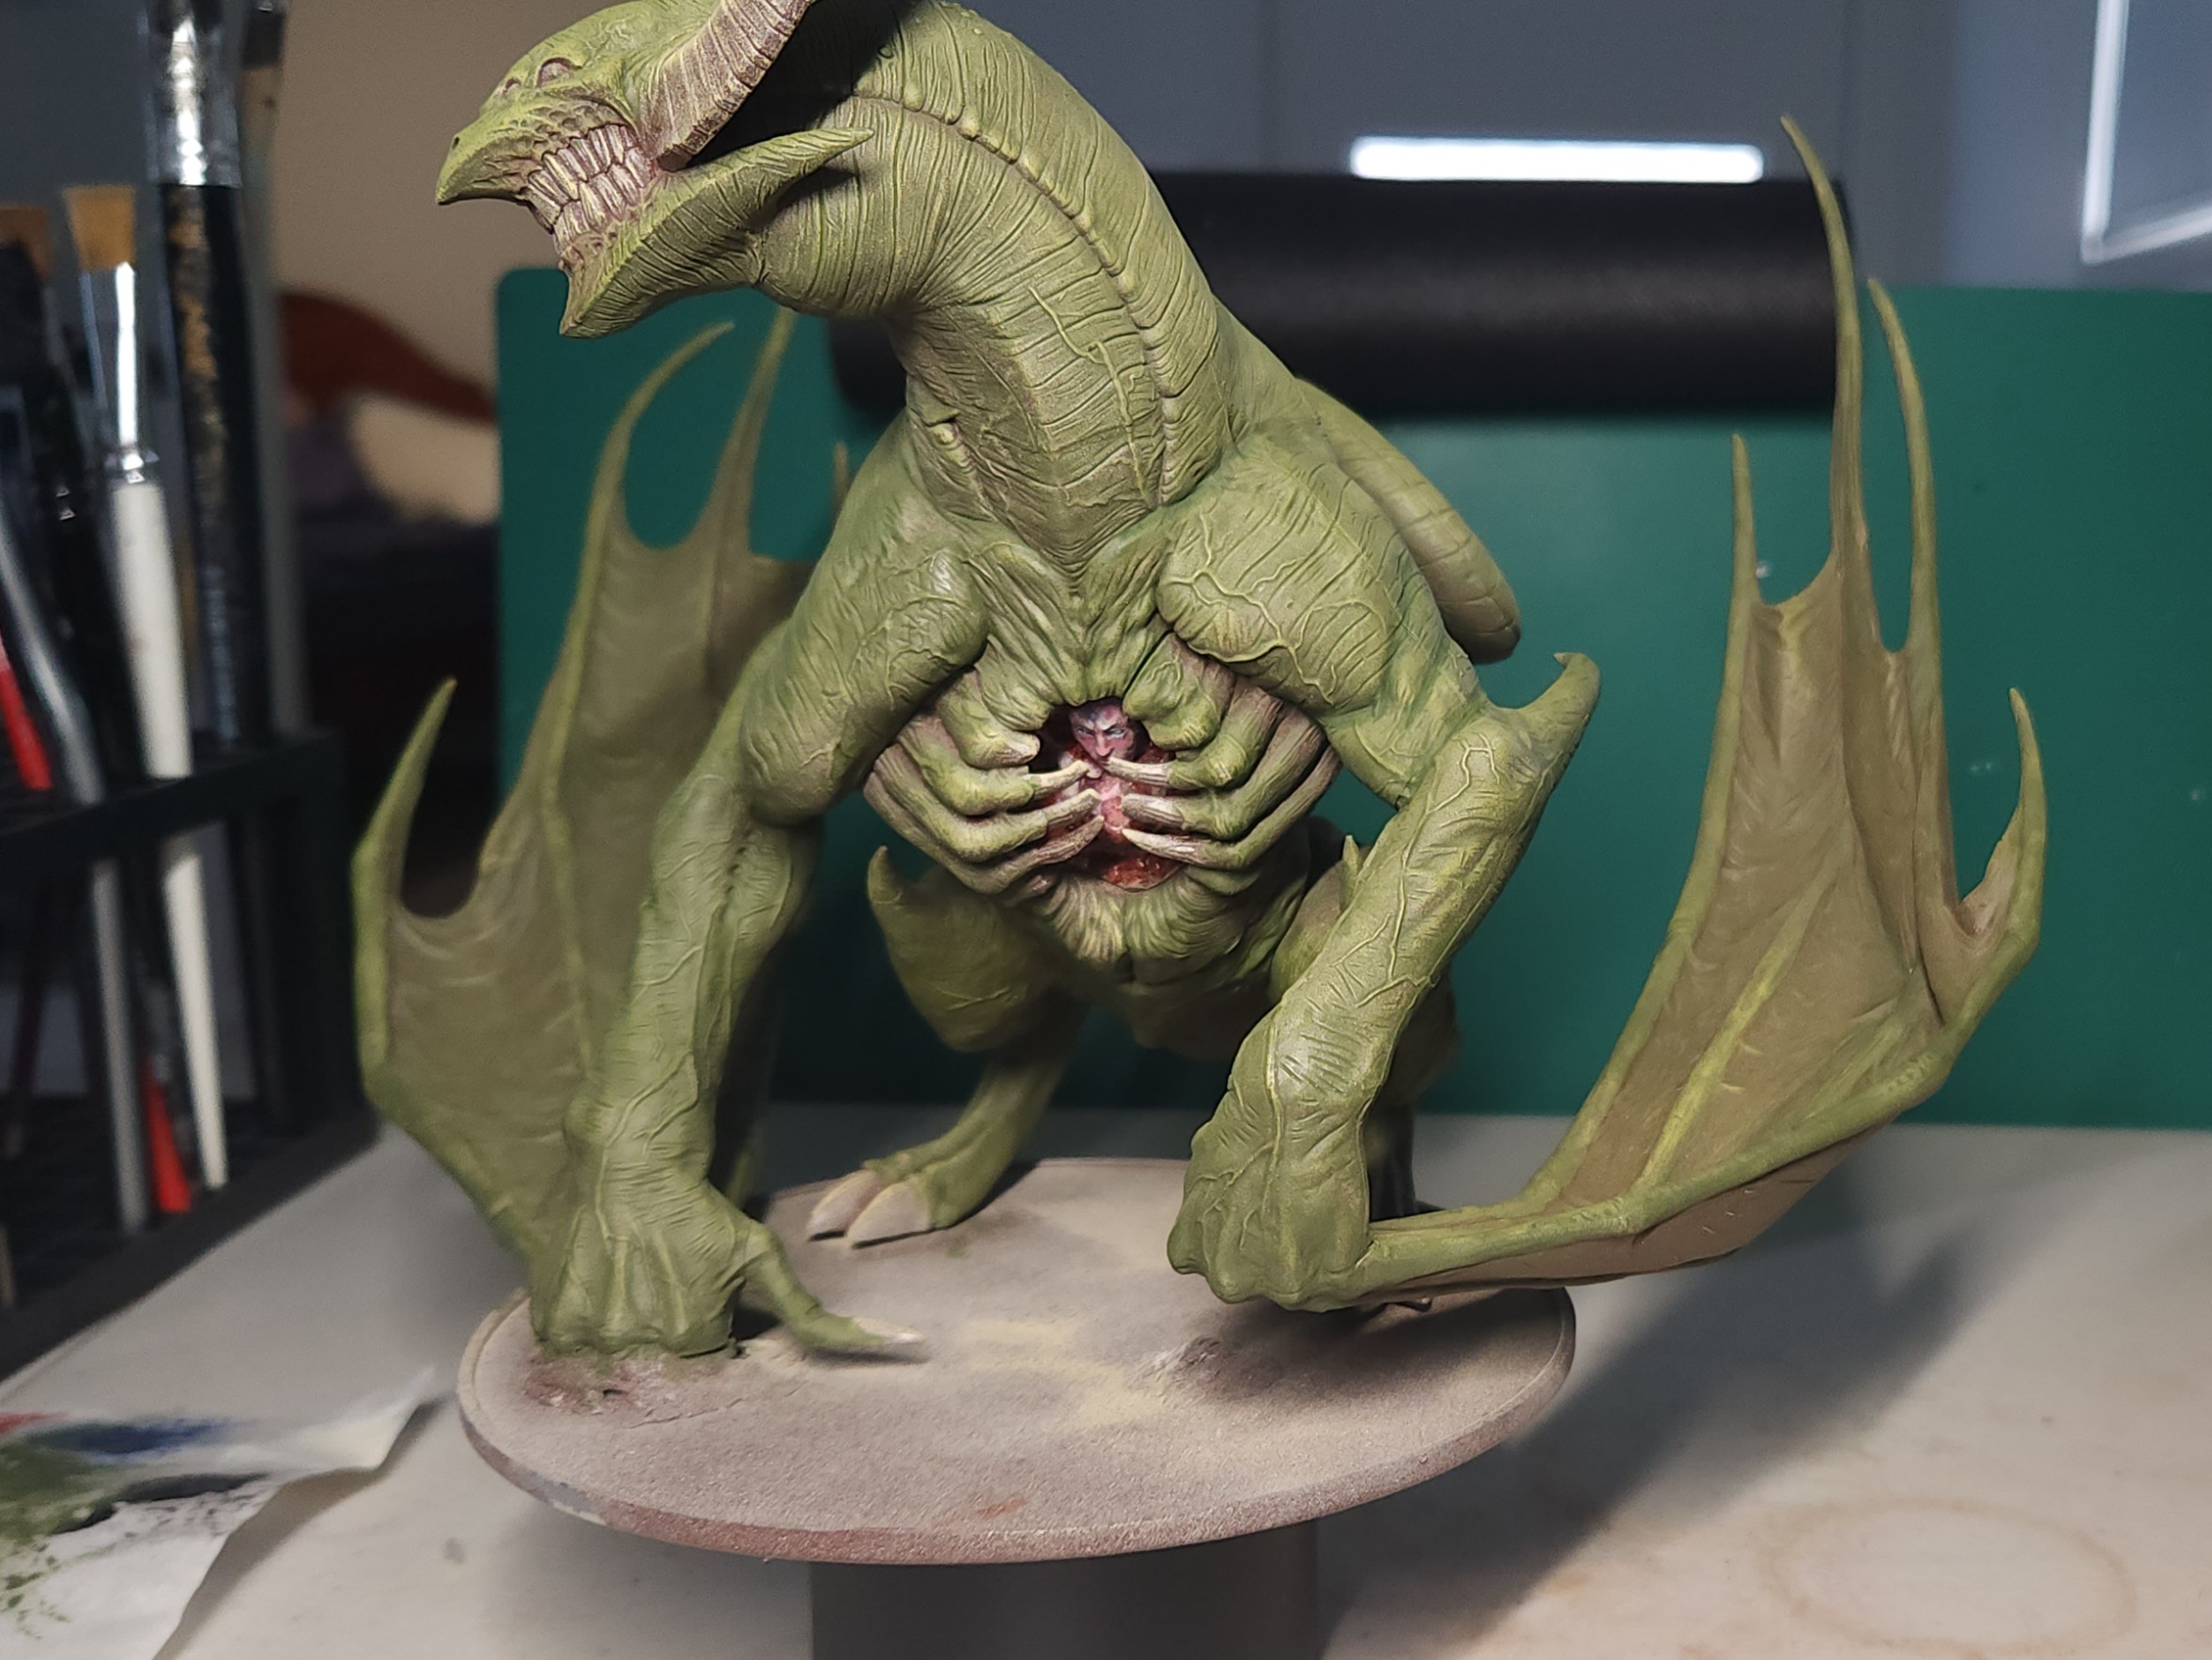
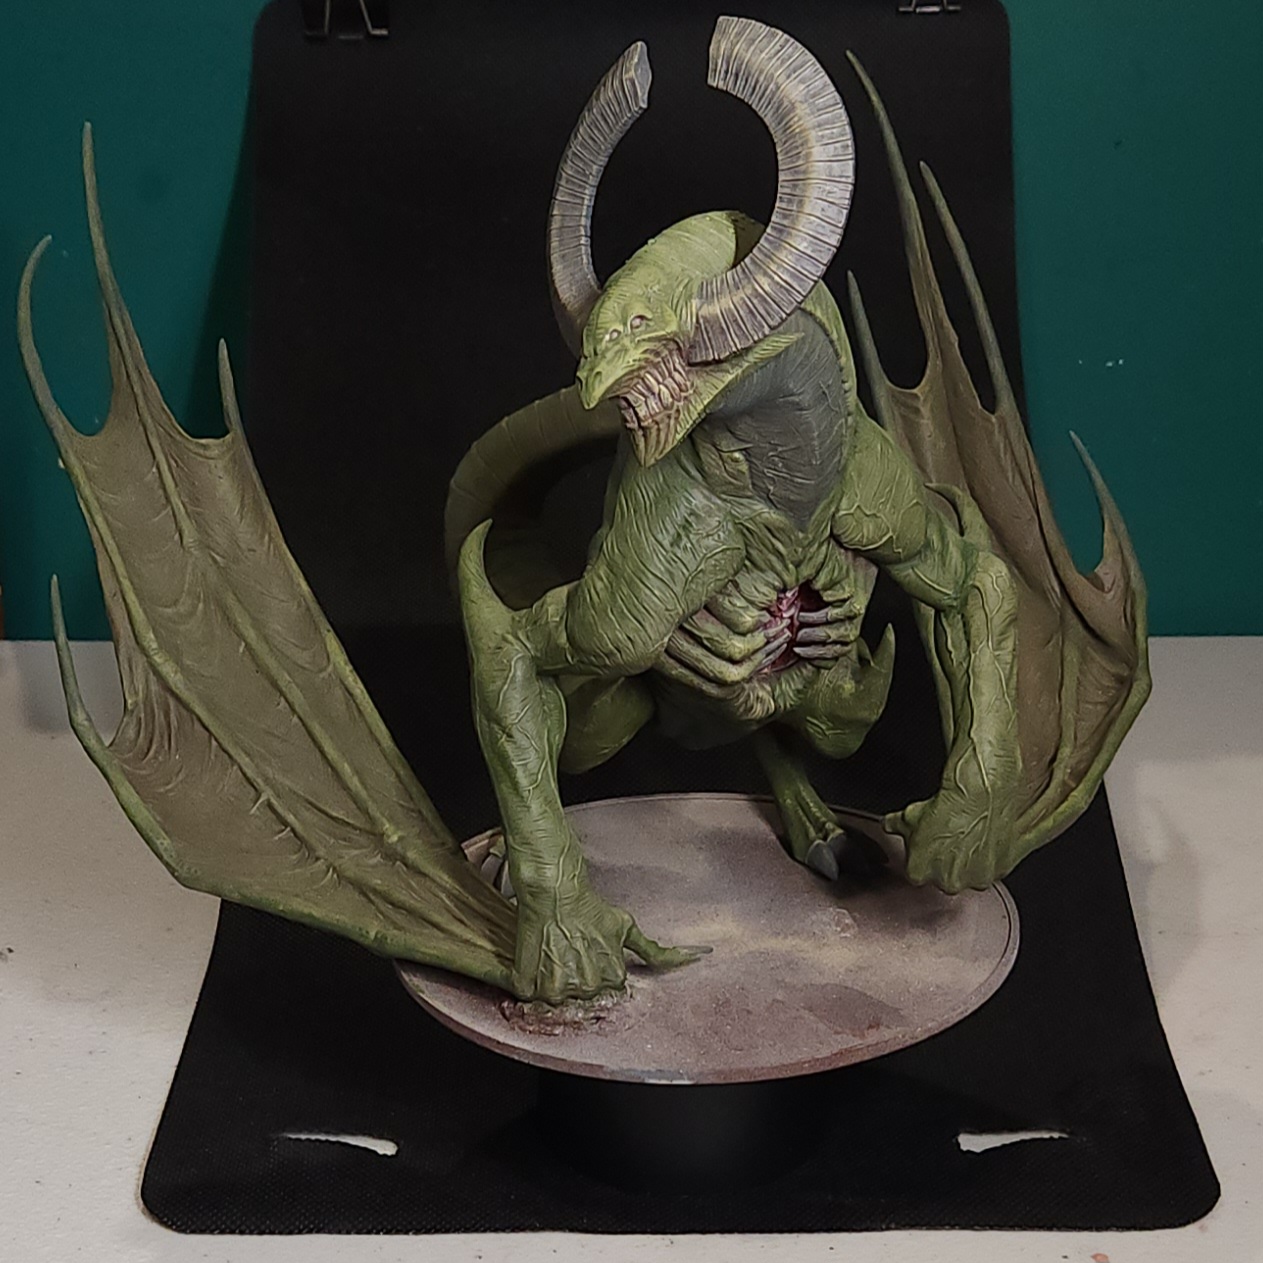
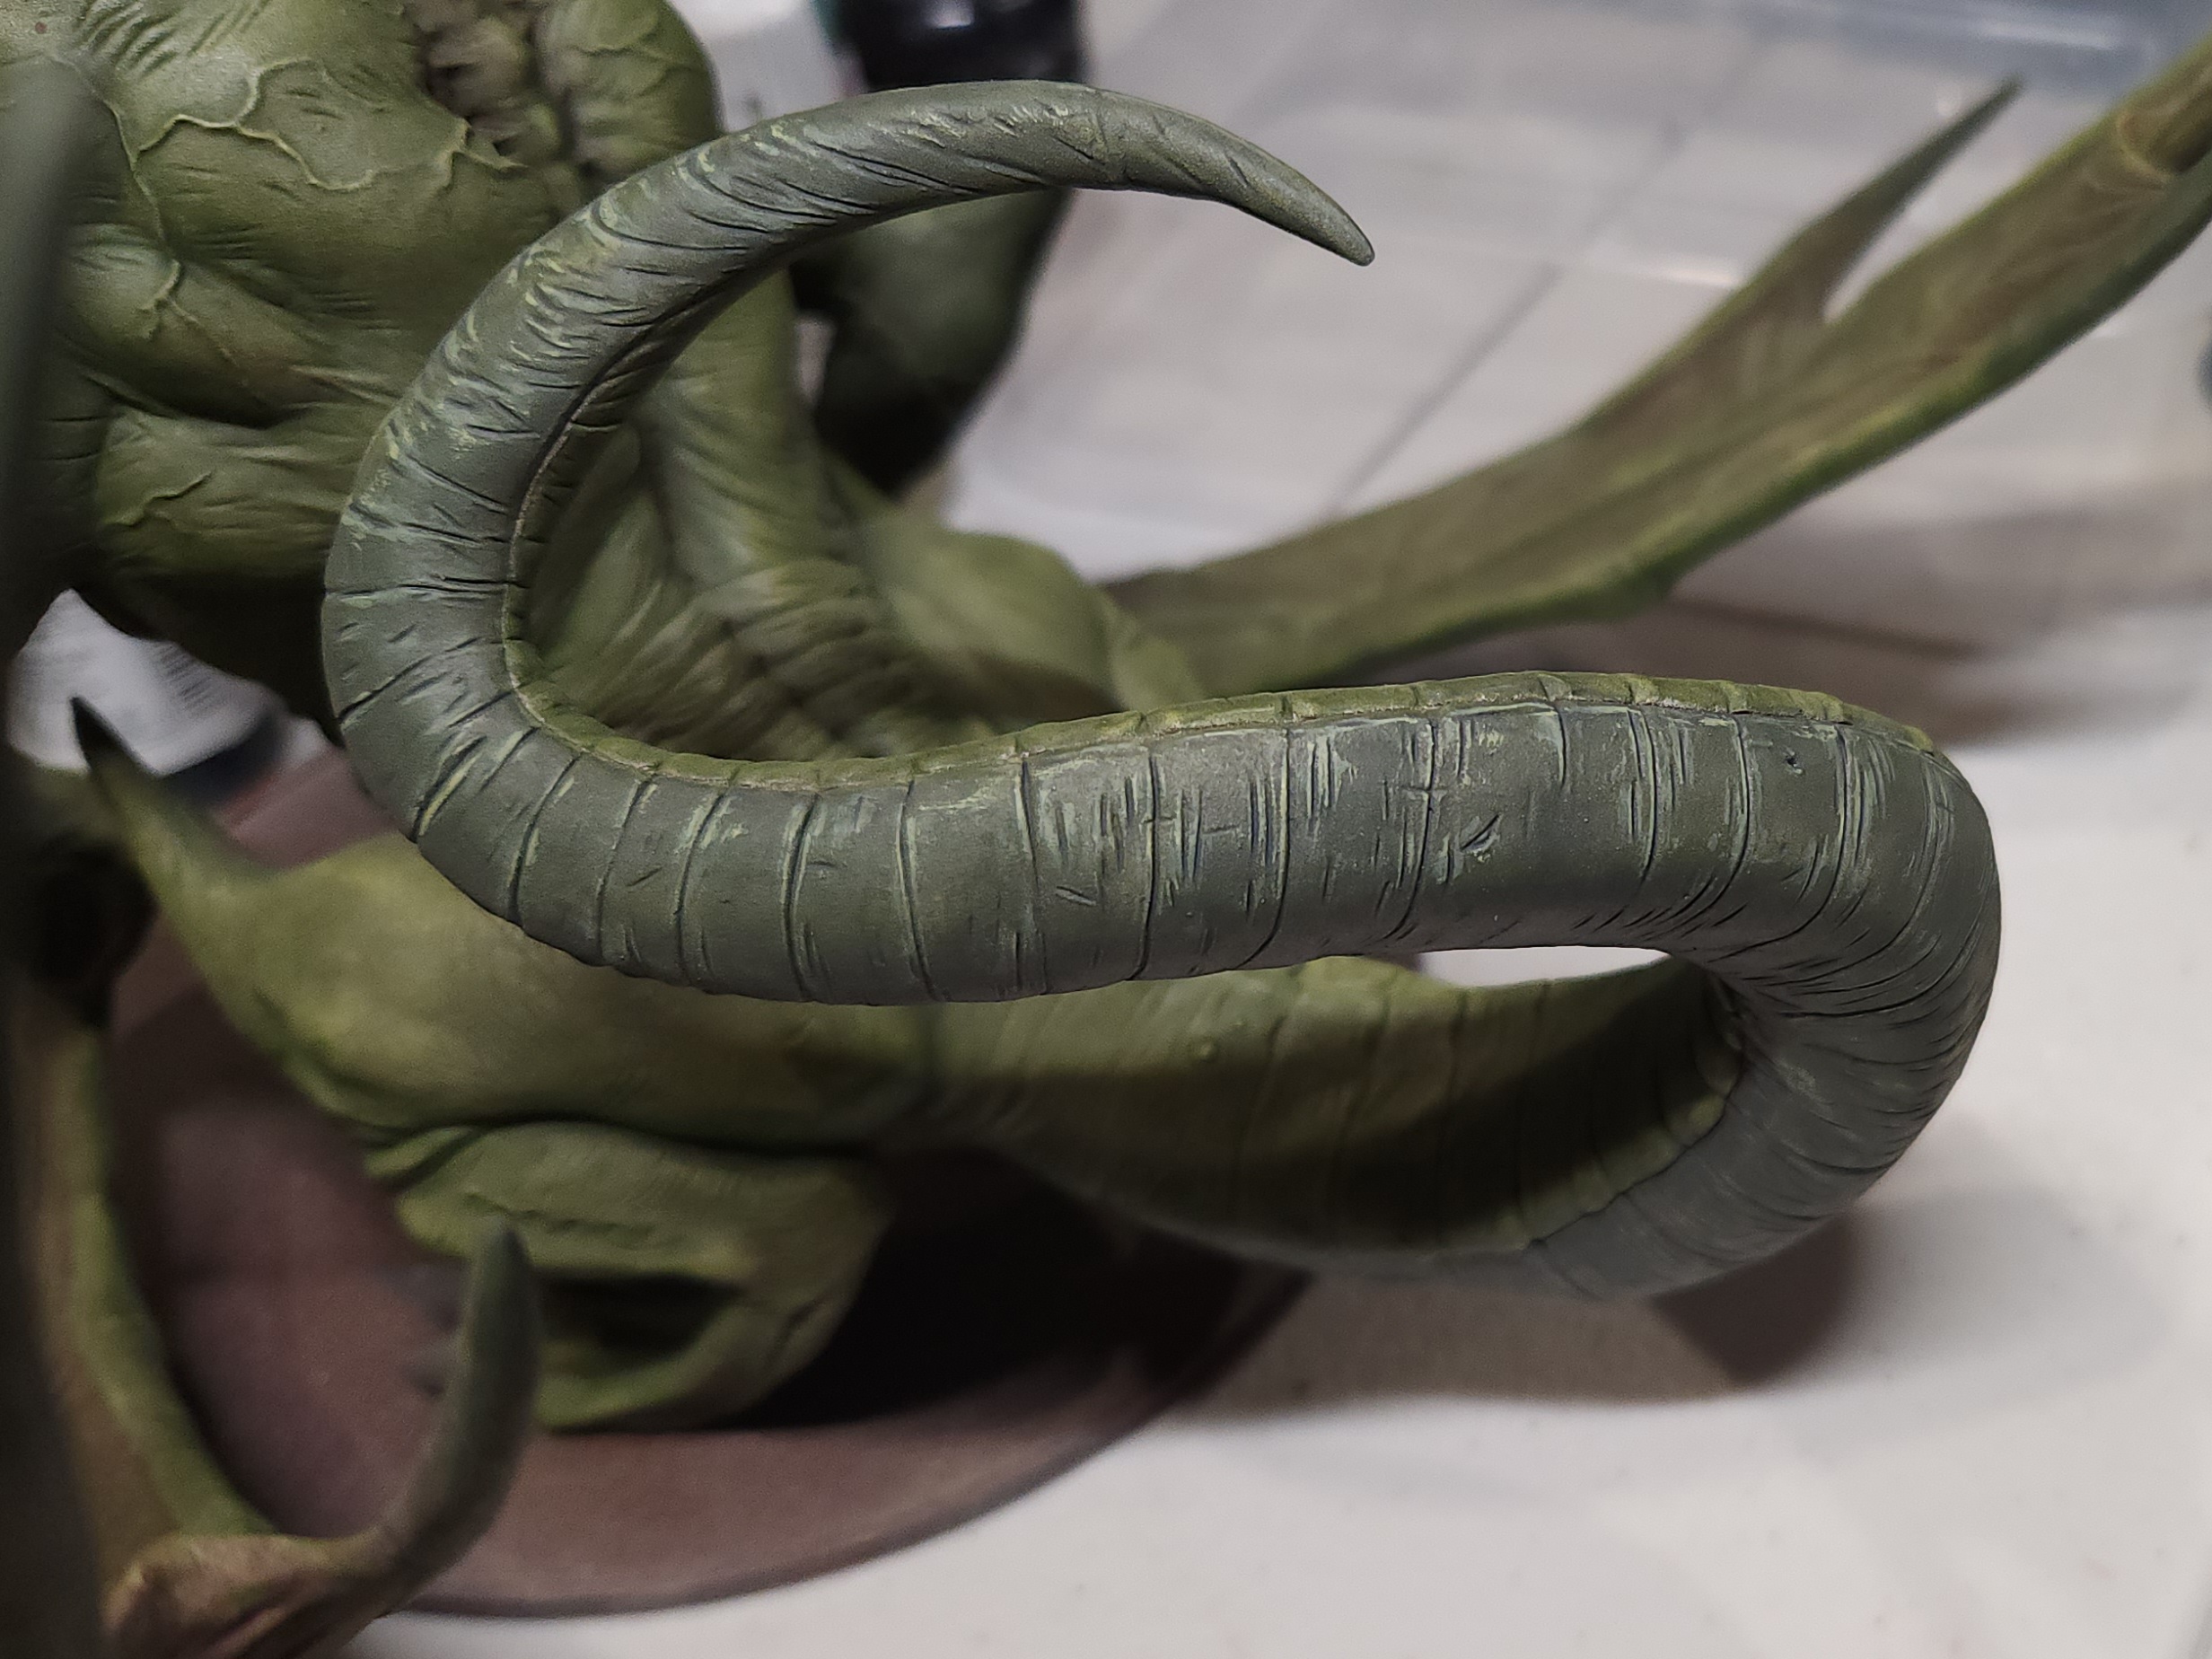
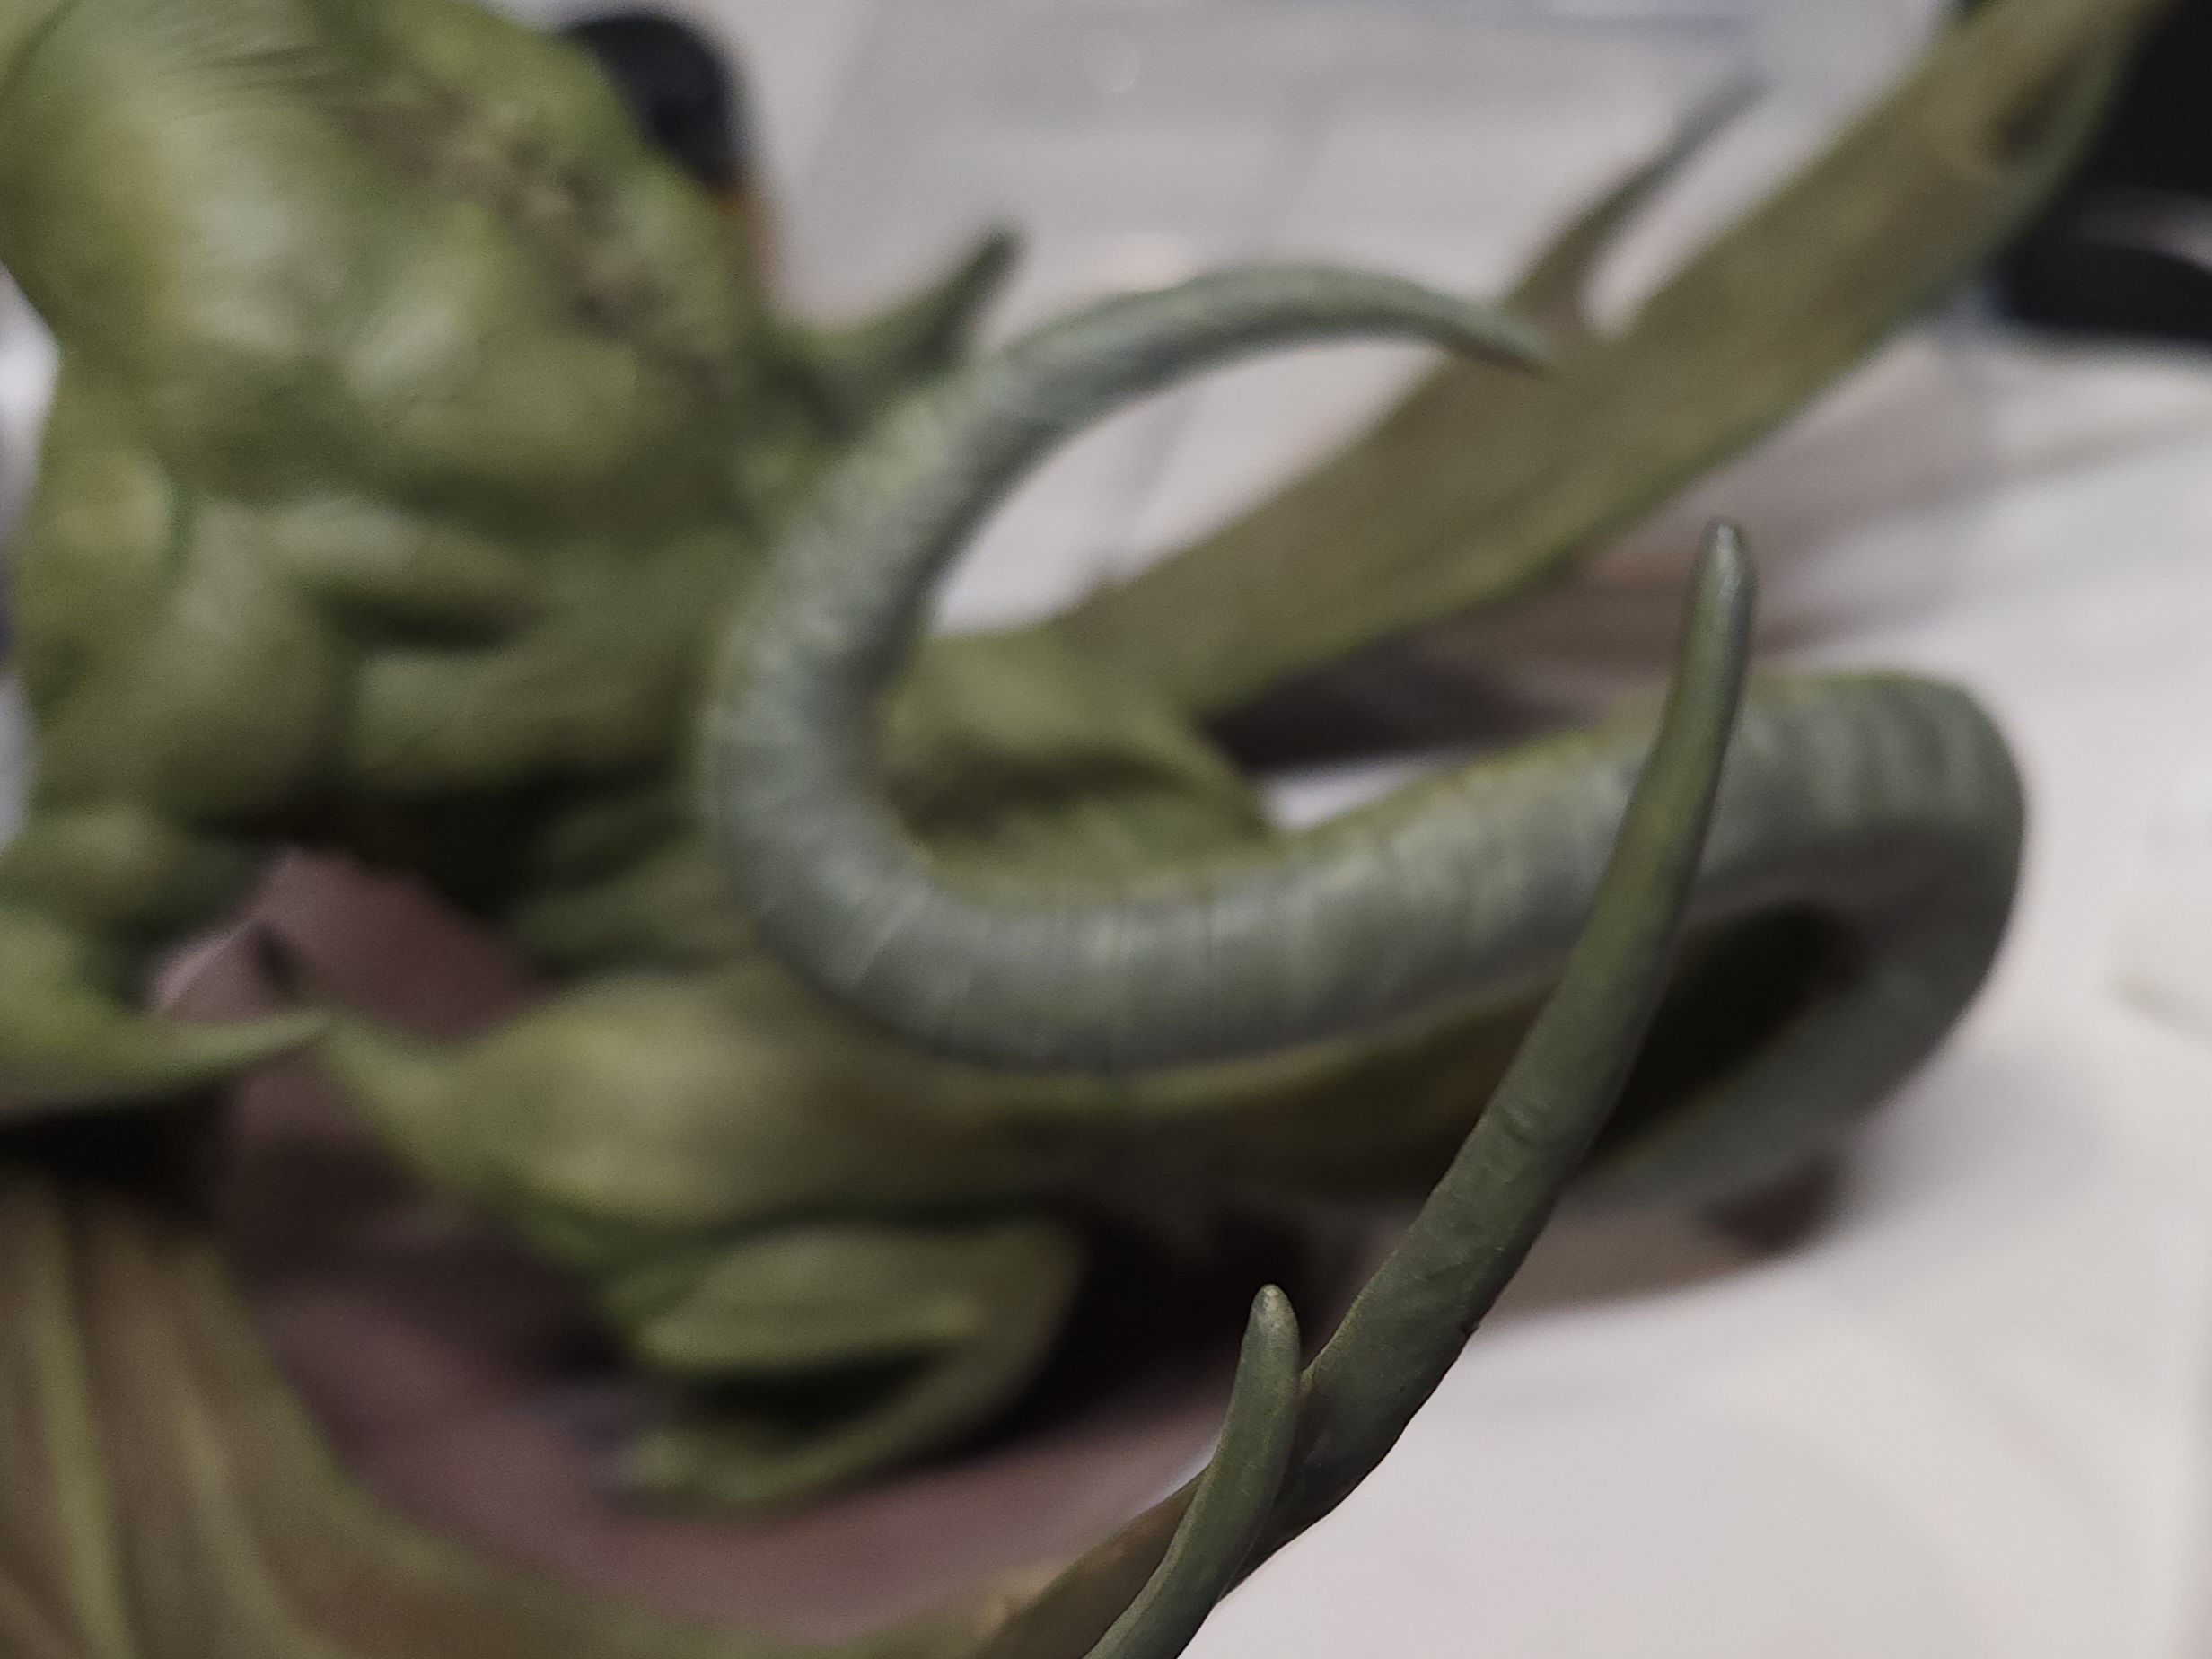
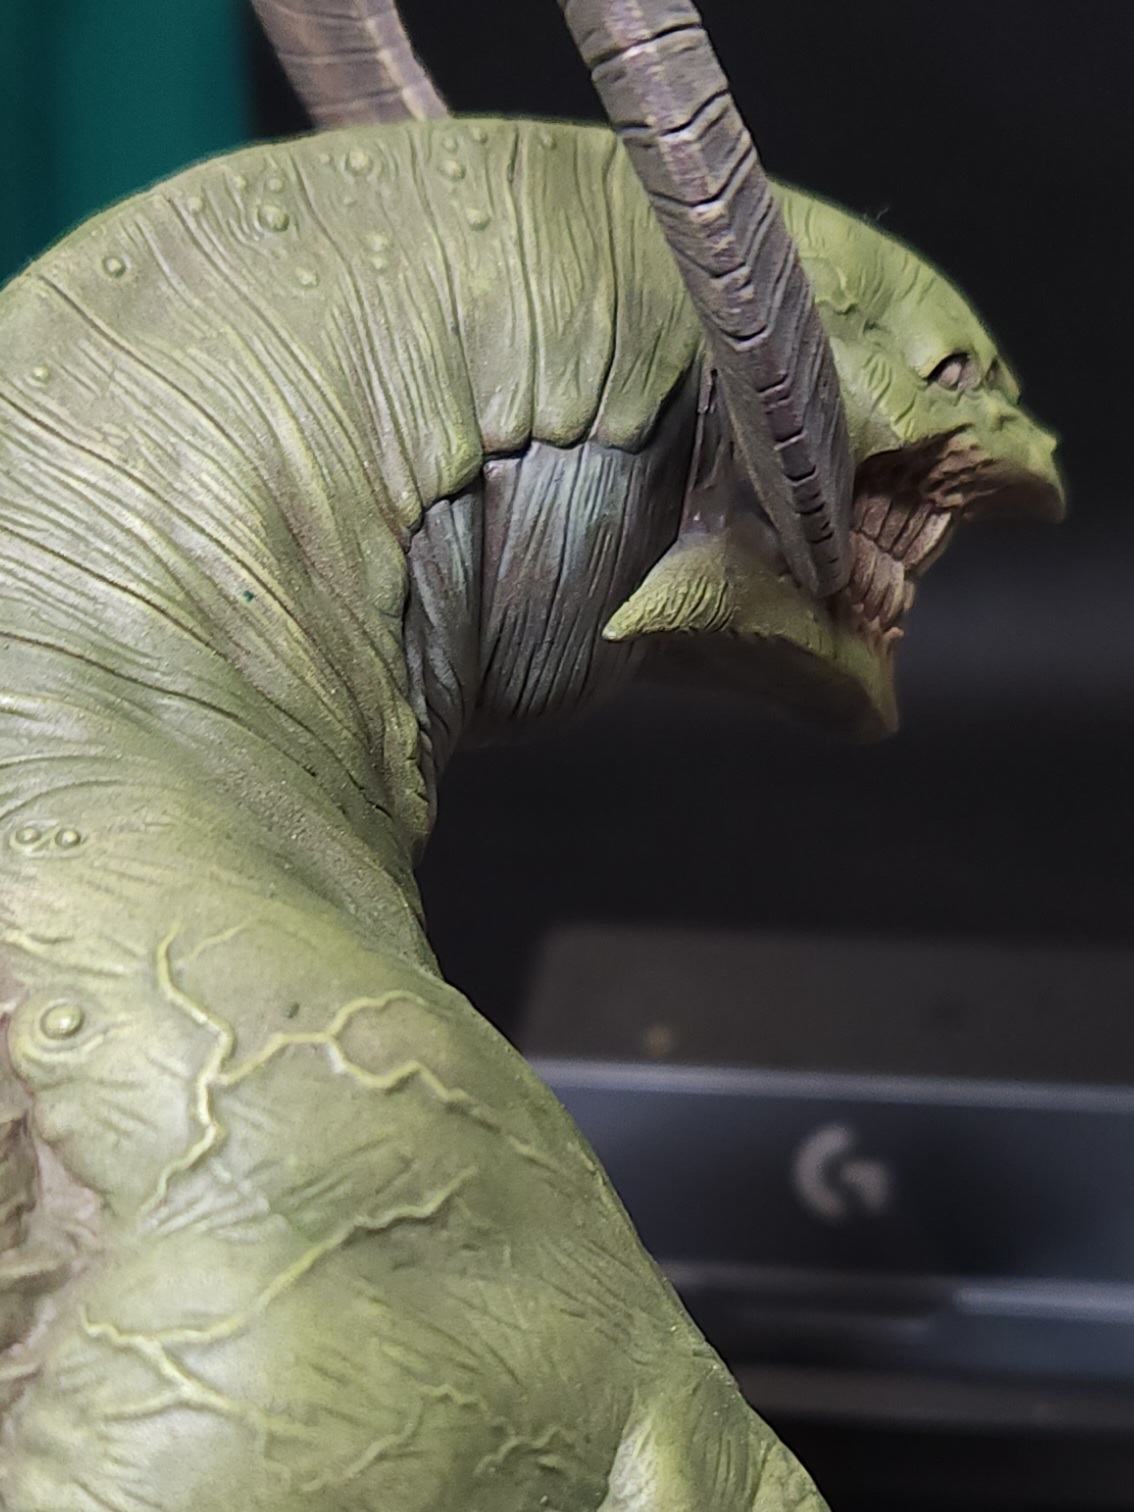
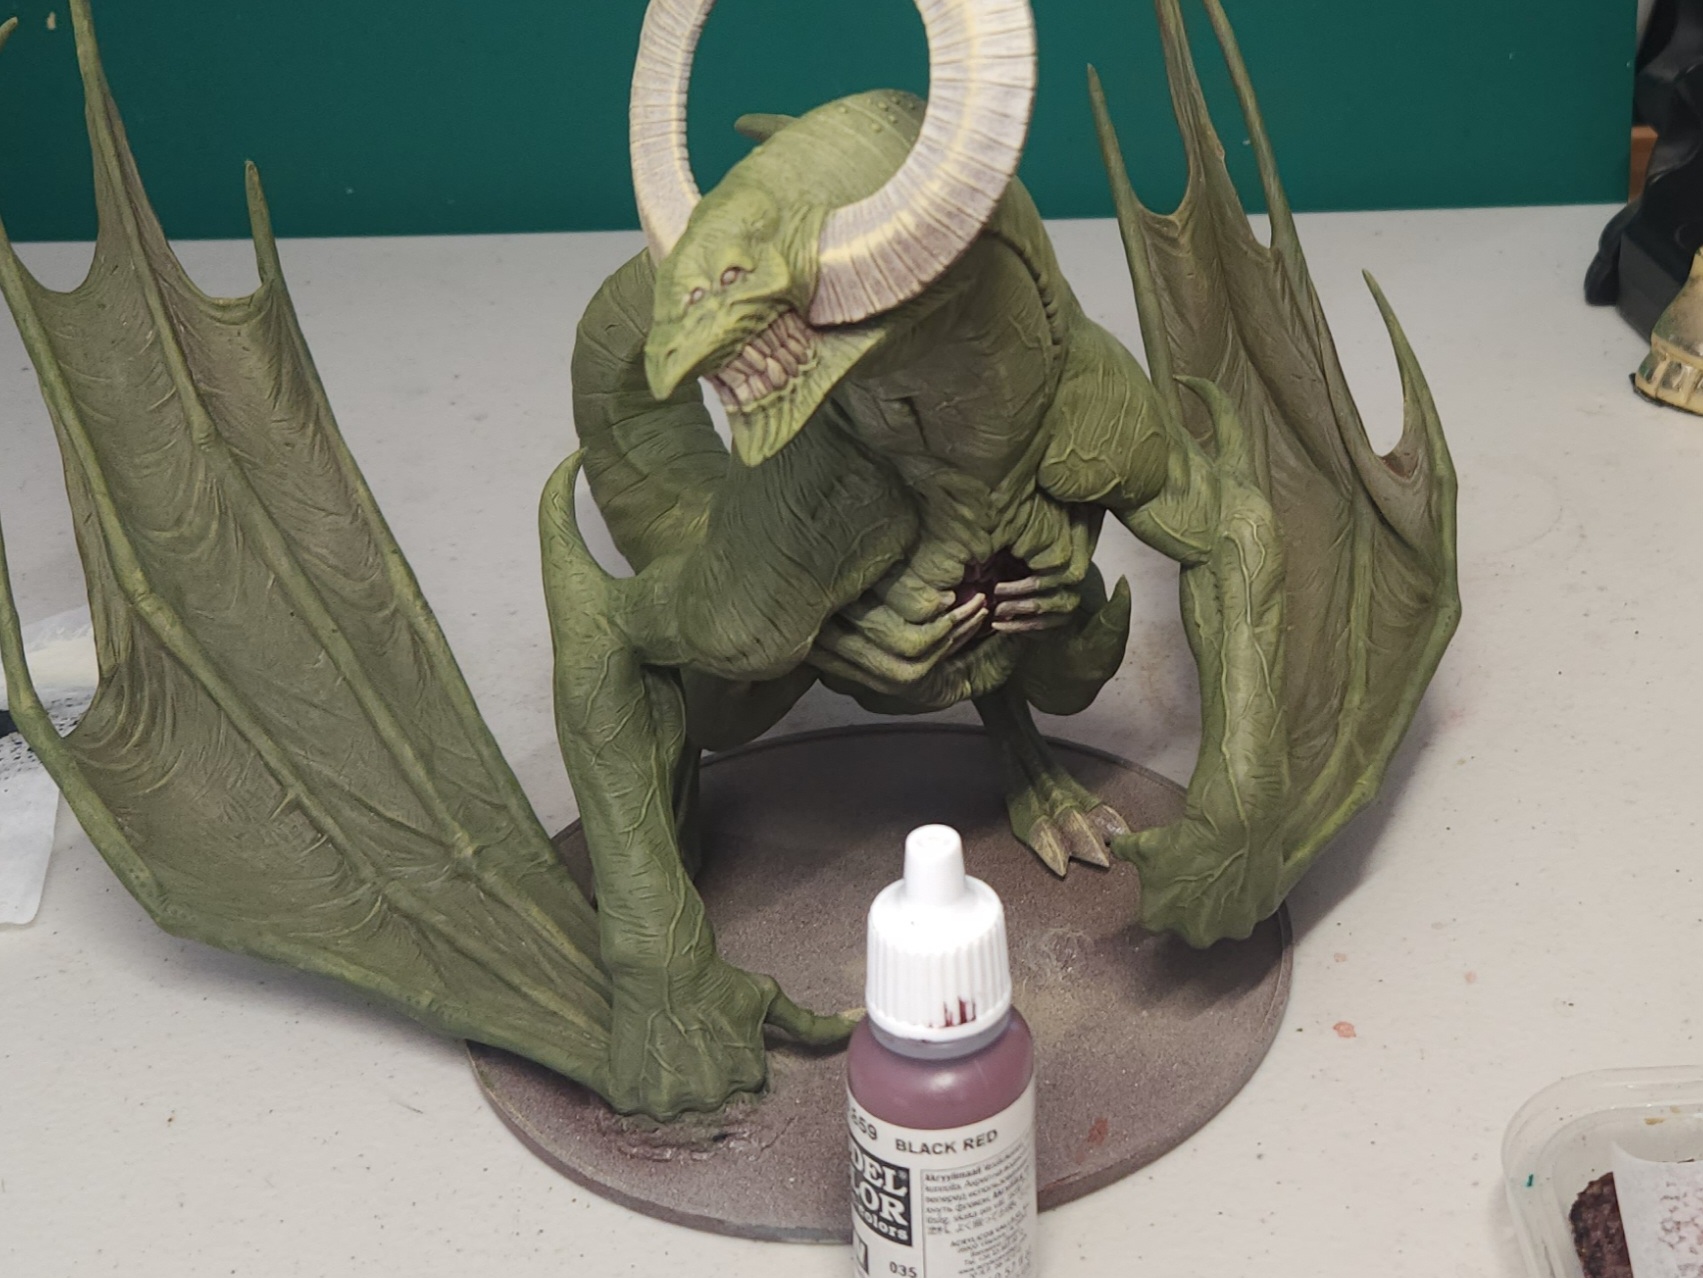
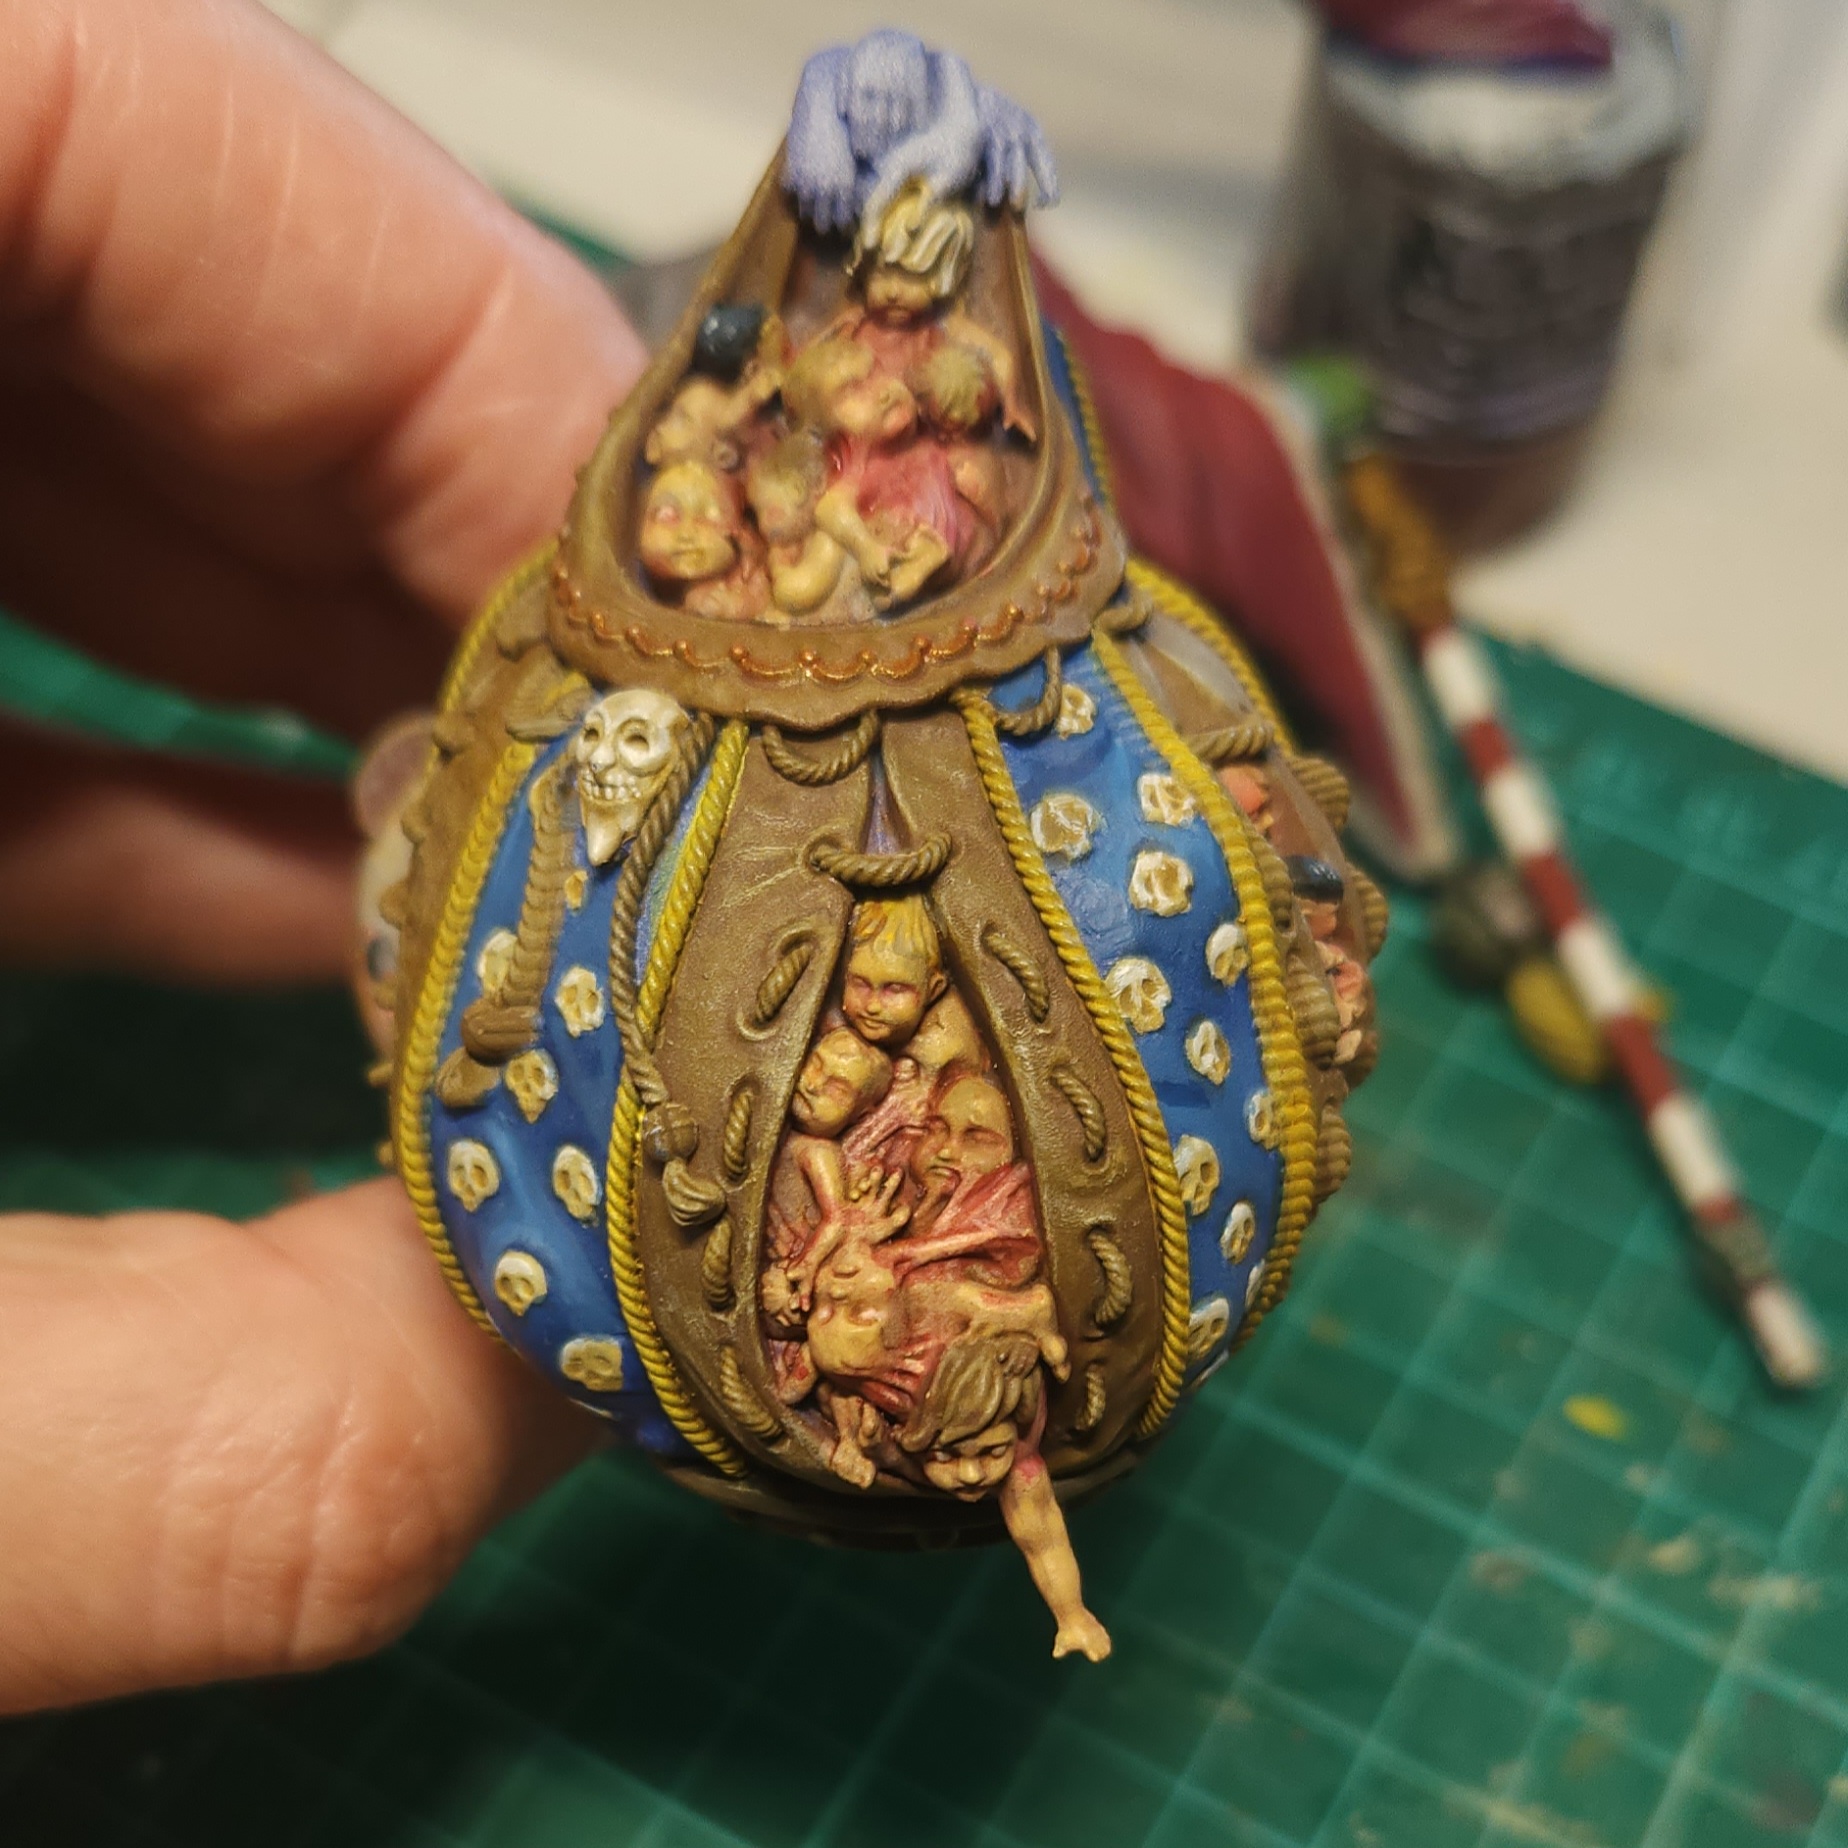
Its a little difficult to see, but the placement of the “dead” lichen and the black tufts has been intentionally done. The KD Dragon is radioactive! The plant life directly below it is dead, lifeless, burnt. In front, it still lives… for the moment.
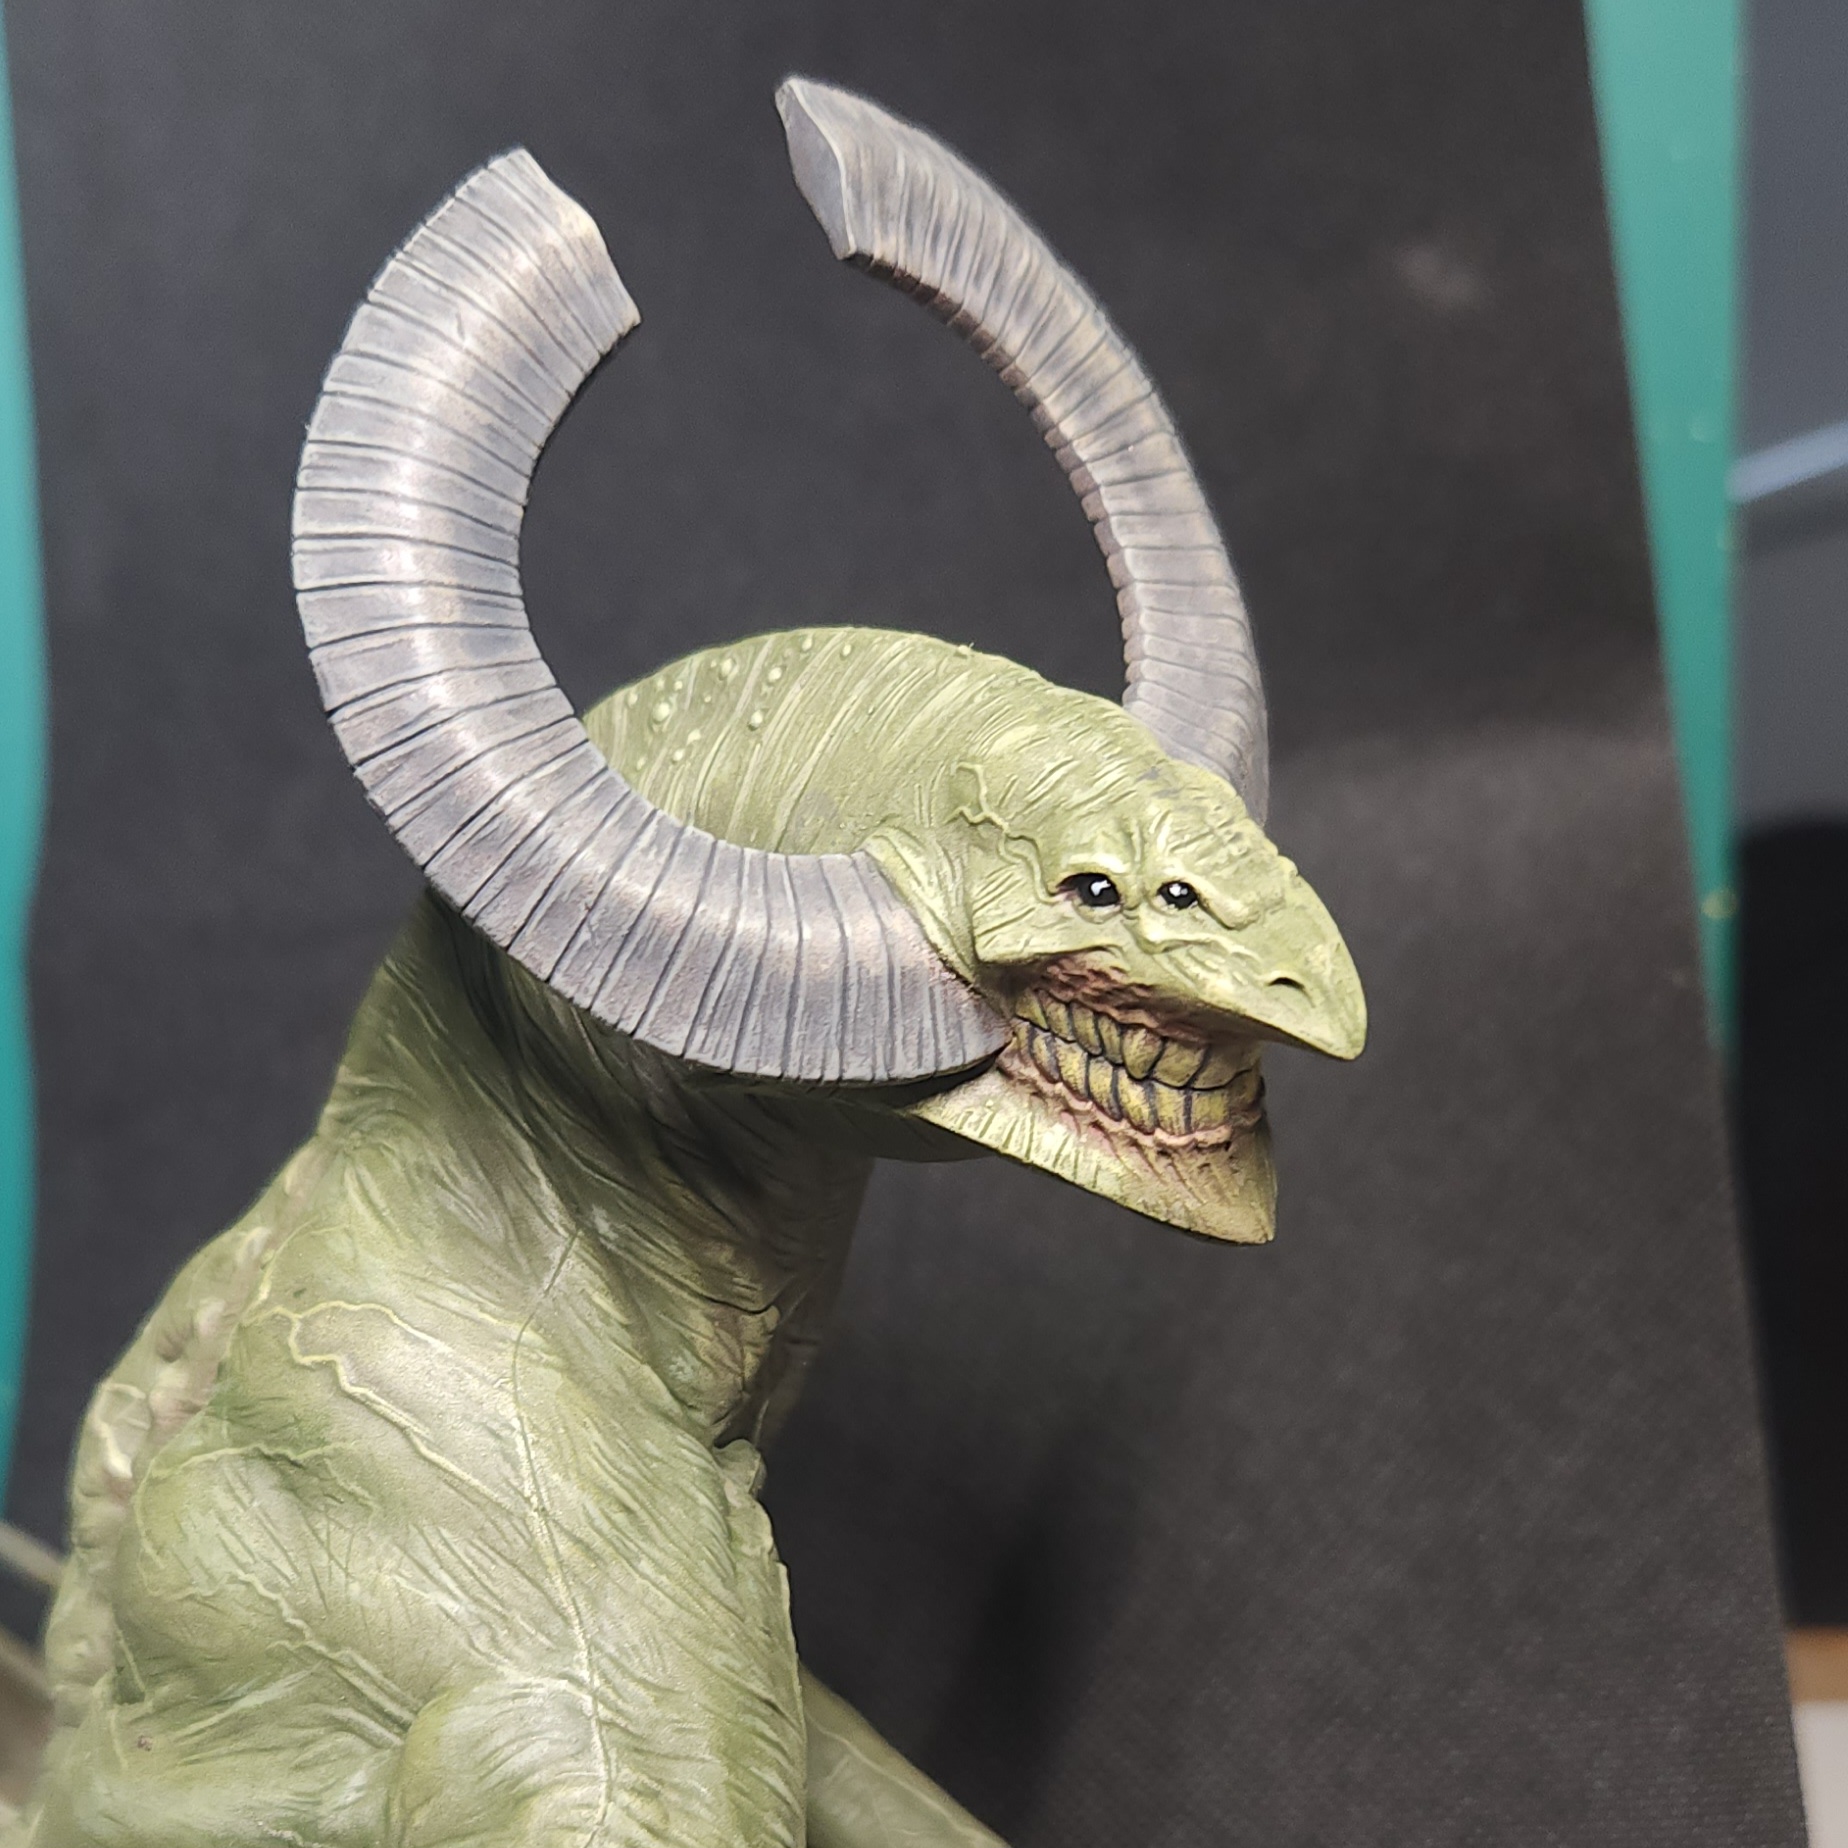
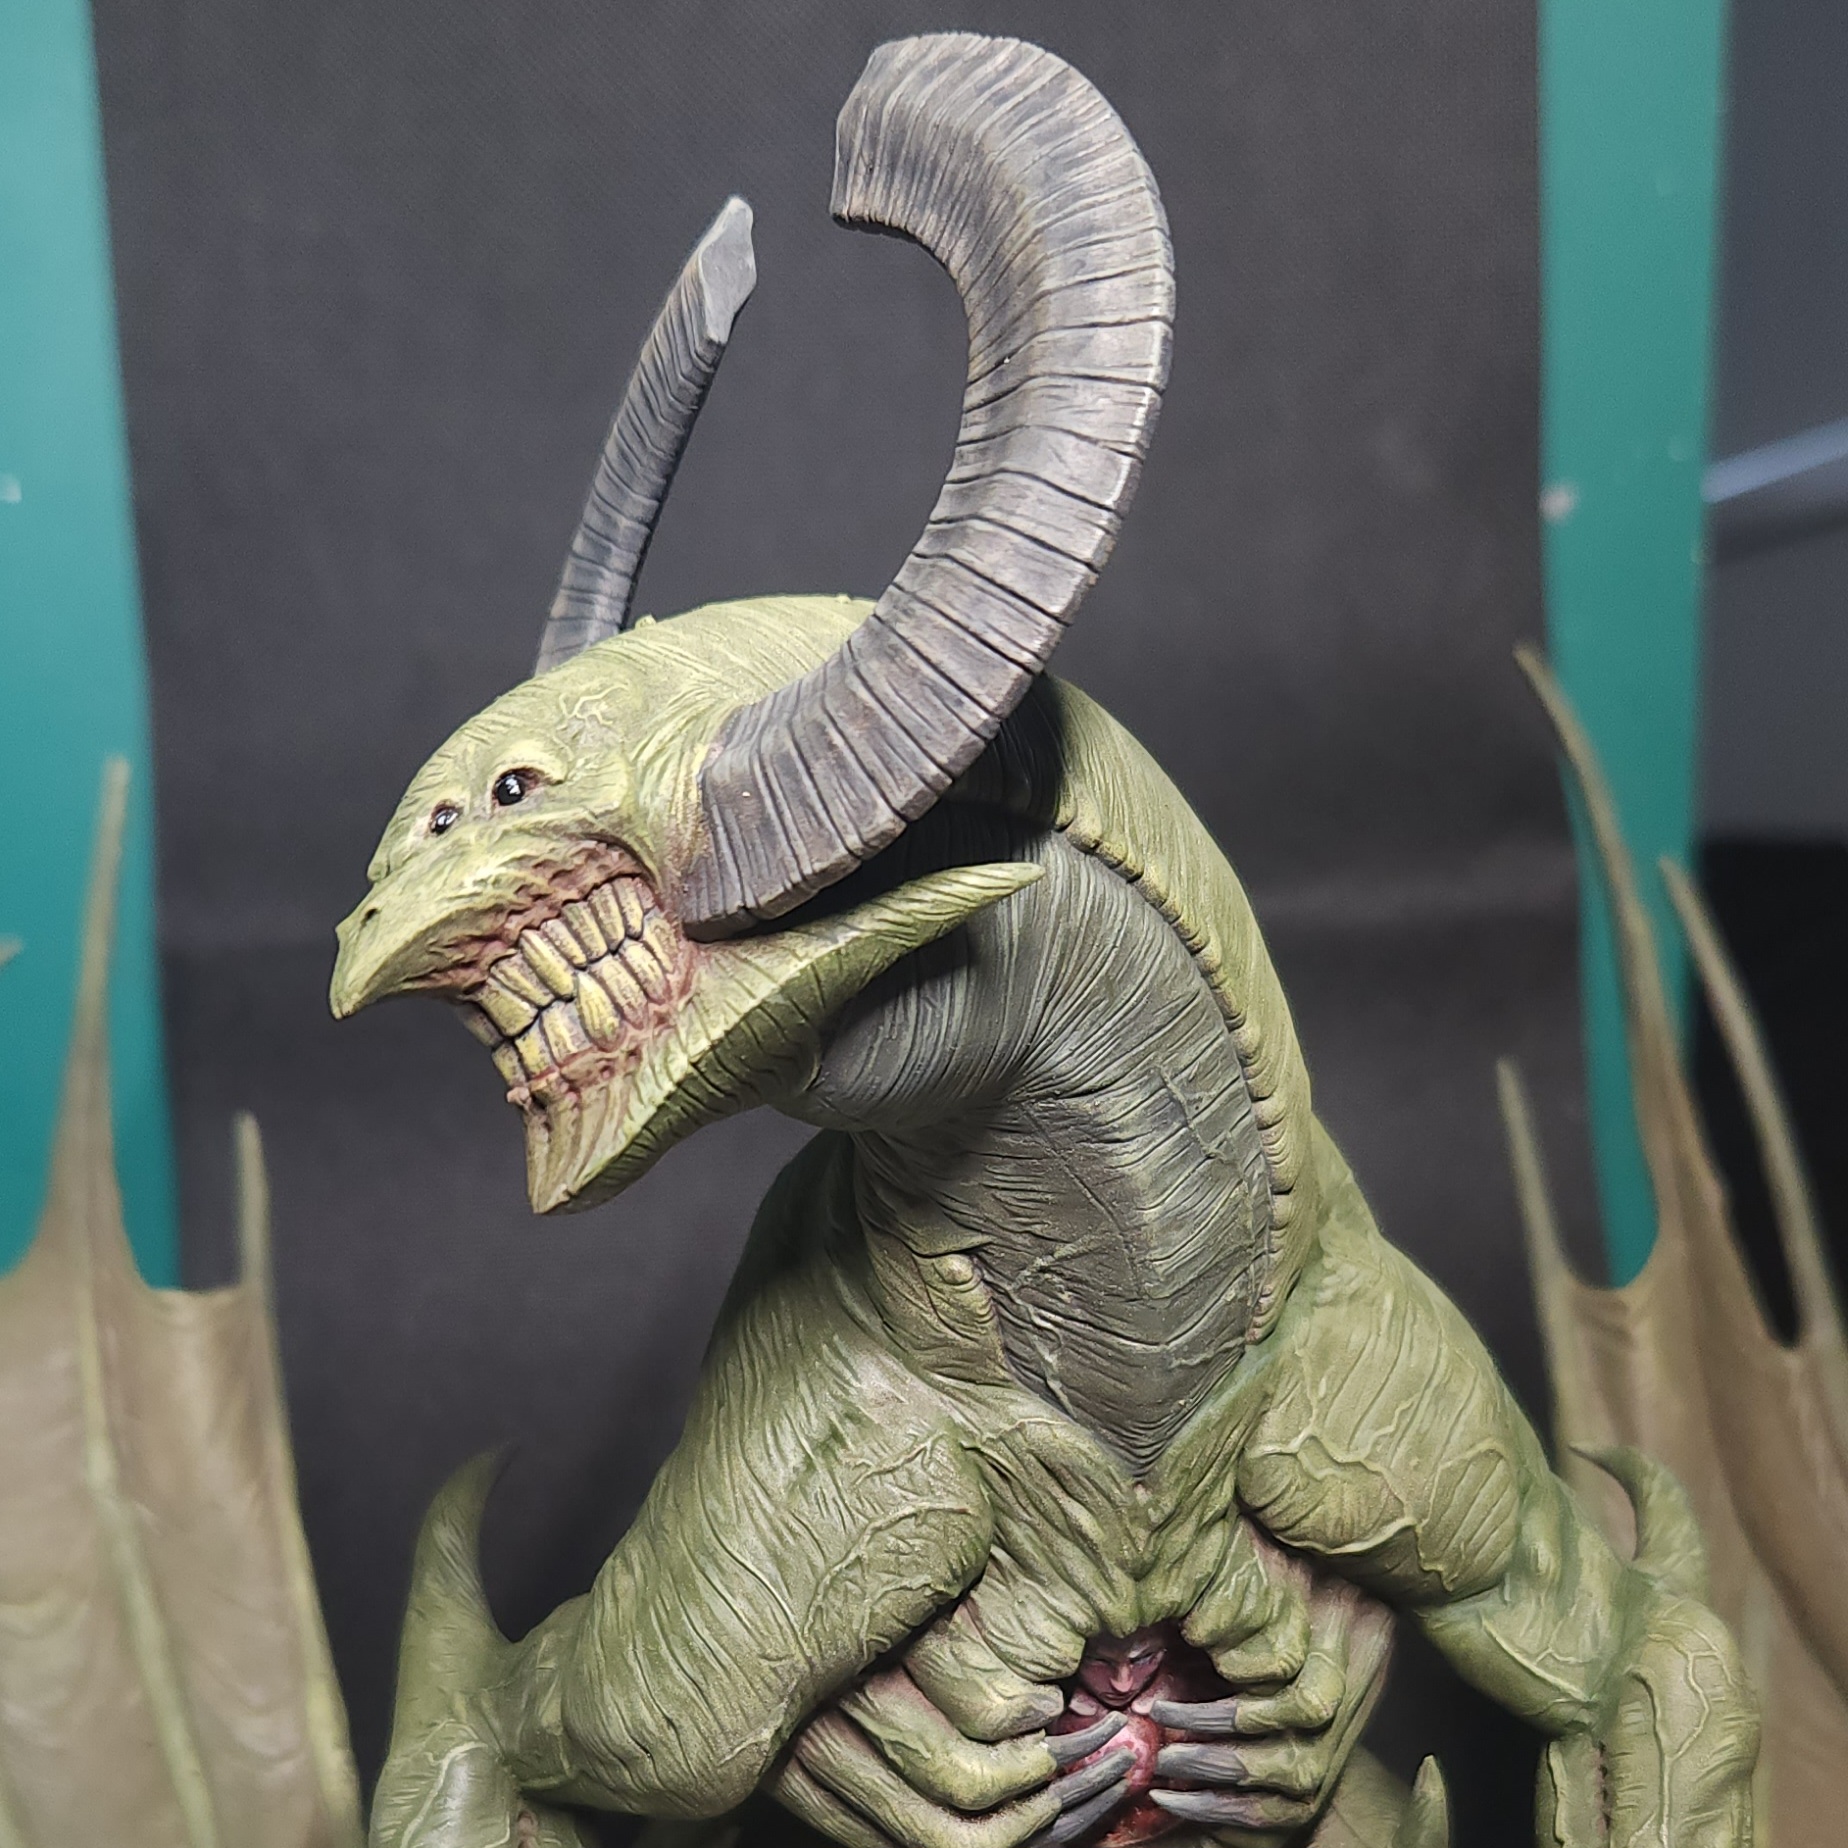
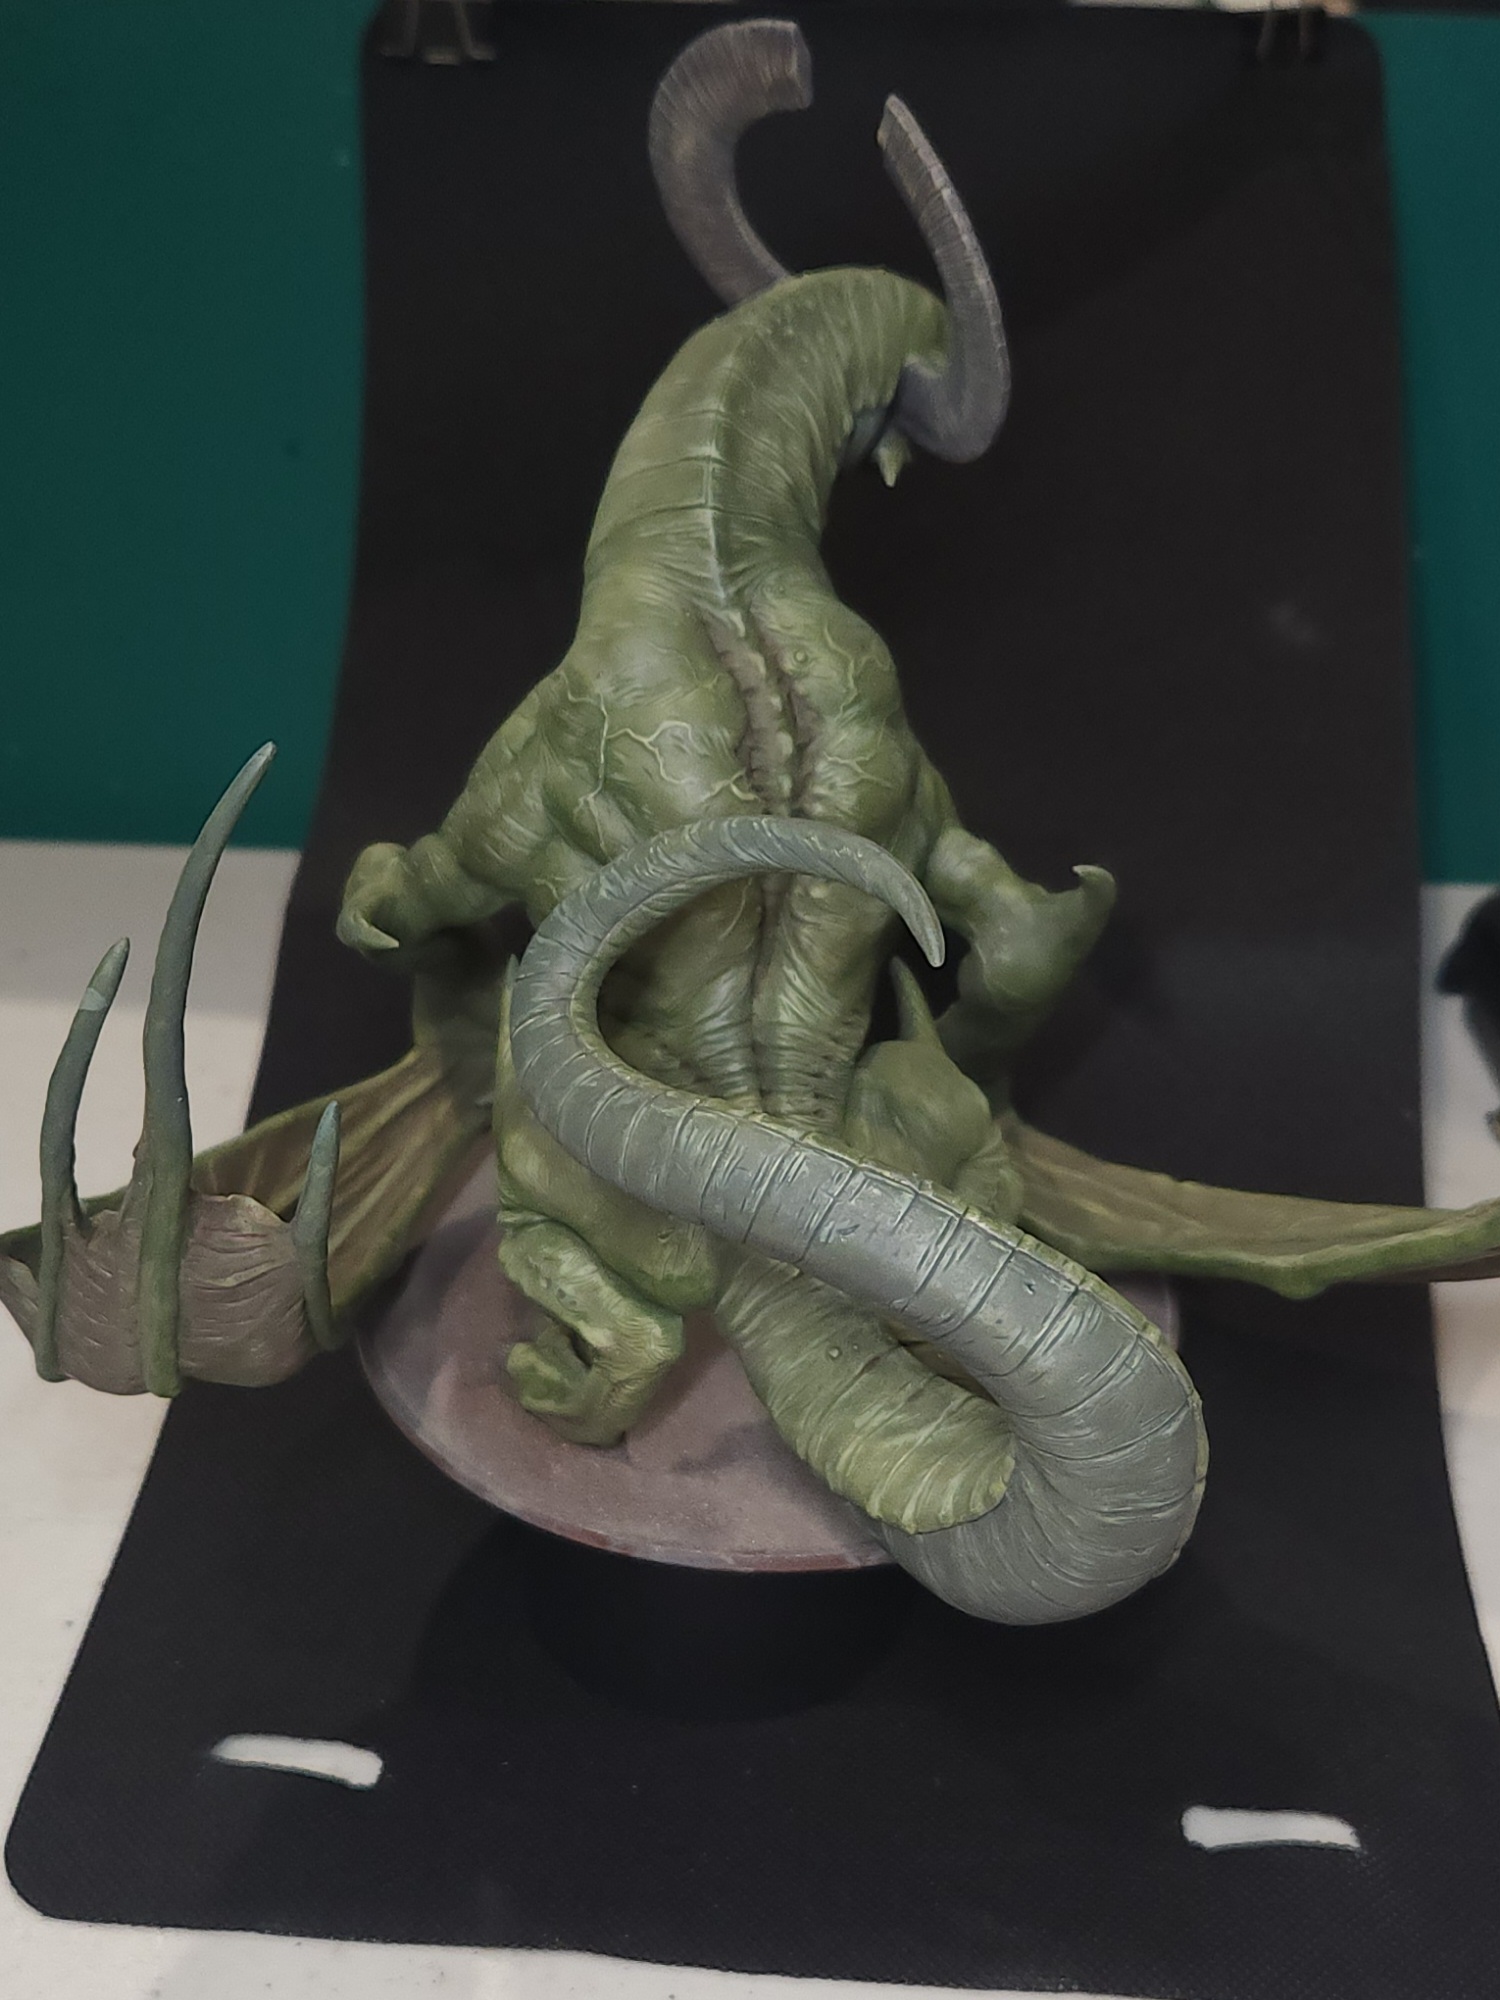
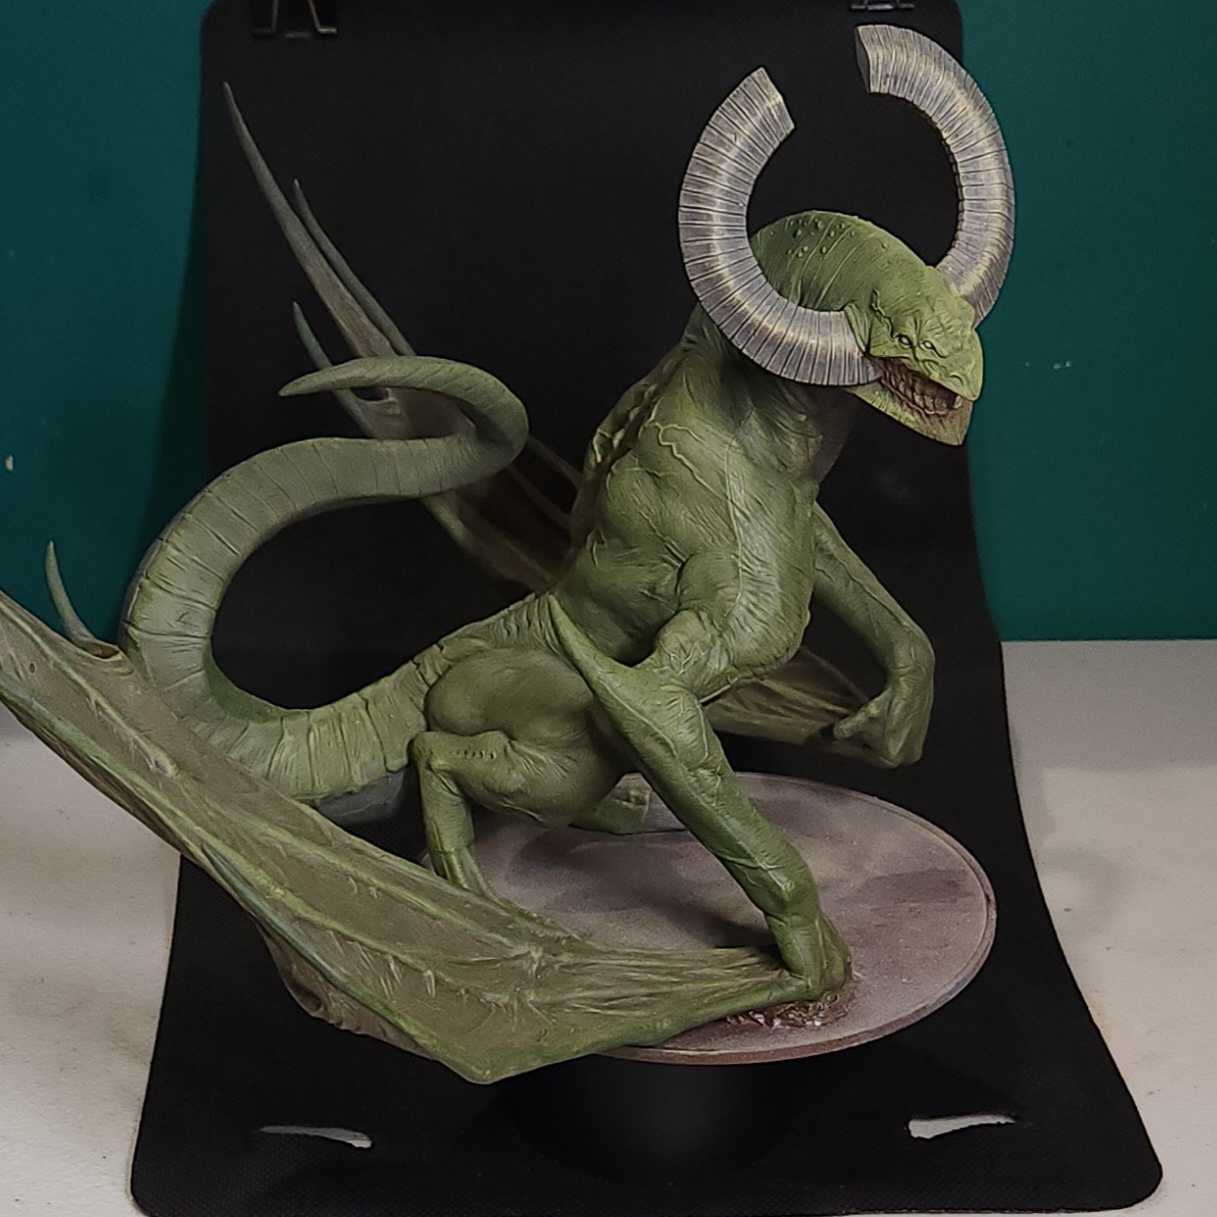
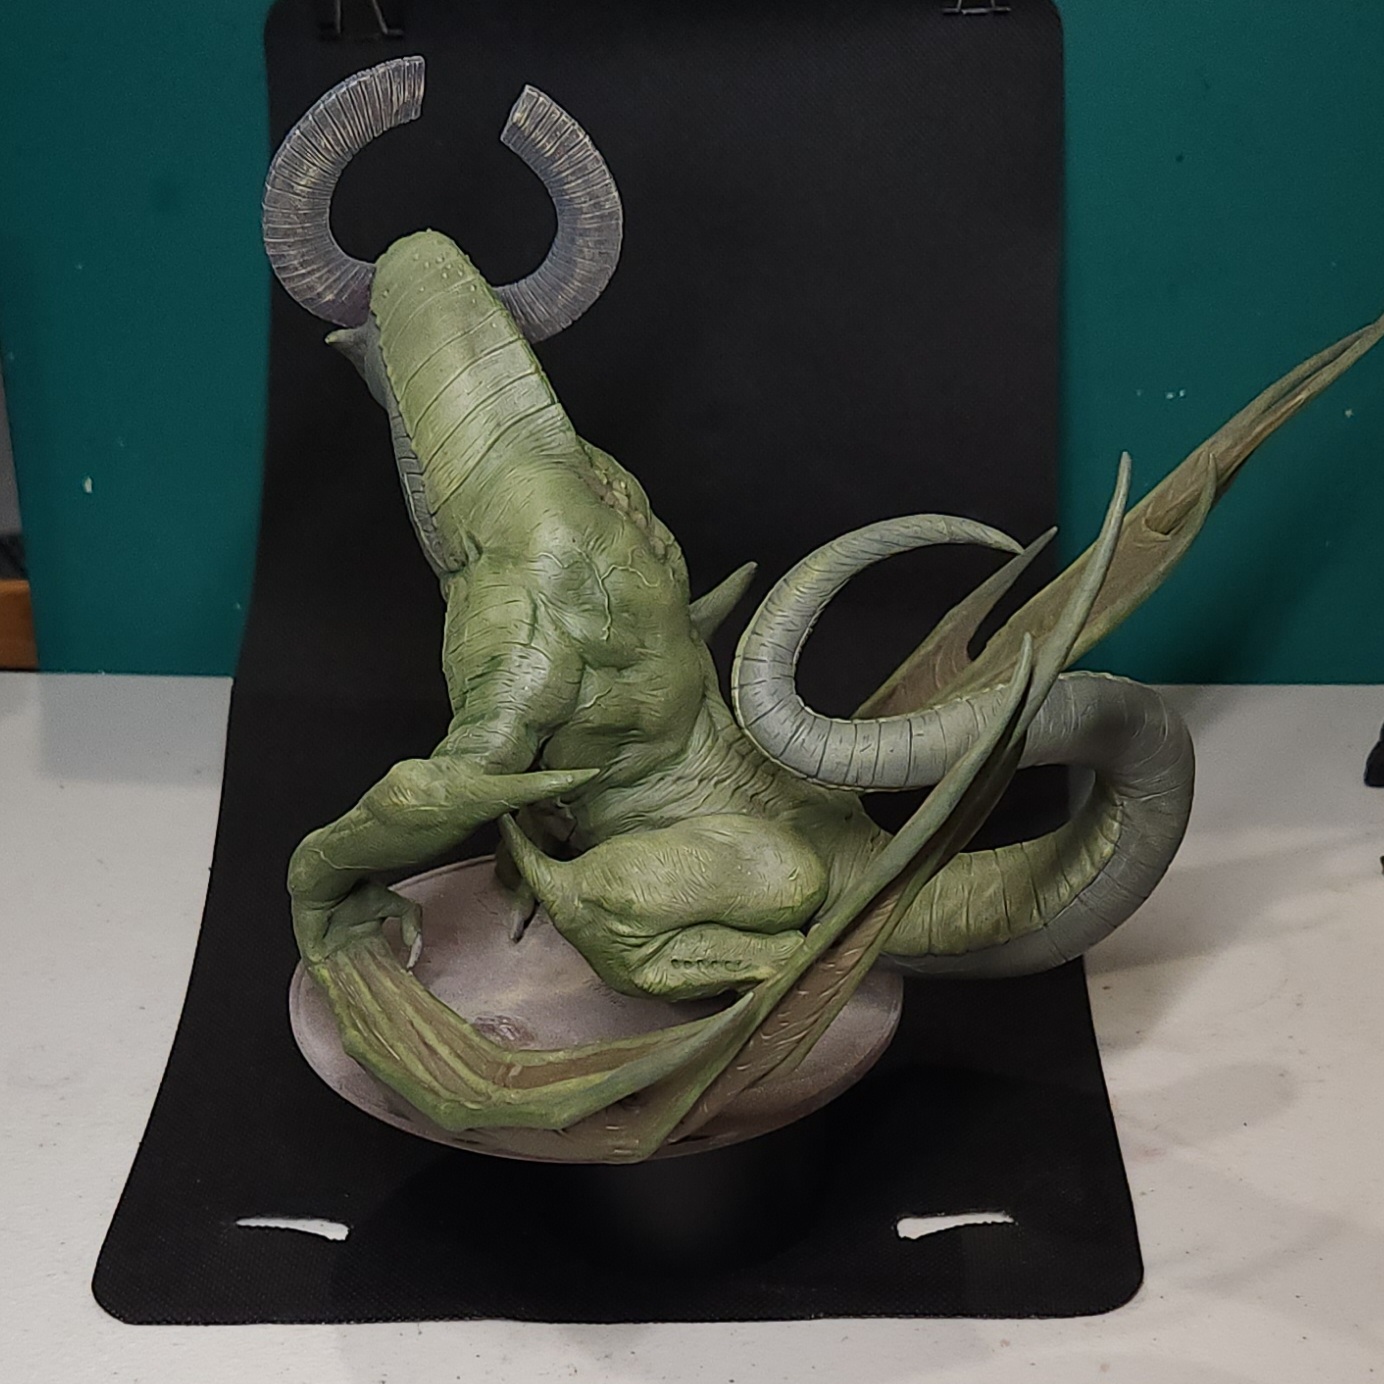
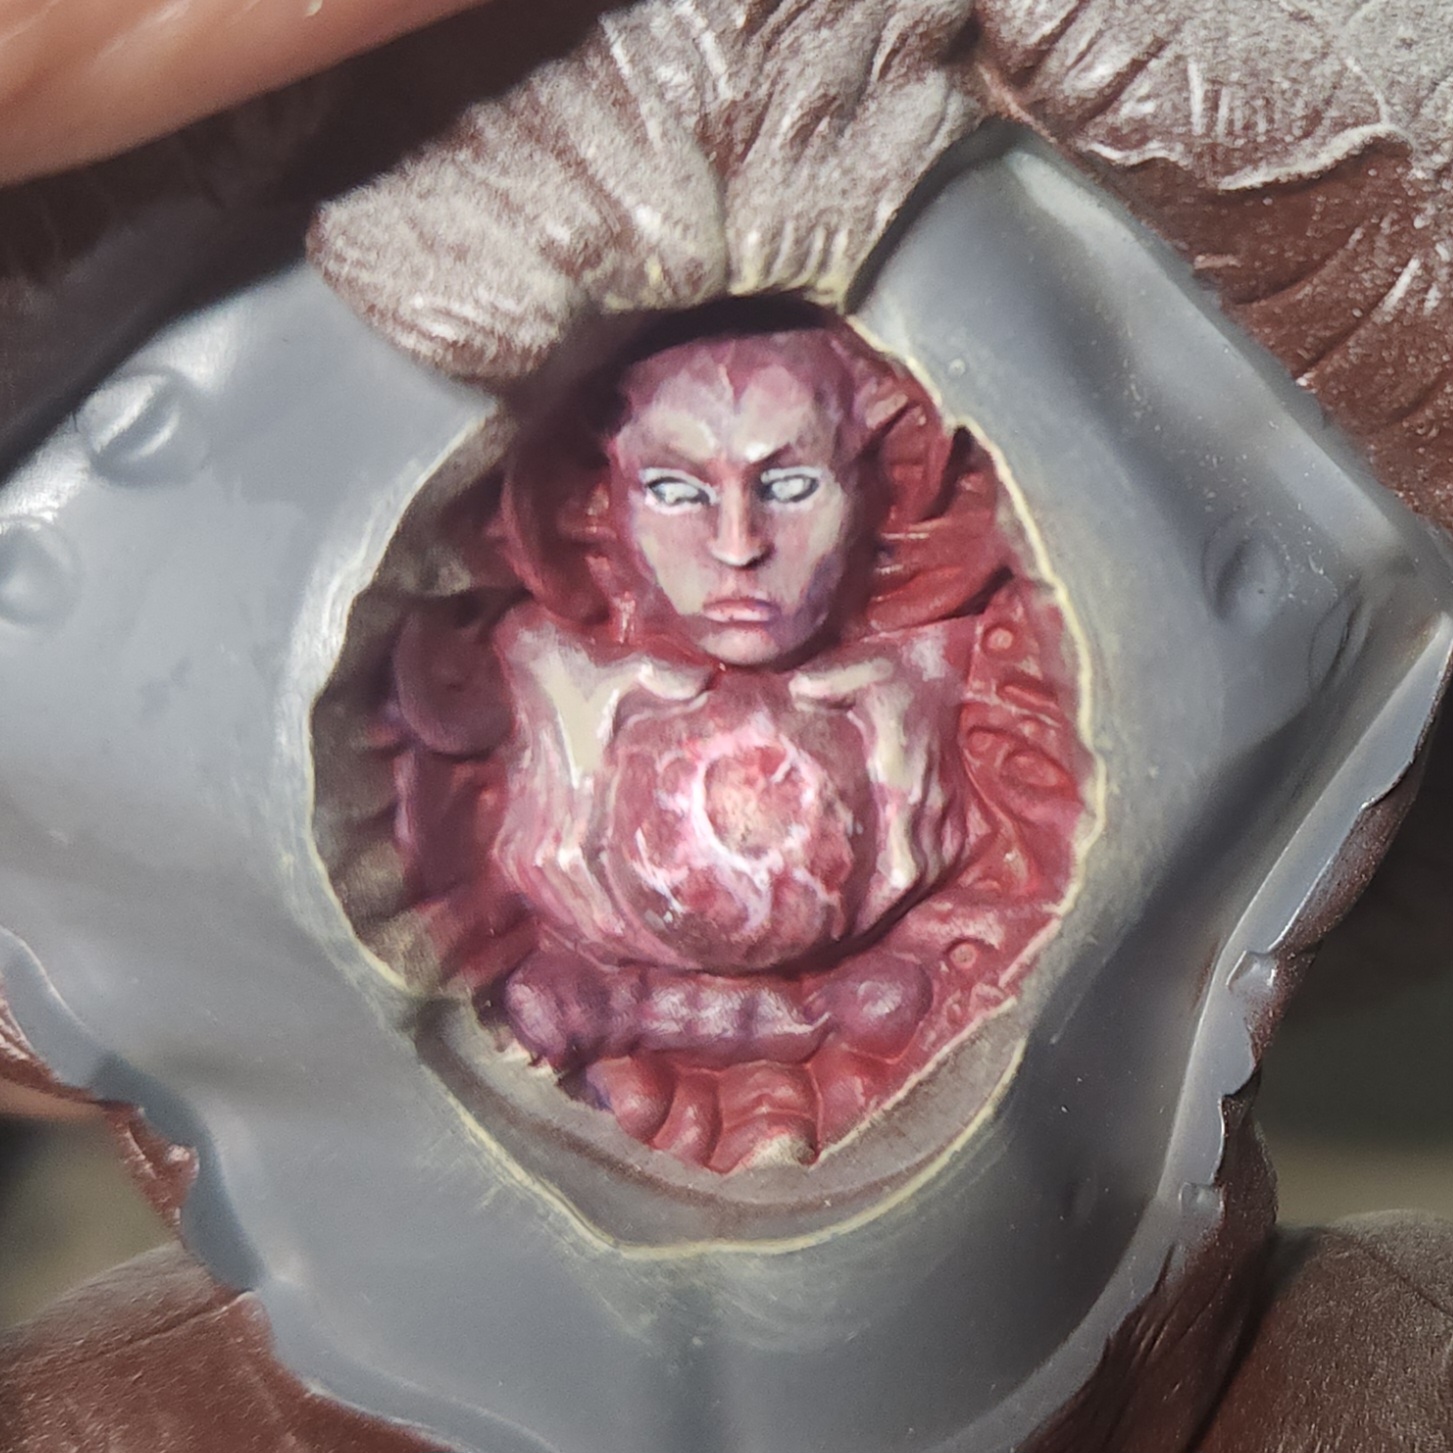
Above: more shots of the face, because, why not?
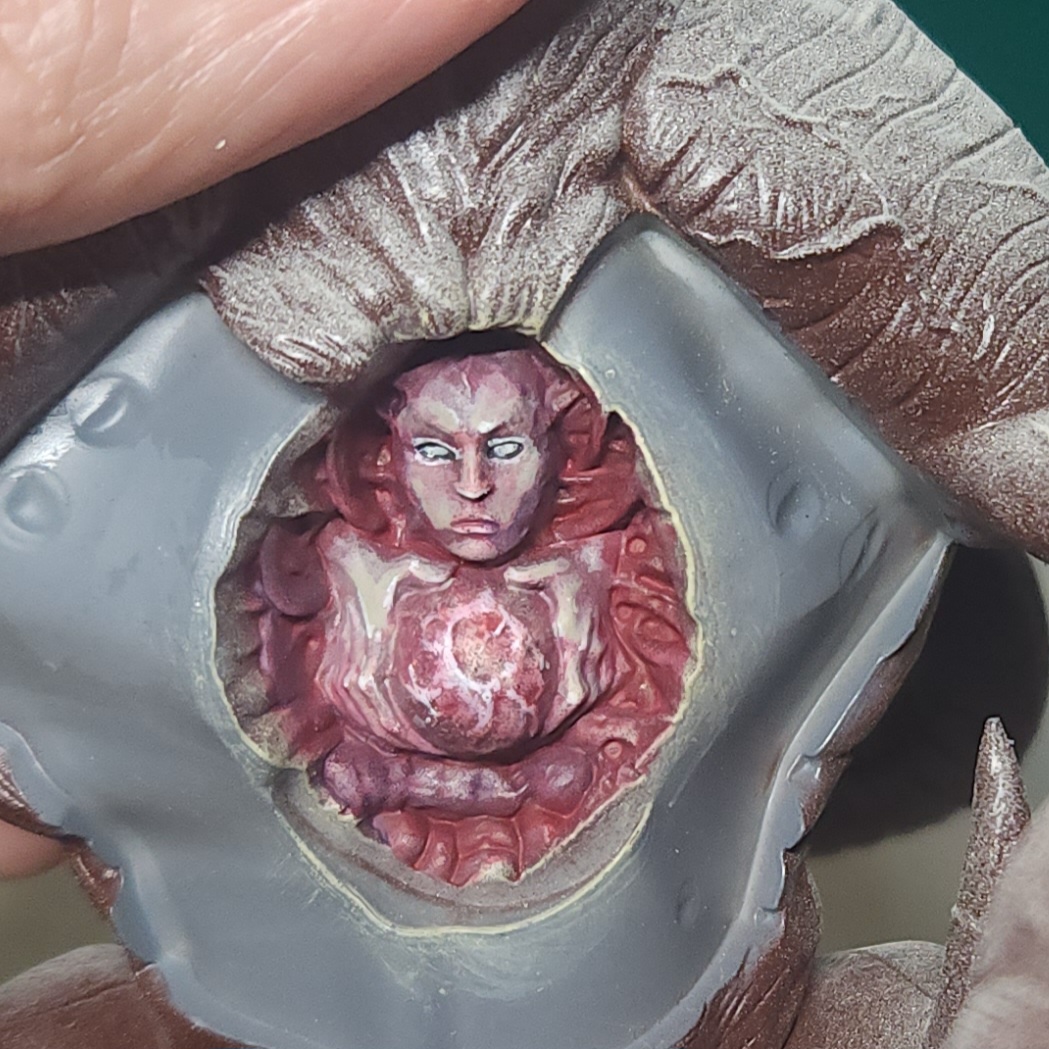
 OK, one last check tomorrow evening, and pending review it'll be photos.
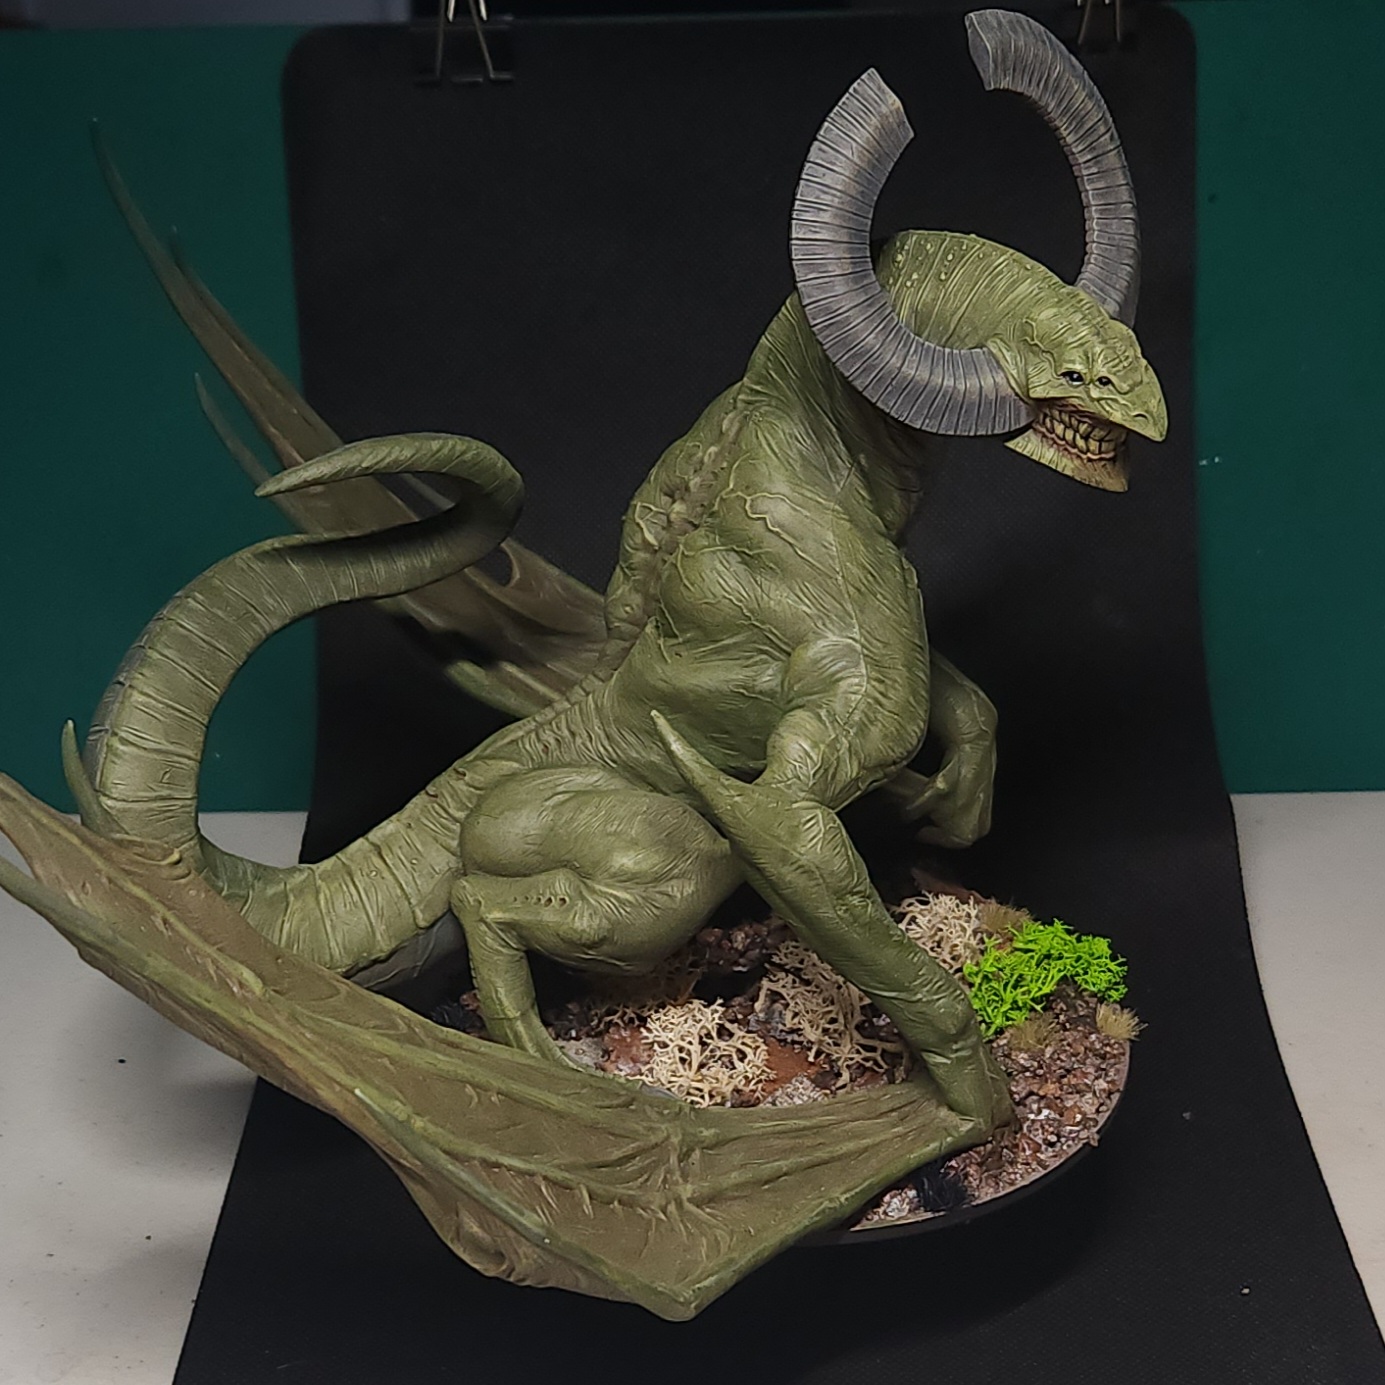
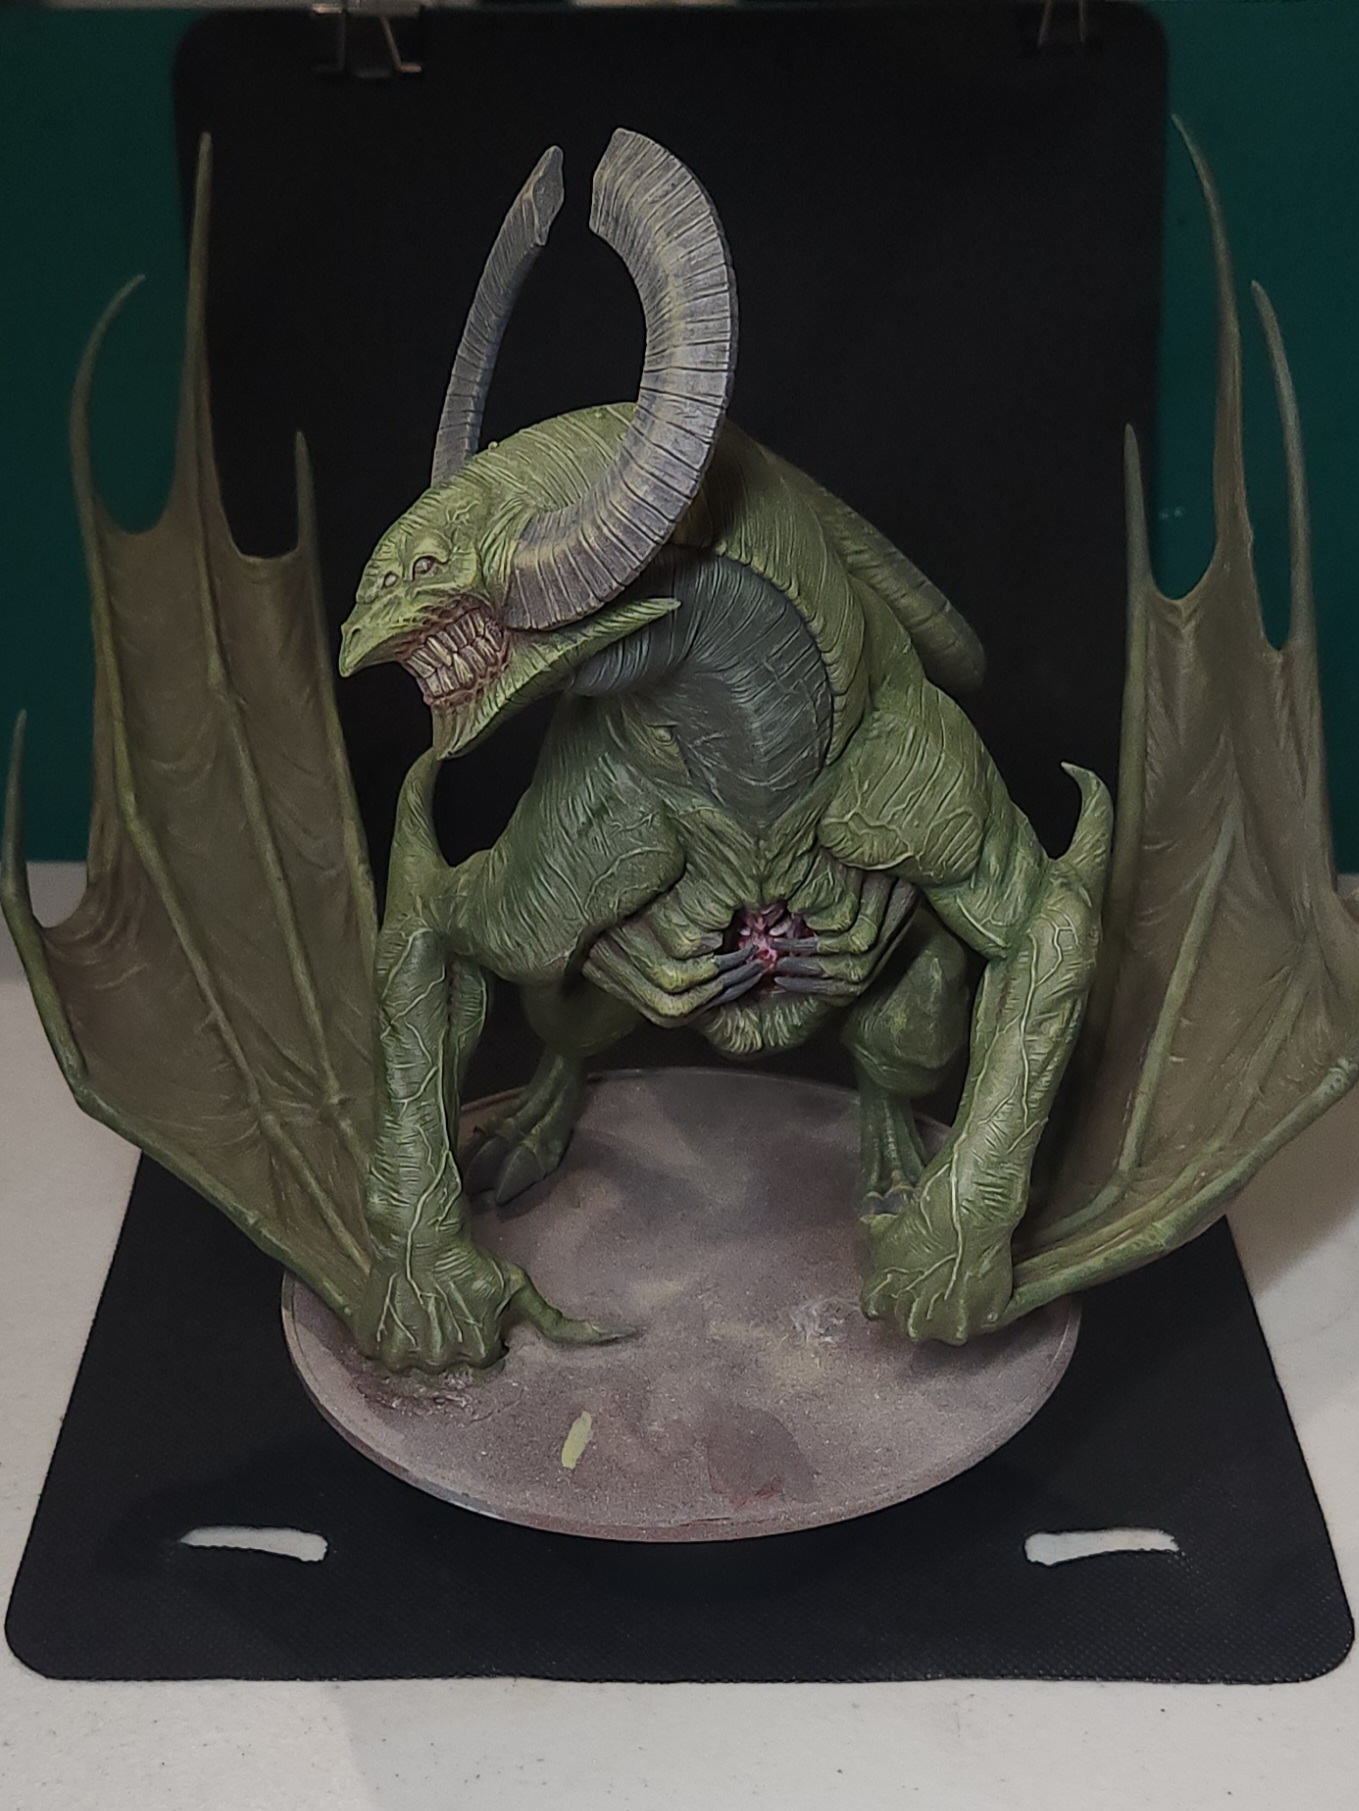
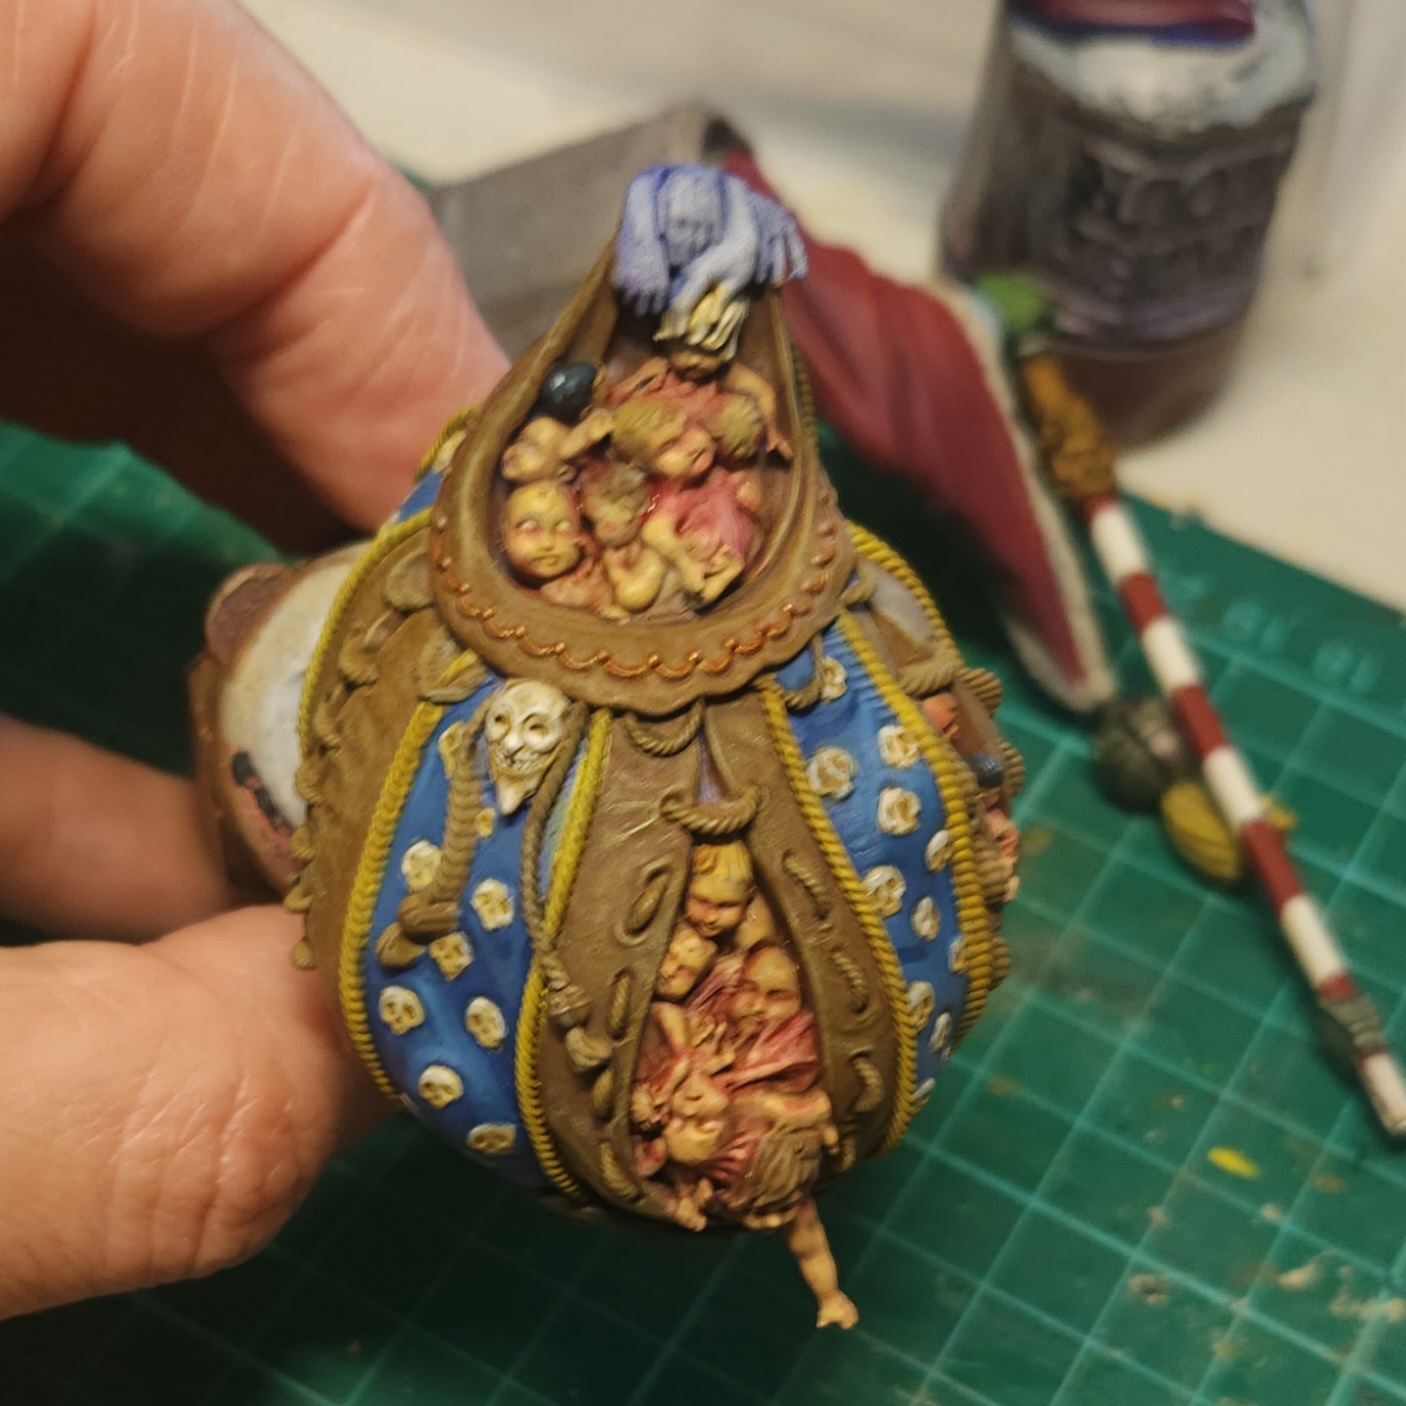
  Another look at the monster within...
25 Mar 25: Surface level details
I’m working on the highlights across the green skin. I picked Vallejo Game Colour Dead Flesh due to it being a pale green. Combined with the drybrushed layers below, I feel that this is the only highlight layer needed.
Also, I recall something about large pieces needing fewer highlights? I hope there’s something to that!
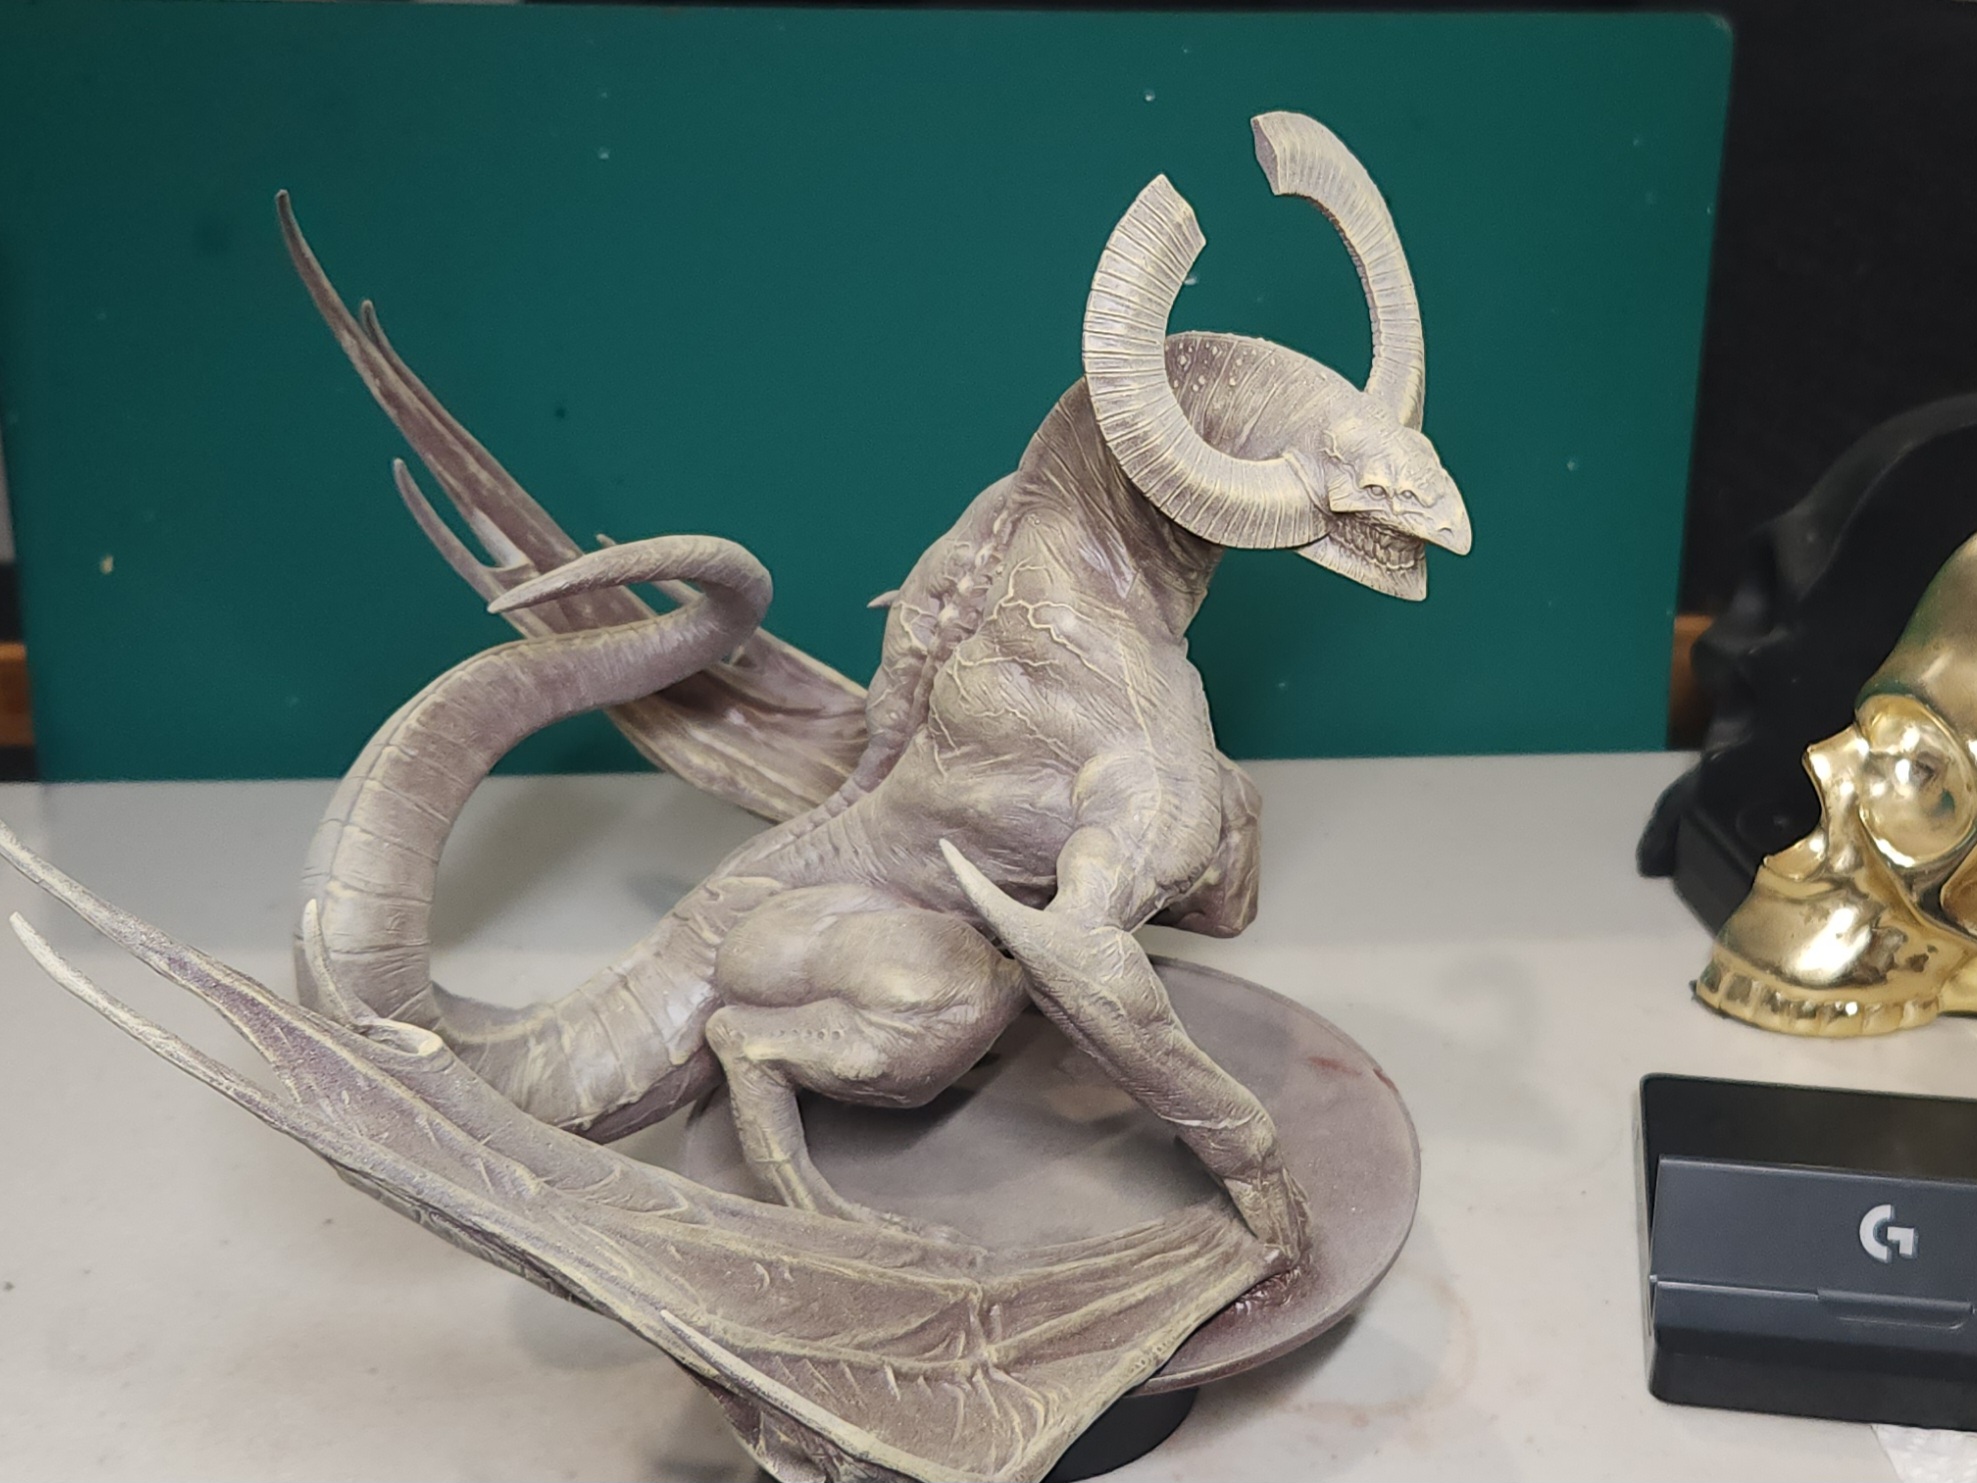
A comparison in picture 3 above: I’ve done the left side of the neck but not the right side.
I continued down the shoulders and spine.

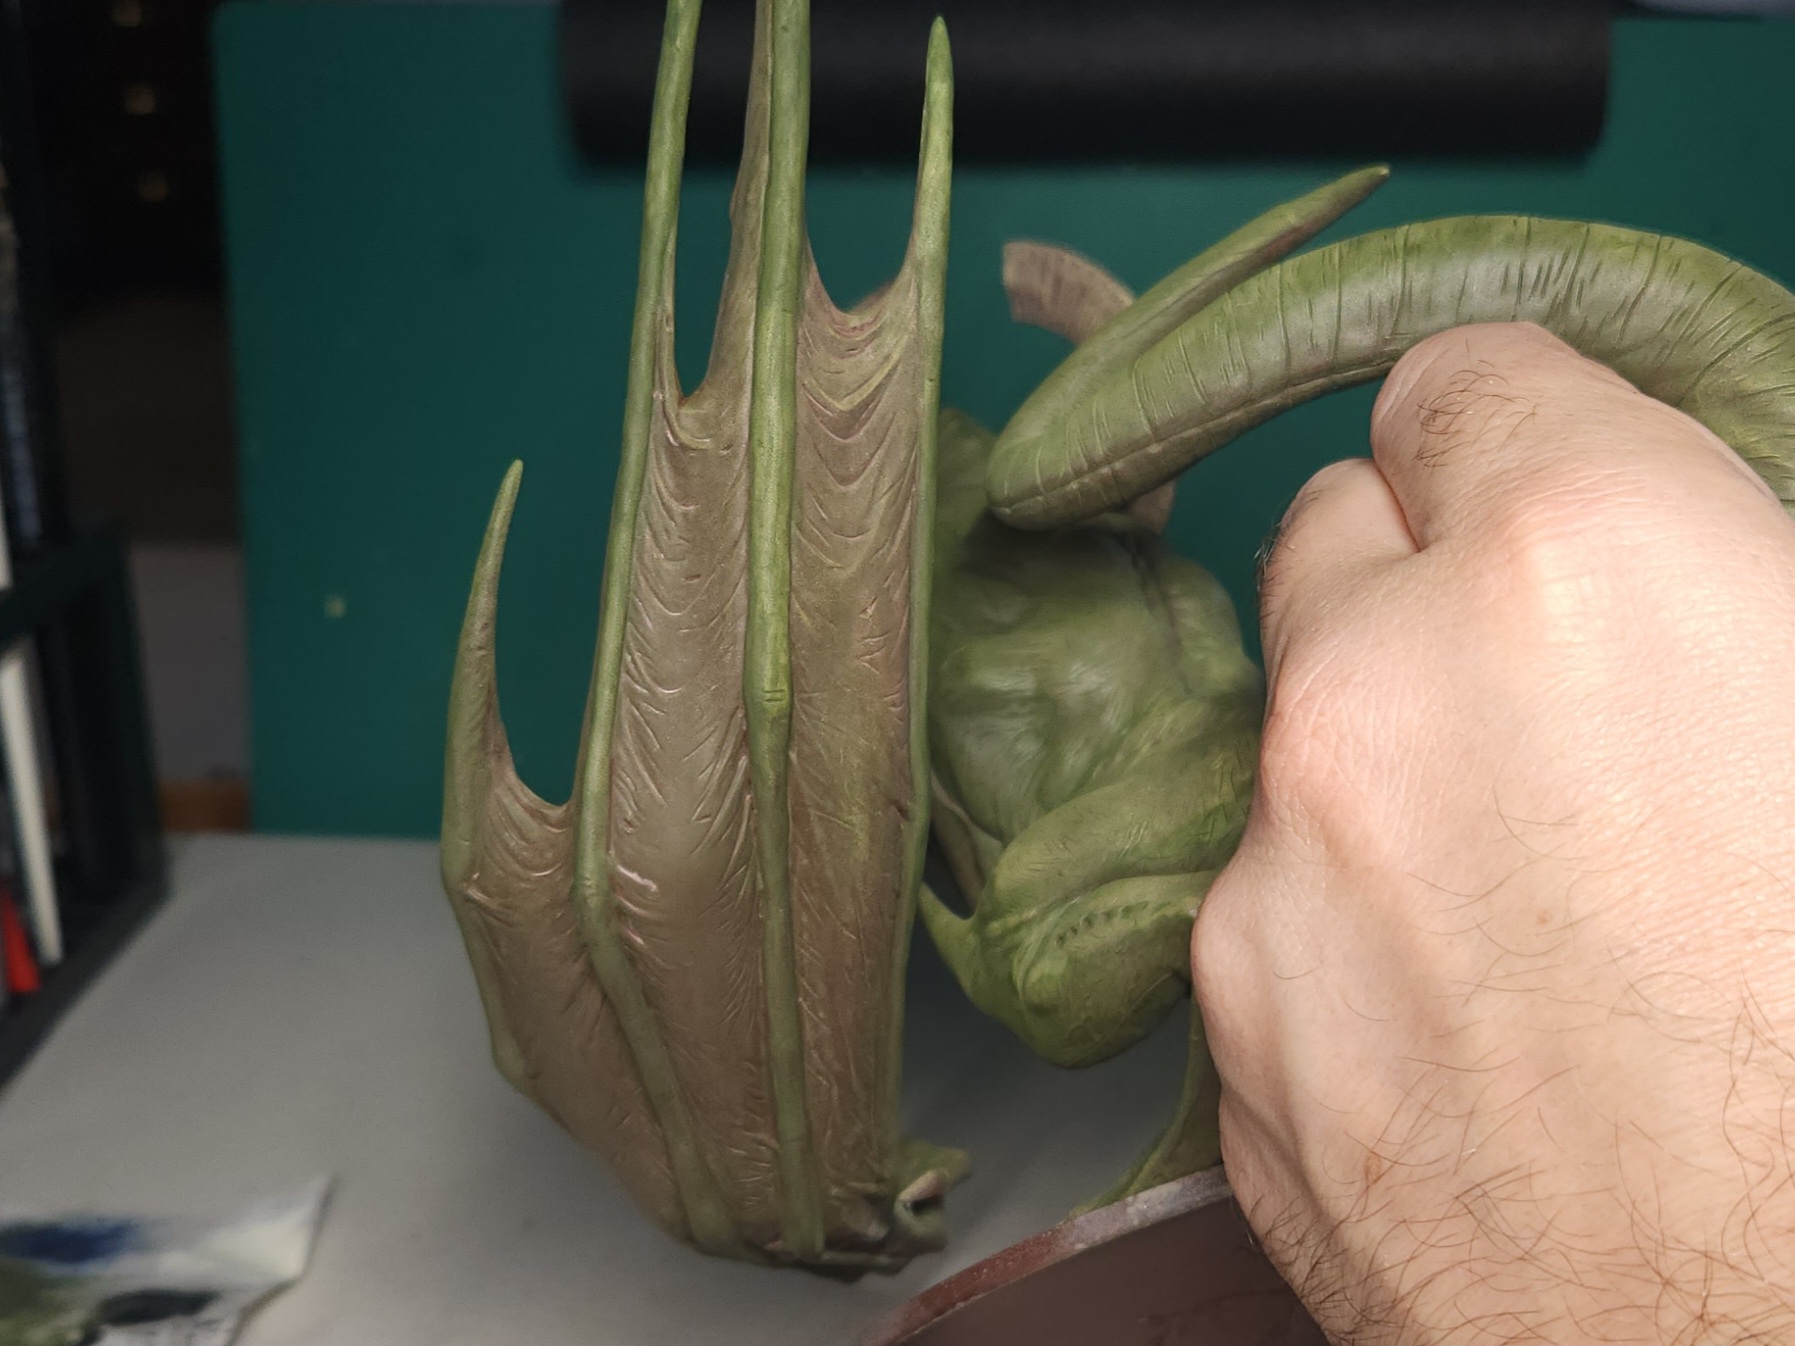
Below: highlights all done for the skin. In picture 3 there’s a small blemish on the left wing tip, a spot of paint not seen, a highlight out of place. I’ll fix this later.

 Getting closer to being done!
26 Mar 25: Focus in on the smaller stuff
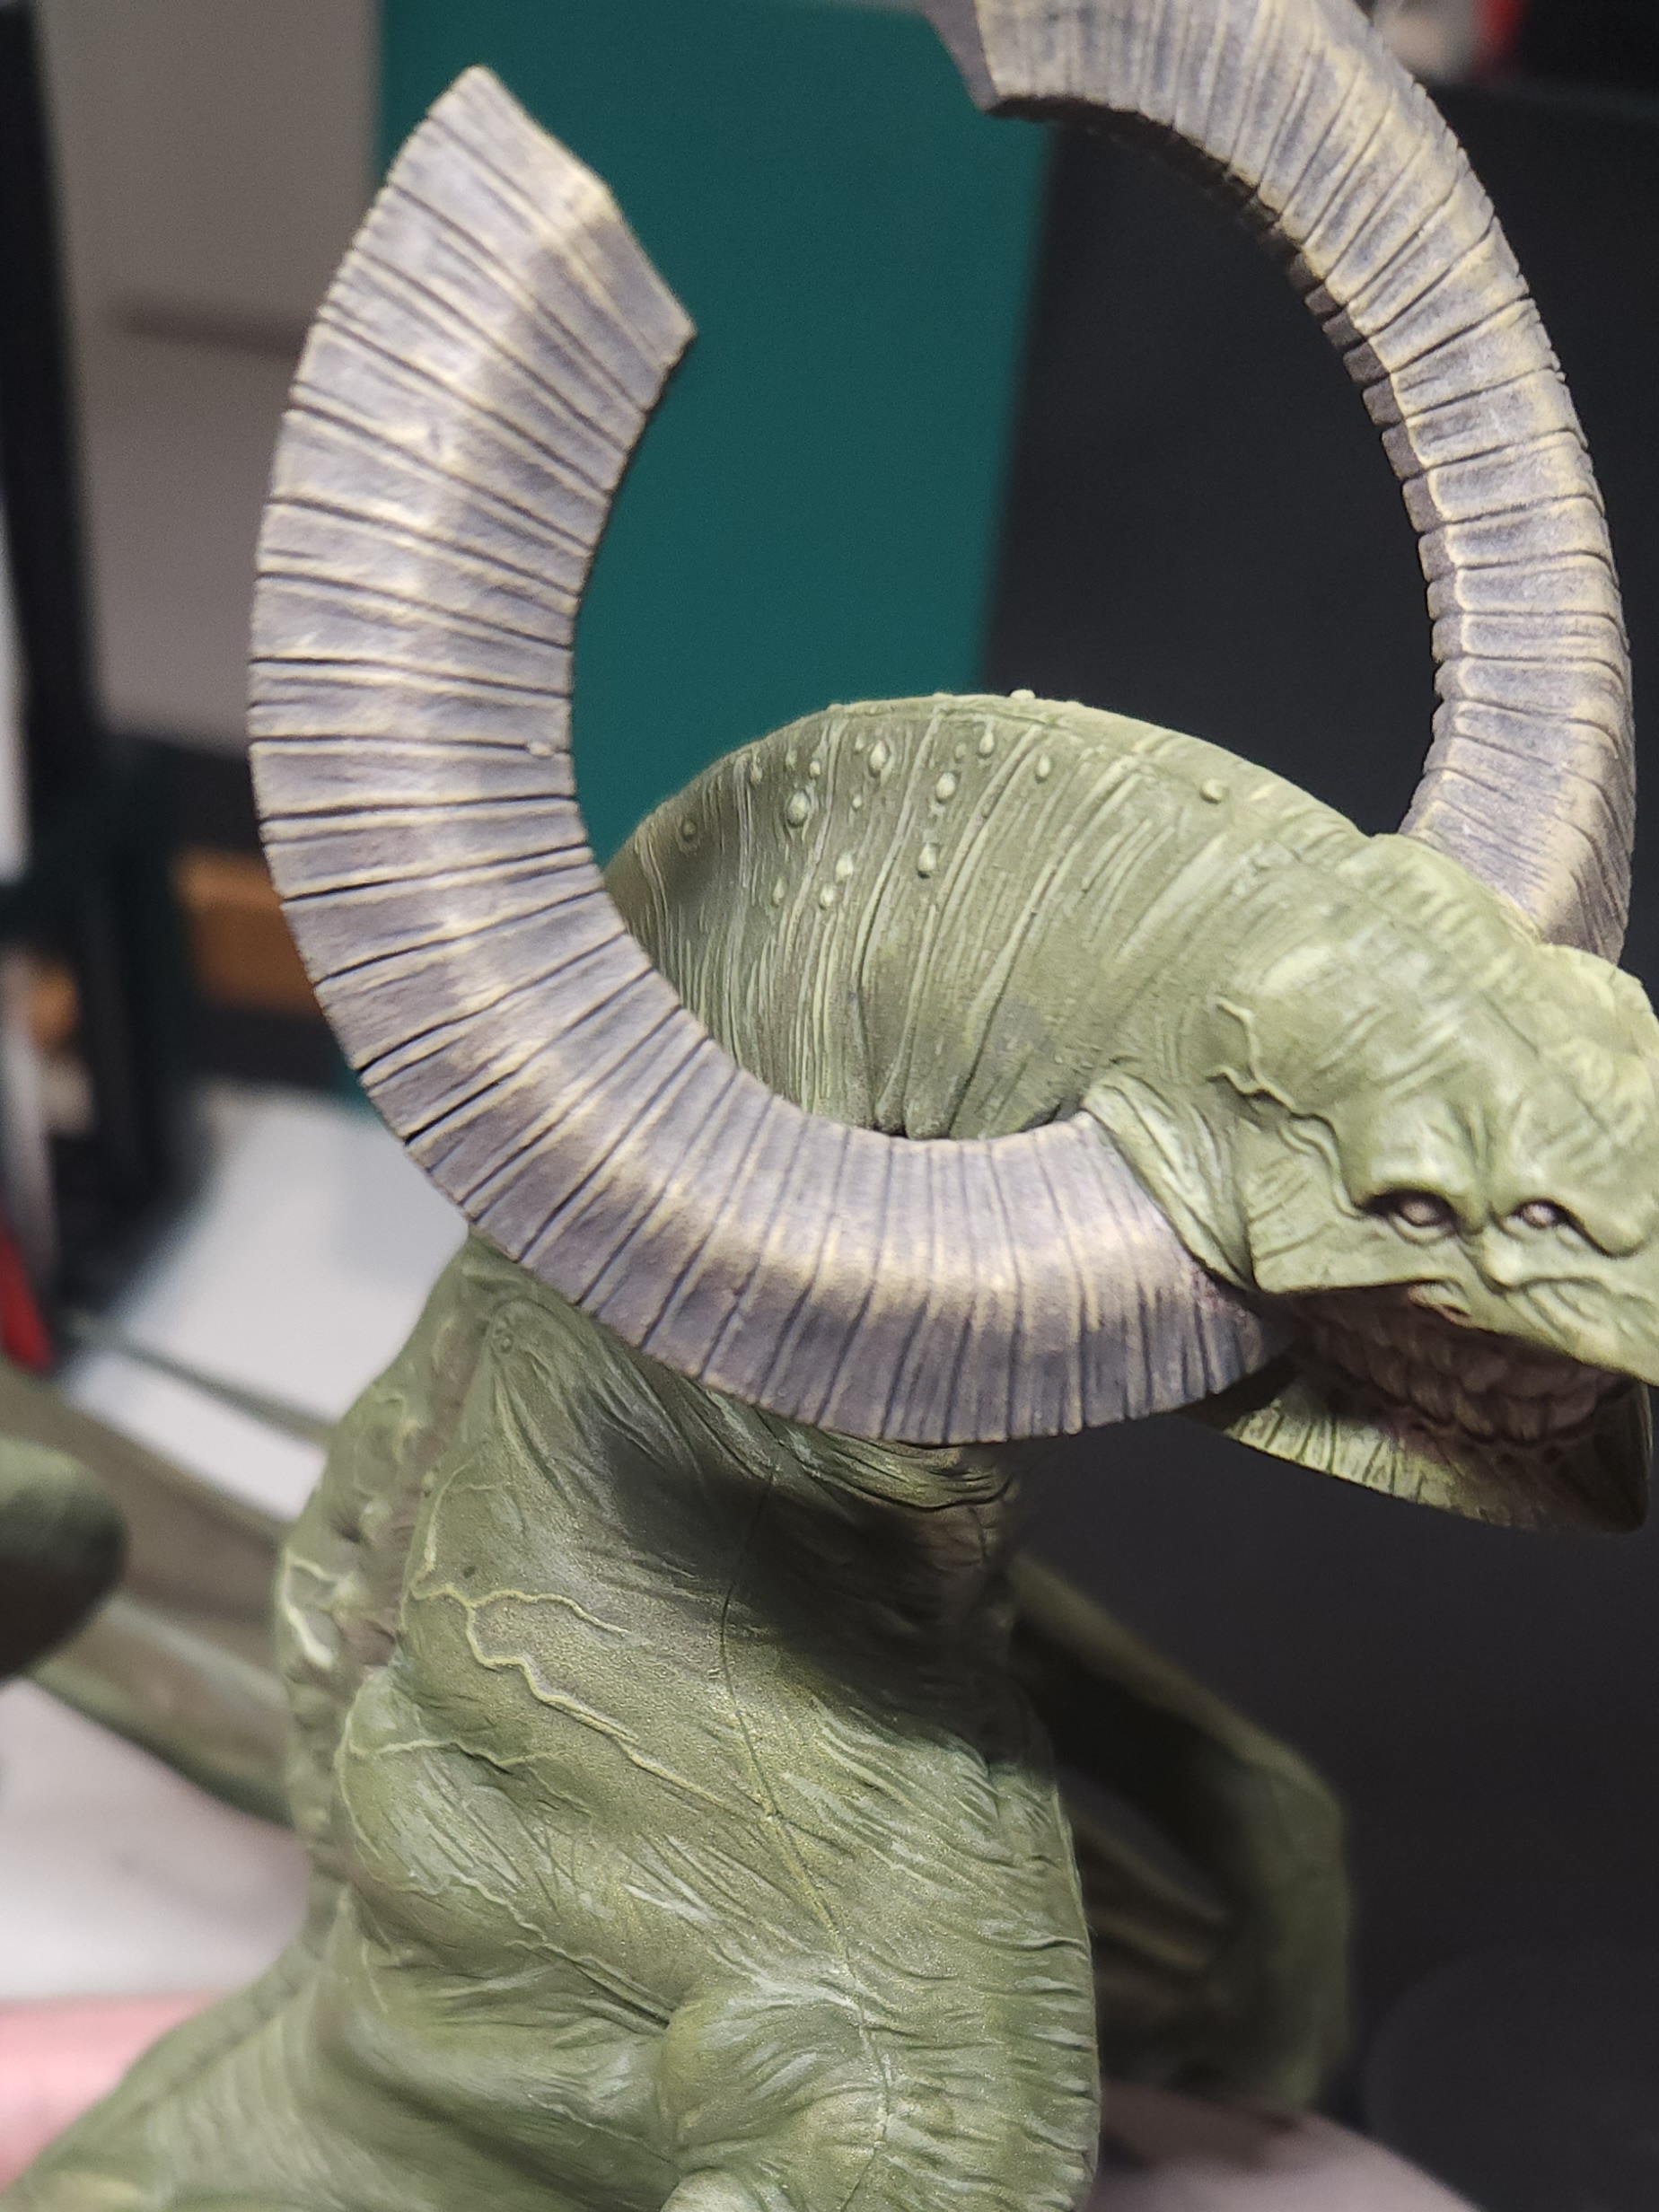
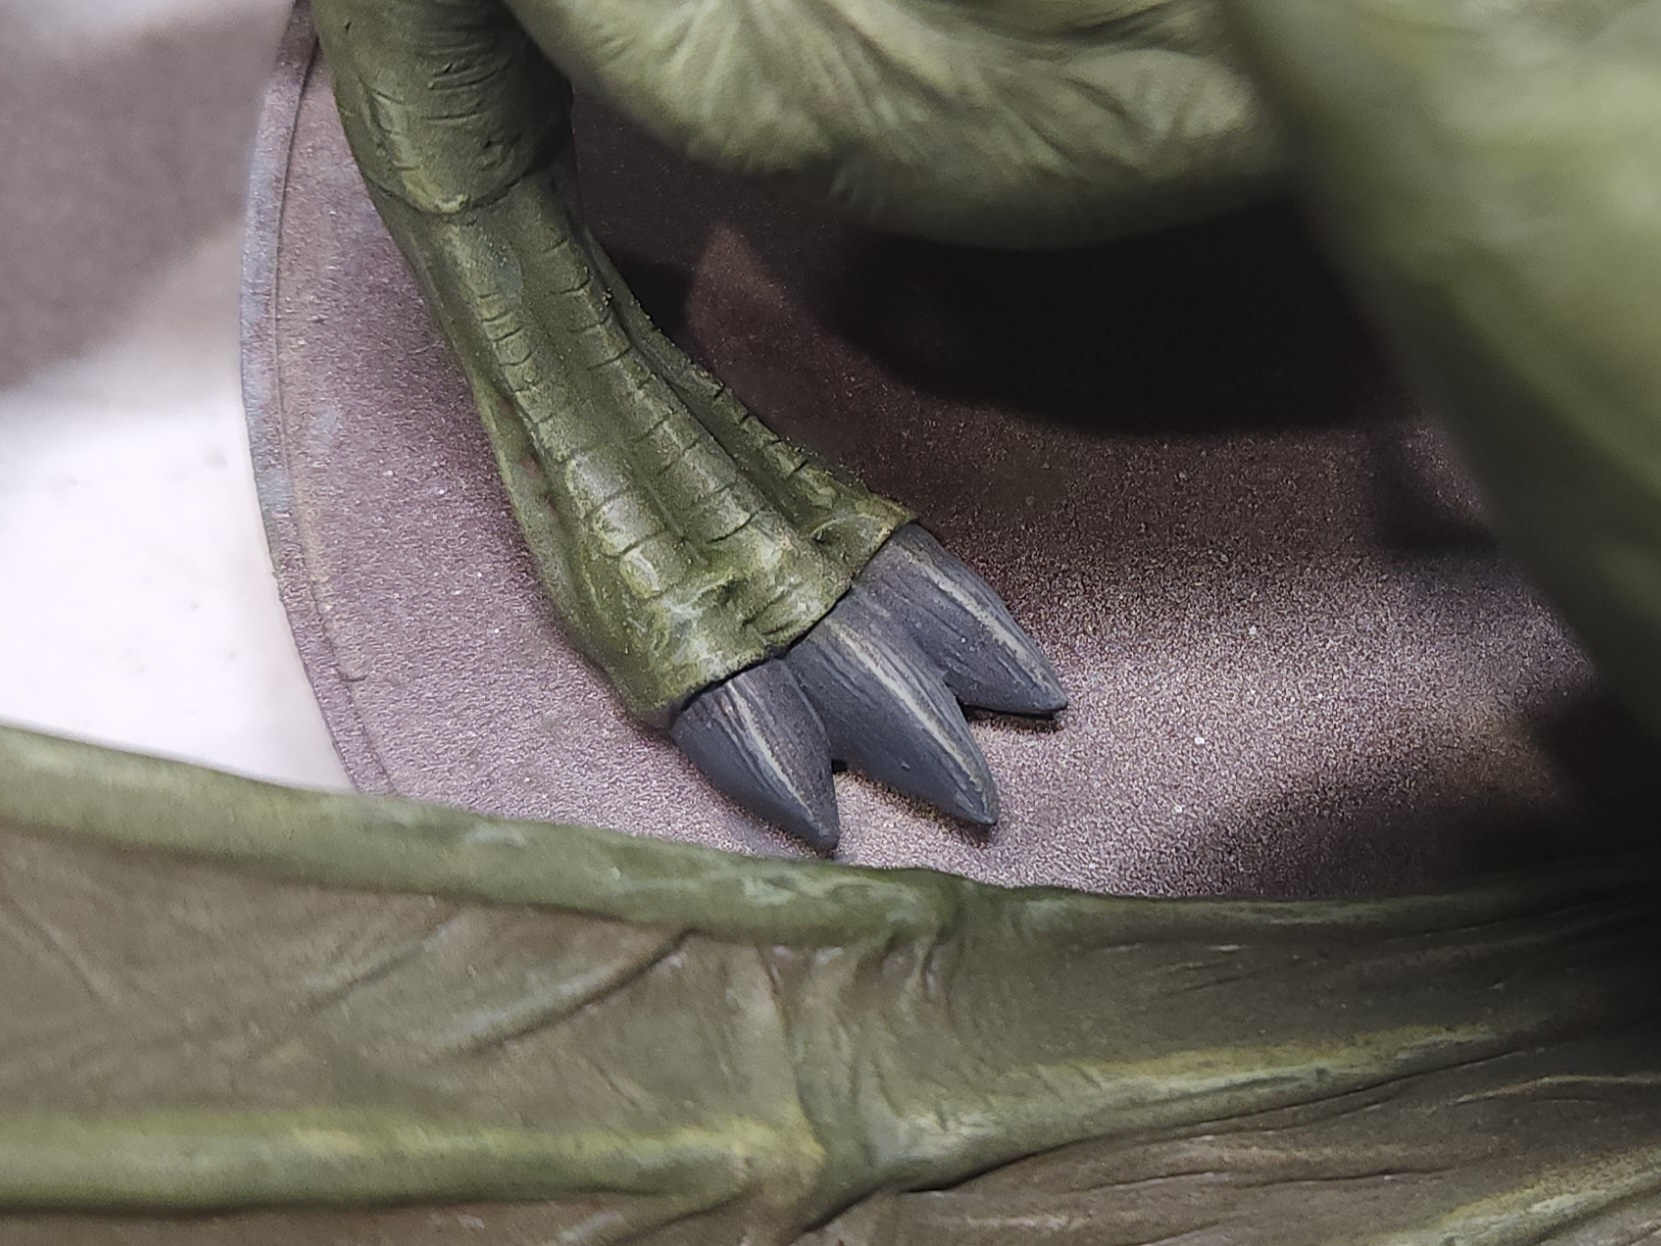

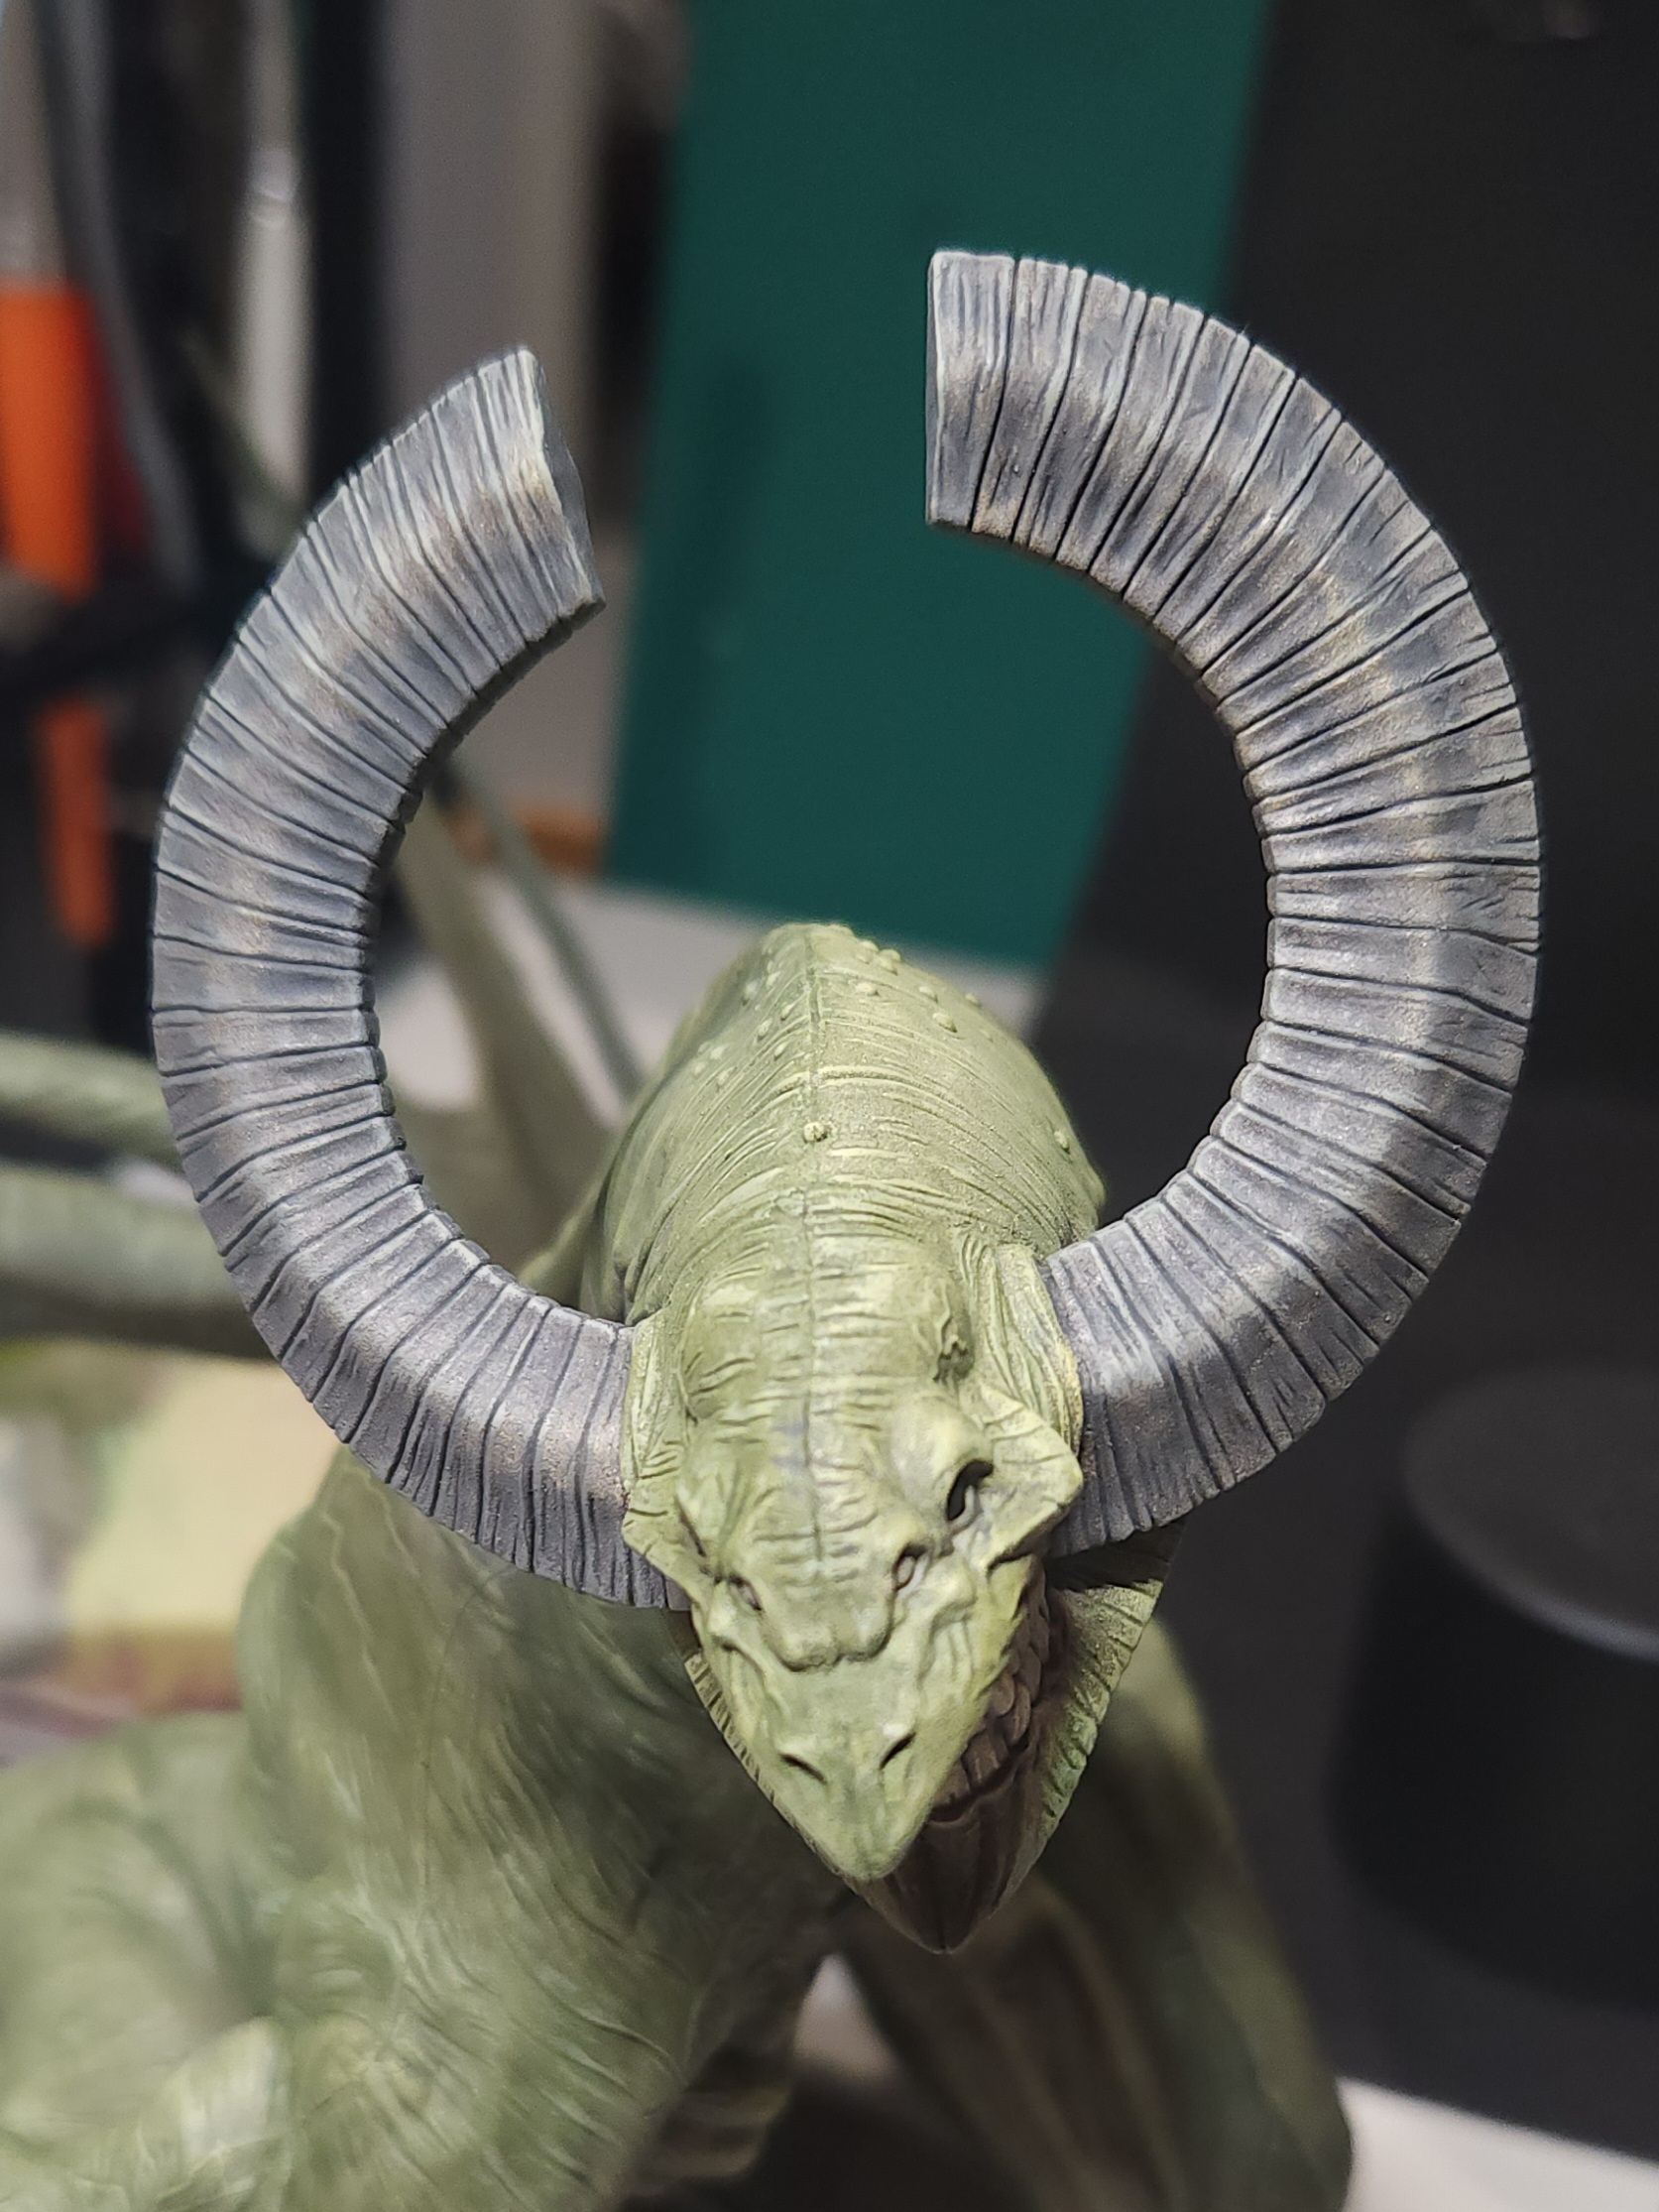
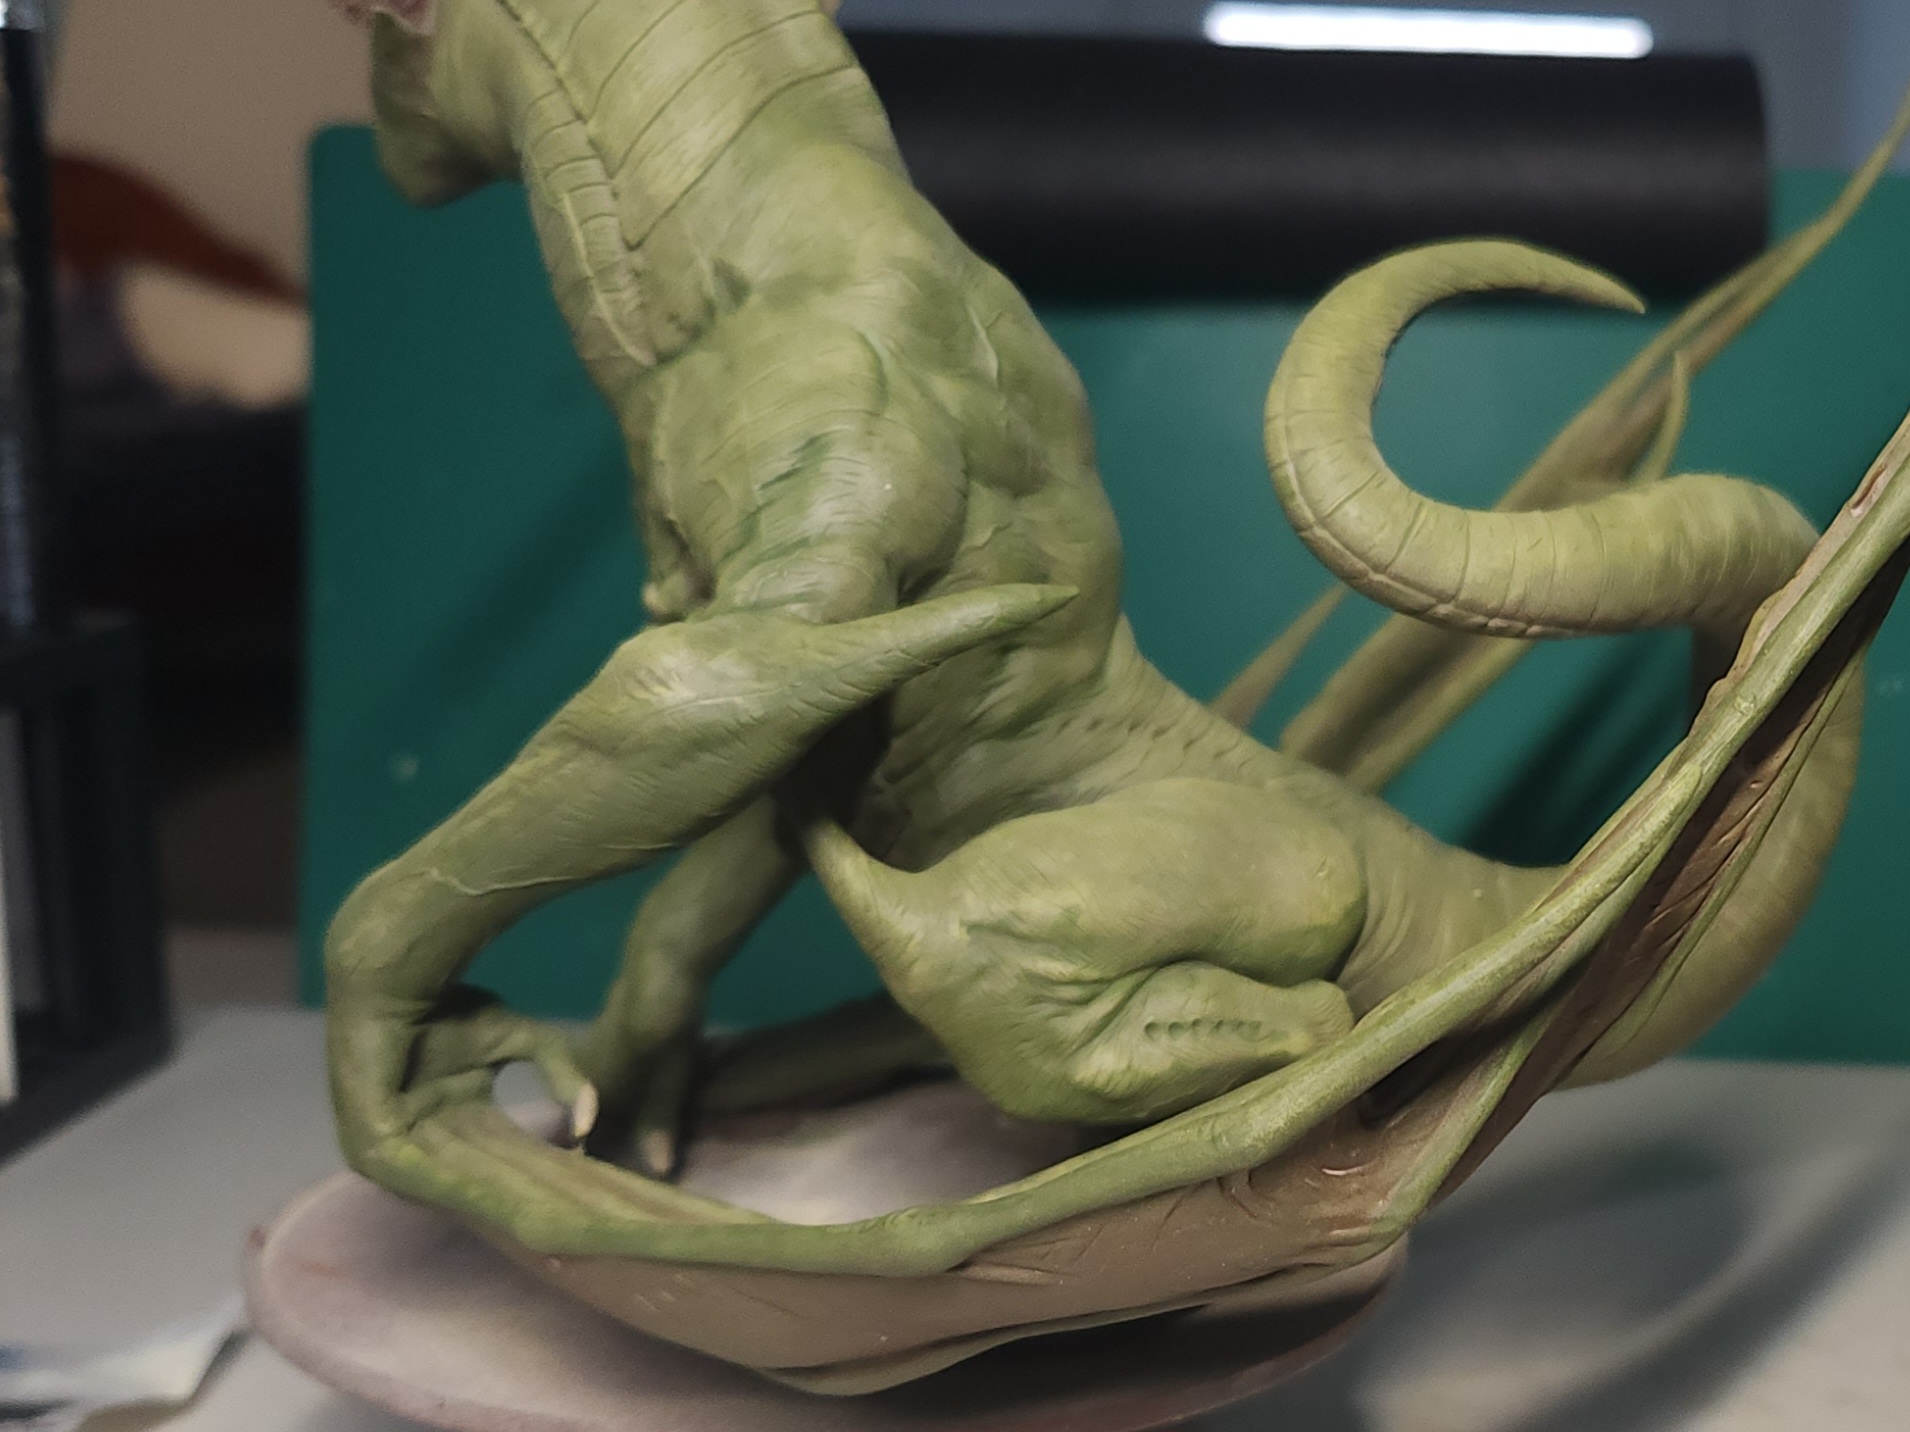
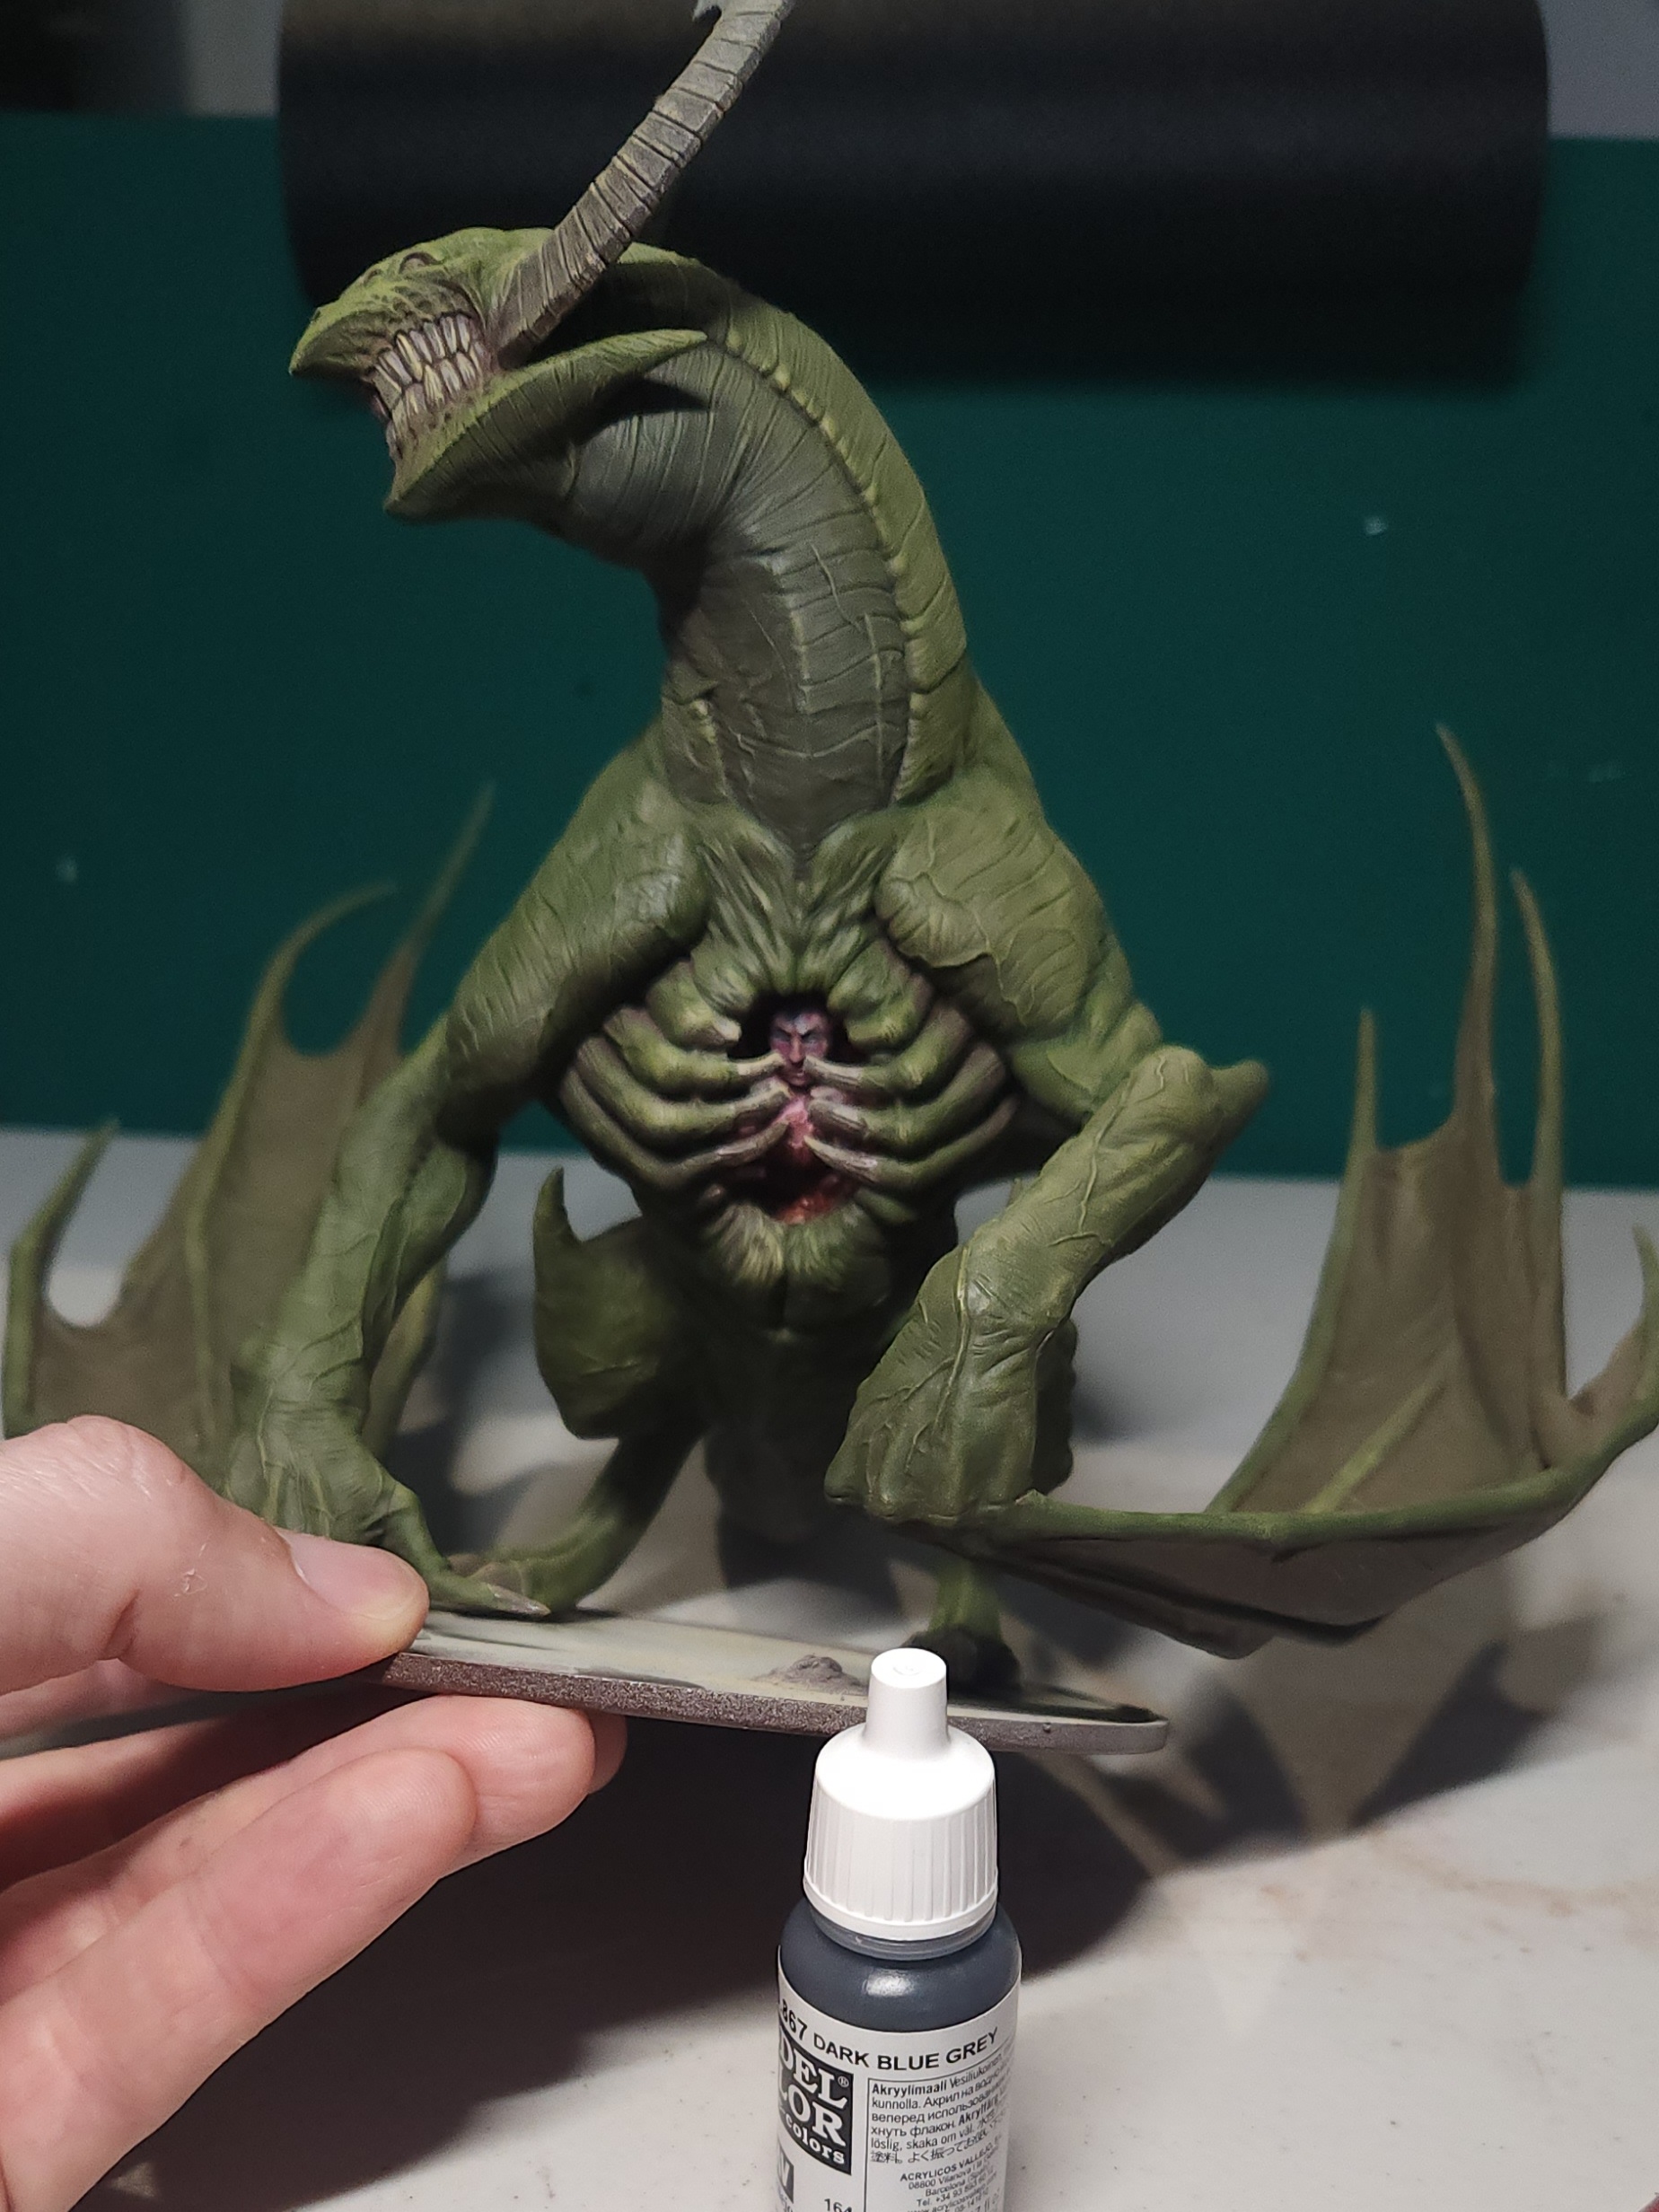
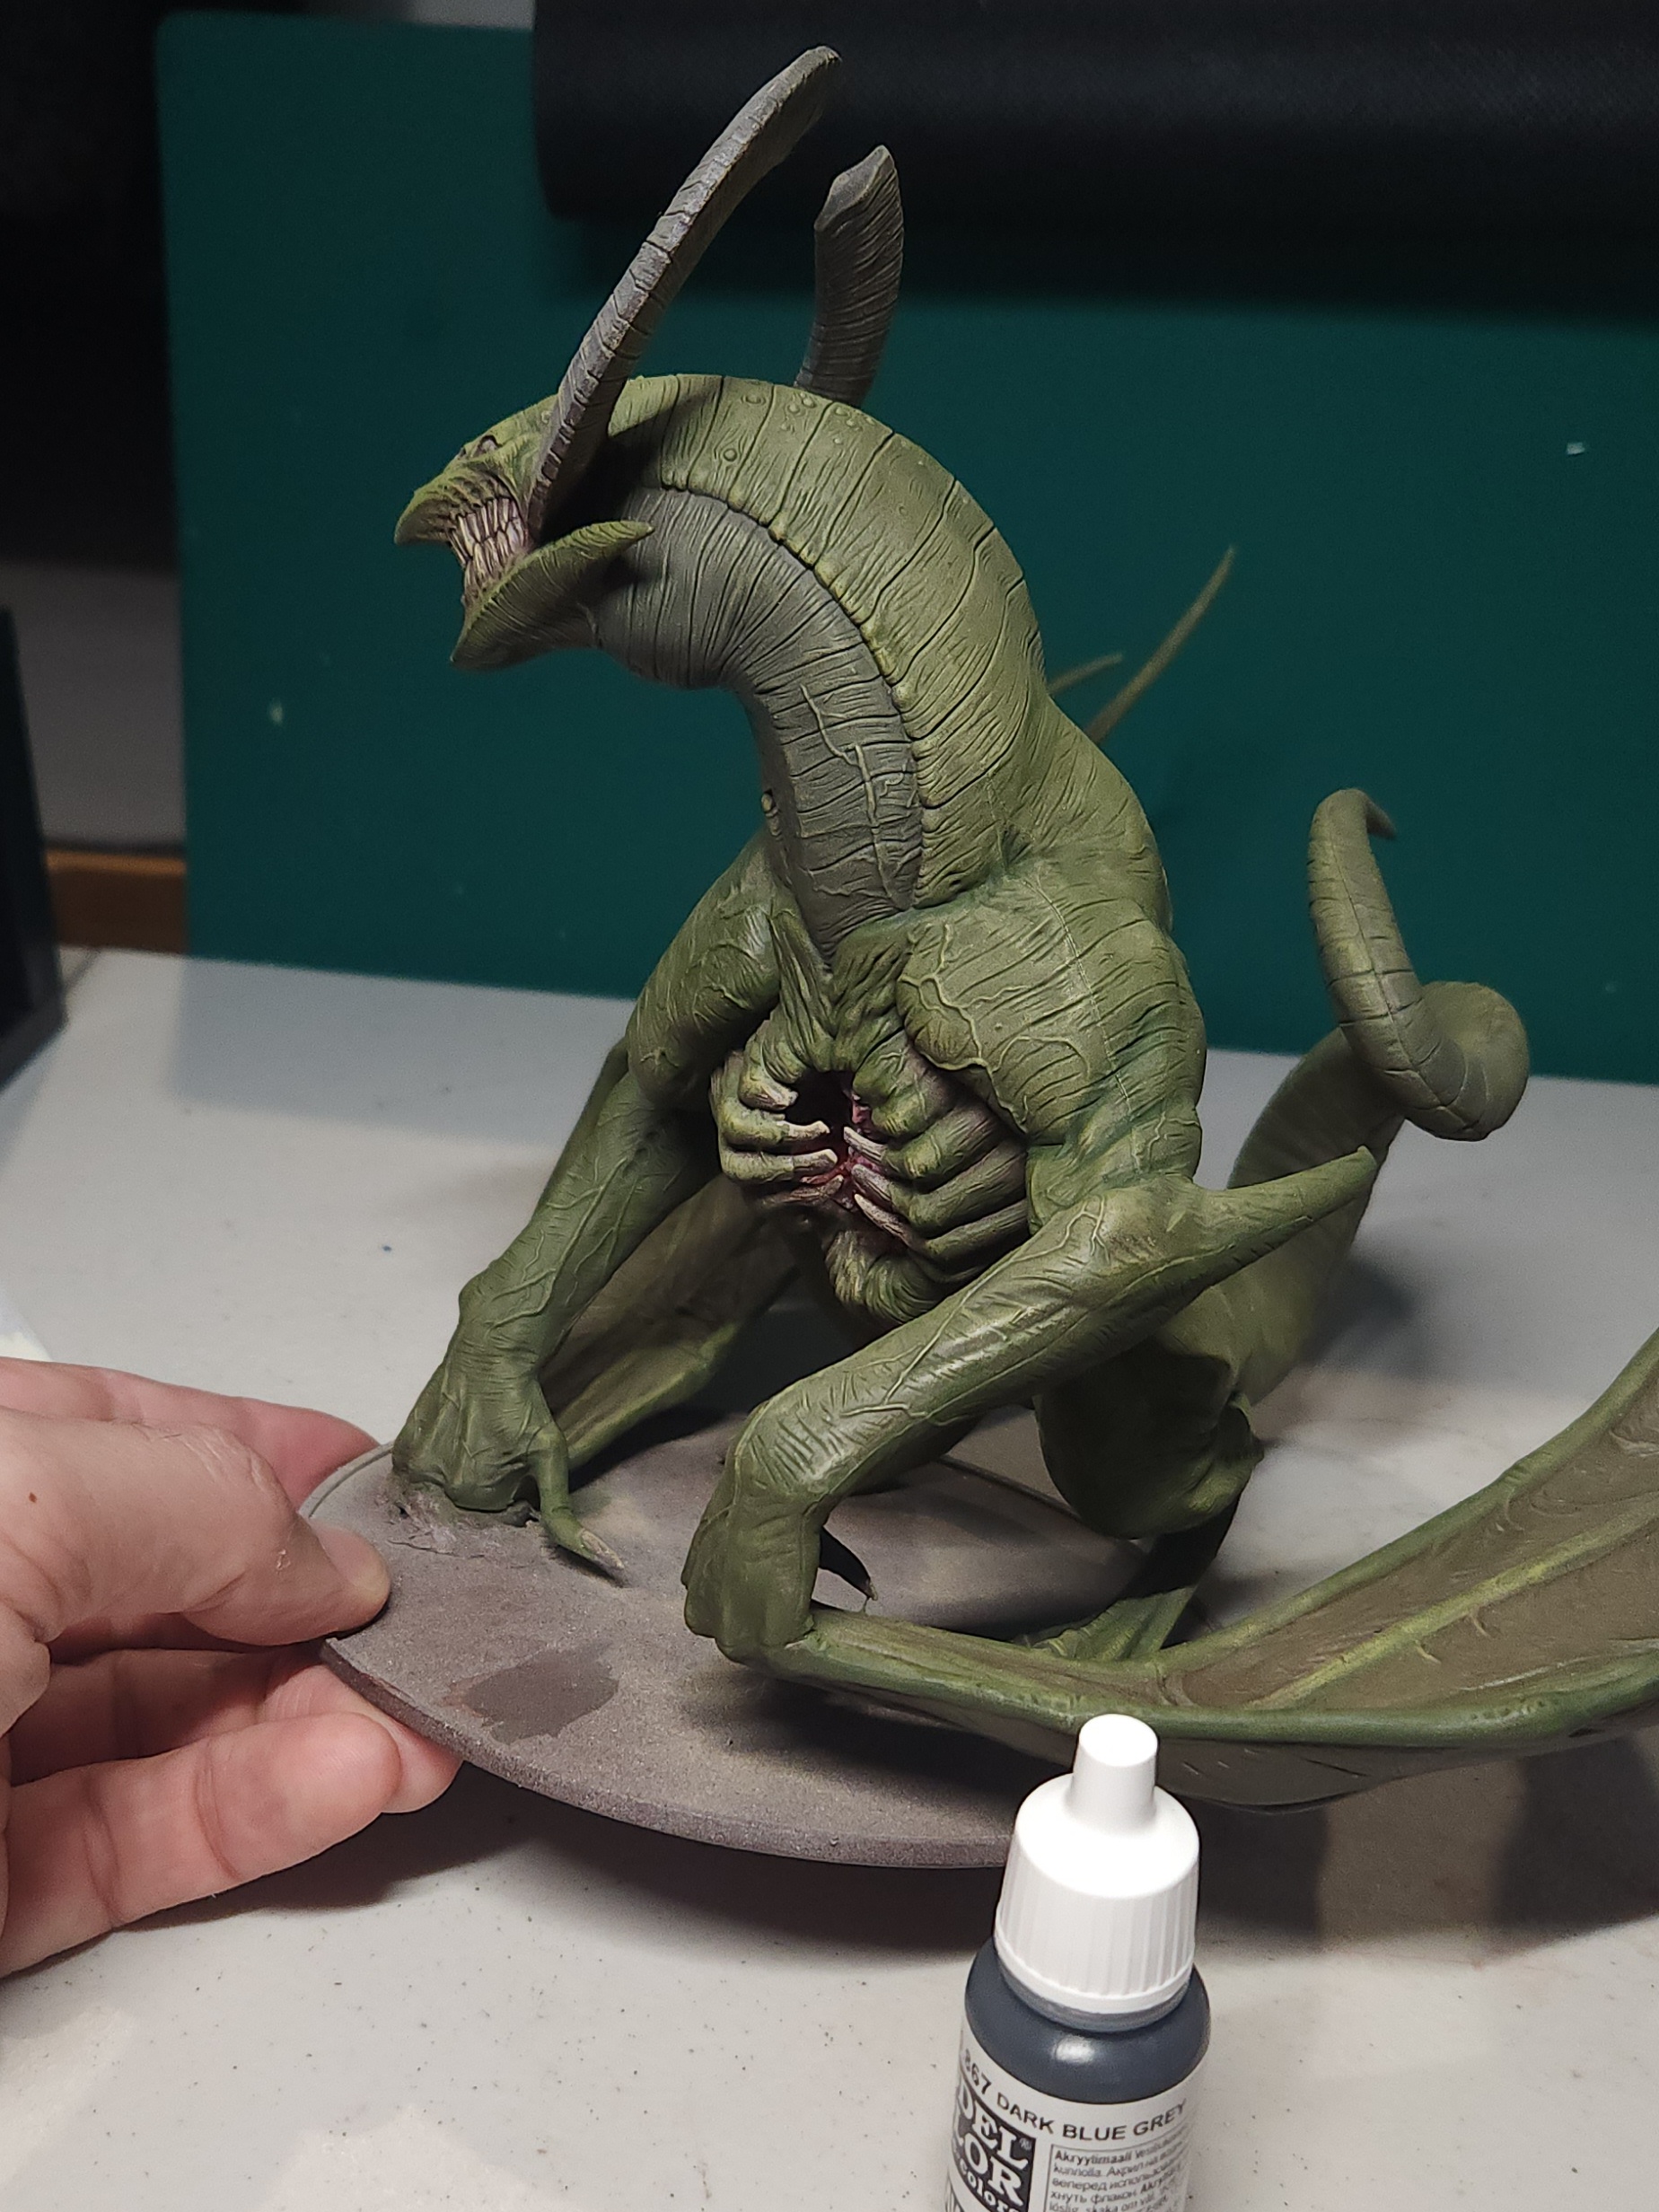
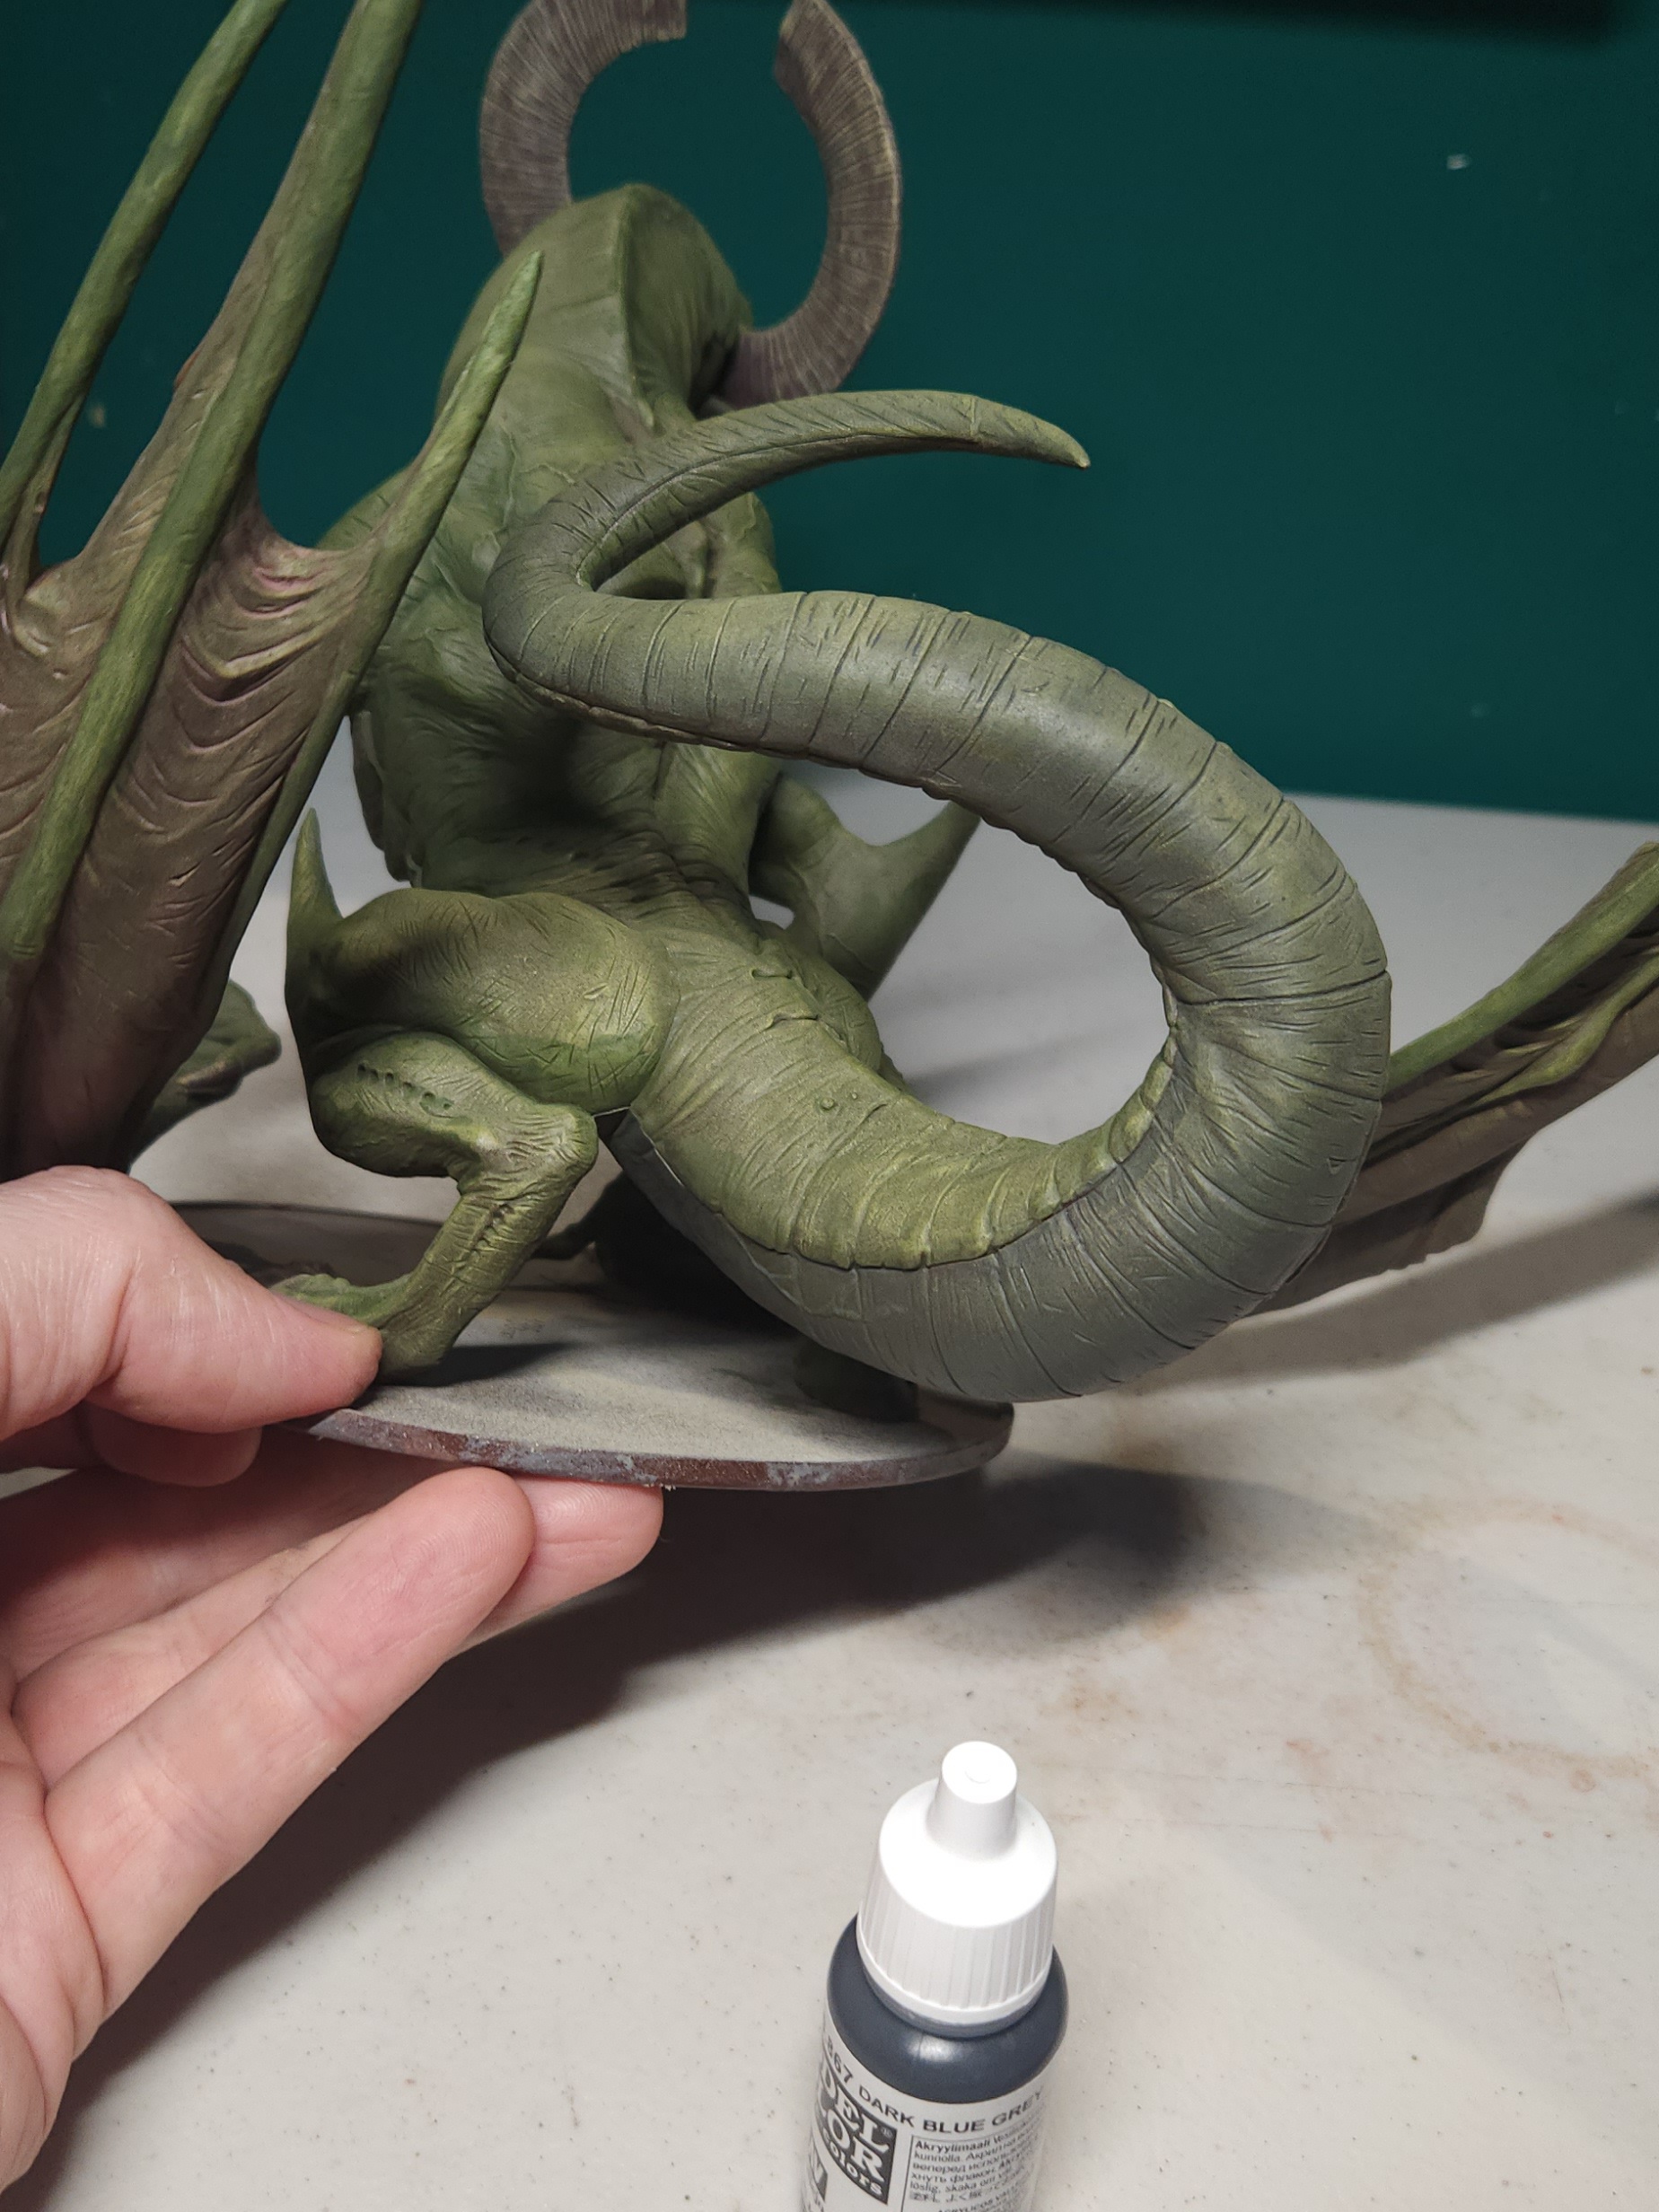
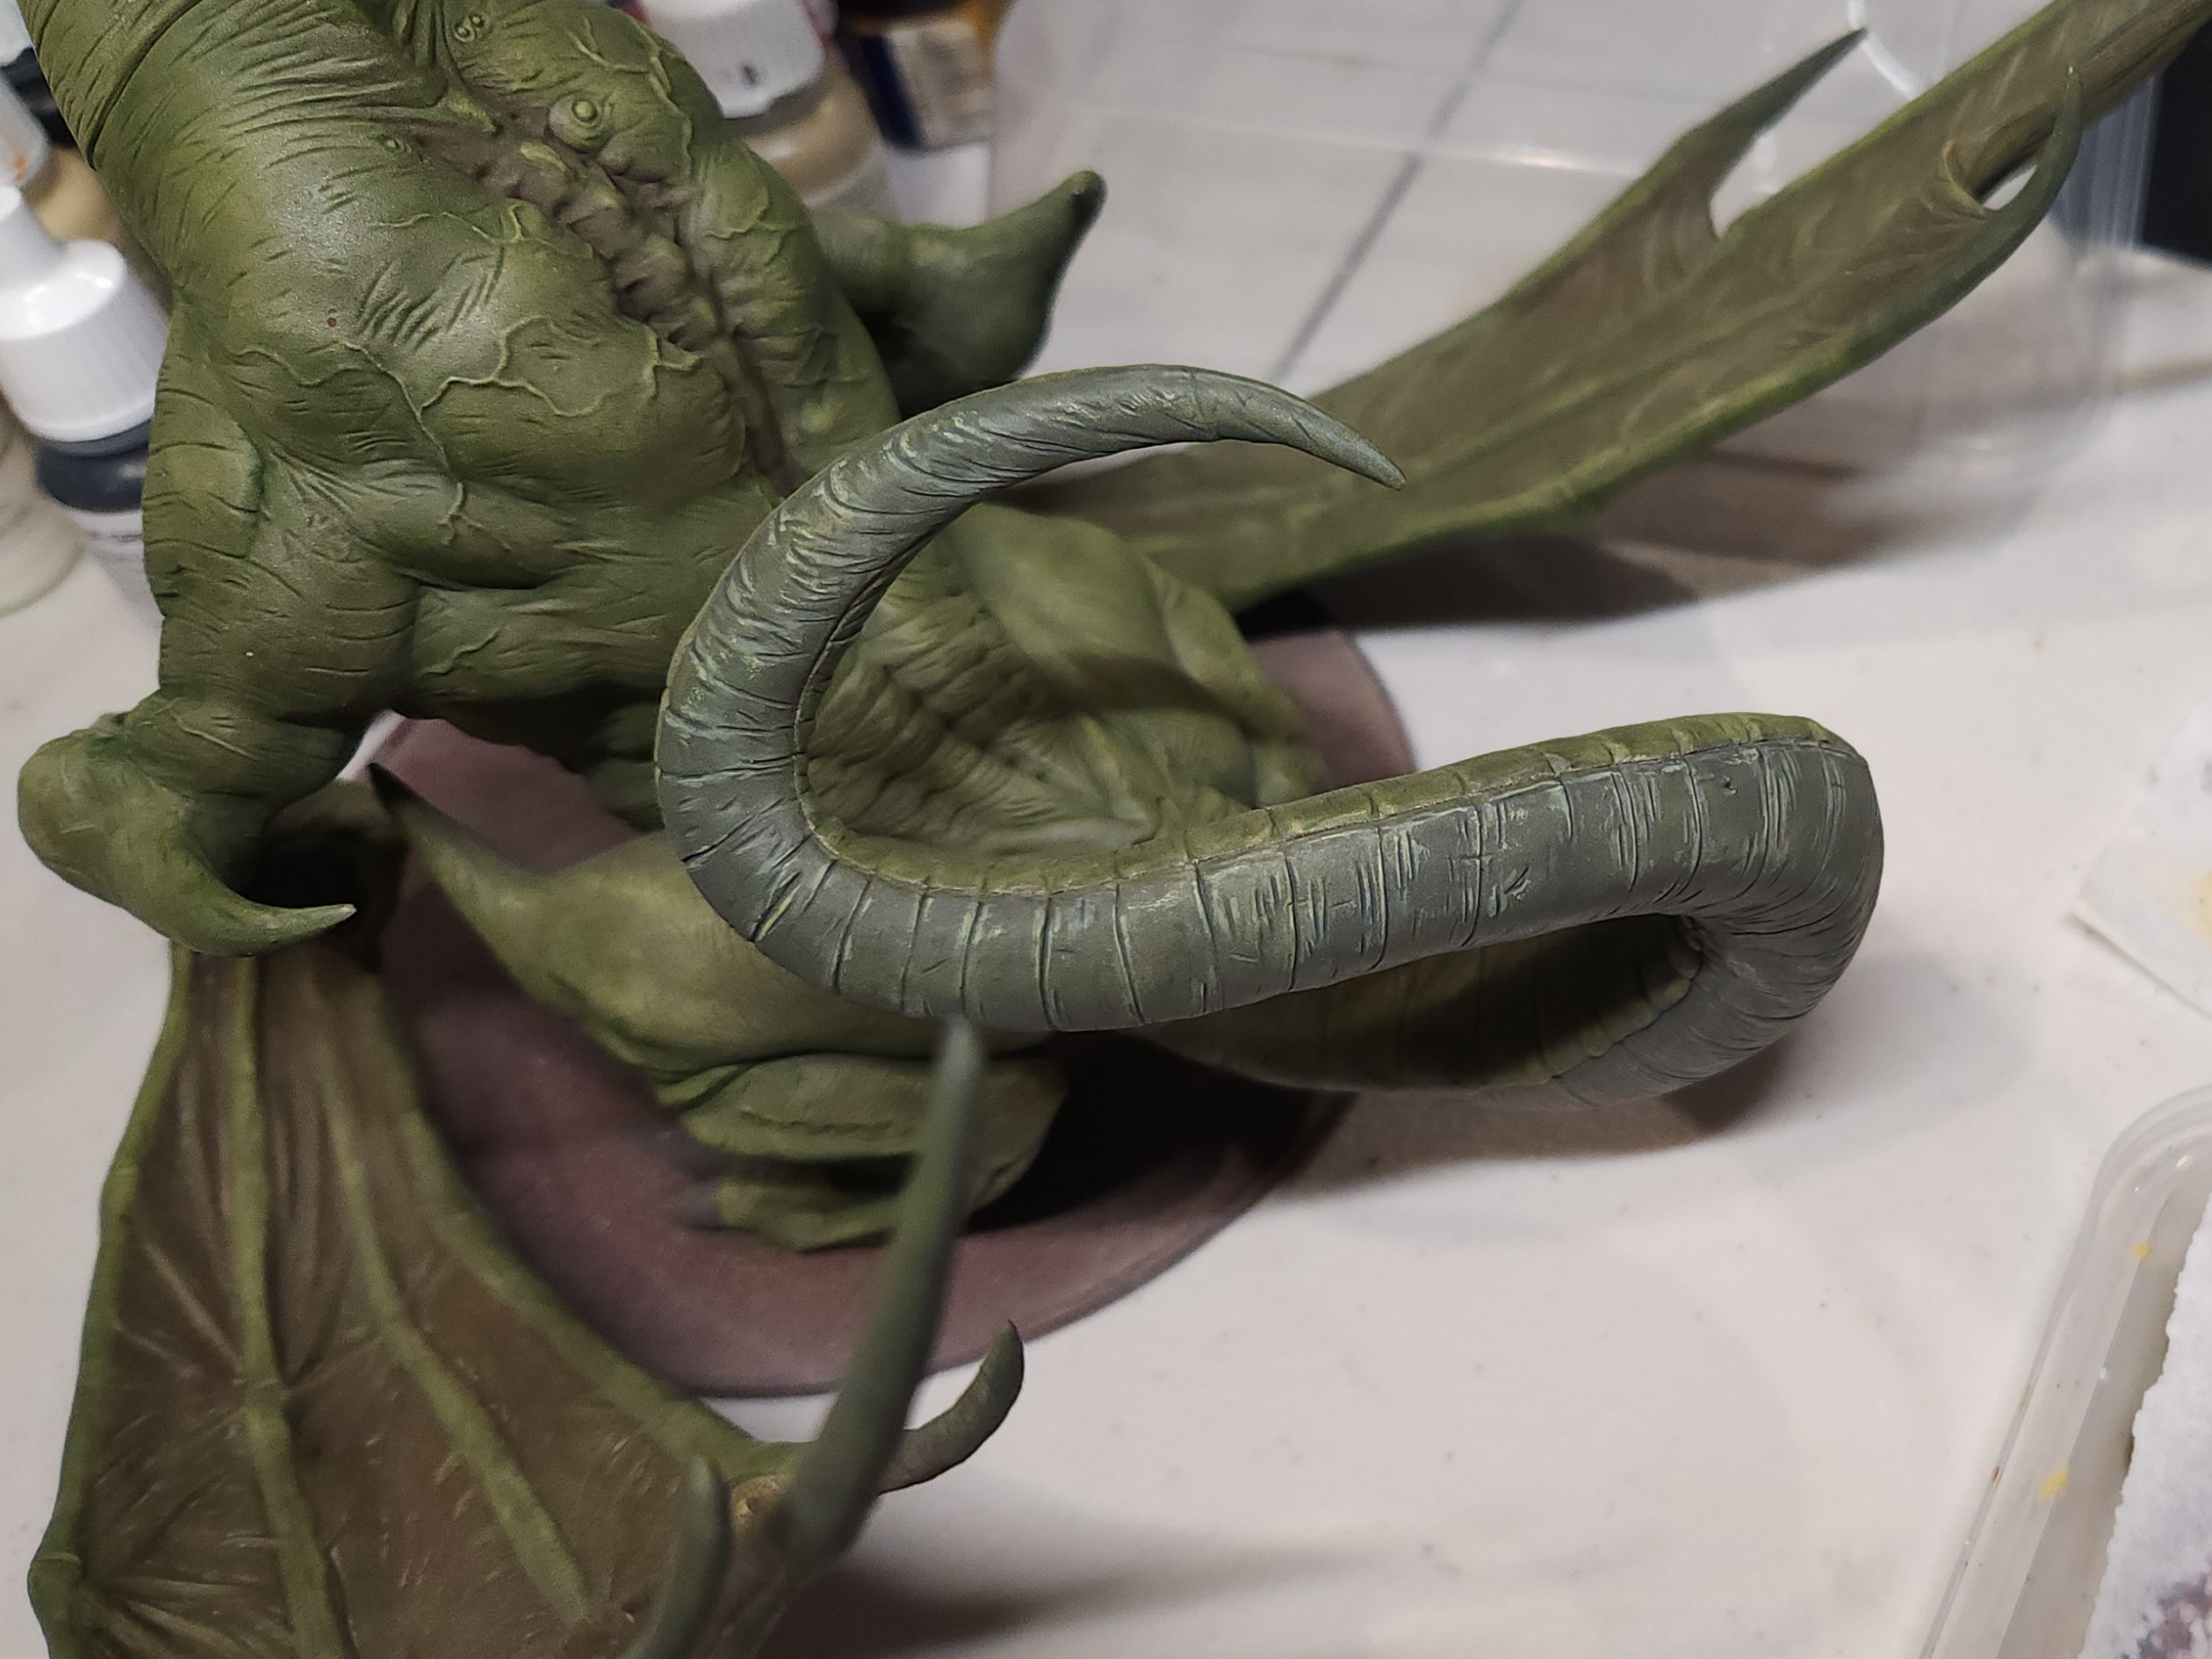
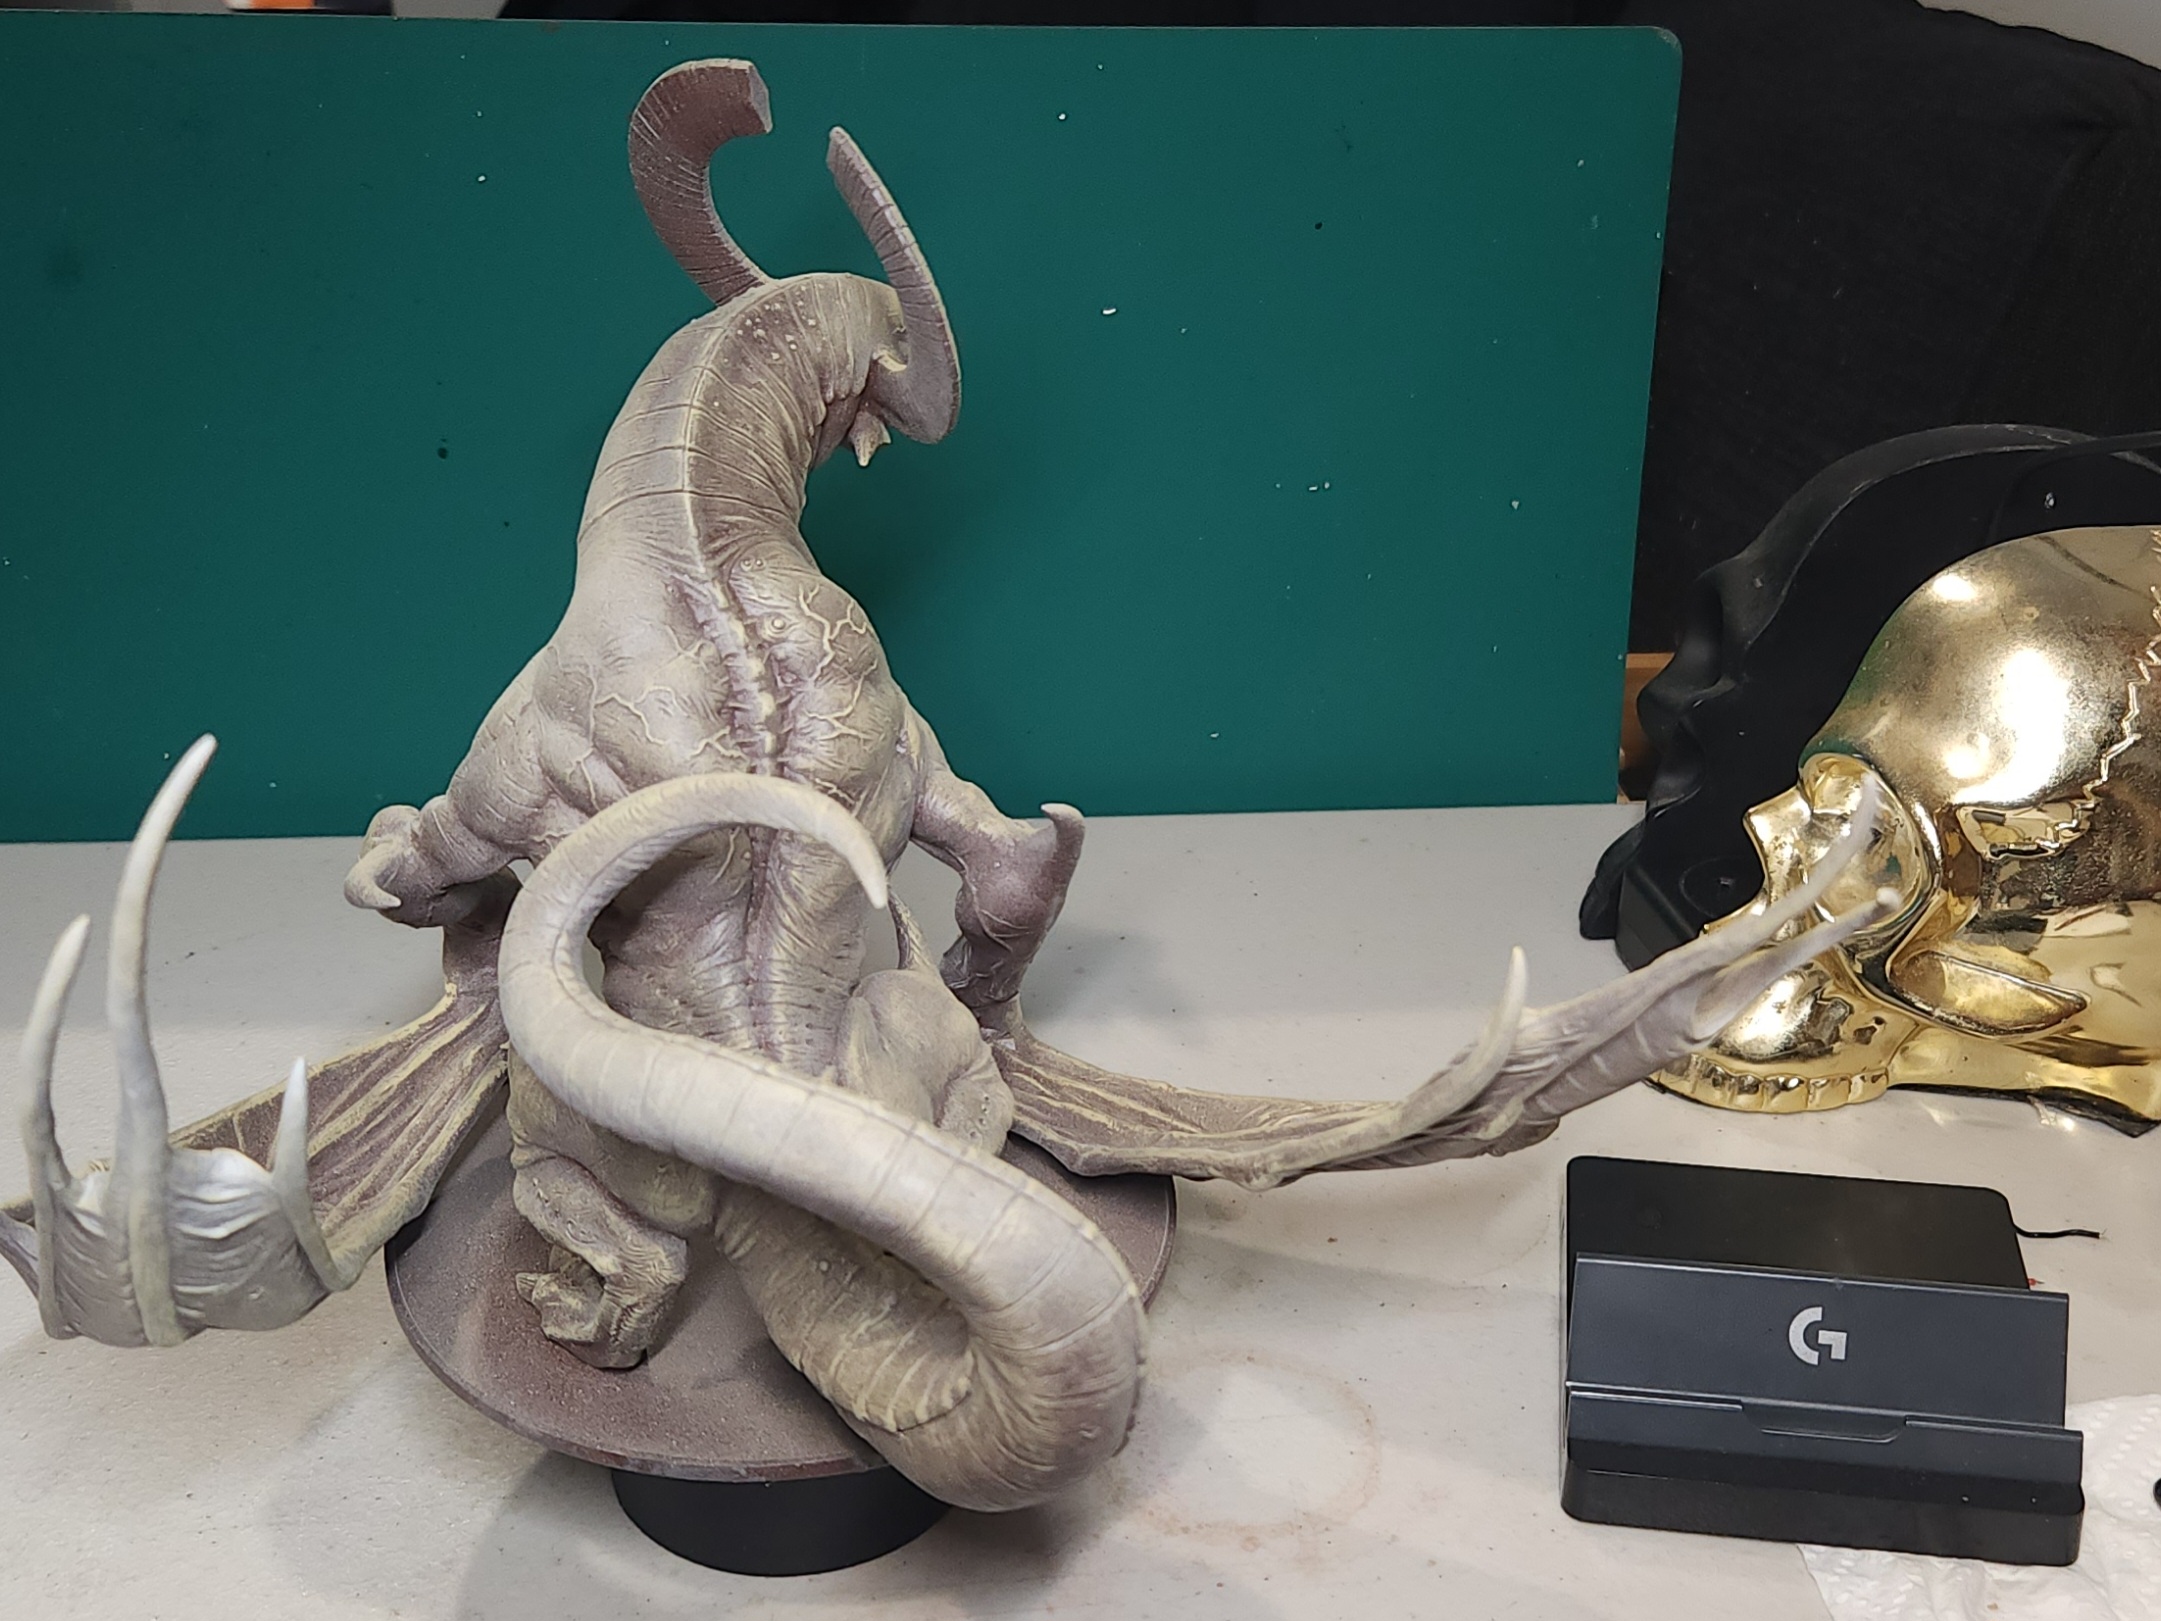
Work on the detail for the horns, claws and ribs begins.
For these components, I made a thin wash of Vallejo Black to run into the cracks and crevices.
This tinted the surfaces a bit to dark, so I re-did a layer of the Vallejo Dark Blue Grey.
For first level highlights I mixed a little Vallejo Buff into the Blue Grey.
Second level highlights were just pure Buff, used very sparingly on hard edges.
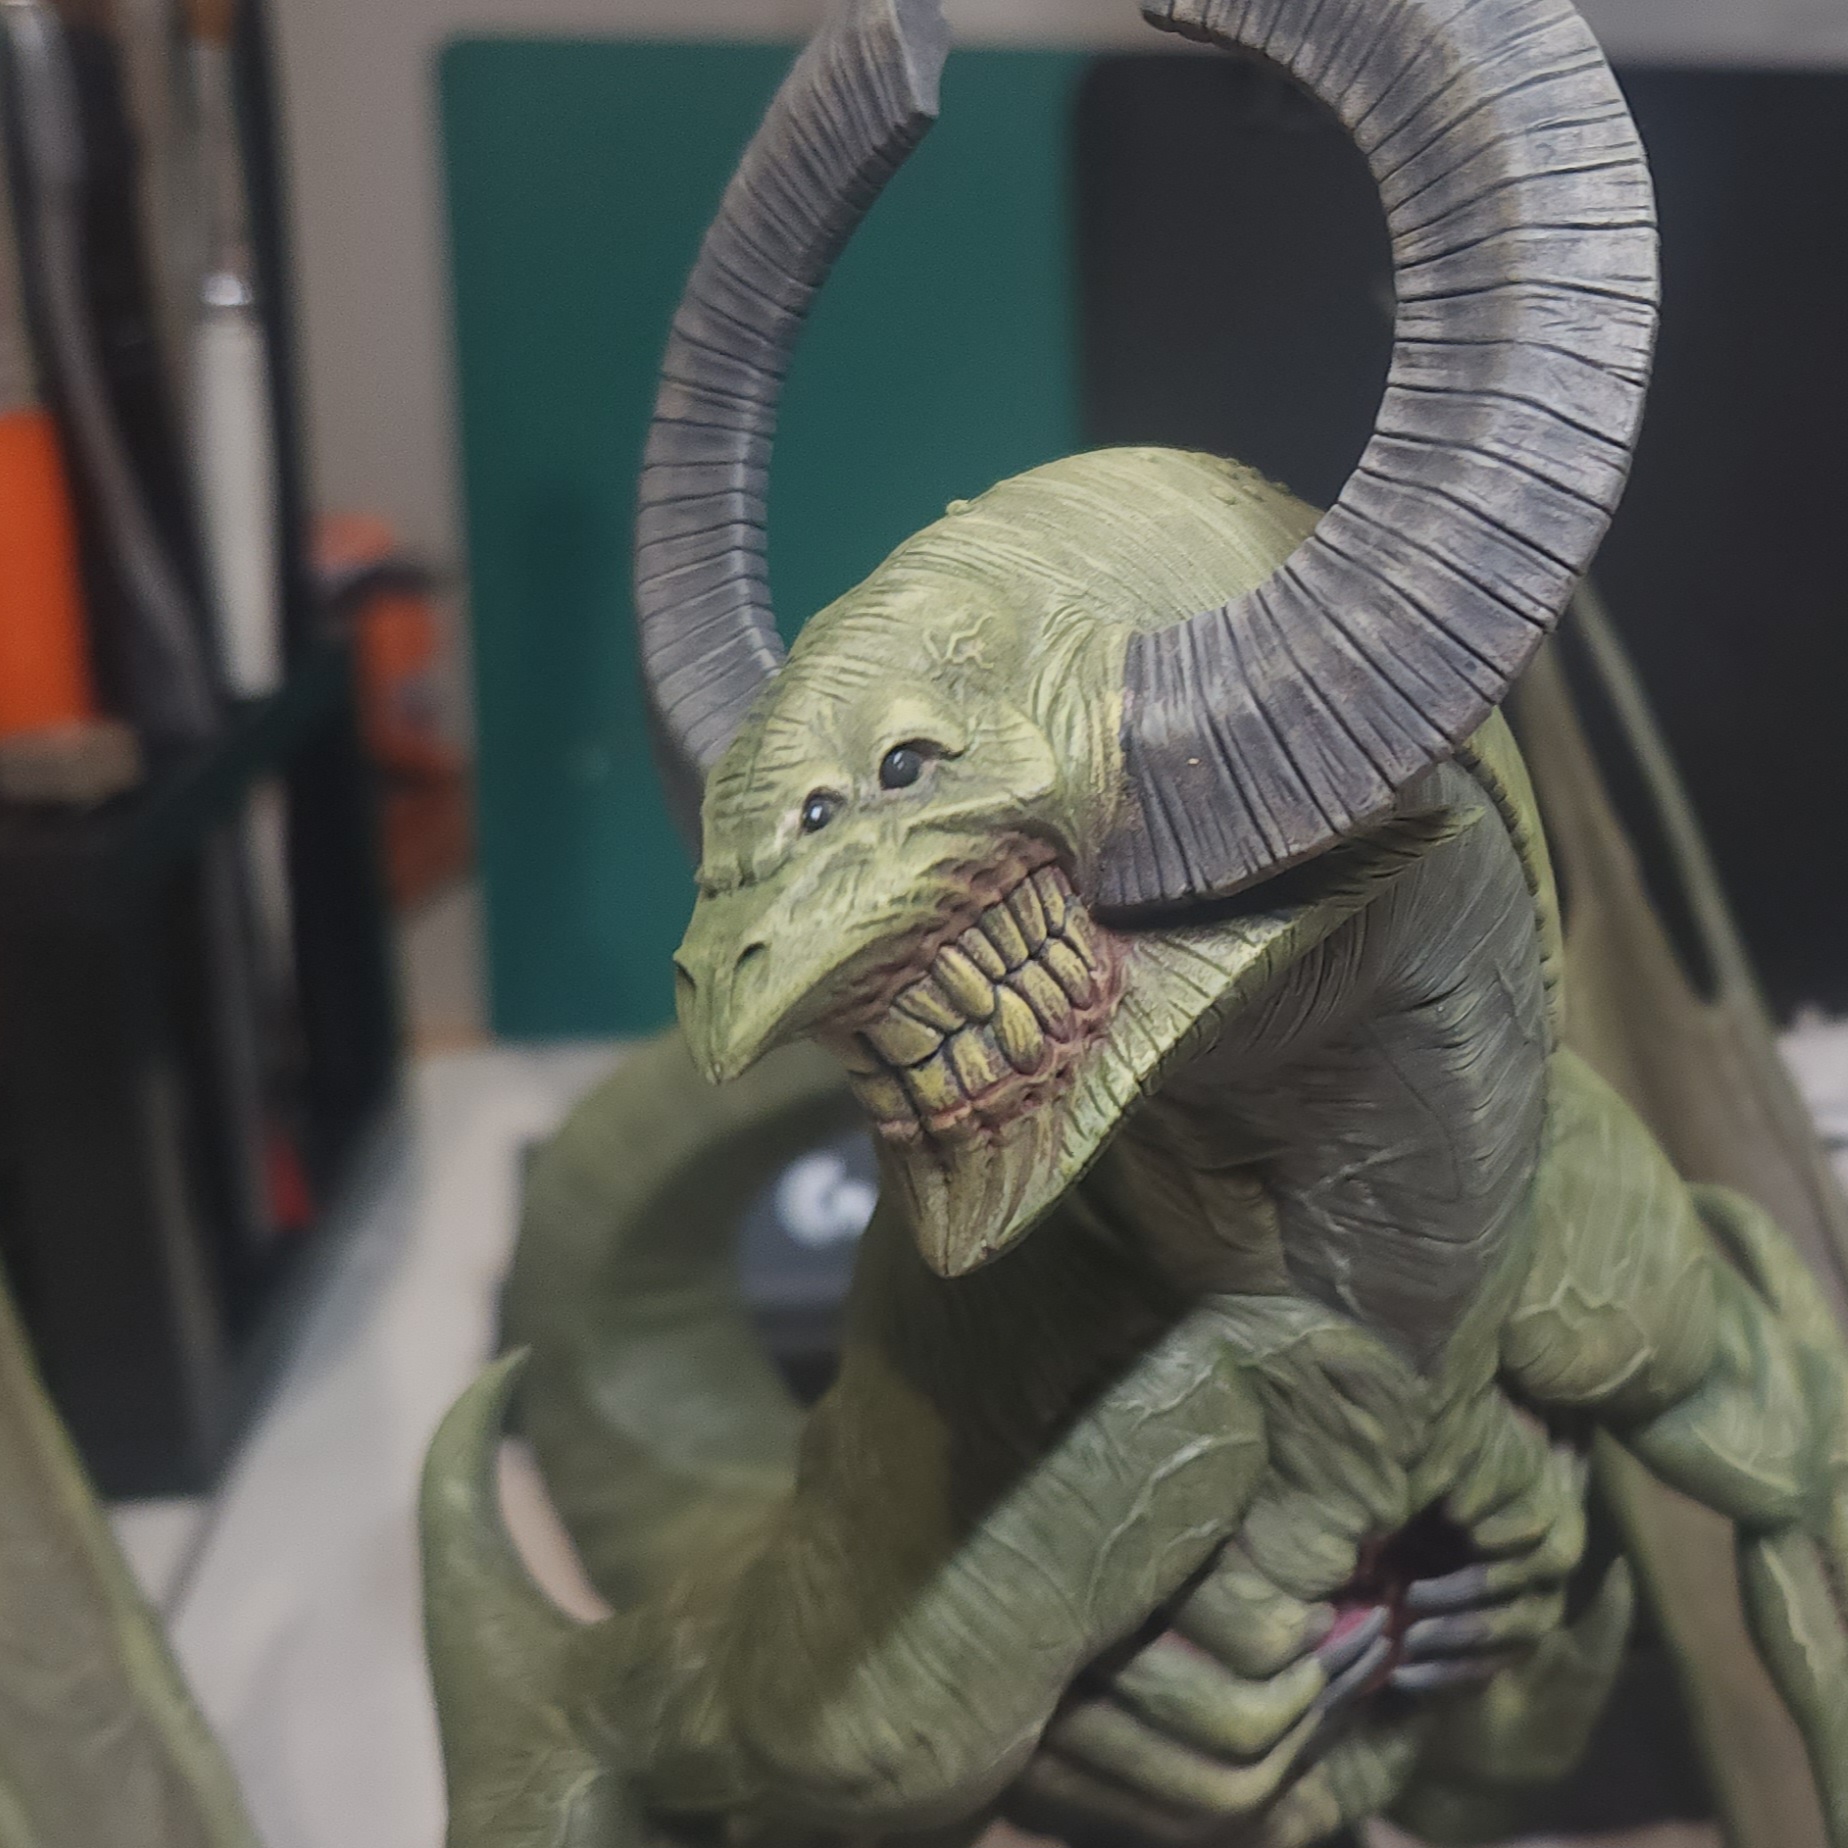
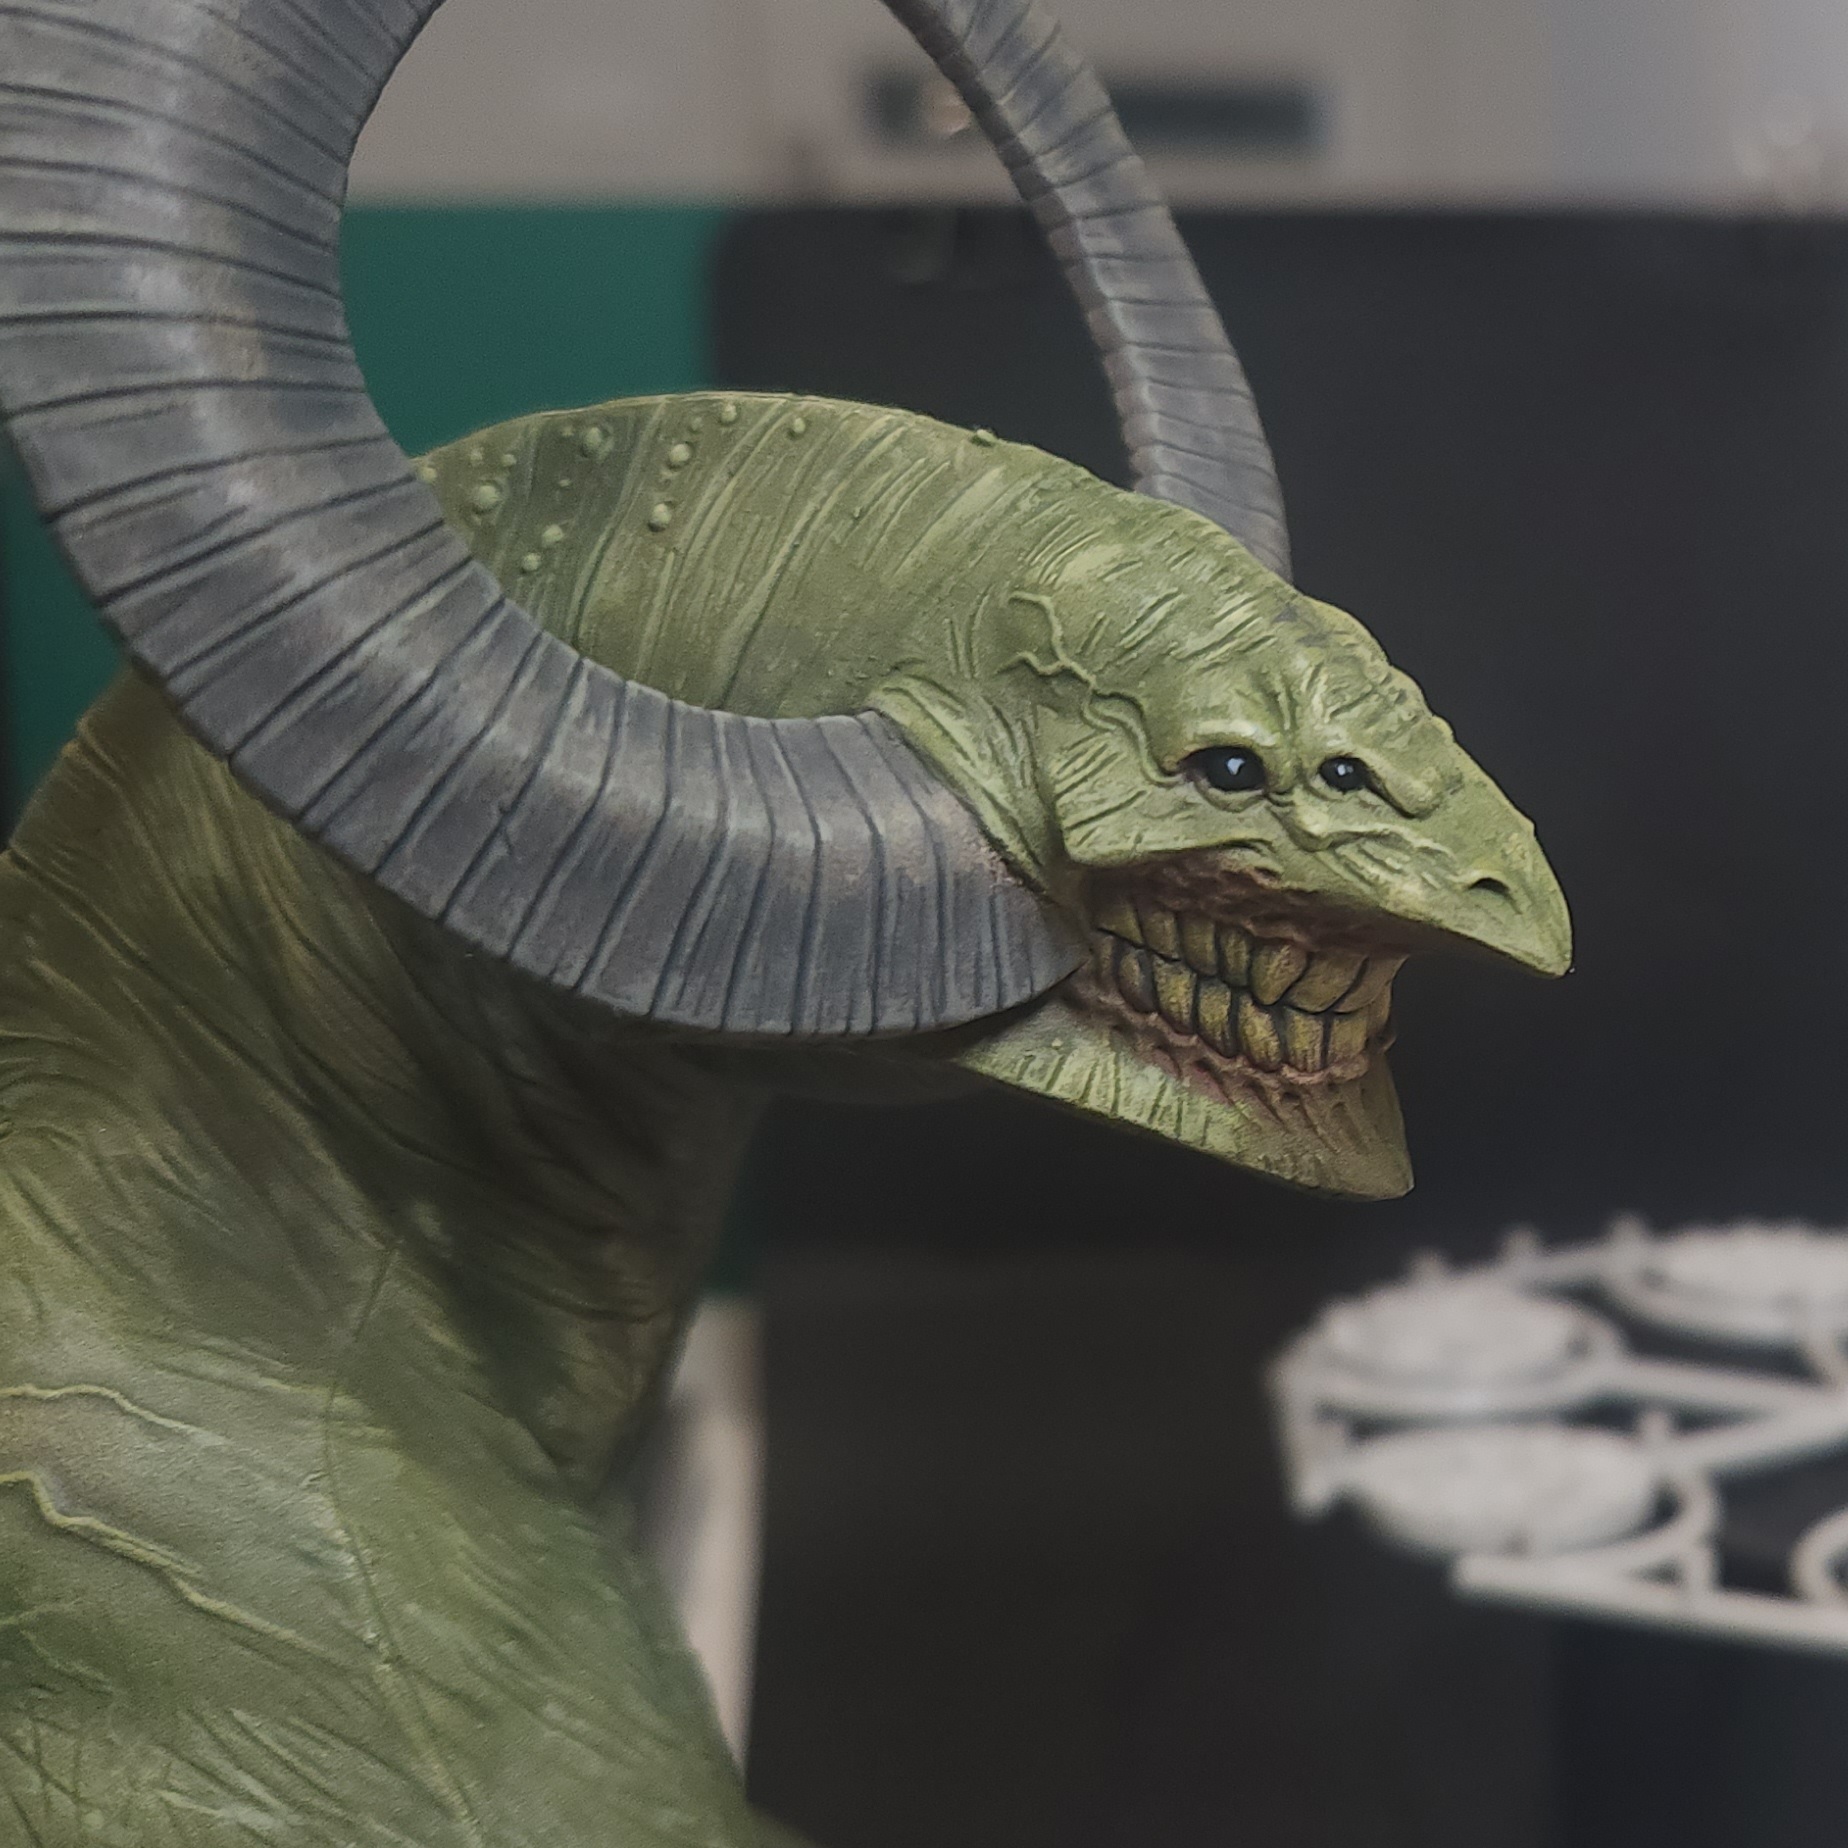
While I had the black on the palette, I also black-lined the teeth and went with the shark inspiration, black eyes.
 Happy with where I'm up to so far, but time is running out...
22 Mar 25: Deeper into the detail
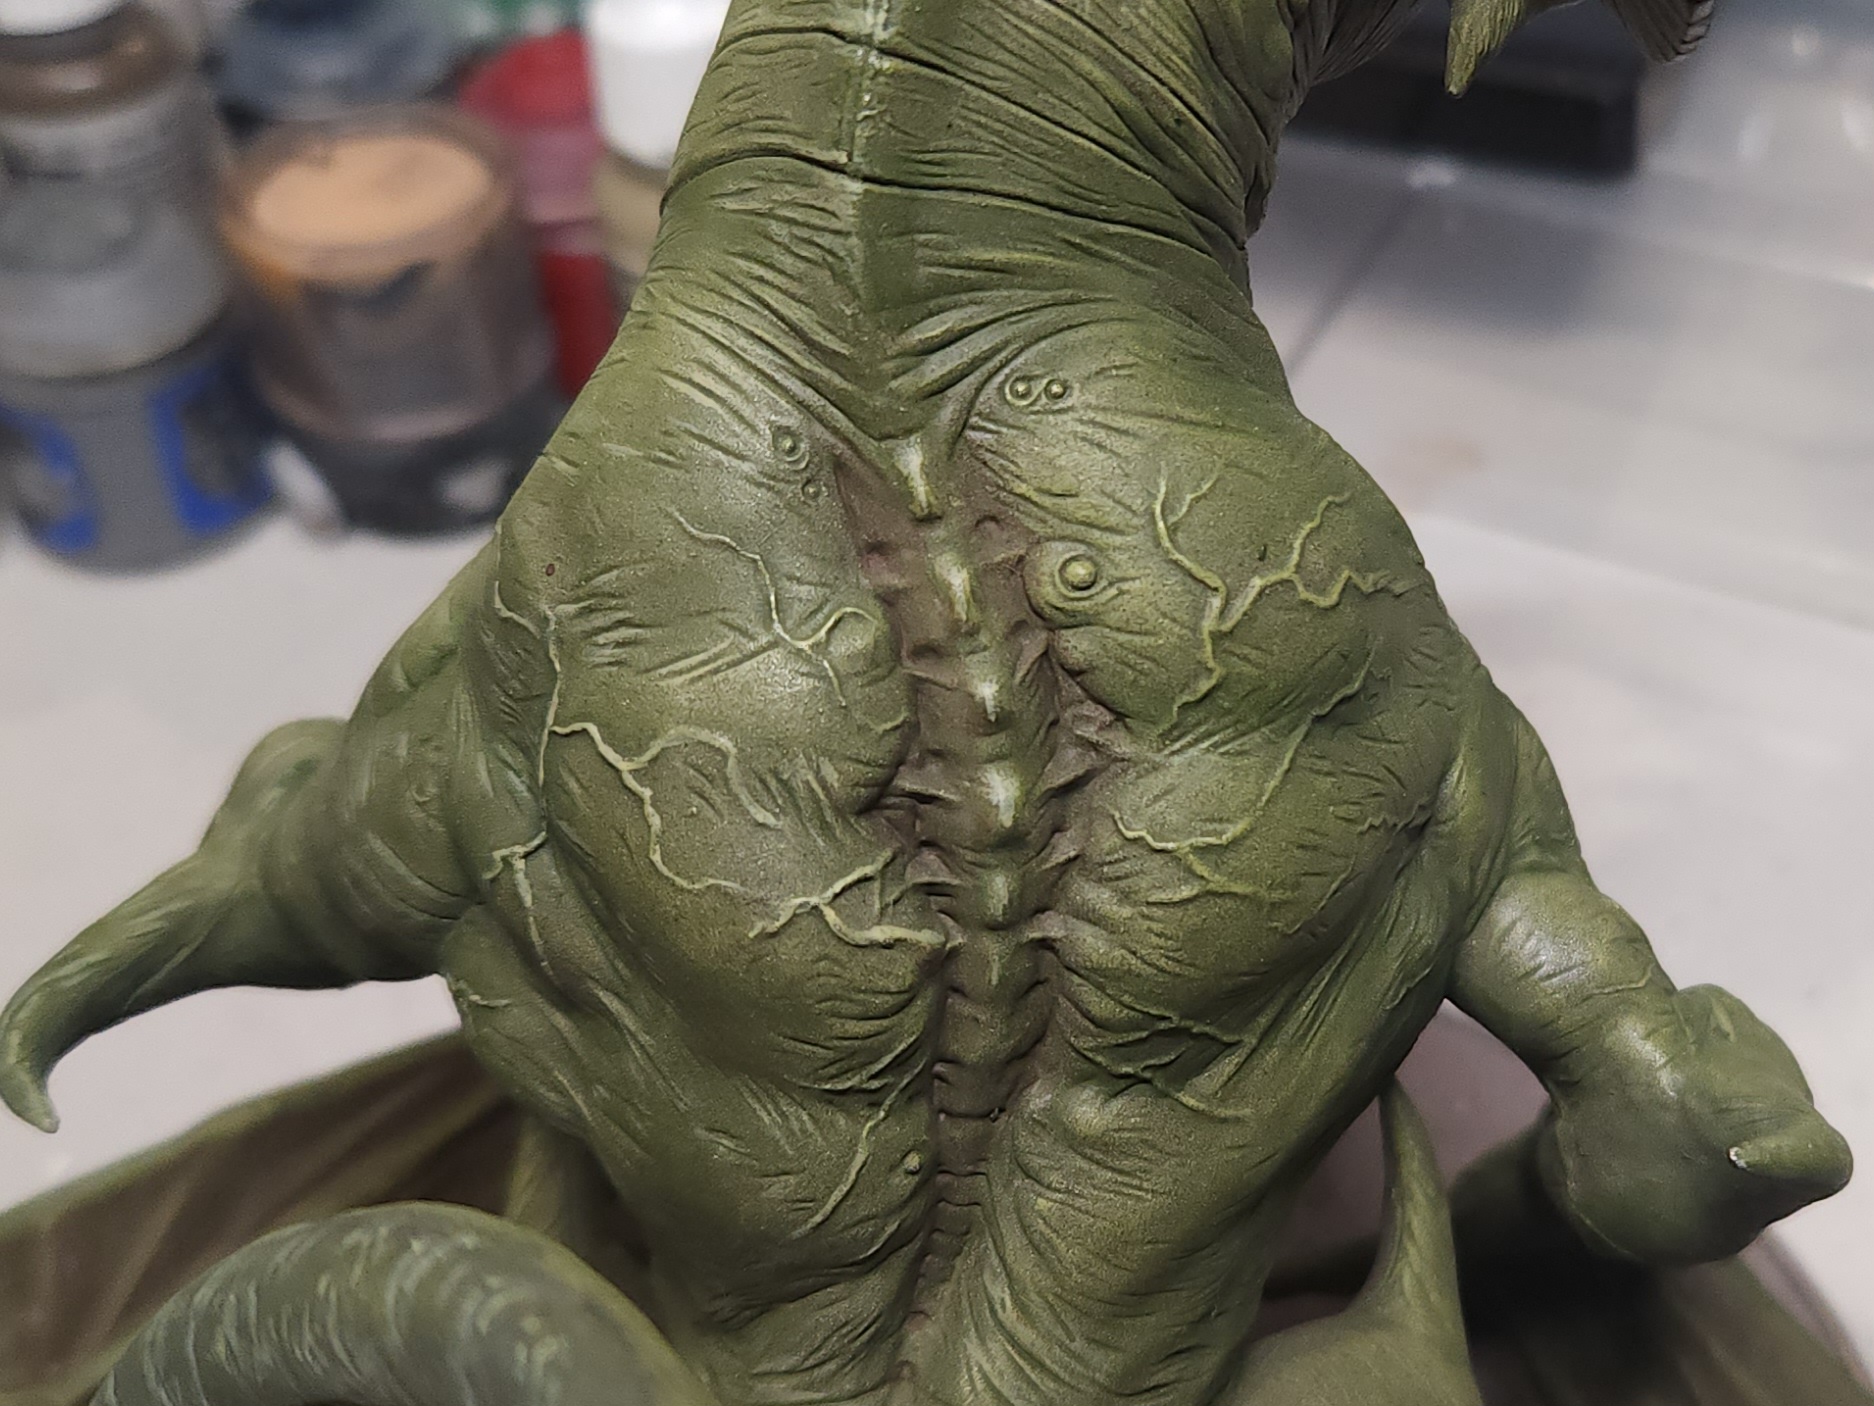
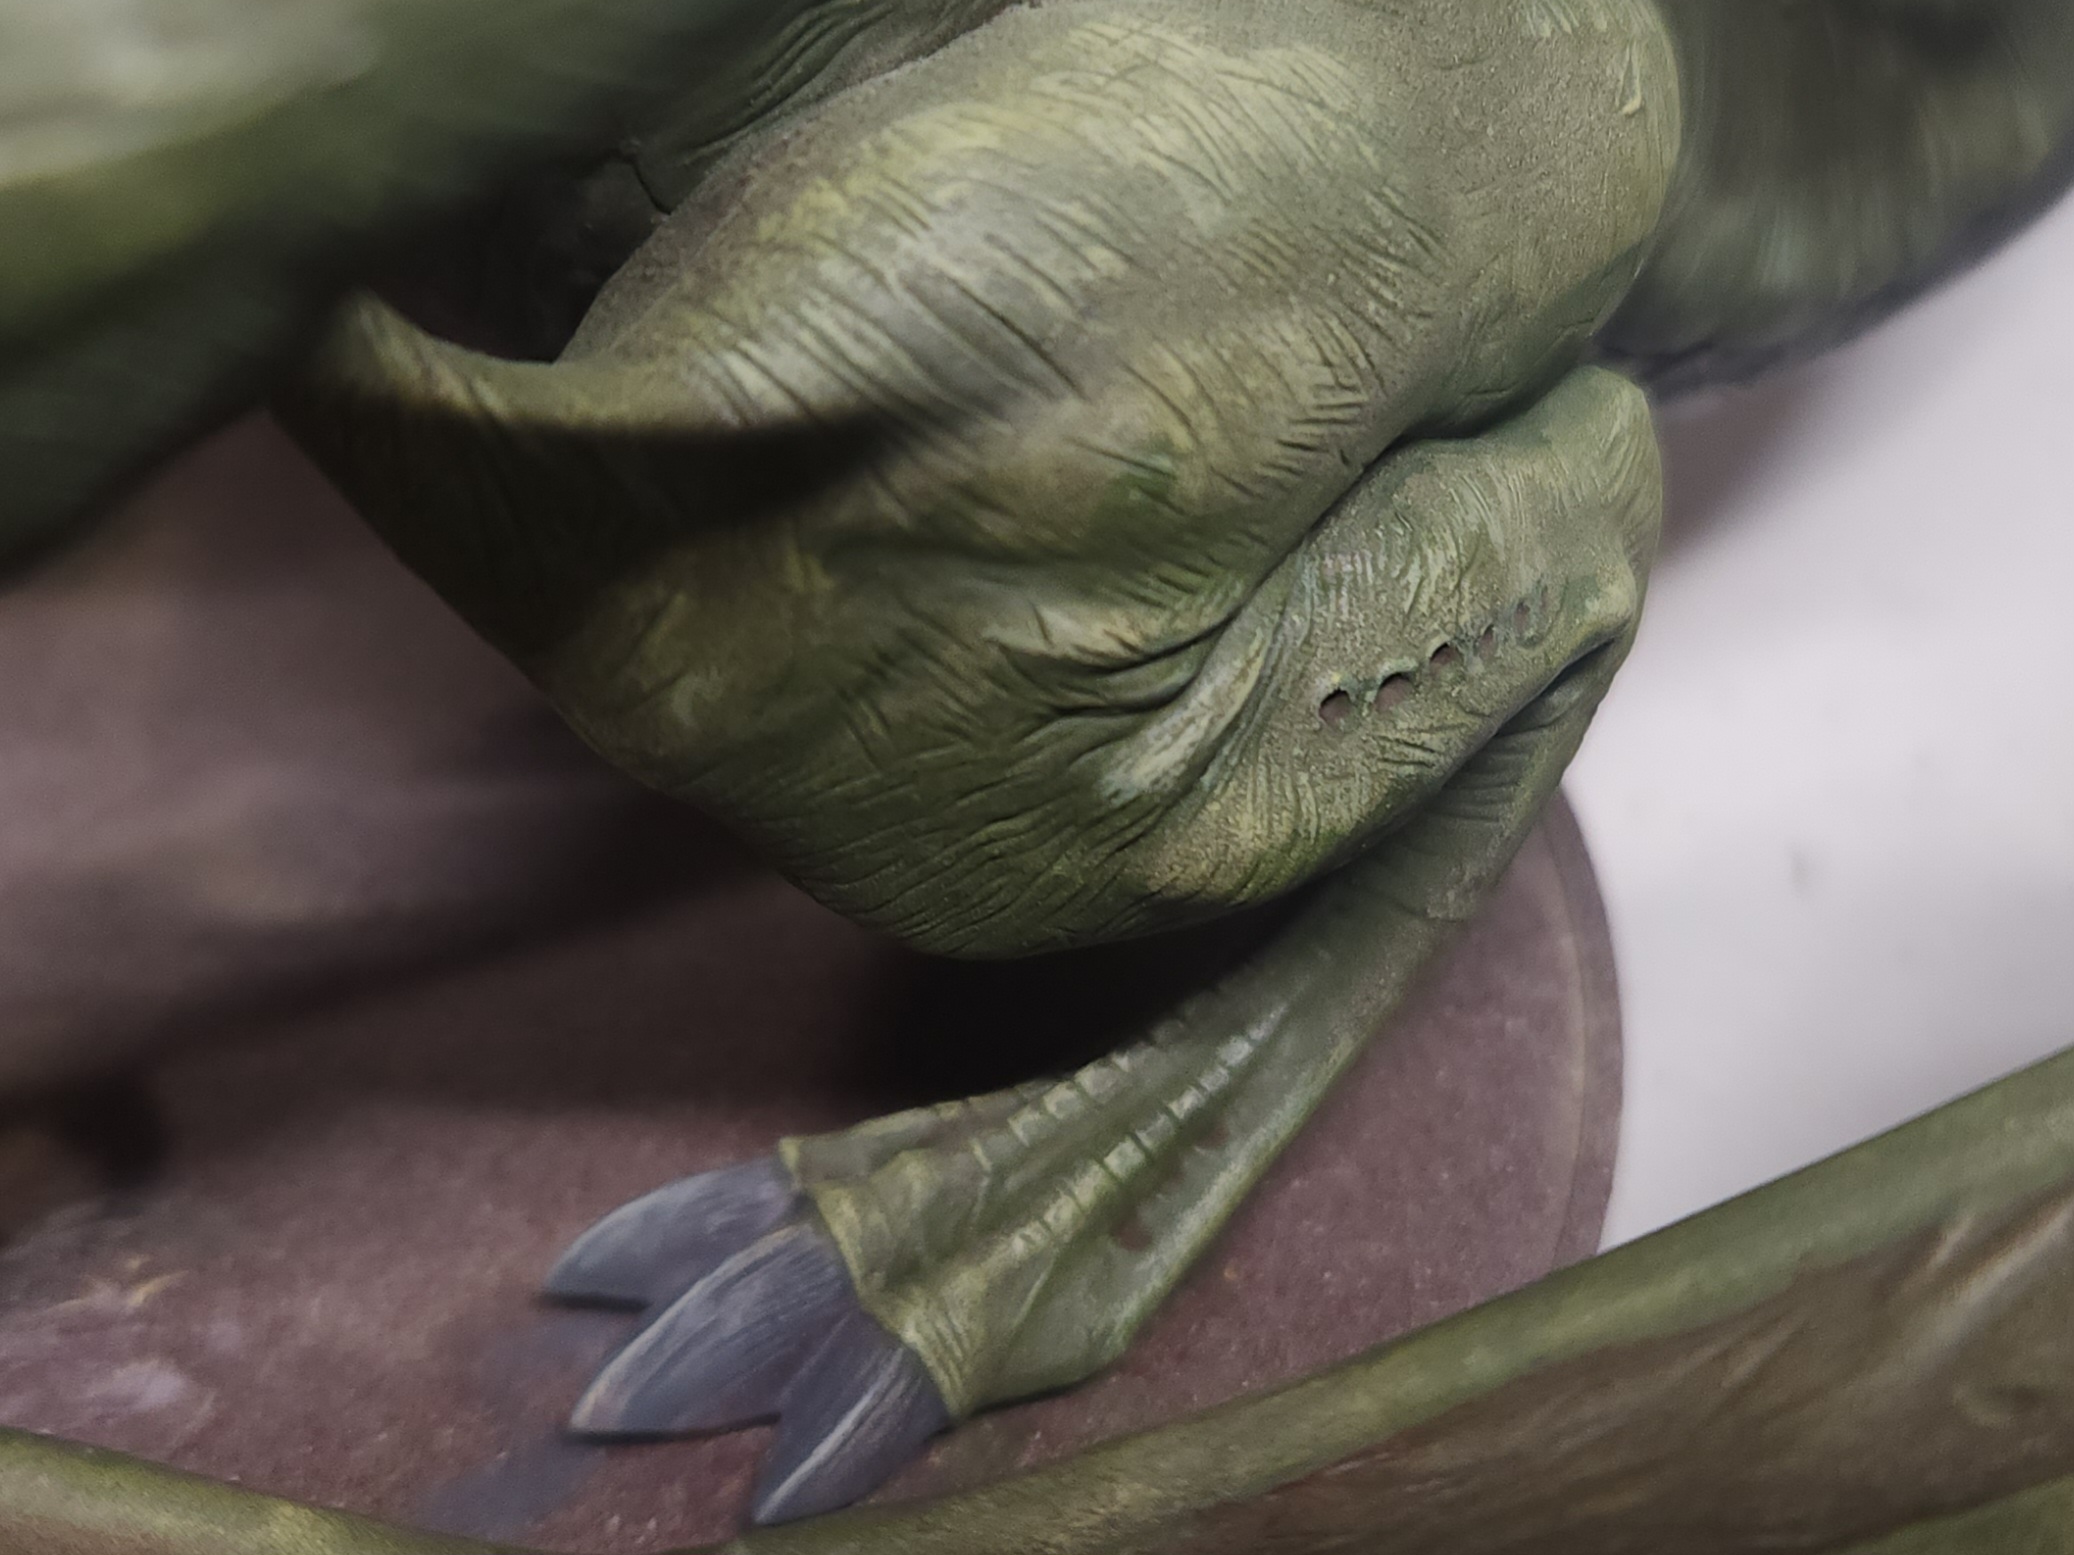
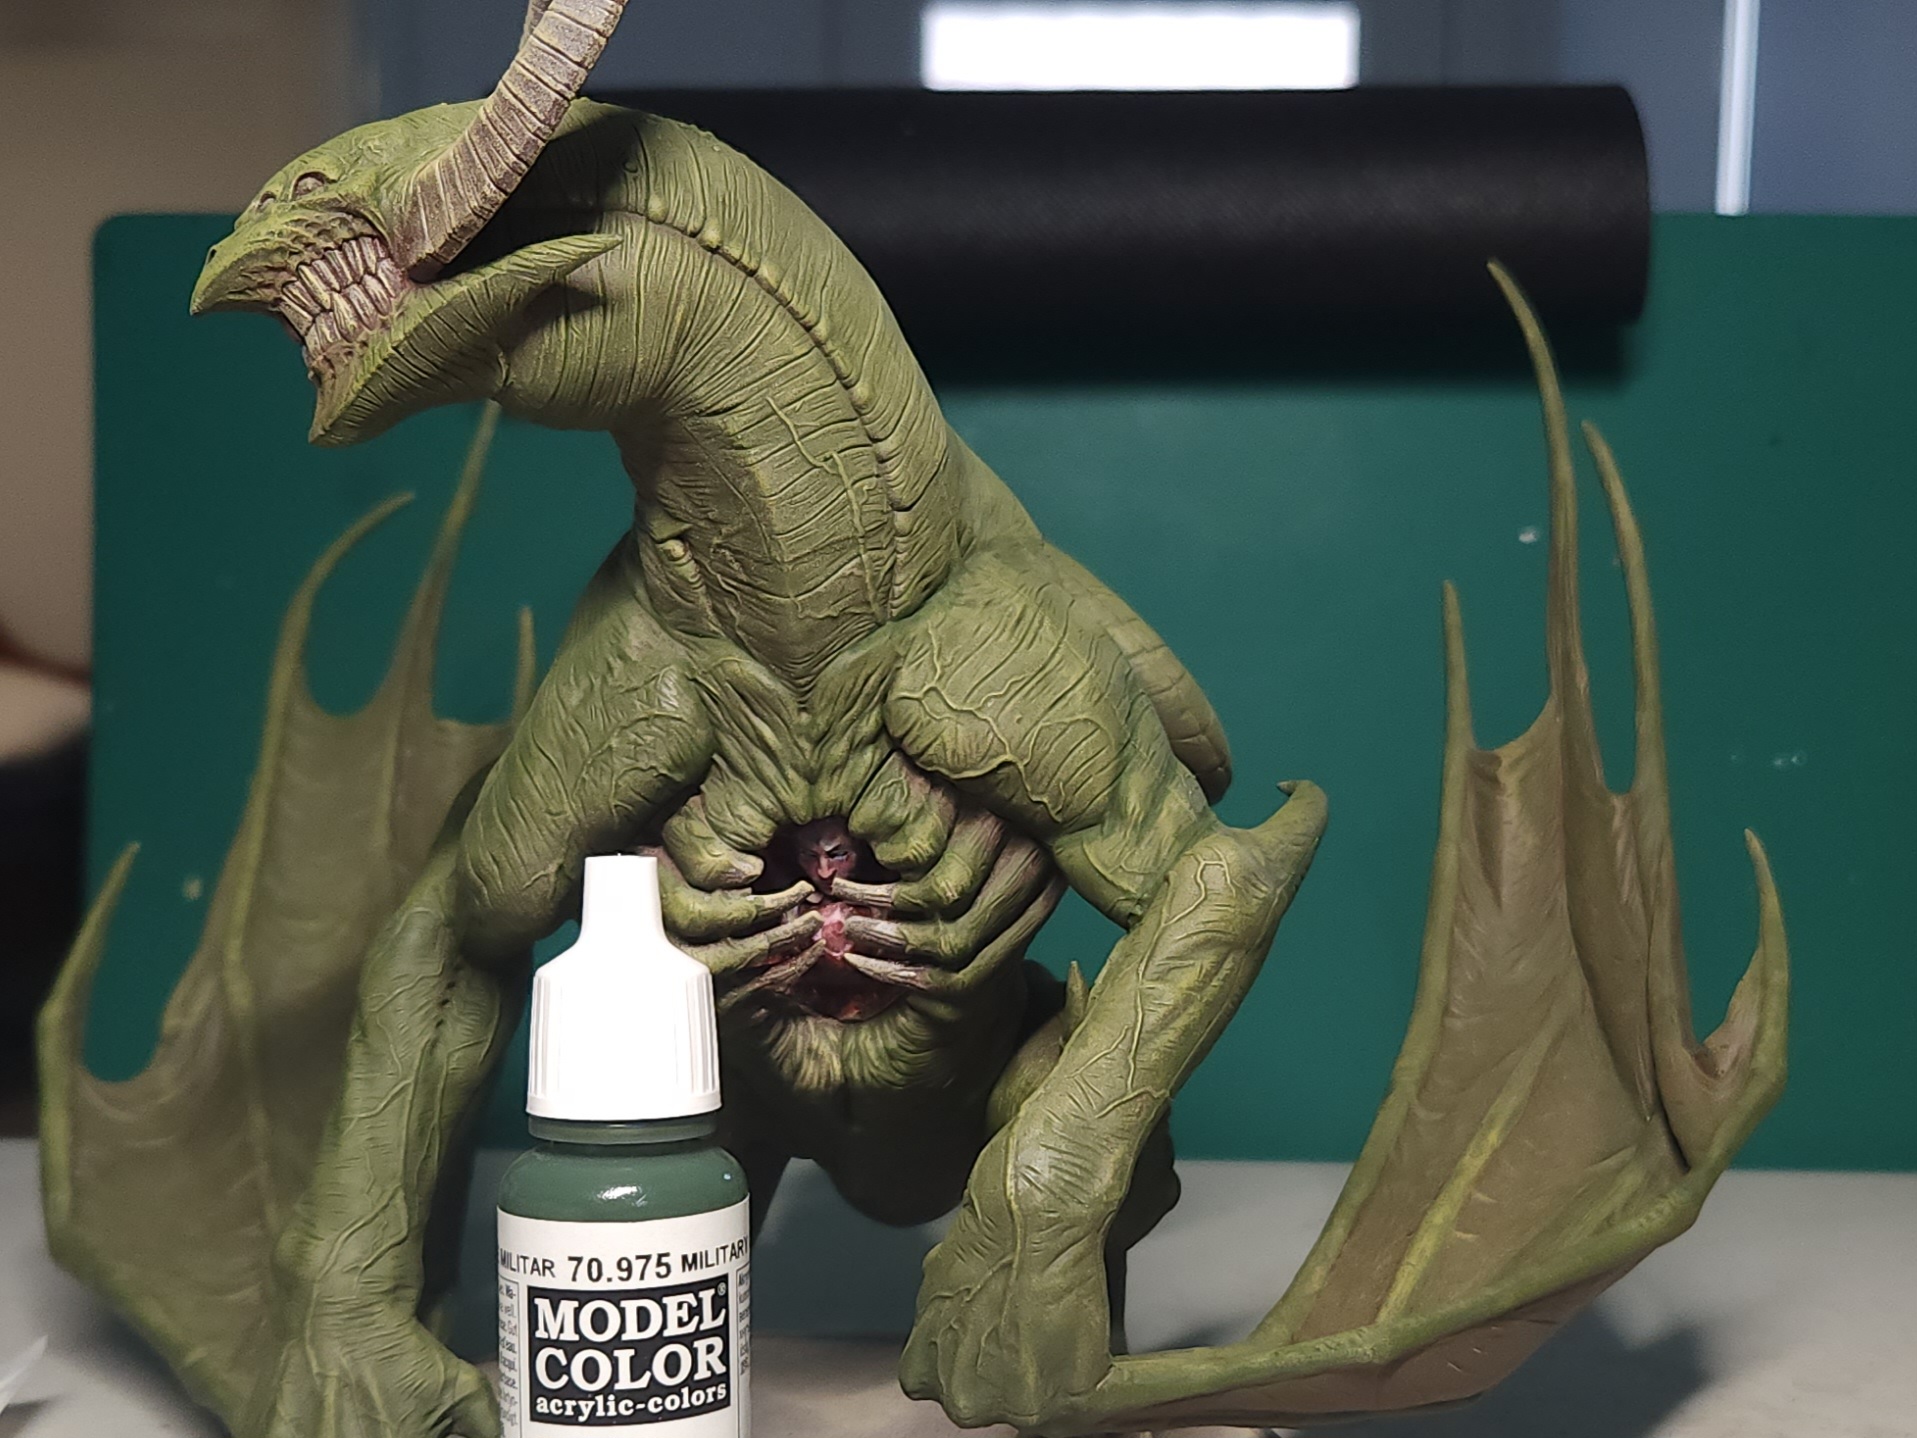 Shadows for the creases and folds in the skin, and the underside of the body.
For the shadows and underside of the skin I used Vallejo Military Green.
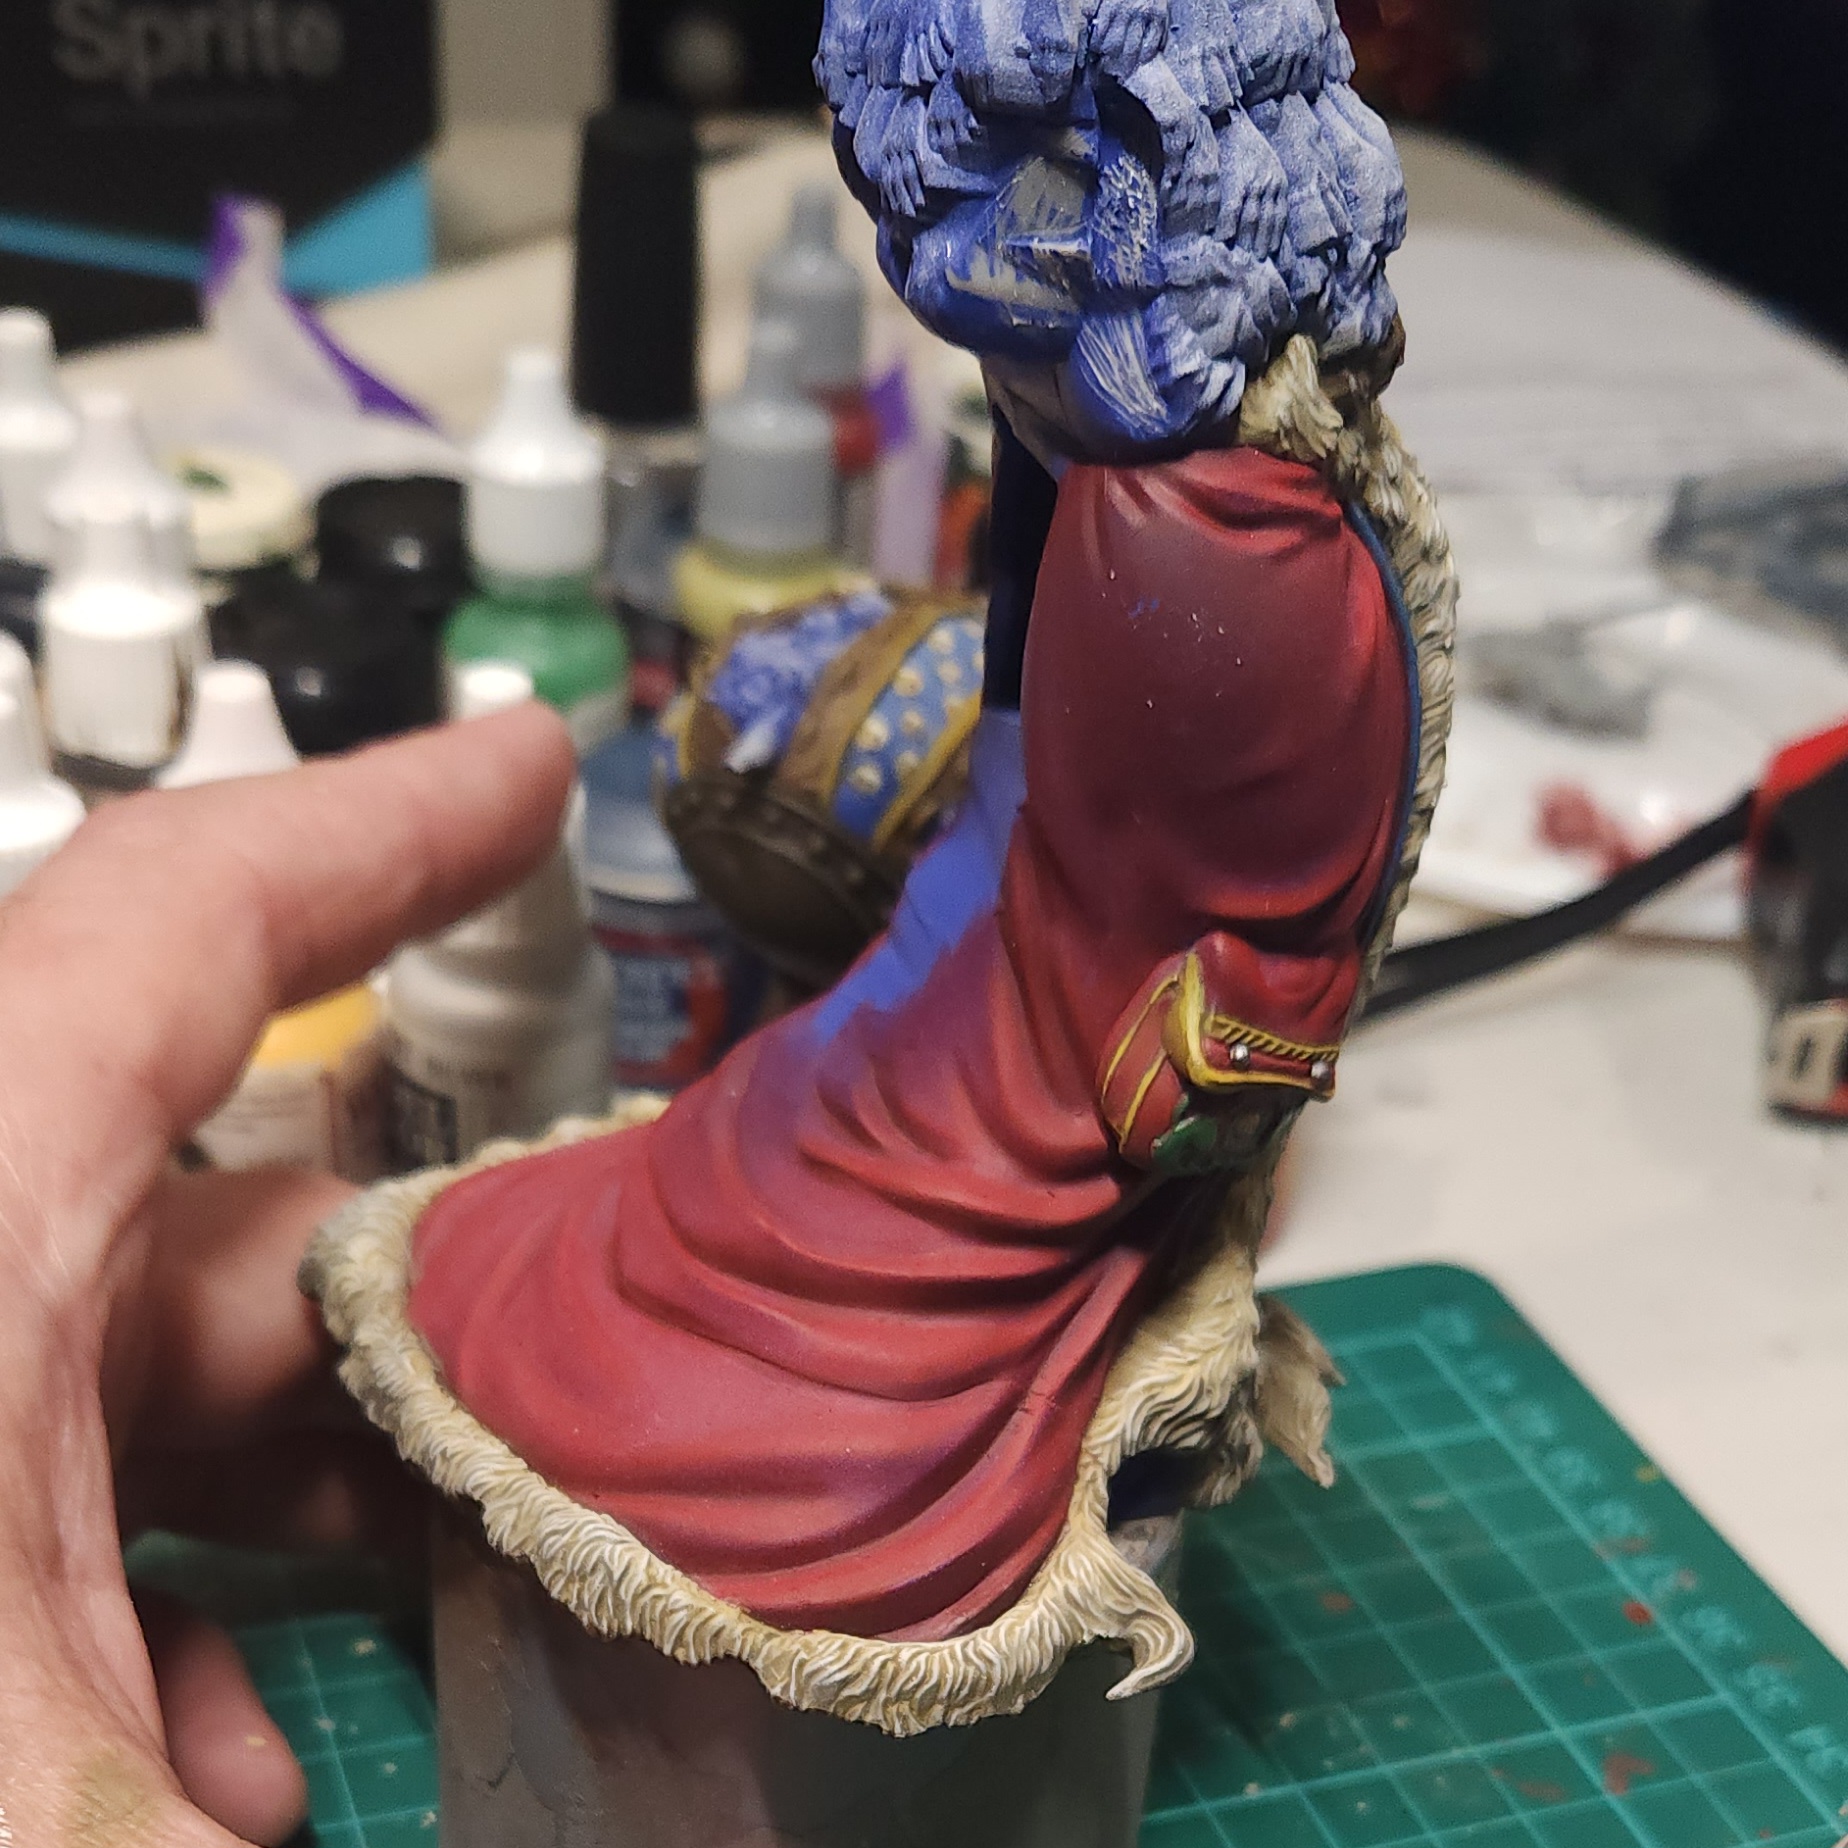
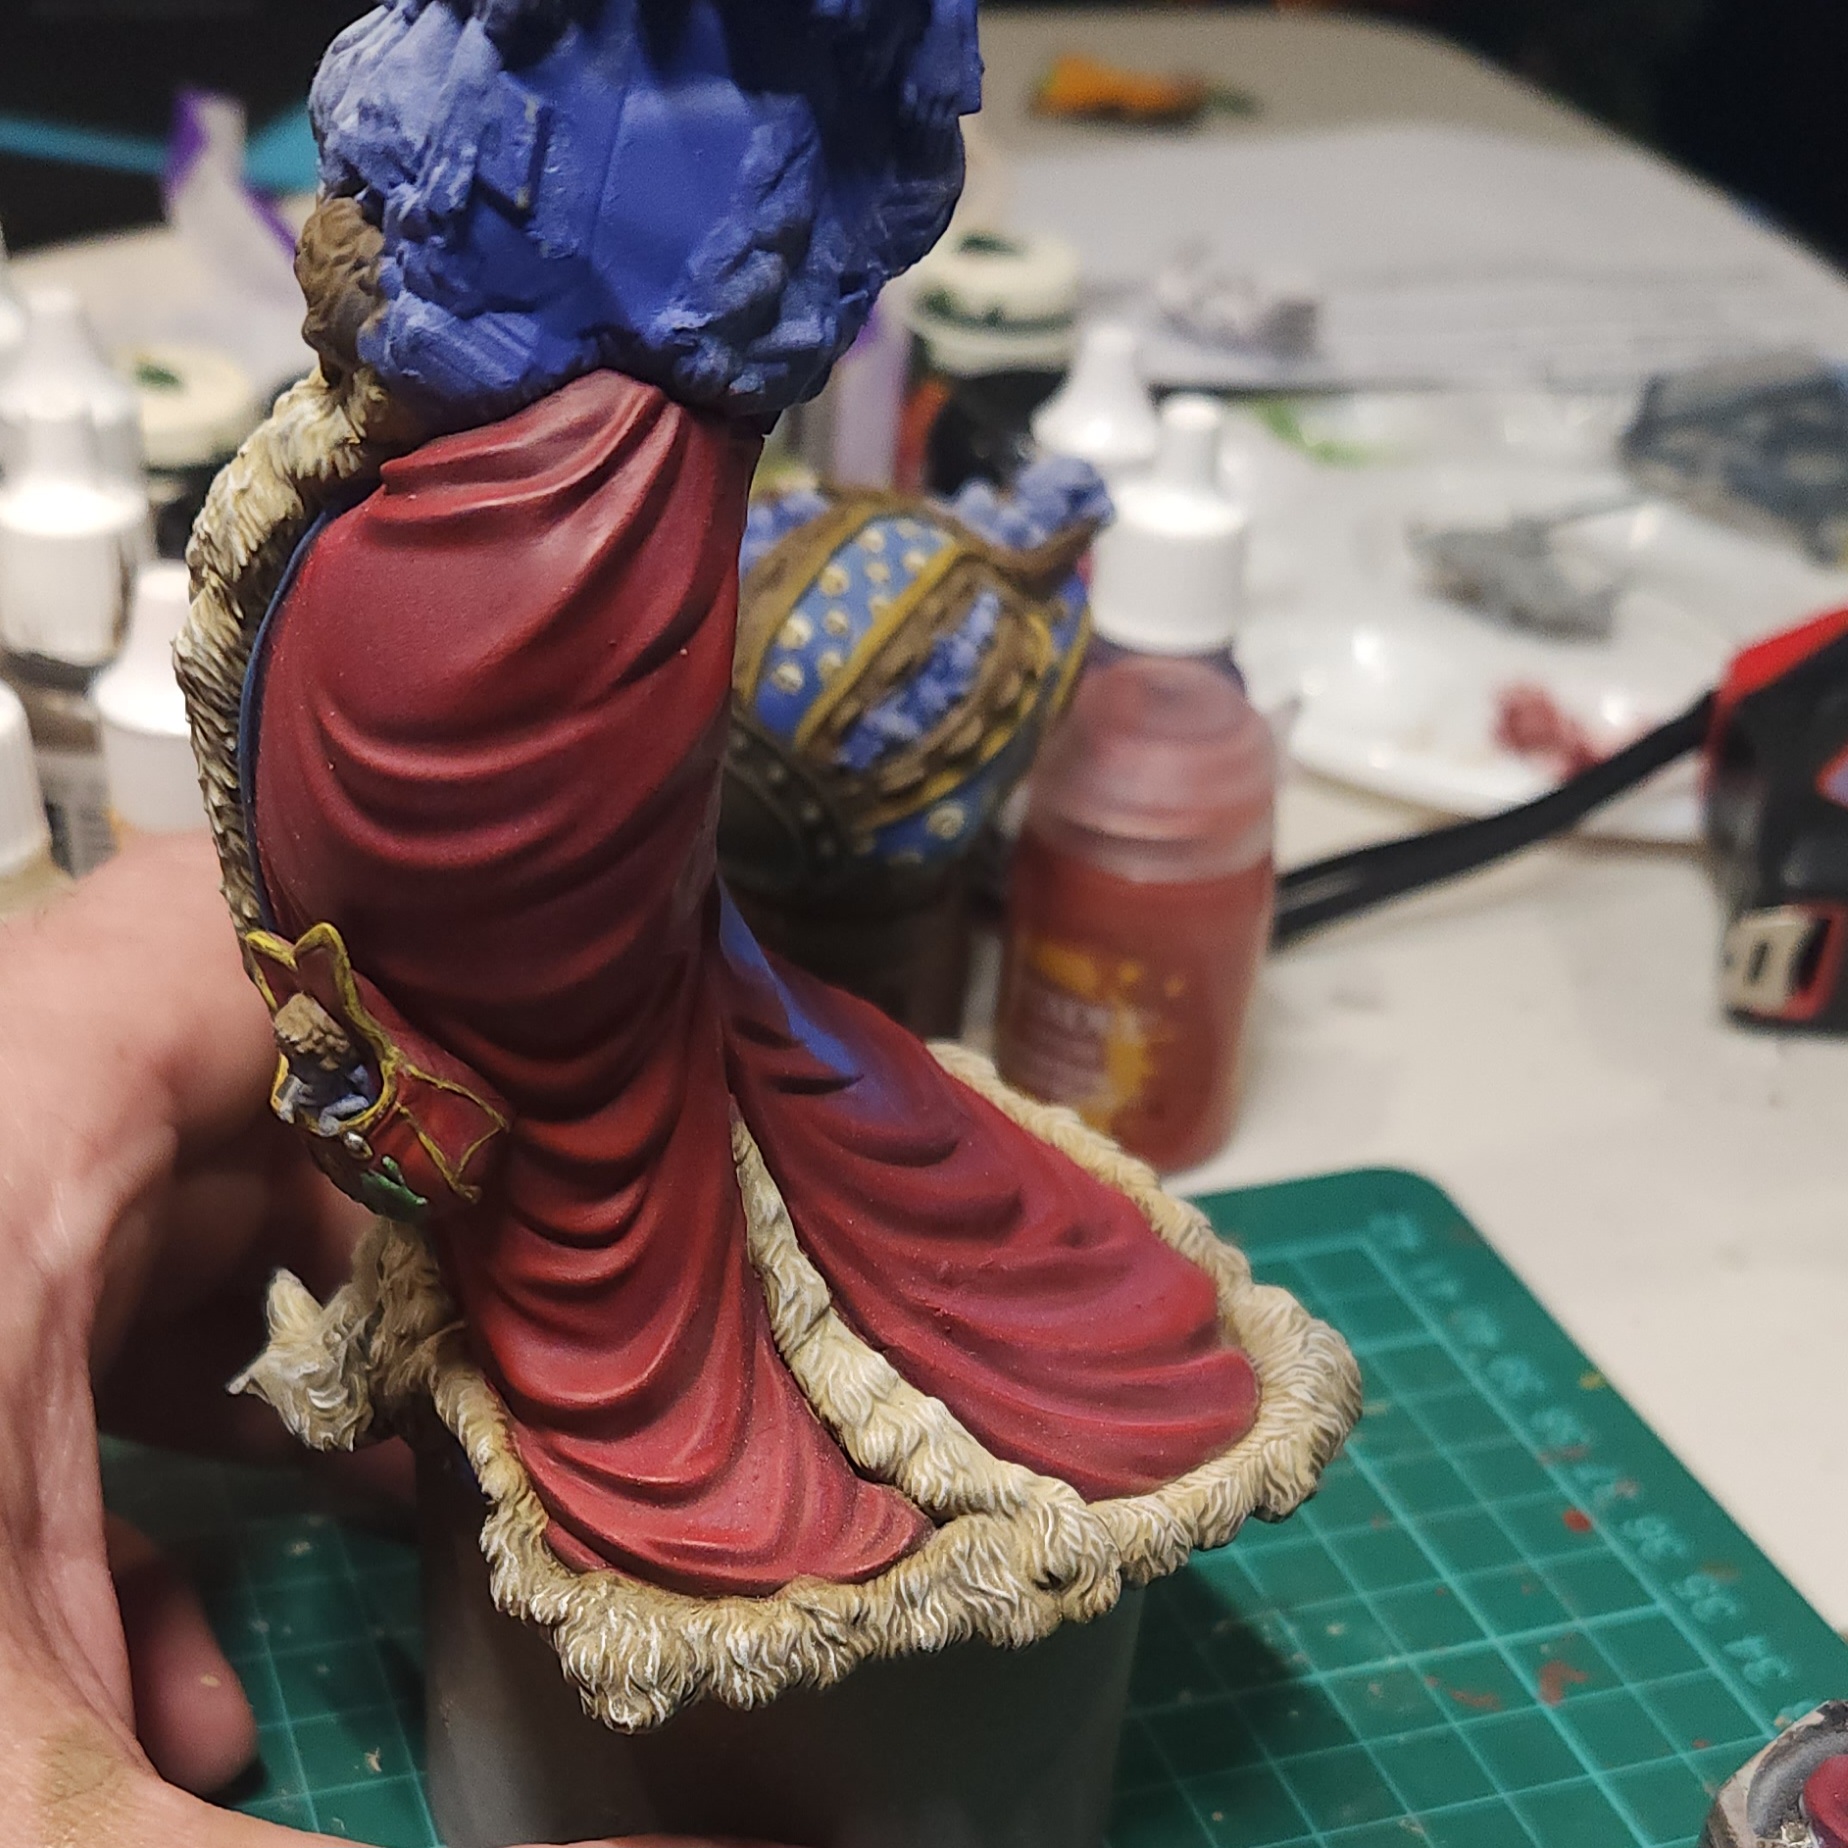
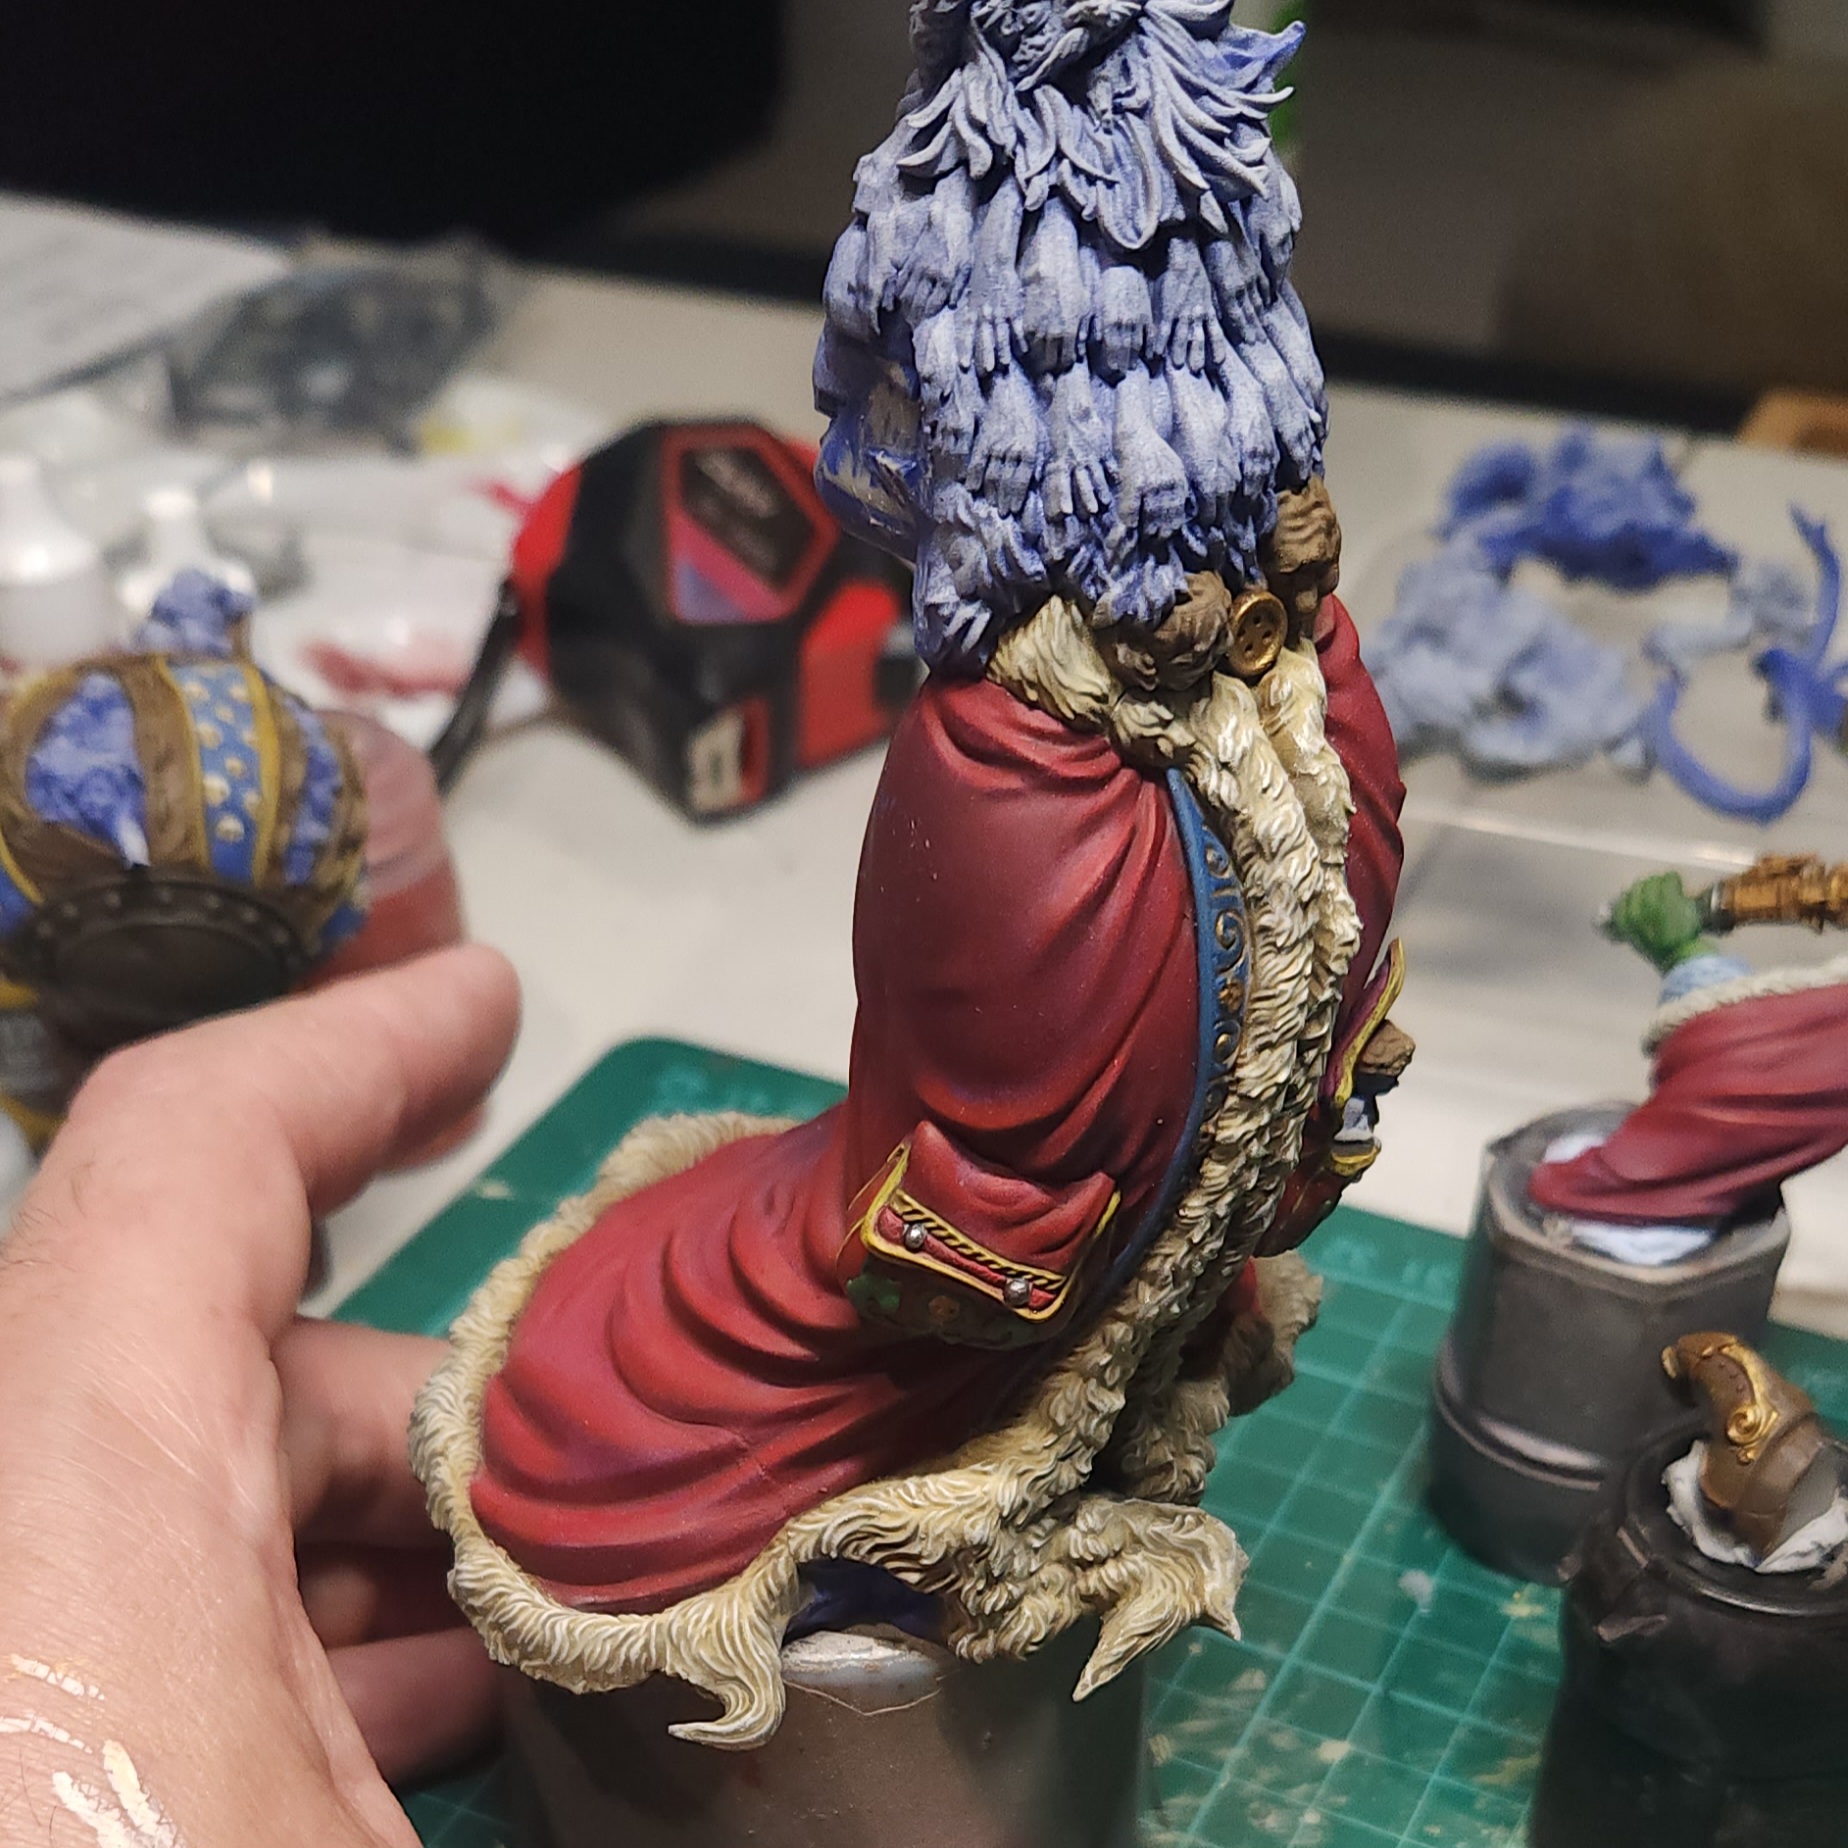
The wings got a second coat of the Vallejo Black Red. I also glazed this in around the spine and around the teeth.

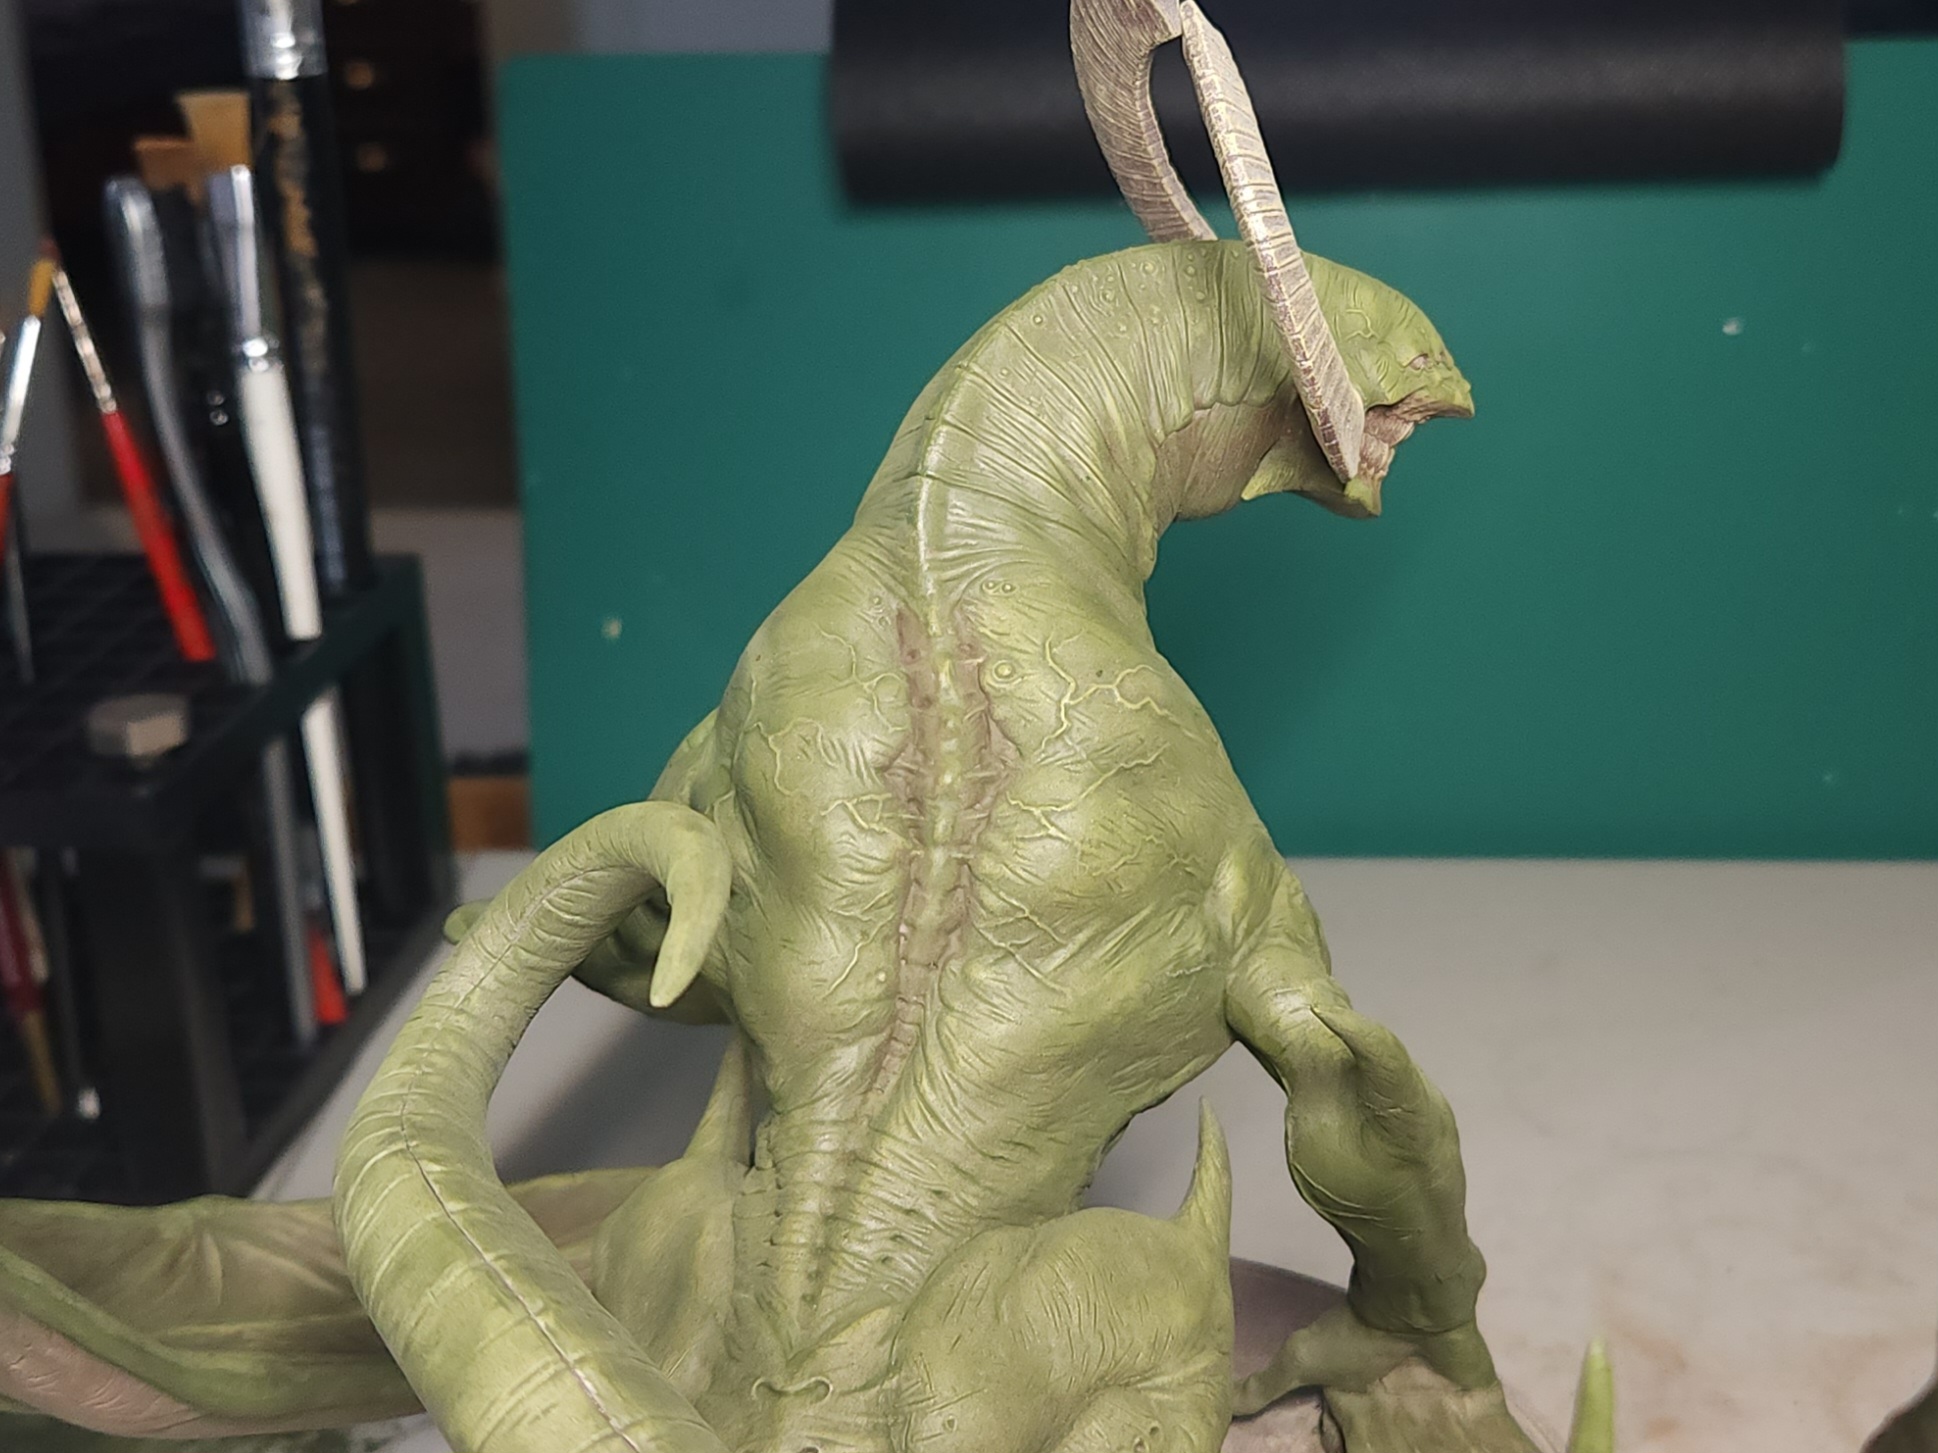
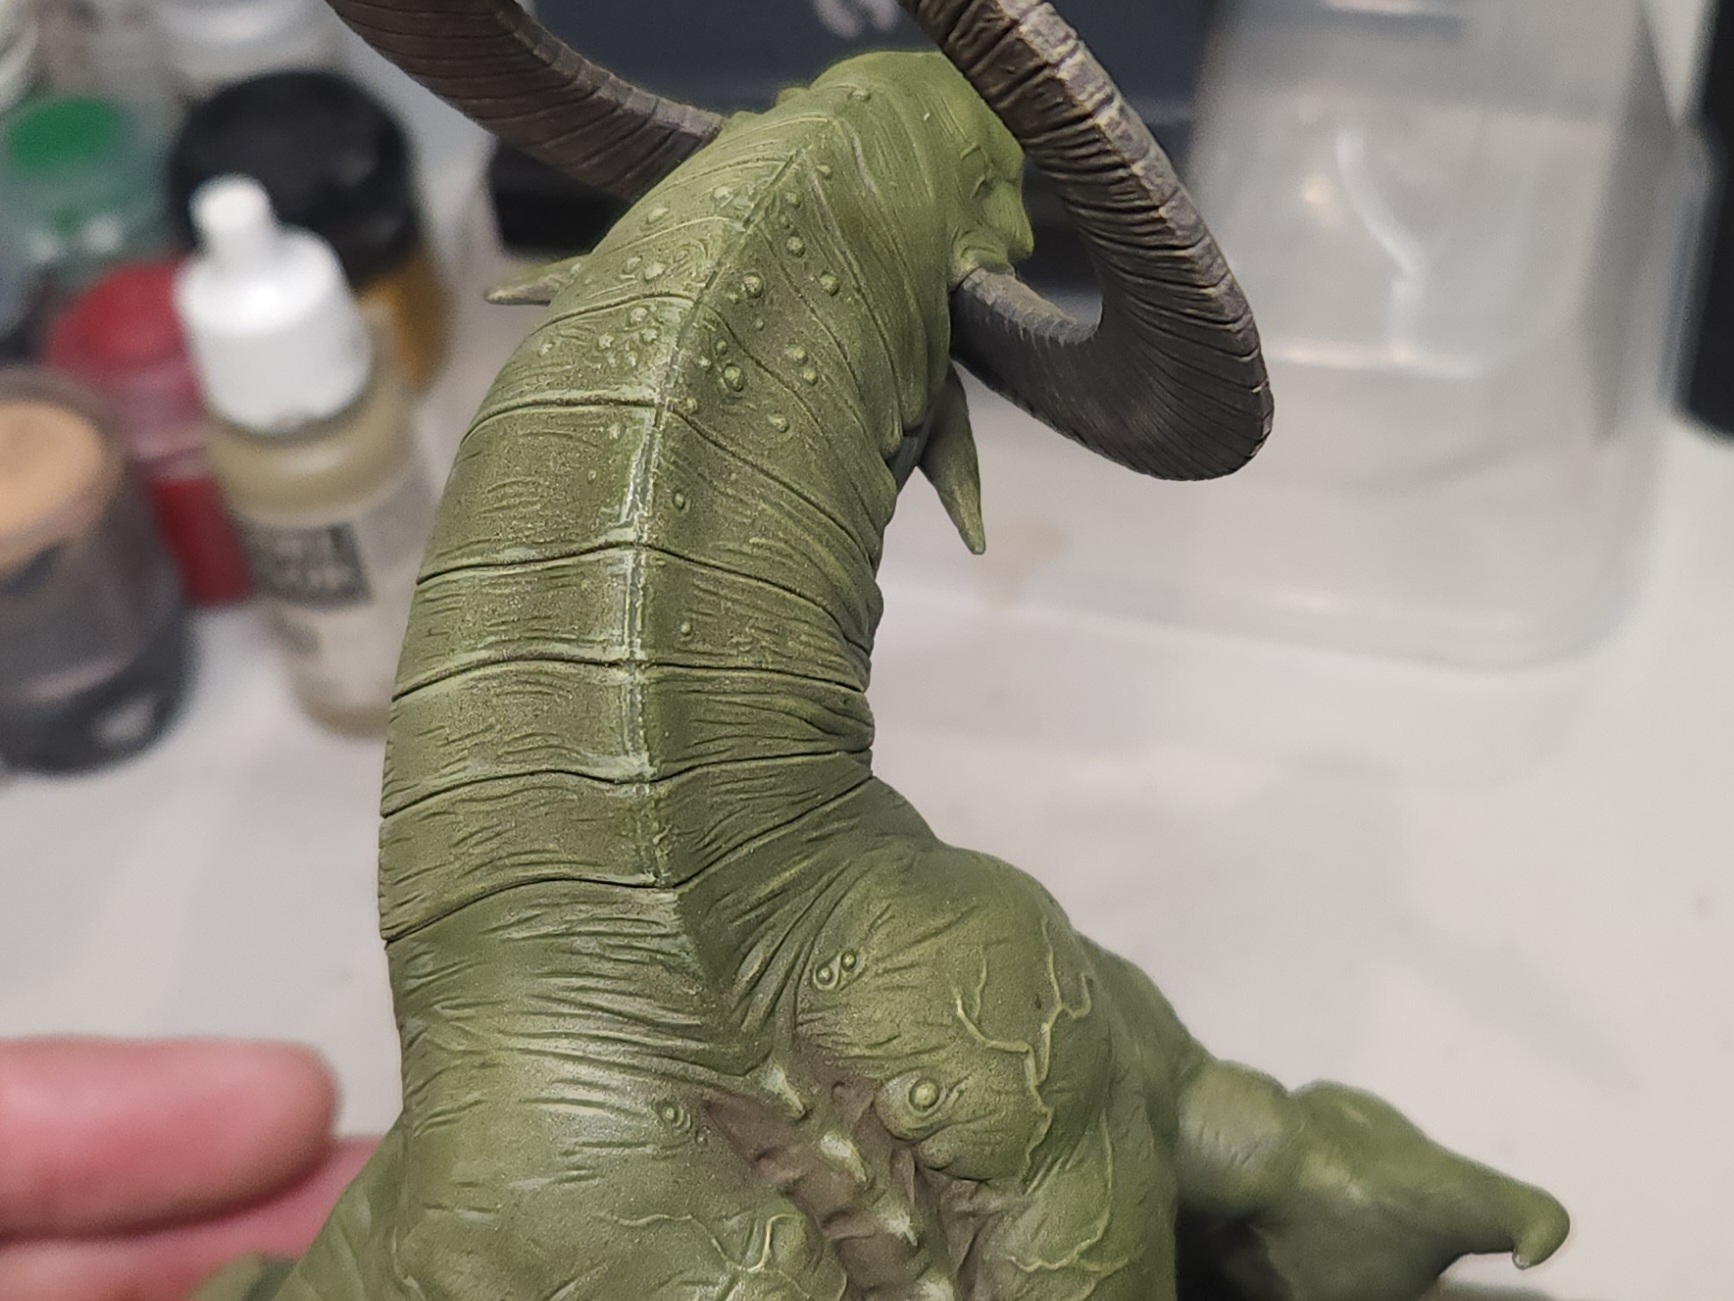
 The underside of the neck and the tail are separated by a ridge, so I've done this in a different colour.
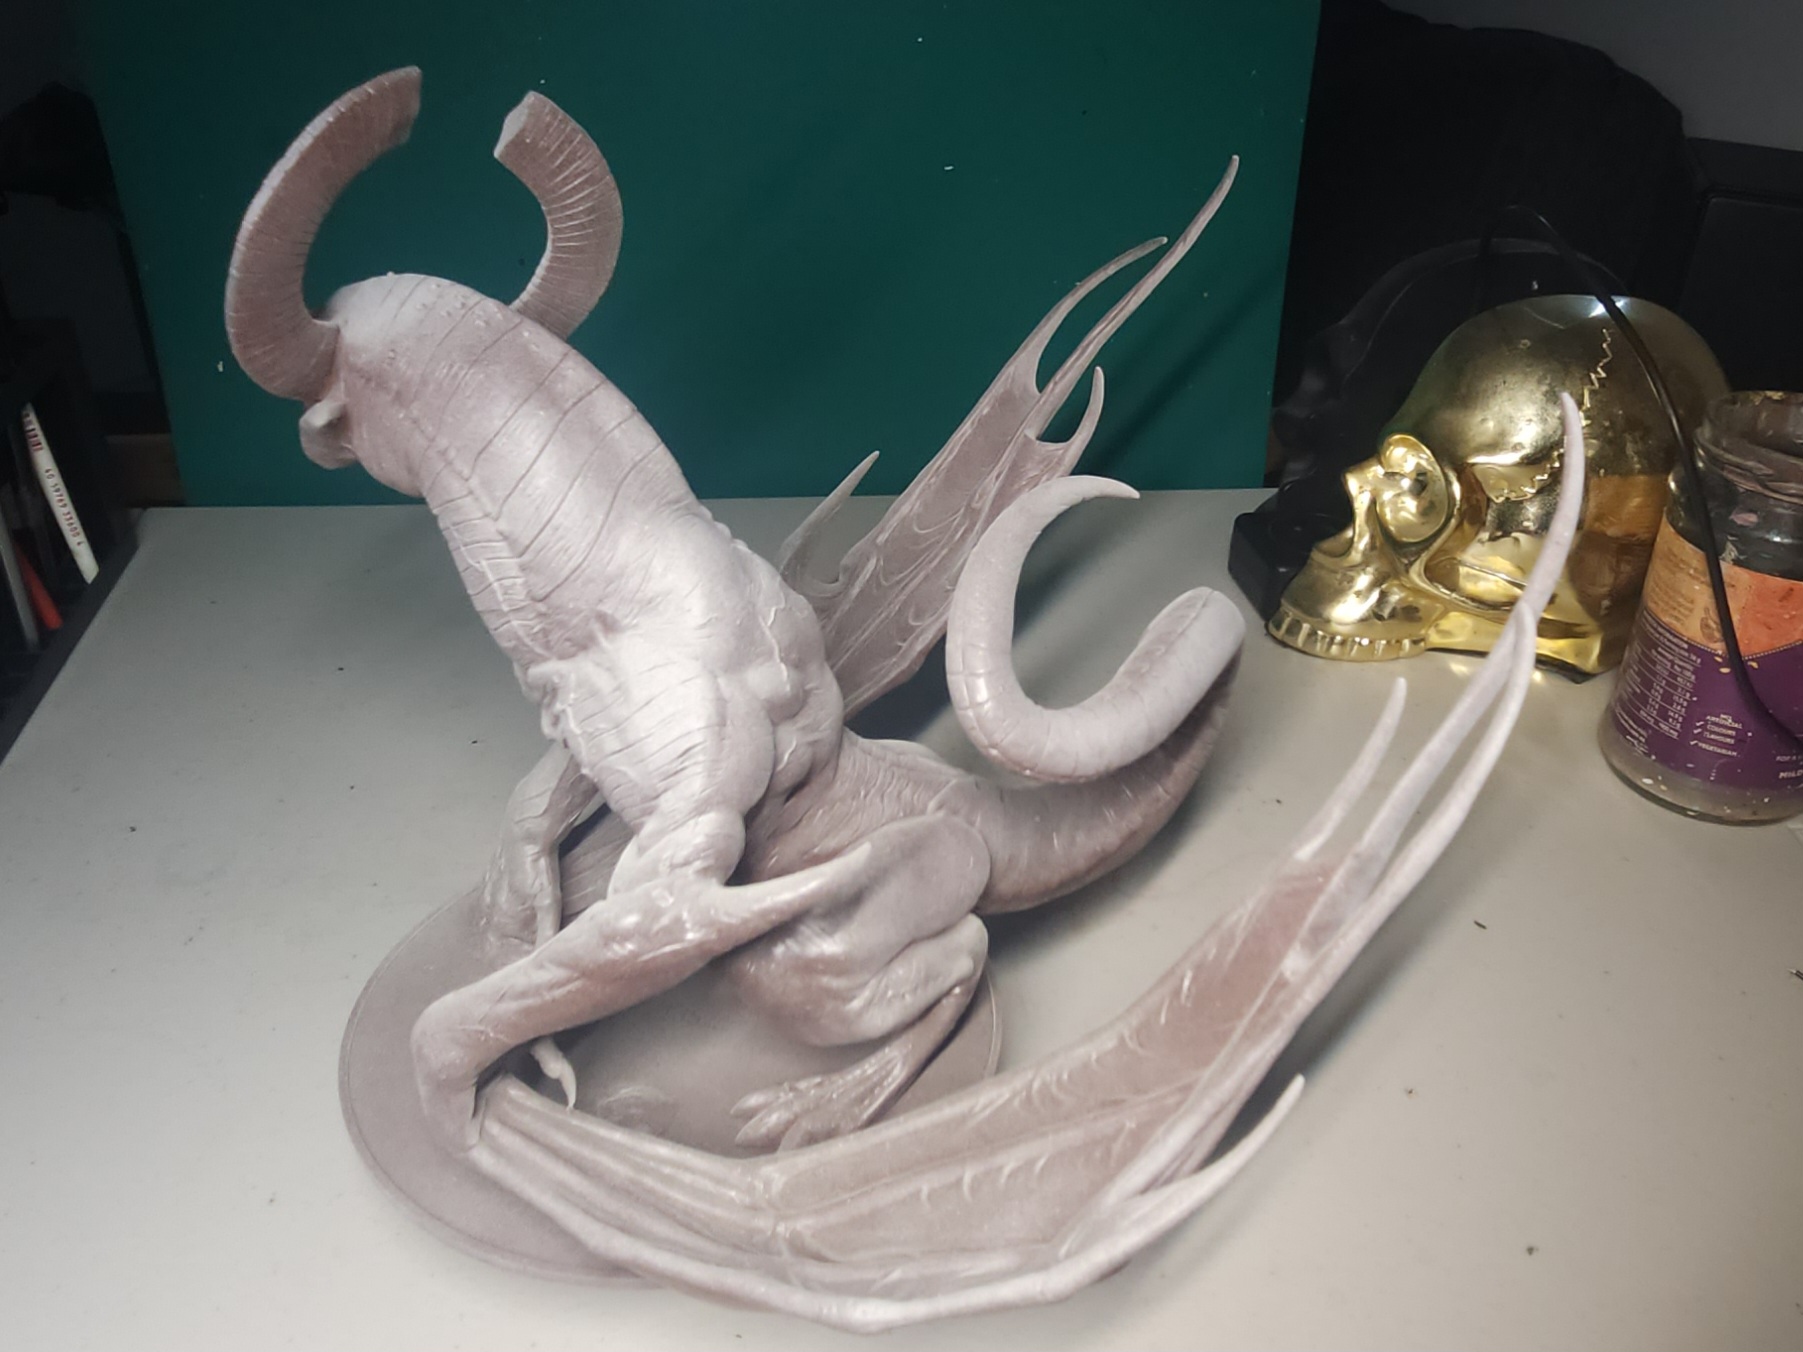
 The separation between the upper and lower neck and tail is quite obvious. In most real-life animals, the underside tends to be pale (e.g. sharks, lizards, crocodiles etc). Given that the Kingdon Death realm is meant to be in a perpetual gloomy night, I thought that a dark underside would make more sense if the Dragon was in the air above. Also, in the planning steps, I’d been considering shark-like colours of greys and blues, so this was an opportunity to bring that back in.
The grey is Vallejo Dark Blue Grey, again applied in two thin coats. This allows some of the green and the red to show through from under and give interesting variations to the skin. (Or, at least, that’s the idea… lol.)
I thinned it a little further to glaze over the horns as well. When doing this, I hit the edges of the horns and avoided the ridge running up the centre on the front of the horns.
This glaze is also applied to the exposed ribs and the claws on the toes, too, to tie together the idea of this being the Dragon’s “bone” colour.

 After all of the above is applied, this is where I'm at.
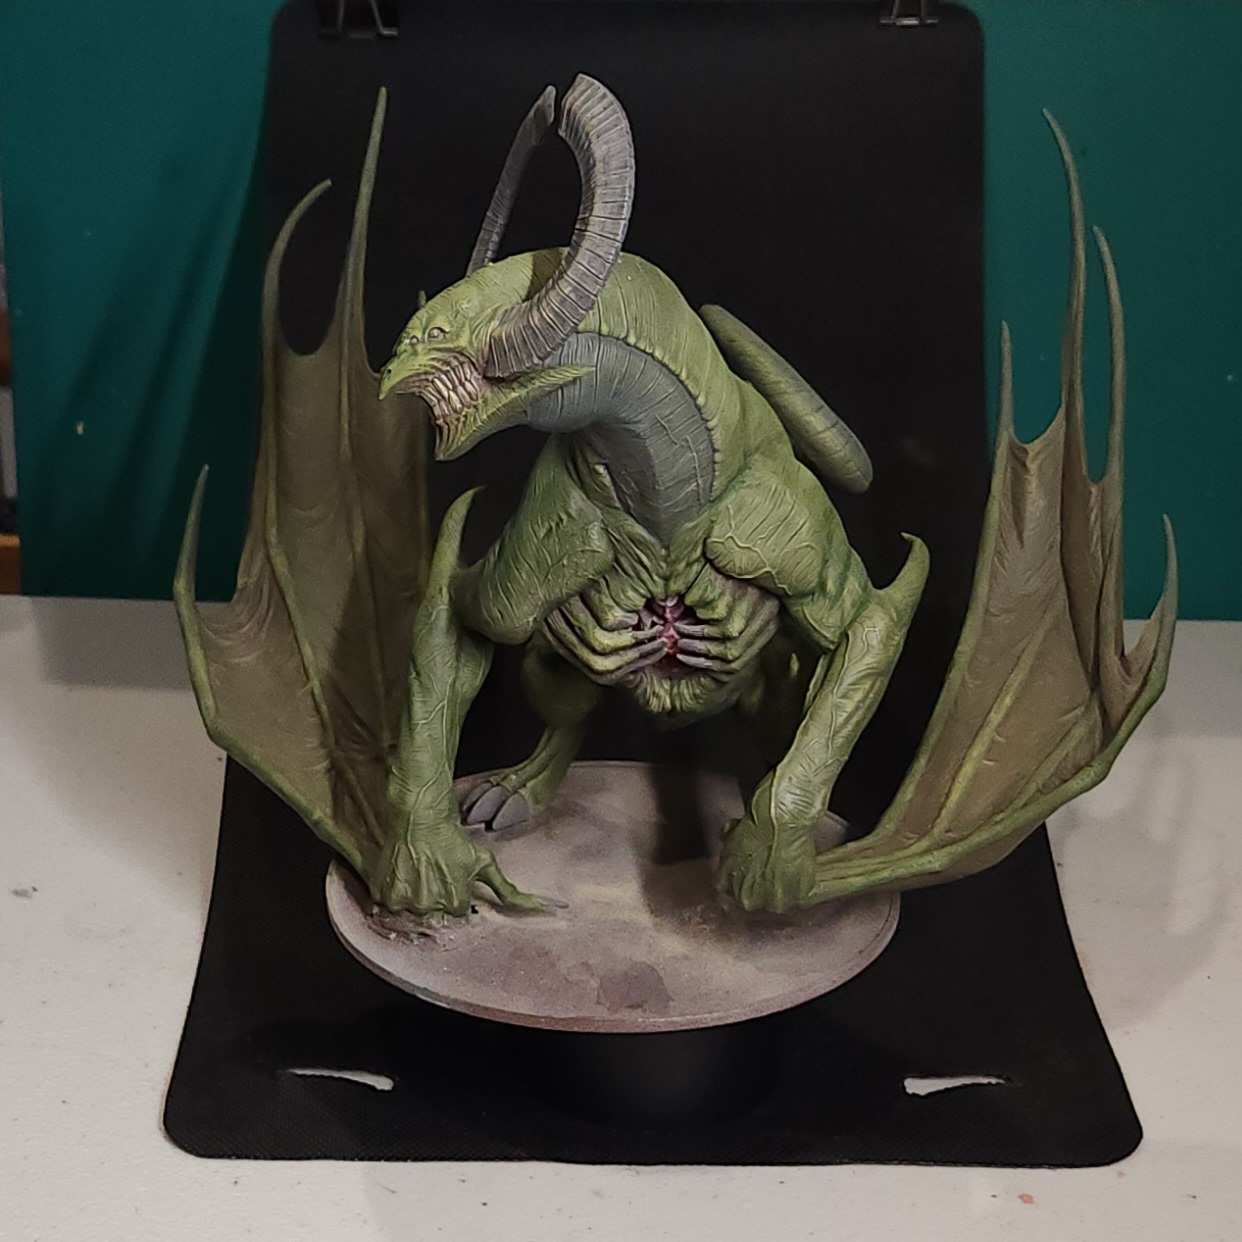

 Highlights started on the tail's underside skin.
 On to the highlight steps now, starting with the underside skin.
I used a mix of the Vallejo Dark Blue Grey with a touch of Vallejo Game Colour Dead Flesh. Just enough to lighten the grey and tint it towards green again.
In the pictures below:
- I’ve glazed some of the Blue-Grey onto the wing-finger tips to indicate the skin there is thinner, then highlighted the very tips.
- Another shot of the tail.
- Shots of the neck also showing highlighting on the ridges of the skin using the same colour mix. I specifically only used this mix on the skin, not the horns/claws/ribs. They’ll get done with different colours later to differentiate them.
 Colours for the highlights on the neck and tail skin.
19 Mar 25: Dragon details
After priming, the entire miniature is given a drybrush of Vallejo Buff.
Then it’s on to the first coat of colour. This is Vallejo Cam Olive Green. Thin coats means approx 2 drops Flow Improver and 2-3 drops water.
This would probably be so much easier with an airbrush! I don’t have one though, so large size, soft bristle brush and patience it is.
 Testing out the first coat
 21 Mar 25: Starting on second coat
 22 Mar 25: Red in for the wing, right in the picture. The goal isn't to cover the green, but tint it with the red.
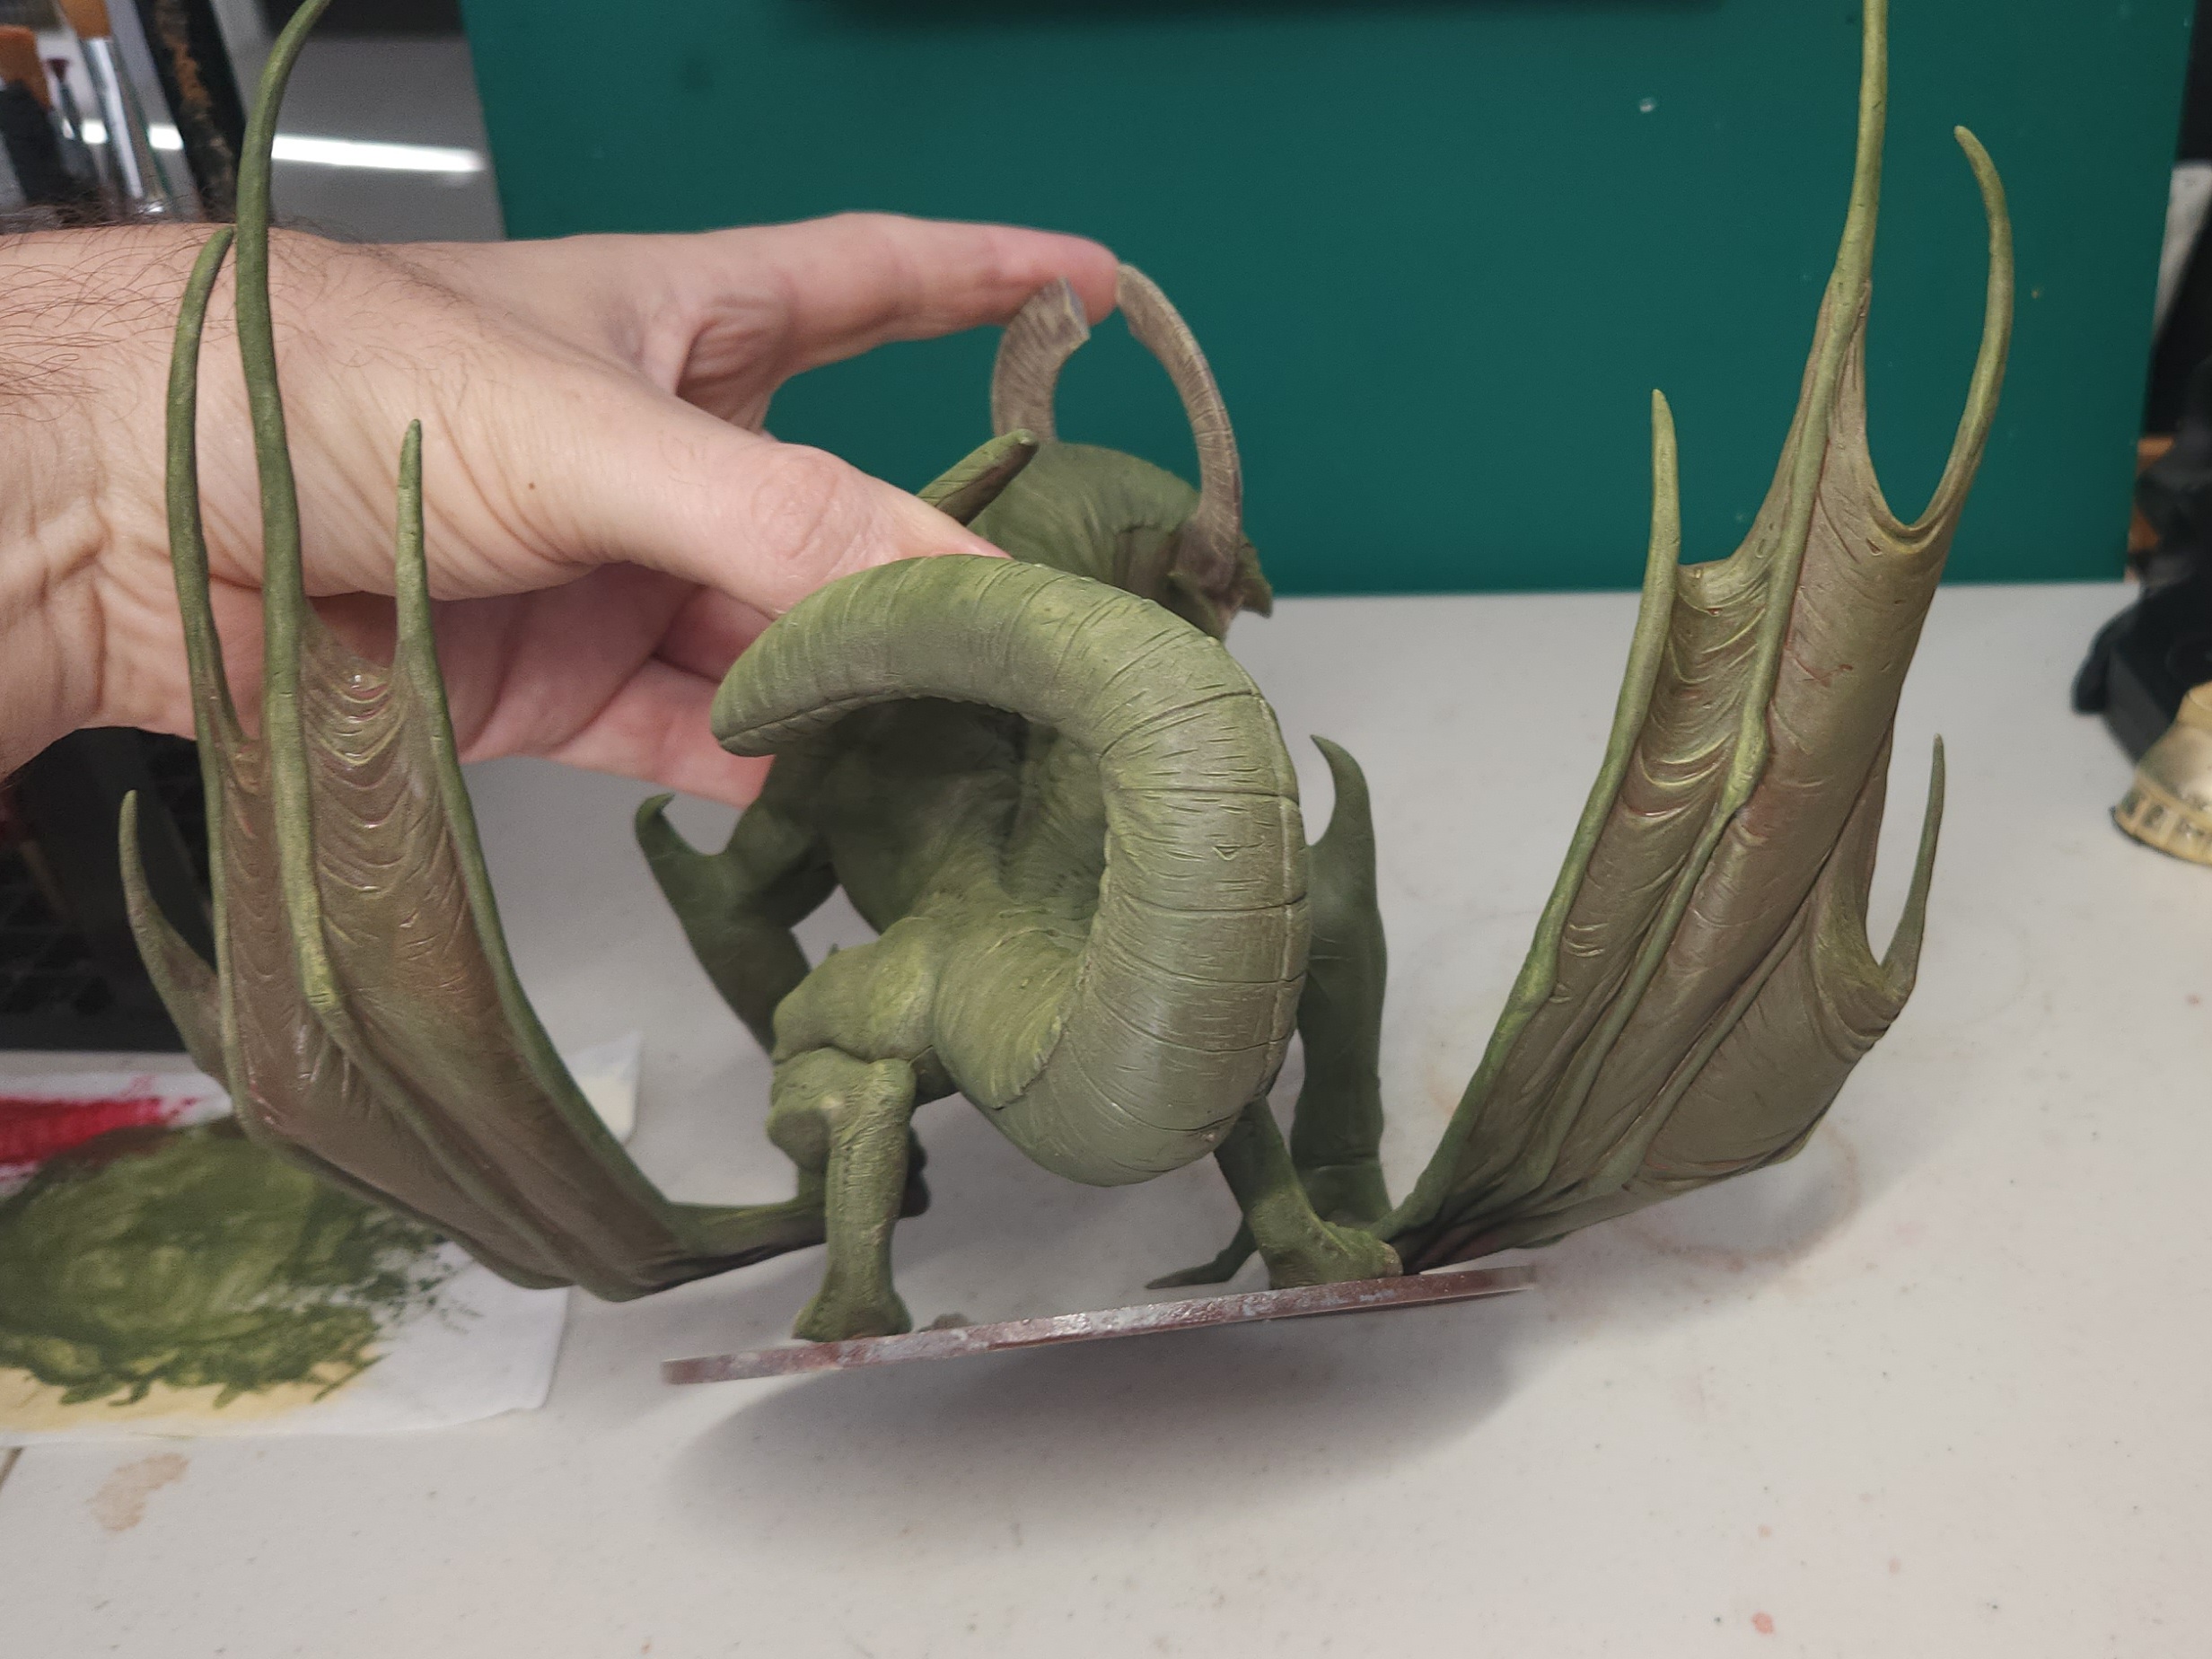 After the first coat this is how the wing membranes look.
8 Mar 25: Time-sensitive tangent
 The Dragon King (Dragon Form)
Some time ago, KD announced their next painting competition: Expansions of Death. Only minis from officially released expansions are eligible.
I was determind to submit an entry, given that I’d missed the previous comp. due to having to move house. I had intended to finish Atnas and then start my entry, but given that I’ve hardly picked up the brush this year, I realised that won’t happen
The Dragon King has been sitting, waiting for paint for a few years now. Given that this was one of the eligible pieces for the competition, I figured this was motivation I needed to get it done.
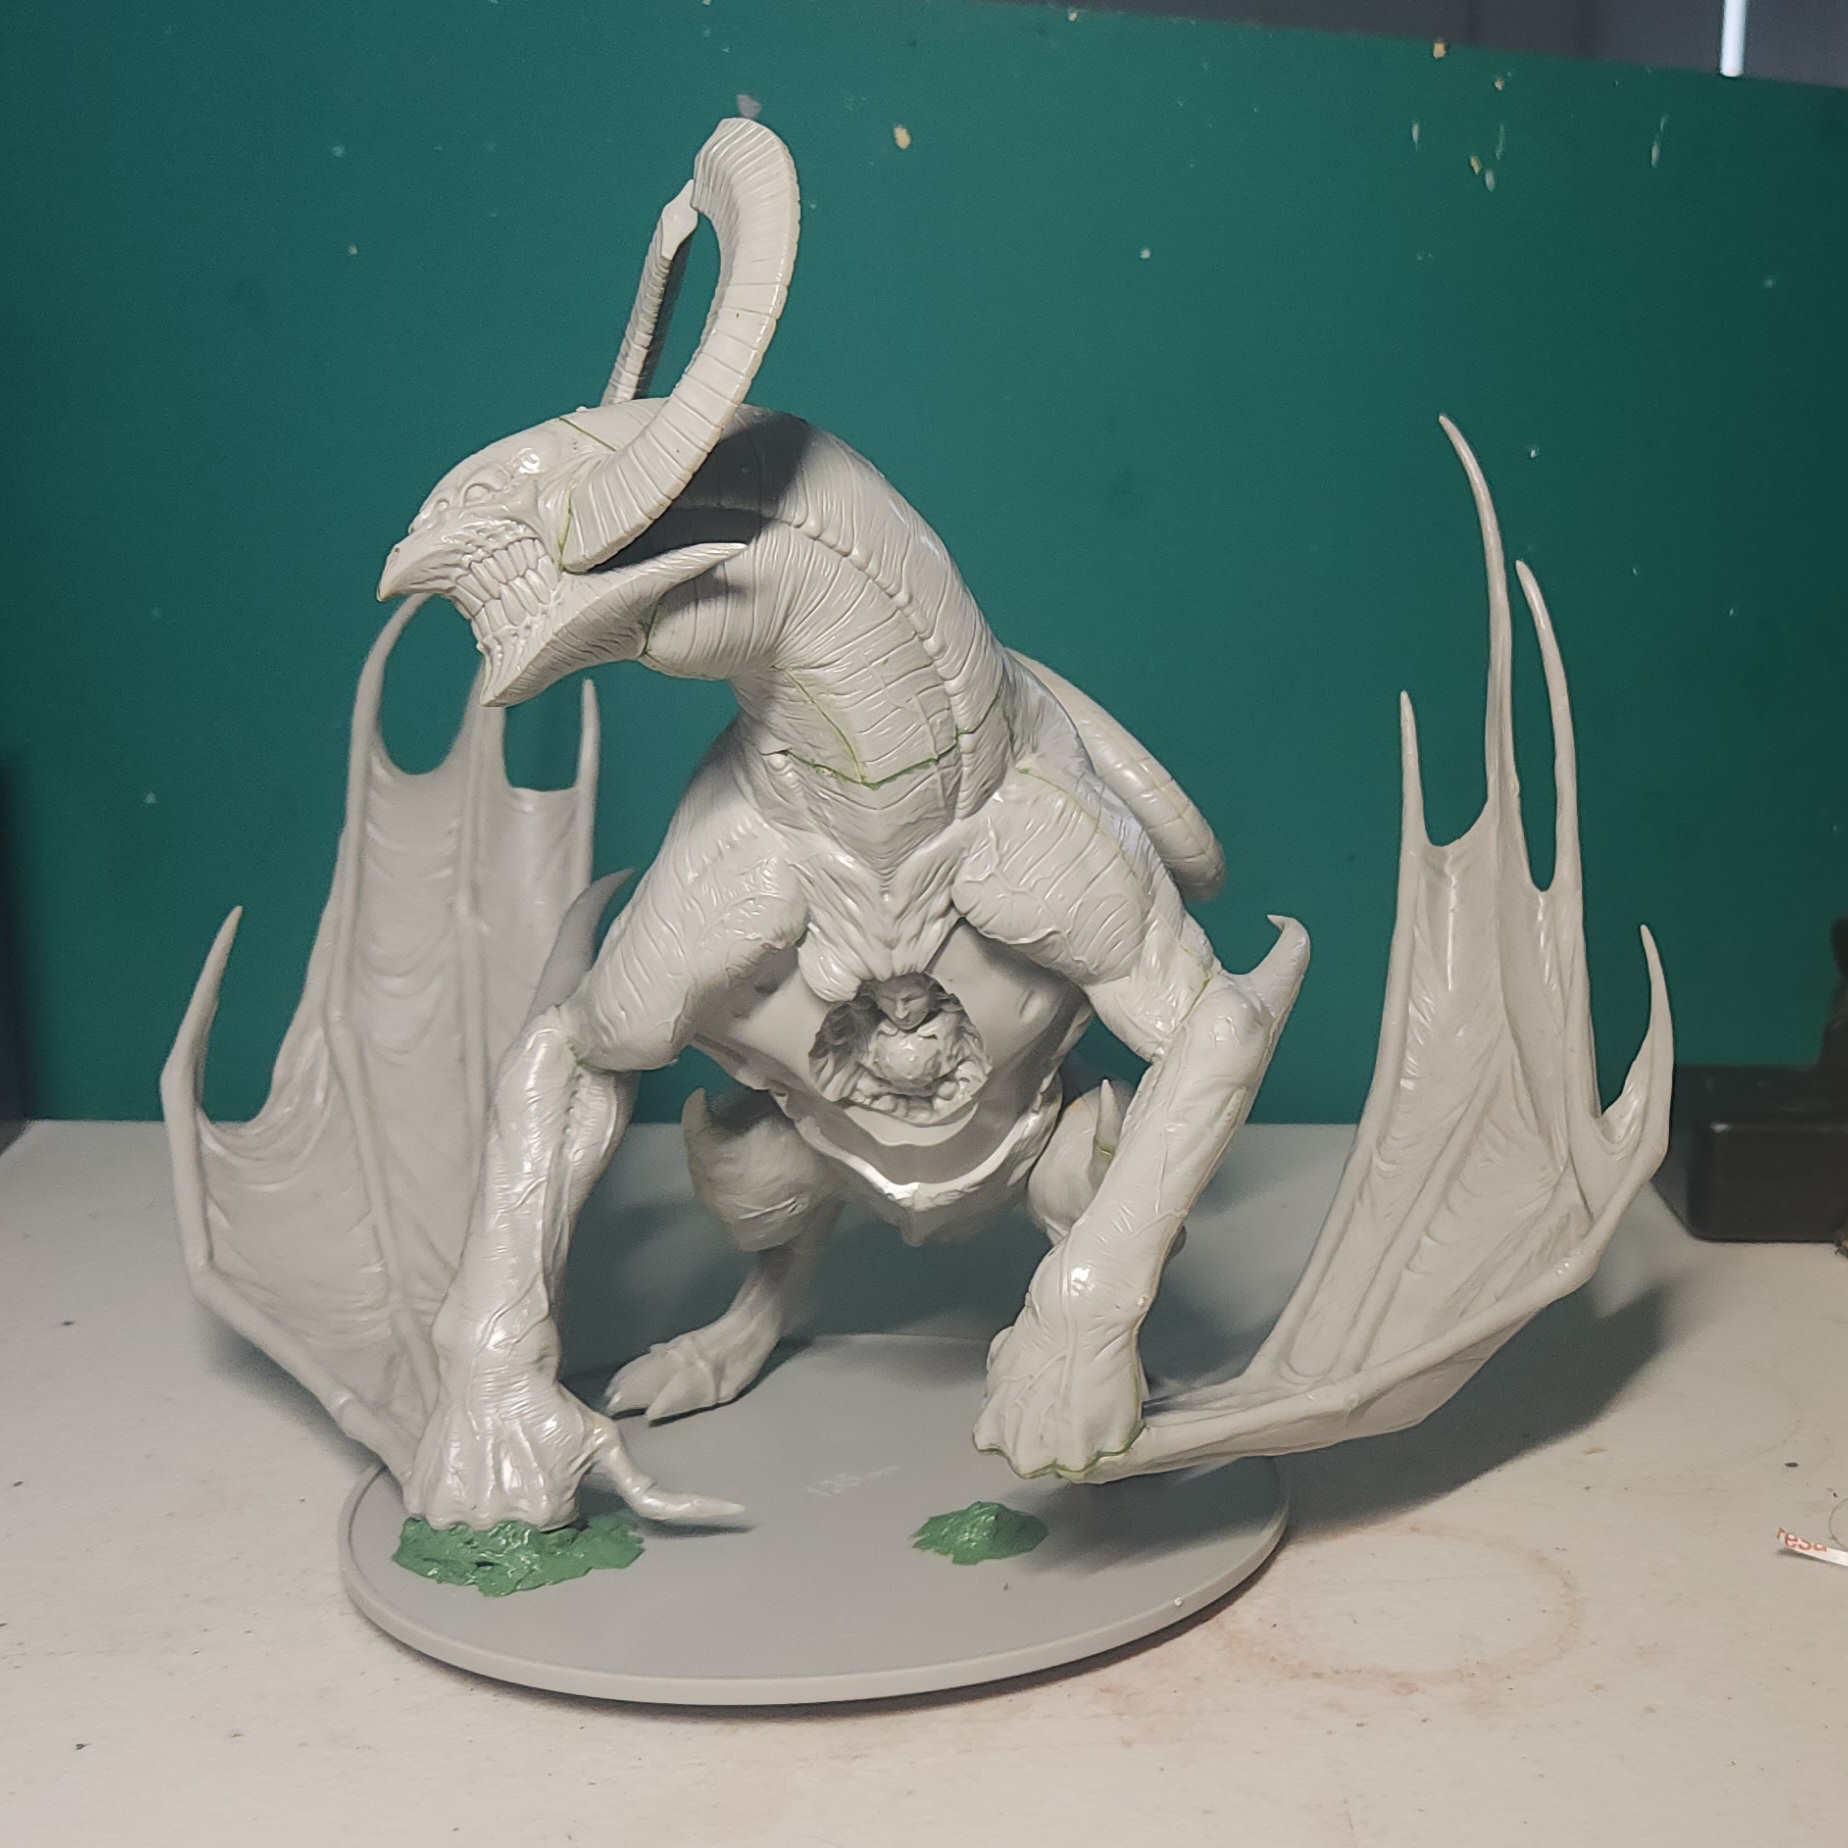
The model was built, but leaving the chest pieces off for ease of painting. (Above).
I’ll also point out that the join for the right hand/ wing (the one touching the base) wasn’t great. It looks as though it’s really intended to be stuck directly to a flat base more so than the palm. I’d previously tried to attach it directly, but the join with plastic glue wasn’t strong enough to support the weight of the wing without that additional base support.
This time, I glued the wing and then pinned a 20mm slotta base to the bottom to reinforce the join. This was then pinned to the 150mm base the Dragon sits on, and all concealed with greenstuff.
It was then hit a grey primer. The two chest pieces were stuck to paint pot and primed separately at the same time.
After 24 hours, I temporarily put the chest onto the body with blu-tack and I coated the whole Dragon with Army Painter Chaotic Red spray all over. Another 24 hours later I applied a zenithal spray of Citadel Wraith Bone.
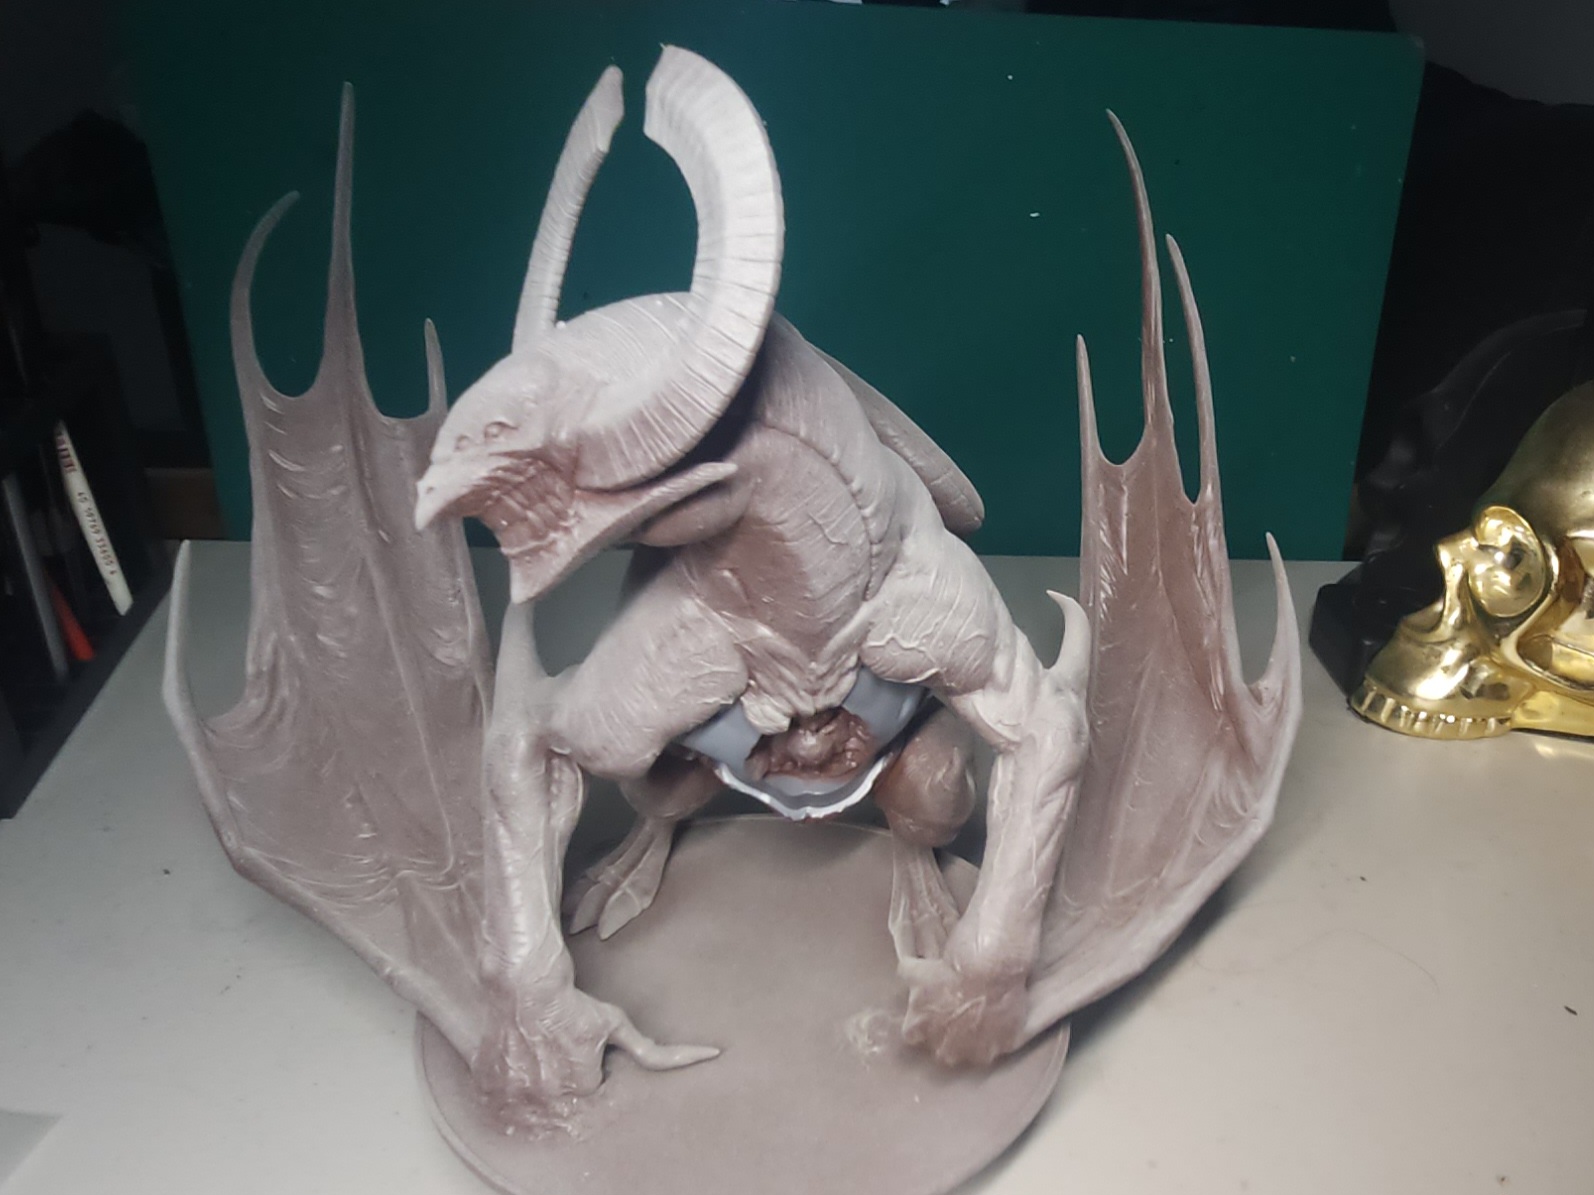 15 Mar 25: Primed and ready for painting
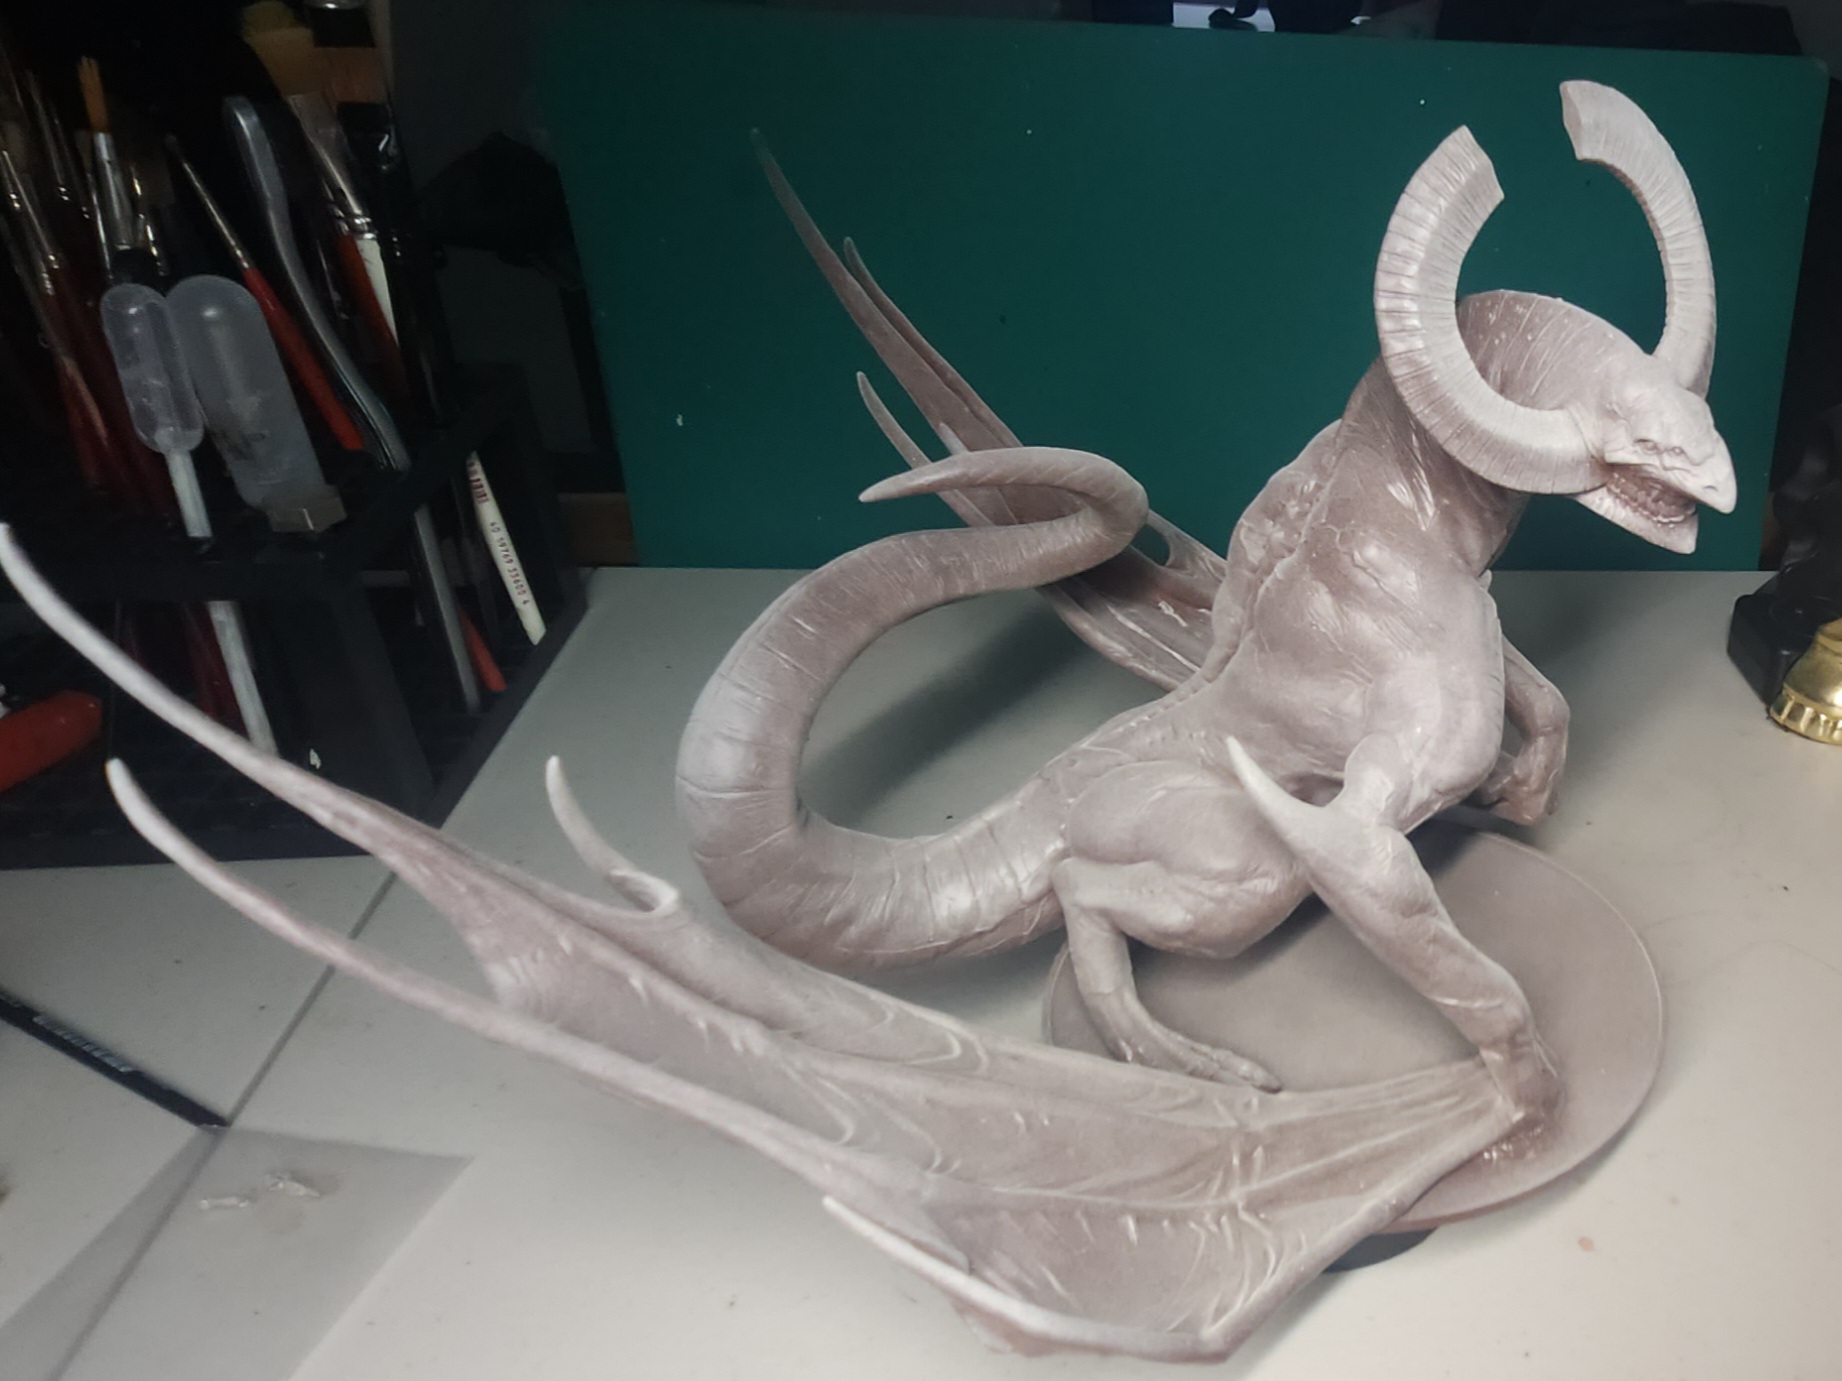
17 Mar 25: Open Heart Paintery
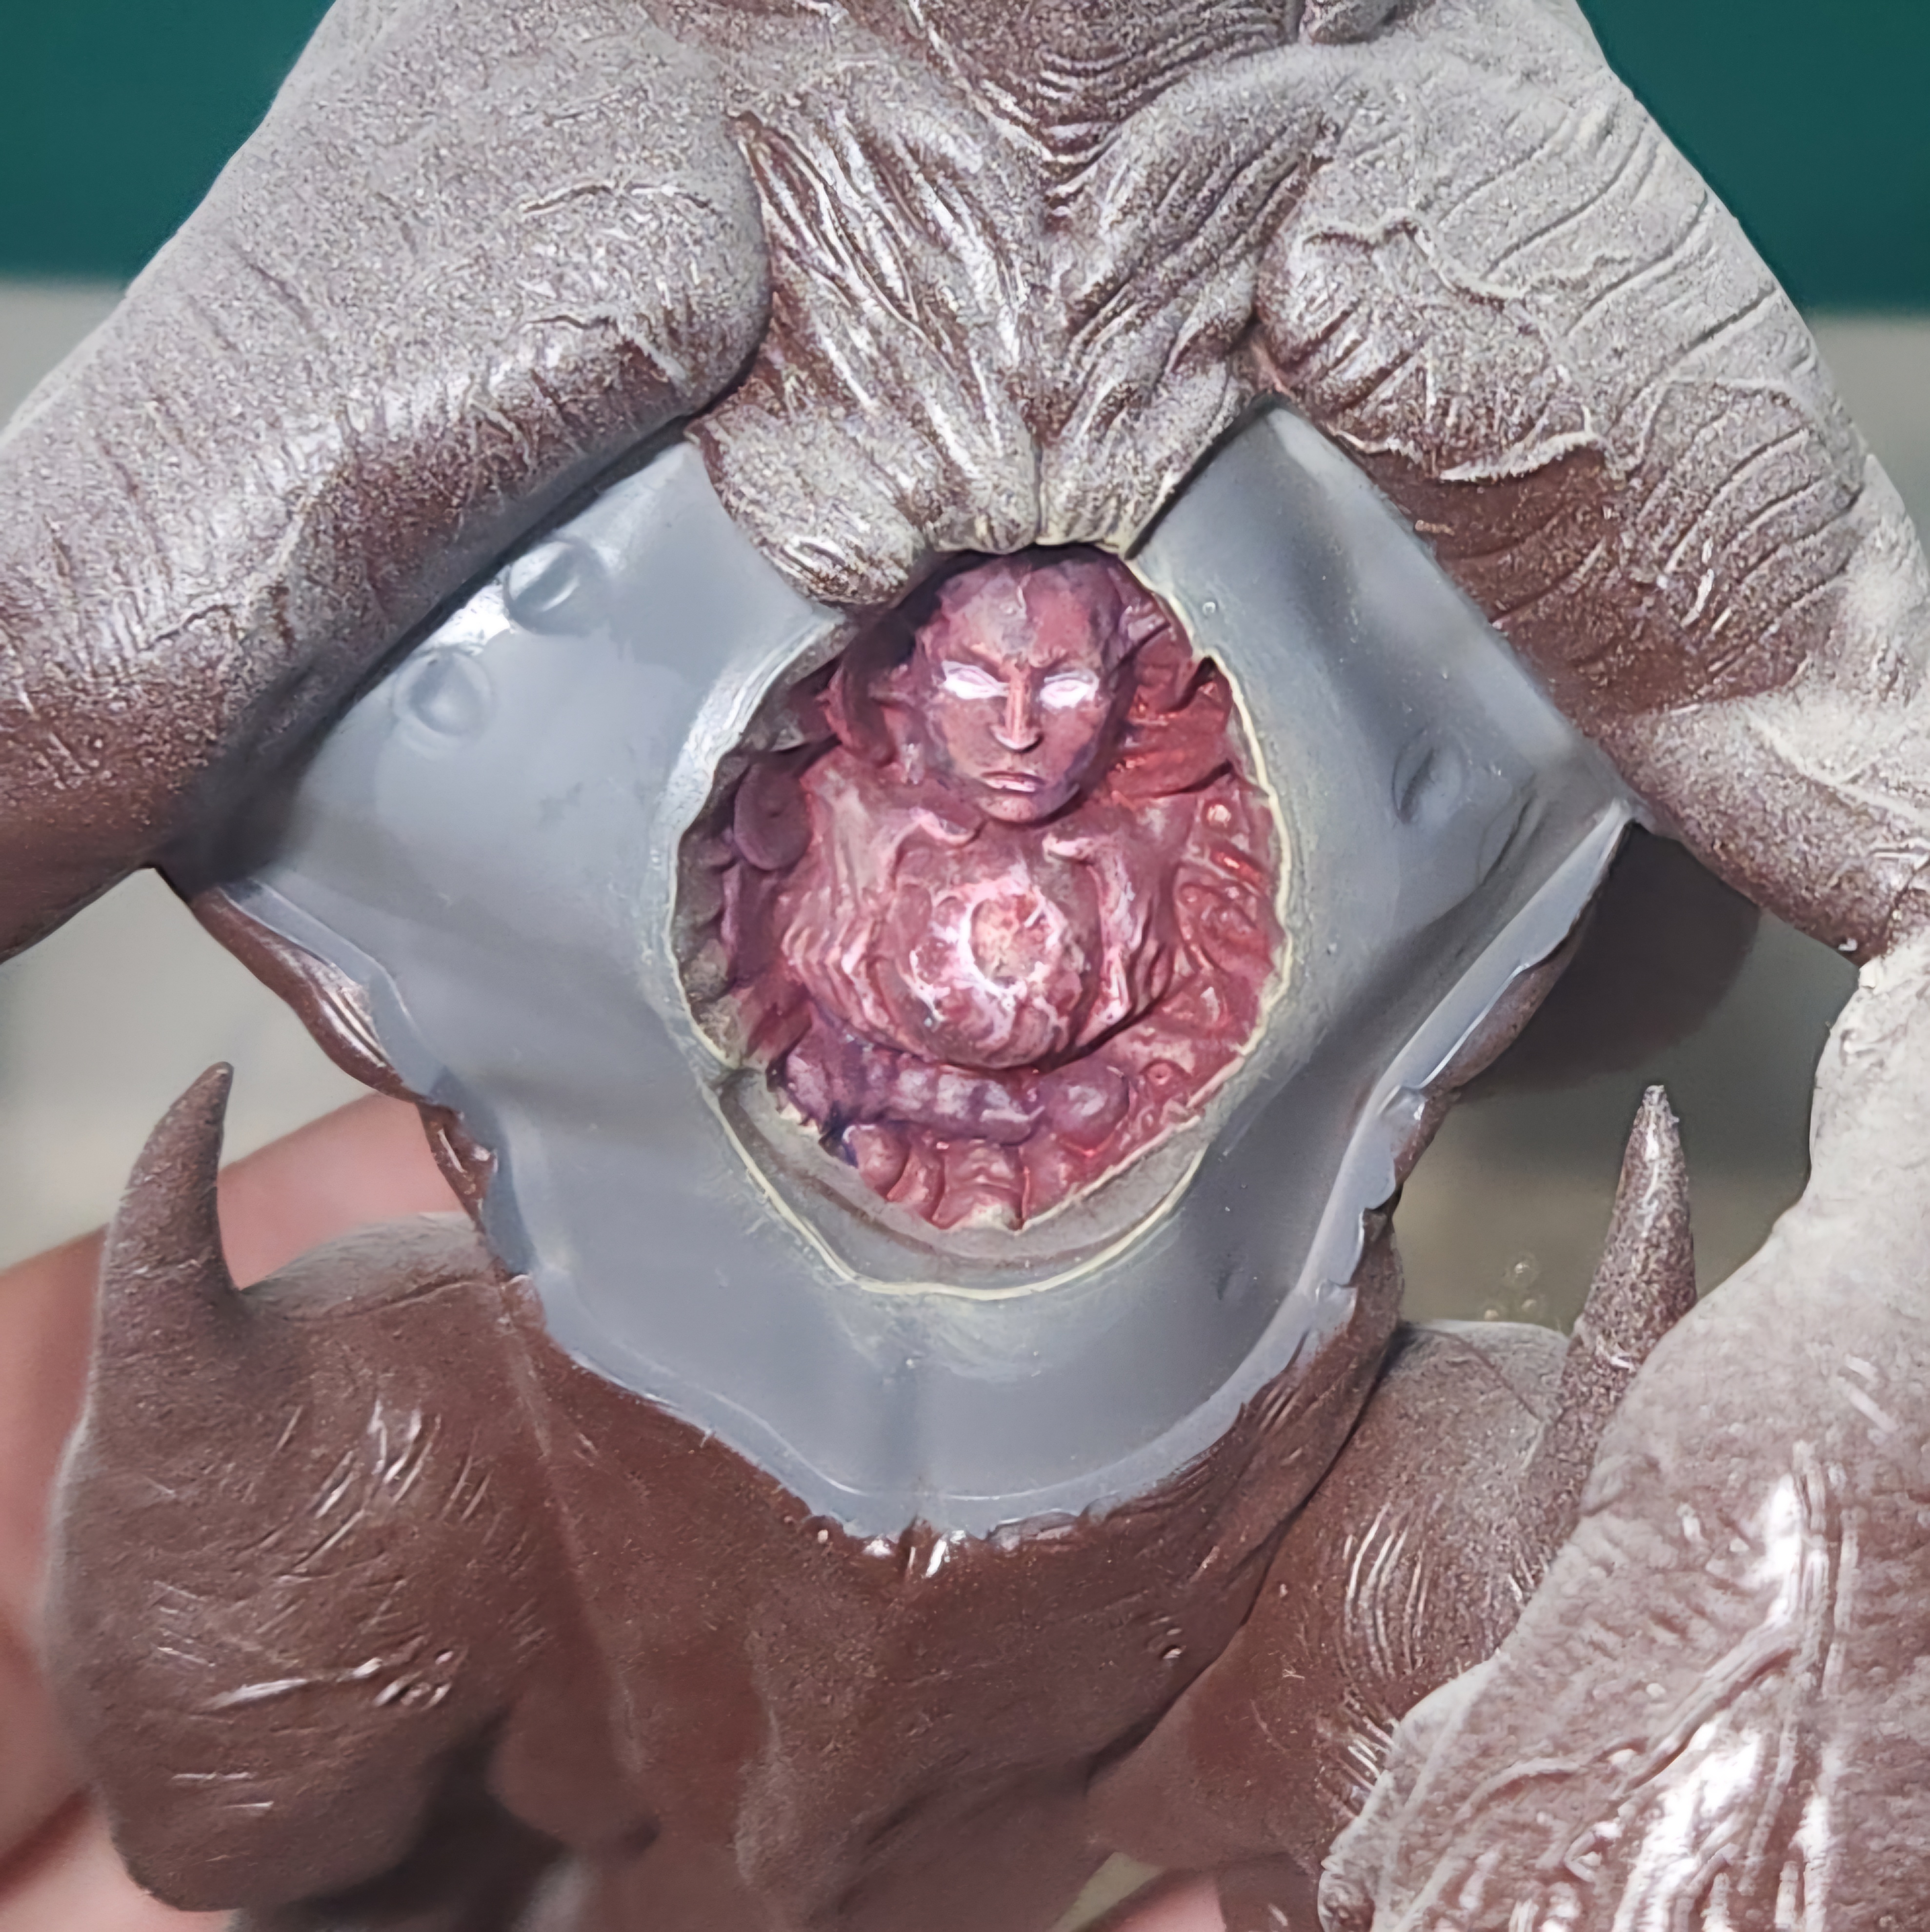
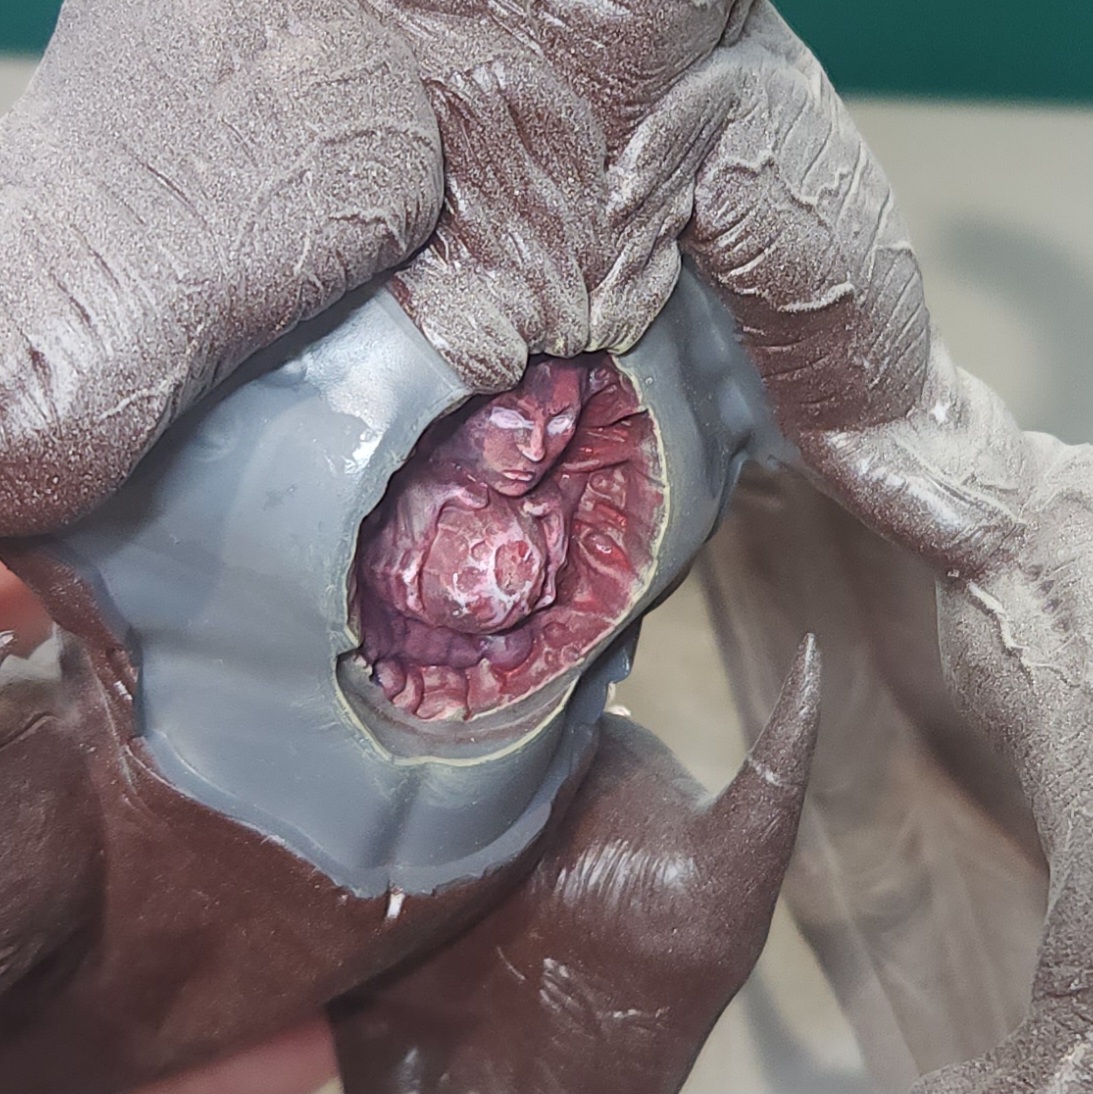
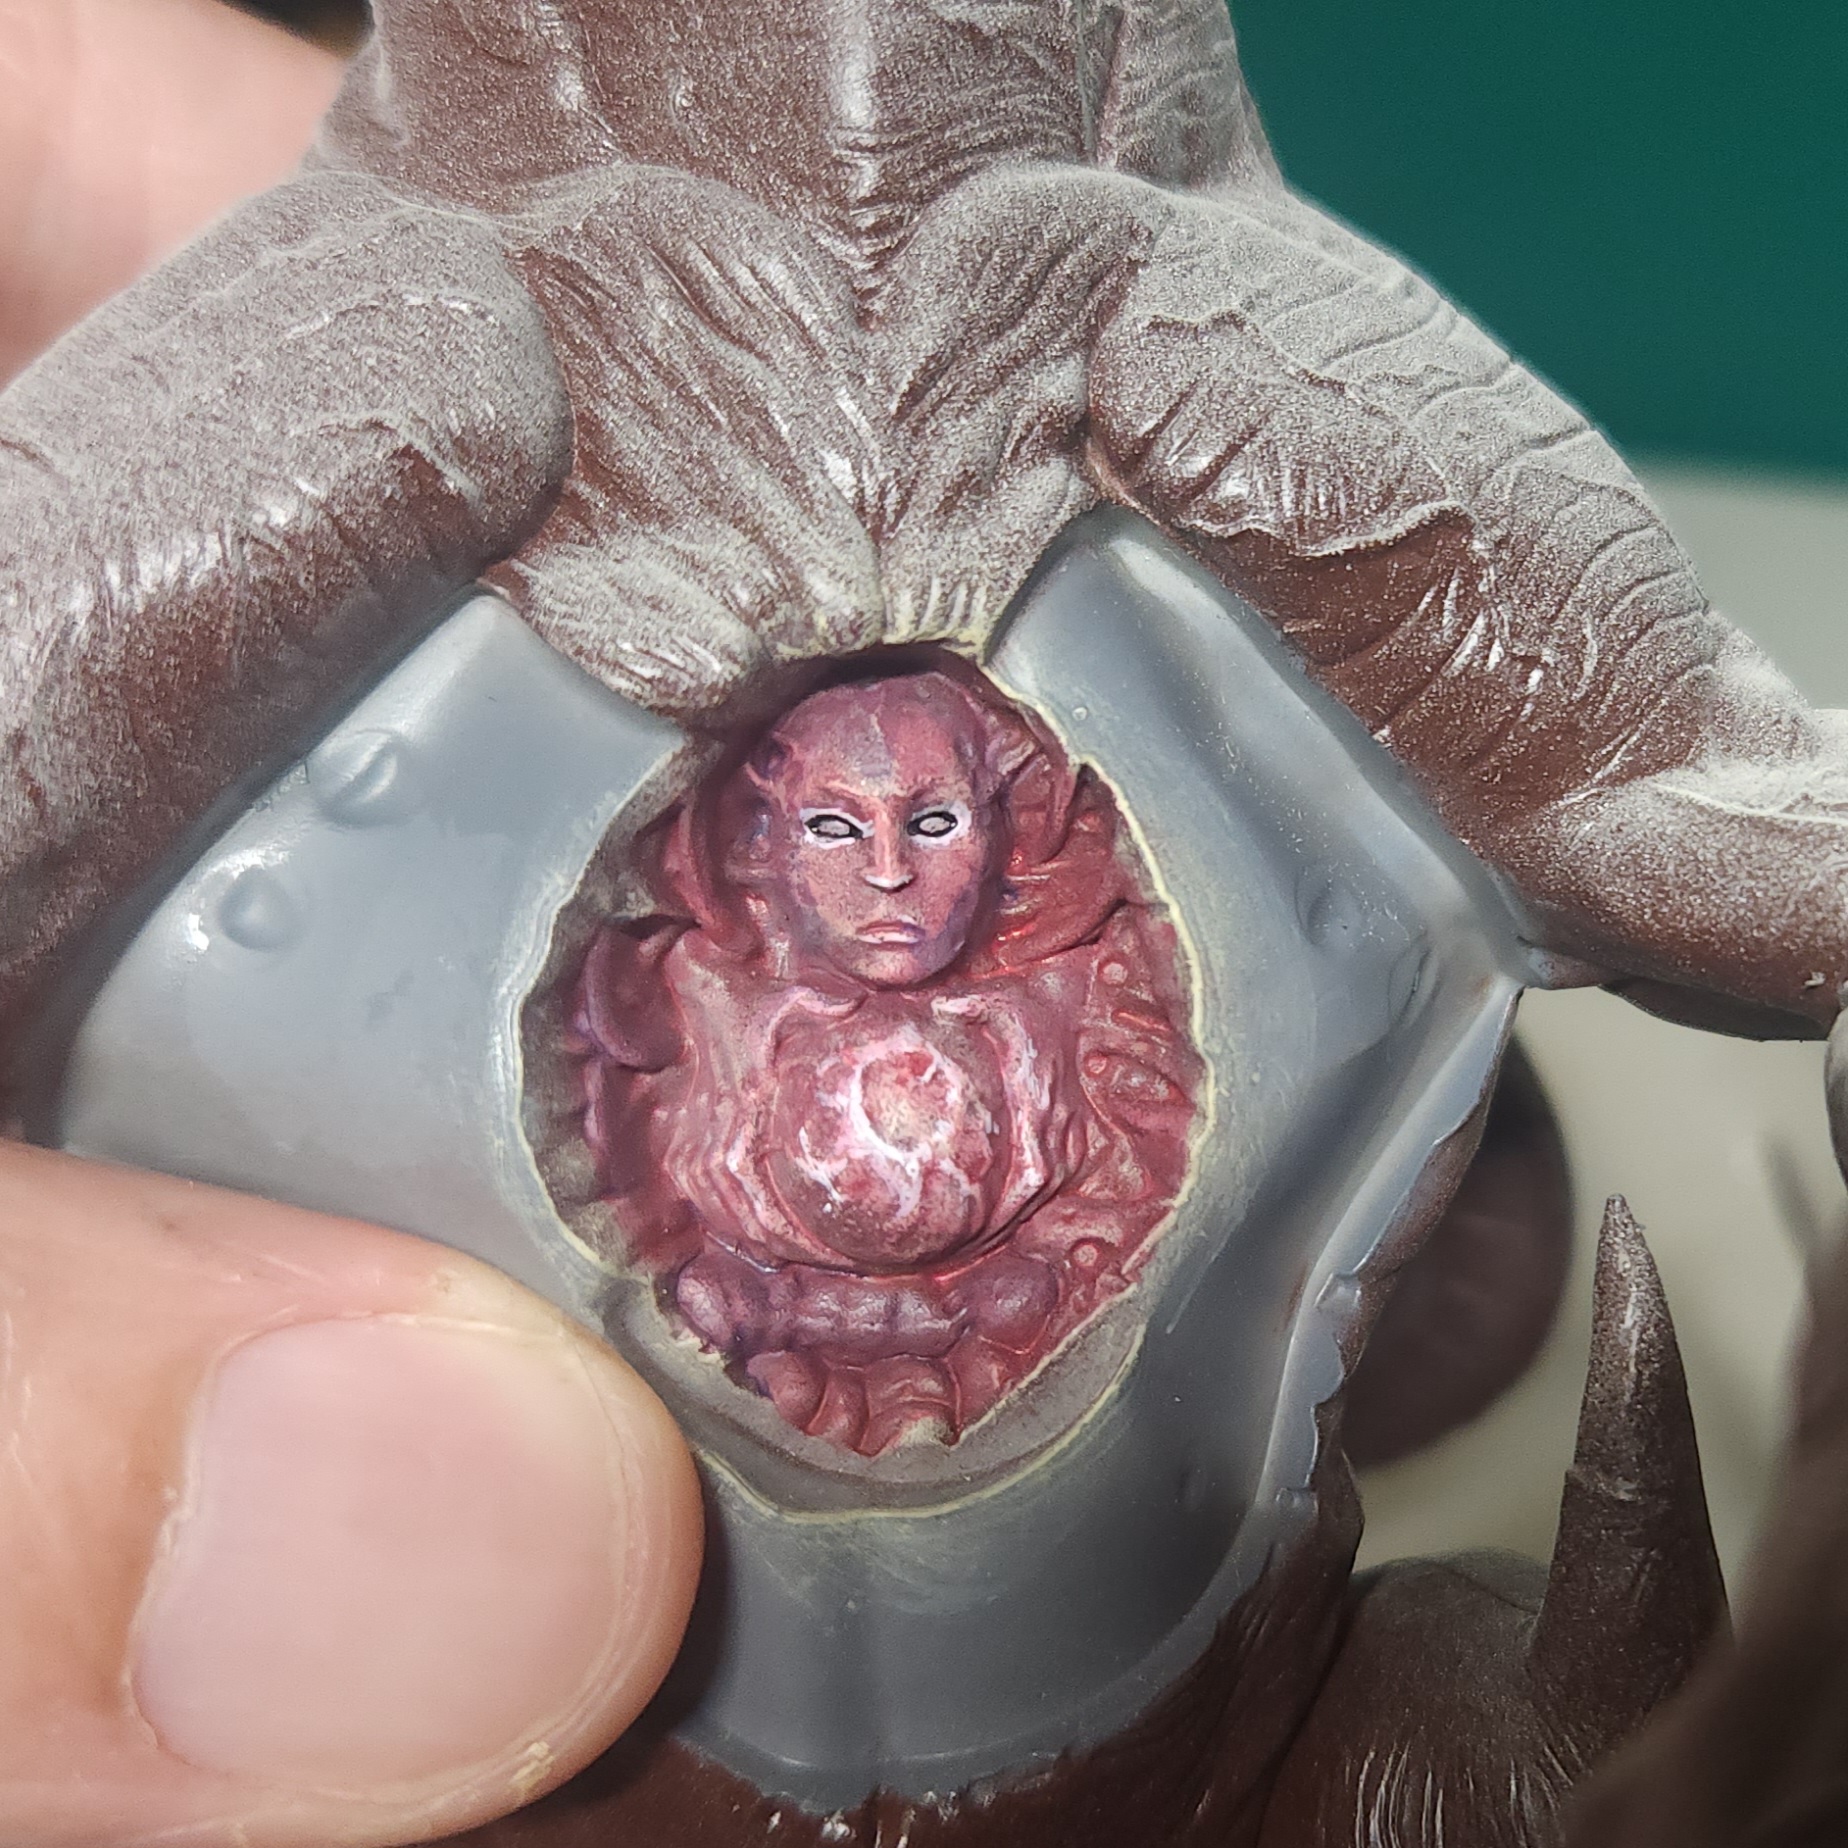
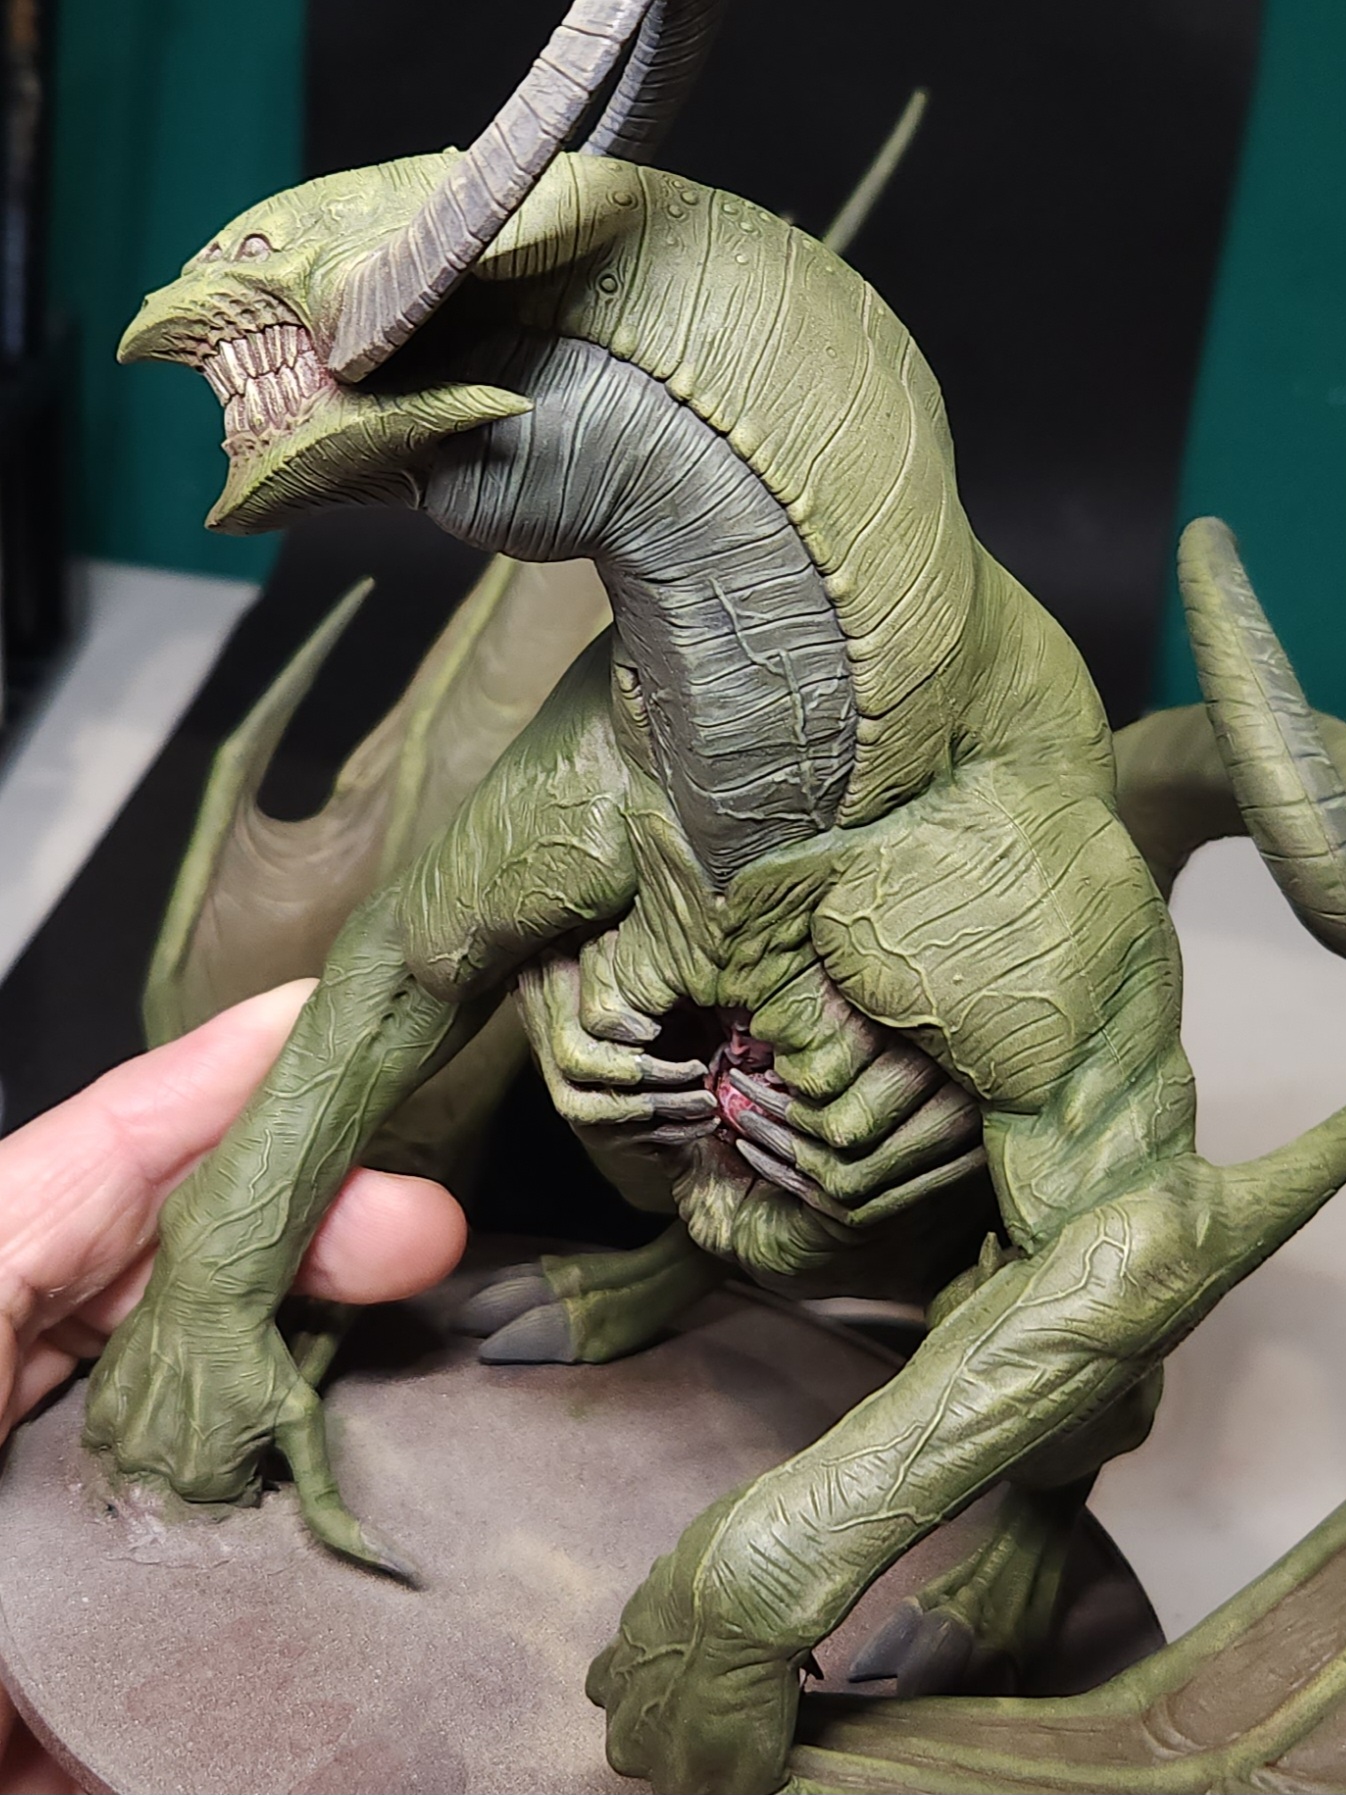
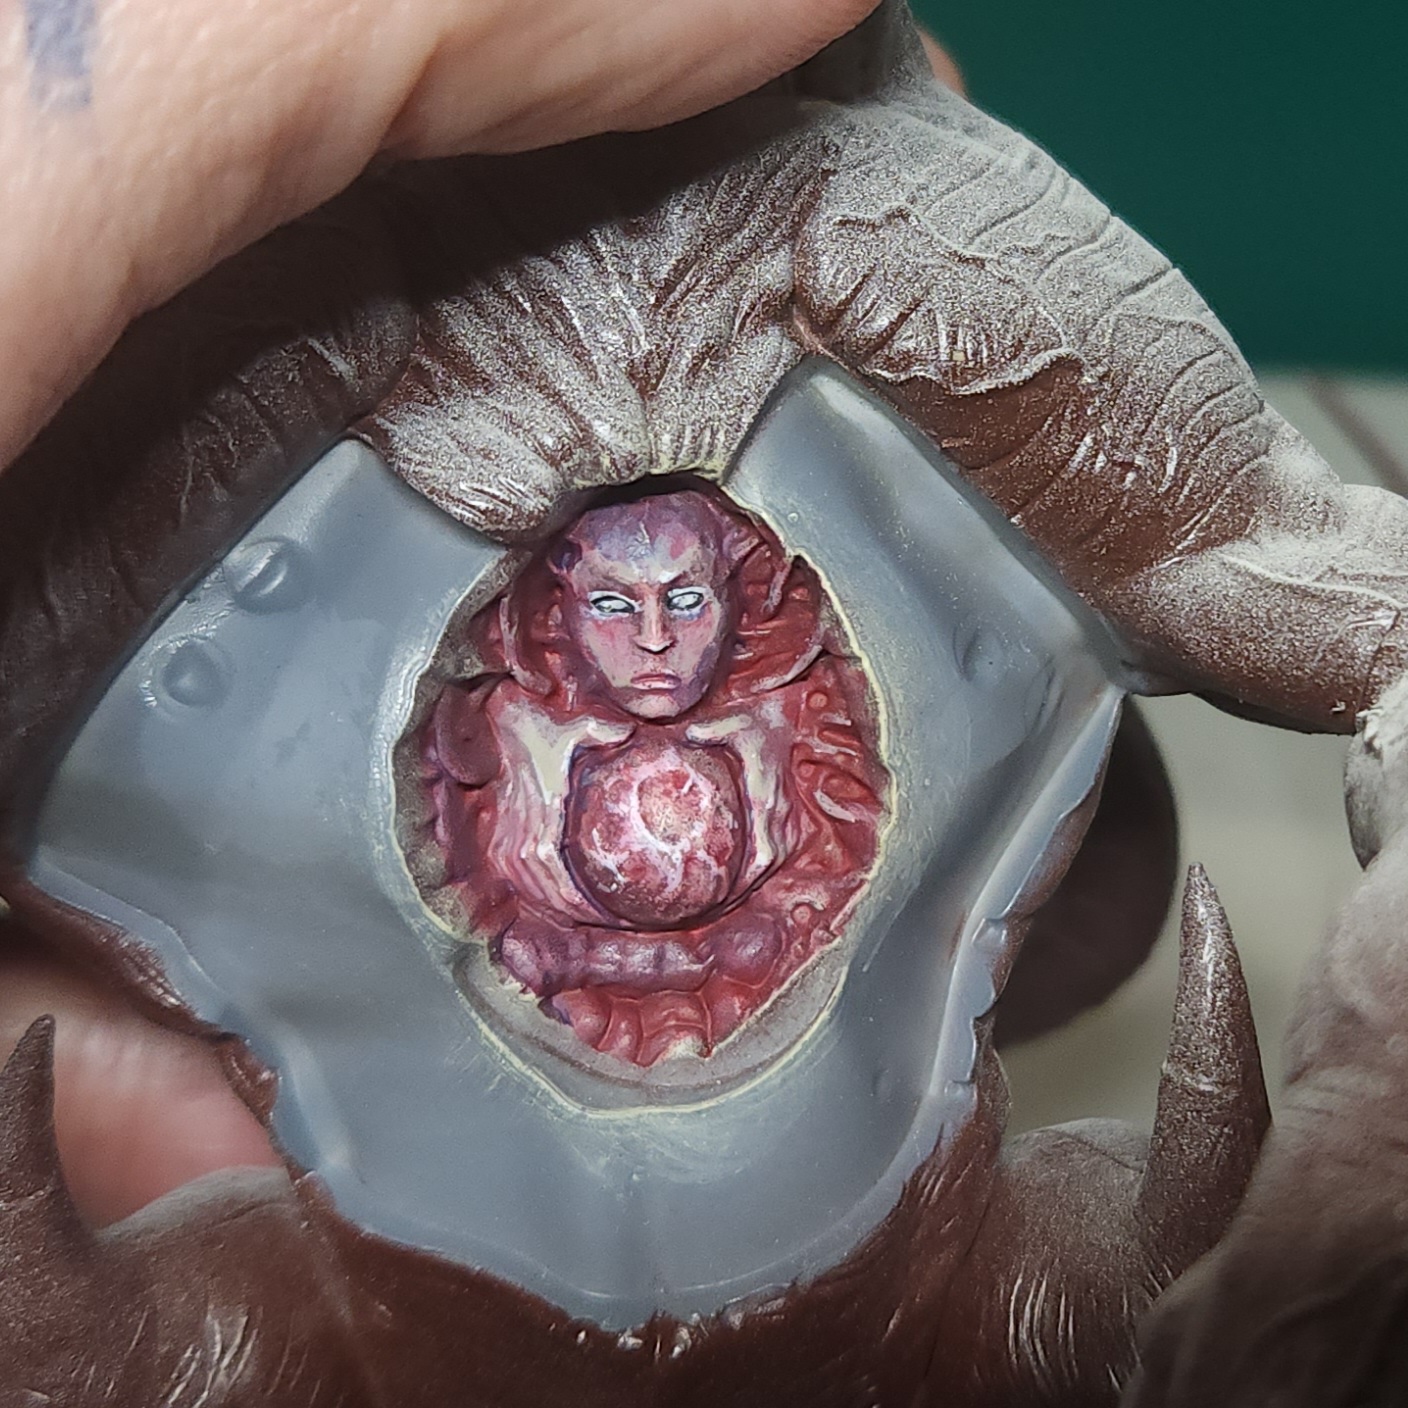
I figured that the best place to start was the exposed chest cavity. I removed the two chest/ rib components and got started.
The entire inside got two thin coats of Vallejo Gory Red.
I made a glaze of Citadel Kantor Blue and applied it to some of the intestine-looking detail and around the edges of the face
The white details are picked out with Vallejo Ivory White. The face and hands has details out with Vallejo
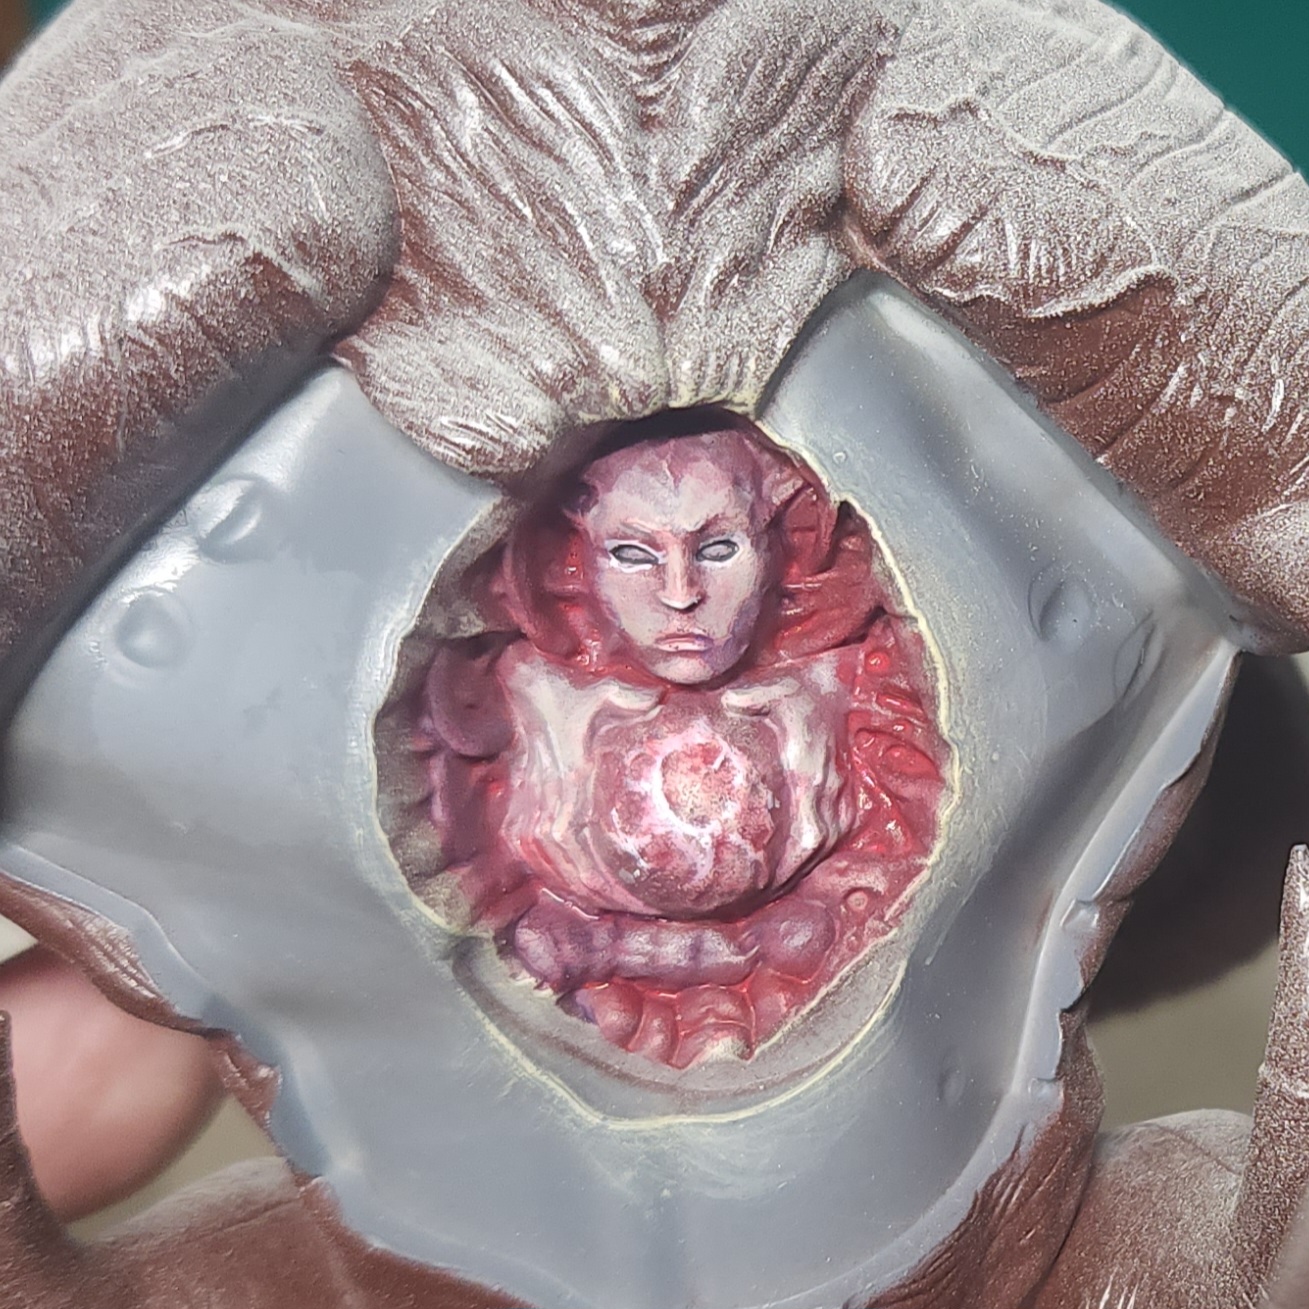
 18 Mar 25: Nearly complete...
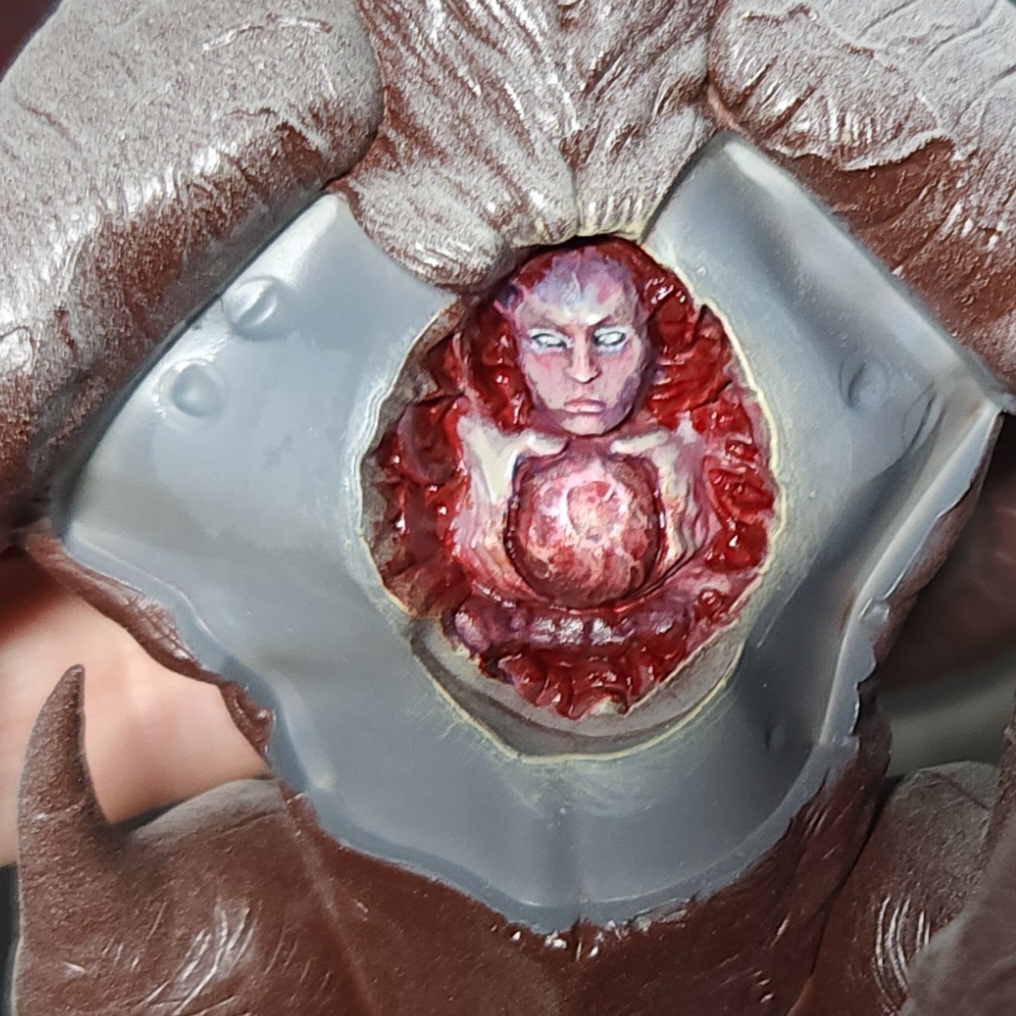 19 Mar 25: Chest Cavity Complete
To finish of and really sell the gaping chest cavity look, I used a coat of Citadel Technical Blood For The Blood God.
4 Mar 25: Facing up to it... it's taking longer than expected.
It’s now March, and the first opportunity to spend time painting. Back to Atnas and getting more done.
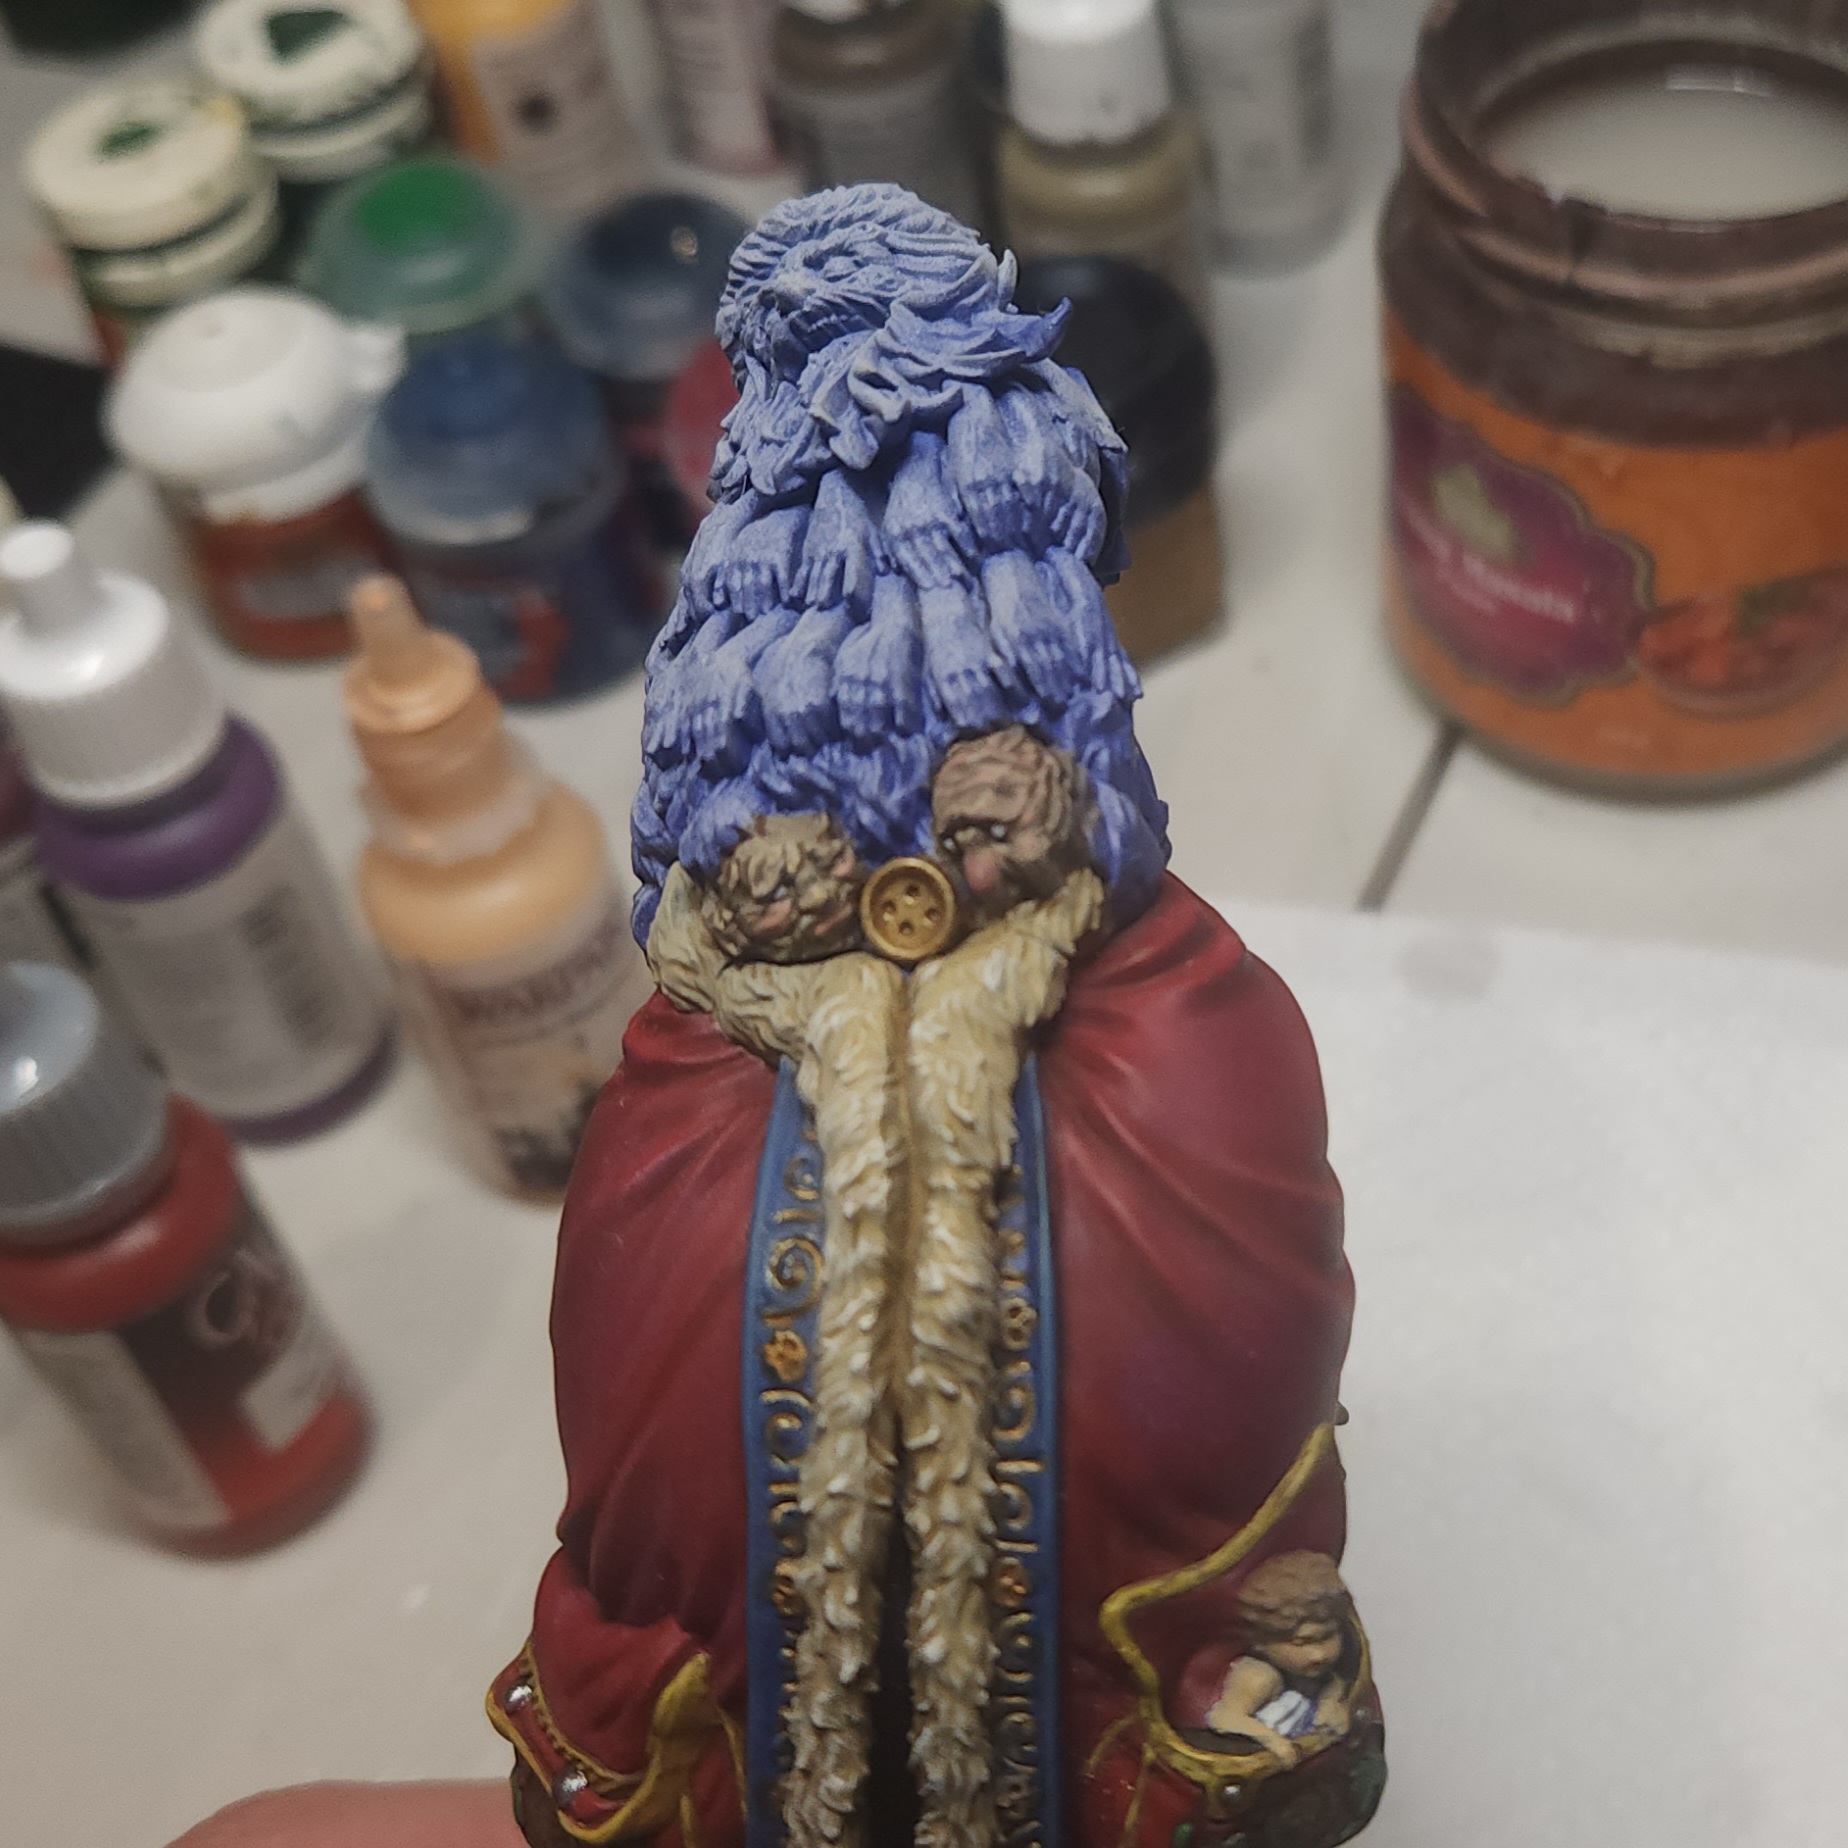
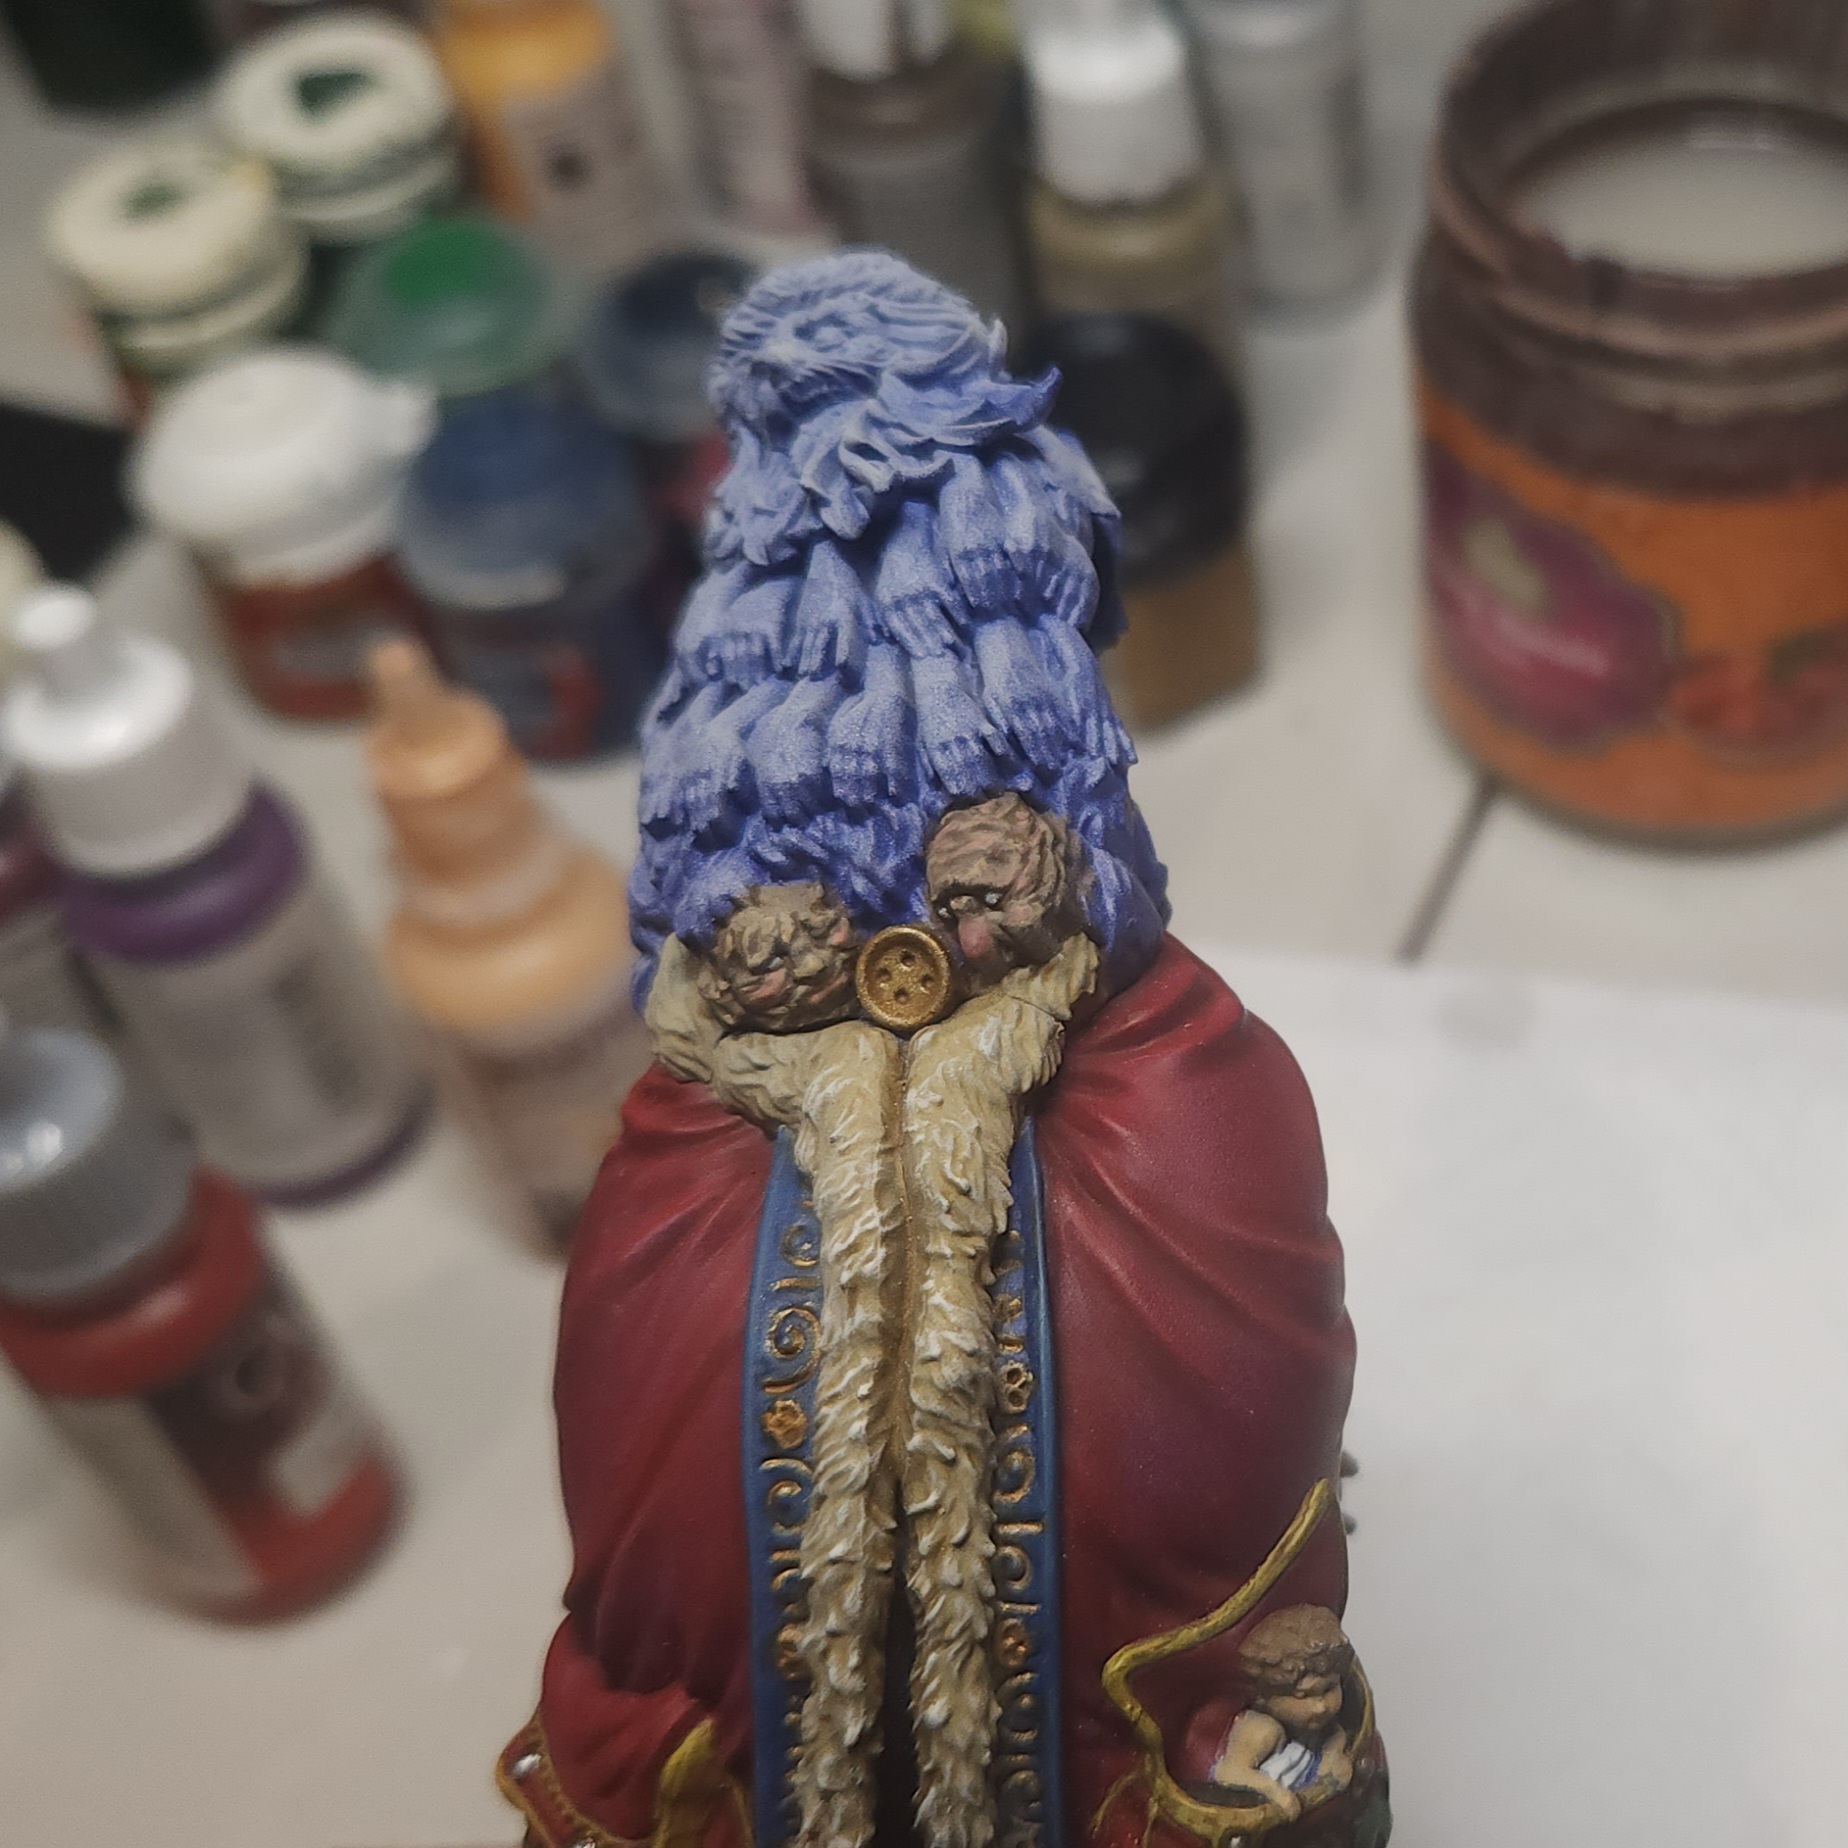
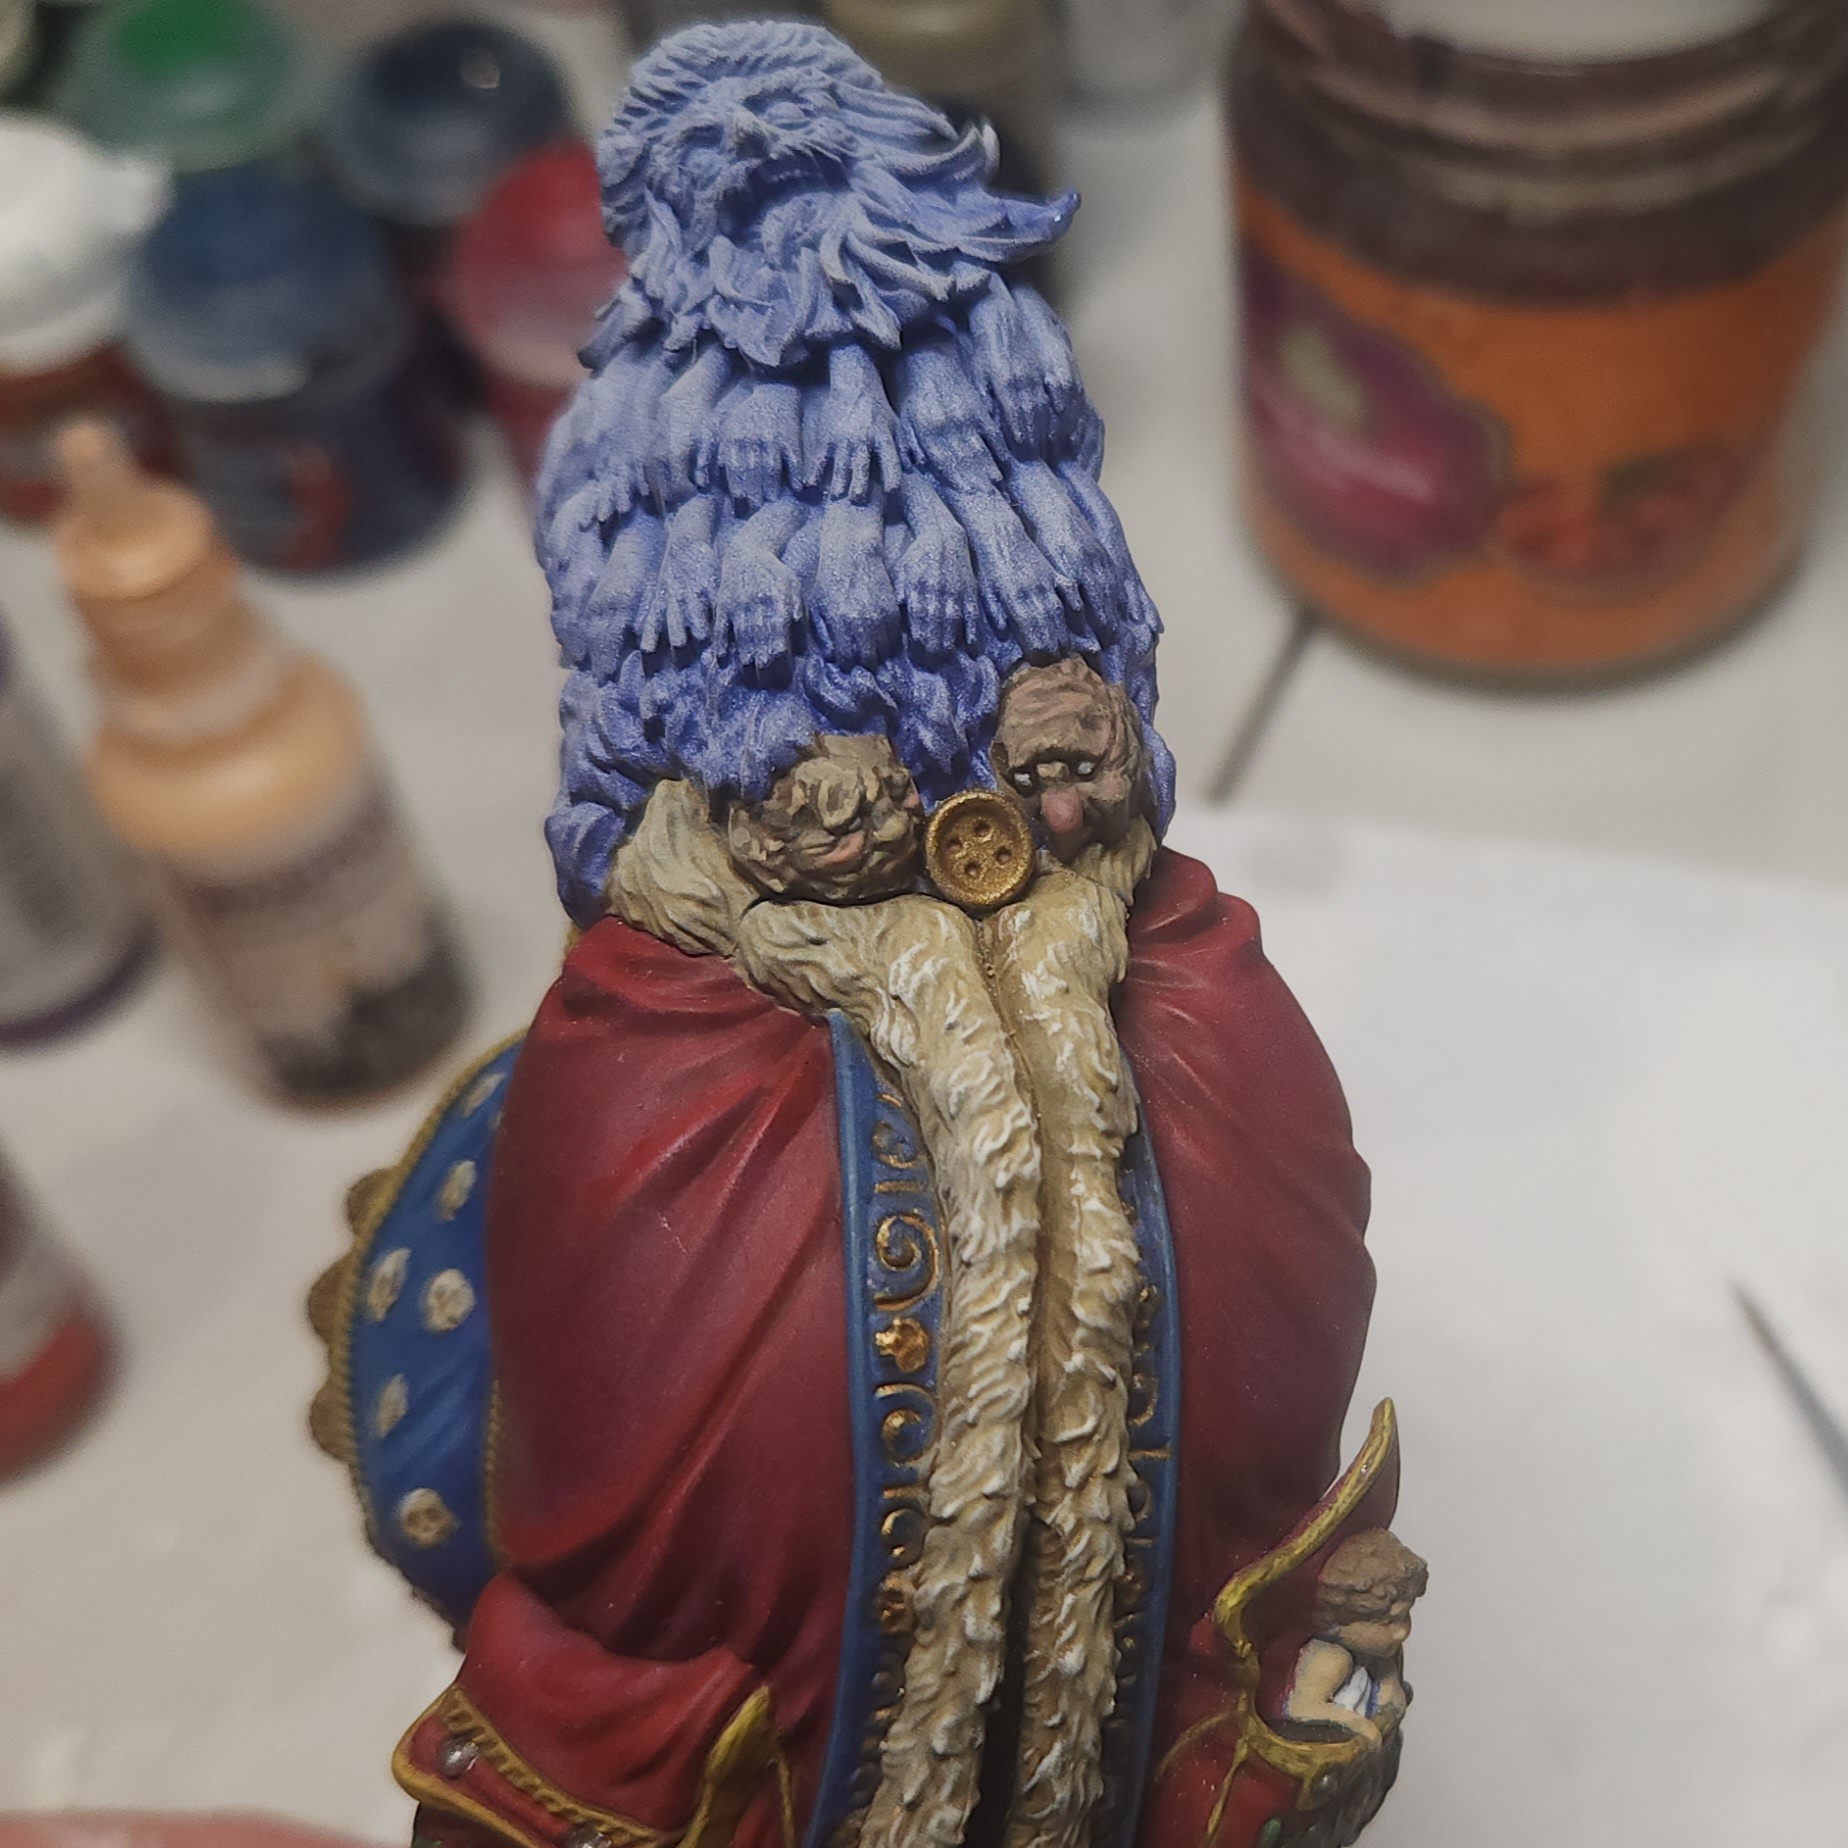
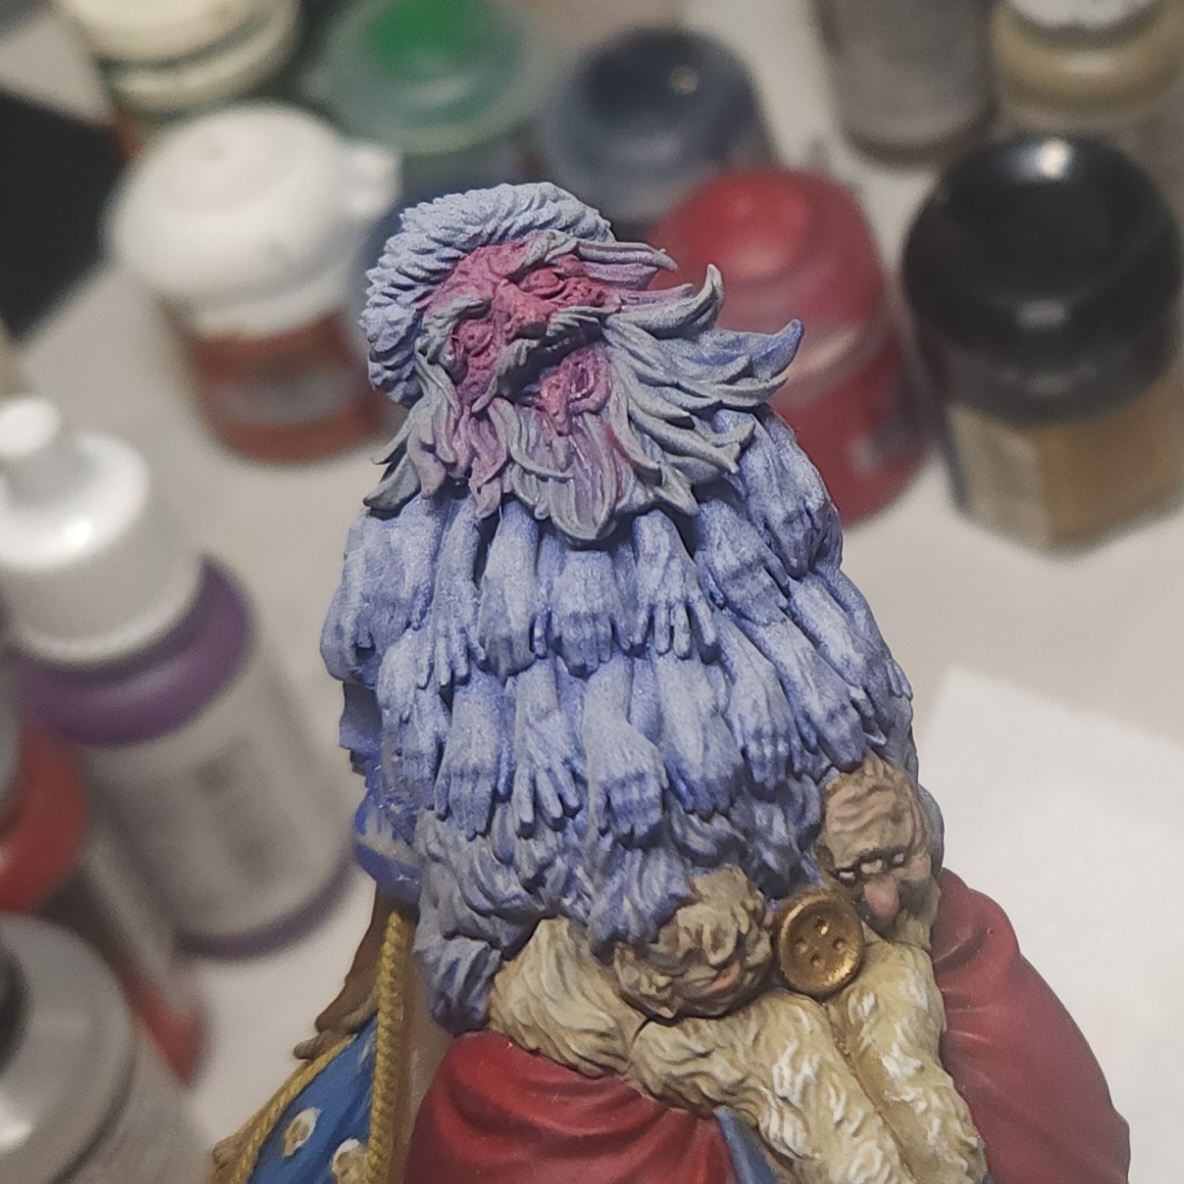
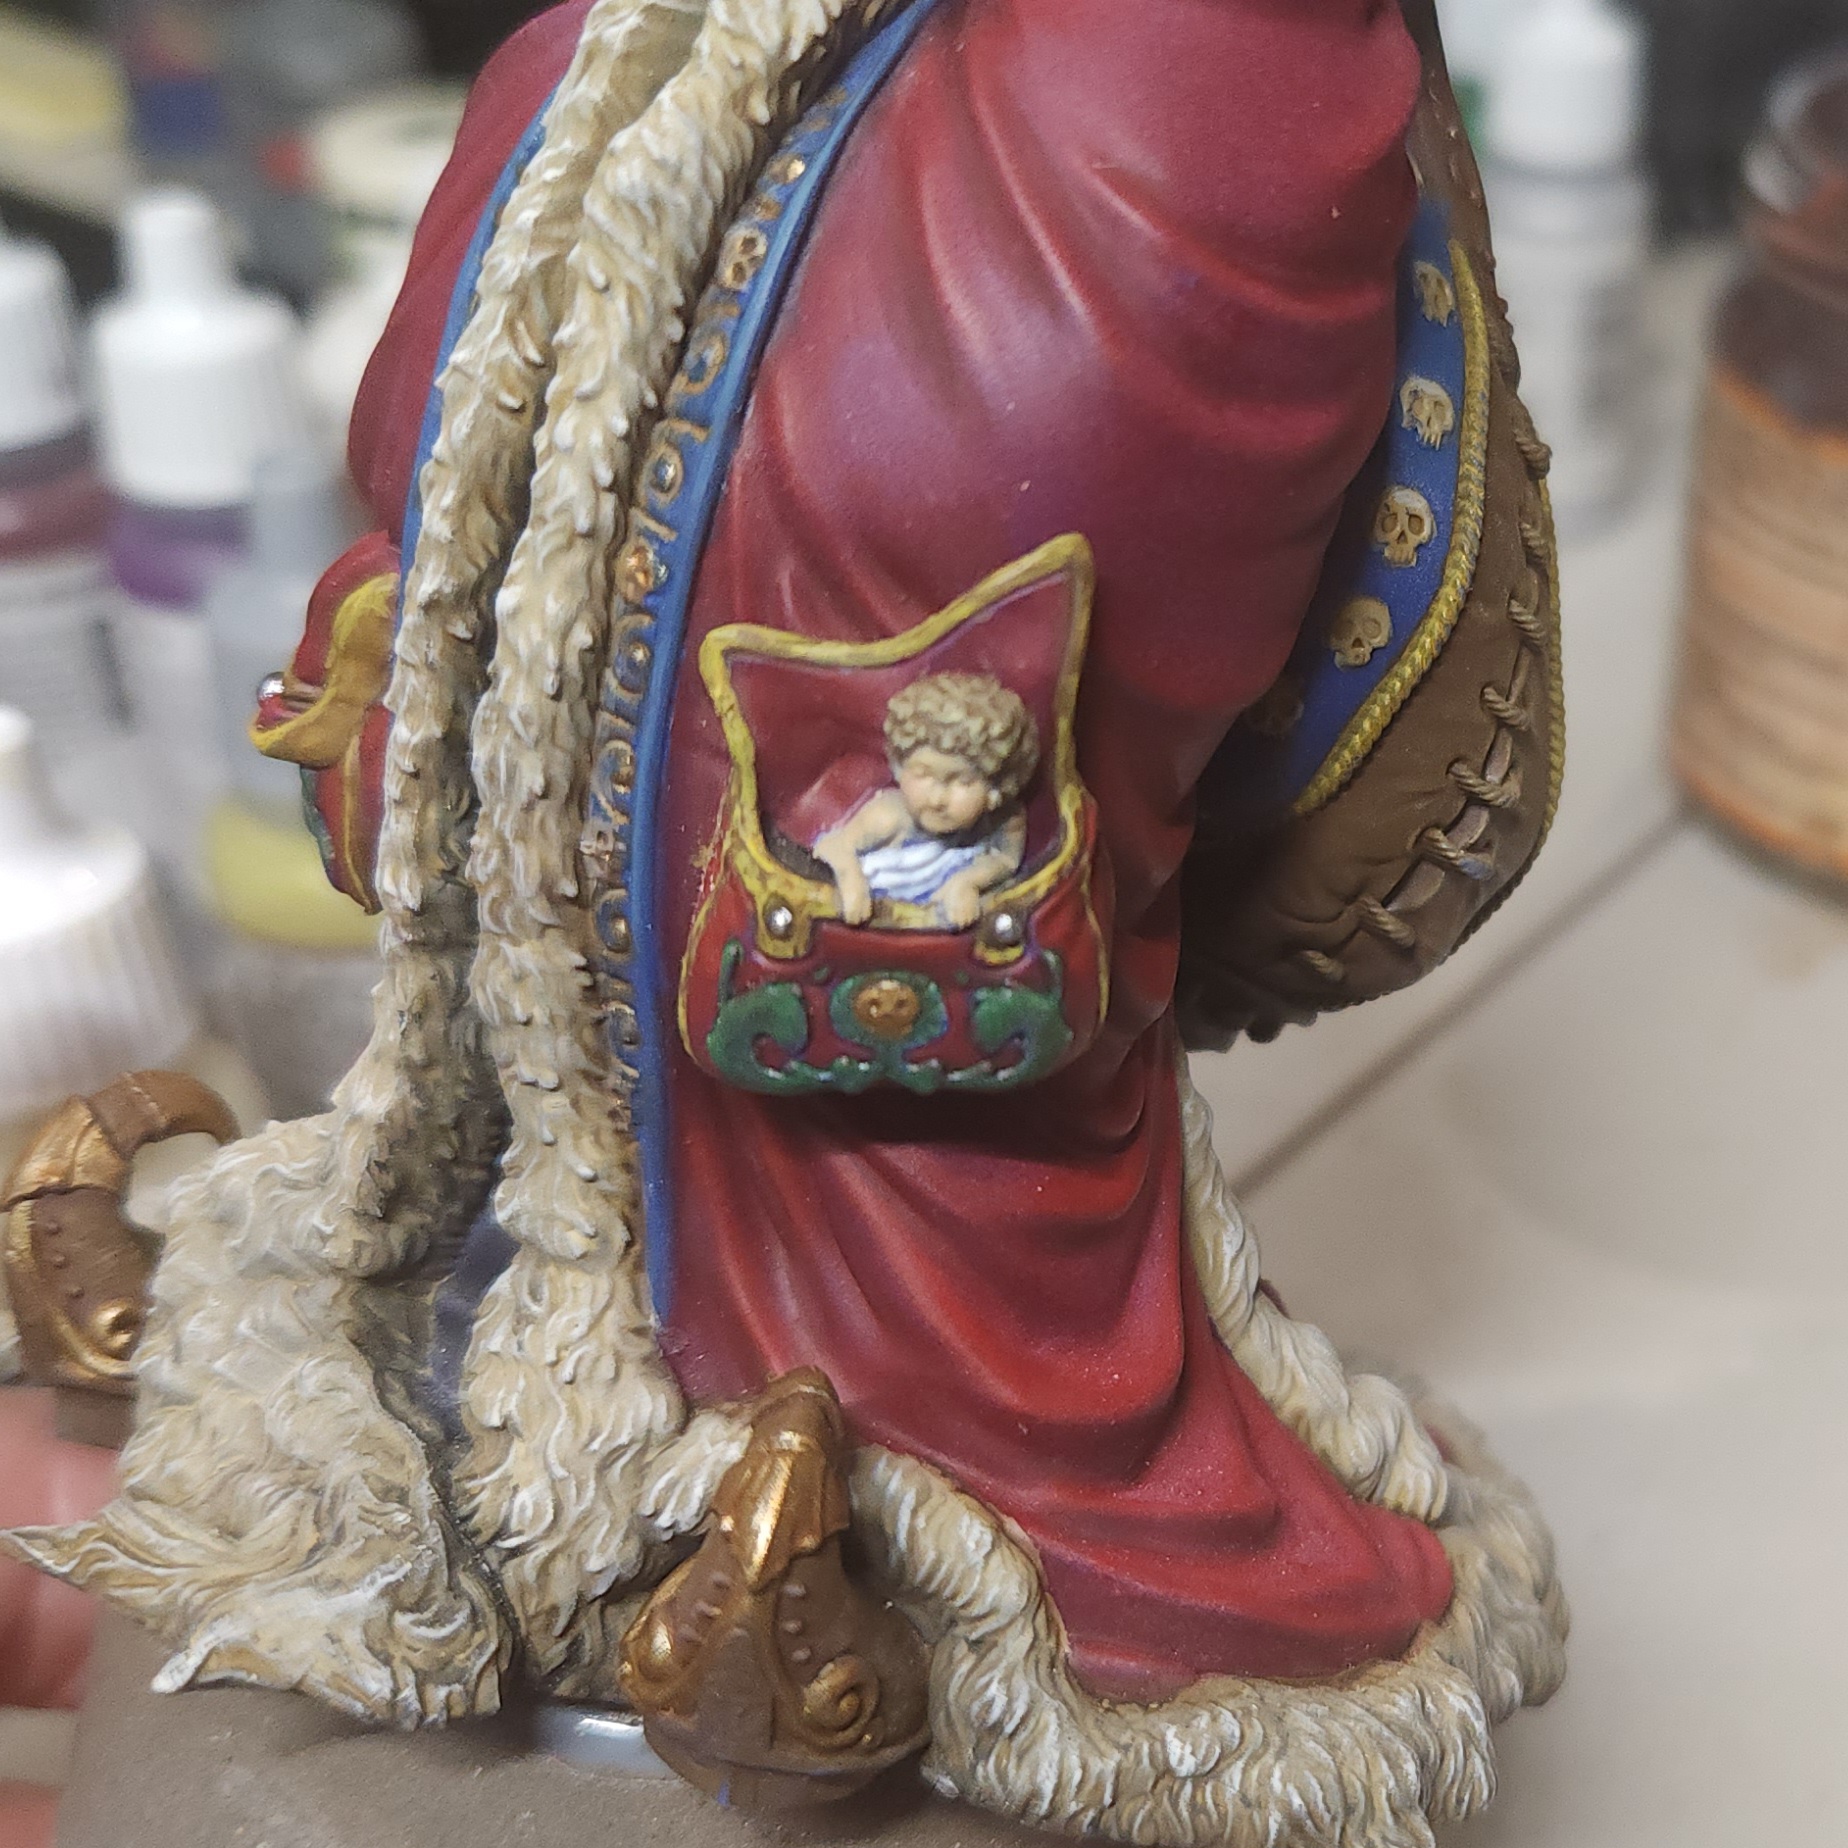
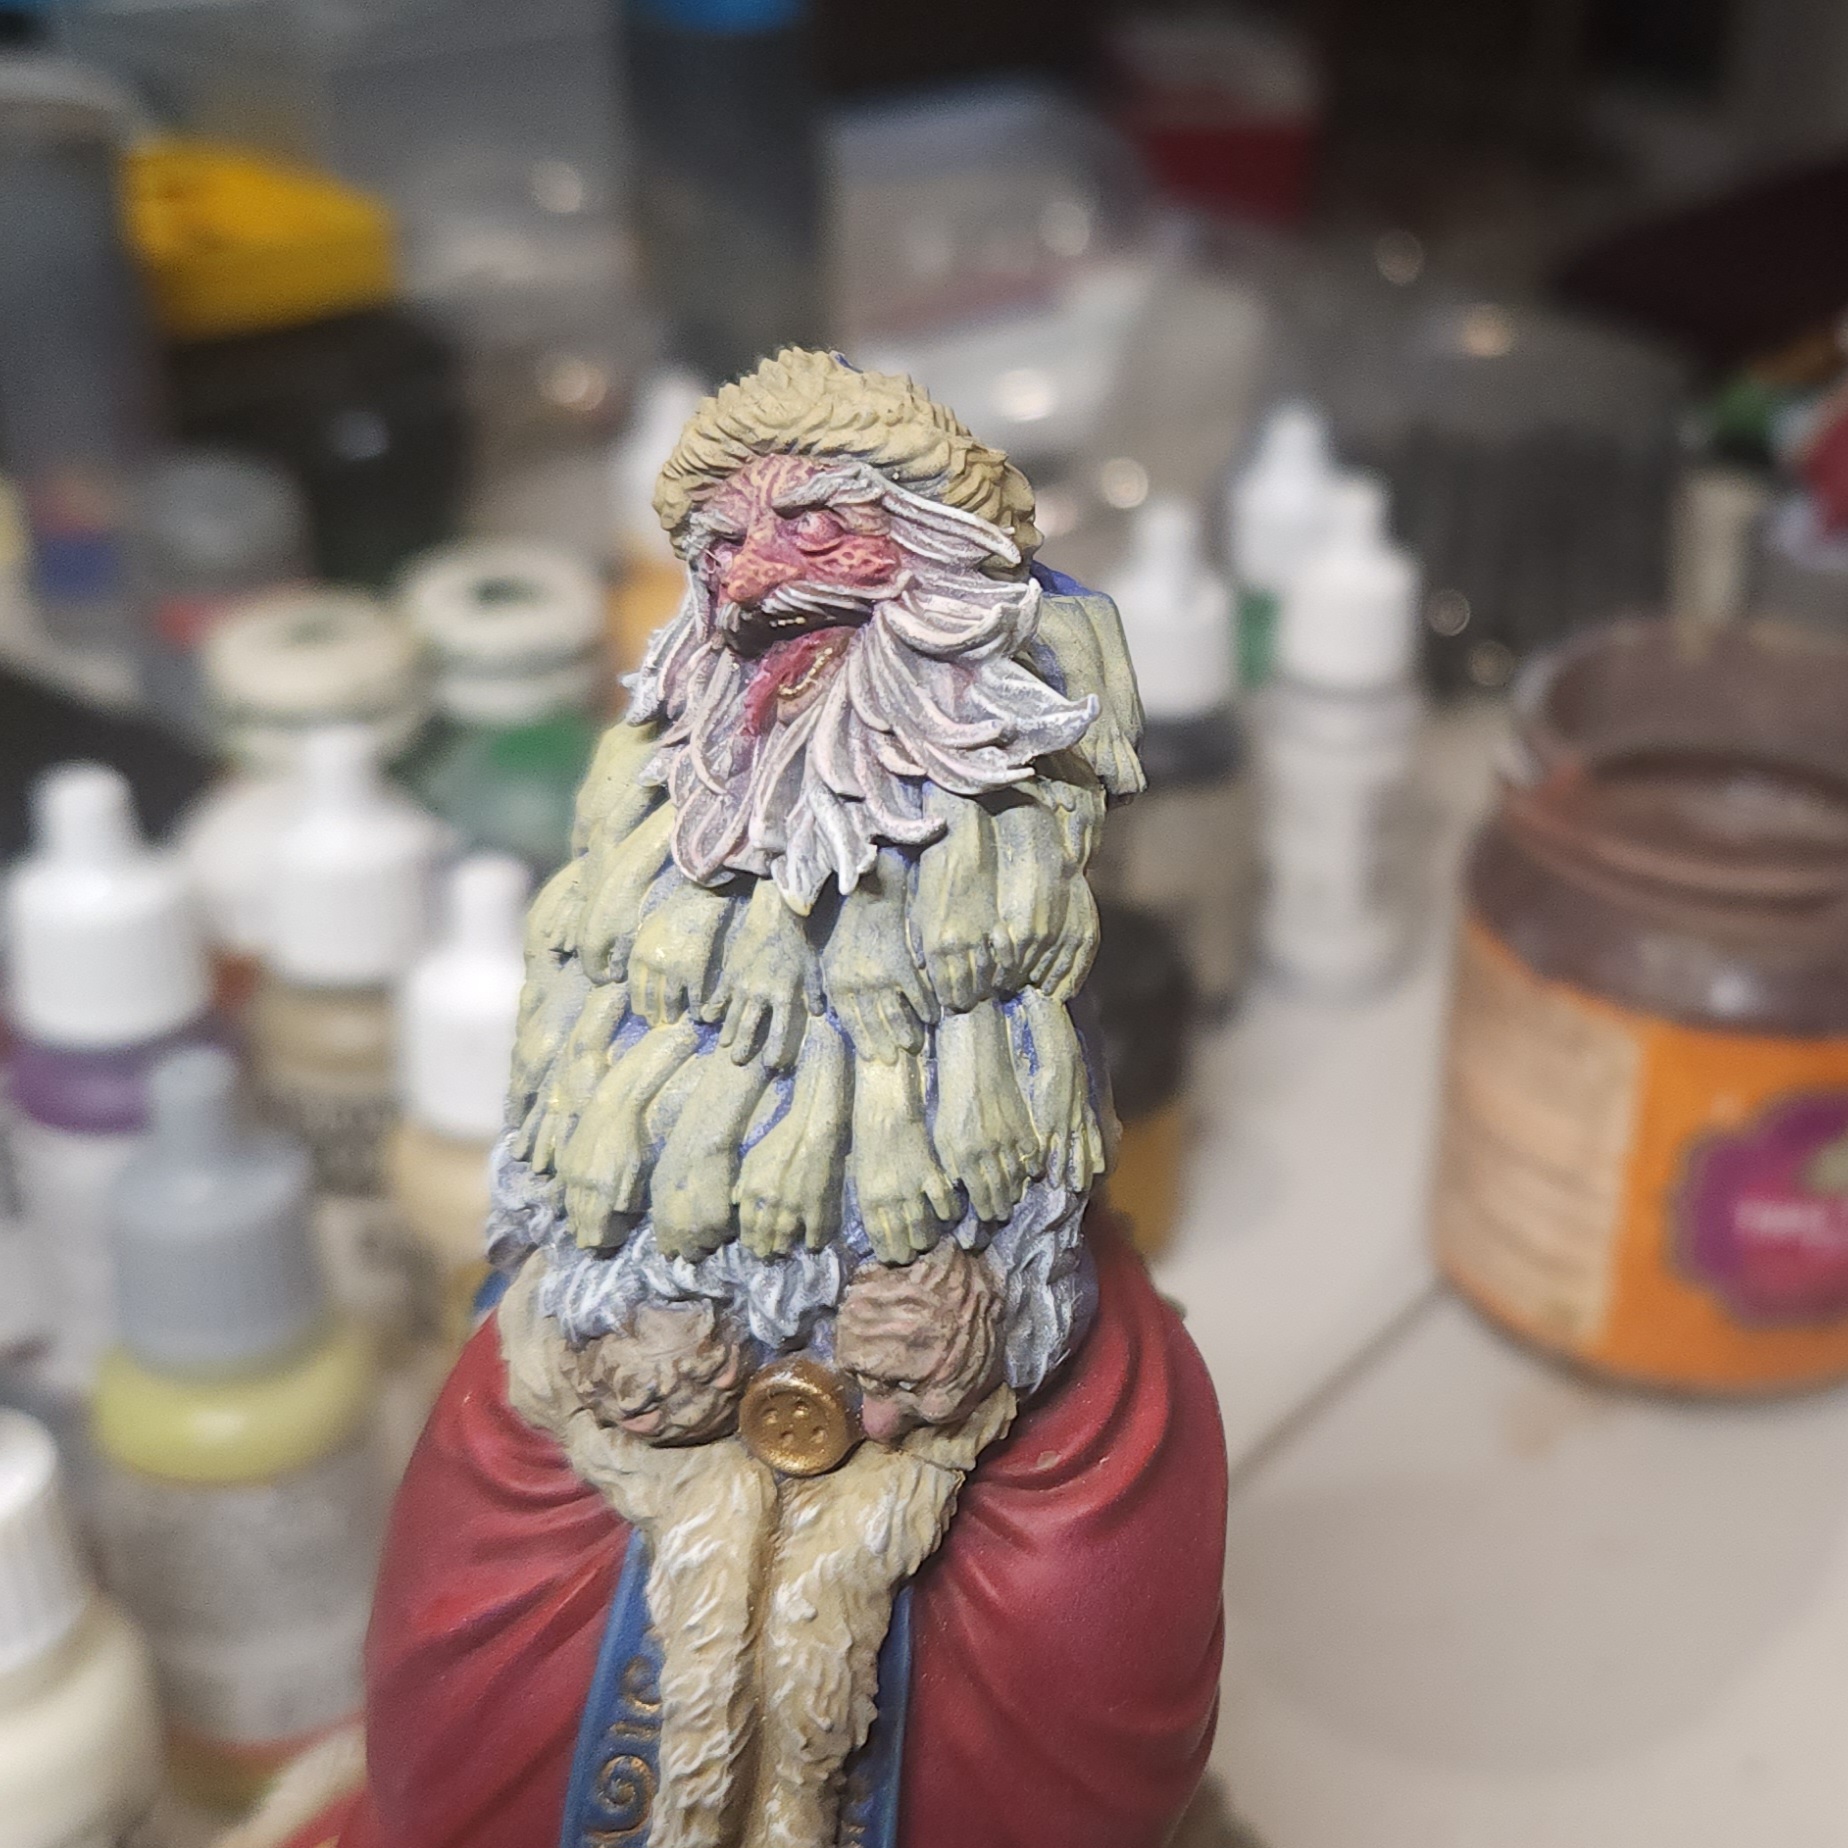
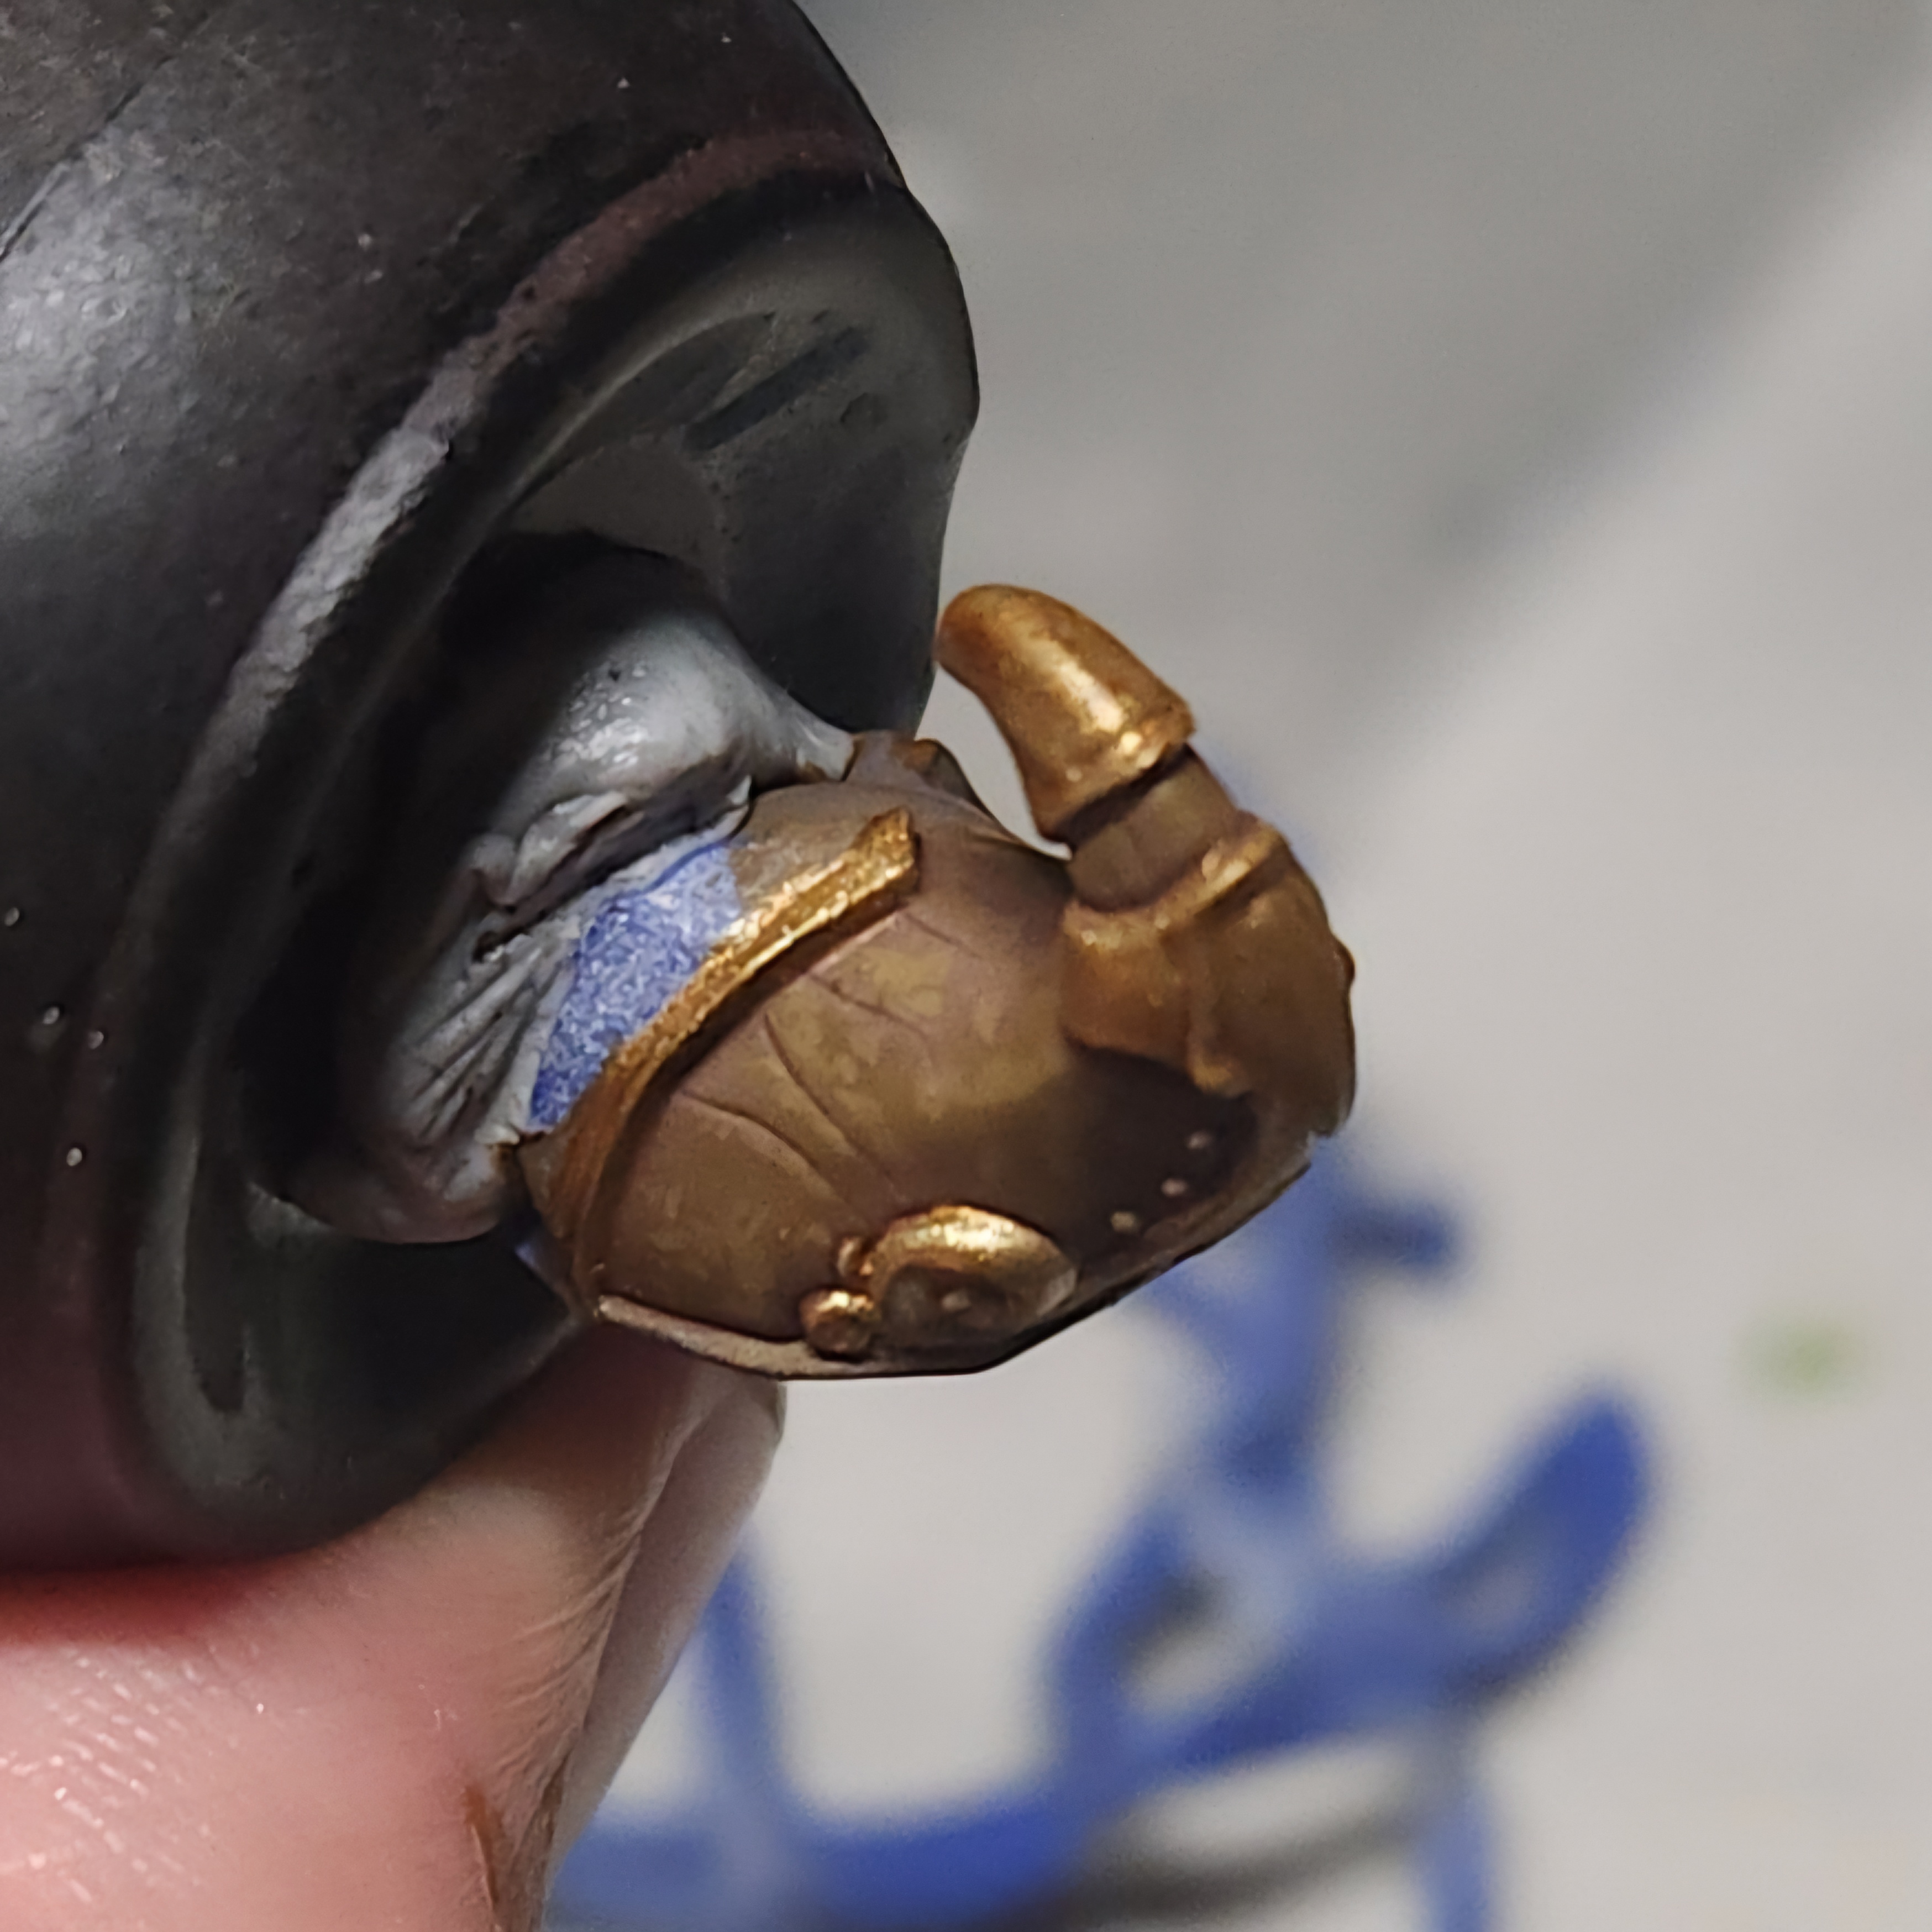
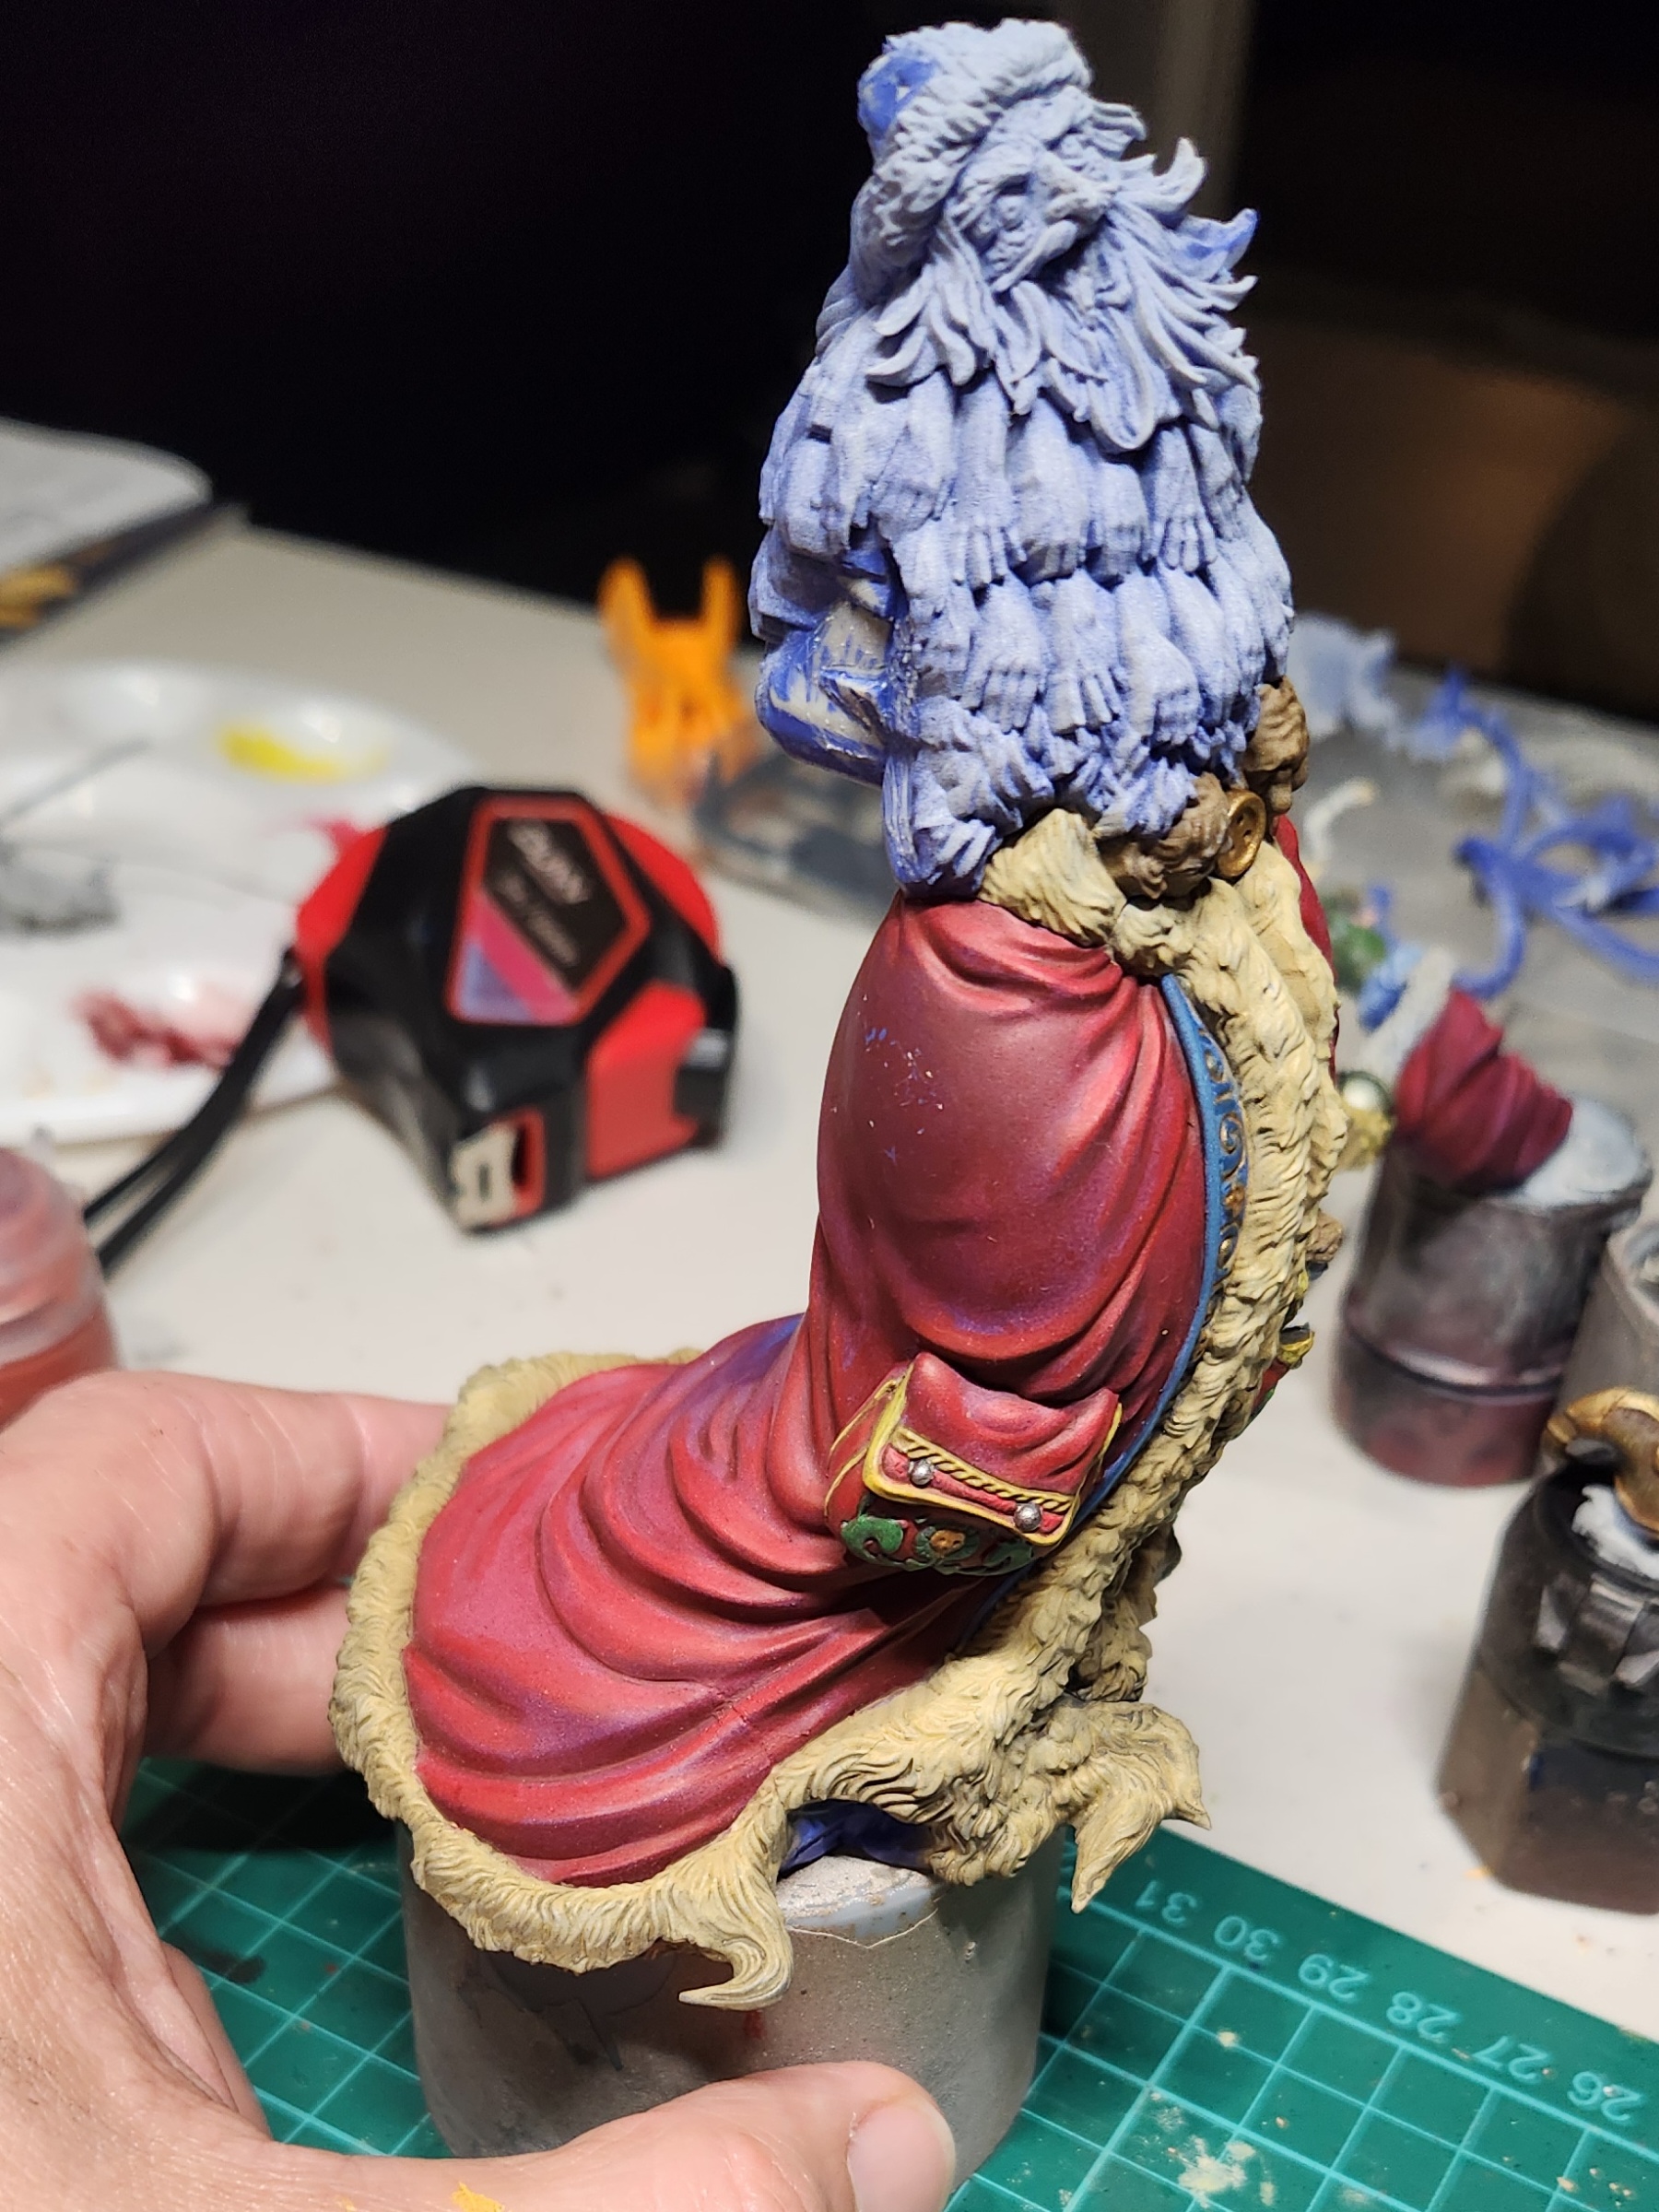
There are two small faces either side of the large button. They look old and wrinkled, but im not sure if they are intended to be decorative or living.
The wrinkles and facial details are picked out with Vallejo Buff. This is done in small, thin layers, using successive layers to build highlights.
The rosy cheeks, lips and nose are a touch of Vallejo Gory Red mixed in to the Buff and glazed onto the particular features.
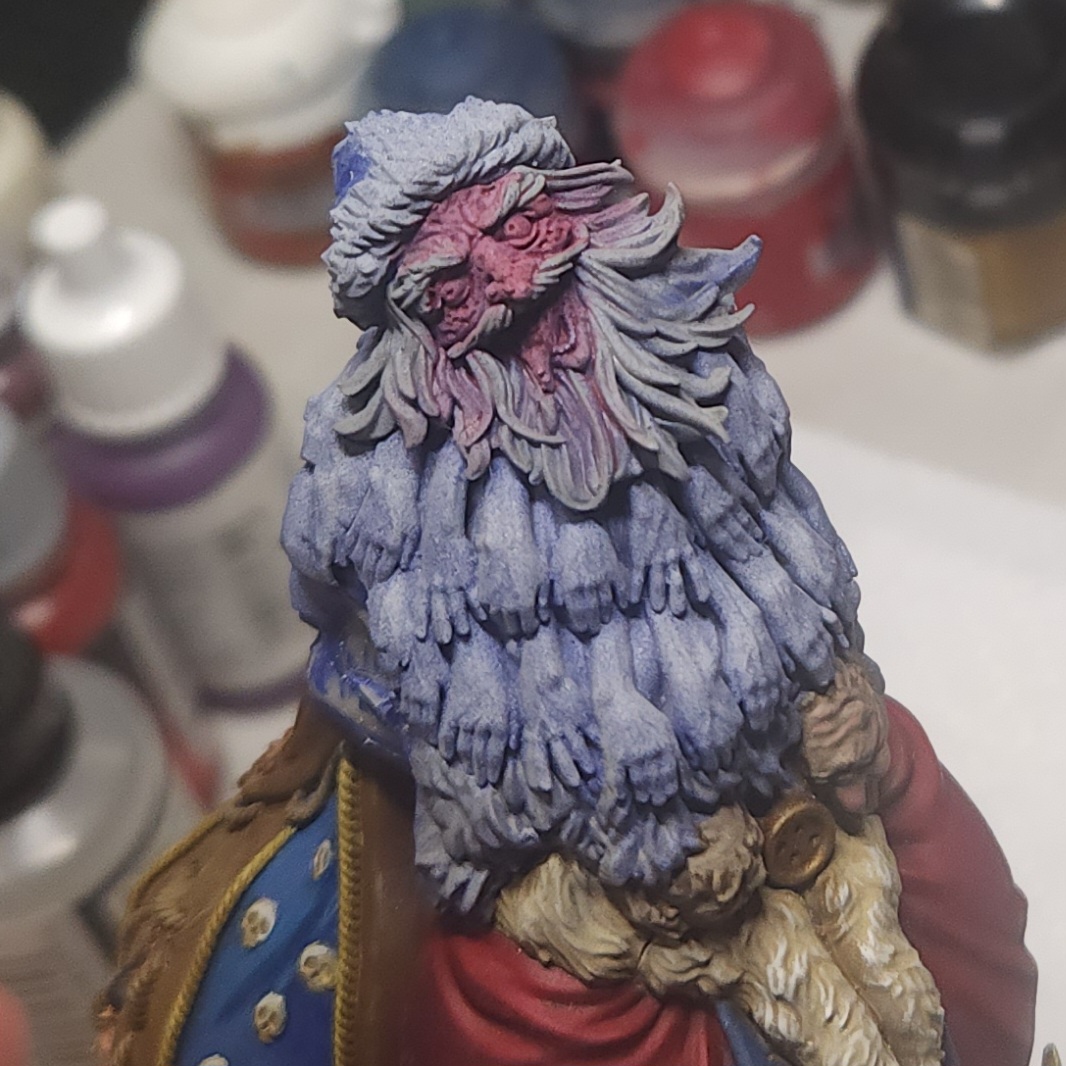
I quickly picked out the eyes with Army Painter Warpaints White thinned well.
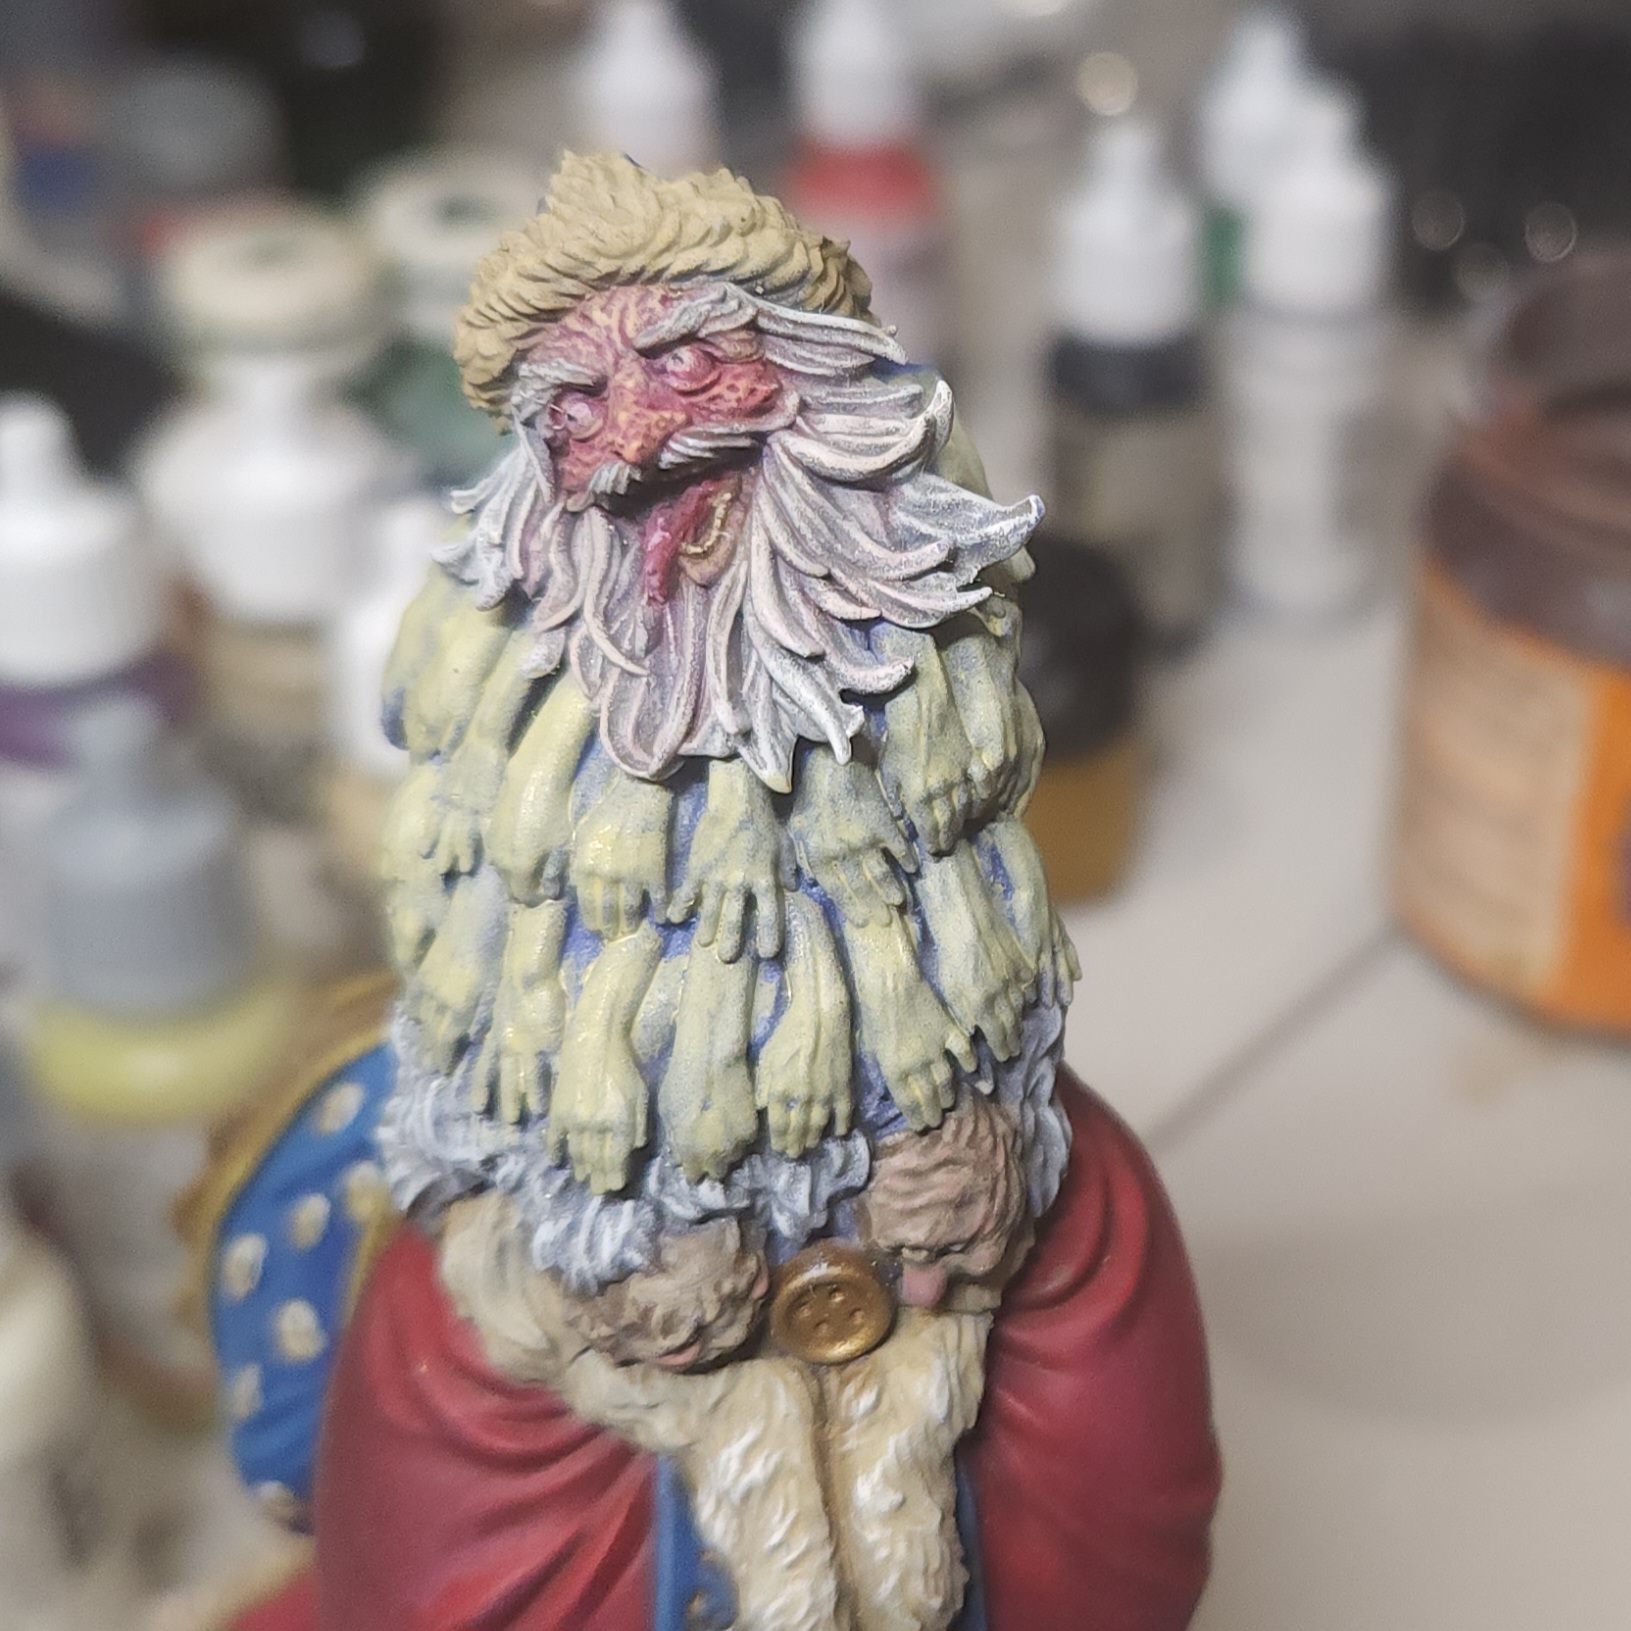
Next I started work on the face.
The skin, tongue and inside of the mouth are glazed with the Vallejo Gory Red. The skin was then carefully overbrushed with the Army Painter Warpaints Flesh, leaving the red showing in all the crevices and detail there.
 5 March: Little progress
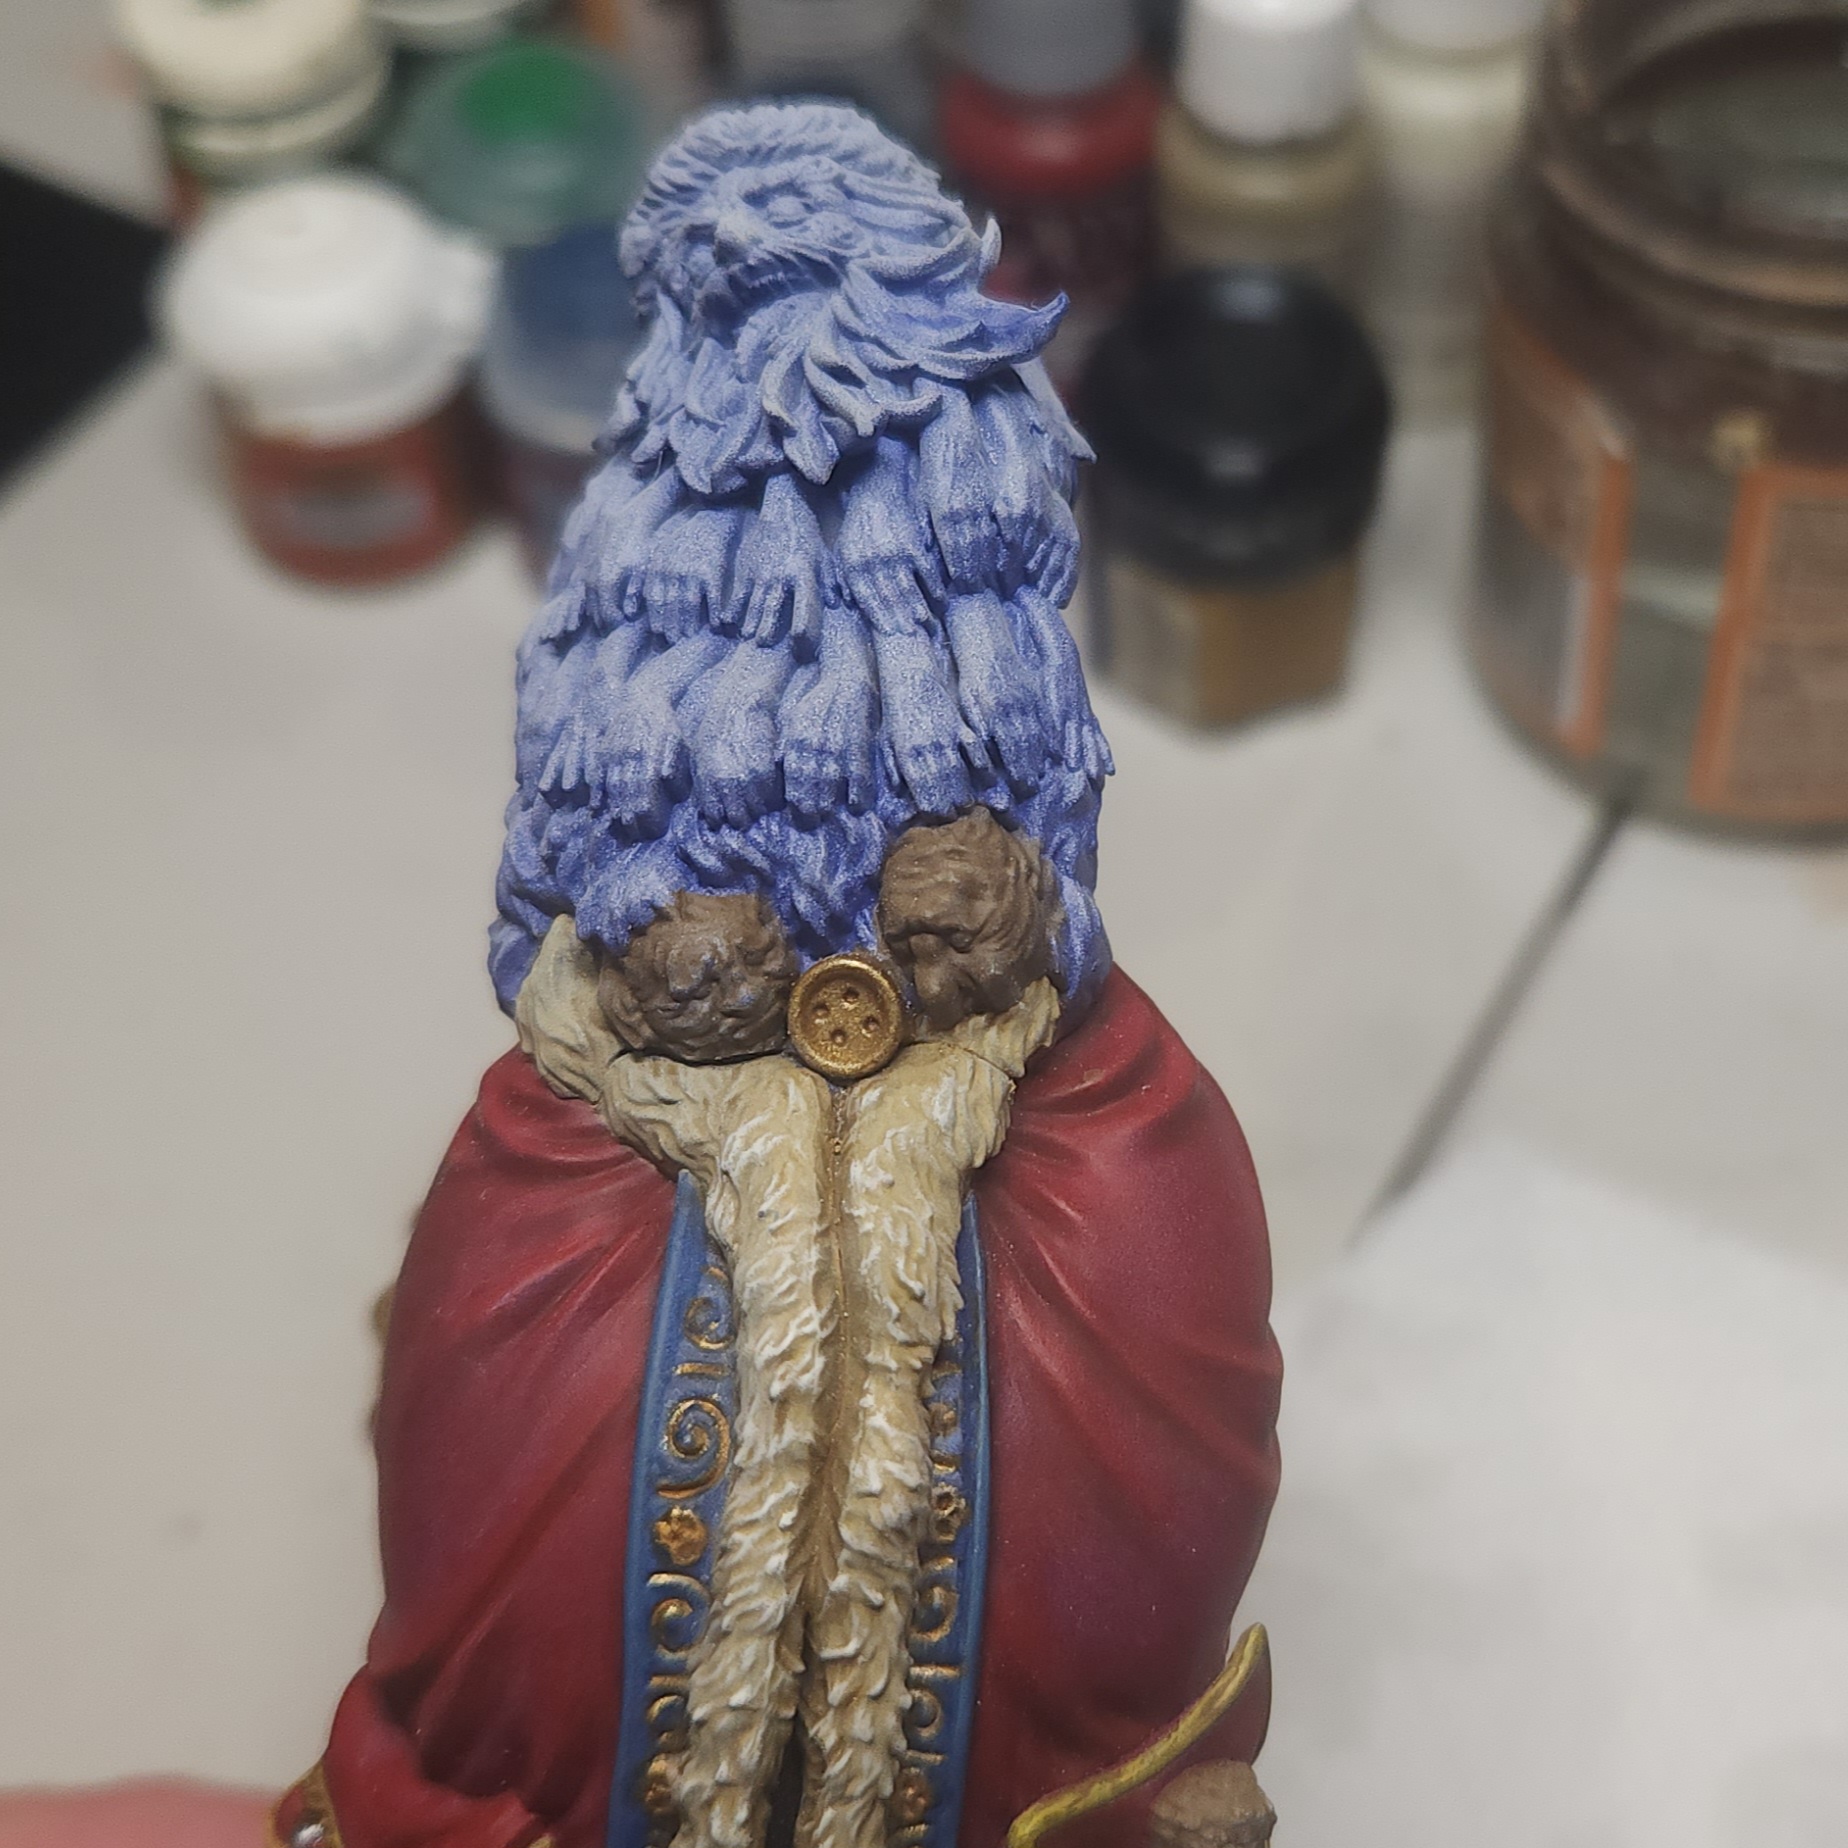
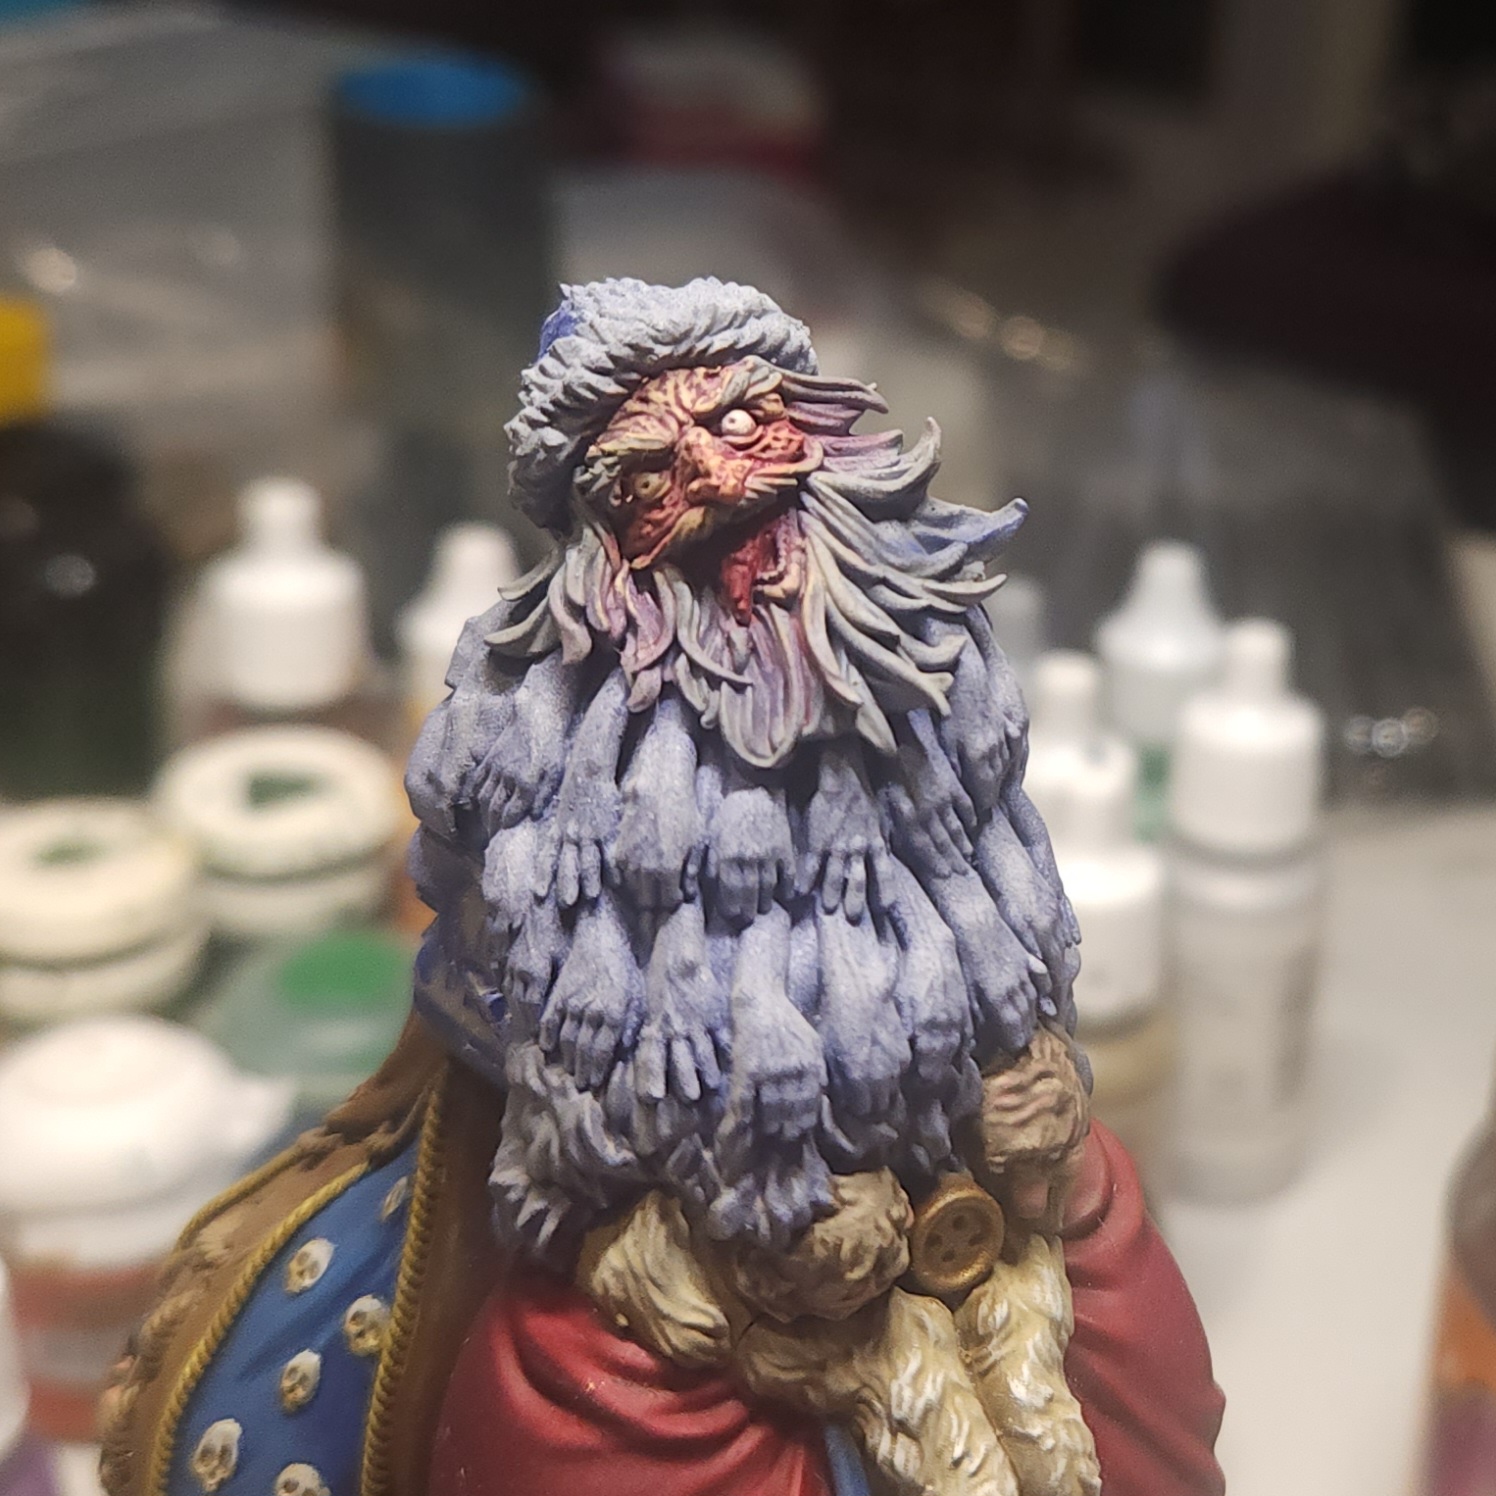
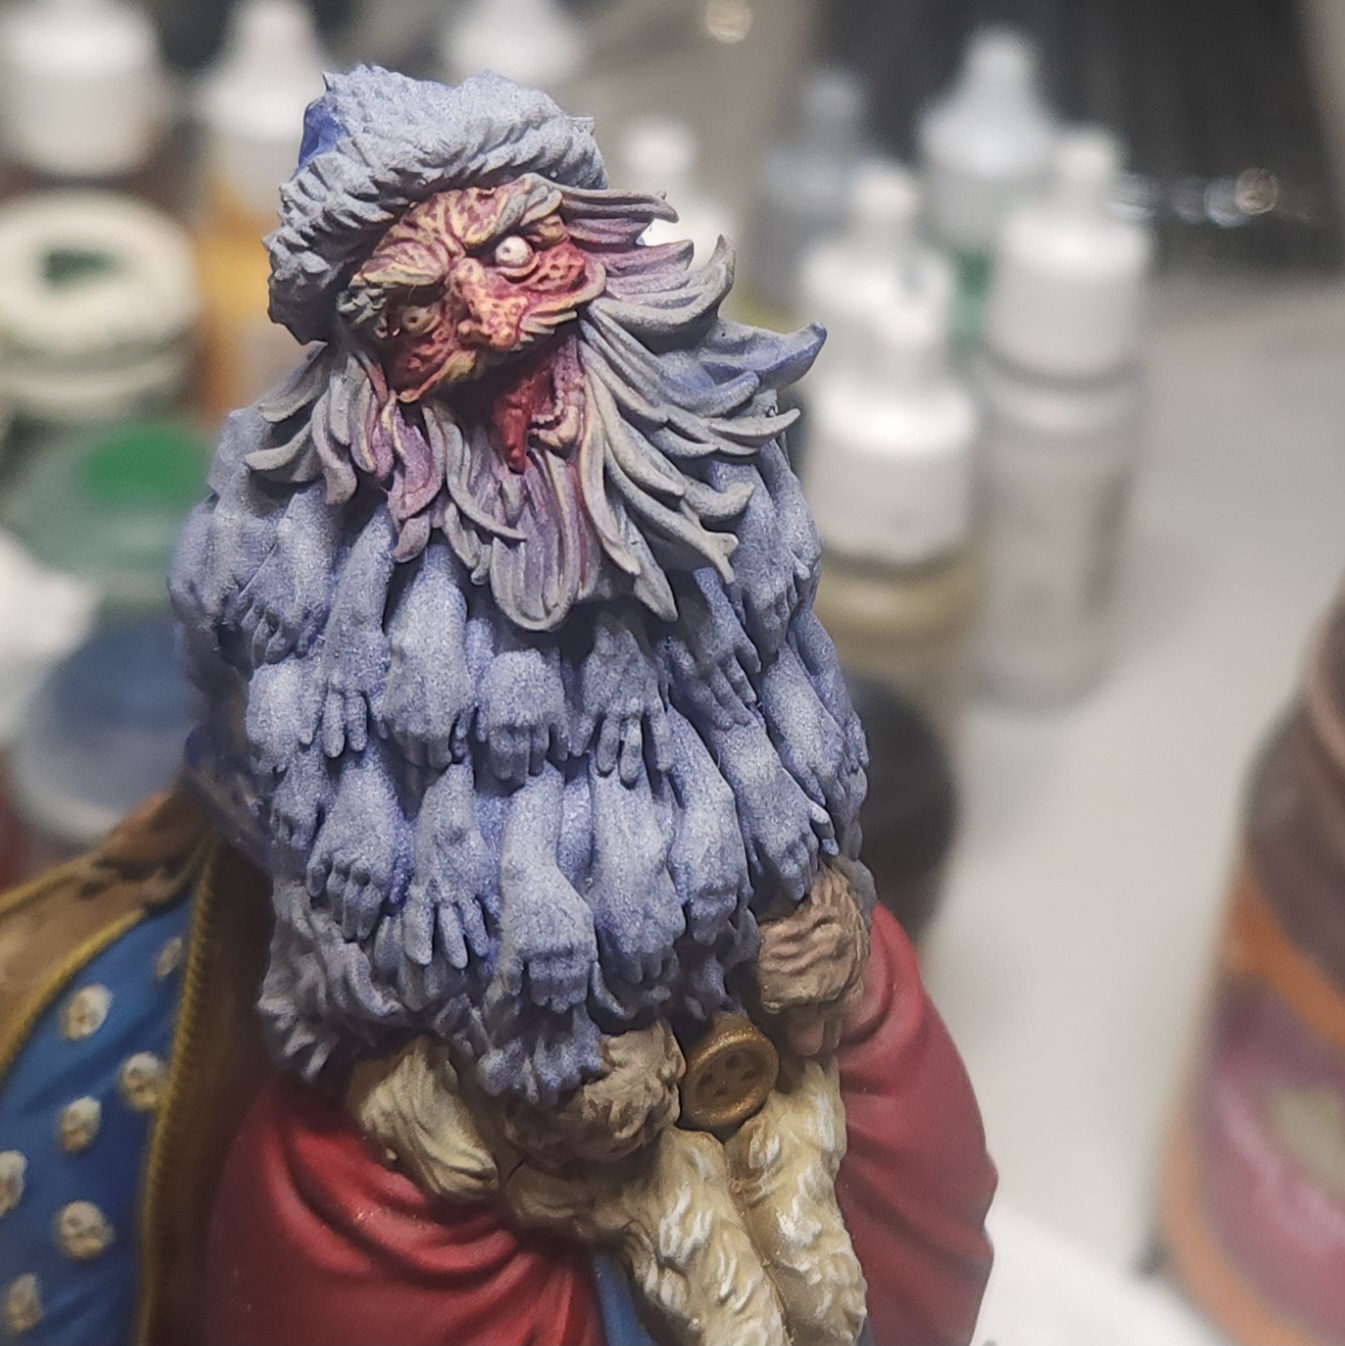
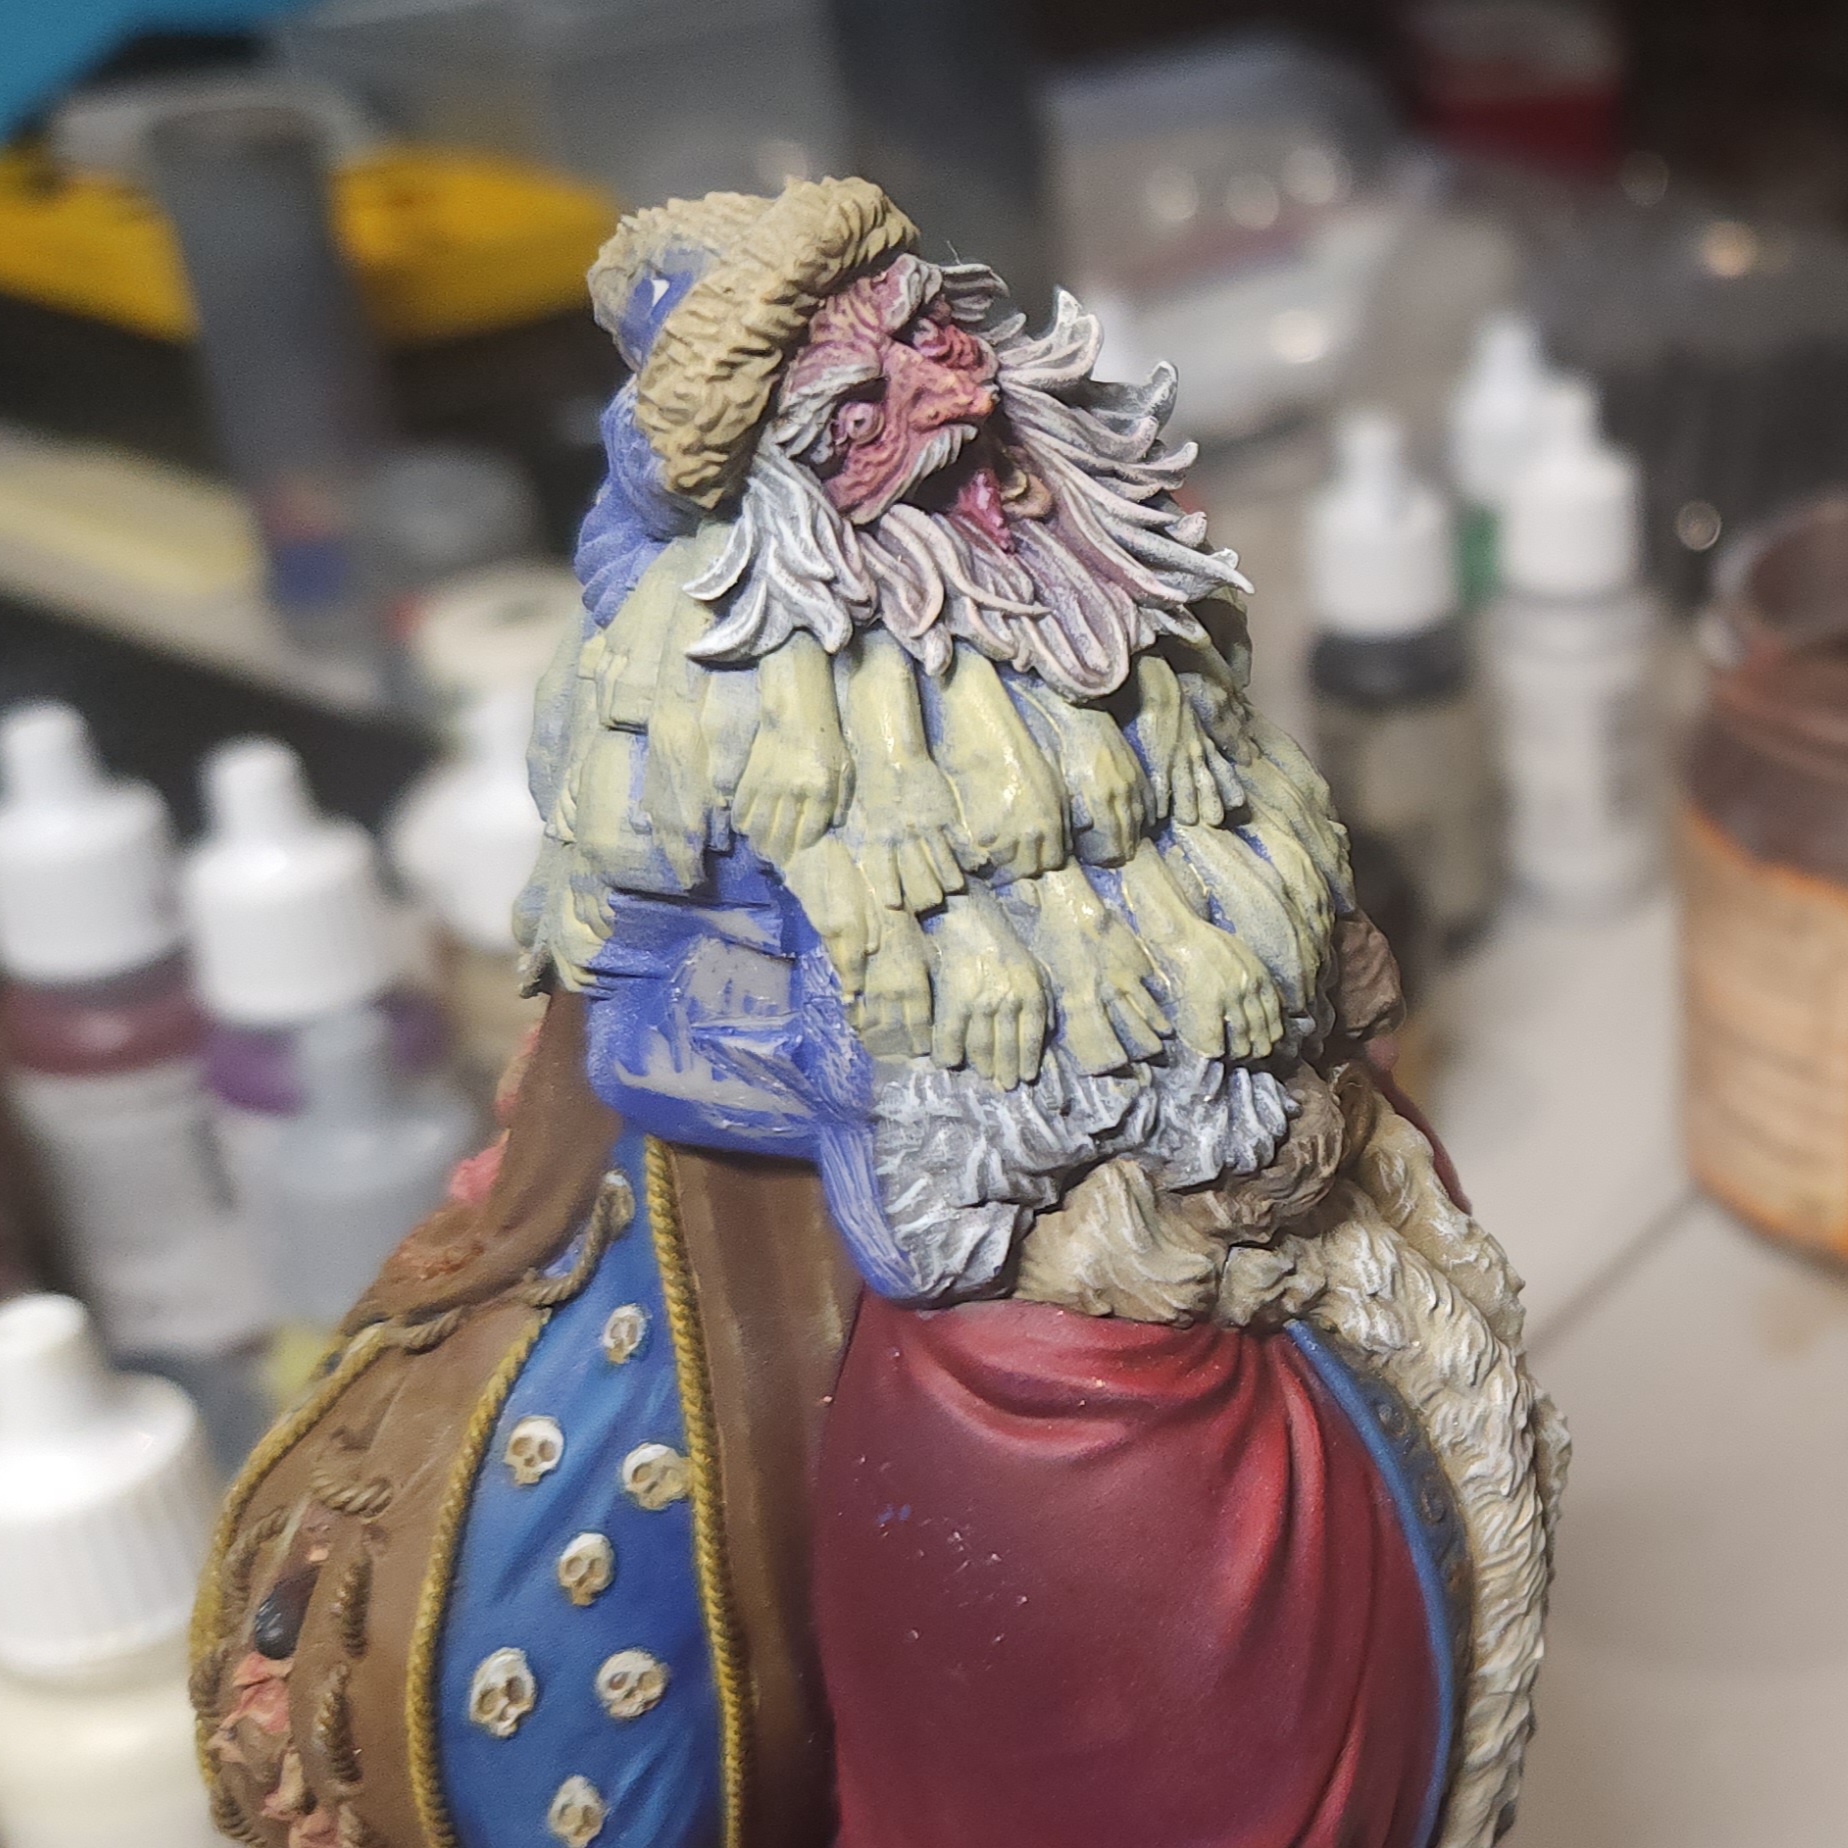
The beard has two layers: hair and hands.
The hair is based with Citadel Grey then carefully drybrushed with Vallejo Ivory.
I went with Vallejo Dead Flesh for the first two thin layers of the hands. I also used a touch of this colour for the curls on the little pocket cherub.
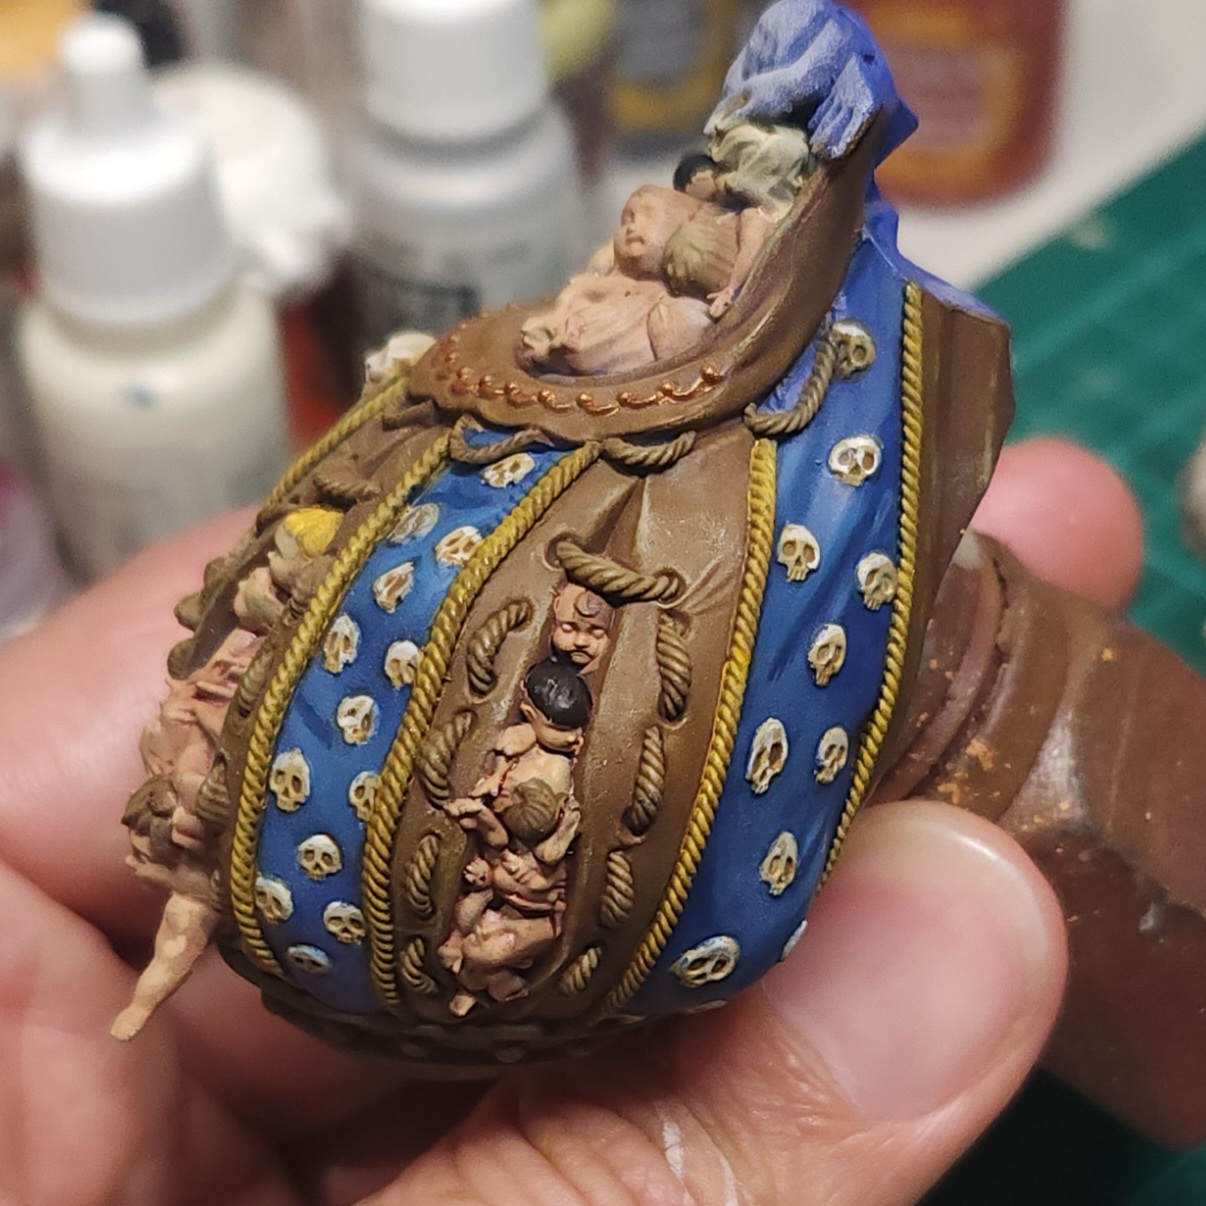
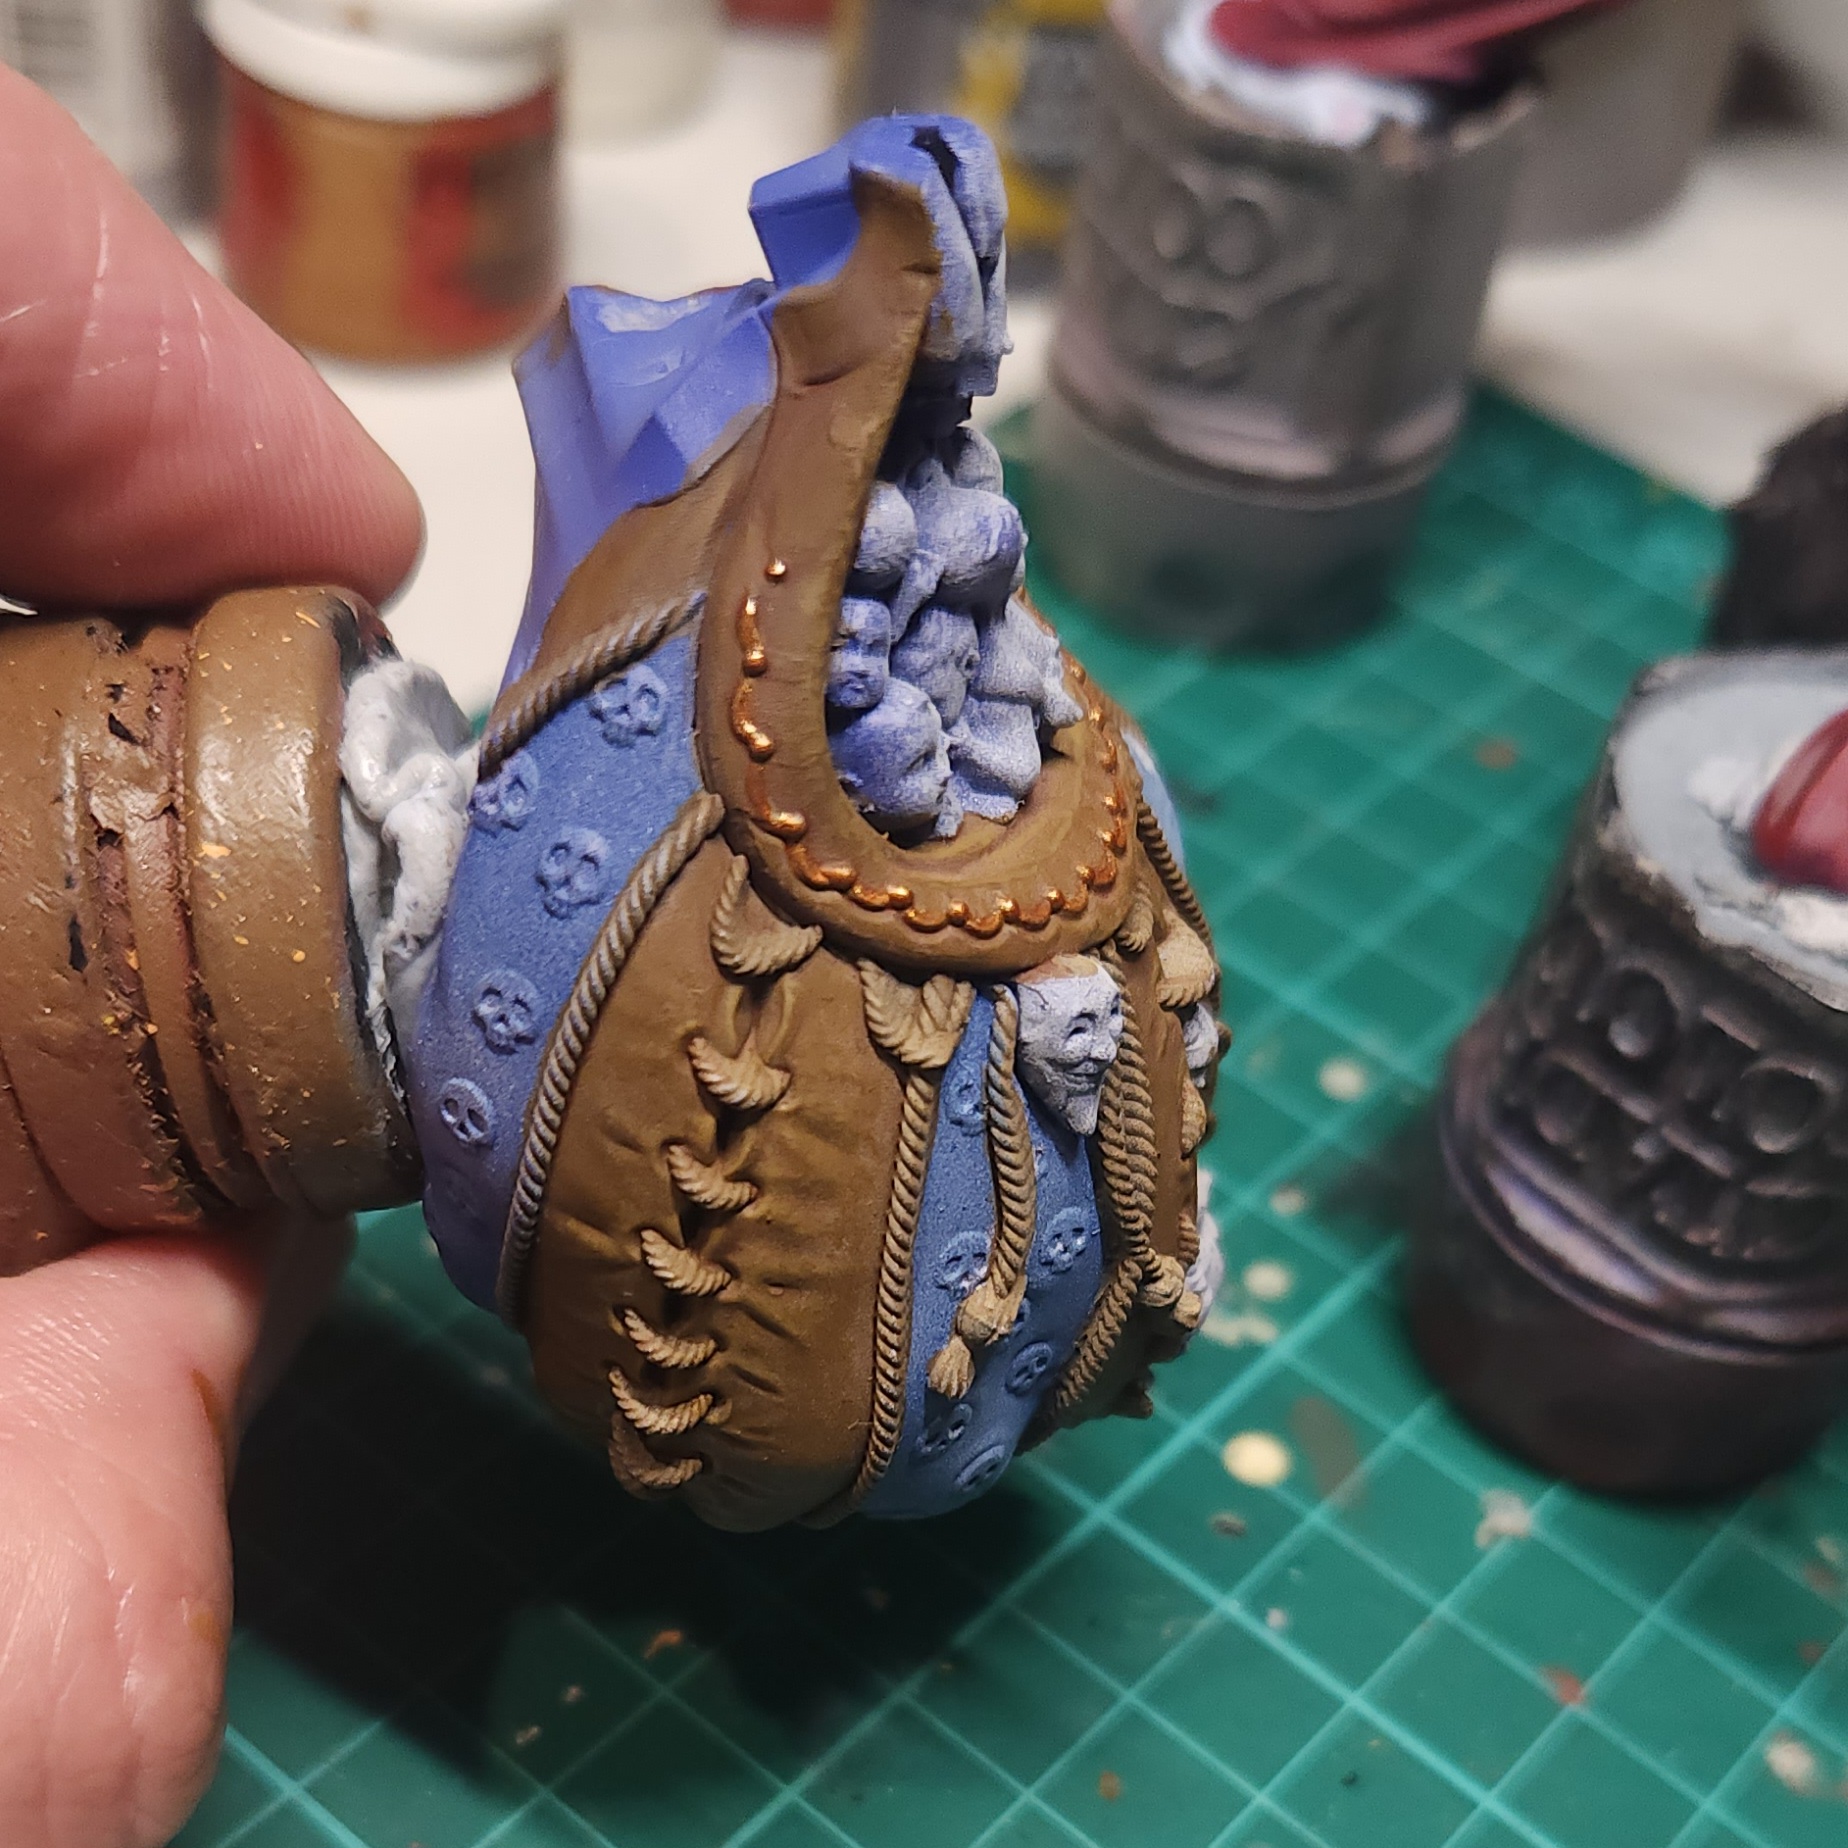
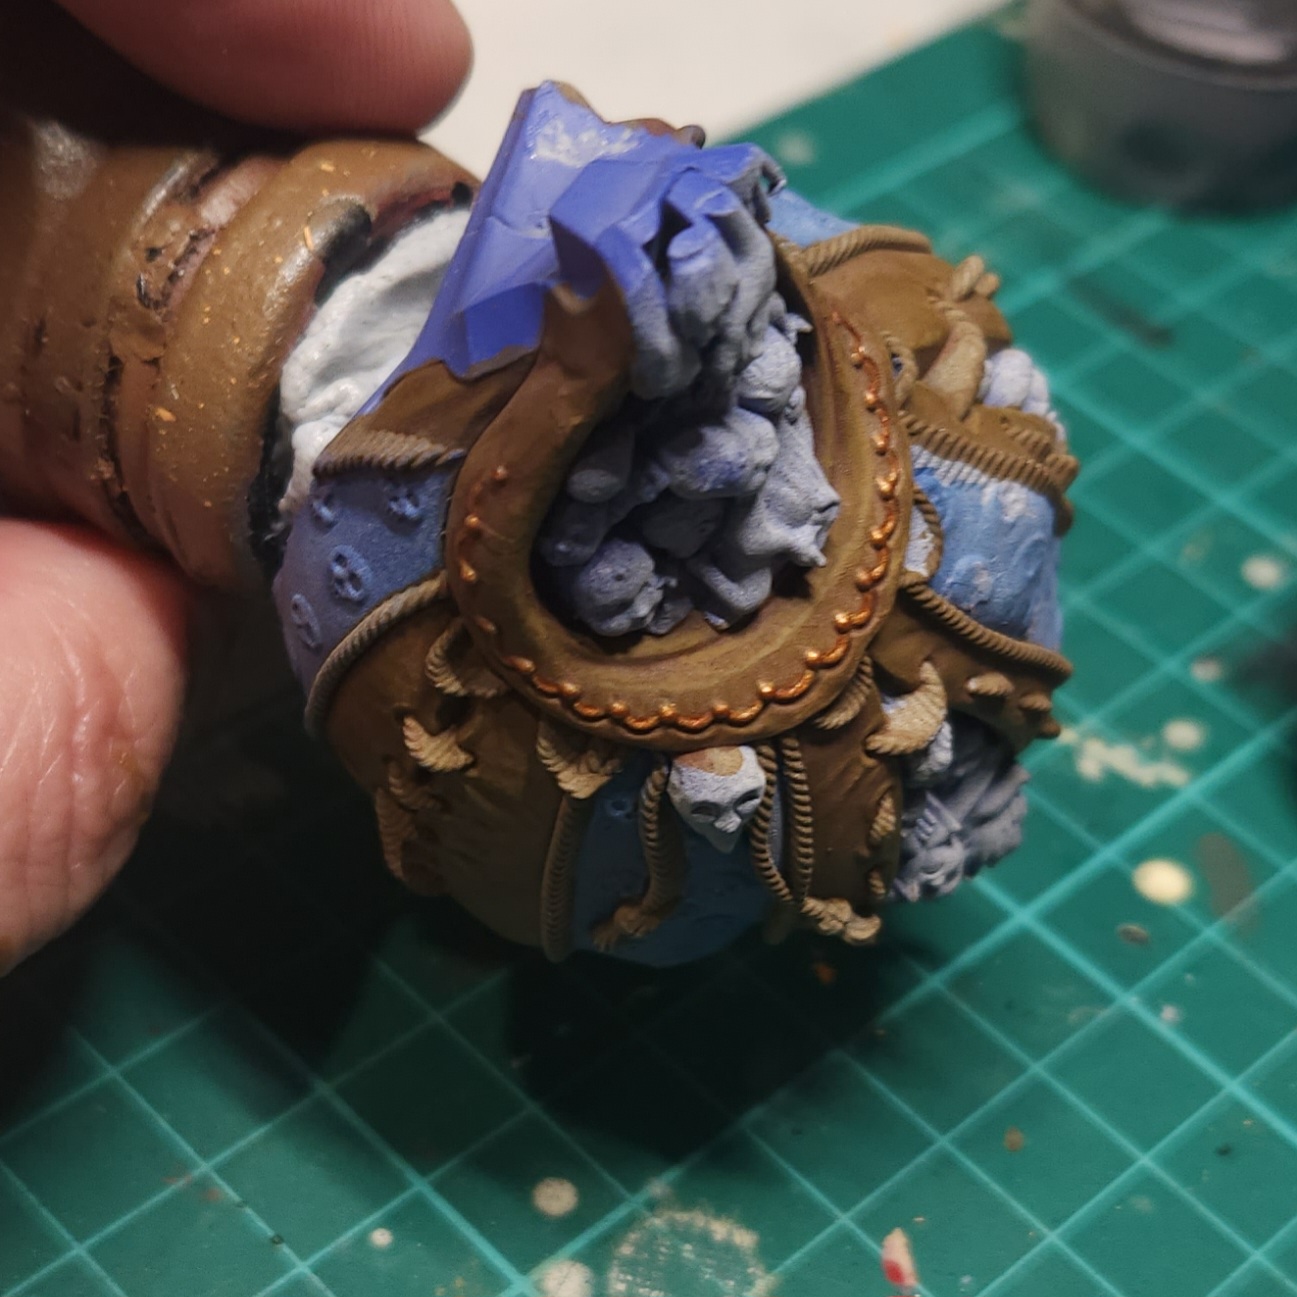
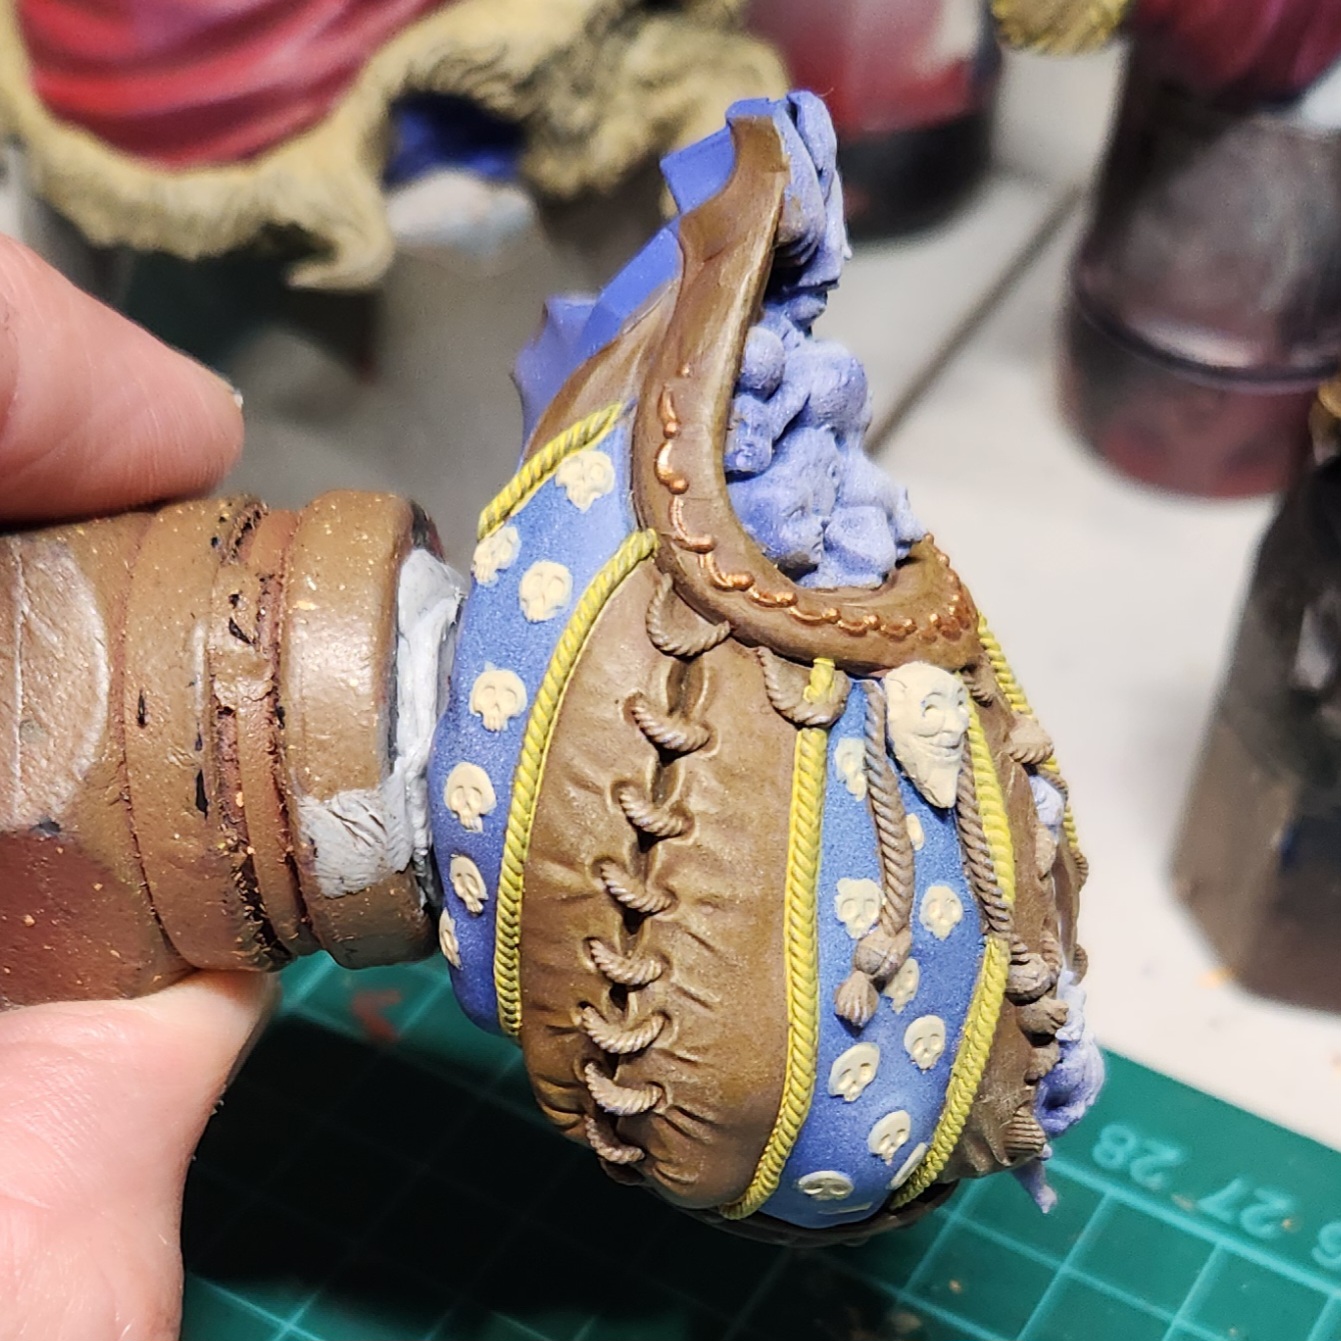
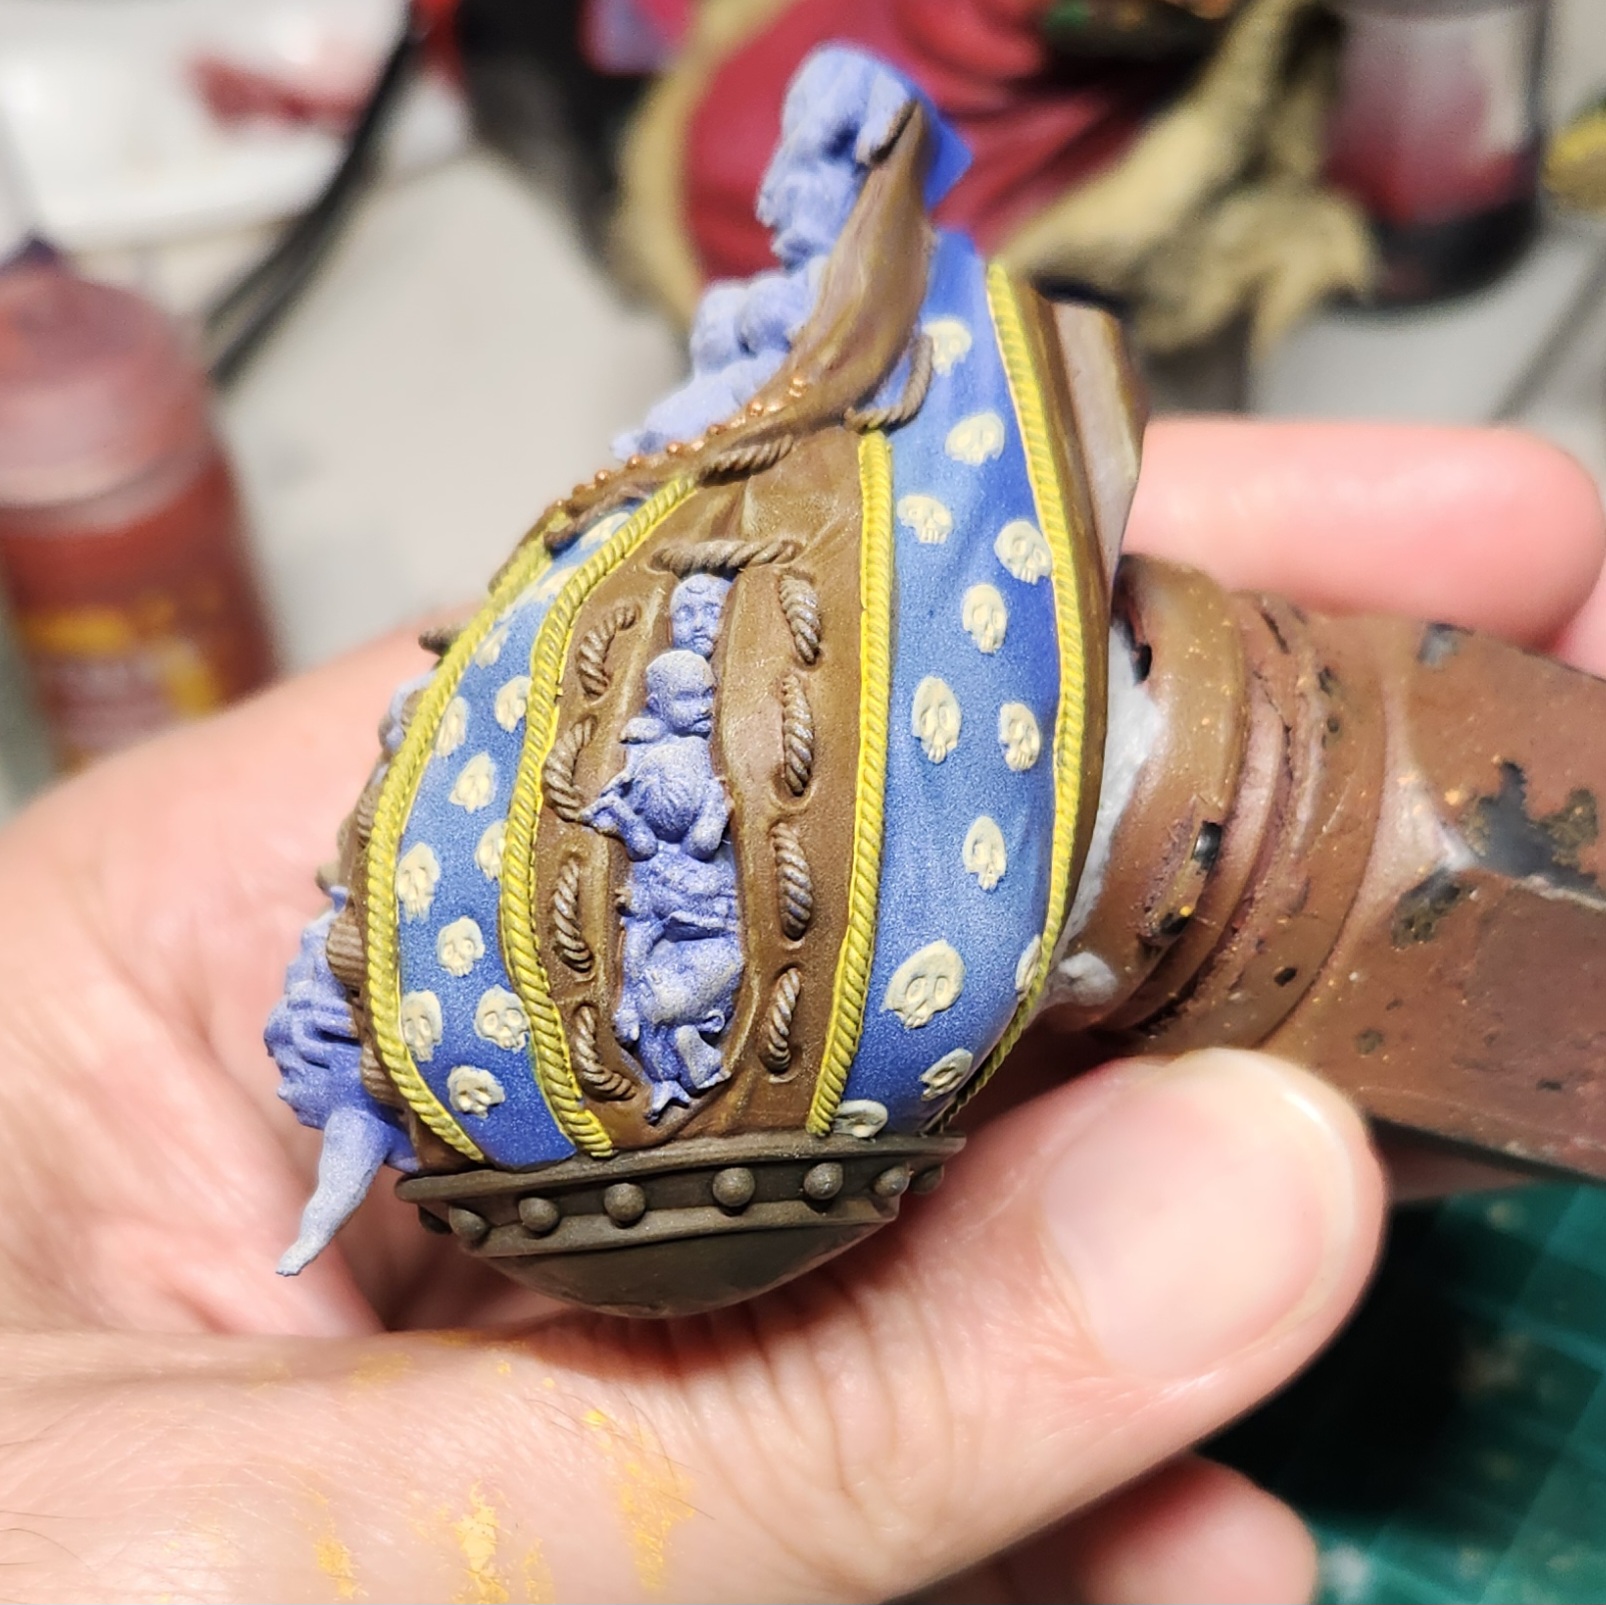
18 Dec 24: 🎵🎵 He's Got A Bag That's Filled With Girls And Boys, Again 🎵
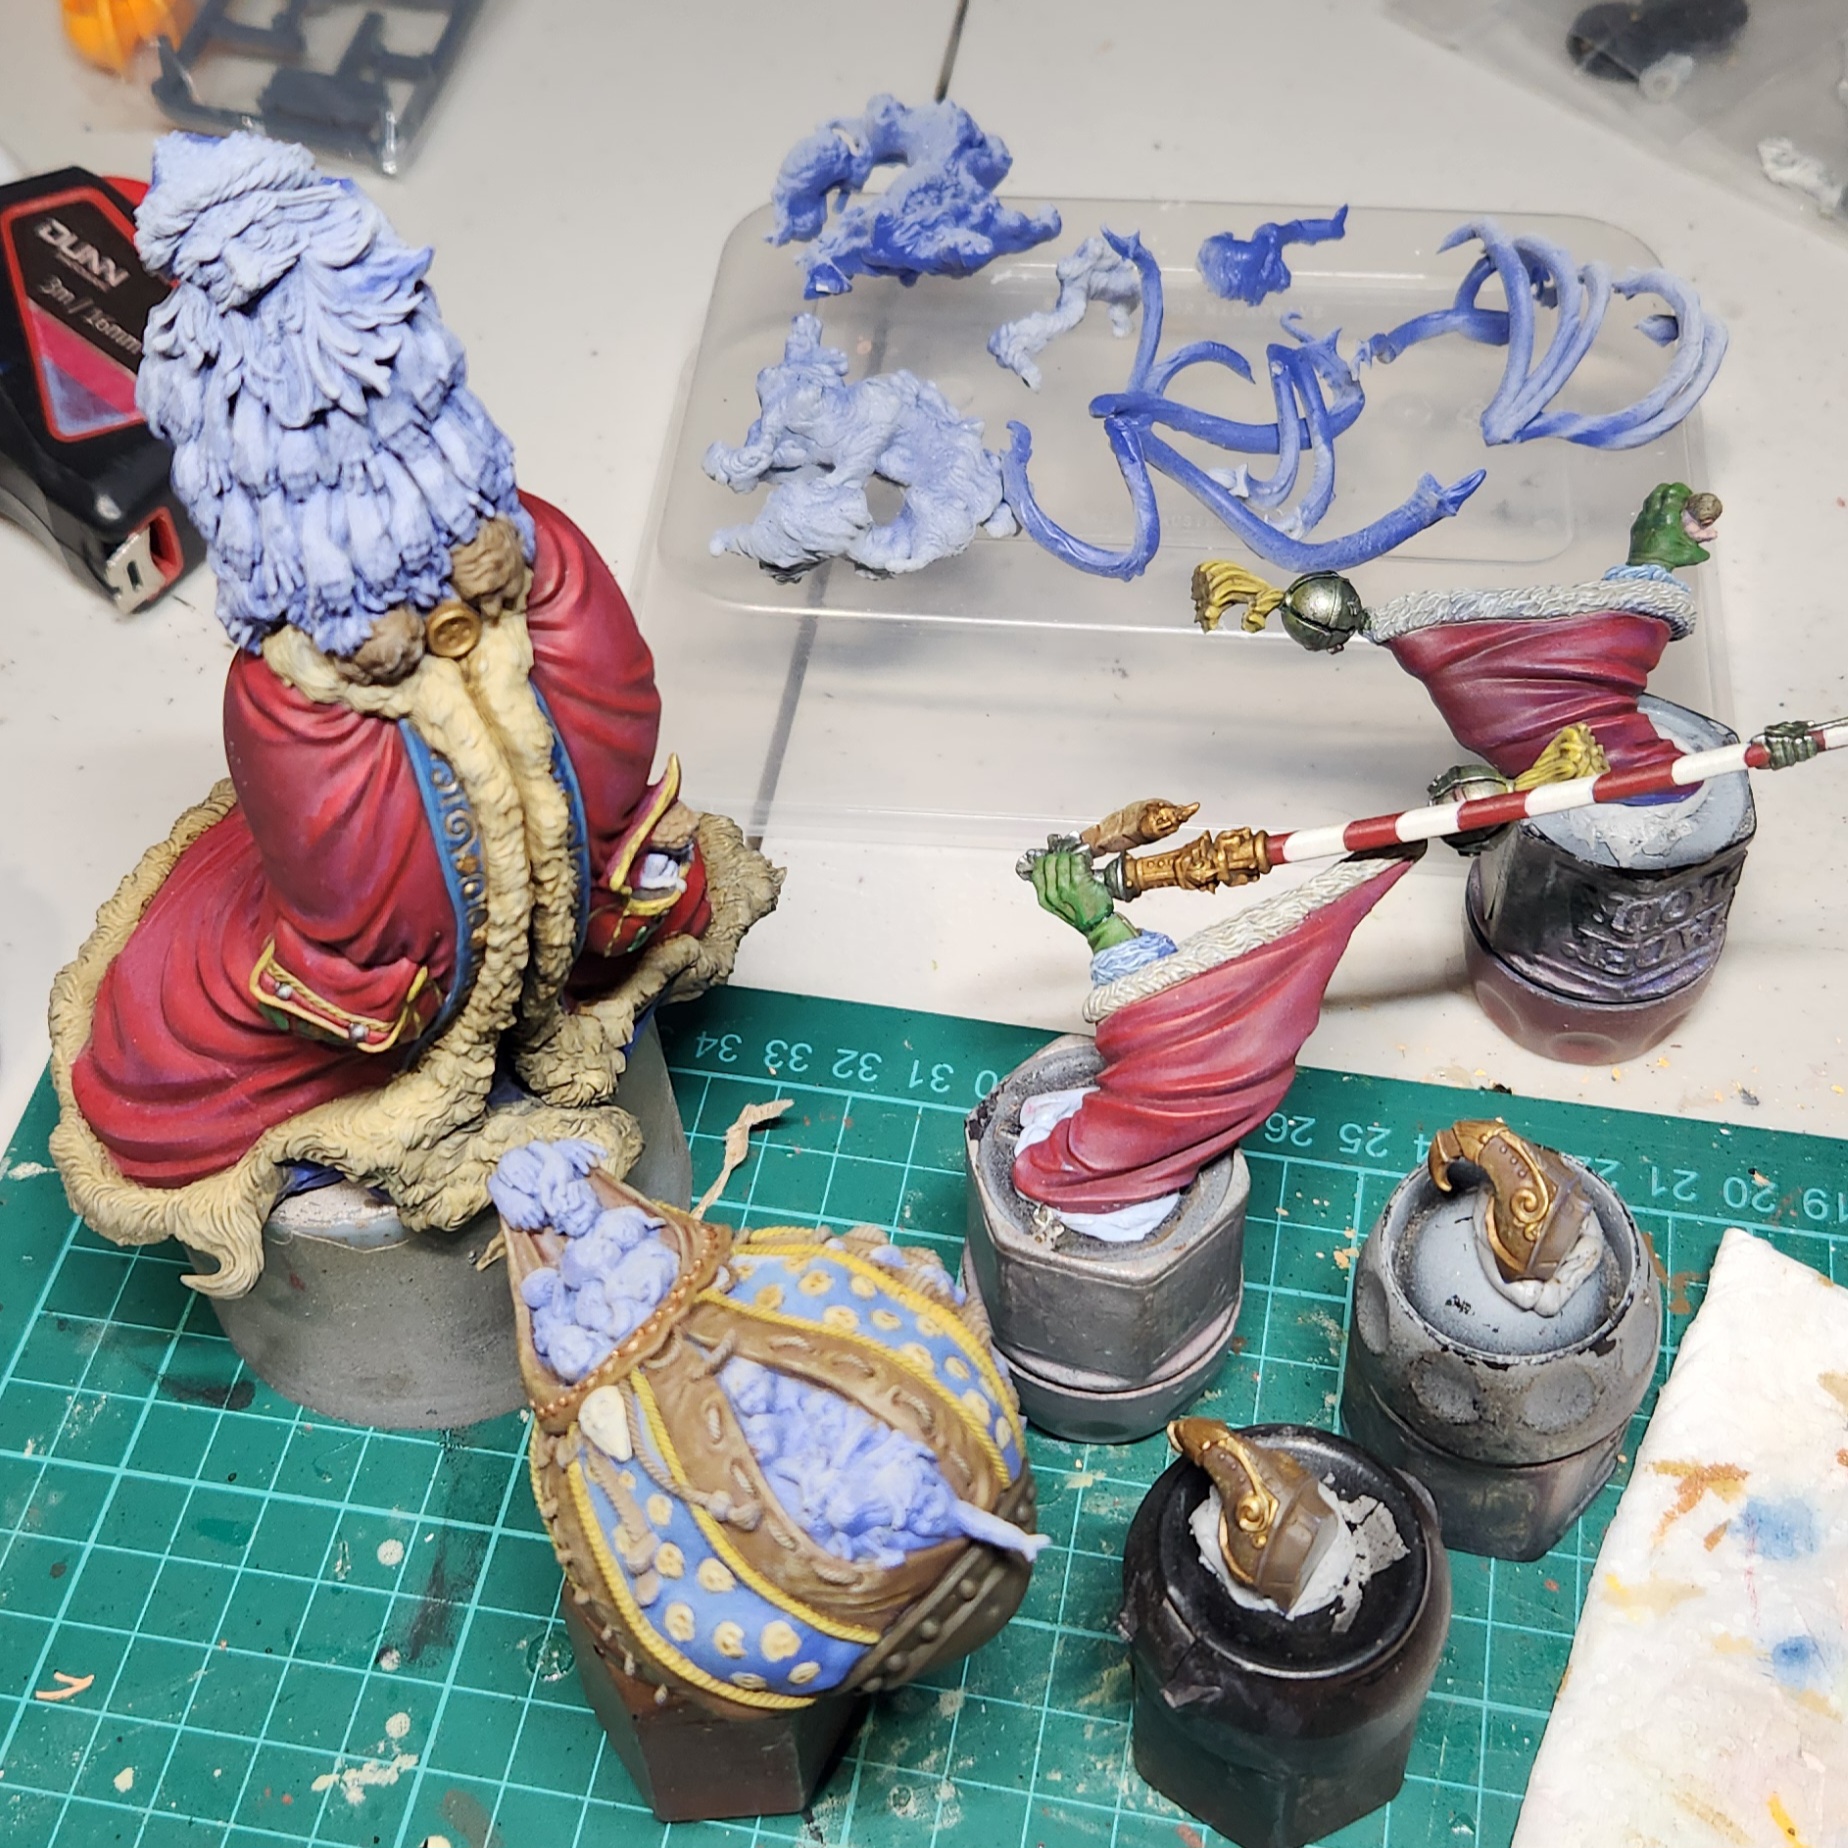 Where I'm up to at this point, and pieces yet to start.
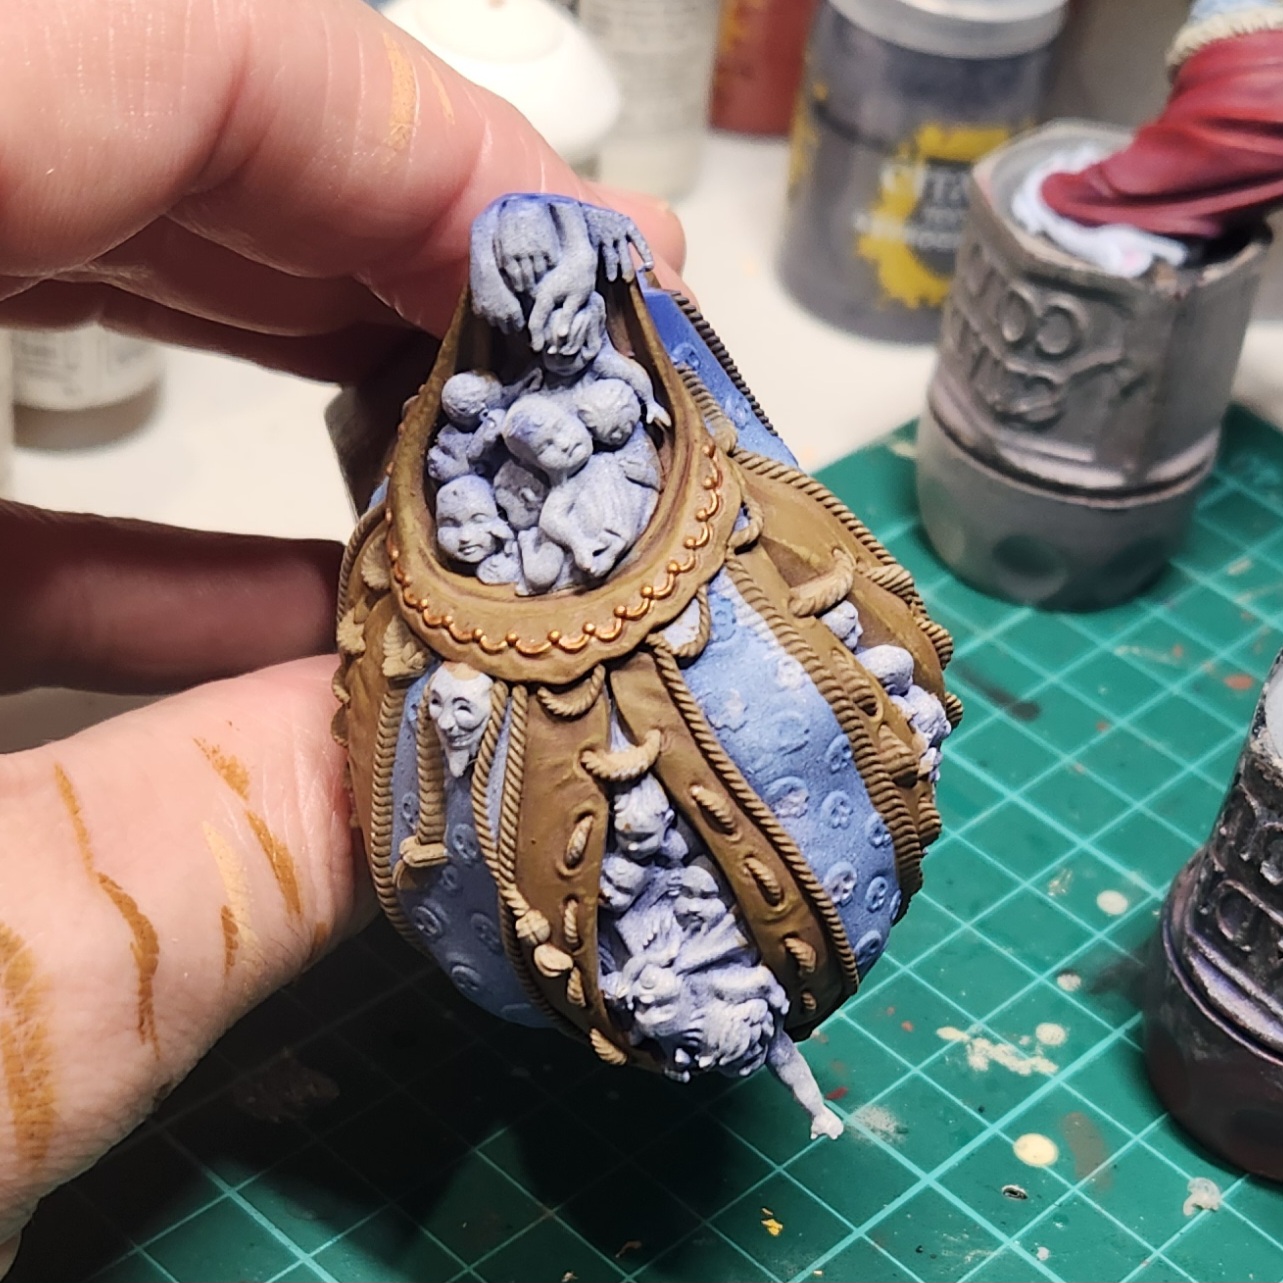
 The next steps are continuing on with the sack.
On the yellow, I gave it a brown wash using a Vallejo Brown Wash. The skulls and the mask were highlighted with Vallejo Ivory.
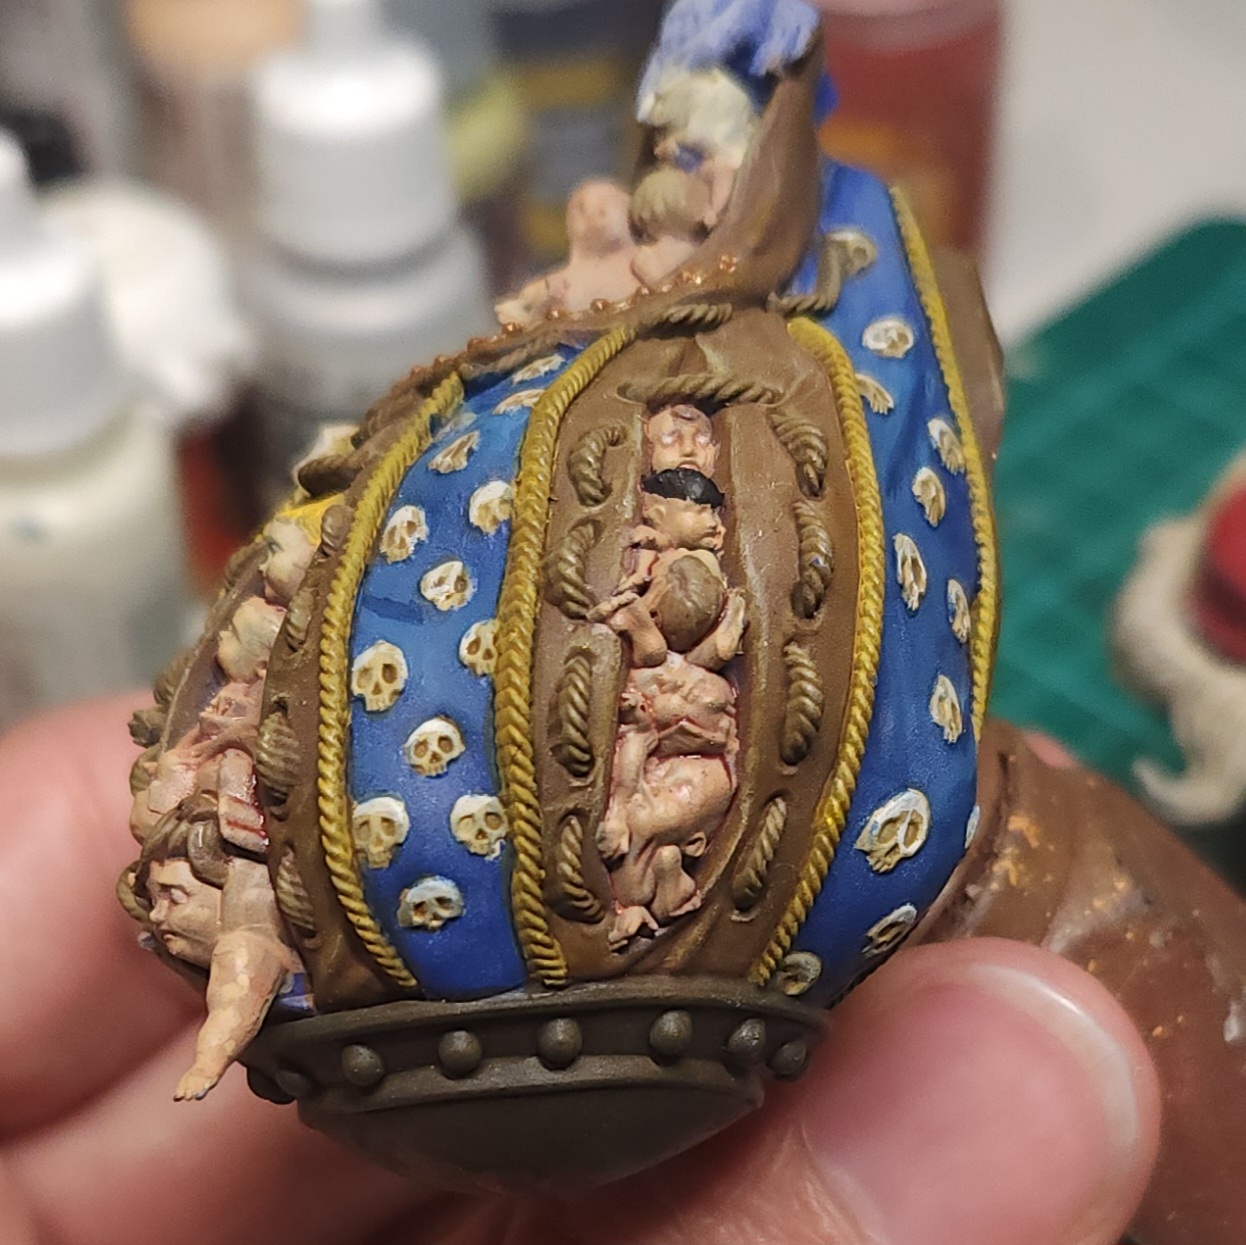
Then the “contents” of the sack.
I used a generic flesh colour, Army Painter Warpaints Flesh, for most of the babies. I picked out a few with some different colours and used a variety of colours for the hair. When dry I made a wash from the Vallejo Gory Red with plenty of water and Flow Improver.
The fur trim on the cloak was carefully drybrushed in the same way the sleeve was earlier with Vallejo Ivory.


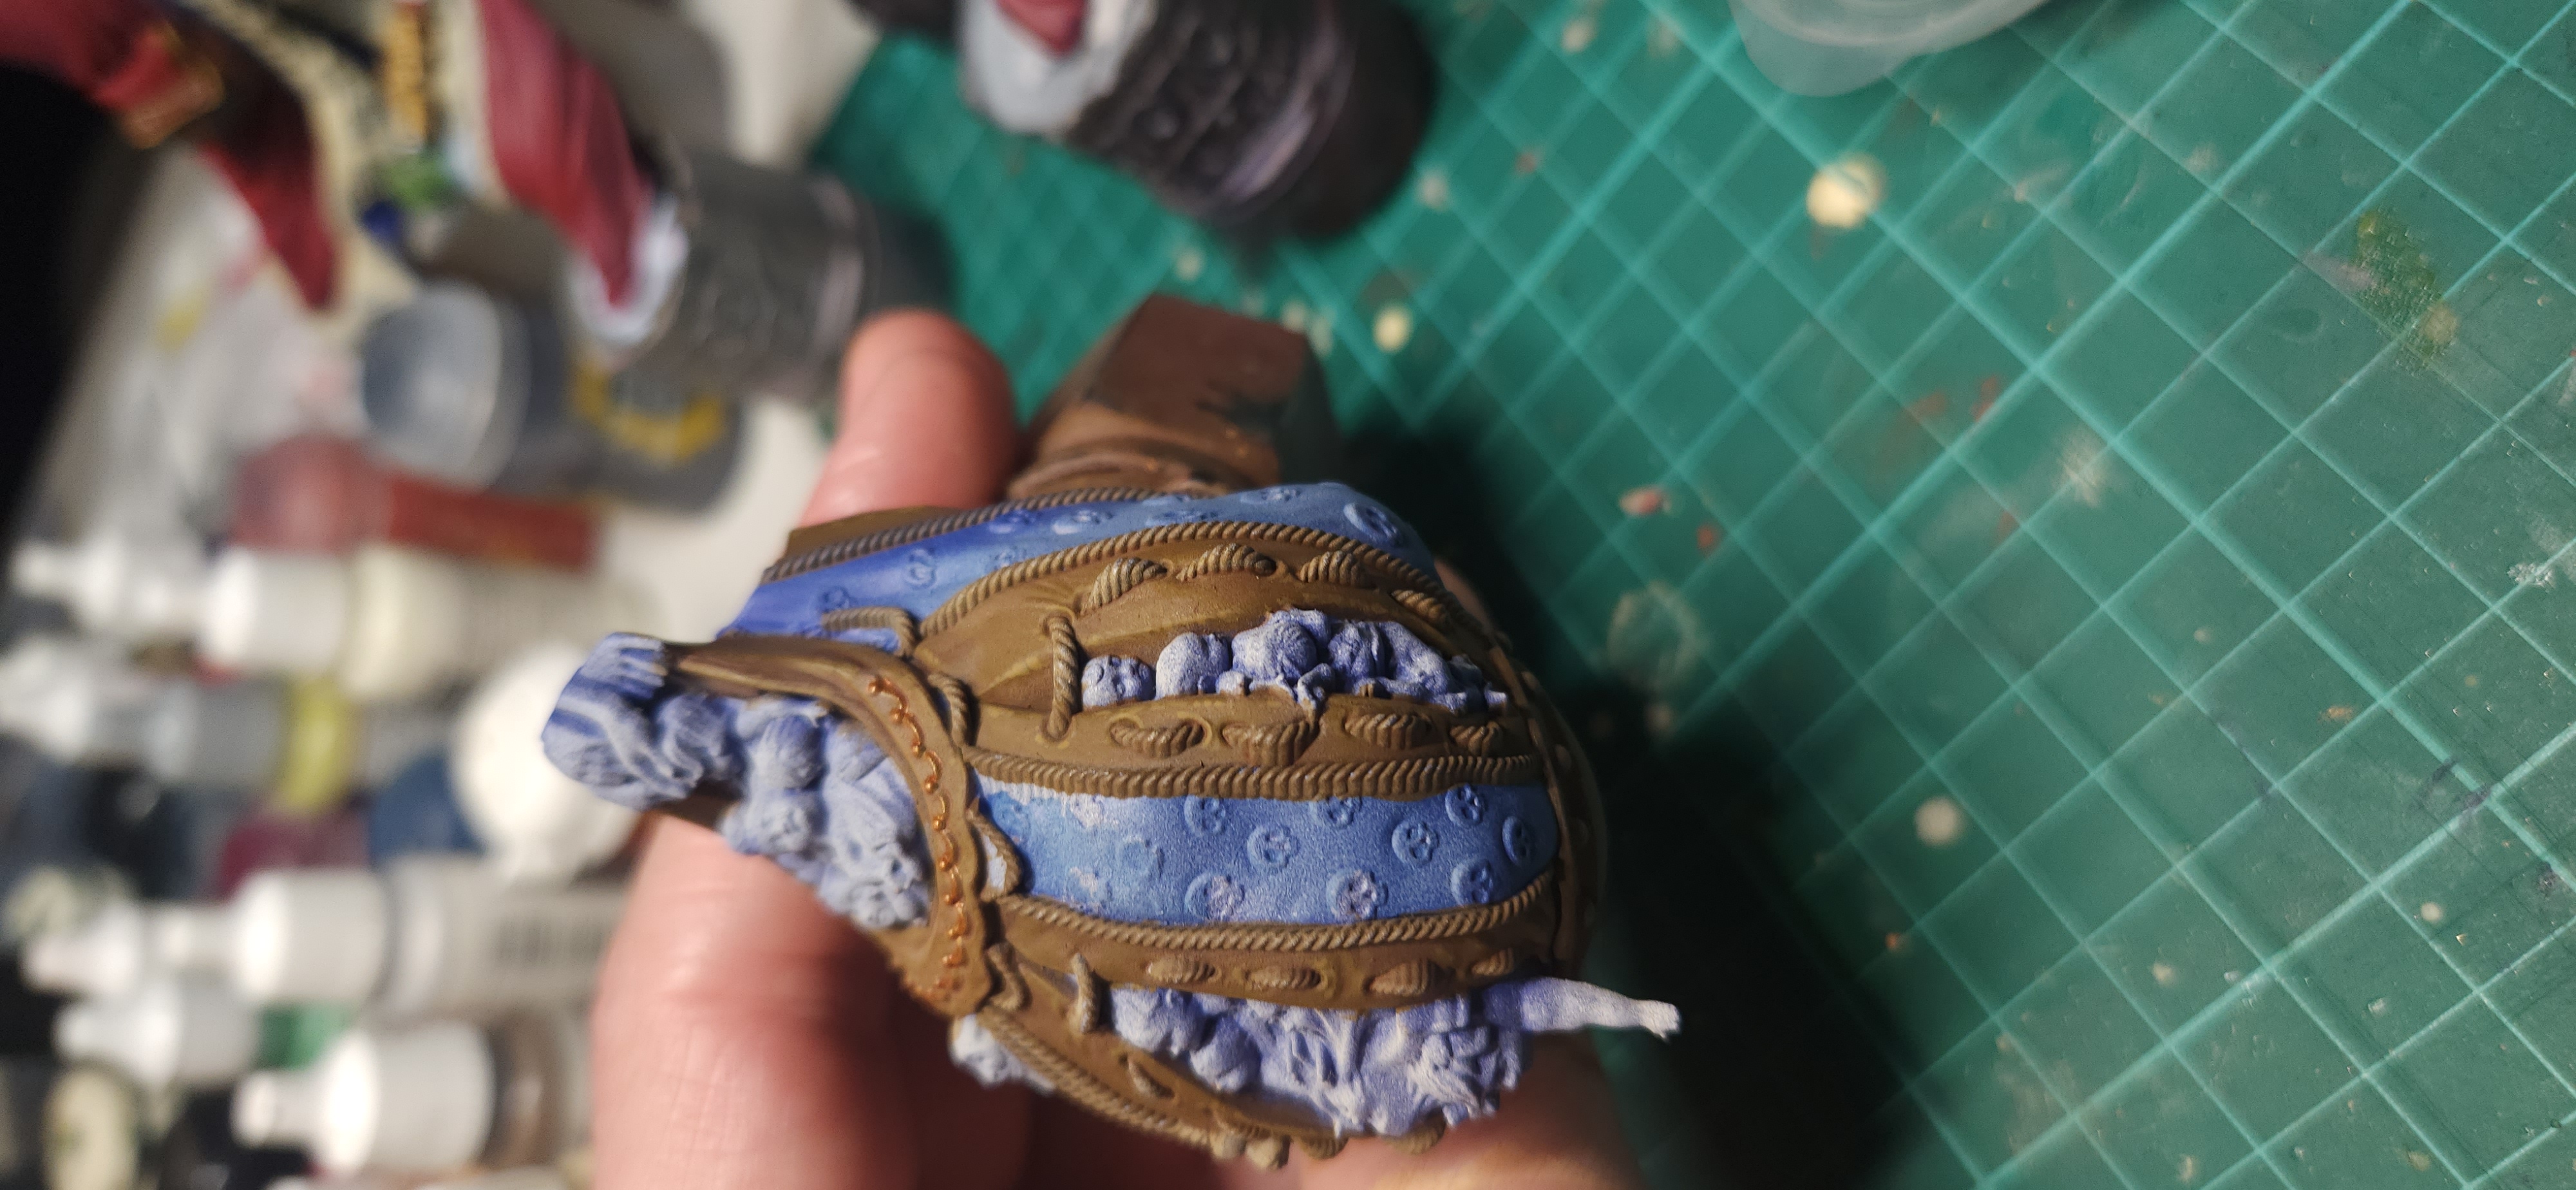
20 Dec 24: 🎵 He doesn't care if your rich or poor 'cause he'll eat you just the same🎵
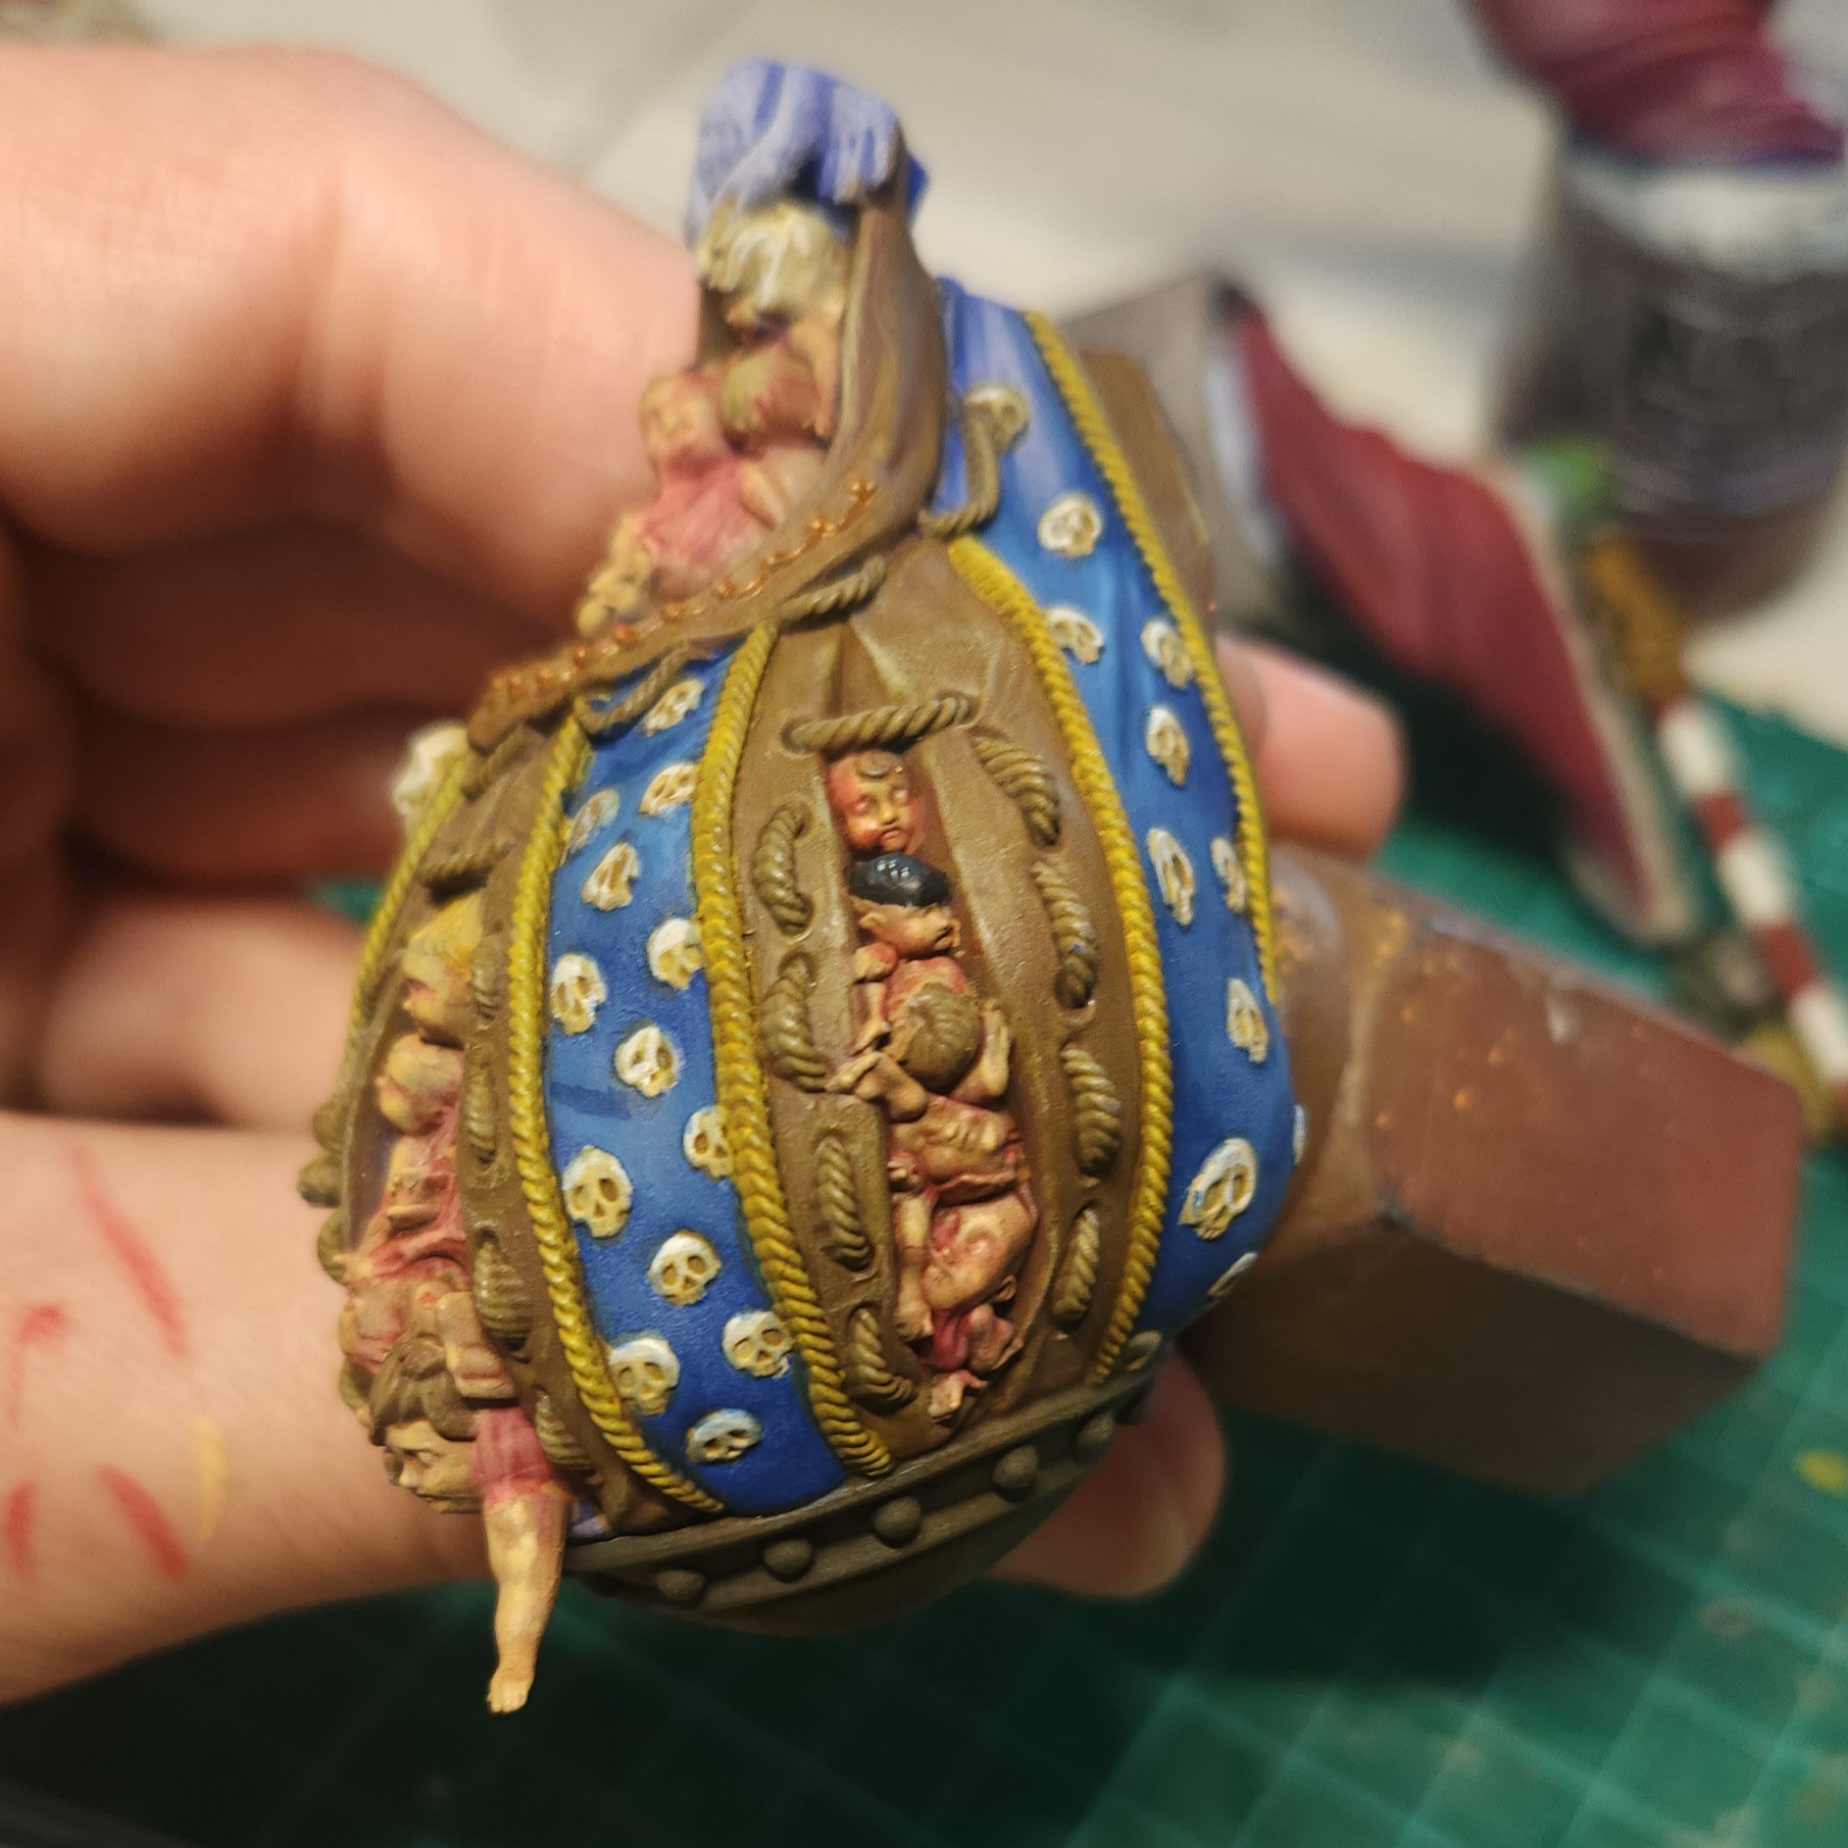
More glazing with the Vallejo Gory Red on the fused flesh in the sack. I also picked out some of the eyes with Vallejo Ivory just to add some extra disturbing factor, I suppose.
Once this was dry, I took the opportunity to glue it back on to the main body of the miniature. The next steps will include painting the beard of hands, which overlaps onto this component.
I was hoping to have this mini completed by Christmas, but this didn’t end up happening. Perhaps if I’d not been distracted by Satan, I may have achieved this goal…
3 Dec 24: A sackful of small details
There are several details around the mini that I decided would be leather. These were all painted using the same colours:
- Base with Vallejo German Camo Med. Brown
- Drybrush with old Citadel Snakebite Leather paint (not the Contrast)
- Light drybrush with Vallejo Buff.
The cord on the sack was based with the Vallejo Buff as well.
Around the mouth of the sack is a trimming that I decided to paint with Citadel Retributor Armour over the brown base coat.
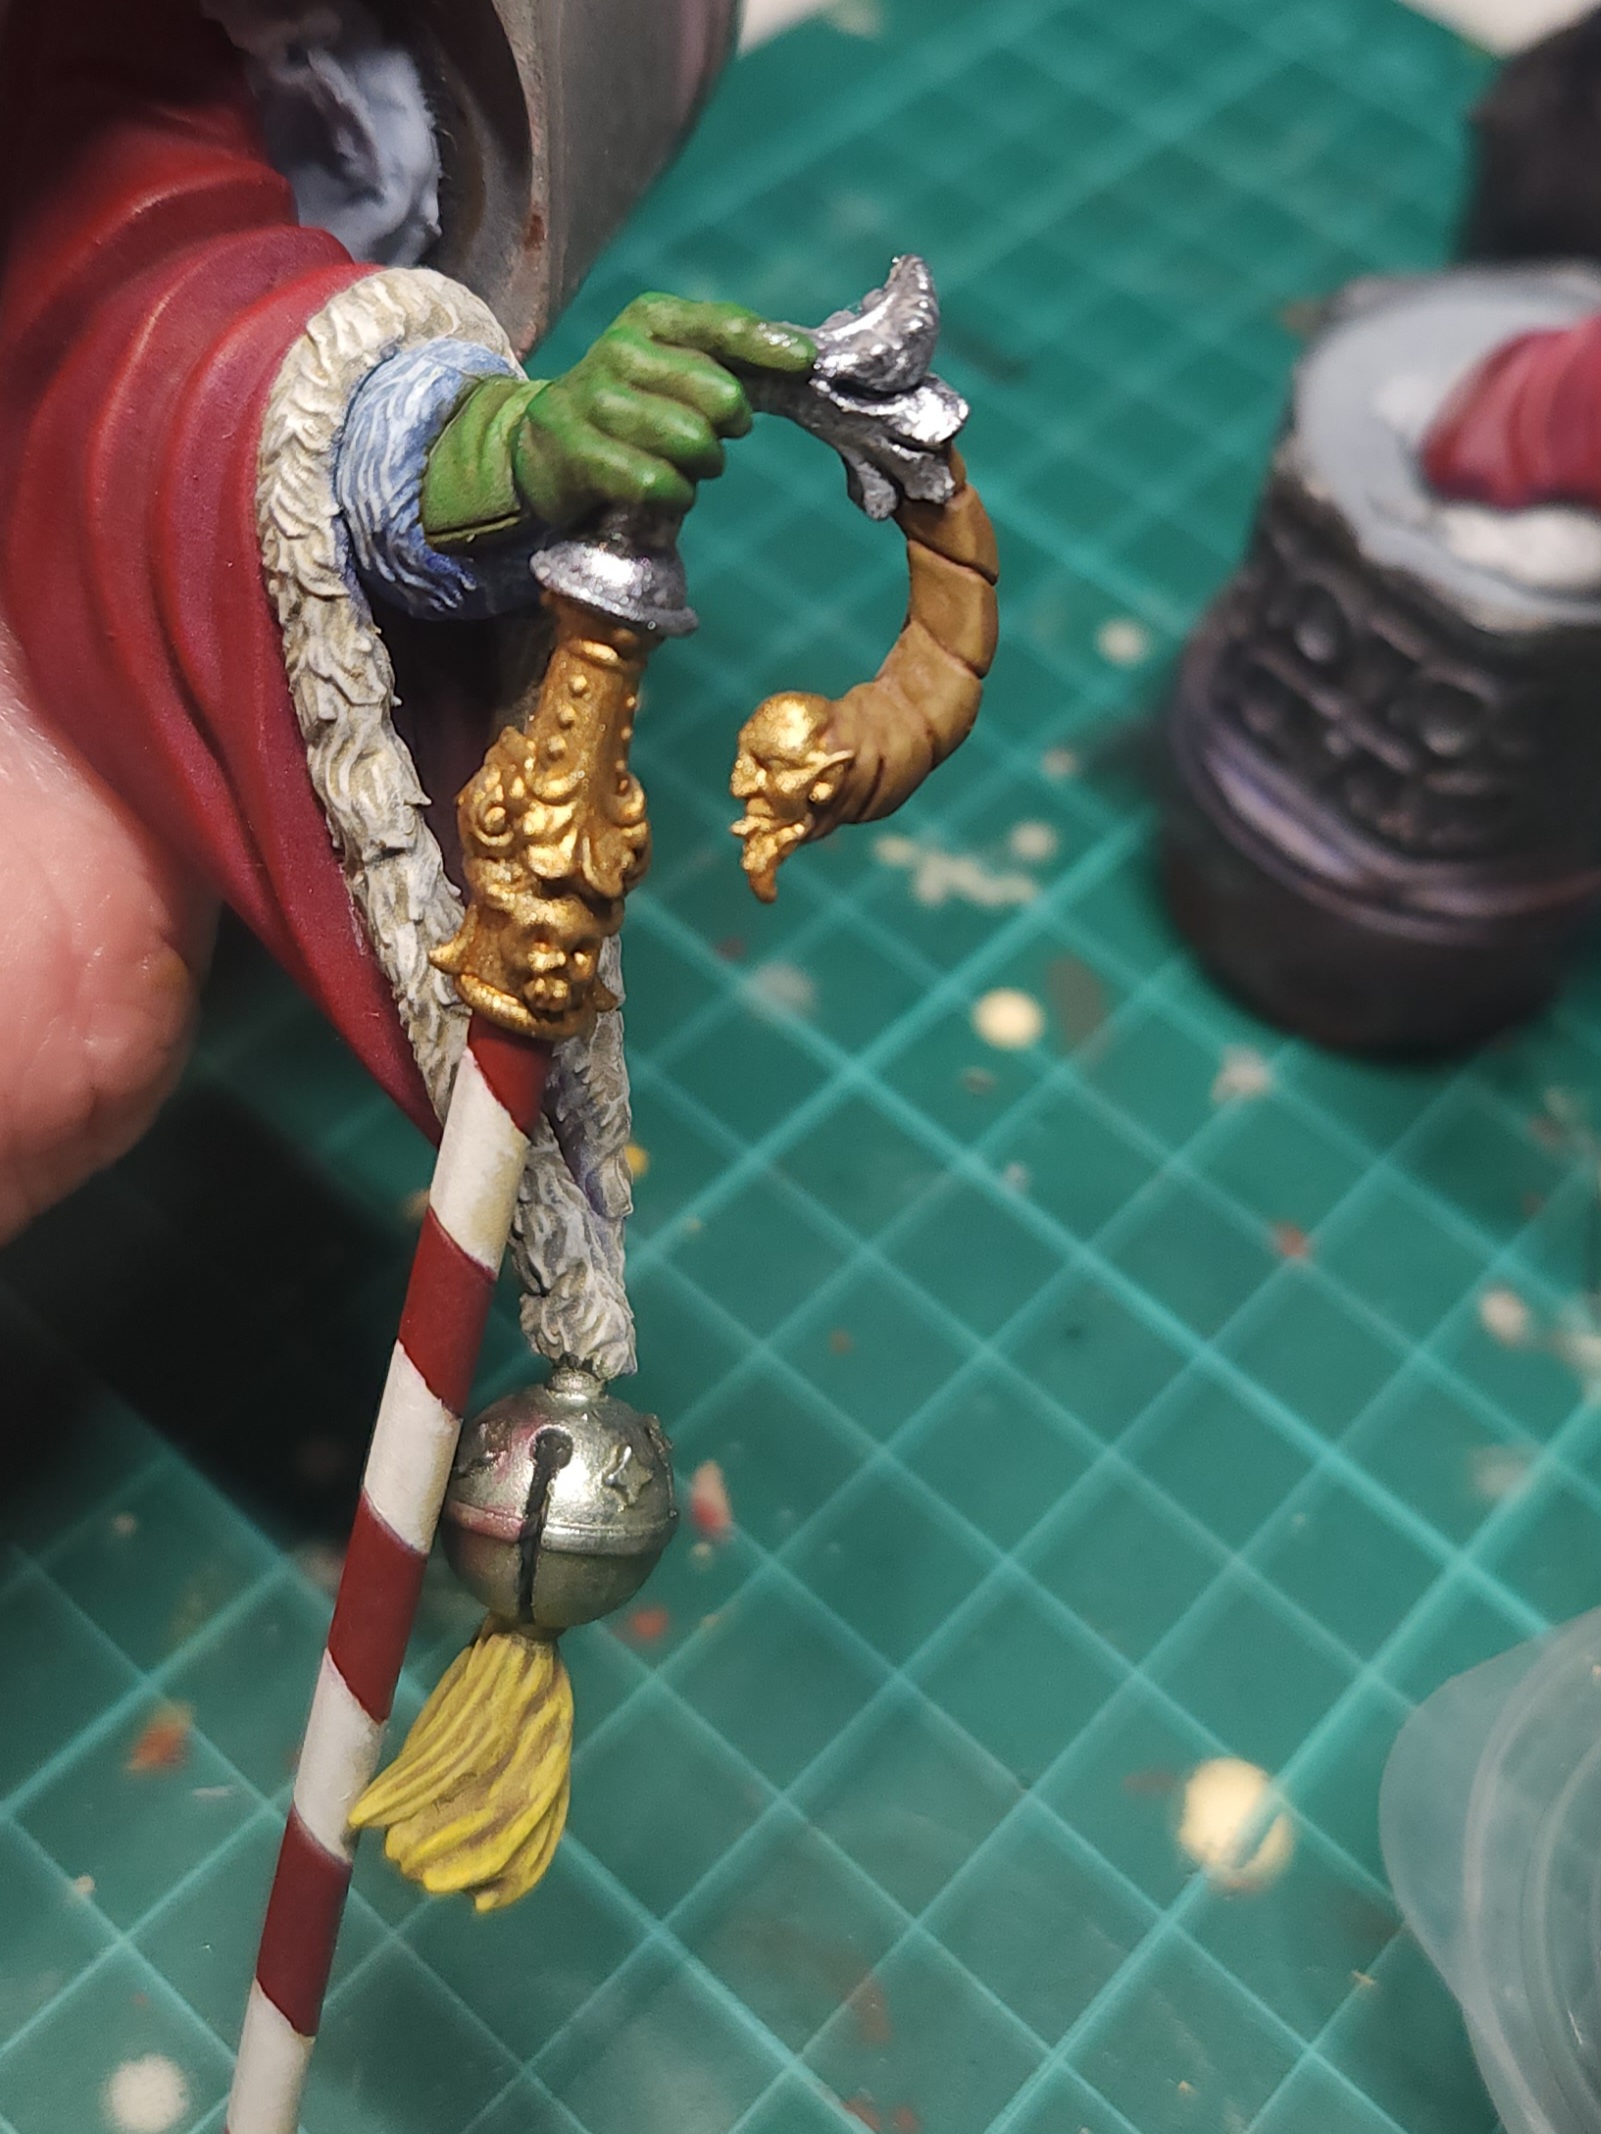
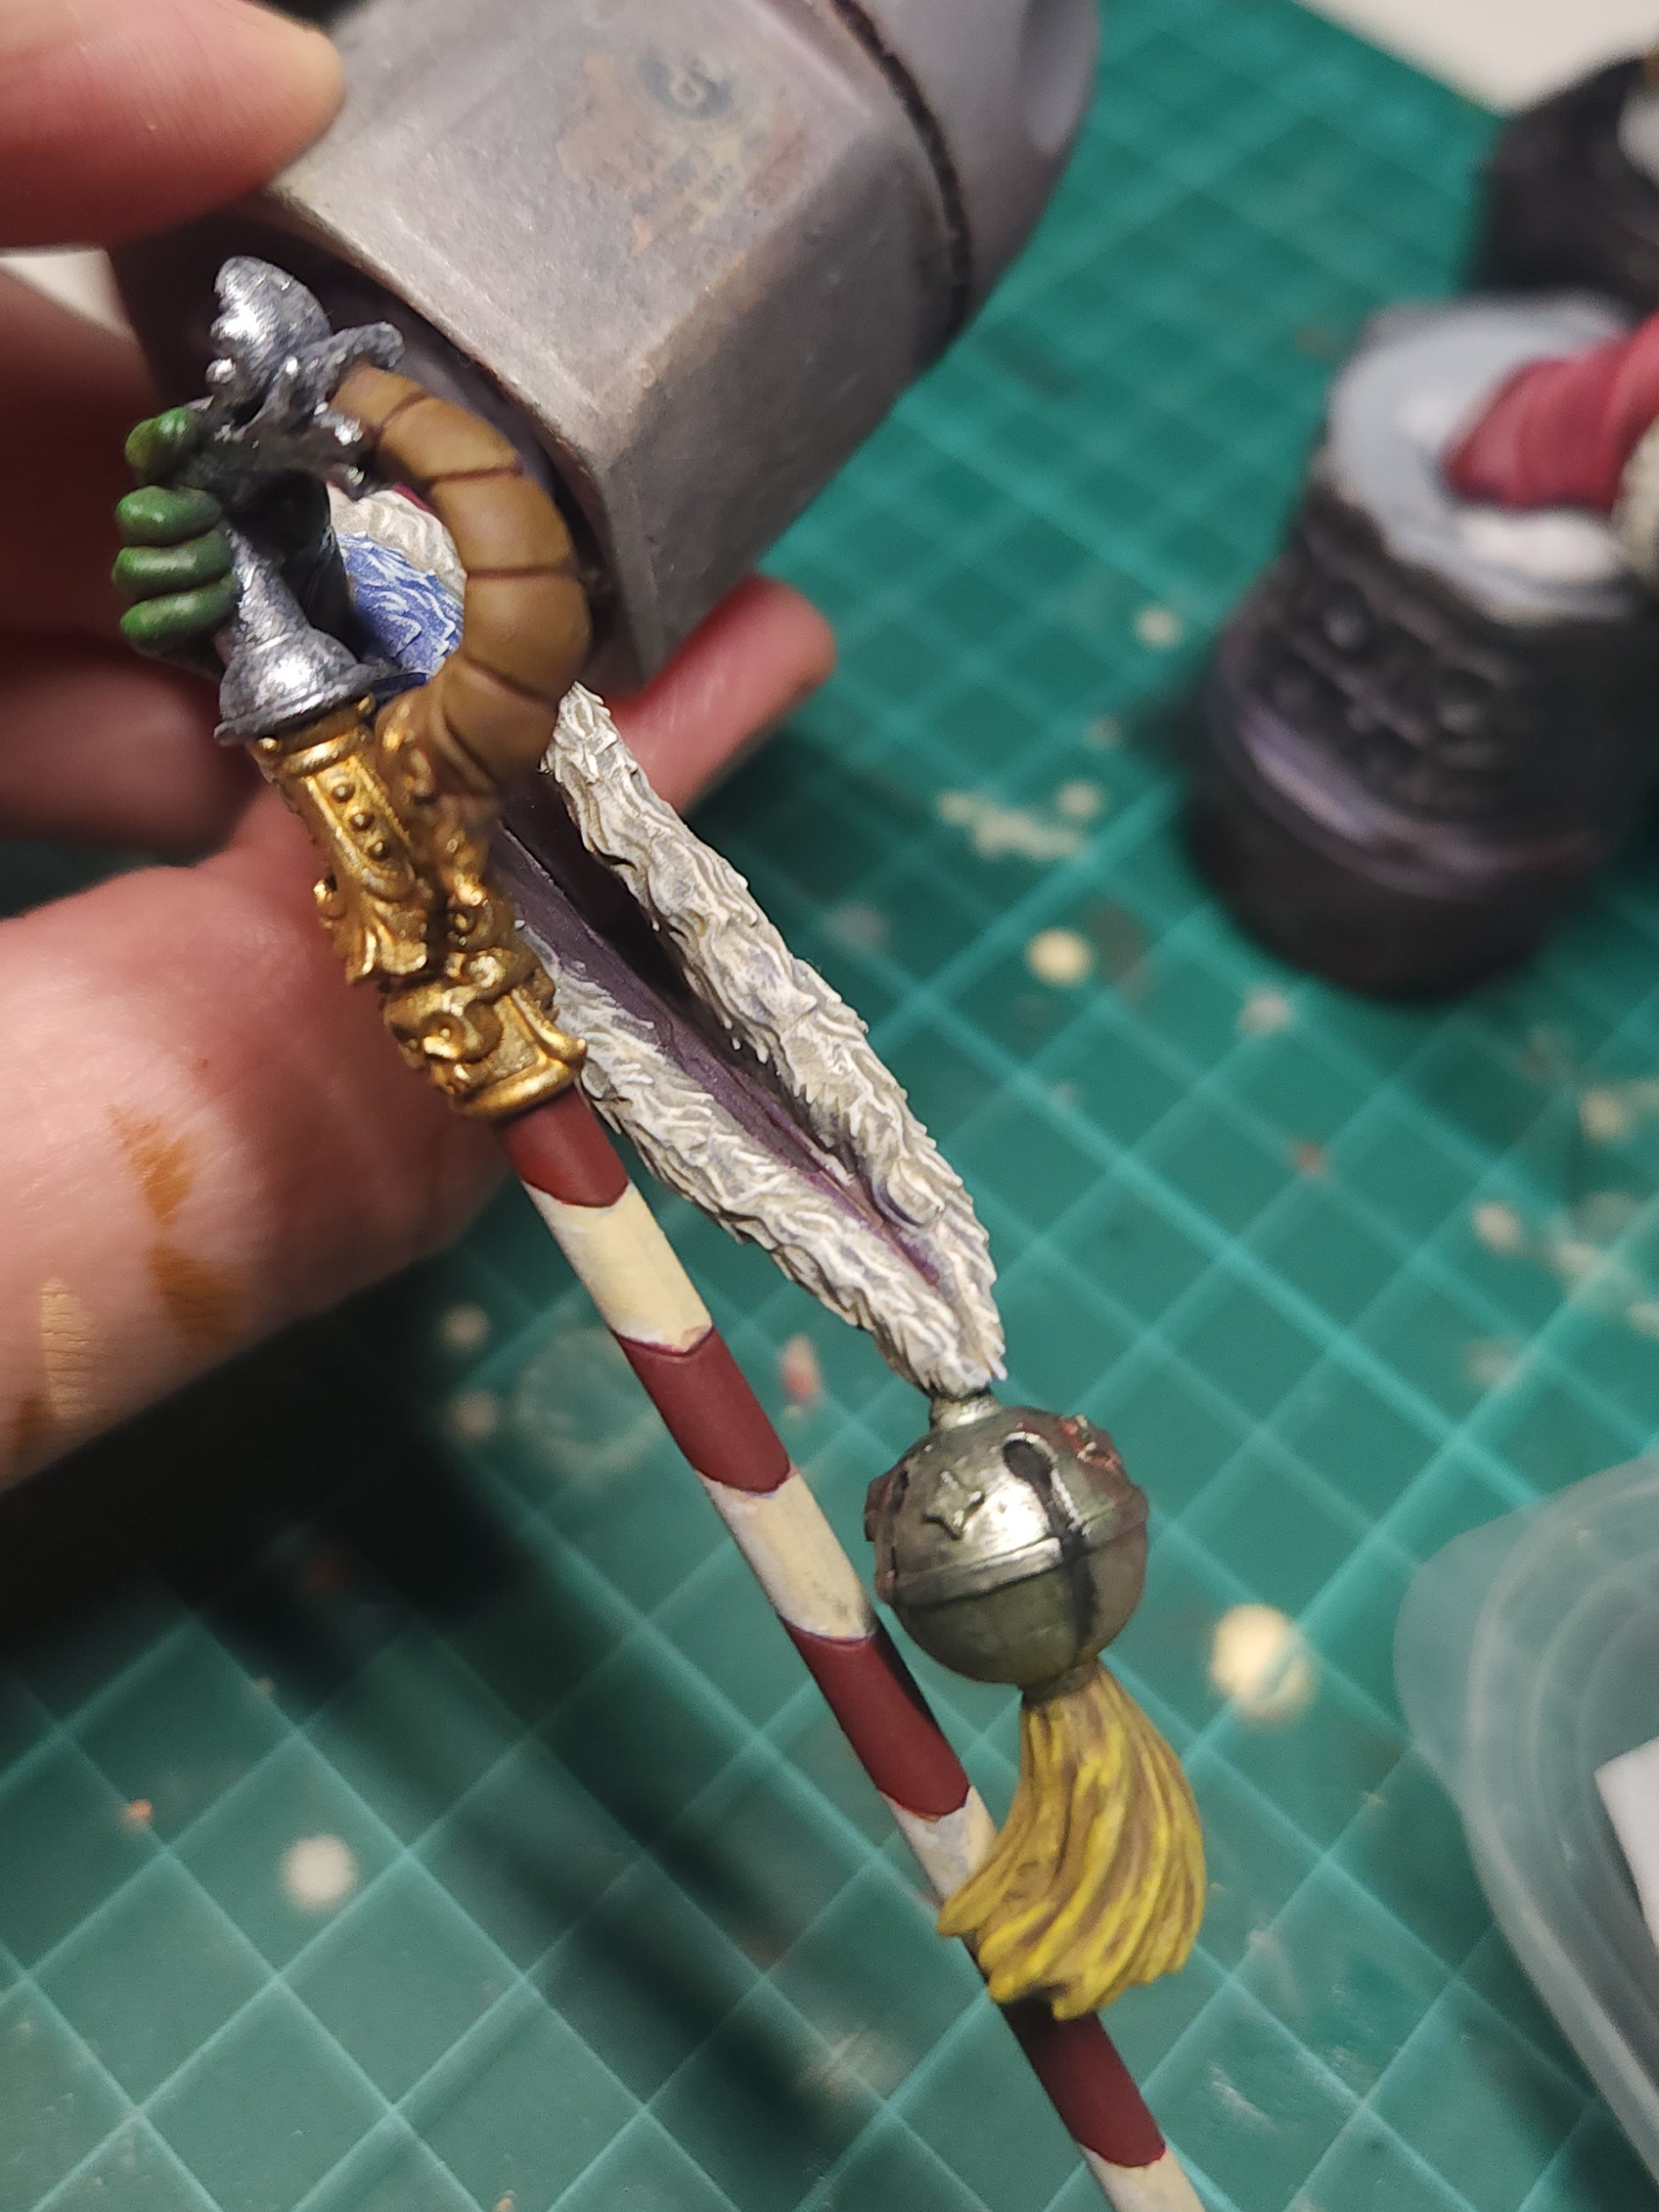

To my eye there are distinct sections of the handle of the cane, which I decided to paint as different materials.
The leather was painted as above.
Silver was based using the Vallejo Pure Silver. It isn’t visible here, but there is another detail at the bottom of the cane that I also painted in the silver.
The gold detail is also Citadel Retributor Armour.
Finally, the shoes are the leather as above, with detail picked out in the gold as above.
17 Dec 24: Working on the trimmings
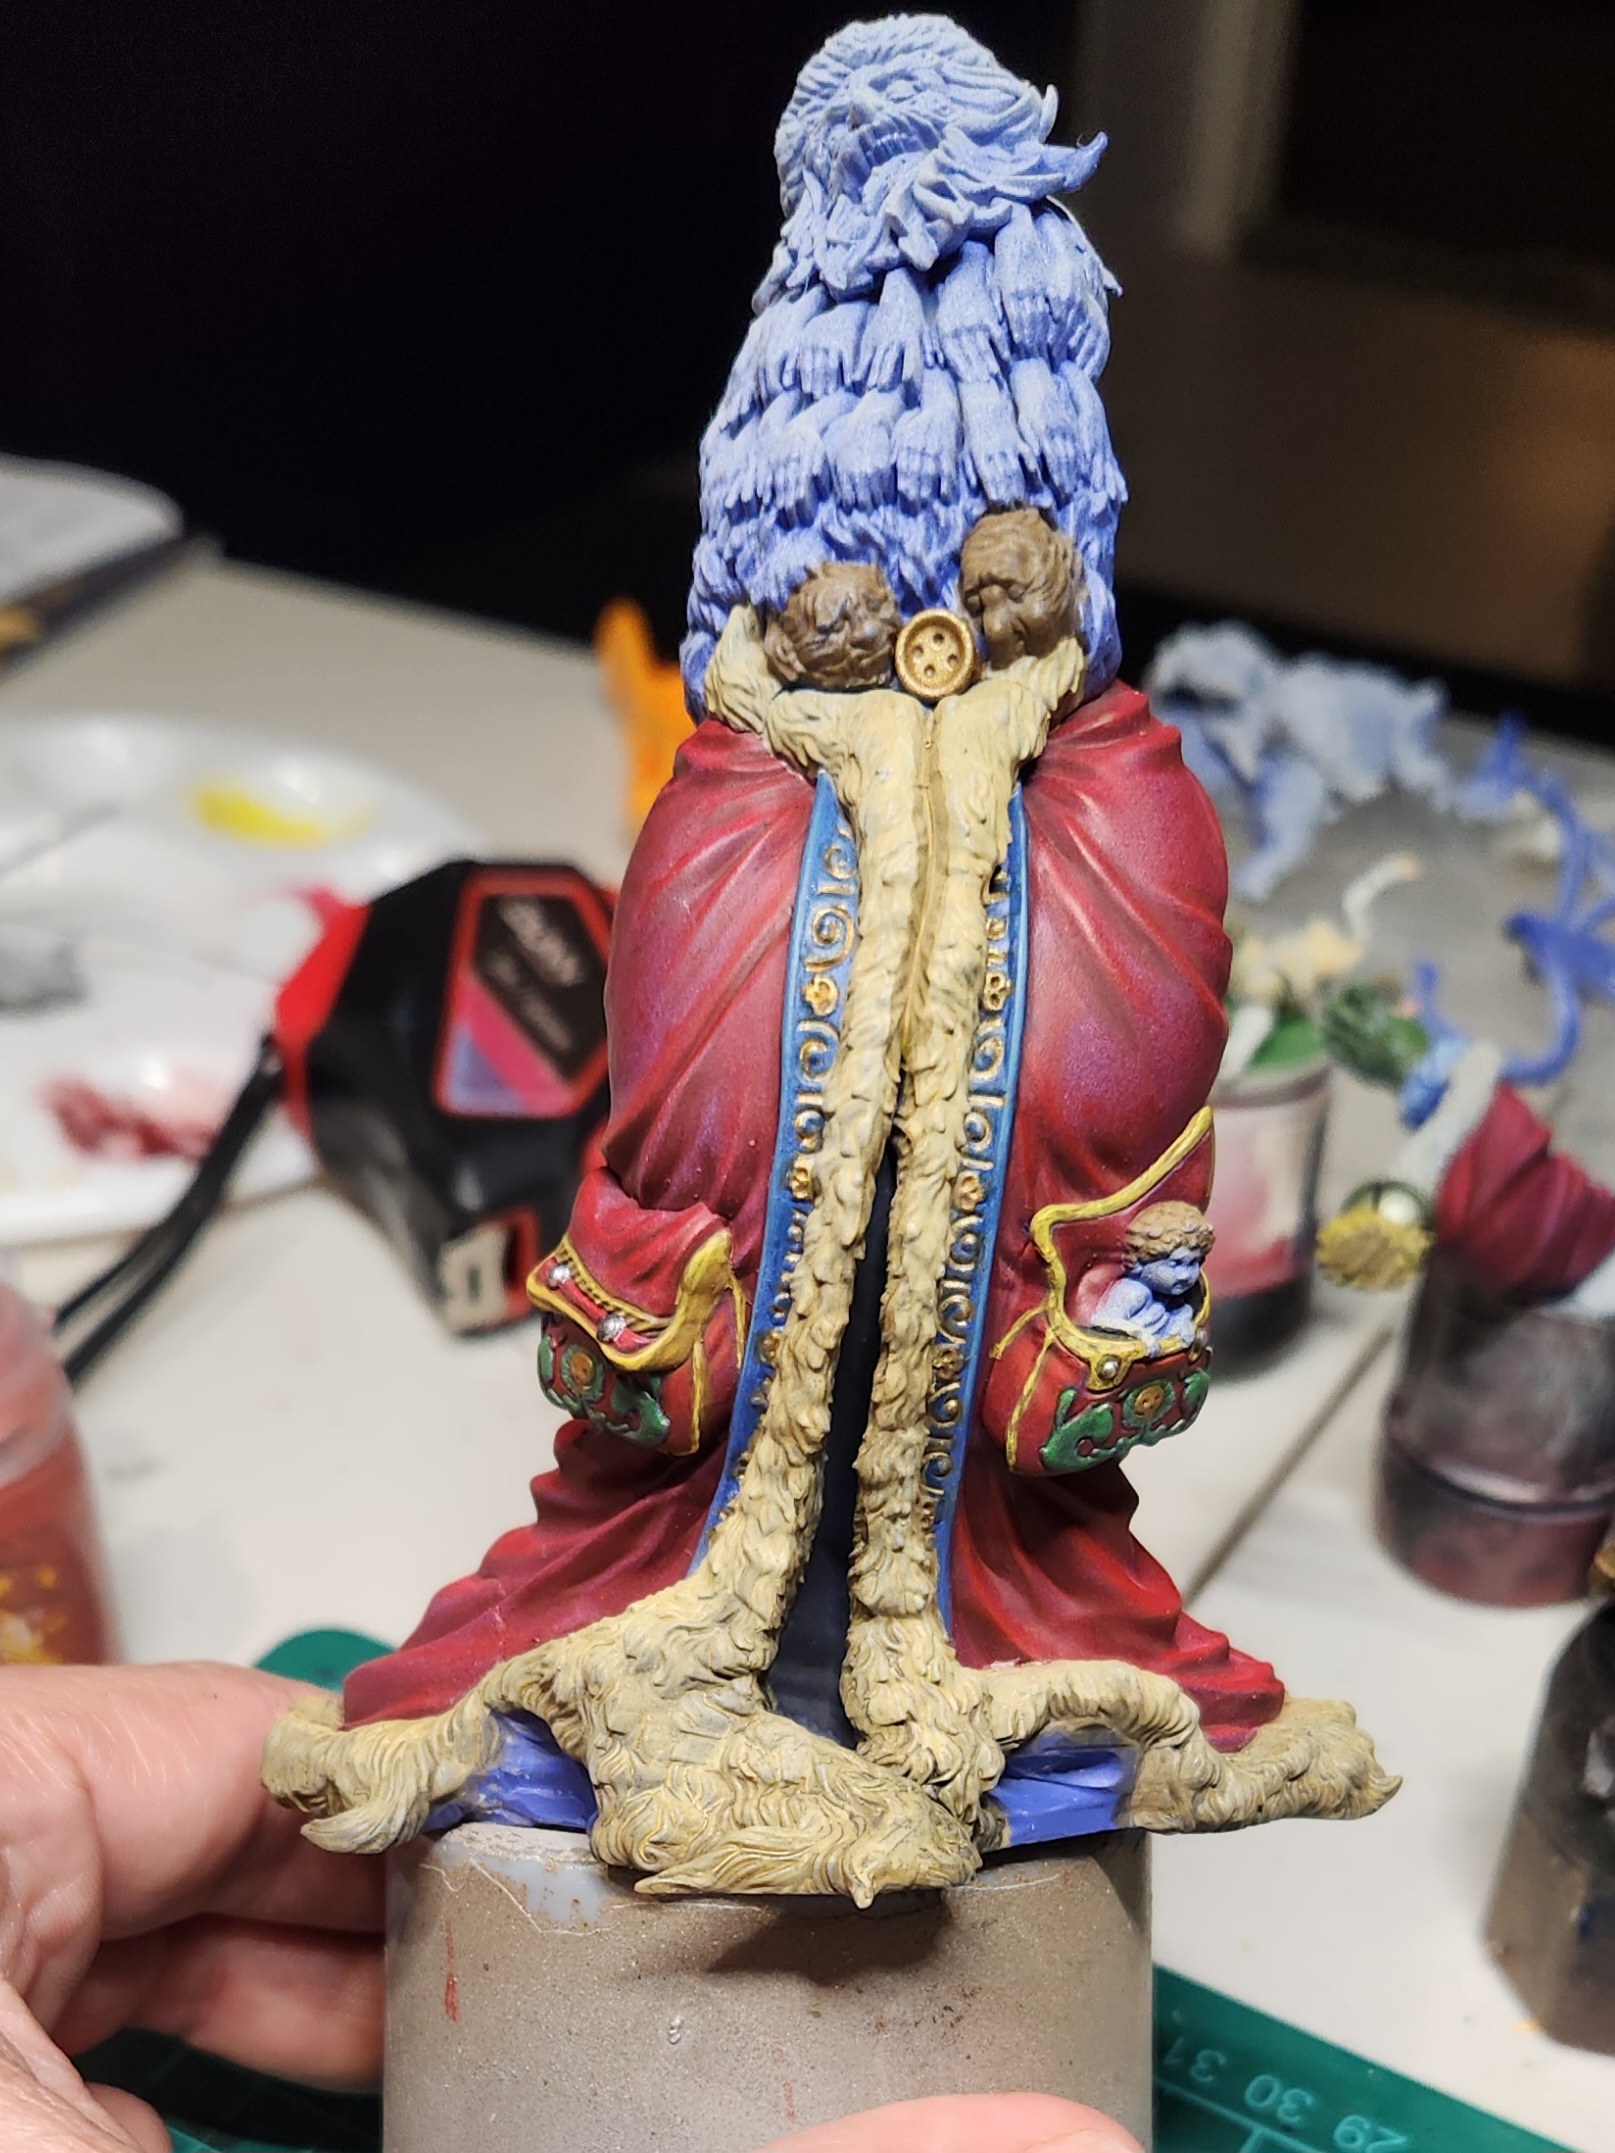
The fur trim on the robe is carefully painted in the Vallejo Buff. There’s a secondary trim running down the front of the robe which I based in Citadel Kantor Blur. This has what looks like embroidered detail. Perhaps once resplendent, I created a glaze of the Citadel Retributor Armour, to give the idea of gold-thread detail. I also used this for the large singular button and the skull details on the front of the pockets.
The small buttons on the pockets were picked out with Vallejo Pure Silver
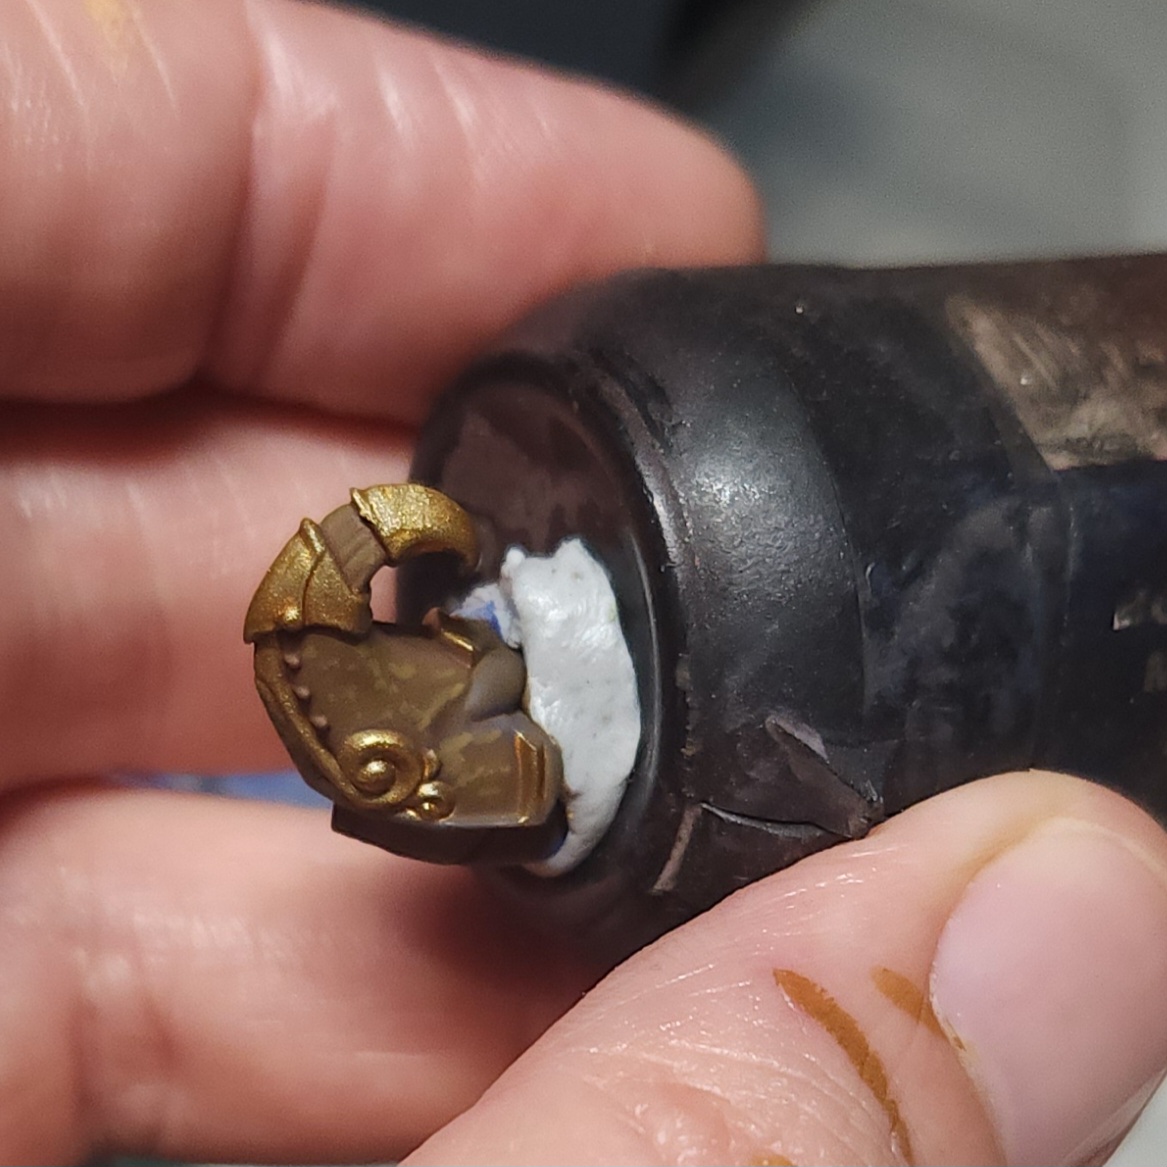
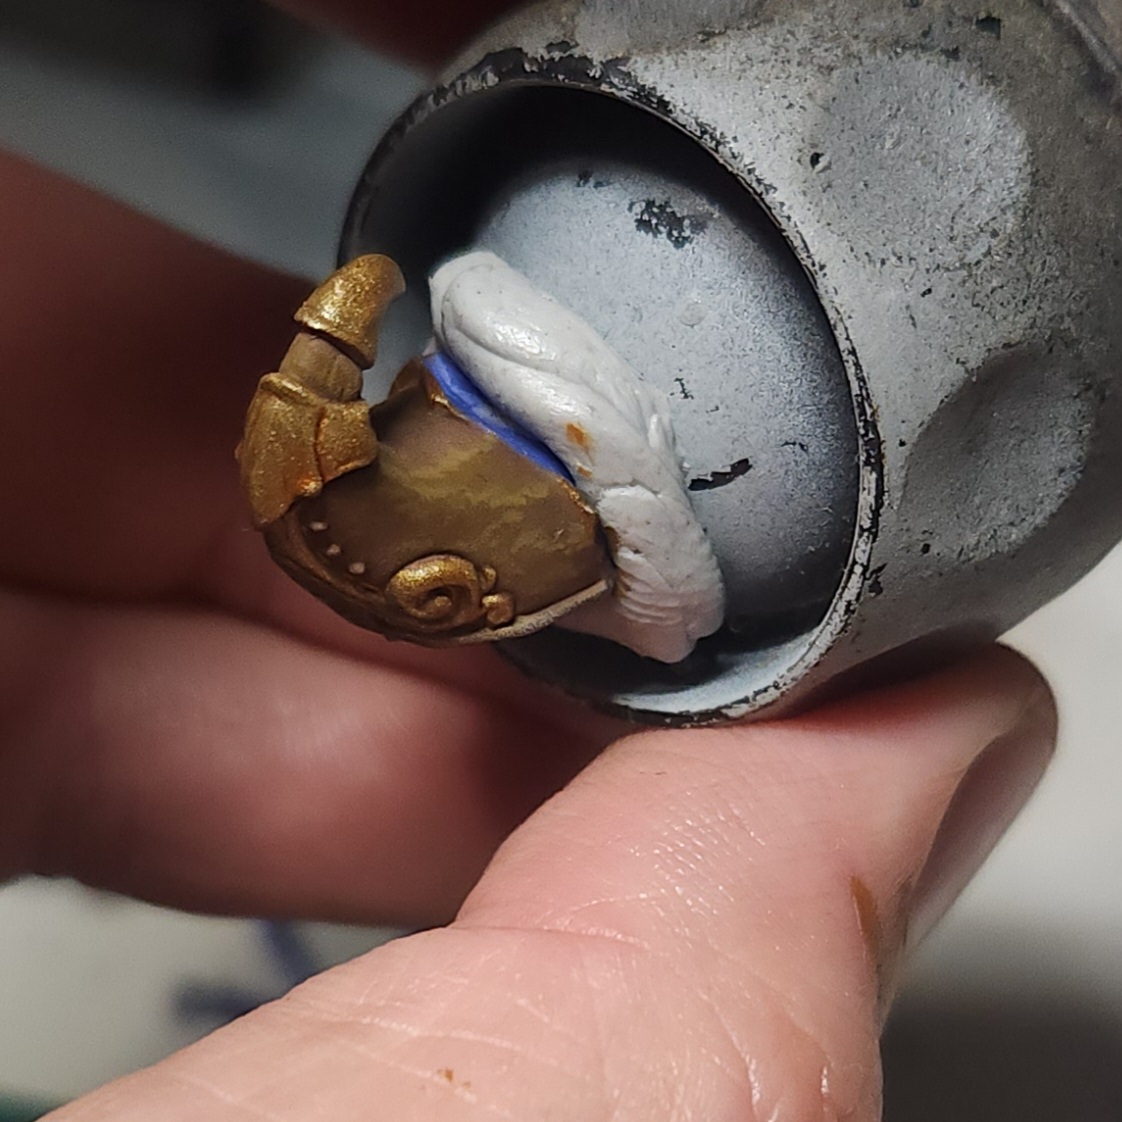
The heads either side of the large button I based with Vallejo German Camo Med. Brown. This was also glazed on the curly hair of the little cherub in the front pocket.
On the sack, I used the Vallejo Buff to pick out some of the detail: the skulls and a mask.
The cord trim was picked out with the Army Painter Warpaints Yellow to differentiate it from the drawstring. I considered have them be the same colour, but decided that I wanted the difference.


