

![O-12 Infinity Fast Response! Firebat Attack Wing Unboxing & Review [7 Days Early Access]](https://images.beastsofwar.com/2026/01/unboxing-corvus-belli-infinity-firebat-attack-wing-coverimage-225-127.jpg)


Collins builds the world of The Walking Dead


Recommendations: 1188
About the Project
In this project I will be building boards that are interesting and unique from The Walking Dead and using them in another project as I document my solo play through of Mantic Games The Walking Dead All Out War. I may take inspiration from the comics or the TV show, i'm not fussed for timelines etc and i'll be making my own story for Rick along the way. Enjoy this project is the building and prep project, go view my other one for the storyline (battle reports)
Related Game: The Walking Dead: All Out War
Related Company: Mantic Games
Related Genre: Pulp
Related Contest: TerrainFest 2025
This Project is Active
Dodgy DFS sofa set
Brace yourself… these are possibly the worst looking sofas known to man. I asked my wife which contrast colour to use and she said ‘go for the Laurence Llewelyn-Bowen hideous purple one’ aka magos purple. so now we have a tyranid sofa set in this gaudy house…
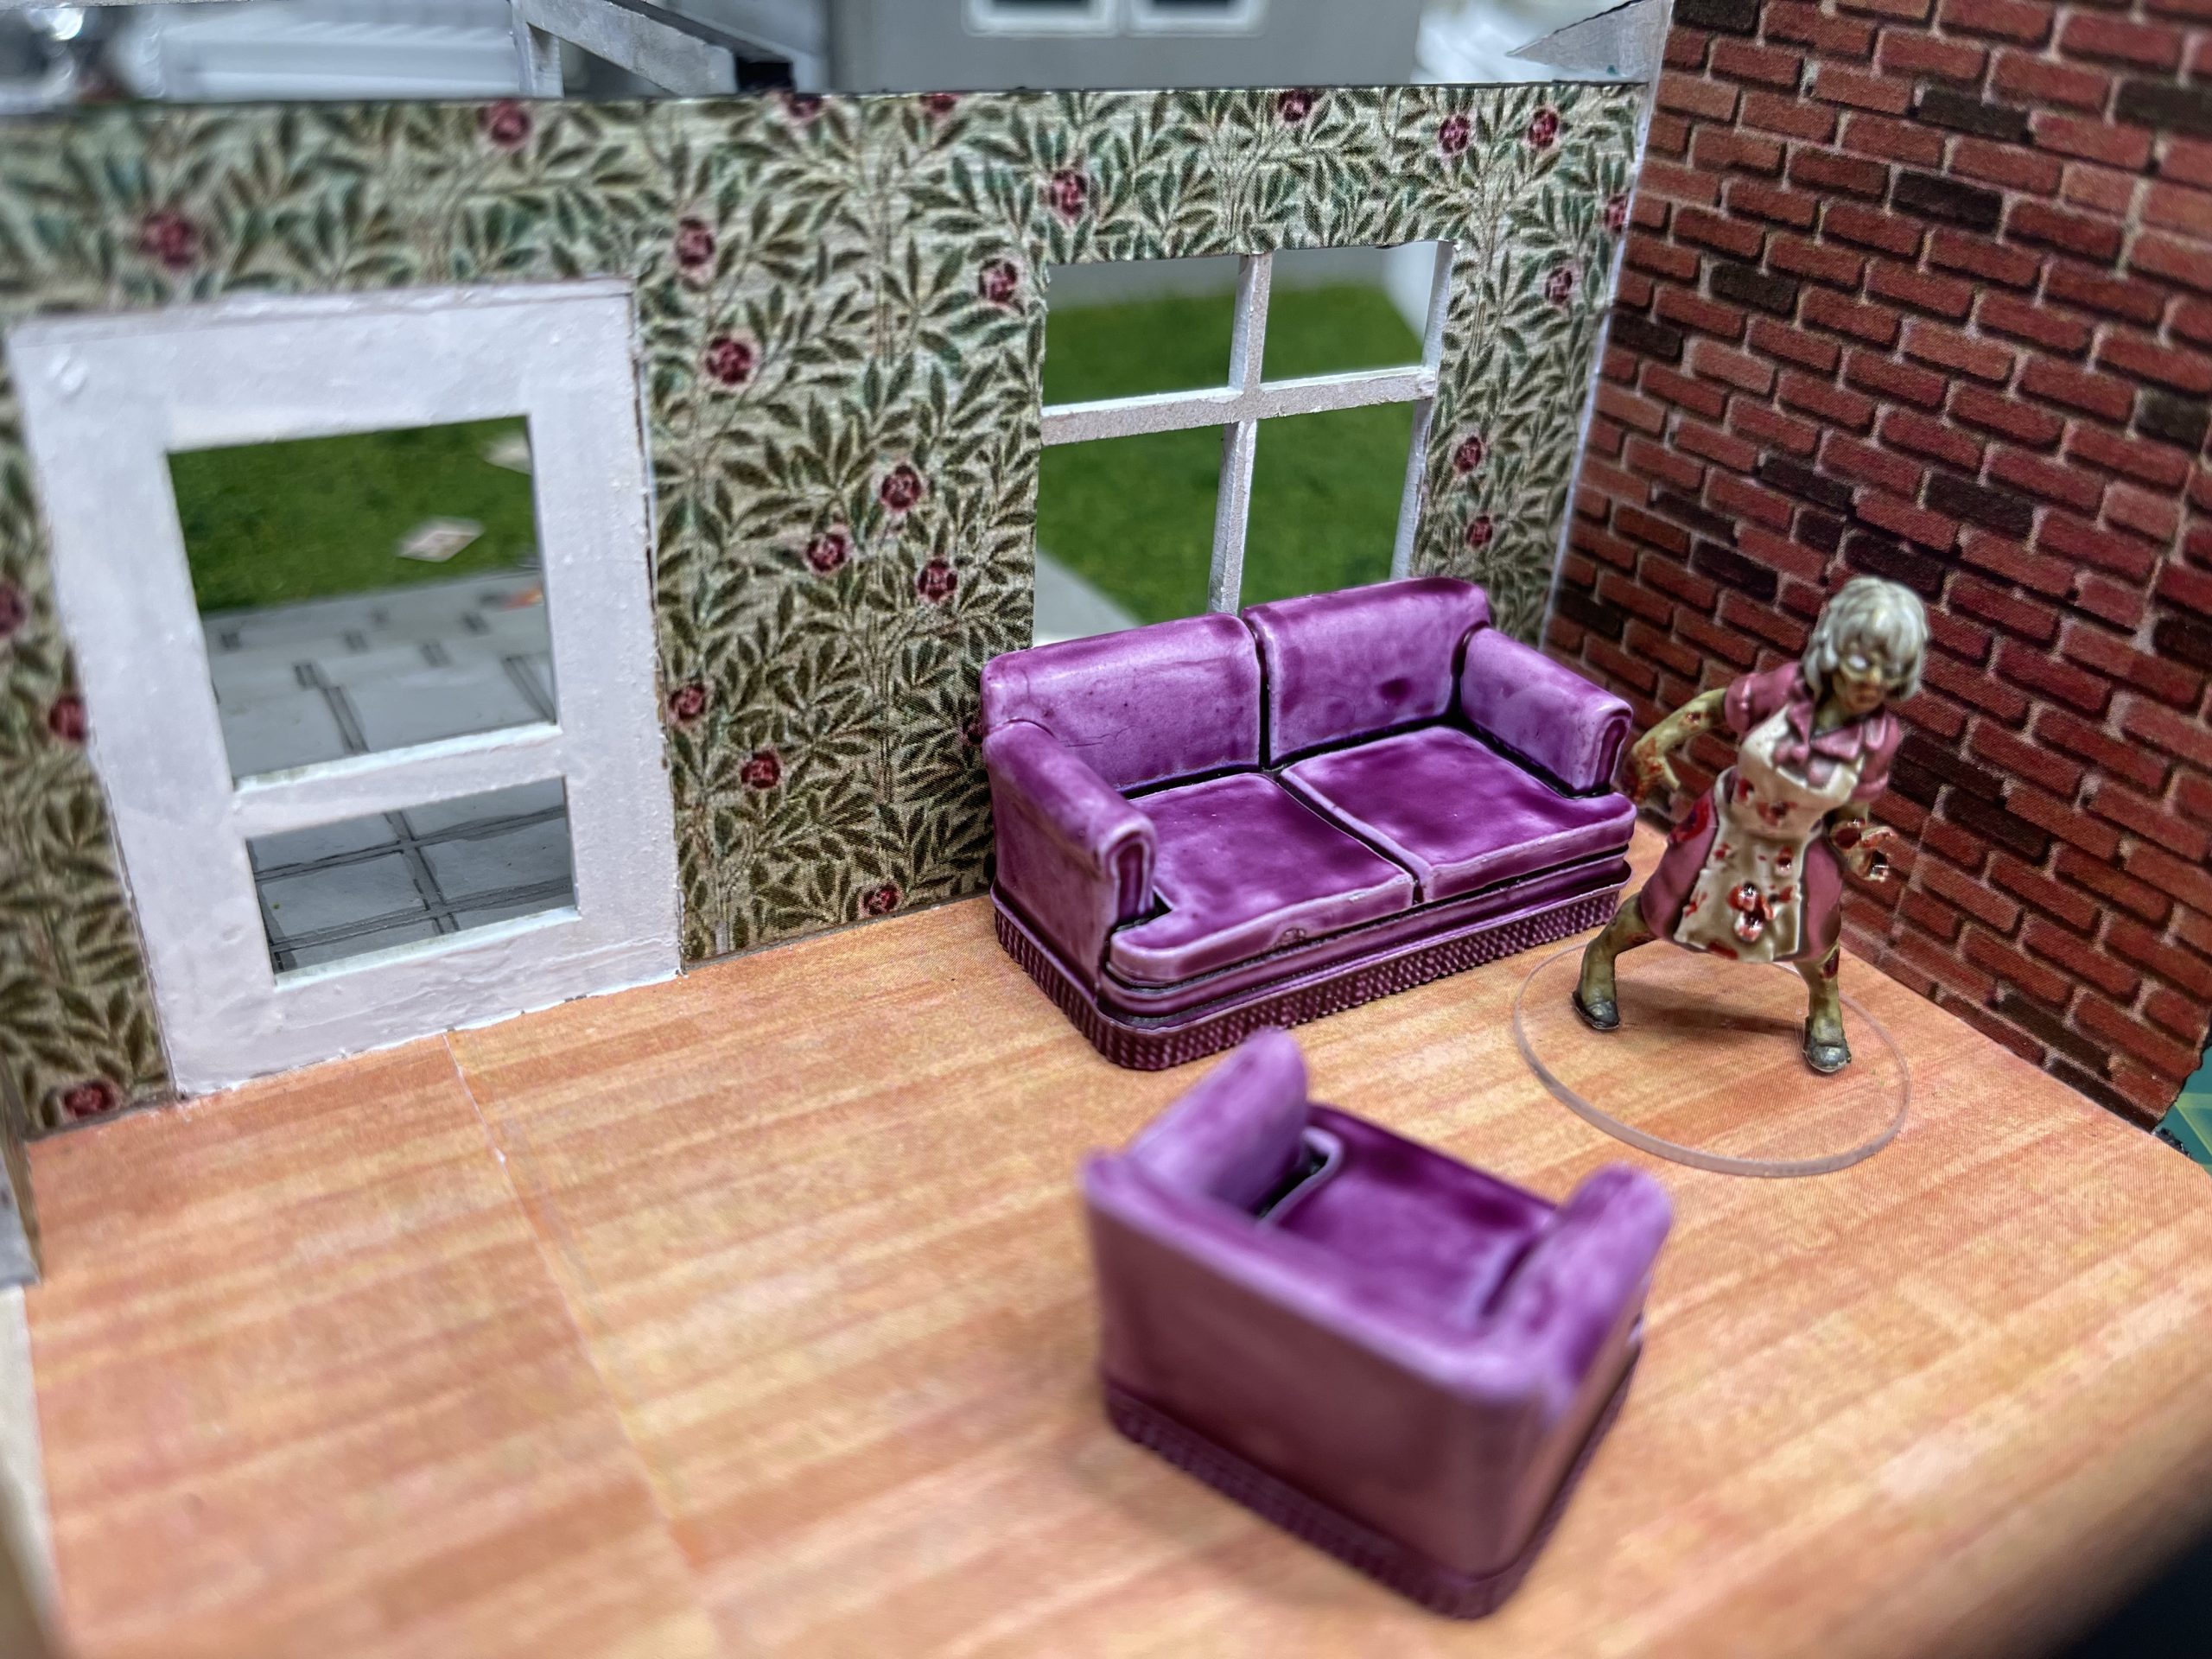
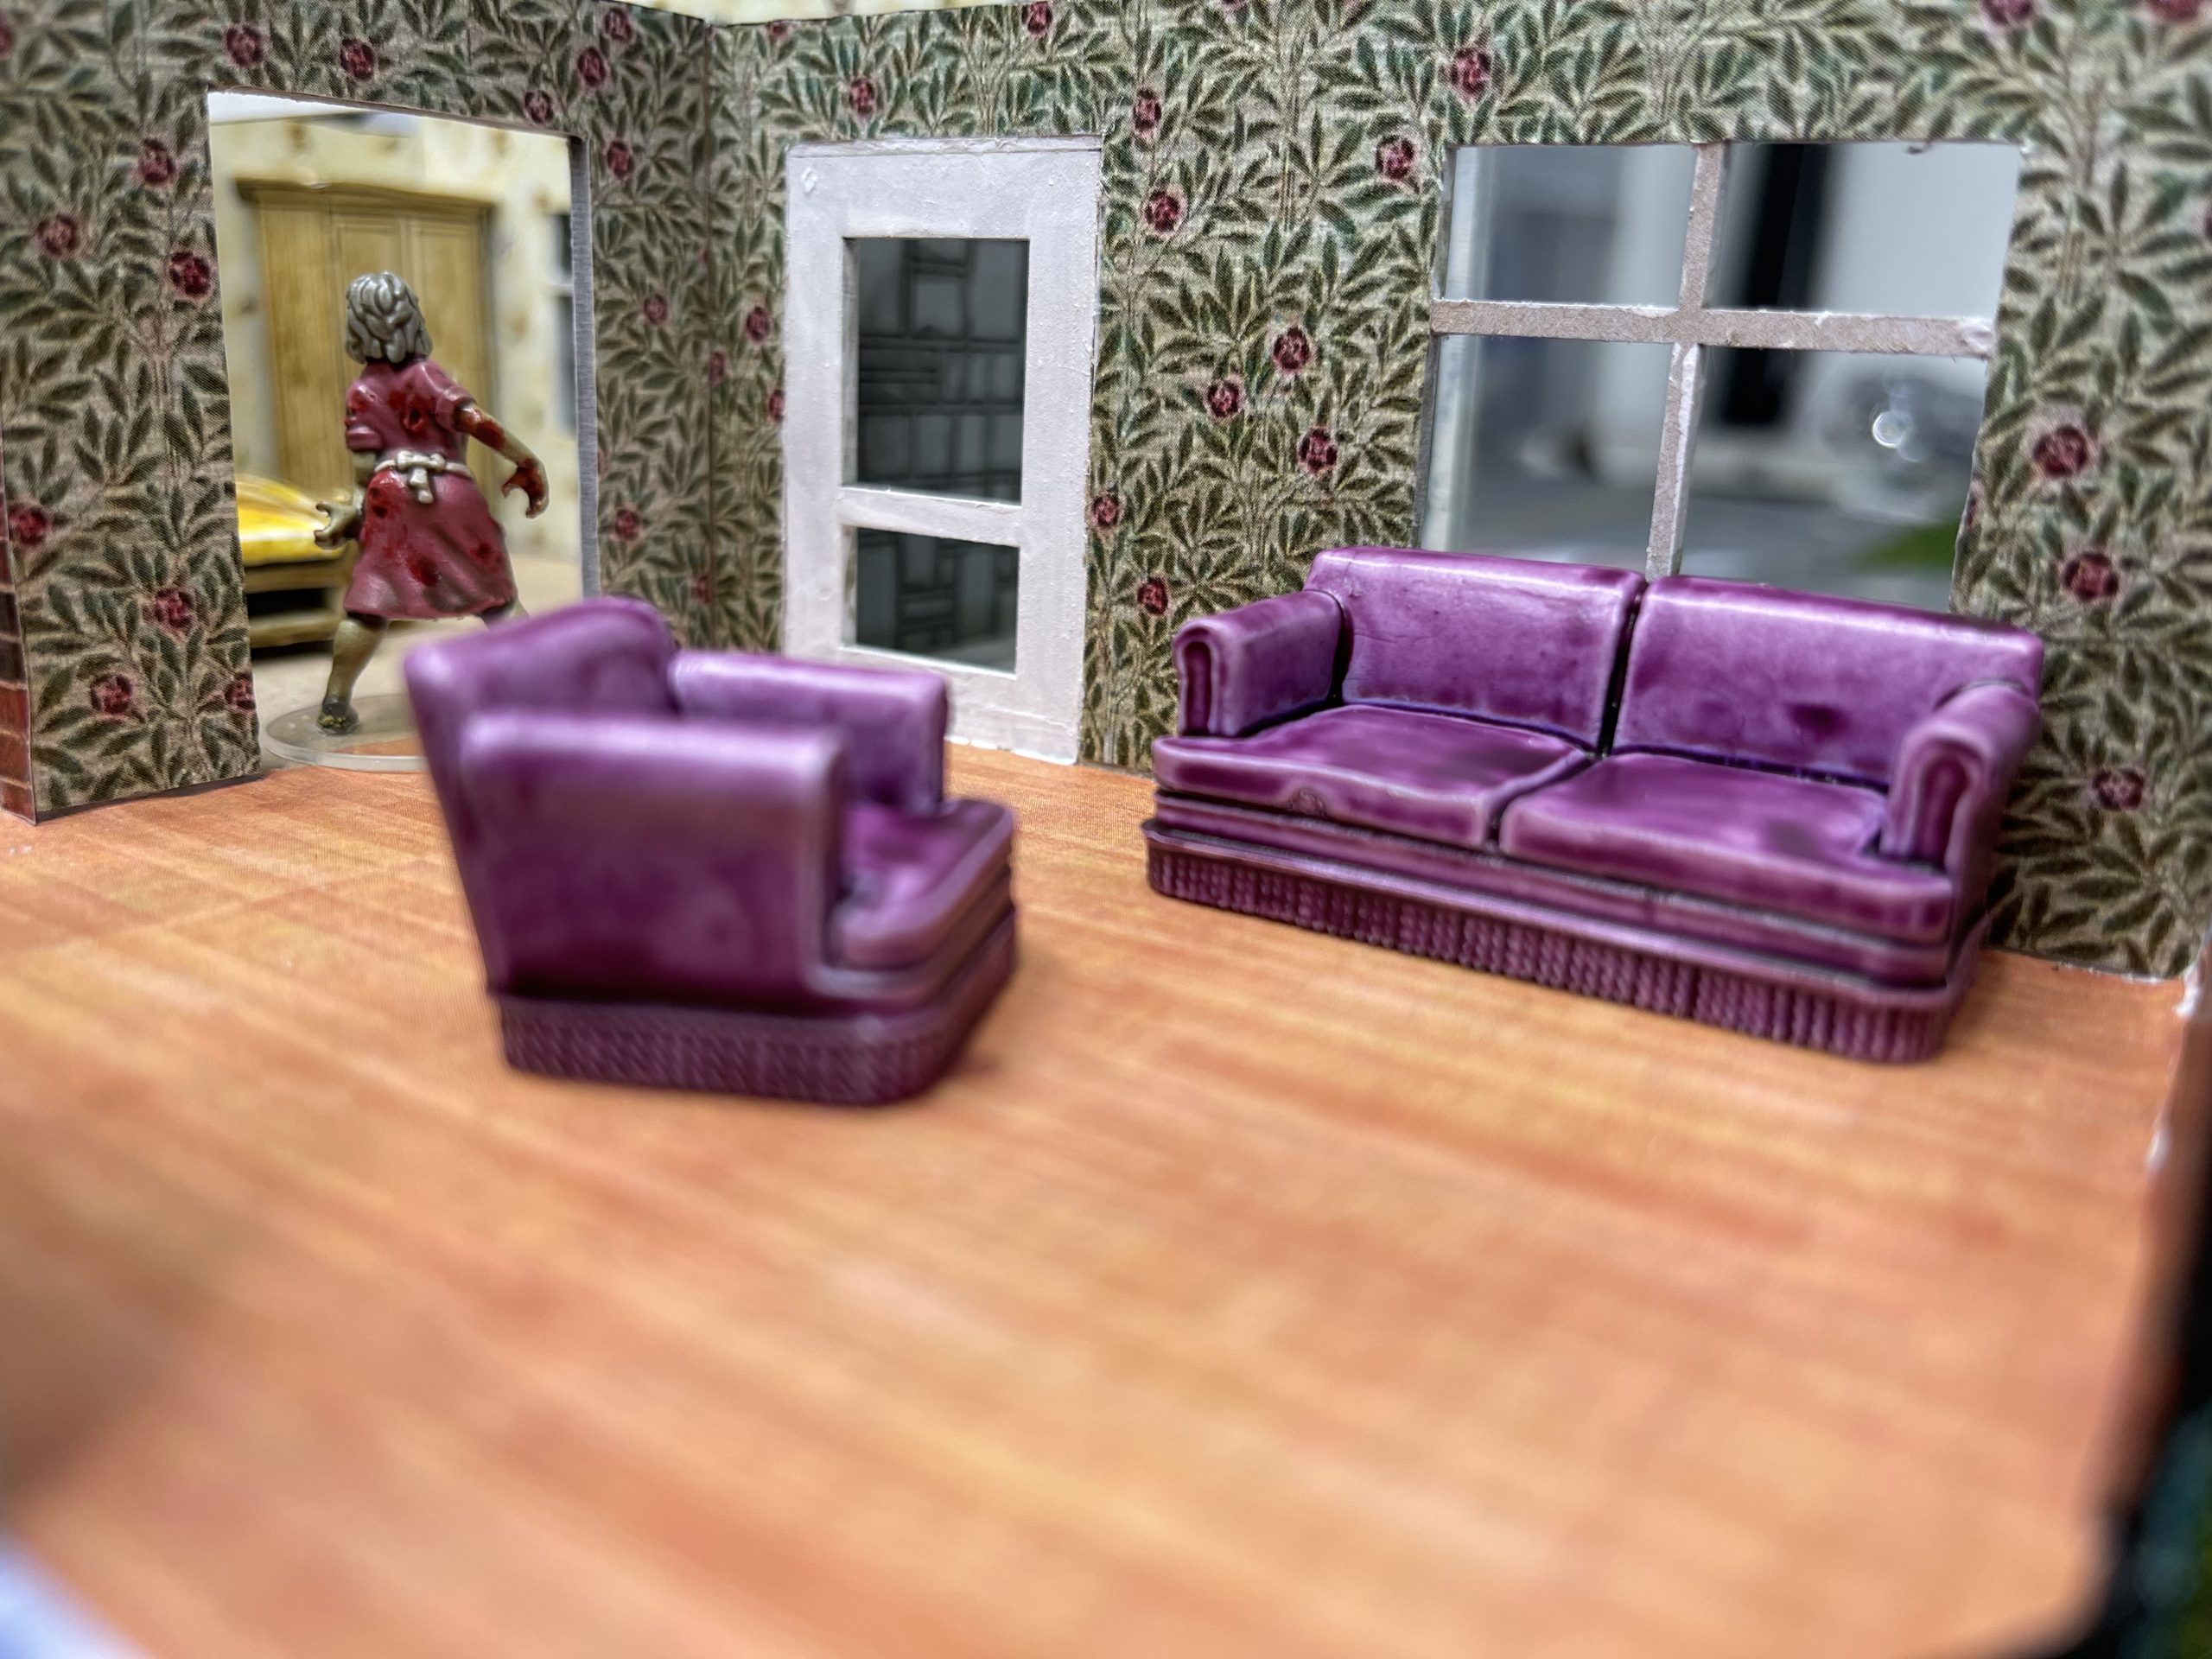 Glynis is so unimpressed she's gone back to the bee bedroom.
Bees in the bedroom

another simple paintjob. just the contrast paints i have in stock and then some ‘3 dabbing’ to make bee shapes, sort of.
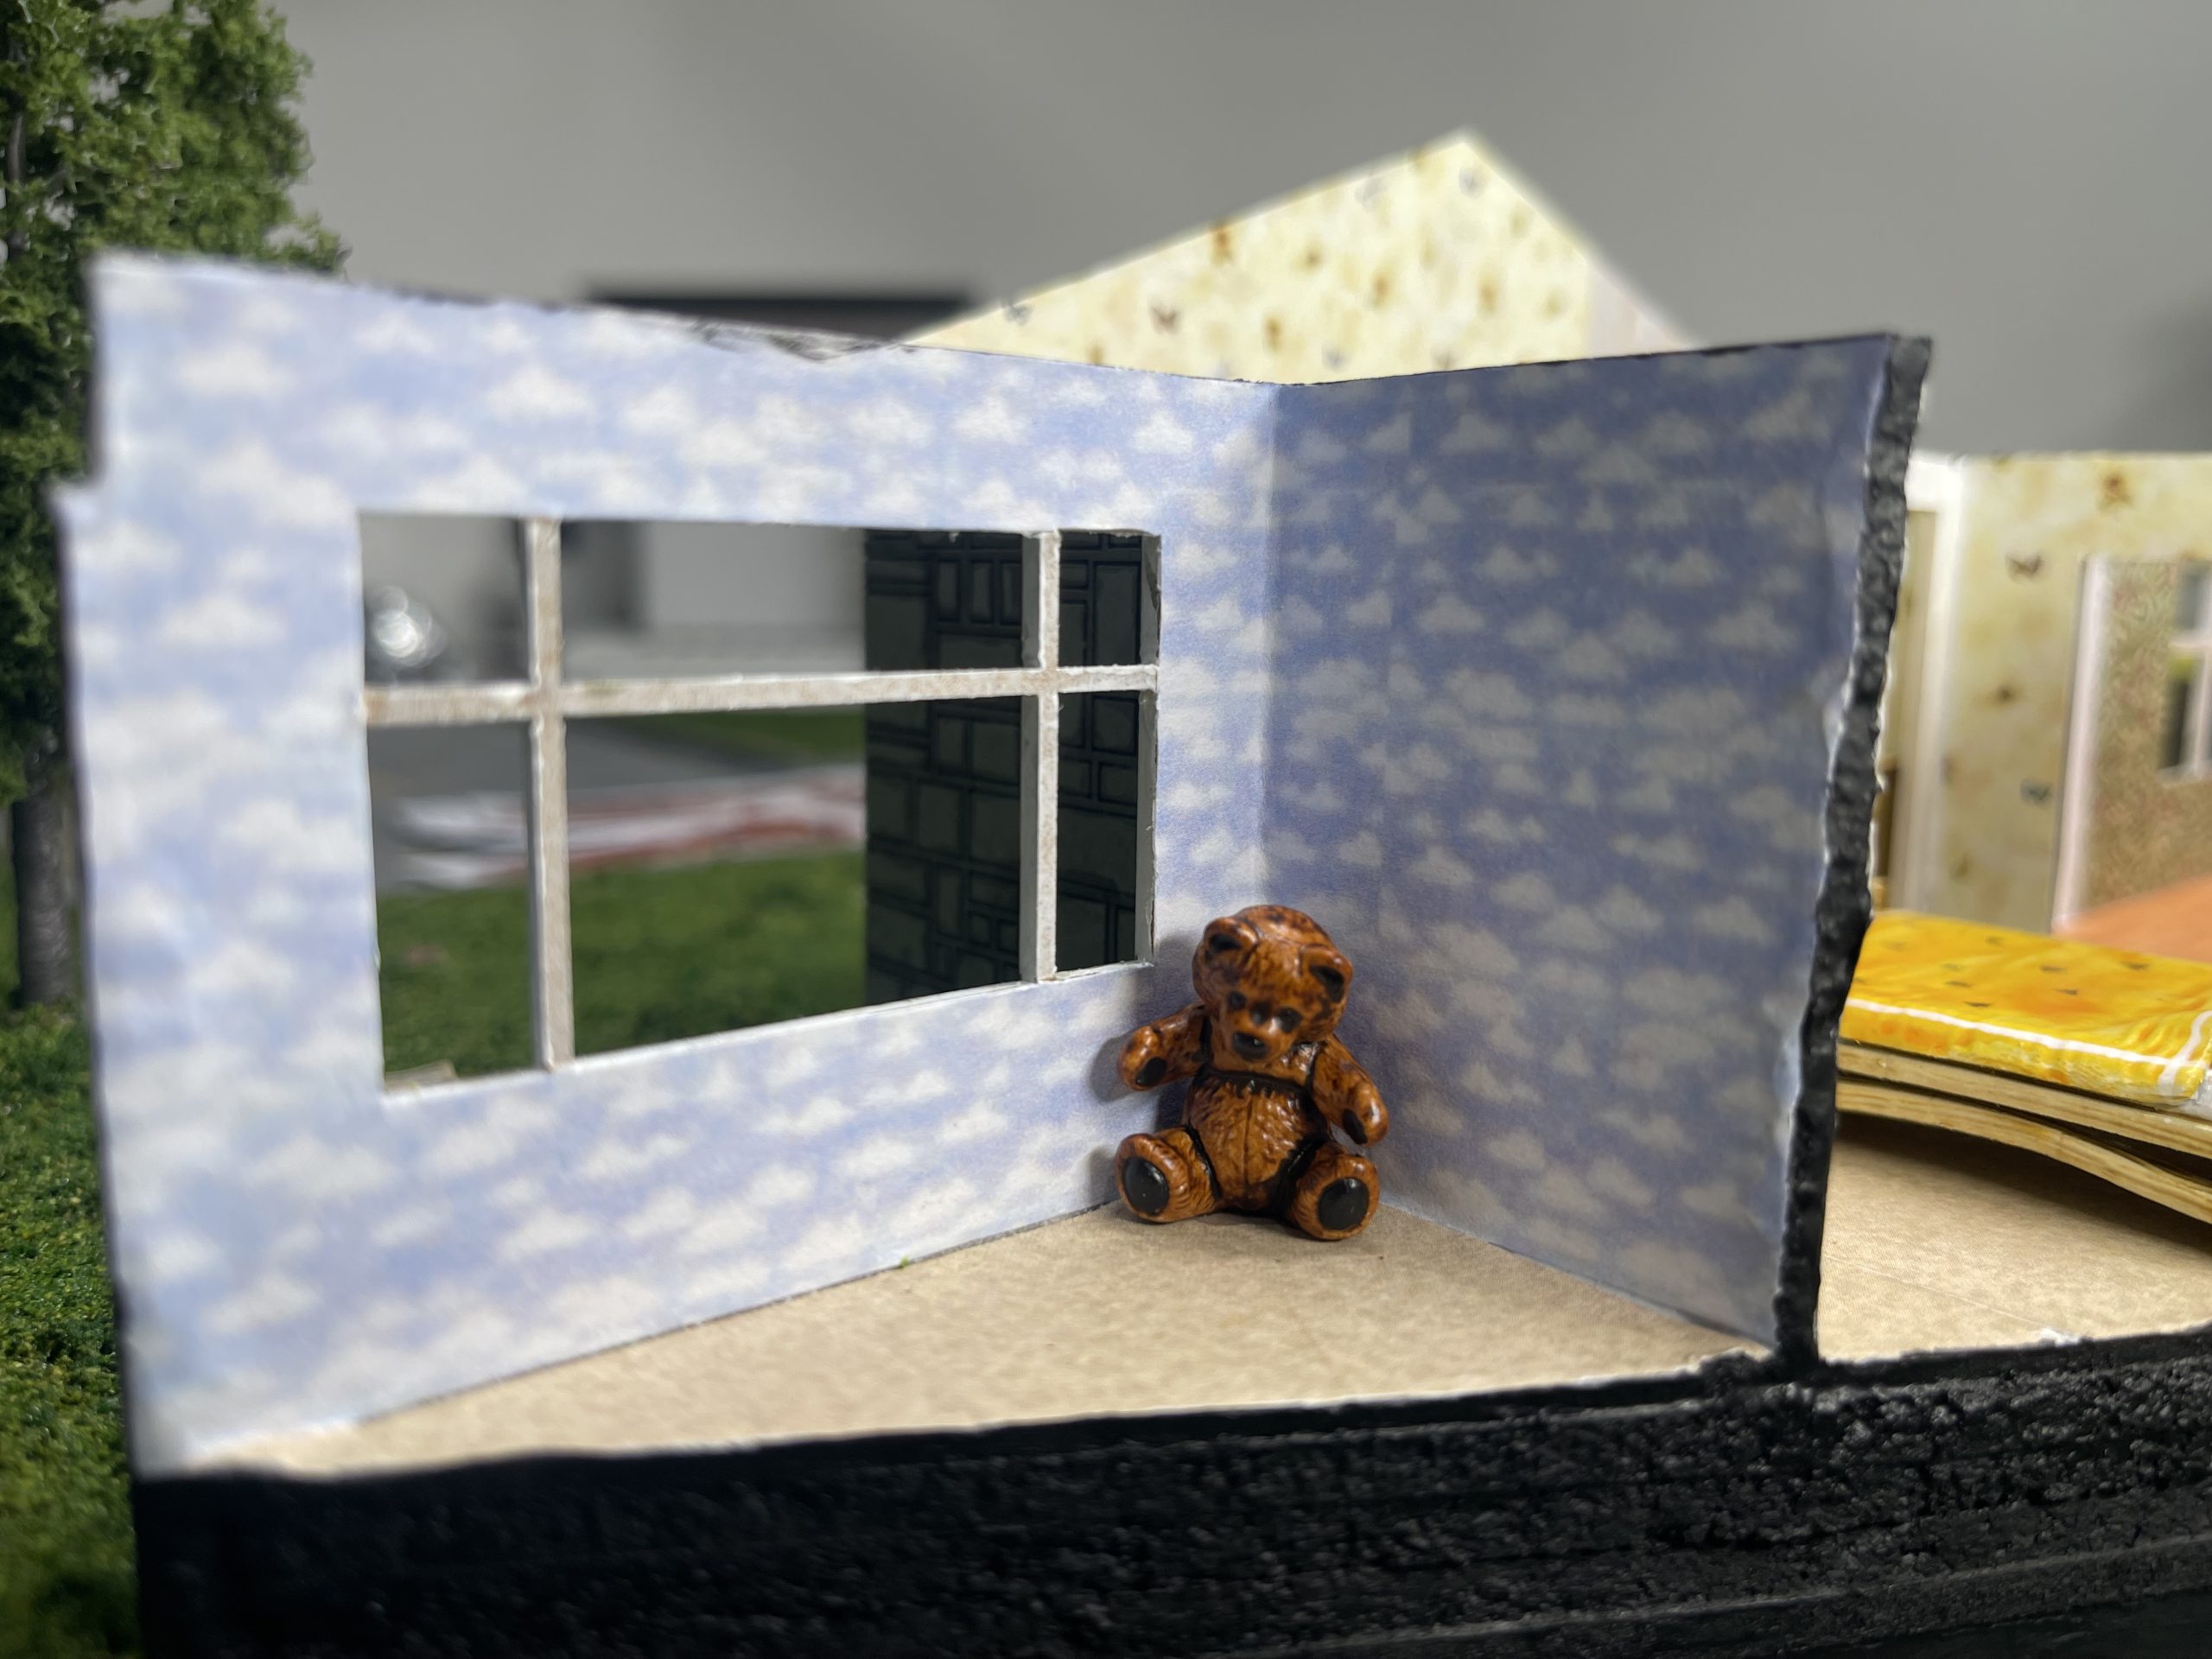 Baby's bear got put in the corner
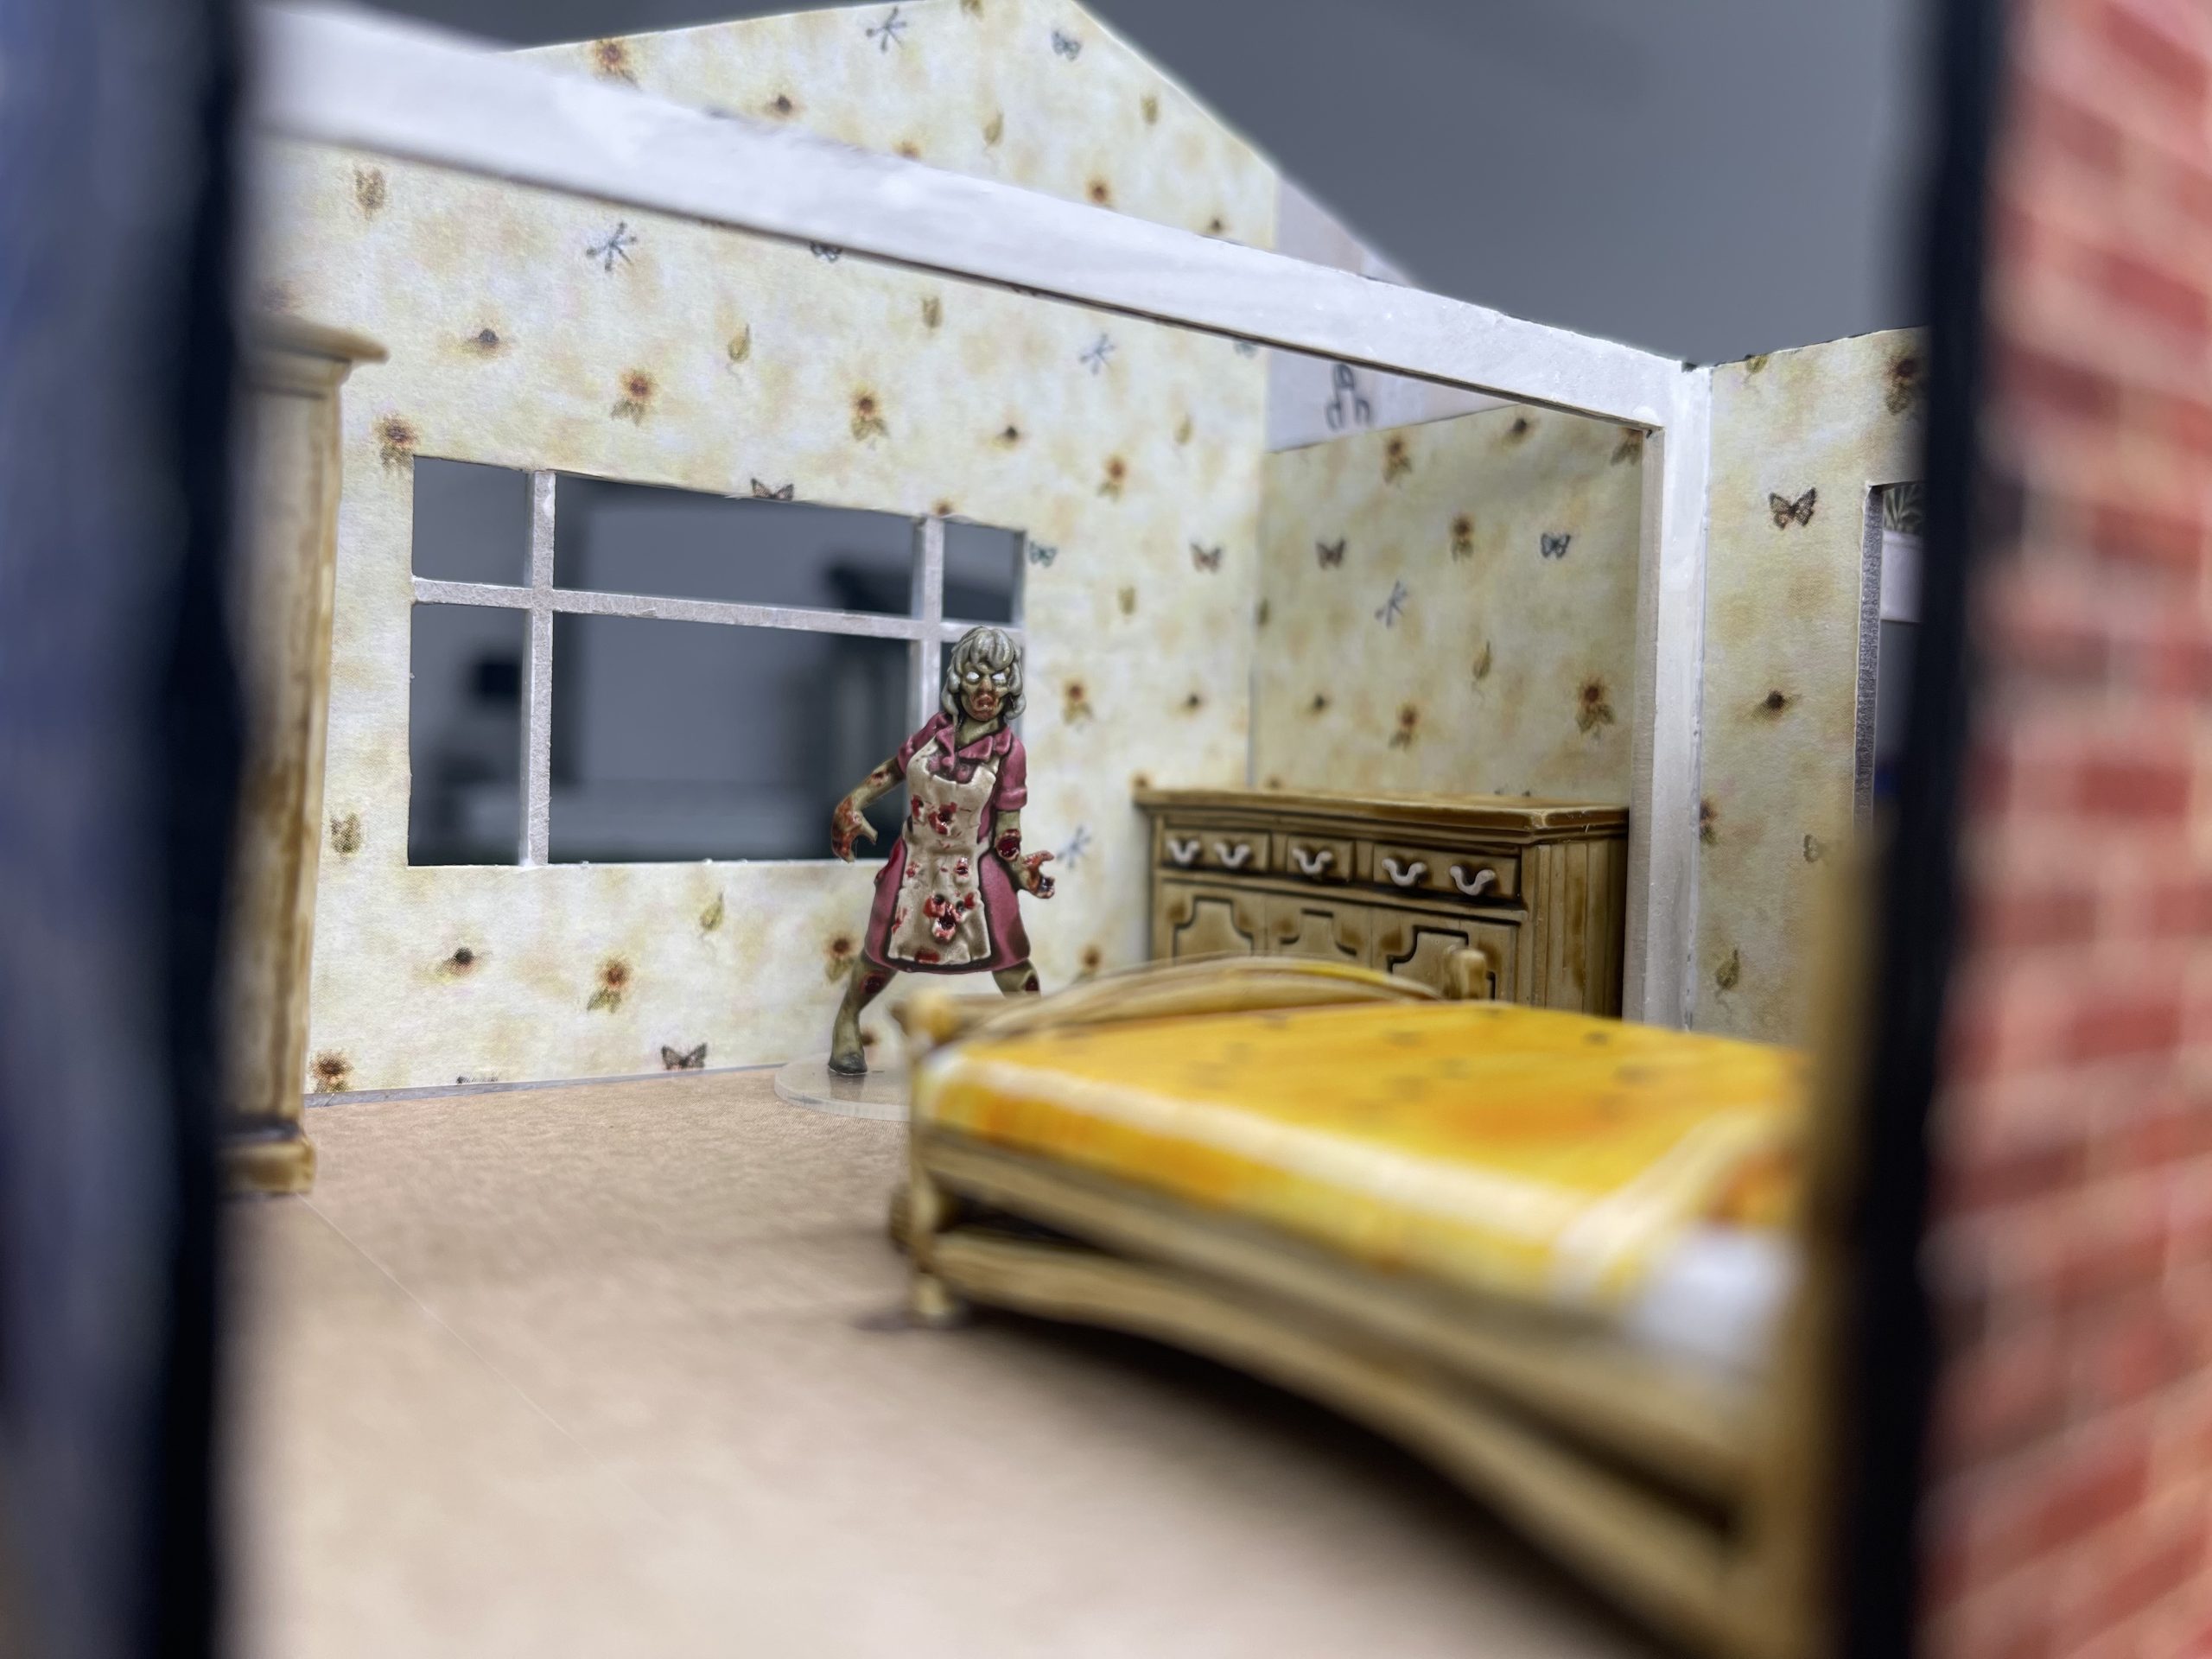 Glynis is trying to tidy up the room... only she can't remember how to
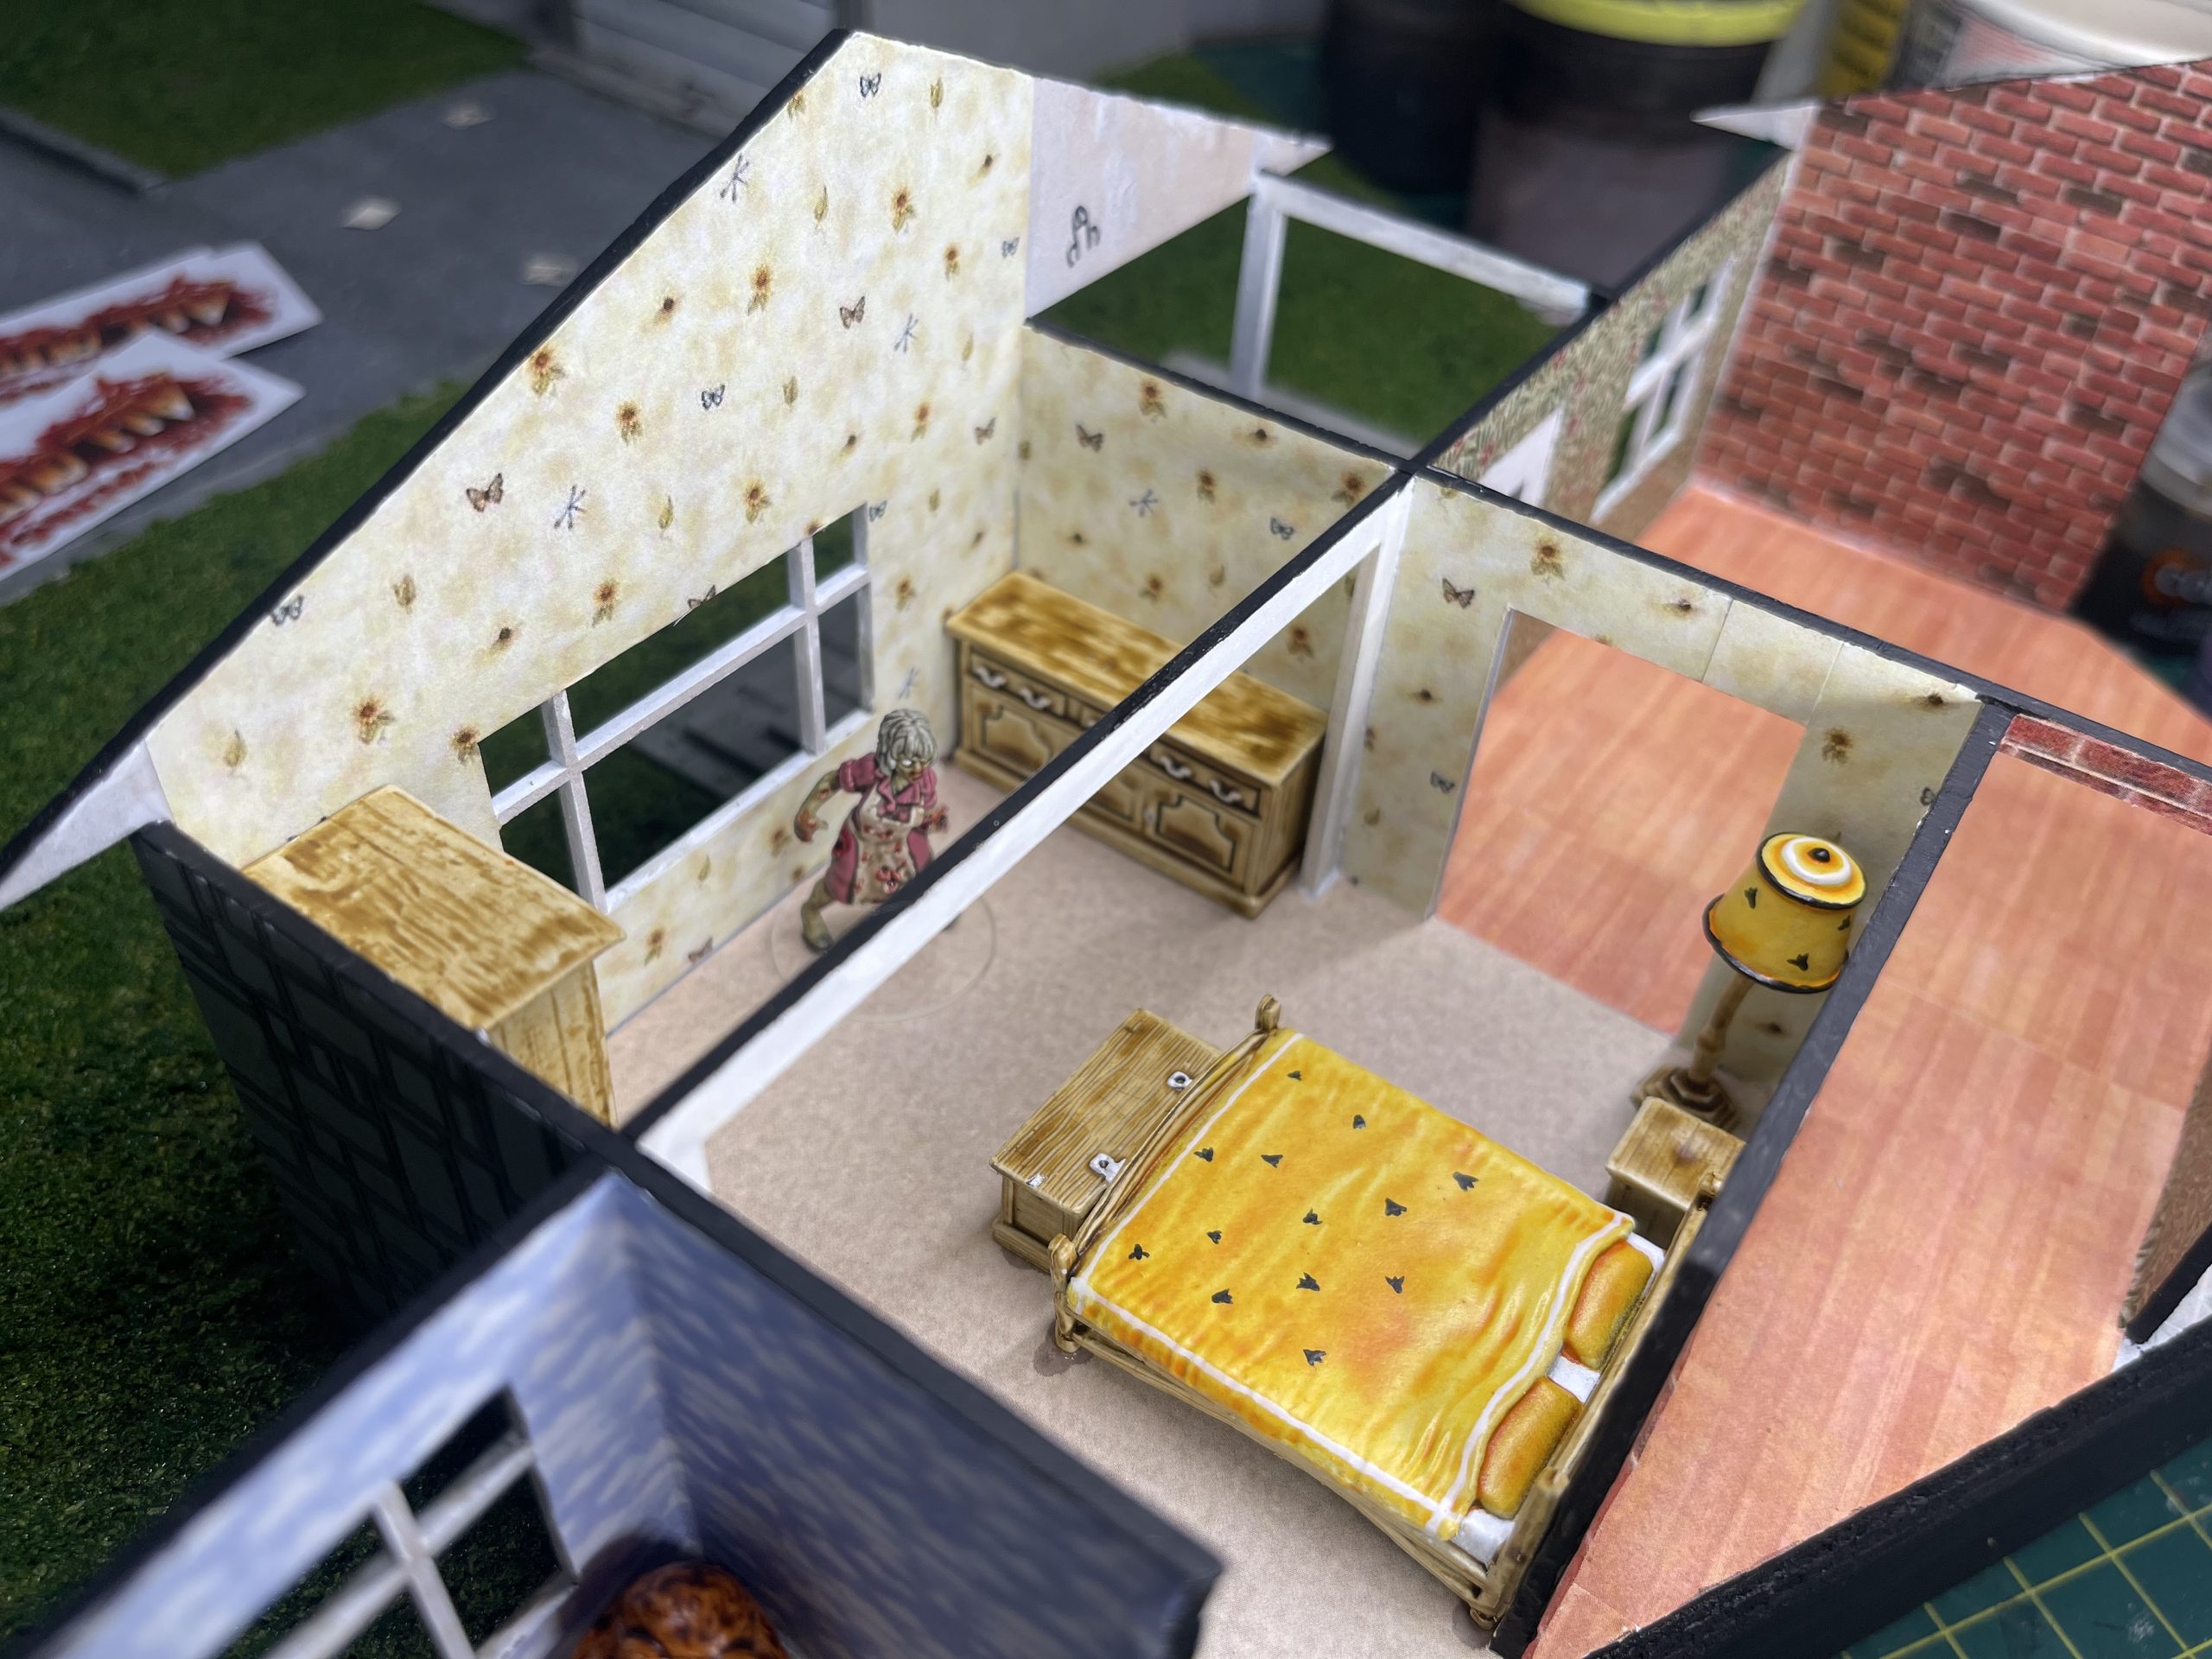 Gives quite a good impression of a bedroom i think
 still enough room to roam about in too
What do you need to survive the apocalypse? Food, Guns and Computer Games
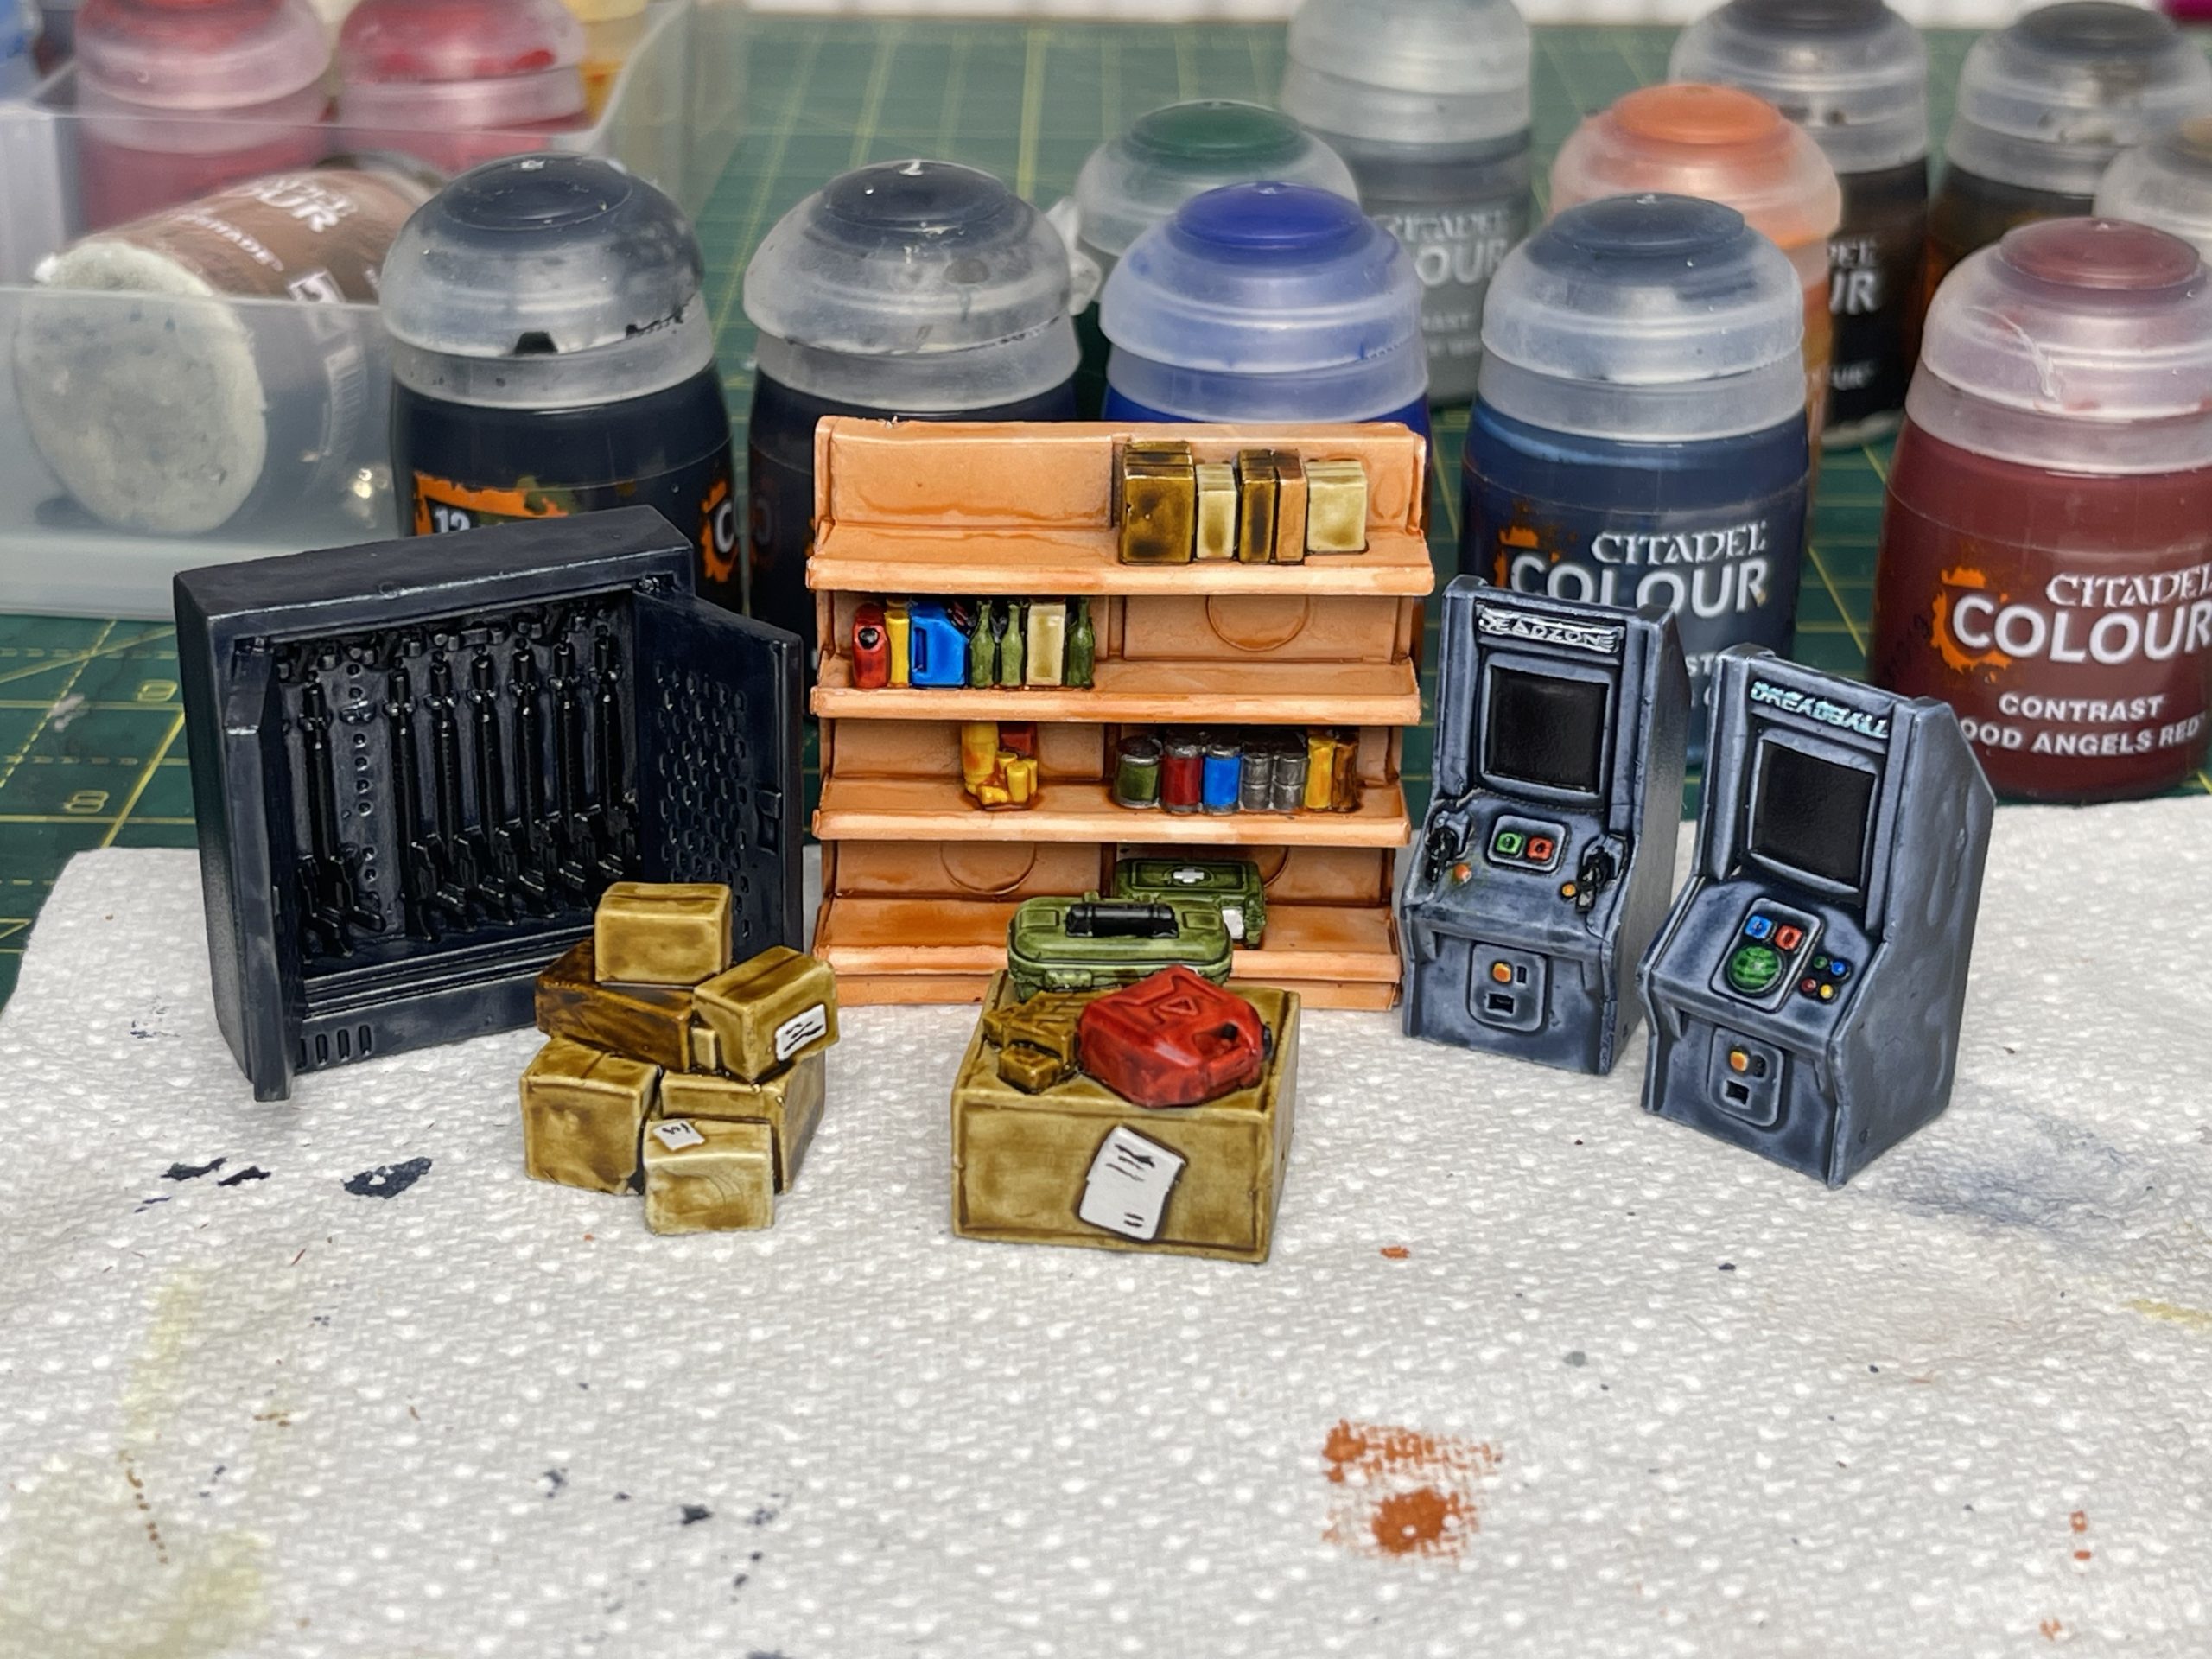
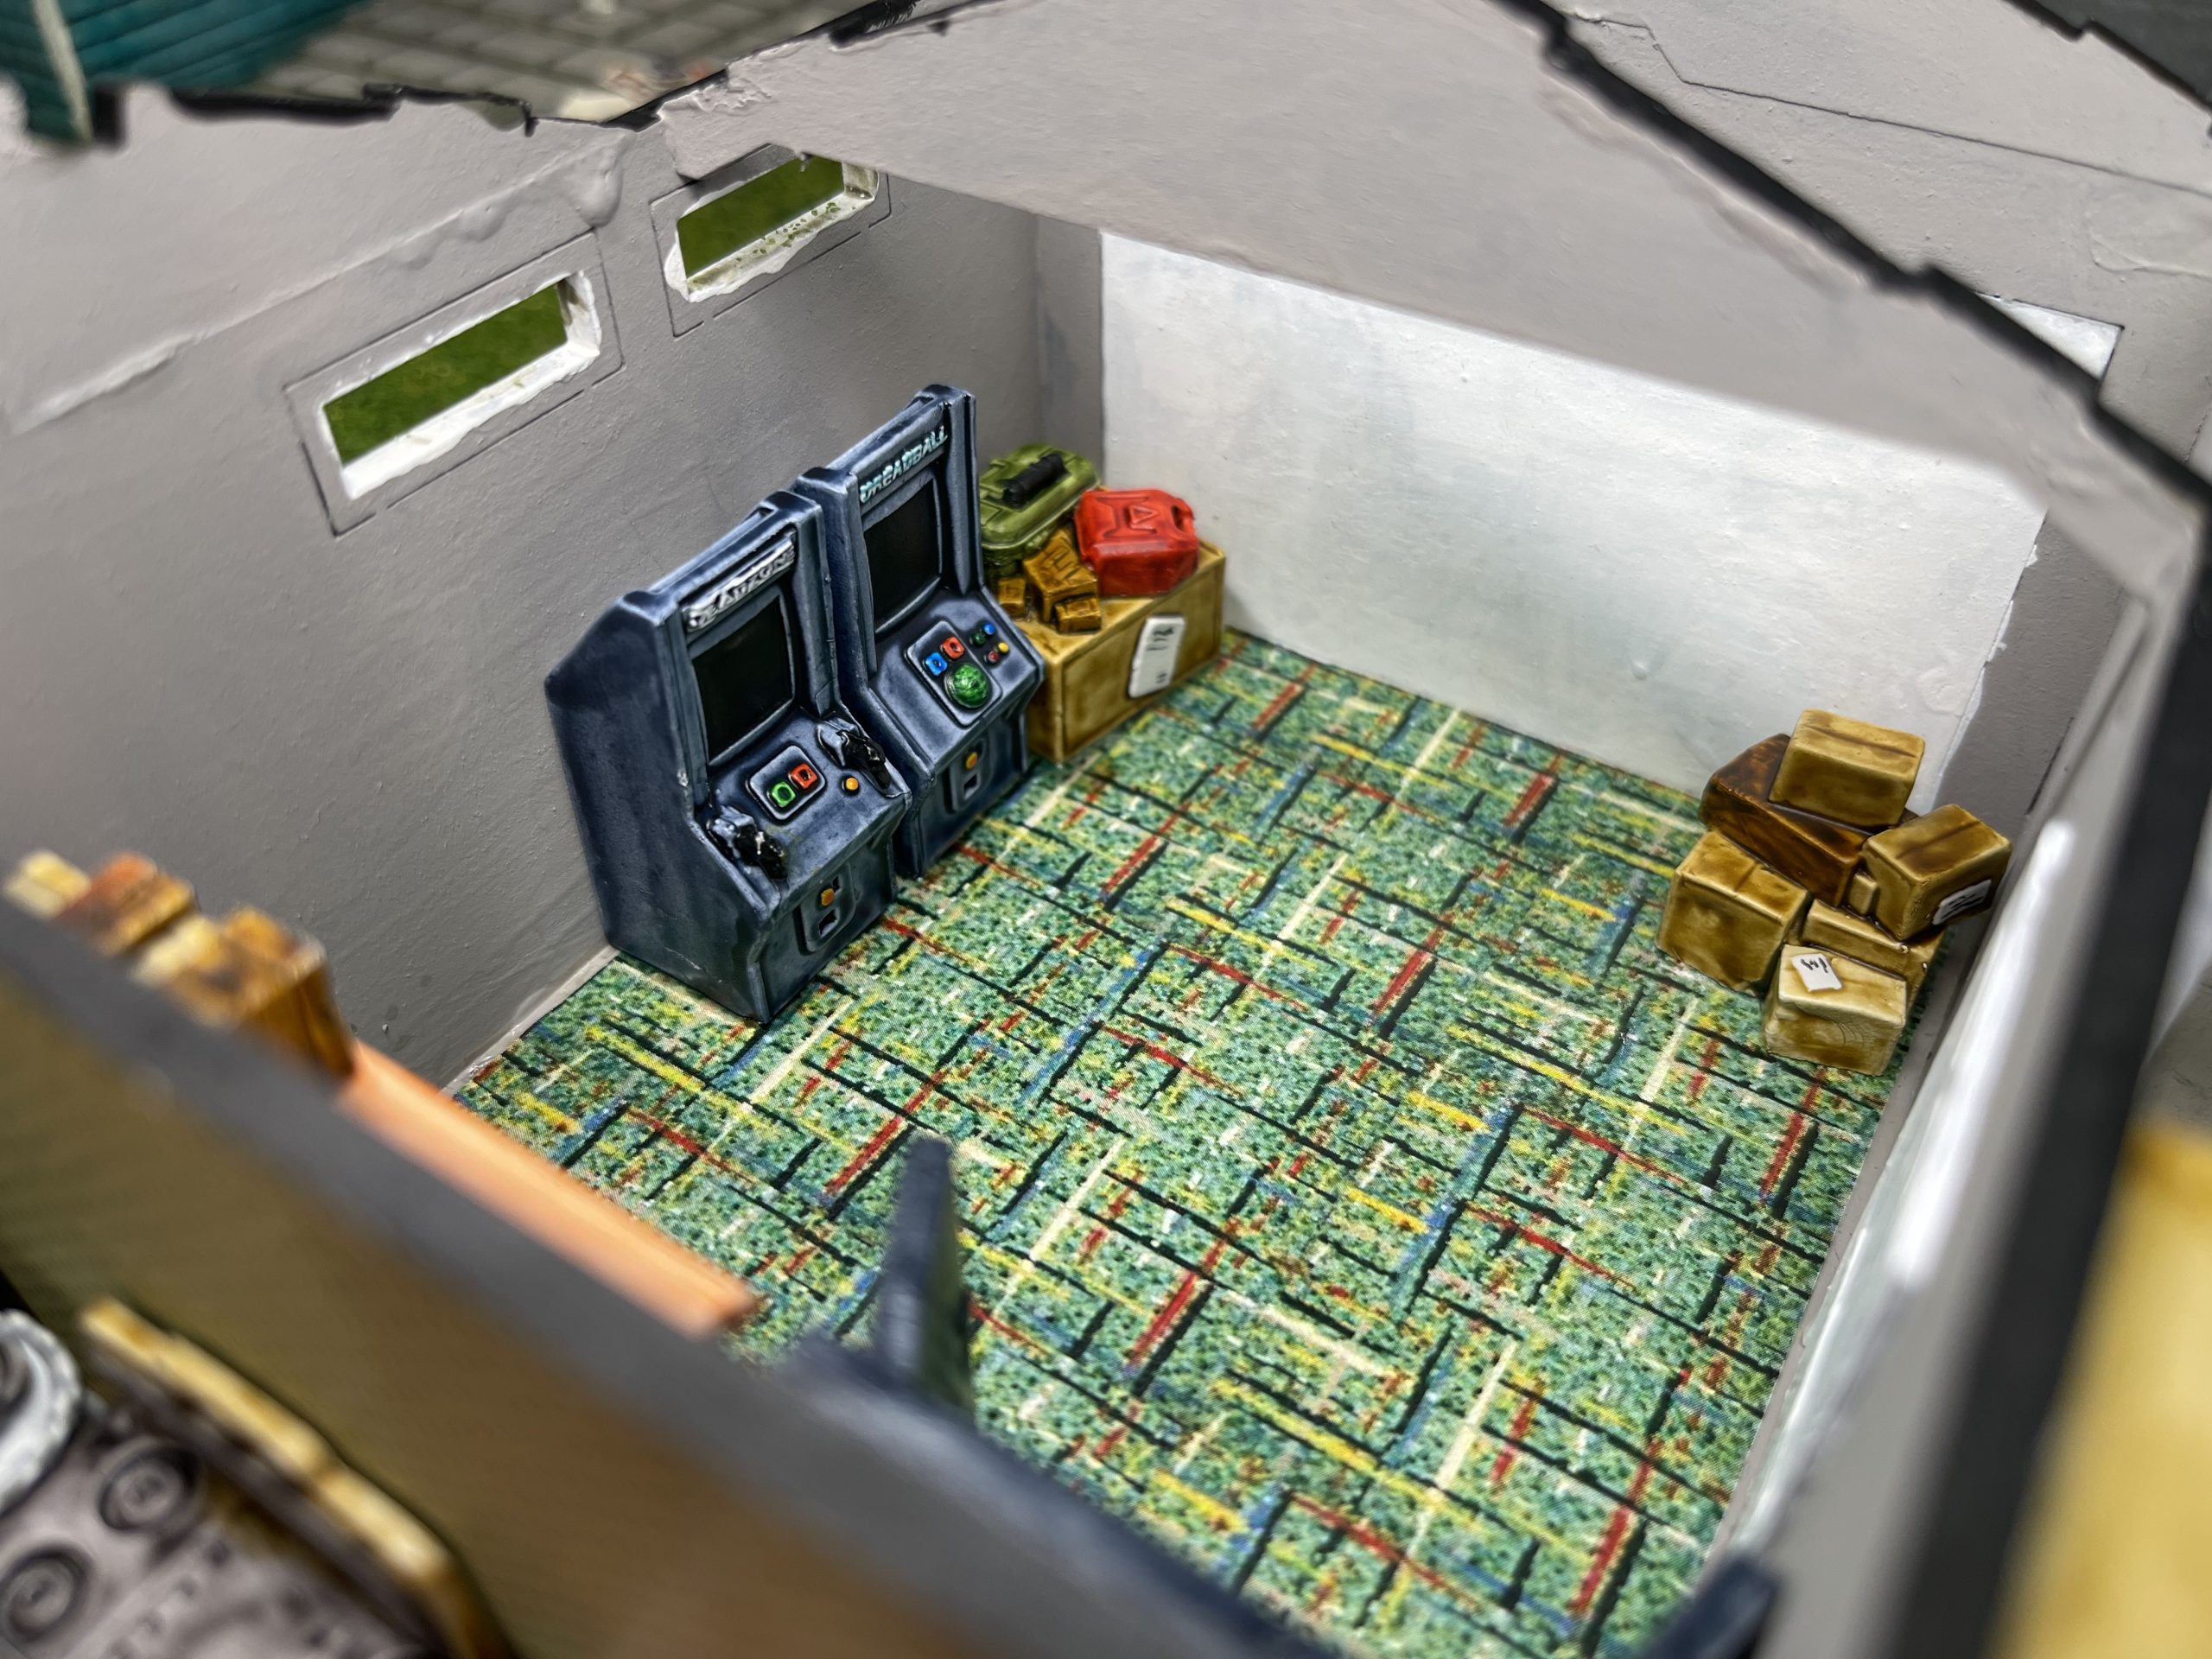
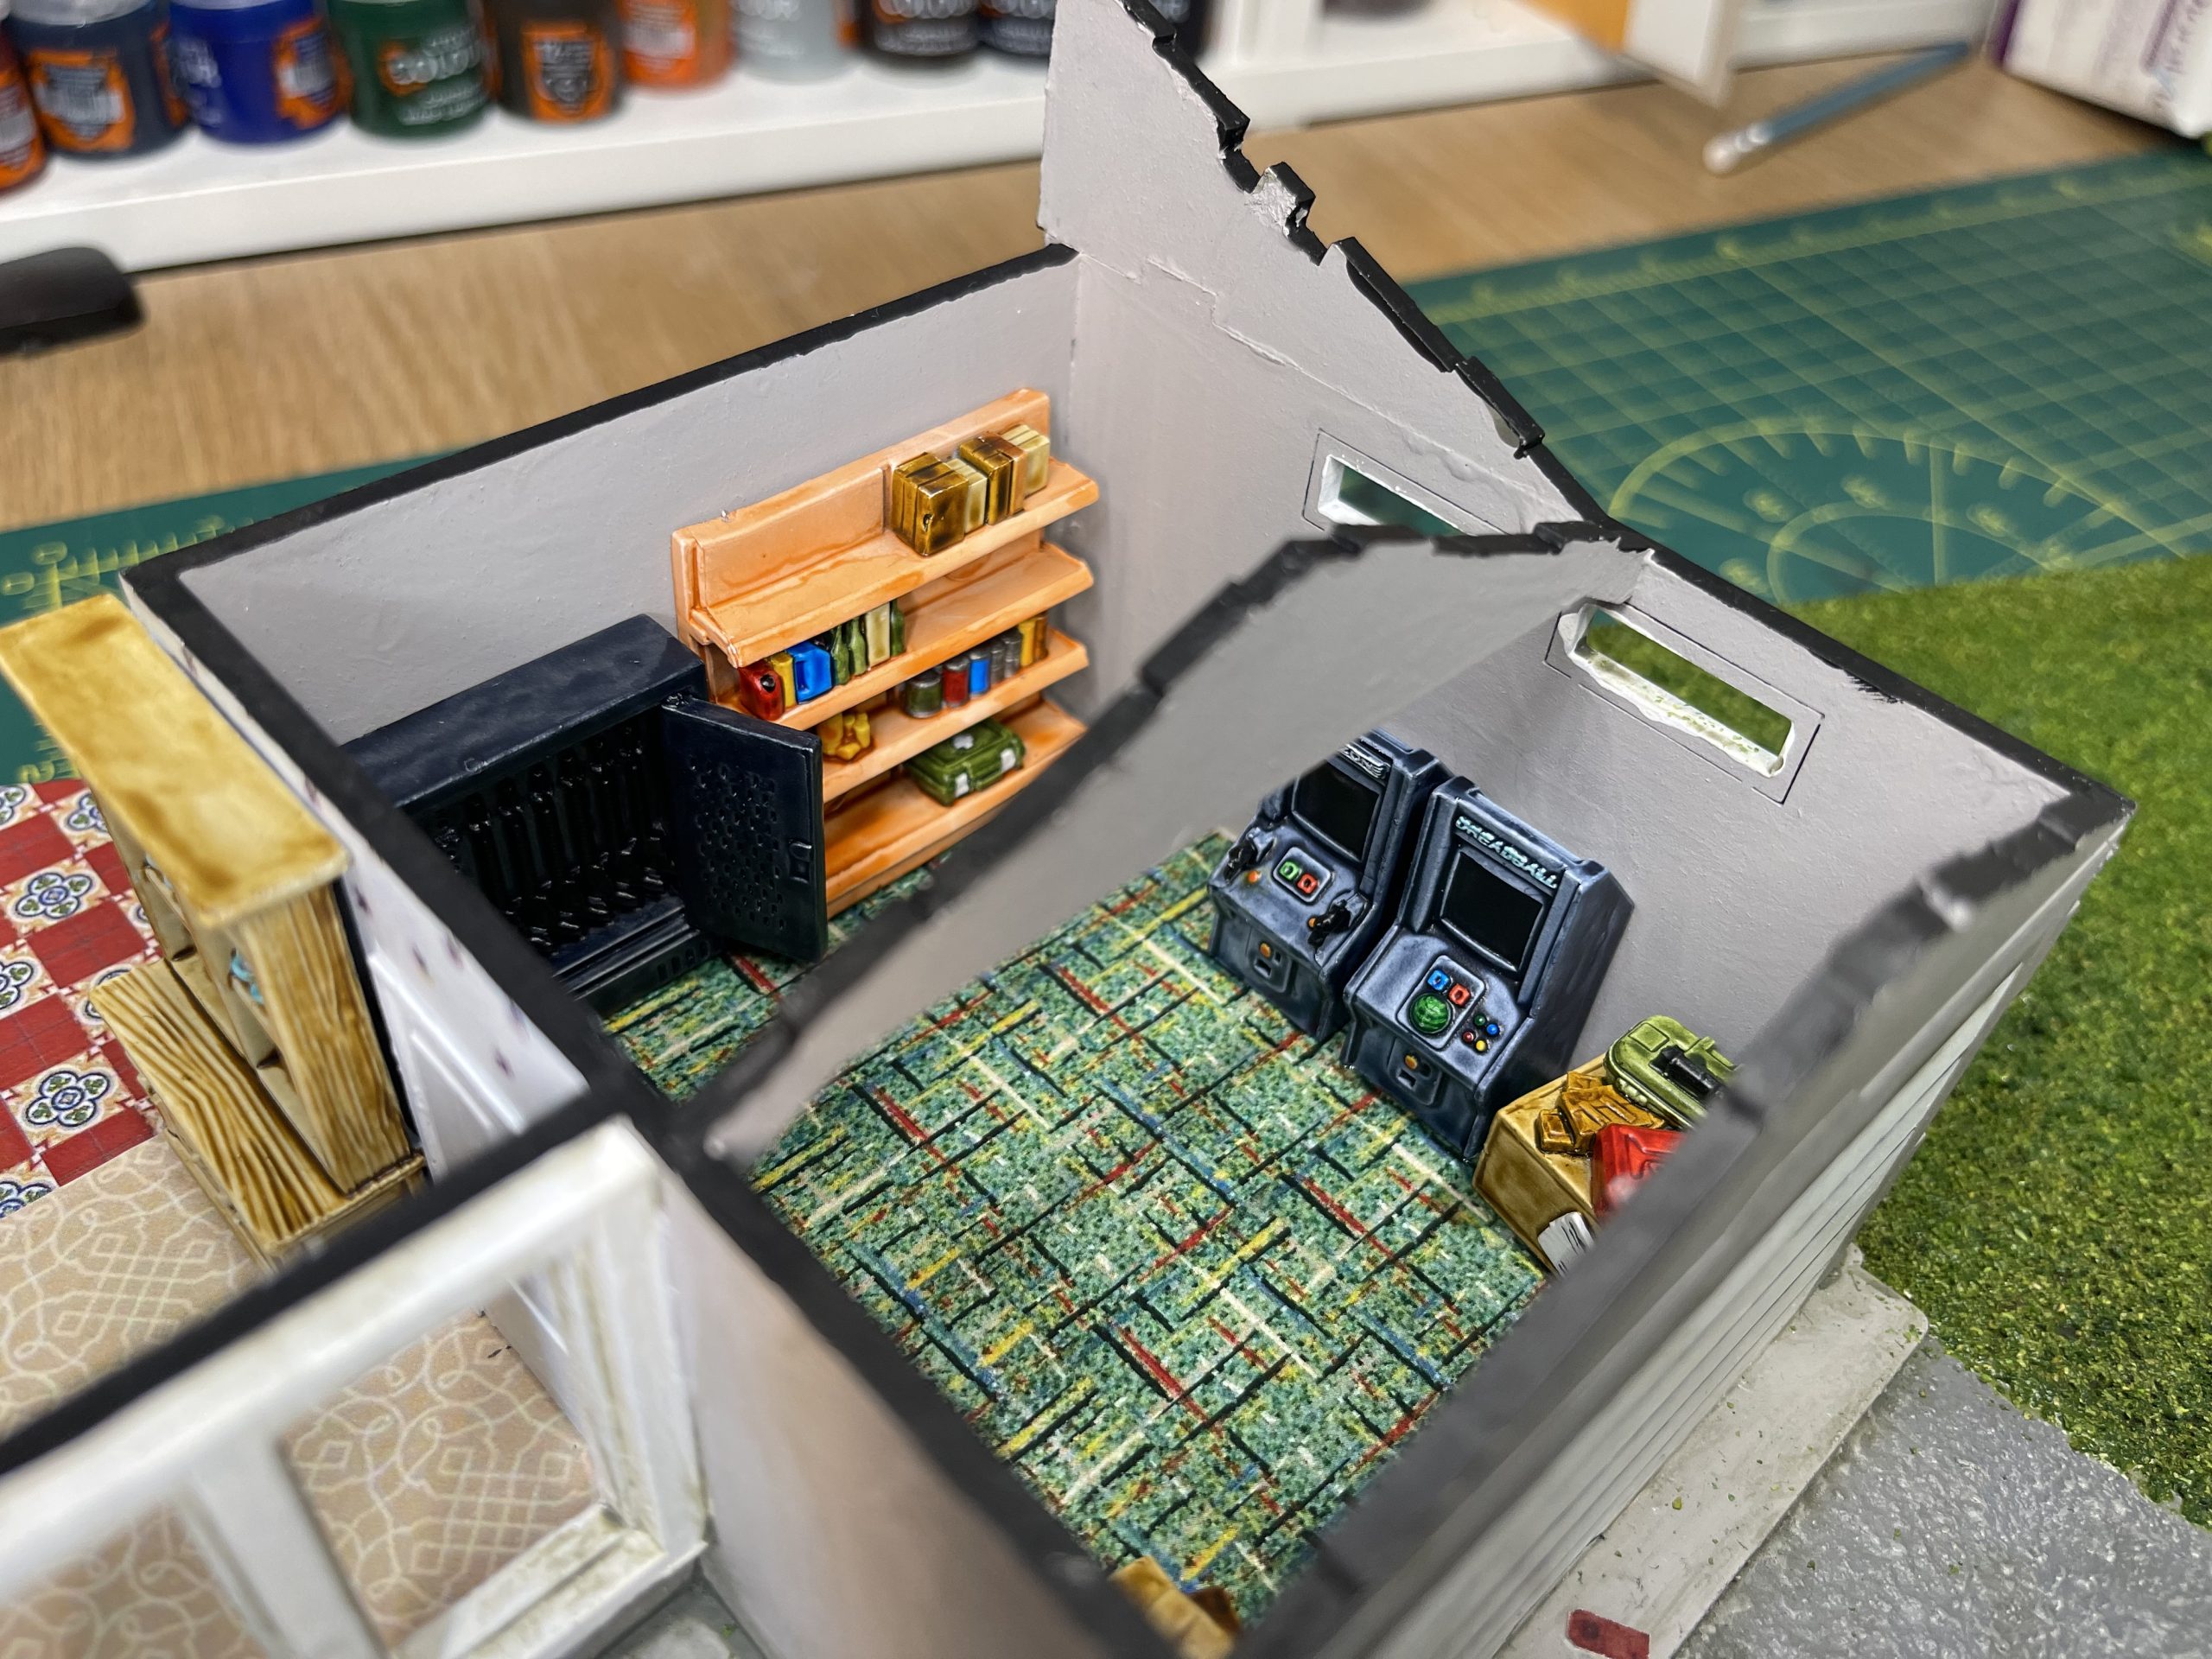
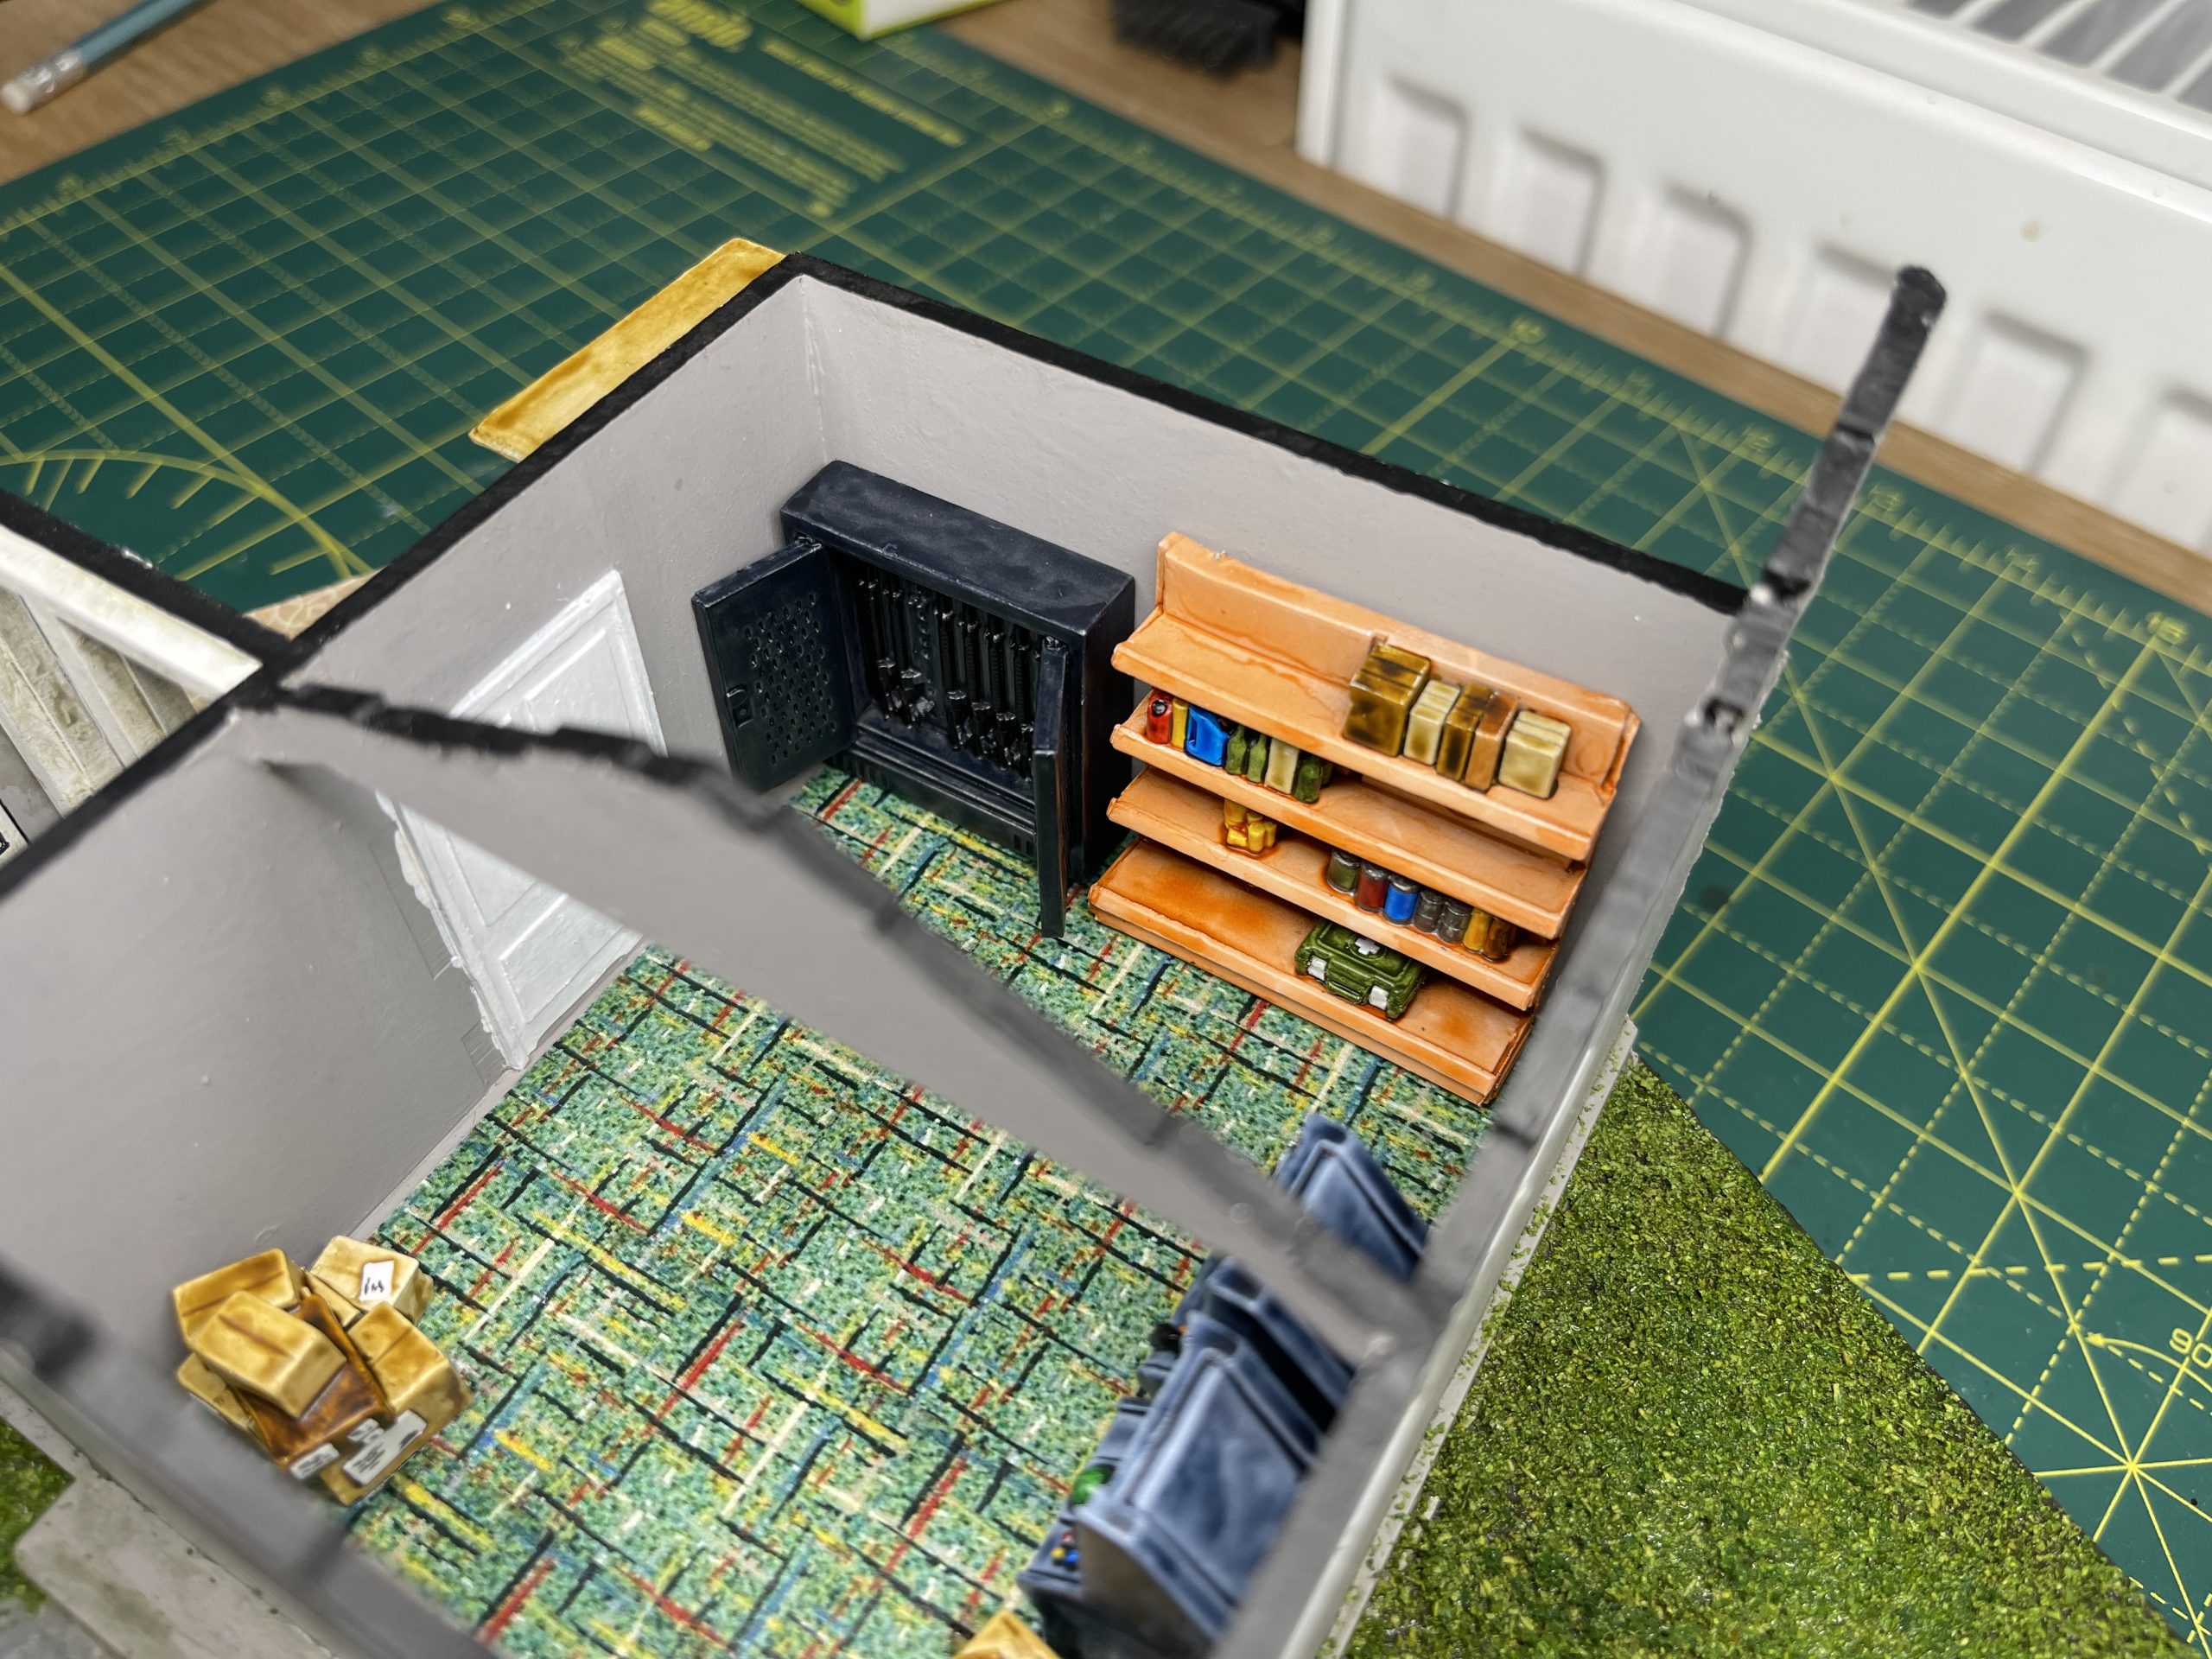
I’m really surprised the owner of this house didn’t survive the apocalypse. they had literally everything they needed. loads of food on the shelves, boxes full of stuff, GerryCan of fuel and a gun safe stuffed with automatic weapons and side arms. To top it off they even have some computer games to keep them entertained too…
These were all whatever contrast paints i had in stock, random colours that looked roughly right, different browns for the cardboard, reds blues and yellows for the tinned food. eg yellow bottle with blue lid for the bleach bottle etc. I did use german grey and grey white for the packing labels for the cardboard boxes to represent stickers and delivery addresses. I think i went a bit too dark on the gun cabinet though, went for a grey/blue metal for it, but it does look a bit of dark blob and you cant see the guns that easily at a glance. C’est le vie
Whats cooking? some furniture.
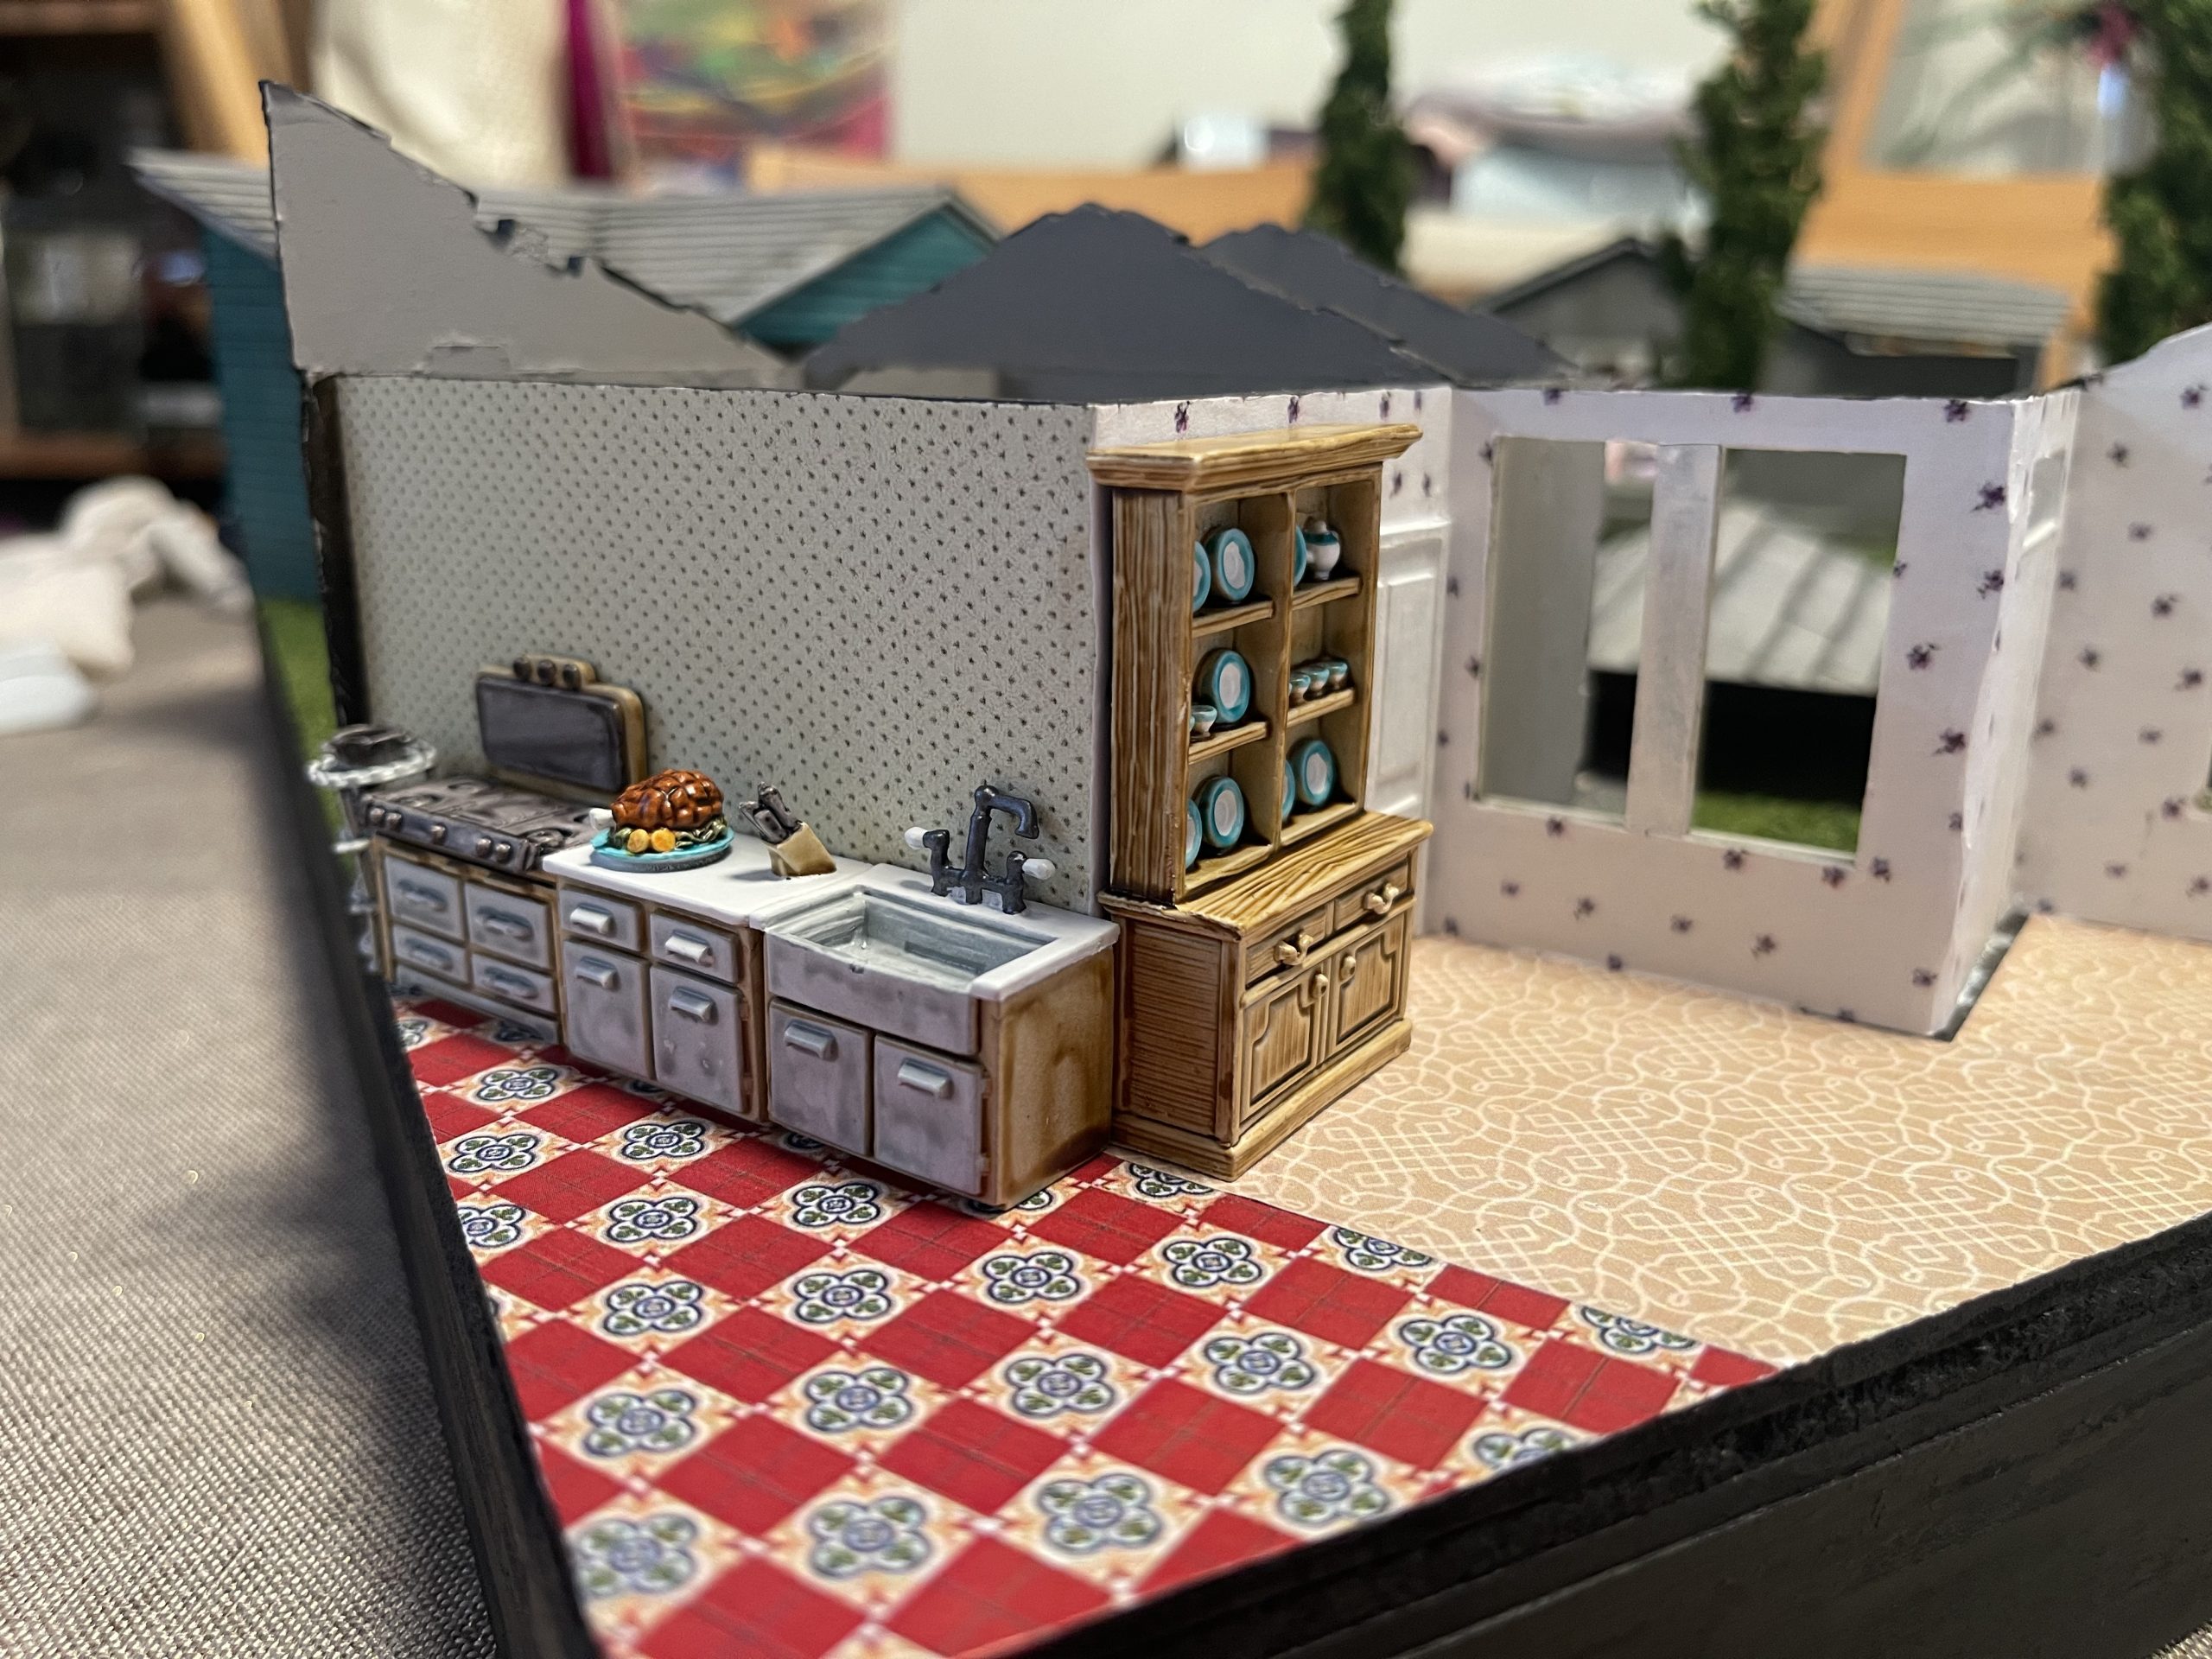
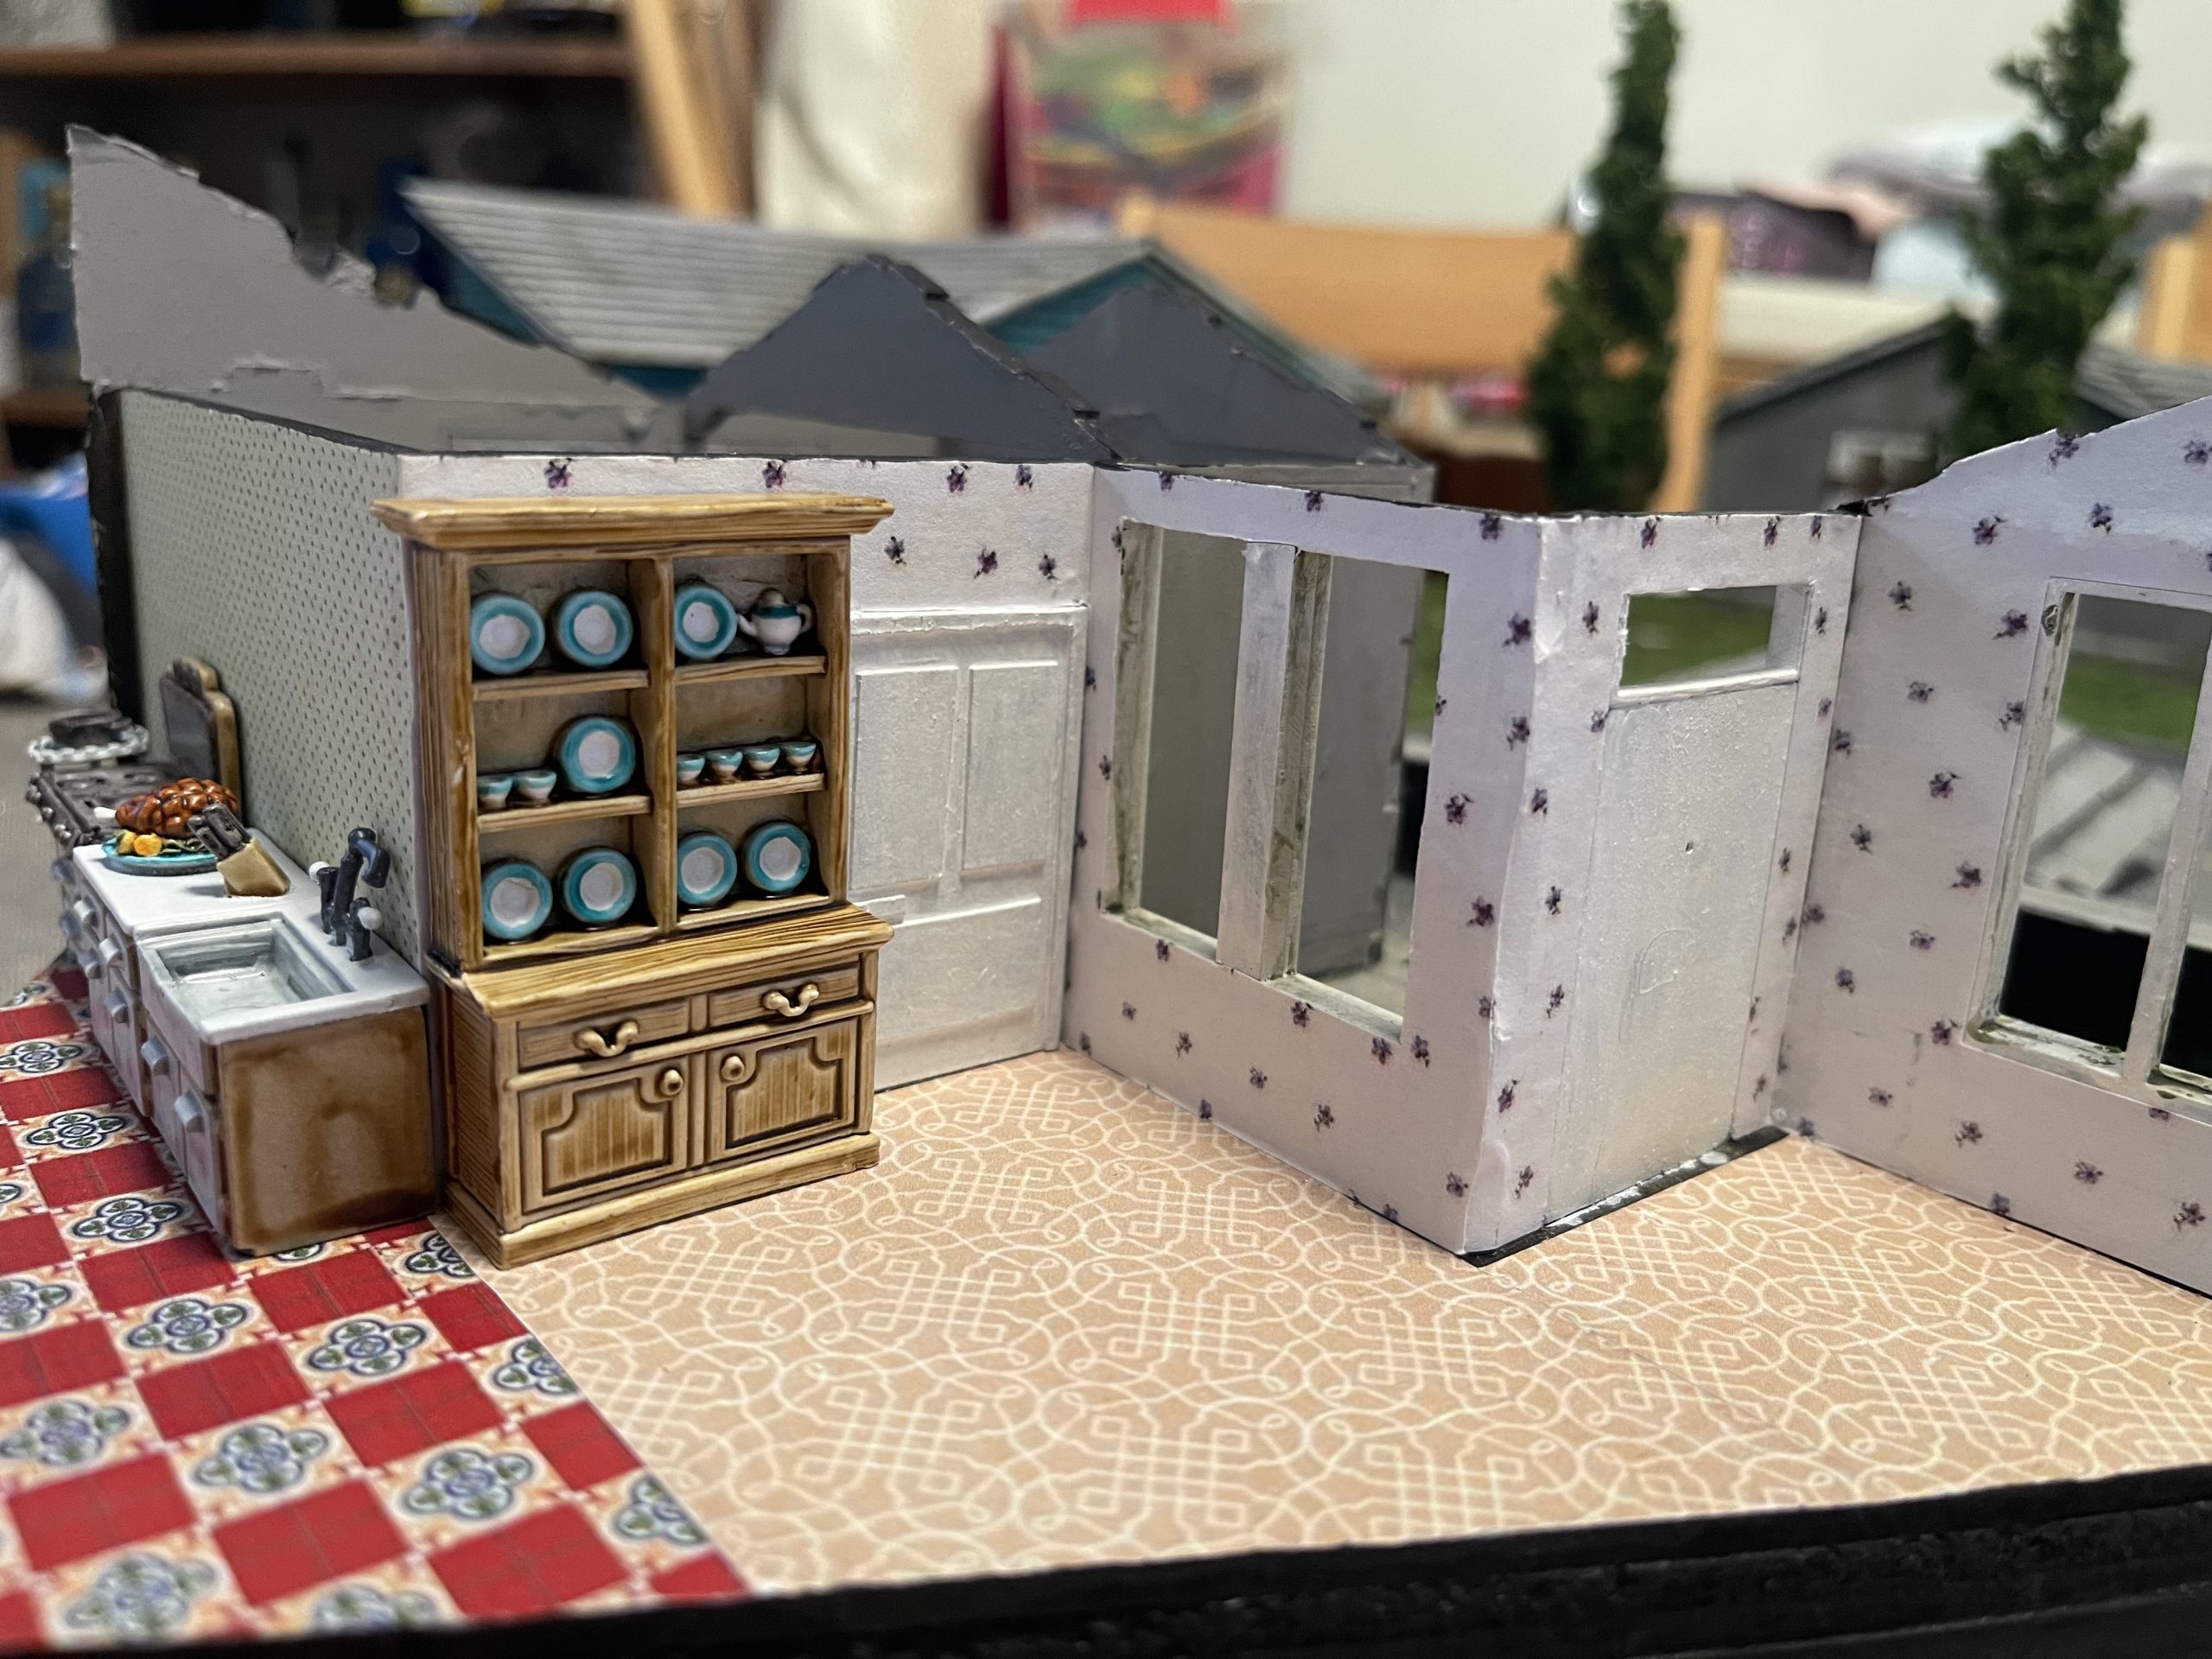
This was entirely done using contrast paints and relatively rapidly too in an evening between dog walks and bedtime routine for the kids etc.
quick block colours and a bit of minor patterning using contrast paint on the plates. gives them a good impression of what it should be (highlights the shapes) quickly but will never detract from the miniatures that will be on the board in front of them. perfect for background scatter/detailing.
Debris
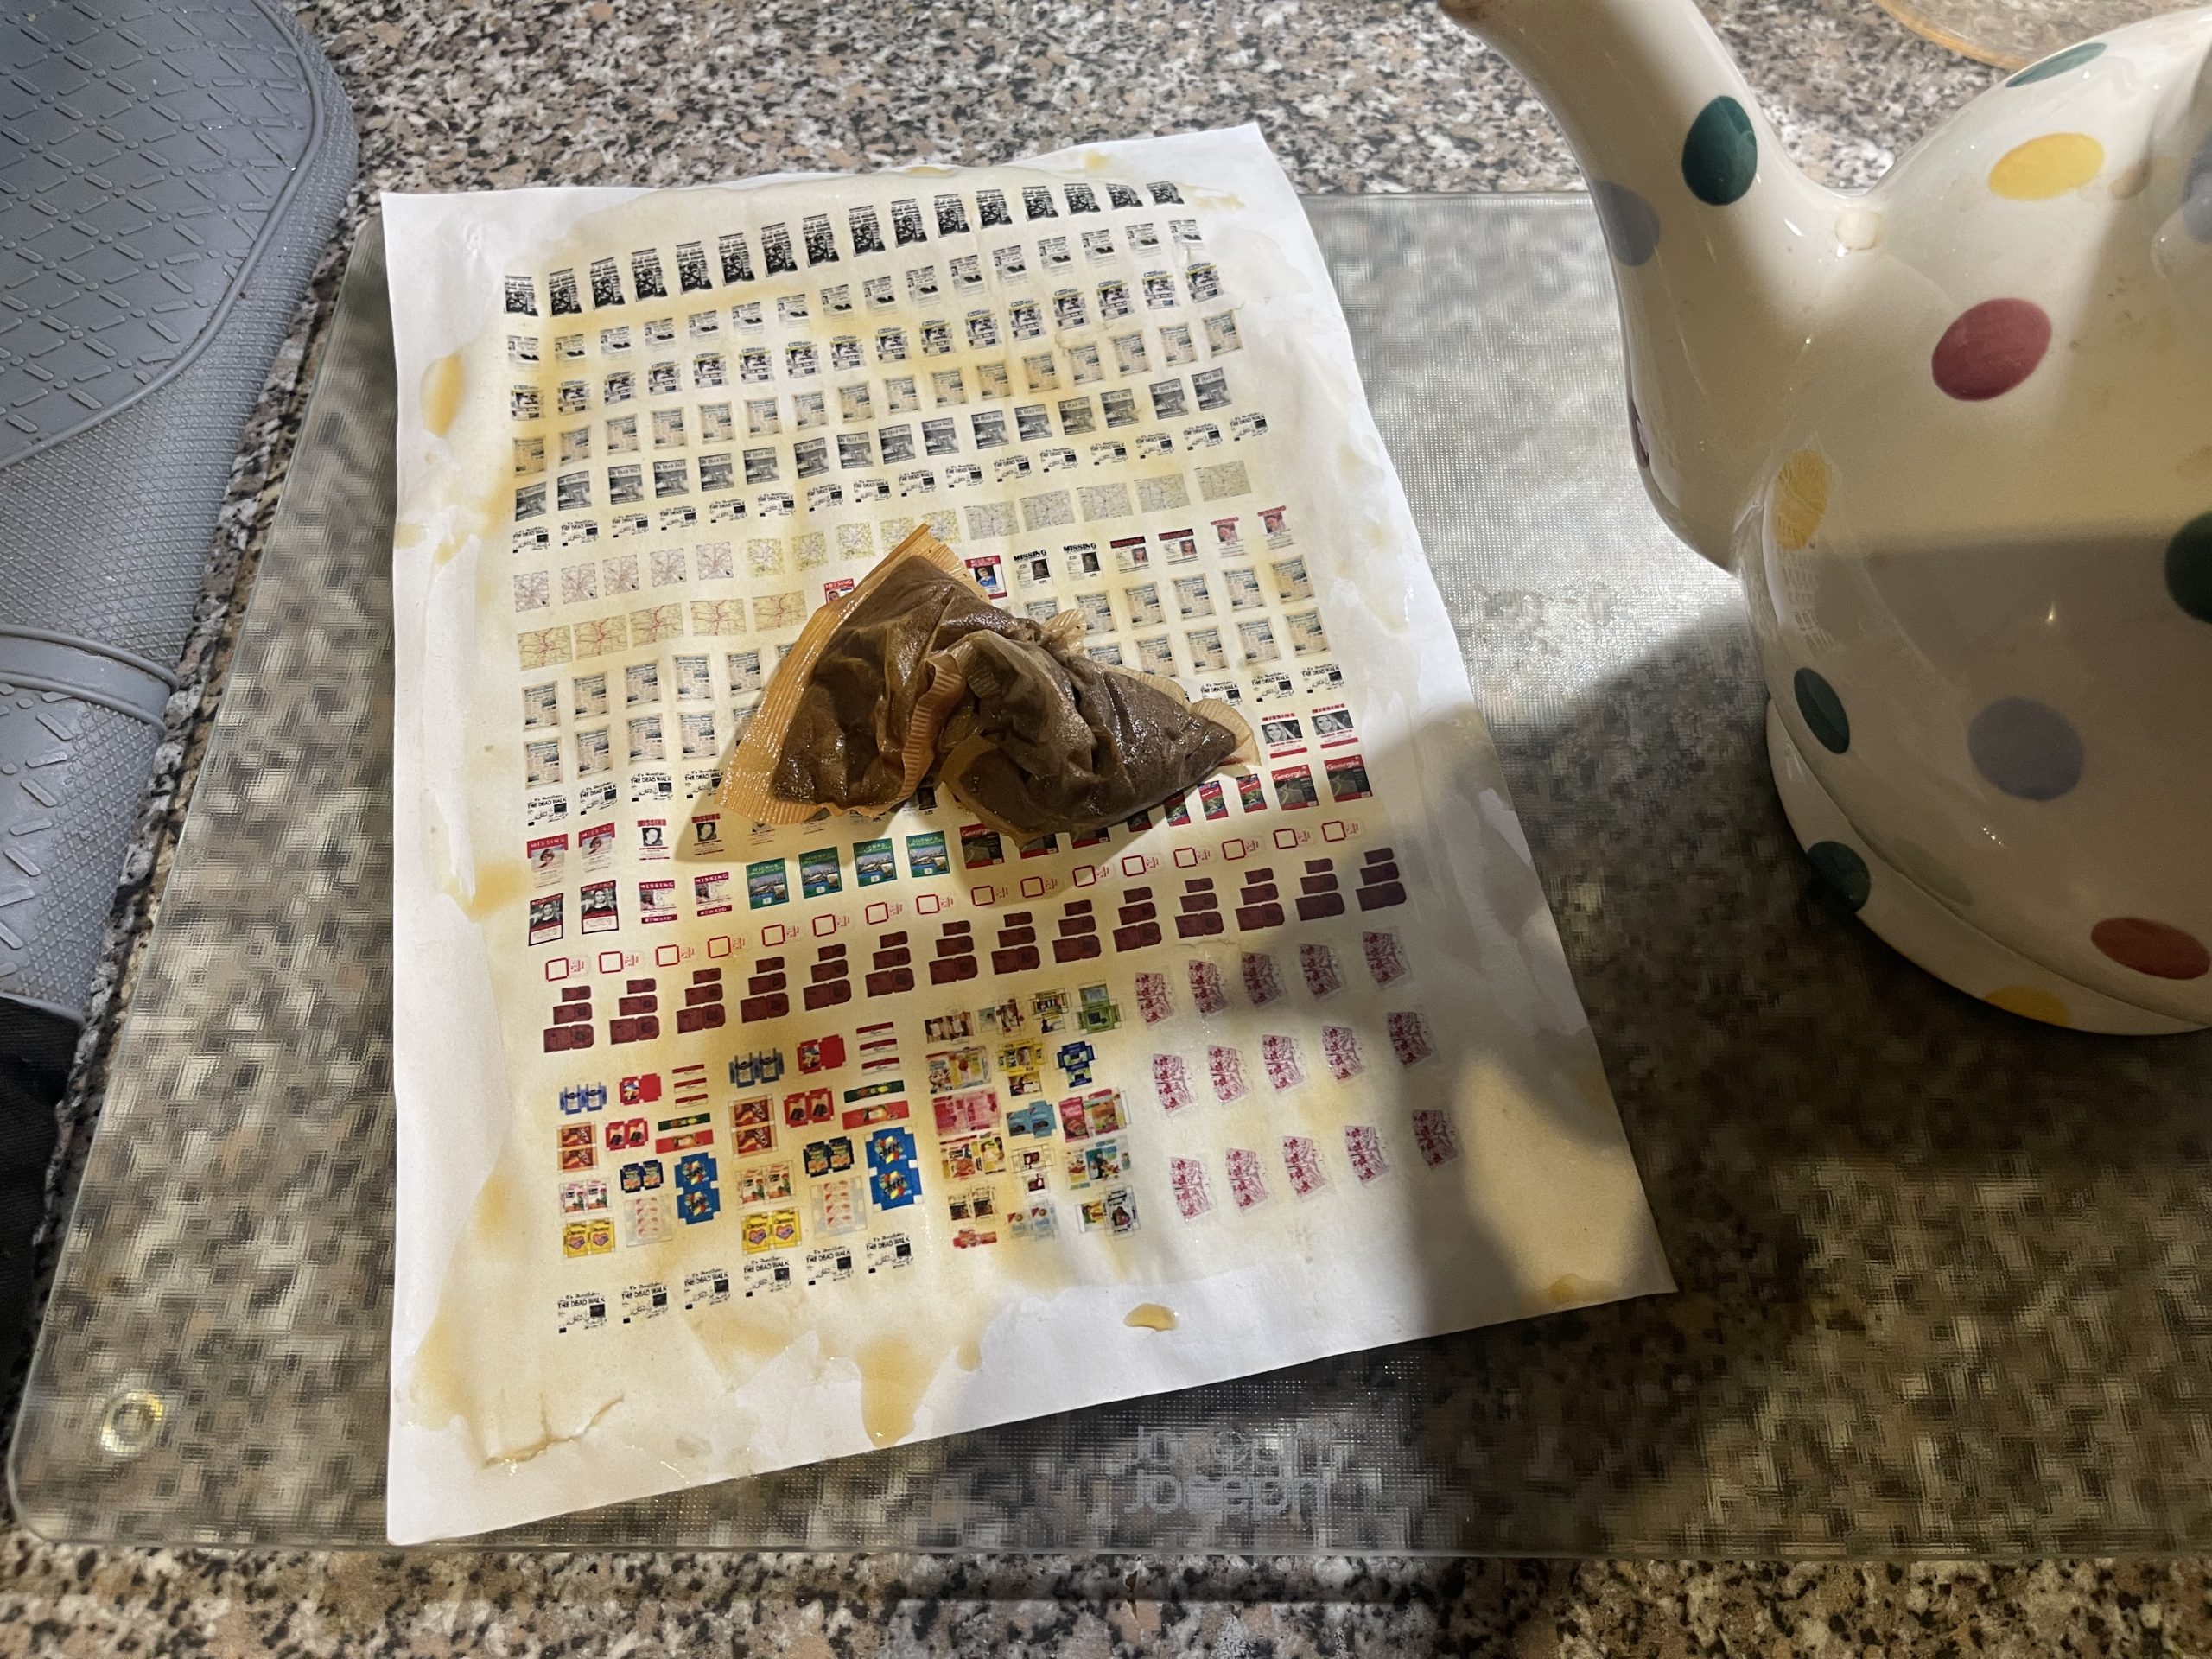 make sure its not a milky tea bag! only one from a pot, the paper will go moldy otherwise
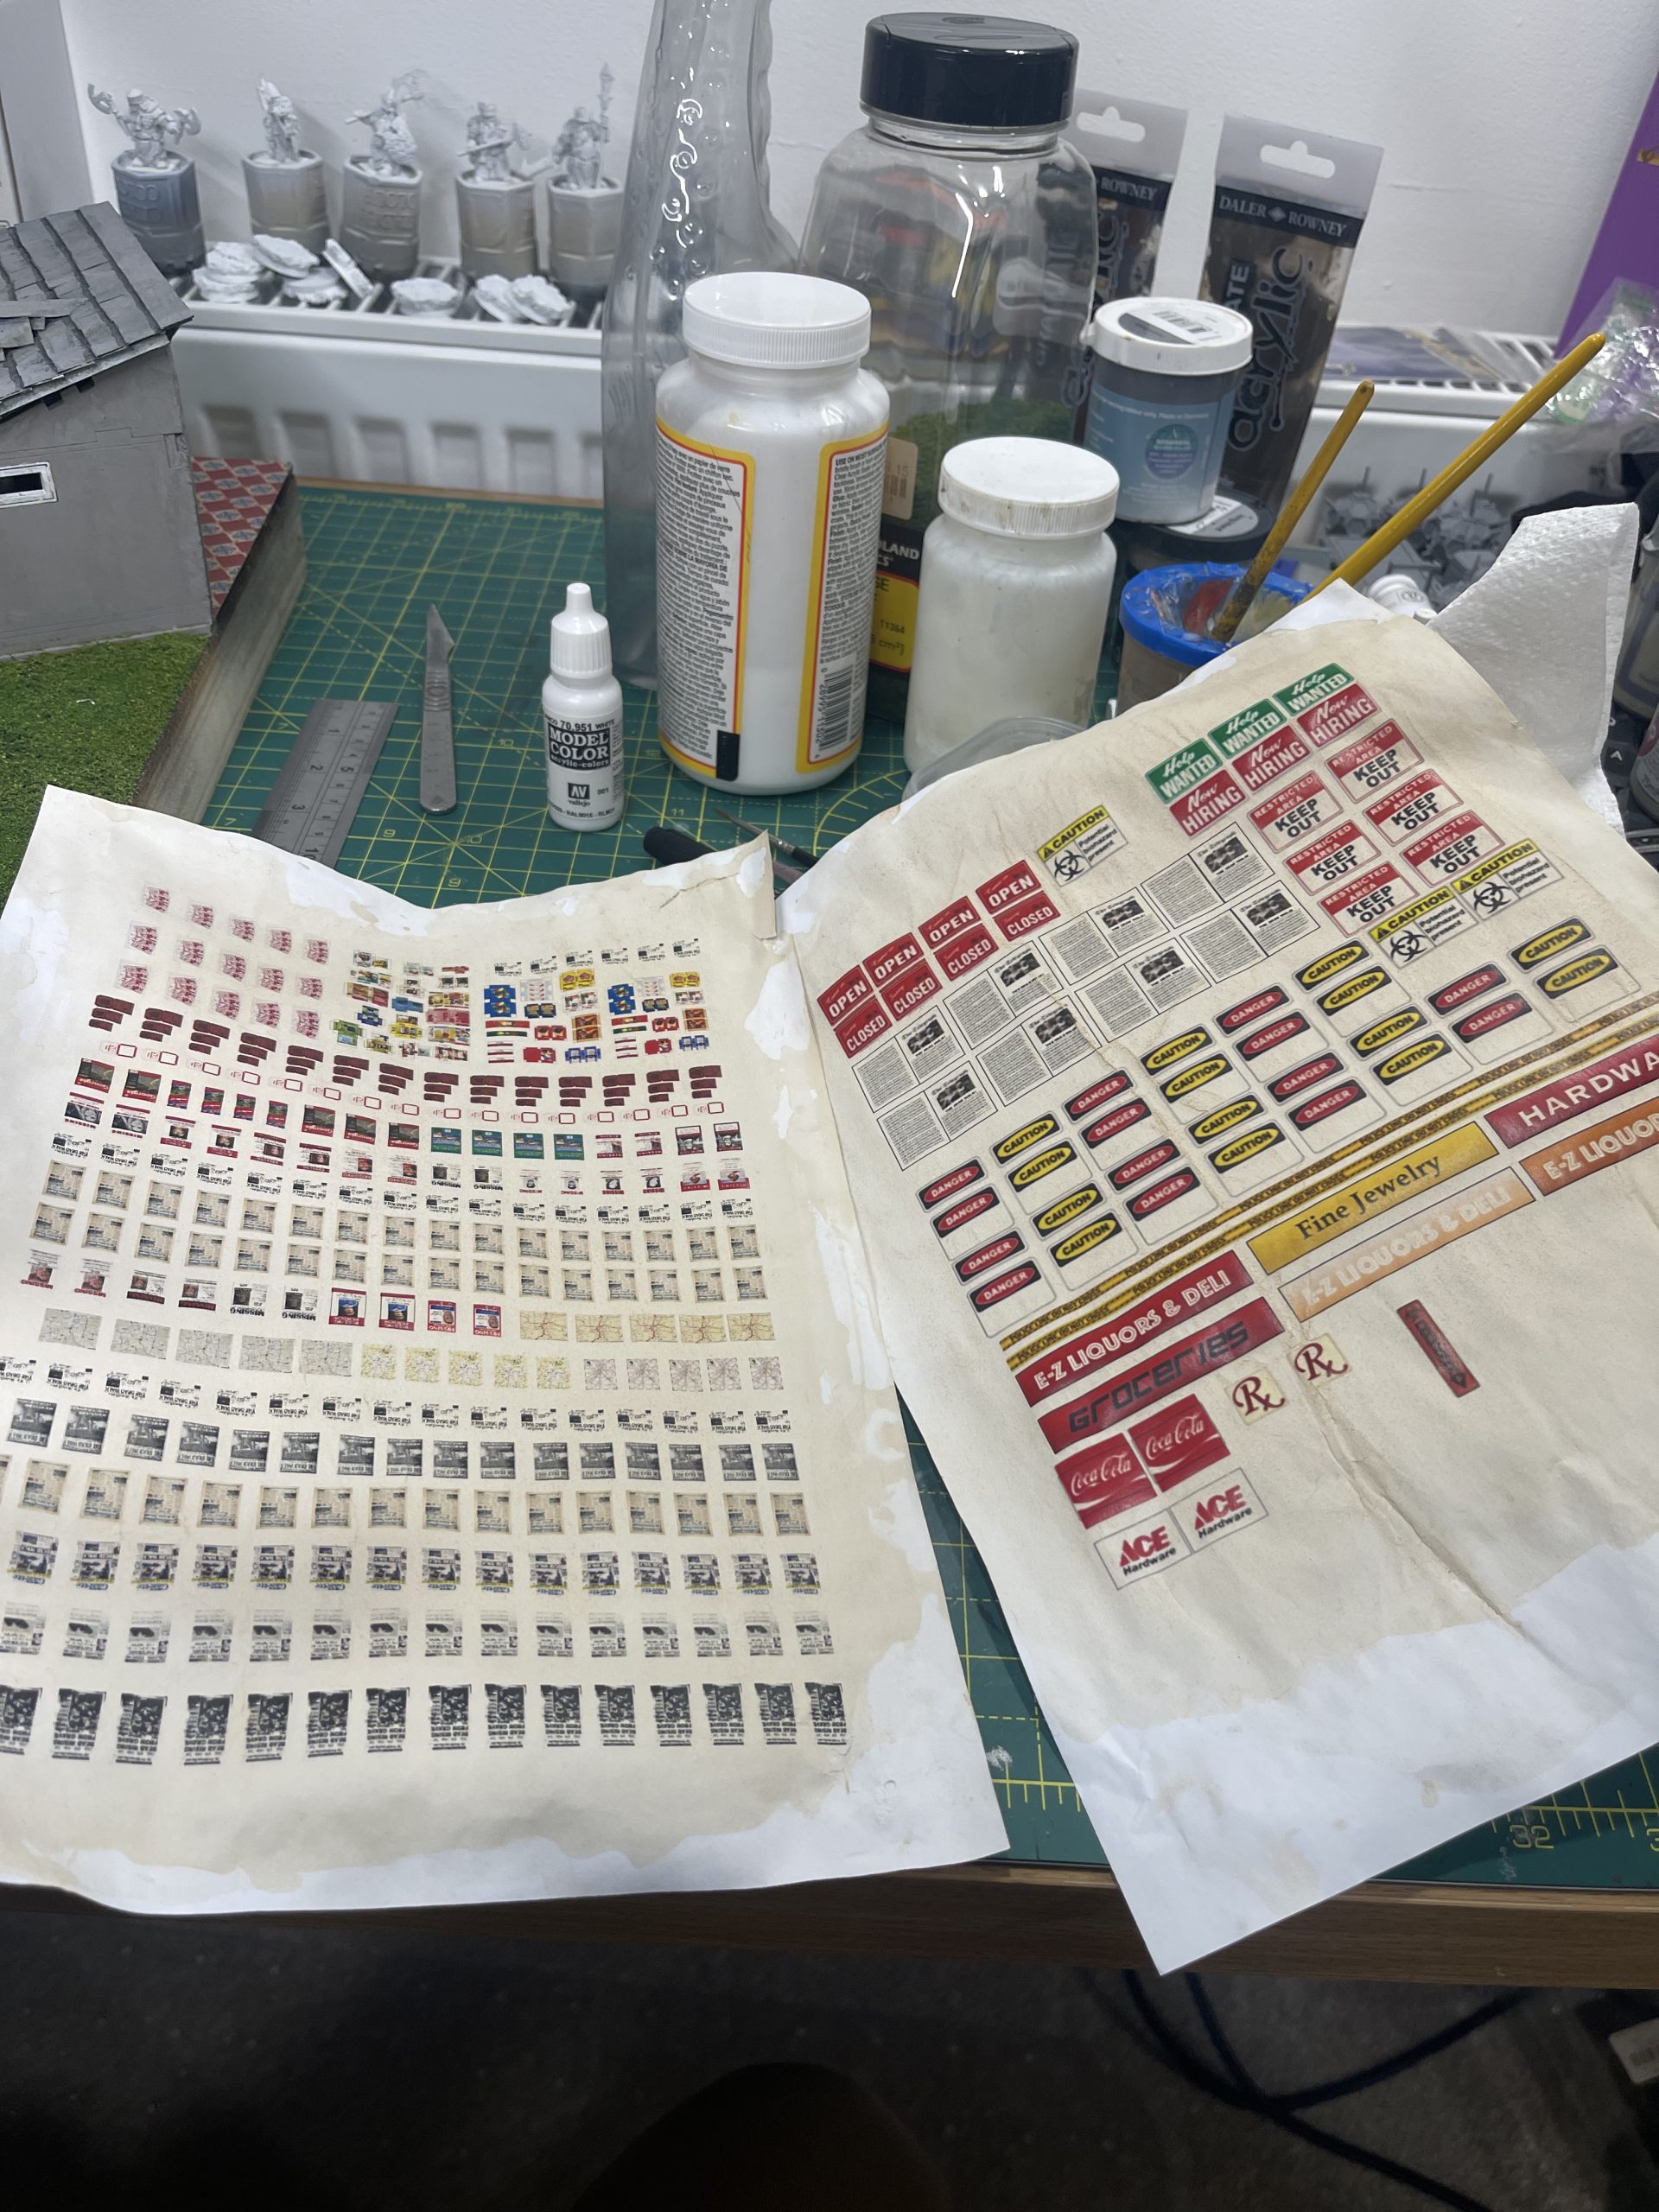 print of sheets of walking dead related posters. tea stain the paper (used tea bag-no milk and wipe it over the page)
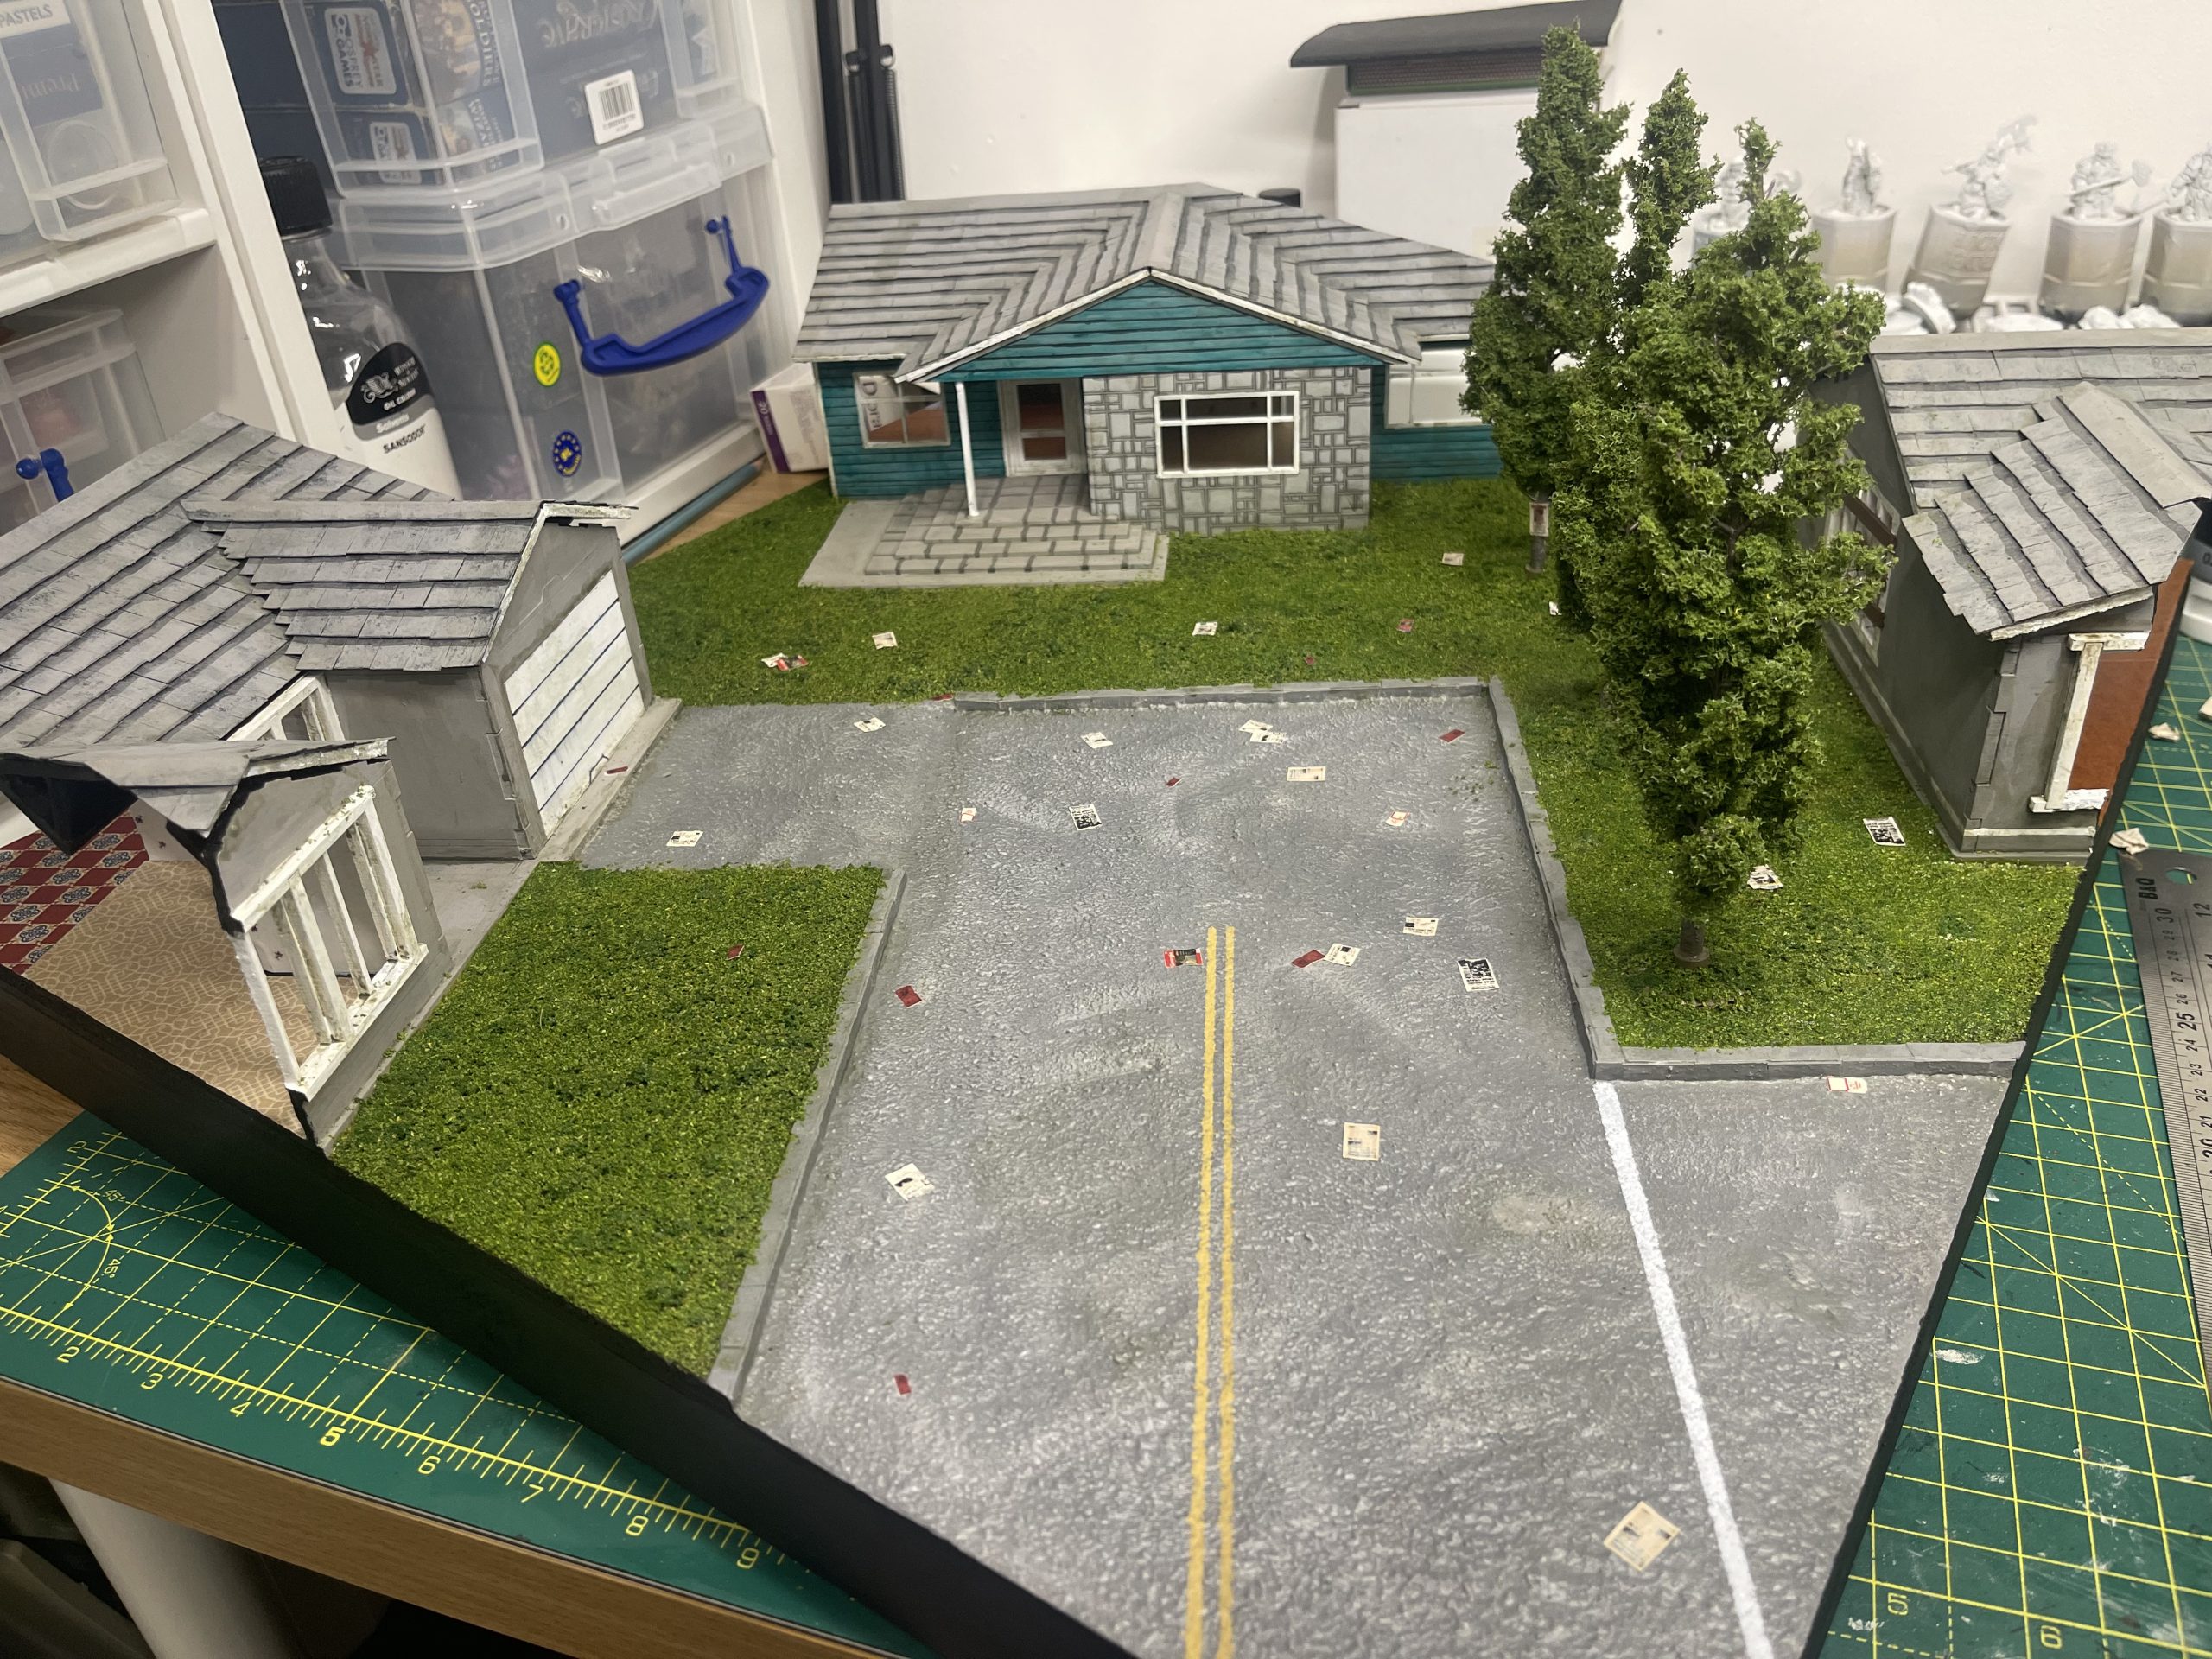 how do you make it look random... drop it from a height
 put a couple of missing posters on the trees as if they had been nailed there.
this sheet was downloaded from the mantic’s walking dead fanatics page for free!
printed it off and tea stained it to get rid of the harsh white paper colour, this is a necessary step i feel to stop the jarring that would occur with fresh white paper. make sure the tea bag you use hasn’t been made in a mug with milk added, it will go horribly mouldy. Be civilised and use one from a full pot of tea.
you could try and place stuff nicely but that doesnt look real or random, i have a good way to achieve this. take your debris, hold it a good distance above (68.3cm above to be precise) and simply drop it. they’ll drop and flutter and end up all over the place. then simply PVA glue them down where they fell. if it looks pants, repeat process, or simply blow air over it to move them. simple.
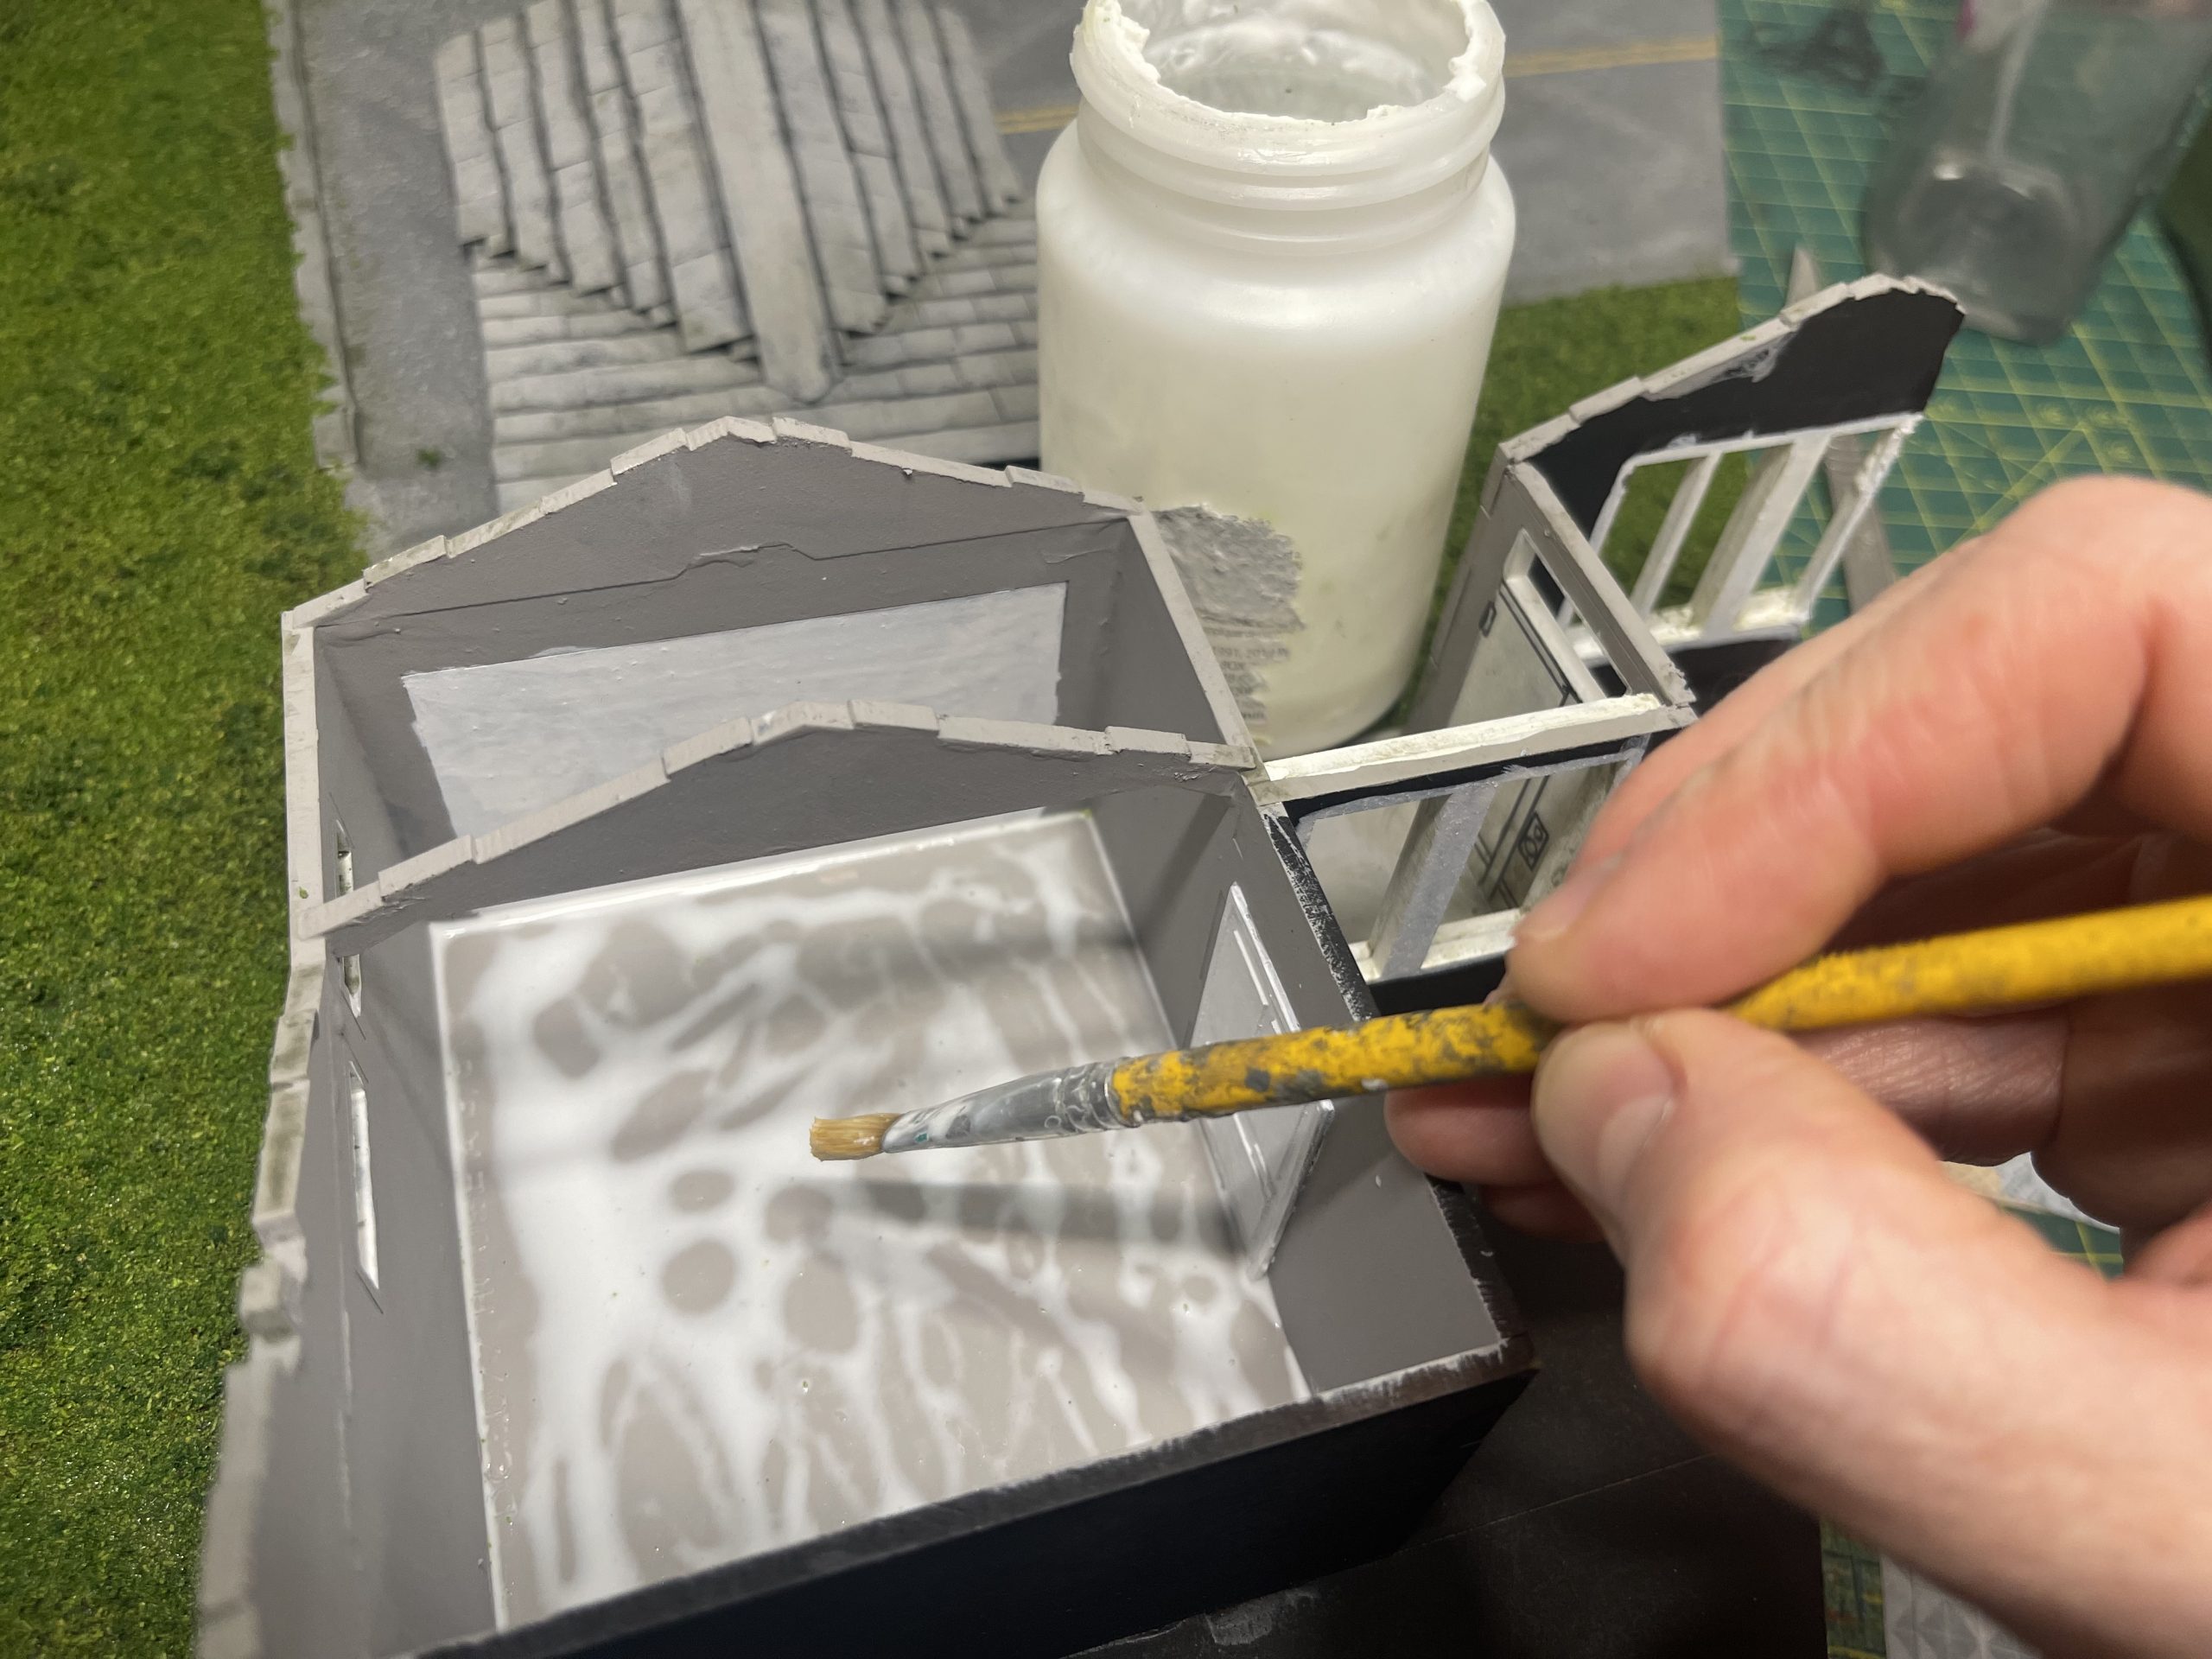
More Carpets
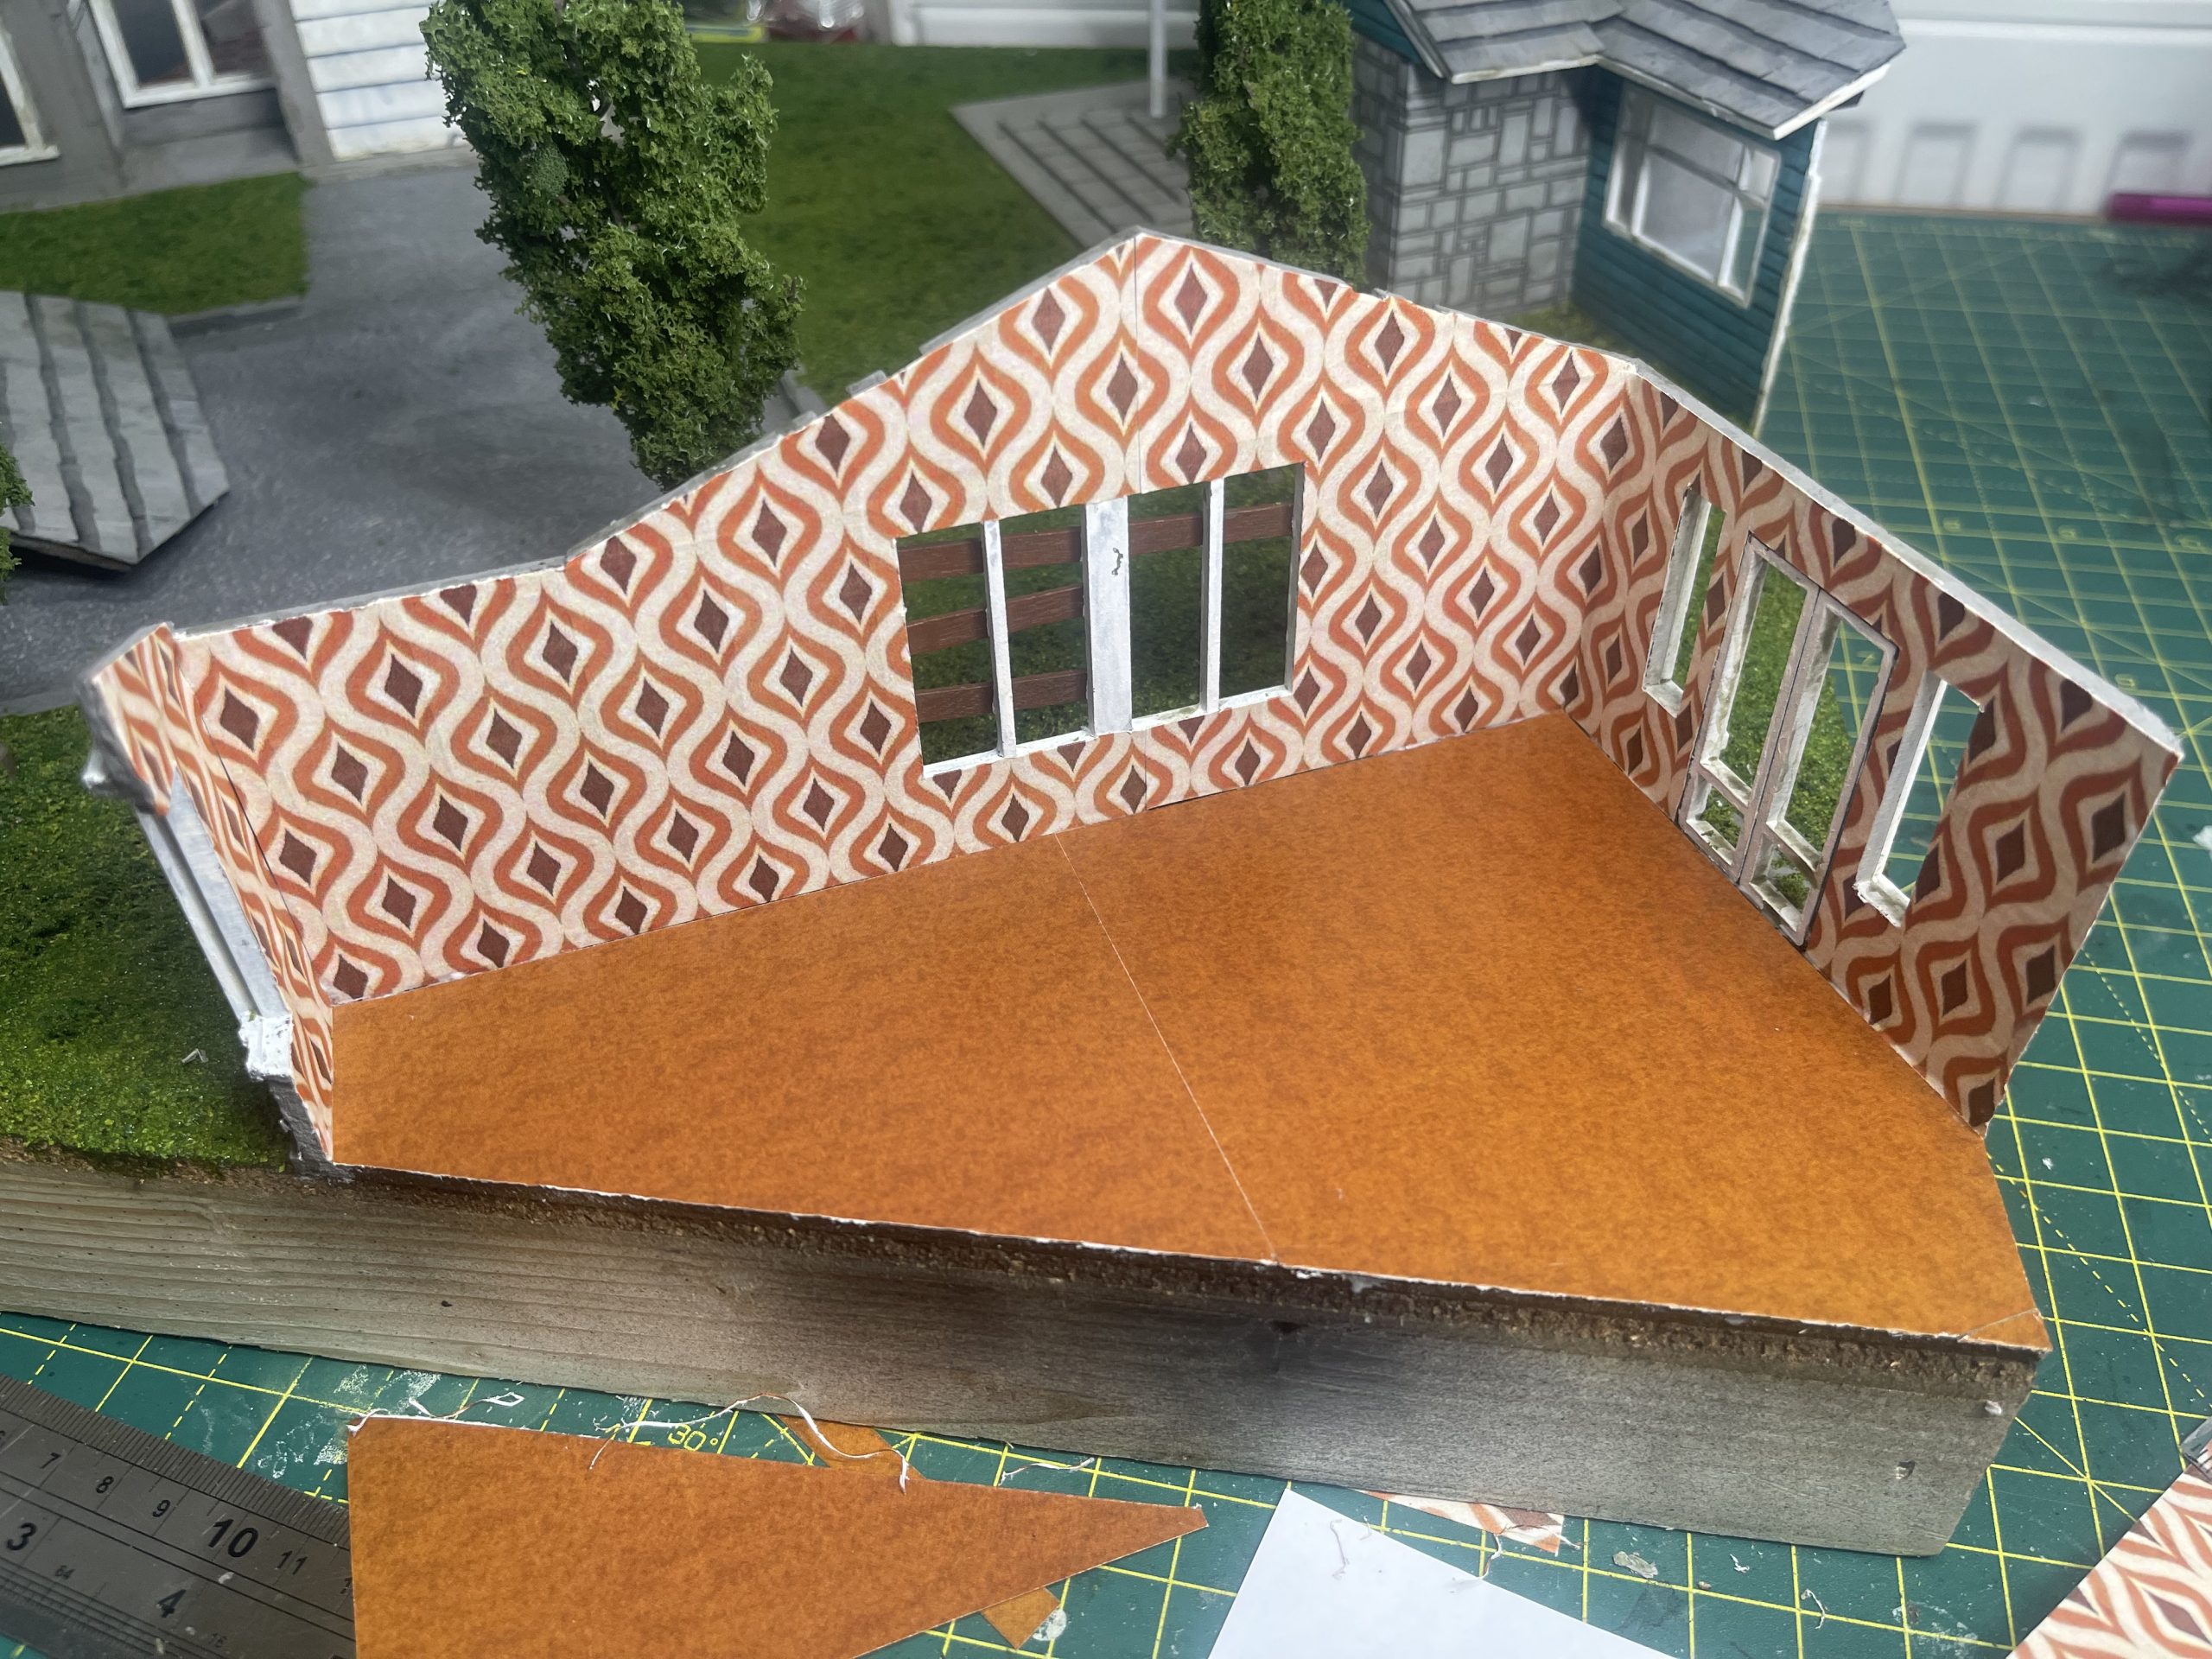 This is straight out of Austin Powers
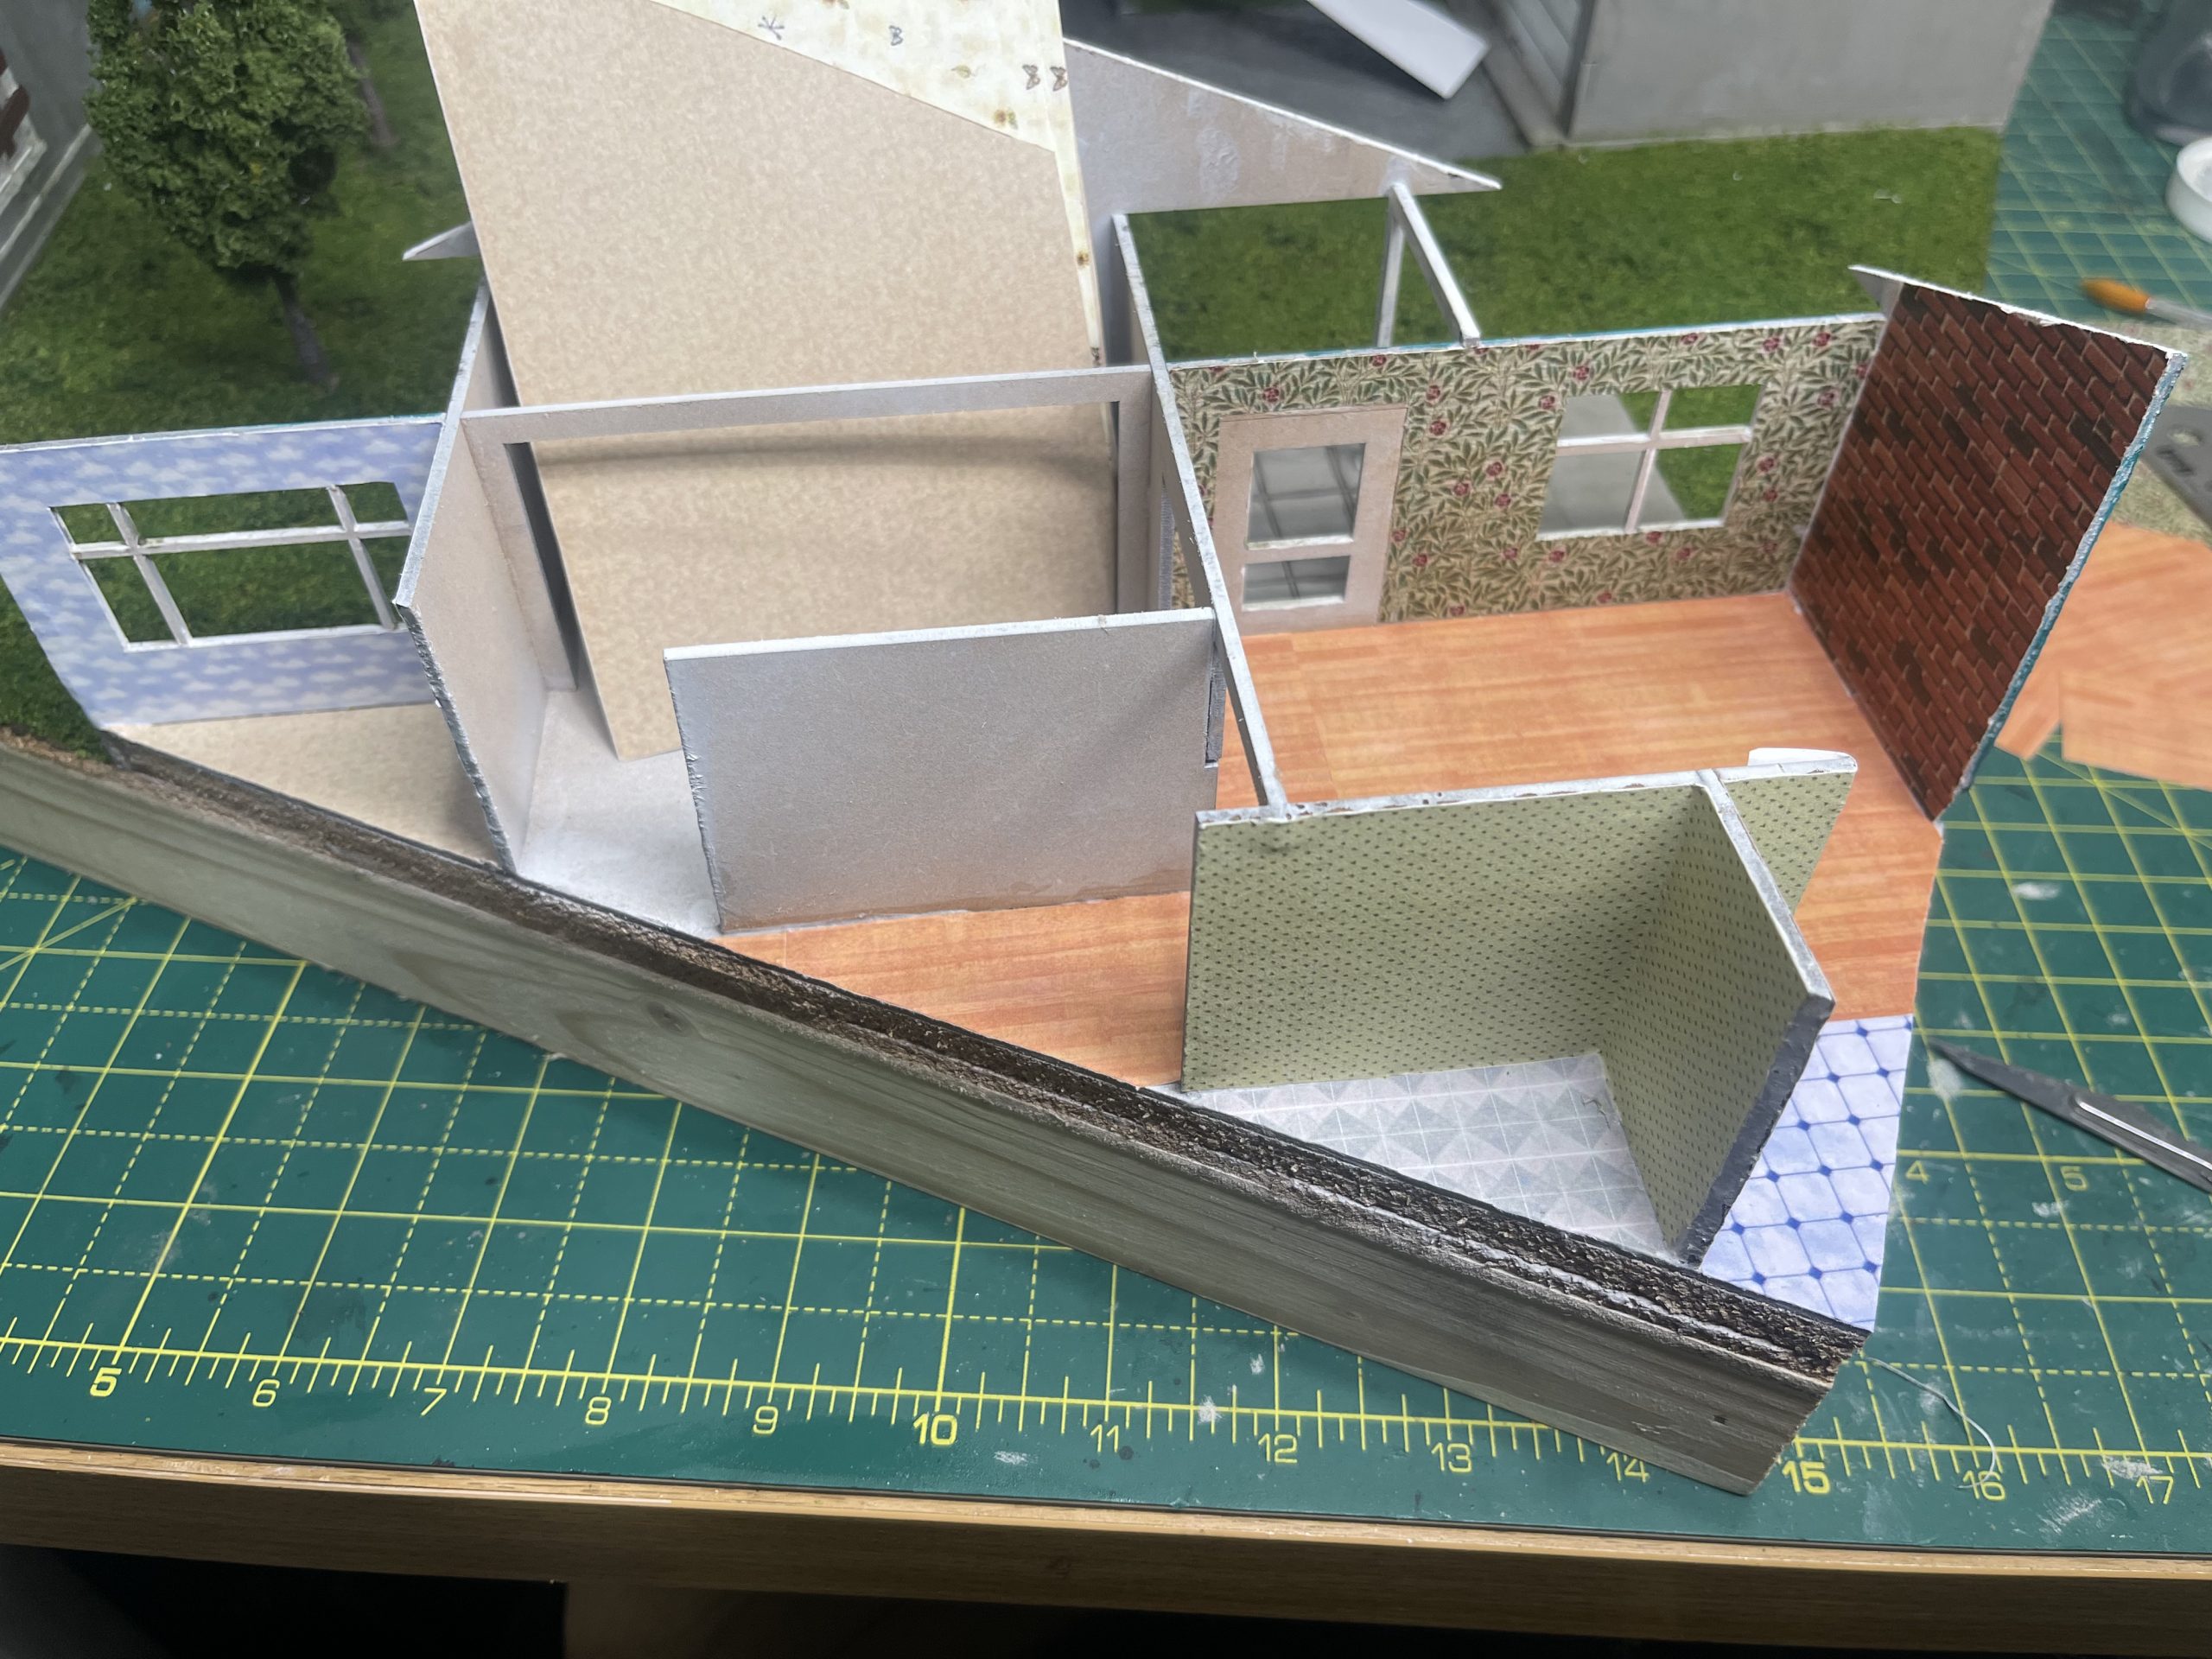 this house took the longest time and most mental gymnastics
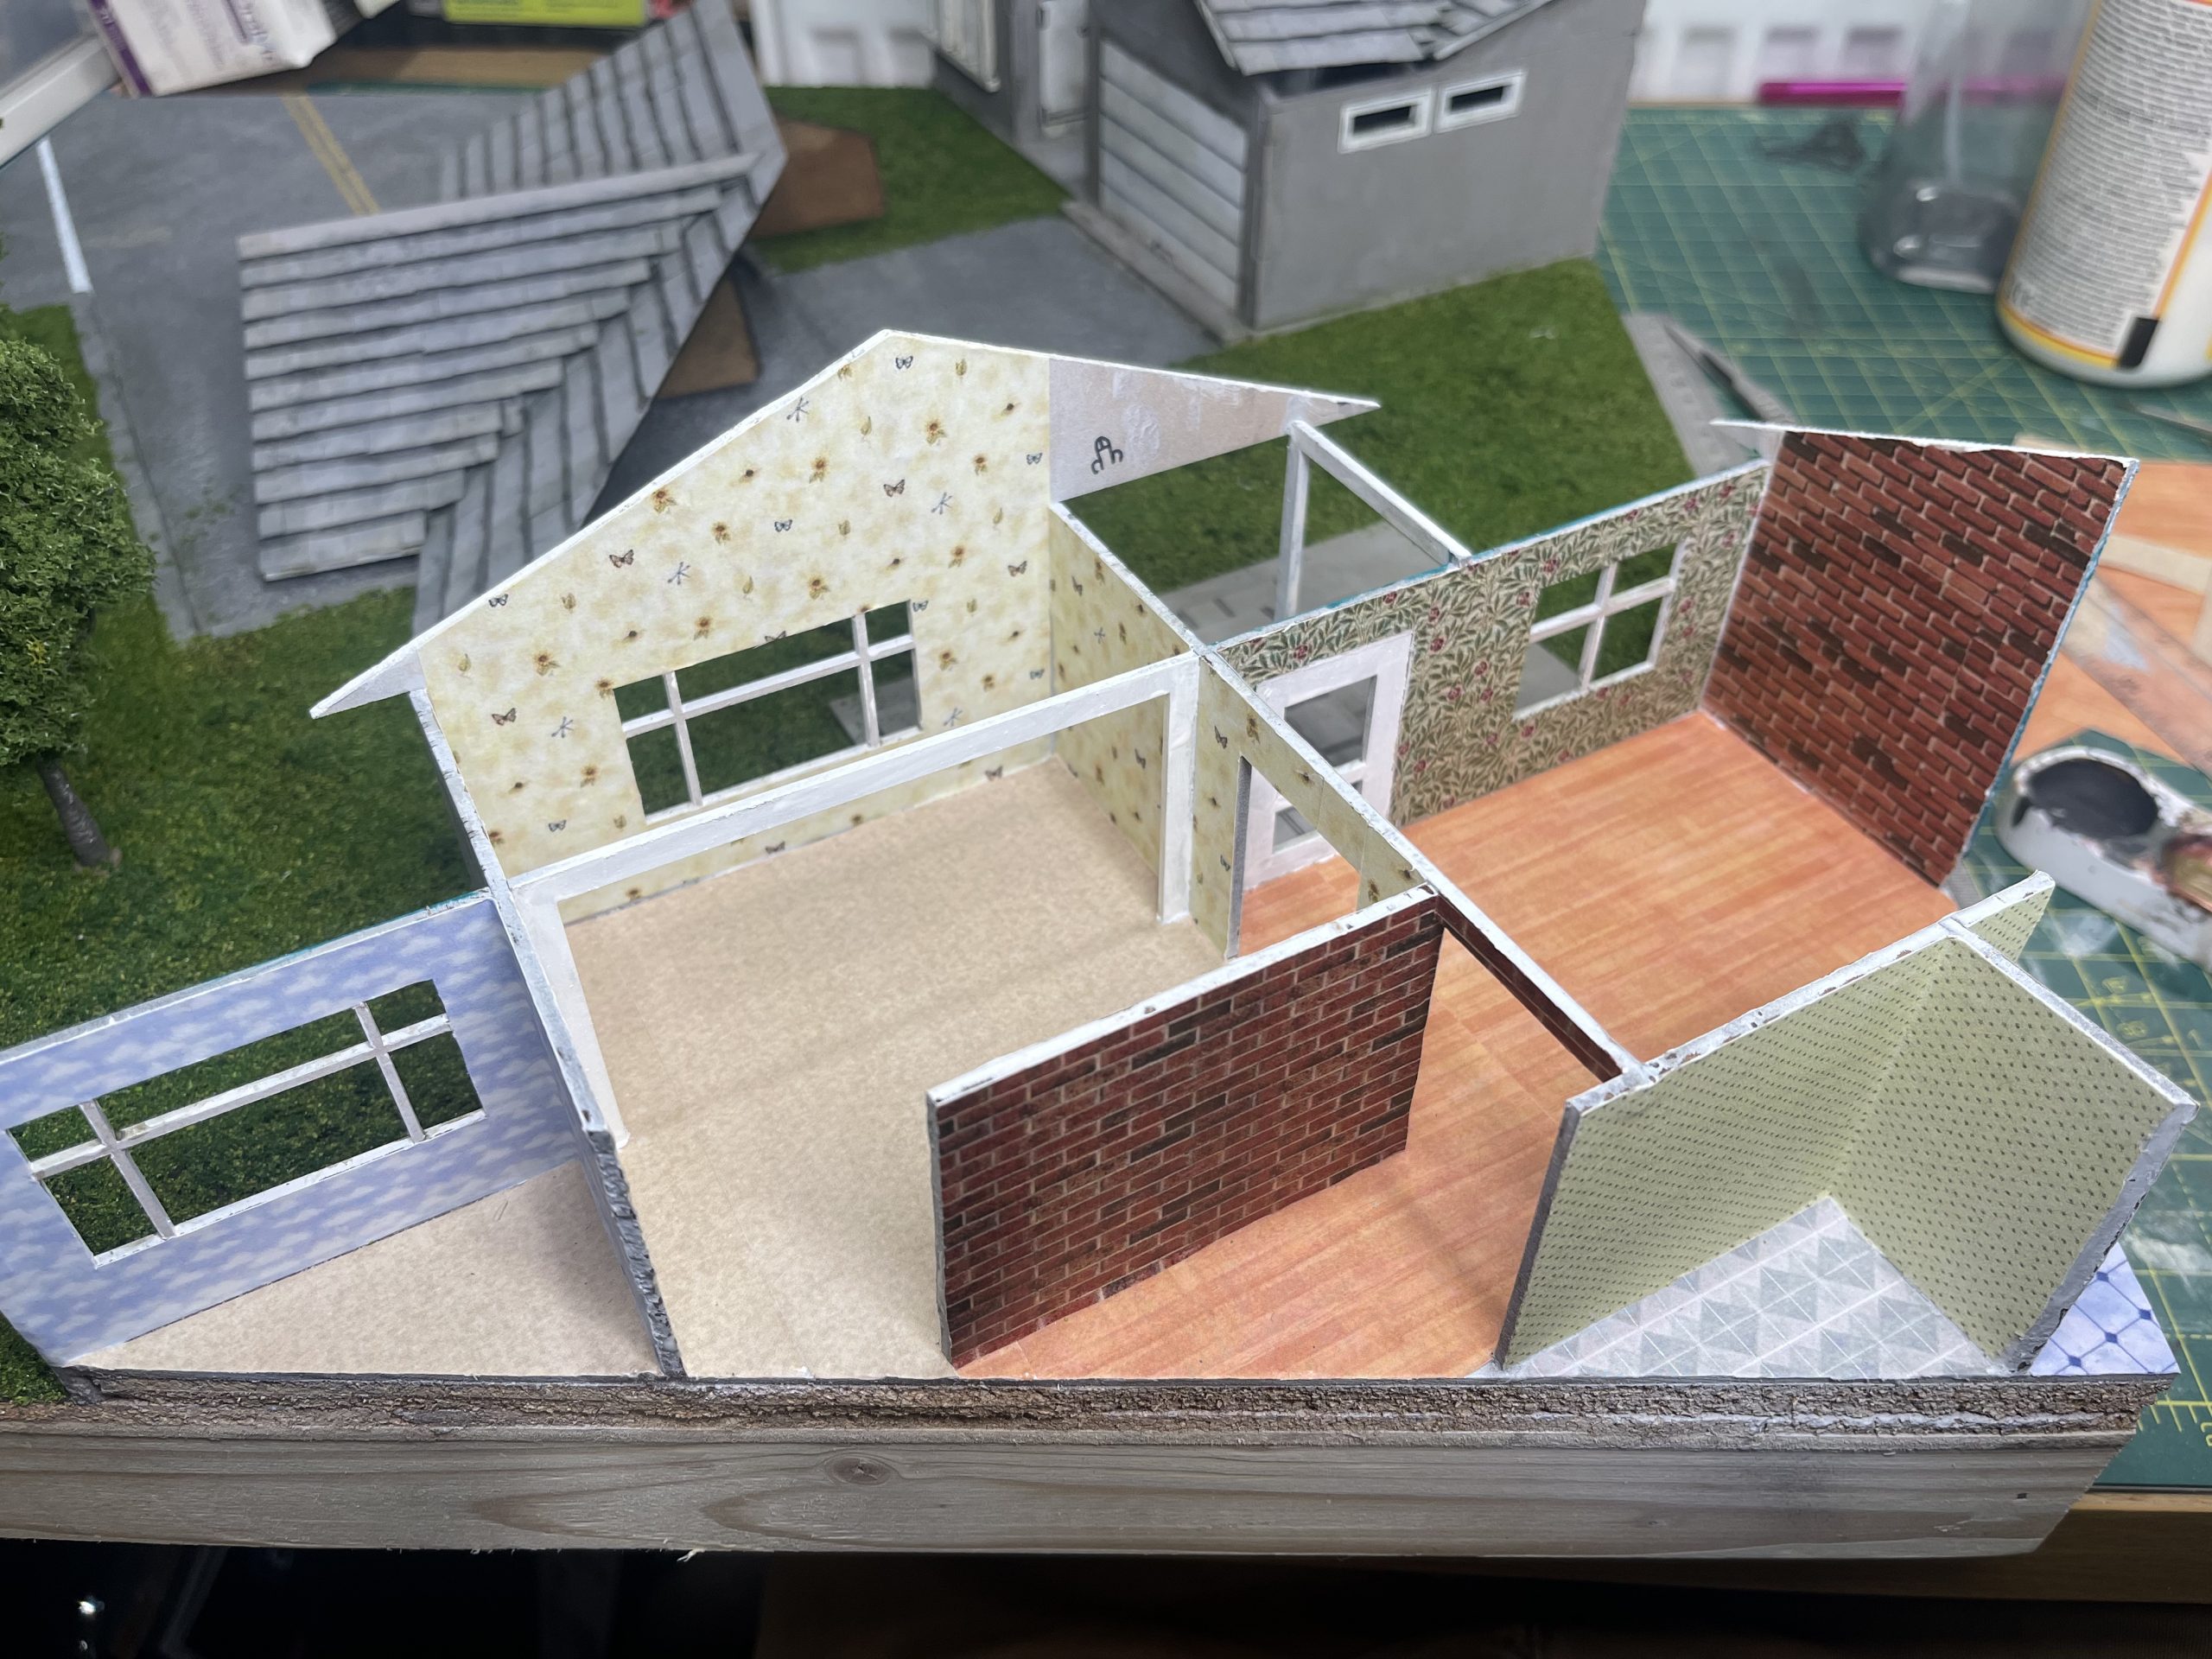 tried to make this one less garish and offensive on the eyes... not sure i succeeded
  look how messy it all it on the tops and sides of the walls
 a nice coat of black paint will sort that out.
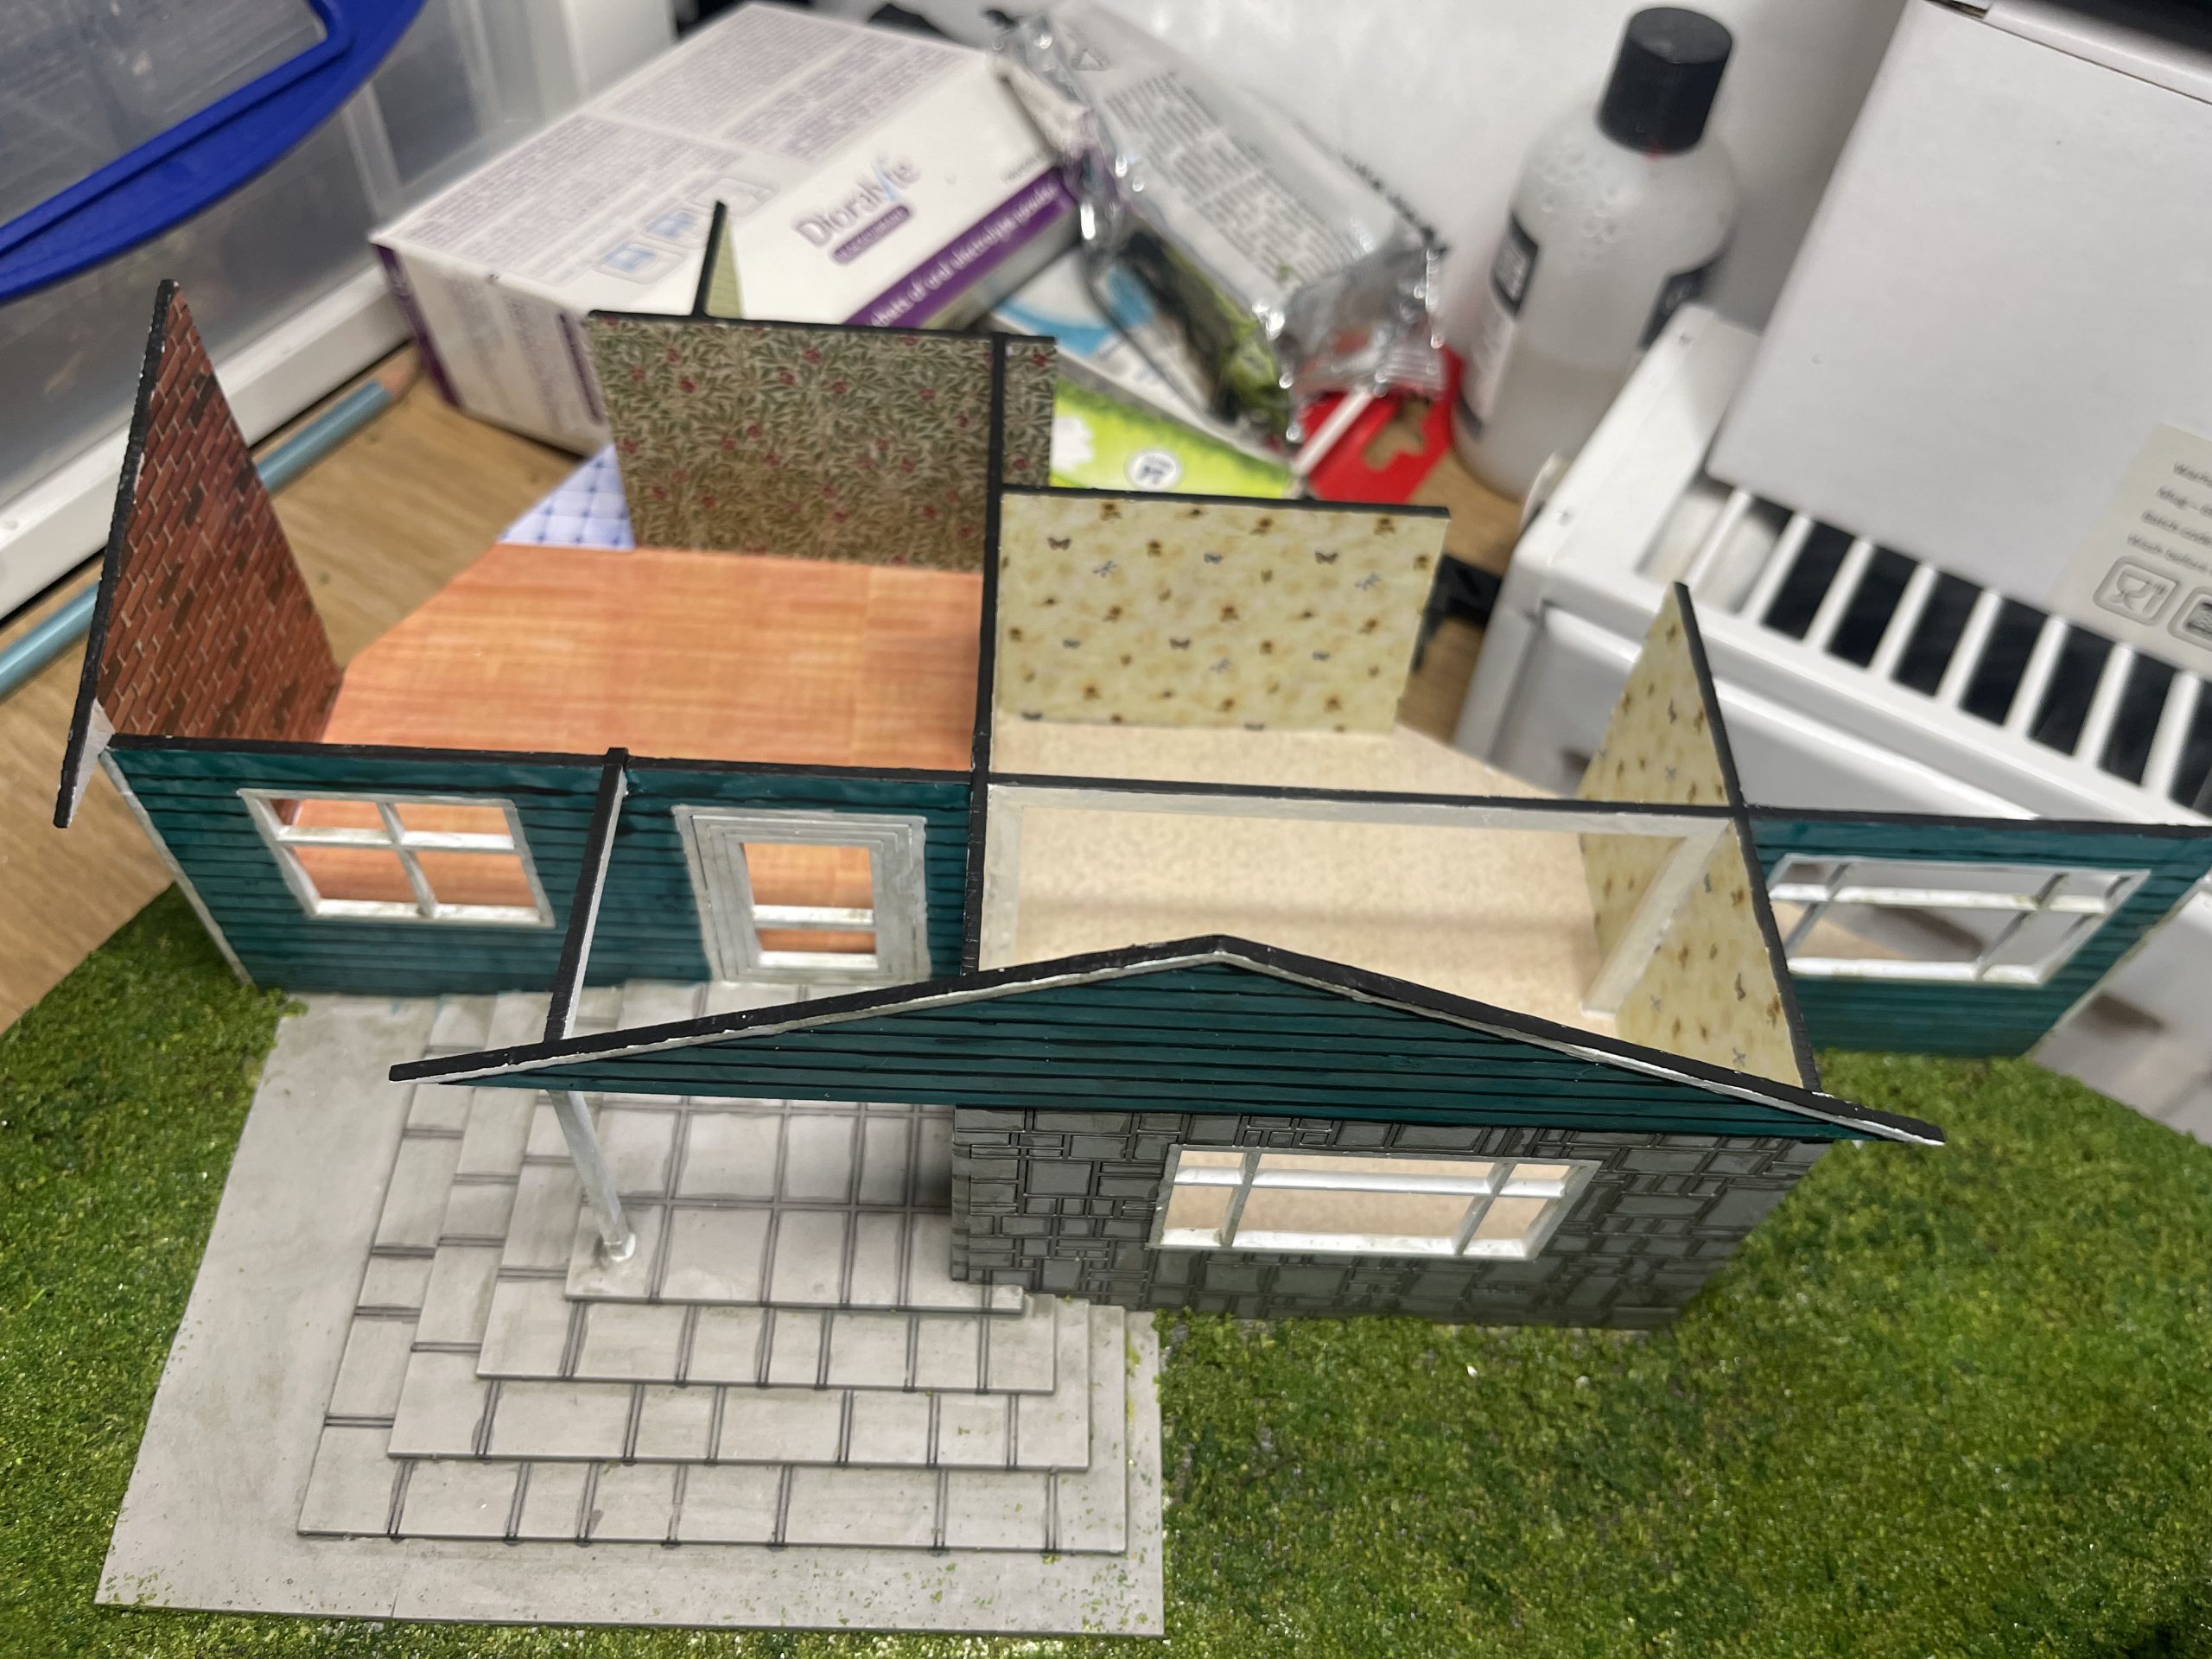 looks so much neater now.
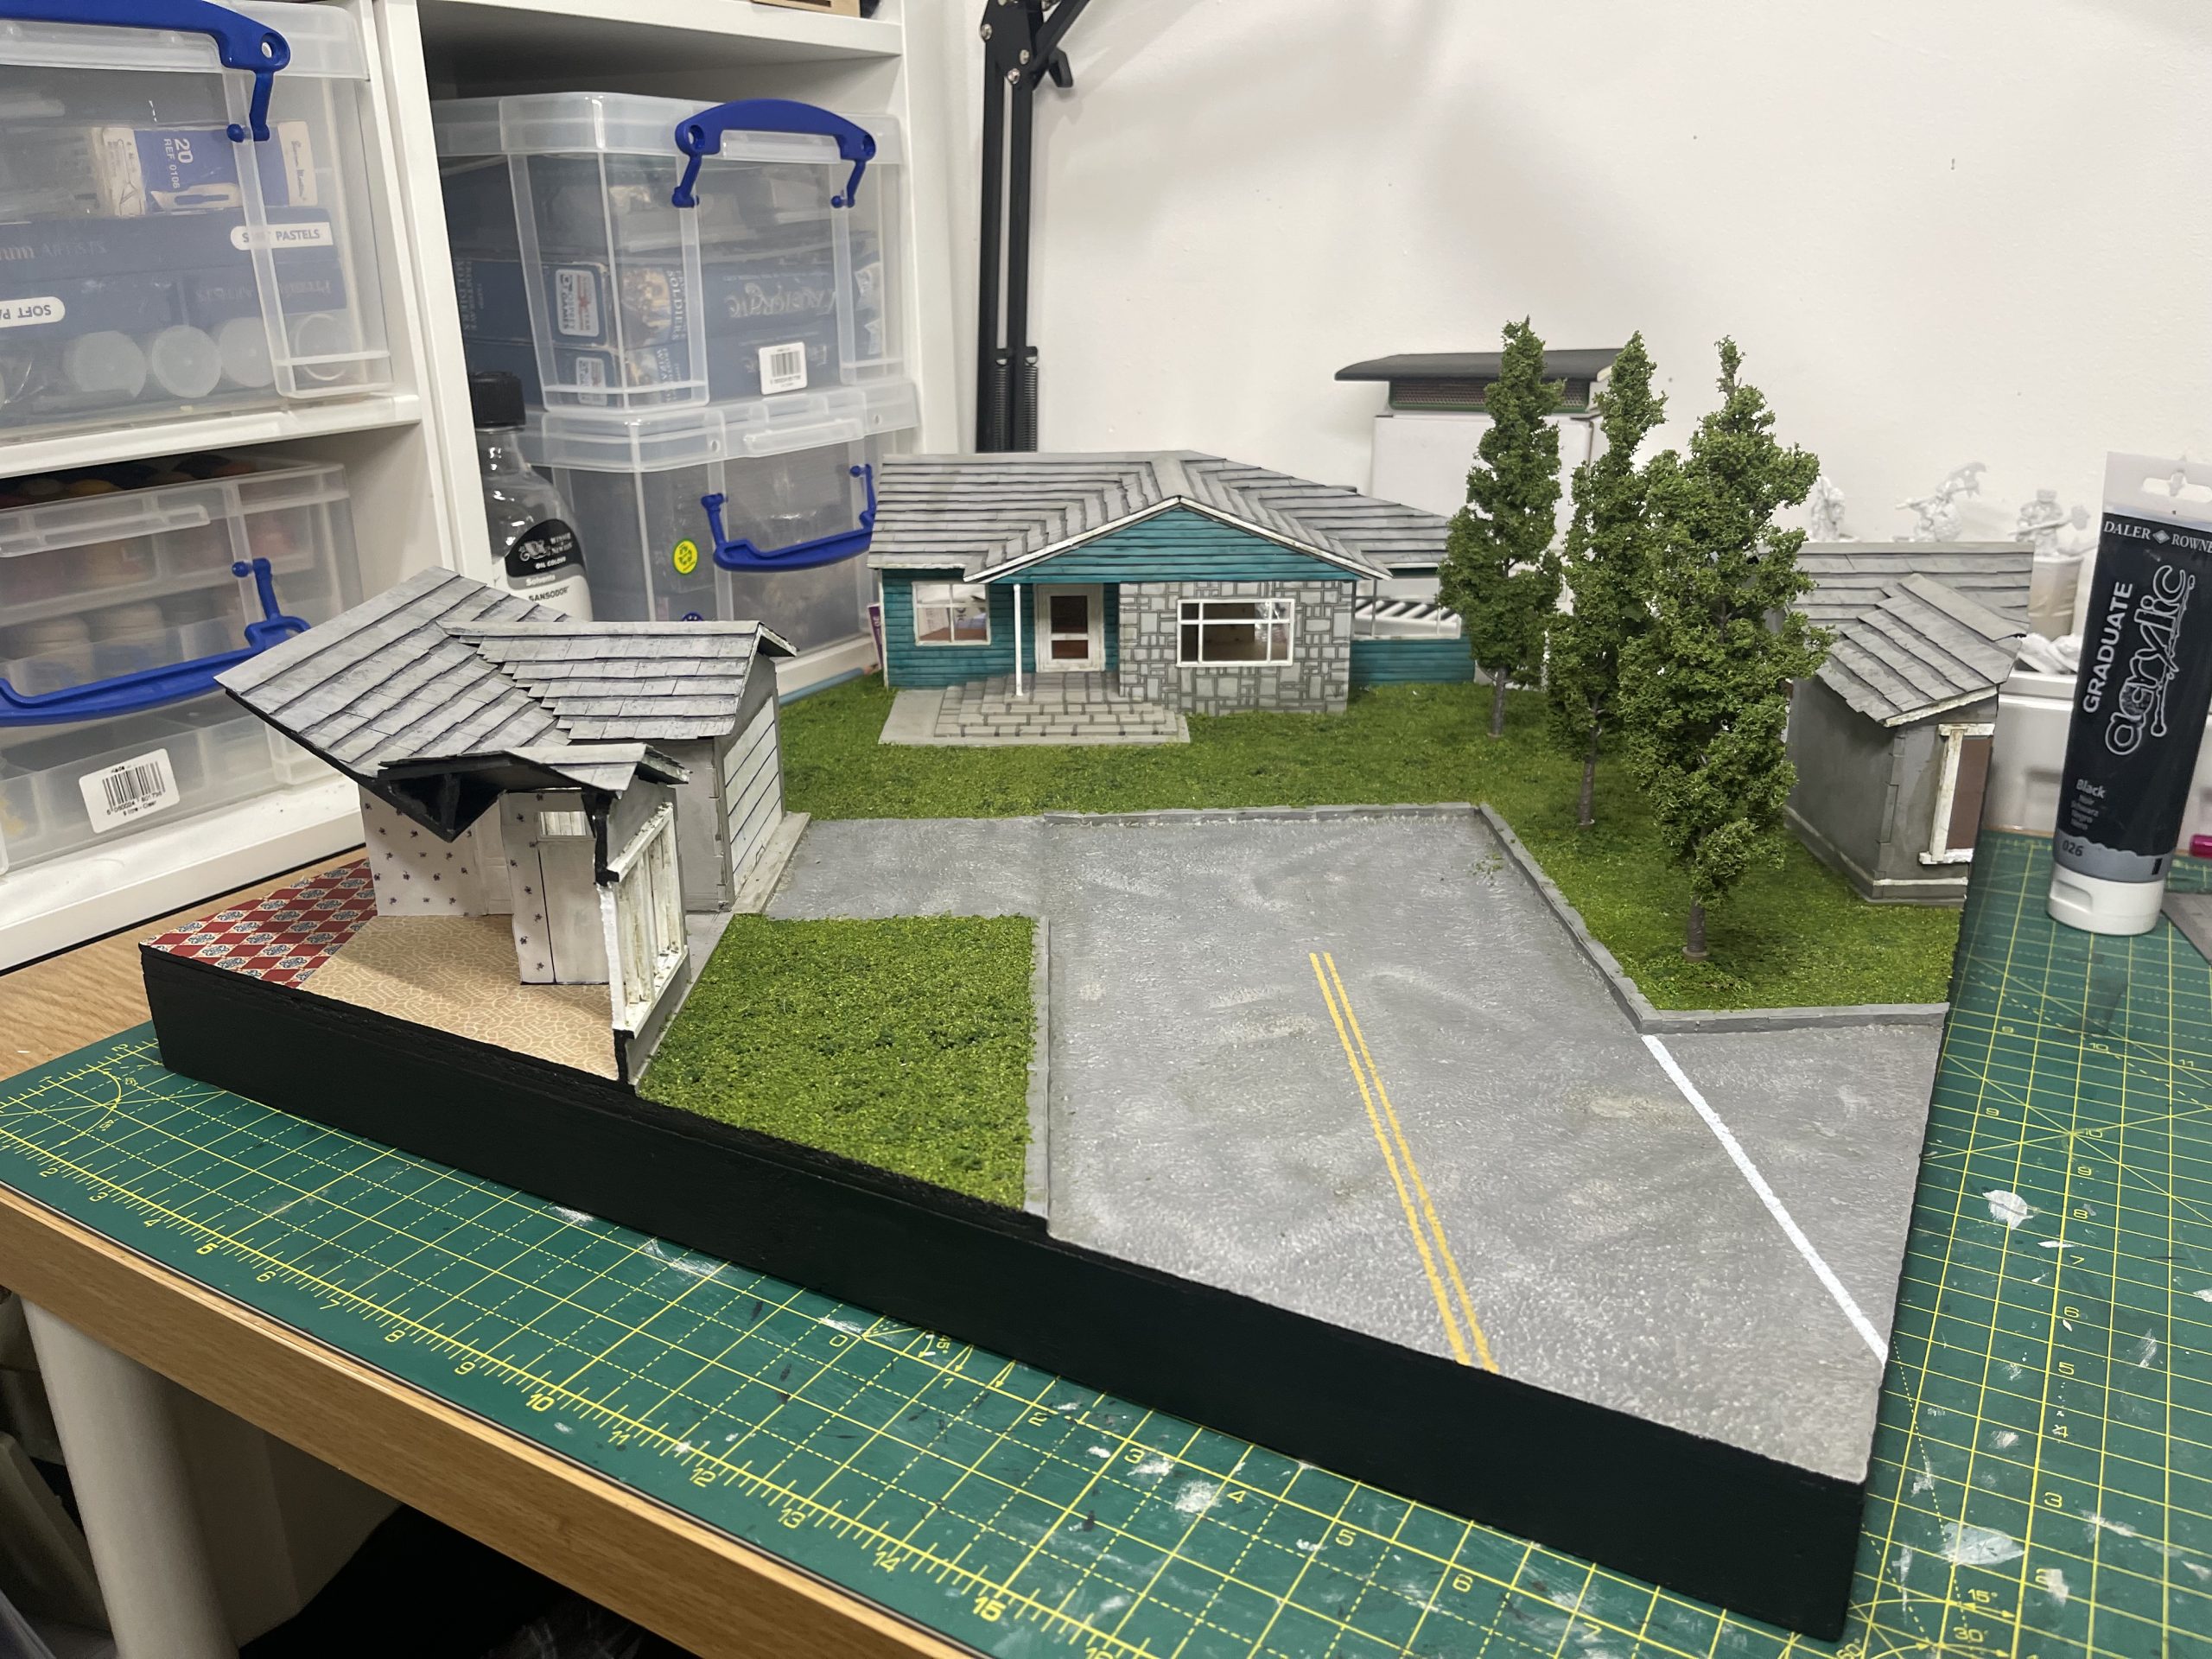 whilst the black was out i gave it a quick rim job. very neat, very tidy
all this paper work and painting has been completed since friday. I spent quite a lot of time on it to be fair (one day off and 3 evenings).
I’m very happy with how its come out so far, i’m within sight of the finished product! i simply need to add in the furniture and then find some appropriate debris to scatter to the winds to make it look like a lived in environment.
If you didn’t spot the penis, the reason for it (other than obvious childishness) is to create a different and odd way to determine priority on turn one… ‘whoever finds the cock goes first!’. I did a similar thing with the previous board but used the dog model, and before that the graffiti in the gas station.
carpets and wallpaper
remember this entry where i did some googling for wallpaper patterns.
well now i have them printed and am at the point to use them its time to chop them up and stick them down
 first put down some thinned PVA down in an even a way as possible - dont flood the area.
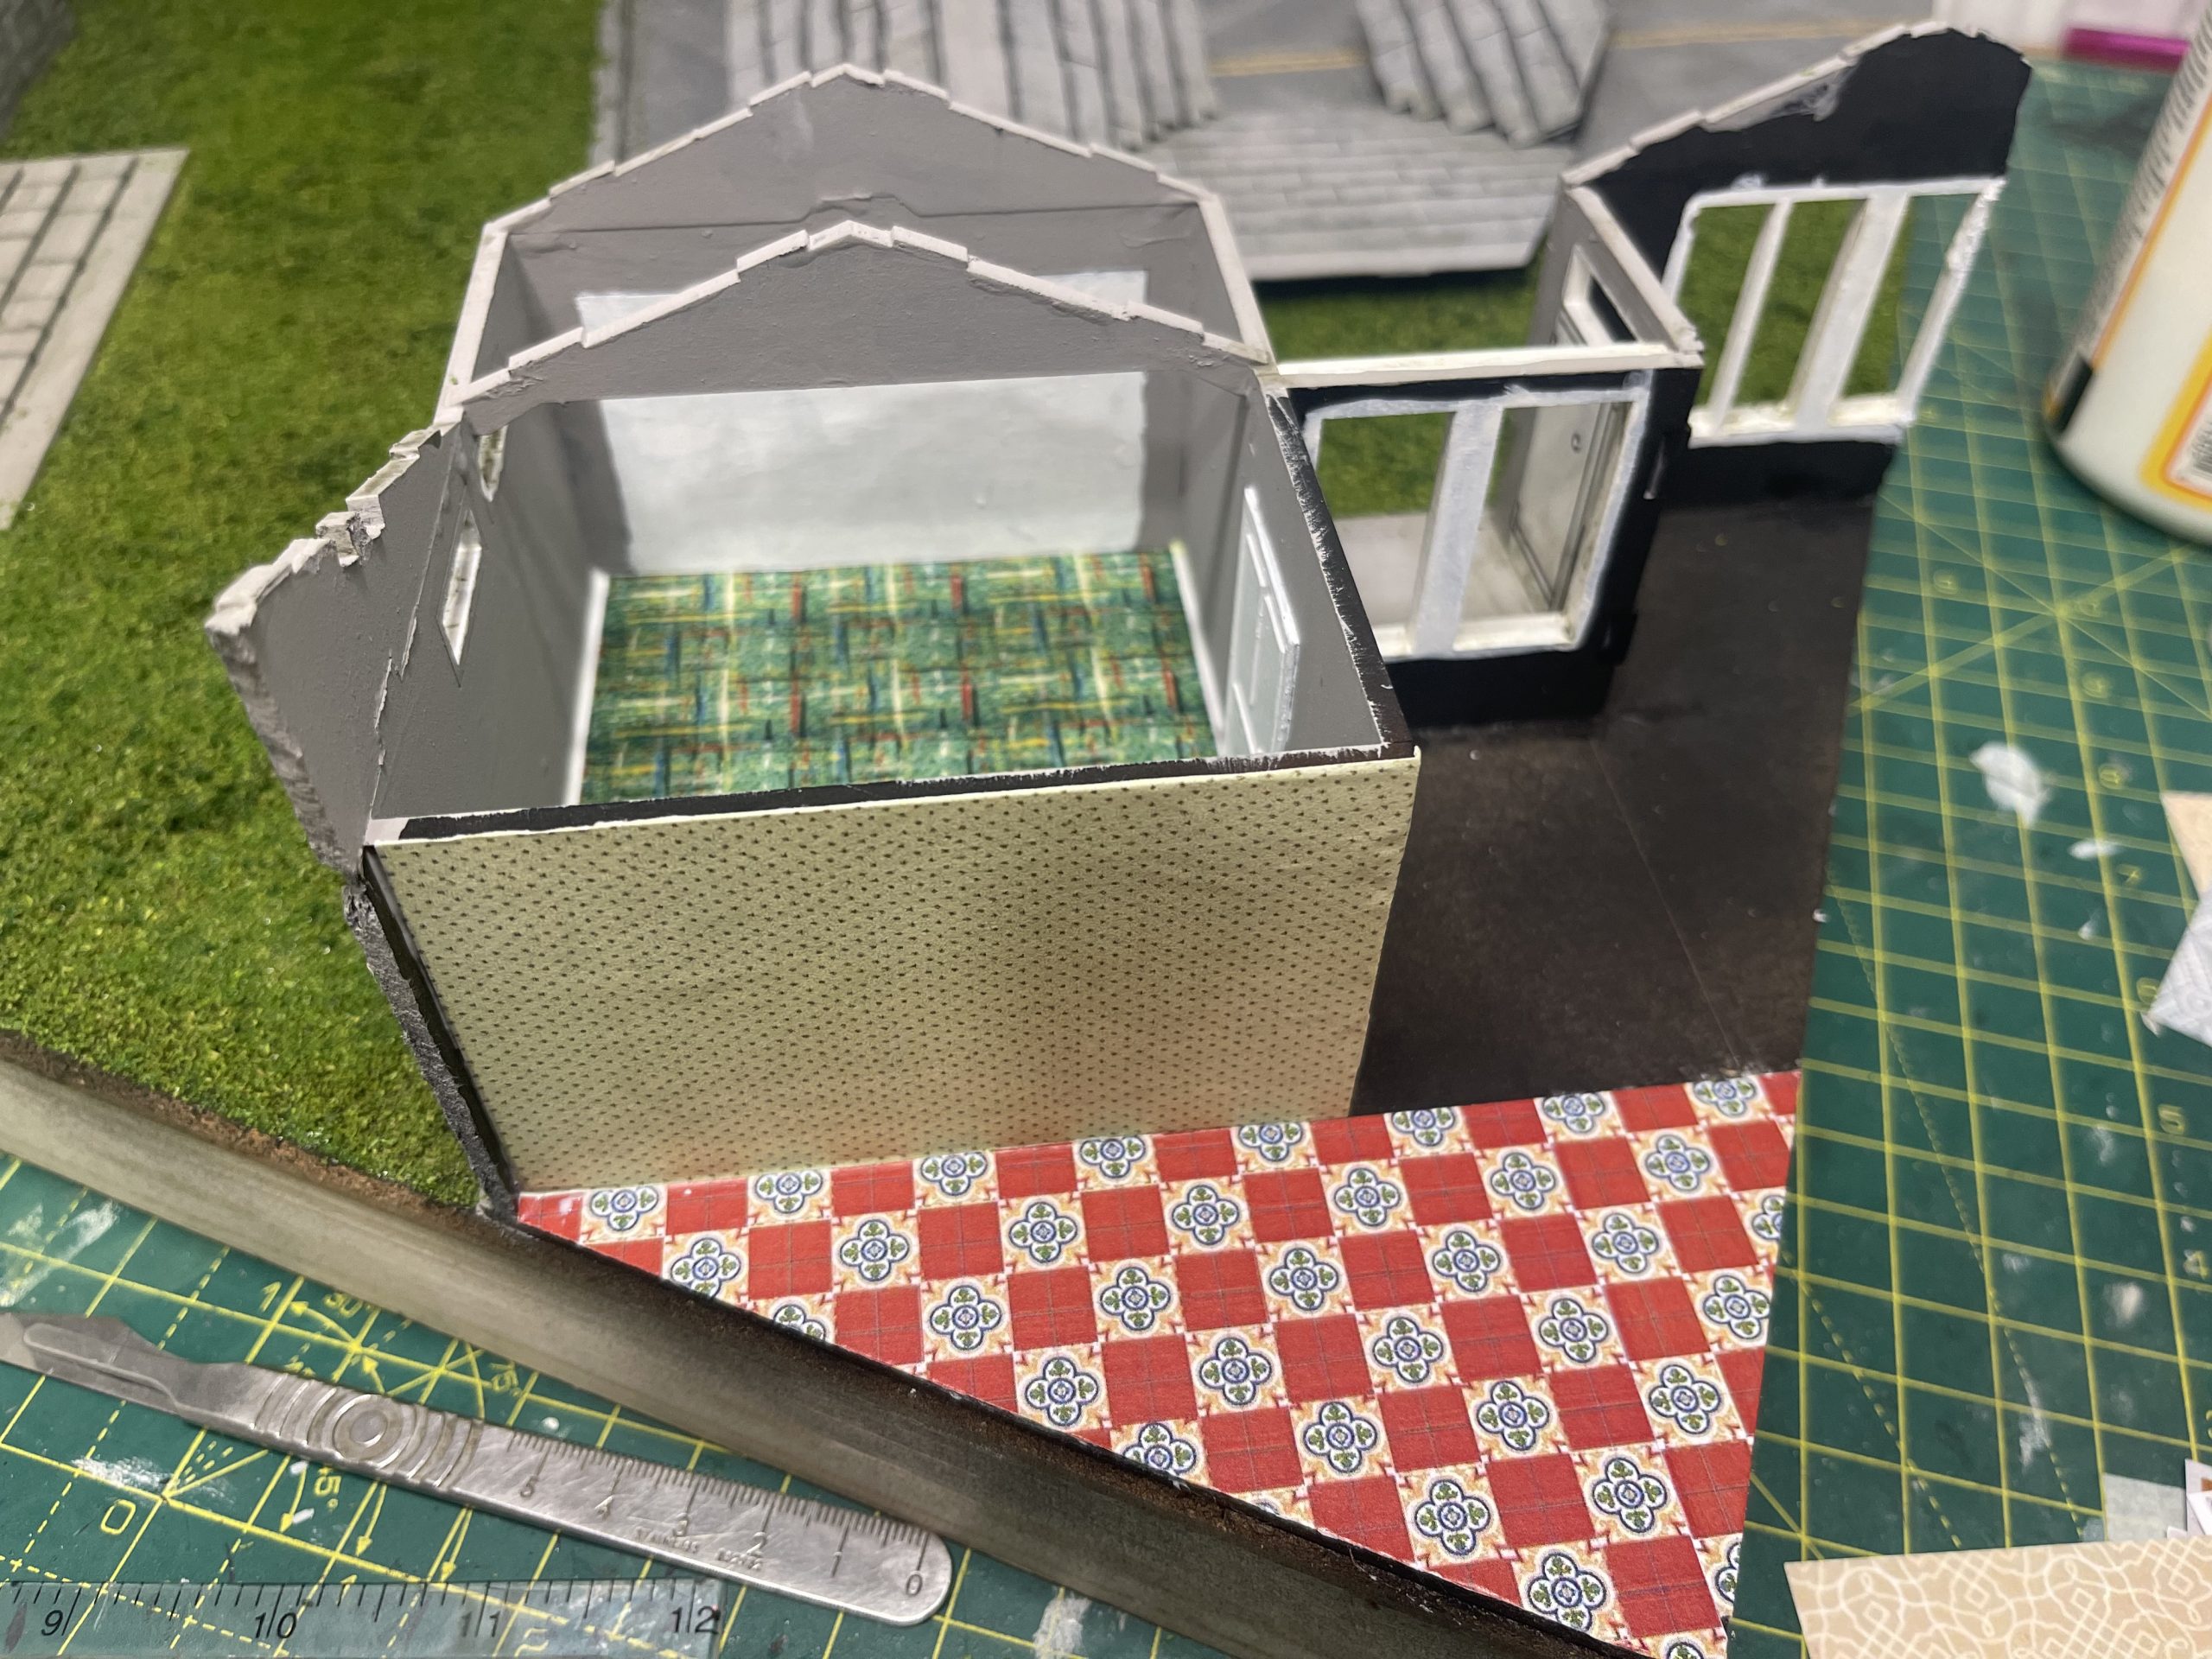 put the patterns down to suit the area theyre in. the worst shit lino in the garage area, tiles in the kitchen etc etc etc
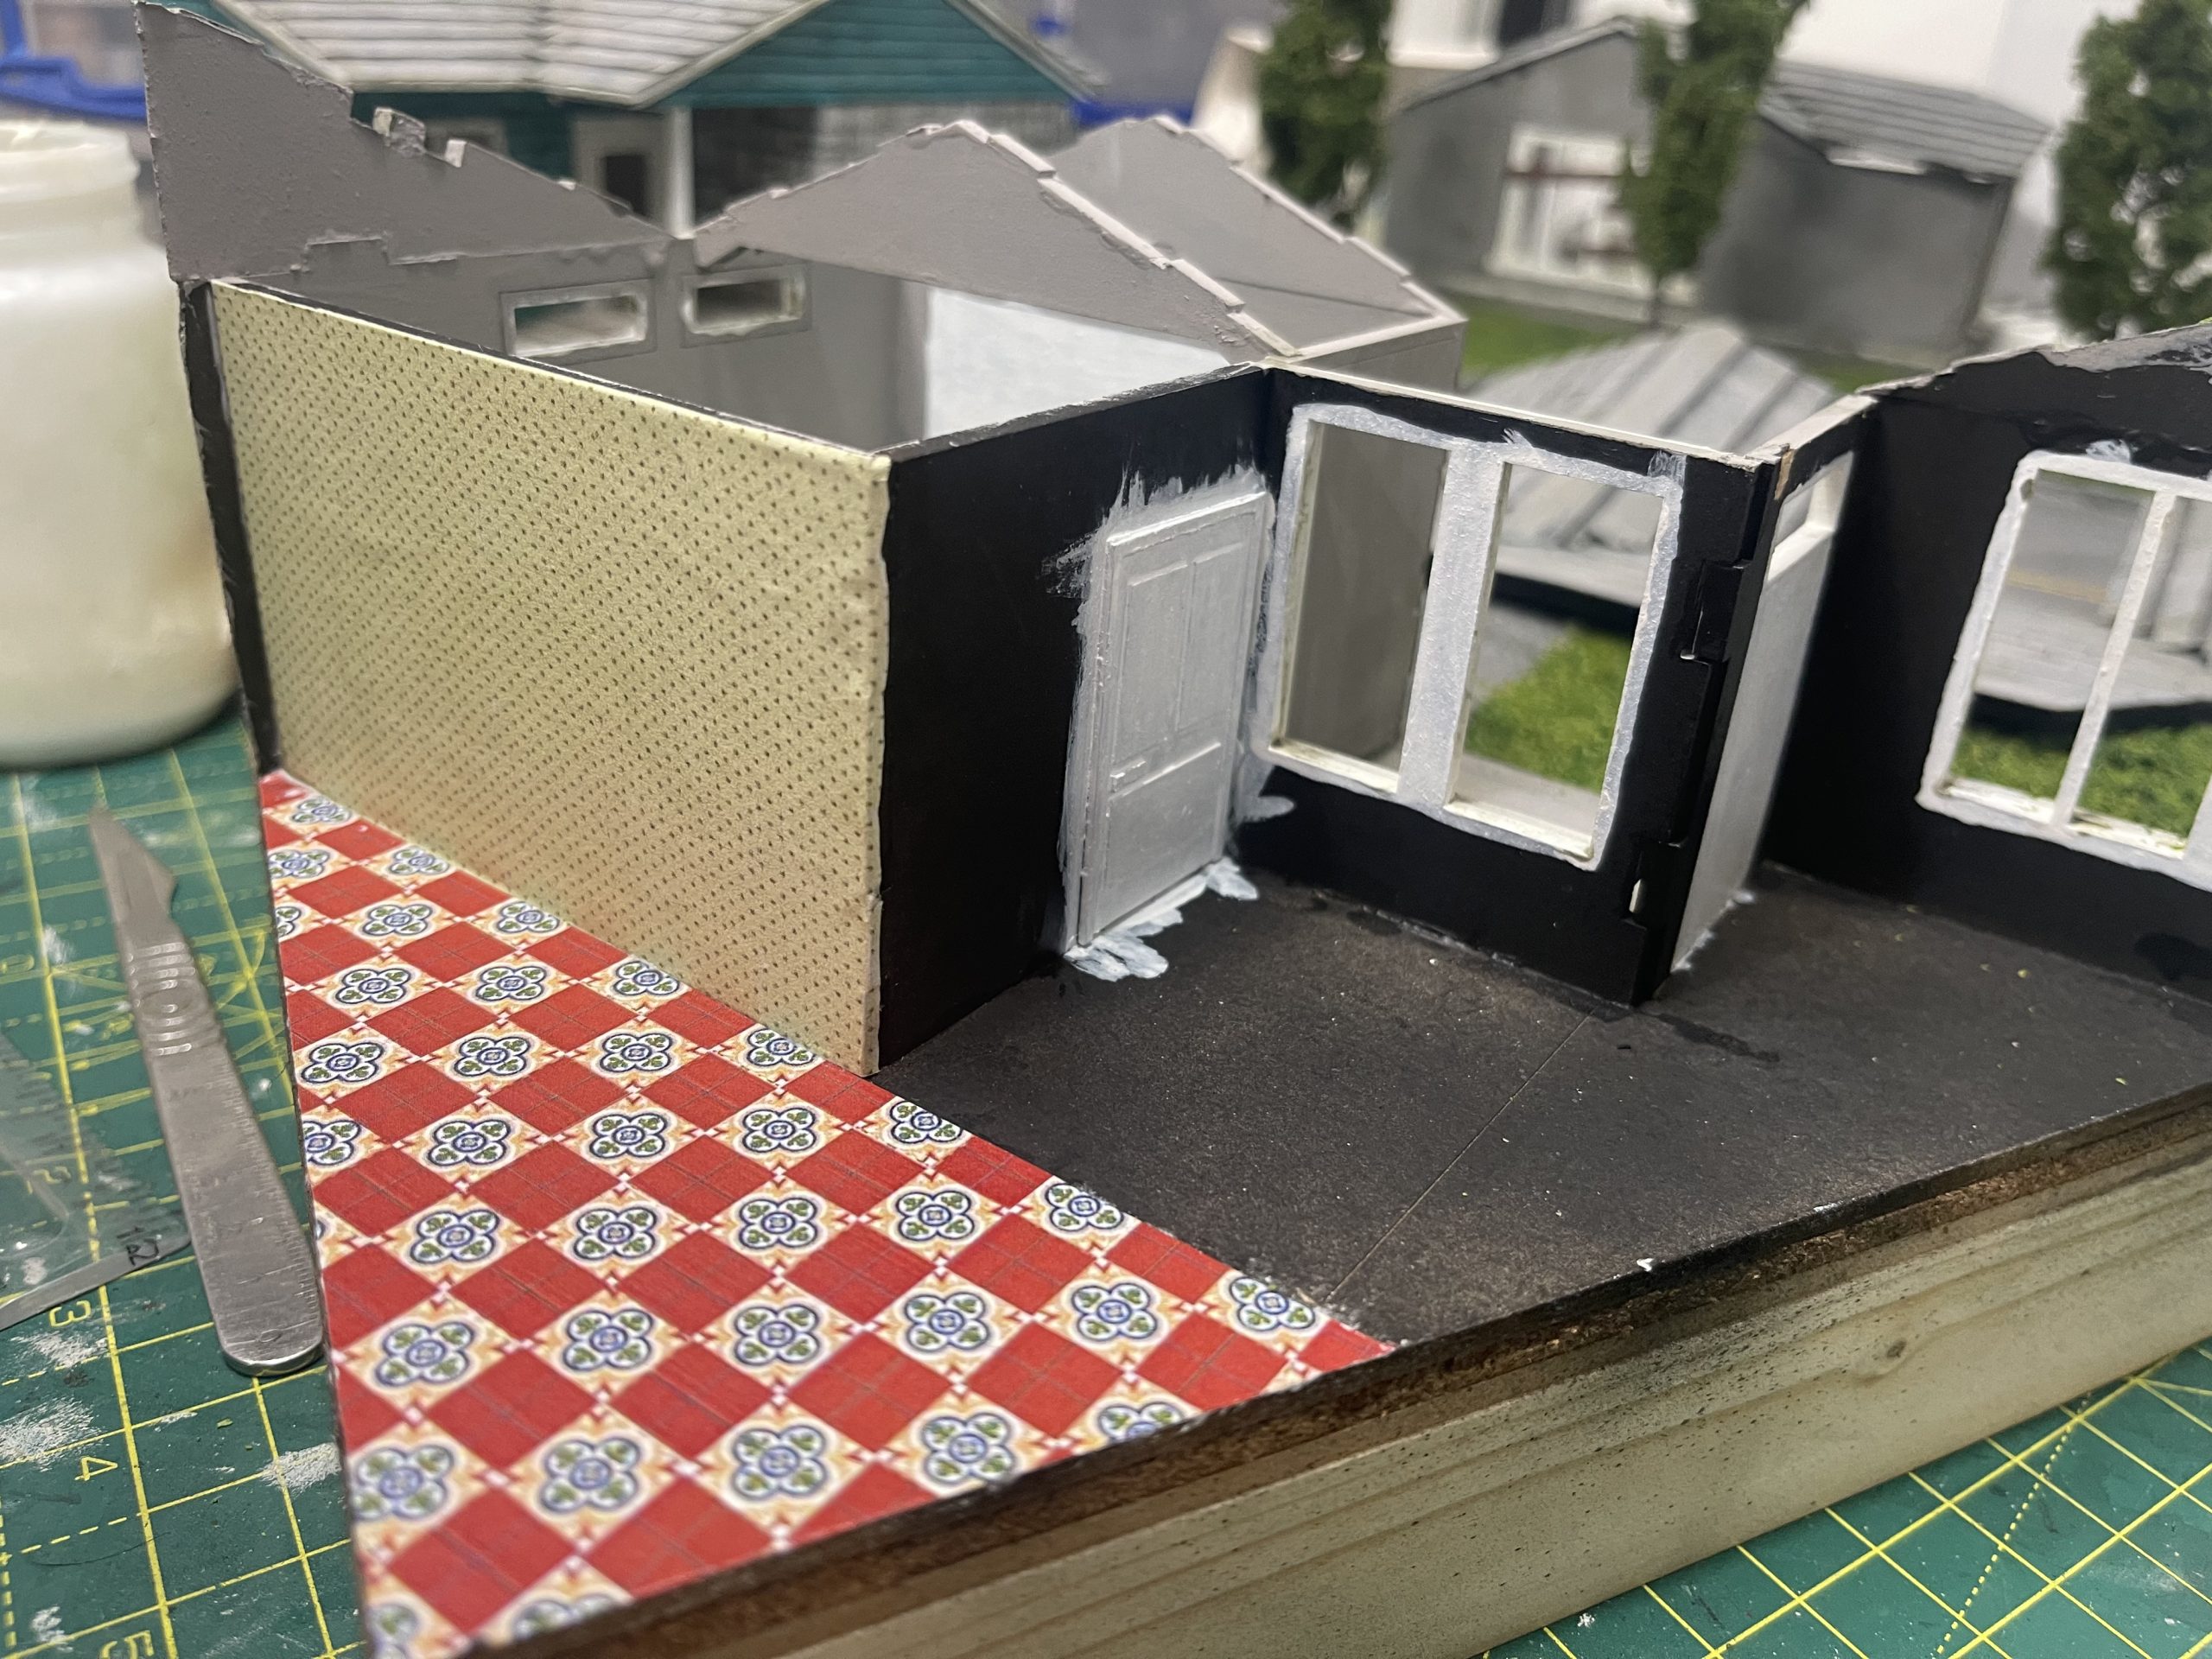 make sure your edging is done well otherwise it will show up really badly later. a super sharp knife is key and consider folding over corners
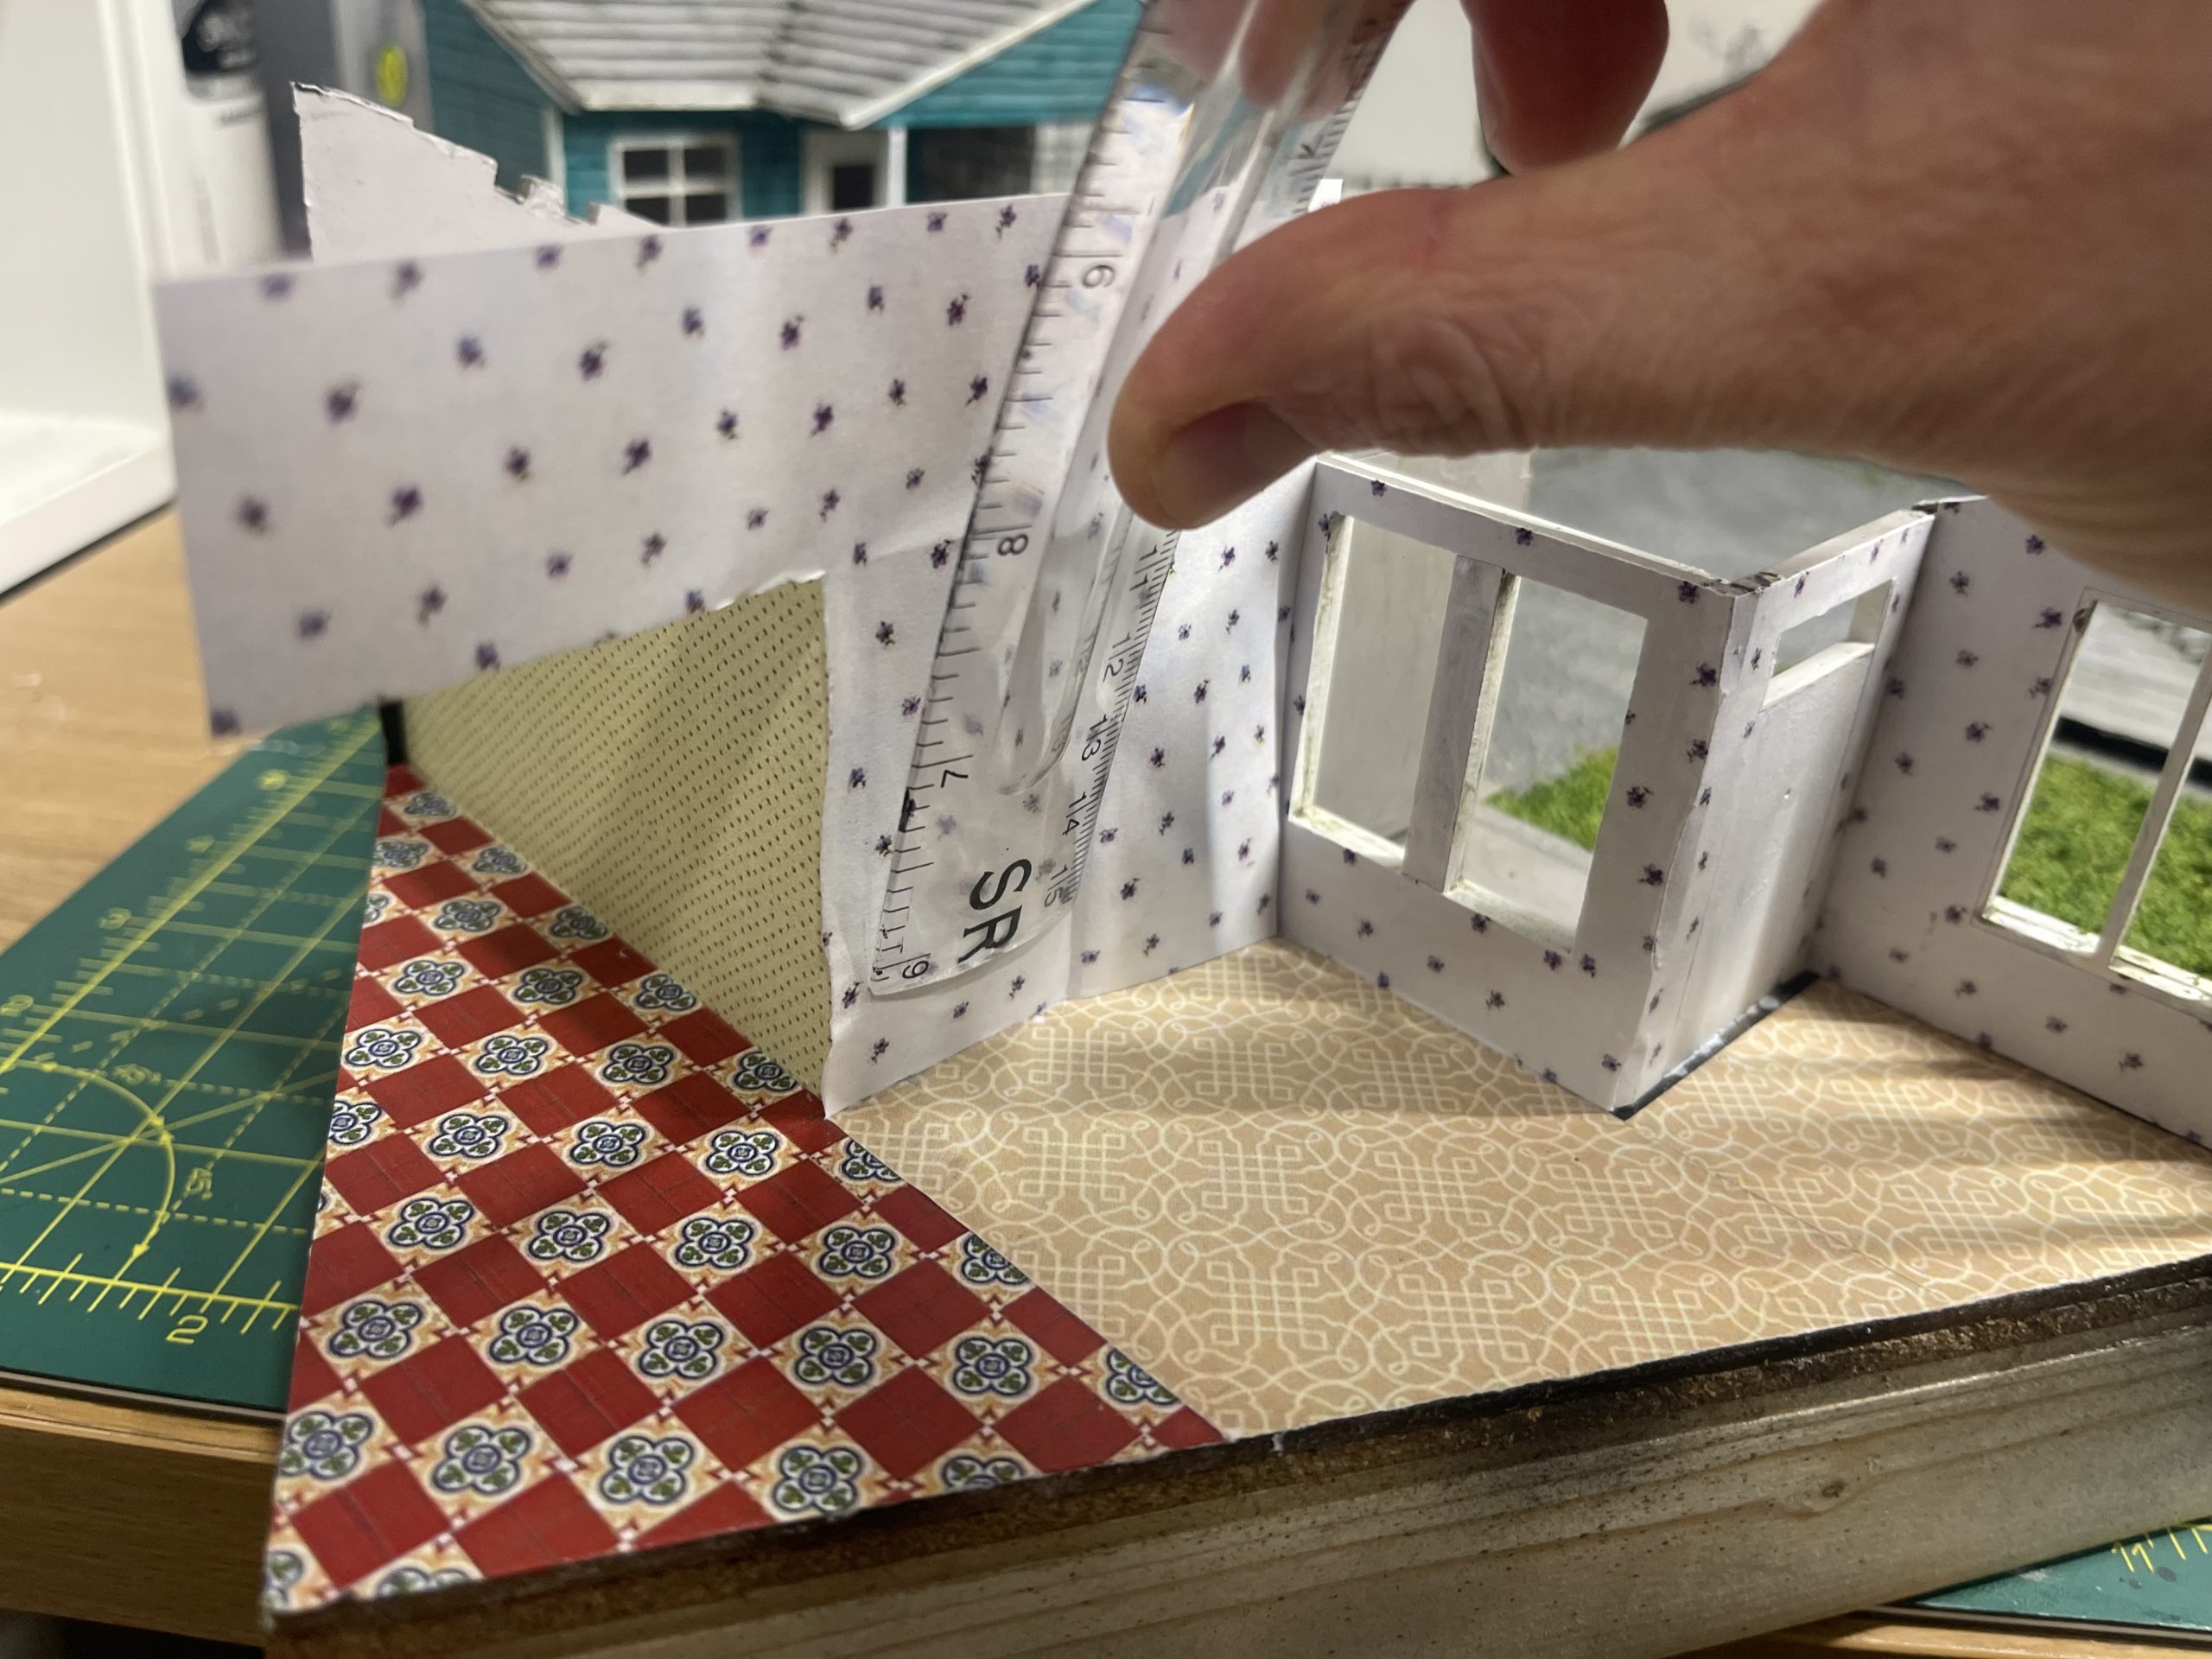 make sure the paper is stuck to all contact points. i used a plastic ruler to add even pressure where my finger couldnt reach. eg edges and corners etc
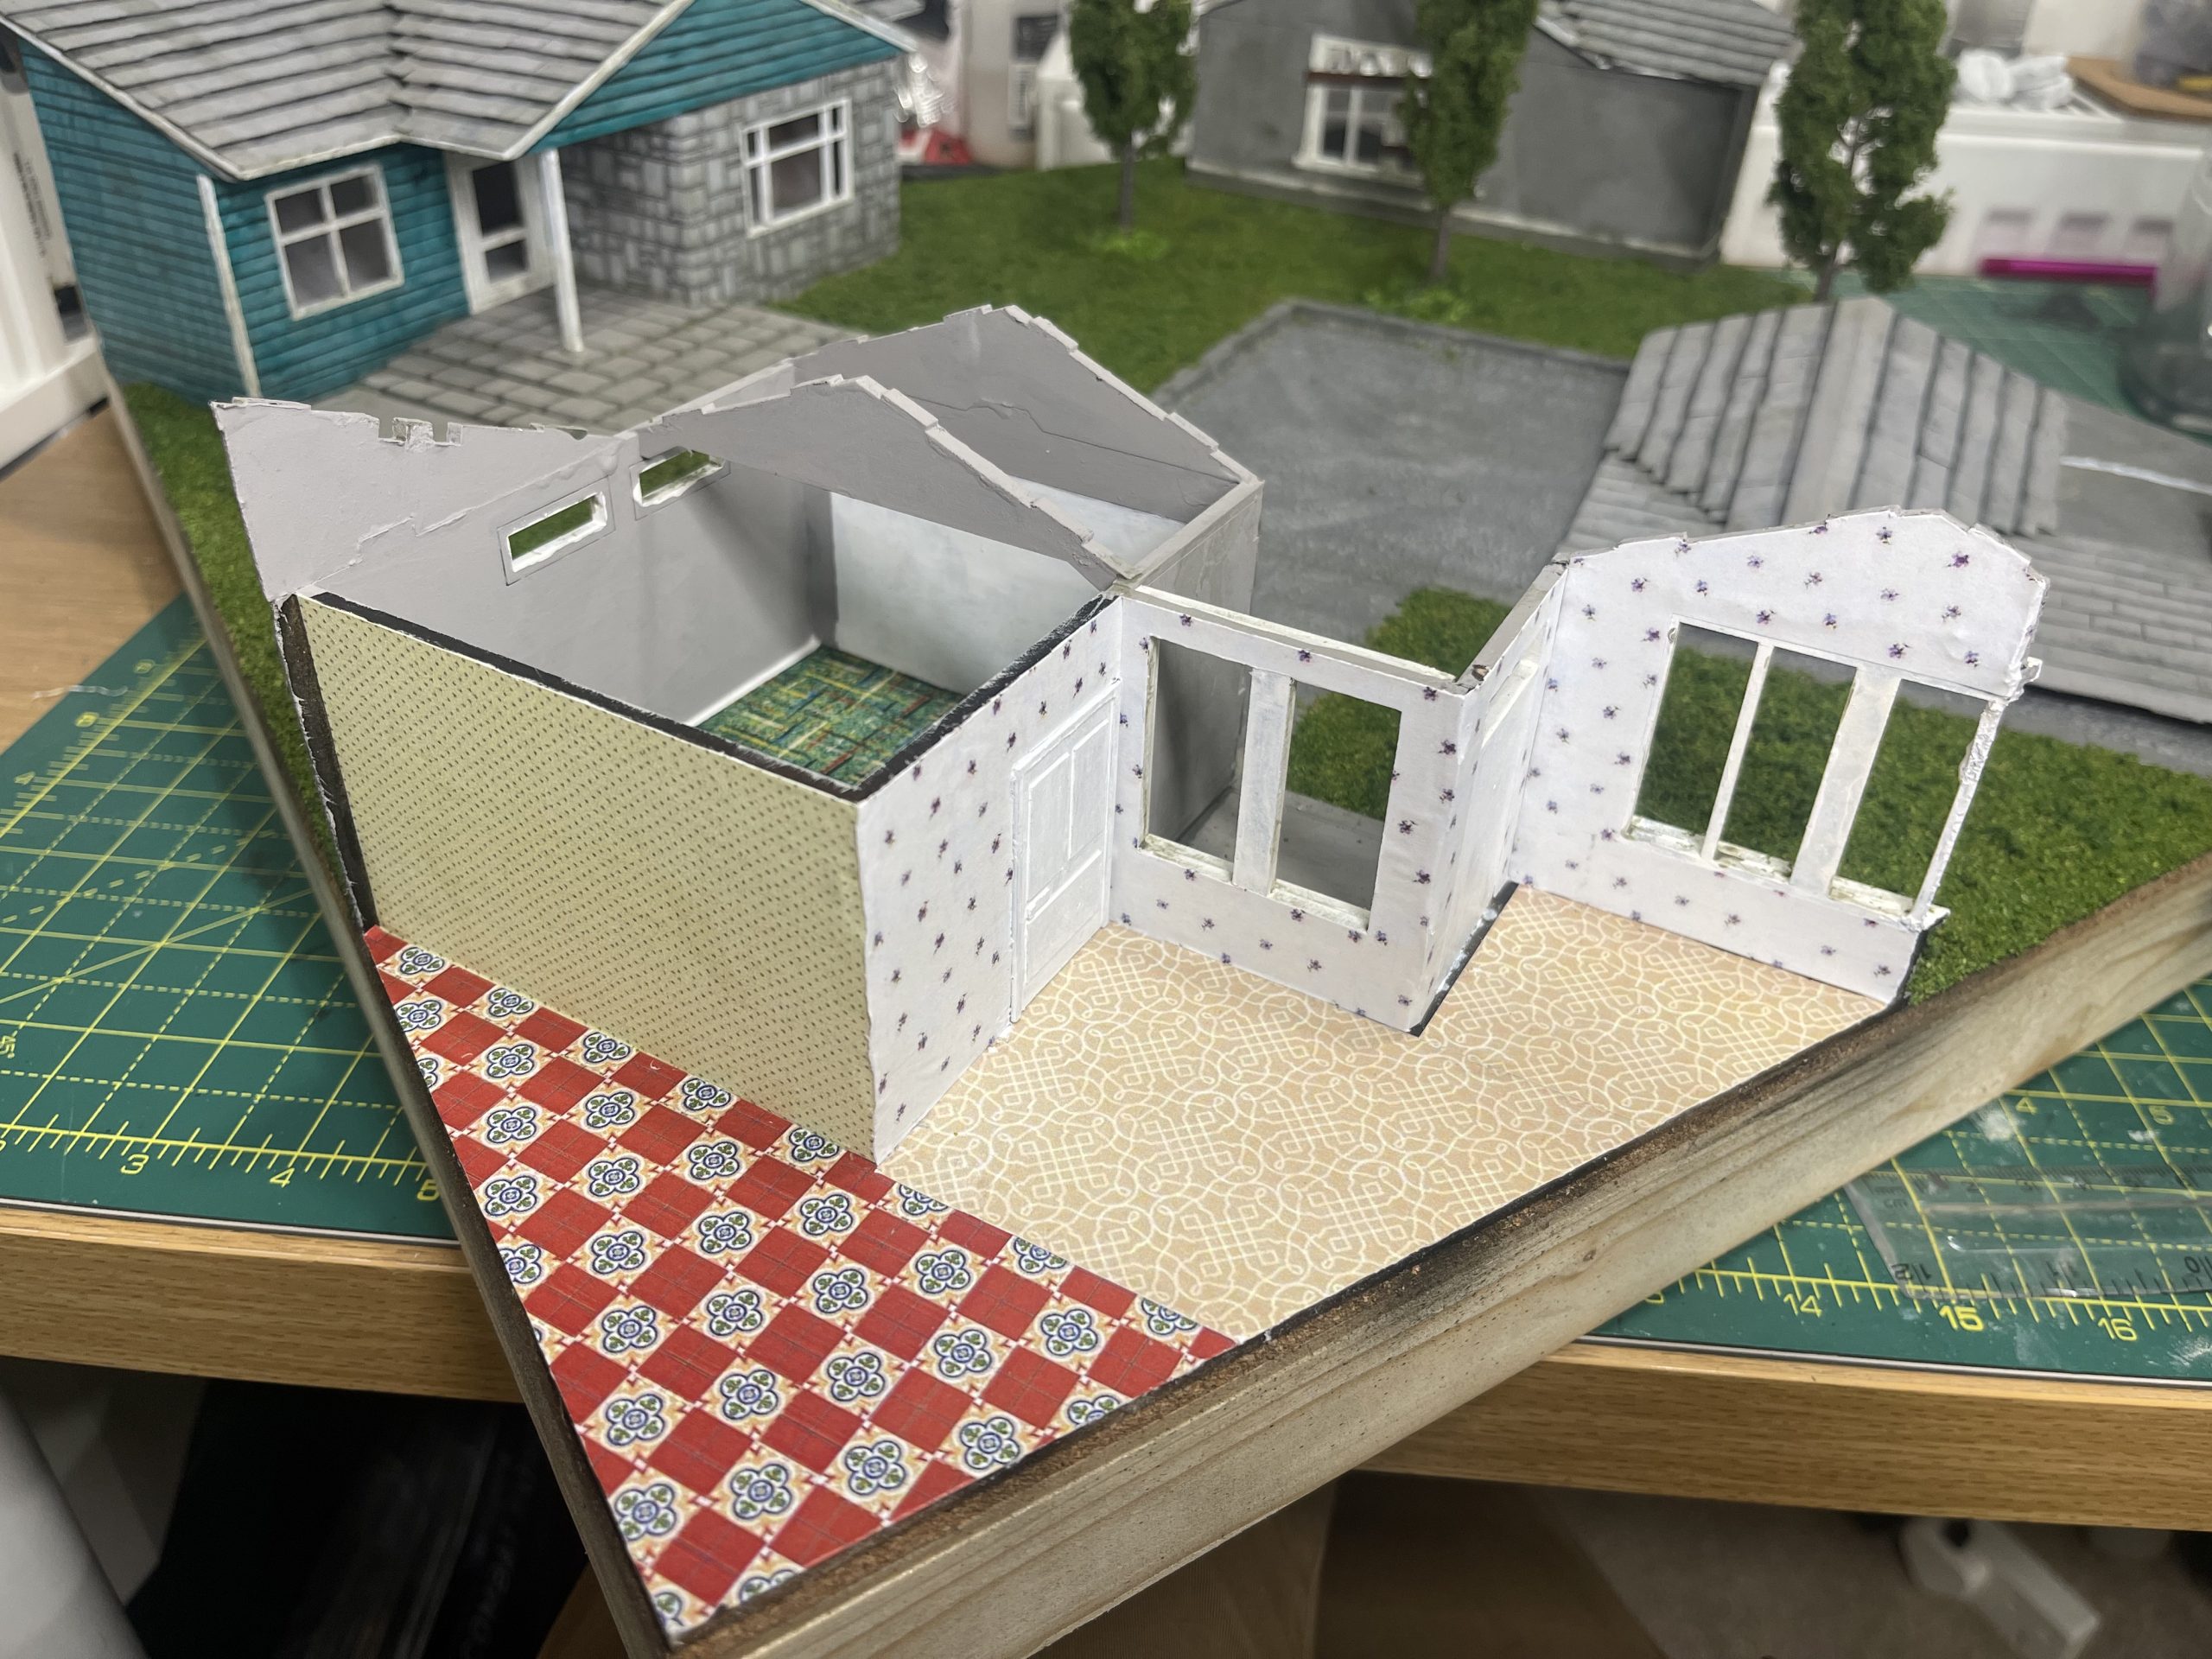 cute out the windows and around doors. easier to do this when glued on rather than eye ball it before sticking down
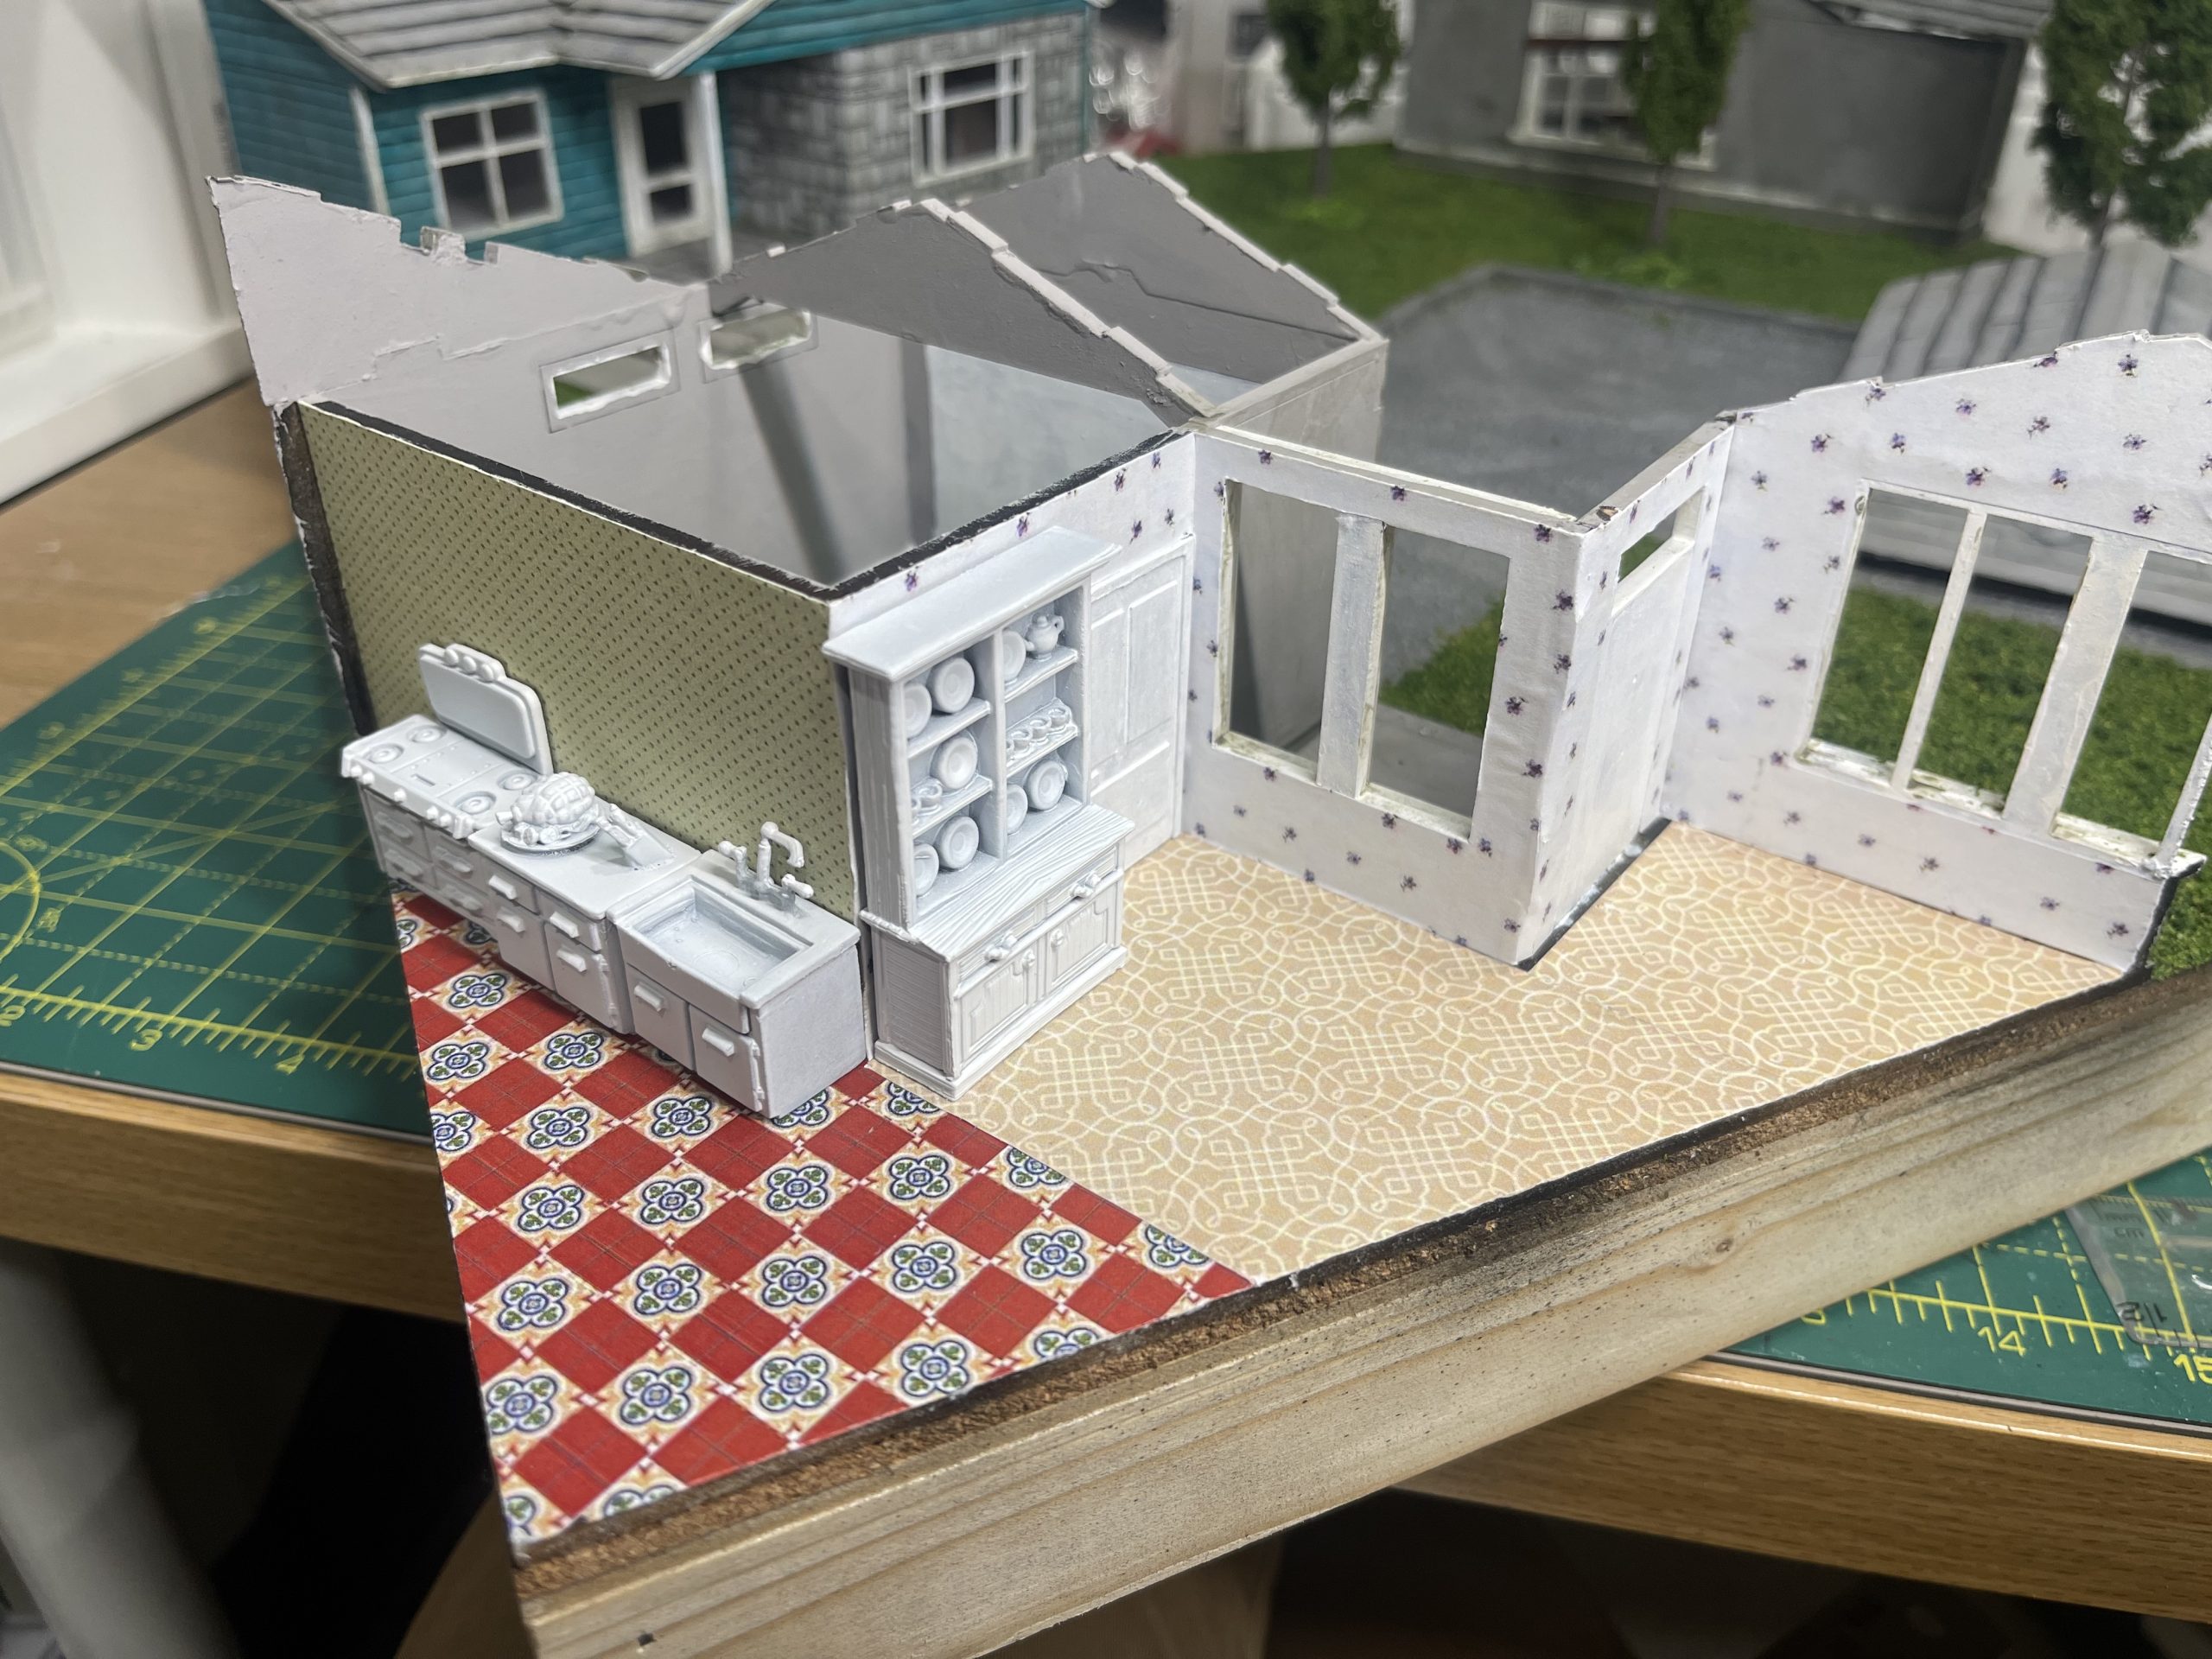 add furniture (no primed) to get an idea of coolness
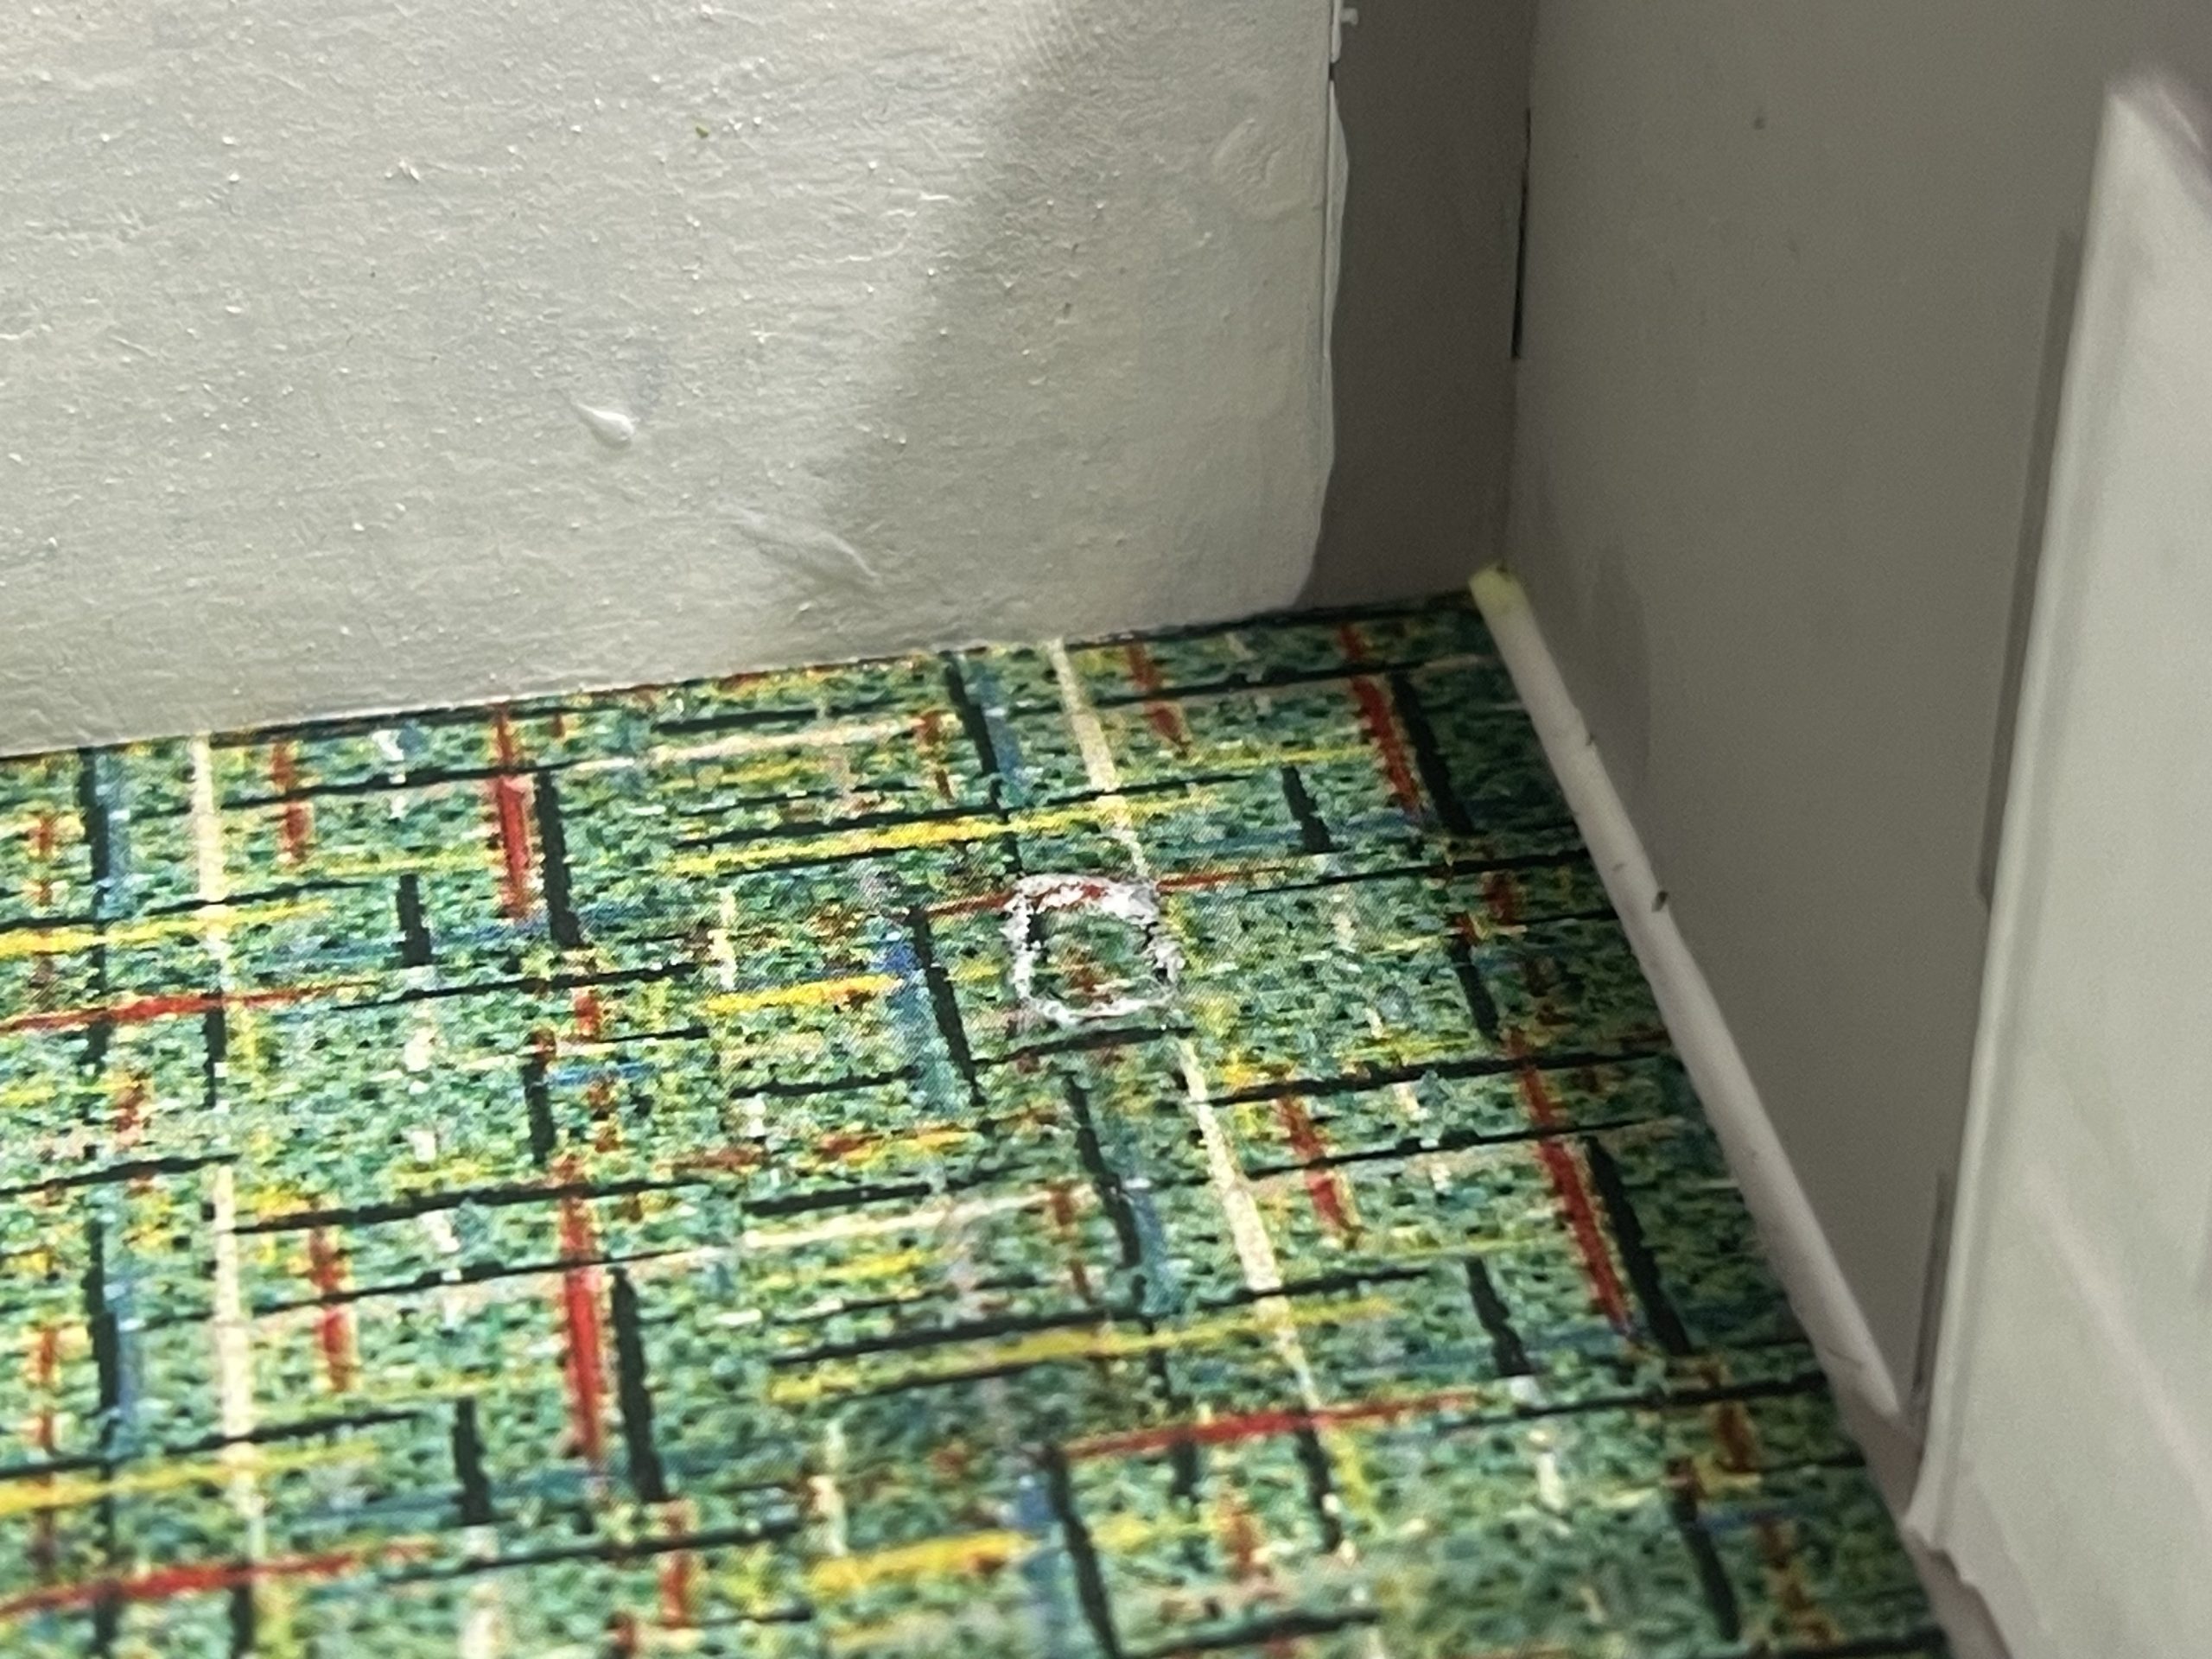 dont touch anything till its fully dried or you will rip the paper (or lino)... expletives were used!
This is a time consuming but relatively easy step. the problem is to find stuff that matches, or at least doesnt clash (unless you want it to). it felt a little bit like playing SIMs back in the early 2000s.
With the garage floor i deliberately chose a horrible pattern. the idea being that the owner took it out of their kitchen from the 60s, 70s or 80s (sometime ghastly for interior design) and dumped in their garage as a somewhat better alternative to bare concrete.
Road research and markings
The road looks like a big blob of (well shaded and weathered) grey.
It needs some markings, so off to google maps and streetview i went to see what the road markings in Atlanta and Woodbury are in actual real life USA. Turns out, the Americans only mark half their roads, and only if they feel like it… often the suburban areas and cul-de-sacs aren’t marked.
I decided to simply copy some stuff from more main roads, a double yellow down the middle and a white stop line.
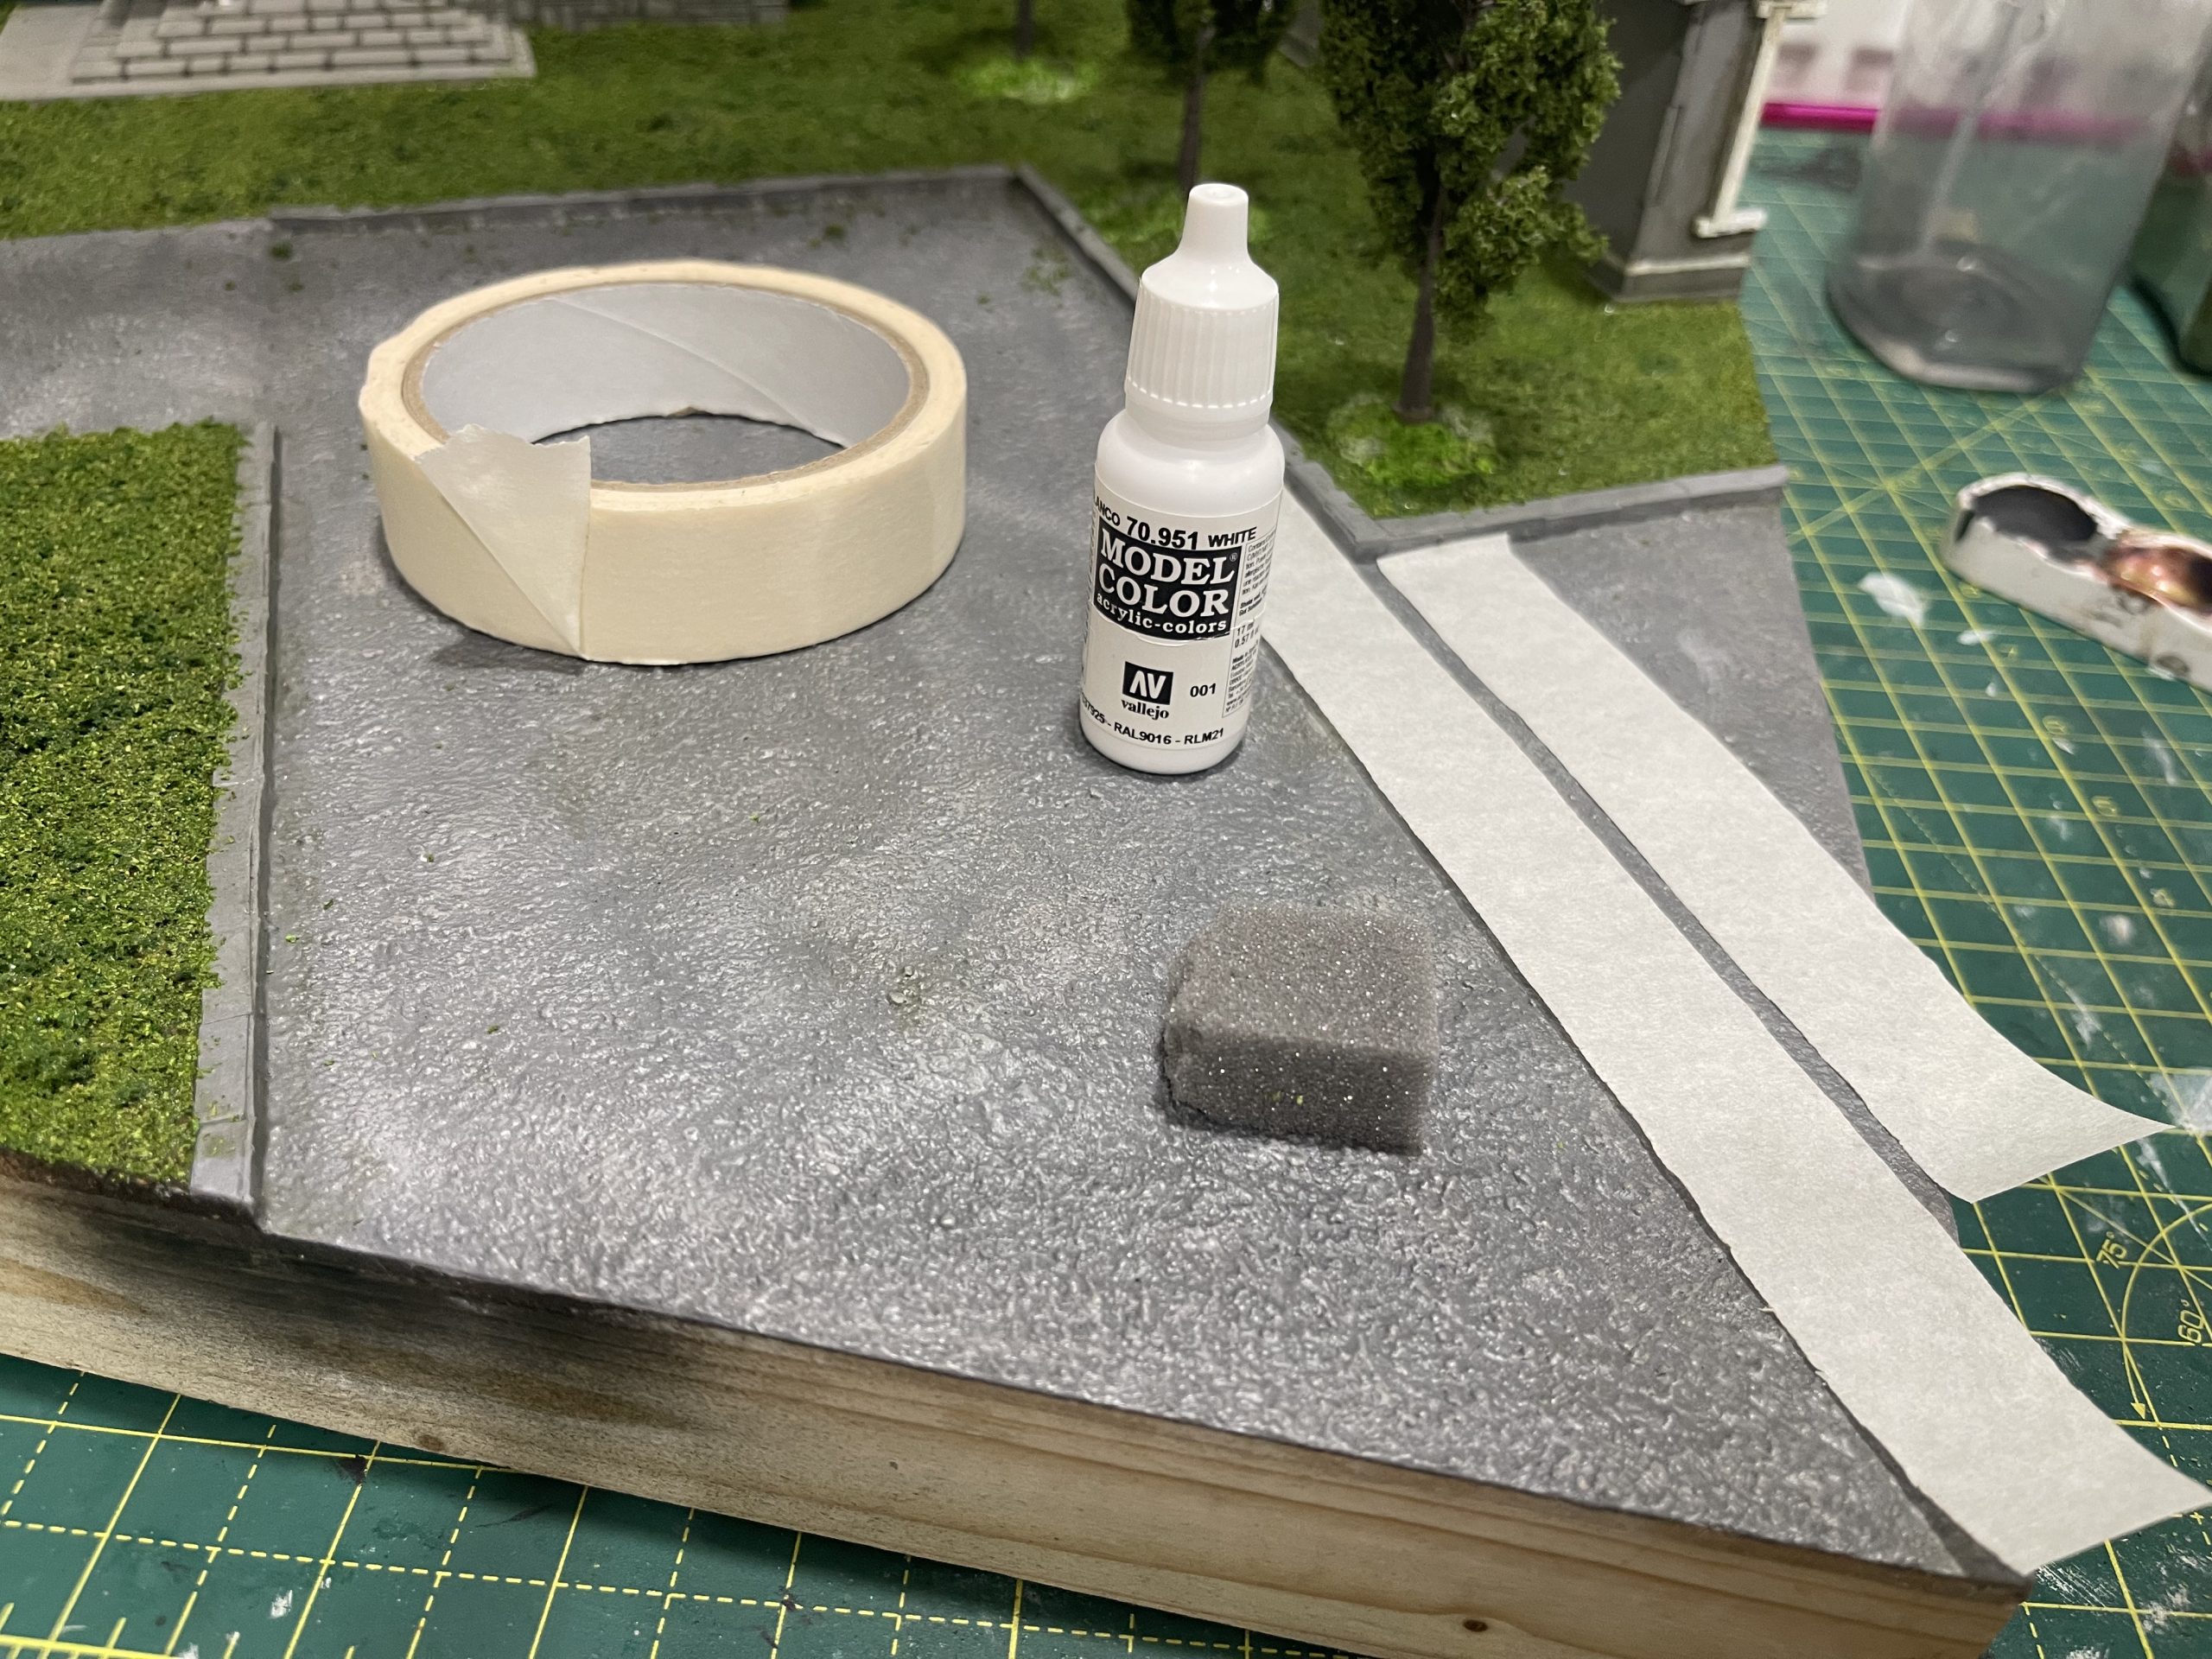 masking tape off the area
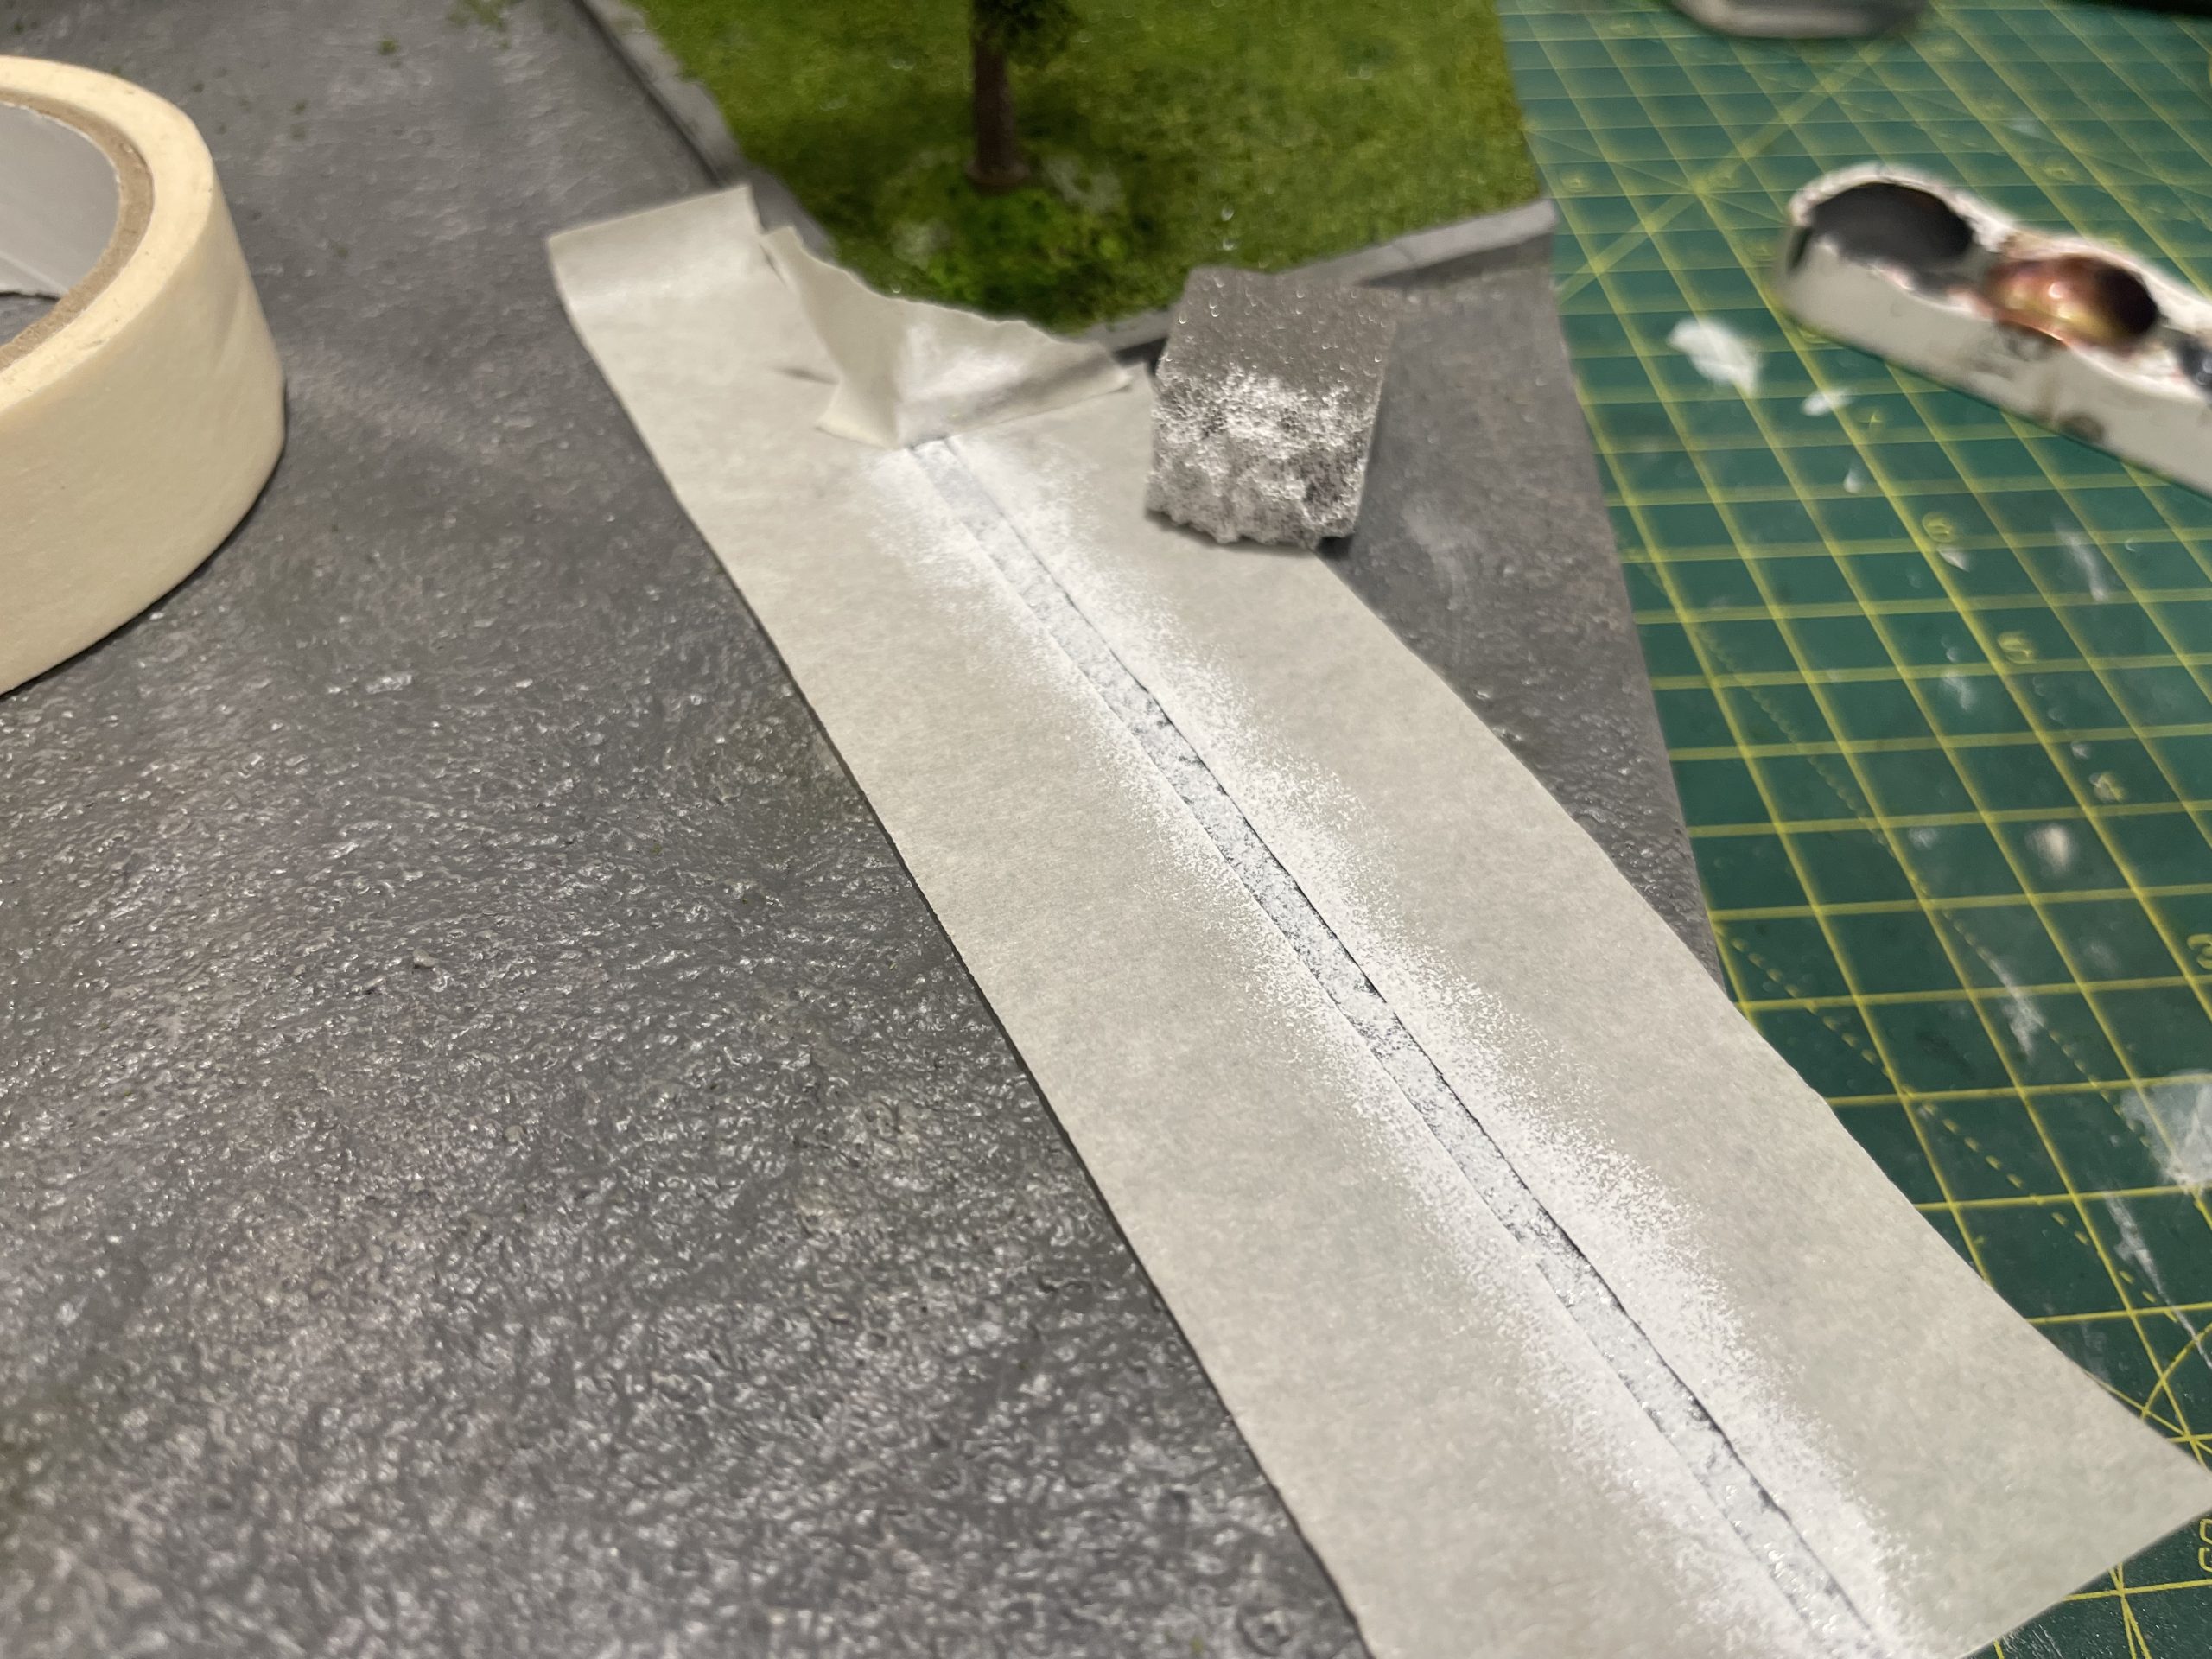 sponge on some of the paint, the less you do, the better it'll look
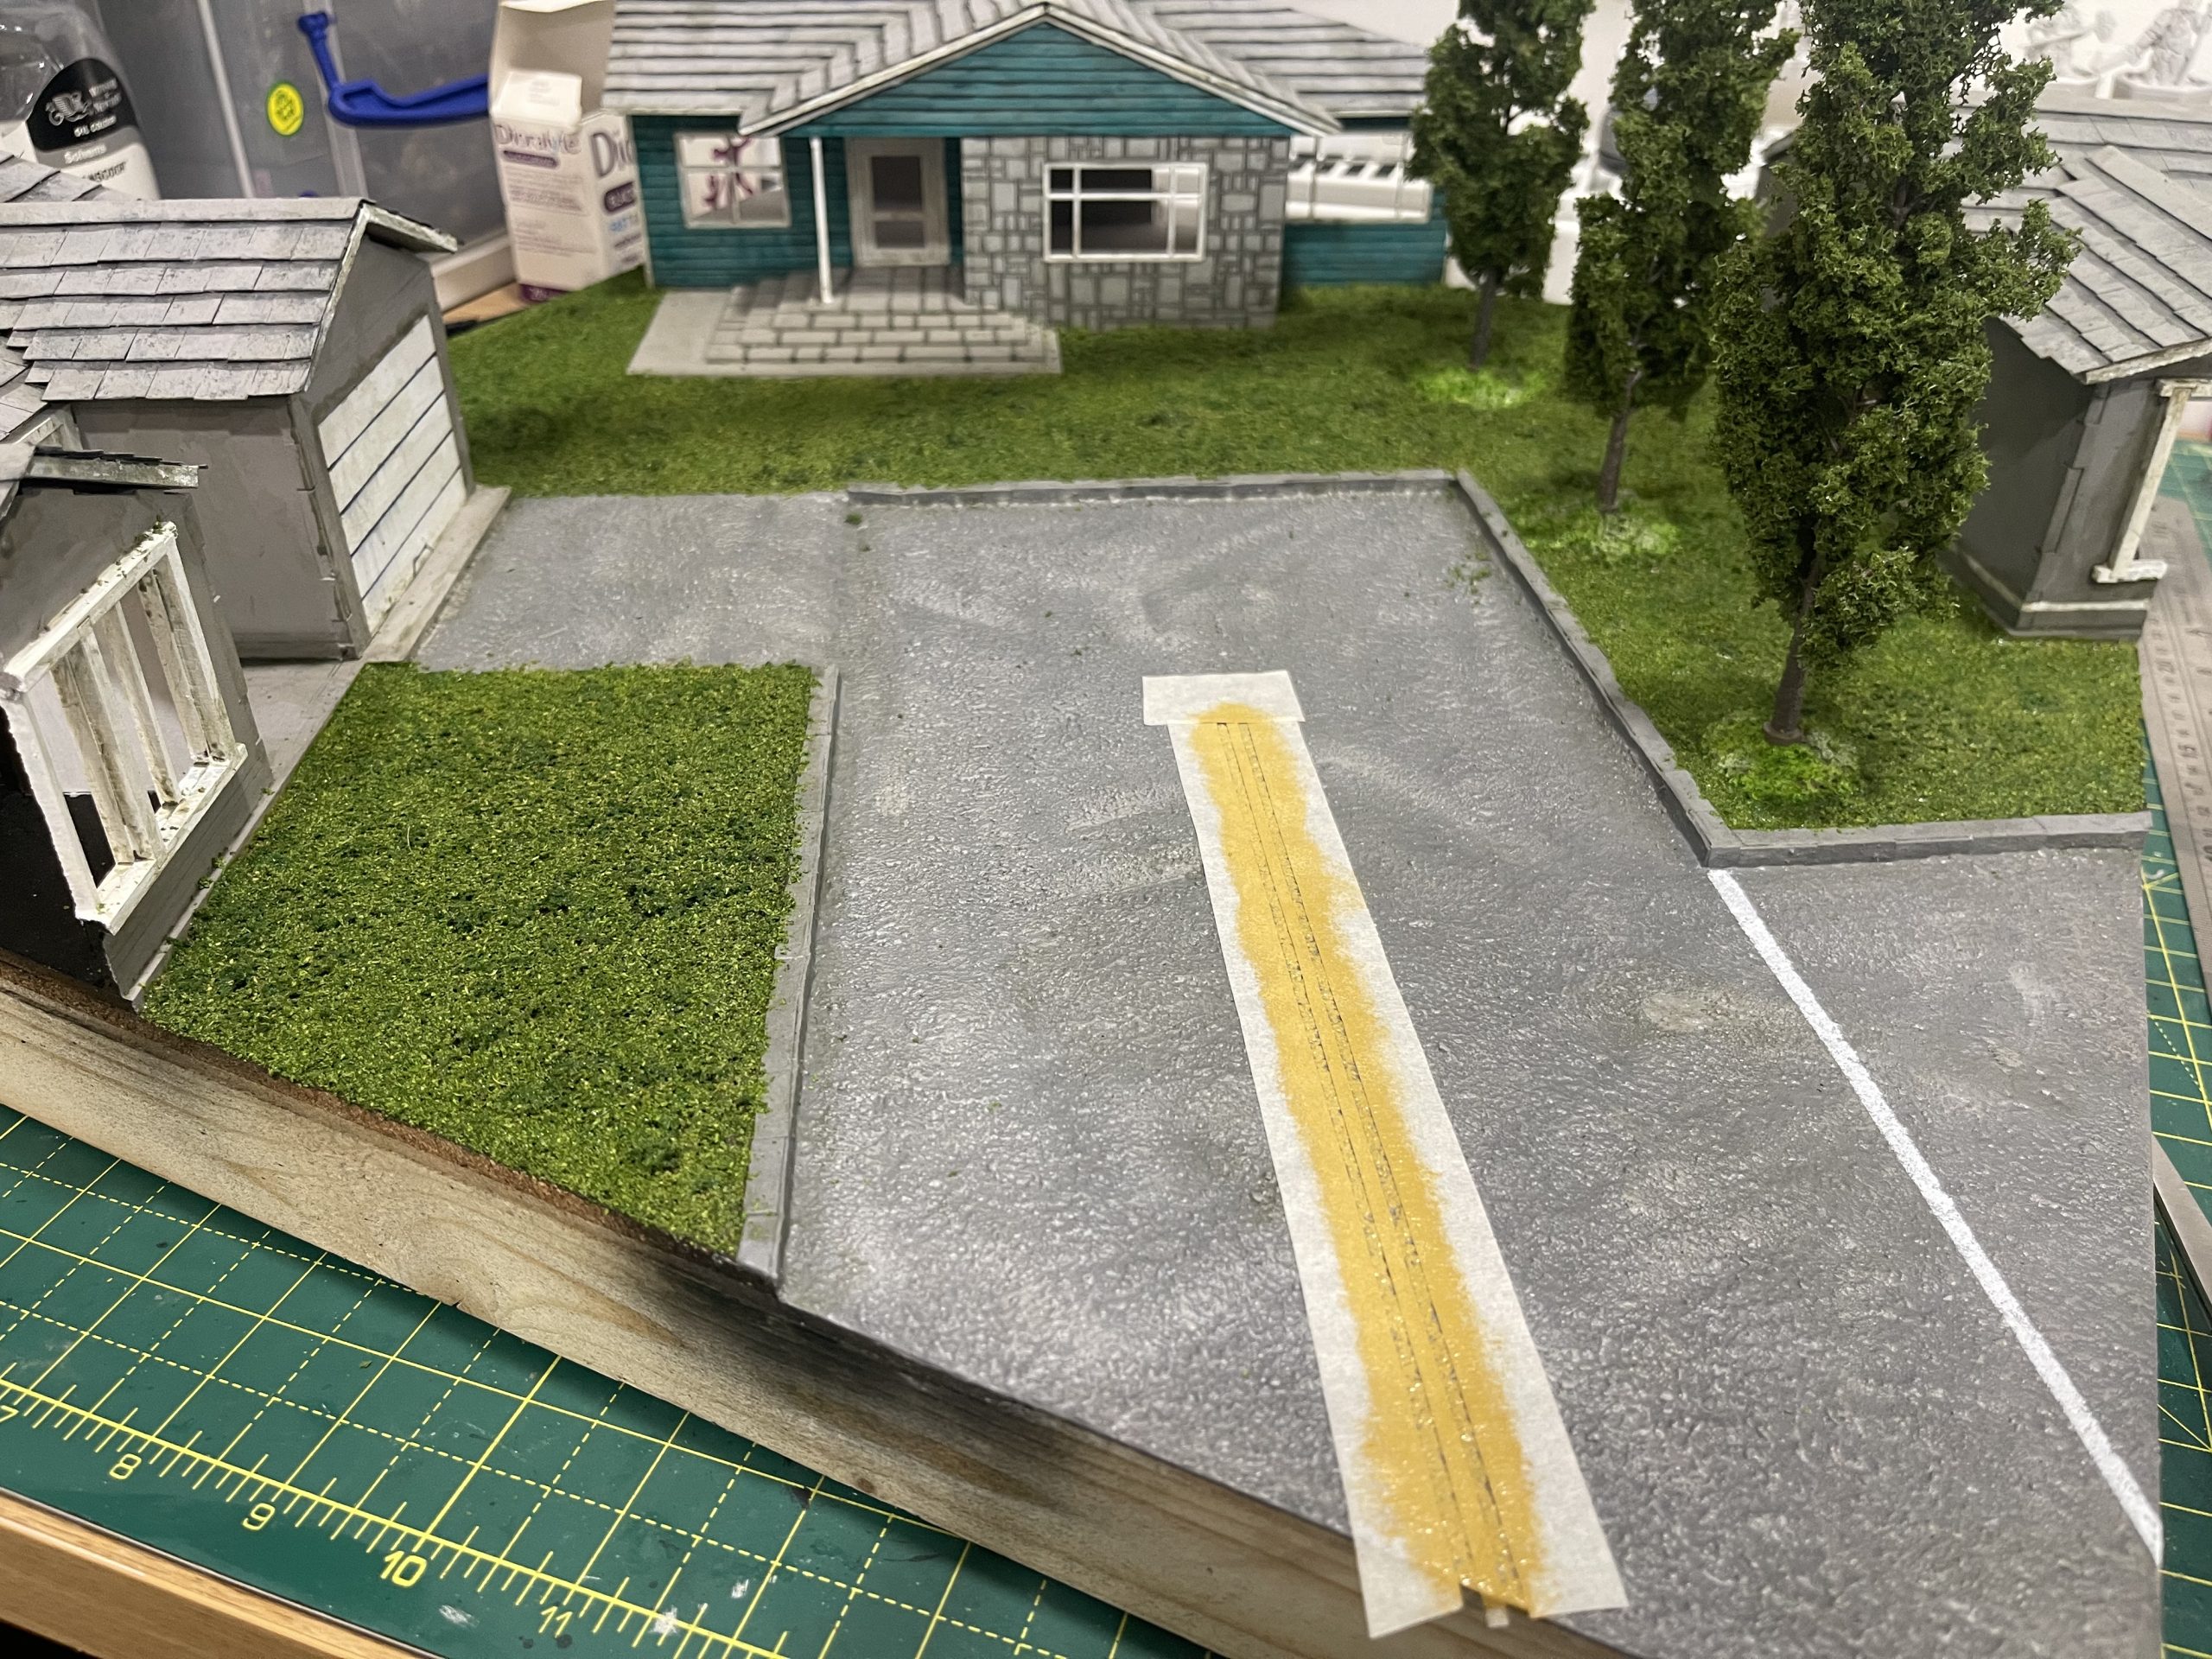 same again but with an off yellow orange
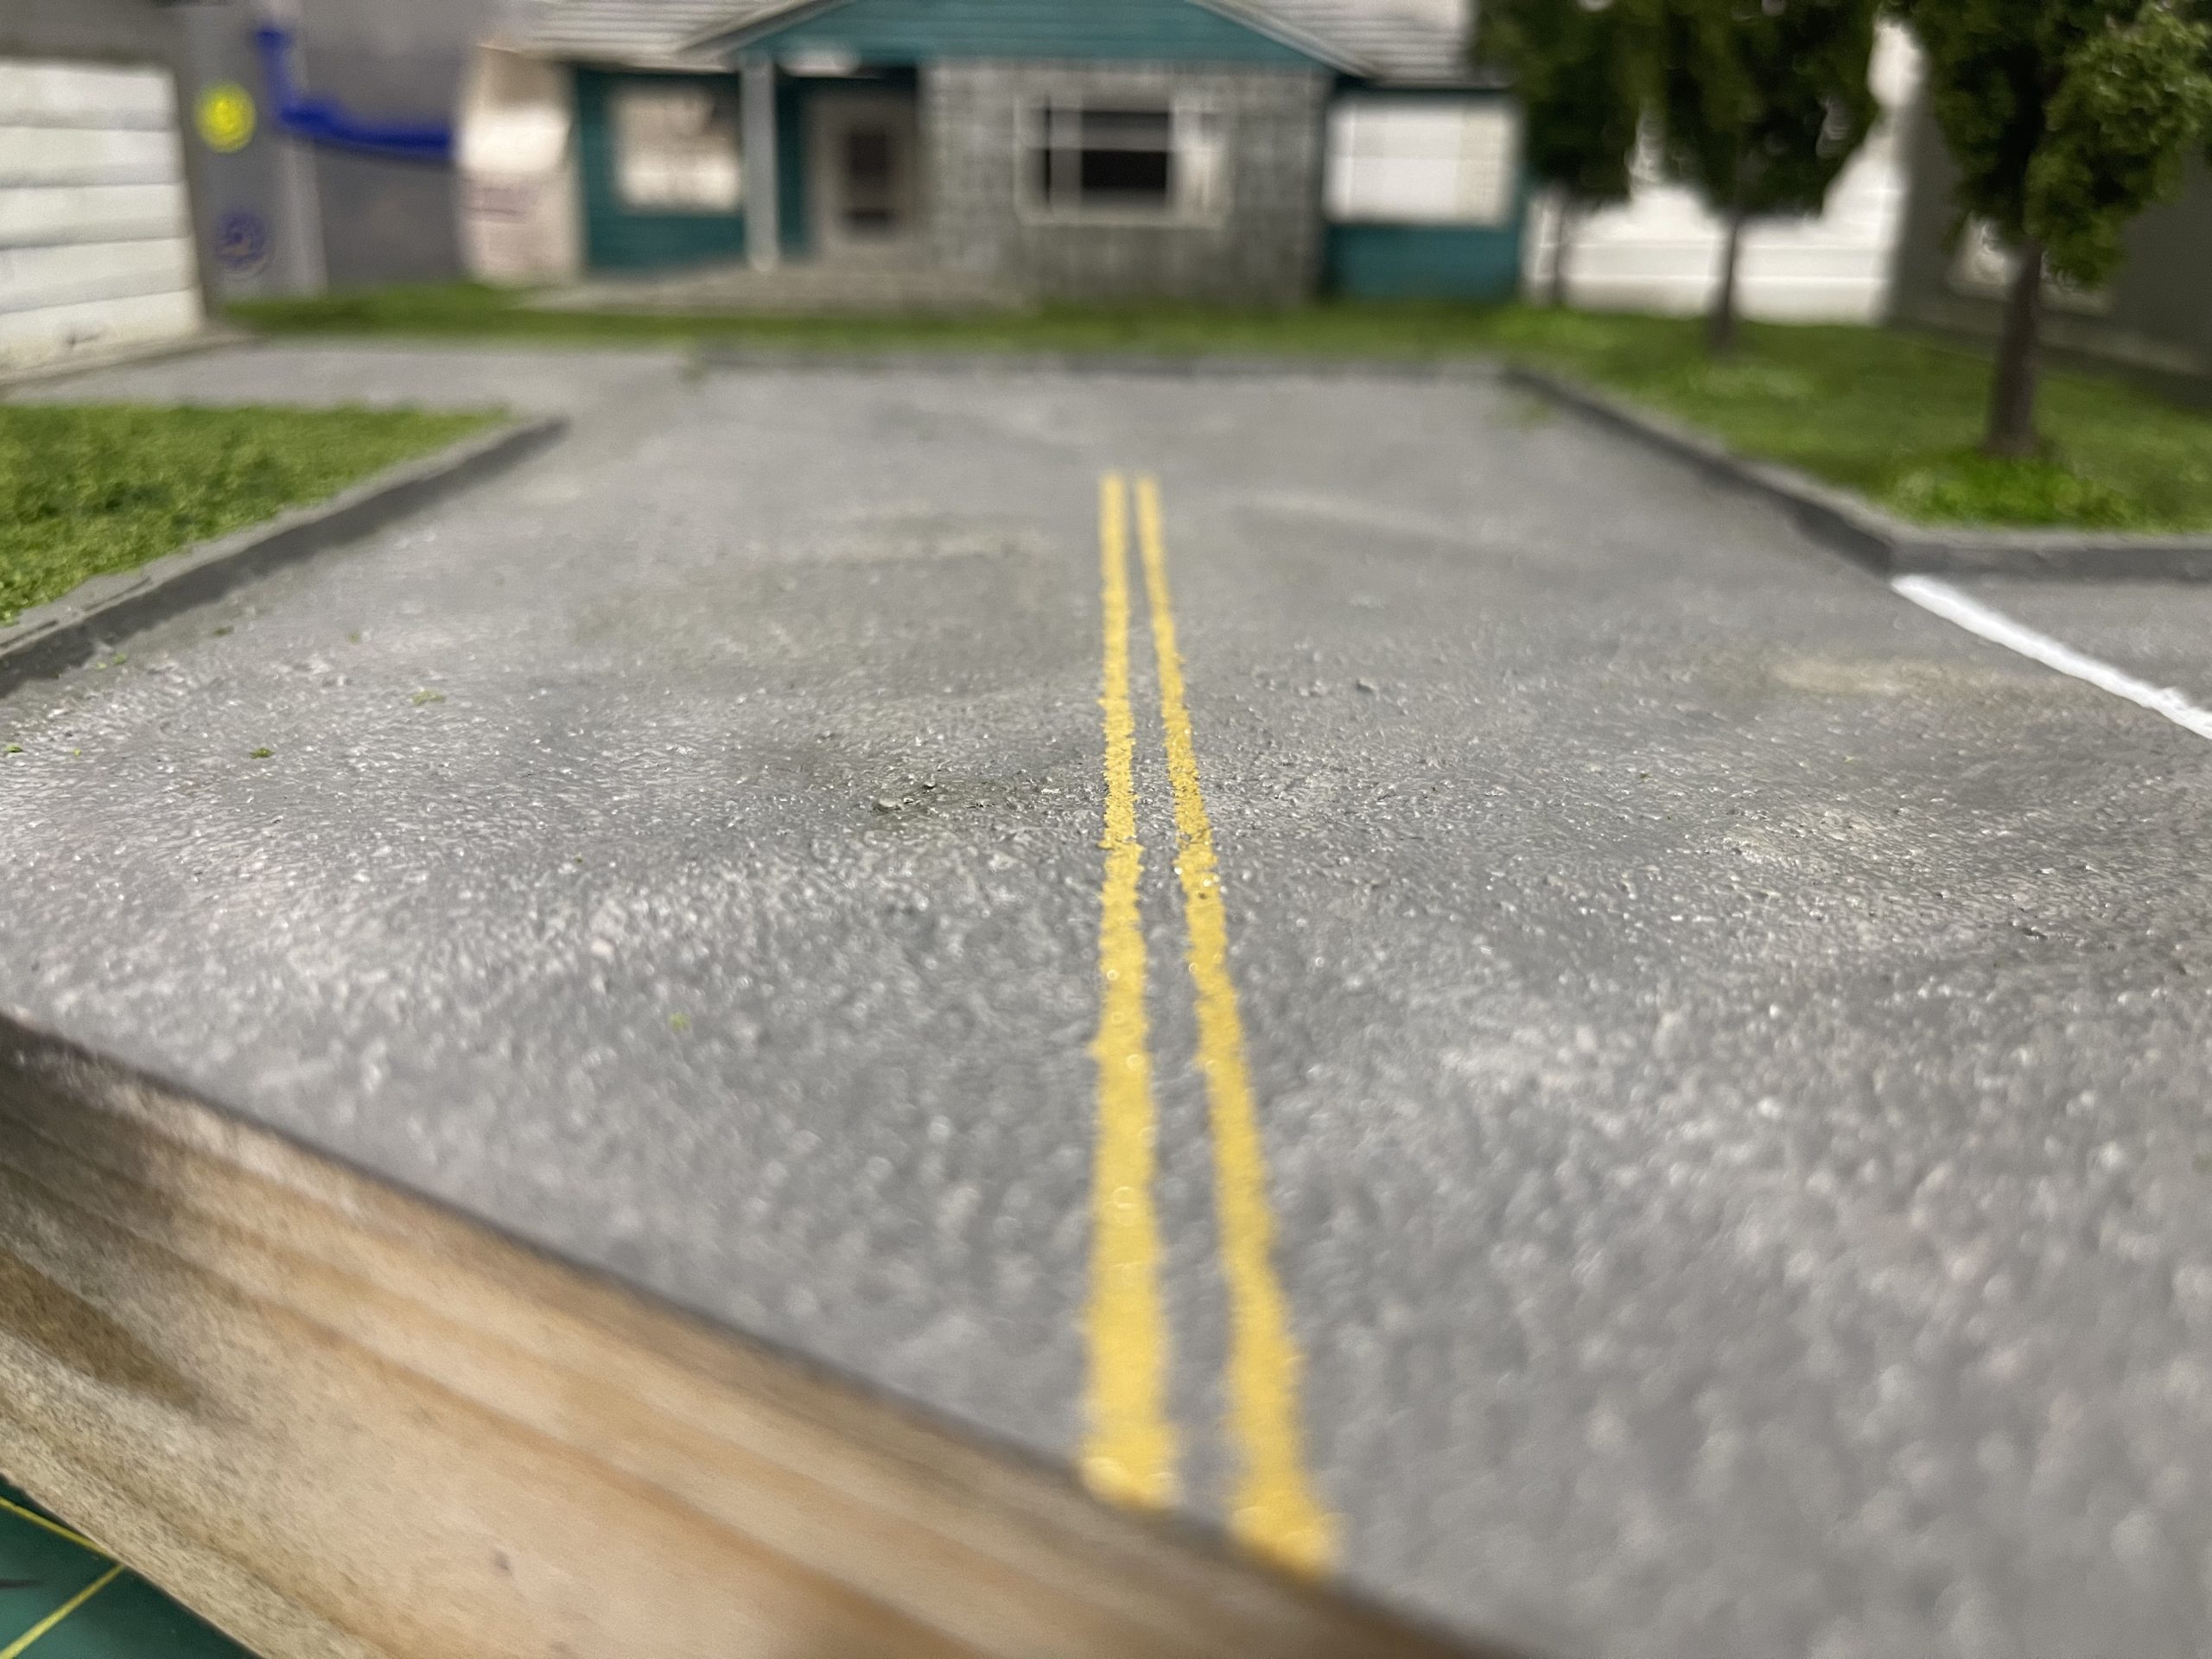 look at how rough and not perfectly straight it is (even though it is straight) - success!
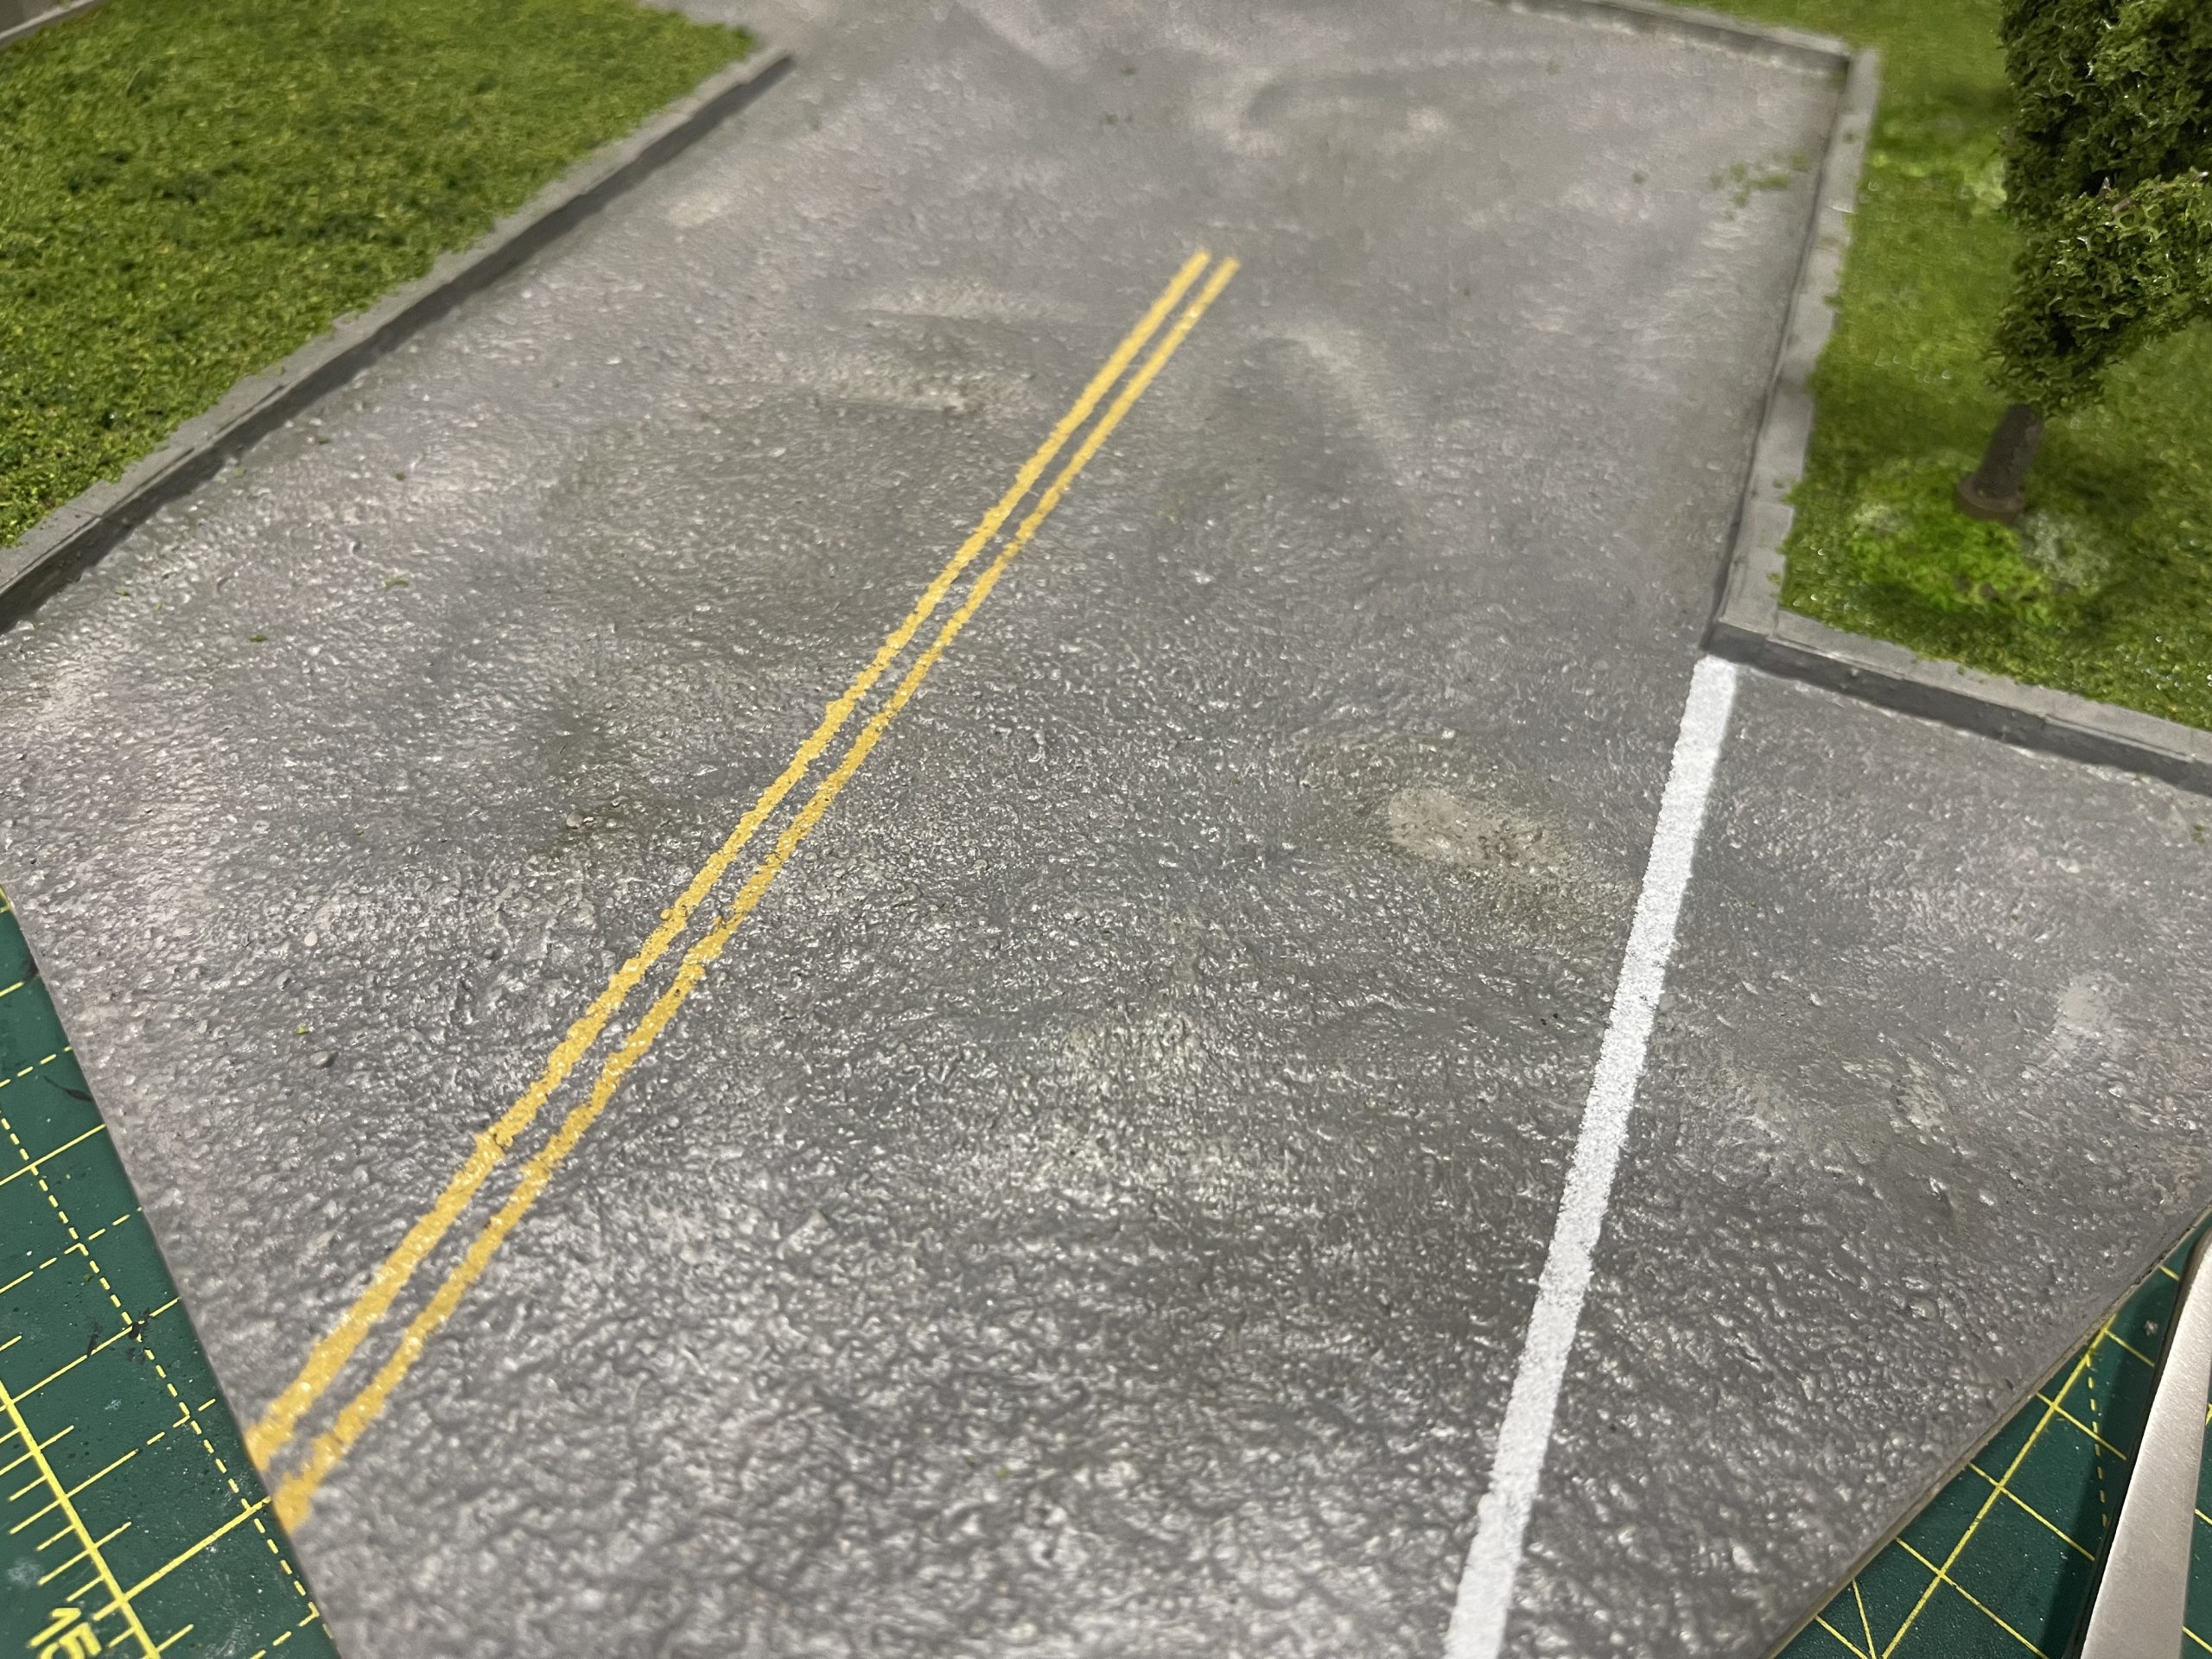 aerial view
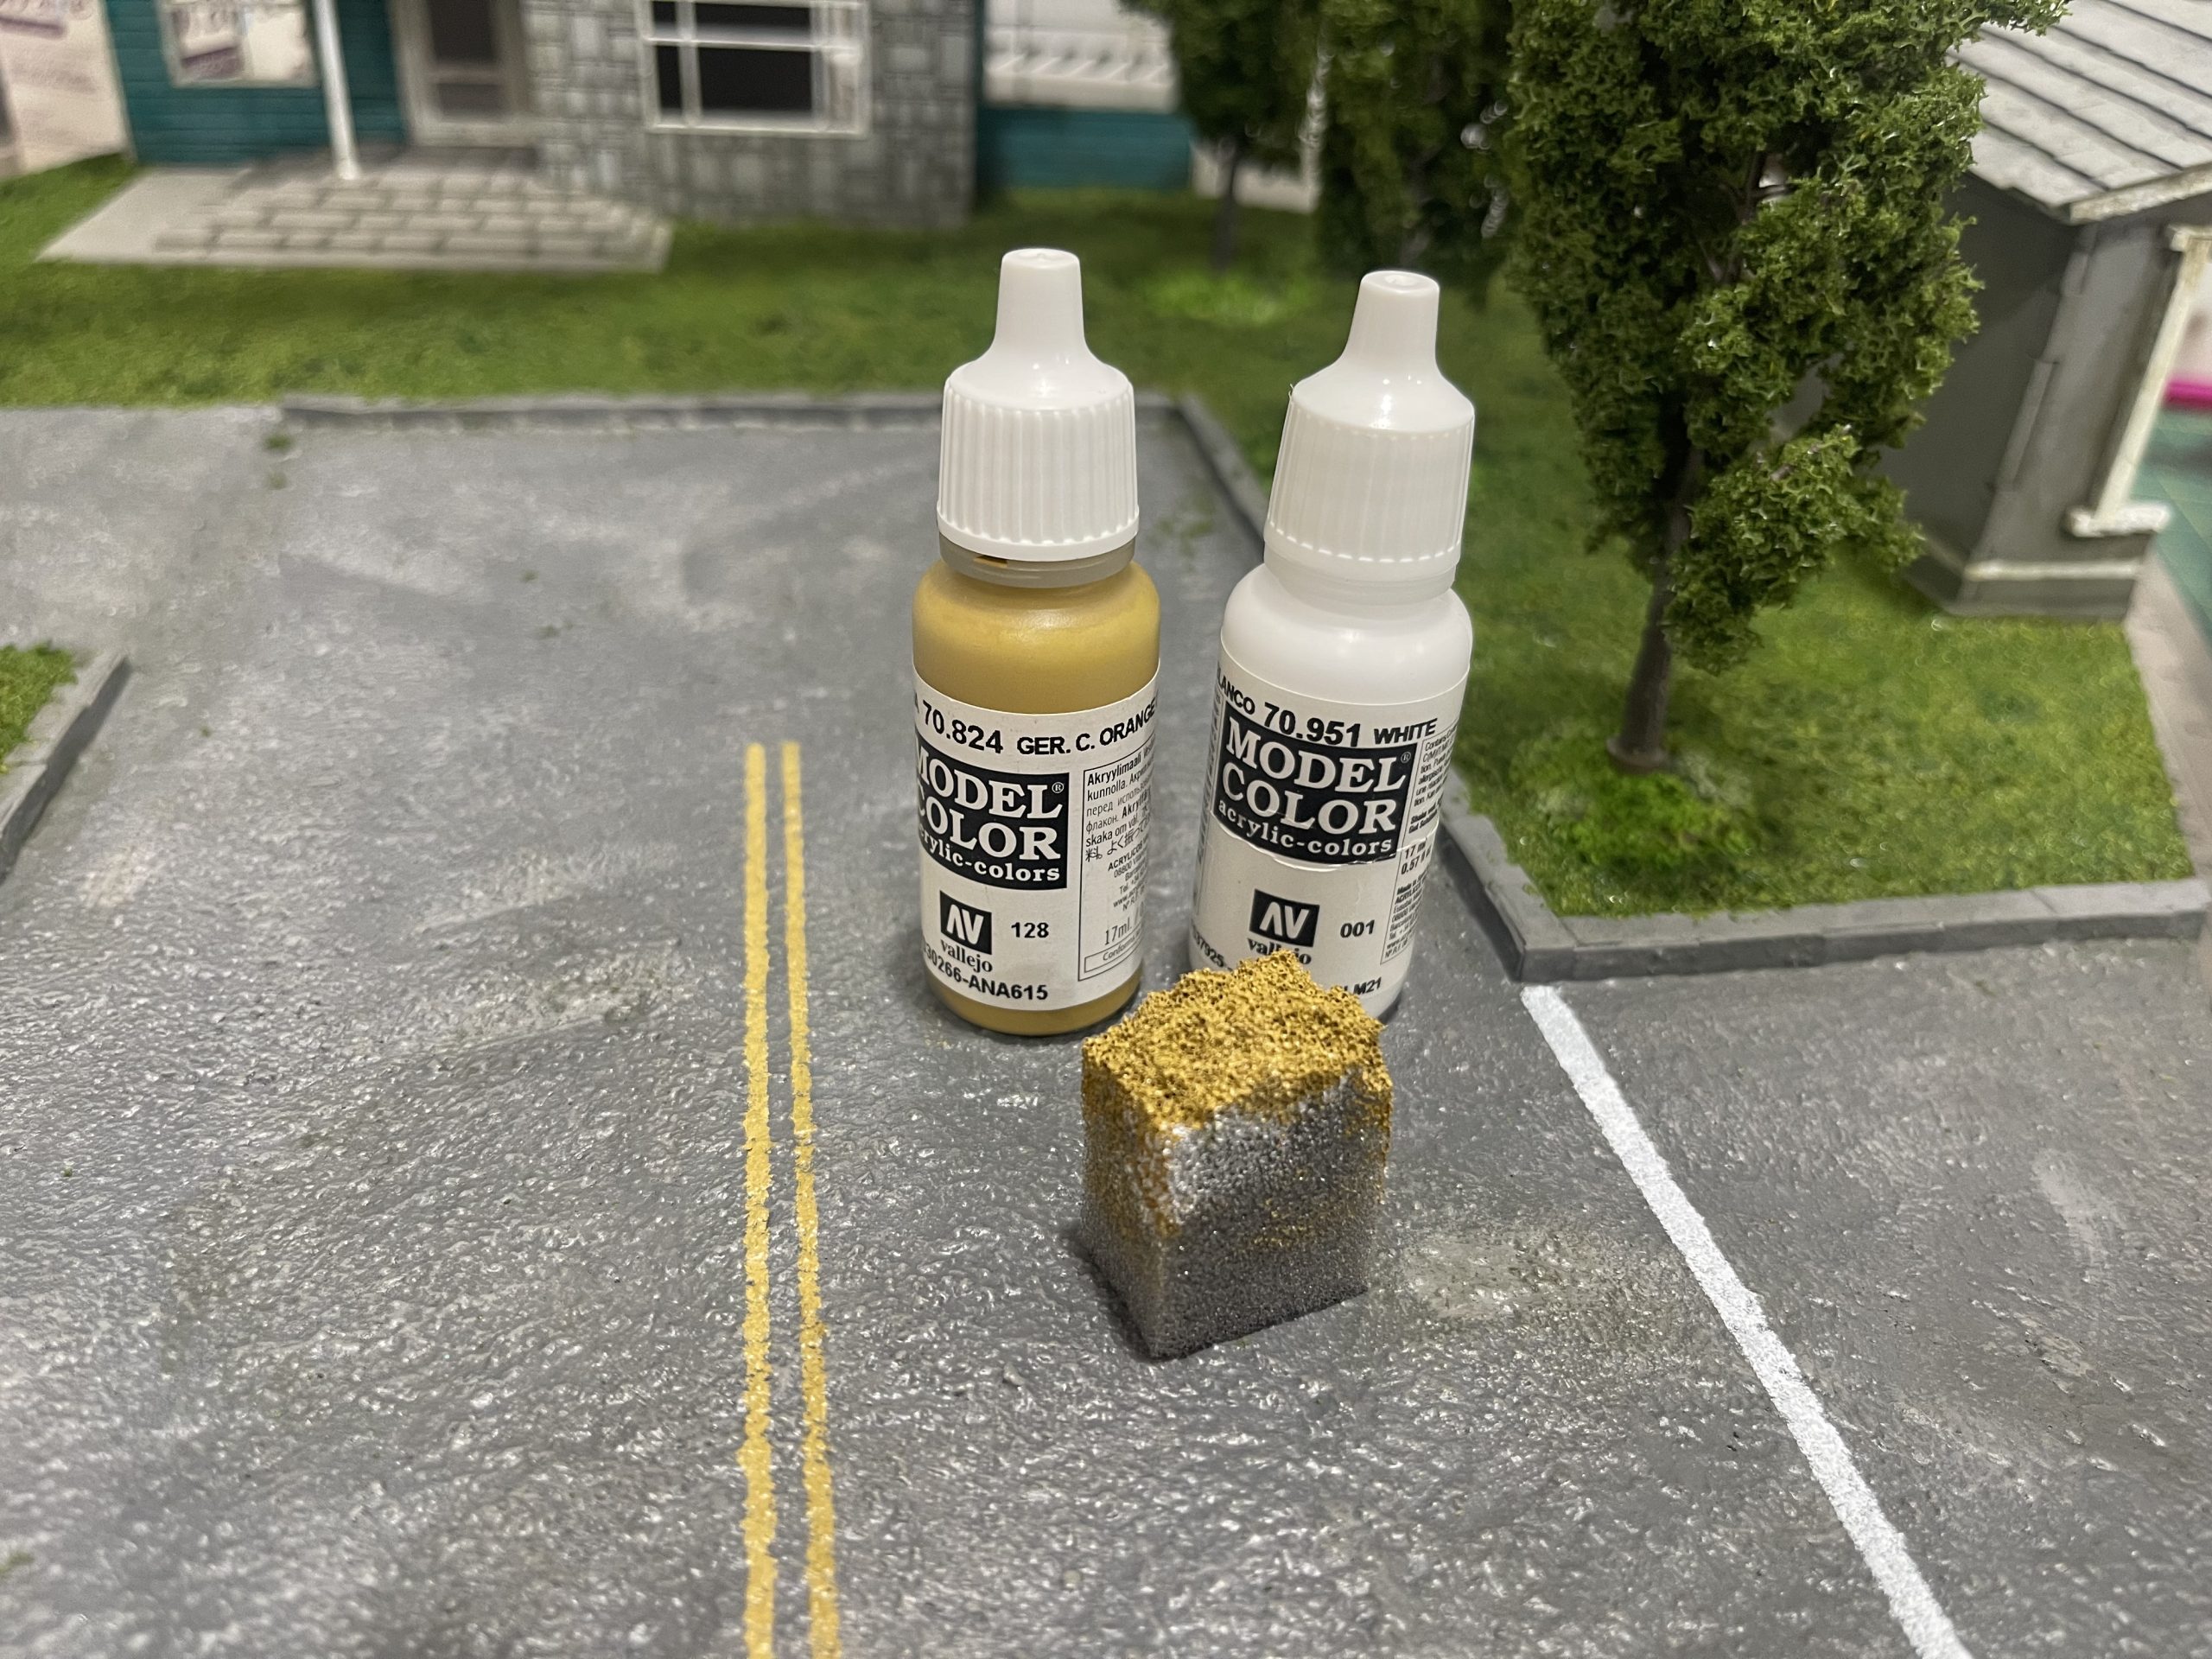 my colour choices were made by the highly sophisticated method of 'thats in arms reach'
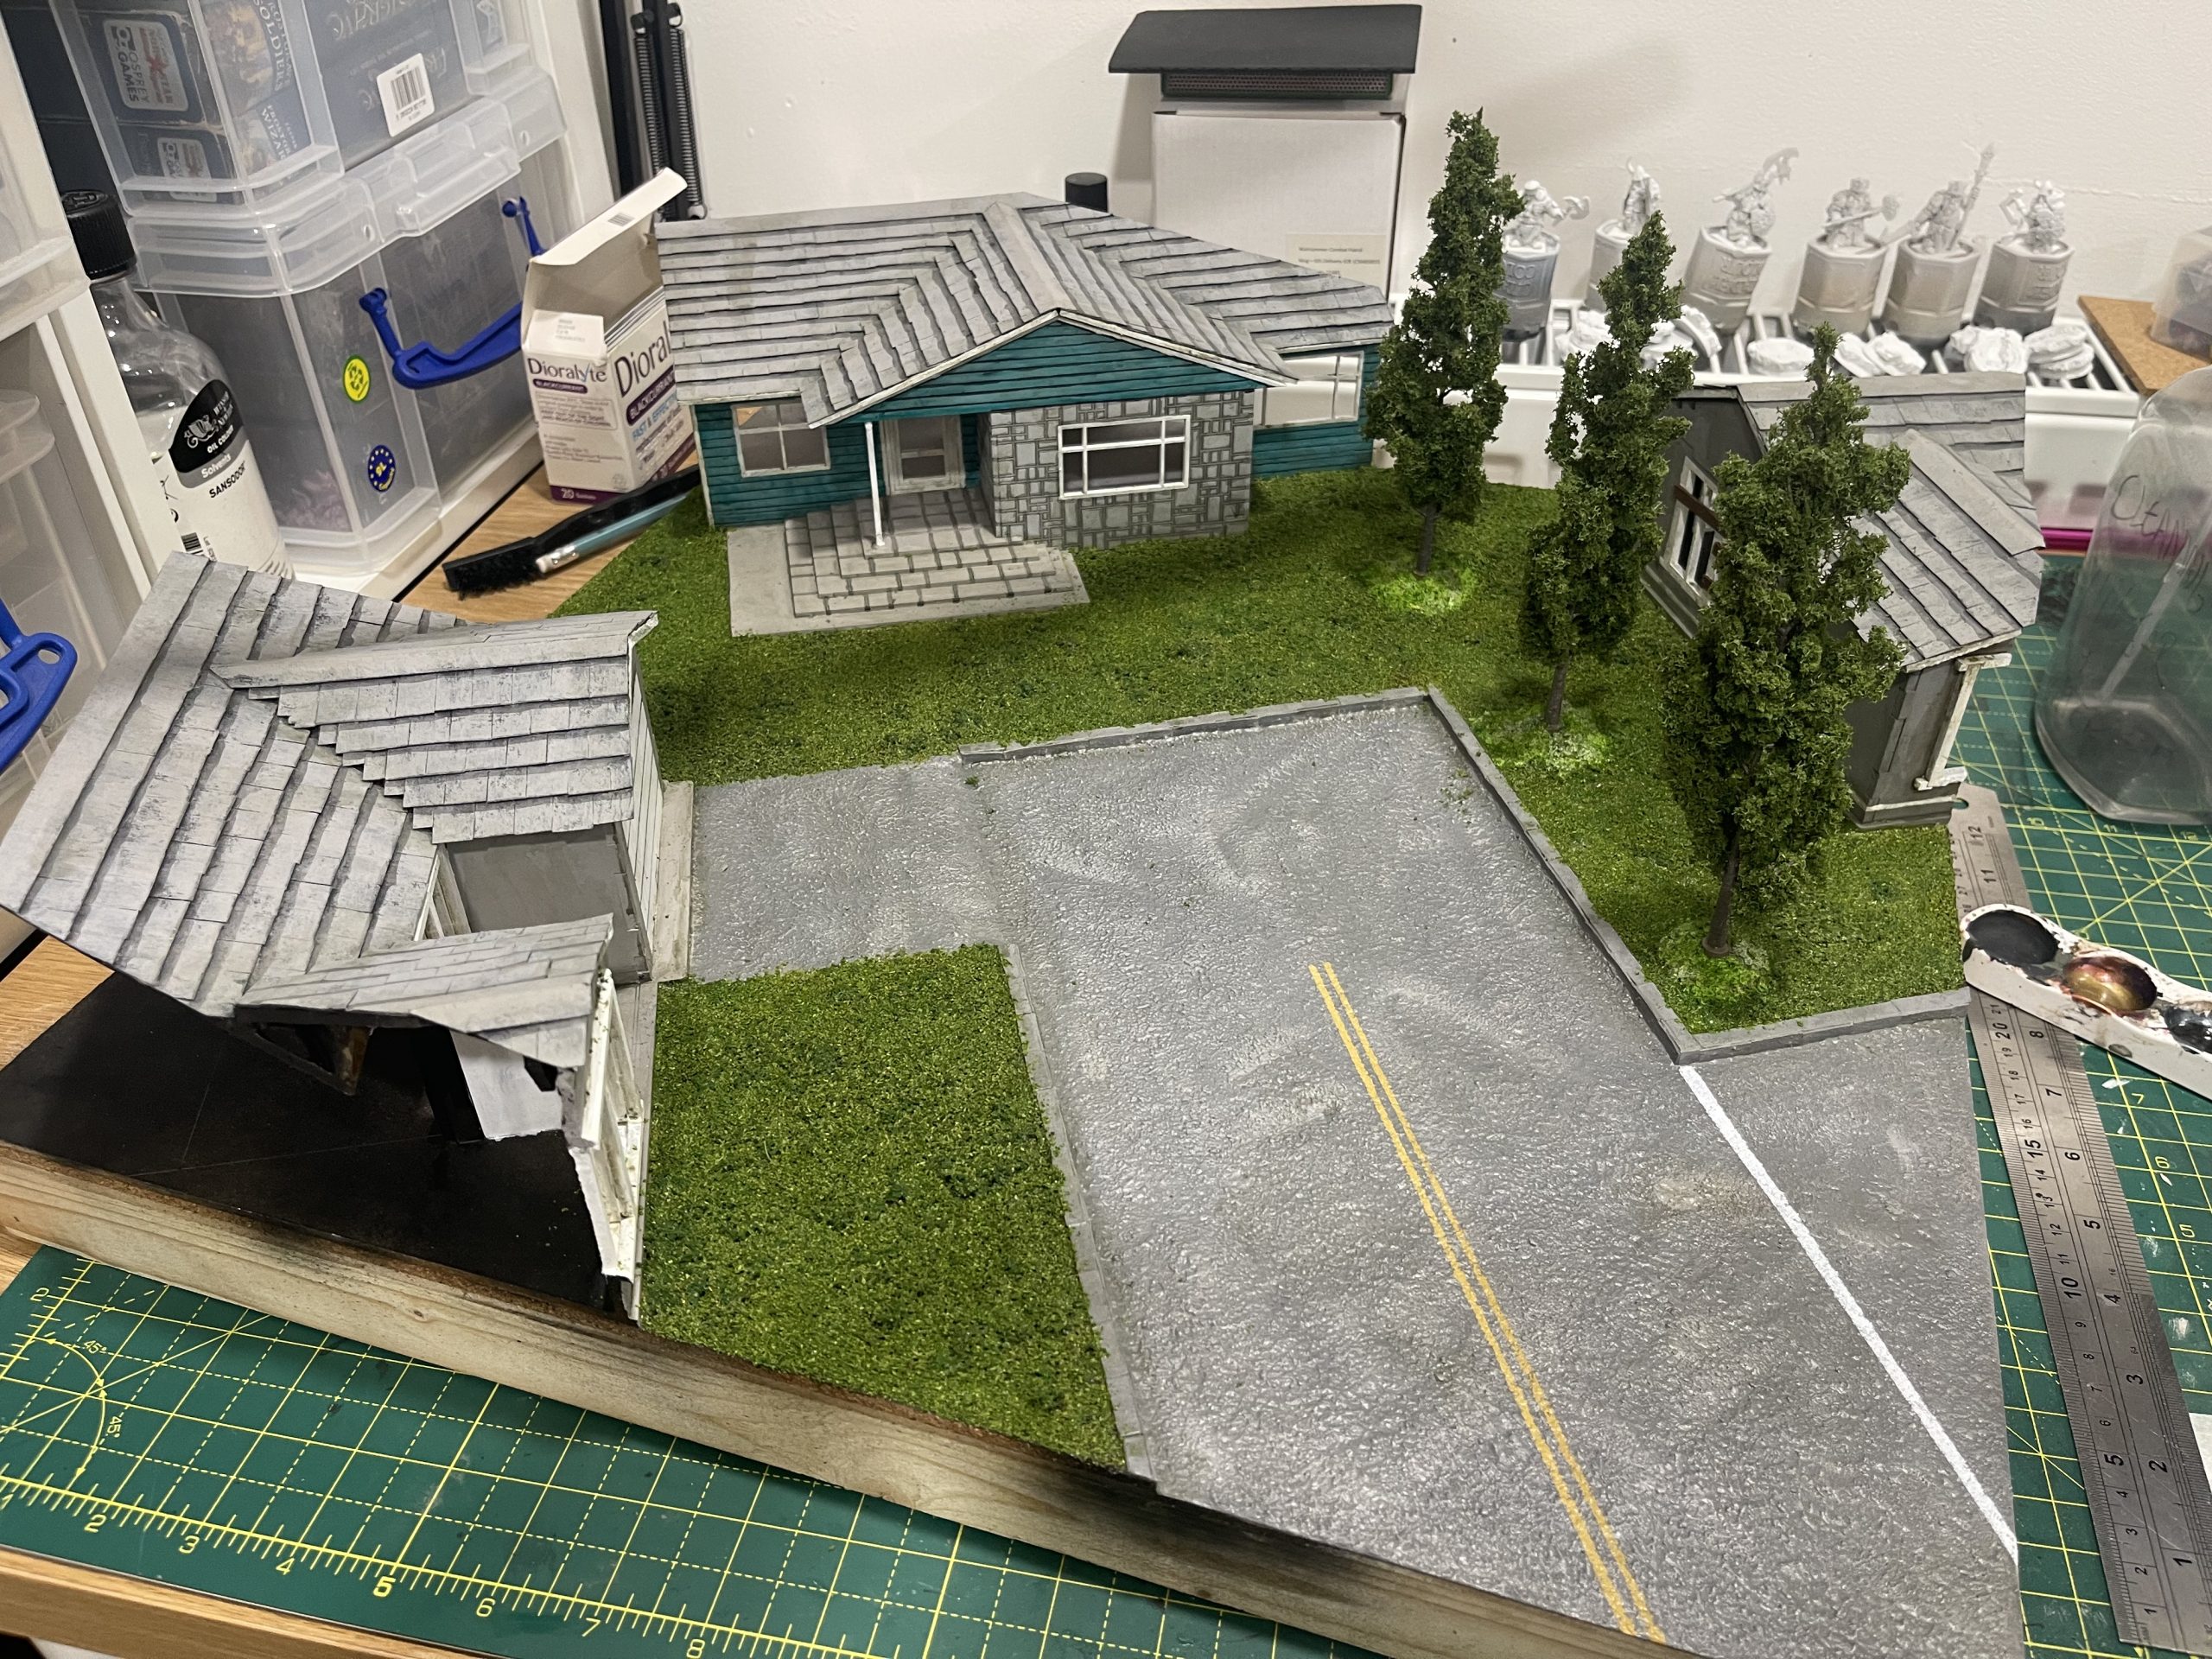 the trees have drying now and look like they'll blend in great