Under construction


Recommendations: 416
About the Project
A little place to document my terrain building madness.
Related Genre: General
This Project is Active
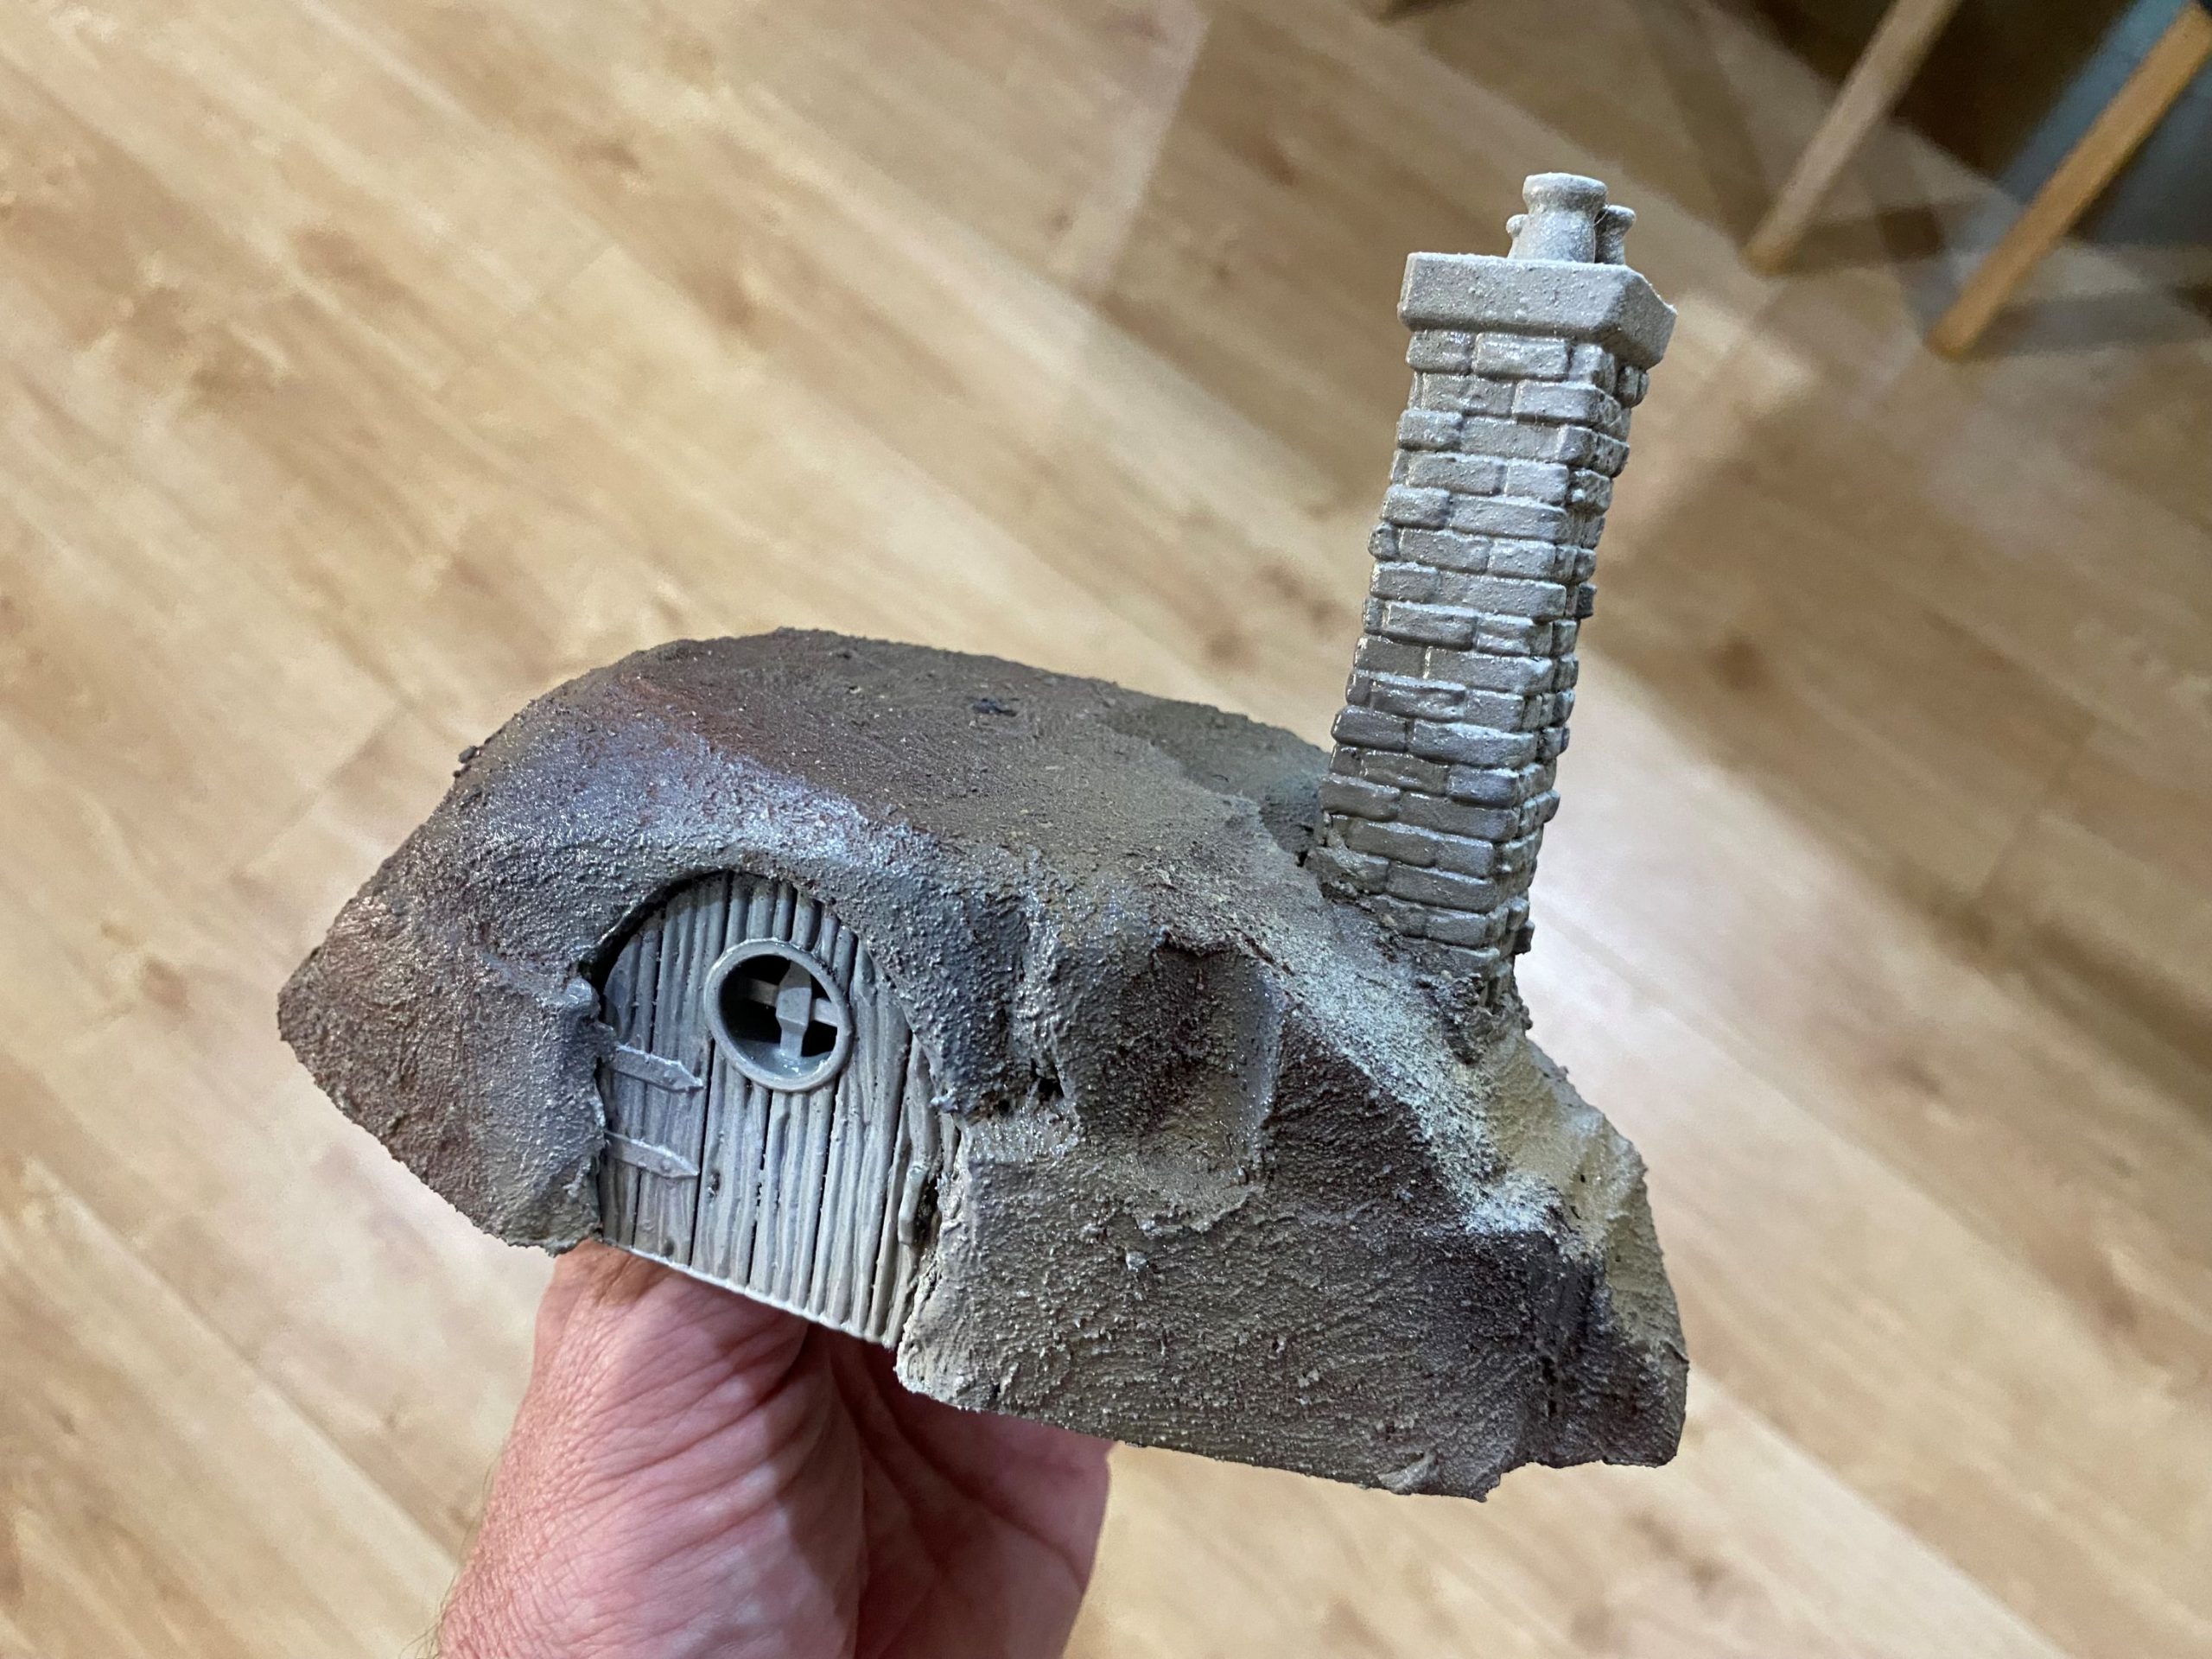
Burrows and Badger Den
It turns out that this campaign I have joined requires us to have something to represent the entrance to our warband’s den, as well as a length of barricades.
Rather than have multiple posts showing the process, I figured I would condense it all down into one.
It may be helpful to refer to my Forest project, as a lot of this is really covered in there.
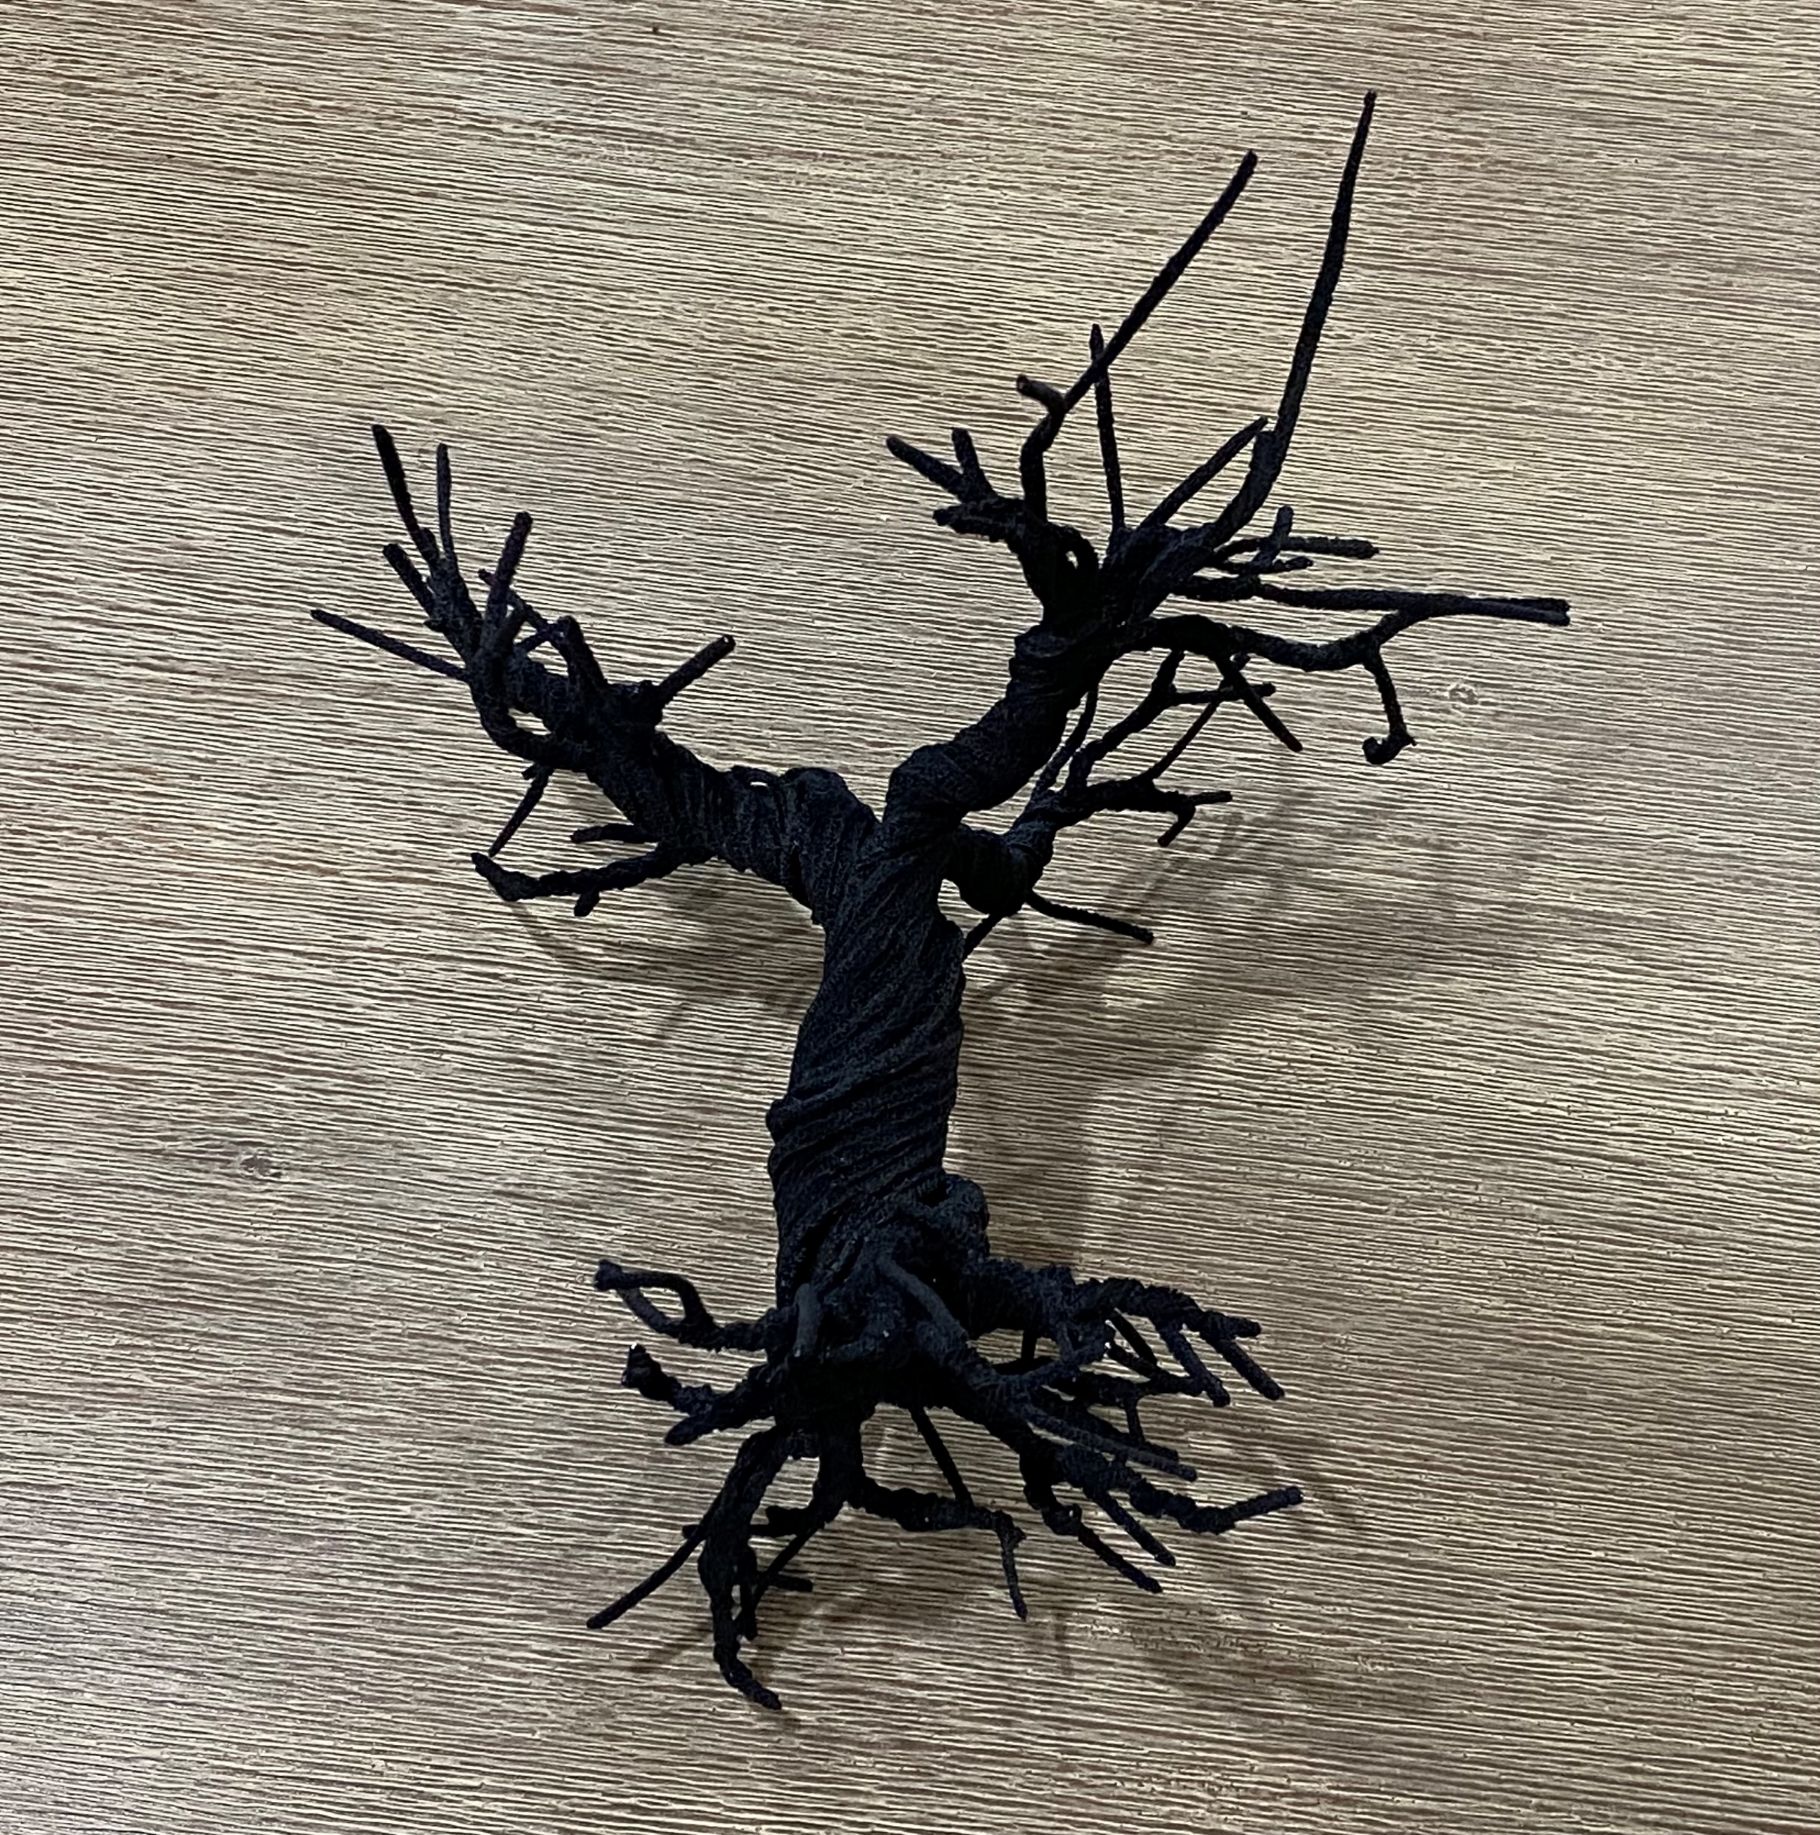
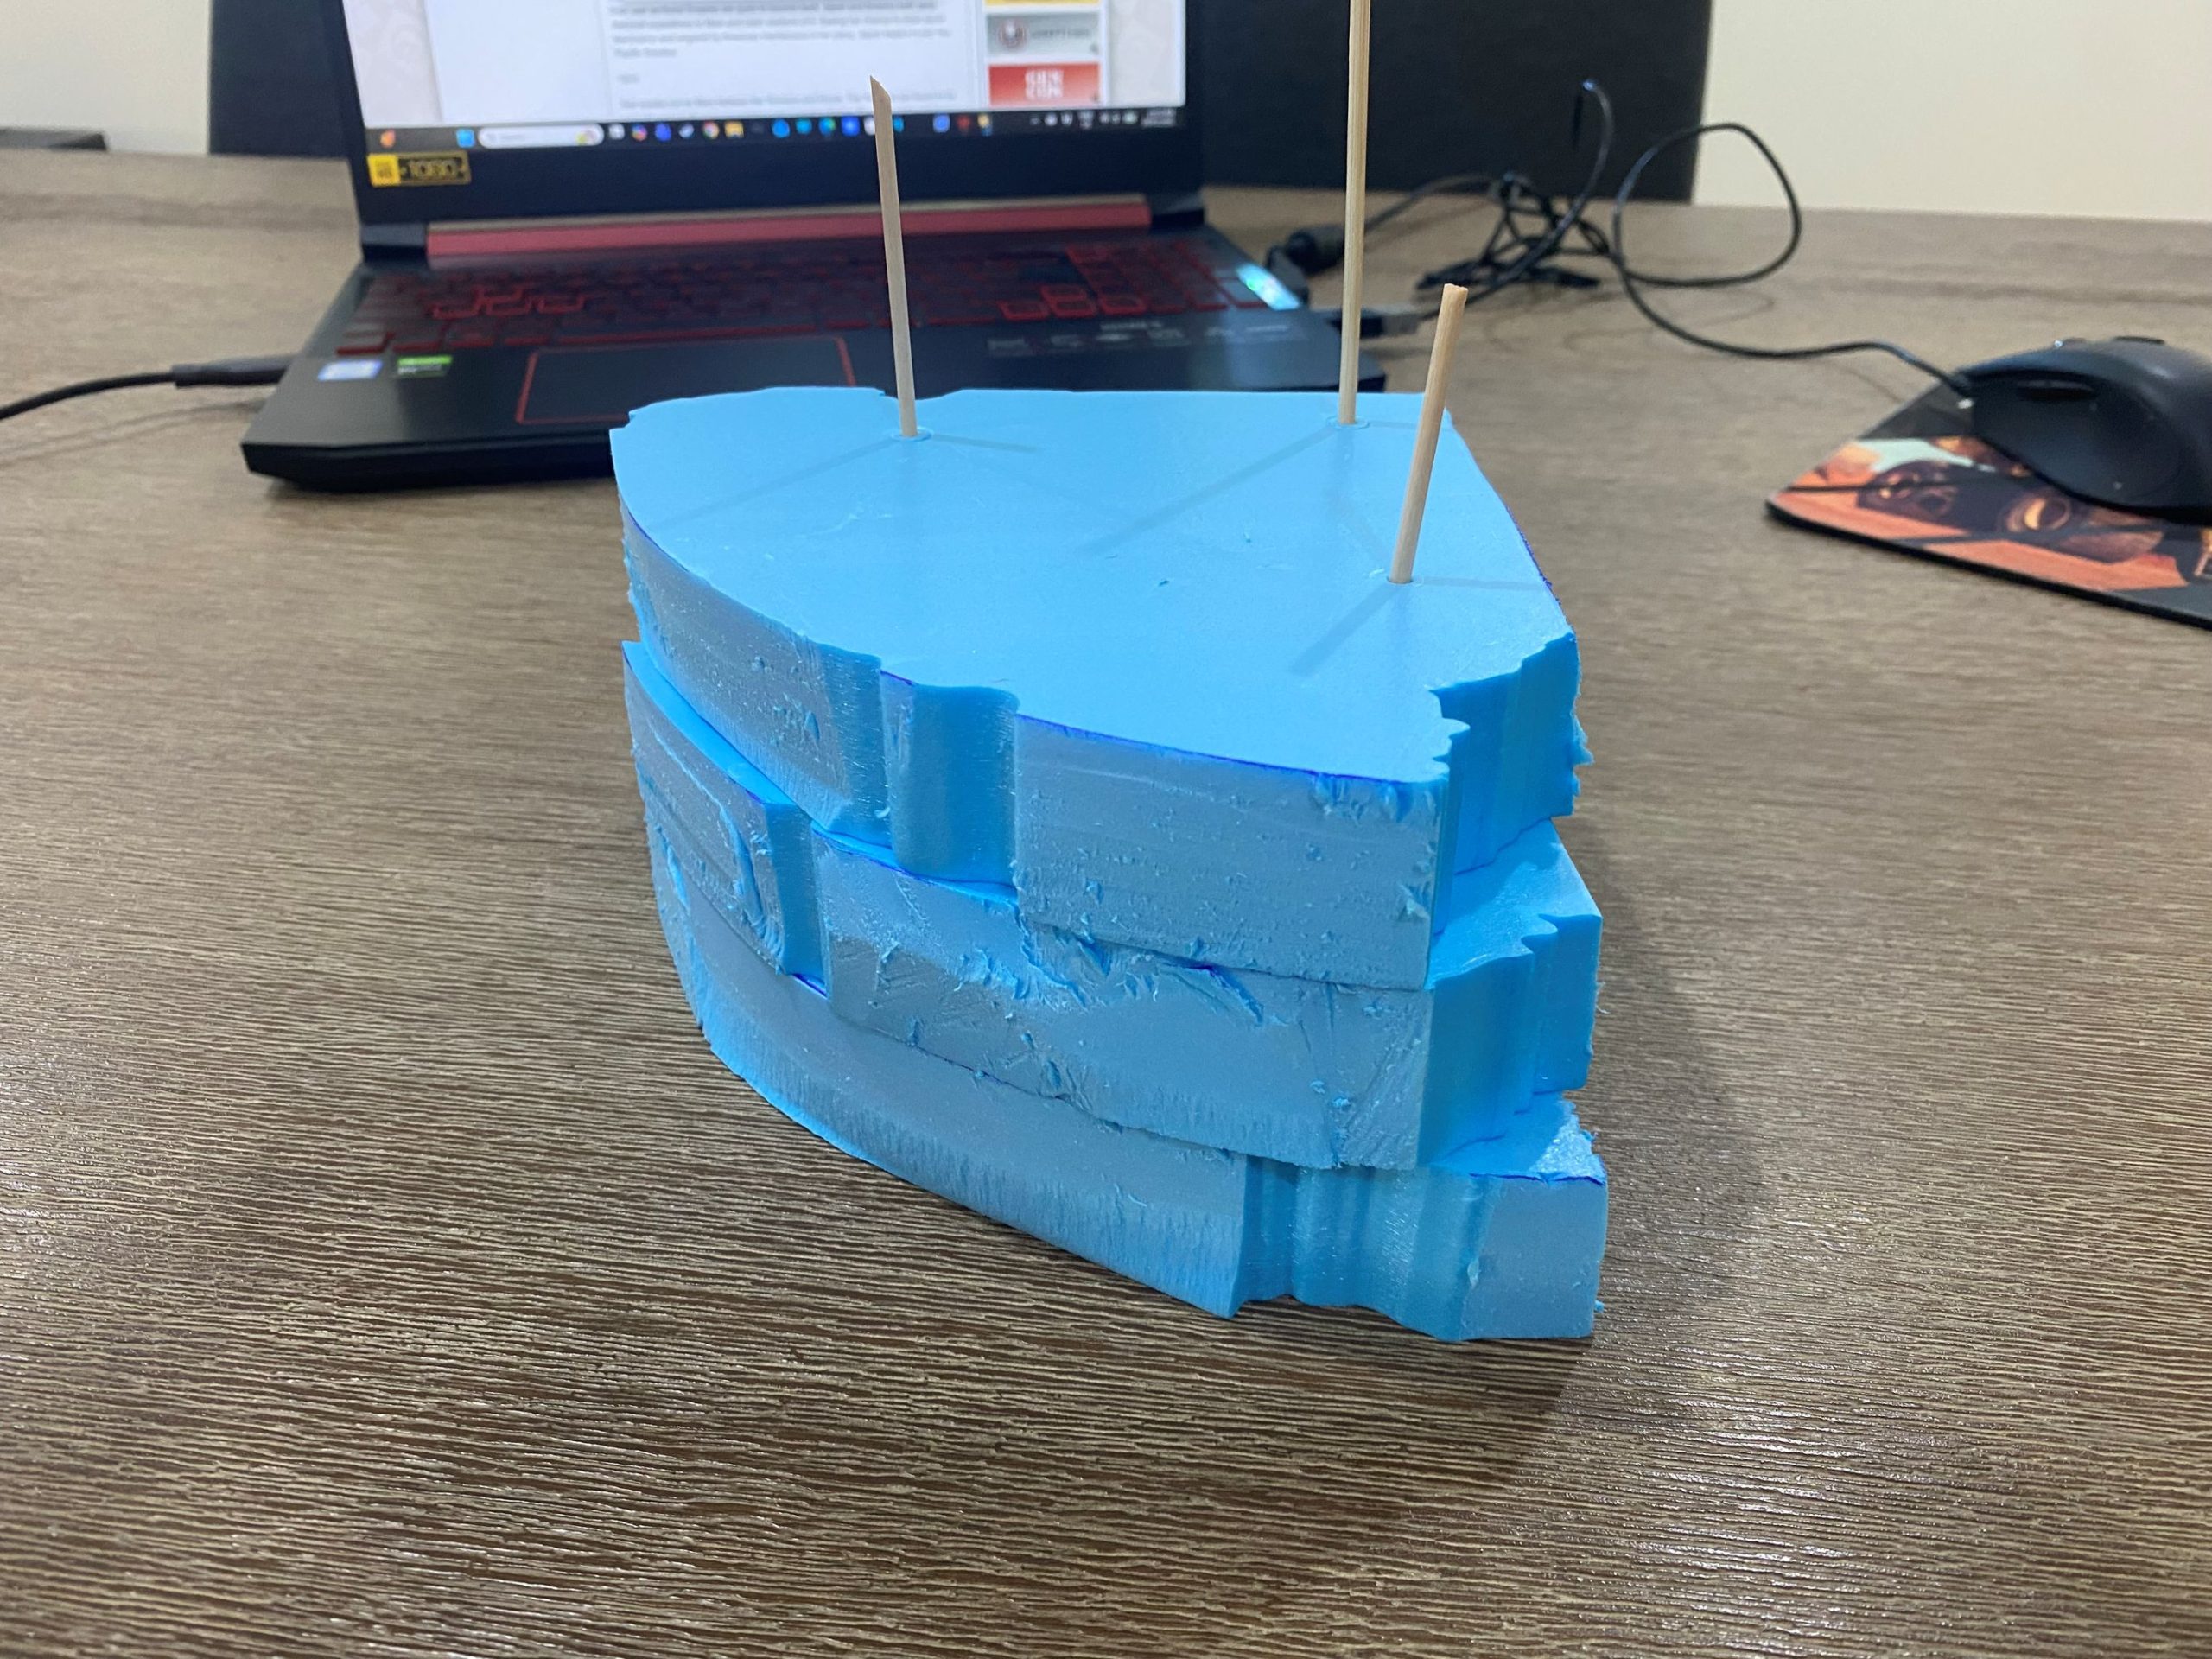
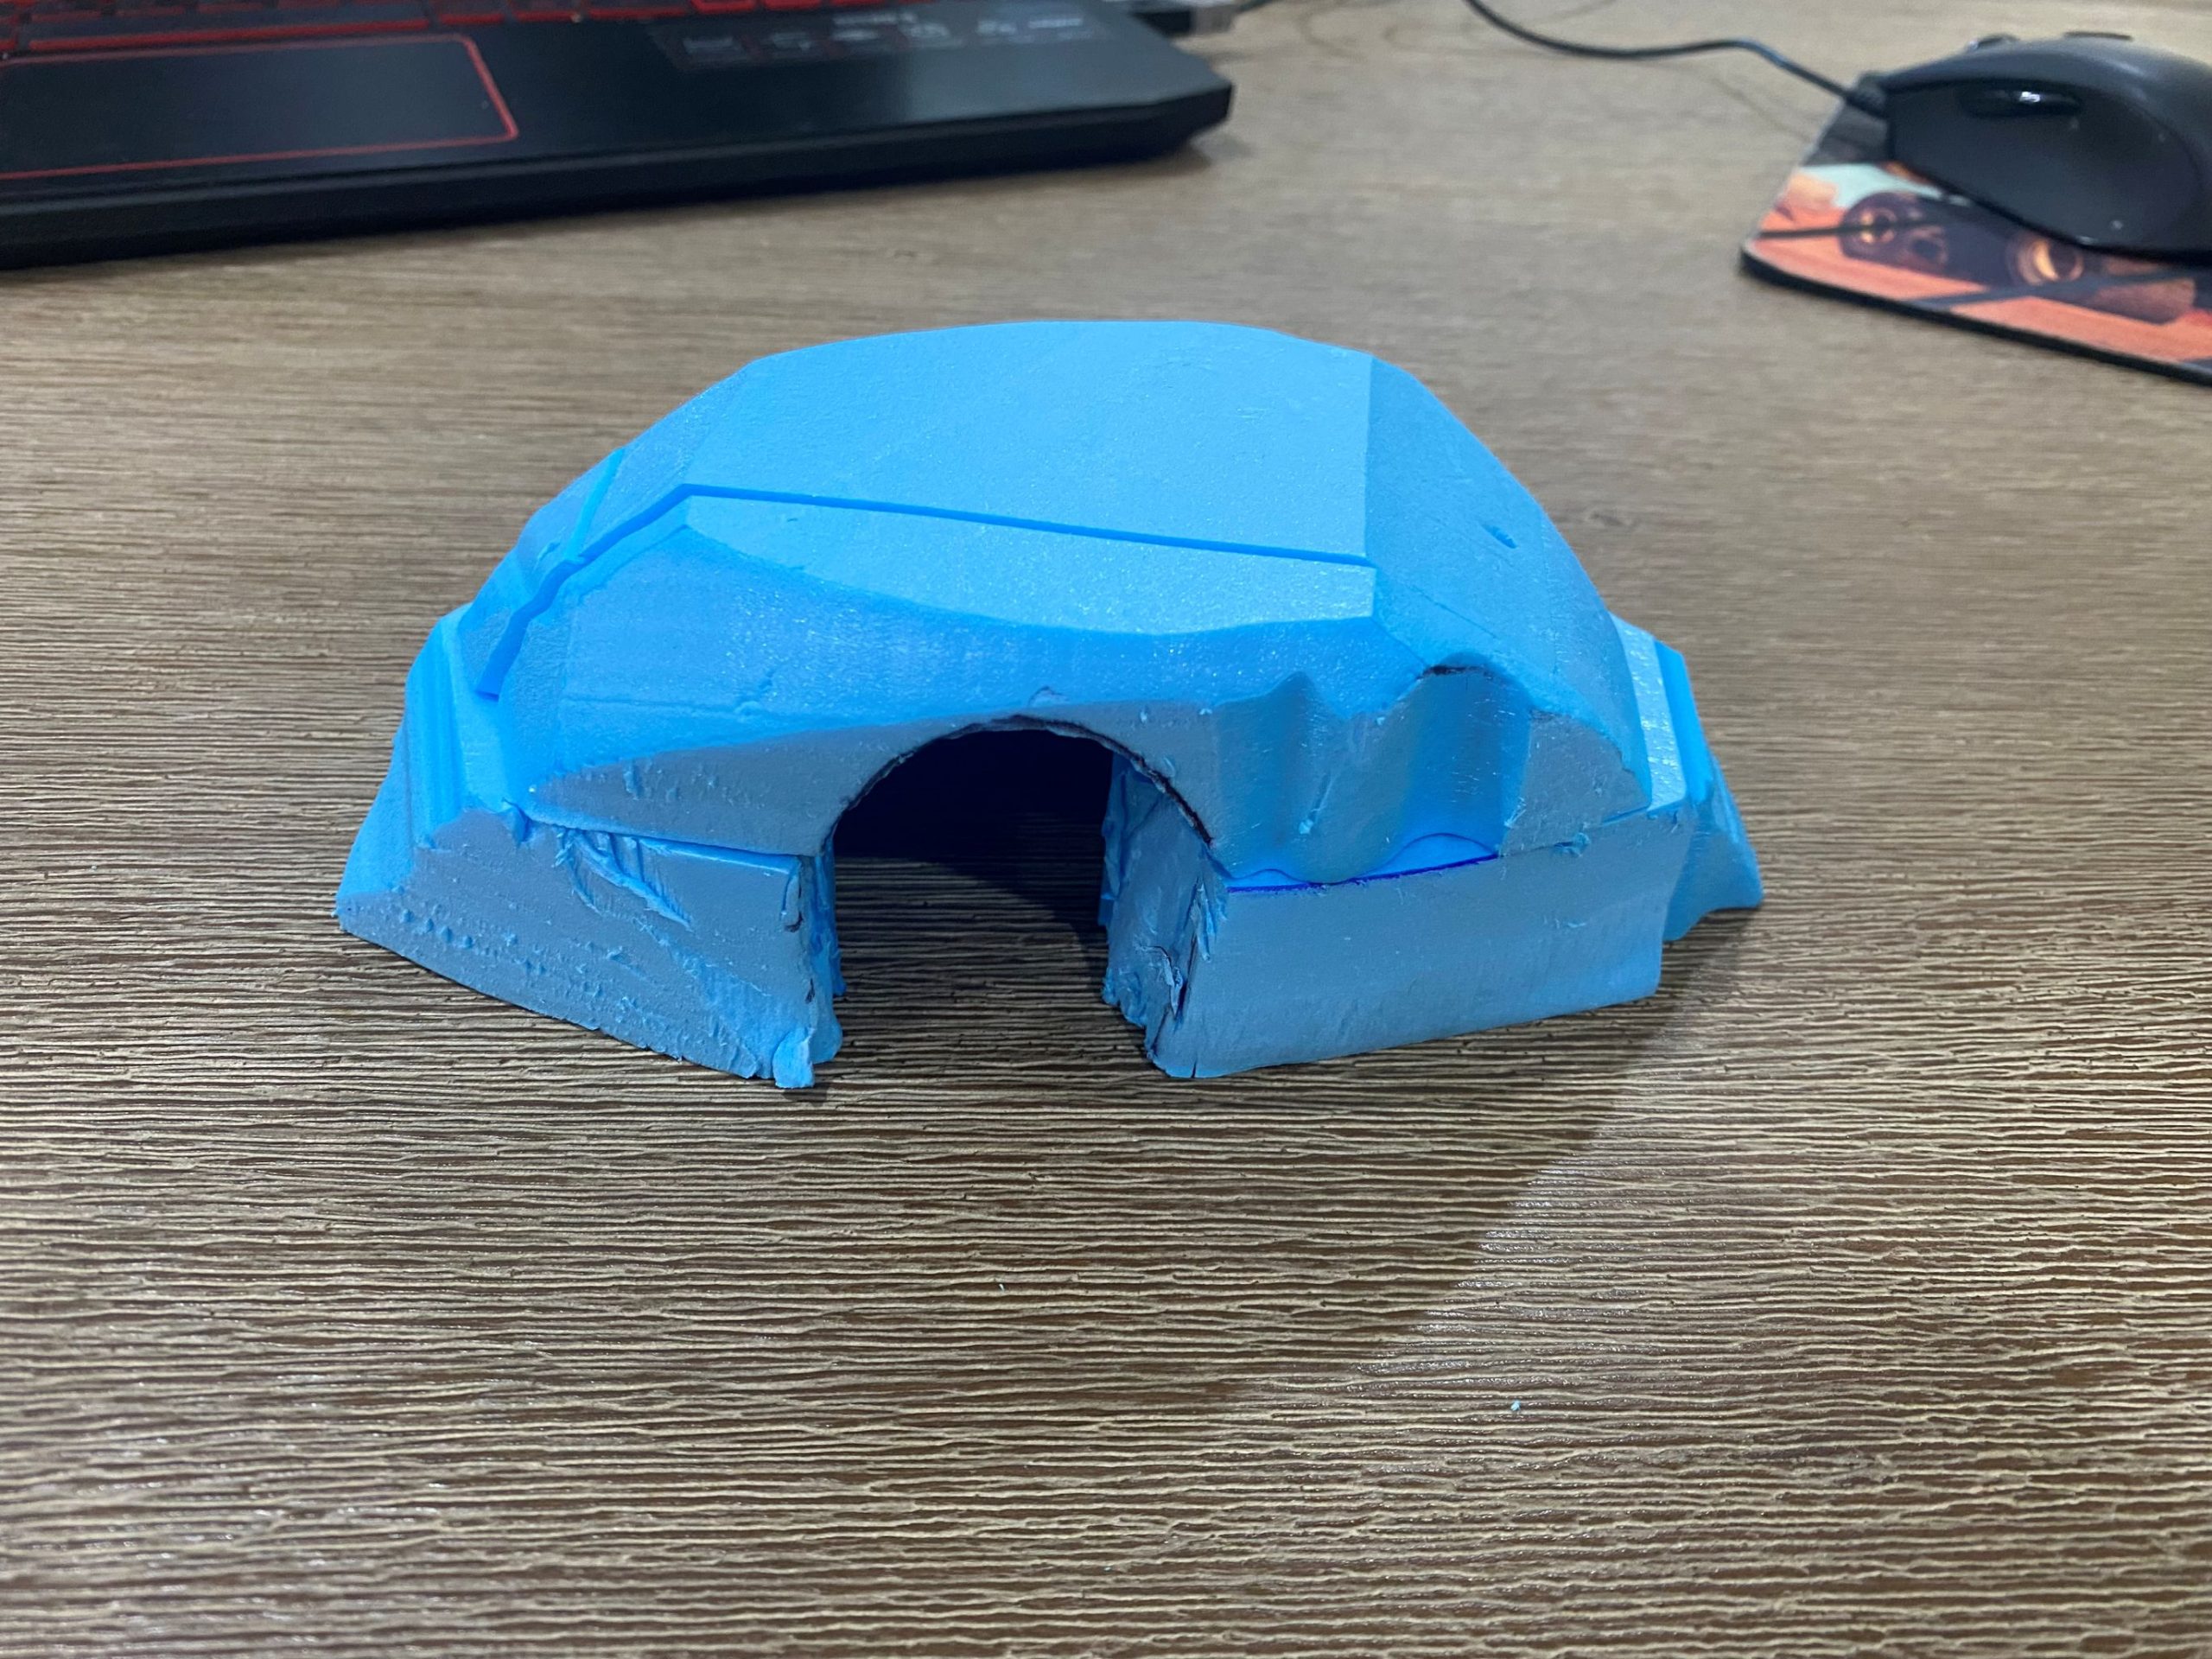
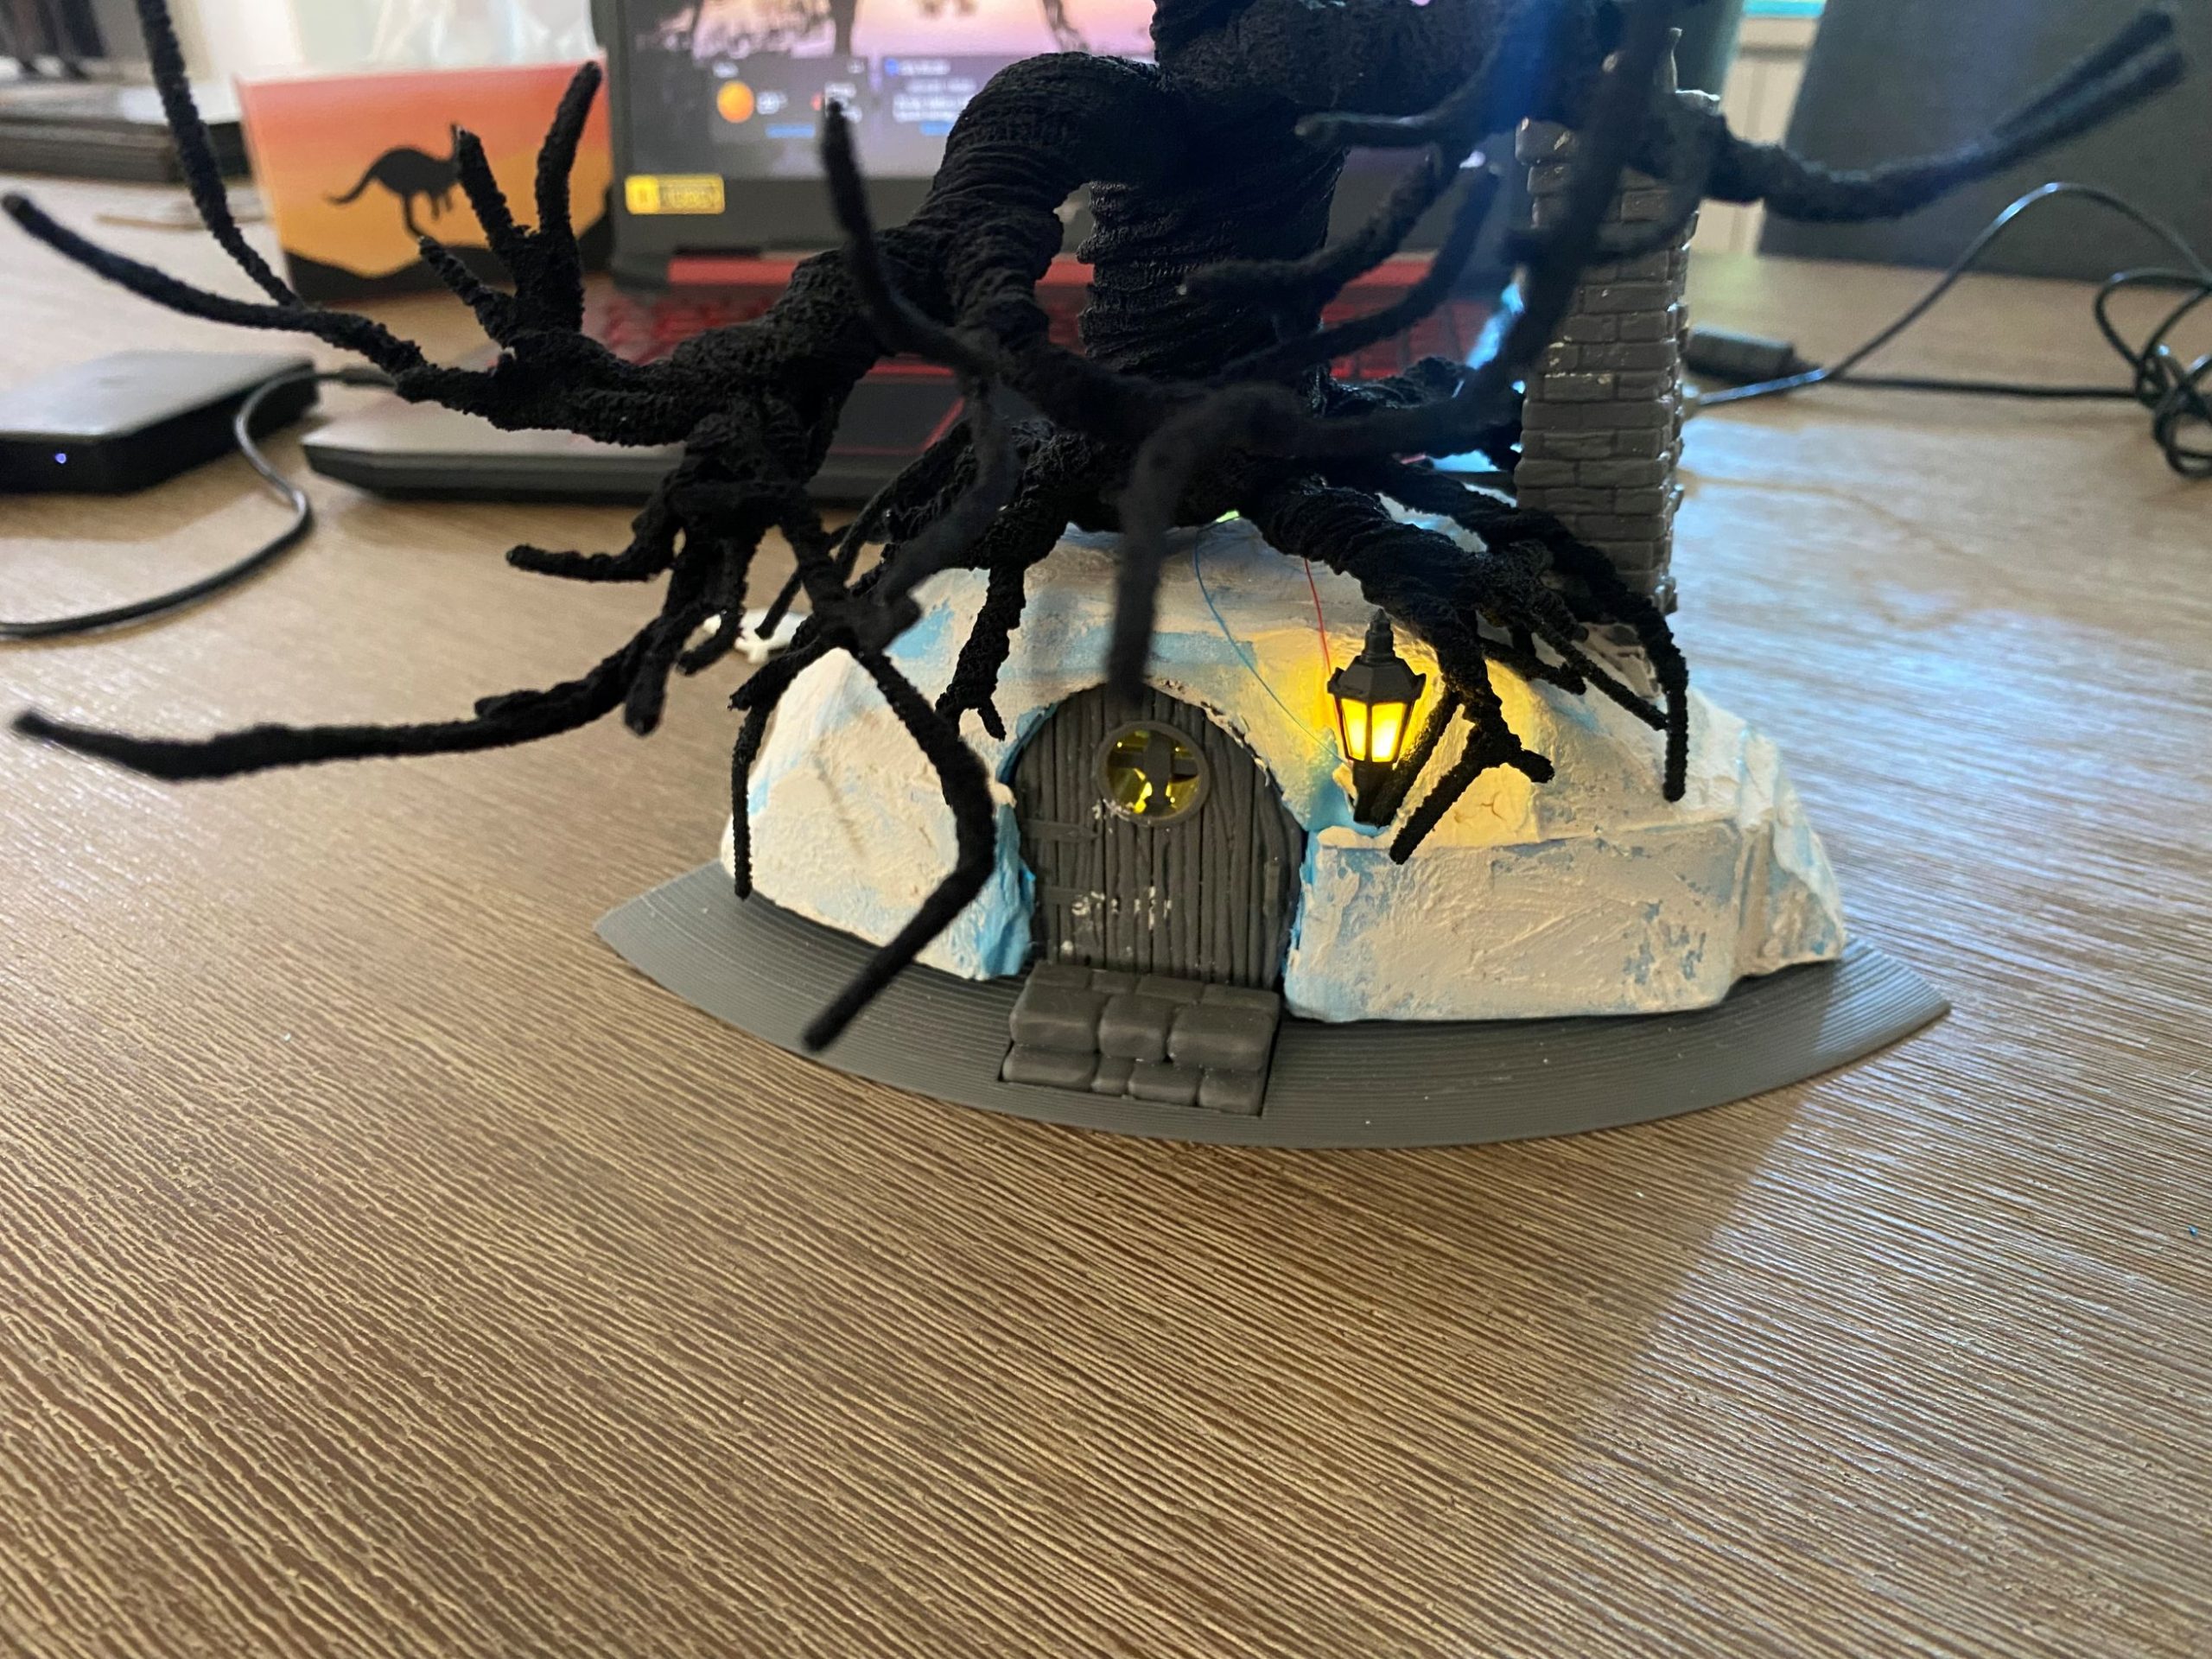
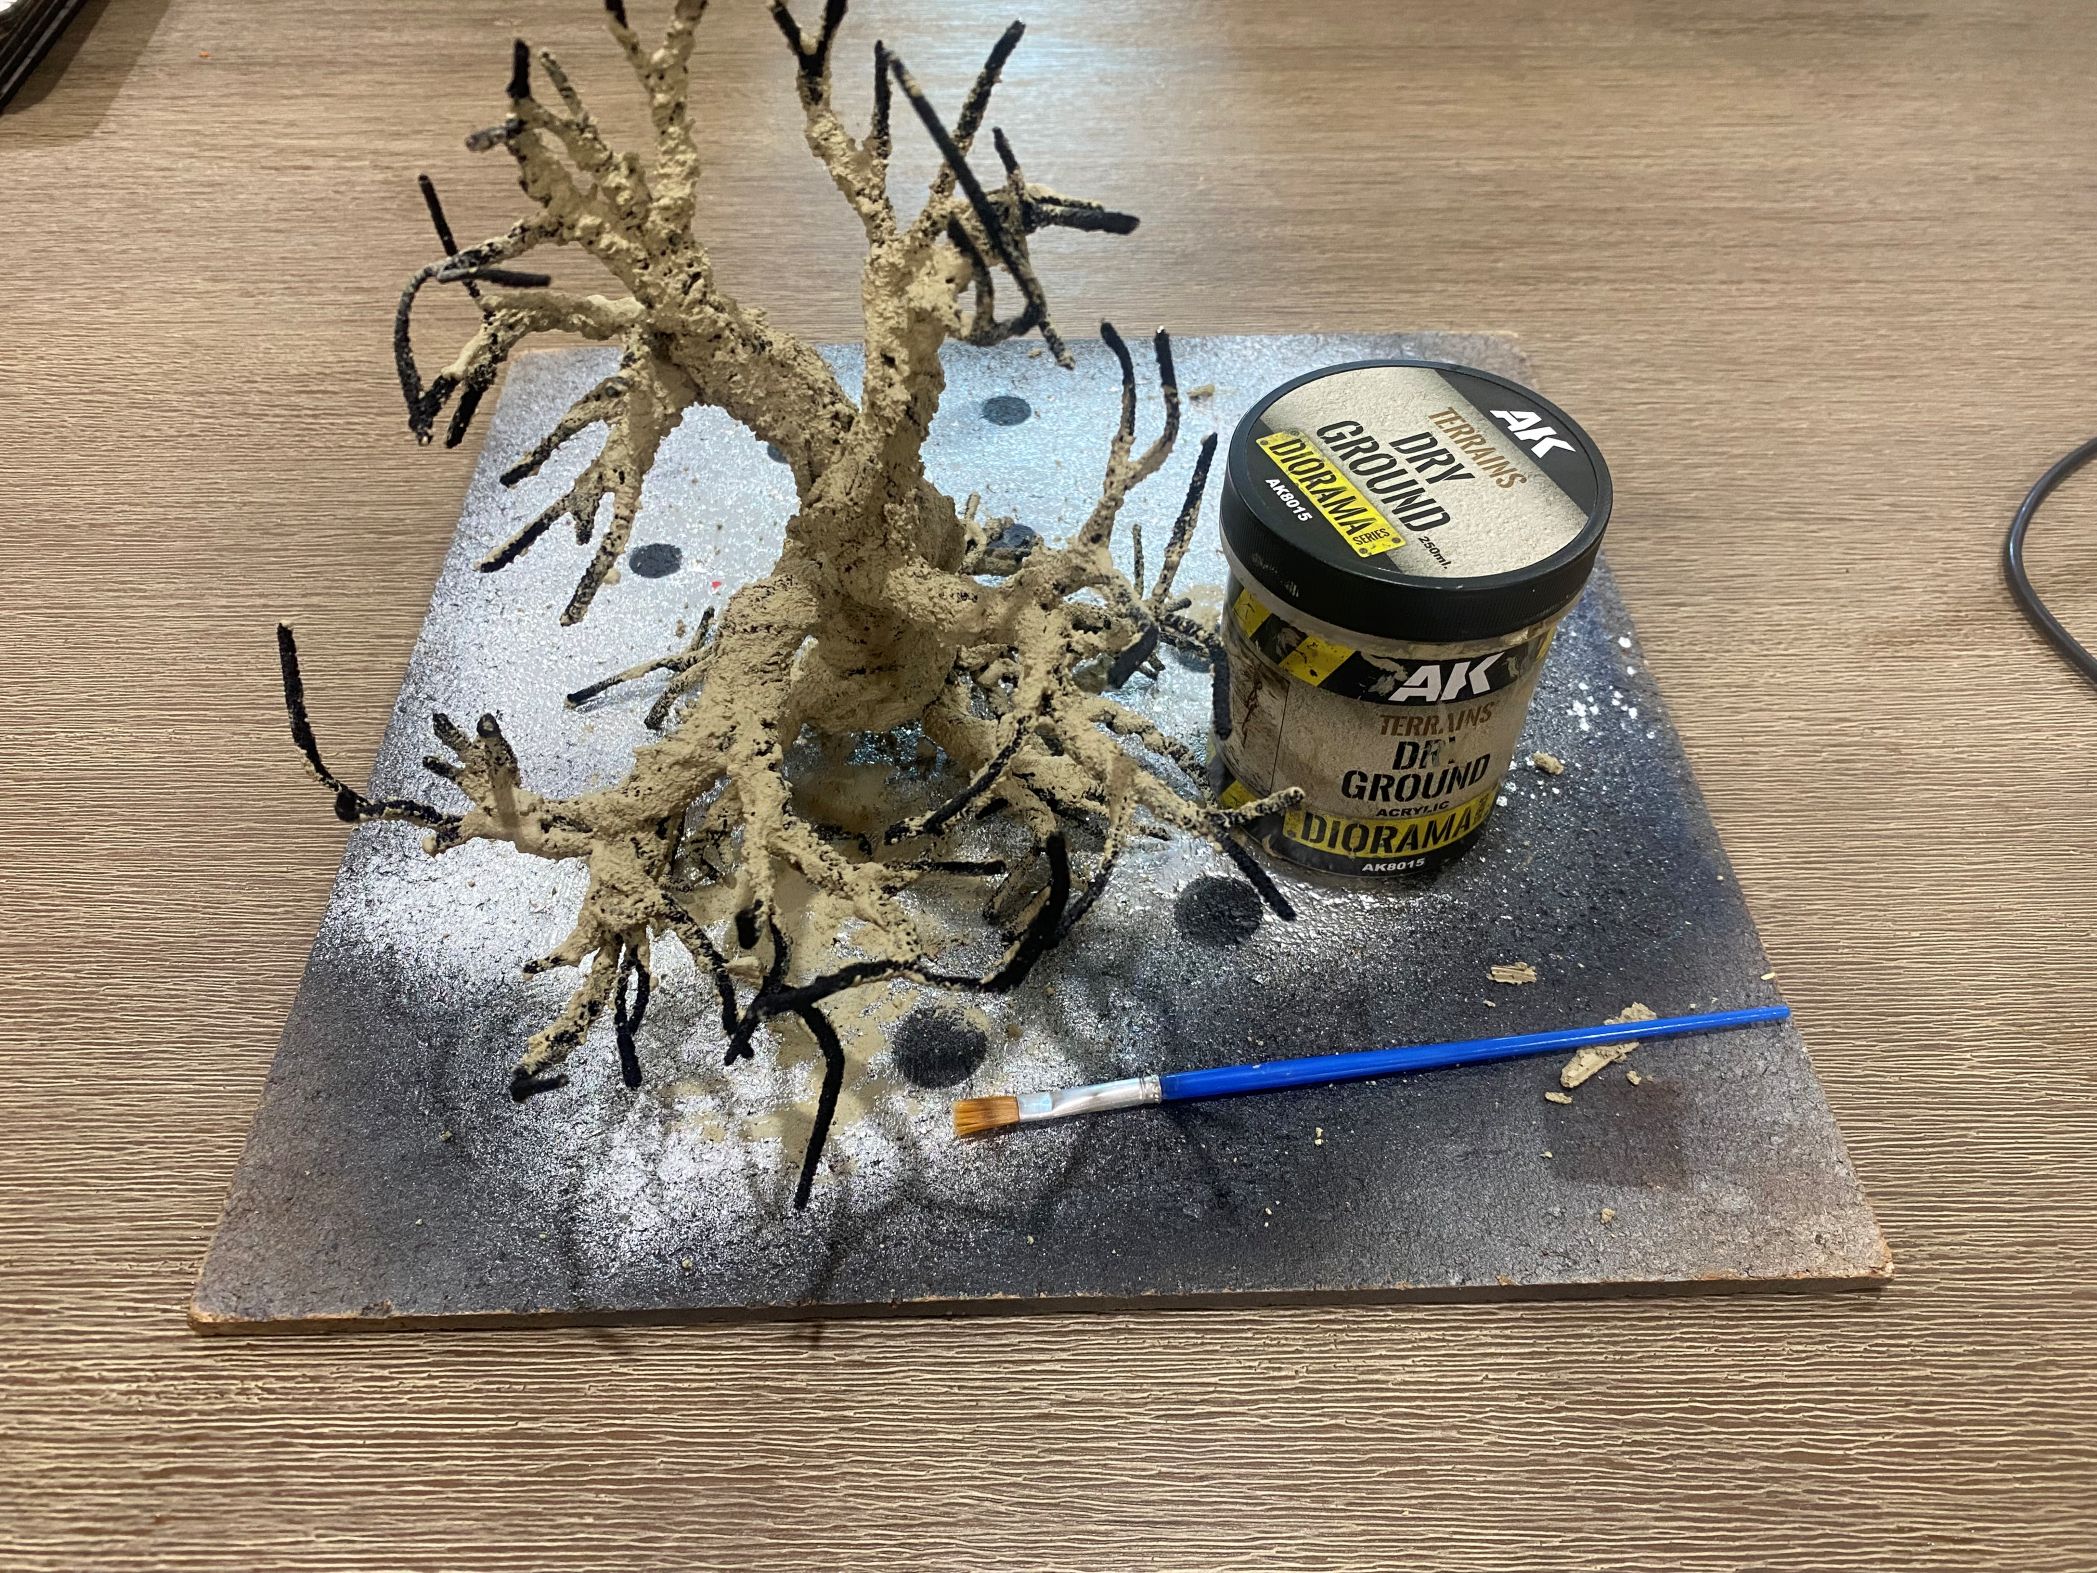
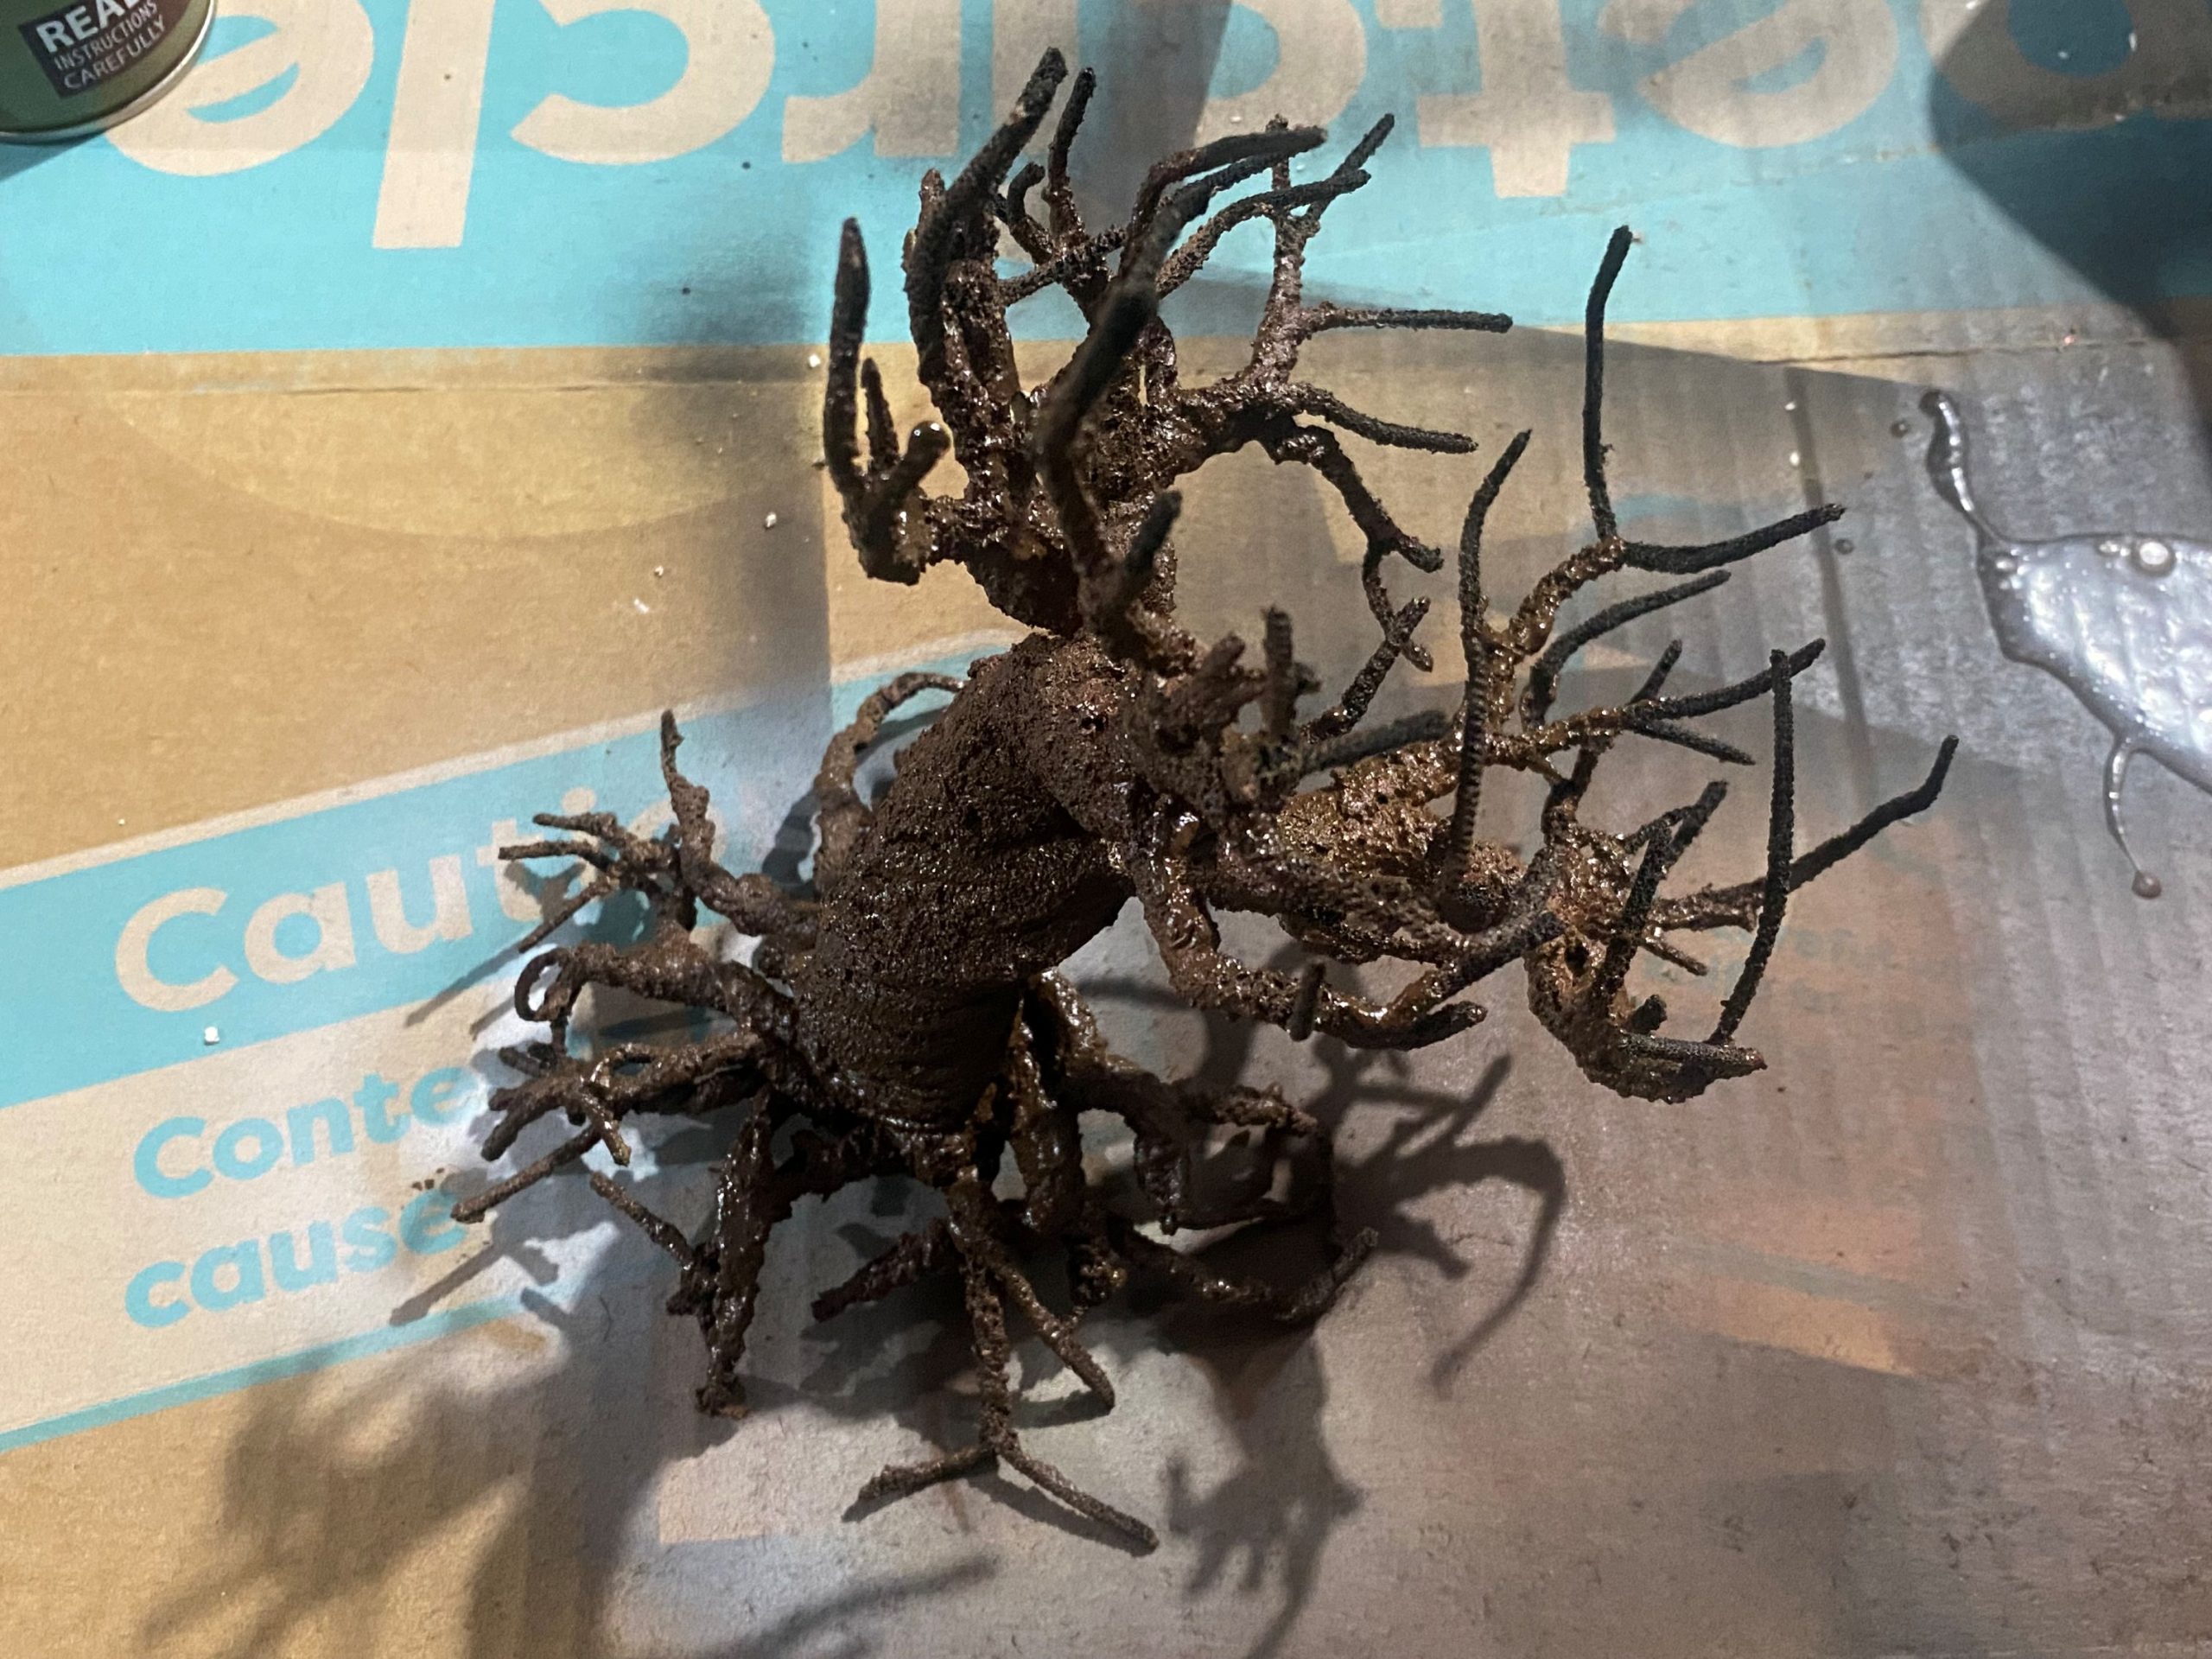
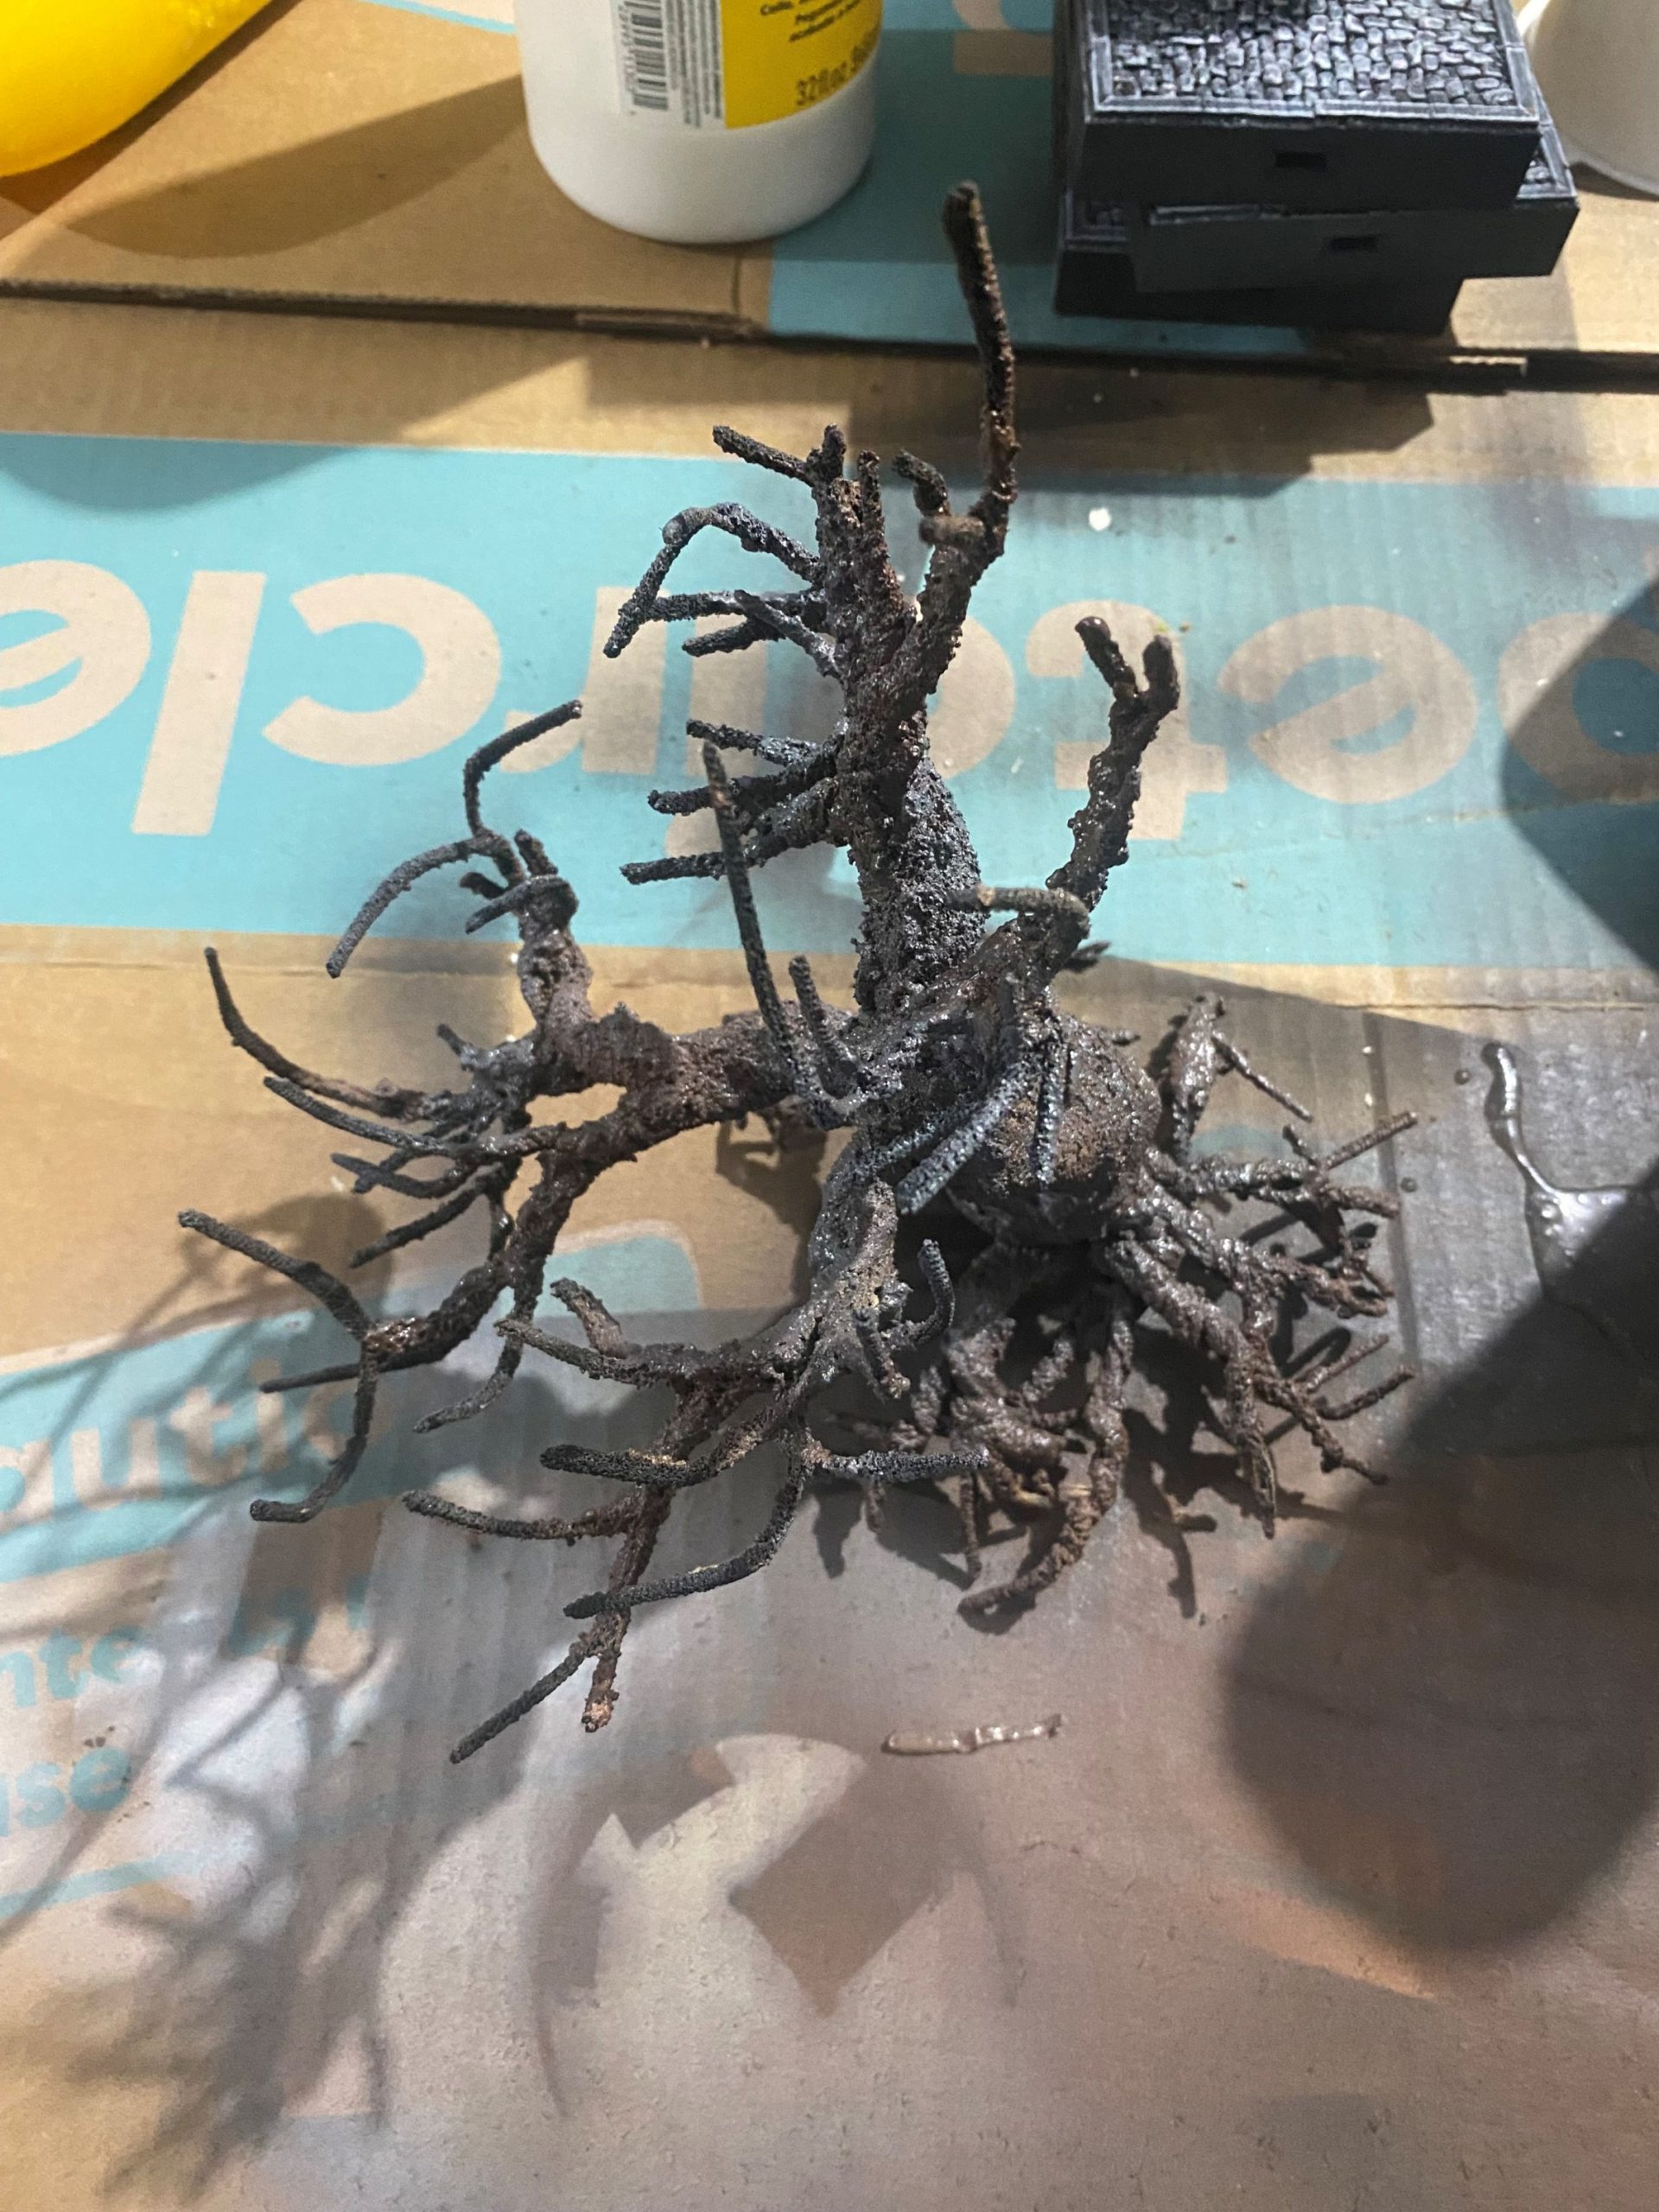
First, I made a tree armature out of pipe cleaners, and then I created a simple mound from XPS foam. The idea is that the Den is under the tree. I played around with some lighting to get a feel for how it could look.
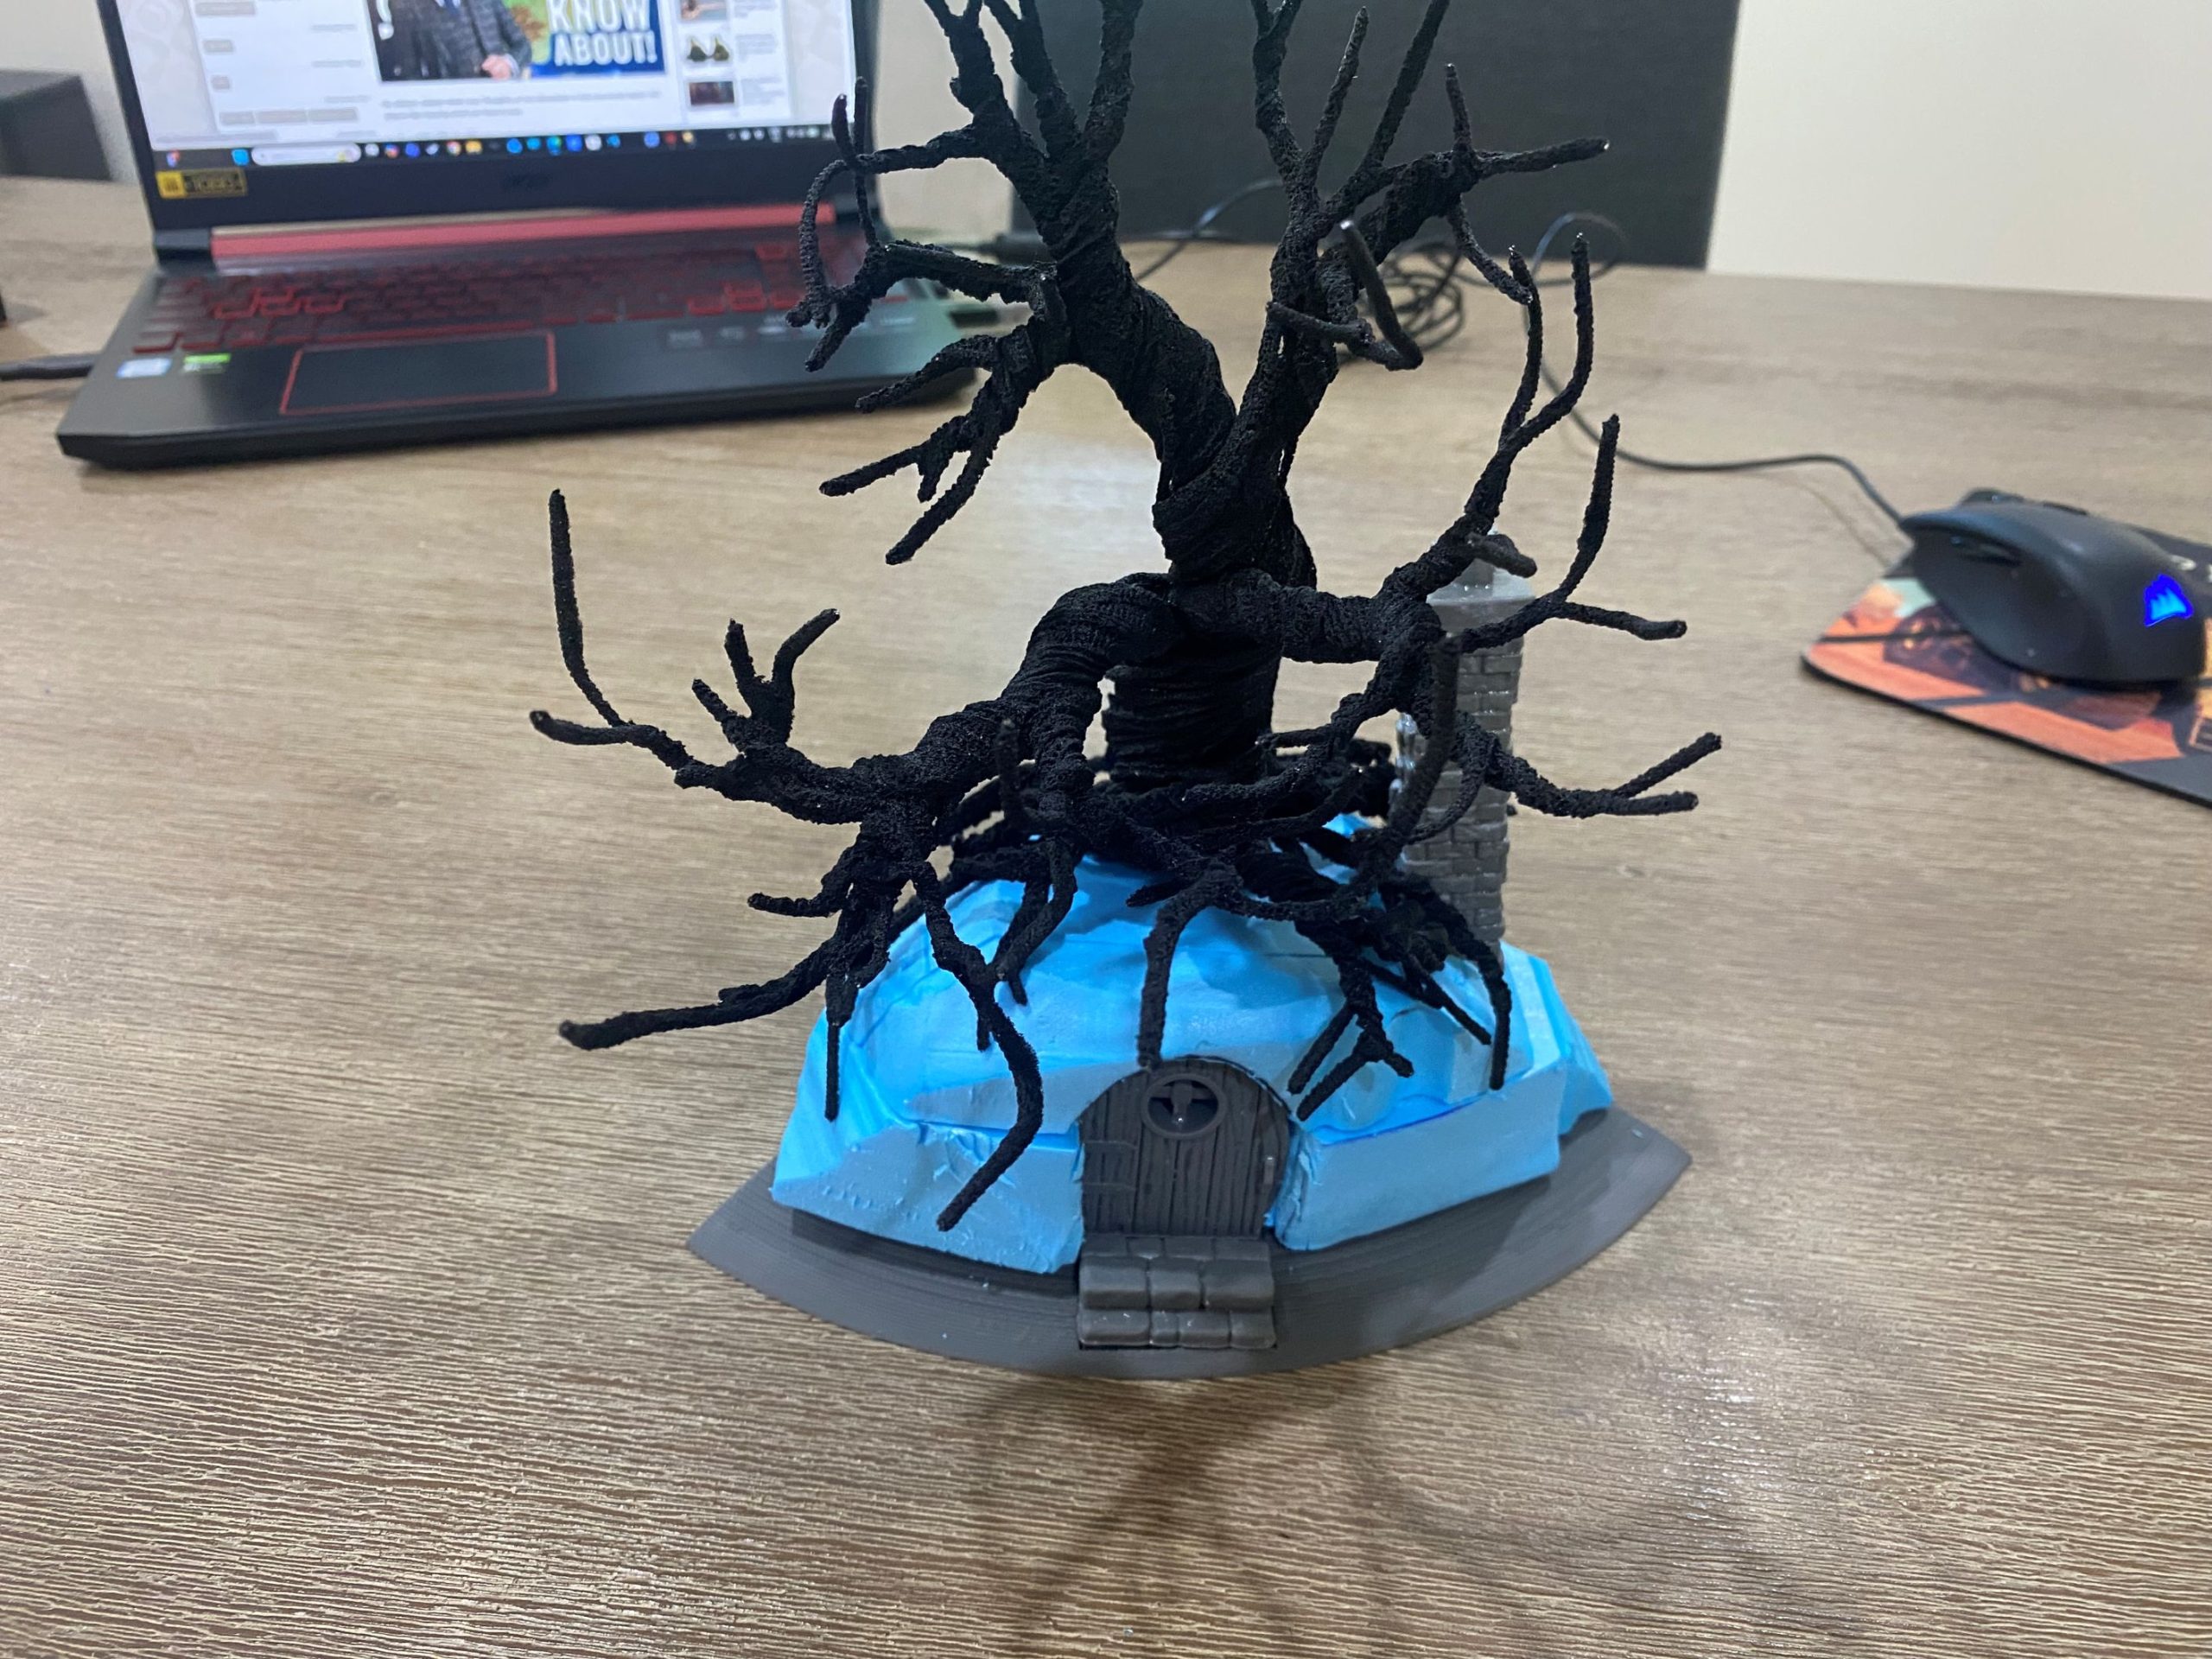
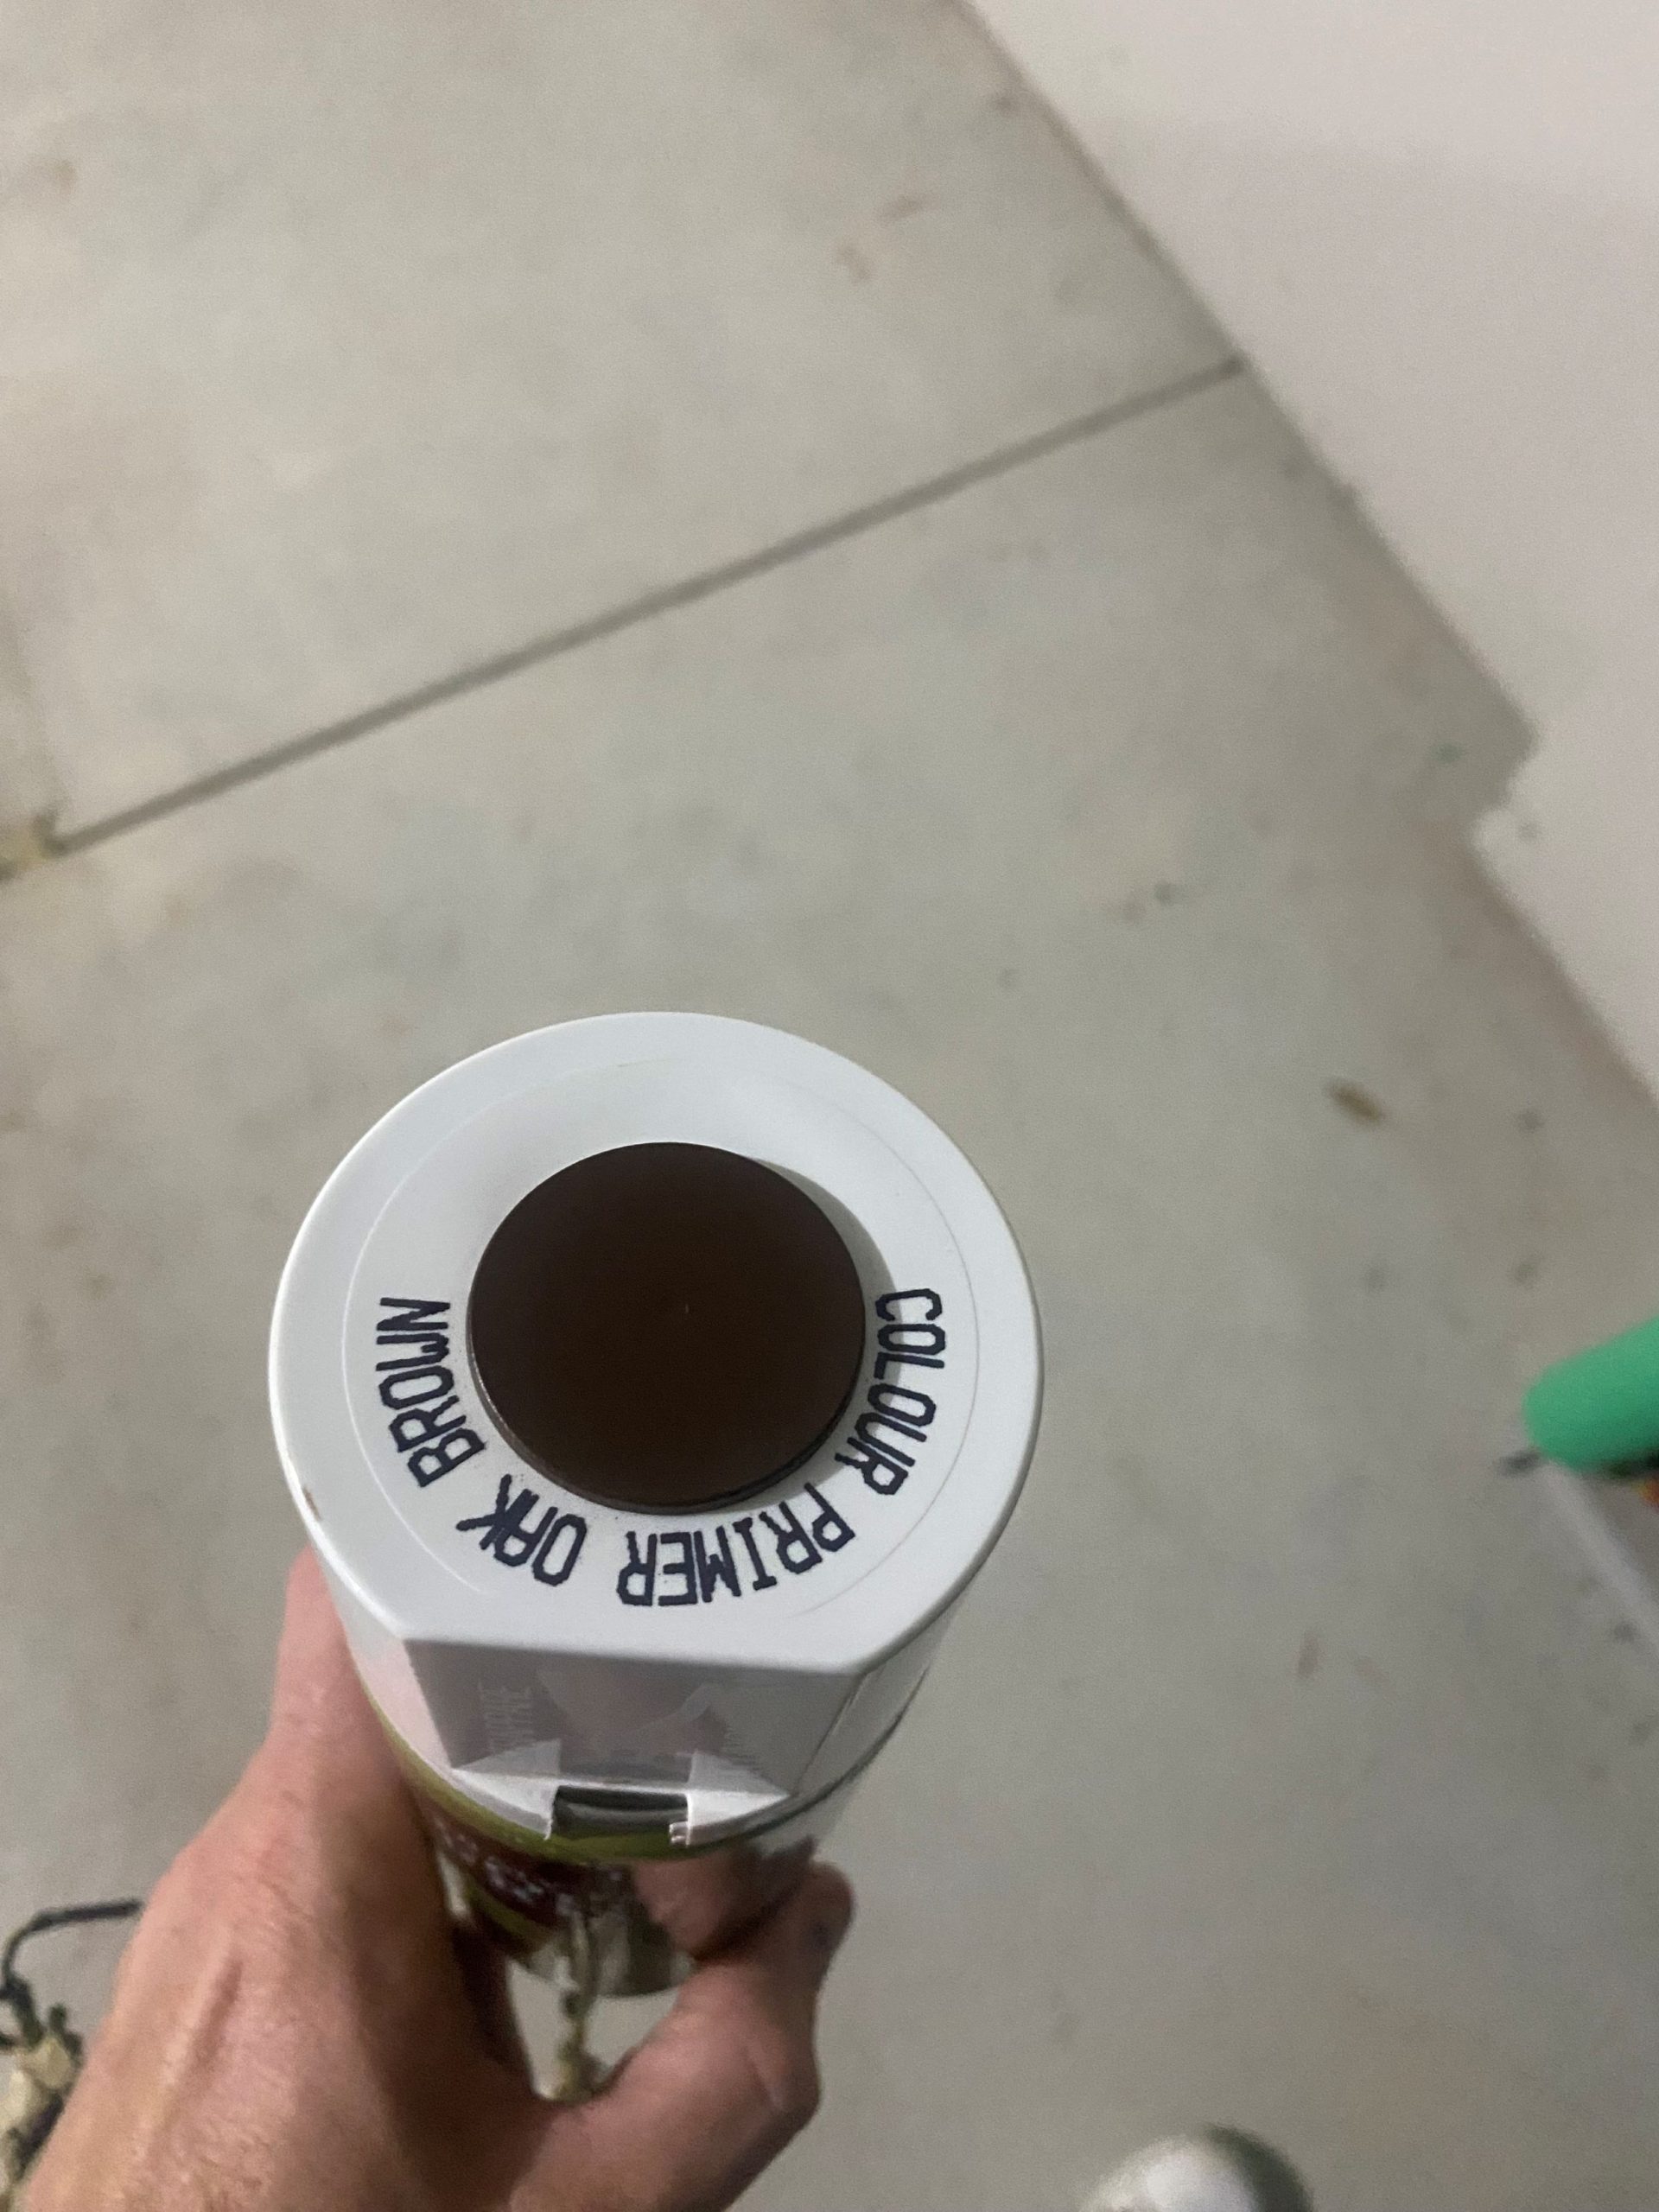
I added a simple door and covered the tree in basing texture, any will do, before painting the tree with brown and grey spray paint. I just used what I had available at the time.
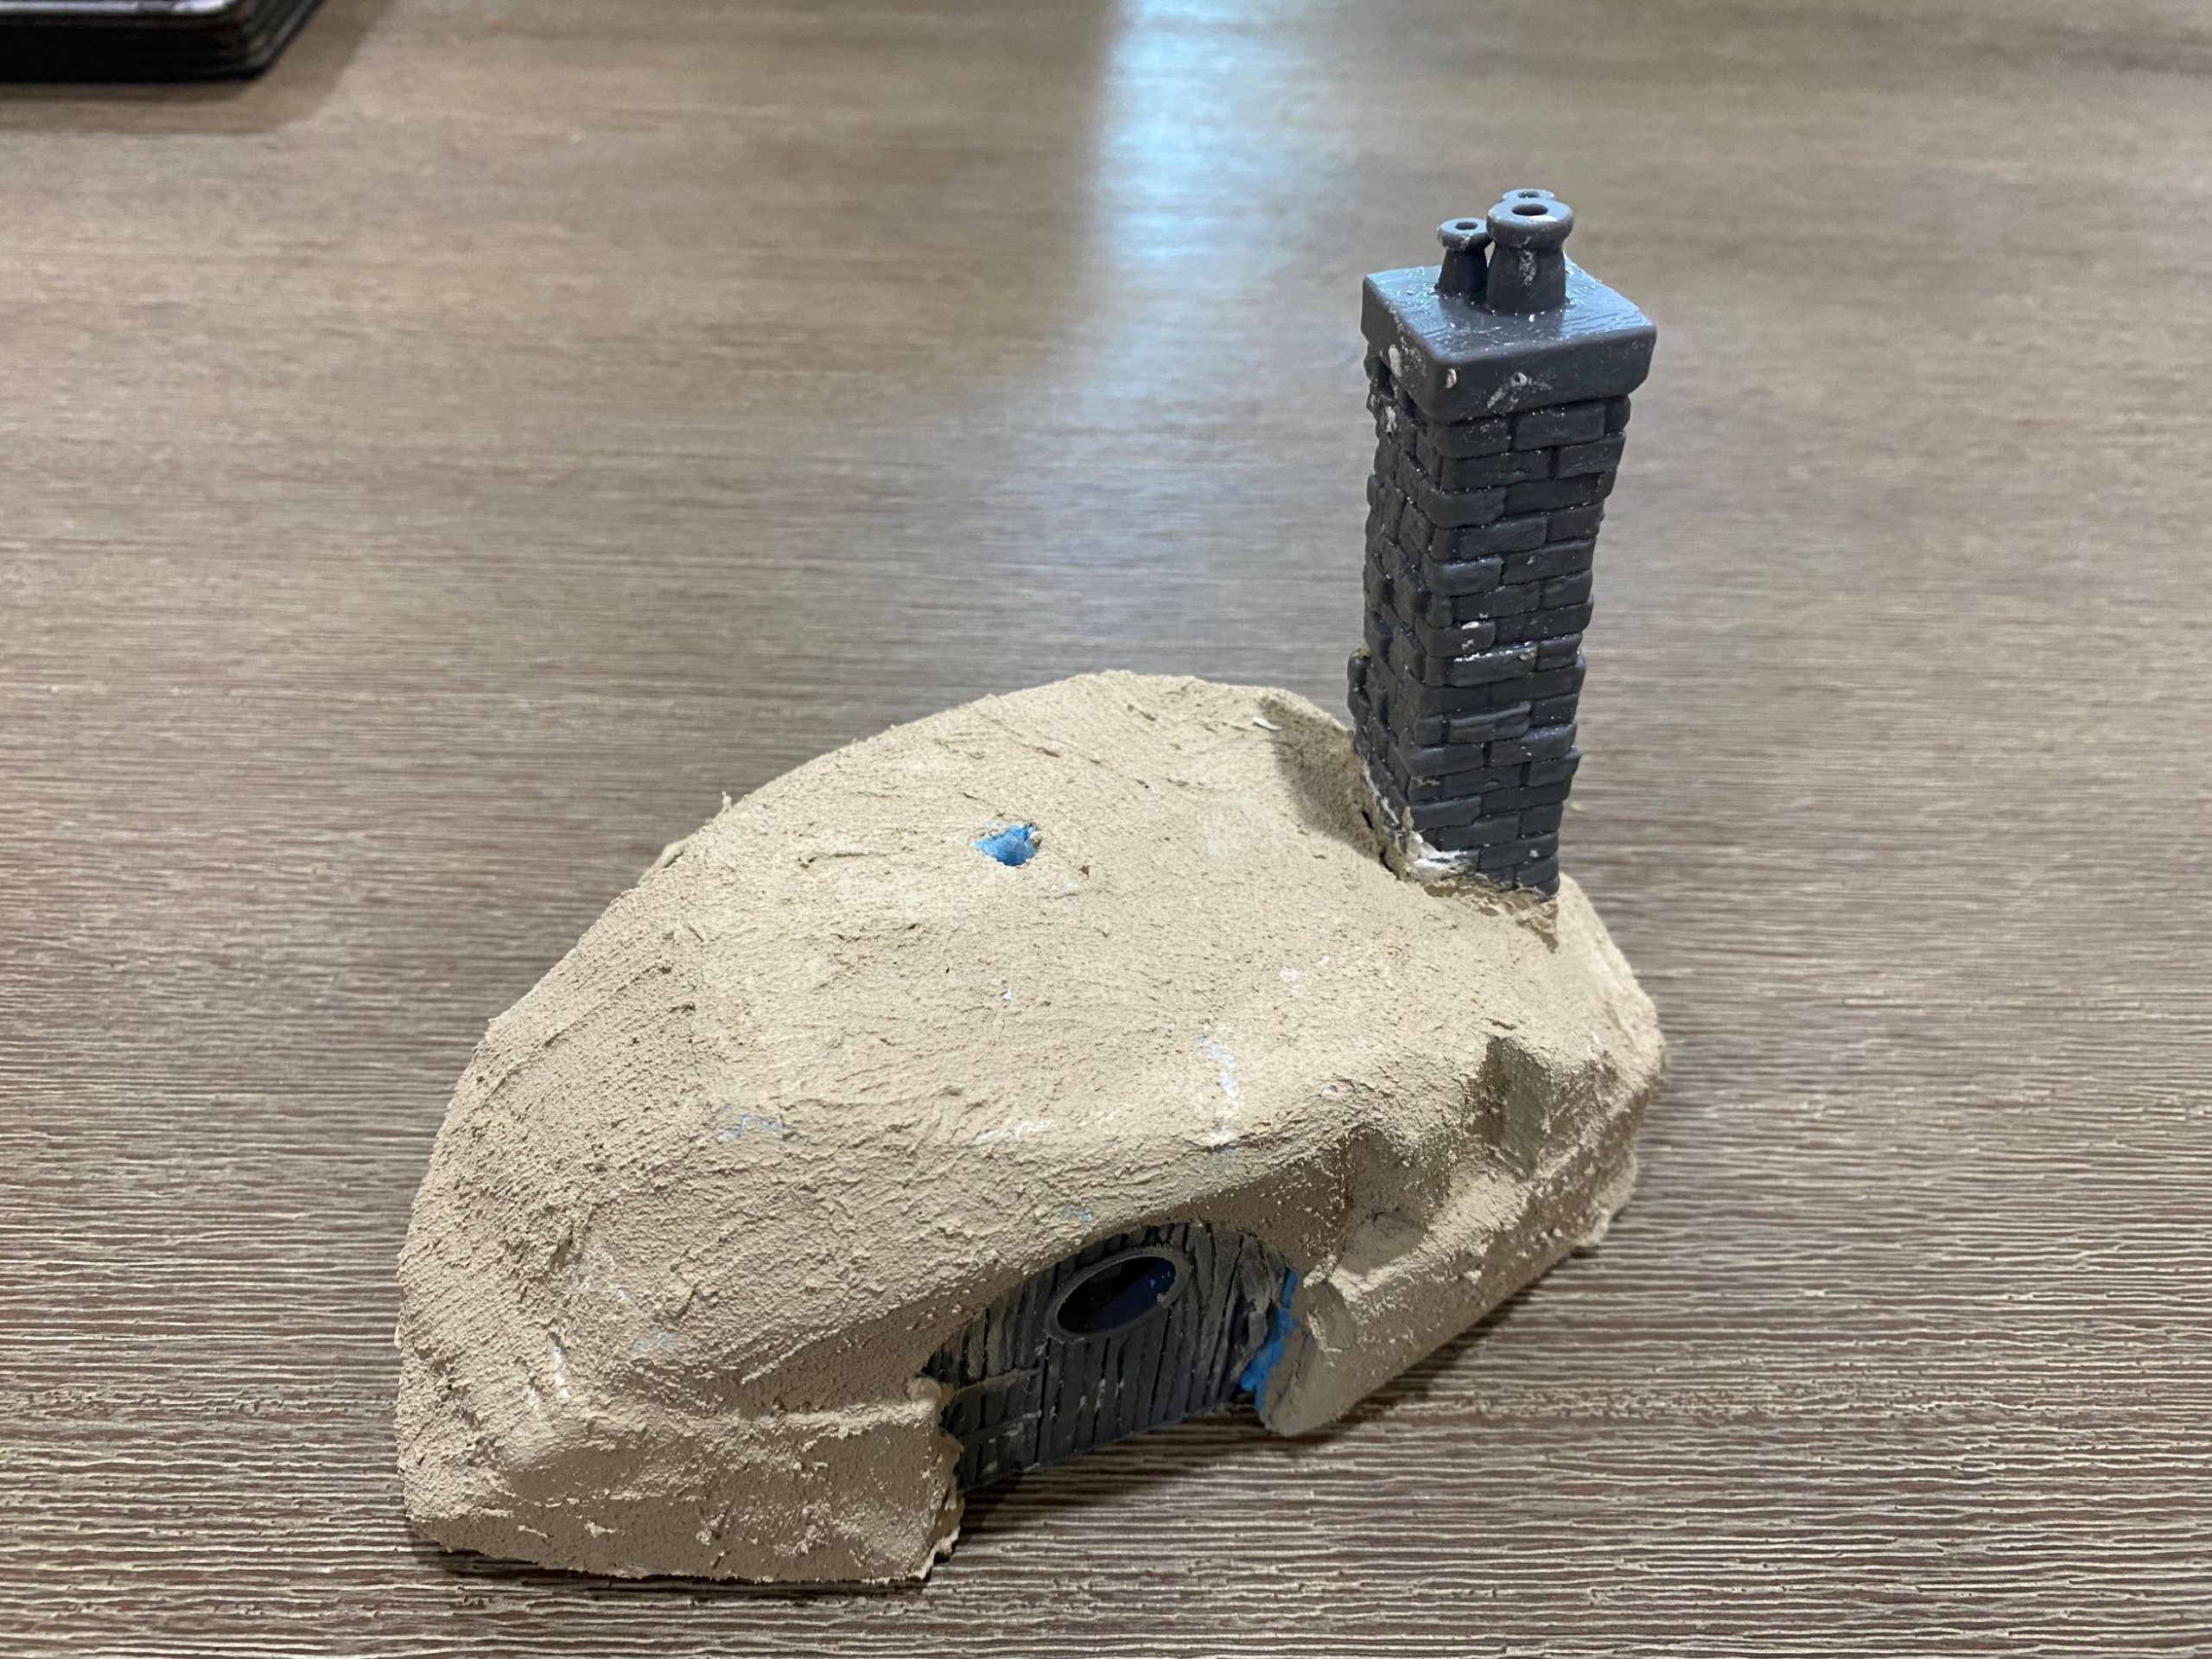
I then attached a chimney and covered the mound with texture; this is just to protect the XPS when I spray the thing.
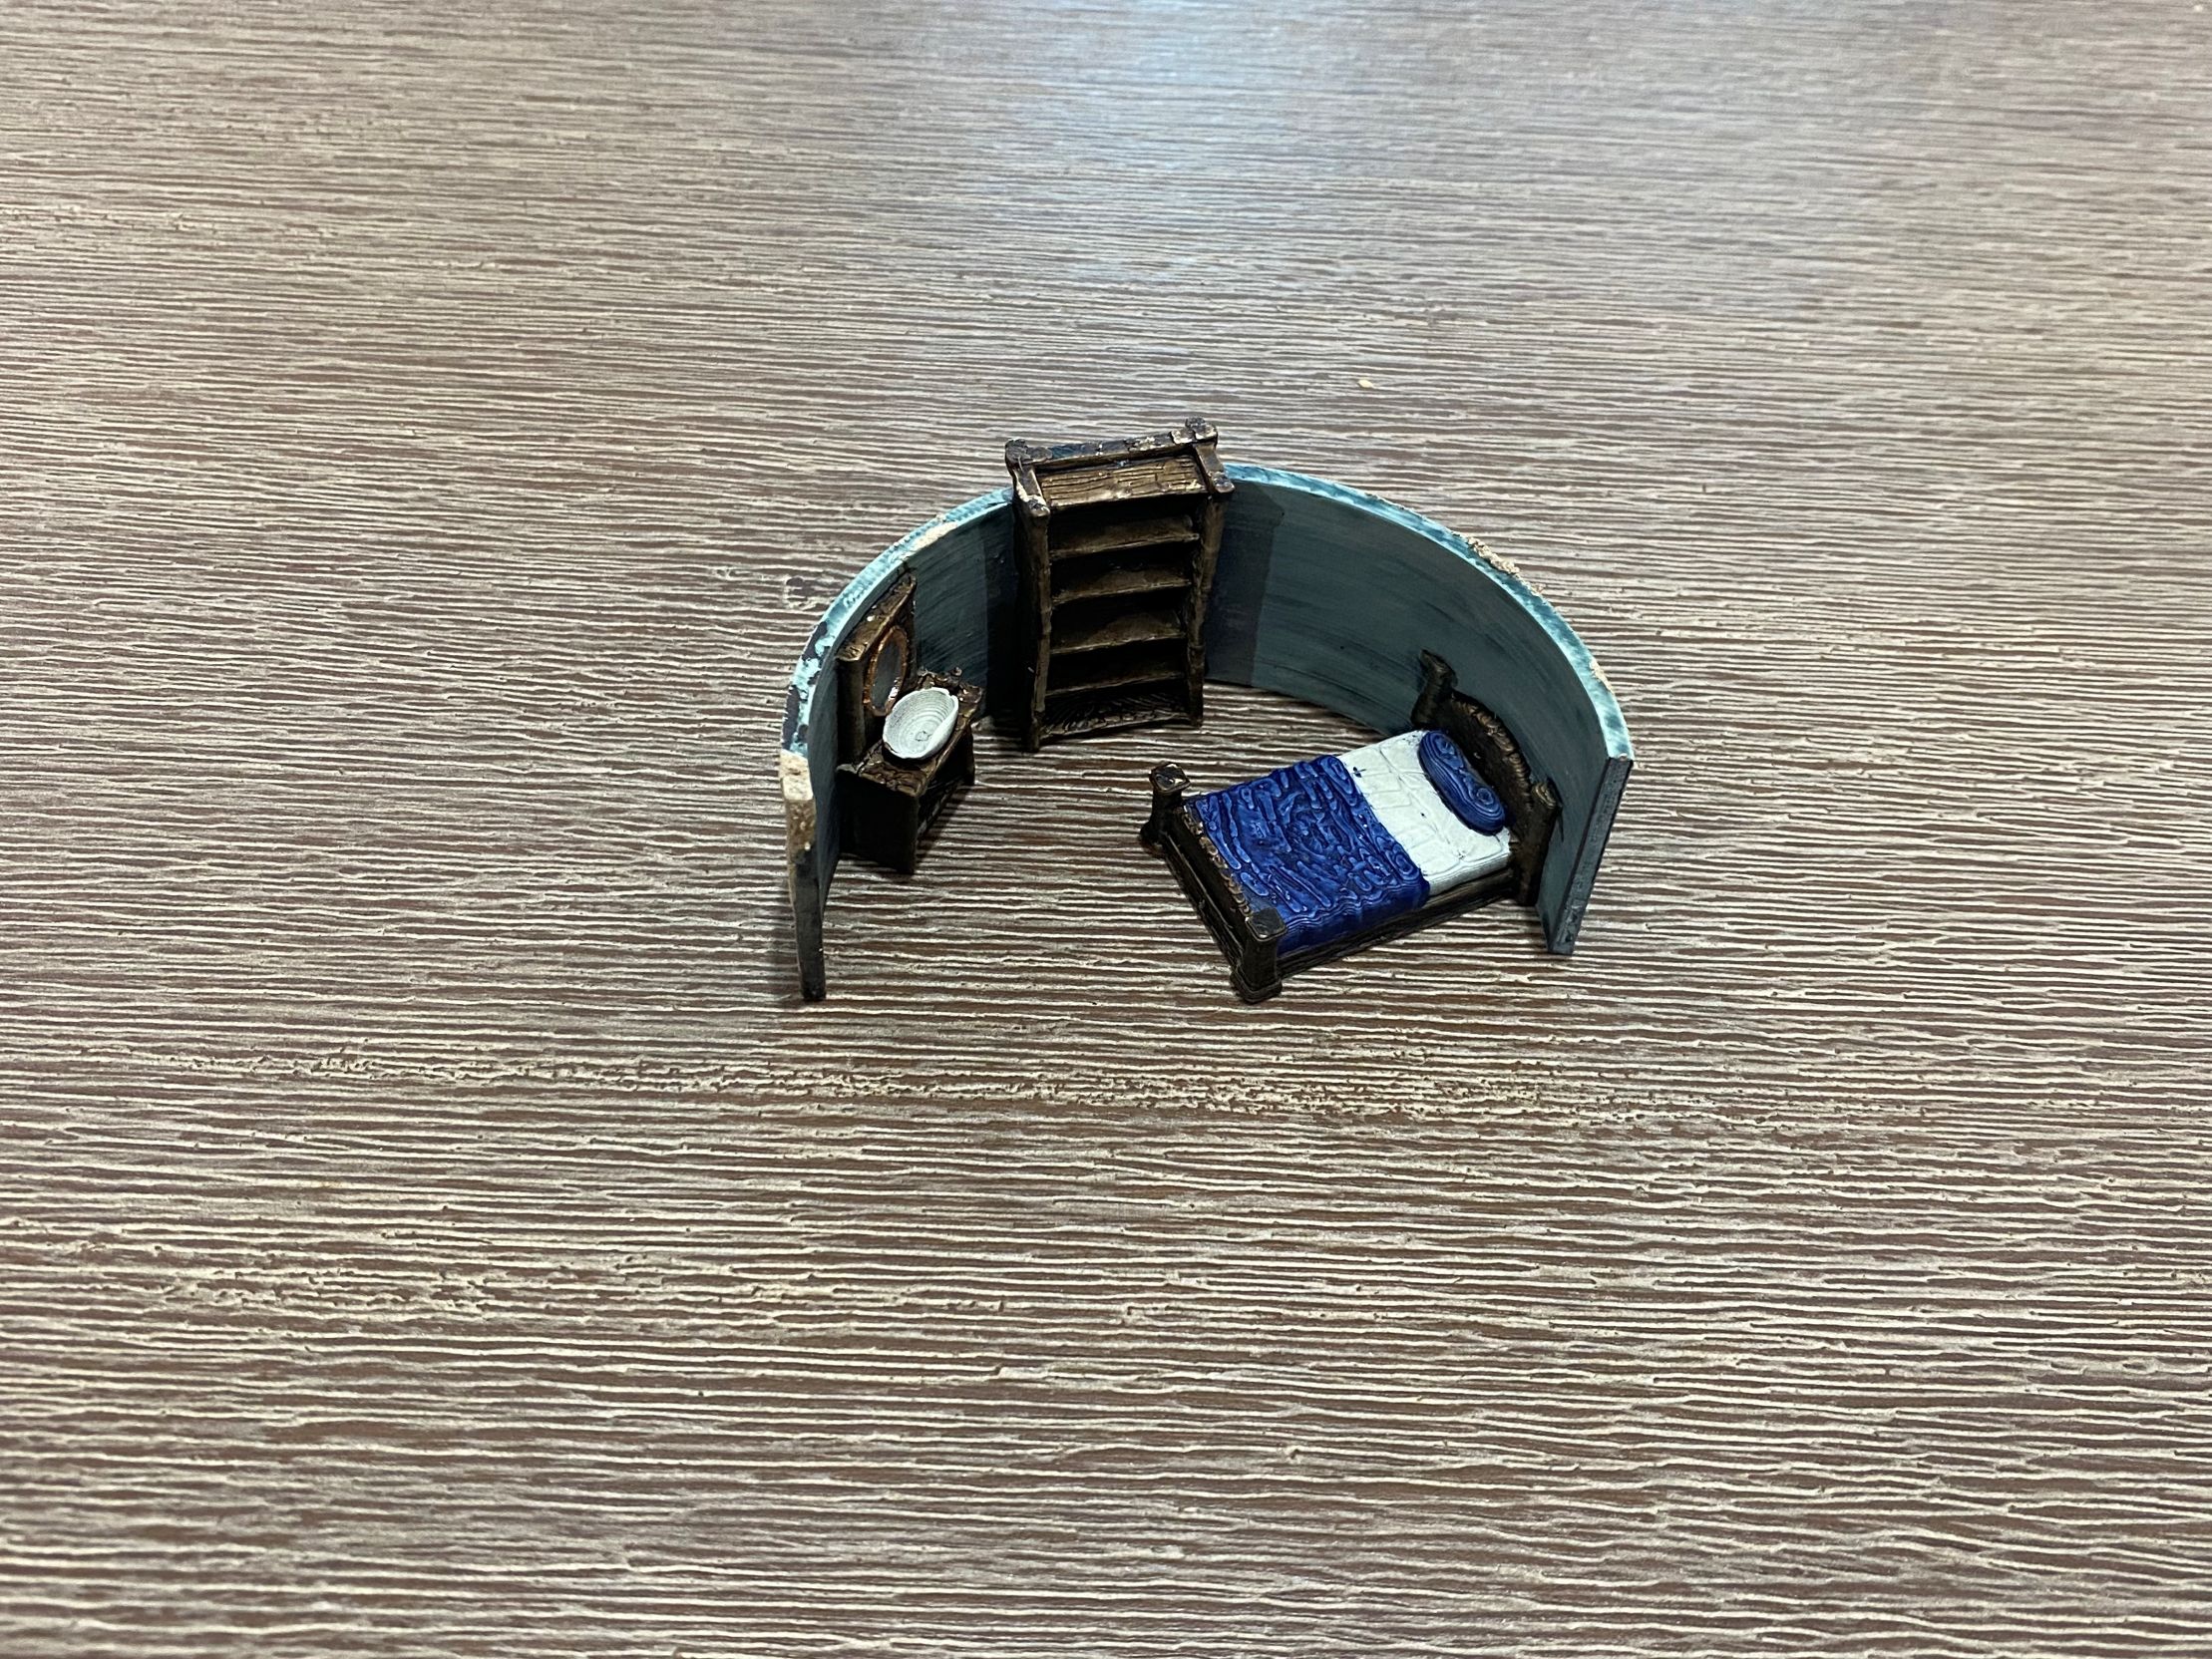
I quickly knocked up a very simple interior on 3D builder; it is nothing fancy, as most of it will not be visible anyway. It is just to give the impression that the place is lived in.
I sprayed the outside with browns and greys and did the brickwork in the same way as I do the brickwork in my other projects, just with different colours.
I installed a small battery holder that I printed out in filament. This is to power the interior light.
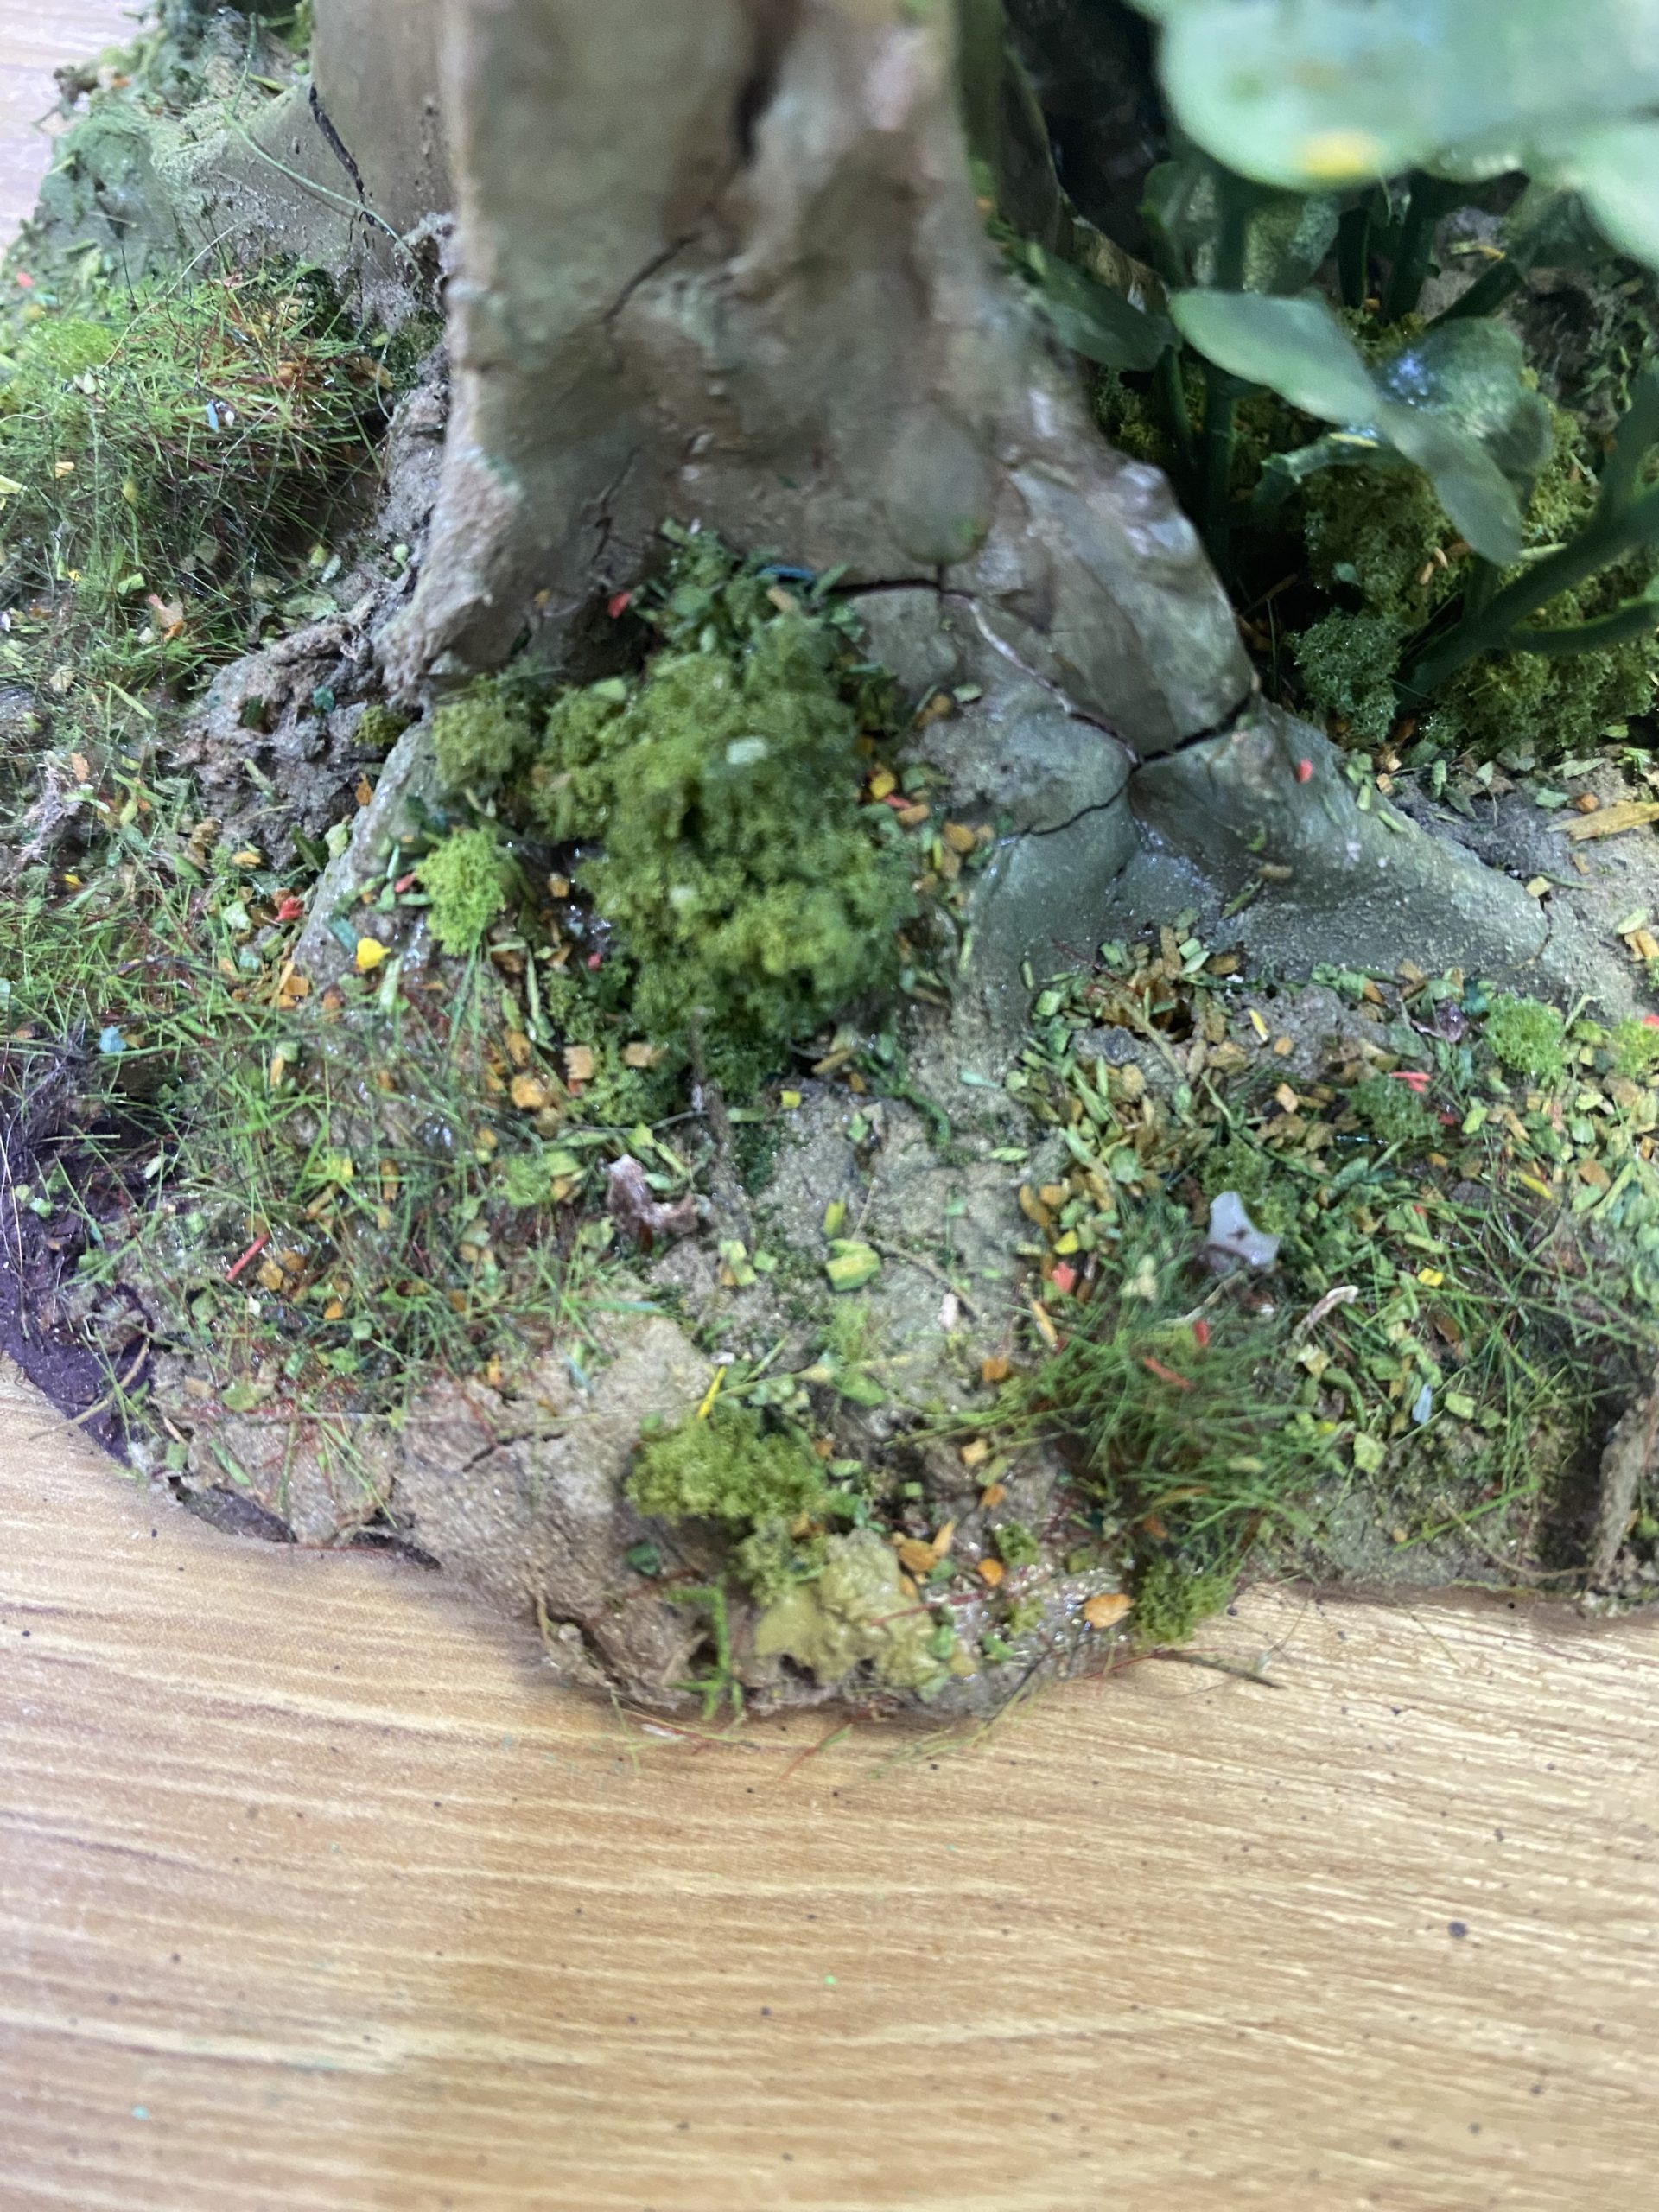
I then glued the tree on top of the mound and added some sand, cement oxide and PVA around the edges, and a bit over the top. This was then added to once dry with further ground coverings and moss in the same way as my aforementioned forest project,

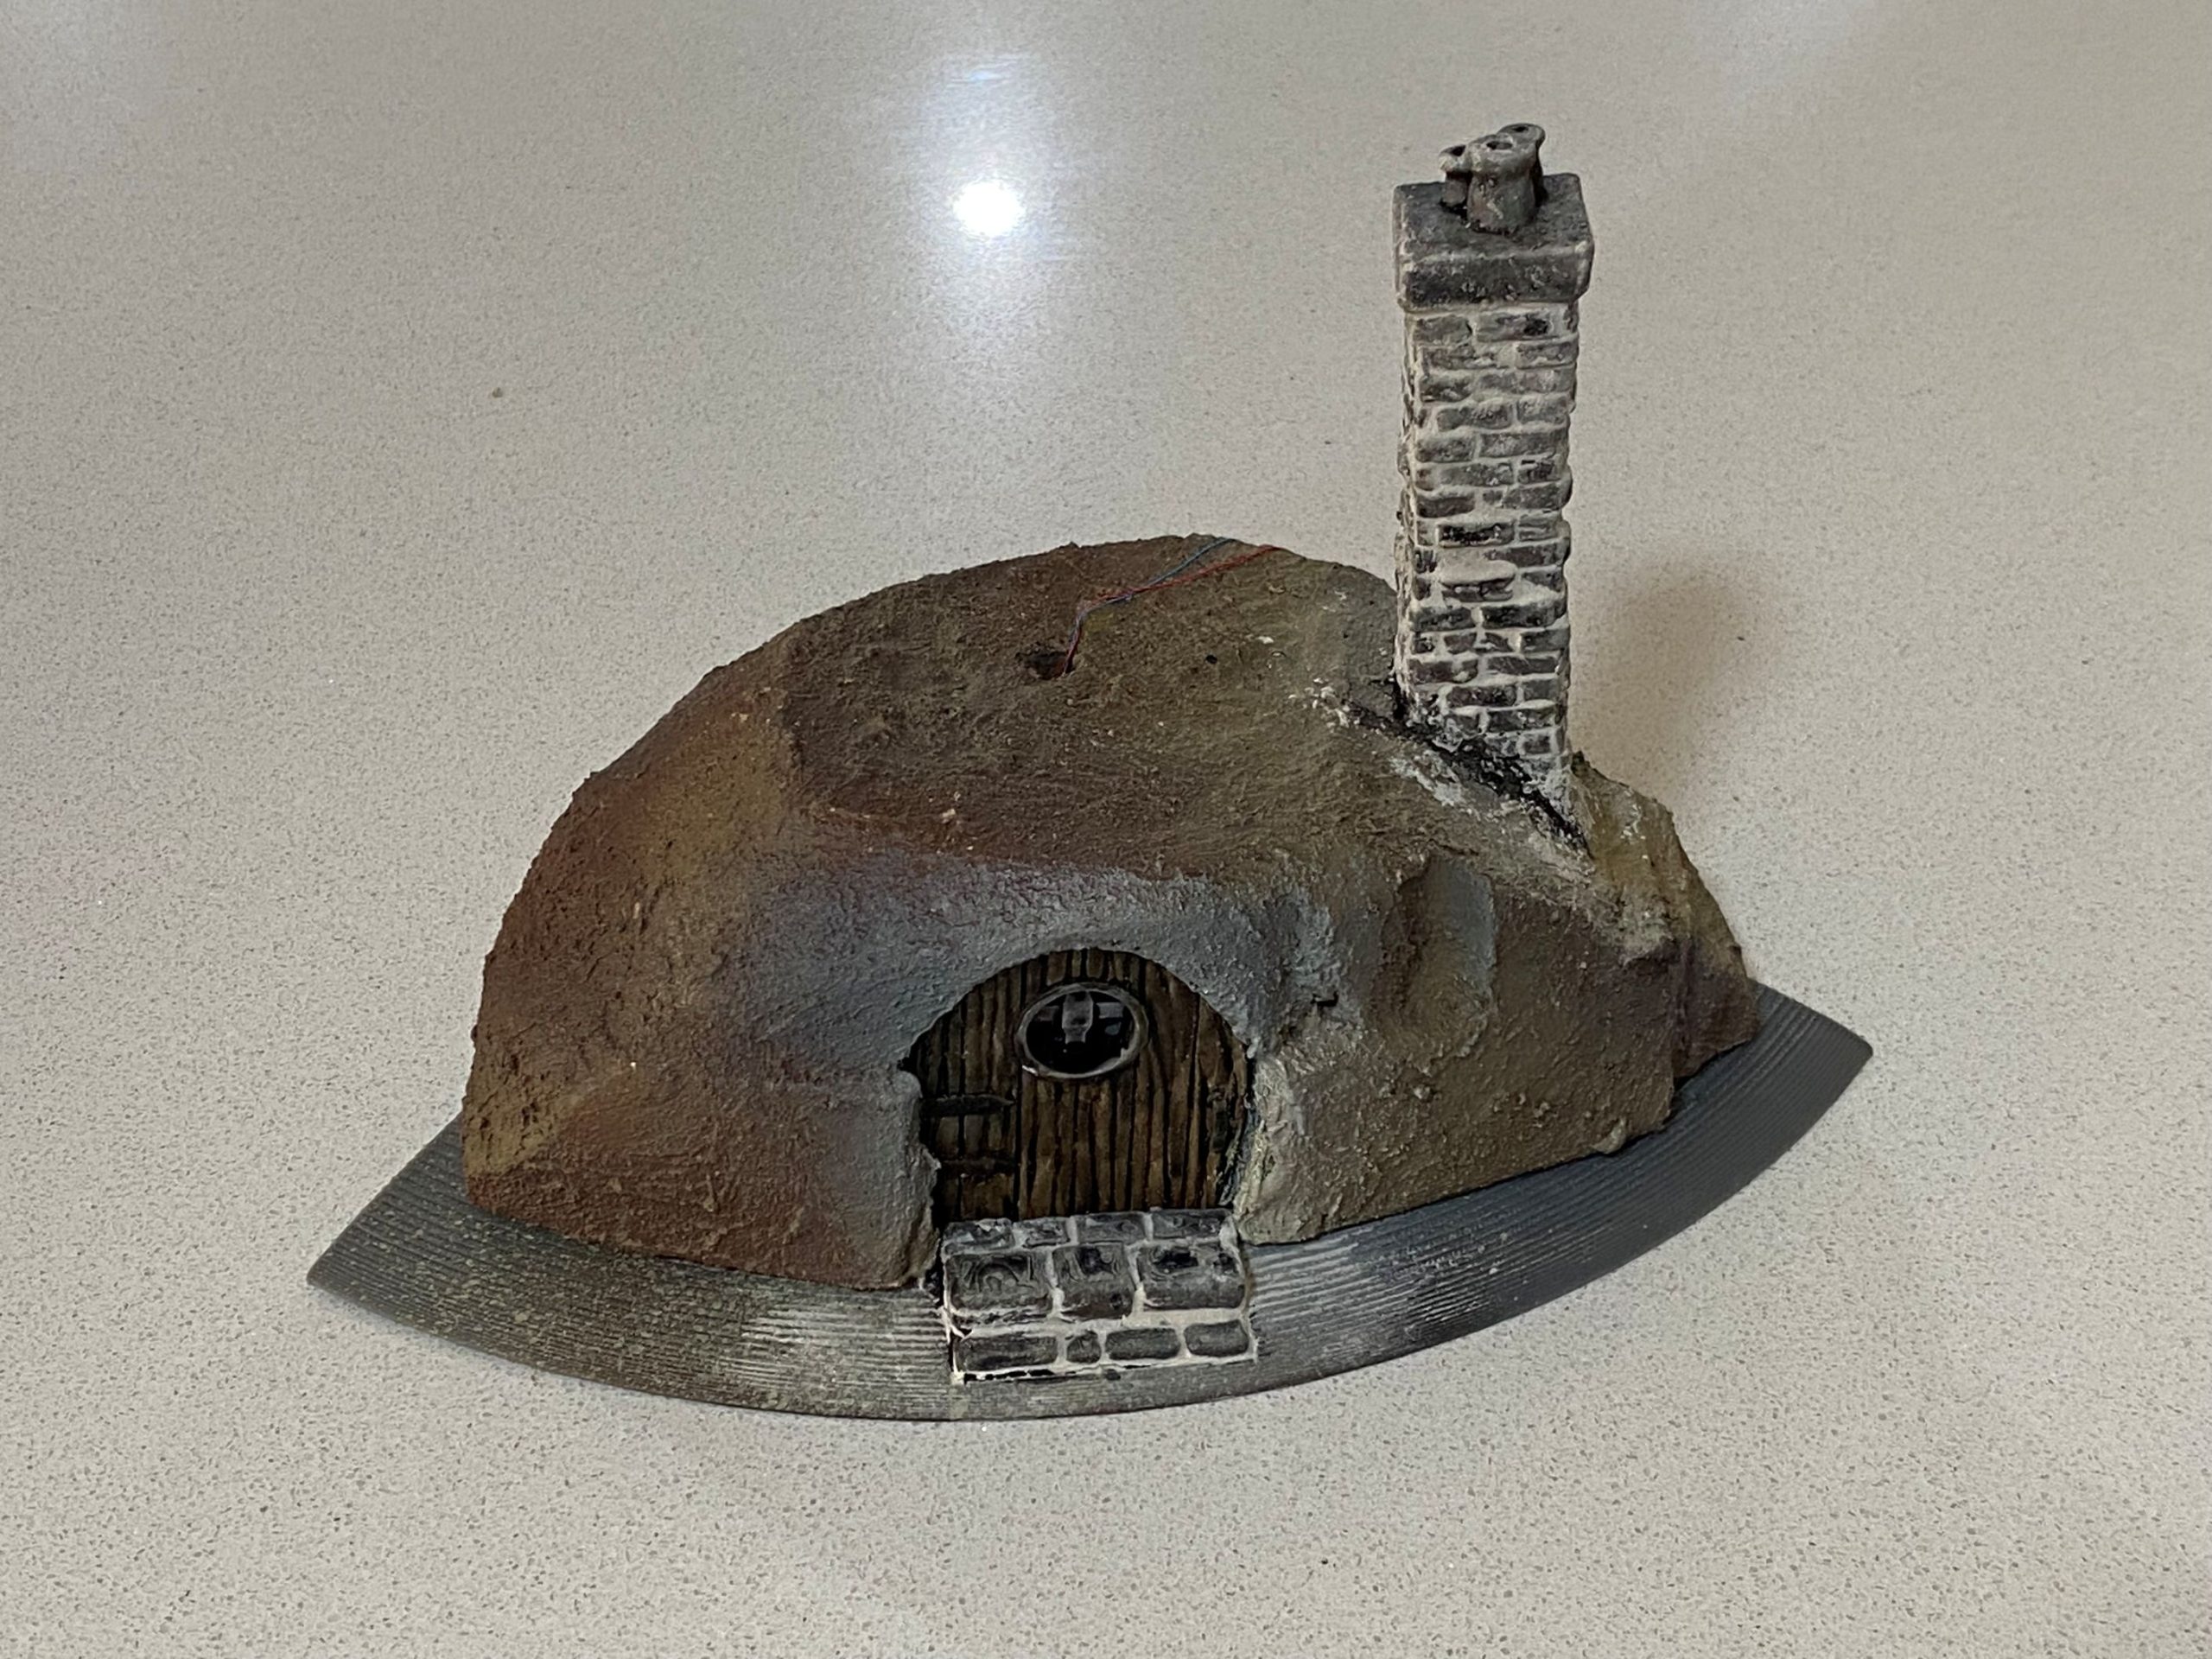


Congo revisited.
Some time ago, I called upon another terrain maker and commissioned some jungle trees because I just had way too much on and found making trees rather time-consuming.
Anyway, to cut a long story short, they arrived and I had mixed feelings about them. I was not in love with the wooden treehouses, despite my brief, having request for them. They looked too much like garden sheds. The doorways were huge, and one had an immaculately precision-cut ladder attached to it. To sum up, they looked completely out of place.
Then there were the canopies that almost glittered with a metallic-like sheen due to the scatter material used on them. They also seemed very sparse and didn’t really capture the dense jungle feel I was looking for.
So, they sat unused for ages. Which is a shame because, for the most part, they were excellent models that, with just a few minor tweaks here and there, could really capture Darkest Africa or something from the prehistoric era.

Well, that was until recently, when I decided that I needed to head back out into the wild and look for a gaming club to join.
I trotted off to one of the many clubs in Perth, one that appears to have a wide variety of games played without a massive crowd of 40,000 players. Sorry, no offence to you folks who love 40K, but I was looking for a club that had a bit more historical stuff going on, and there are so many players for 40K at most of the other clubs around here.
I met a good old friend of mine, with whom we used to play a lot of VSF together, who was also taking the bull by the horns and heading back out to try to get back into playing games again.
Before the night was over, we had both completed our membership submissions for the club and also committed to putting on a game this week. it was going to be something small to buy ourselves some time to come to grips with what we have in both models and terrain. I think there may be some War of the Roses, Medieval, Dark Ages and even some Lord of the Rings mass battle on the cards for the future, but for now, it was going to be Congo.
I needed to get these trees up to scratch.
First thing was to rip off the wooden huts, ladders and walkways.
I repainted the trees using rattle cans to give them a greyish look. First, using a dark grey spray, then a couple of shades of grey. No, not fifty of them, just two.
I sprayed over all the existing foliage, figuring that those would look good as fine branches.
Once dry I attached Lichen of various colours to create a larger, denser canopy.
Finally, I gave everything a matt varnish to get rid of a lot of the shine.
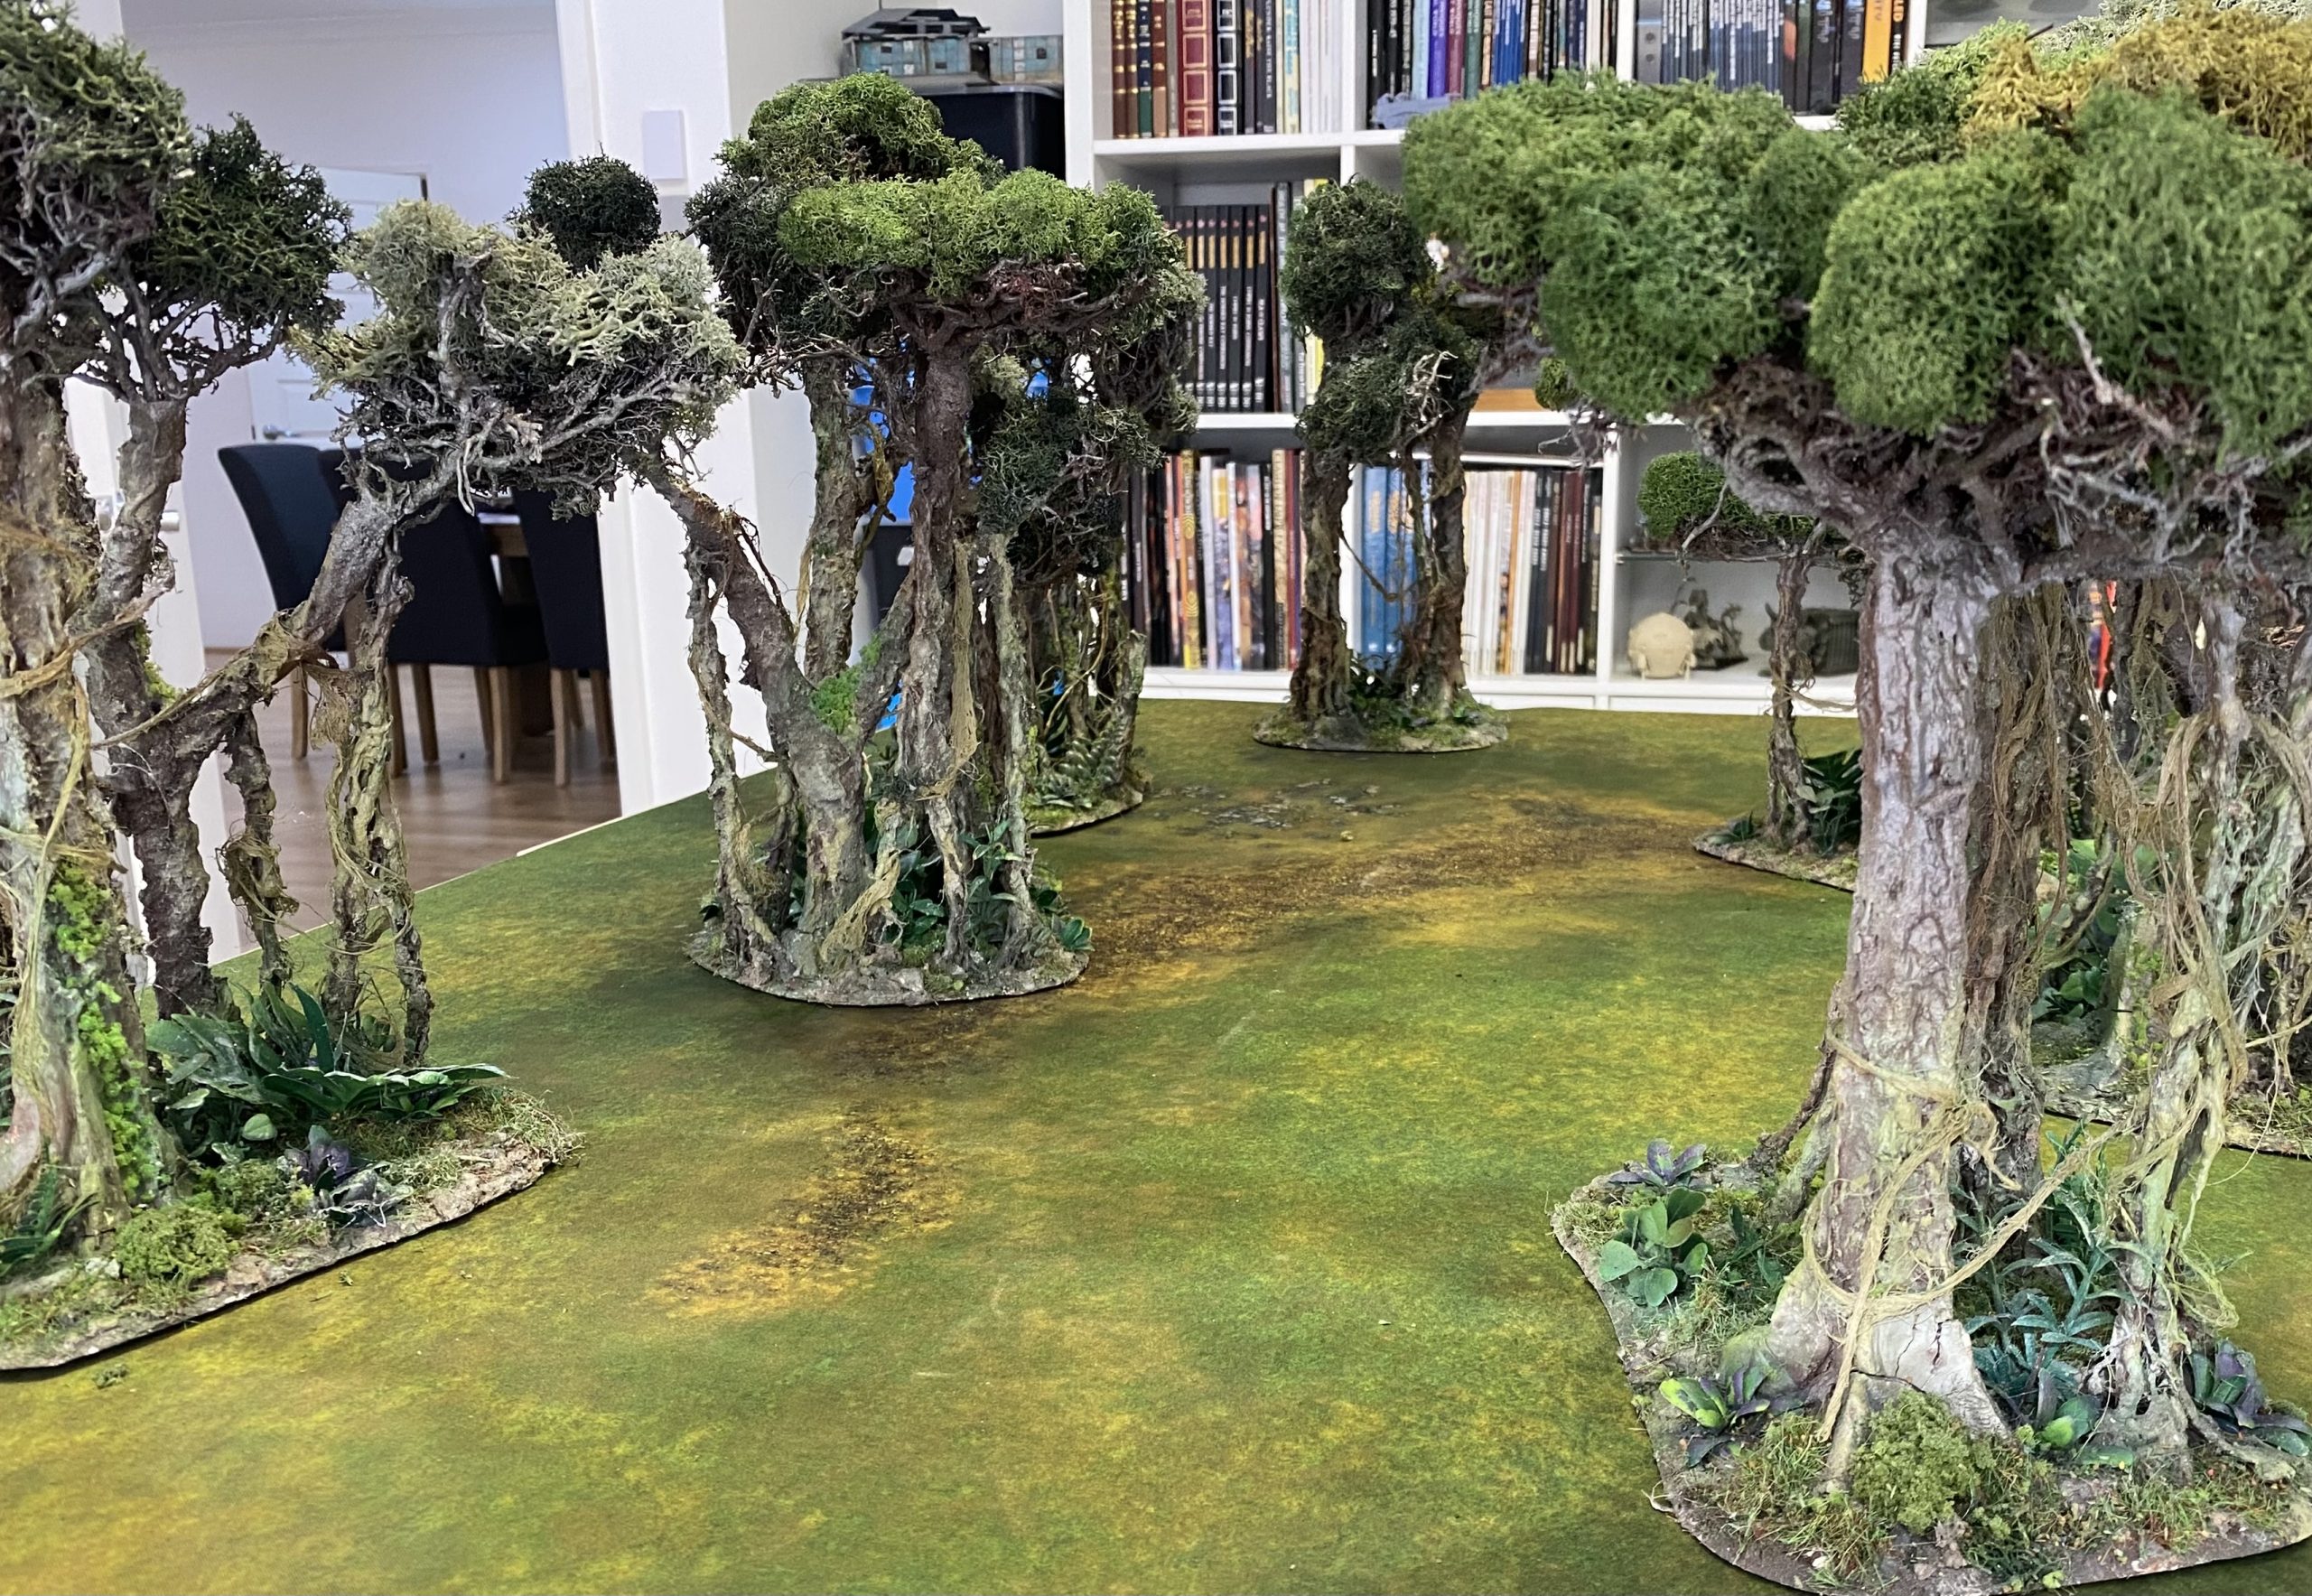
I am pretty happy with how they turned out in the end.
Do I have any regrets about the initial commission? None at all. I love about 99% of what they did, and it really did save me a lot of time and effort that it would have taken me if I had done these myself from scratch.
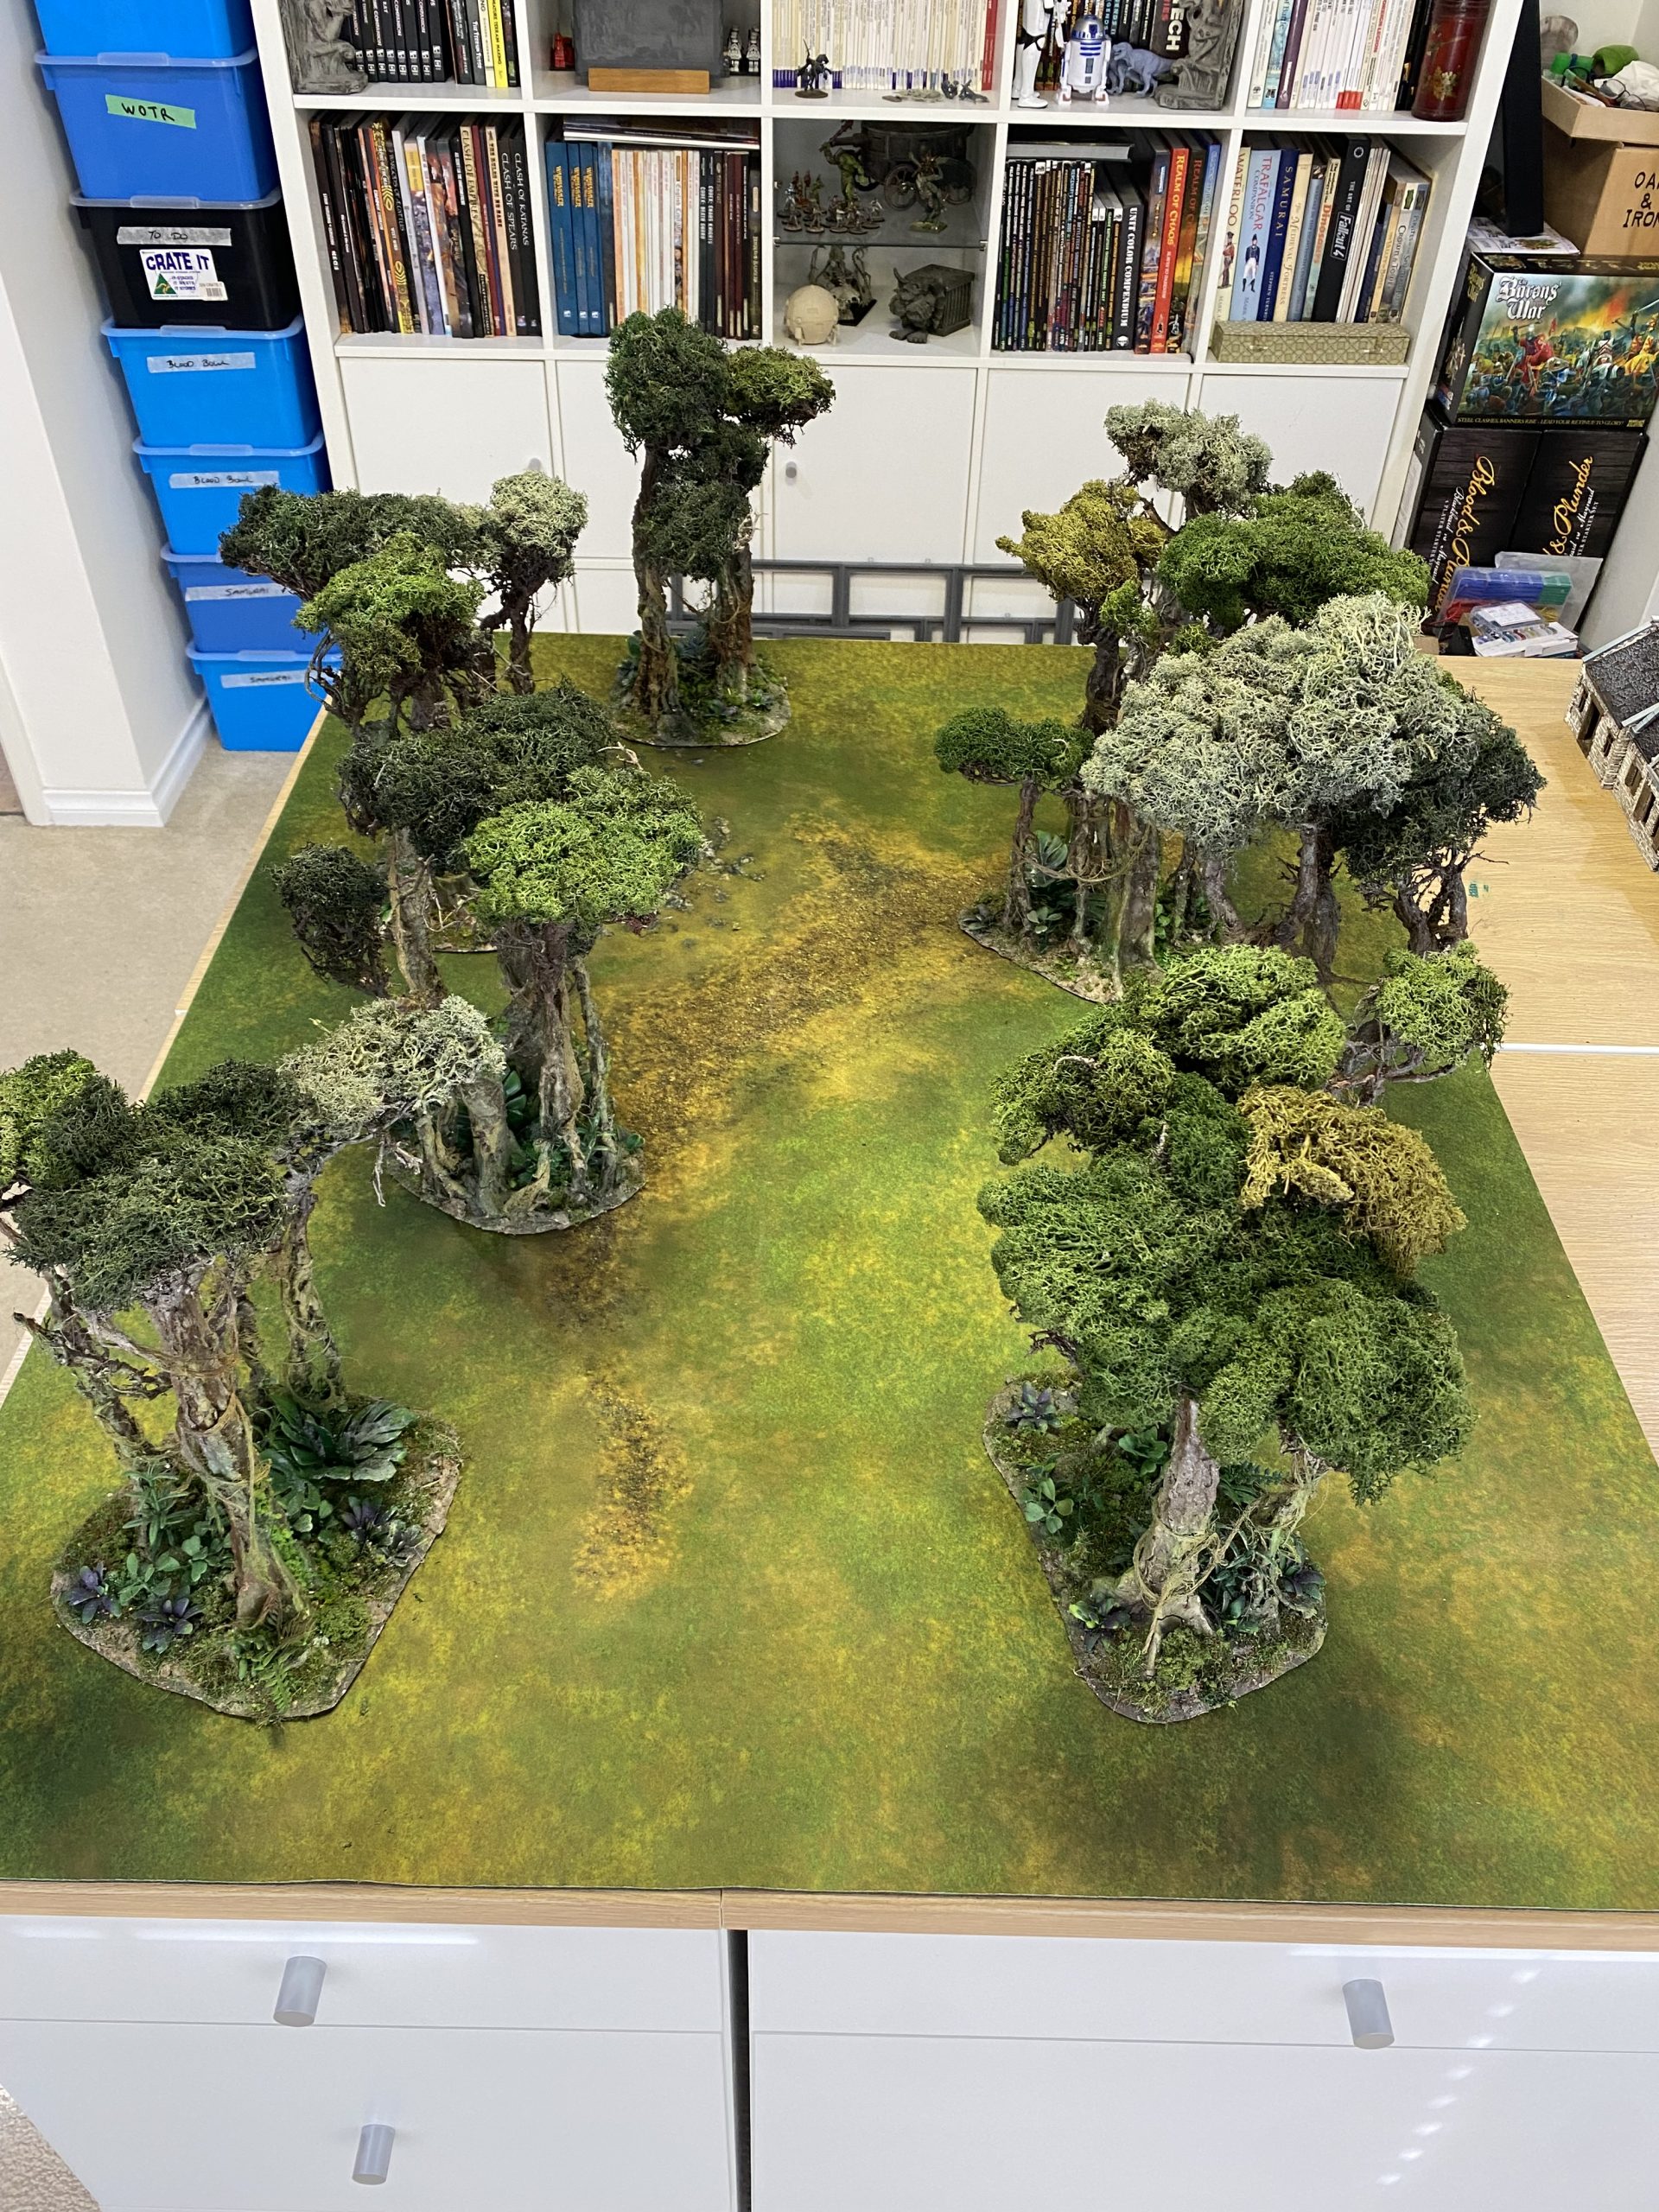
These jungles have a lovely overgrown feel to them, and they did a wonderful job of creating a dark, dense setting that, in my mind, really captures what I imagine being an explorer back in those days would have been like.
I would definitely get more of these and add my own bits to them, like I did with this lot.
I guess the story is, it doesn’t matter if something isn’t exactly how you imagine it, you can always add and change stuff to suit personal tastes. Don’t be afraid to get other people’s work and mix it up with your own artistic flair.
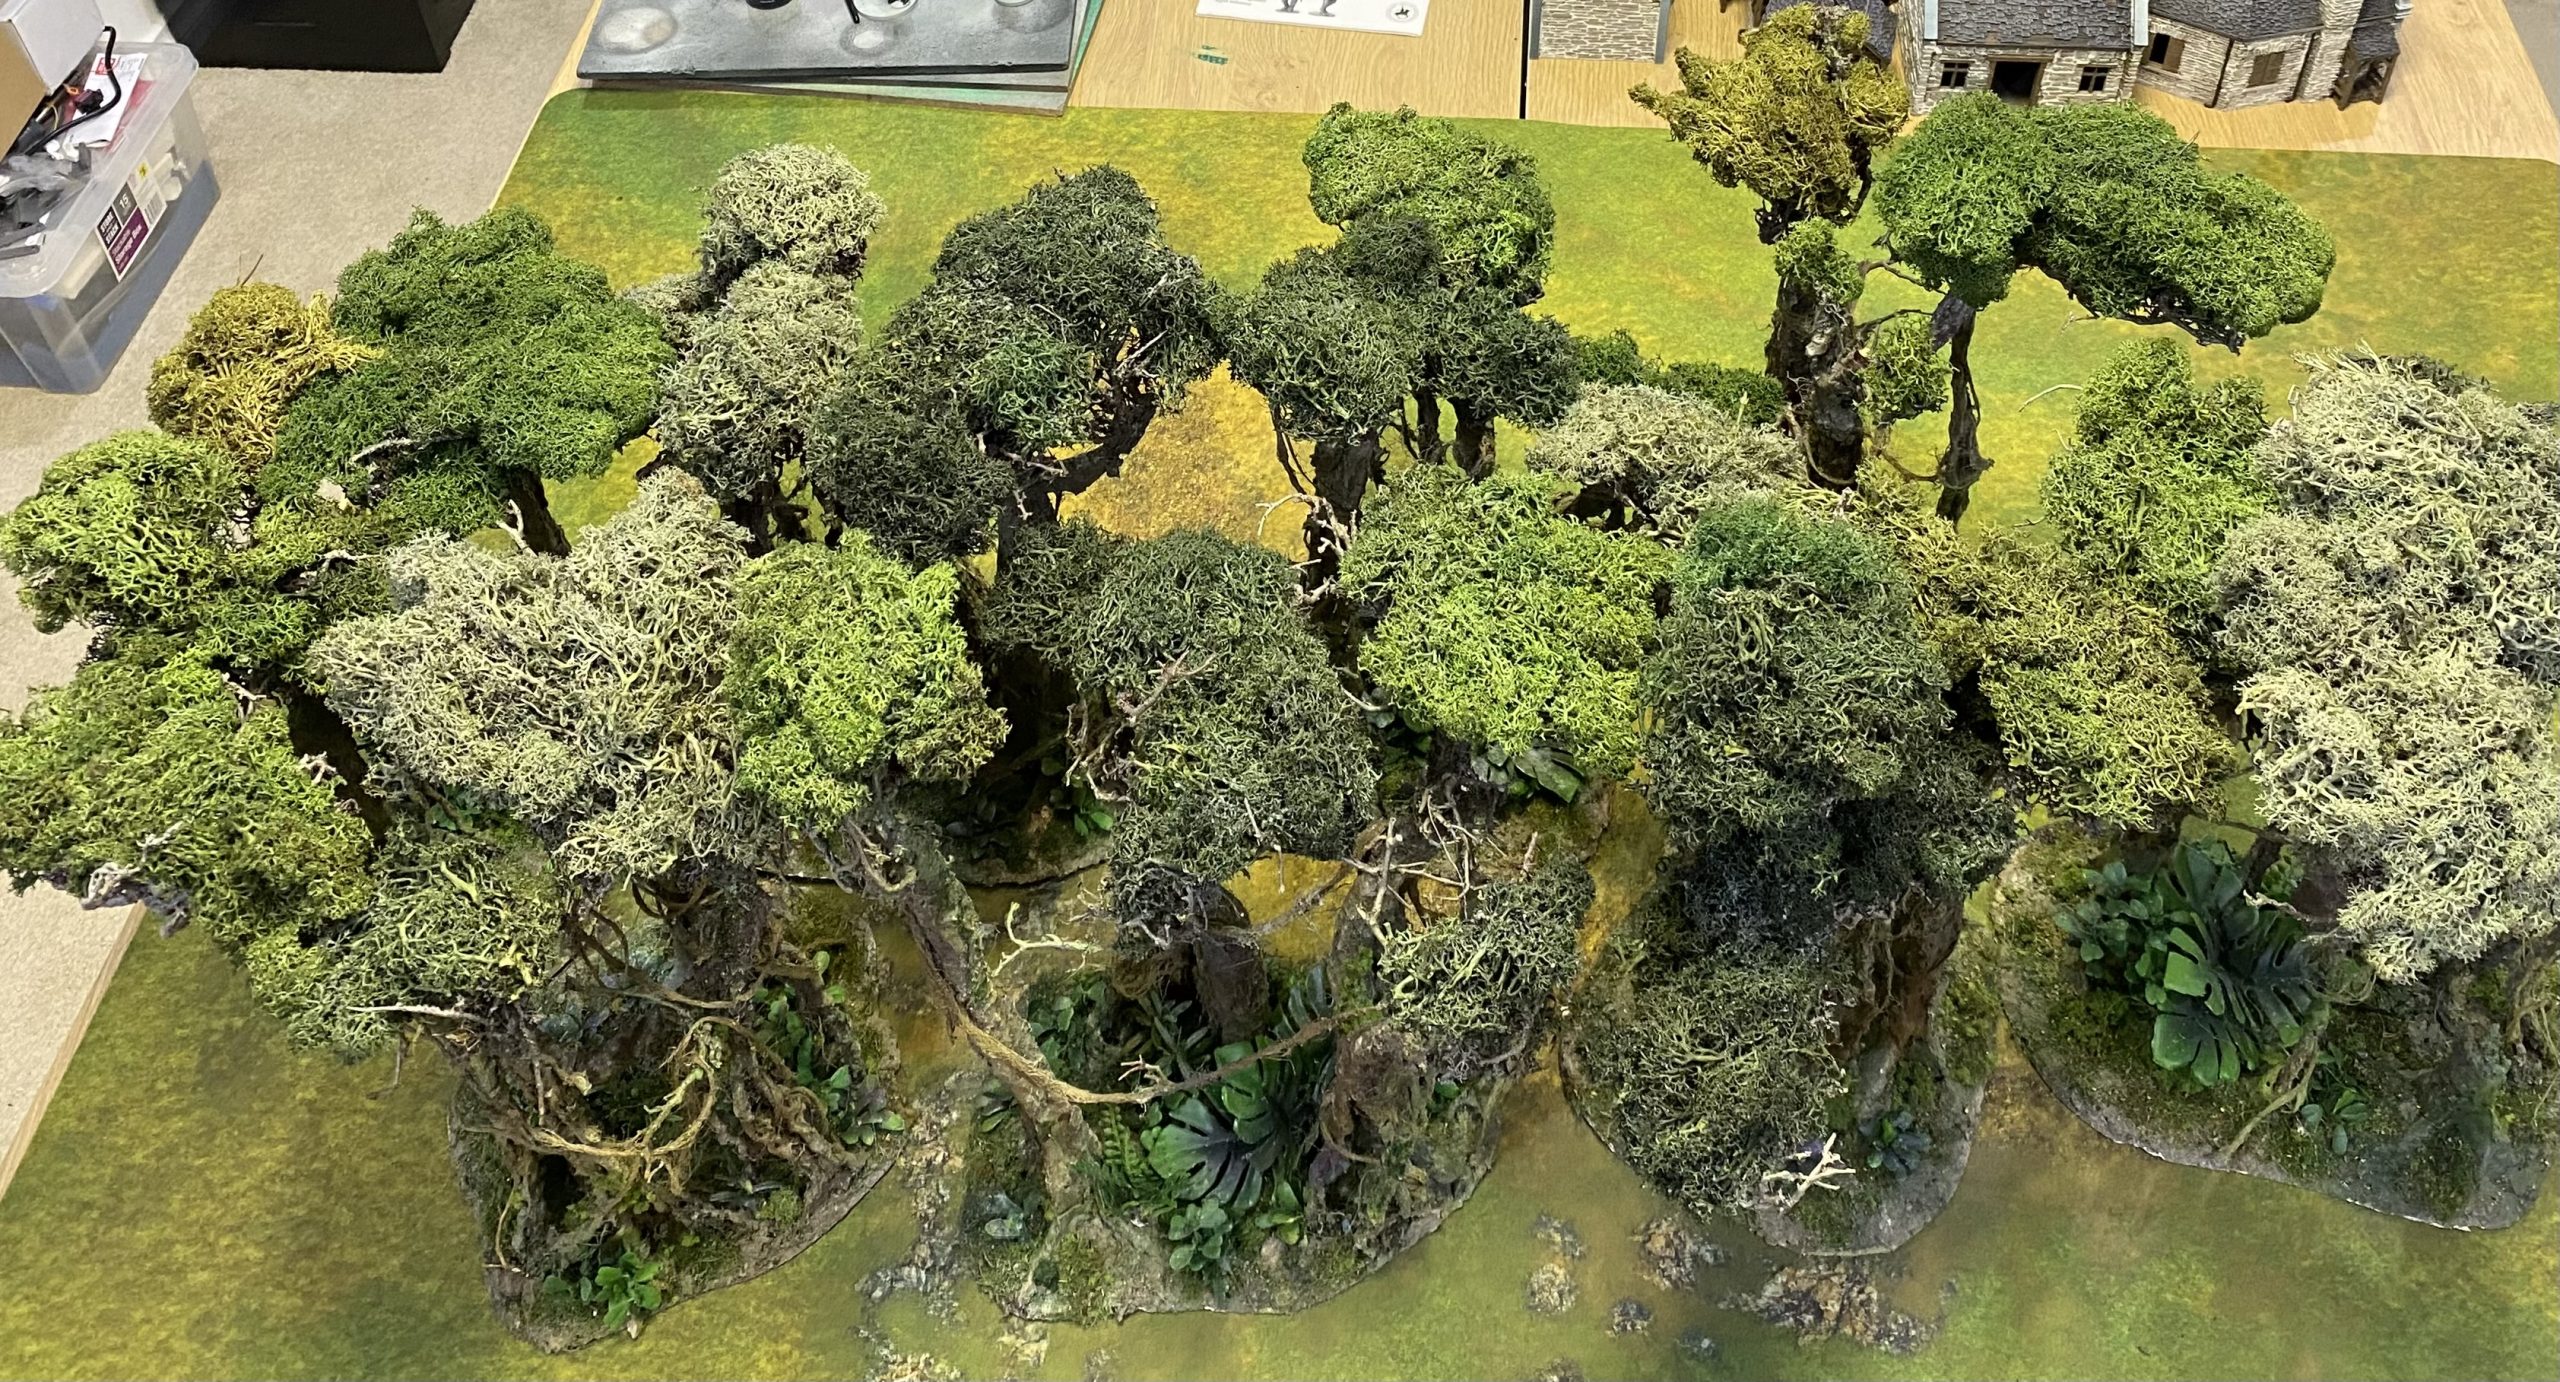
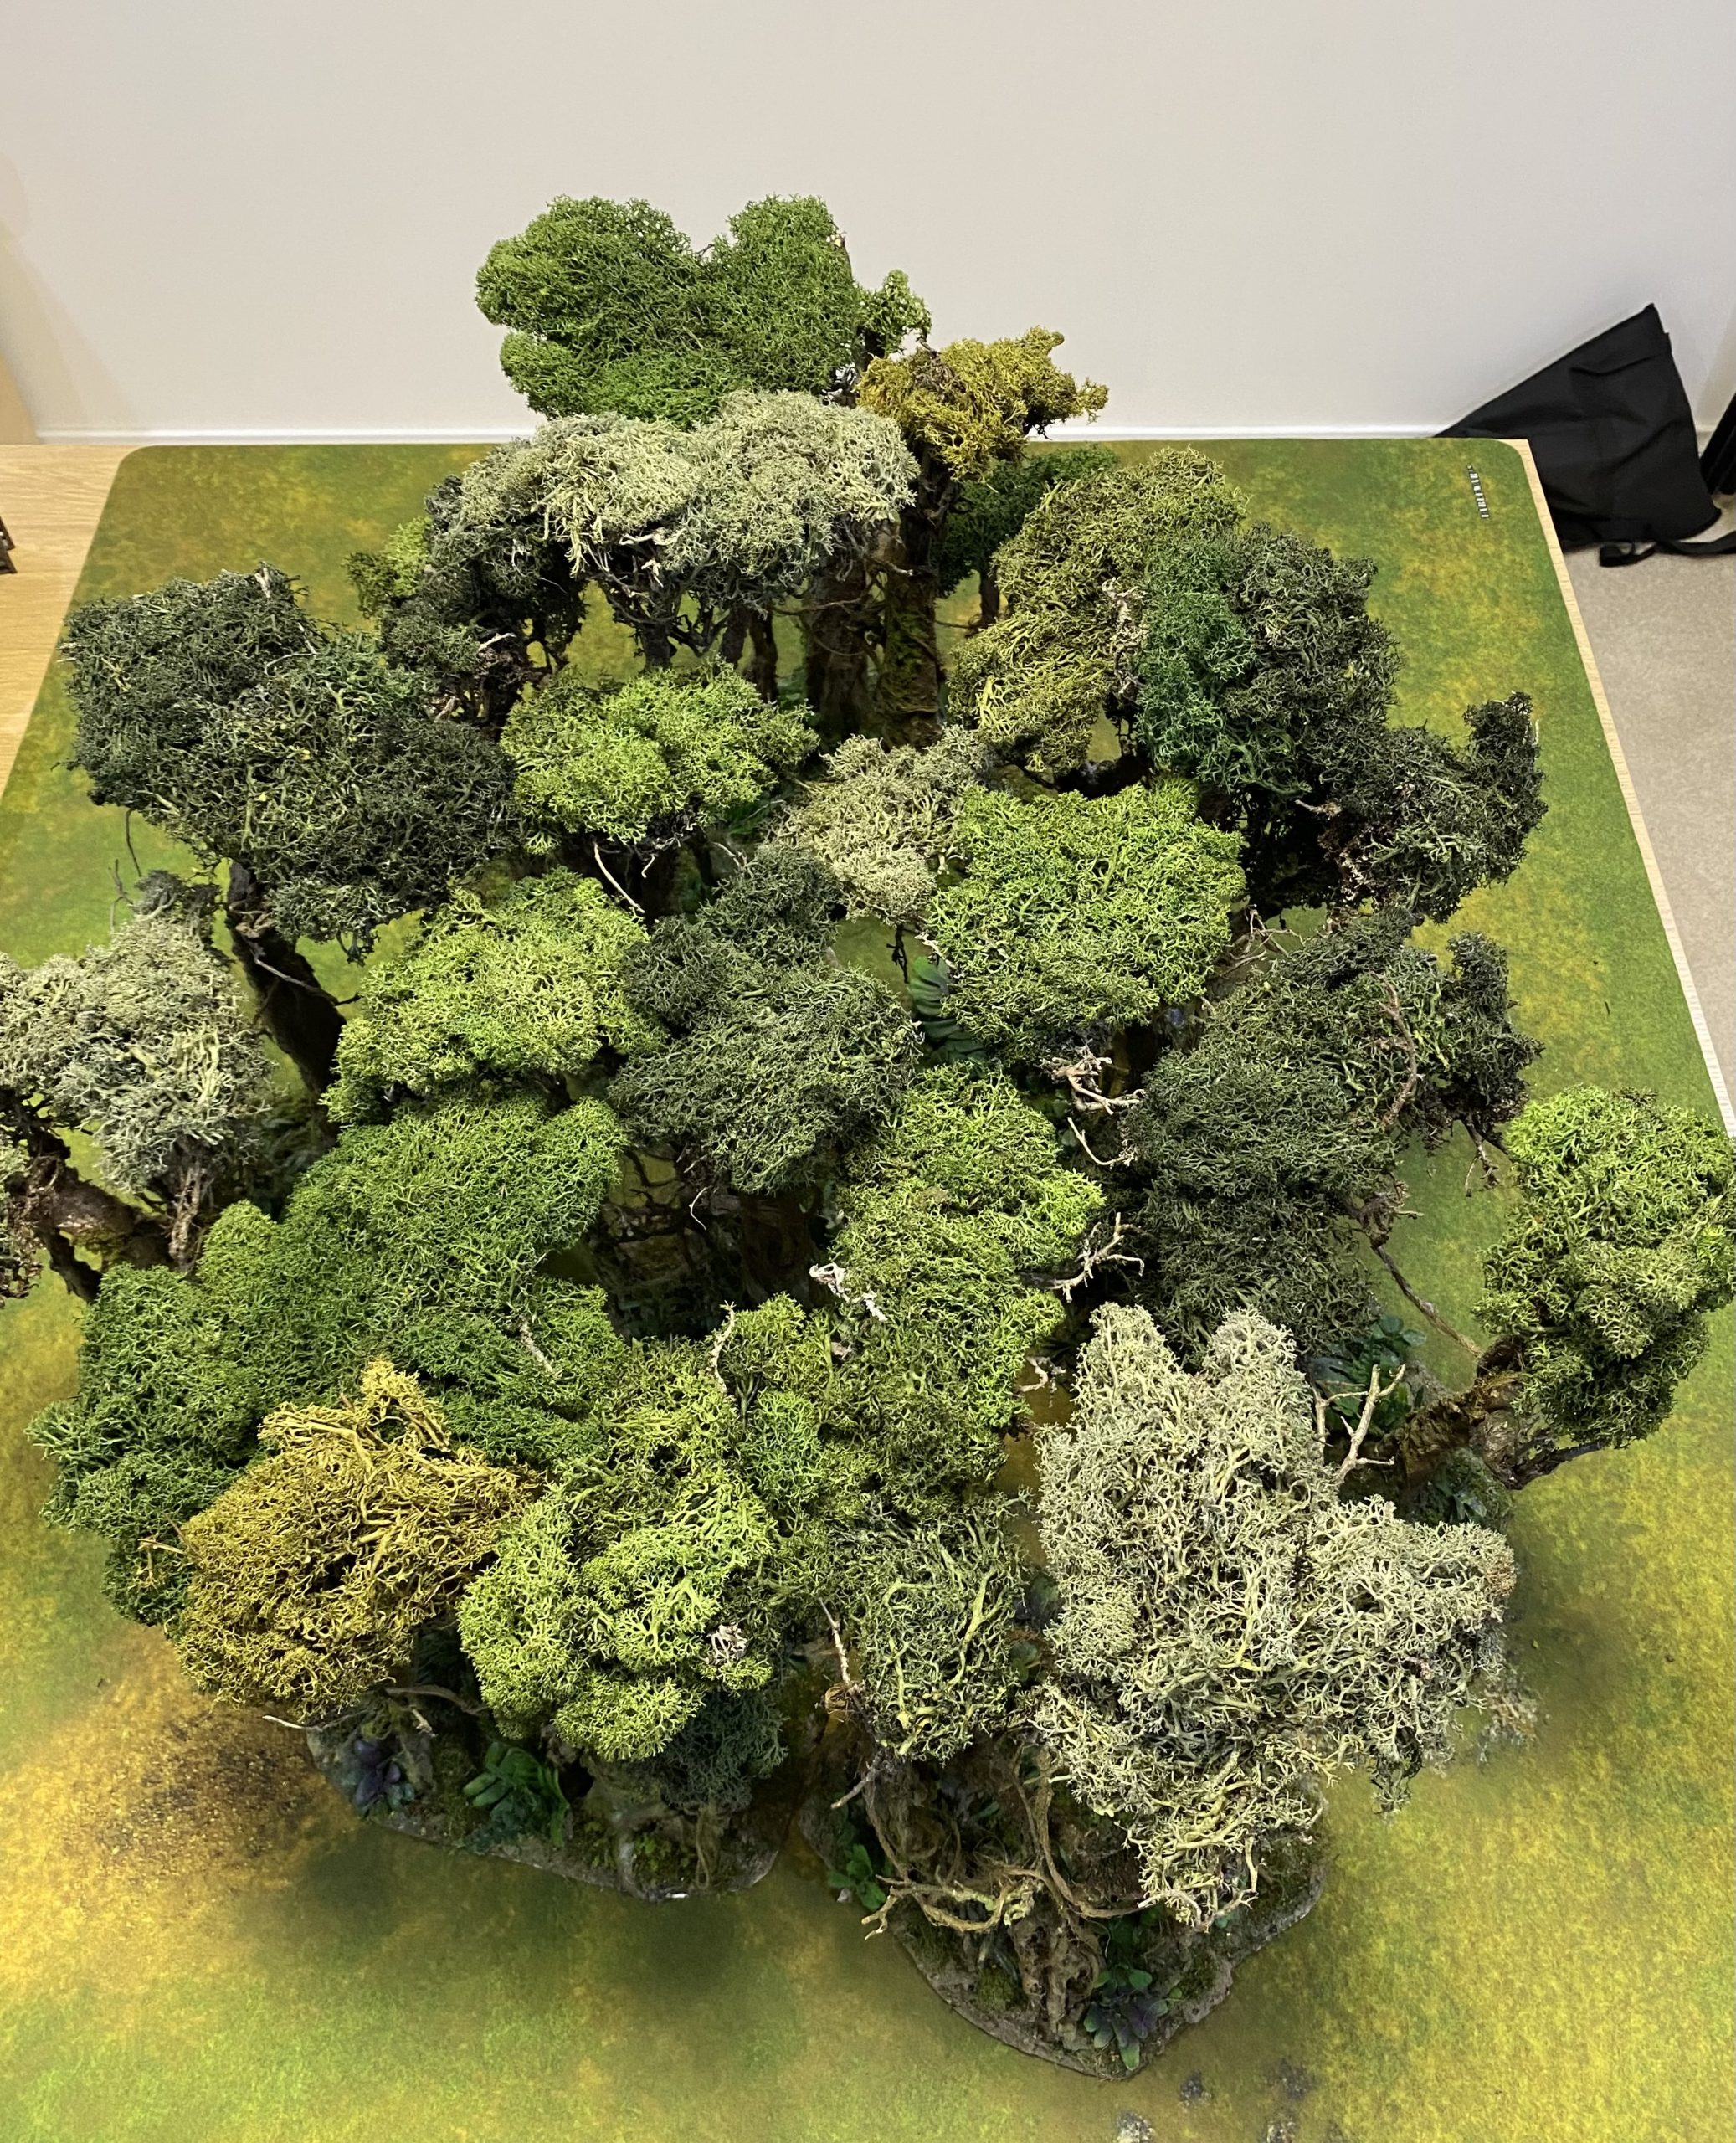 A final picture of the new jungle canopy.
Clearing out more stuff
More stuff for the chopping block.
I have multiples of all of these for one reason or another. Some were painted up on commission, others were just excess to my requirements and have to go to make space for new stuff.
Figured I would post some pictures up here as a way of cataloguing what I have done.


It's been a while
It’s been a while since I posted anything on here, and to be honest, I had completely forgotten about this project log.
Sorry, no in-progress shots for this little lot, but I figured I’d share some photos of this stuff before it goes on the chopping block to make room for other items.

As I open more boxes in the garage, I will likely come across other items that I can clear out. However, I will try to take a photo of everything before rehoming it. I can’t promise that I will remember to do that, but I will try.
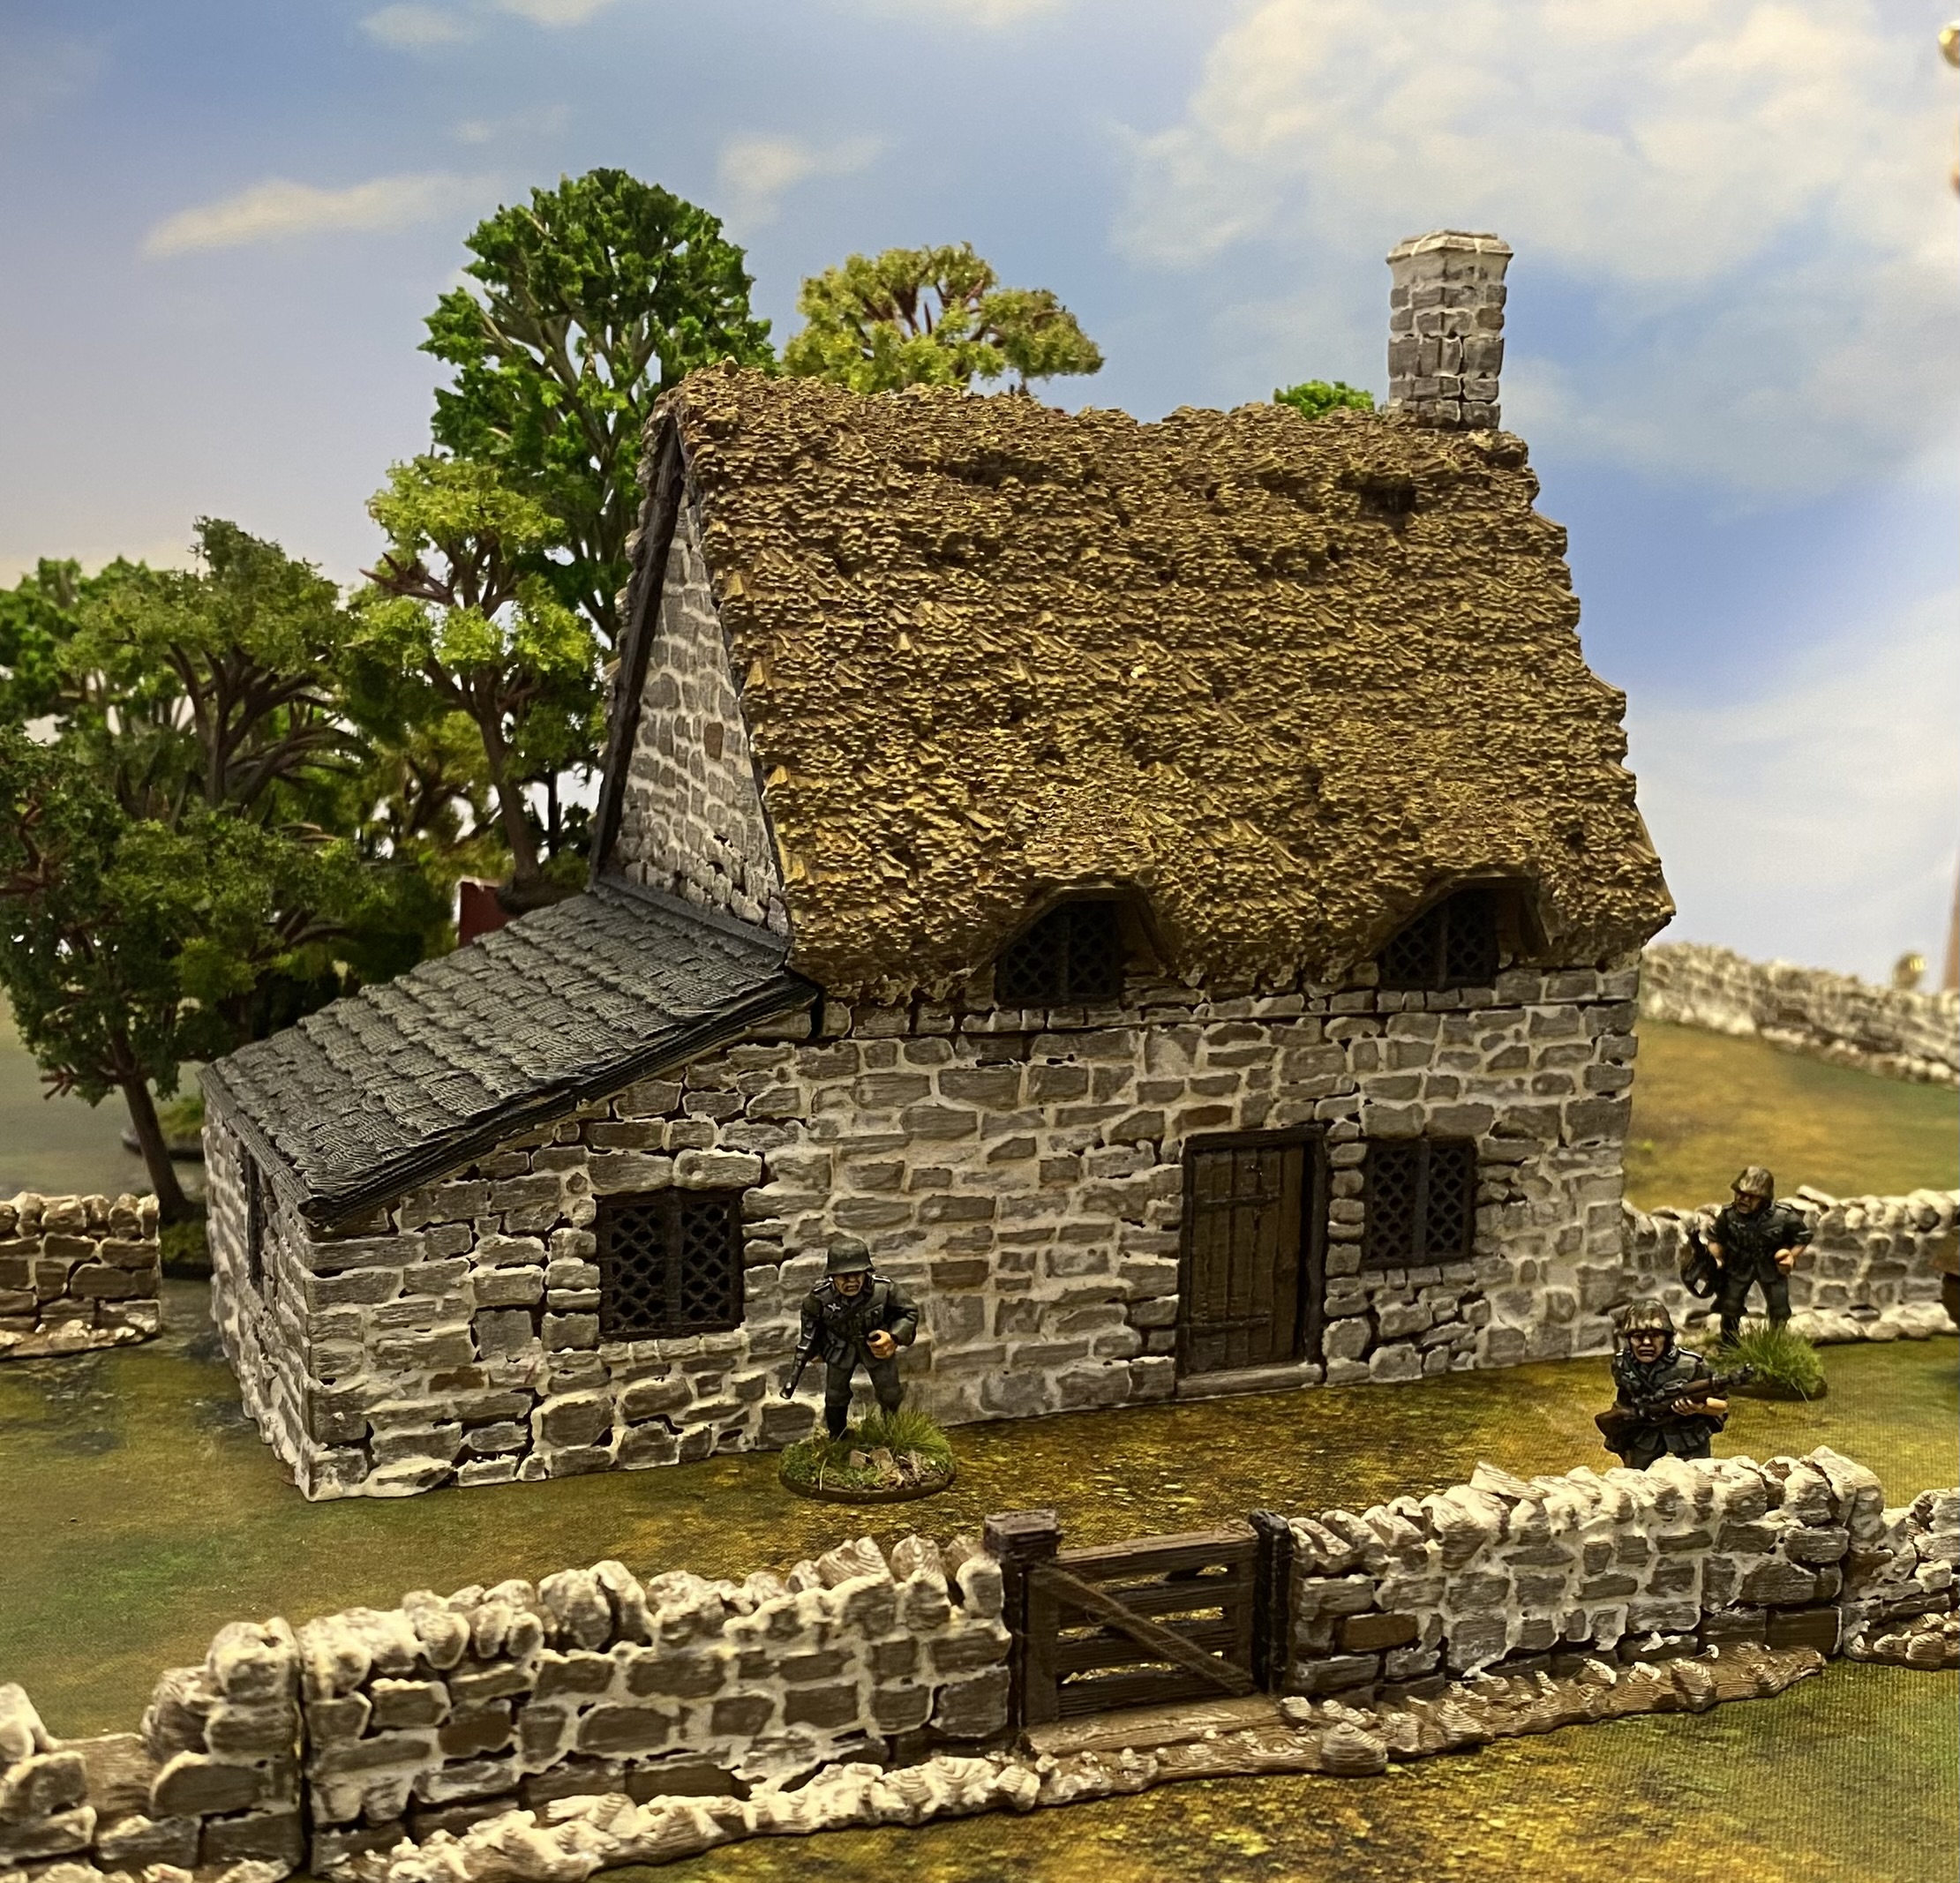
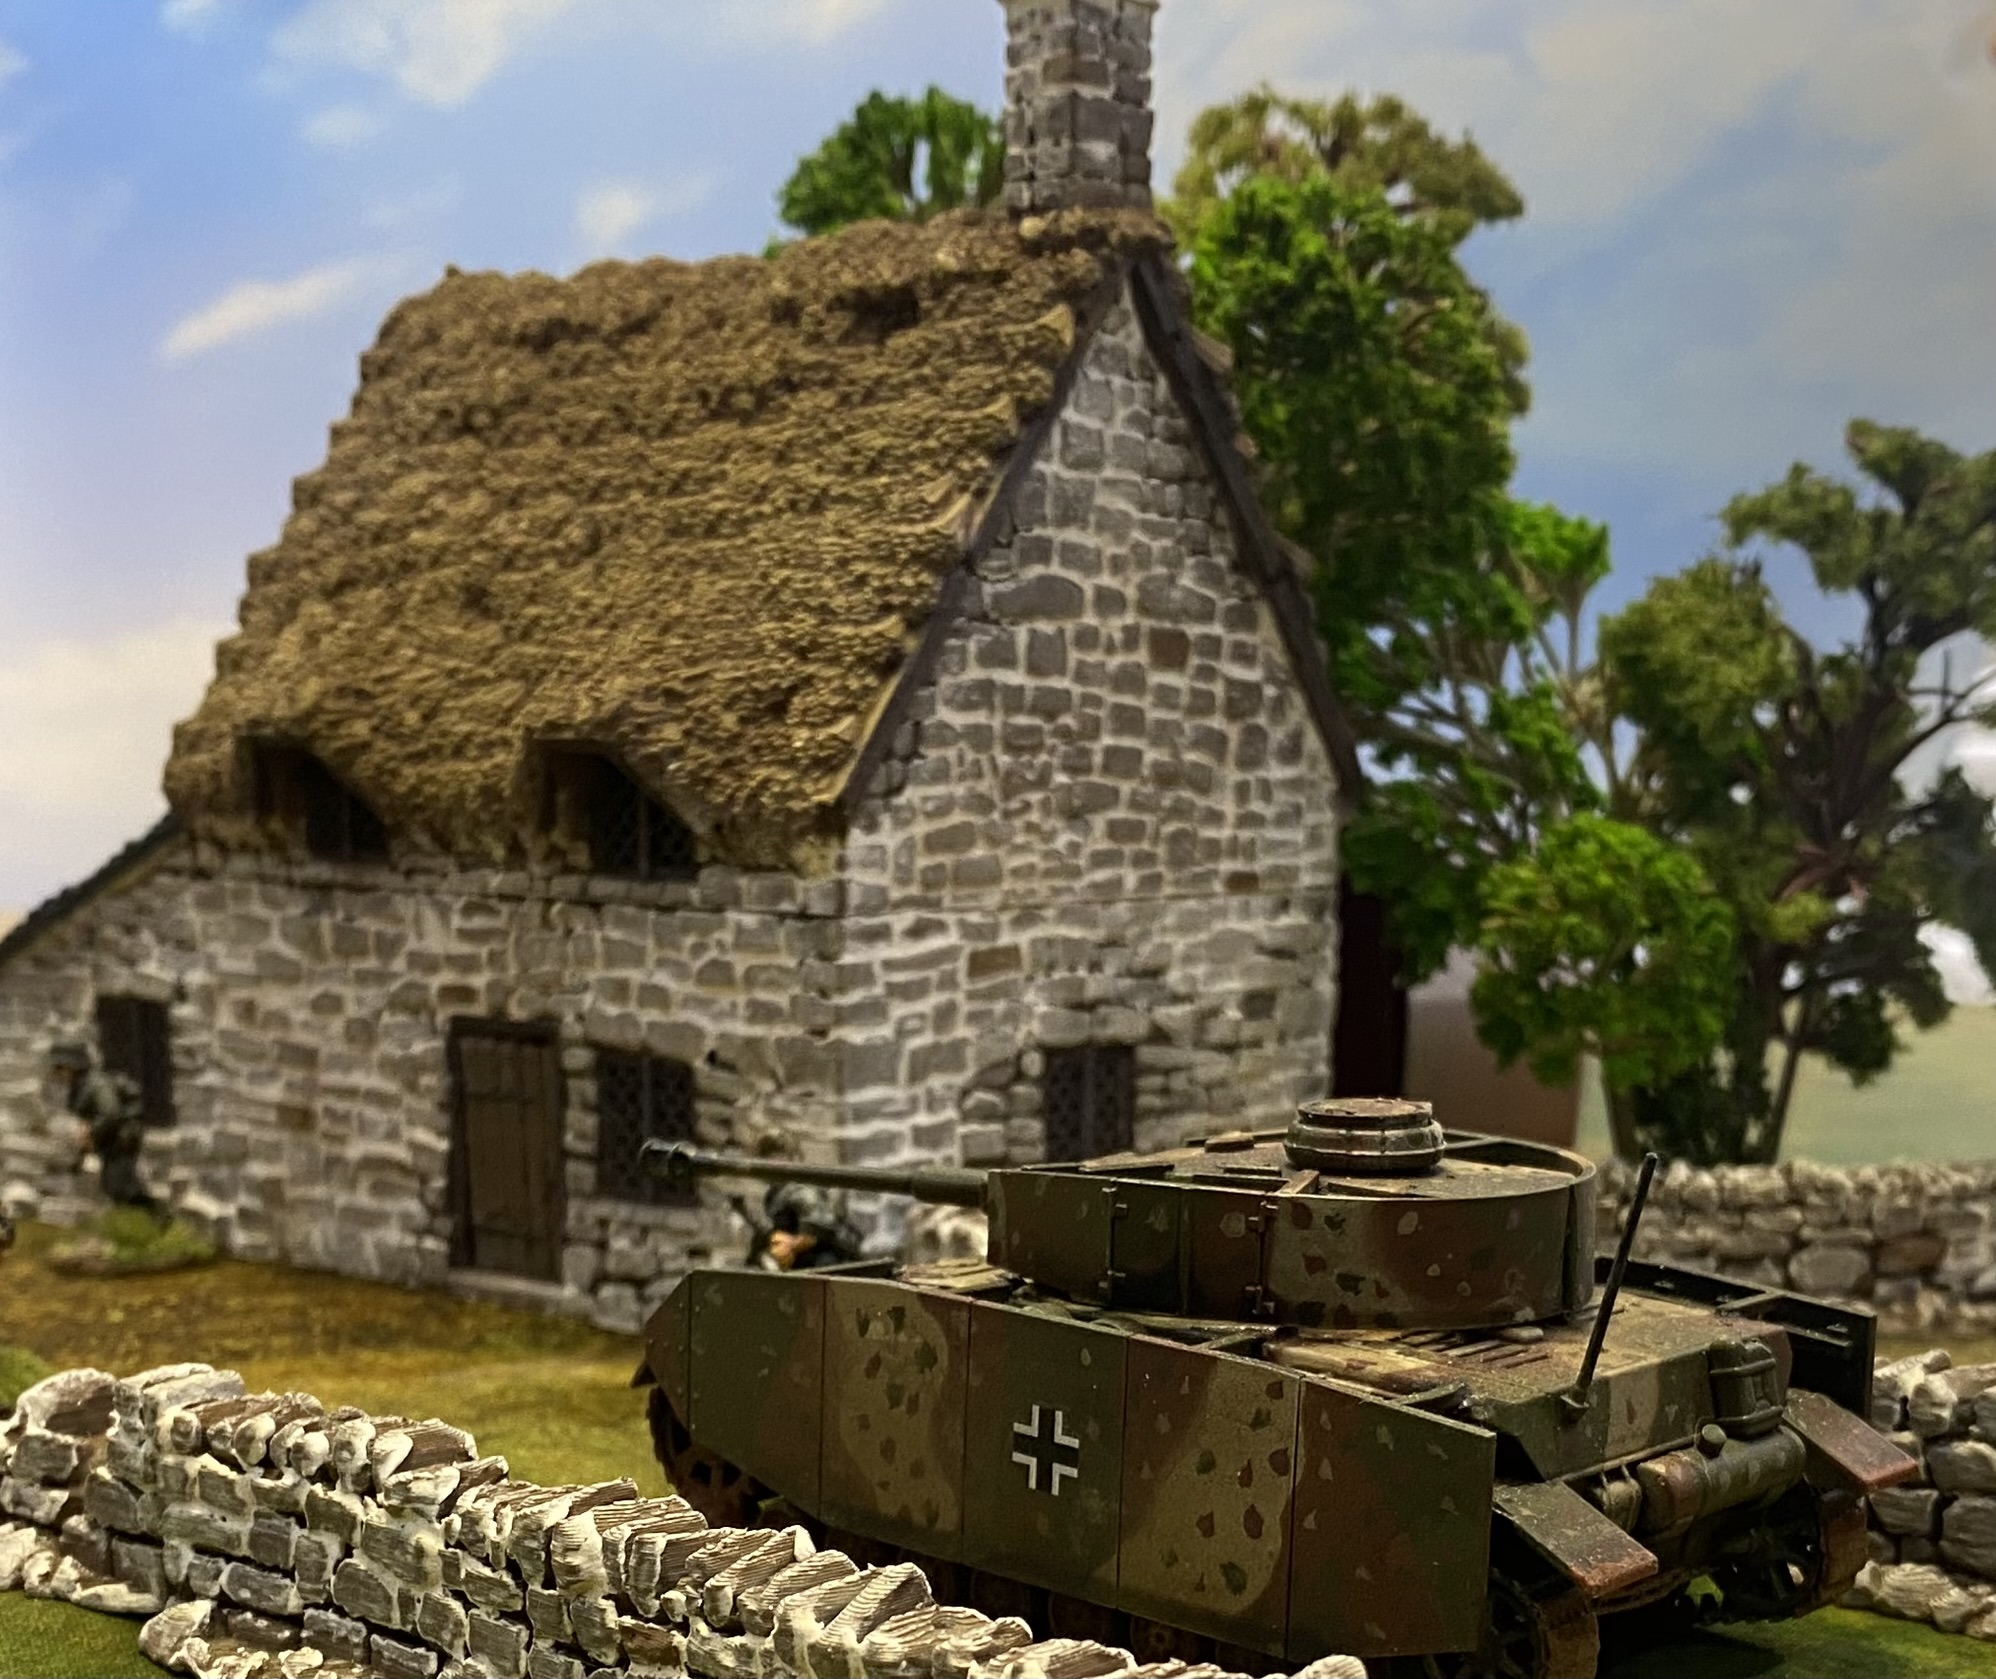
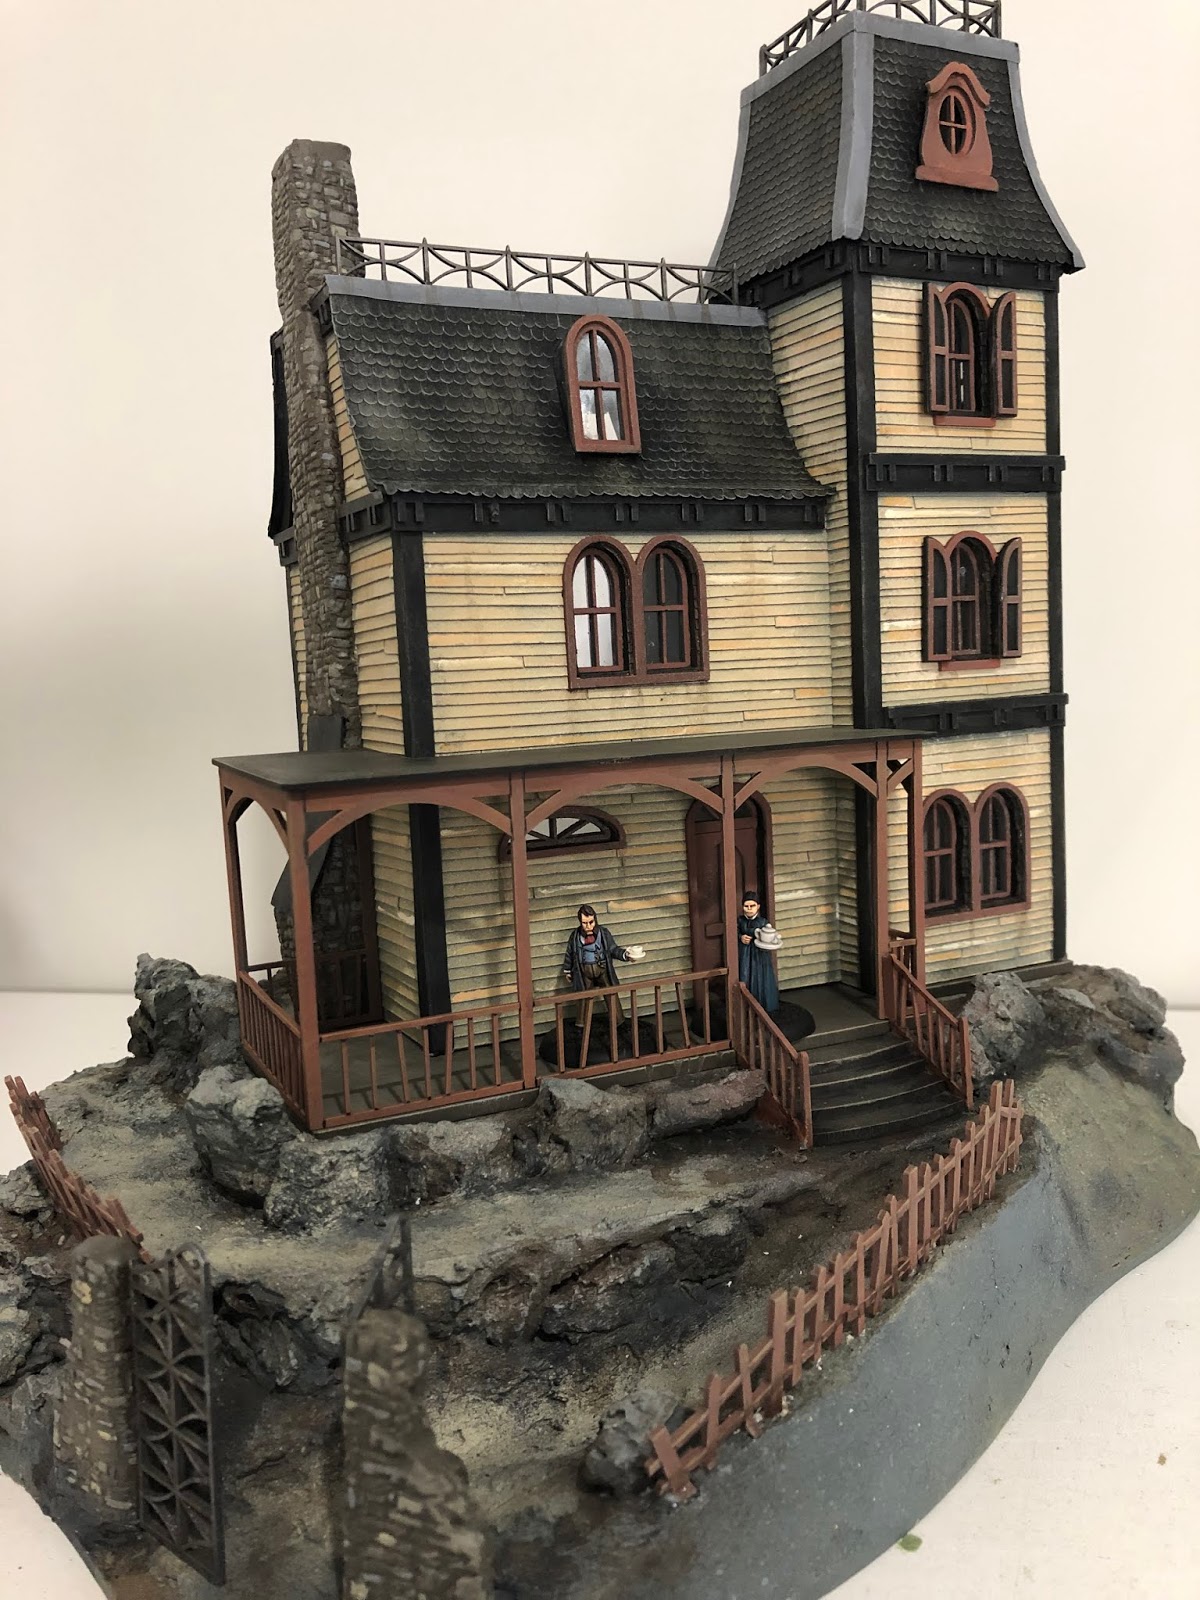
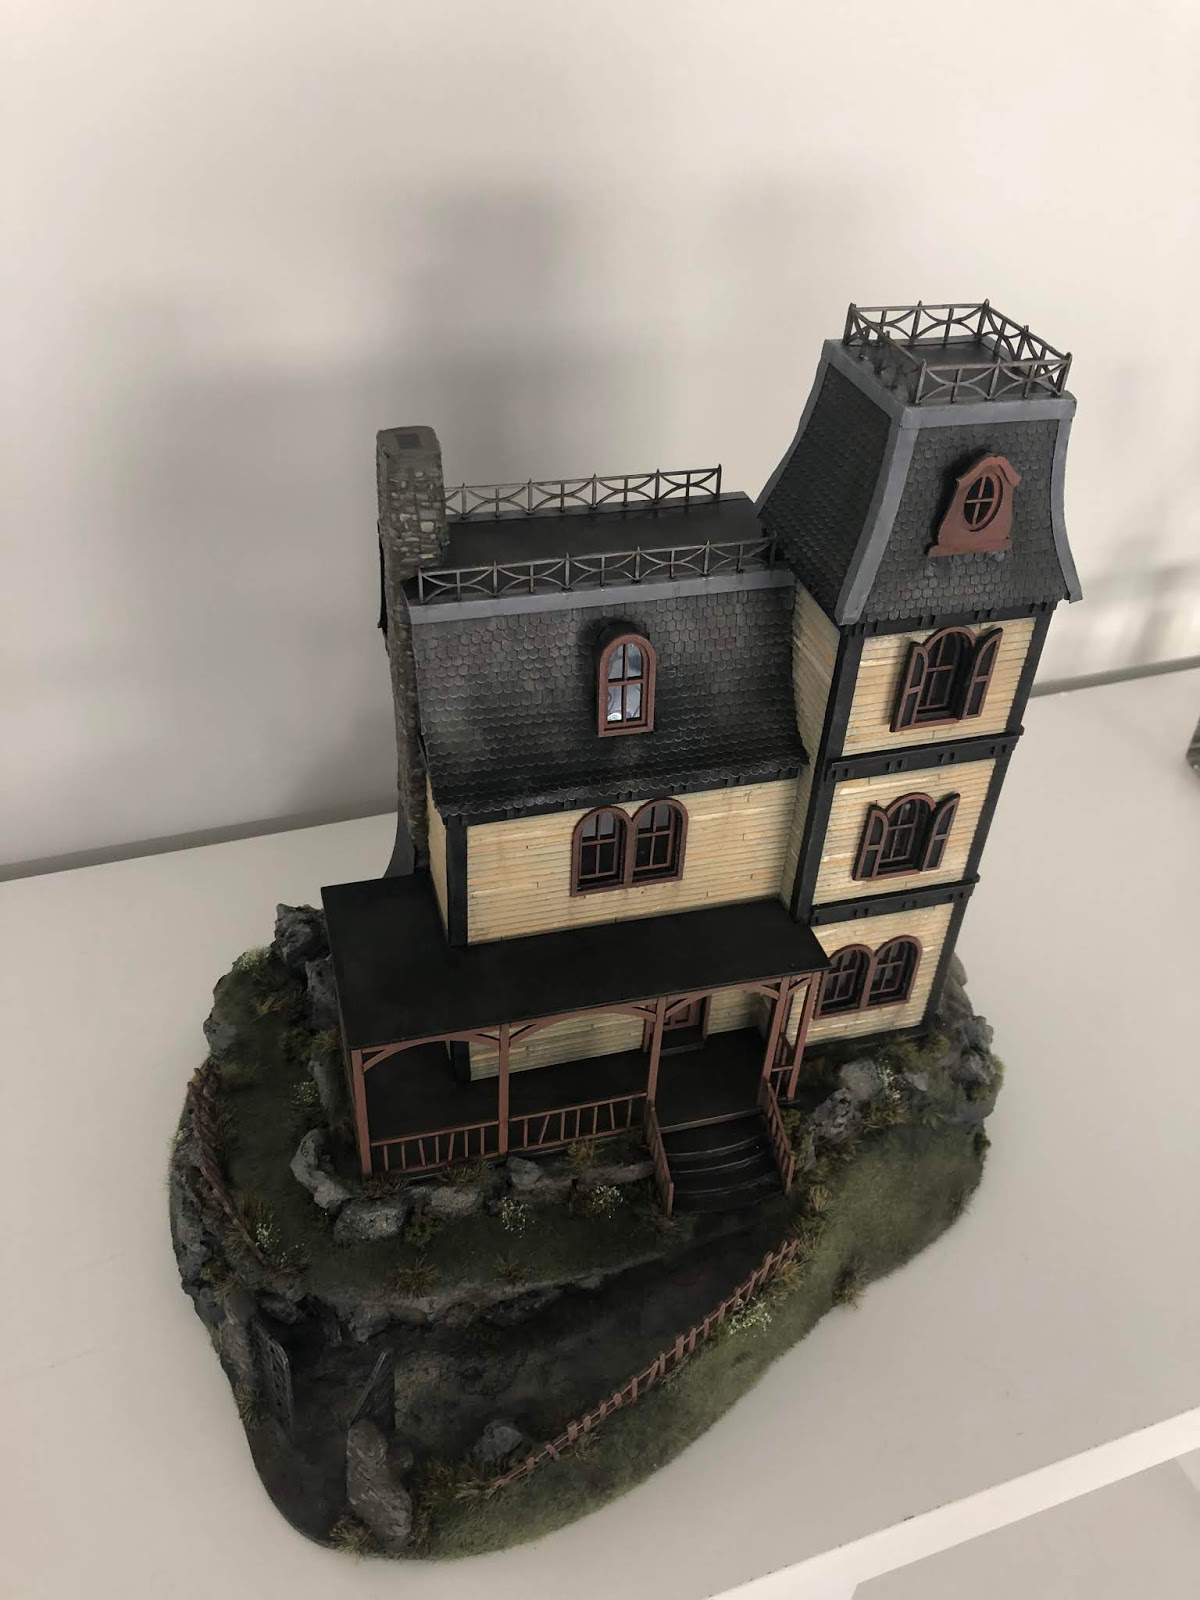
American Horror
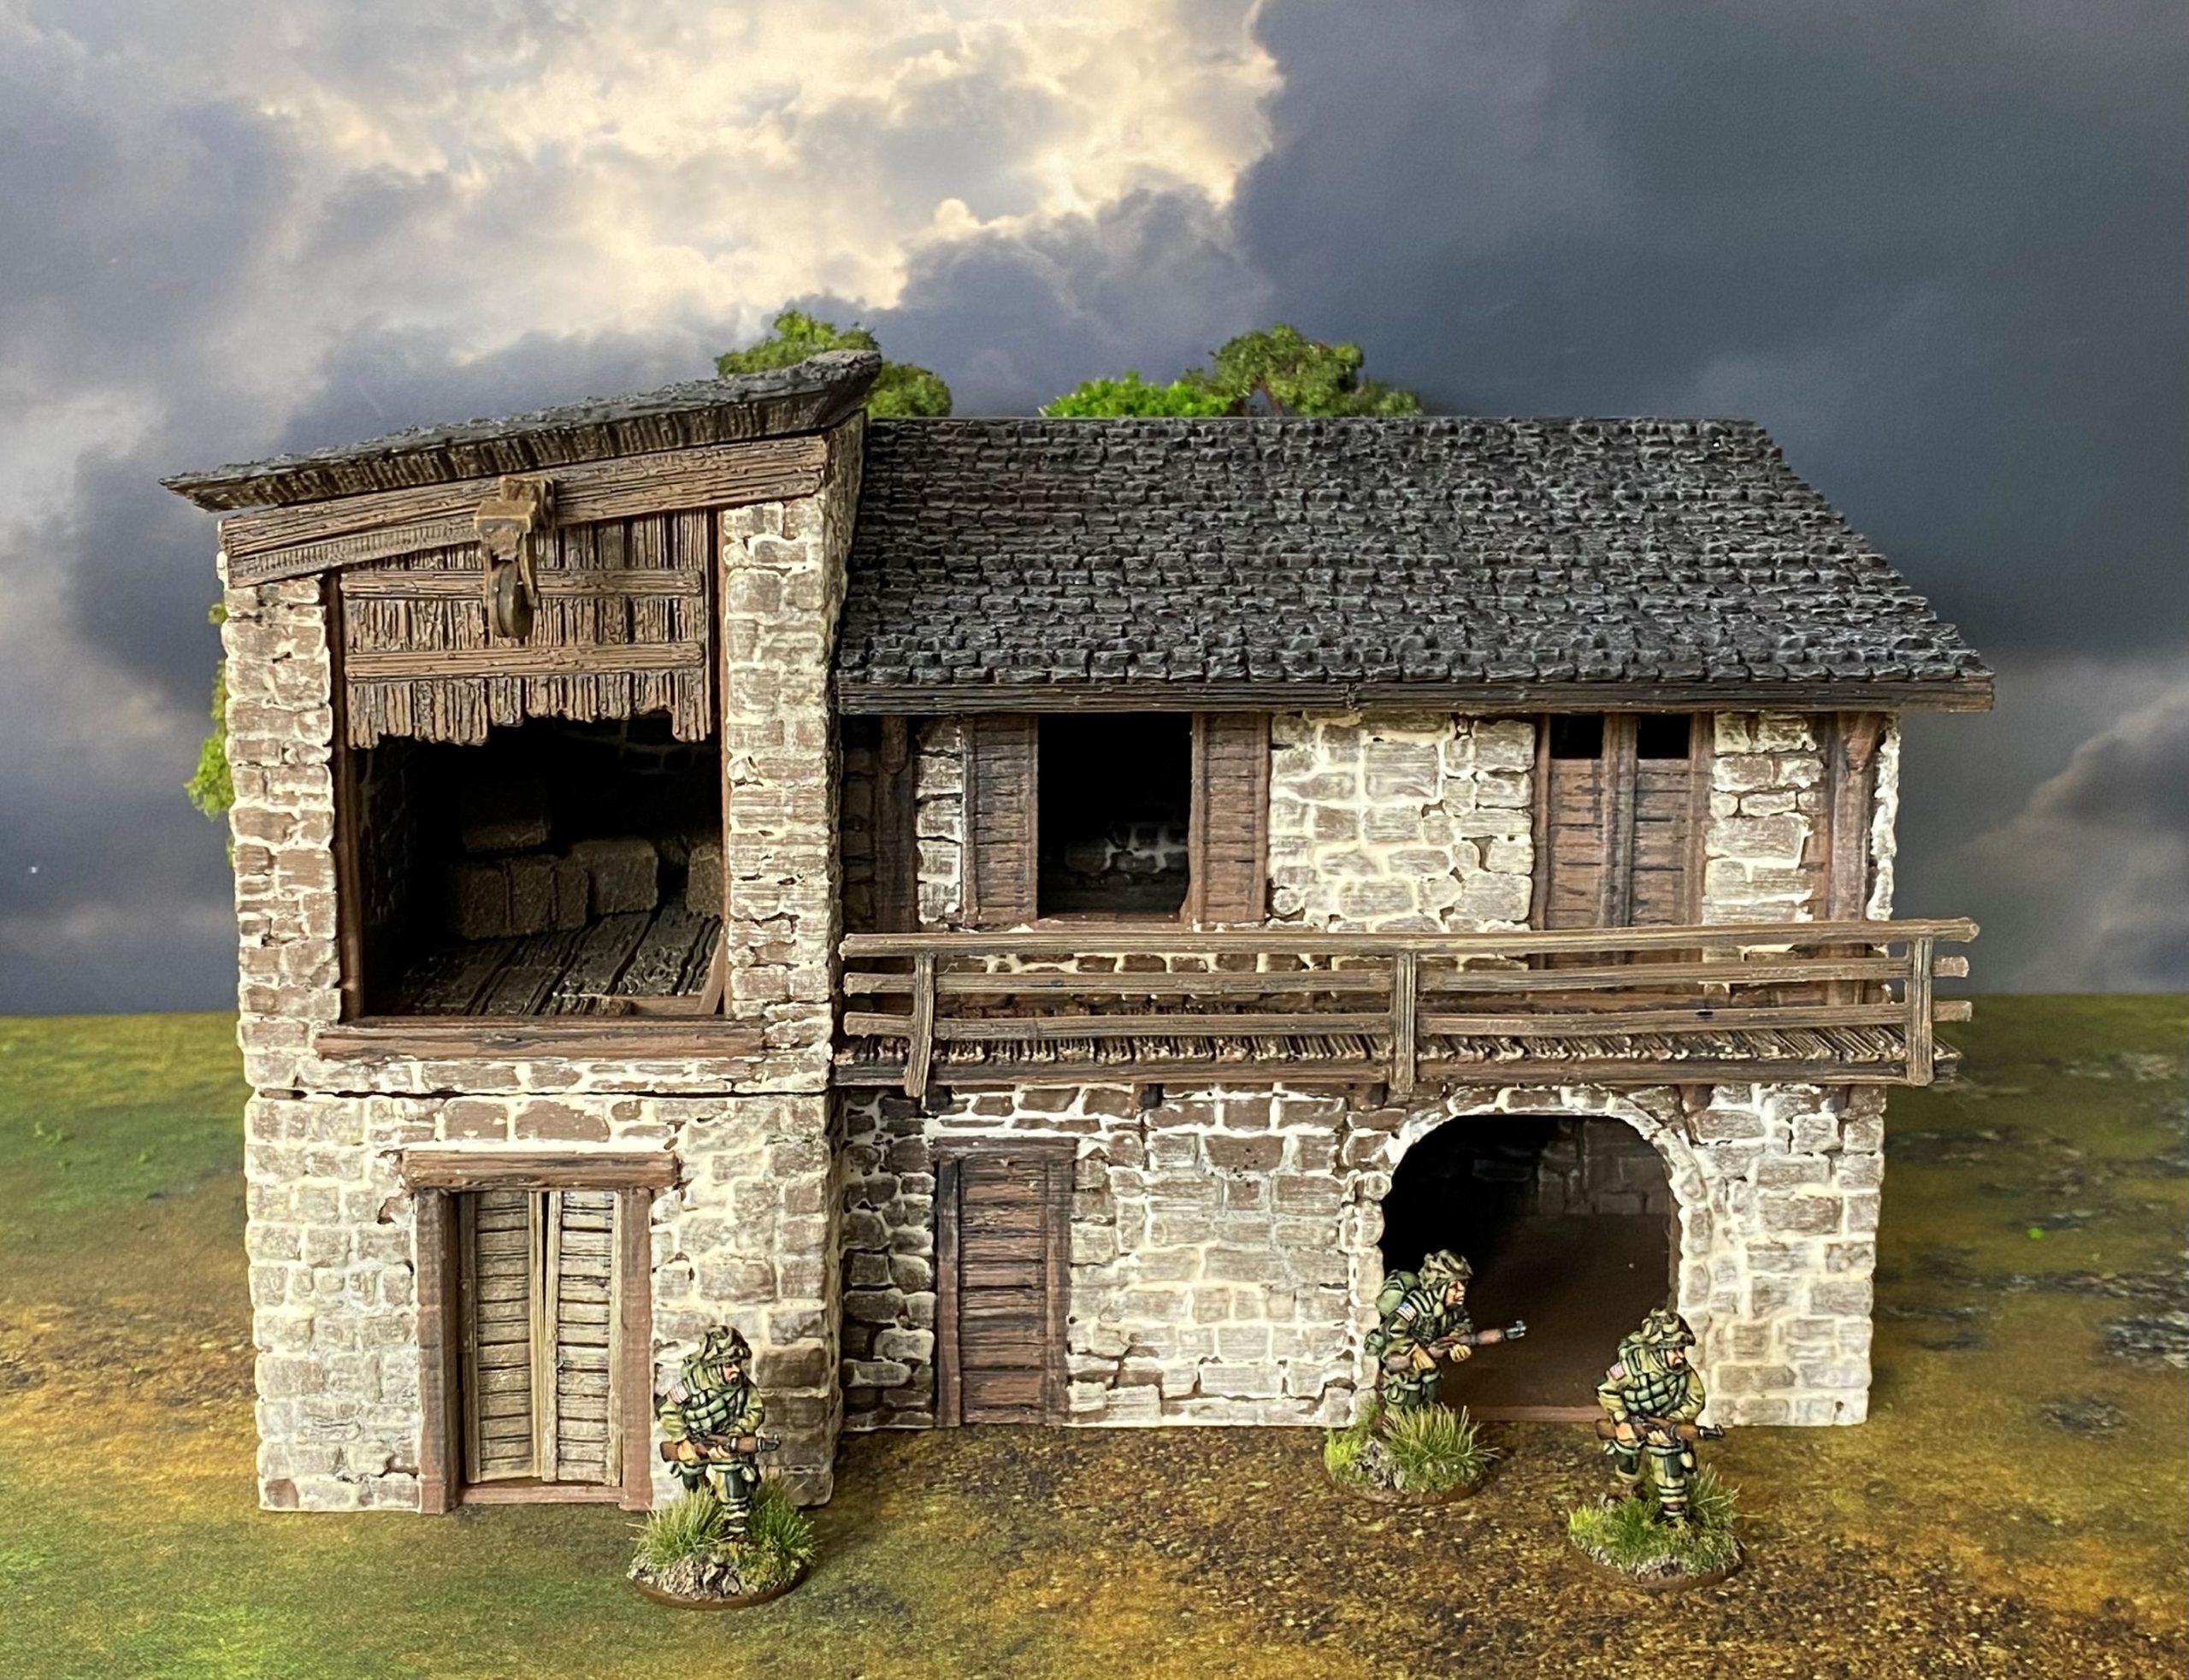
Having been collecting a fair few figures for a Gothic Horror setting I couldn’t resist getting my hands on the lovely Ravens Perch model by Petite Properties.
This kit is a mixture of laser-cut cardboard and MDF. Extra detailing can be added if required.
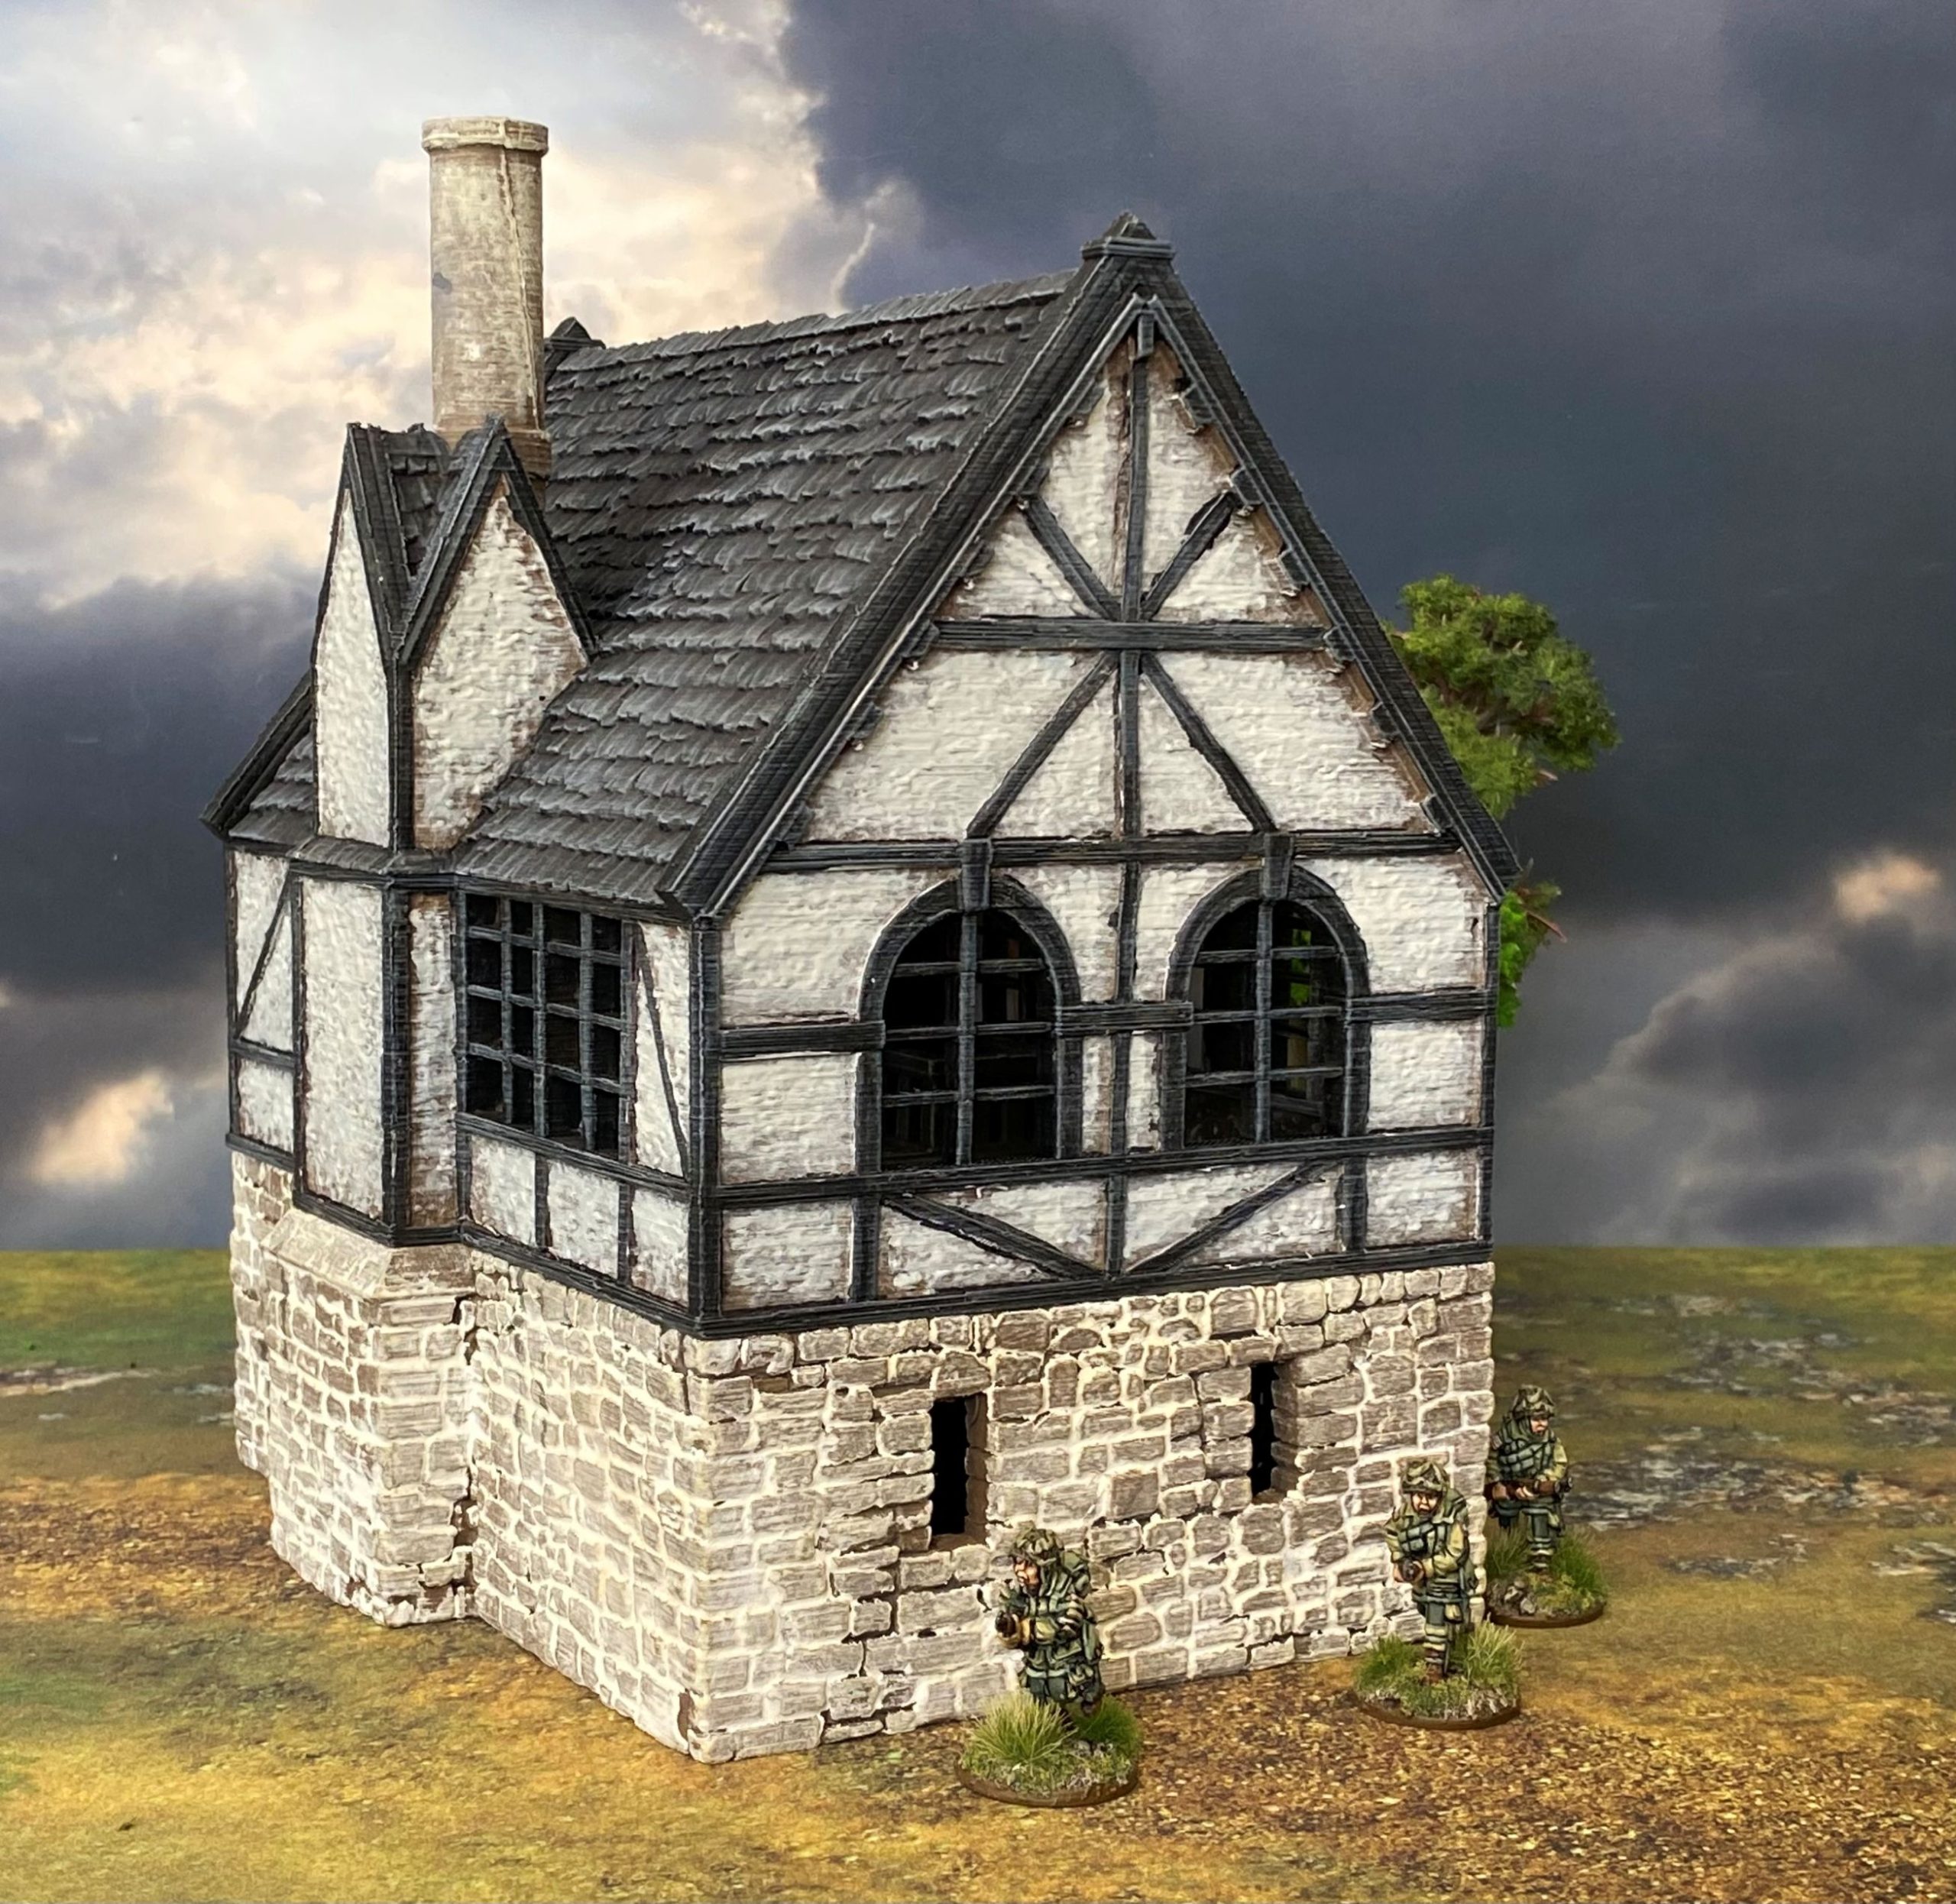
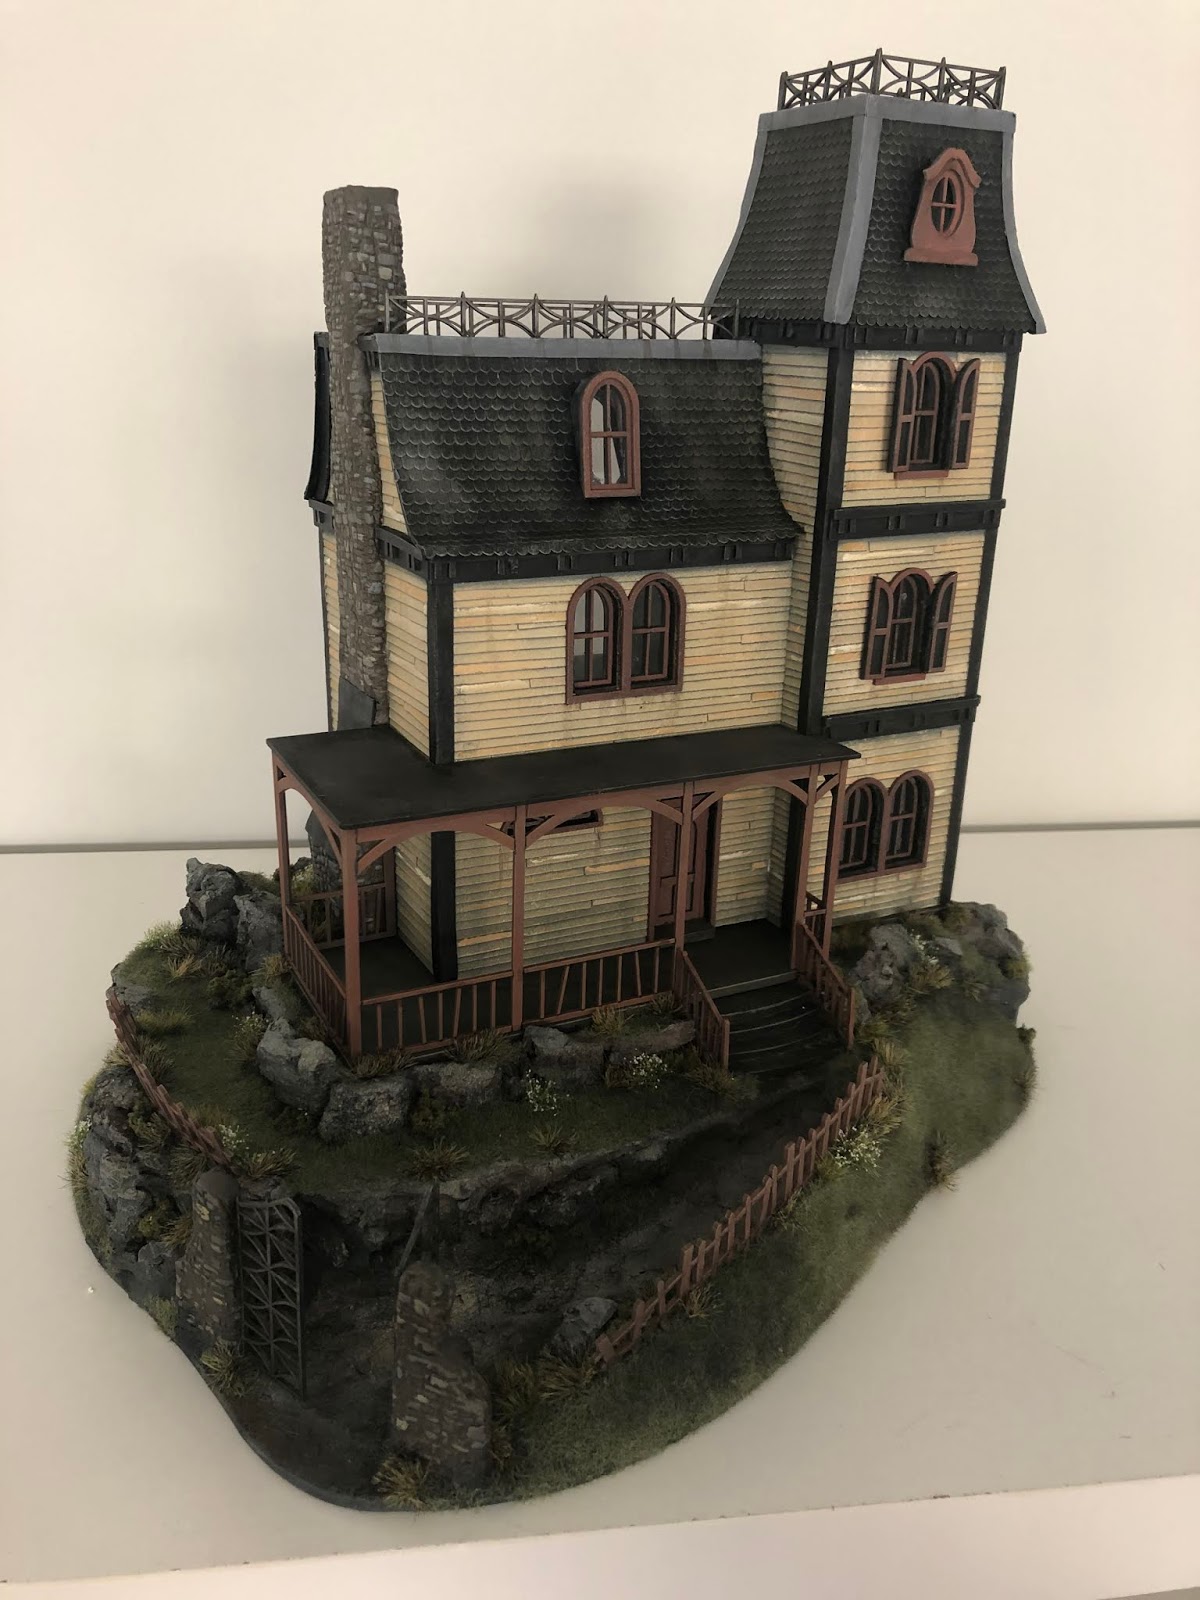
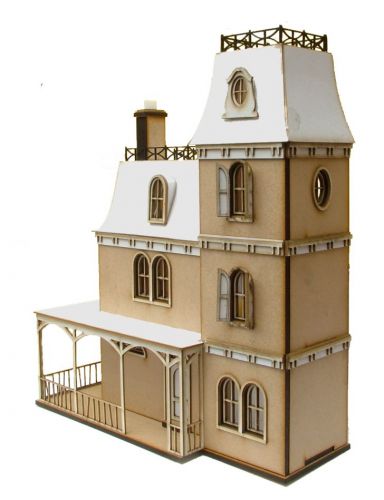 The base kit looks like this when constructed.
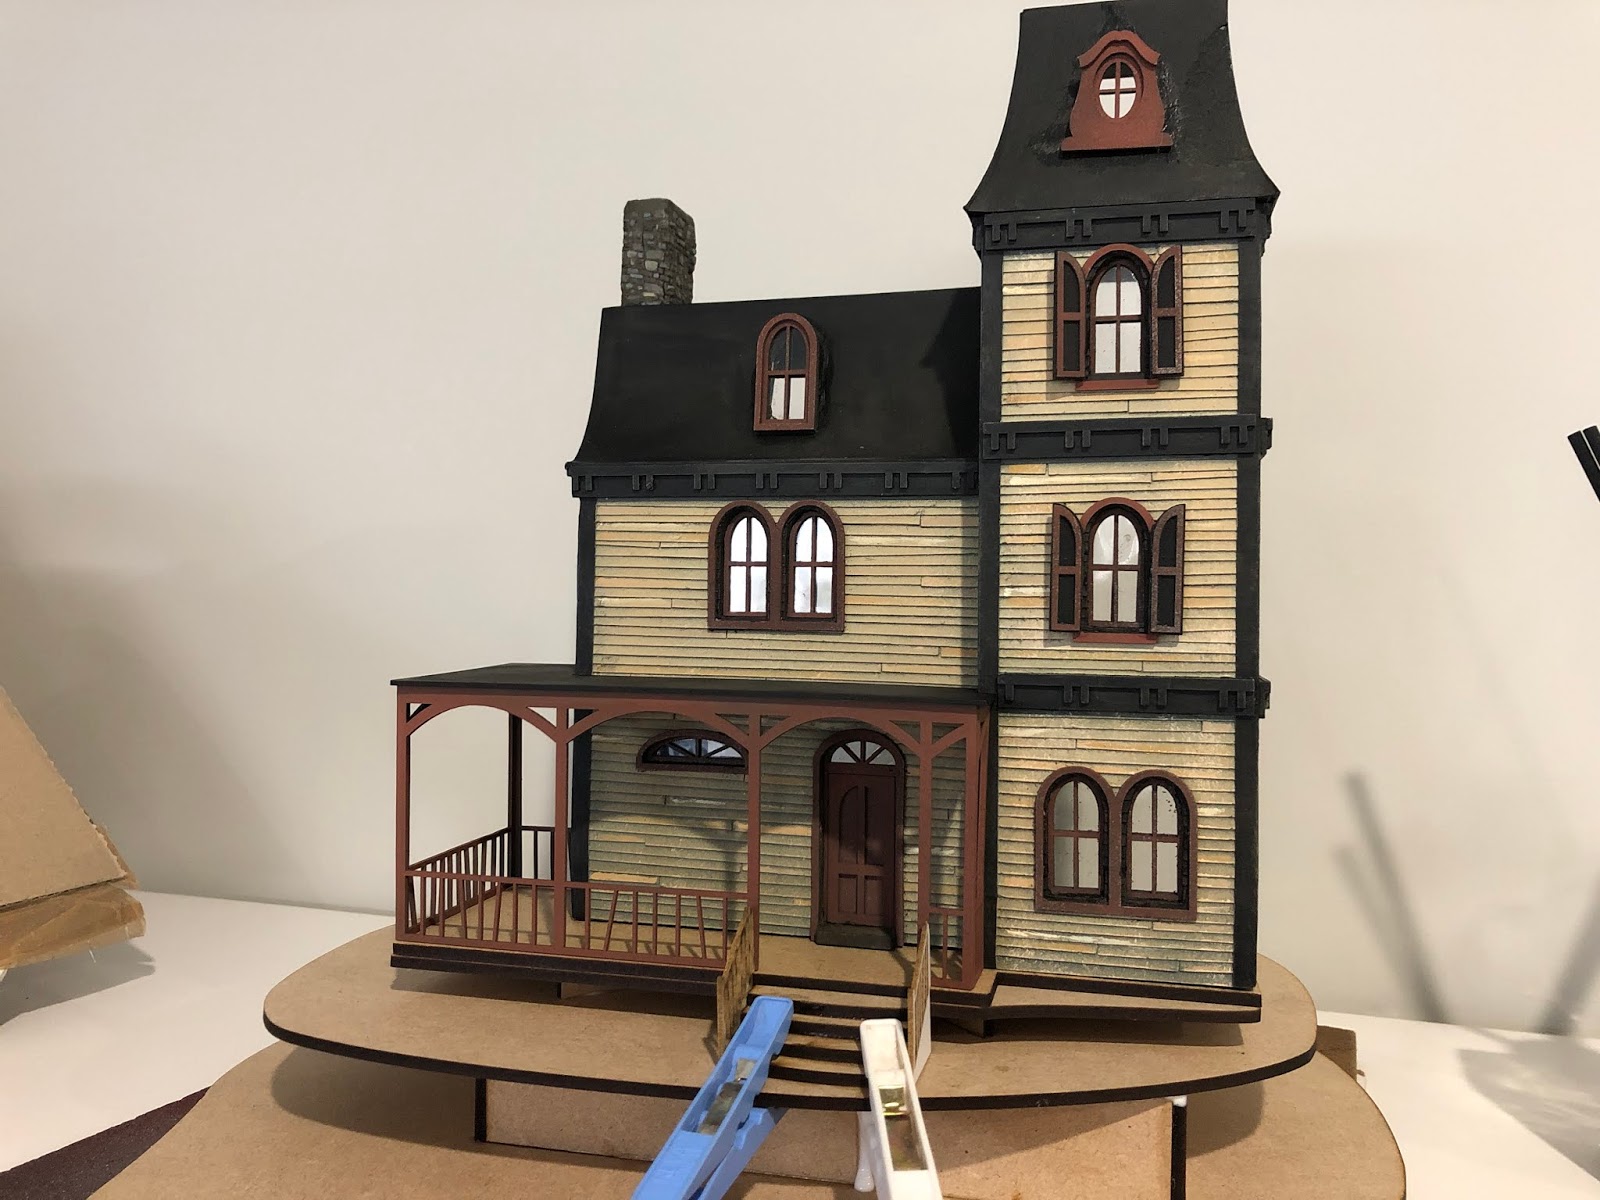
The panelling on the walls was done with double sided sticky tape and thin card. The chimney was made from air drying clay. I used DAS modelling clay. I used the same clay to make the pillars for the gate leading up to the house.
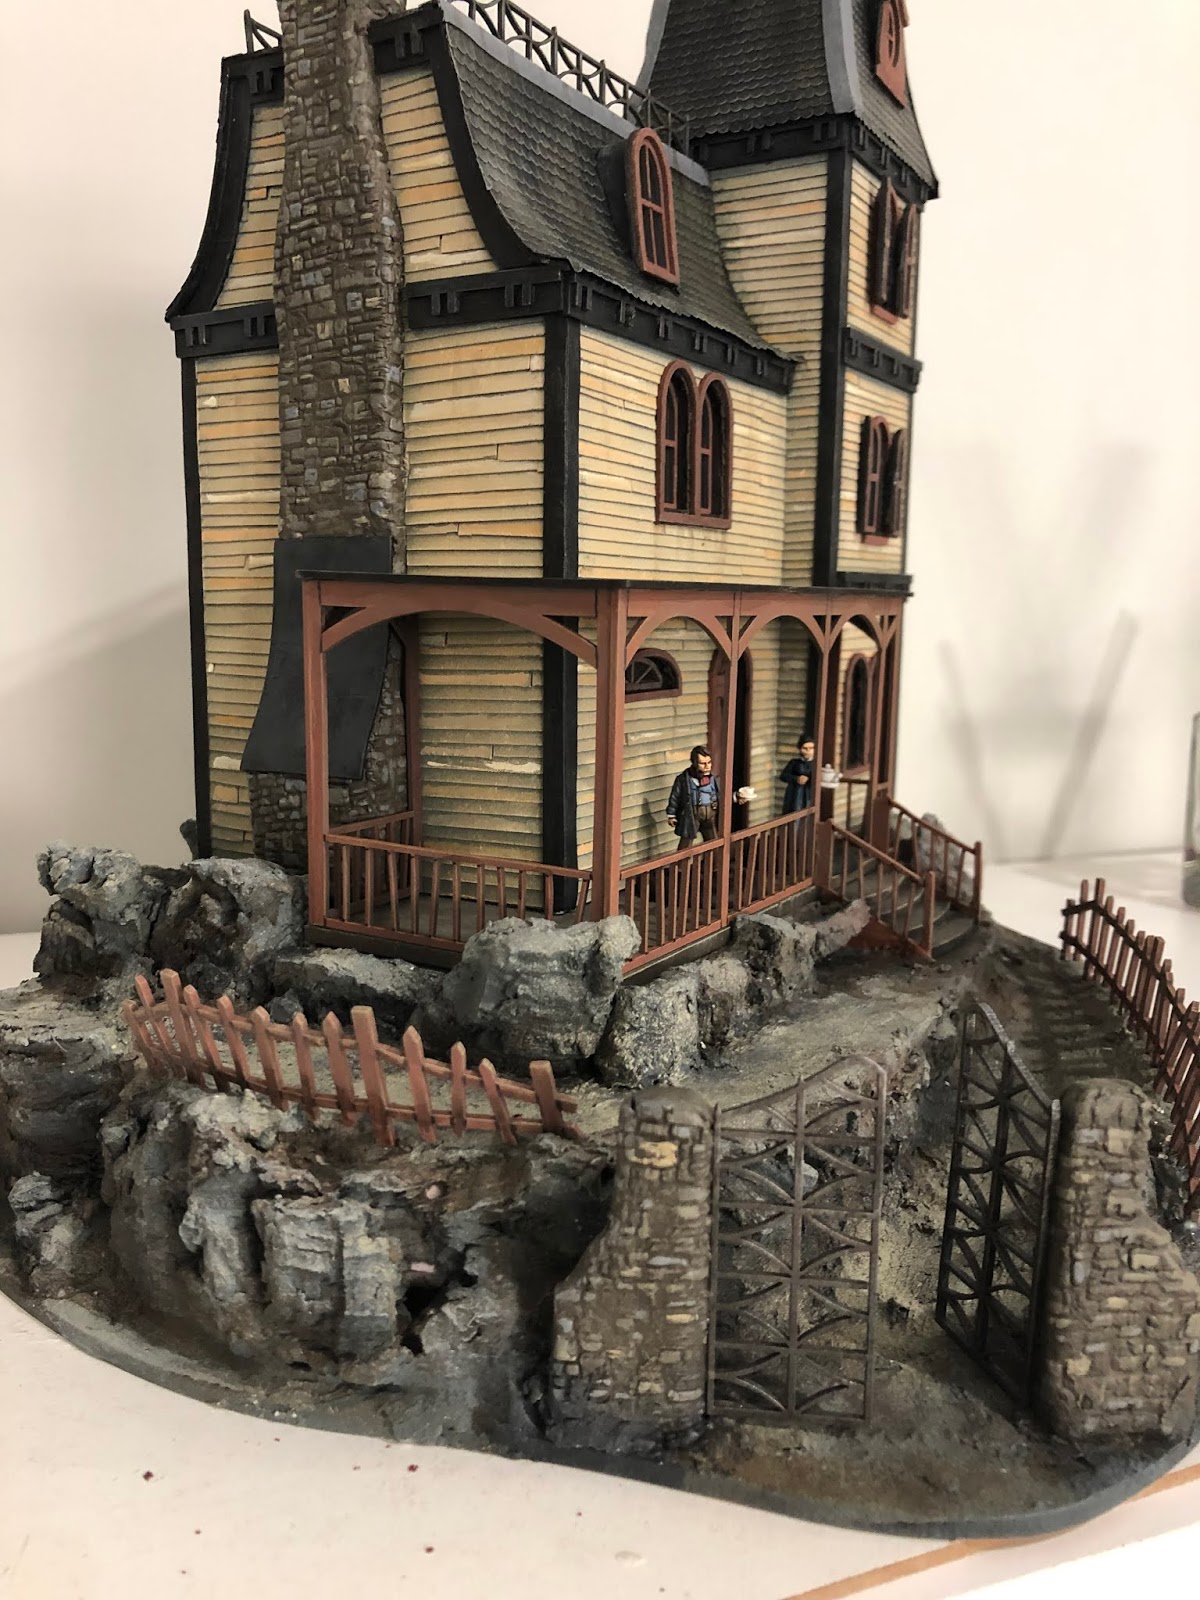
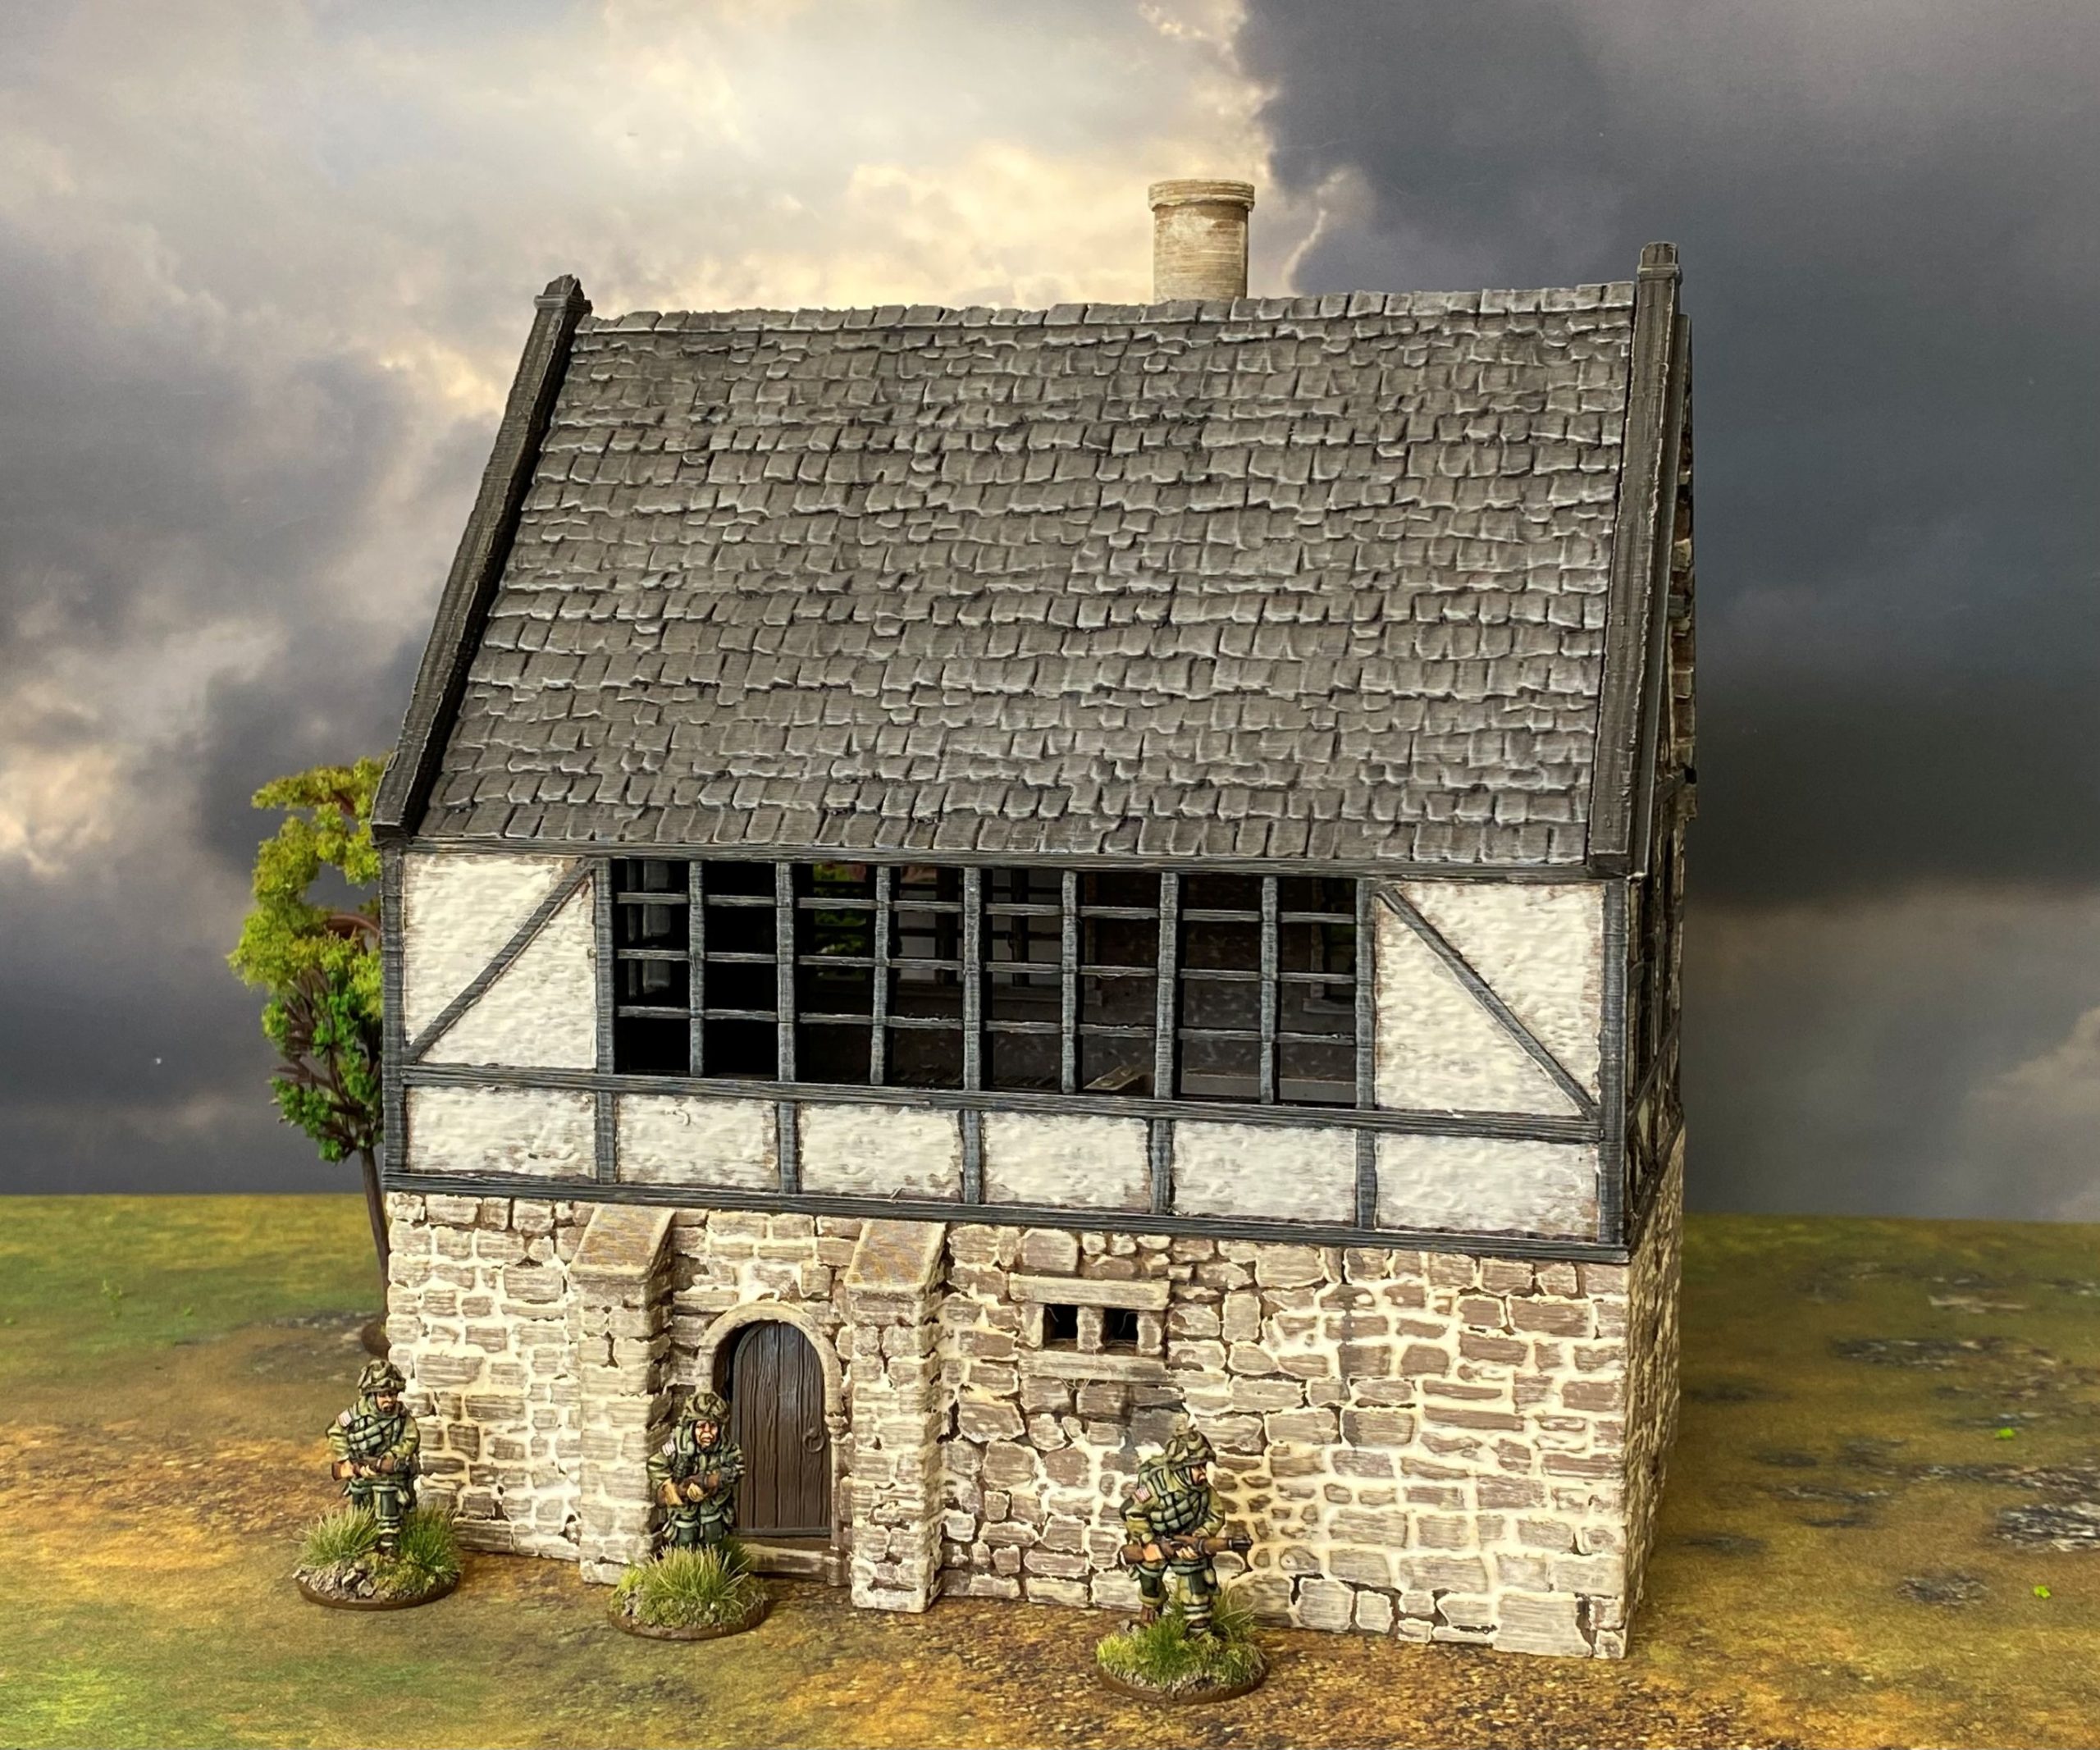
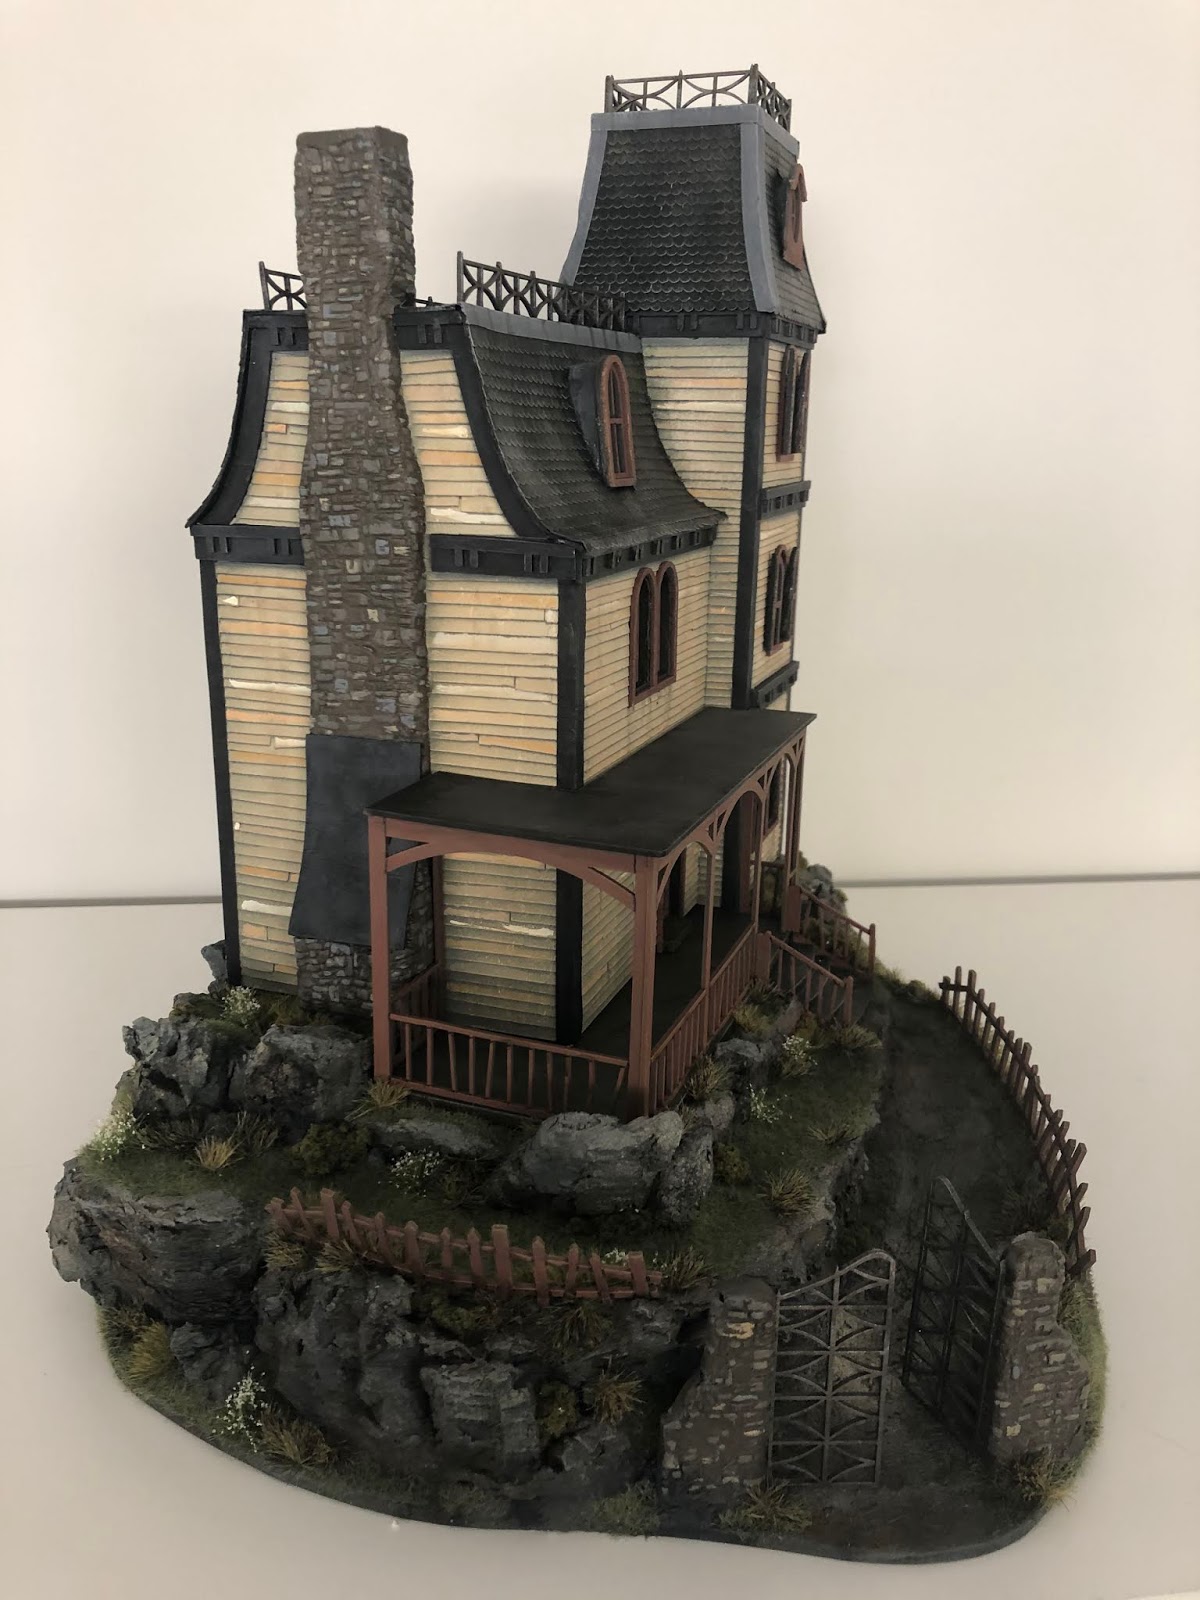
The rear of the house is open, and I left mine a dark colour. I did consider adding a back to the model but decided against it. My games using this will be skirmish level and I imagine that any back I make would spend most its time off to one side anyway.
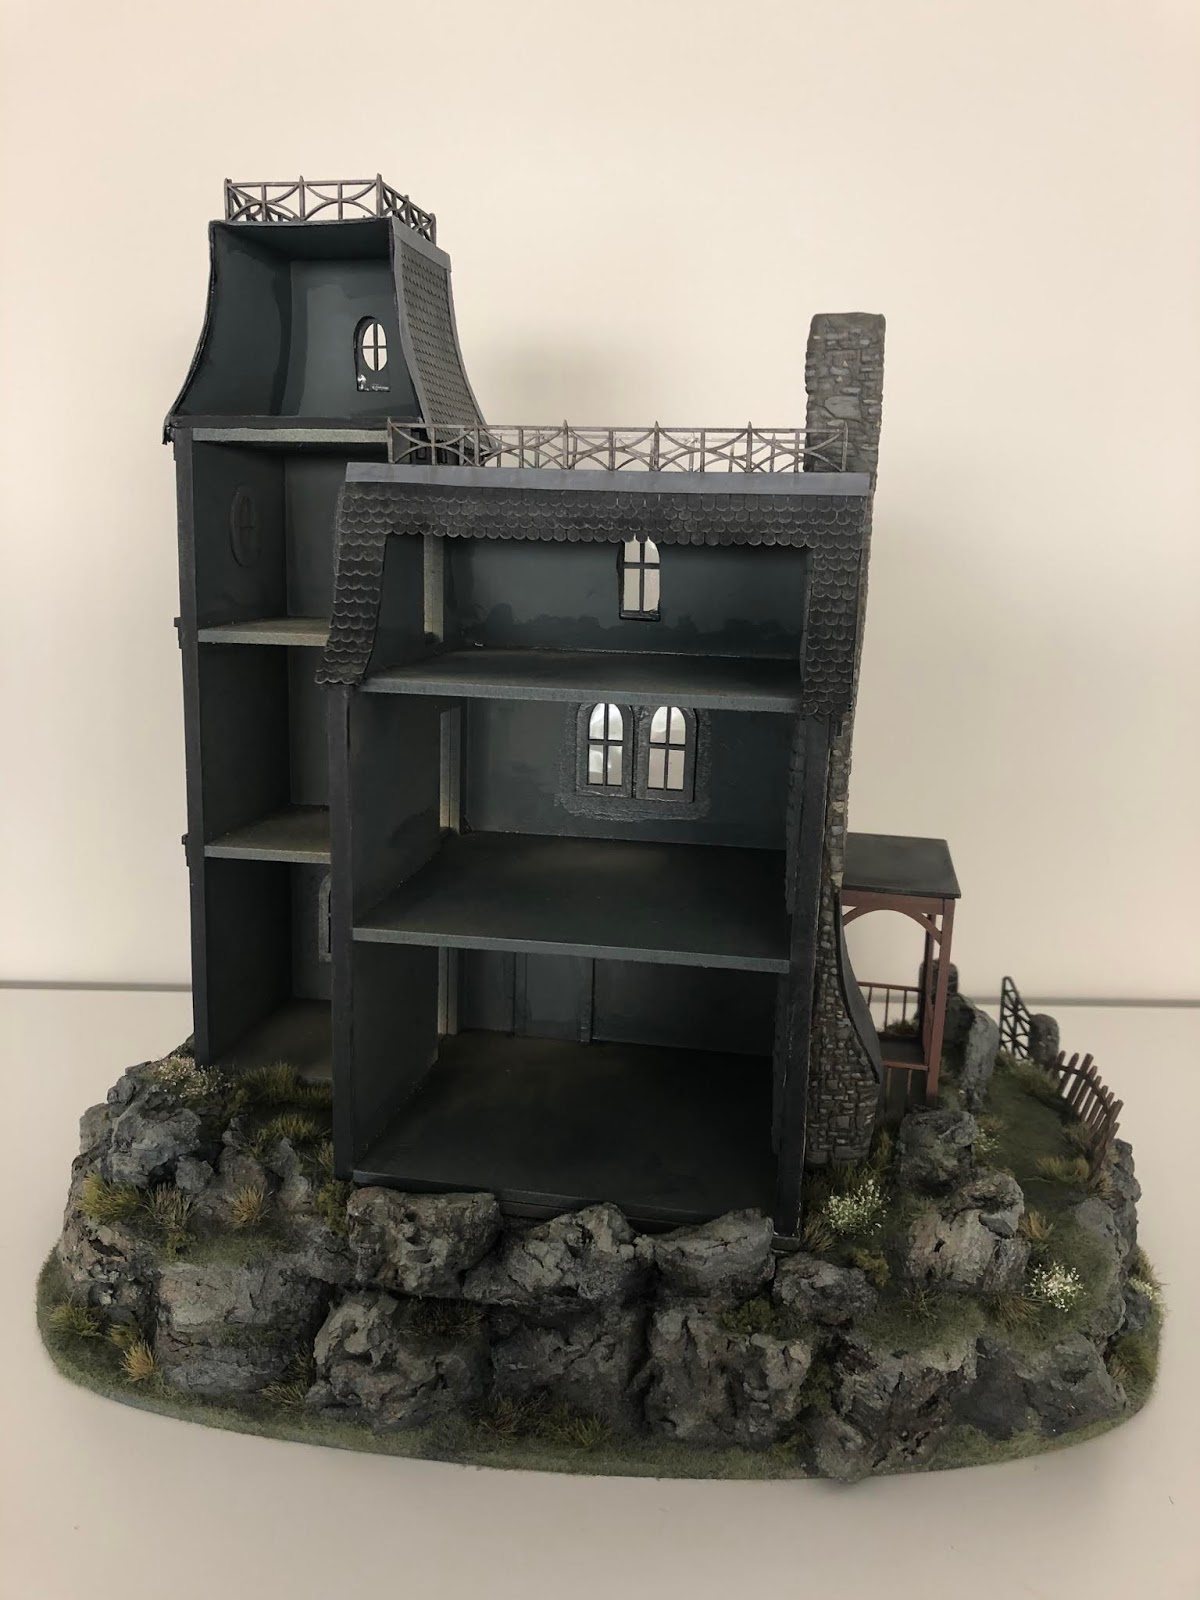
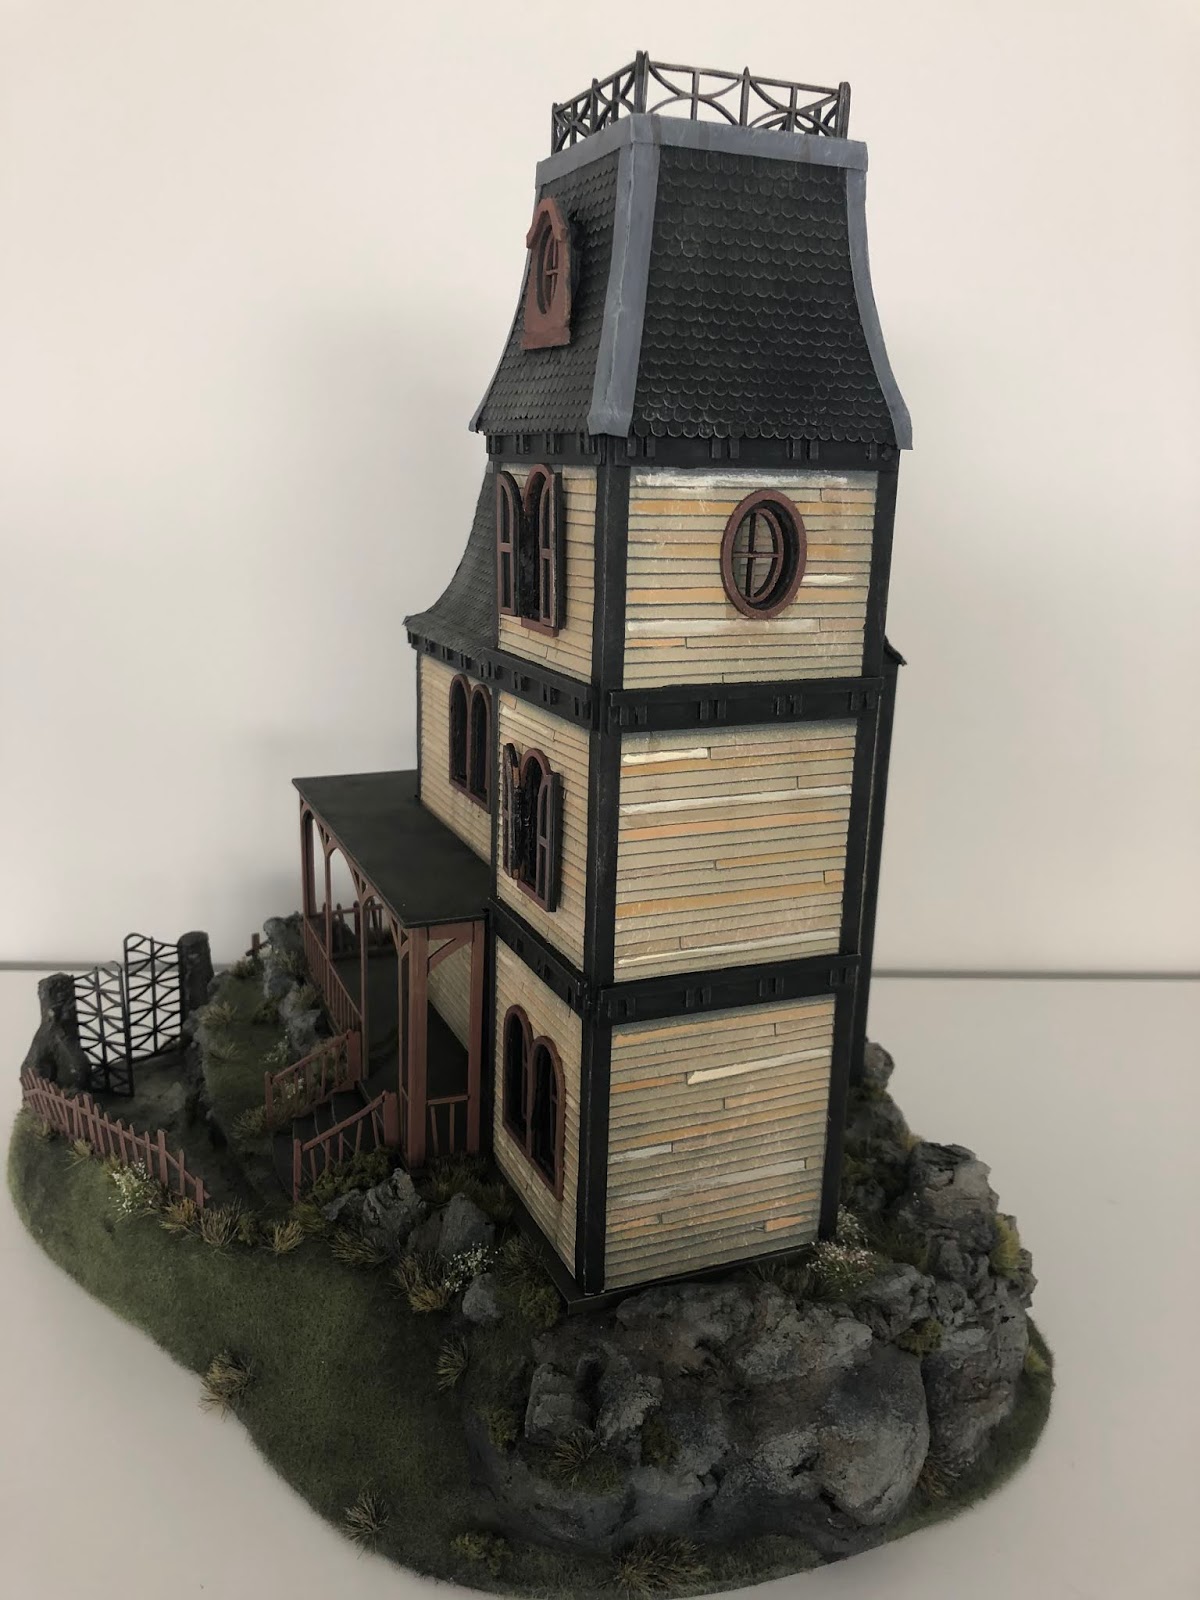
All in all, I am very happy with this kit. The instructions are easy to follow, and it forms a good structure to add detailing to without much effort.
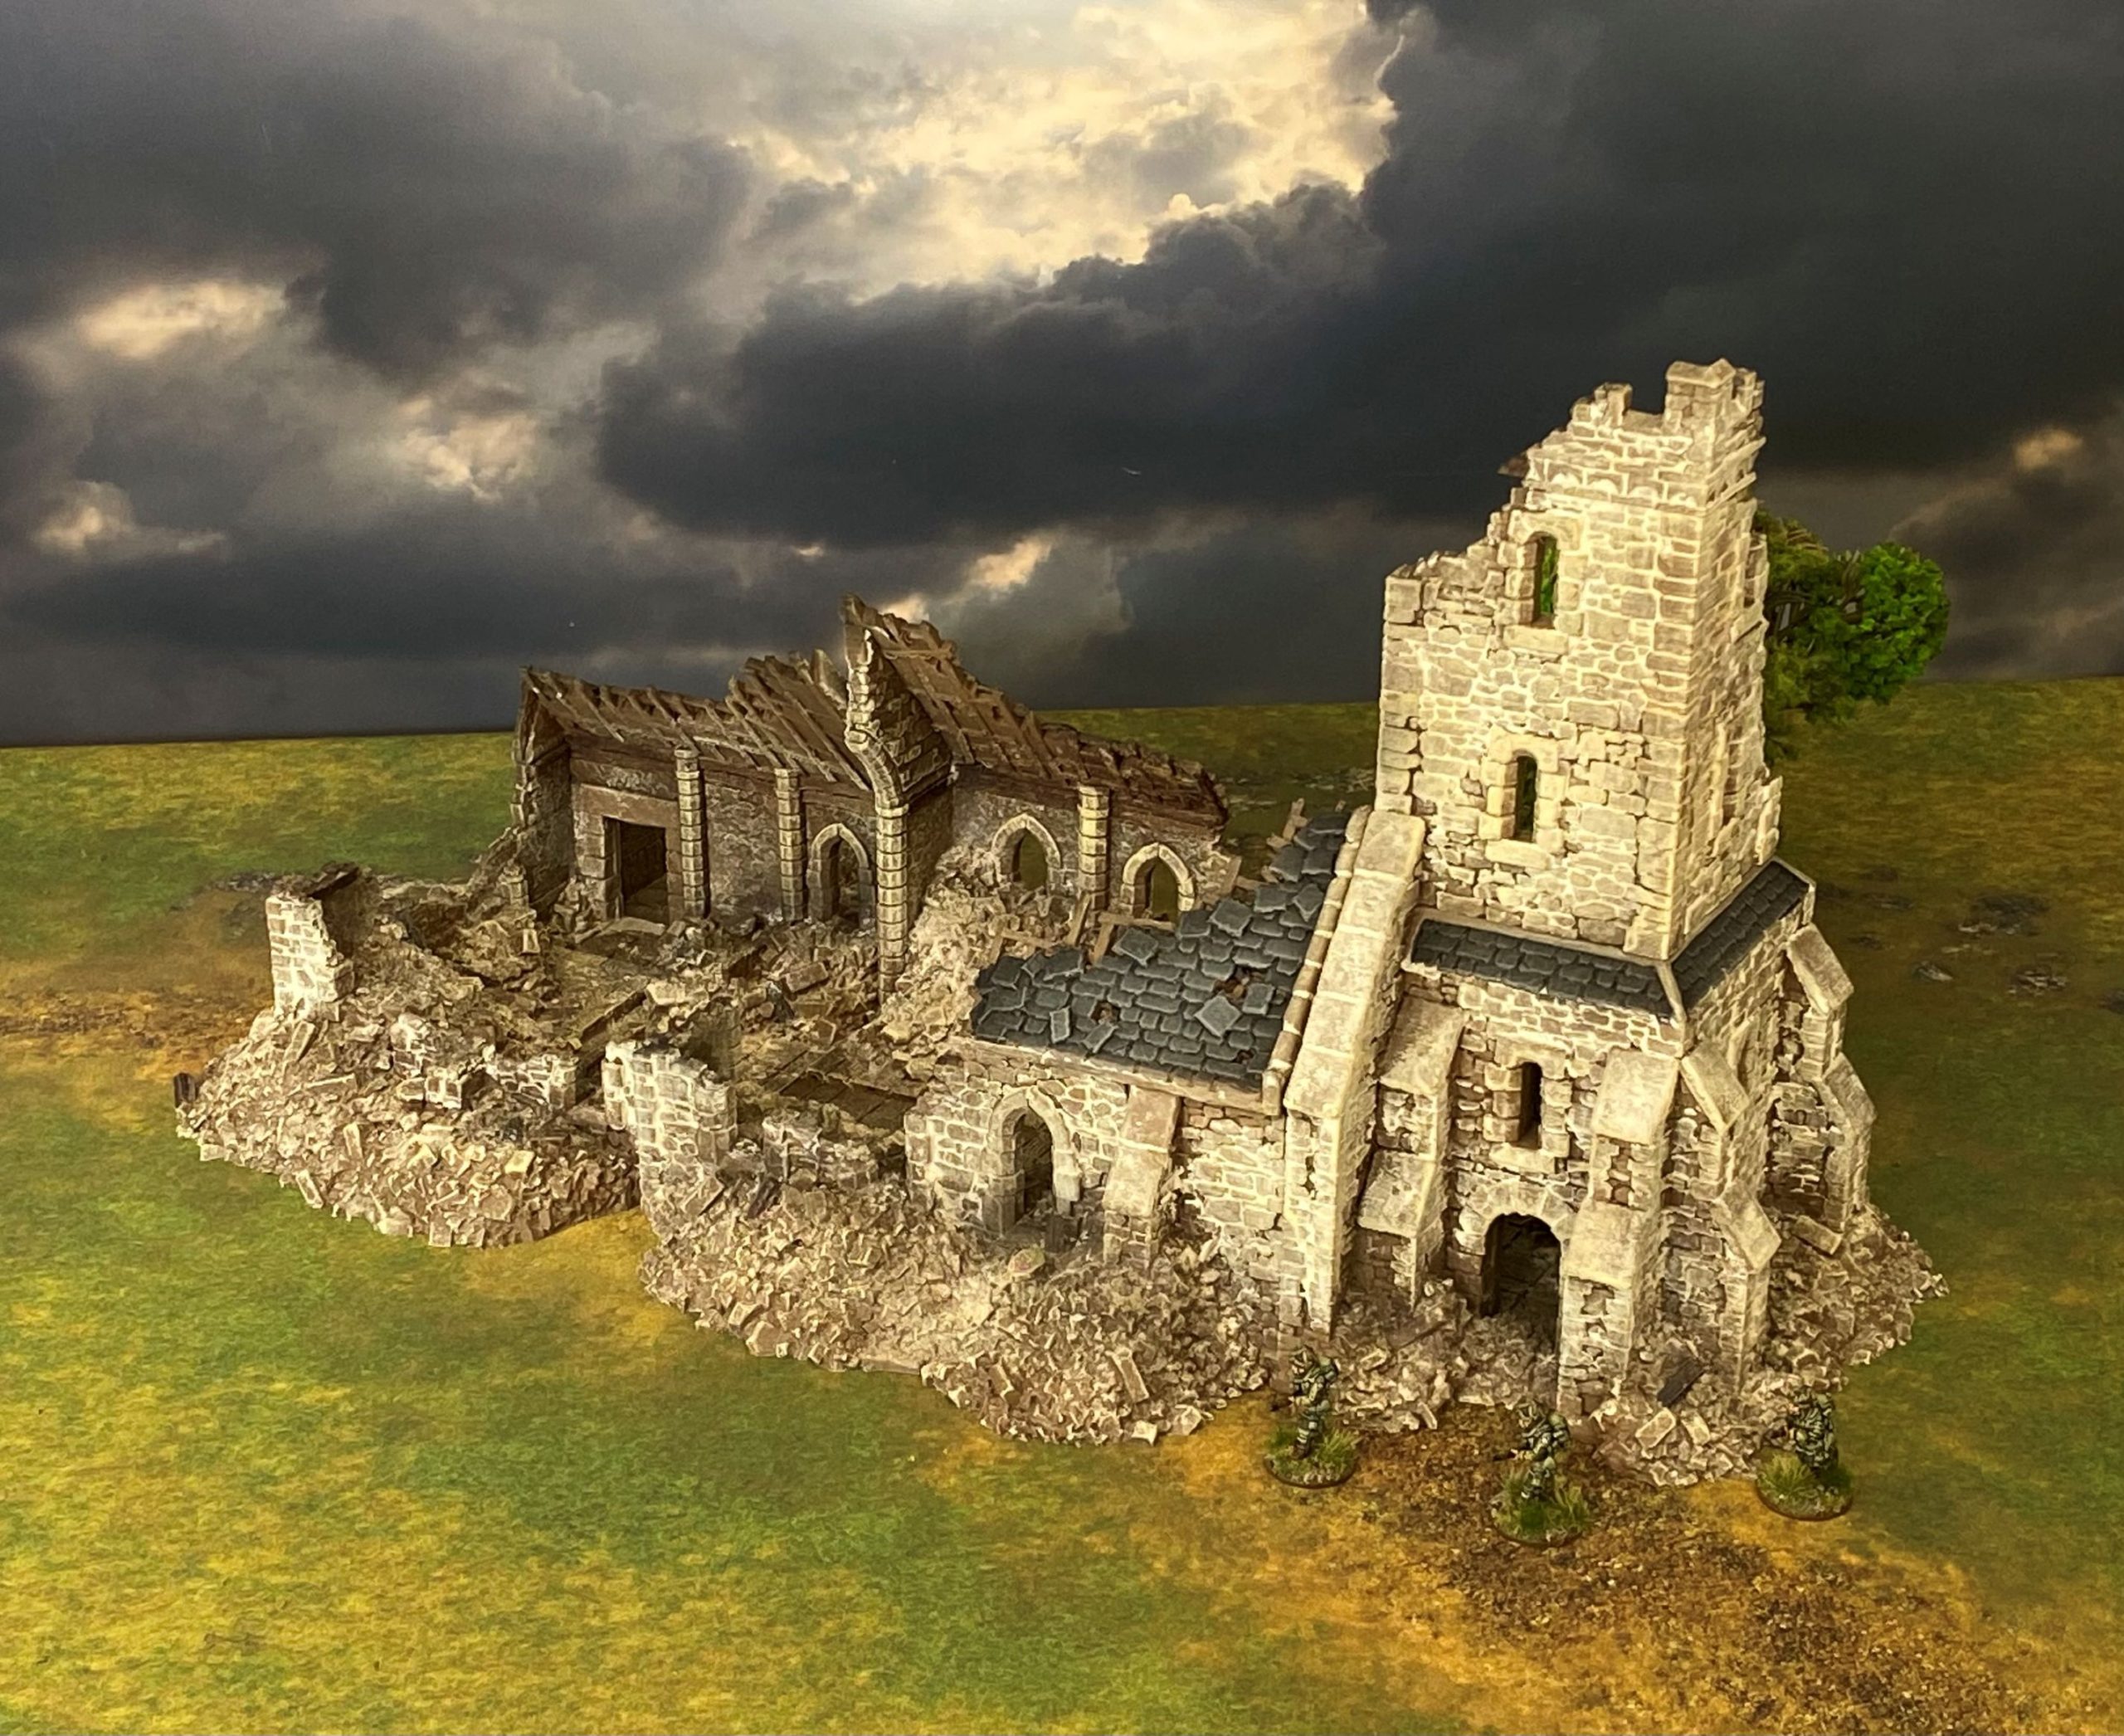
I guess my investigators of the occult will have to travel to the New World at some point.
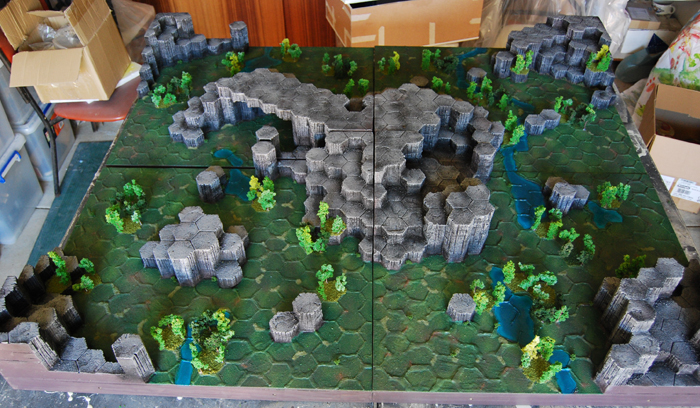
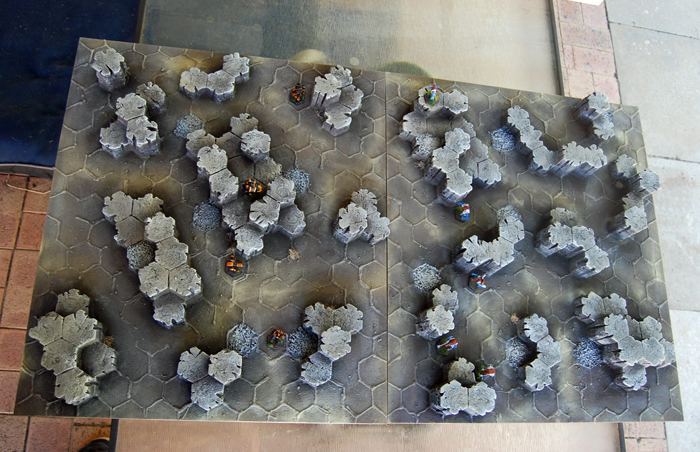
Battletech Recon Tournament Boards
I have been meaning to add these images for a while now and just recently decided it was about time to rebuild my boards for BattleTech. With that in mind, I will share my current boards which are now a number of years old.
Now I have to admit that I can’t take full credit for these as the idea for them comes well and truly from the mind of a rather talented builder on the Terragenesis website.
But as they say, mimicry is the highest form of flattery here is my little journey into hex terrain.
These boards were to be used in my RECON events. For those of you who don’t know the tournament format, it’s based on Light and Medium classed Mechs and individual mission objectives.
Each game is only set to last 8 rounds so with that in mind the Boards would be smaller than the regular BattleTech map sheets.
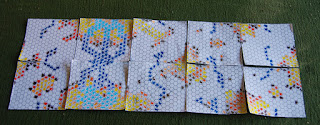
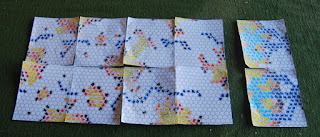
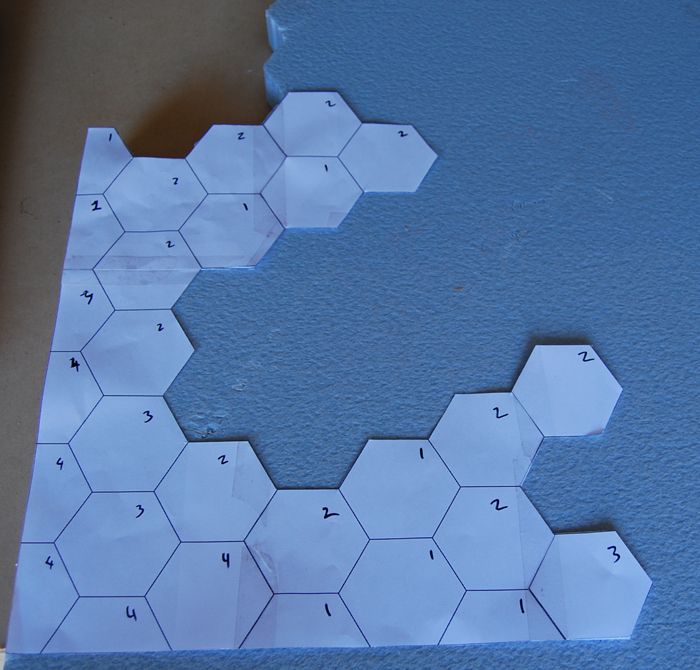
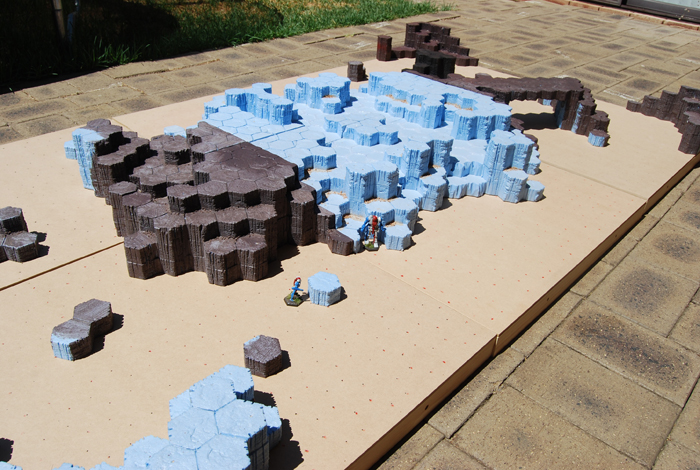
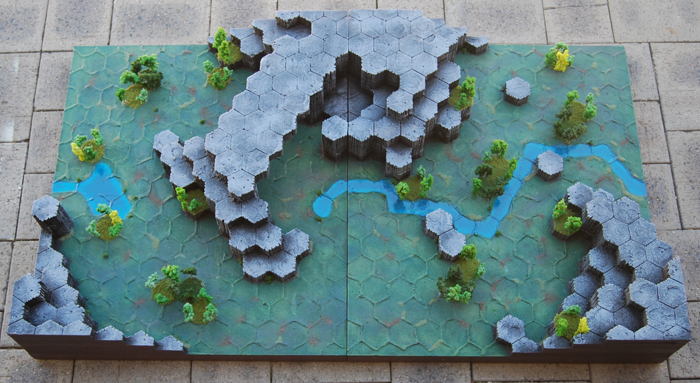
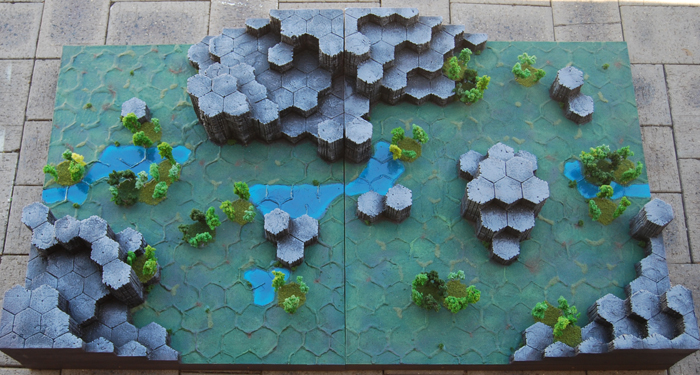
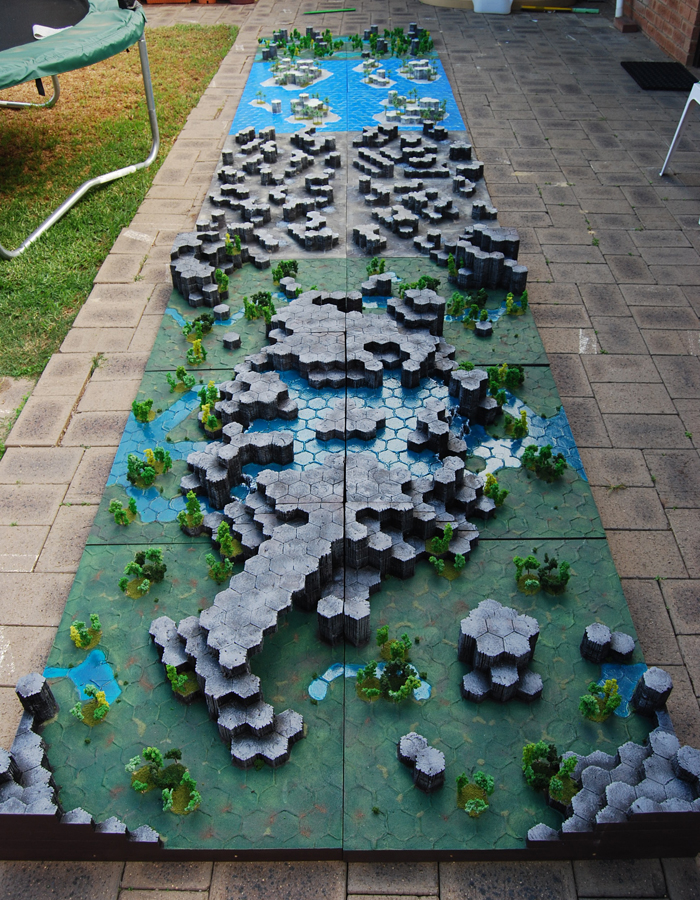
I began by mapping out the terrain features on hex paper. The intention was that each battlefield would consist of two boards that could be swapped and twisted around to make multiple different layouts.

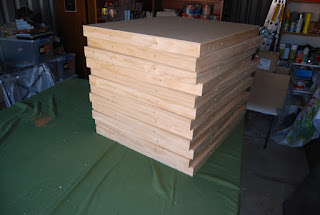
A whole load of wooden terrain boards cut to size.
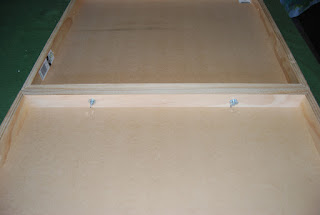
Beneath each board were holes so that they could be bolted together to form larger boards.
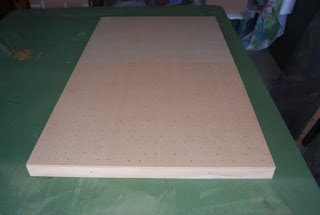
Next, I used a homemade stencil to mark out all the points for all the hexes for each terrain board.
A quick visit to a Foam sales shop and I had a big pile of thick XPS polystyrene.
I printed out sheets of hex paper. Each hex is big enough so that a Mech could comfortably sit on it and still have room for some trees to be added to the outside of each hex should they be needed.
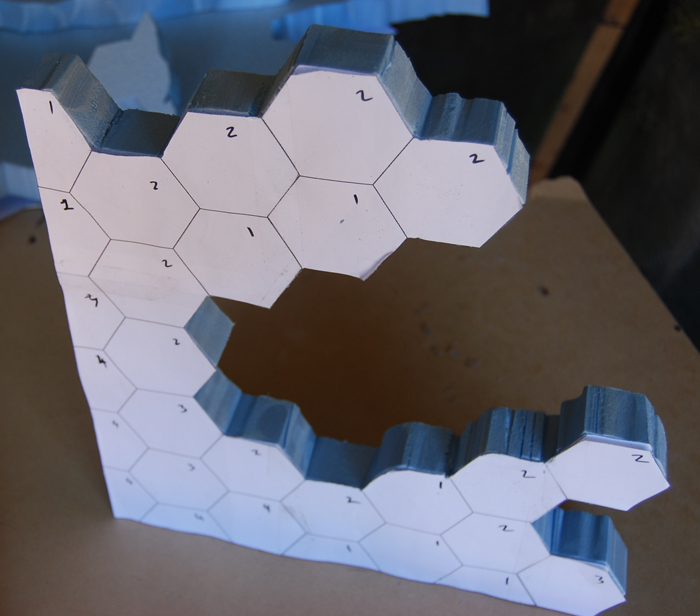
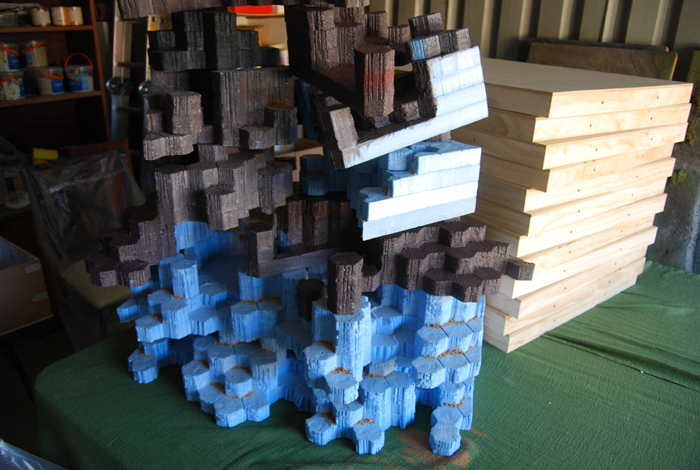
Once I had the lowest part of a hill mapped out, I began cutting the polystyrene with a table-mounted hot wire cutter.
Once cut out I cut away the hexes that would only appear on the lower section and repeated the process.
I kept doing this until I had the finished hill.
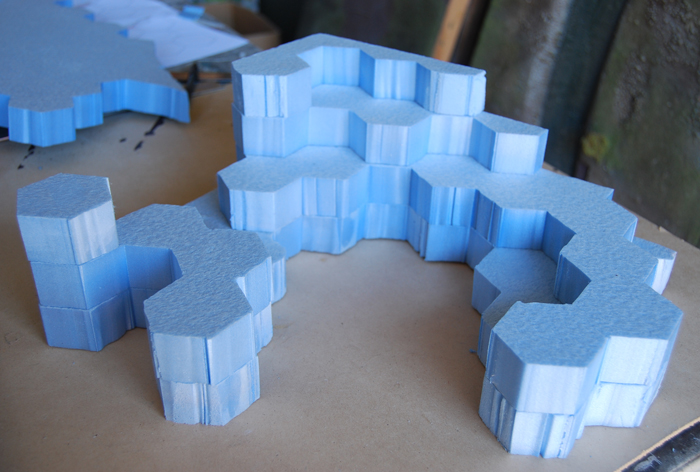
Eventually, I ended up with a huge bile of chopped polystyrene pieces.
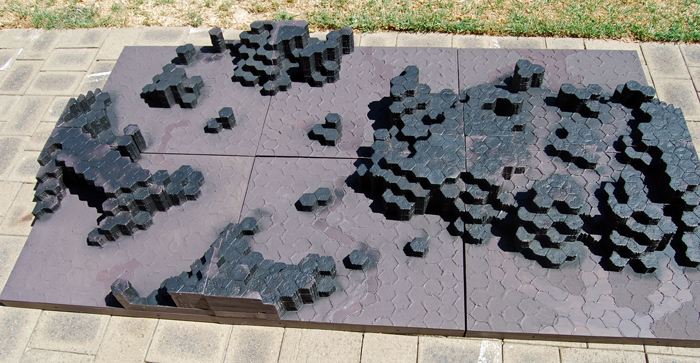
I carved the sides to give a rougher look and used a hot knife to mark out all the hexes on the surfaces.
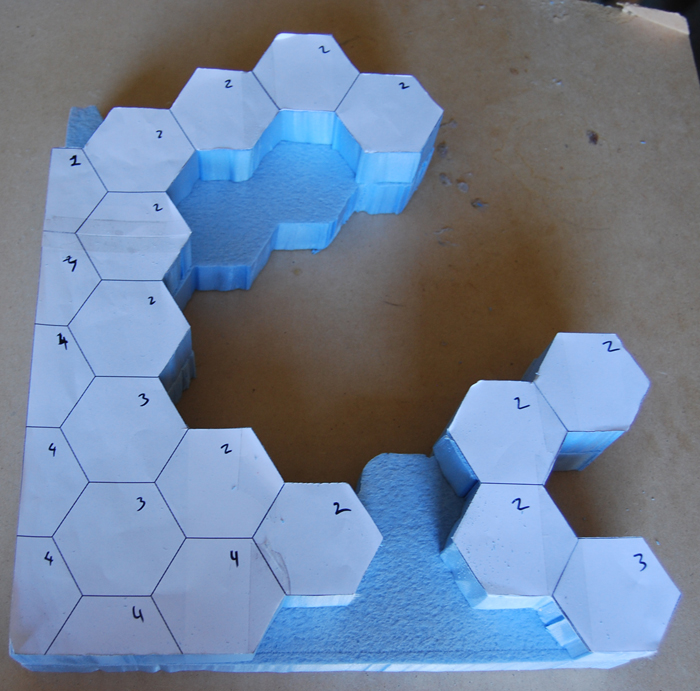
I then glued the hills to the wooden boards following my pre-drawn plans making sure that they could be moved around to make different setups.
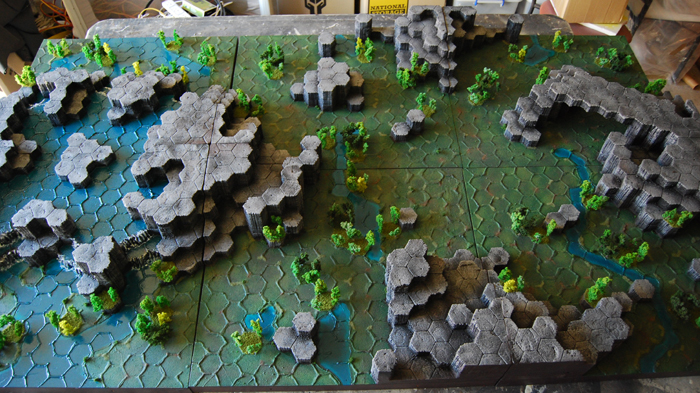
Once the first six were assembled I ended up with this.
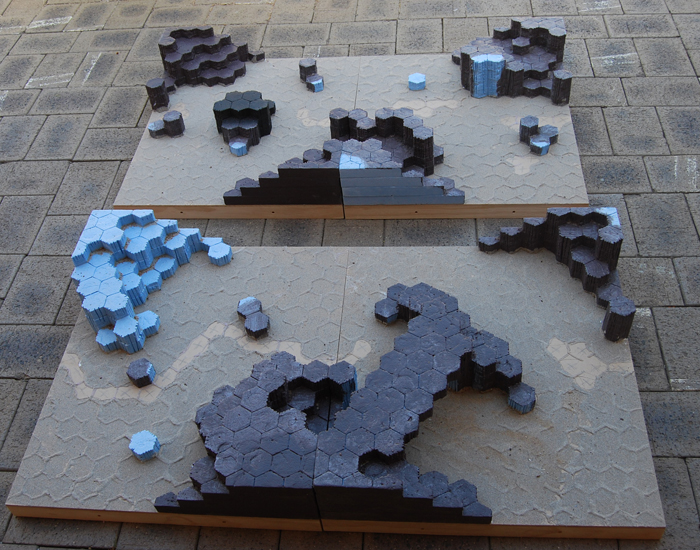
All the polystyrene needed to be undercoated. I used PVA glue and mixed in some brown paint so that I could see where I had covered with PVA and what I had missed. It’s important to seal the foam this way if you intend to use spray paint on it.
I then used a hot glue gun to roughly mark out the hexes on the wood surface. I also marked out where the small waterways and lakes would go. Next, I covered all the land areas with sand.
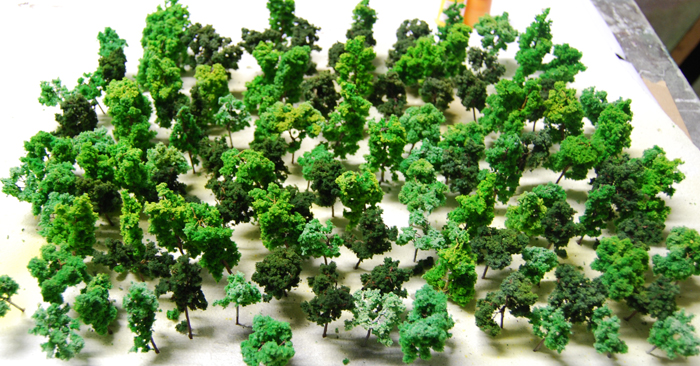
I ordered around 1000 trees from eBay. Yes, that’s one thousand trees, it’s not a typo.
The trees were a little bright, so I gave them a dusting of spray paint. I did them in batches so I could vary the colours a little.
The bases were then painted brown, and the hills were painted black.
Next, I used regular house paint from the local DIY store to start adding some colour.
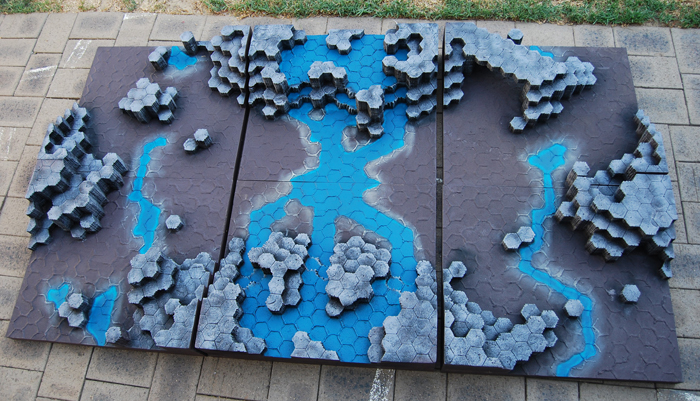
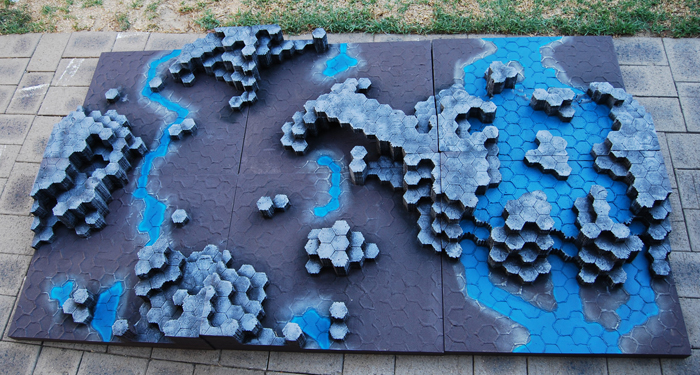
The hills and backs of the waterways were drybrushed in a couple of shades of grey, no not 50 of them.
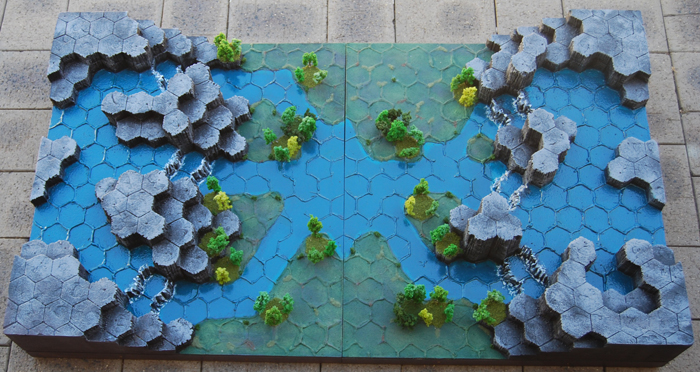
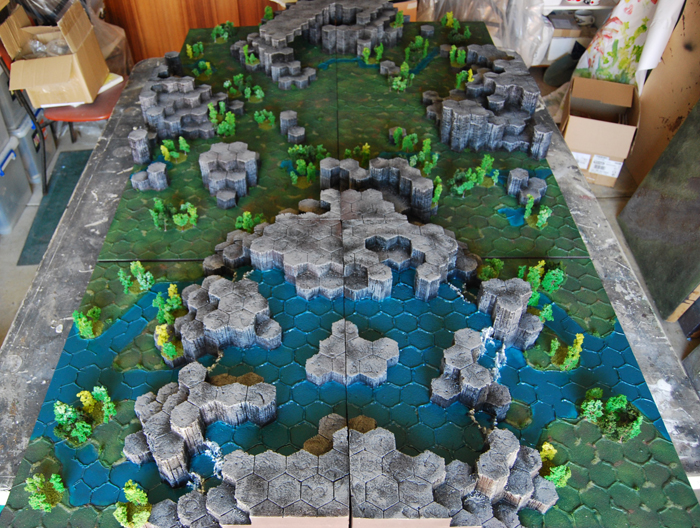
The water was then painted in a nice bright blue. I know water is not really a bright blue, but I figured a nice bright colour would make the tables pop a little at the event.
After that came the ground. A nice green colour.
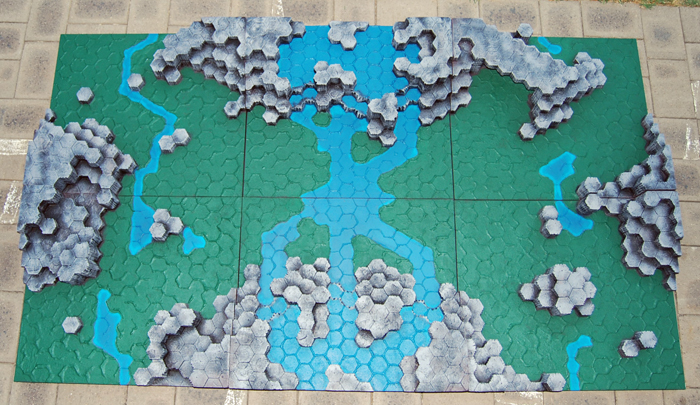
I then used foliage scatter to mark out the hexes that would be woods. and dry brushed the green to break up the flat colour a bit.
Trees were planted into holes drilled into the boards leaving space so that figures could still be positioned among them, and the waterfalls had a white drybrush to simulate water spray.
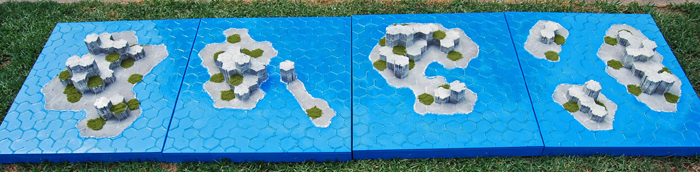
Small Demo Game Tables
Now I really love small scale skirmish games, the sort of game that can be played on your average kitchen table. Better still a game where only a handful of models are on either side.
With so many awesome games out there these days it can be hard to persuade people to try things outside of what they normally play. It can be a huge investment in time to sit down and try a new game and there is nothing more annoying then being stuck playing a 2-hour introduction game to a system that just doesn’t grab you.
So I set about making some very small demo tables.
The idea of these tables is just to showcase the basic rules of my chosen skirmish games. Ideally each intro lasting less than 30 minutes. Much less in fact.
The games I had in mind were, Dark Age, Wrath of Kings and Eden, of course these little boards could also be used for other post apocalypse type settings.
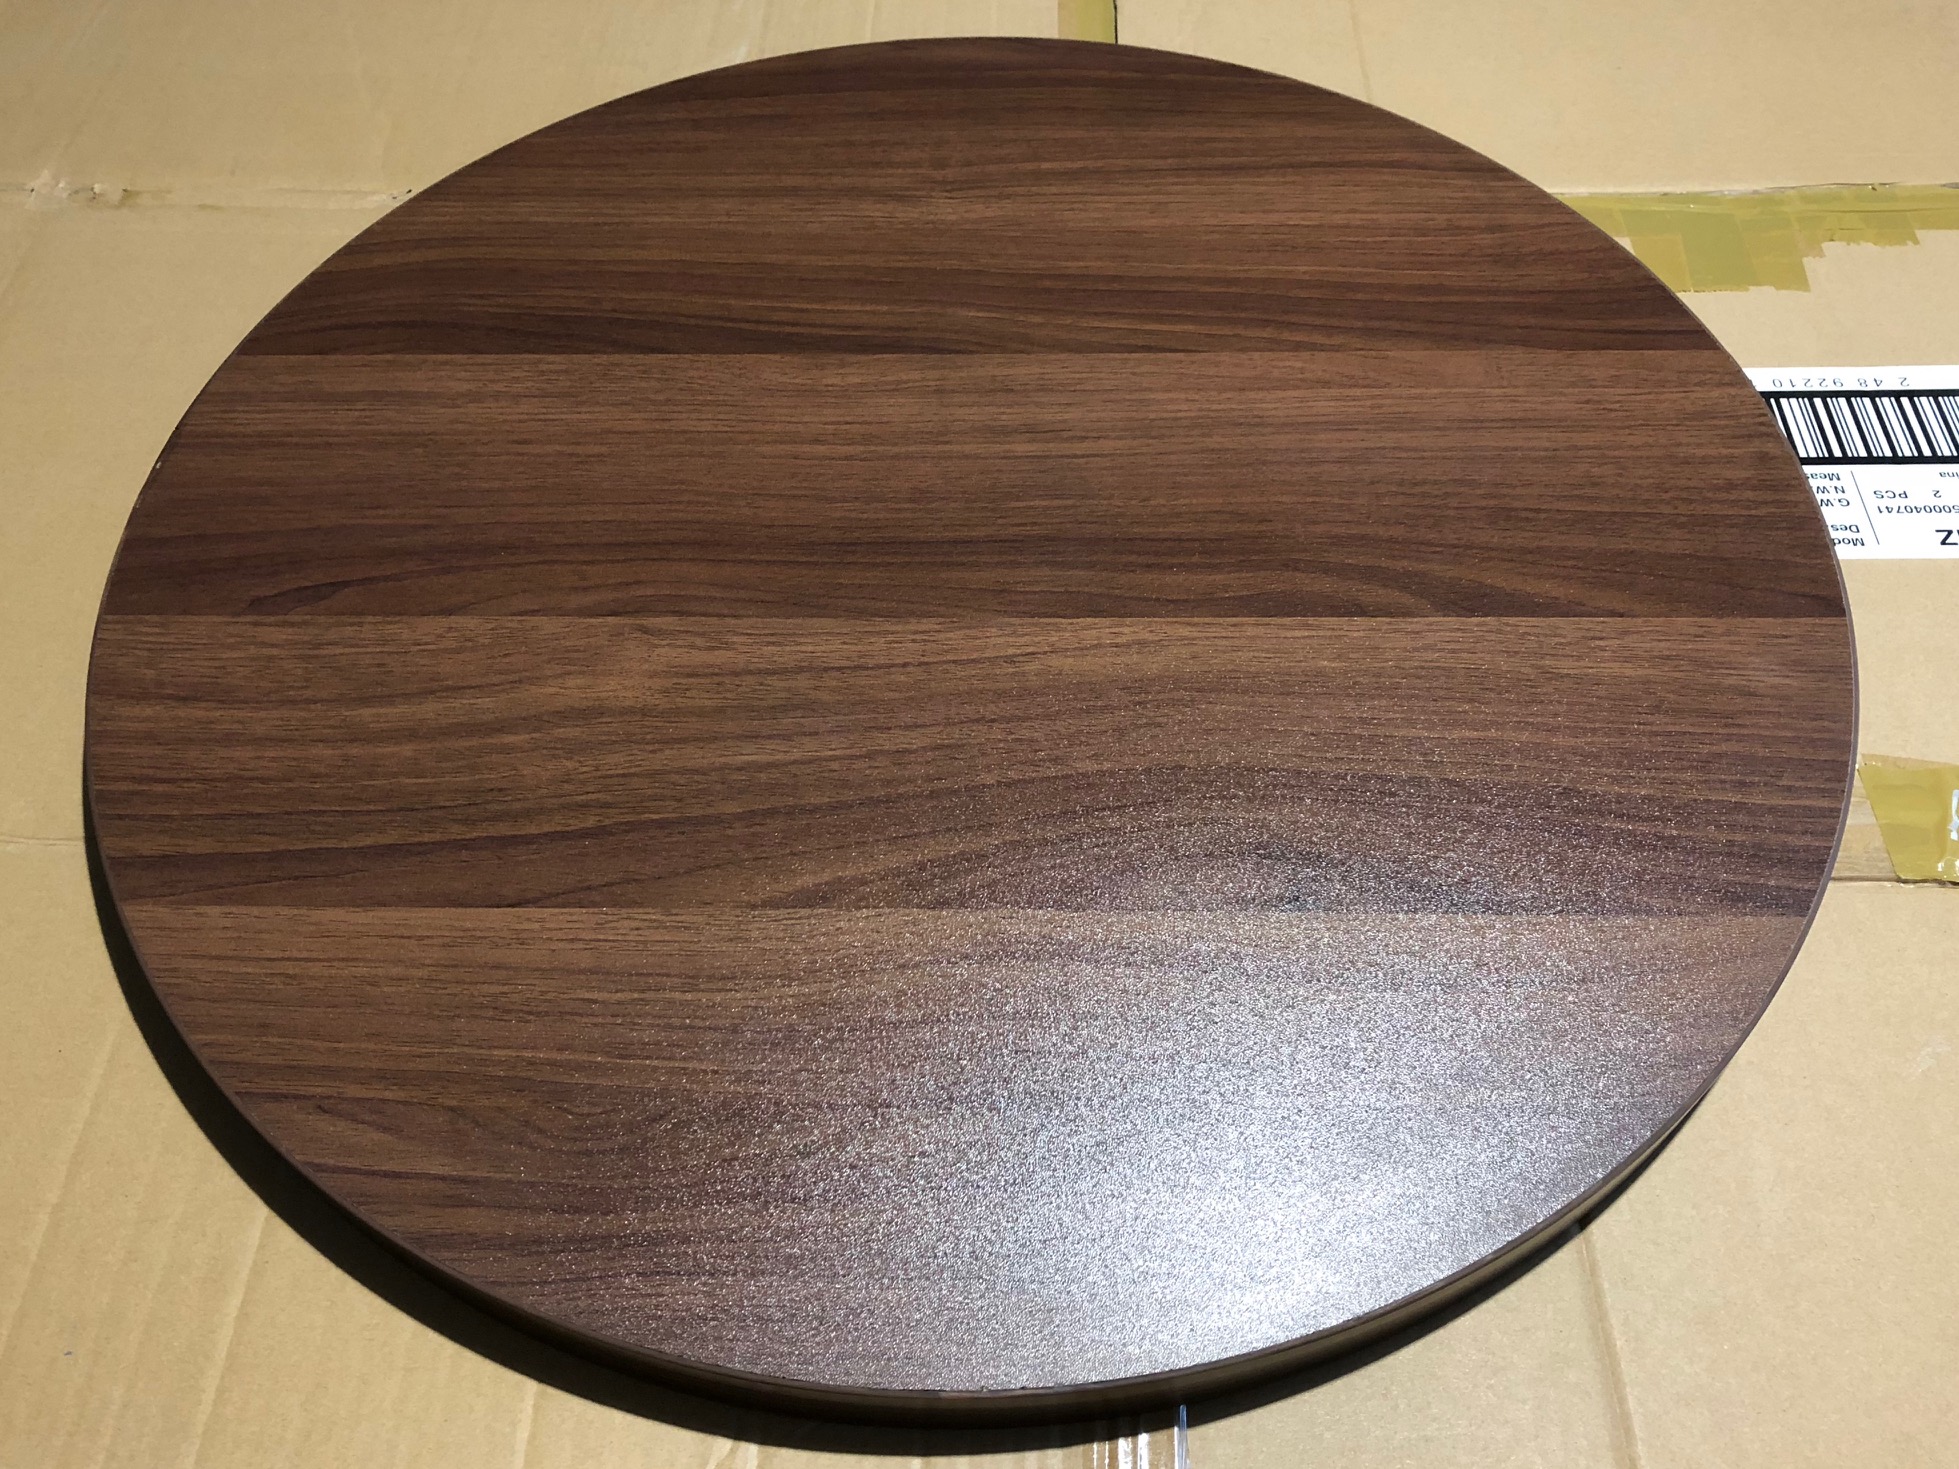
I decided on round tables.
I thought that given these are to be used to welcome new players a round table is less confrontational. It gives less of a feel that you are facing off against someone sat opposite you.
I found some nice round bar tabletops 60 cm across.
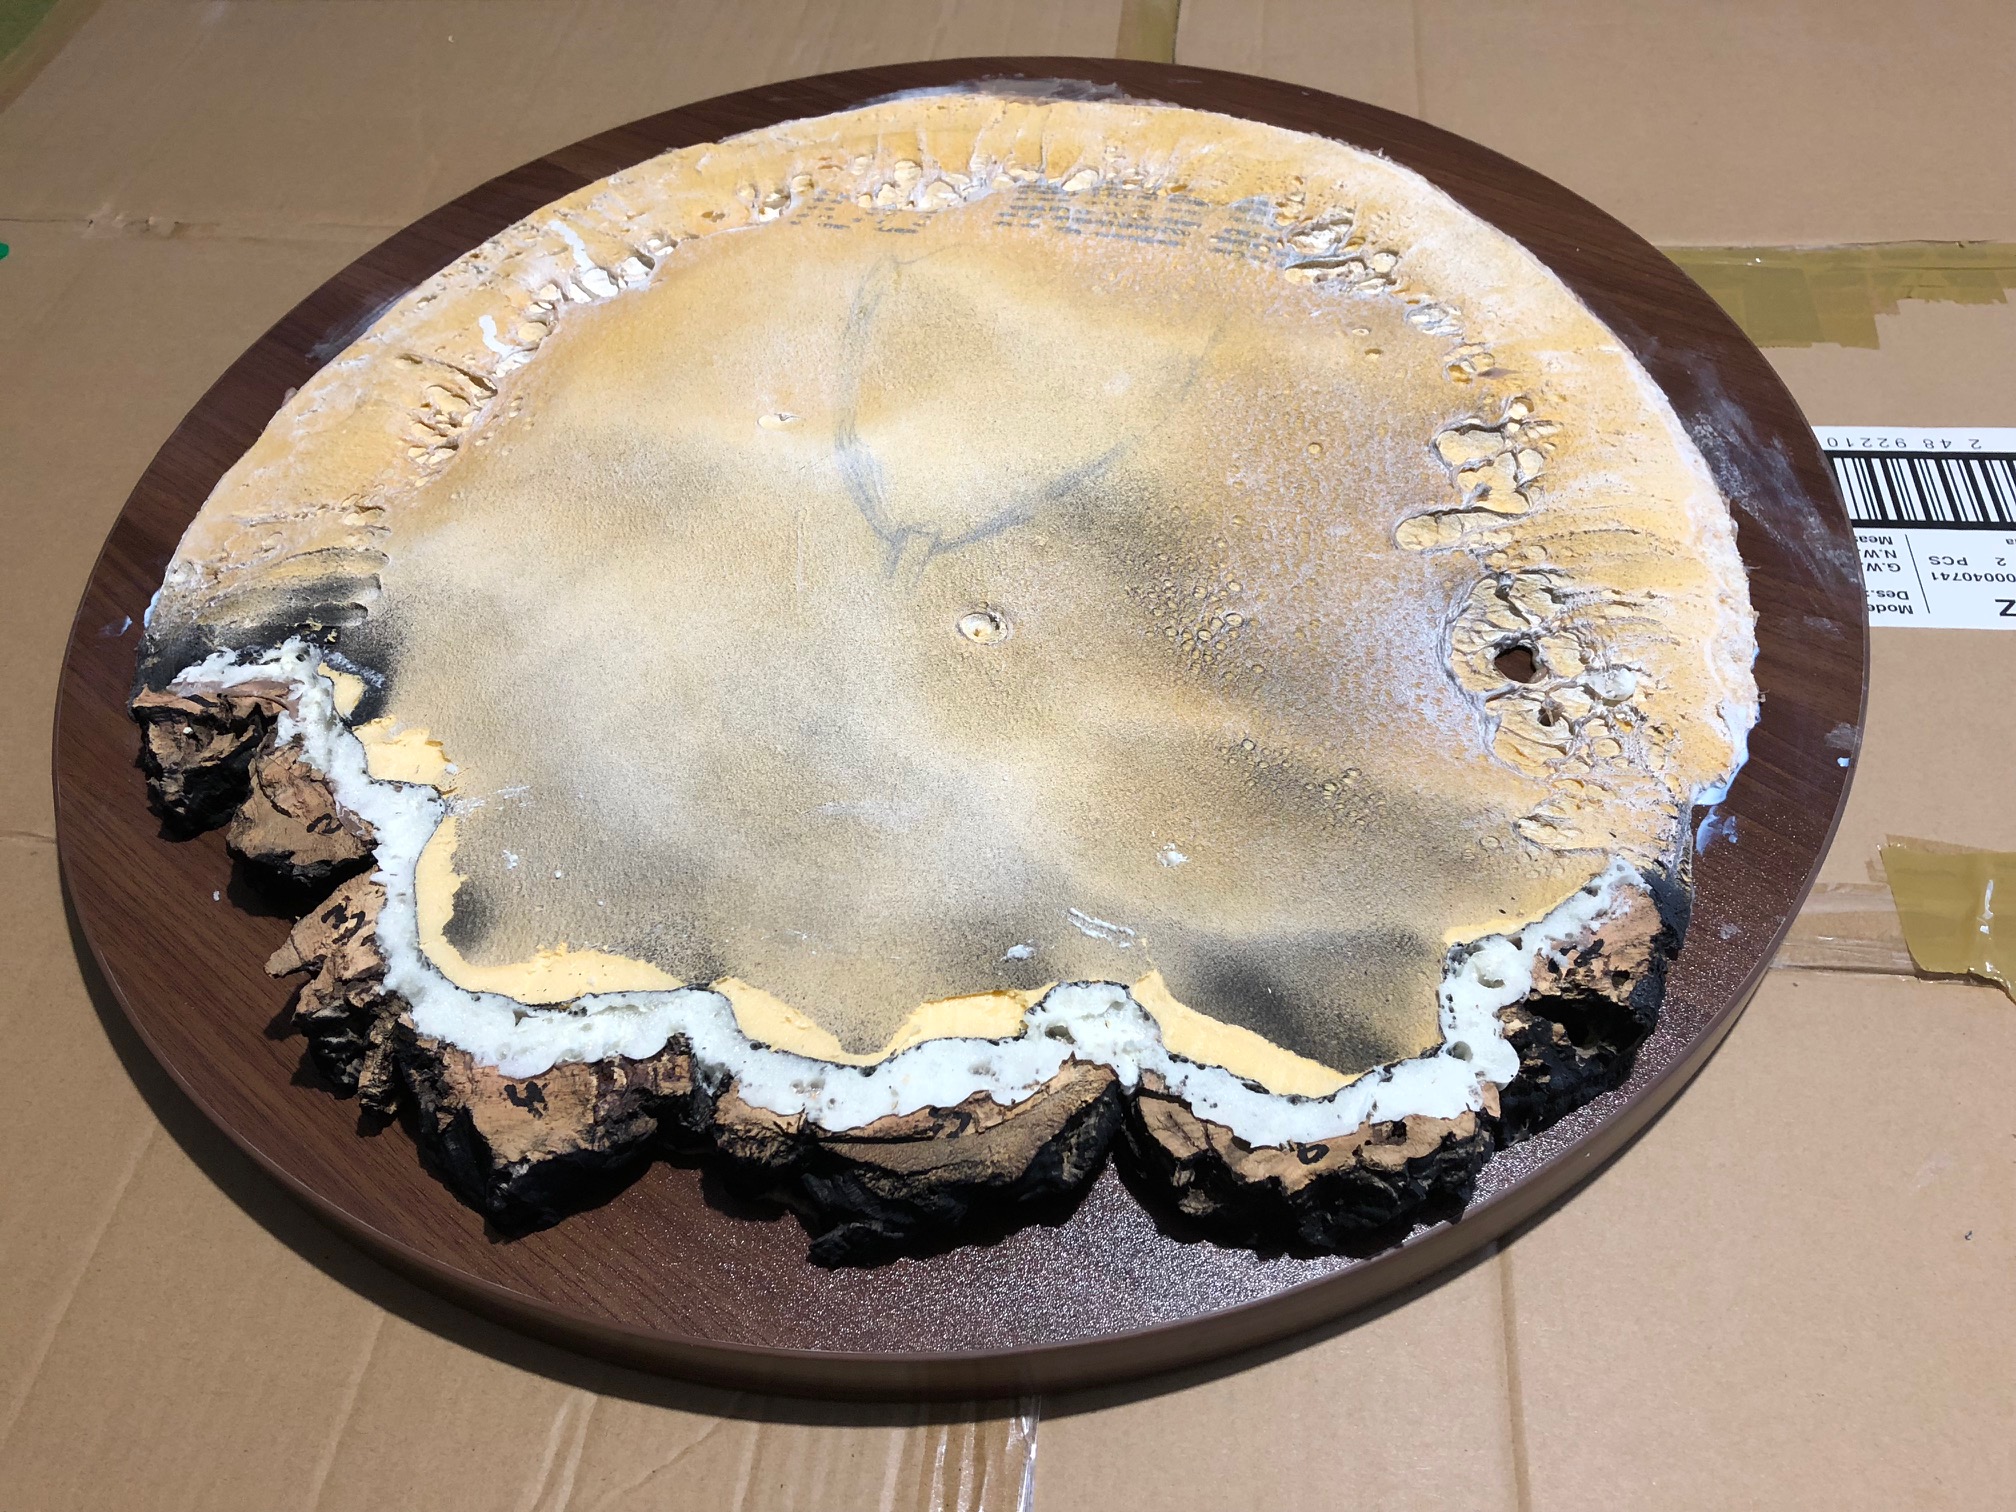
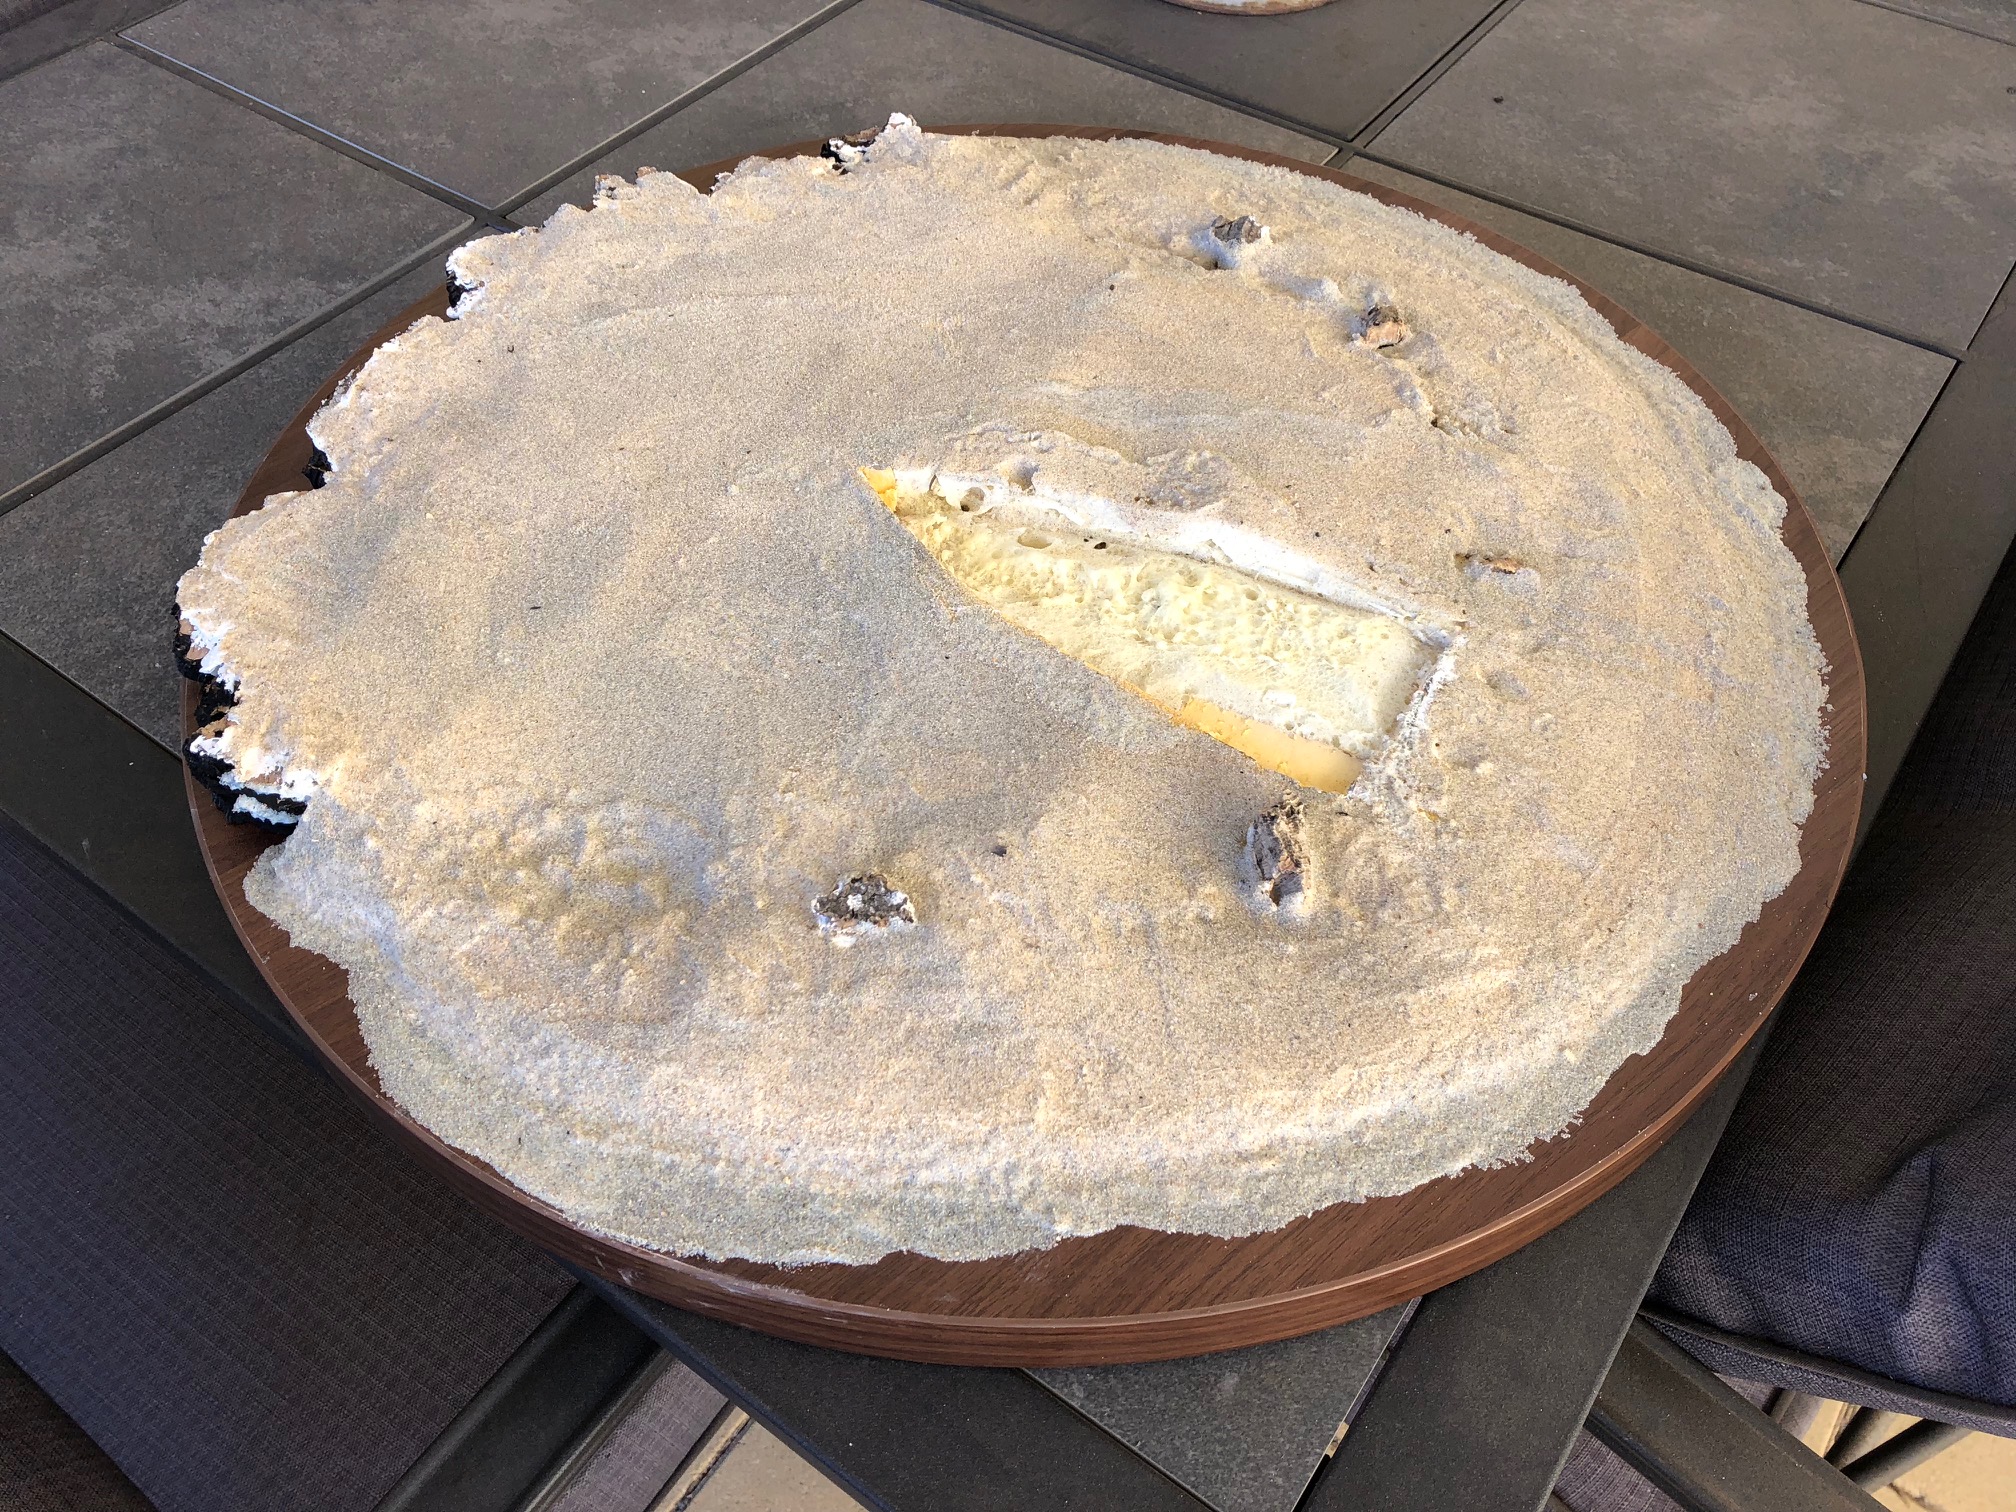
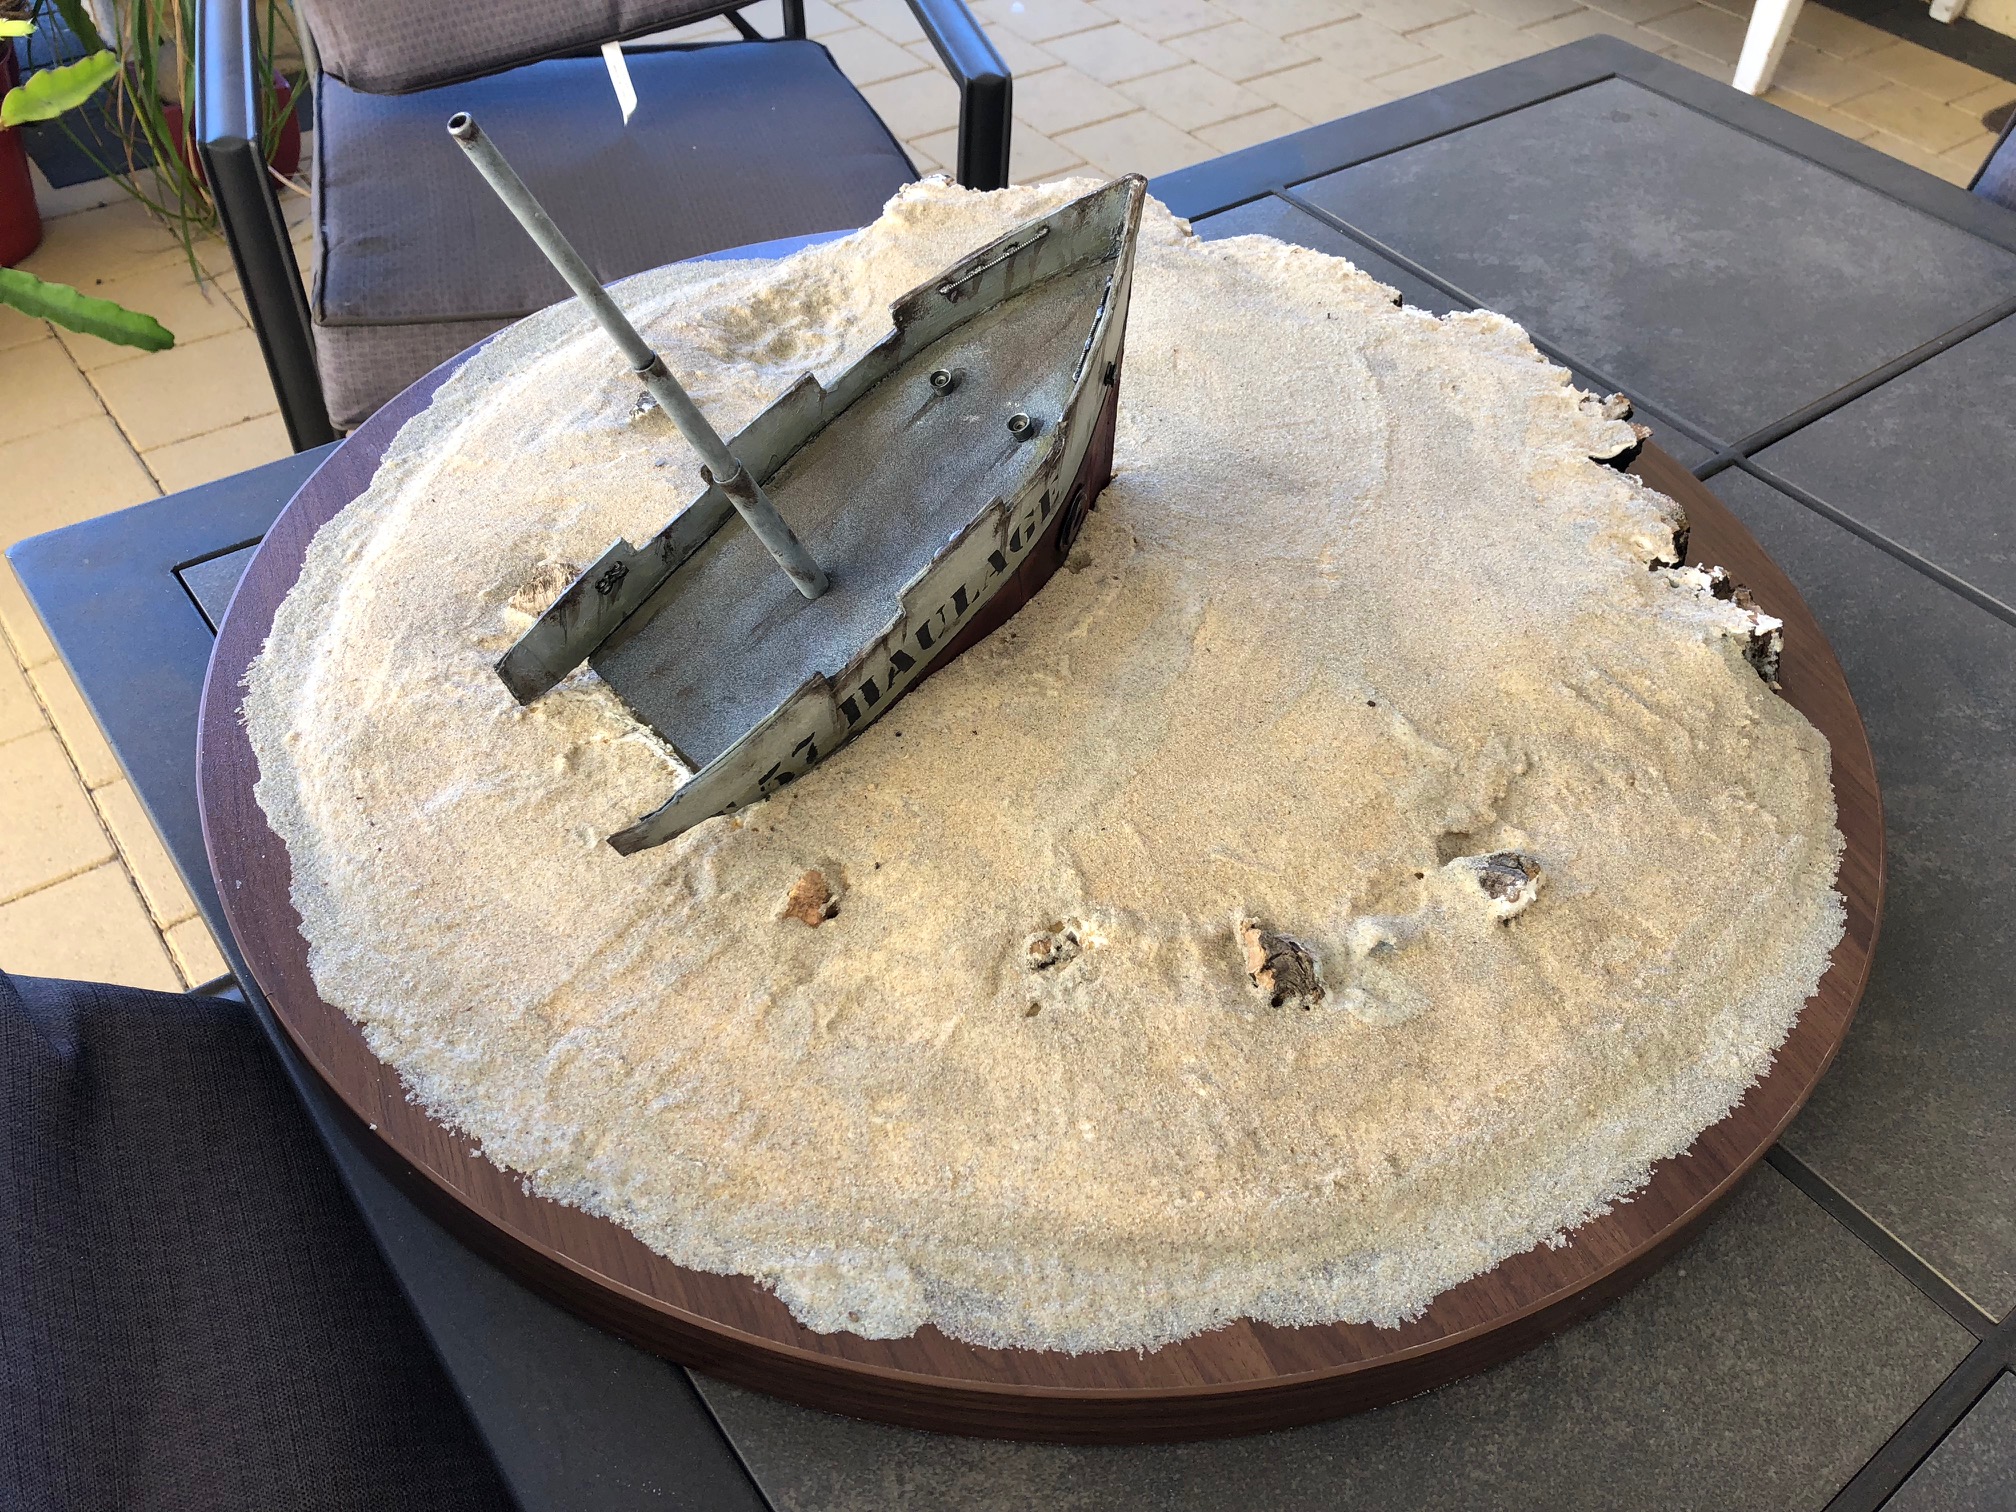
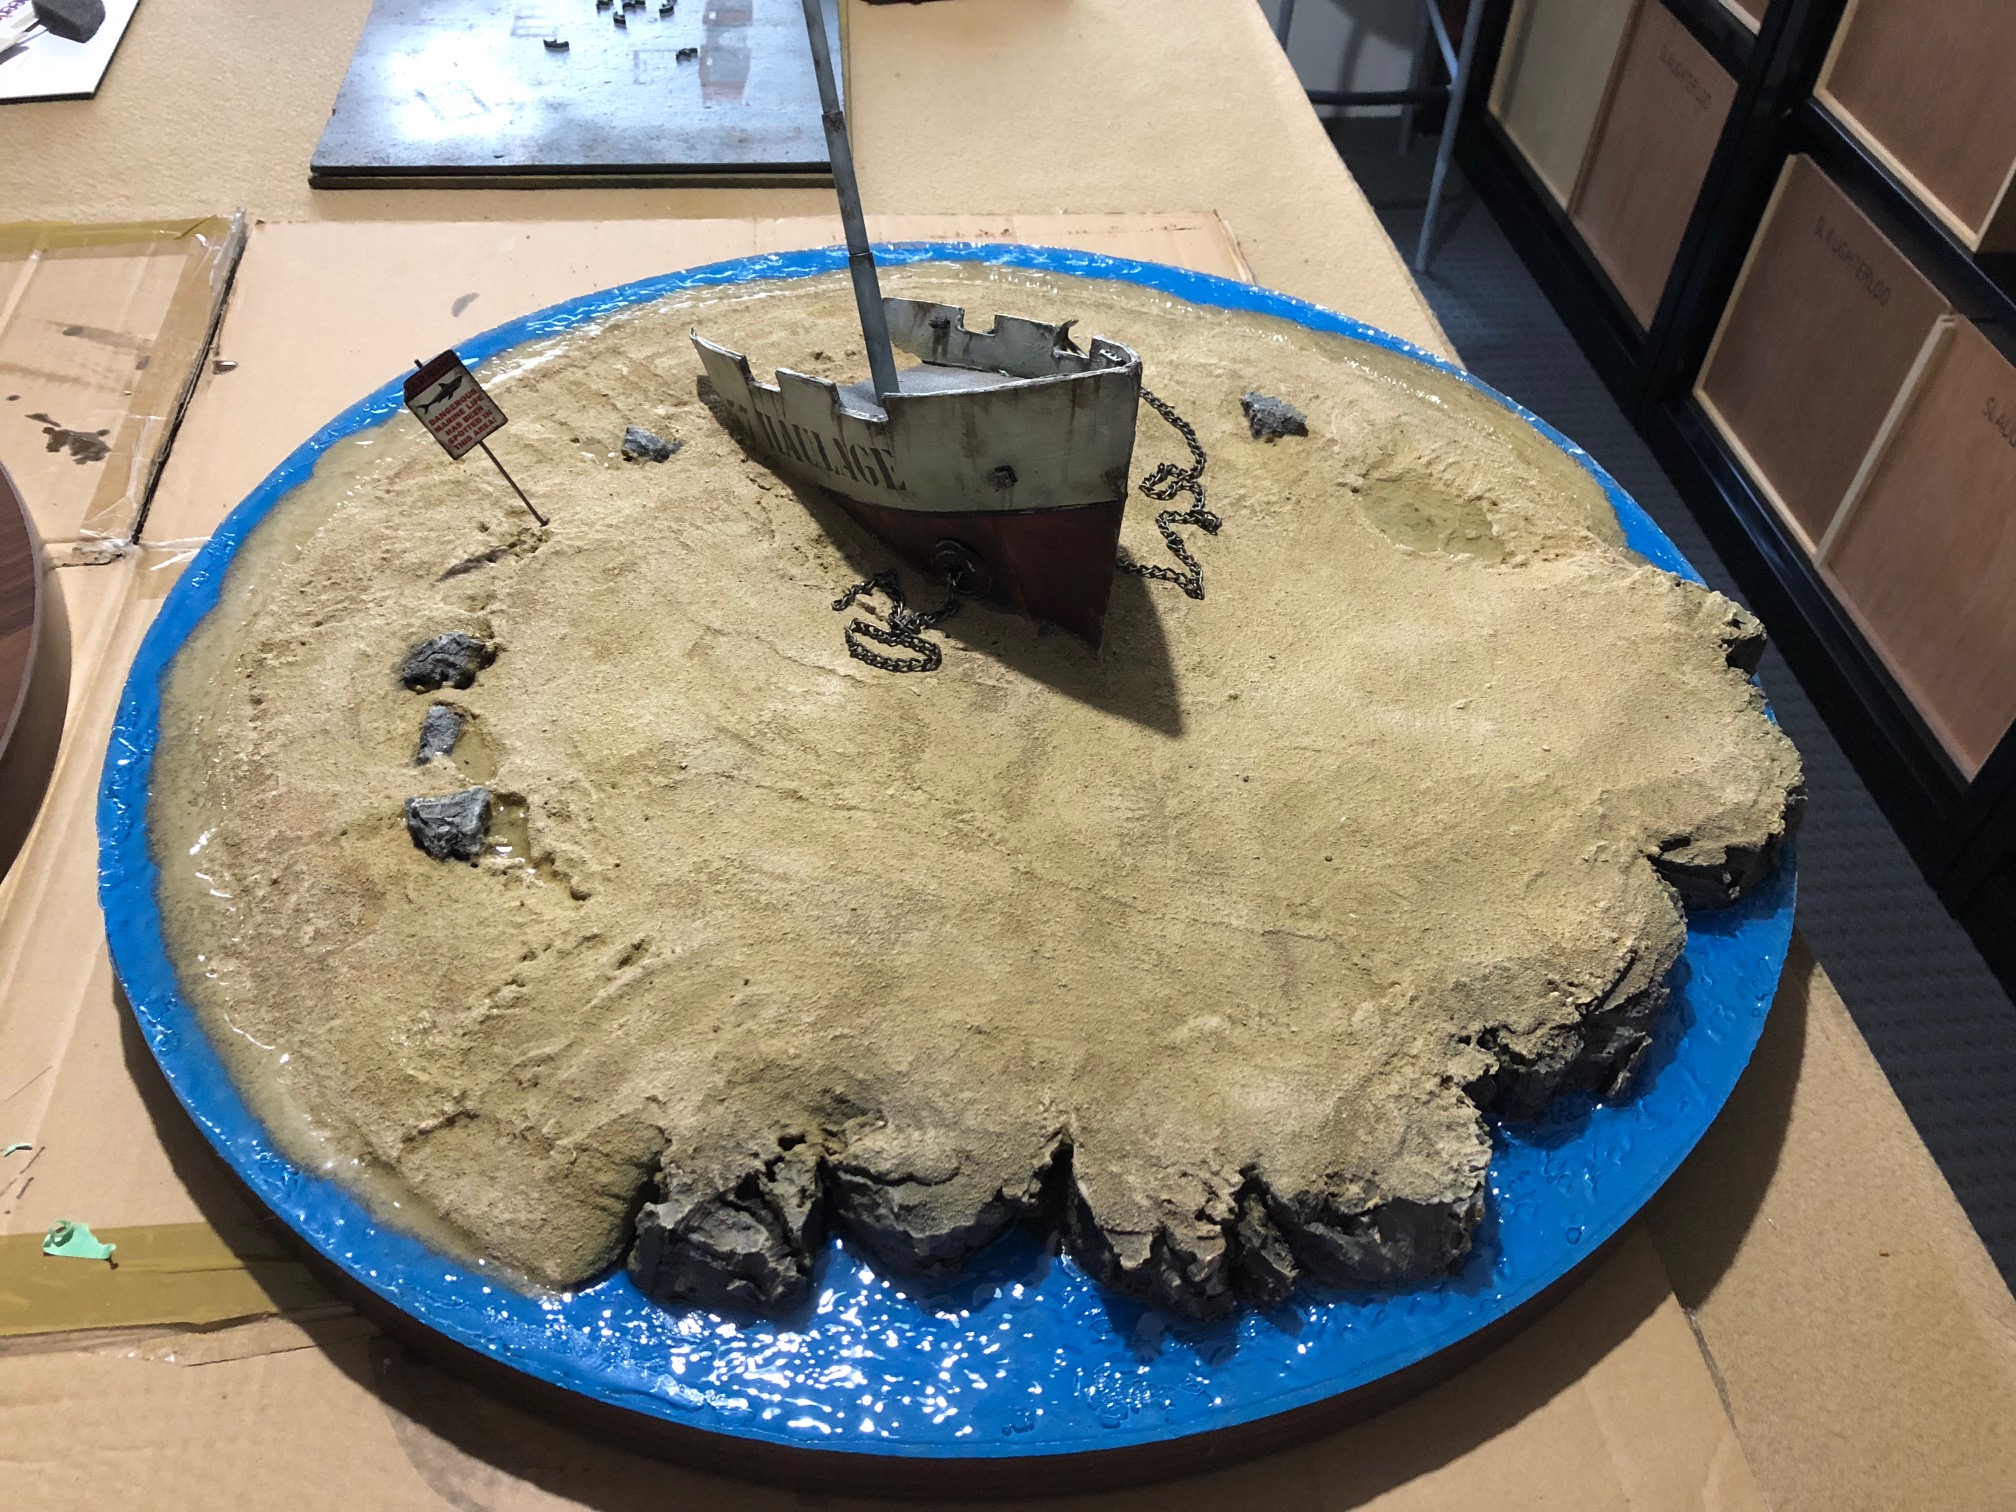
For my first table I had in mind to do a shipwreck on a beach. Not your normal wooden ship but something a little more substantial. I used high density foam to make an island shape.
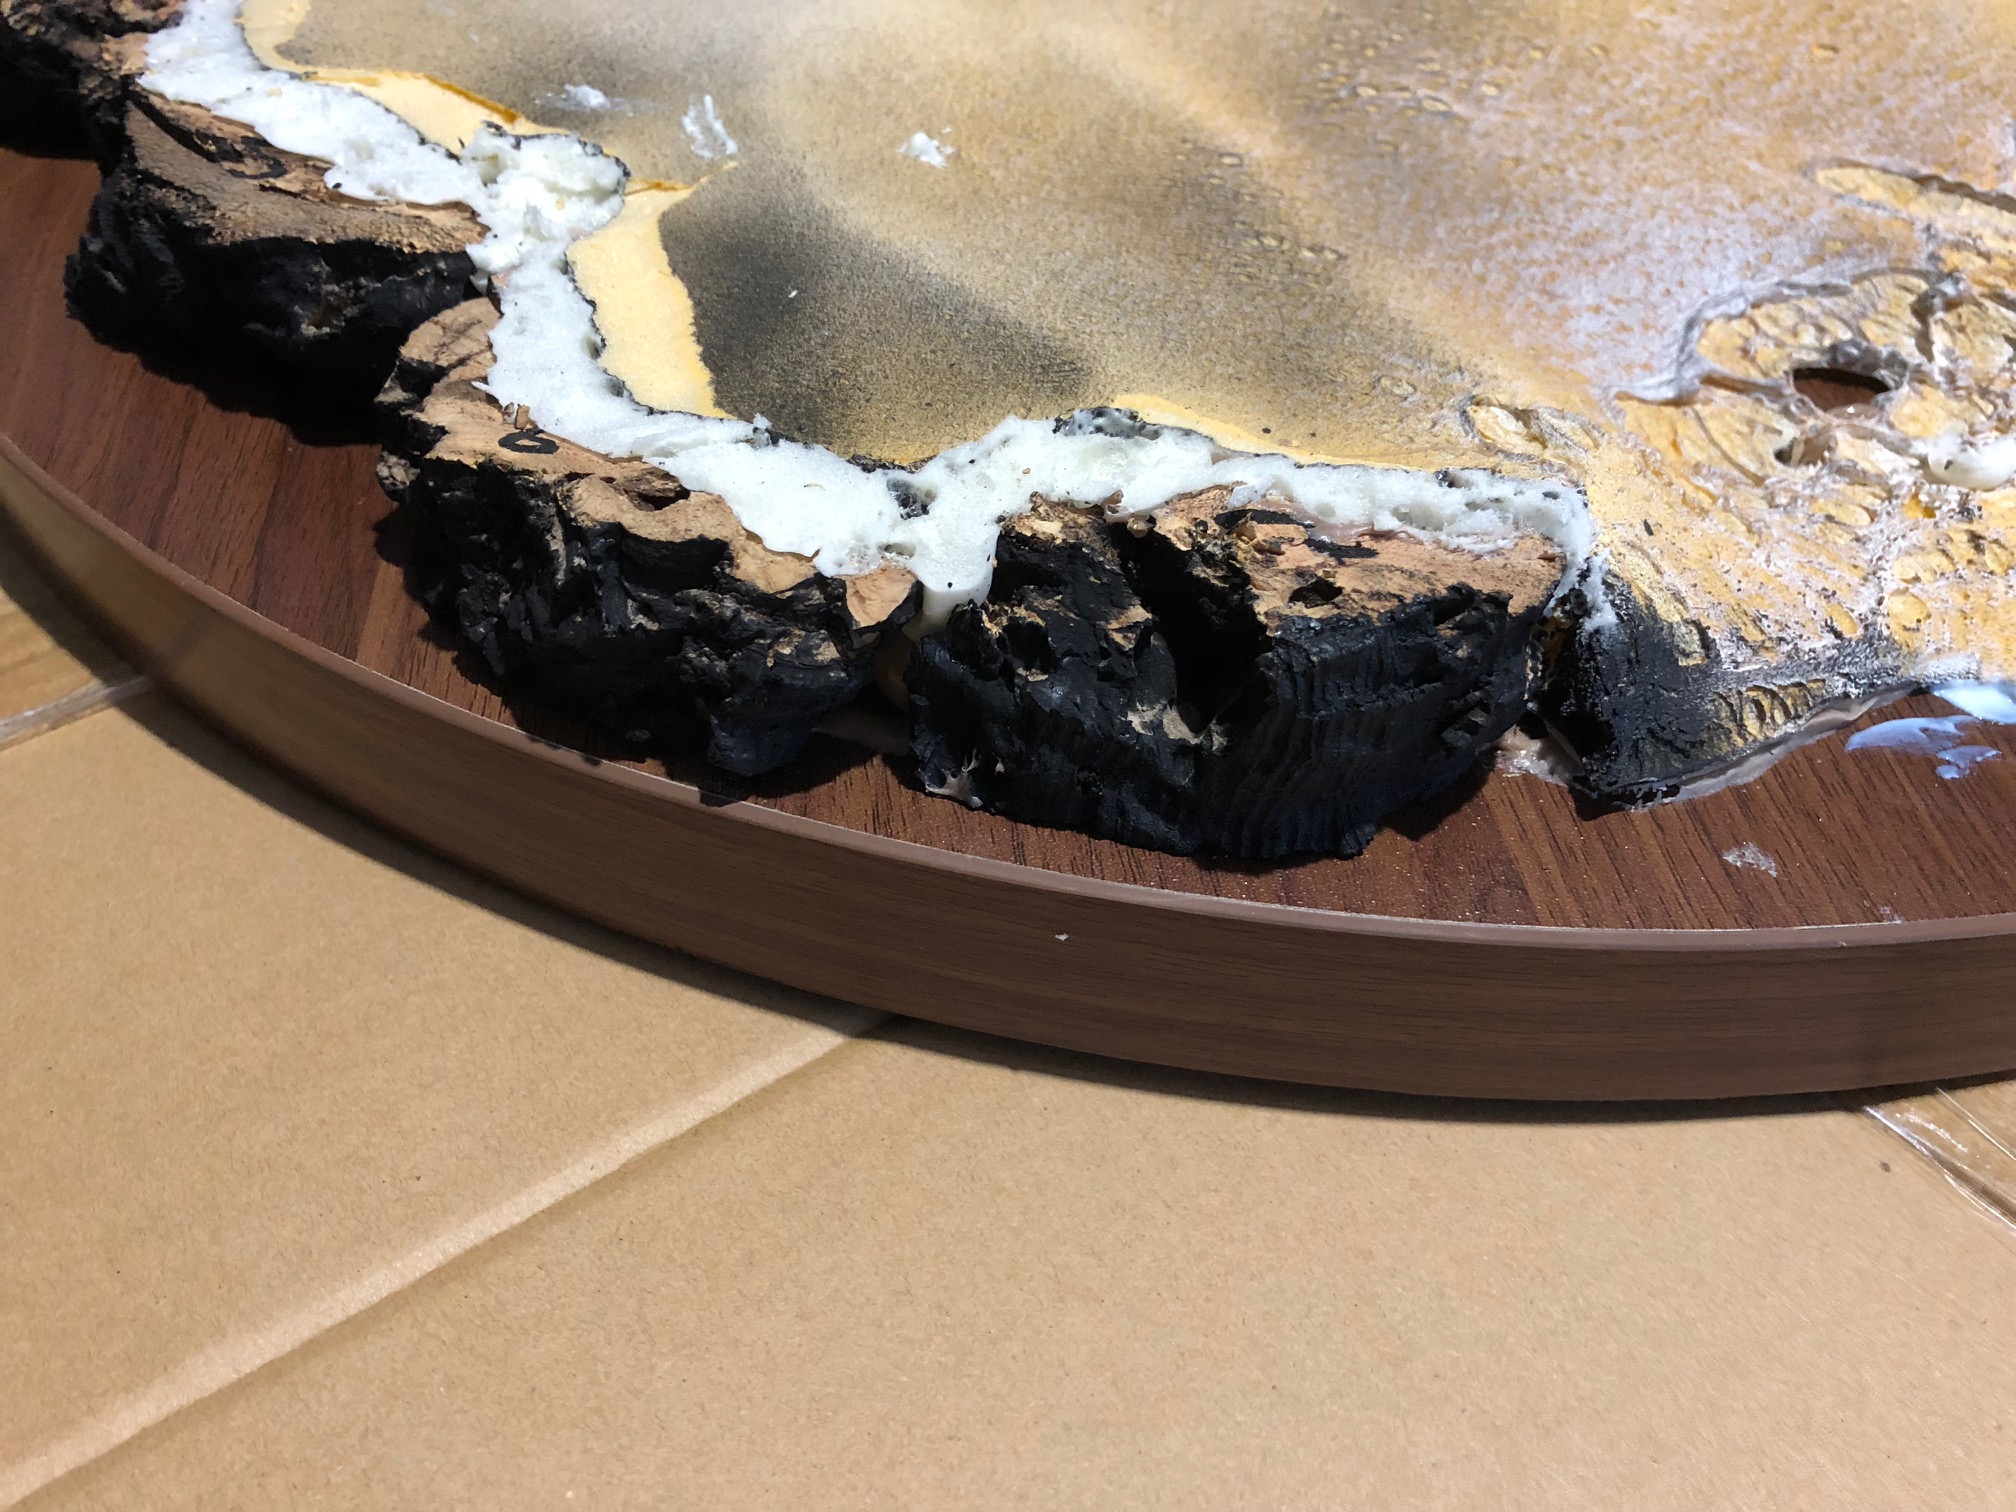
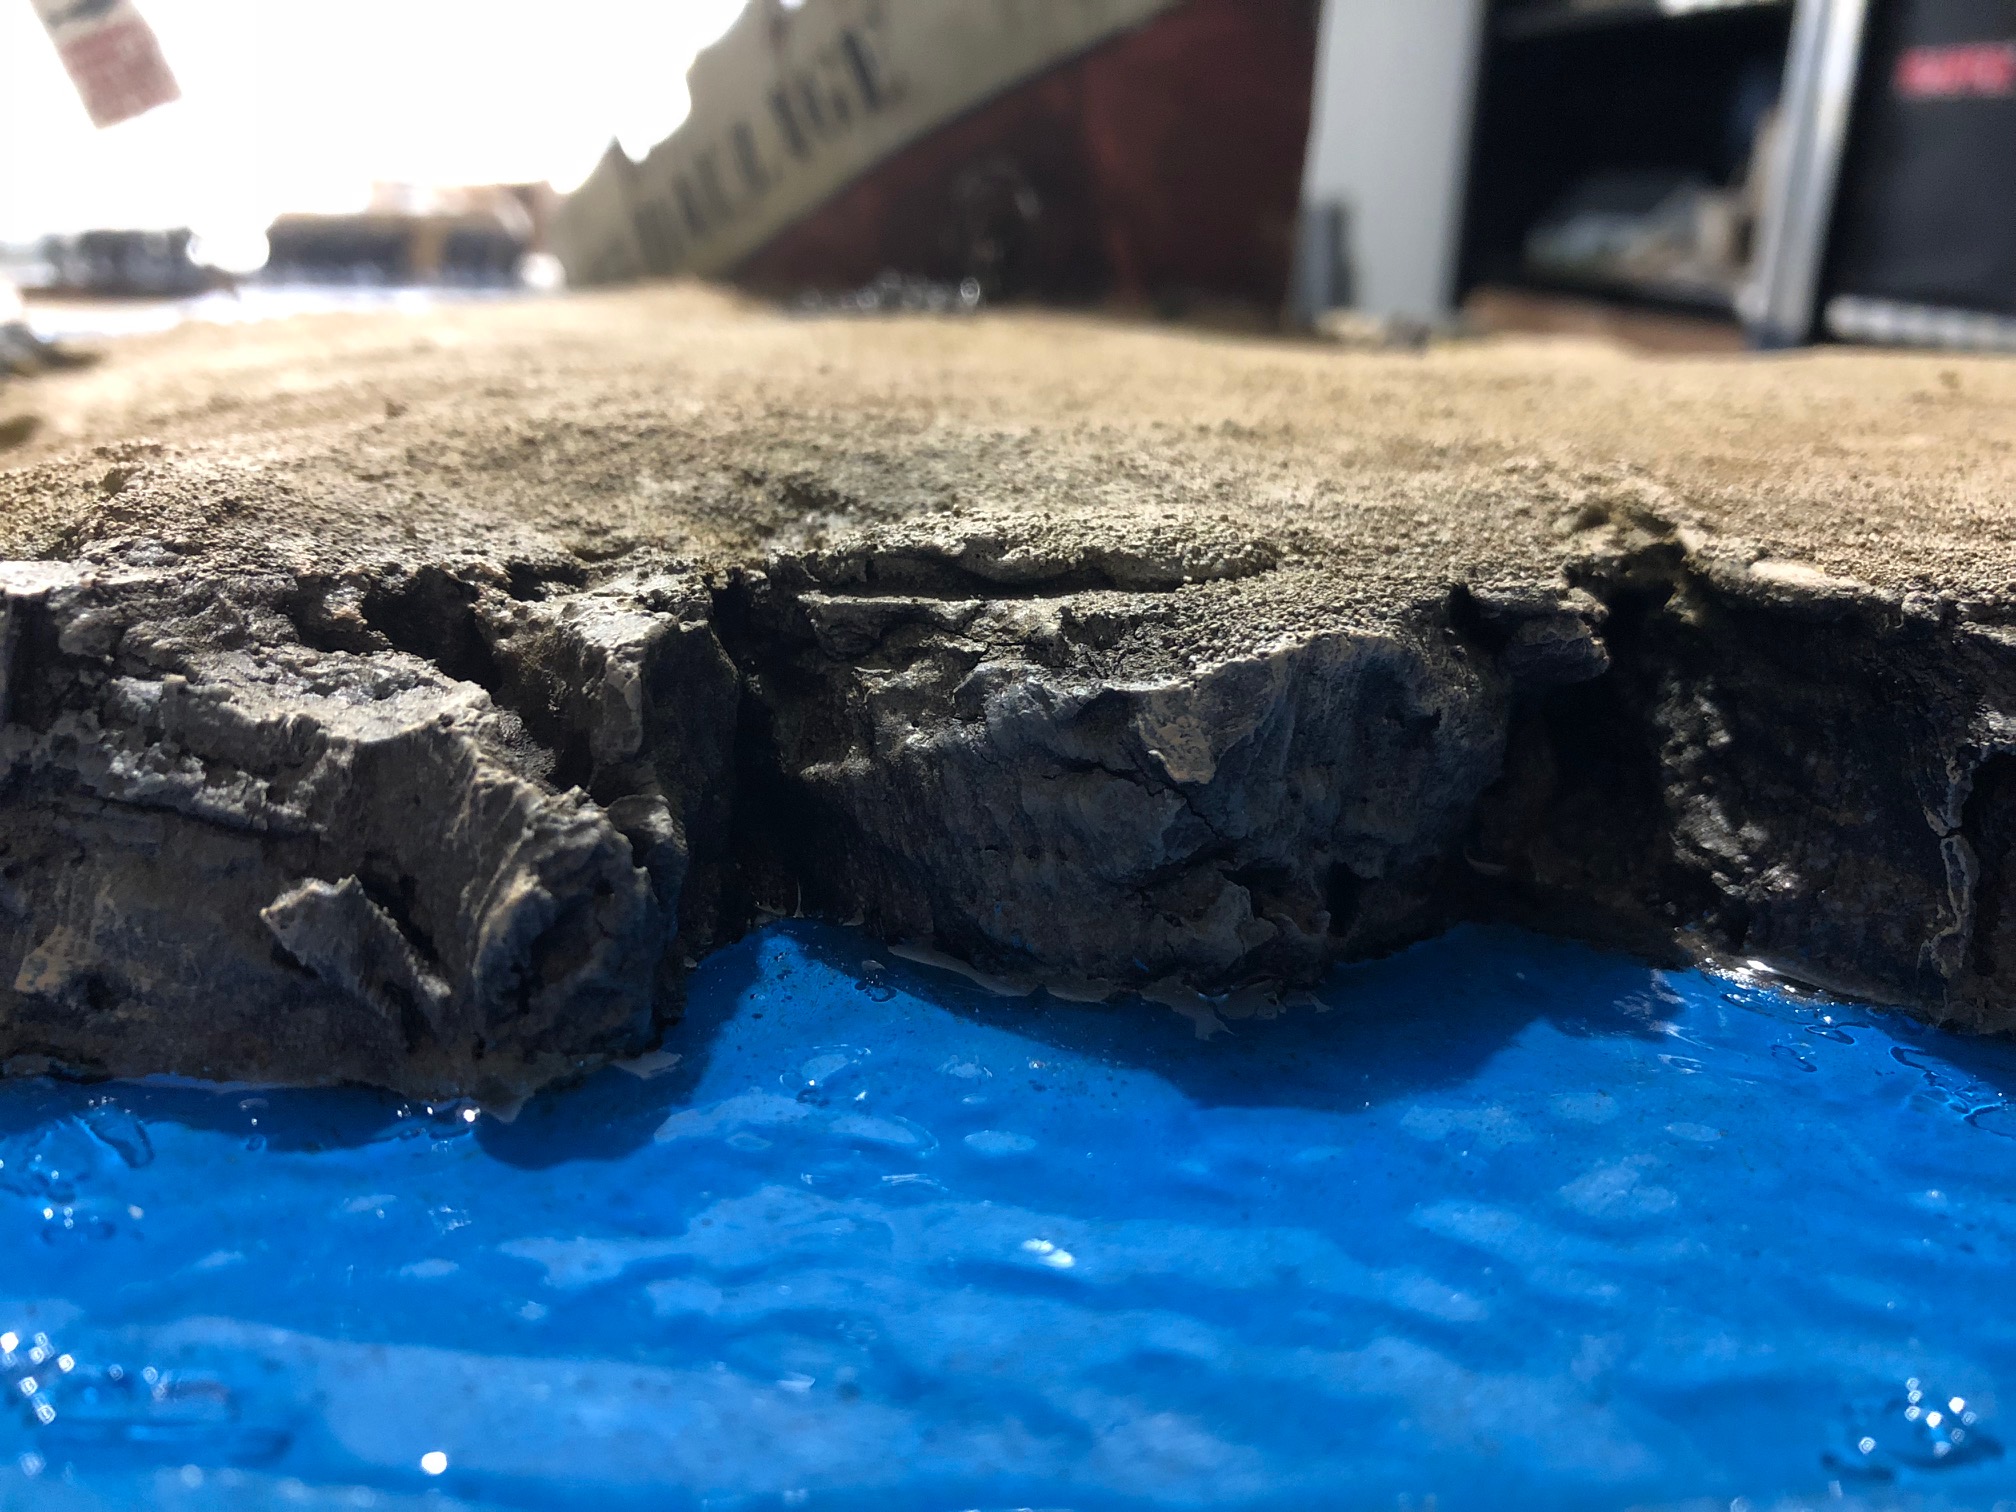
Cork bark was used to make a rough cliff on one side with the rest of the island gently sloping down. I repeatedly tested figures on the surface to make sure they could stand up okay and that no part was too steep.
I cut out a section of the island to insert my proposed section of ship and covered the entire island with sand. I used filler to smooth off sections that were a little rough and added some cork bark as rocks.
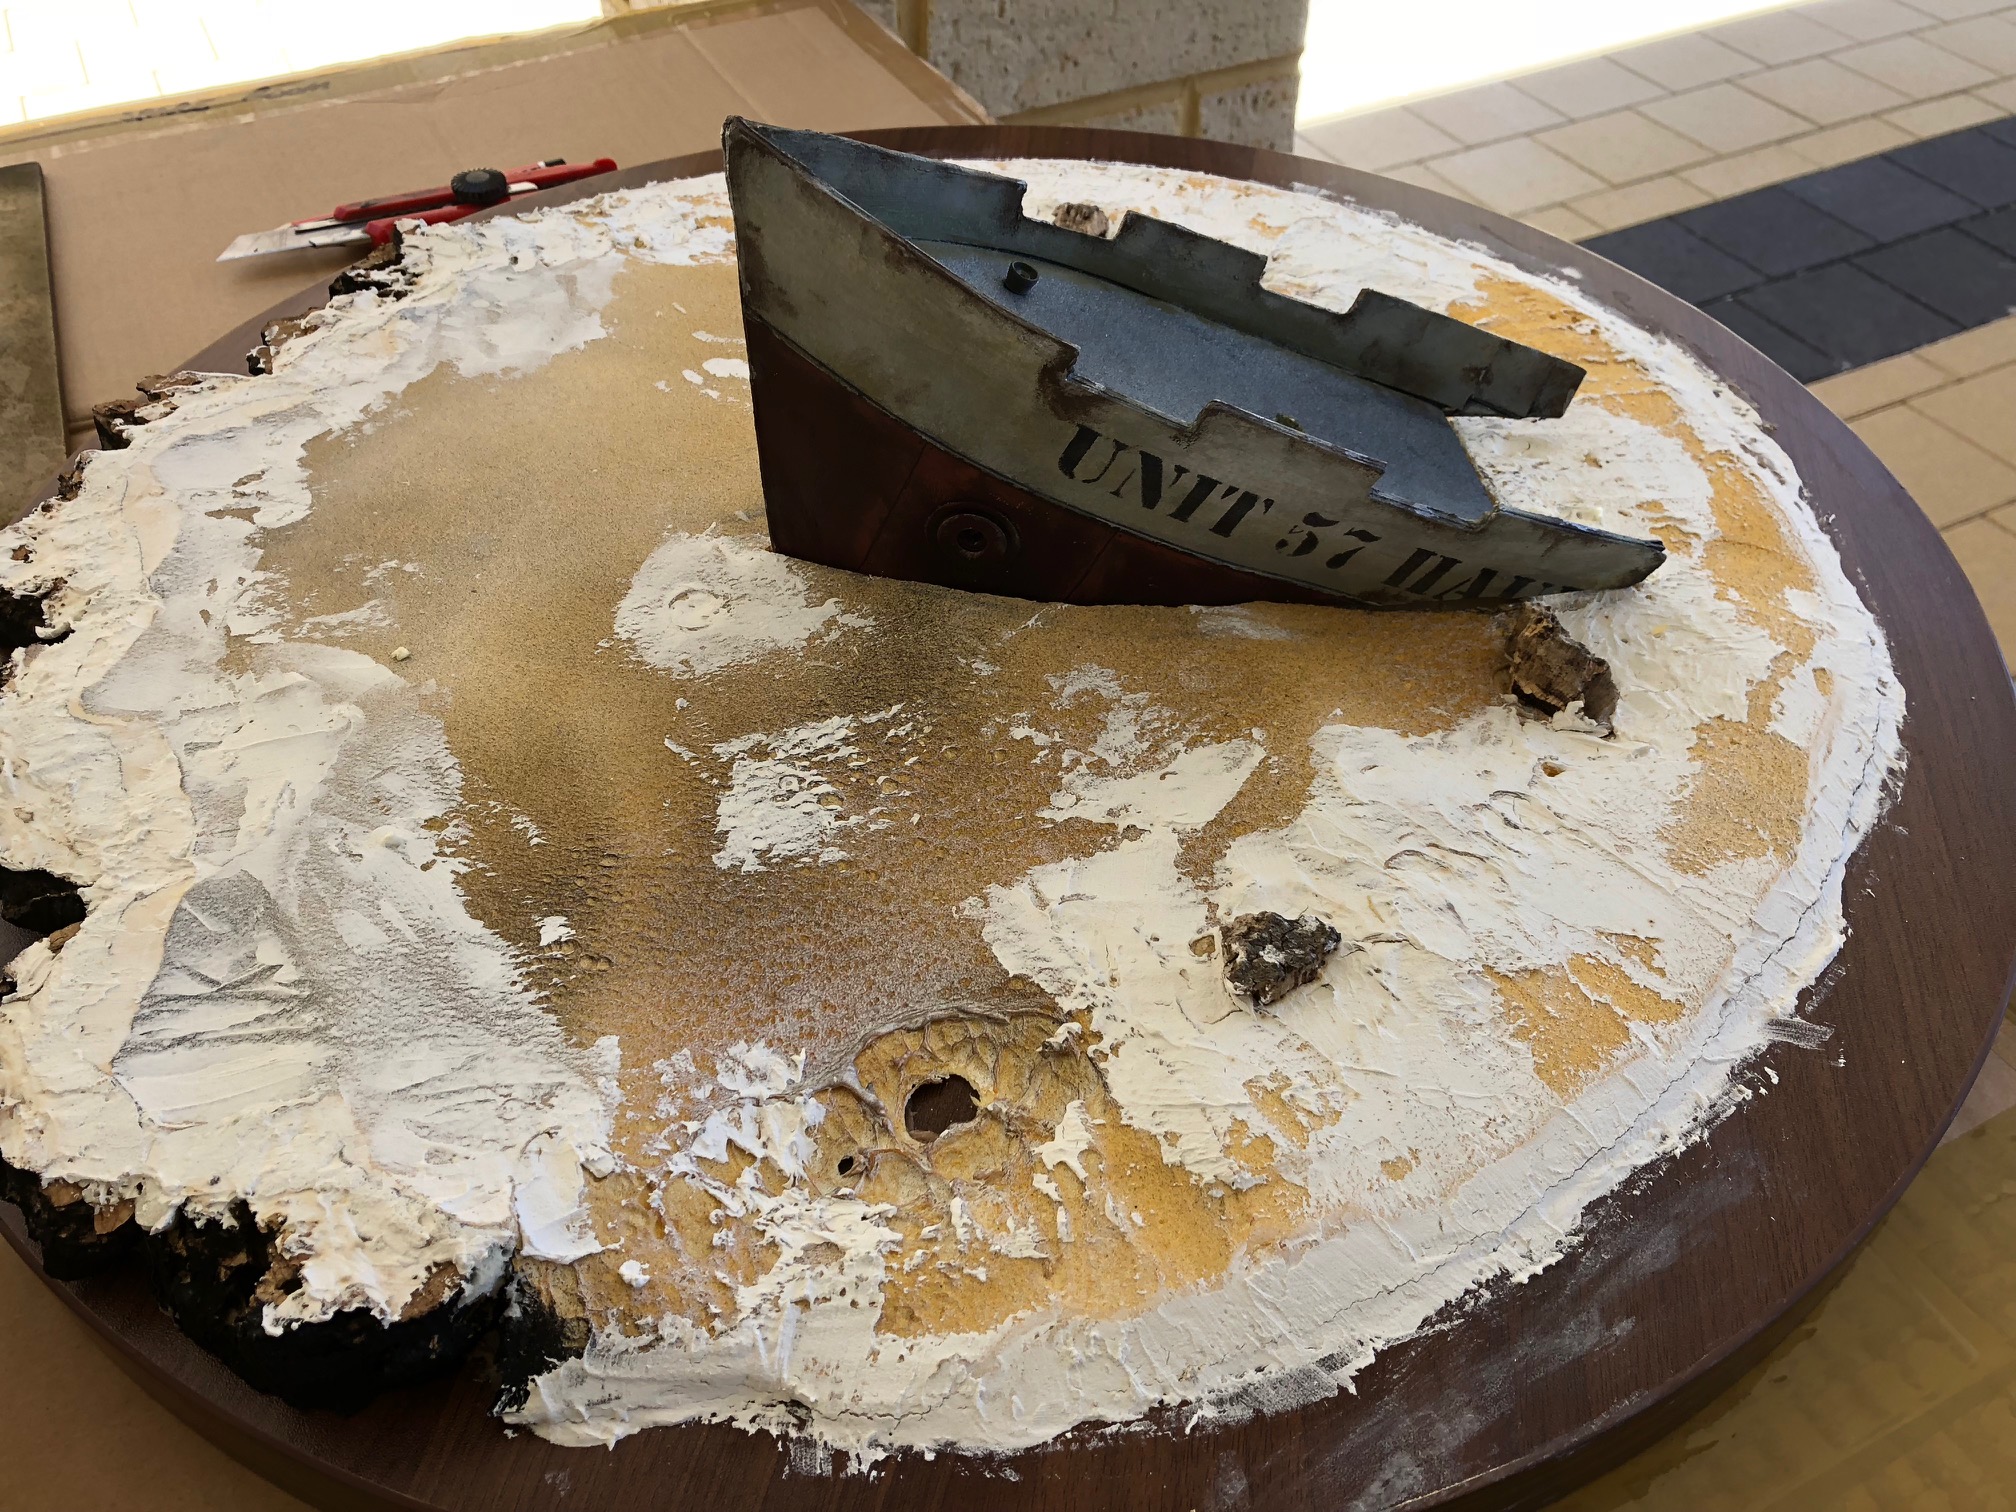
The section of ship was built from cereal packets wrapped around a polystyrene core.
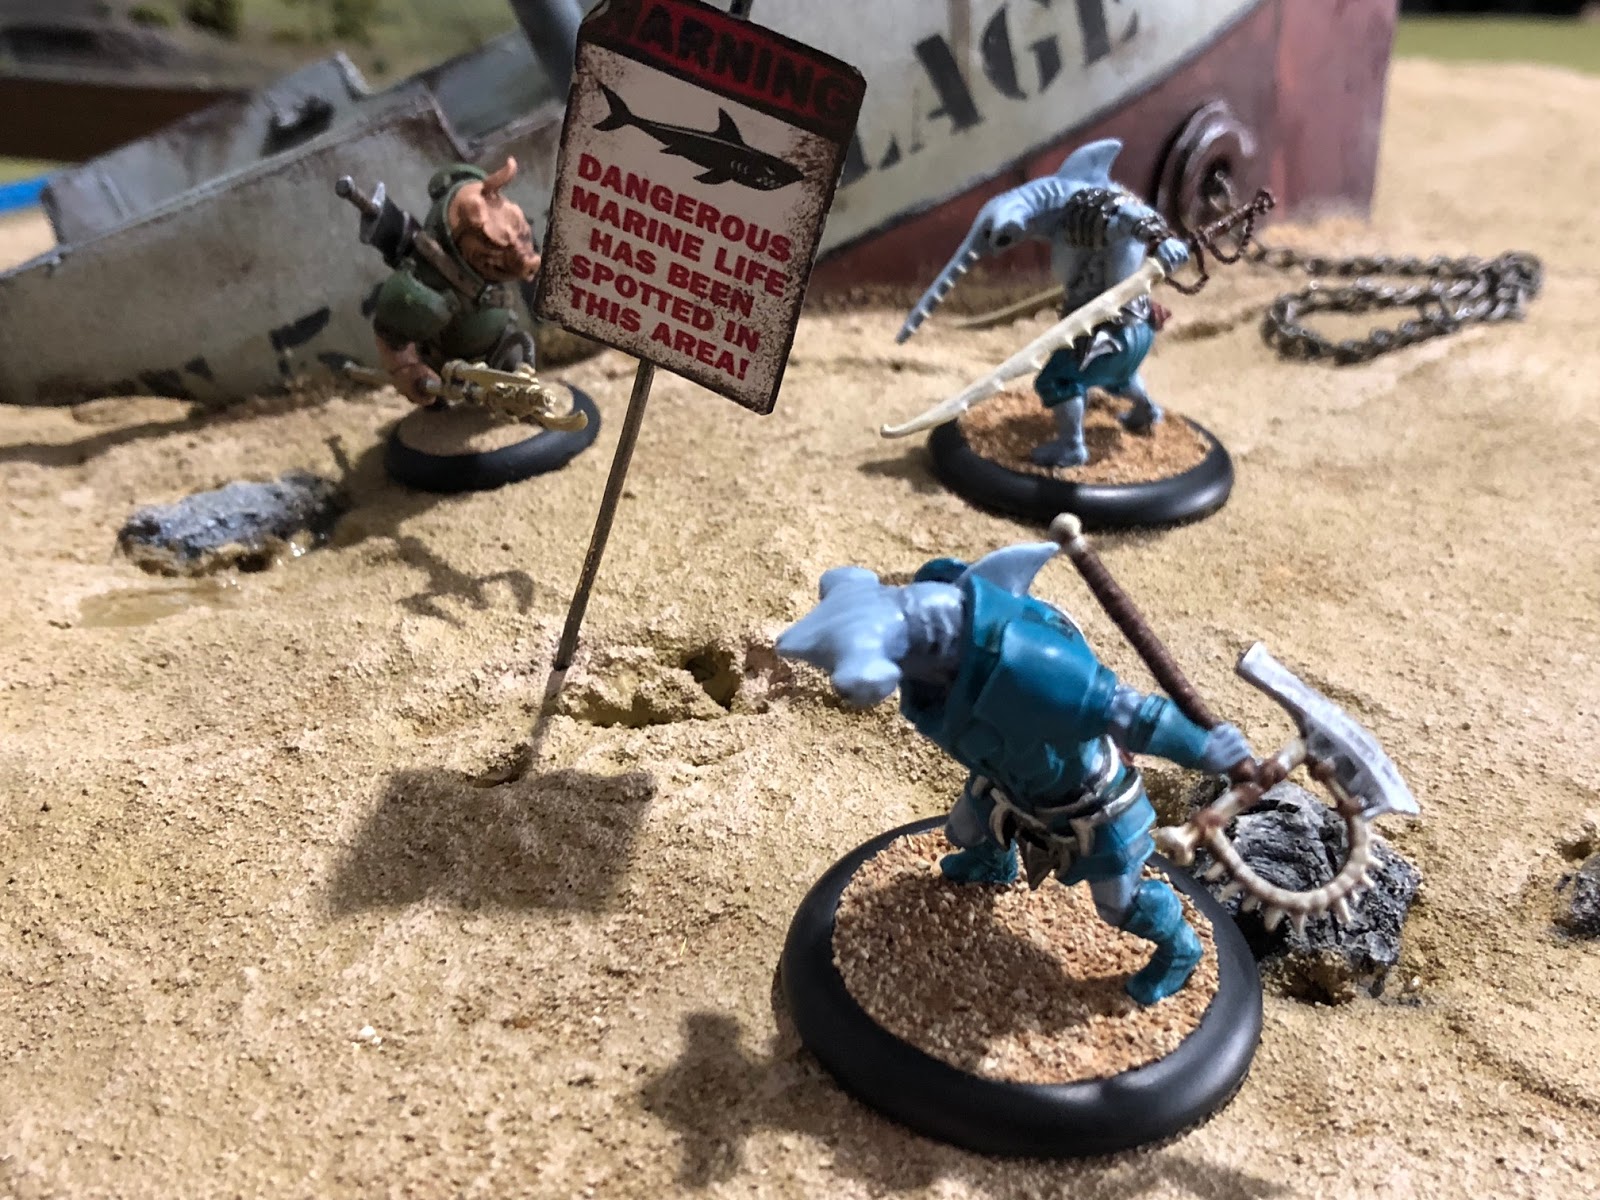
I painted the ship up to look weathered. I added text to the ship using a stencil that I printed off. This ship is ‘Unit 57 Haulage’.
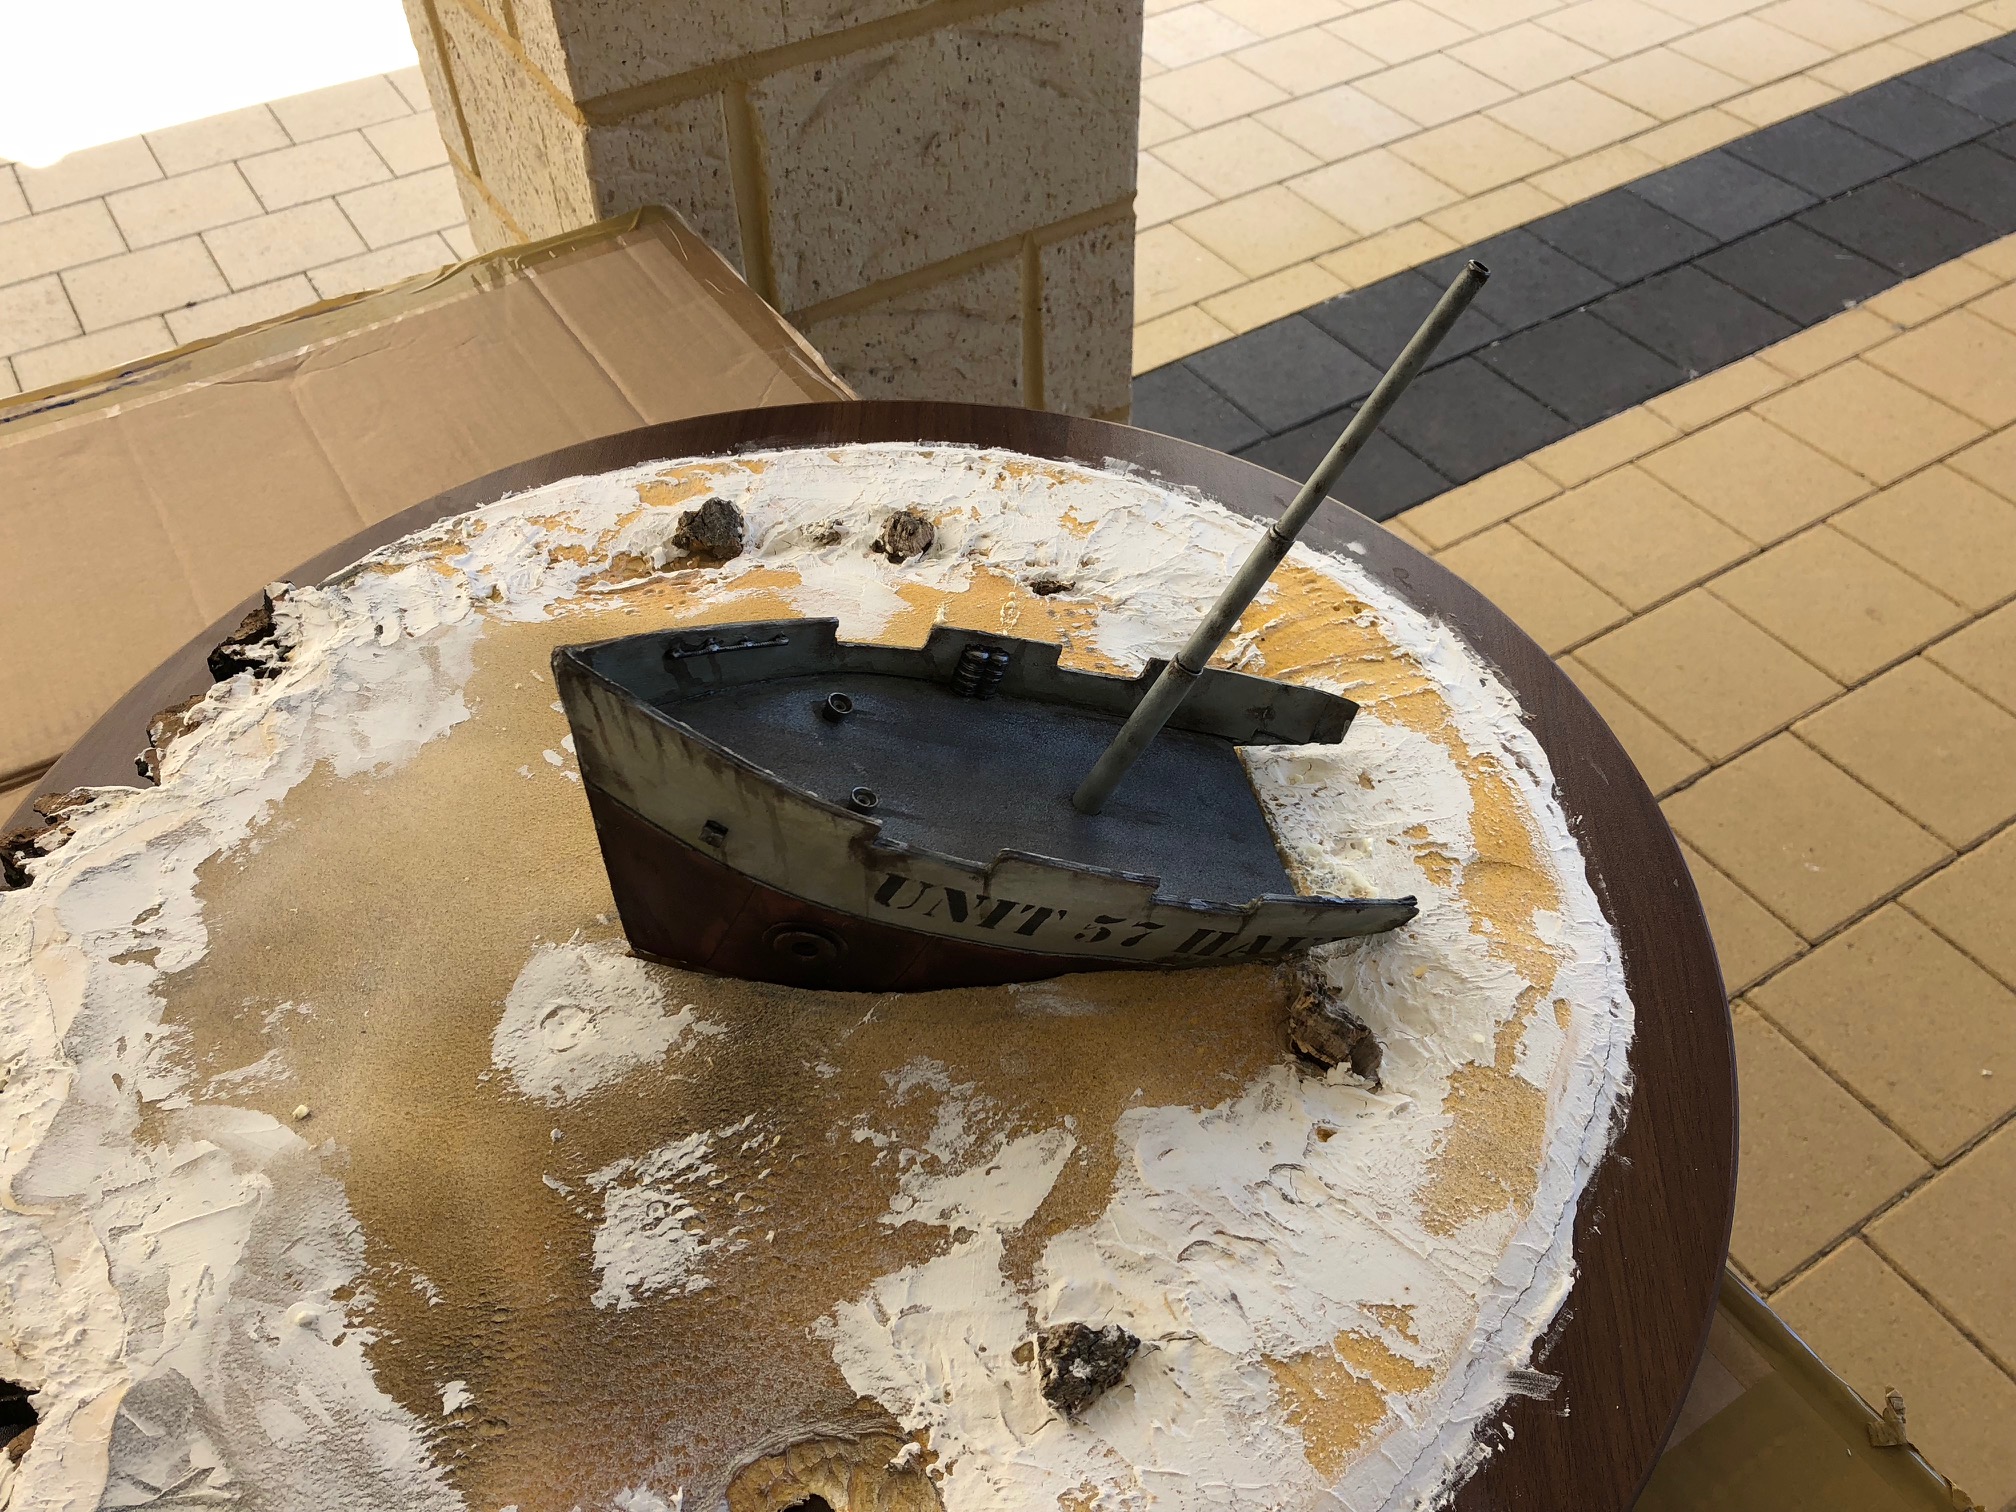
I glued sandpaper to the deck to give a nonslip surface for figures to stand on and then added some small jet pack exhausts I found on an old toy.
I added more plastic components from my bits box and made a simple mast from plastic tubing.
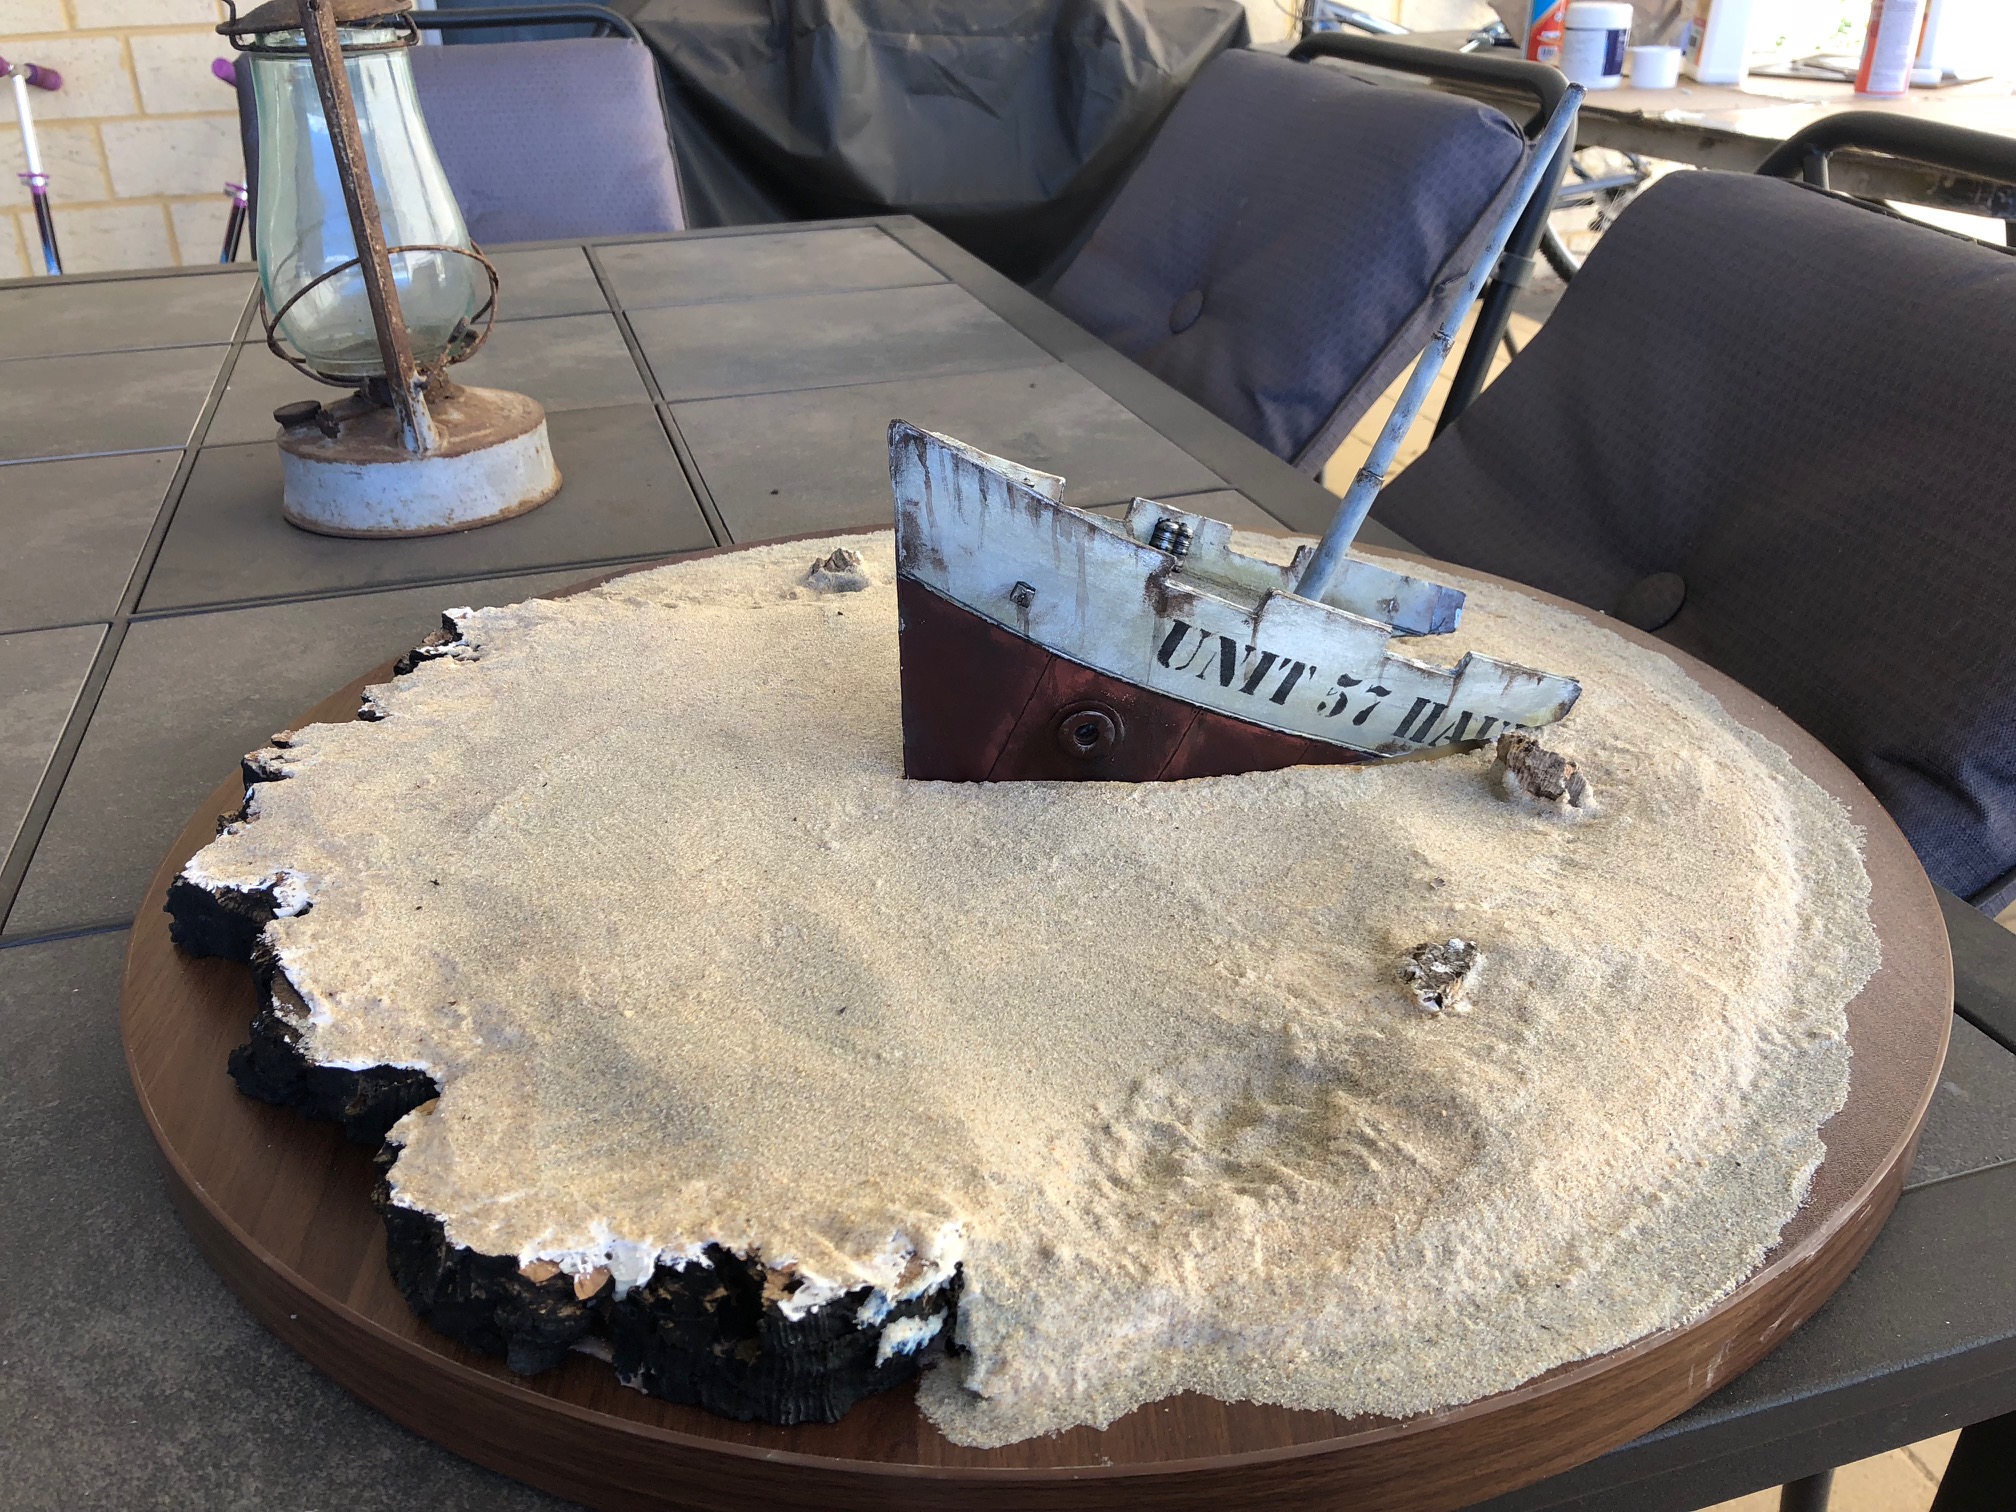
The whole island was then covered in sand.
I painted the sand in regular household paint.
Then I made a simple sign from copper sheet and a copper wire. The sign is a decal I printed off at home. This was weathered to look old.
I added streaks of weathering to the ship and glued it in place.
Next, I added some chains.
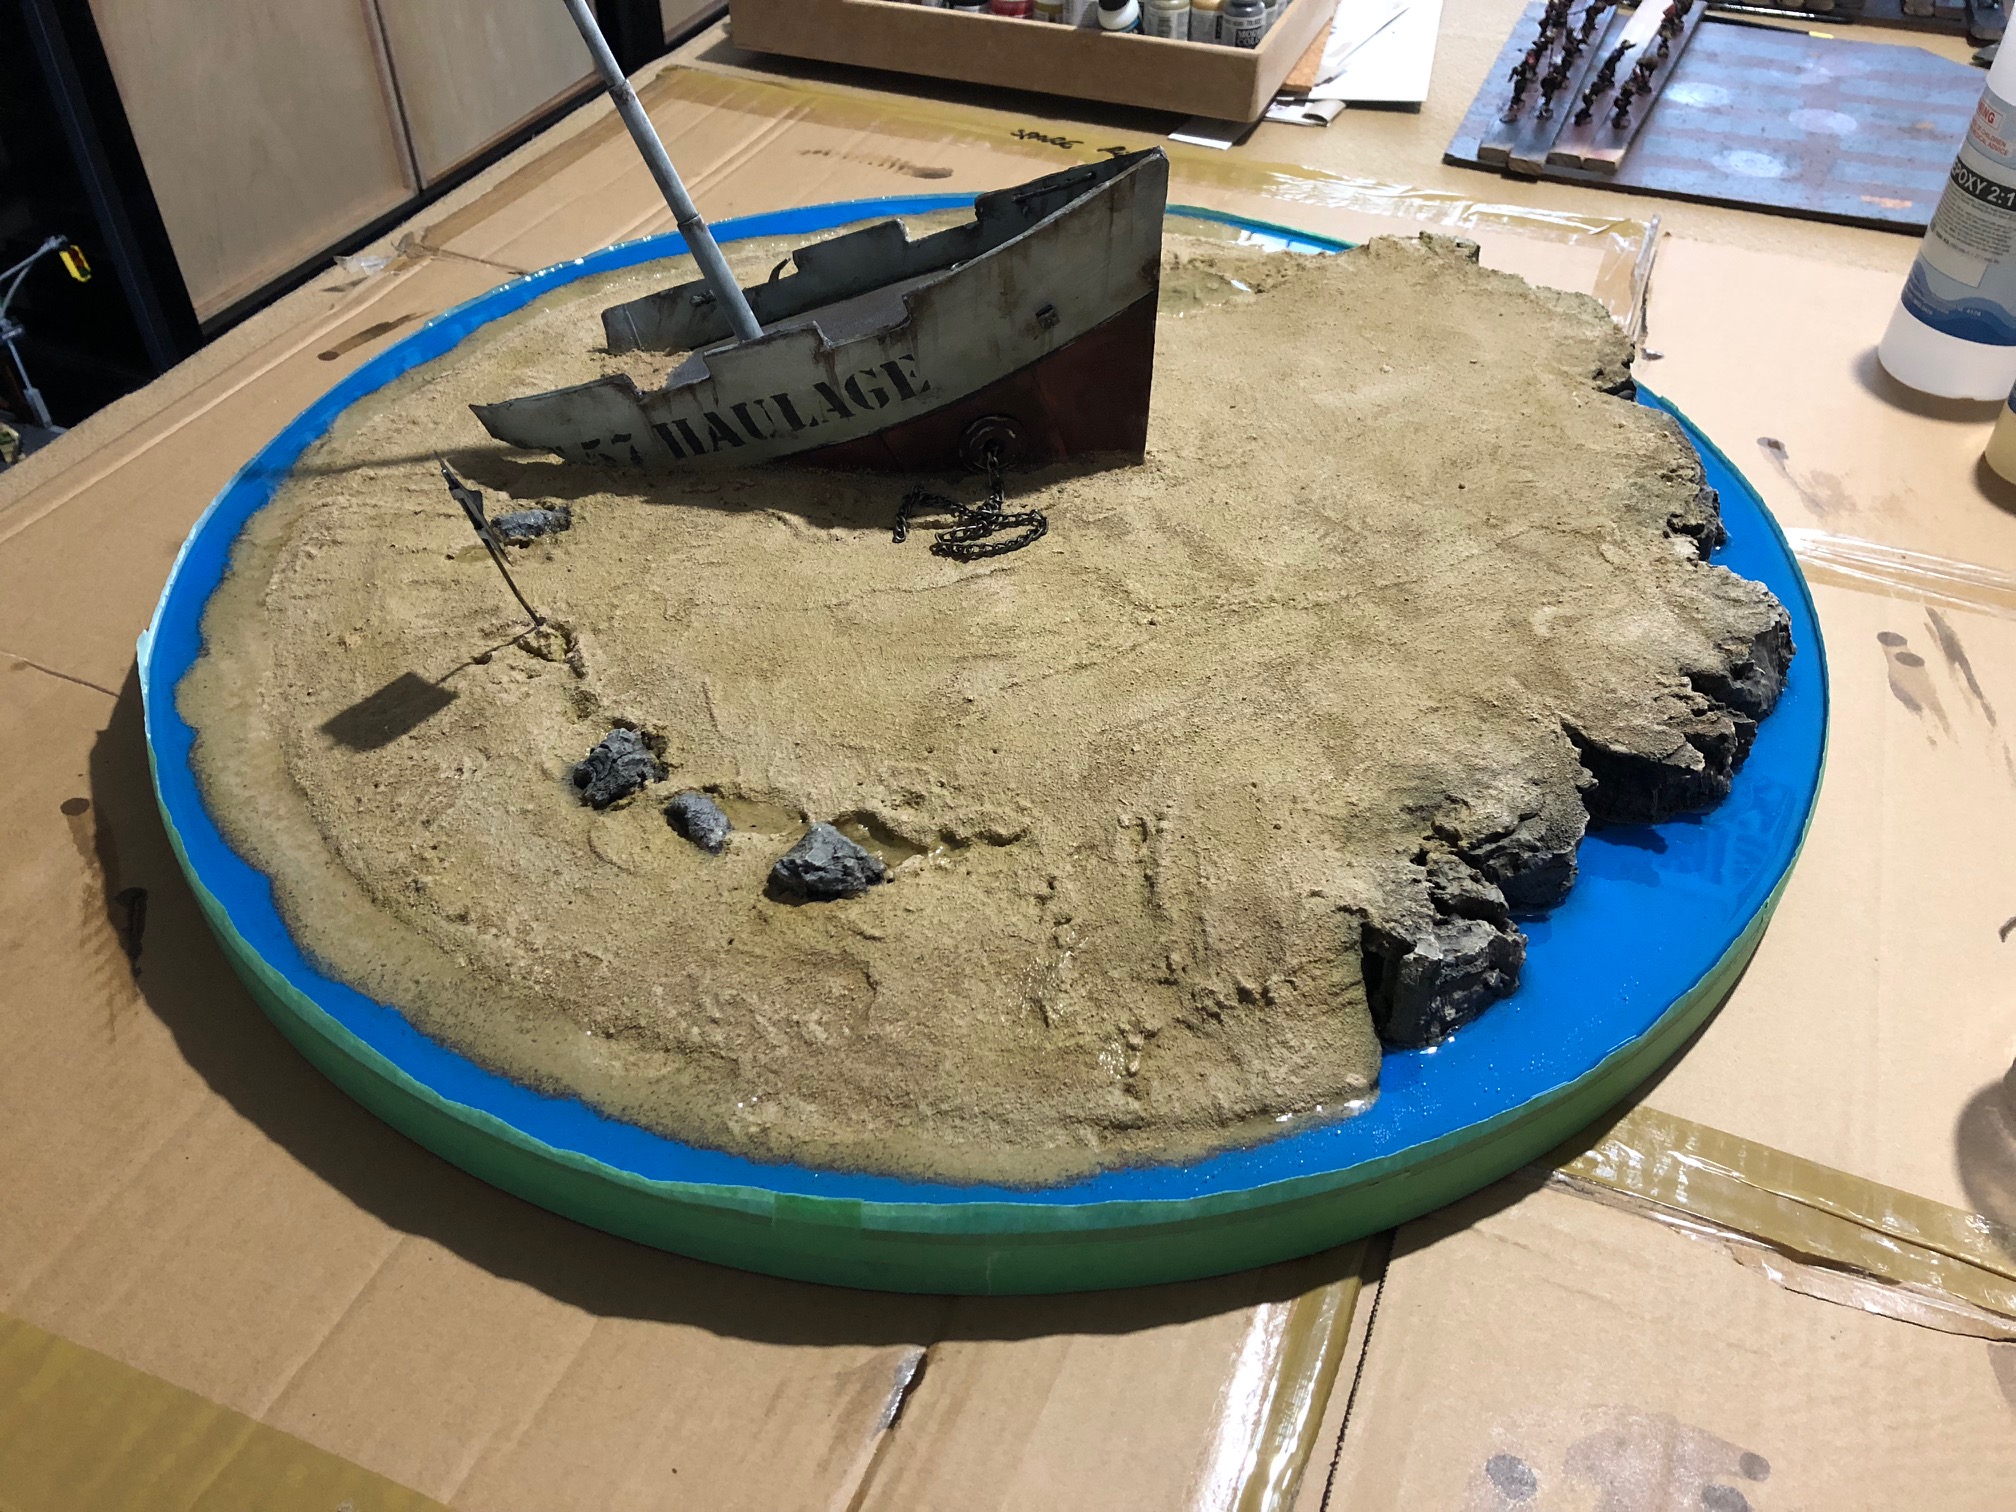
I masked off the rocks and painted them, so they stood out better from the sand. I also painted the blue around the island. It’s quite bright and not a colour I would normally do water, but I figured it was eye catching.
I added sand to hide the join where the ship met the island.
I decided that the sign looked better on the opposite side.
An anchor was added to one of the chains.
I masked off the entire board and poured resin over the water area.
Using ultra clear two-part glue I dabbed the water area to create an uneven surface.

 I painted the sand in regular household paint. Then I made a simple sign from copper sheet and a copper wire. The sign is a decal I printed off at home. This was weathered to look old. I added streaks of weathering to the ship and glued it in place. Next I added some chains.
 I added sand to hide the join where the ship met the island.
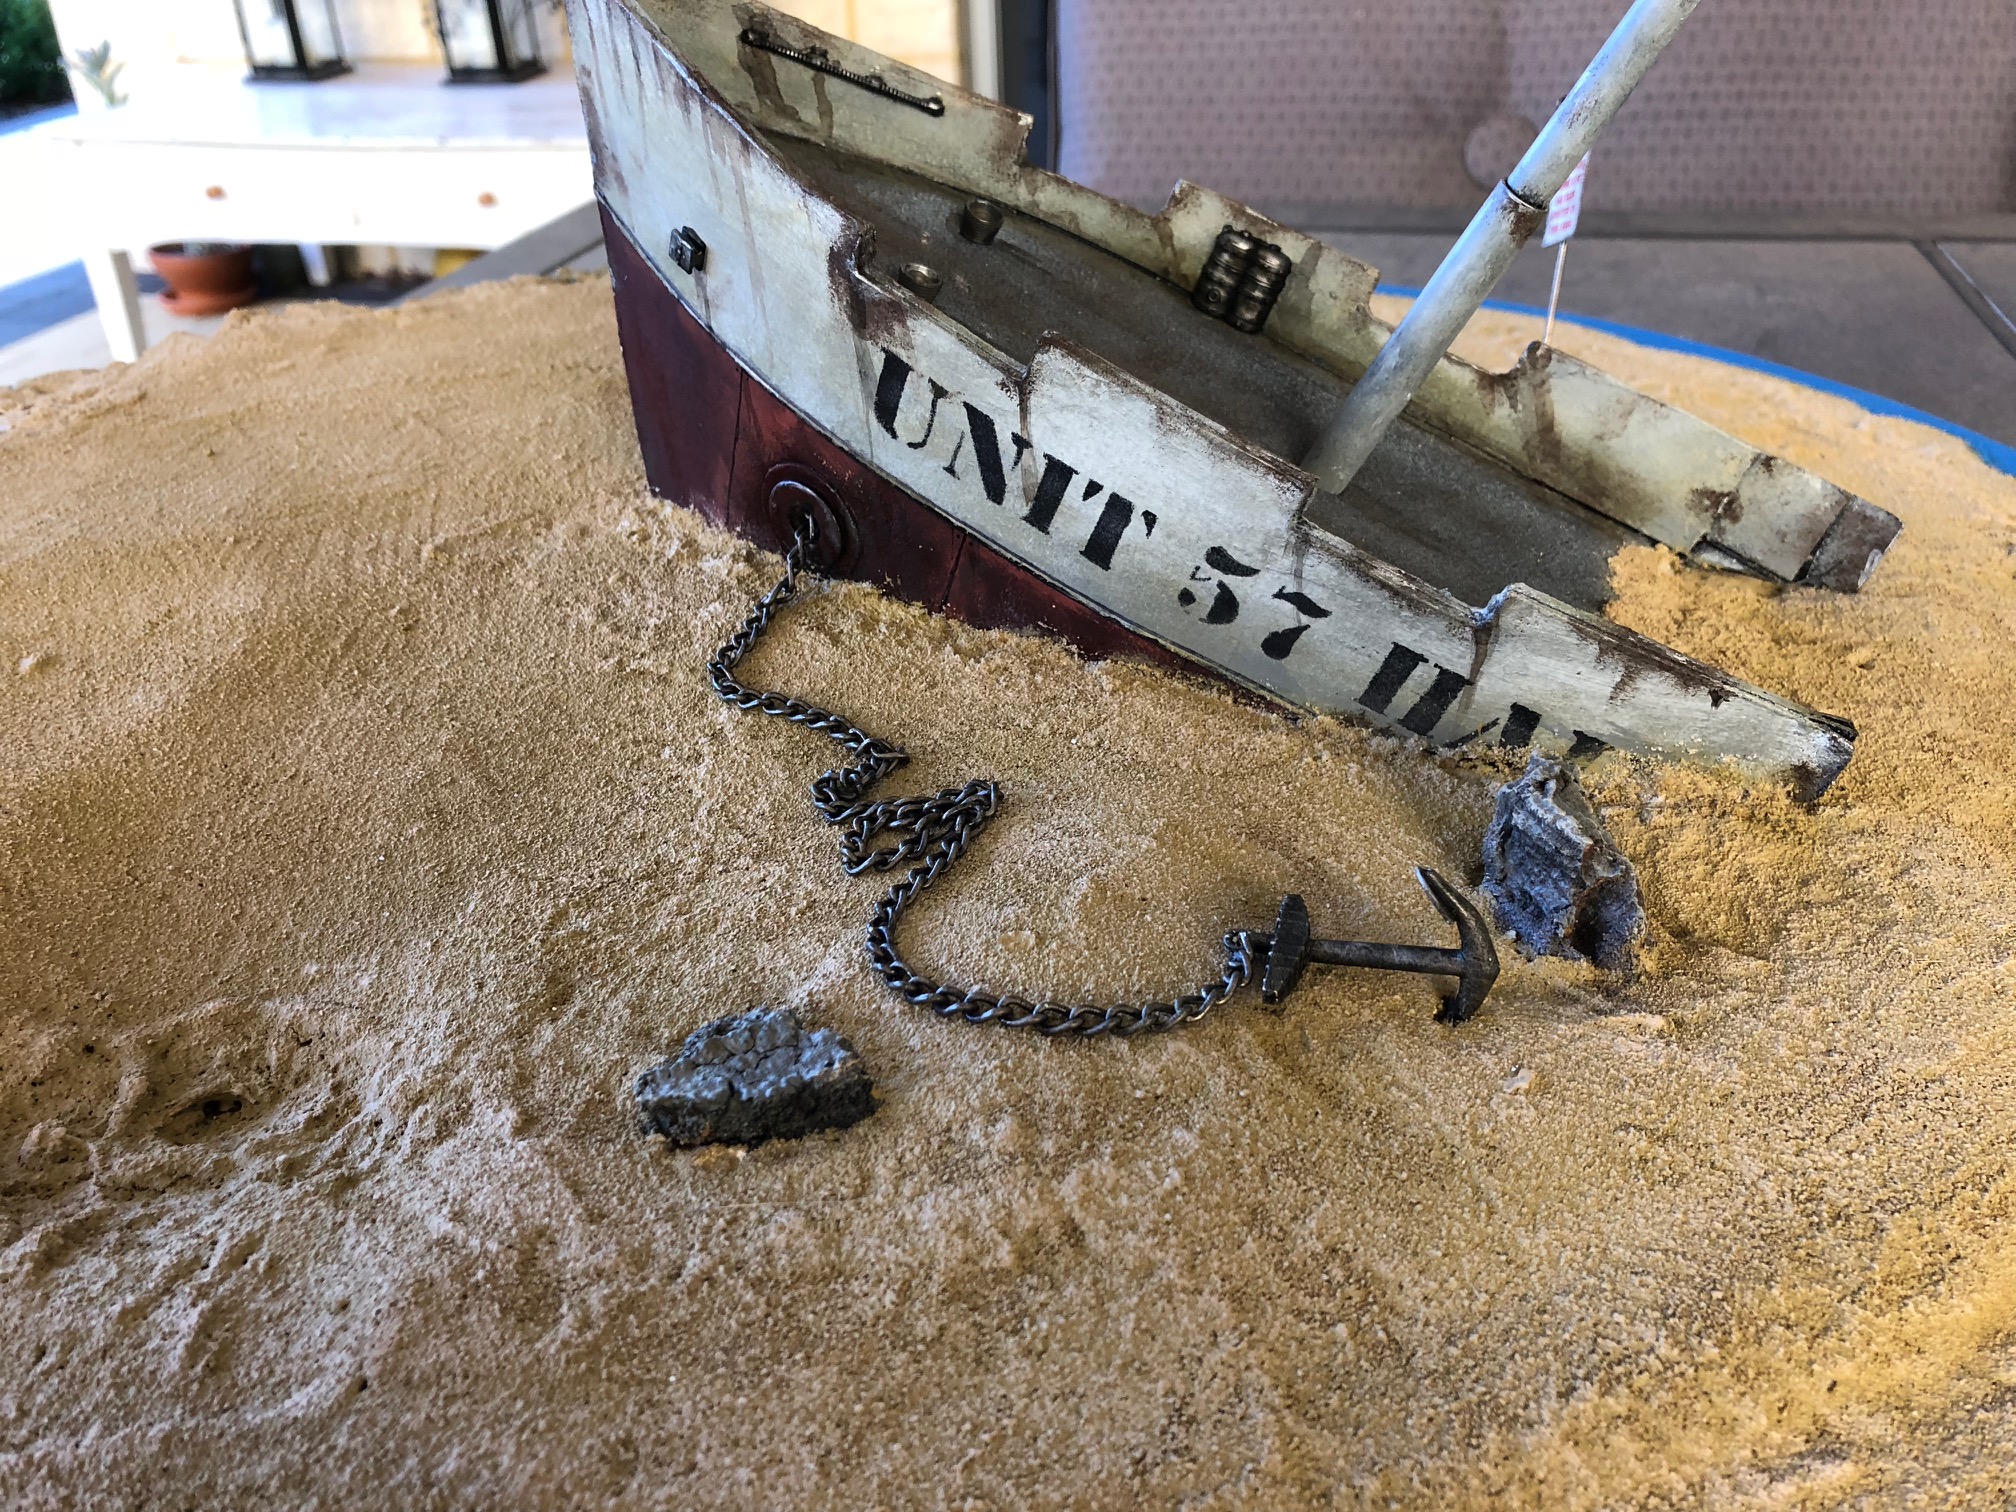 I decided that the sign looked better on the opposite side and added an anchor to one of the chains.
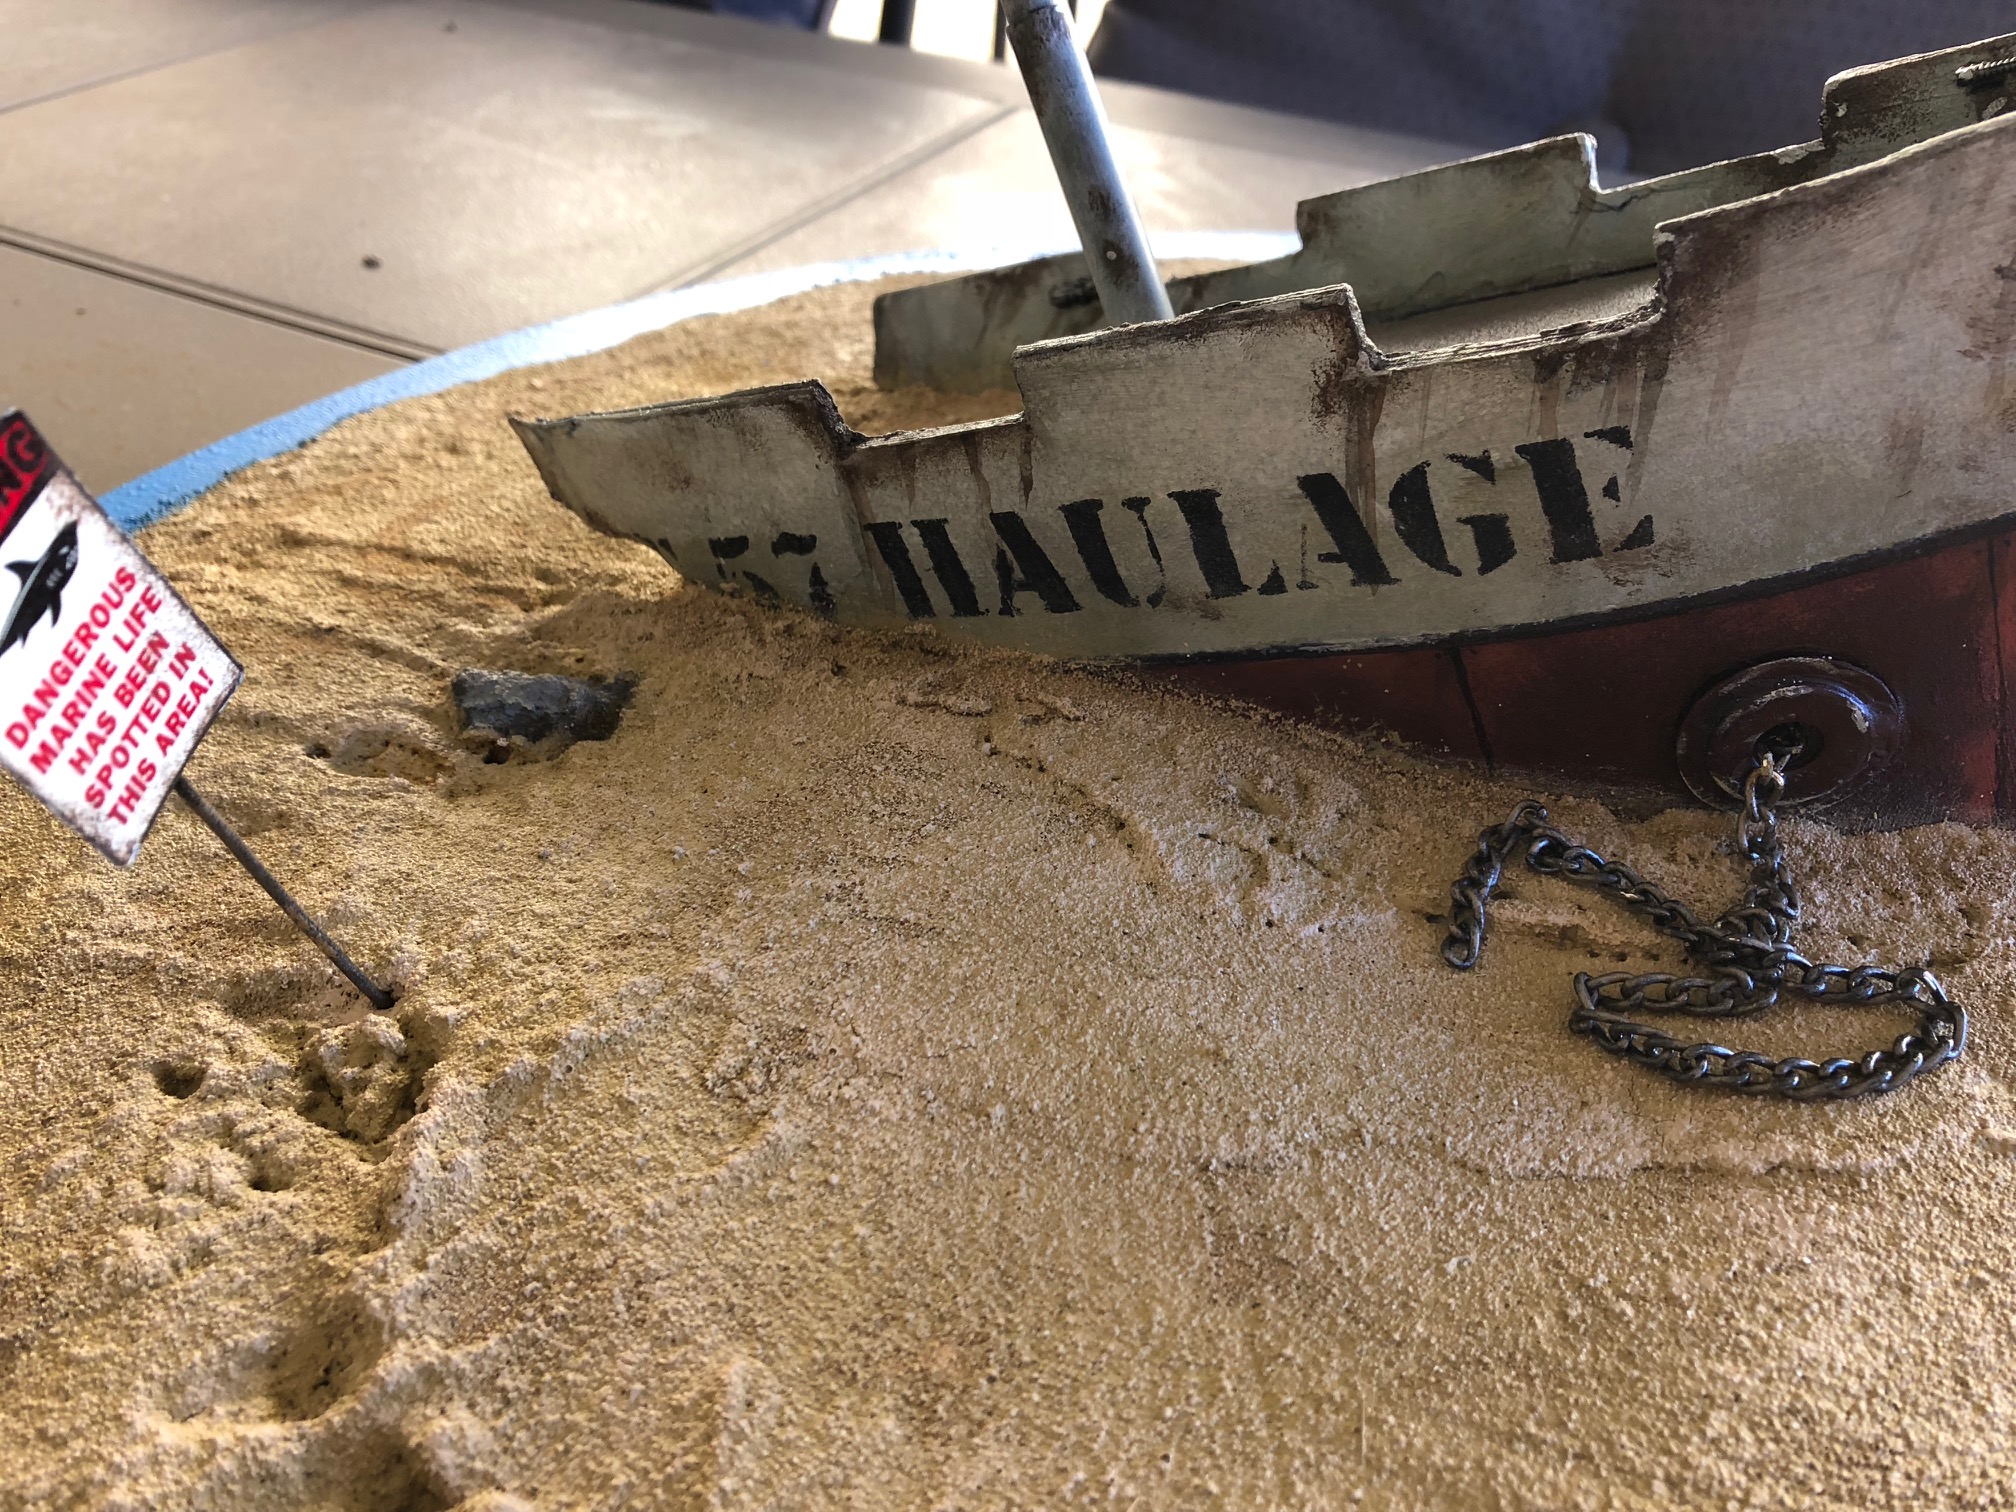
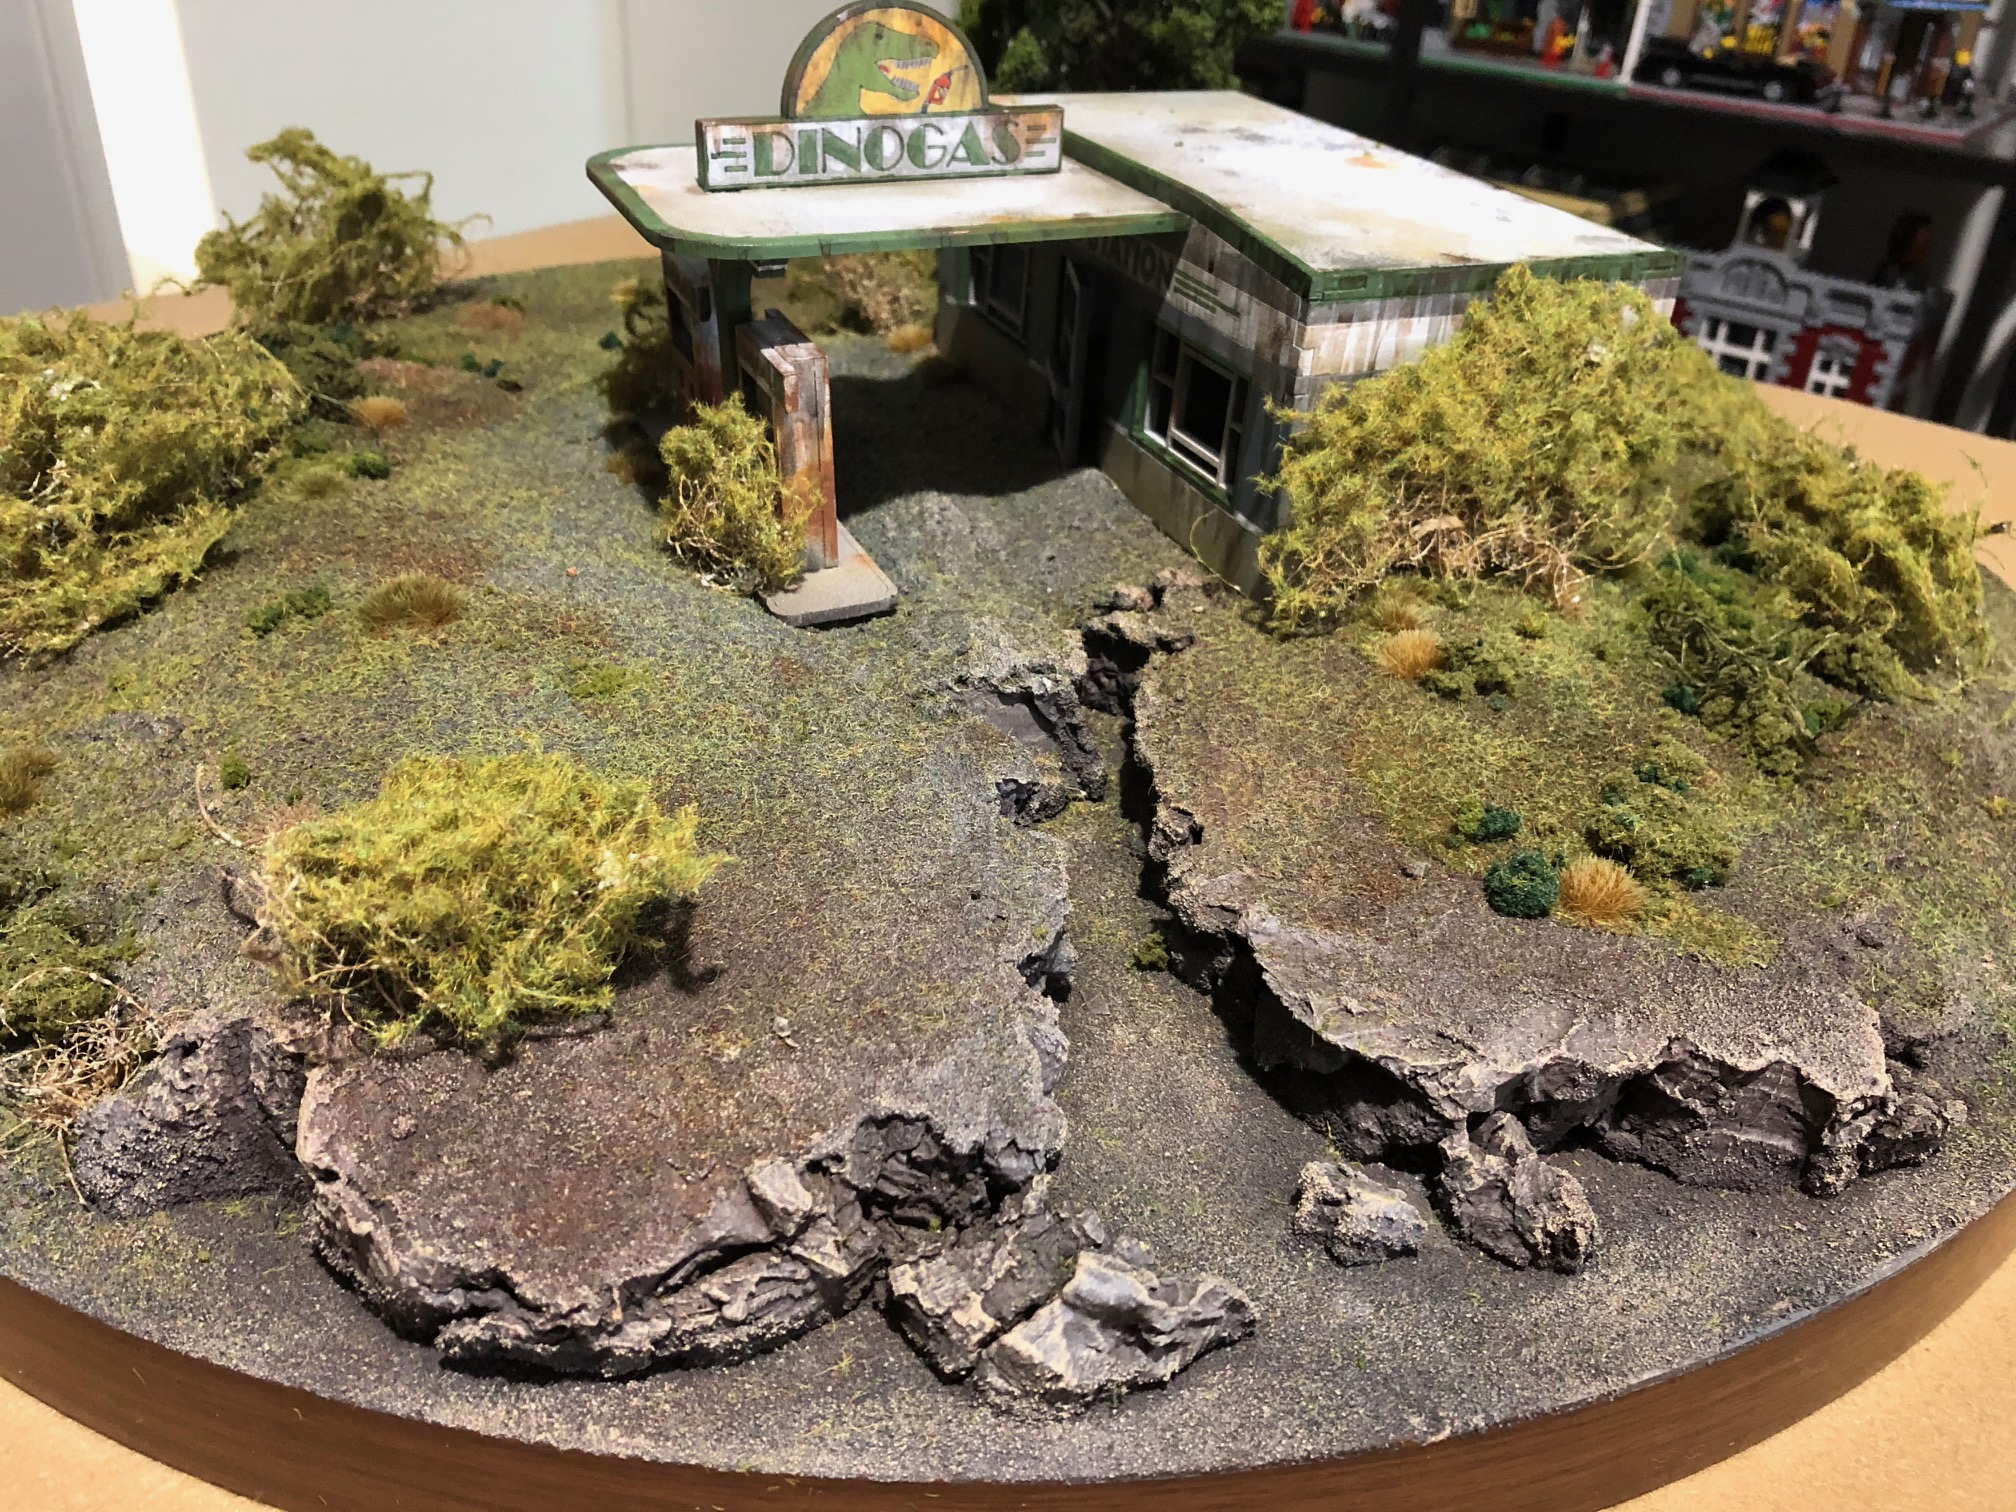
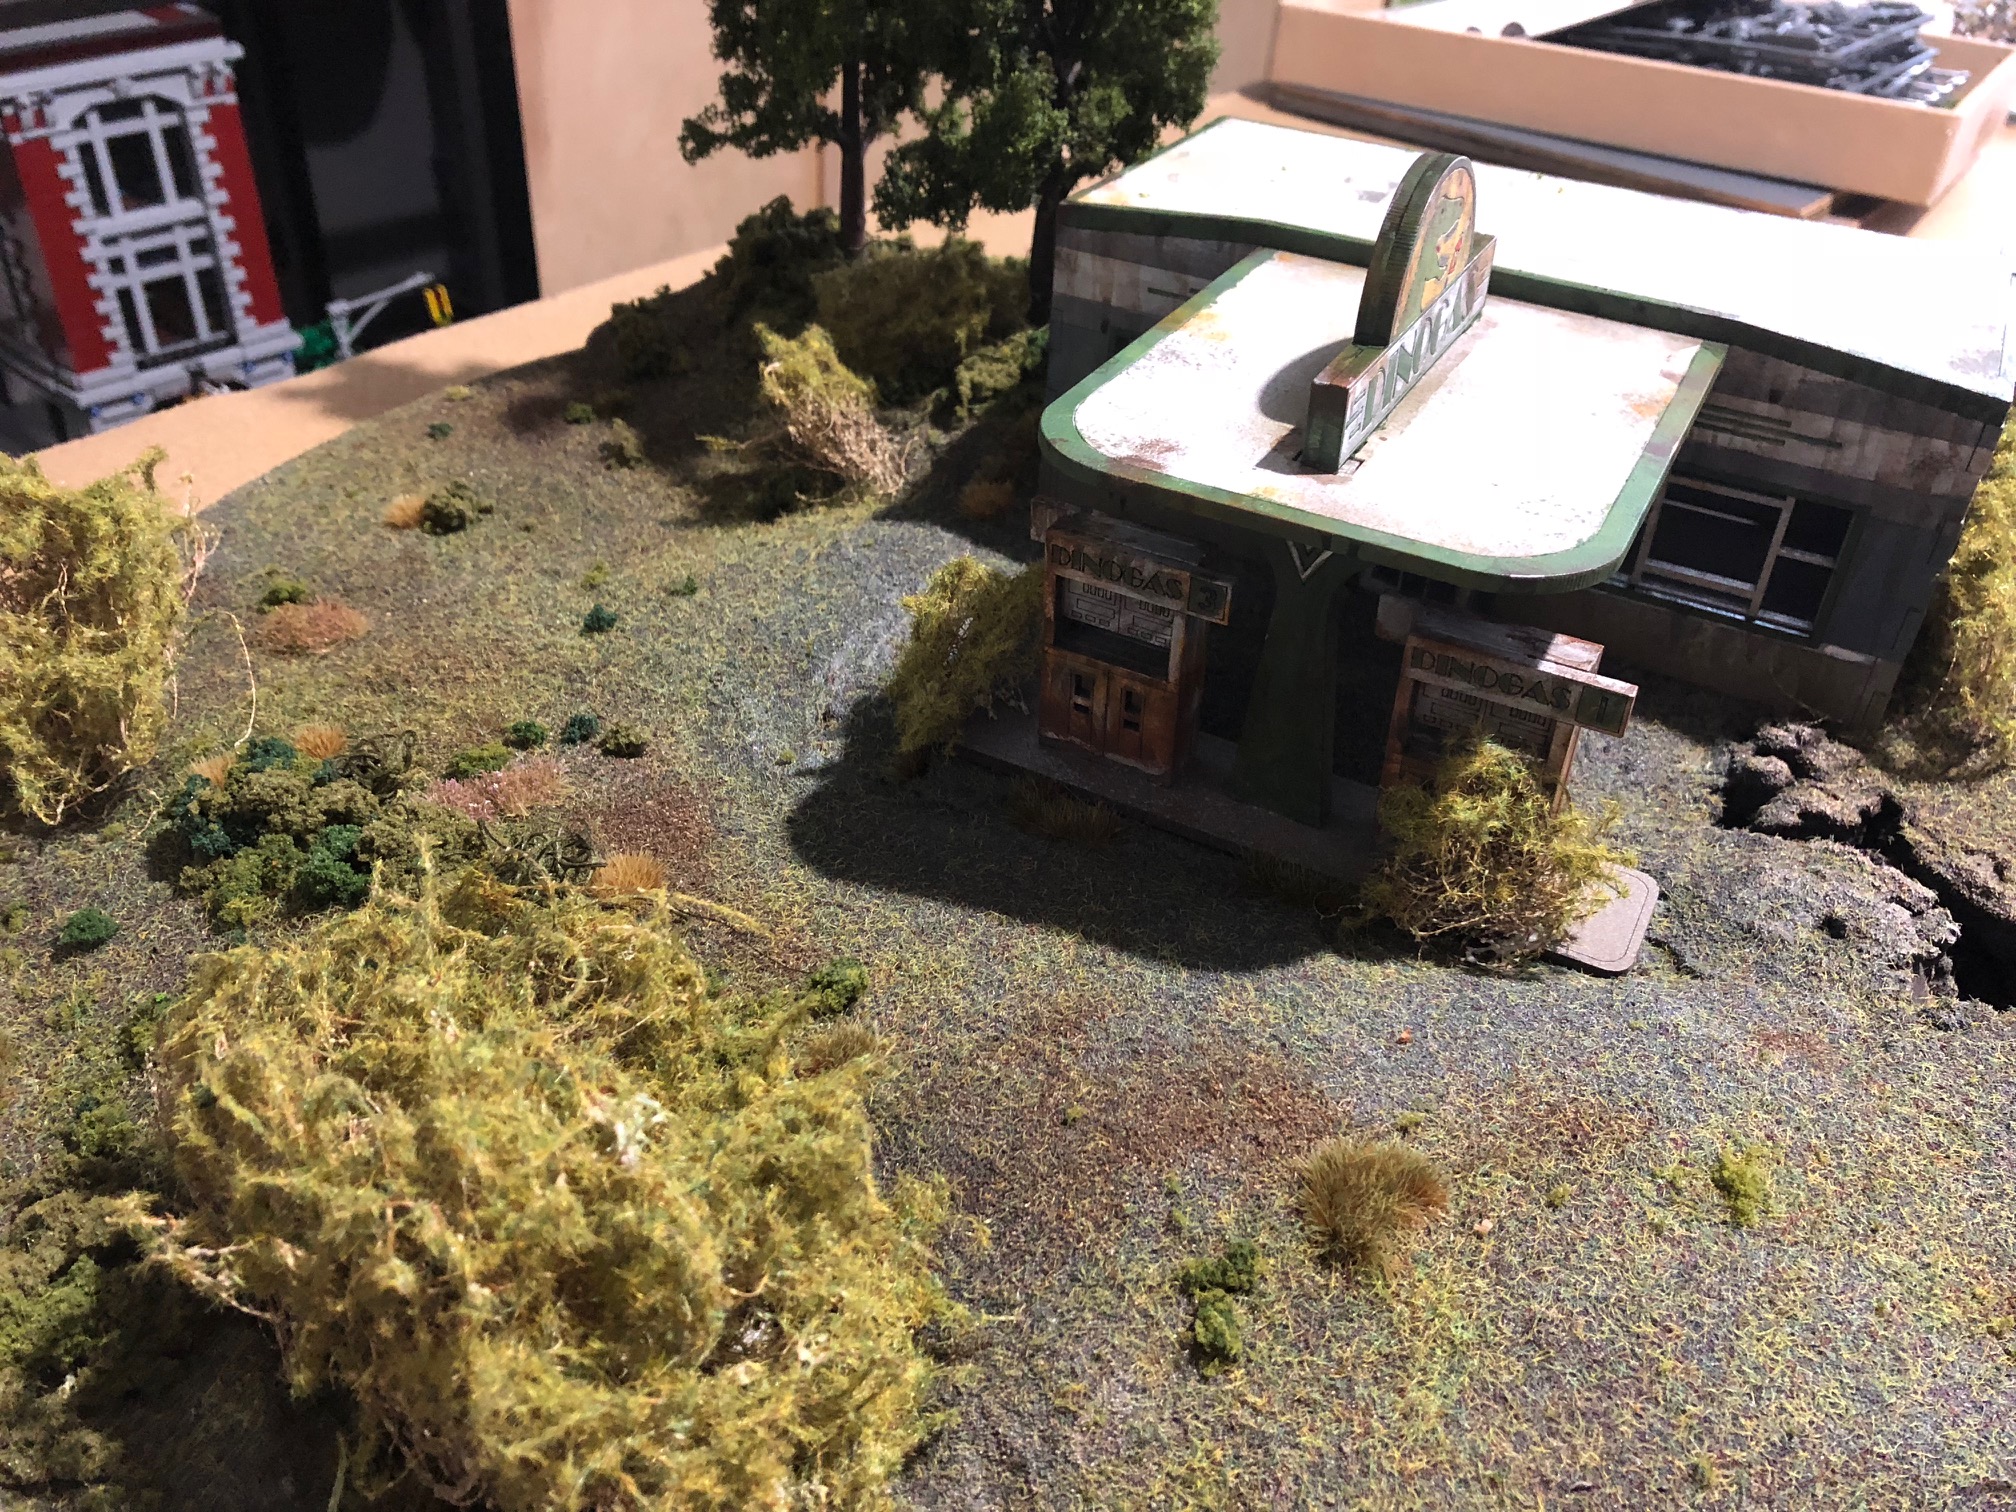
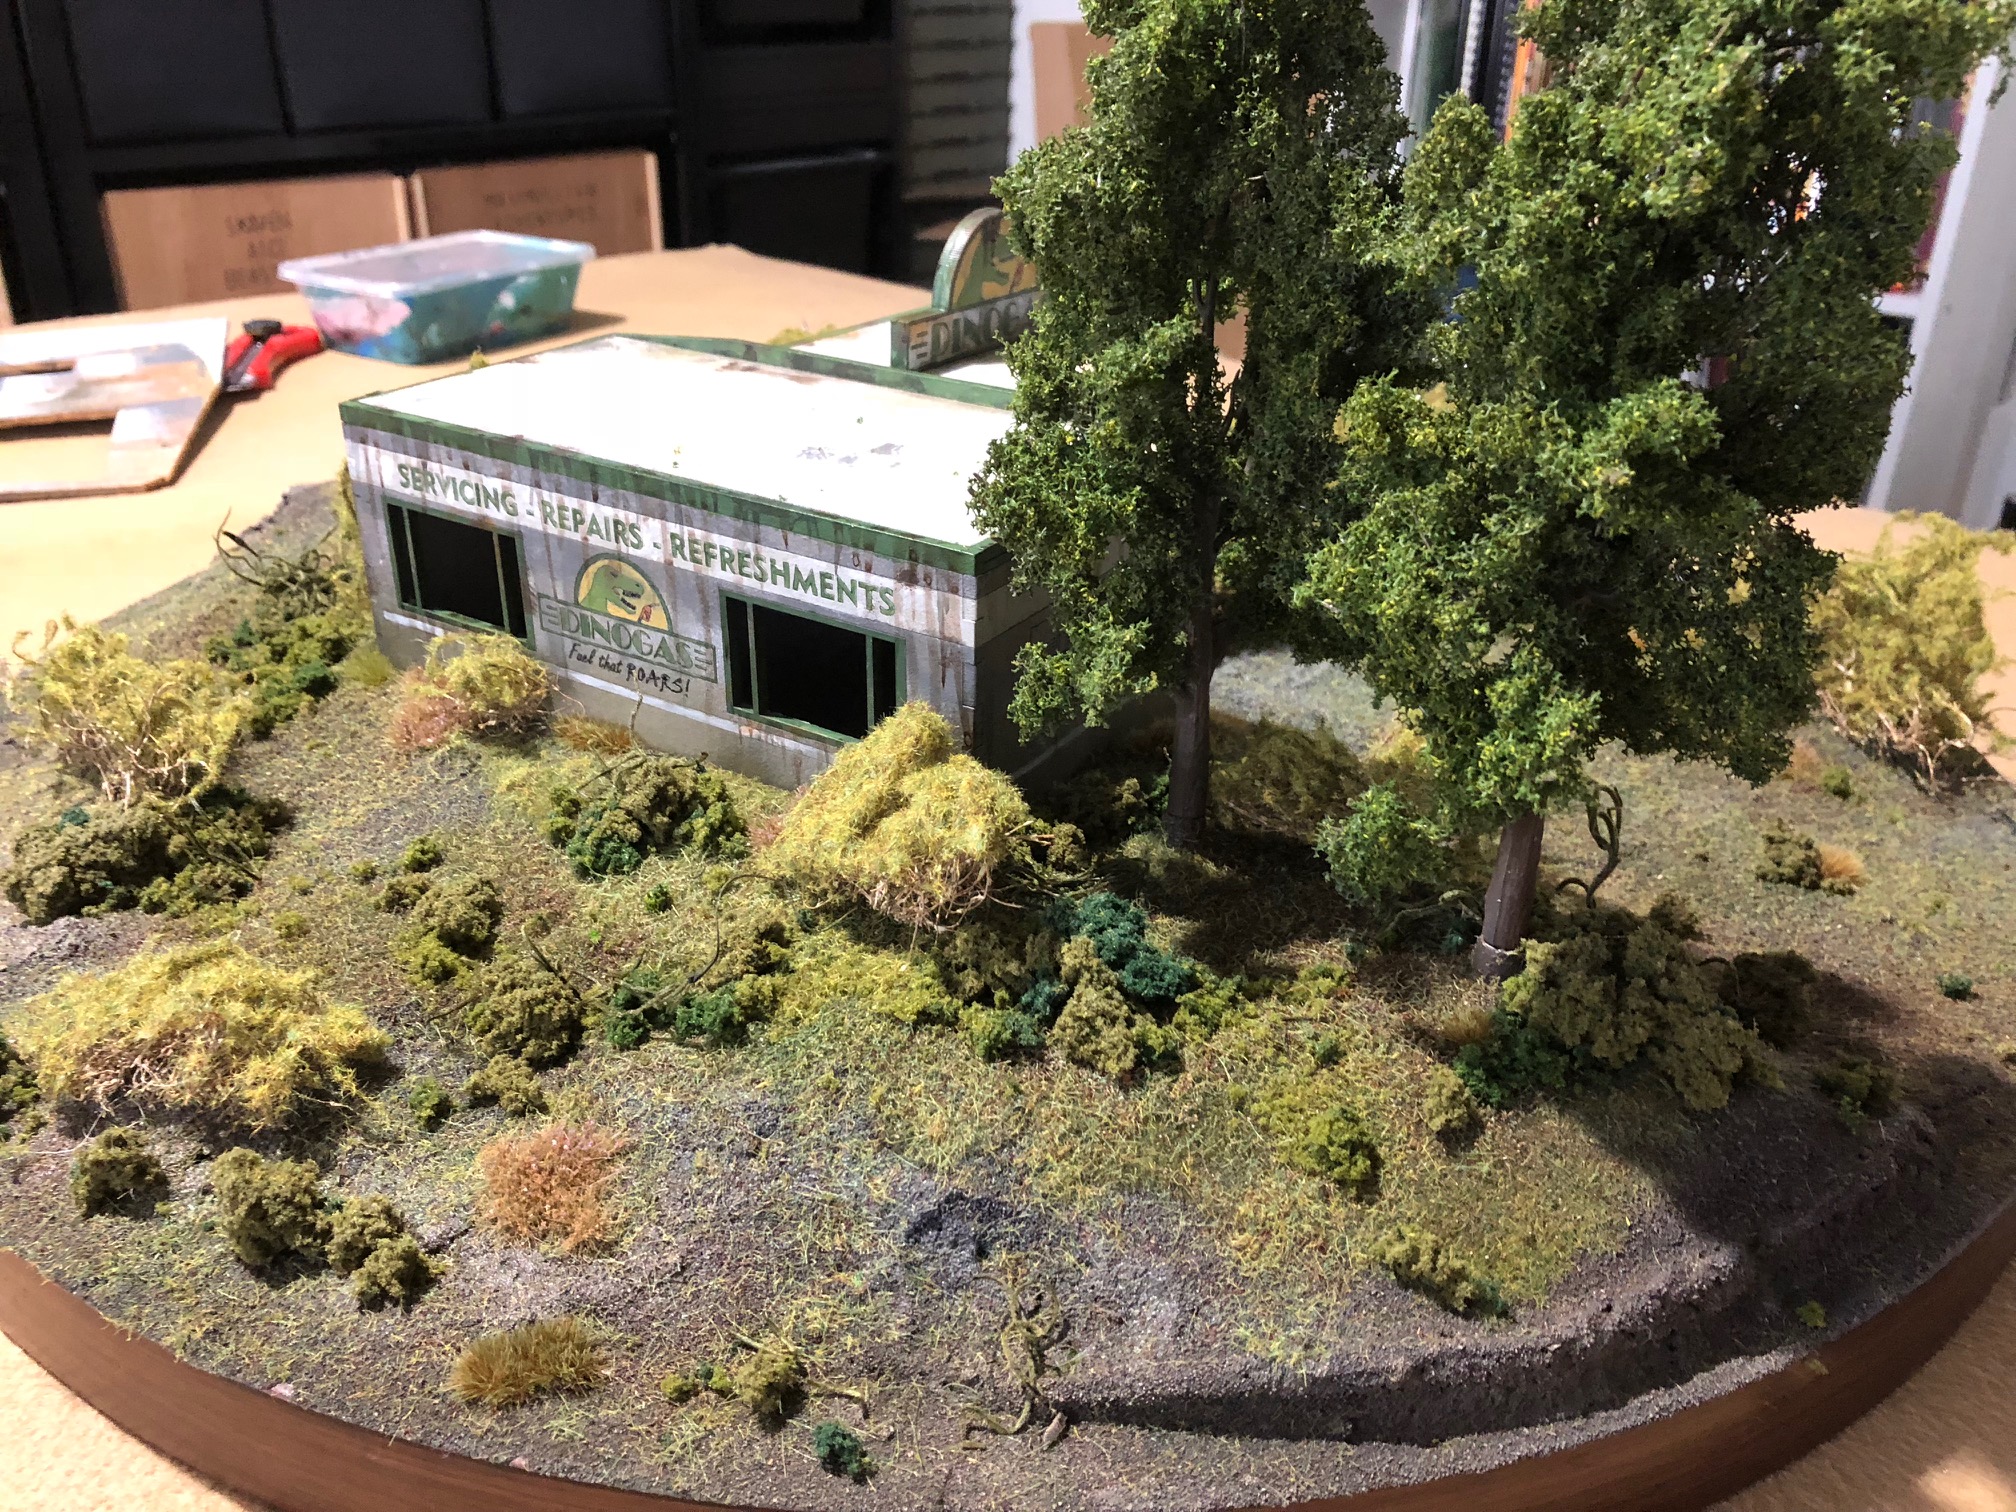
 Surf & Turf
After the Island board was finished, I moved on to a second tabletop. This time an old, abandoned petrol station. I pretty much used the same techniques just changing colours.

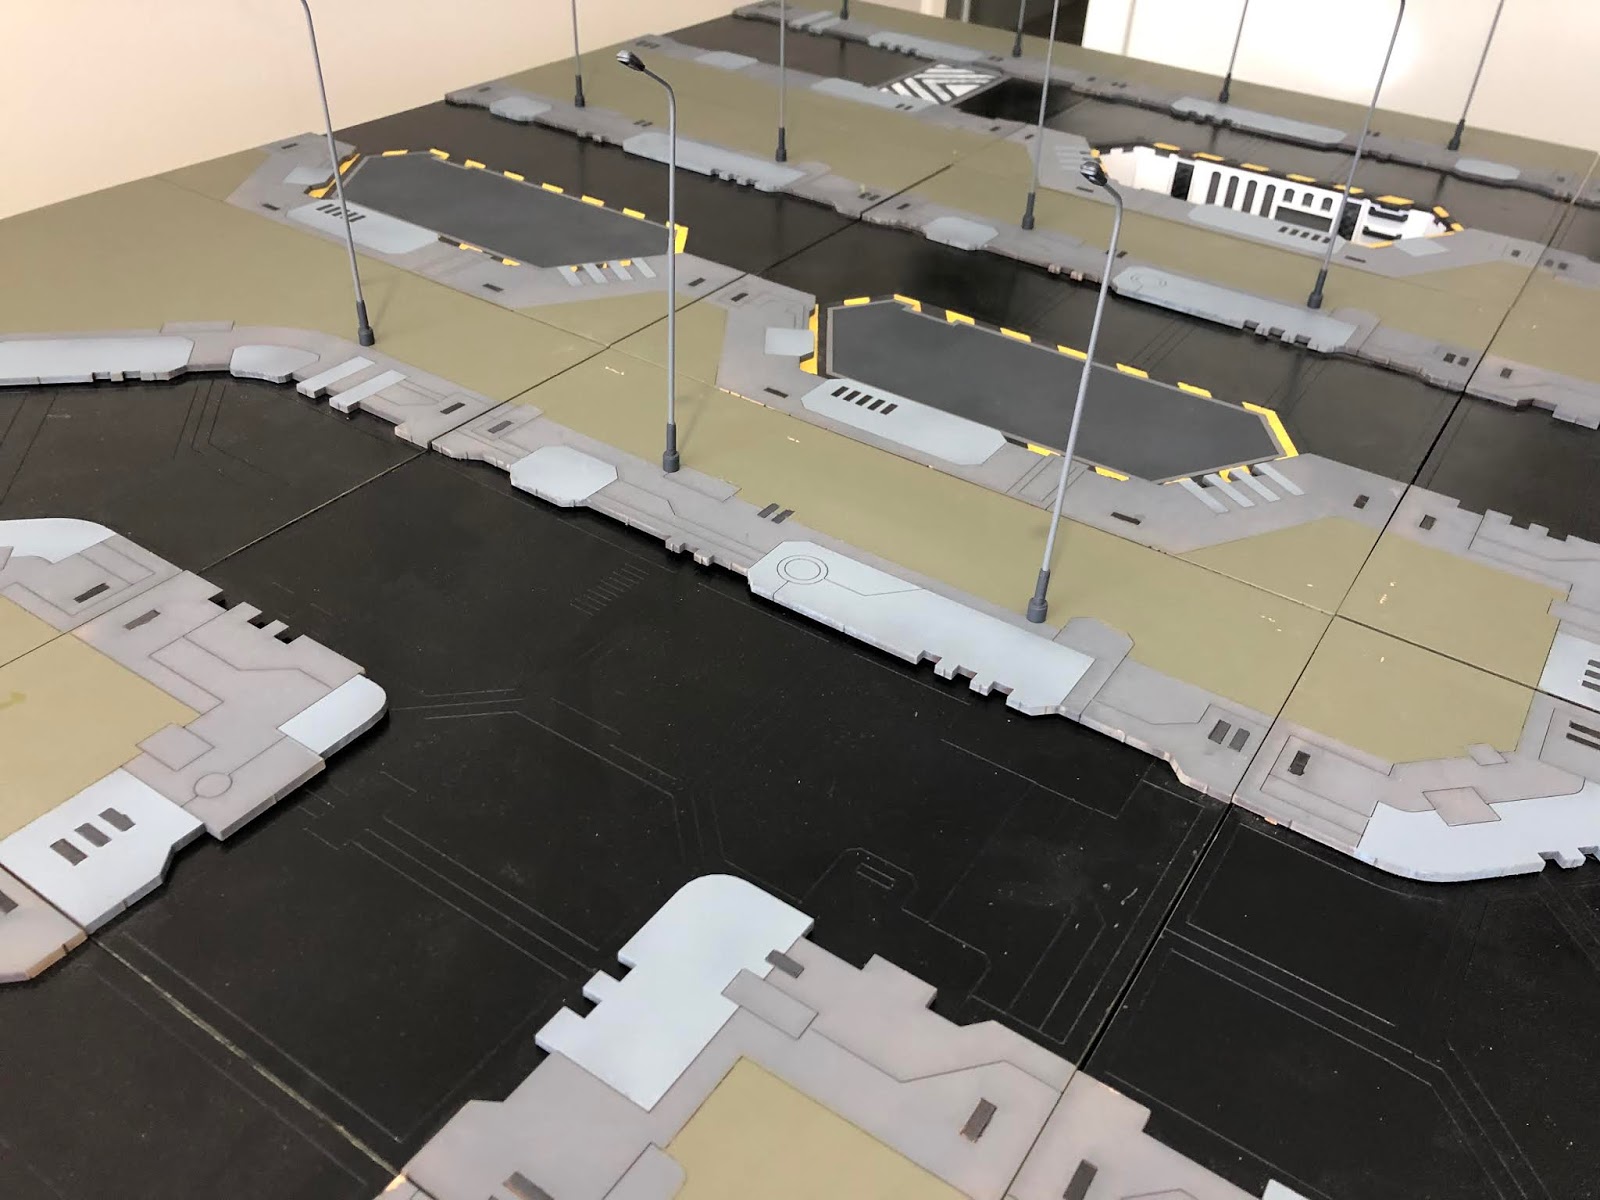
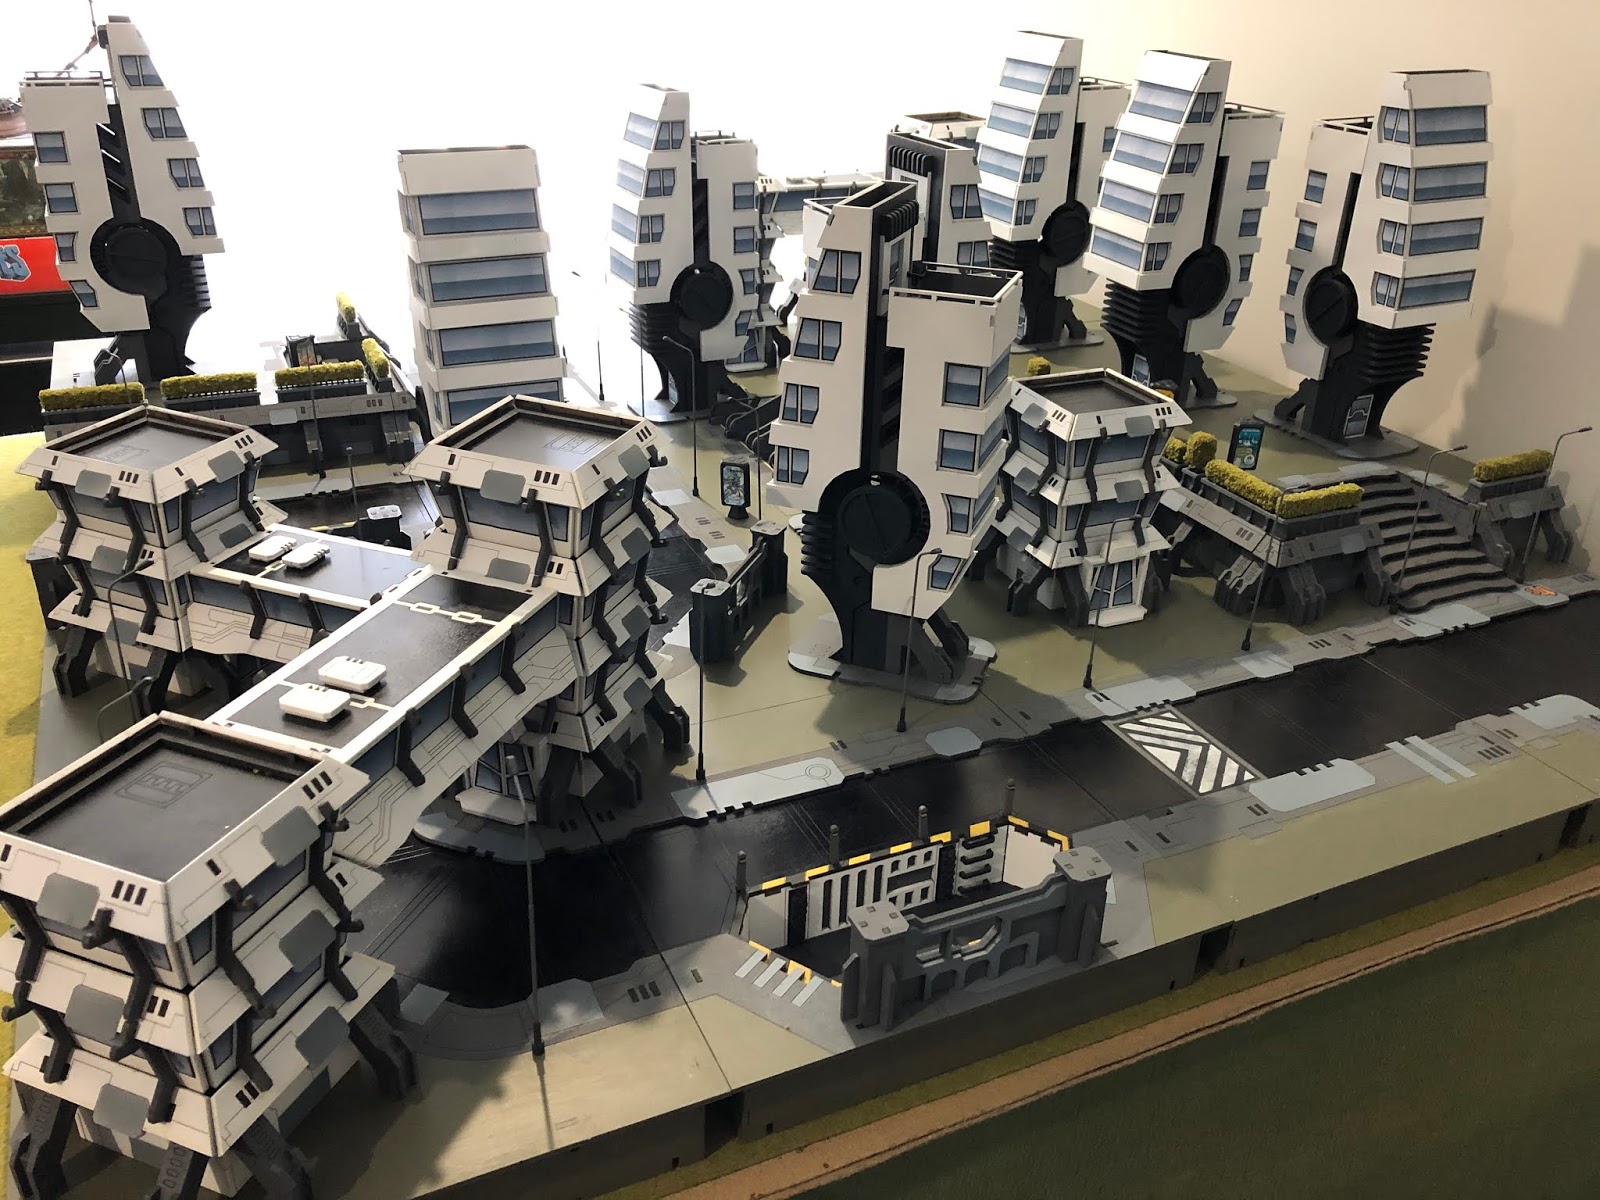
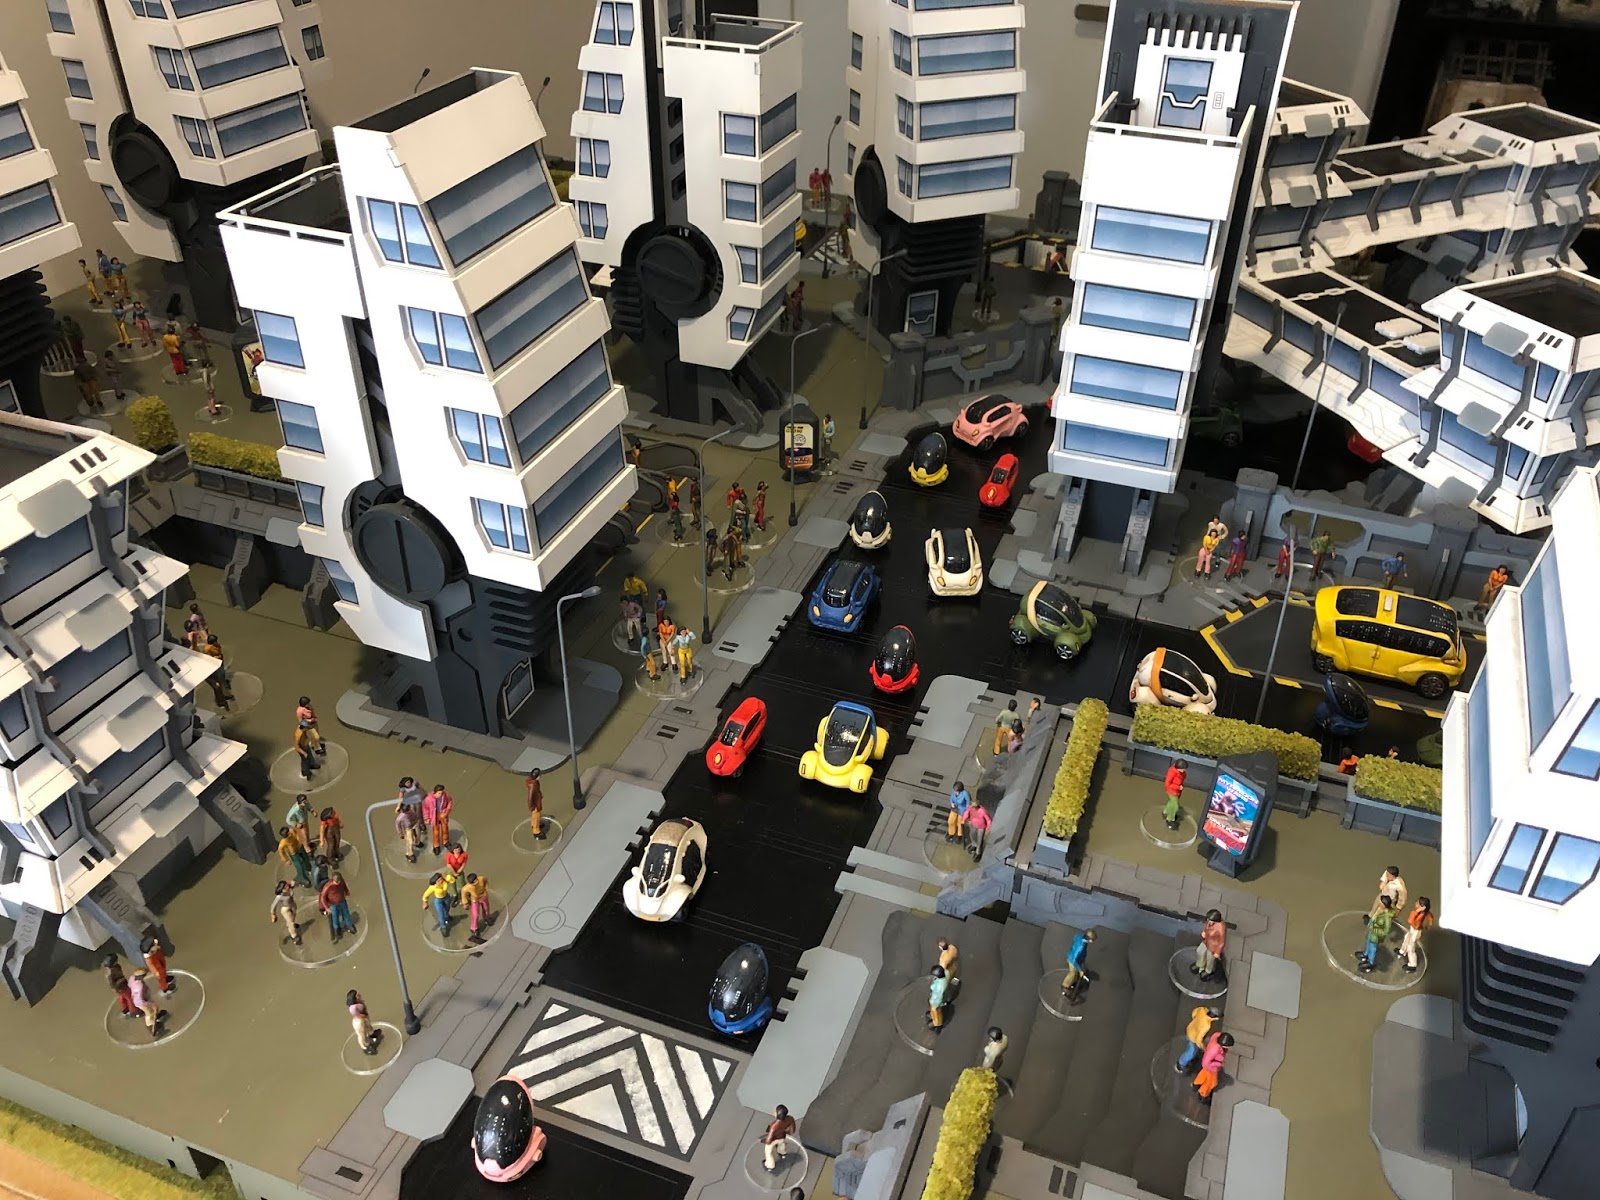
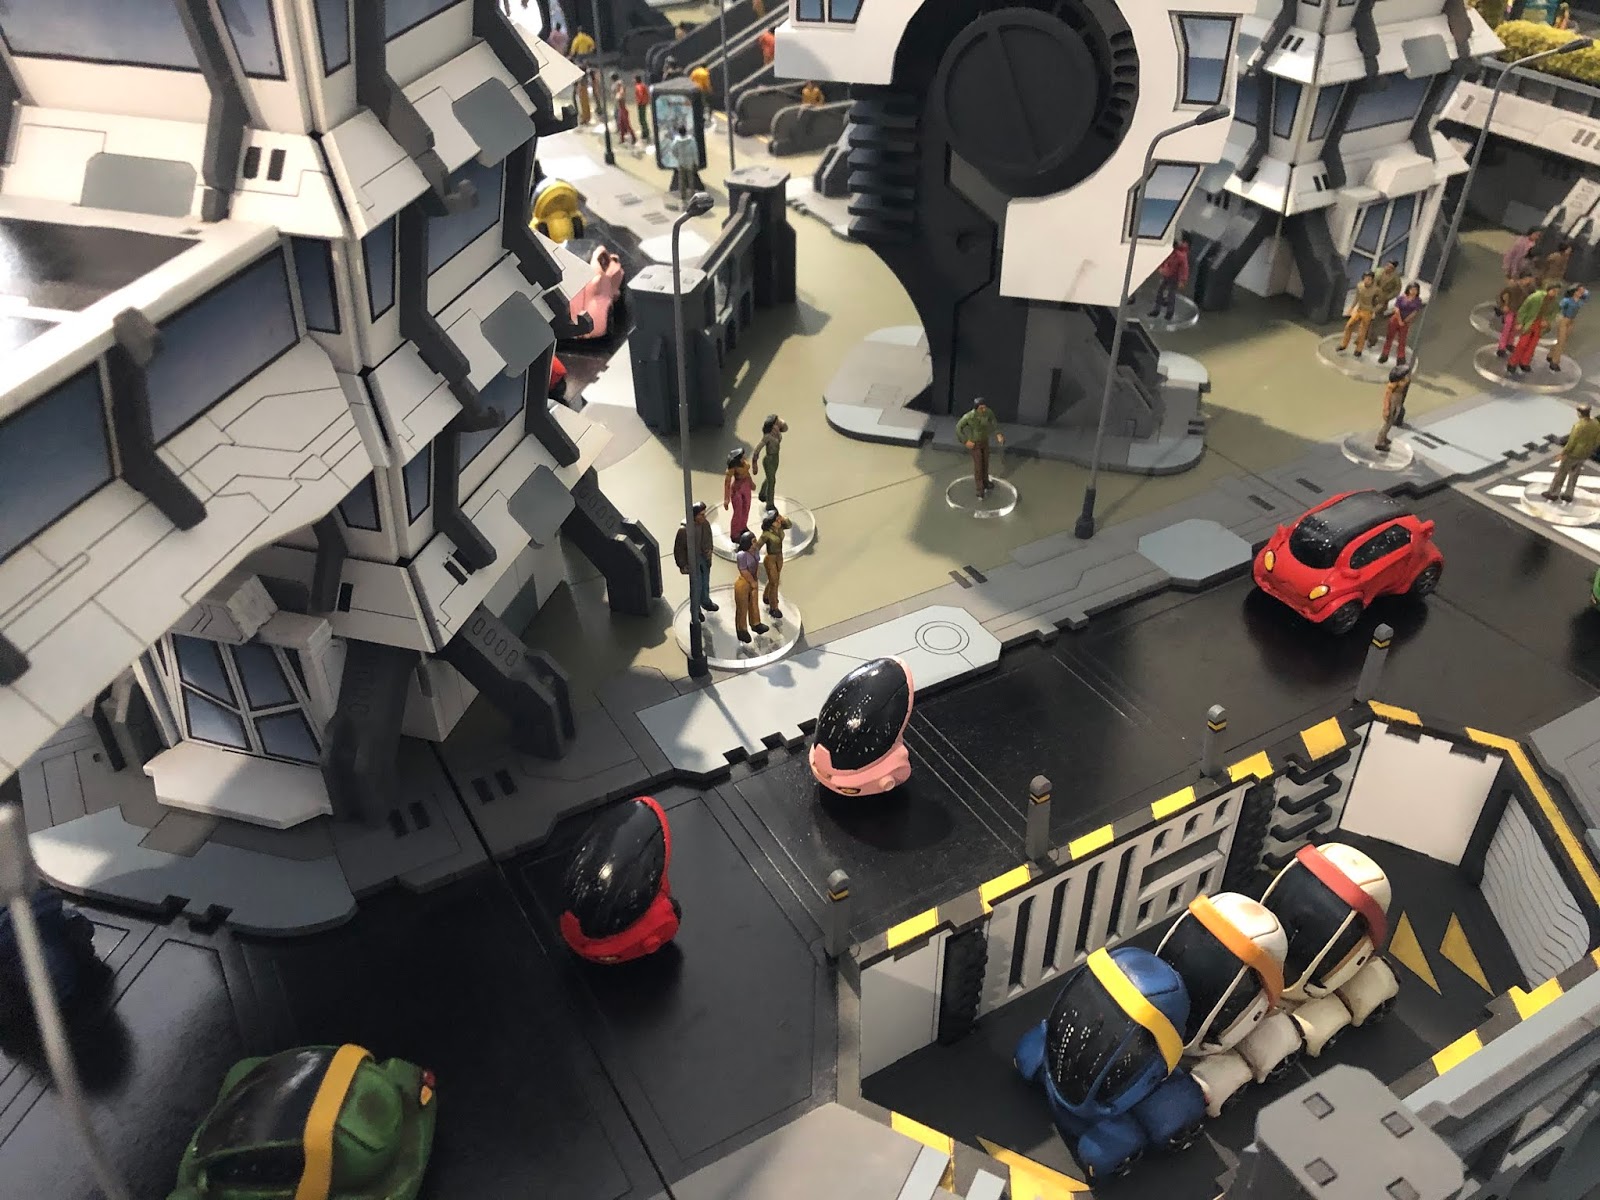
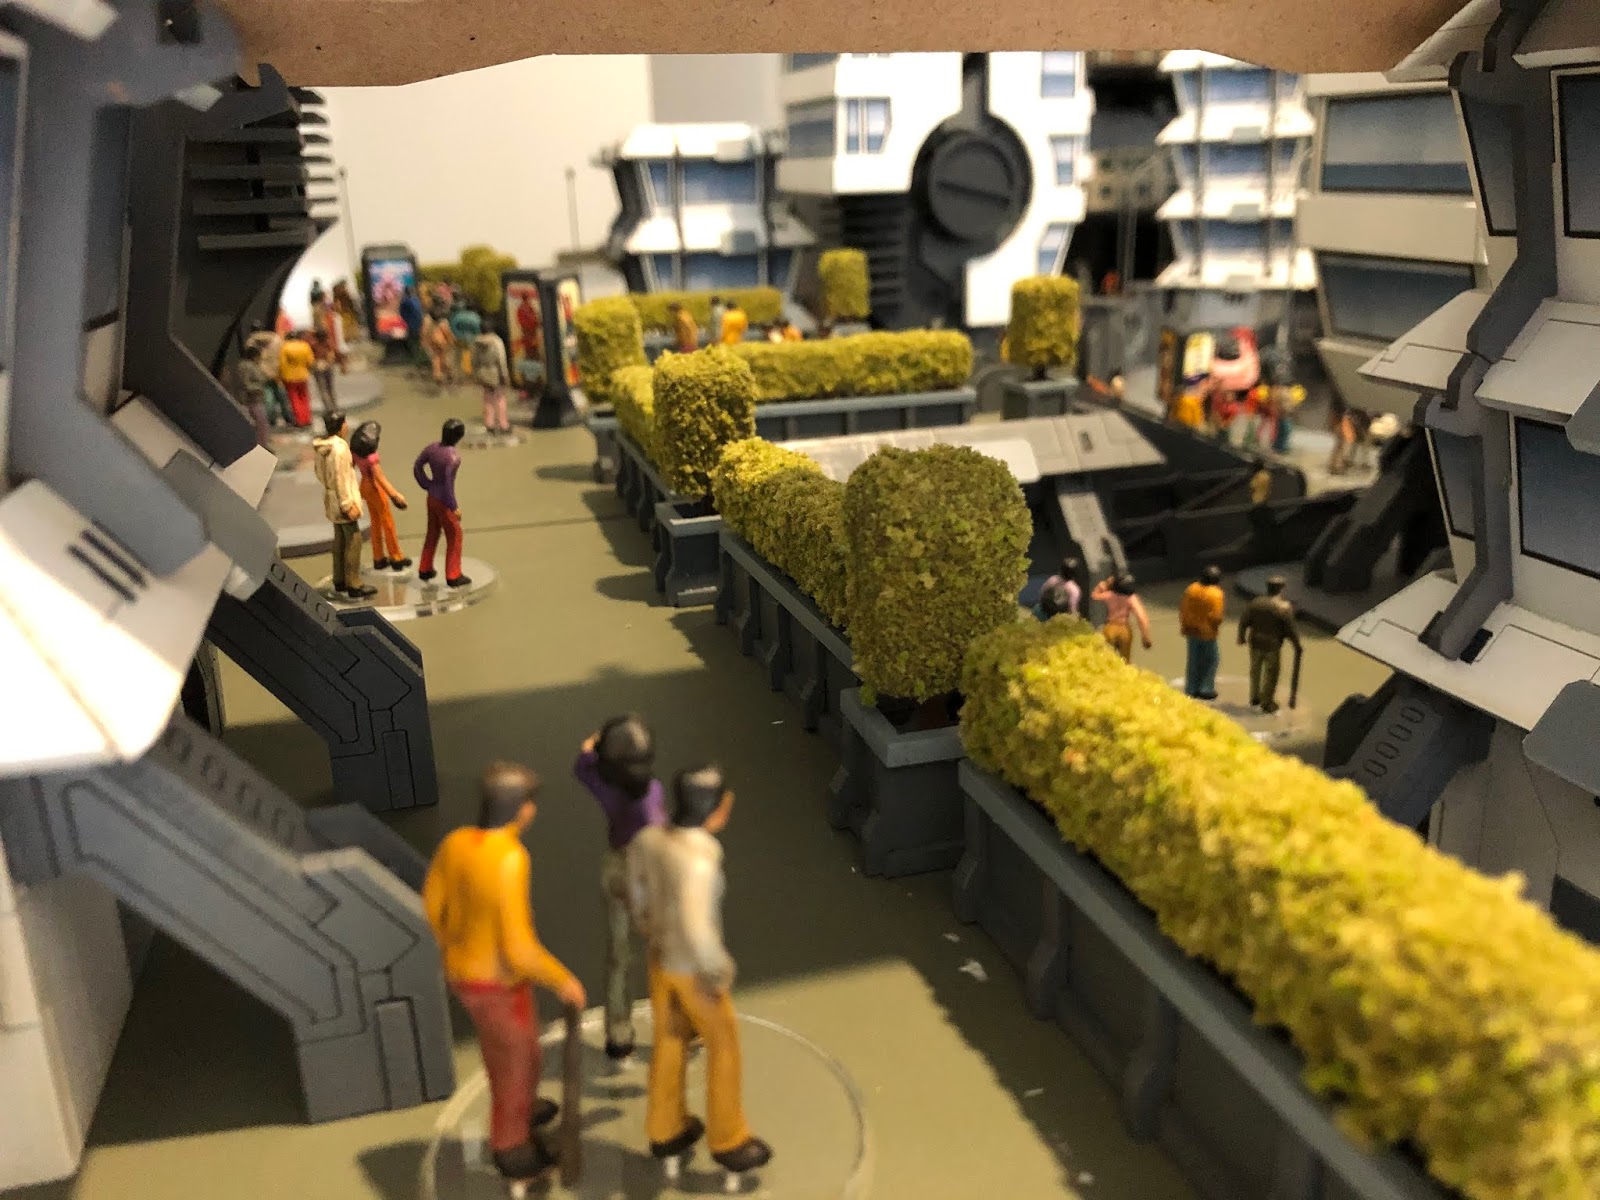
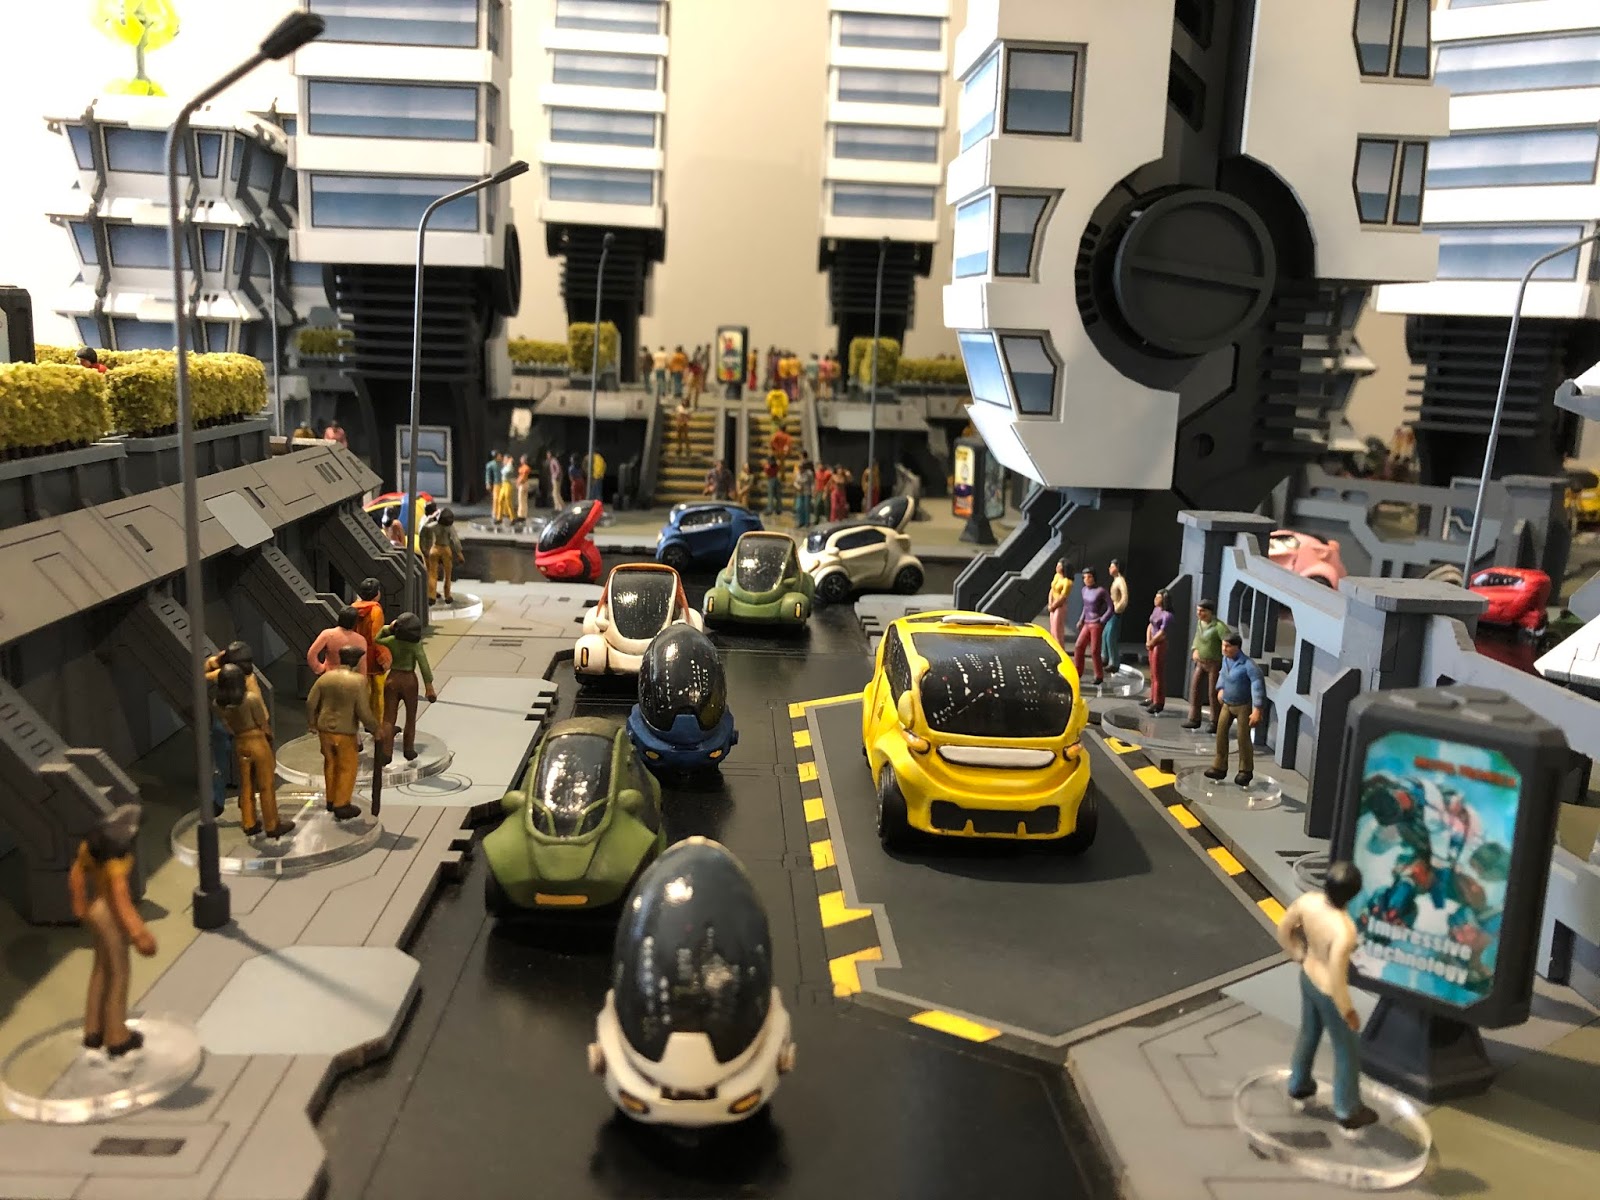
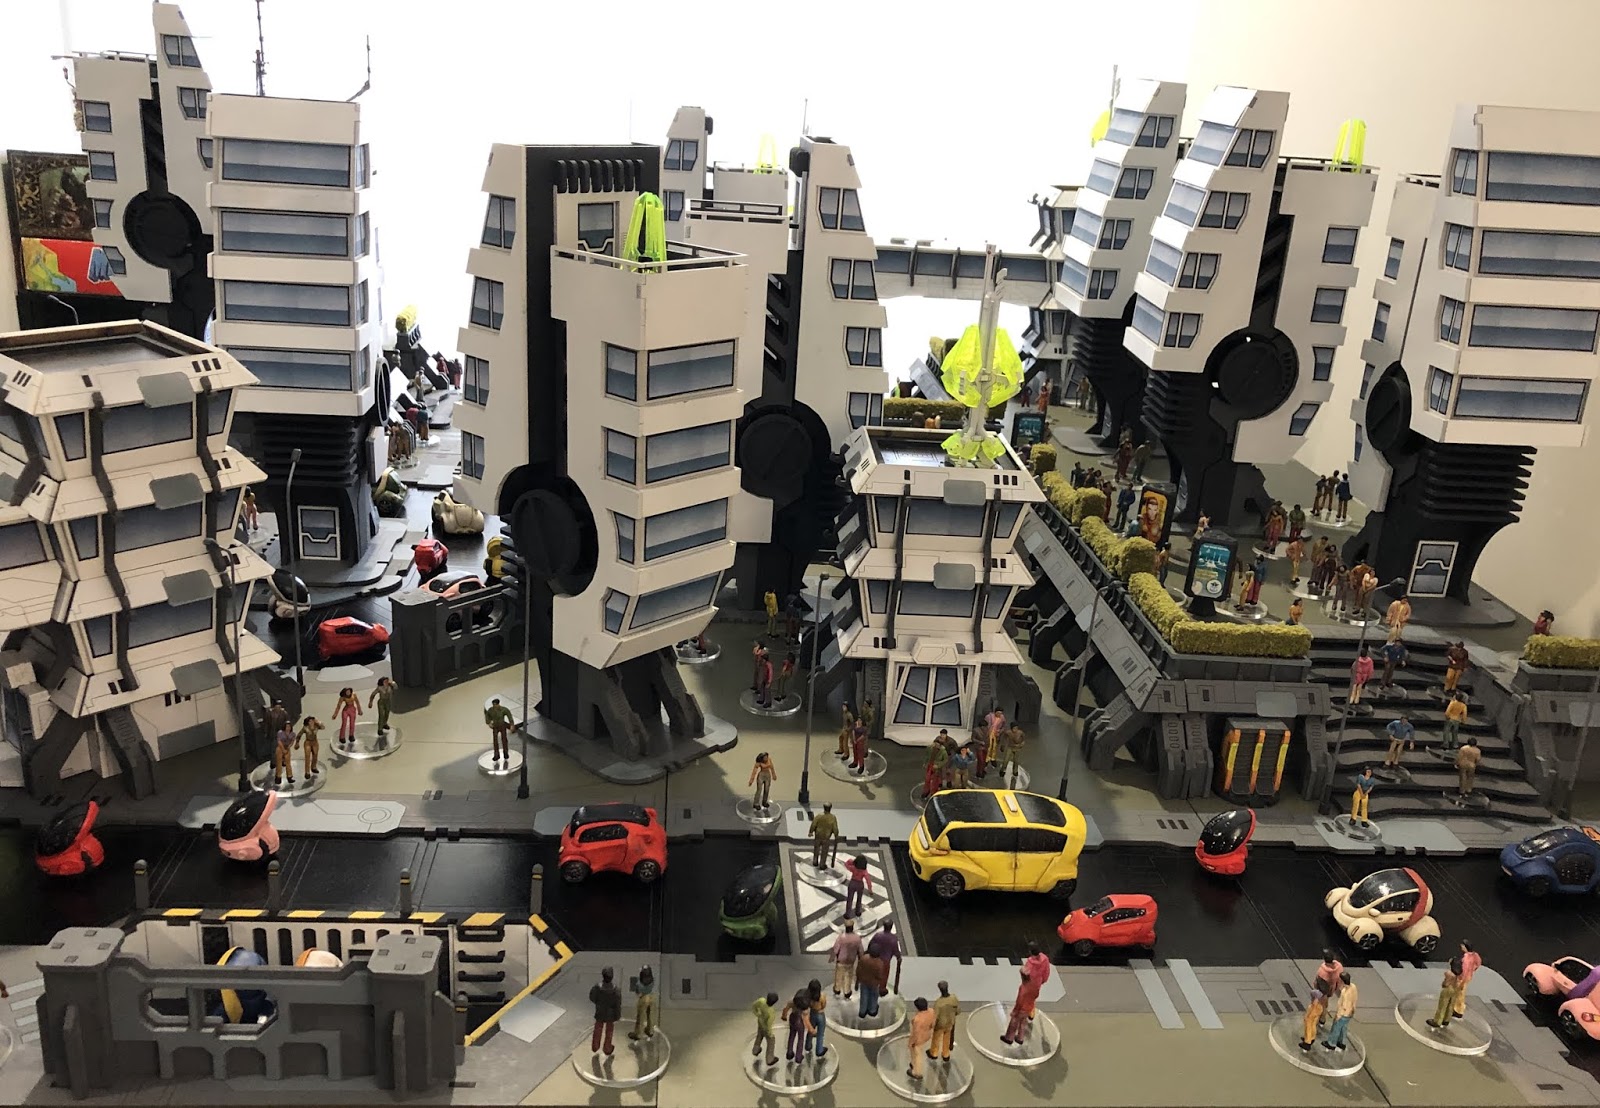
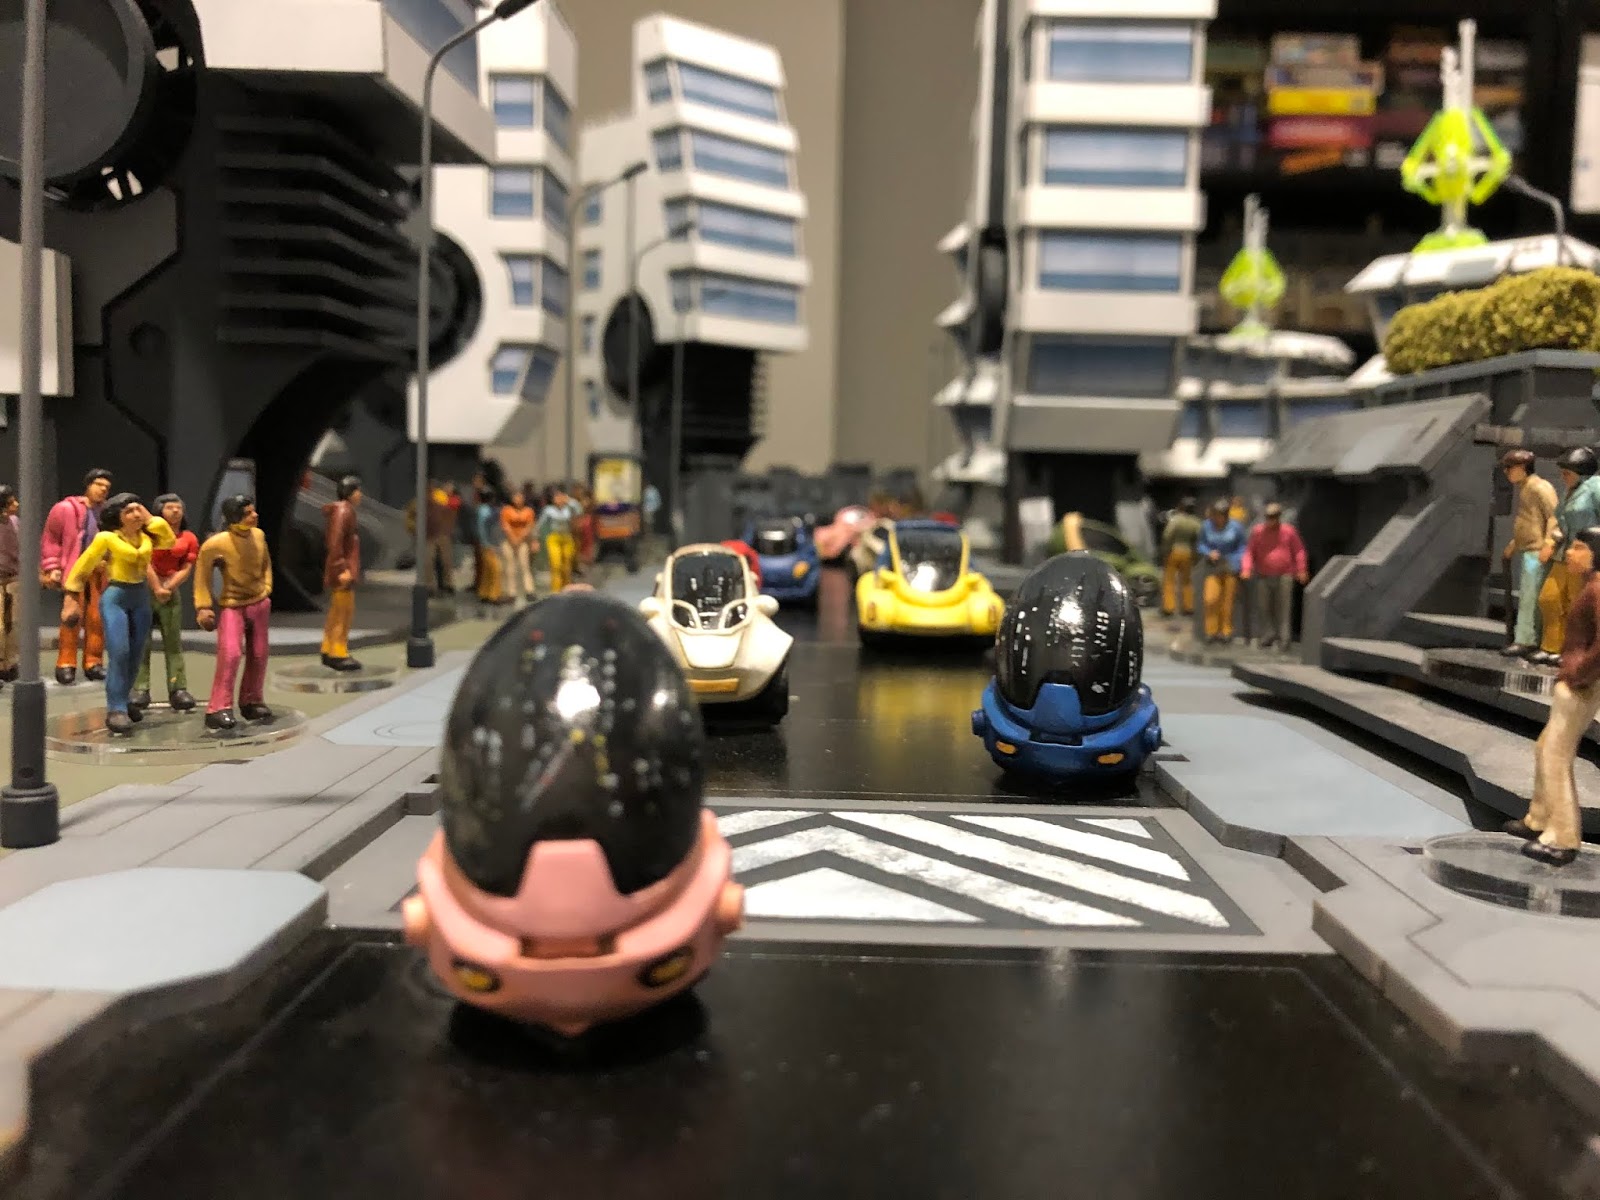
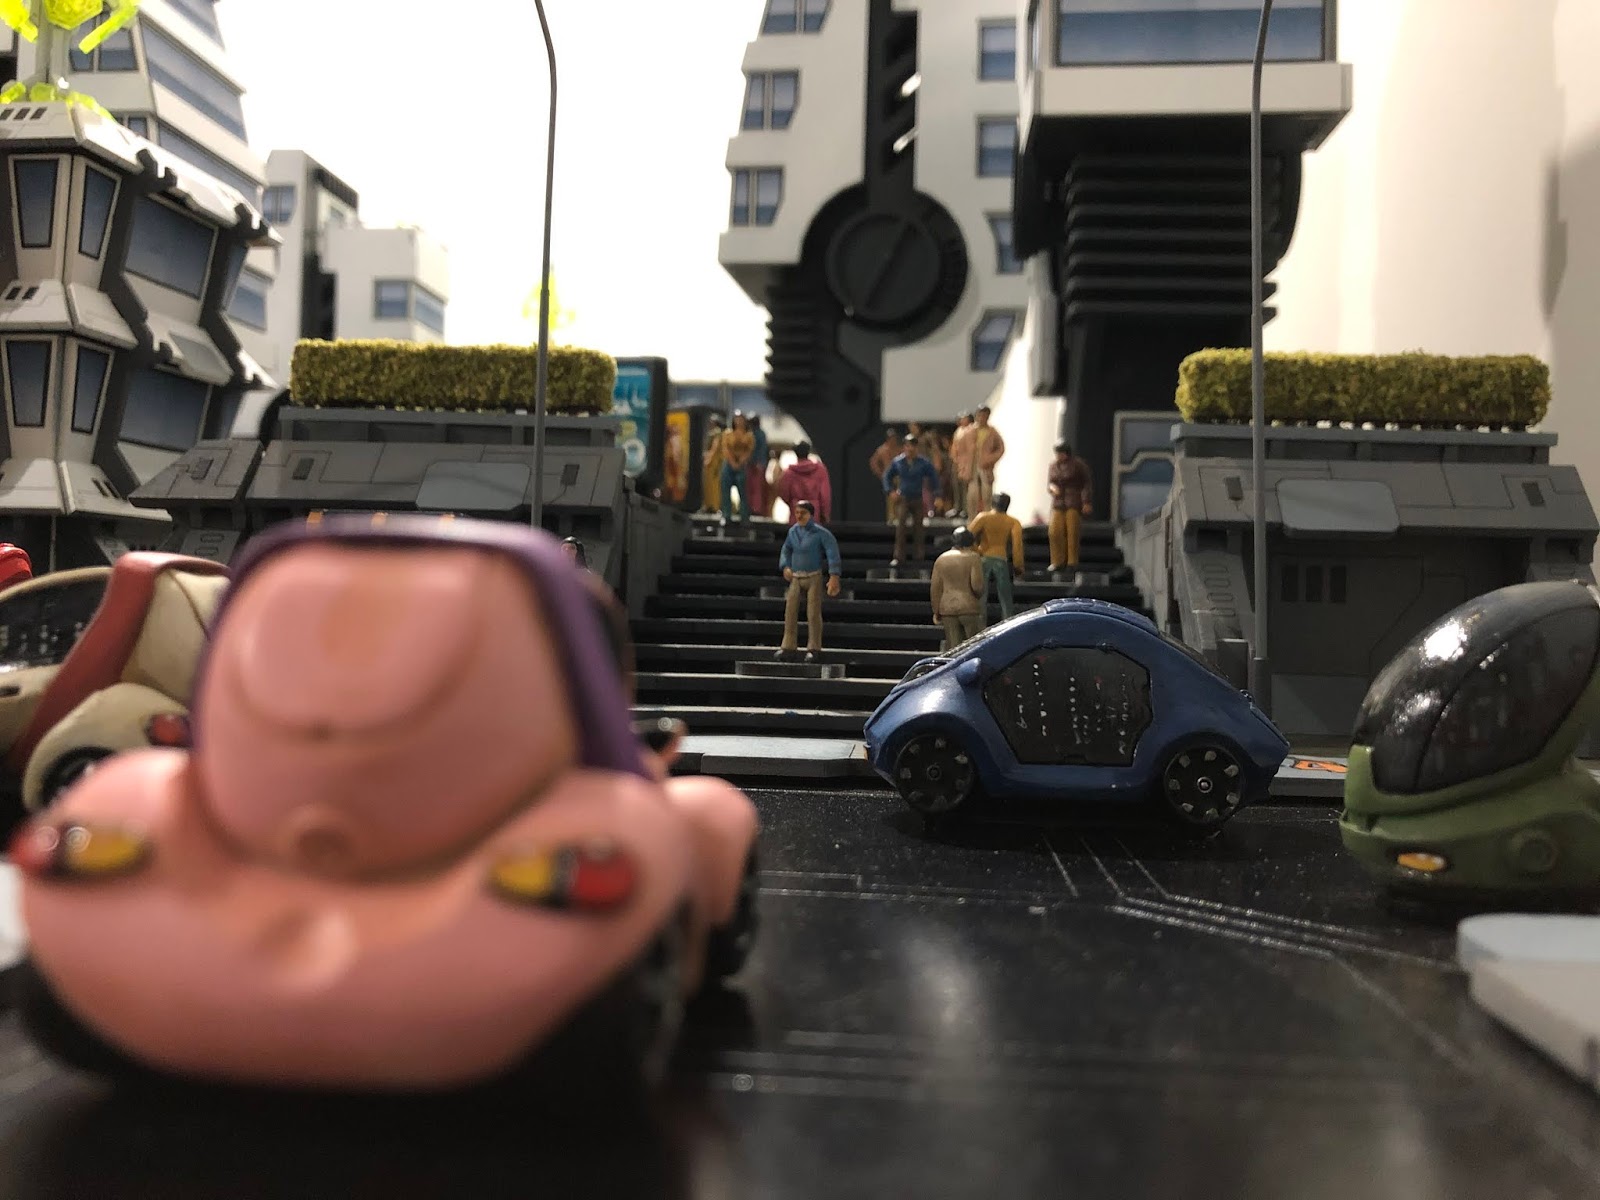
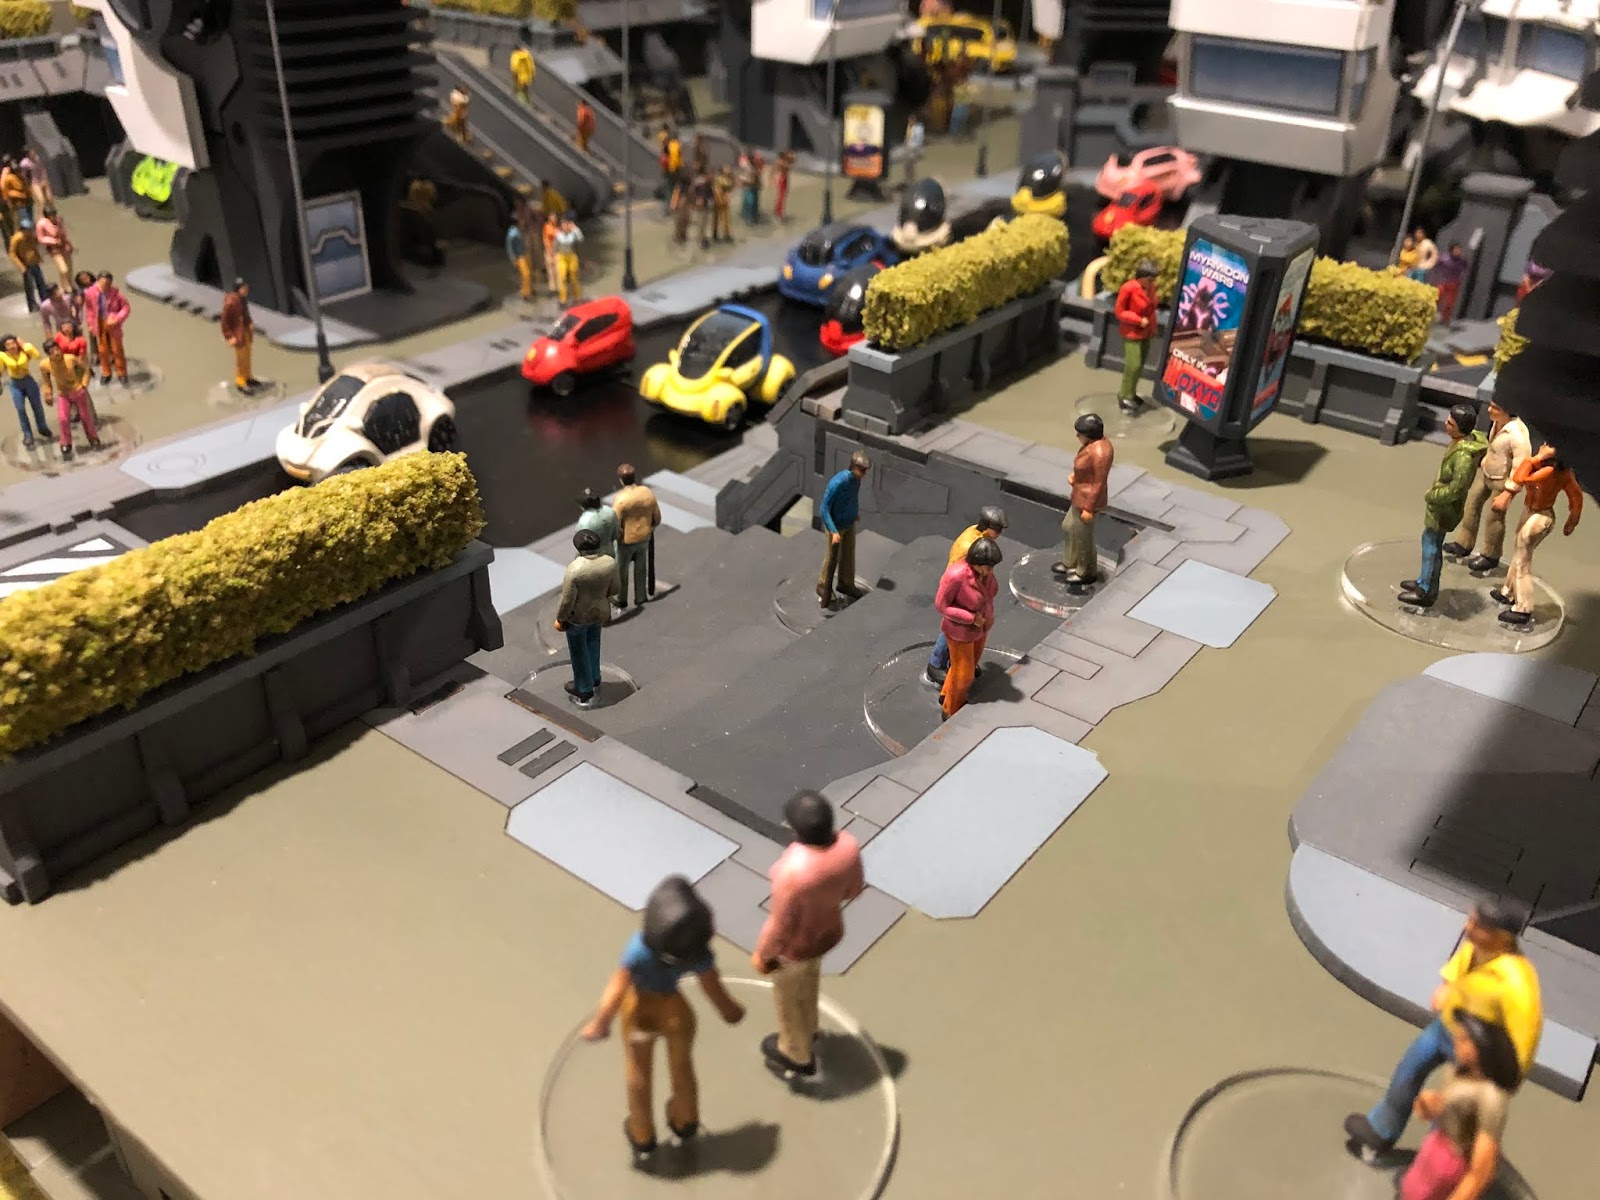
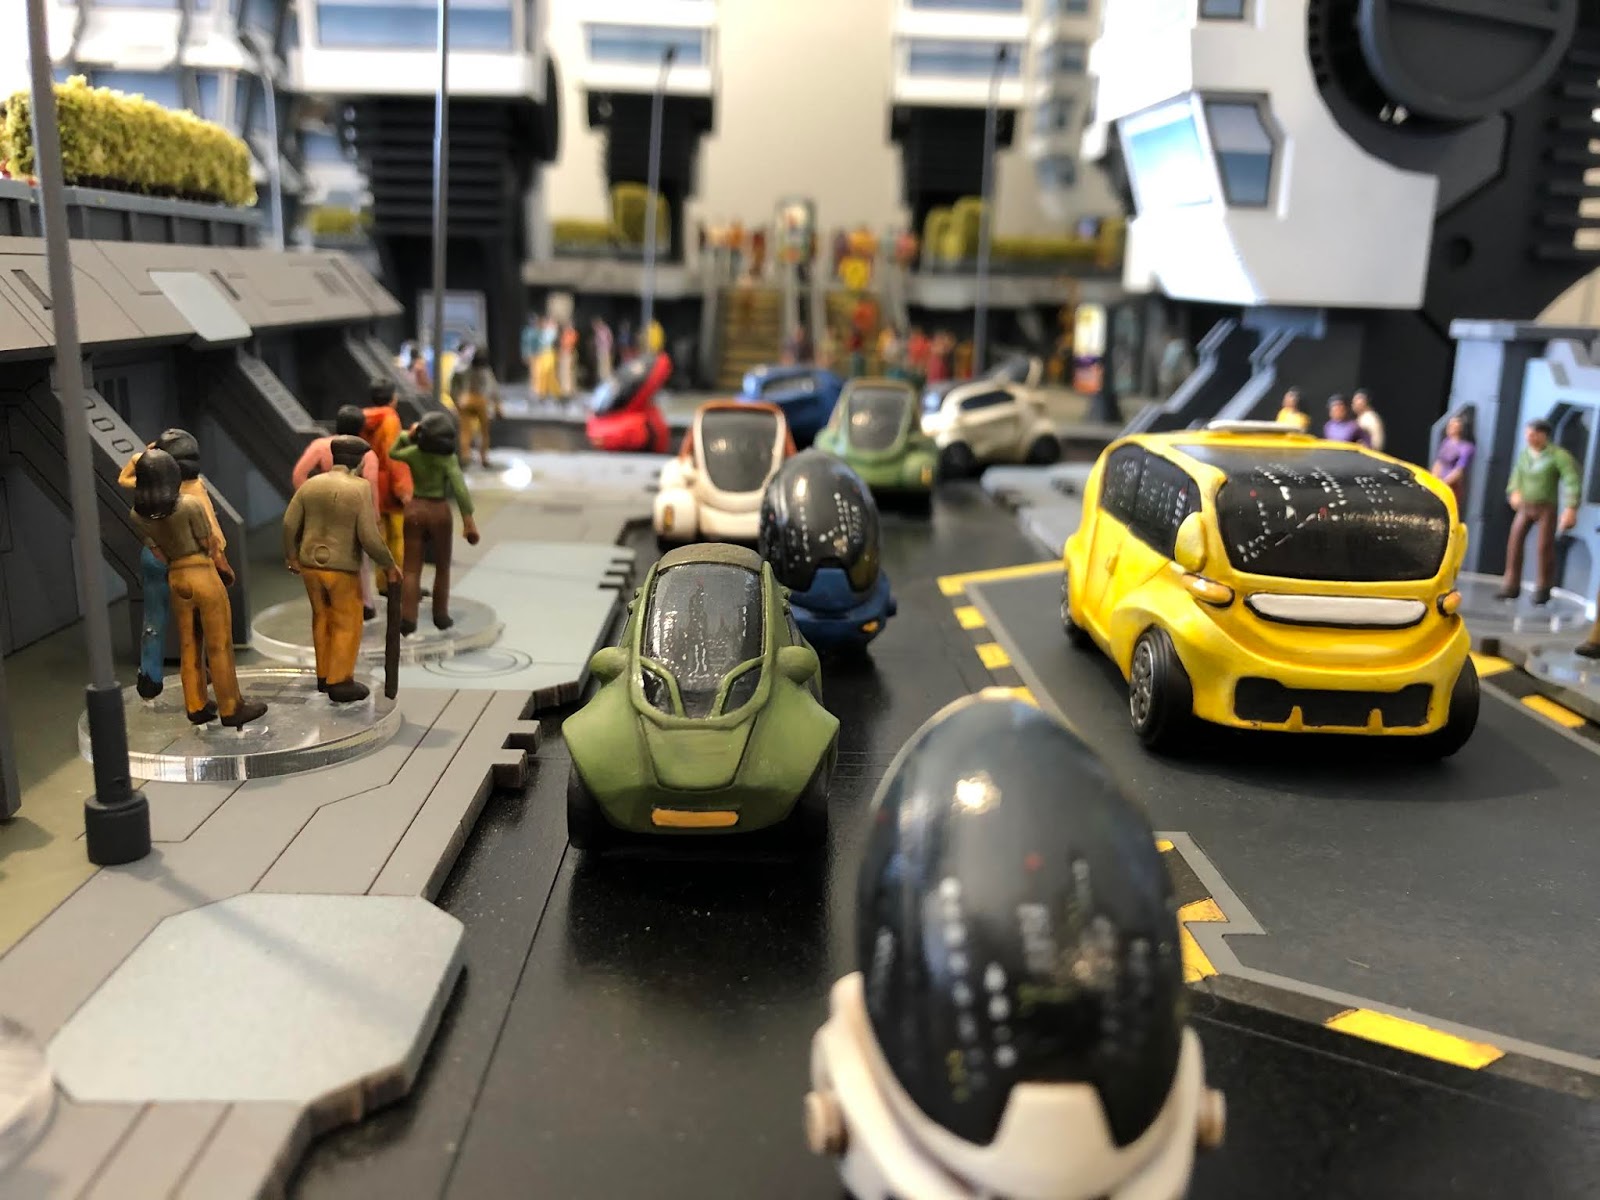
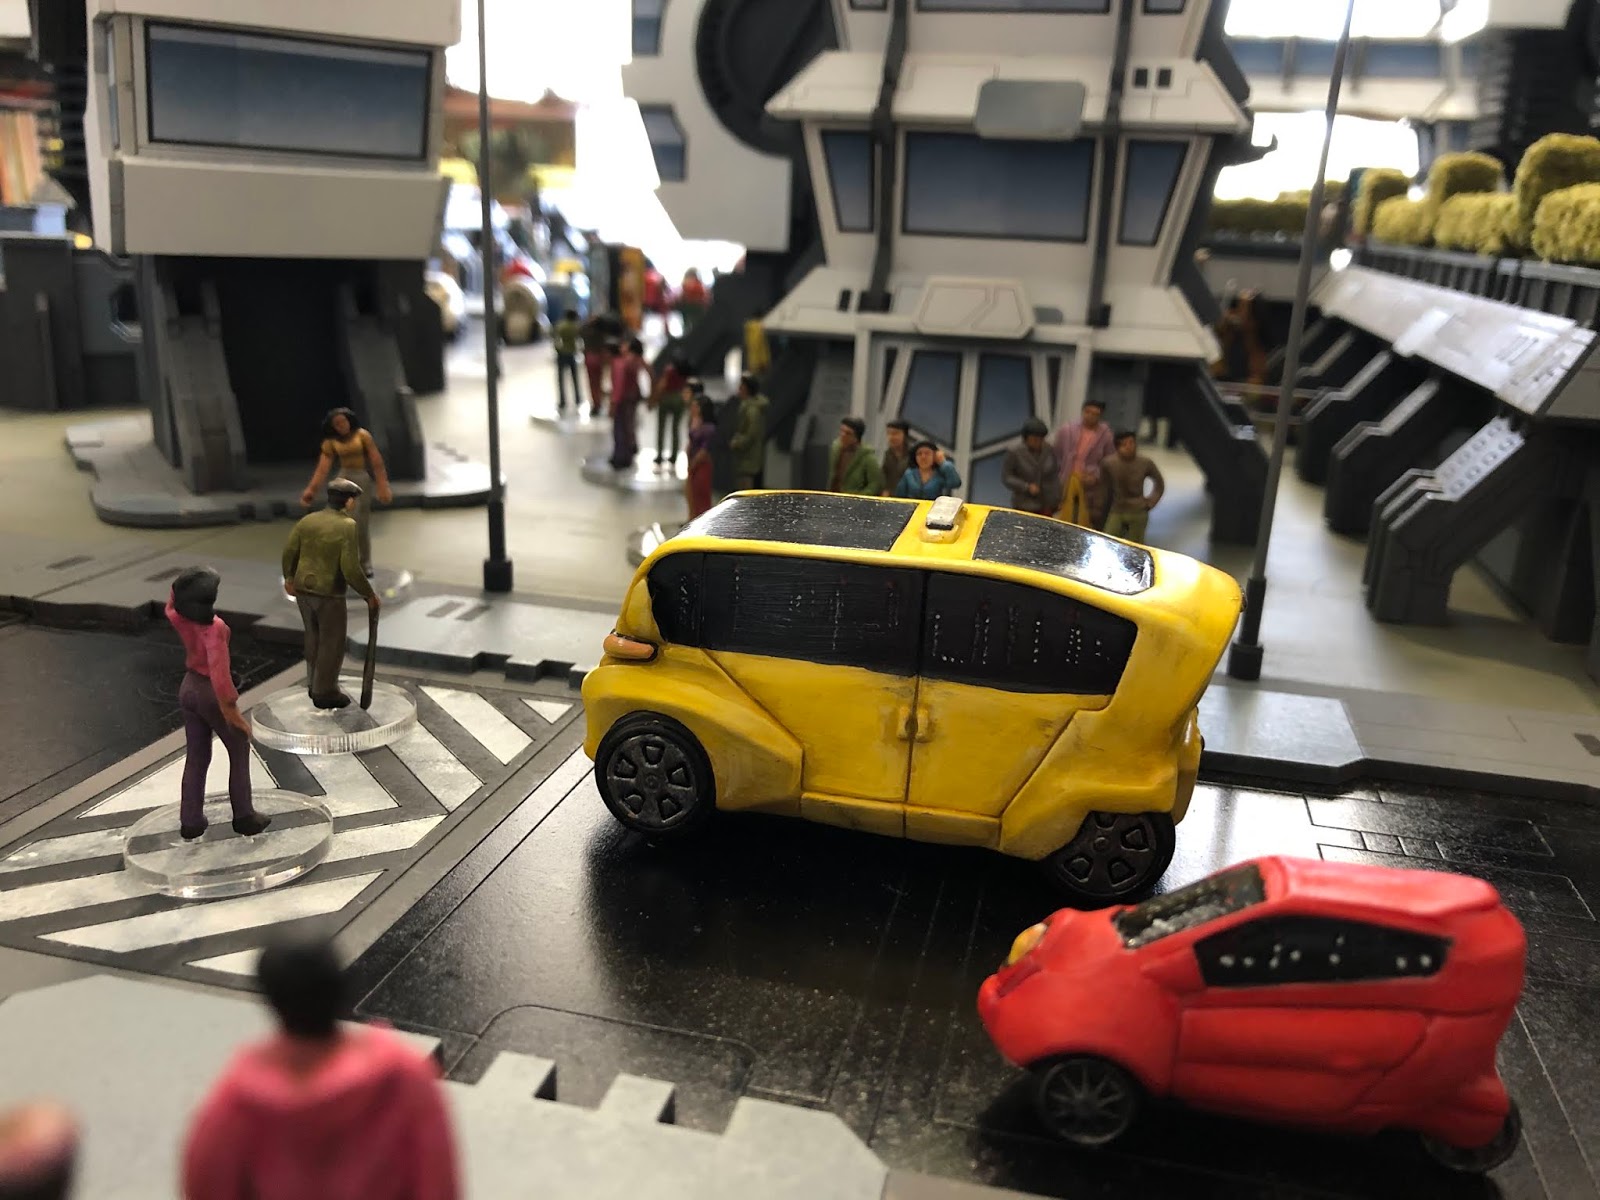
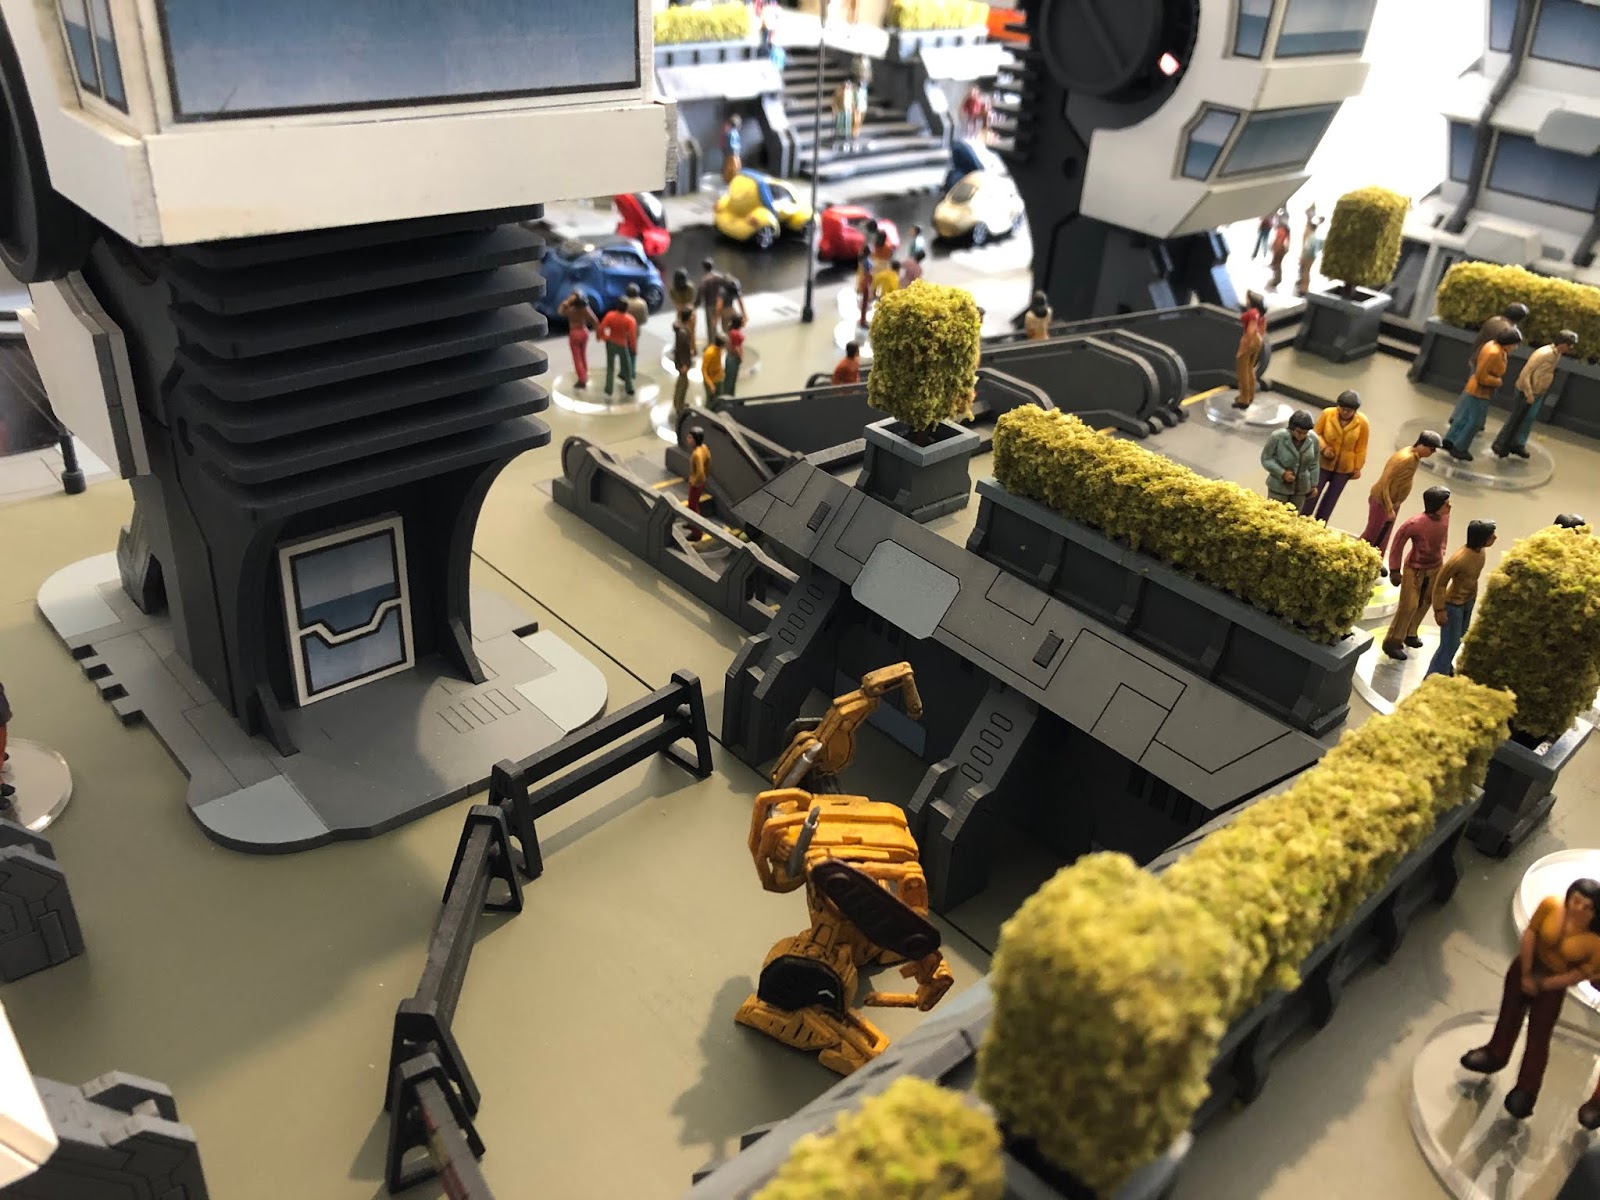
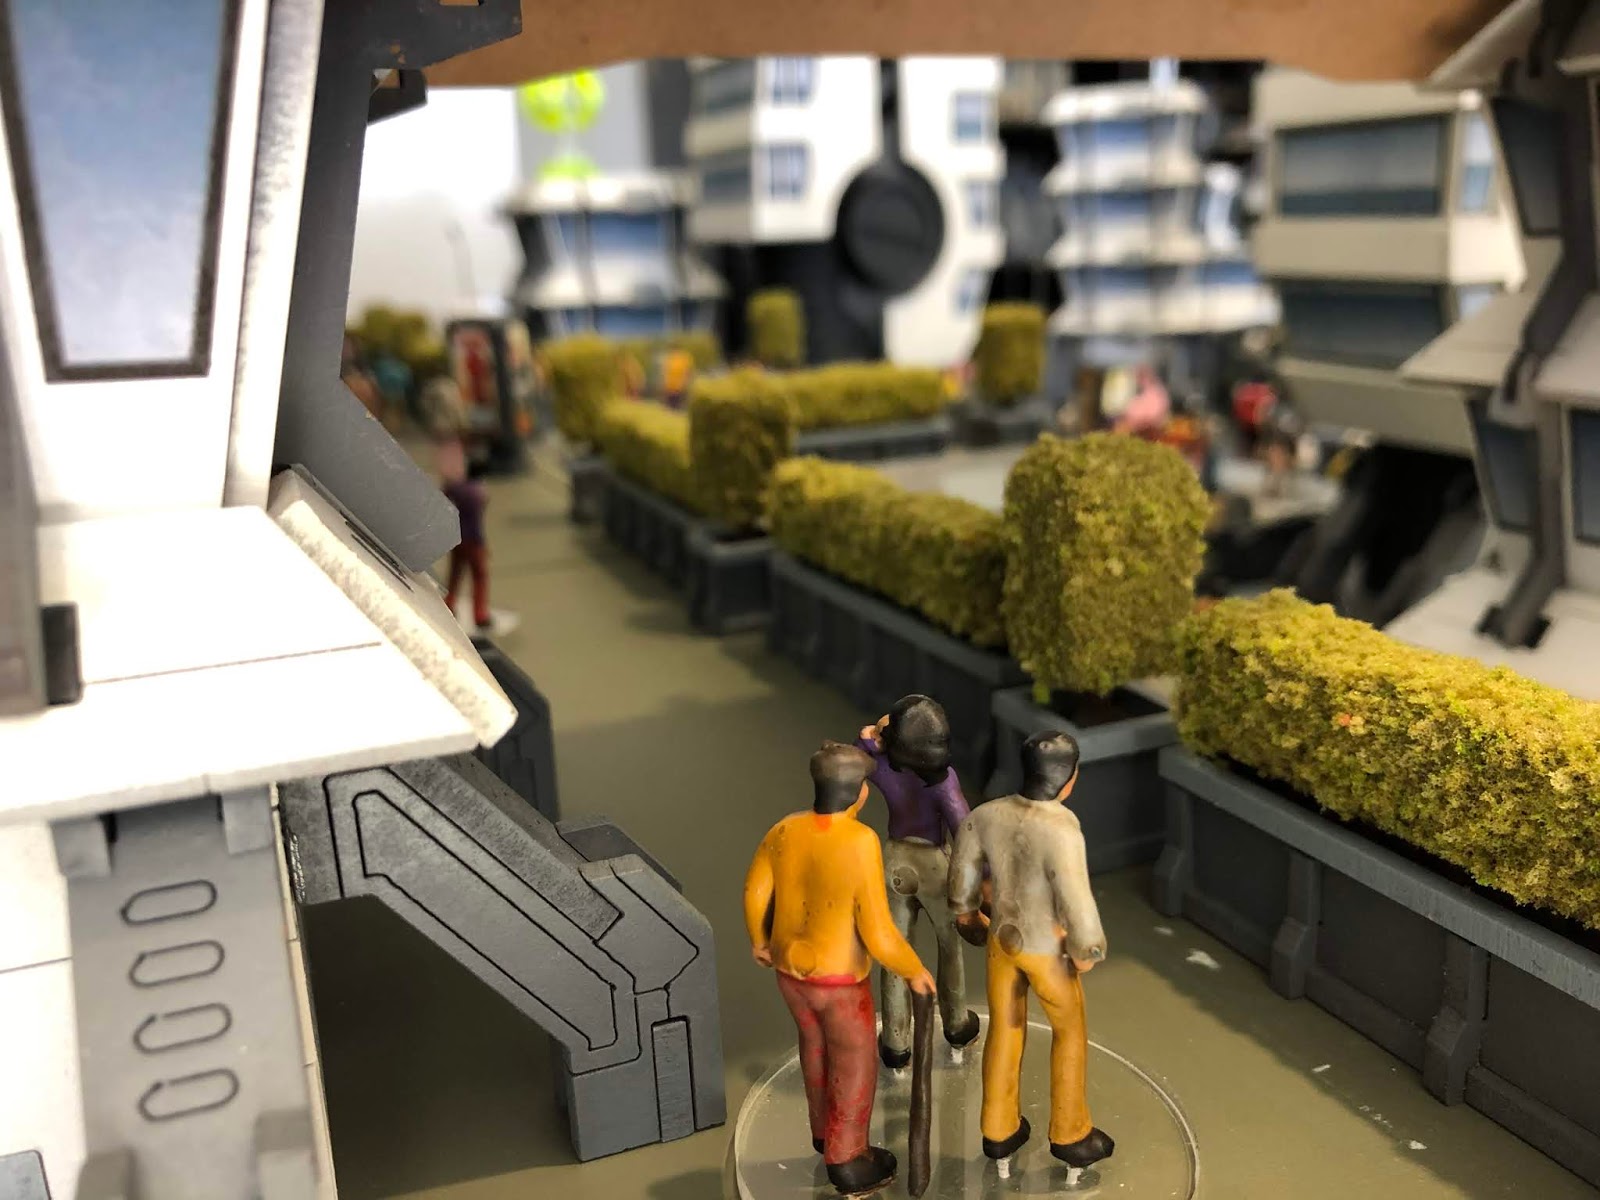
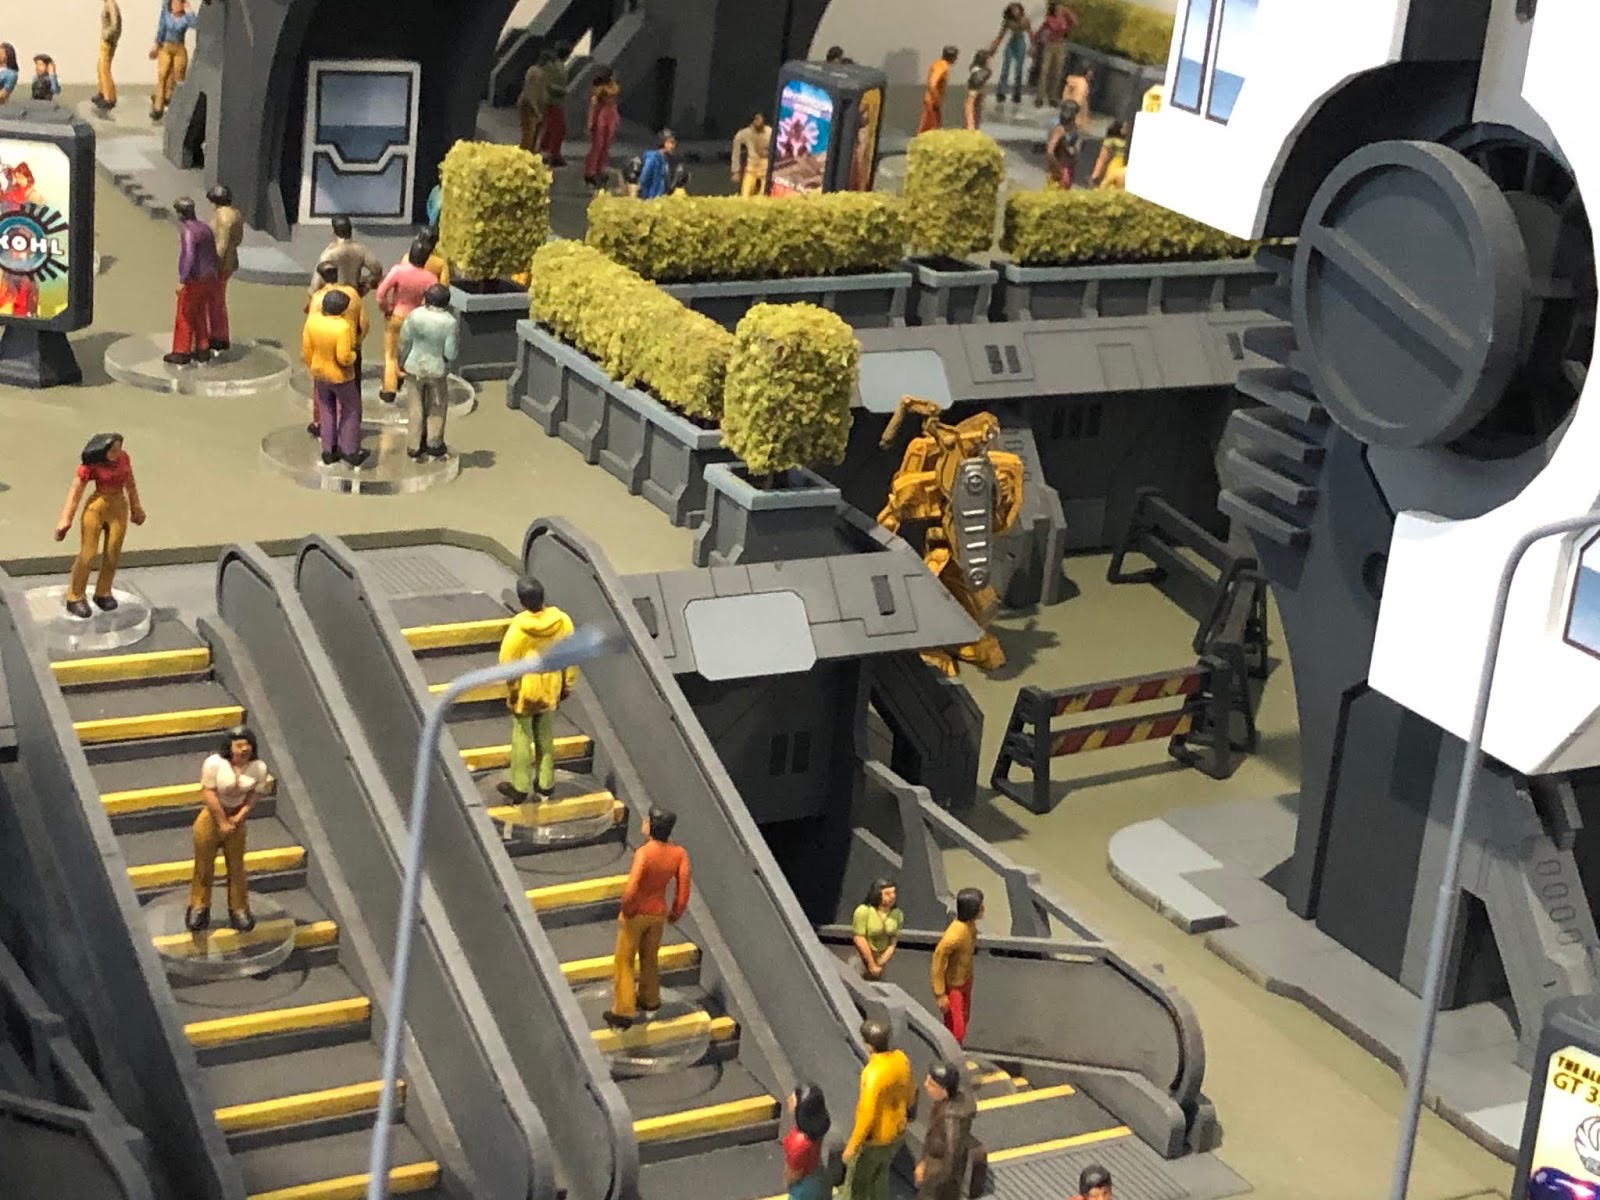
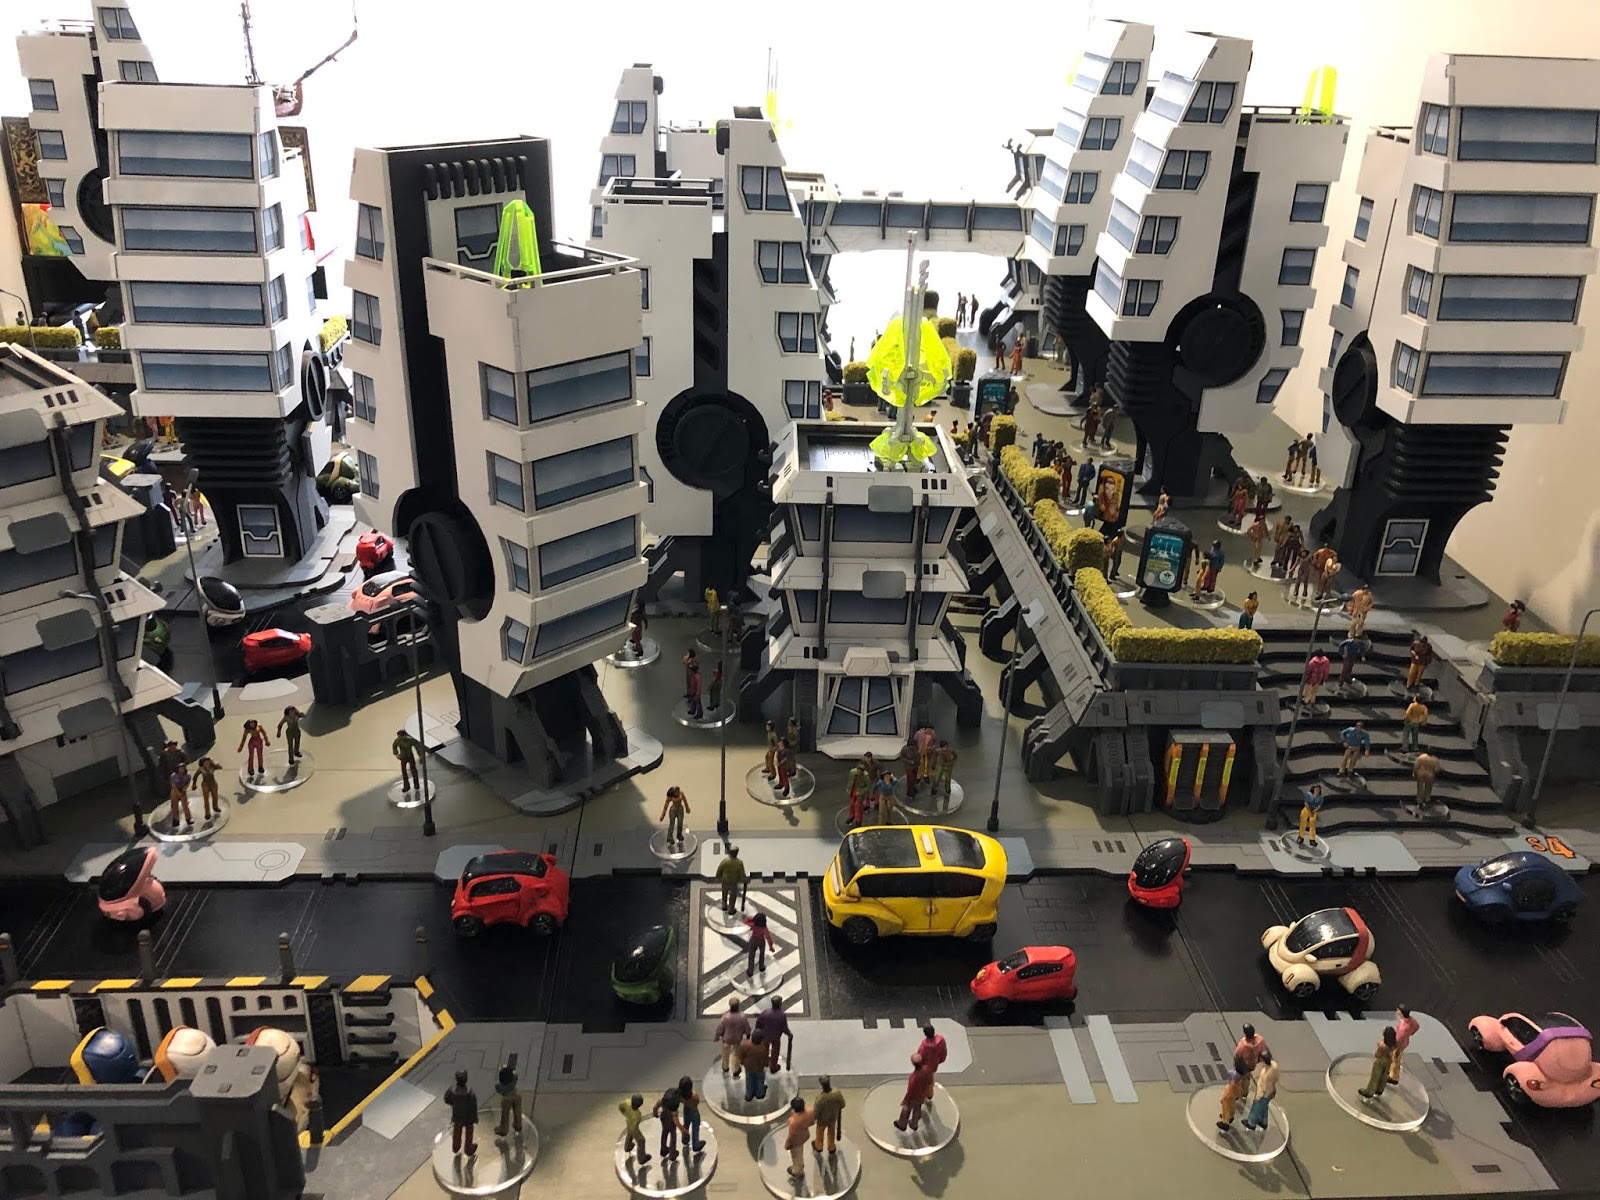
Future City
Thank you so much for the Golden Button. Very unexpected but very appreciated.
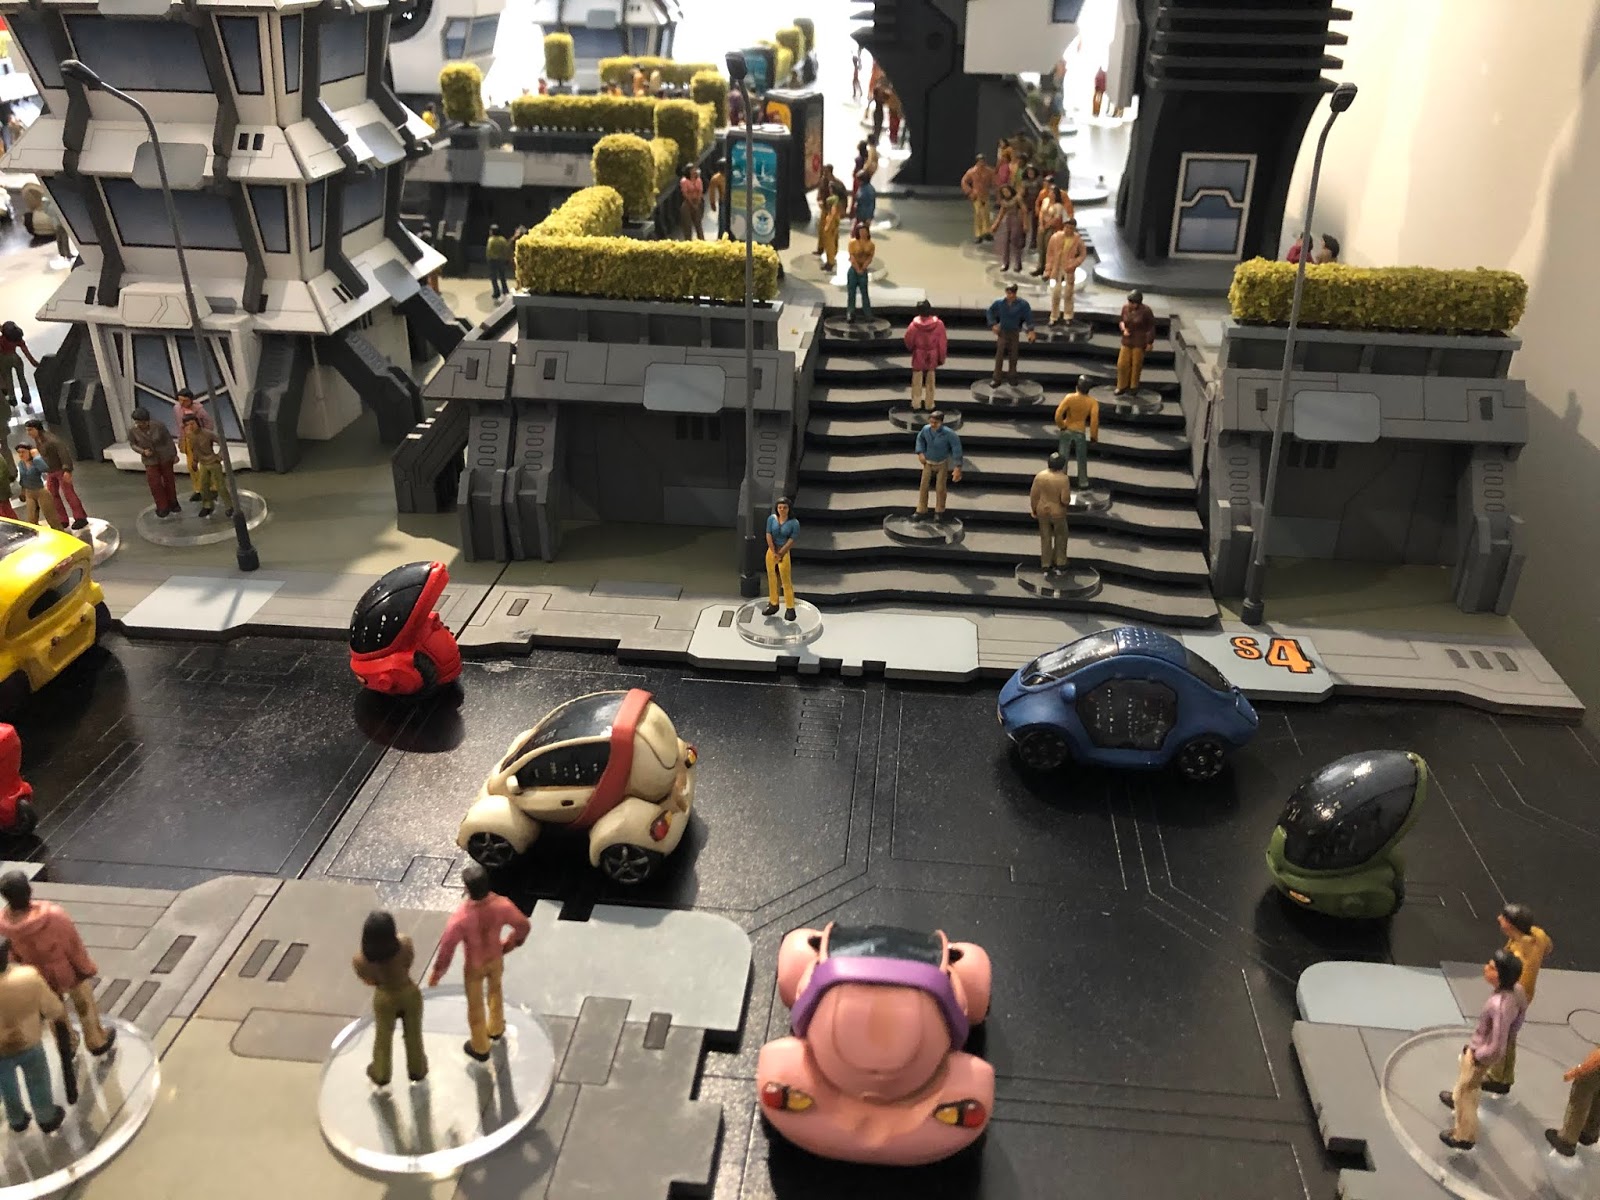
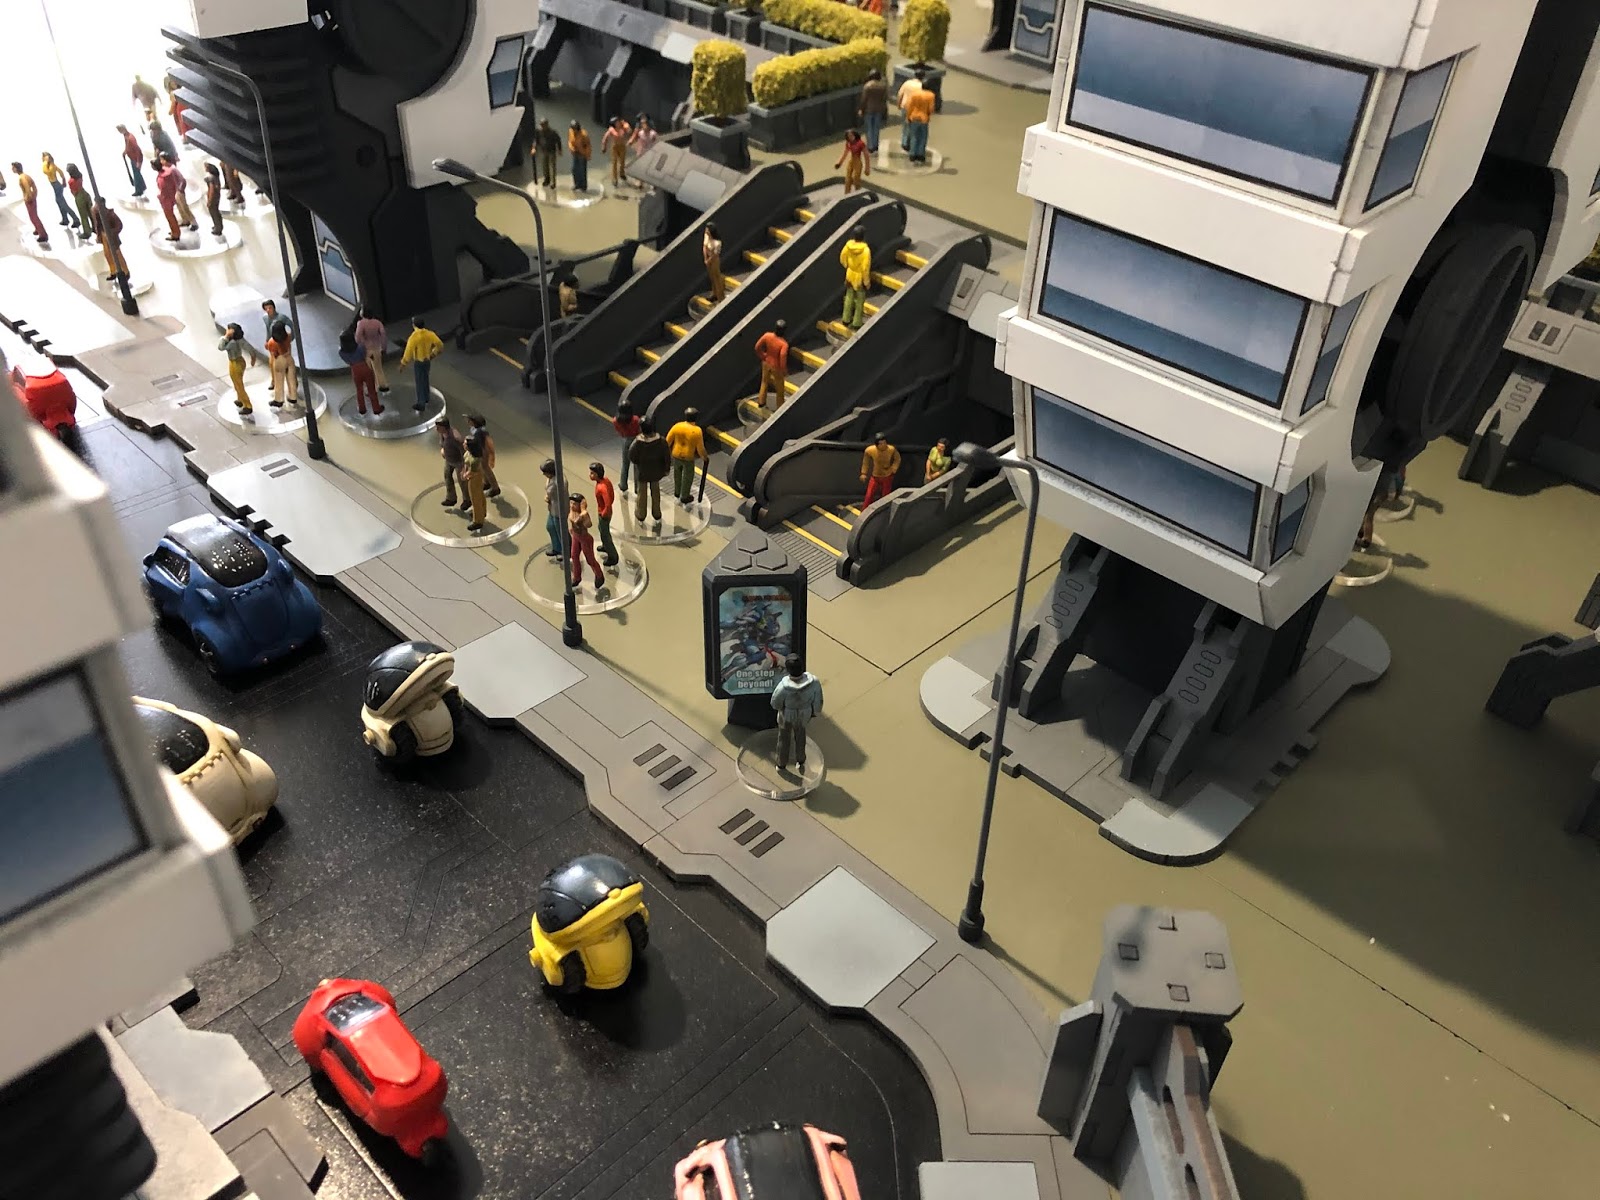
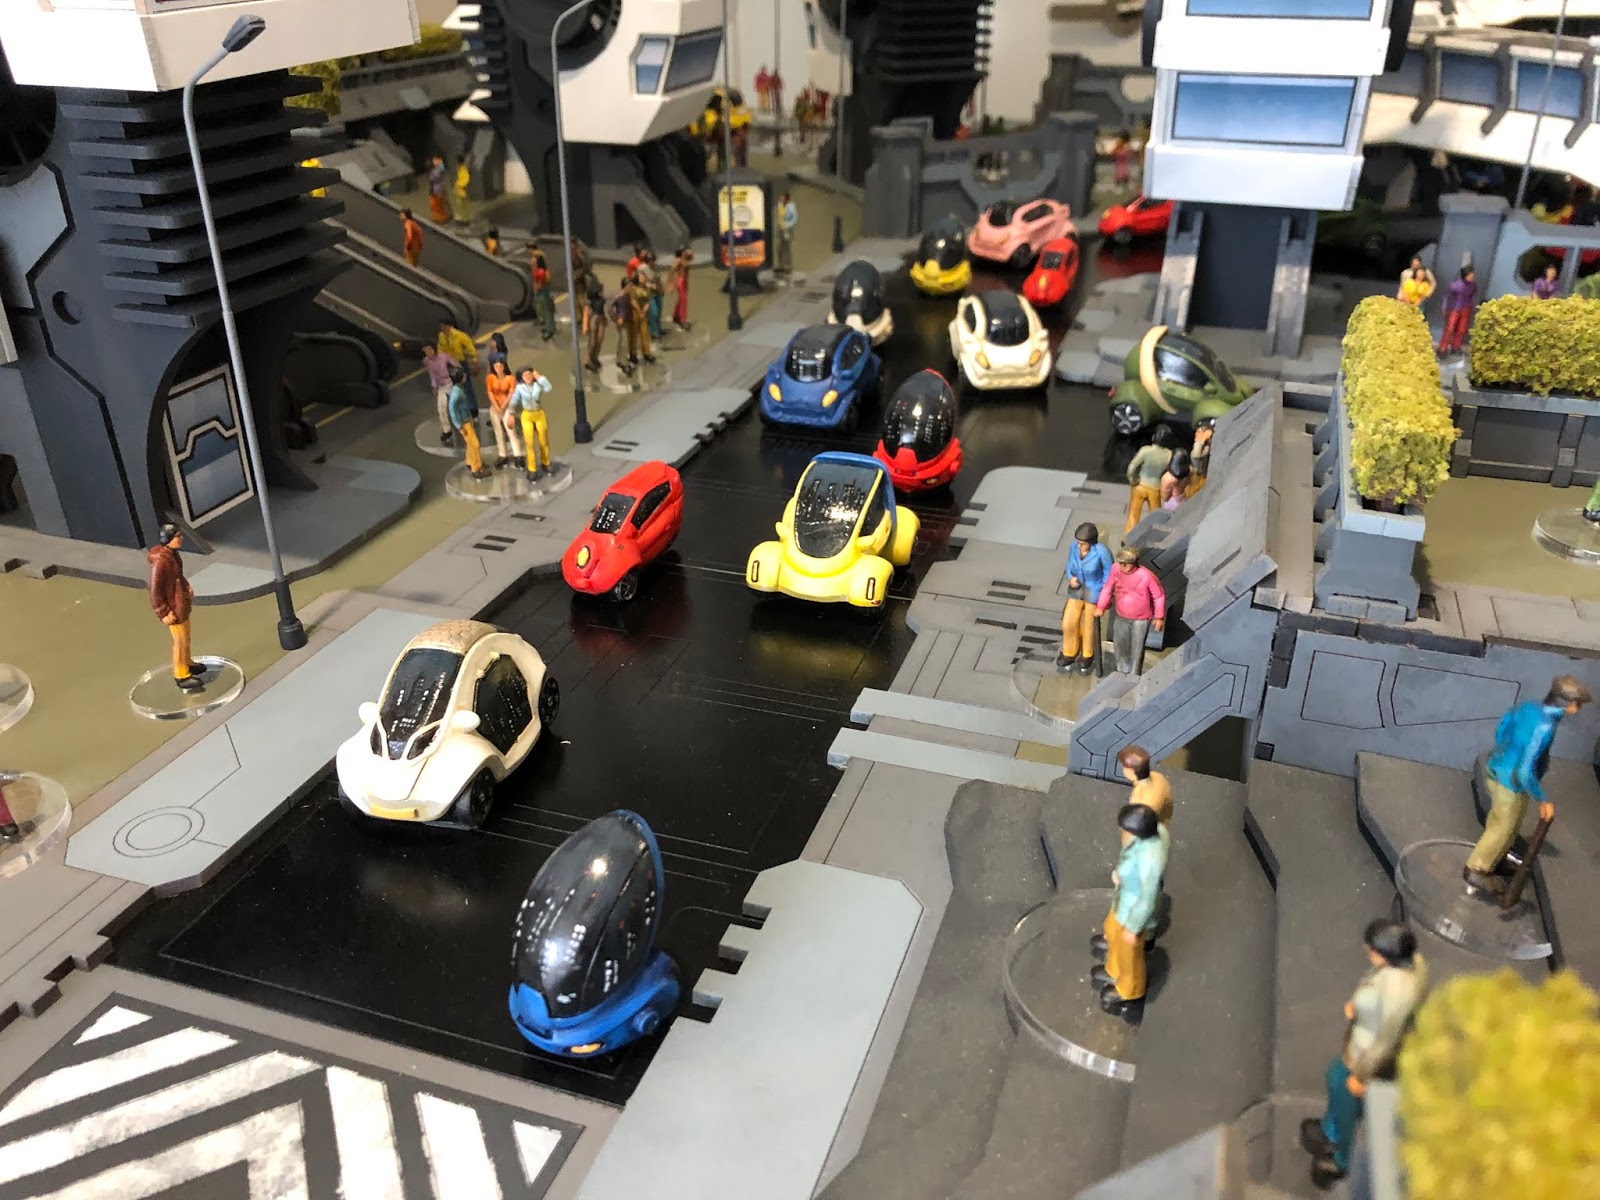
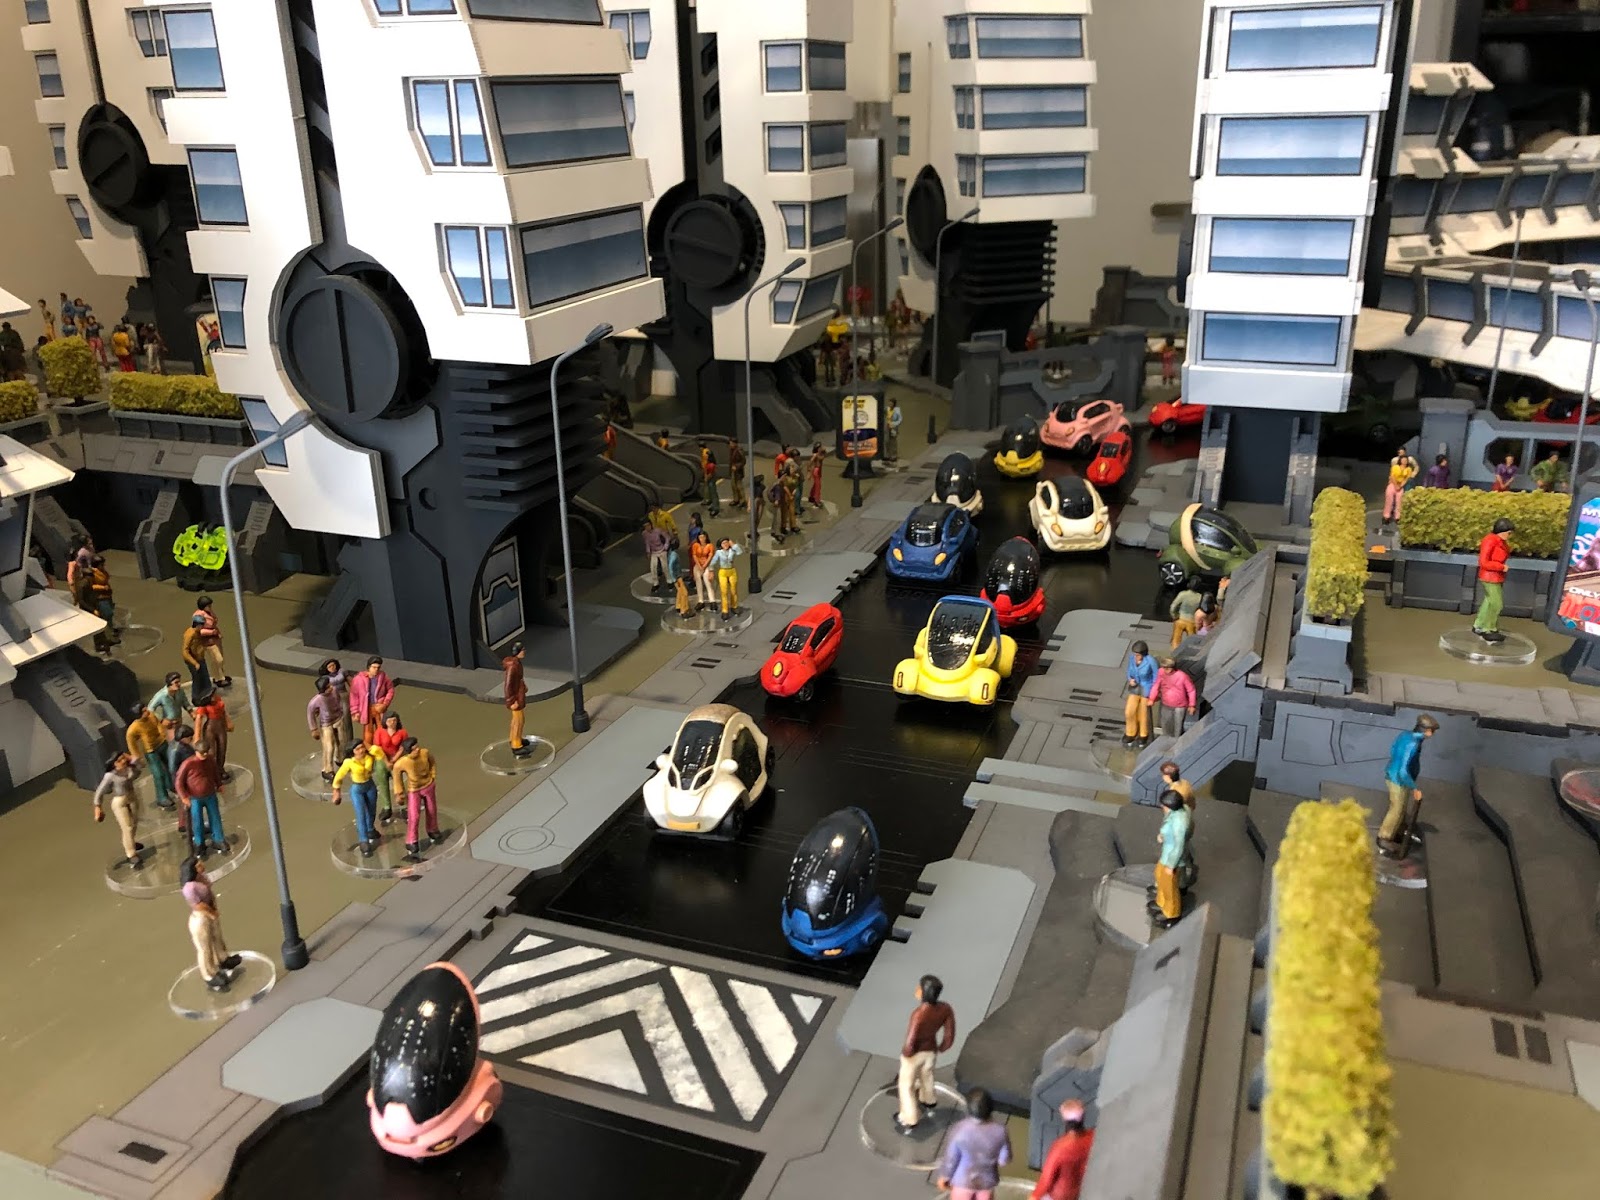
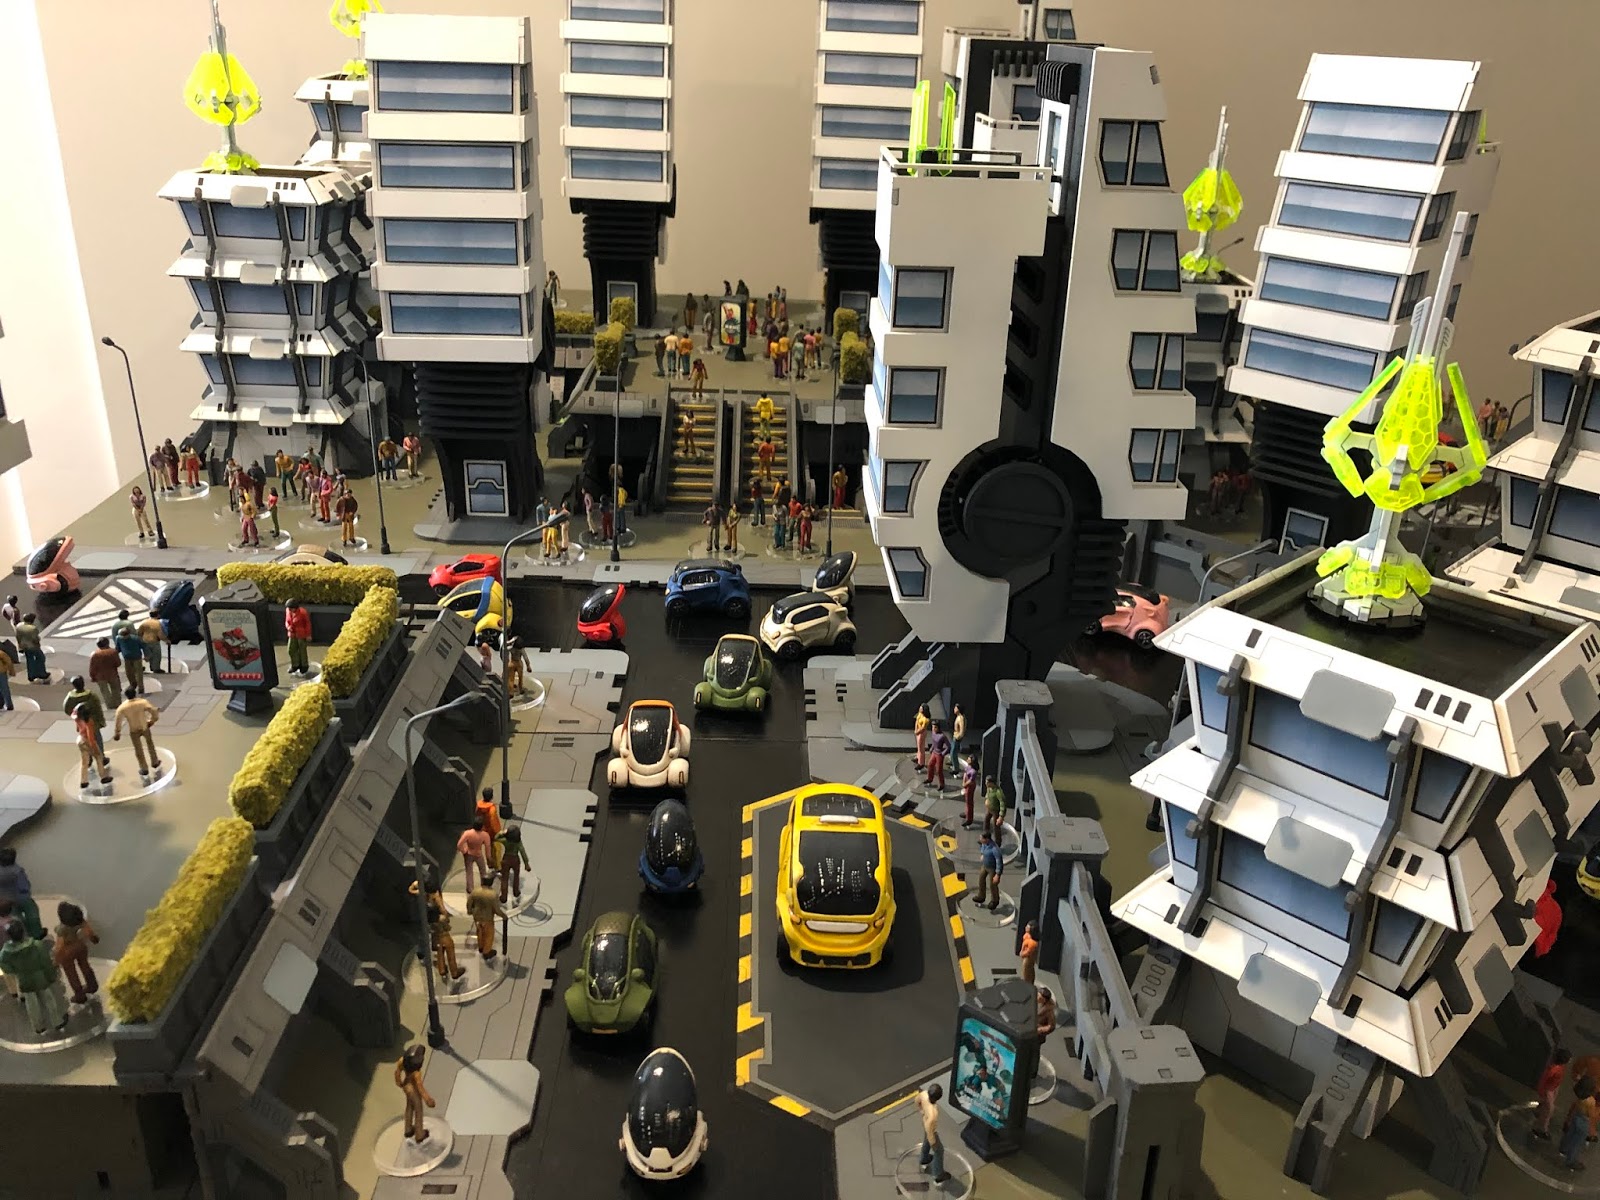
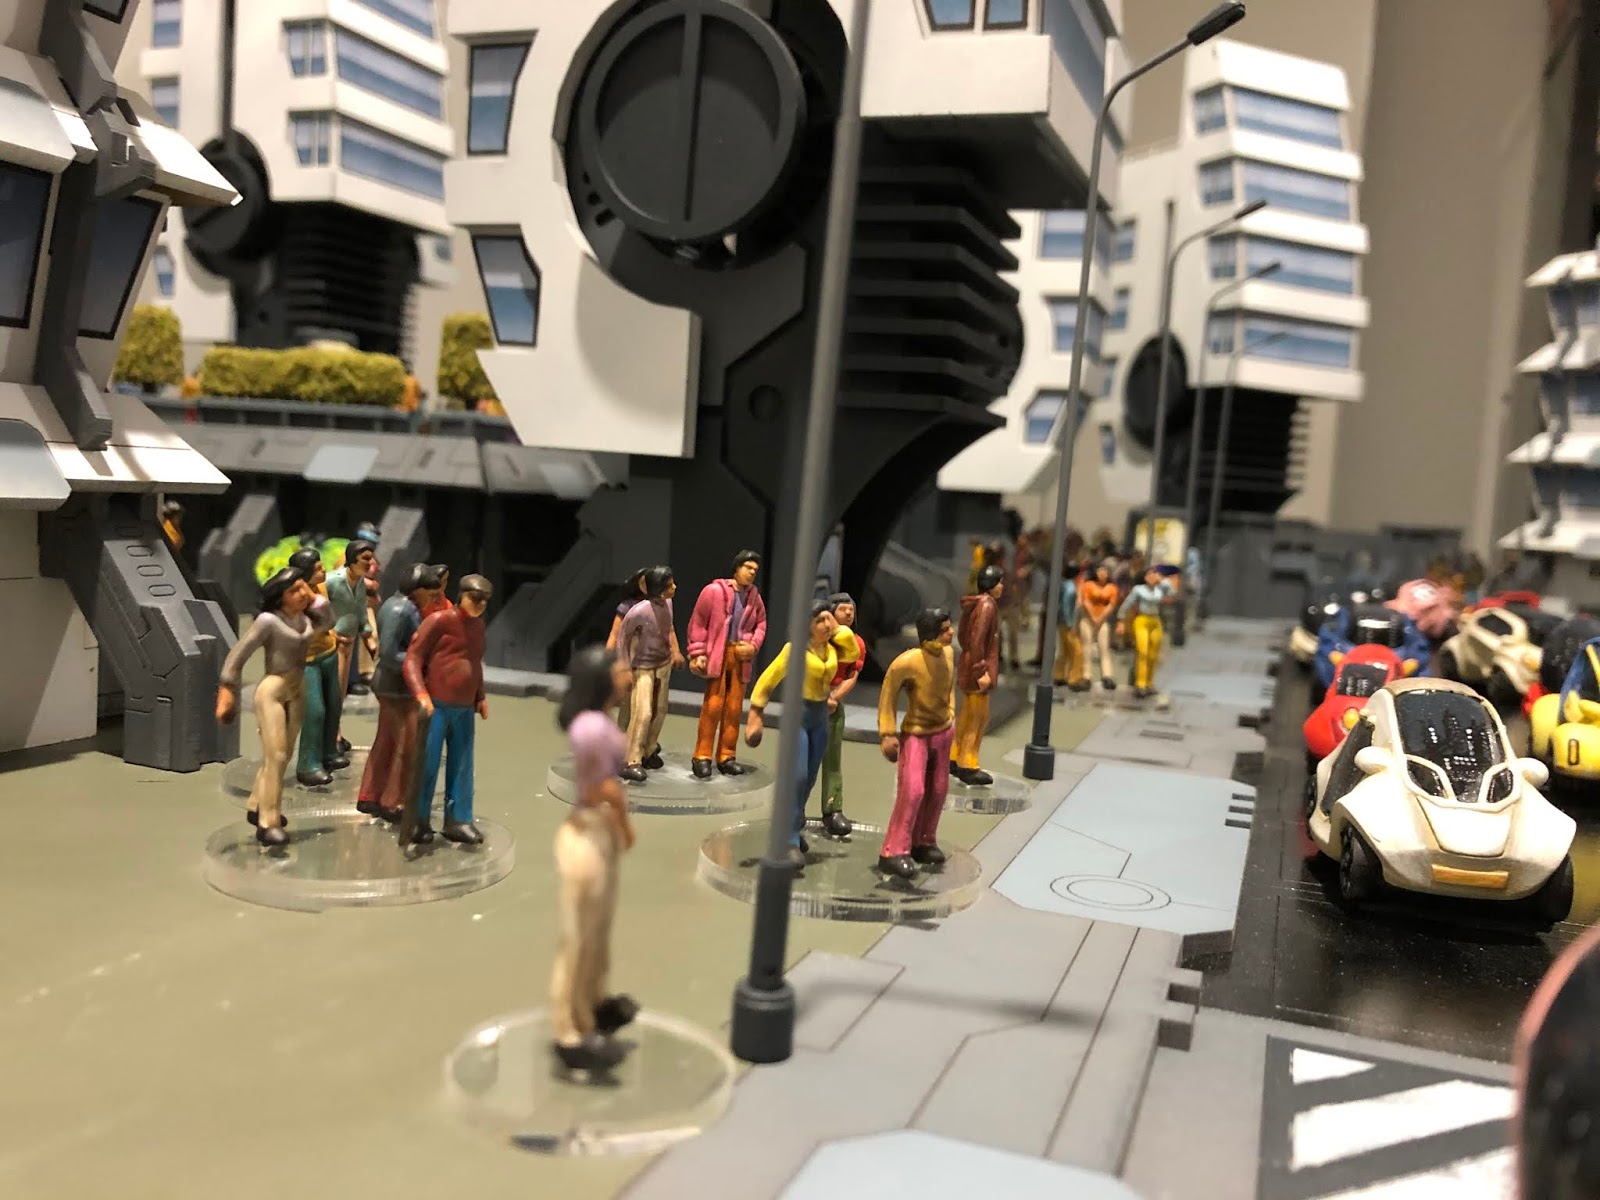
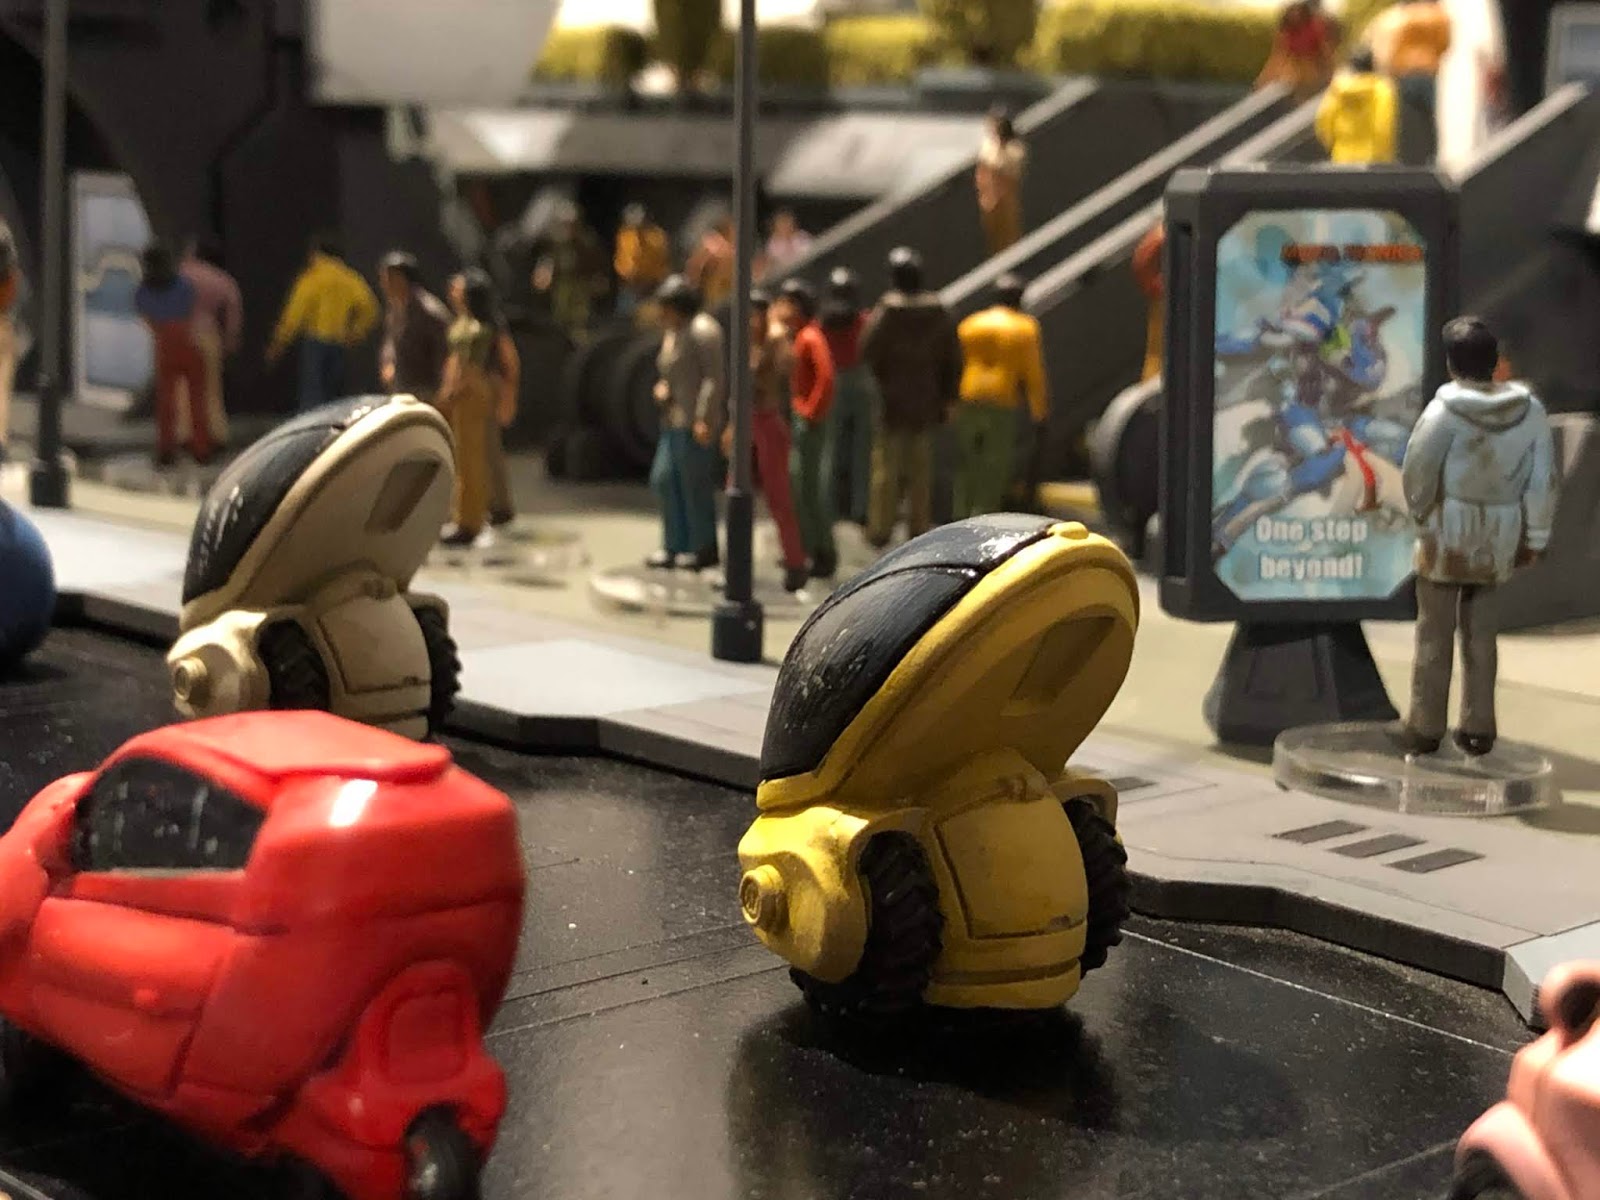
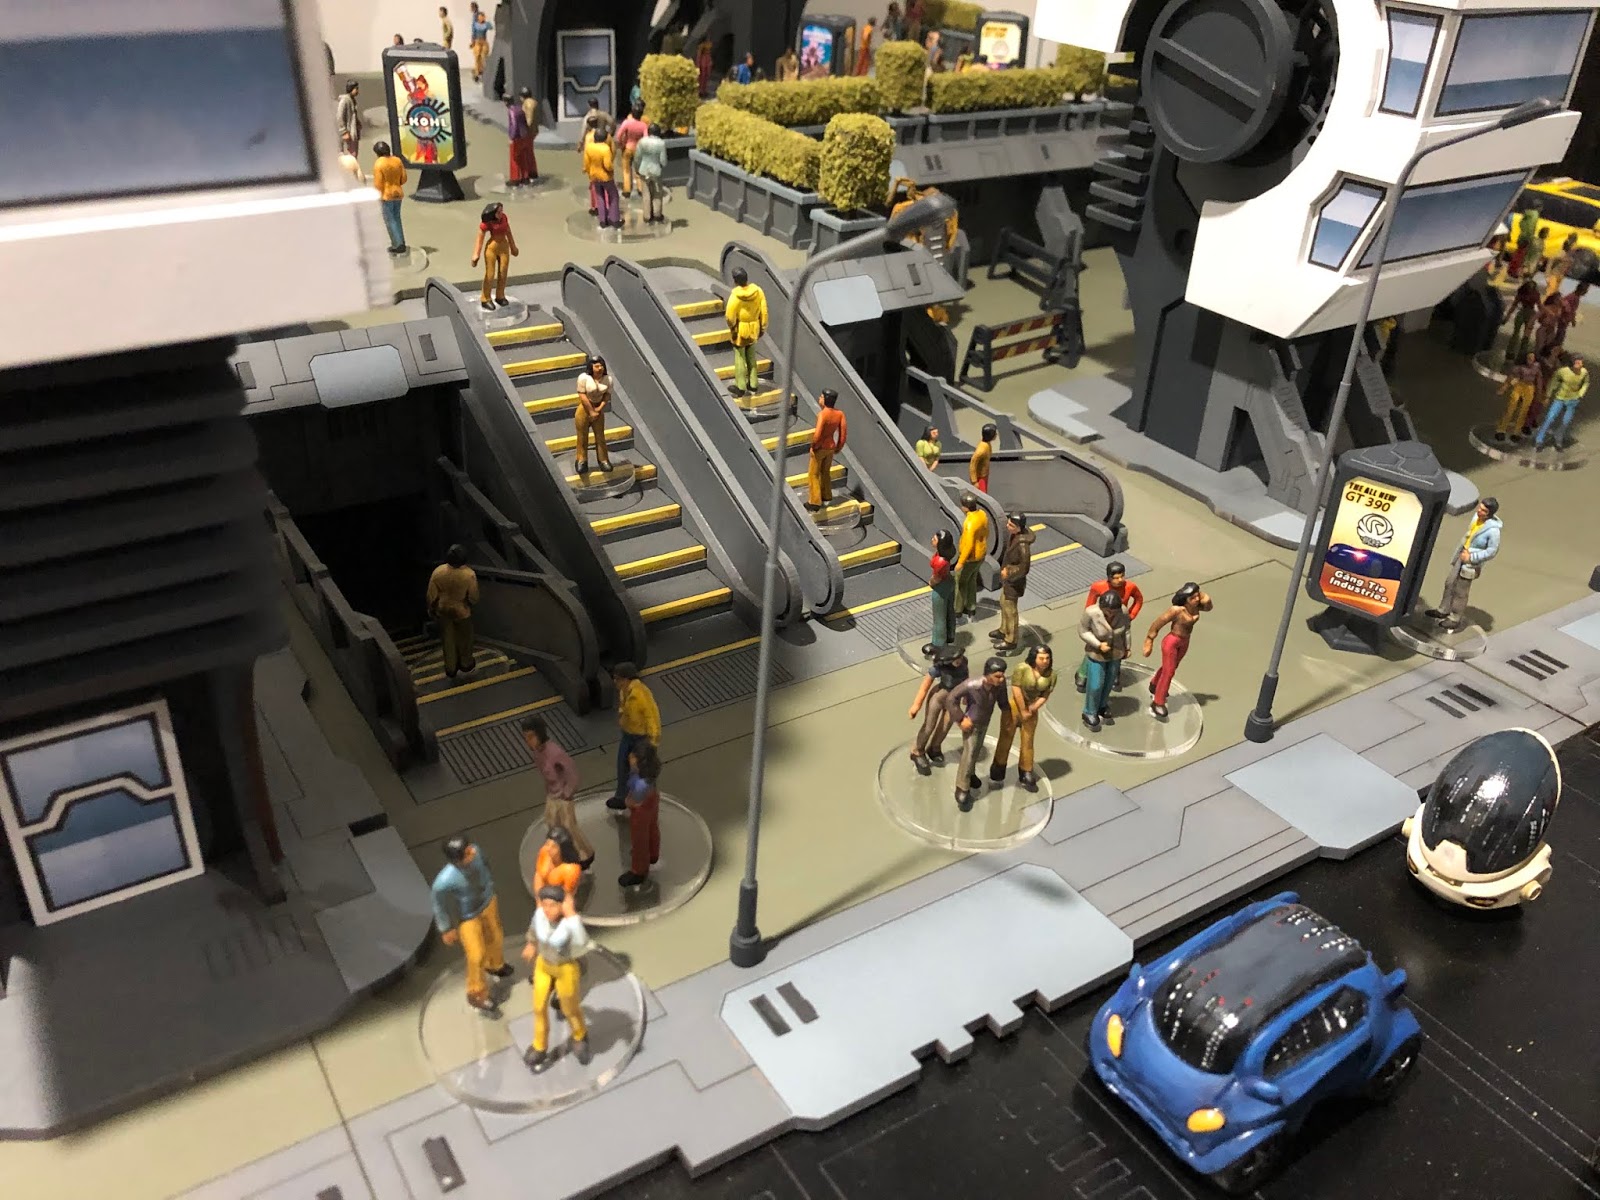
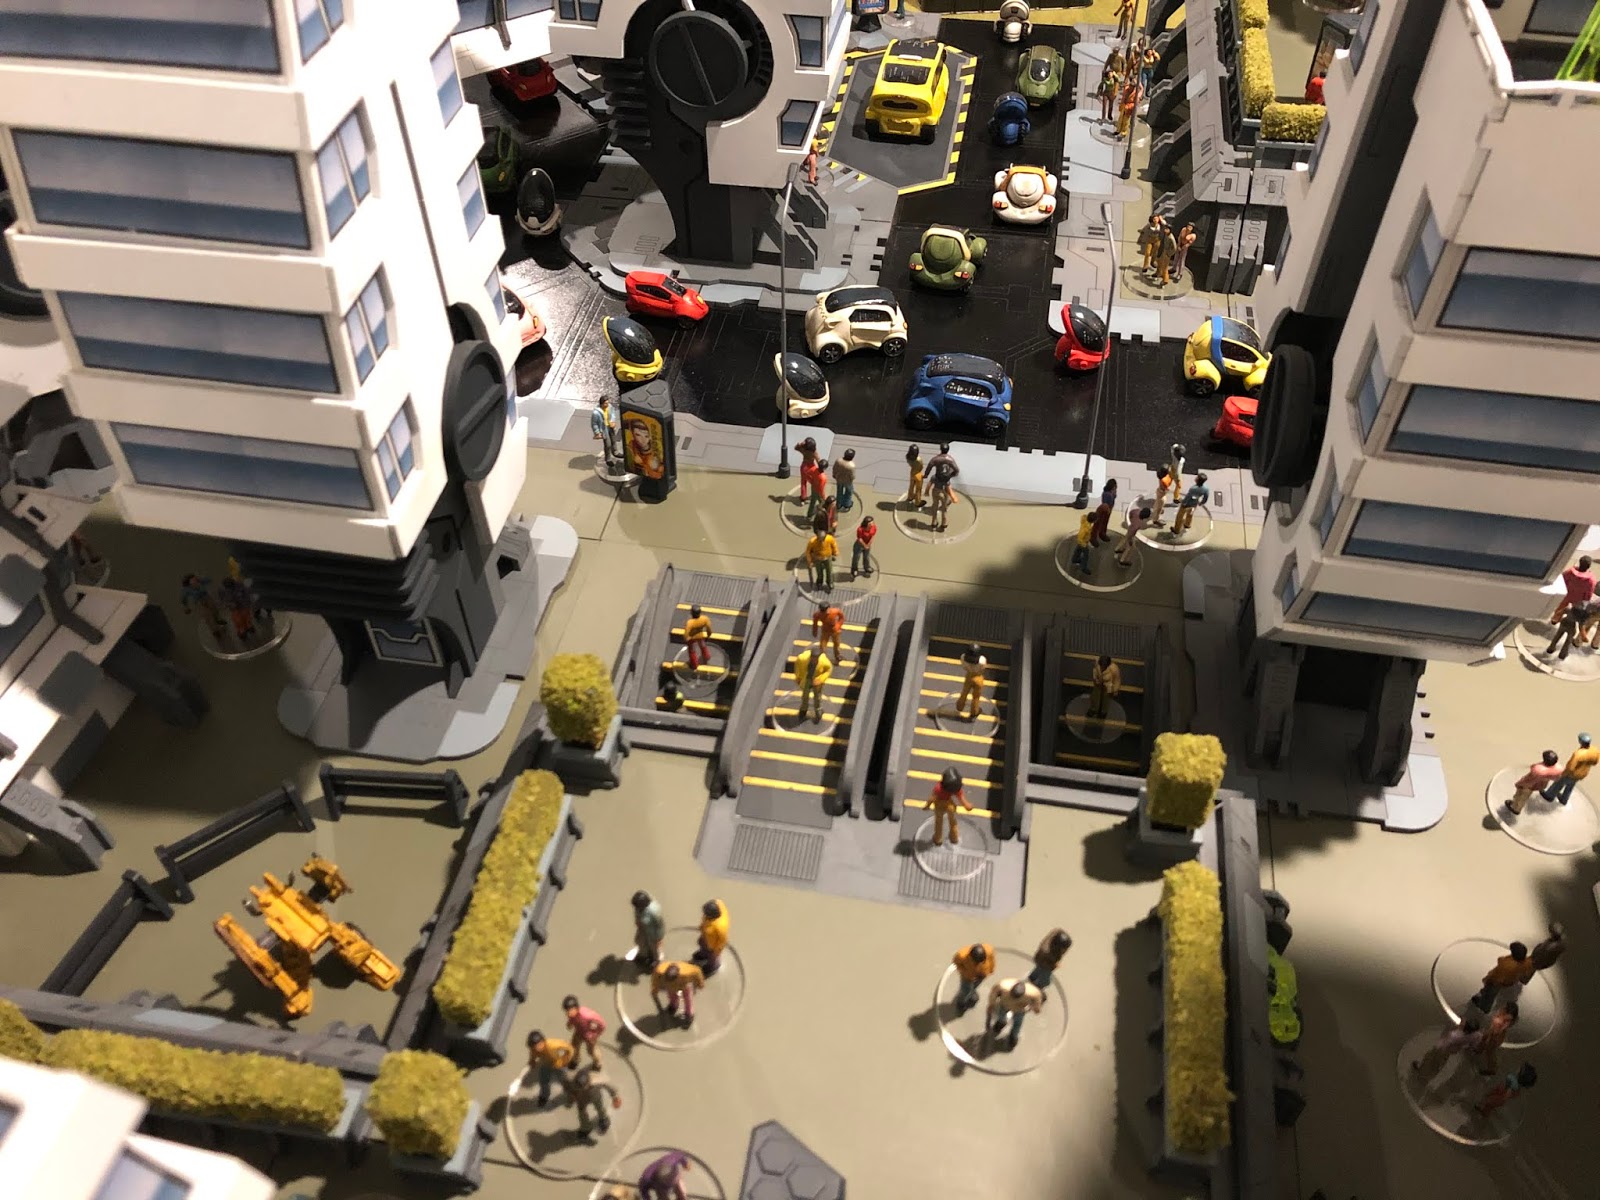
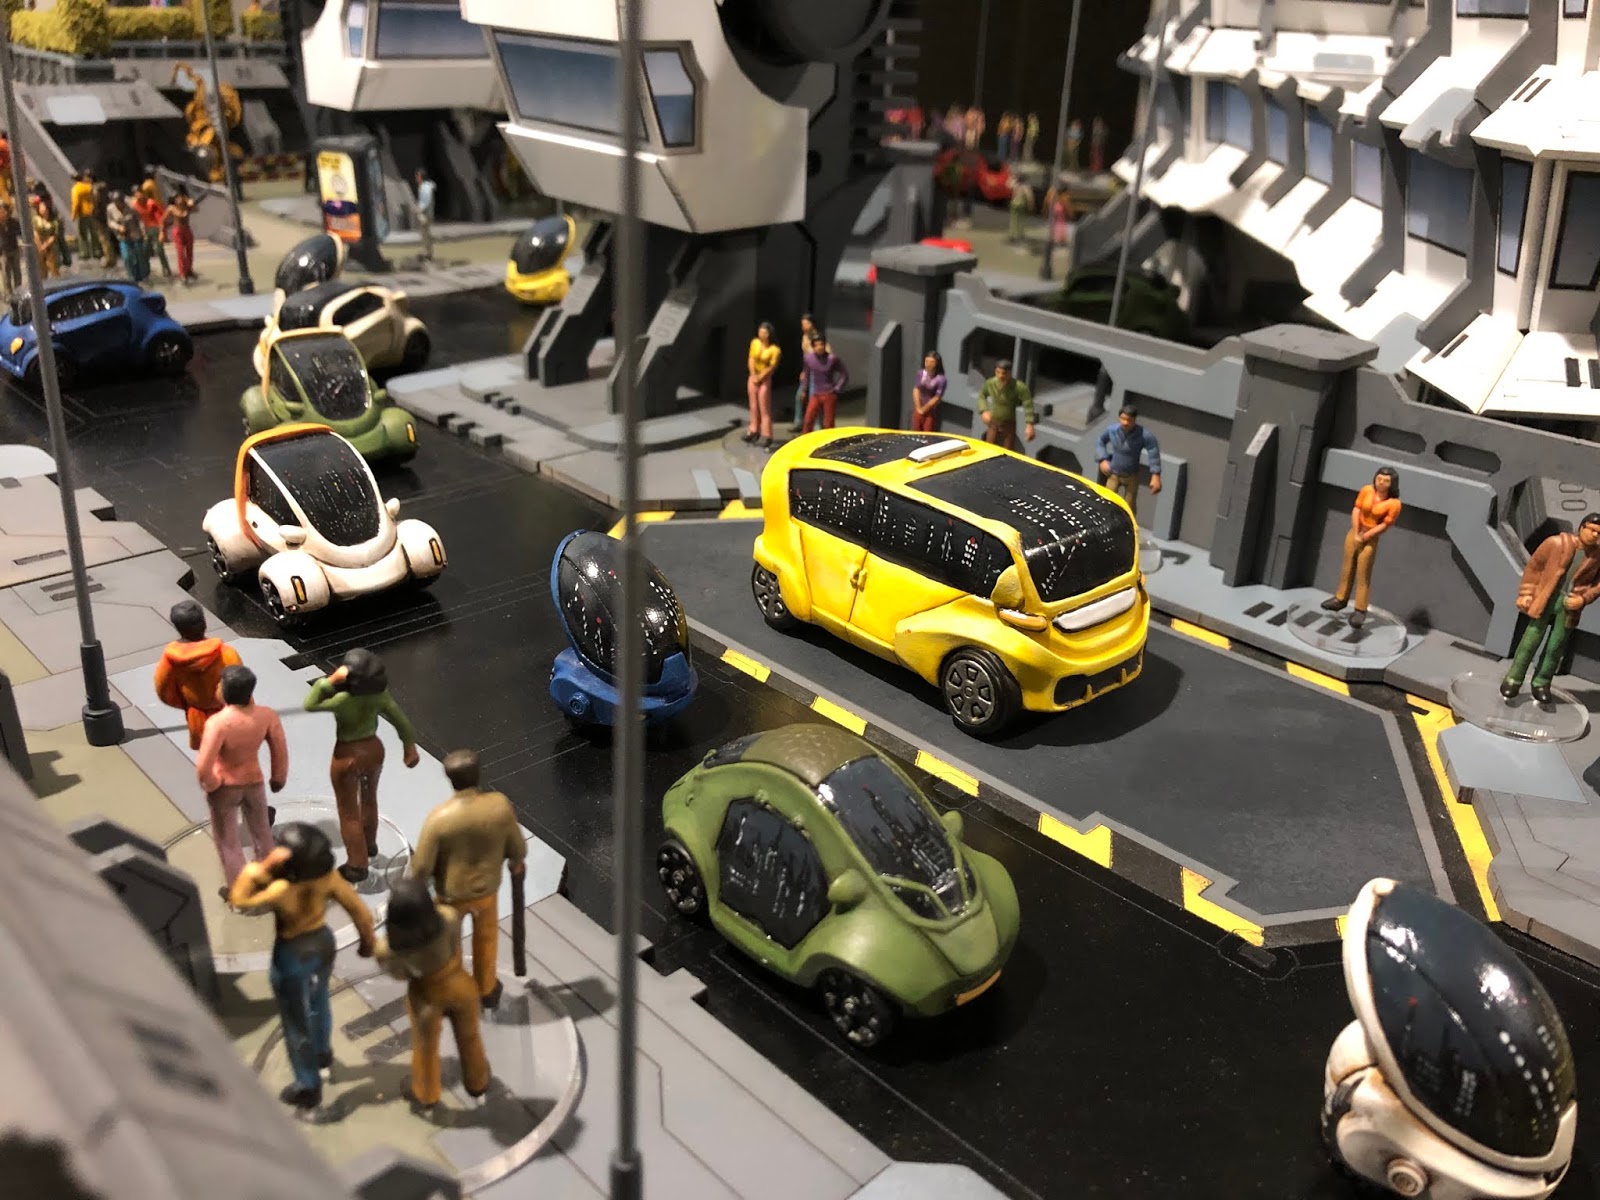
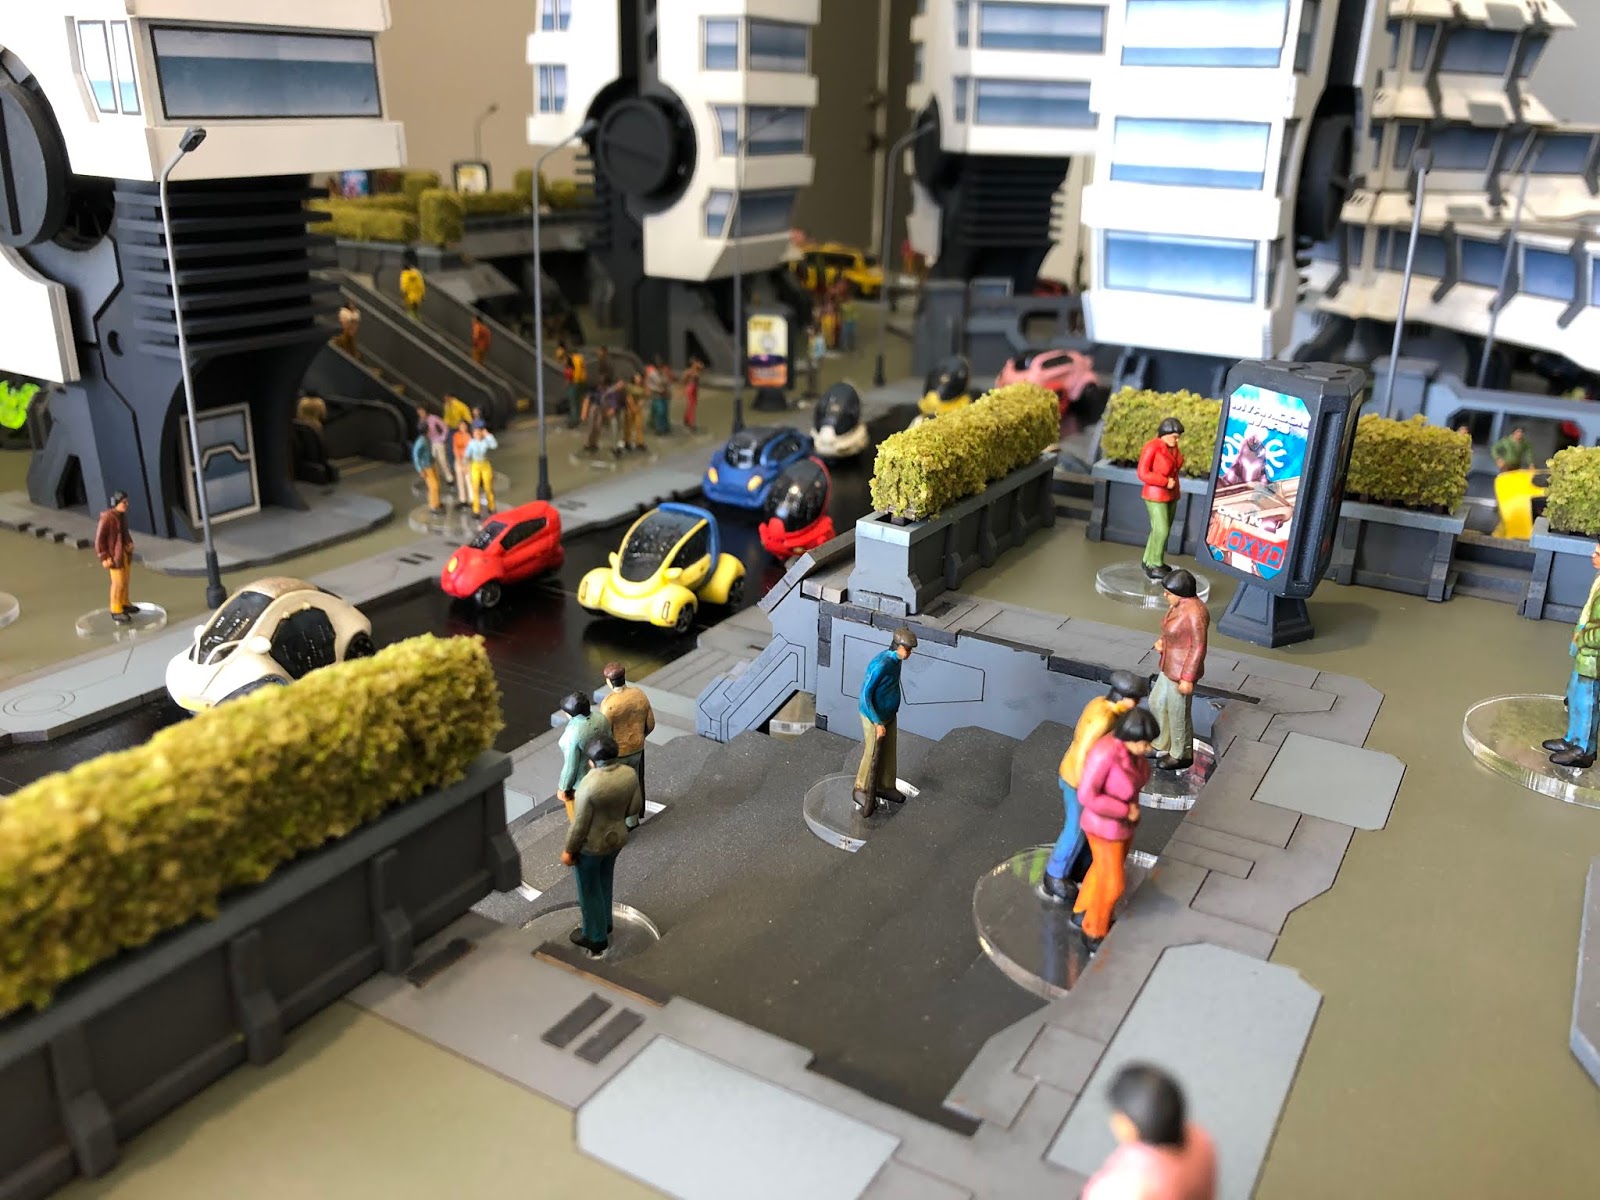
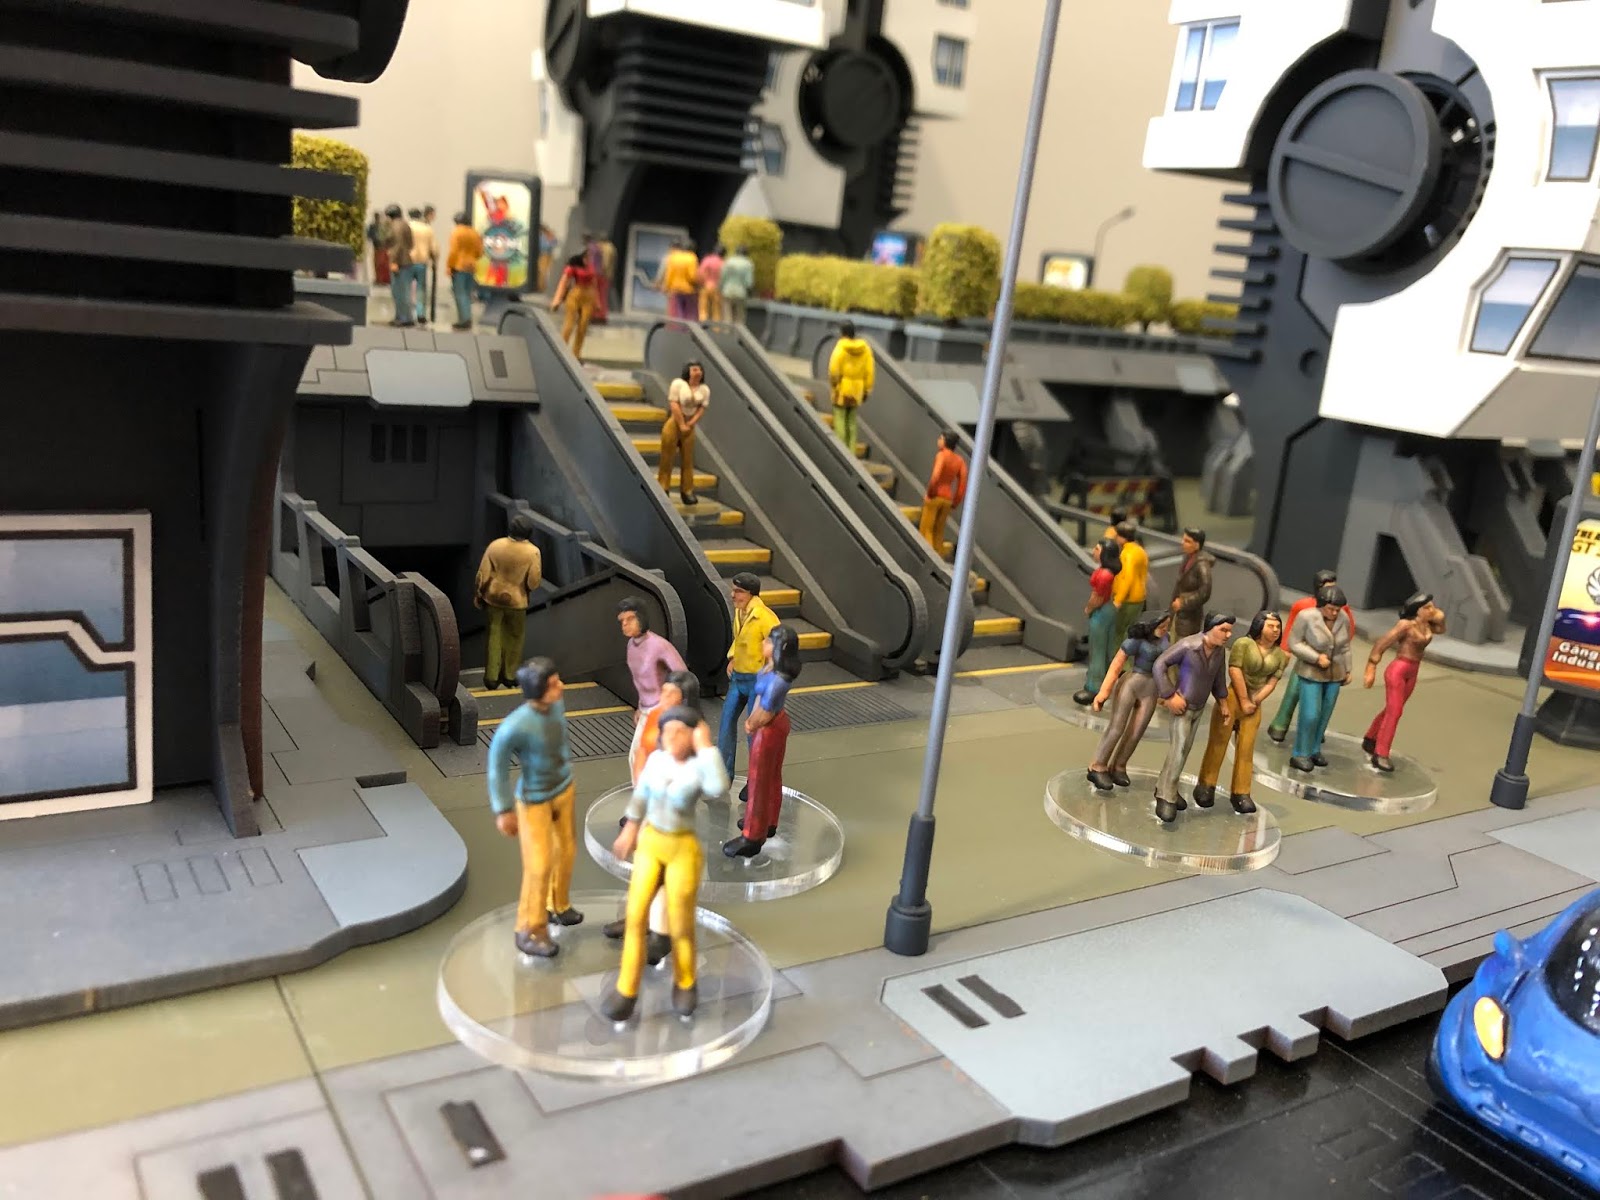
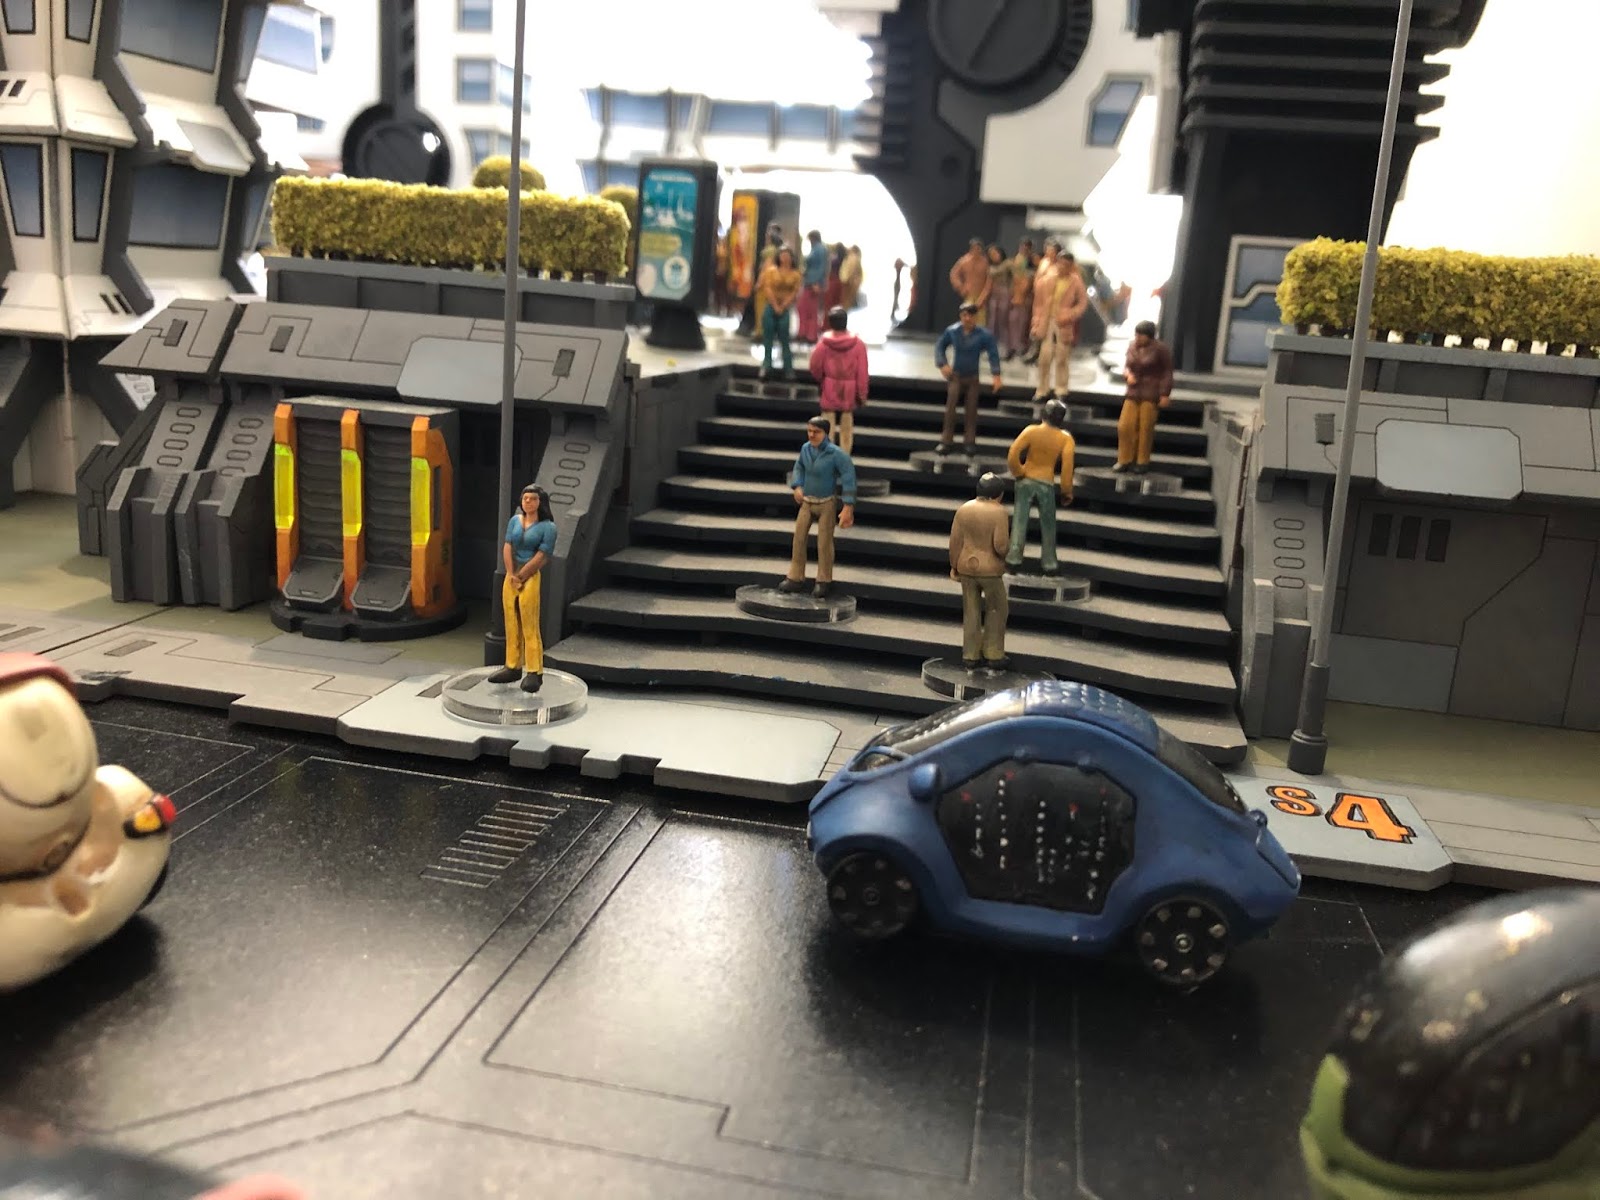
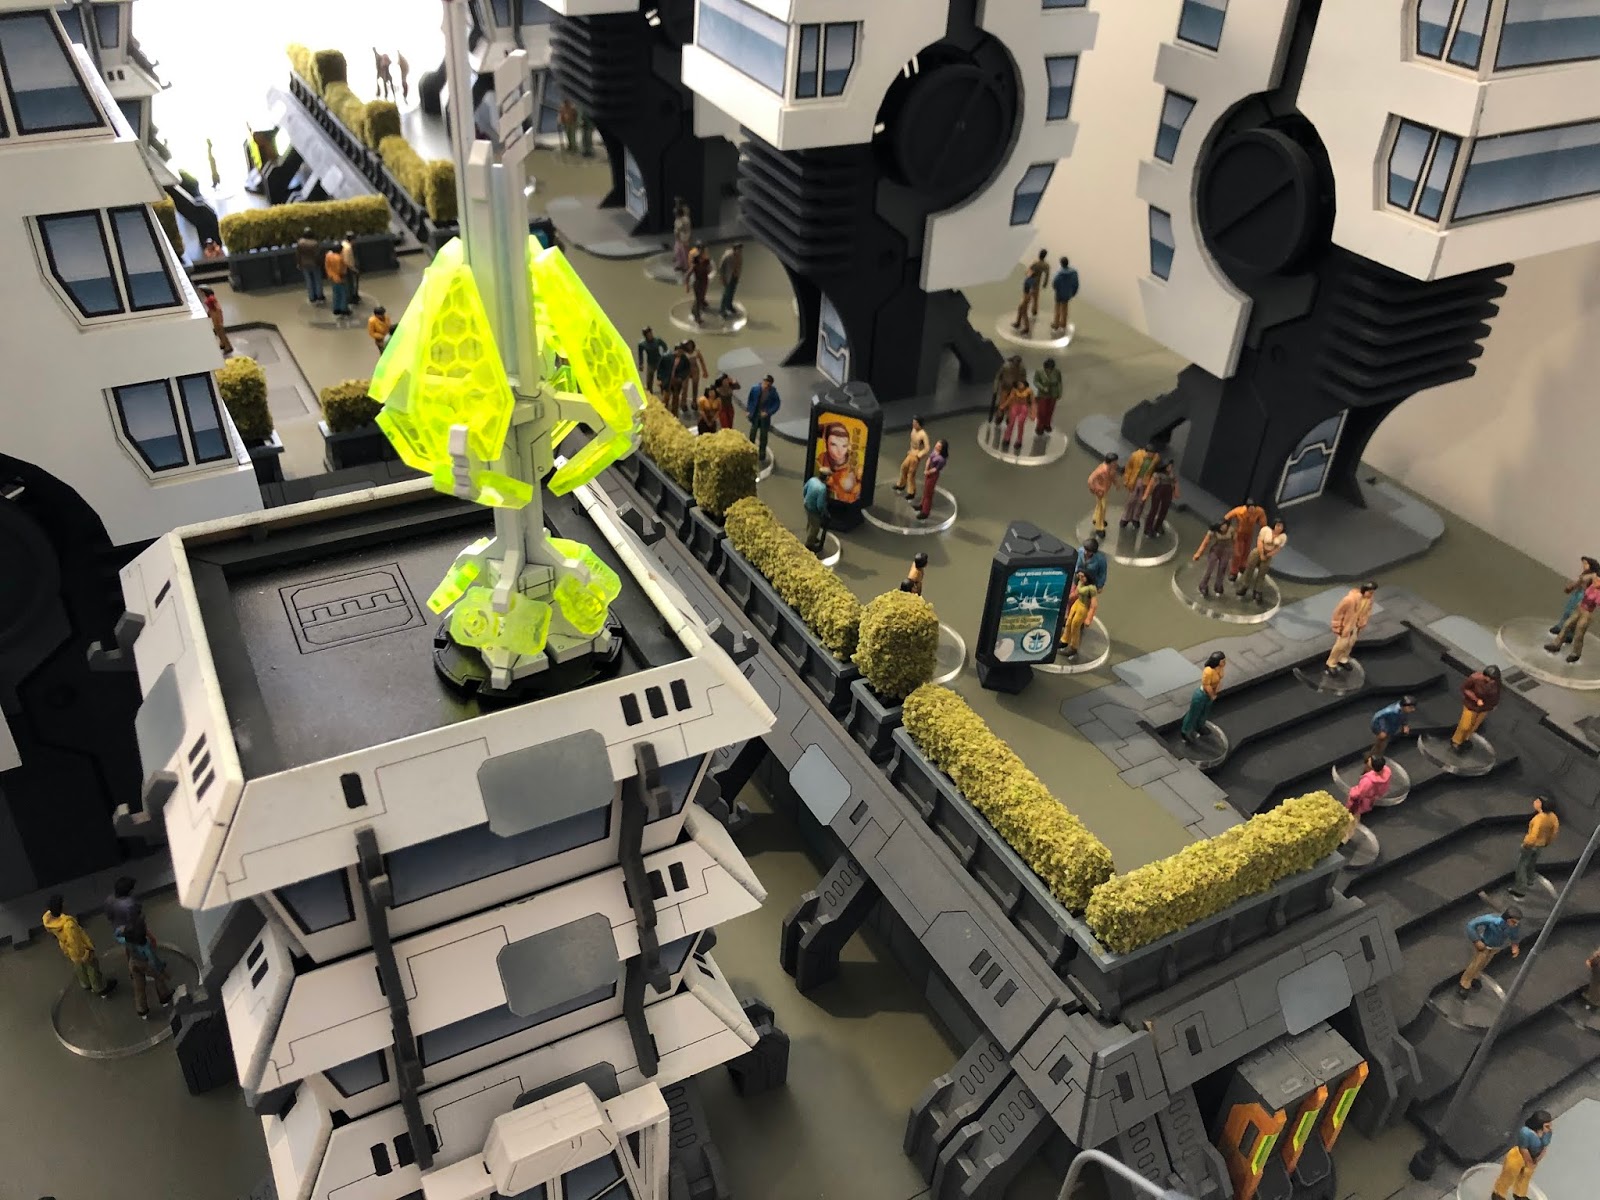
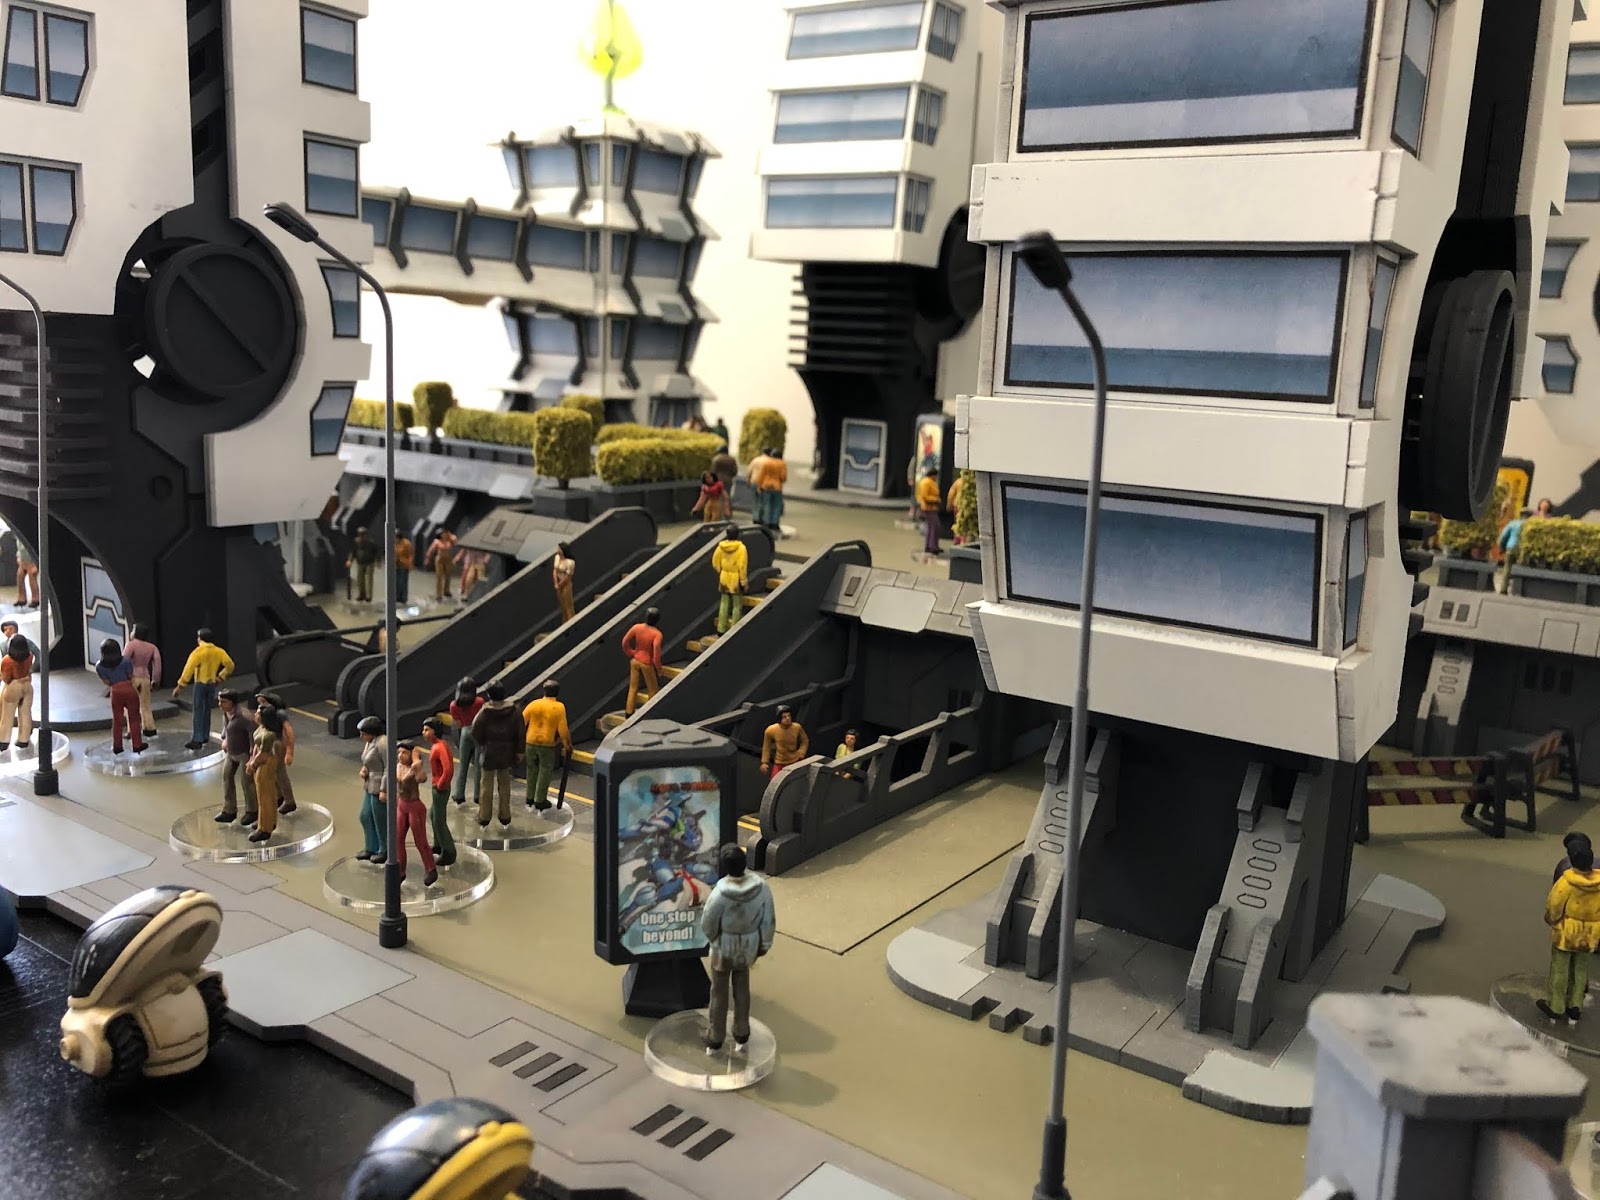
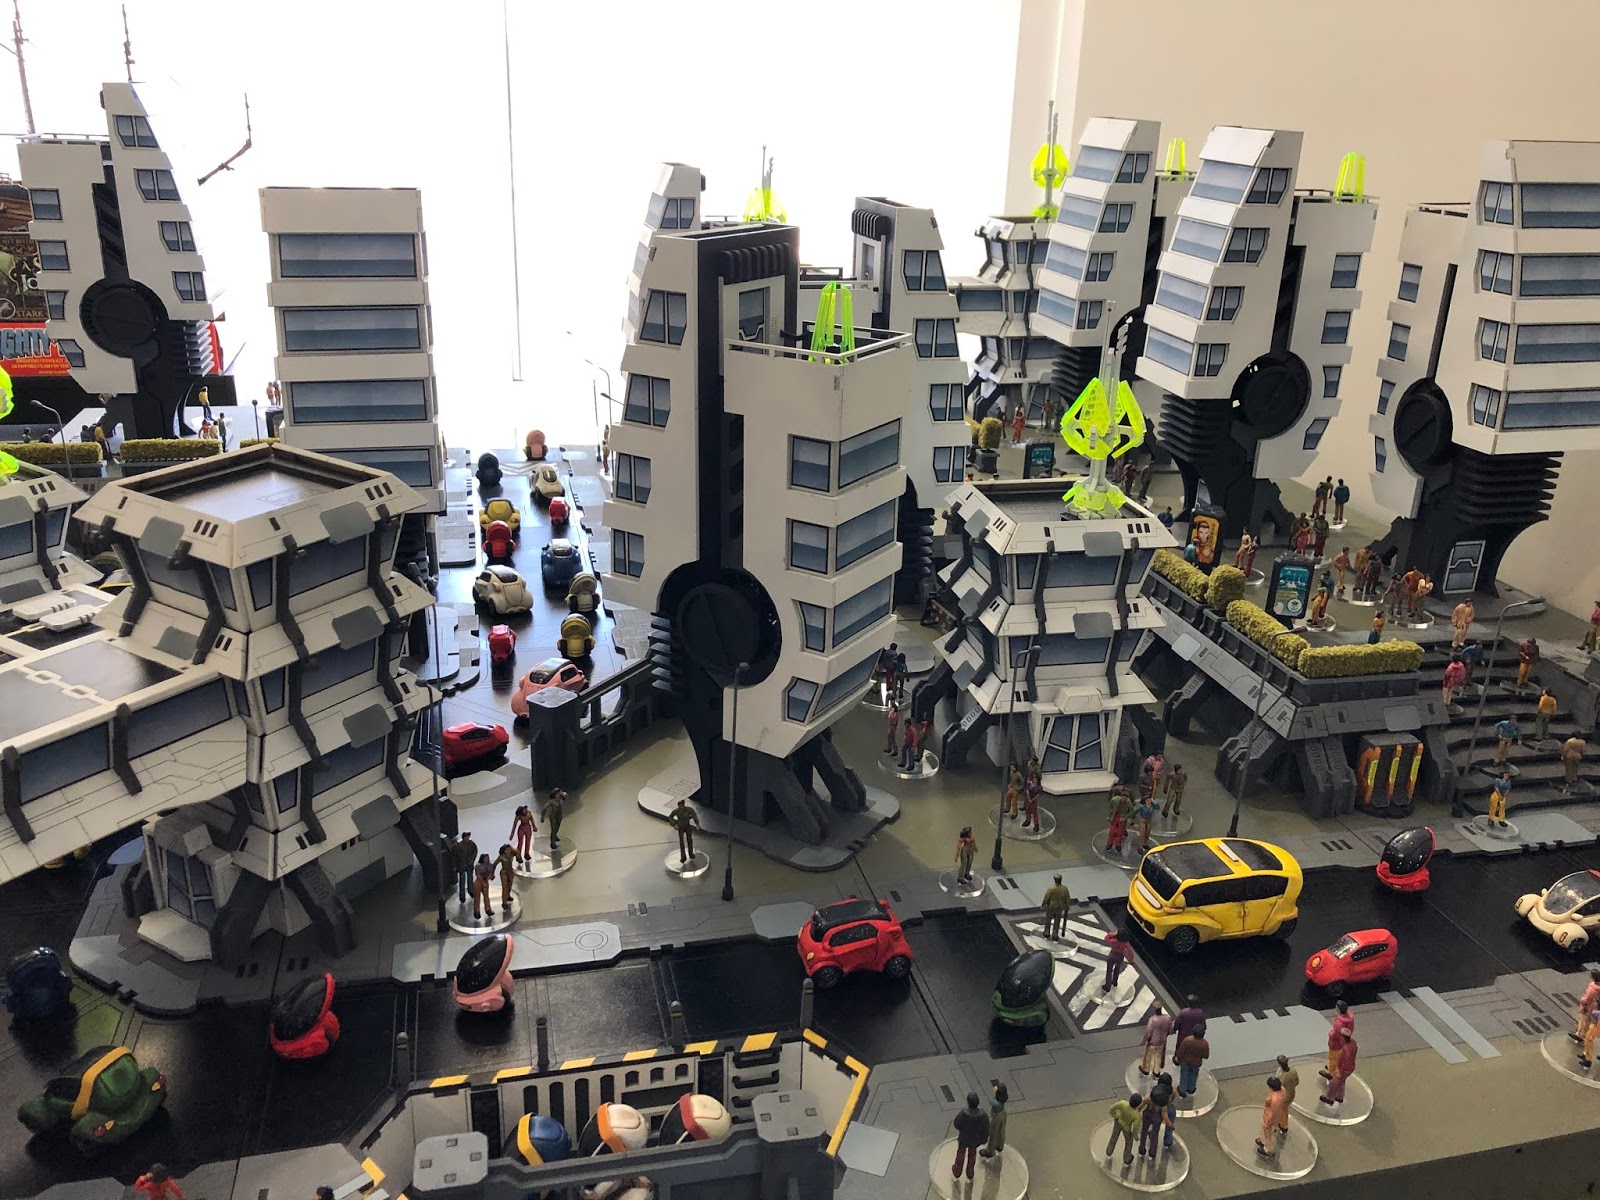
My Futuristic City Terrain which is a mixture of MDF kits, Resin Vehicles and cheap train layout civilians.
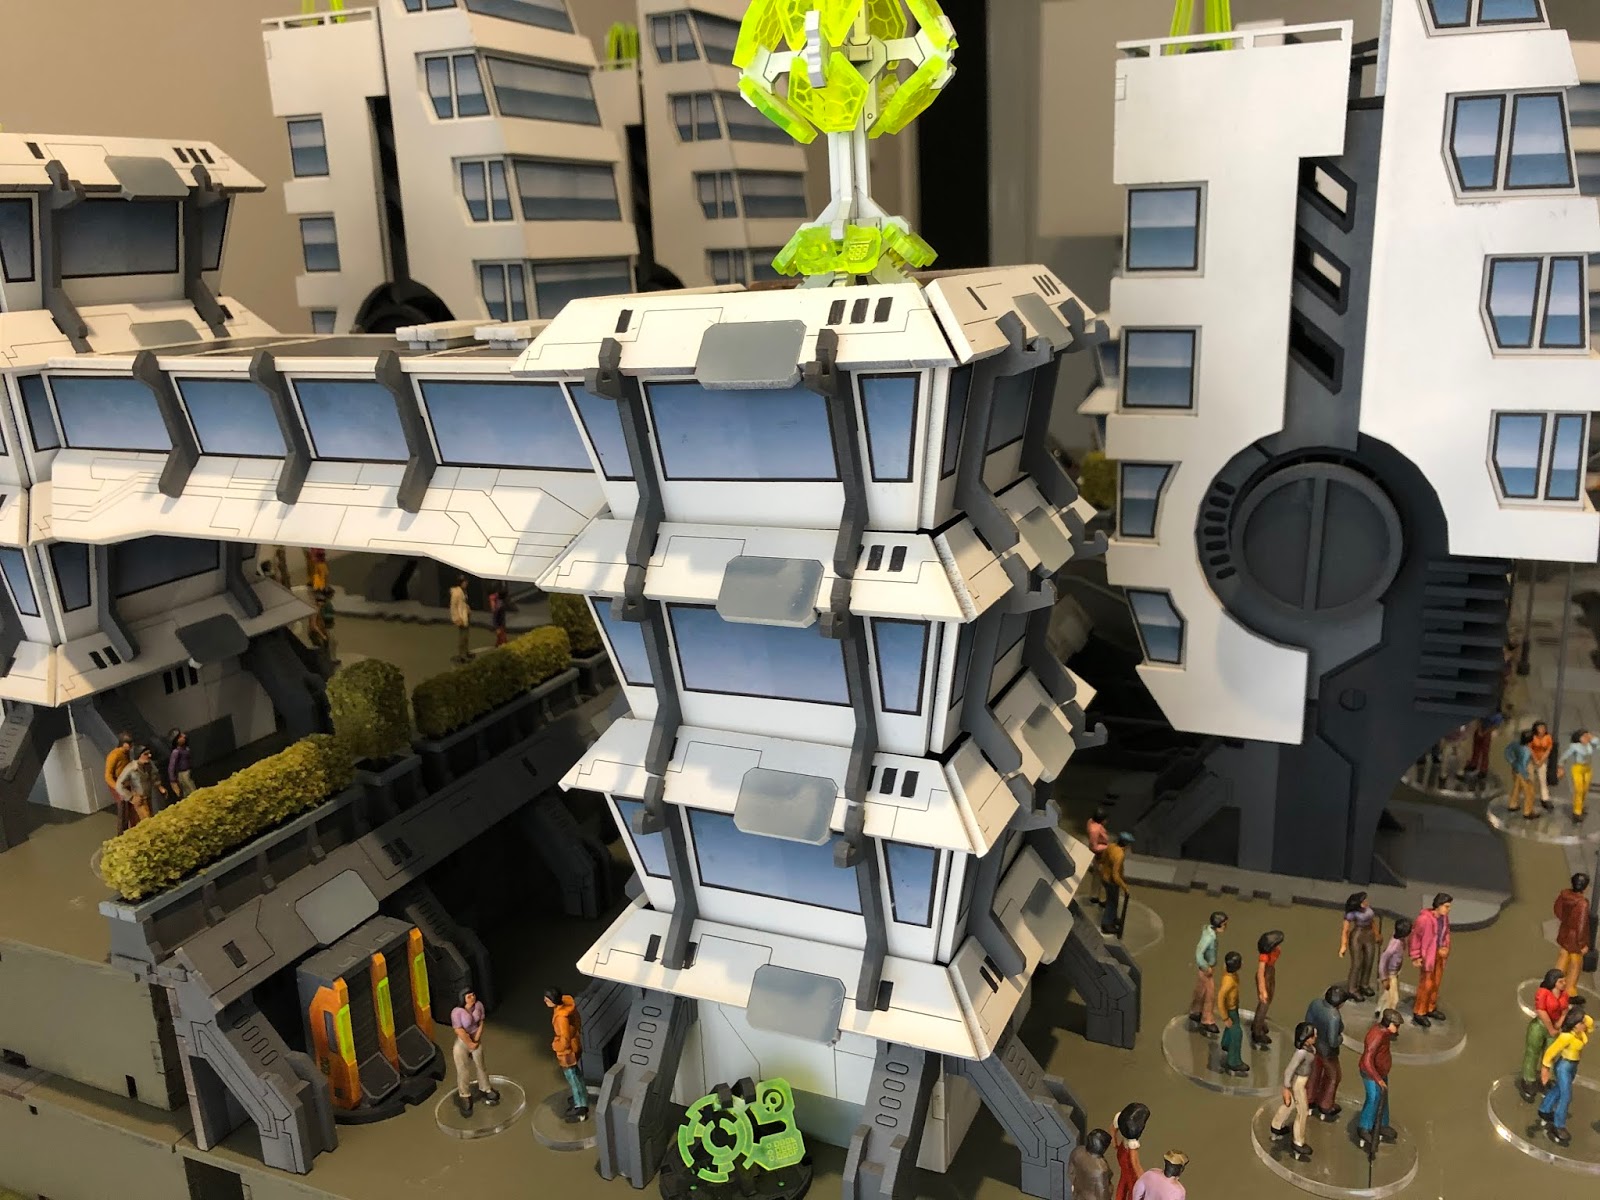
The buildings and terrain were all painted with spray cans. I used masking tape to tape of areas where needed and for the most part spray painted everything before assembling it.
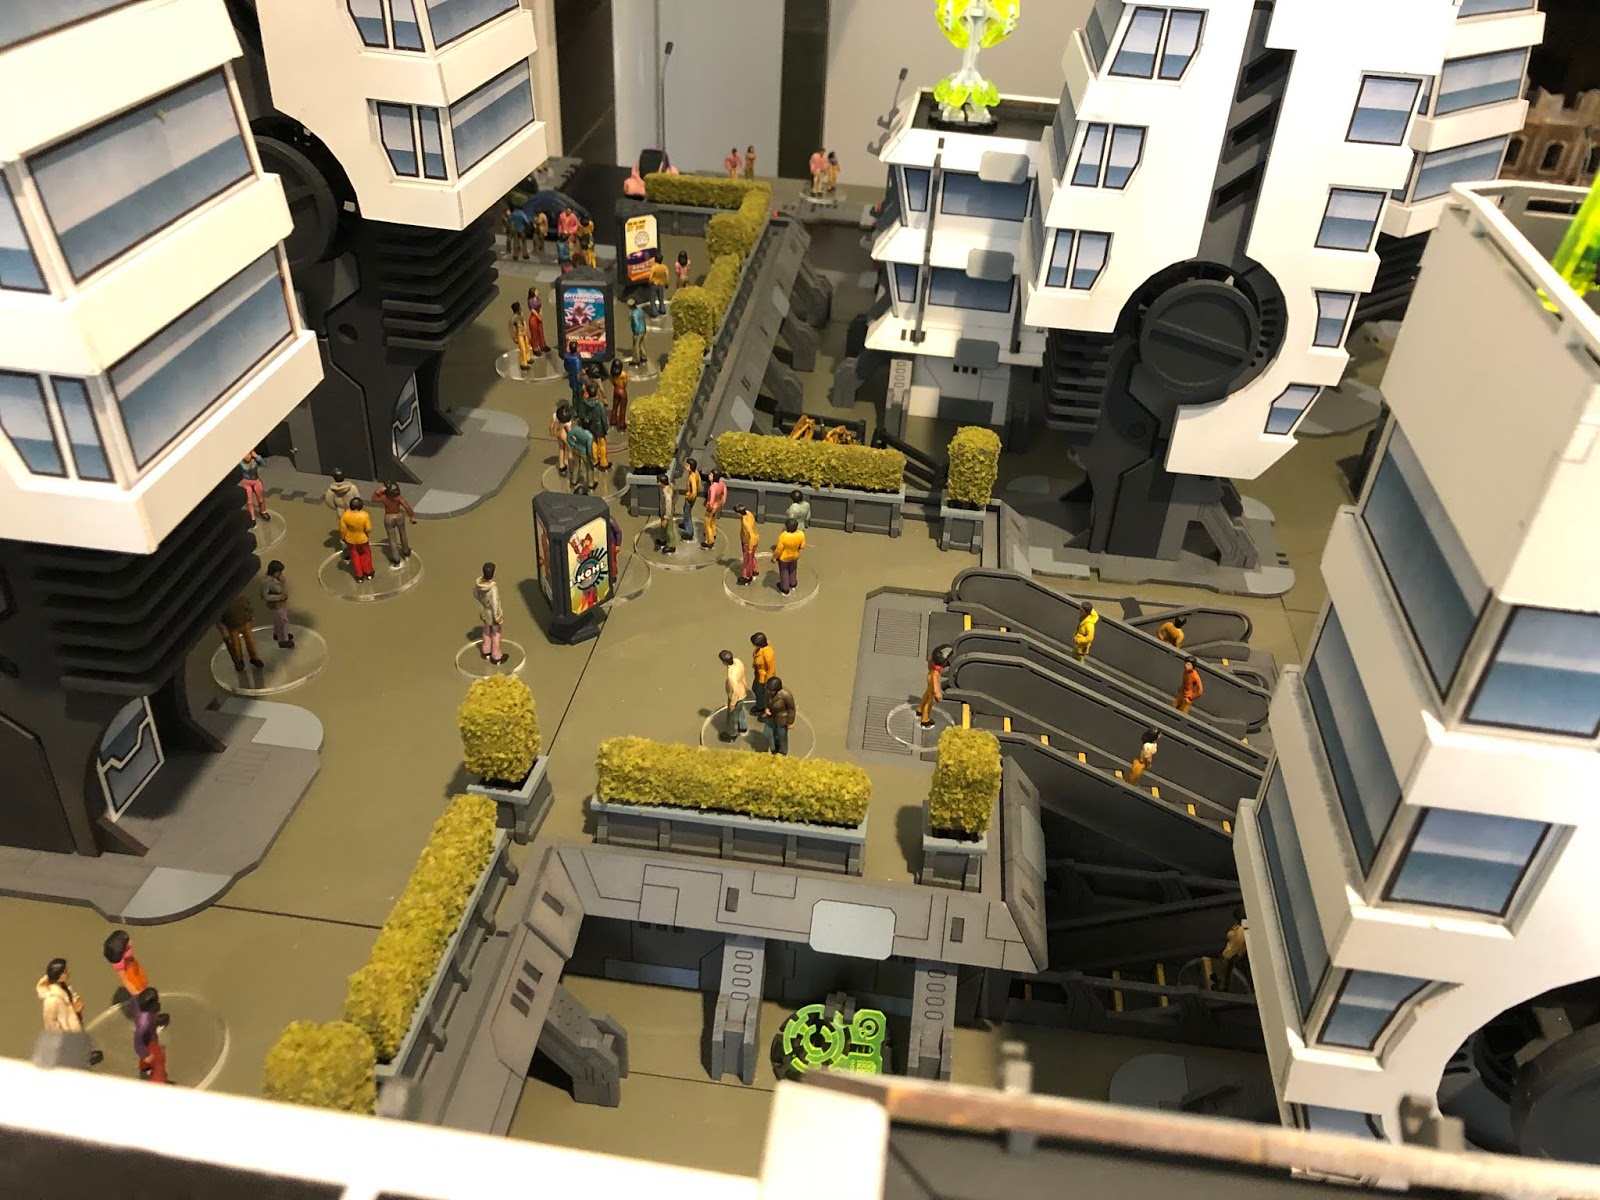
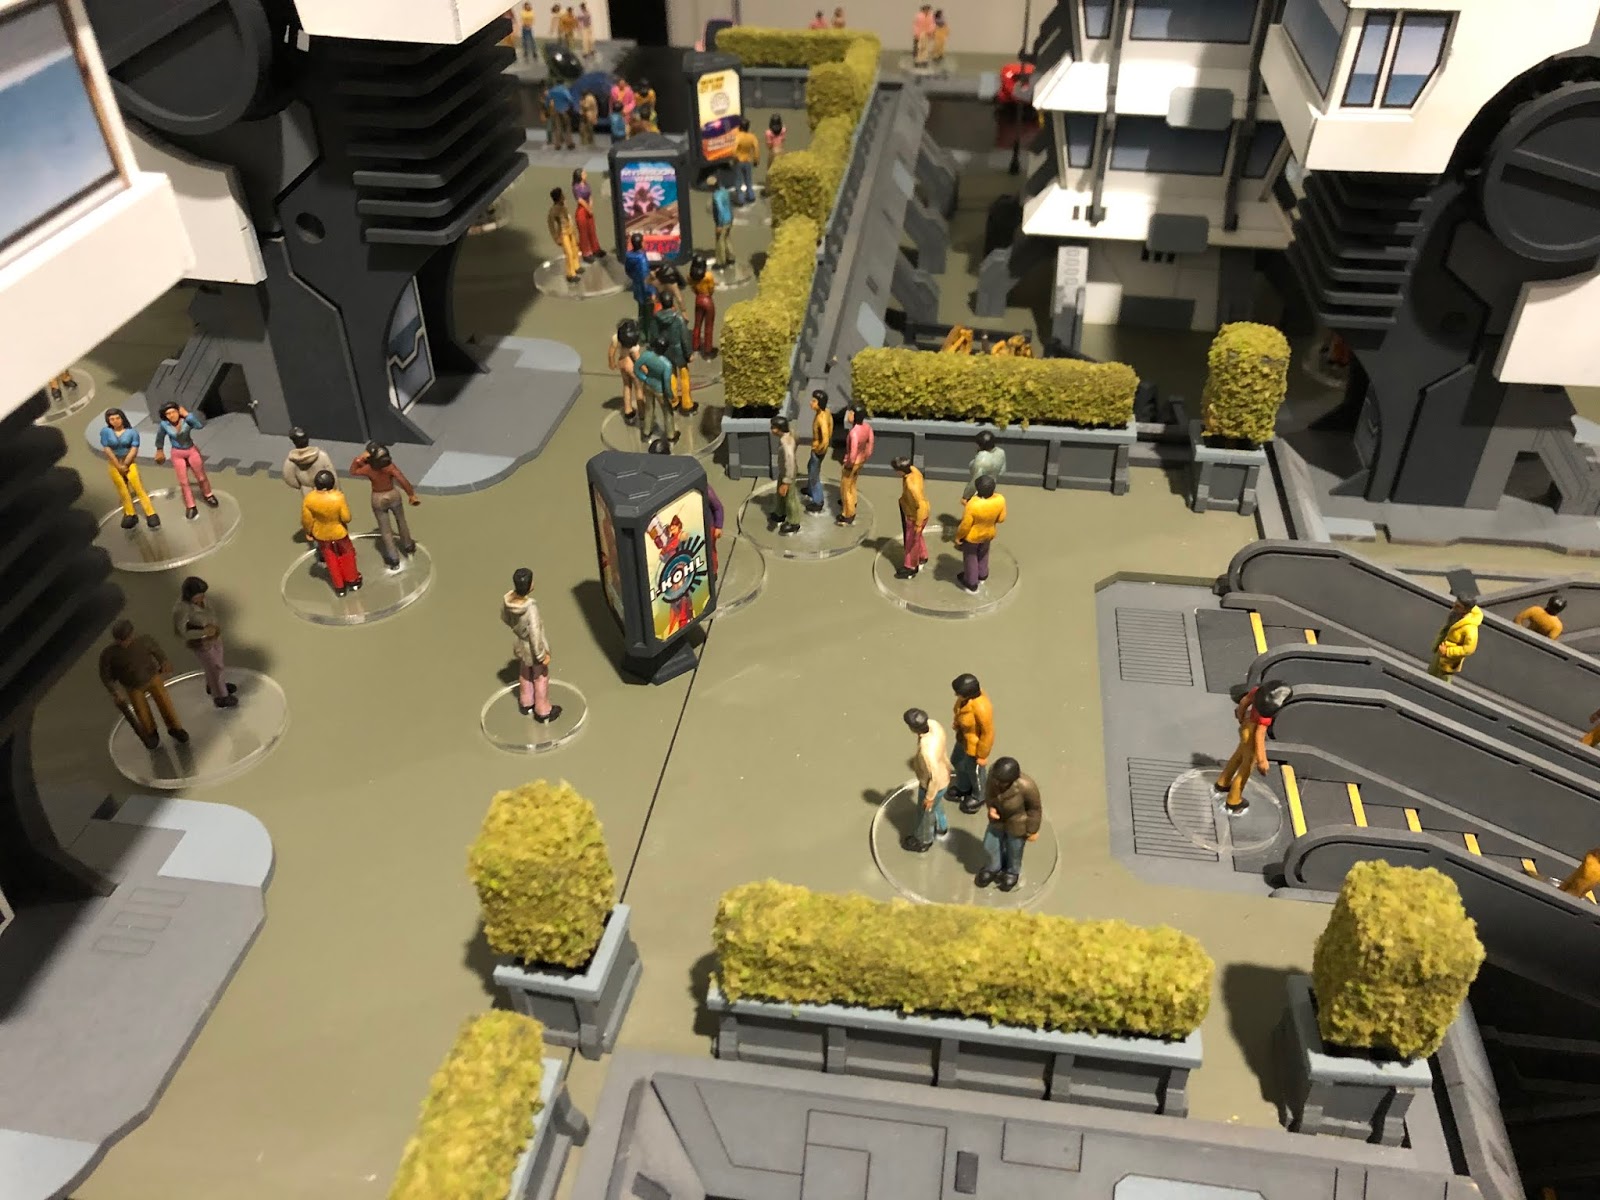
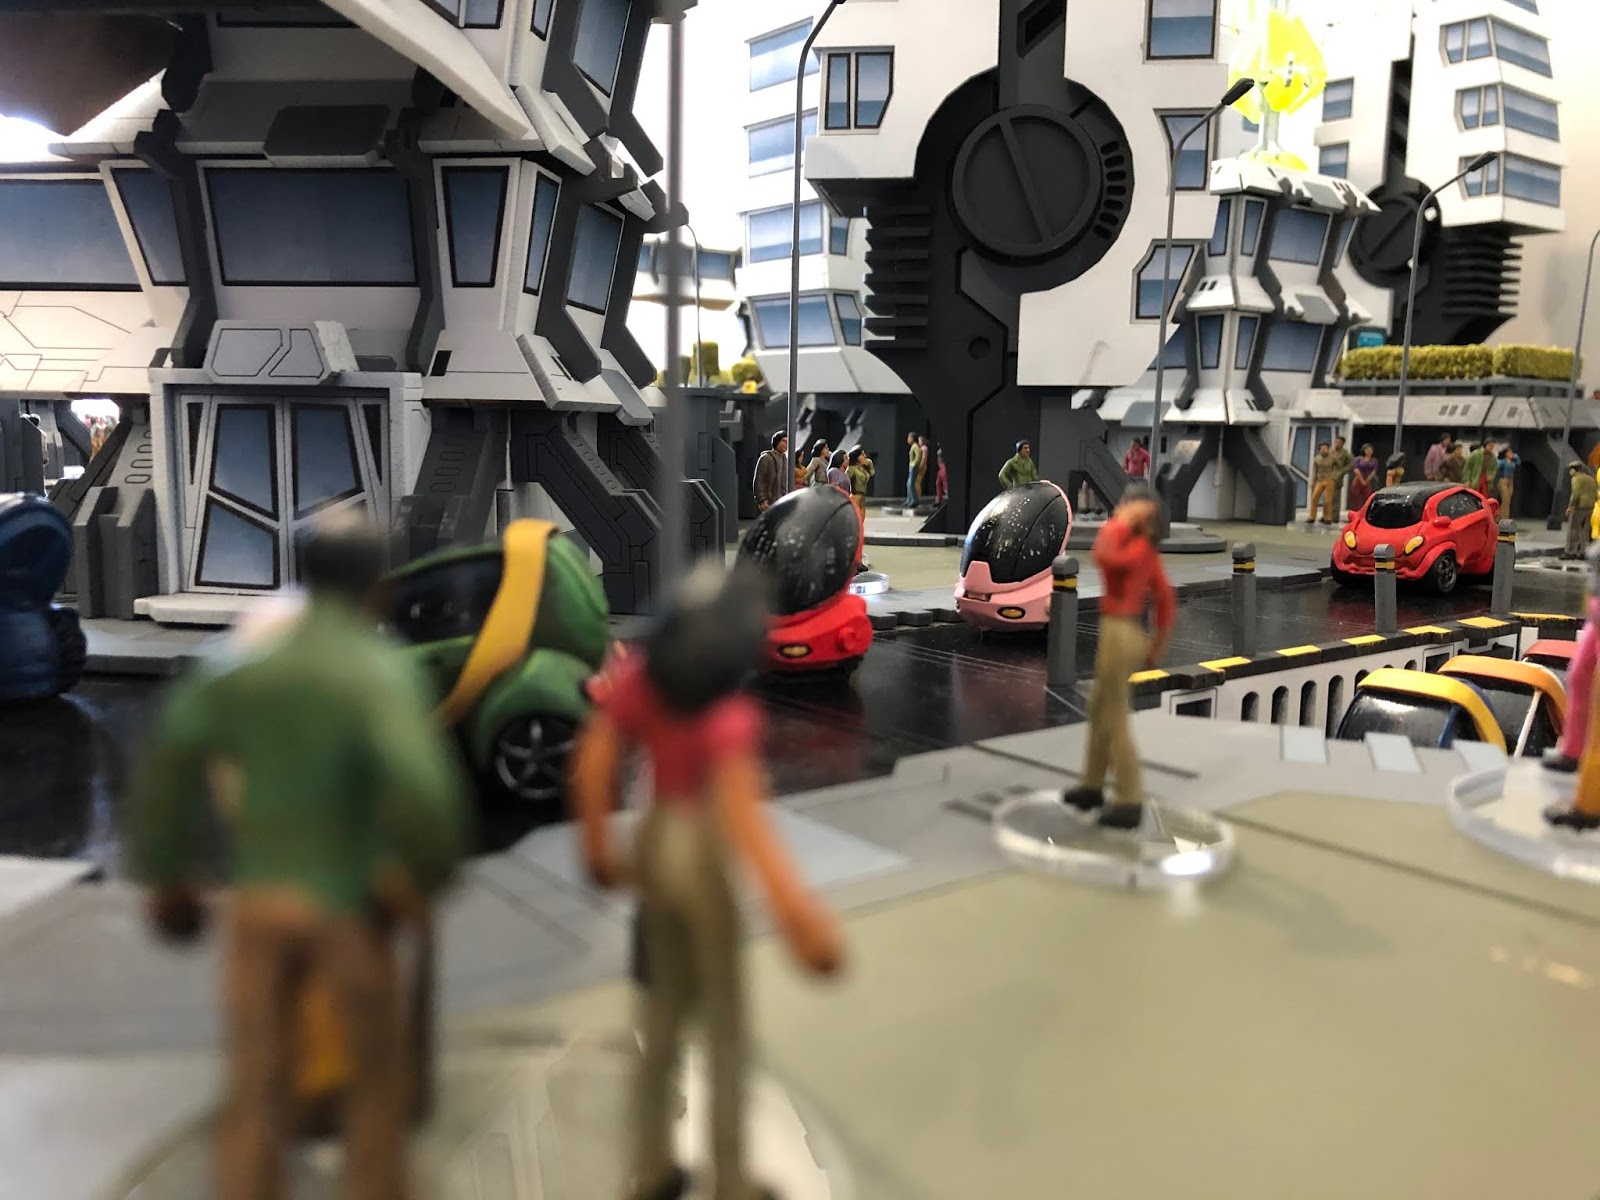
I used a very limited palette and went with white buildings because they I wanted a bright futuristic feel and not the normal dark gothic look that is popular in games like Warhammer 40K
This terrain was built with Judge Dredd and Infinity in mind, so a comic book style seemed to fit the bill.
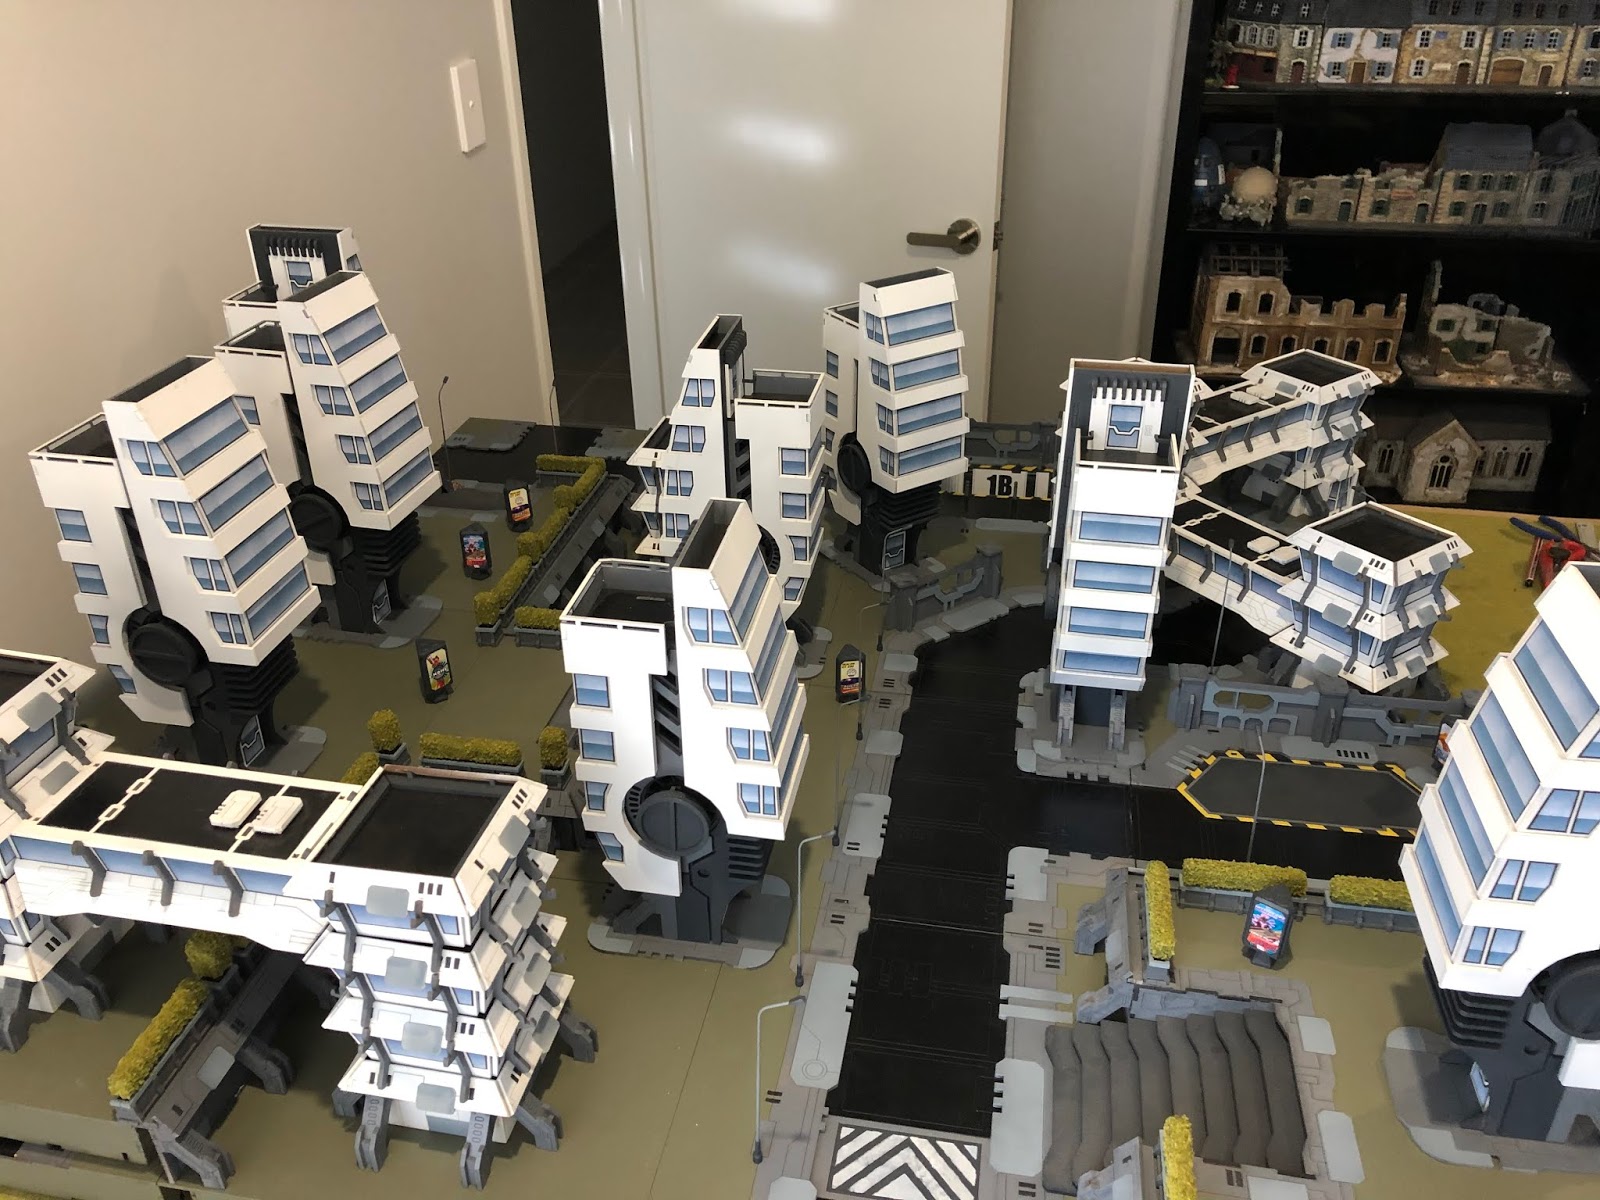
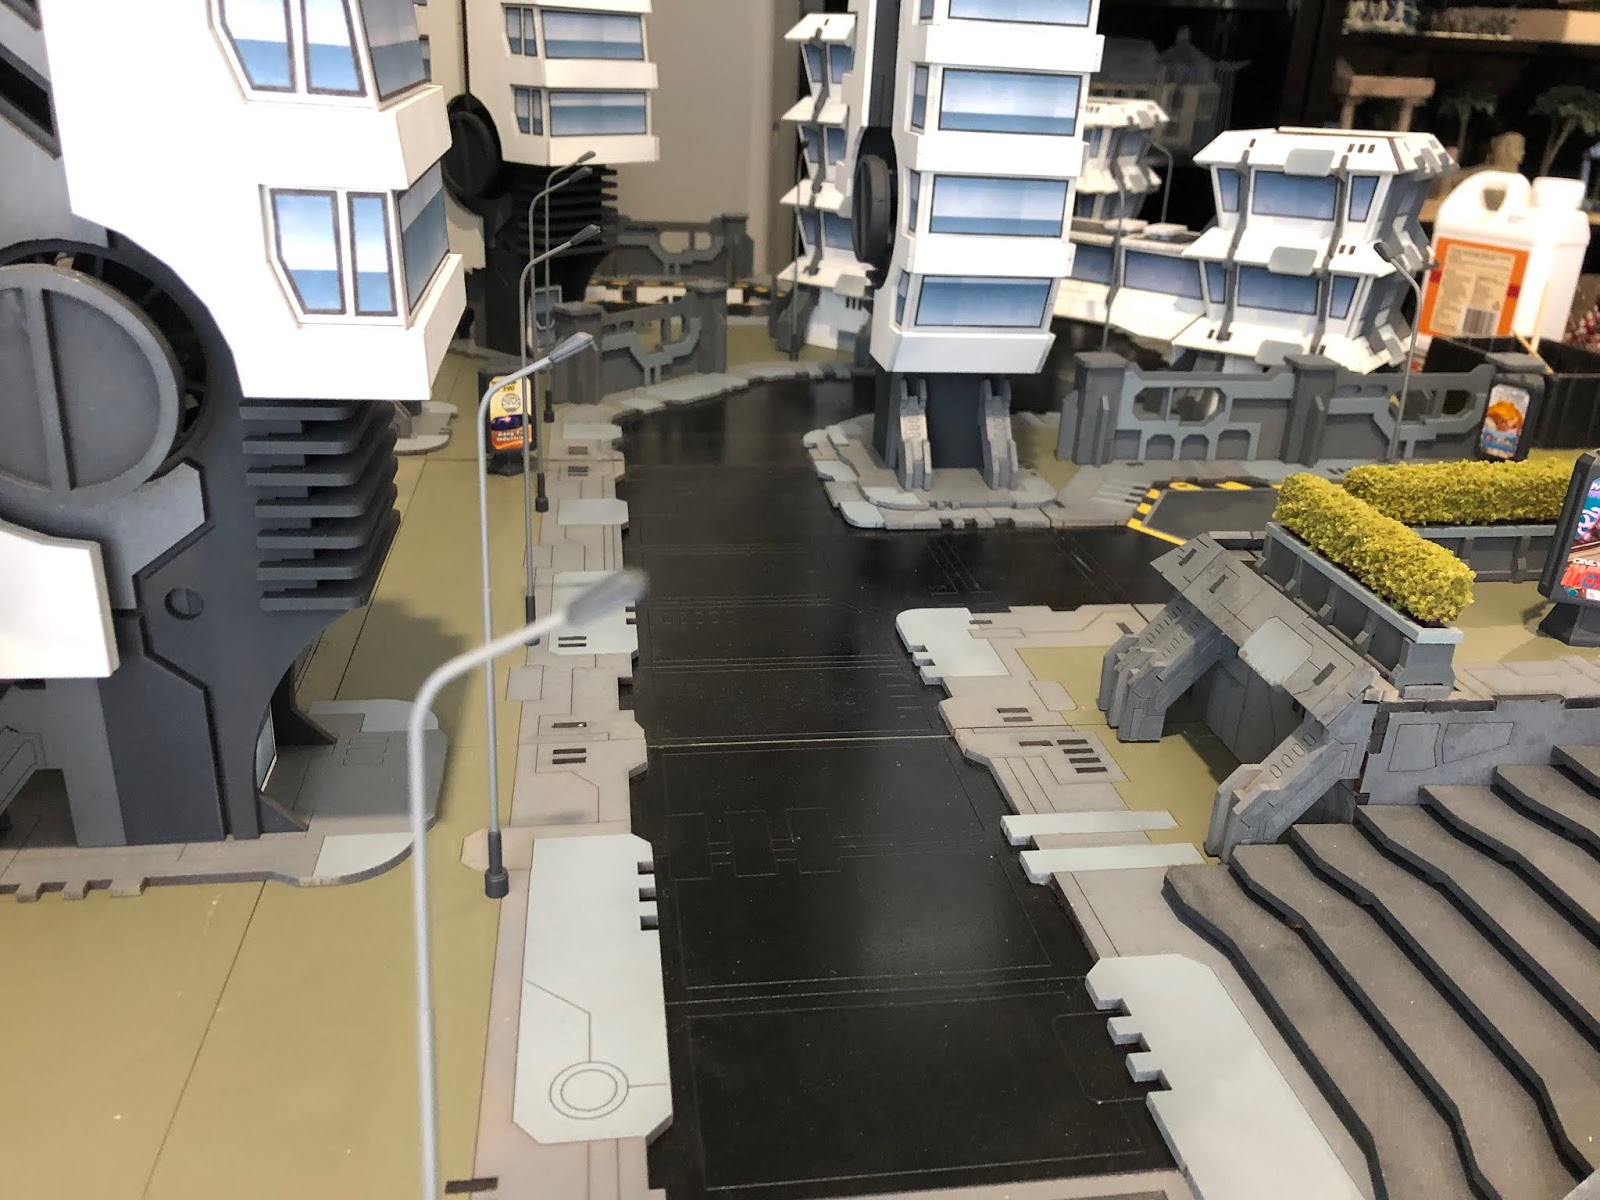
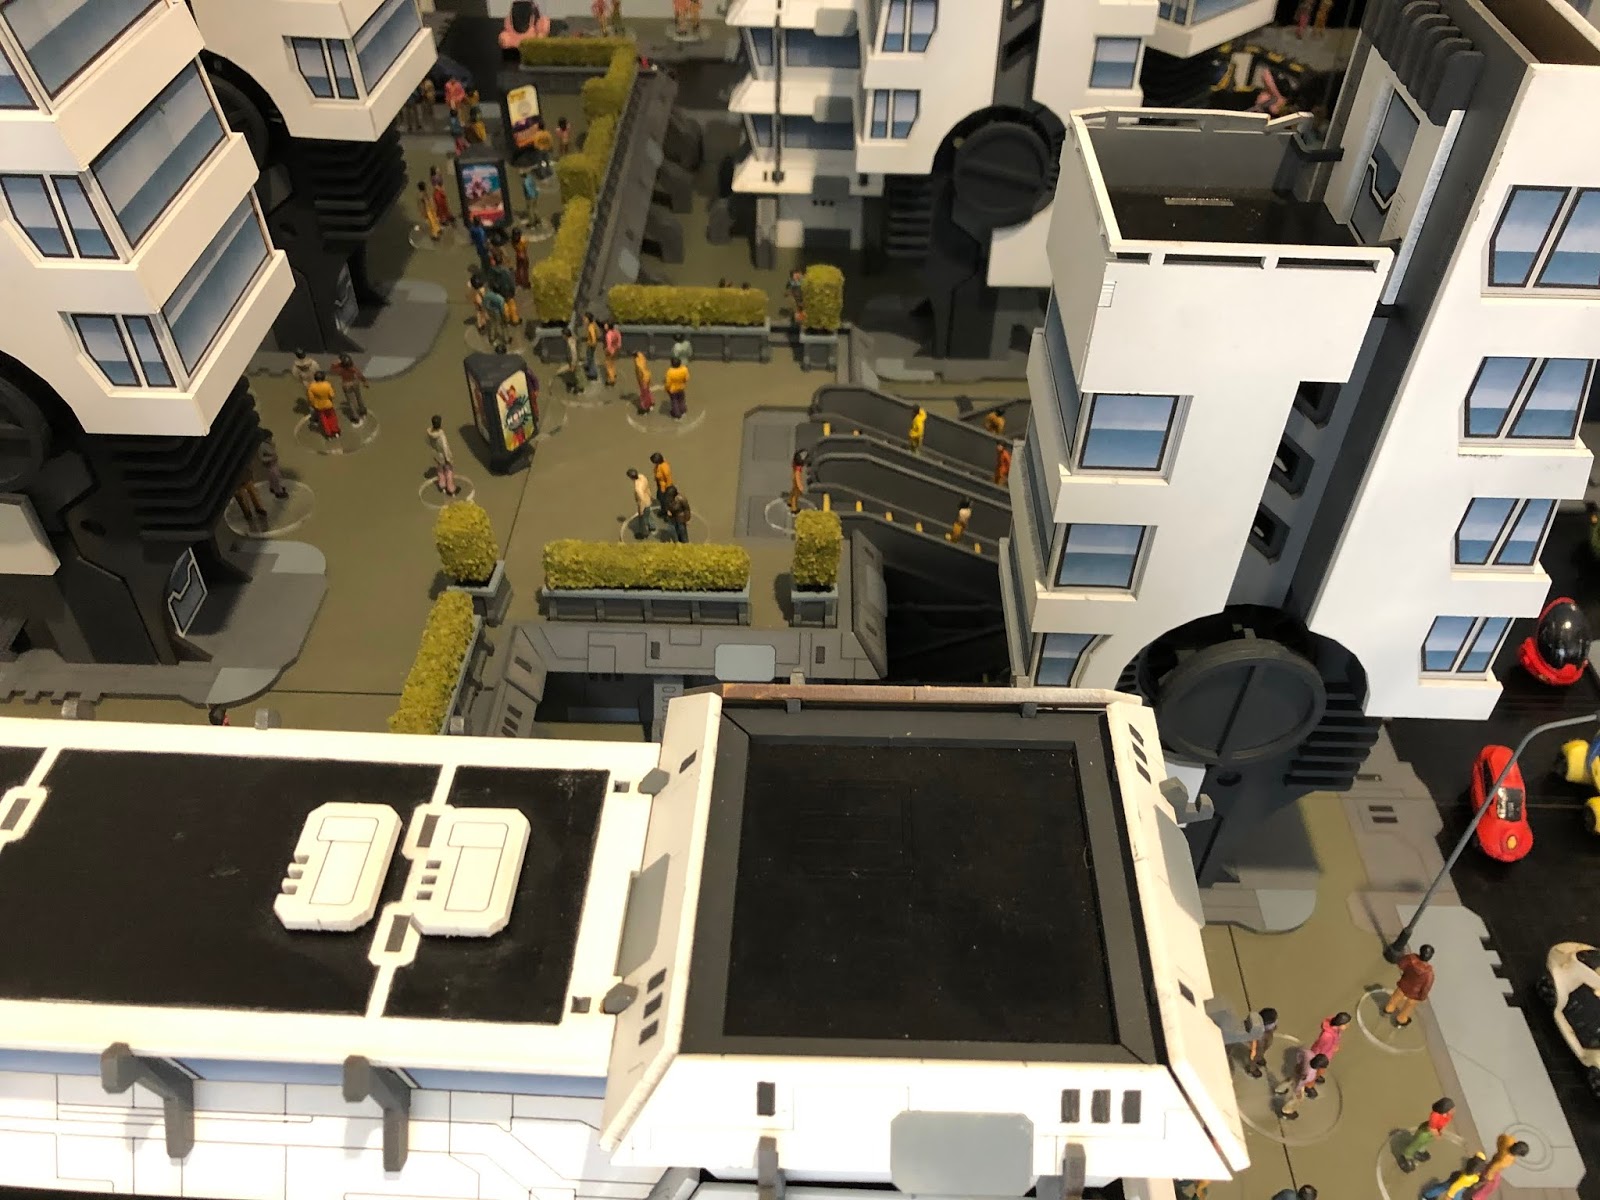
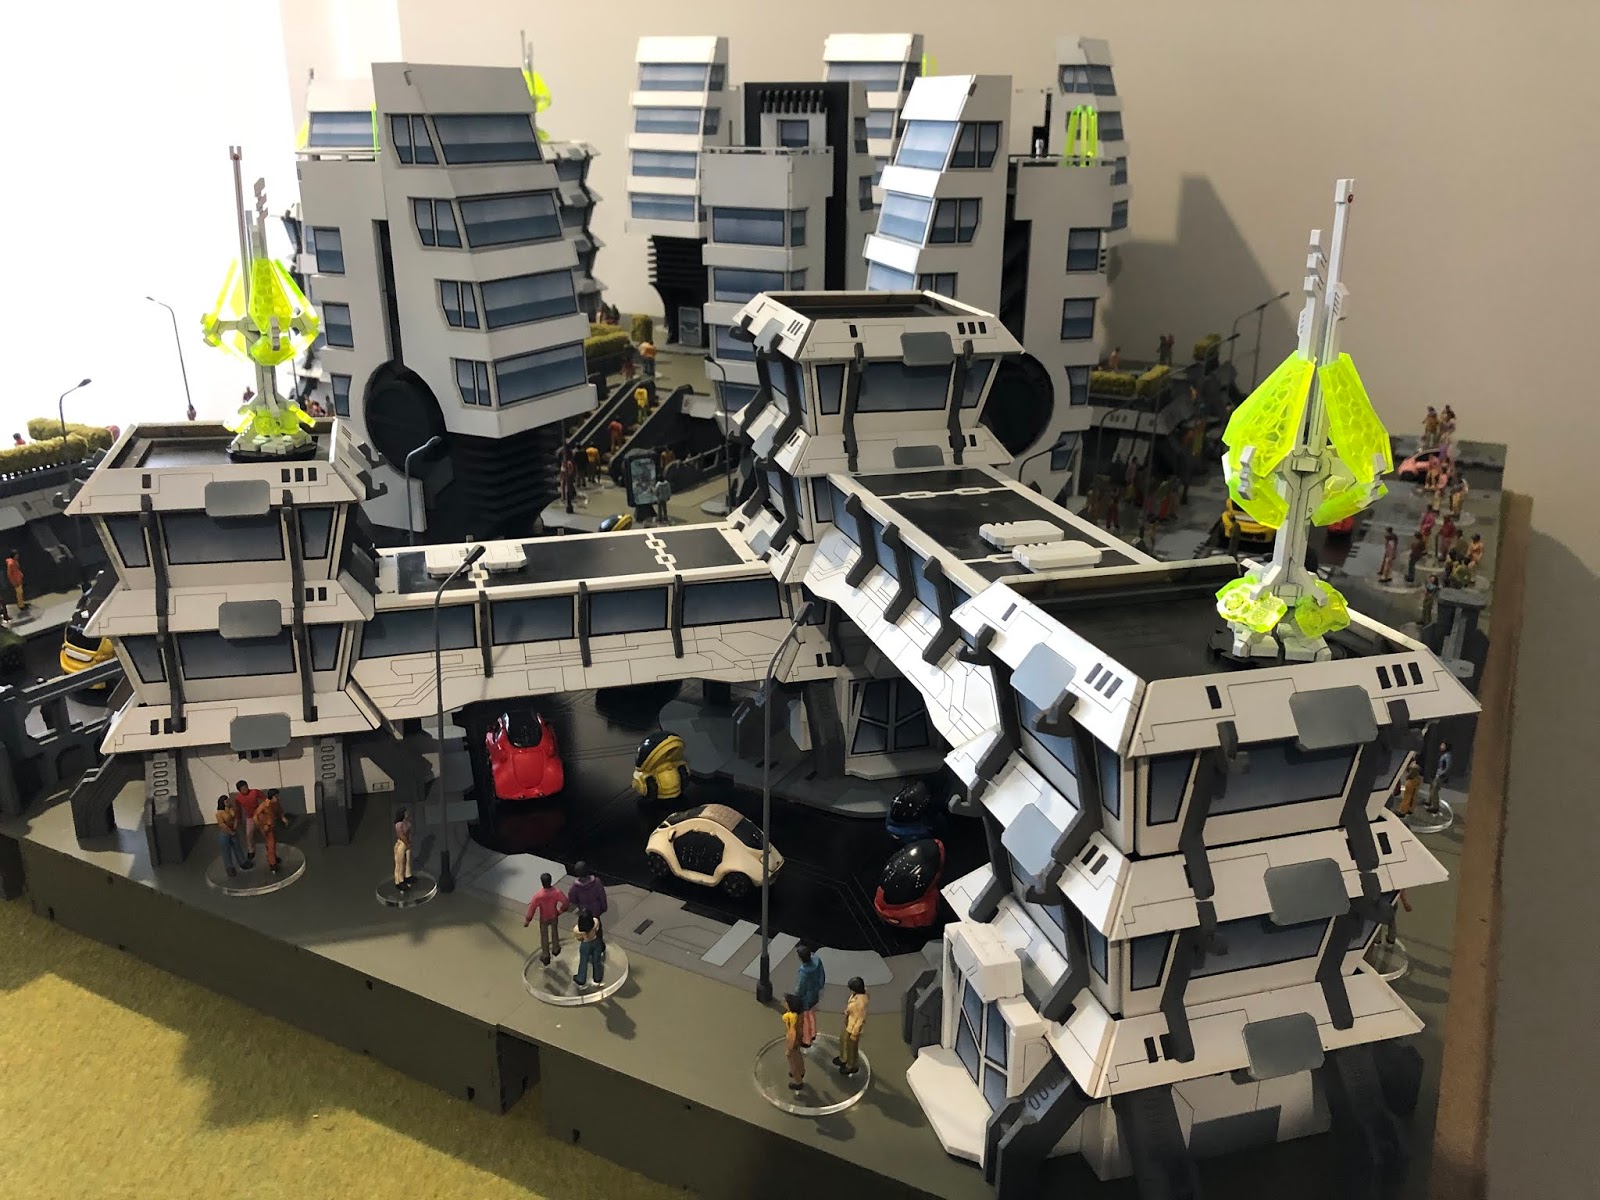
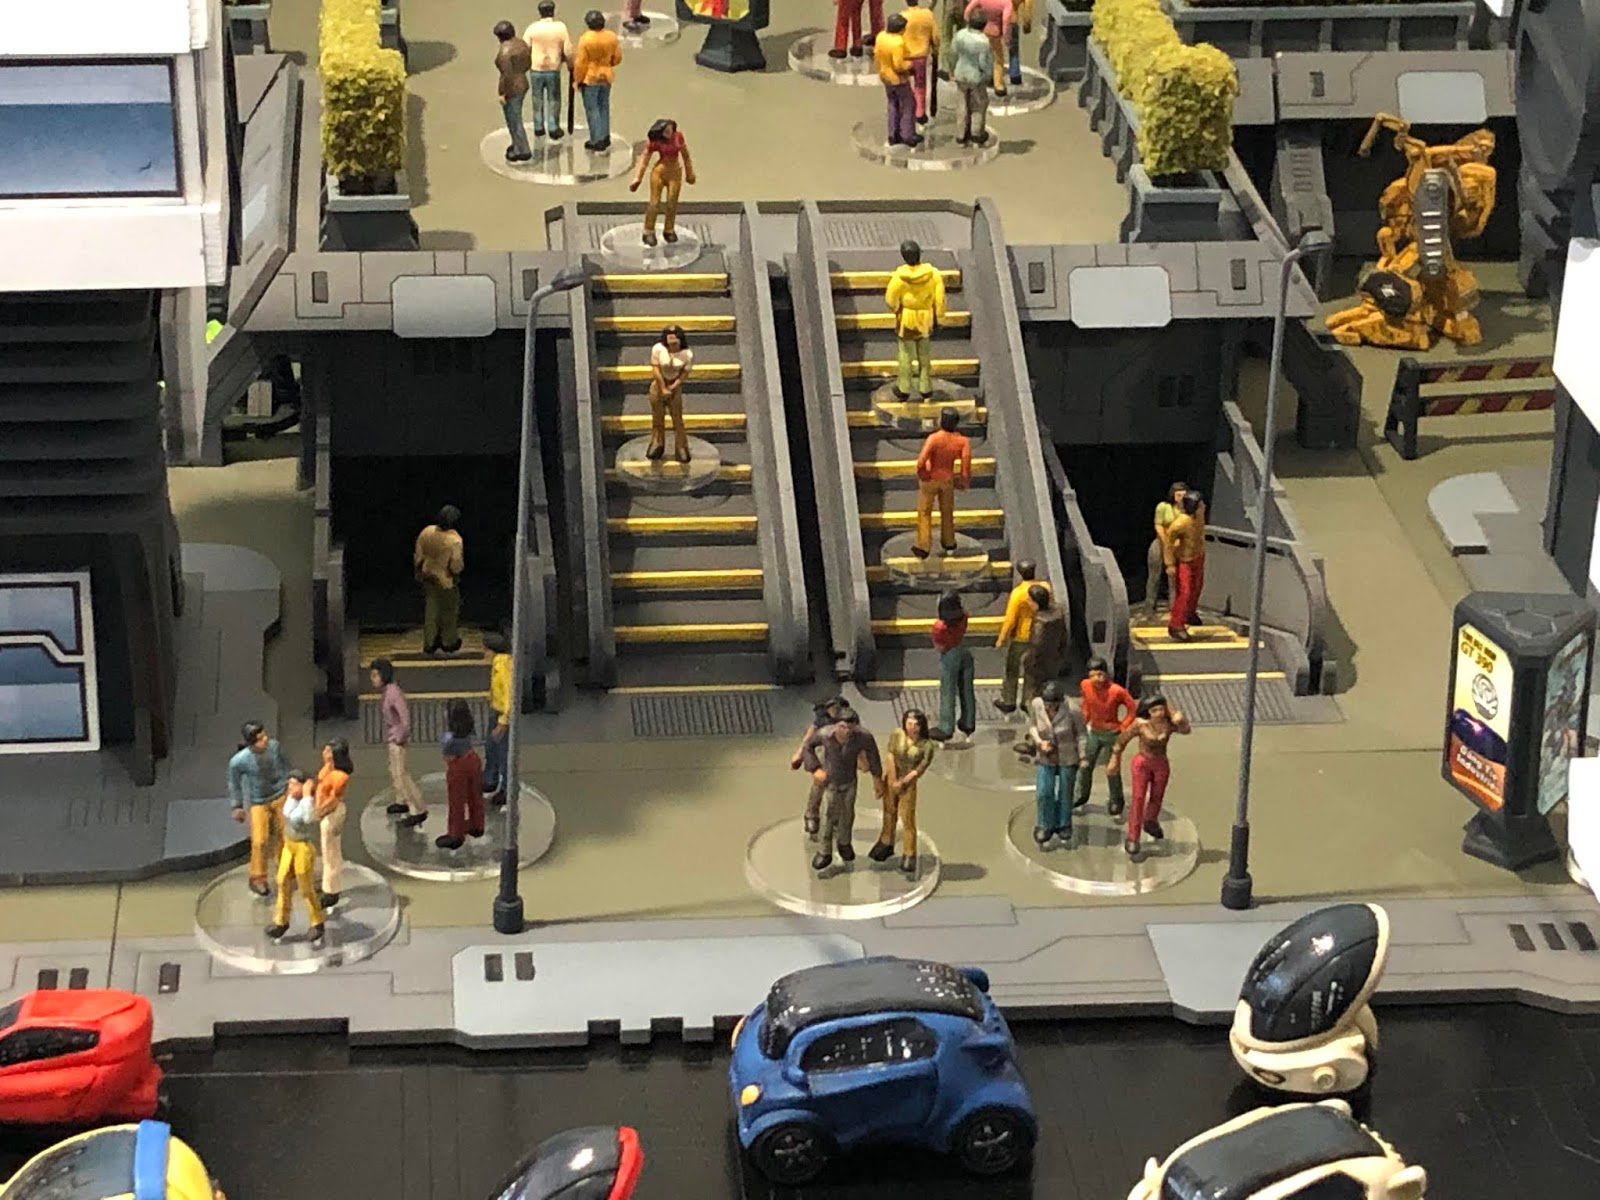
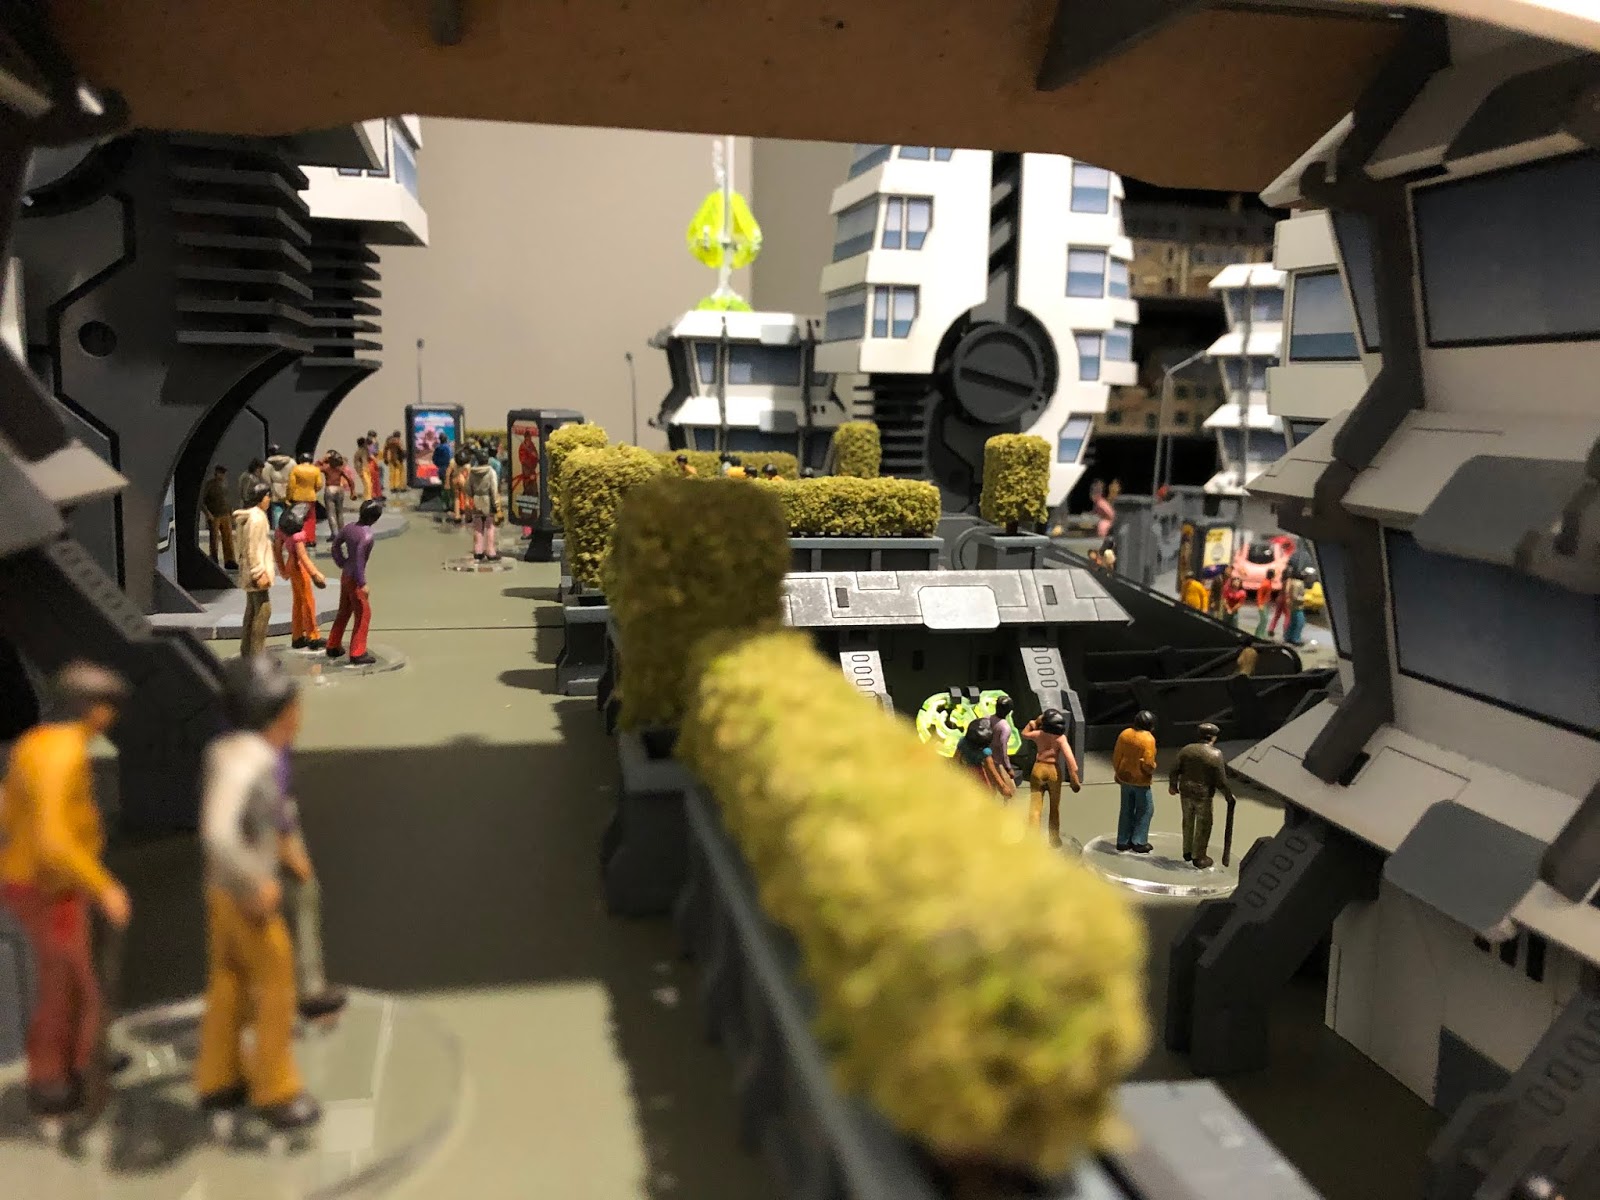
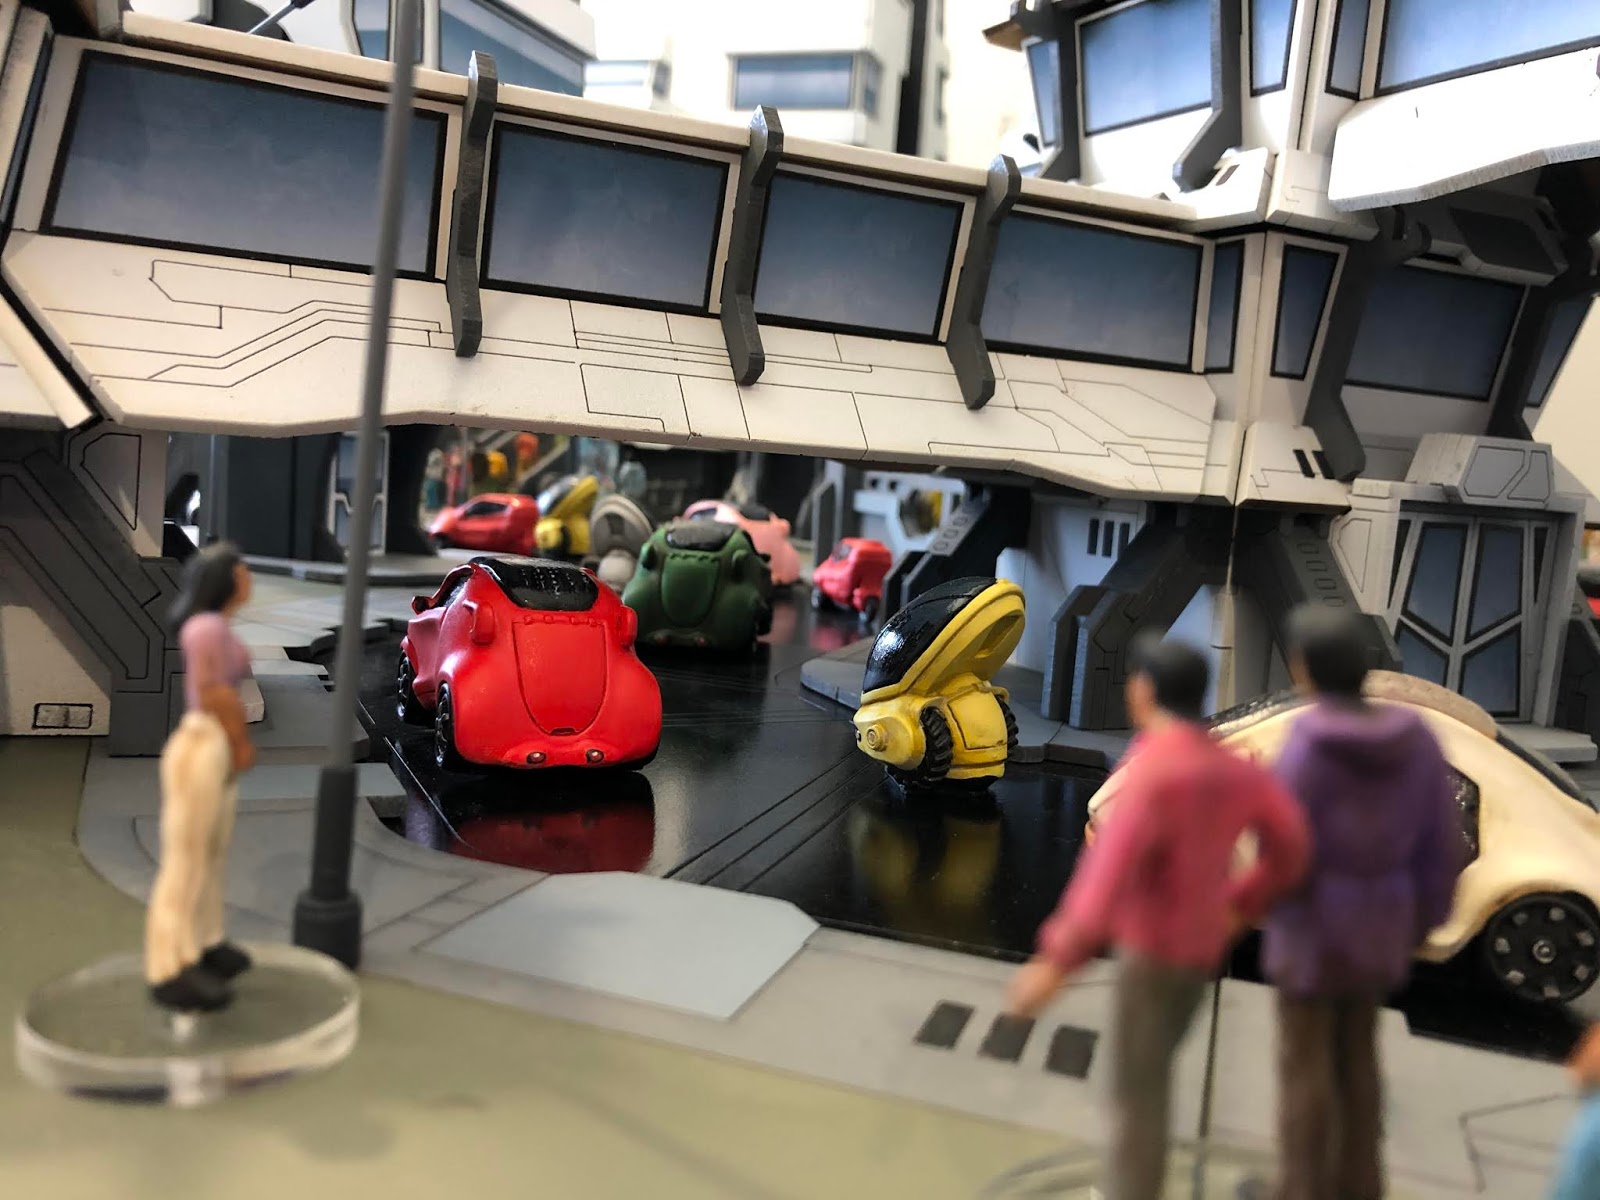
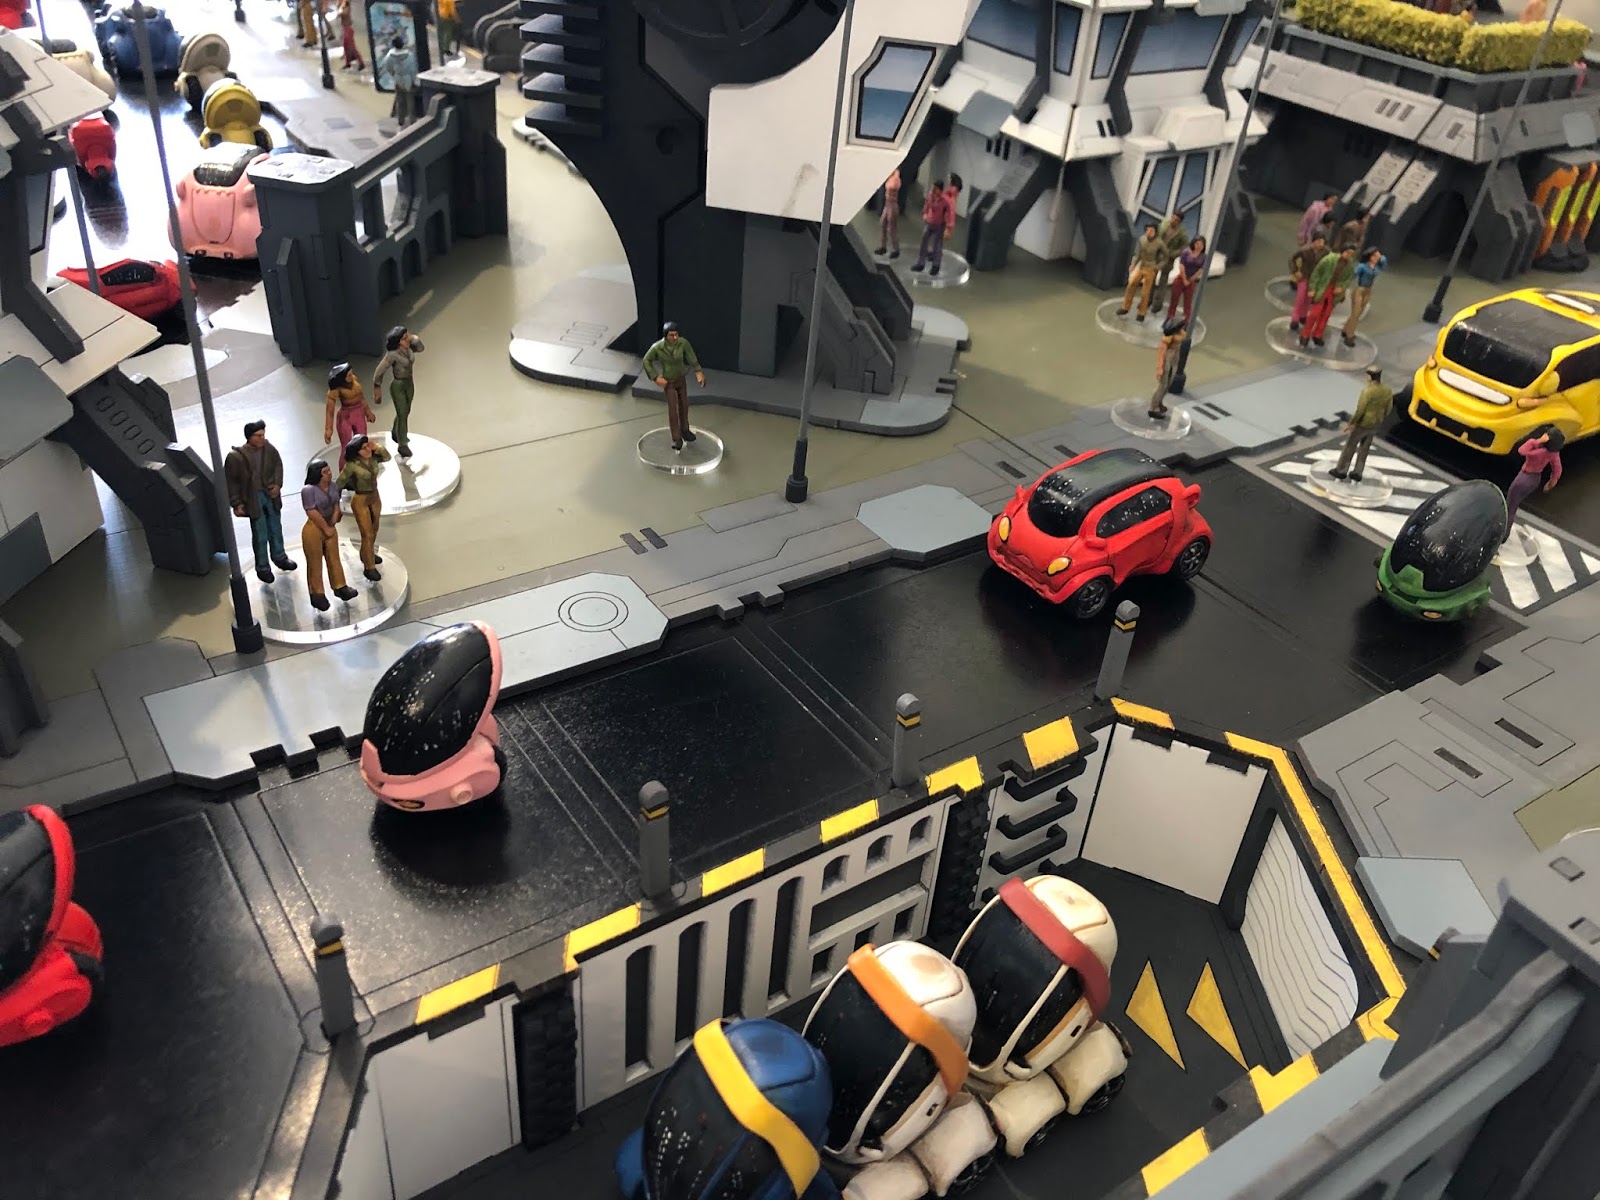
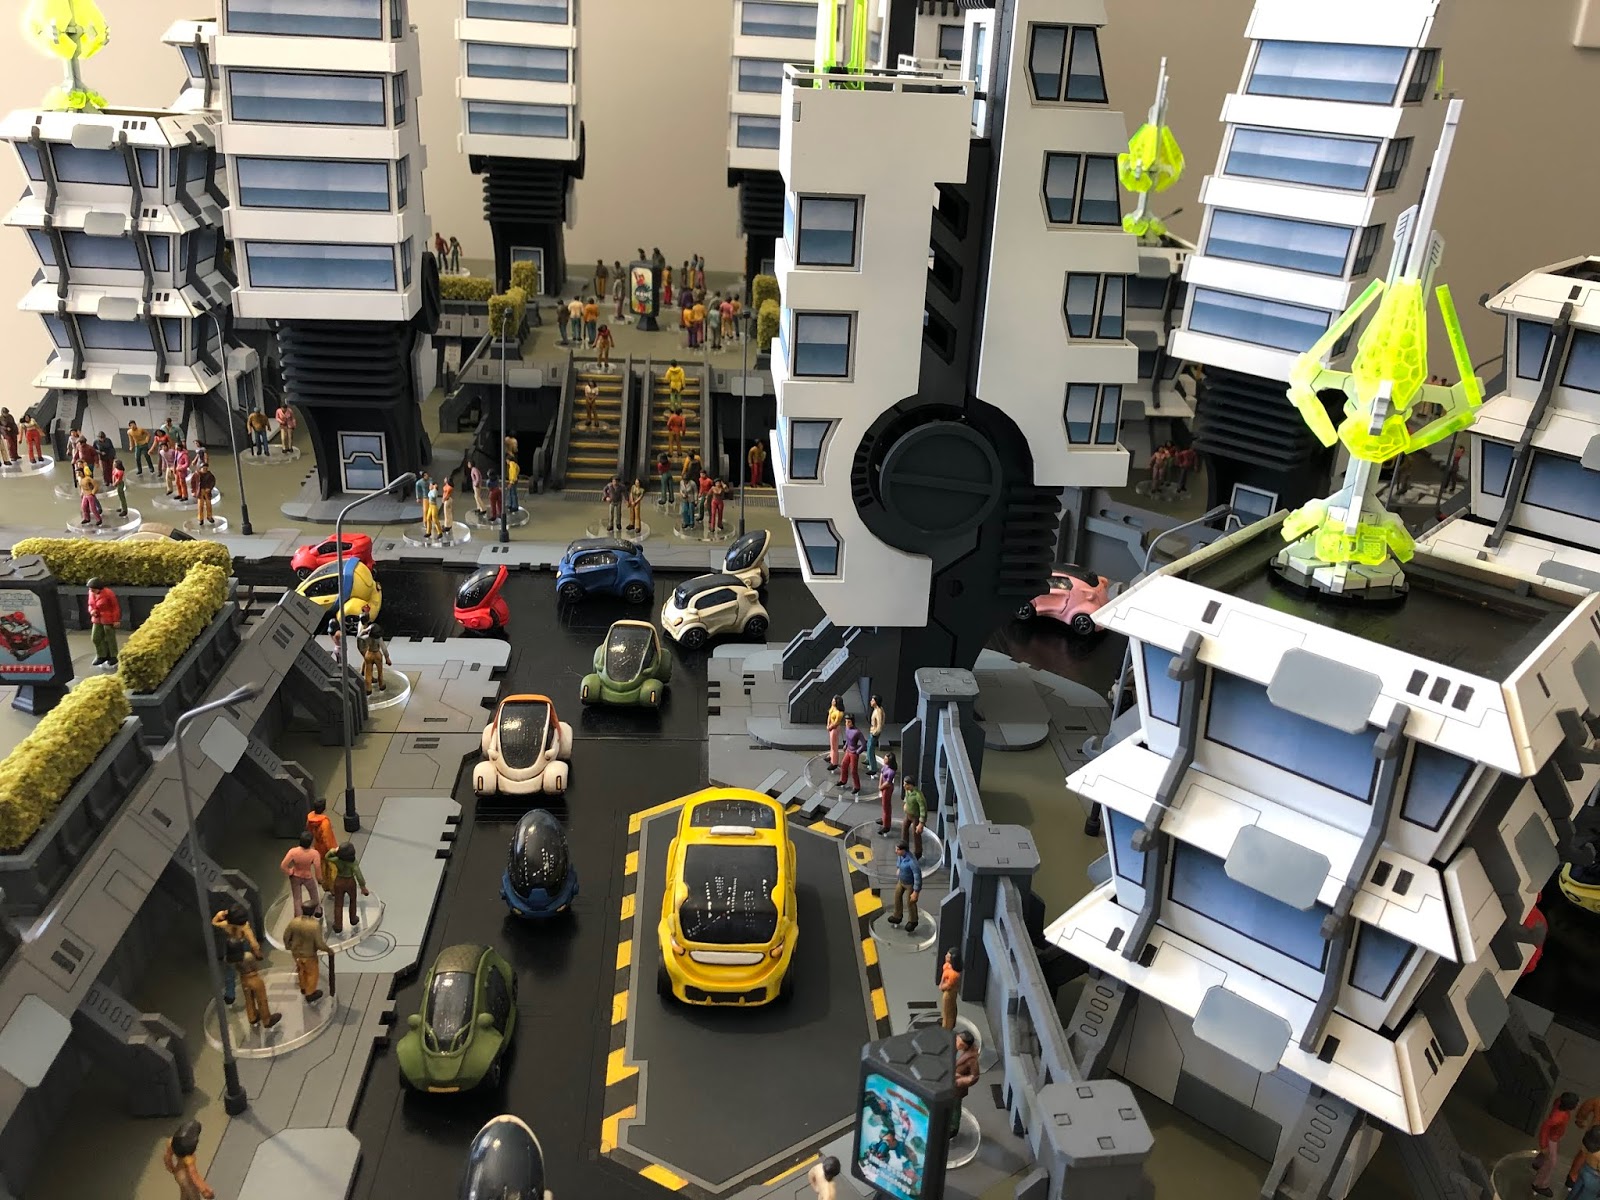
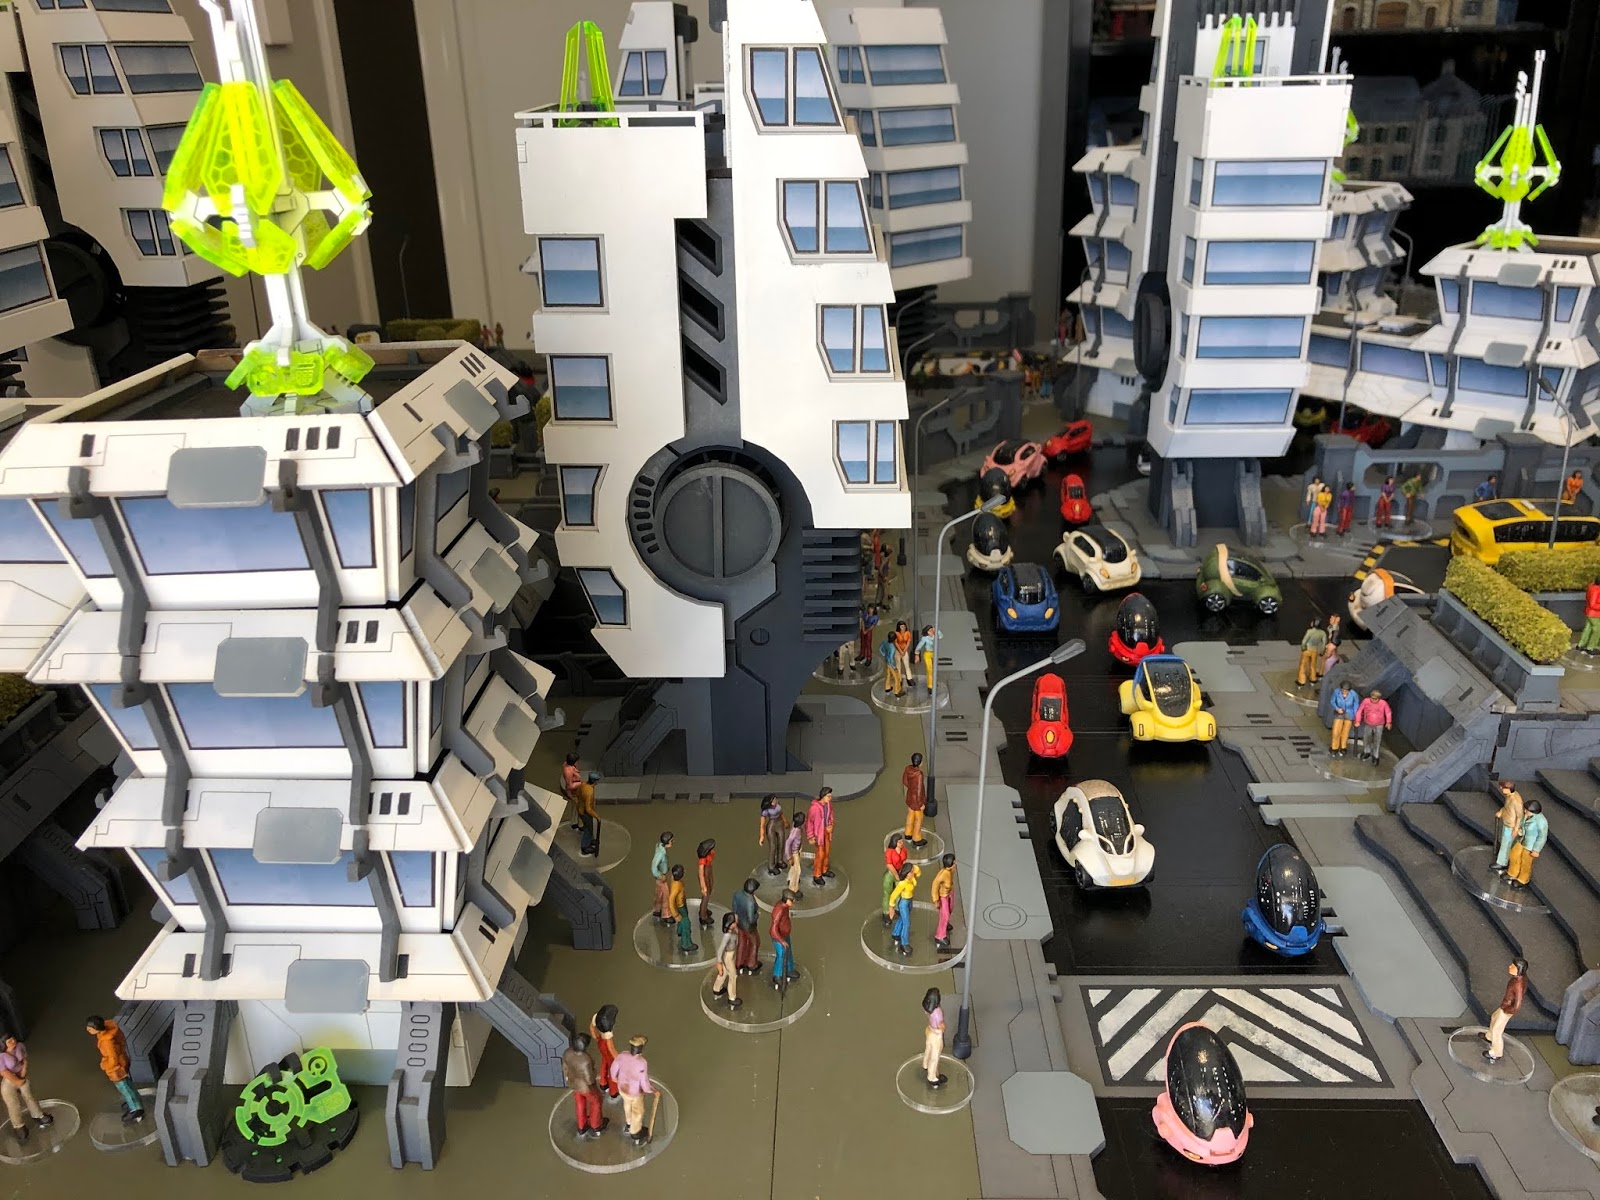
It’s all modular so can be moved around as you please. The street lighting is all attached by magnets.
I haven’t gone into how each bit was assembled because they were literally built just following the instructions in each pack.
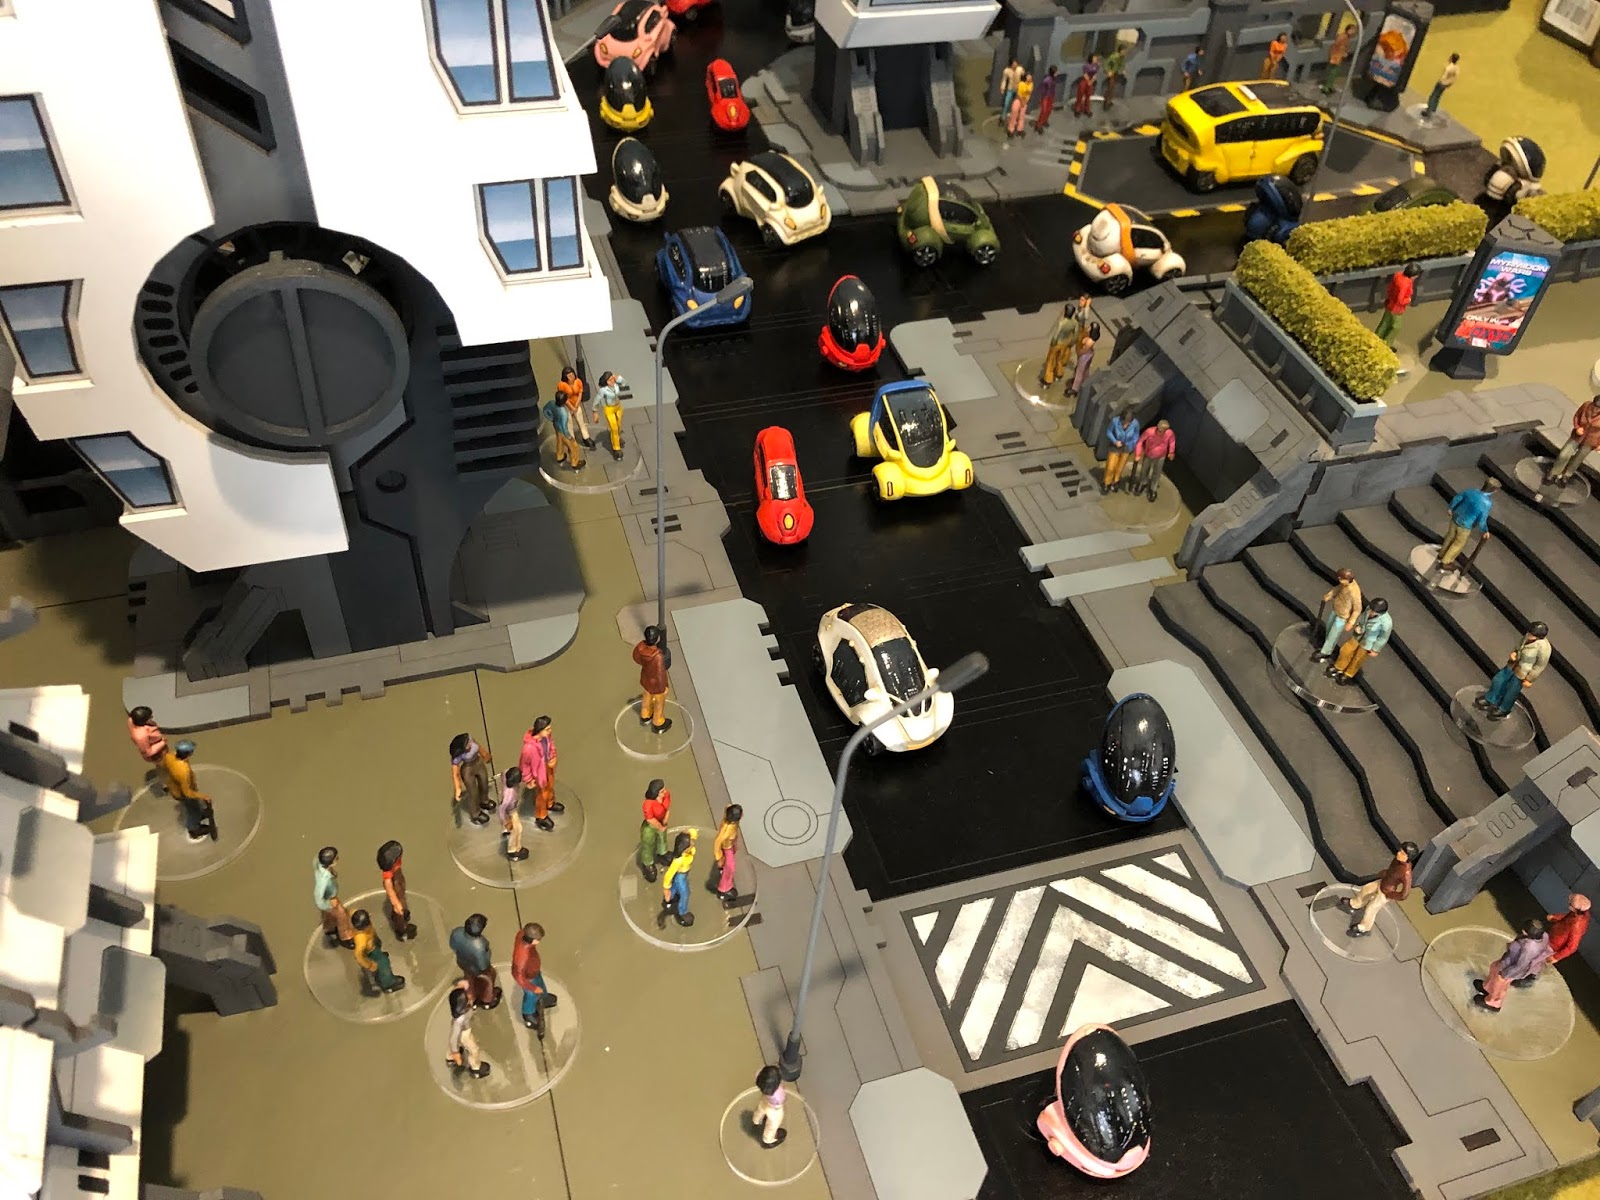
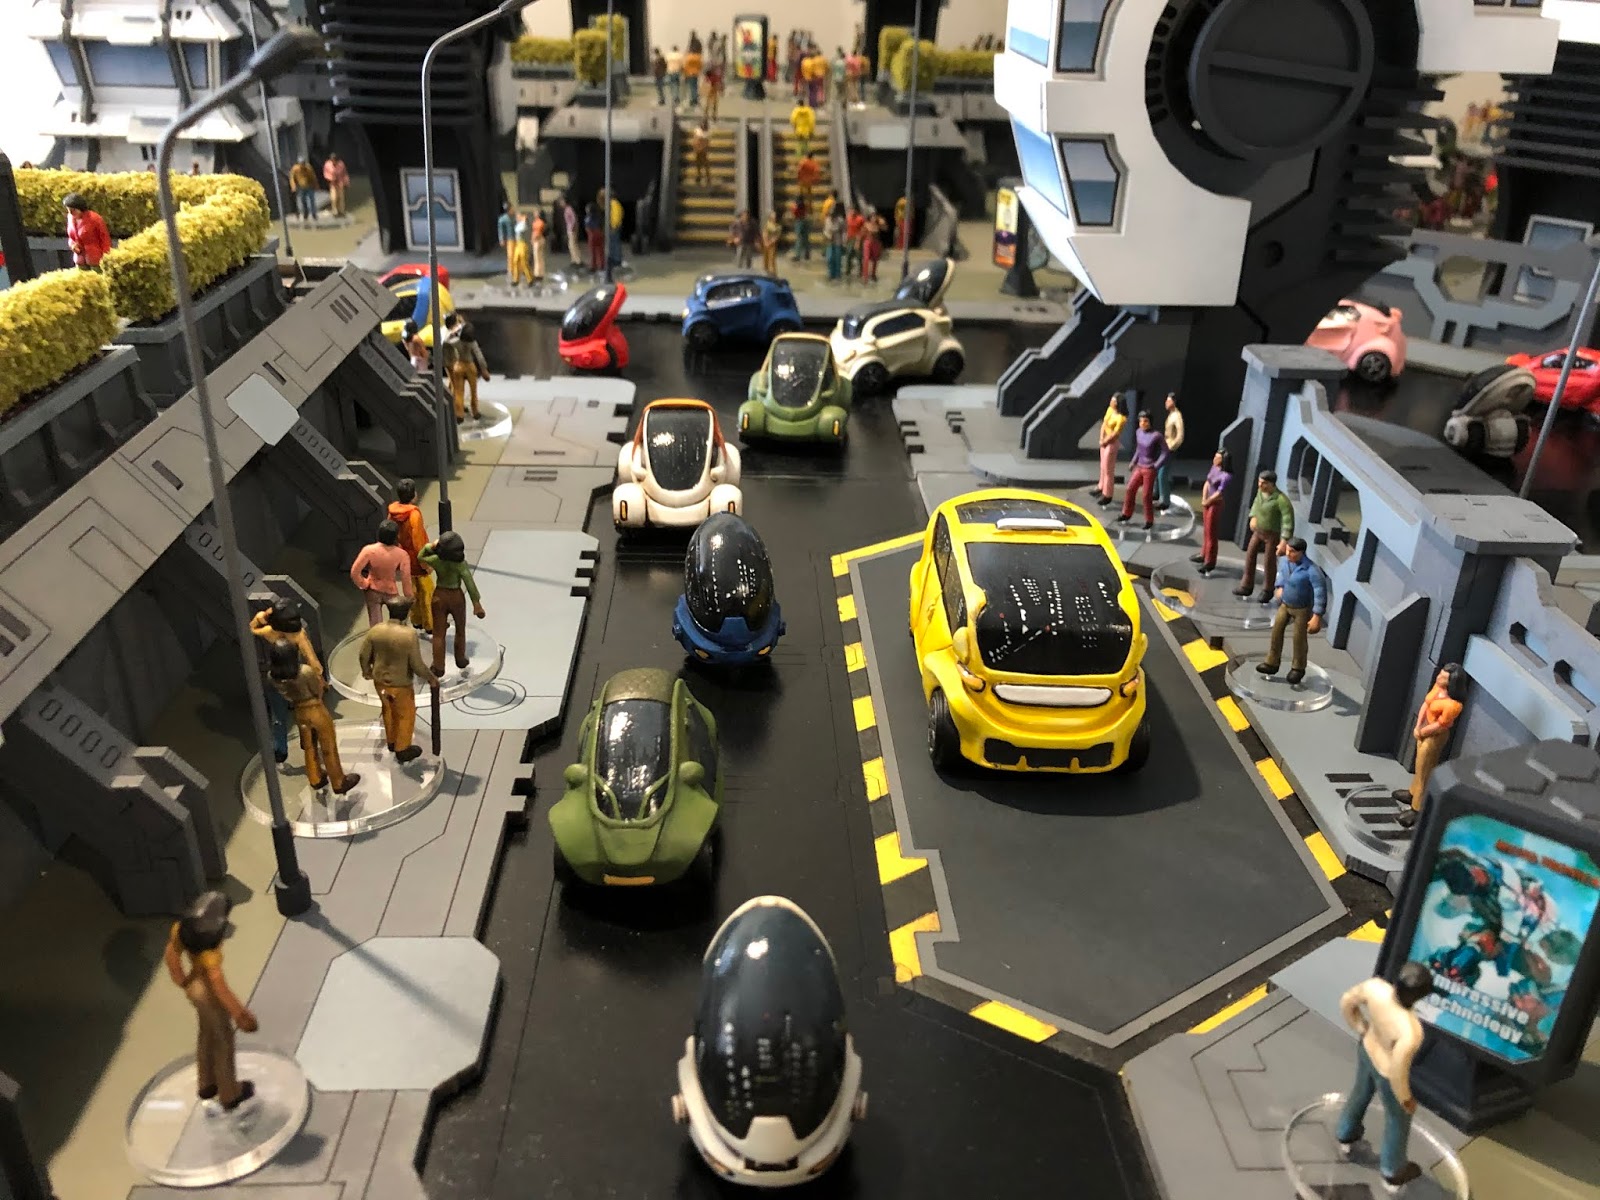
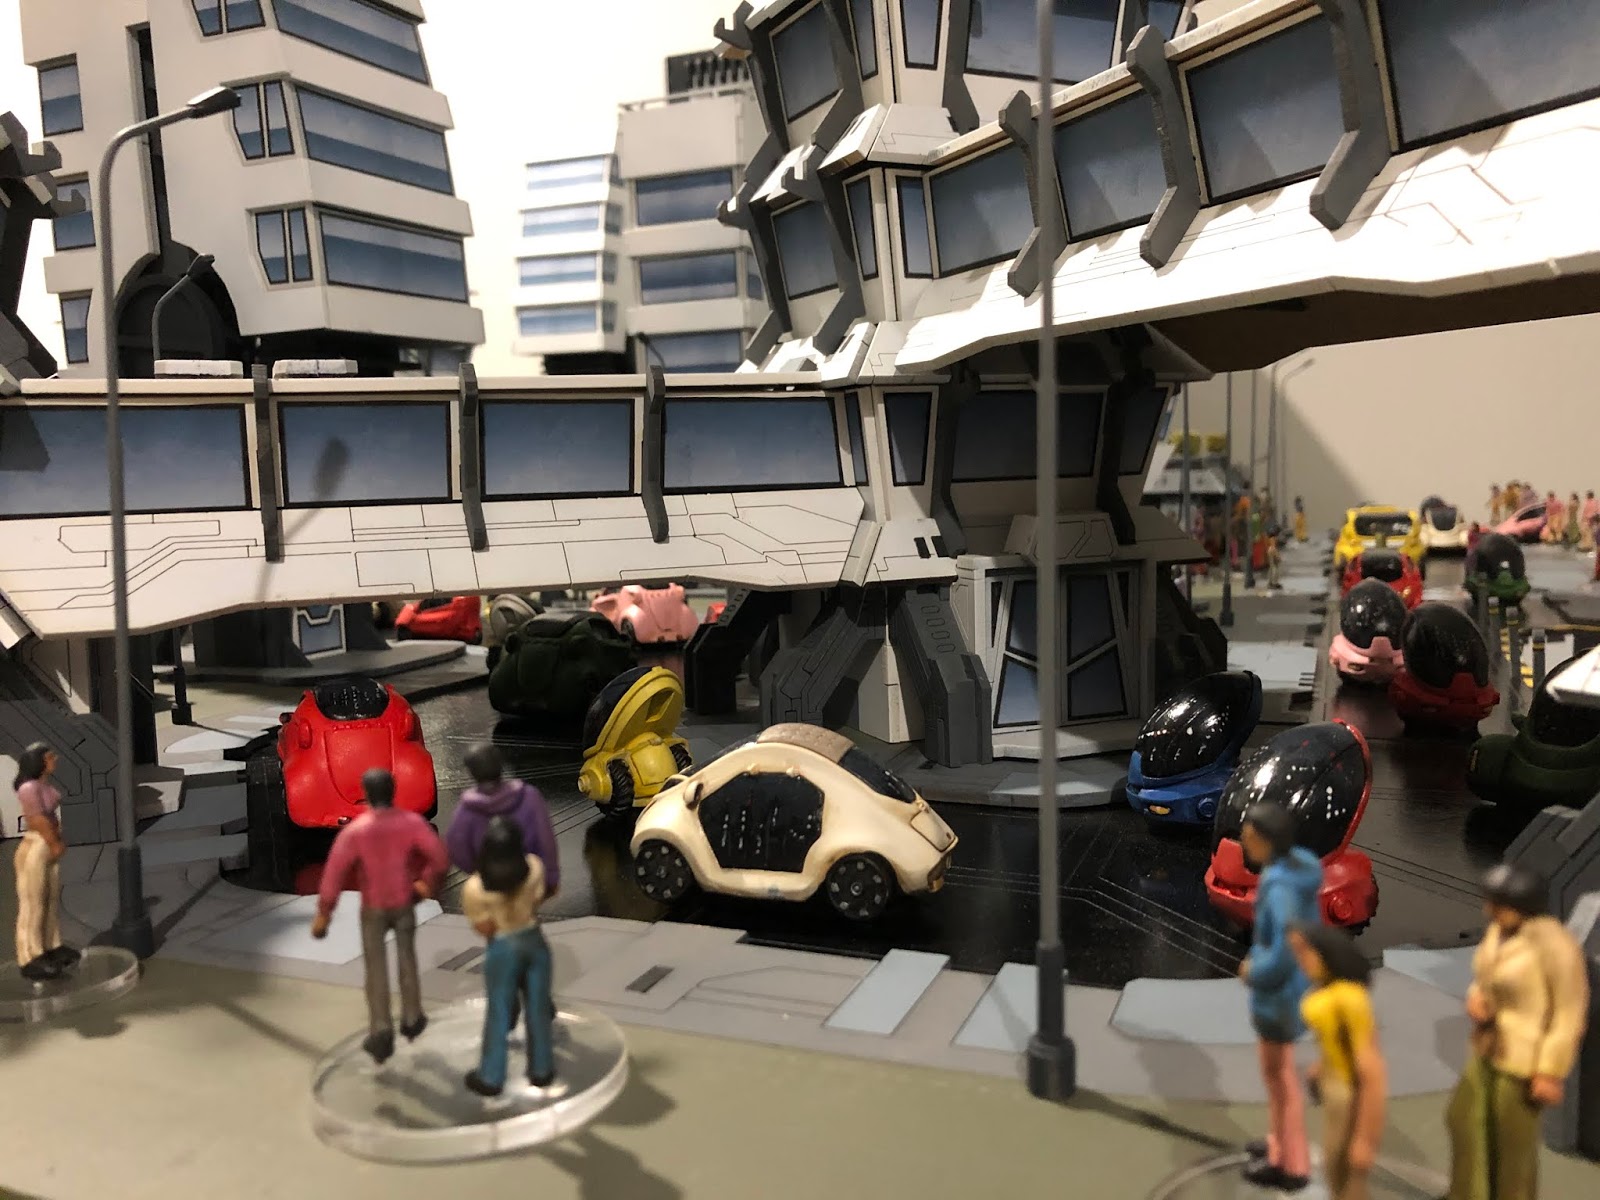
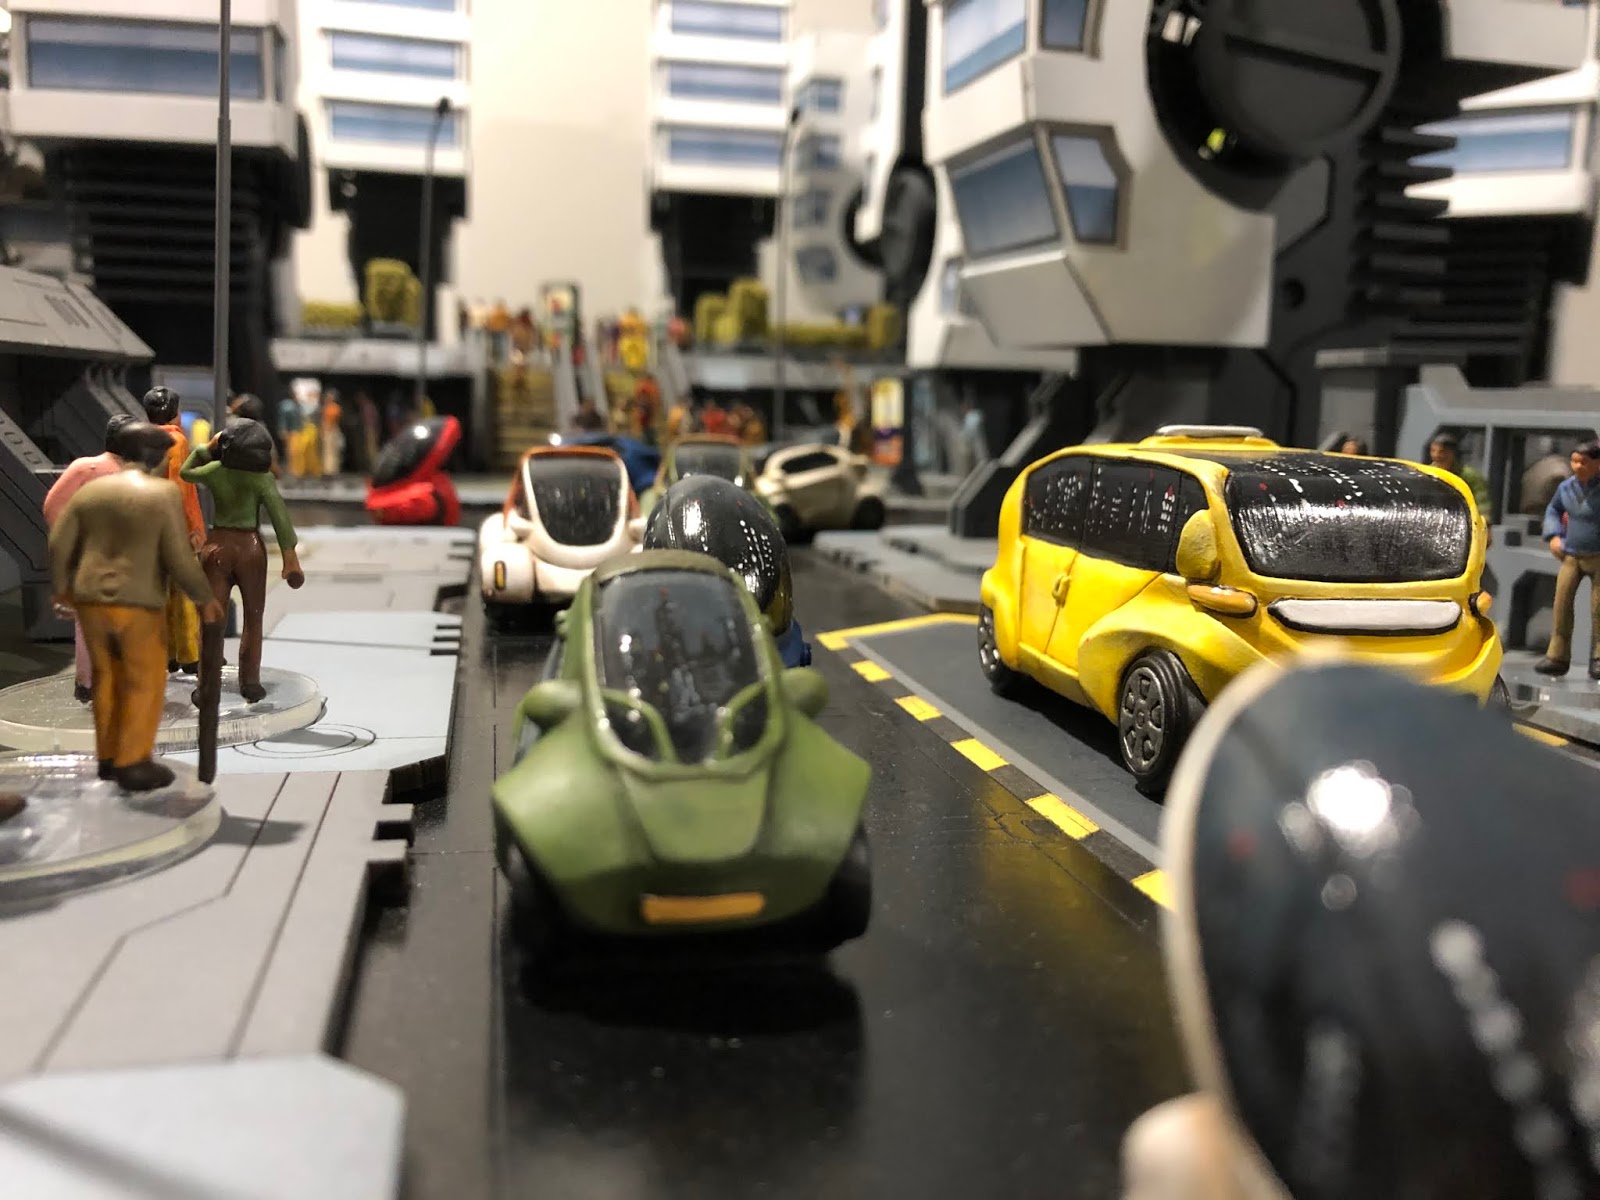
I painted lines and dots on the vehicle windows to simulate the city reflecting in them. I then gave them a high gloss varnish to add to the reflective feel.
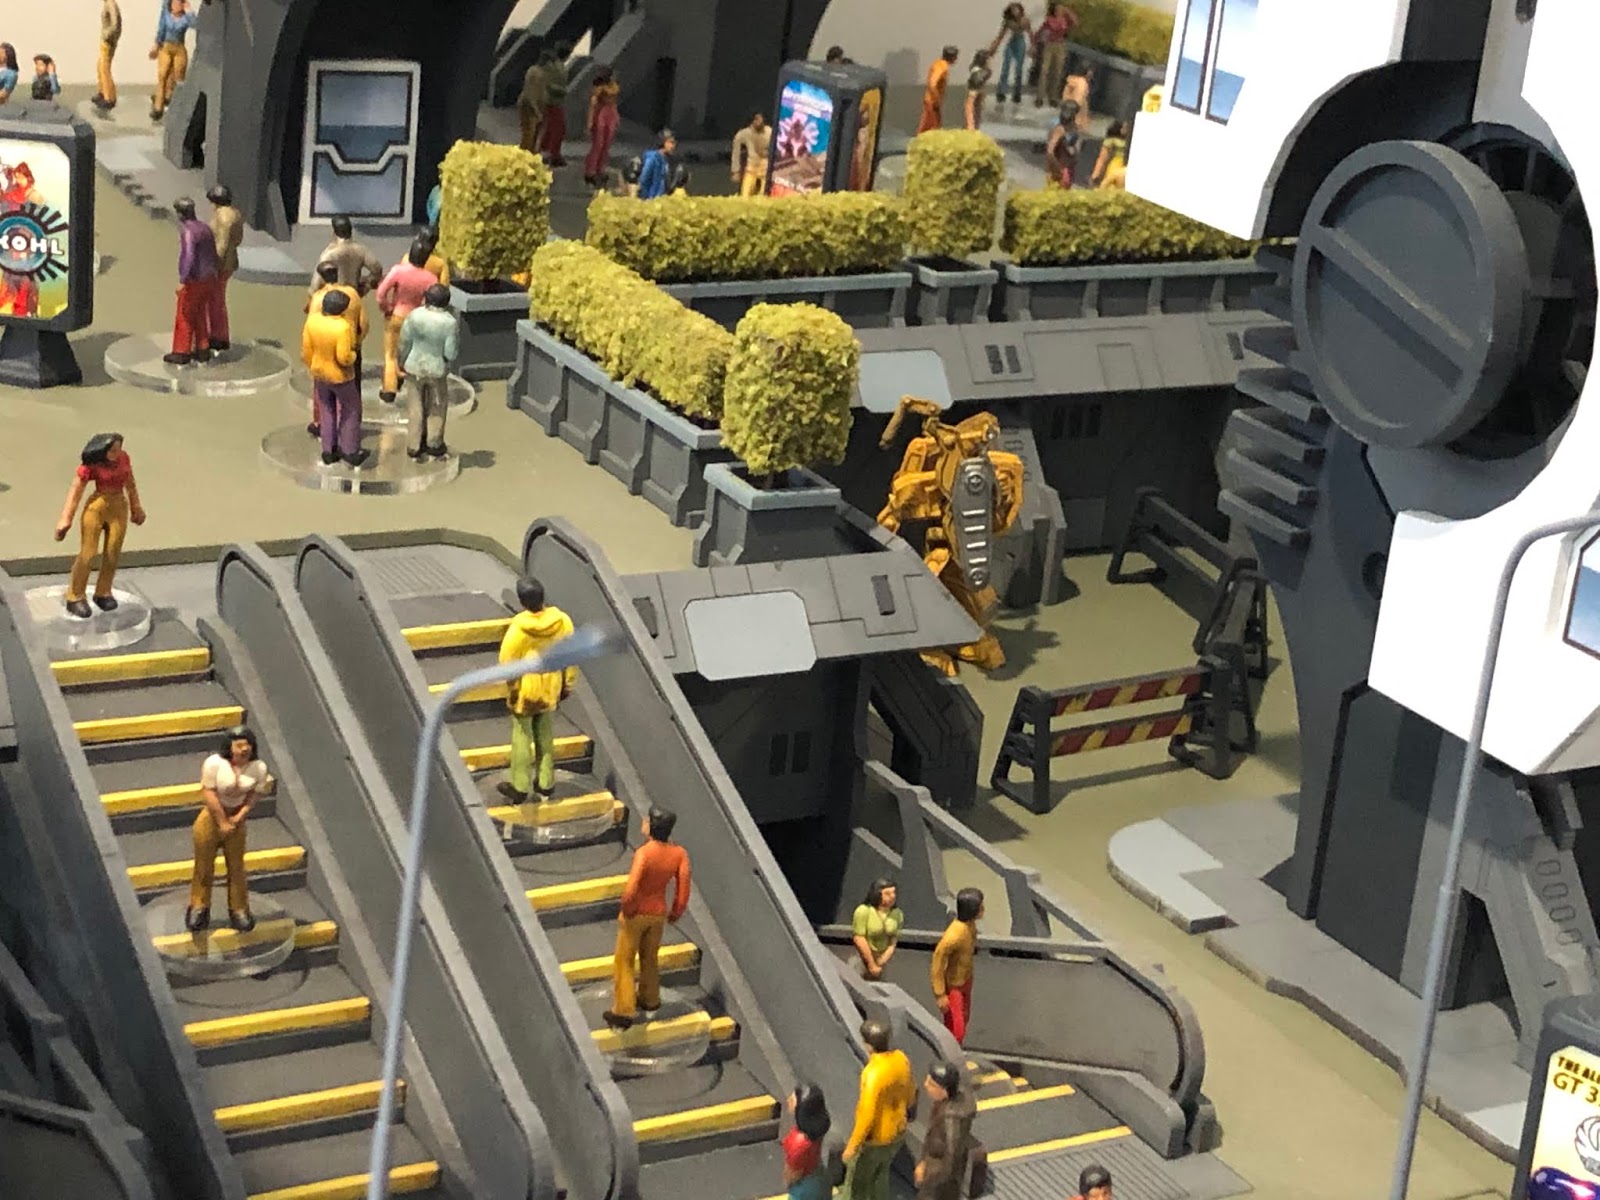
A small assortment of scatter pieces adds extra colour to the layout but really, it’s the civilian models that bring the city layout to life.