


Redvers and Son Get Into Bushido


Recommendations: 1224
About the Project
My son and I were looking for a new game to get into. Something that was low on models, fun and reasonably quick to play. We decided on Bushido.
Related Game: Bushido
Related Genre: Fantasy
This Project is Active
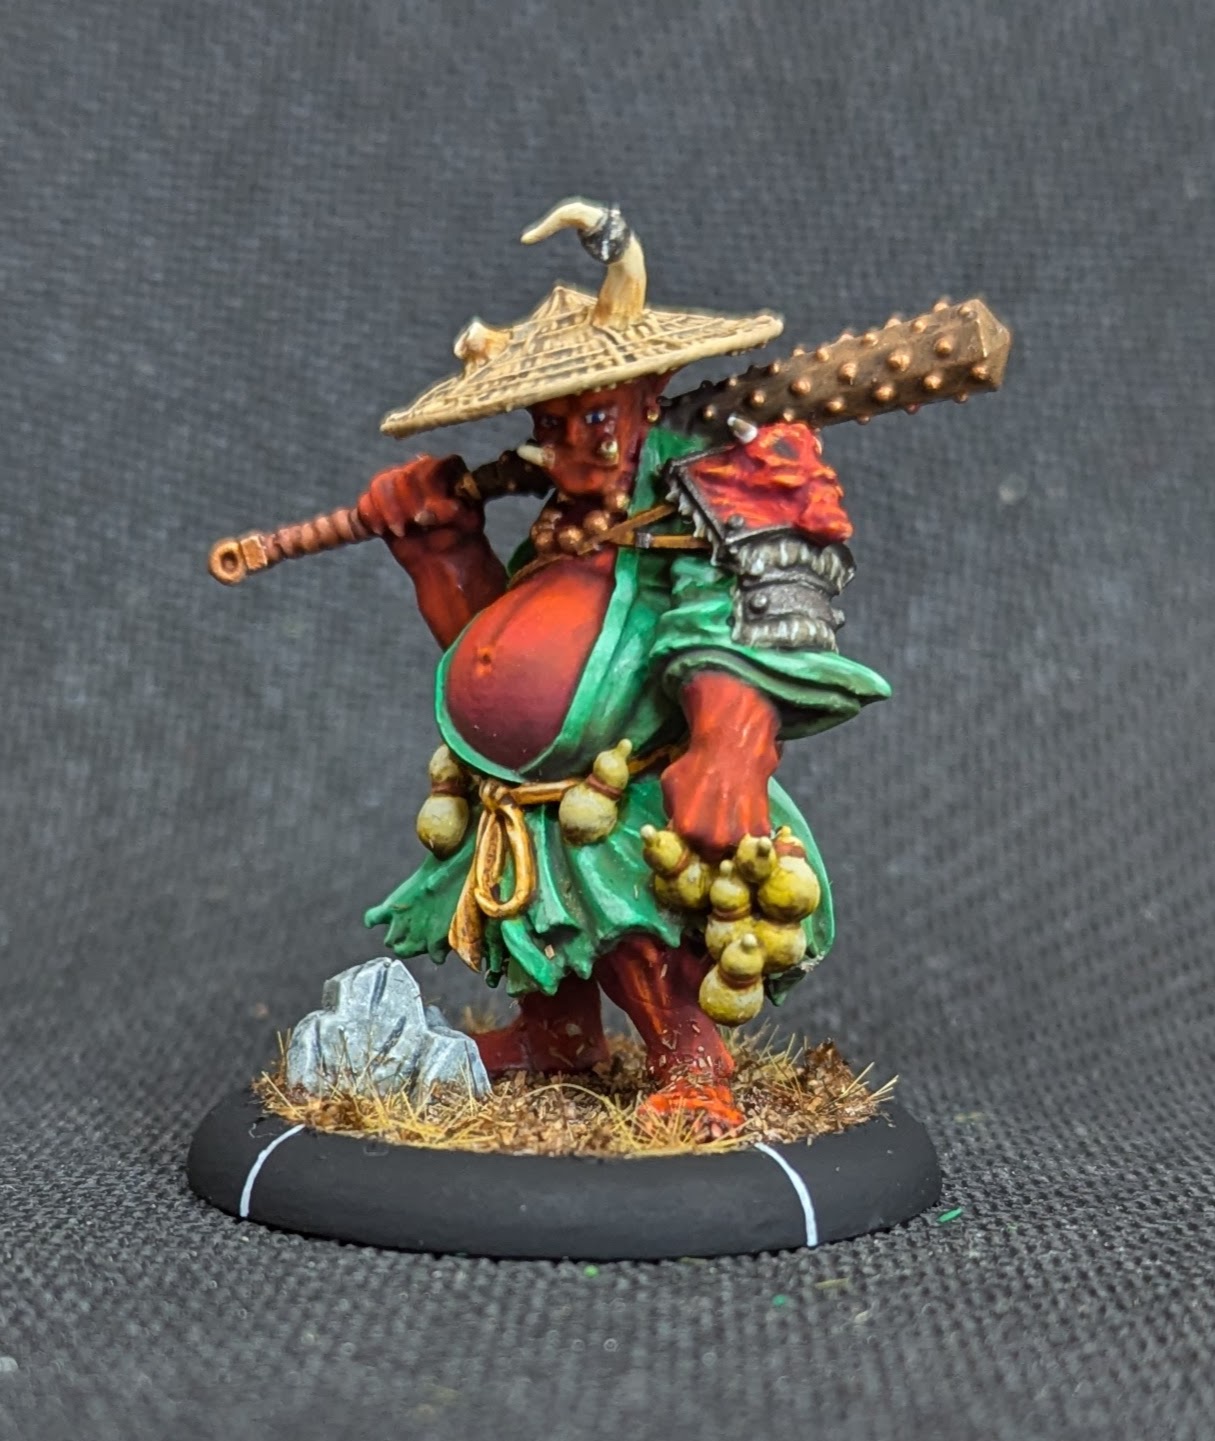
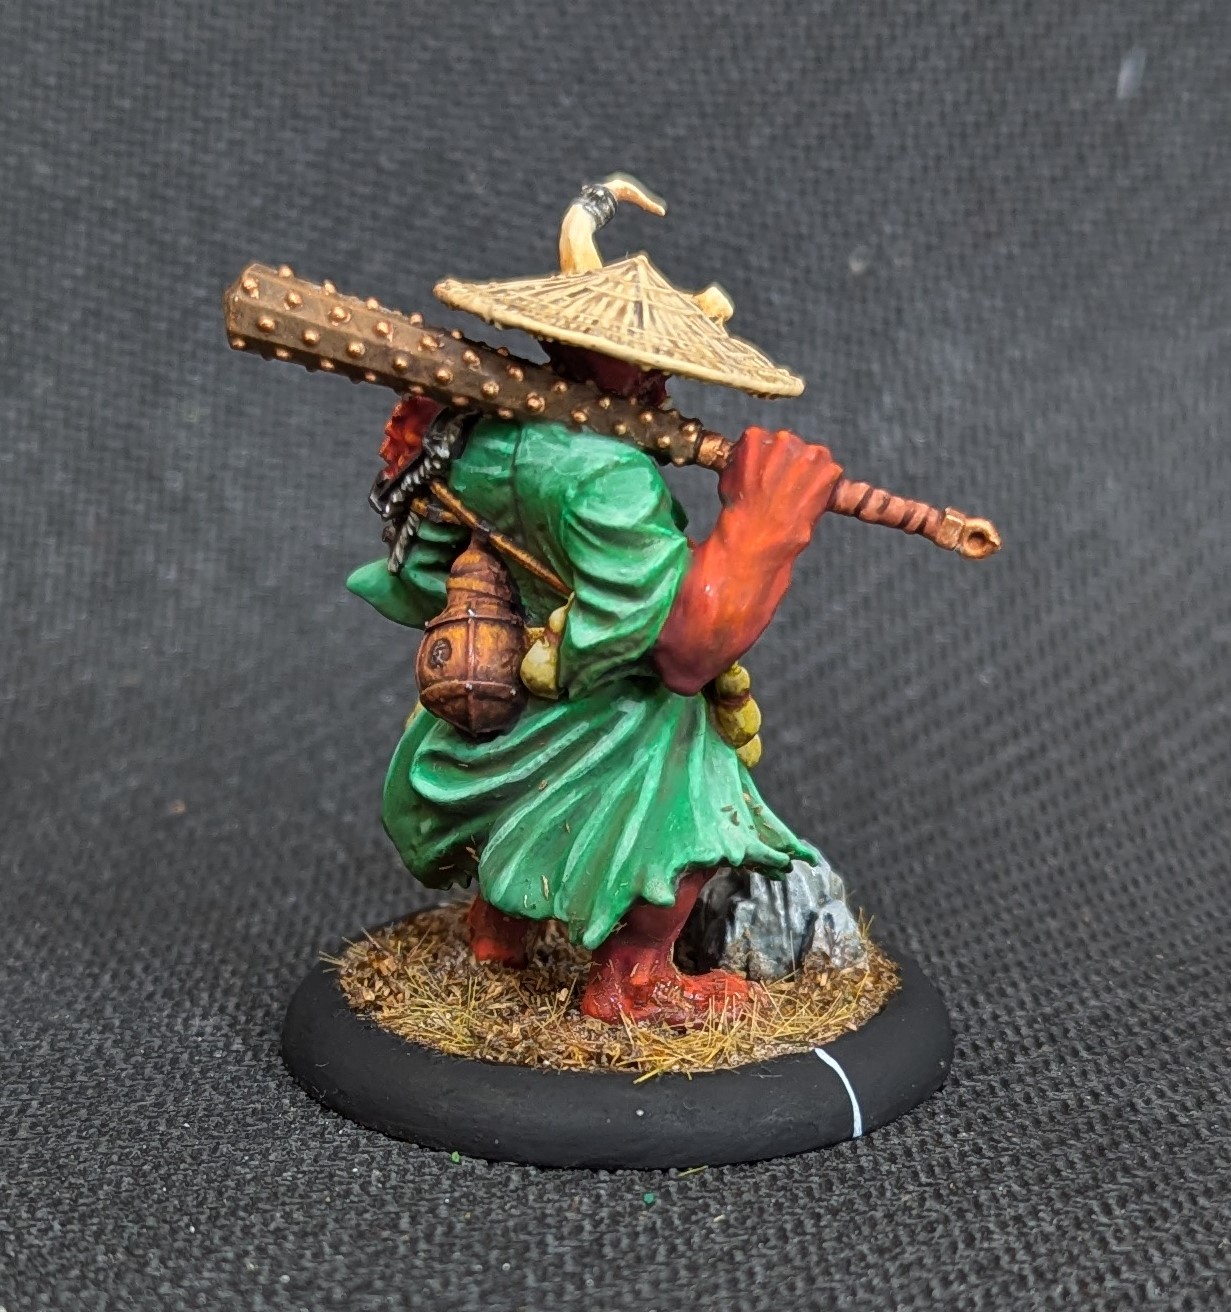
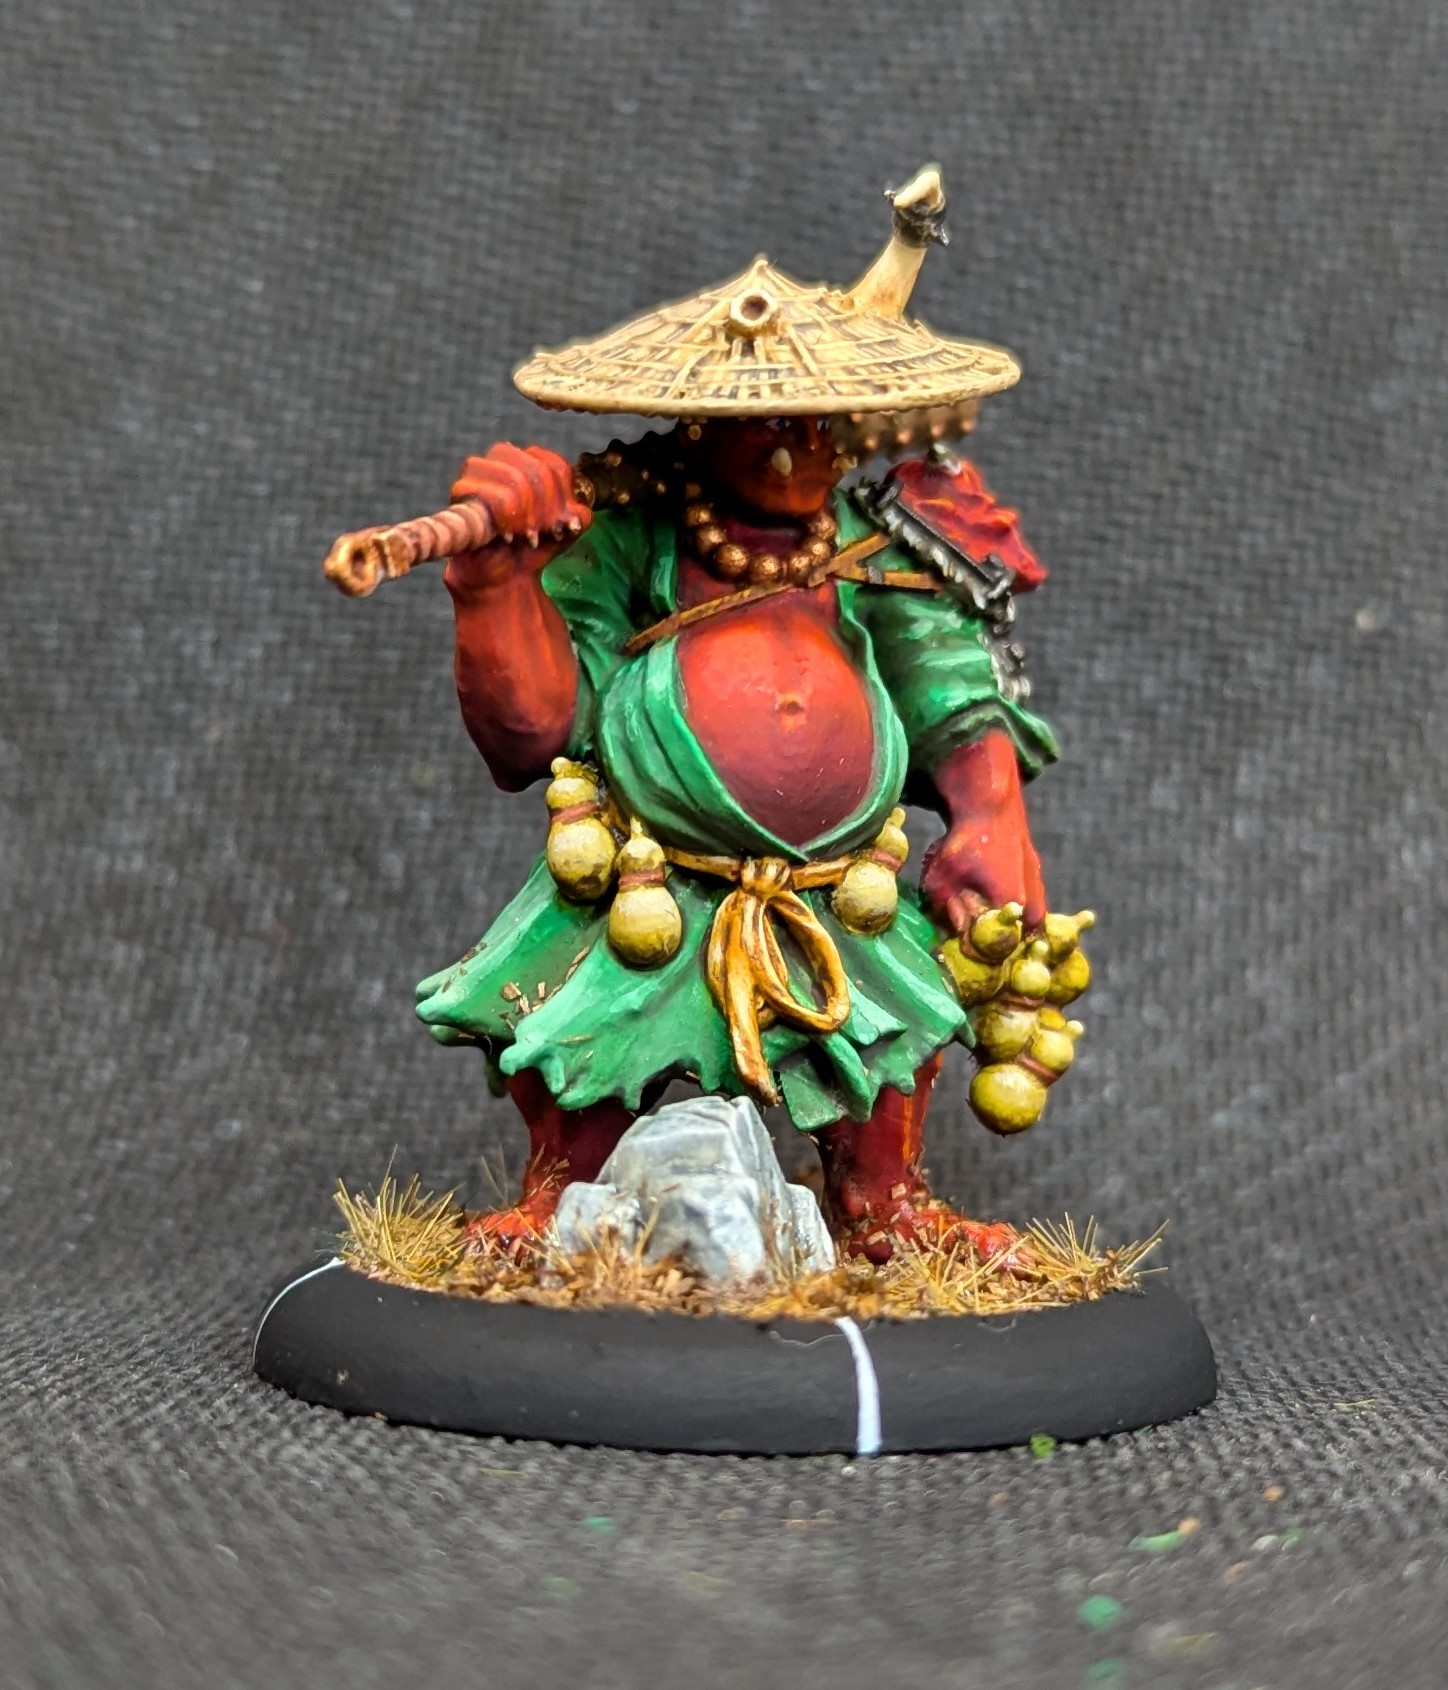
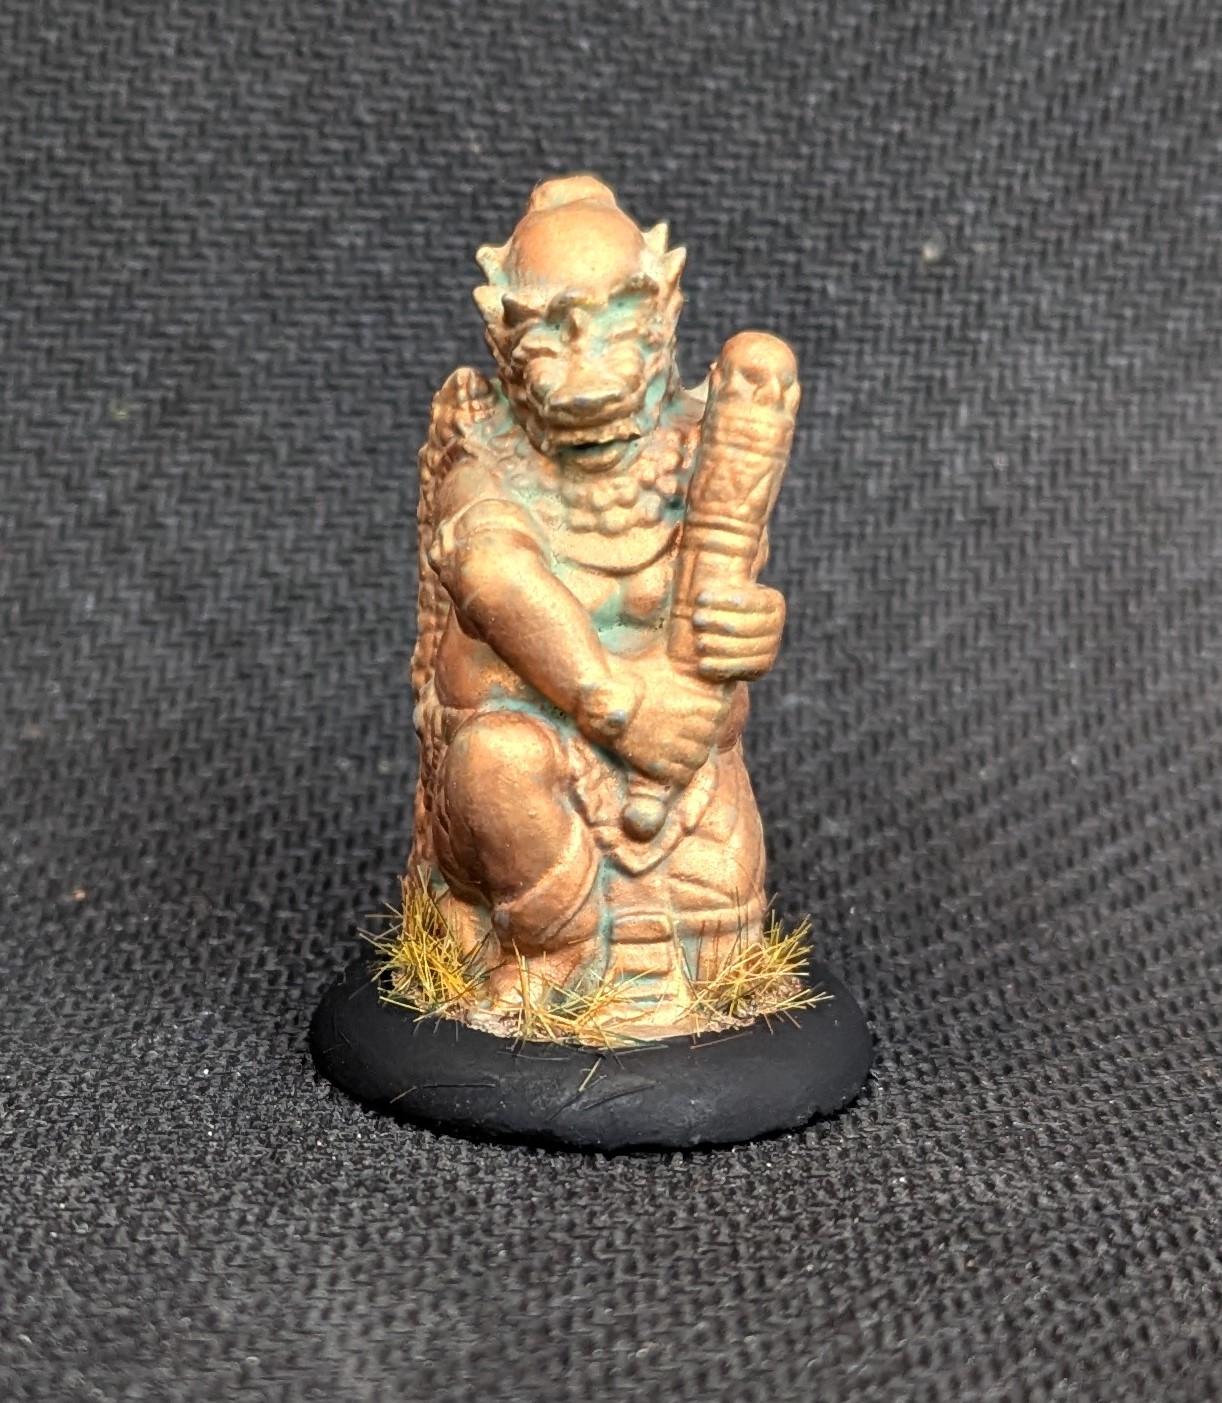
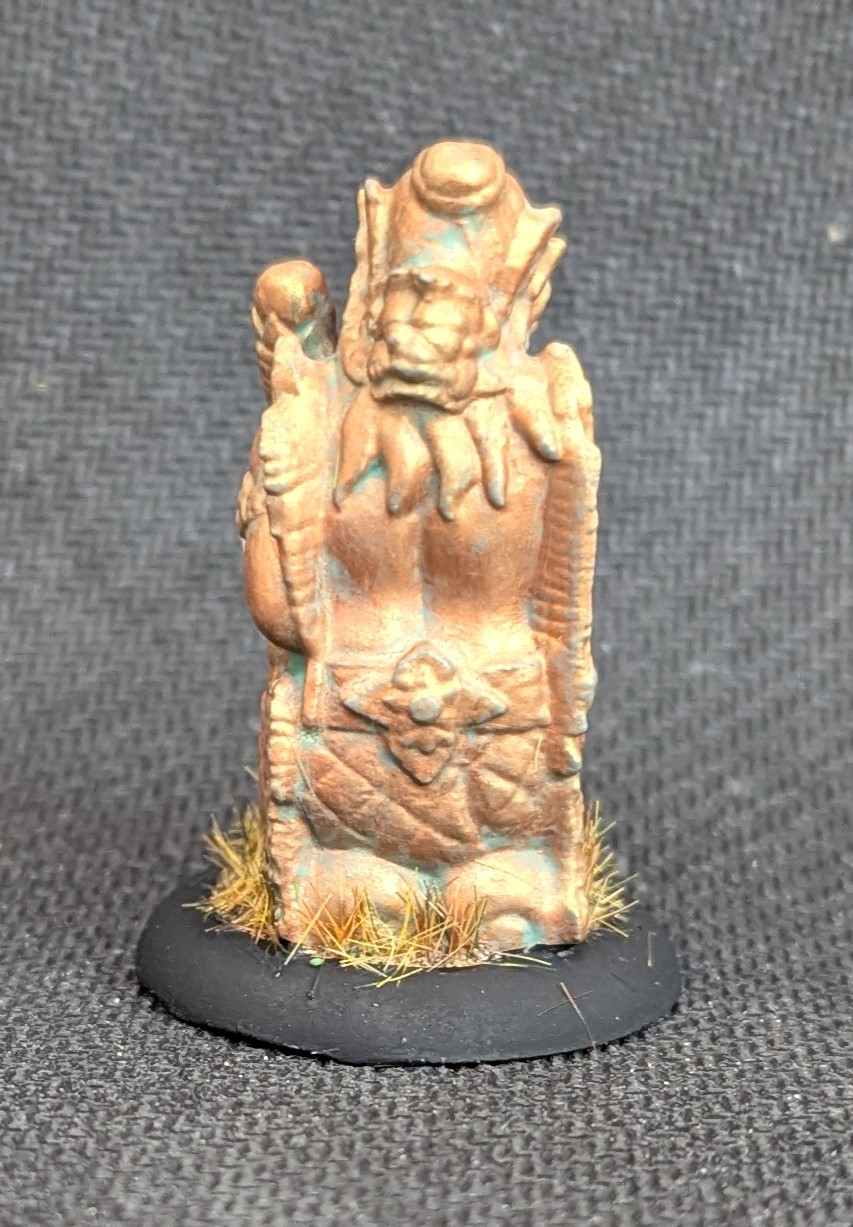
Eldest Brother
Bushido has a faction that is made up of oni and smaller bakemono (like goblins) called Savage Wave but within the Ronin group, there is a mercenary oni called Eldest Brother. He can fight for just about any faction, including my Cult of Yurei and he provides some much needed combat effectiveness.
In game, being an oni, he’s a bit of a combat monster, gaining bonuses on his melee dice pool and to his damage rolls. He can further buff this by ‘raging’ which makes him more powerful in combat at the expense of being more predictable. And like all oni, he can regain wounds by harvesting the souls of those that die around him.
Painting wise, I wanted a red skinned oni. I could have been imaginative, but red just looks right. I started with a dark based of nocturnal red. In the darker shadowed areas, I applied a cavalry brown glaze to really deepen the colour. From there, I layered up the highlights using Aldebaran Red (mixed with nocturnal red) and then just aldebaran red before finally using pink as the top highlight. This then got several glazes of nocturnal red on the shadows and aldebaran red on the highlights to smooth the transition.
The green was a base of elf green, goblin green and light green mixed and layered. And then a series of glazes to try to tie it together. This wasn’t quite as successful as the red skin.
I’ve used scruffulous brown for the cord, red leather for the leather and a flat earth for the tetsubo. These were given various washes and a gentle highlight. I’ve used a bright bronze to pick out the studs on the tetsubo.
The hat was a base of Iraqi sand, washed and then dry brushed with Iraqi sand and then light deck tan dry brush. The bottles were a khaki given a yellow wash and then highlighted back up again.
The leather bottle on the back was a base of red leather, washed to pick out the shadows and the stippled with a thin red leather and scruffulous brown to create a patterned look.
 A grumpy looking Eldest Brother
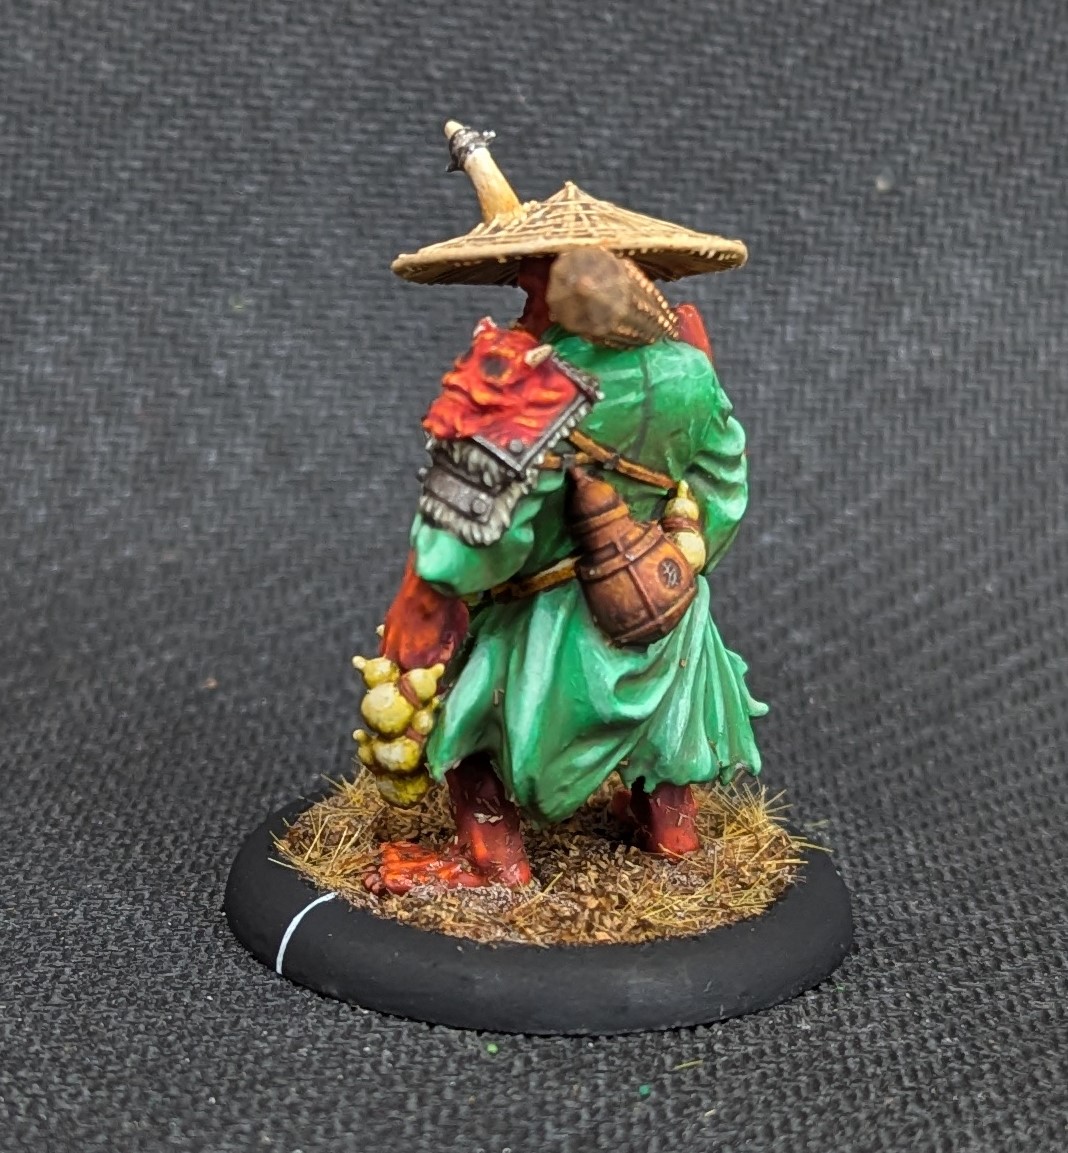
Minarai
It’s been a very slow start to the year hobby wise, a lot of work and other stuff whirling around that has taken up time. But I managed to grab a few hours to finish off Minarai. This model is from the Yuta of Yurei boxed set that I got for Christmas (that’s Christmas 2023!) and this is the first model that I’ve been able to complete (the others are all started but in various stages).
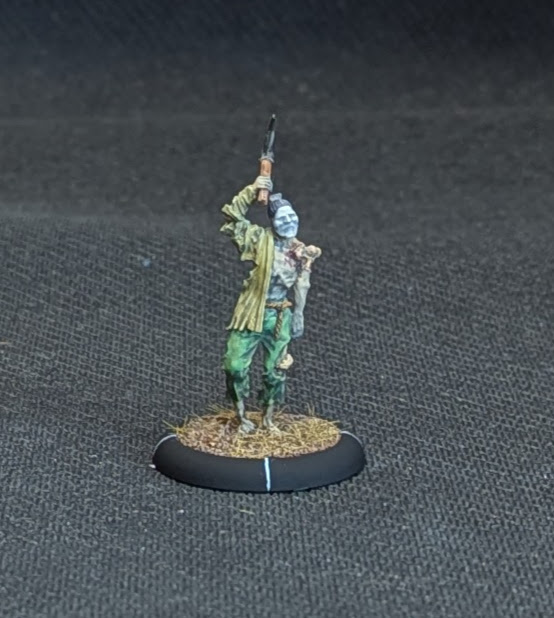
Minarai is a zombie (or Kairai, which translates as puppet) and the first one I’m adding to my Cult faction. In game, this model is very cheap and really should be played as part of a zombie horde. The model provides Fear, albeit at a low level, so it won’t impact a lot of enemies much but being a zombie, does come with the Rise ability (once killed, on a 4+ it’ll get back up again with full health). Being a zombie, it is slow and has some poor stats, so another reason to take it as part of a horde, where weight of numbers can make up for the poor stats.
Being a zombie, I wanted to give the model a dirty look – something I will apply to future zombies that I will add to my cult. I also wanted the skin to have a greyish look so I painted this with a light skin tone and then highlighted this with the light skin tone mixed with a light grey. To get the grey look, I glazed this a couple of times with a mid grey.
Trousers were Elf Green and then layered up or down the colour scale to create the highlight/shadow. I’ve just used dark grey and white to mix with Elf Green here as I want a de-saturated look. The torn shirt is a khaki, again layered to get the shading/highlights.
The mask (all zombies in Bushido have a cult death mask attached) I wanted to look more pristine, so this was painted off white and given a sky grey shading. I’ve then highlighted with white. The sickle was a mid brown with a wash and then highlighted with a light brown, gunmetal for the blade with a nuln oil wash.
Once painted, I’ve varnished this with a matt acrylic and then picked up my enamel washes. I’ve first applied a wet earth wash to the lower trousers and used thinners to make this a little splotchy and draw the dirt up the legs. Once dry, I’ve then used a dust wash. I’ve applied this more liberally over the model in several thin layers but each layer was applied increasingly to the lower half of the model.
Basing wise, again just some acrylic dry earth given a wash and some dead grass flock.
 Minairai front
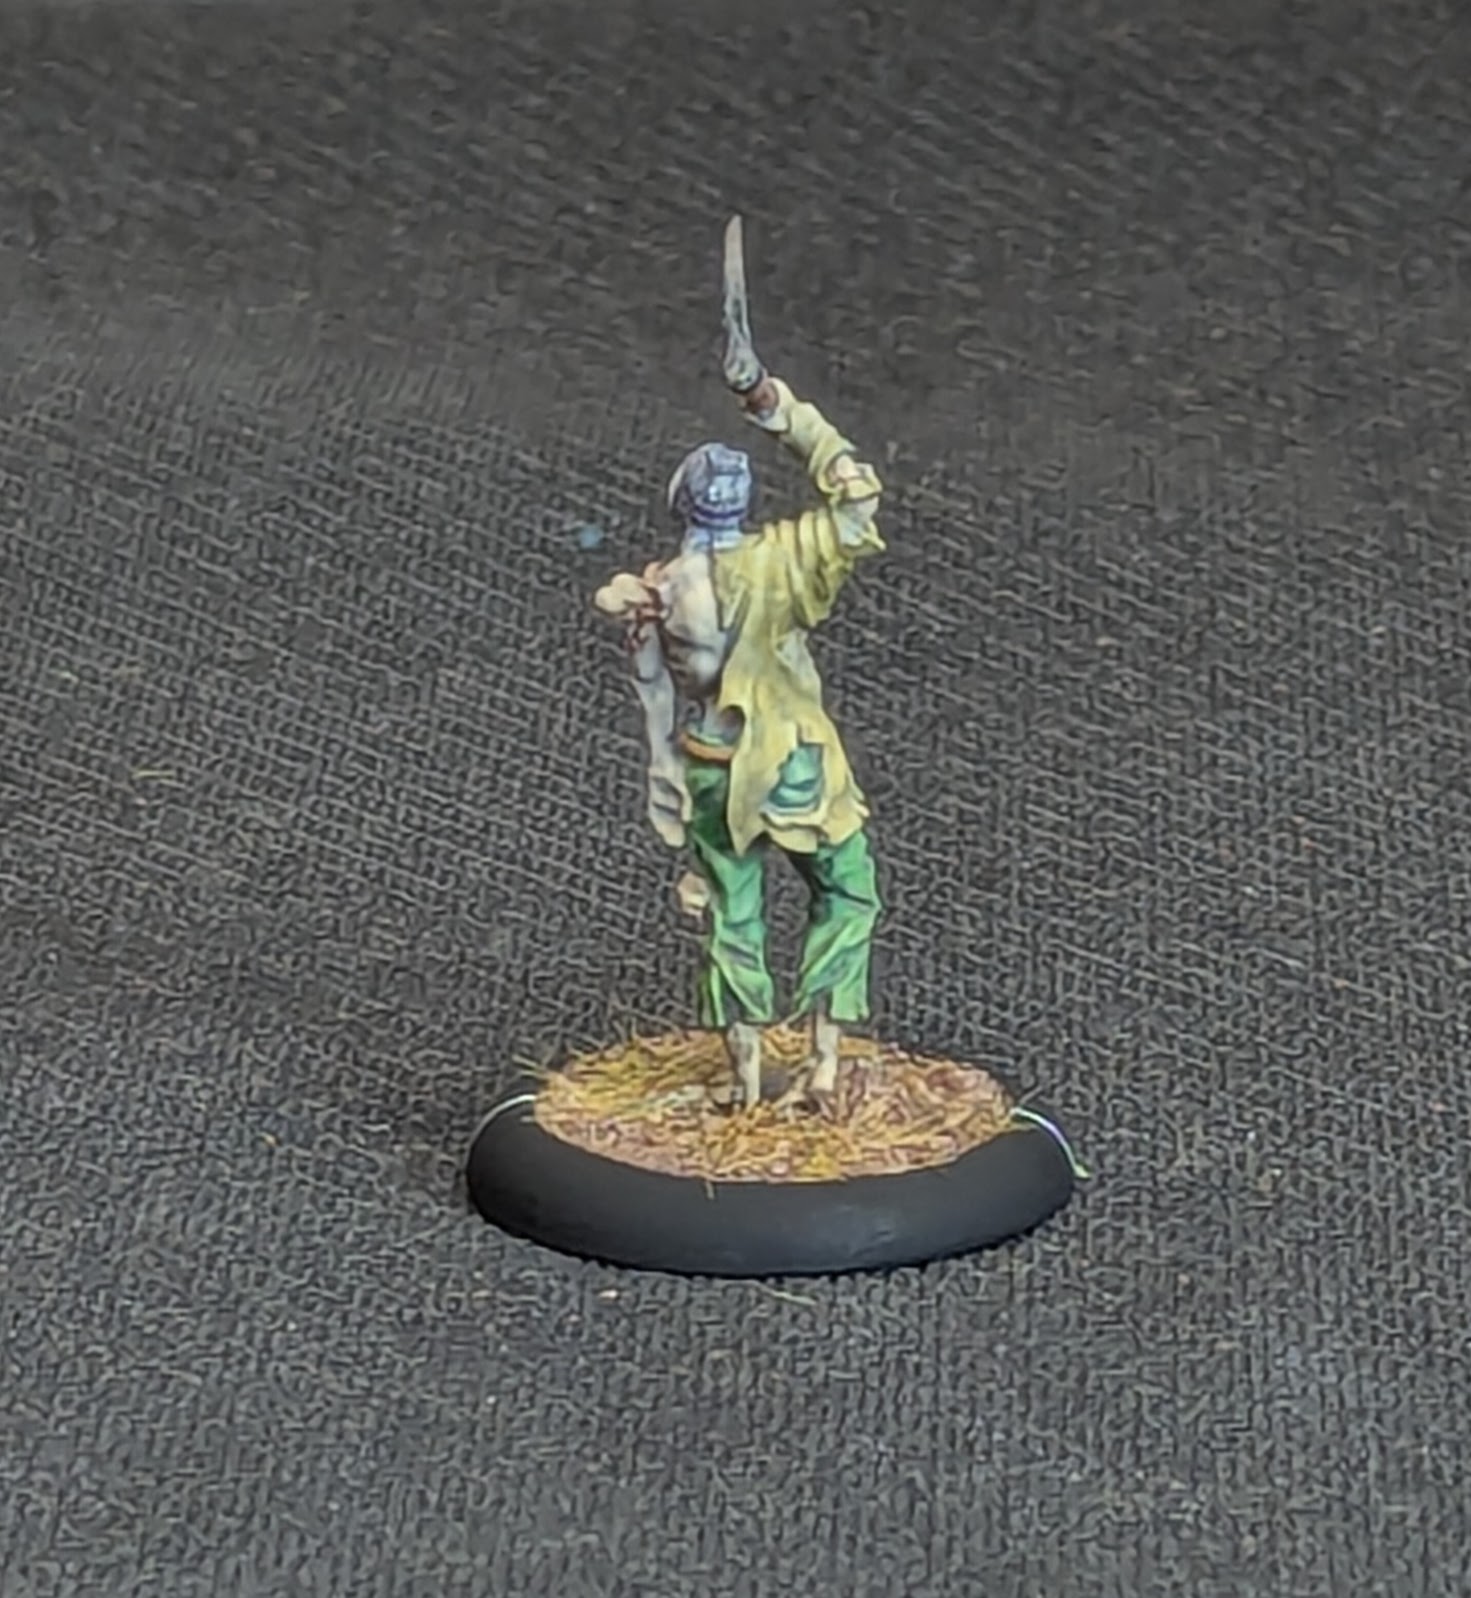 Zombie bum
Battle Report 10
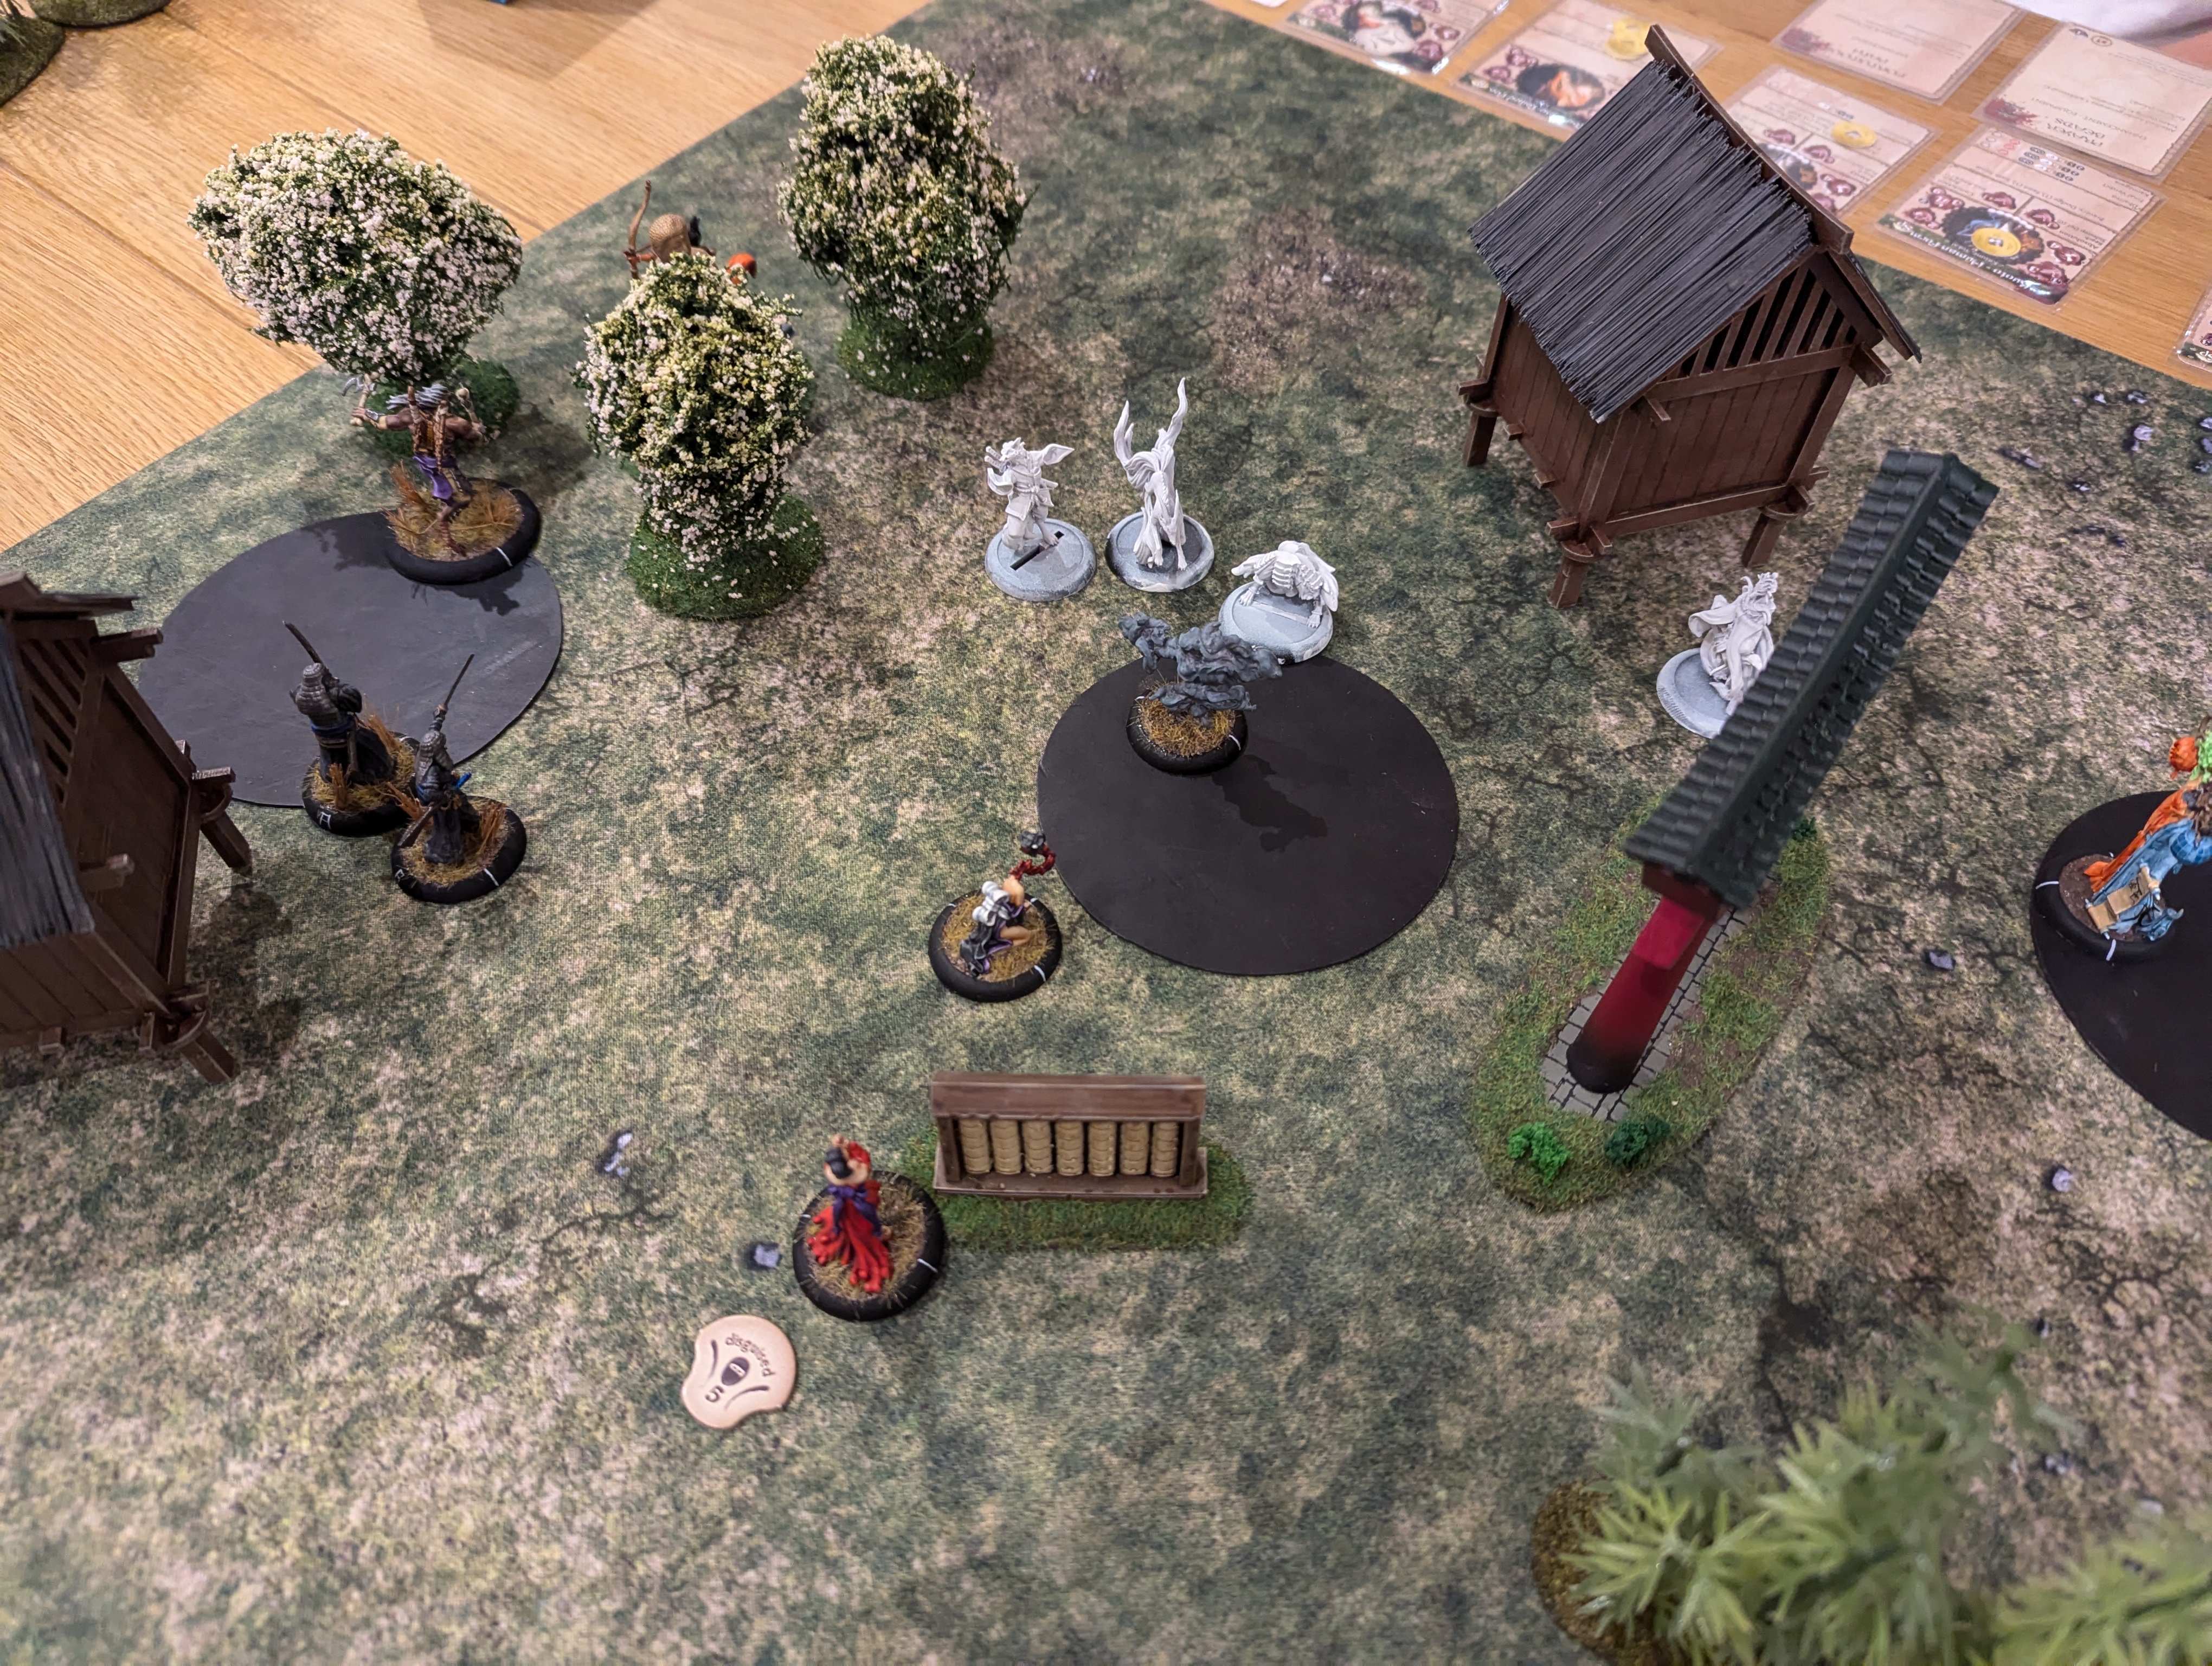
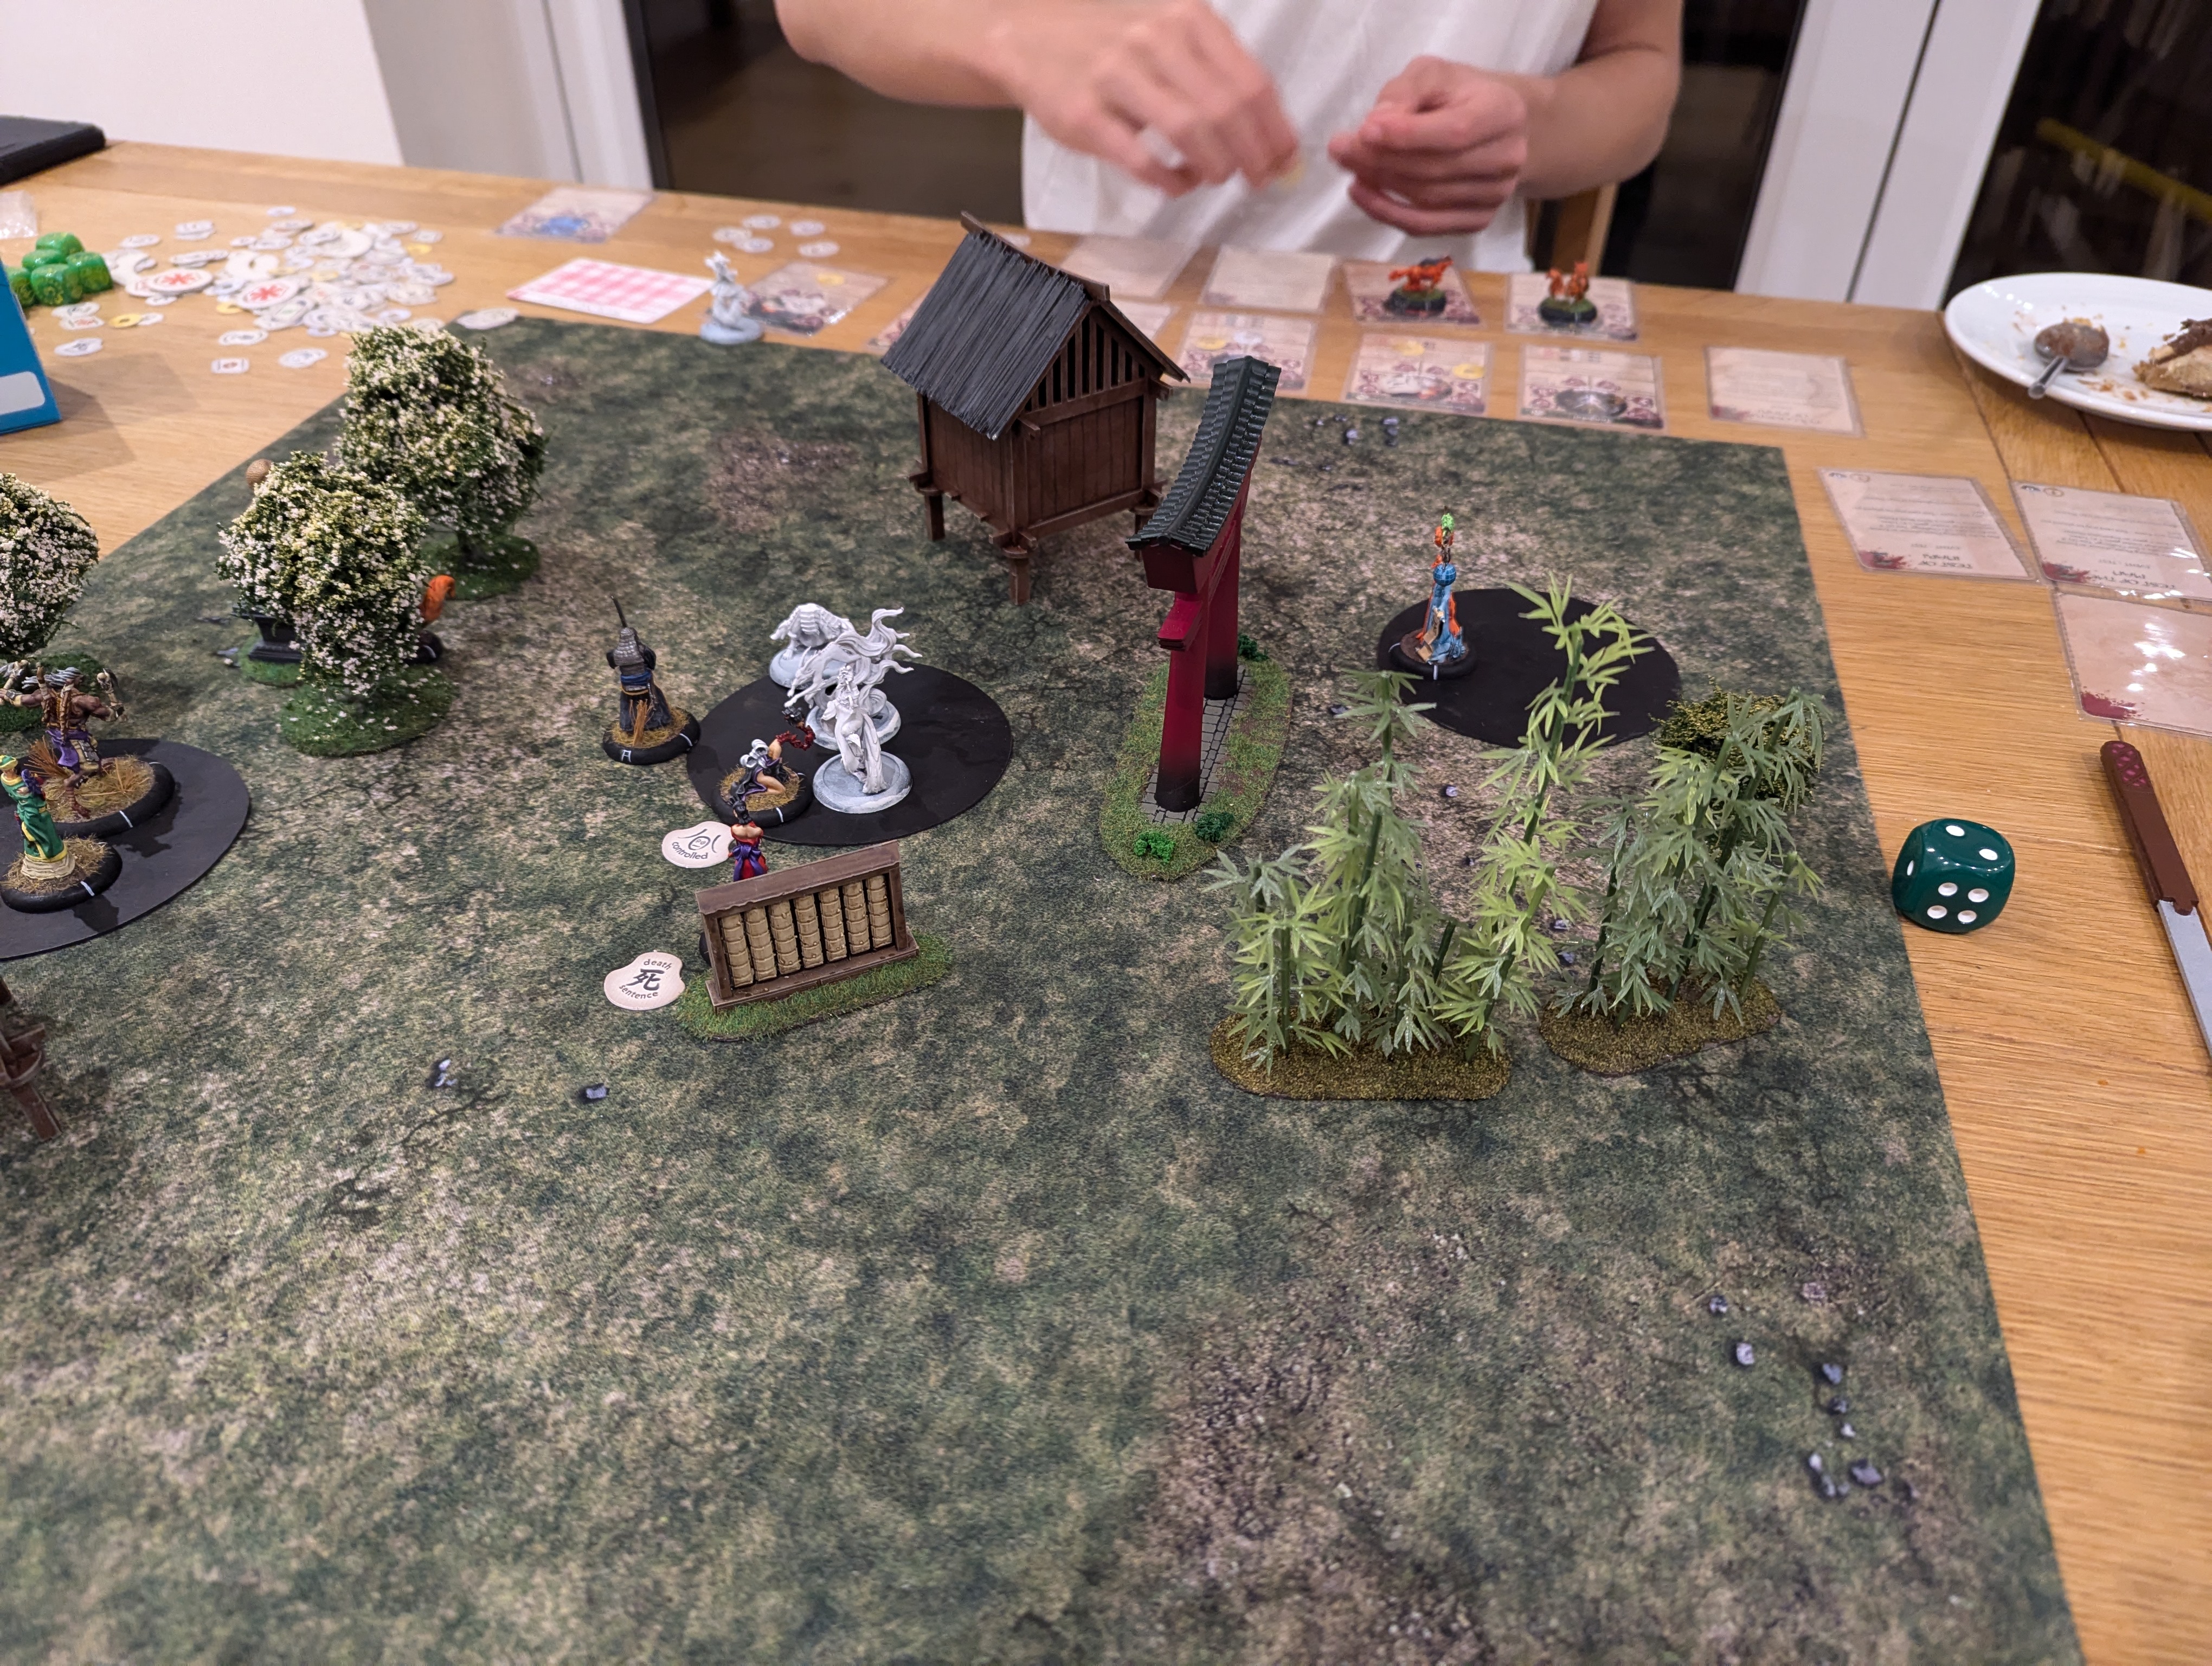
This was a game we played just before Christmas between my Cult of Yurei and my son’s Temple of RoKan where he used the Kitsune sub faction. The game was a 6 turn affair with zone control. VPs are score at the end of turns 2, 4 and 6 with 1VP available if you control the most scoring zones. To control a zone, you need more models with a higher points cost than your opponent.
Below is the starting line up.
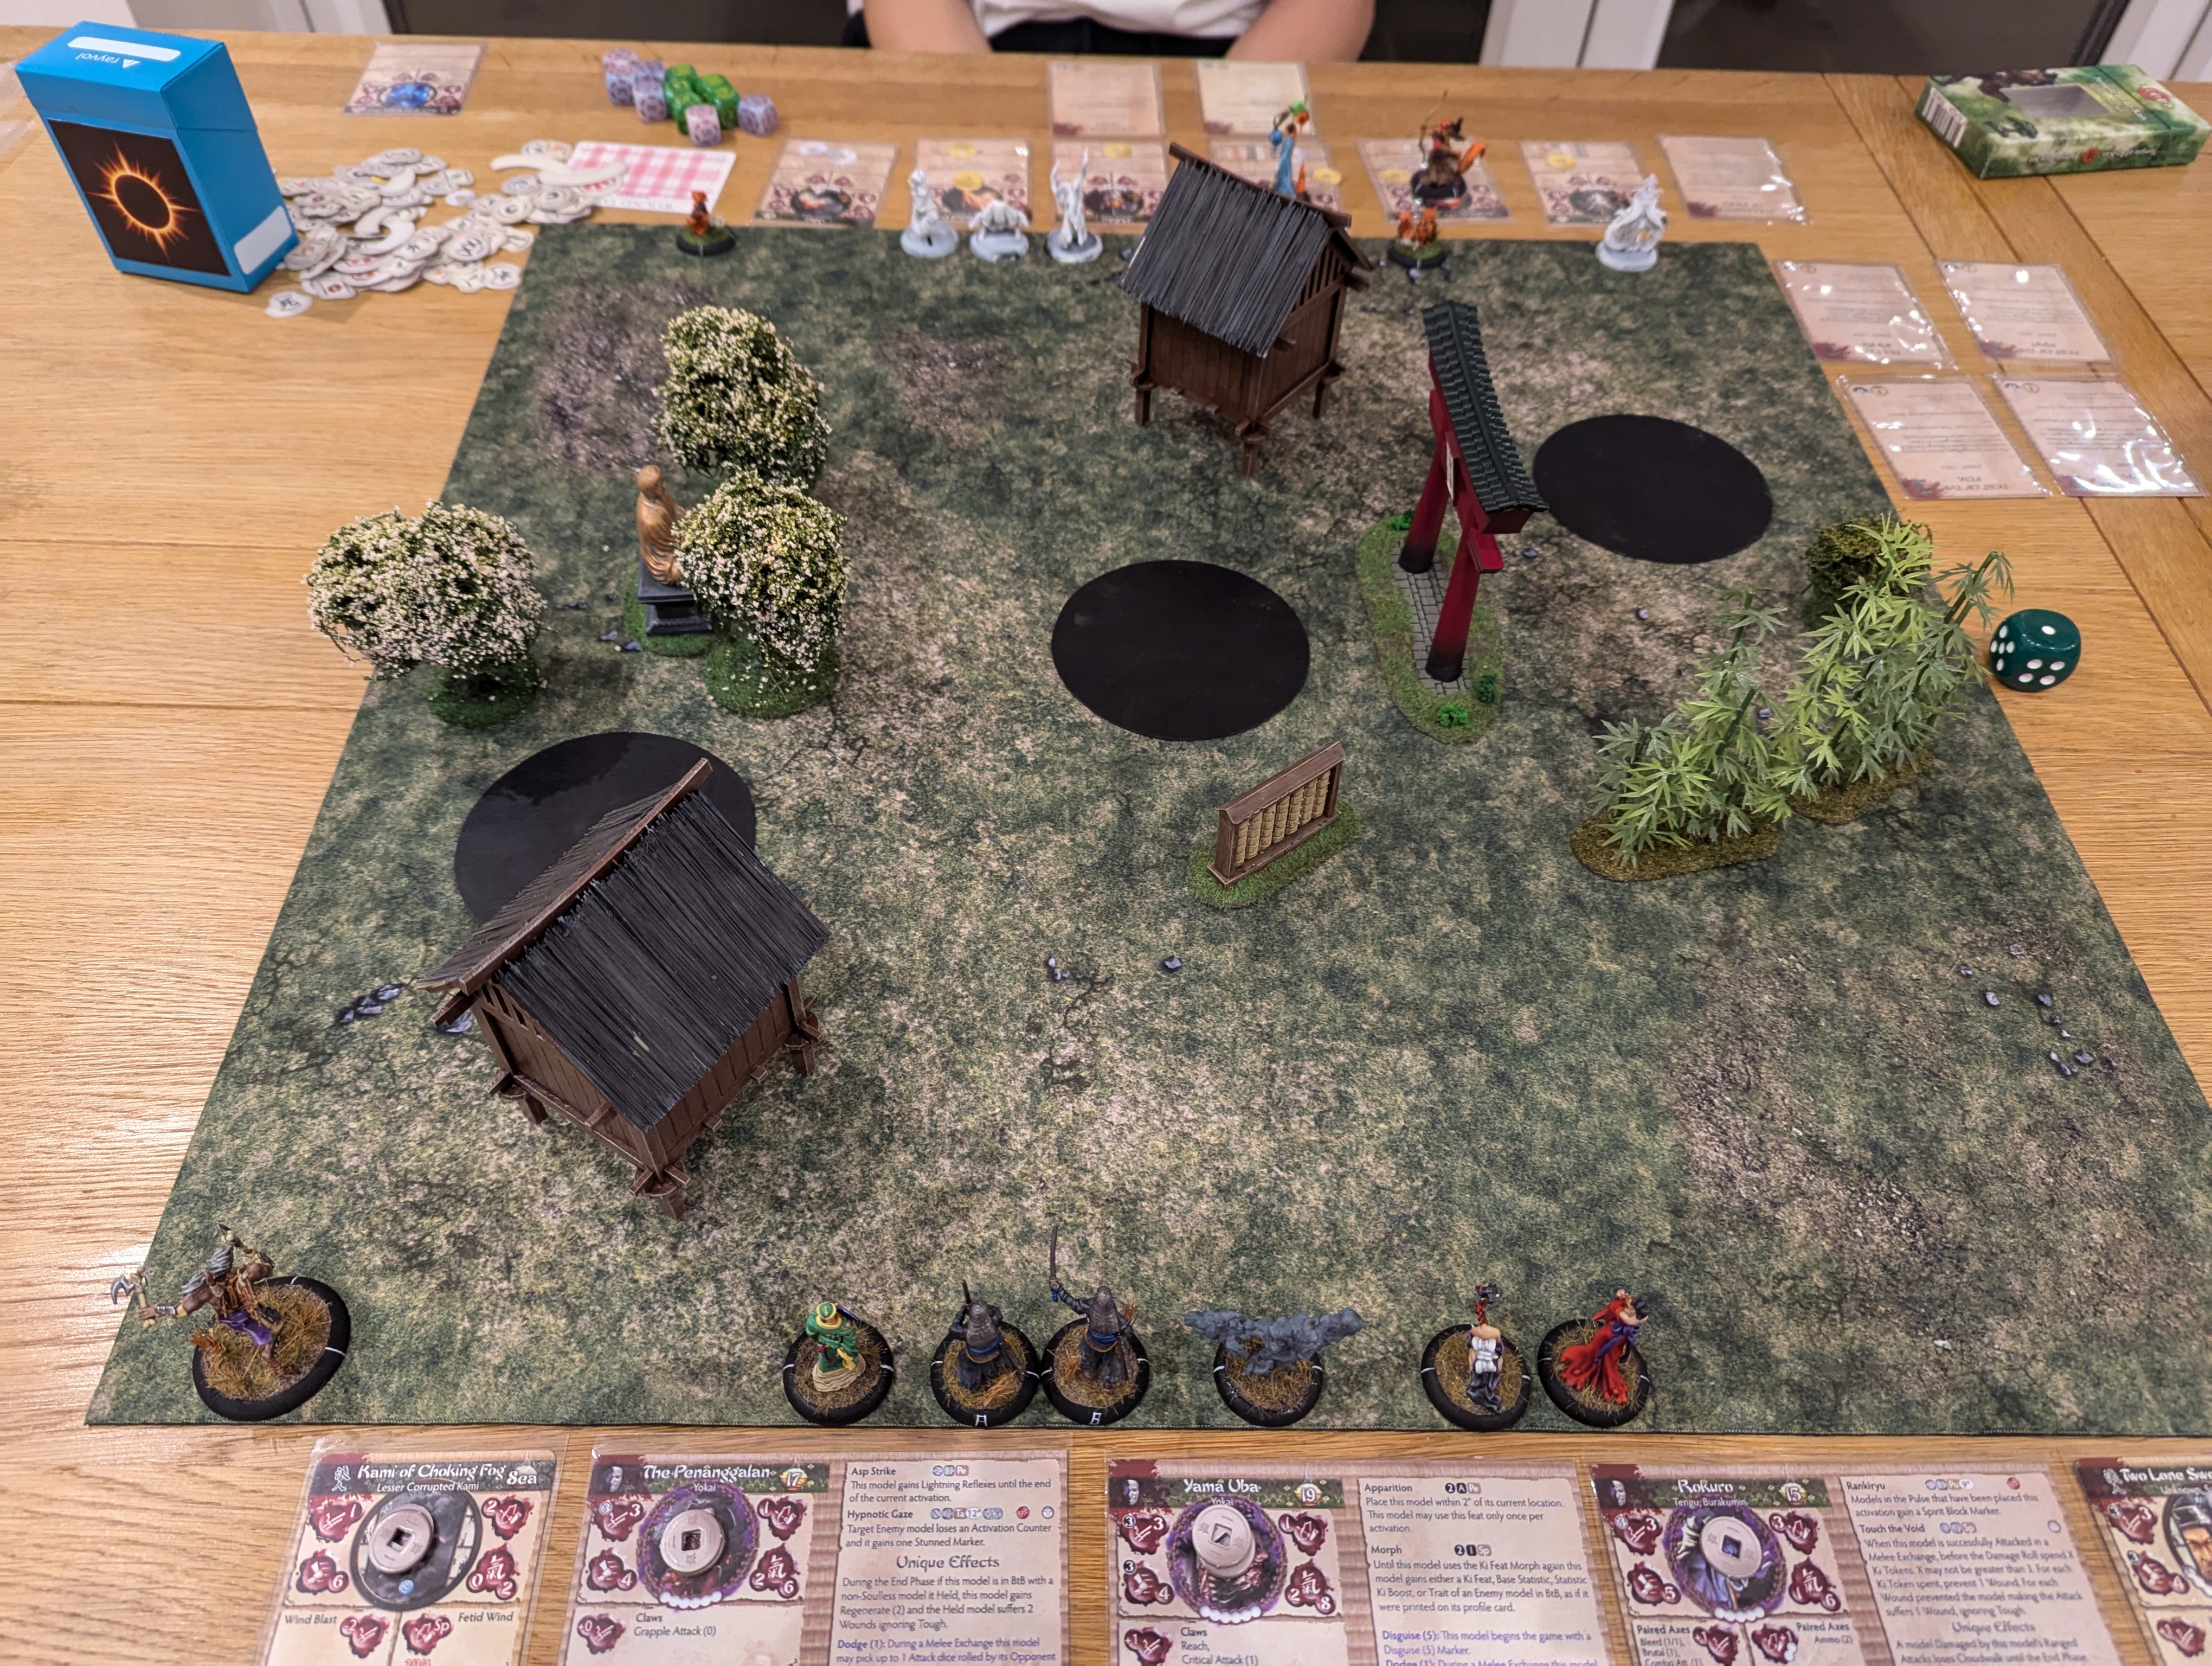
Turn 1.
This was the usual moving forward into position. I was able to really push Rokuro up the field as he has the scout 4” ability (giving him a 4” move before the game starts) and a standard 5” move. My aim here was to get up the left flank and into a scoring zone and take ownership. My son spotted this aggressive move and used his White Faced Fox (WFF) to shoot Rokuro with a bow, doing 3 wounds.
Below we have the end of round 1 position
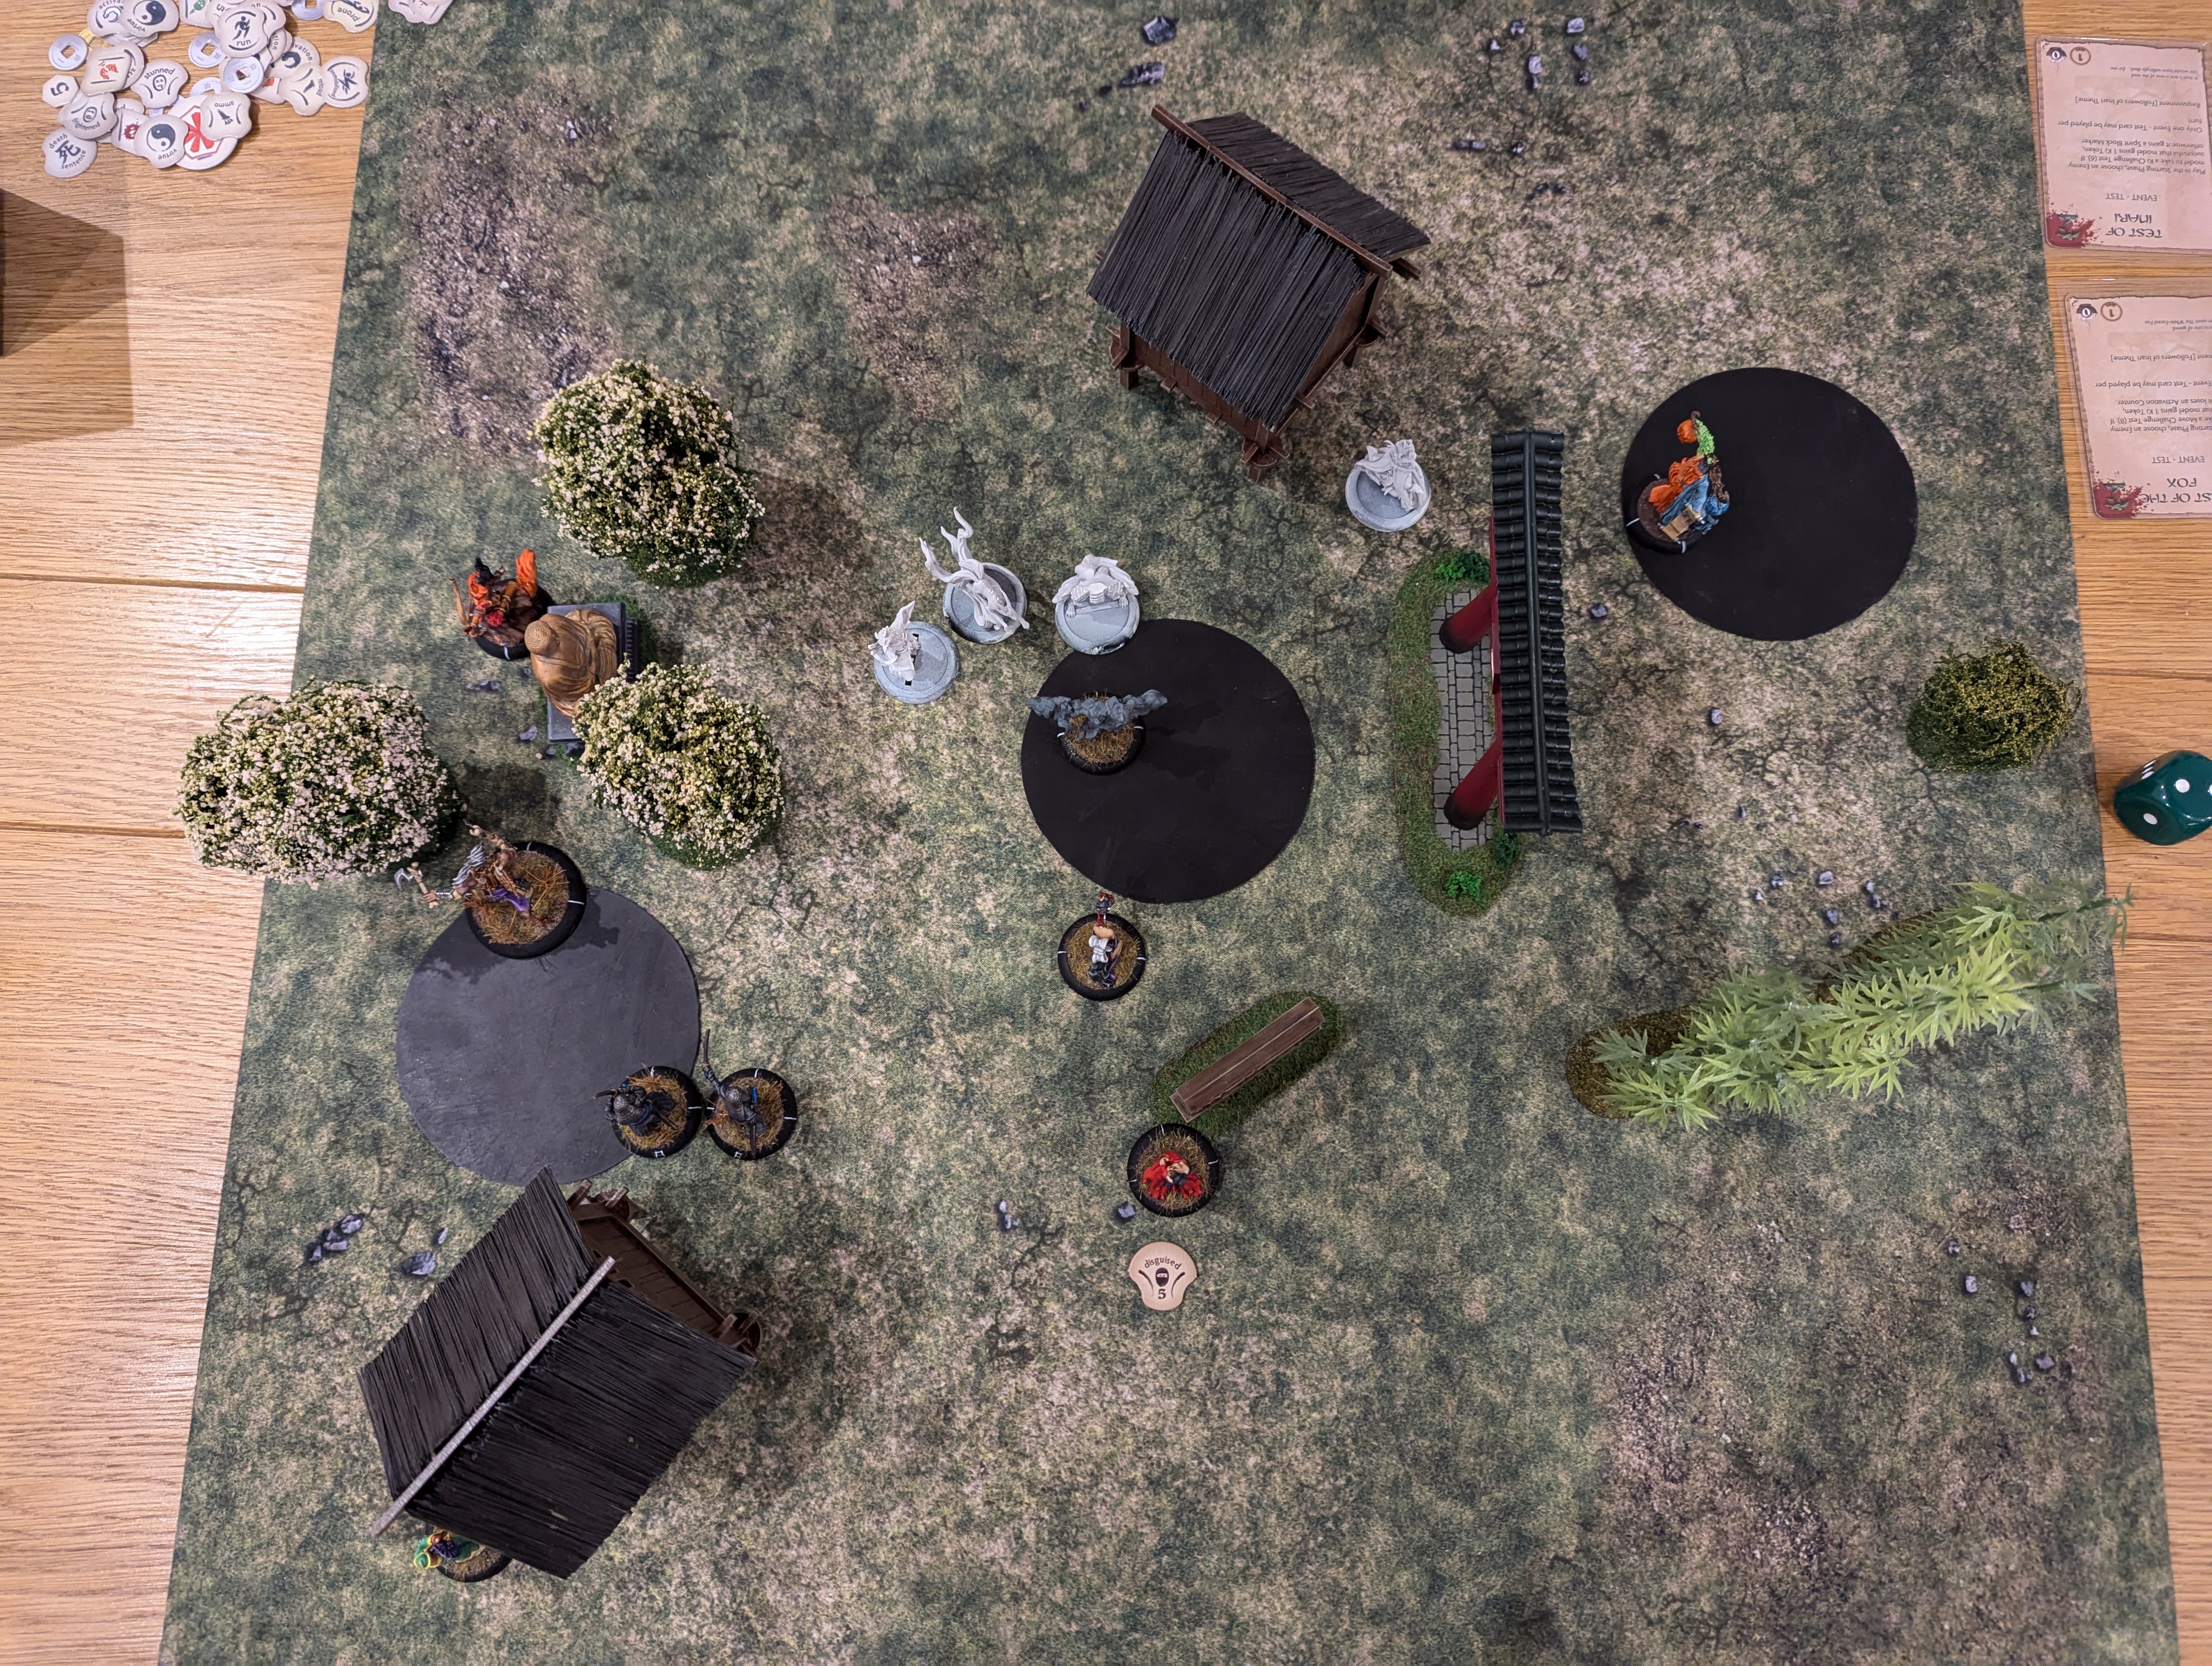
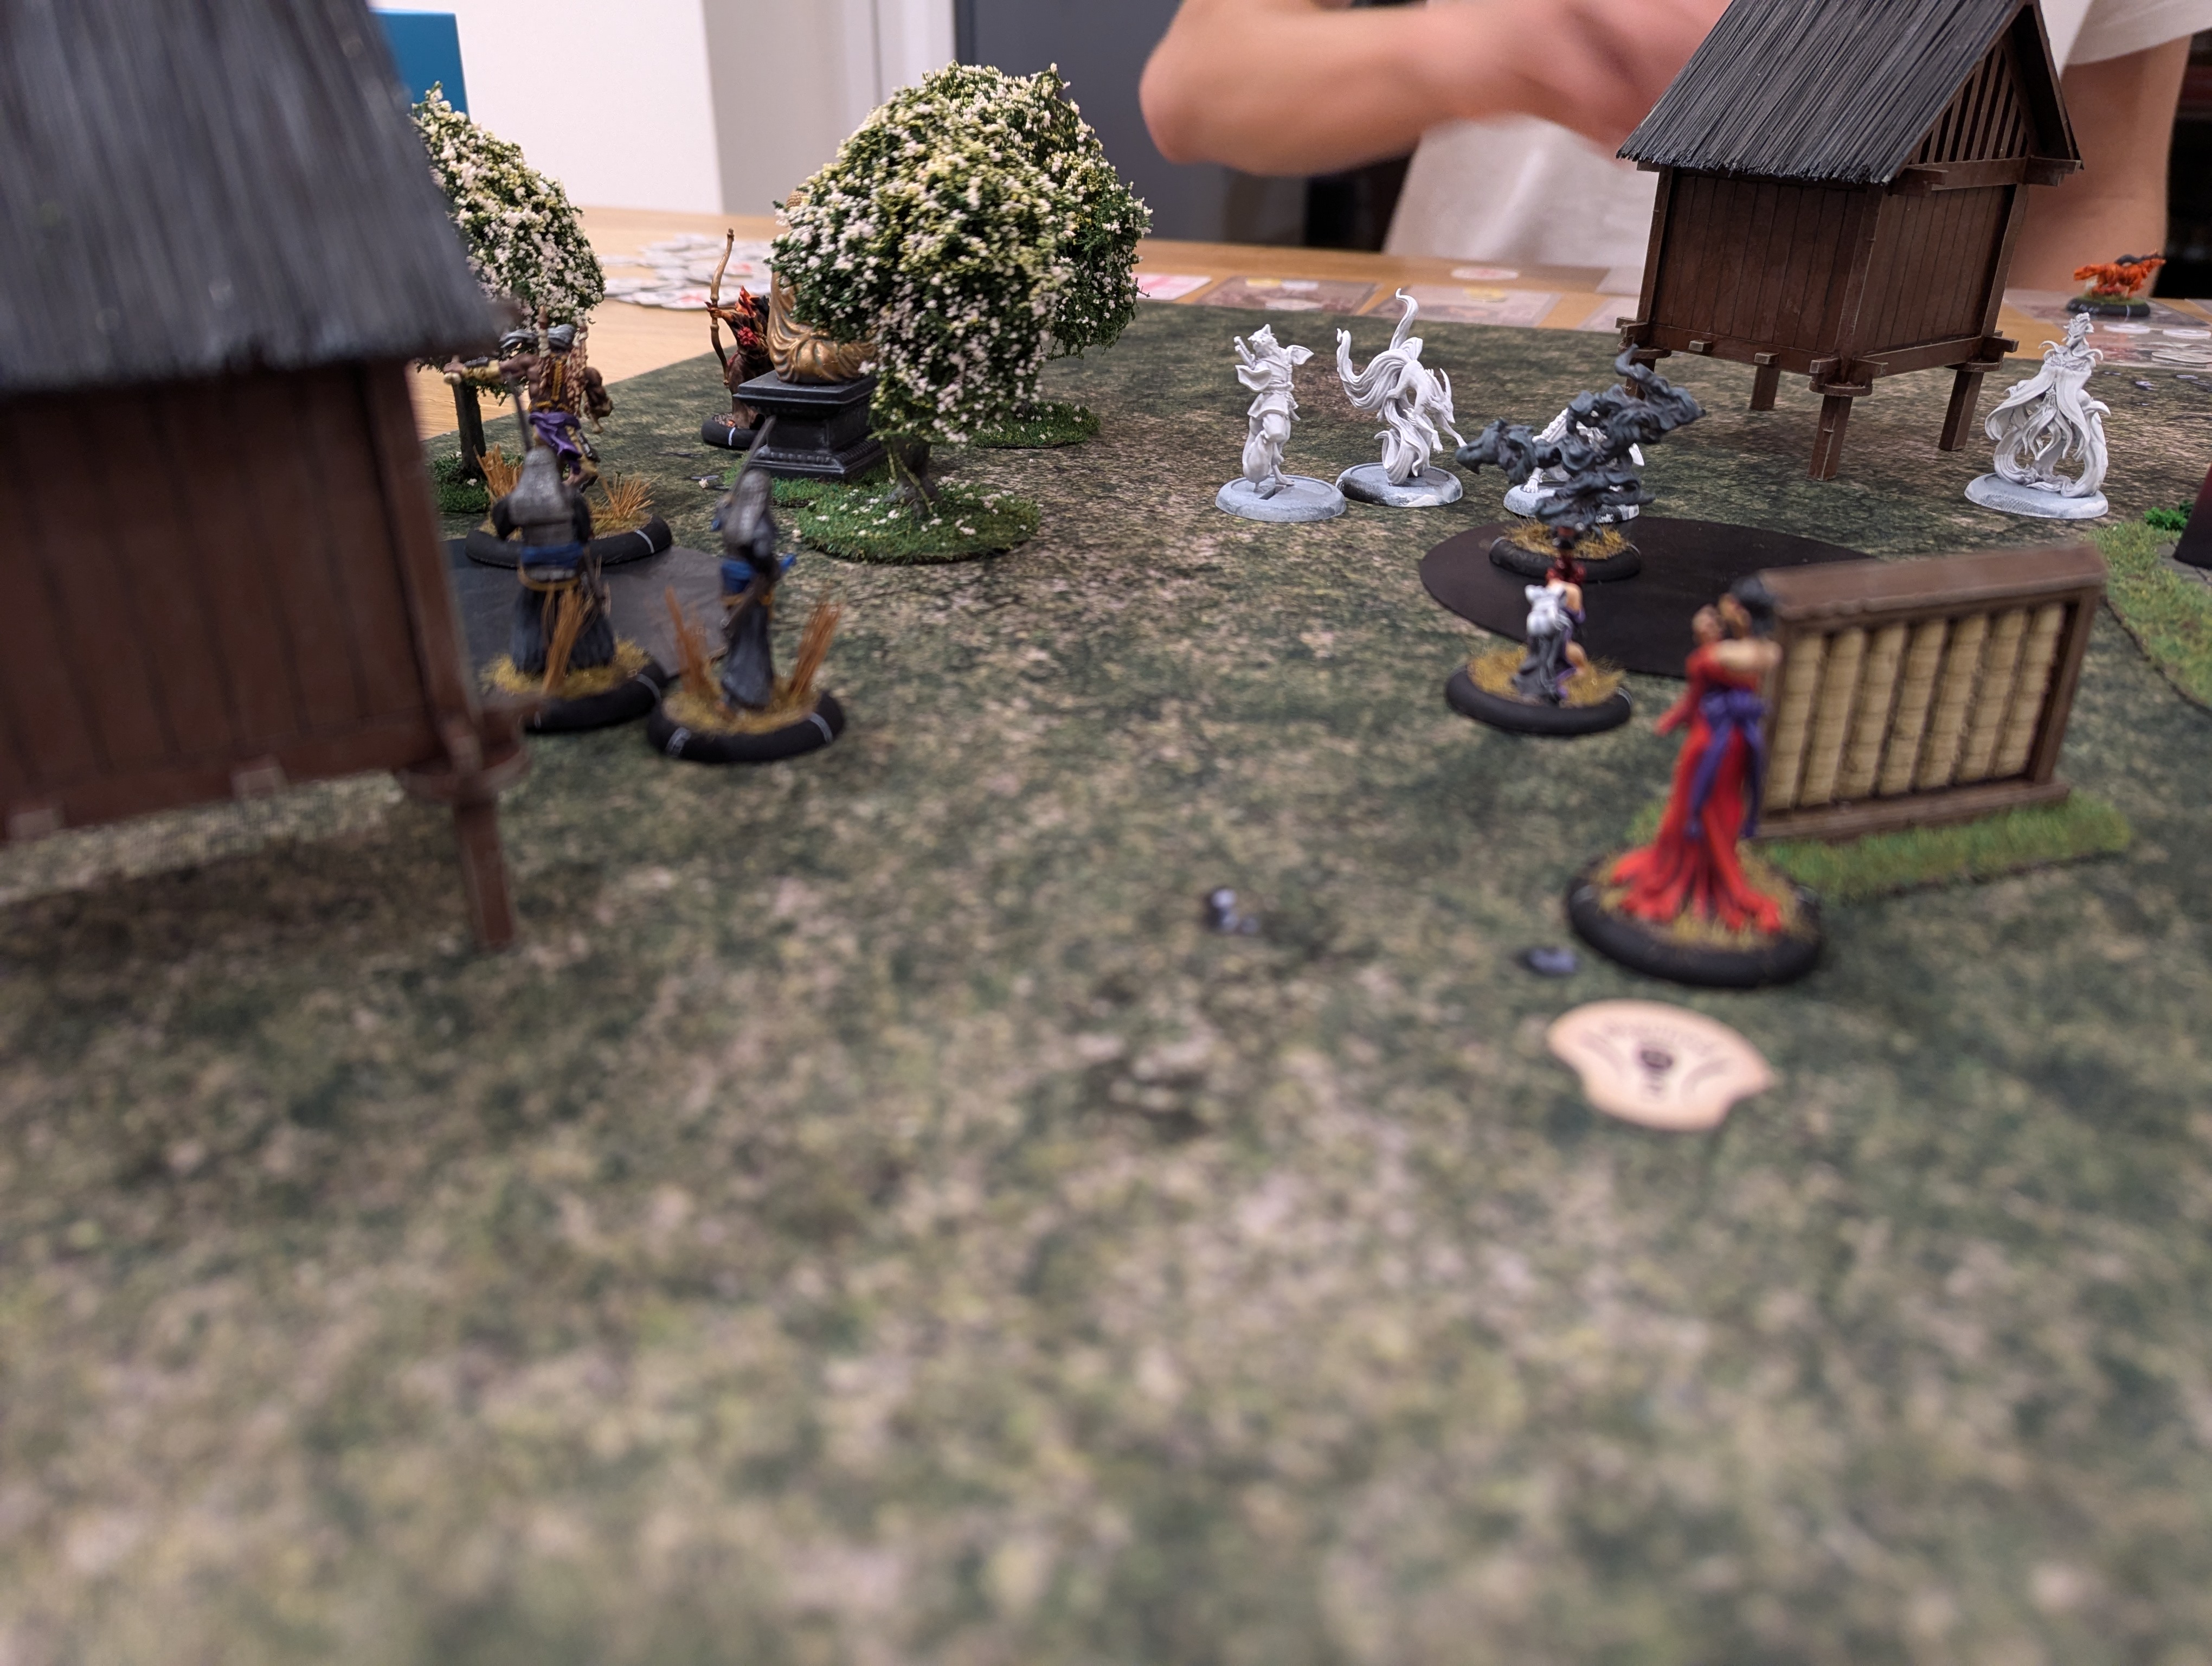
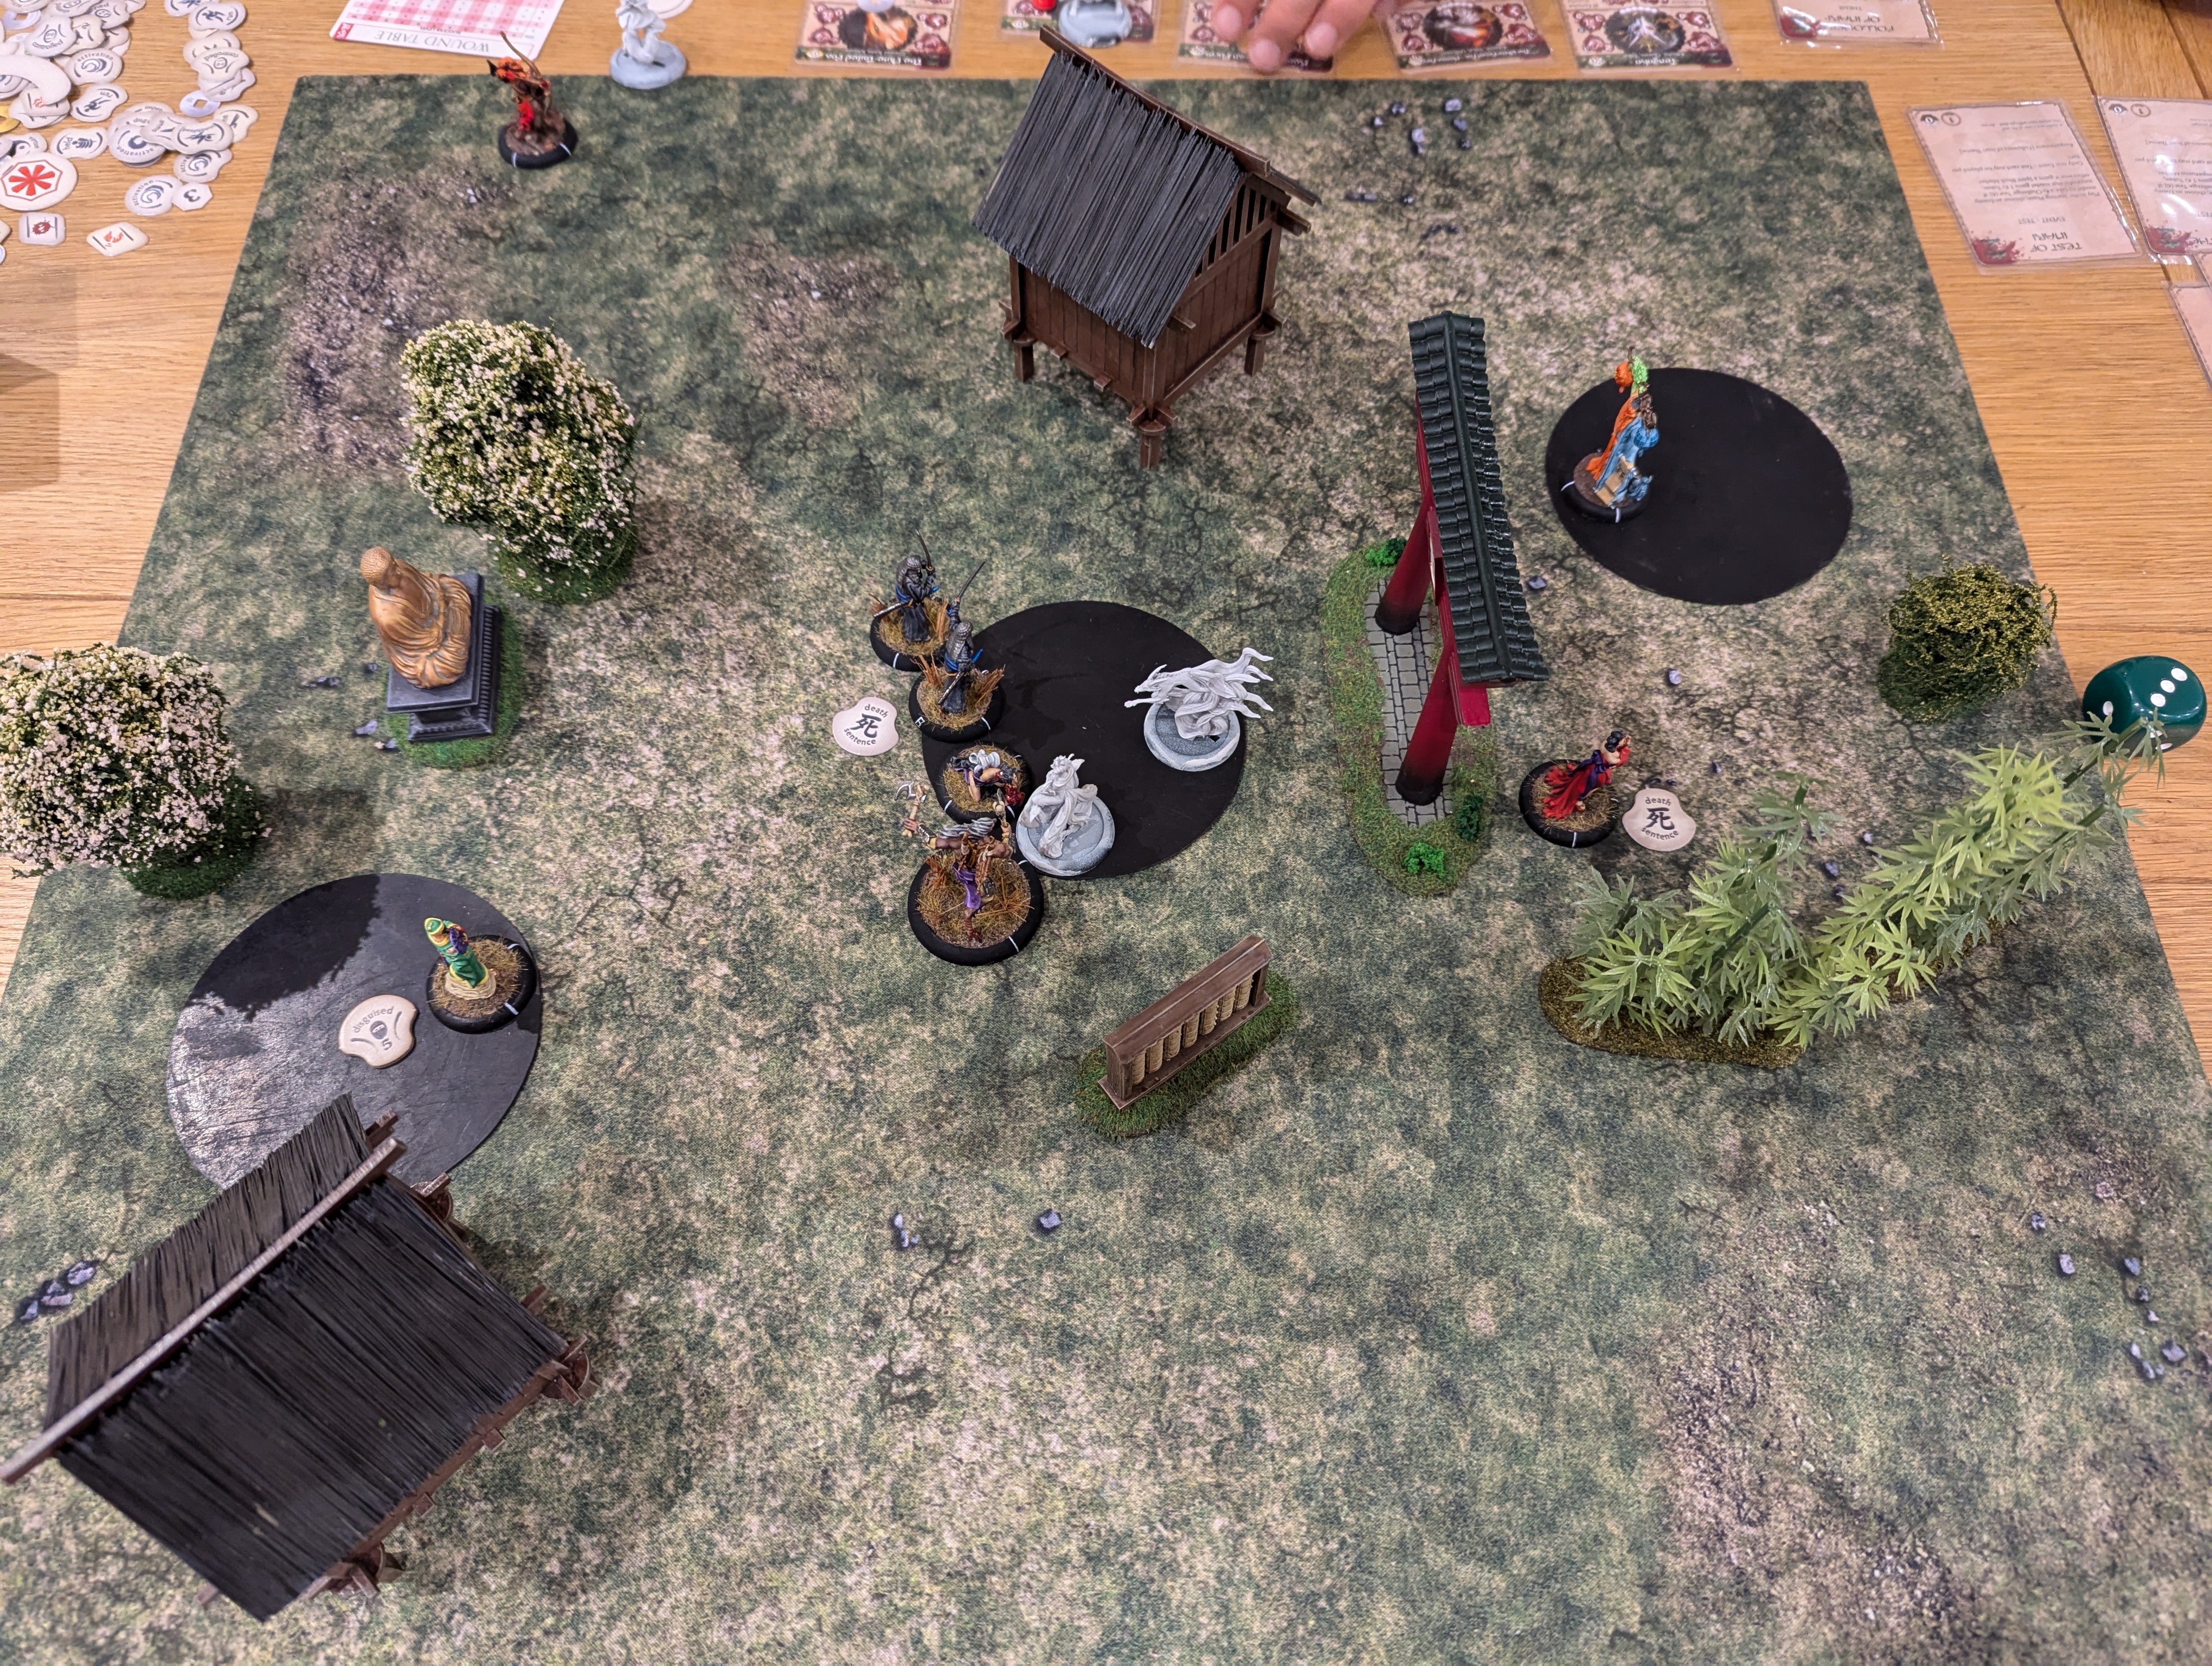
Turn 2.
I pushed my kami up the field to act as a blocking piece. Juko moved to attack but fortunately failed to cause any damage. In retaliation, I used the Penangalan to hypno gaze Juko, which worked and Juko lost its remaining activation.
I was able to move Rokuro into position to attack the WFF but failed to hit. WFF was able to get off a defensive move that allowed it to move back 1” out of BtB and therefore out of combat.
My son then activated Hofoku to attack the Kami. This was successful but as the Kami has Durable, only one wound was caused. It didn’t matter, as Hofoku got activated again on my son’s next turn and this caused the final wound to kill the Kami. First blood to my son.
With Juko exhausted, I was able to move the Two Lone Swordsmen (TLS) in tandem into attack. I used their Ki ability to boost their combat support and this, coupled with Juko’s exhaustion meant that I got to roll 5 melee dice vs Juko’s 1. This massive attack hit home, doing 6 wounds and killing Juko. It’s great how you can set these big attacks up in Bushido to really hammer home an attack.
My son uses the Nine Tailed Fox (NTF) to attack the TLS. I have reach, so the TLS goes first in melee and I’m able to deliver 6 wounds. It’s not enough to kill NTF who is able to attack TLS back and kills one. I’m not worried about this due to another of the TLS special abilities (see the end of the turn).
I move Yama Uba in to attack Tengoko. I’m not able to wound but I use my special Ki feat to steal Tengoko’s Impenetrable Defence special ability. This ability will now allow Yama Uba to remove an enemy’s highest attack melee dice, which makes her a lot more survivable in combat. I then use Yama Uba’s other Ki ability, apparition, that allows her to move 2” away and therefore out of combat and as this happens before Tengoko’s attack, the attack fails.
At the end of the turn, my son has control over one of the scoring zones, and so gains 1 VP. I also place the removed Lone Swordsman back on the table in BtB with the other one. My son hasn’t read the card for the TLS and howls in complaint but to completely remove the TLS, you need to kill both in the same turn, otherwise the removed one returns, with full wounds, in BtB with the remaining one. He’s not happy!
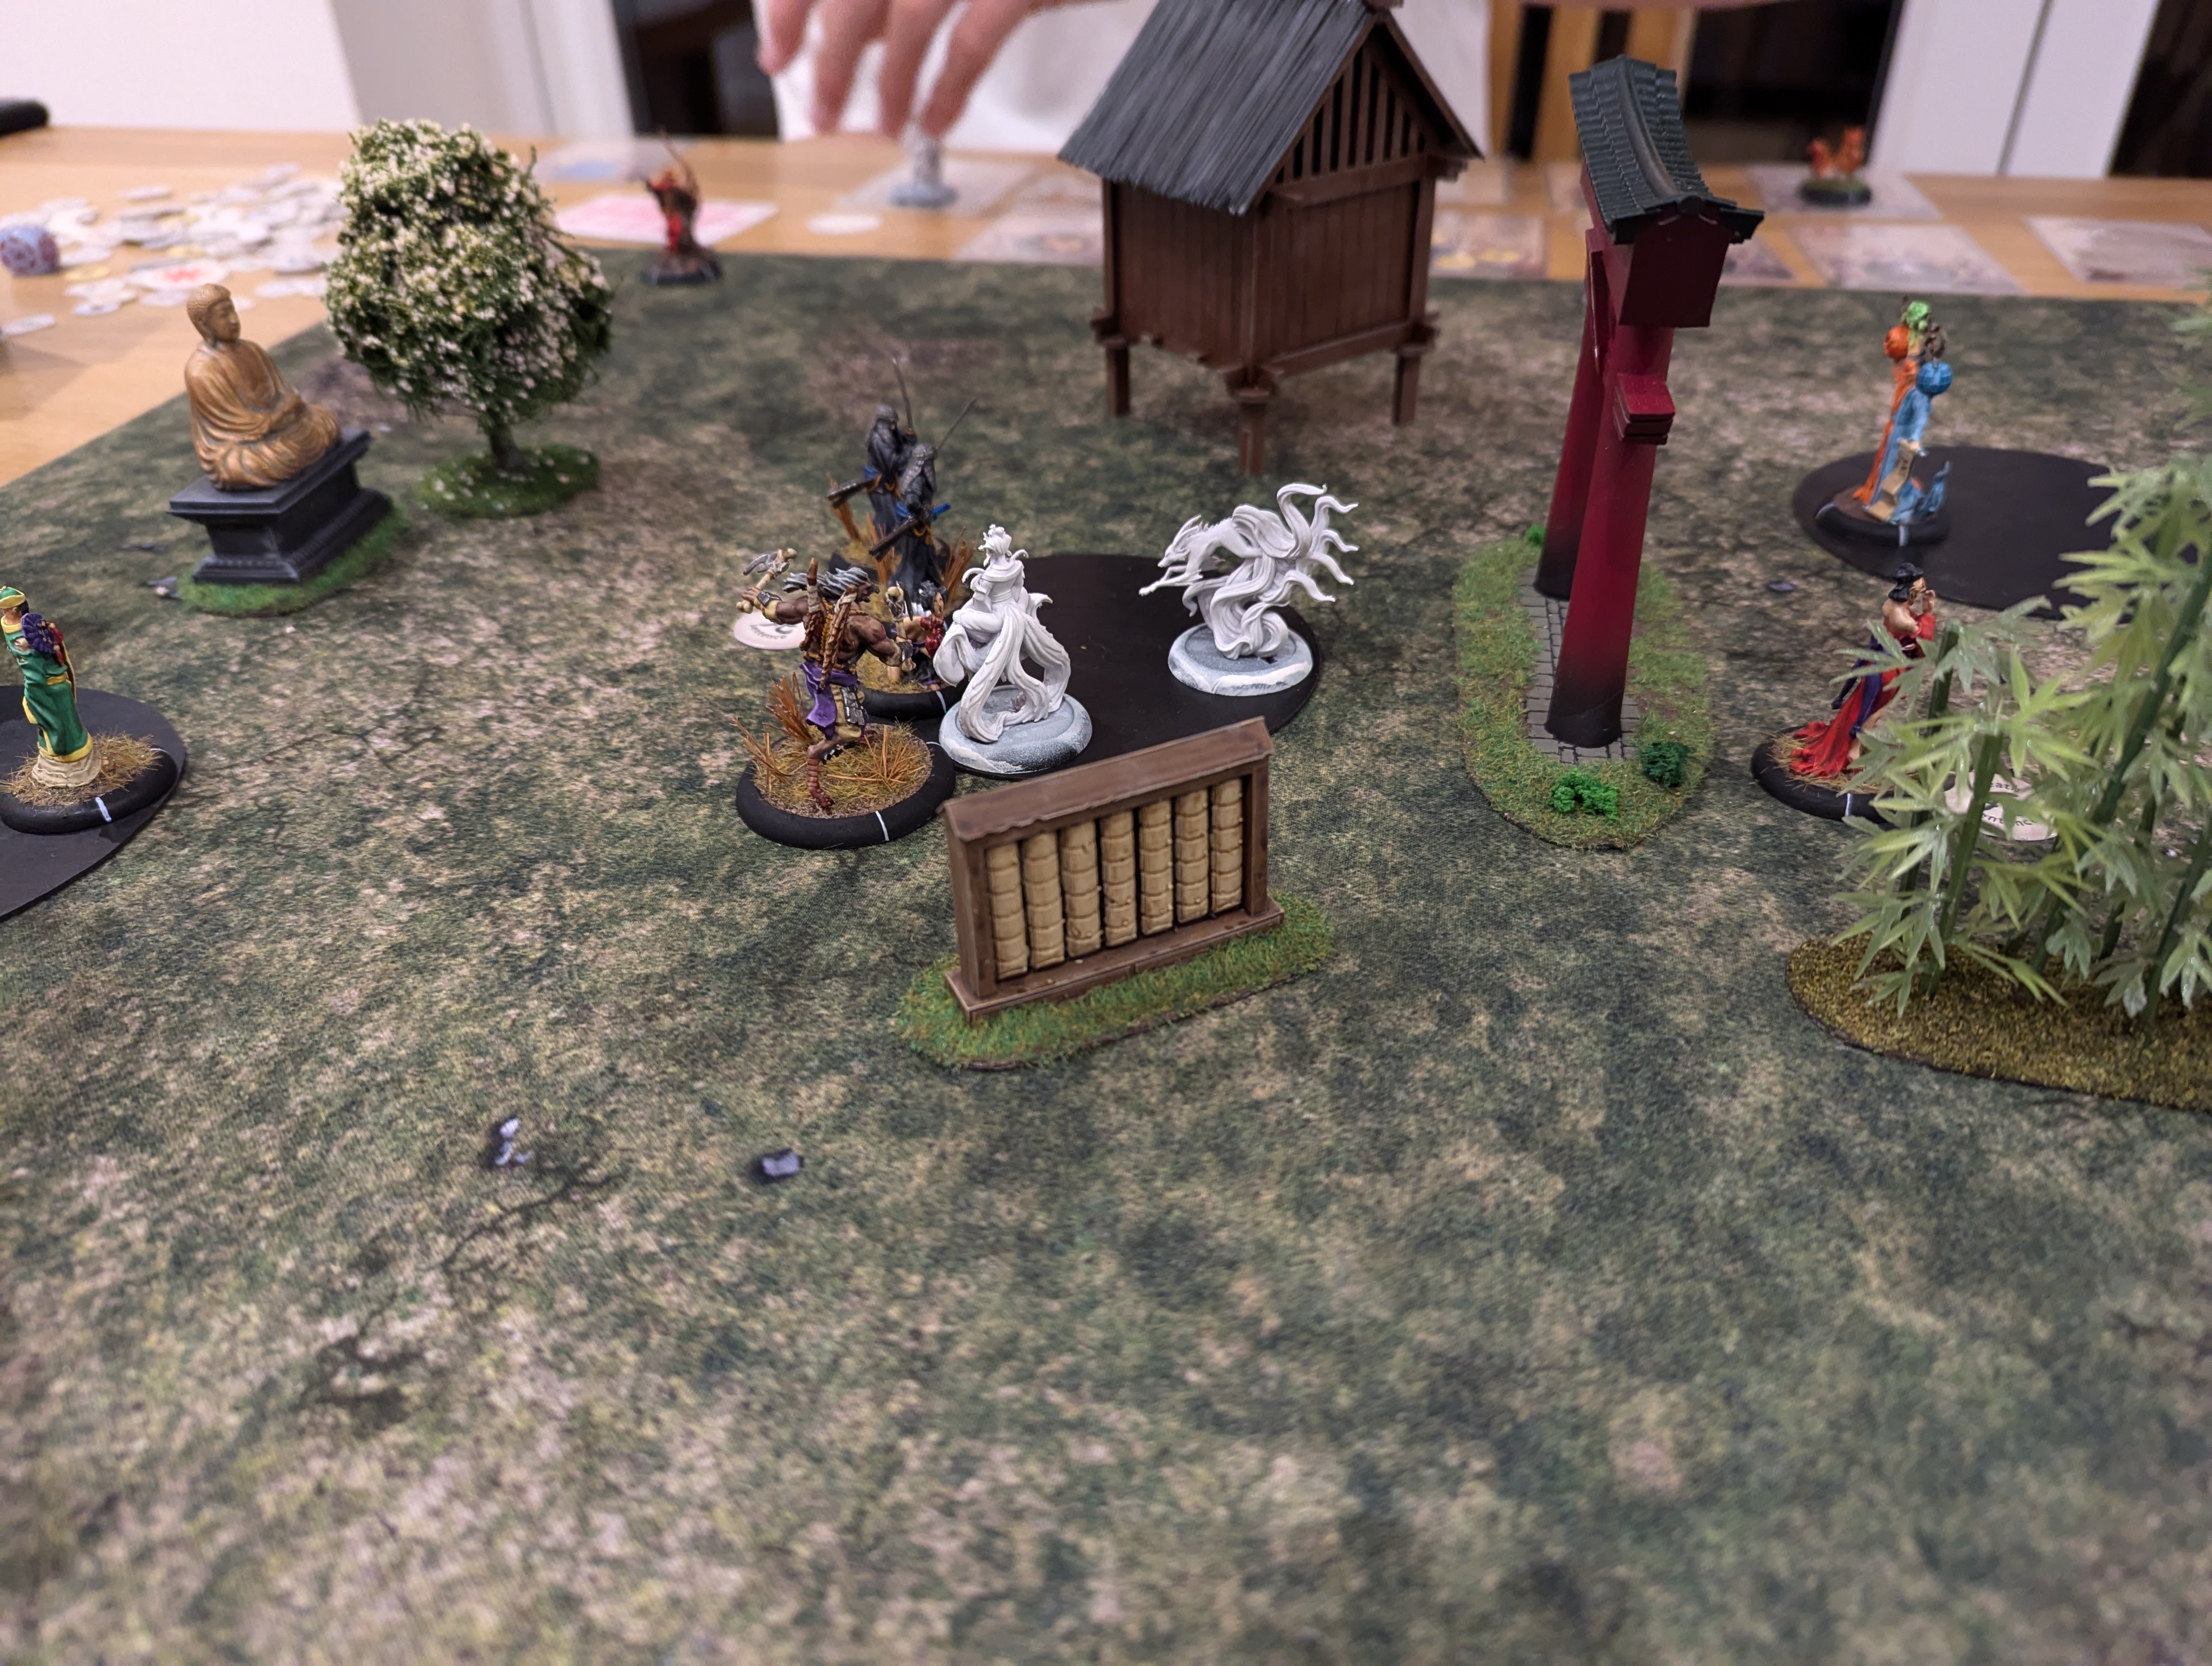
Turn 3.
I immediately use Rokuro to attack Juko. I roll big and Juko is removed from play.
Kuto uses its Ki feat, Final Verdict, on Yama Uba, who fails the Ki challenge roll and consequently I have to choose between a Death Sentence marker (giving anyone attacking Yama Uba a bonus to hit) or a control marker (giving my son control of Yama Uba for one activation). I chose the Controlled marker.
I use TLS to attack Hofoku. The first attack hits but Hofoku is saved by its armour. The second TLS attack does get through, doing 4 damage.
Tengoko attacks the Penangalan and I use asp strike (a Ki feat) to try to get in first but Tengoko’s impenetrable defence means I lose my best attack dice and I’m not able to get past the defence roll. Tengoko delivers a successful strike causing 4 wounds.
I use Mo Ises’ Ki Feat to walk Rokuro into position. This doesn’t use an activation on Rokuro, so a great way of repositioning your models. I’m now able to move Rokuro into attack Tengoko but I’m not able to get an attack through and there is no damage.
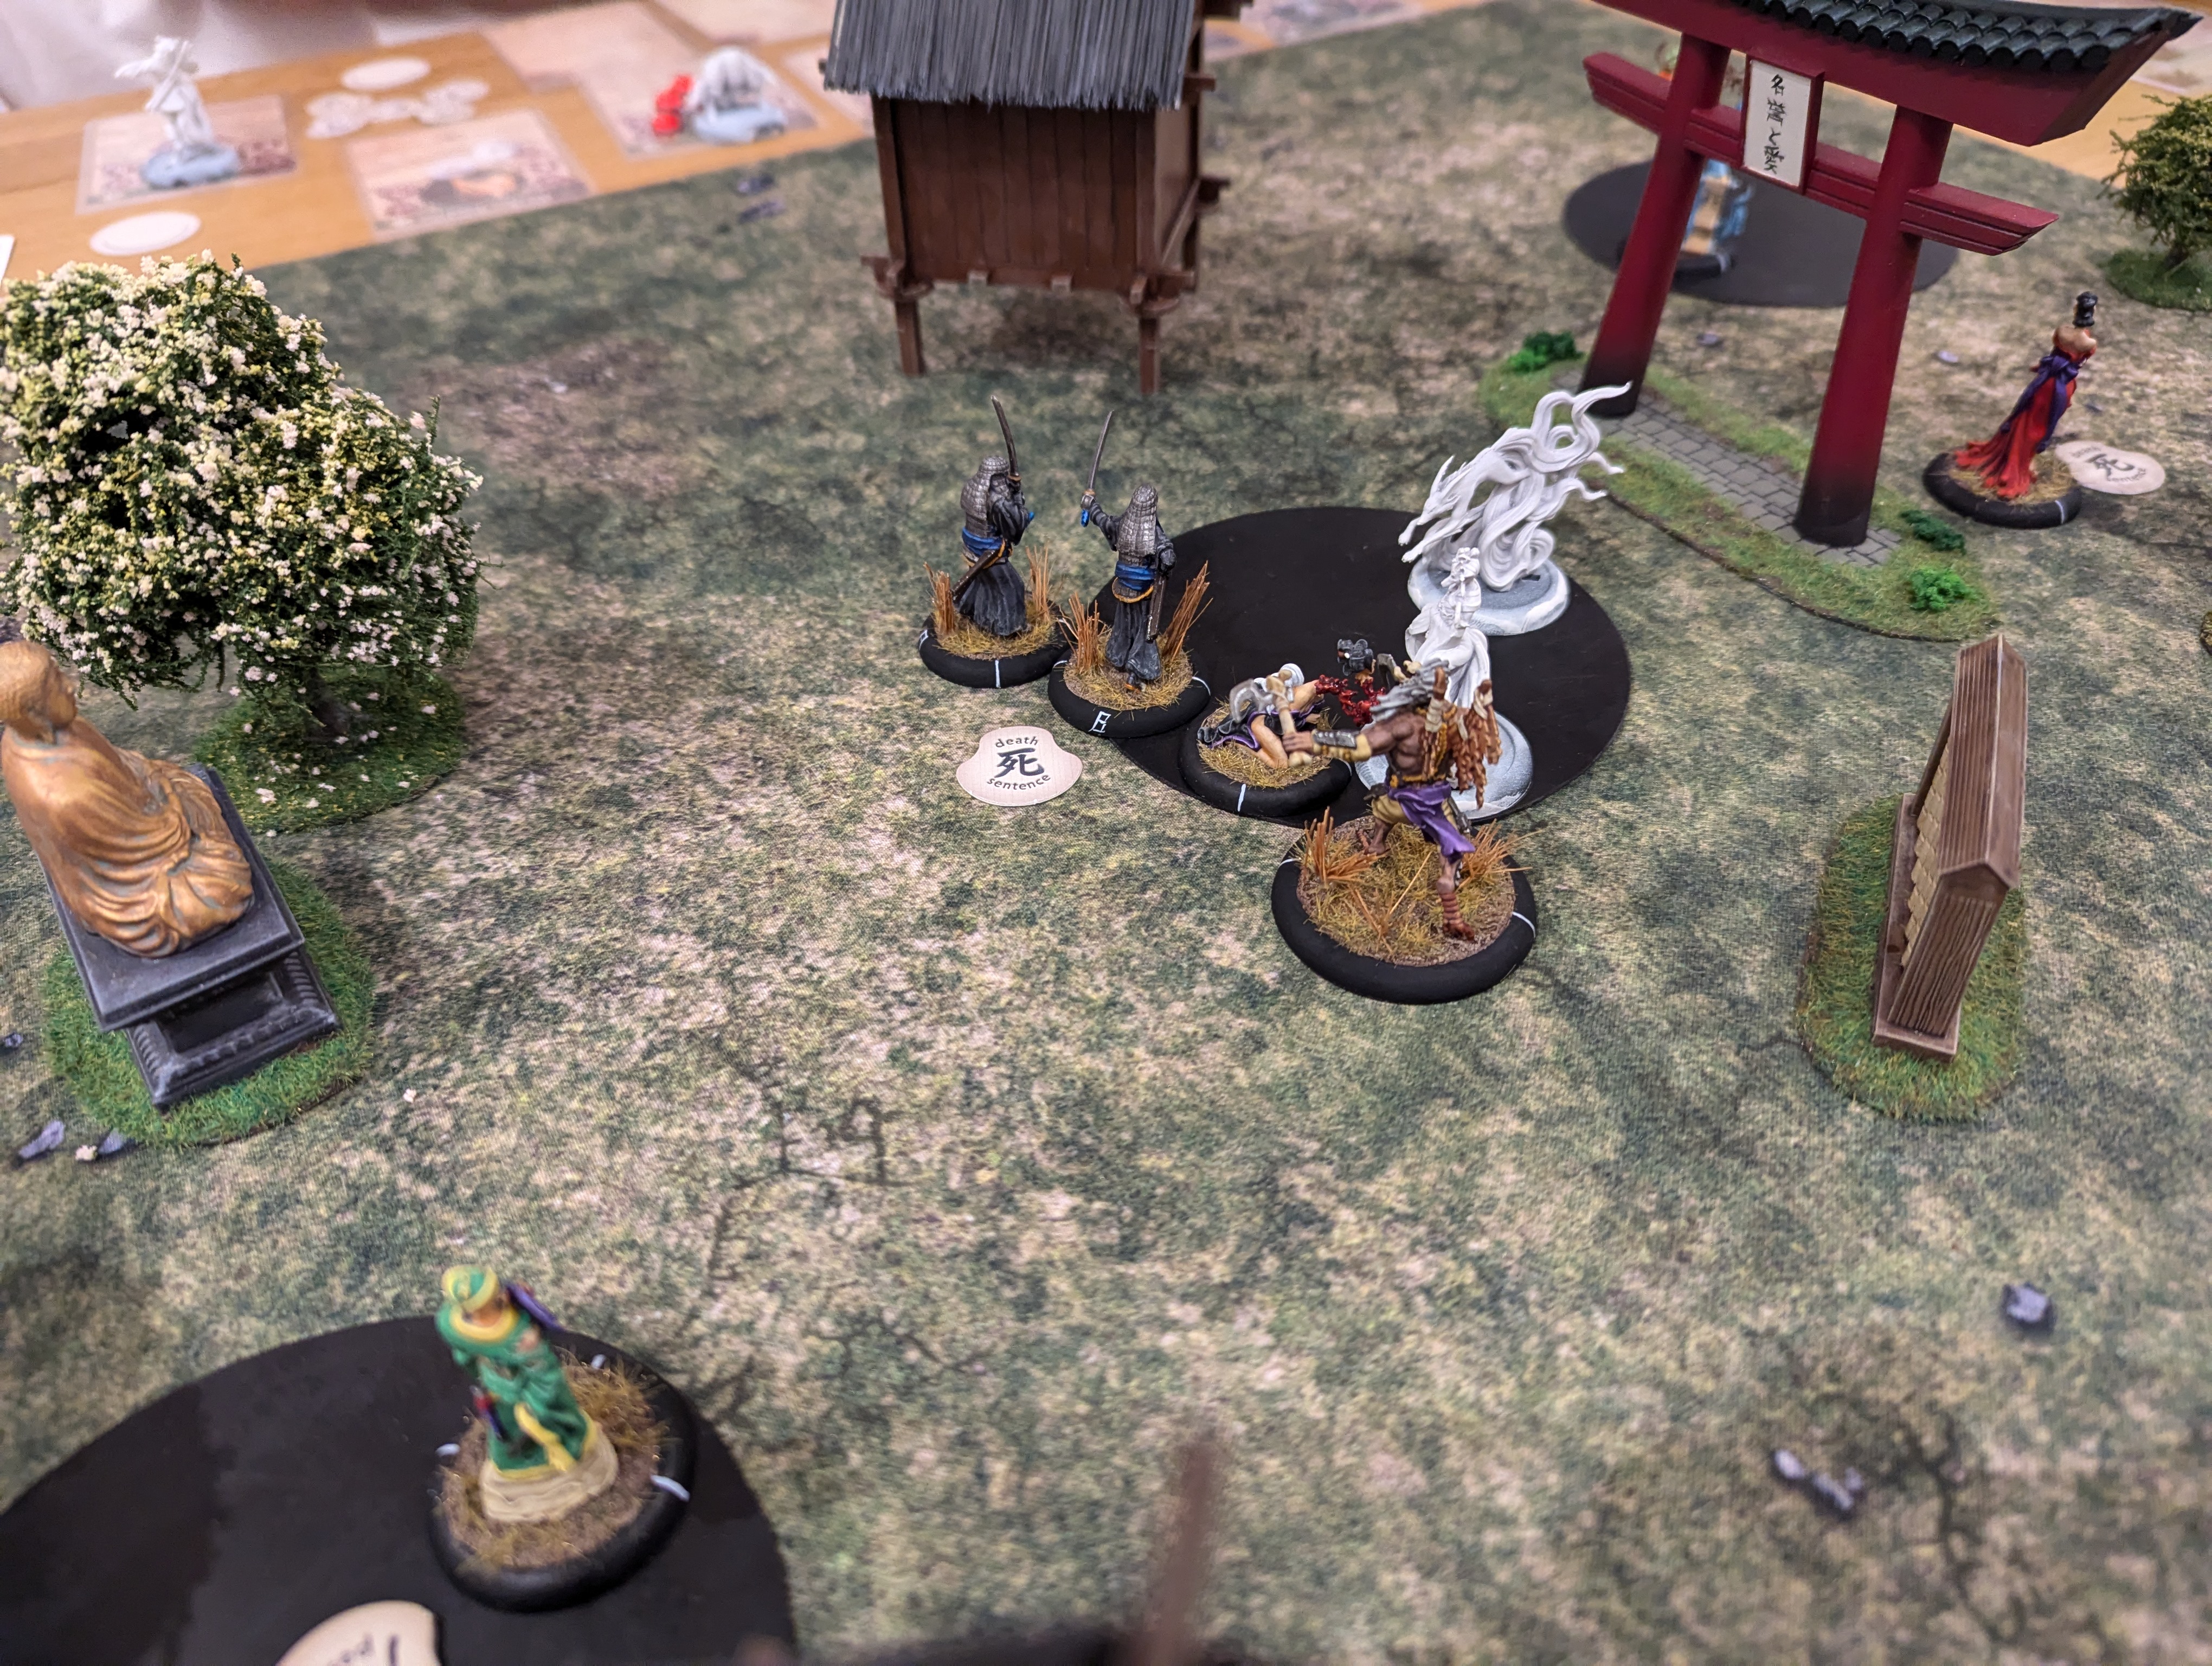
Turn 4.
My son uses his controlled marker on Yama Uba and runs the model back, away from the action. This means it is going to be turn 5 before Yama Uba is back in a useful position, so effectively out of the fight for a few activations. Clever move.
I use the TLS to continue to batter NTF. Clearly the TLS are into fox hunting as they batter NTF and remove it from the board.
Back to the Rokuro vs Tengoko fight. The annoying Impenetrable Defence that Tengoko has removes Rokuro’s best attack dice but it’s not enough for Rokuro’s brutal ability to cause some wounds. Tengoko is able to disengage from the combat but I move the TLS into combat and they are able to kill Tengoko.
It’s at this stage, with little left on the board, my son realises that he can’t win. I can control enough scenario objectives this turn to pick up 1VP and will do the same again on turn 6, so he shakes my hand and concedes.
Wrap up.
This was a brutal game and the TLS really shone through being able to hand out some serious damage. Once again, the Kitsune proved a difficult faction to play. They have the Ki feats to be very challenging but lack a bit in the combat area, so weren’t able to compete against TLS and Rokuro. I definitely think that the Kitsune are a faction that requires practice but have the potential to be really good once mastered.
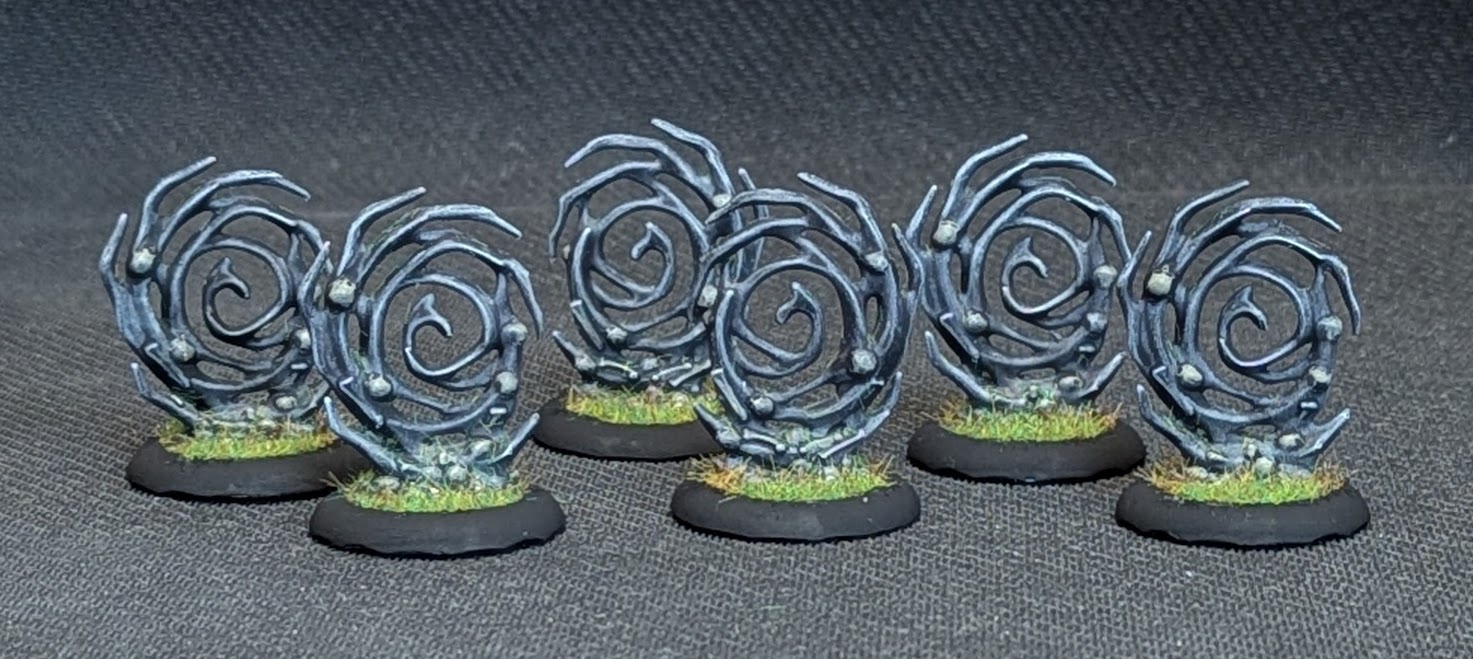
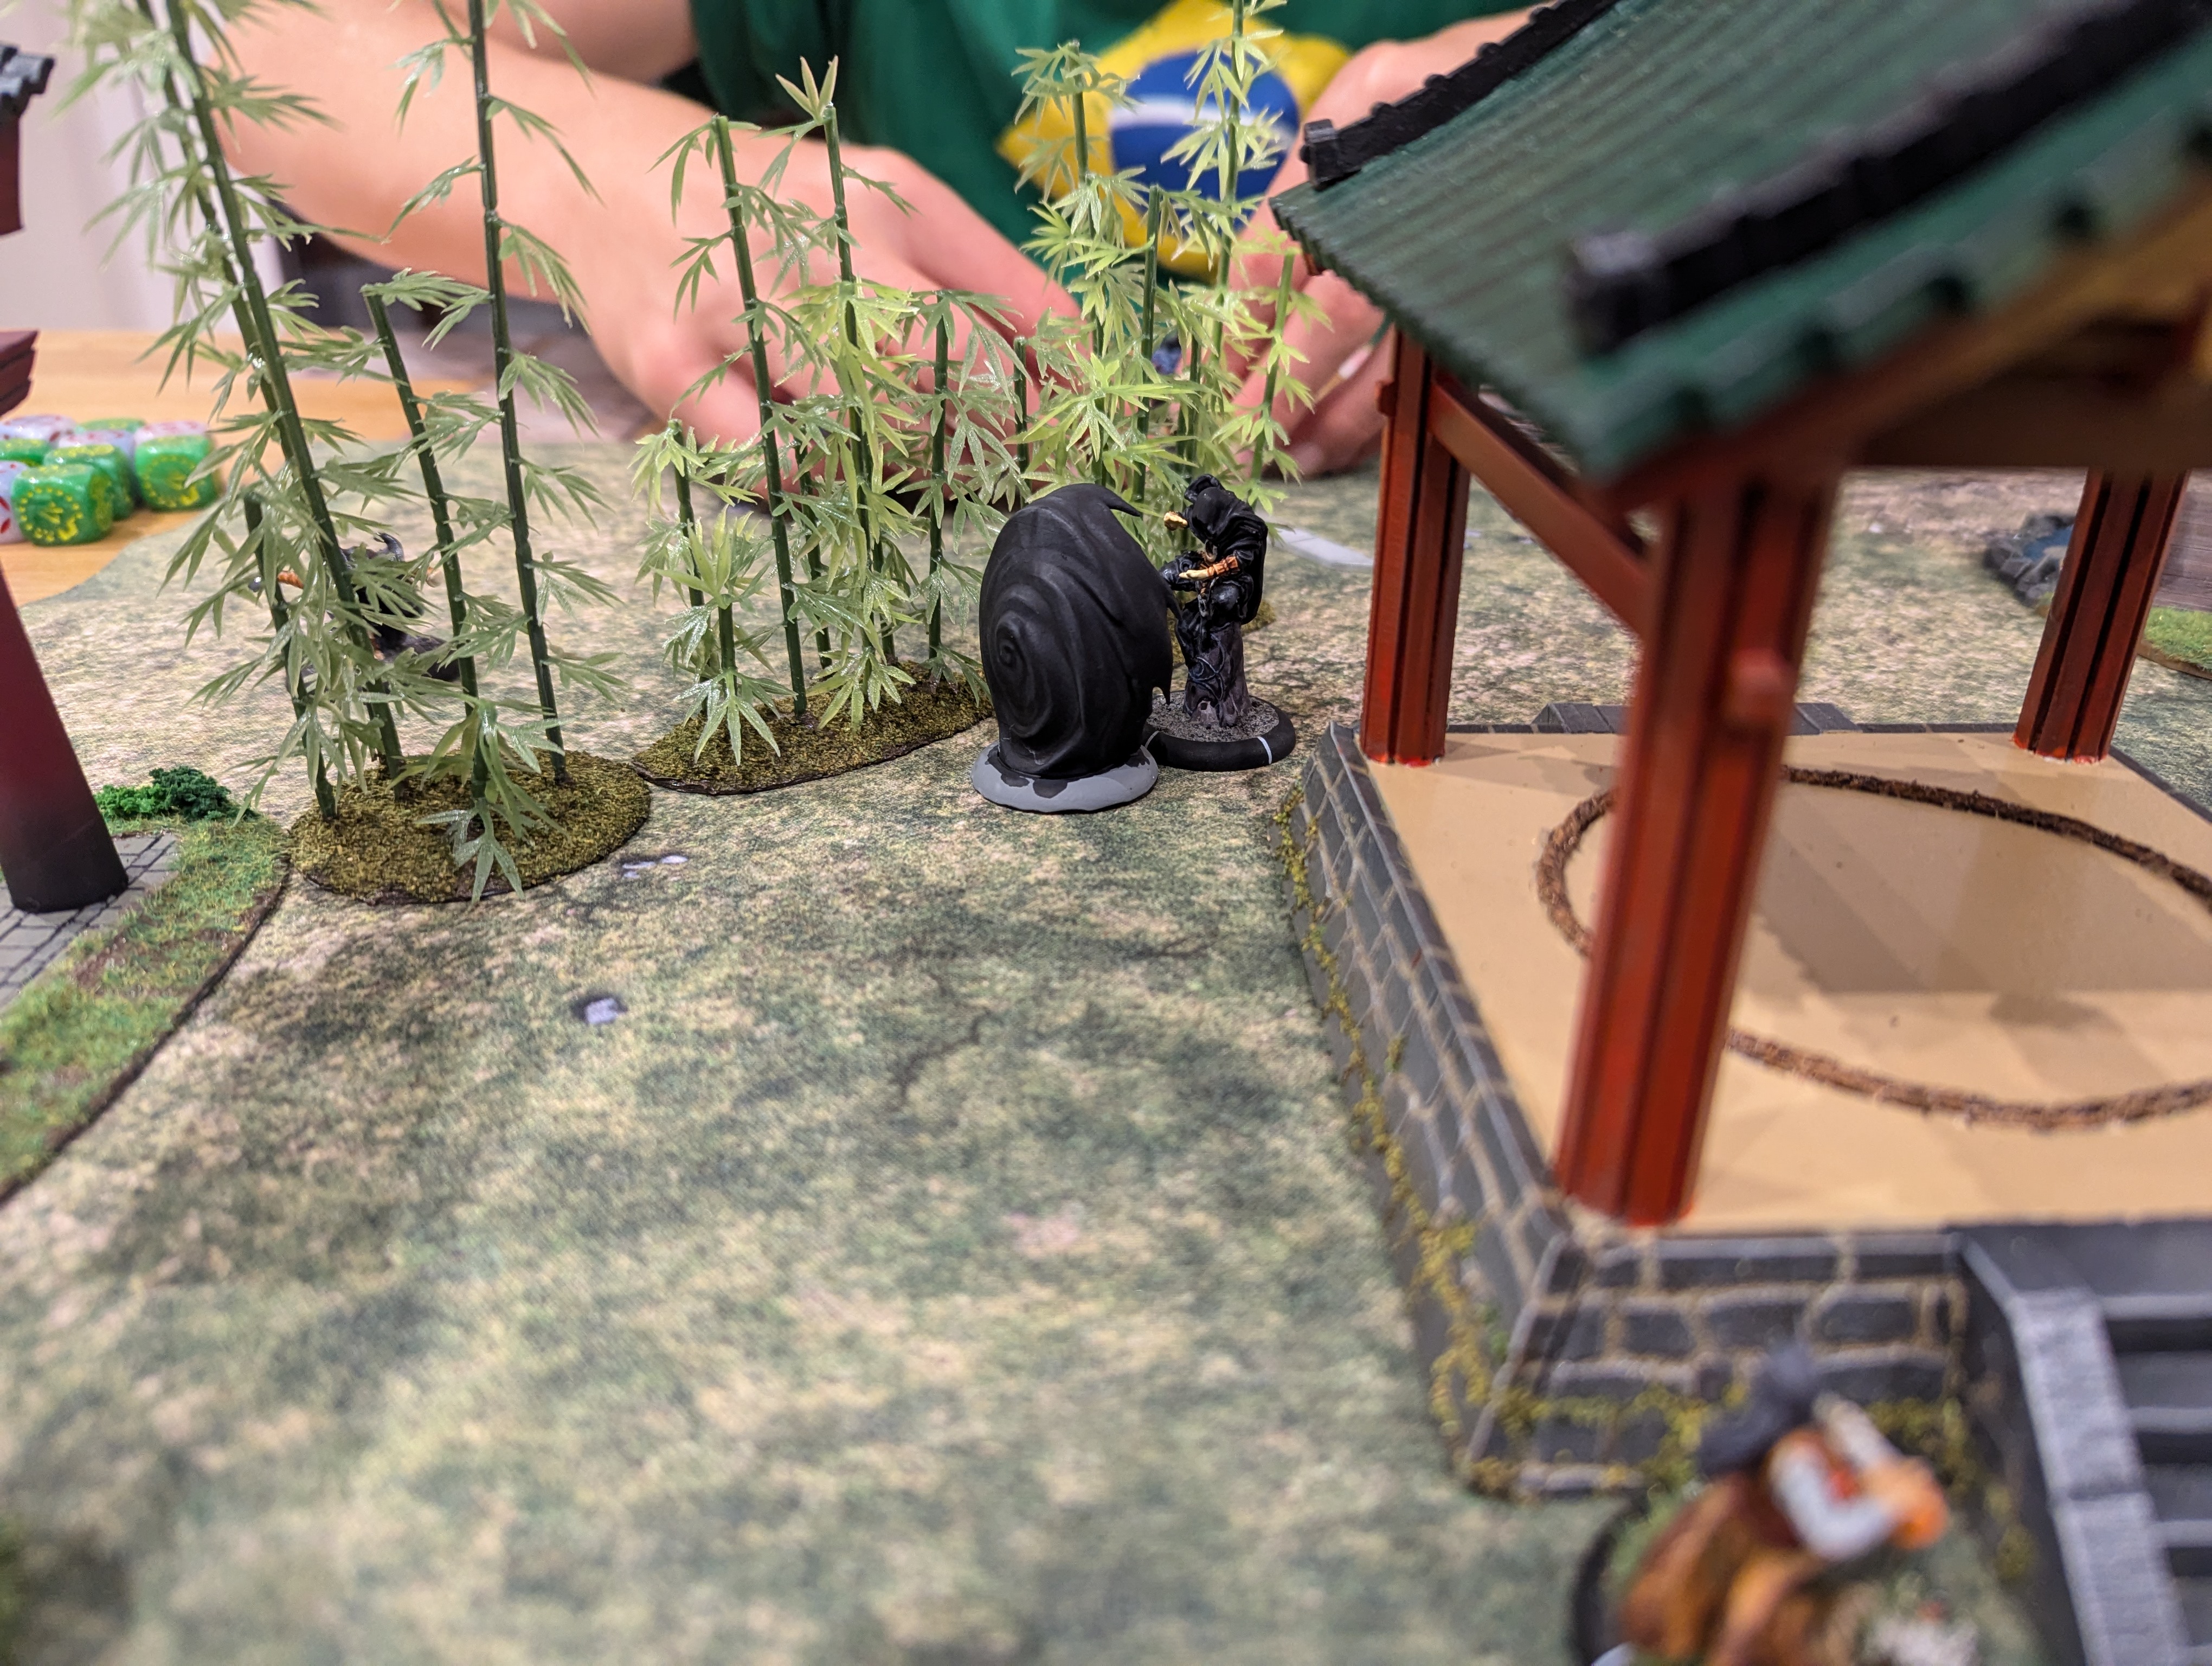
Void Rifts
A few posts ago I showed off my son’s completed Kinshi Temple faction (that he painted, I can’t take any credit for them). Part of the Kinshi Temple is their use of Void Rifts that they deploy on the table before the game starts and the faction can use them to move between the portals. This makes for a very mobile faction and some annoying shenanigans. But GCT Studios don’t make any models for the void rifts (at least not yet, I think something may be coming next year), so I decided to help my son out by making some for him.
Searching the various STL sites, I found a much larger portal model that had the ‘swirly portal’ bit as a separate piece and so I purchased the STL. I’ve printed out the original portal, so will put that together later but through some 3D Builder manipulation, I was able to resize and shape the STL to fit onto a 30mm round base and then print it out.
Painting wise, I went for a grey and then a speed paint black. Then a lot of grey dry brushing. I picked out the bones and skulls with a very watered down bleached bone. Nice and quick.
 Void Rifts
Rat Pack
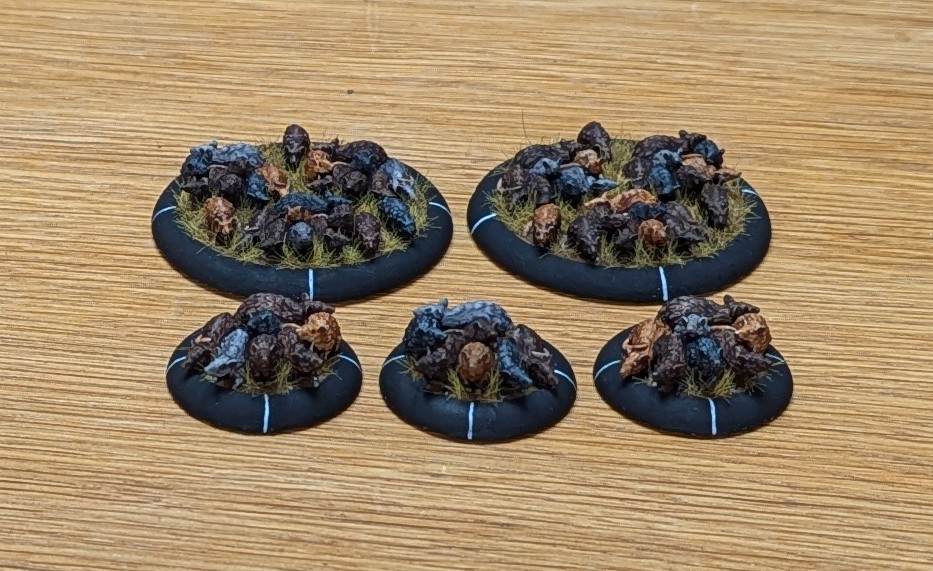
Within the various factions of Bushido, like many other games, there are sub factions. Within the Cult of Yurei, rats seems to be an emerging sub faction. I say emerging as there is no official ‘theme’ that can be played supporting this and the number of models that would fit into this sub faction is still quite small. However the latest teaser from the developers is for a new rat model and some hints at other rat-kin, so perhaps it will grow into a fully fledged sub faction given time.
I’ve previously painted up some plague rats and thought it time to also work on the small and large rat swarm options. For these, I’ve opted for the 3D printed route. I found some rat STLs free online, a couple of individual rats and one of a group of rats. Through using Microsoft’s 3D Builder tool (which is very easy to use) I was able to create a few variations of the STLs and then (virtually) attach these to the relevant base size. A couple of hours of work for the resin printer and we have some models.
Painting wise, as the detail was quite good, I thought I’d carry on trying out the speed paints. After a black primer and I painted the upper parts of the rats white, I slapped on some speed paint. In particular, I went for Gravelord Grey, Grim Black, Dark Wood and Hardened Leather. A quick splodge of Barbarian Flesh on the tails and feet followed by a strong tone wash and then a dot of black for the eyes, it was done and time for basing. All in all, I think I spent more time waiting for the paint to dry than actually painting. It’s not going to win any painting awards but for the speed, great stuff. These Speed Paints are quite good.
 Rat Front
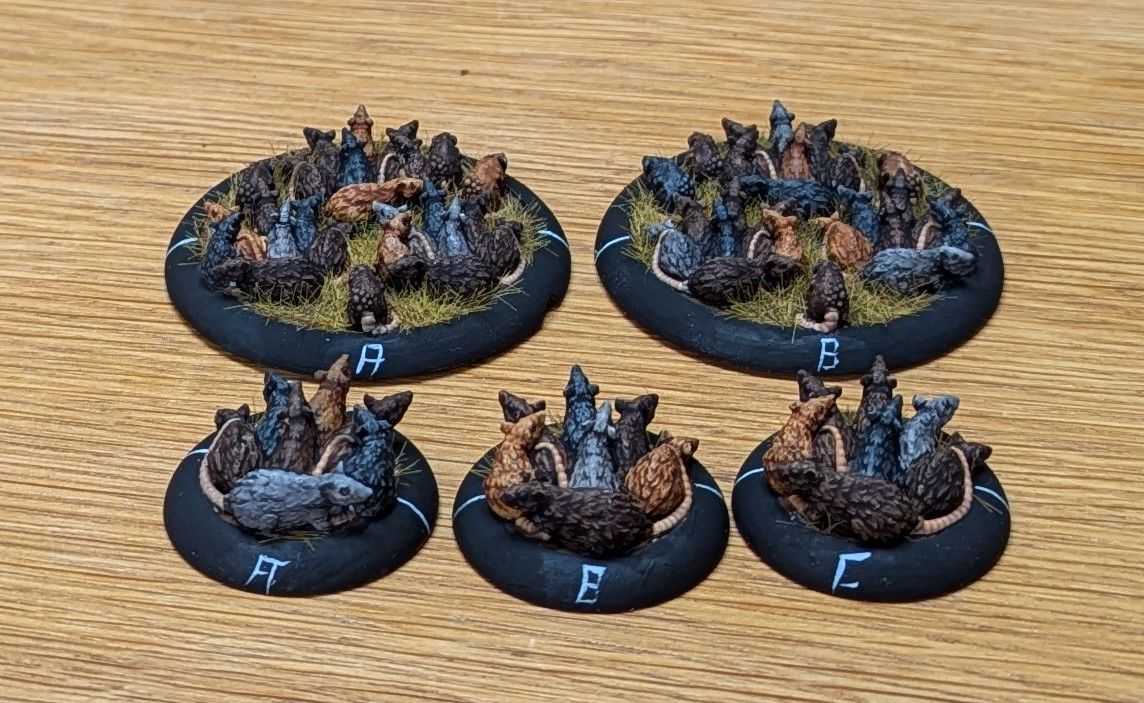 Rat Back
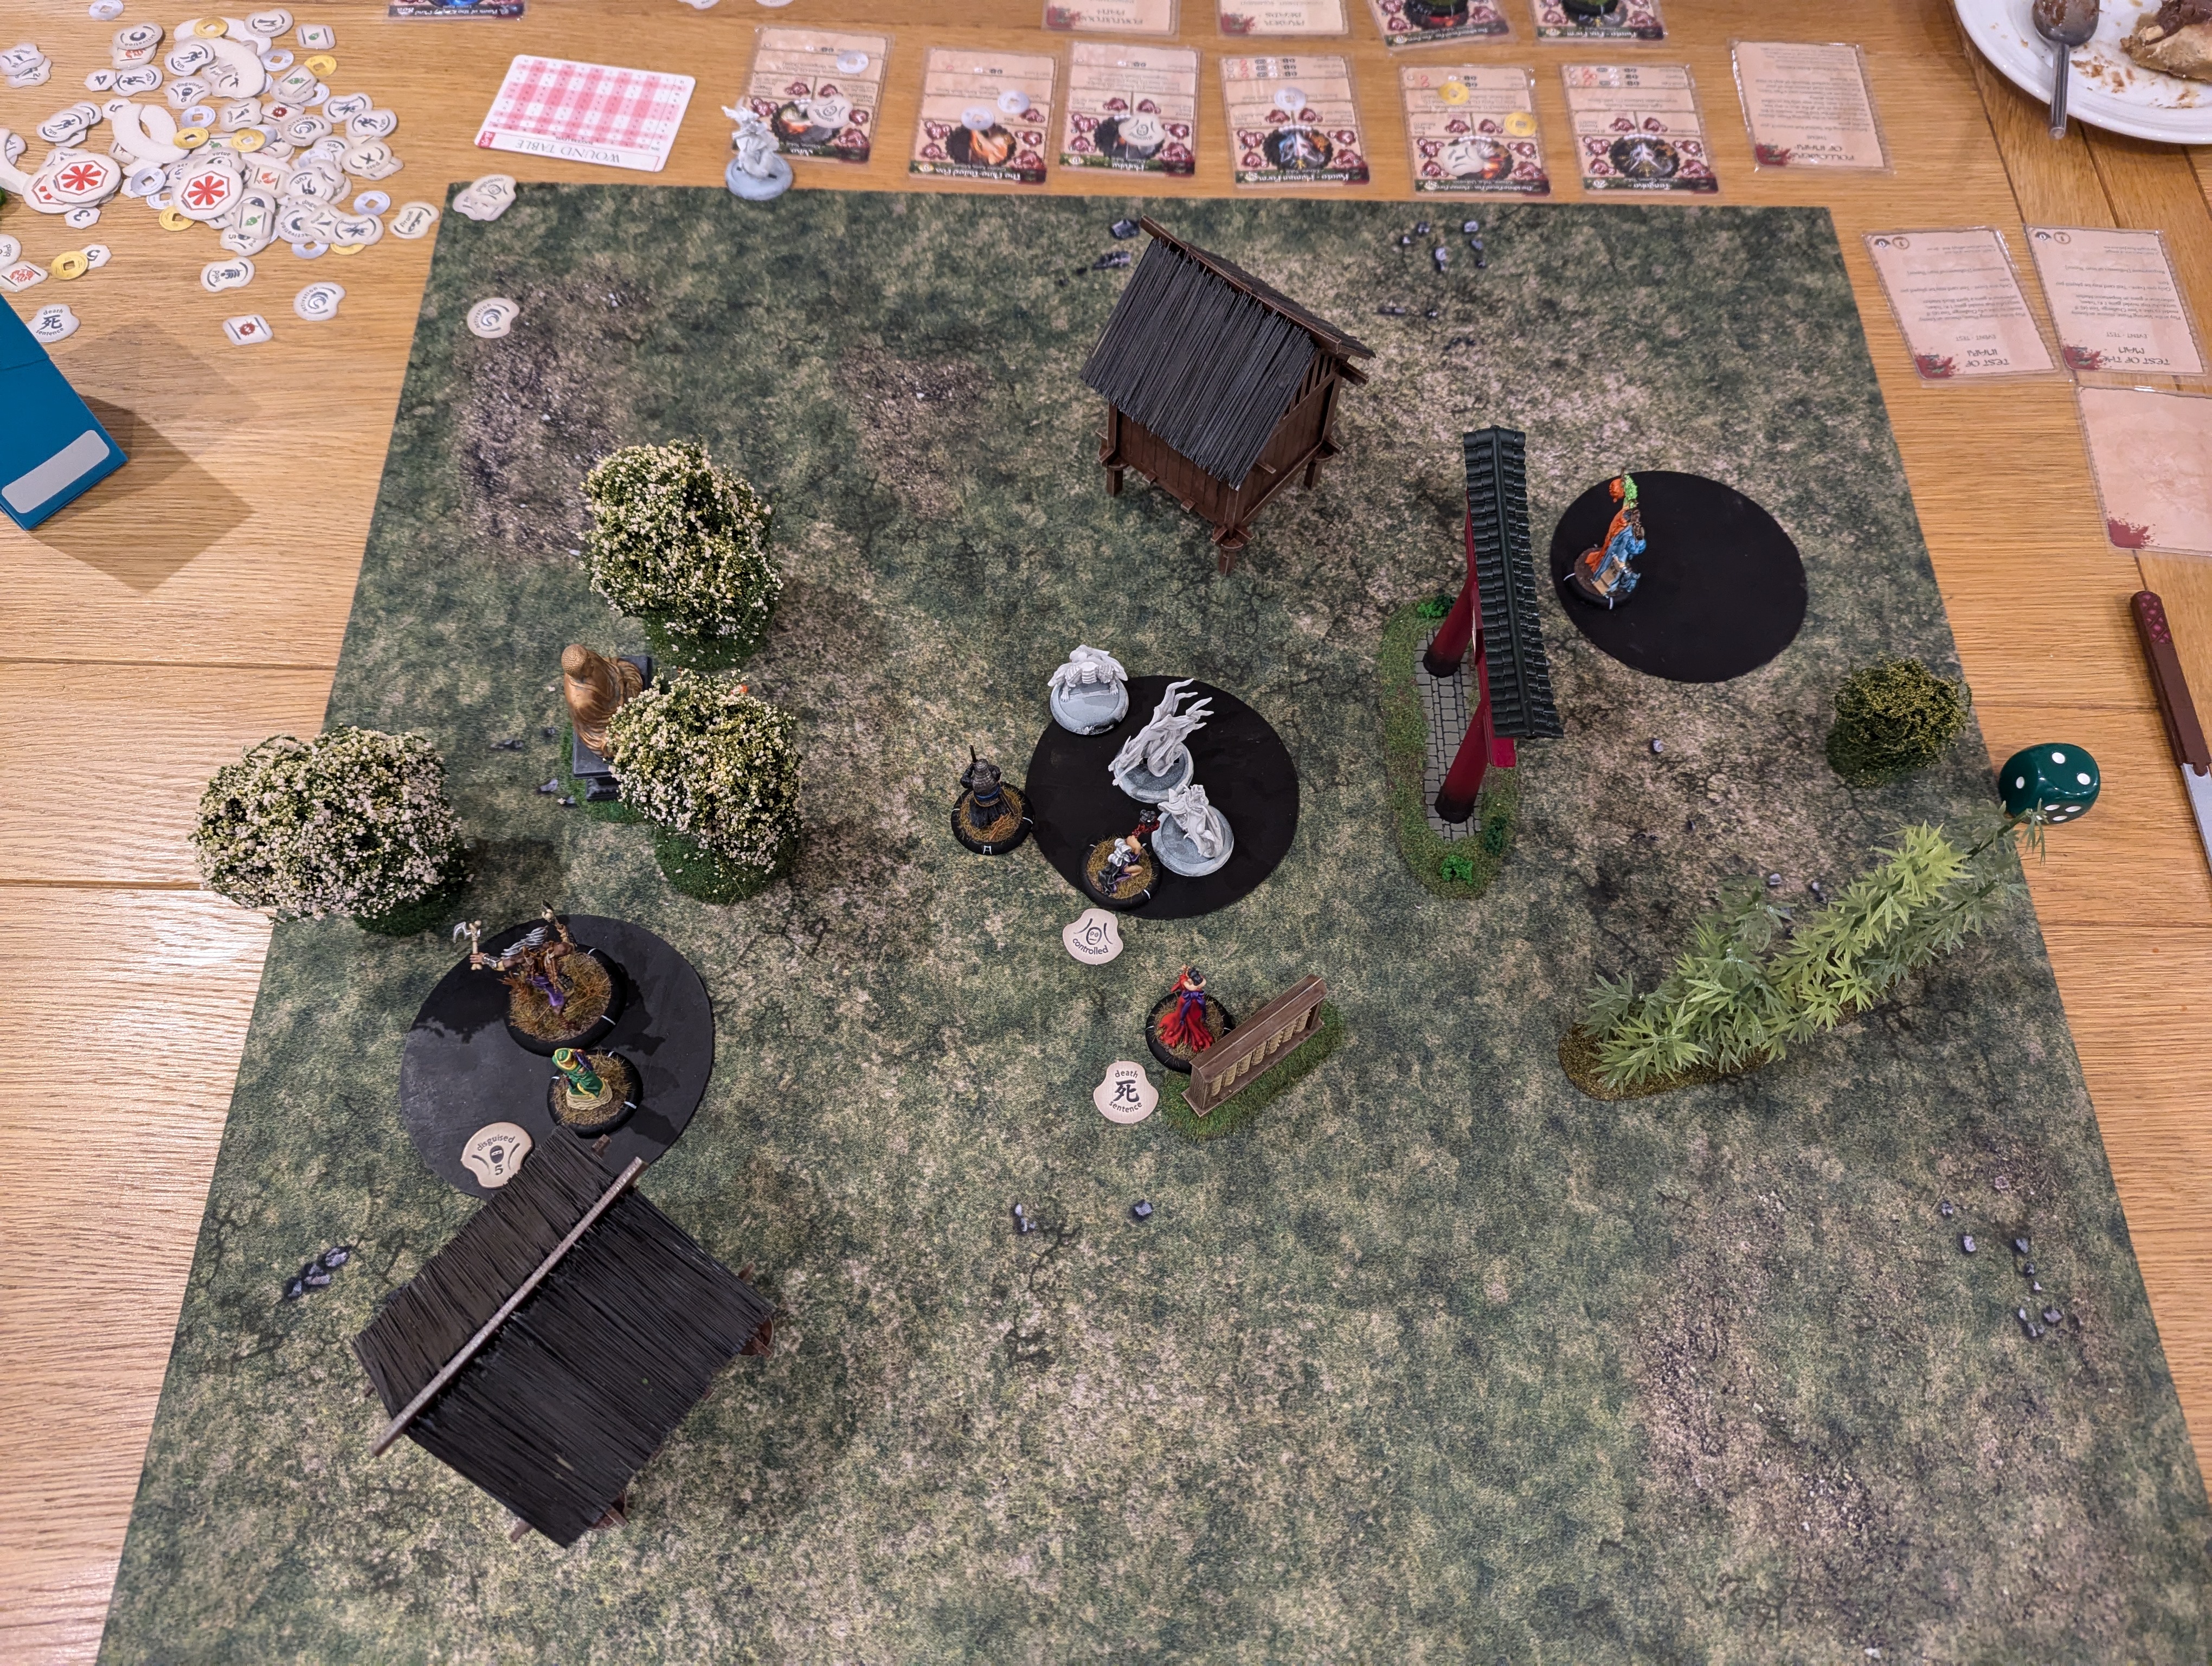
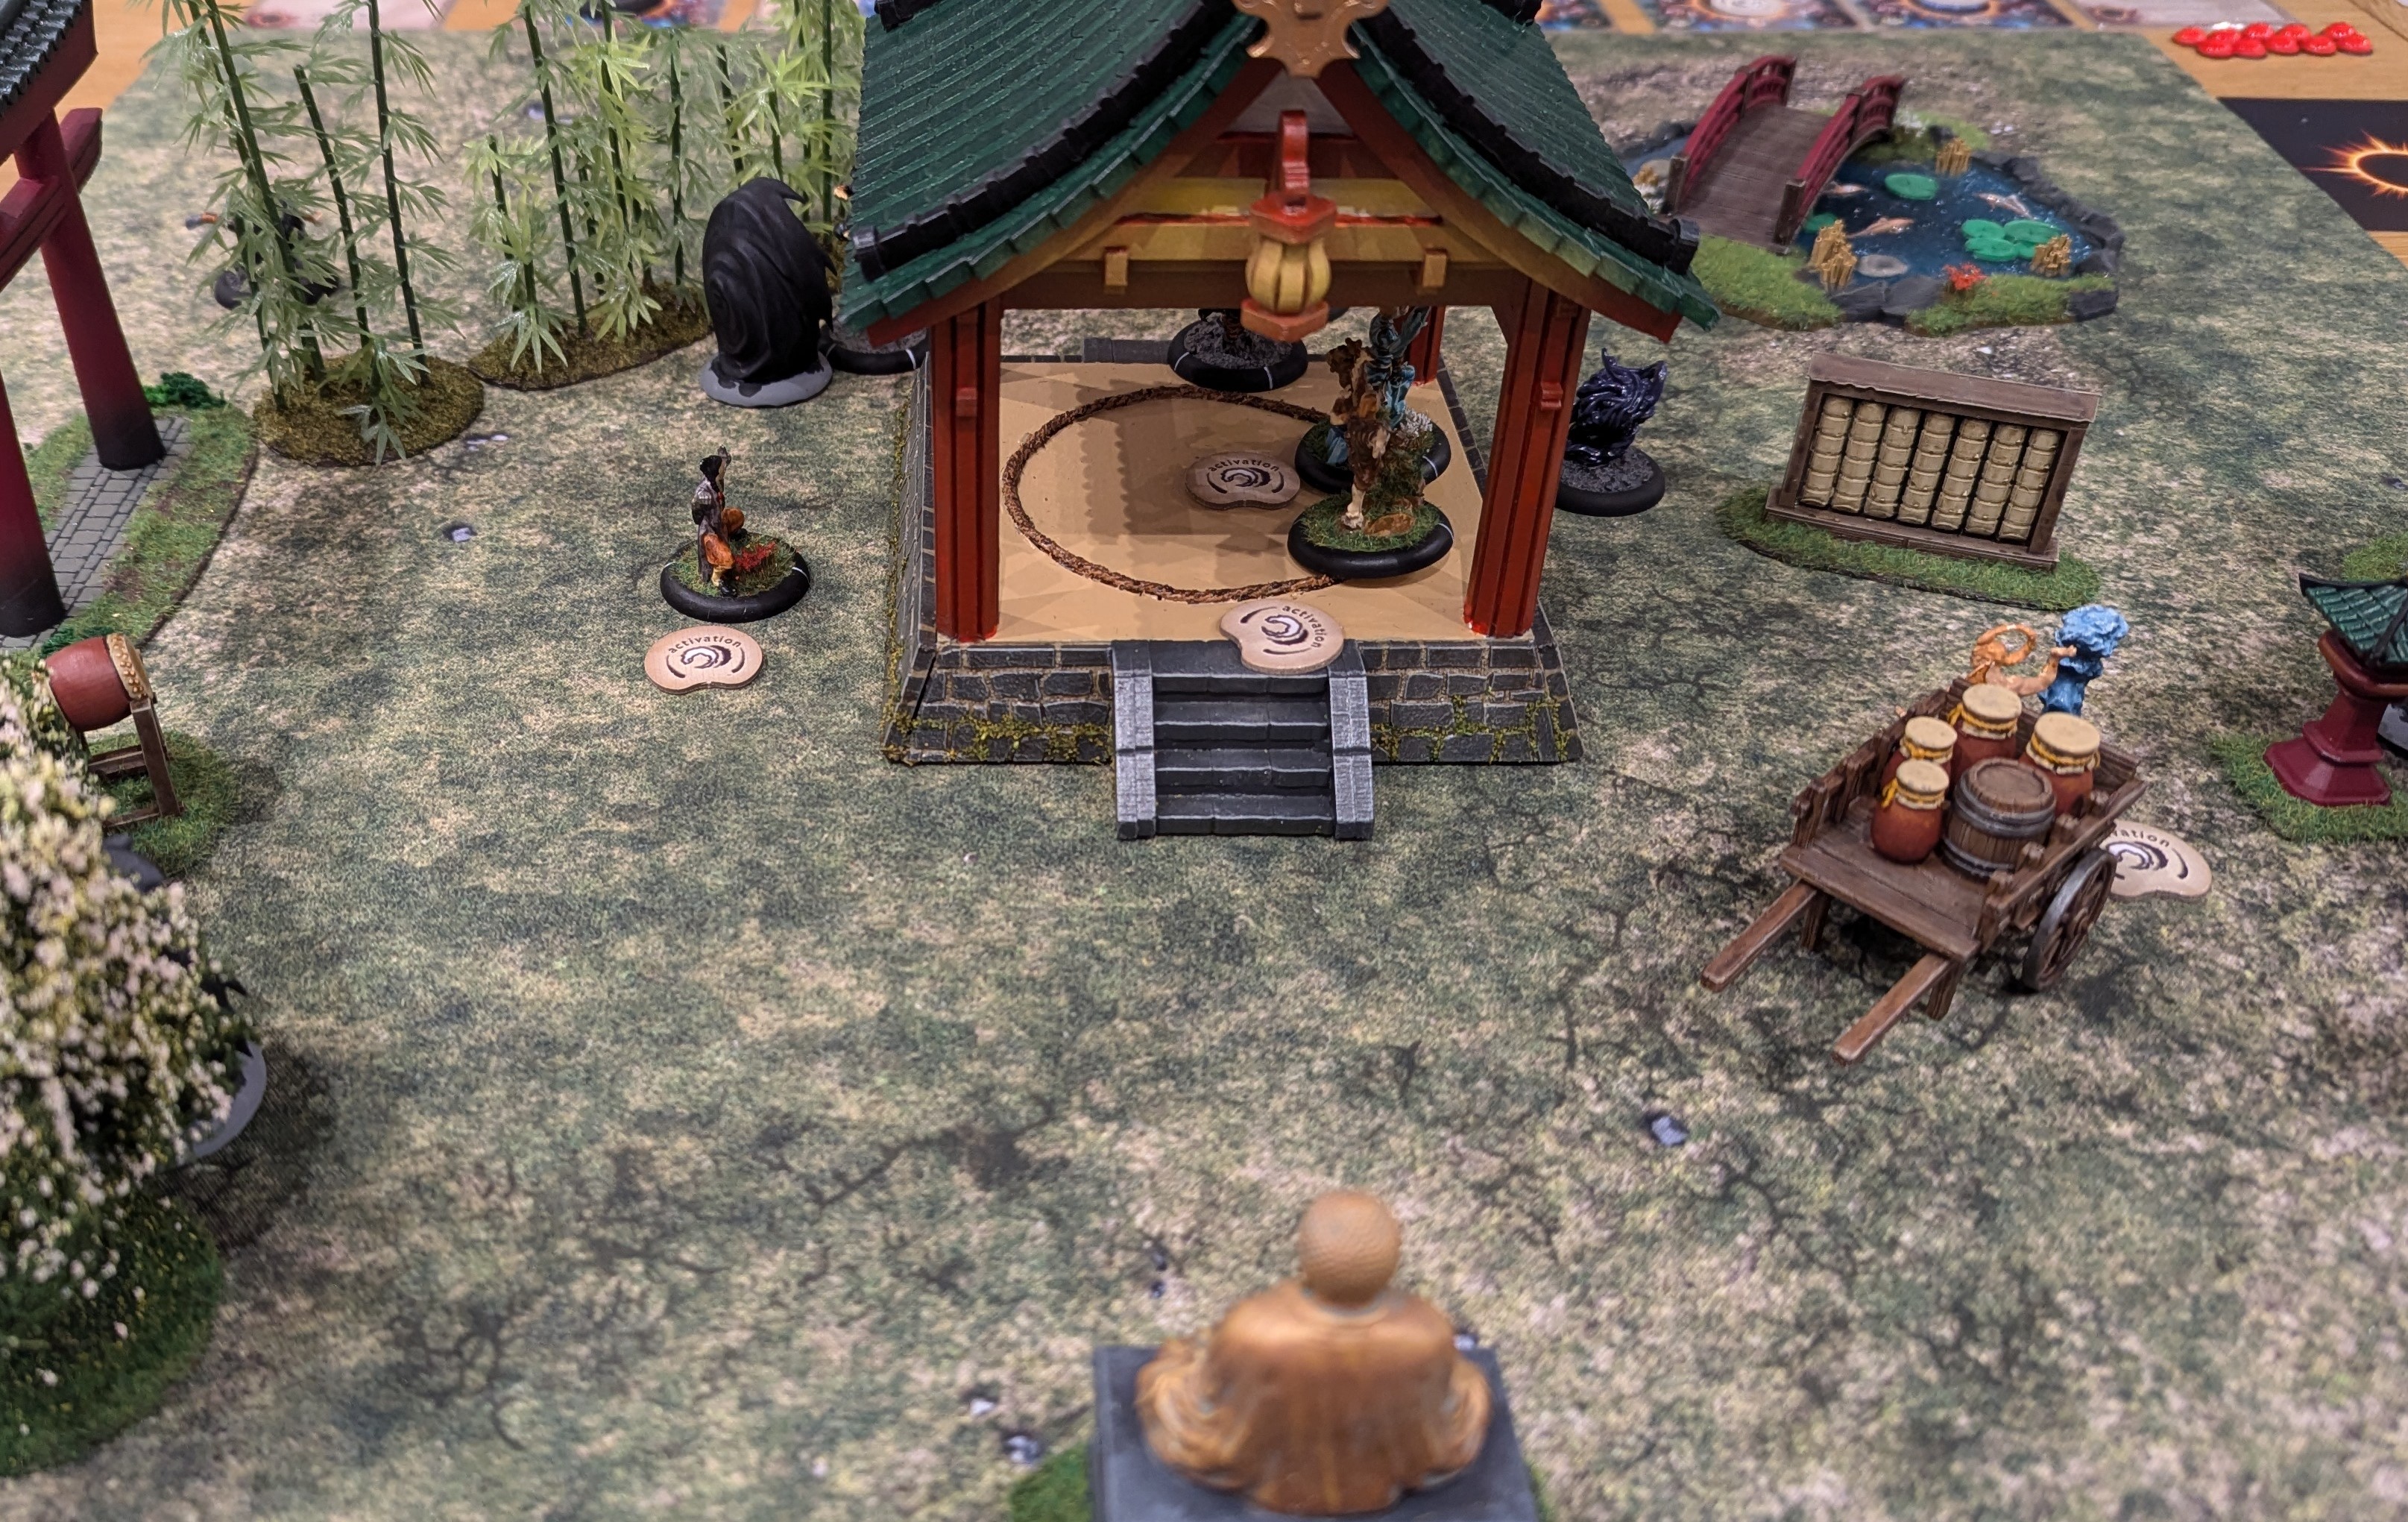
Battle Report No. 10
Game 10.
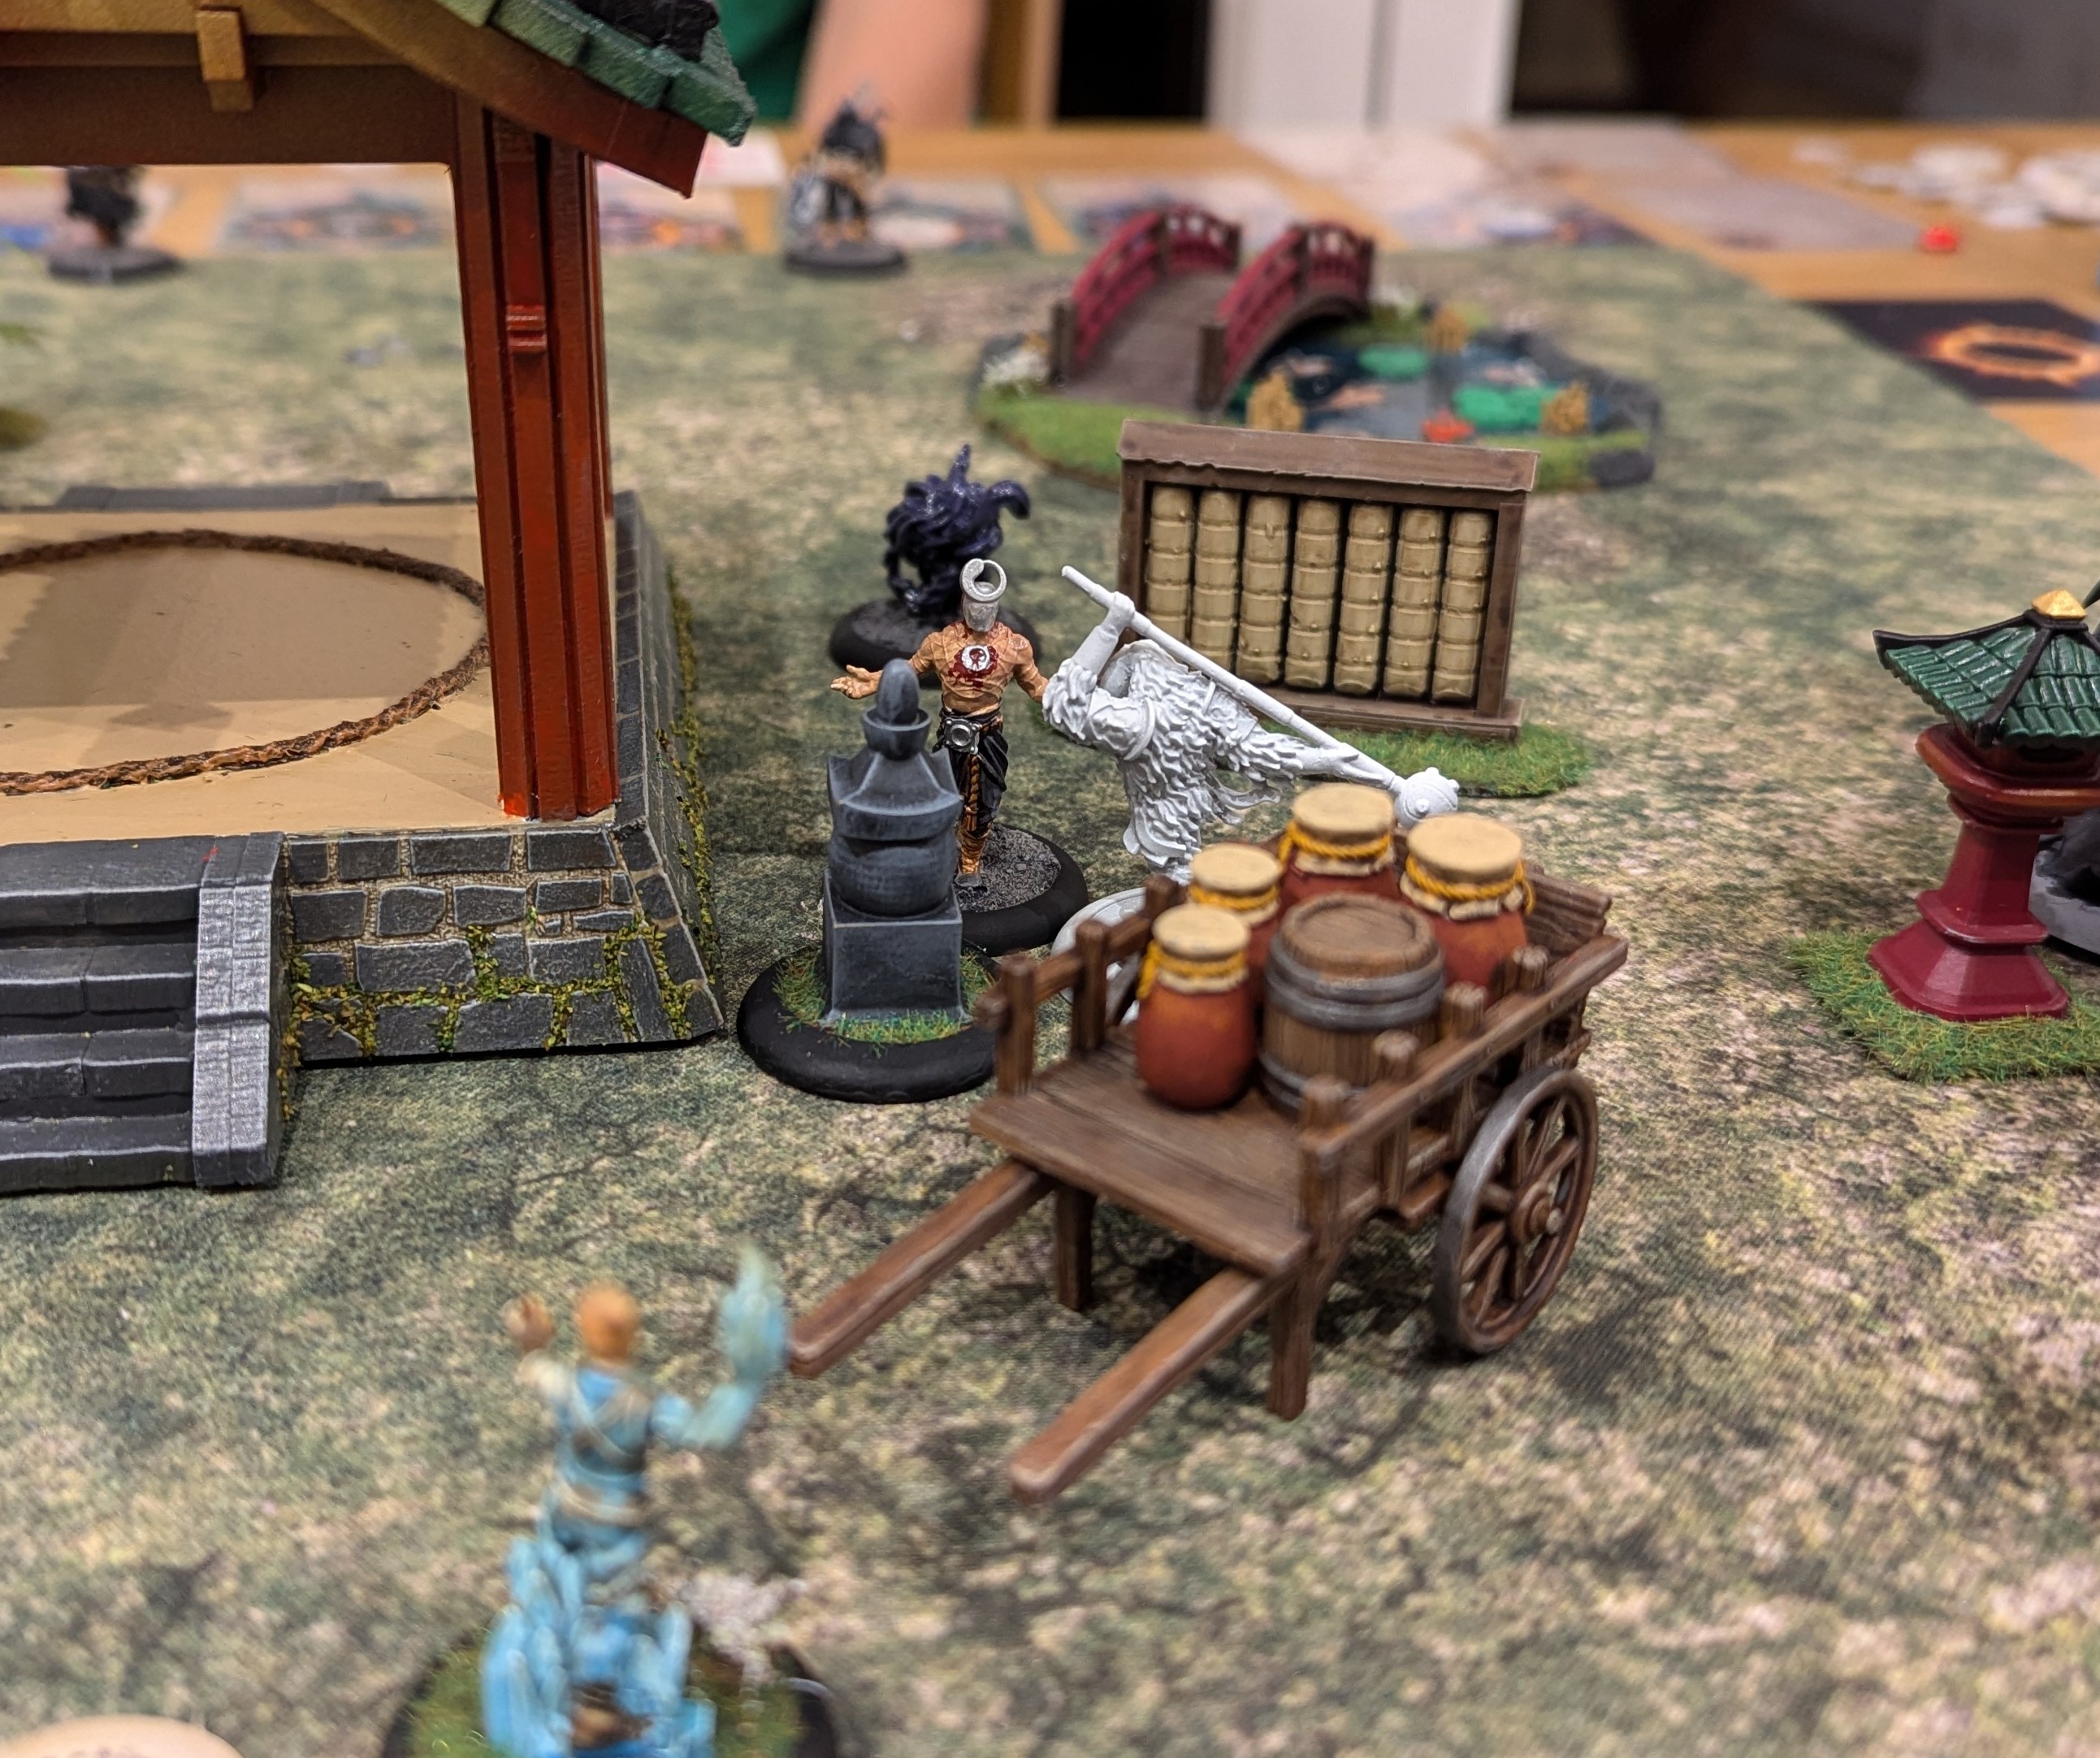
This game saw my son use his now fully painted Kinshi Temple as he claimed that he has figured out how to play them. As a change, I took his Temple of RoKan for a run out. I wasn’t really sure how to play this faction, but I thought it could be fun.
For my Temple of RoKan (TRK) I had Yim, Haru, Saruka, Riku, Ume and Kosuke. Kosuke is new (the others are described in previous posts in this project but they’re all monks) and an angry ape wielding a massive maul. I also took the Gorinto terrain piece to generate some extra Ki (as TRK monks are all about the Ki).
For the Kinshi temple, my son had Master Shi, Hishigata, a Kami of the Empty Mind, Kodai, Batsu, Ku and Shikaku. He also gets some Void Rifts that his models can pass through giving a lot of extra movement. I would describe what these models do, but I’m not entirely sure I fully understand the Kinshi Temple yet…..
We just went for a straight fight rather than a scenario.
Turn 1.
Kosuke is quick and I wasted no time moving him up the board and getting him in to melee with Hishigata, who had made his way forward. Using Kosuke’s ‘Flow Like Water’ Ki feat and Combo Attack, Kosuke gave Hishigata a significant slapping with that giant maul. The Combo Attack special ability allowed extra damage to be piled on and as Hishigata put no dice in defence, the damage was enough to kill him. First blood to TRK but the death of a Kinshi model does allow my son to add a counter to the Void Card. The more counters here, the more powerful the remaining Kinshi models get…..
 Some Turn 1 close up action as Kosuke takes on Hishigata
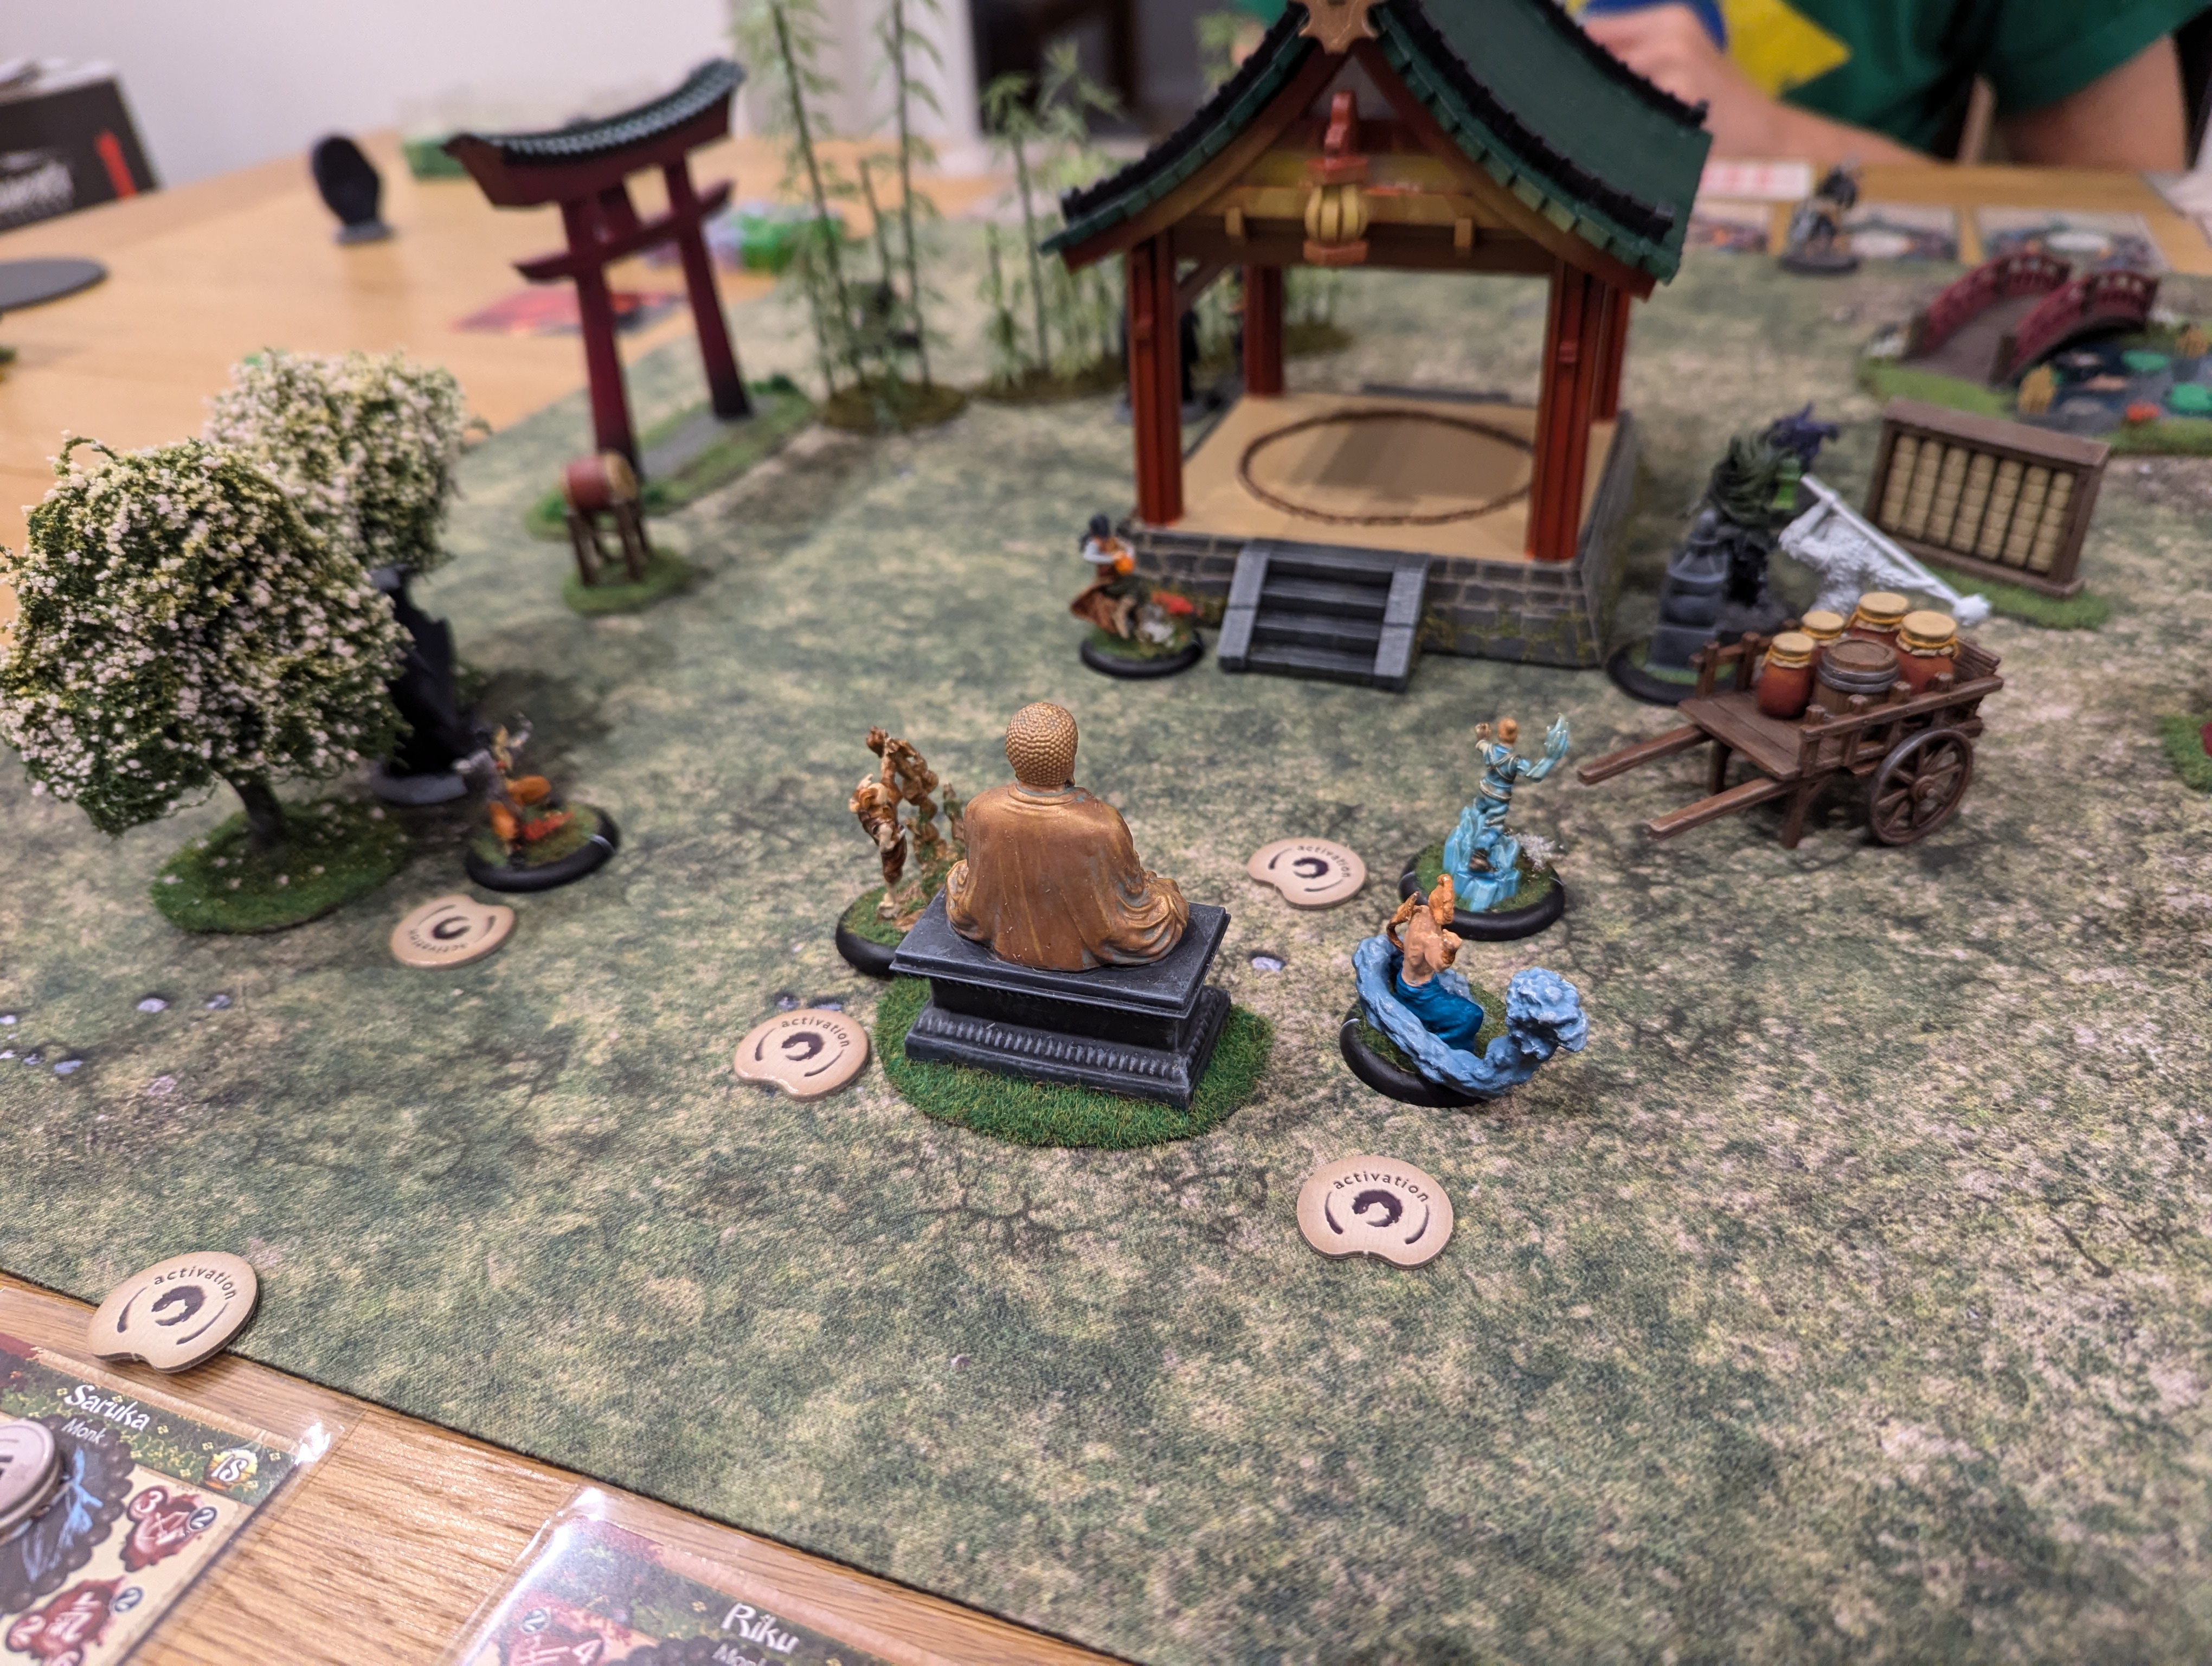

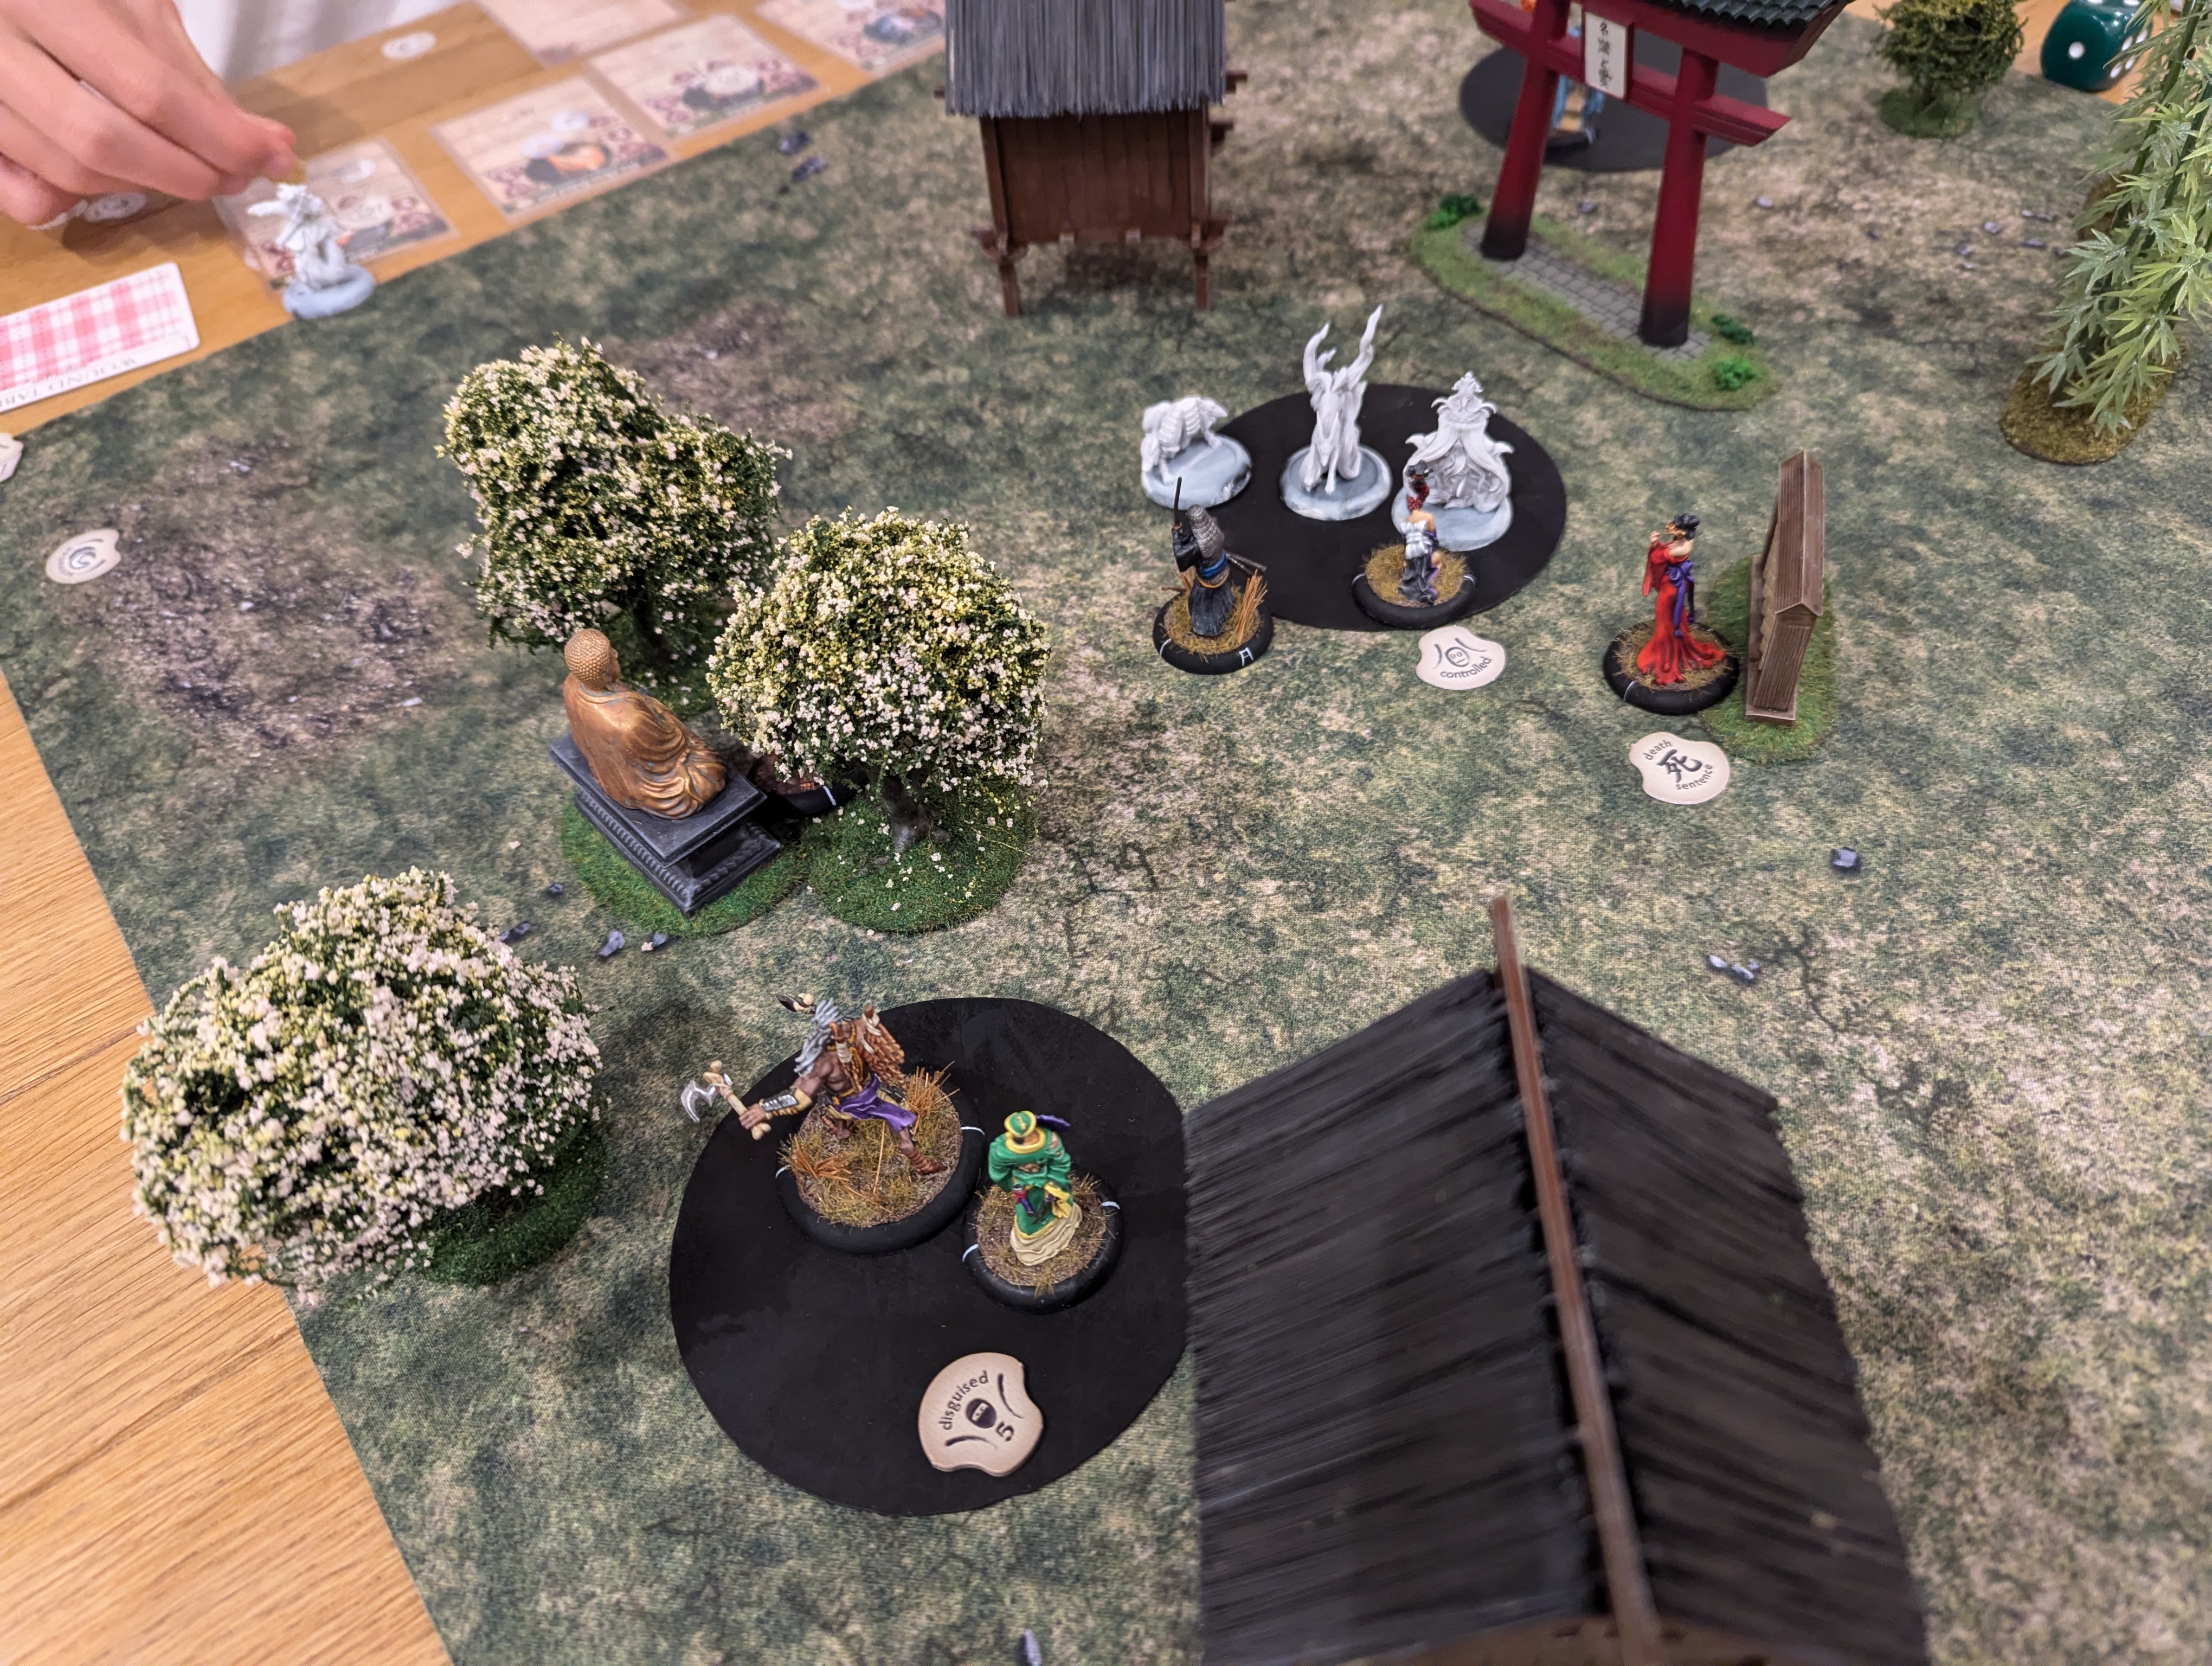
Turn 2
As I normally play the Cult of Yurei faction, melee isn’t something that we usually want to get into but having Kosuke is a novelty and I waste no time getting him to take on Kodai. I manage to get some damage down but find out that Kodai is Durable and so this damage is reduced to 1. Kodai on the other hand deals out 6 damage. Ouch.
I use Saruka’s Fireball Ki feat to blast Kodai for 1 damage and set him on fire, giving him a fire token.
My son then used Shikaku’s Ki feat, Look into the Void. I’m aware of this as one of my Cult models has this Ki feat but it’s not so funny when on the receiving end. It’s pretty powerful and Kosuke is killed.
Batsu then uses his Scorched Earth Ki feat to create a burning terrain feature over Ume, so Ume gets a fire token.
Master Shi uses his ranged attack on Saruka and rolls well. It’s a Combo Attack and the extra damage kills Saruka.
It’s not a good turn for me and to make matters worse, Ume takes damage from the fire token at the end of the turn.
 It all gets a bit messy in and around the sumo ring
Turn 3
Ume gets into combat with the Kami and kills it but this adds more tokens to the Void card and the Kinshi get more powerful. It unlocks new and better shared Ki feats for them.
Master Shi is able to range attack Yim for some damage (again with the pesky Combo Attack being the difference)
Haru then comes in for some attention, firstly from Ku who is able to do some damage and then from Batsu who fails. But Haru is up to the task and causes wounds against Ku and Batsu with some nifty bujutsu.
Batsu is now exhausted, having spent 2 Activation tokens, so I use this opportunity to have Riku attack. This gives me extra attack dice and Batsu gets a firm kicking.
Shikaku again uses Look into the Void, this time at Yim. Yim takes a lot of damage and promptly dies.
Ku now gets in on the Look into the Void act and attacks Riku. This also succeeds and Riku takes damage.
During the end phase, both Haru and Riku have picked up fire markers during the turn and the wounds now take effect. Sadly, they both burn to death.
This leaves me with just Ume. At this point, I’m well and truly beaten and so concede a very one side match.
Seems that my son has figured out how to play the Kinshi Temple…..
Yet more terrain
I put these two models together in 3D Builder based upon some free STL files that I downloaded. They’re both scans of real world statues, in the case of the lone figure, this was from a temple in Bali (and no, I’ve not been to Bali).
First up is just a generic temple statue. I’ve painted in exactly the same way as the previous statues, namely luftwaffe grey, nightshade wash and a light grey drybrush for the stone. The bronze was shiny bronze and then just a nihilakh oxide wash which then gets quickly wiped off.
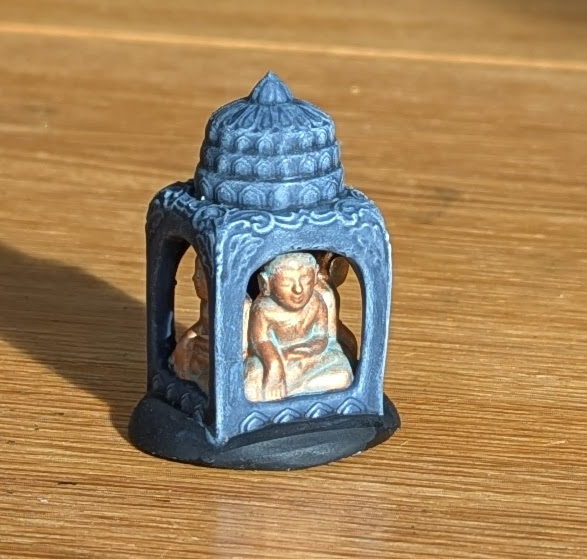
Next is a Cult of Yurei piece of terrain that can be purchased as part of your warband. In game, at the start of each turn, any enemy model with a couple of inches has to give up 1 Ki point and when you have collected 5, the statue is destroyed and you can give these 5 Ki to any friendly model. Handy.
Painting wise, this is just another bronze and painted in the same way as all the others. It’s quick and easy to knock several of these out in a night.
More terrain
As Terrainfest is running at the moment, I thought I would get some of the extra terrain that I have lying around finished and off of the painting desk. With that in mind, I’ve completed a few pieces that I picked up from Master Crafted https://mastercrafted.co.uk/
First up we have three rice bale stacks. These can be purchased as part of your war band and are very common in competitive games as they can provide cover as well as blocking off lines of movement.
Painting wise, I took the line of least resistance here and went with a khaki basecoat followed by a heavy brown wash. From there, I painted the ropes with a light brown and then just dry brushed everything, first with Khaki and then Iraqi Sand. A quick flock and job done.
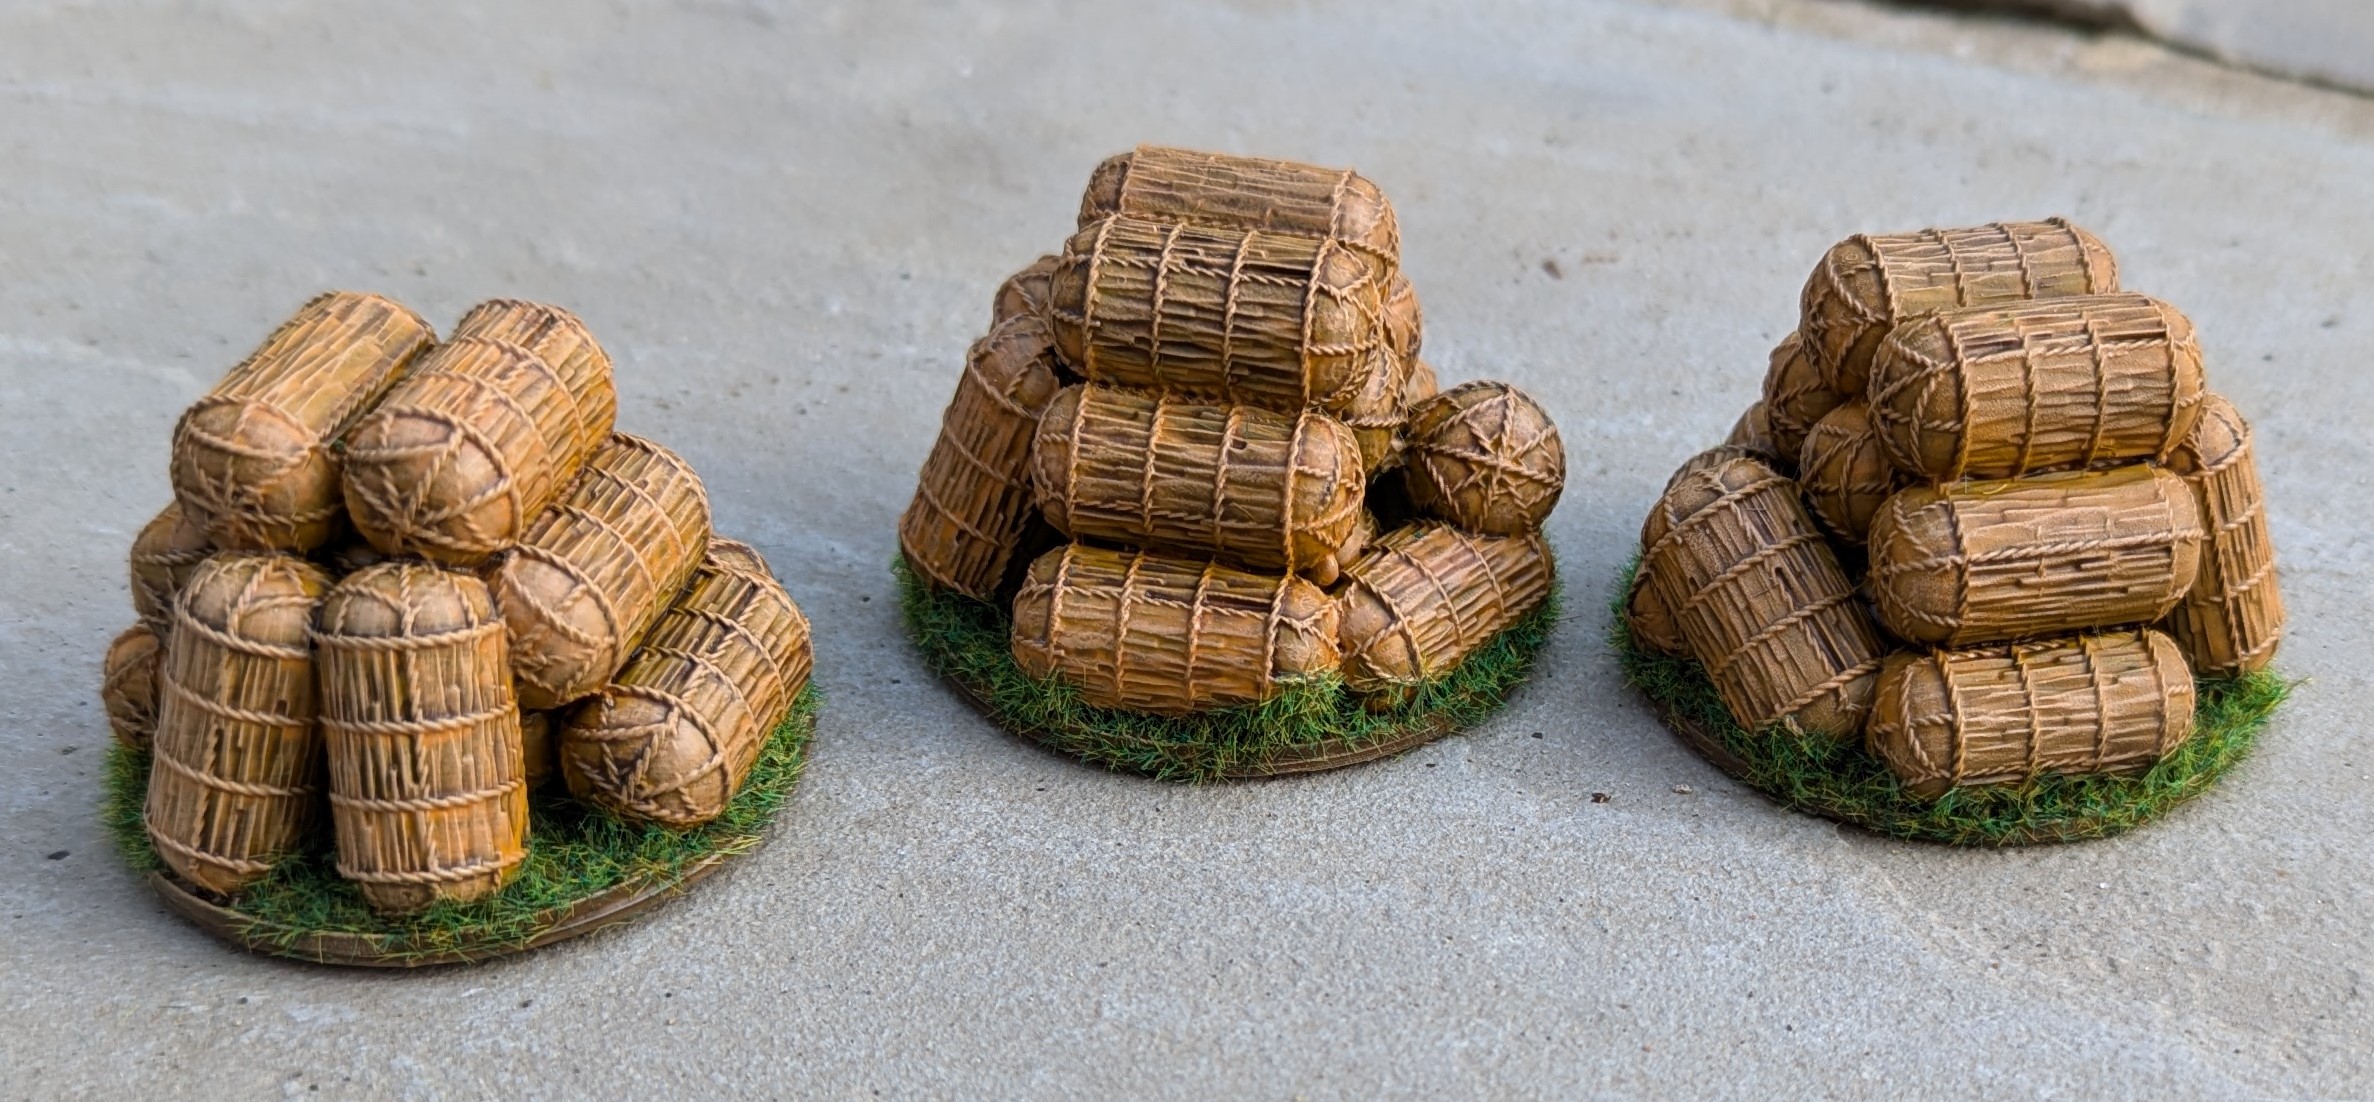 Rice bale barricades
Next up we have a prayer rock. This comes in two pieces and required some careful pinning and then I shoved a lot of polyfilla inside it to give it some weight (the sphere is hollow). The base rock was painted luftwaffe grey and, with a break from tradition, rather than a black wash, I applied a nightshade blue wash, which I think I prefer to the black and this might be my new rock wash. A light grey dry brush followed.
The sphere was given a Halfords yellow primer spray followed by a light brown wash. I’ve then dry brushed it with middlestone and Iraqi sand to try to create a sandstone look. The rope was scruffulous brown, with a wash and then highlighted. A light green for the tassels, then a dark green ink and then a very light green dry brush. Flock and scatter added to cover the joins between the two pieces.
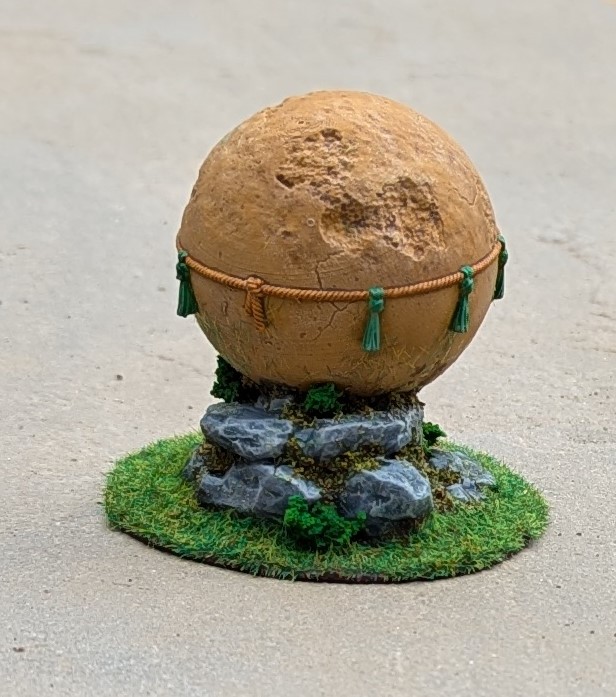 A spherical rock
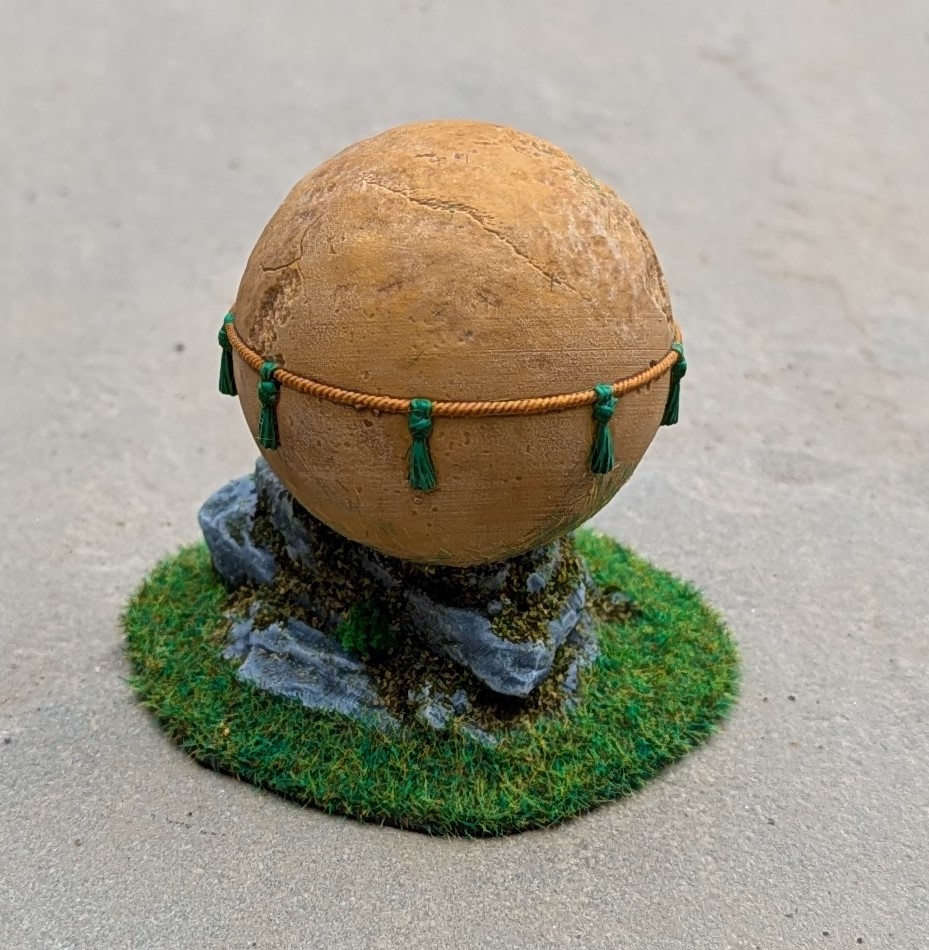 Lloyd shot


