SanchoPanza Rides Again – ReVamping Gangs of Rome


Recommendations: 284
About the Project
Step into the streets and alleyways of the ancient Roman Empire. Those streets have become rife with carnage and unrest in these uncertain times. Gangs of brutal Fighters are used as weapons to exert the will of their paymasters. These paymasters, known as Domini, are ambitious heads of Roman households; as such a Dominus you begin your story in troubled times... Gangs of Rome is a skirmish game from Warhost/Footsore Miniatures and Games in which you will use unique fighters, pitting them against the gangs of rival Domini in both campaign and scenario play to earn influence enough to manipulate your way into the Senate. Then, as a Senator of Rome, you will be granted the power destroy your enemies with methods far greater than the sword. So hold on to your sandals and watch your back, Dominus! Things are about to get bloody… Now it is time for a ReVamp
Related Game: Gangs Of Rome
Related Company: Footsore Miniatures and Games
Related Genre: Historical
Related Contest: Spring Clean Hobby Challenge 2023
This Project is Active
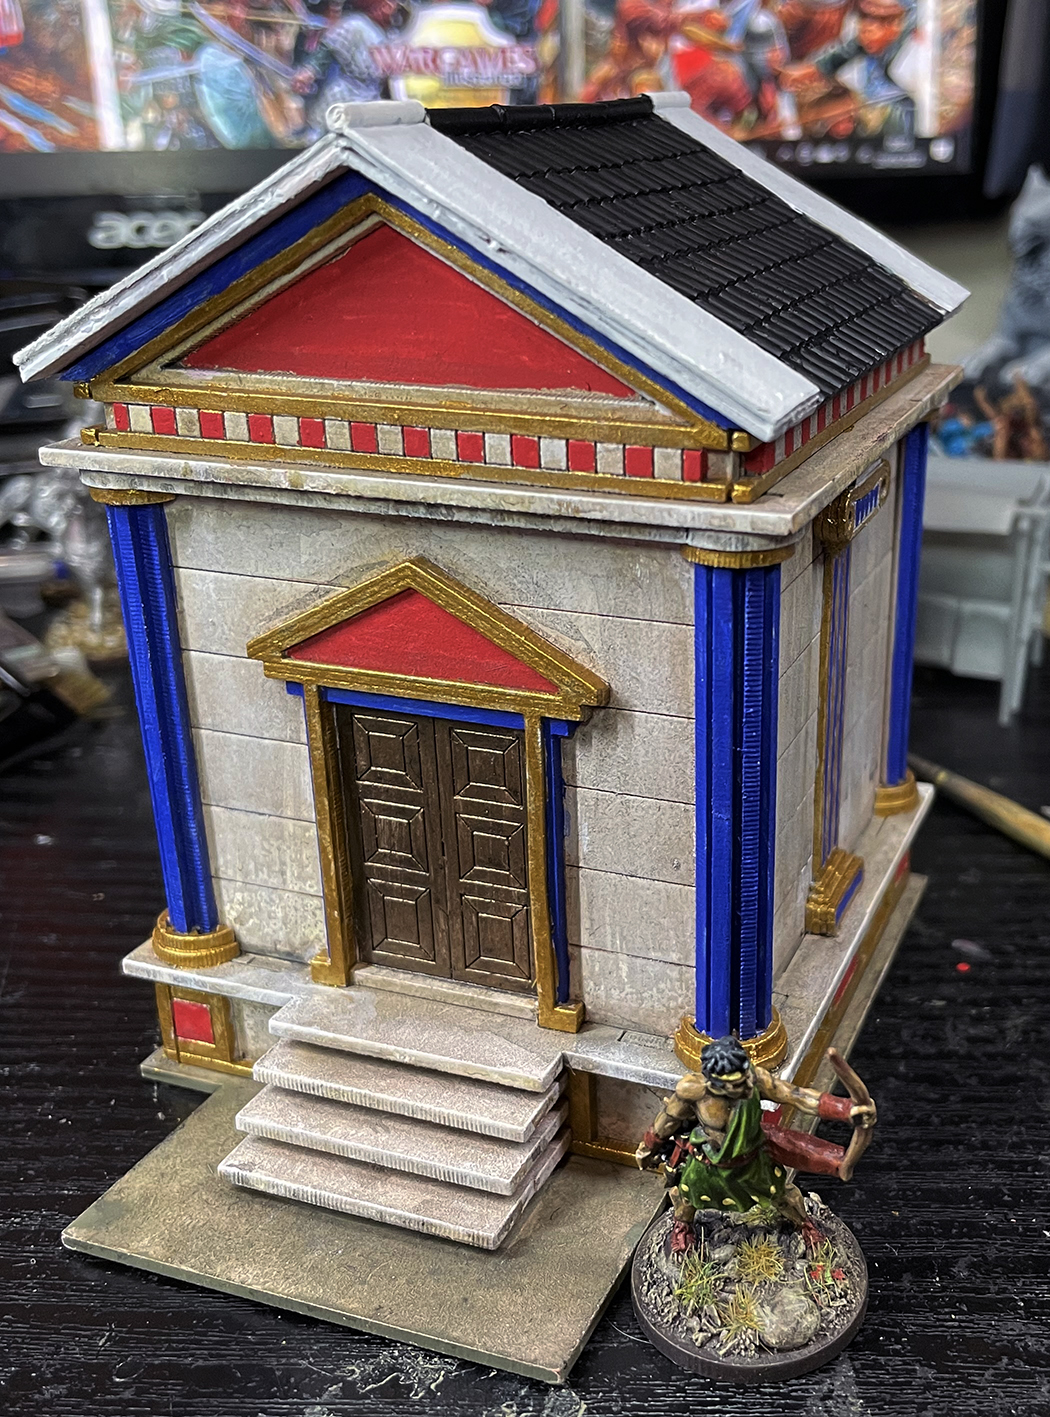
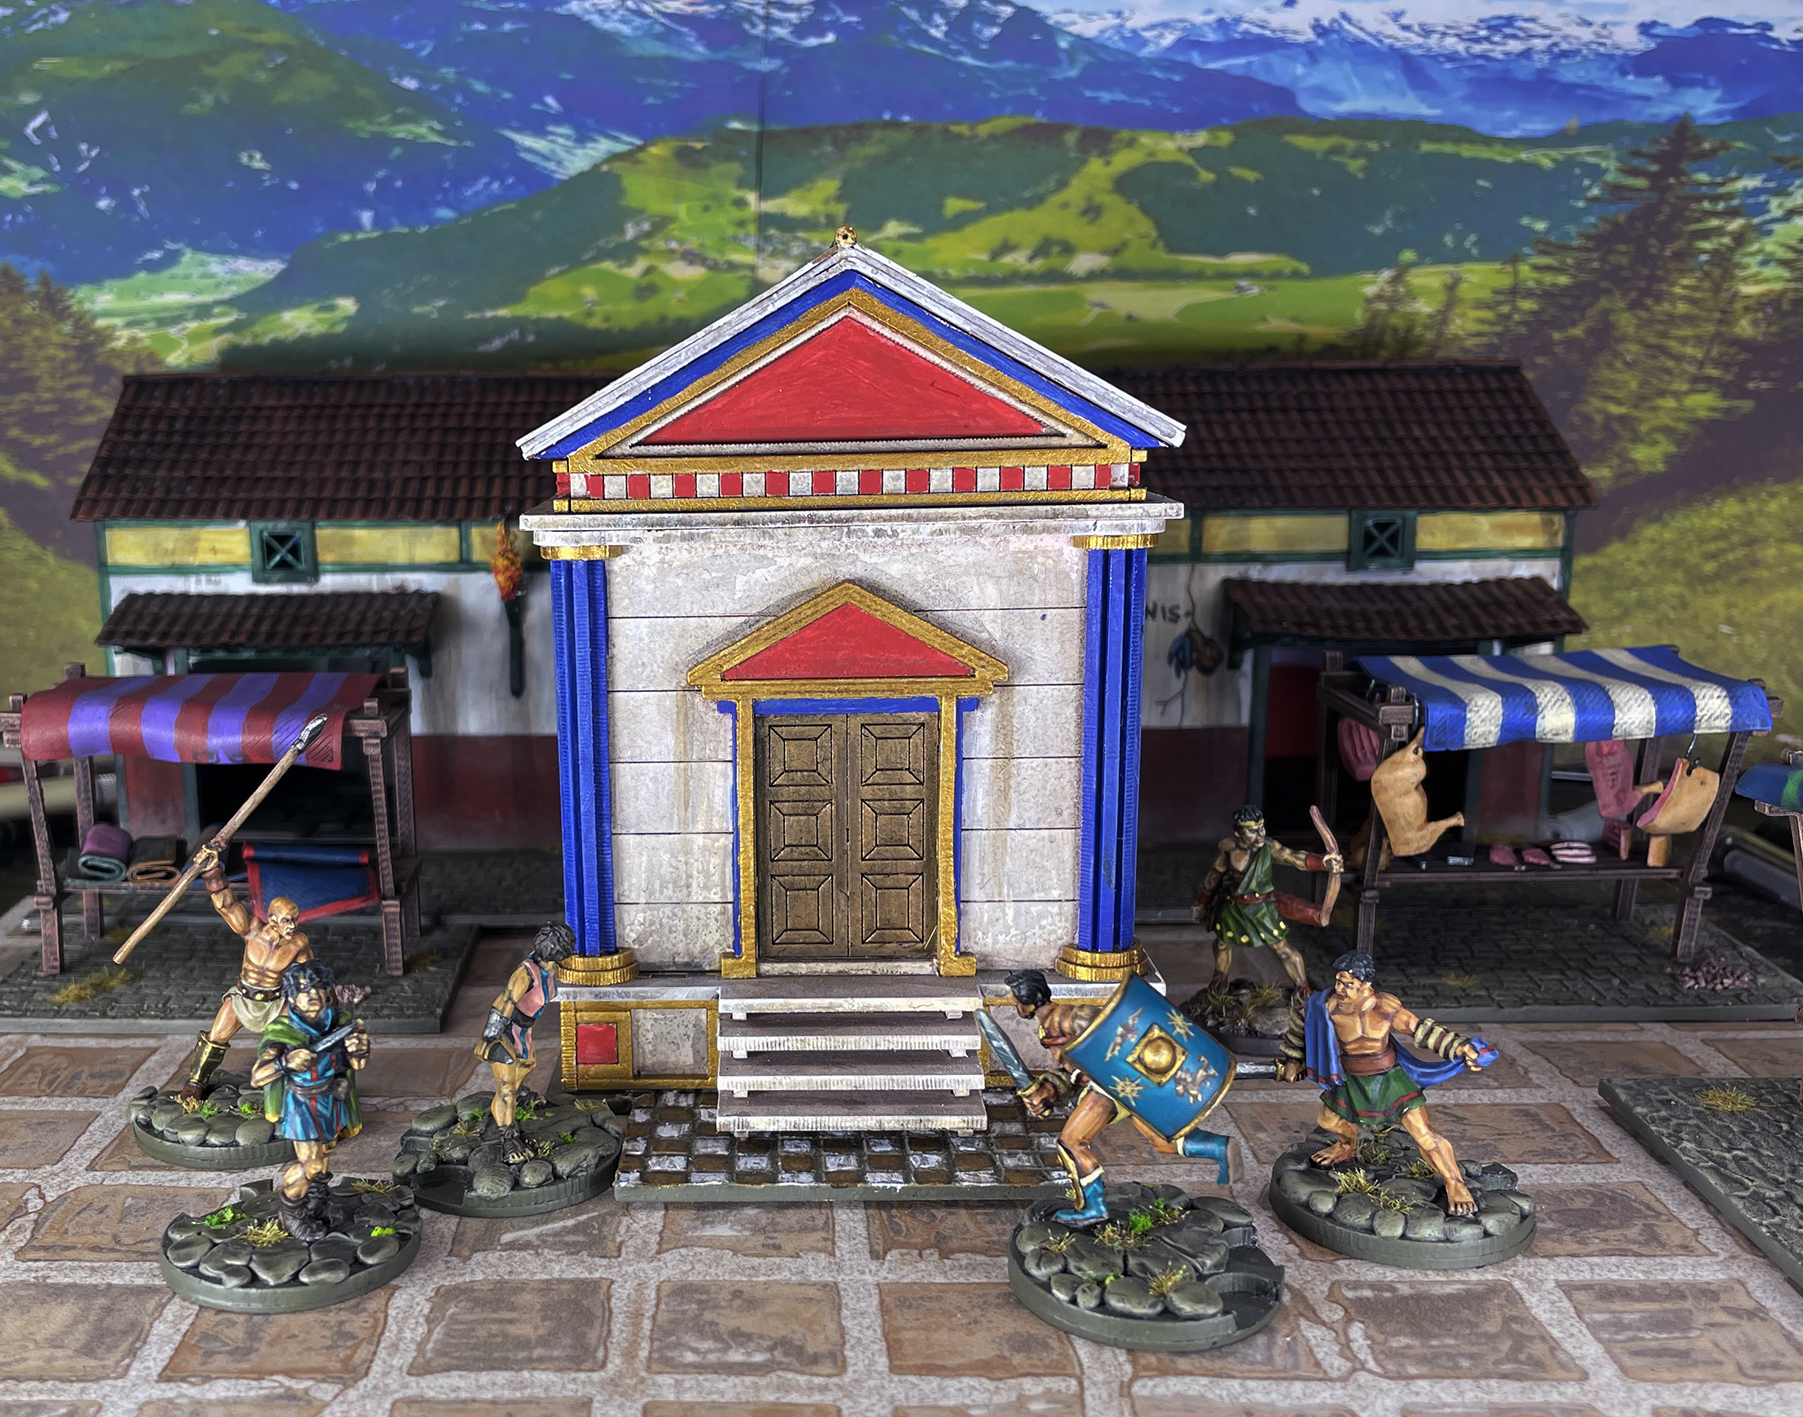
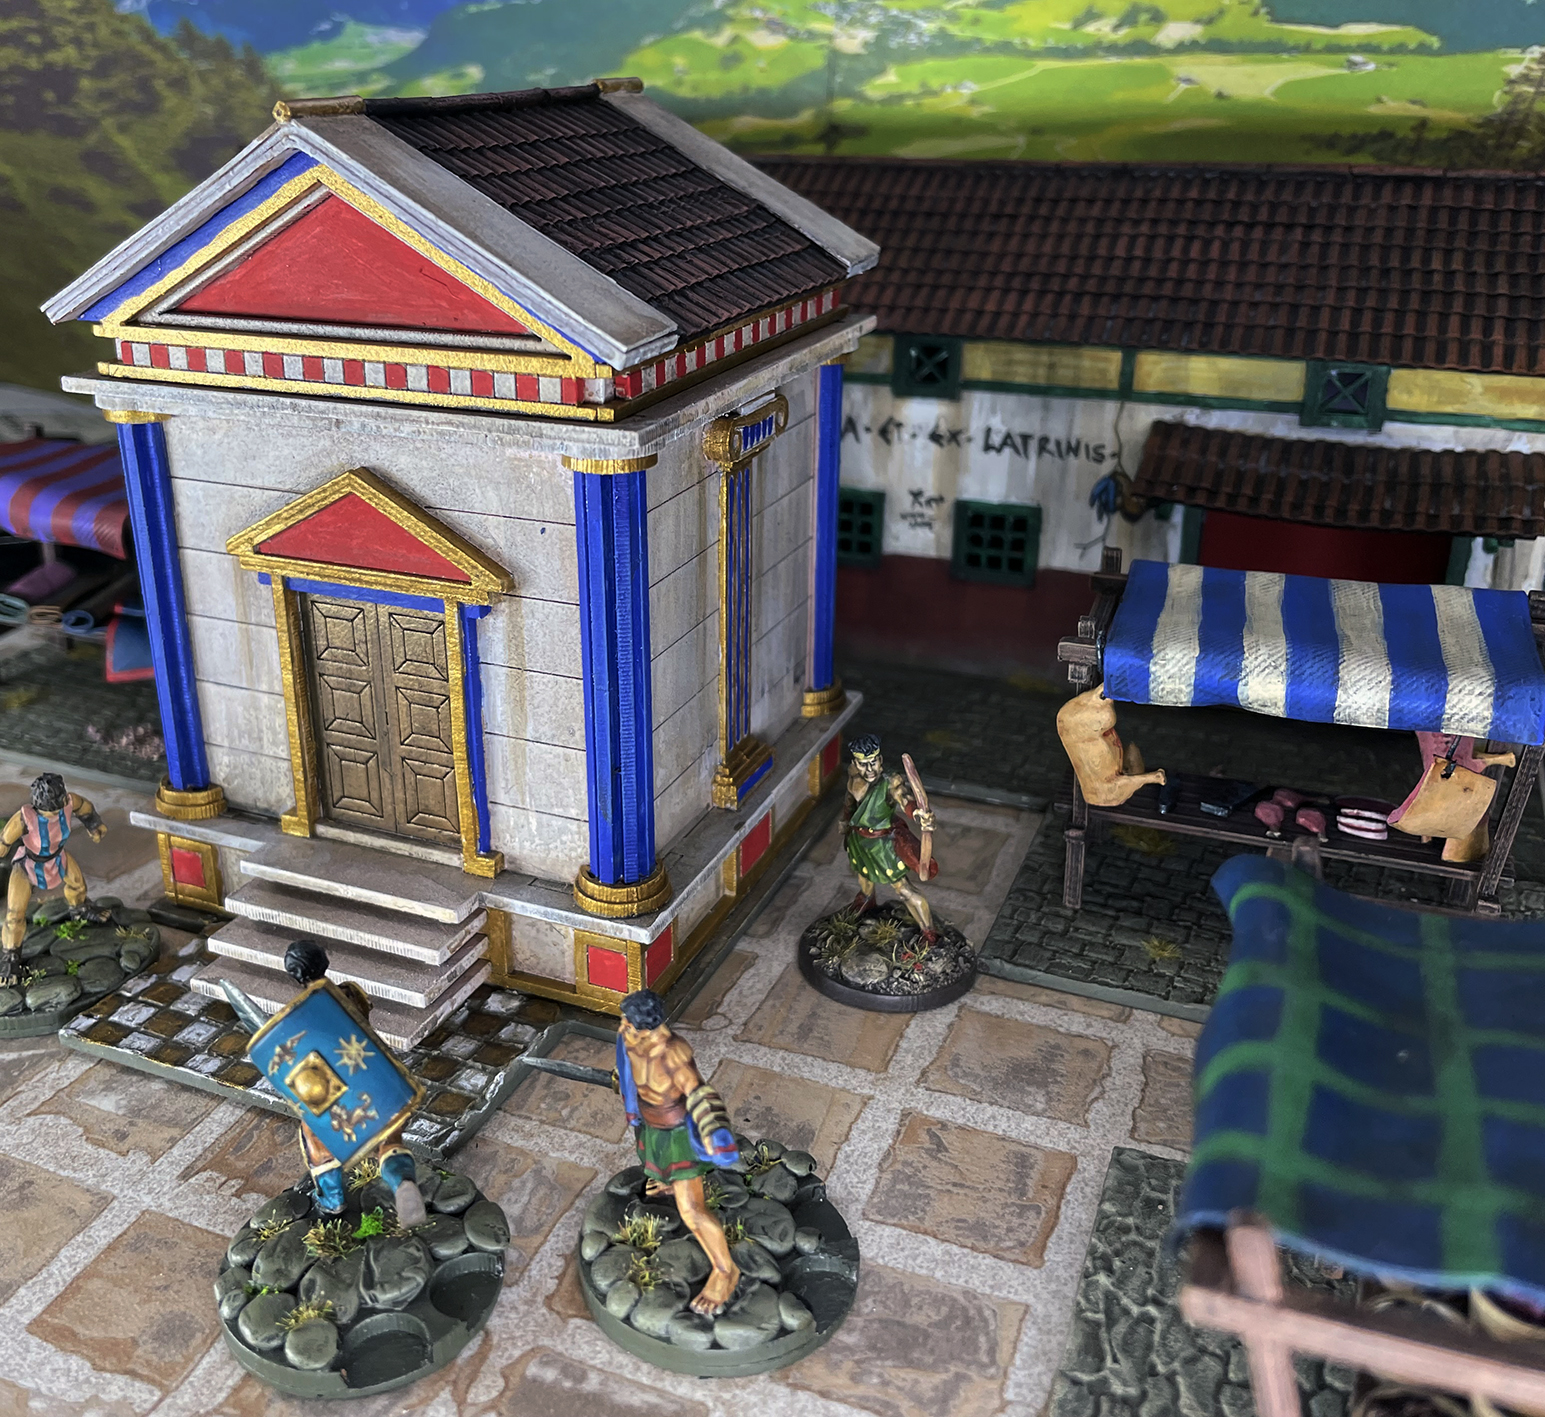
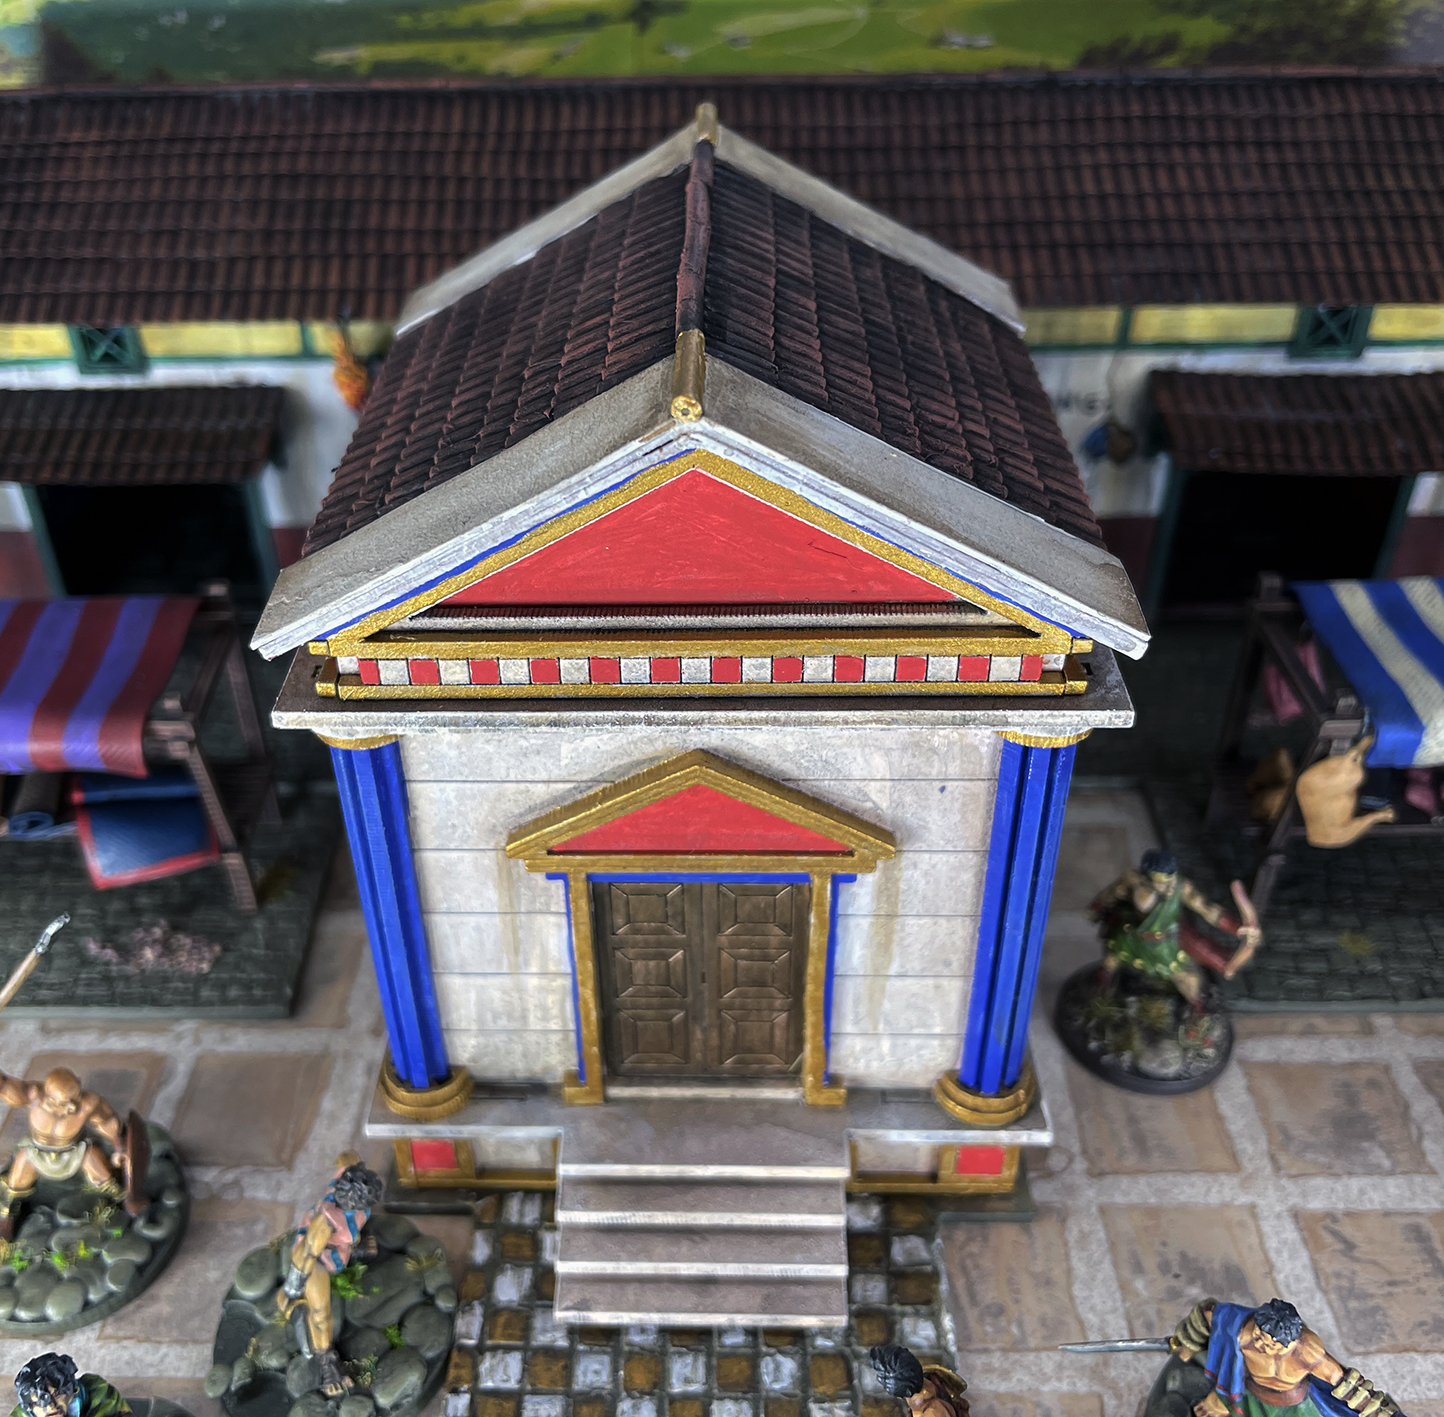
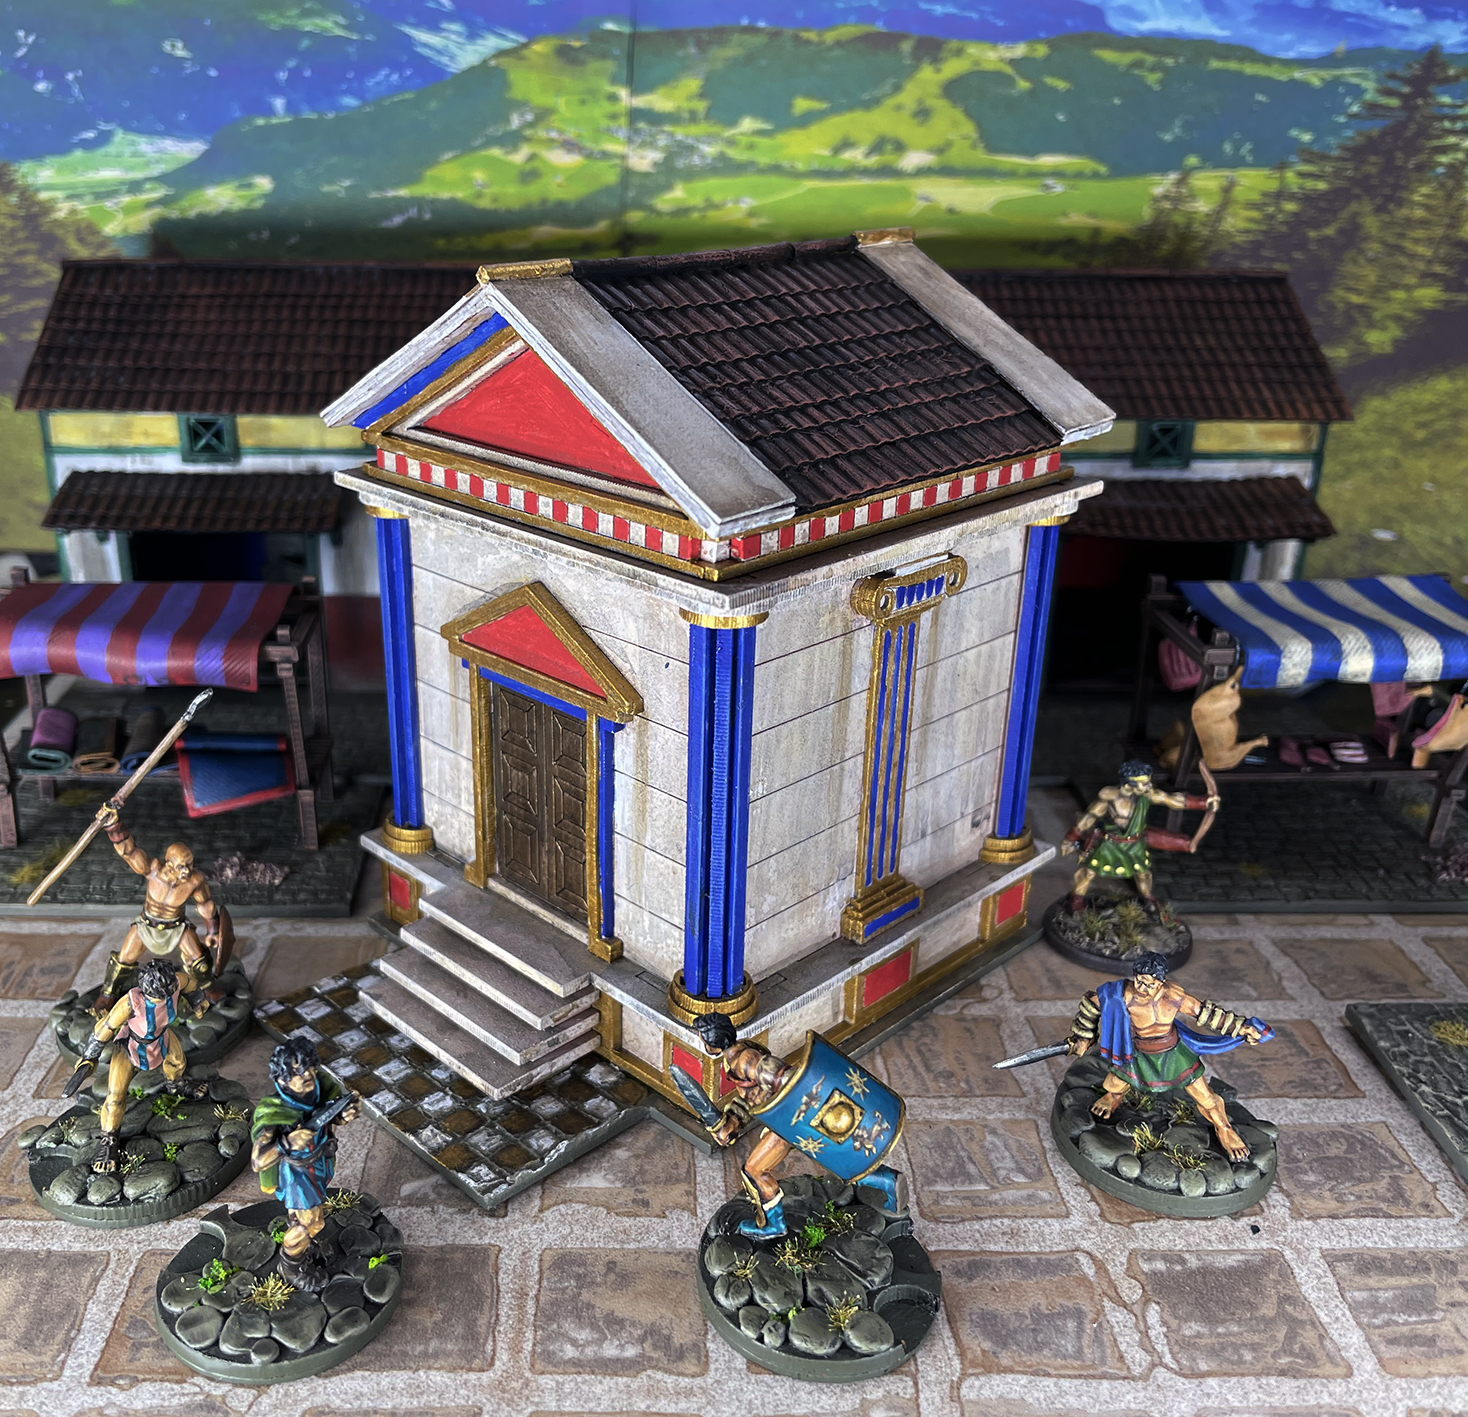
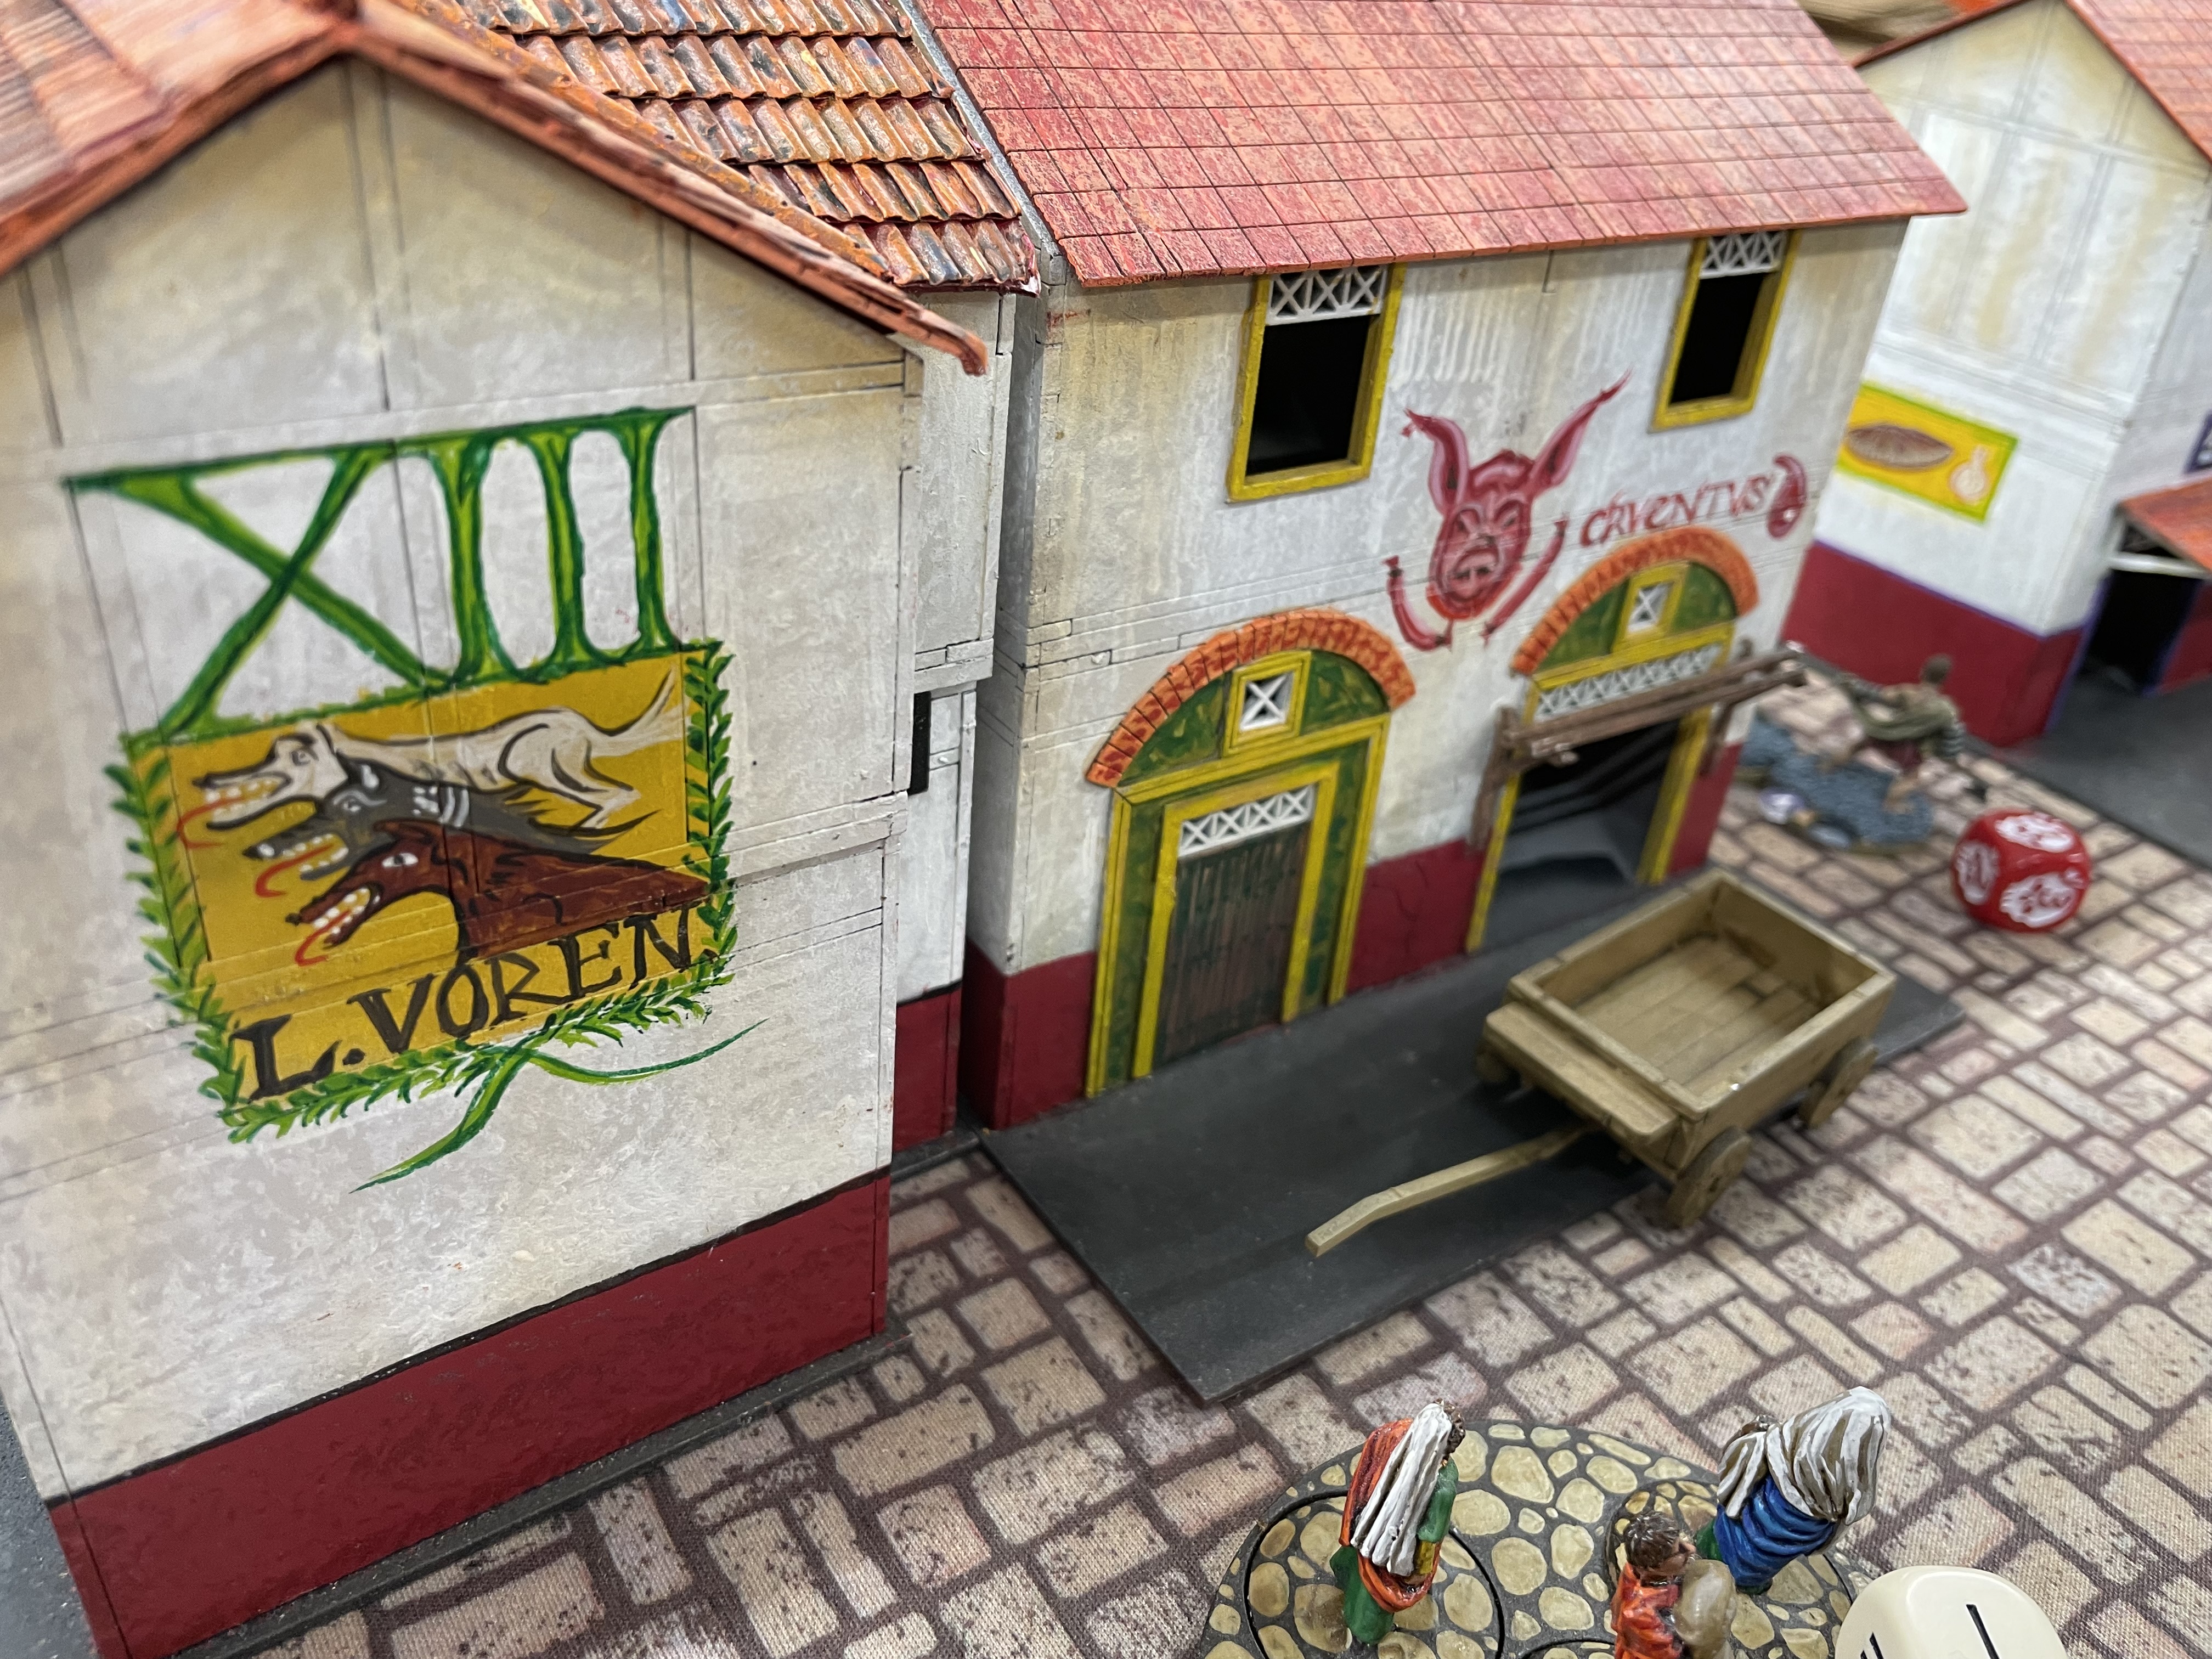
The Temple of Apollo, Revamped and Upgraded
 The Temple of Apollo
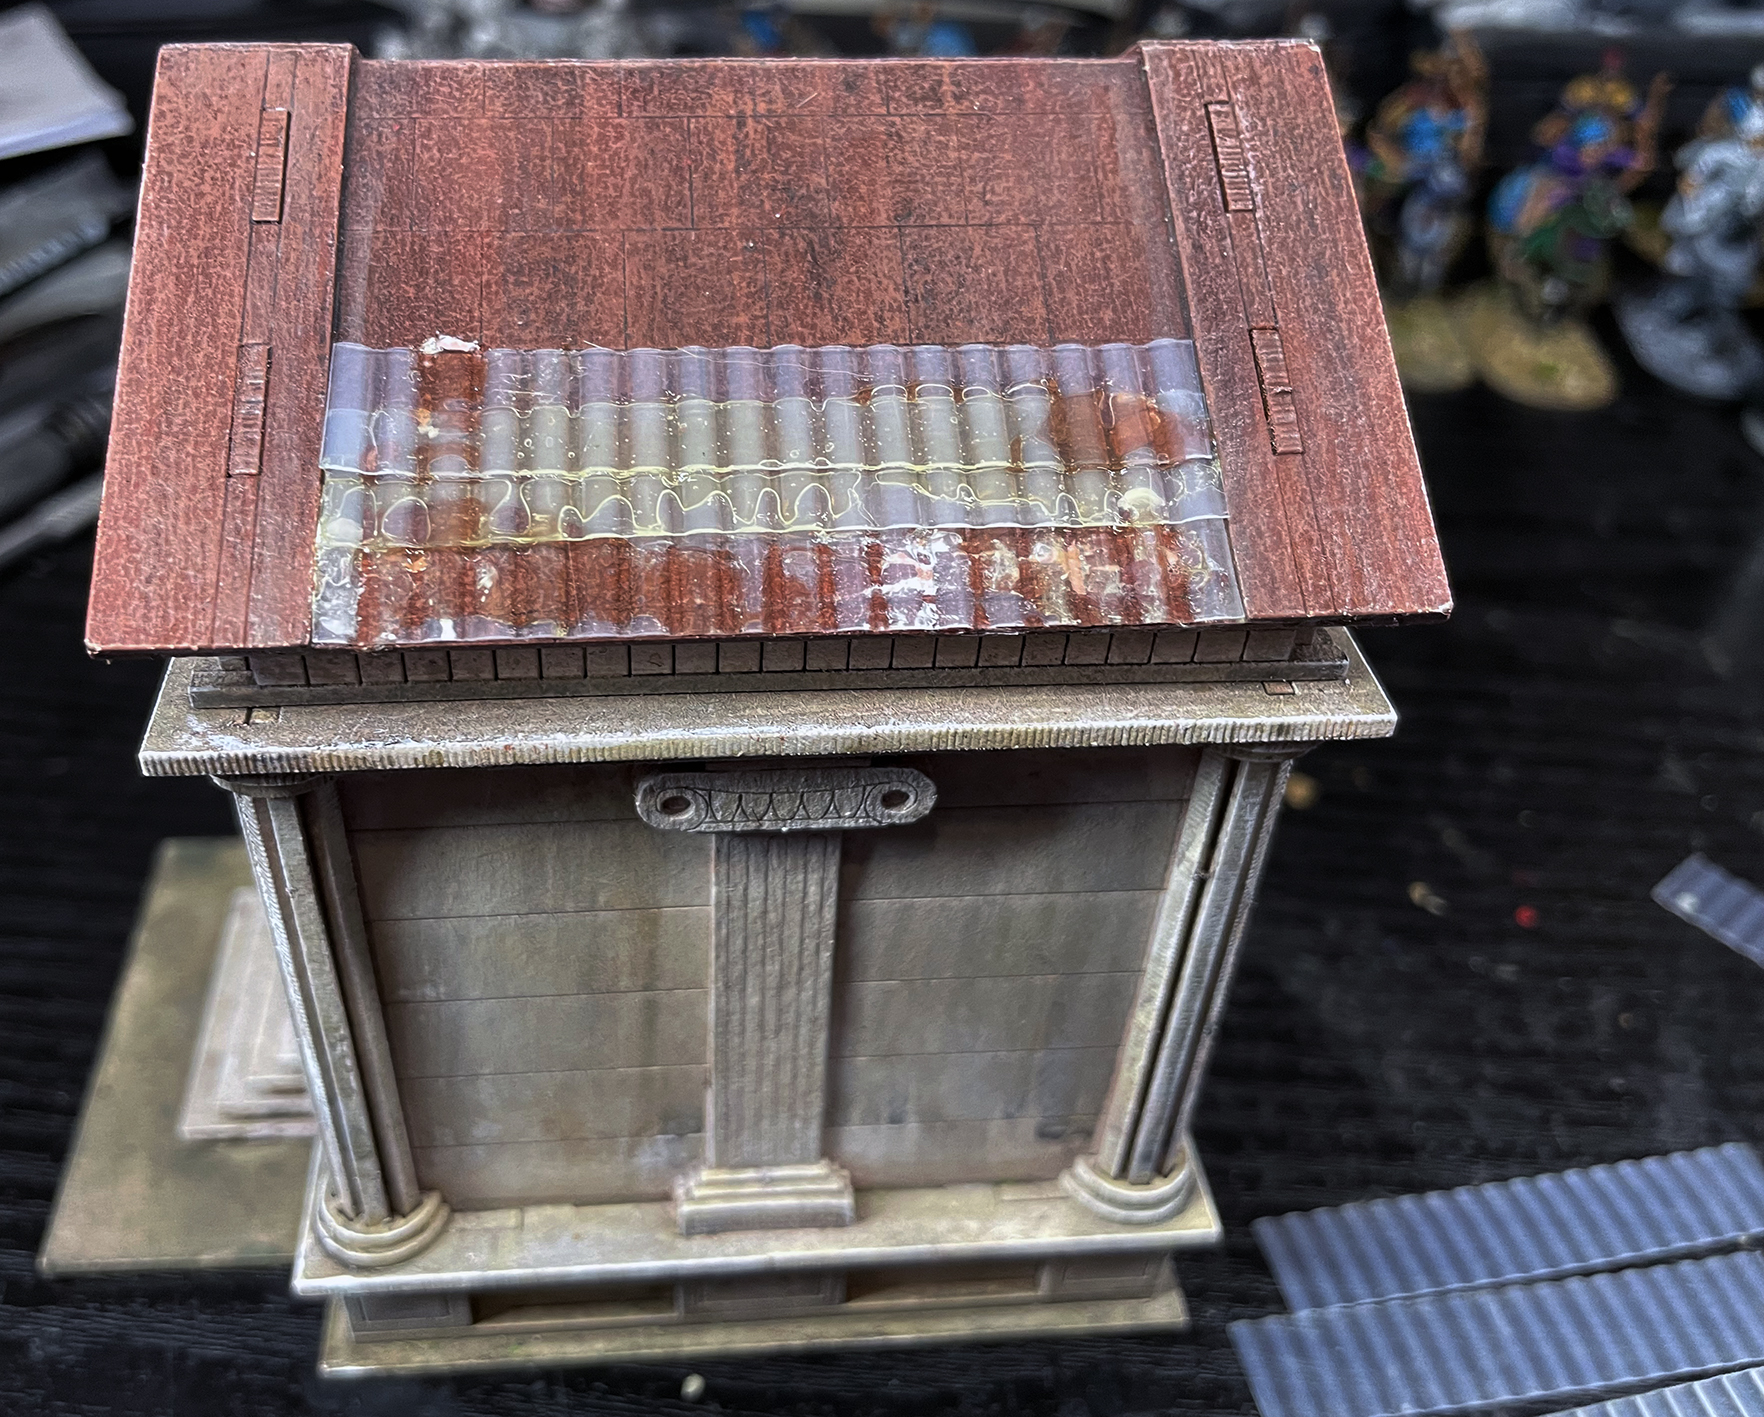
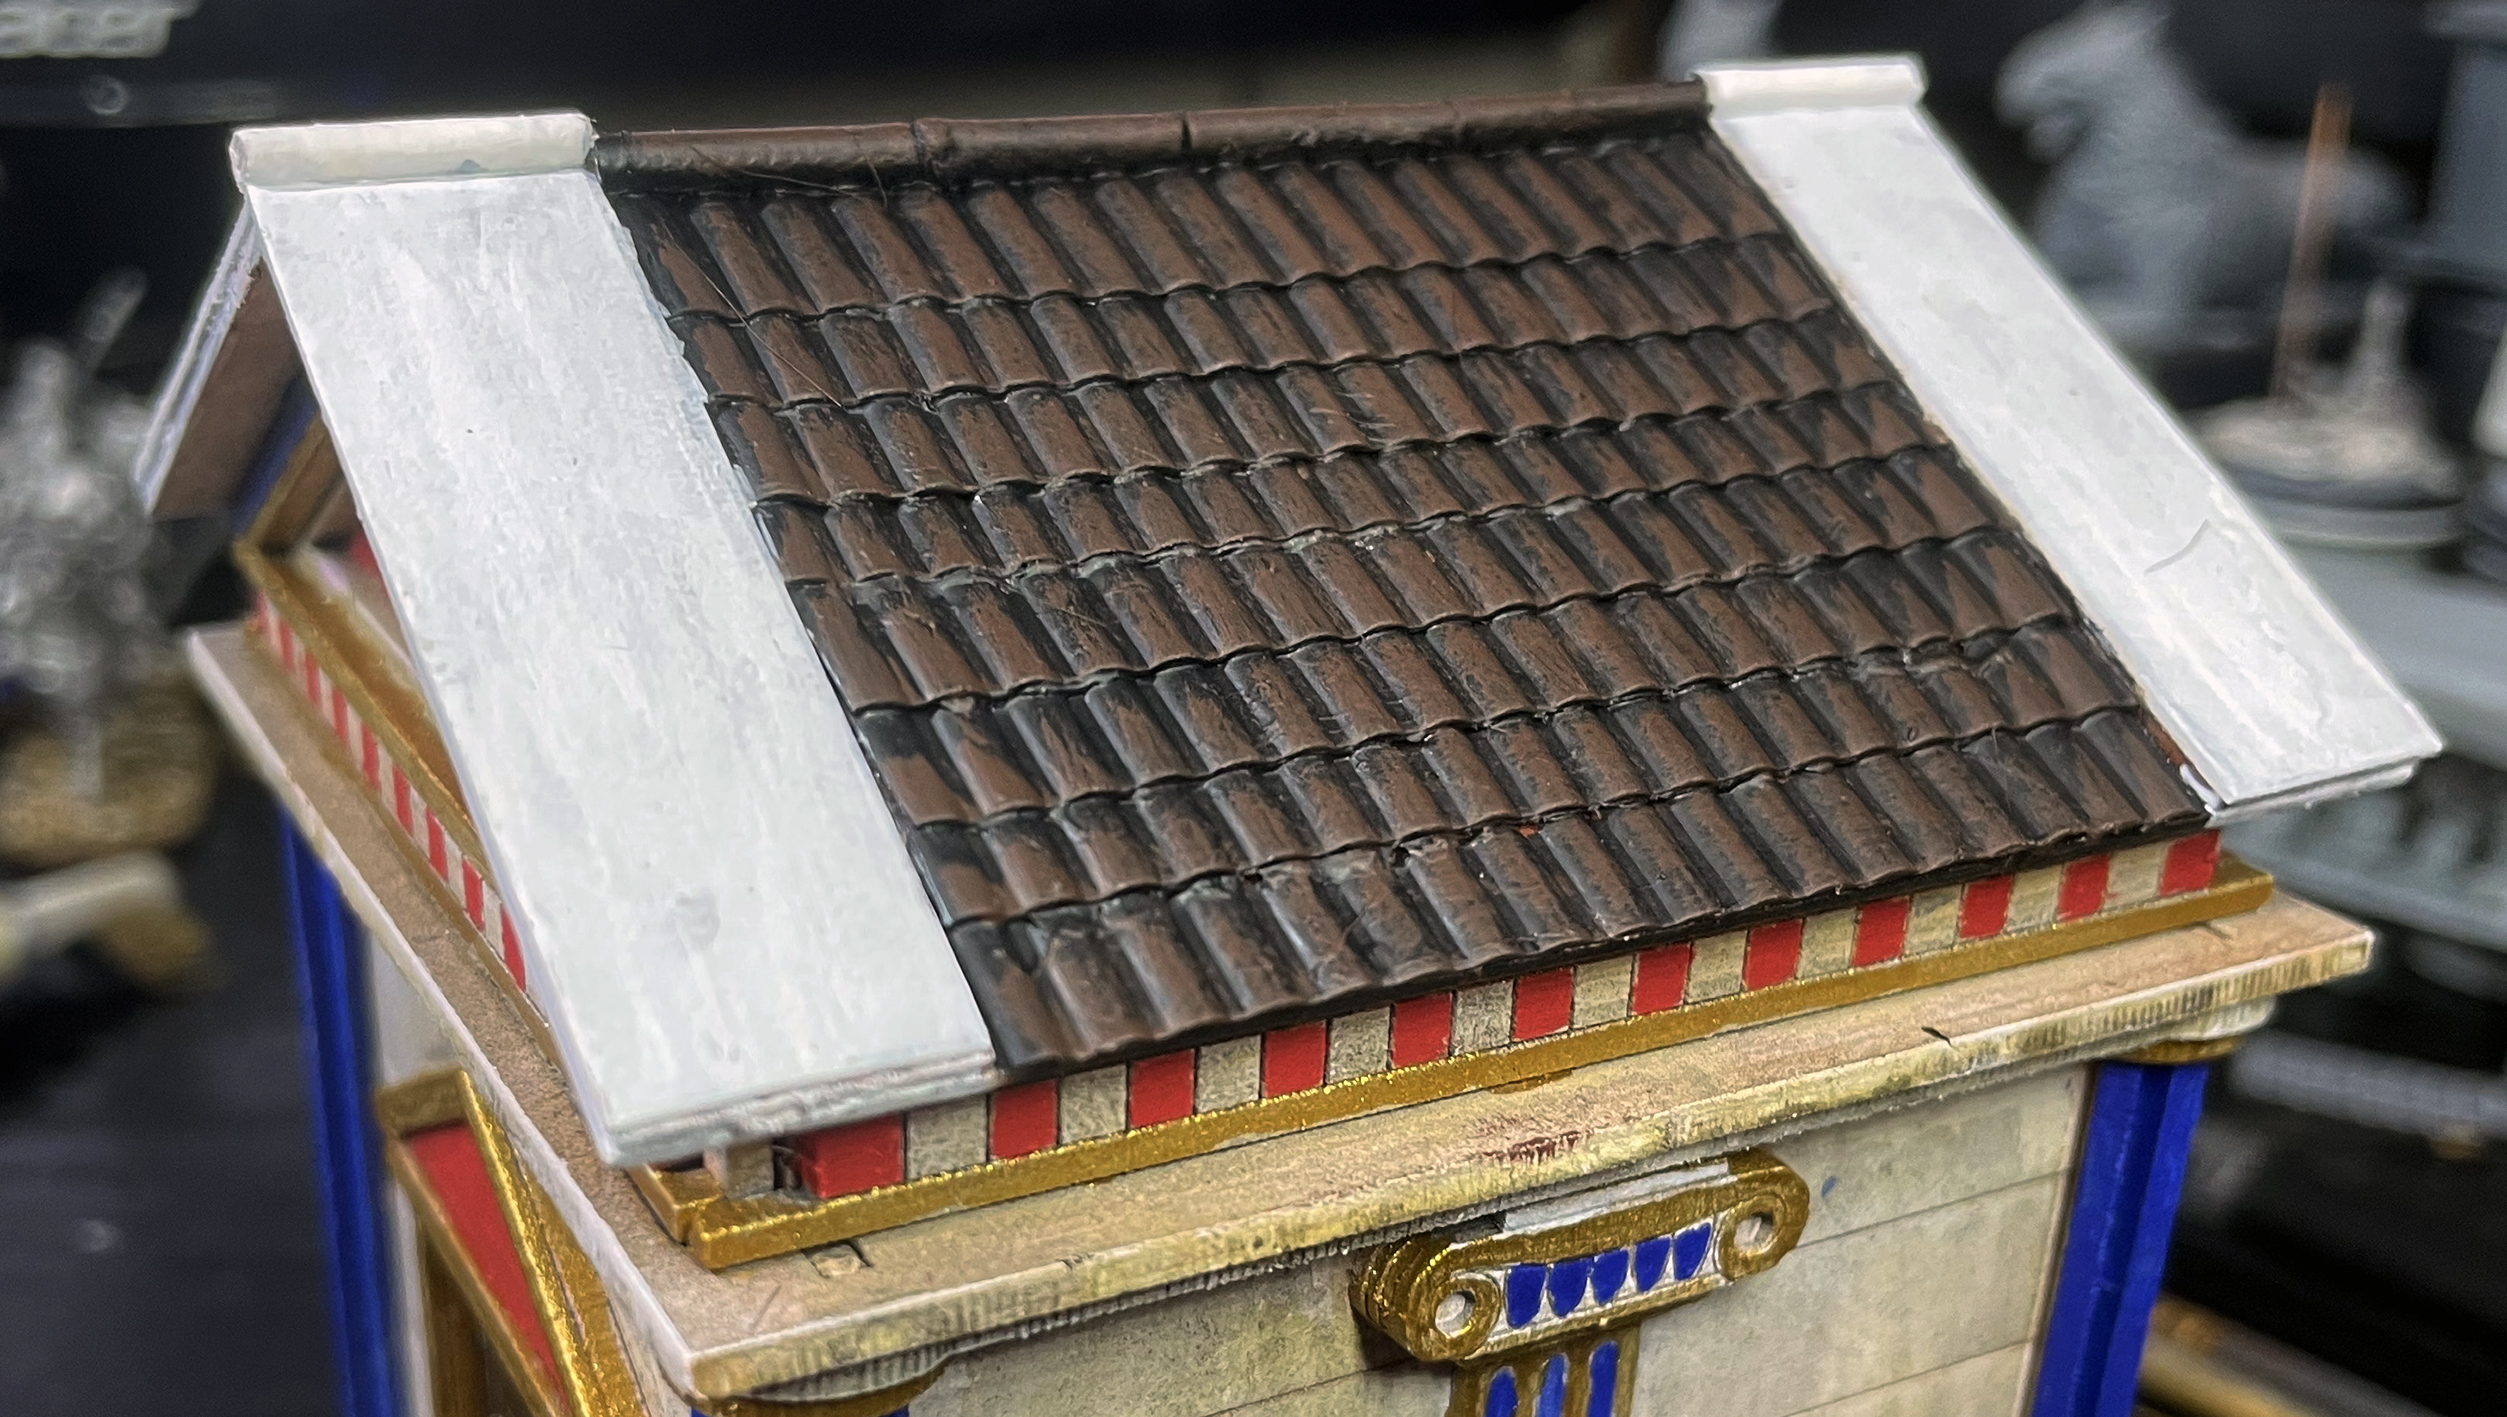
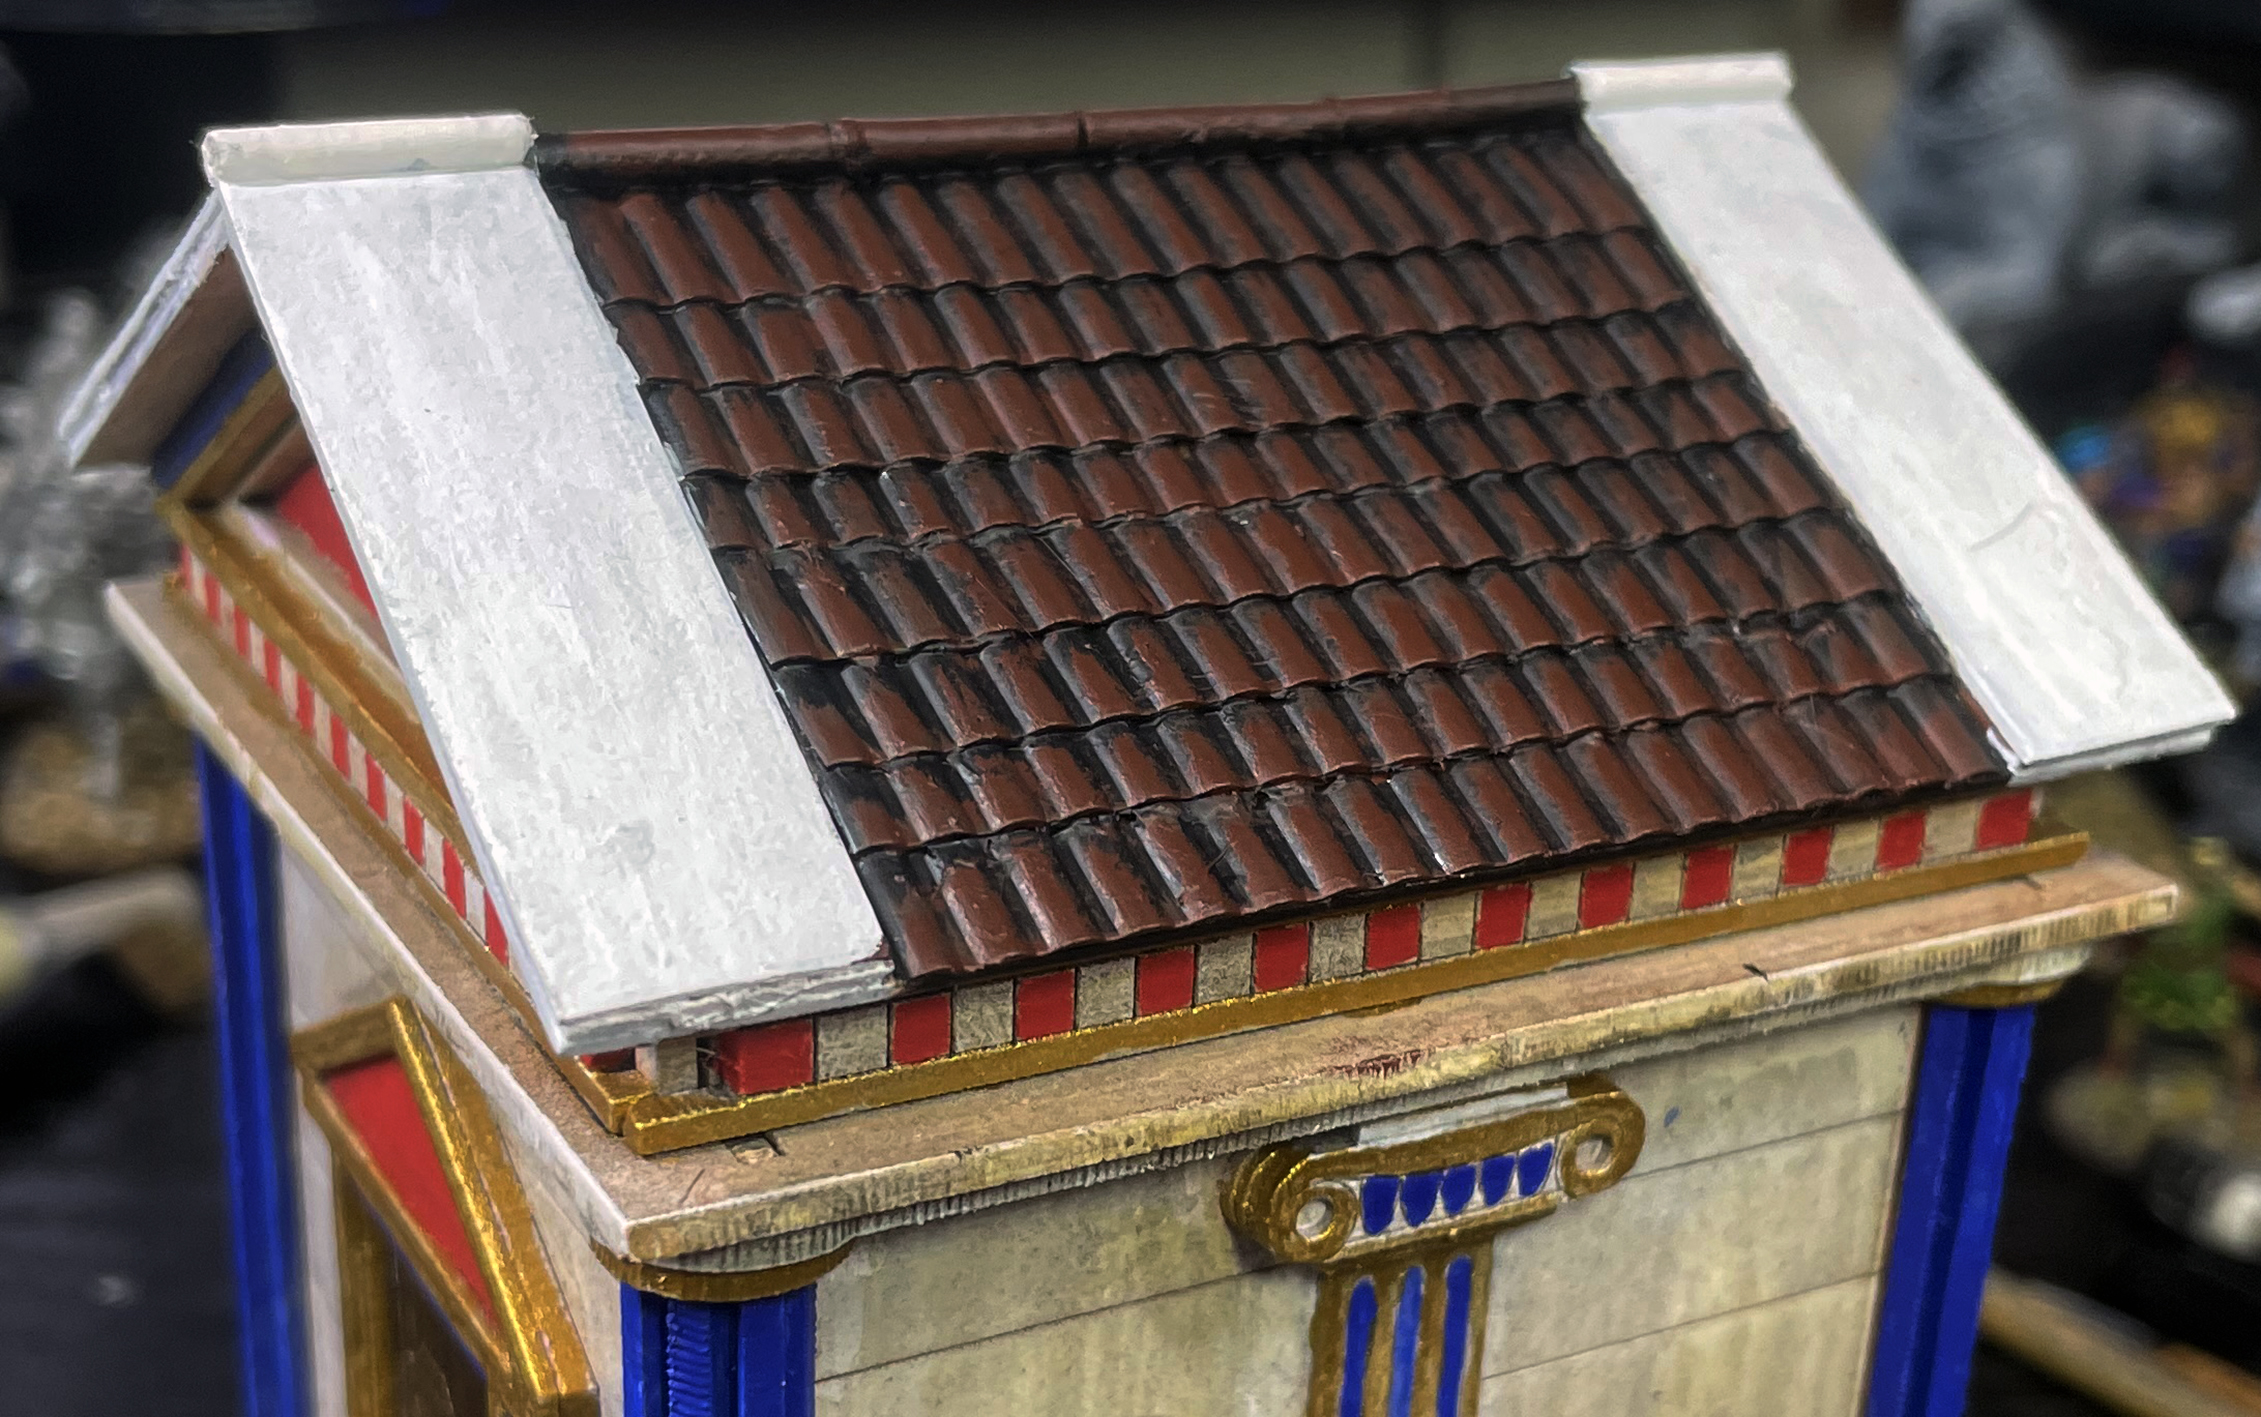
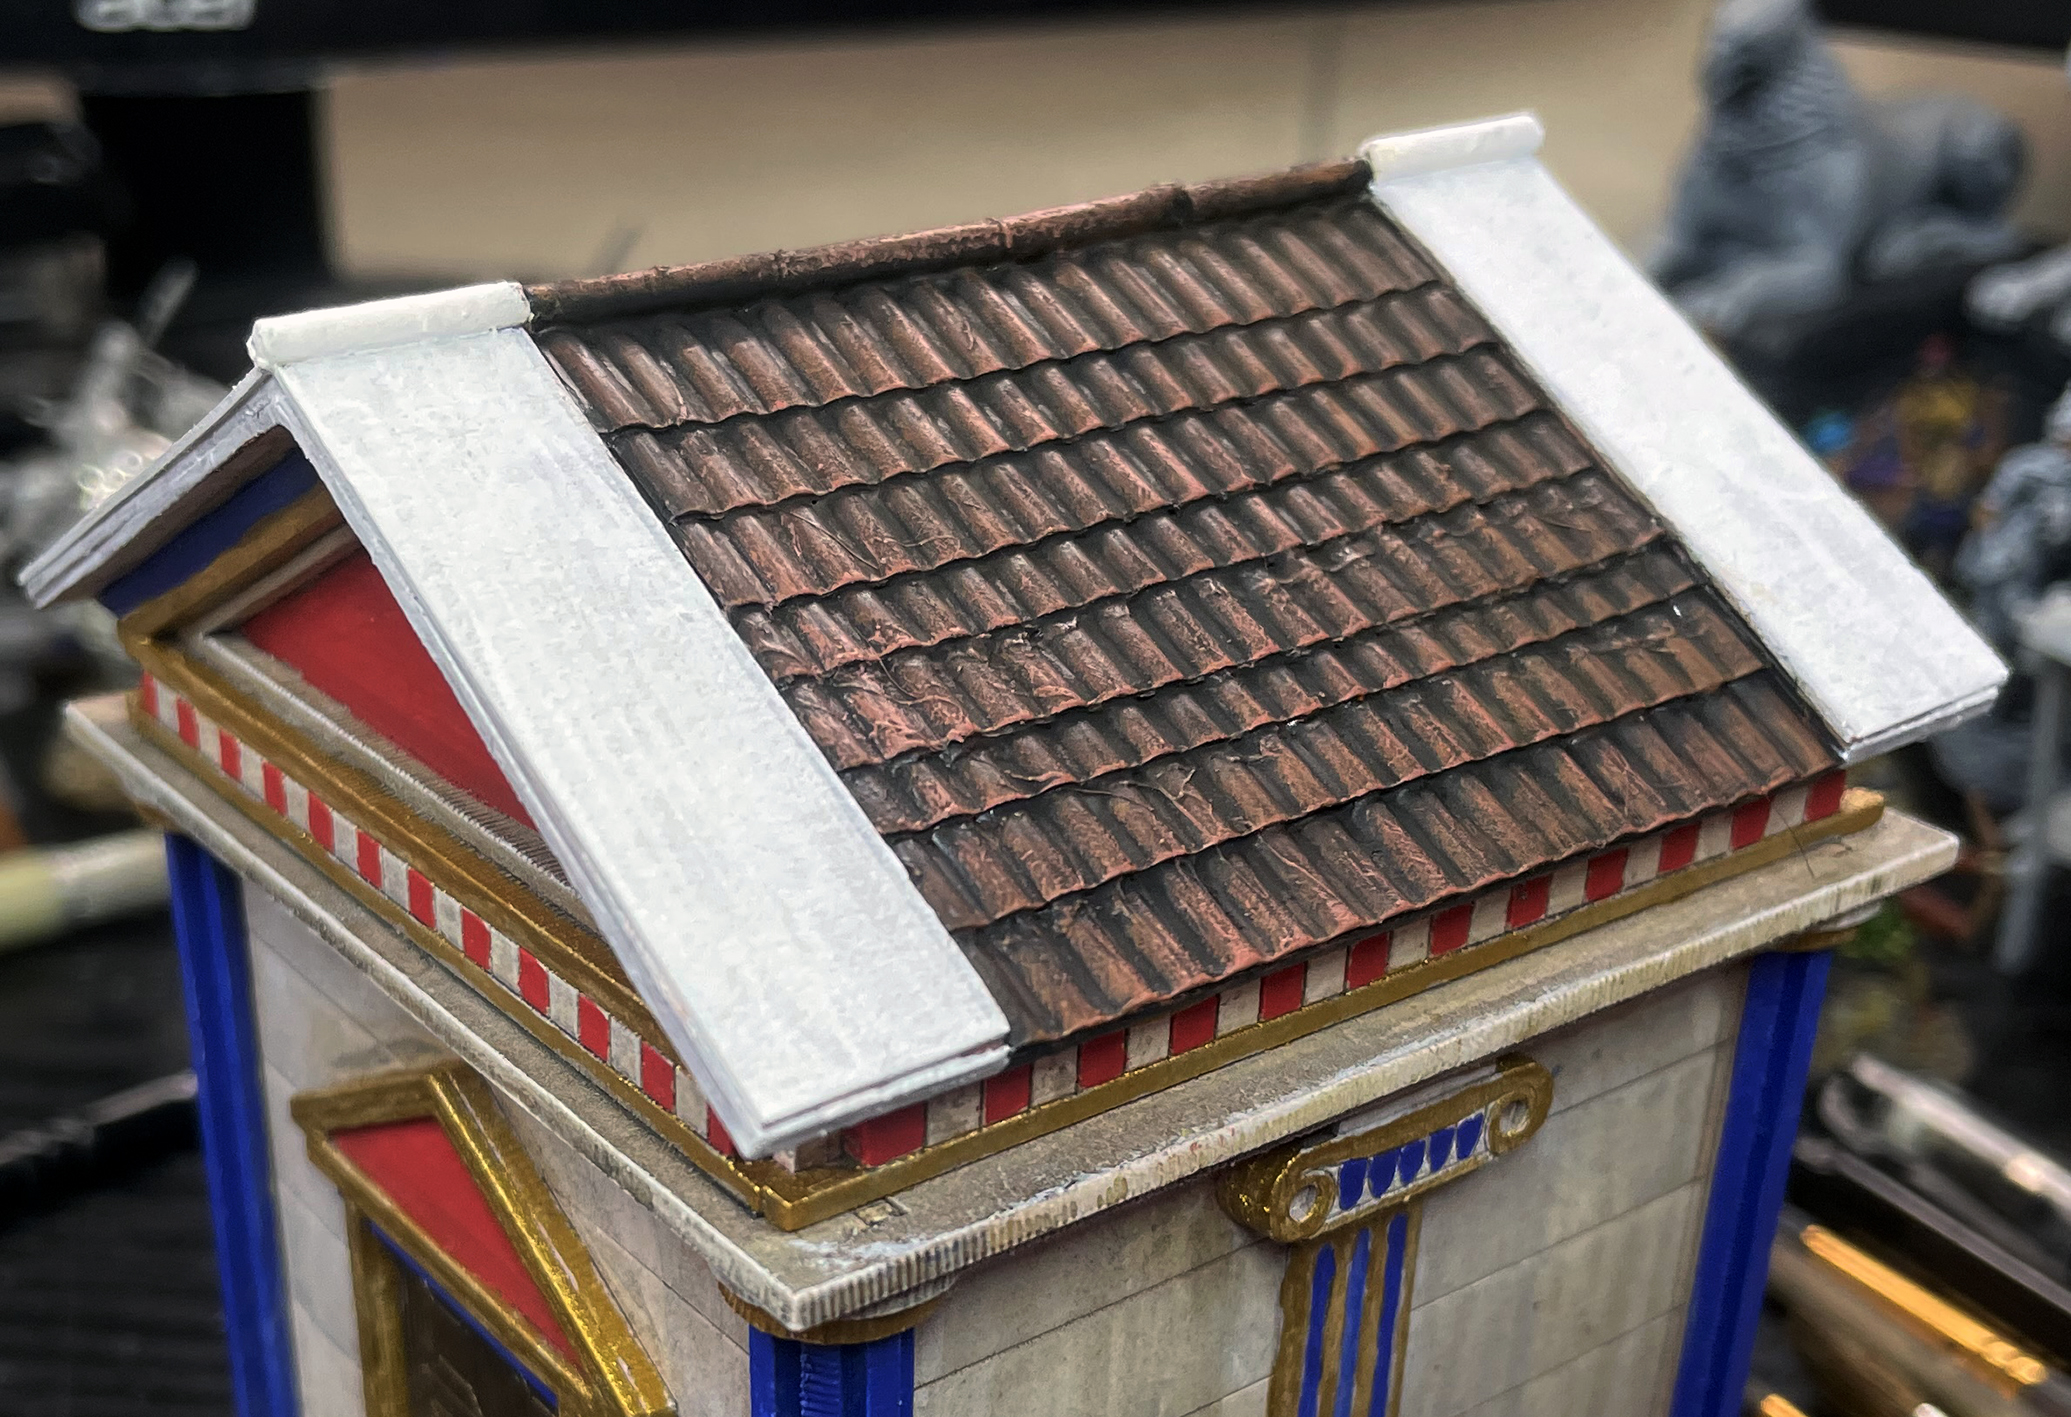
The next building on the list for upgrading and revamping is Sarissa’s Roadside Shrine/Mausoleum and I have created this and dedicated to Apollo, but really it could be any of the Gods. This is a lovely small building but a really fun build.
The first image is the starting block with it all painted but I need to revamp to roof.
The second image is the start of apply the fridge liners to the roof to for the pantiles.
The third image the roof is fully tiled and I have cut some card to raise the front and rear of the roof of the temple and cut some cotton buds poles to use as the ridge tiles.

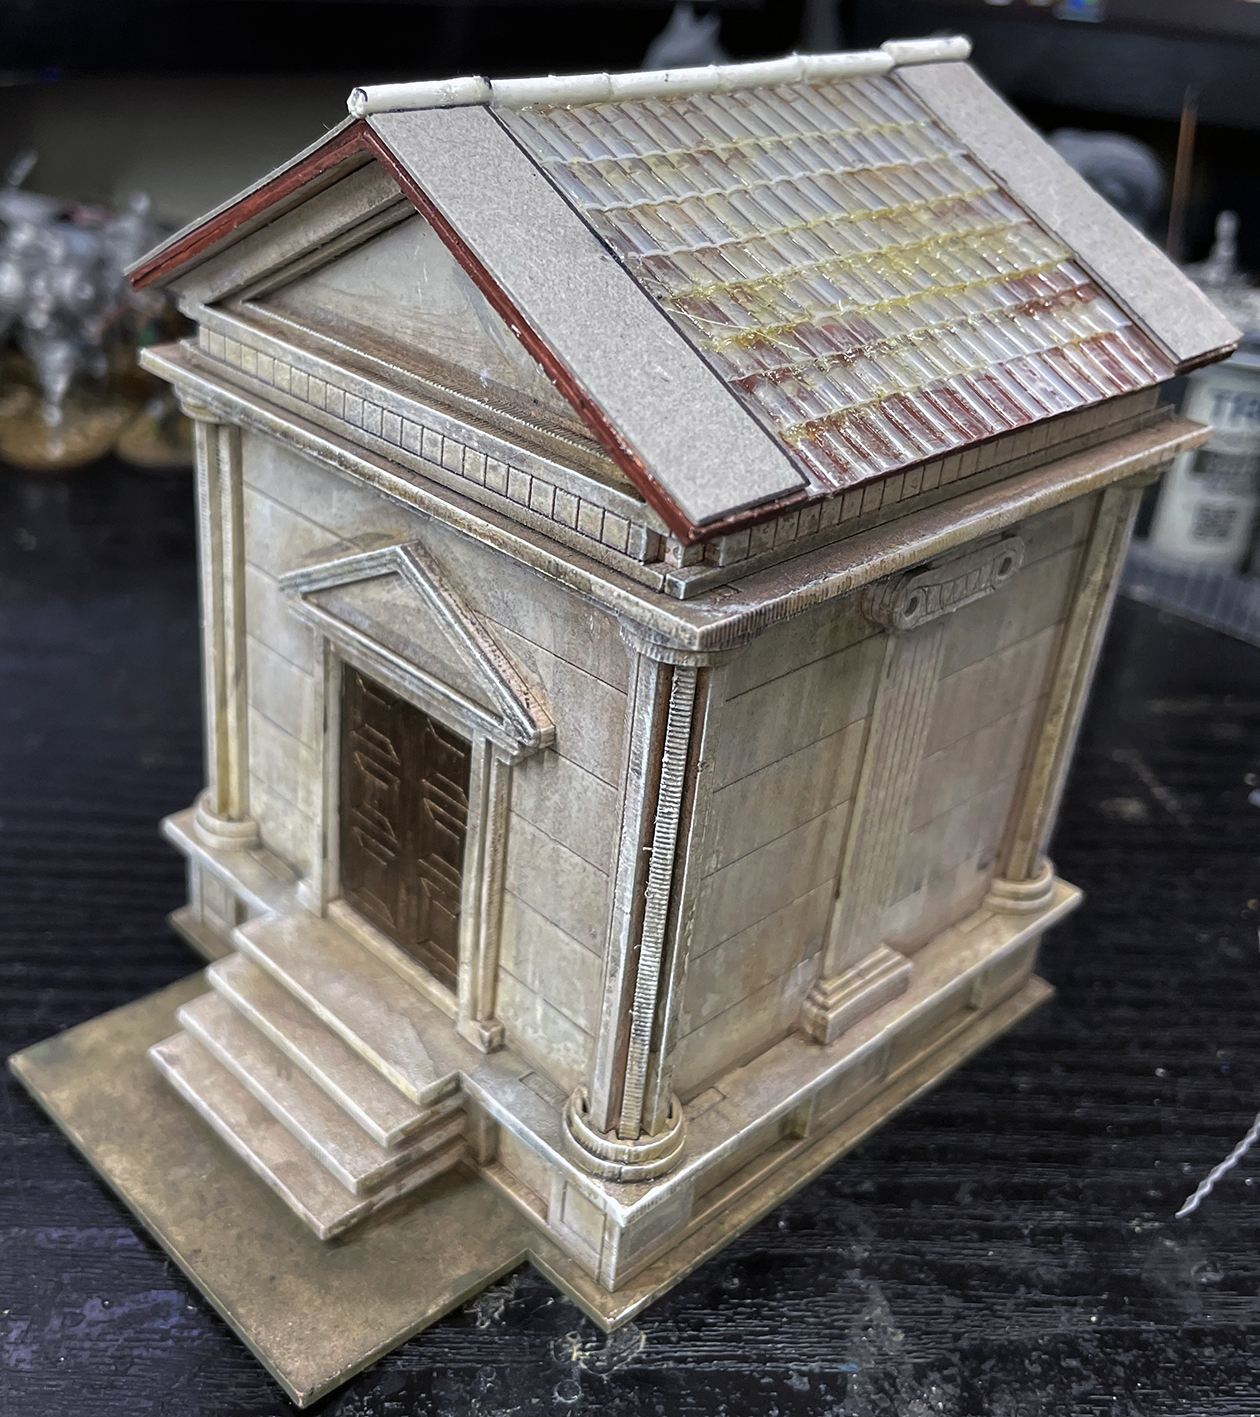
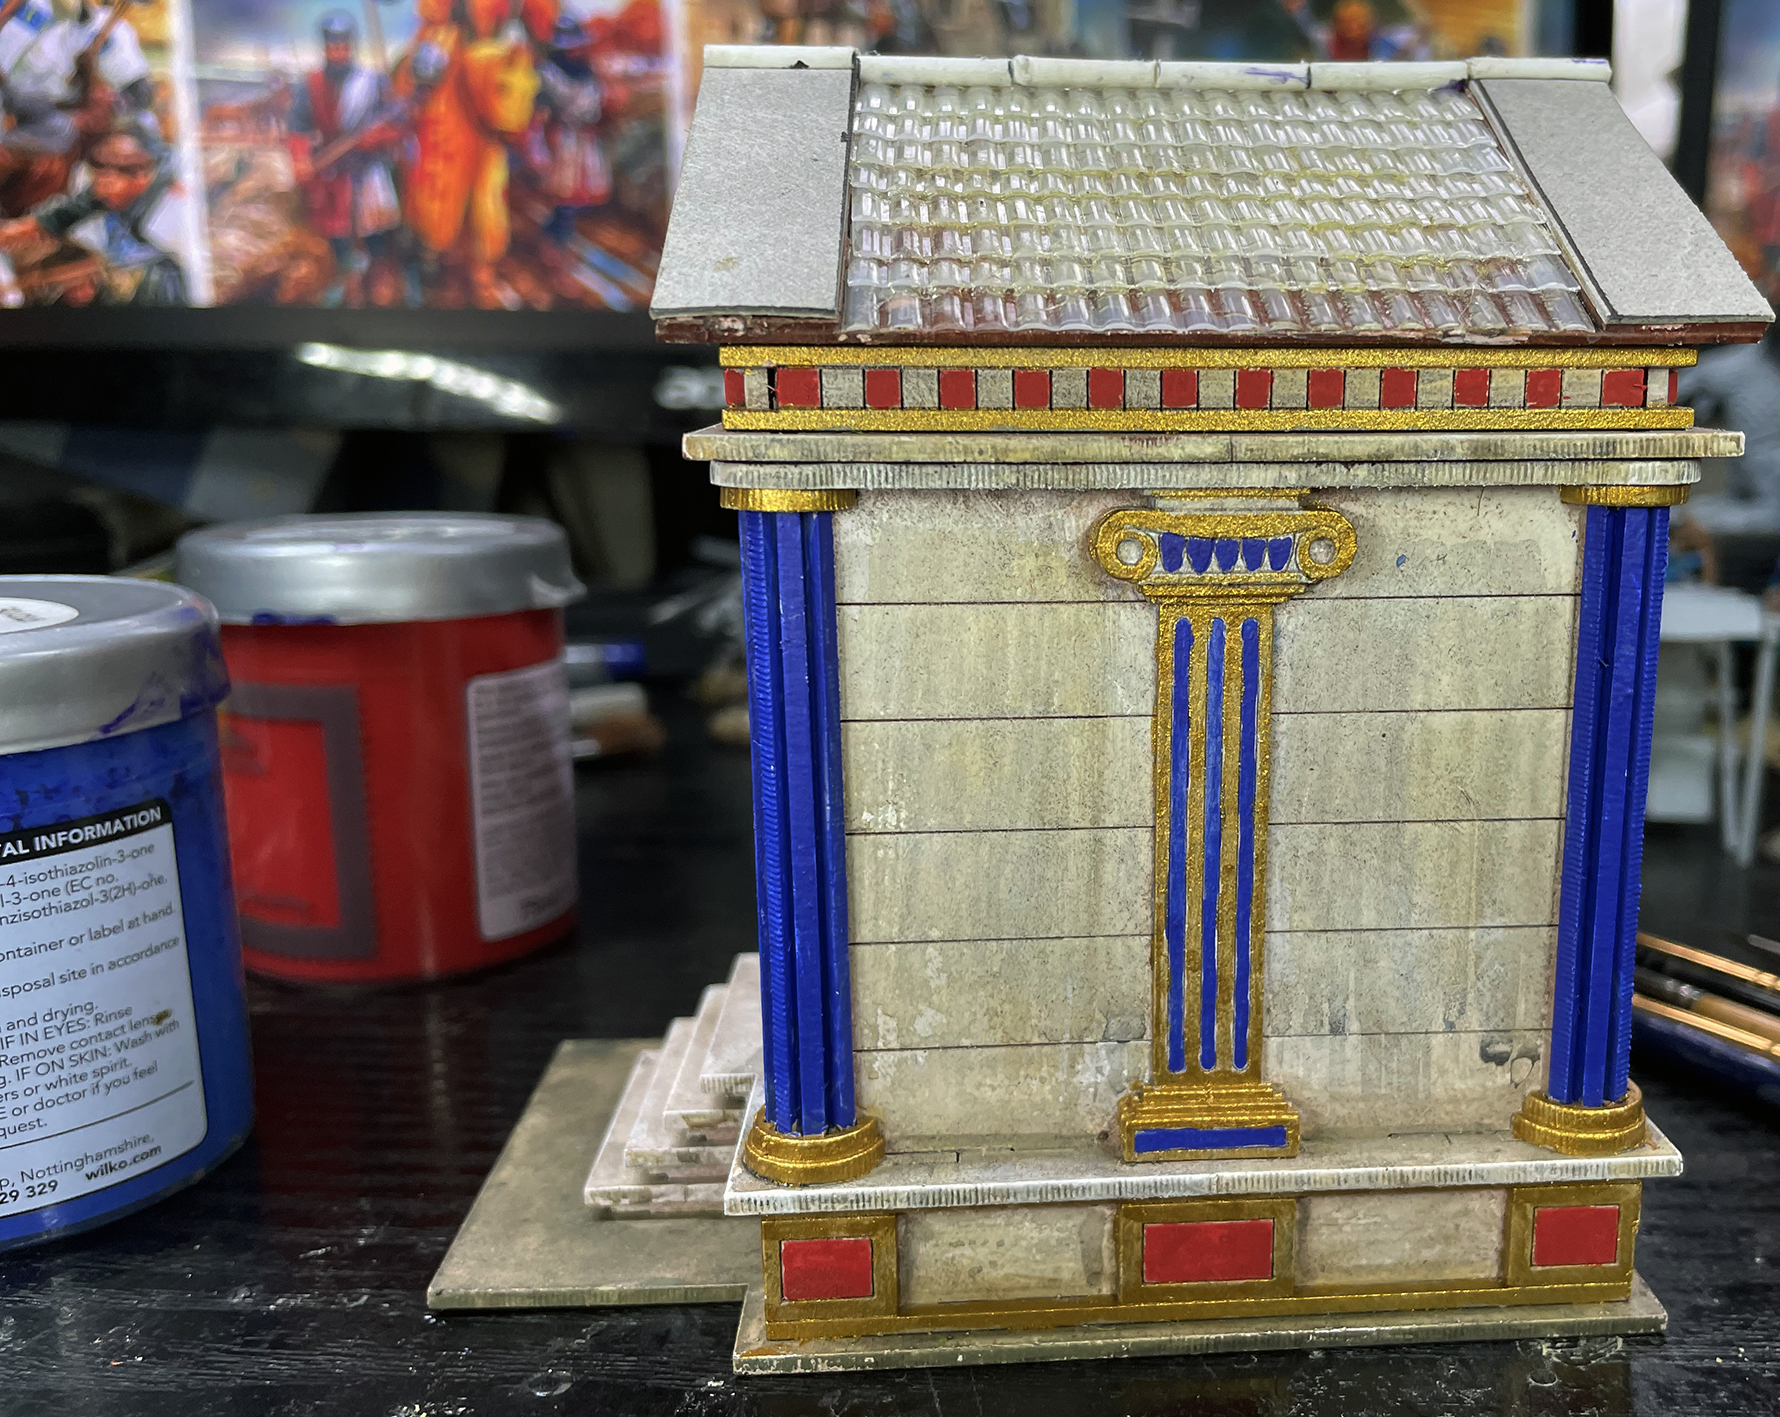
Next before painting the roof I revamped the temple wall to add some colour as Roman and even Greek temples used a lot of colour on them, so I went for red, blue and gold to bring out the details.

I started to paint the roof starting with the pantiles. So I primed the fridge liners with black primer.
In the first picture I drybrushed Vallejo Scorched Earth over it.
In the next image I drybrushed Vallejo Game Colour Terracotta to give it that rich red tile colour.
I then did a light drybrush of Vallejo Game Colour Tan to add the highlights.
I then I washed the tiles with Vallejo Game Colour Black wash and then their Sepia wash to add a rich reddy brown colour.
I then using the same washes for the tiles I gently weathered the temple and added some gold to the ridge tile to finish it.

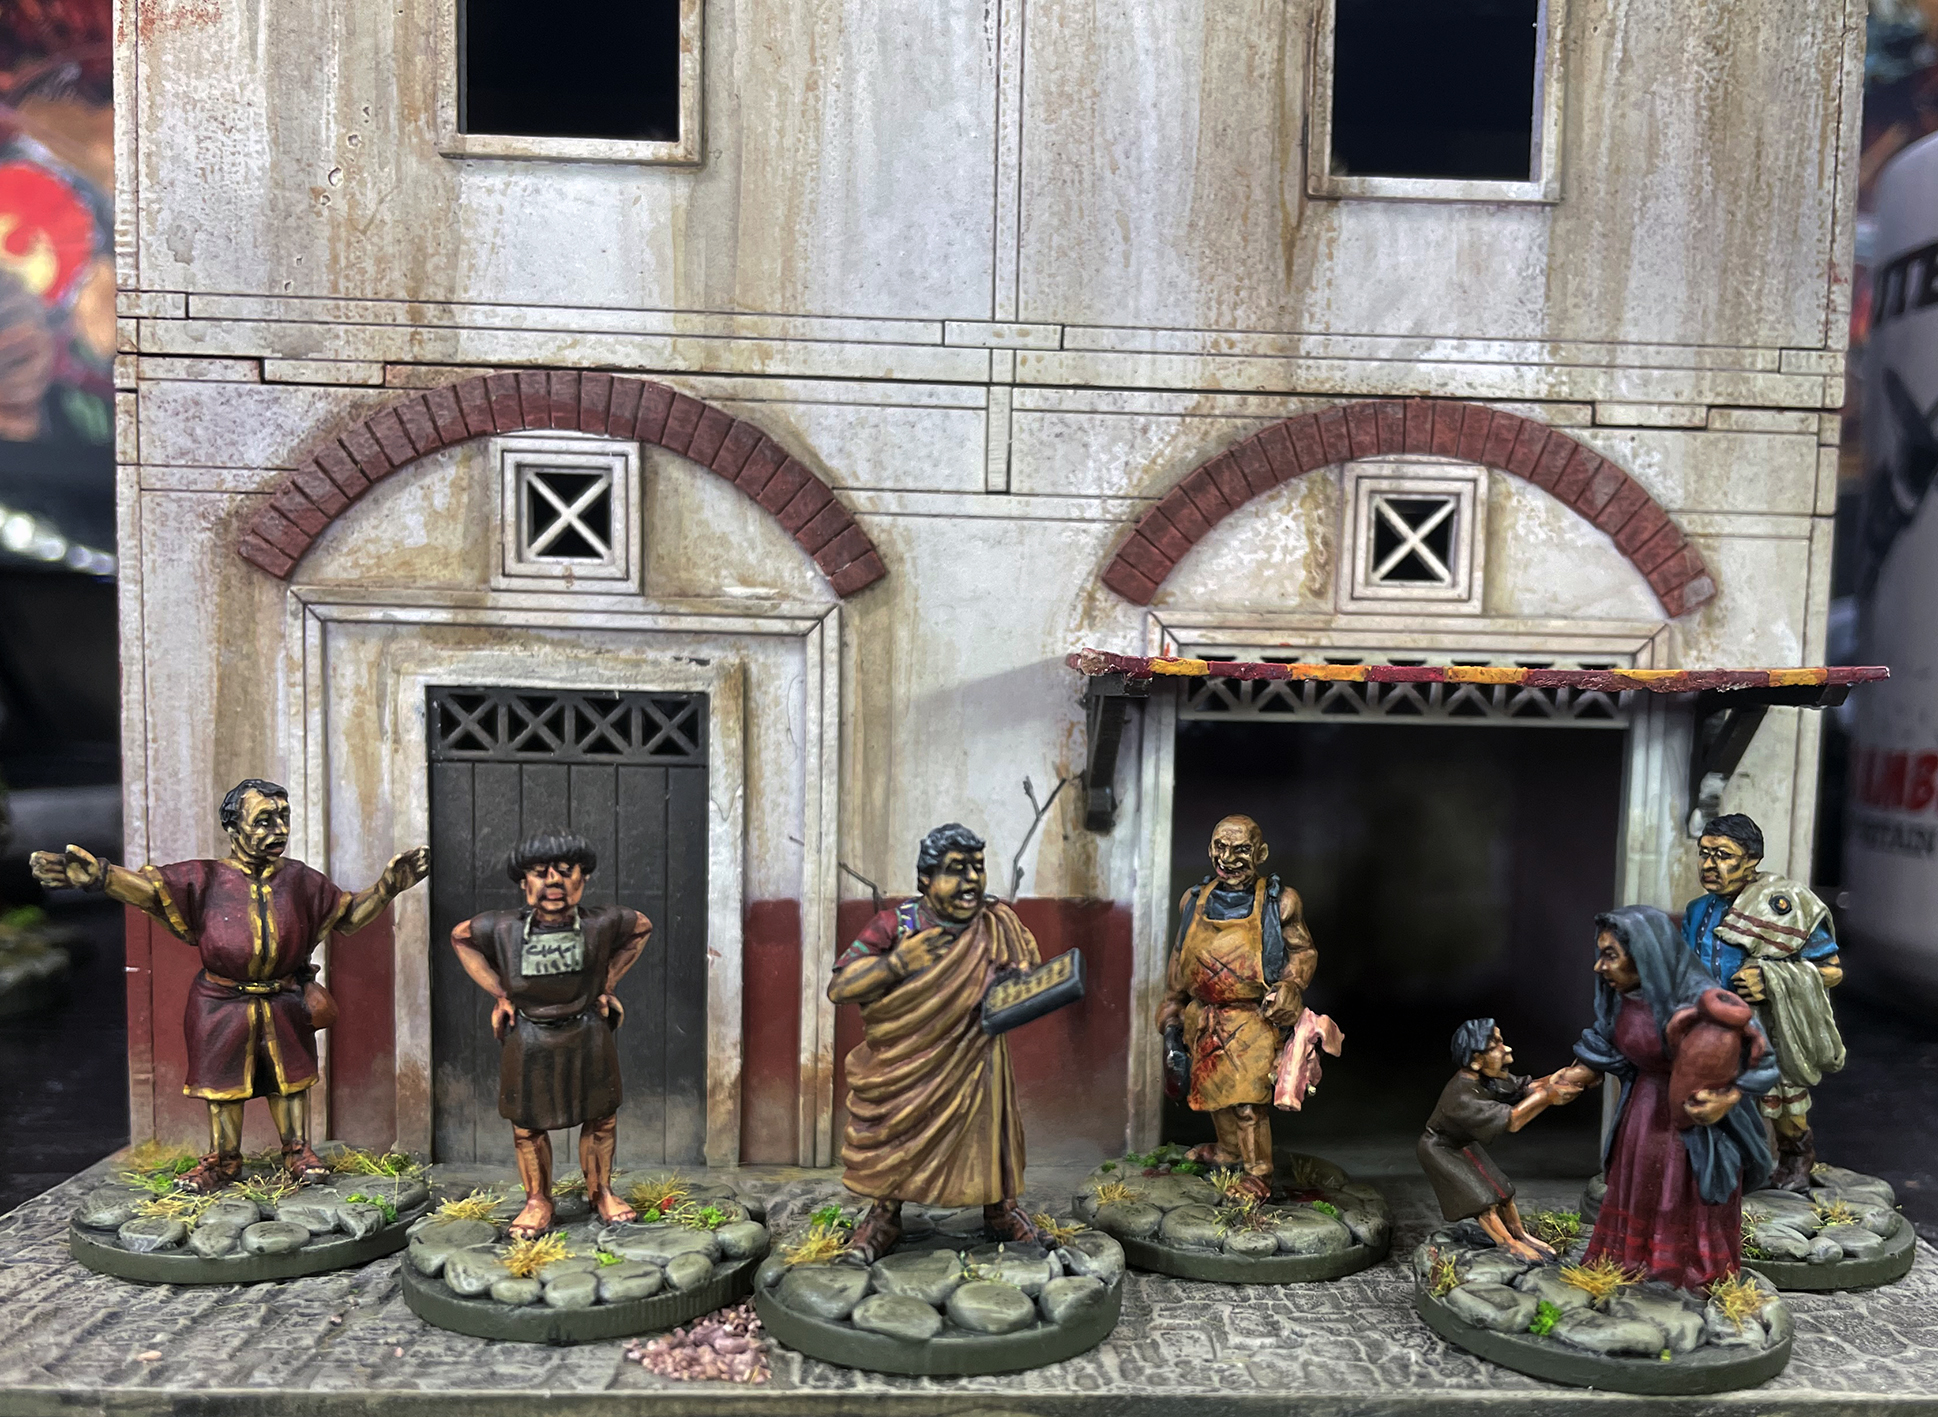
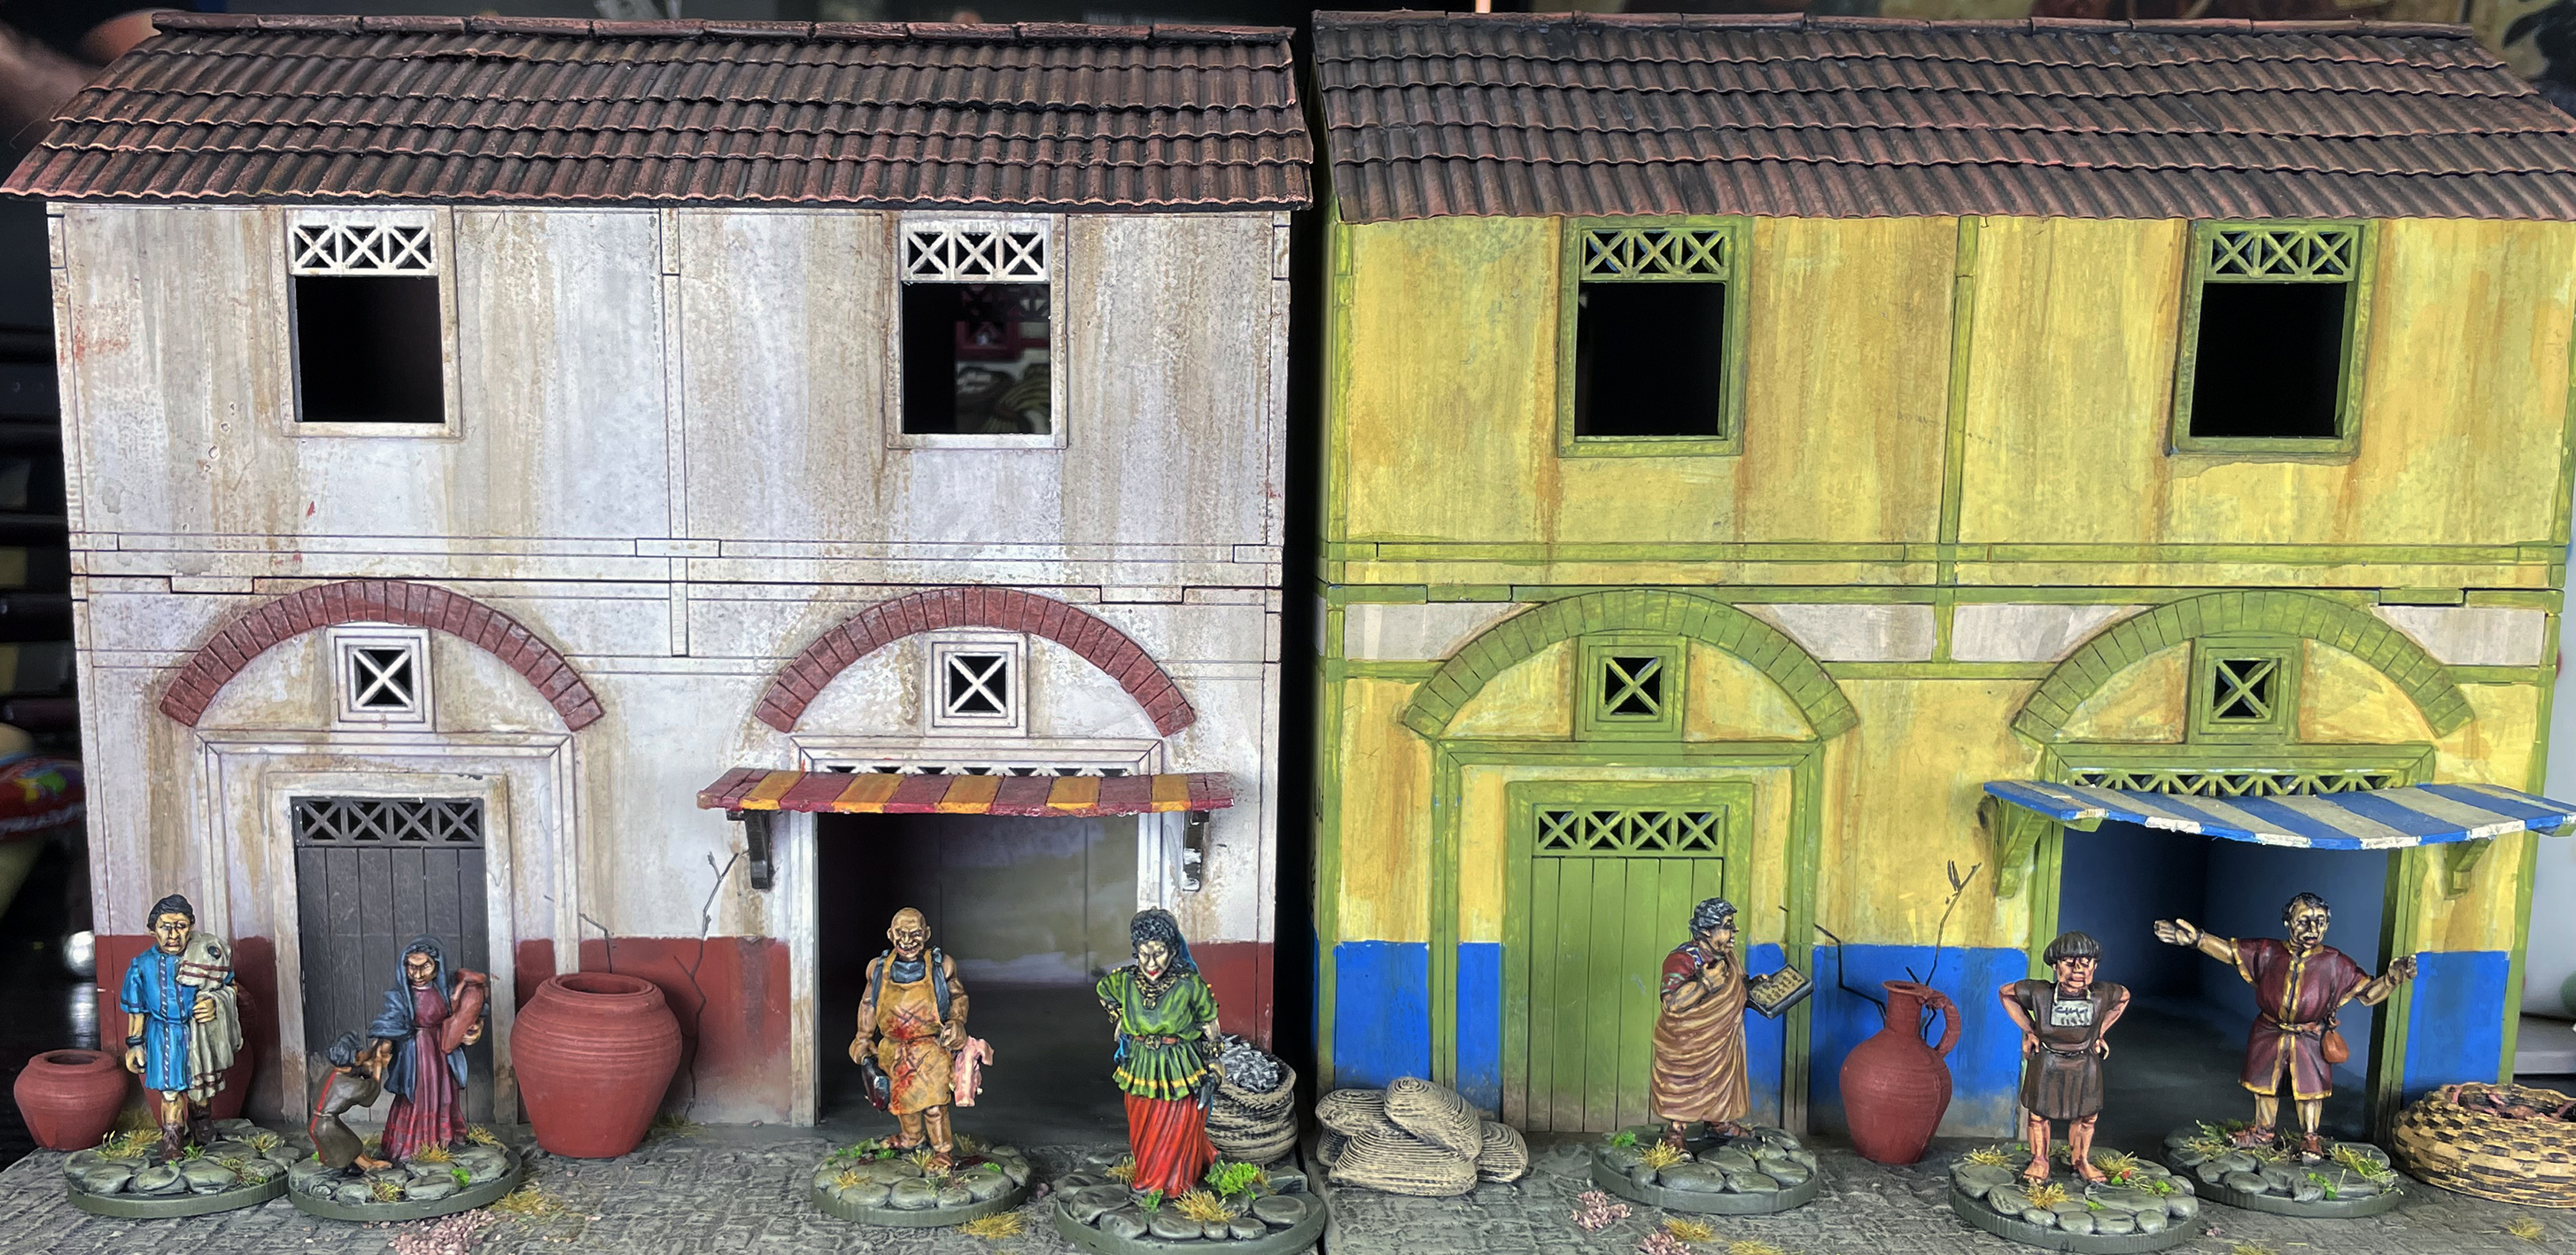
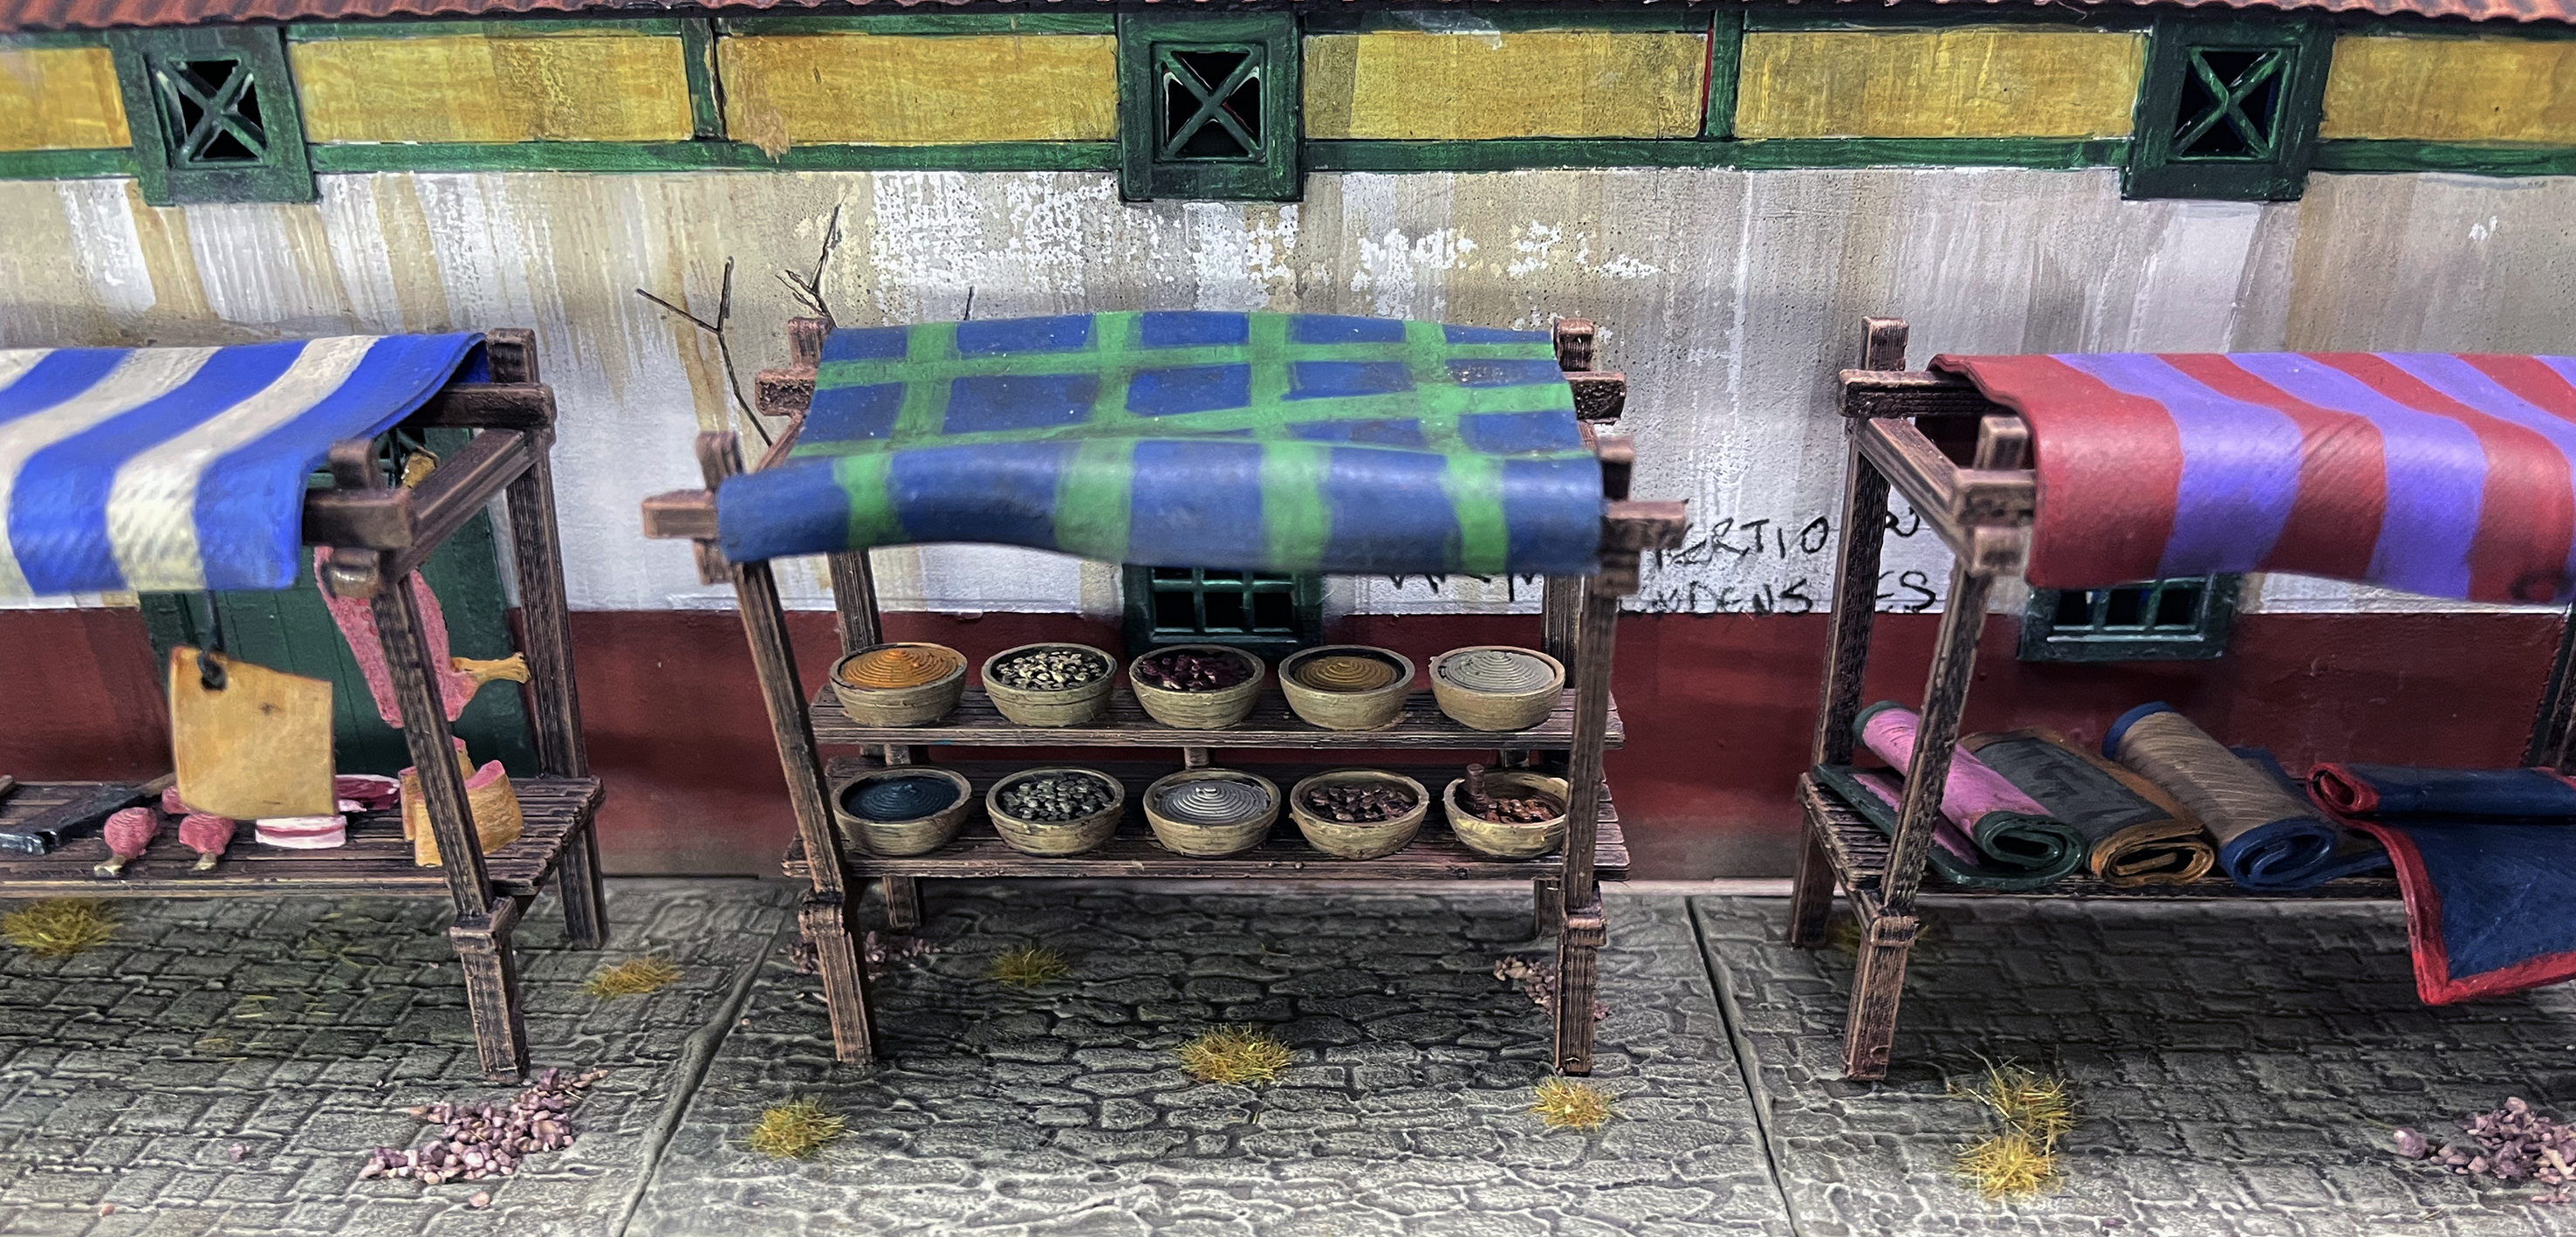
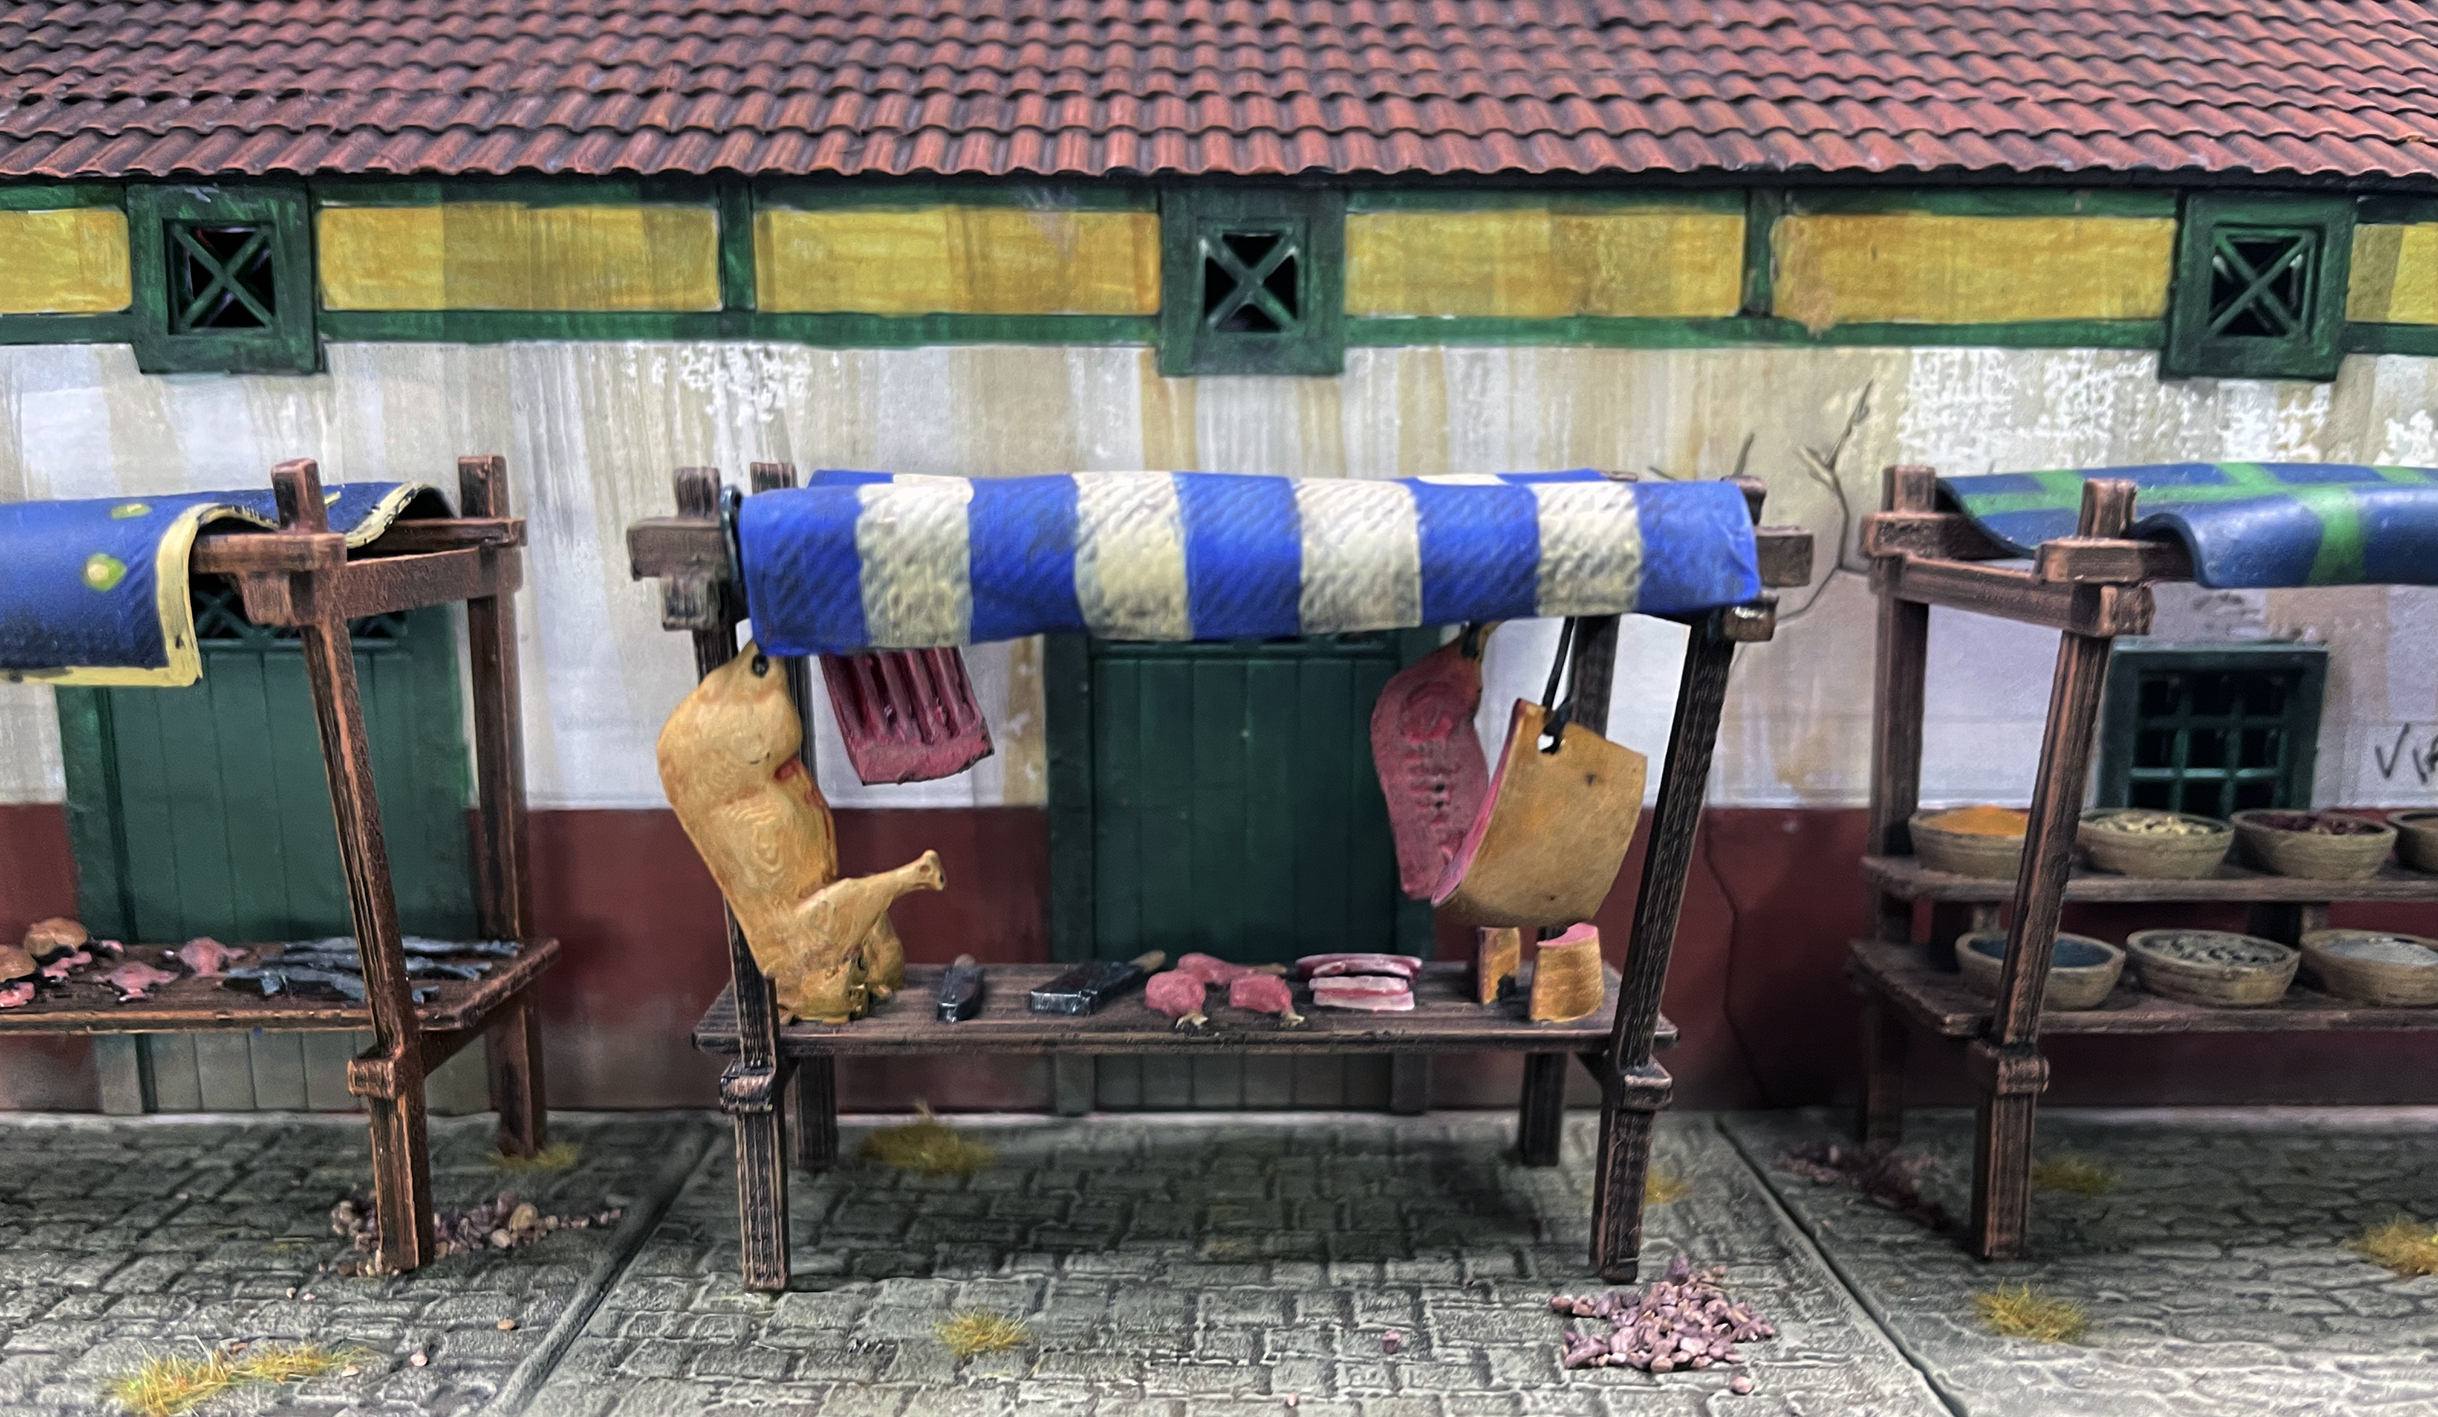
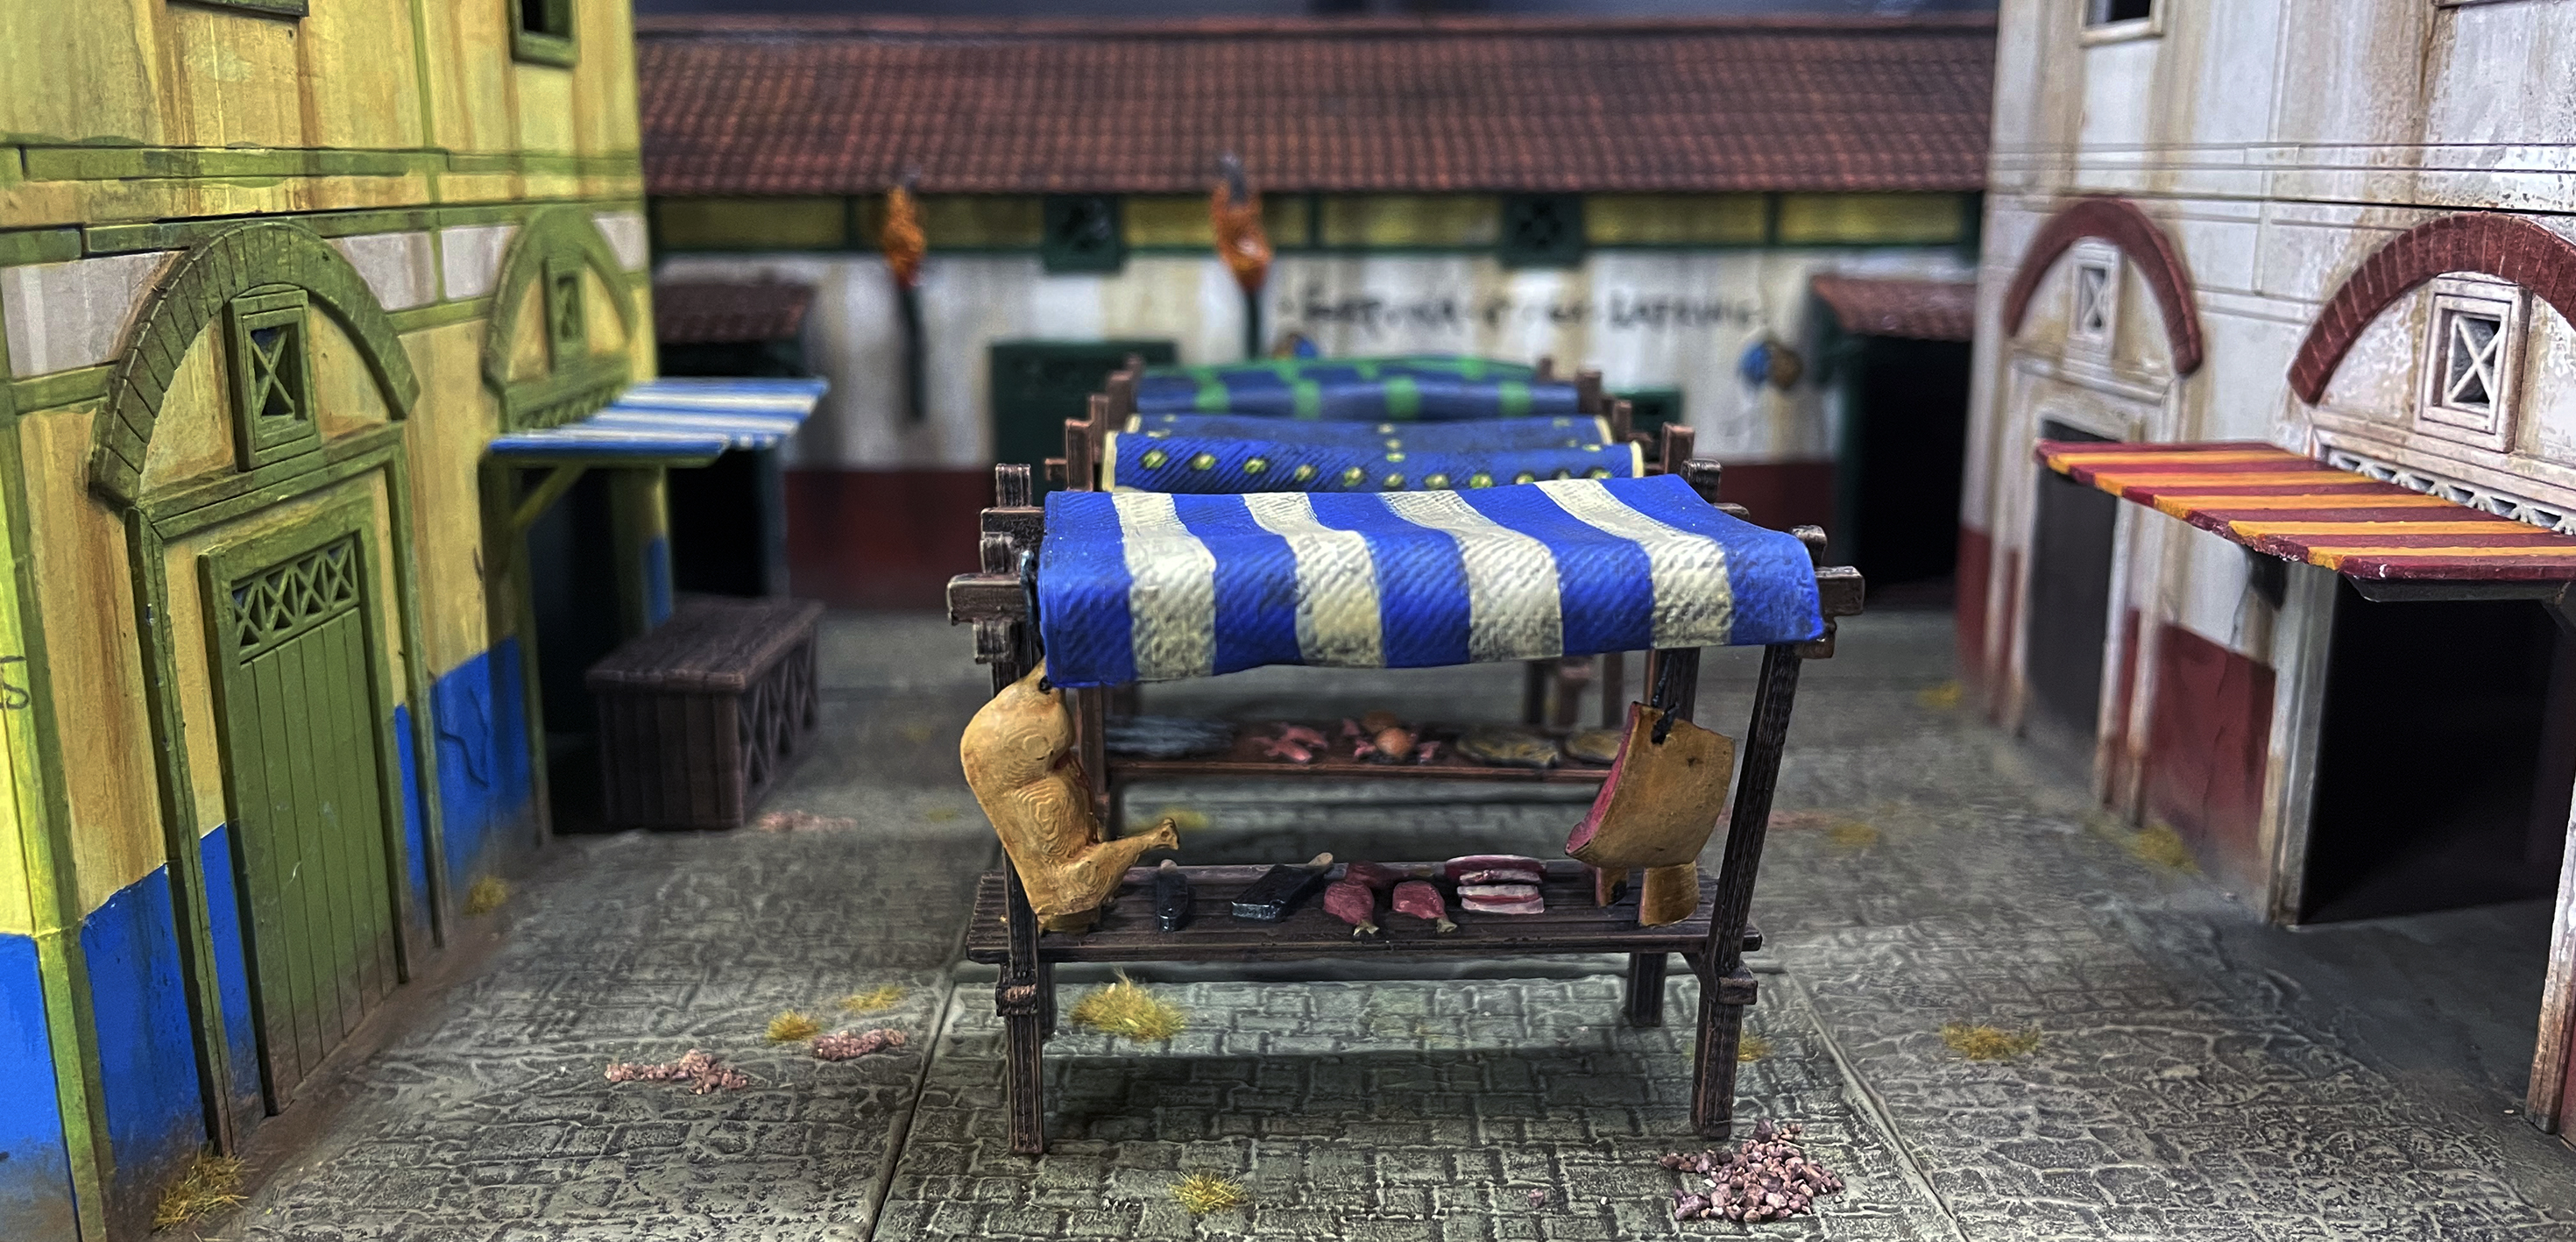
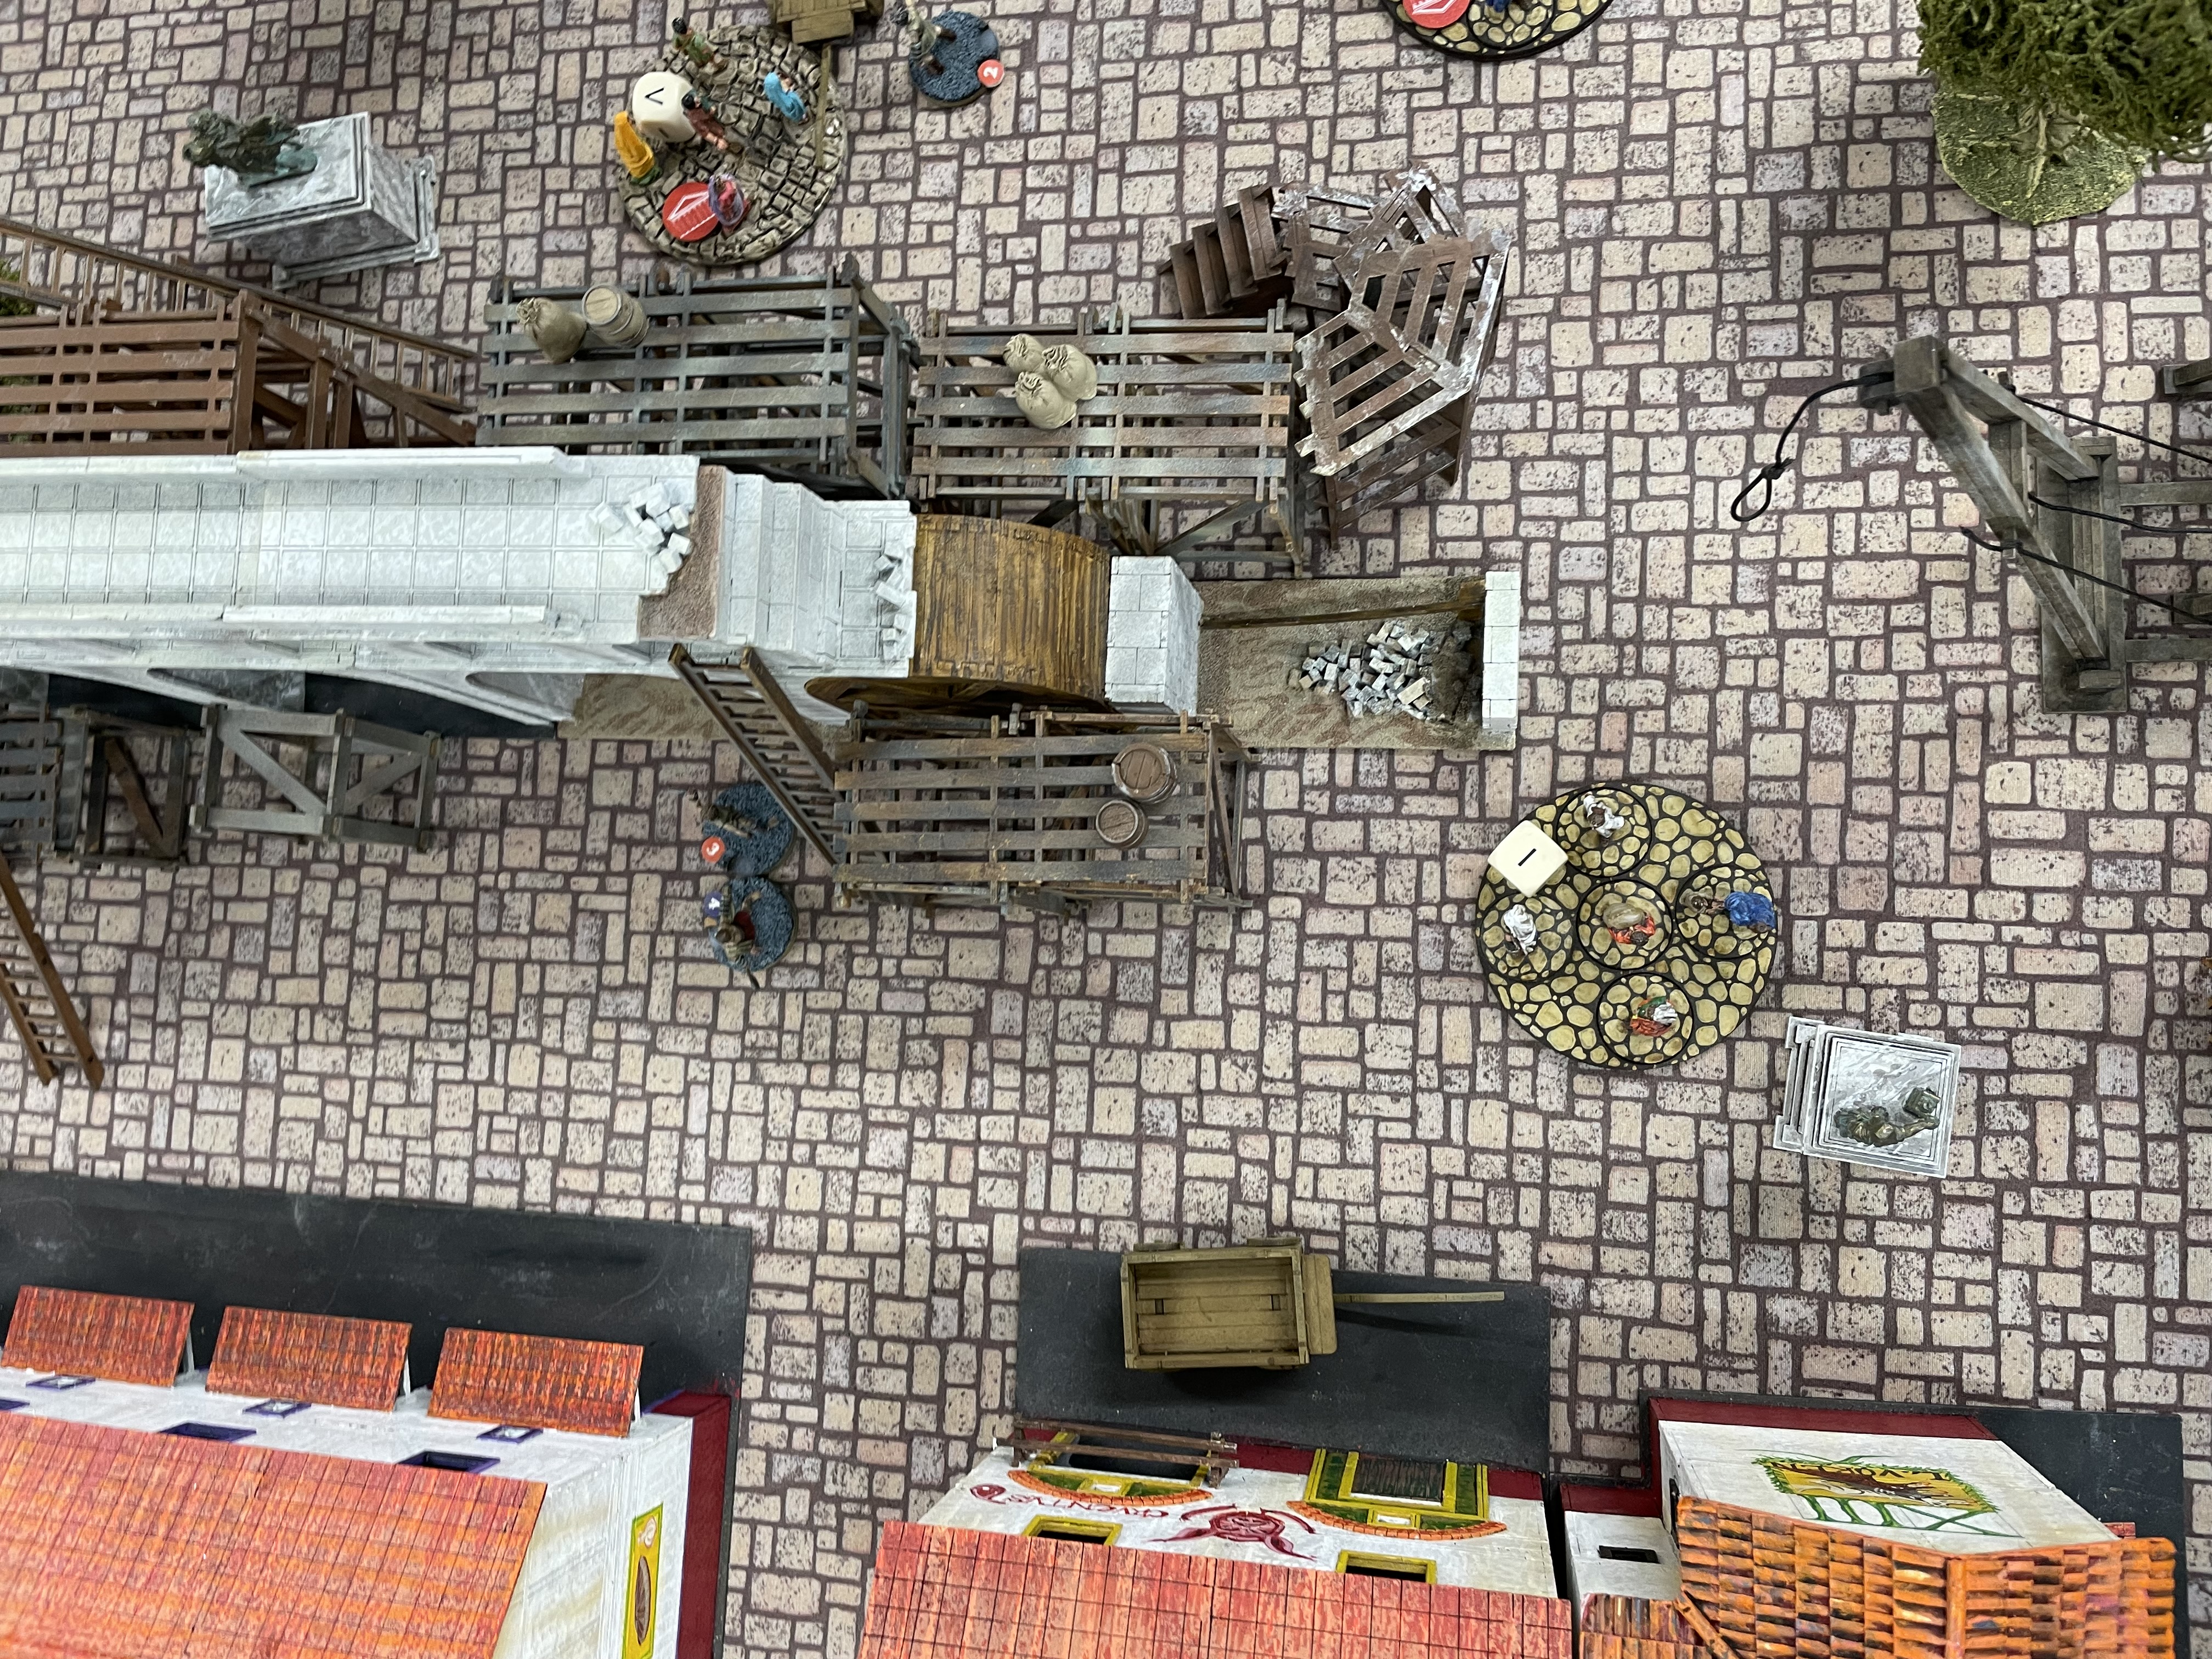
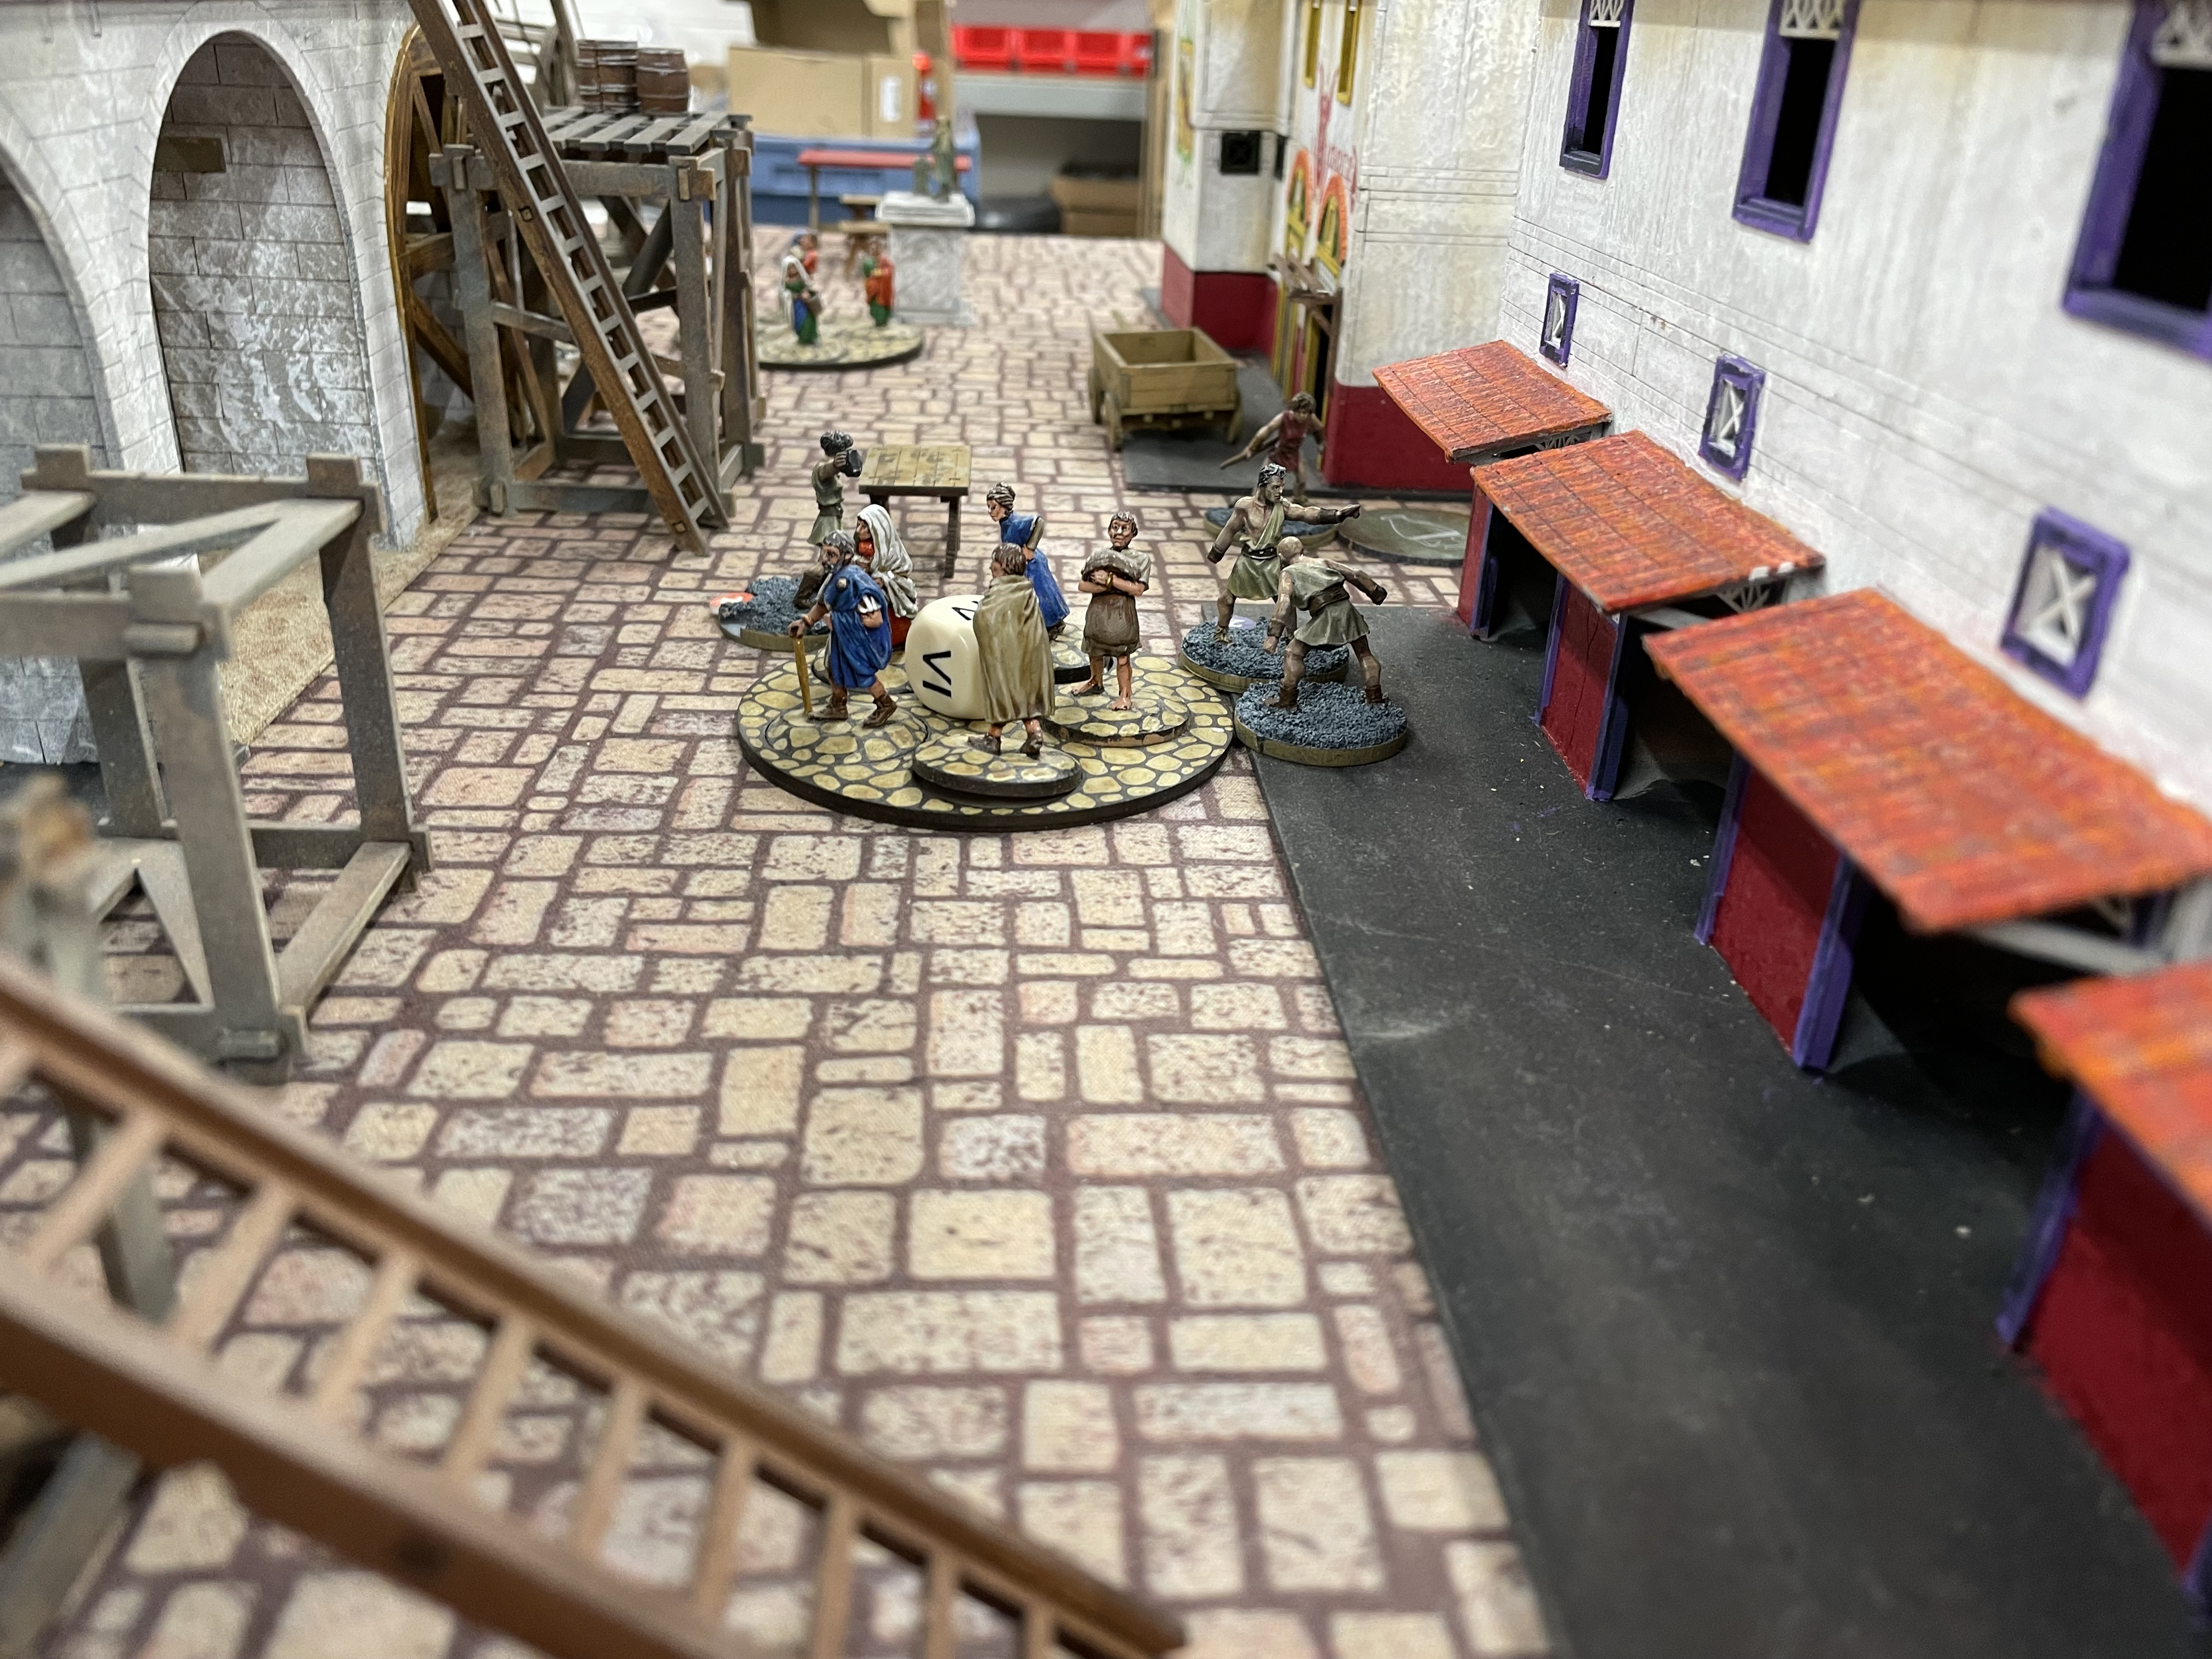
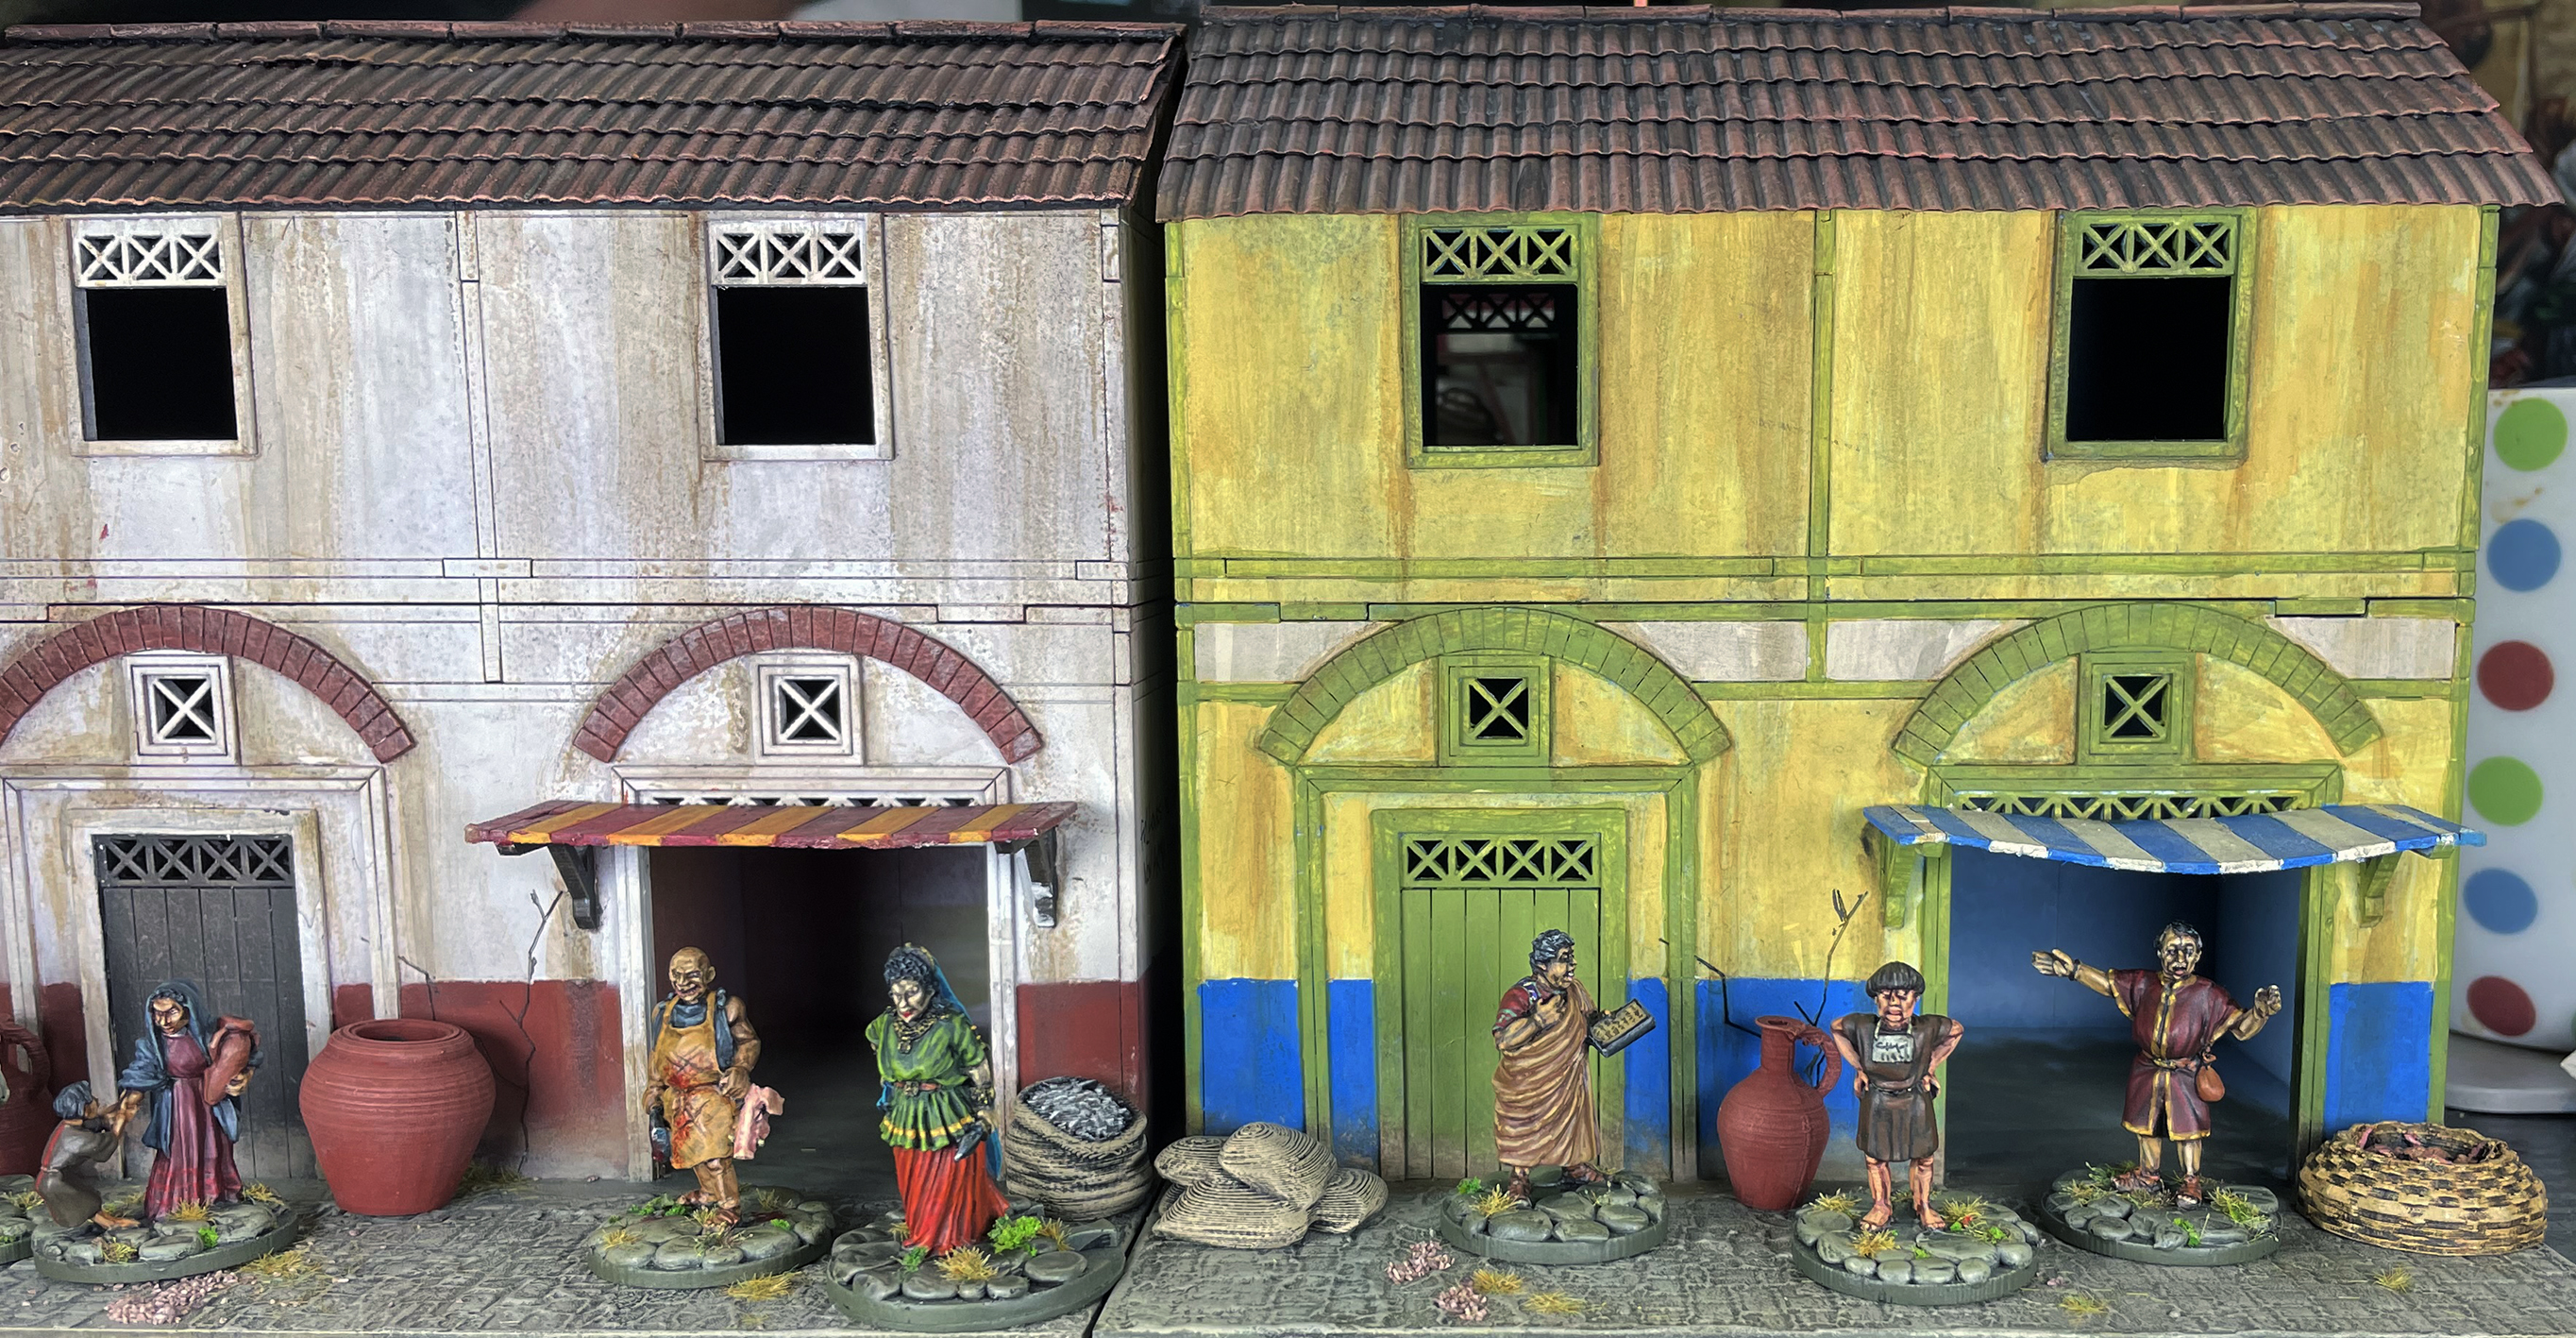
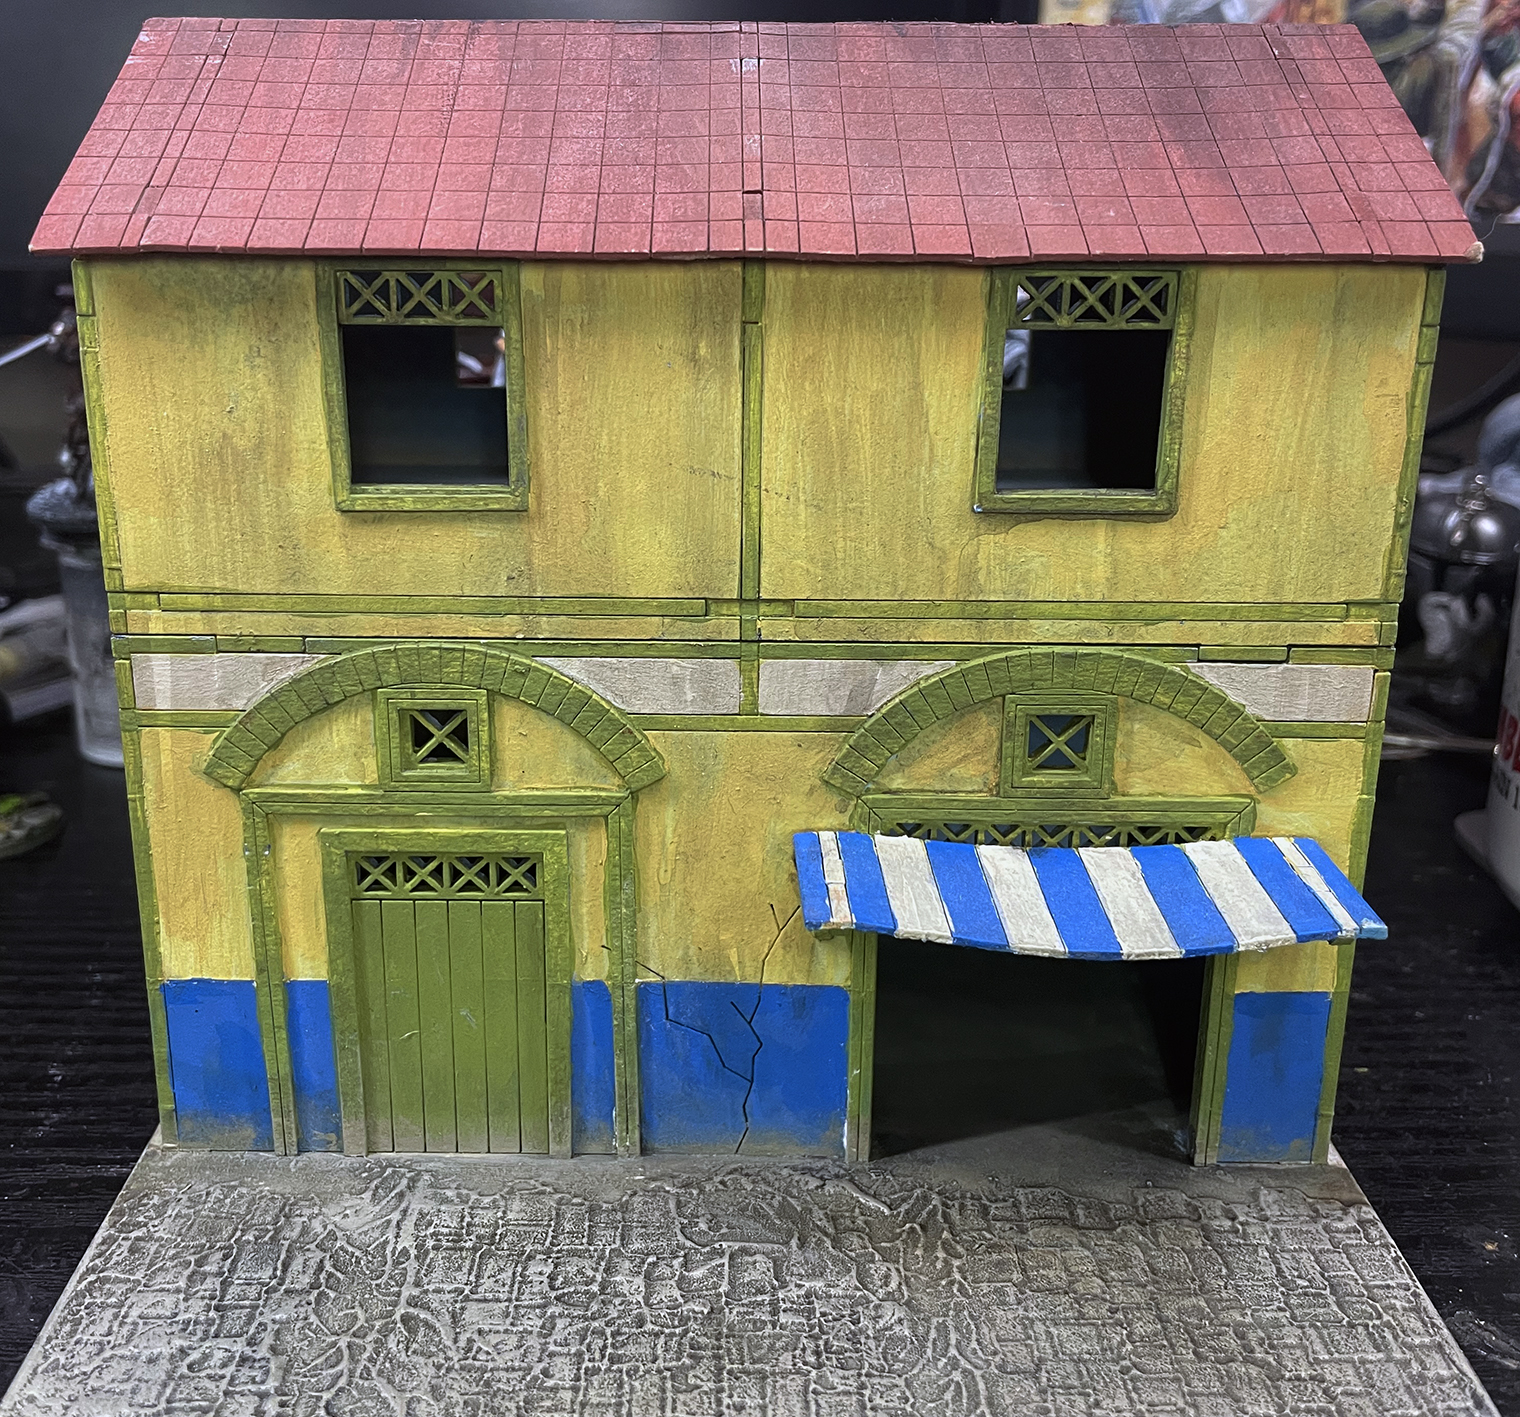
Upgrading Market Stalls
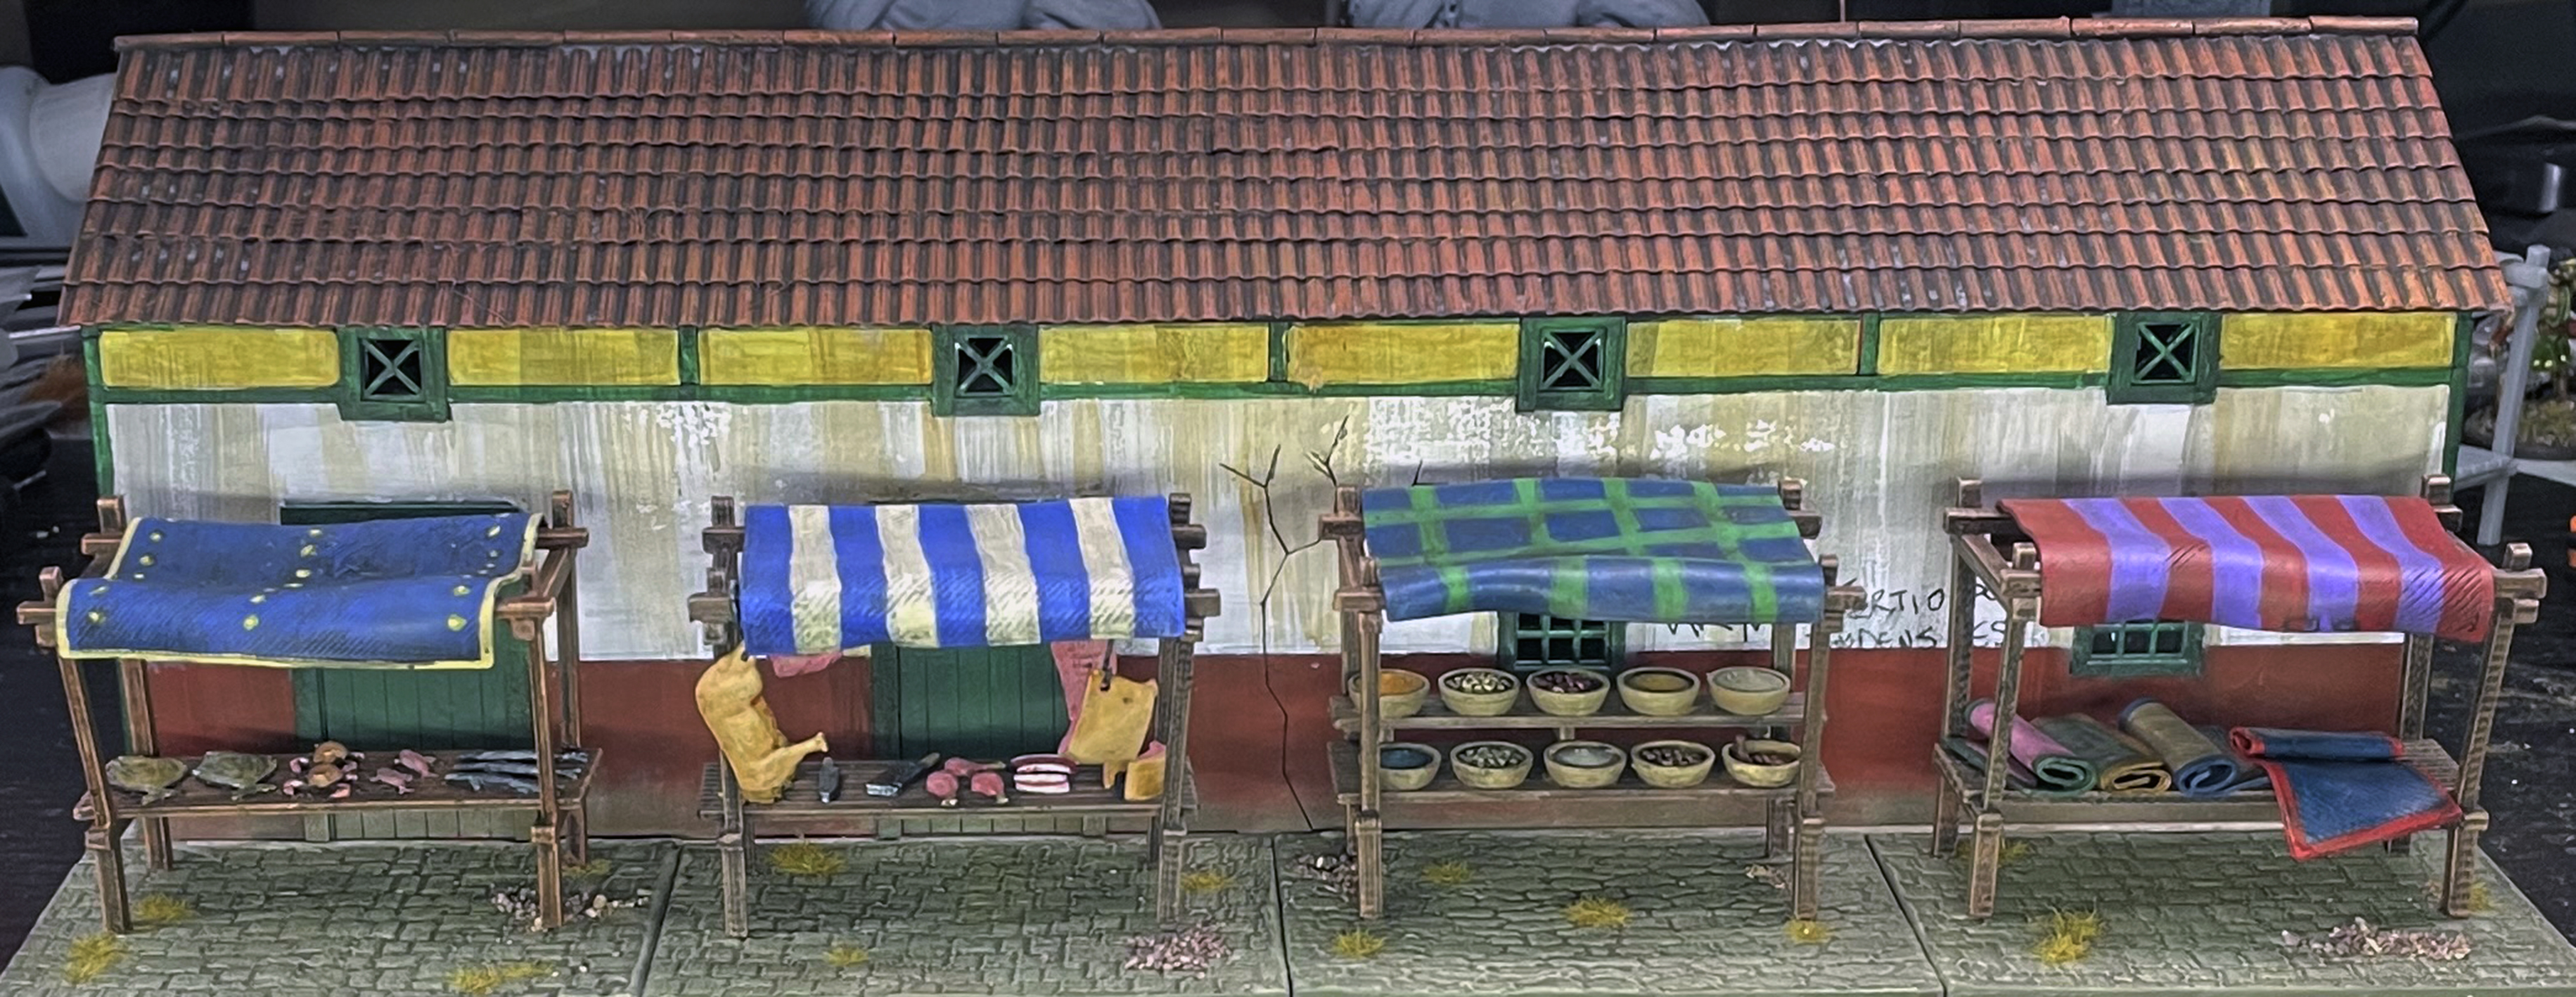
Not just buildings I am upgrading but actually its the whole of my Gangs of Rome collection, so I have decided to show some love to the Market Stalls. Original I decided that I was not going to have them on bases so they can match the mate they are on.
But now after revamping some of the buildings and adding a pavement to the front of the shops, instead of the plain painted front I did before I have opted for the same for these.
So I used the Sarissa Stencil System, smoothing a polyfiller/PVA mix through the stencils and painted them to match the pavements in front of the buildings. I have it was the right thing to do as it brings some stability to the stalls and also means I can now add some other boxes and stuff to the bases.
The Market Stalls are 3D prints from Iron Gate Scenery


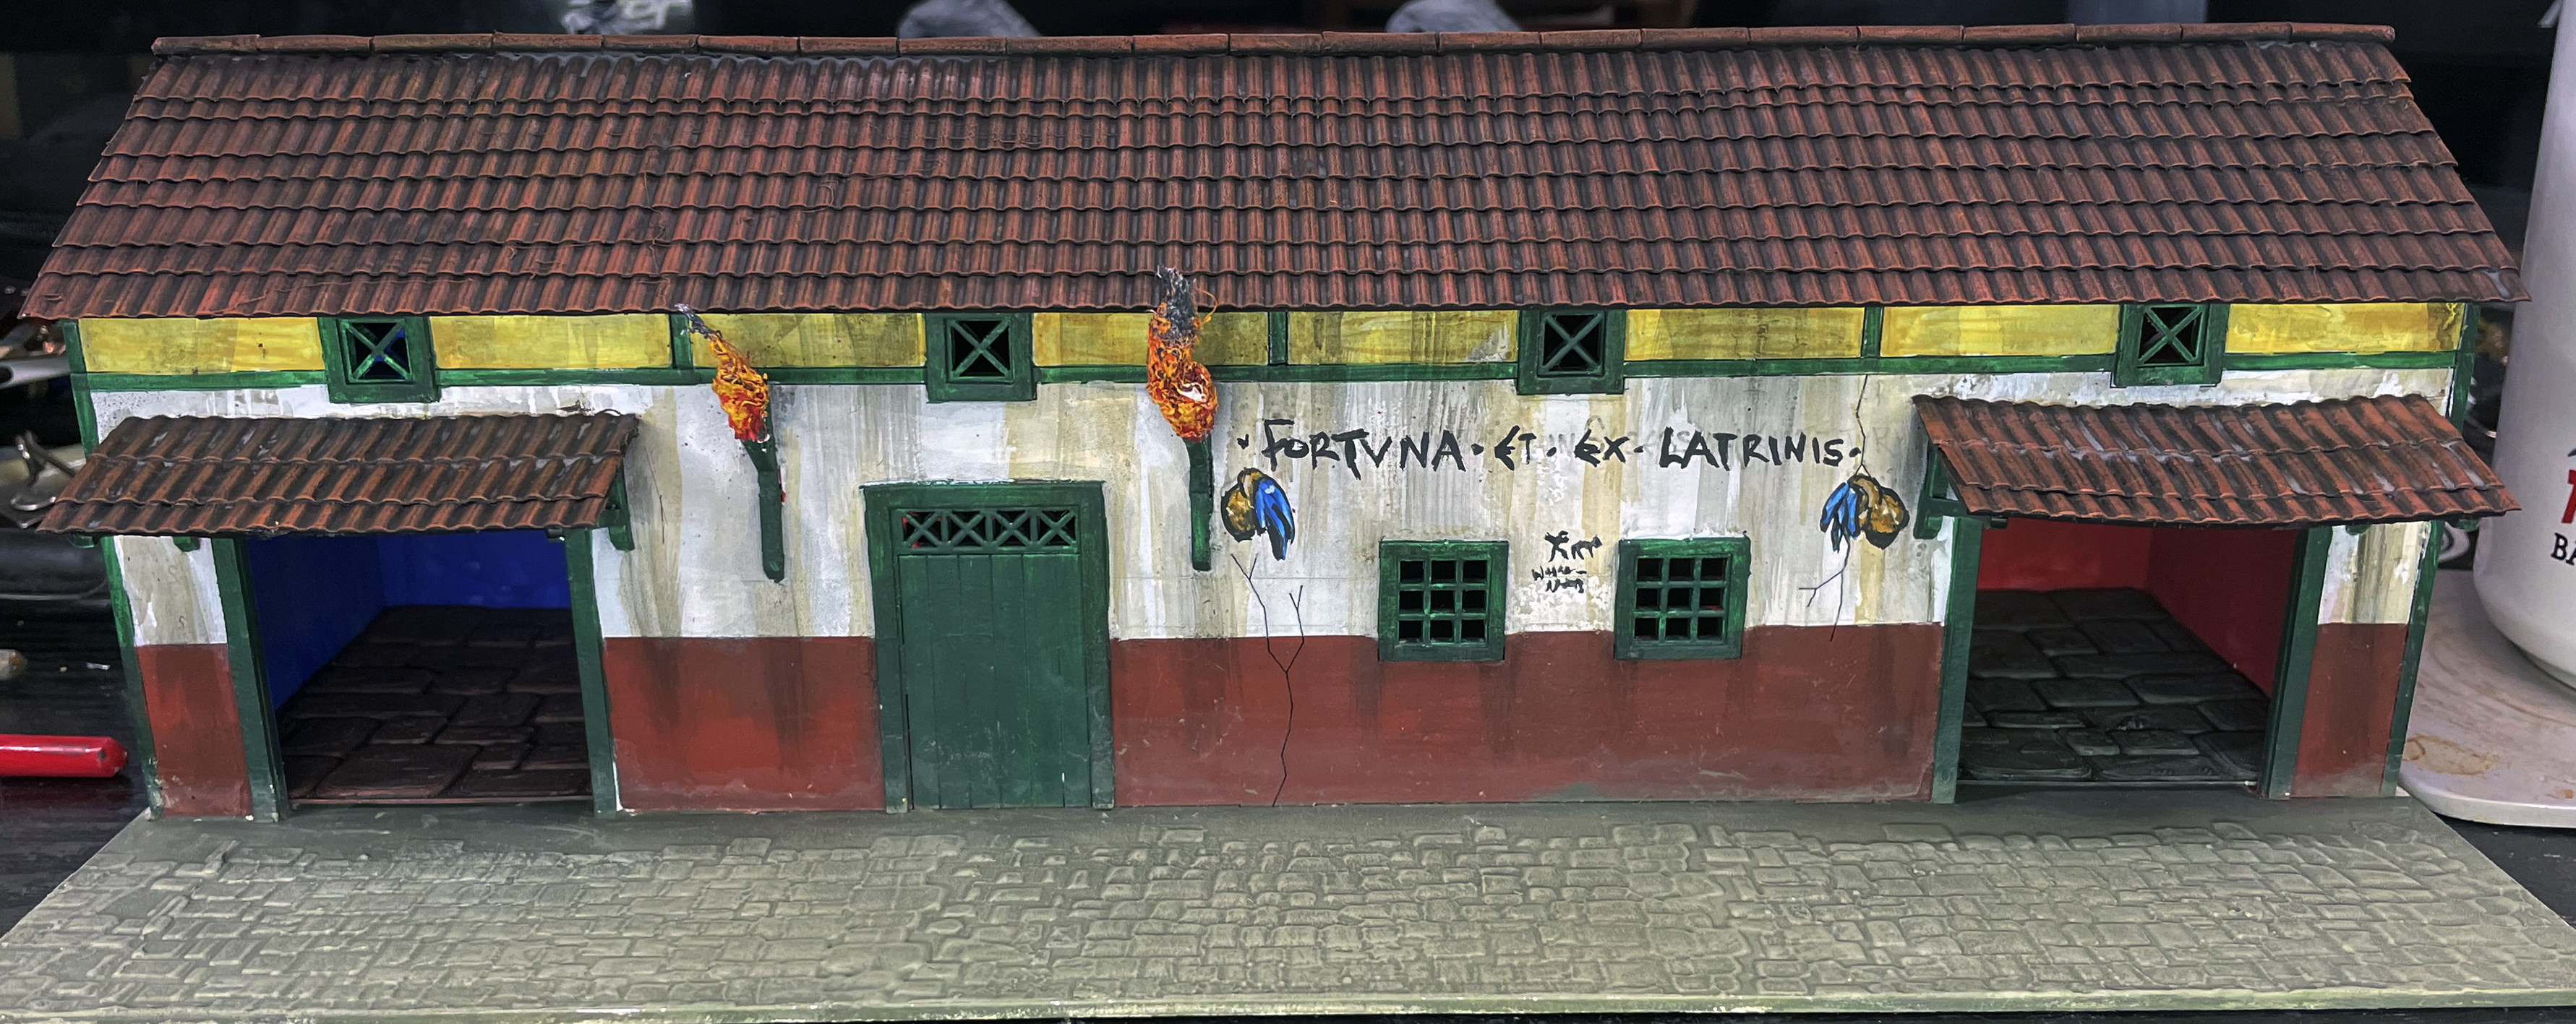
Upgrading and Revamping the inside of the The Foricae
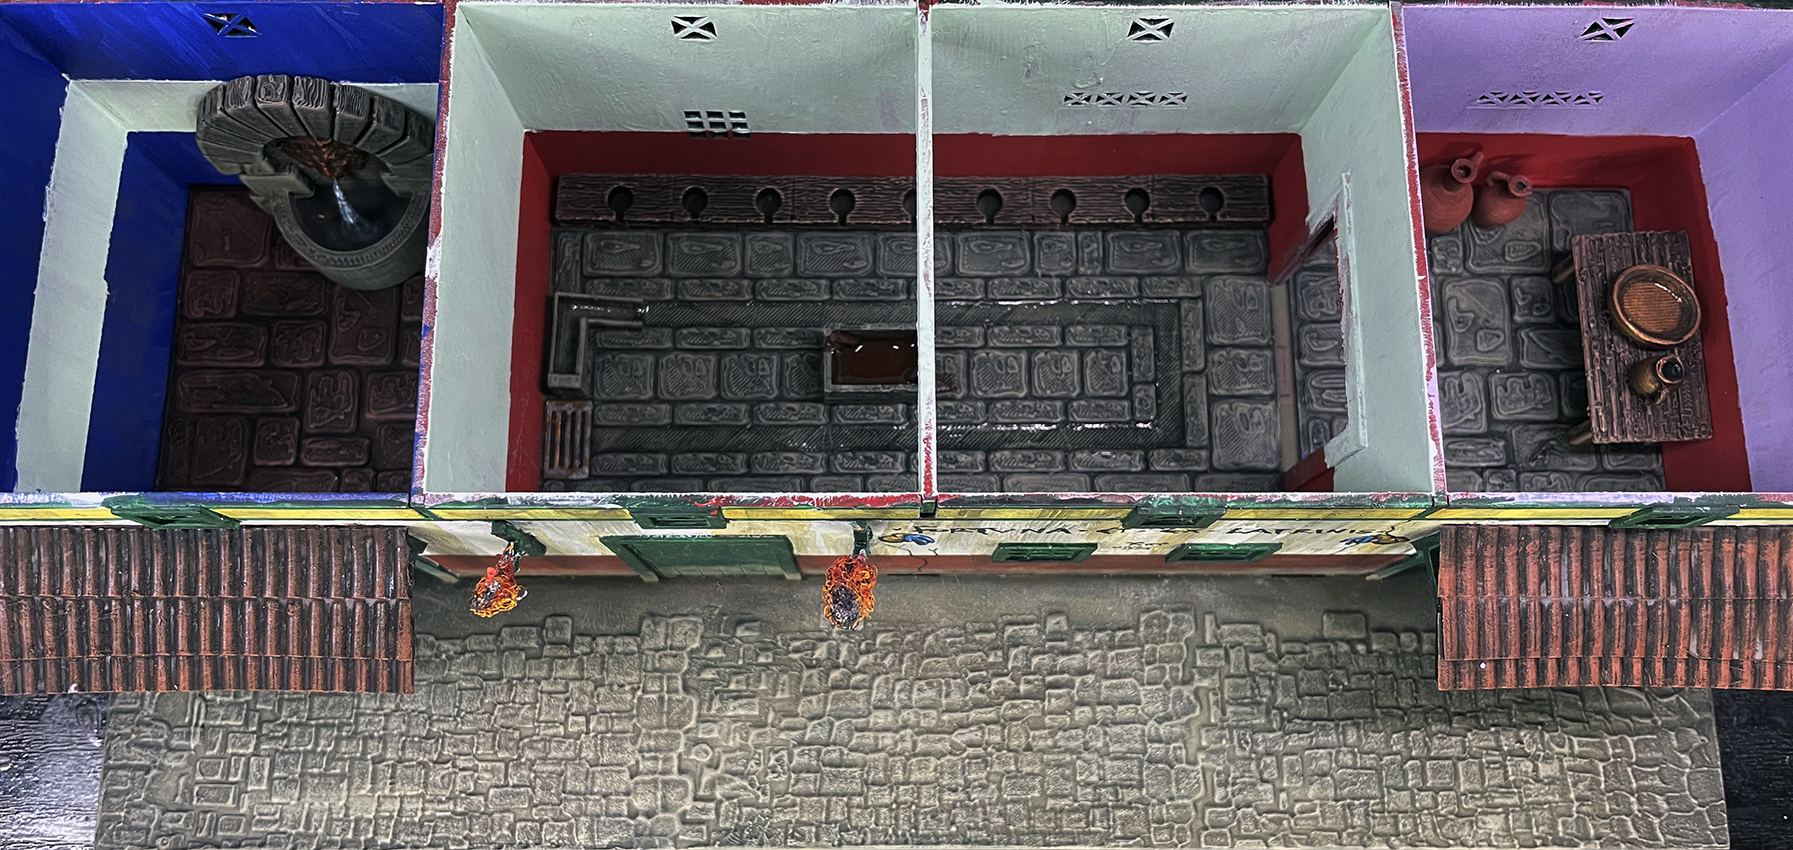 Roman Plumbing
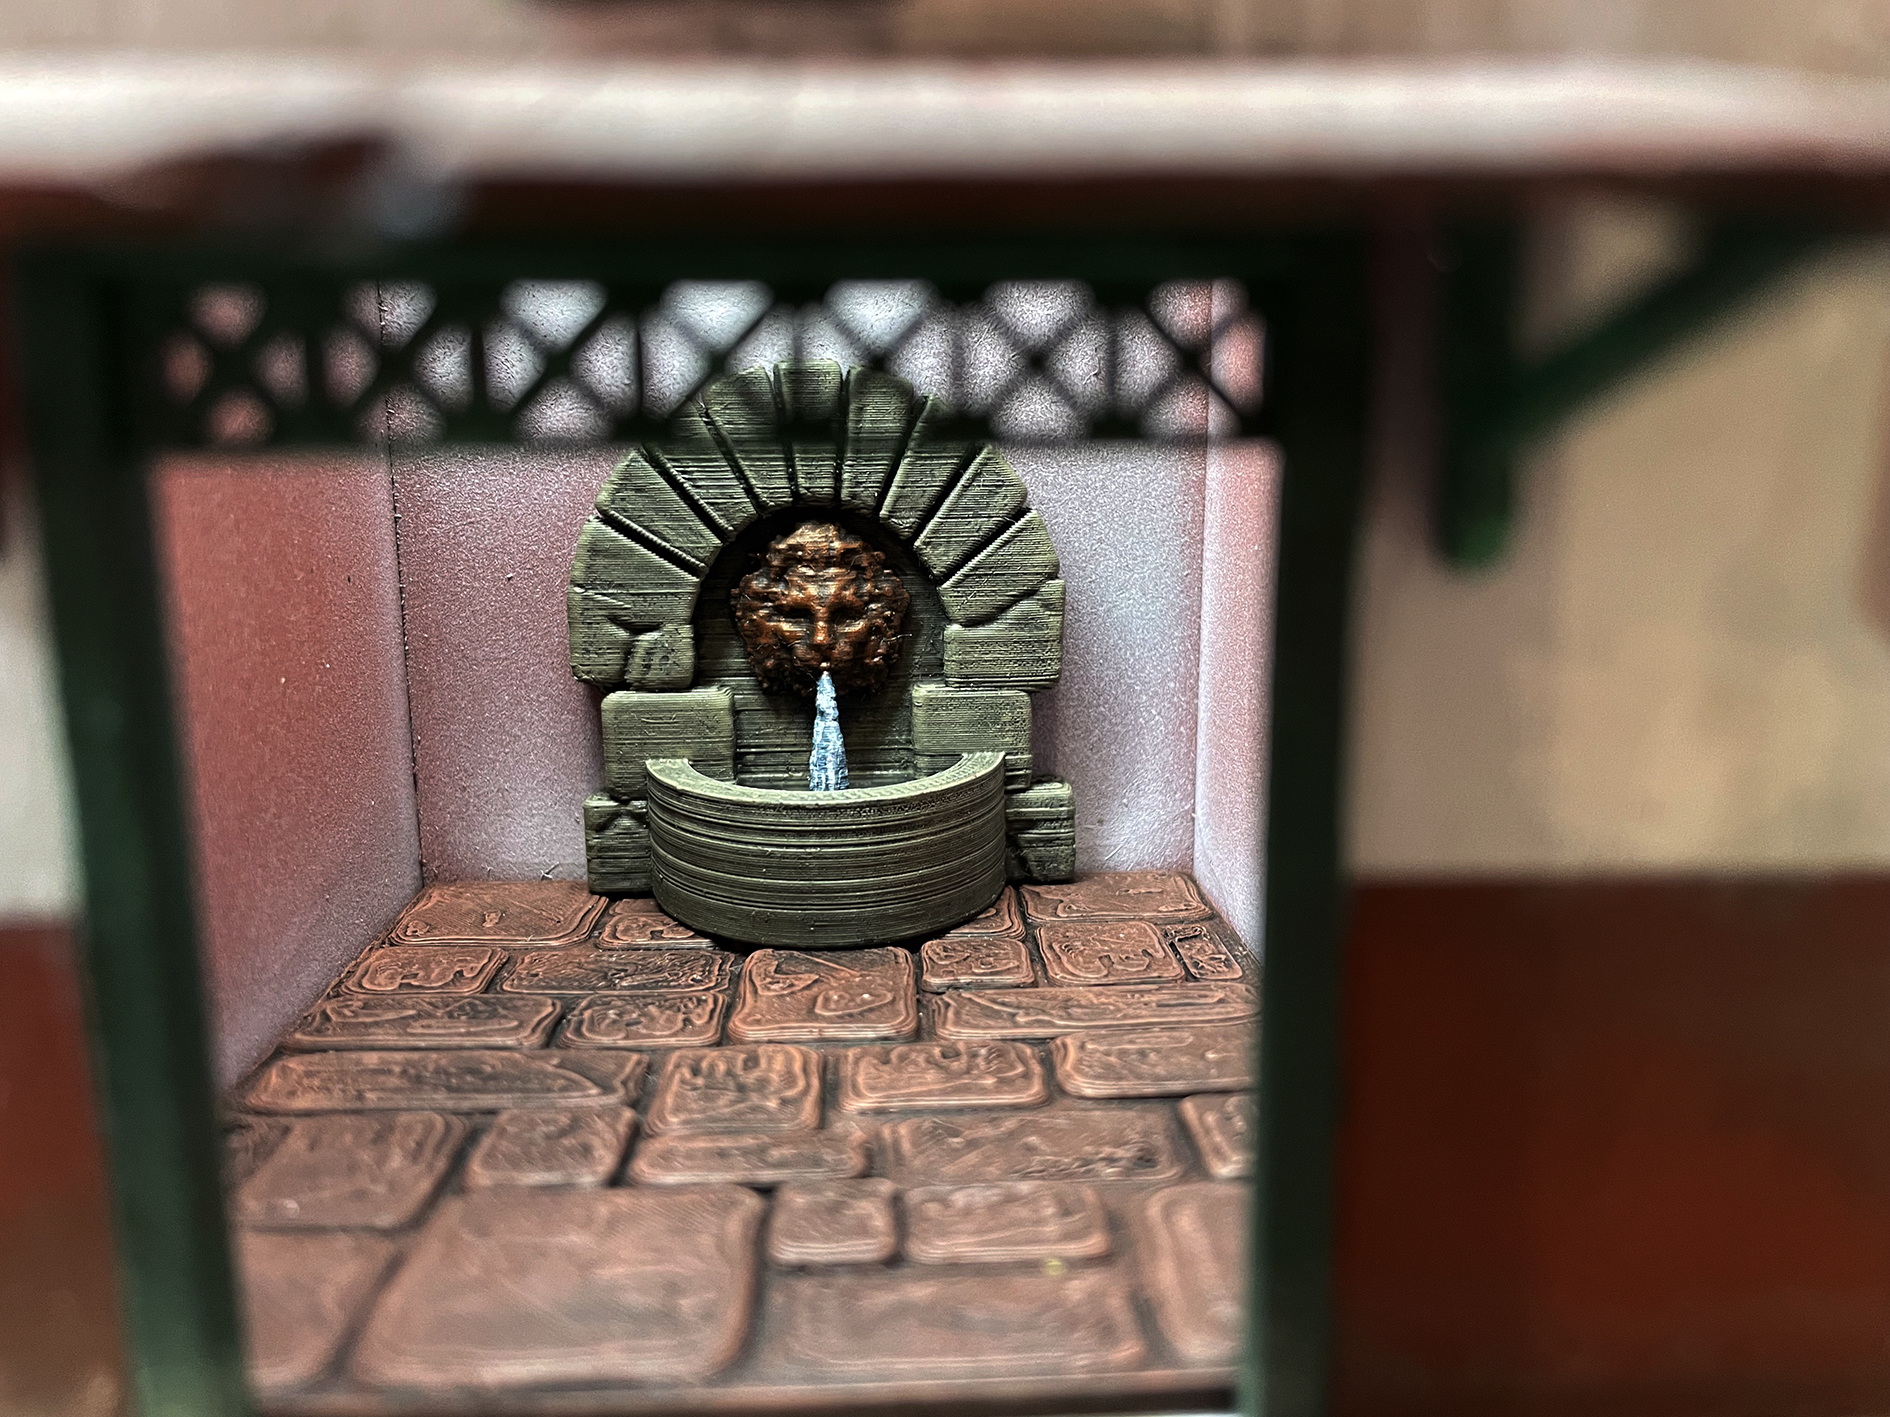
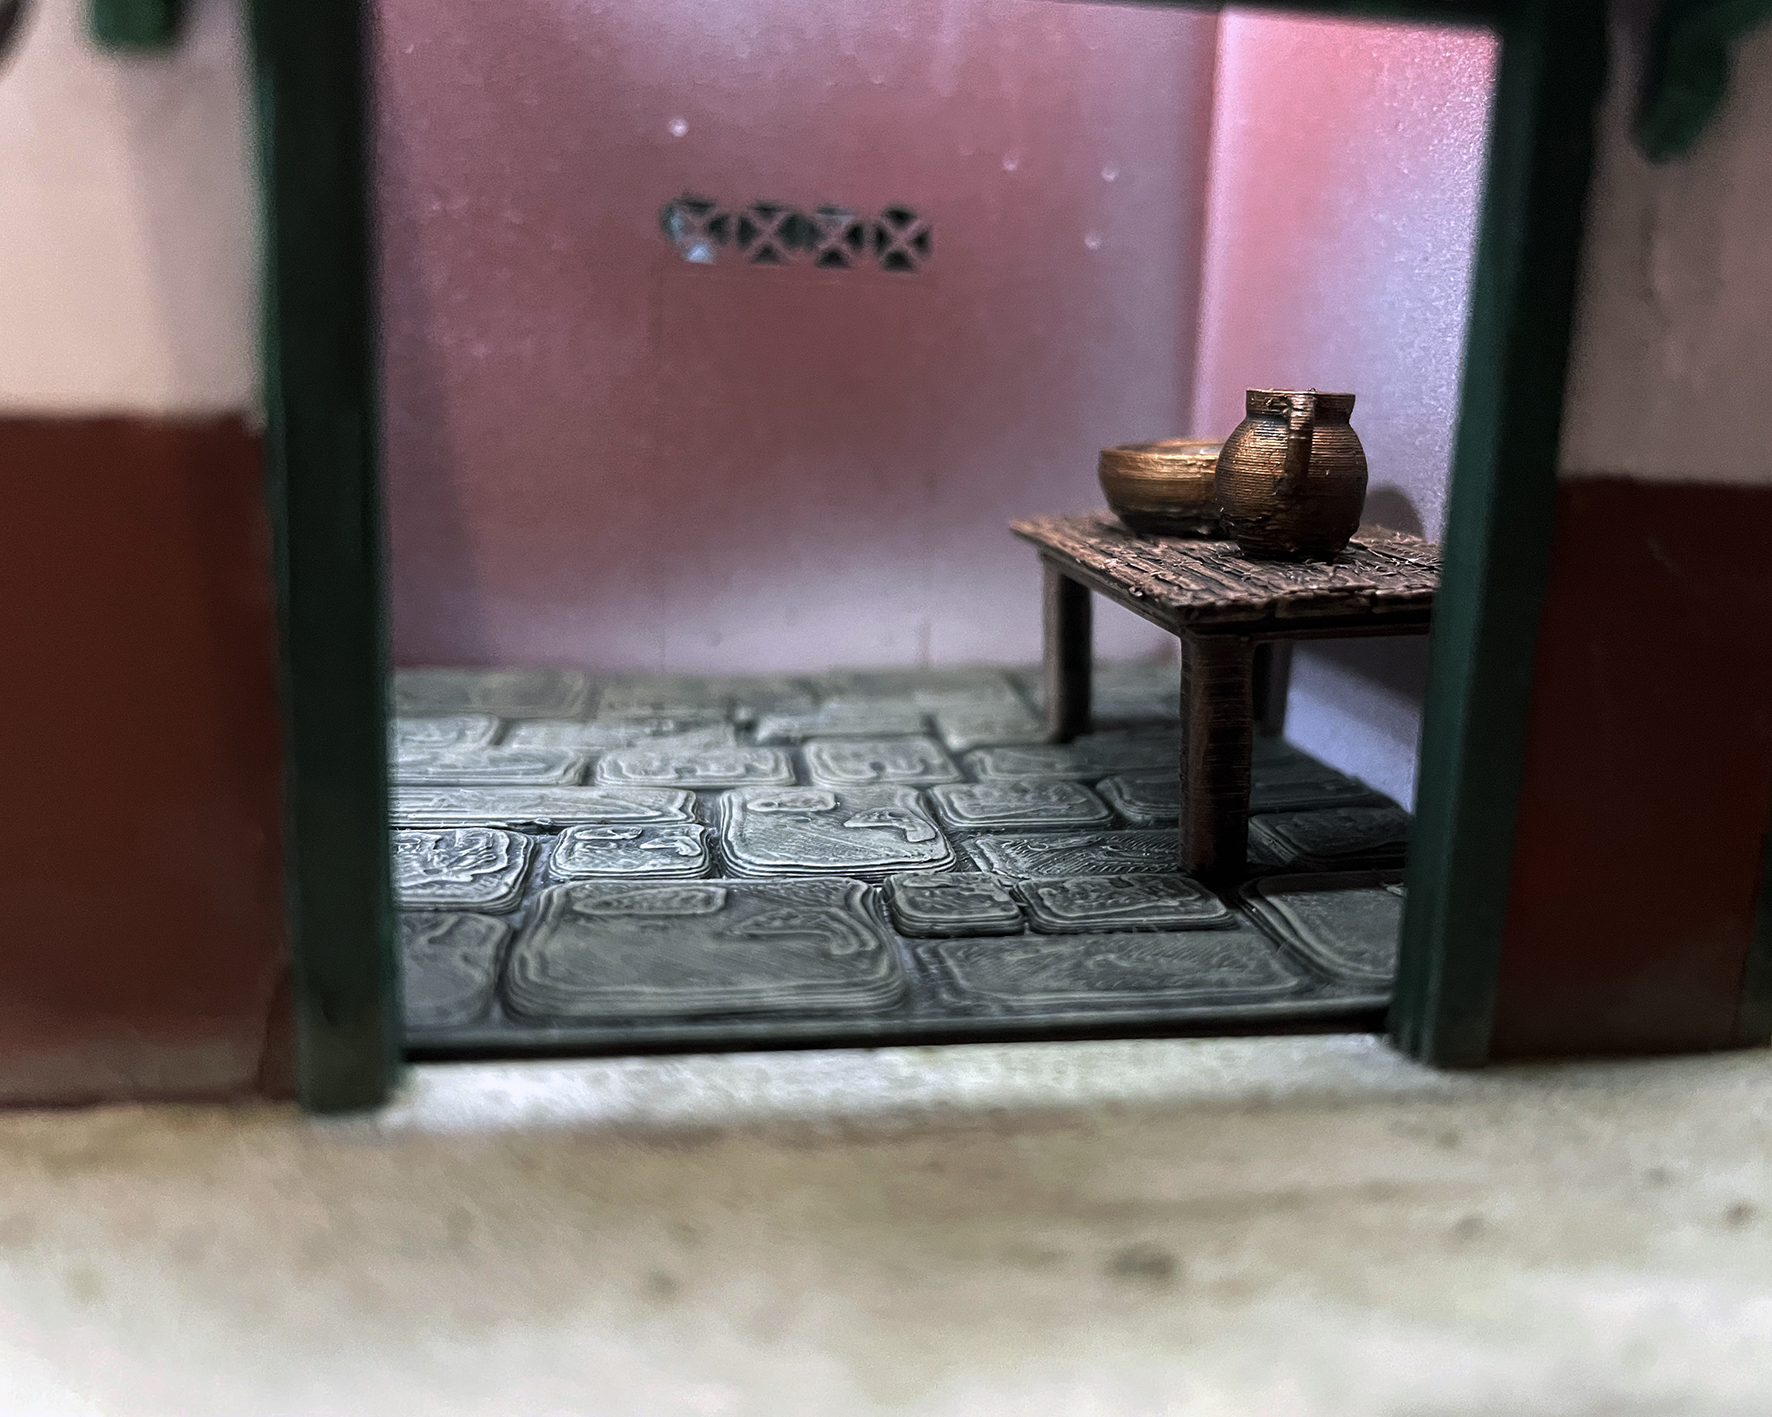
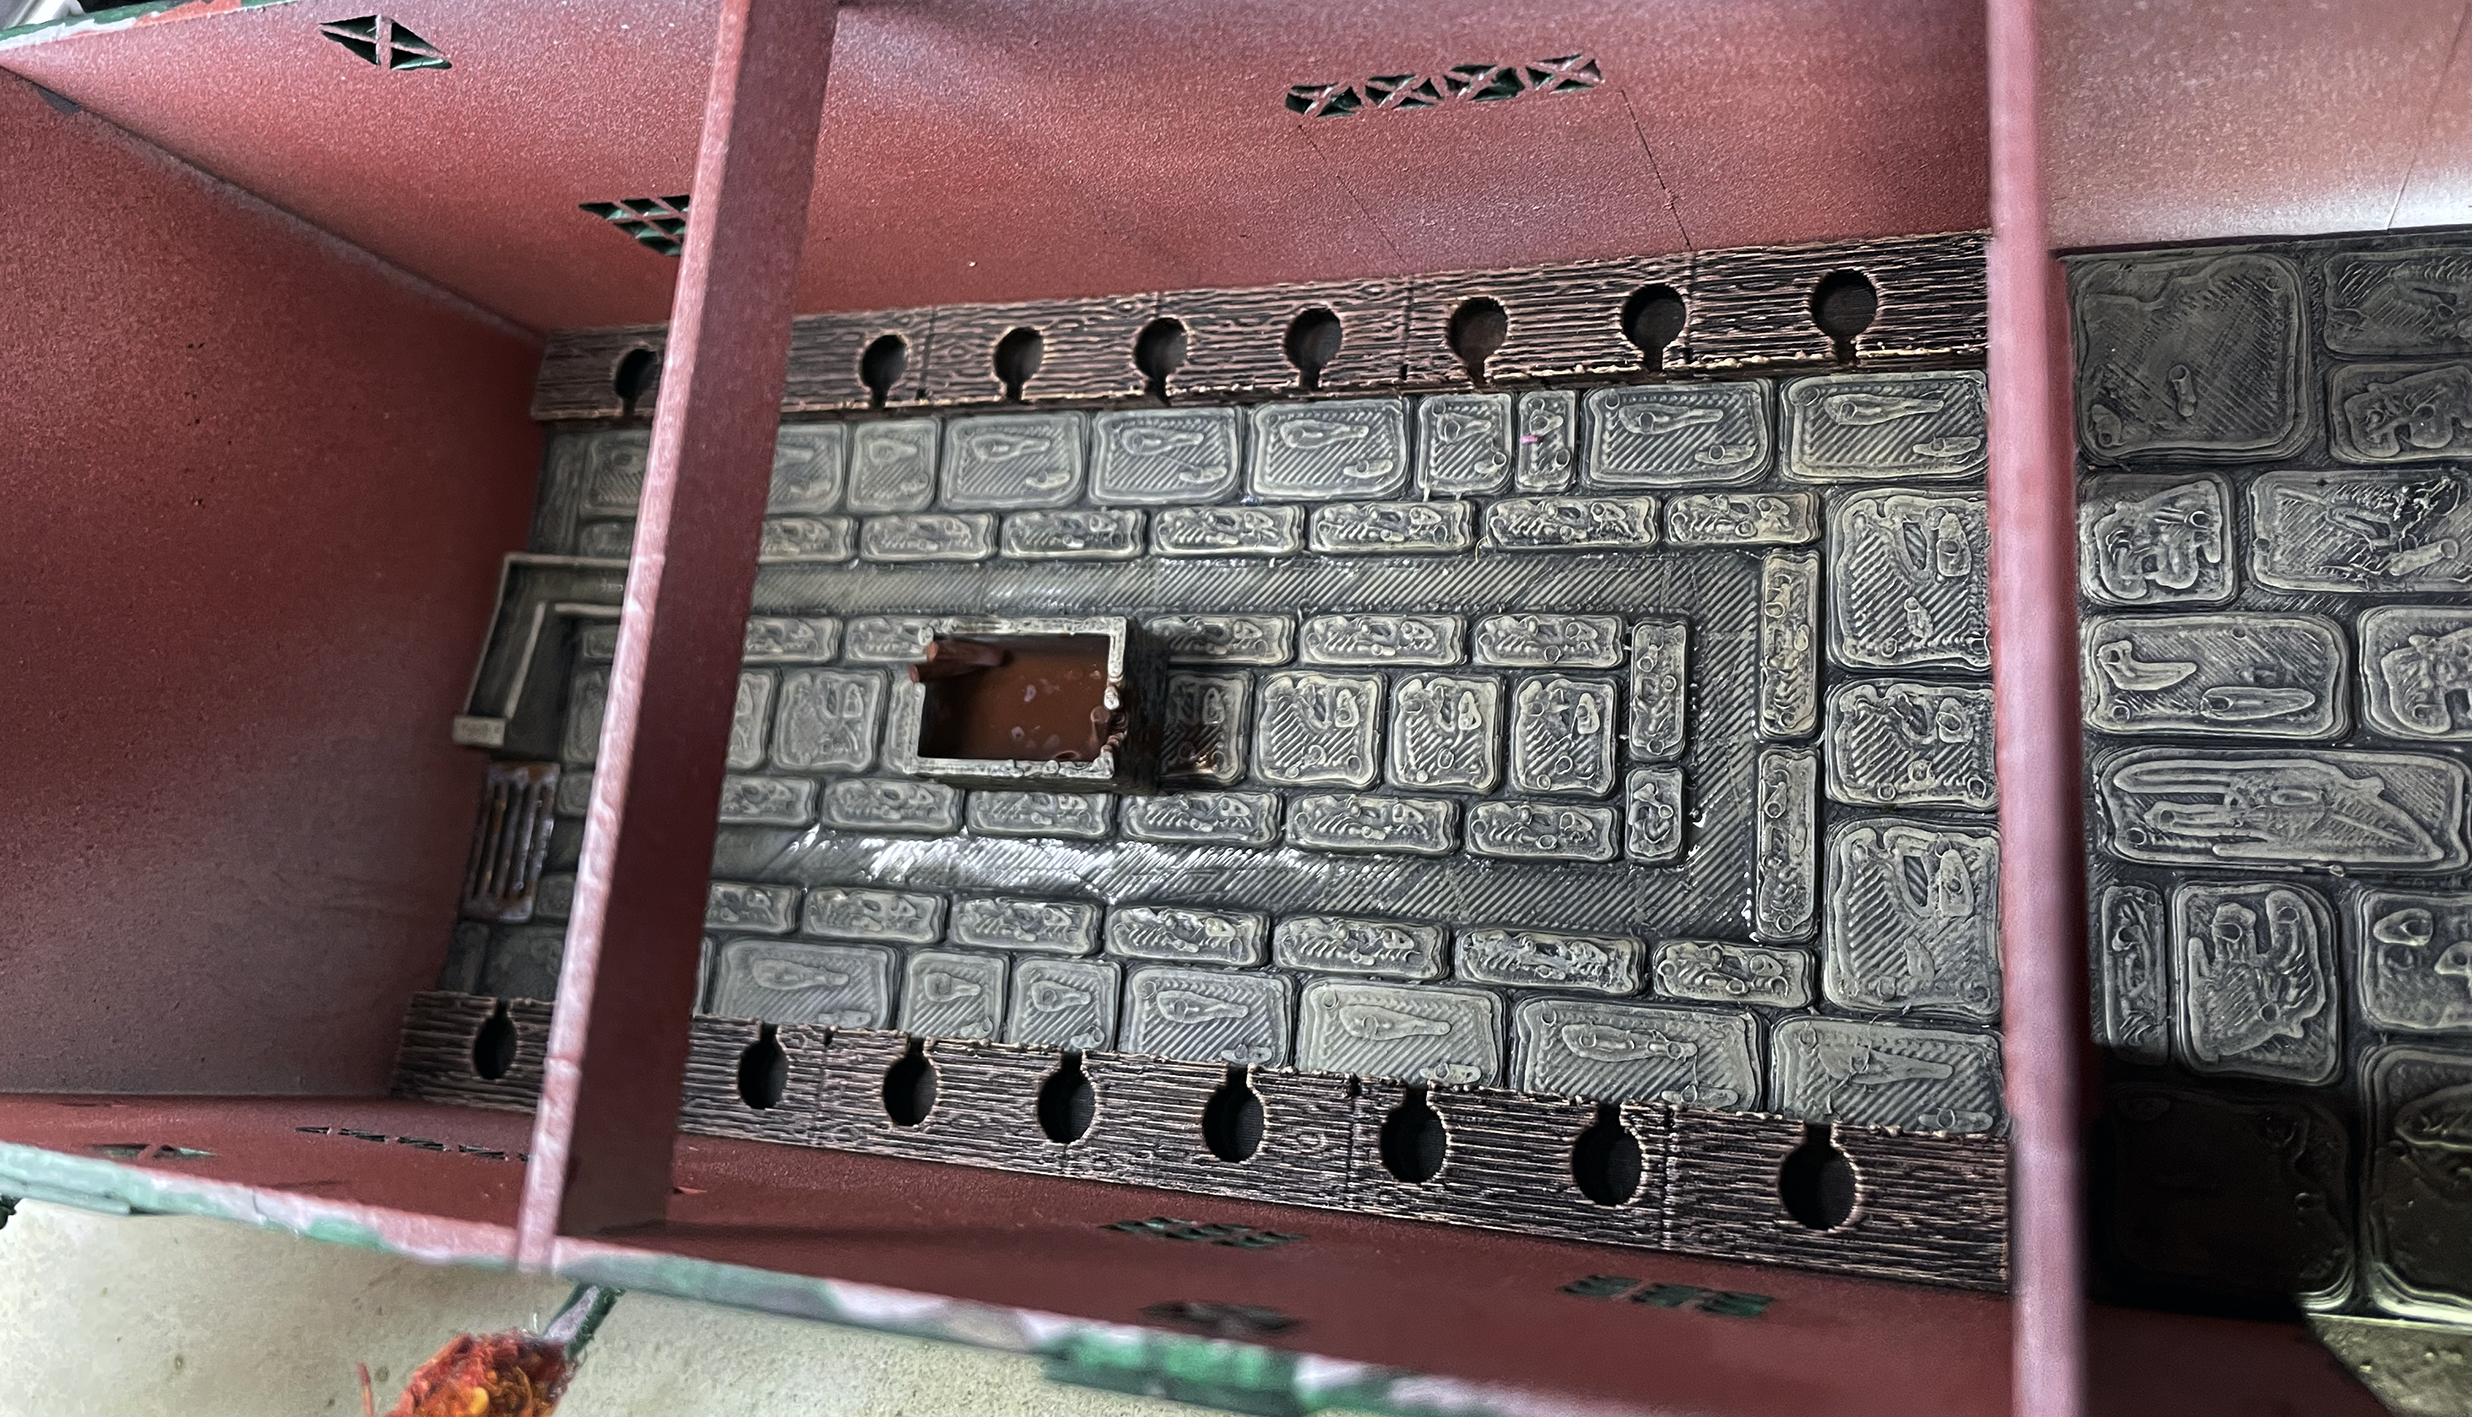
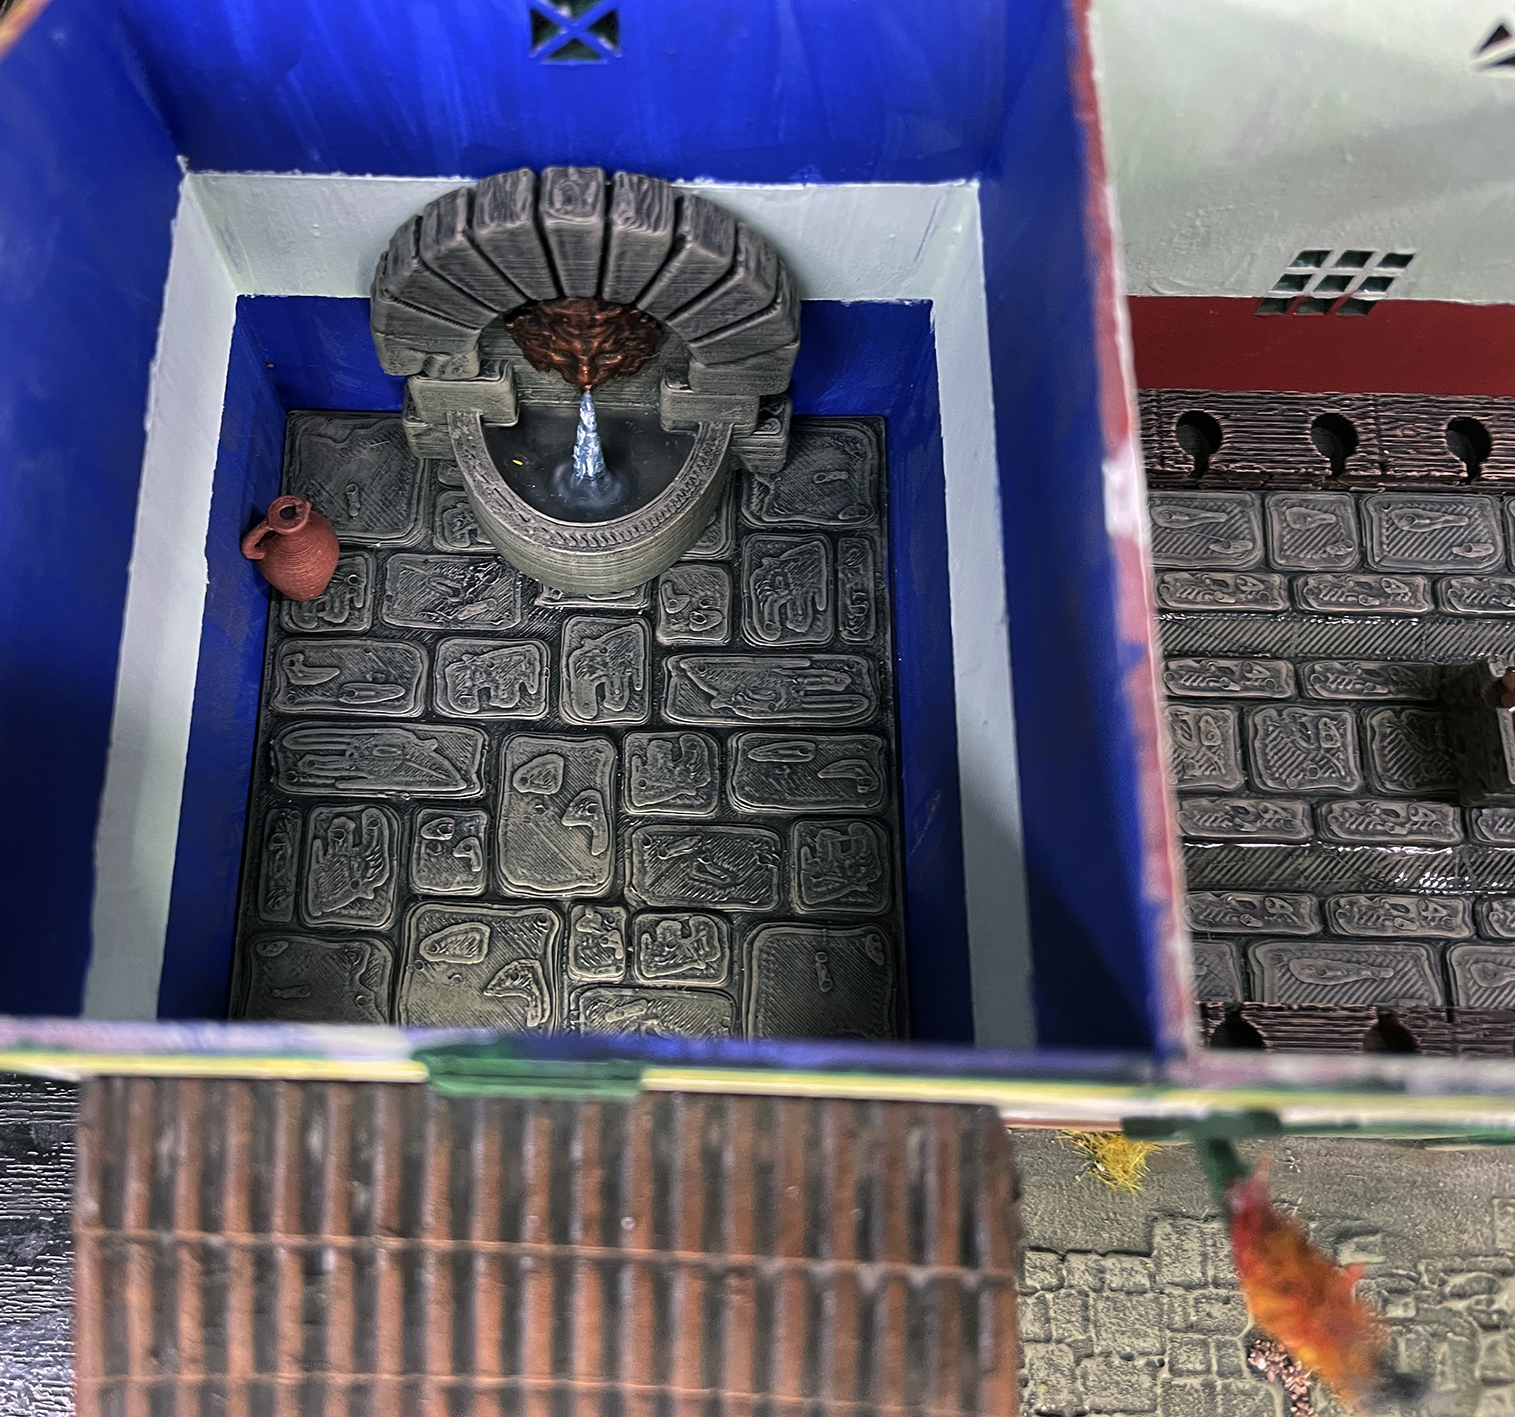
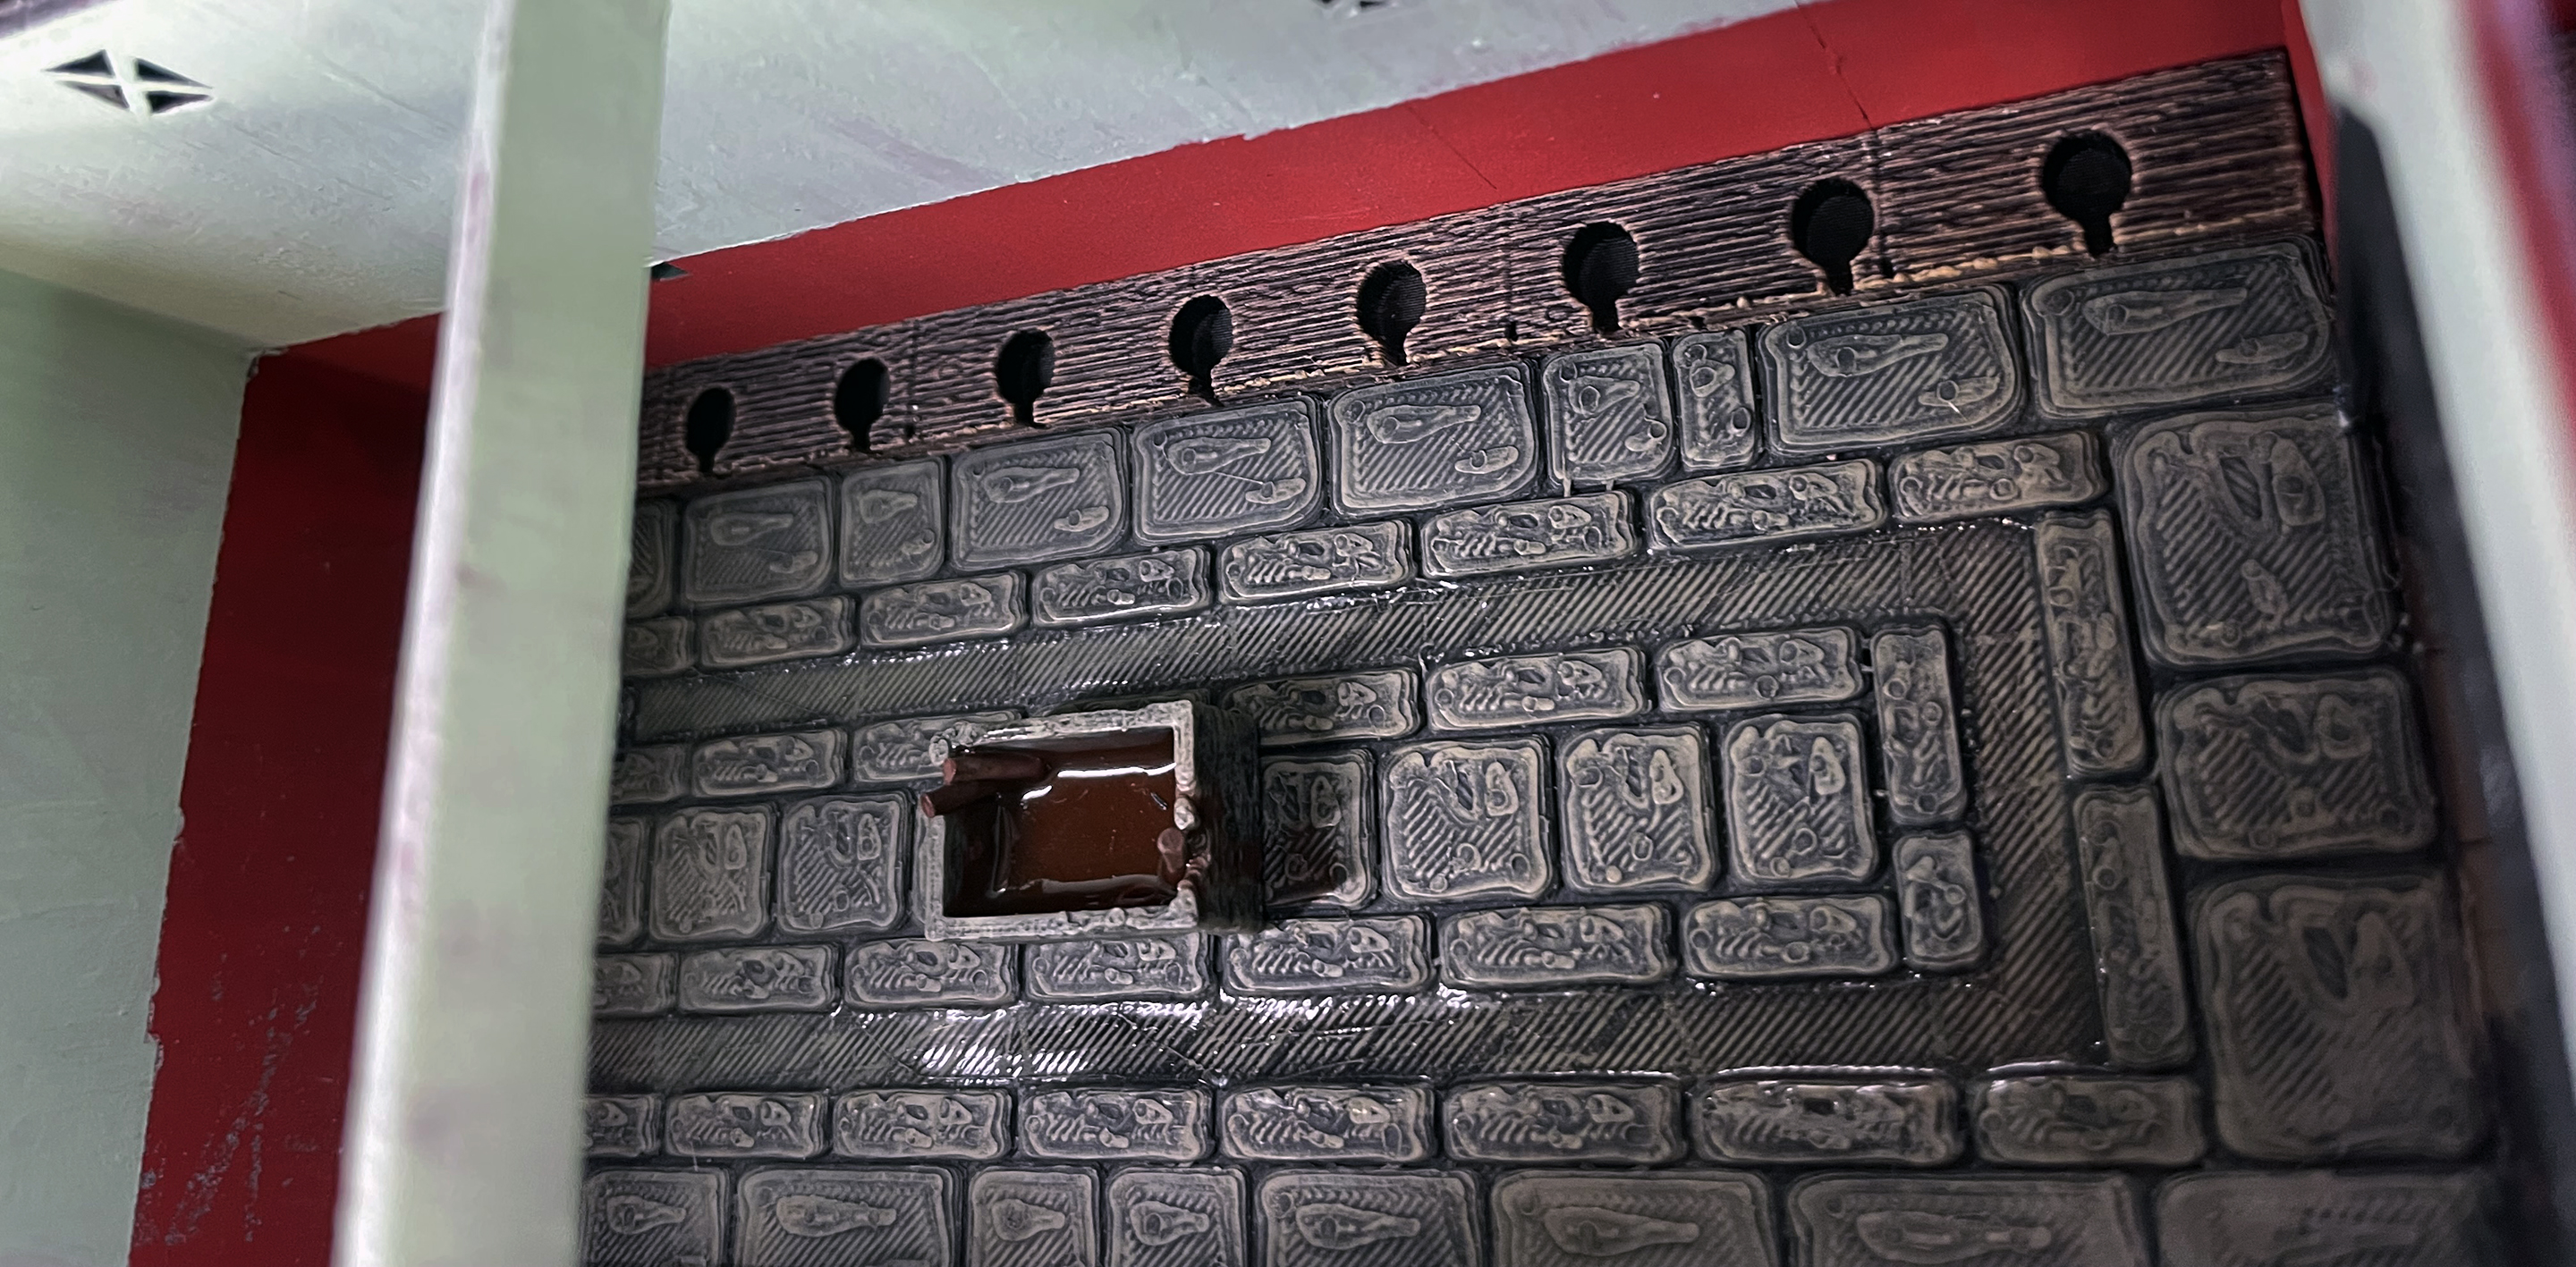
I have do all of the outside of the building and now to make it a little better I have decided that the insides need a facelift too. I have added some details to the inside and gave the walls a lick of paint.
The room with the drinking fountain might change into a towel, cloth toga shop and the drinking fountain be moved to the toilets first room.
The first set of images are before the revamp
Next set of images are after the revamp


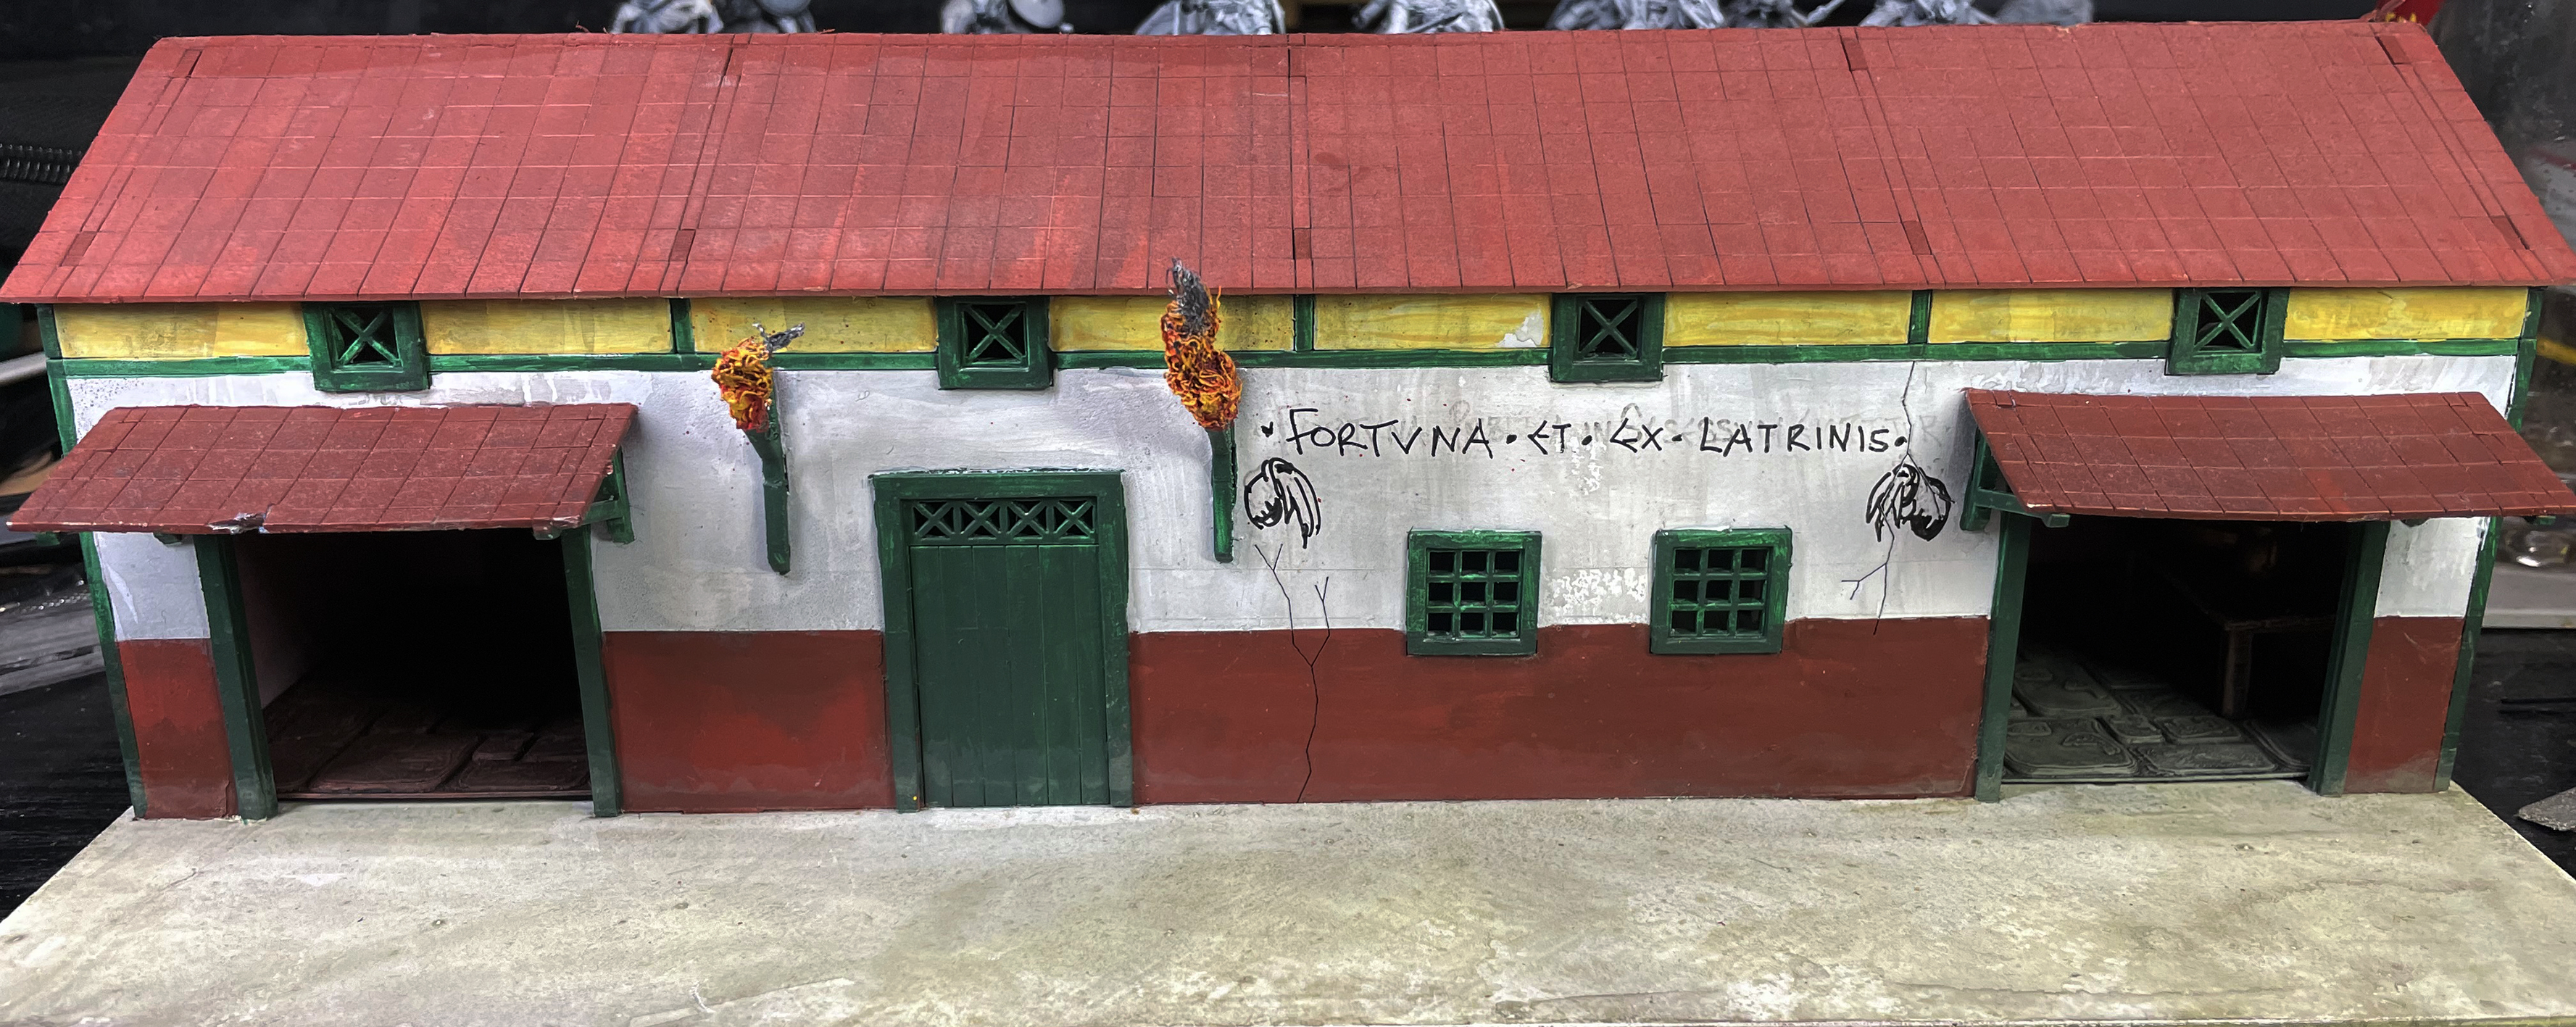
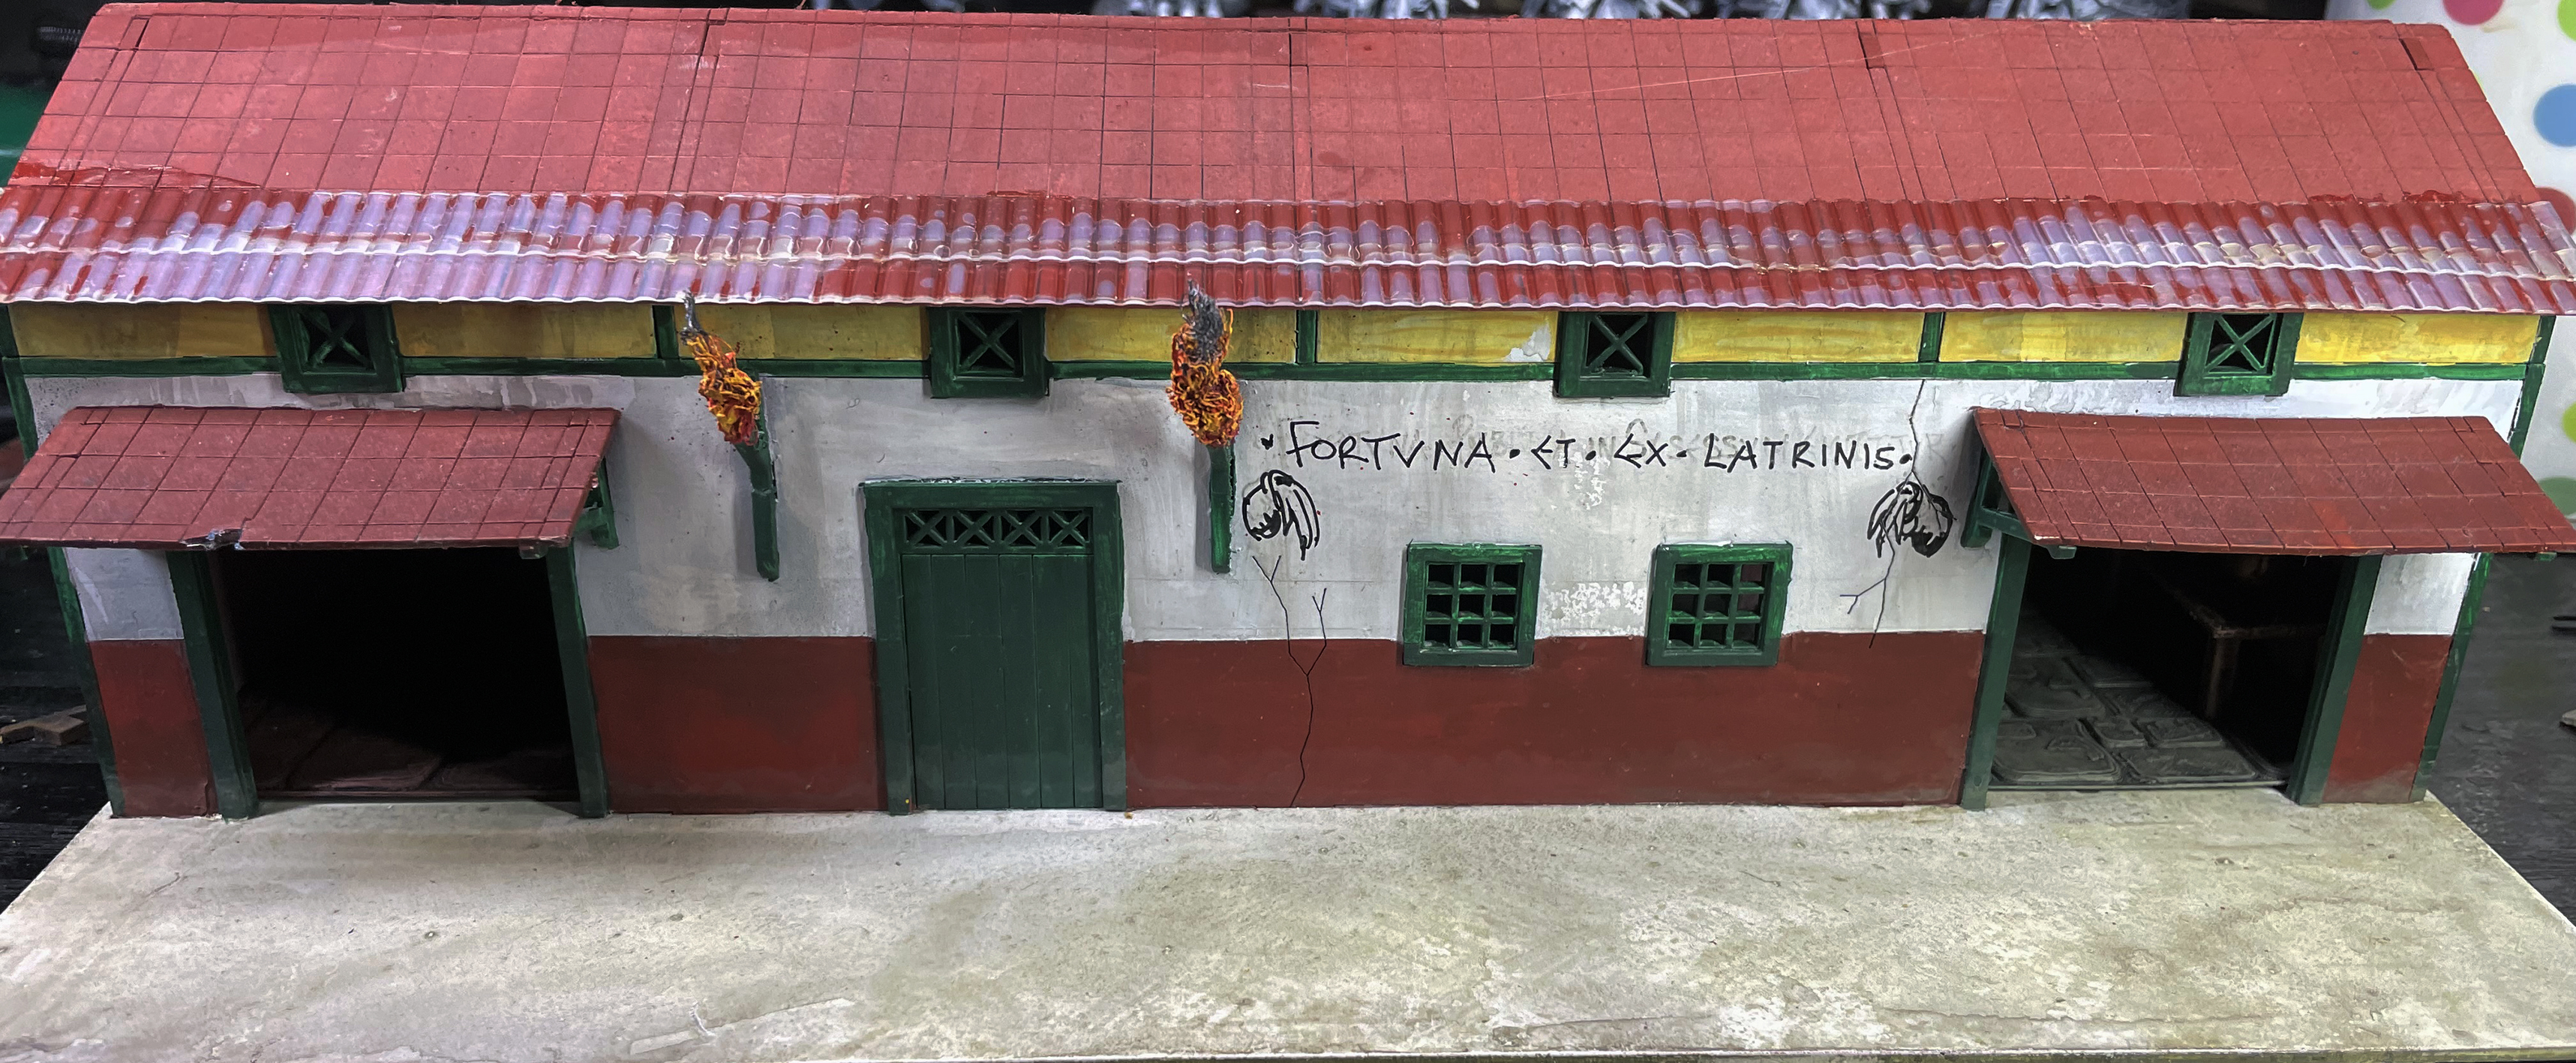
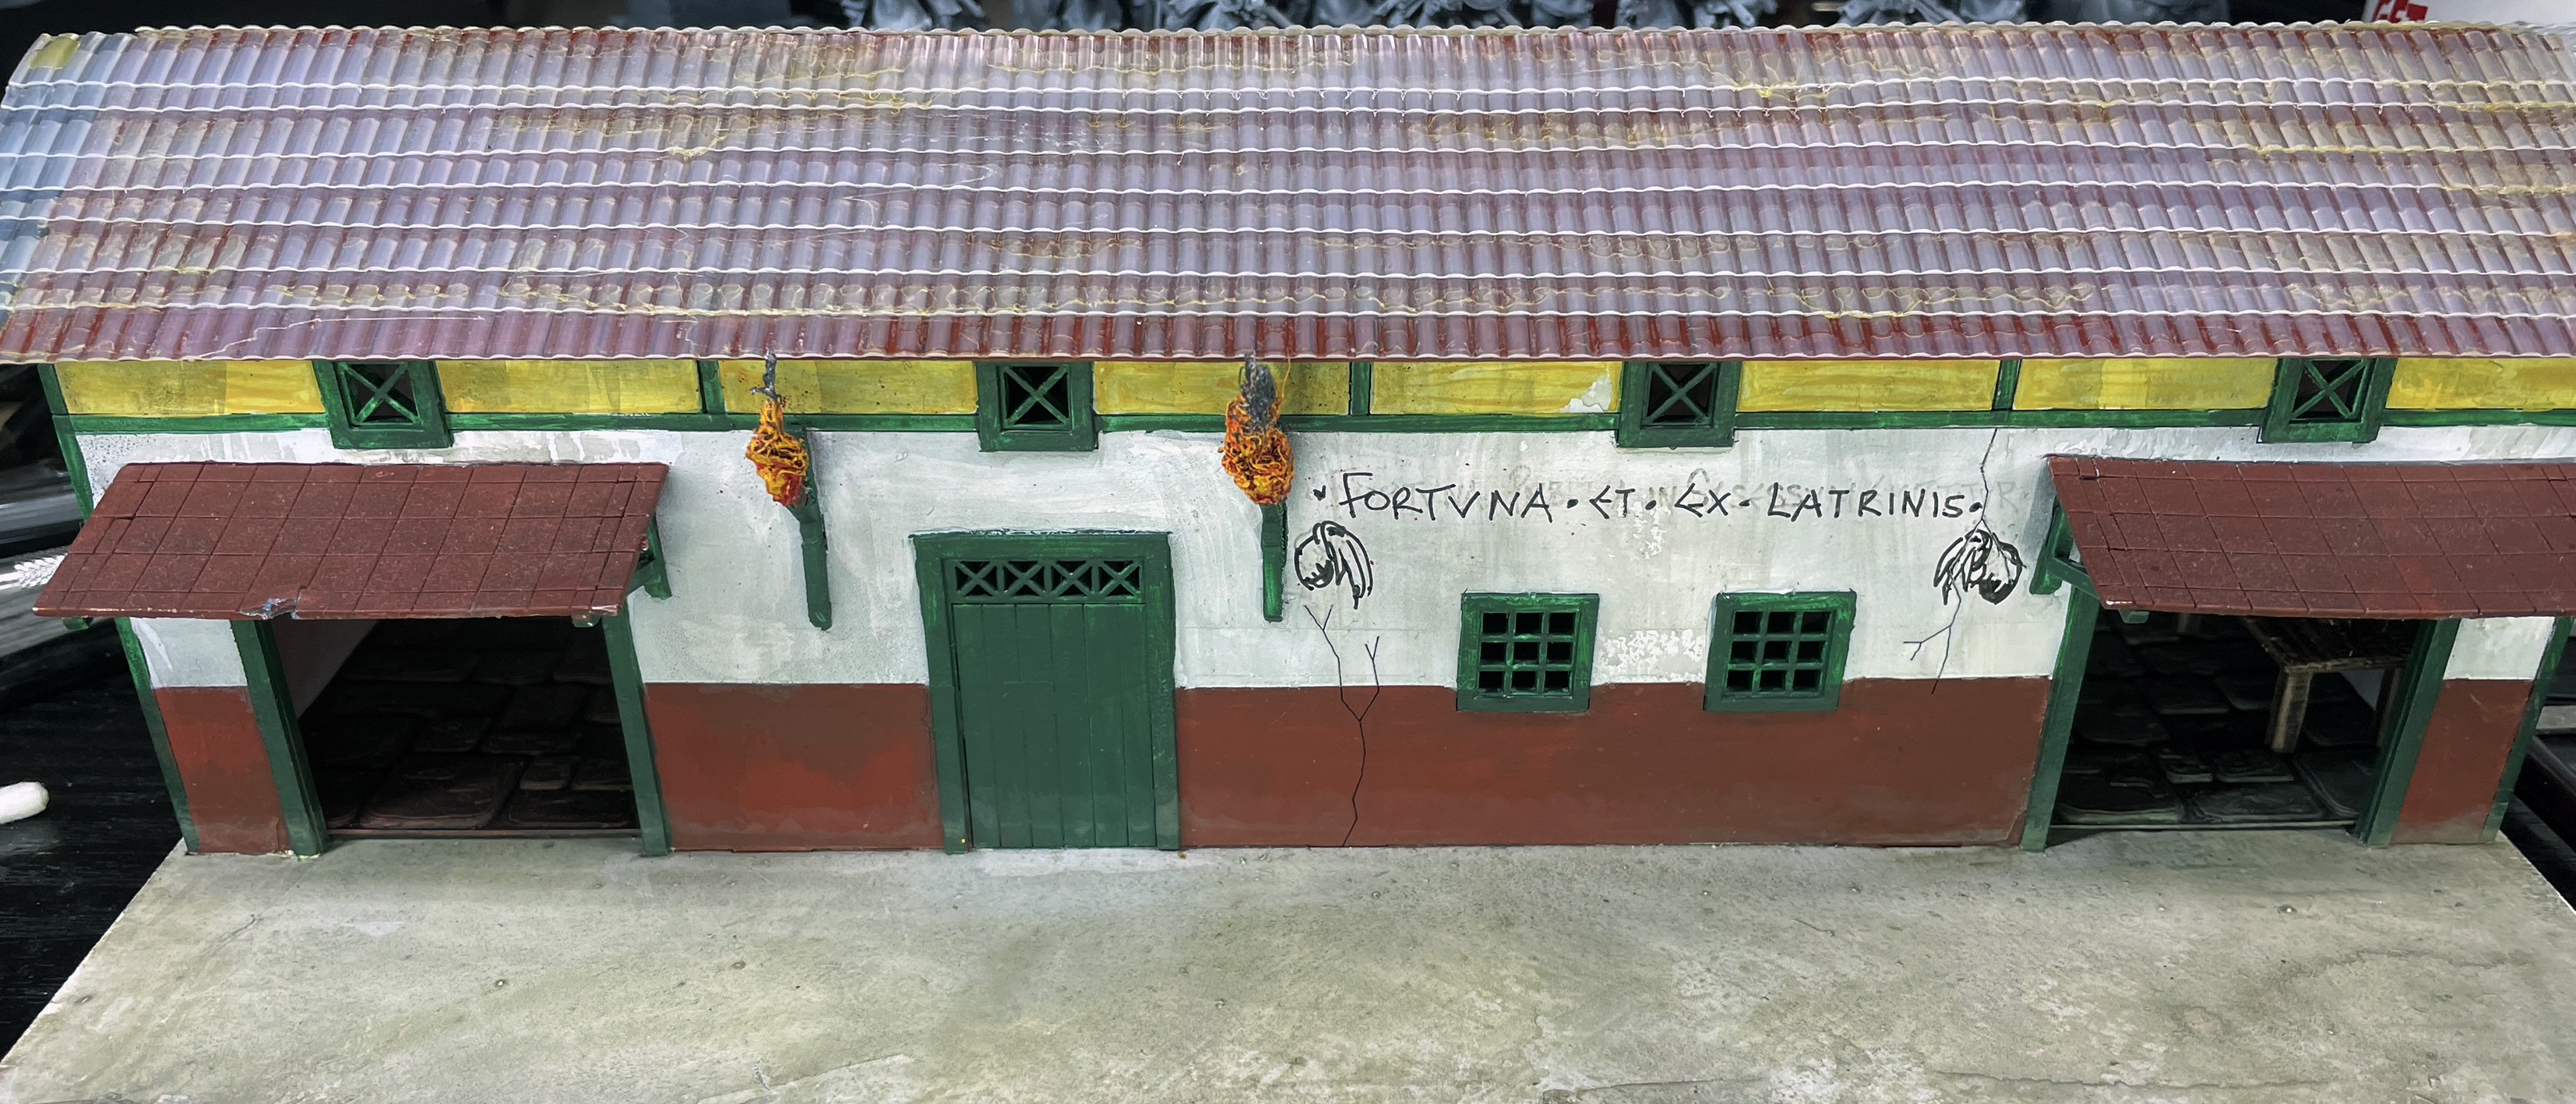
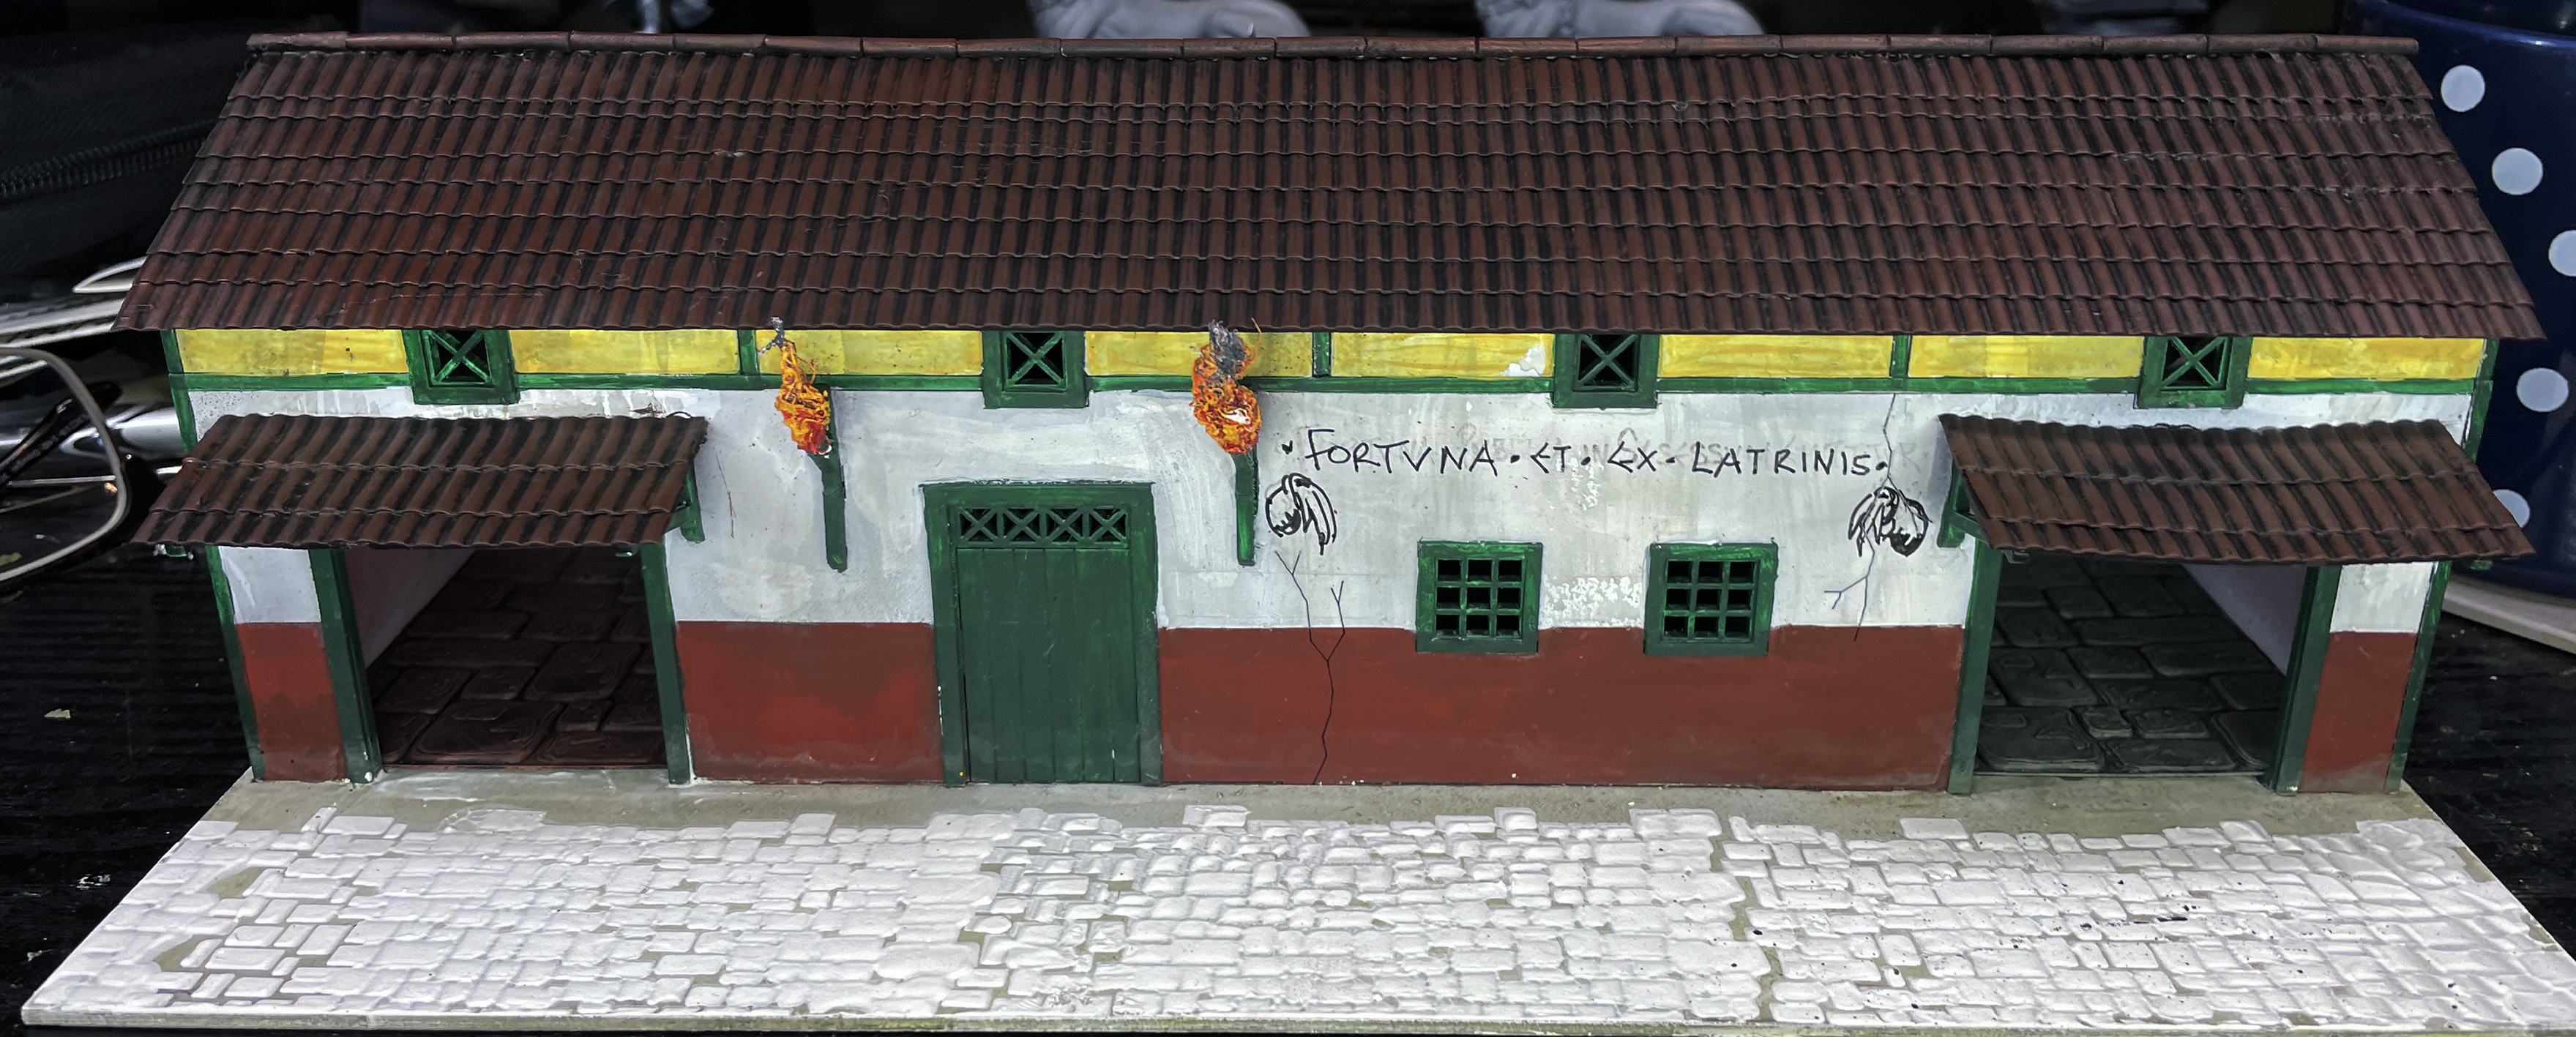
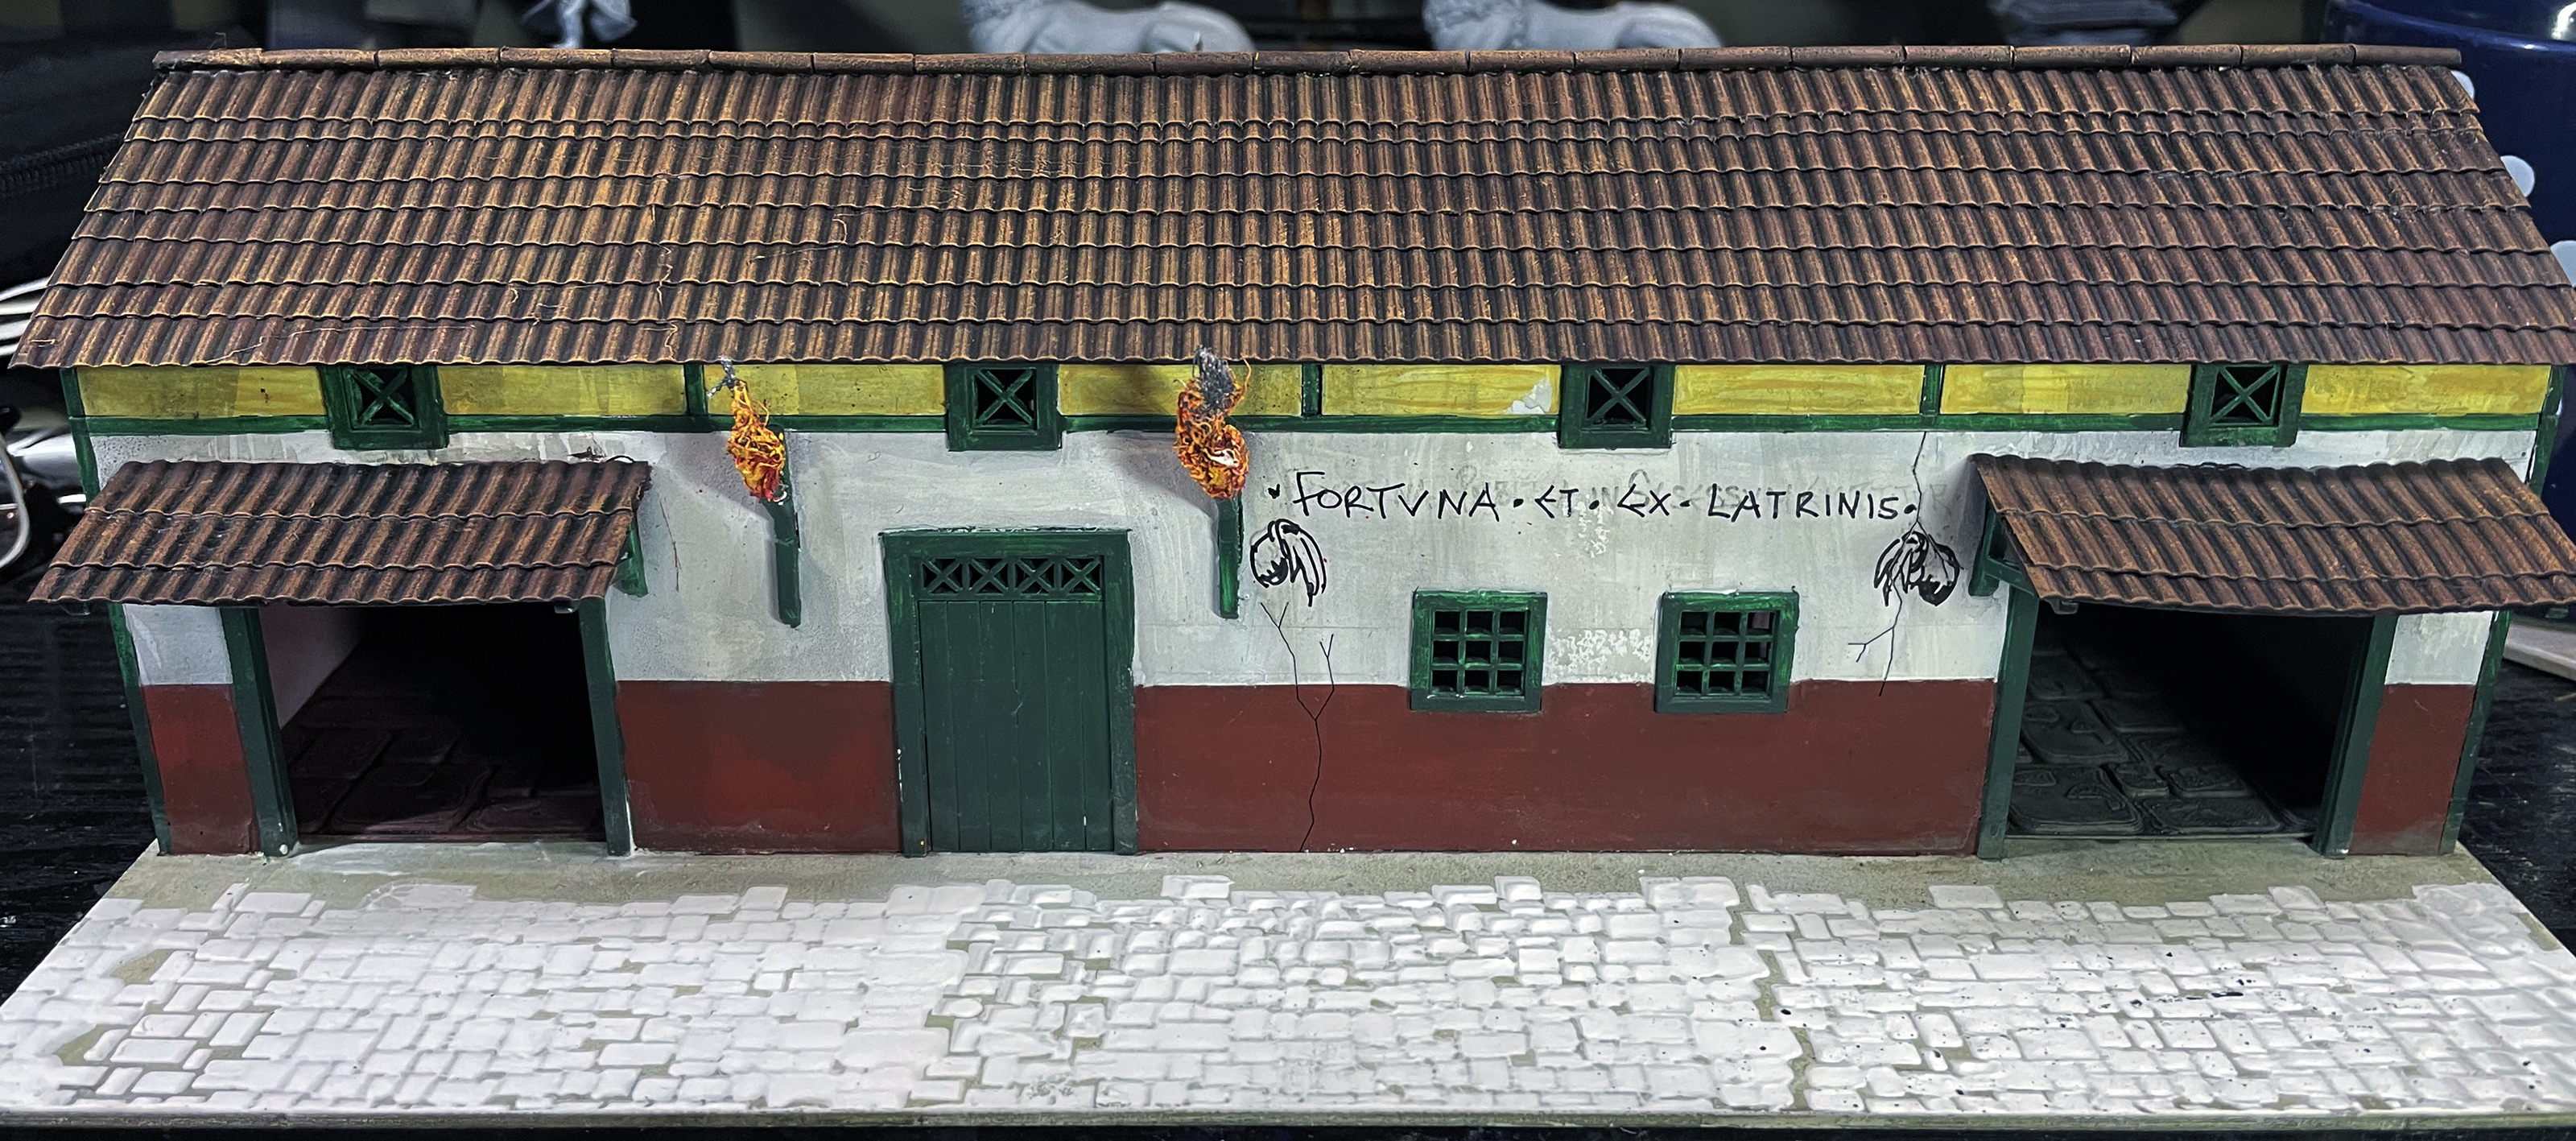
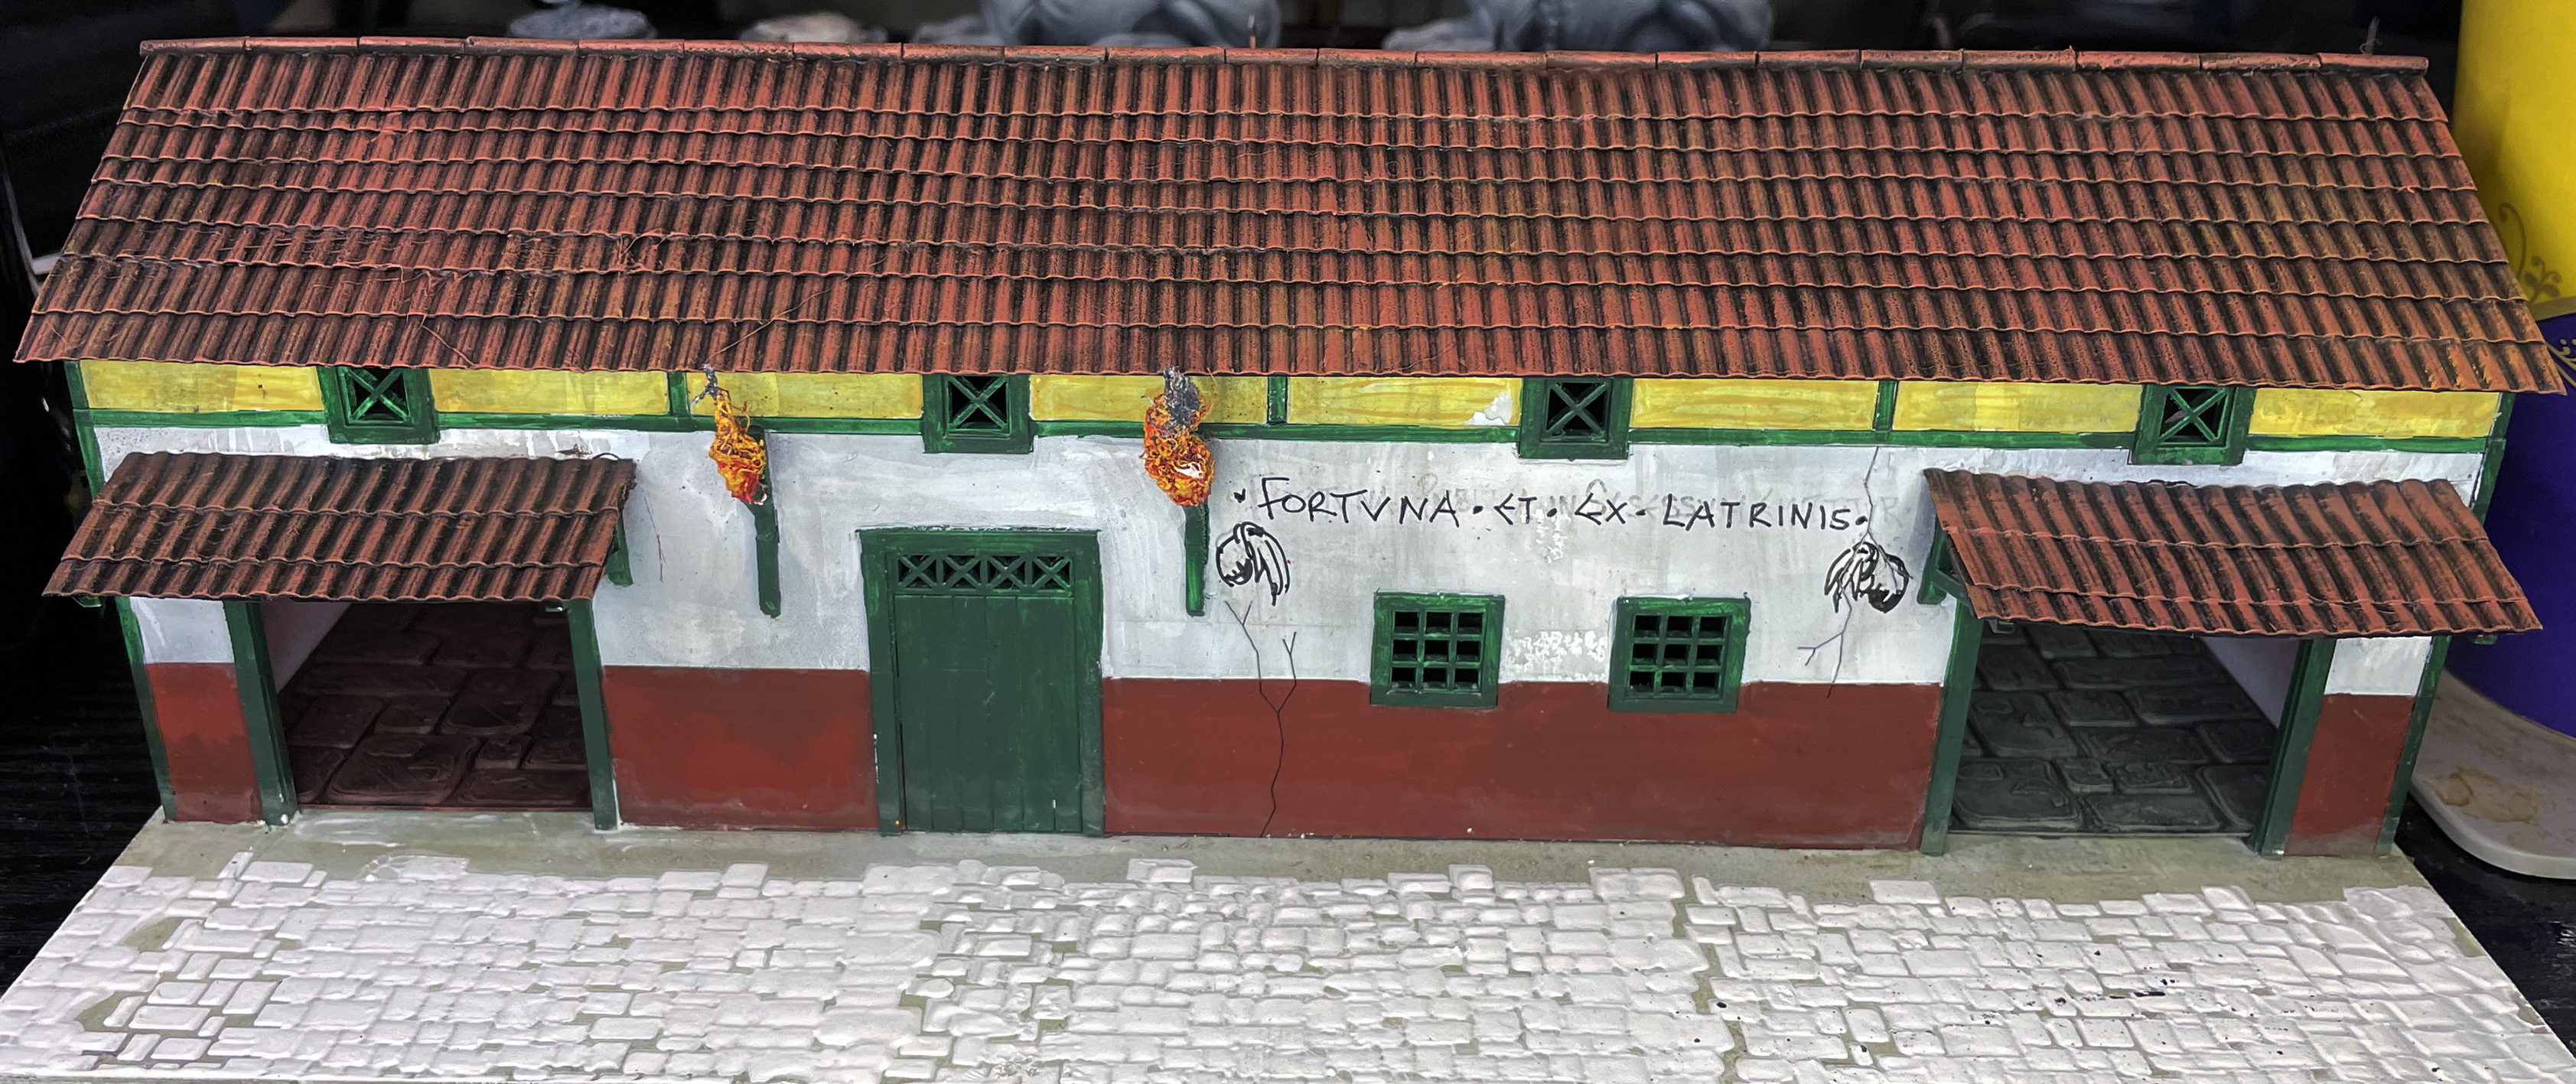
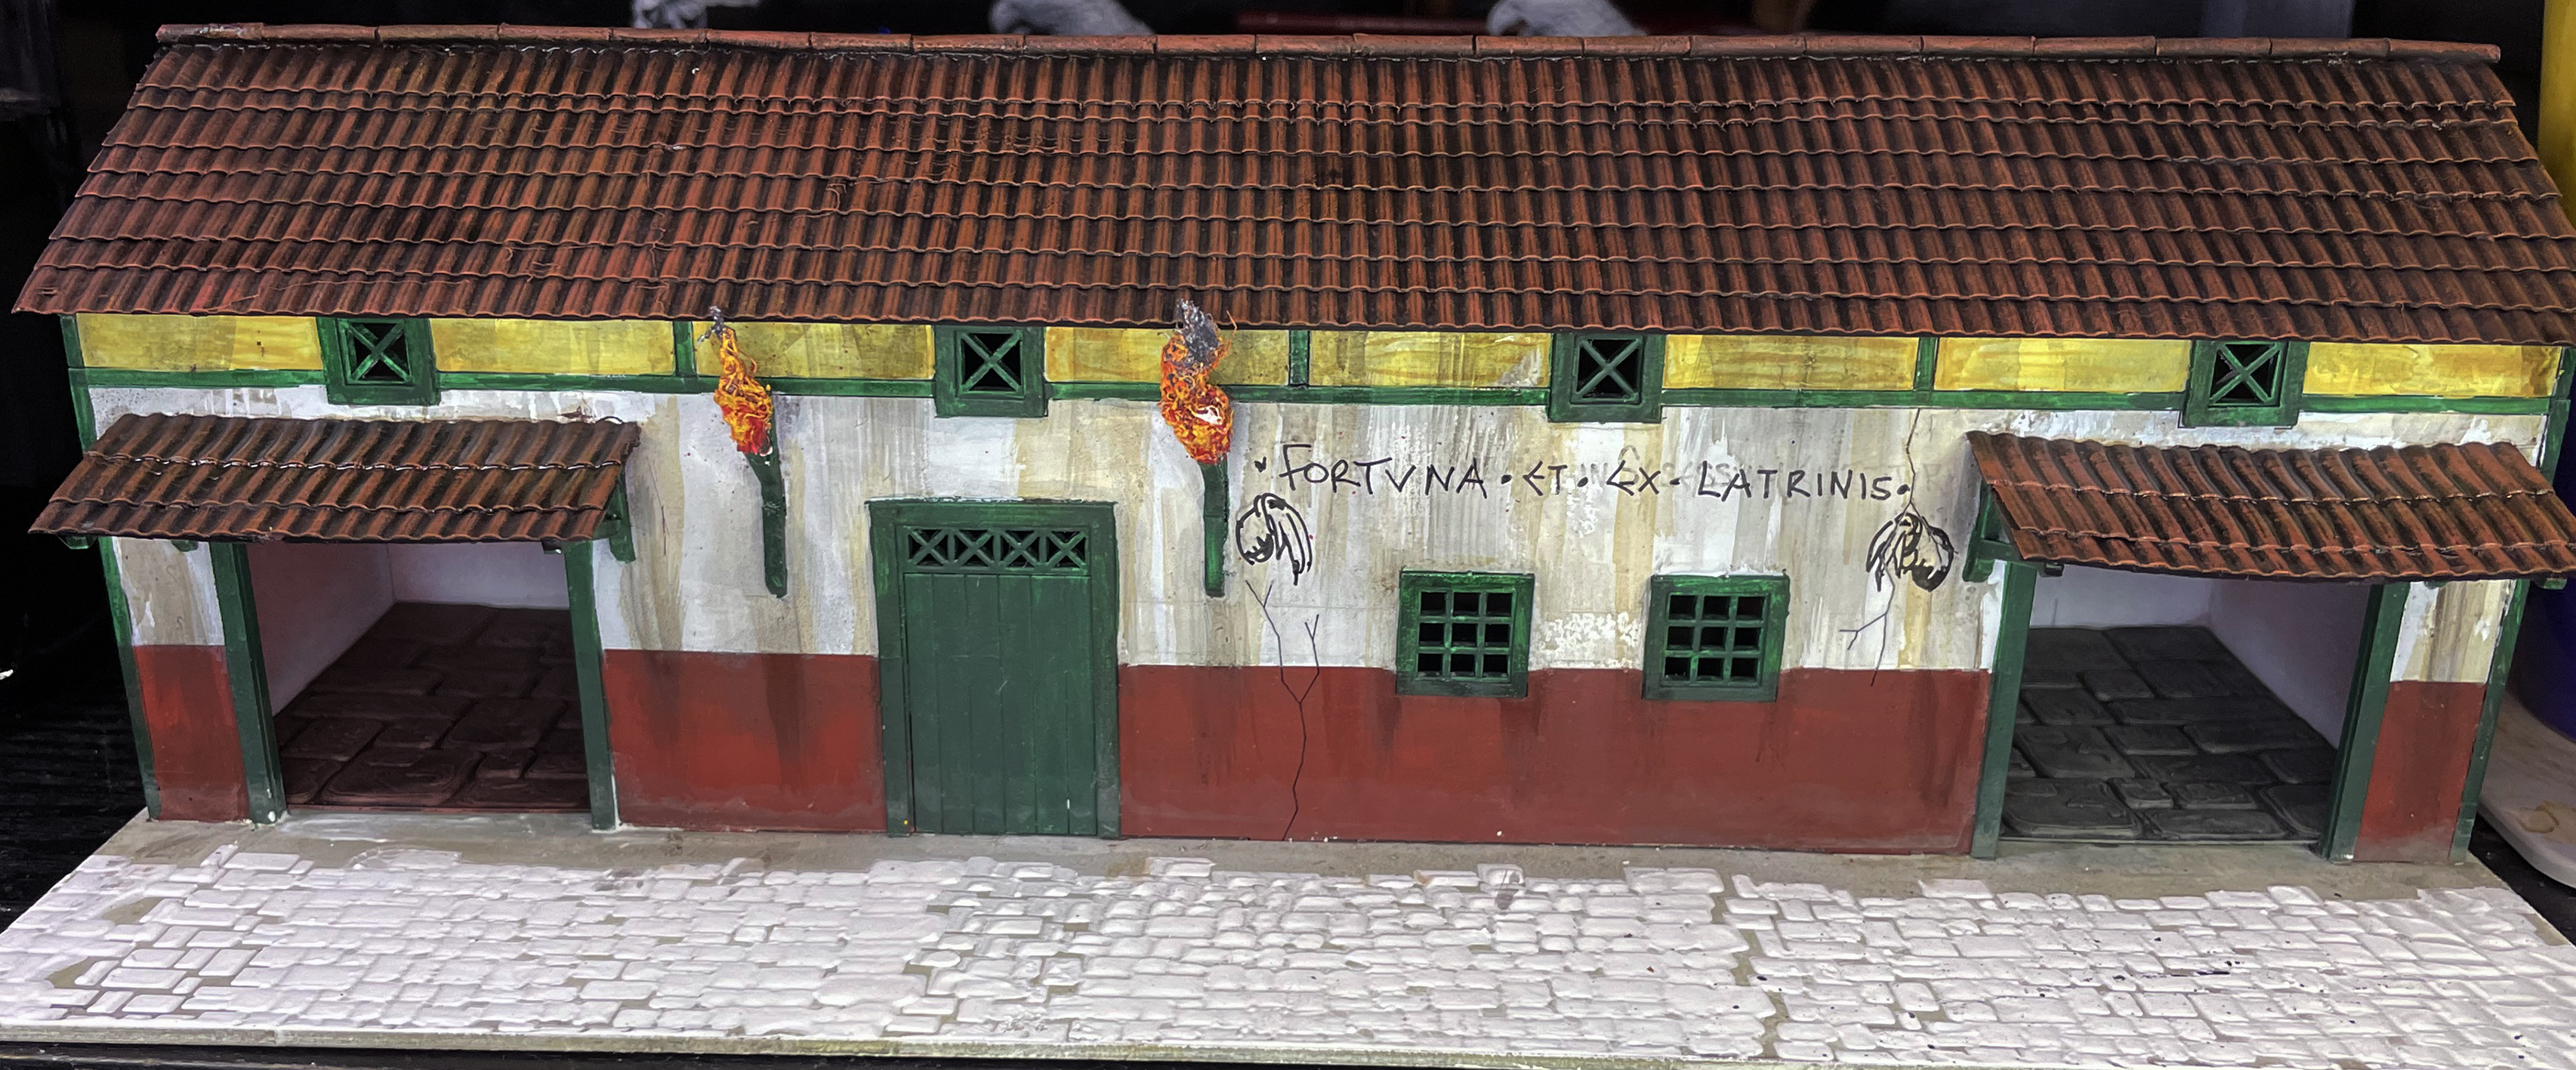
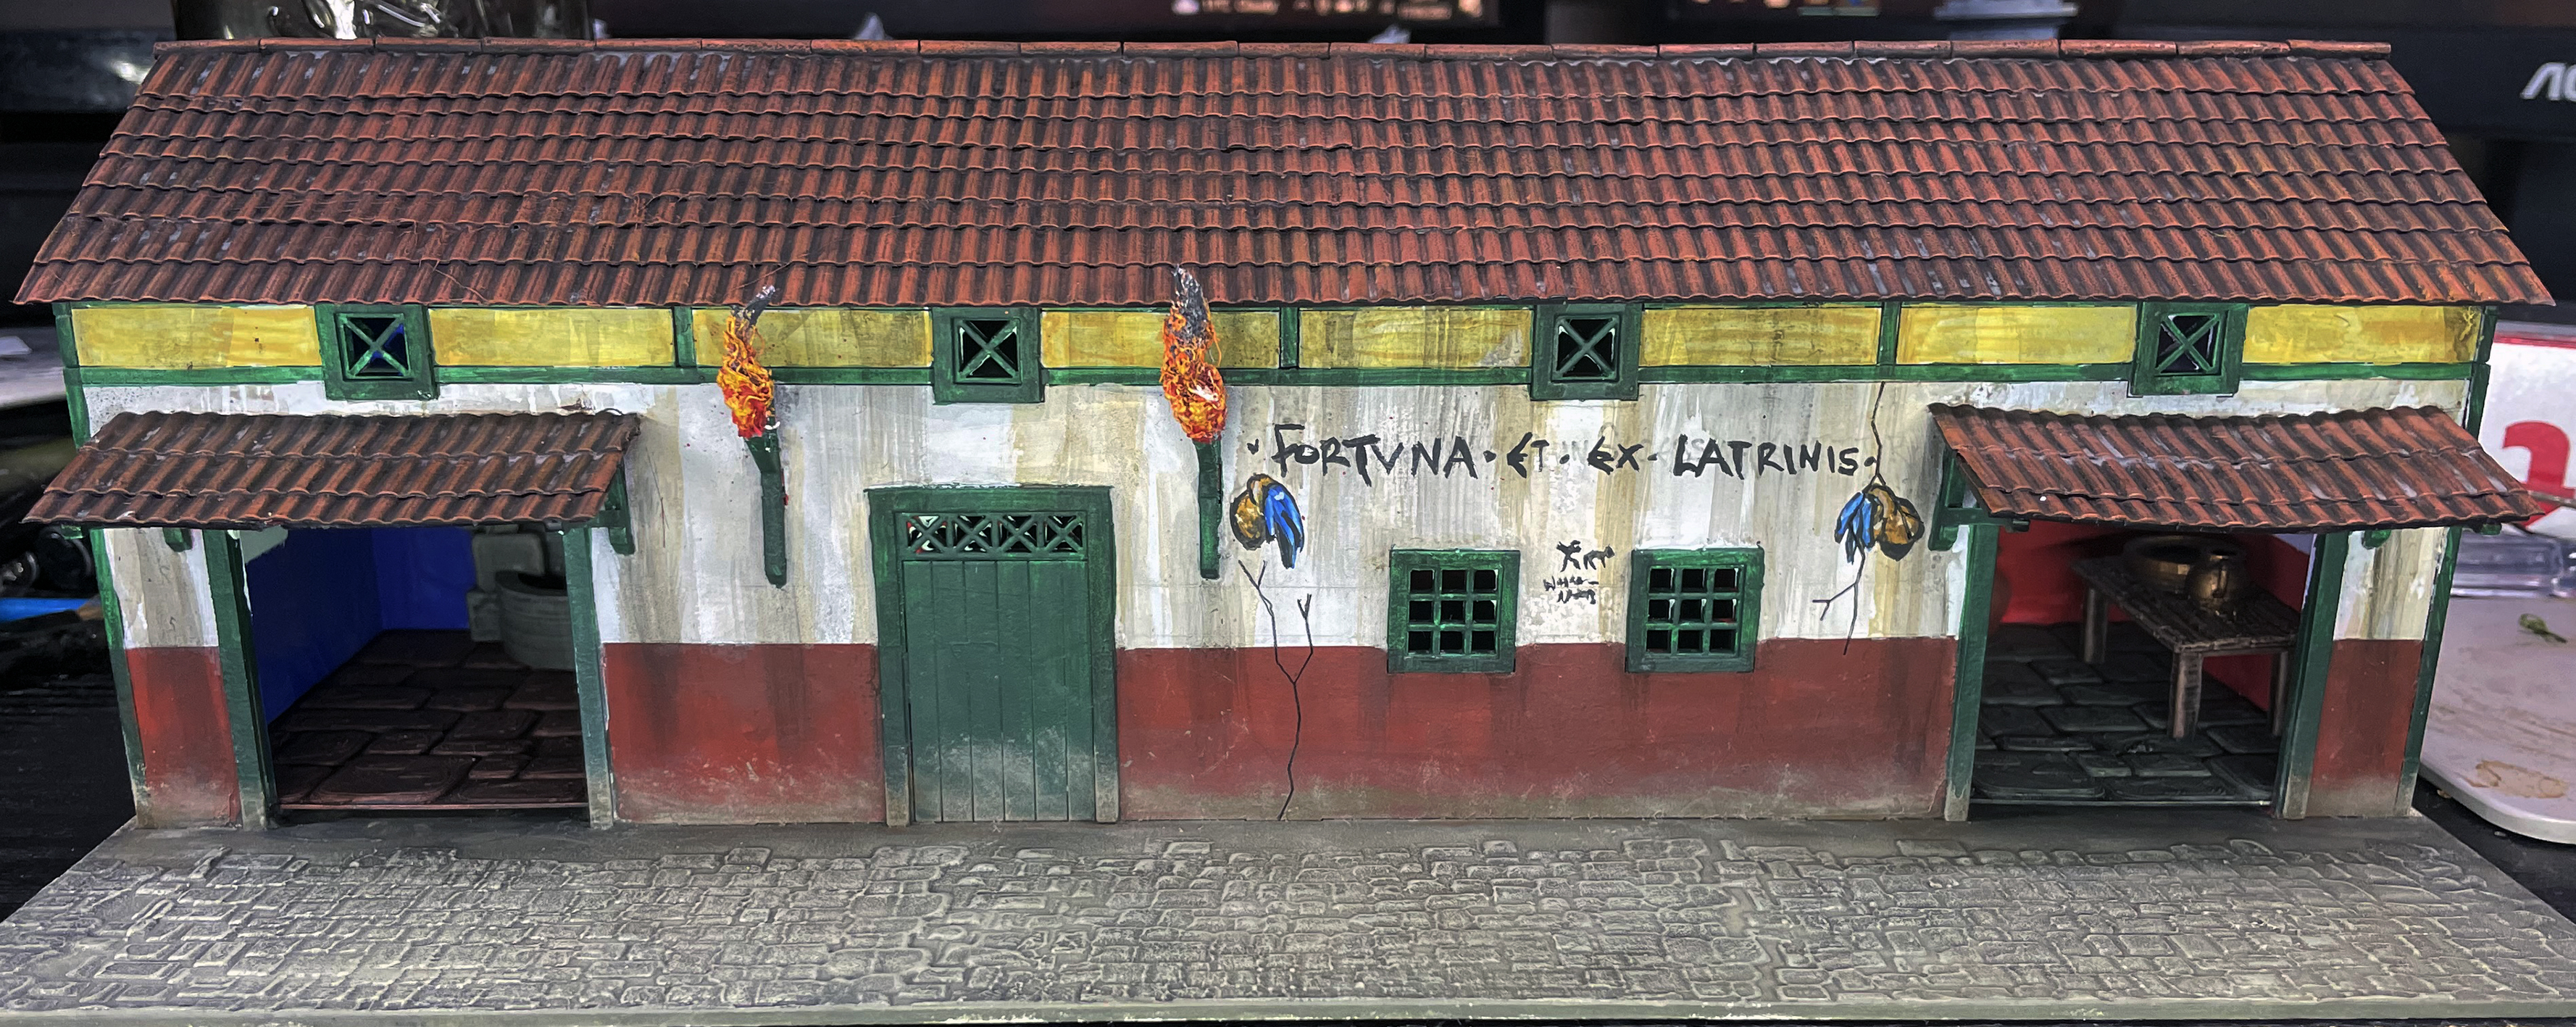
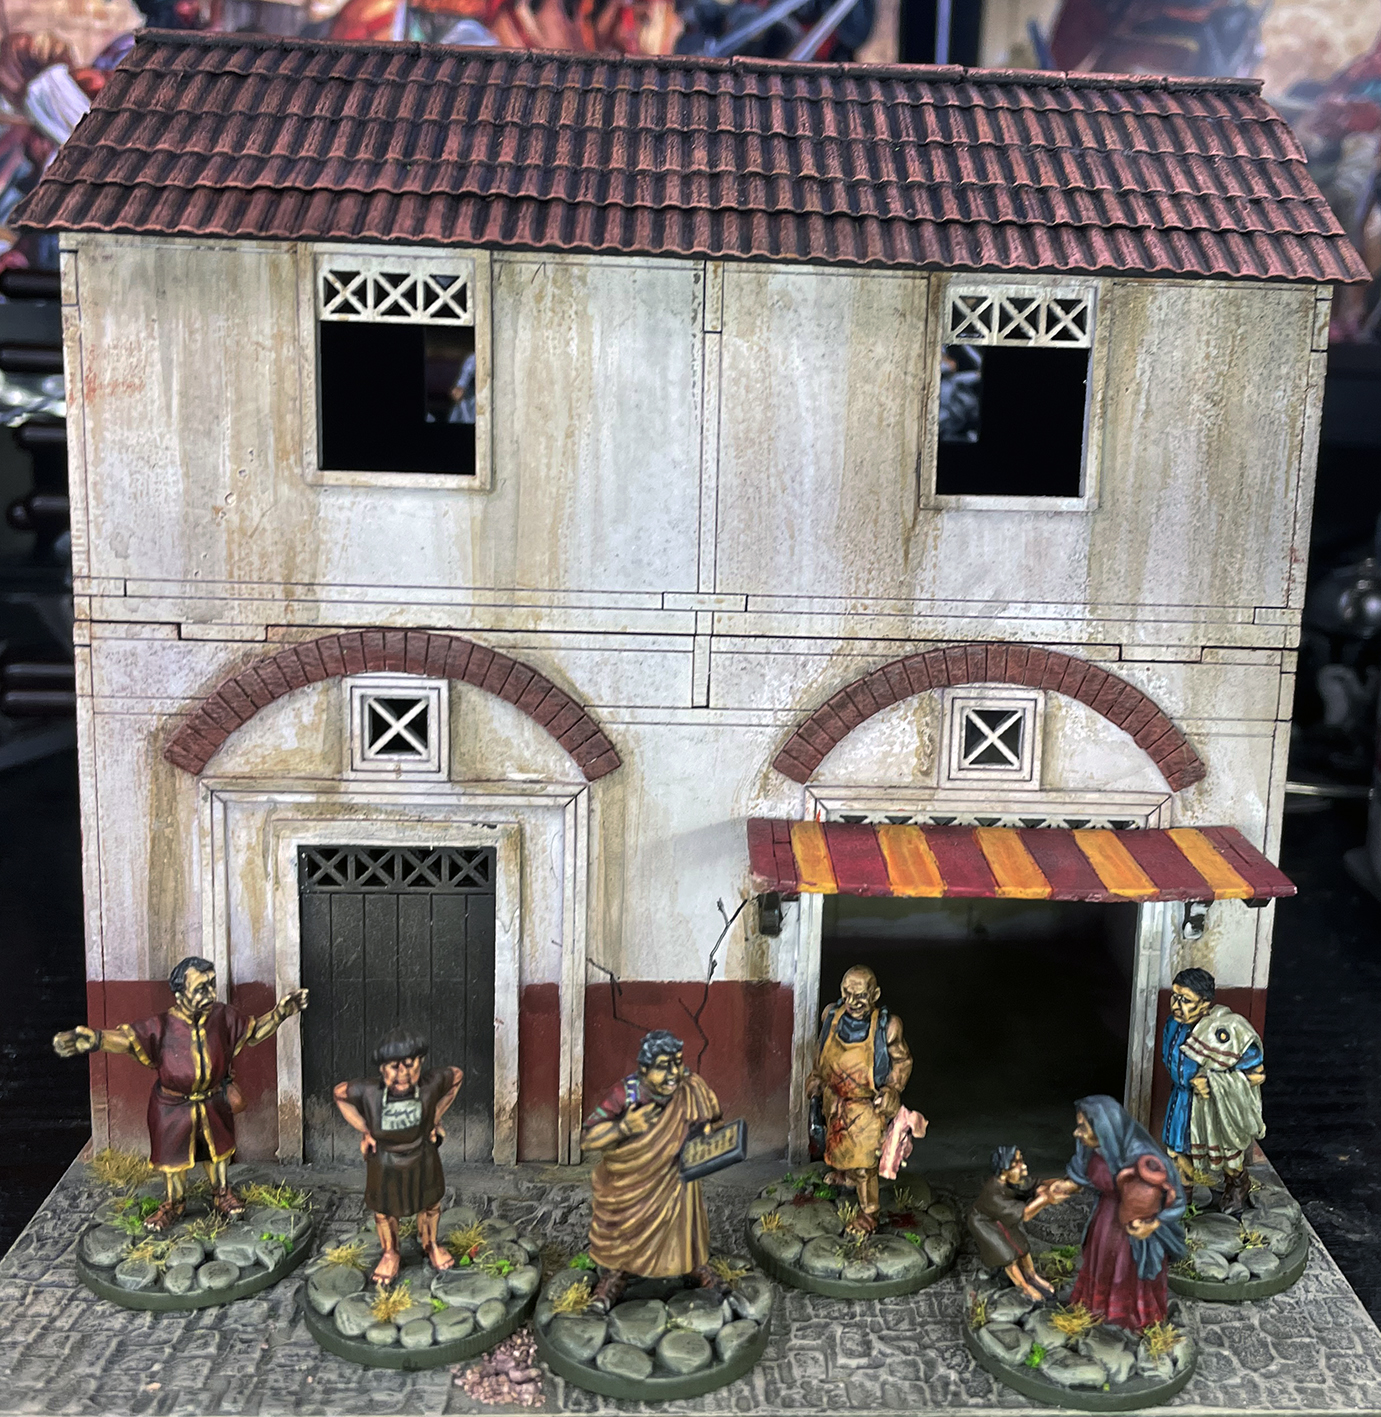
The Third Building Upgraded, The Foricae
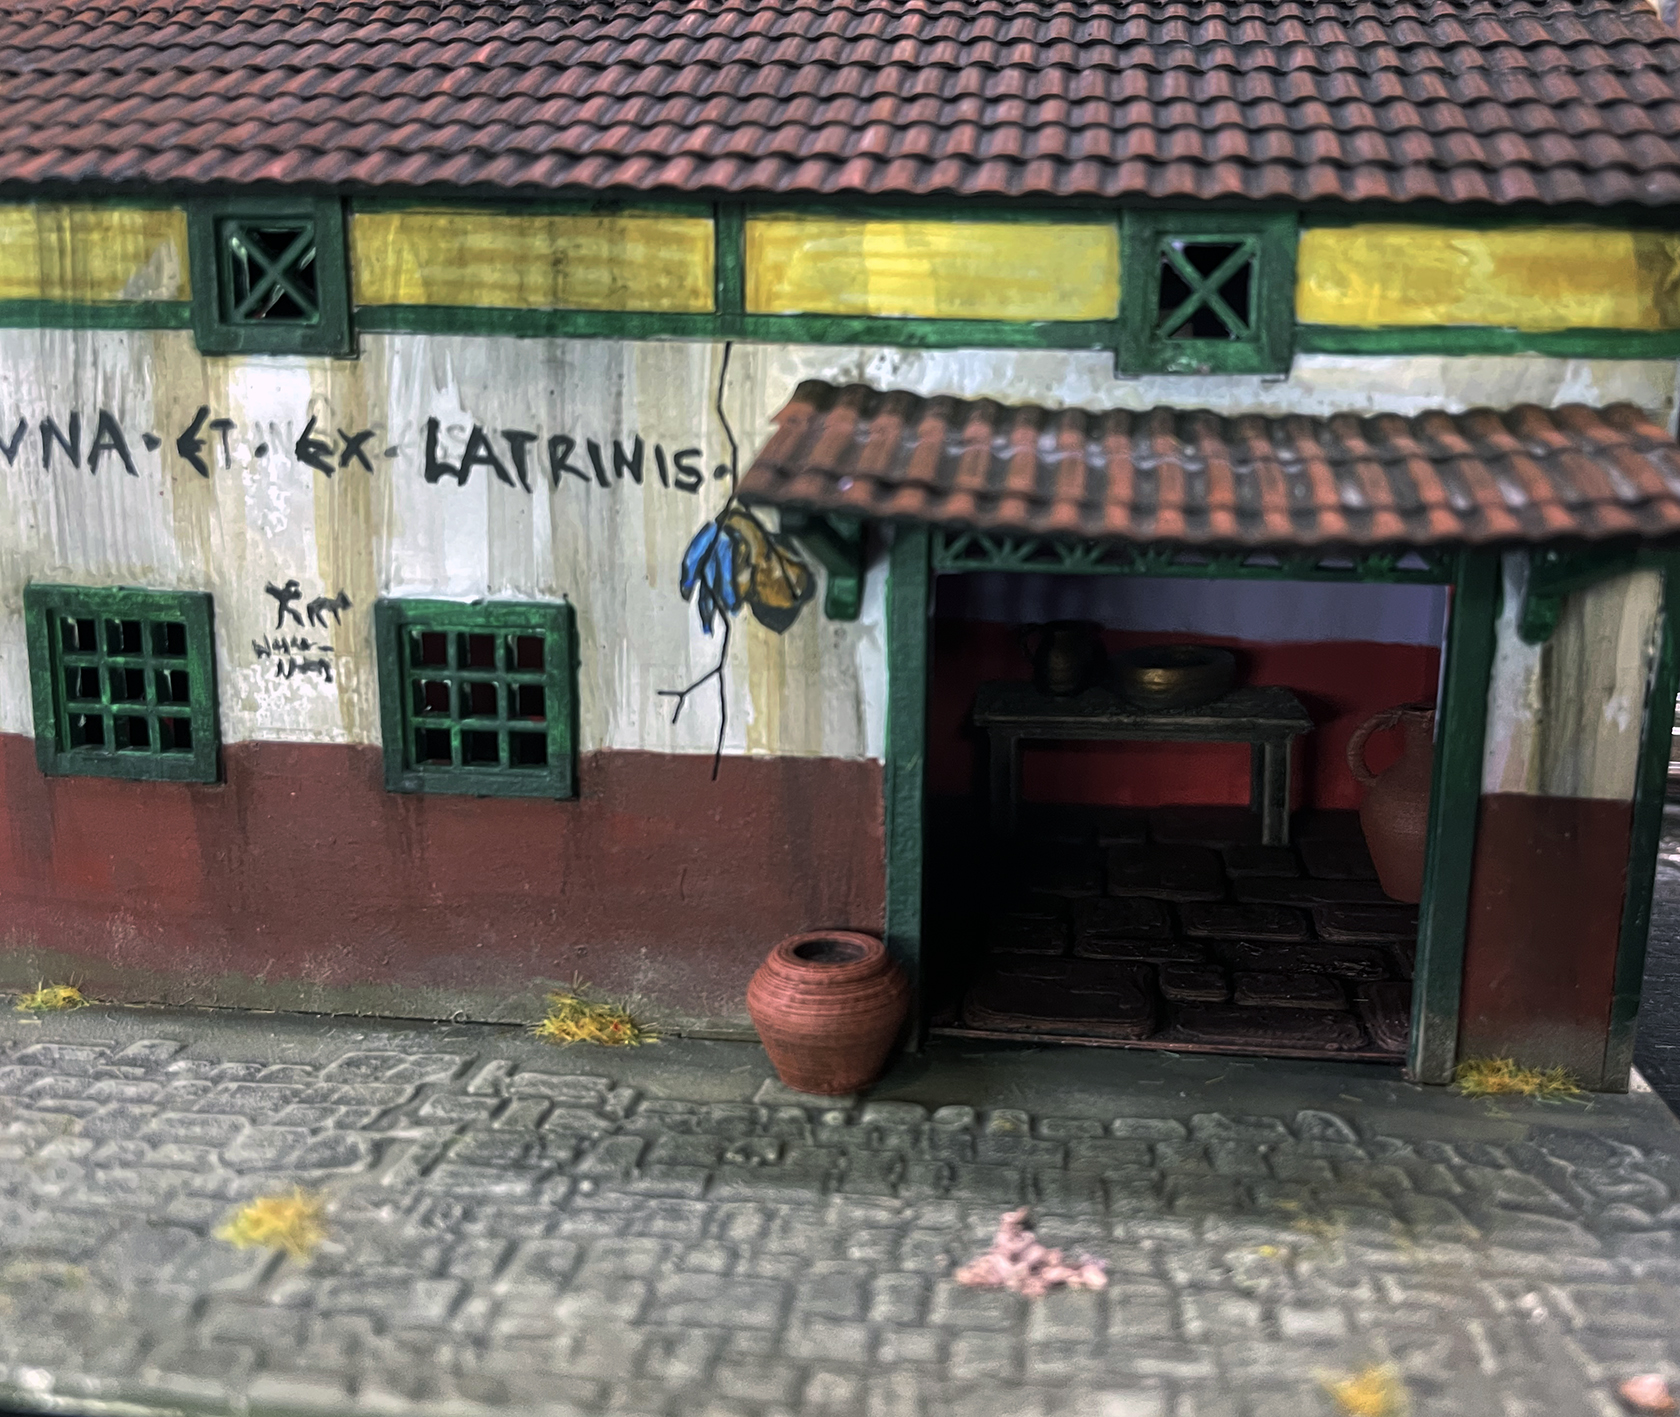
 The Foricae
This is the third building in the series and many that I have upgraded and revamped to hopefully improve the look of it. Dating back to the 2nd century BC, Roman public toilets, often built with donations from charitable upper-class citizens, were called foricae. These toilets consisted of dark rooms lined with benches dotted with key-shaped holes placed rather closely together. Romans therefore got pretty close and personal while using the foricae.
They were also never far from a large number of vermin, including rats and snakes. As a result, these dark and dirty places were rarely visited by women and certainly never by rich women.
Elite Romans had little need for public foricae, unless they were desperate. Instead, private toilets were built in upper-class homes called latrines, built over cesspools. Private latrines probably also smelt awful and so many wealthy Romans may have just used chamber pots, emptied by slaves.
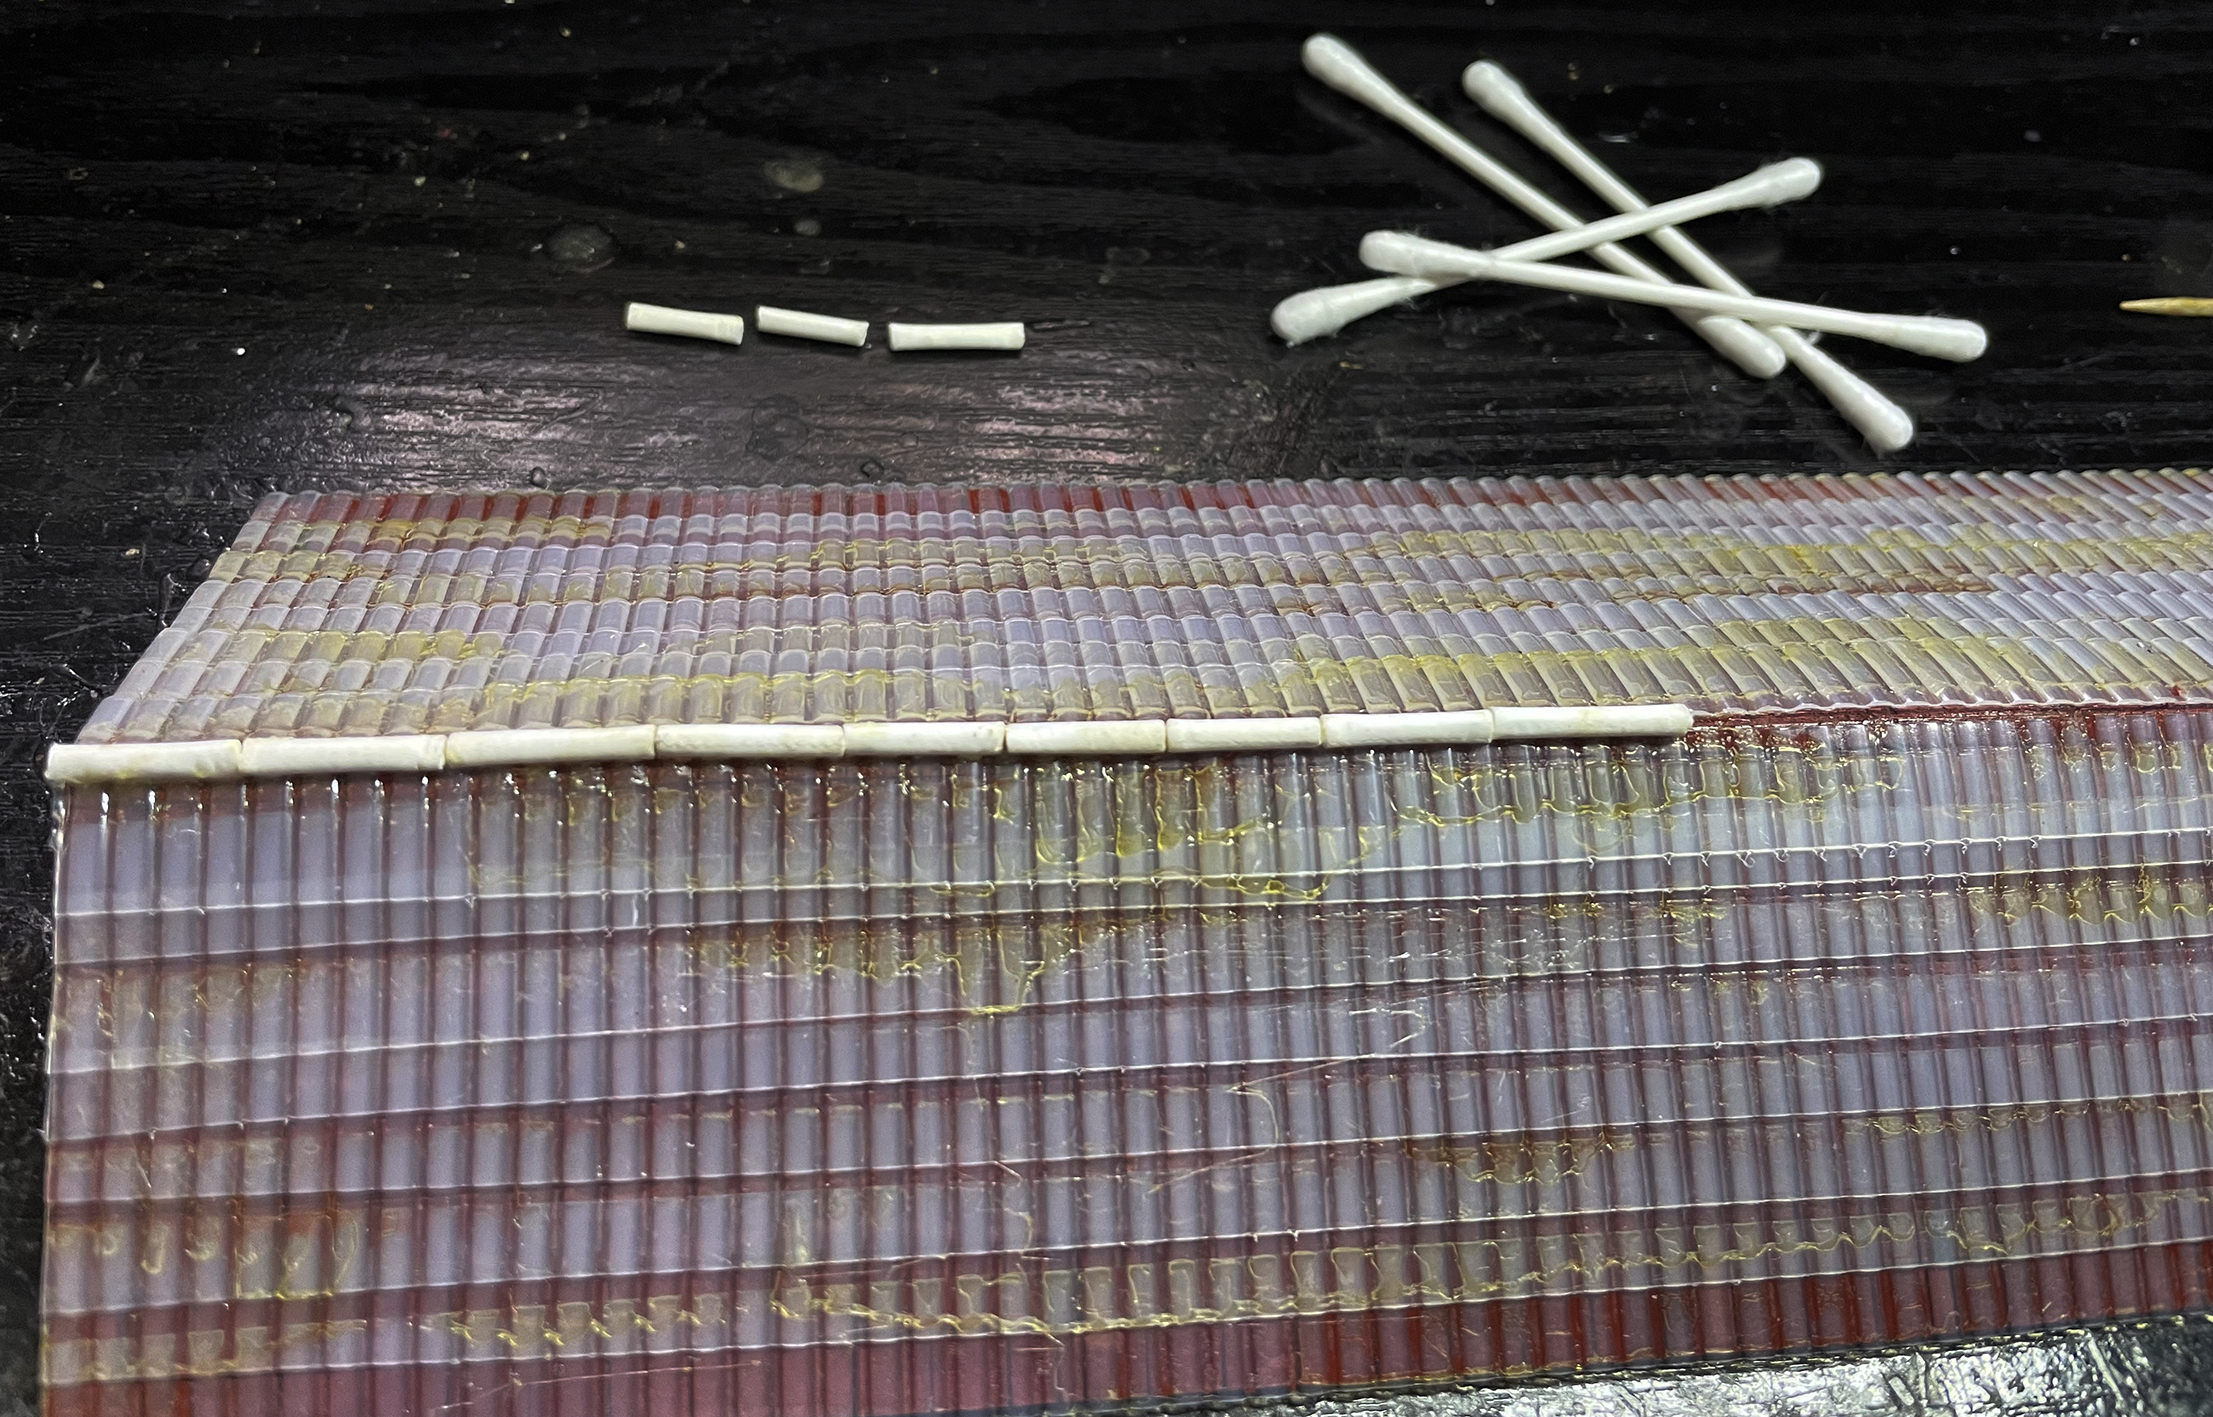
I have upgraded the roof to add the fridge liner ribbed sheets for the tiles and have added a pavement using the Sarrisa stencils and a Polyfiller and PVA mix, to give it that 3D feel.
The first picture is before the upgrade.
The next picture we are starting to glue and lay the fridge liner tiles to the roof.
The third picture is more tiles added.
The fourth picture is the completed tiled roof.
The fifth picture has the ridge tiles being added.
The sixth picture shows what is used for the ridge tiles, the tubes from cotton buds, cut in 2 cm or so lengths and glued along the top of the roof.


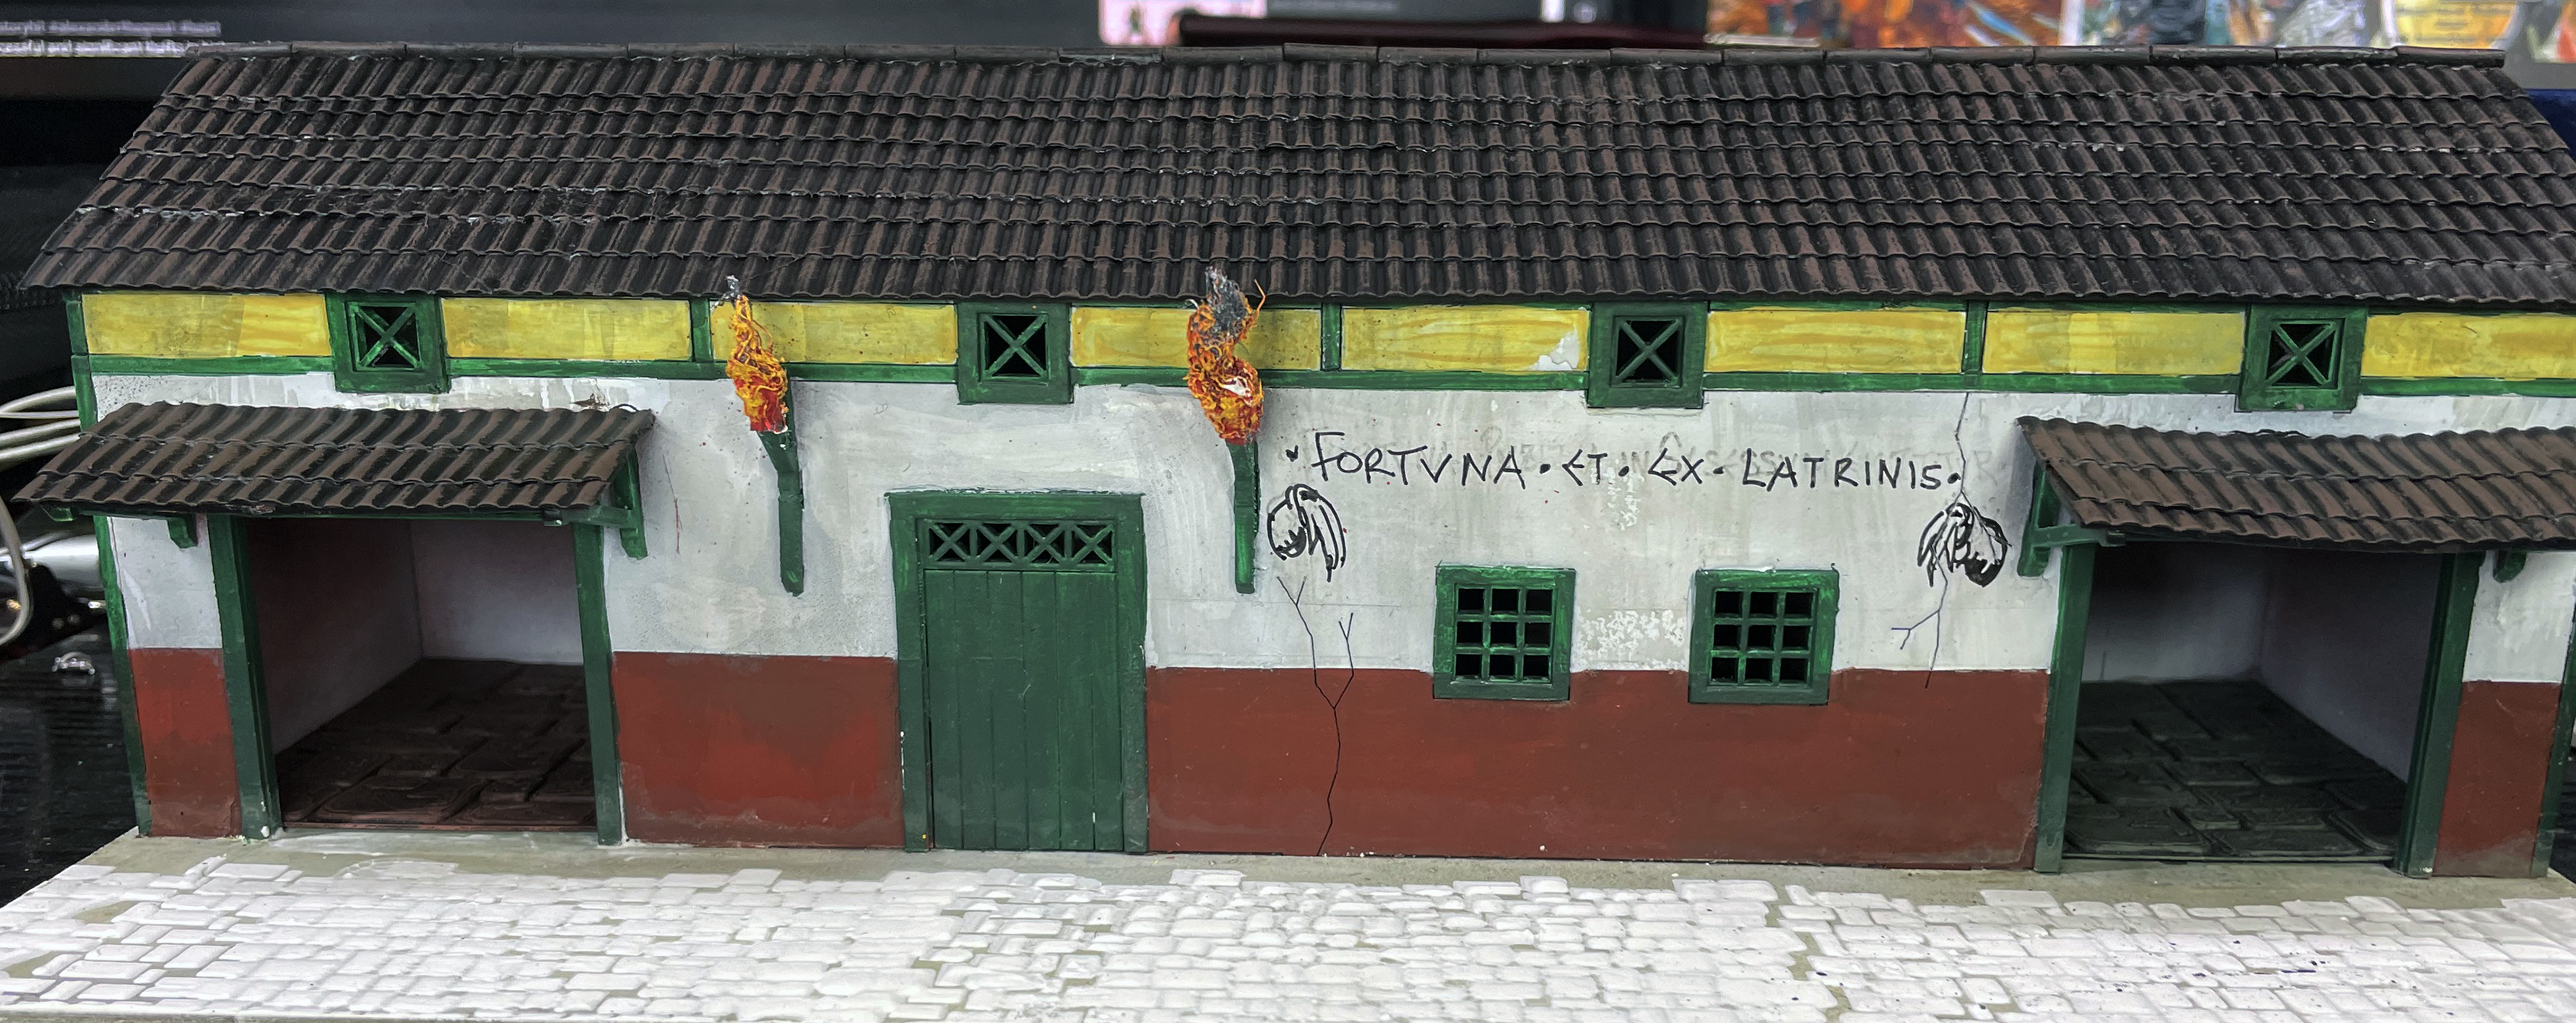
The next set of pictures is how I painted the roof, which is very simple.
In the first image the tiles are primed black.
The second image I did a heavy drybrush of Vallejo Game Colour Scorched Earth
The third image I drybrushed Vallejo Game Colour Filthy Brown.
The fourth image I drybrushed Vallejo Game Colour Terracotta, to get it that red clay tile feel.
The fifth image I drybrushed Vallejo Game Colour Tan to highlight it.
The sixth image I put a wash of Vallejo Game Colour Wash first black and then sepia to make the colours richer.
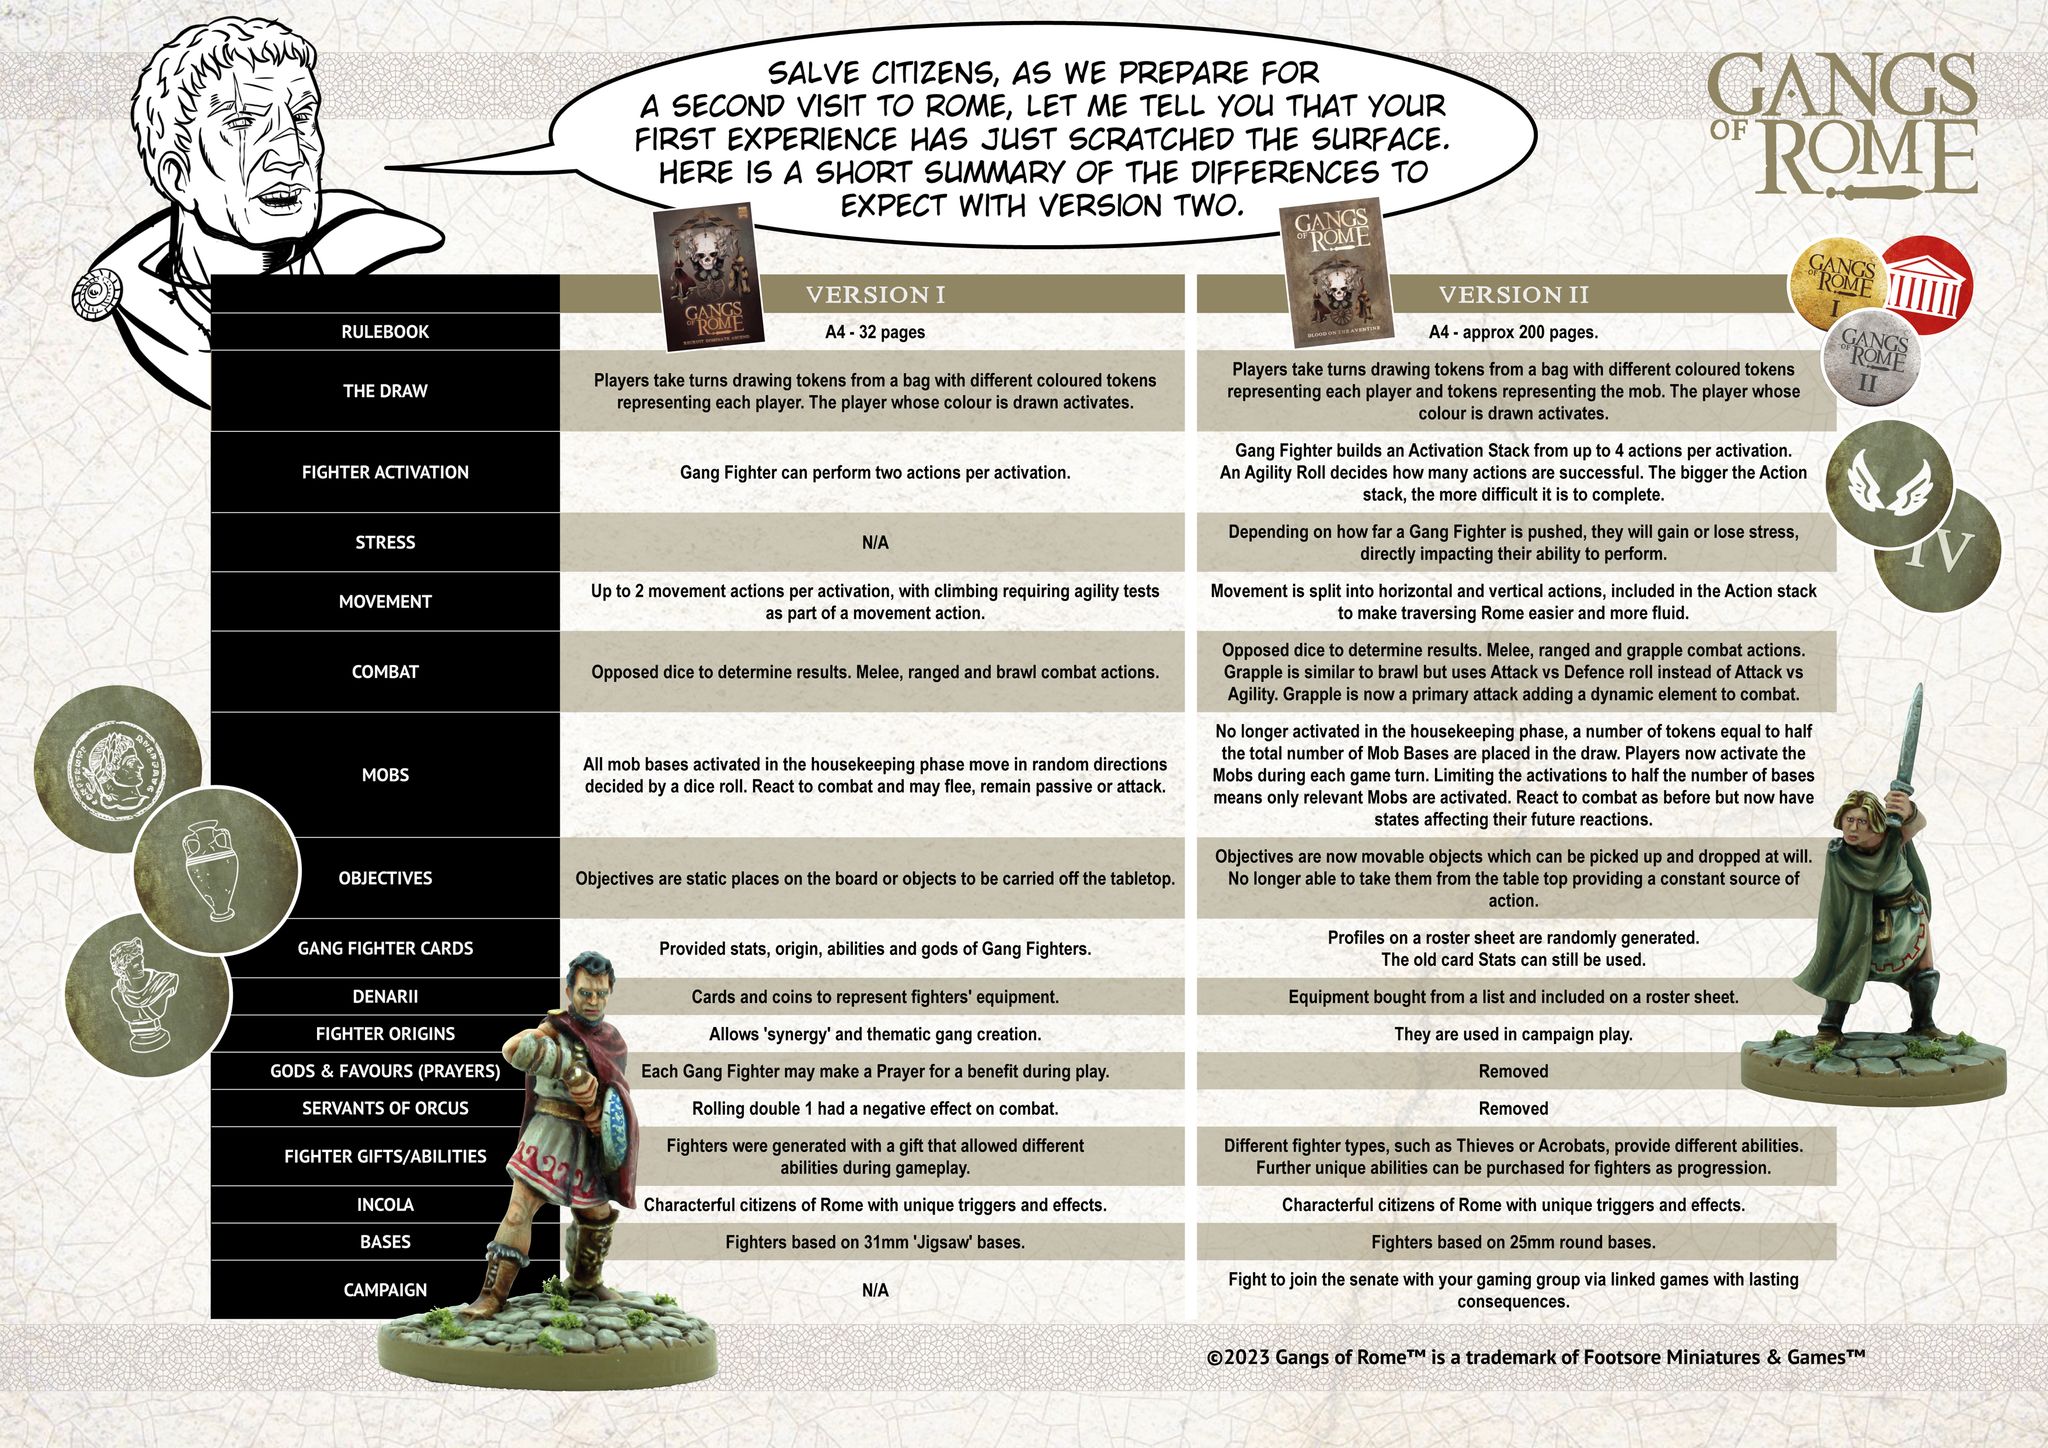
Whats Different Between First and Second Edition
This simple diagram helps explain the main differences between the games
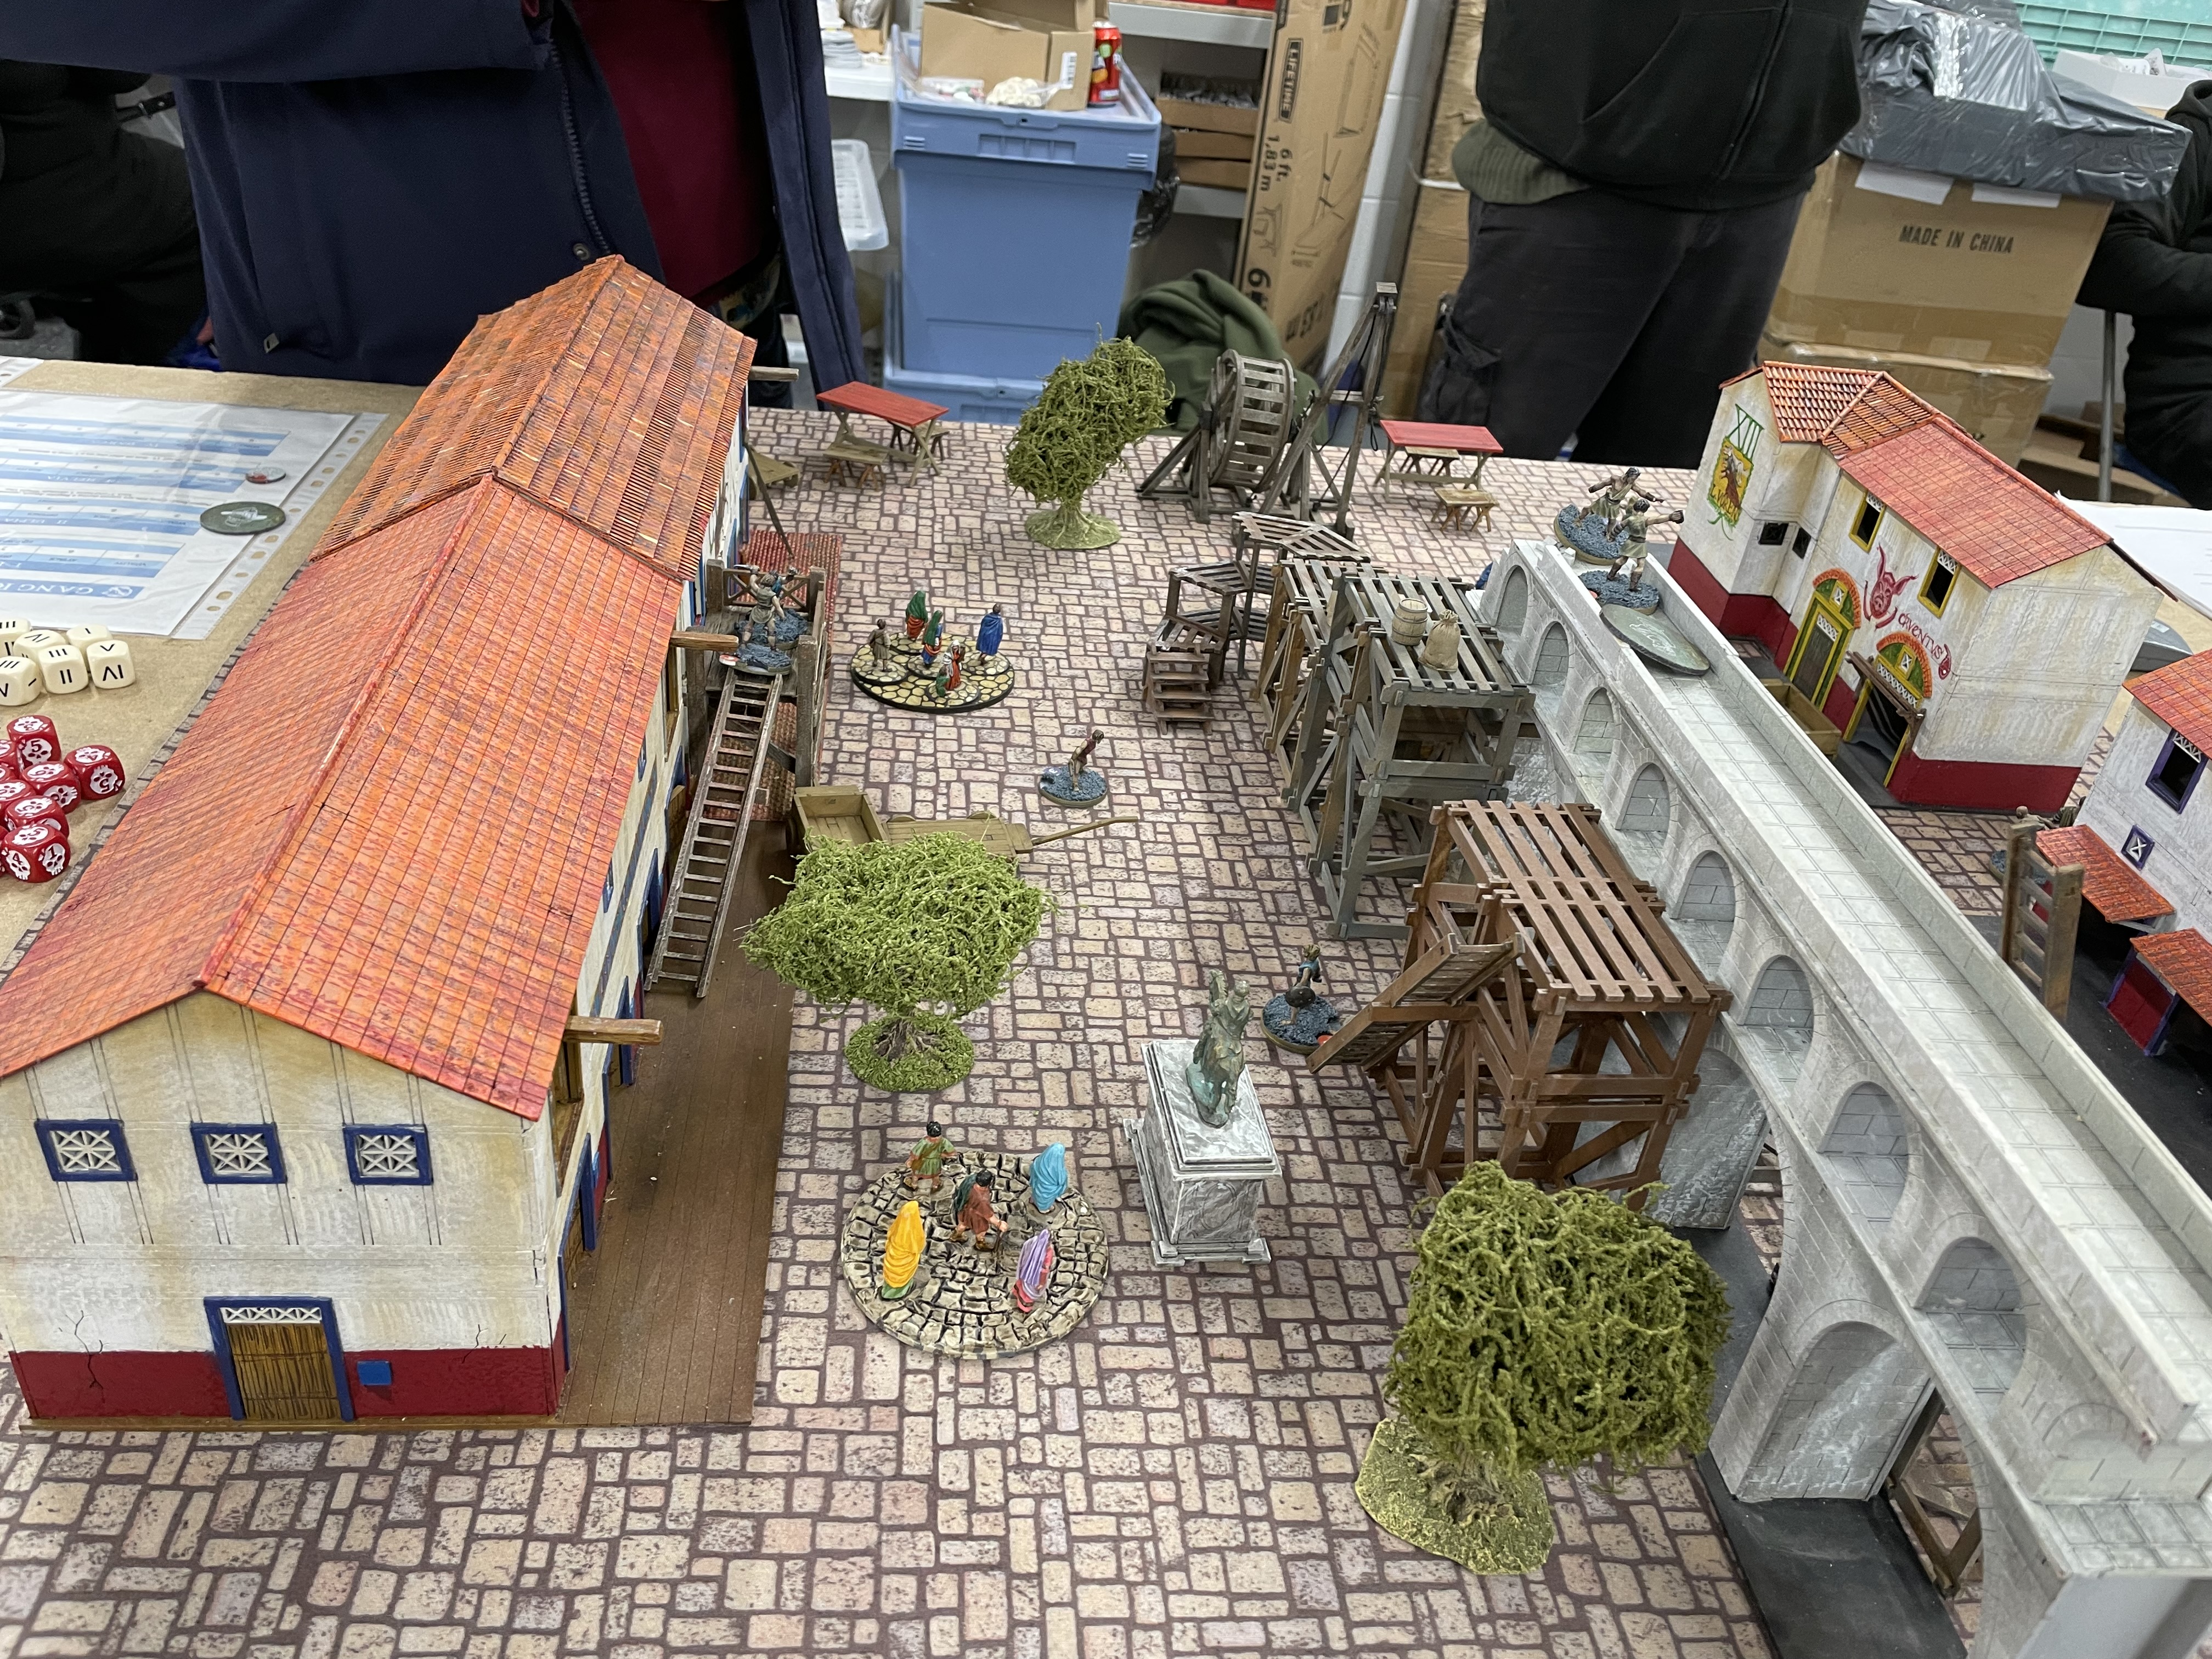
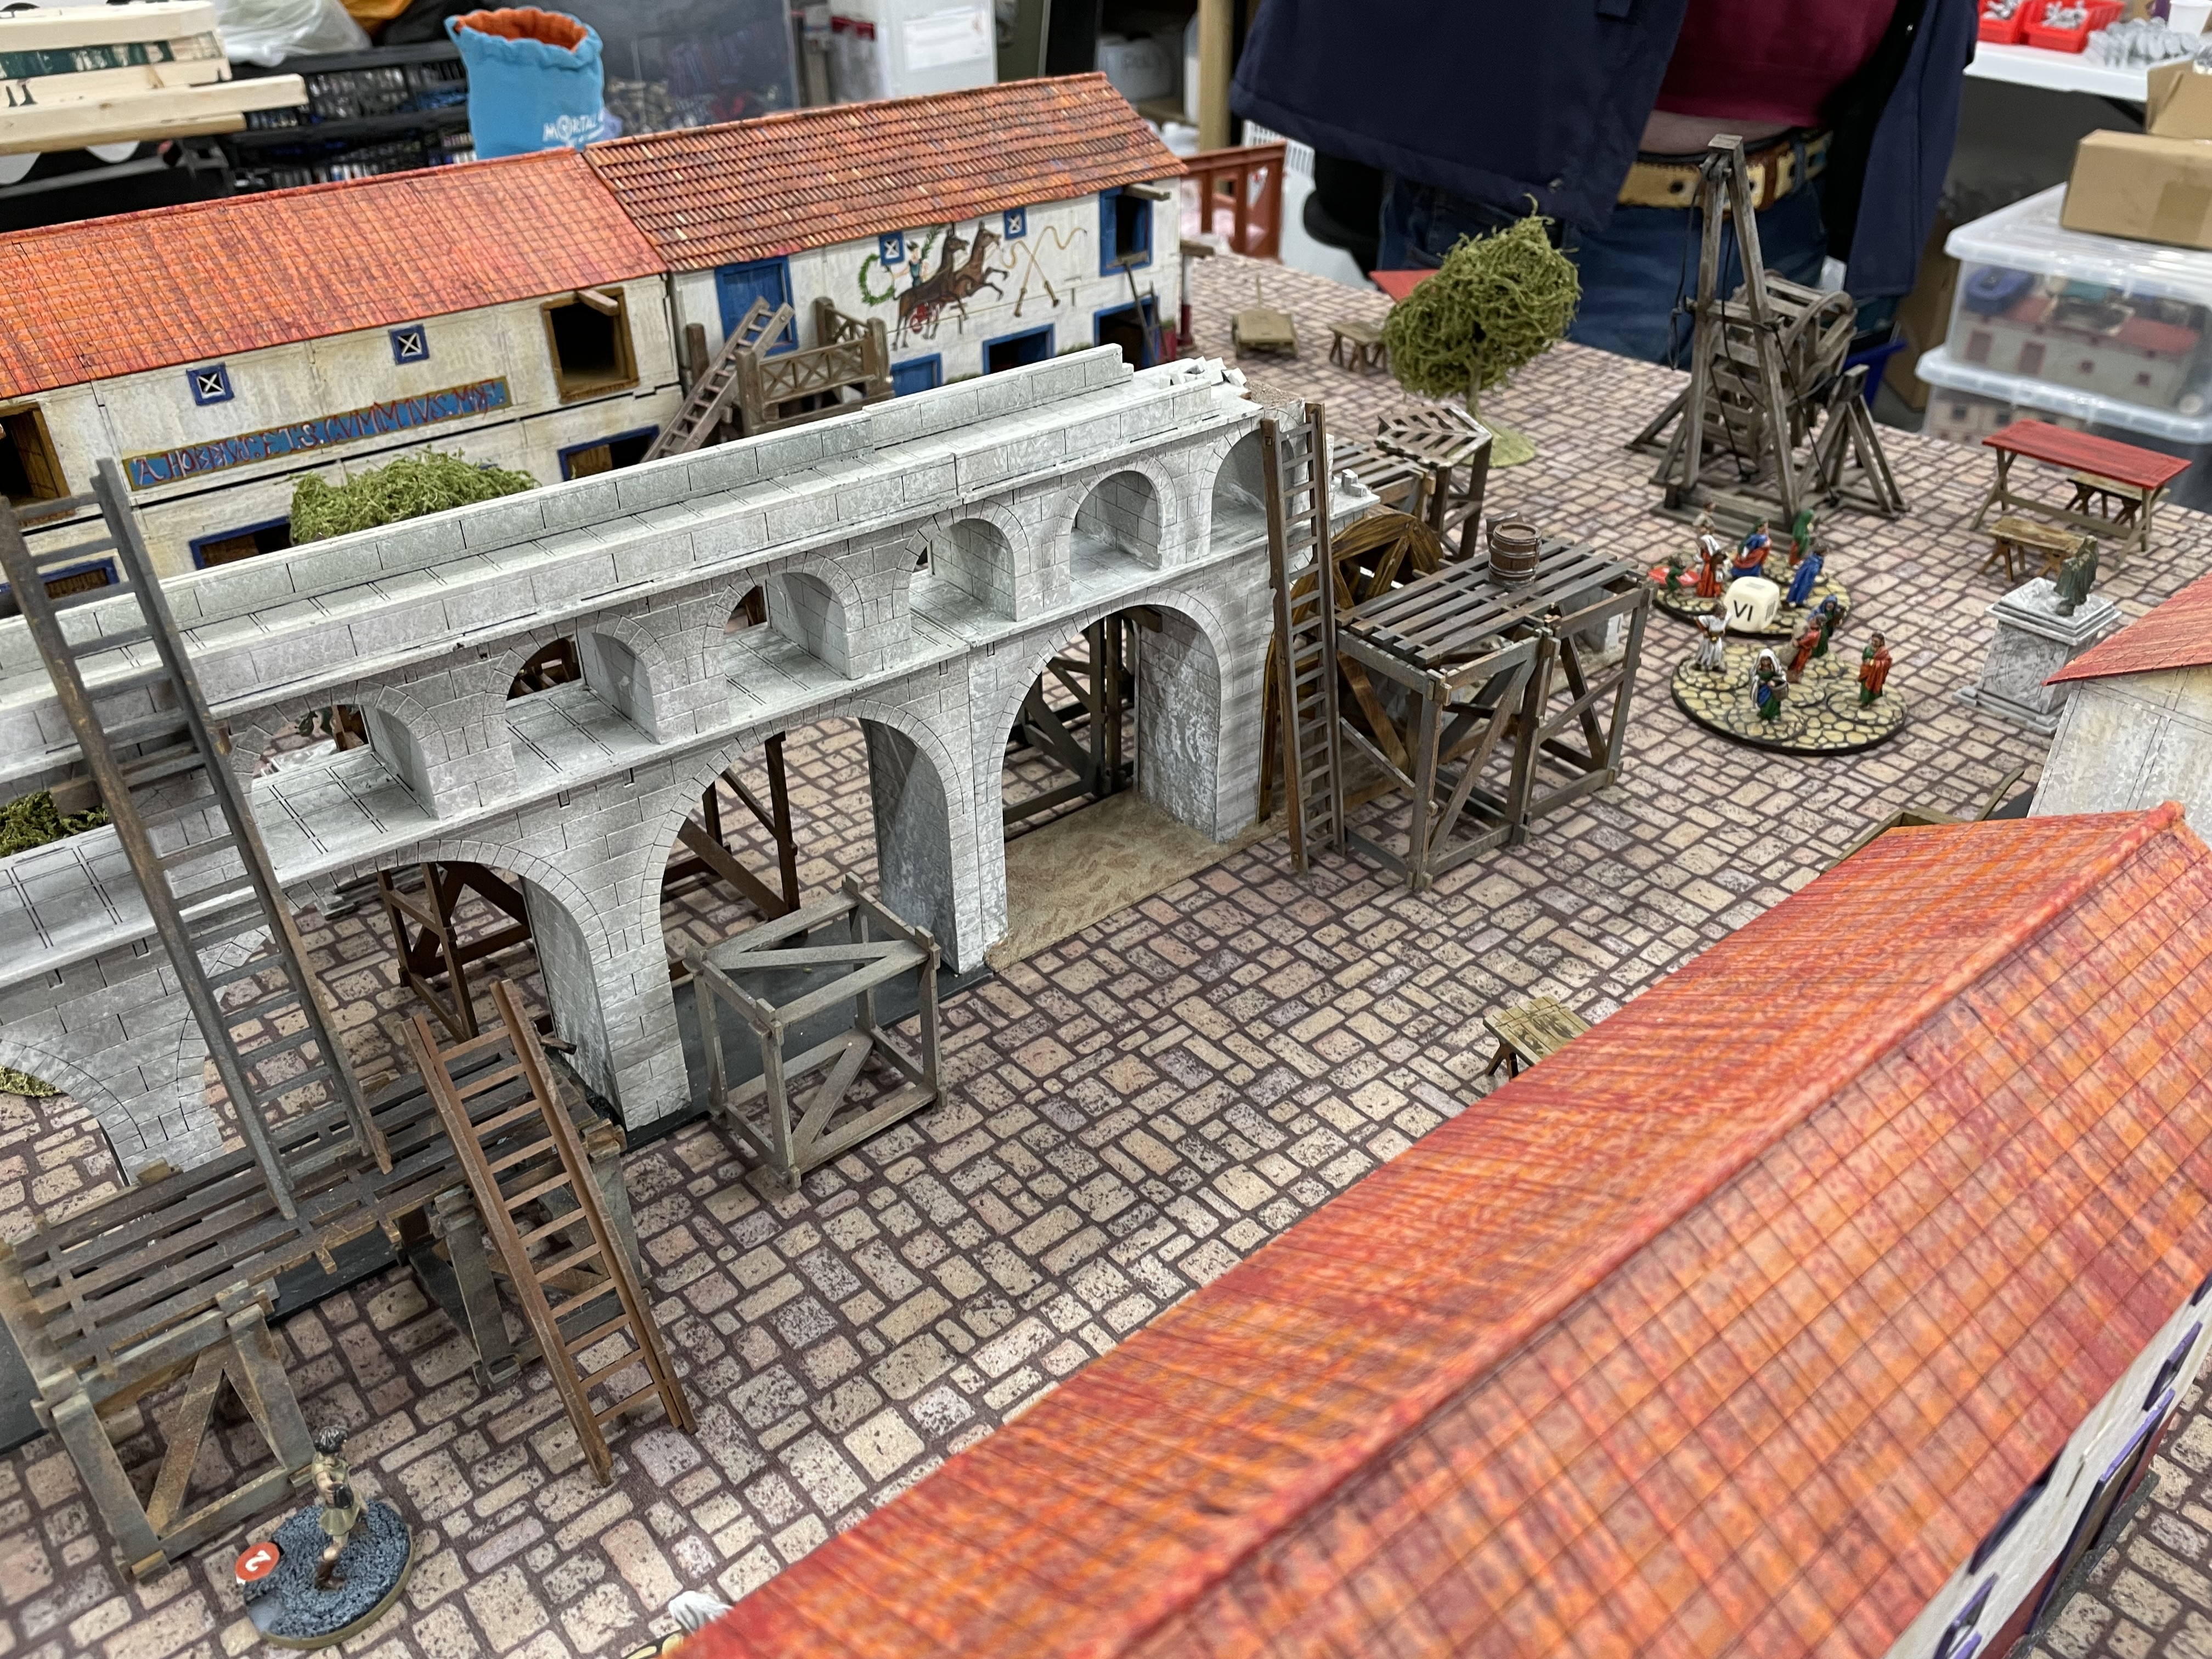
First Playtest Day of Gangs of Rome Two

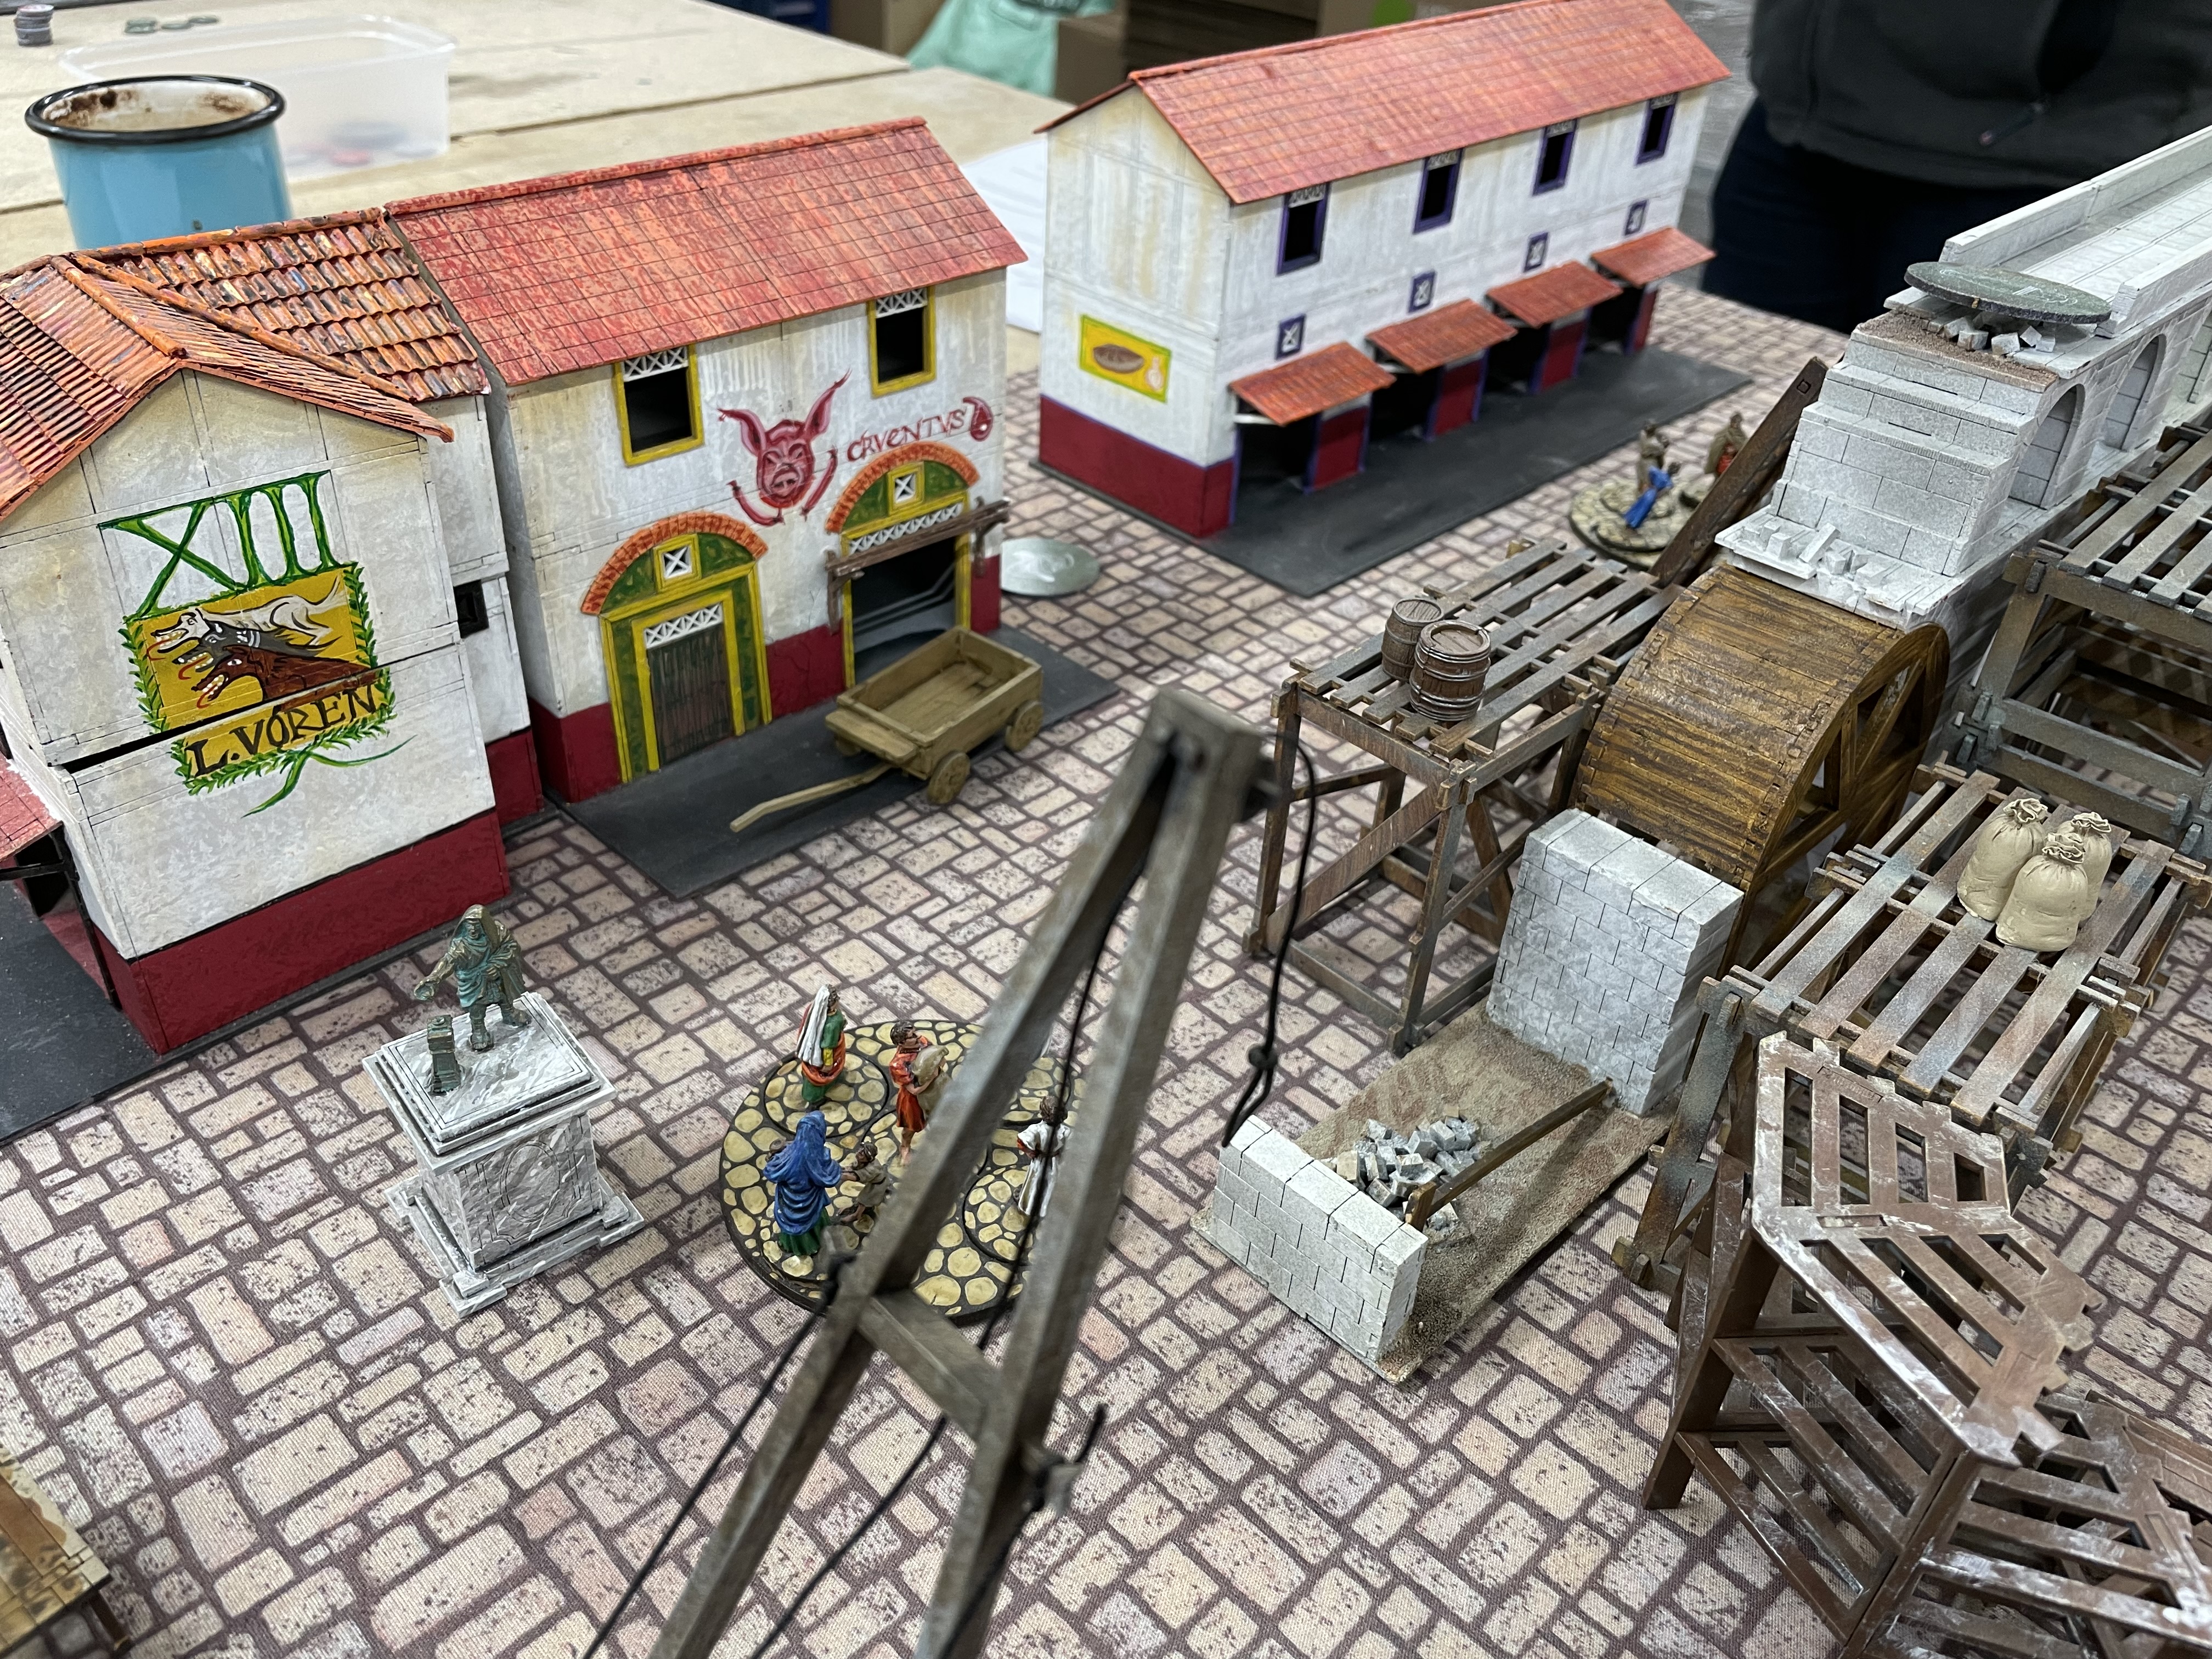
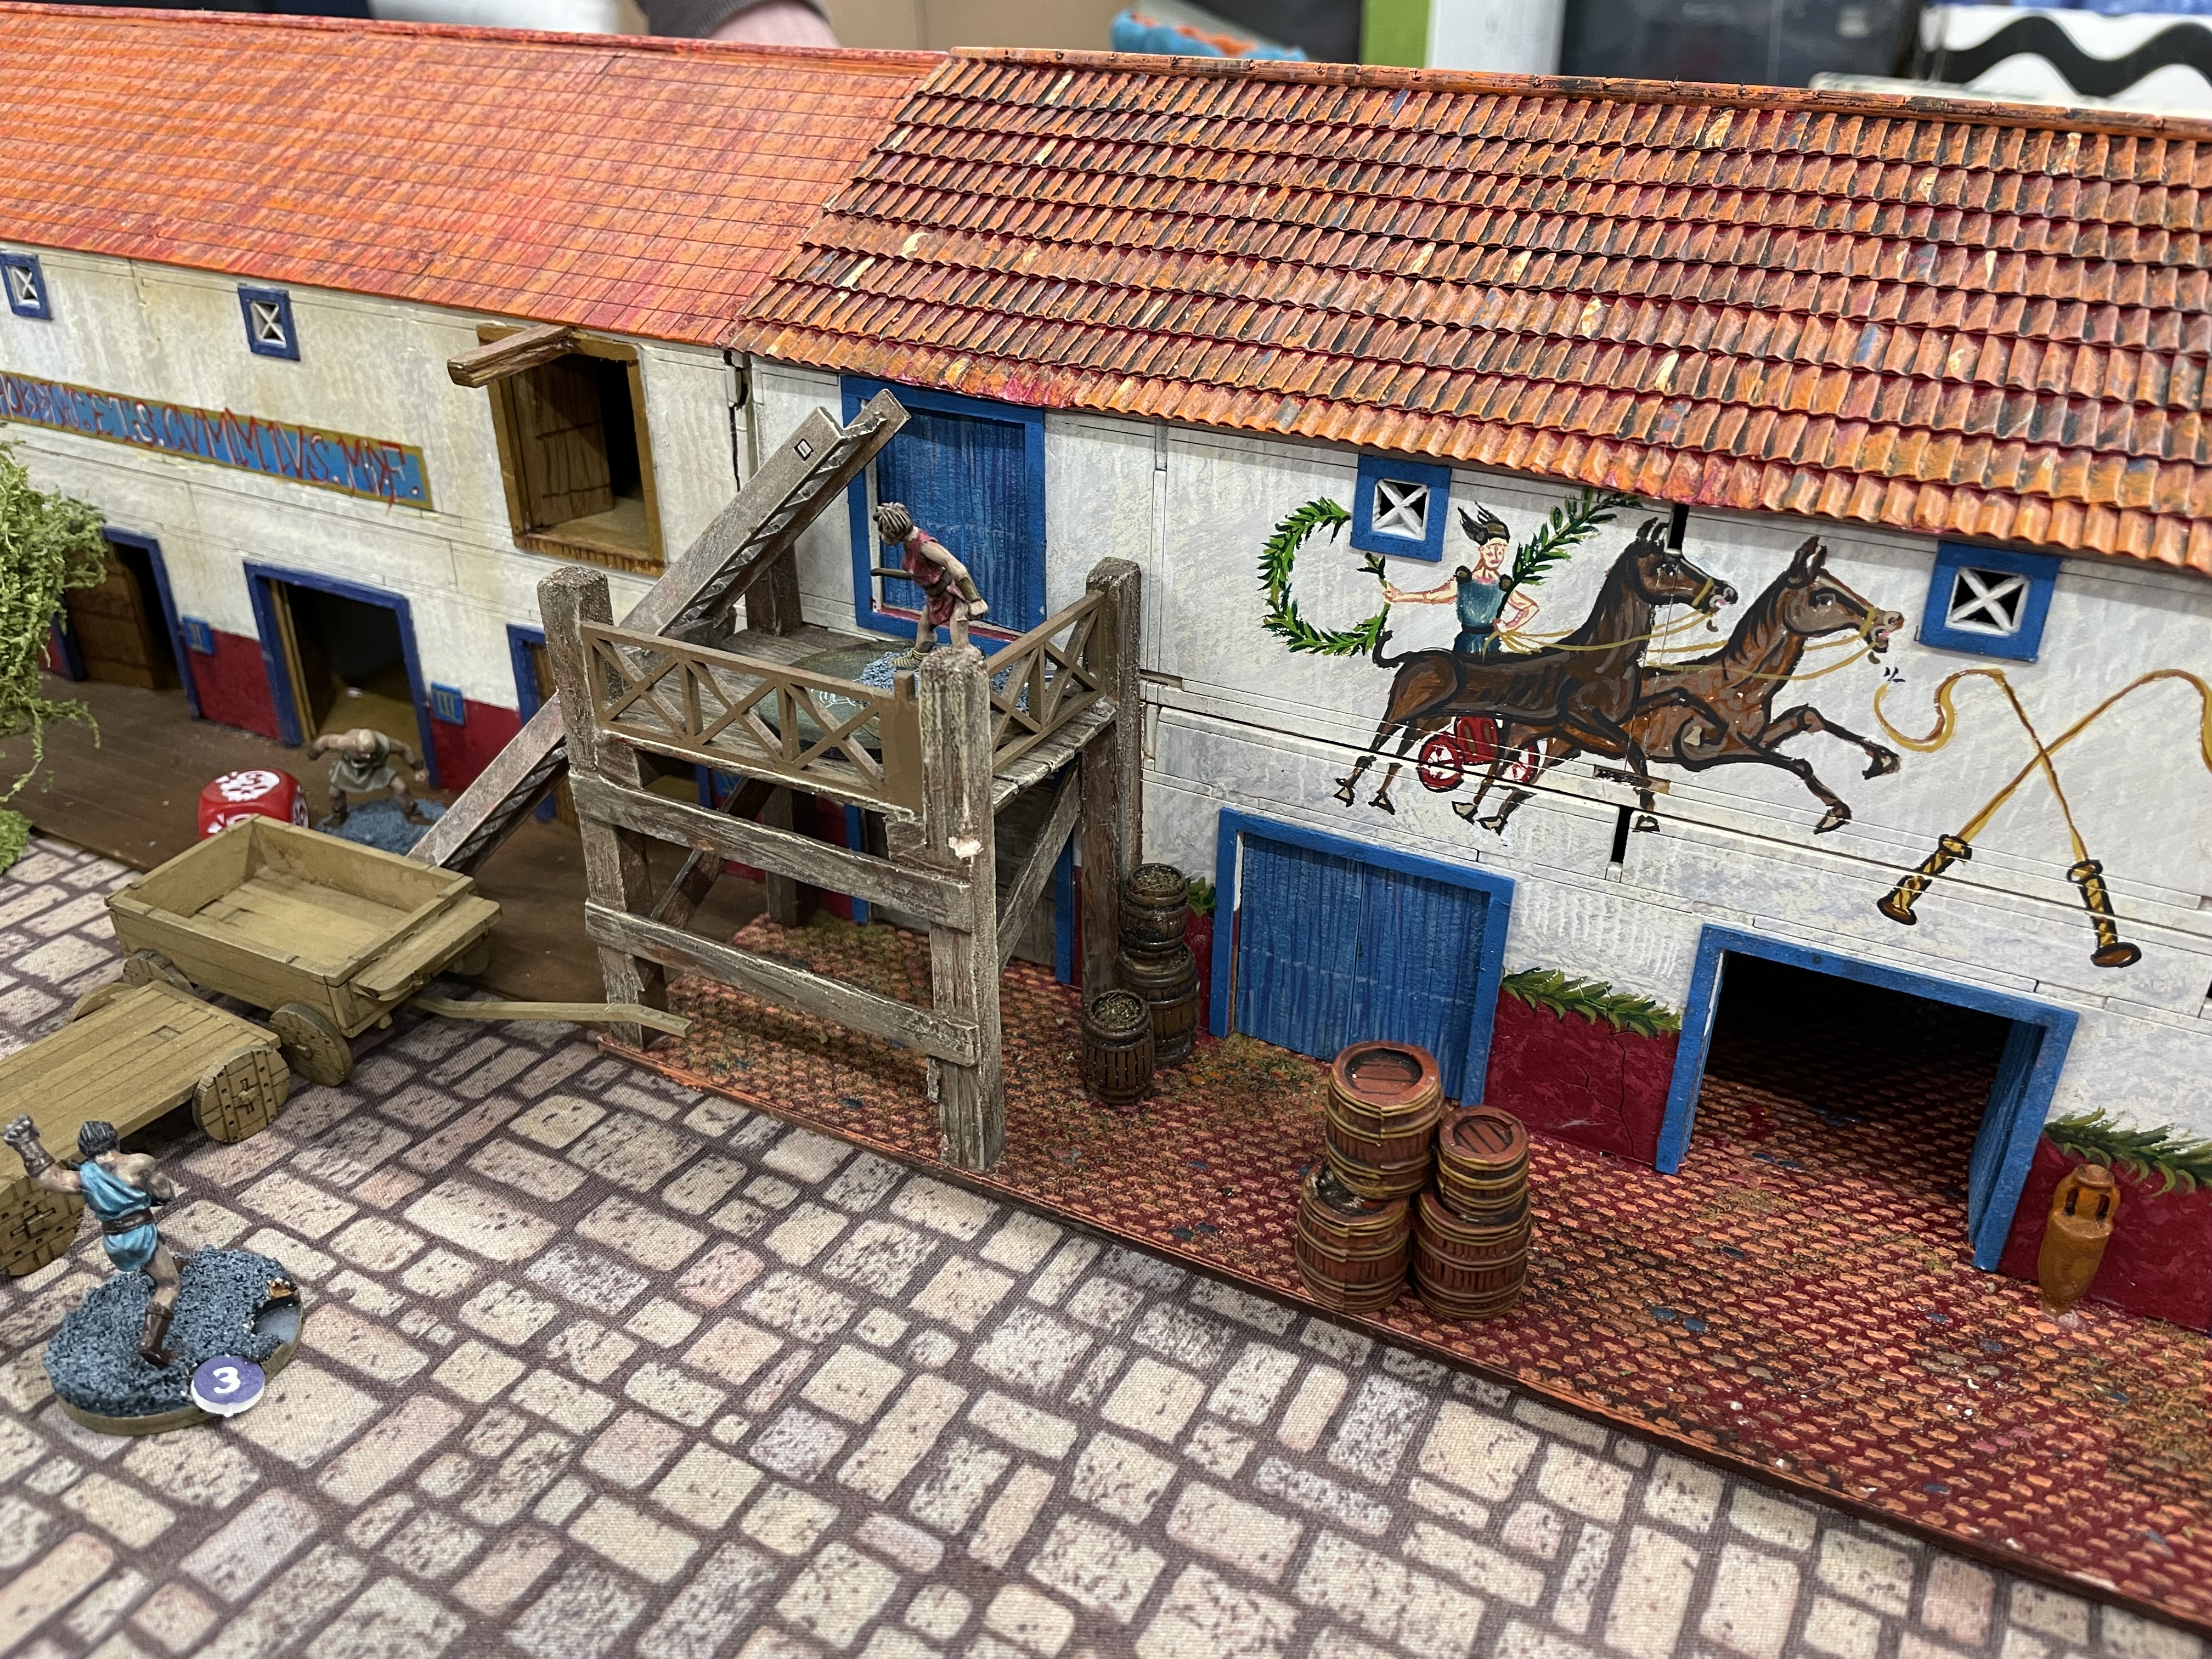
Had a cracking day playtesting the new Gangs of Rome, second edition rules and I am loving them. It’s the same basic game but with a get new mechanic for doing activations. It totally changes the game with its risk/reward mechanic for the better.
Well, I played the new version, and wow, small changes but a significant impact on the game. This edition is a real improvement. I love the Action Stack system for activation, where the greater the risk, the greater the reward, but also the greater the failure. I believe the new stress mechanic simulates the stress for the ganger and the player, and the new movement actions make the game flow easier. In short, this wonderful game plays even better.
It was an honour to play with the great Dicky Boyds buildings and they are amazing.
I would love to say more but instead have are some pictures of the day.


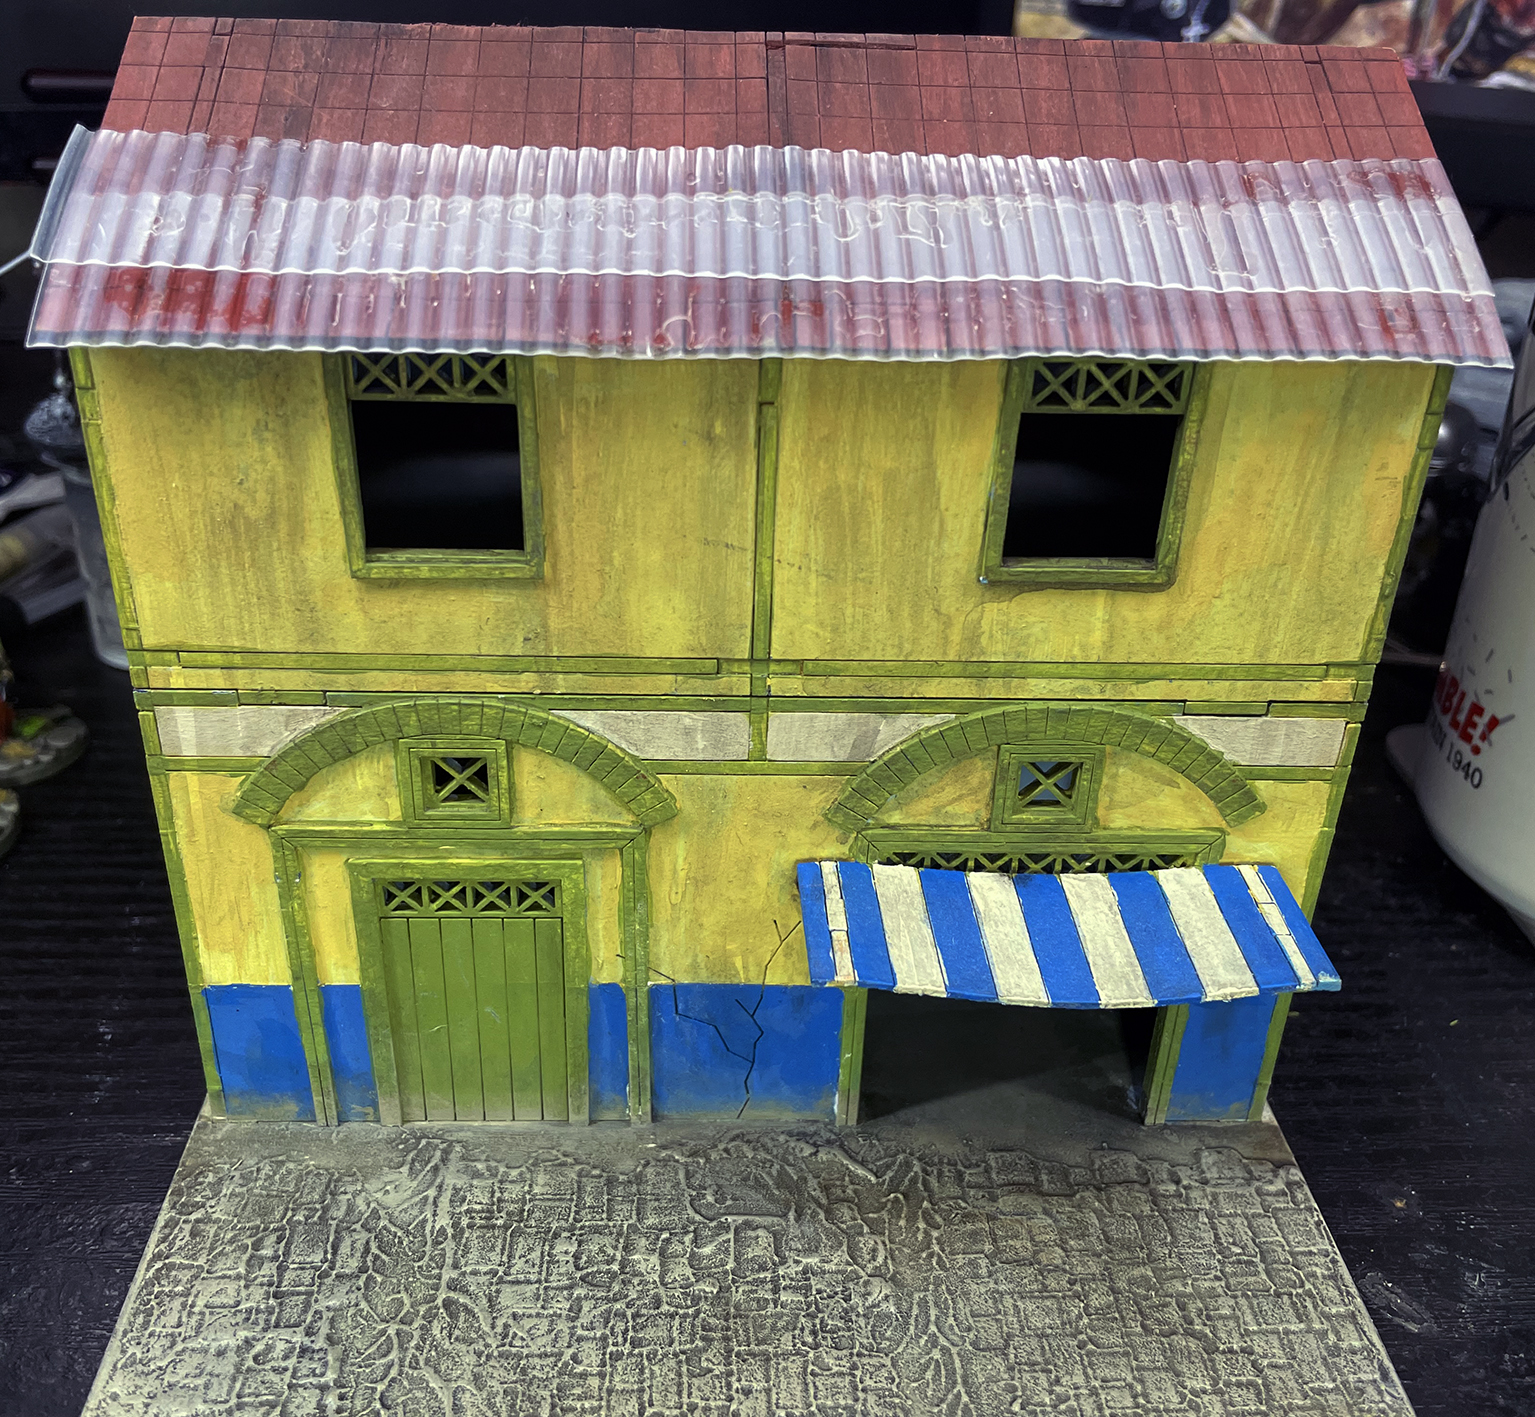
Second Building and Guide to Roofing
I have finished the second revamped building using the EVA plastic fridge liners from Amazon and I think they can out much better than the corrugated cardboard as they are much strong and sturdier.
Here is a link to the ones I have used. Fridge Liners
I cut them into 1cm wide stripes and laid then down so the next layer overlaps the layer below. Now these are not the best representation of Roman Pantiles as there is a short flat part between each rib but they are much better than the plain MDF roof from before.
Below is a small guide showing just how easy it is. I use contact adhesive to glue them down but it is messy, as PVA takes a day to dry.
The first image is the building before the revamp and see the roof has squares etching into it. I used these are a guide to help with placing the new tiles.
The image shows the EVA tiles placed and overlapping each other. With these tiles I actually cut them to 2cm in width not 1cm.
The third image shows them fully tiled.
The fourth shows them primed ready for painting. I have cheap car primer so the paint to stick to the plastic and not tub off.
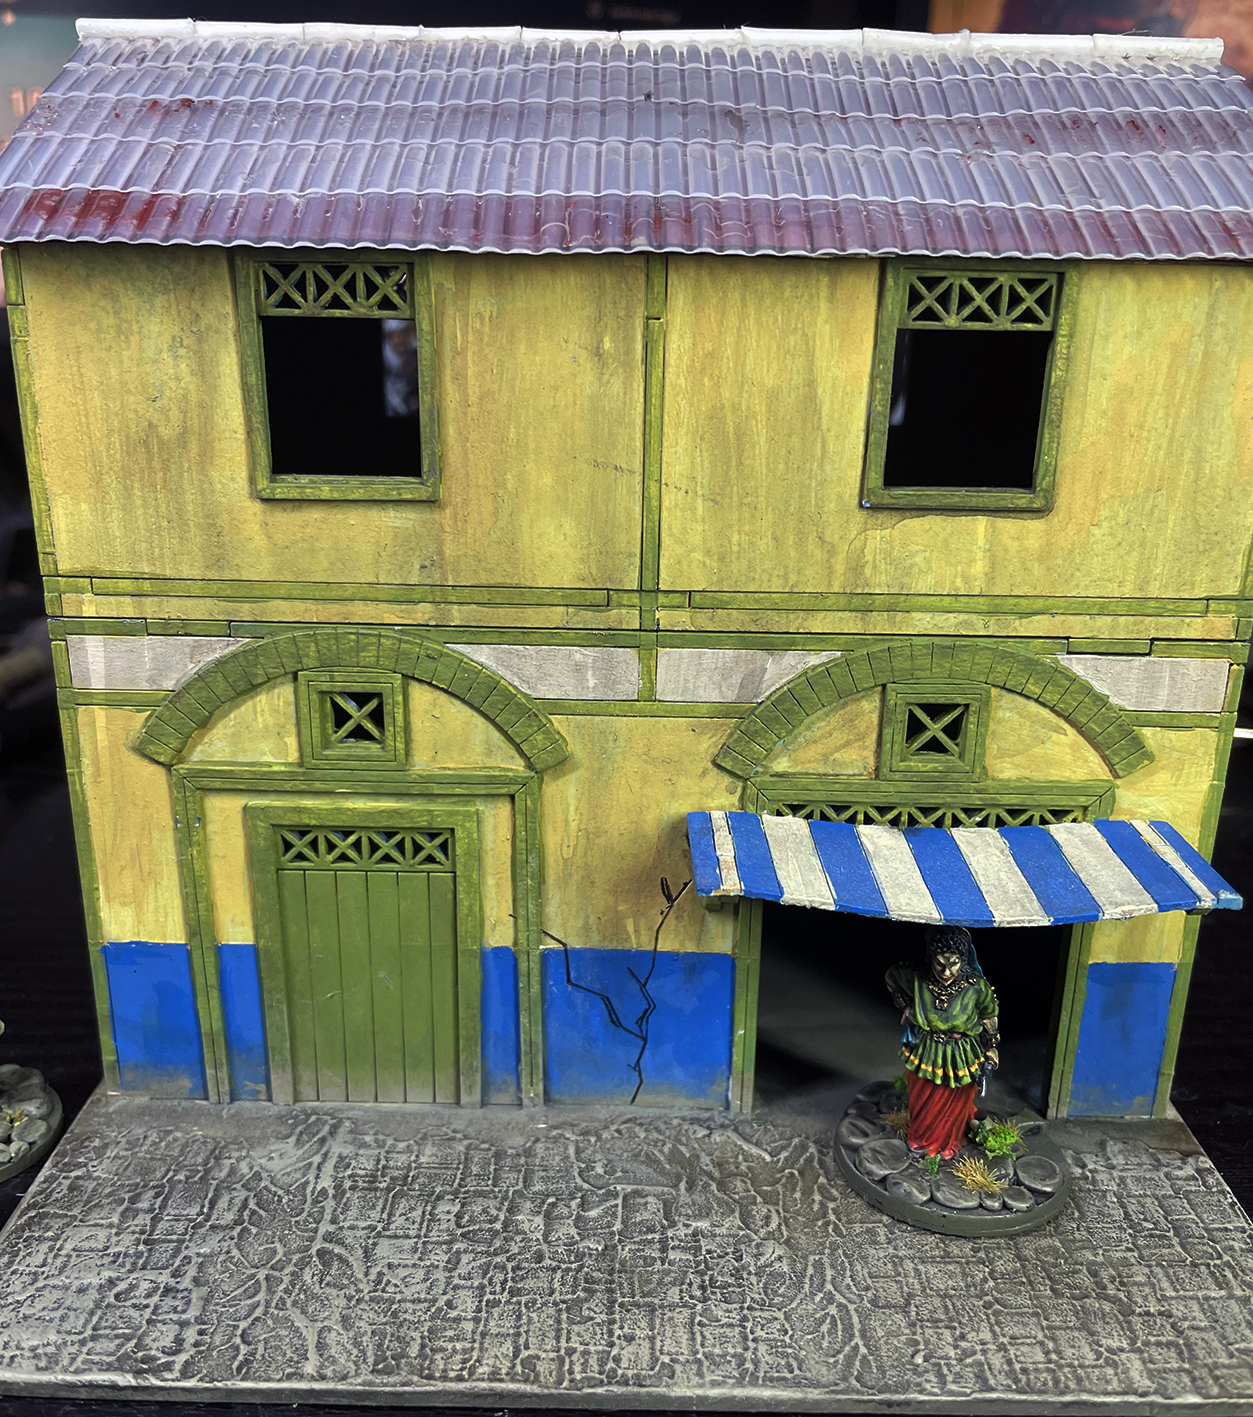
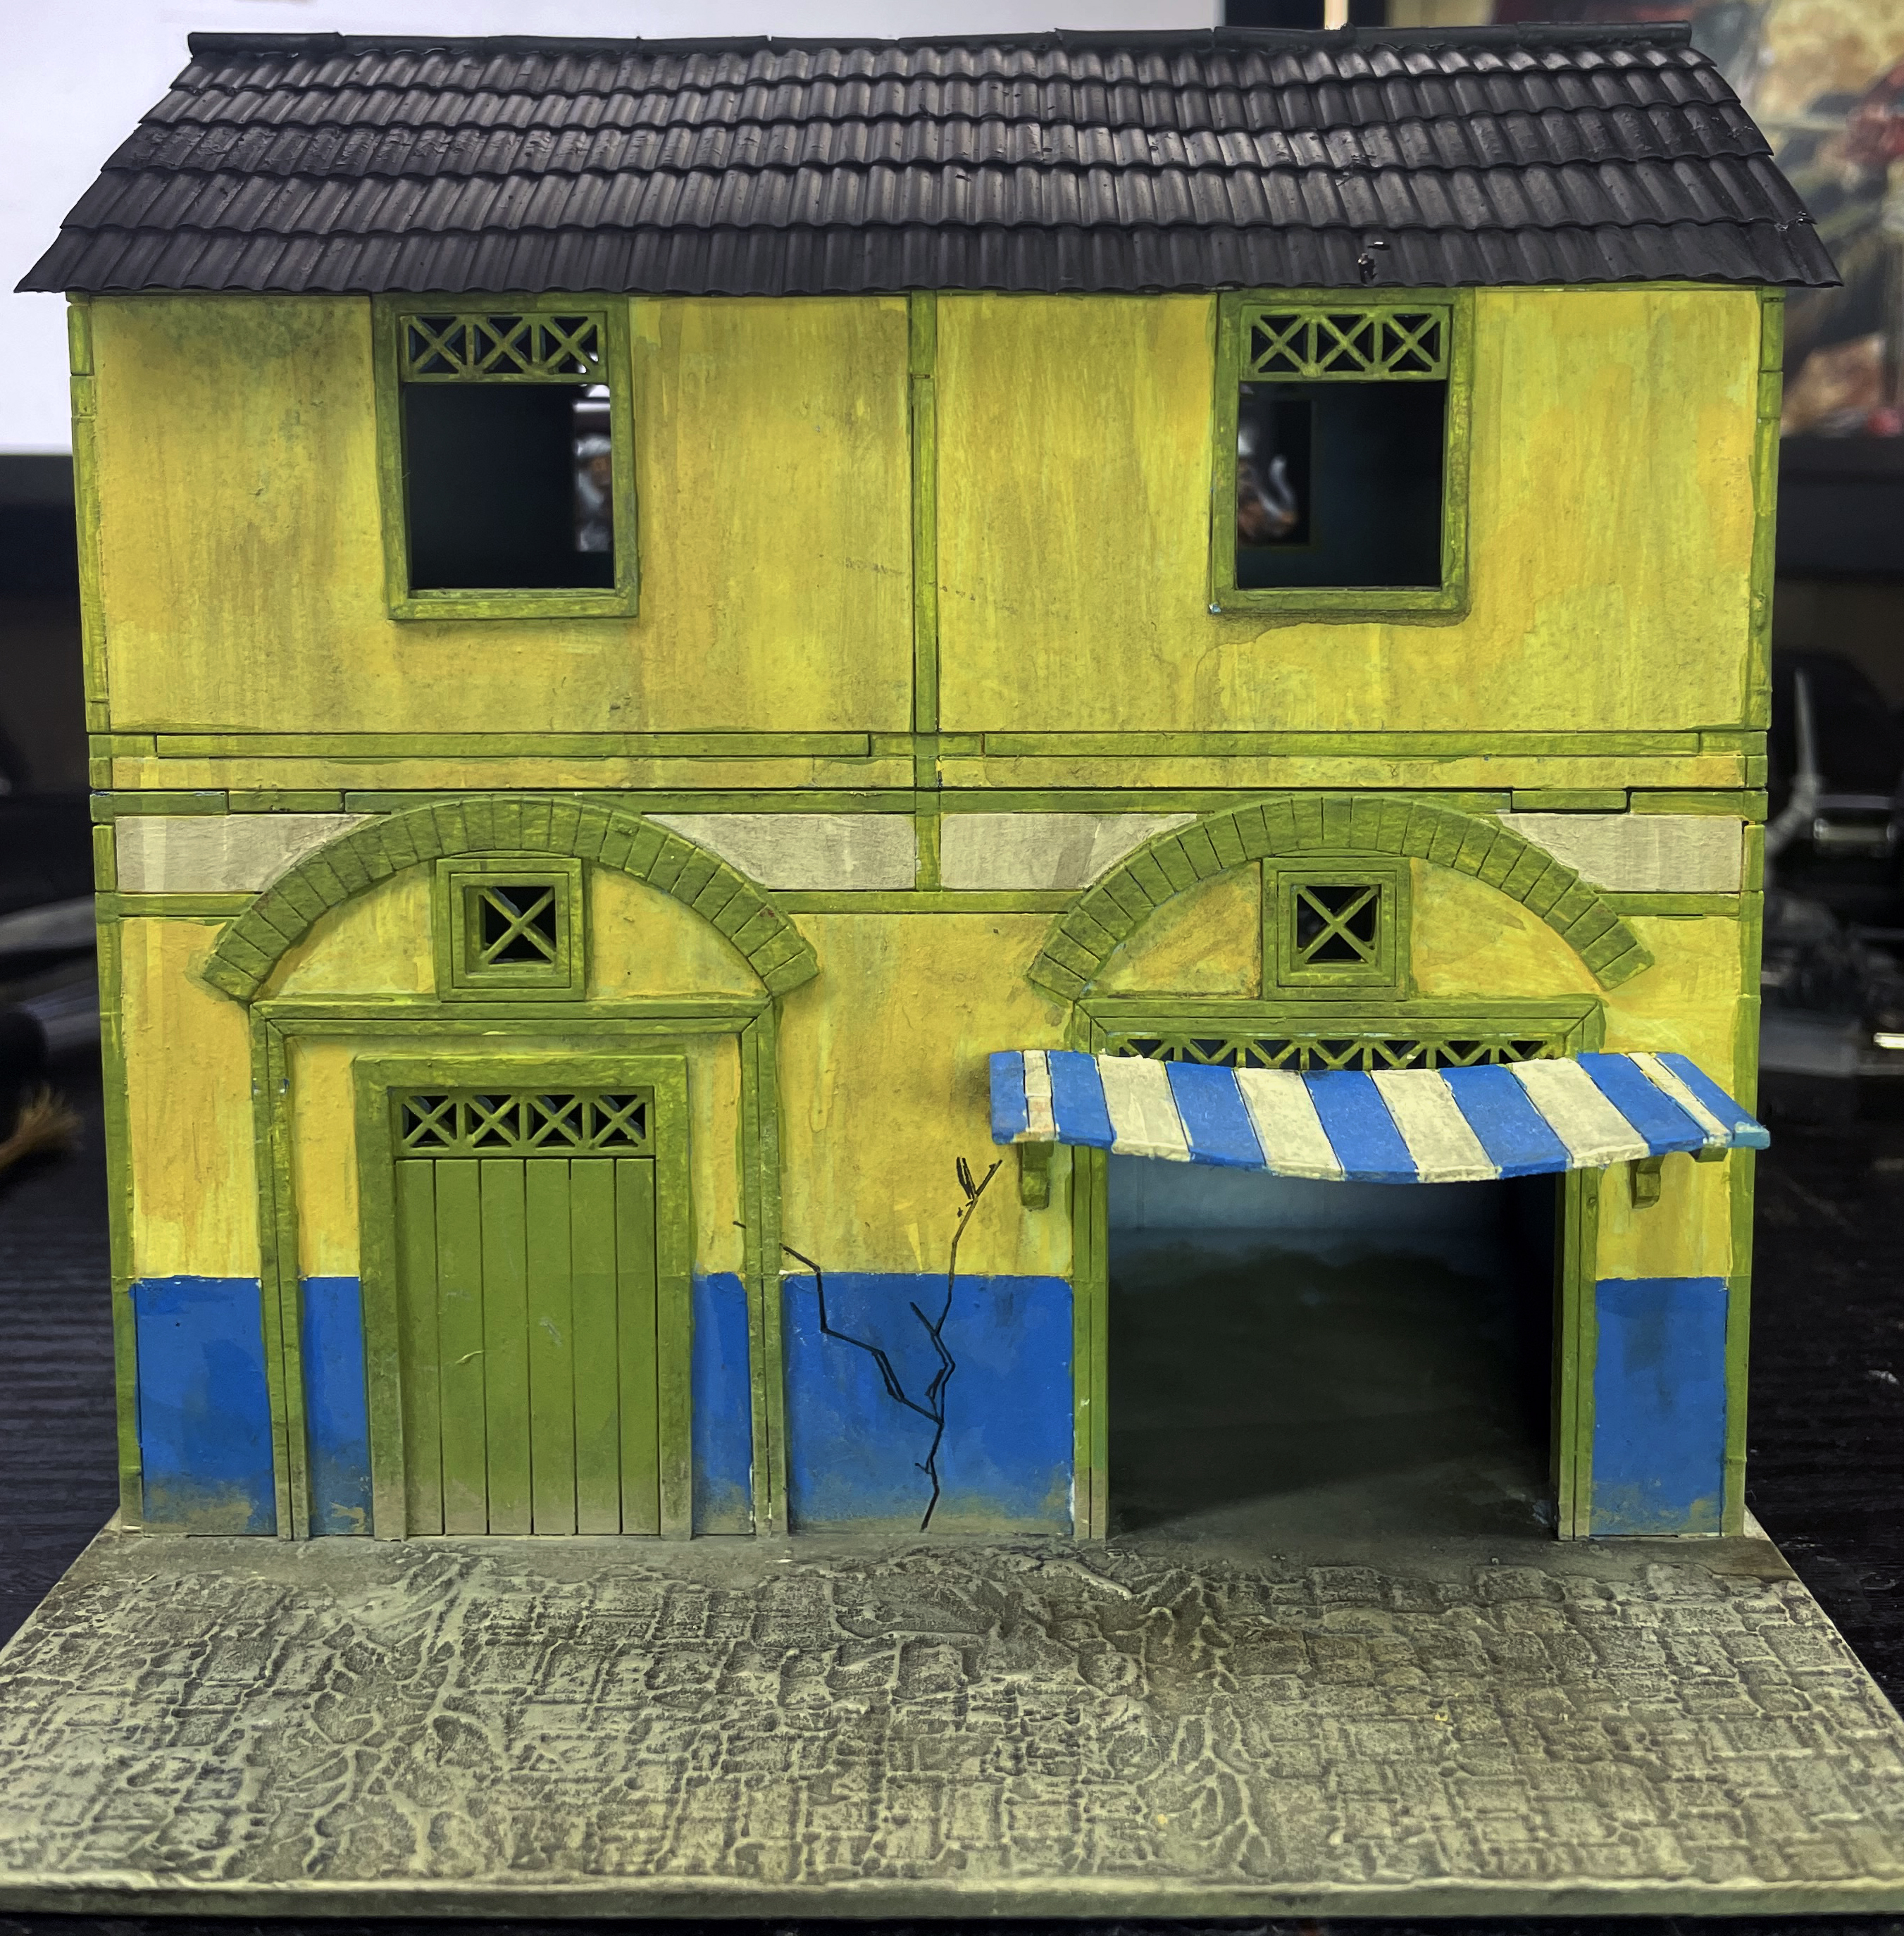
 Both of the First Two Buildings Weathered and Done
The First Building
 Detached Building
This is the start of the revamp journey but I have stupidly forgot to record the progress, but it was a test, I have recorded the progress on the next buildings.
I was actually very pleased with the results and now have decided that all my buildings need the roofing and street pathing revamp at the very least and the grime and dirt added to try the buildings together.