


Building terrain of Doom


Recommendations: 85
About the Project
Bam ? Rather than just thinking about building scenery Hopefully I can use this project to get some scenery built up to make my games more interesting. Having just got hold of starwars shatterpoint I'm looking forward to making the buildings for that, as well as making some fantasy buildings from card for moonstone. There are also plans underway for a small game table that doubles as a picture frame. I also need some epic tenches and bunkers for my kreig so fancy scratch building them using some templates from an old white dwarf. Gonna give some new techniques a go as well including messing with a cheap spray gun and trying out weathering solutions.
Related Genre: General
Related Contest: TerrainFest 2023
This Project is Active
Having a go at making some trees
Been thinking that the gaming tables are in need of some trees to dot around.
After watching some YouTube videos and looking through some books I decided on a wire armature covered in masking tape to make the trunk and branches.
This is then covered in a pva glue to hold it together and maybe a bit of sand or filler added to the glue to add some texture.
 Cut some strips of cheap gardening wire into strips about twice the length you want the tree to stand with a little extra added to form some roots so the tree stands up easily
 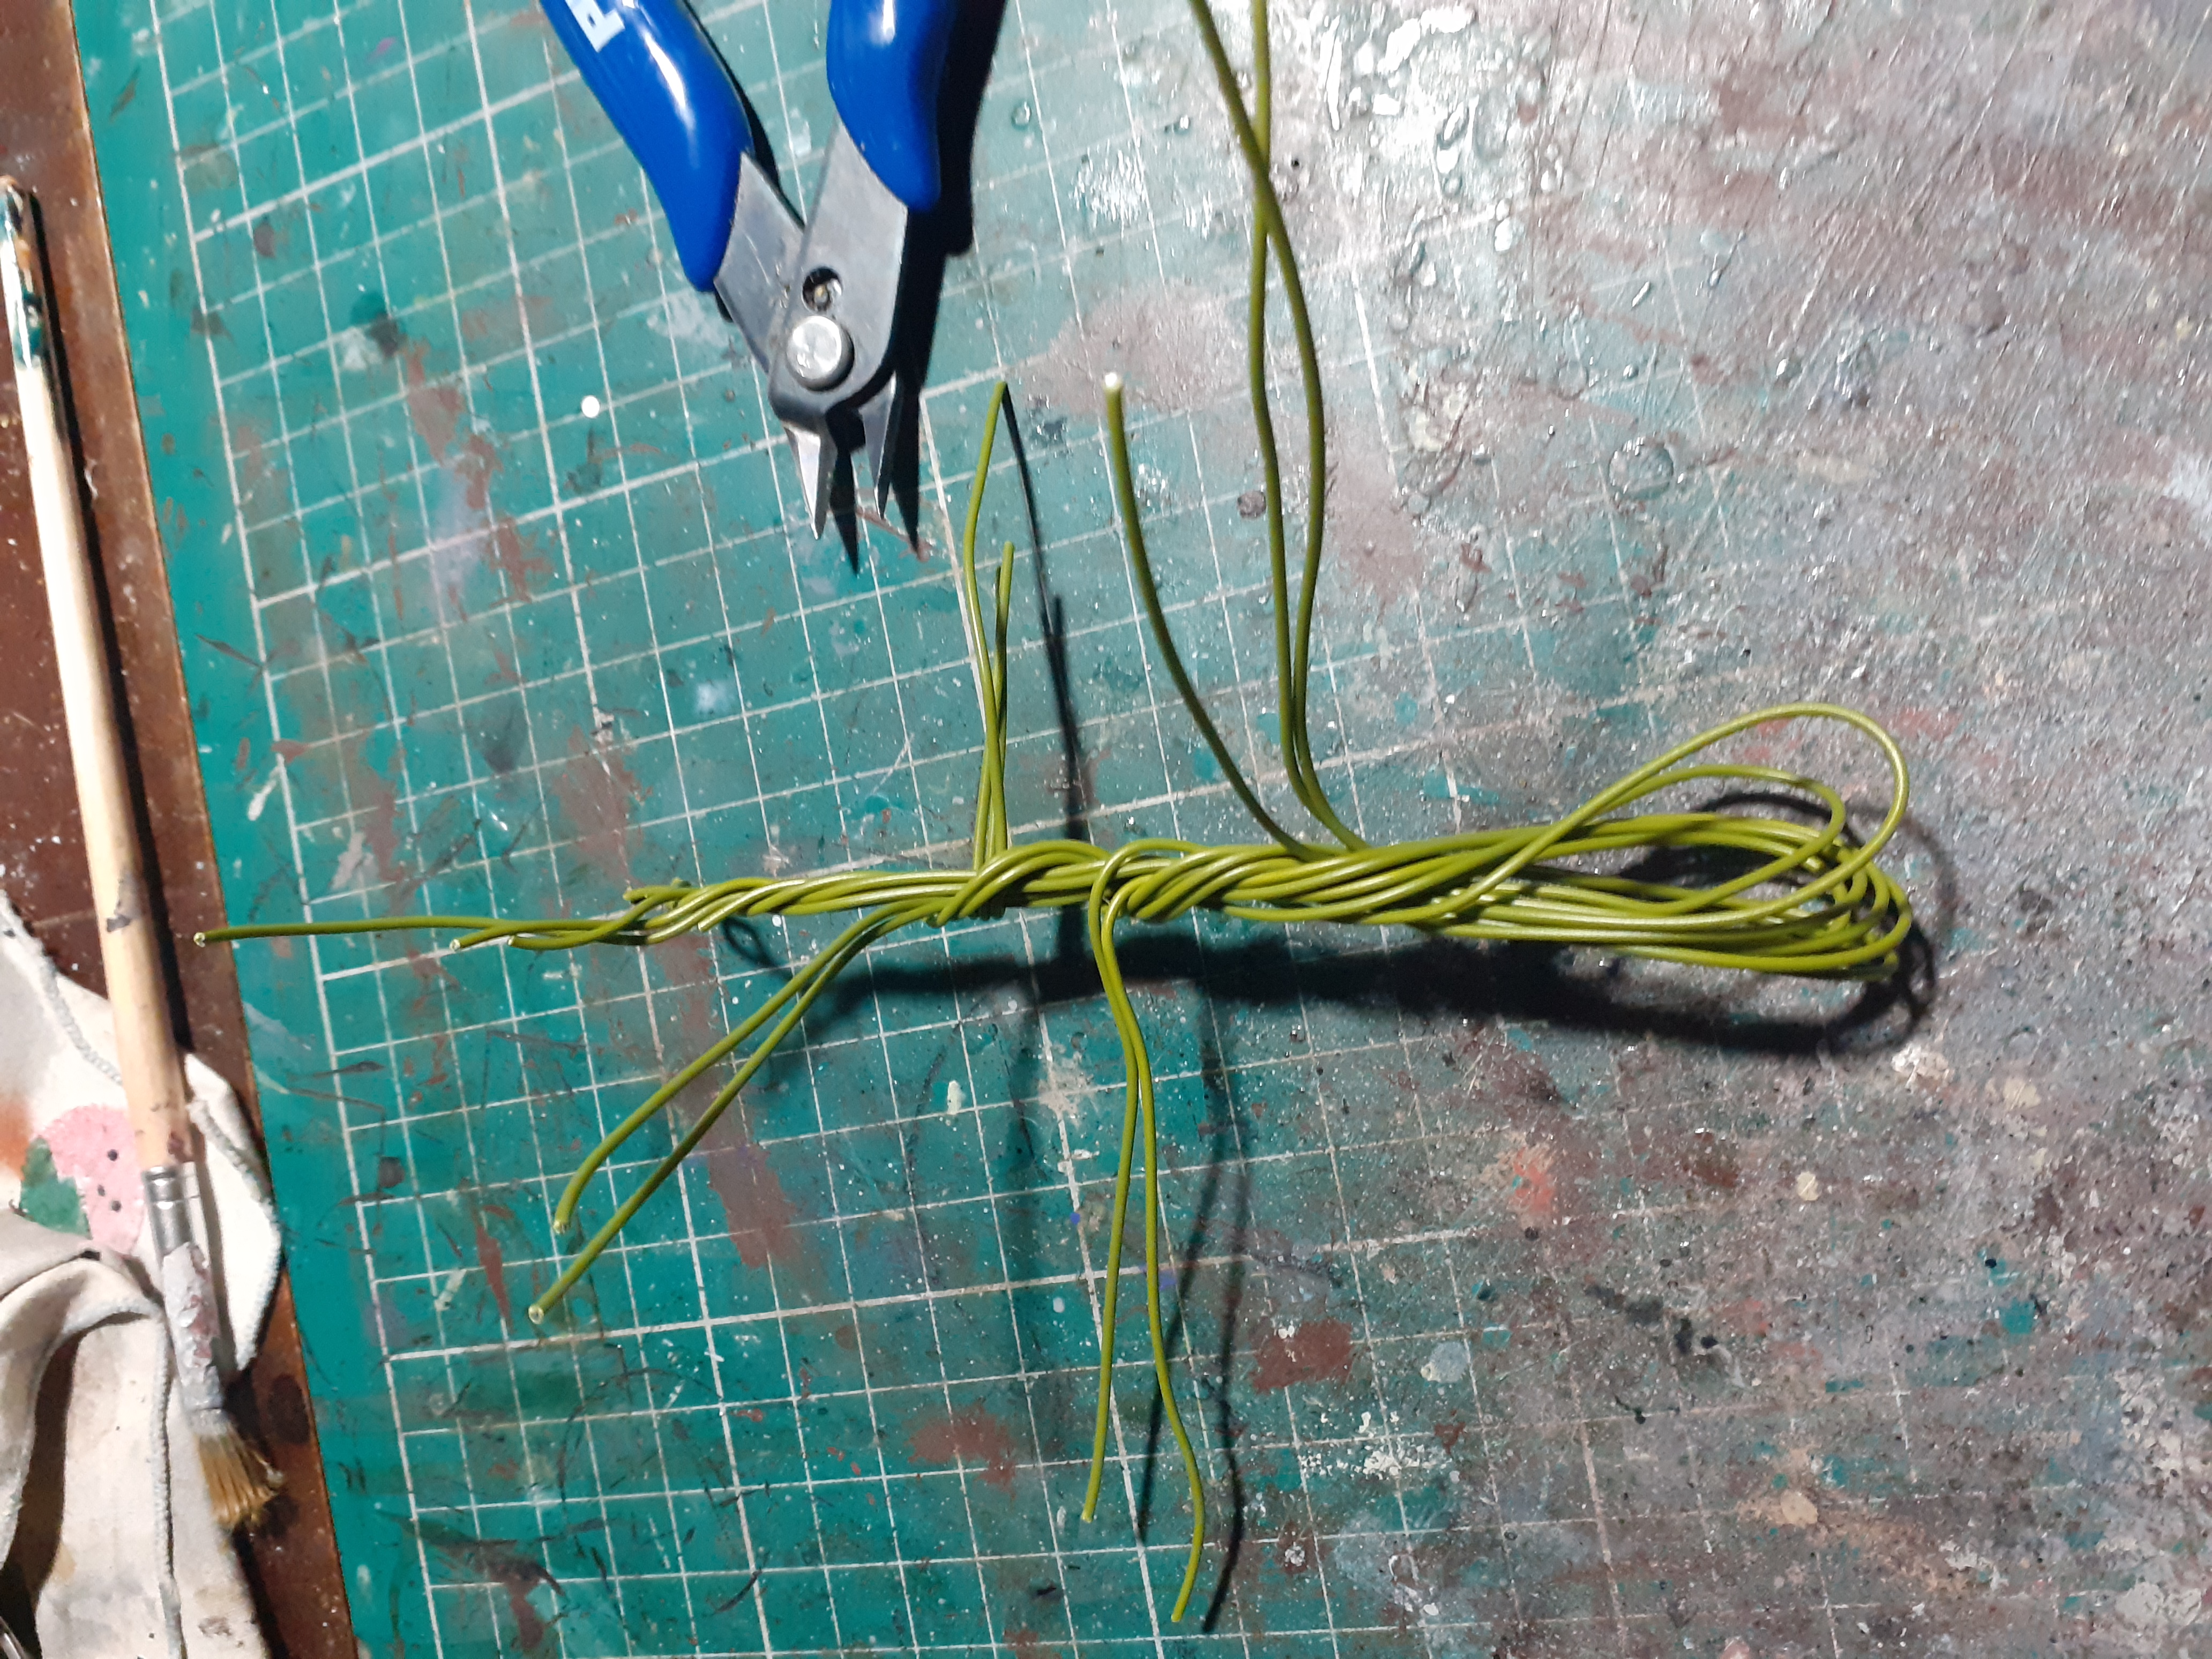 Bend the bunch of wires in half then twist the wires to form the trunk. When you want a branch twist a couple together in the shape you want then carry on with the trunk
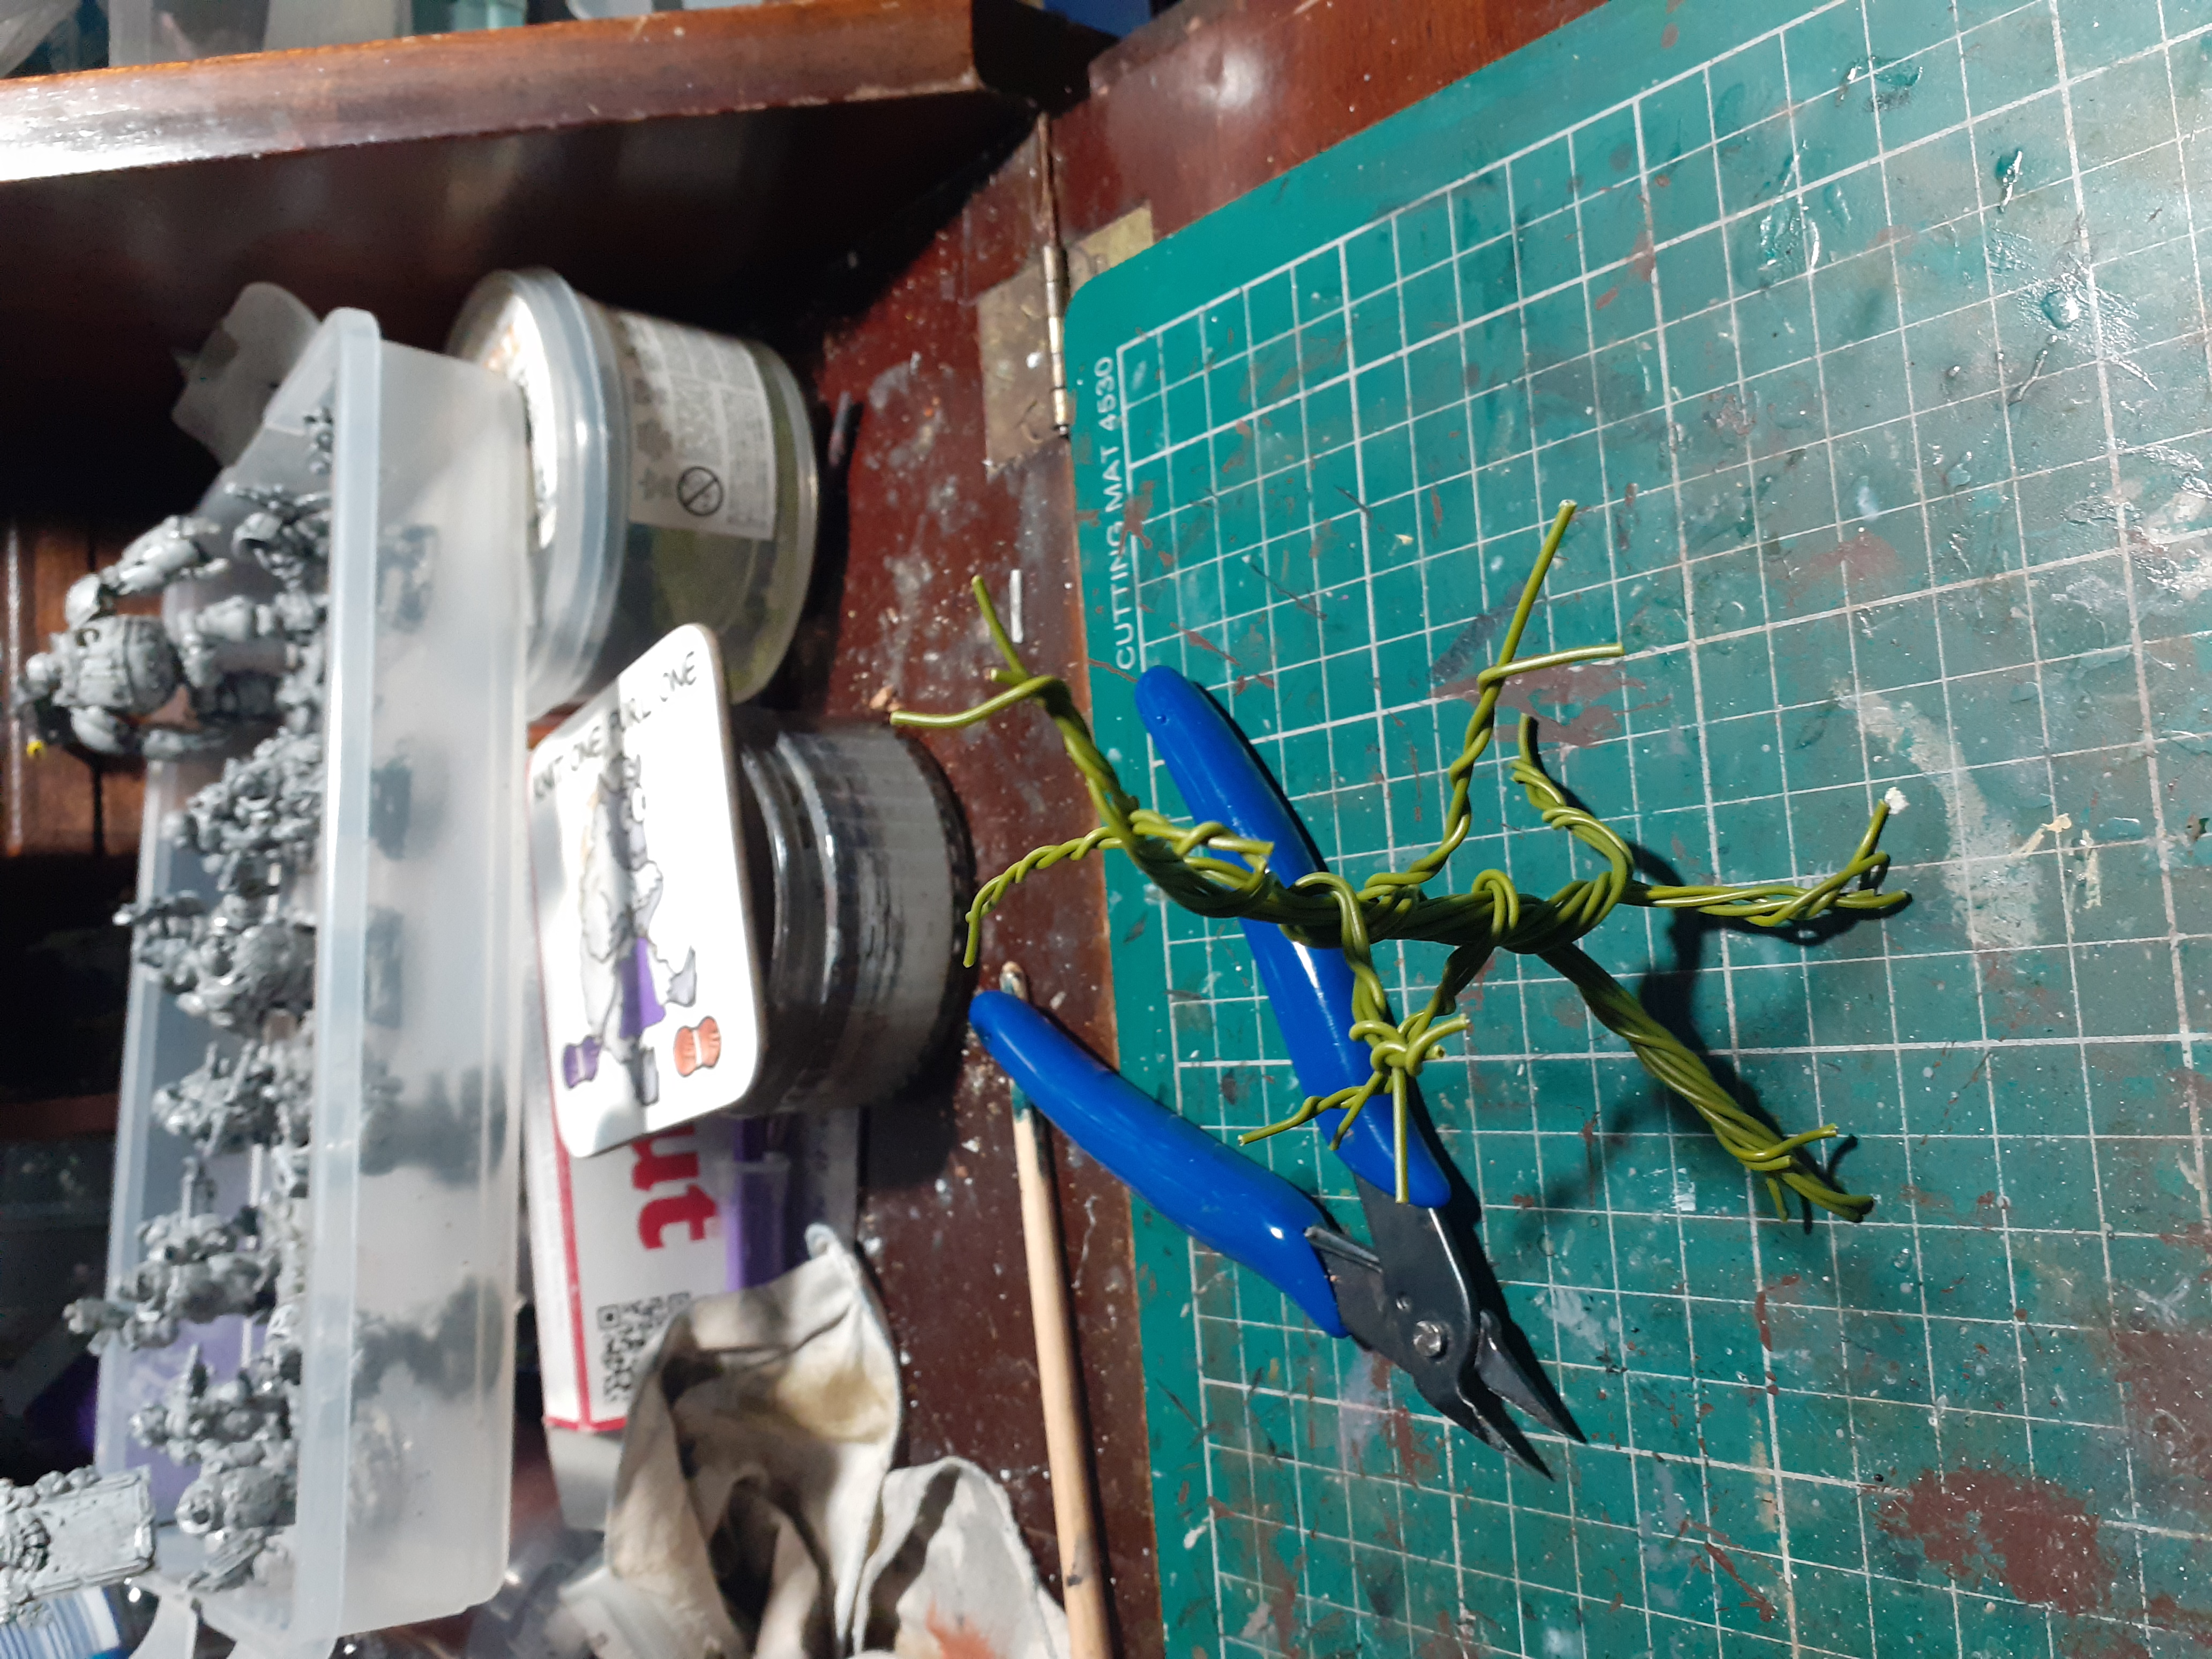 Cut the loop at the bottom then twist the wires together to form roots and trim to size.
 The wire tree is then wrapped in strips of masking tape the more tape added the thicker the trunk or branch
 Next I stuck the tree to a Cork base and built it up with broken bits of Cork and some bits of stone. It qas then covered in filler to fill in the gaps. Once this drys the whole thing will get a coat of pva glue to hold it all together.
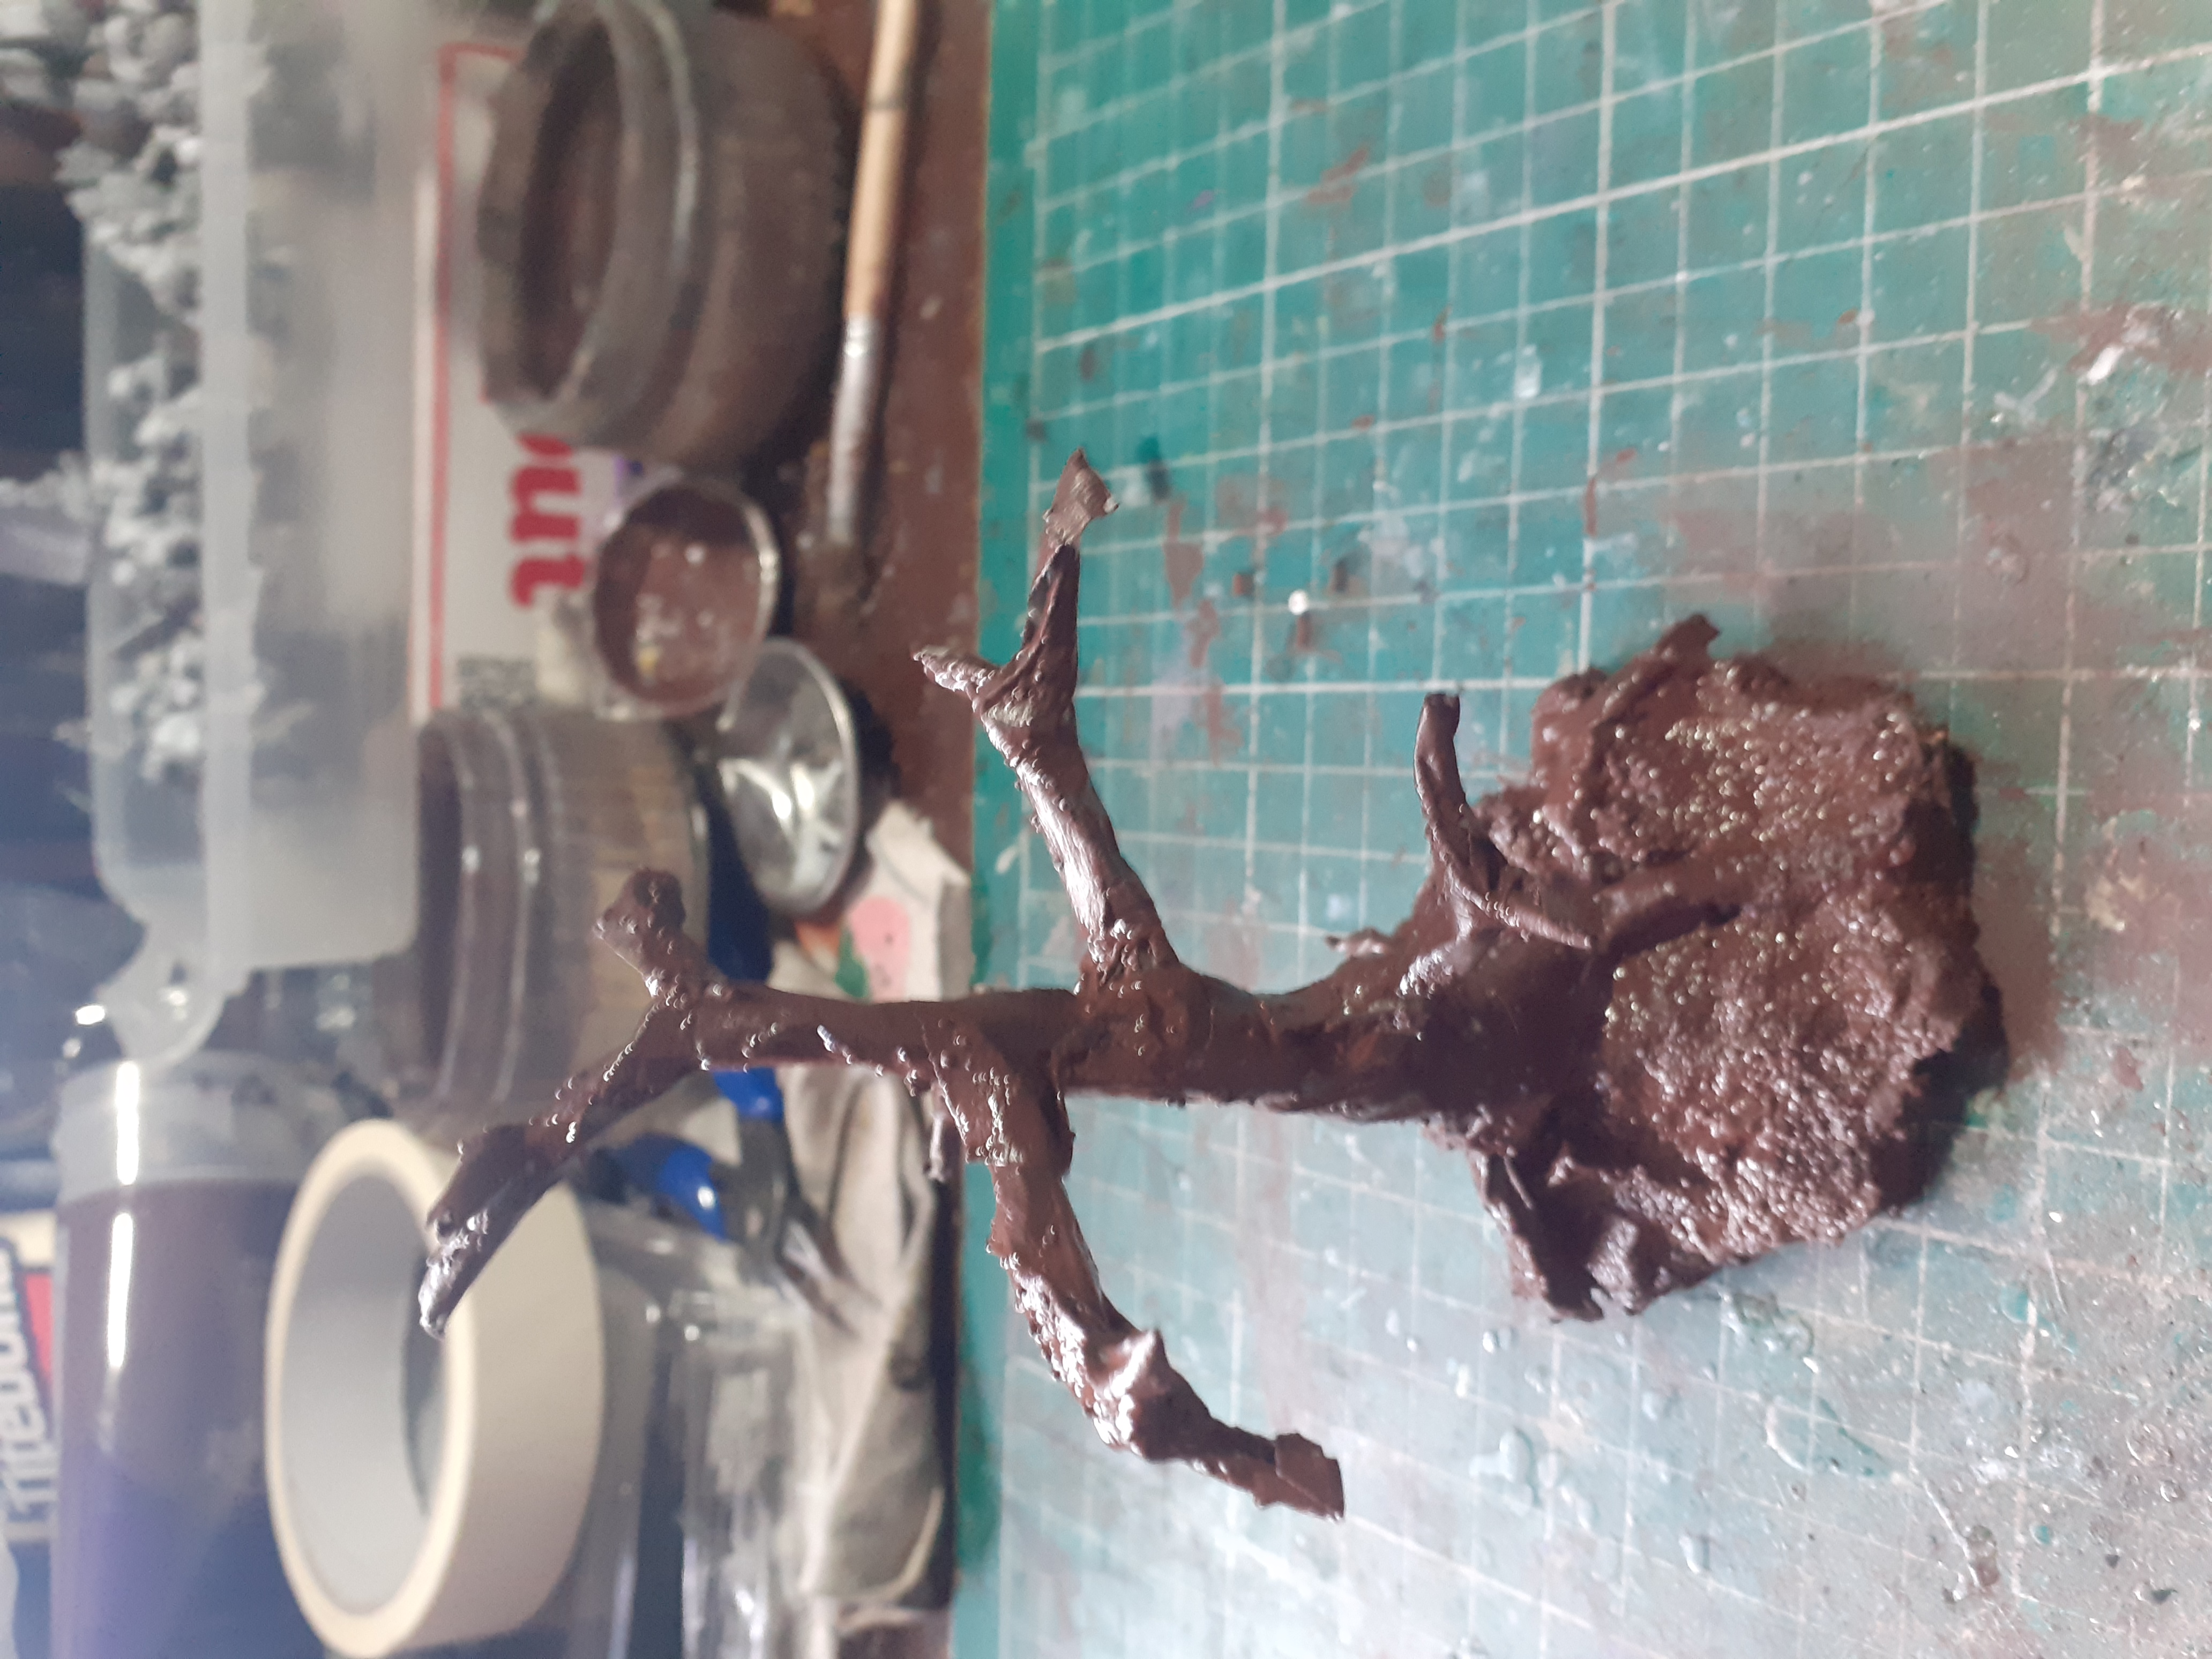 Got up early today so I could splodge some paint on the tree that way it has all day to dry, when I get home tonight I can drybrush it with lighter colours to bring out the details. Some of the masking tape had peeled back so stuck it down with super glue before painting.
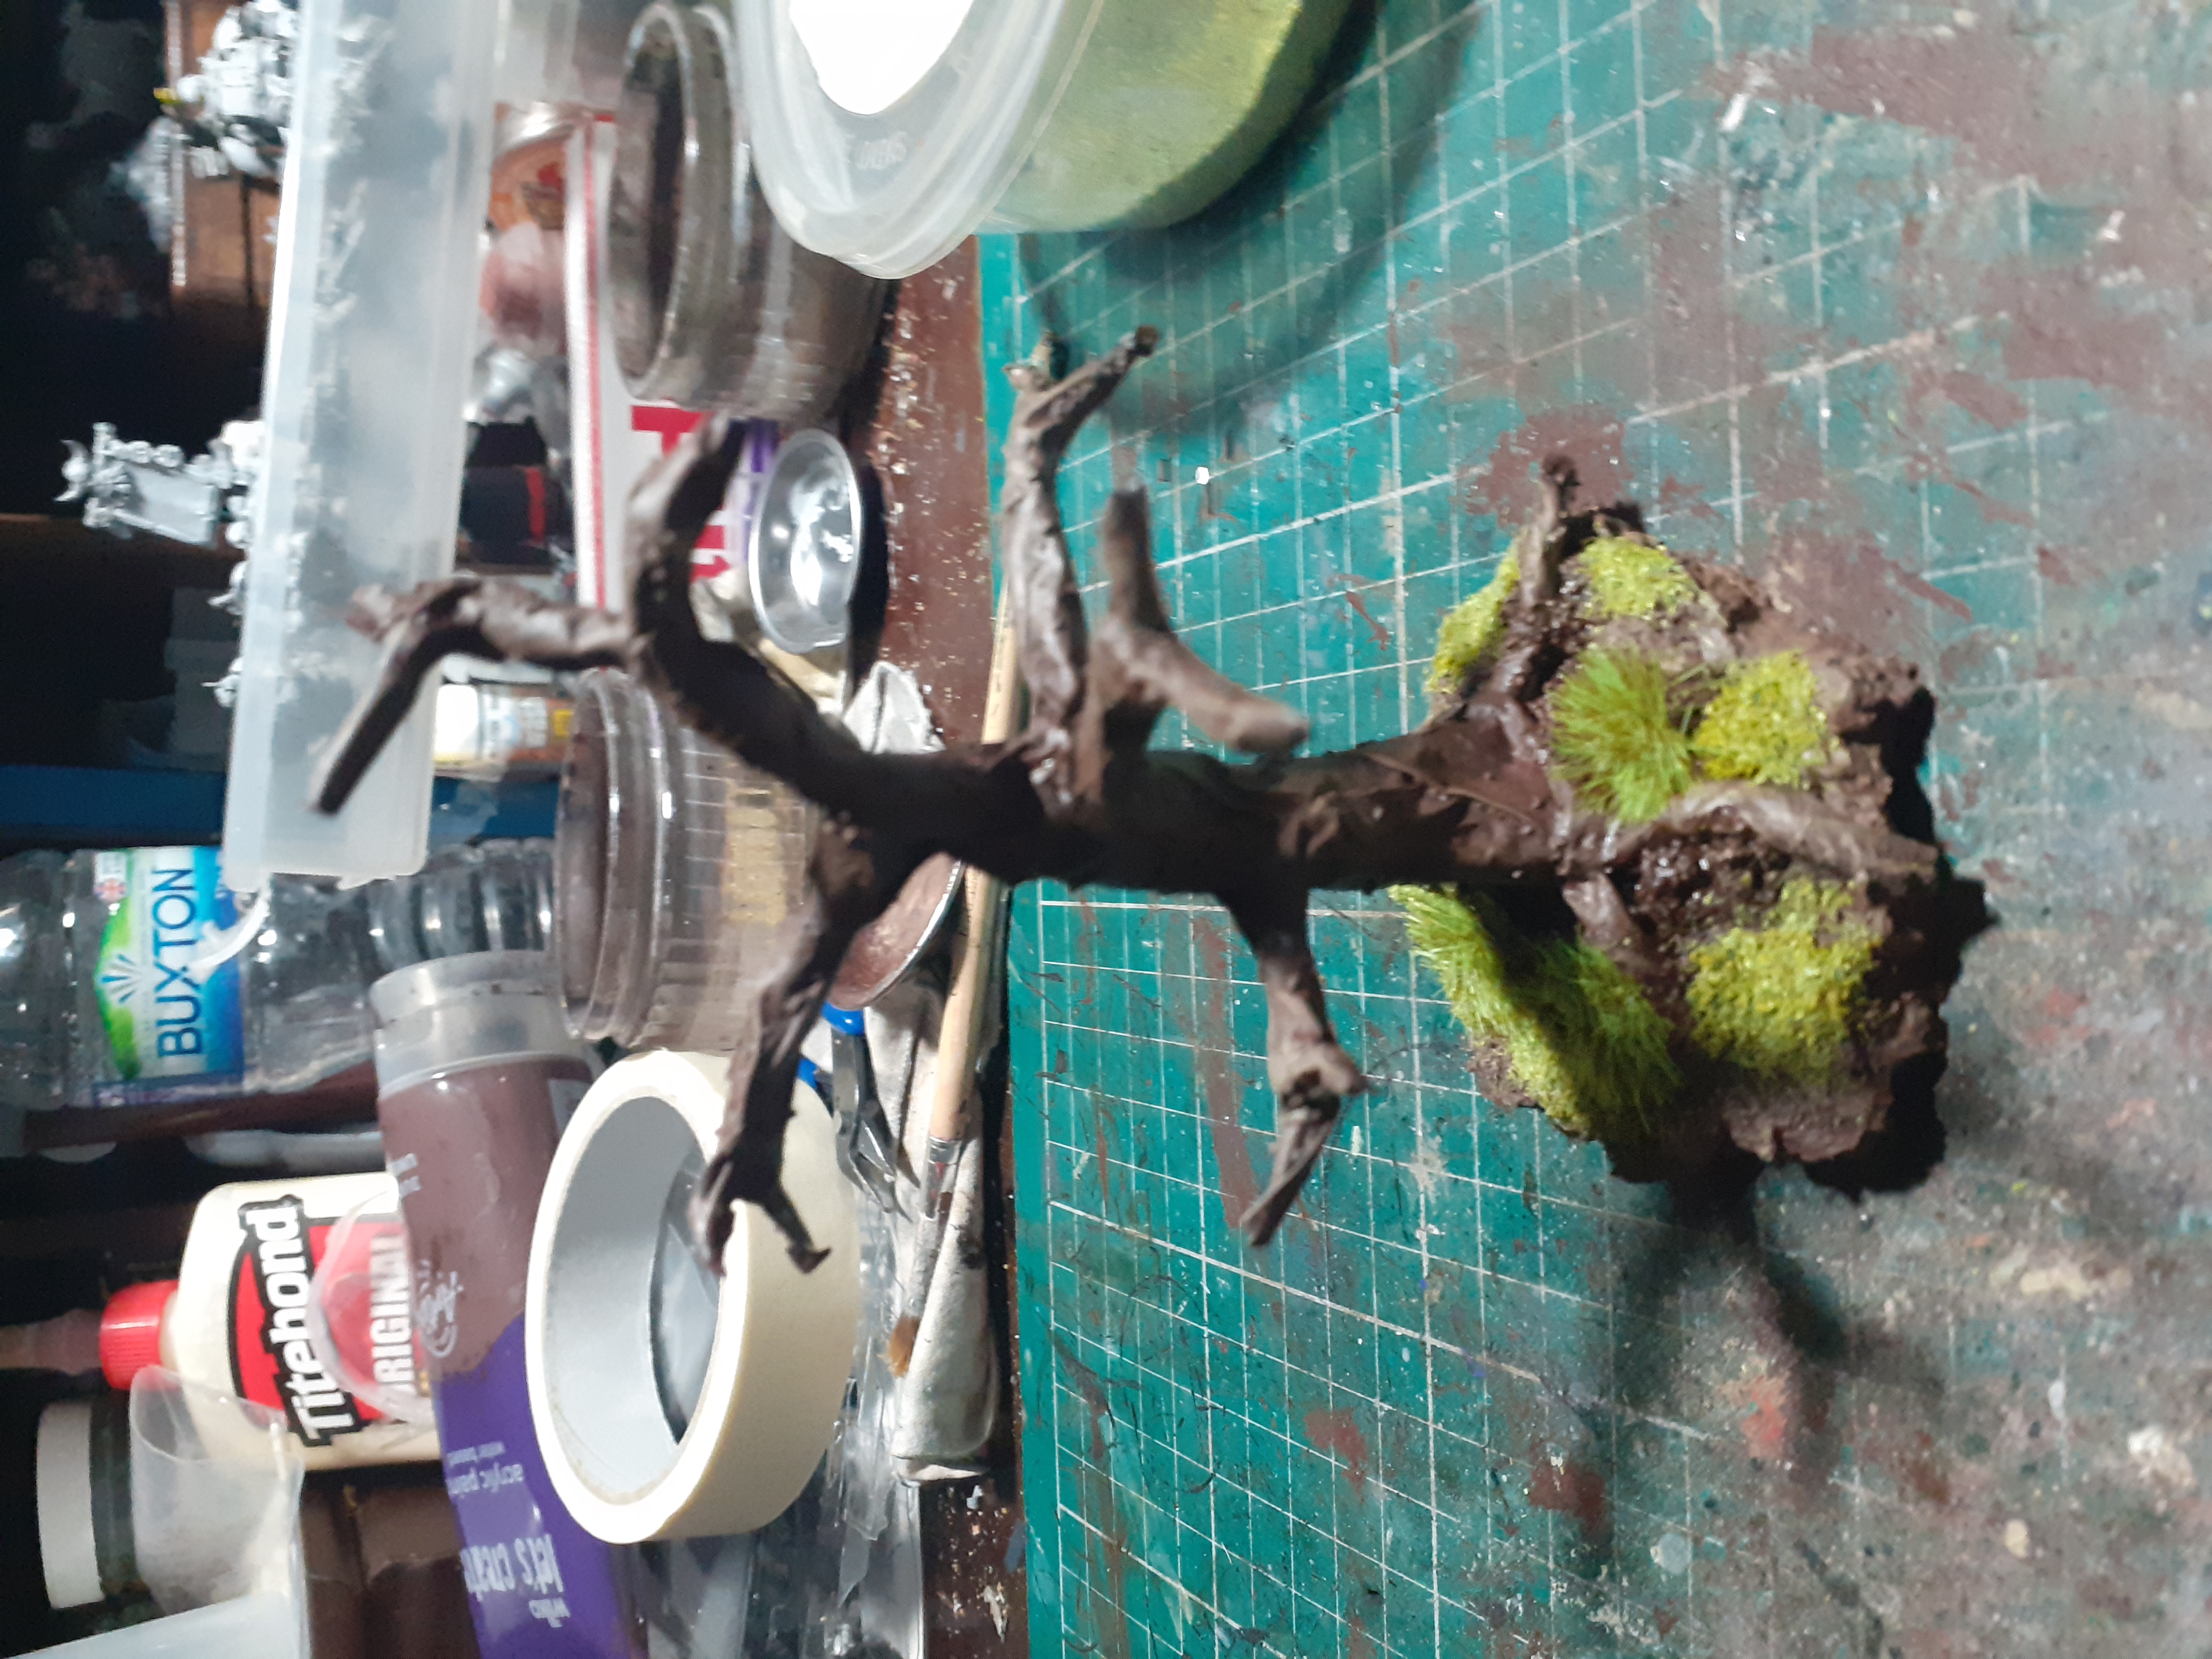 Bam ? tree of doom, with the brown paint fully dry I have it a drybrush of khaki followed by bone. Let that dry then added some watered down brown wash. The base then had a bit of flock added to blend the base with the tabletop
Painting the tiny emplacements
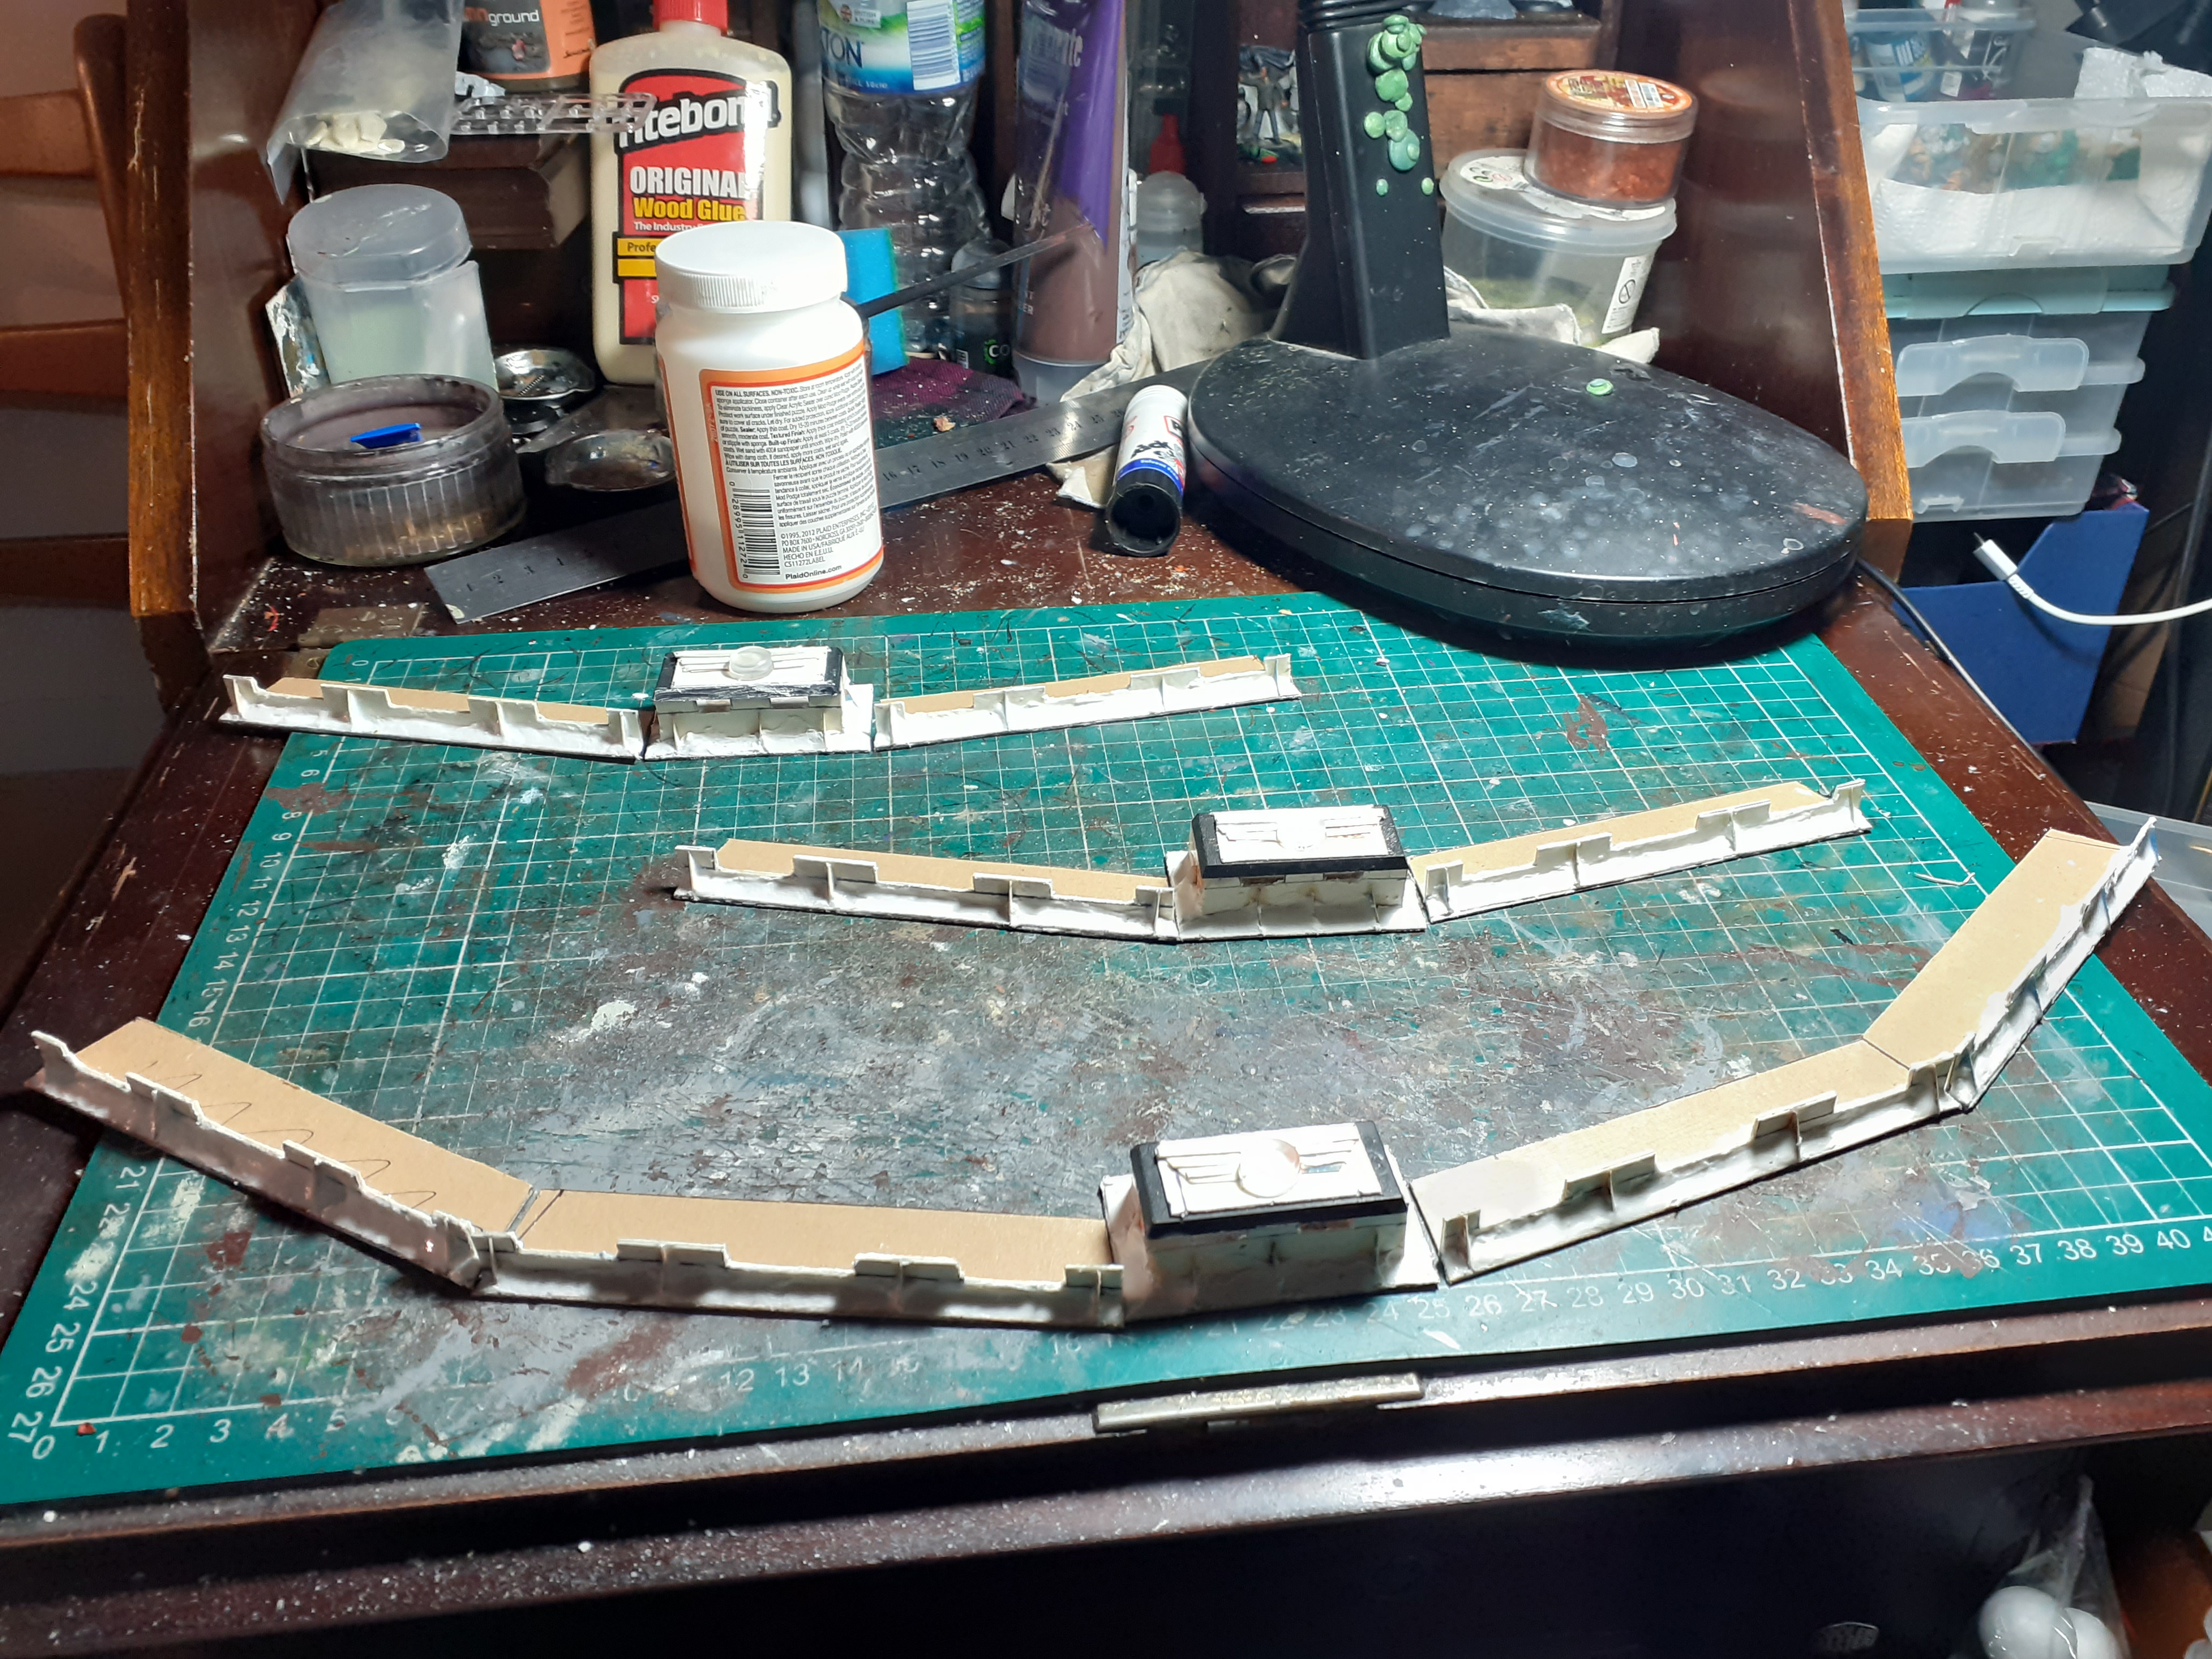
 Started off by covering everything including myself with super cheap umber paint from the works. Turns out the works paint is better than poundland as it has more pigment making bade coating scenery a dream
 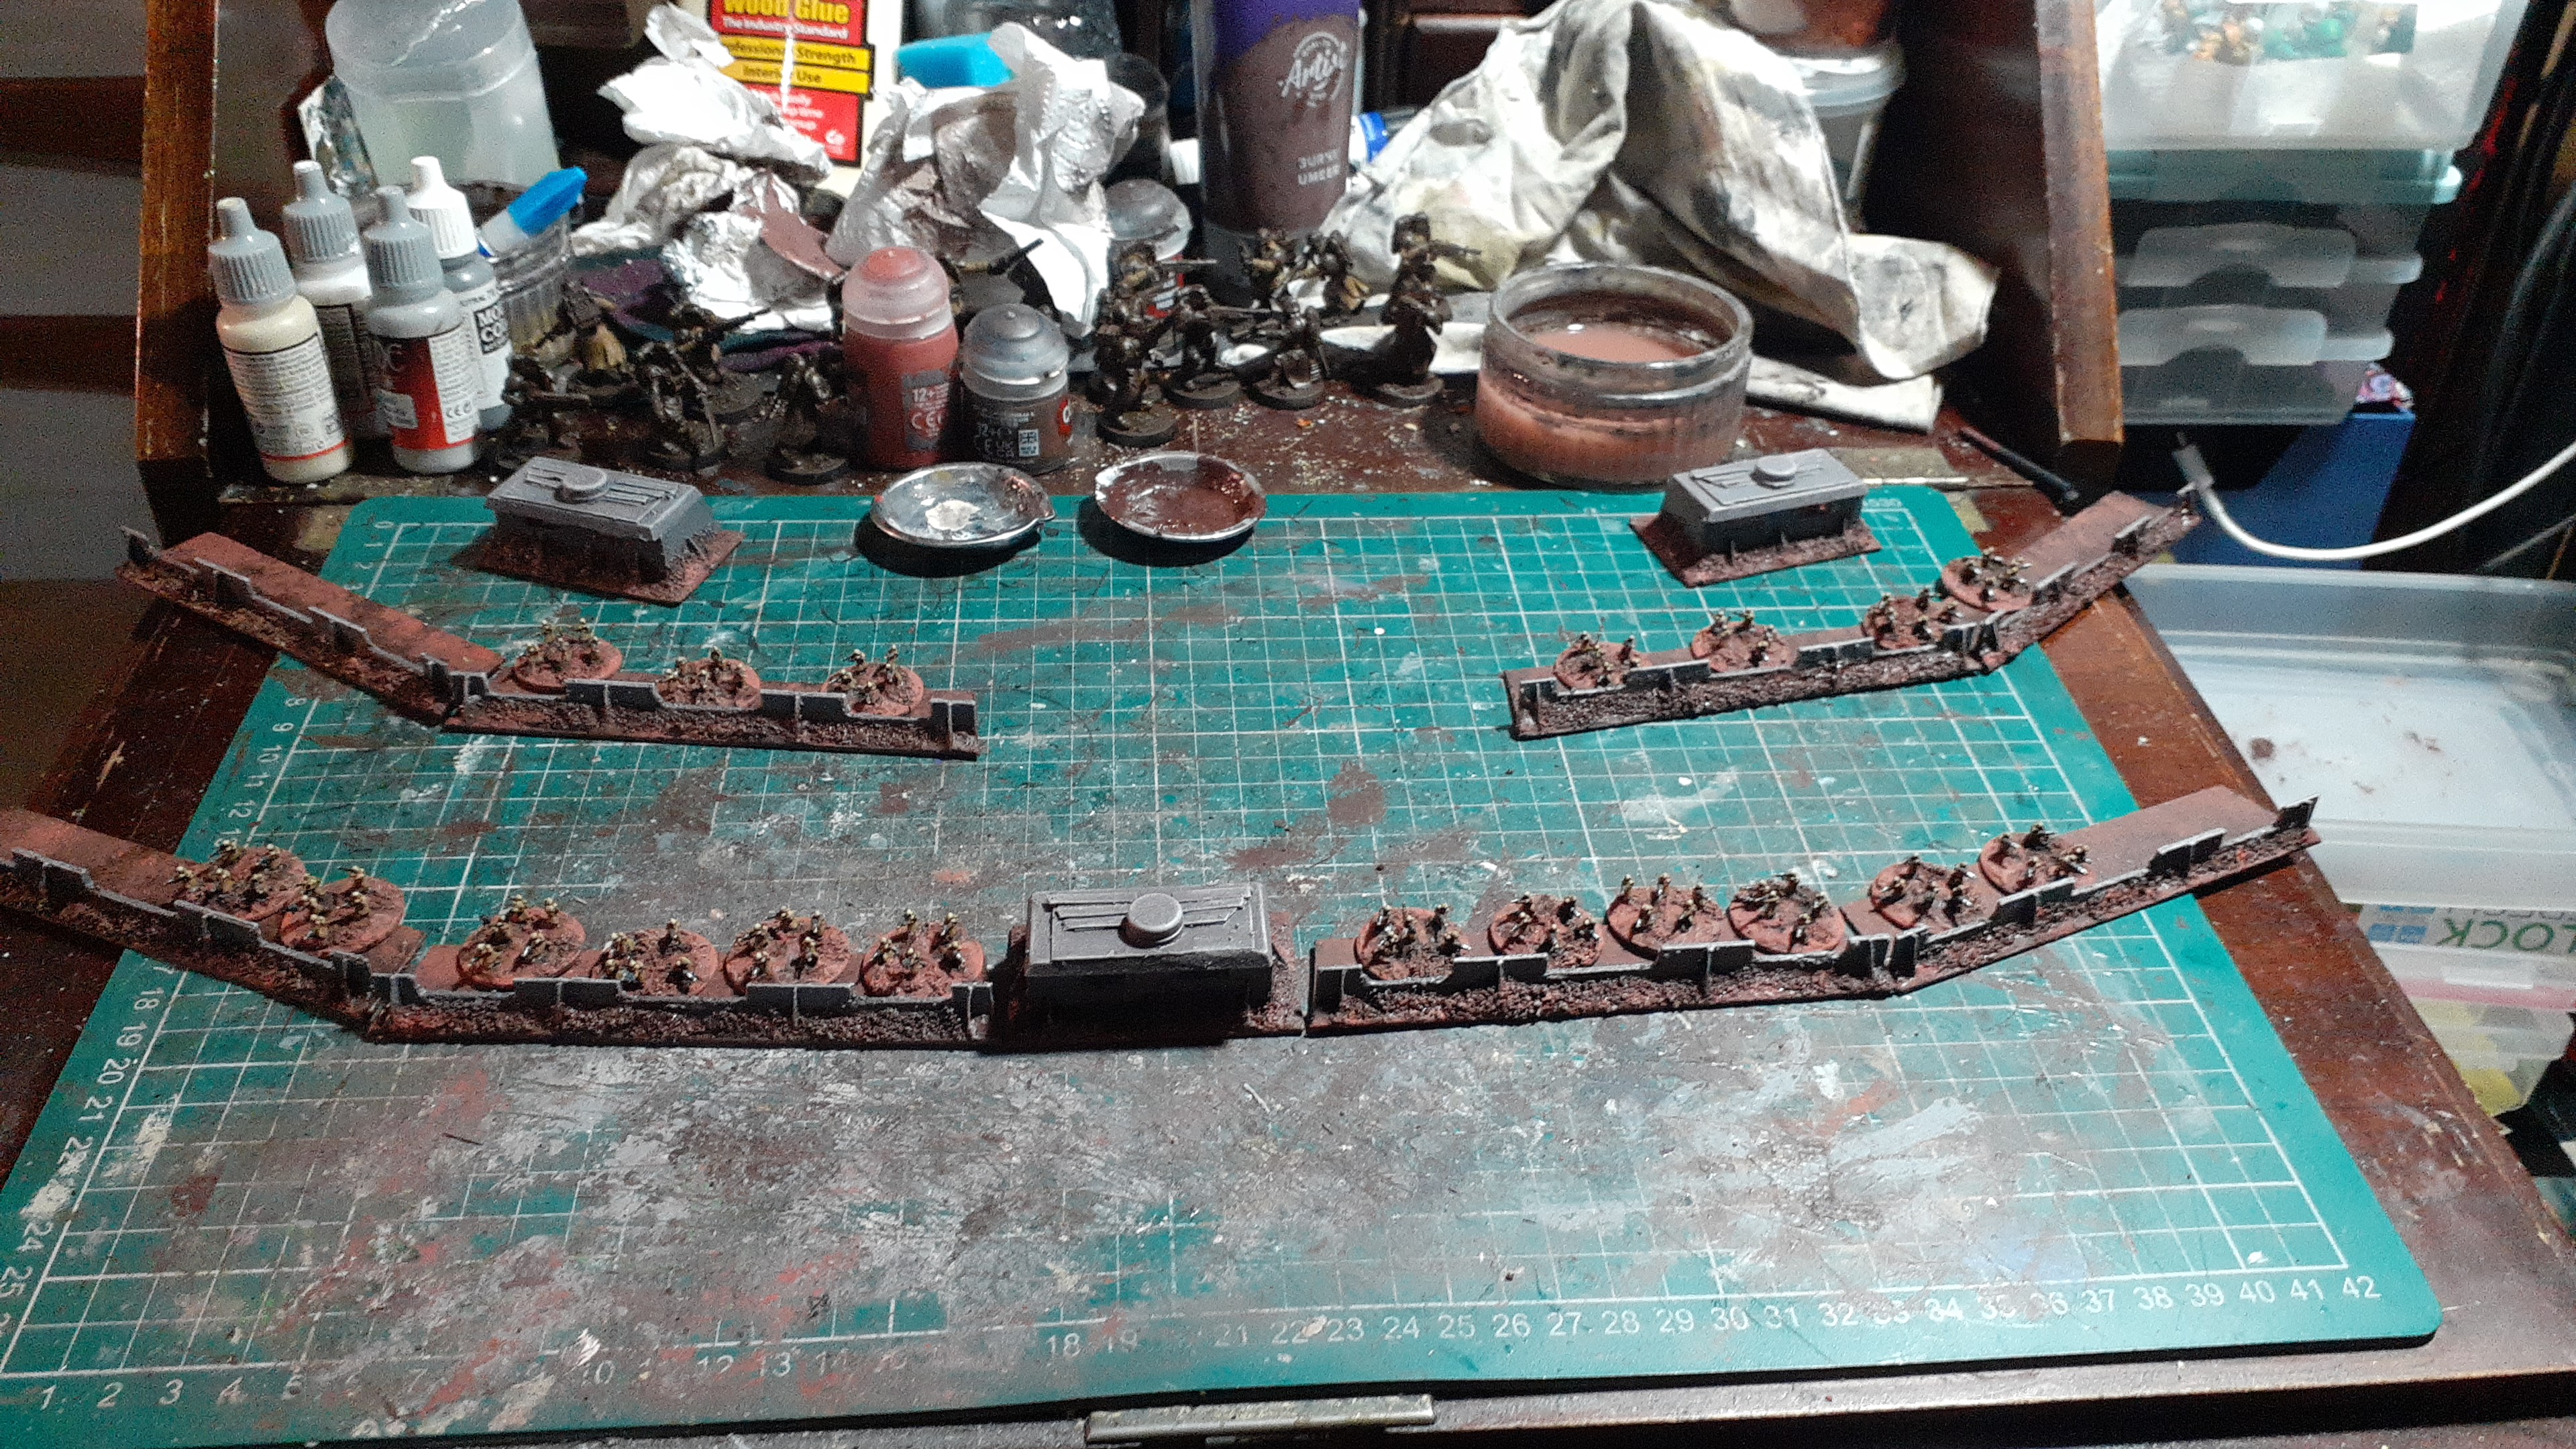 The concrete parts were the painted with a neutral grey, the muddy bits were a mix of brown and red textured paint once it had fully dried everything had a drybrush of bone followed by bright white on the edges
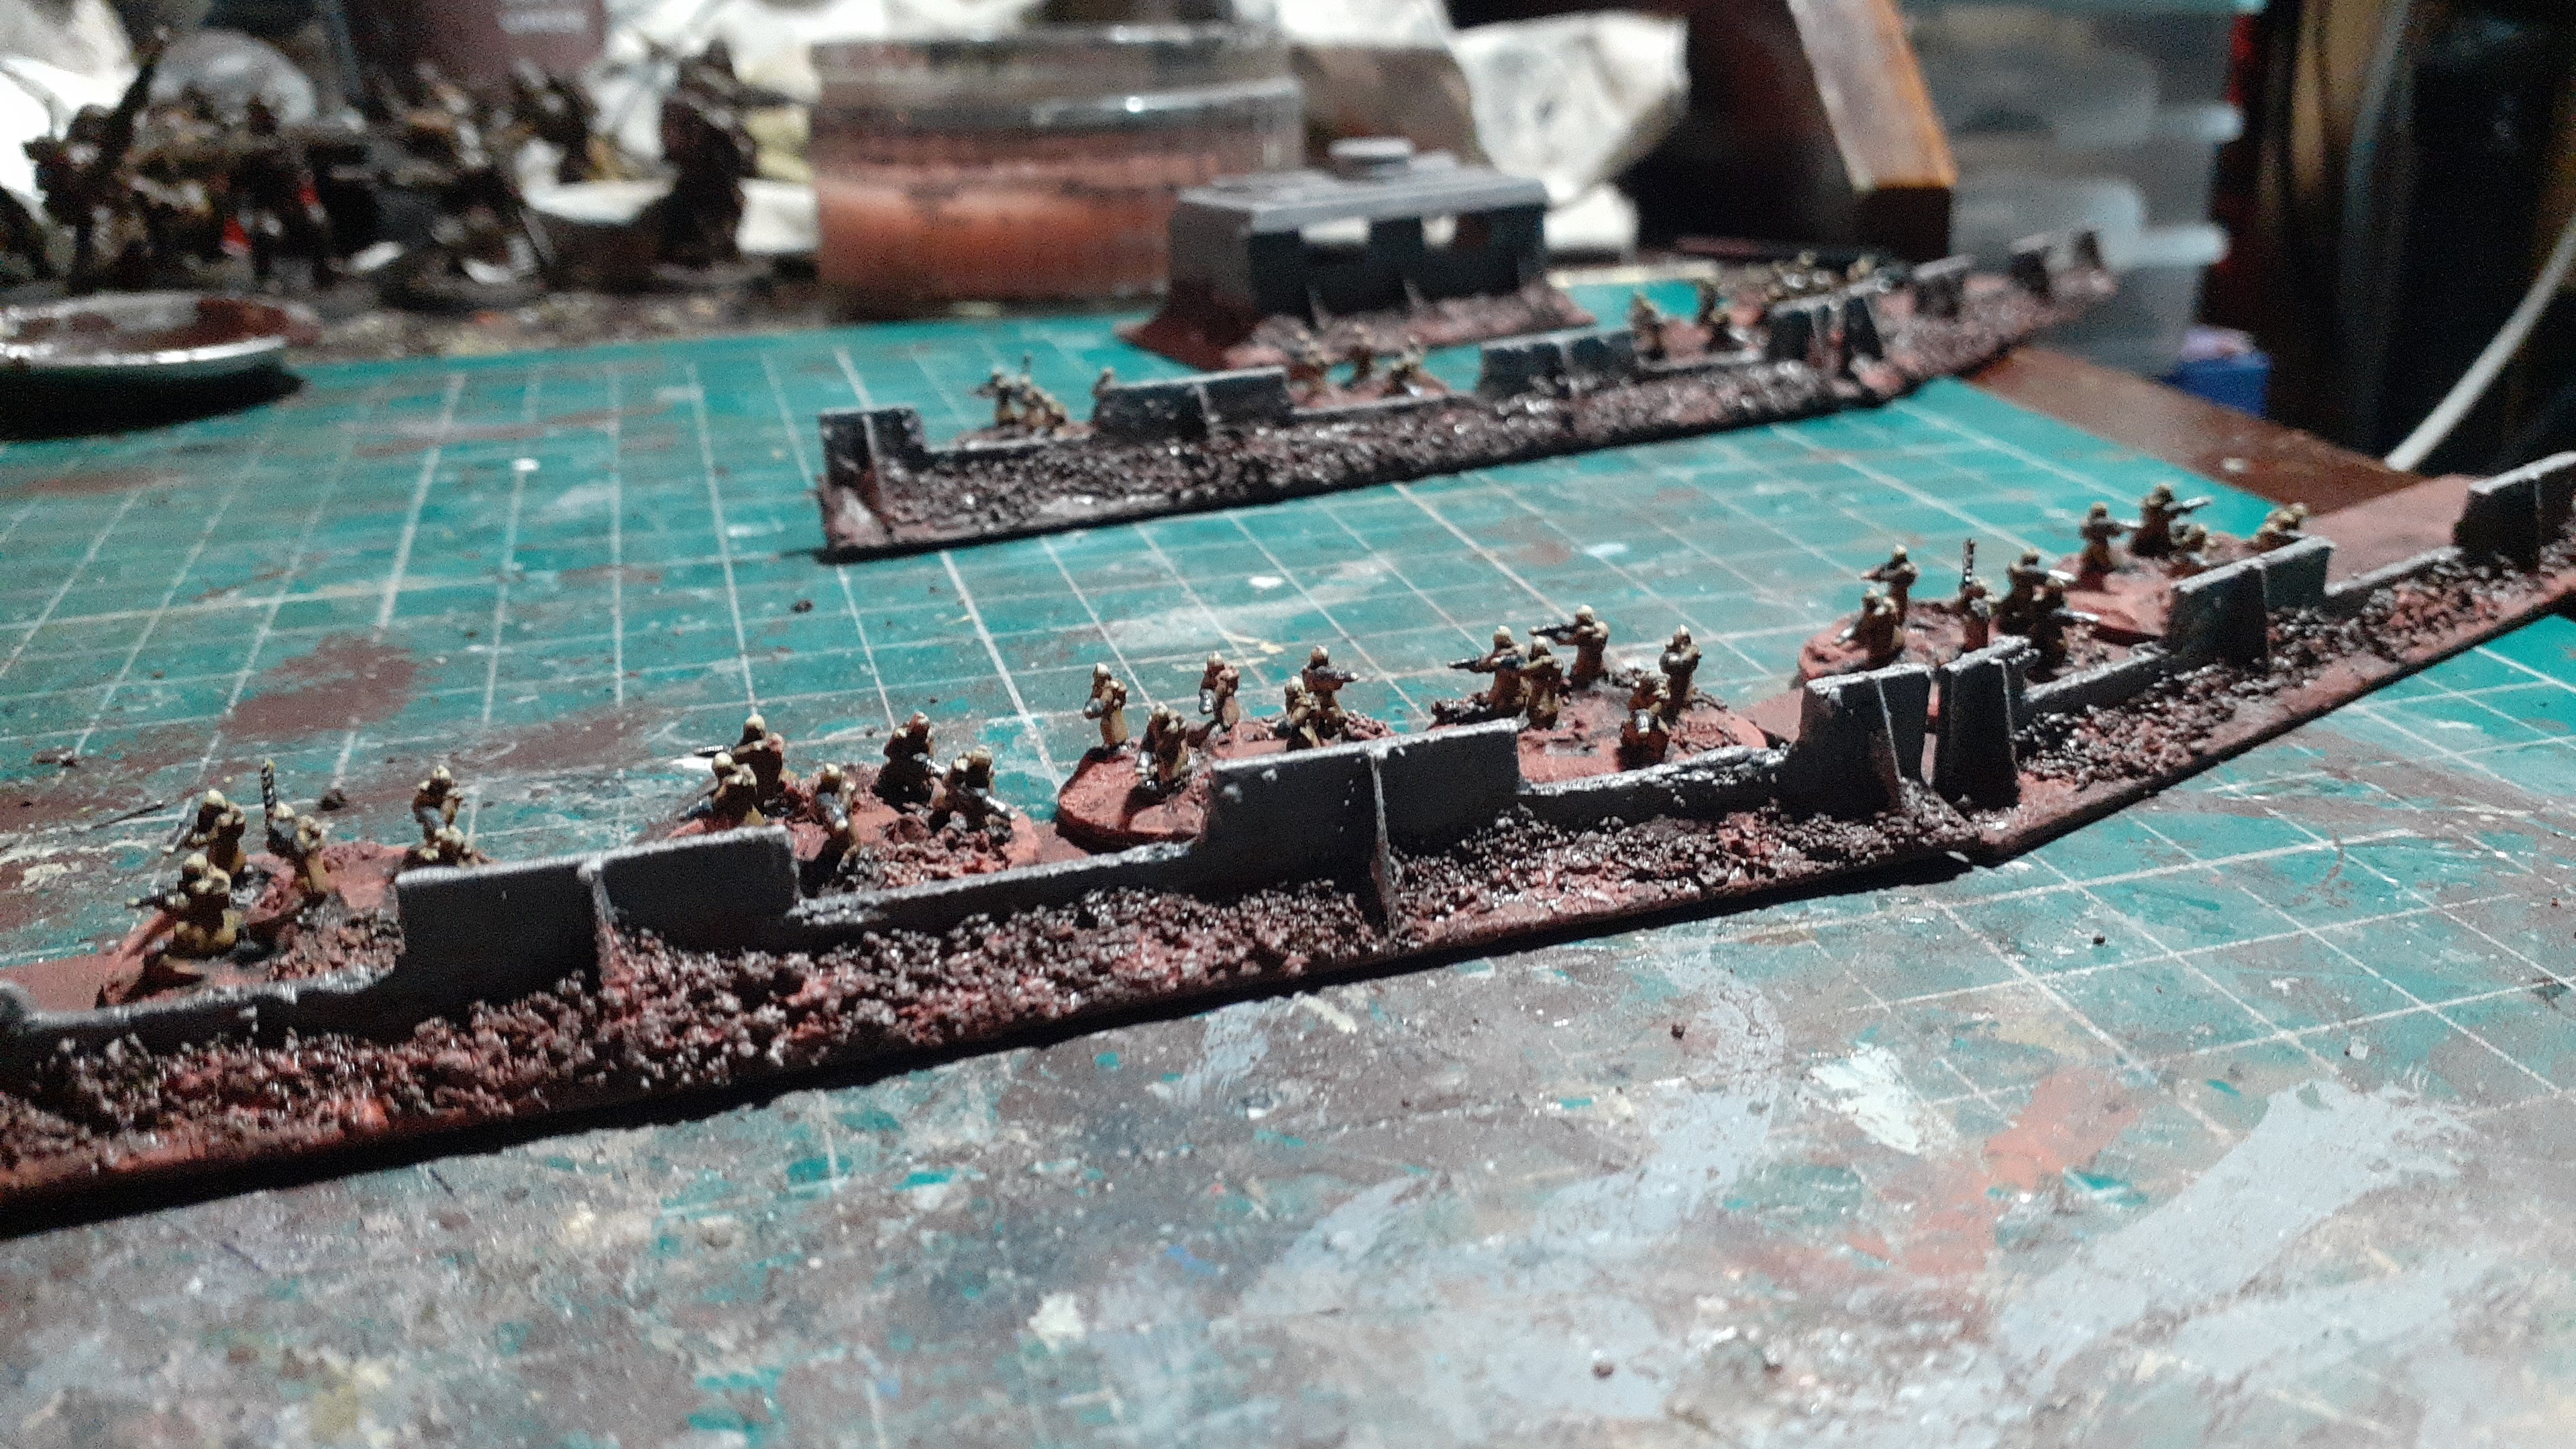 After a coat of satin varnish they are ready to help my guard defend against the foul hordes of chaos and xenos
Painting the tiny emplacements
 Started off by covering everything including myself with super cheap umber paint from the works. Turns out the worksc
 An Epic undertaking
Over the next few evenings my plan is to build some trenches and bunkers for use in epic 40k.
I’m going to use instructions from a white Dwarf magazine from a time long ago when pva and cereal box buildings were encouraged by gw.
I remember building these years ago with the help of my older brother as I was not trusted with glue and sharp things.
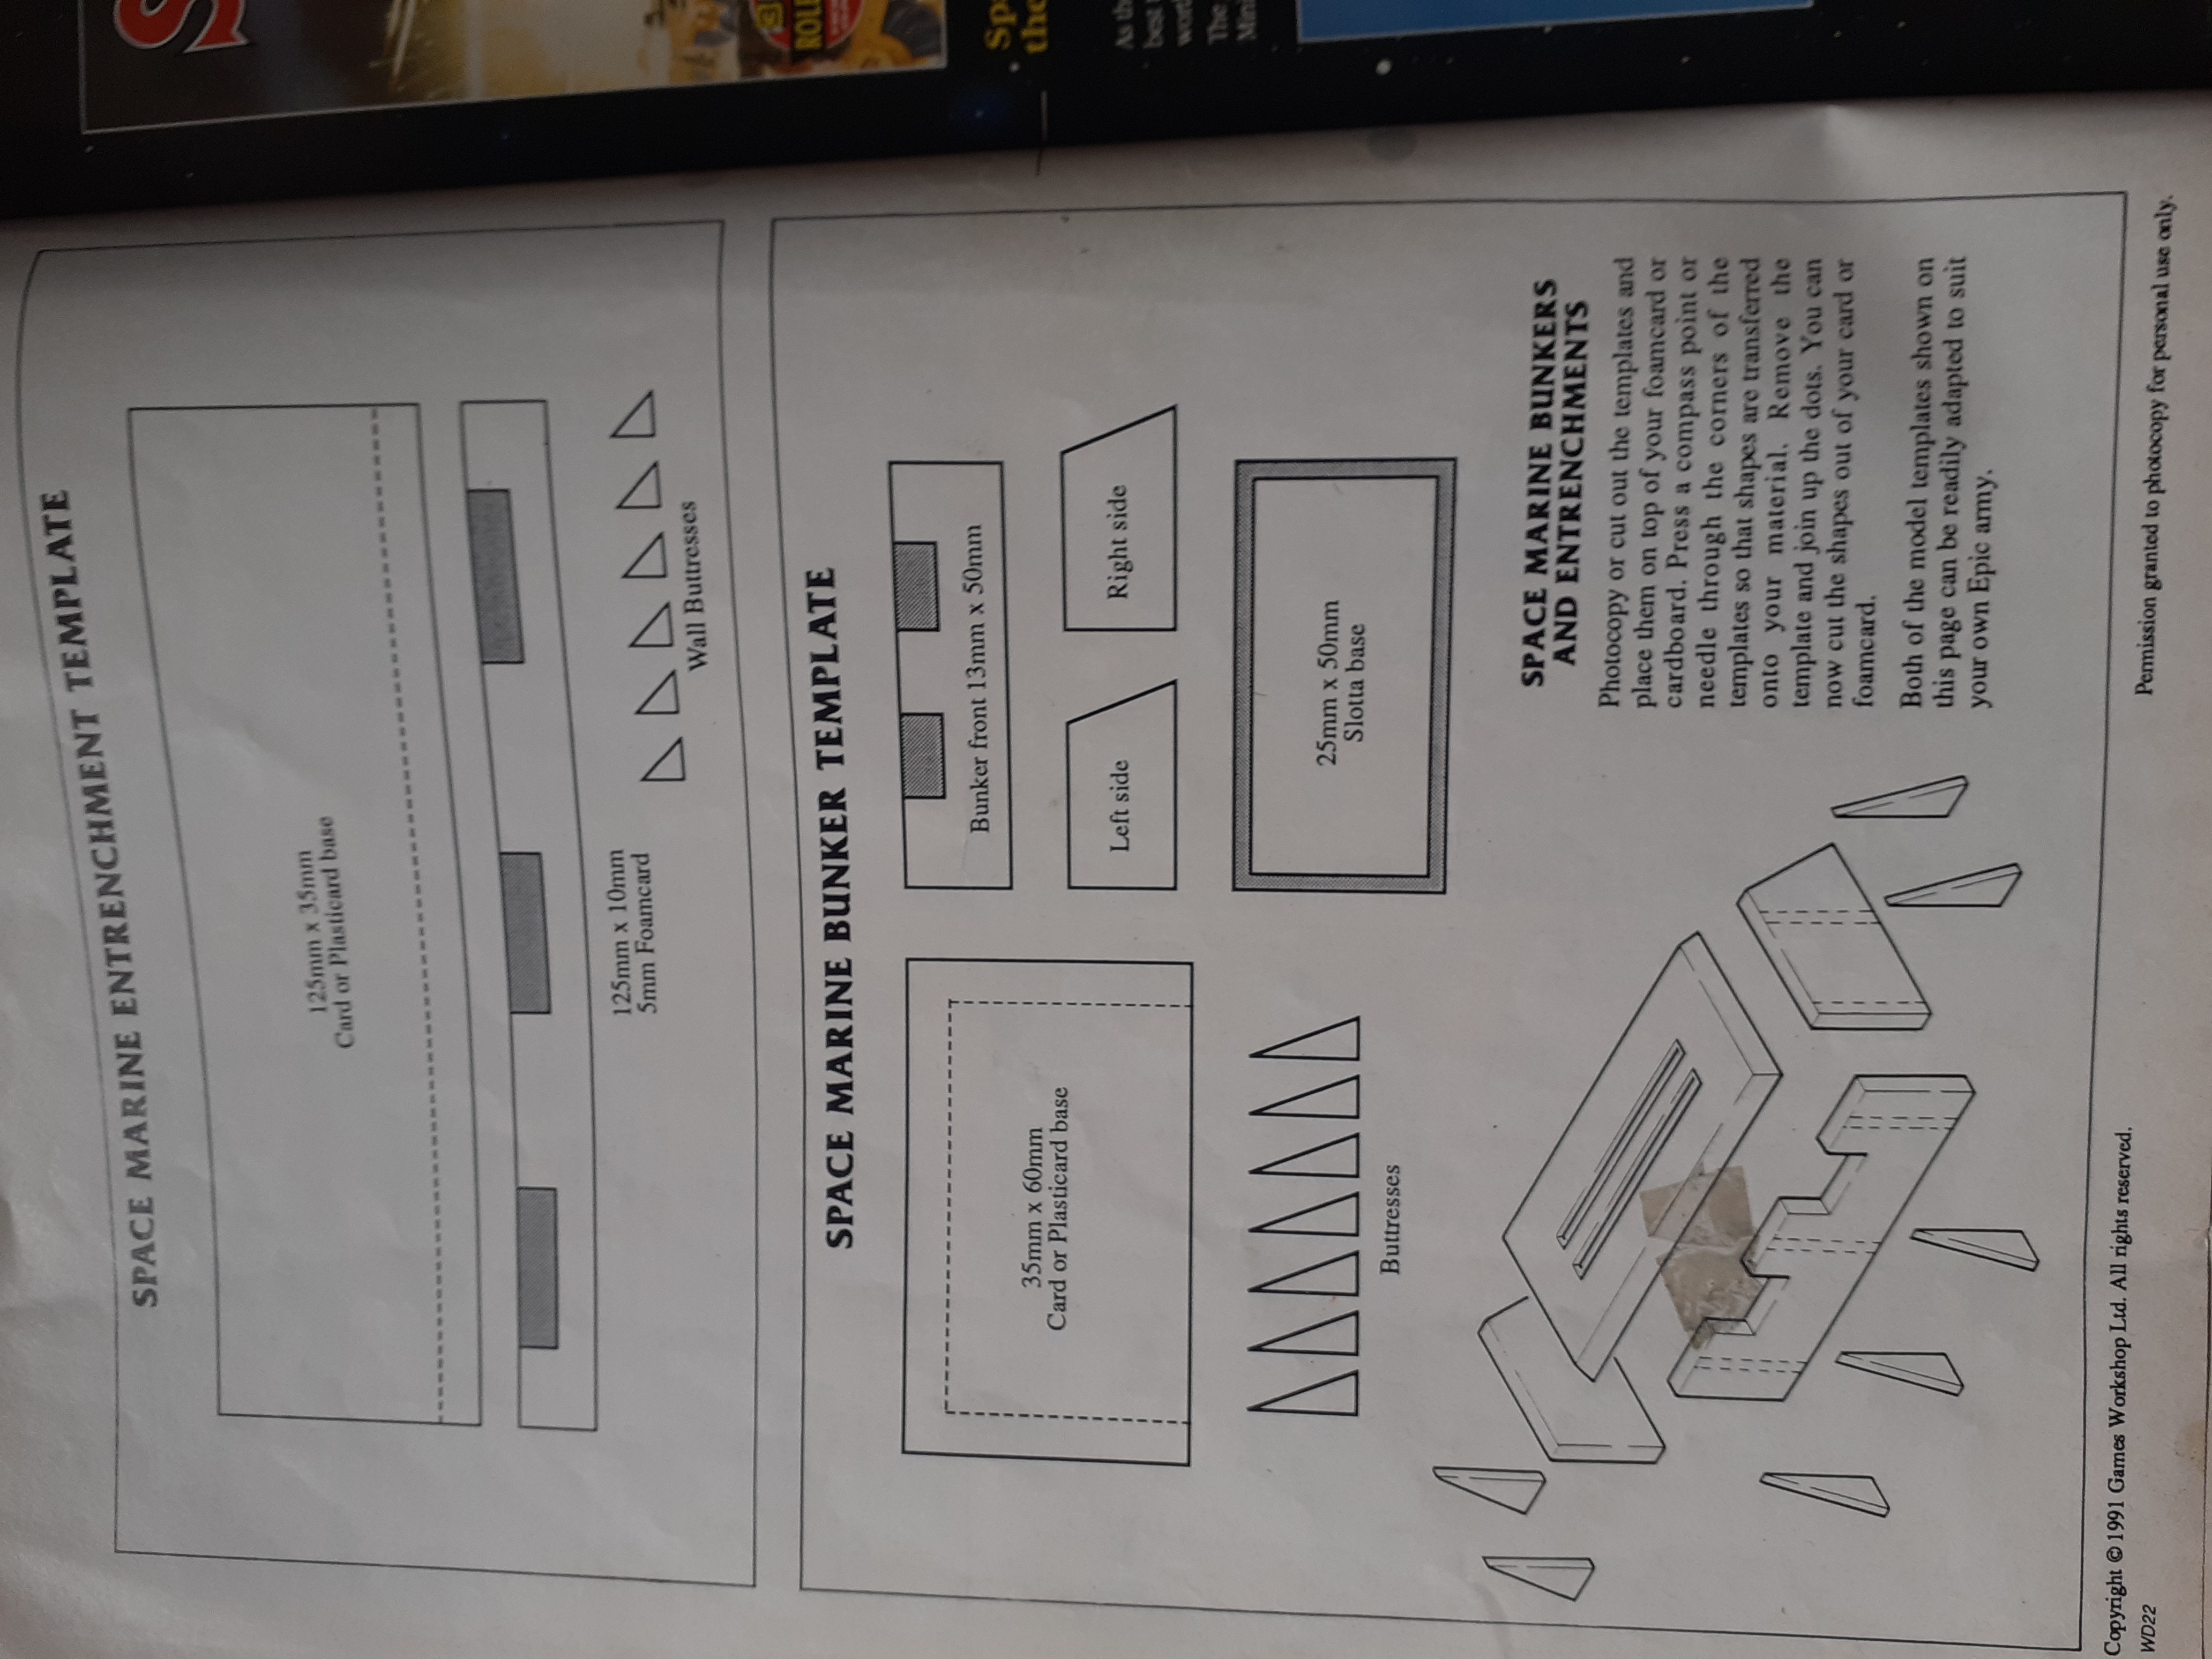 The plans from the White Dwarf
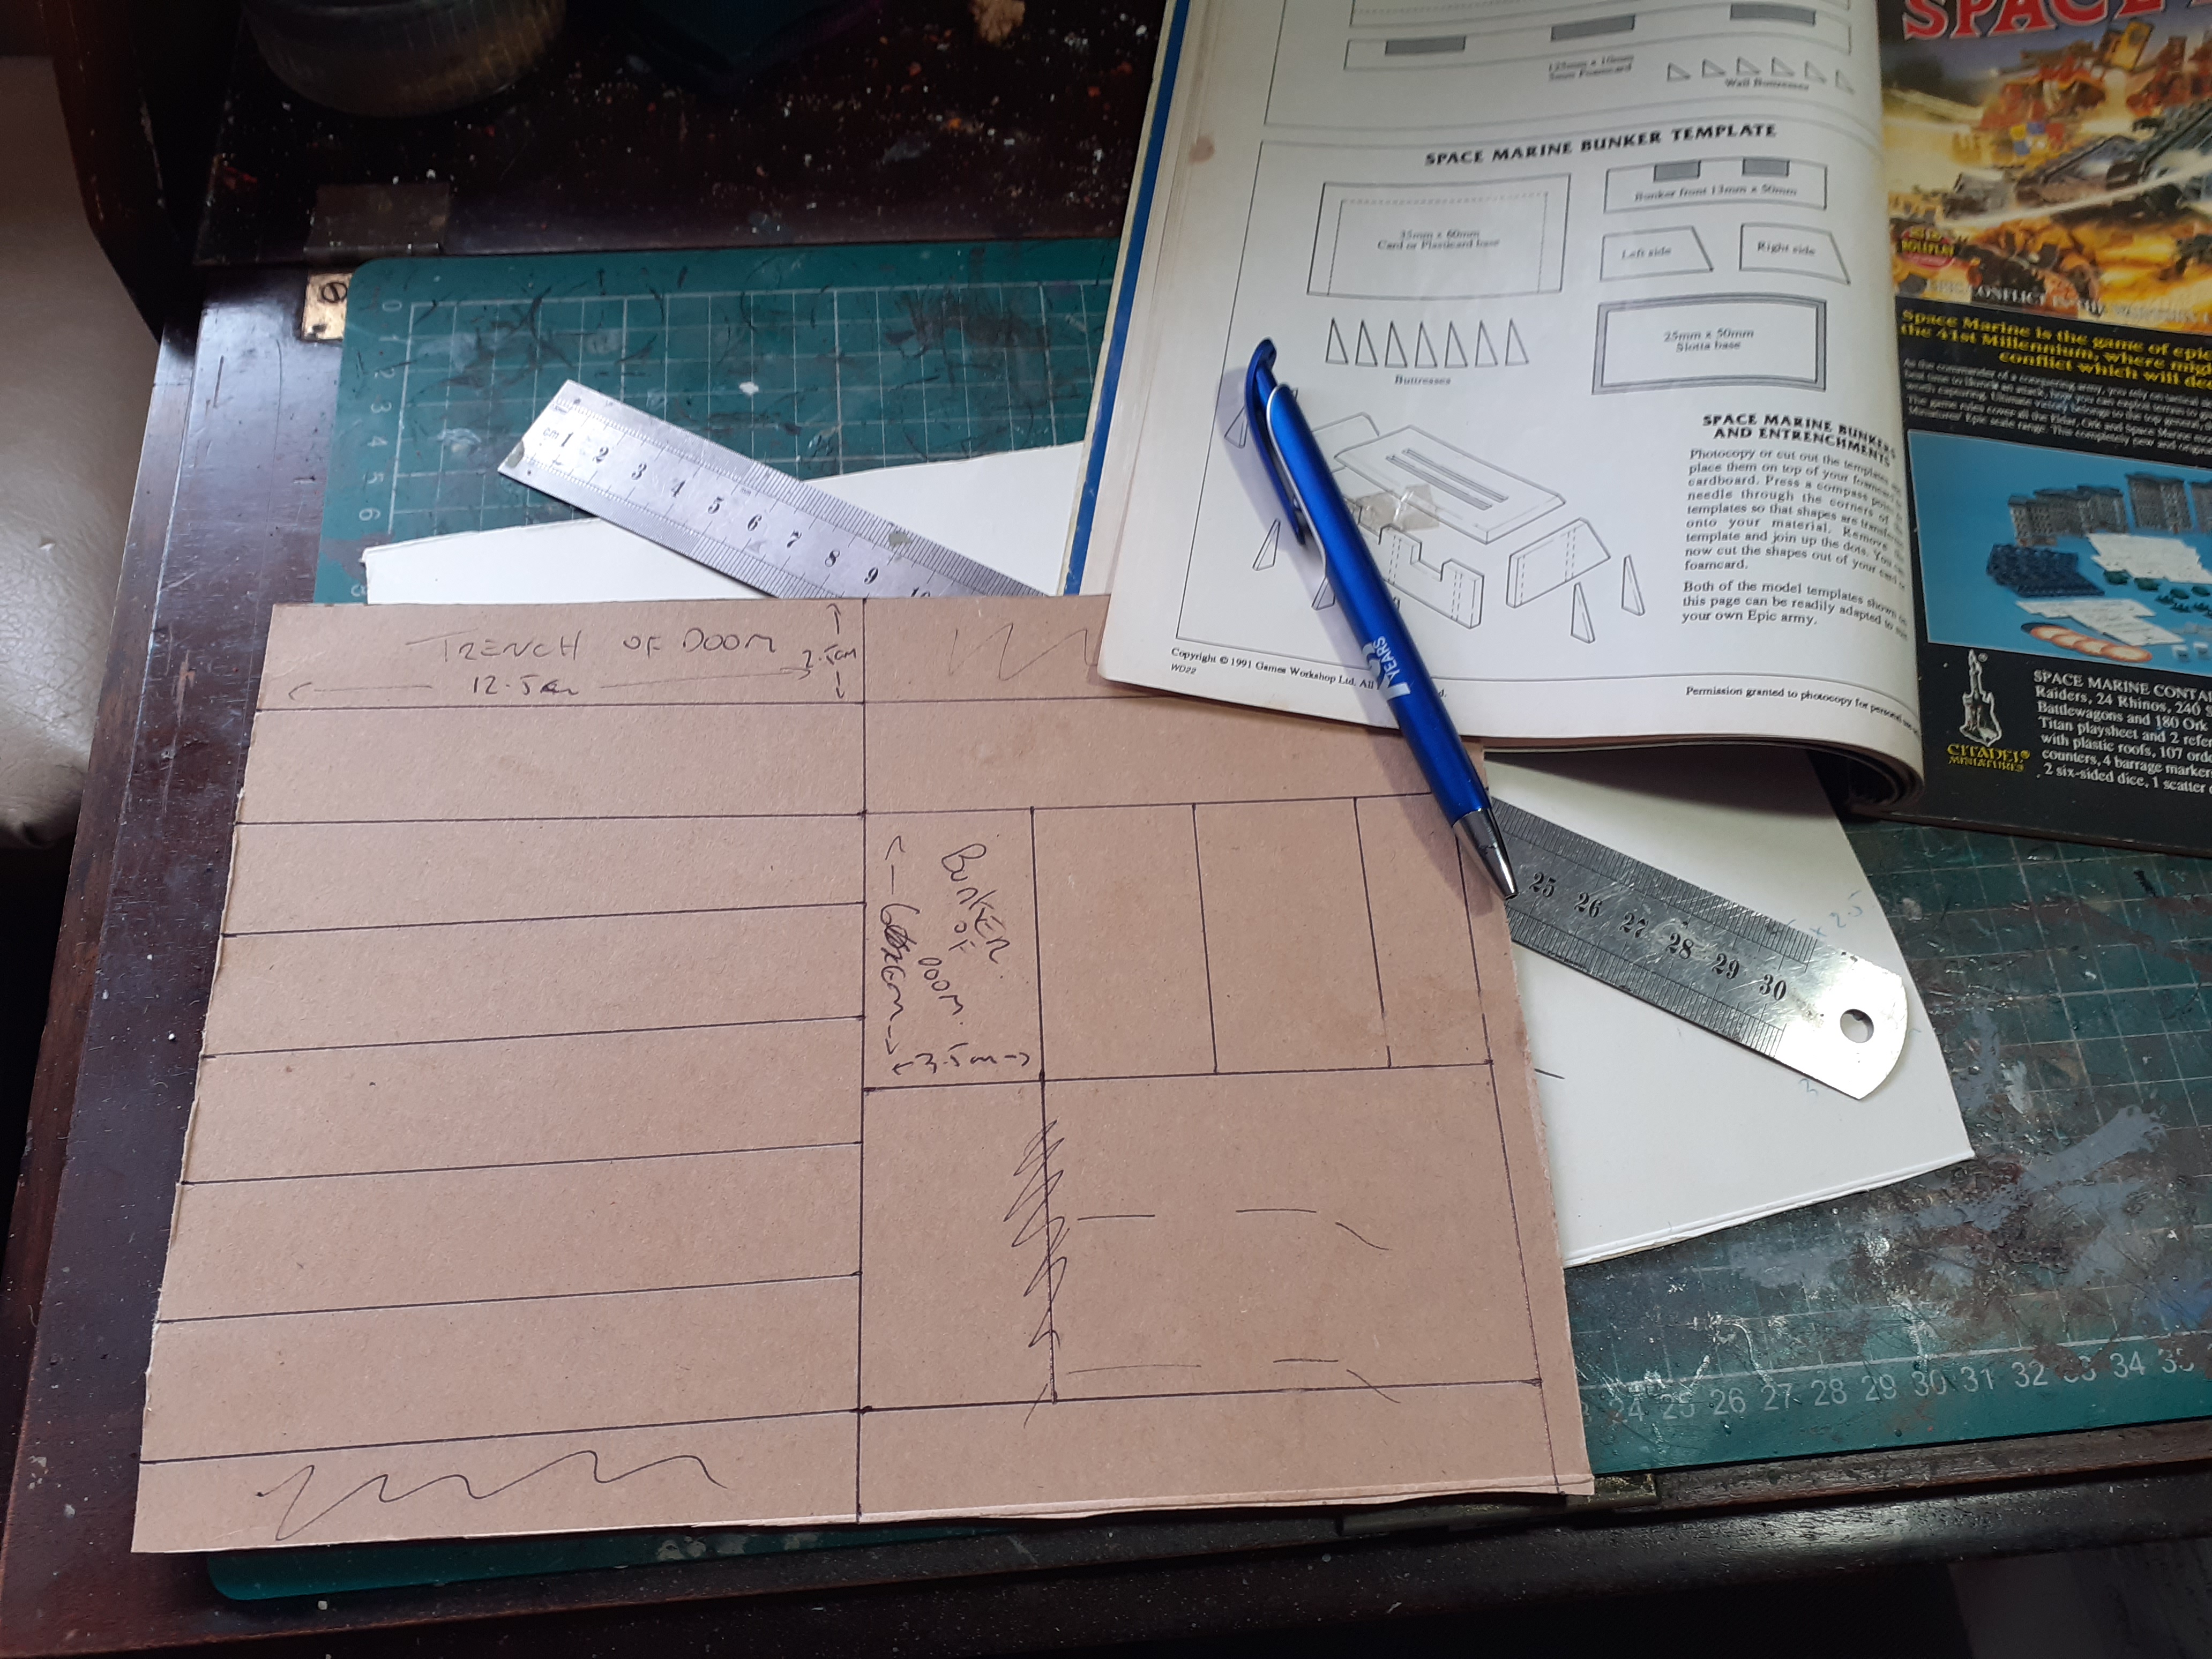
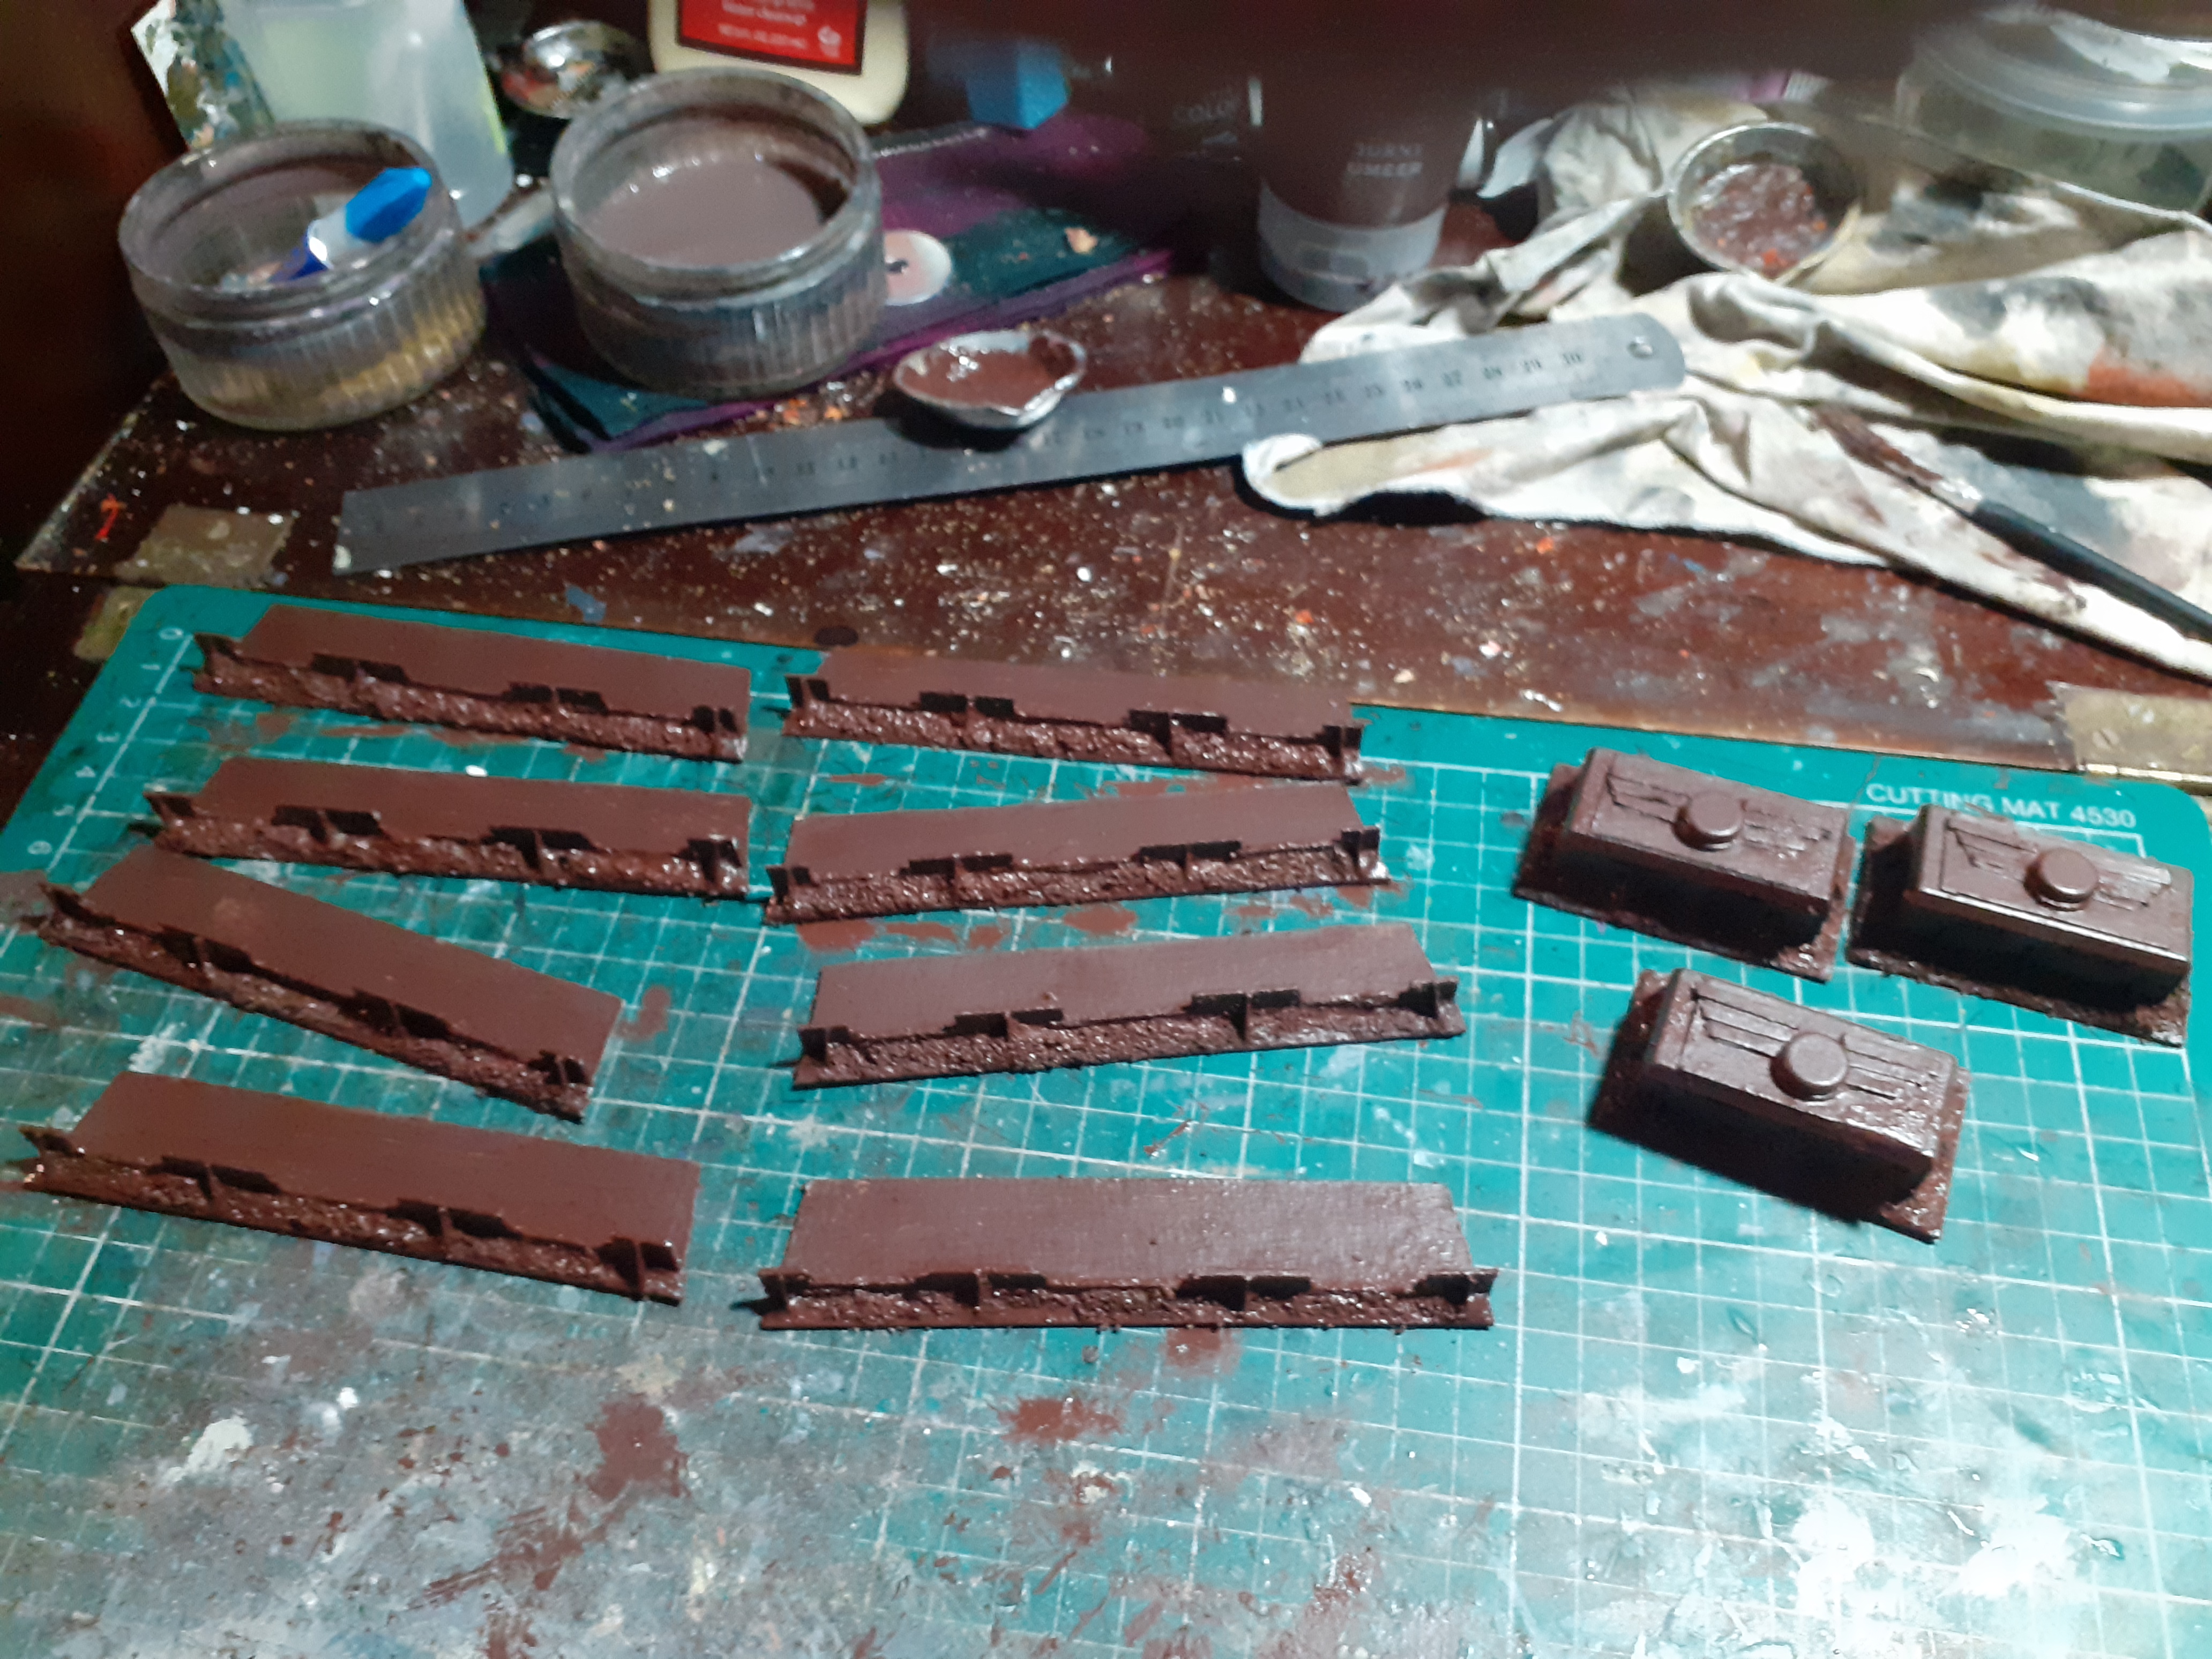
The first step was to hunt out a cereal packet then mark out and make the bases, rather than going with square edges I trimmed the corners so I can set the trenches out I wiggly lines.
I decided to only do one side of the trench line or as the article points out you get rather wide looking trenches that are hard to move your tiny dudes a out in.
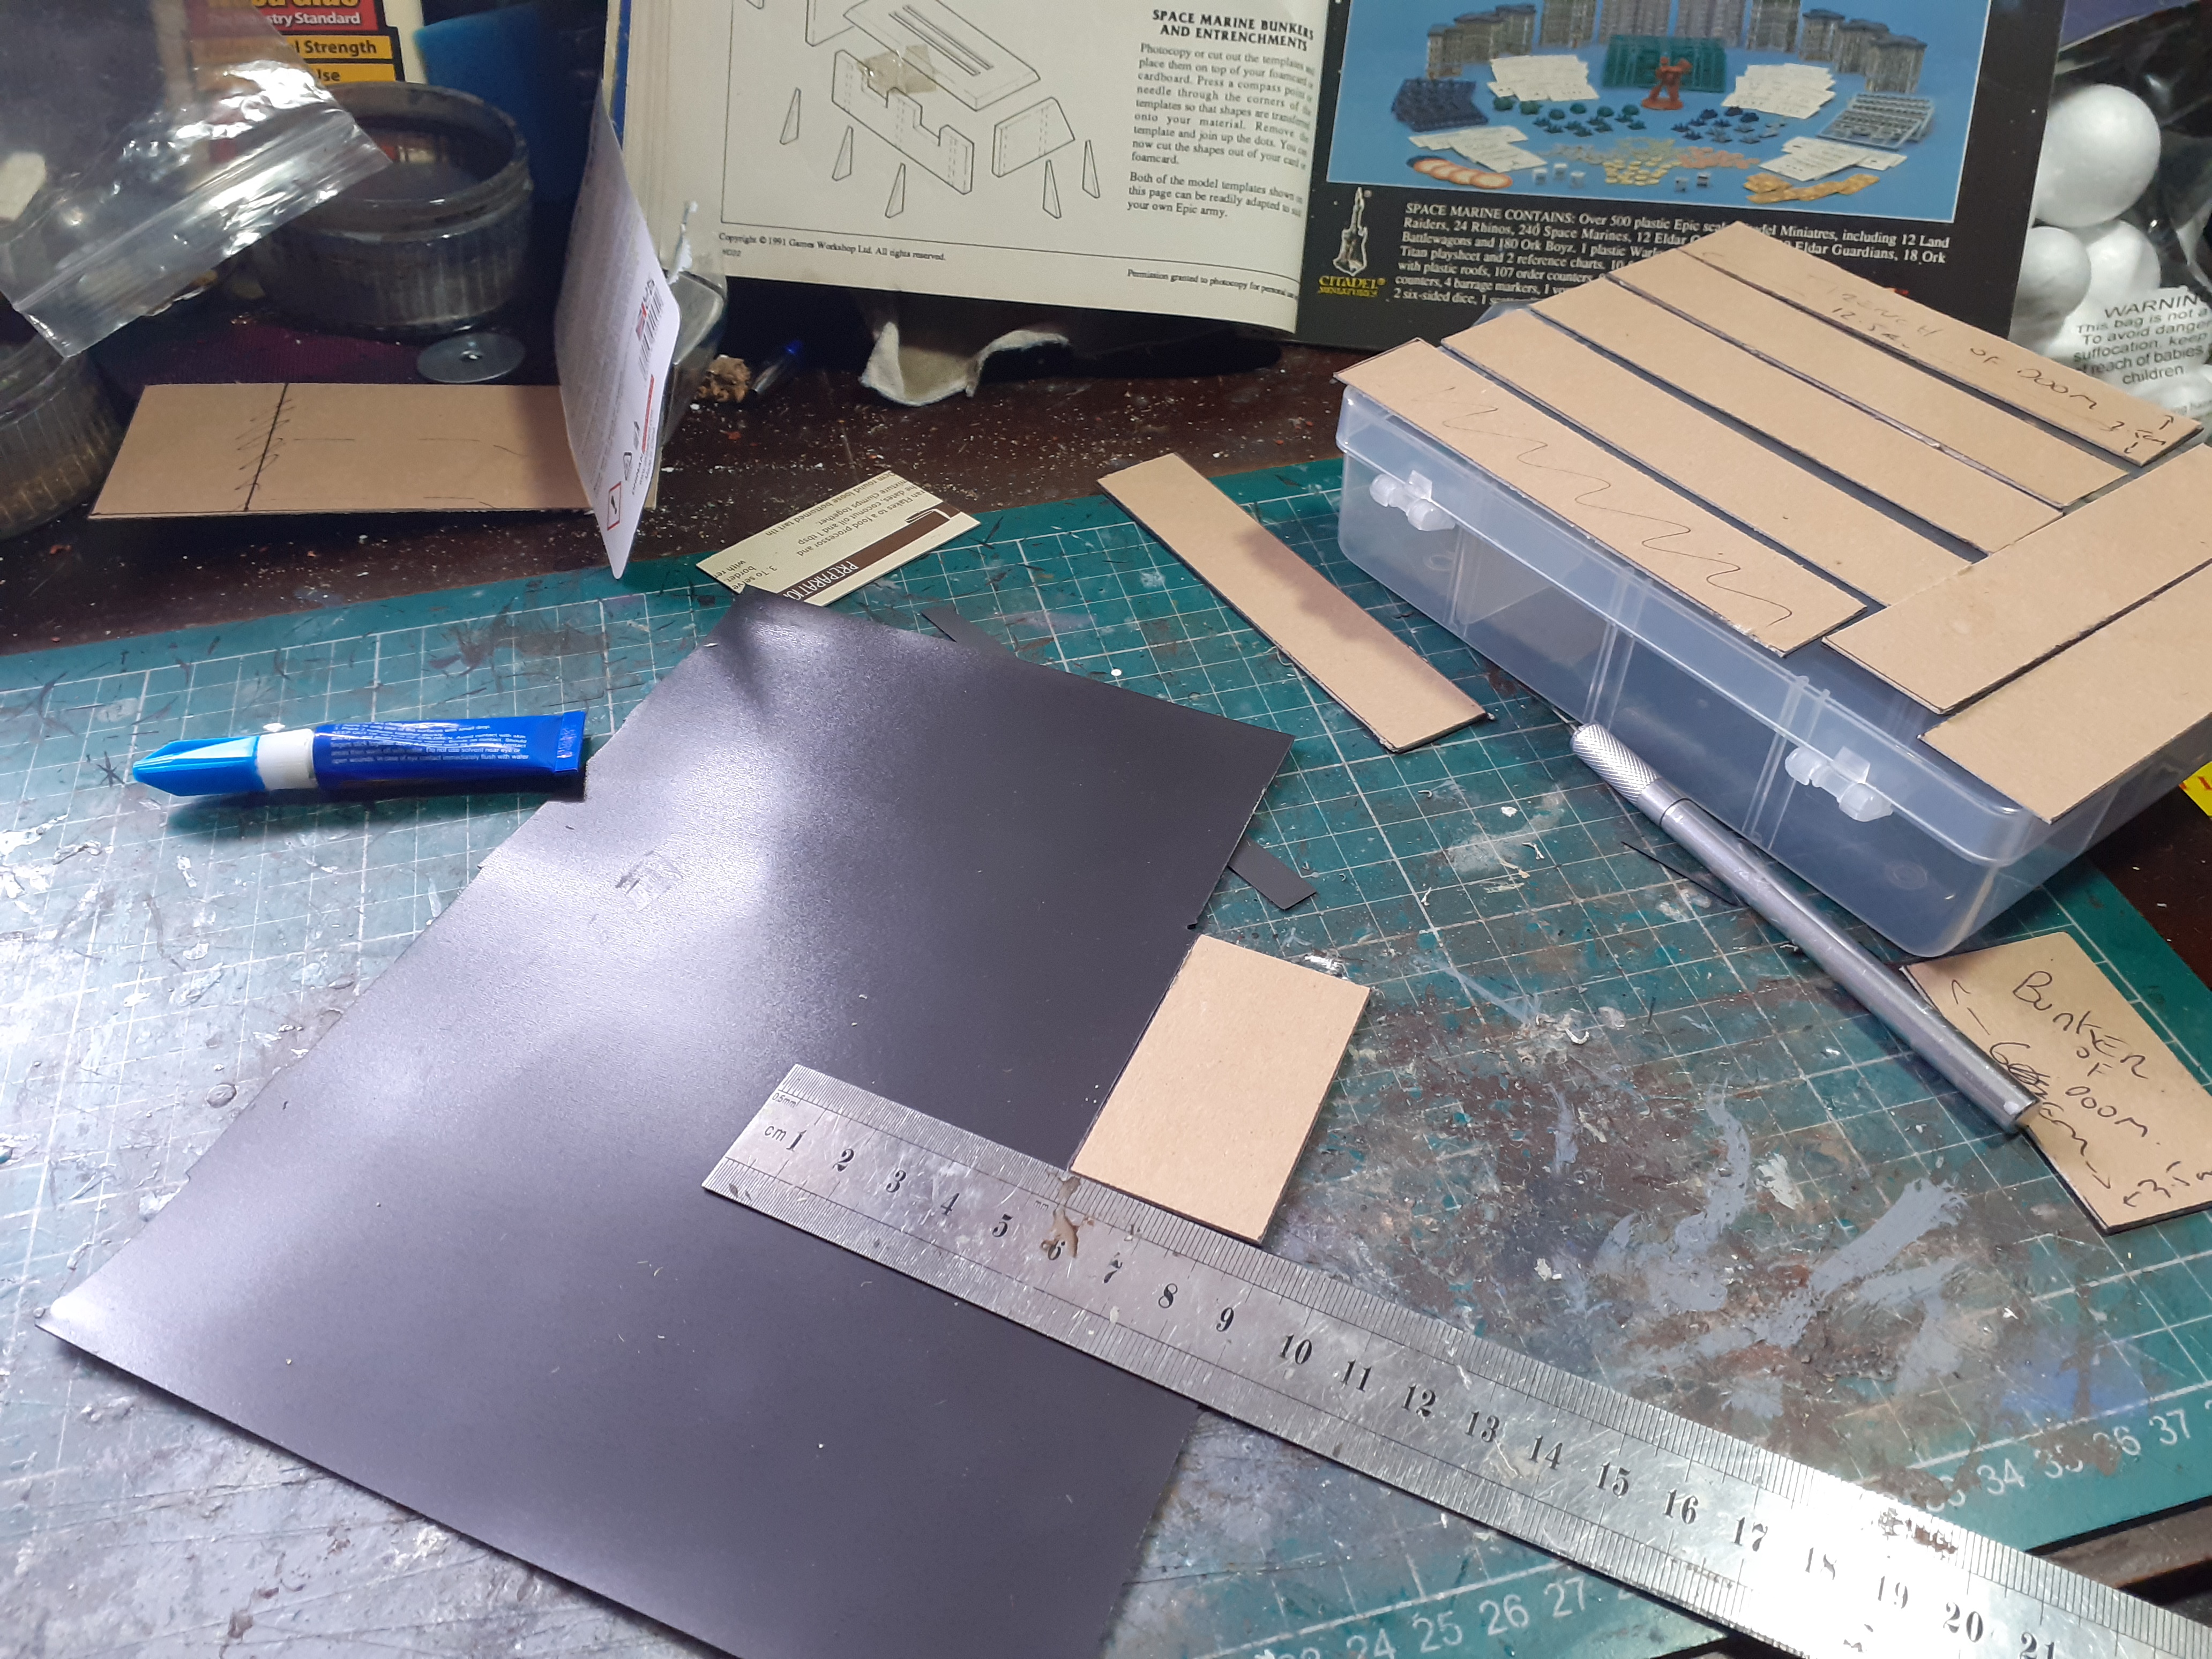
I also decided to mount the card bases on some thin magnetic sheet, mainly to add some strength and to help stop the edges curling after painting.

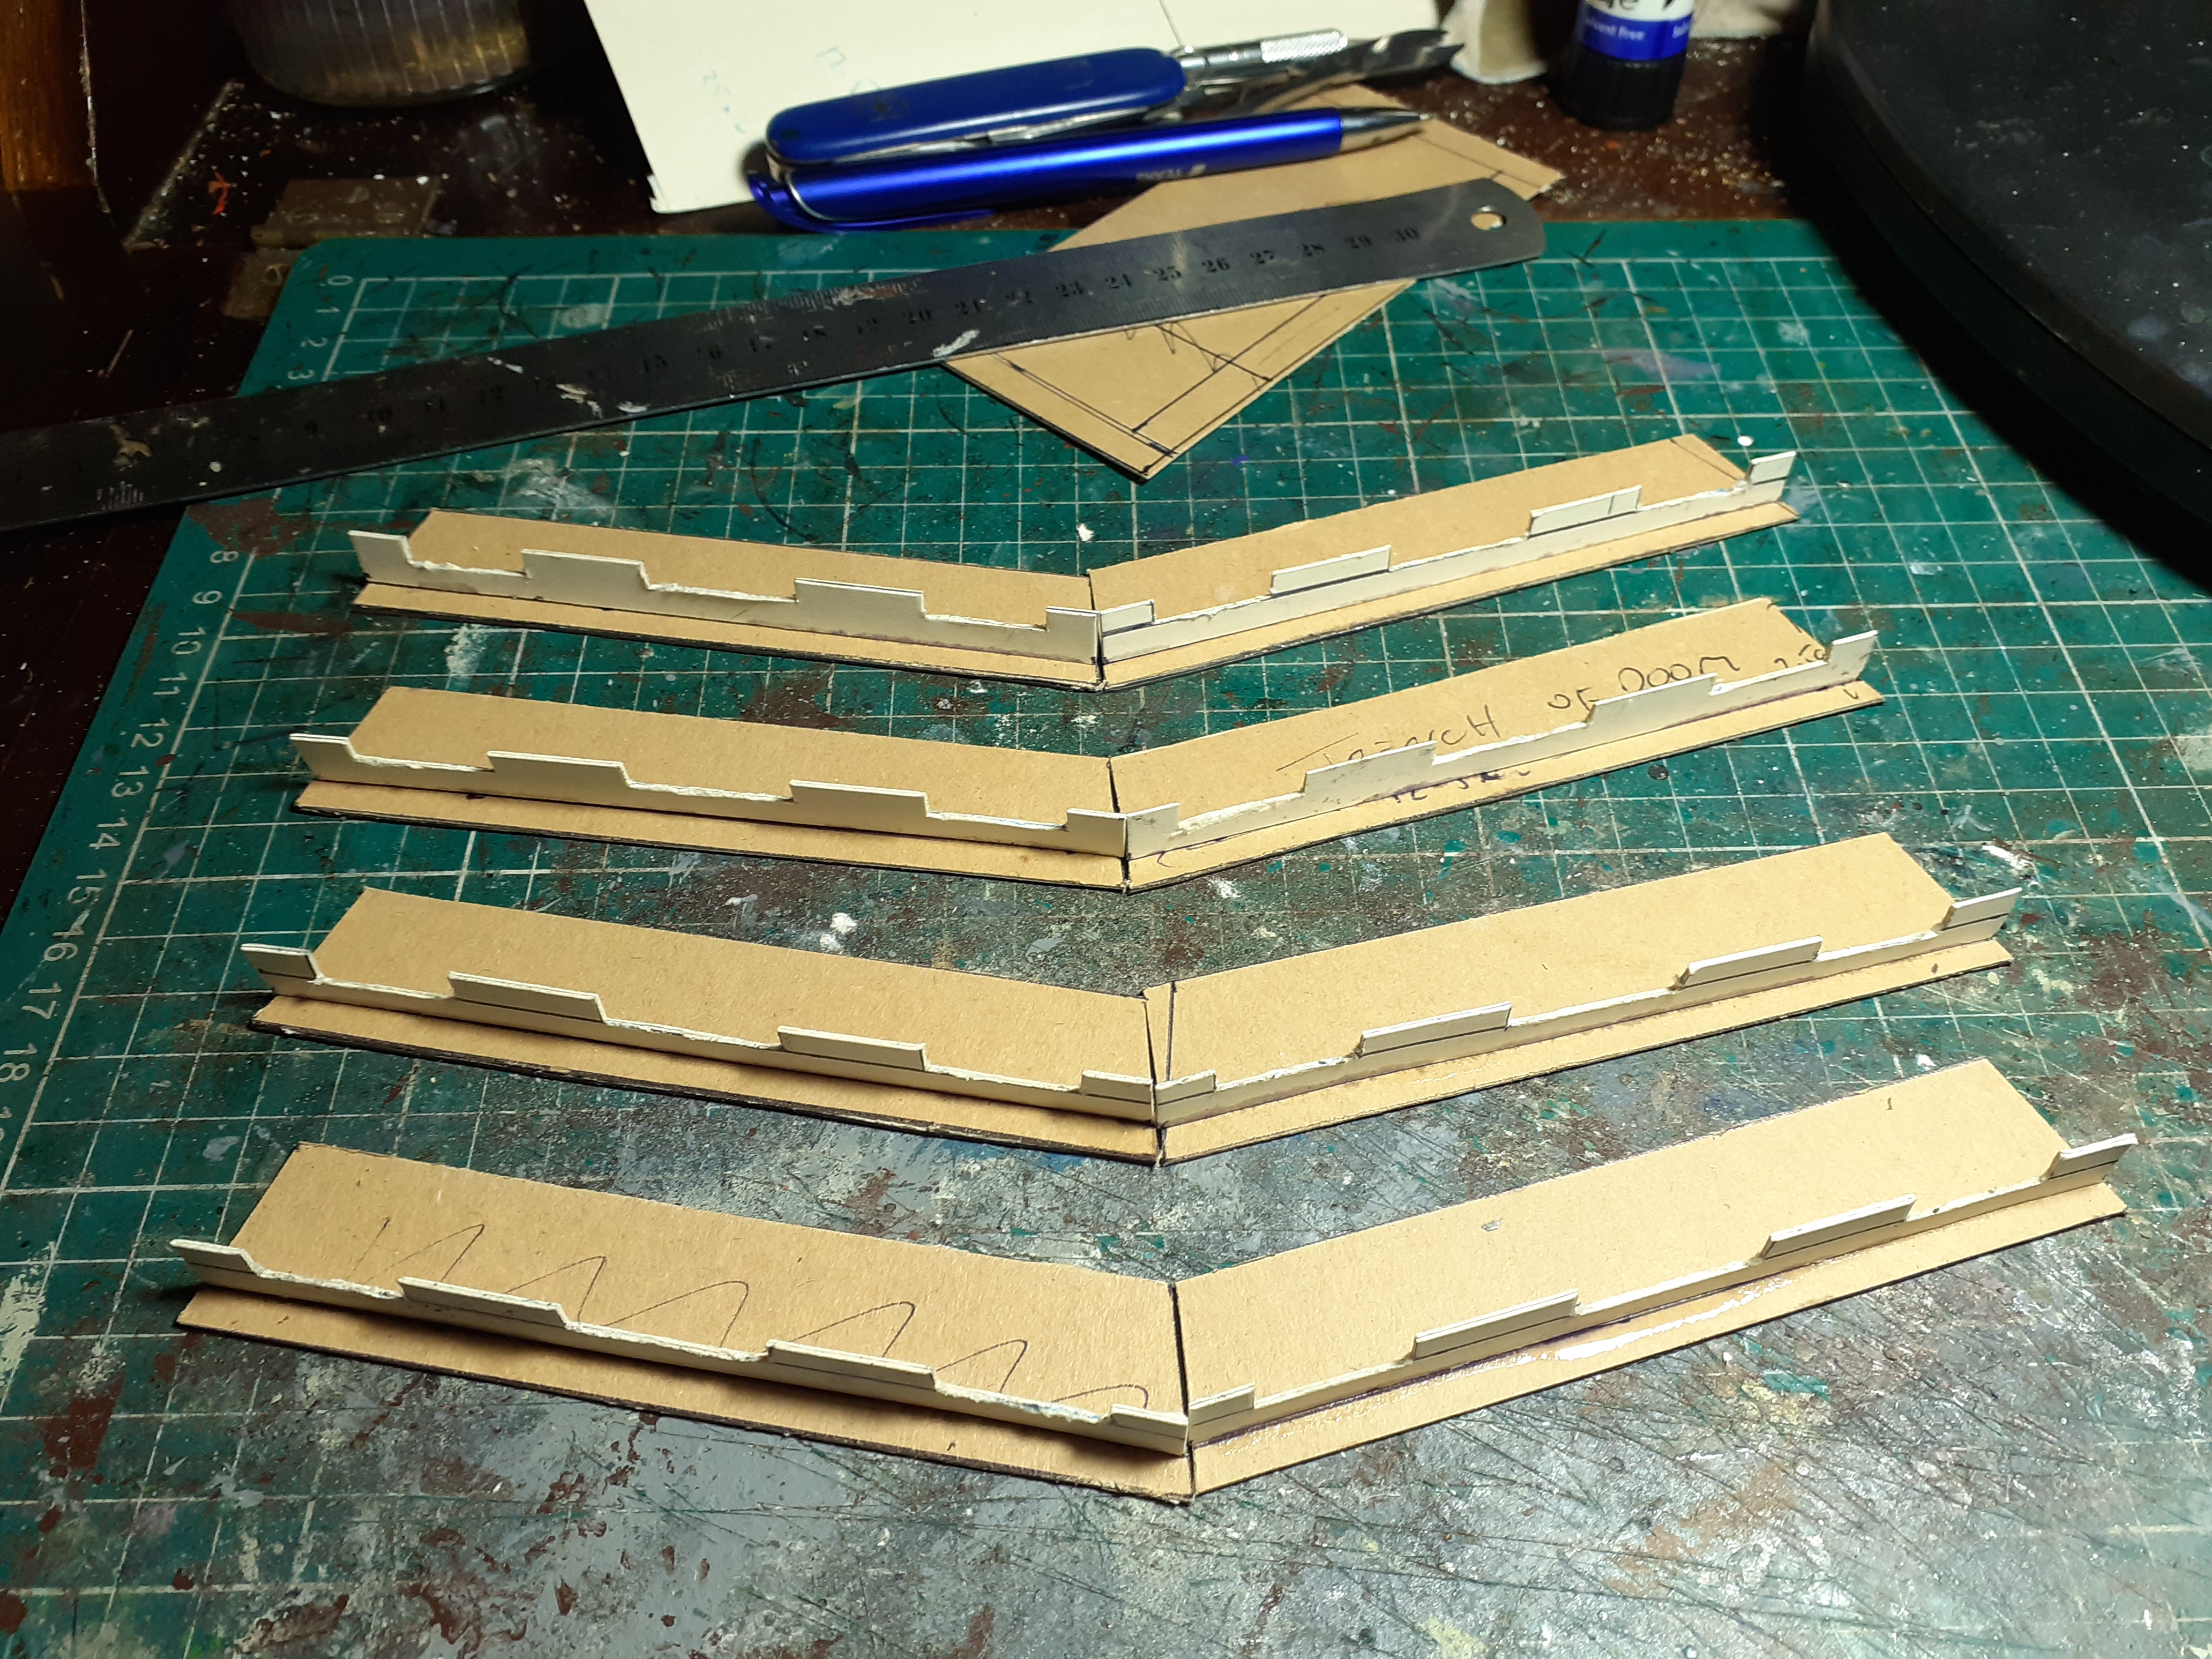


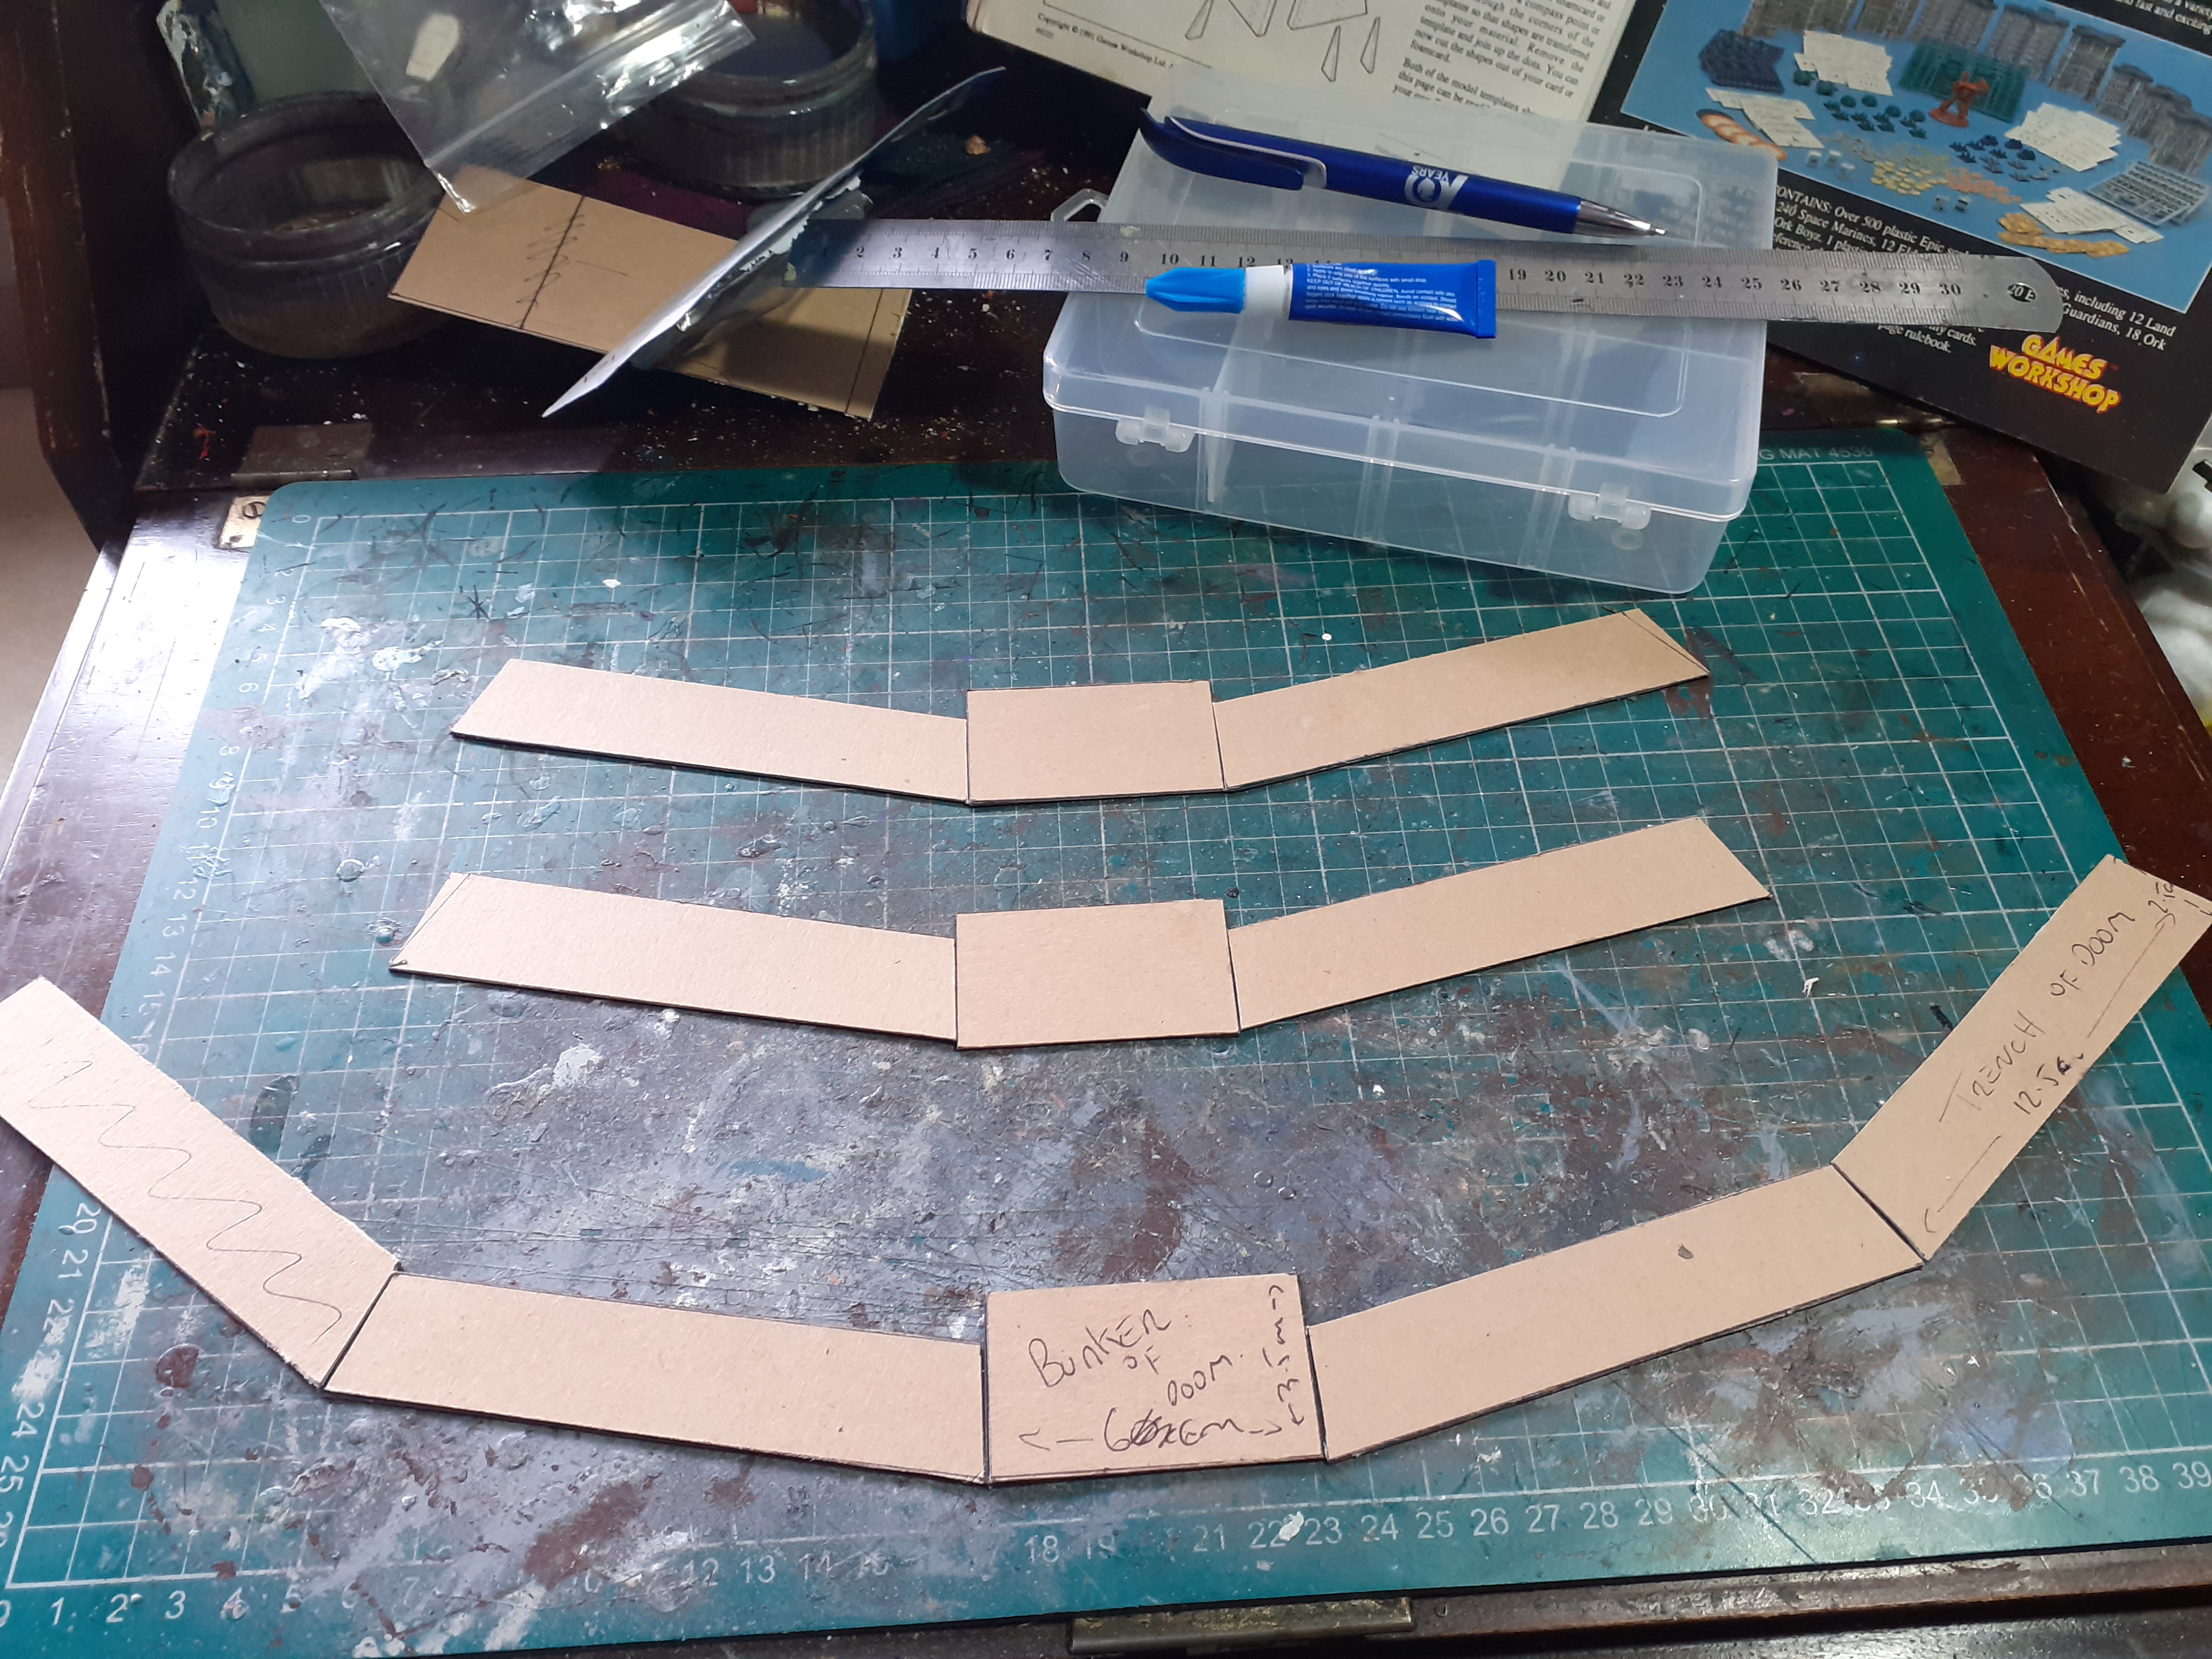
Whilst the glue was drying in the bases it was time to cut out the walls of the trenches and the teeny tiny buttresses. The walls were quite thin so I doubled up the wall sections and used prit stick to join them together as pva made the card curl.
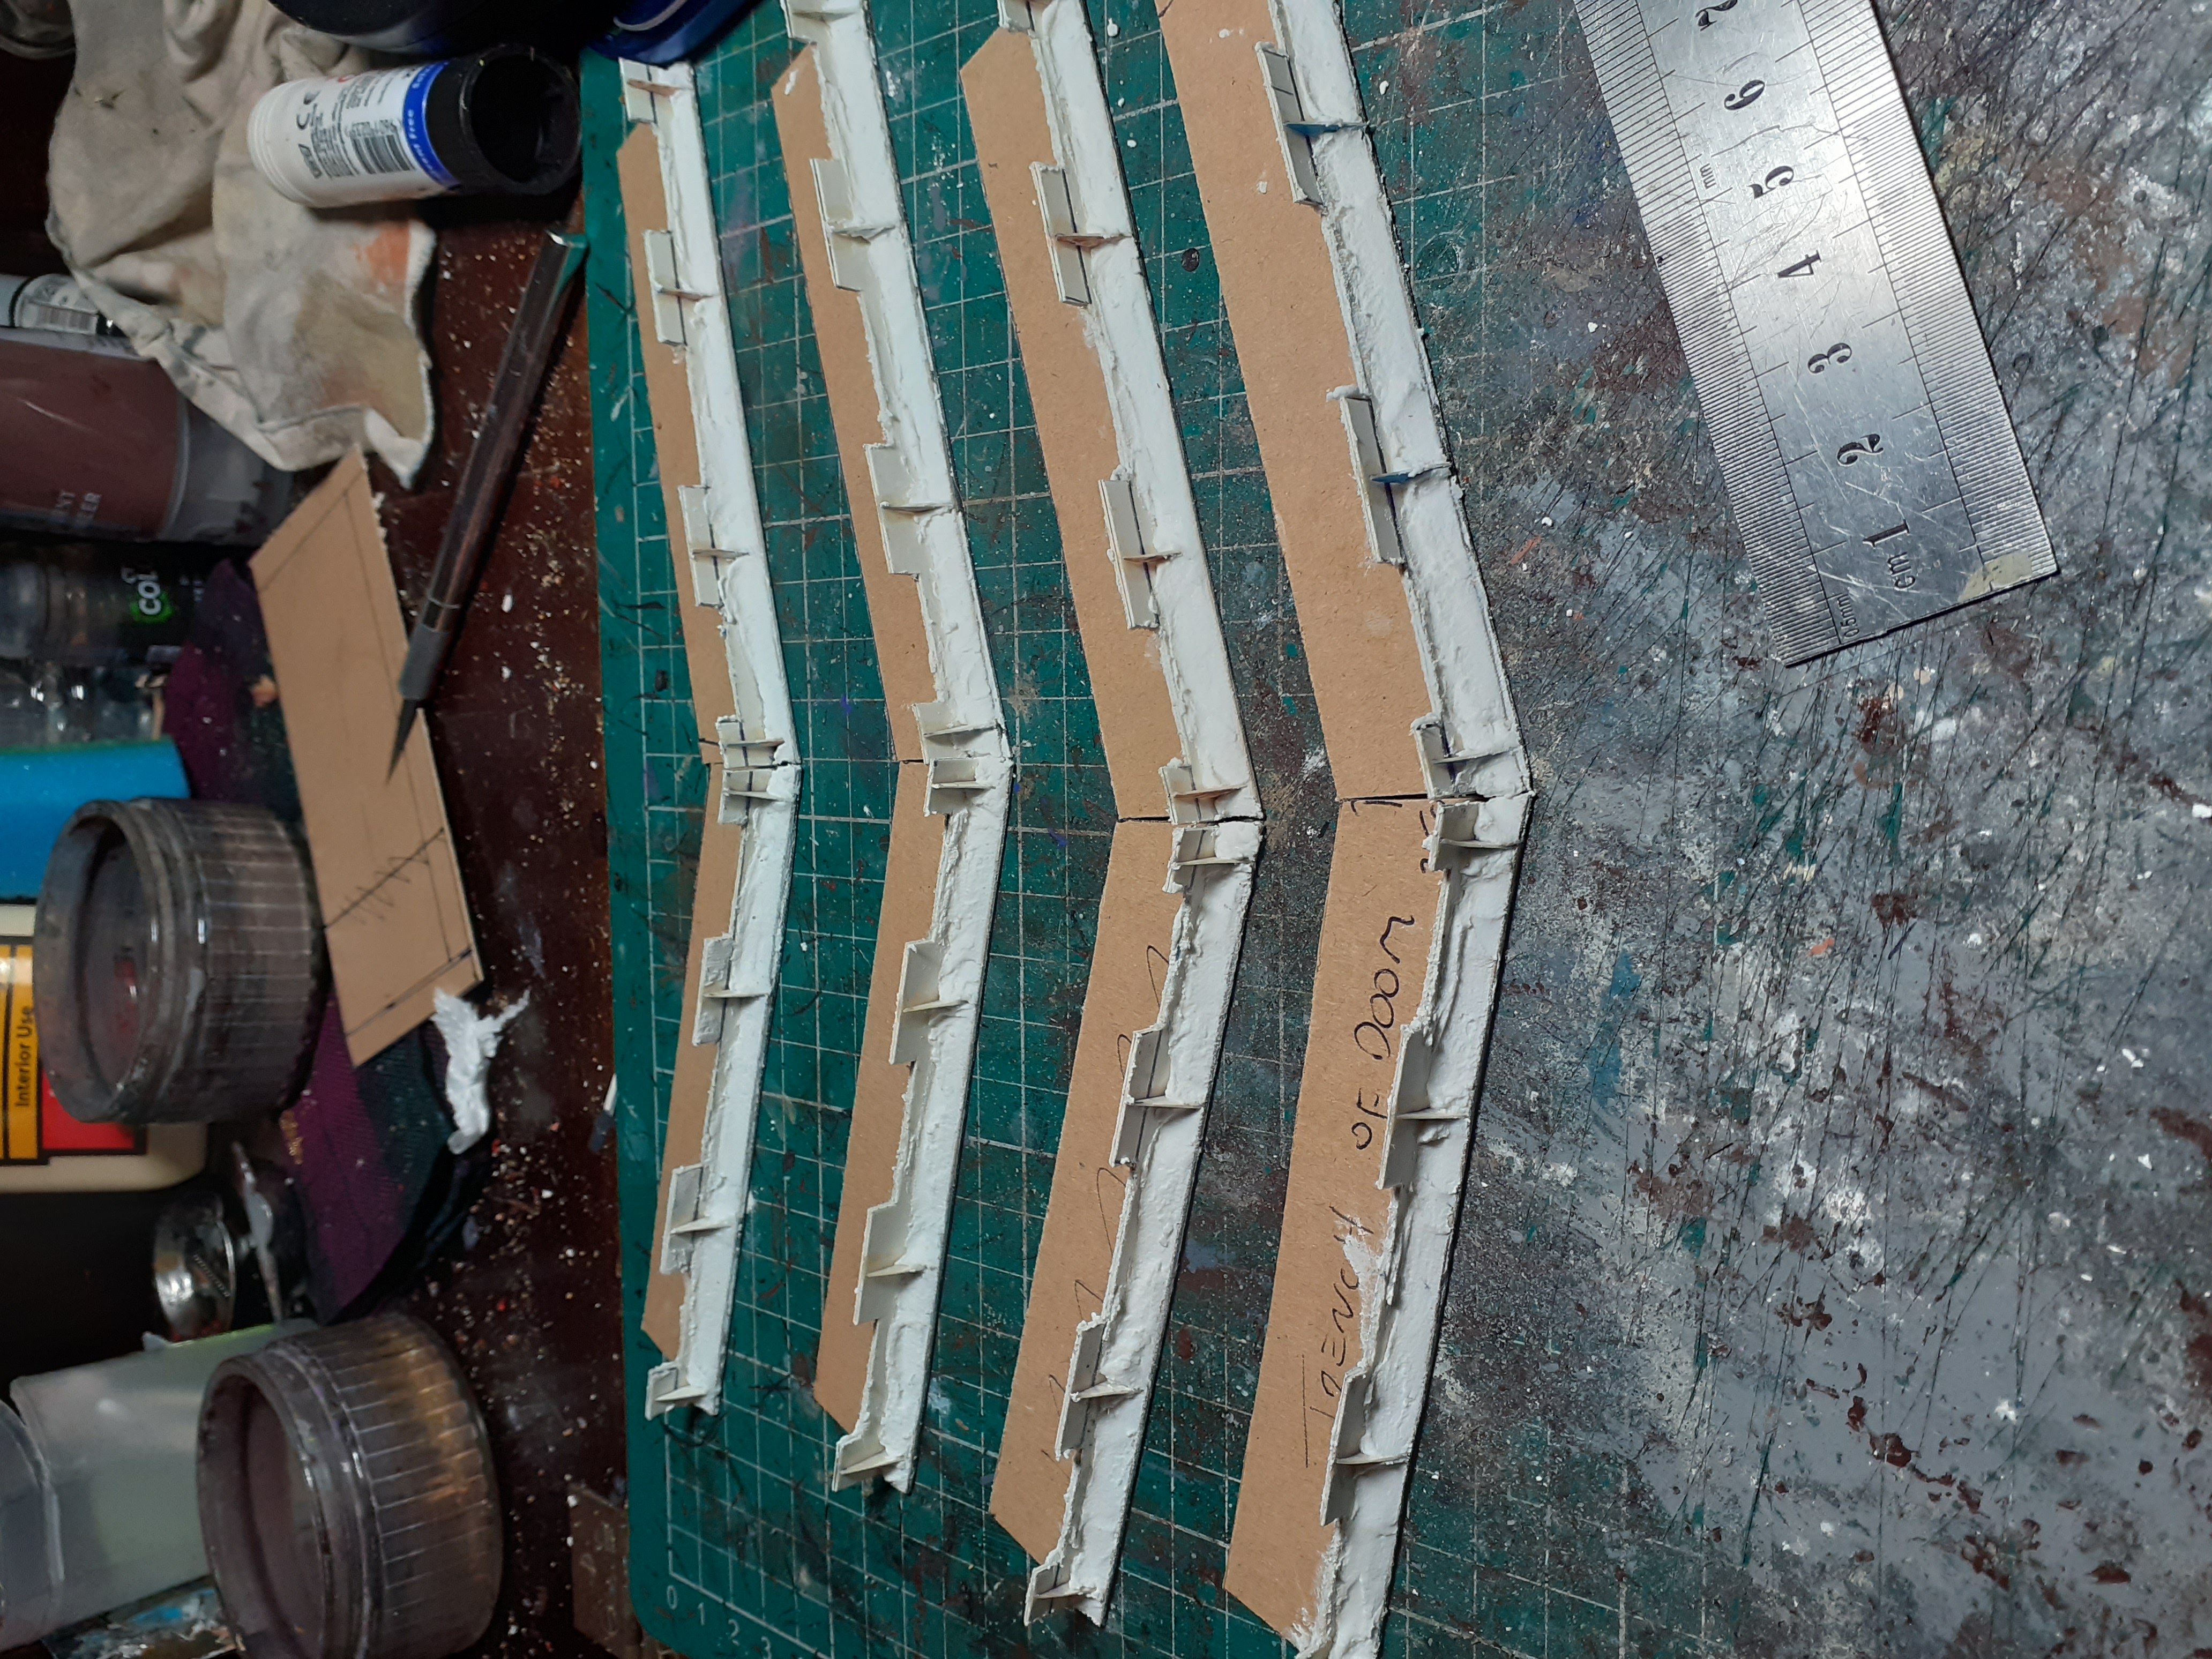
Then It’s time to stick your fingers to everything, found out the hard way that super glue is great for this as pva let’s the card slide around before it drys
Once that was all dry it was time to splodge on some filler that was then coated in modge podge glue to make it nice and strong
The bunkers were made in the same way, think I messed up my measurements as the bunker is supposed to be as wide as a cavalry base, I just gave the bunkers a lip at the front rather than starting again.
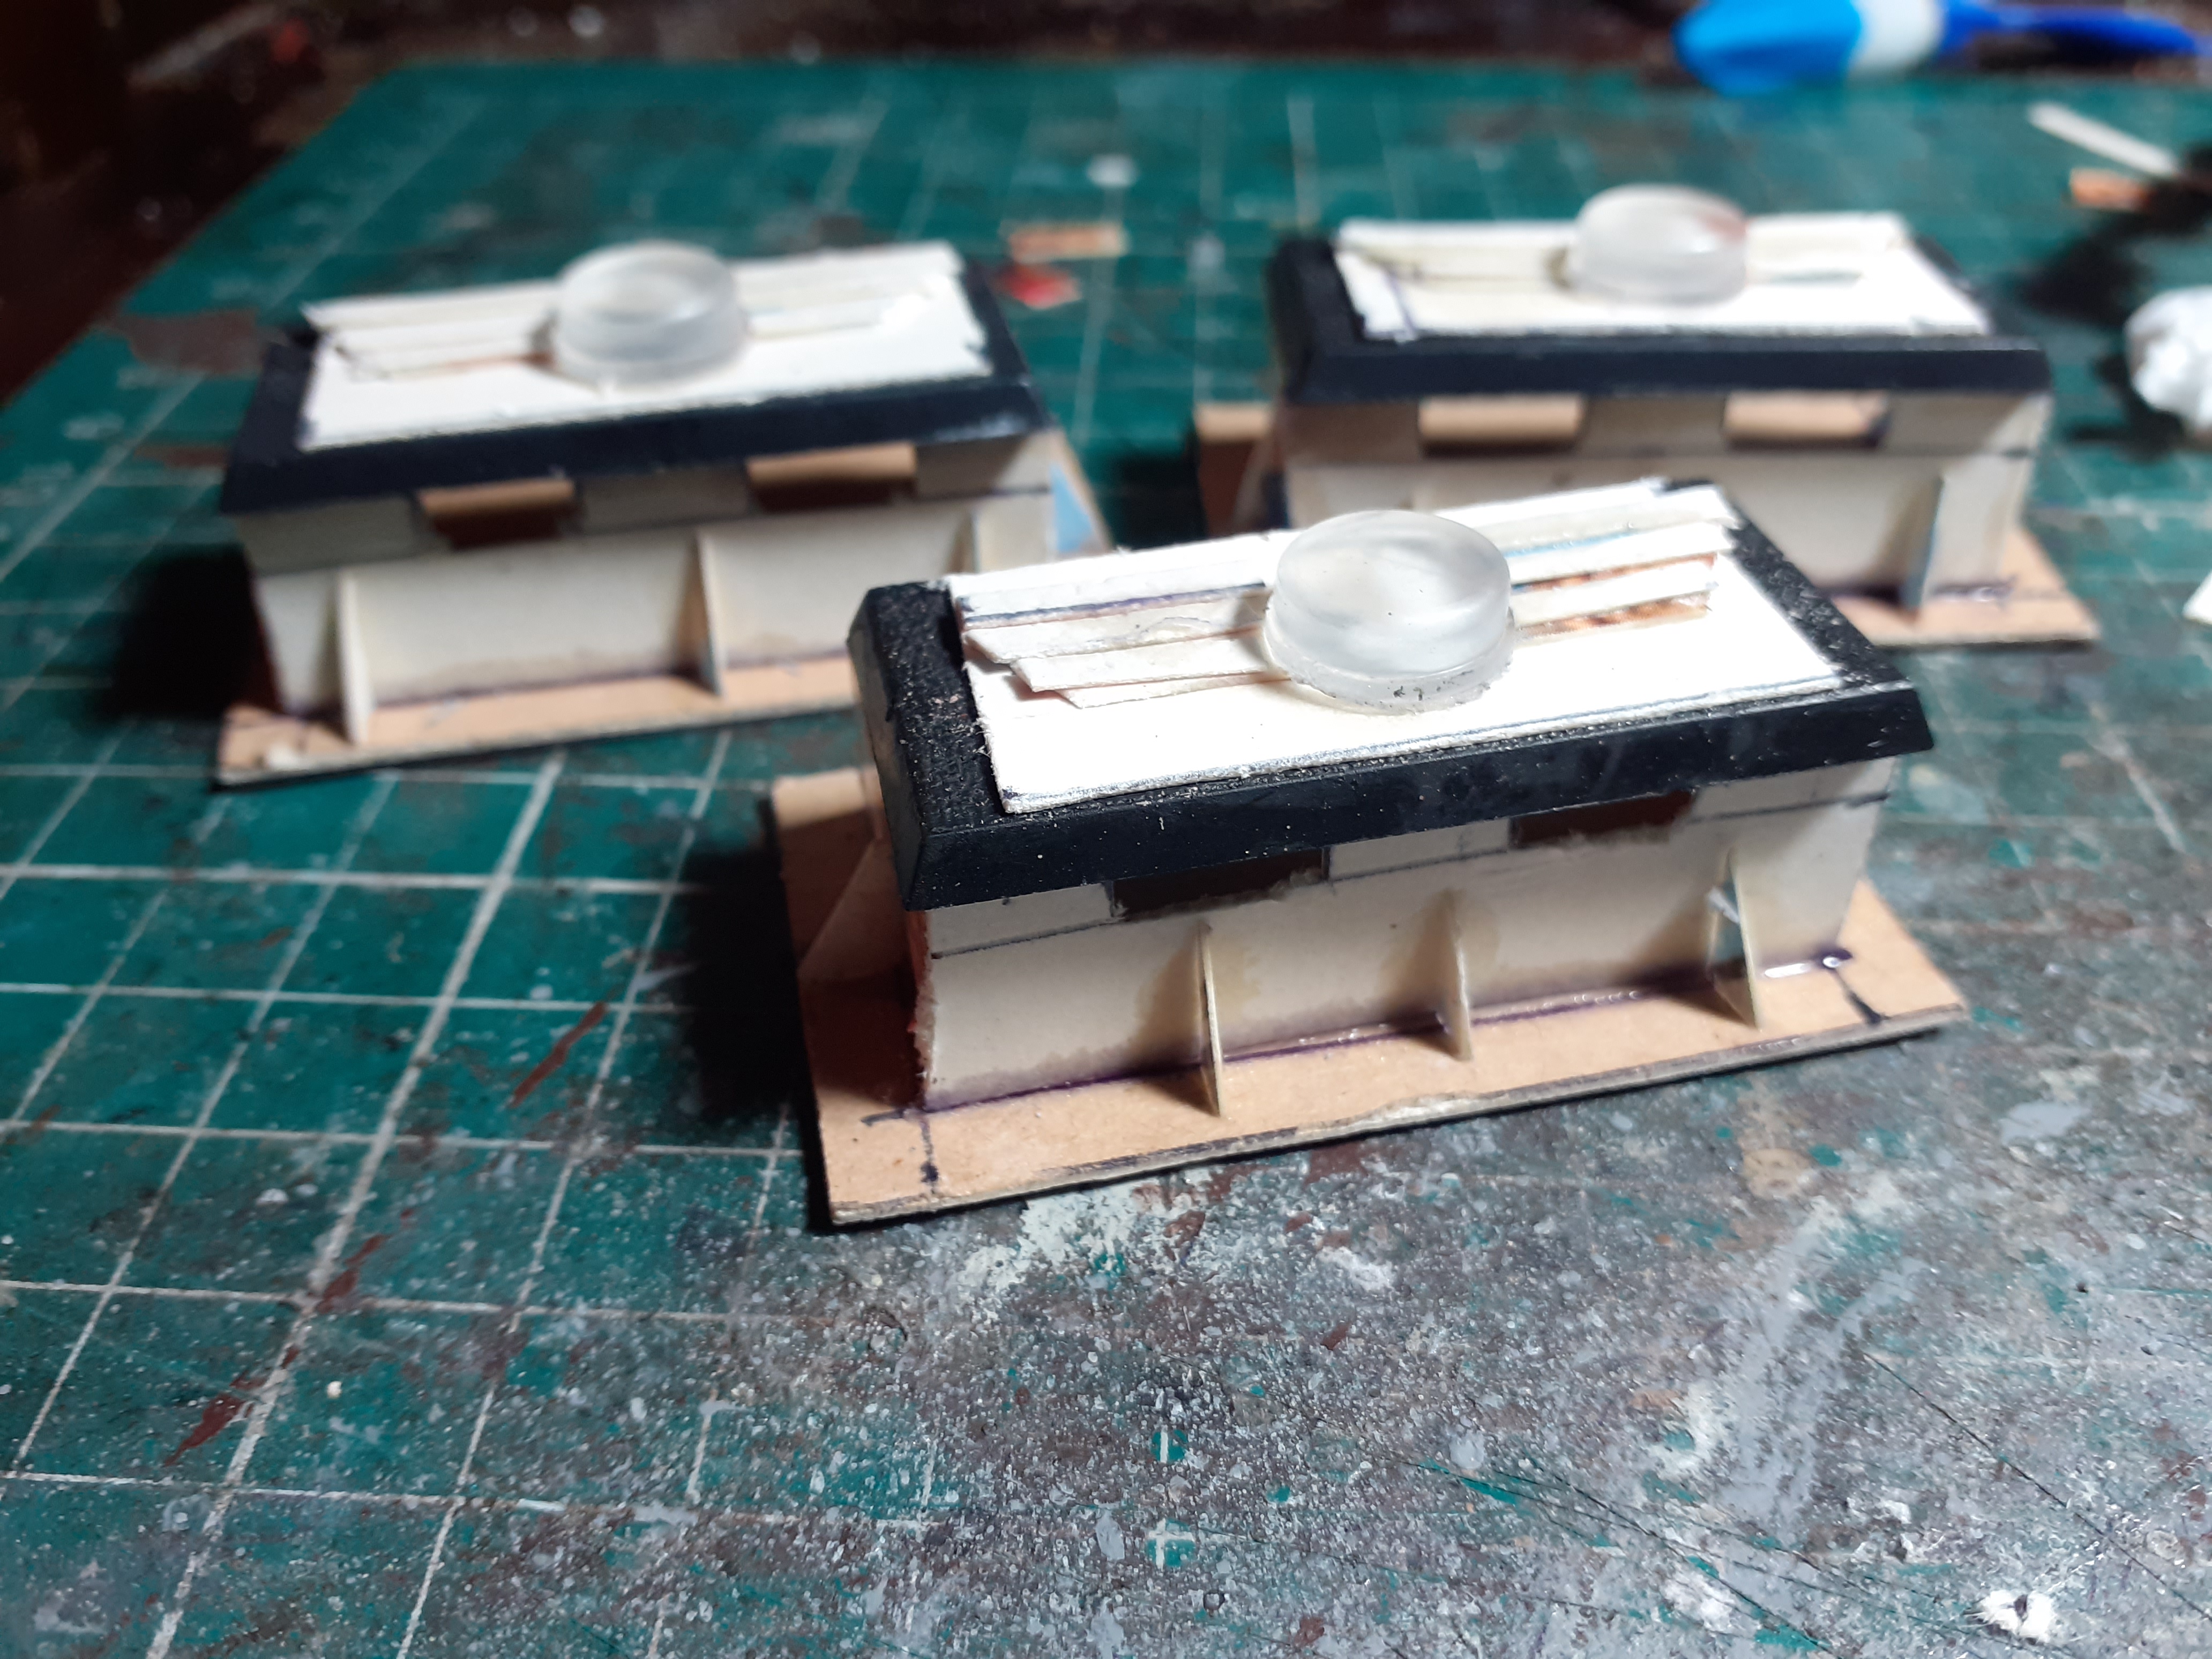
Tried to make some imperial symbols for the top of the bunkers, the wings are just card strips and the circles are the little sticky plastic blobs you can use to stop things sliding around.
 Leaving these to dry for a bit
 Last bit before splashing on some paint I glues some sand round the bases to give it some texture.
Shrooms and houses
 Got the airbrush out and sprayed the houses and stood piles grey with a white over brush
 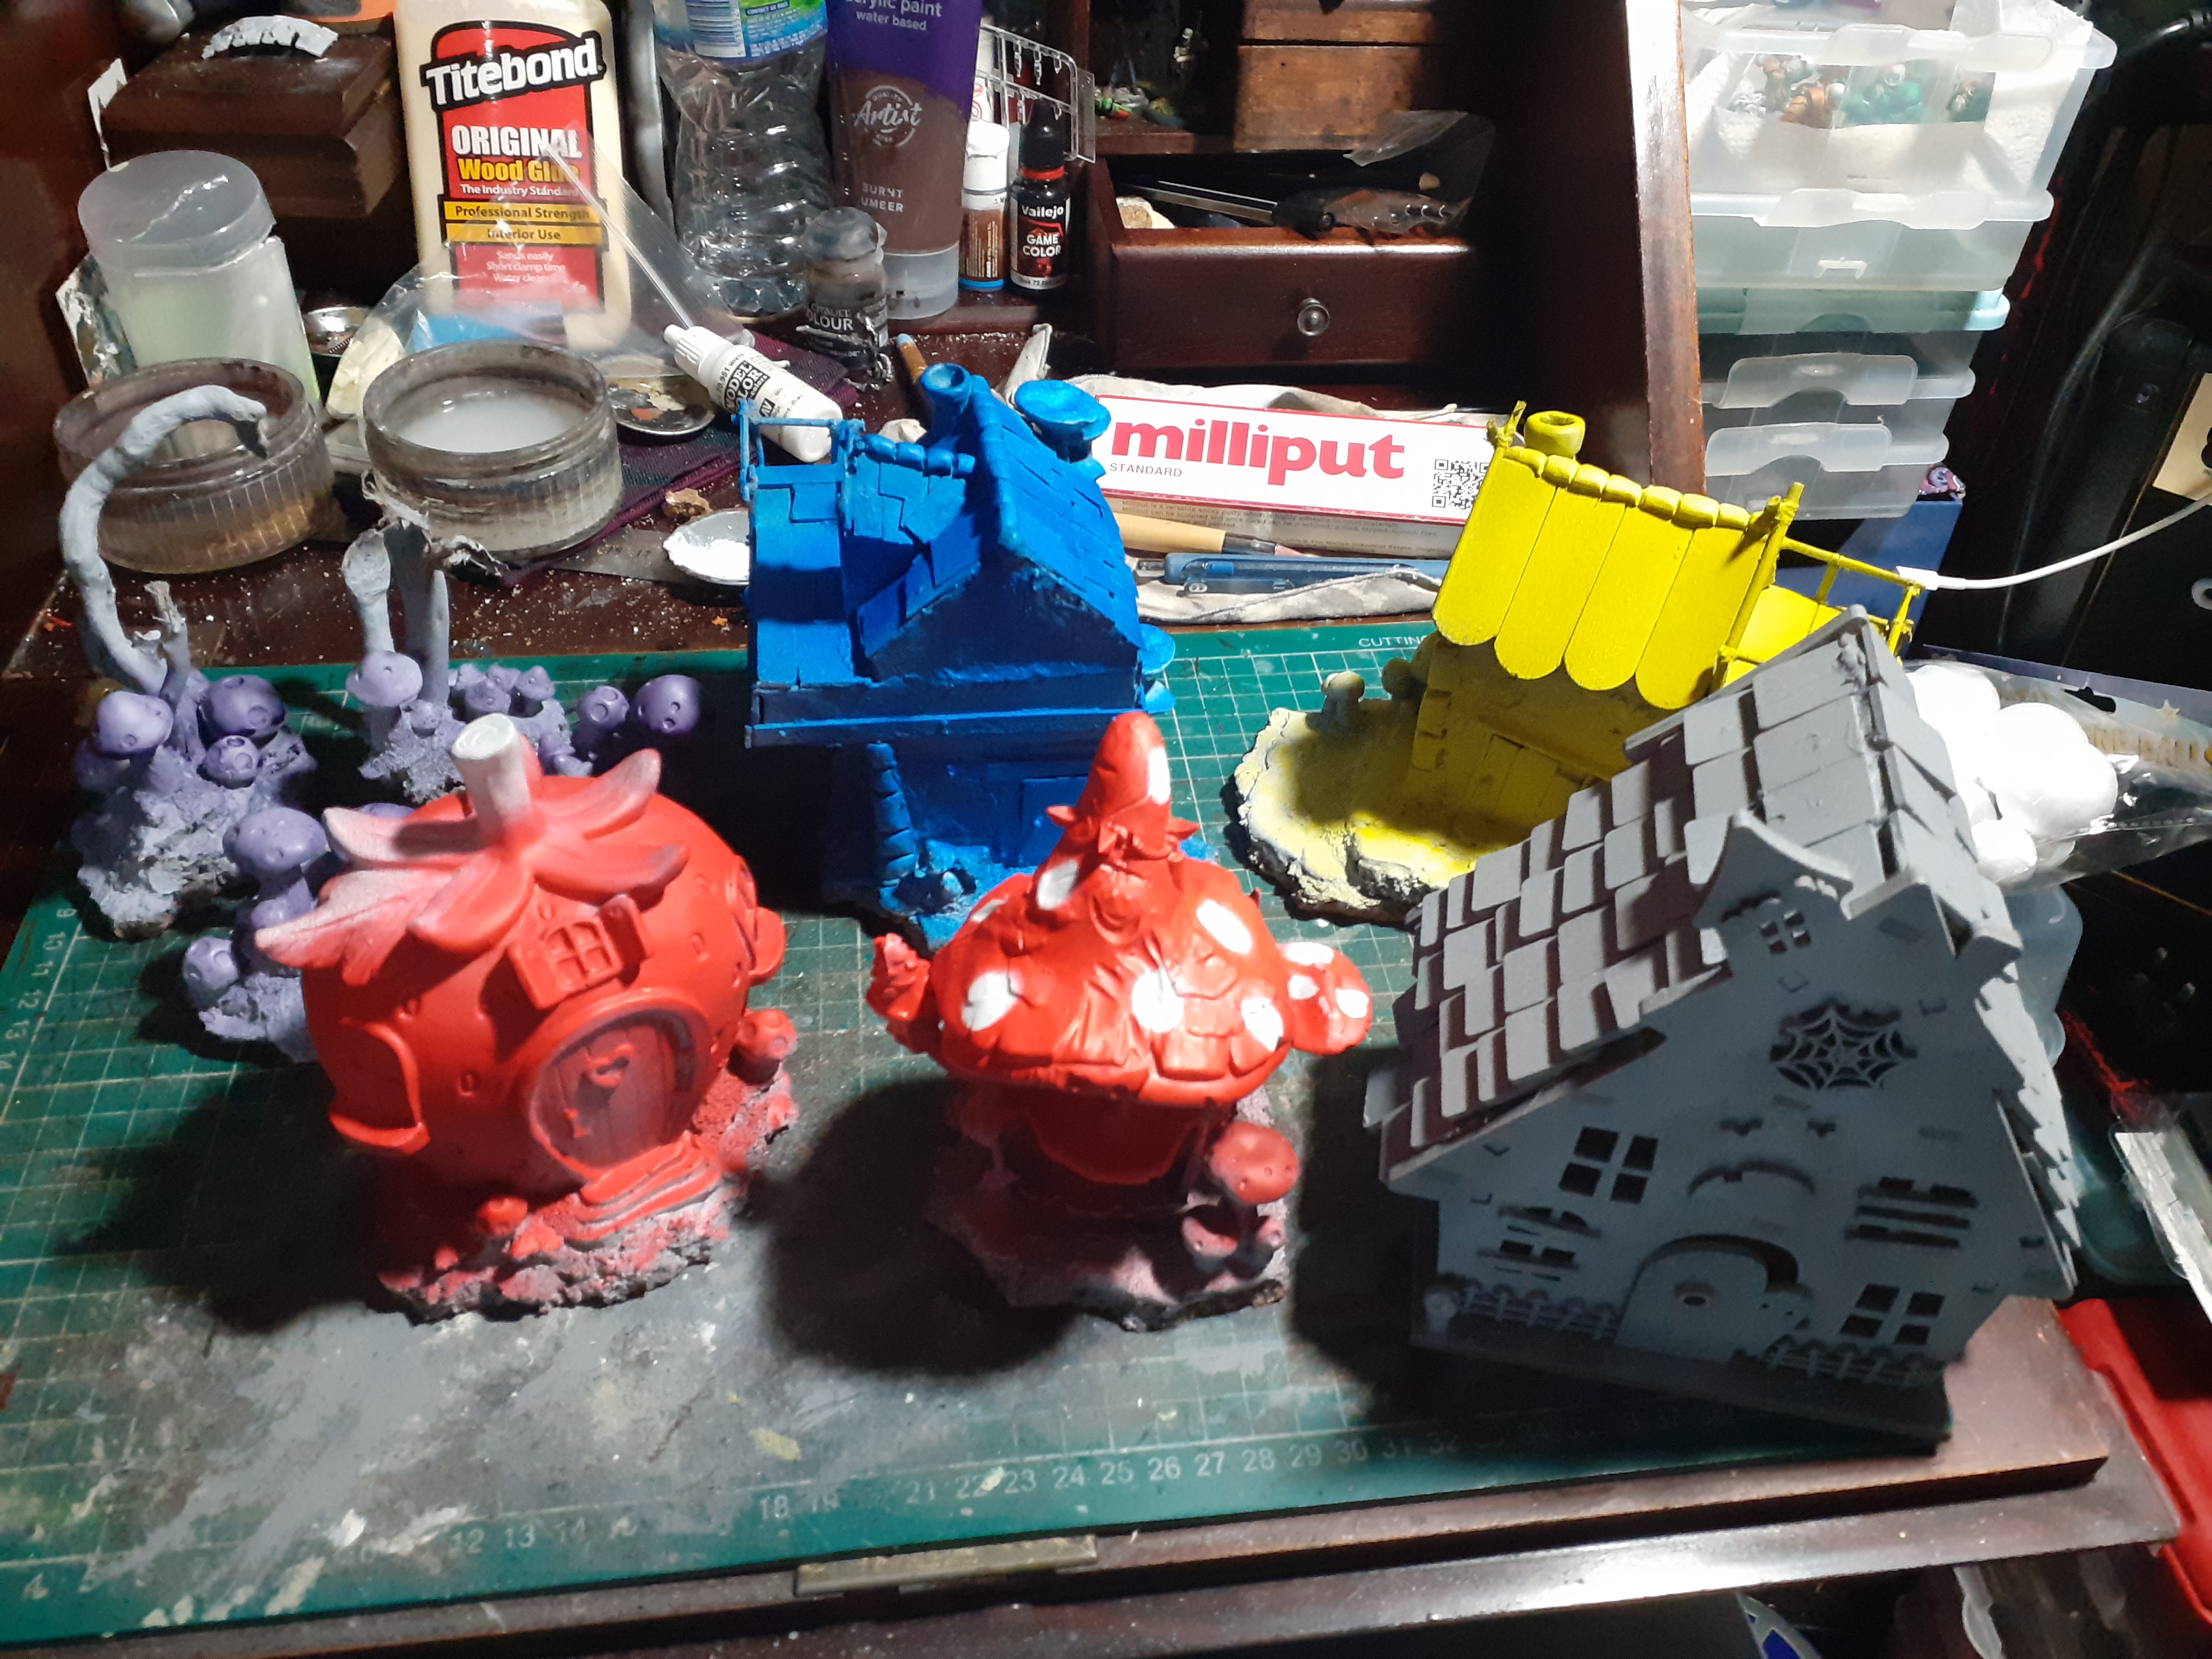 The next thing to so was to airbrush the models in their base colours.i wanted a bright looking table so went with bright red yellows blues and purple
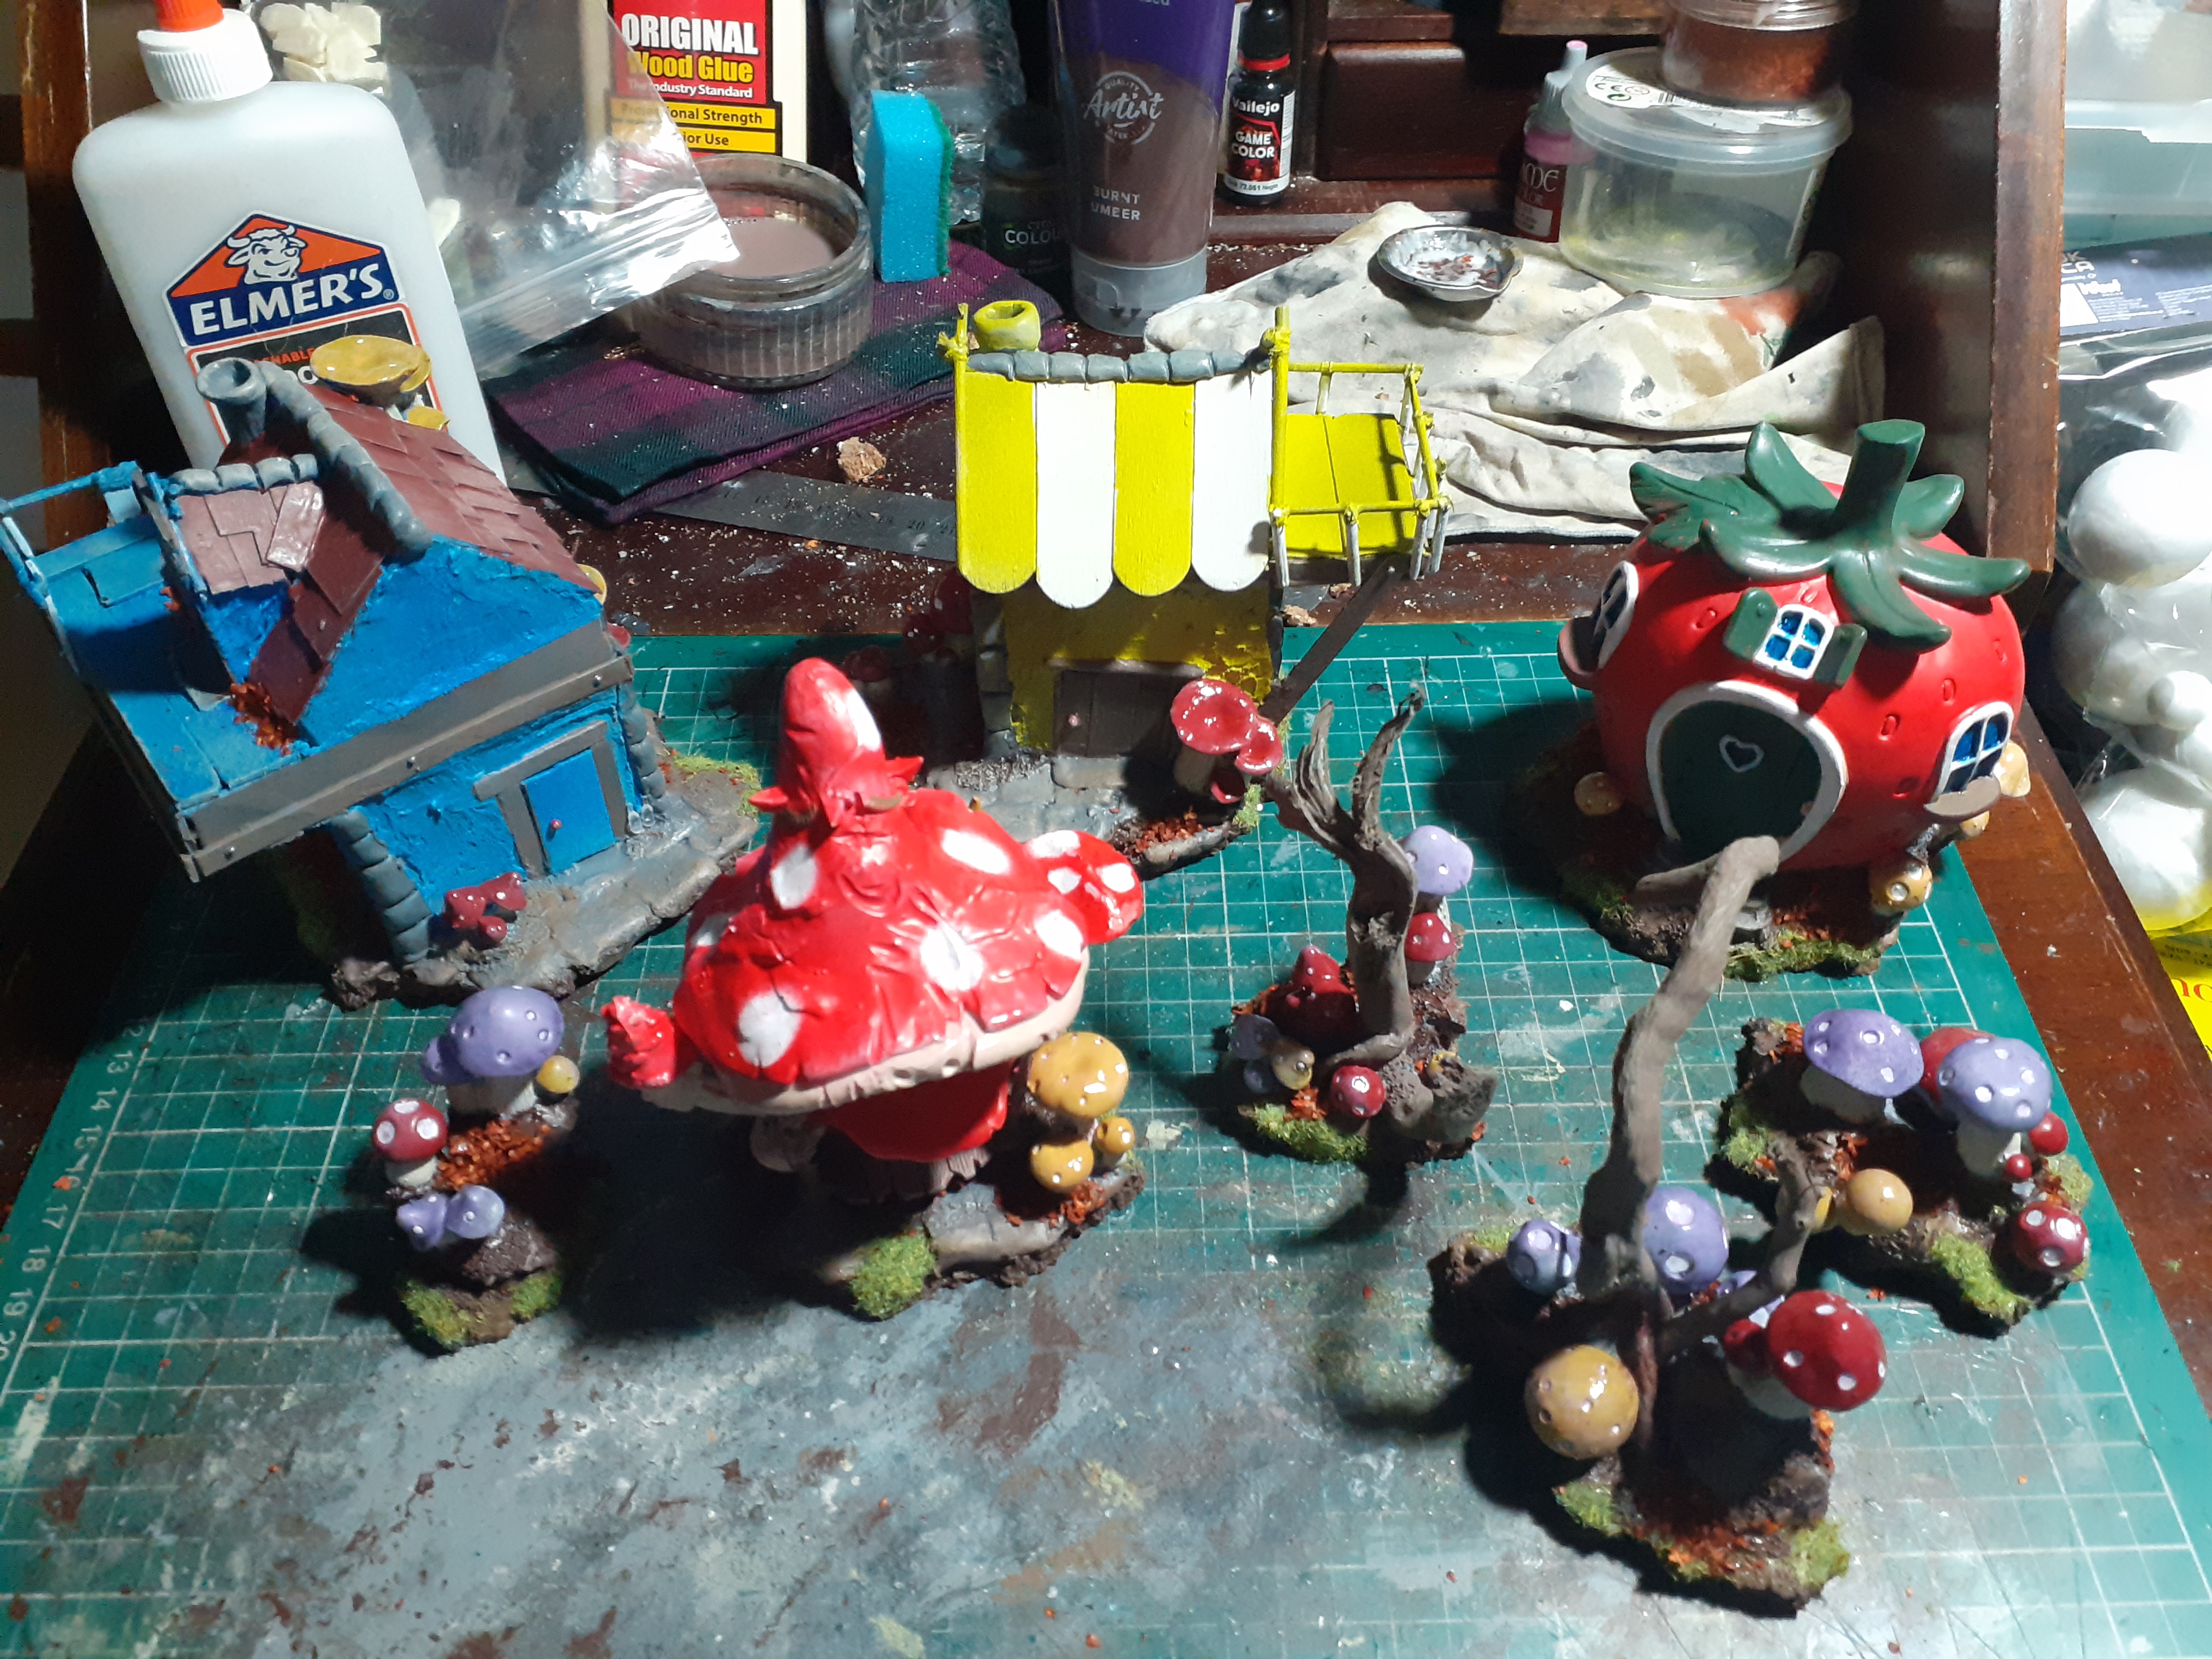
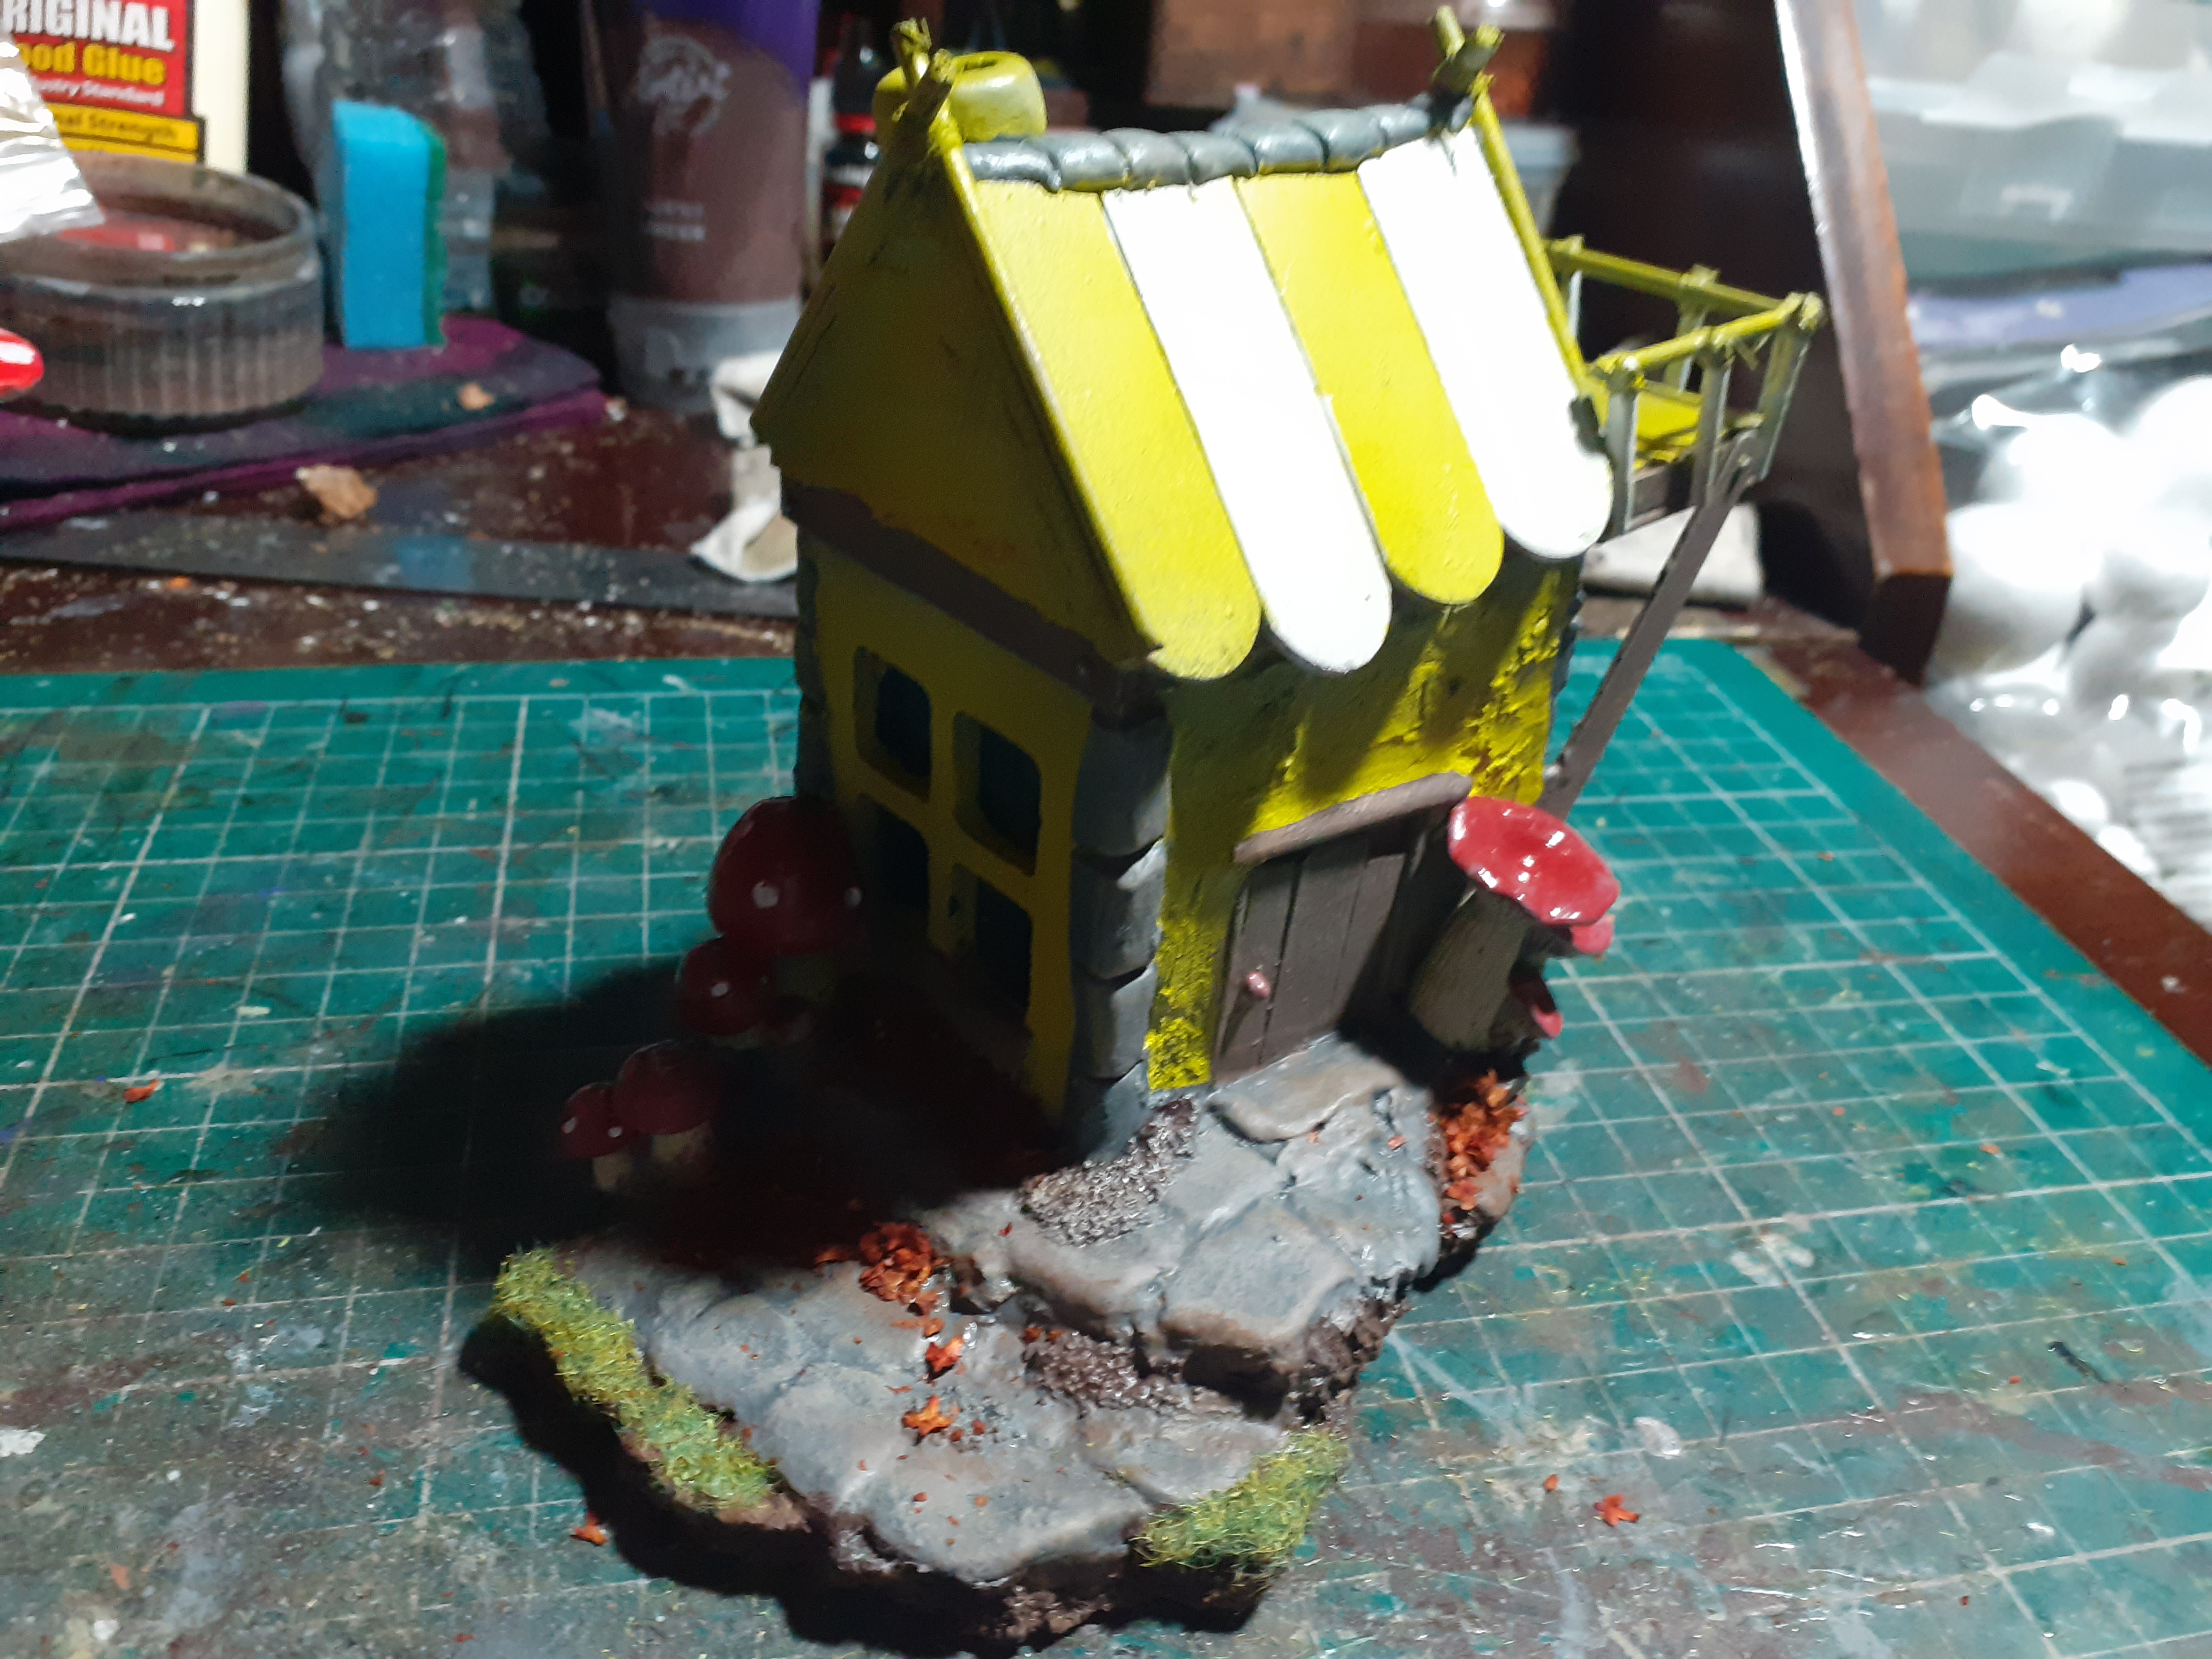
Once the buildings were dry I painted in the wood sections as well as adding more colours to the mushroom clumps.
The flagstones were drybrushed grey and bleached bone then the edges were painted in a muddy colour. Once that all dried I gave the models a satin varnish coat then gave the mushroom heads a nice glossy coat.
Finally some flock and autumn leaves were added to the bases.


Painting the houses got my good lady’s interest and decided to paint up a ghost tree that she snapped up at the selwig show as well as a funky halloween house from the works, that she added some details to including rickety roof tiles made from wooden scrabble tokens from the works stuck on with a jollop if hot glue.
They were sprayed with grey then She used the spray gun to paint them white masking off areas with tape to create a brick effect then uses the gel based paints from warcolours, think they look pretty cool indeed.
Unfortunately the Elder scrolls online witches Festival event arrived so don’t think the models will be completed fir a few weeks, they look awesome as they are and will fit in nicely with the other moonstone terrain.
 Sticking the roof down with the hot glue gun of doom
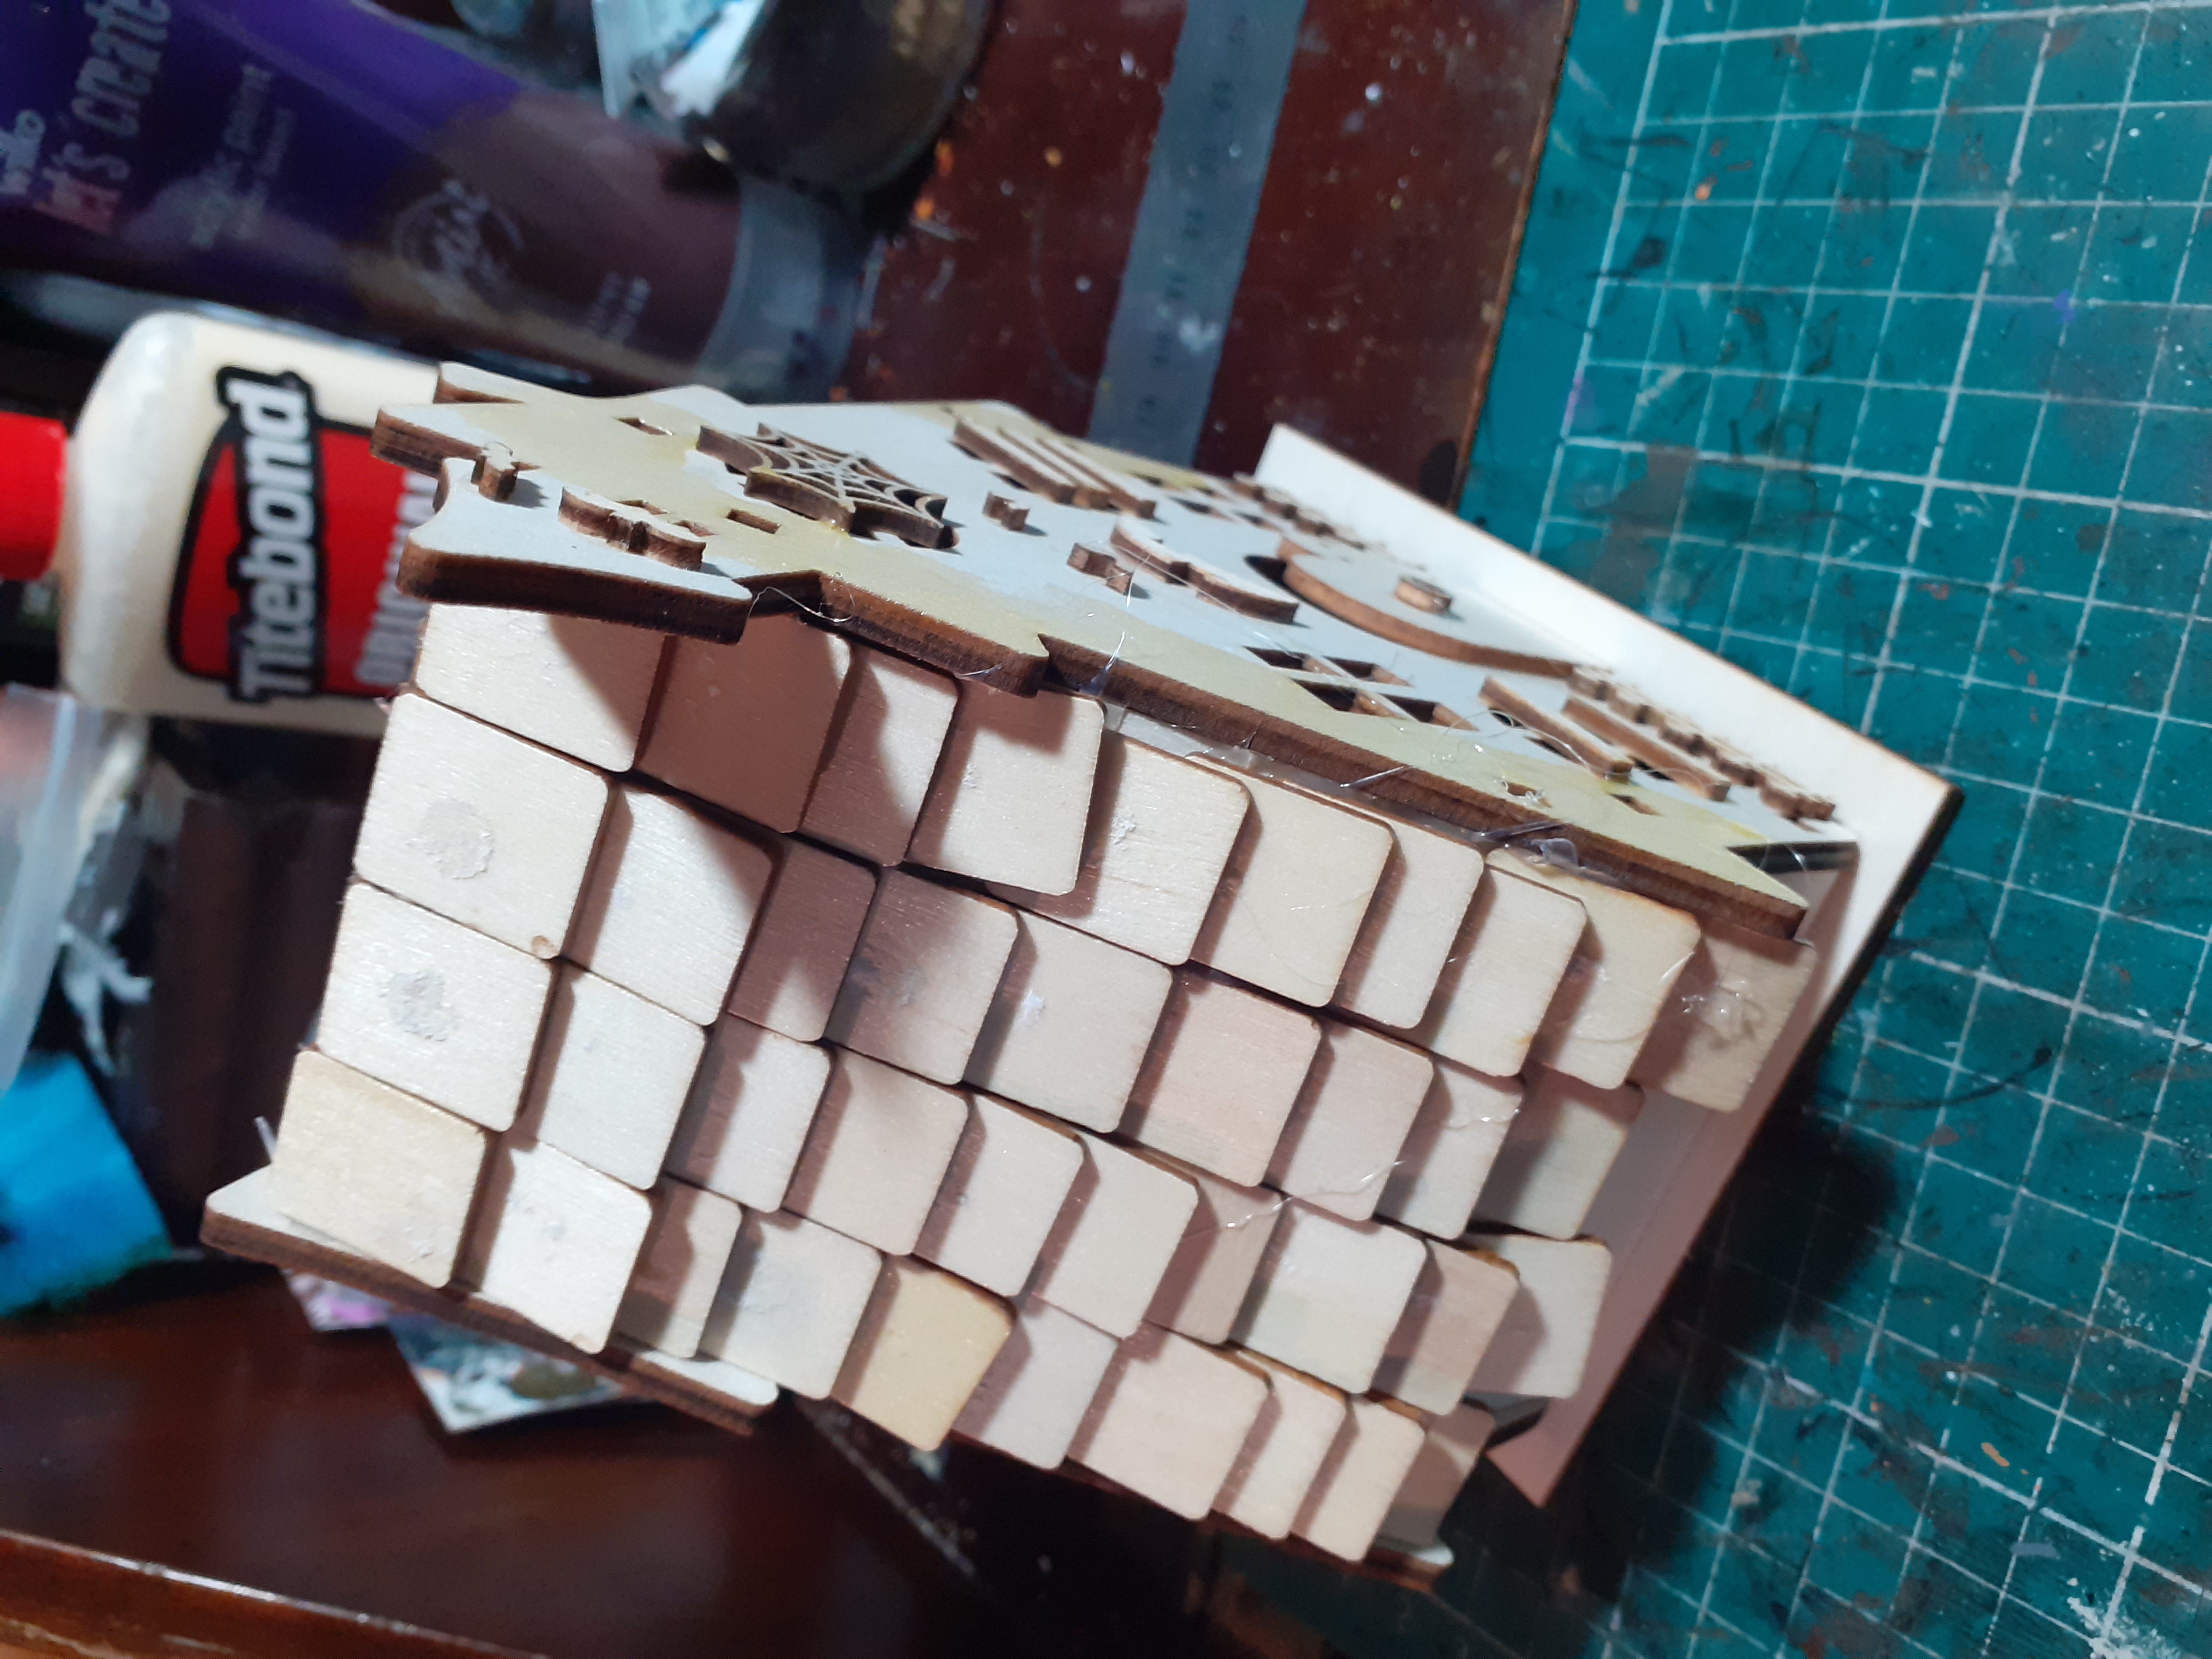 Haunted house ready for some paint
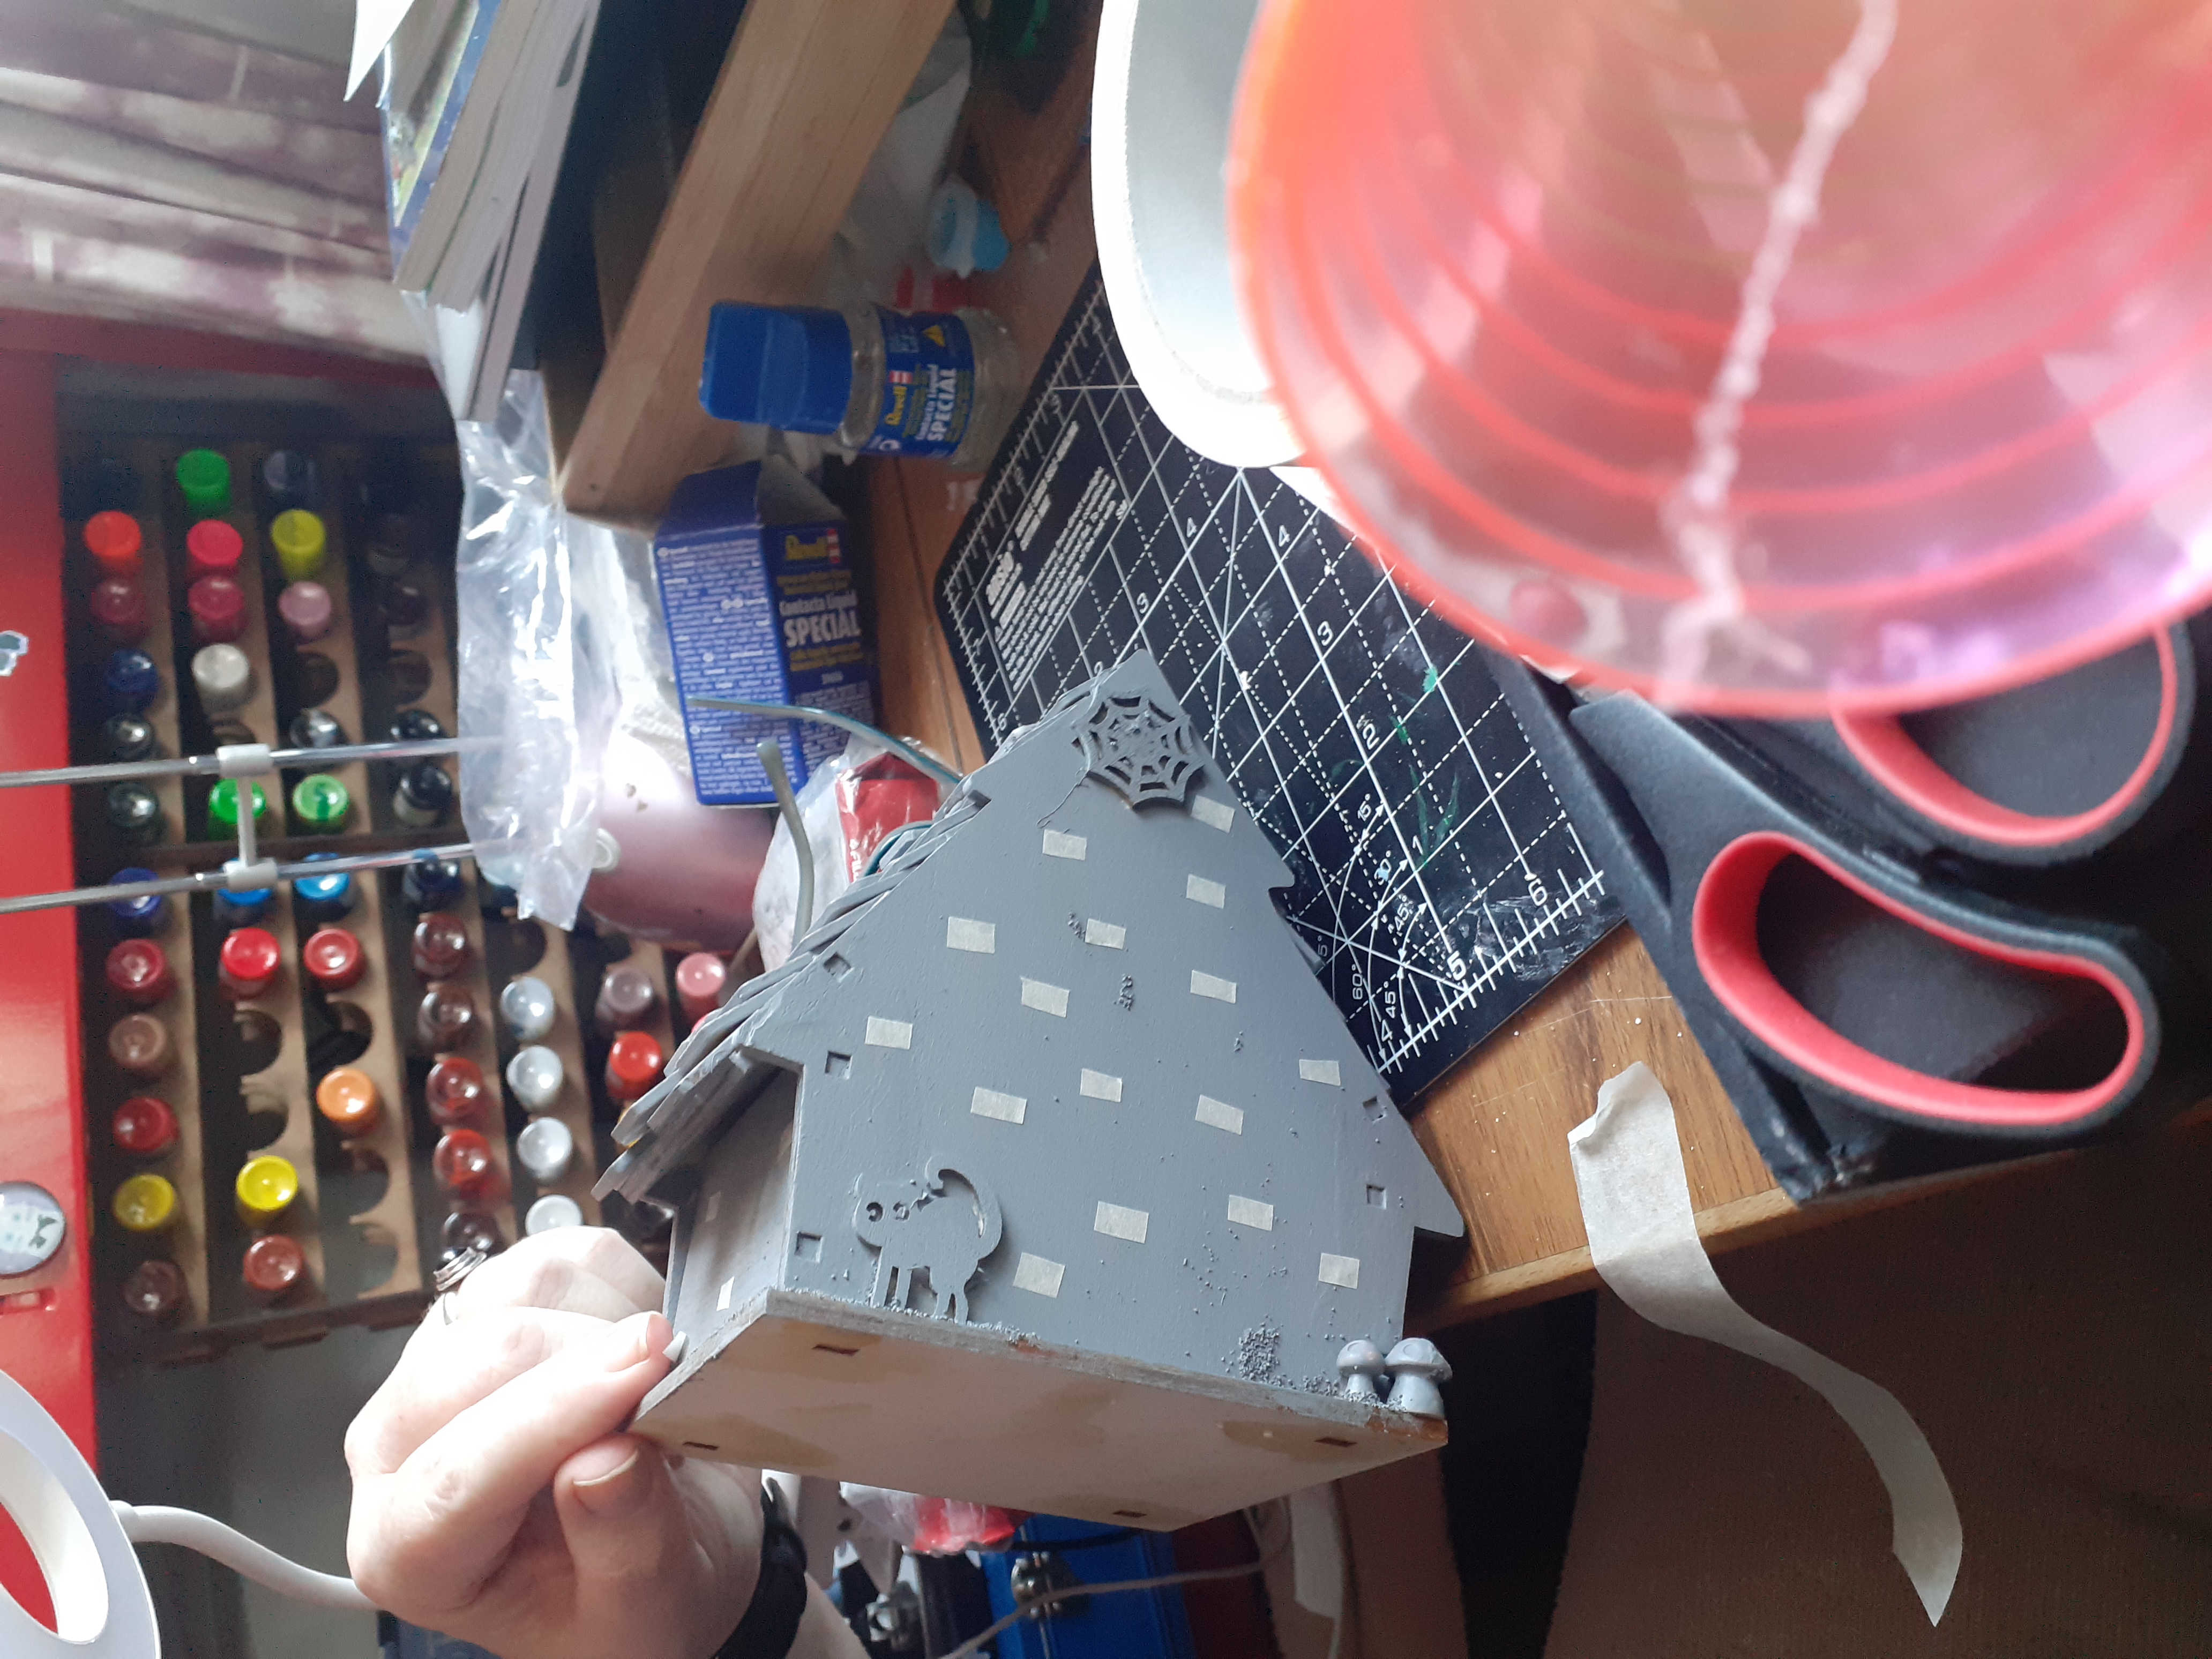 Masking tape brick work is added before spraying
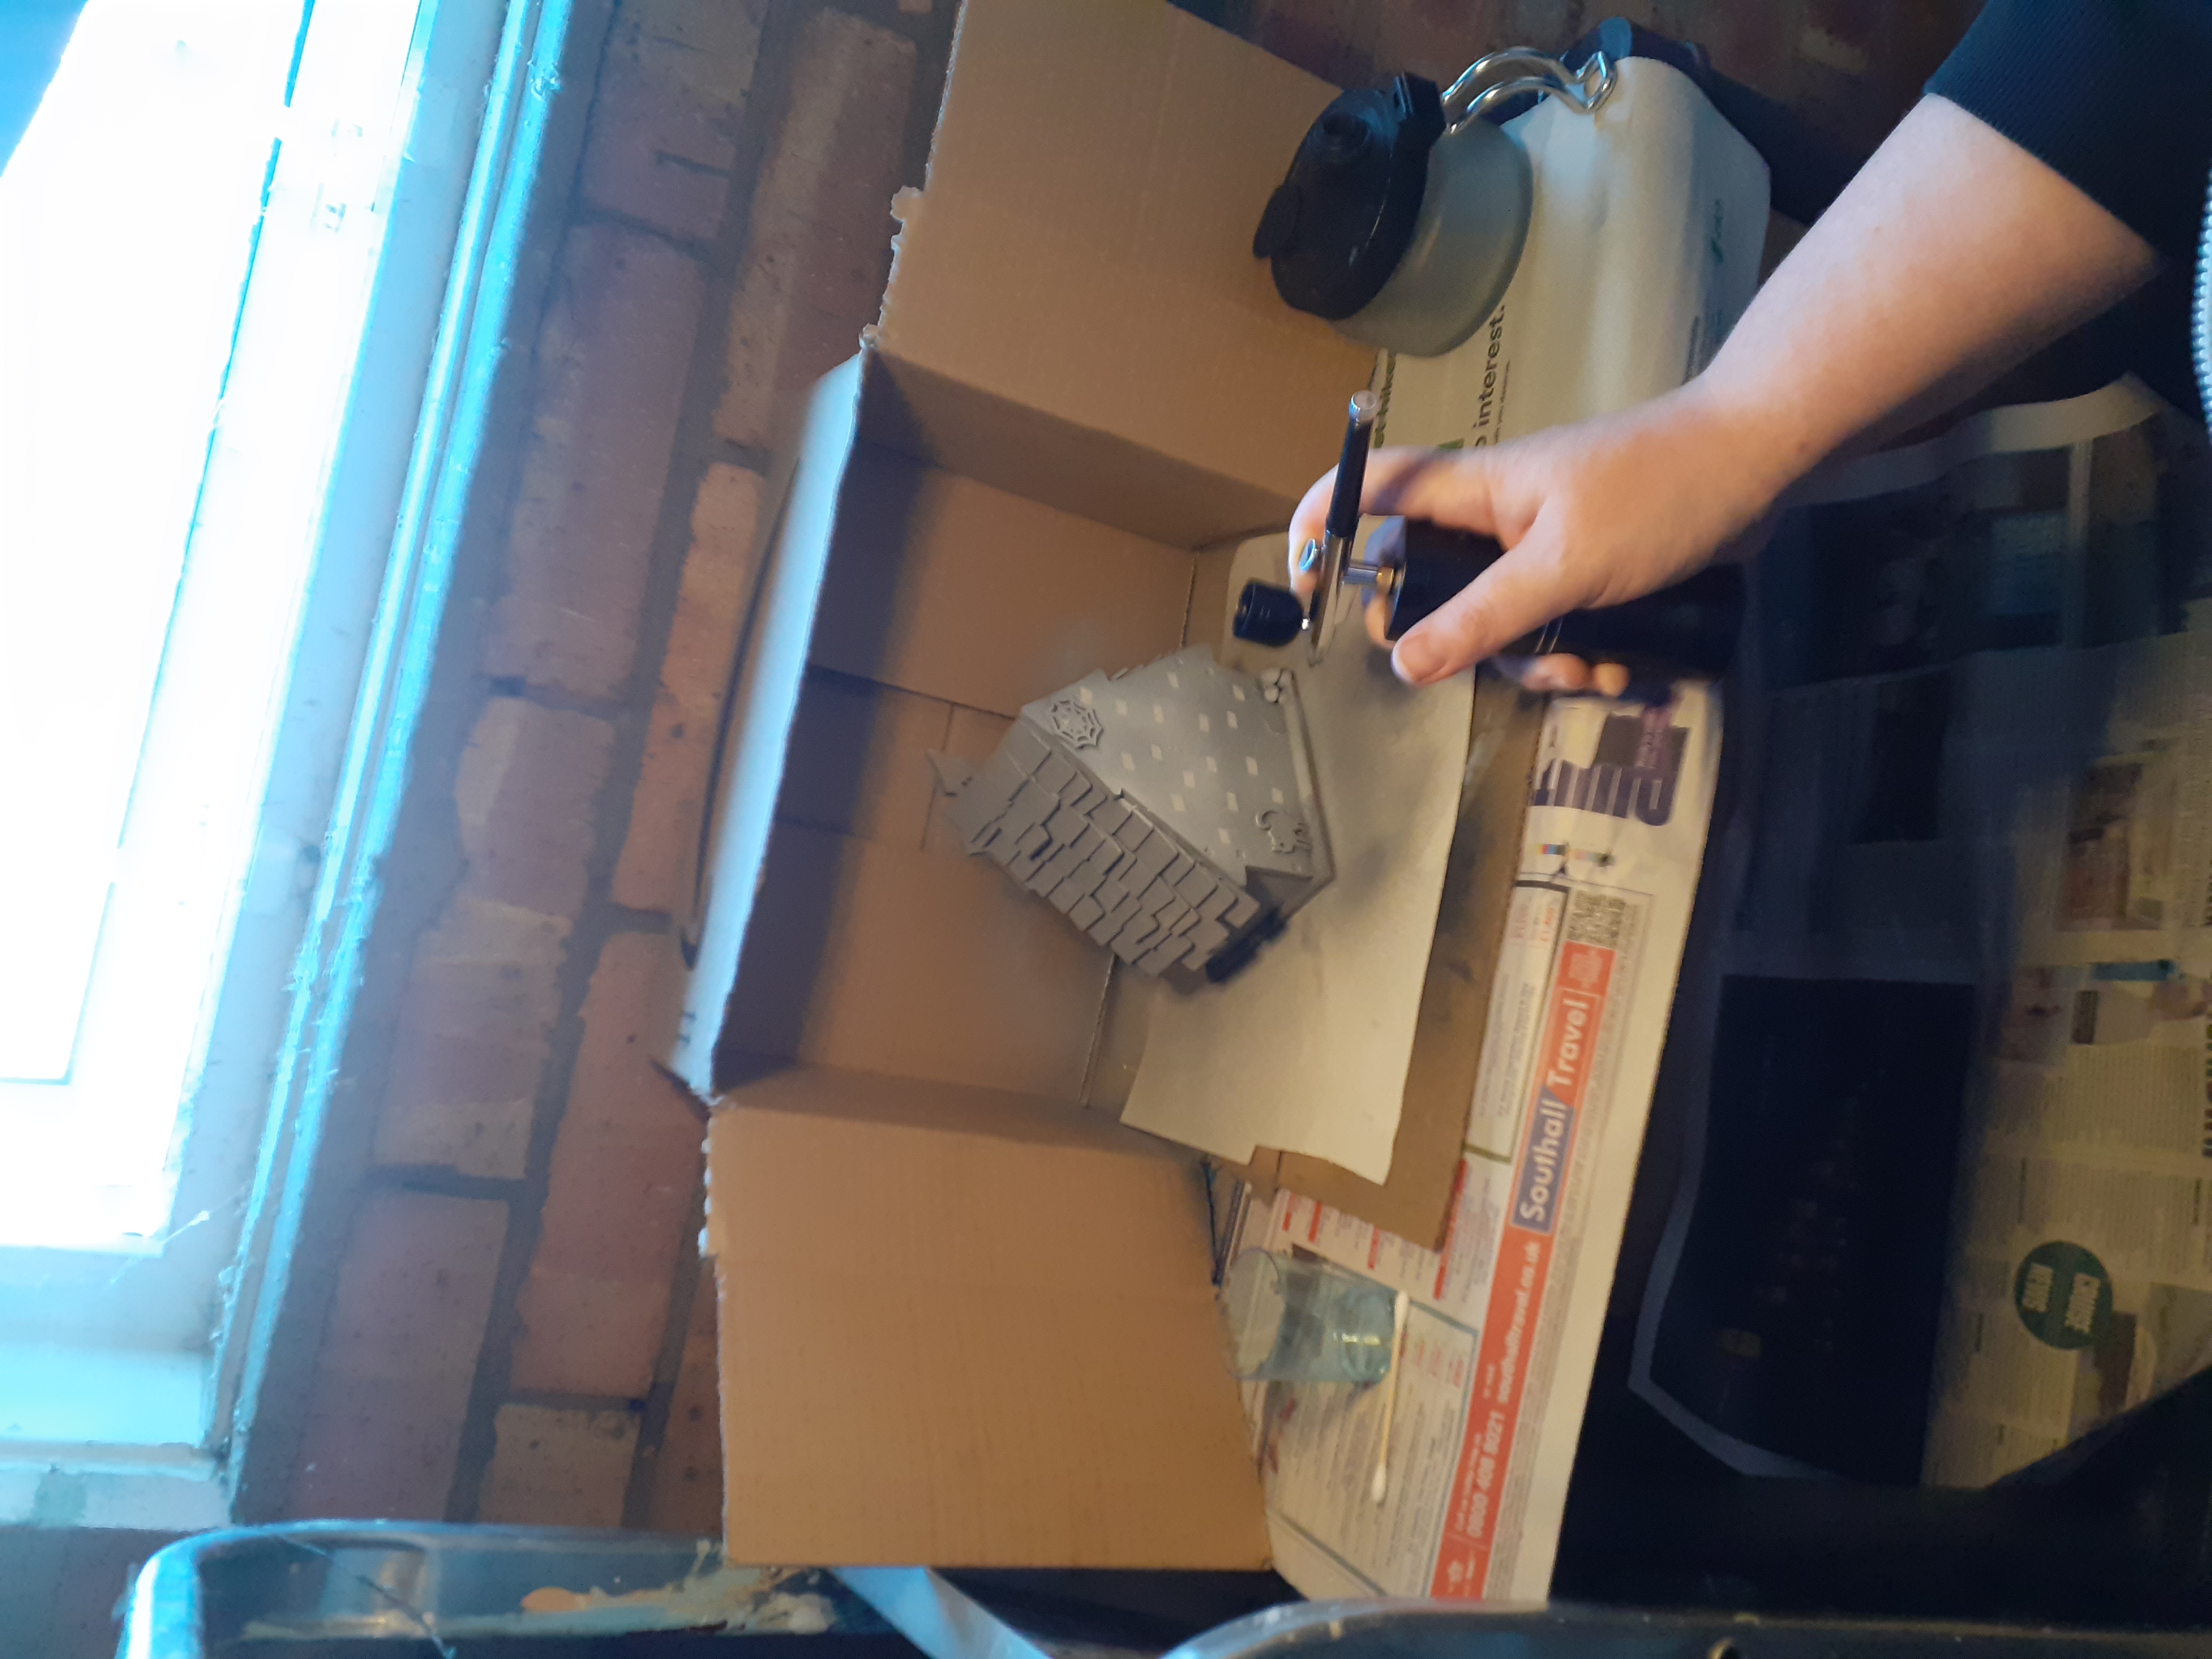 Having a go with the spray gun of doom
  Going in for the details using the led ring lamp of doom
 Mushrooms of doom
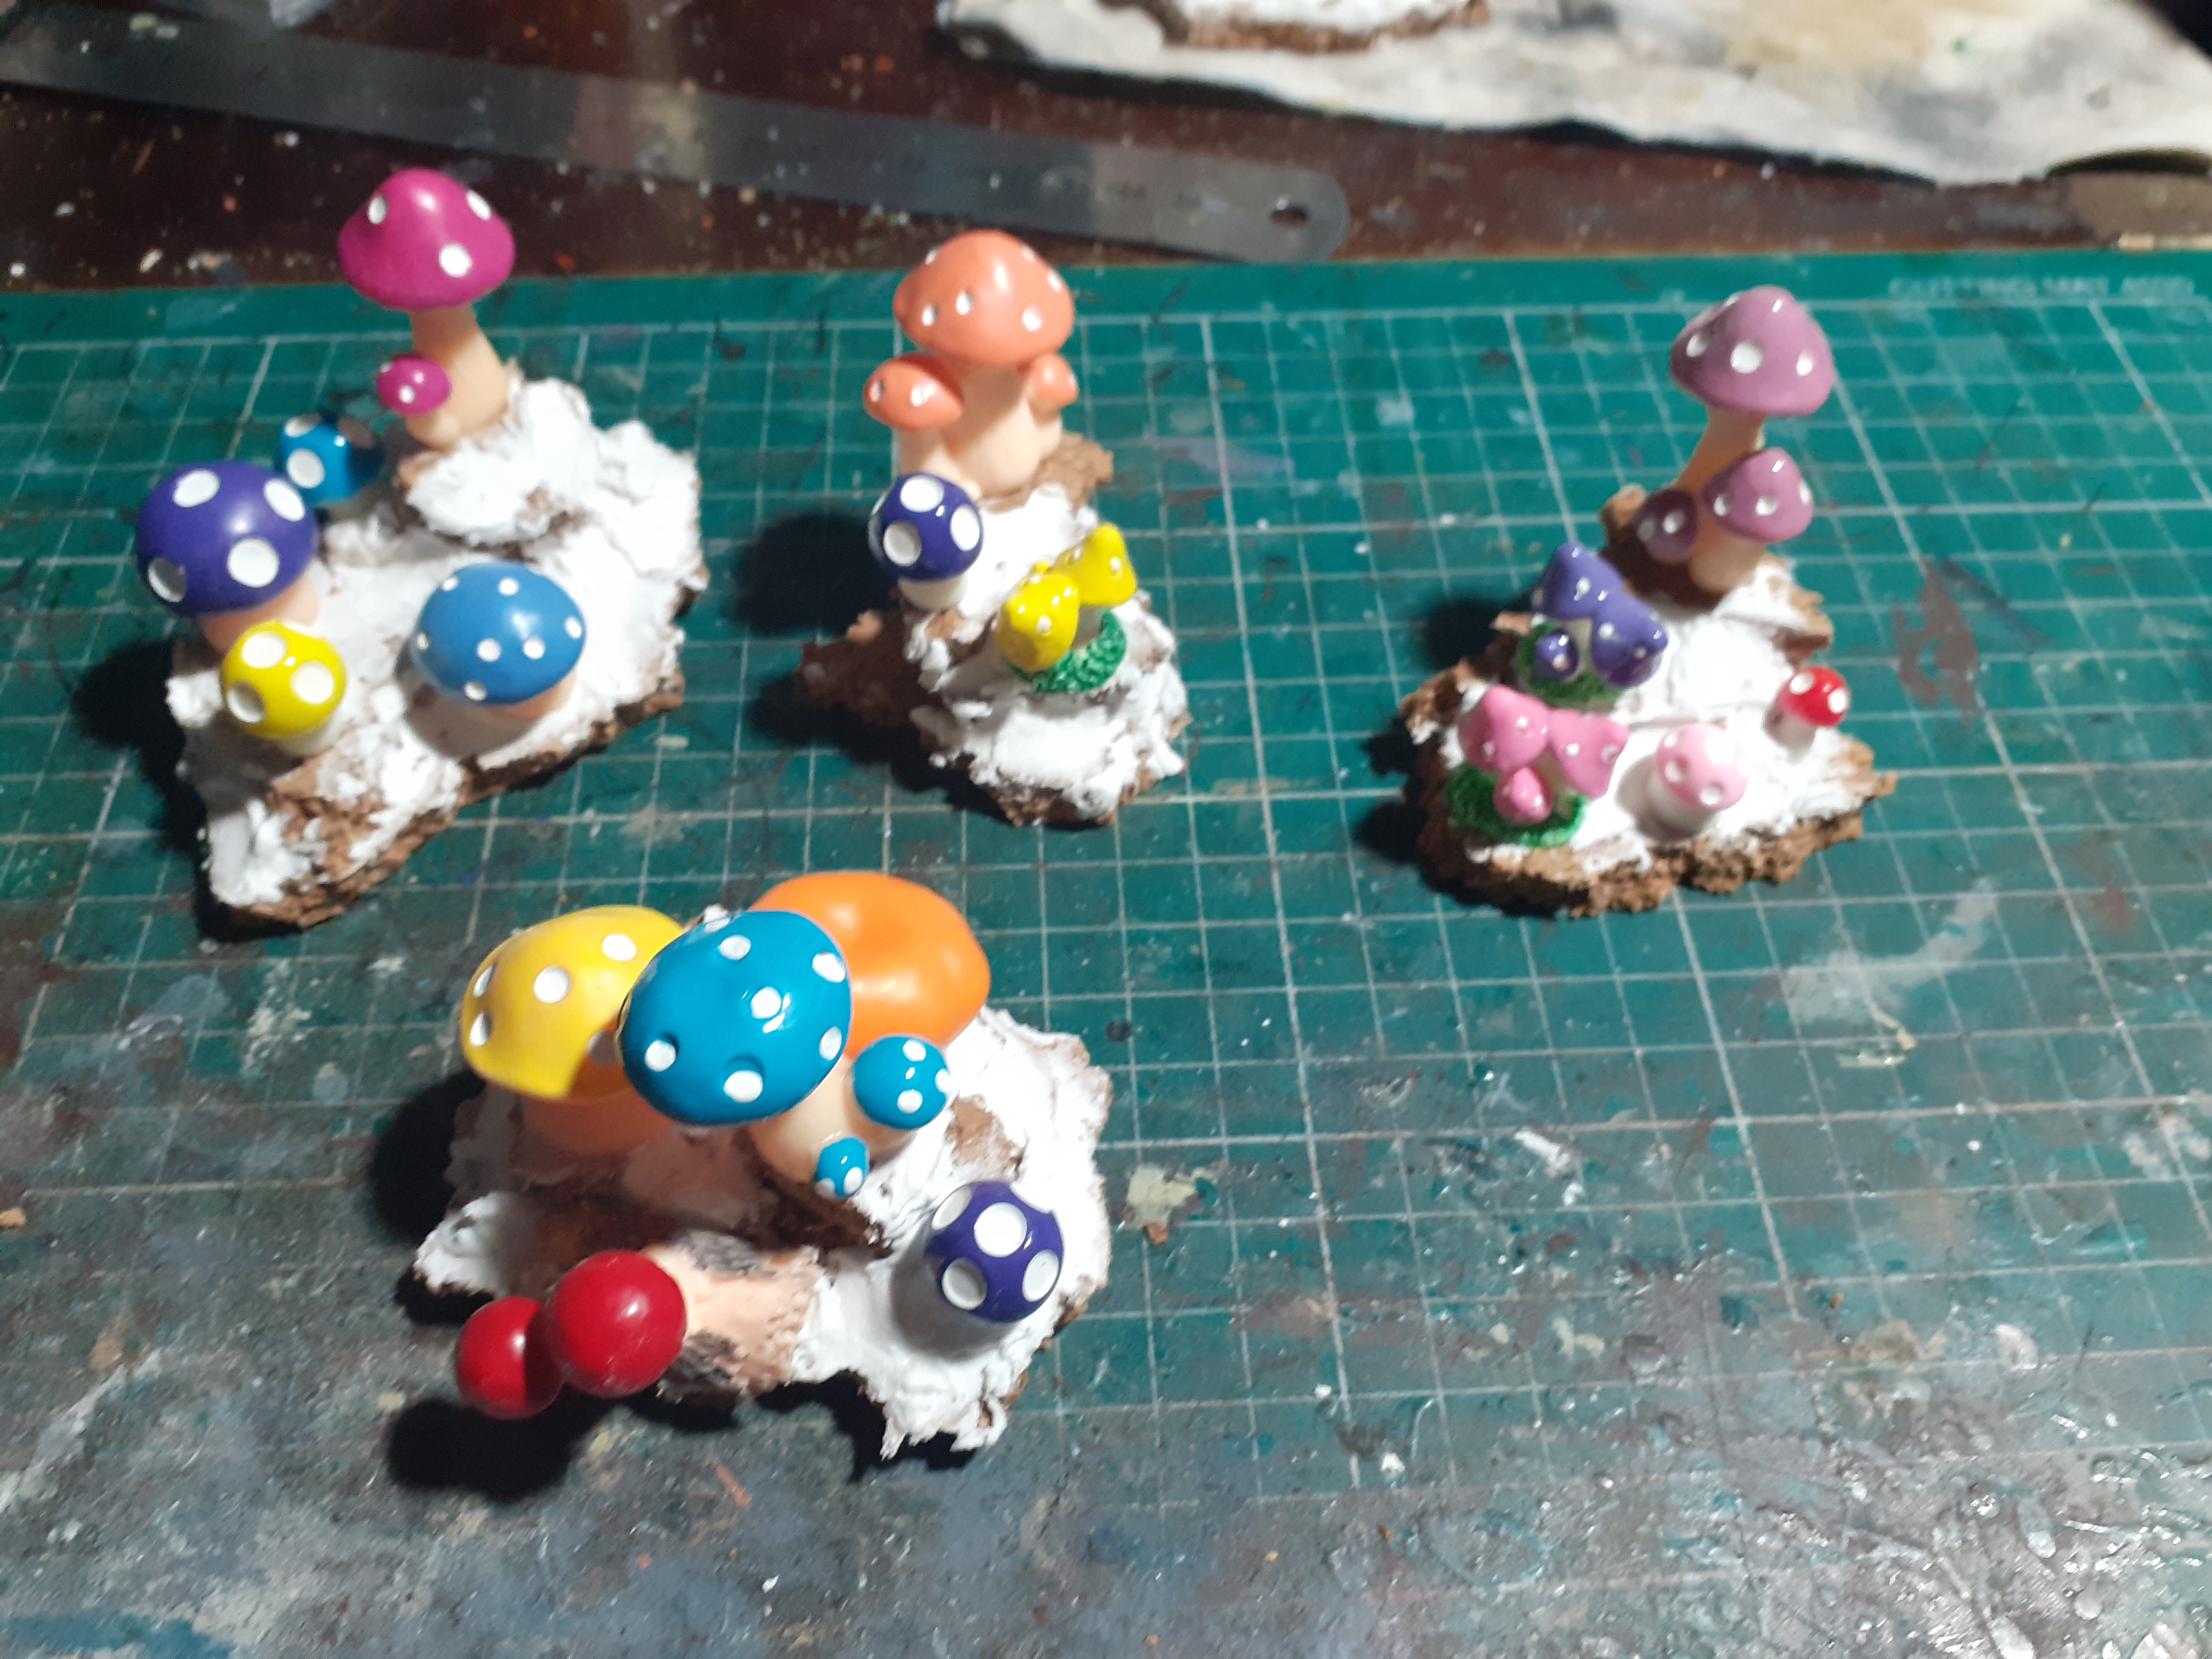
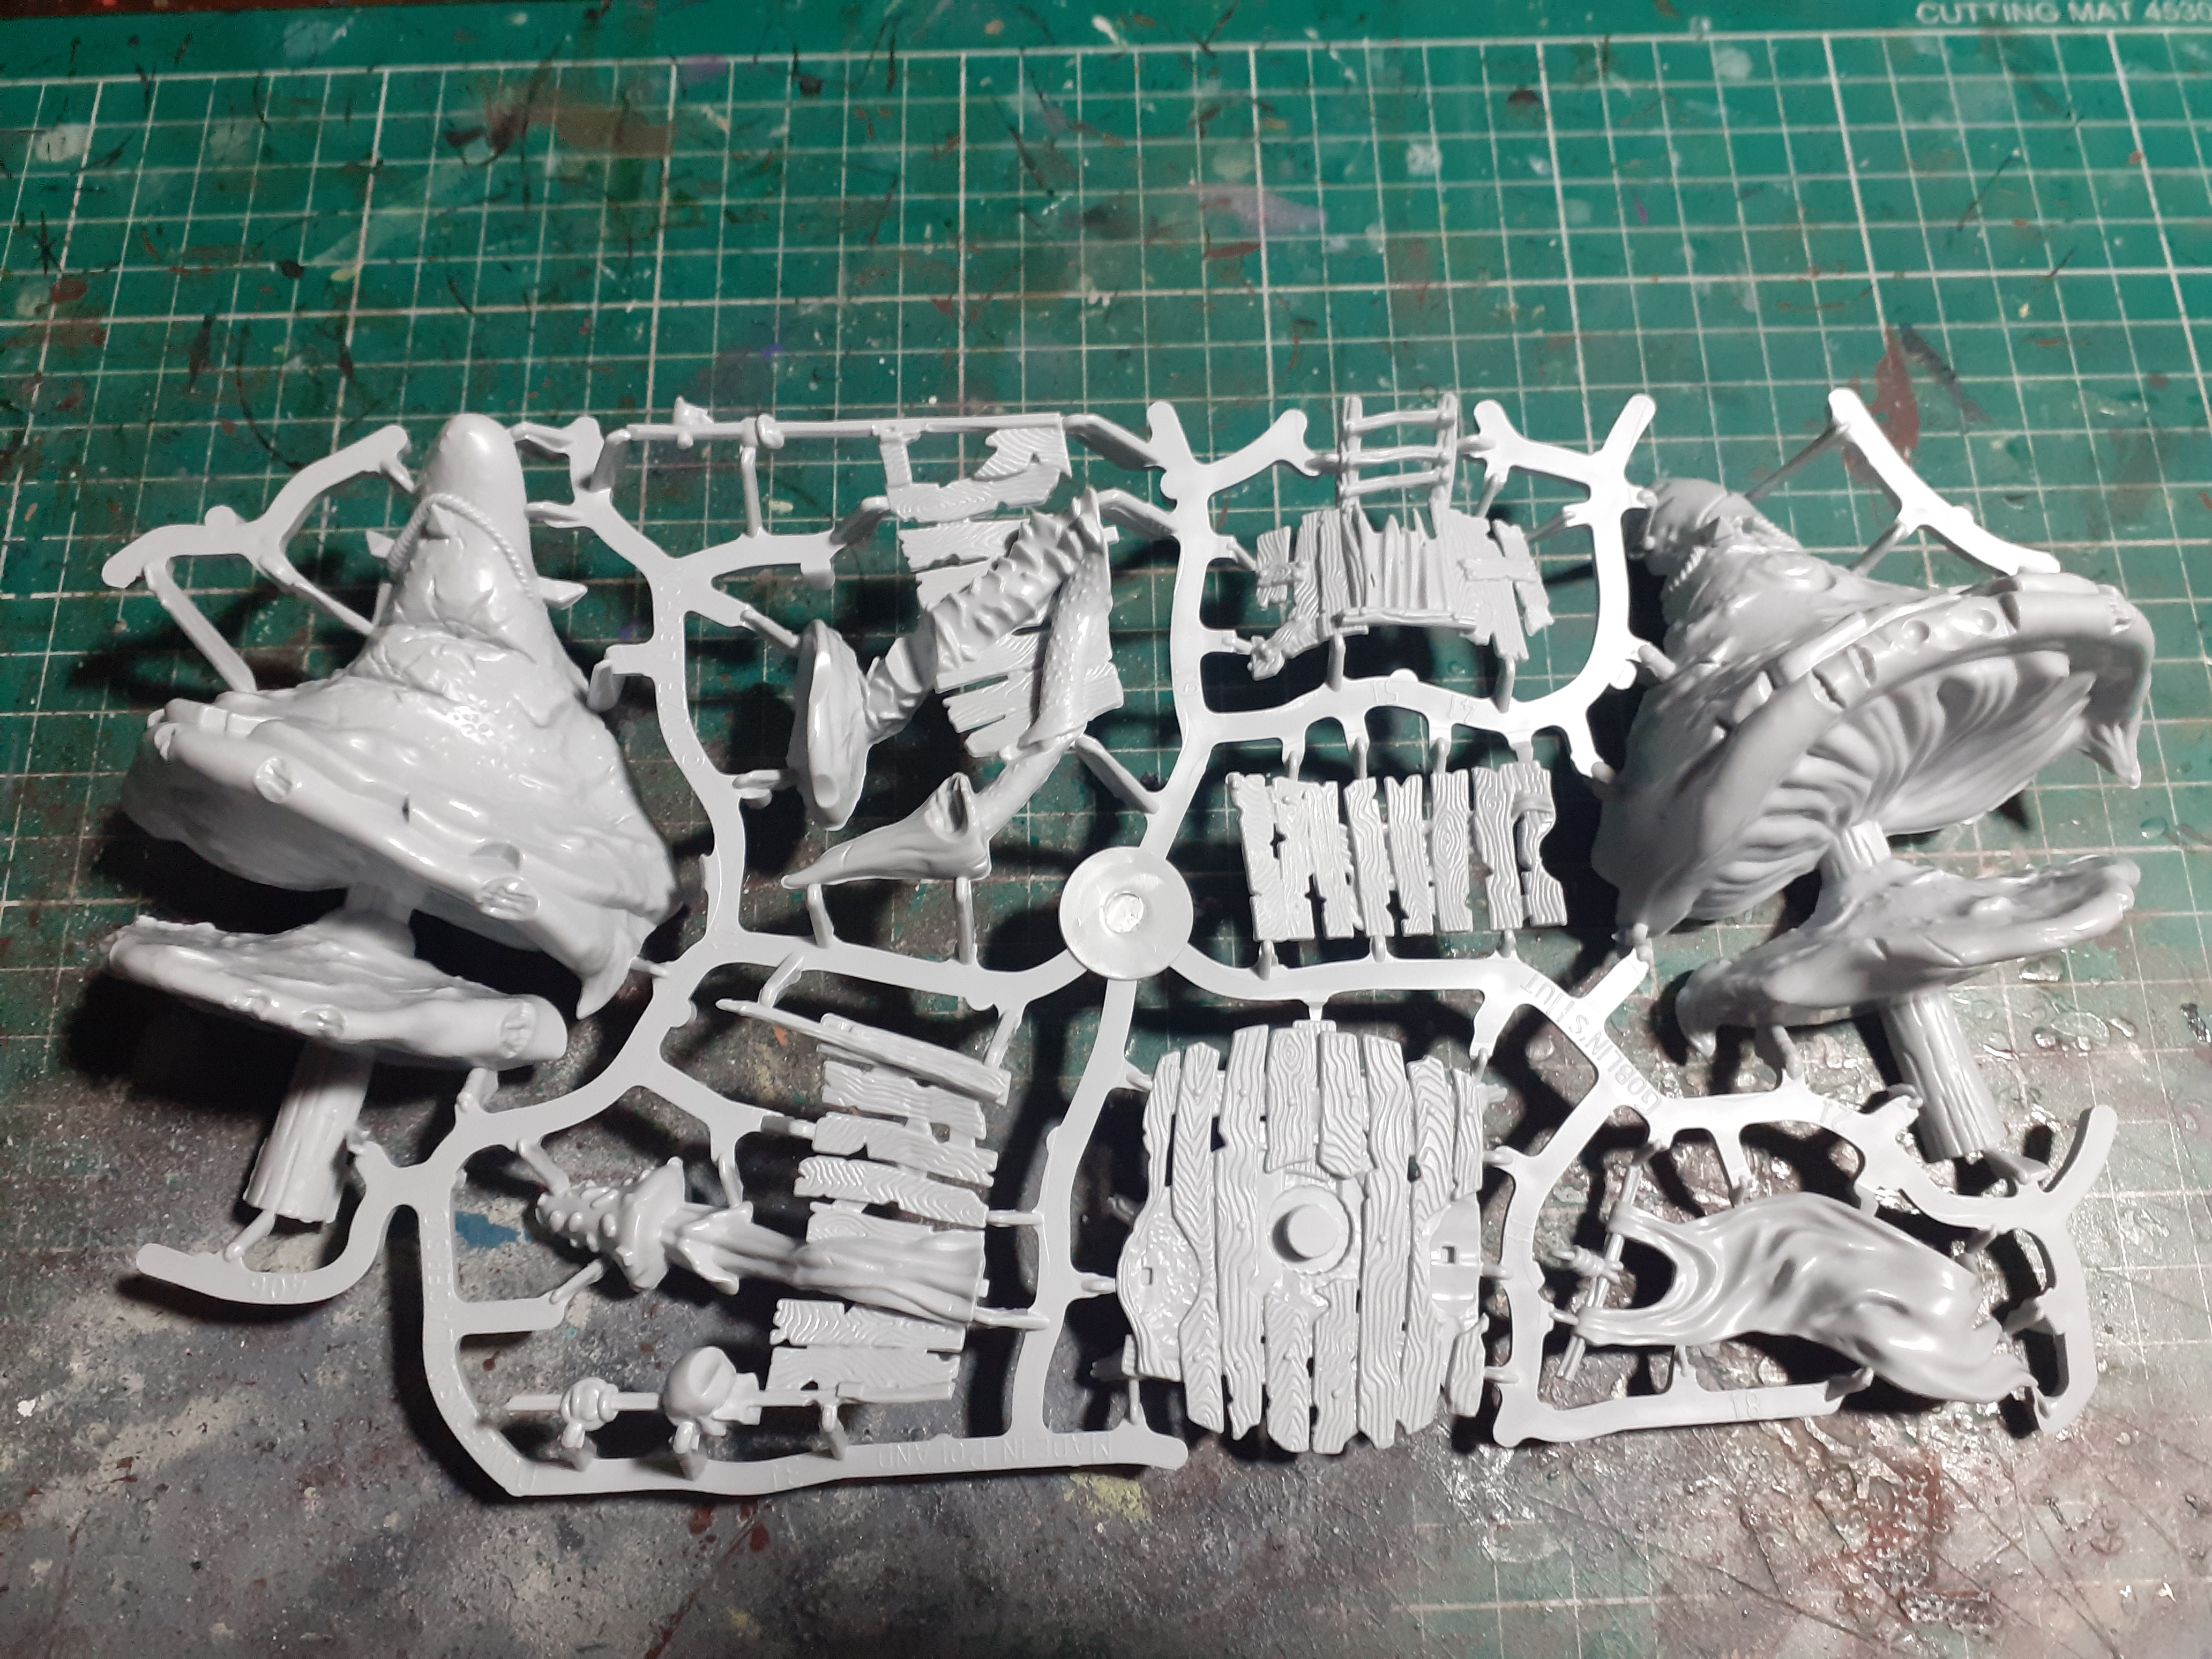
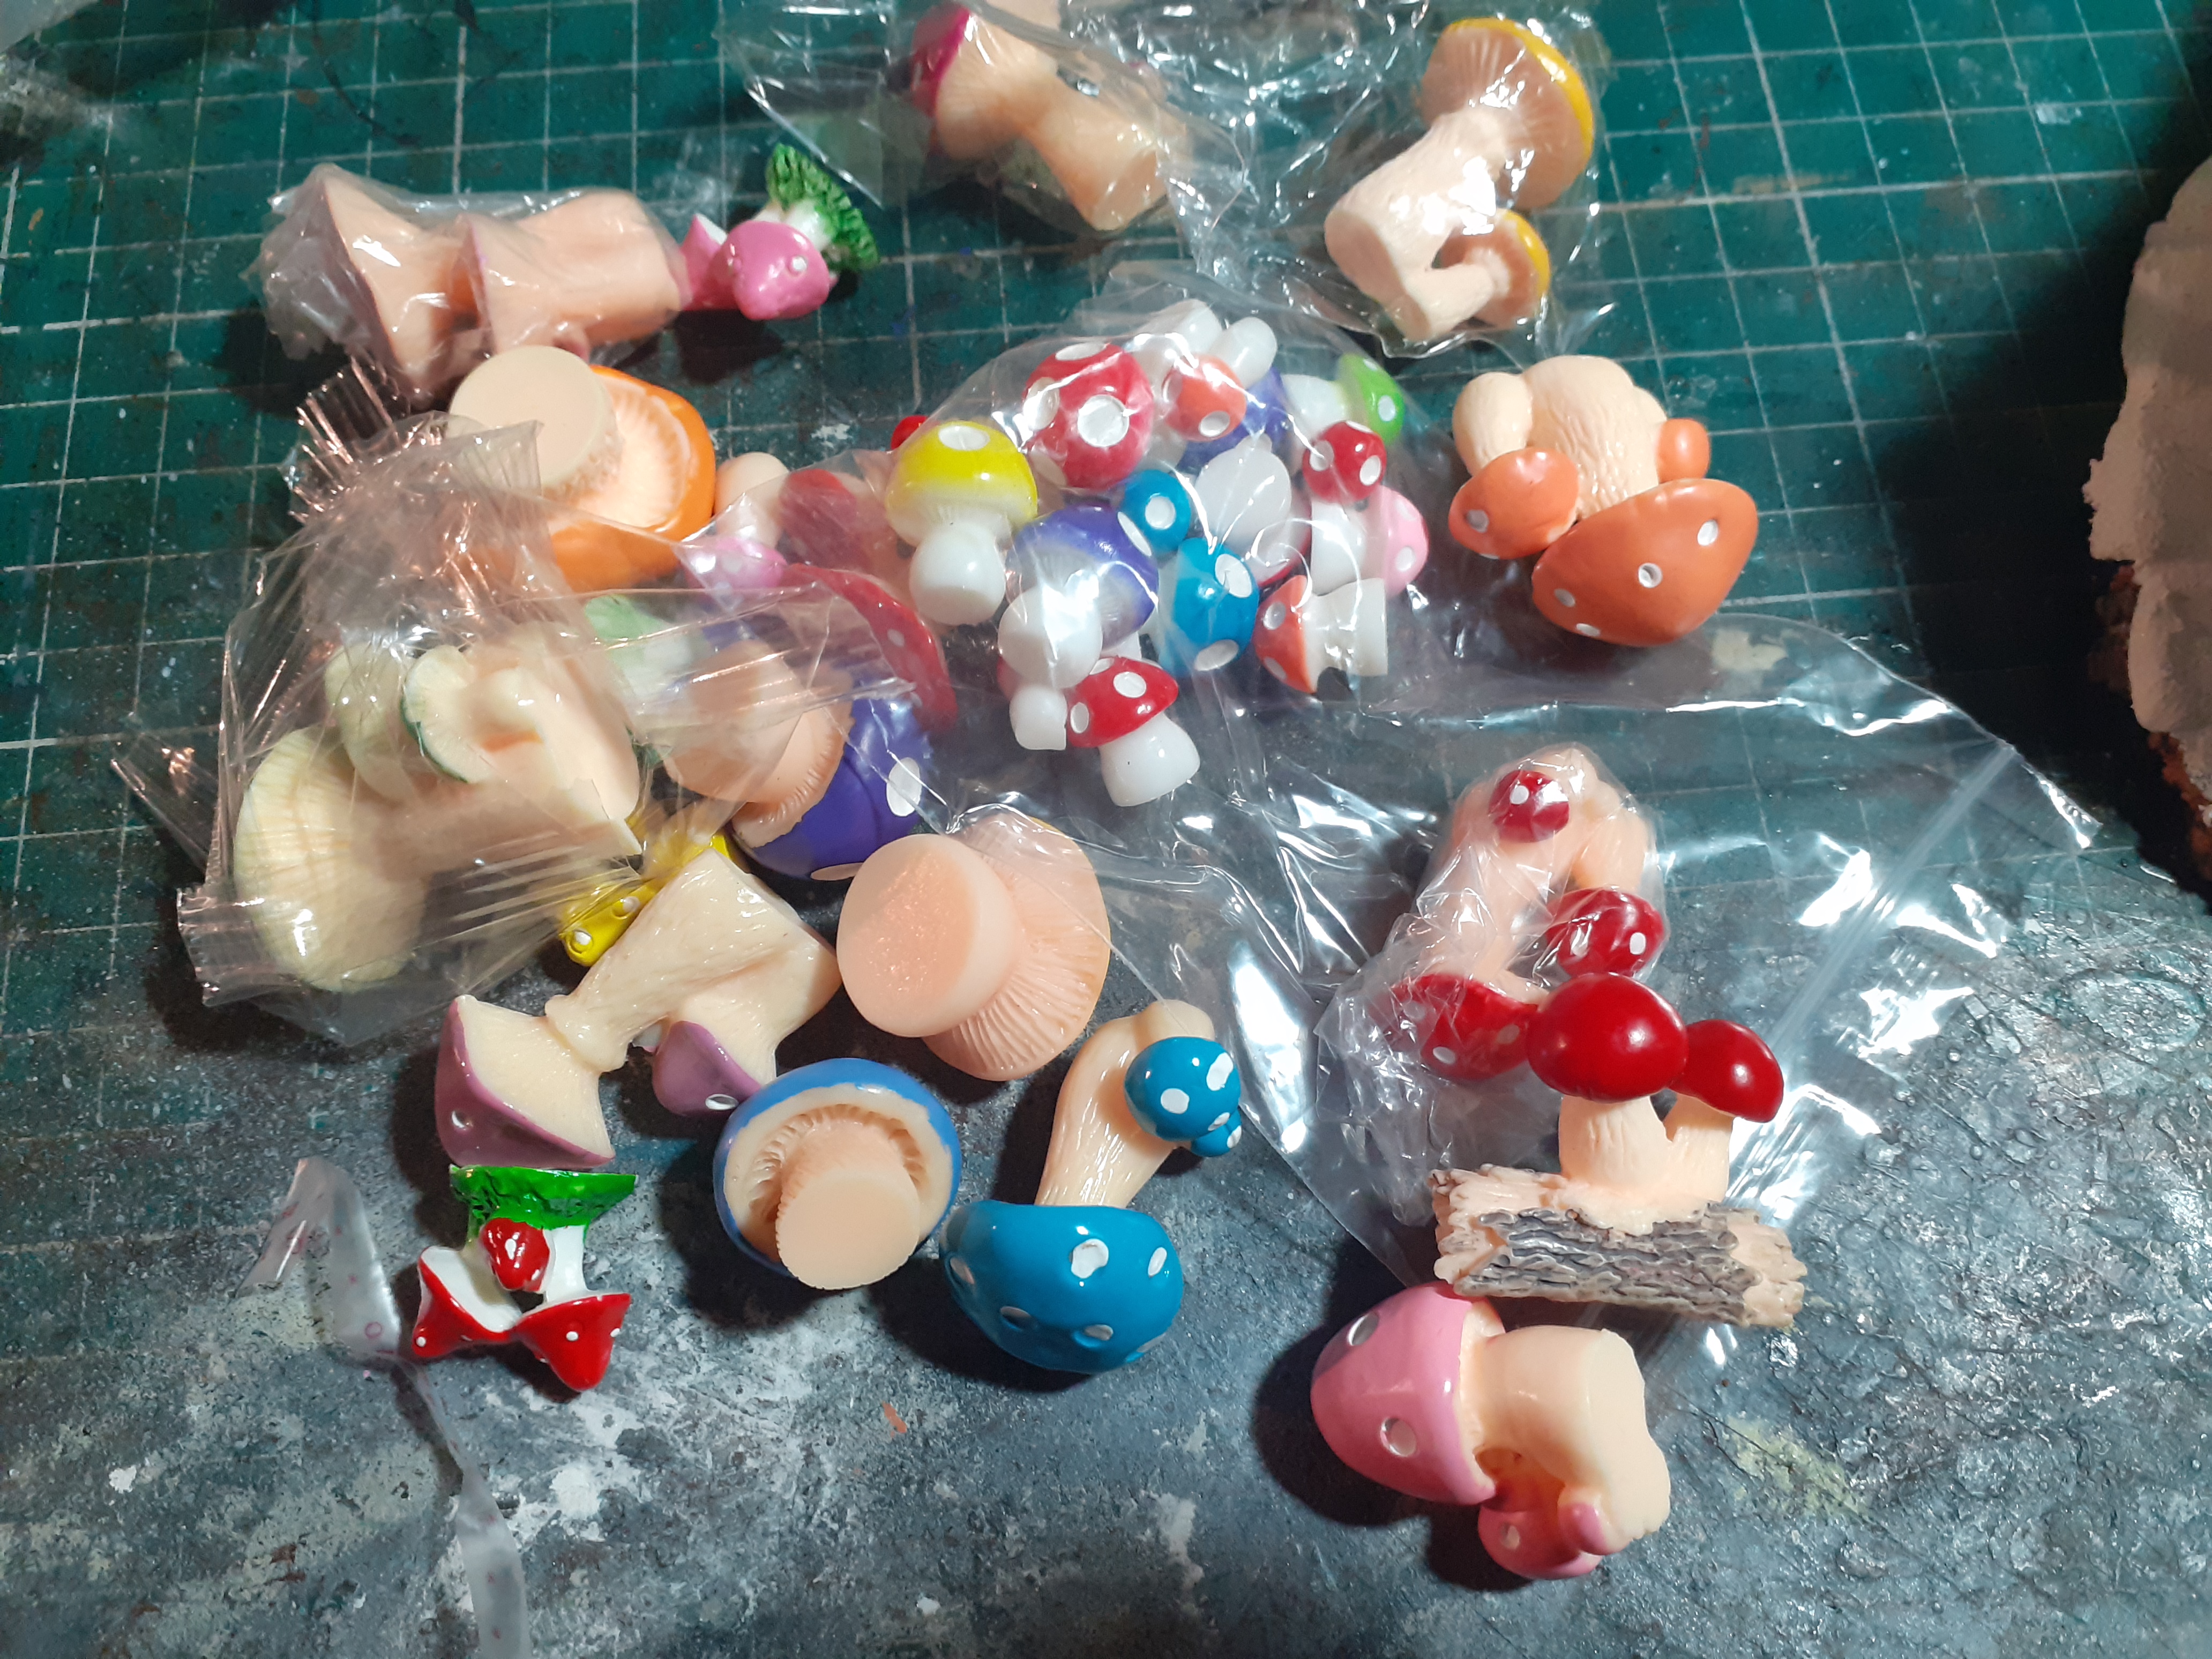 Big old multi pack of resin mushrooms arrived in the mail, did try making some putty mushrooms but the looked amusing but a little suspect so found a cheap pack online
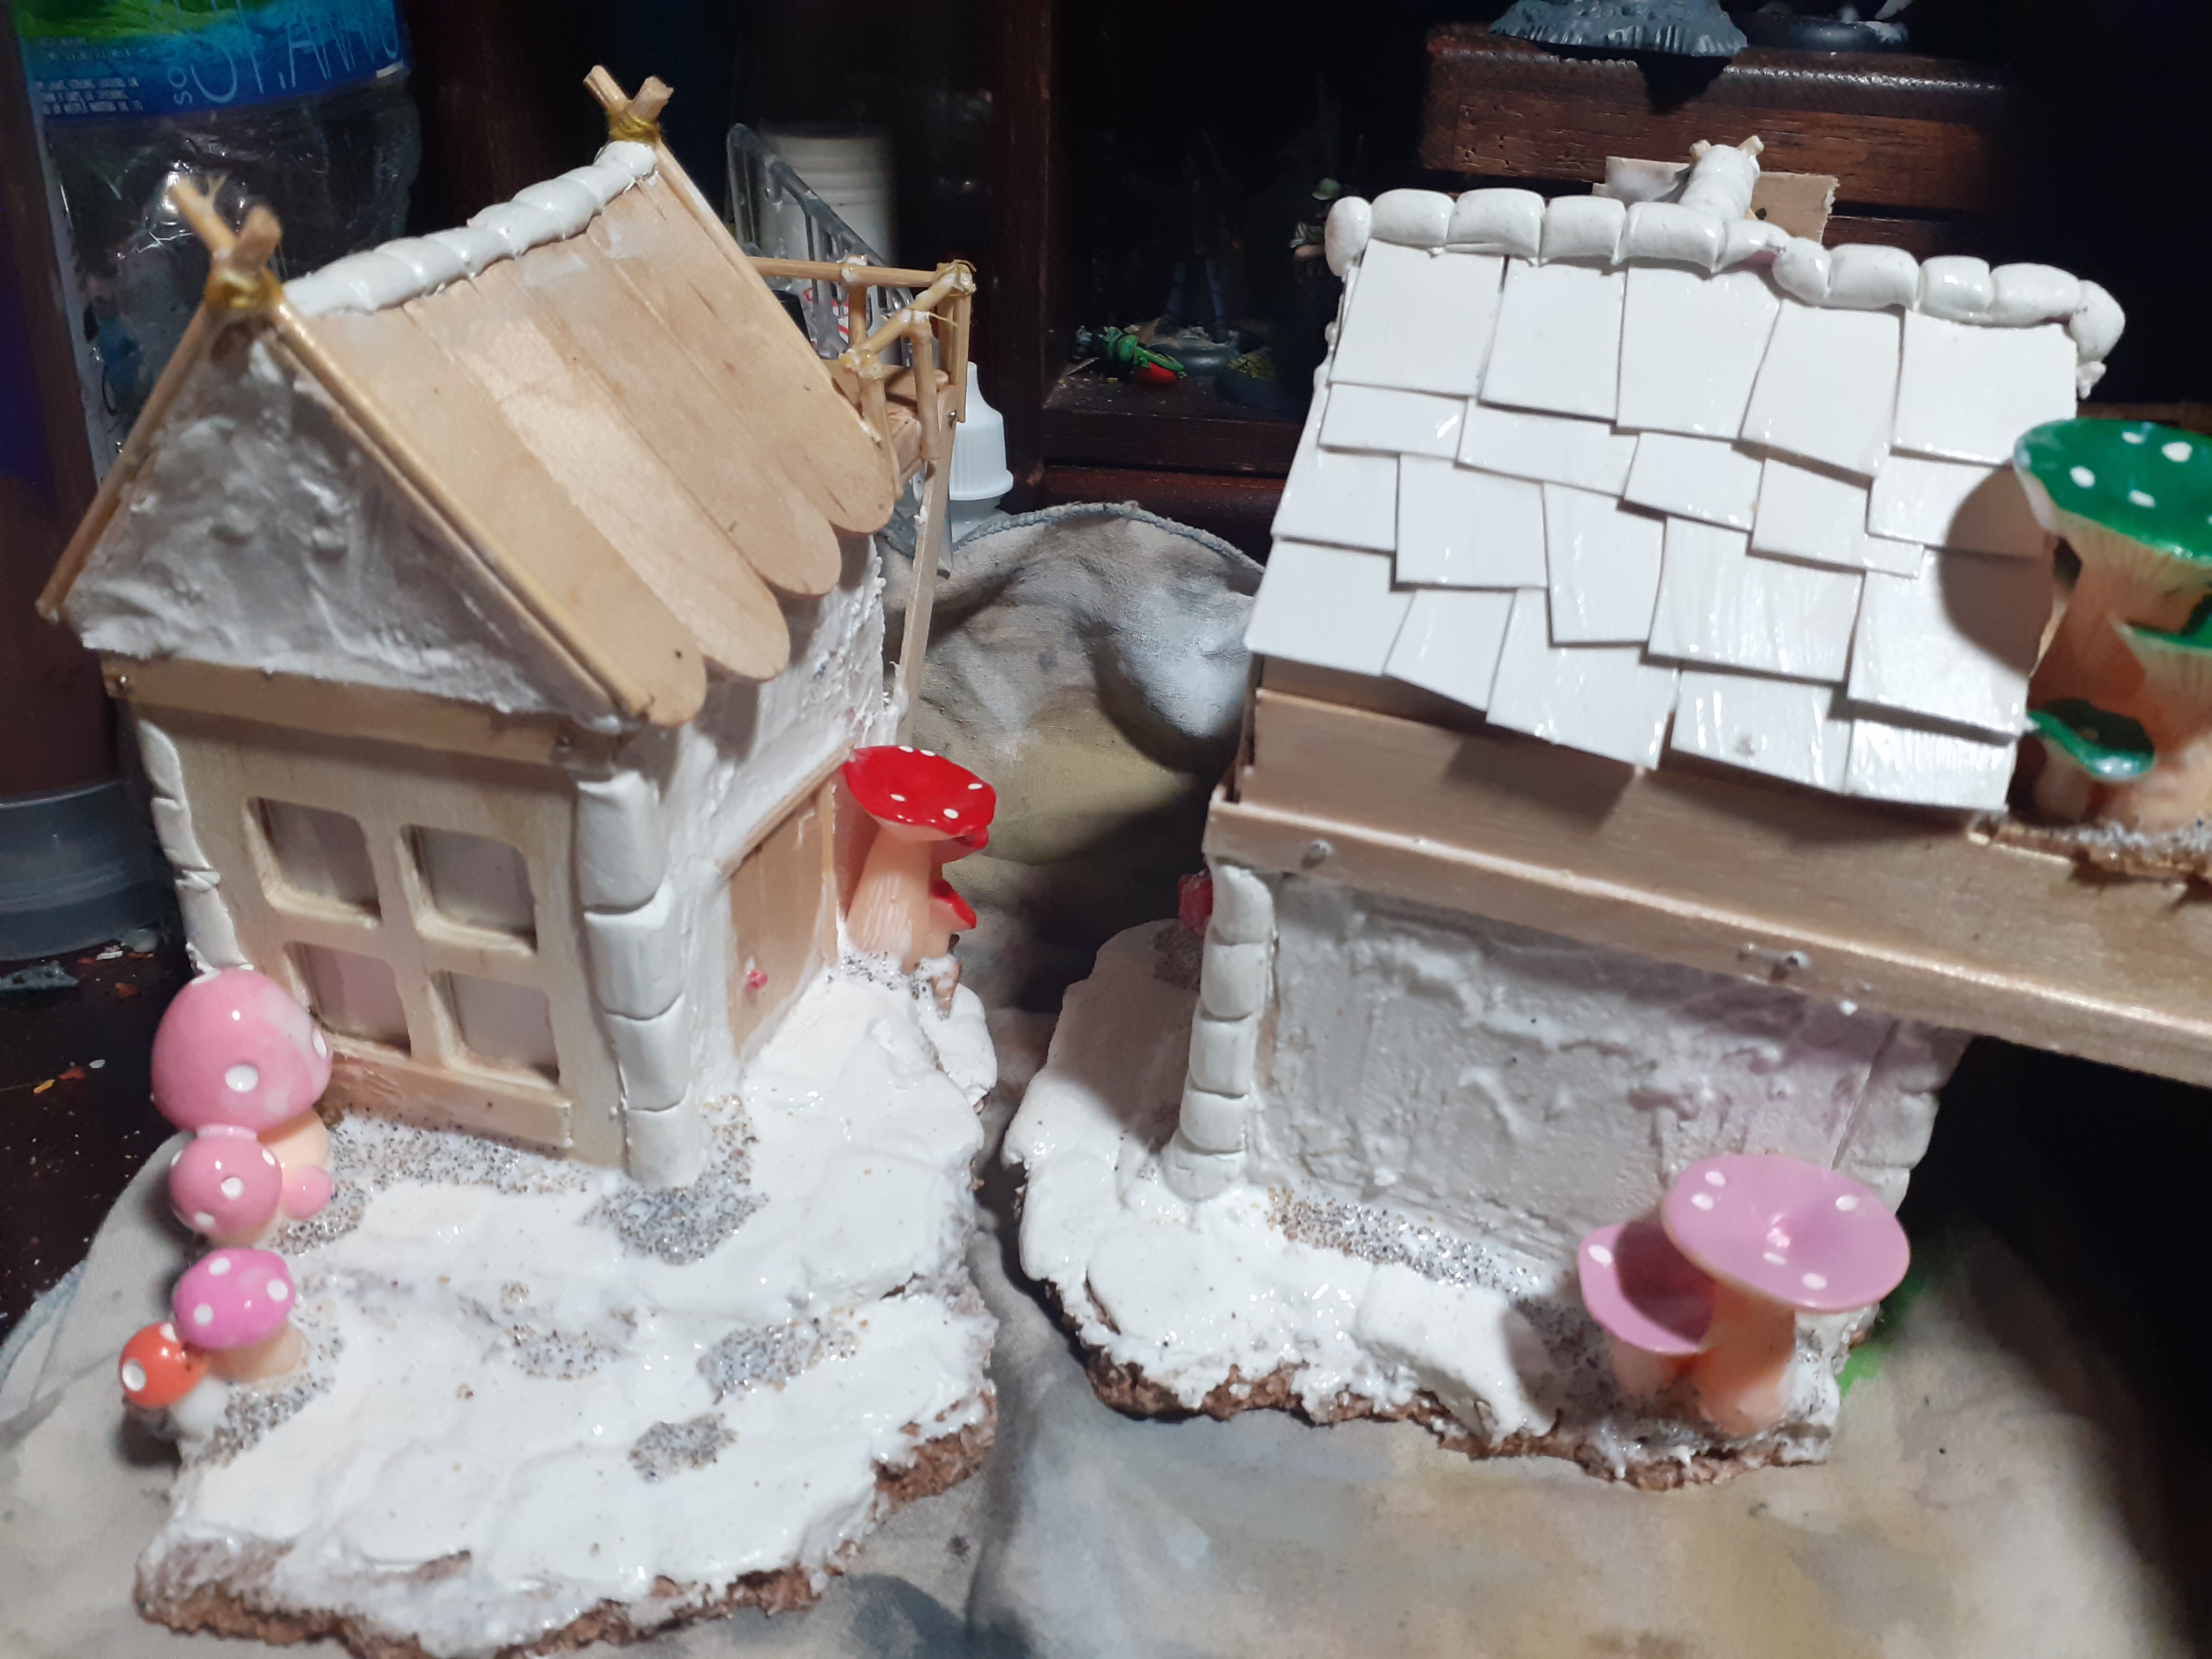 Added some more details to the houses including door knobs made of beads, some rivets on the wood made from pins and some cotton tied and glued around the wooden rails.once that was all done I gave the buildings a lite coating of modgepodge glue mainly to stop the filler crumbling away
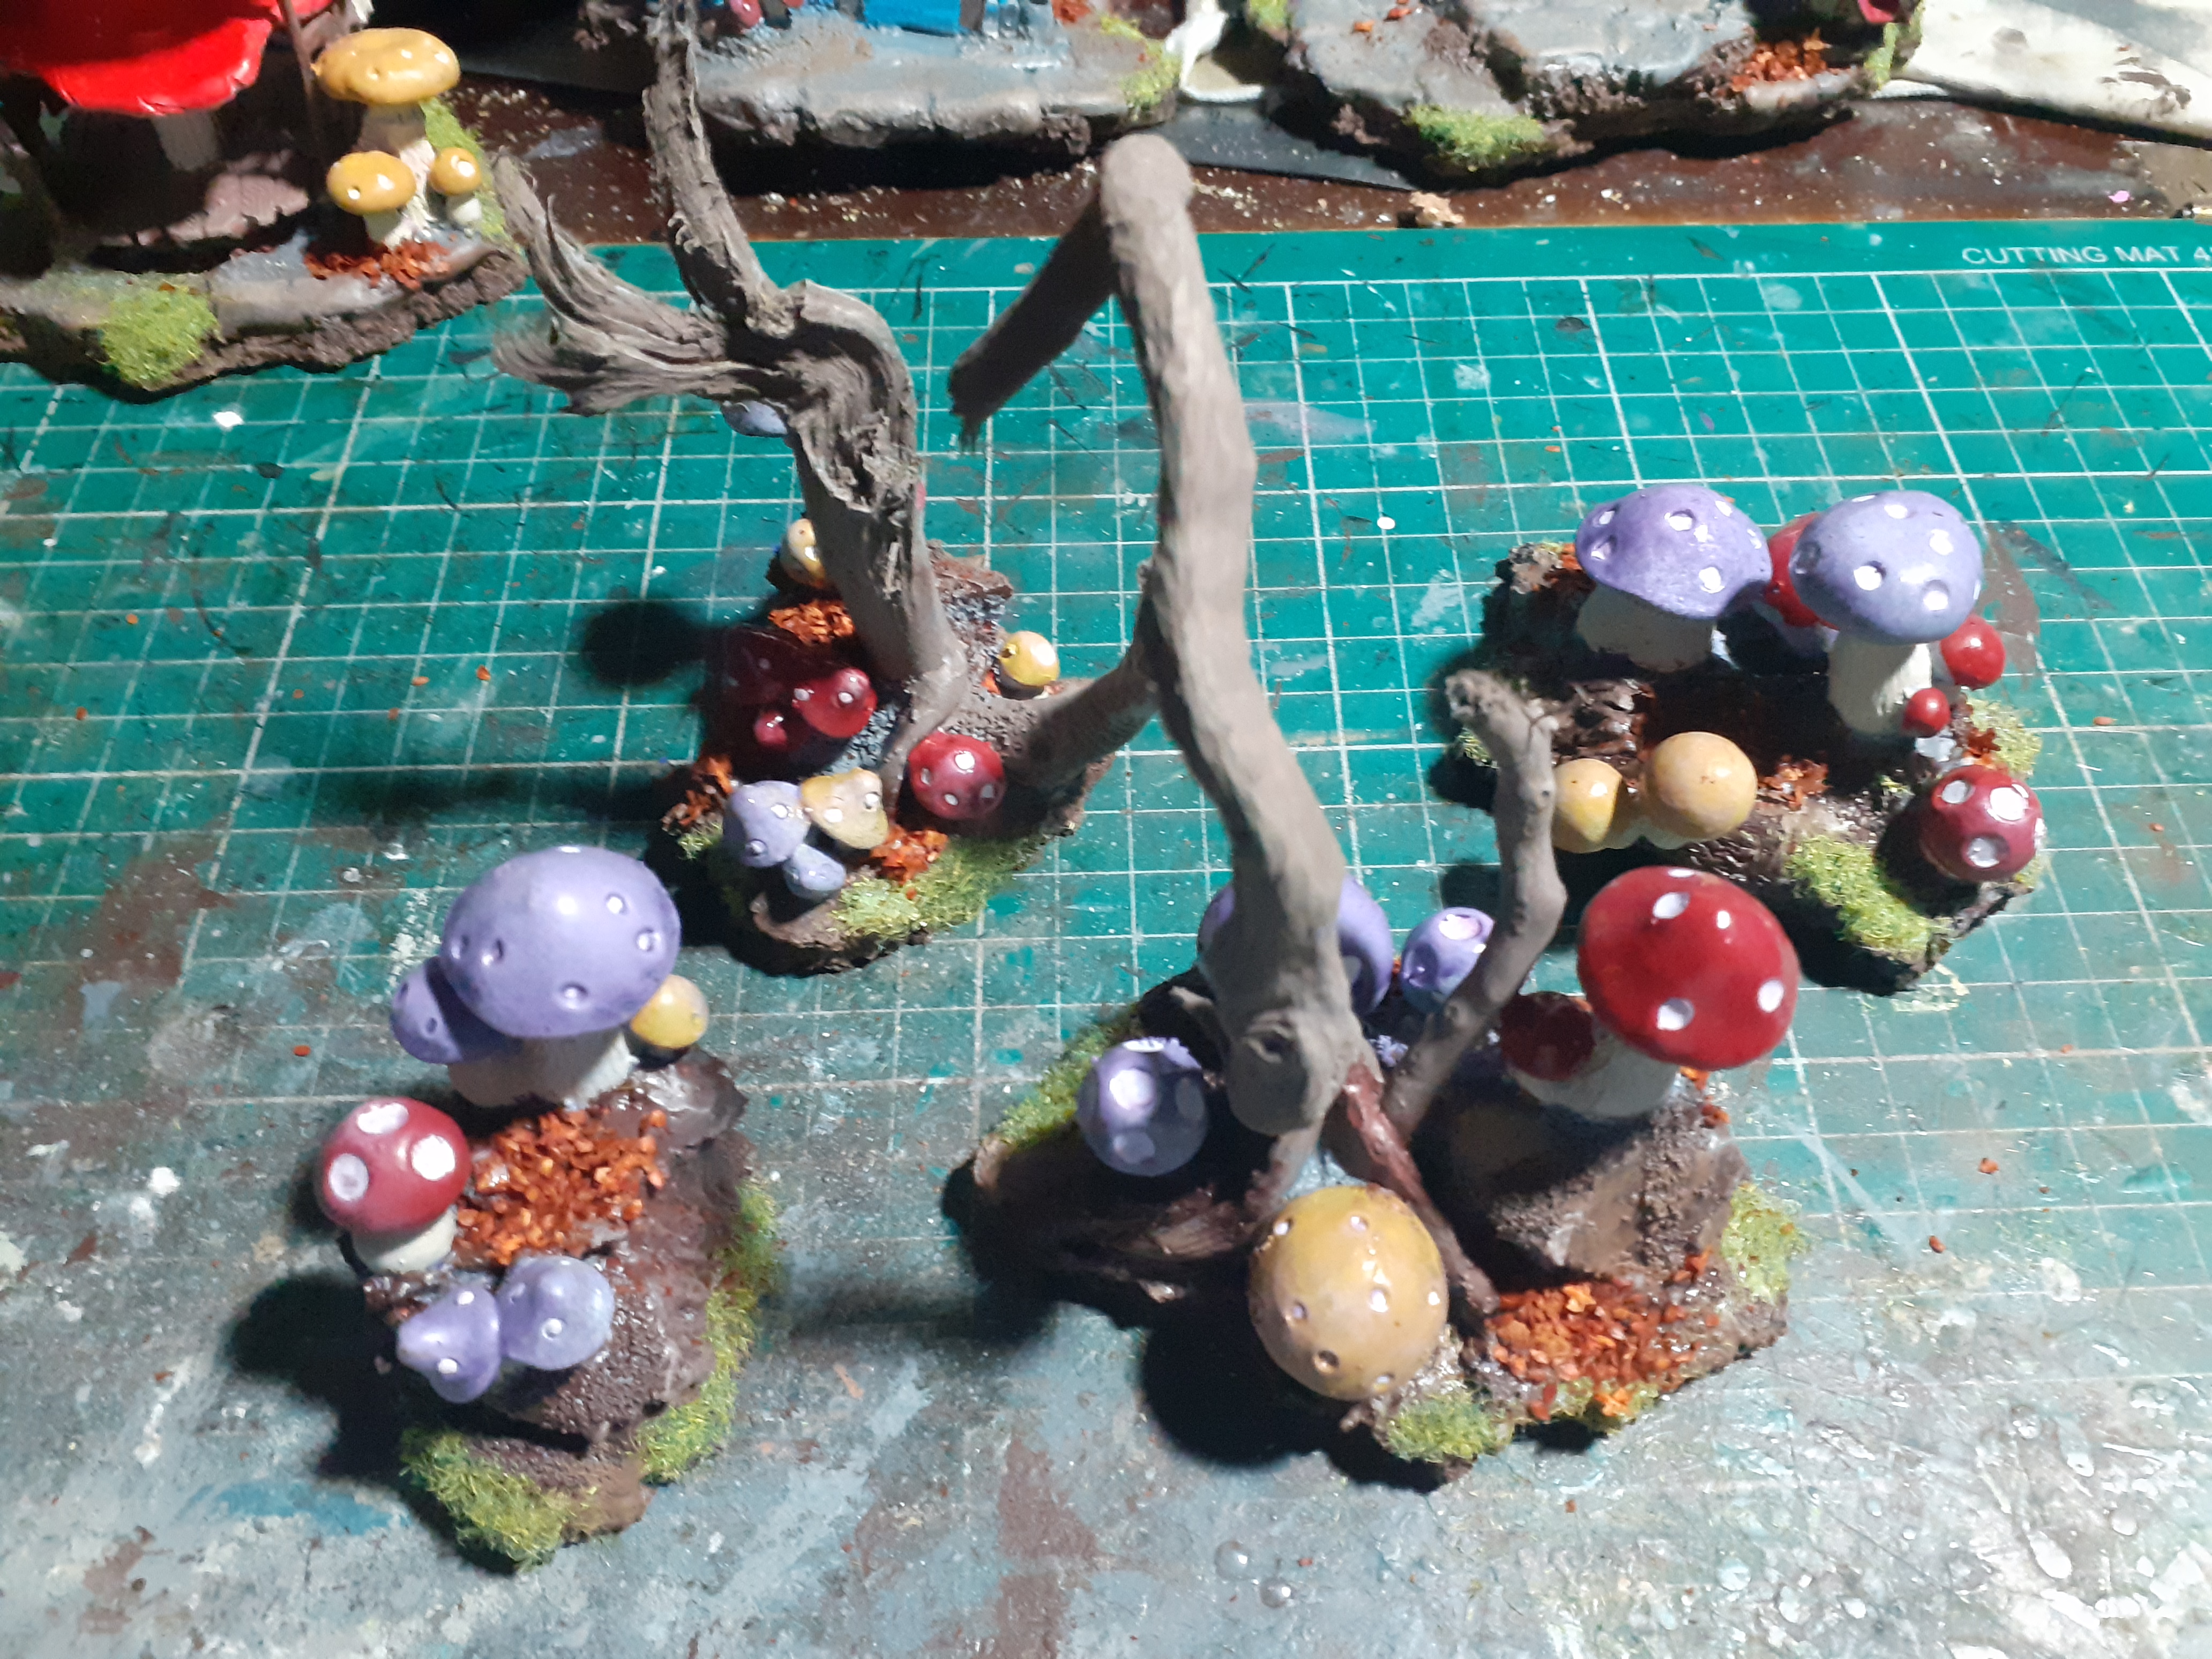
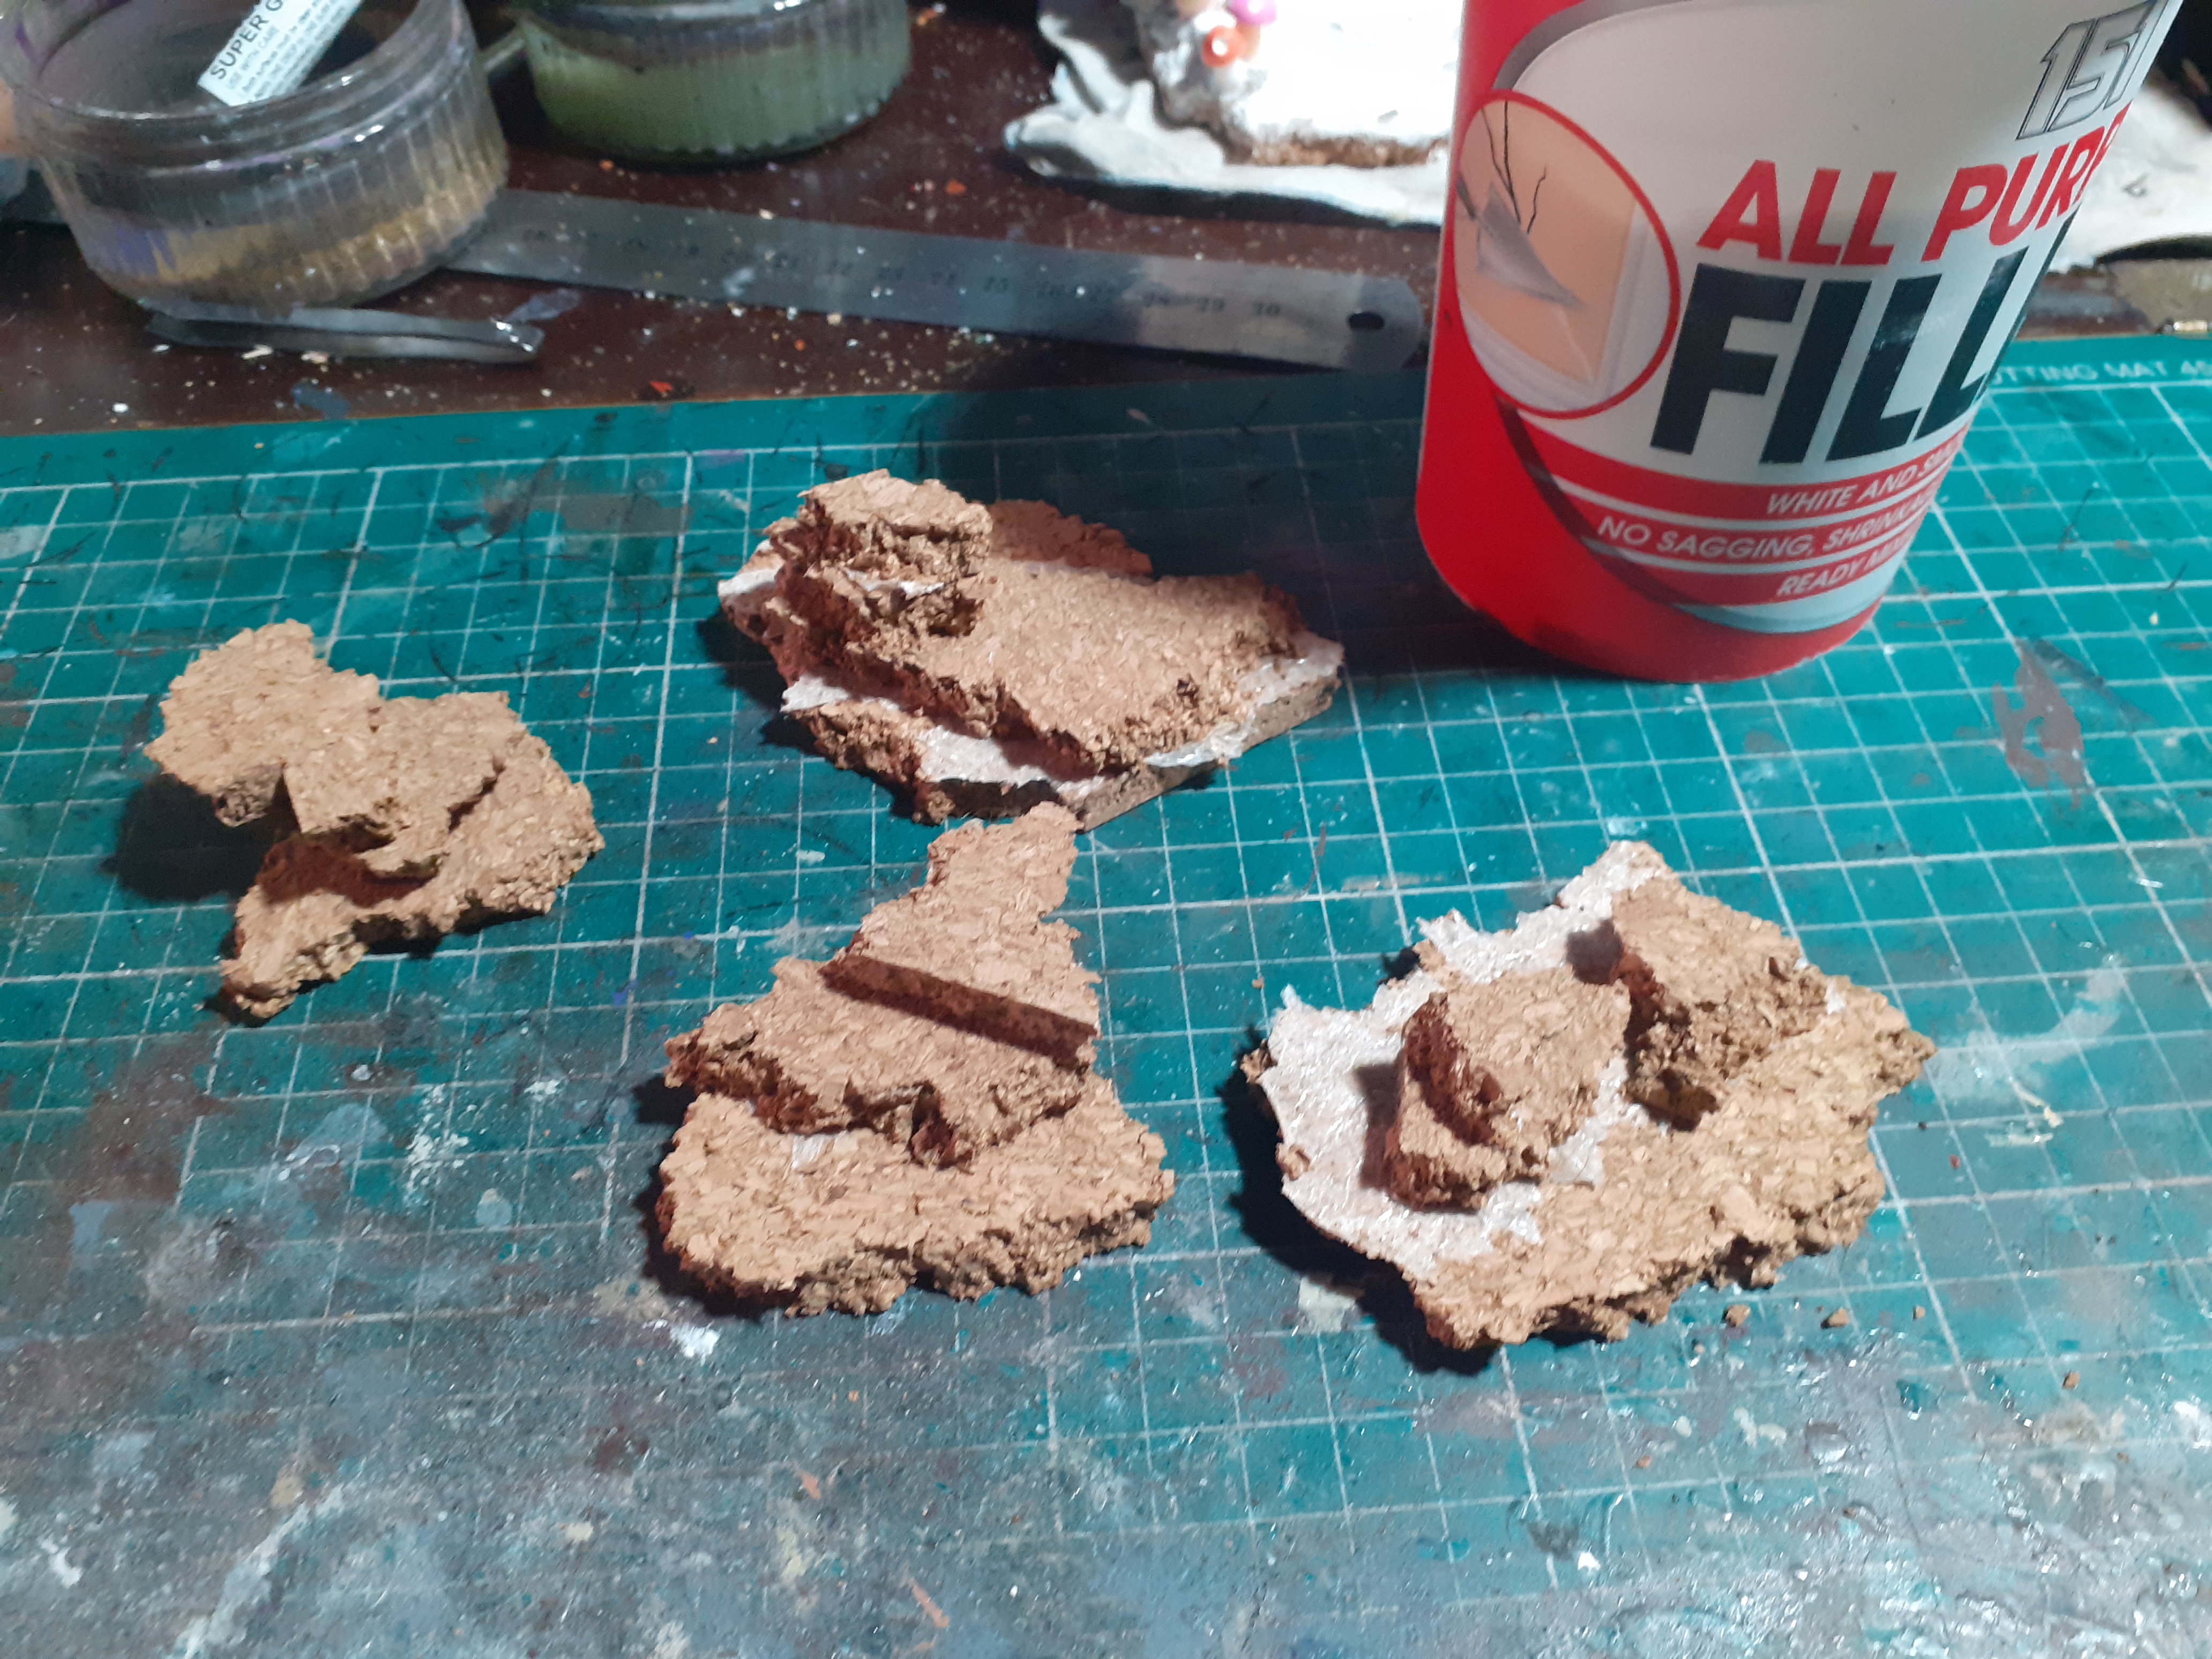
Thought some mushroom outcrops would be cool instead of woods, so started on some scatter terrain using some scrap Cork tiles I made the basic shapes.
Next I filled out the shapes with filler and as it was drying I glued the mushrooms in place.
Going to let it dry fully overnight then after work tomorrow I’m going to add some grit to the bases then cover in modgepog to make it more sturdy
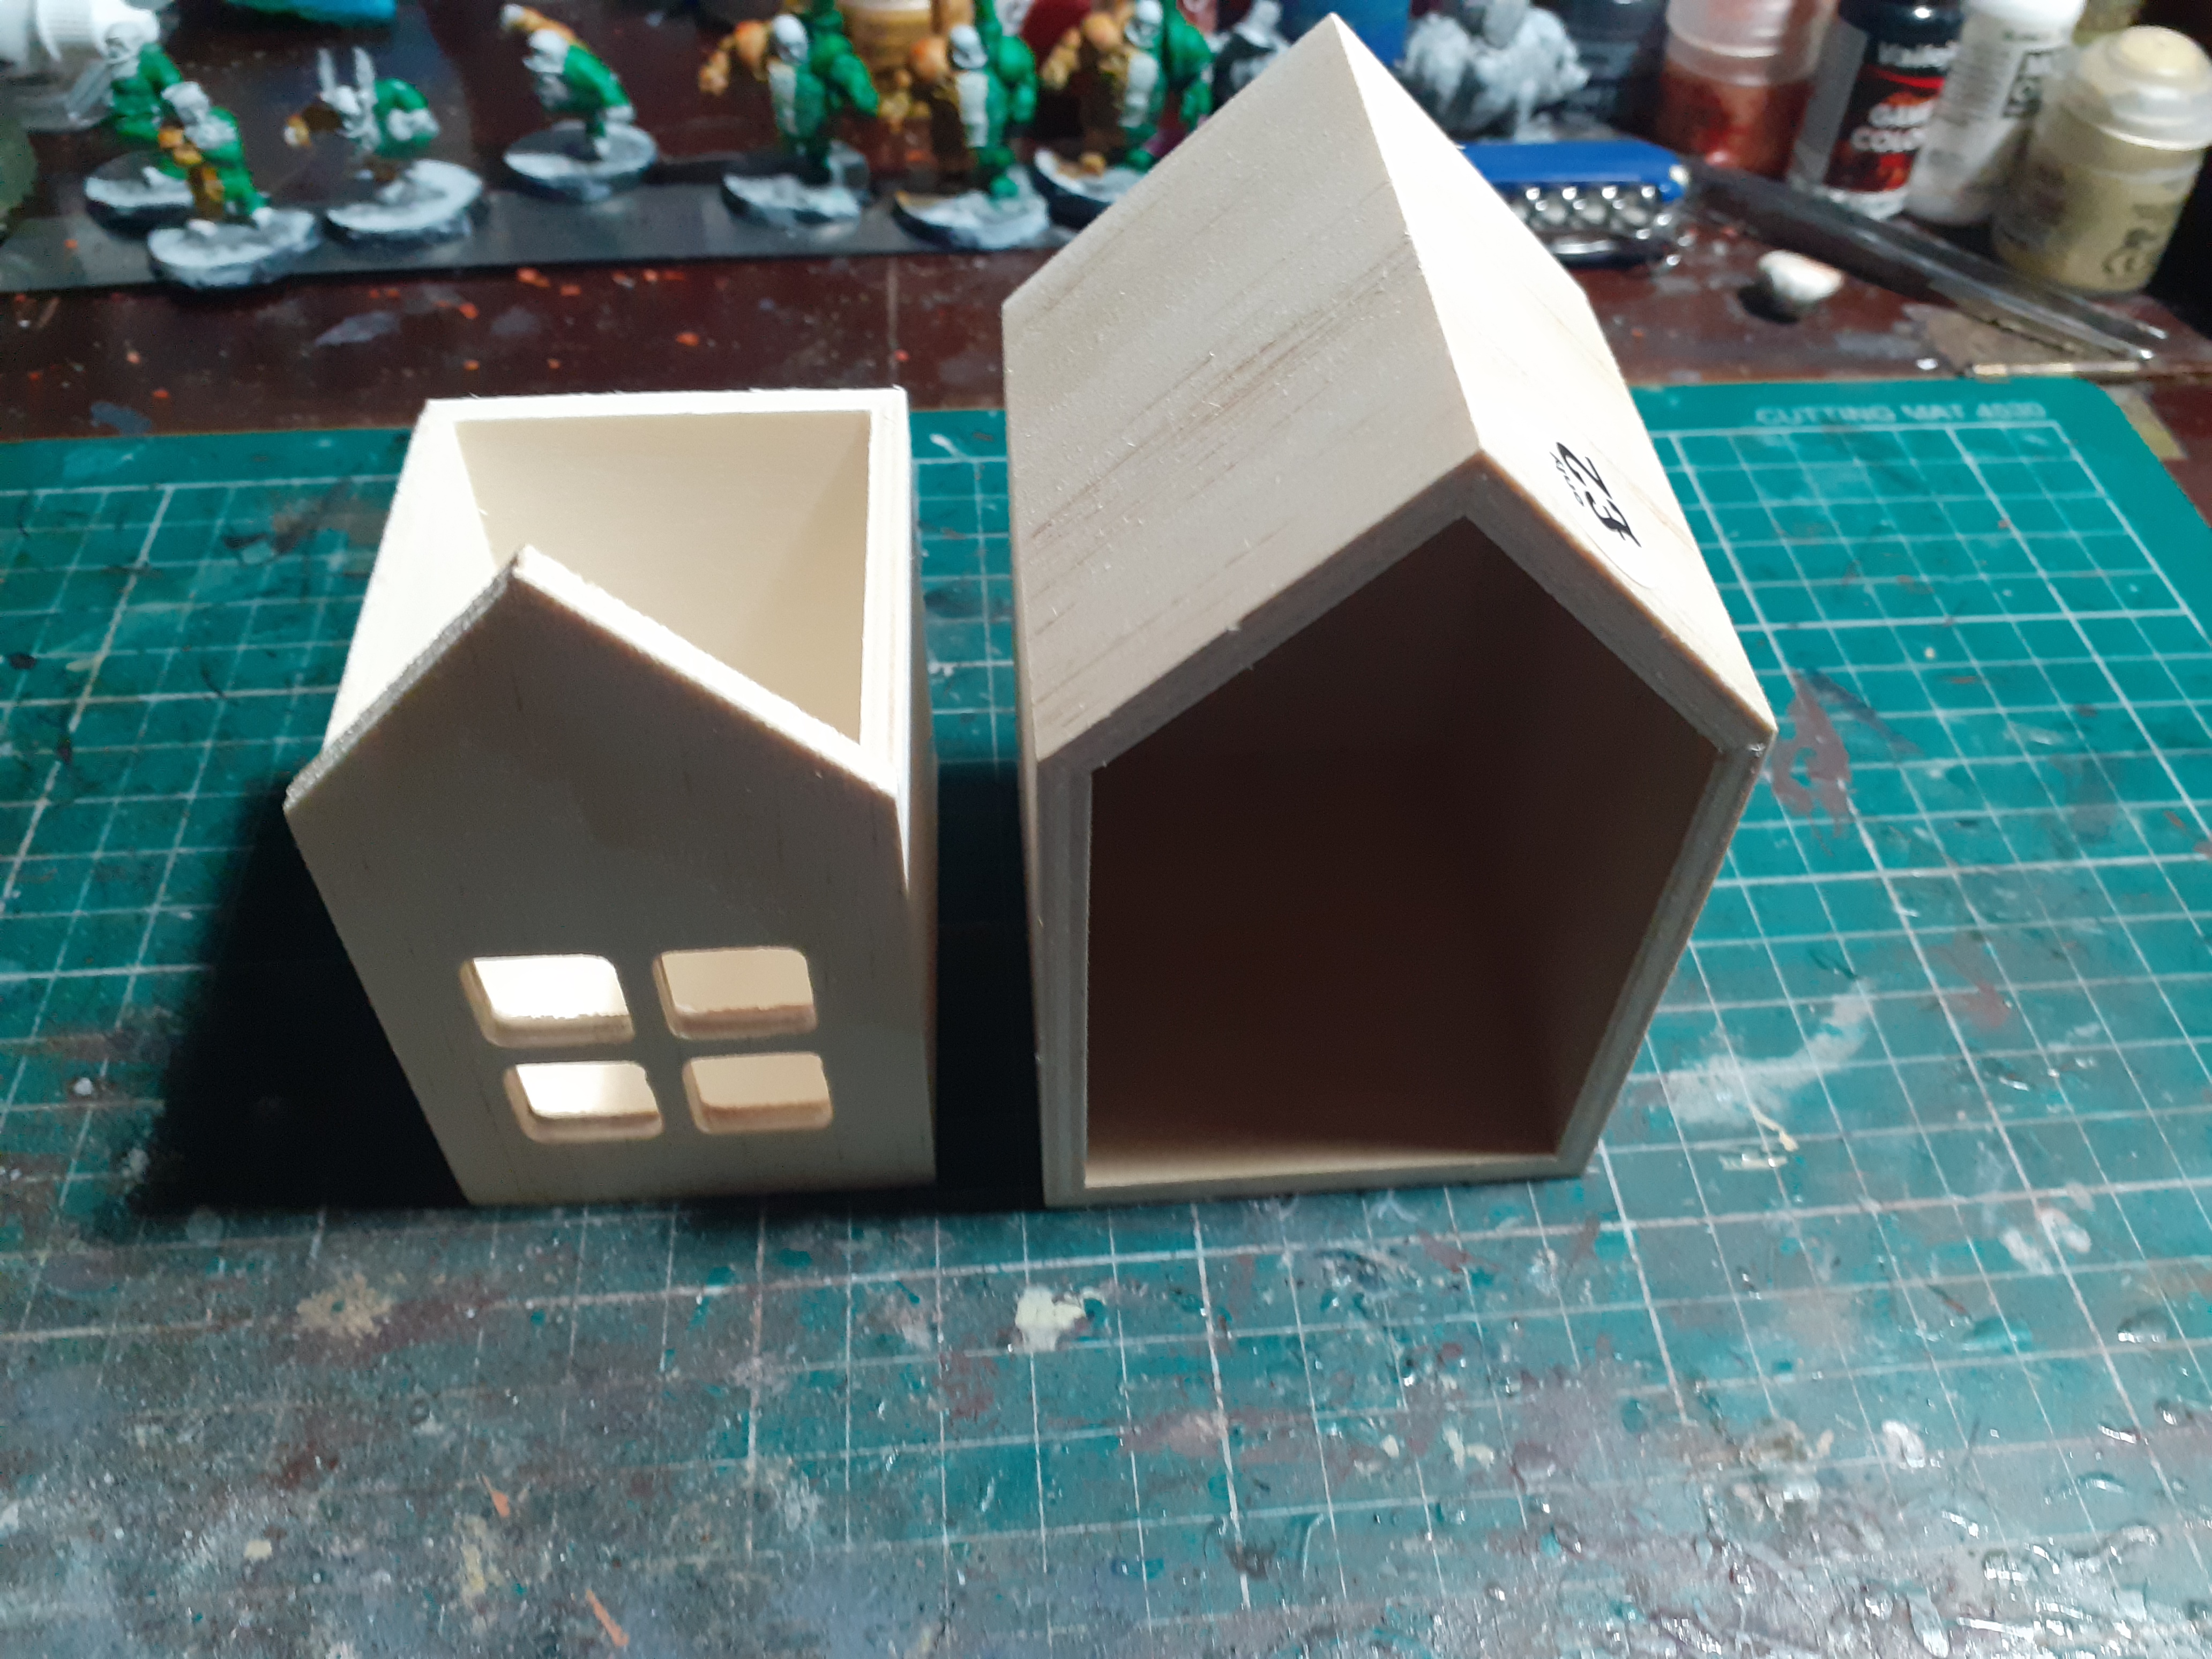
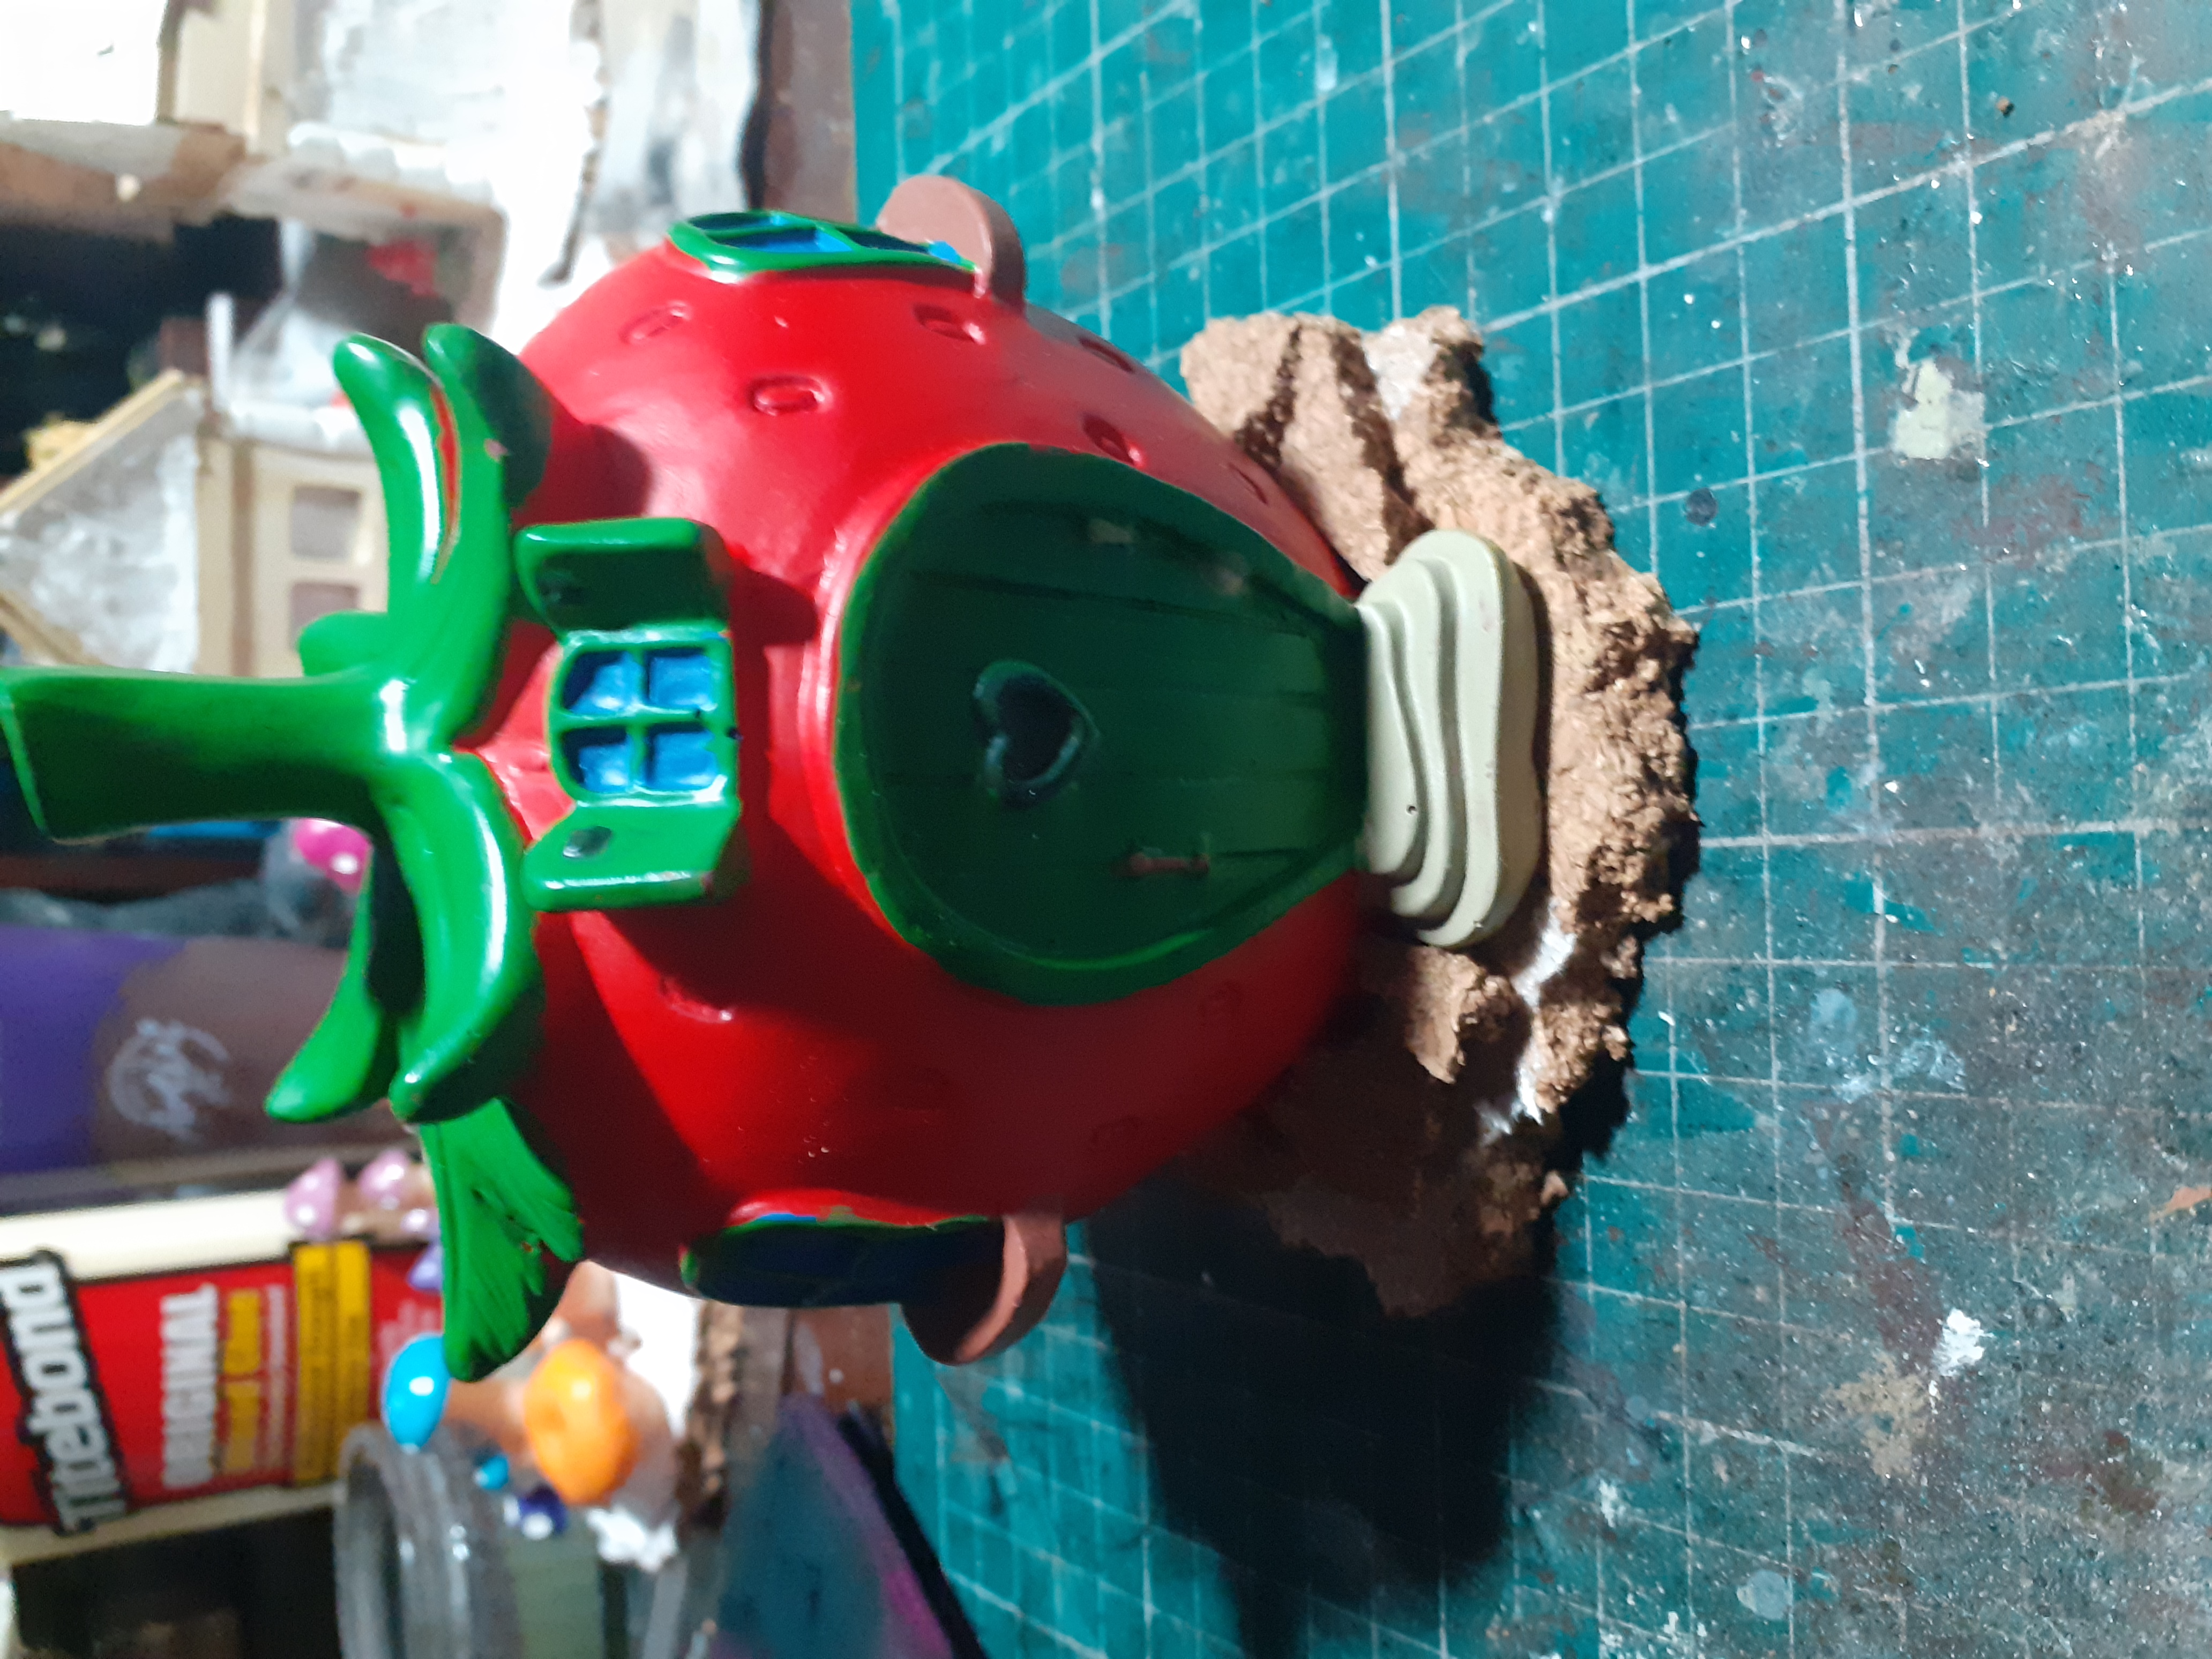 Last but not least this evening I'm starting on the greatest find from poundland the mighty strawberry House of doom.
The plan is to base it on some Cork scraps, add some filler around the edges and a few mushrooms, before painting it.
Hopefully paint sticks to the plastic as it feels a bit oily only time will tell I guess I should have tried some paint on it before sticking it down as it may need a good old soapy wash
Meddling in moonstone
This week’s project is going to be seeing how much scenery I can build for a moonstone table for as little dosh as possible.
Last Sunday my better half and myself visited the selwig show that had a humongous bring and buy where we were able to snap up a funky mushroom house and a ghost tree, making a great start to the scenery needed.
Next we visited poundland and the works looking for supplies and came back with a little house shaped box with a draw that should be easily converted into a second house. Rhi has caught the scenery bug and found a Halloween wooden house and is planning on building it and having a go with an airbrush to paint it.
We also found a pile of plastic mushrooms and some other odds and ends.
Now it’s time to get gluing and see what happens.


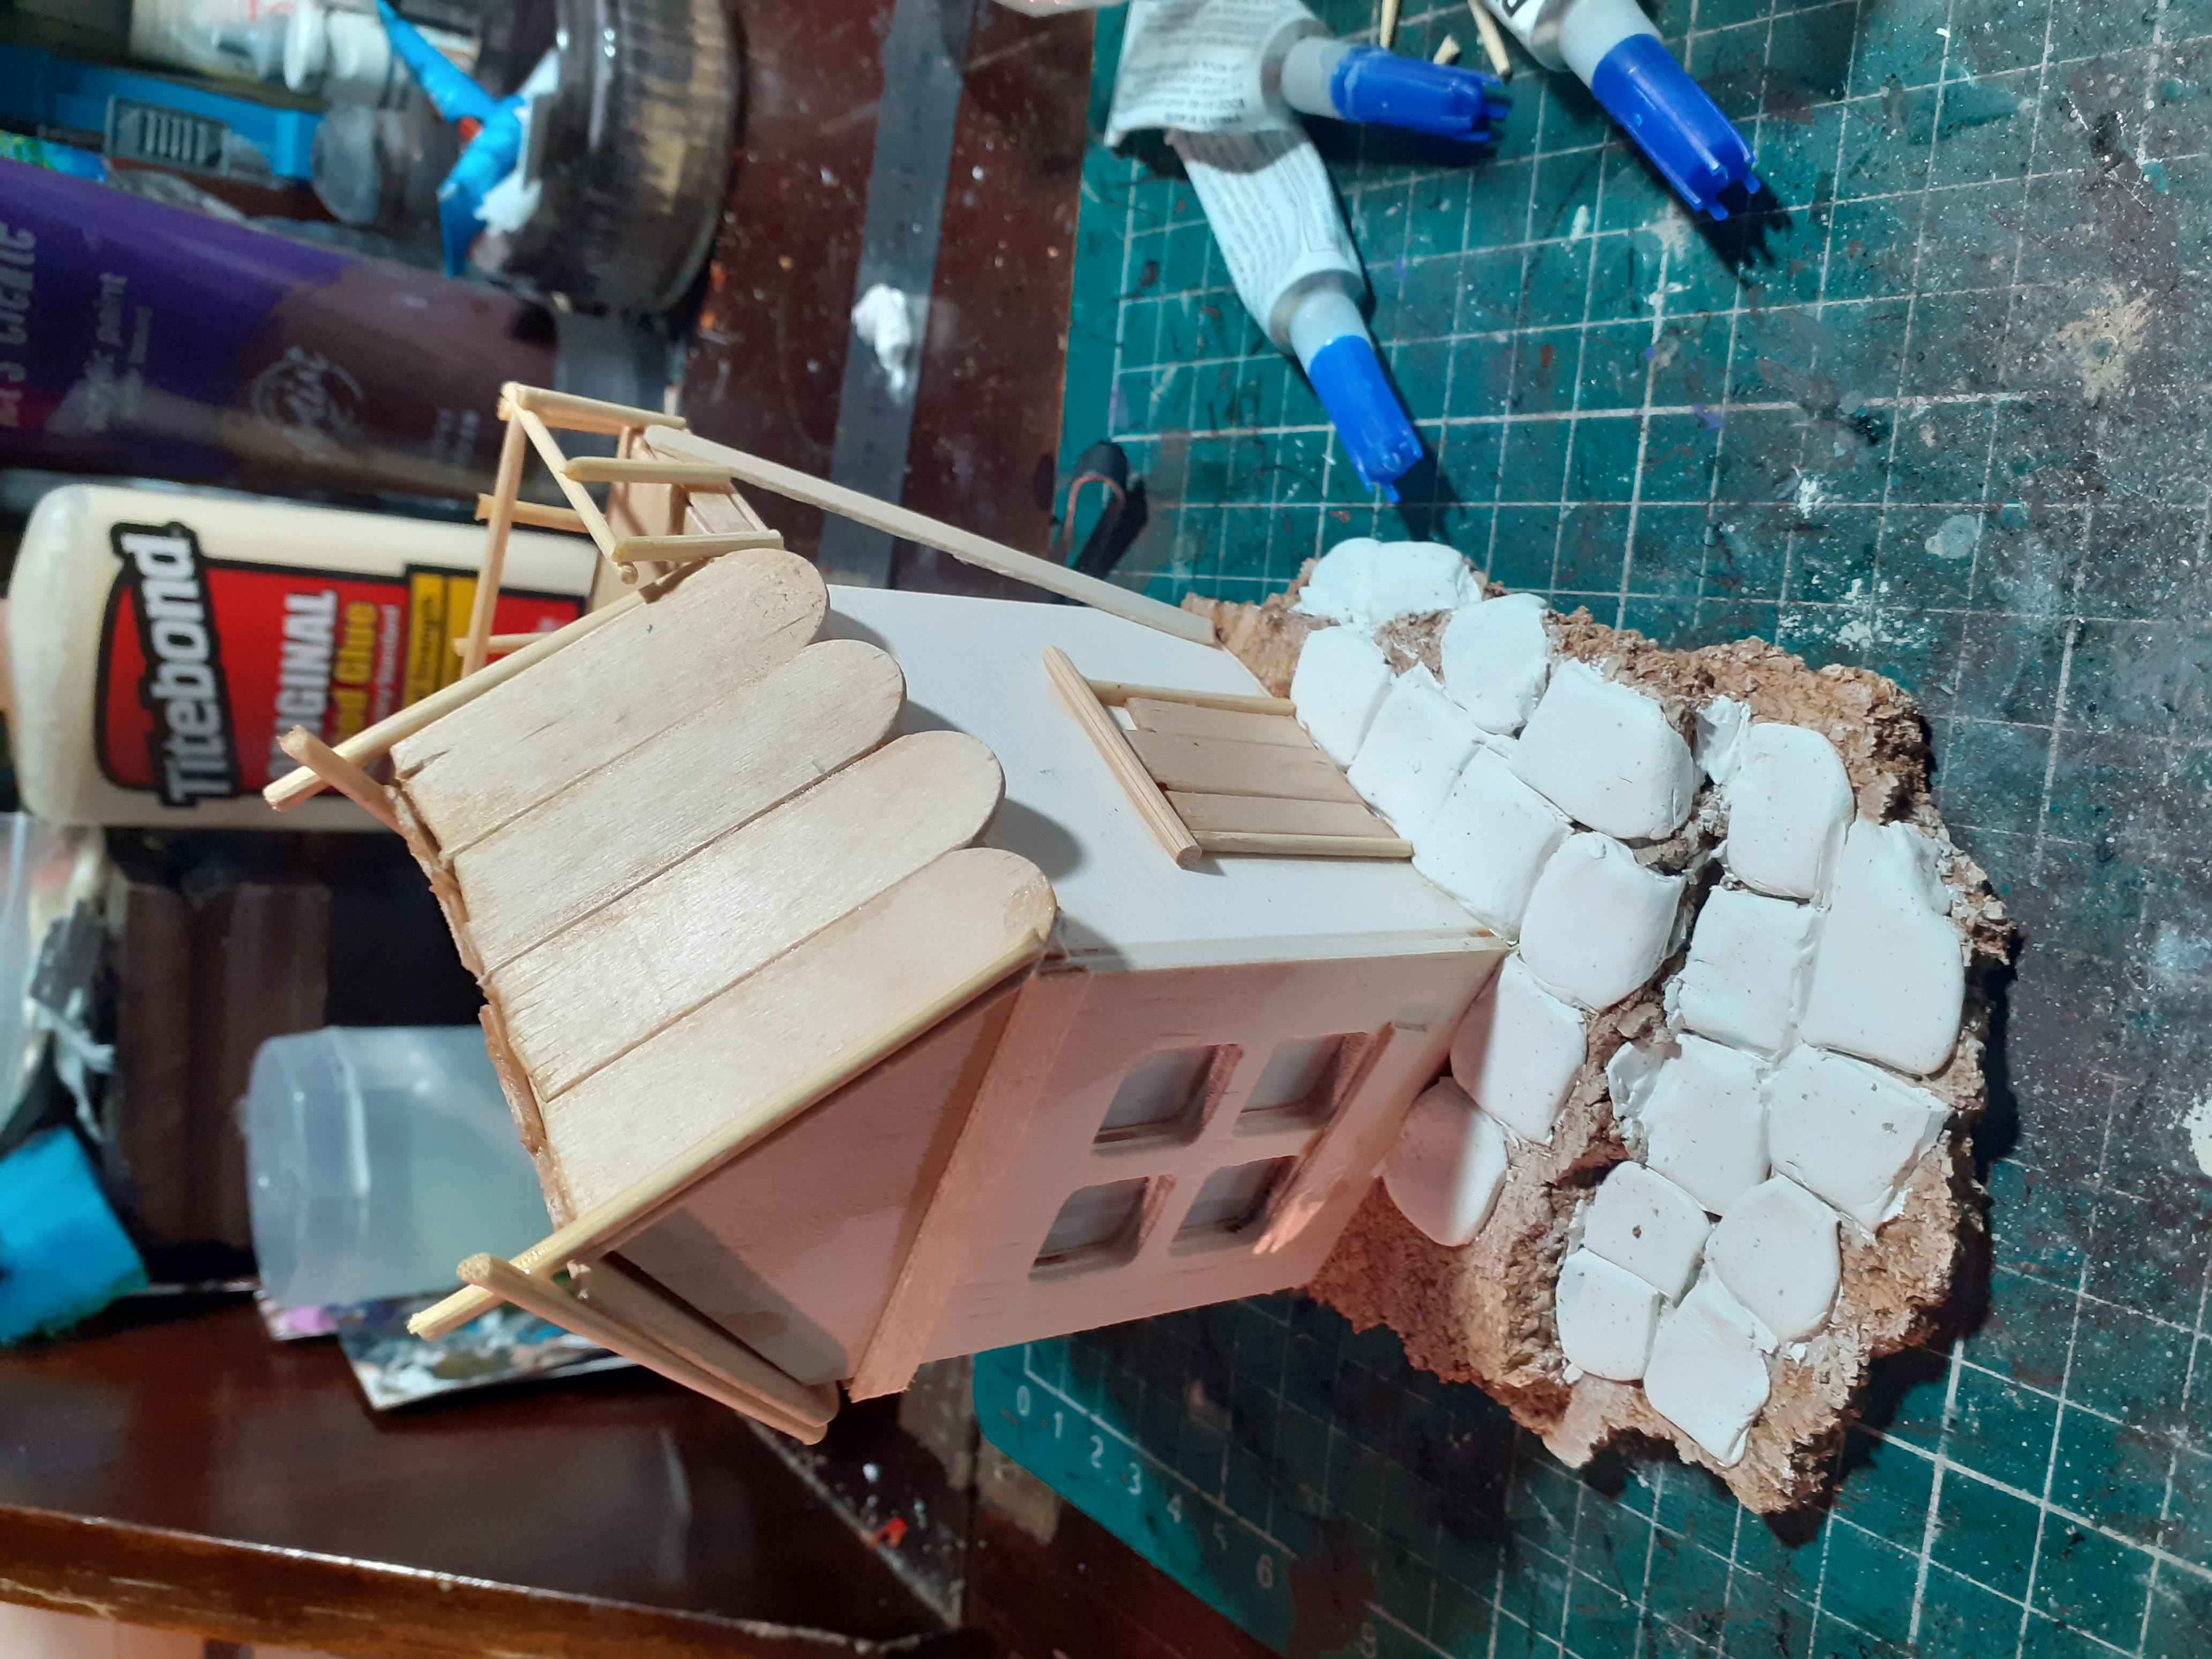 The wooden buildings needed some work to make them house like, coffestirrers and cocktail sticks were used for the balconies and roofs. Milliput was squished on to make some flagstones around the houses
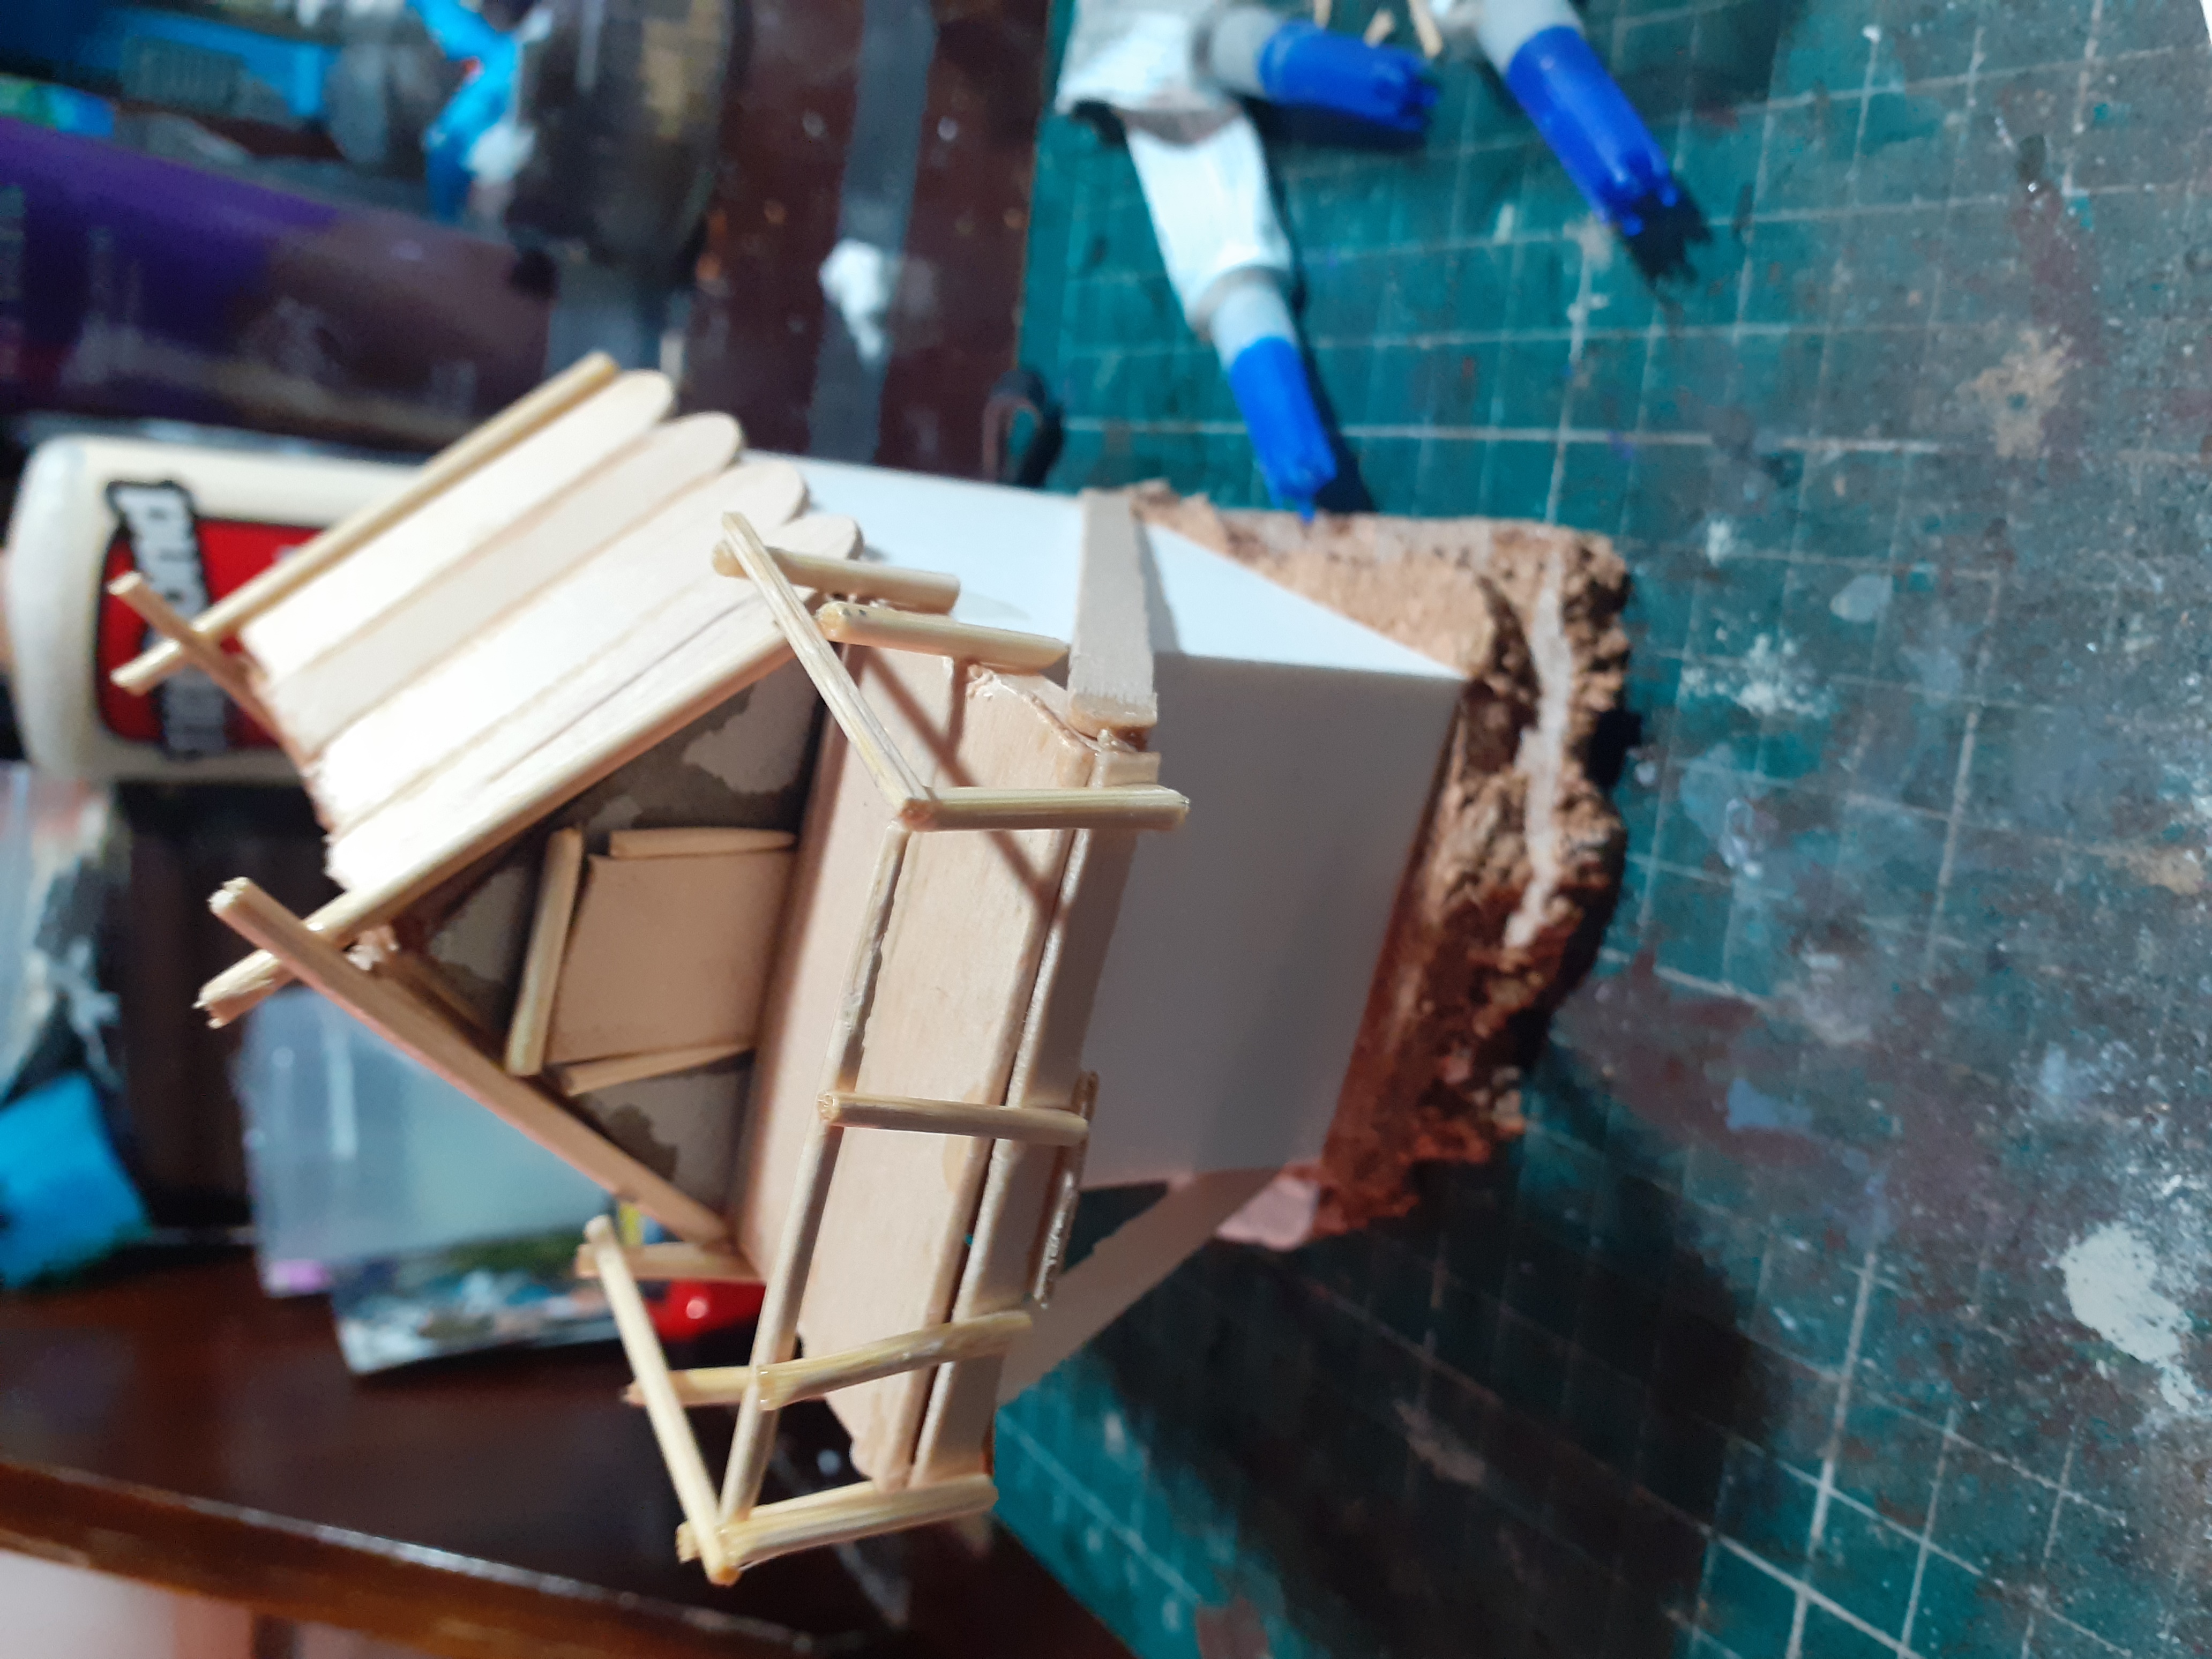
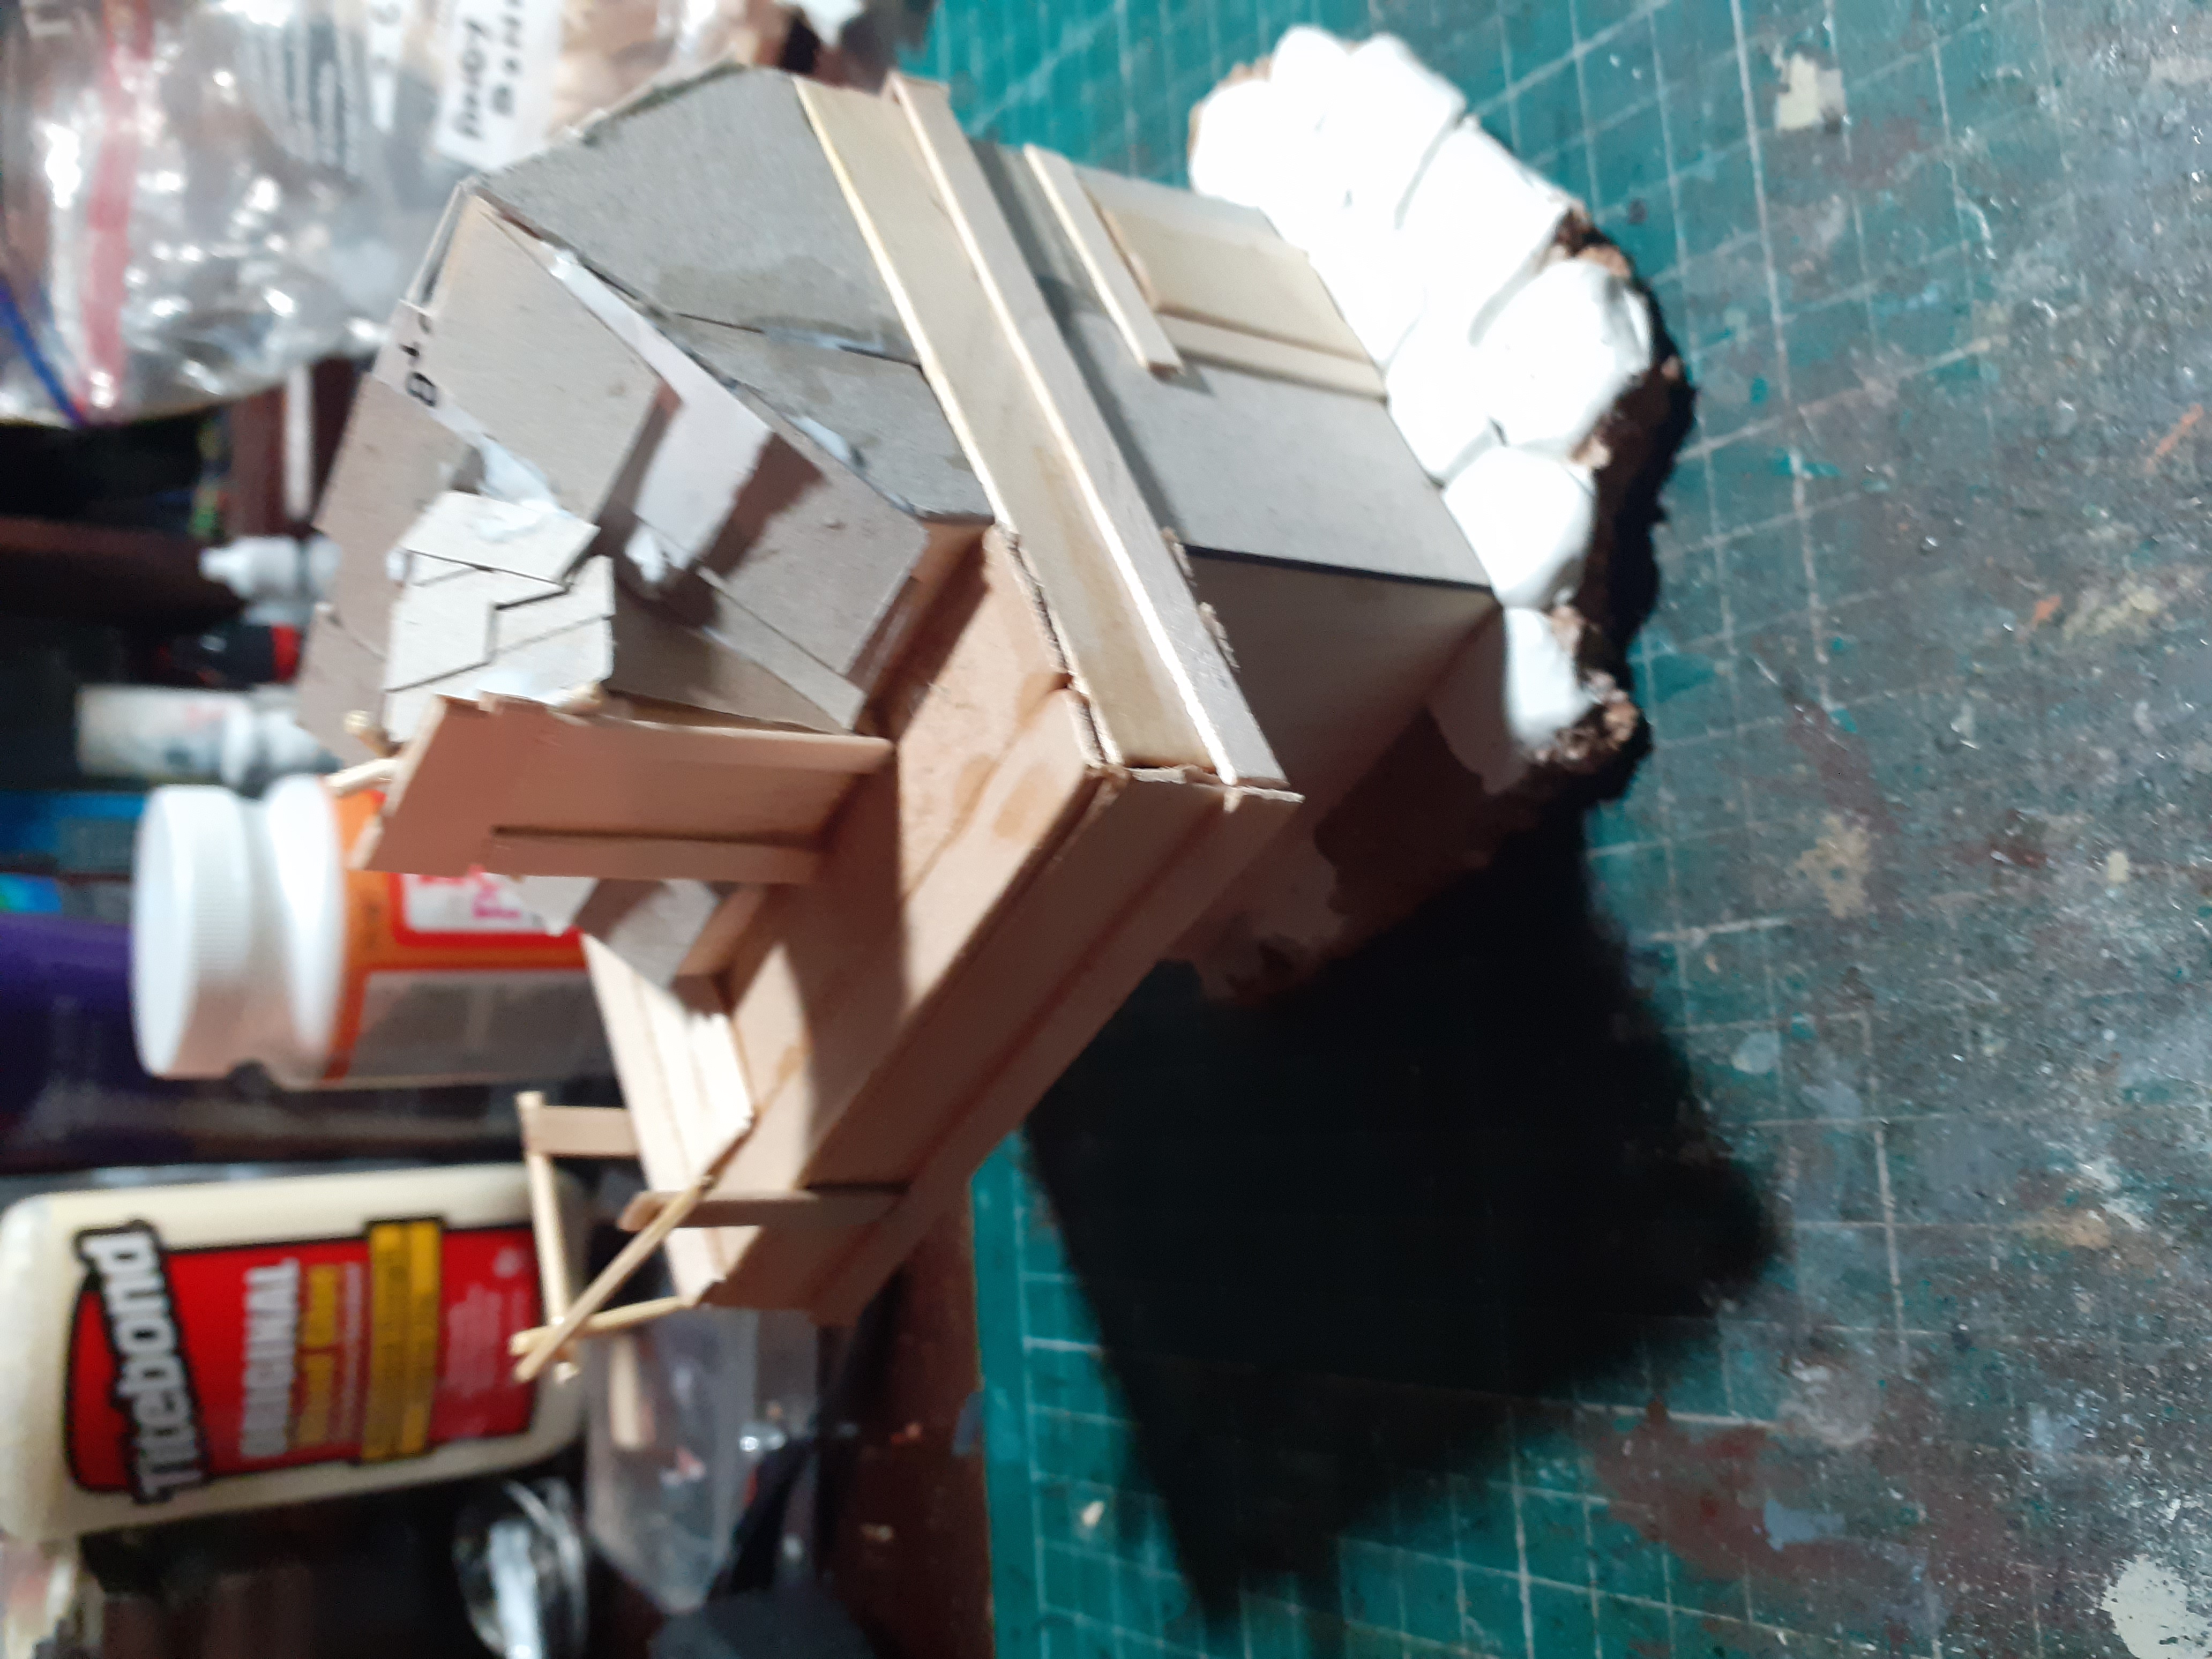


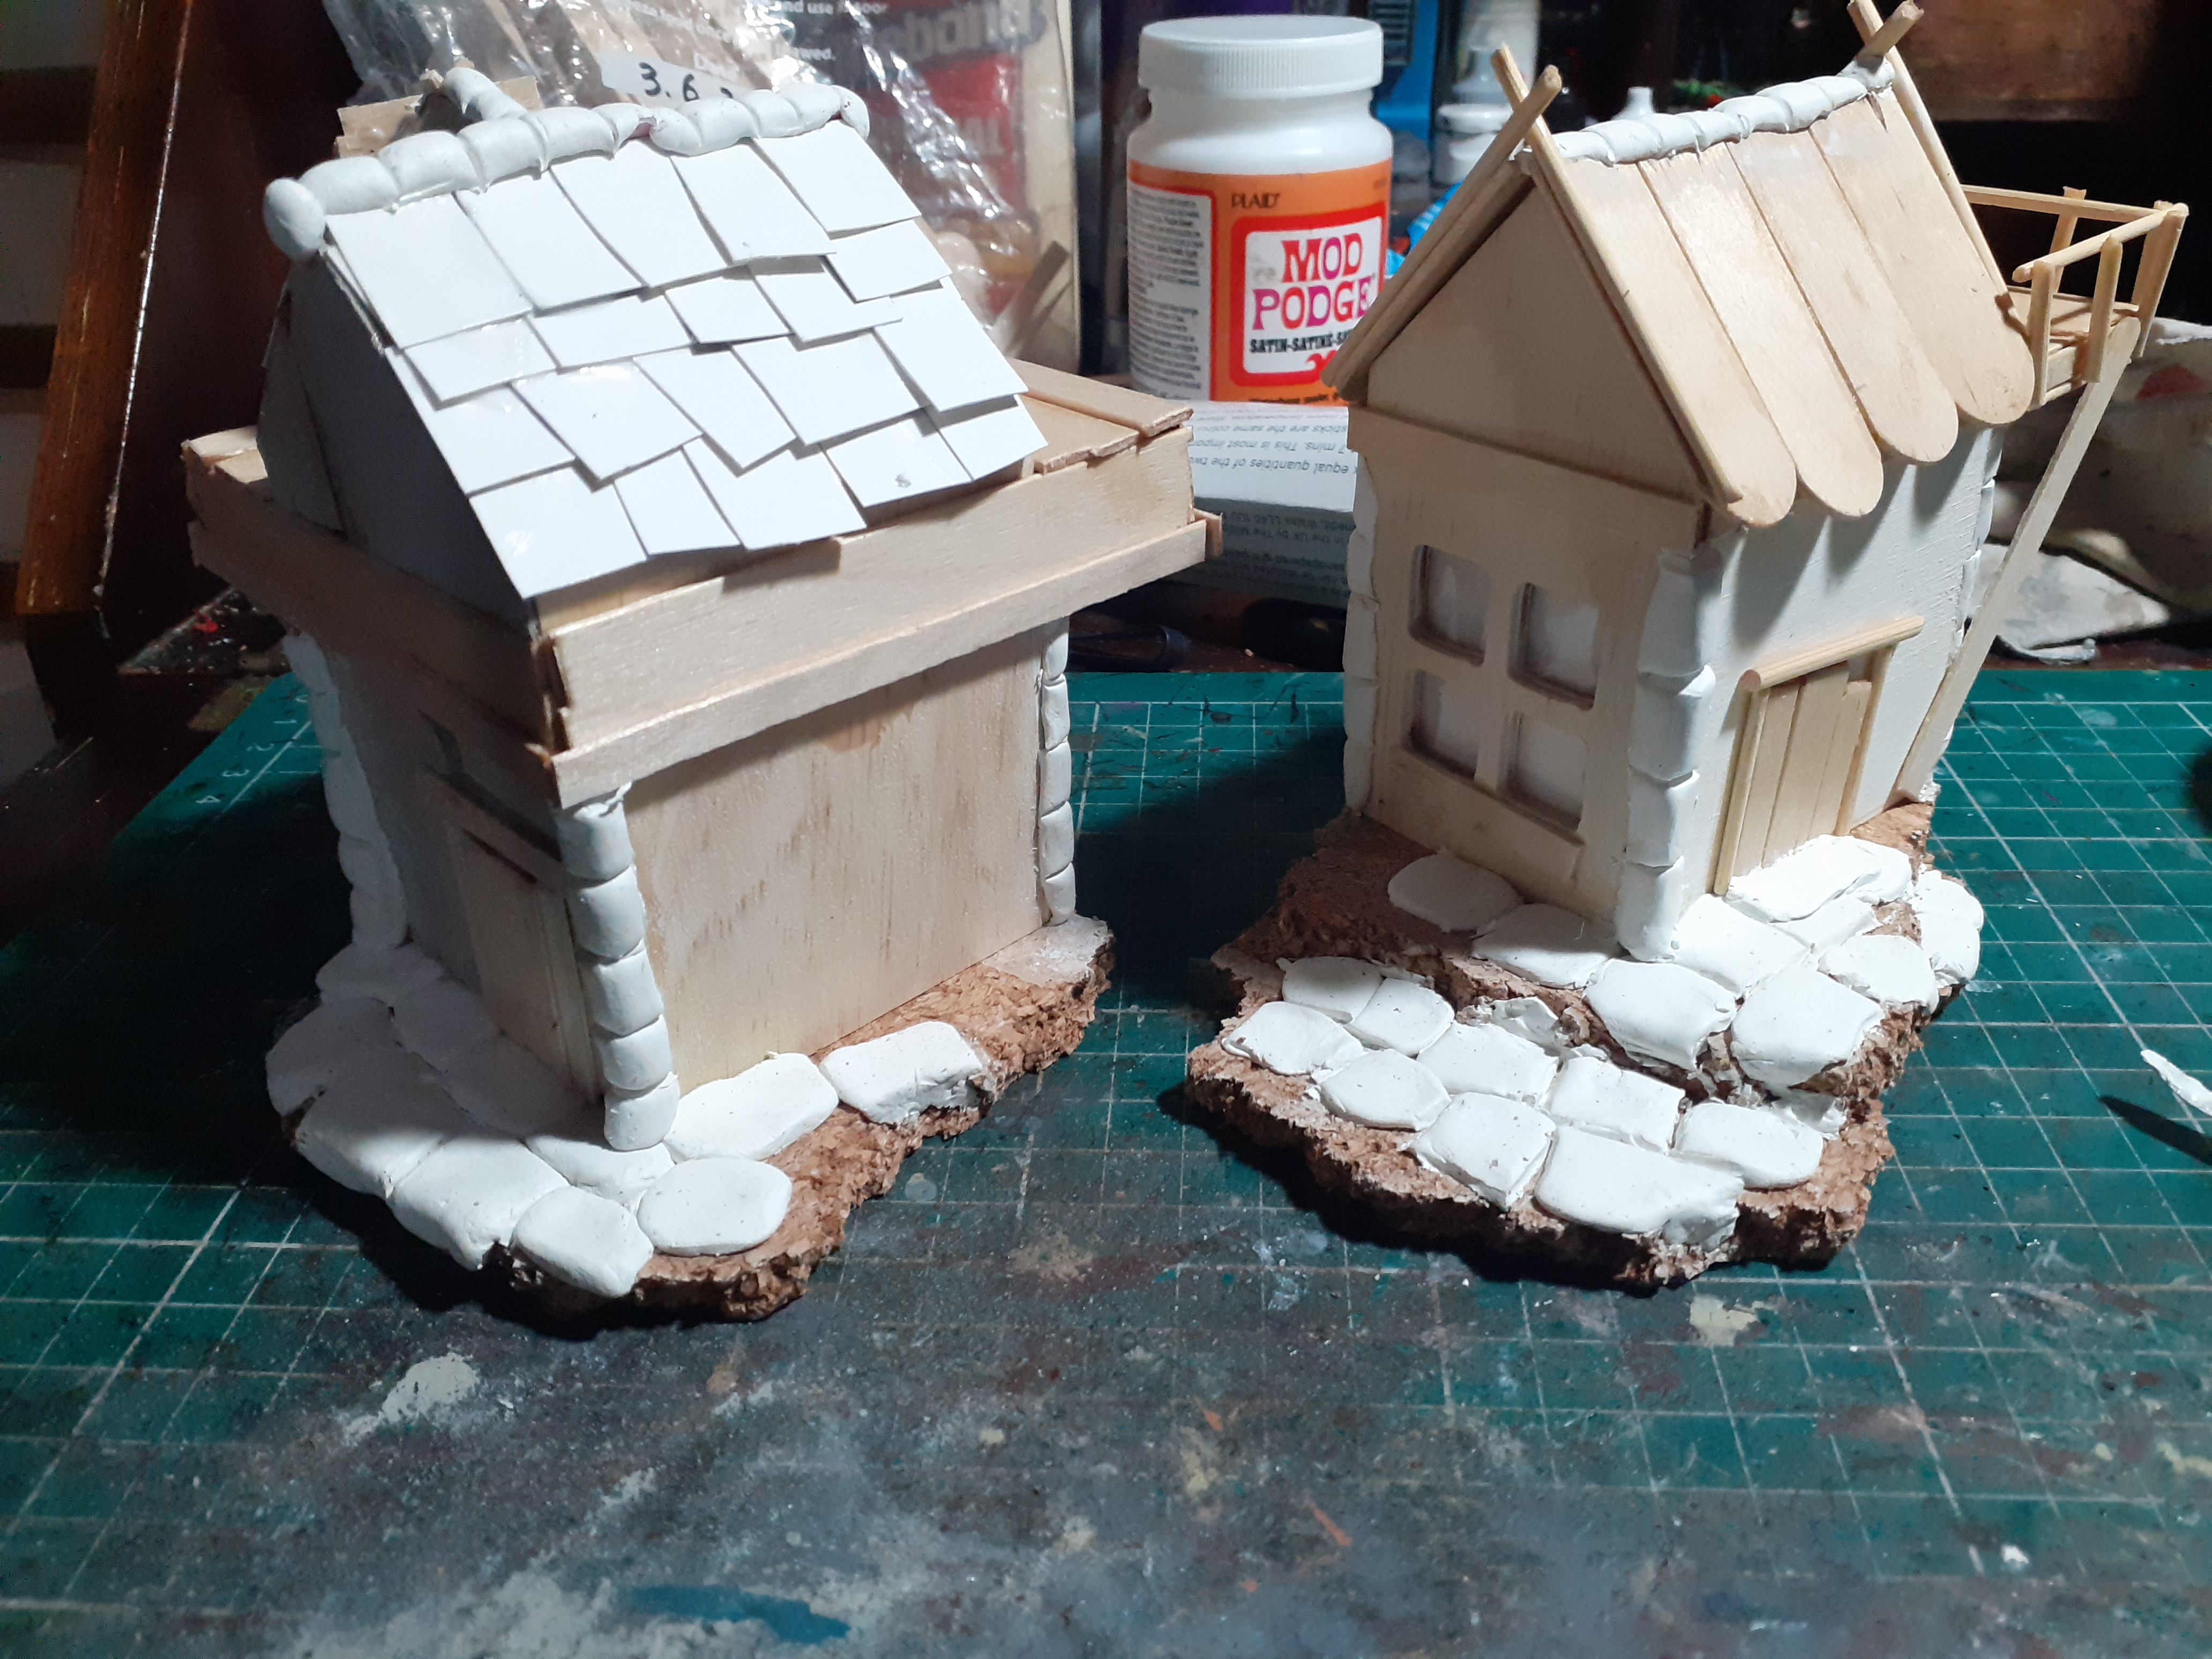
 Leaving the houses to dry then I can cover the walls in filler to give an nice rough Finish
 Easy to store vietnam stuff
The last few years I have been working on some rules for a solo vietnam game based on the mobile strike forces in the vietnam war putting you in control of the indigenous forces helping rescue downed pilots in enemy territory and carrying out ambushes on enemy supply lines as well as patrolling around and protecting their compound.
This required a selection of different scenery including village buildings and sections of jungle to help fill out the scenarios. As well as needing a suitable bord or mat with squares on it for movement of miniatures and line of sight.
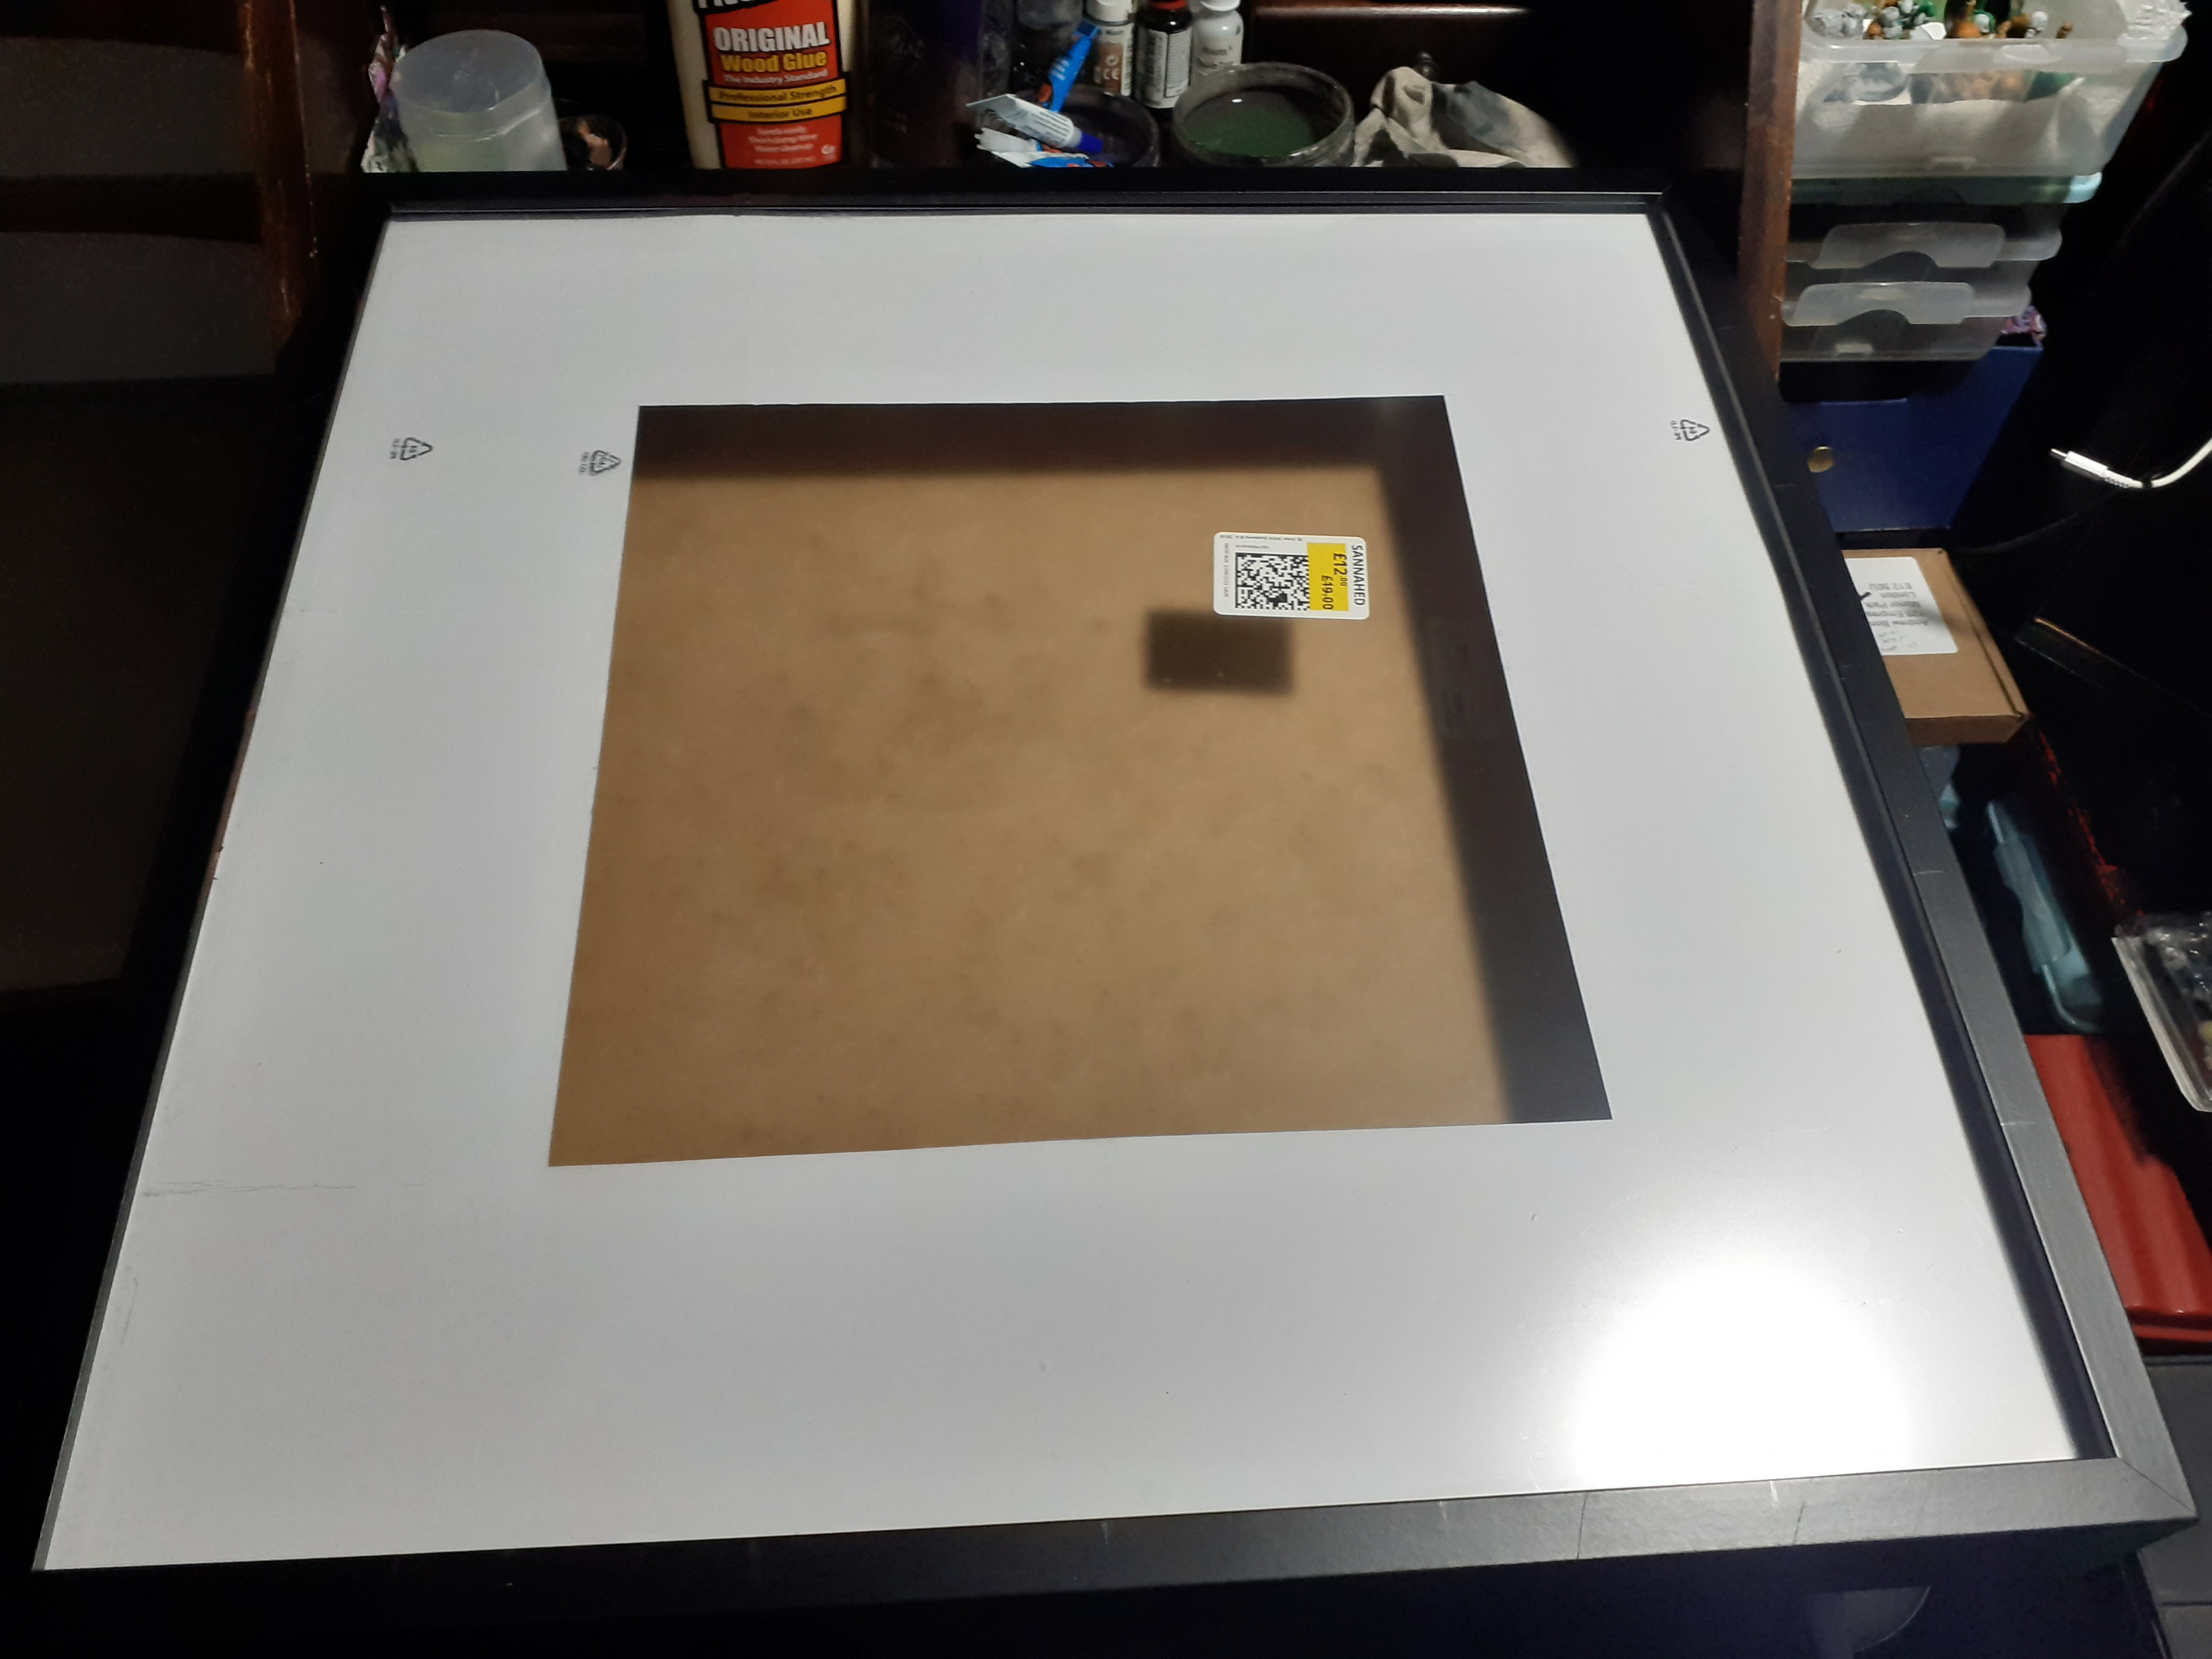
This is not the first of the boards I have built as the project started in 28mm but is awkward to get out and play the game because of the space needed, so I tried it in 15mm which was super fiddly so now have settled on 20 mm.
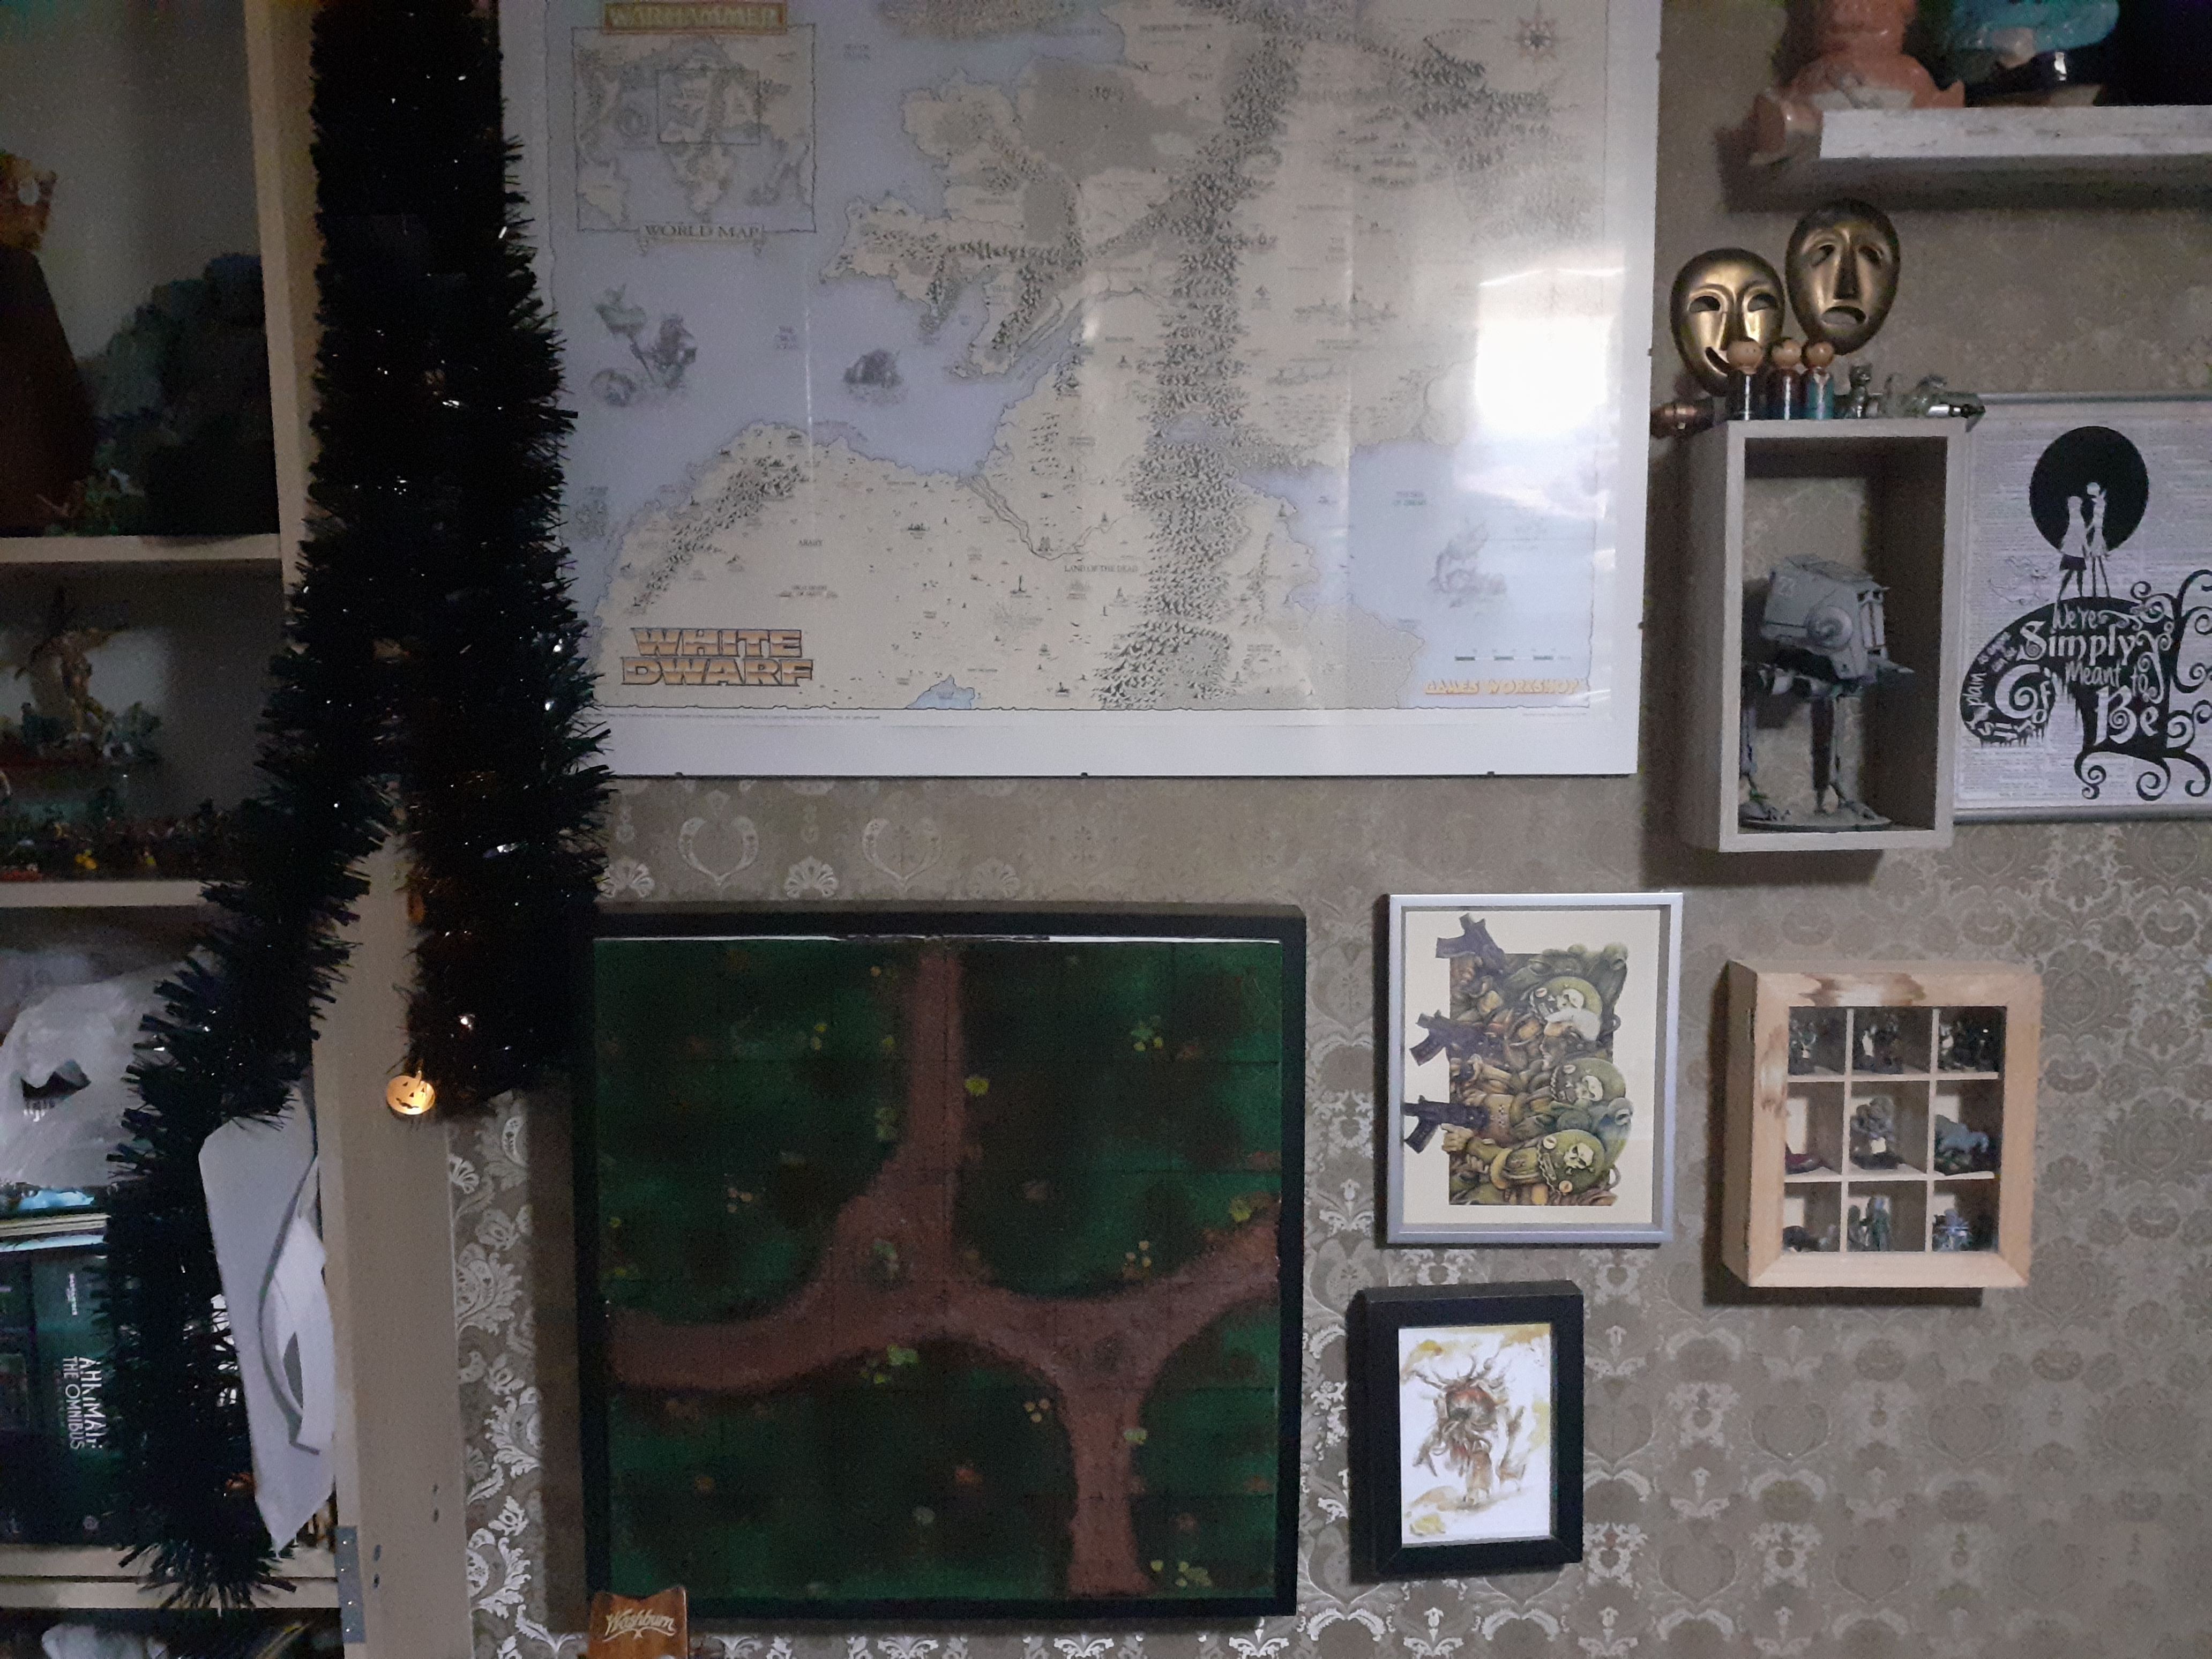
Walking around IKEA I found a box frame in the sale section which gave me the idea of a board that I can hang on the wall. So with that in hand I started collecting bits of card and cocktail sticks together.
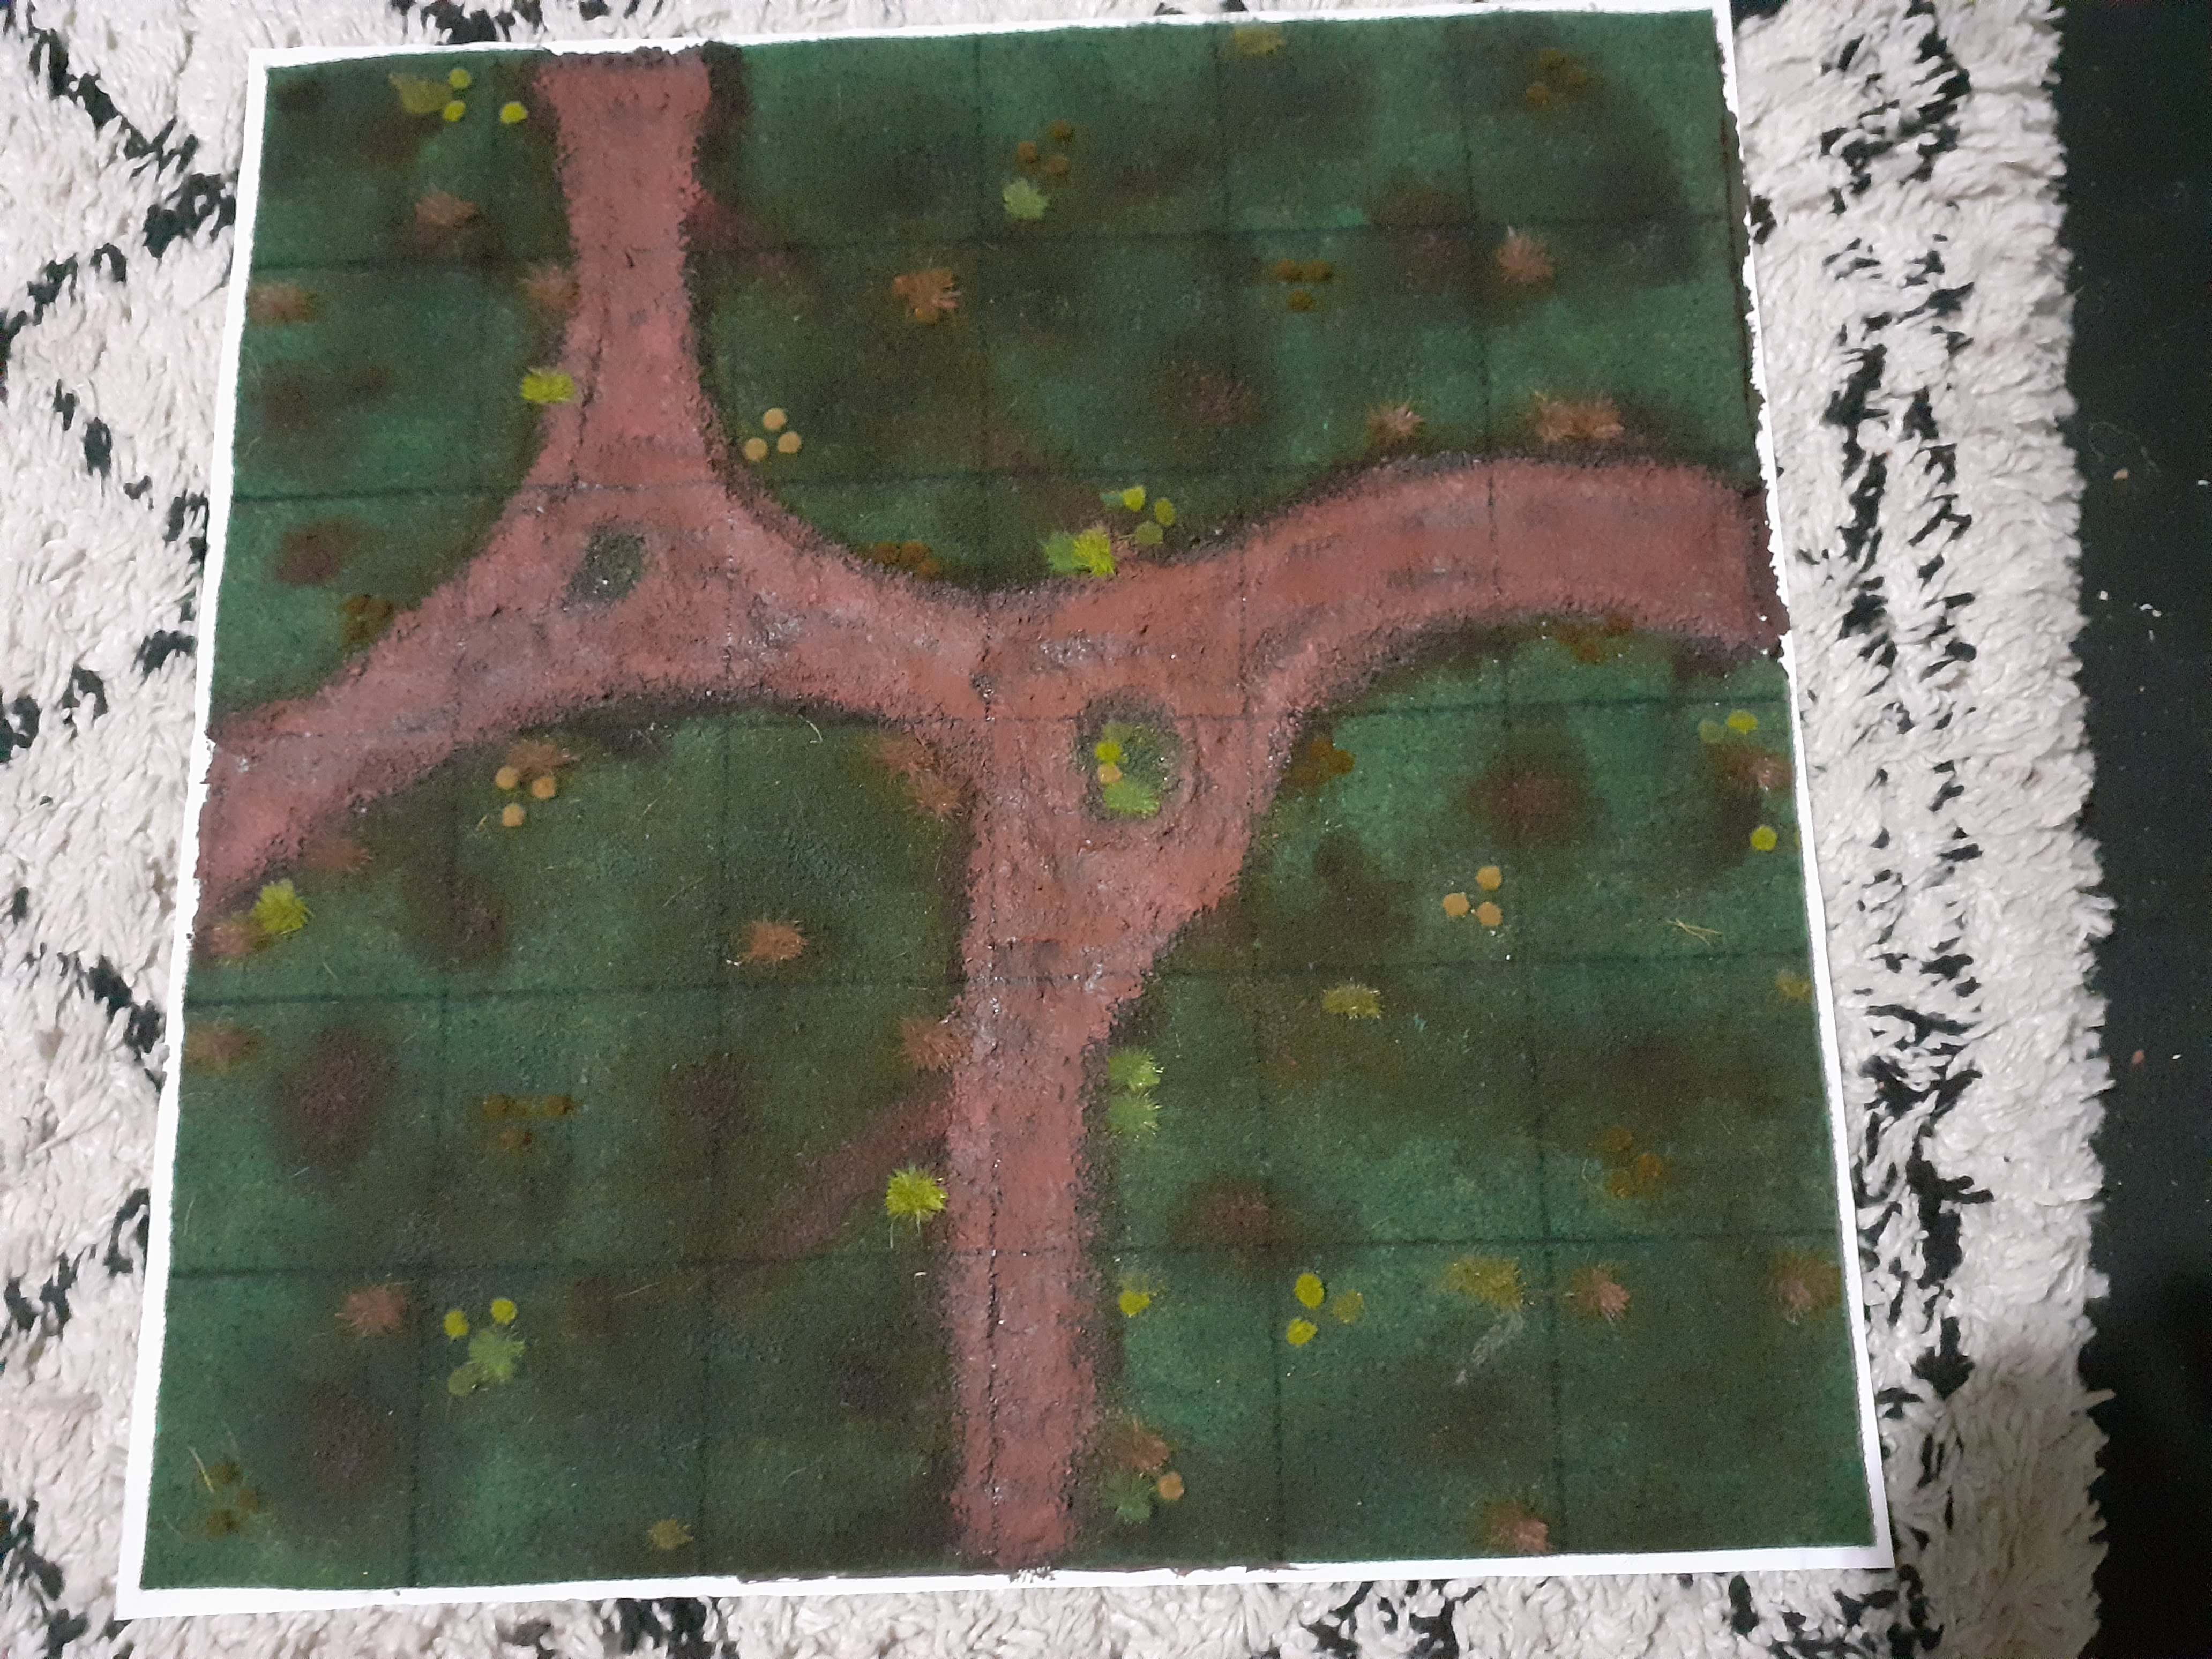
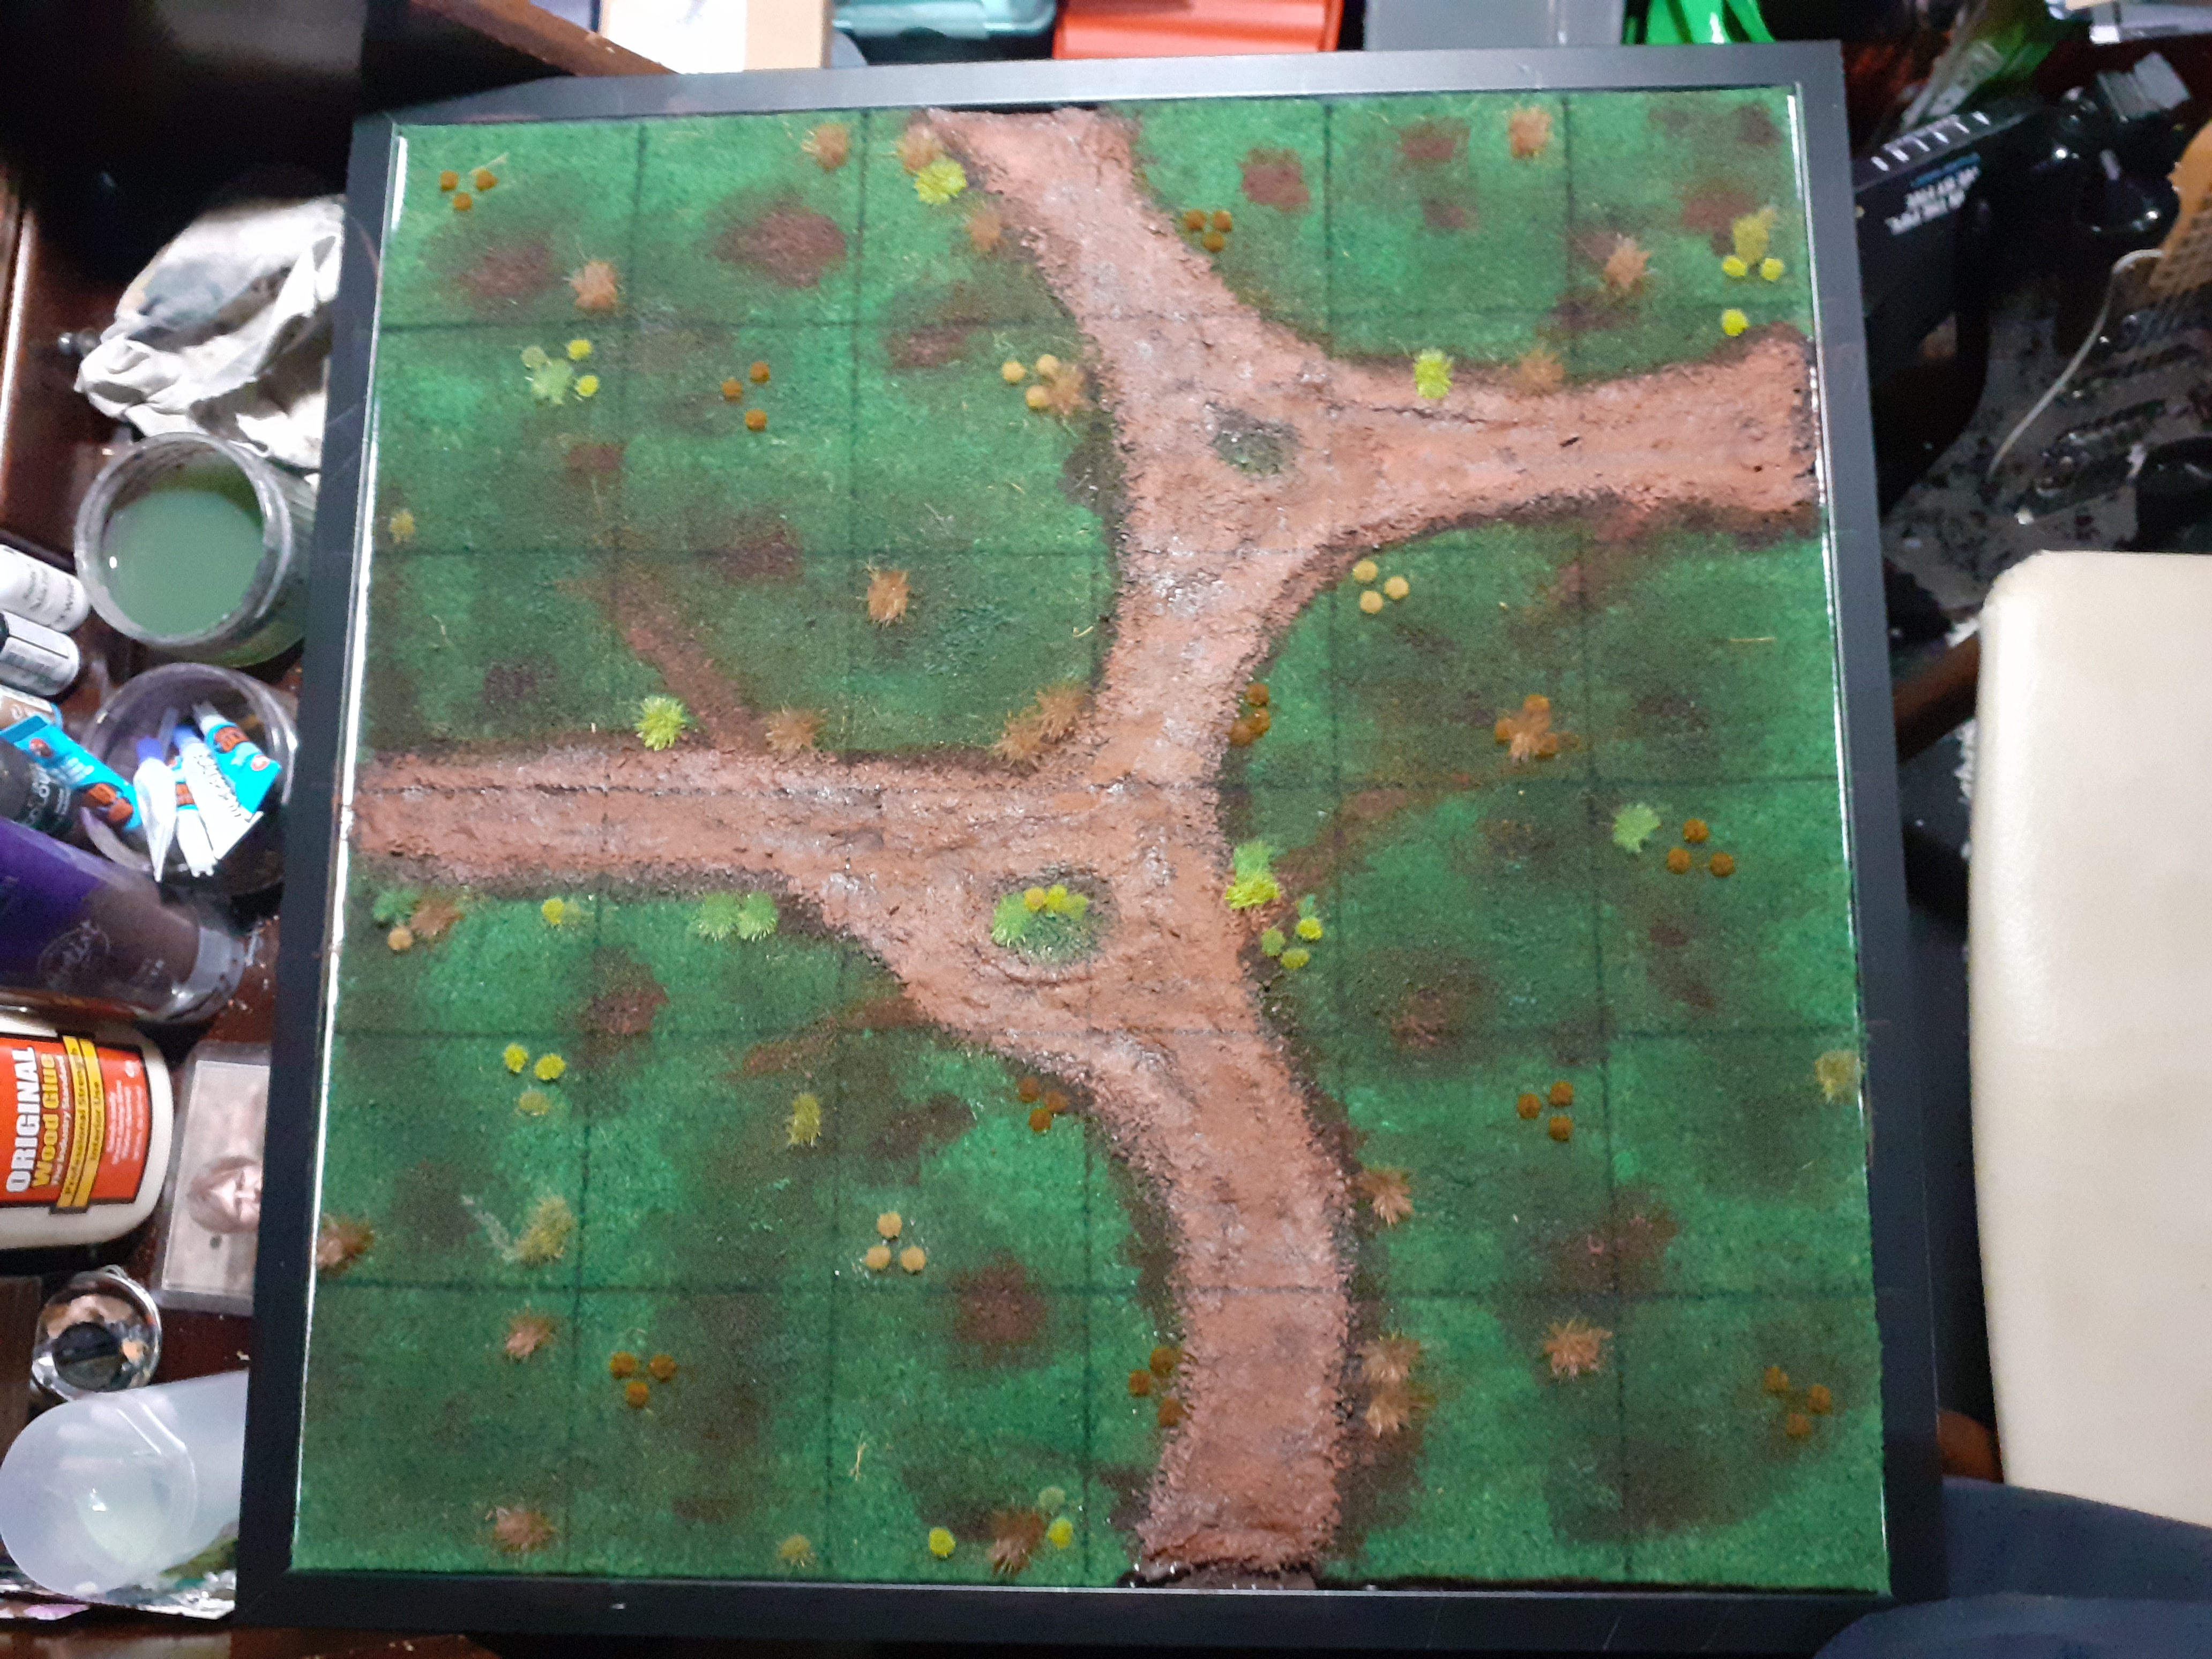
The bord is made of a fake grass matt from aldi that I squished cheap brown green and red acrylic paint from the works into with a sponge, the muddy track is a mix of filler and sand mixed with plastic and again squished in with a sponge.
Once the paint was fully dry the lines were added with a shape then a selection of grass tufts were stuck down with pva glue for some variety.

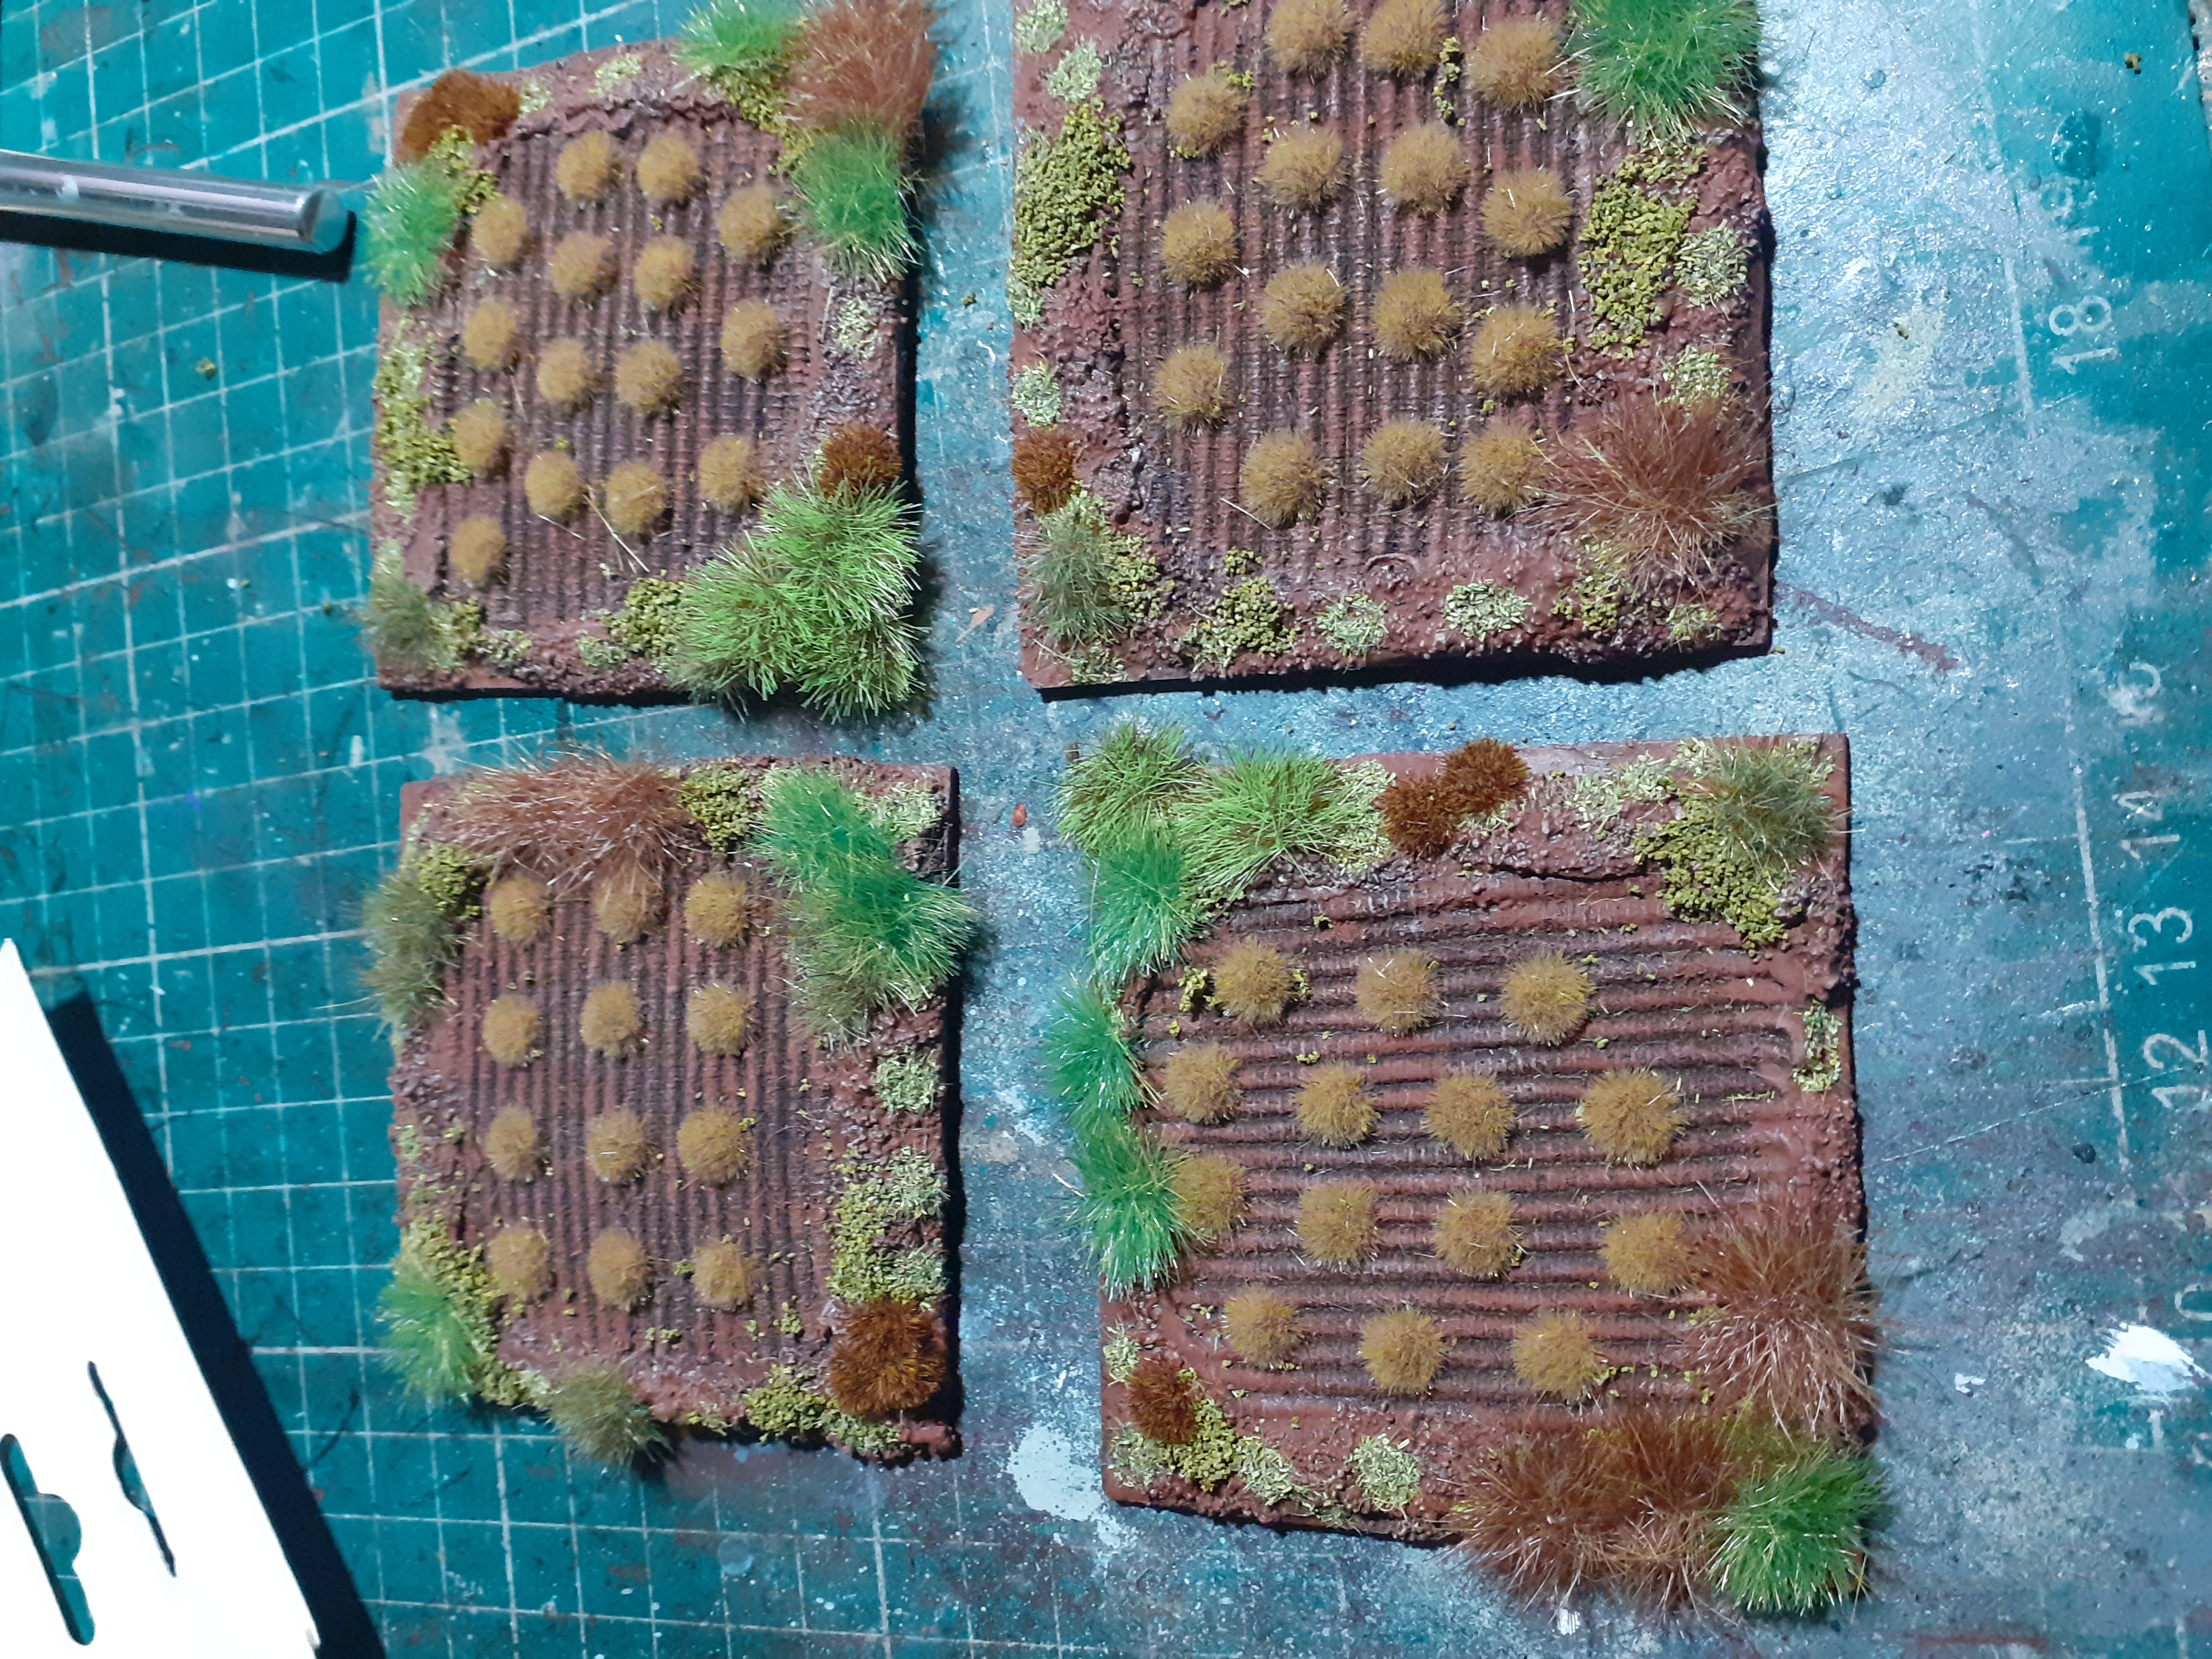
- The fields are cut from carpet tiles from poundand stuck to Cork squares. The edges were built up with Millput then coated I sand and plastic before painting in muddy colours, tufts were then added

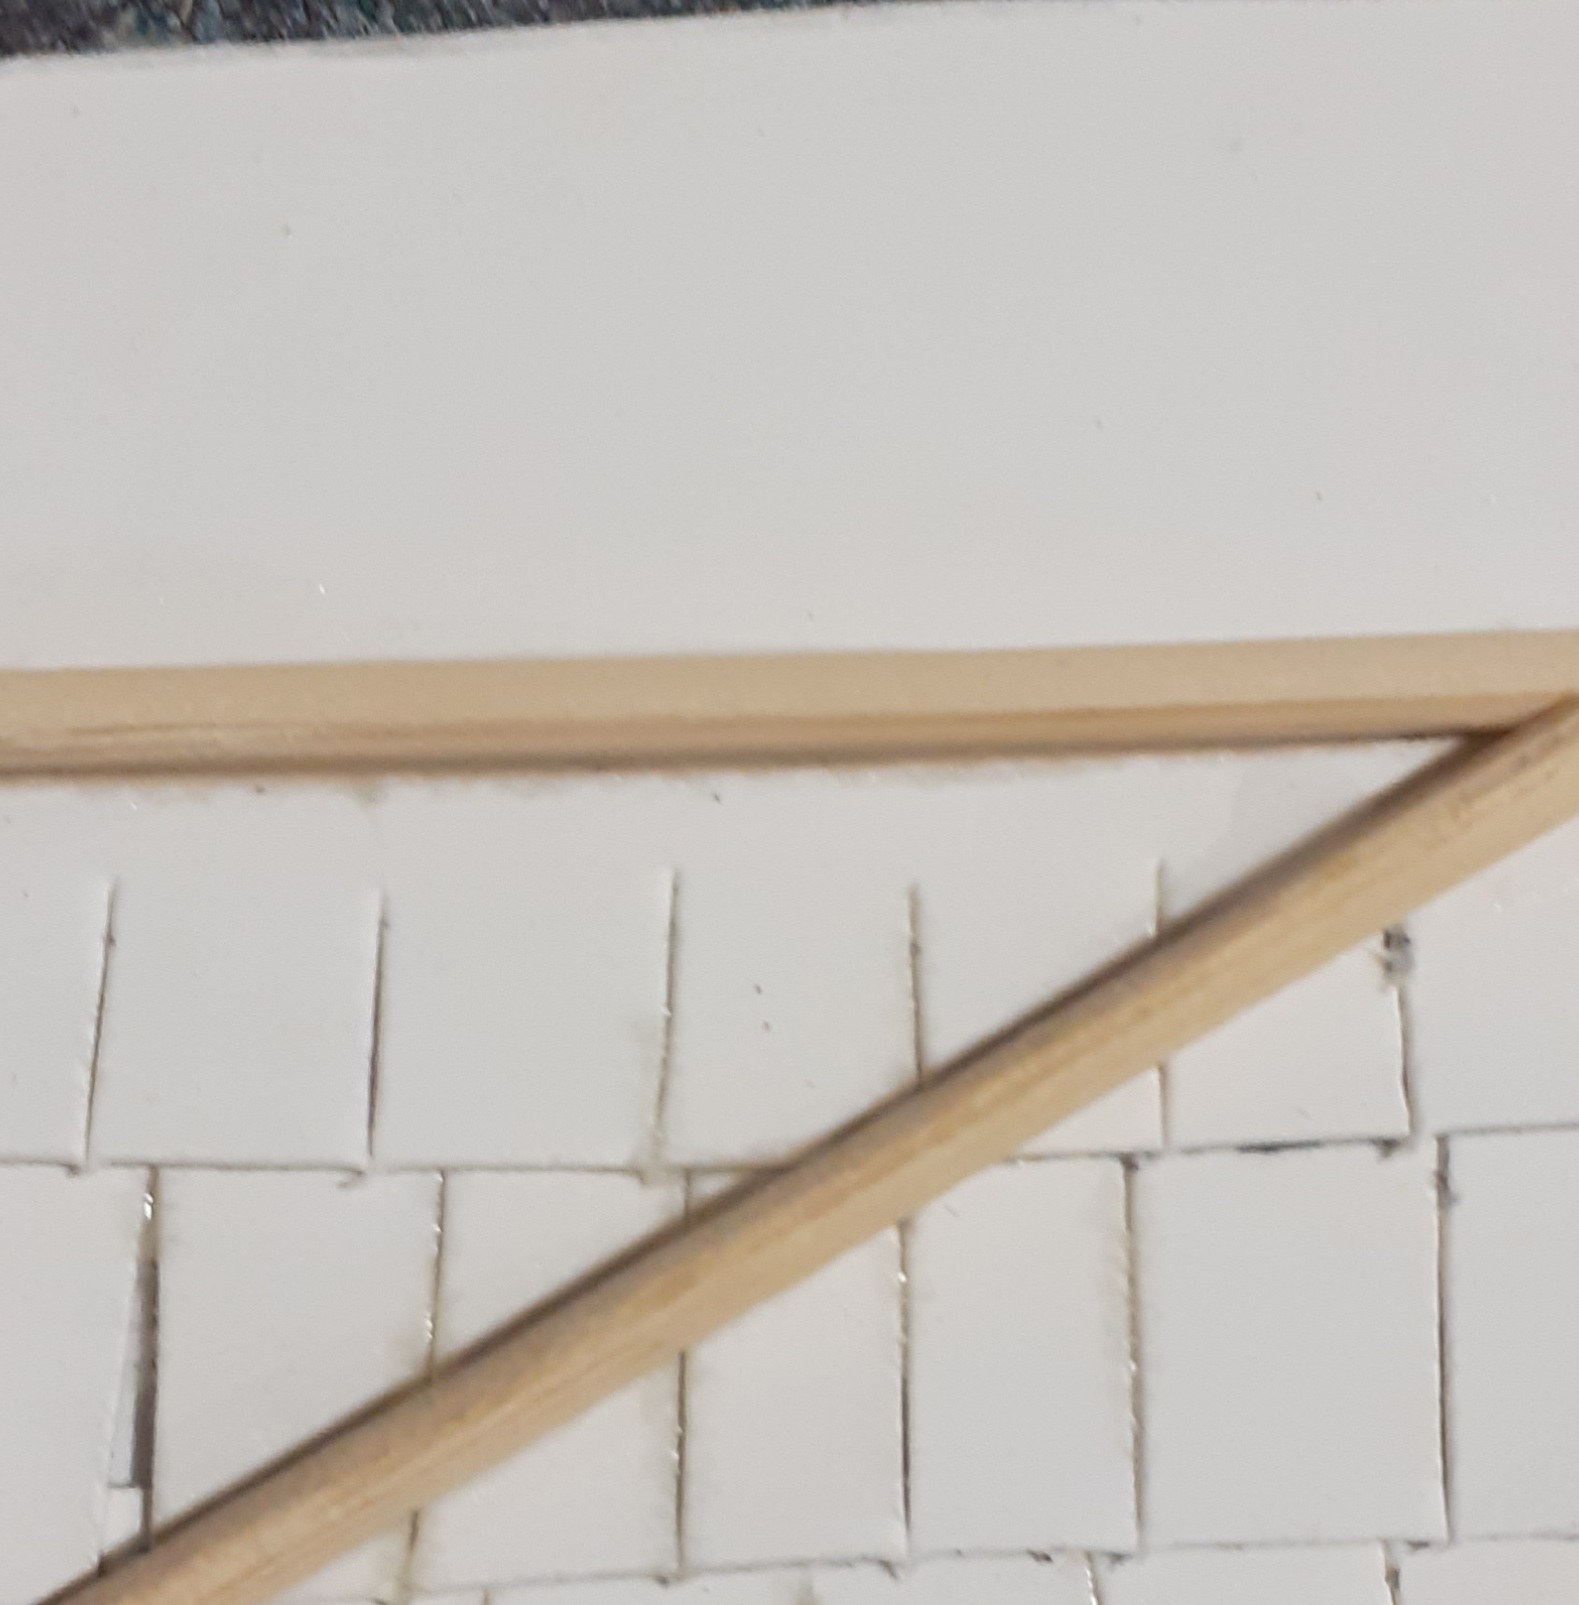
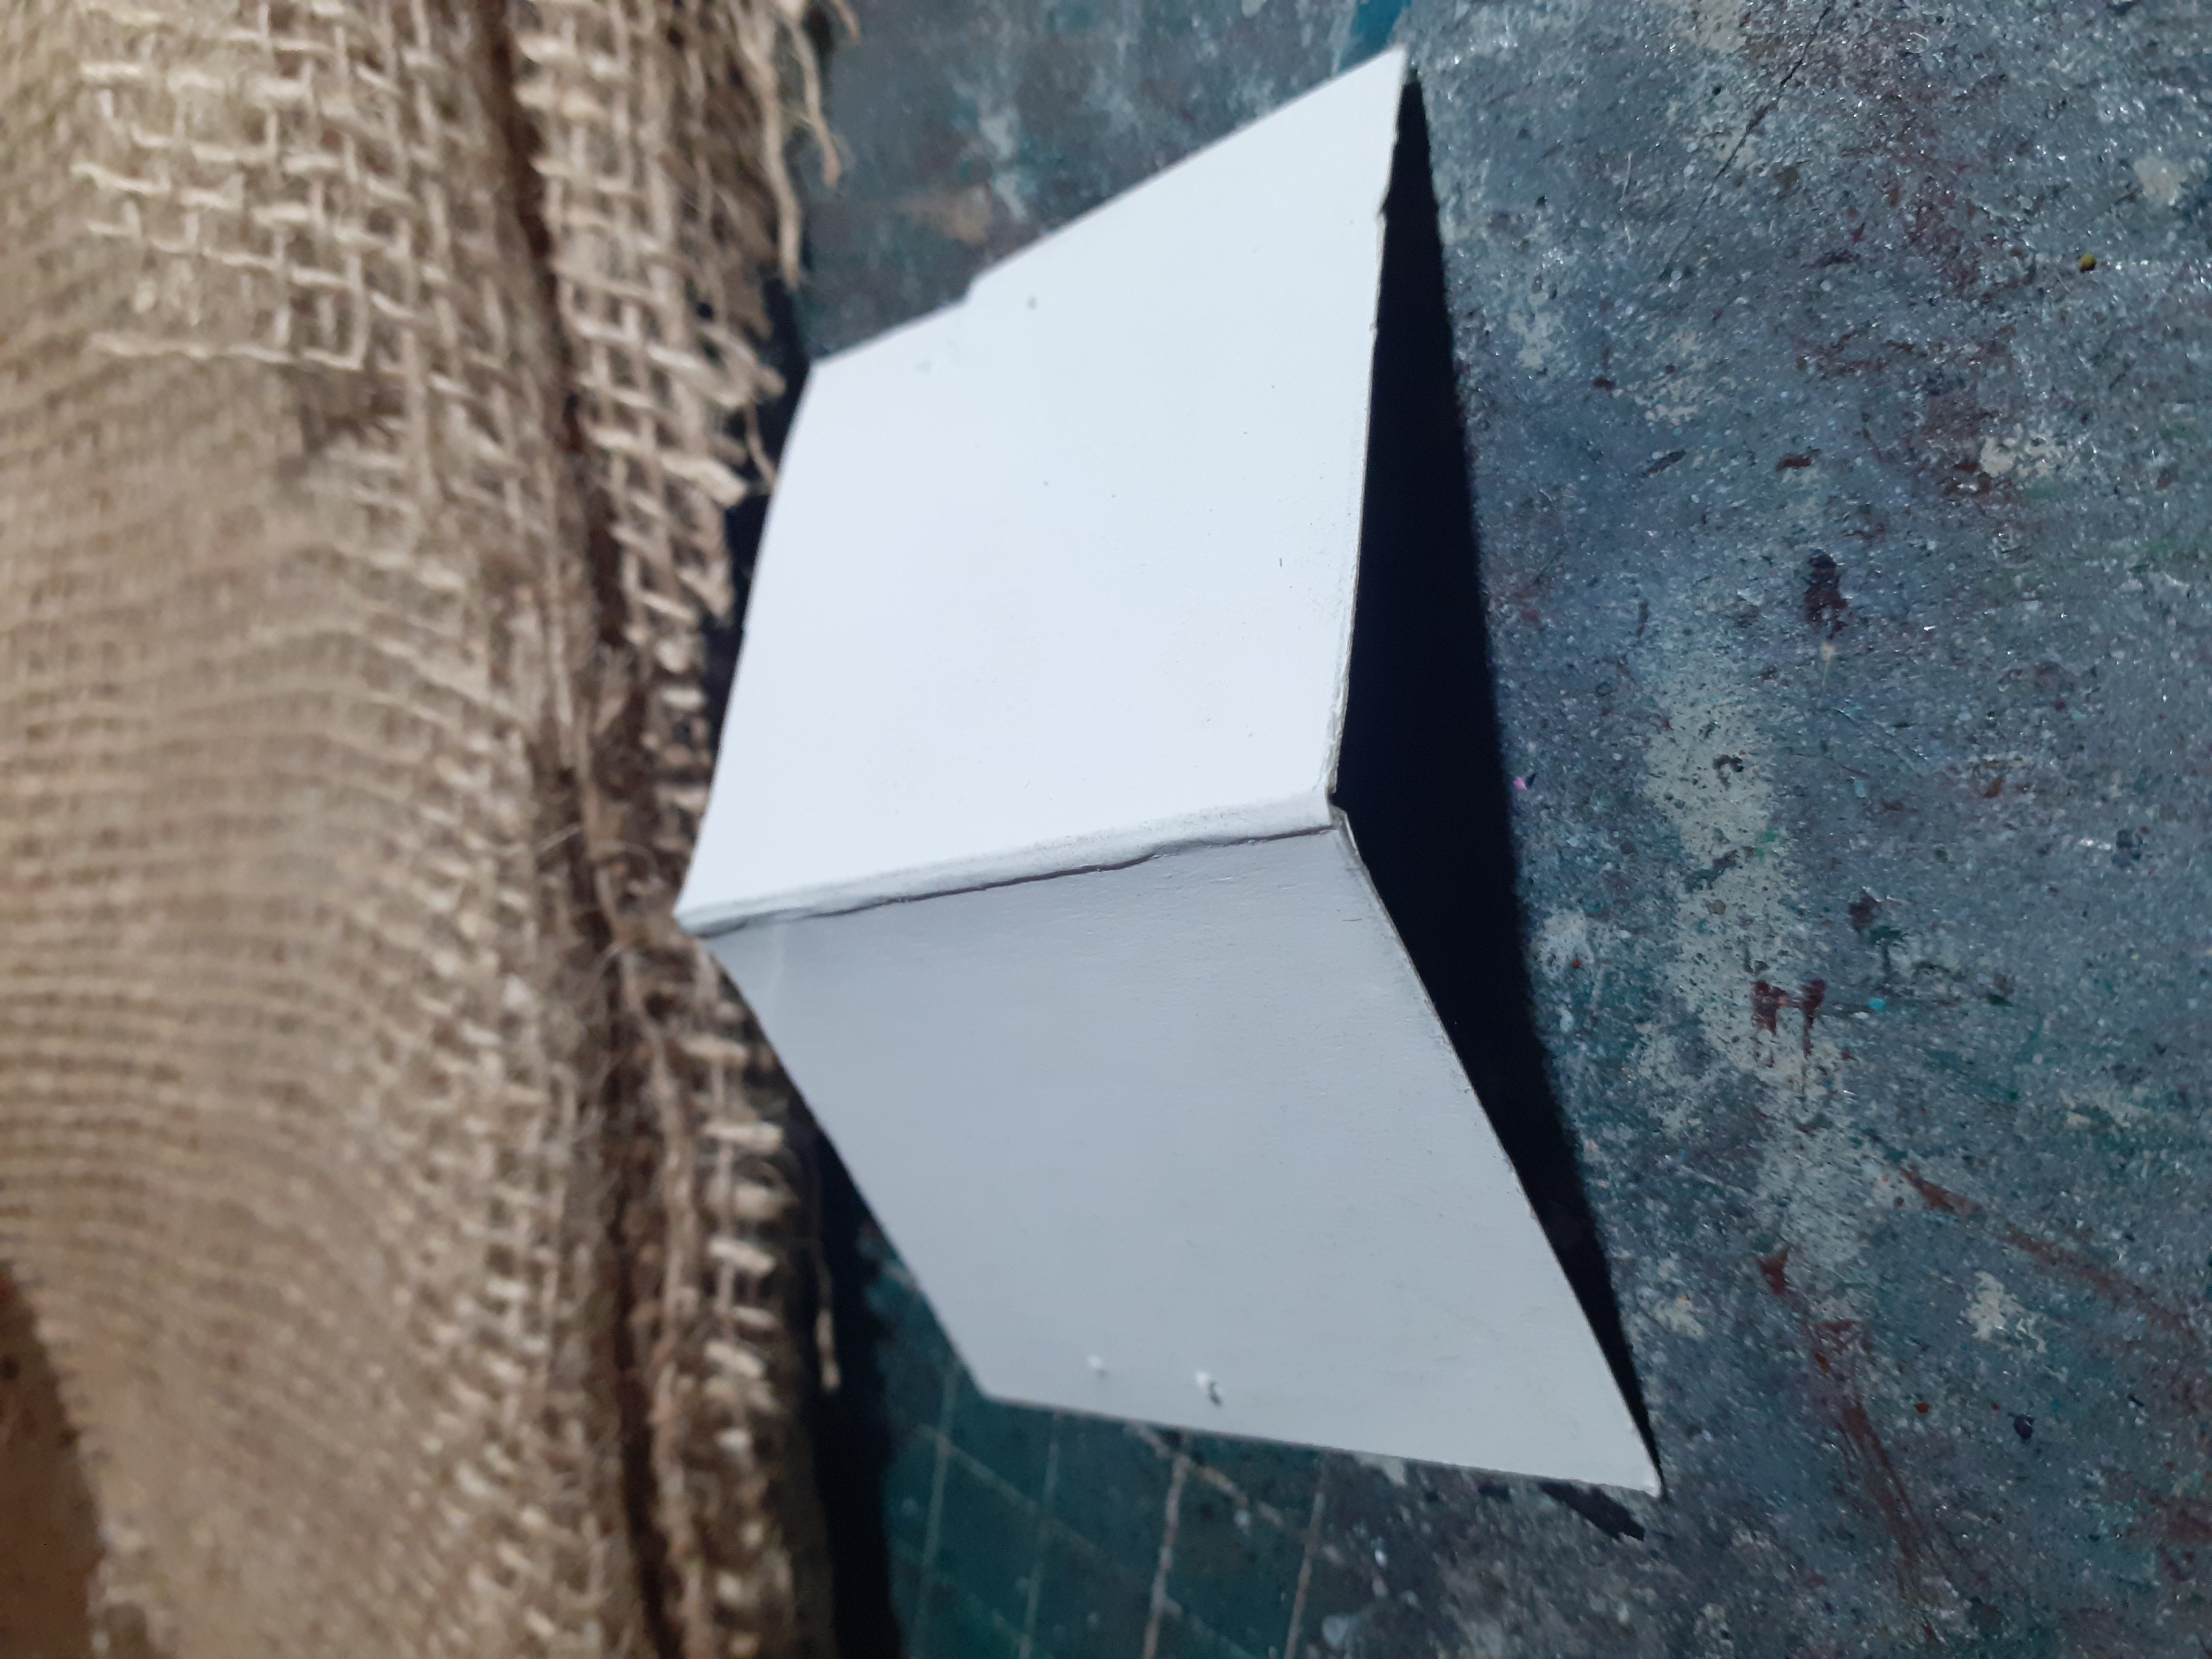
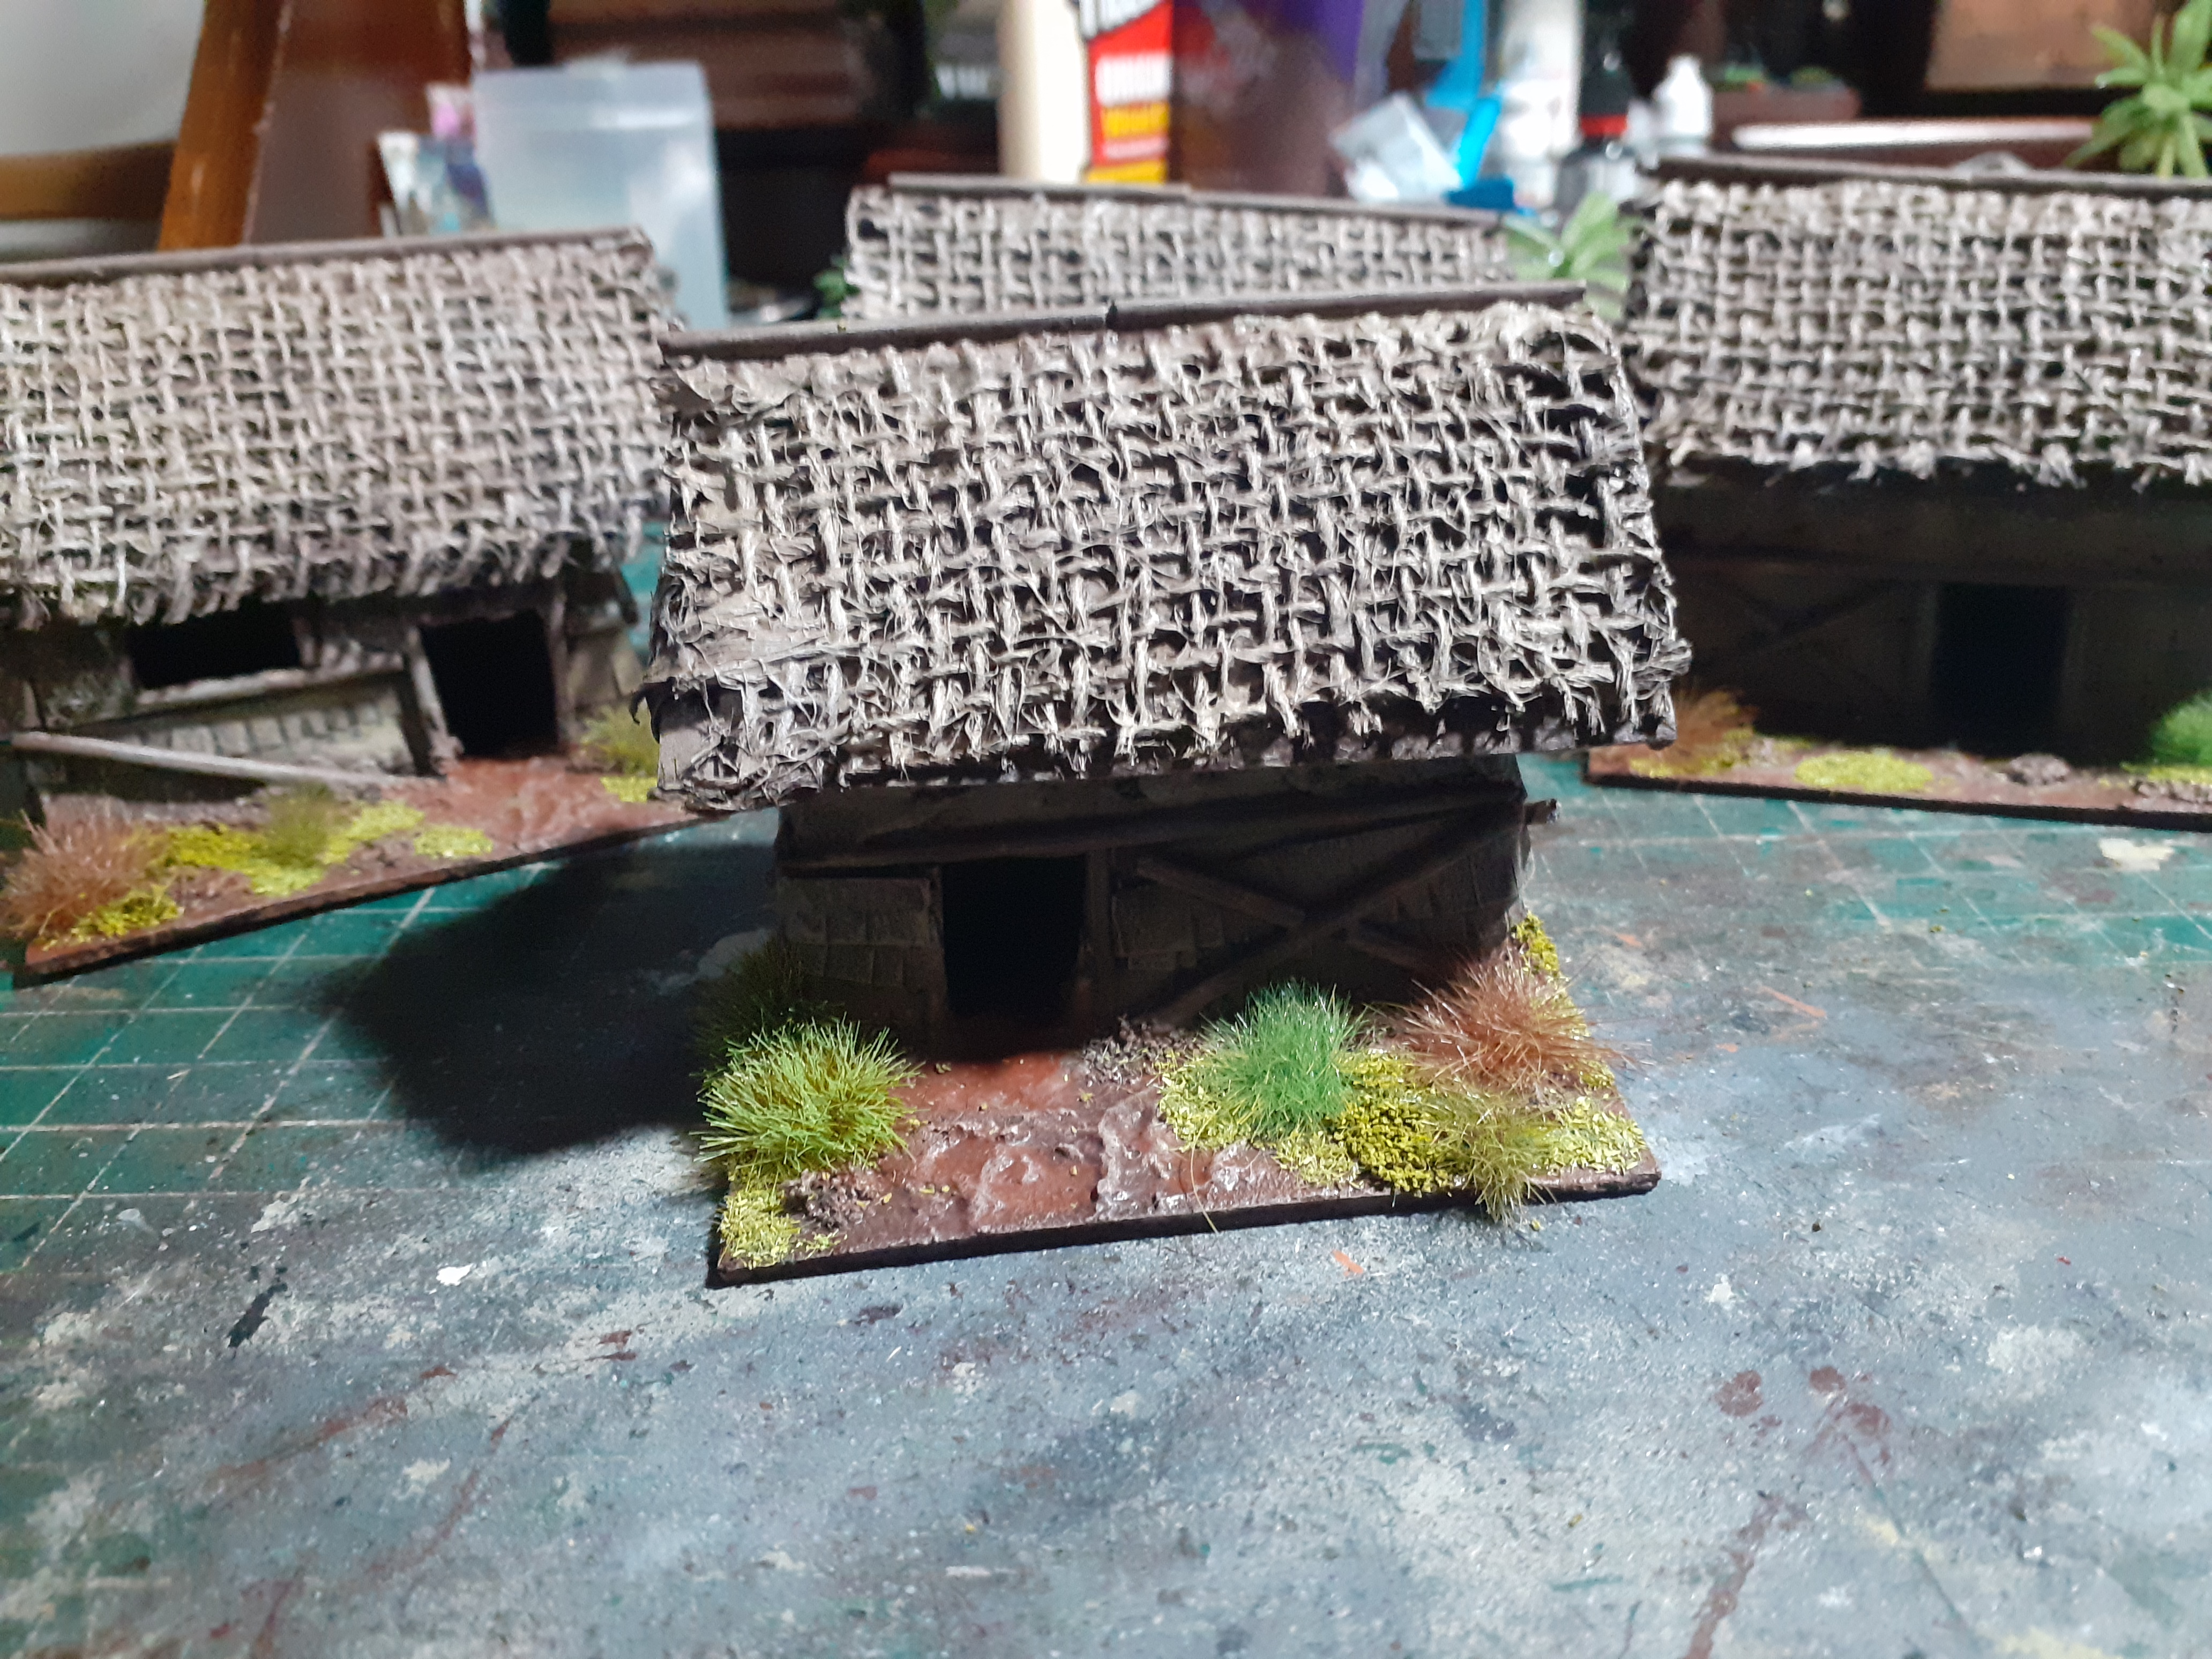
To make the buildings I made the basic shape from card from cereal packets, then glued cut up cocktail sticks as wooden beams. To give the walls some texture I used a thin coat of filler. The thatch roofs were made from hessian soaked in pva stick to card.
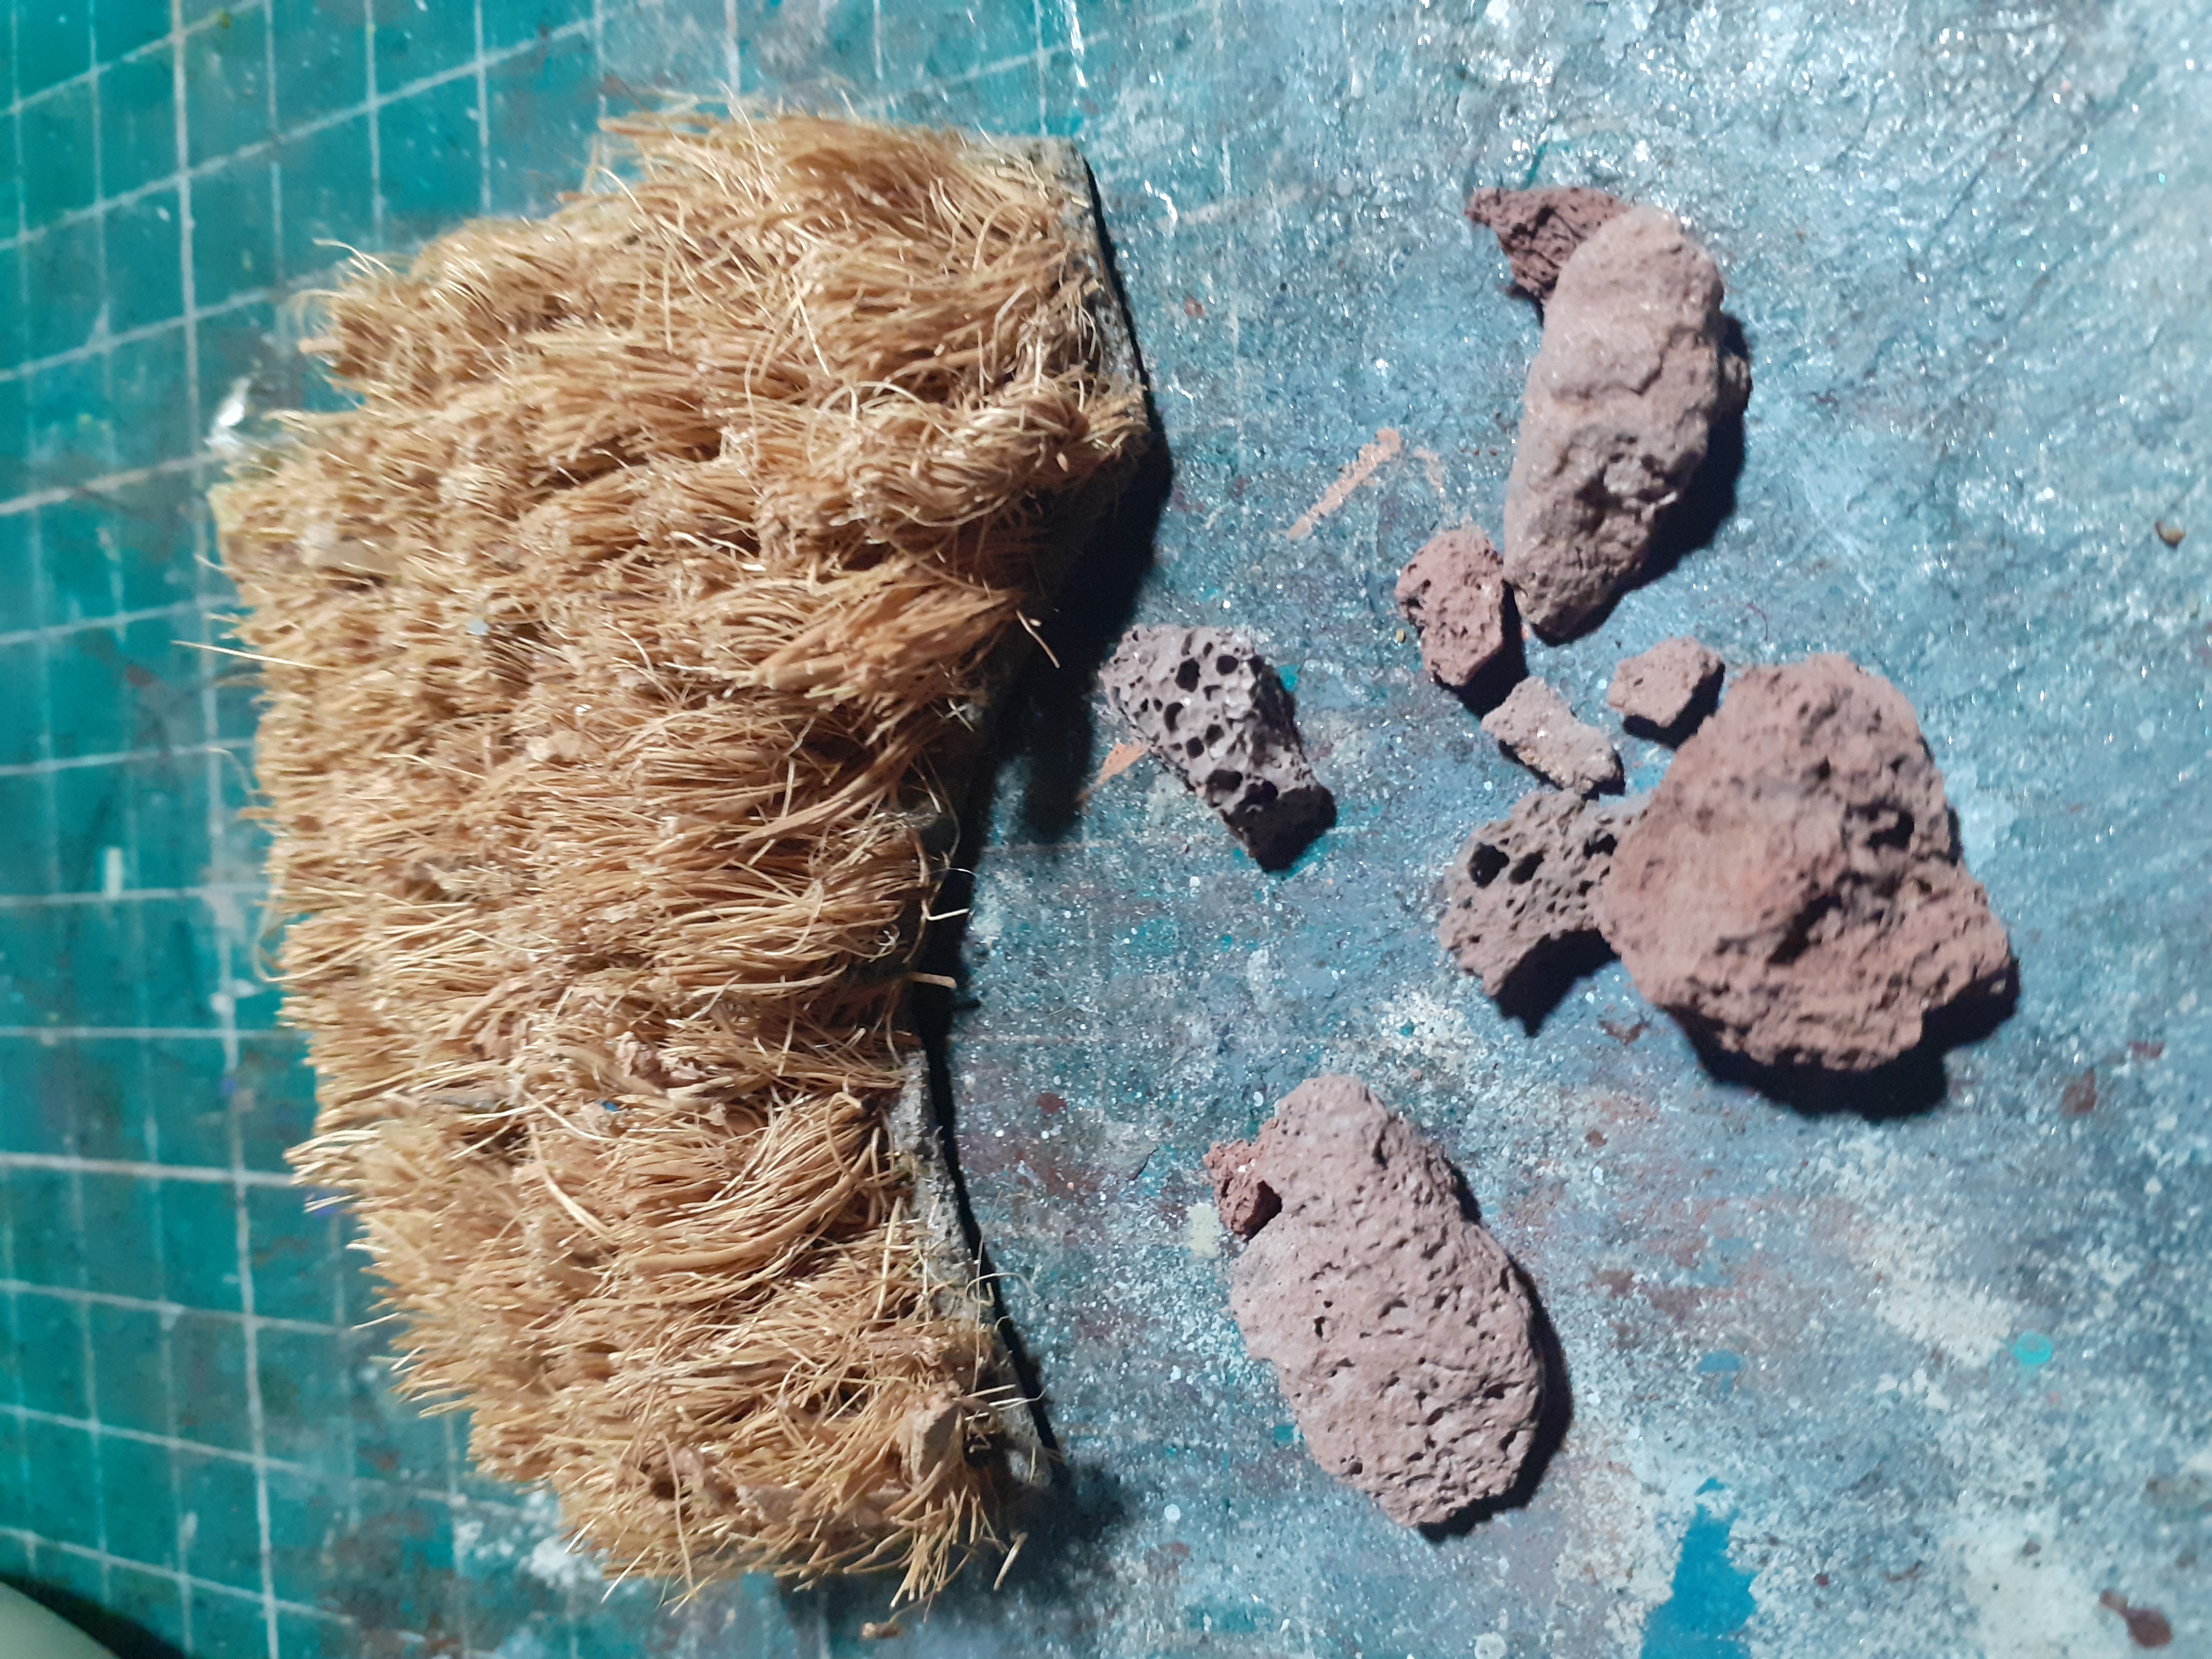 The jungle tiles and rocky areas are made from a mix of lava rock cut up door mat to give the effect of long grass and bushes puttied to Cork with plastic palm trees added in
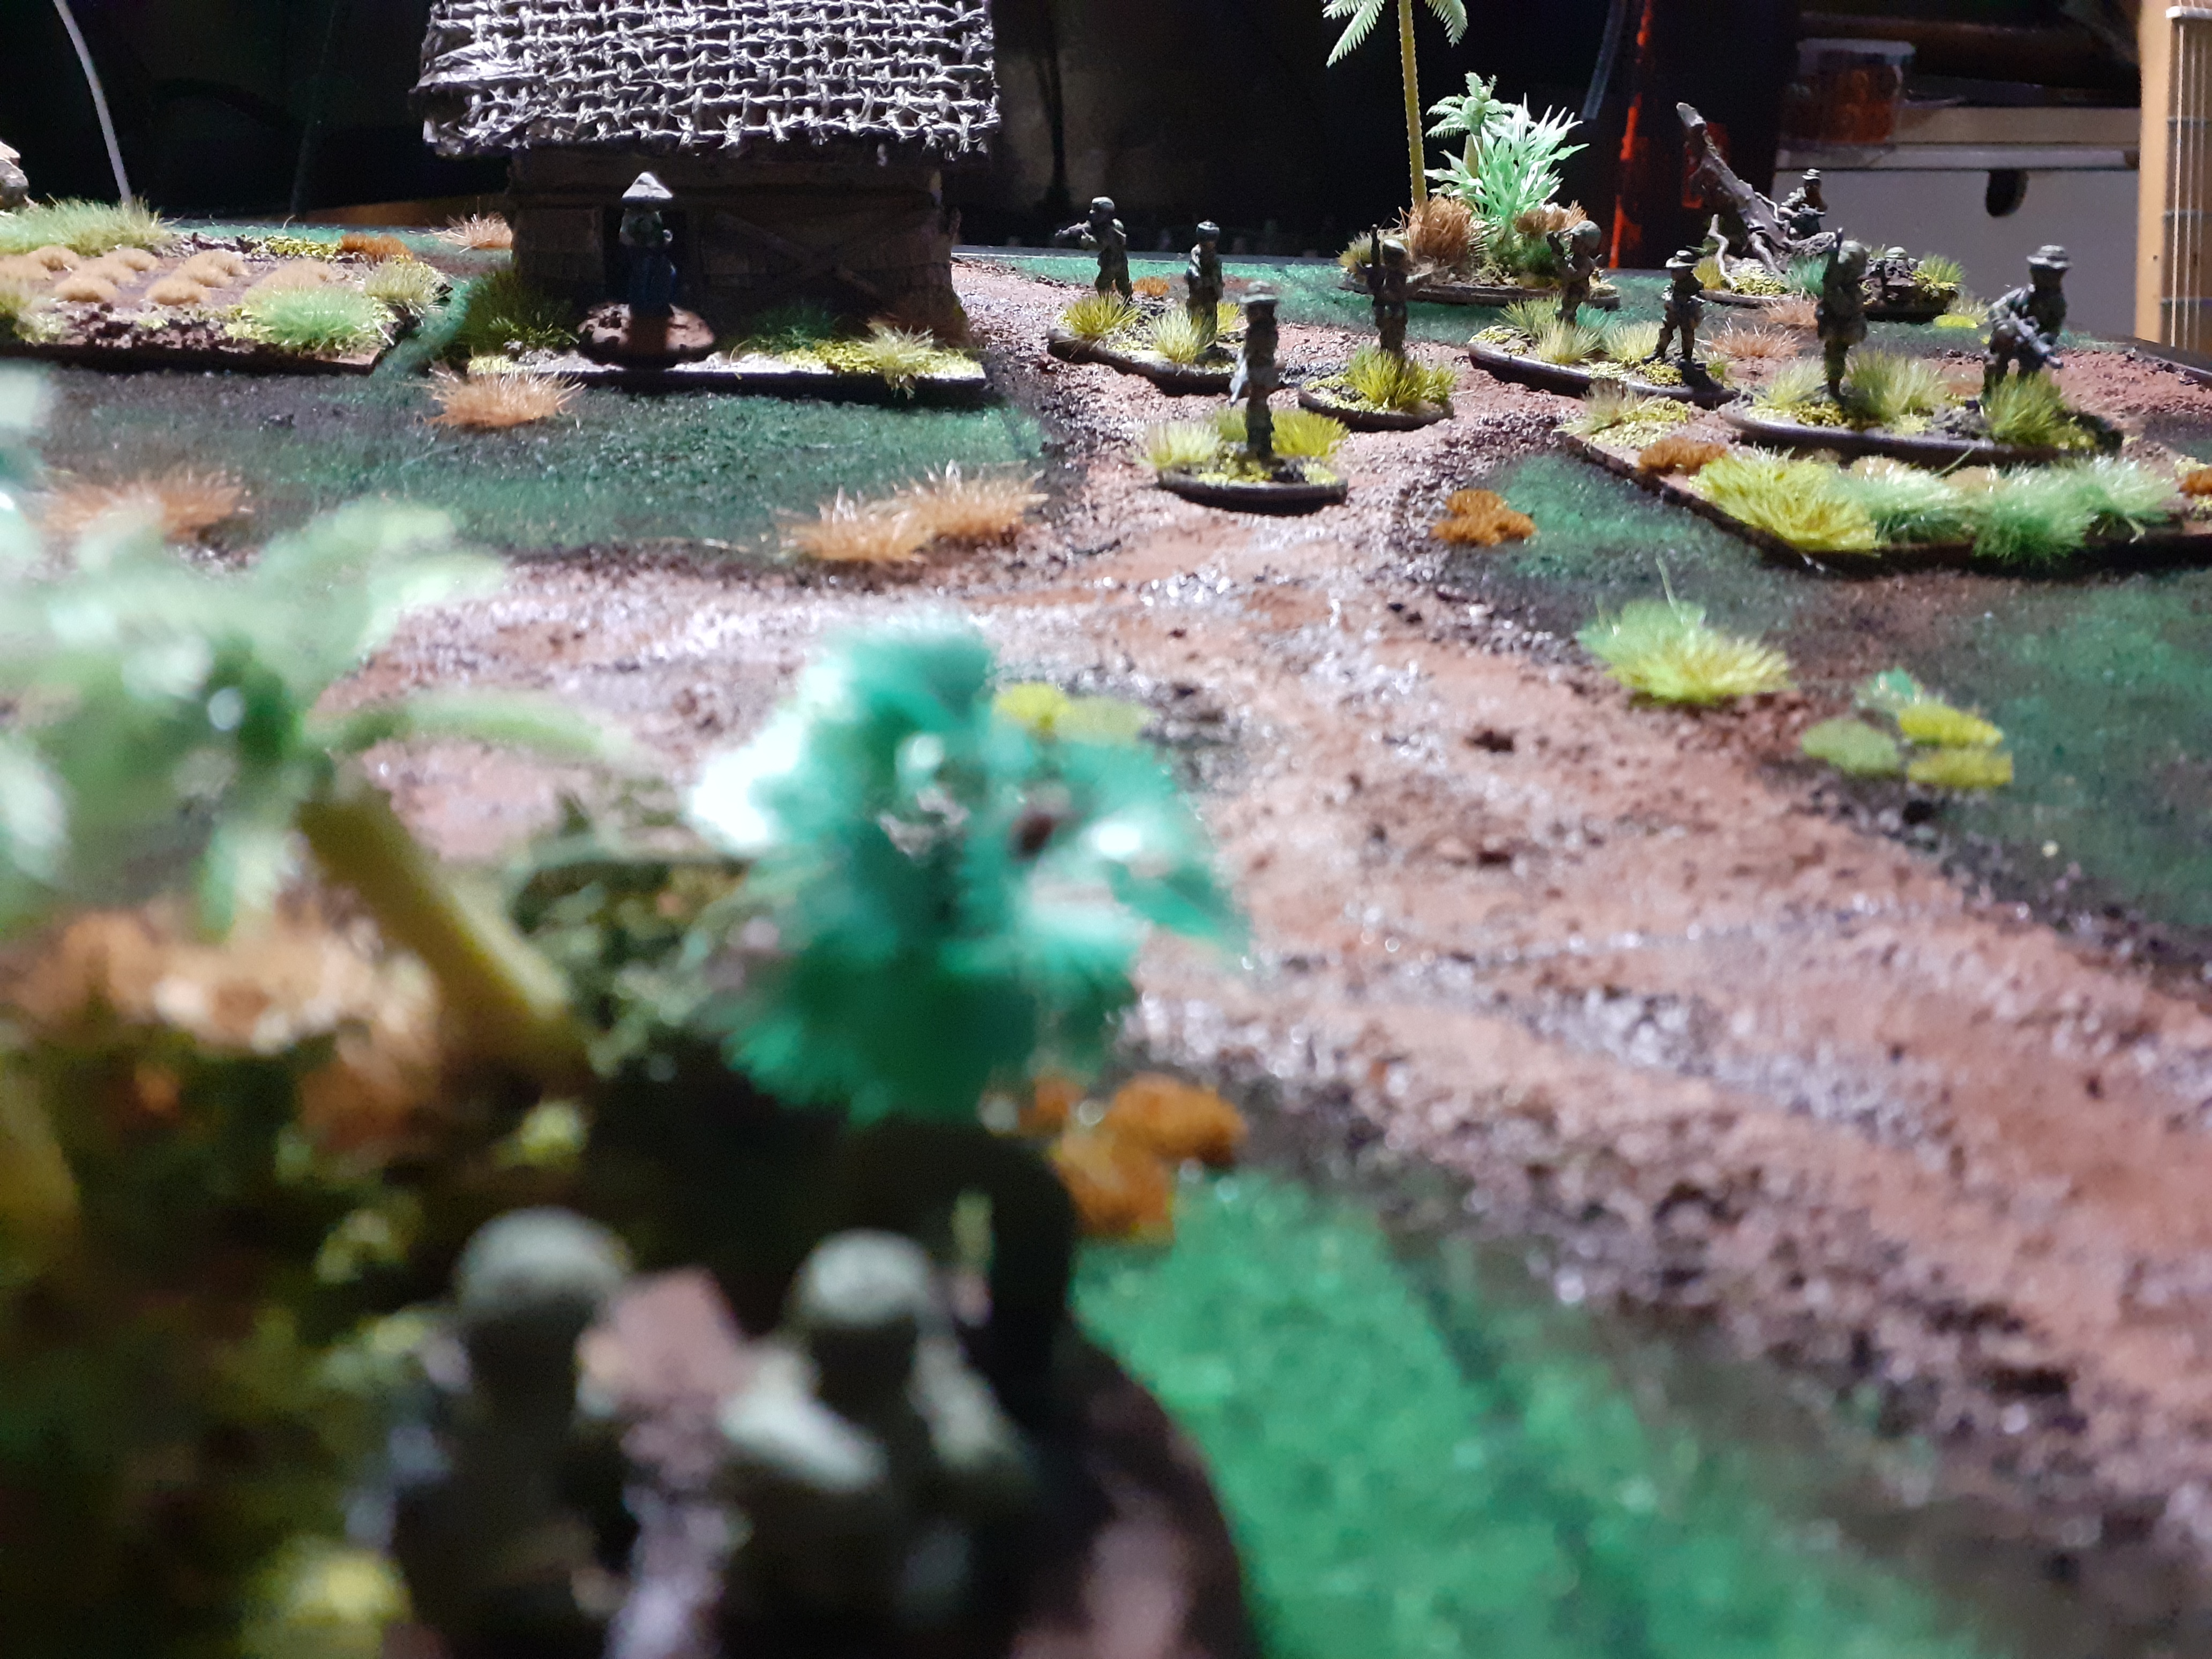
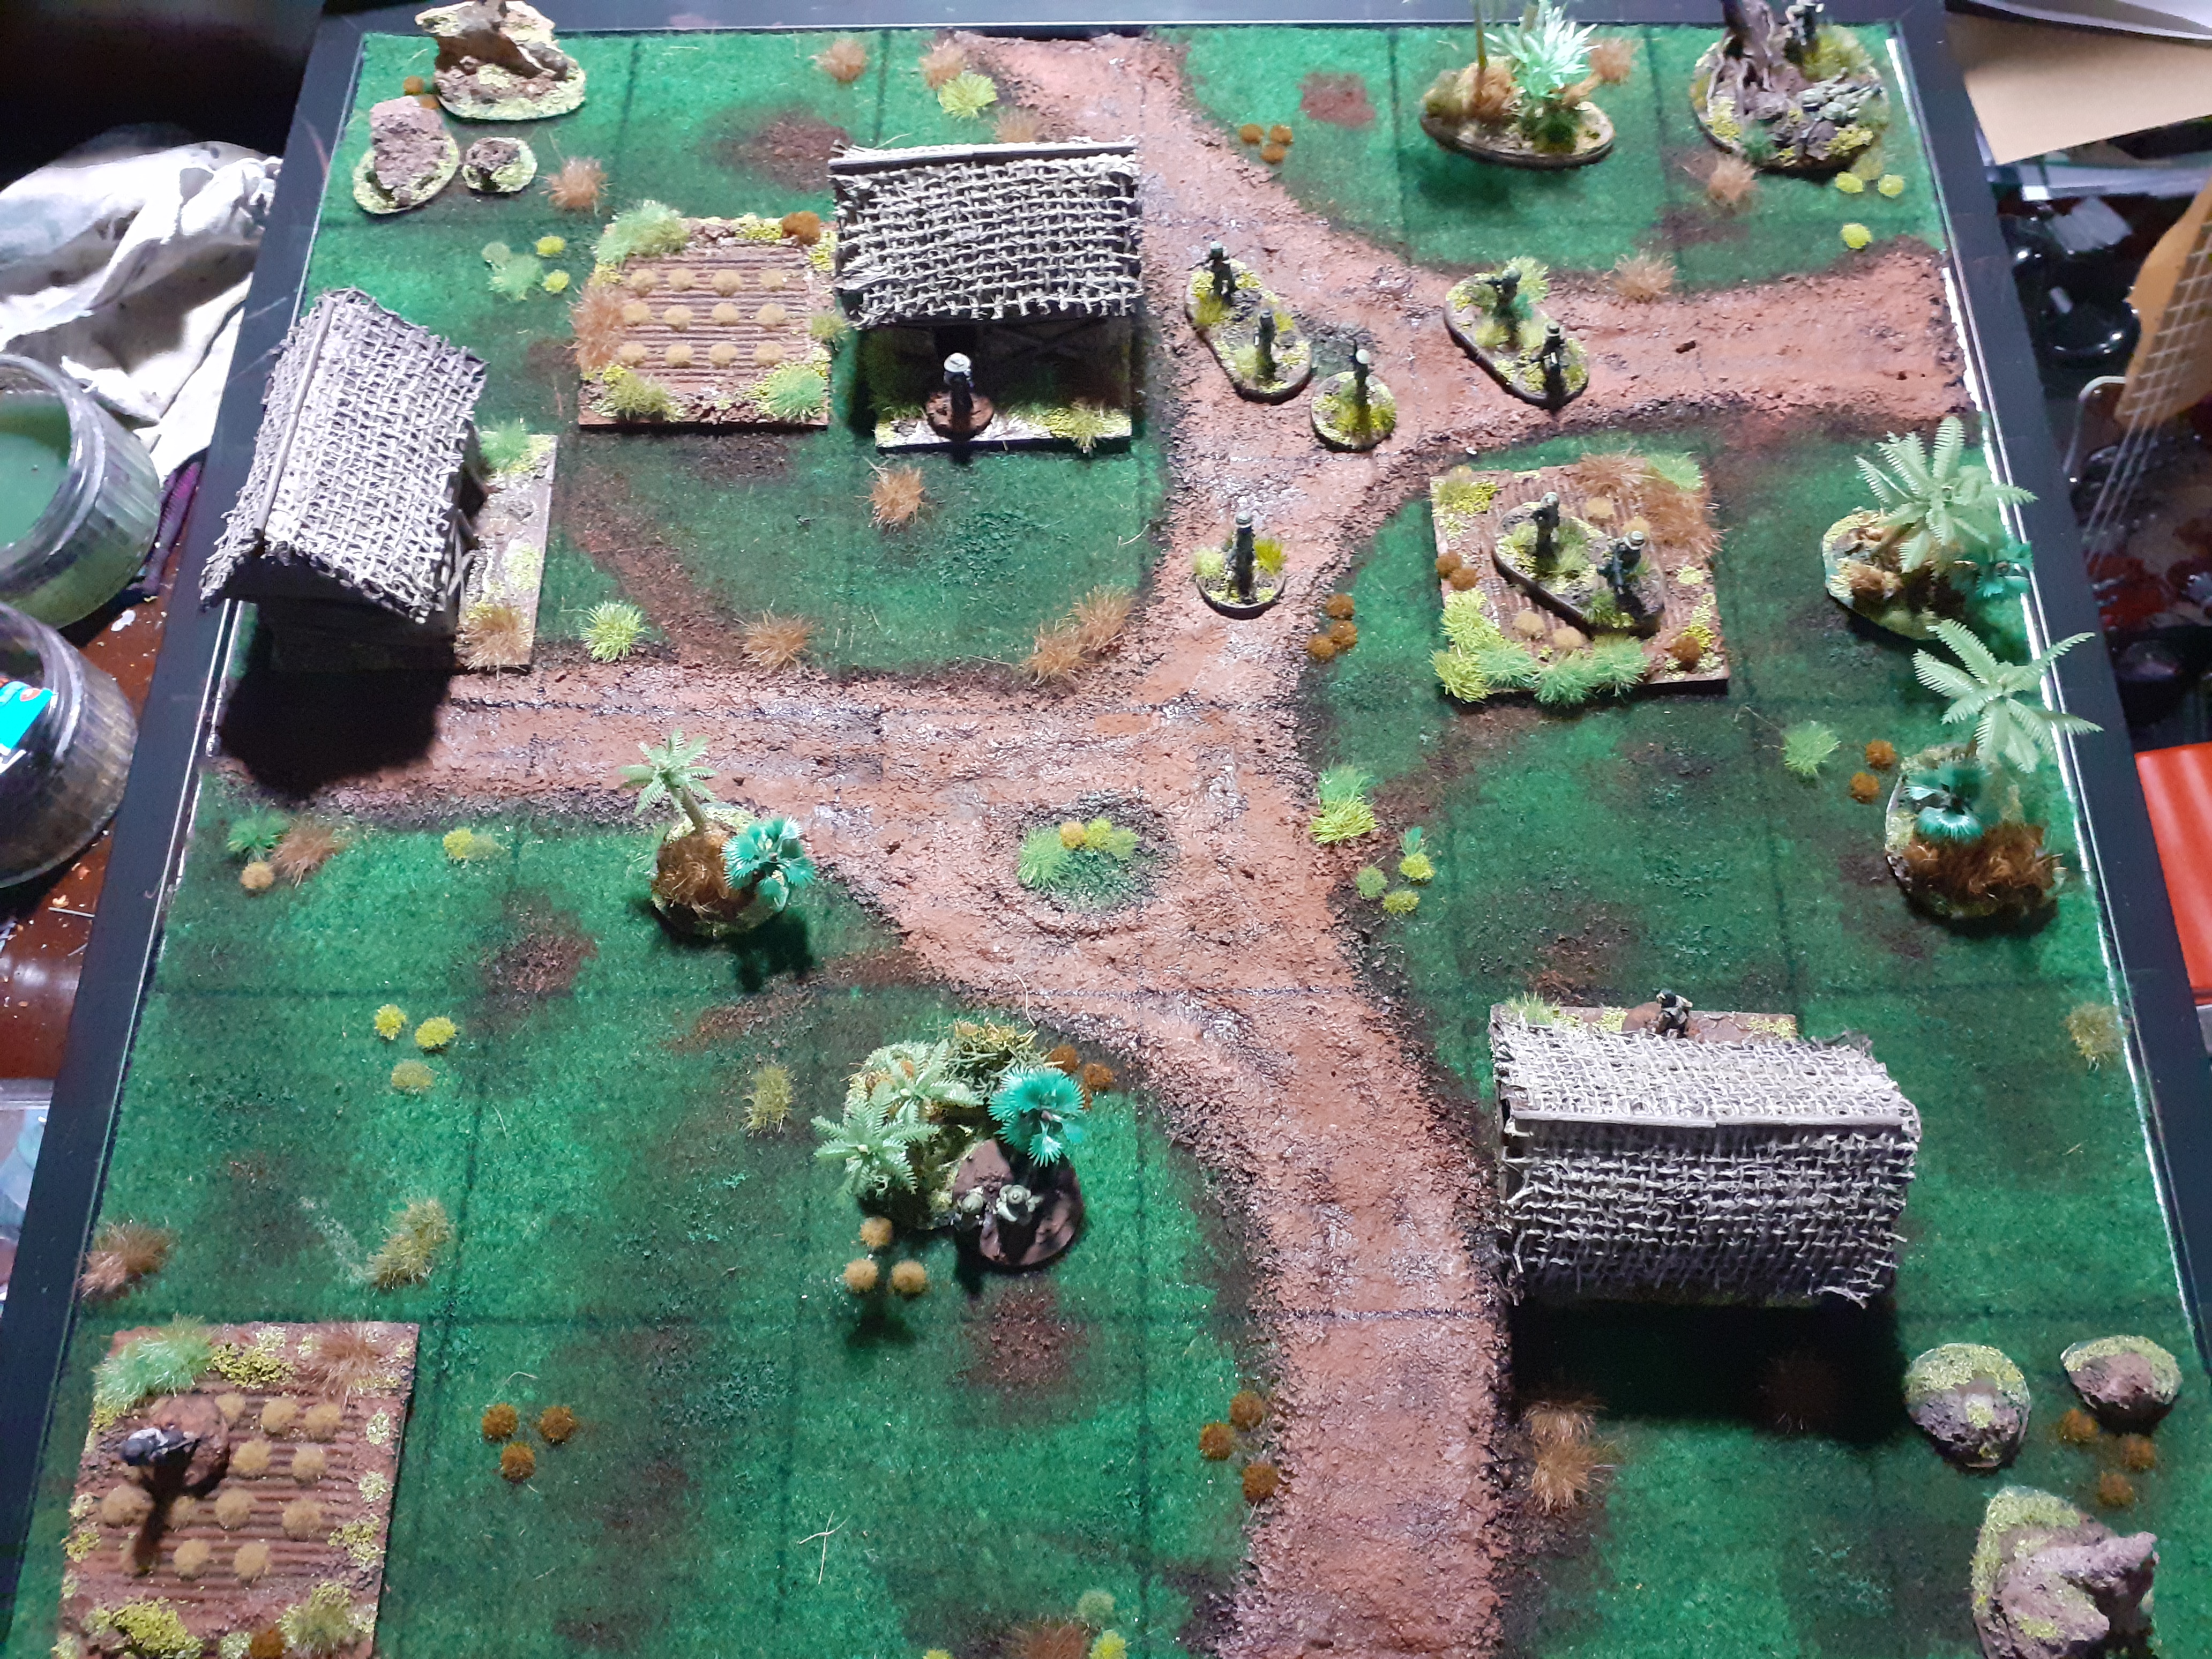

The board all set up for an afternoons gaming
Having a load of terrain on the table definitely helps with the immersion of the game.


