Gorram’s Grand Army Project


Recommendations: 753
About the Project
One dog's quest to have more painted armies than unpainted
Related Genre: General
This Project is Active
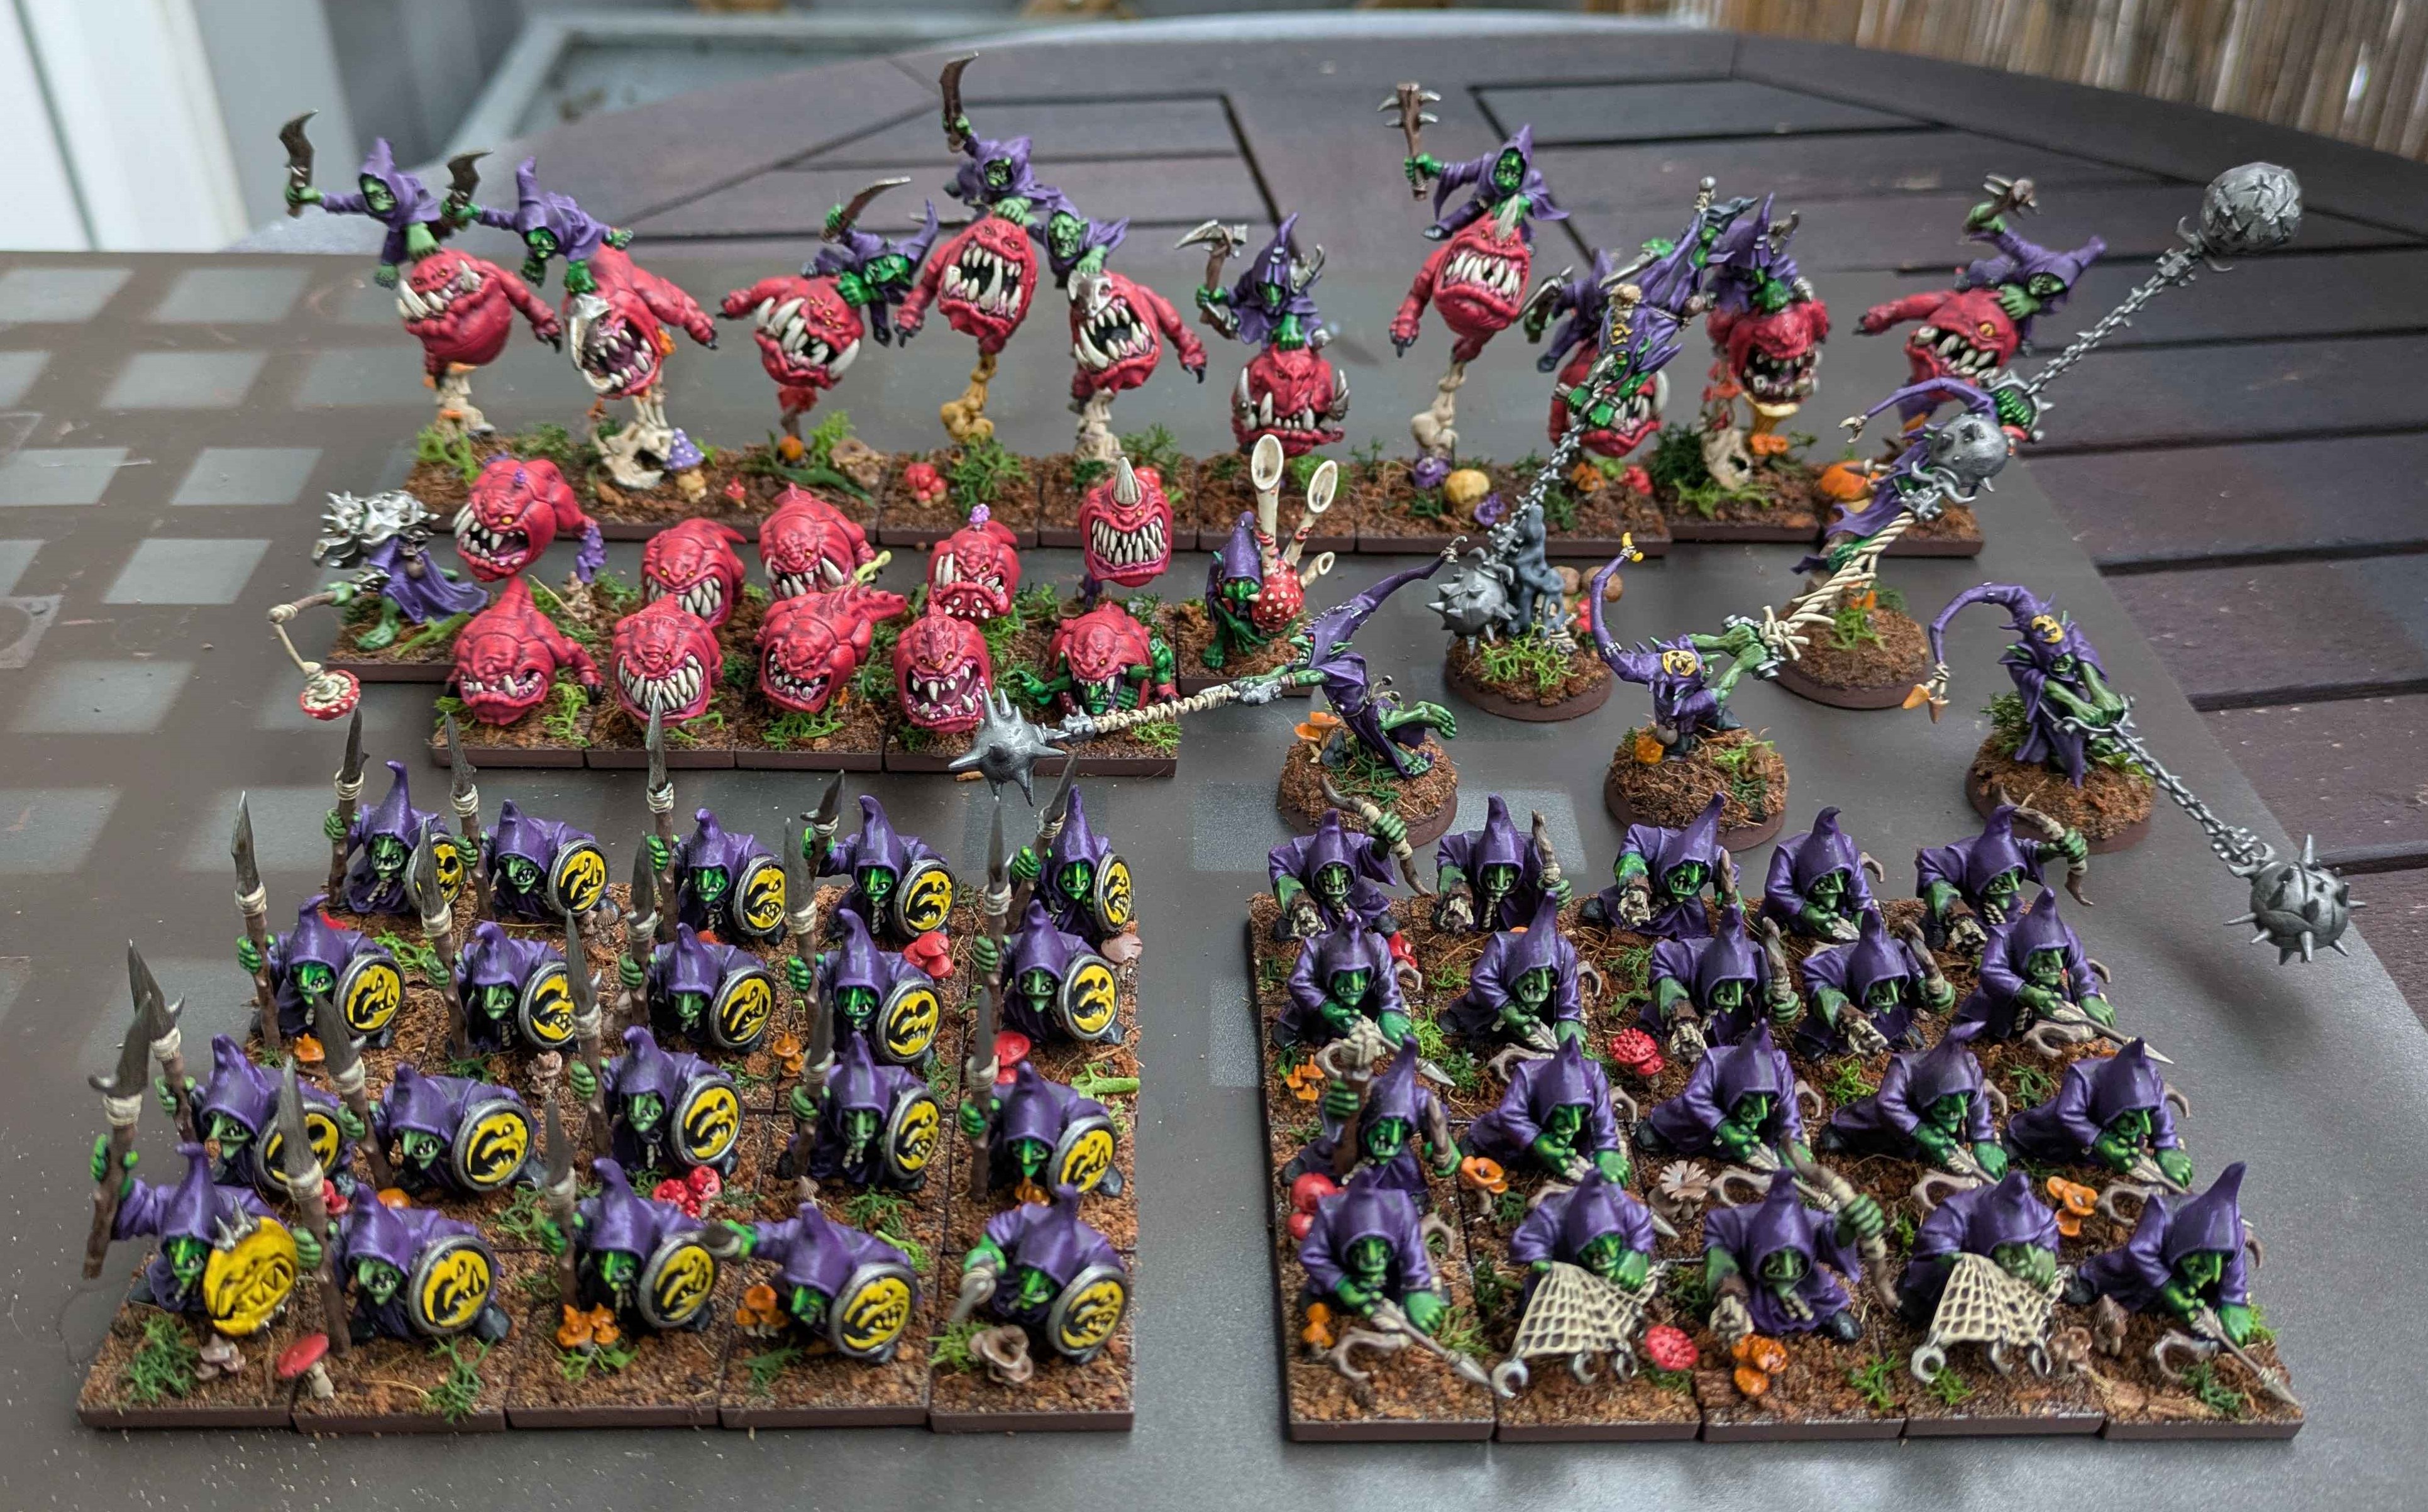
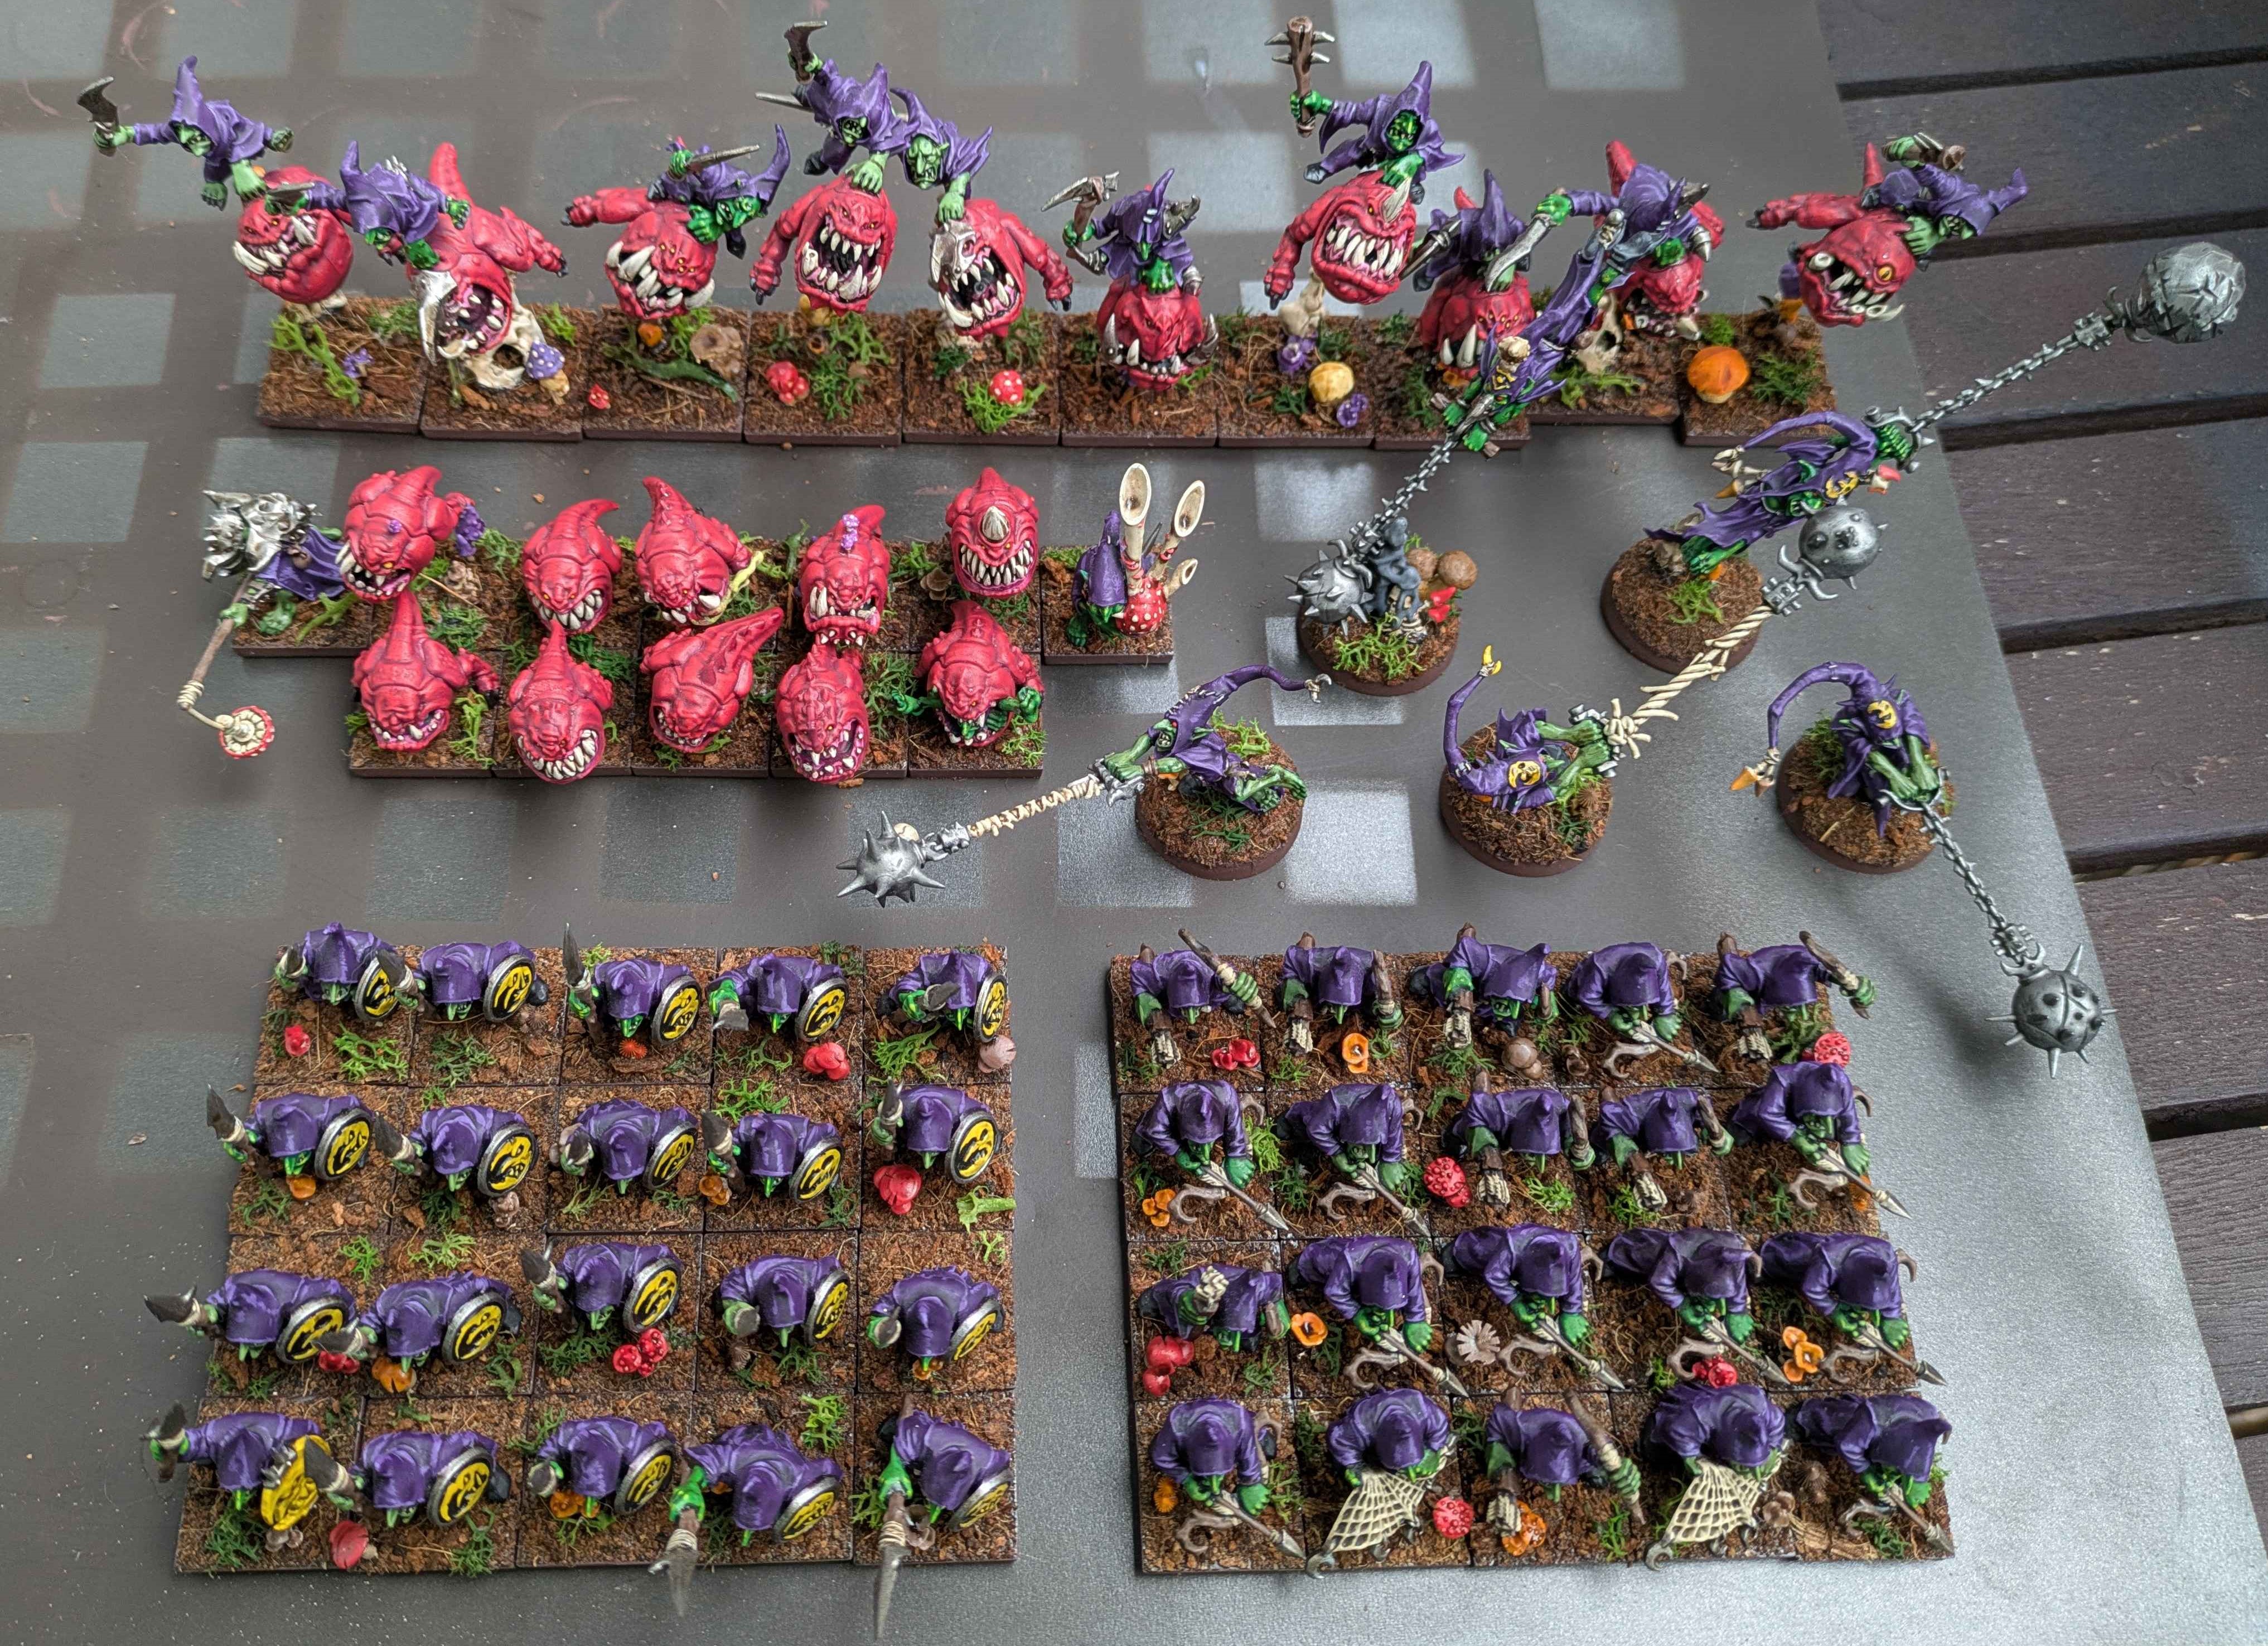
Night Goblins Part 11
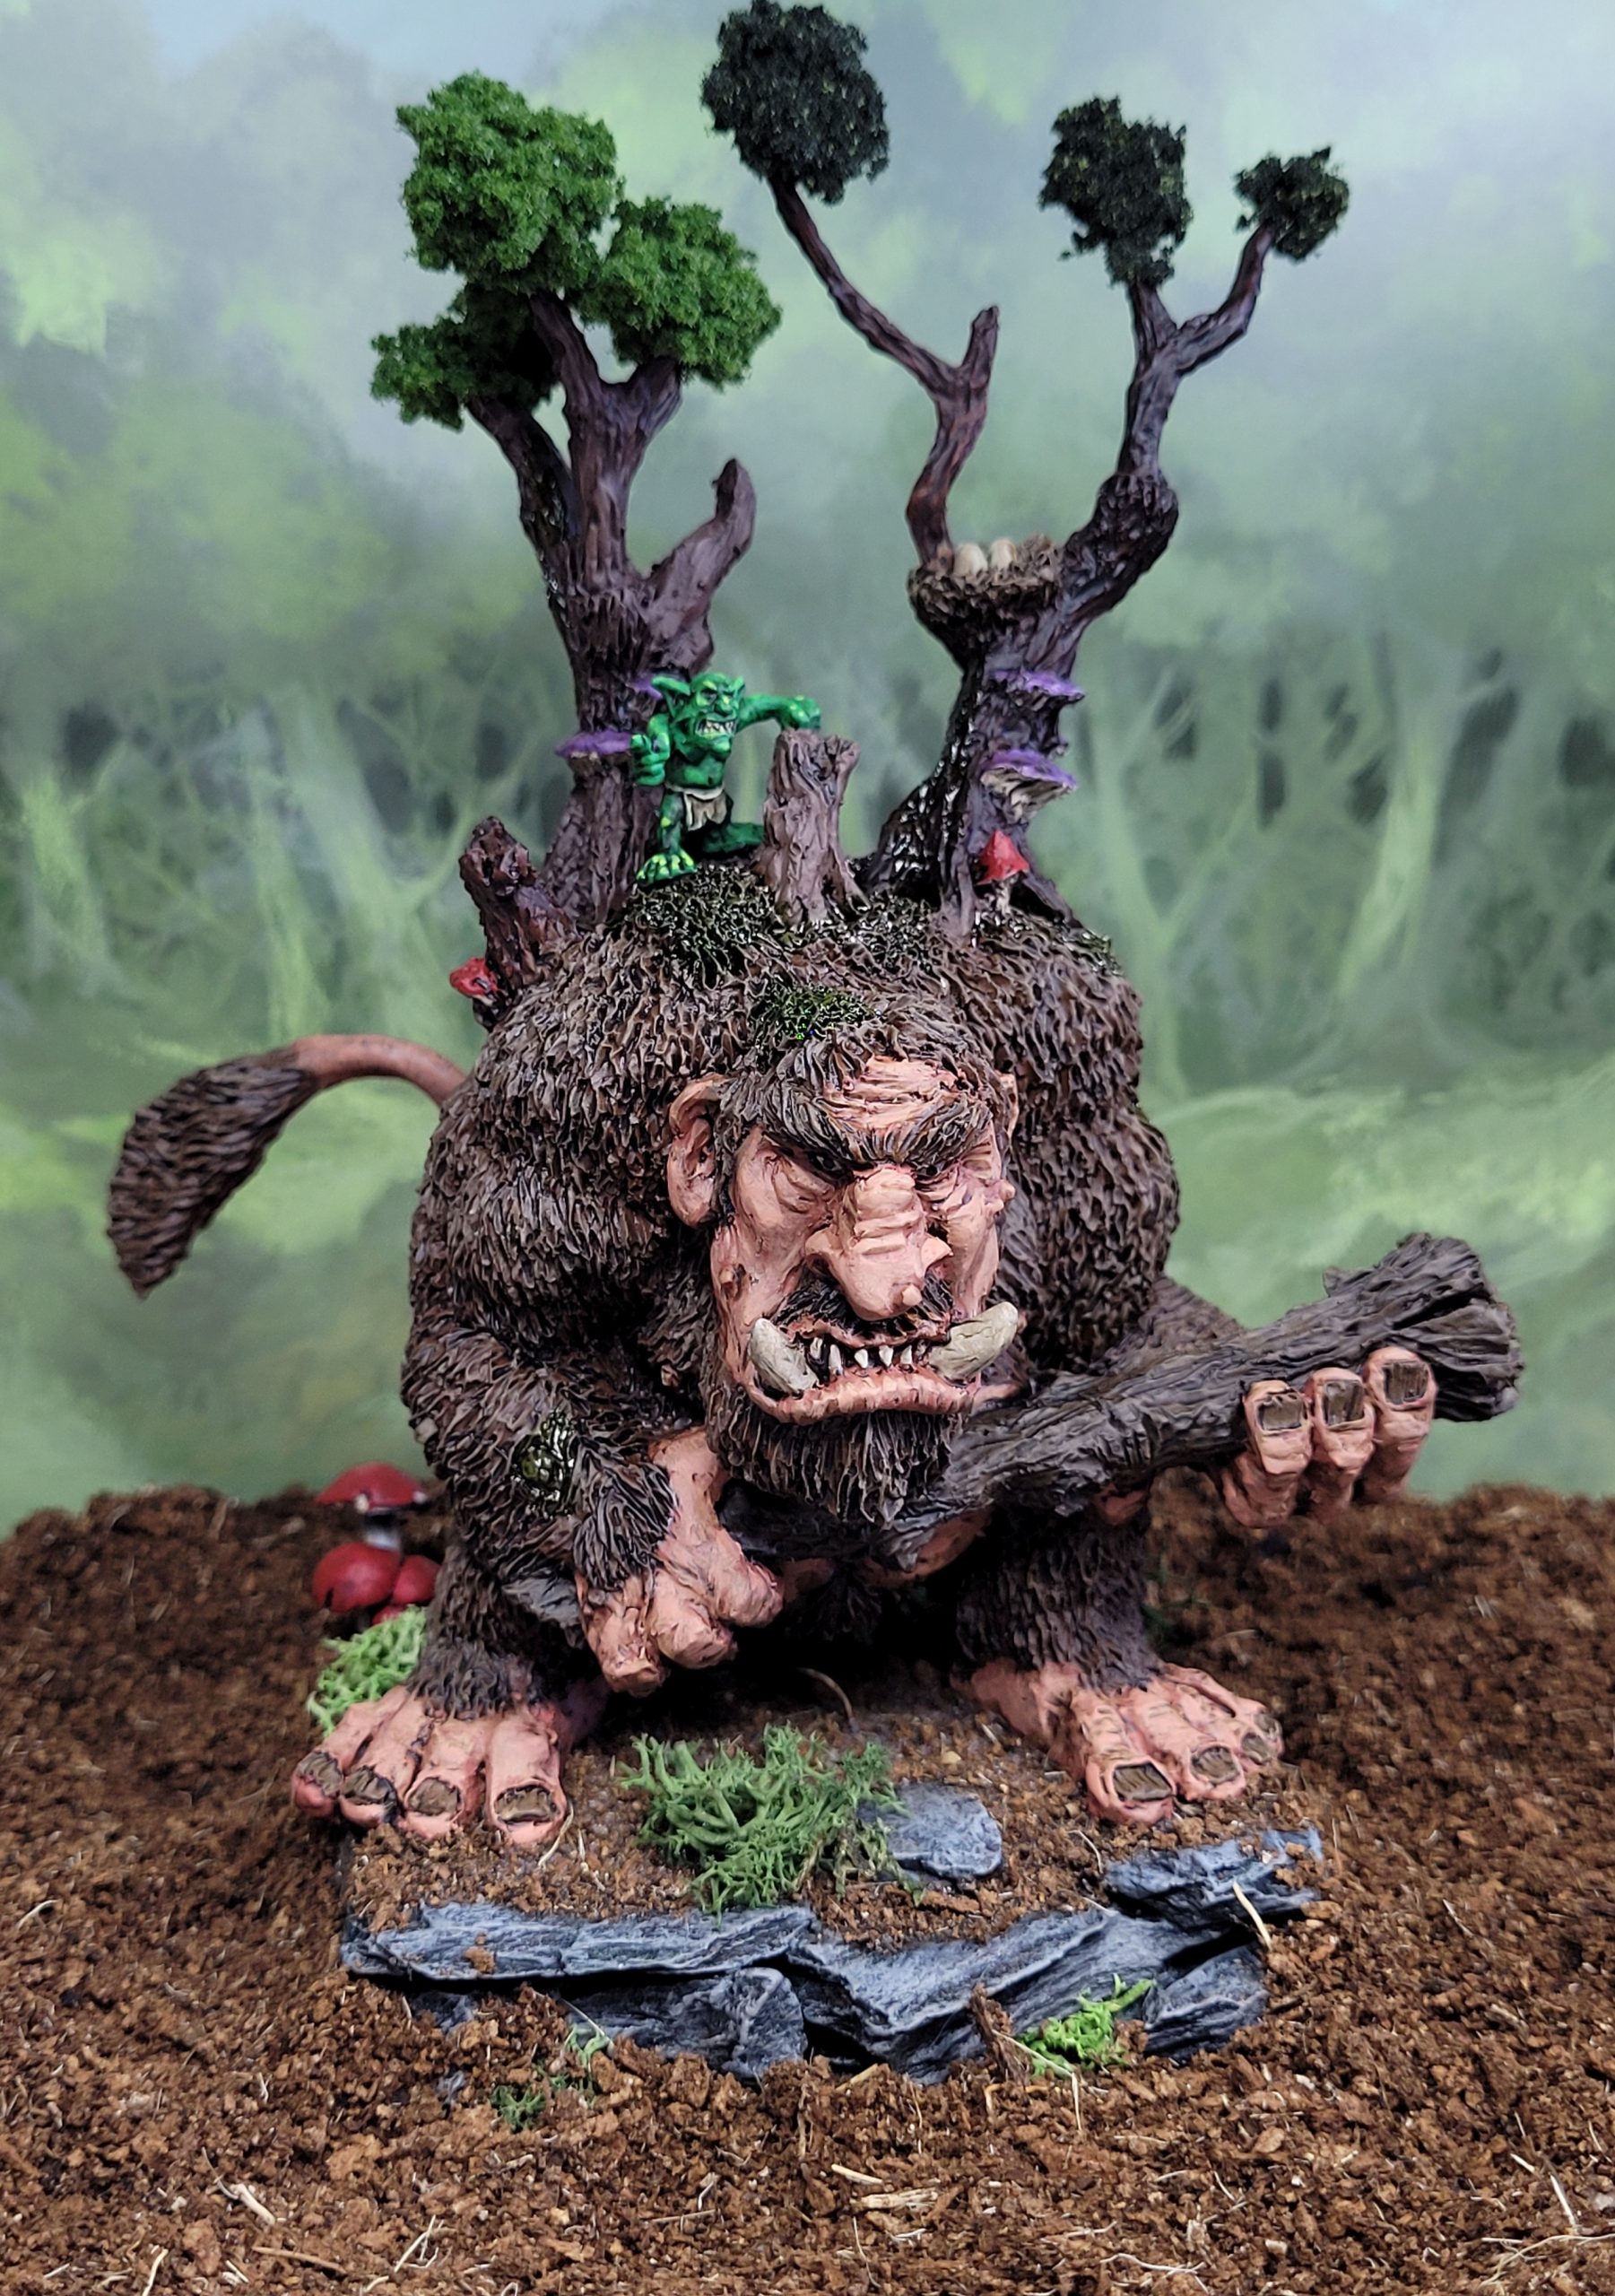
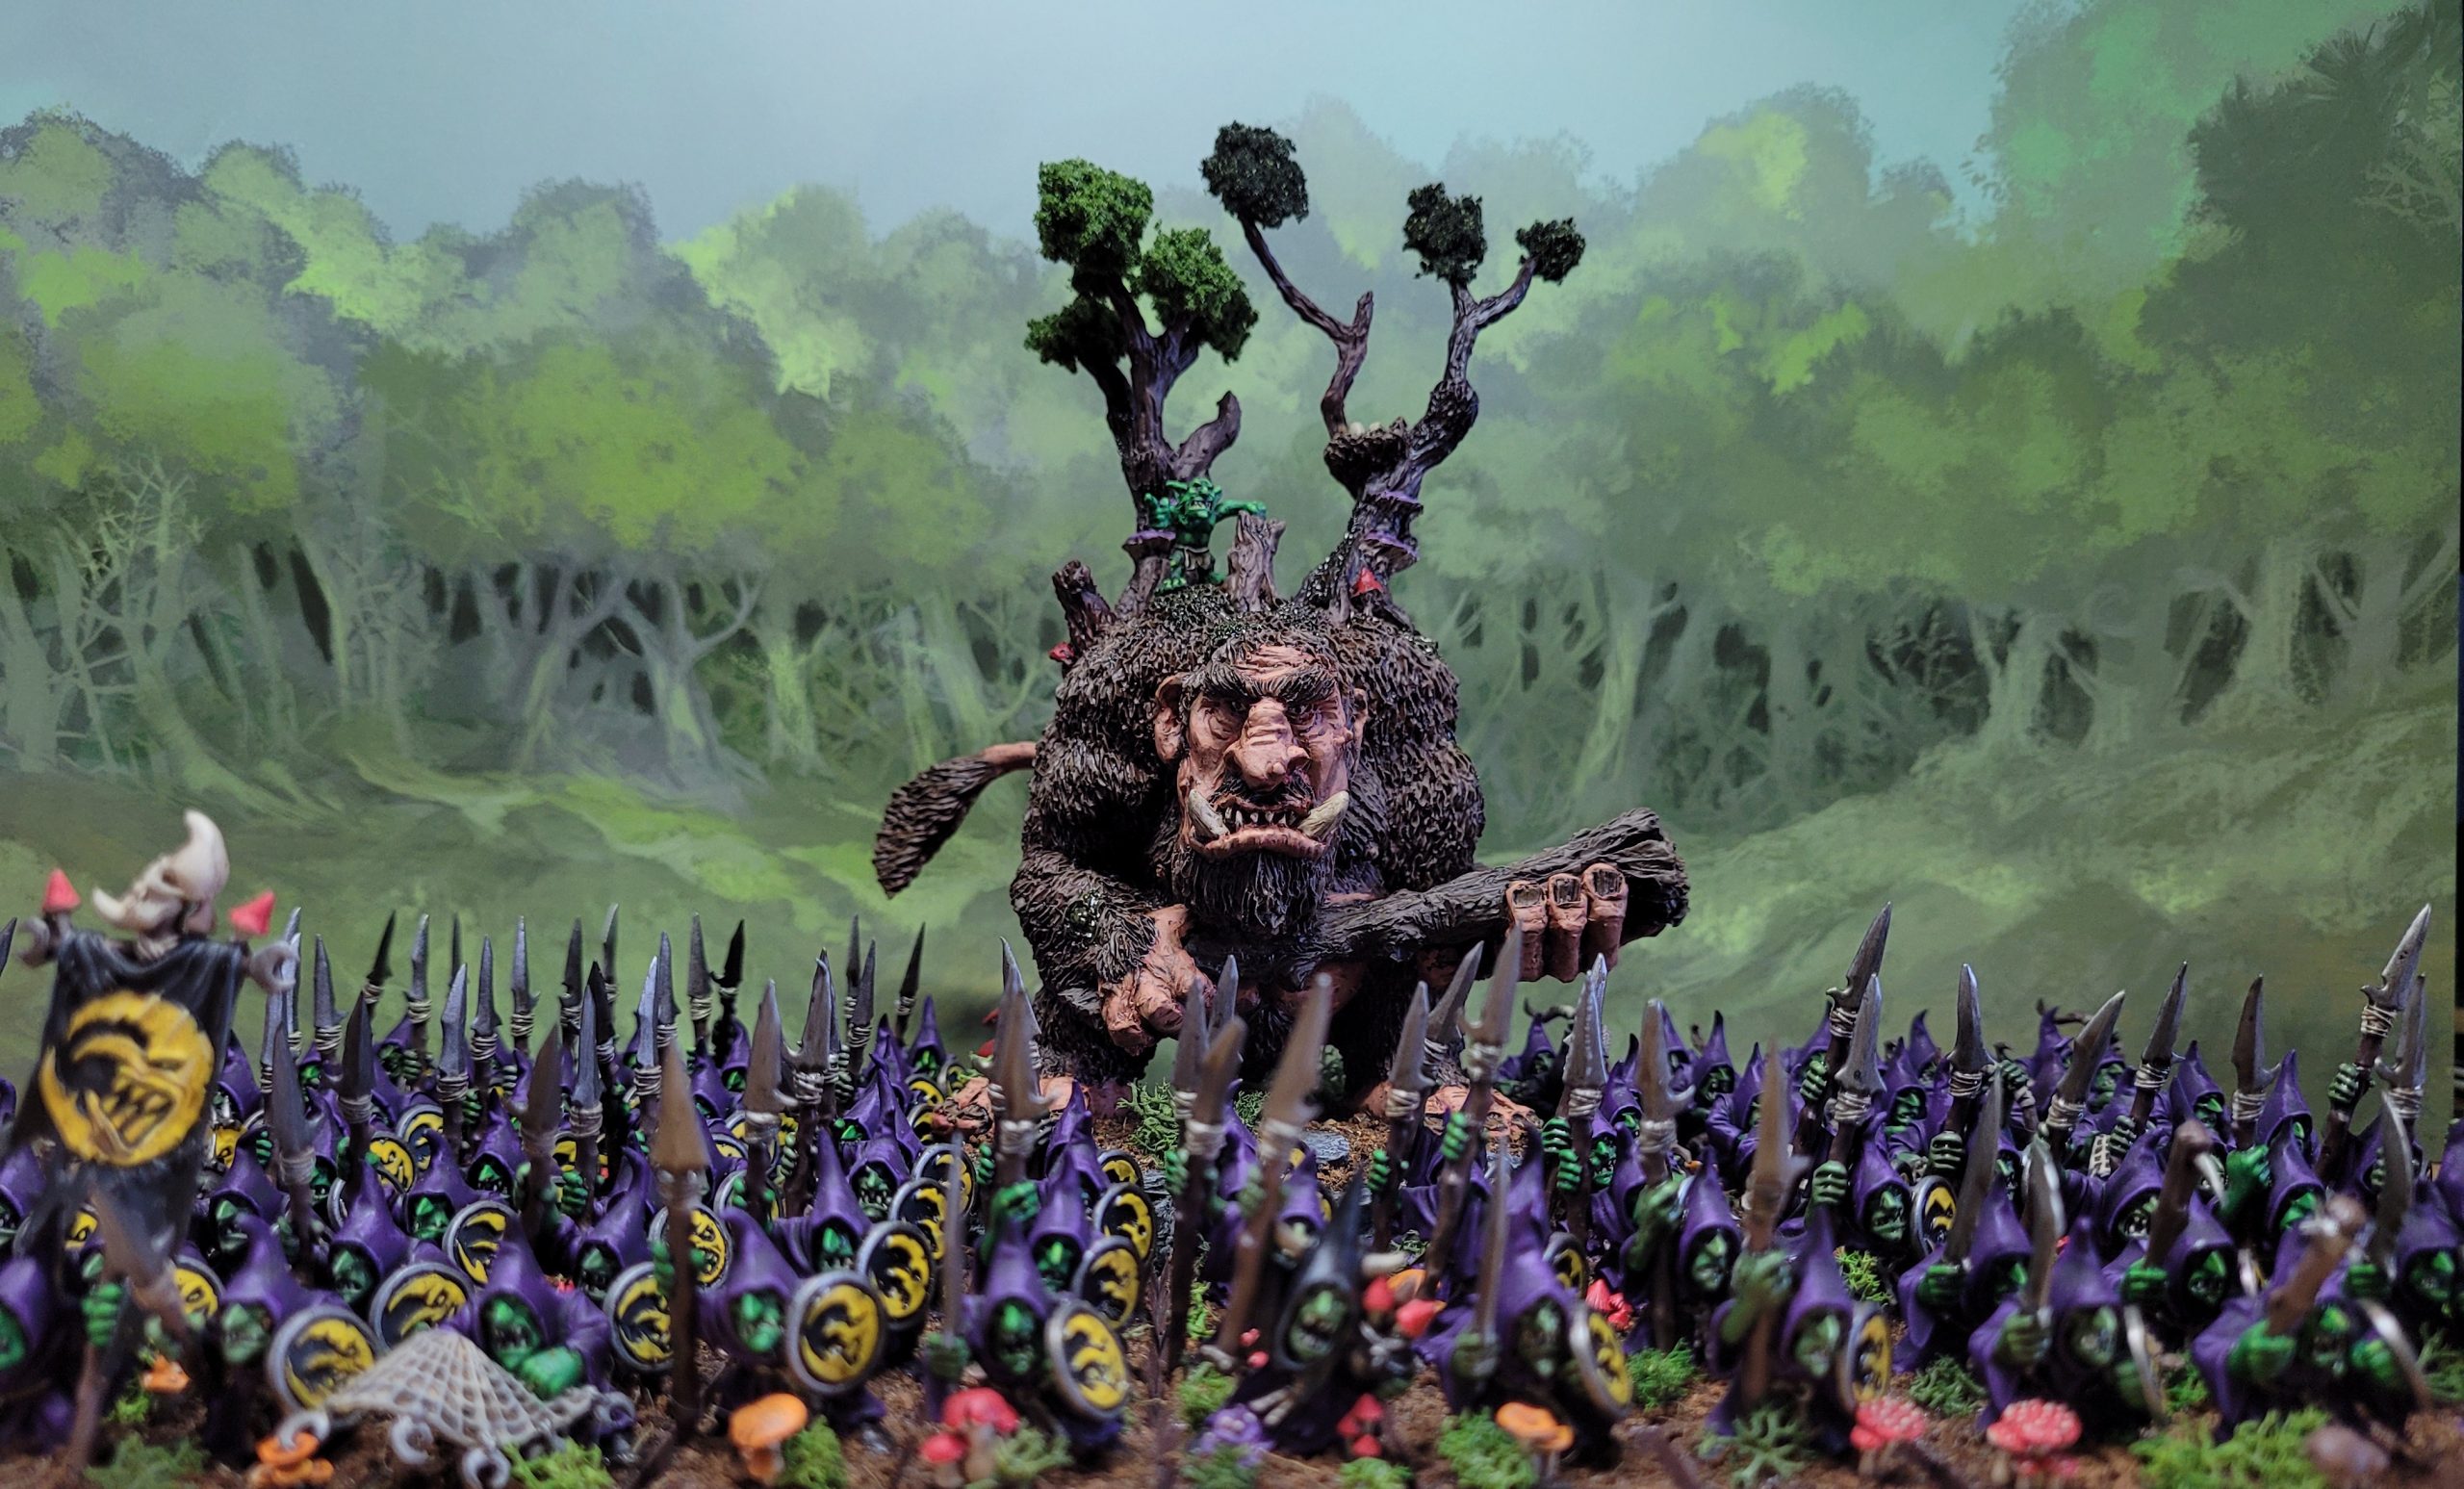
I wanted a giant for the army but I really dislike building the Mantic kit and I’m not a fan of the GW ones. Then I found this lovely big soul on Old School Miniatures. He is a giant forest troll, his name is Albert and I love him.
Albert doesn’t understand that he is big and everyone else is normal size, he thinks he’s normal size and everyone else is just very small. He takes care of the forest, mostly by trampling over the ground to keep it clear of invasive species and to ensure that the plants that survive are tough as nails.
One day he found a small green thing cowering behind a fallen log and garbling at Albert in a language he didn’t understand. He’d heard through the grapevine of a philosophical concept called the Snotling Distribution Network, a cosmic force beyond our ken means that trolls find snotlings not necessarily when they want them but when the universe knows they need them. Albert lifted his new pet, his Precious and put it on his head to keep him safe.
Precious the Snotling believes he is a magical wizard who to managed to stop the biggest troll anyone has ever seen from squashing him and now controls the giant creature.
Intermission: Basing Prep
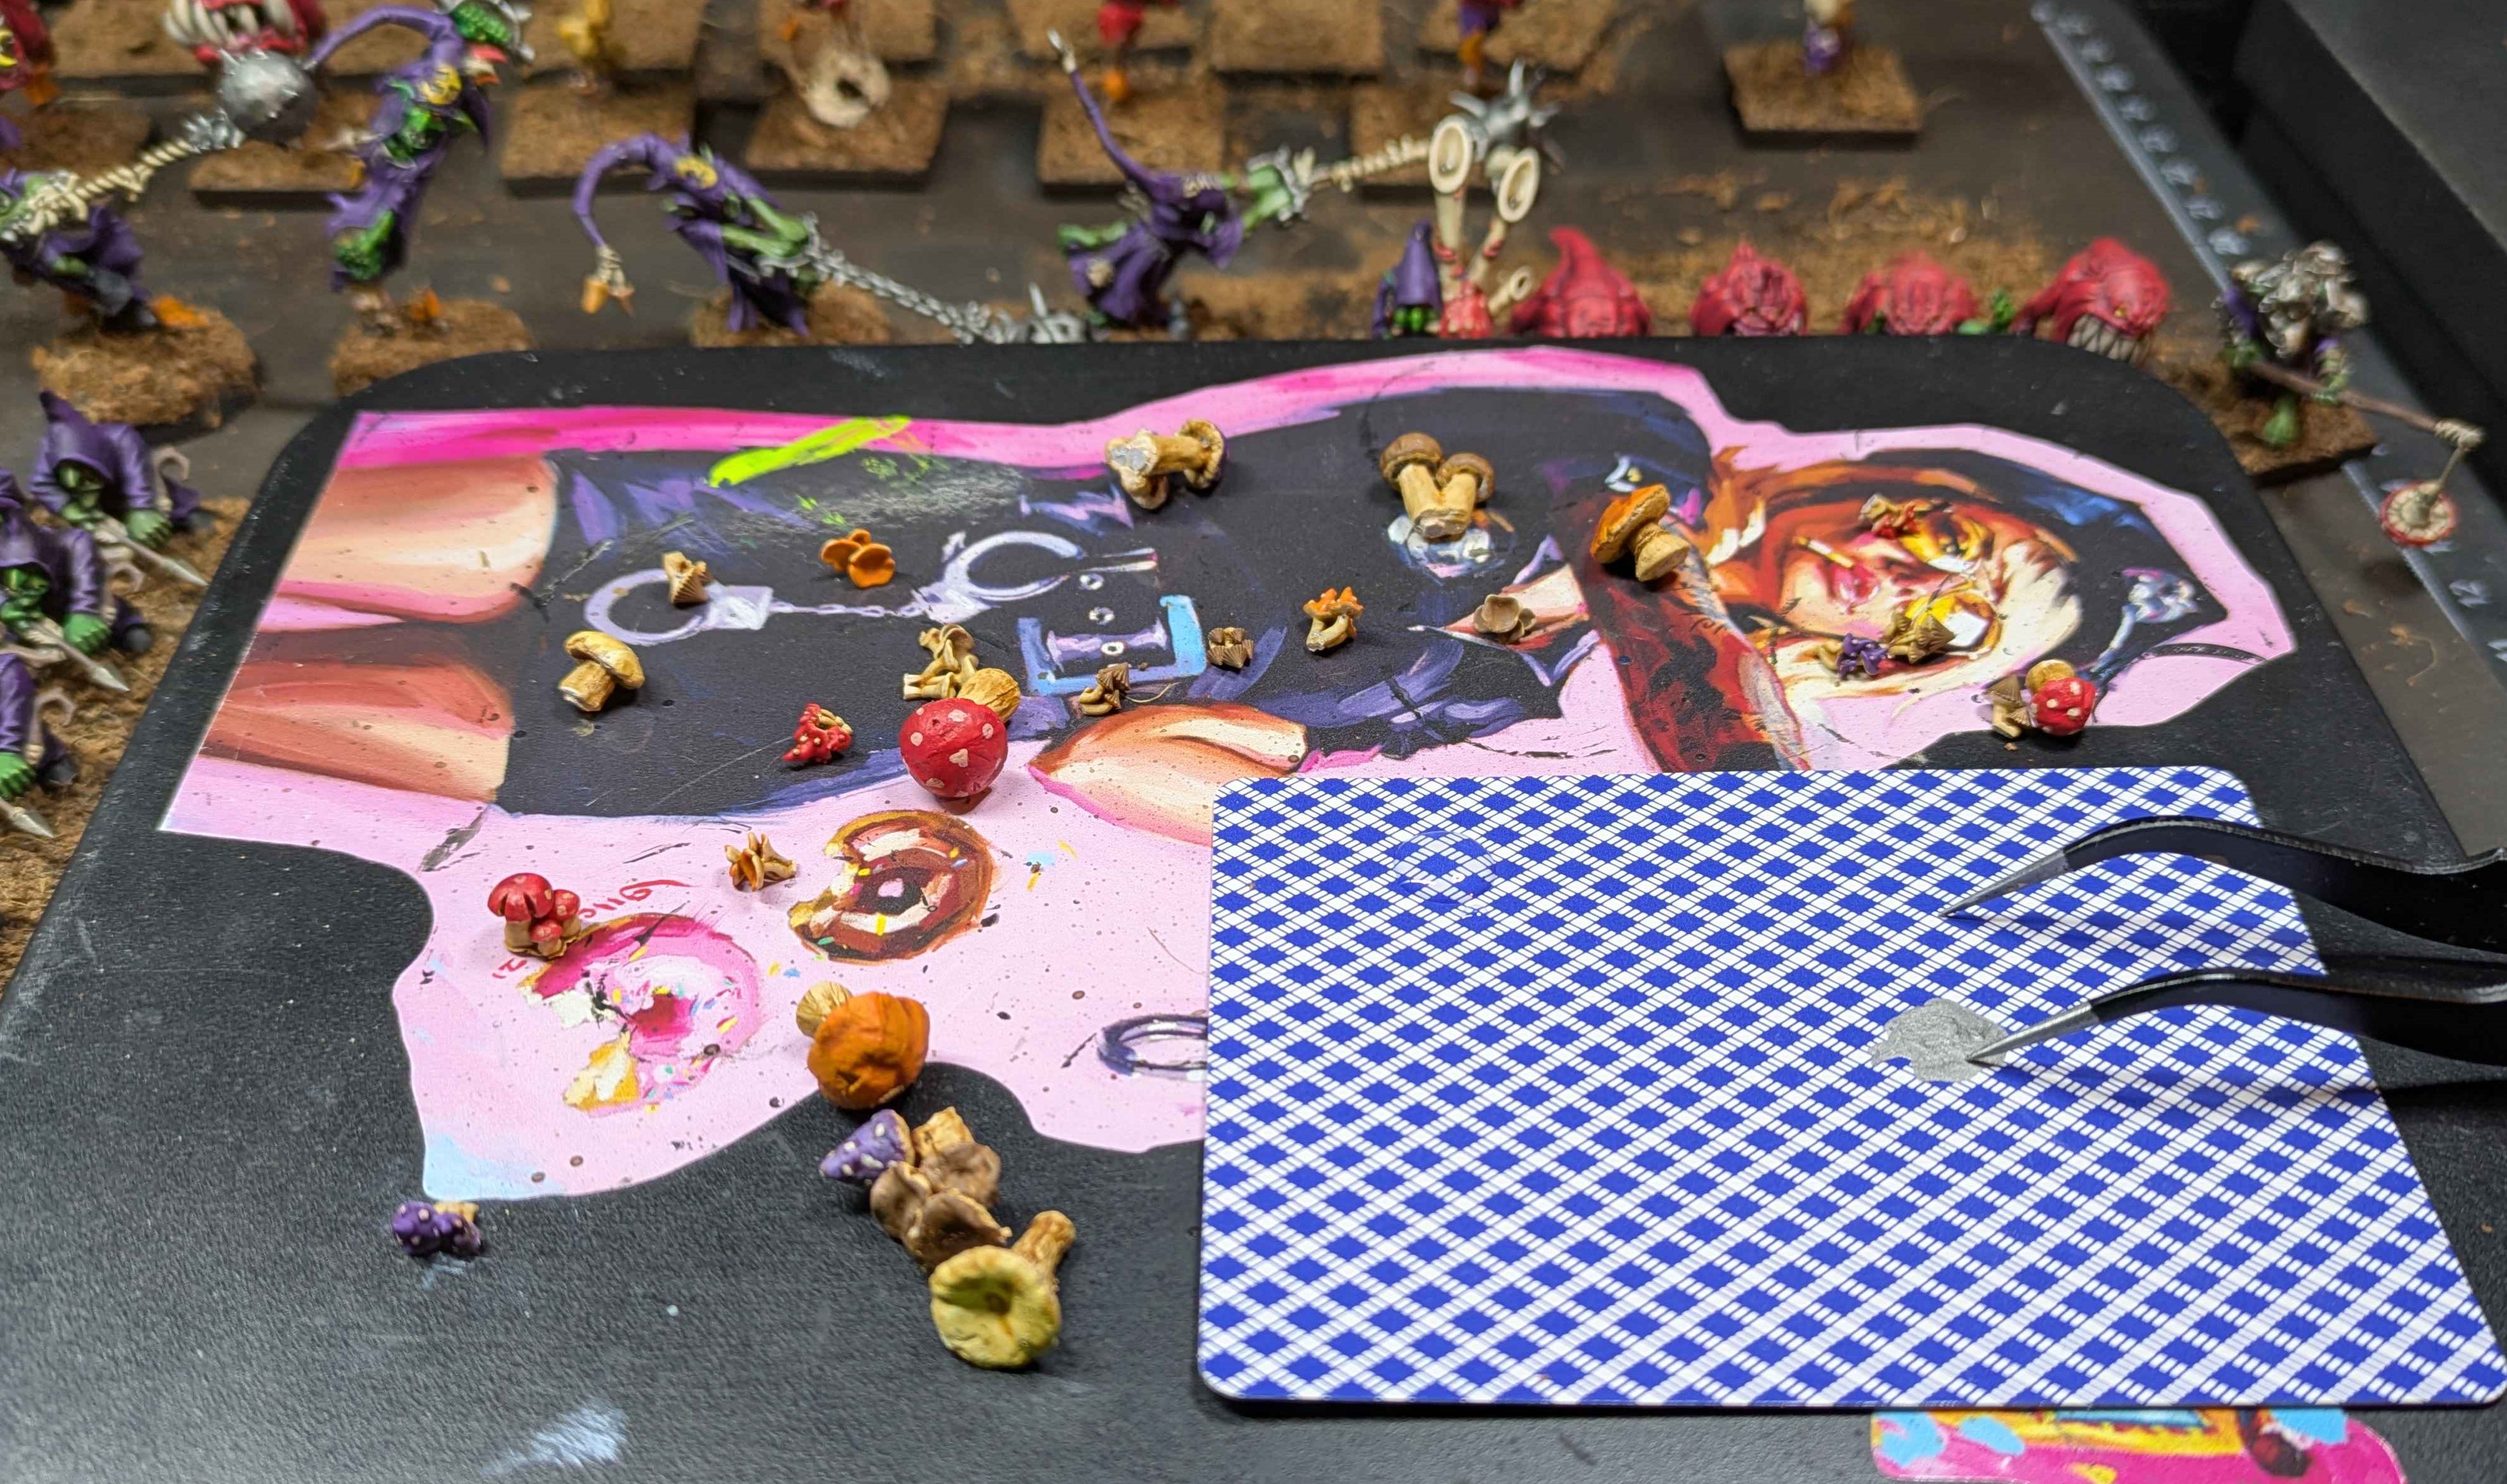
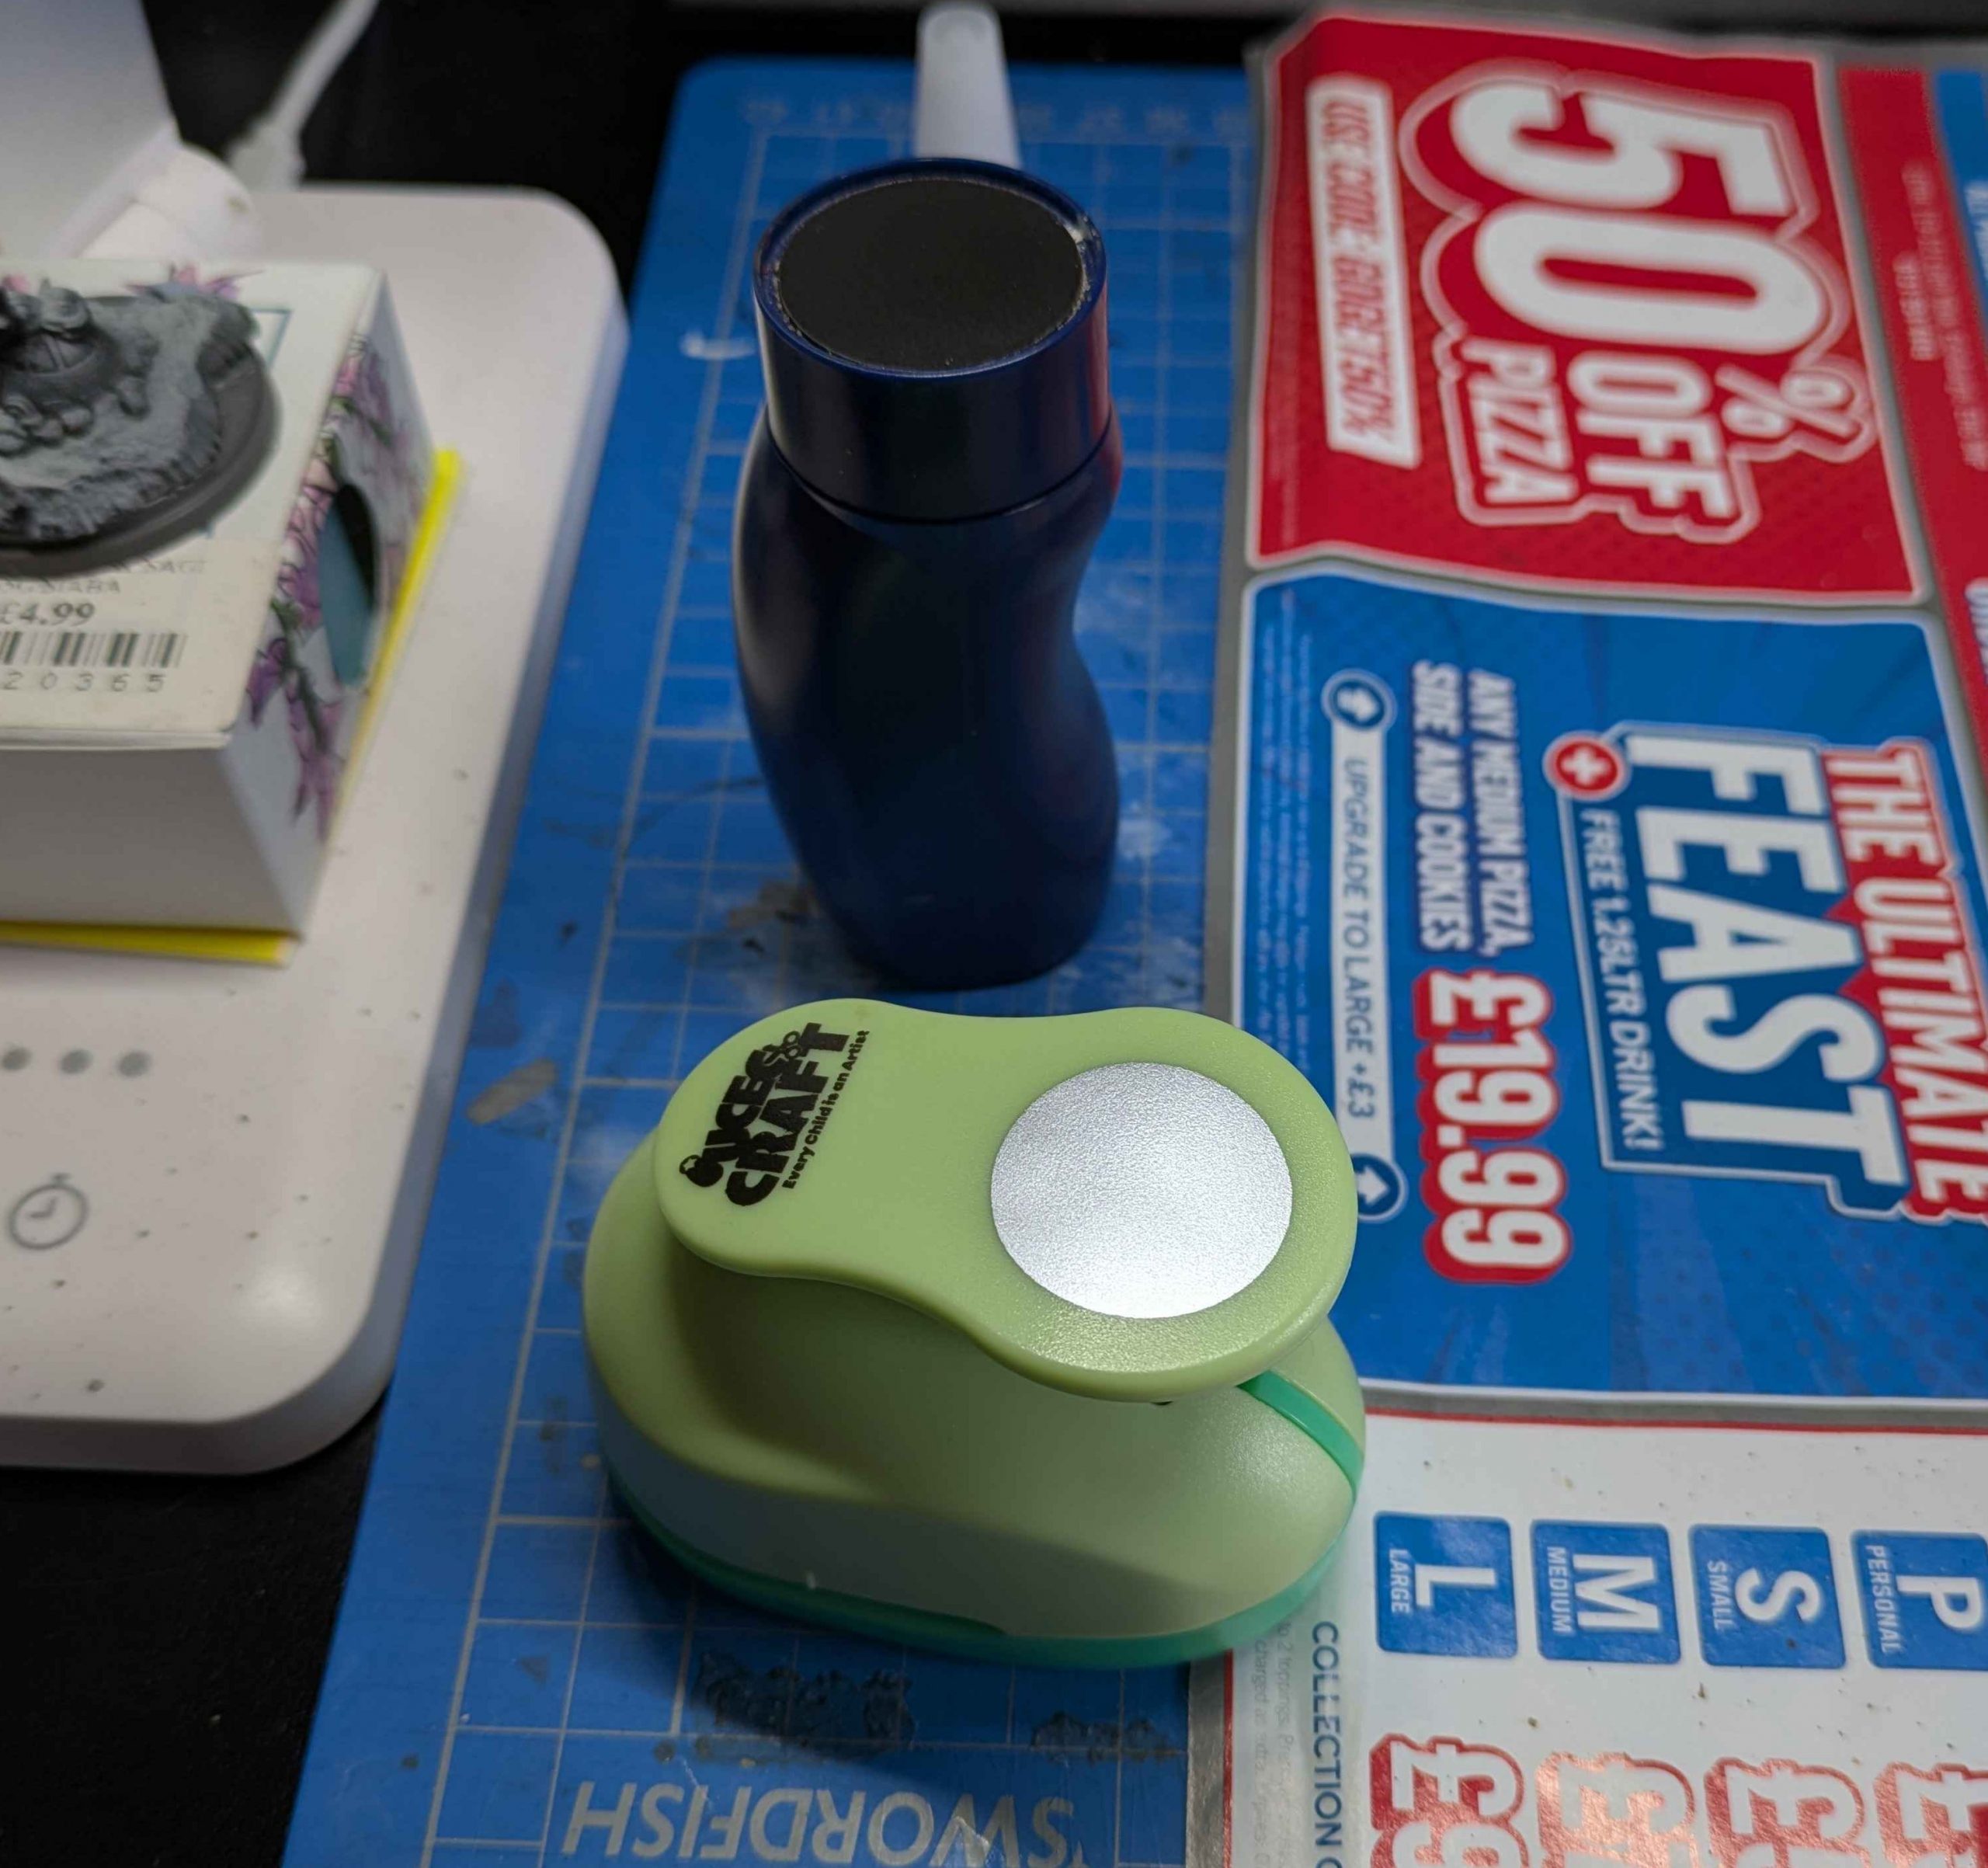
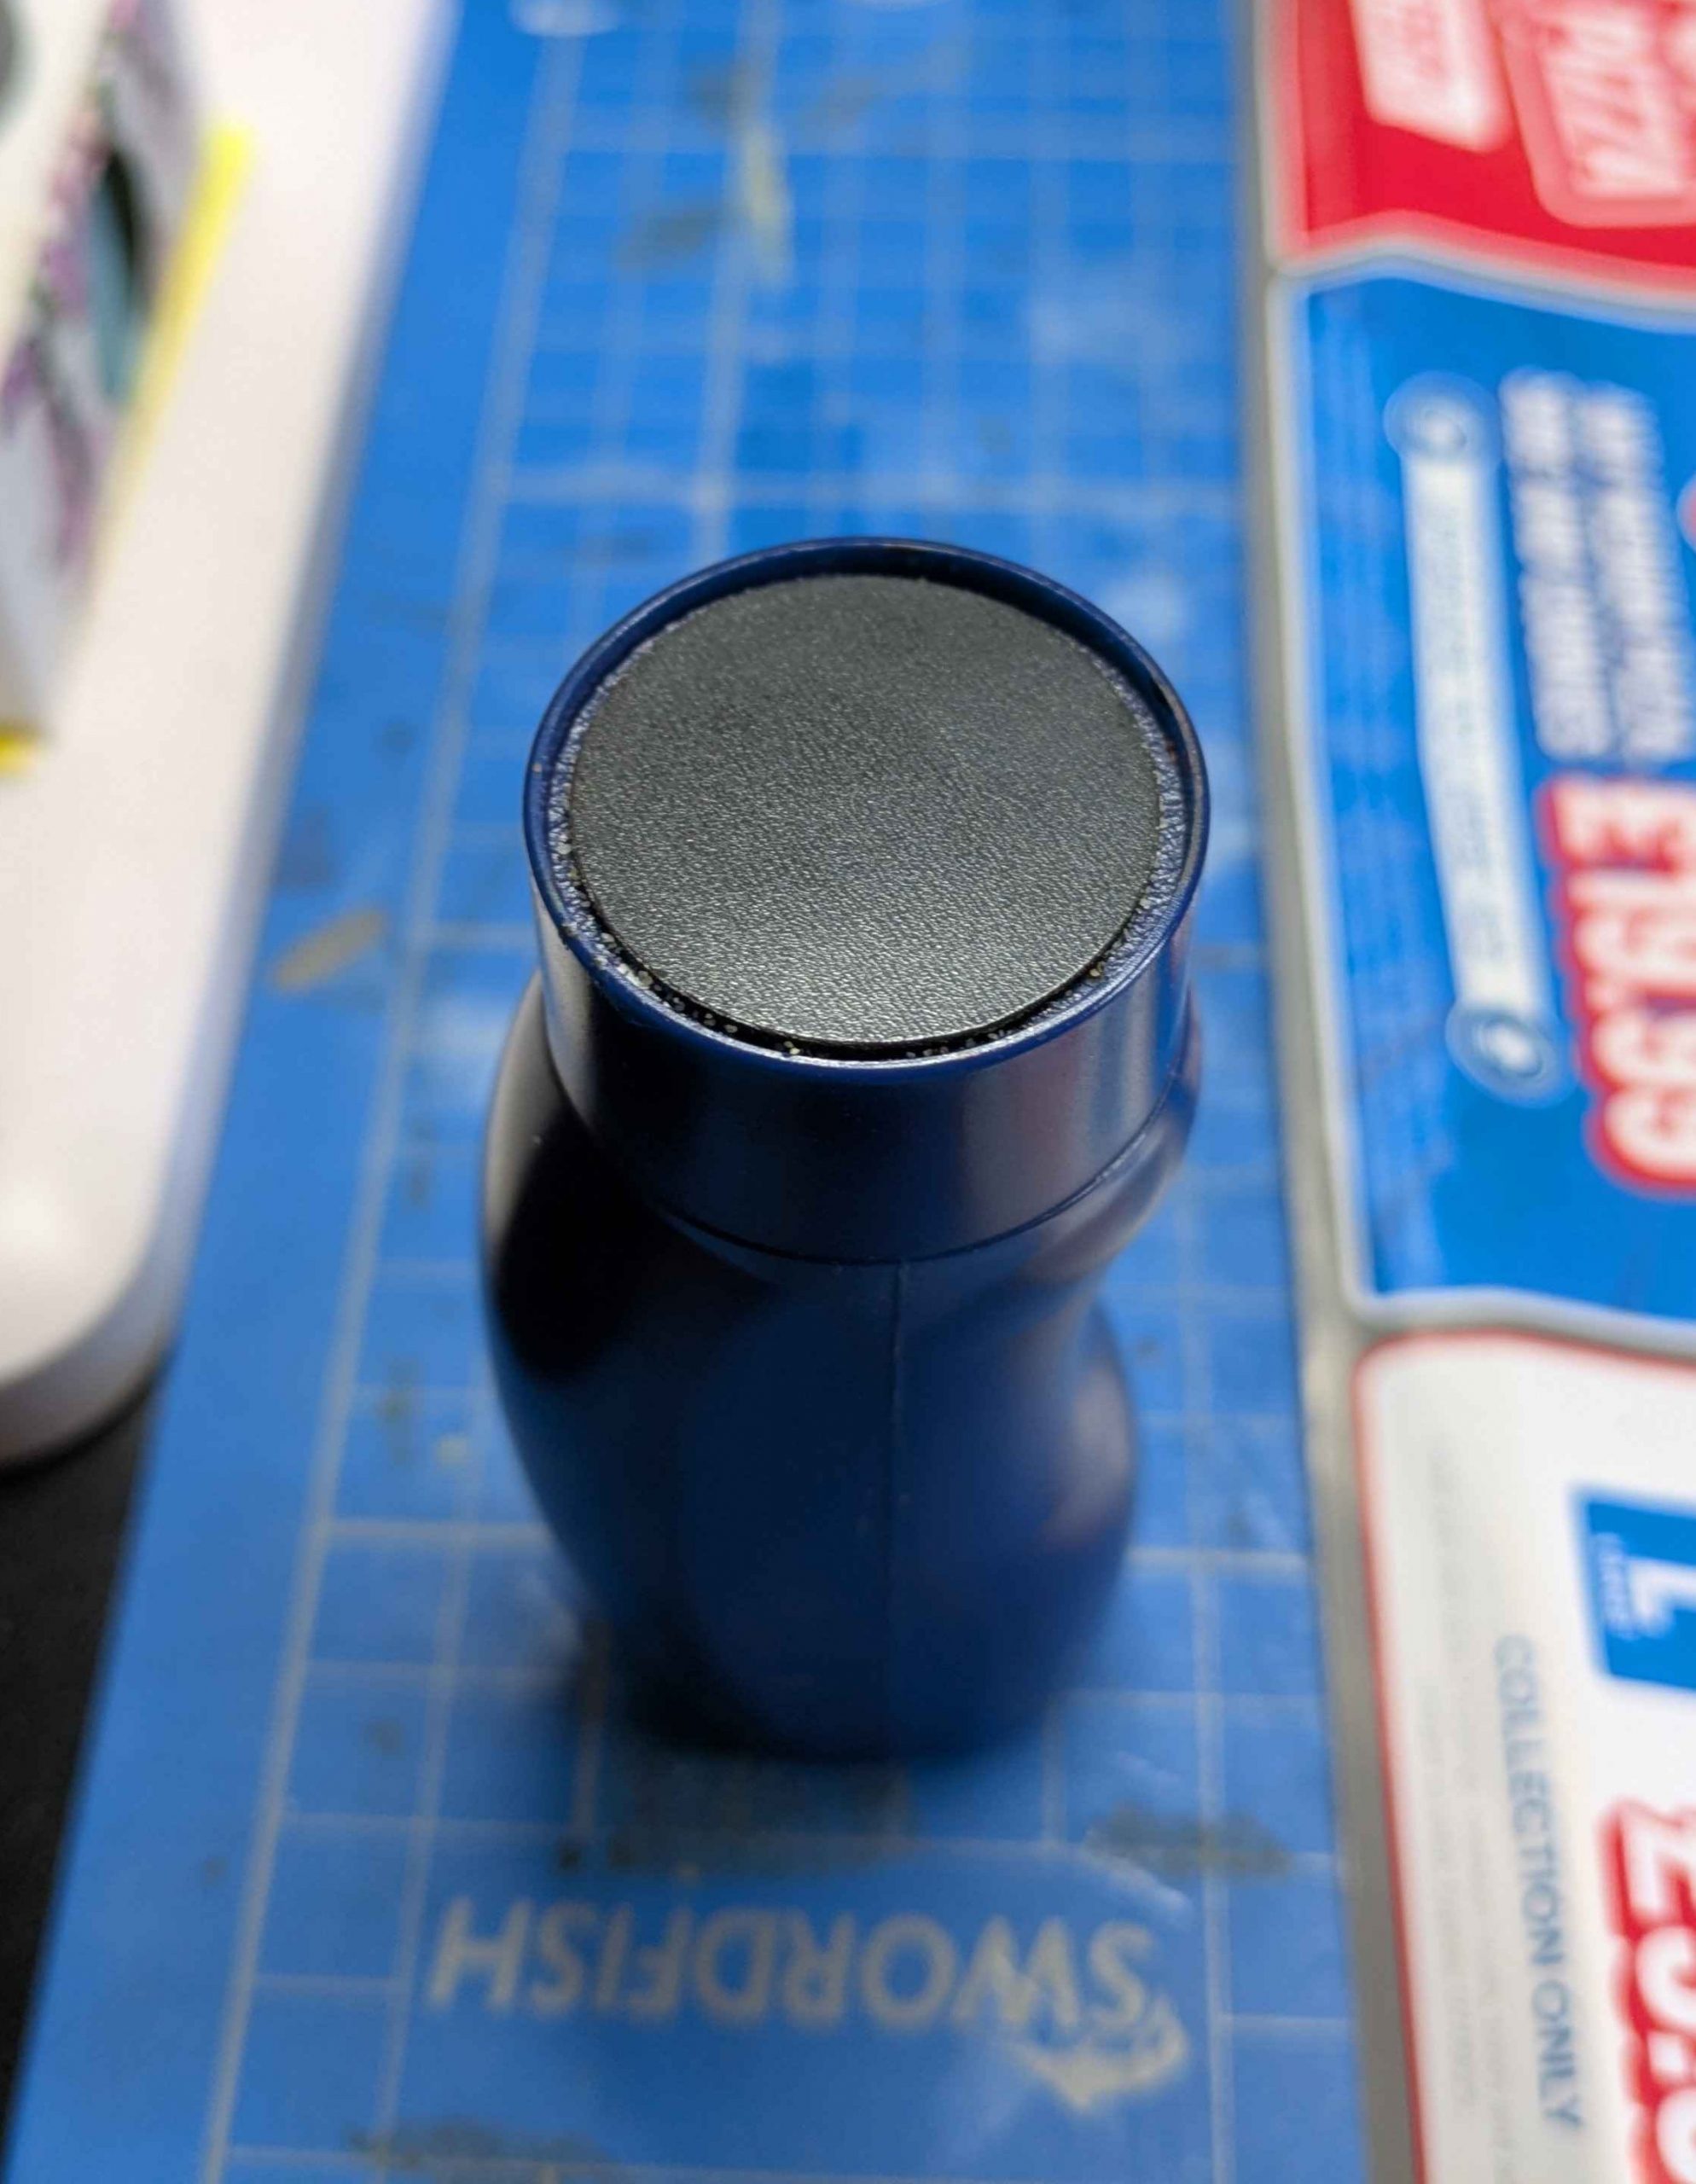
I love painting but there are some bits of our hobby I’m not such a fan of. I have two projects coming up that I want very traditional sand and glue bases for. I’m not a fan of using PVA, usually my go to is superglue gel. Unfortunately I’ve run out and only have thin superglue left.
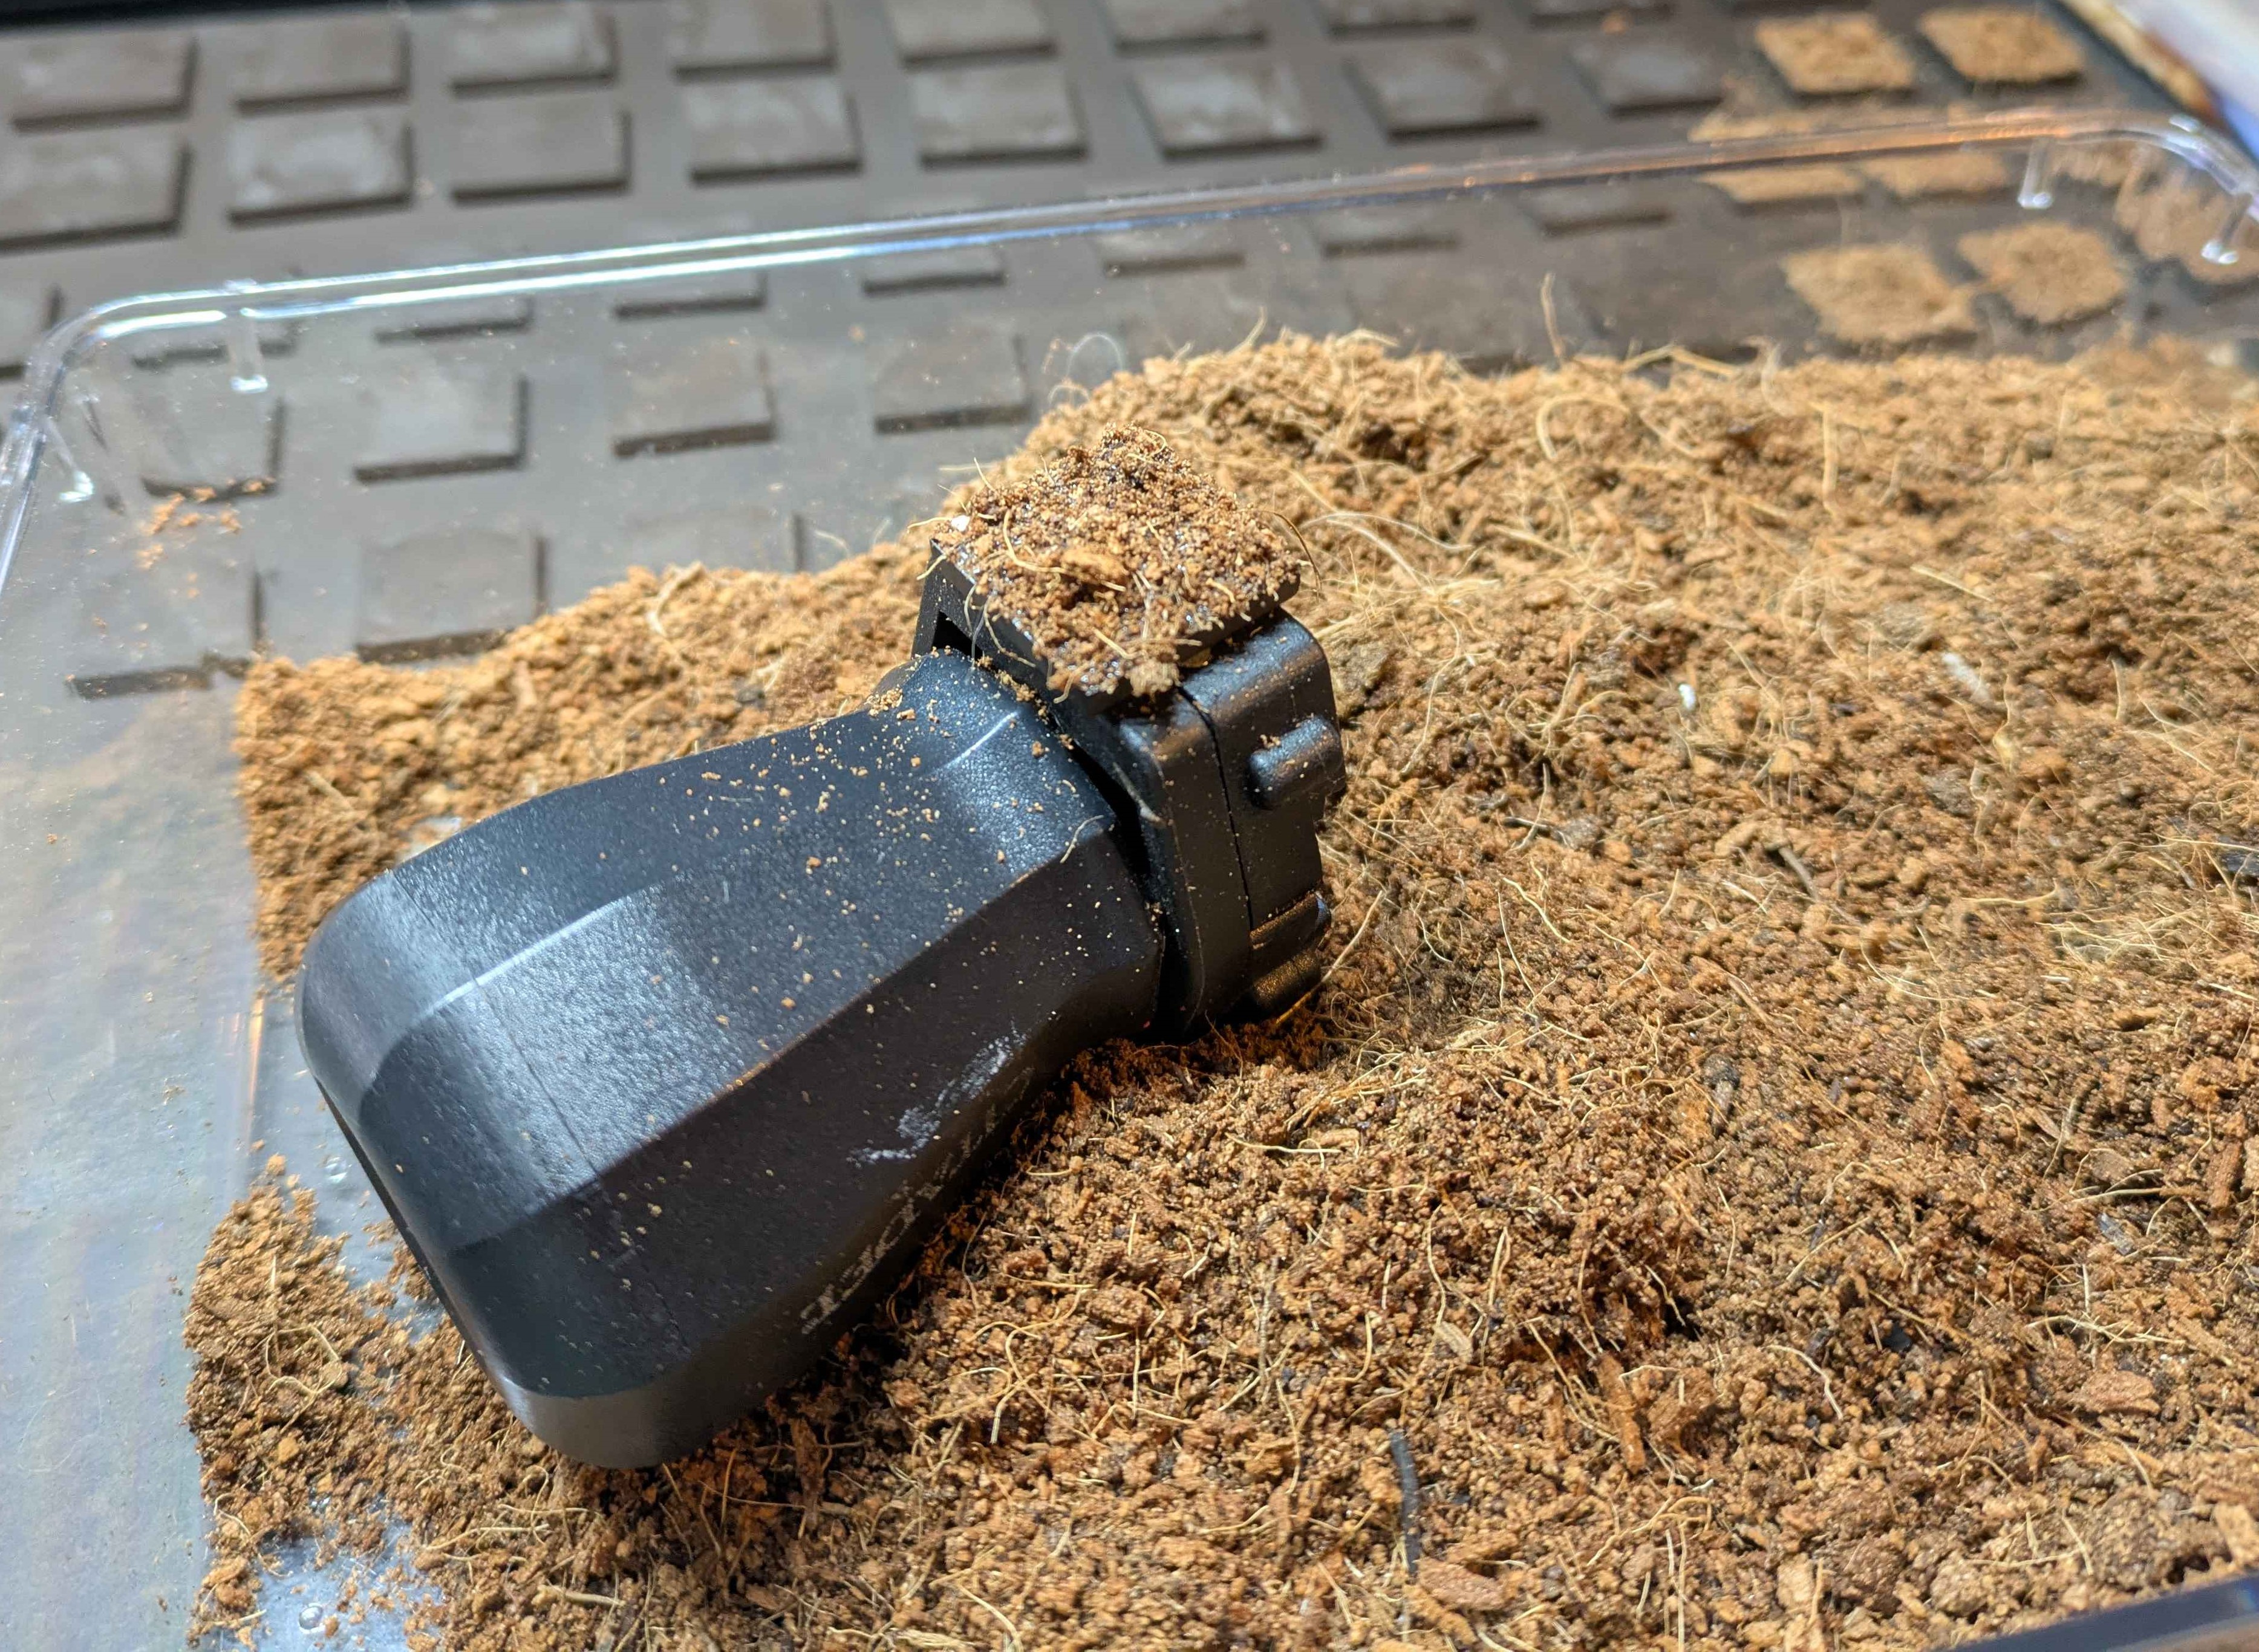
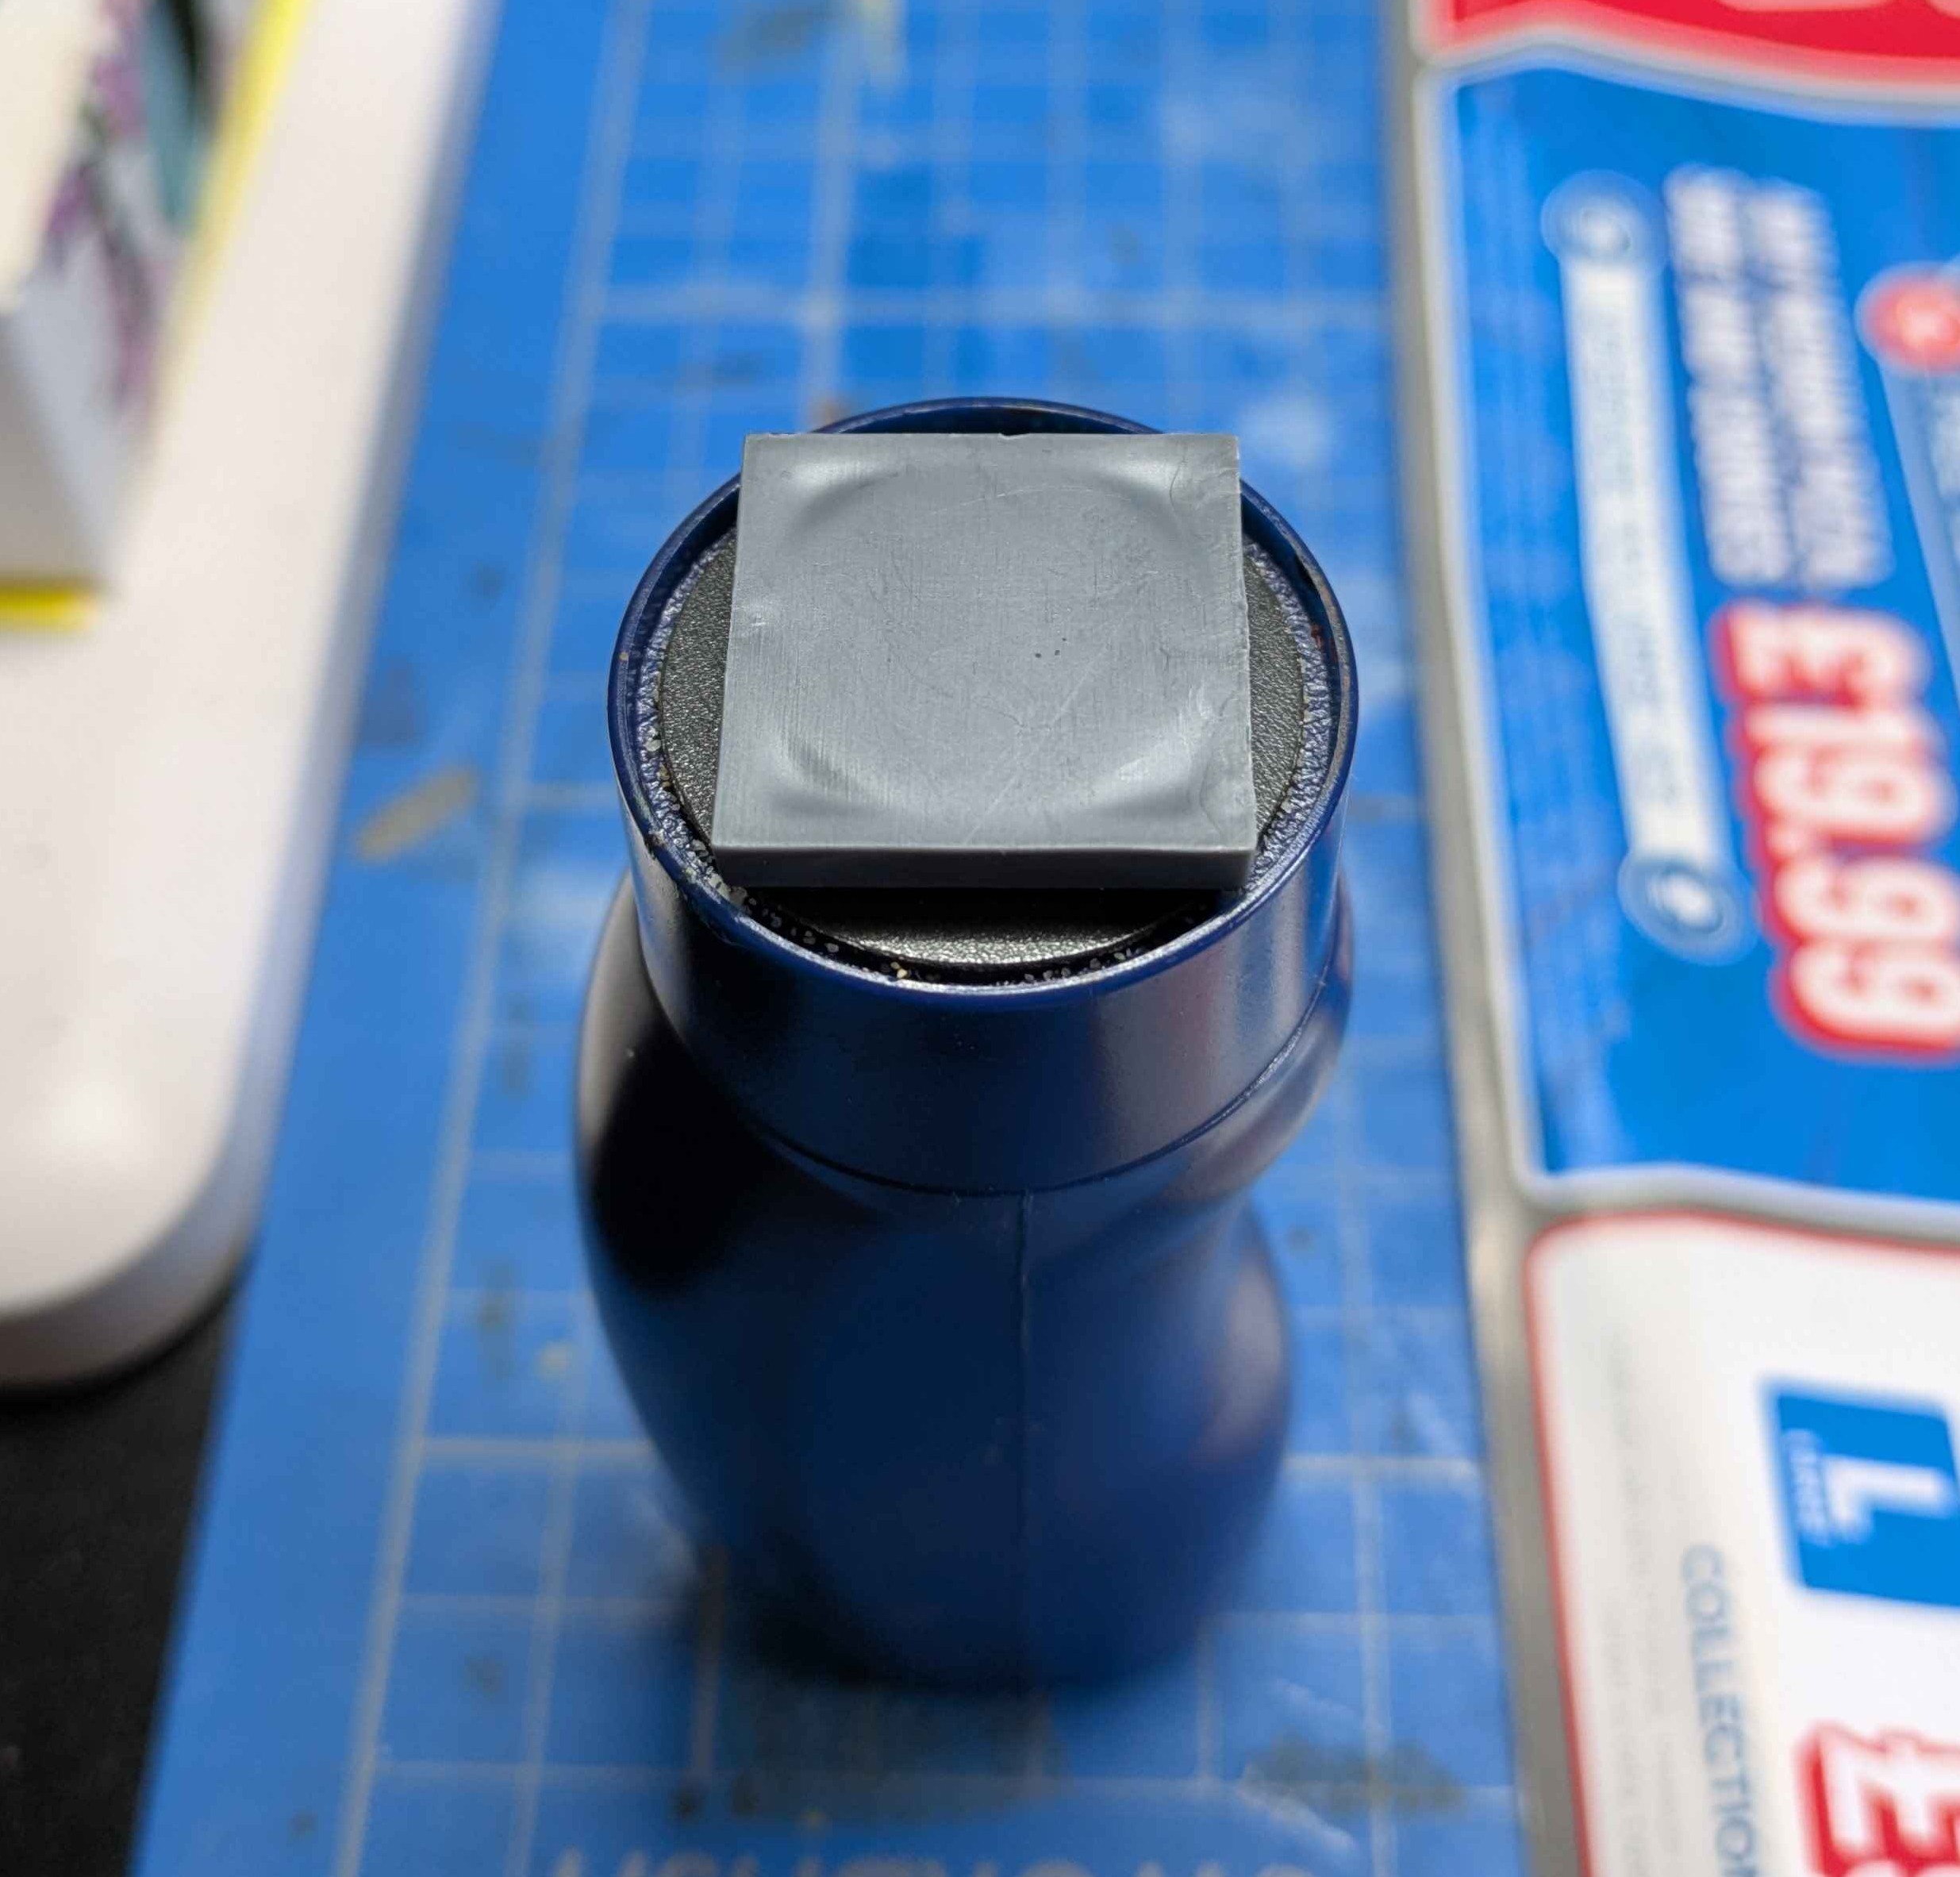
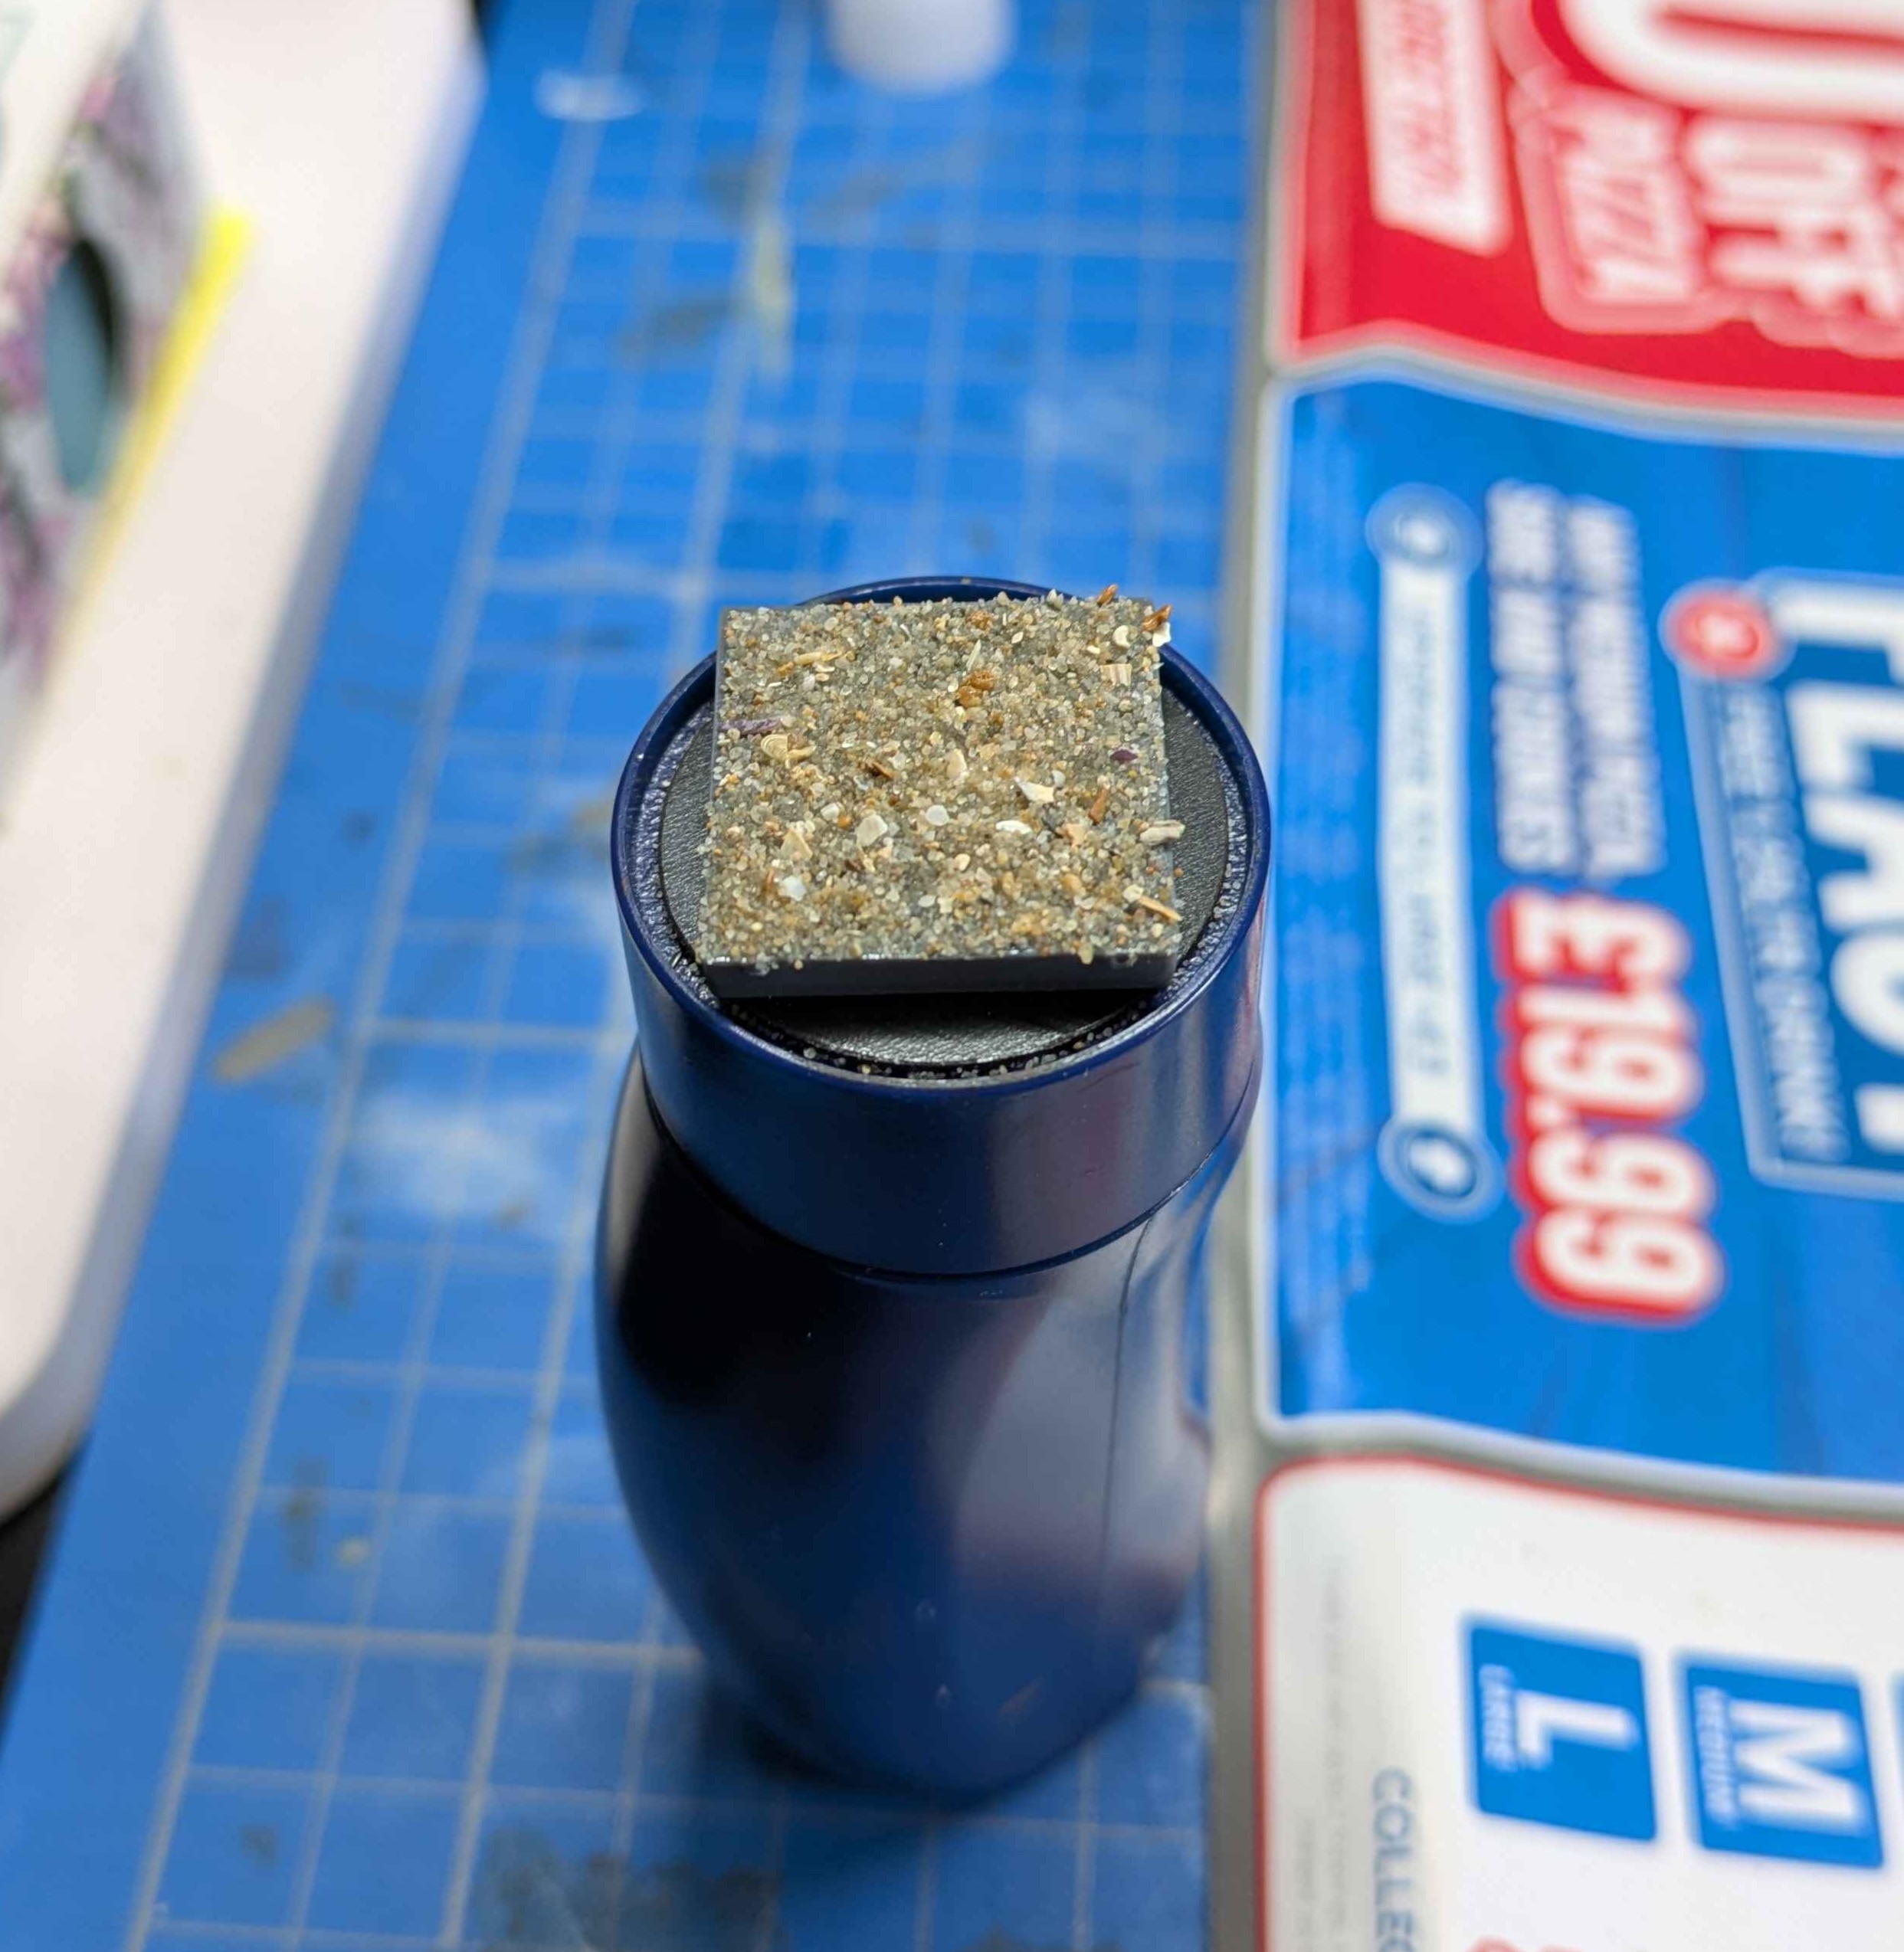
My brain goblins, not always the most reliable for good ideas, hit upon inspiration. Using my one inch circular punch and some self-adhesive ferrous sheeting, I’ve now got a magnetic painting handle cap. When it comes to basing, I can now put superglue and sand all over them quickly and without getting any on my fingers. The handle even makes tapping off excess sand easier. Good job brain goblins.
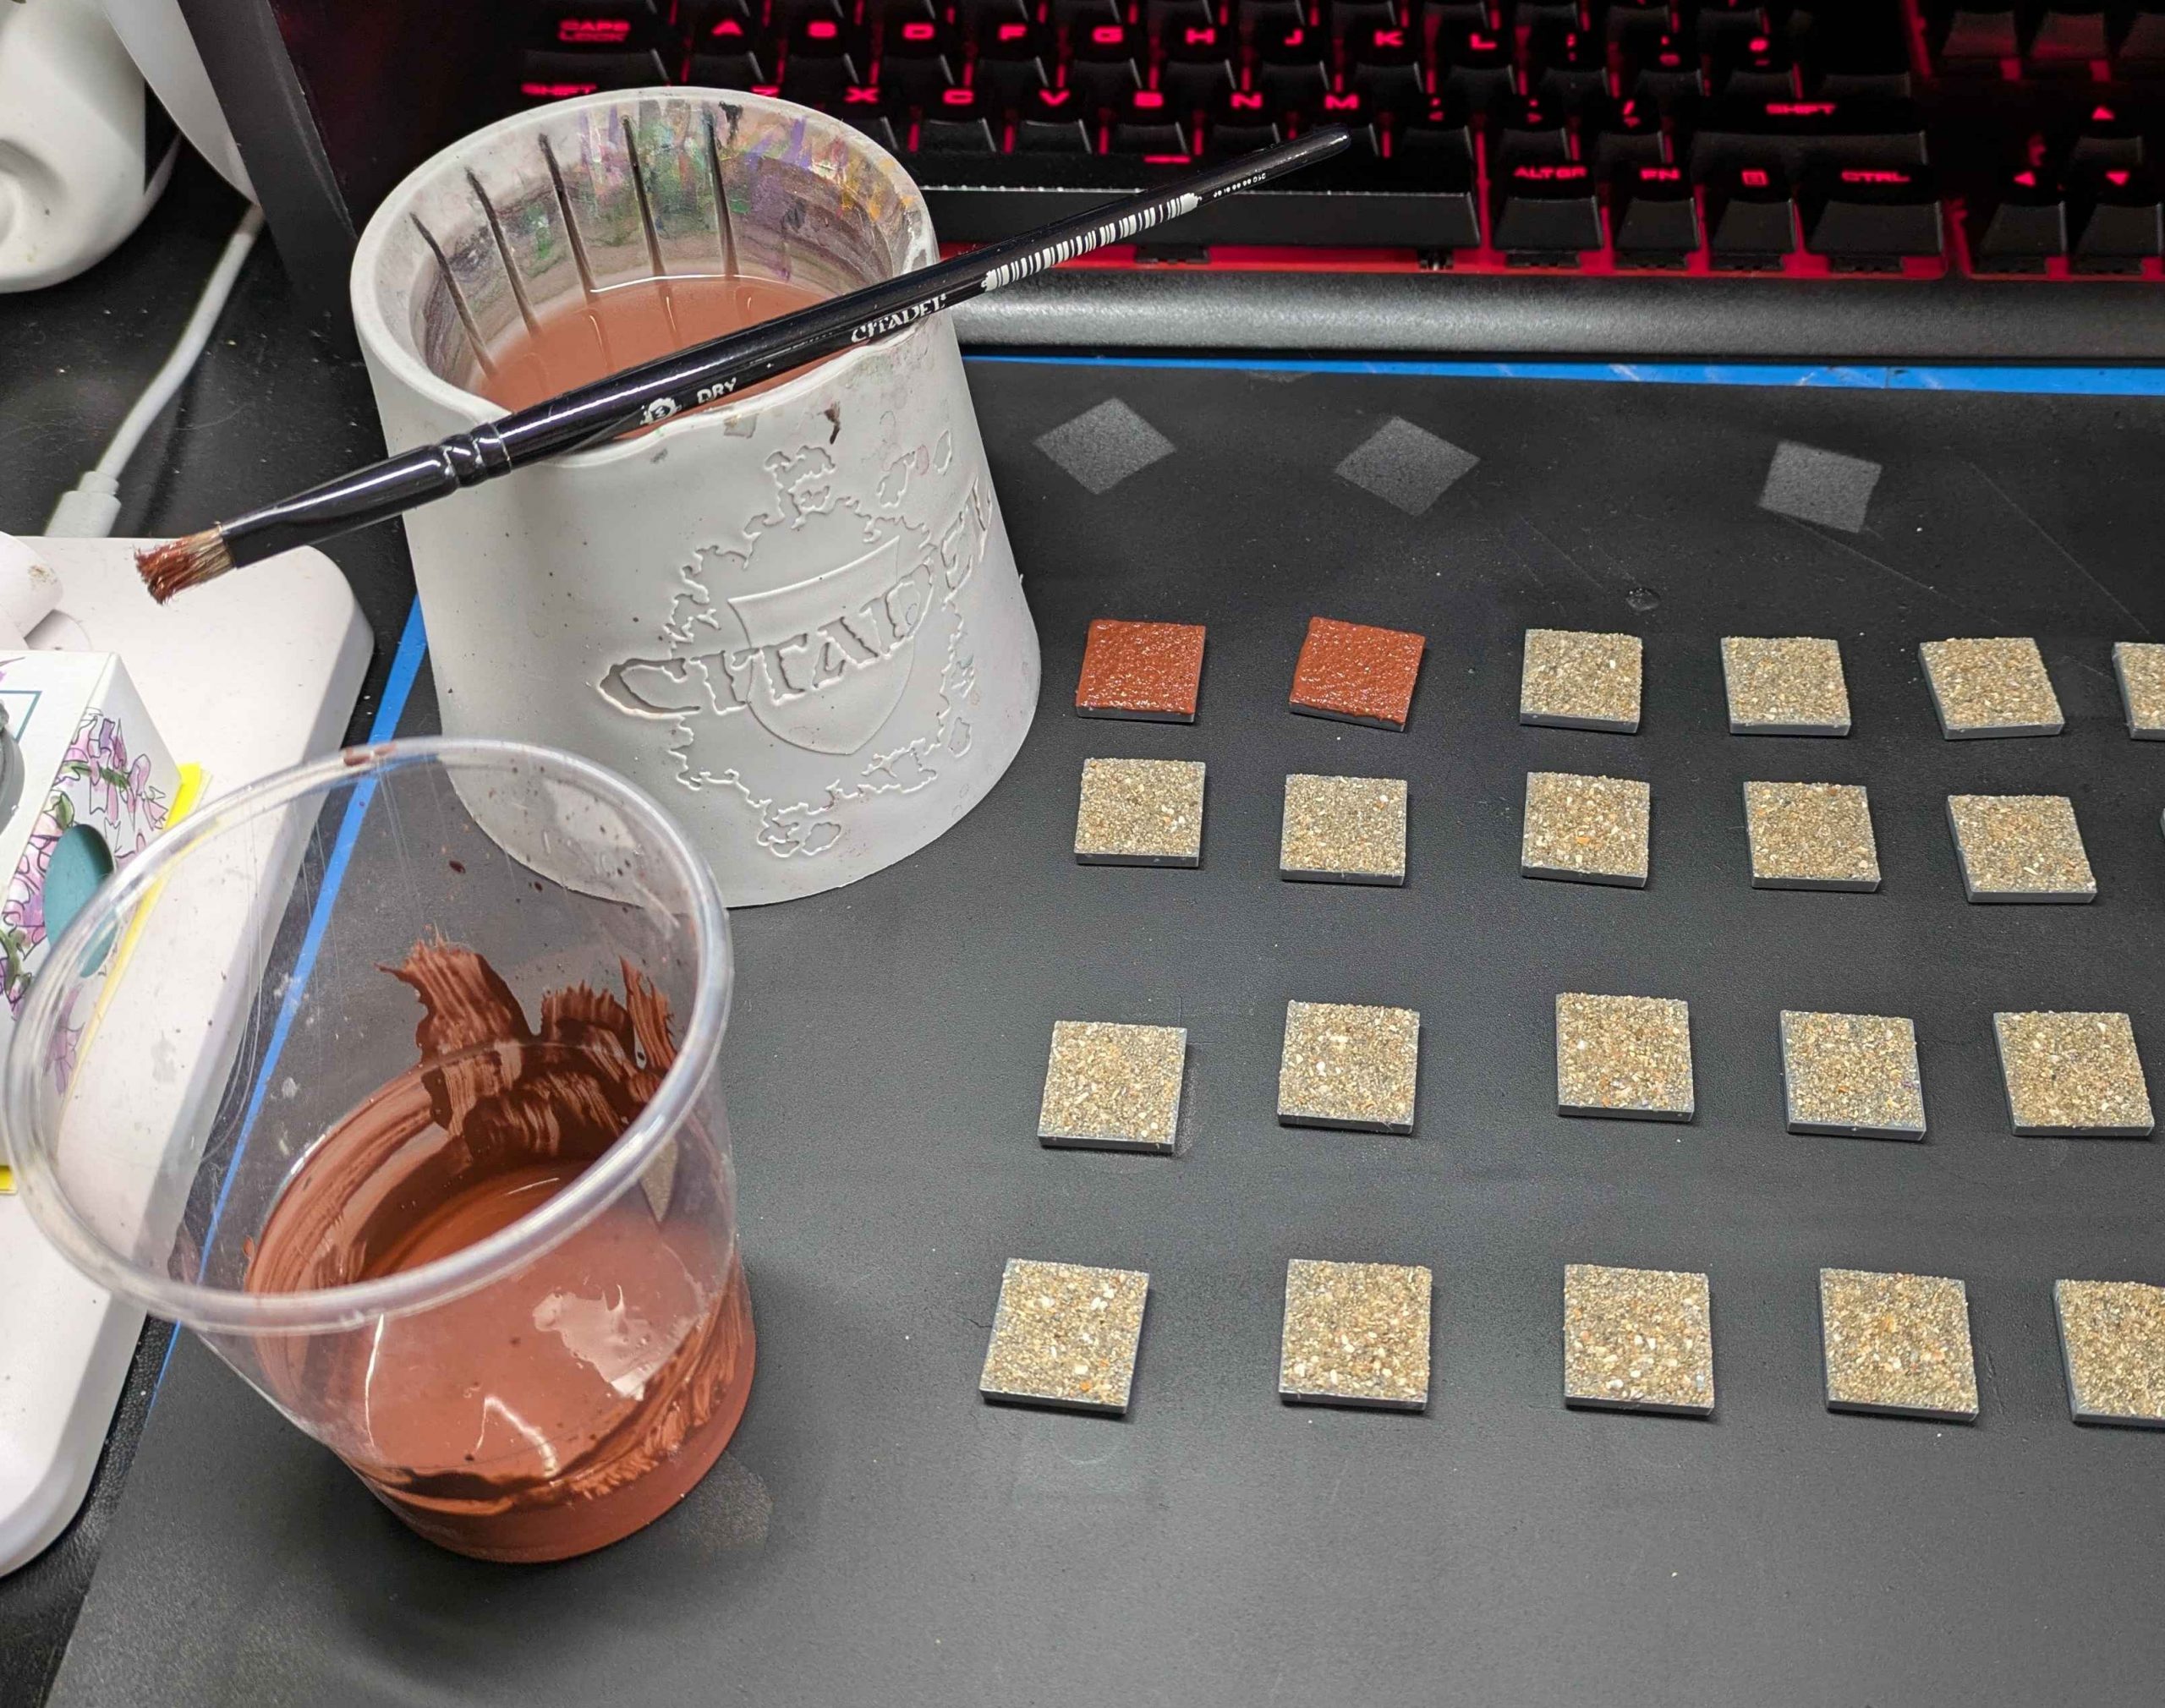
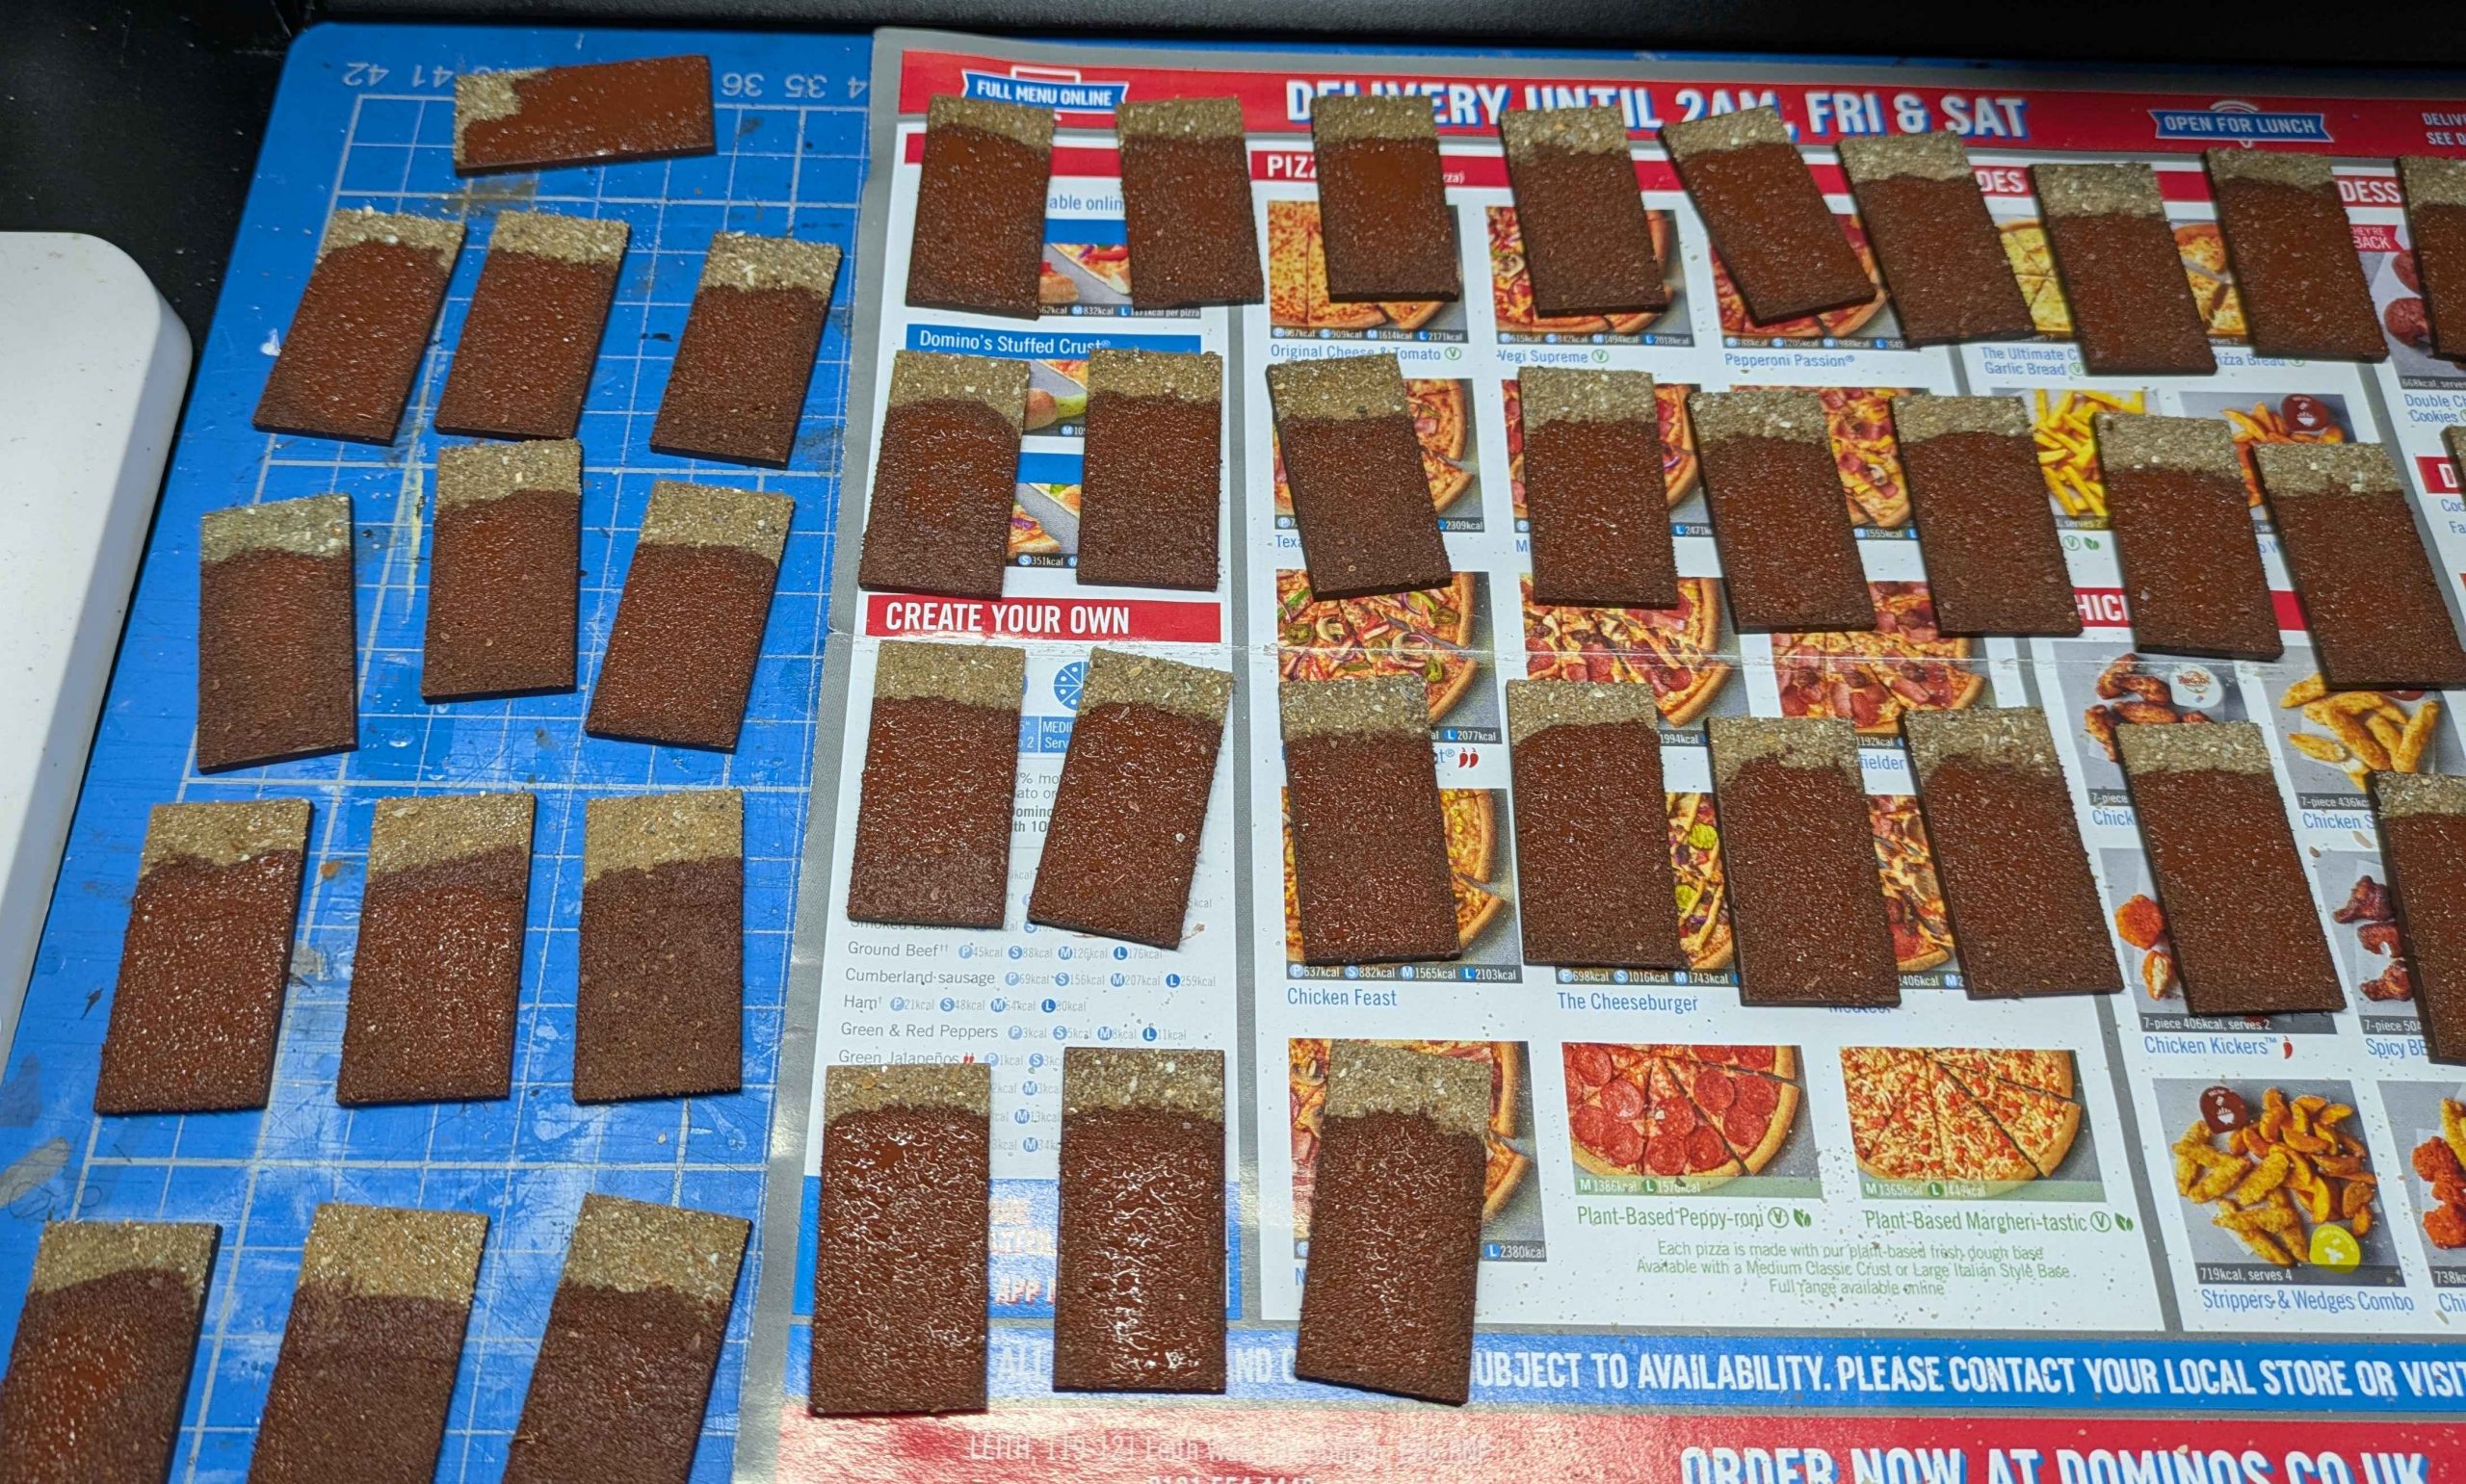
I then gave everything a coat of thinned craft paint because I find sand doesn’t take a spray prime coat as well without it. I have a doubled sided priming sheet of MDF – one side is plain and one has more of that ferrous sheeting on it so priming magnetised bases. I now have bases done for both army projects in one hobby session… time to move onto the fun part!
Night Goblins Part 10
My poor brain has been on a rough ride the last eight months thanks to a delightful colleague and two weeks or so ago, it broke. After an urgent doctor’s appointment, some prescription medication and a sick line for a month and strict instructions to do things that make me happy, it was time to grab some boxes of goblins.
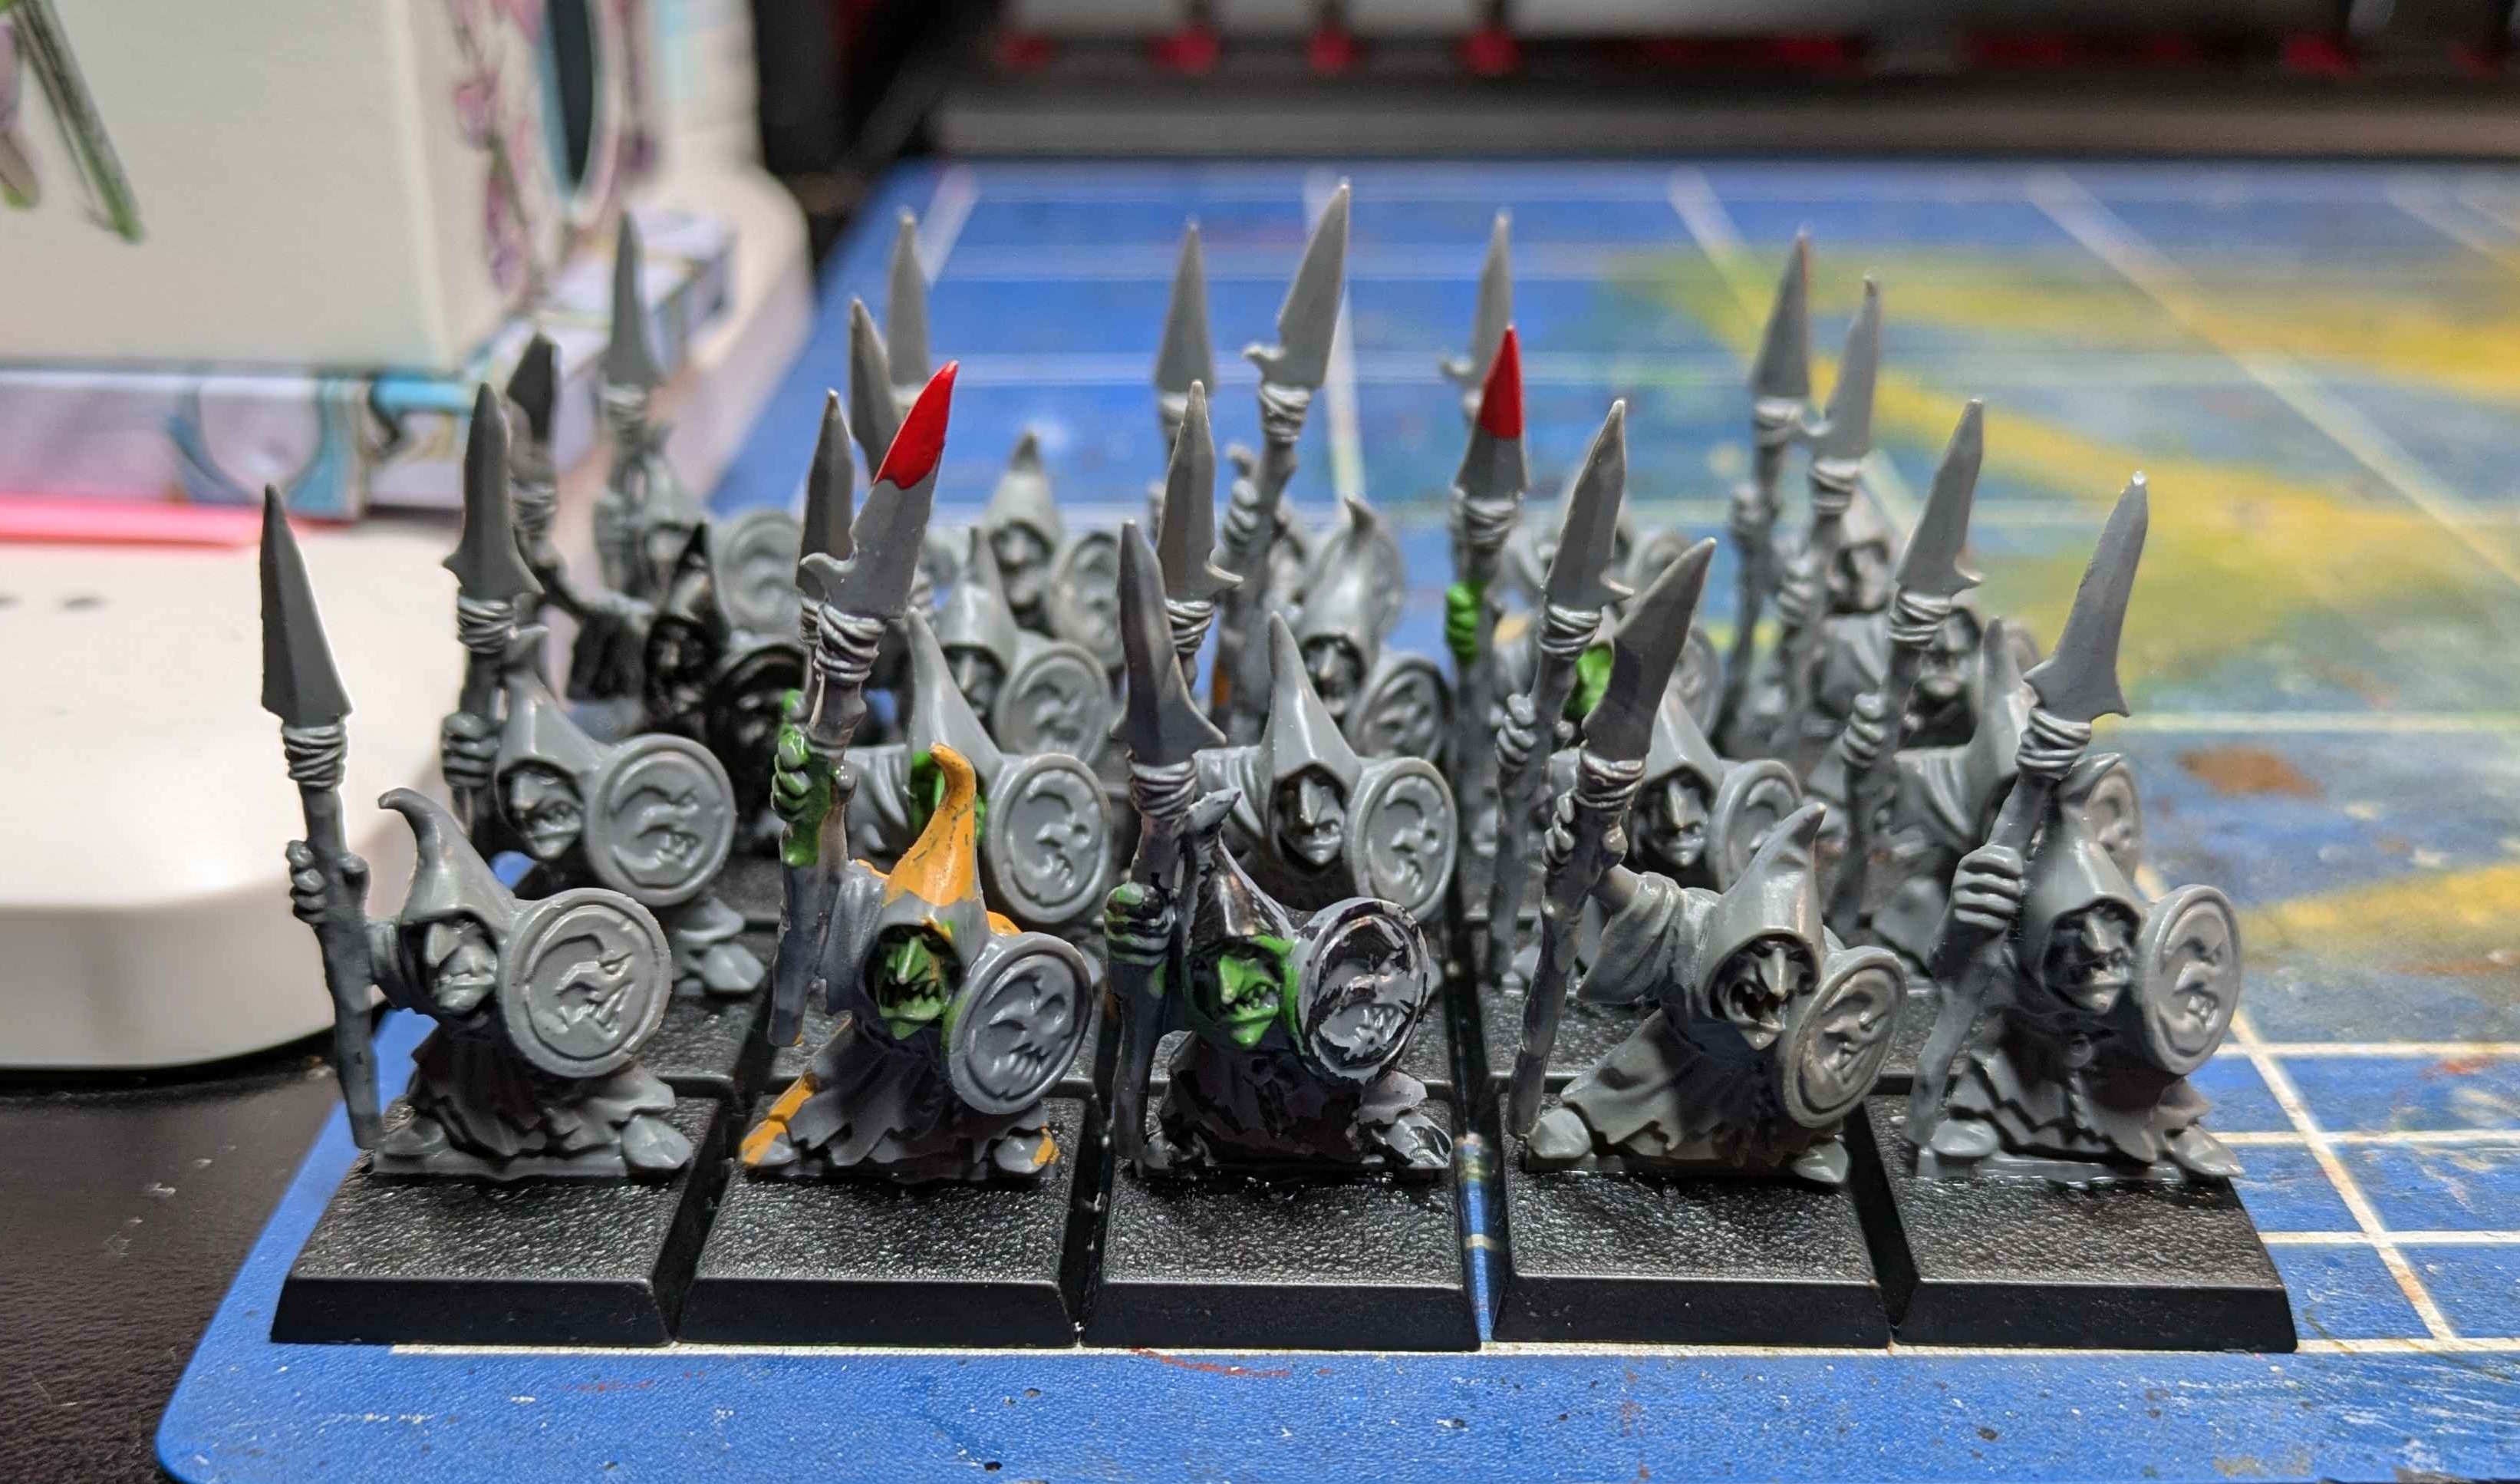
I have been slowly collecting some lovely special models but right now I need something with less thinking so infantry is a better starting place. We’ve been here before so for the painting scheme see Part 8 for the models and Part 9 for the basing.
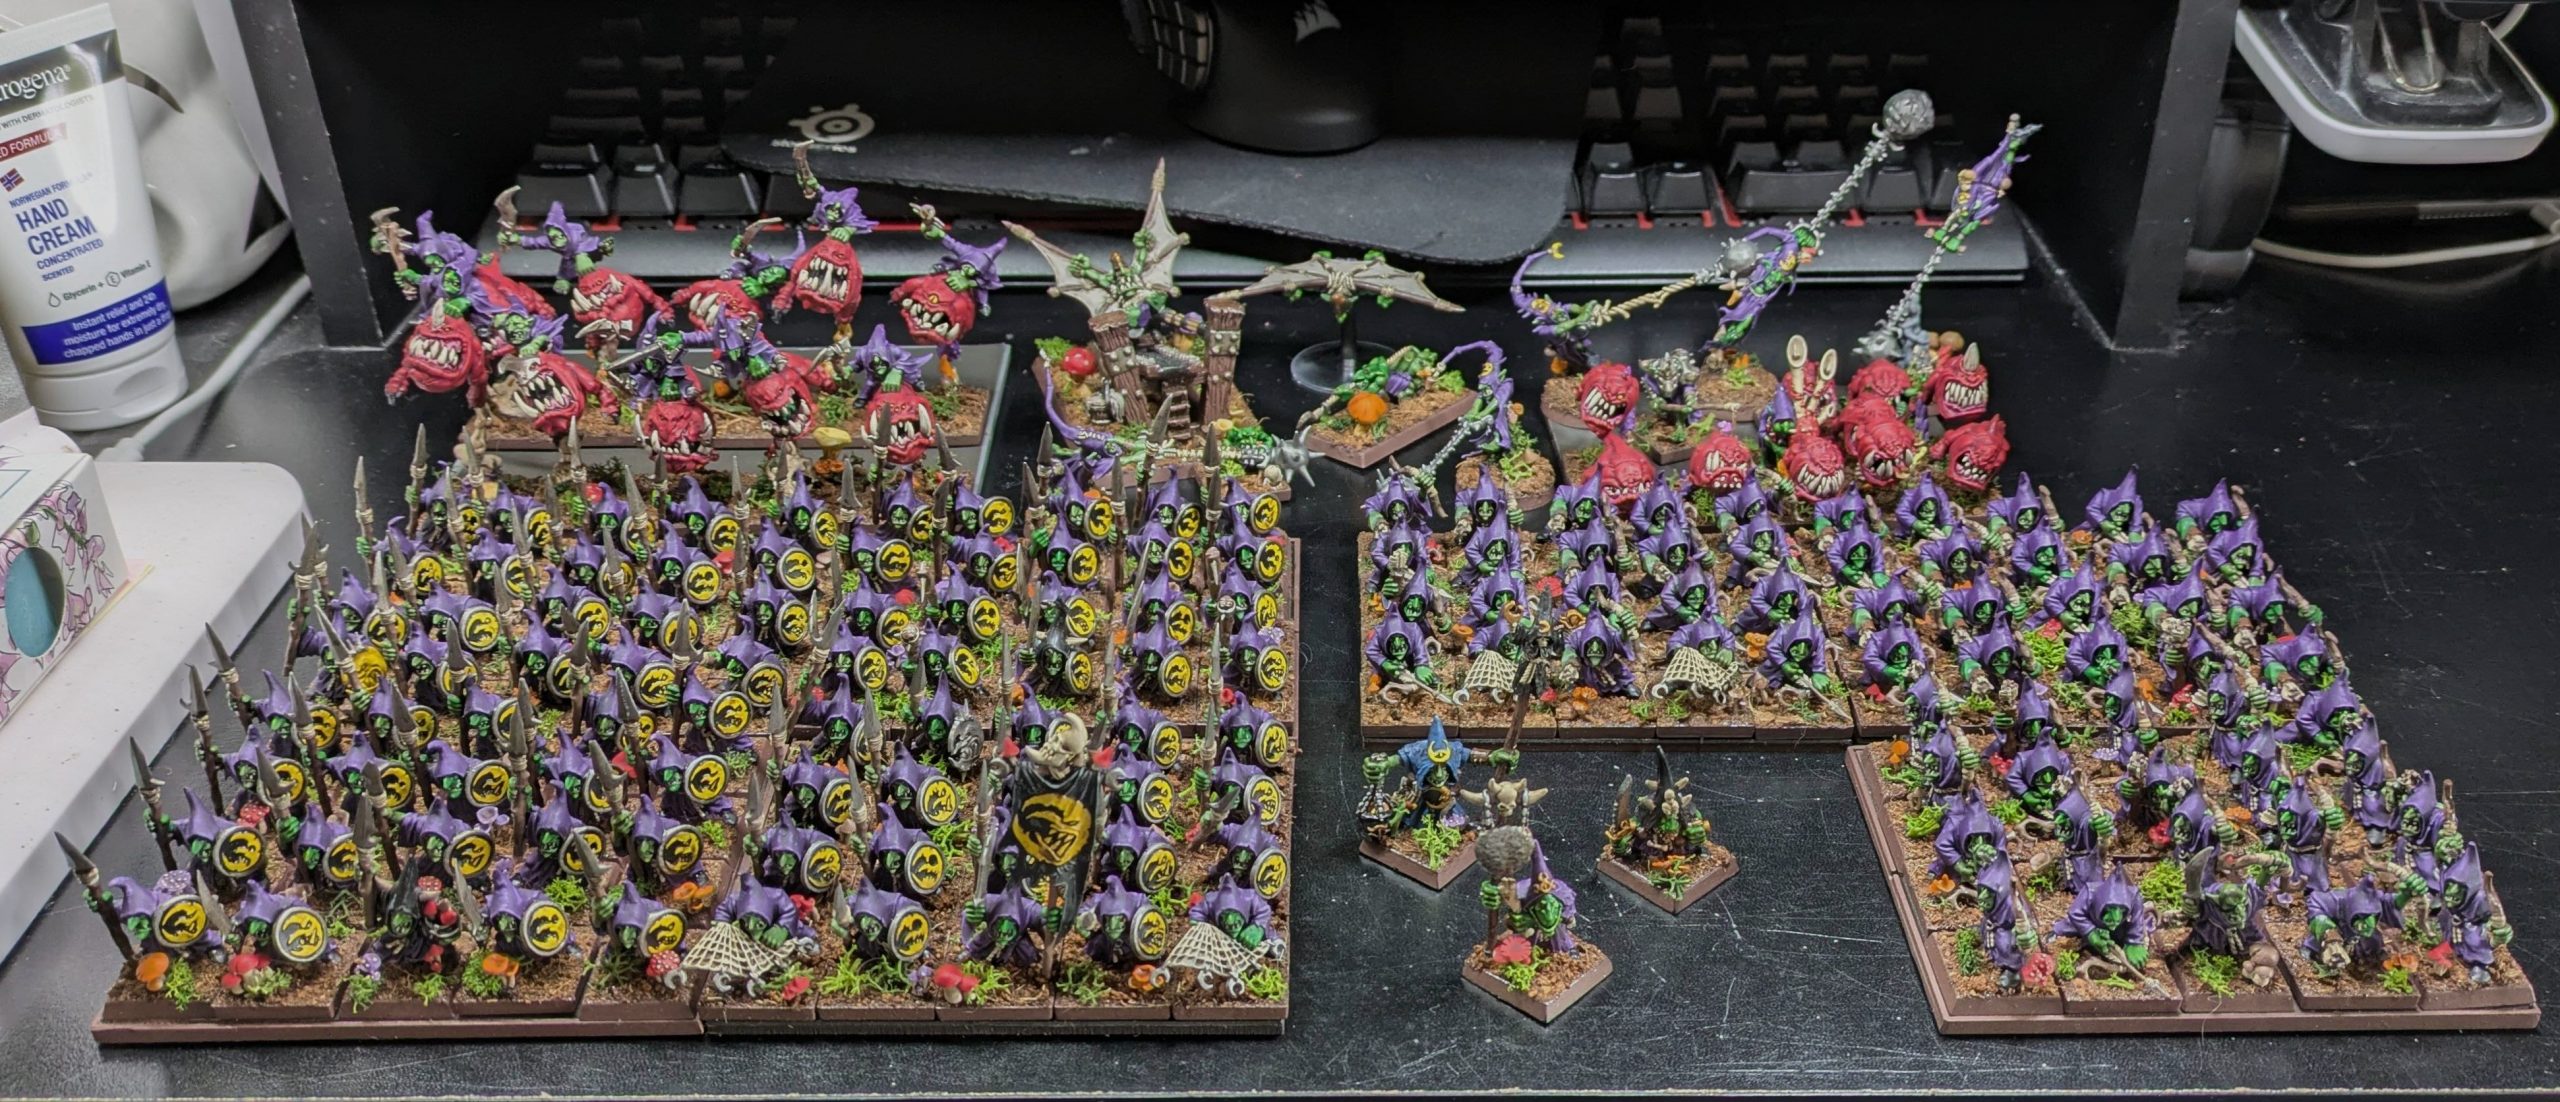
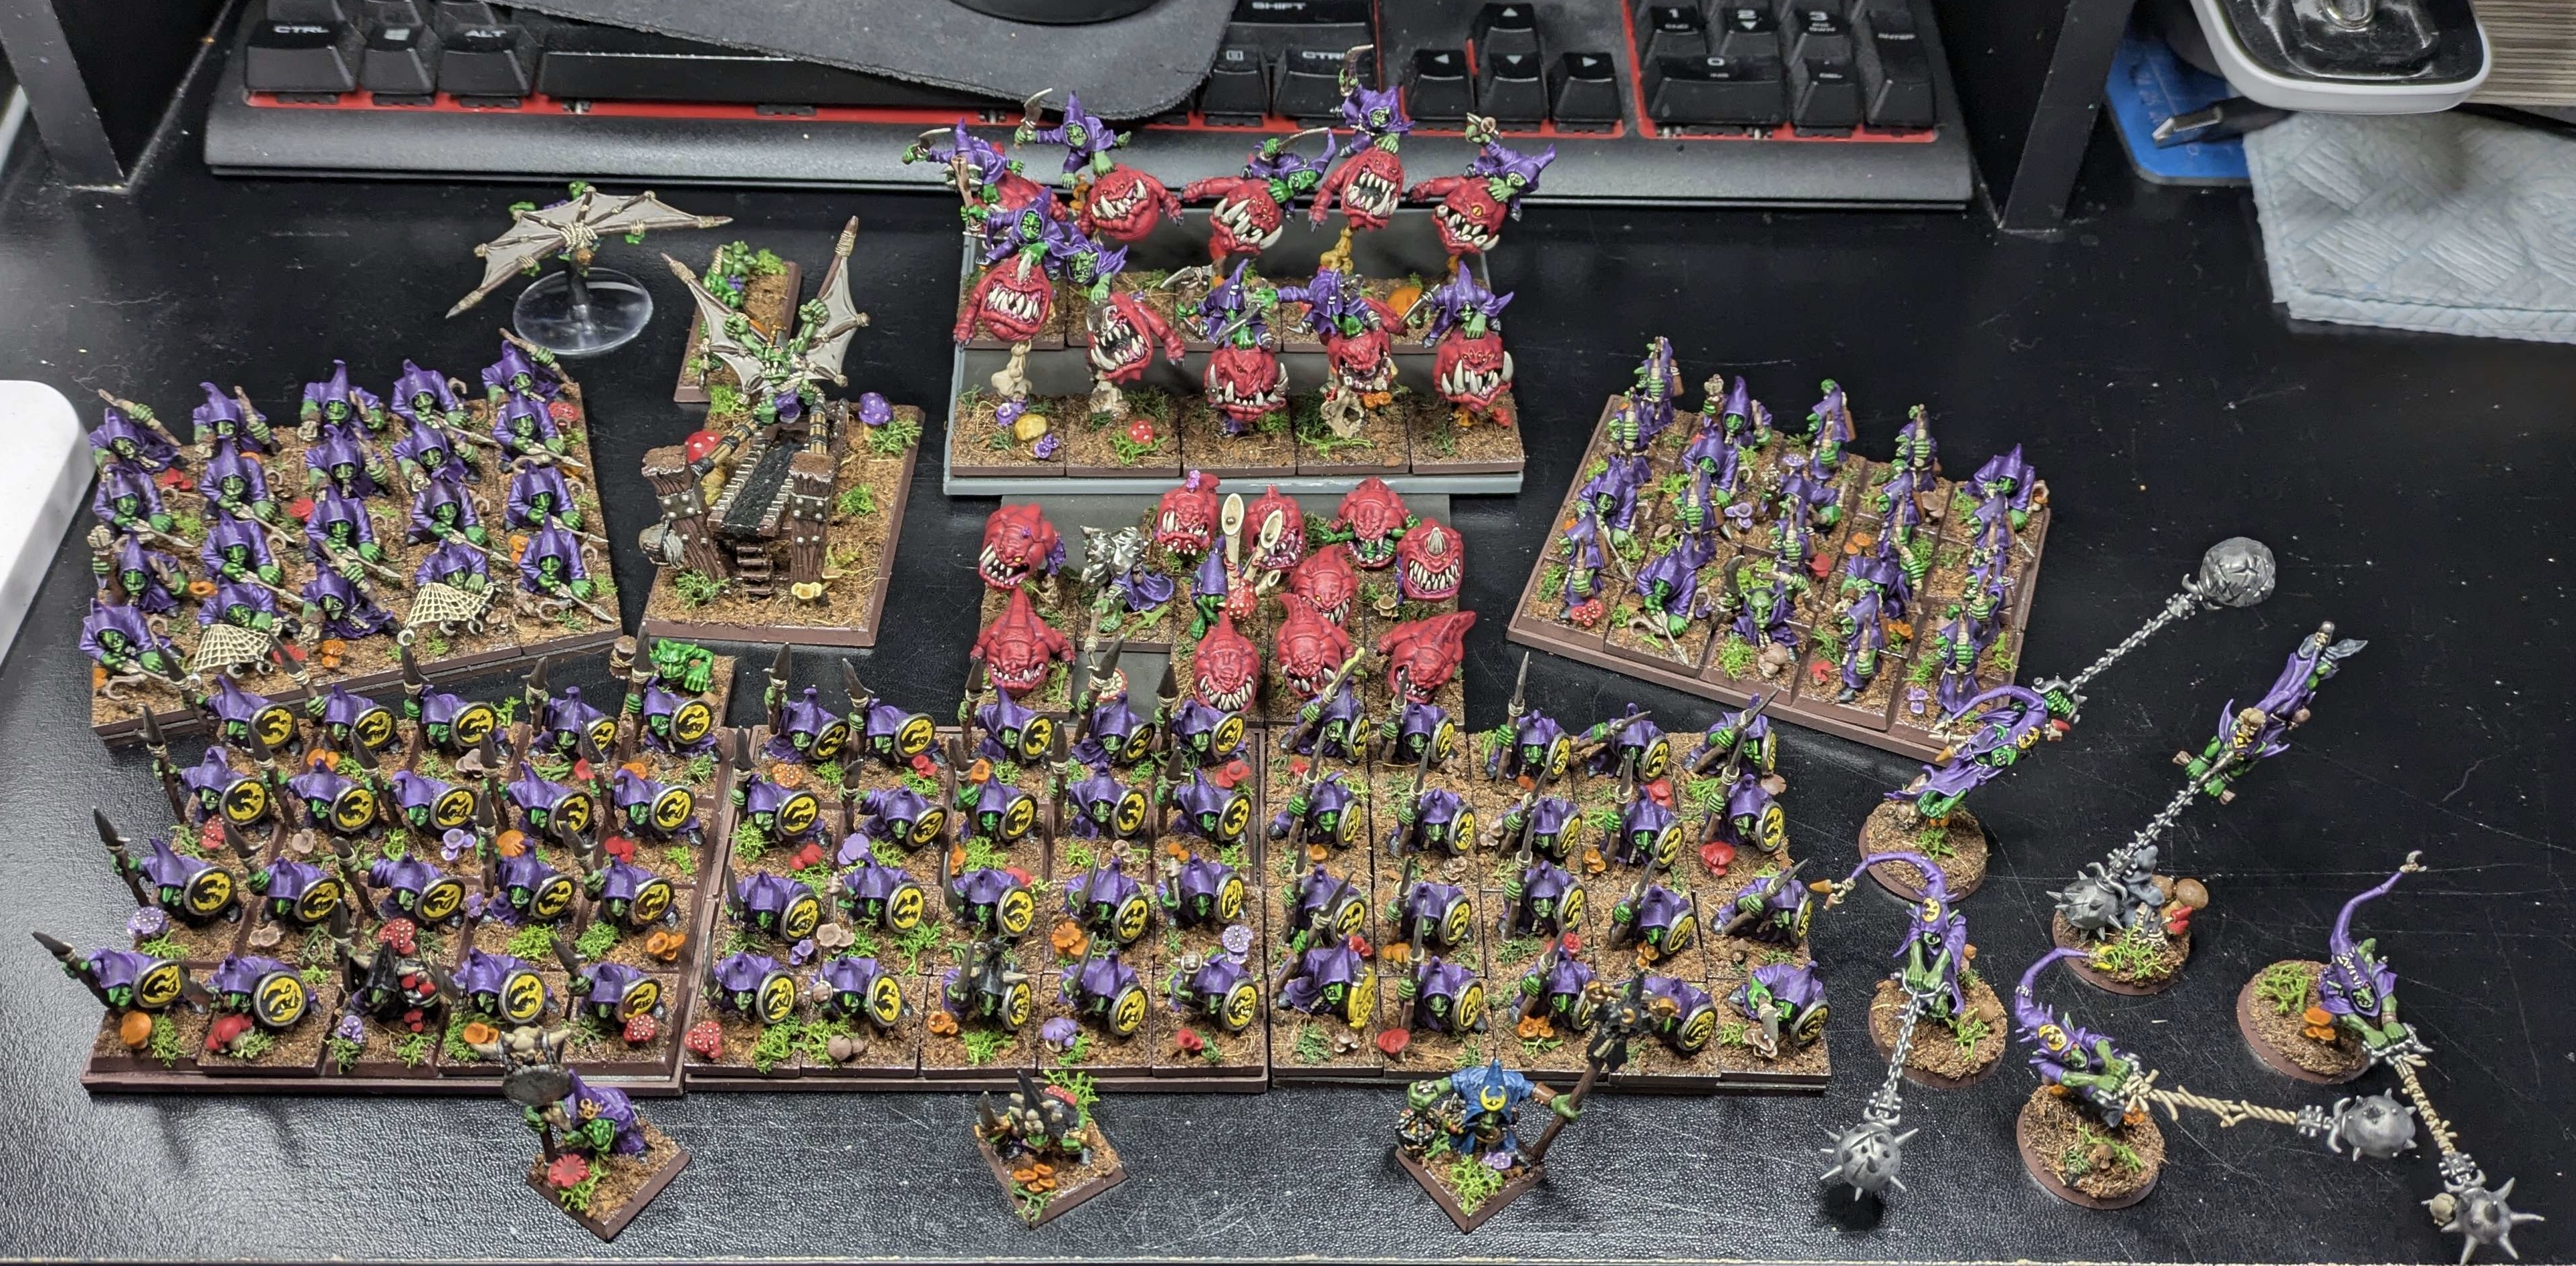
Ten days later and I’ve two more units to add to the army. It now completely fills one shelf in my glass cabinet. I’ve actually run out of some of the basing bits so I’ll need to wait for my next payday to order a load more of those. Rather than paint the characters and extra units I’ve bought just now though, I’m ready to move on to something else for a bit. I’ll be back though…

Night Goblins Part 9
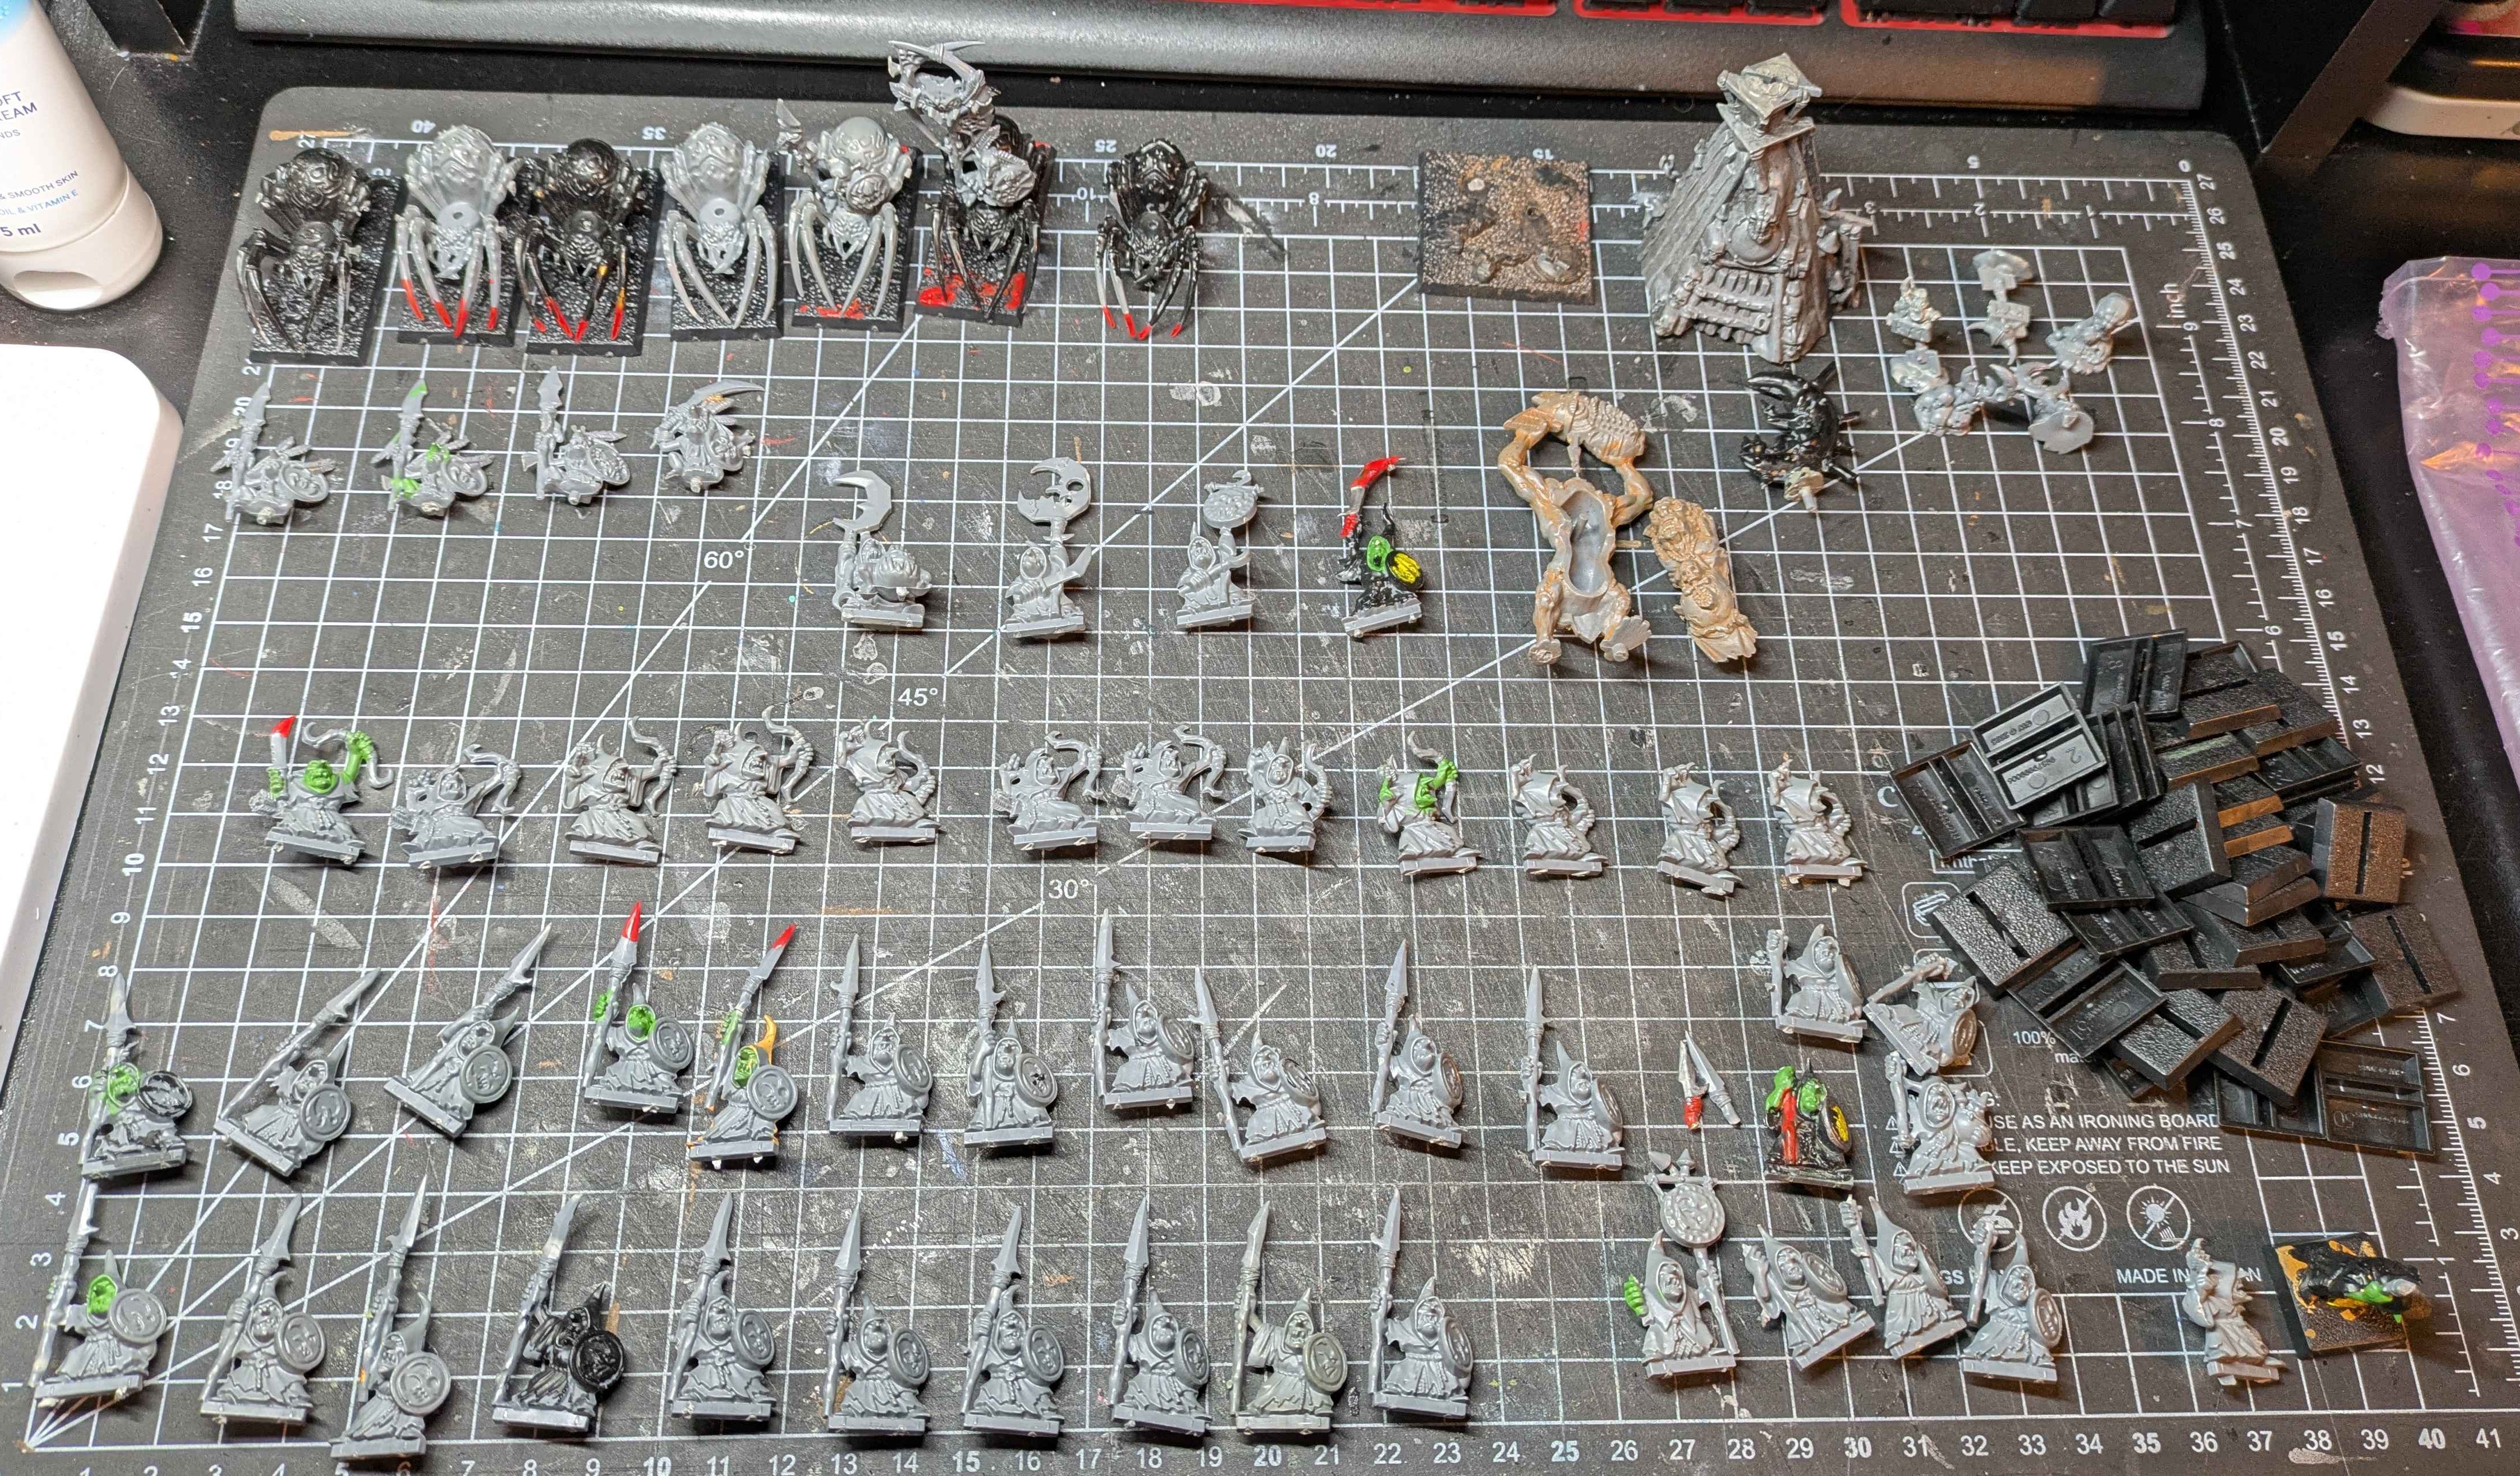
I’ve been on a wee goblin painting rampage in mid-March. I took the remaining infantry from the cheap eBay bag, did some repairs from my bits box and picked up another box of Stabbas to make up the number to 20 more each of ranged and melee. They are a great project to work on while watching or listening to something more interesting – after 120 of them, it is muscle memory to paint them.
Then though, I had 63 goblins that needed proper basing done. And magnets added to the bases cos I forgot to do that step first (again!).
The basing this time was a little different as the eBay ones are all on slottas so would already be on the bases for the first step. Other than that, the process was pretty much the same:
- Paint bases dark brown (AP Fanatics Oak Brown)
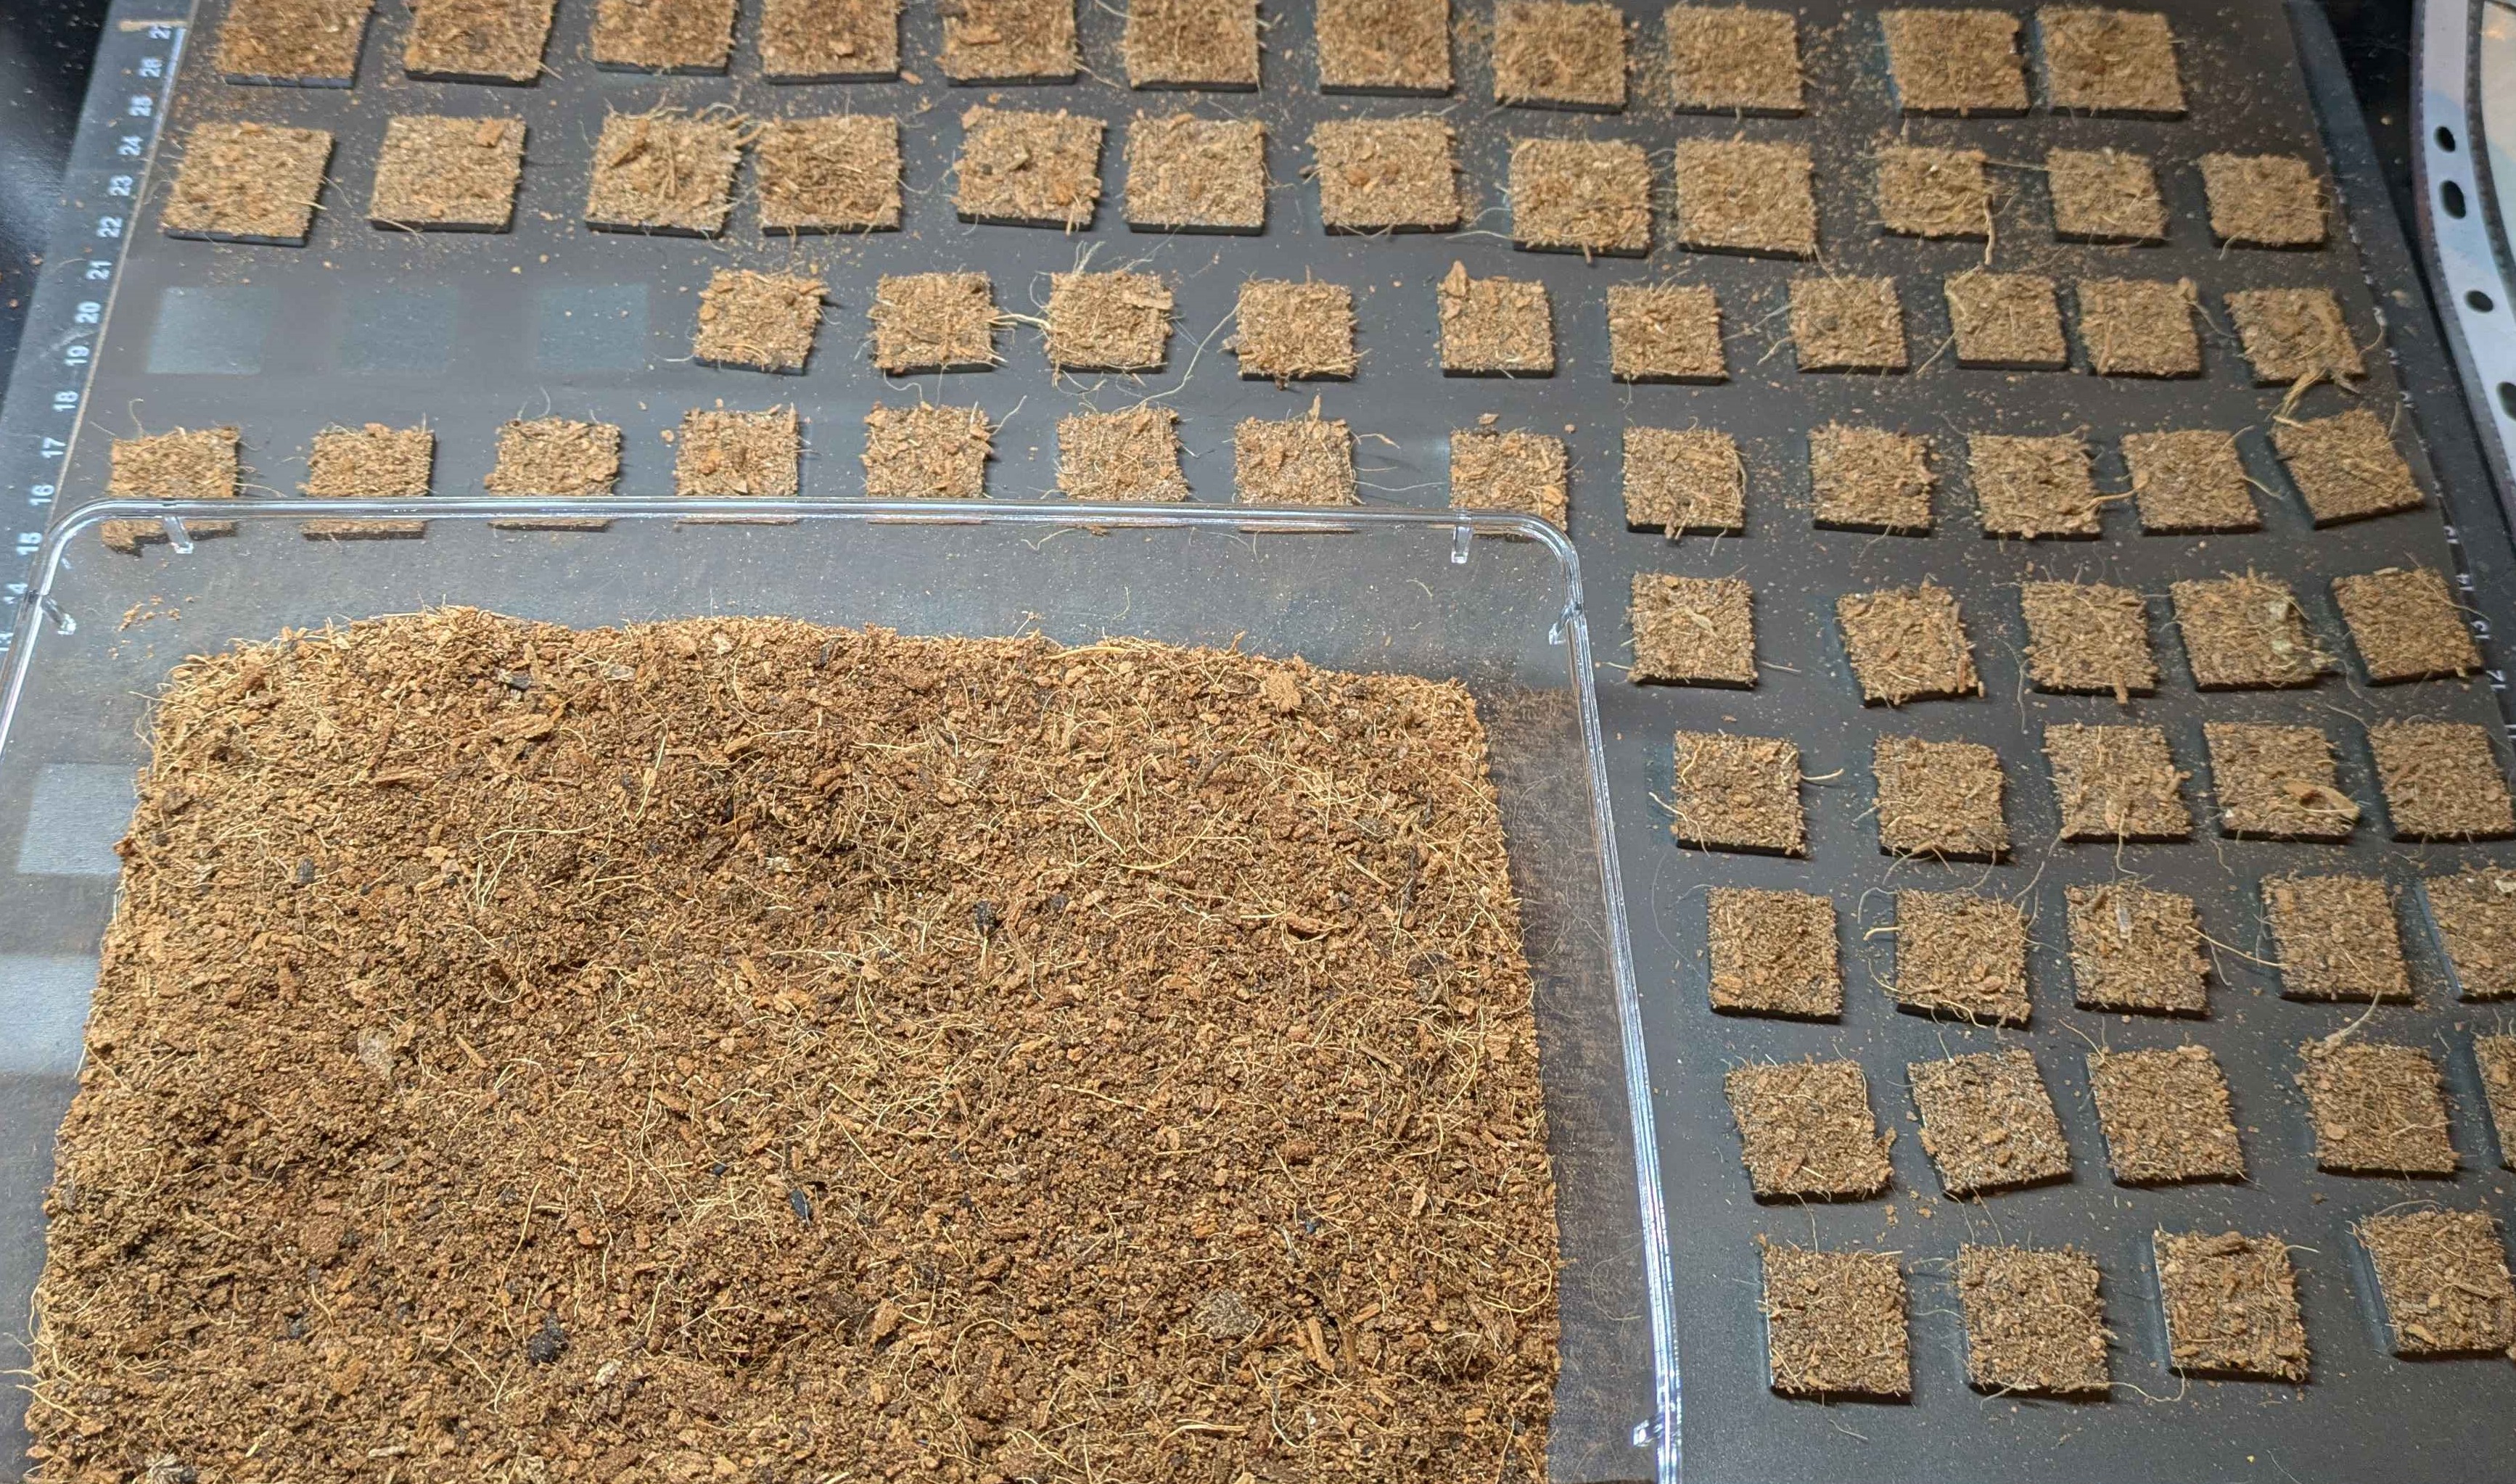
- Get a good layer of thick superglue all over the base and cover it in shredded coco fibre
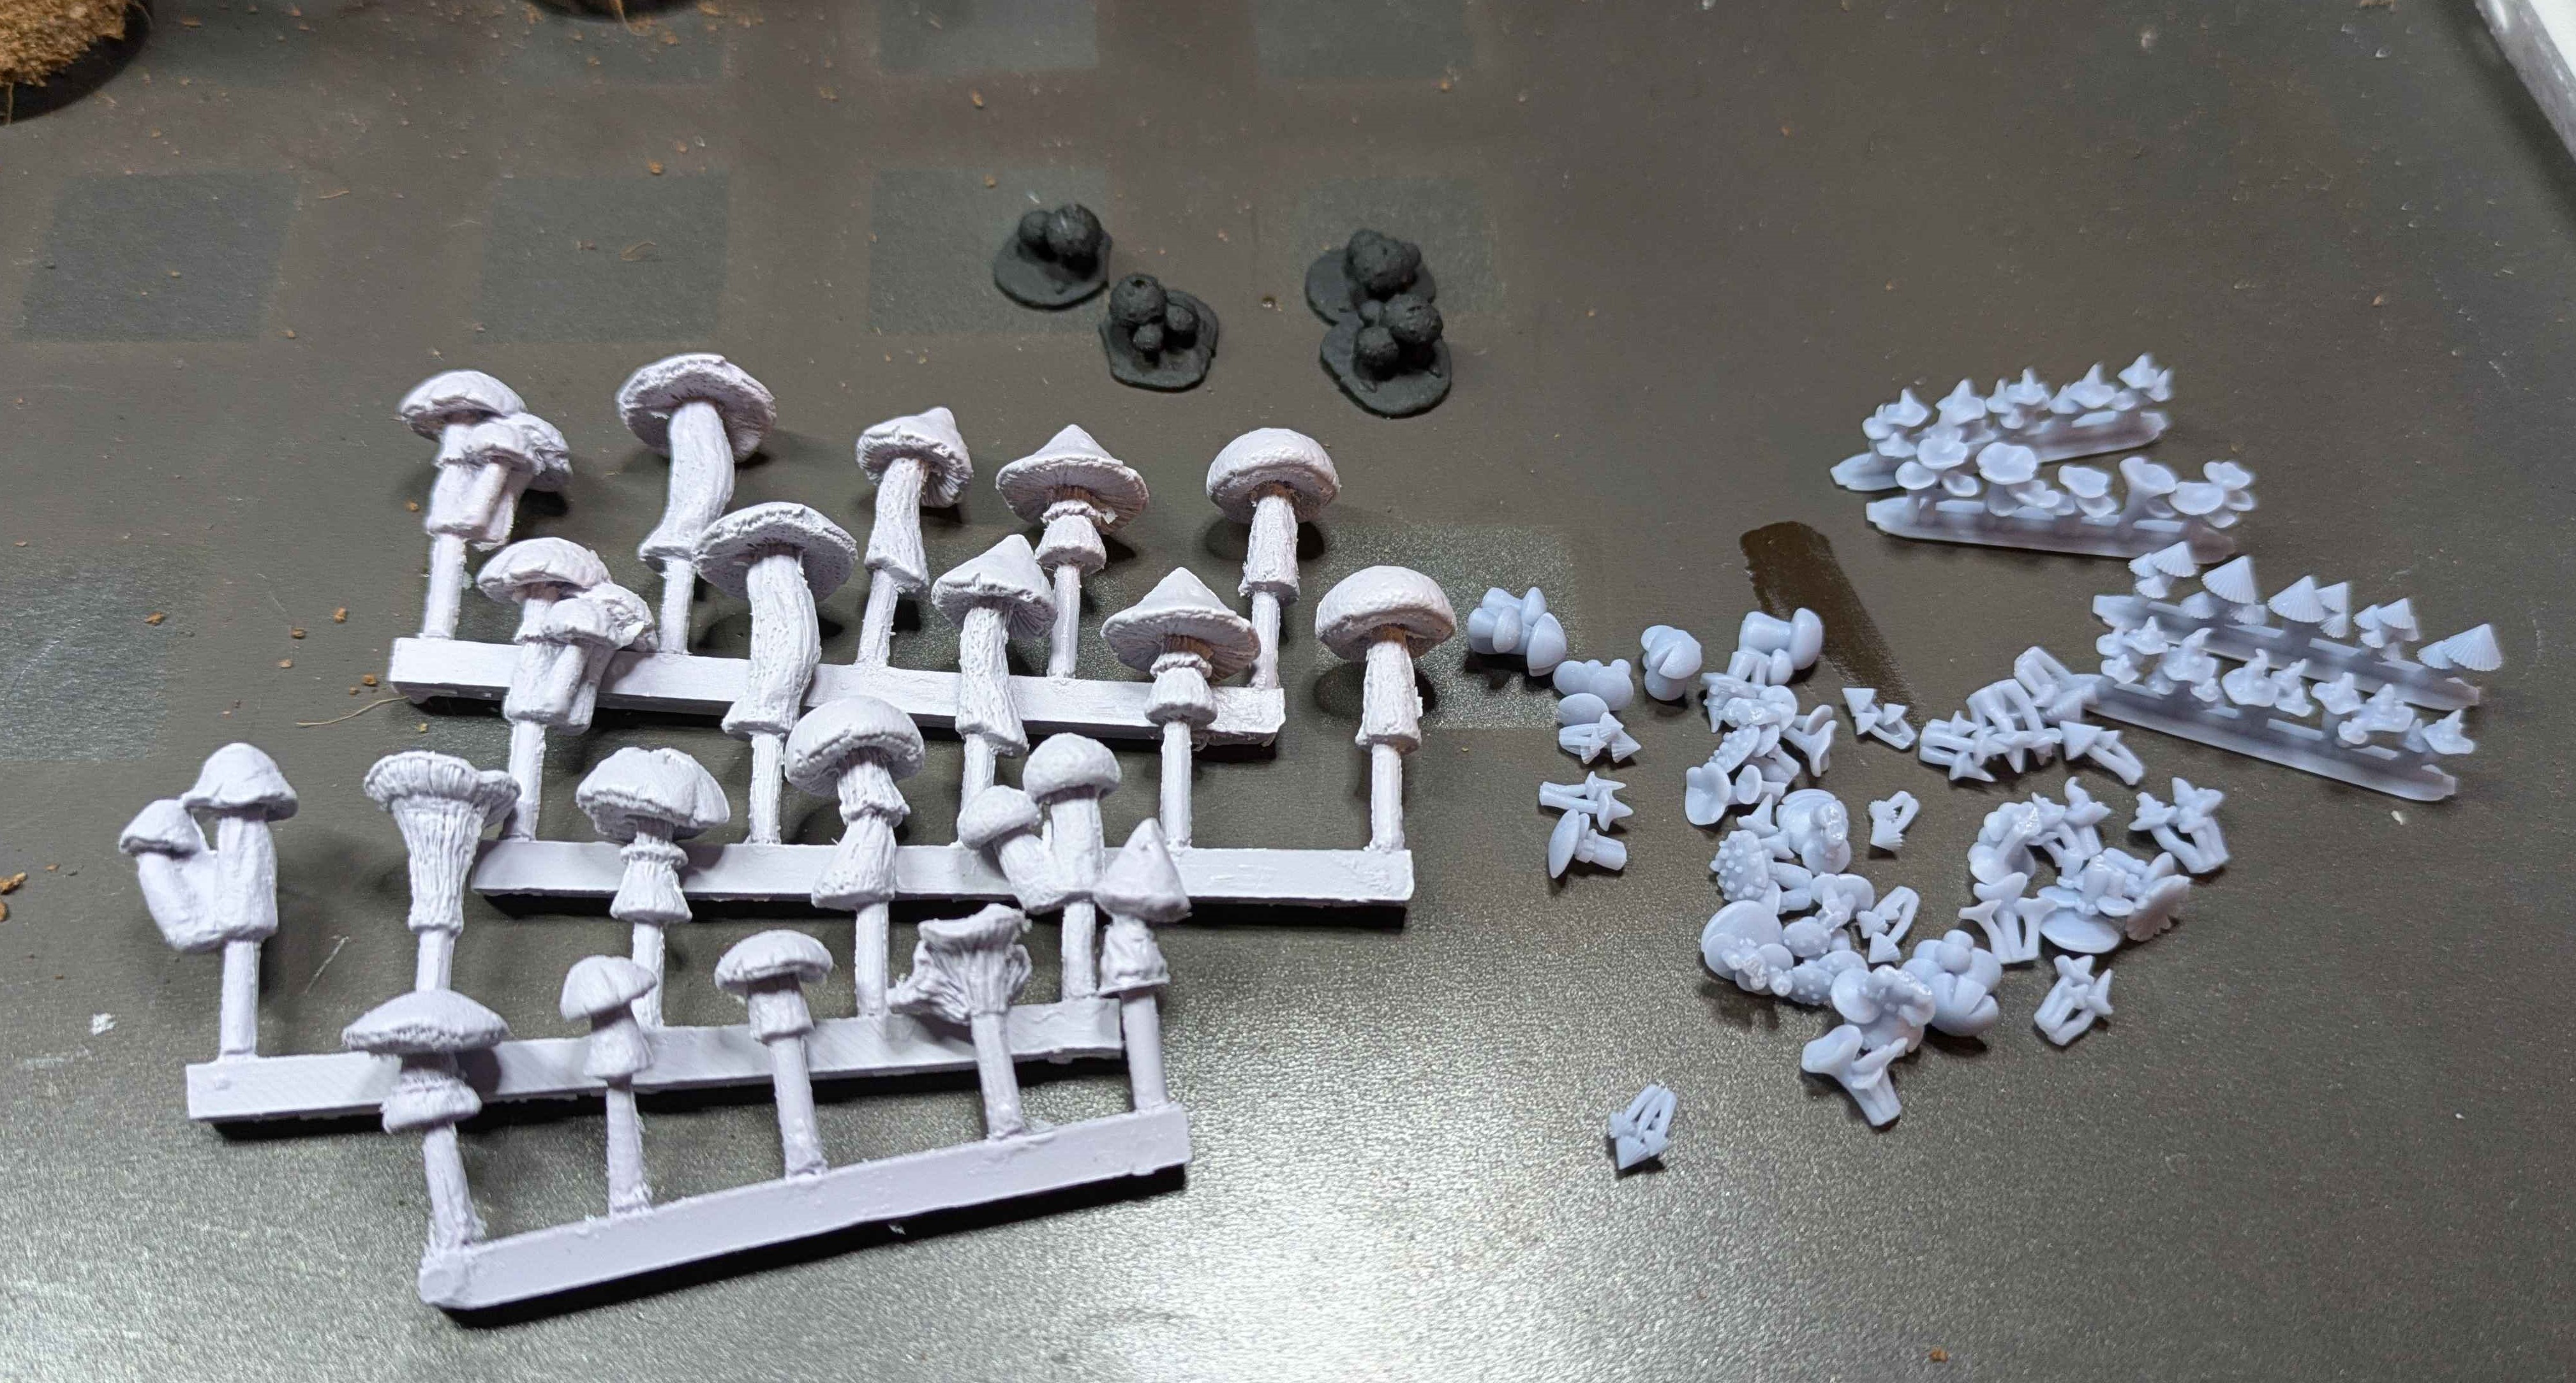
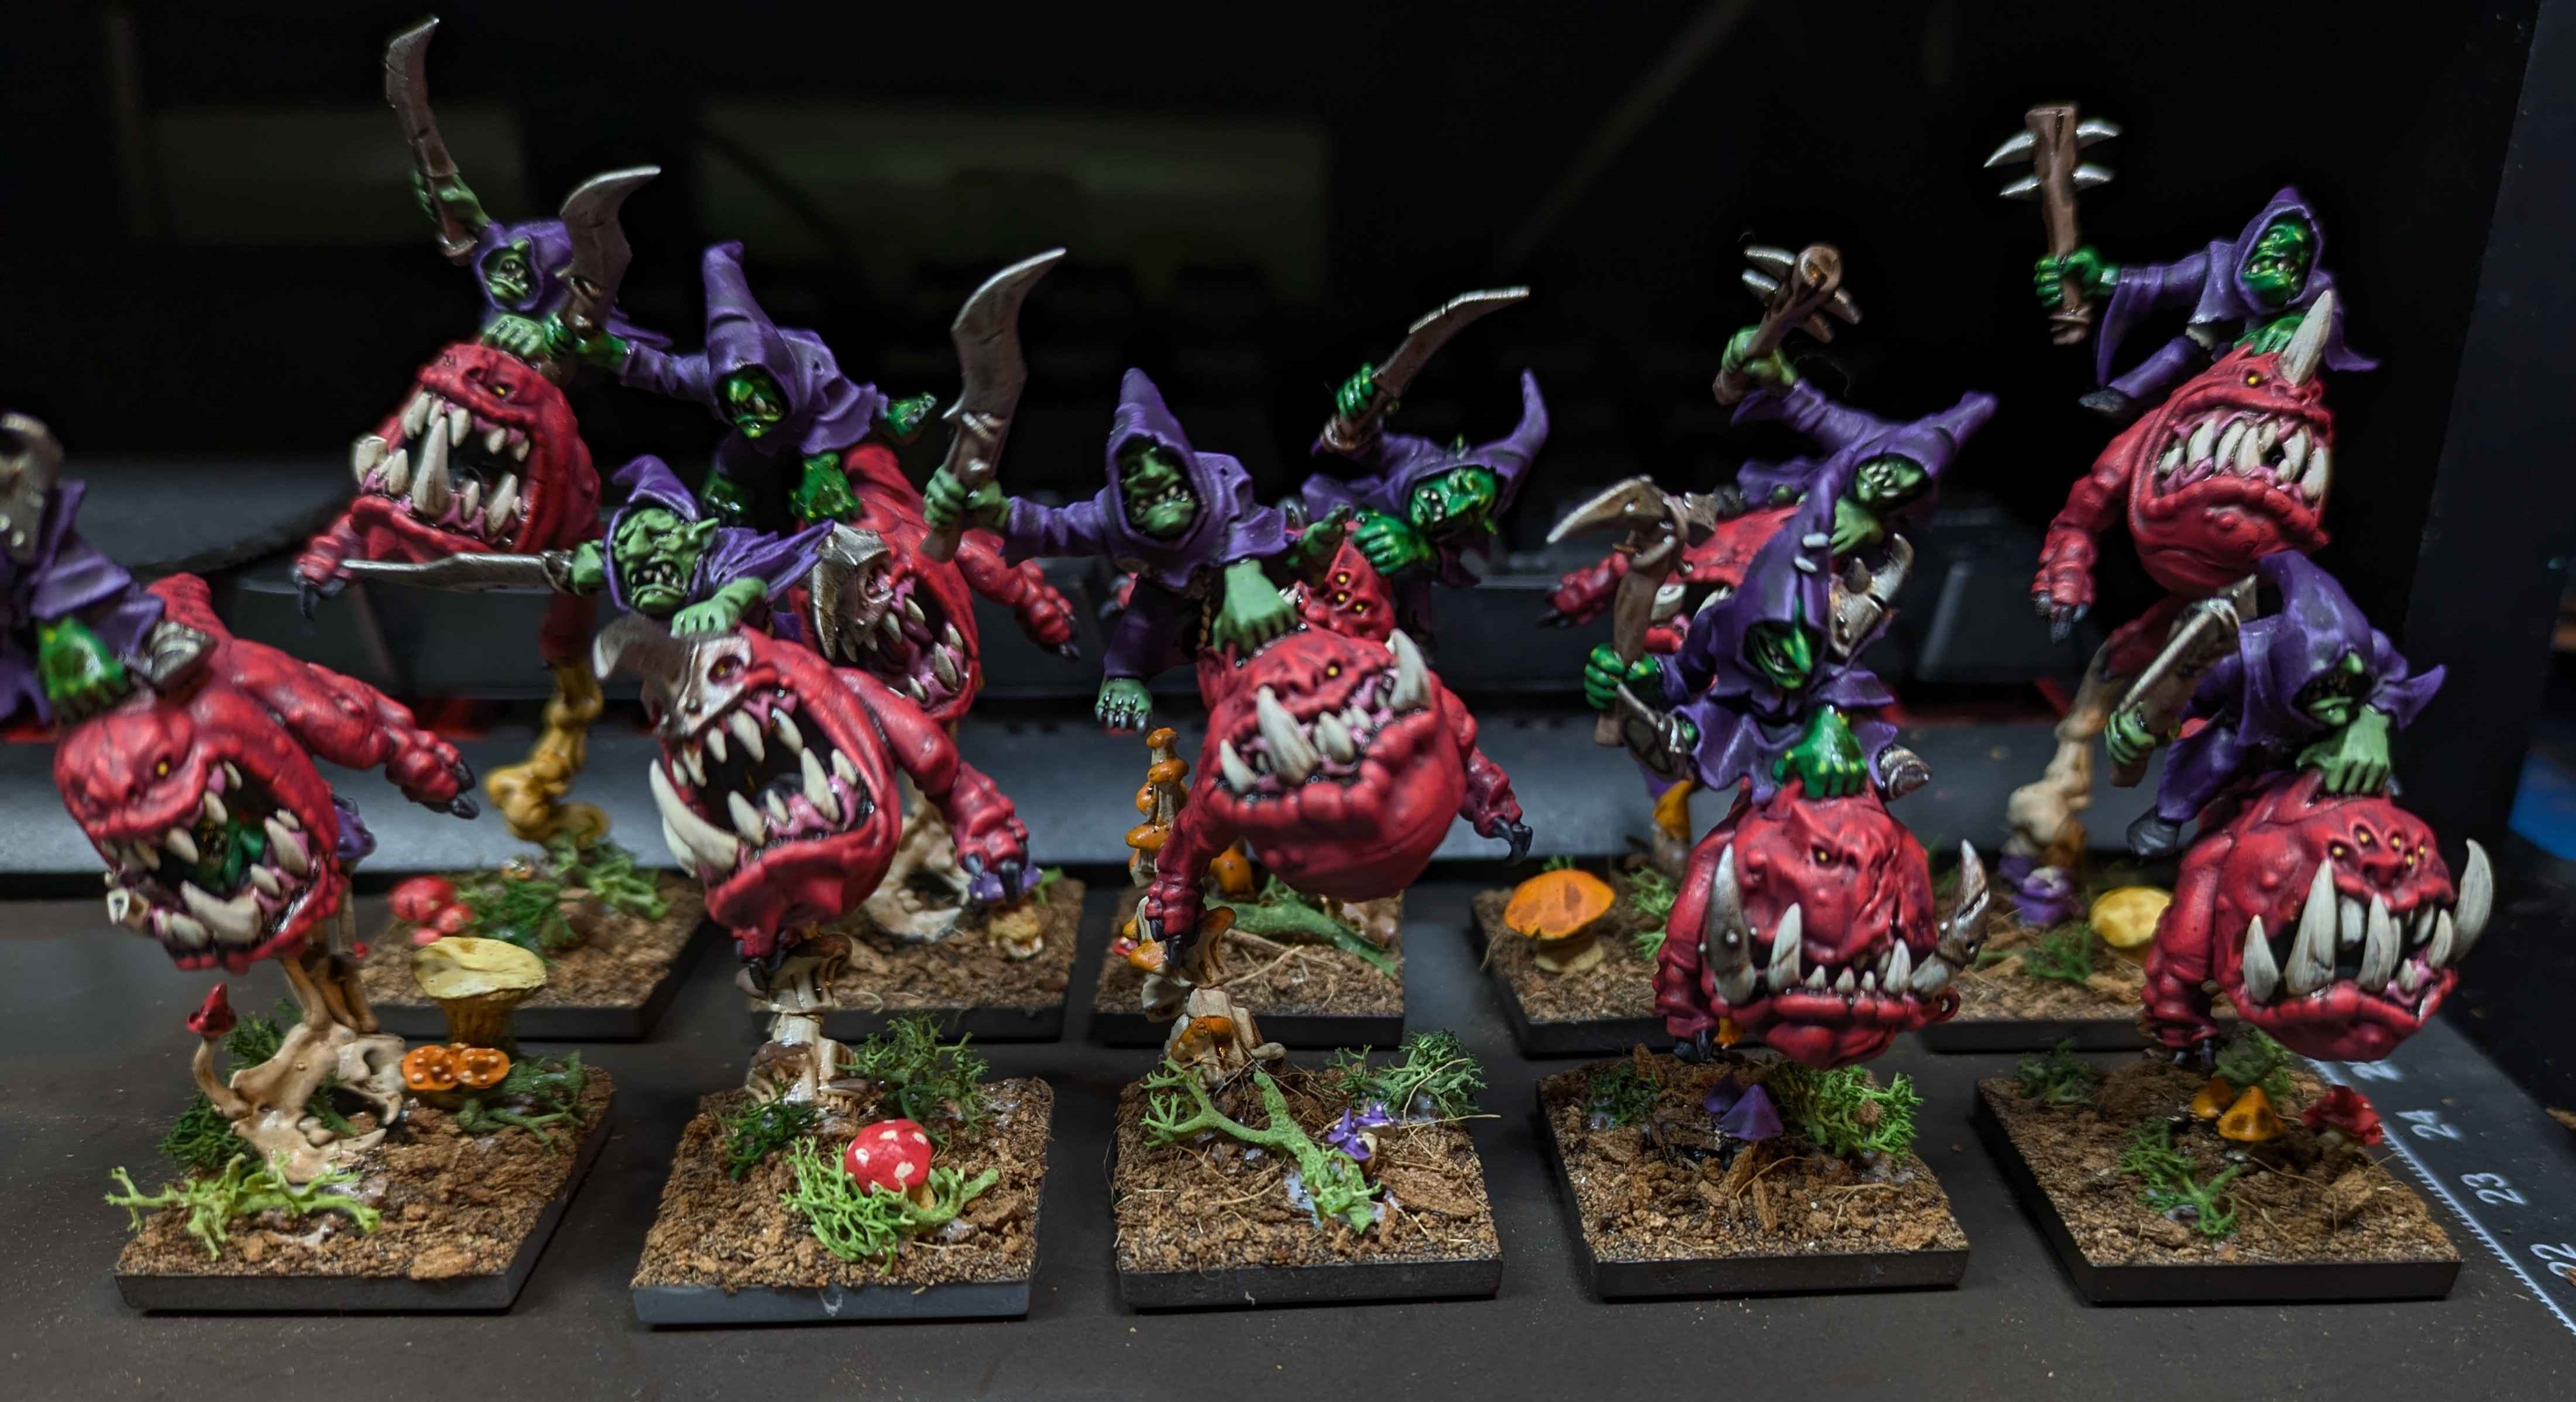
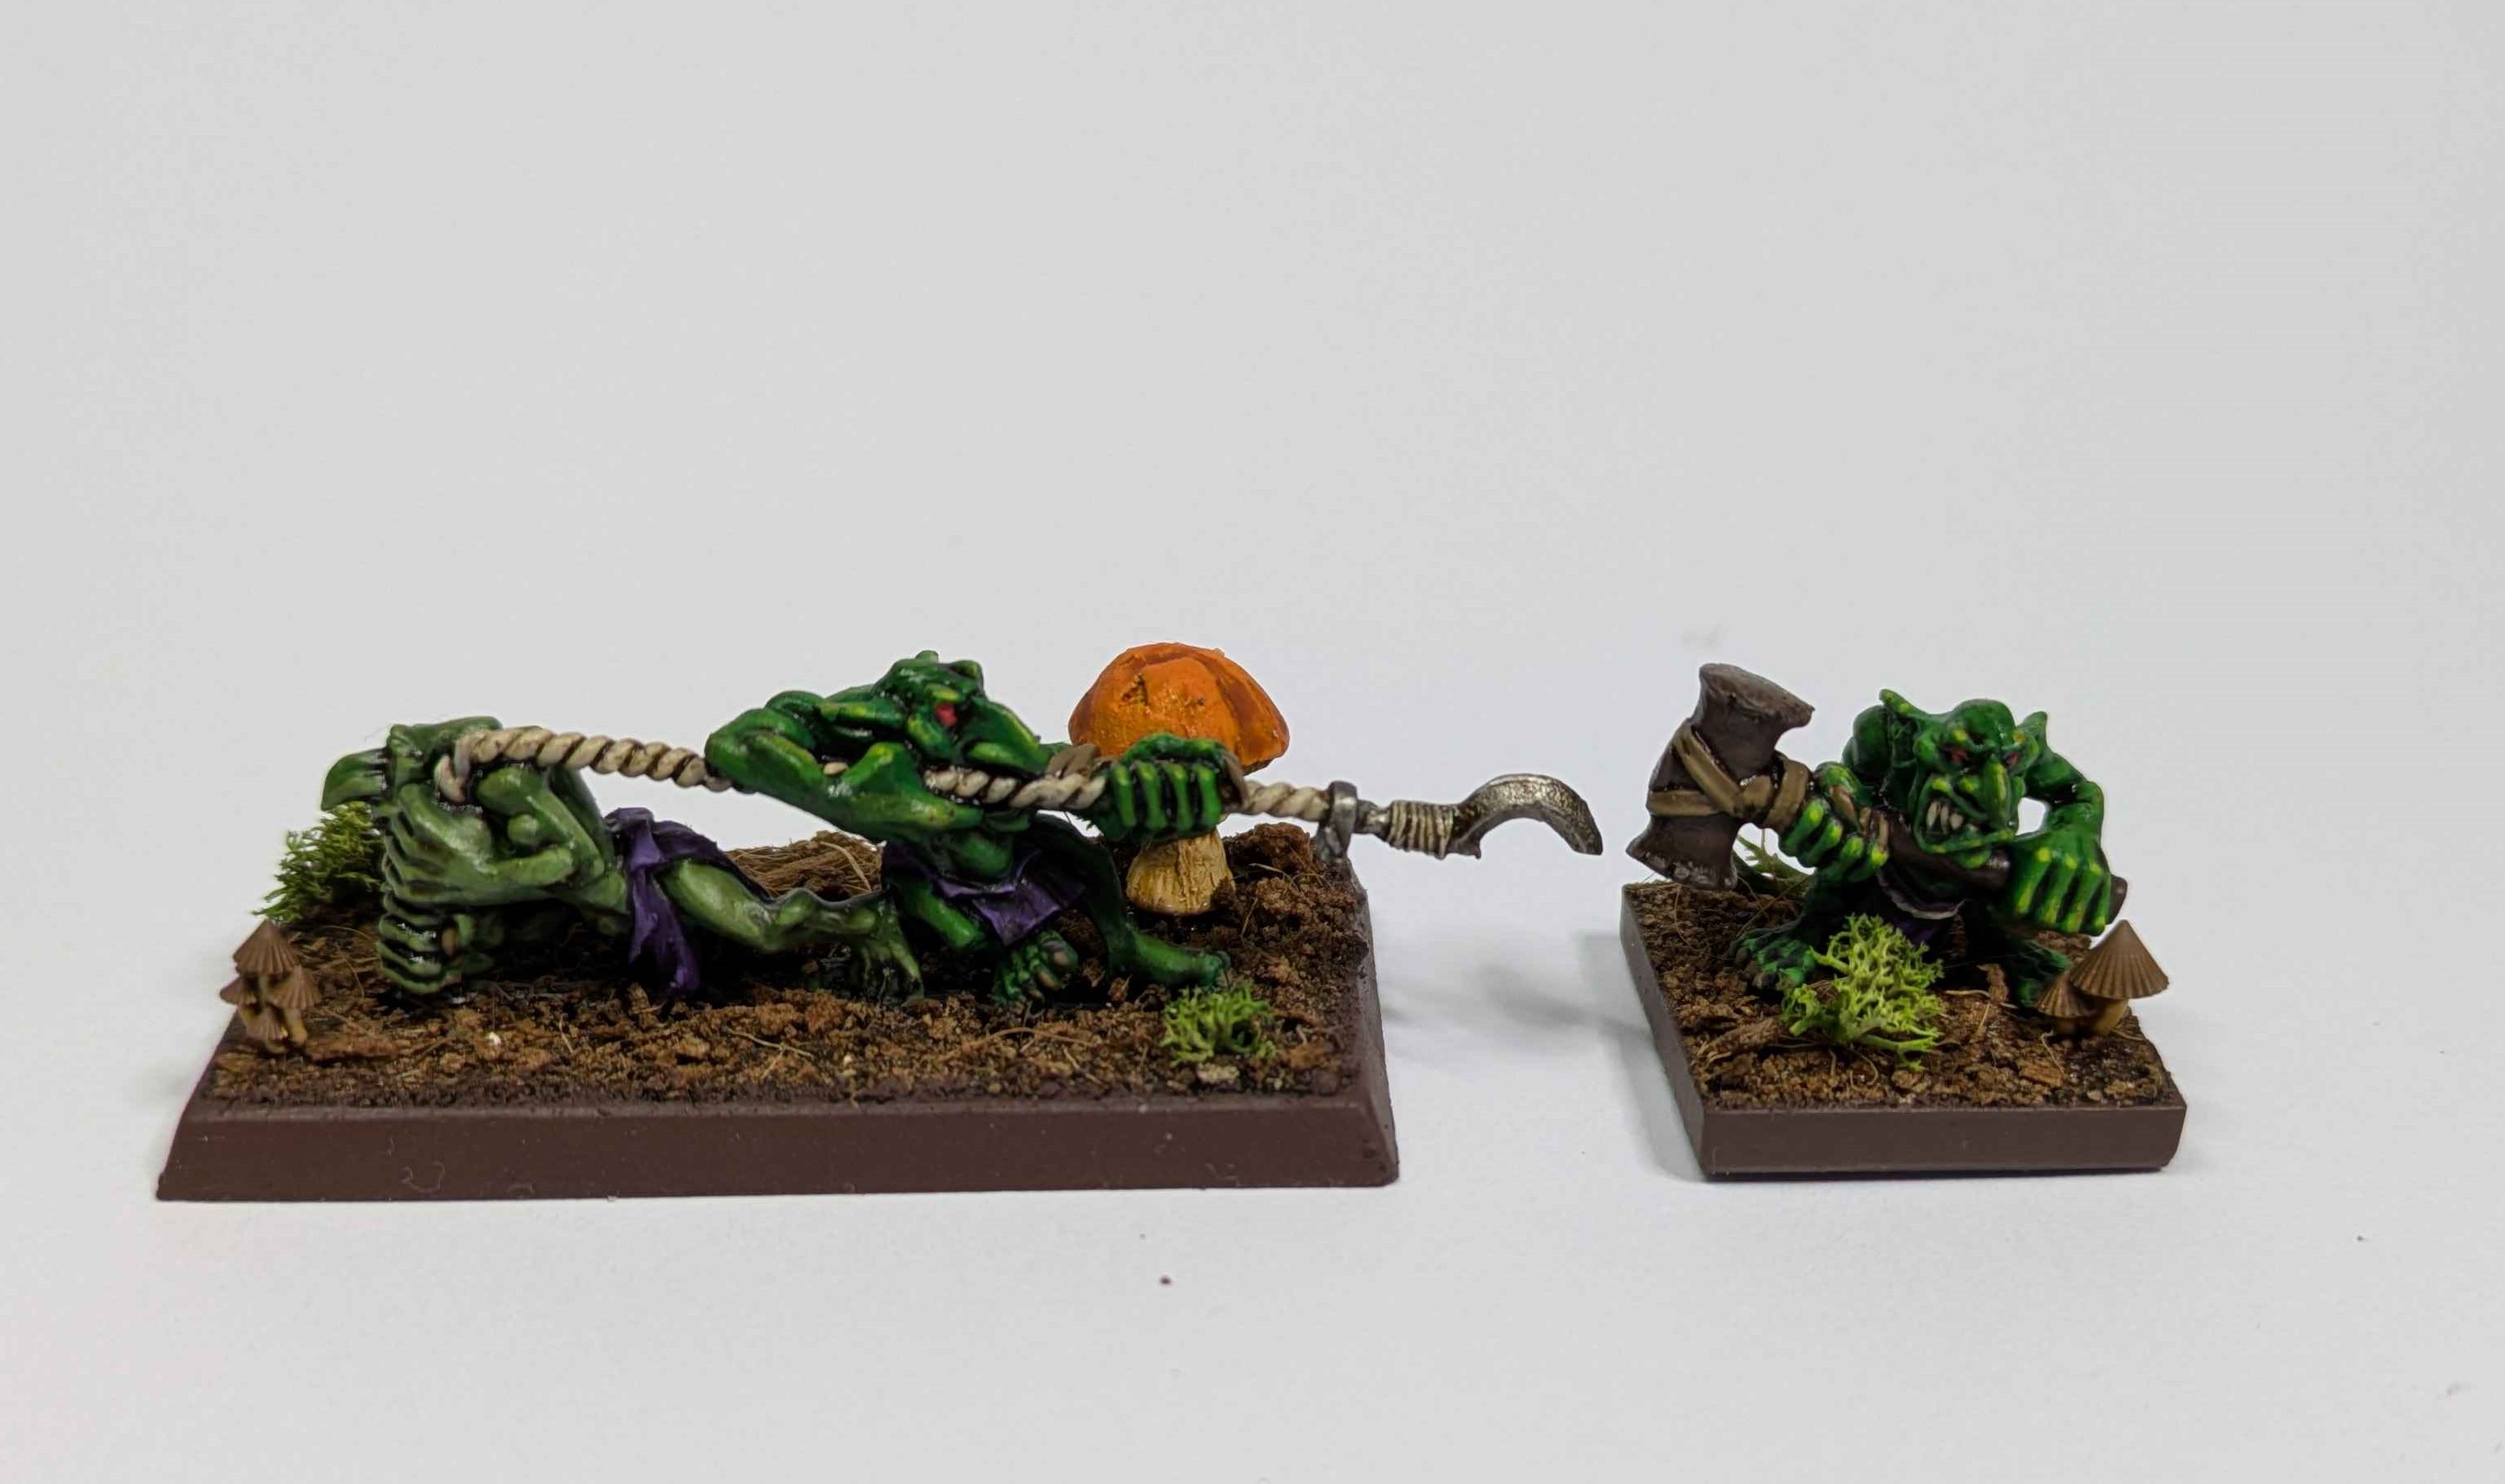
- Glue some mushrooms on everyone’s bases. The majority were 3D prints from an eBay seller with some of the Bad Squiddo mushroom packs added in for the larger shrooms. The mushrooms were all base coated with AP Fanatics Dorado Skin and then a random assortment of Bright Red, Onyx Skin, Alien Purple and Lava Orange for the tops. A wash of Marine Juice to give everything definition but to keep the colours vibrant.
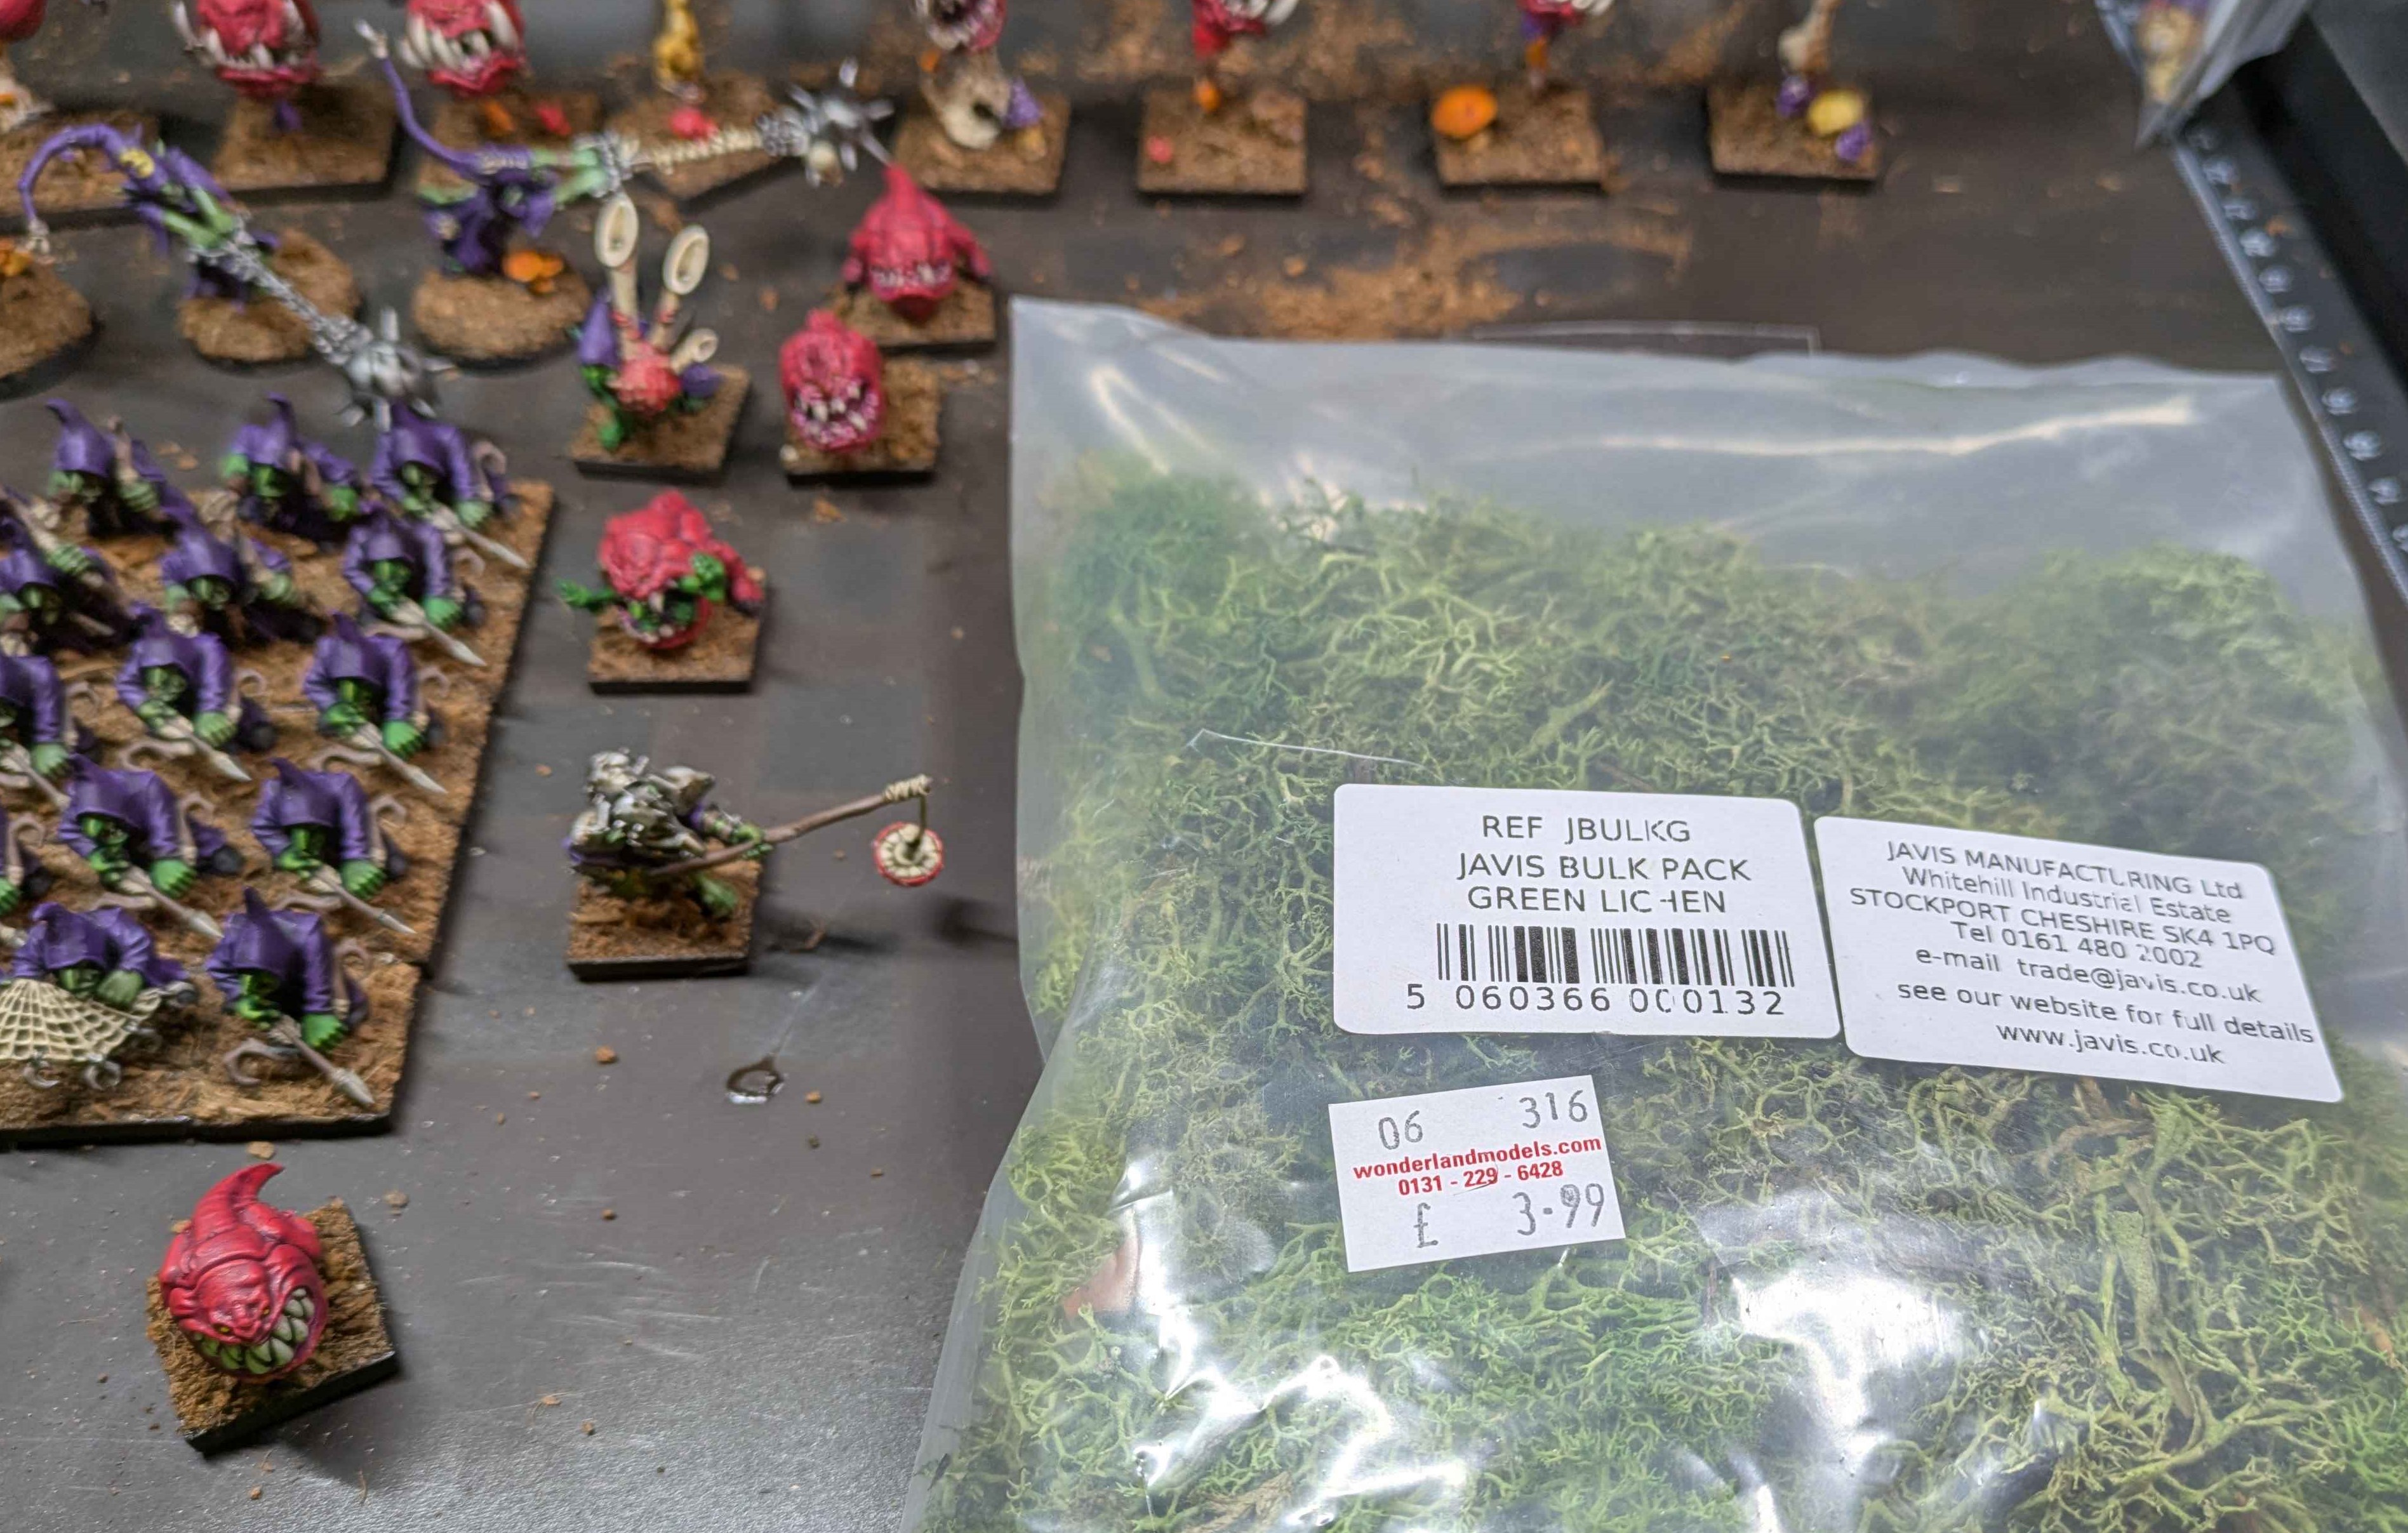
- Some bits of lichen/reindeer moss to add an extra texture to the forest floor.
- Each base got a soak of isopropyl alcohol and then watered down PVA glue to keep it all in place
- Base rims were tidied up with the same dark brown as step one
Hopefully I learned a valuable lesson here which is that basing 60+ models is more tedious than painting 60+ models and I should work in smaller batches!
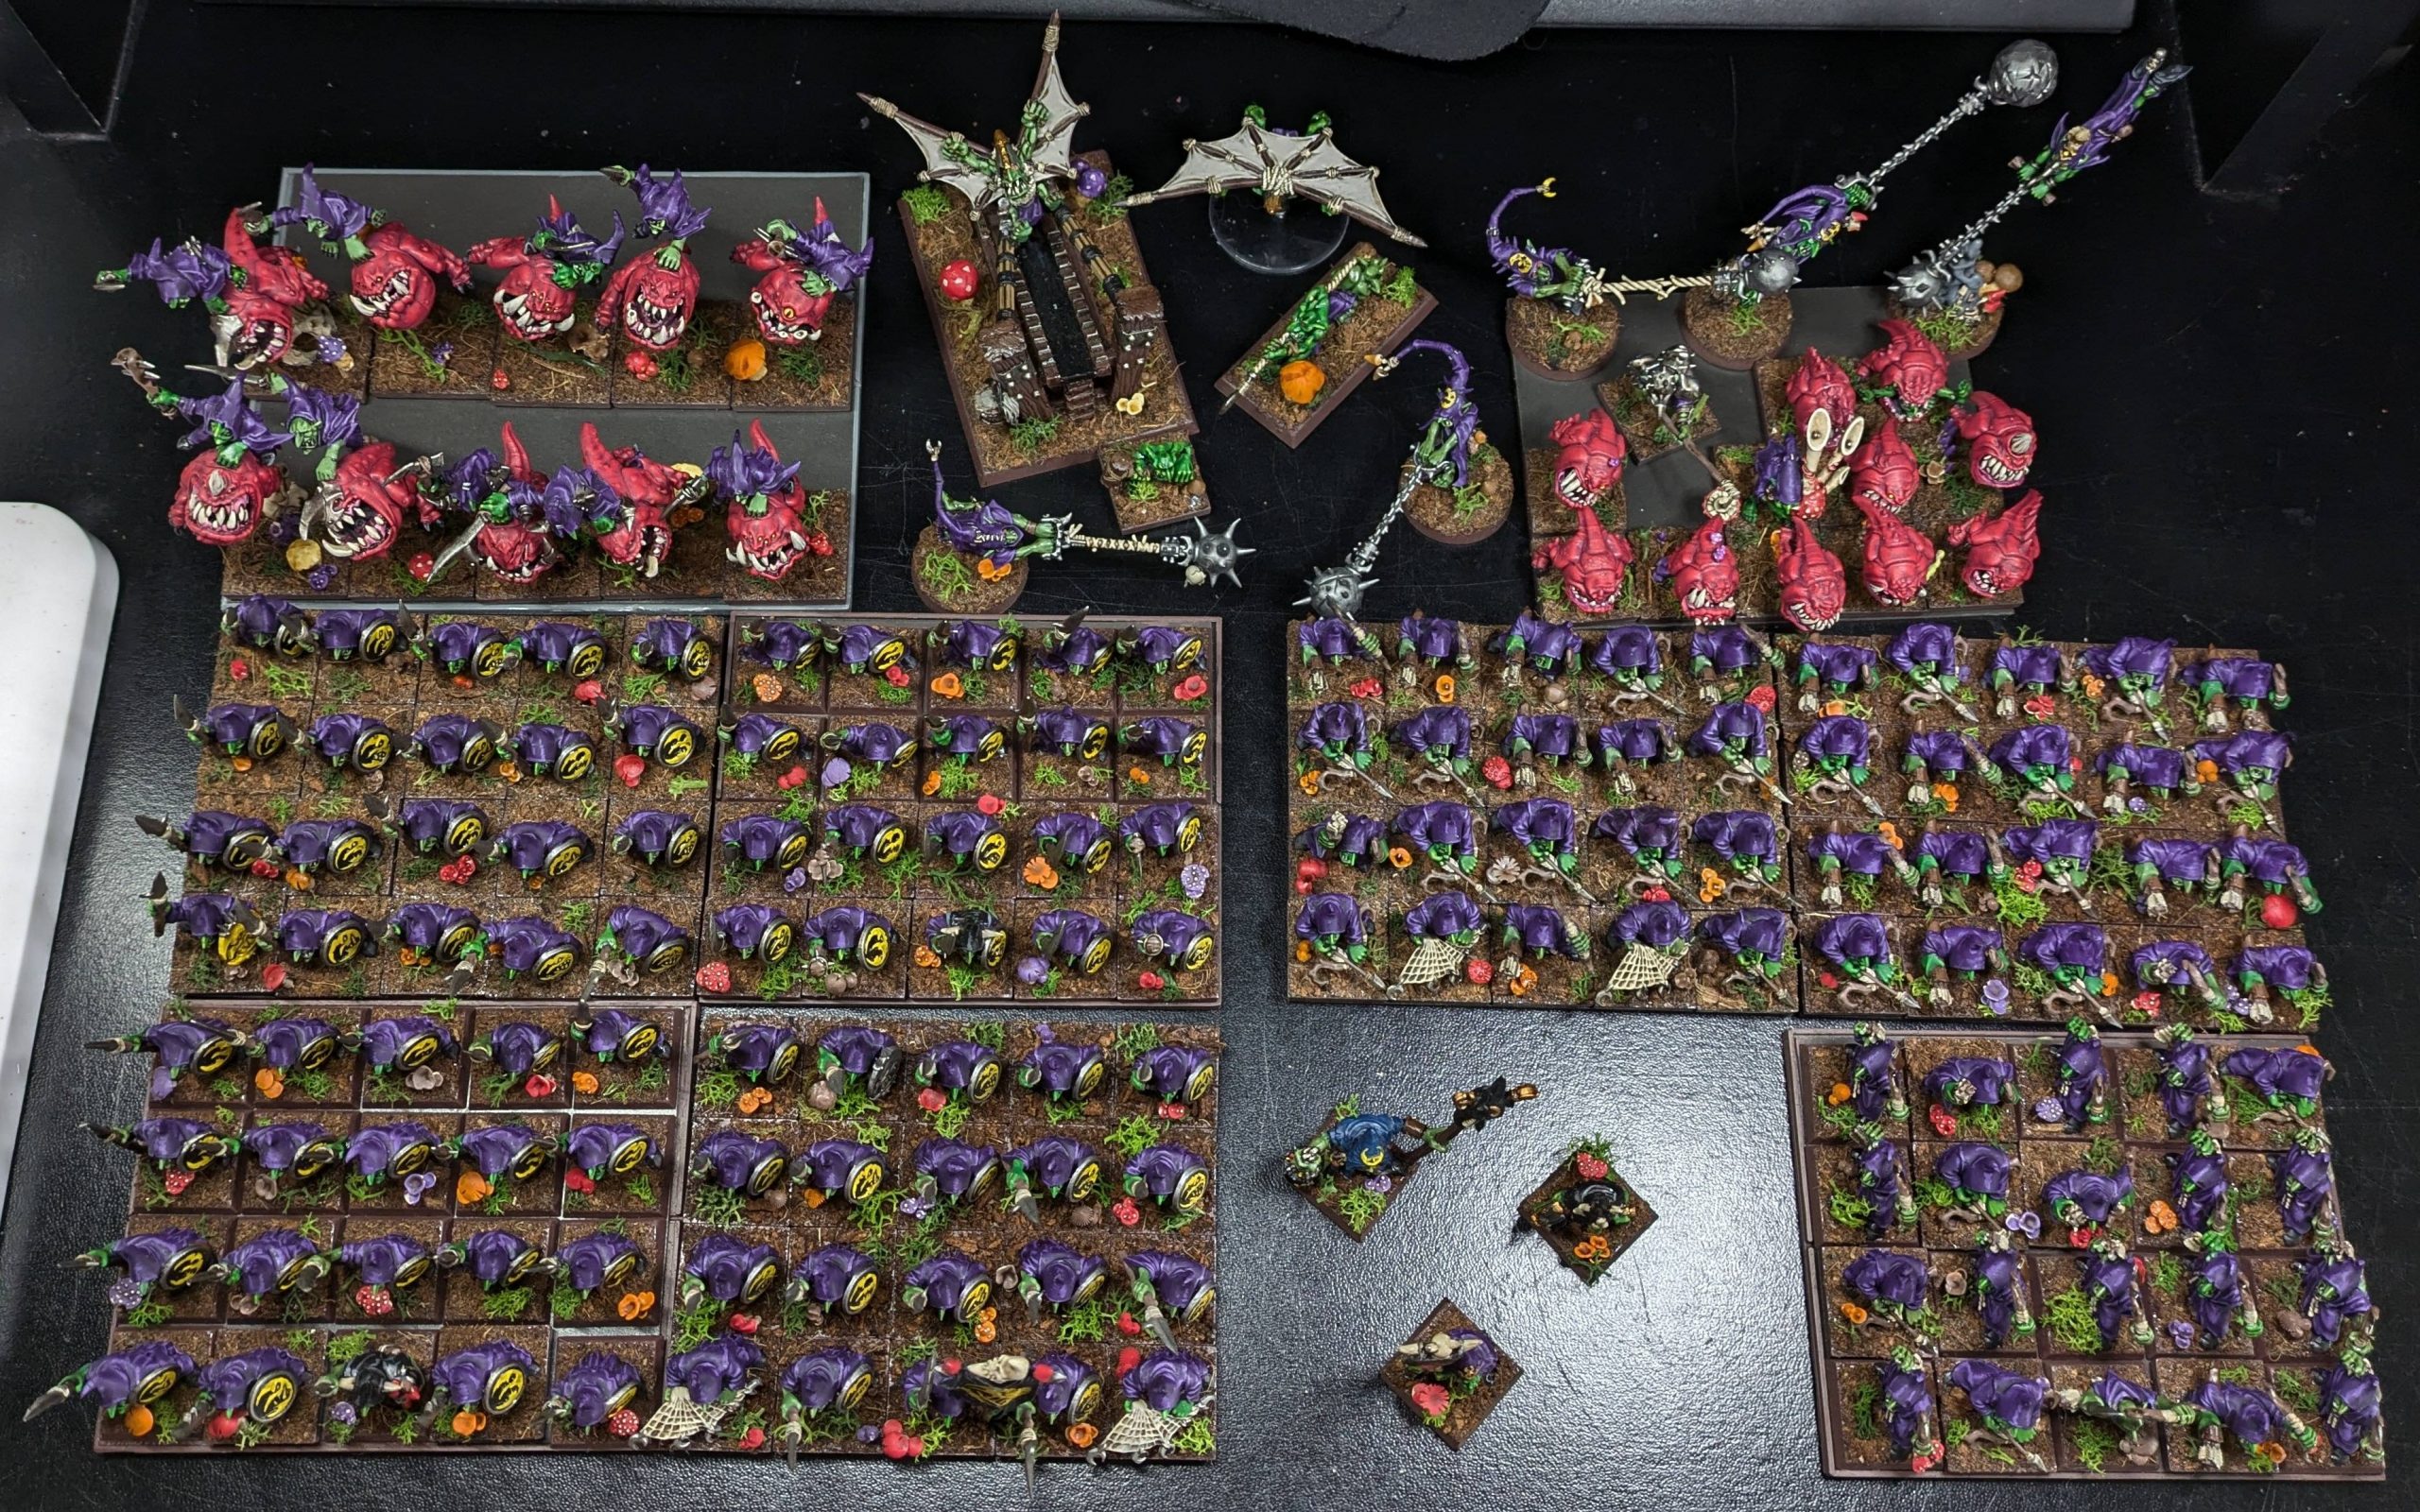
At this point I’ve no more basic infantry to do. I have a bunch of character models, some spider riders, a troll and a rock lobber left to paint up. As much as I’d love to get the army to 100% painted, I’m wary of burning myself out so I’m going to switch to another project for a couple of weeks I think.
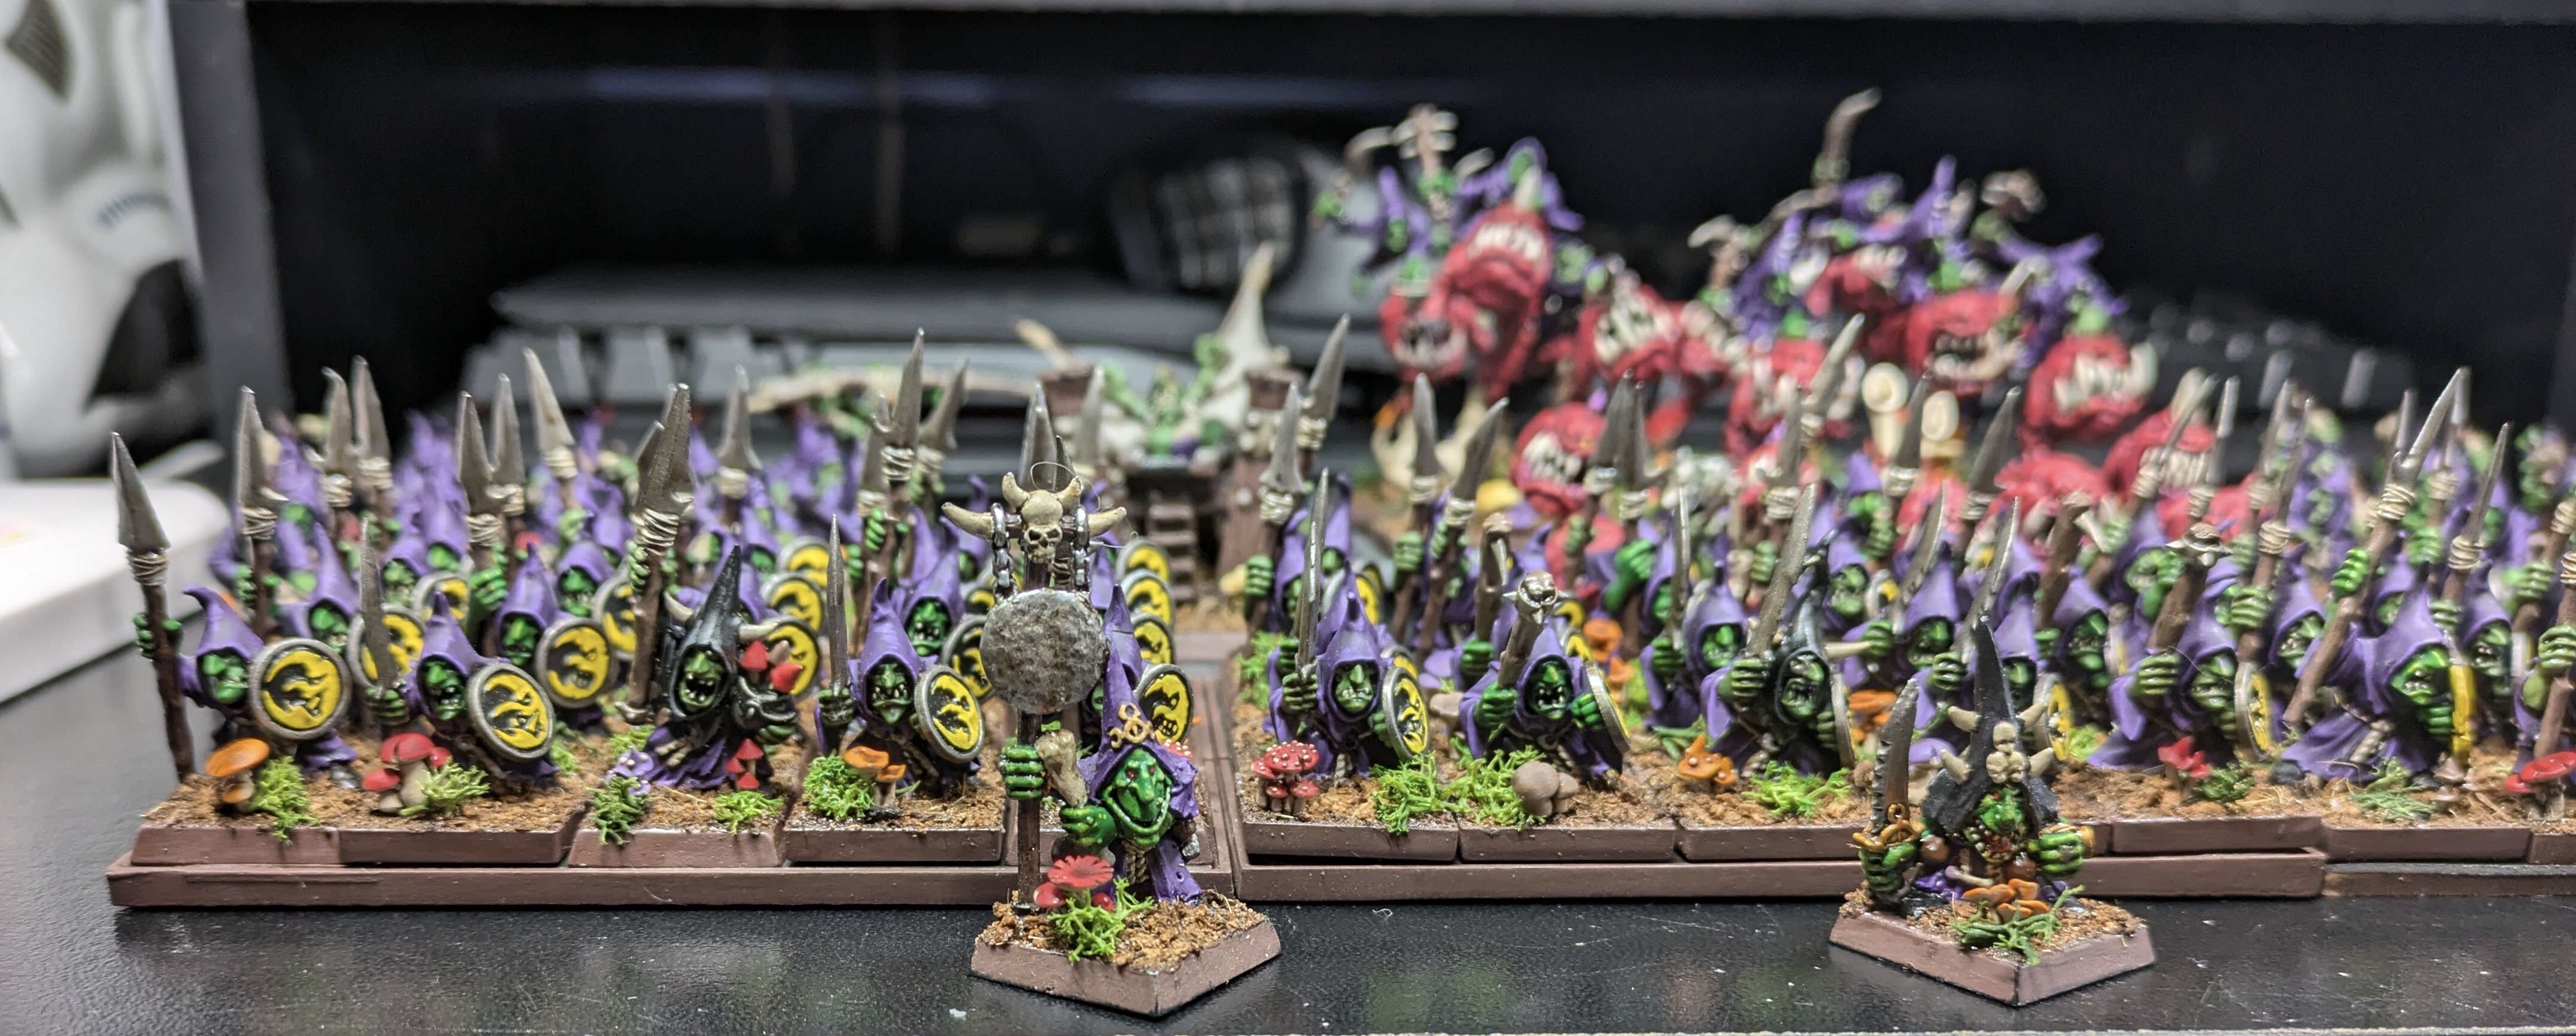
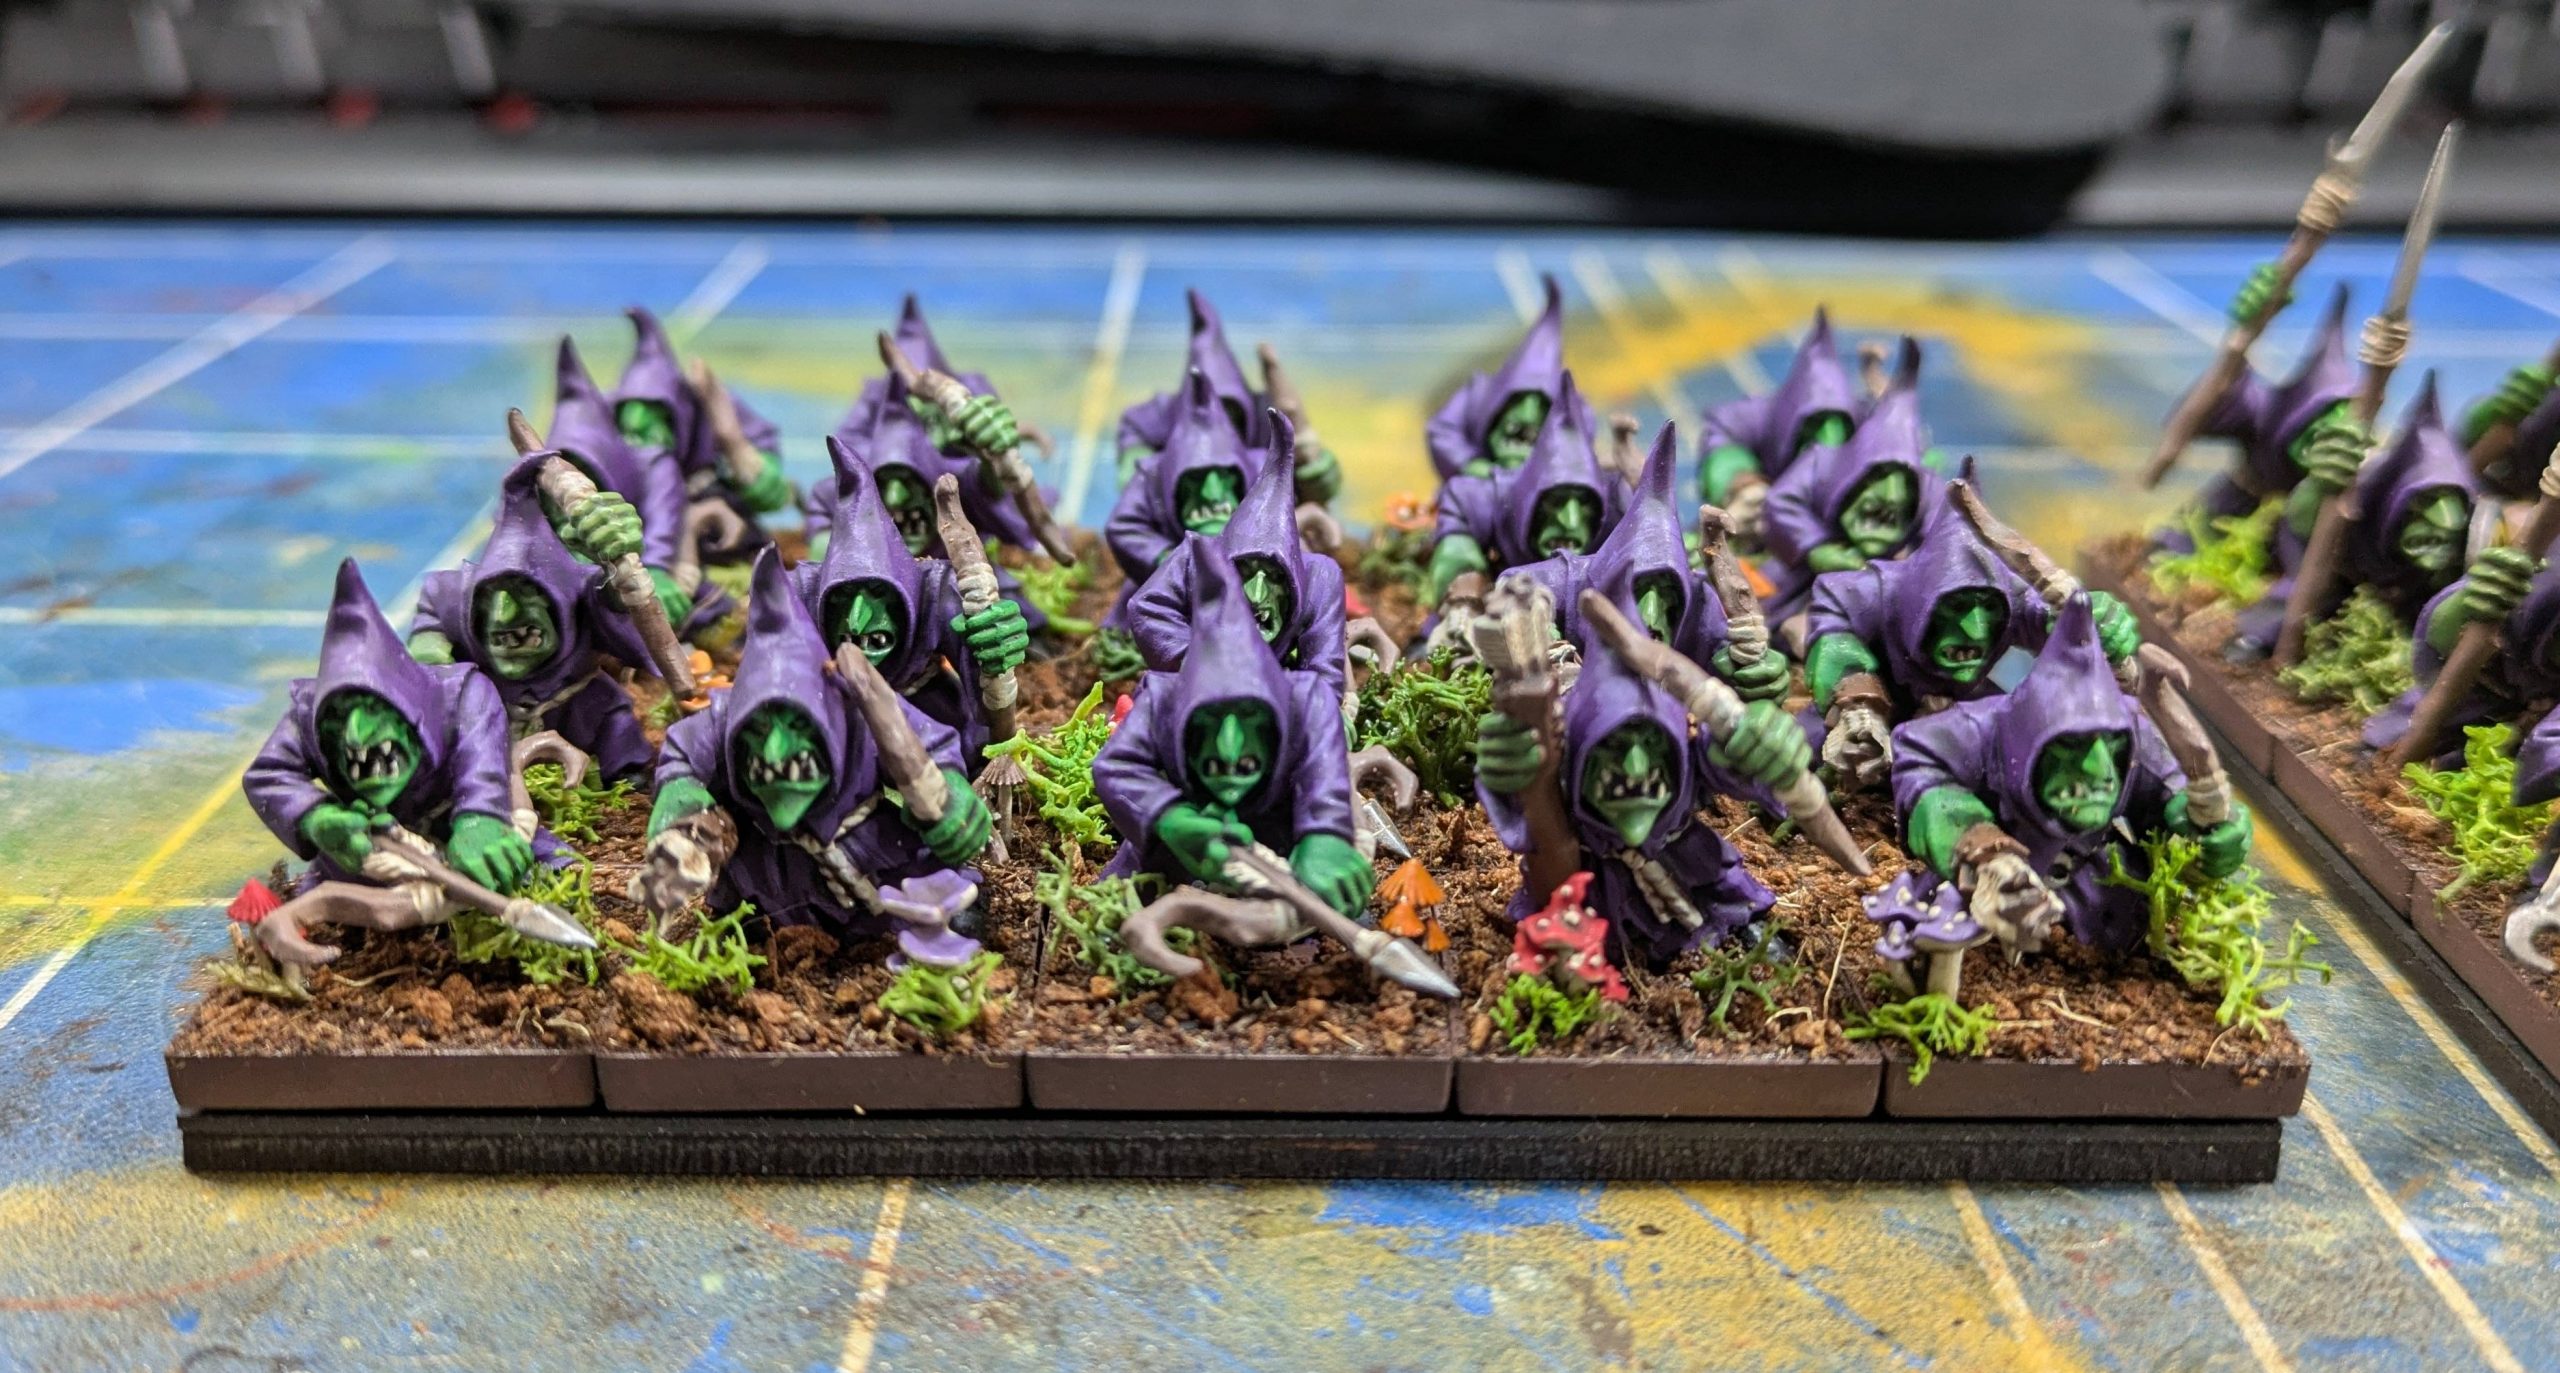
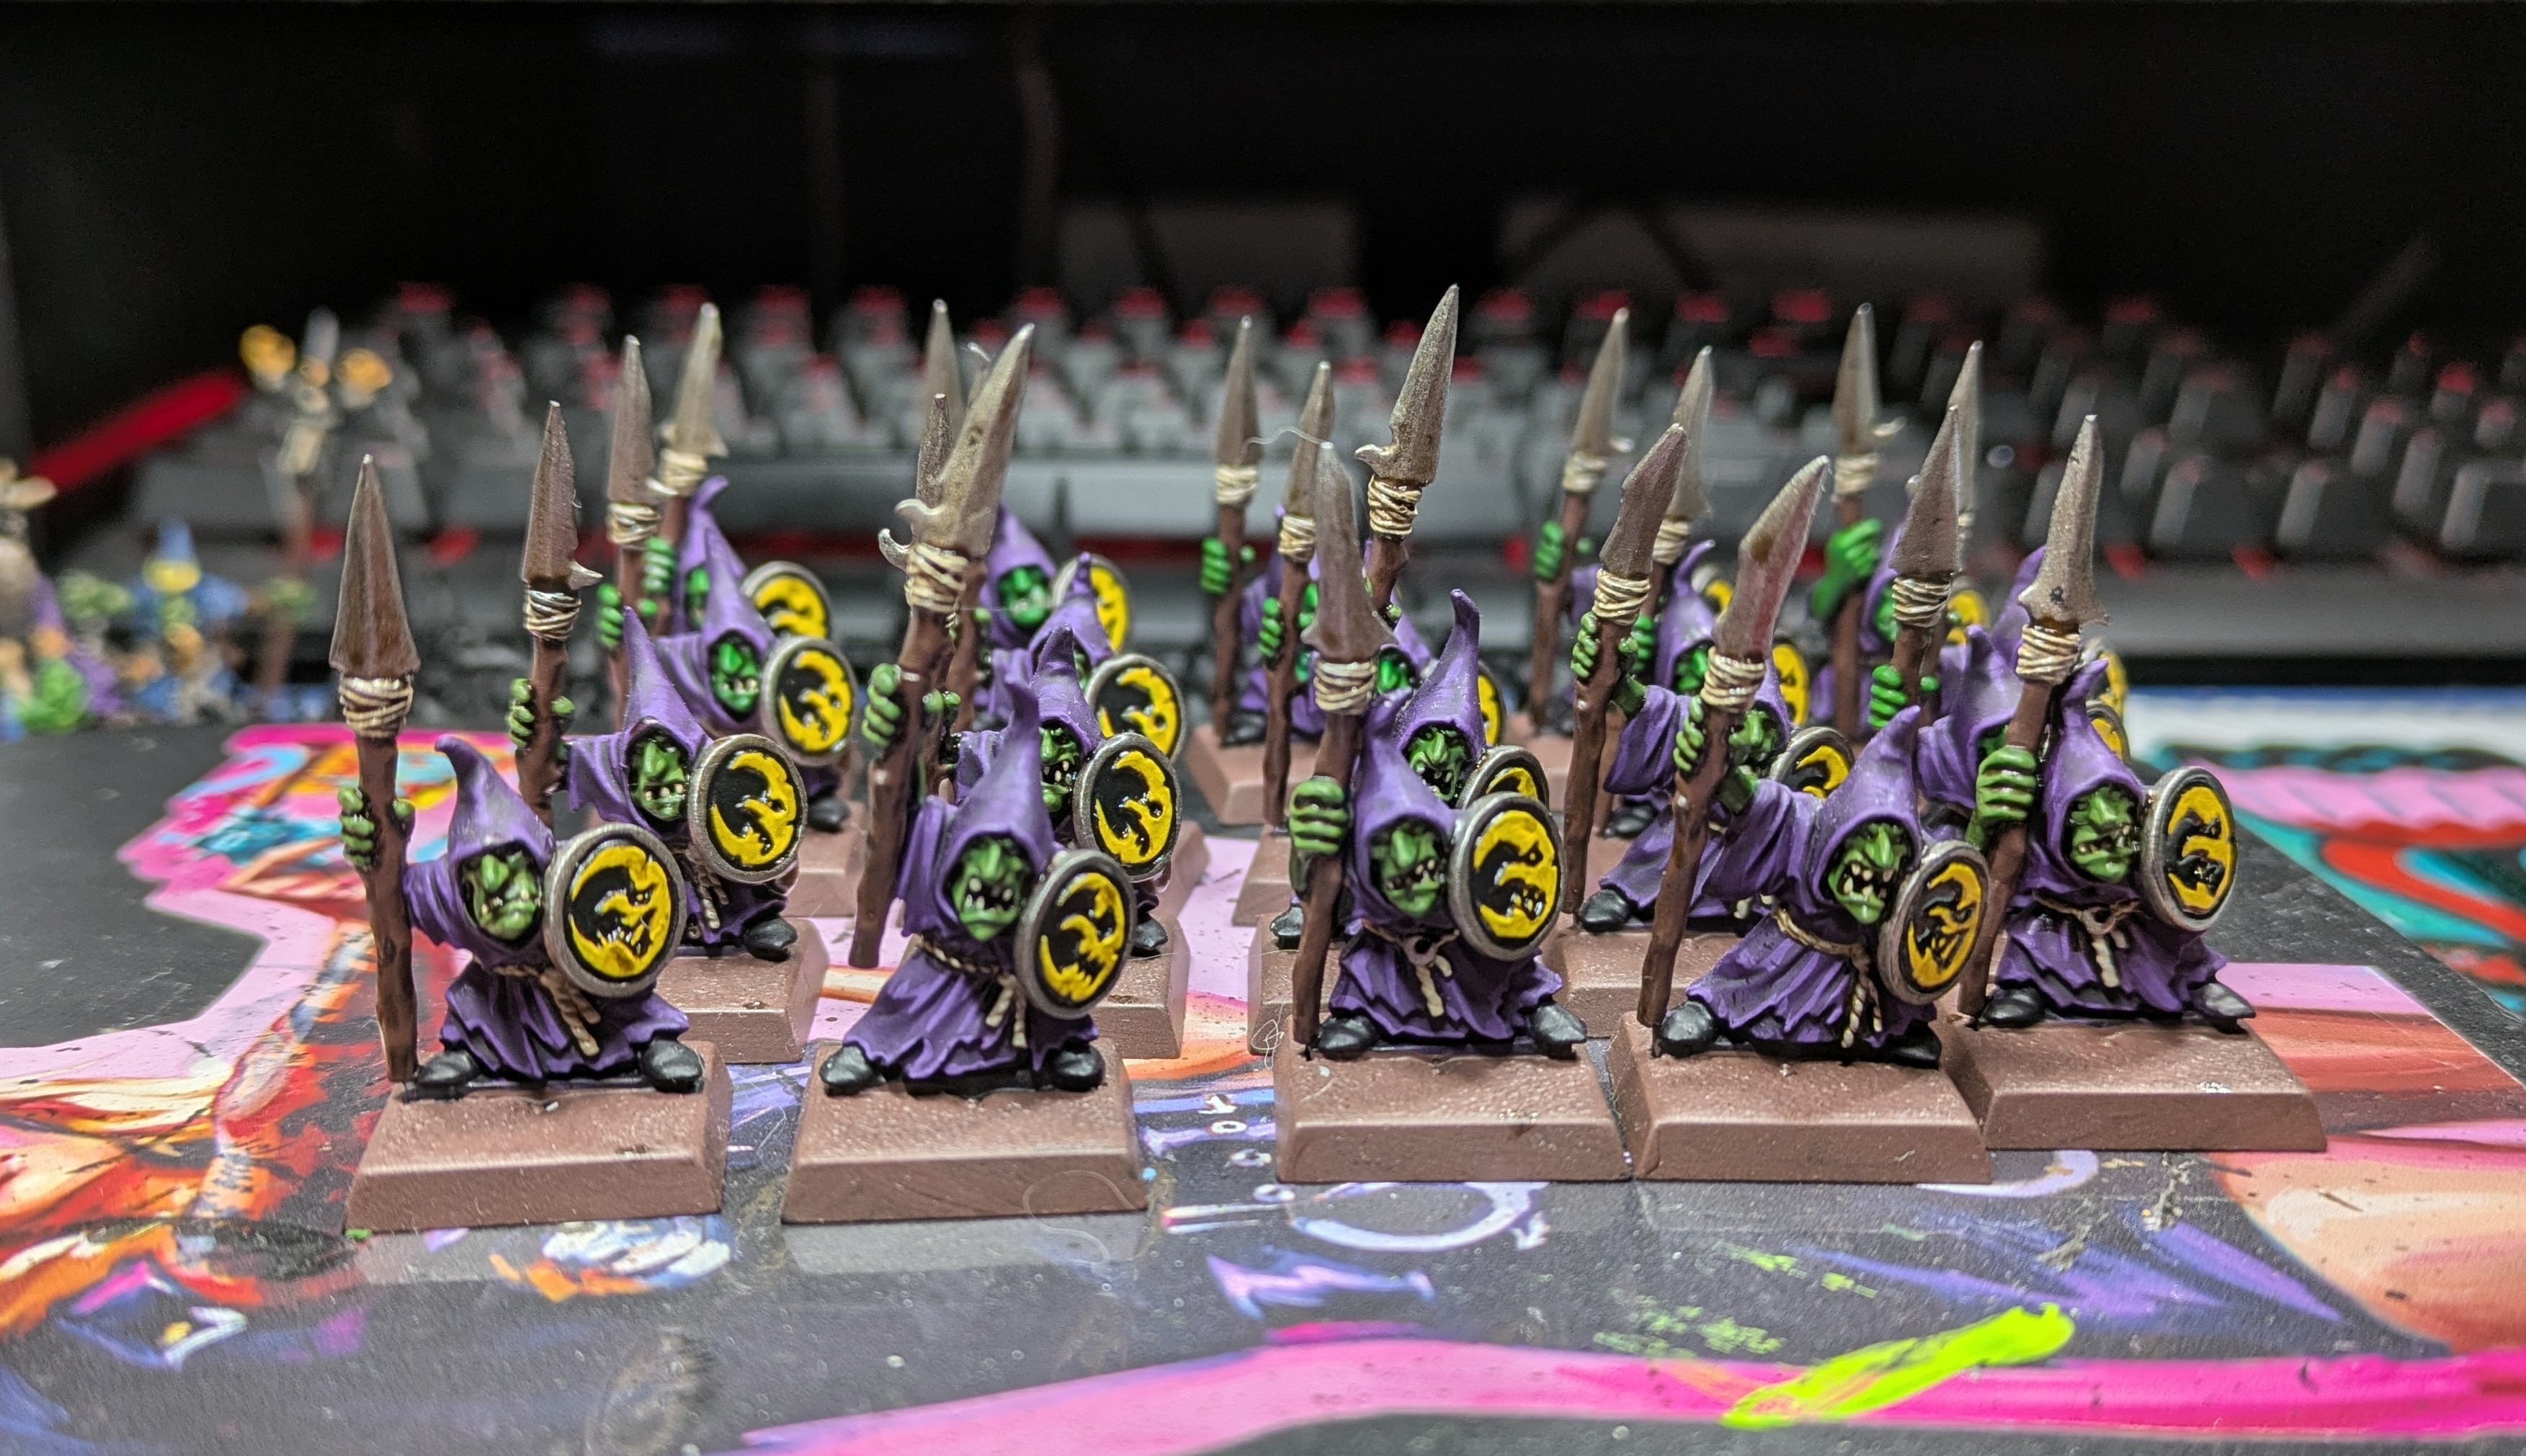
Night Goblins Part 8
I haven’t achieved much in terms of finished models over the last few weeks – I did a test run on a 10mm 3D printed army but the resin breakages were just too annoying to justify the hassle. I fannied about with terrain for Guards of Traitor’s Toll but I’m sick of terrain so haven’t finished it. I’ve got a lot of models built for a couple of projects but haven’t put much paint on anything. Needing to feel the joy of a win, I fell back on the good old Grand Army Project to give me some focus.
Back in January I got a message from Scribbs who kindly sent on some character models to add to the goblin hordes. They are fantastic and painting them up inspired me to jump onto eBay to see what bargains could be added.
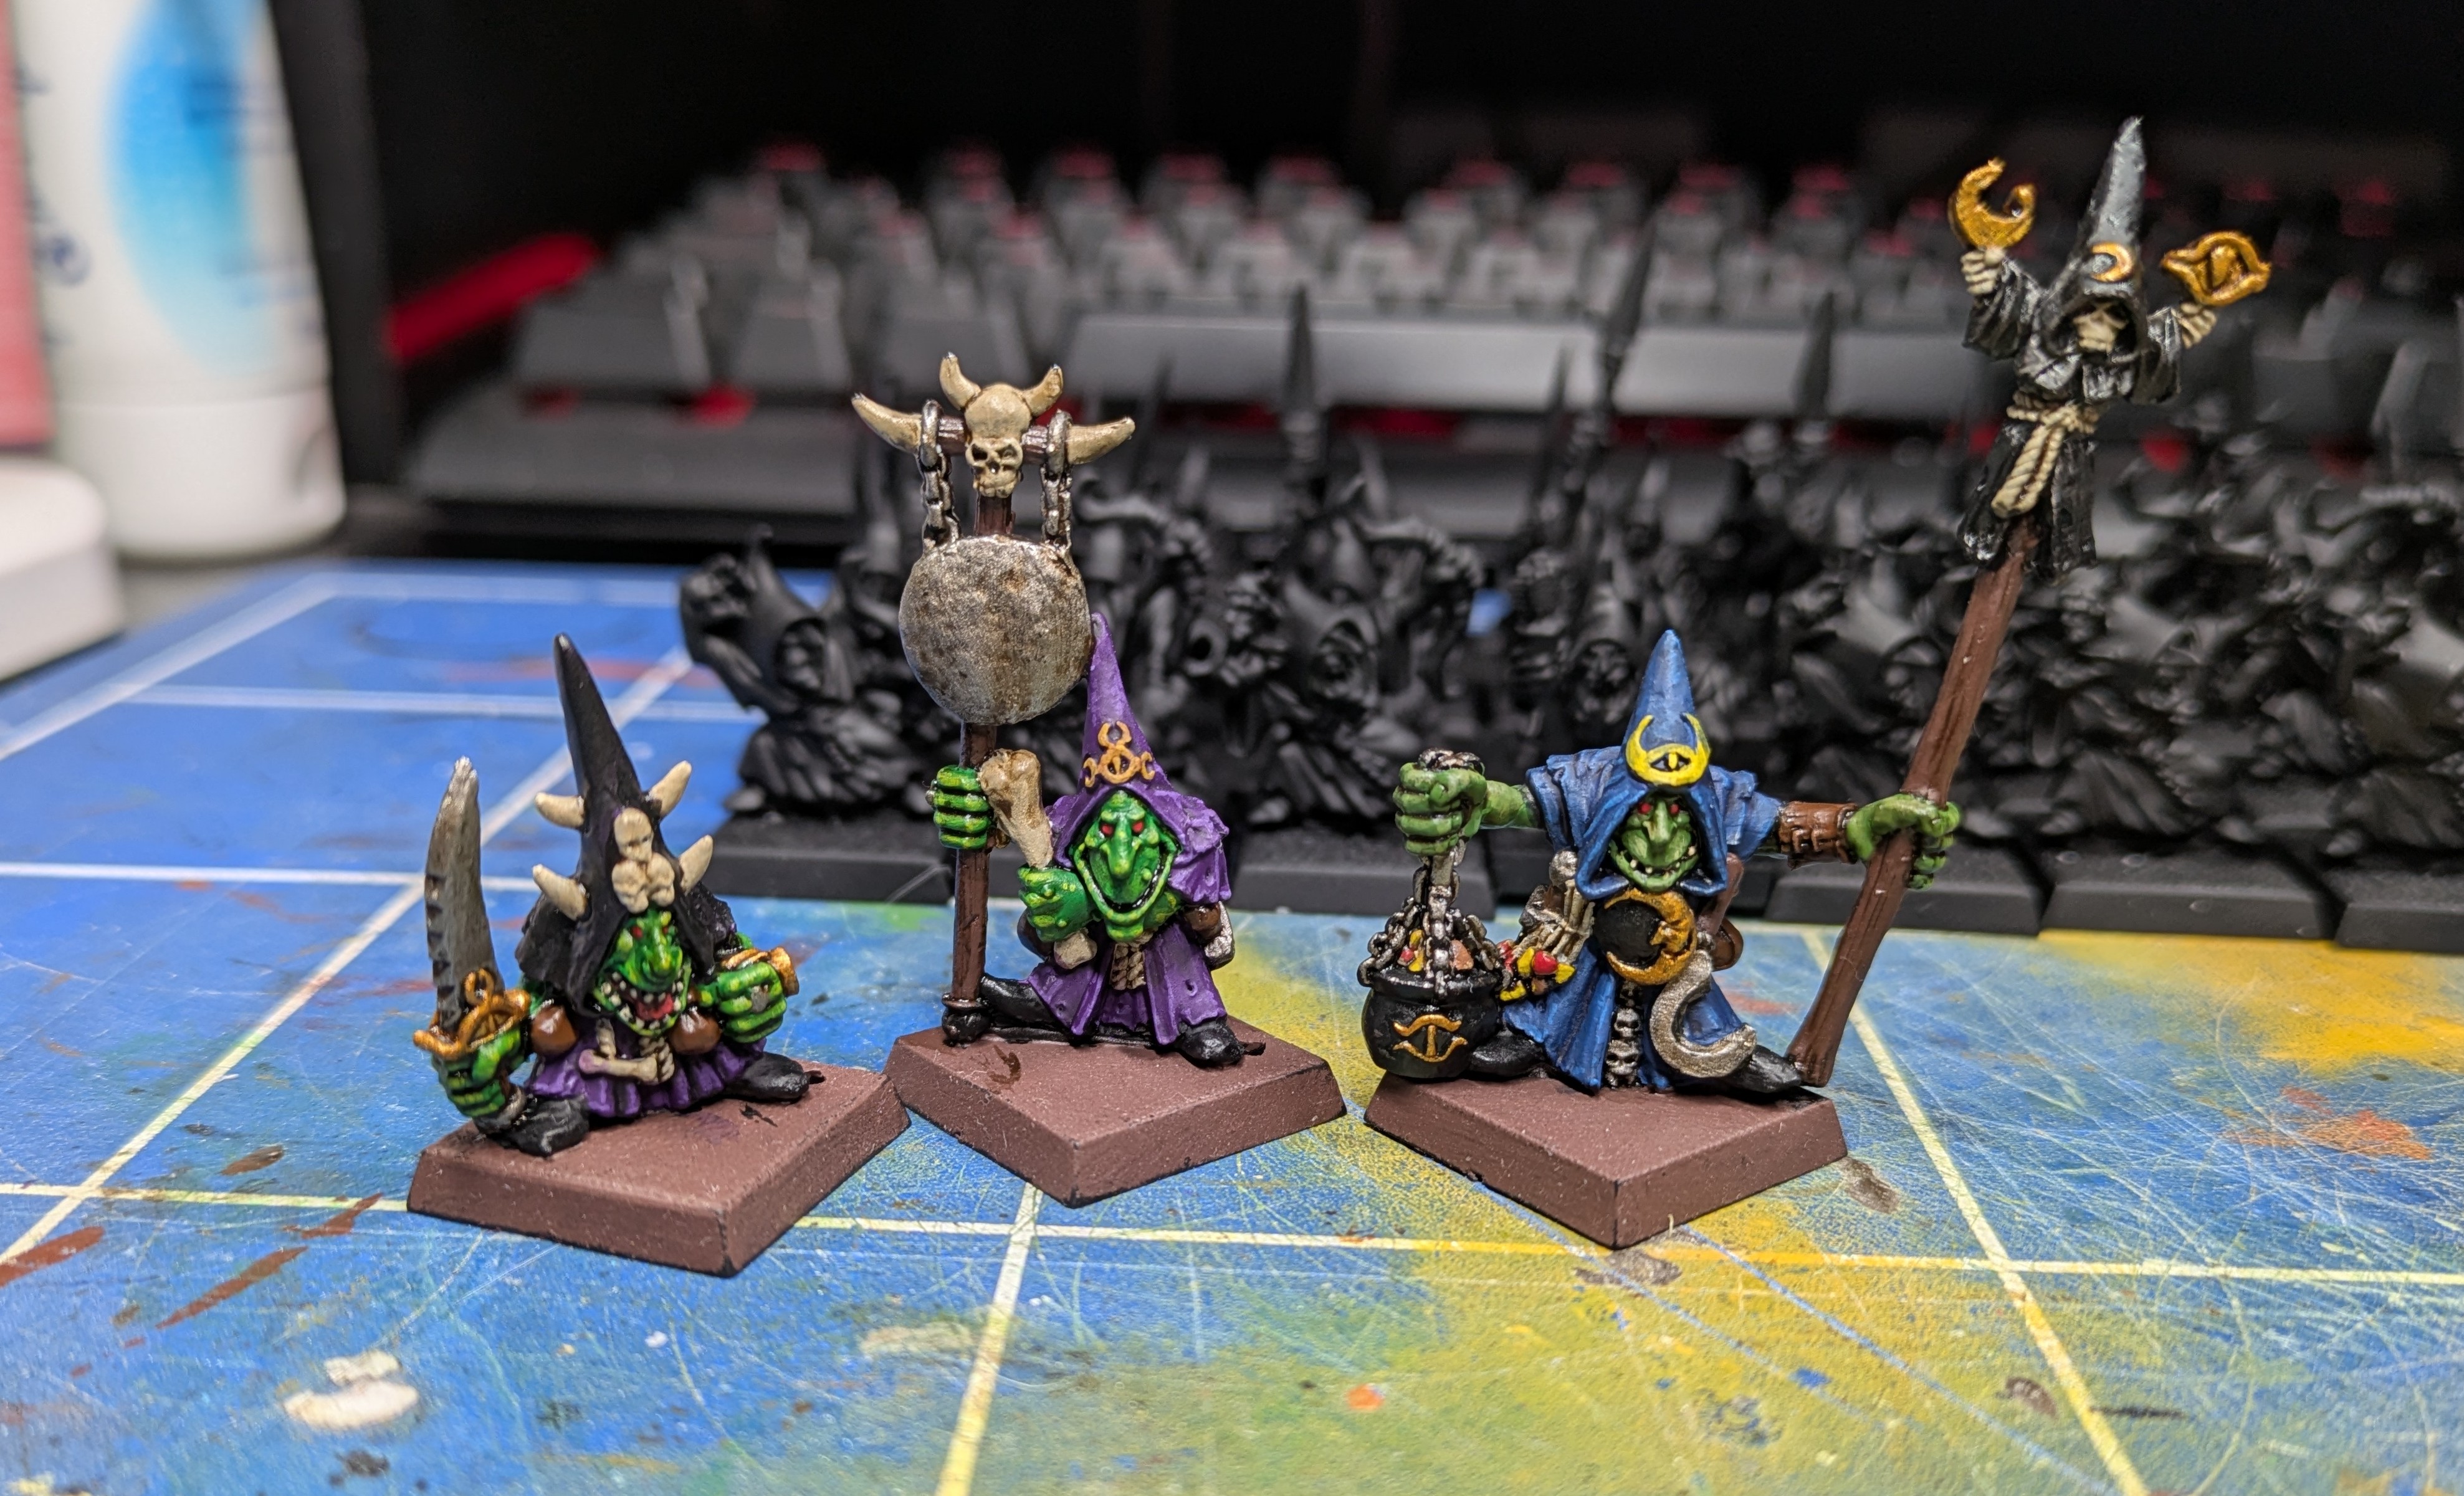
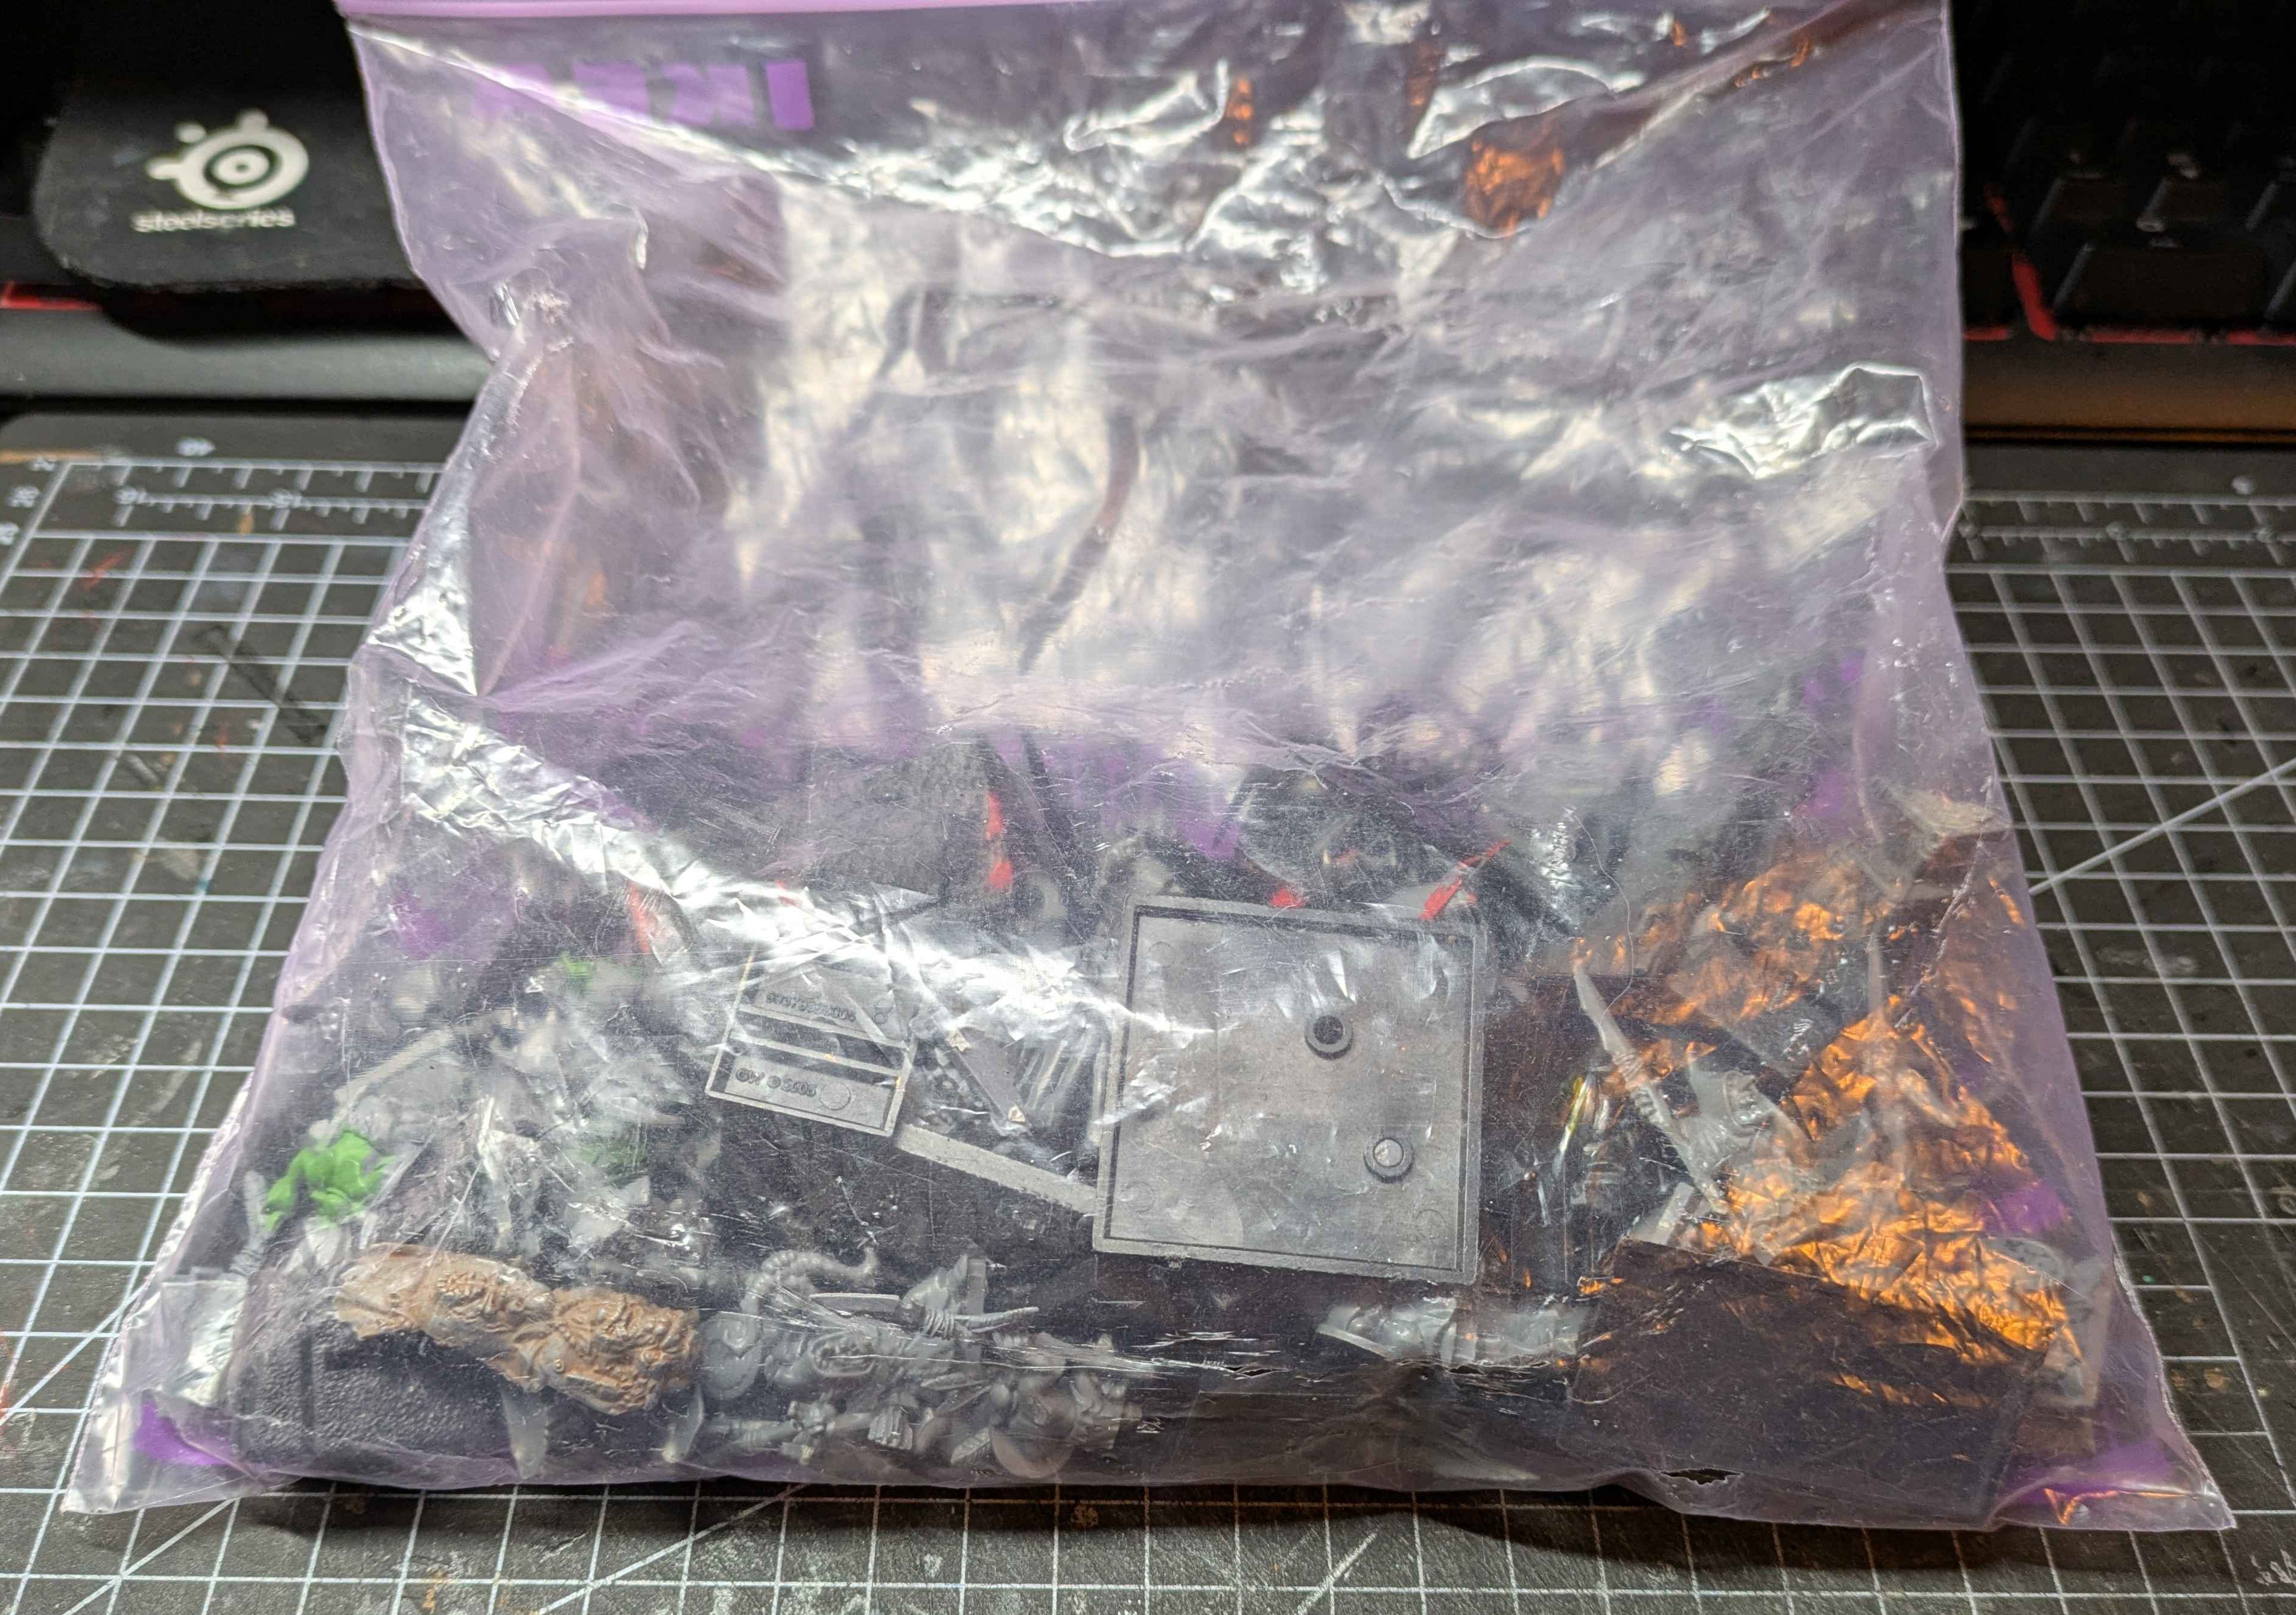
A week later this £48 bag arrived. Inside, the goblins were a mix of conditions but all of them salvageable. Thankfully what little paint is on them is thin enough that it doesn’t need stripping. I spent an afternoon scraping mould lines and fixing broken spears and scrounging replacement parts in the bits box. Rather than do everything all at once, I lined up twenty then I followed my own notes and painted them up:
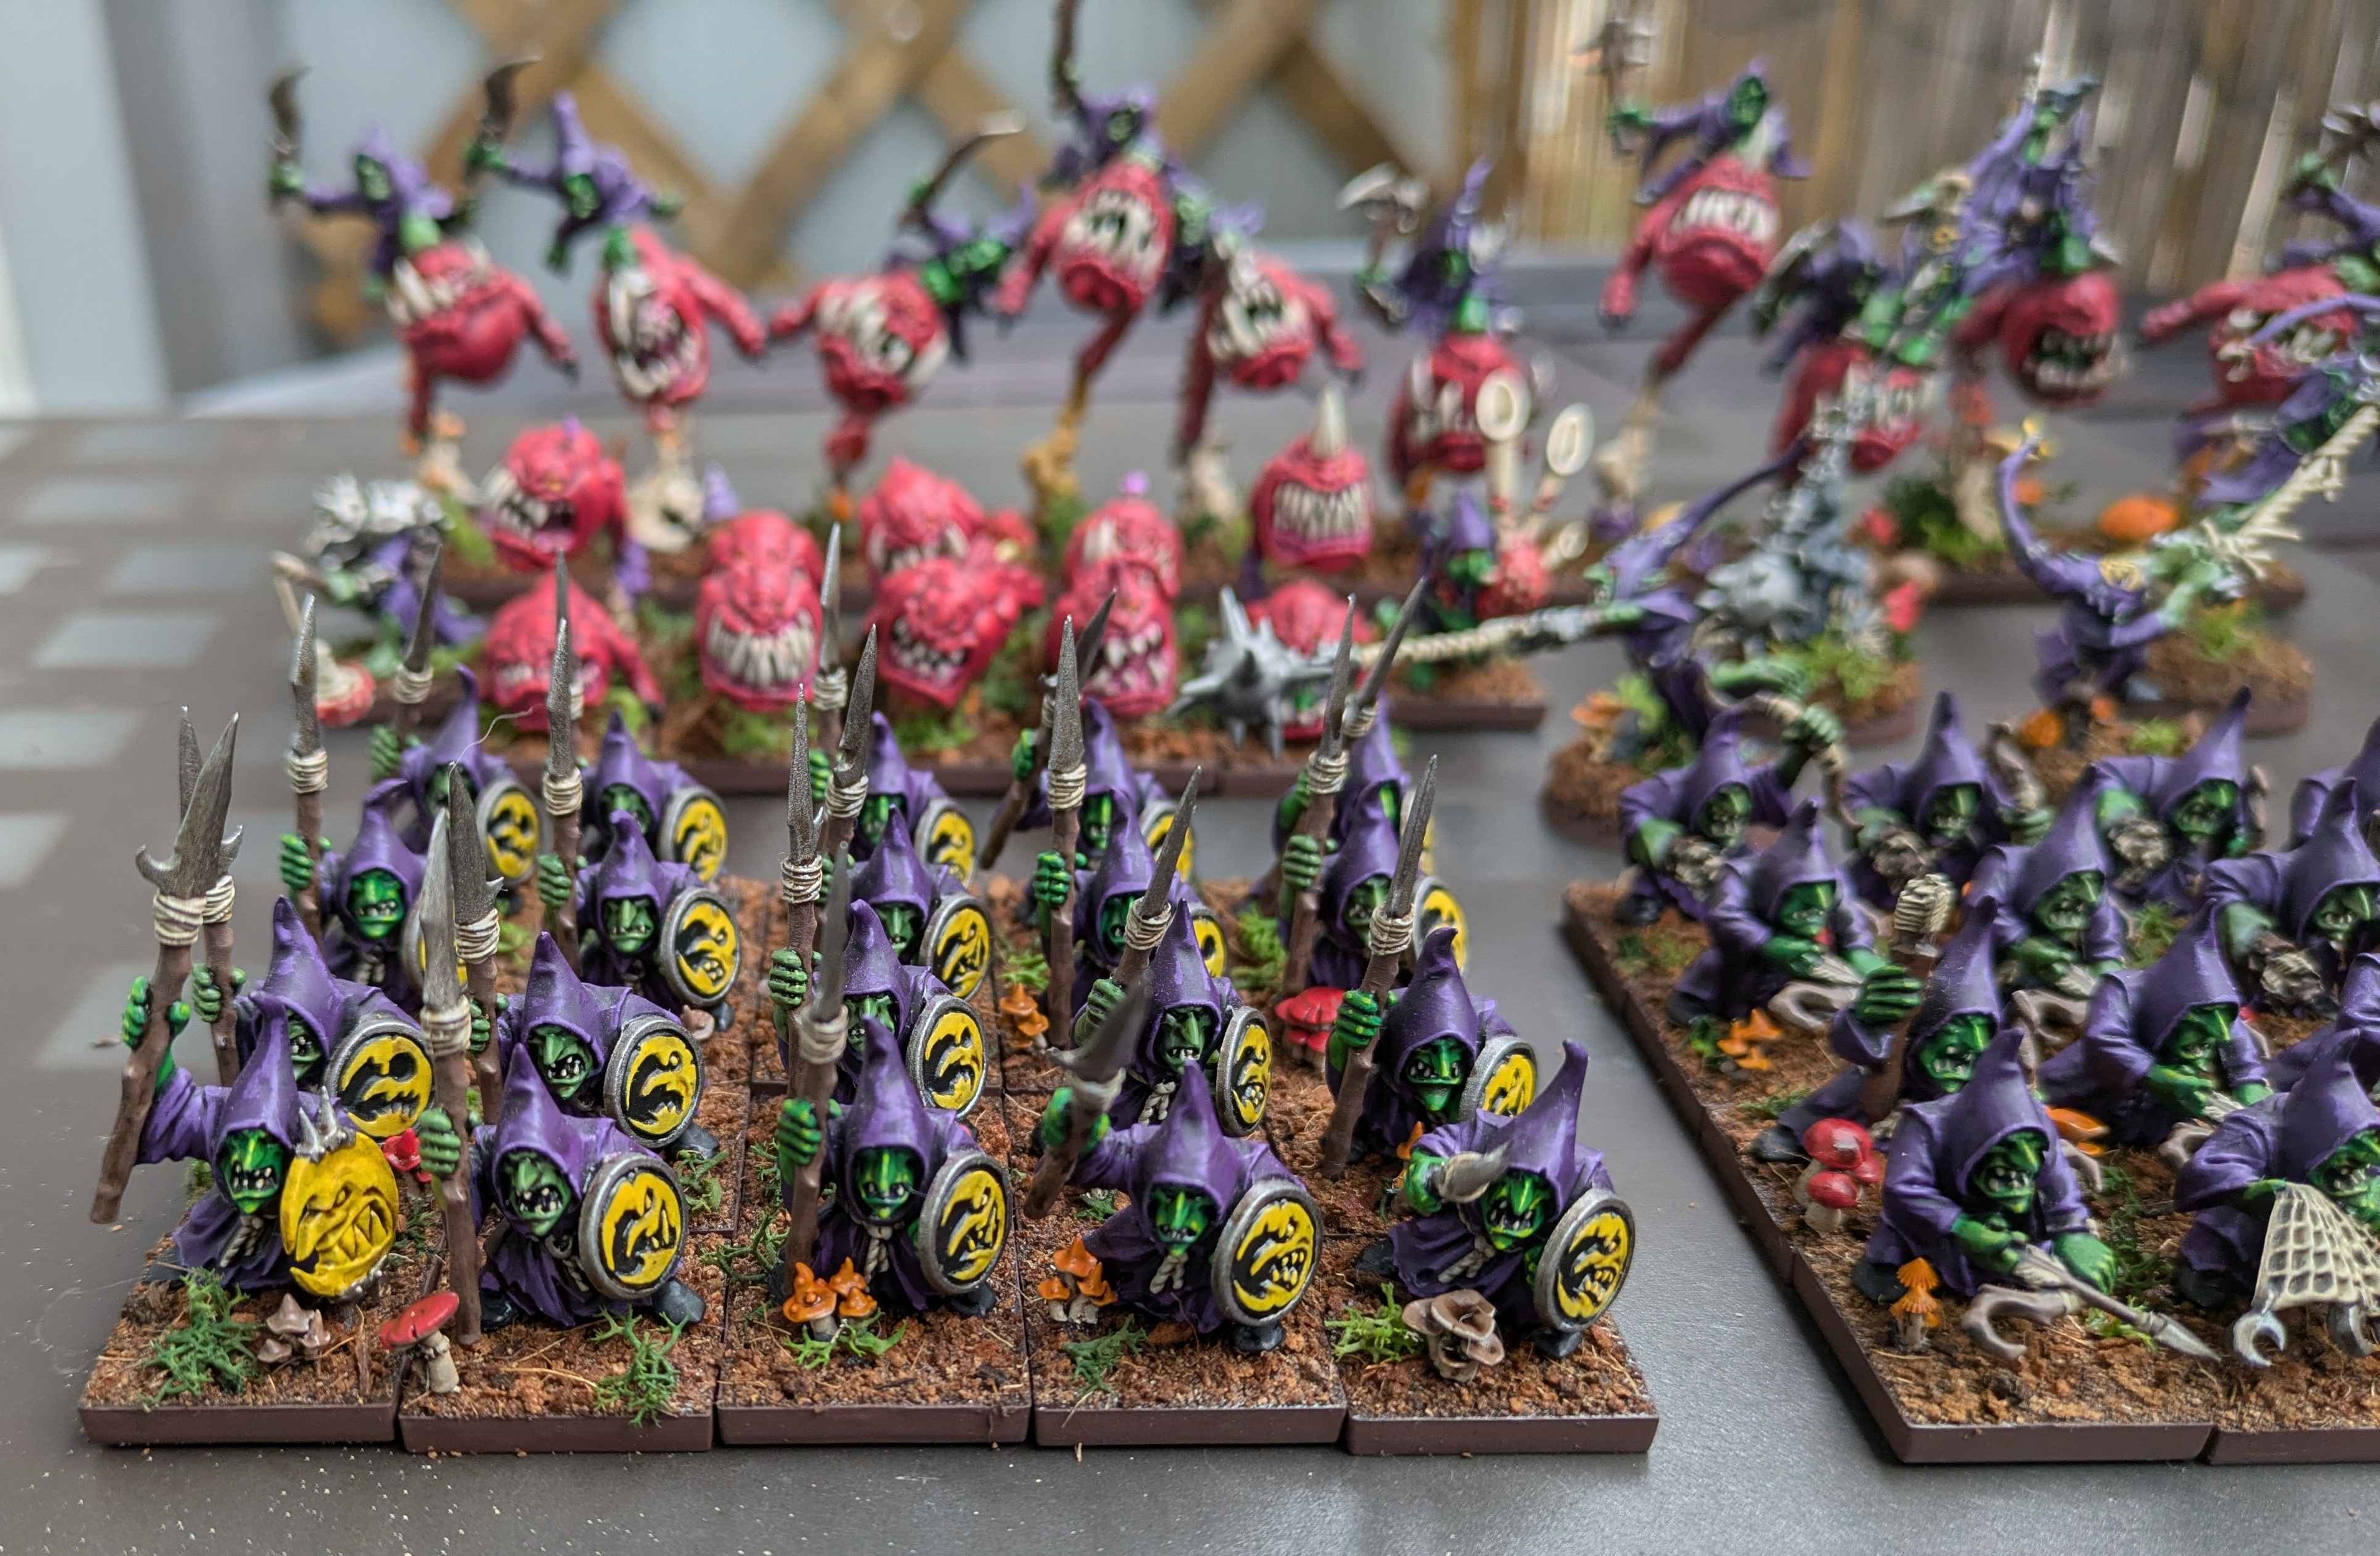
- Black prime so that a quick paint job that misses any bits won’t be as noticeable
- Heavy dry brush, almost an over brush Vallejo Royal Purple
- Highlight the robes with Alien Purple from the Army Painter Fanatics range then a wash of Druchii Violet
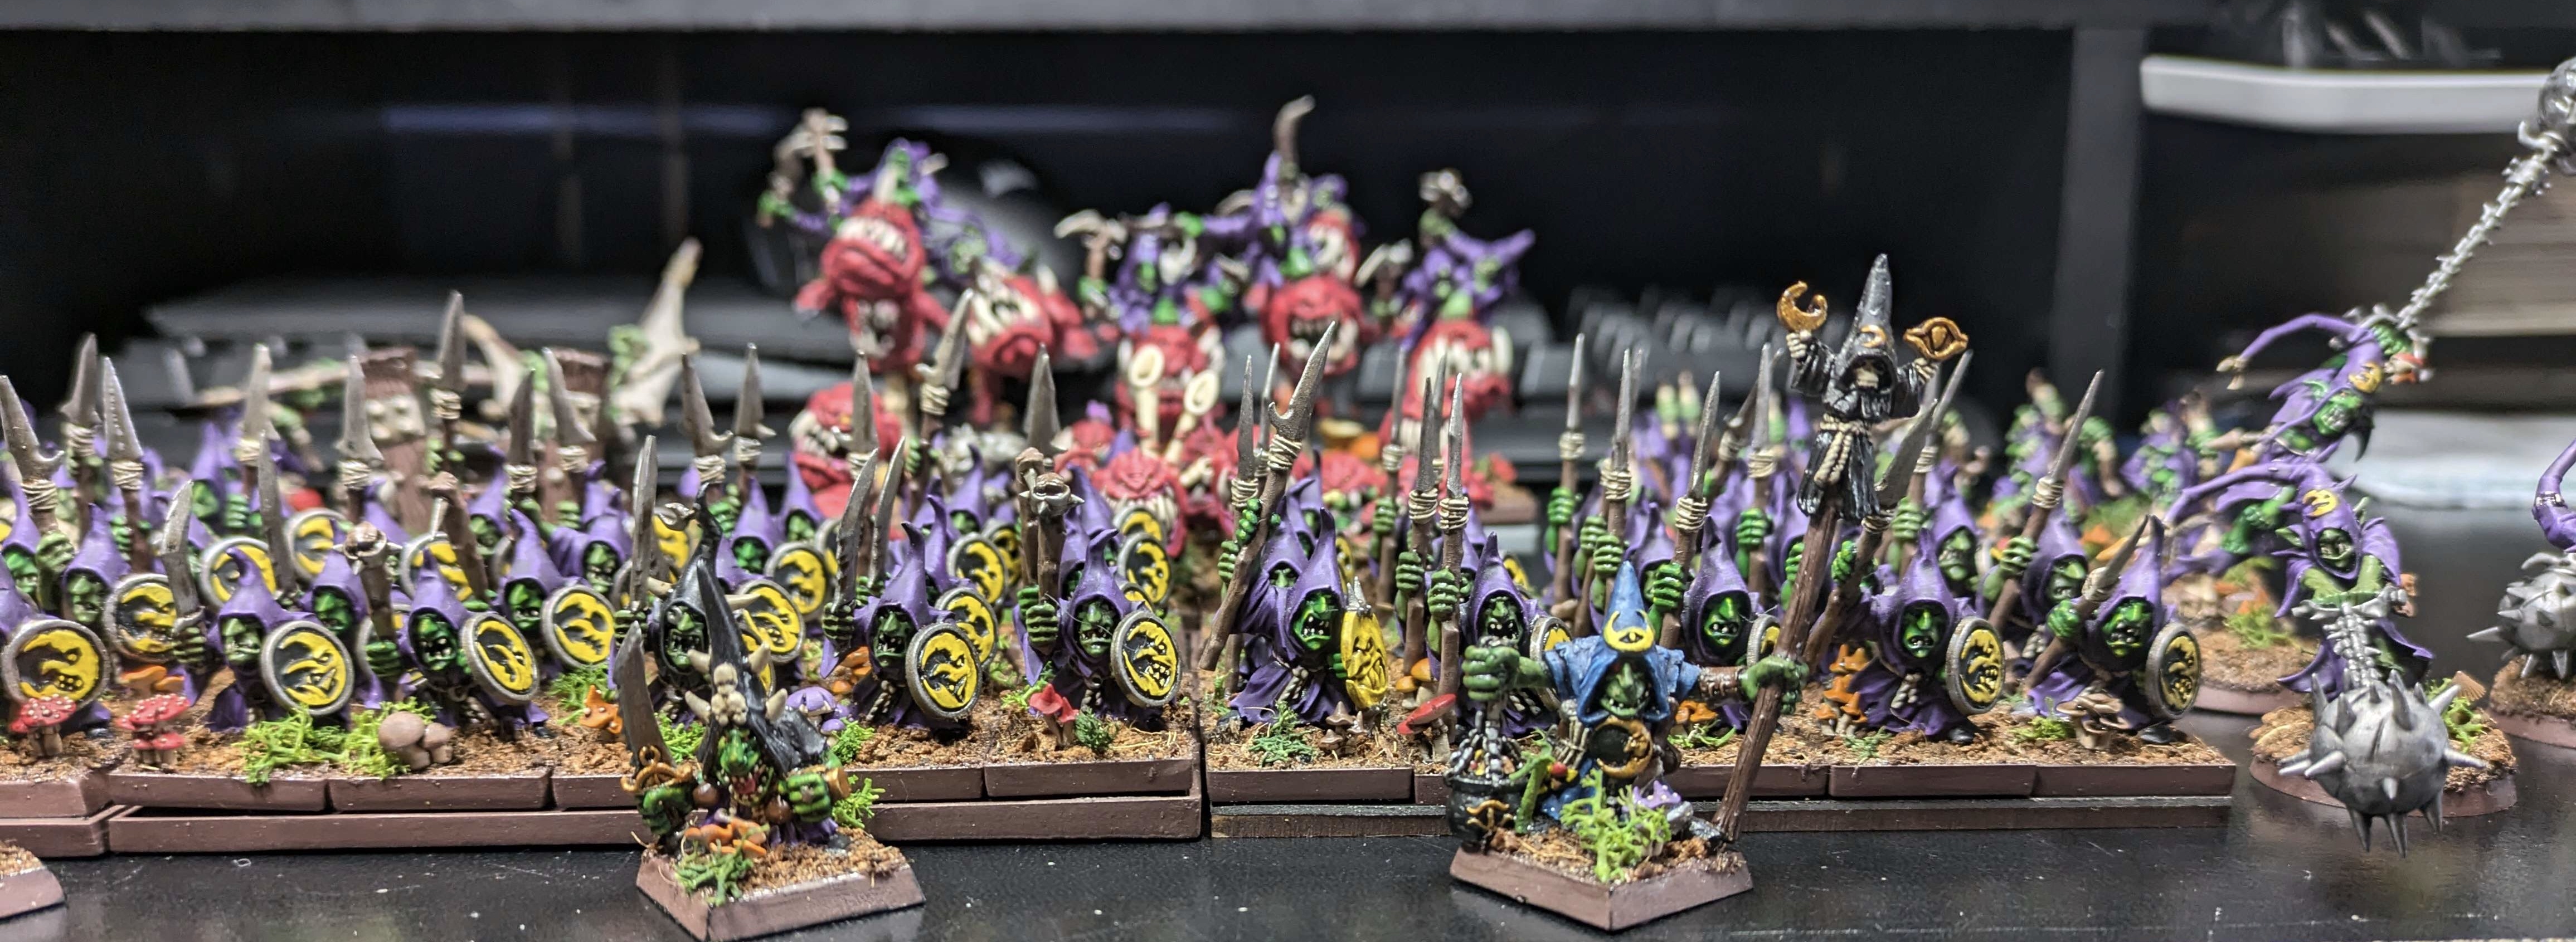
- Time for skin tones. Like with my Mantic orcs, I wanted two different ones, split roughly 50/50
- Base colour AP Fanatics Greenskin, first highlight Greenskin and Fanatic Rainforest mixed in a 1/1 ratio, final highlight pure Rainforest. Wash with Agrax Earthshade
- Base colour Citadel Warboss Green and highlighted with Skarsnik Green. Wash with Agrax Earthshade
- Metal details are just Citadel Leadbelcher base coat, wash with Agrax Earthshade
- Wood details are Fanatic Onyx Skin base coat, wash with Agrax Earthshade
- Ropes are Fanatic Ancient Stone base coat, wash with Agrax Earthshade
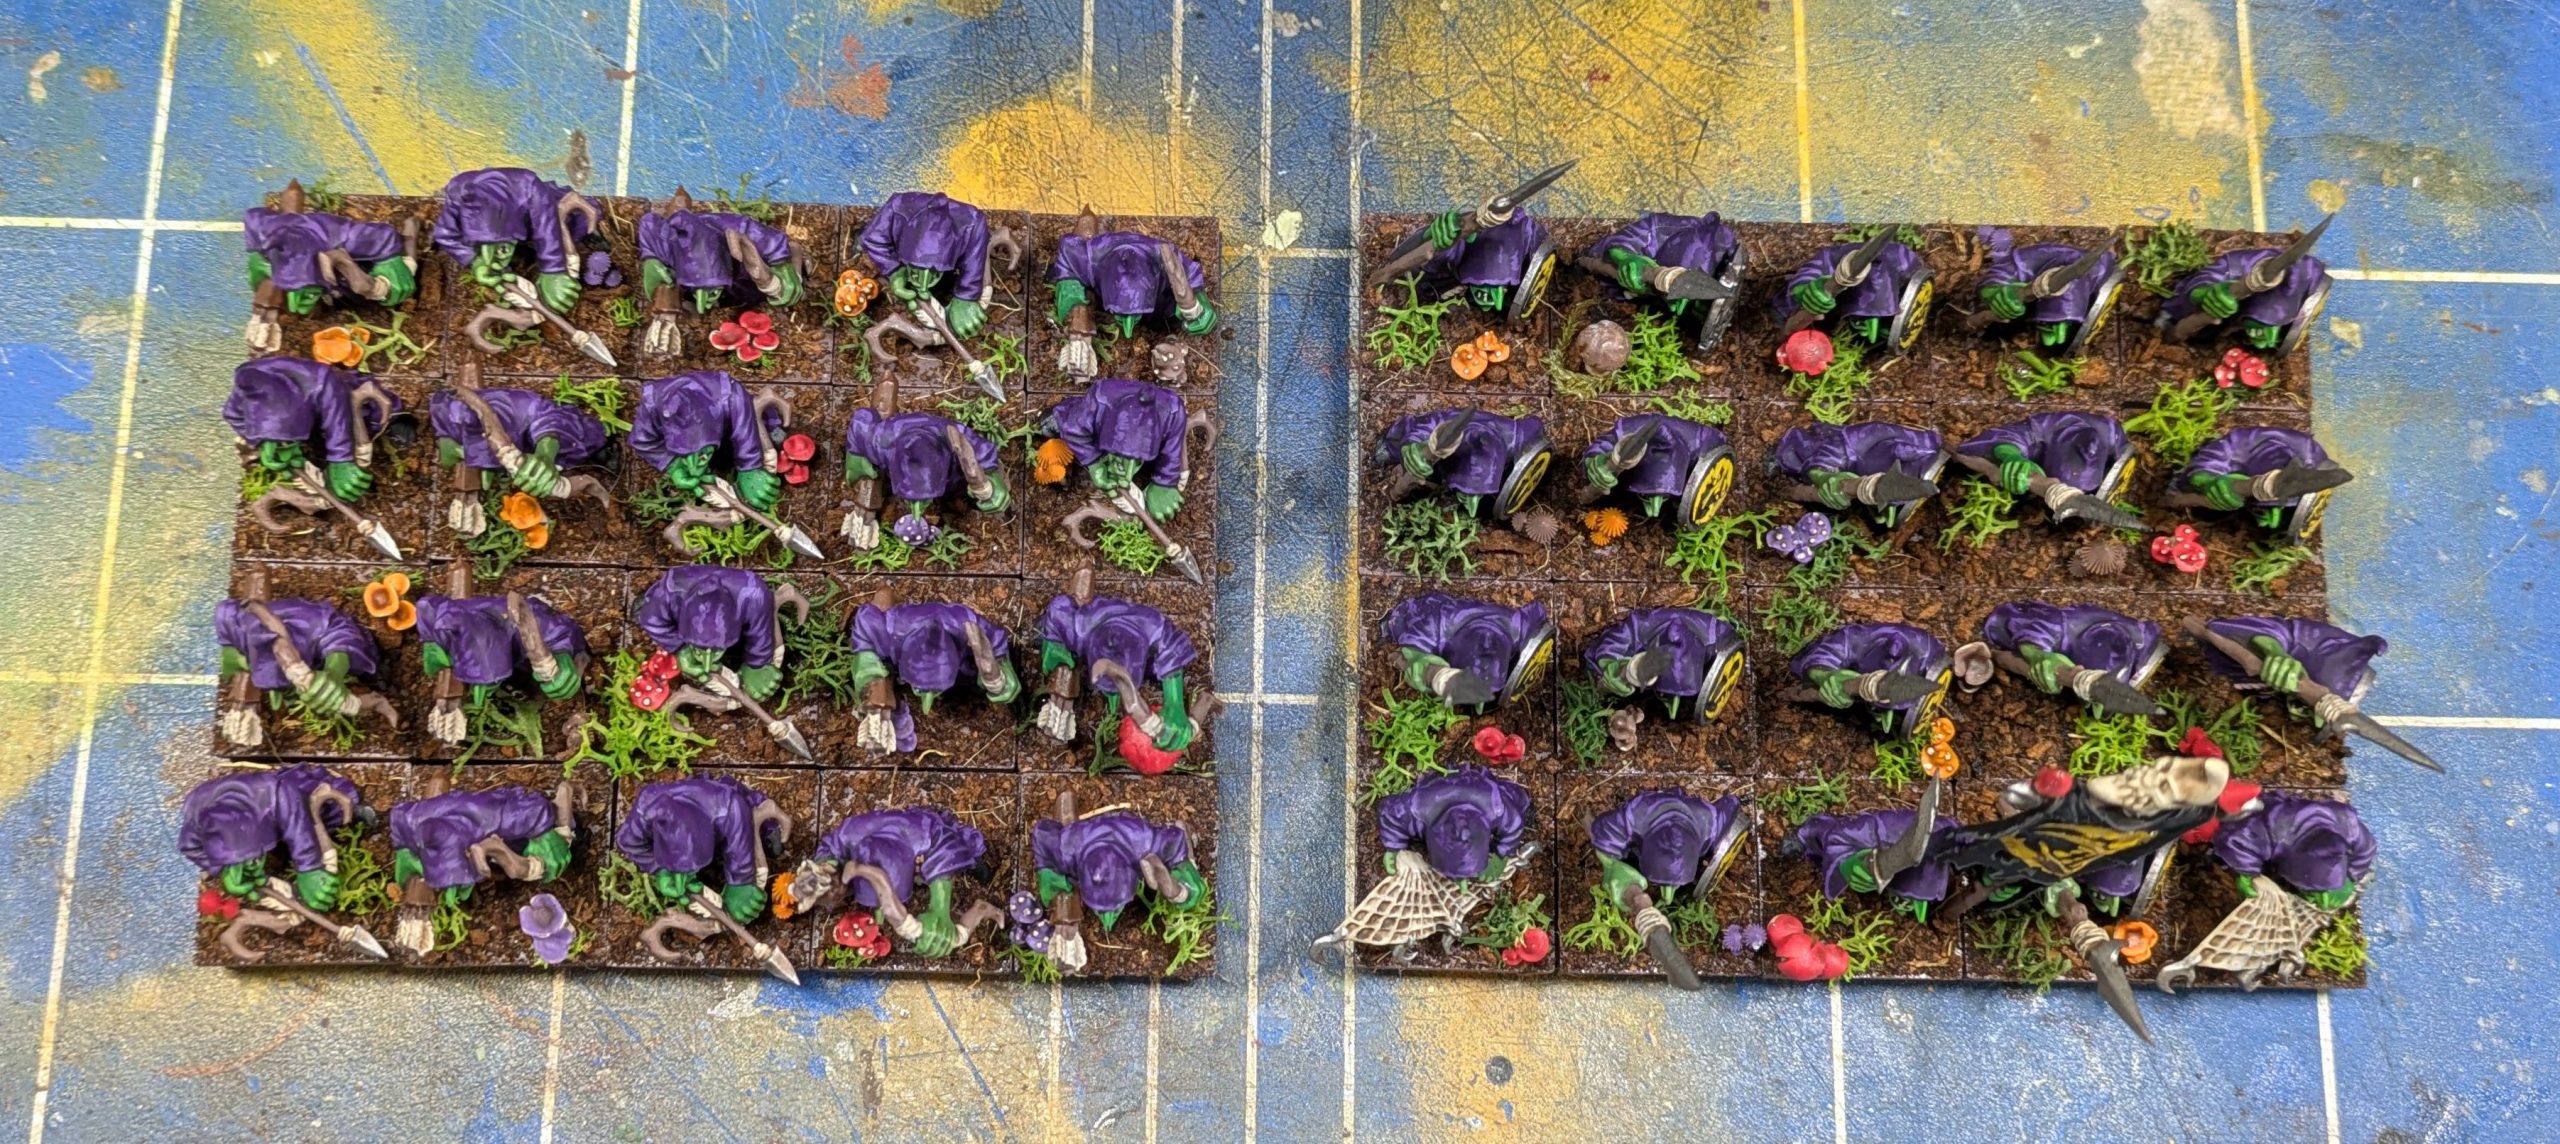
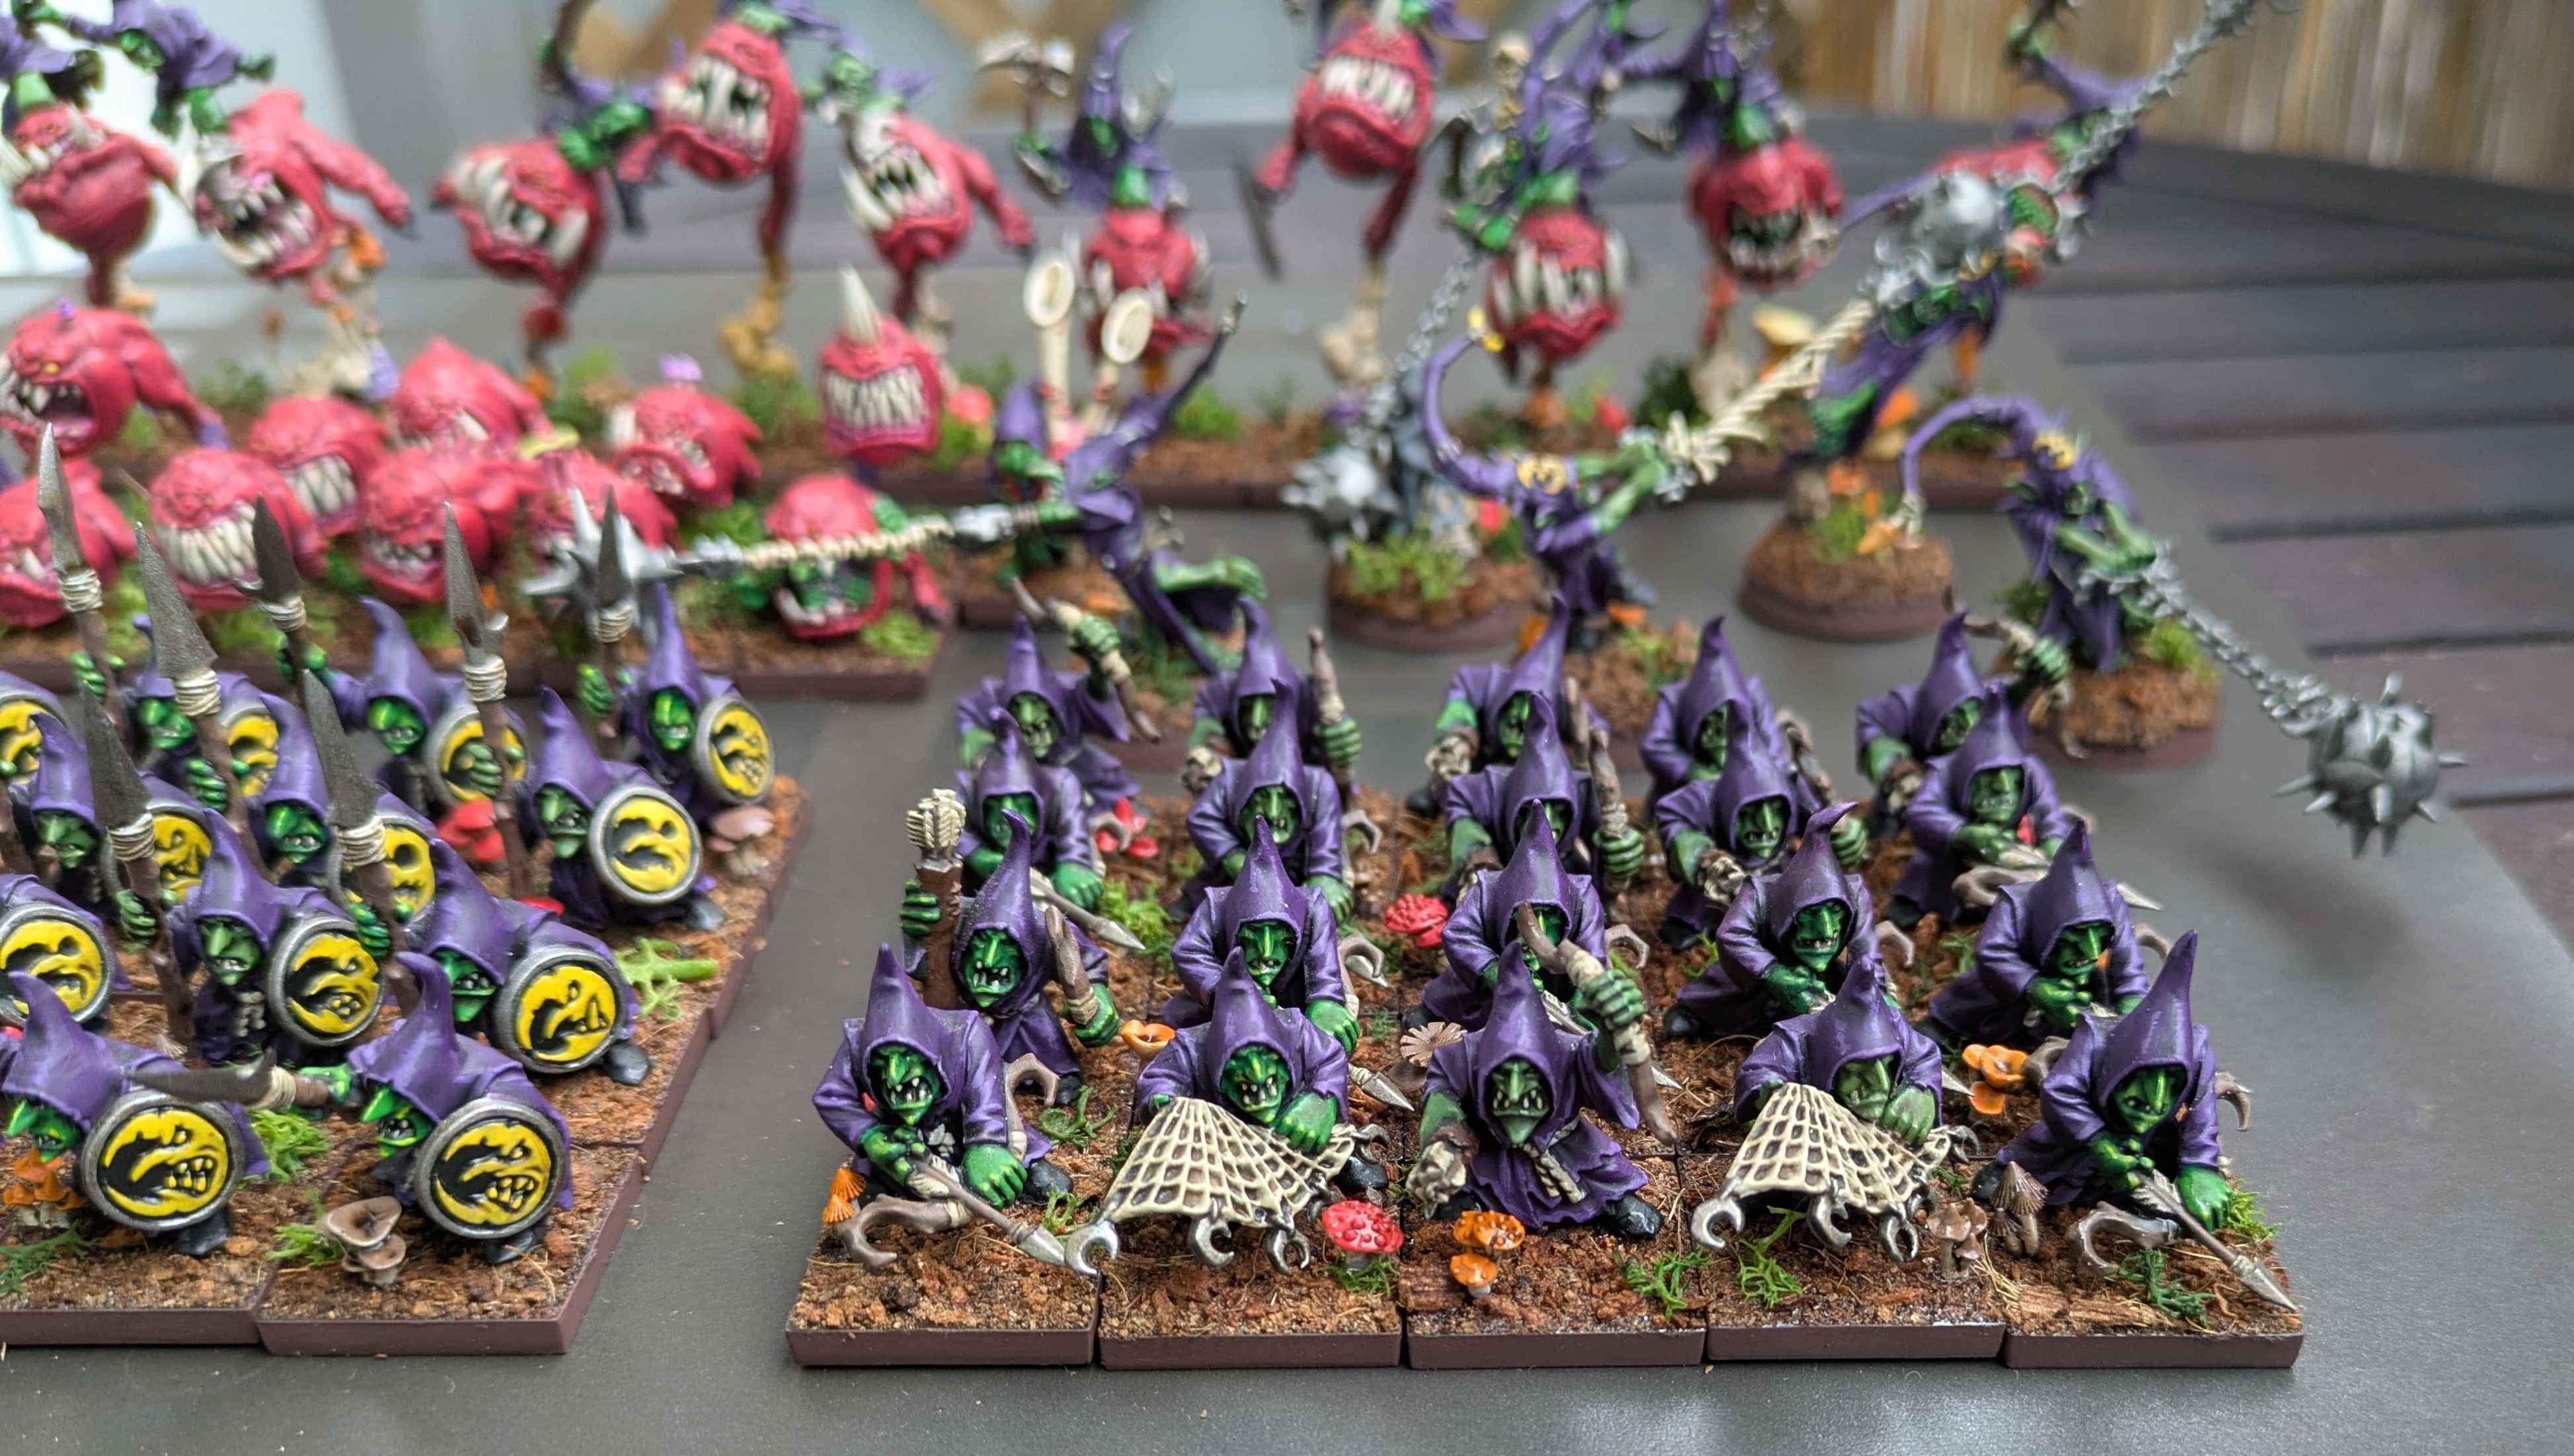
- Shields have their shield detail in Fanatic Demonic Yellow, the base was left the black from the prime. Wash with Agrax Earthshade.
I’m going to wait before basing them – the next batch is already prepared for painting so I’ll do it once they are at the same stage.
I love these silly little buggers, I really do. They might never get on a table but they have been given a shelf in my glass cabinet. Turns out they are also the perfect project to work on during rally weekends – they are so simple and mindless to paint, I can focus on the tv much more than normally I can if I’m hobbying.
Night Goblins Part 7
None of my family know anything about wargaming and would, should the dark day ever come, be horrified at how much money has been spent on it over the years. As a result, I don’t get hobby gifts… which means I justify buying myself them instead. That’s how that works, right?
I was ordering something direct from GW in December so took the chance to grab one of the online only models for my goblins, the Doom Diver. A fantastically fun model to paint using the same paints as previous parts. I wasn’t happy with the wings, they seemed too plain. Once I finished basing the models though, it doesn’t look as bad as it did. I may still go back in the future to change them but I need a bit of distance to really figure out my feelings.
For the base size , I didn’t really know what I’d run this as in Kings of War. War engines usually base on a 50x50mm but this would have to fall under the exceptional base size rules (use whatever size is needed to get the model fully on a base) as it is too long for 50mm. The crew would all just be flavour rather than essential so I kept them on separate bases.
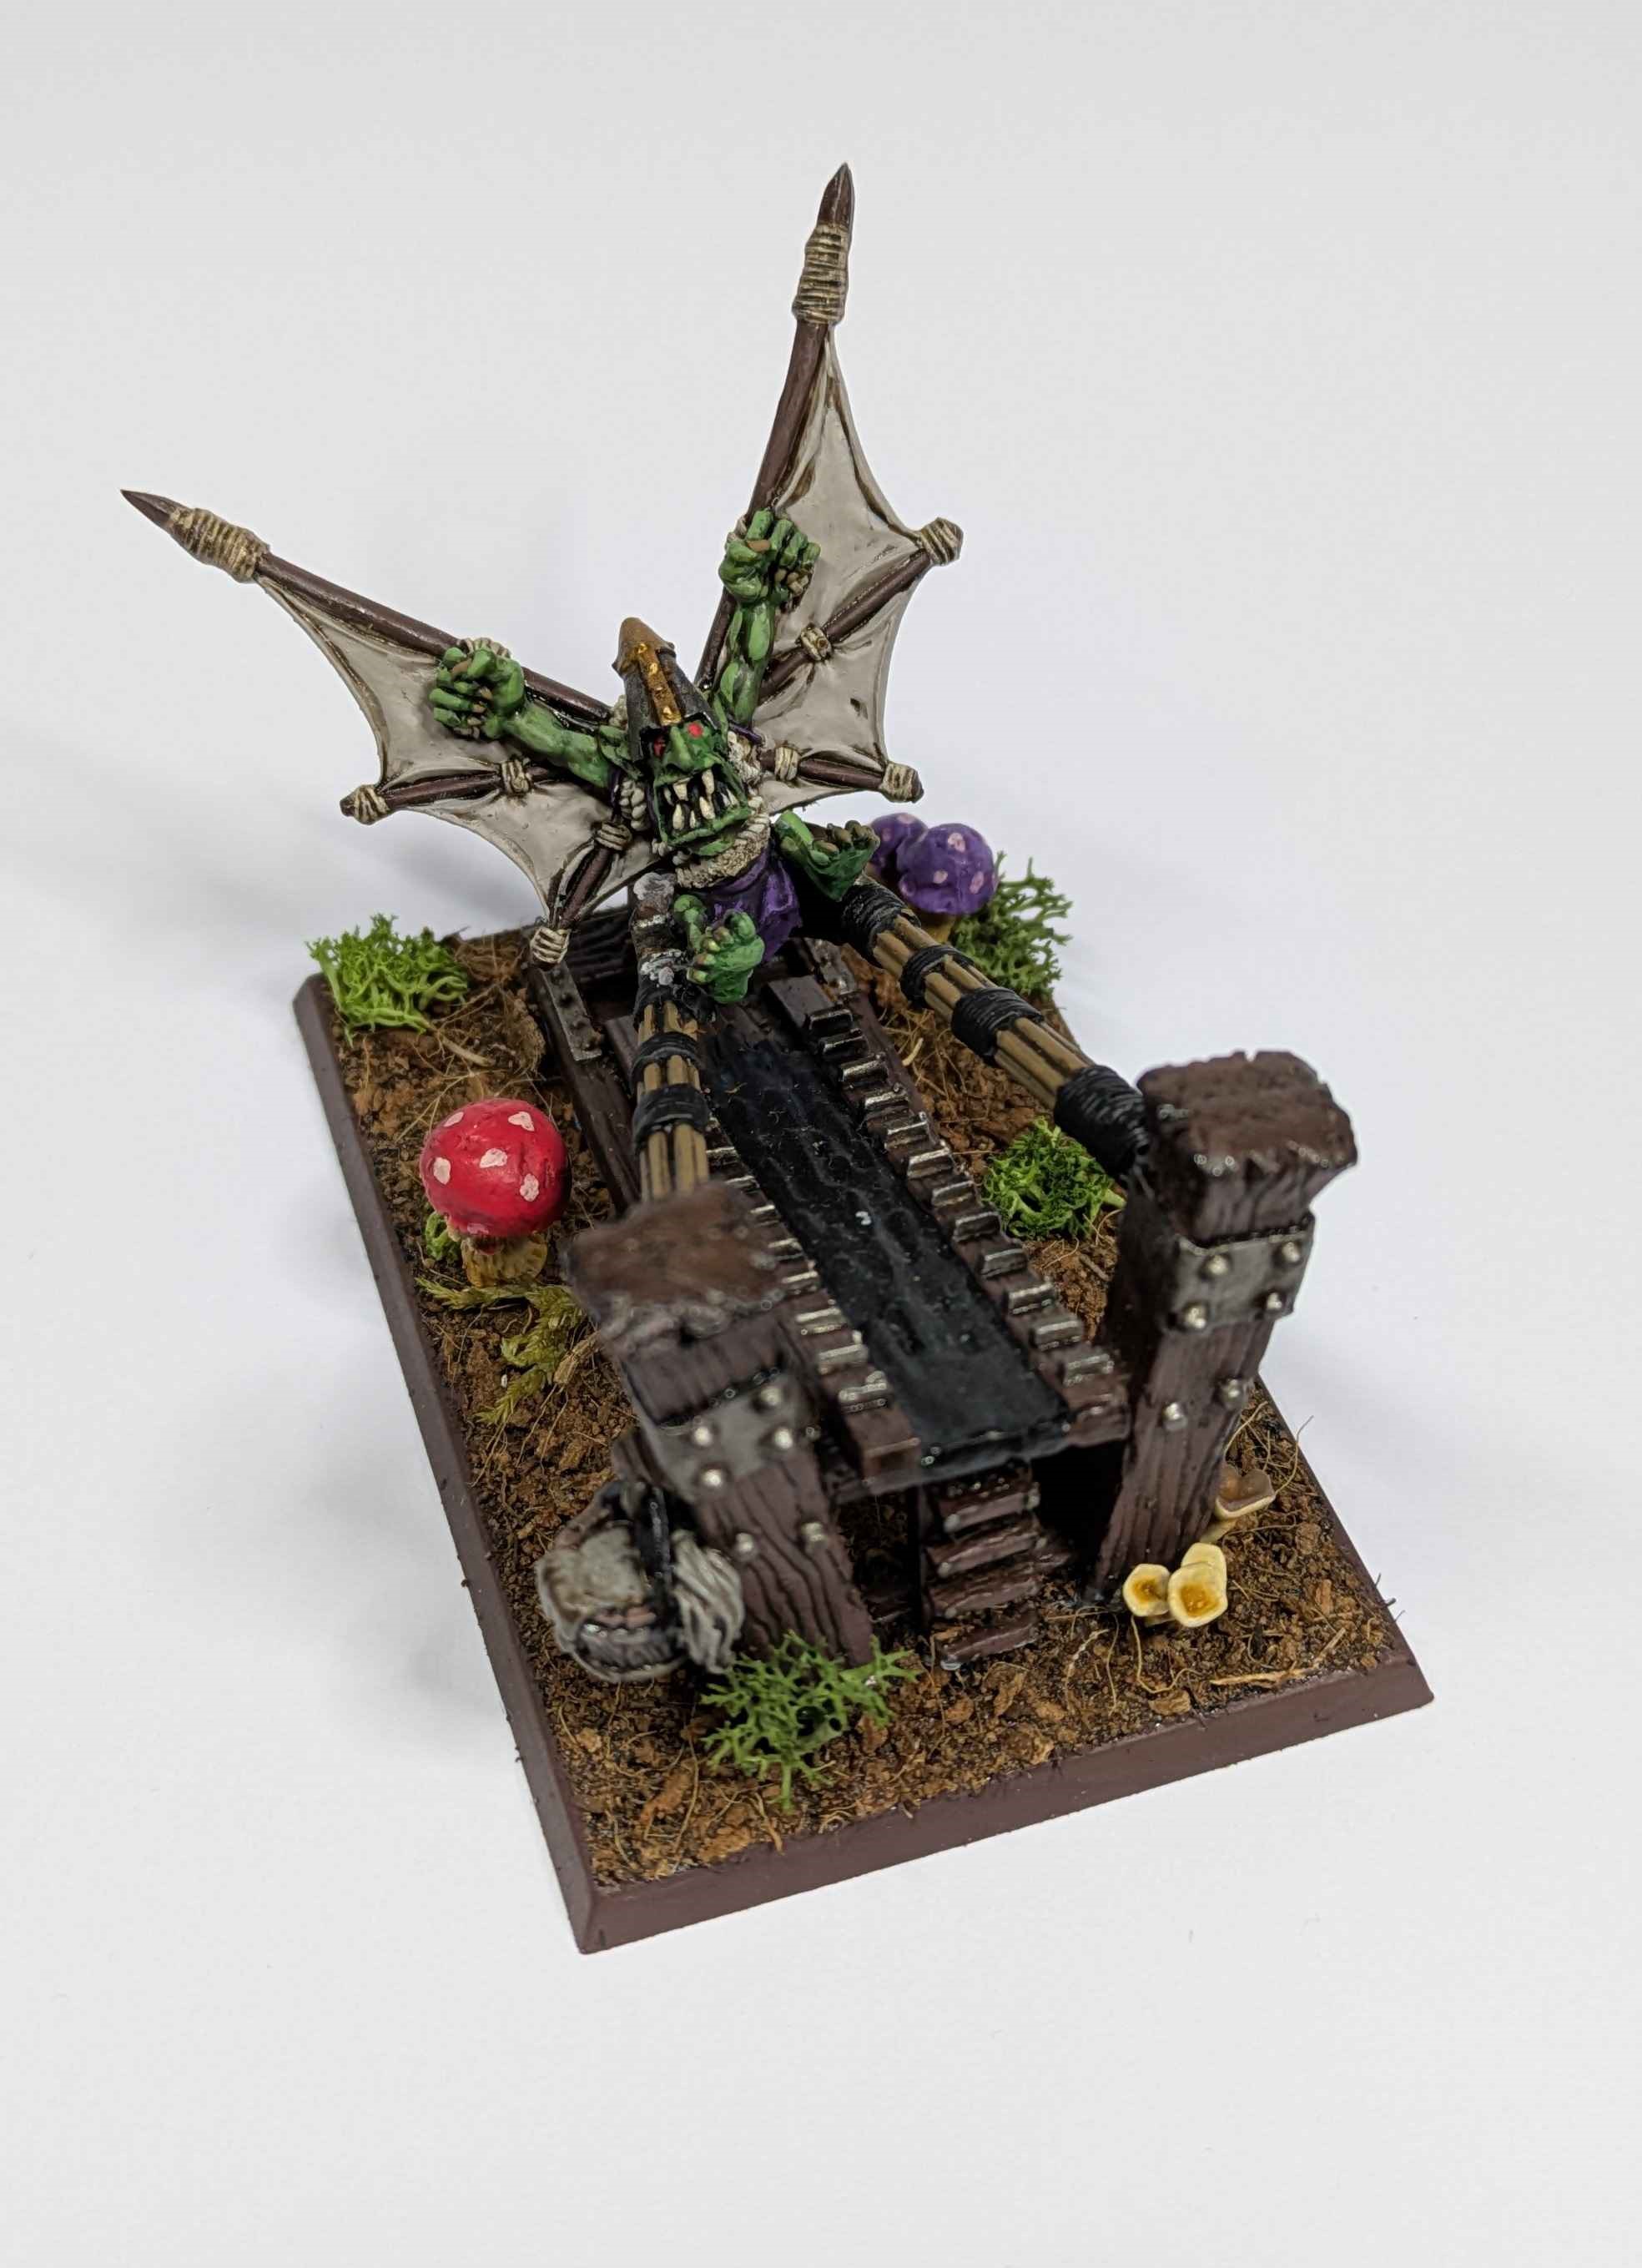
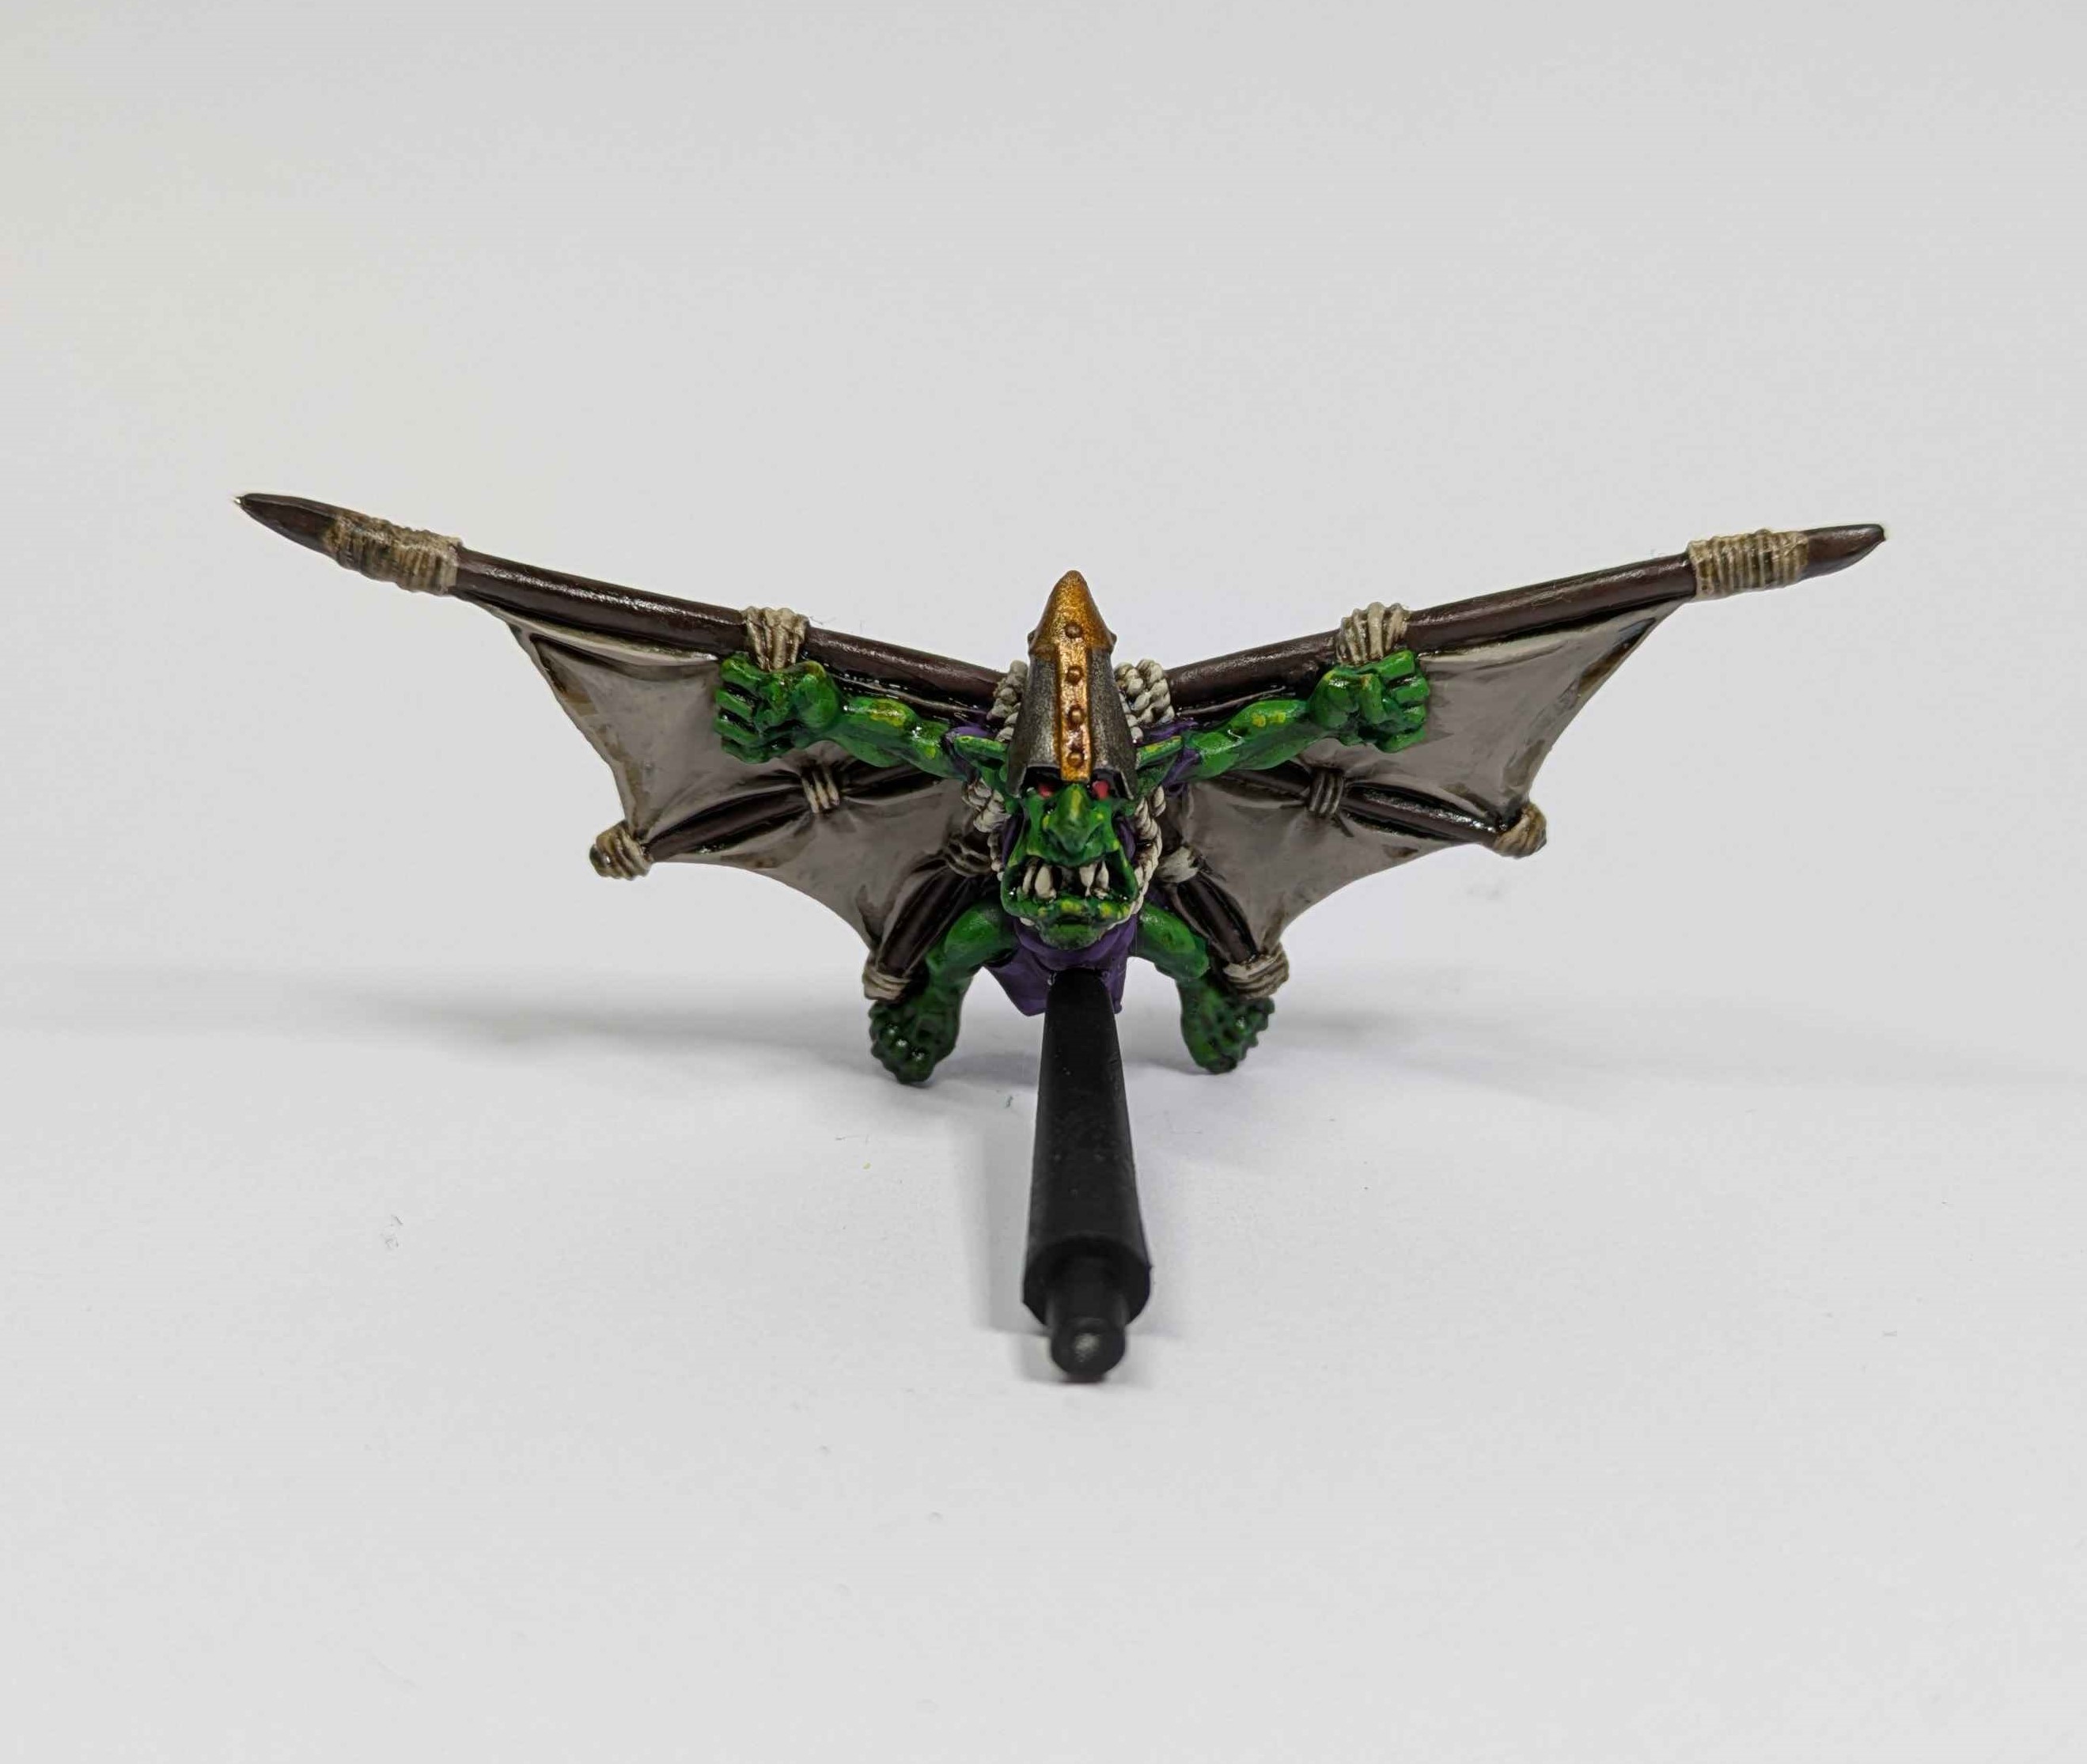 Its the flight stand you filthy-minded Otter
November Project: Night Goblins Finished
Army finished… for now at least! I’ll definitely be adding to this one when pennies allow.

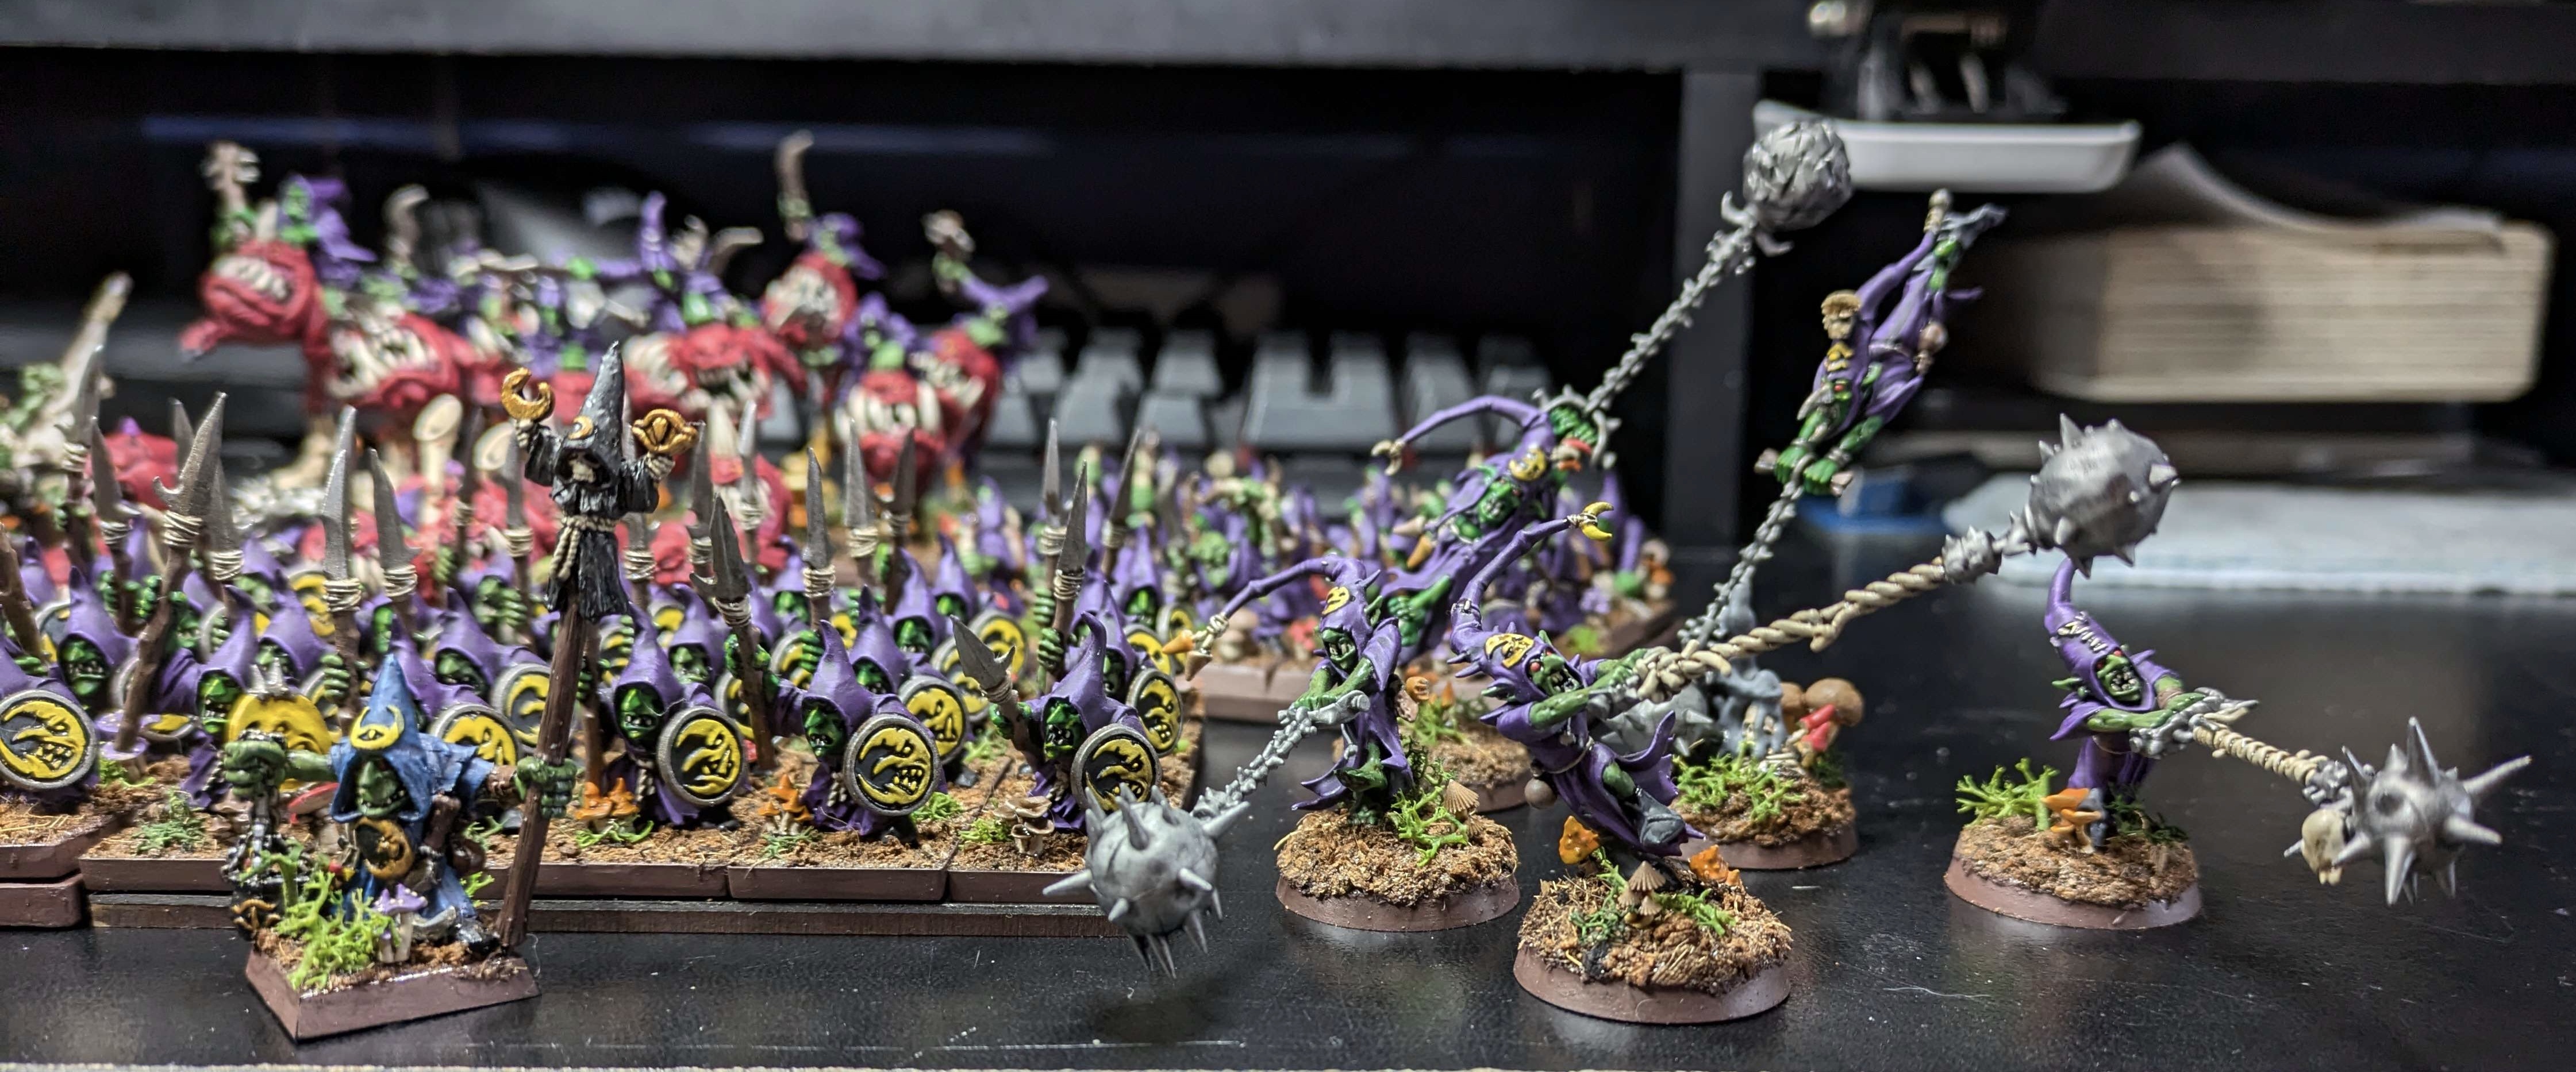
November Project: Night Goblins Part 5
Technically this is a spillover into December now but thanks to a bad bout of illness it was pushed back. I’m determined to finish it before the year is out though so let’s get into basing.
I don’t really have plans to play with this army but if it does ever get to the table, I want it to be flexible about game system. I love the multibasing aspect of Kings of War but these guys are going to be individually based. By putting the infantry on 20mm squares they can work easily for KoW or Old World with some spacer trays. The squig hoppers count as cav but in OW that means 25mm squares (light cav) or in KoW 25x50mms. The models aren’t really big enough to justify the 50mm depth so I’ll work on some filler bases to help them out.
Basing steps:
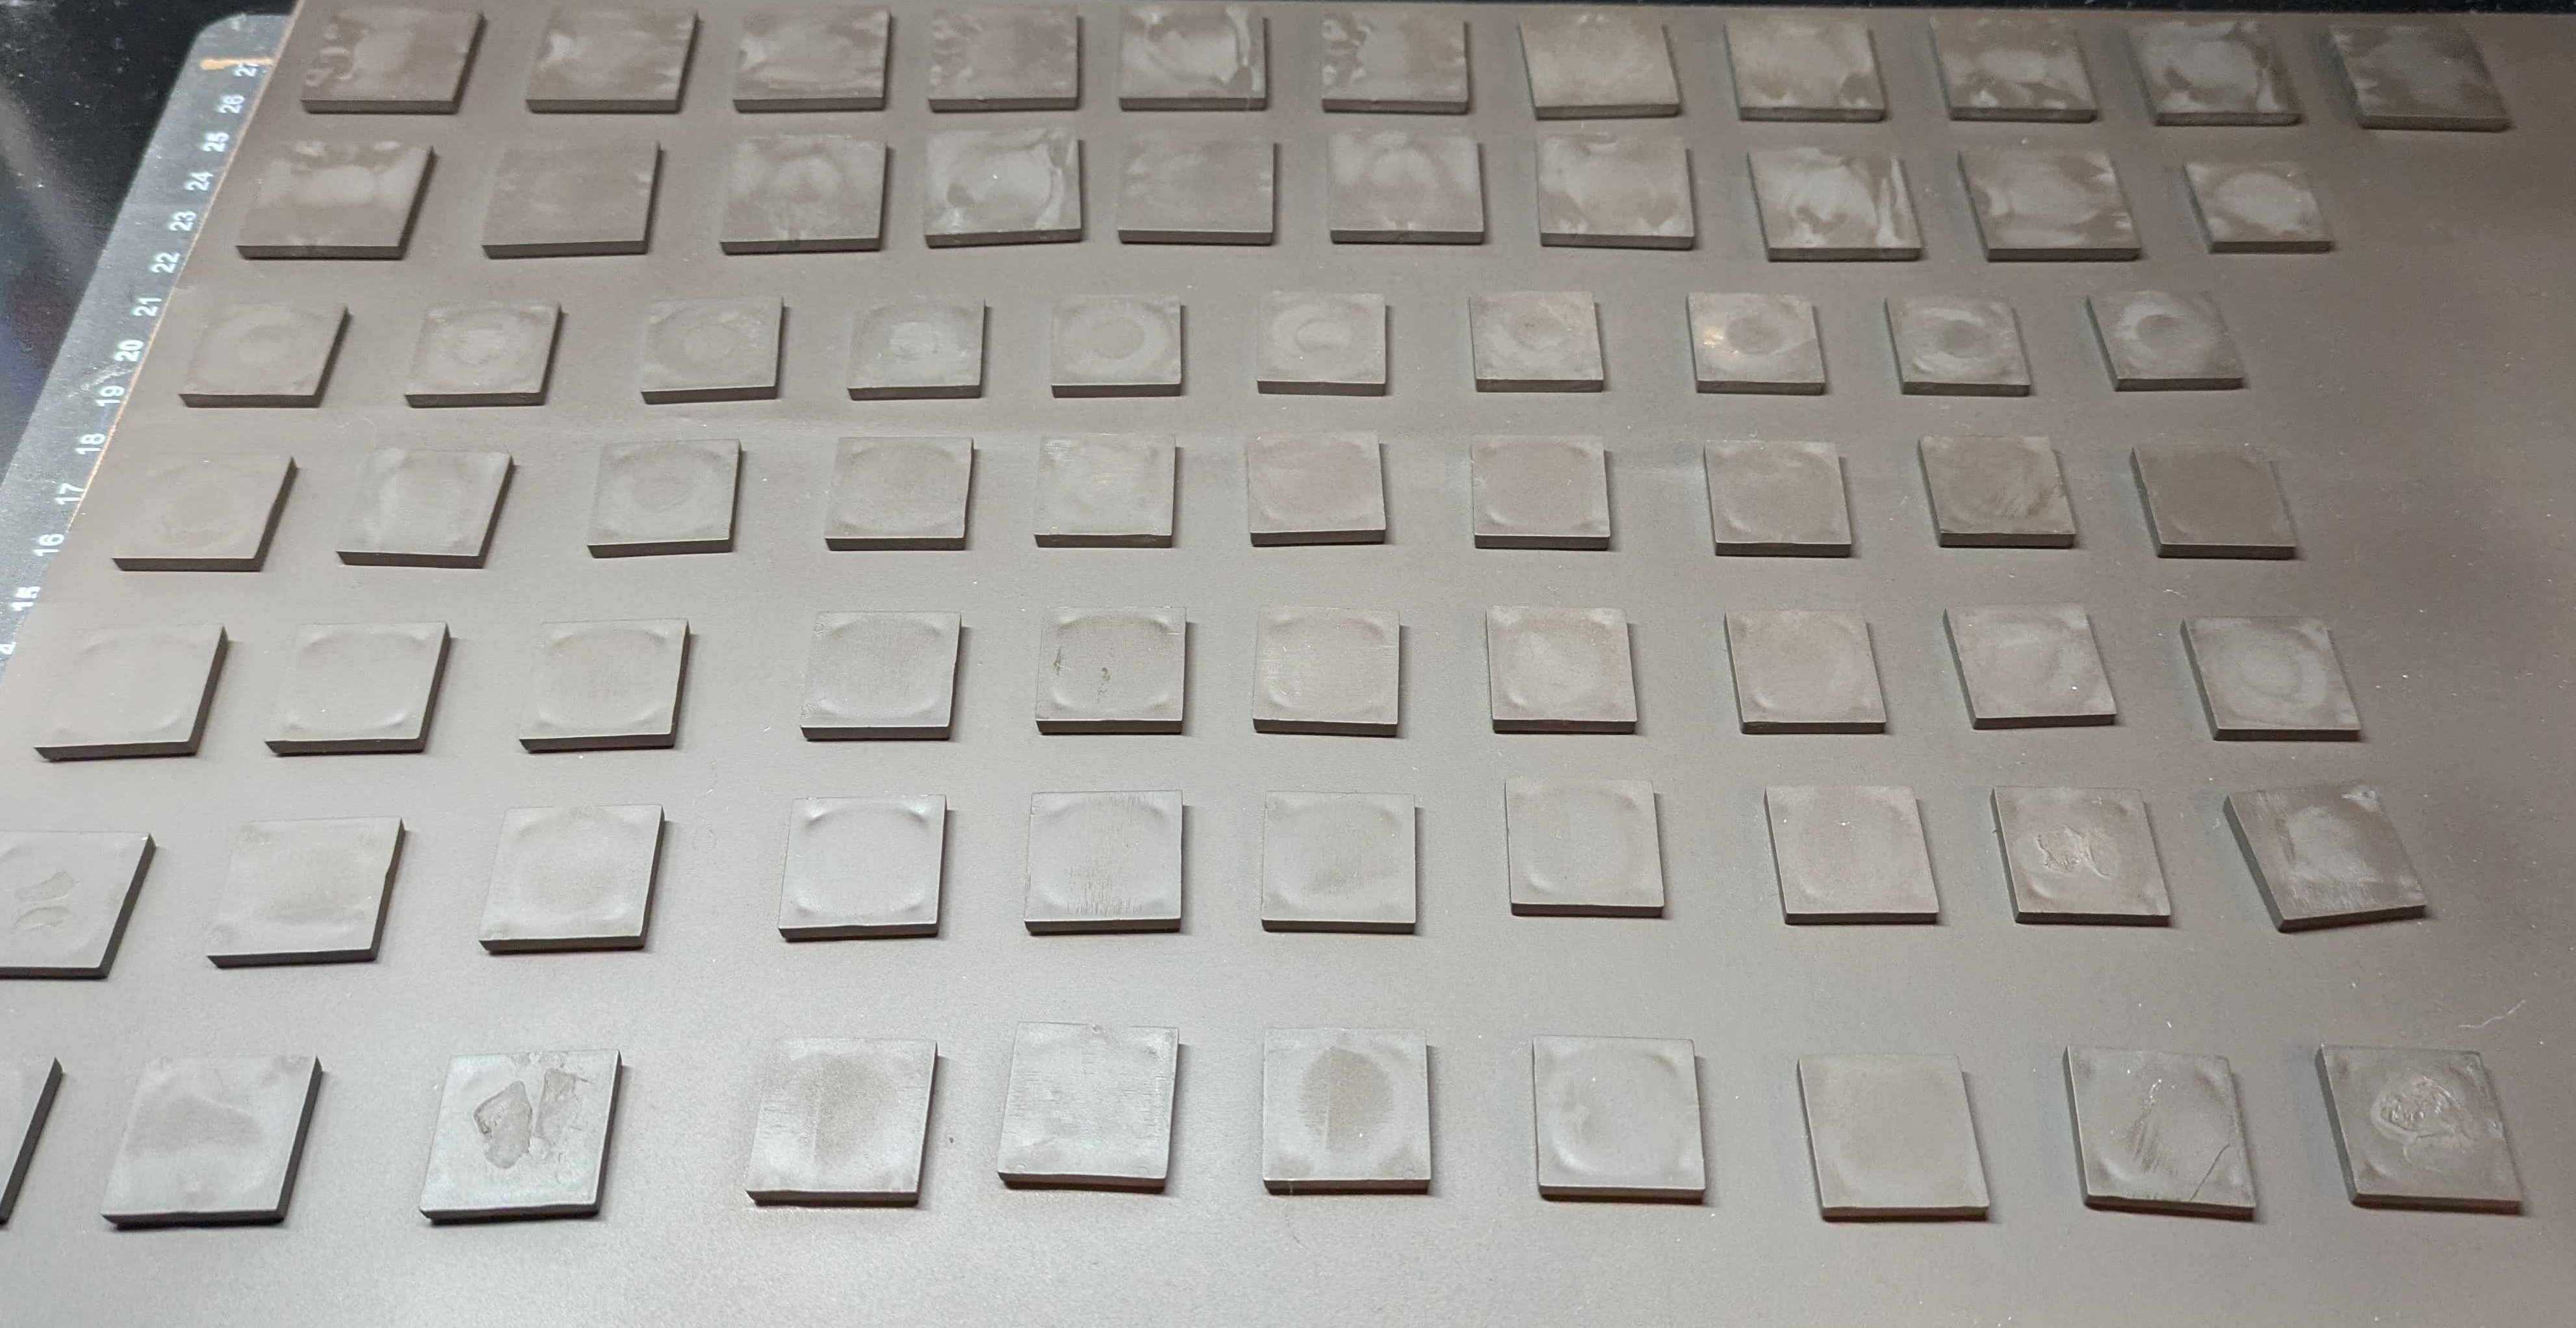
- After getting all my bases magnetised, I gave them all a spray prime in brown. This is mainly so no grey shows through the final look. Black would also work.
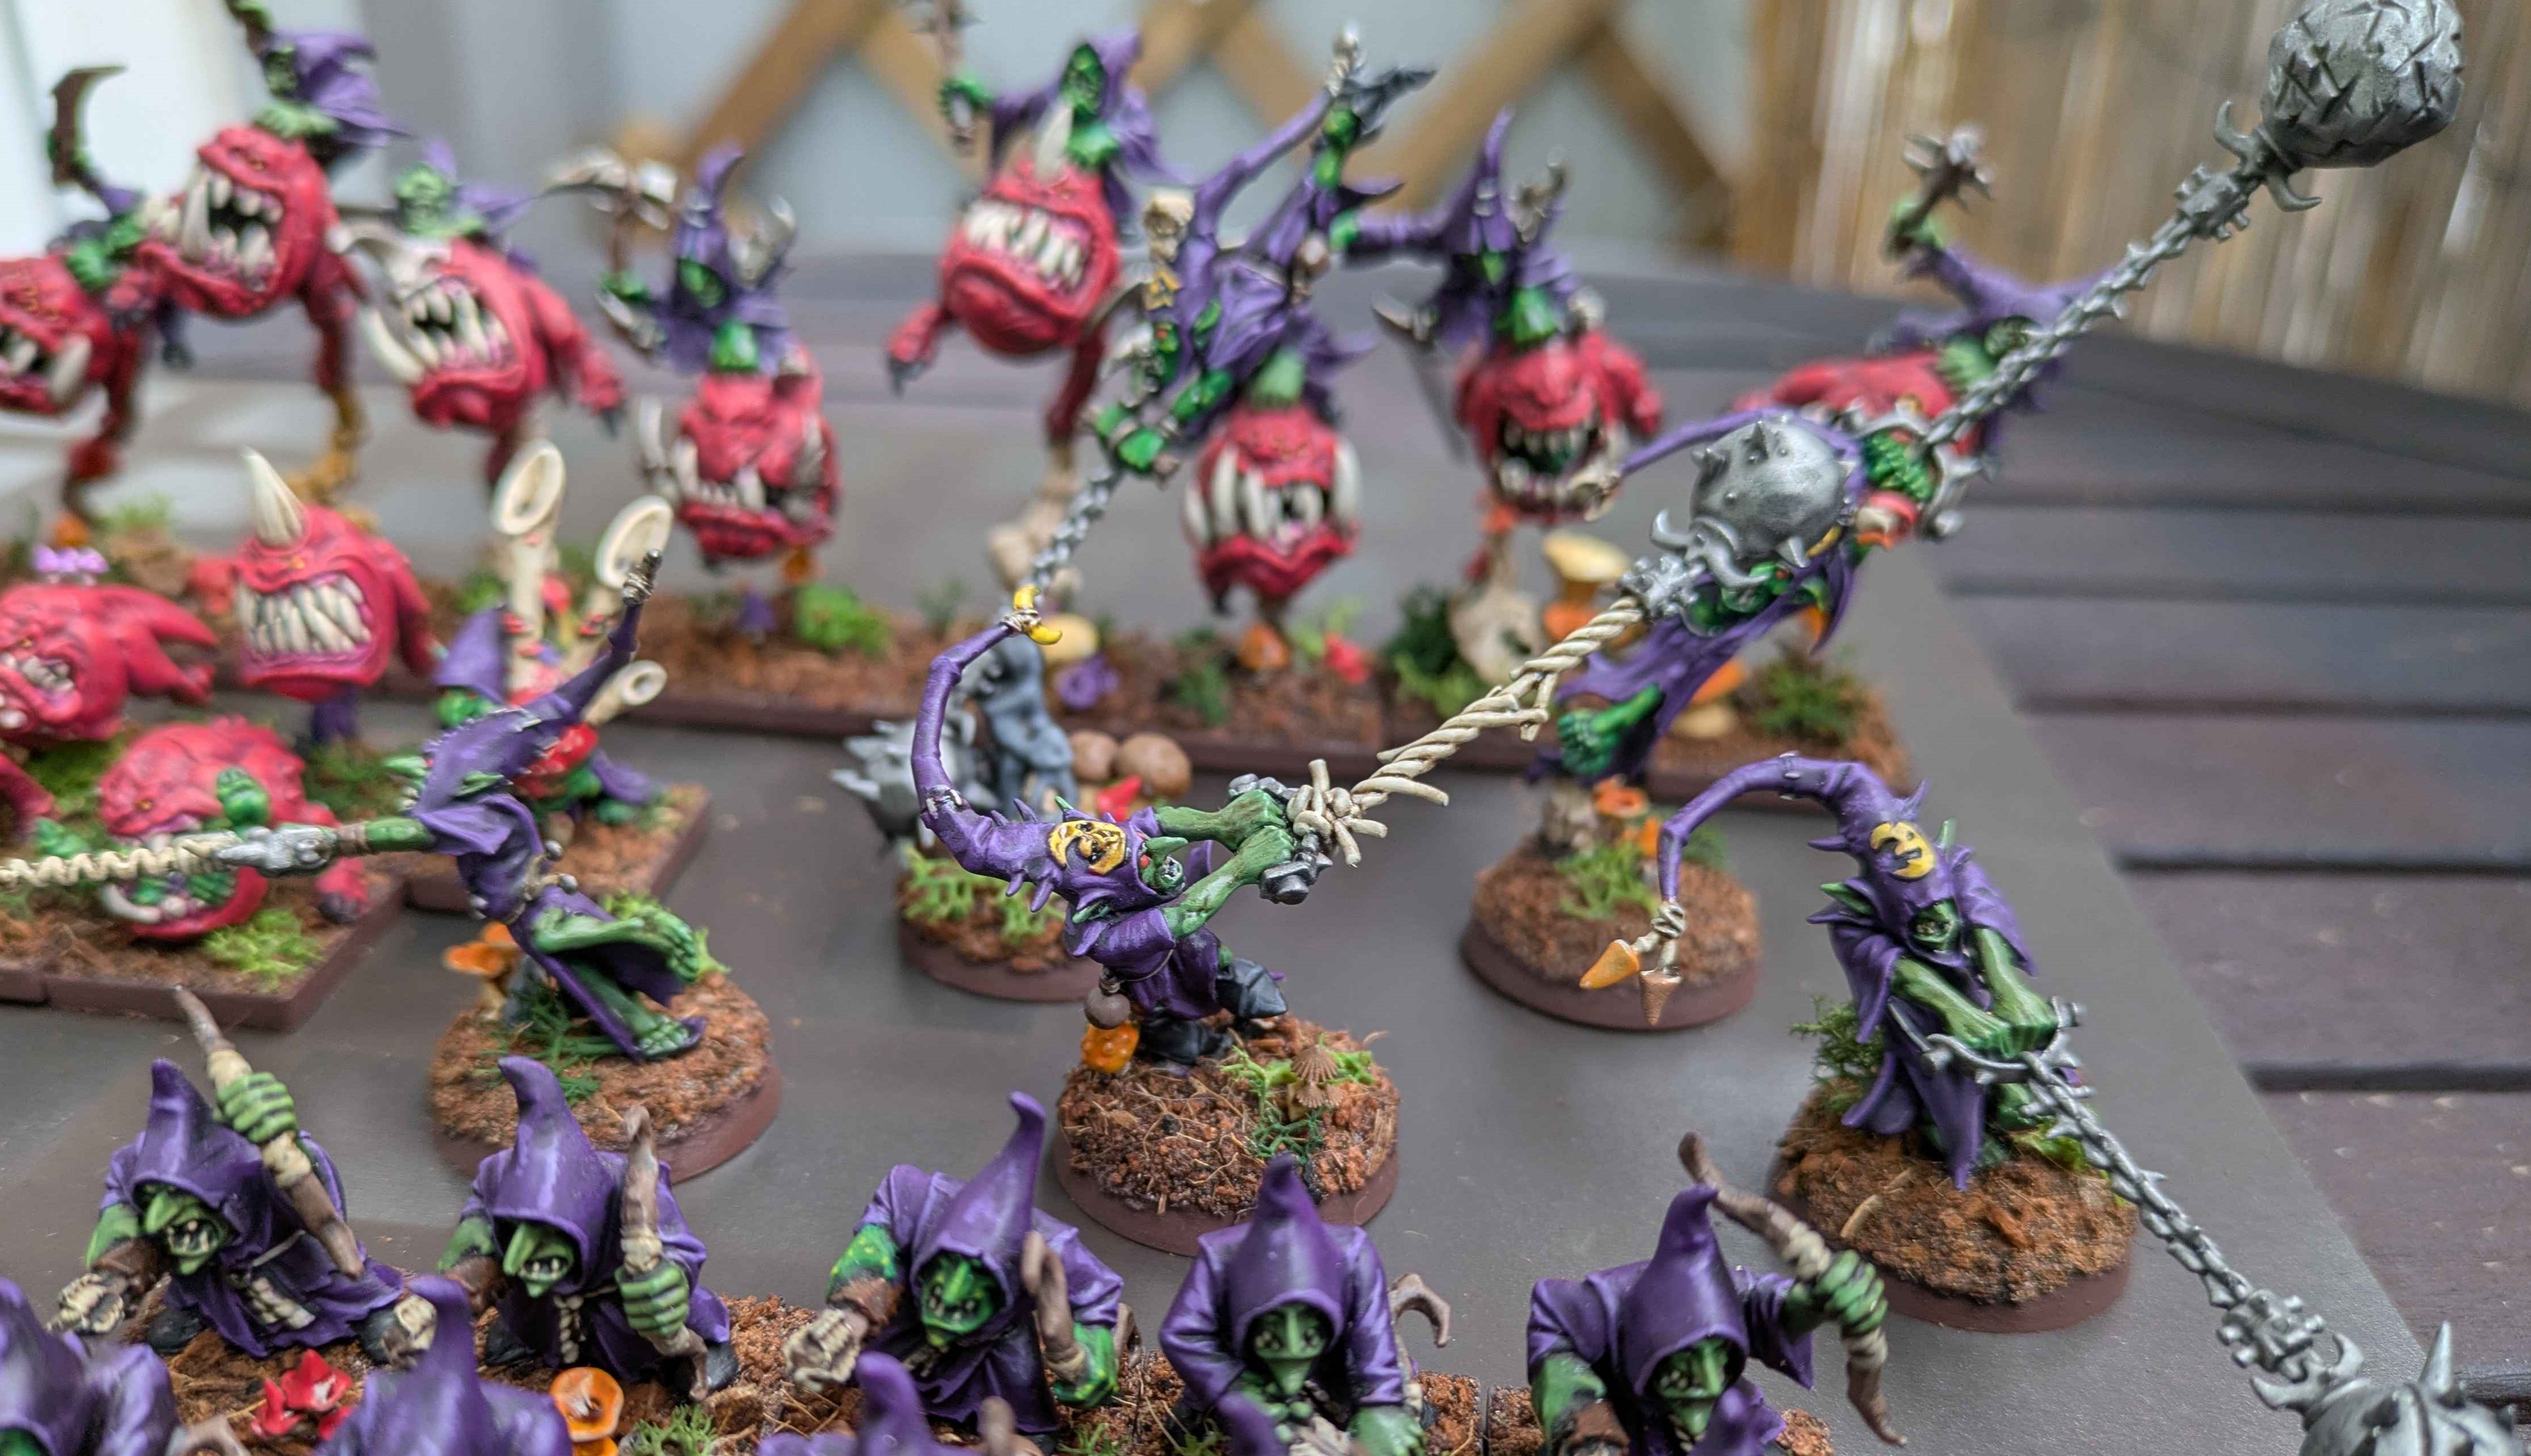
- The exception to this was the fanatics. The models are so top heavy that I needed to add extra weight to the base in the form of a penny. Once this was glued on, I used some brown texture paint to hide it before continuing to…
- The main part of the basing is going to be forest floor made out of coco fibre, the kind sold as a soil rather than as a hanging basket liner. It comes compressed in bricks and after some effort with a saw, I got a small chunk broken off and into some water to rehydrate it. Then I dried it out again. Yes, this was a necessary waste of a few days 😆
- I used superglue to get a good layer onto the bases. This is a messy step. Or it was until I realised I could mount the base on the magnet at the side of an old GW painting handle… fingers spared!
- Time to mount goblins, more super glue but less mess. Some of the models needed an extra application of the coco fibre at this point to blend their mounting points in better.
- Over the months, I’ve collected mushrooms for basing. There’s some great ones from Bad Squiddo, some less great ones from a 3D printer on eBay, some from various GW goblin and troll kits in the bits box, and then there some I printed myself.
- I looked at a lot of online images of mushrooms to get some colours. I was going to do lots of different ones but in the end I thought maybe sticking to a few across the army would look a little more cohesive.
- At this point I was going to use a bunch of autumnal leaf litter to finish the bases off but, after seeing them all at this stage, I decided a little green was needed instead. Looking through the flock box, I found some reindeer moss. Little scissors and little tweezers deployed and I think it’s a much better look.
- Can’t paint an army and not rim the bases so I spent a tedious 90 minutes or so going round each base with a couple of layers of dark brown because it looked better with the basing scheme.
- Lastly everything got a soak of isopropyl alcohol and then watered down pva to stop the coco fibre from shedding. In the future the whole army will need to be hit with a matte varnish but the weather here isn’t likely to be conducive to that between now and late spring!