![Perfect Call Of Duty-Style Miniatures? Wargames Atlantic’s Operators Review [7 Days Early Access]](https://images.beastsofwar.com/2026/02/unboxing-wargames-atlantic-operators-coverimage-225-127.jpg)


Just a little something


Recommendations: 640
About the Project
A little something to keep the creative juices flowing.
Related Genre: Fantasy
Related Contest: Dungeonalia 2023
This Project is Completed
undercoating
Because I want to make this as multi-purpose as possible, I will use more earthy colours and not the standard grey and light grey drybrush method.
To undercoat I turned to my trusty spray cans. Leather Brown followed by Zandri Dust followed by random patches of Skeleton Bone, Wraith Bone and some yellowy green colour I found in the garage.
The plan from here is to use a mixture of dry brushing, stippling and washes to build up colours.
Slowly getting there
Added a few more colours to my little project. Still need to do the floors and weathering. I also have 9 more boxes to do, but they will be a little different to this core set.
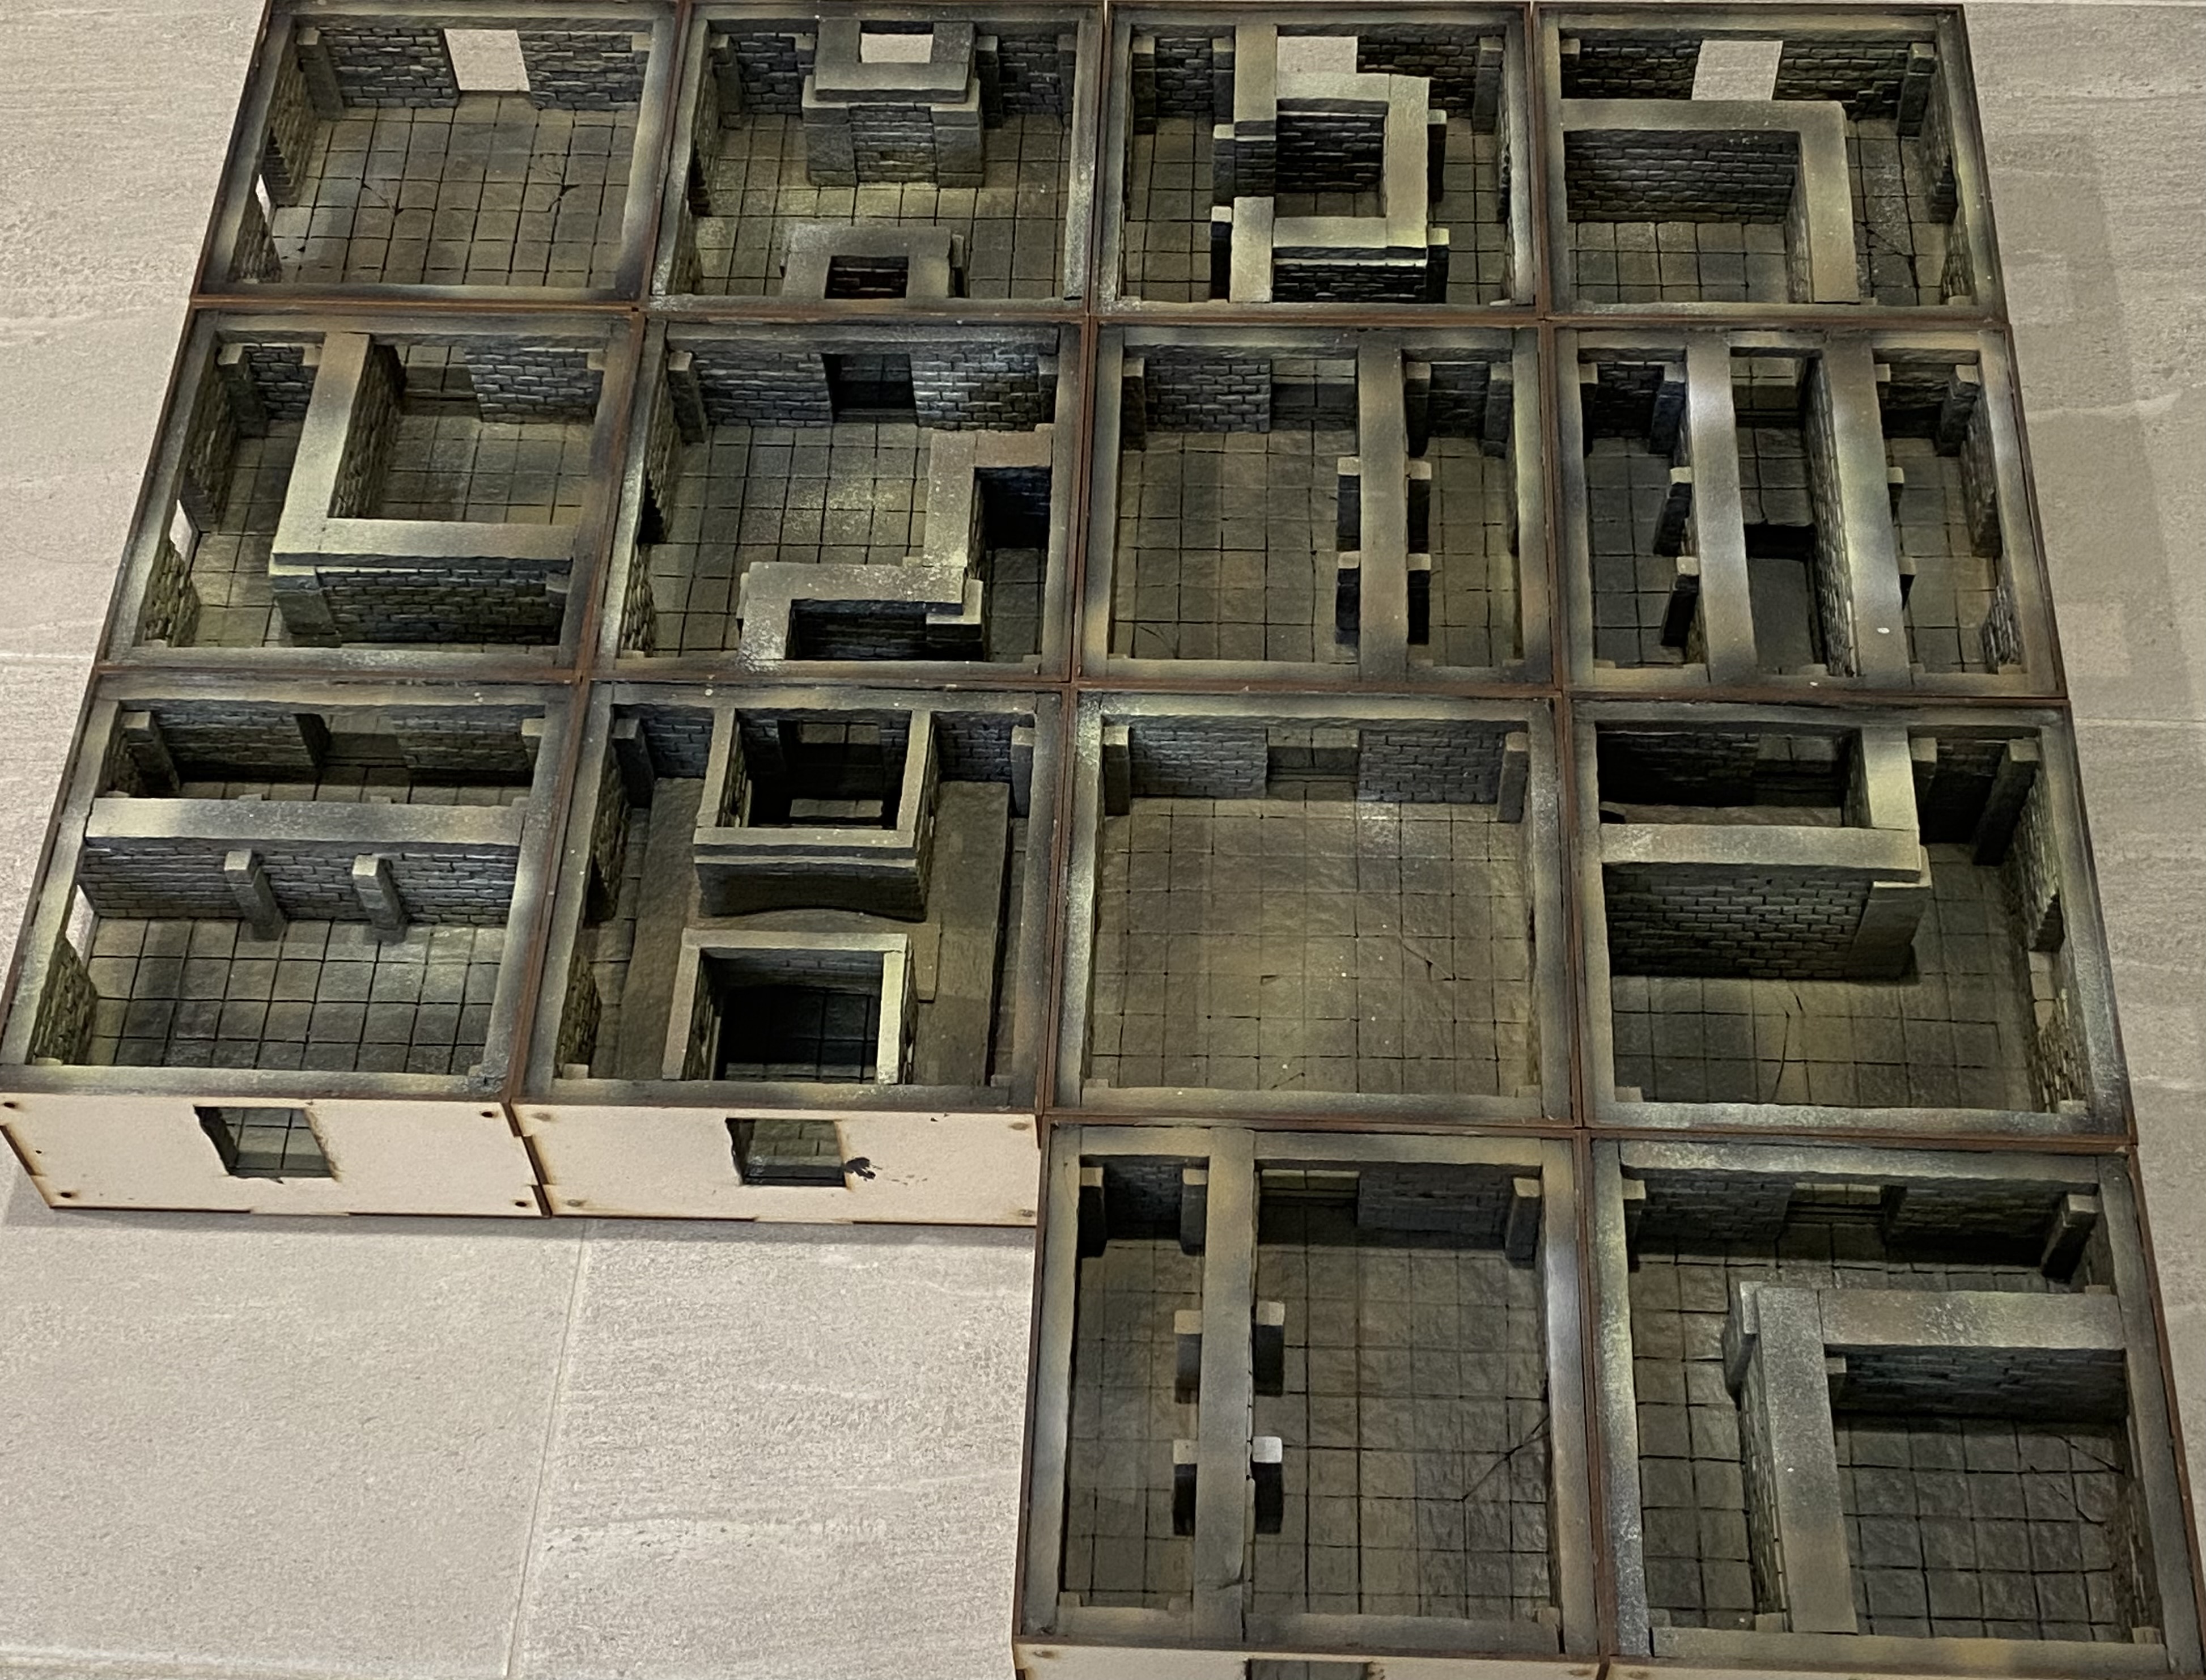
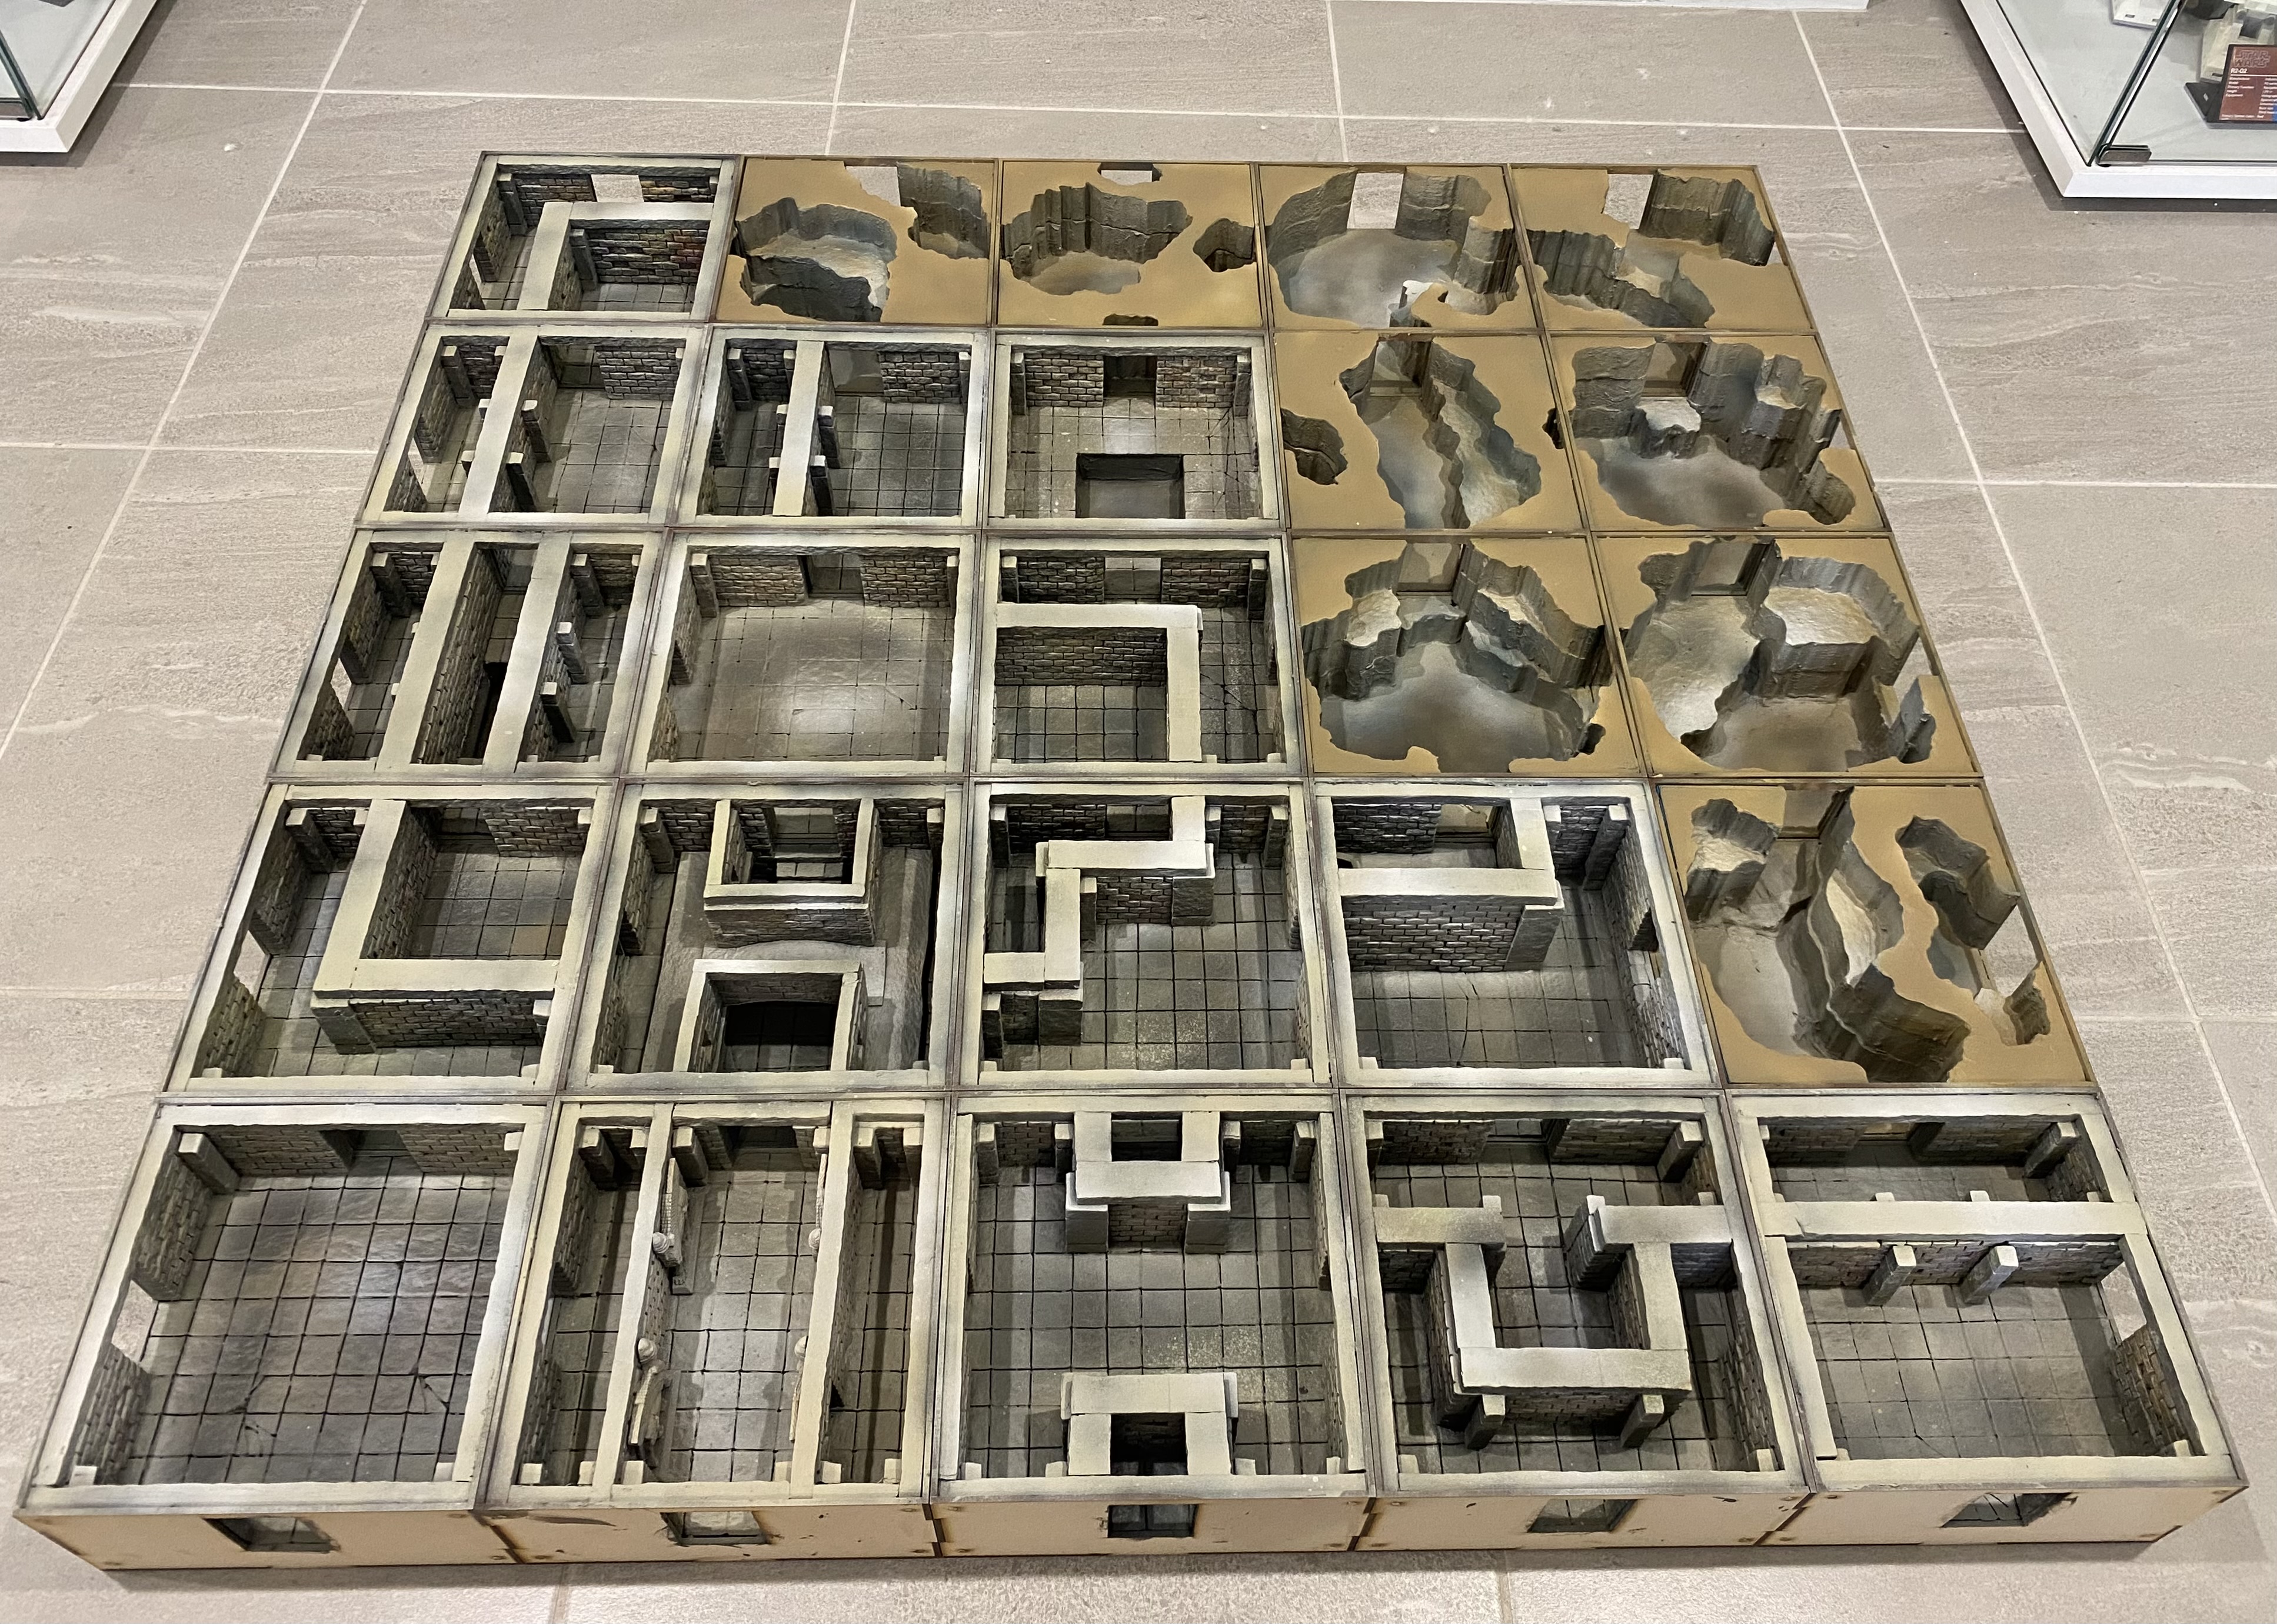
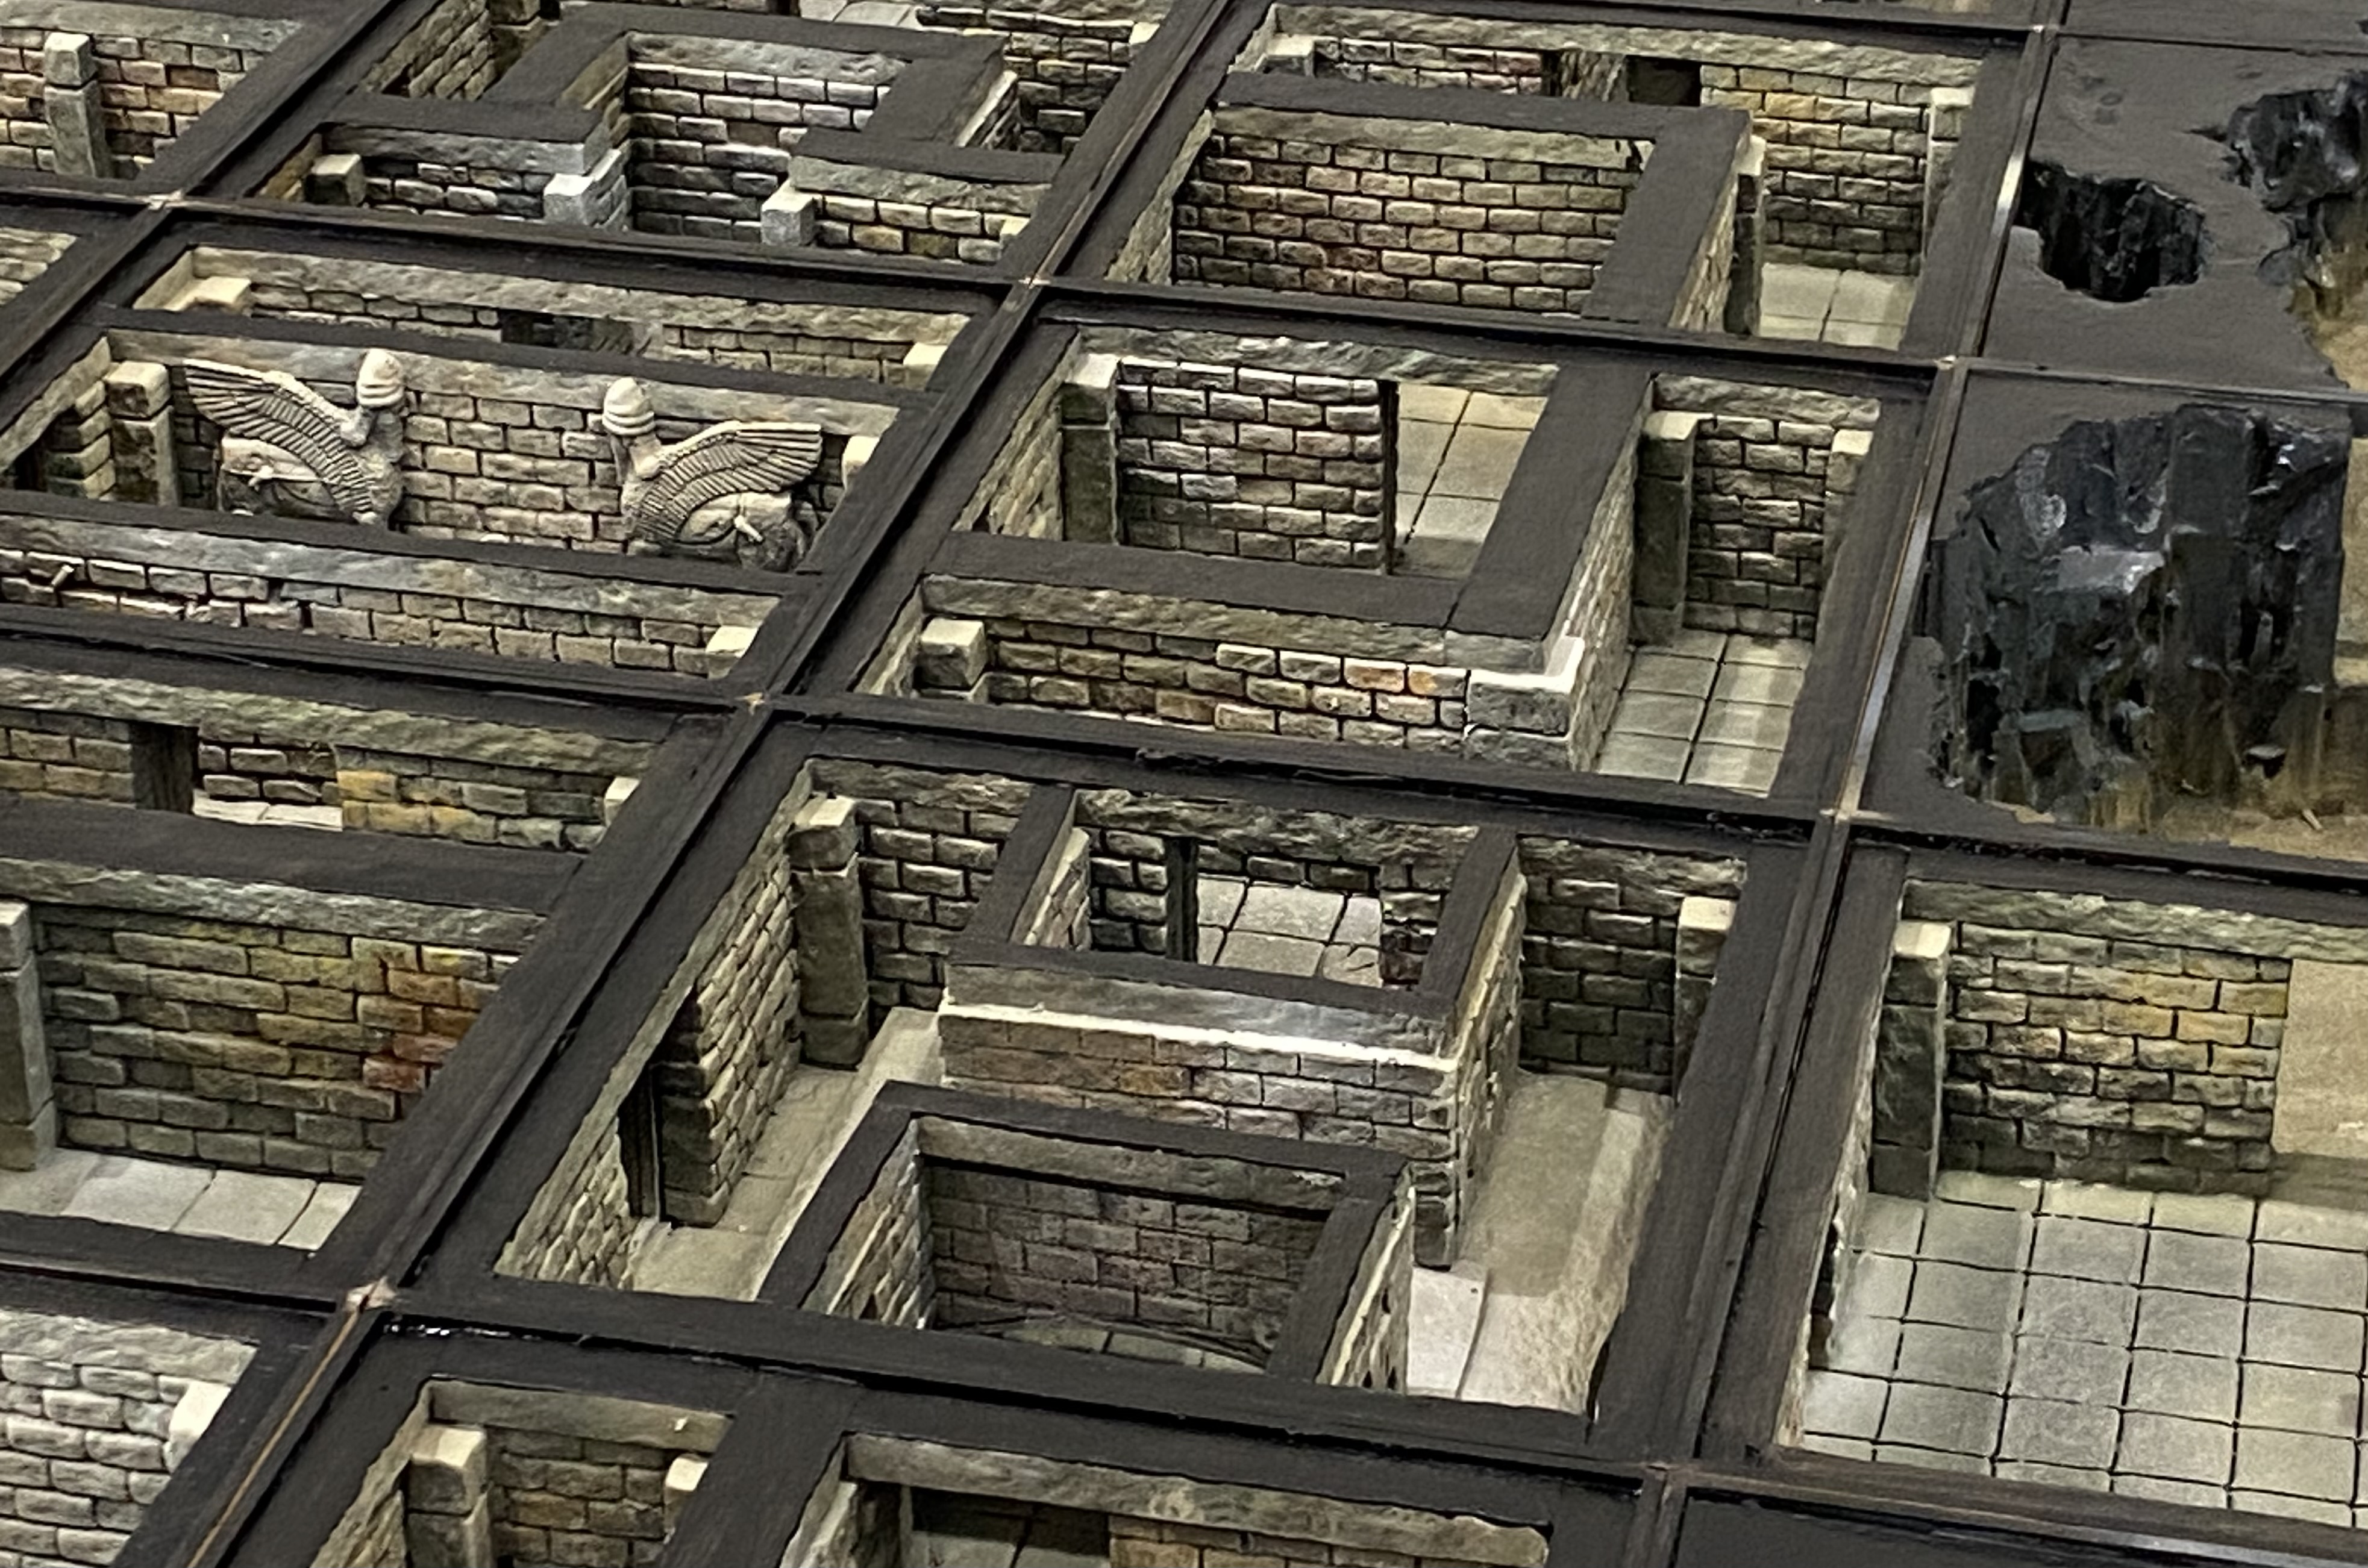
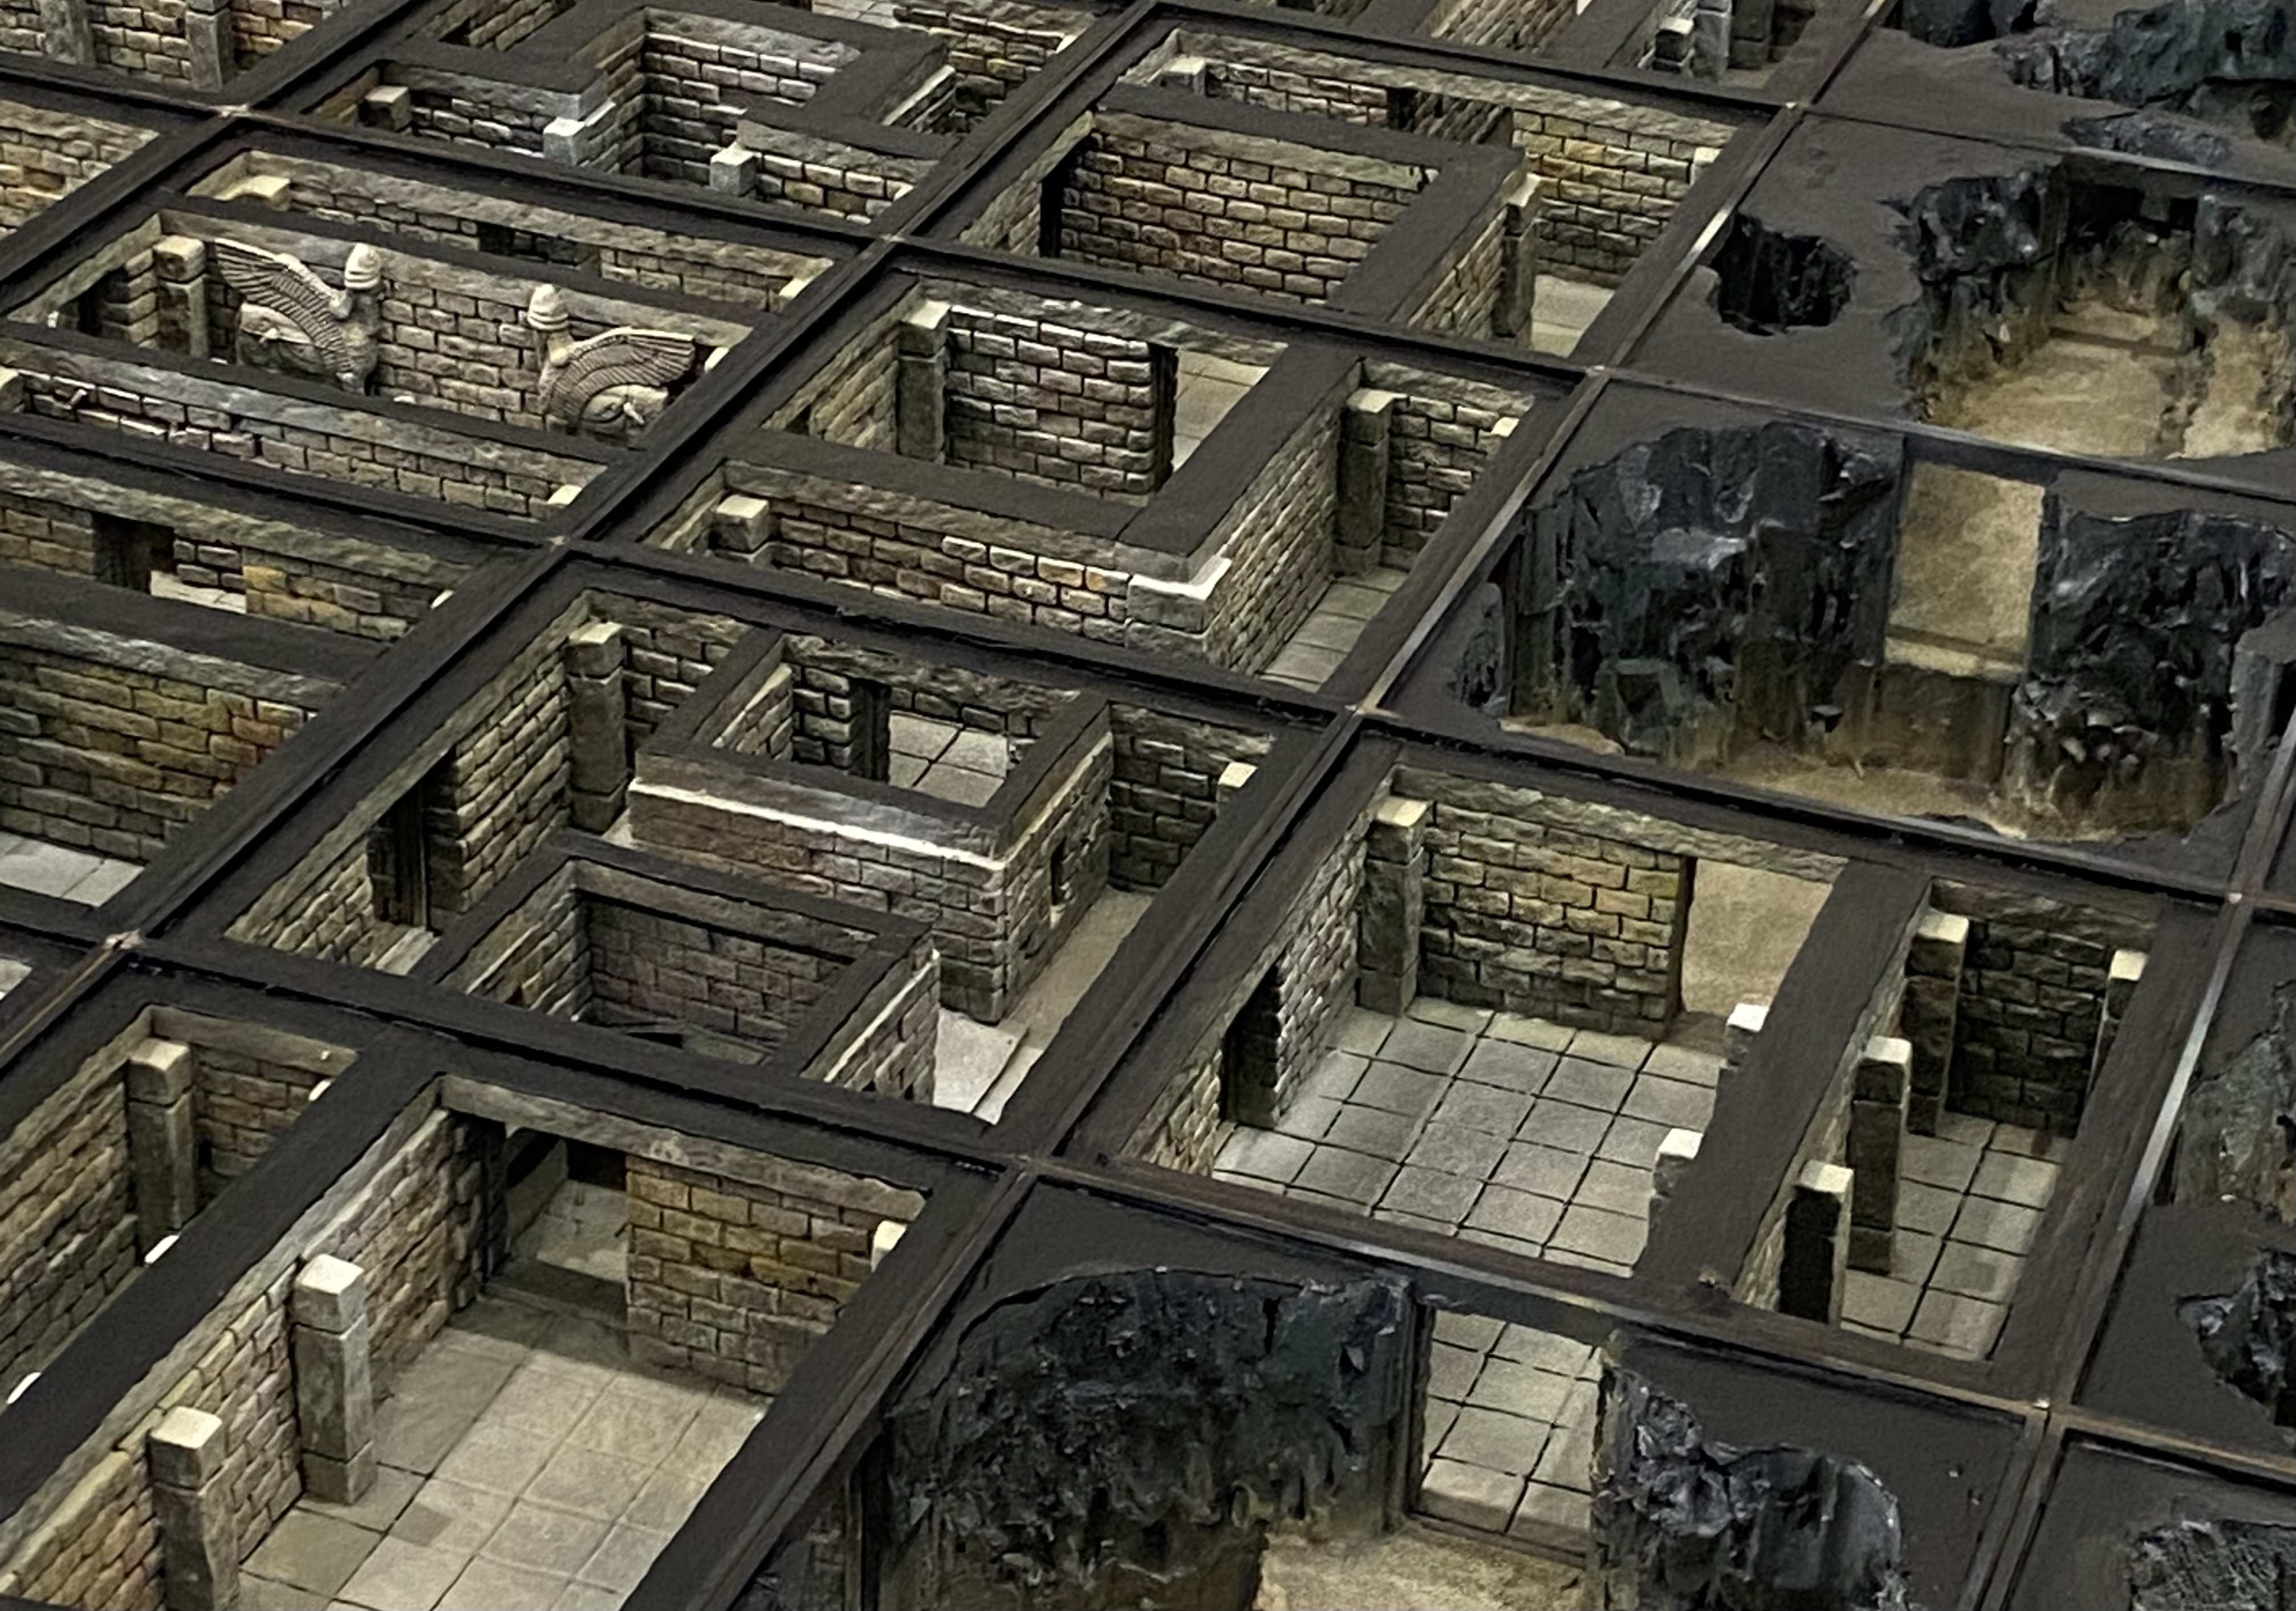
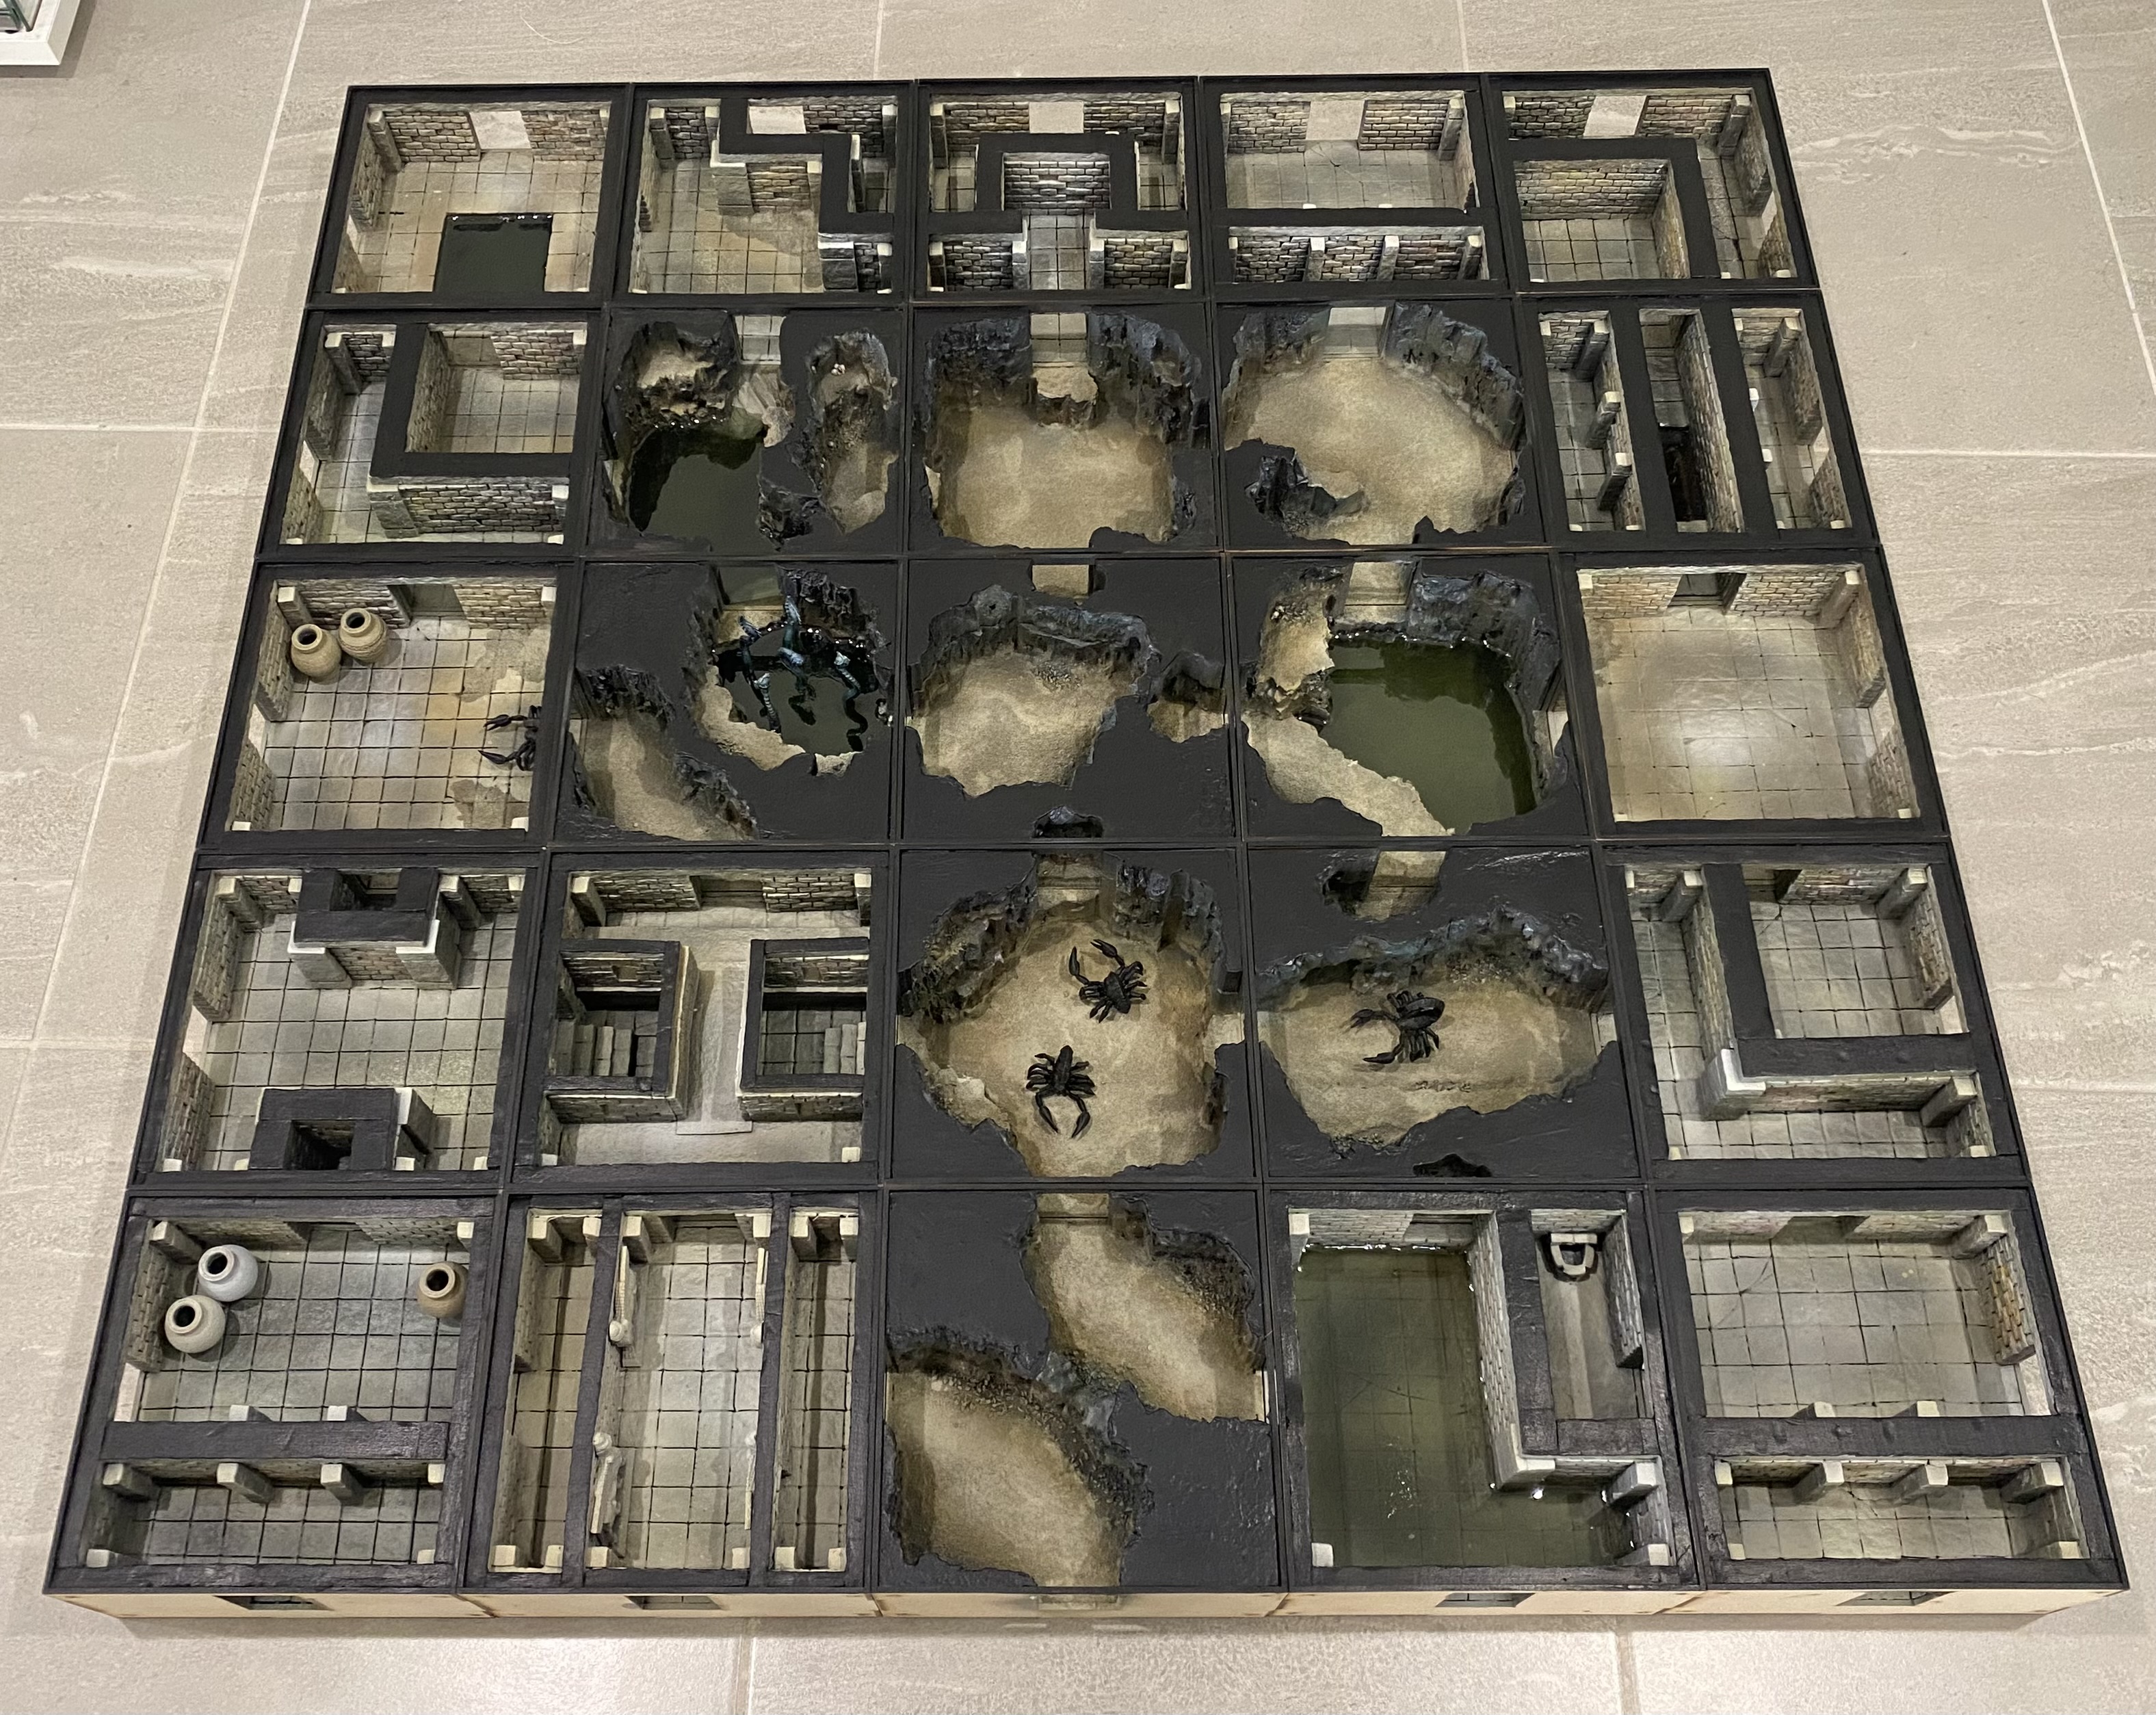
I laid them out in a simple random layout to see what I could come up with.
I then thought it would be fun to see where all the paths lead and highlight them on the same layout. There are a few hidden doorways built into some of the walls, so some of the ways through may not be instantly noticeable.
One of the boxes also consists of a bridge so although all 4 entrances are accessible, only 2 are at any one time depending on which way you enter the room.
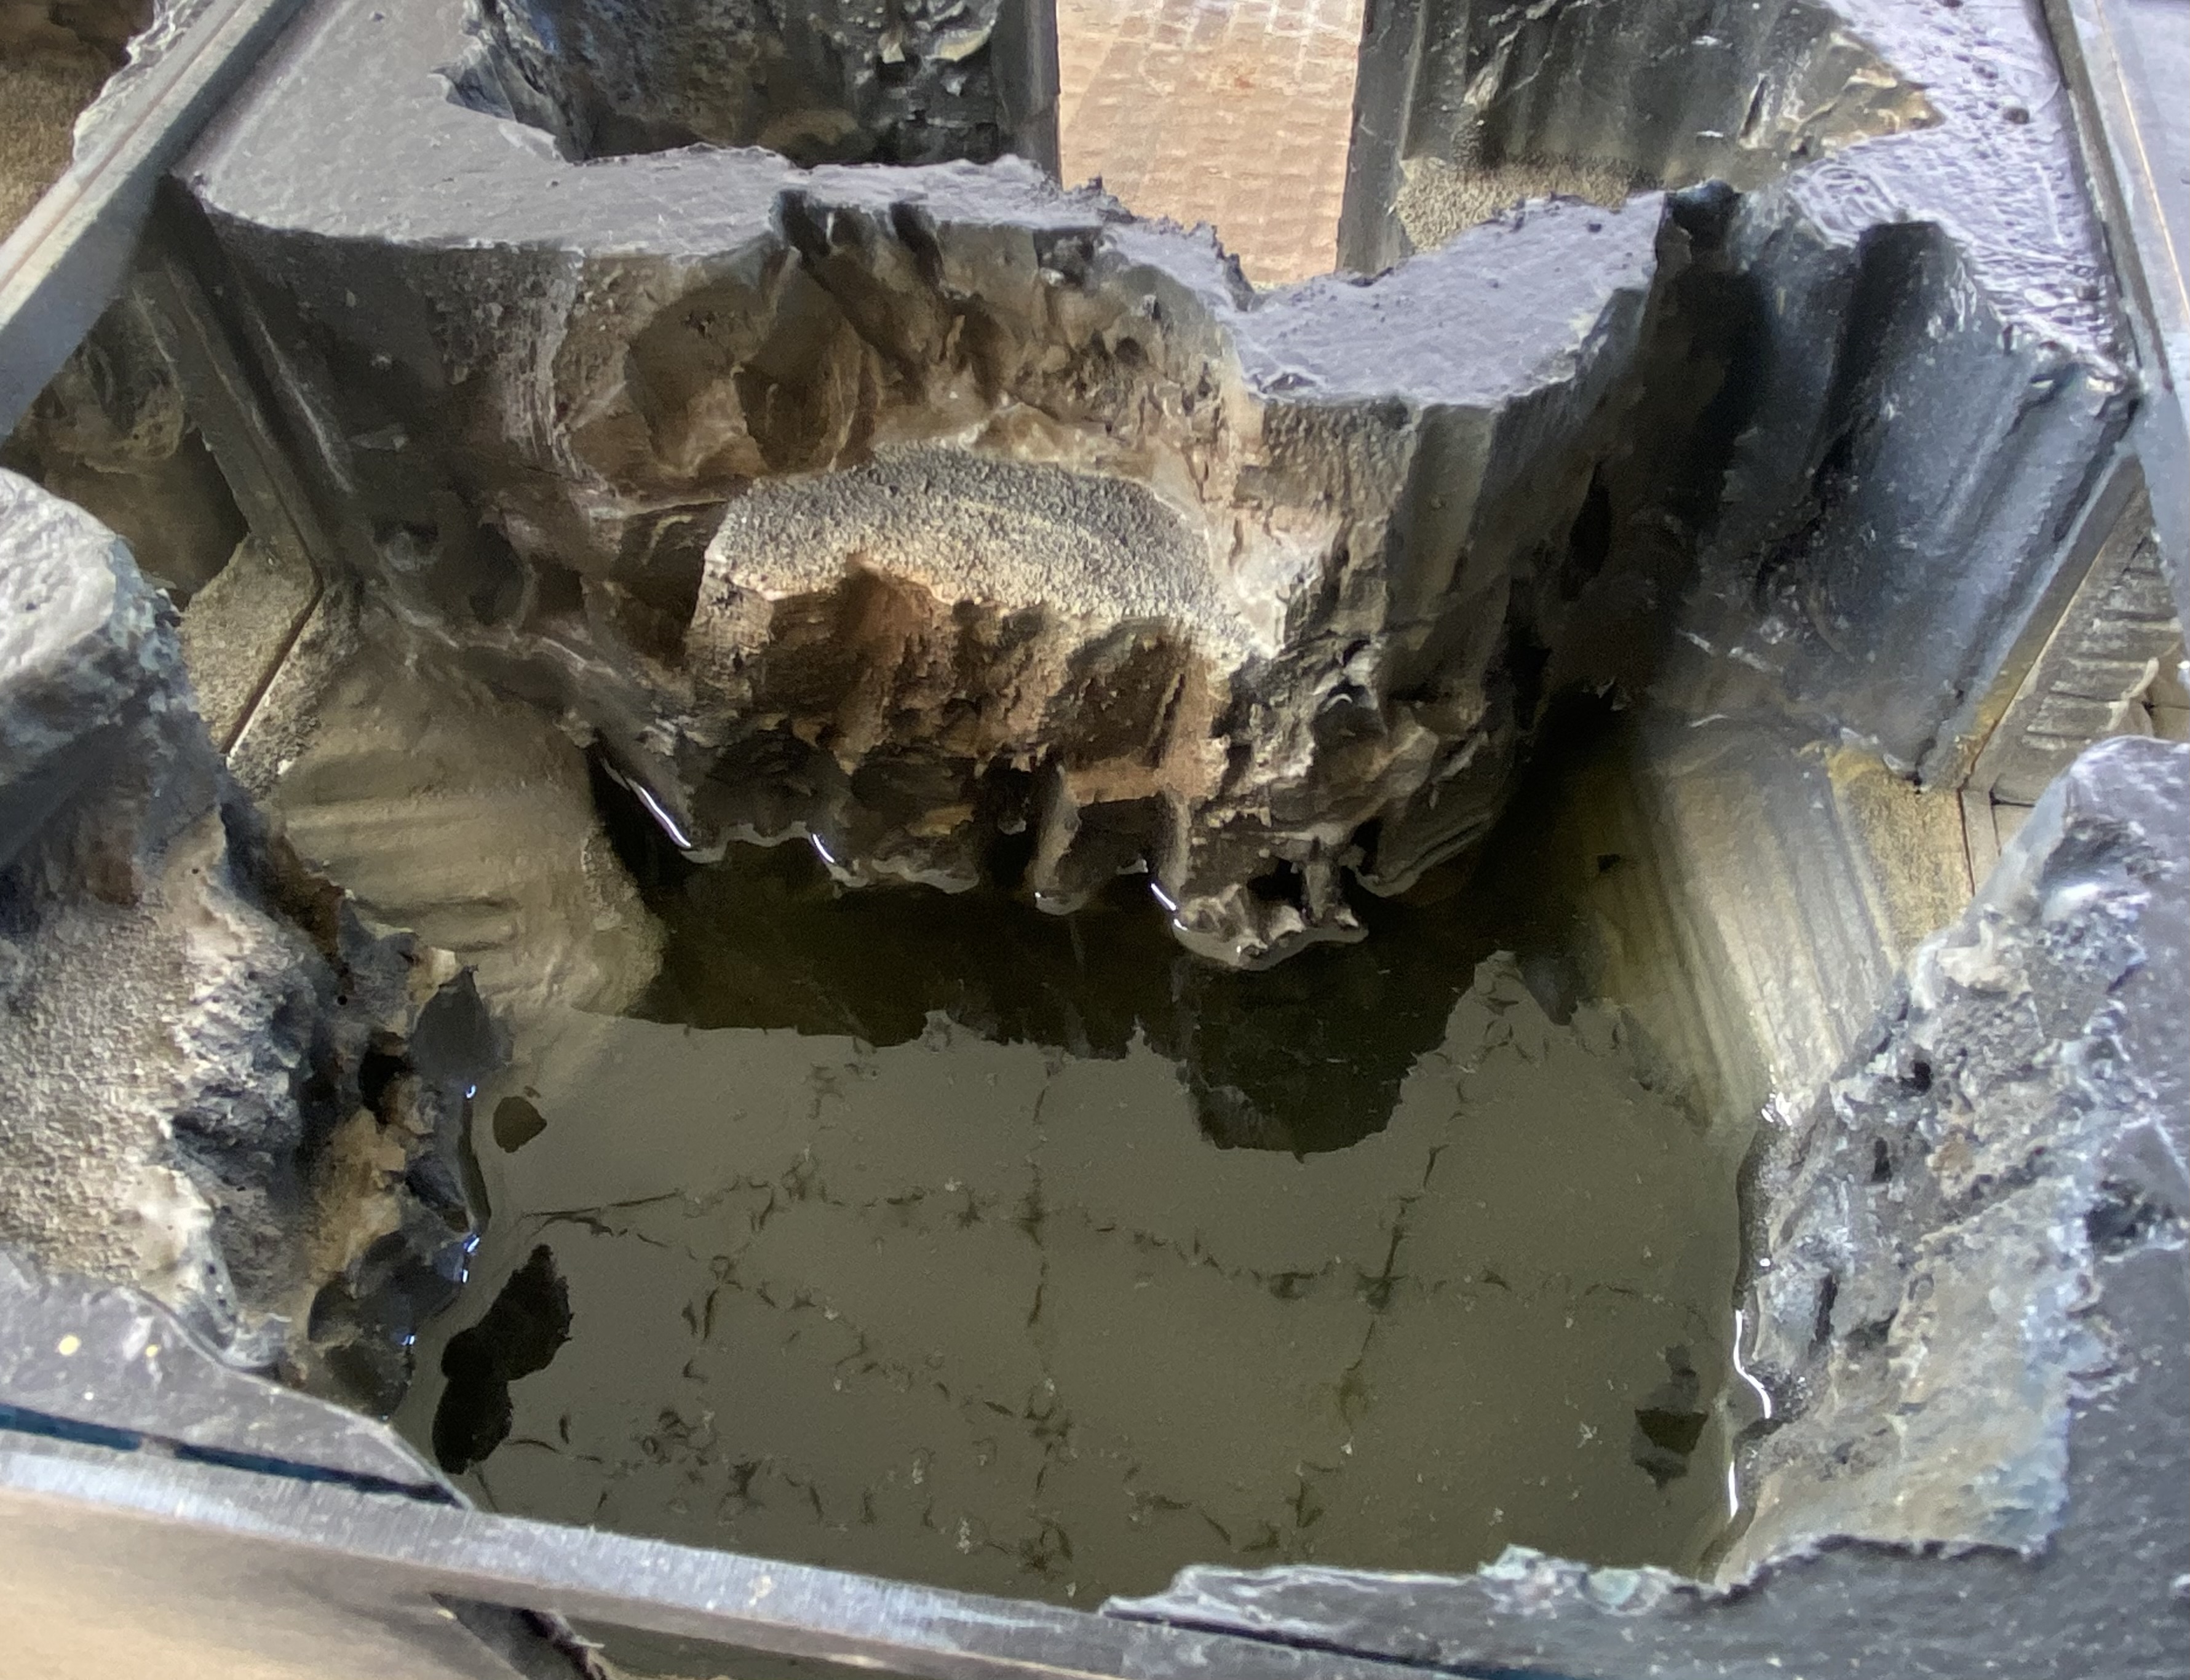
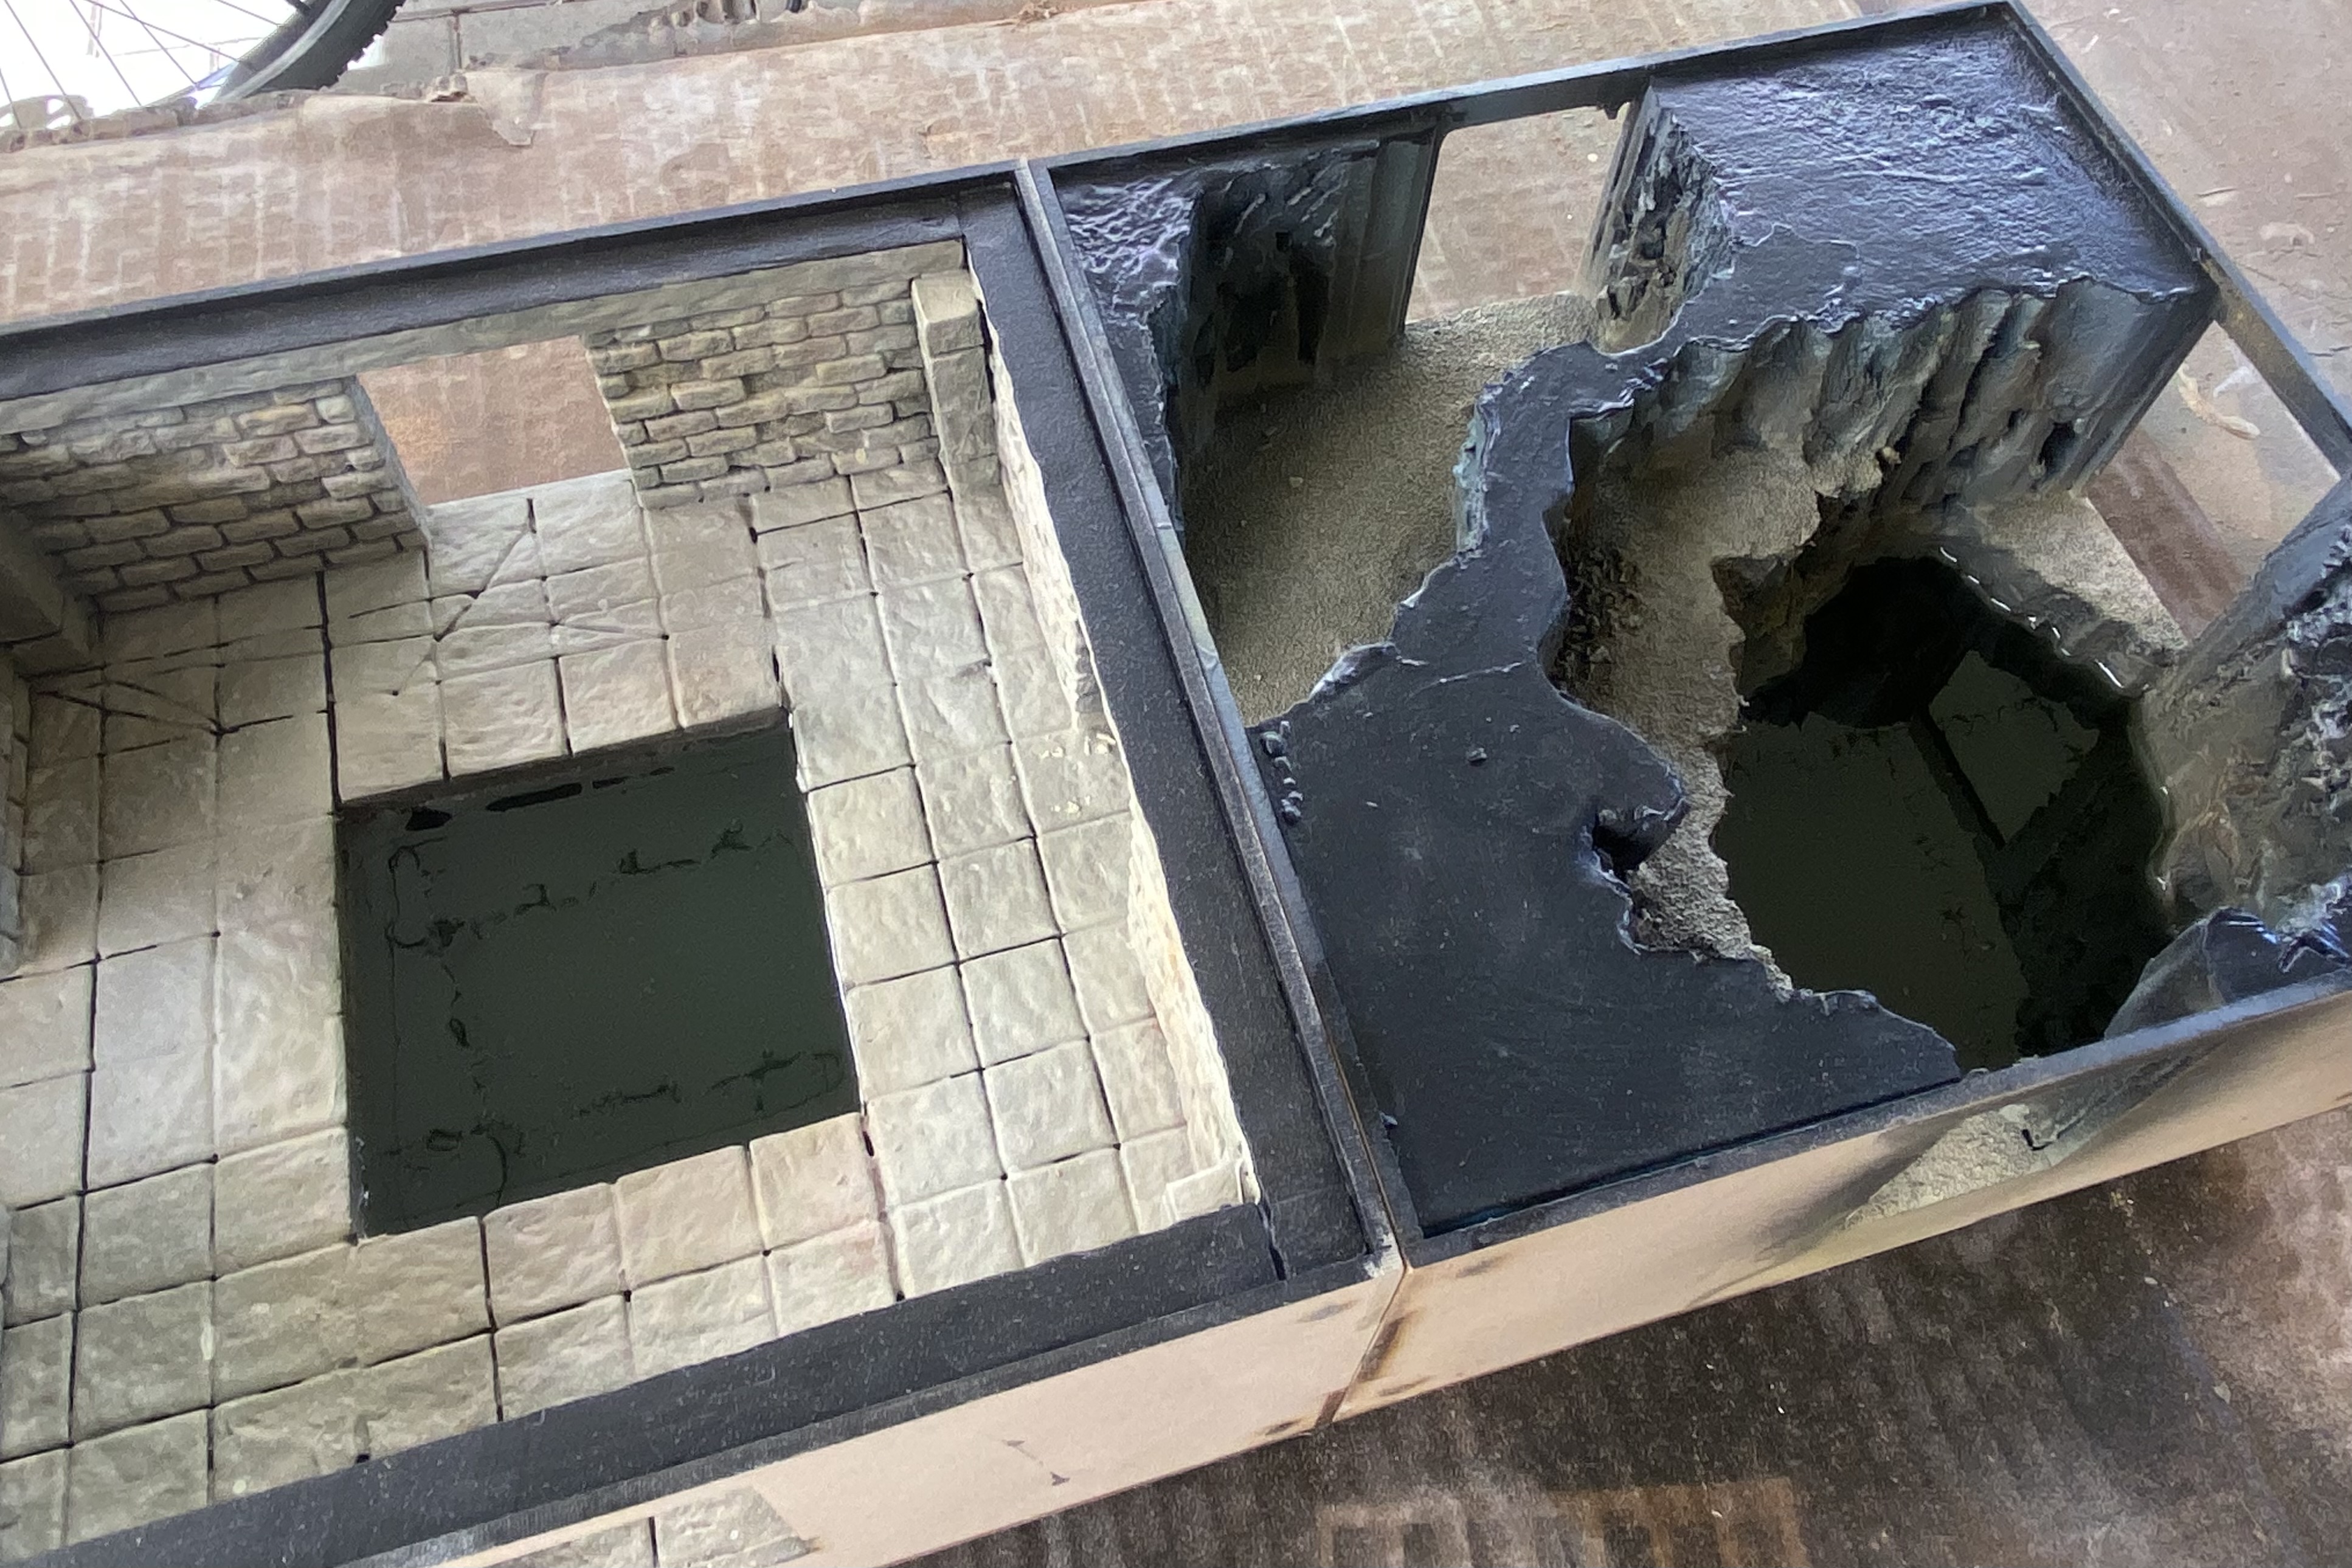
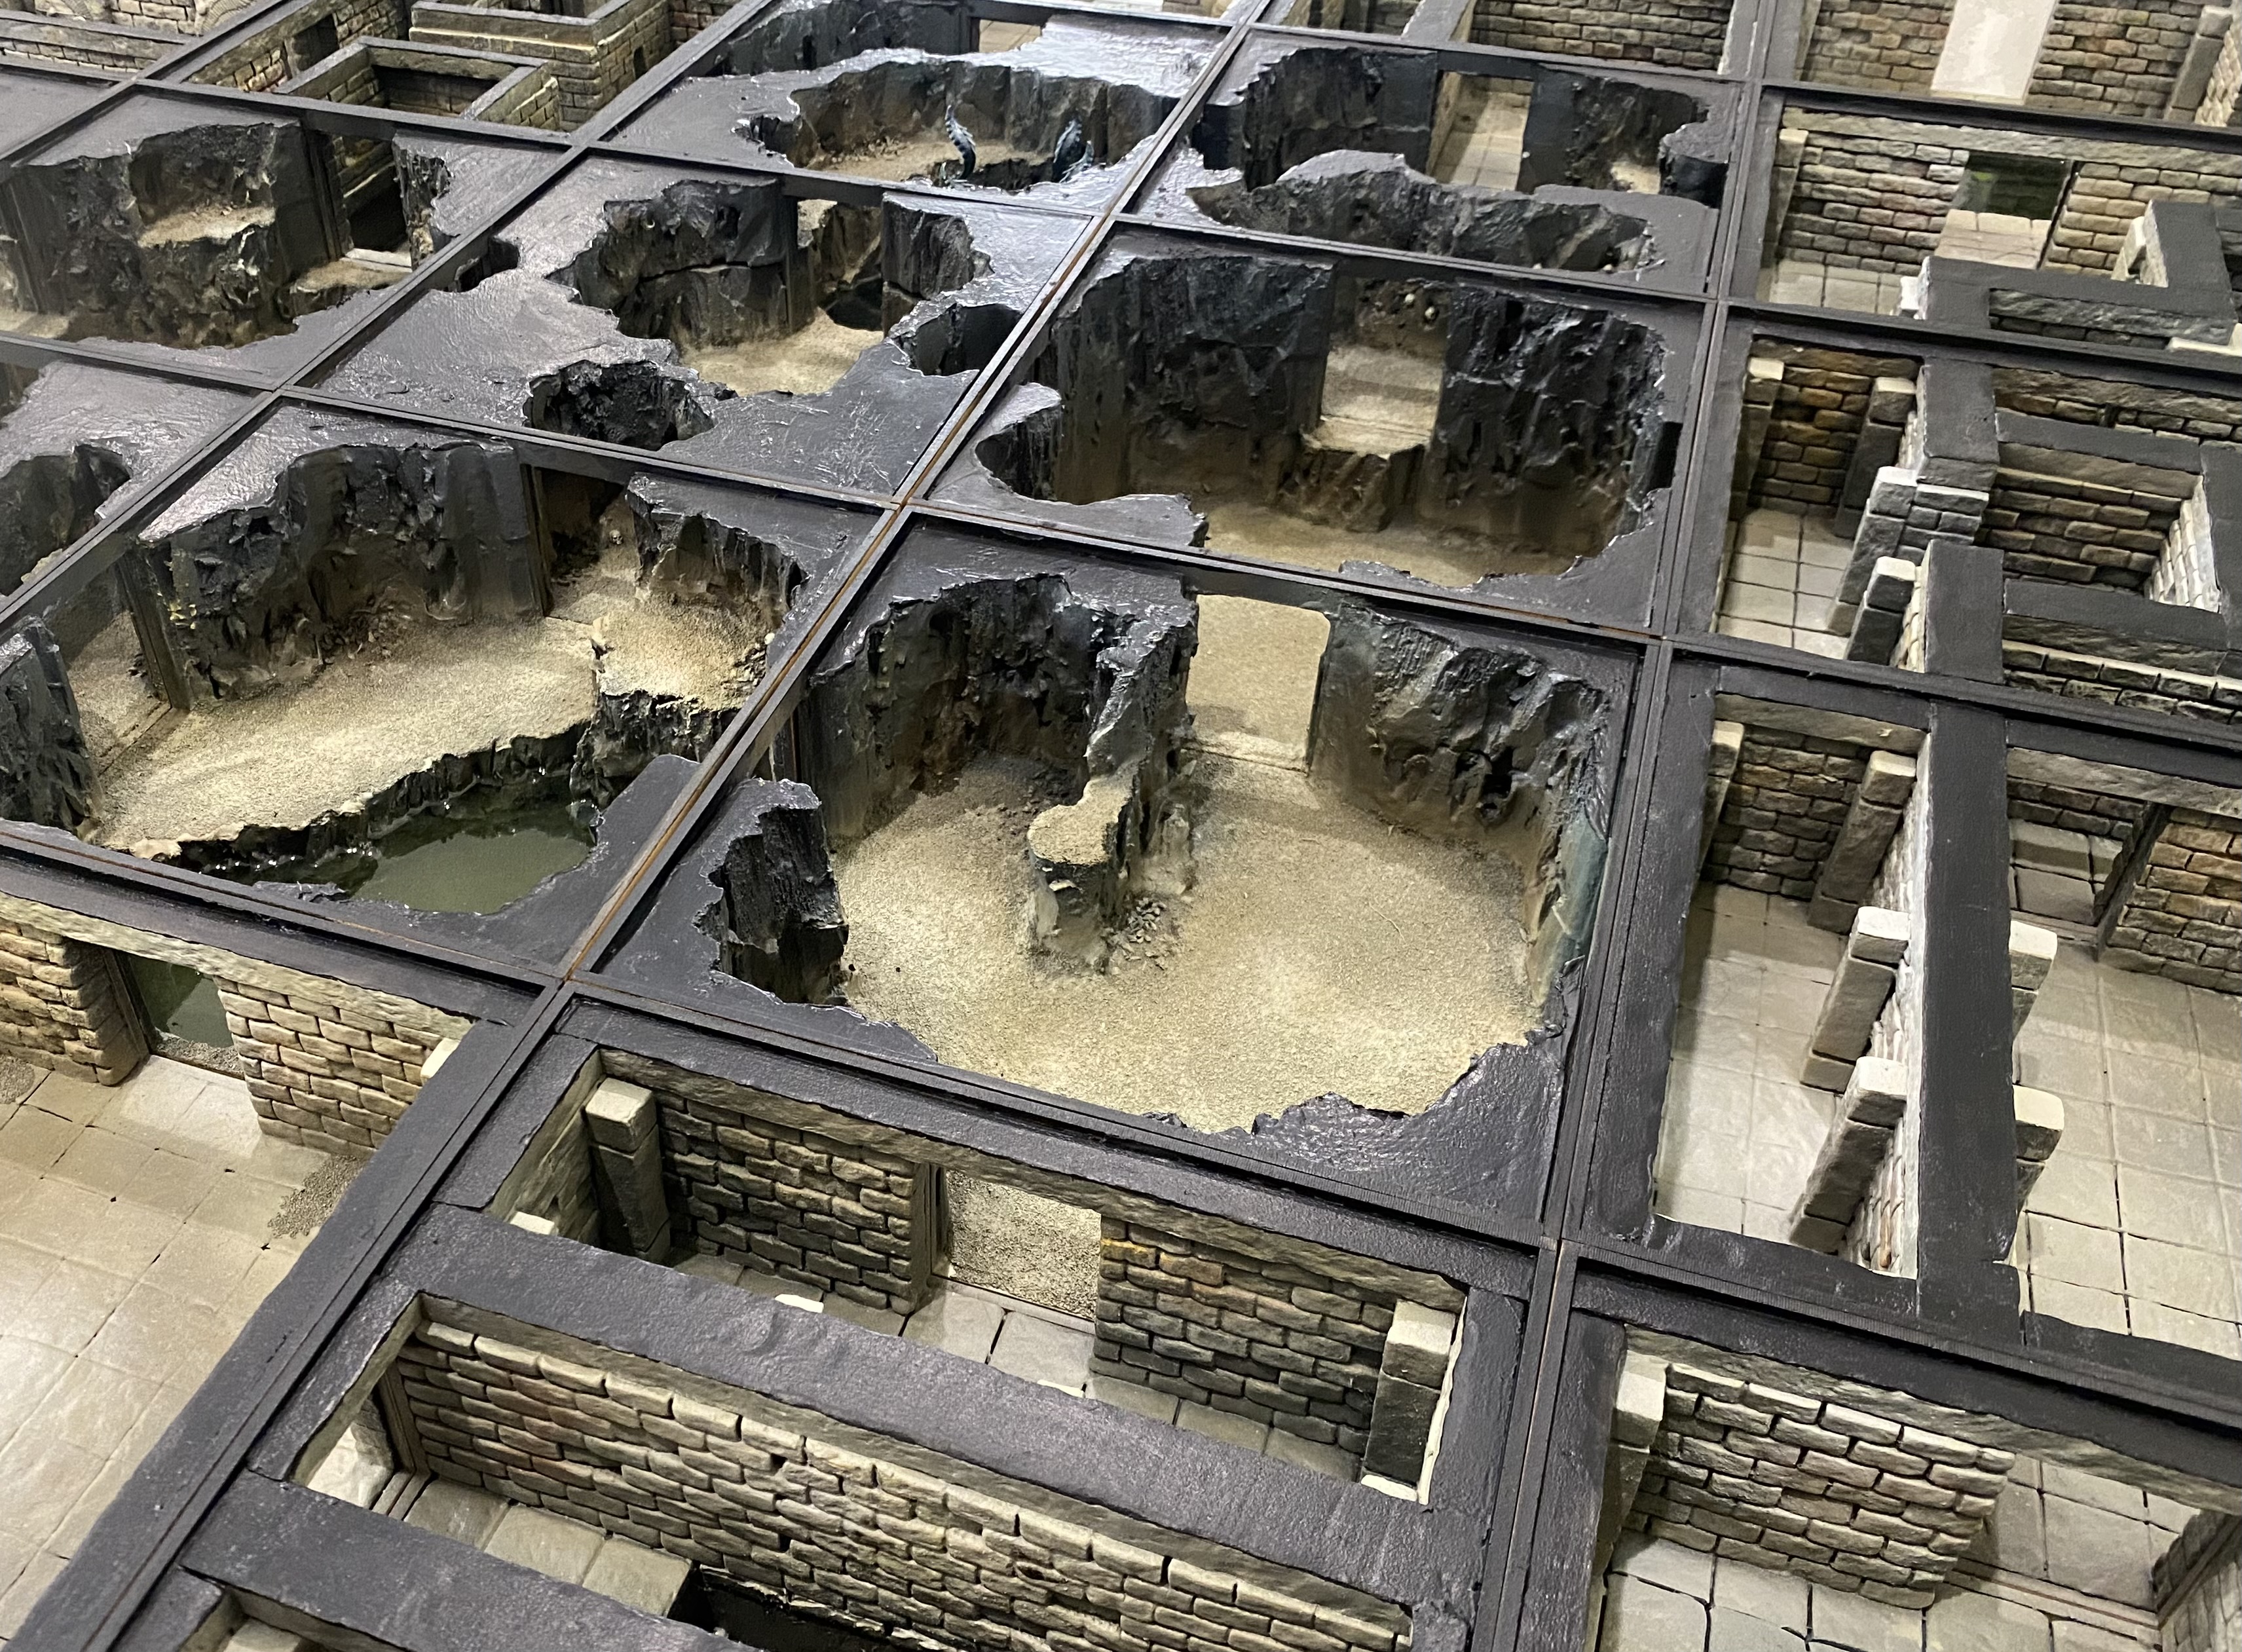
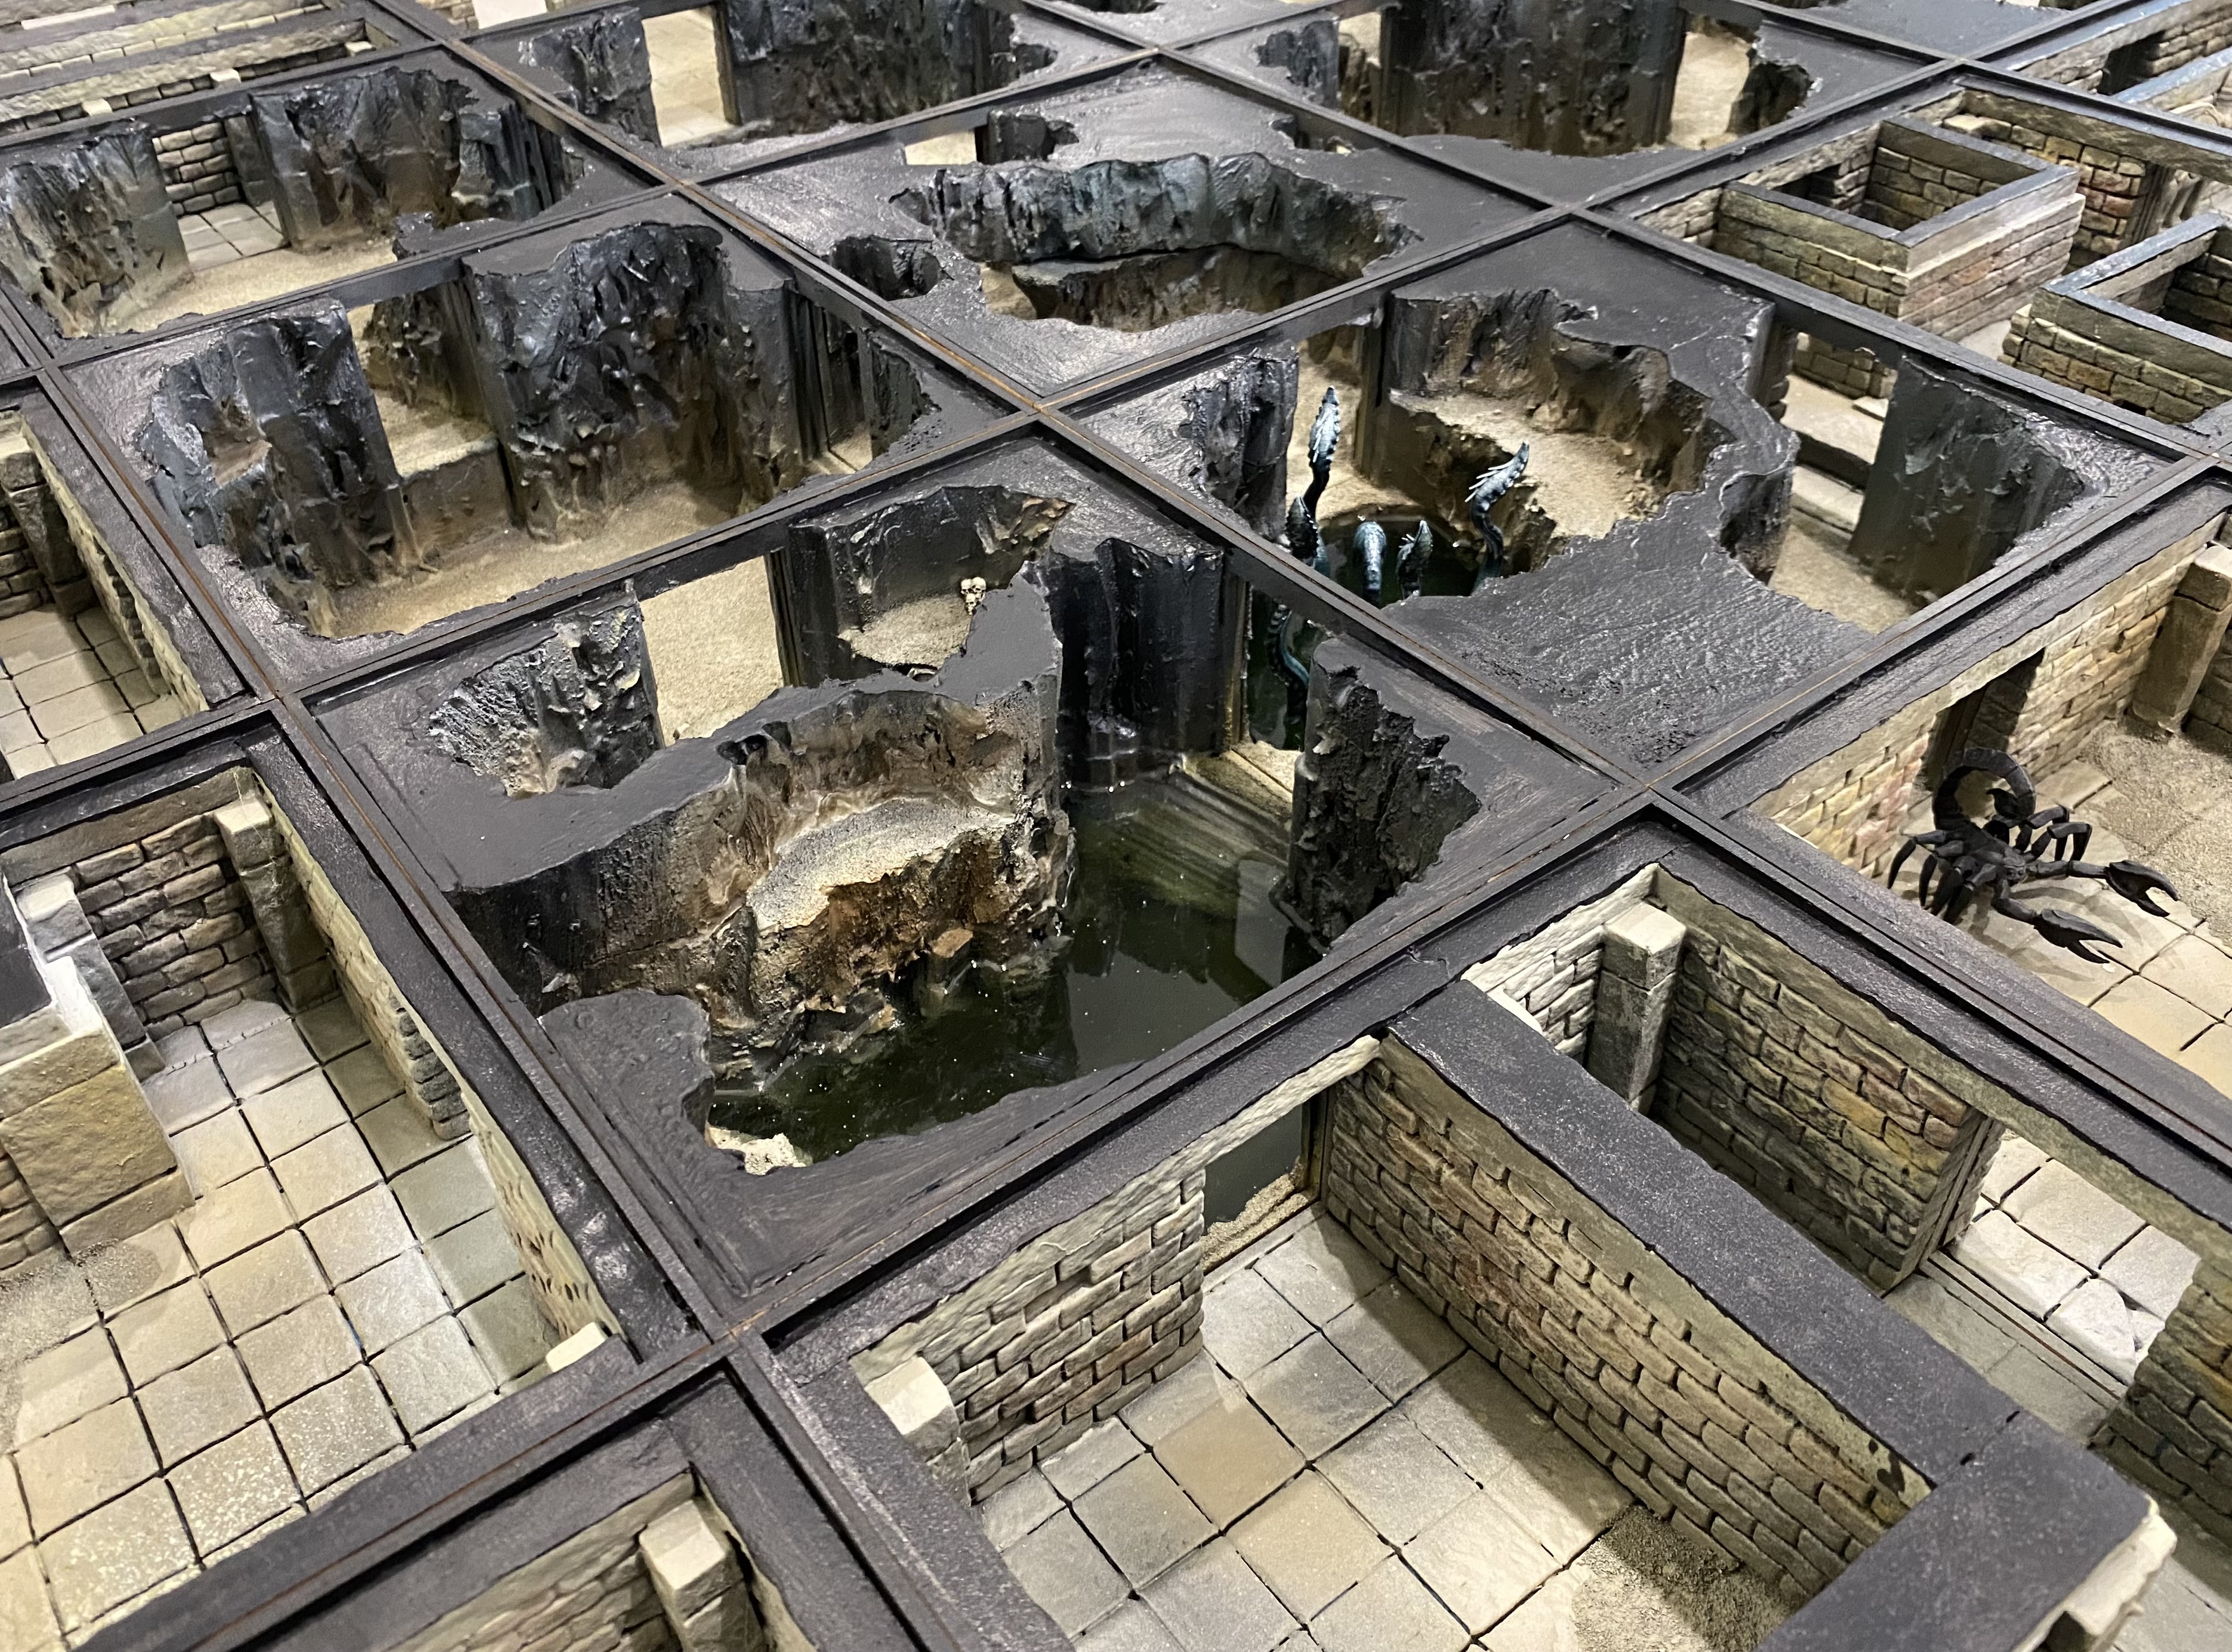
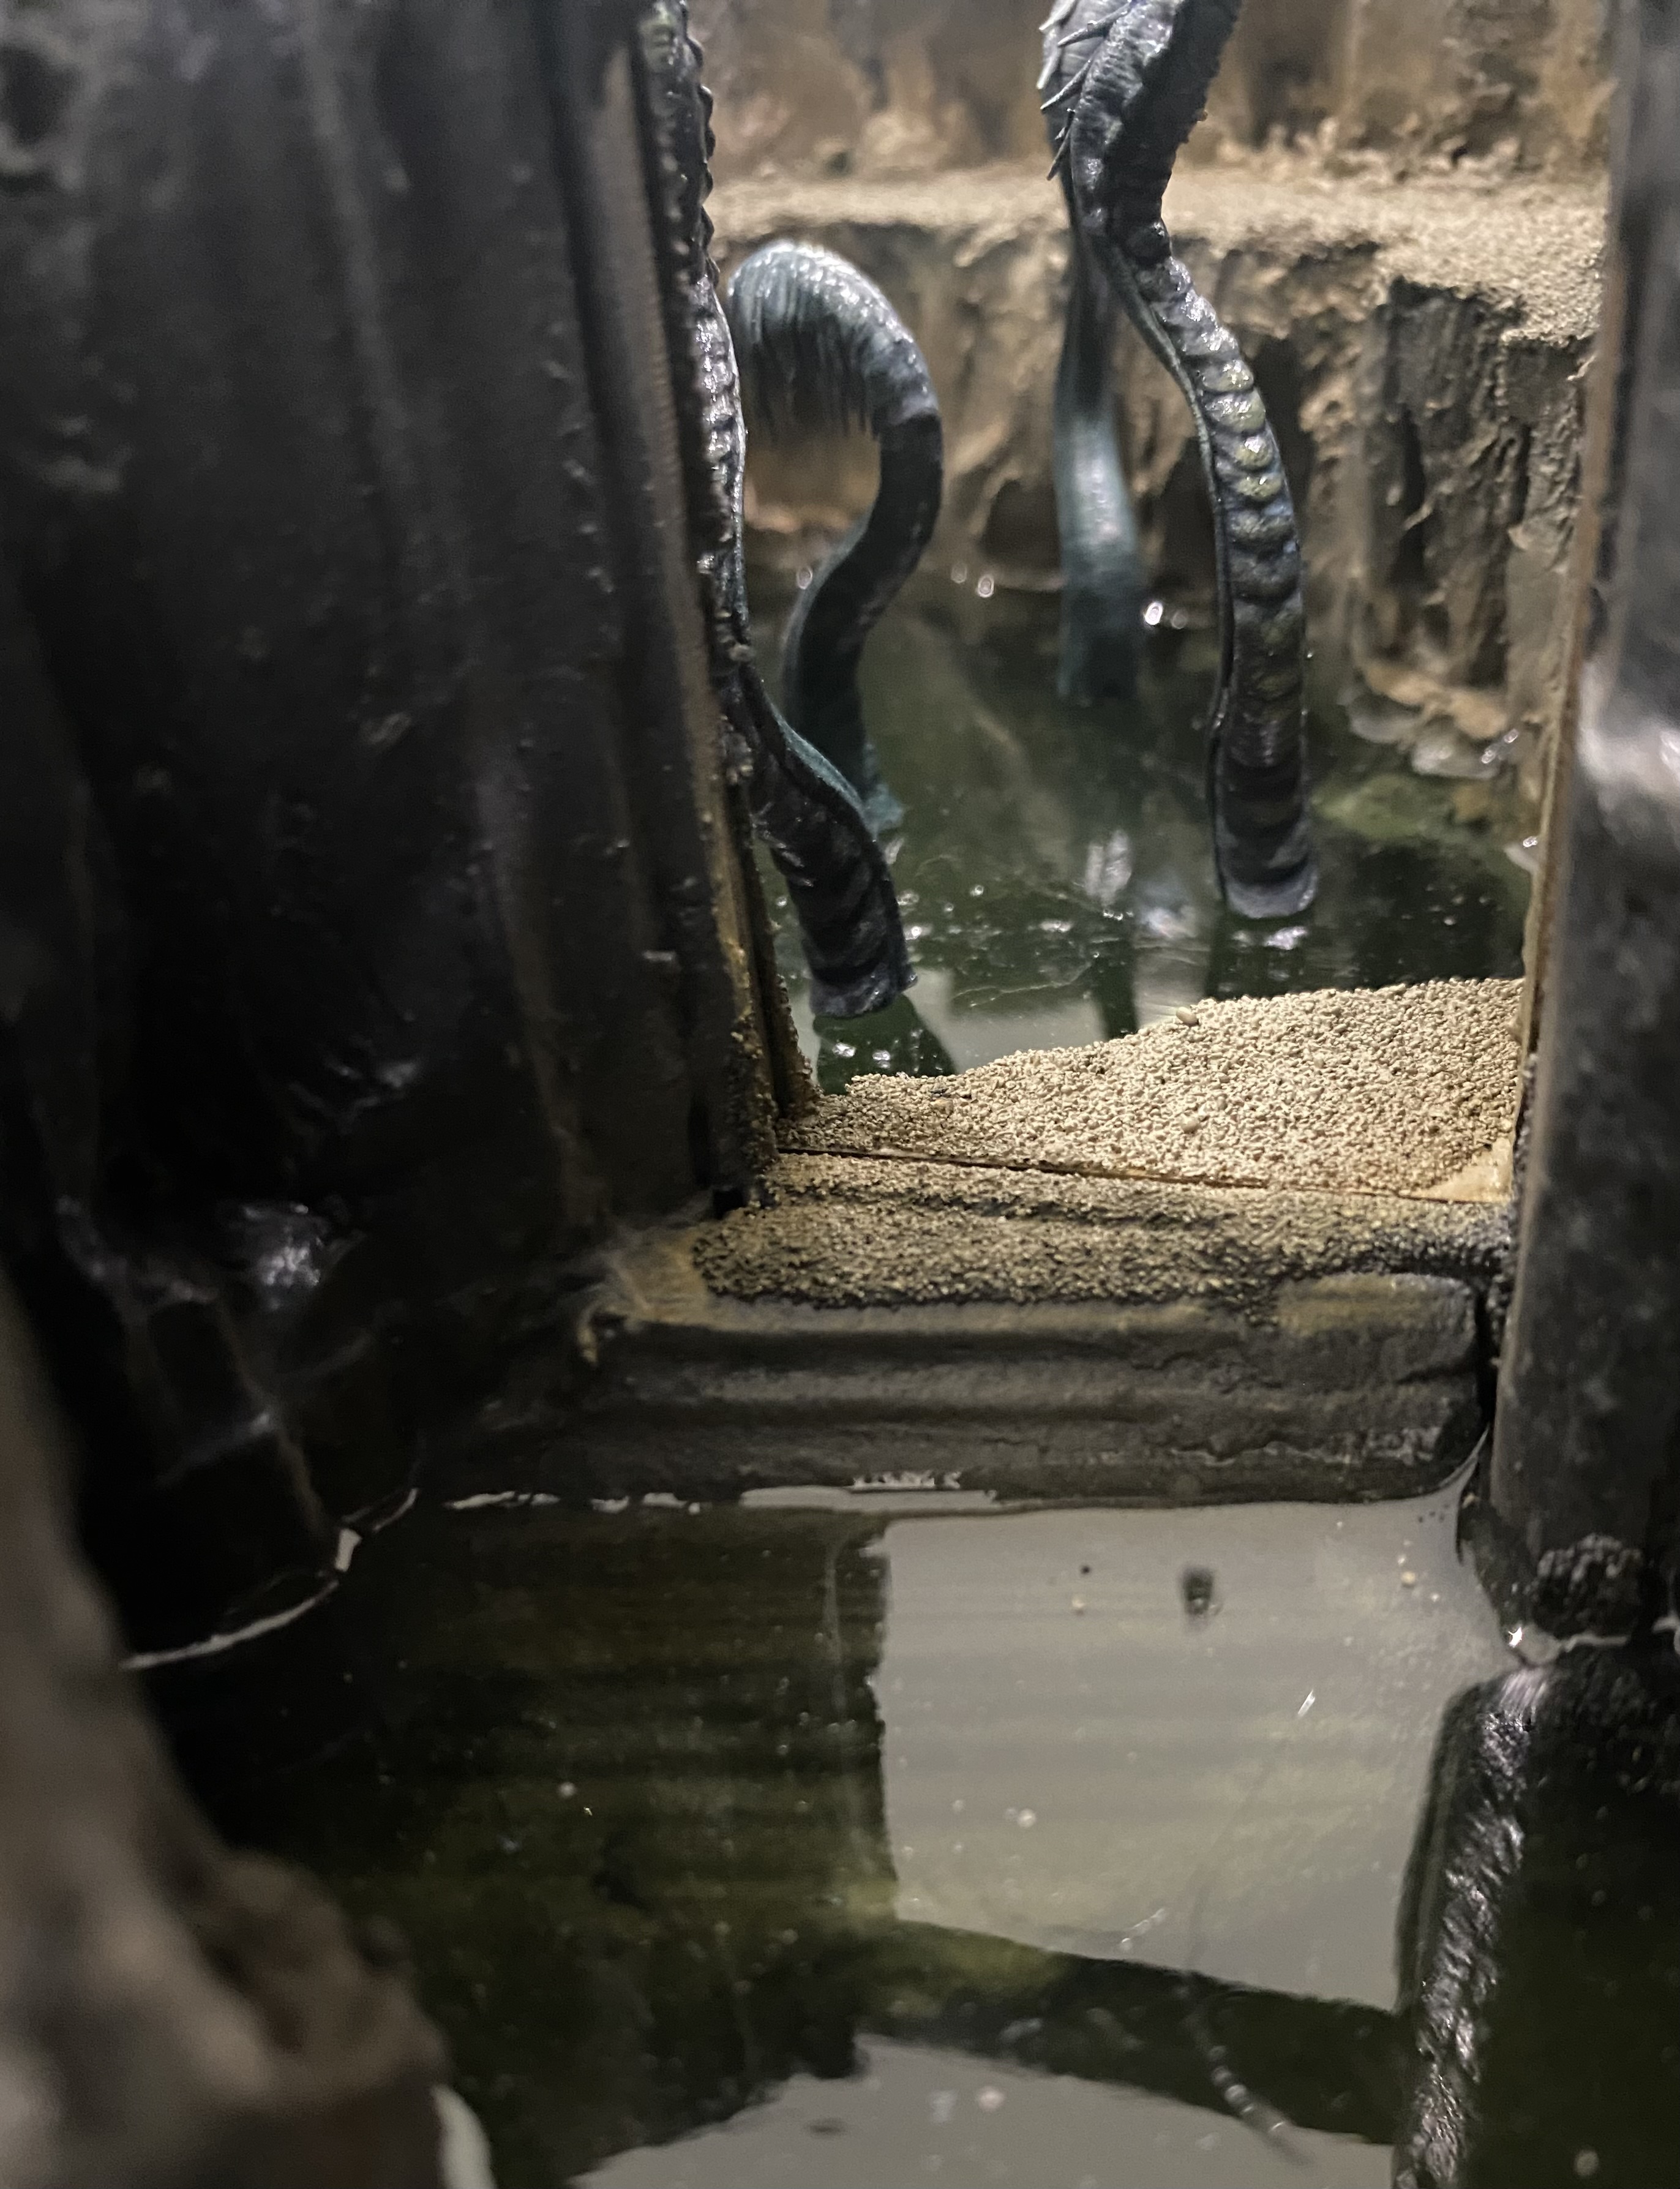
I have also included some sunken areas, some of which will have water features,
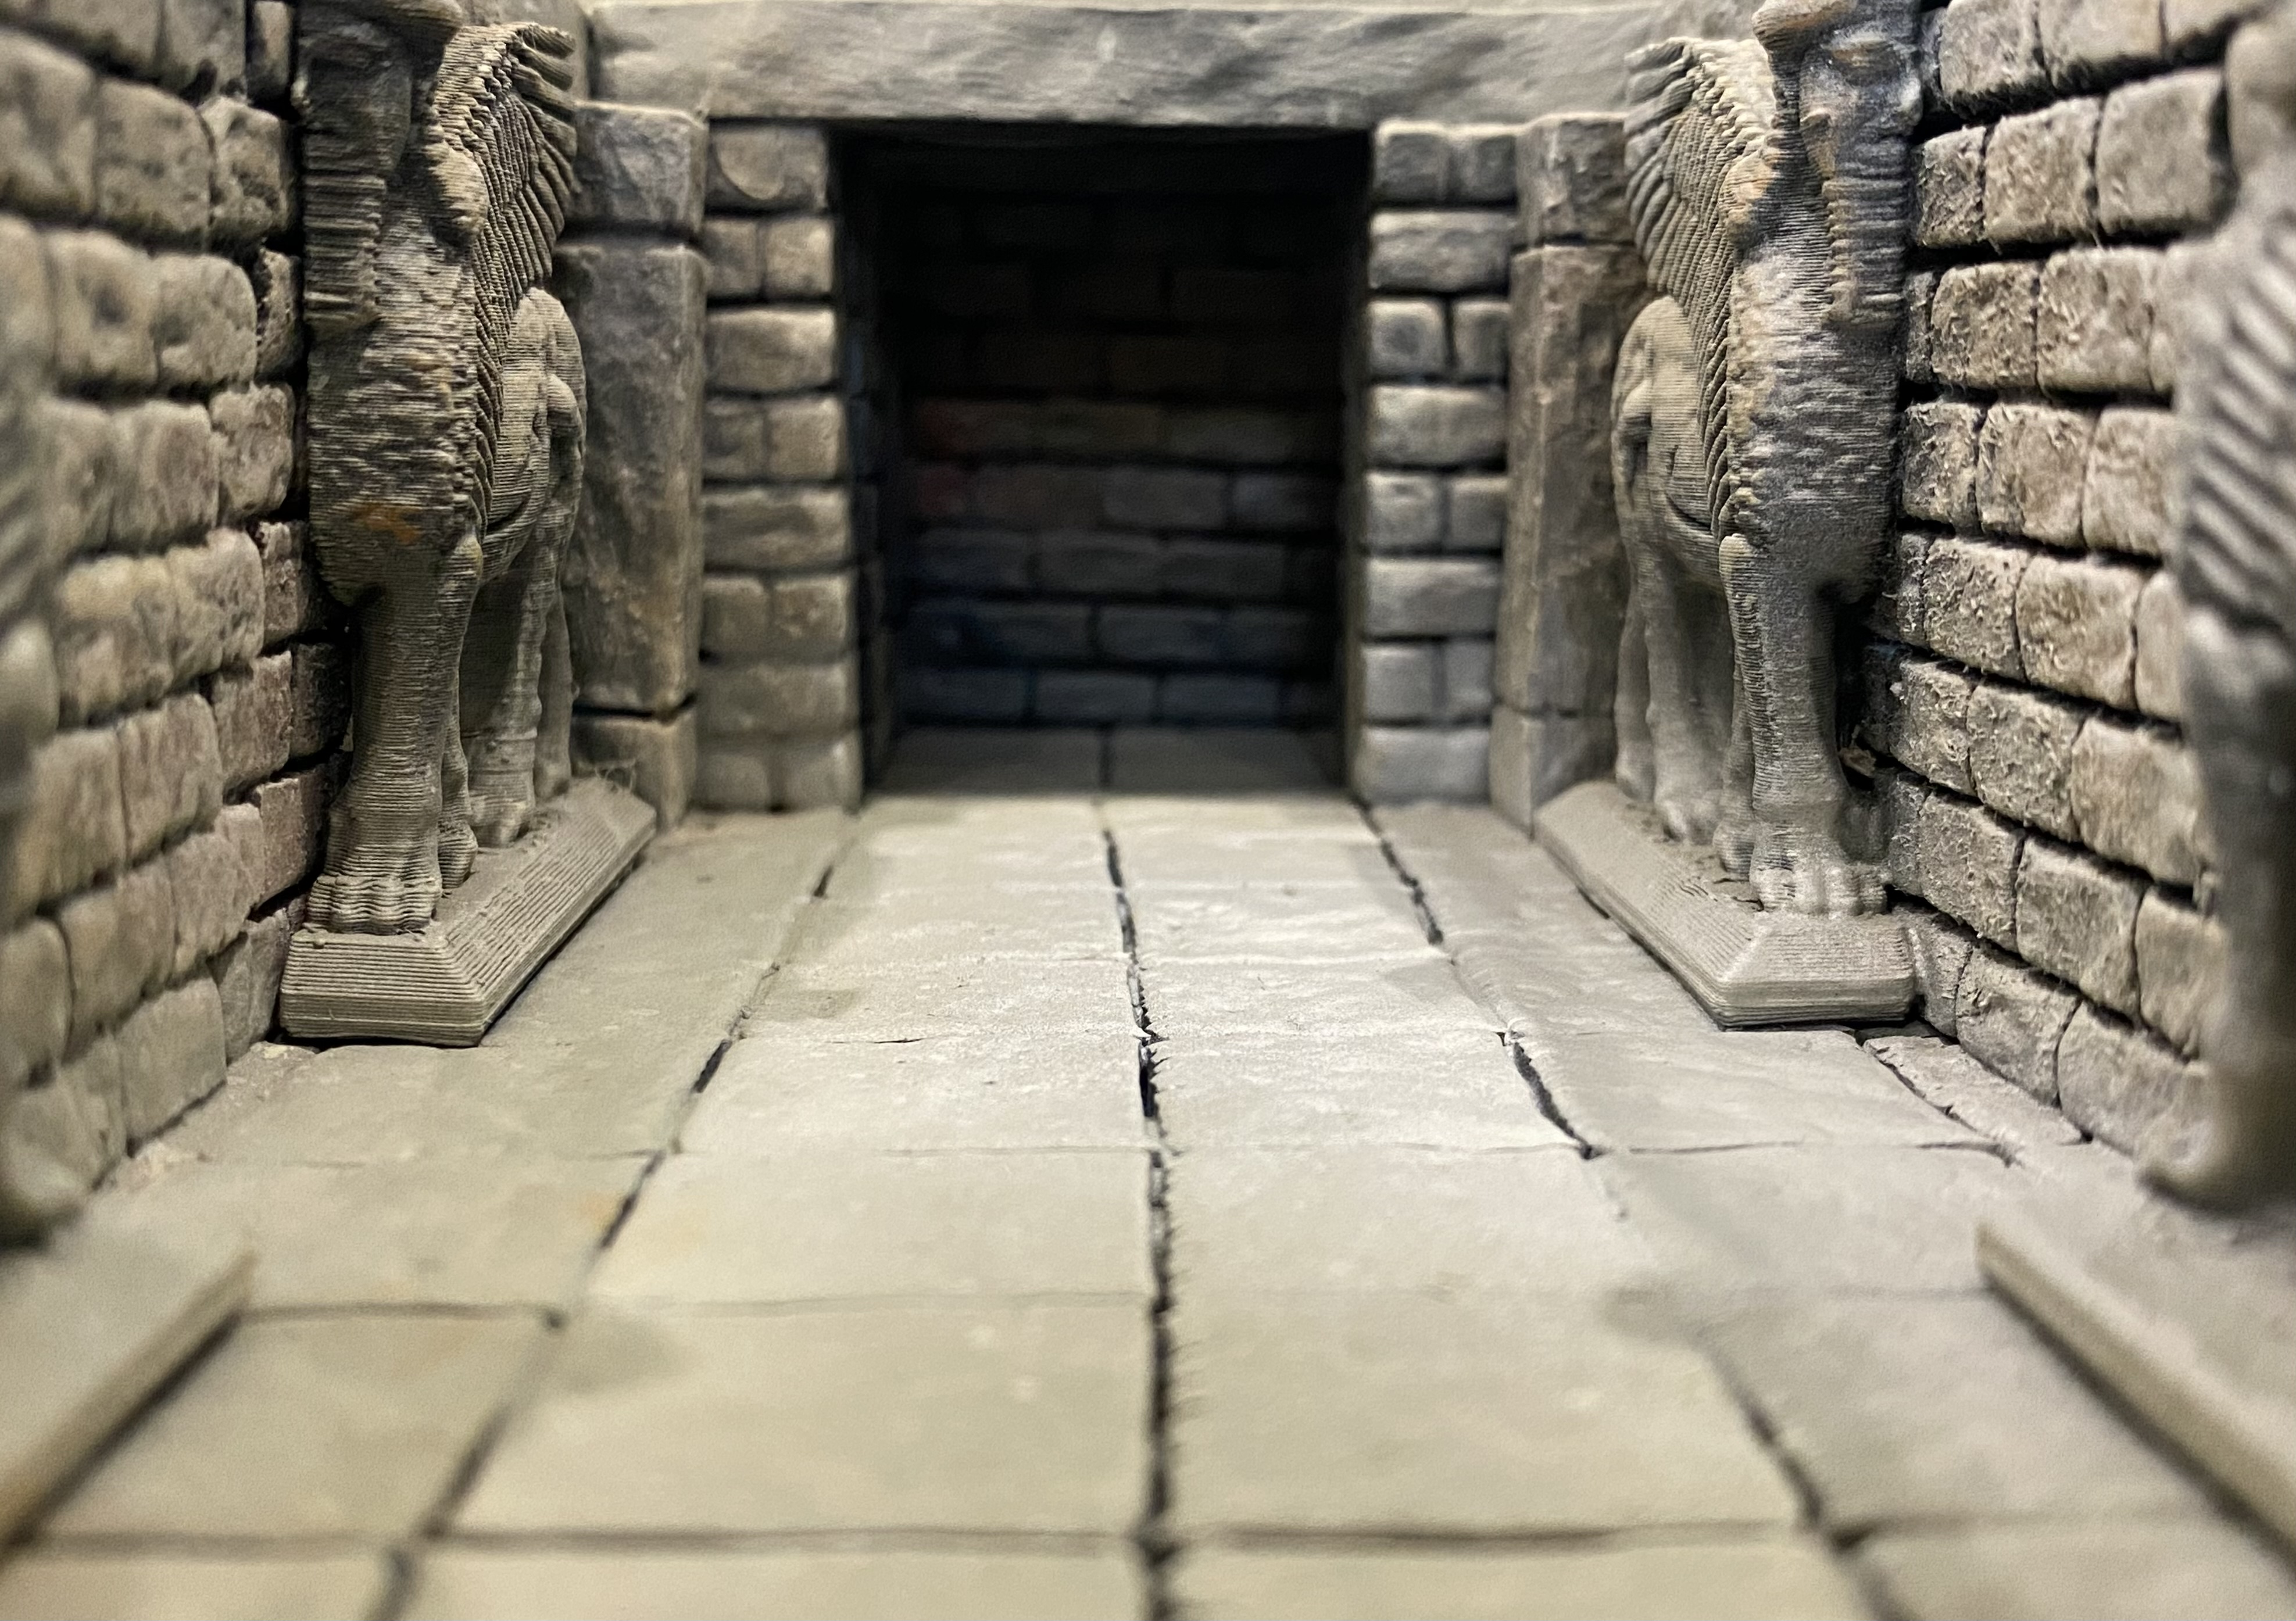
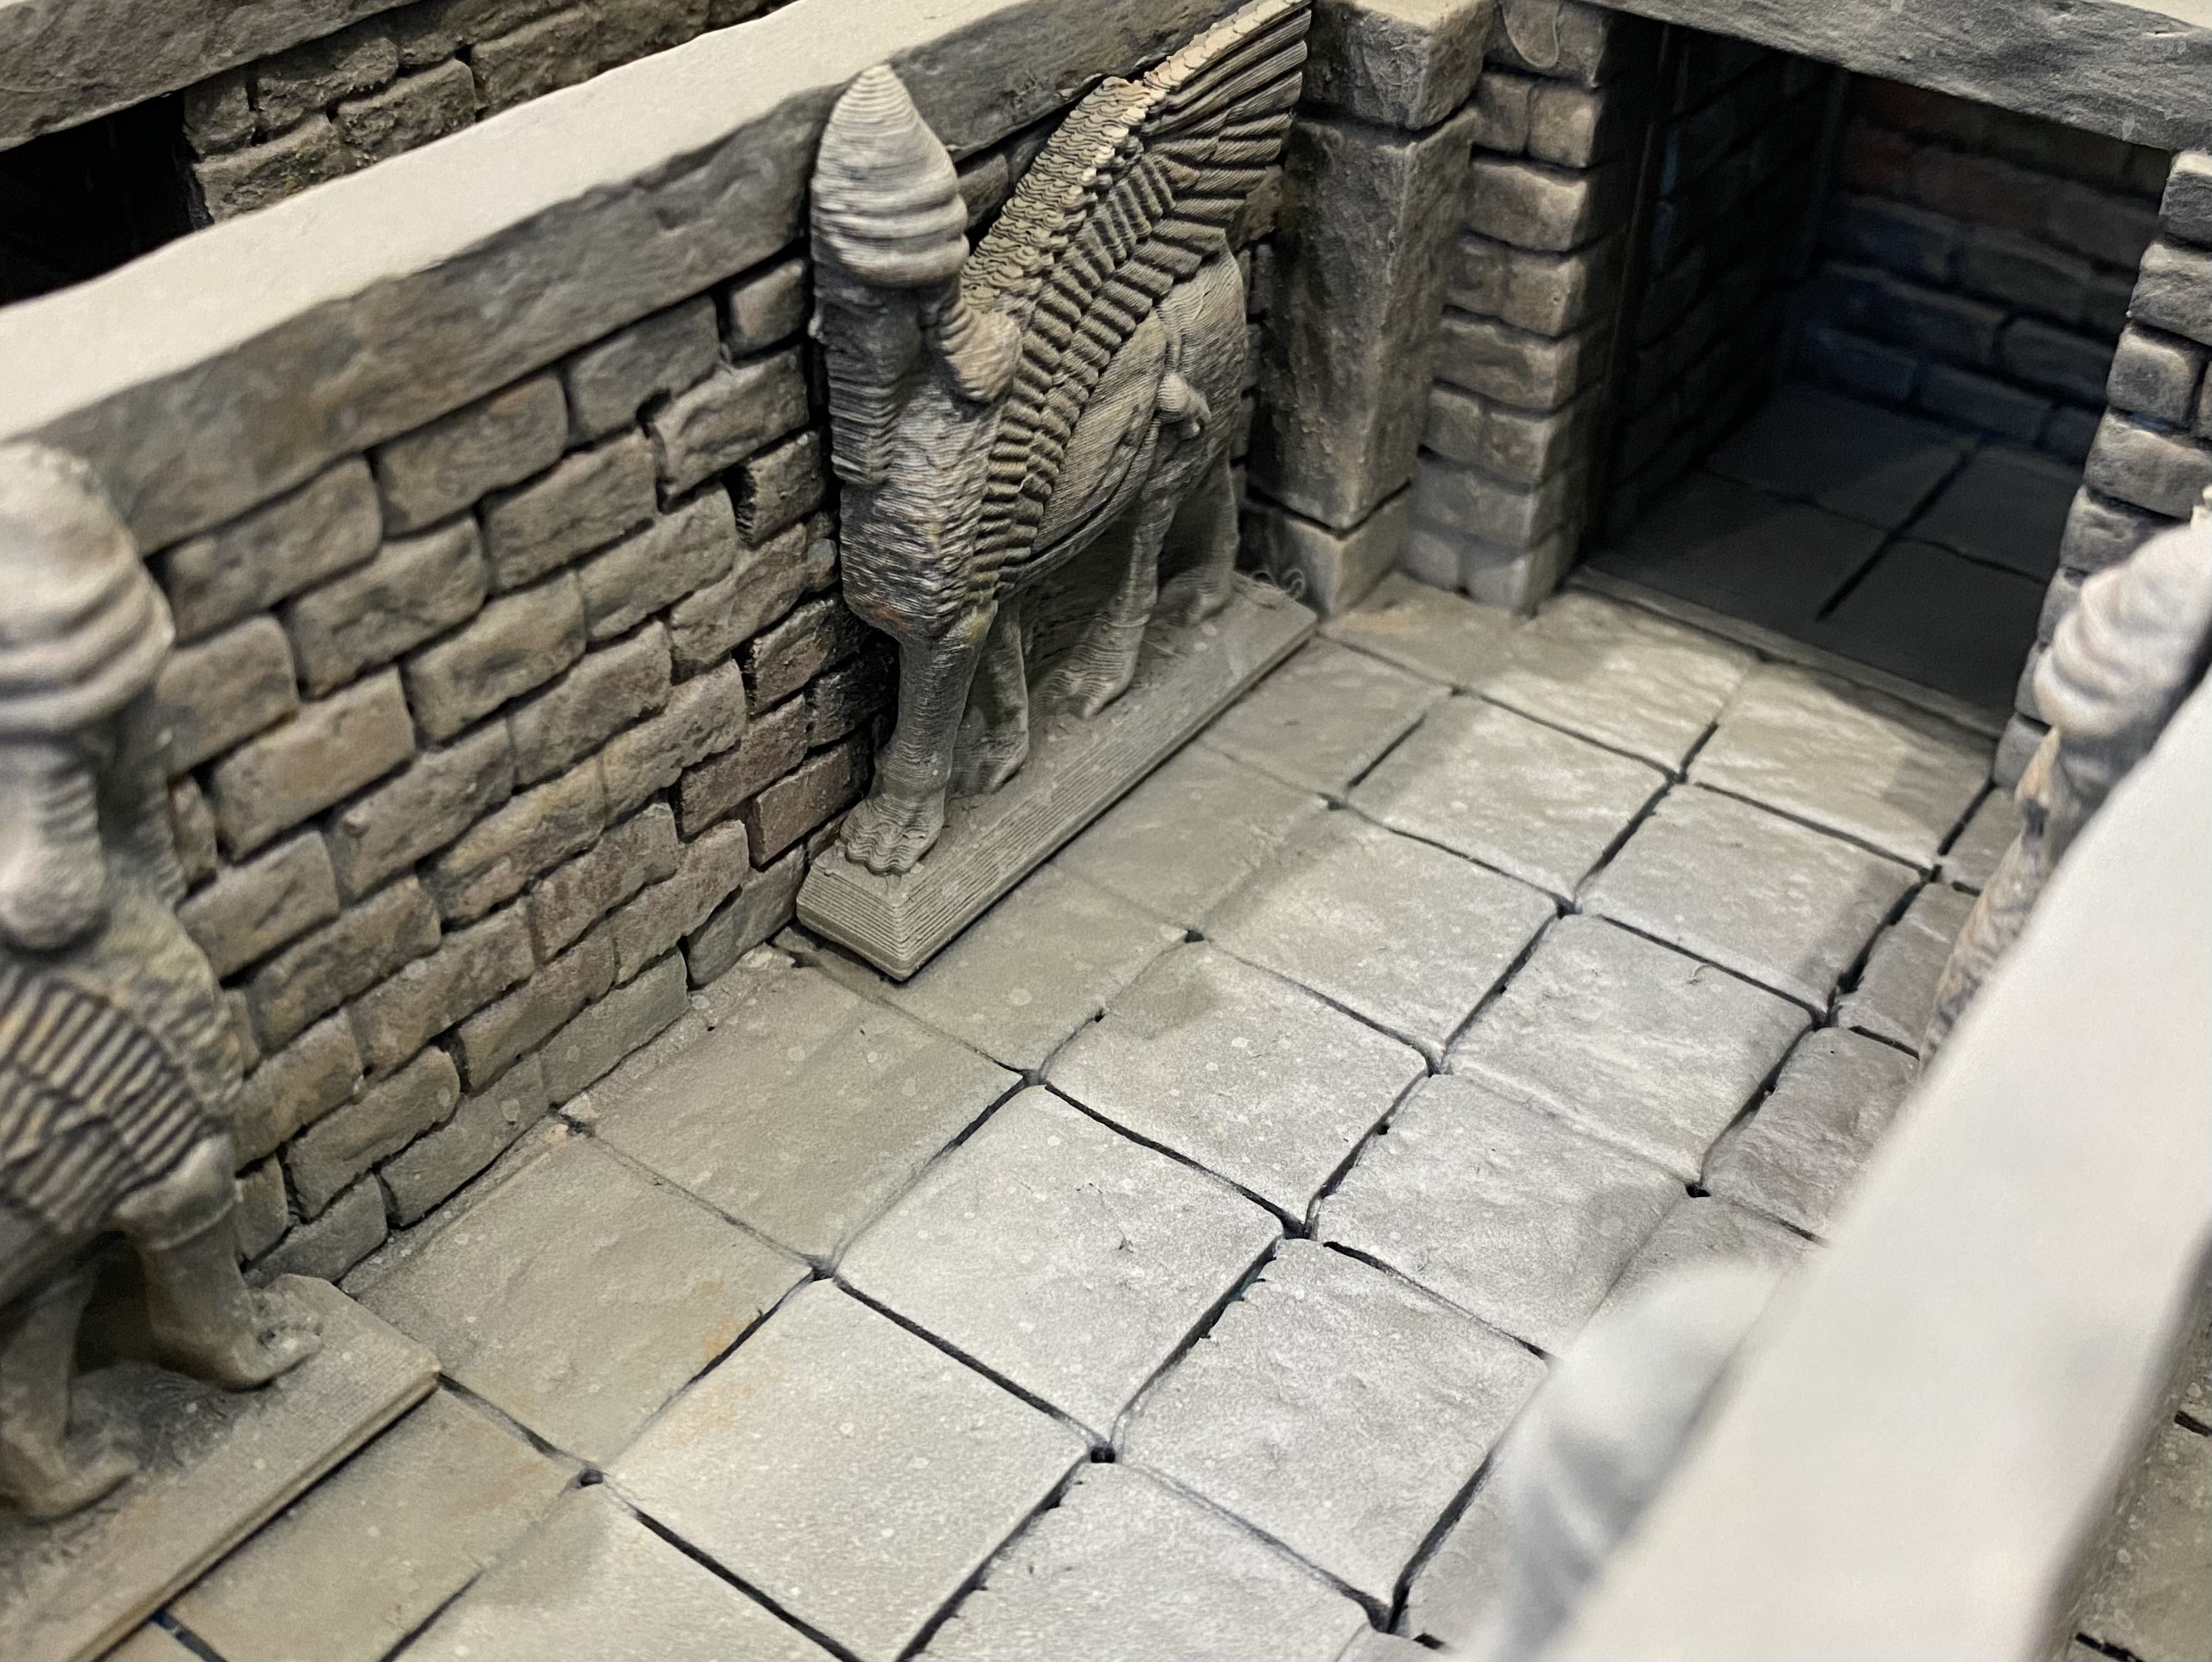
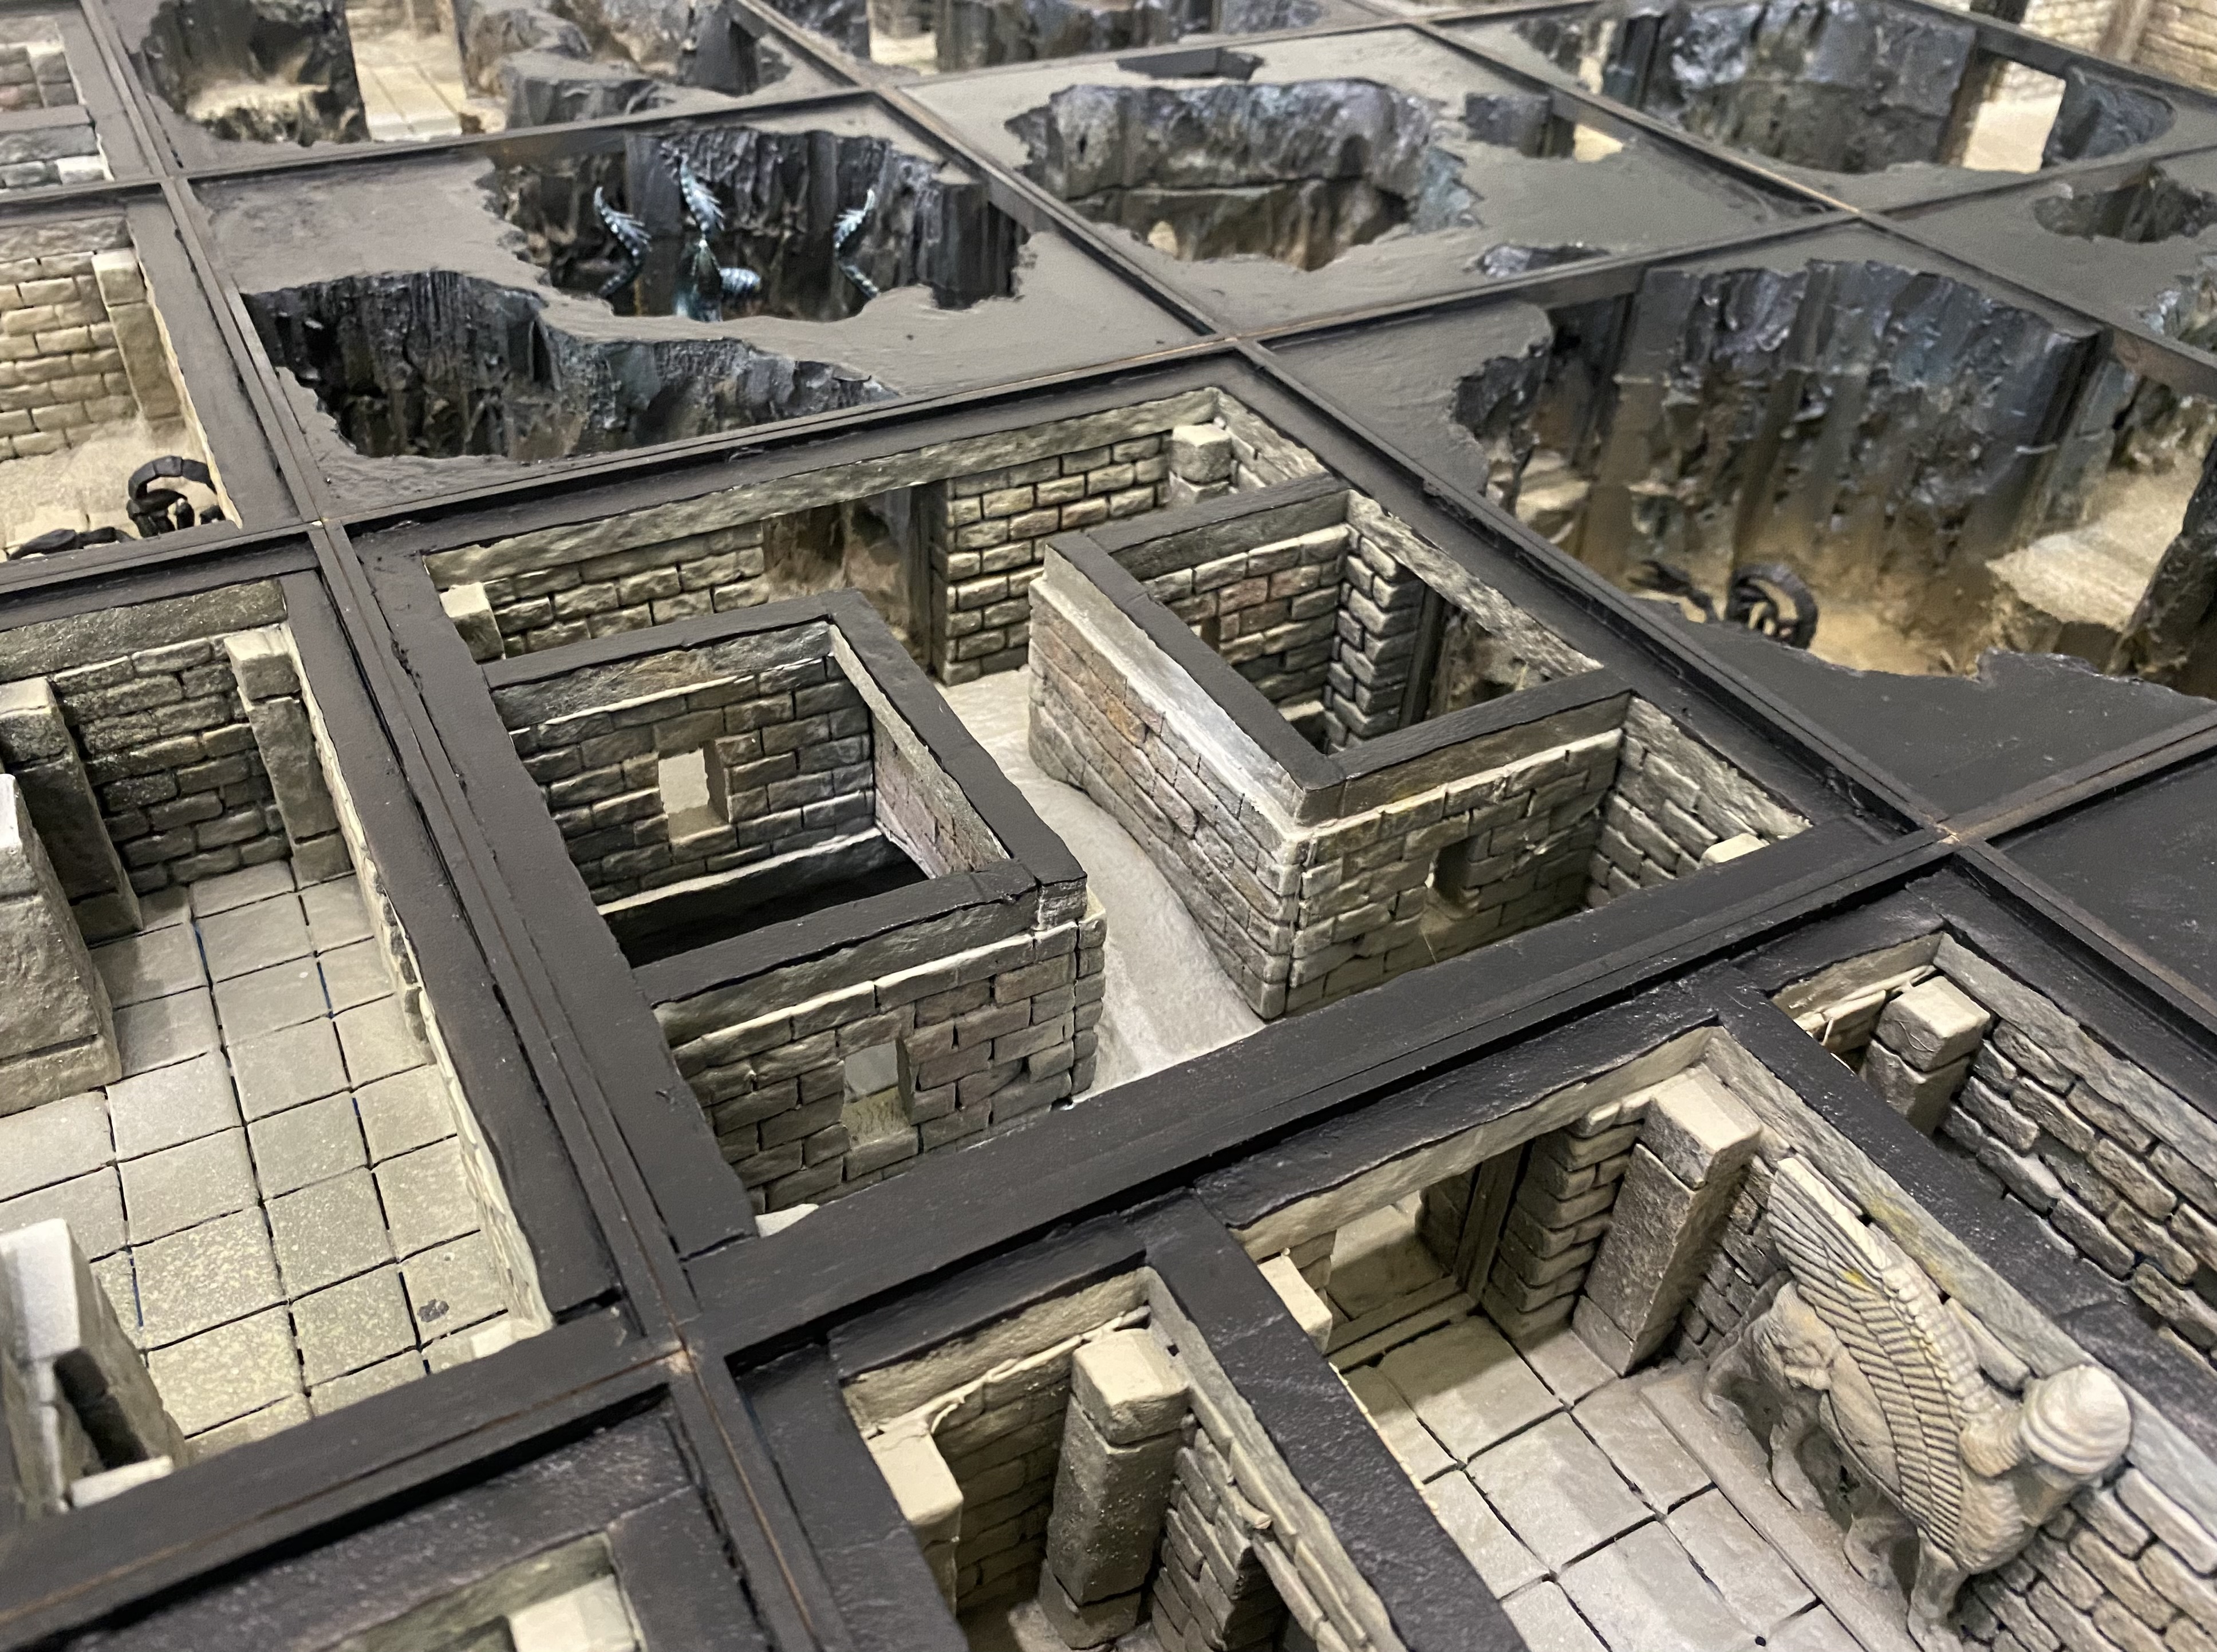
The Lammasu Room (Just for you @avernos) has a couple of sliding doors.
I had to go for these statues because the Sphinx have a much lower profile and I needed the height to help cover the doorways. So, a little poetic licence has been used. At the end of the day, it still gives an impression of an ancient civilization that could fit in with our Victorian Science Fiction Campaign quite well as we hint at Aliens visiting Earth in ancient times so the thought that multiple gateways between Mars and Earth exist is not beyond the scope of our campaign. For pulp games, well it’s just ancient statues really, and my kids will not know that these belong in a different part of the world.

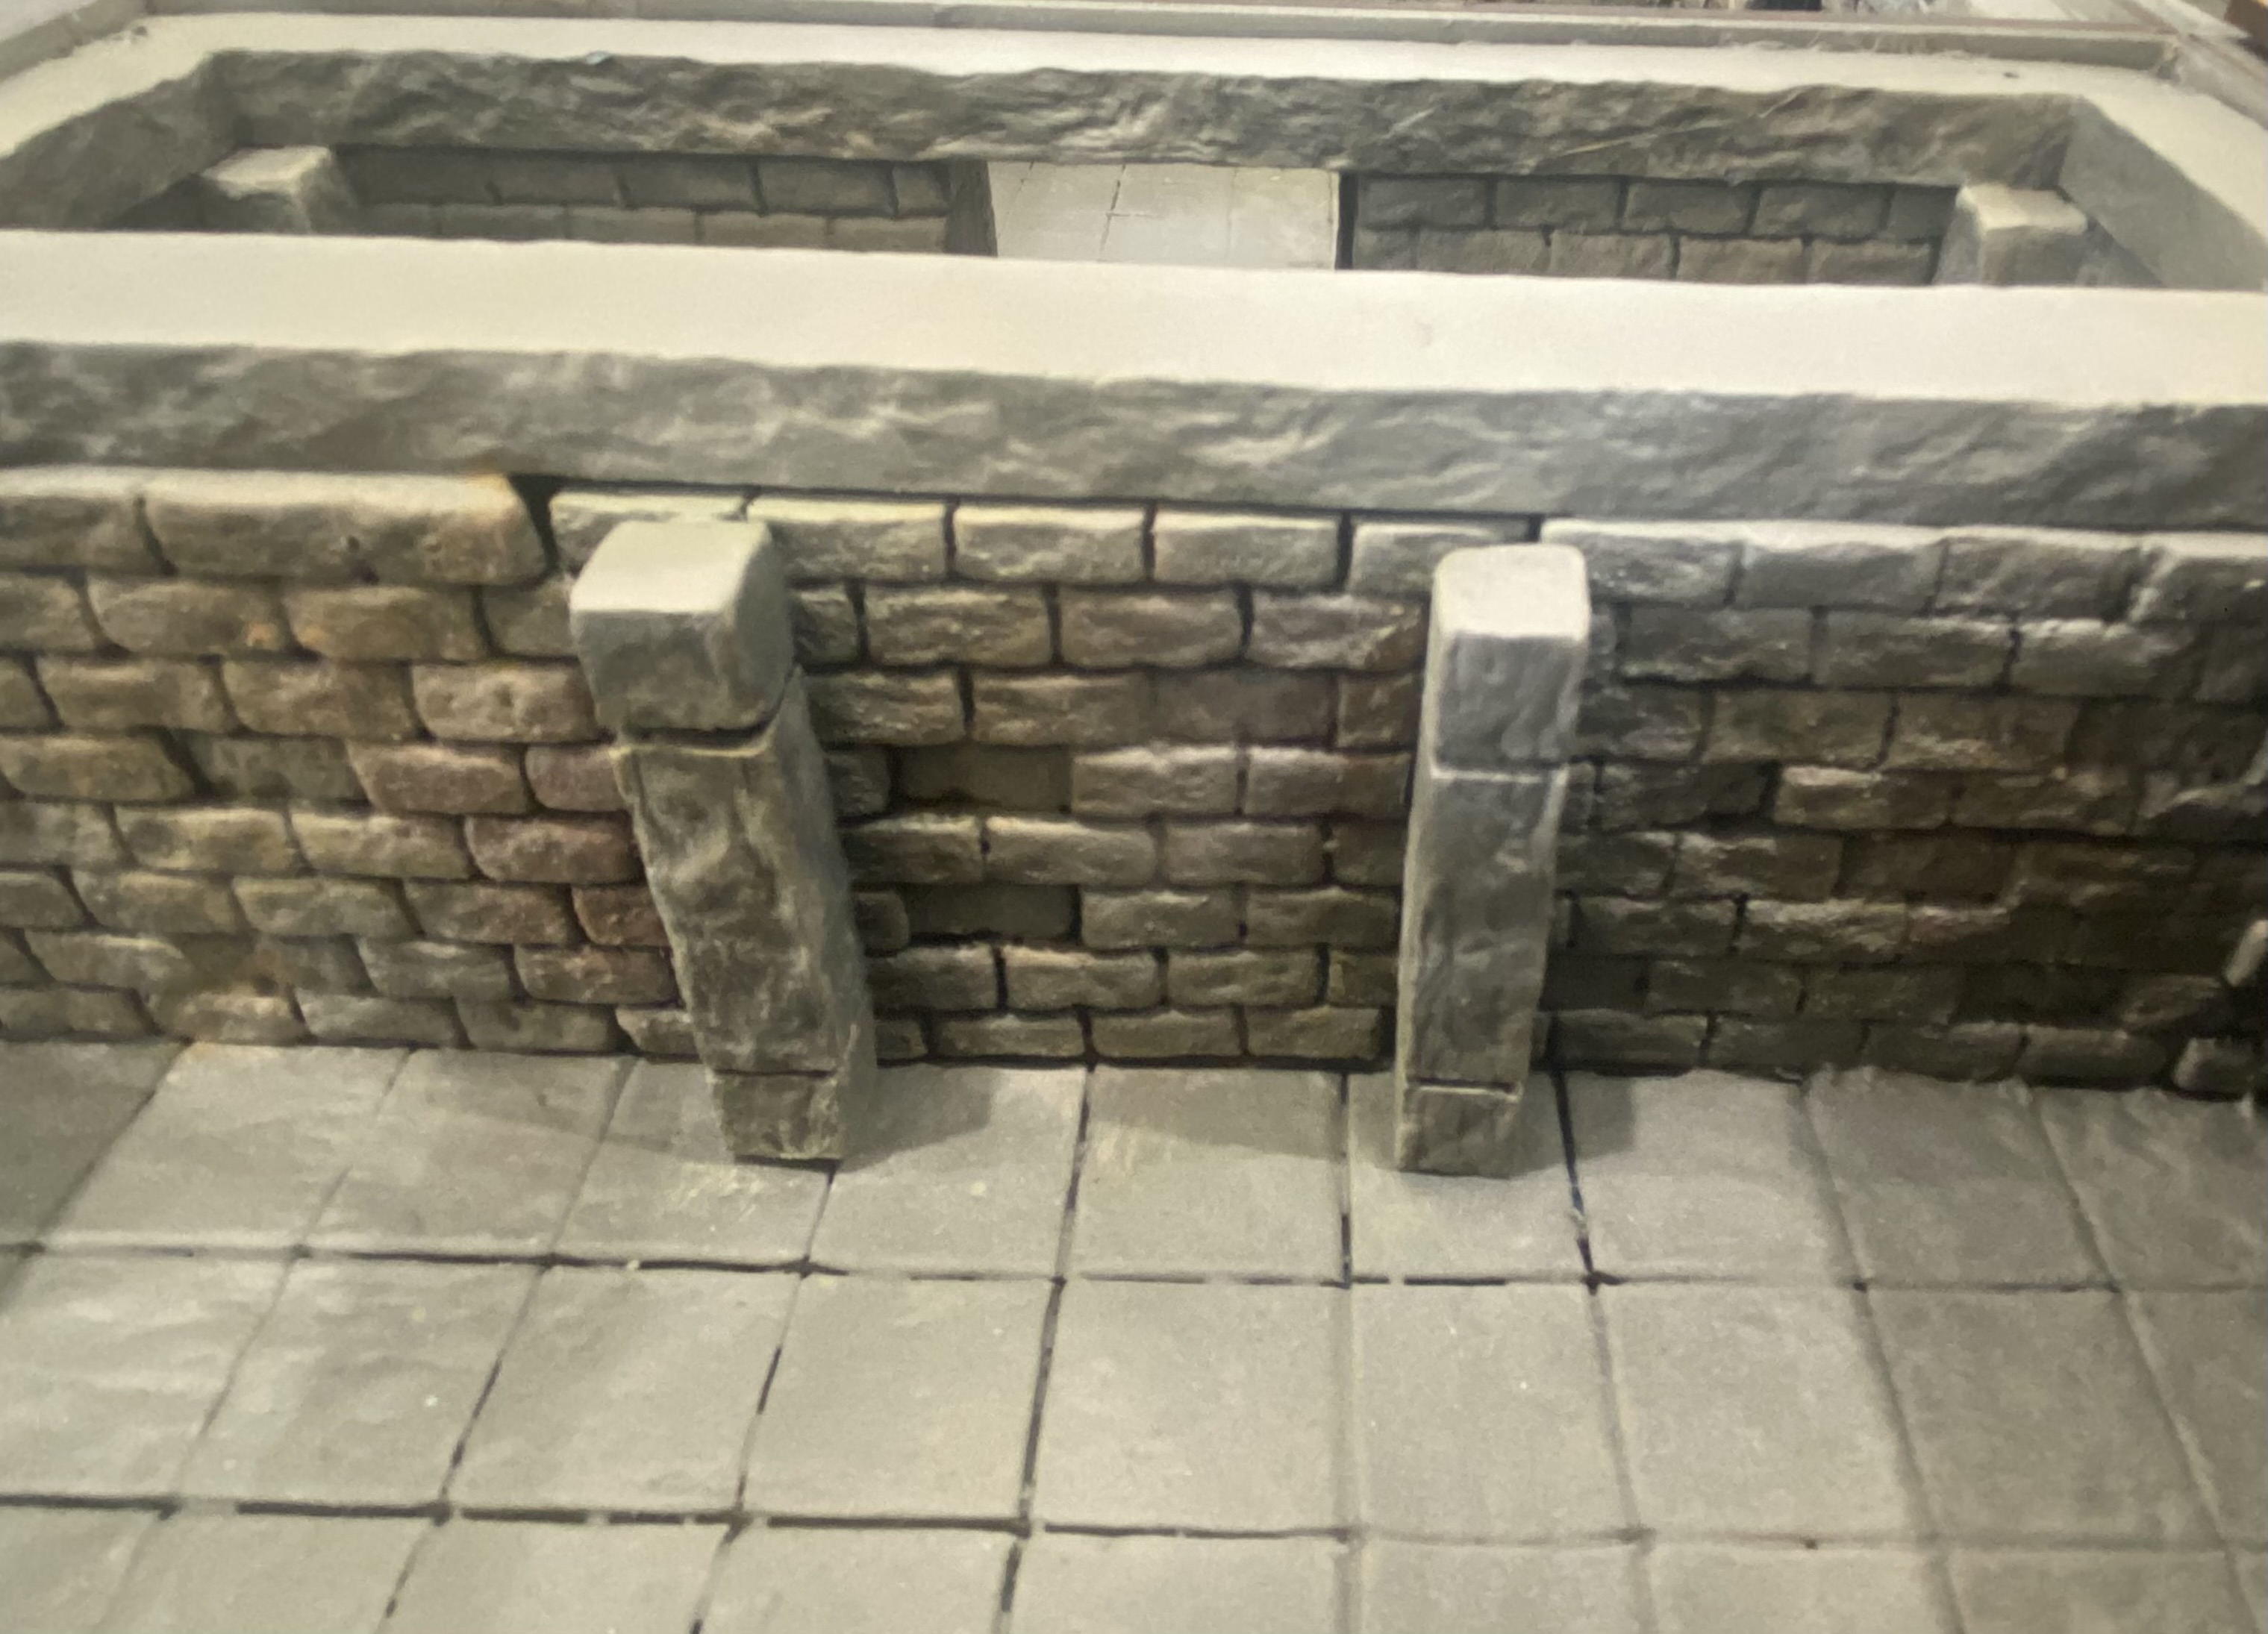
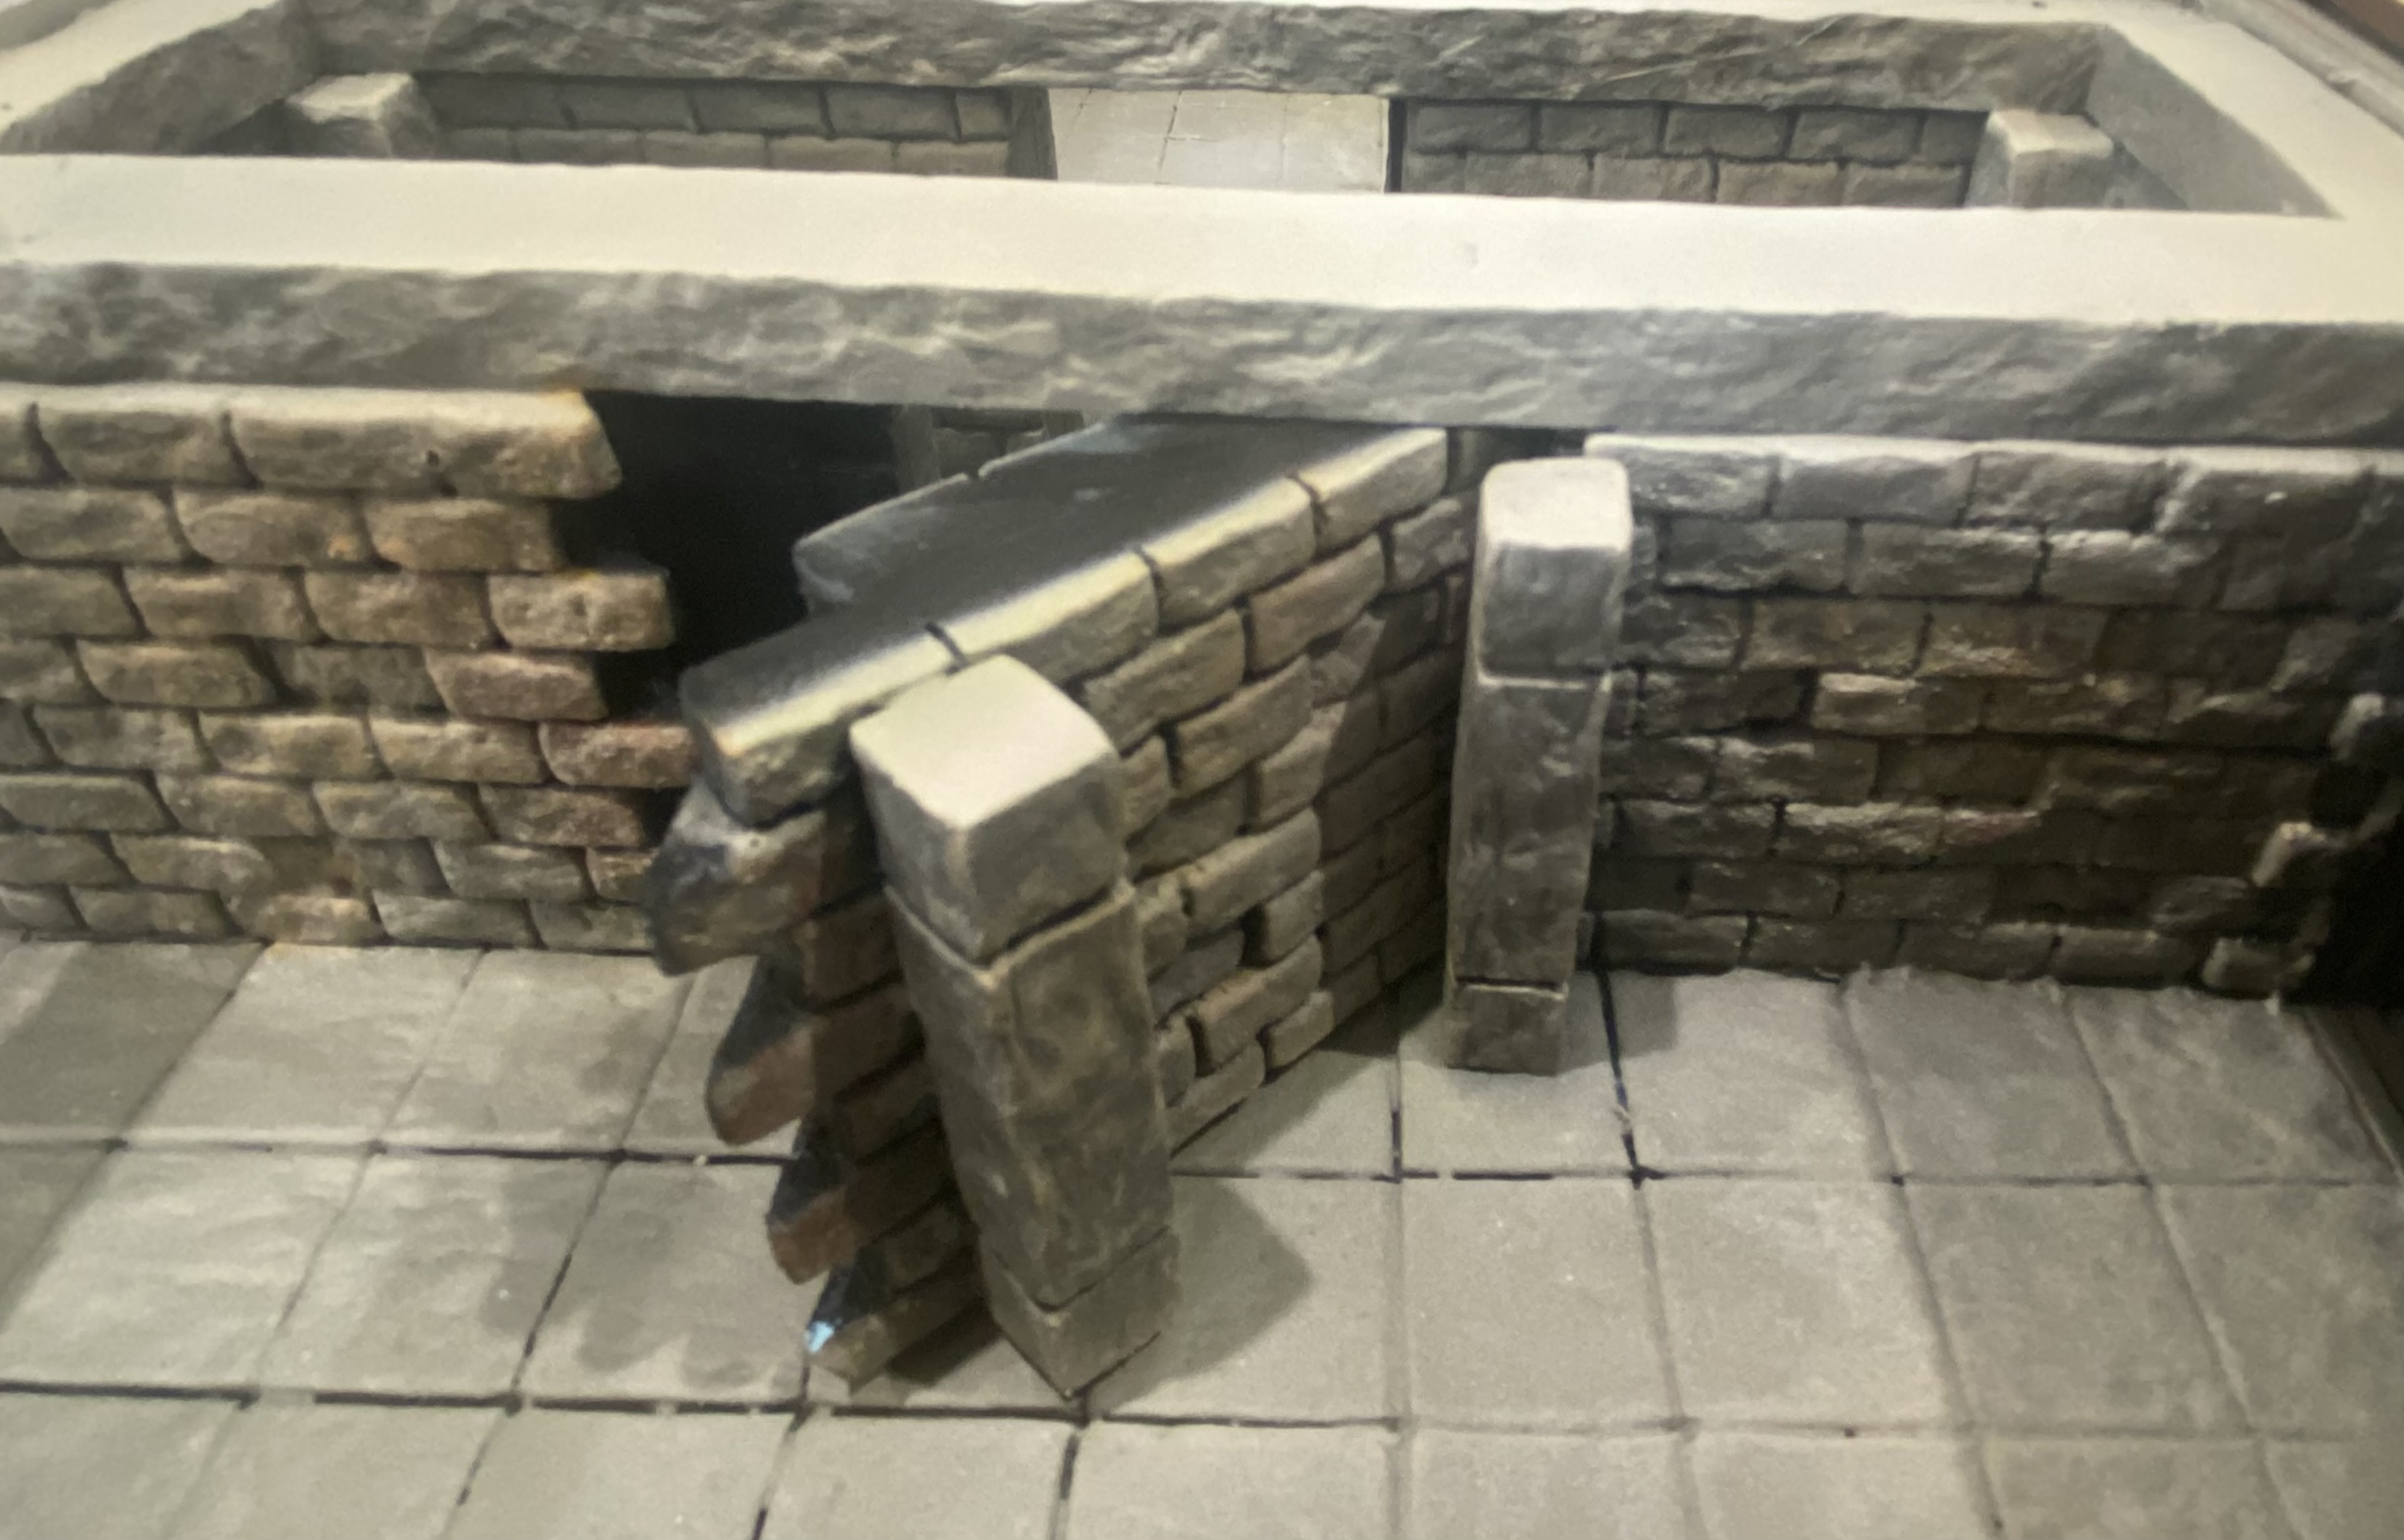
A simple moving wall in one of the non-descript boxes.
The up and under room. Useful for creating figure 8 style complexes.
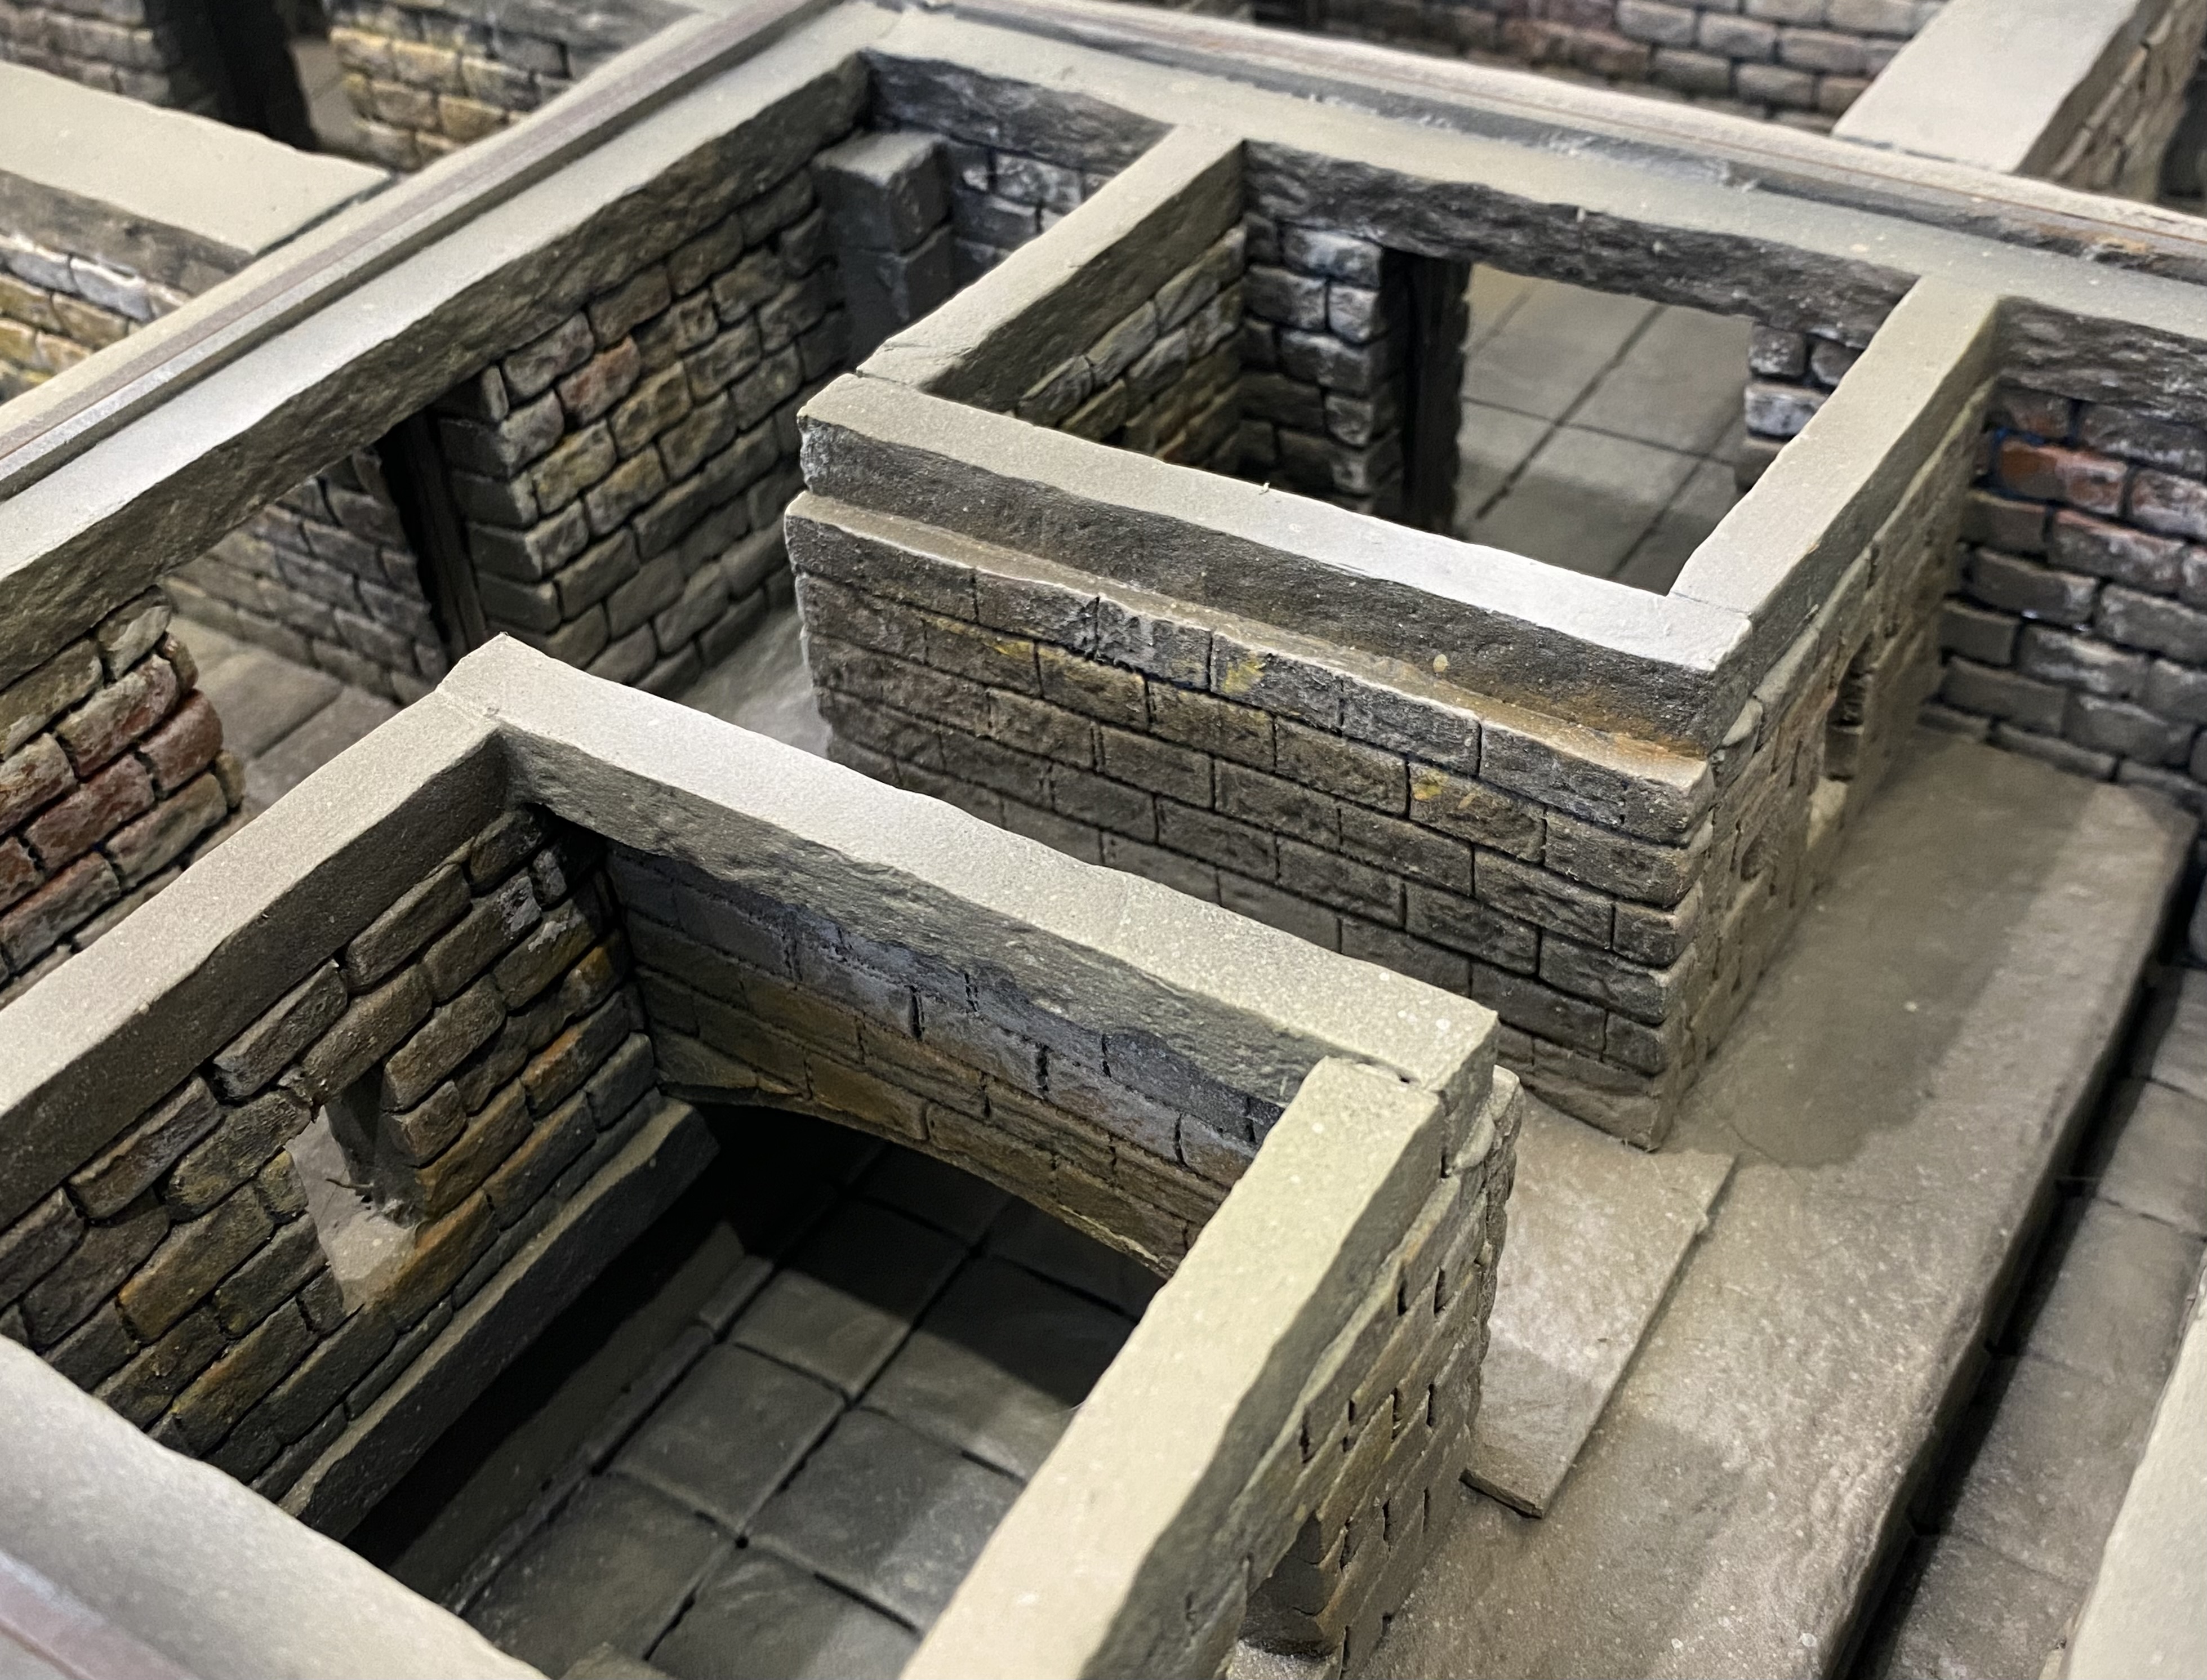
4' x 4' Boxed up
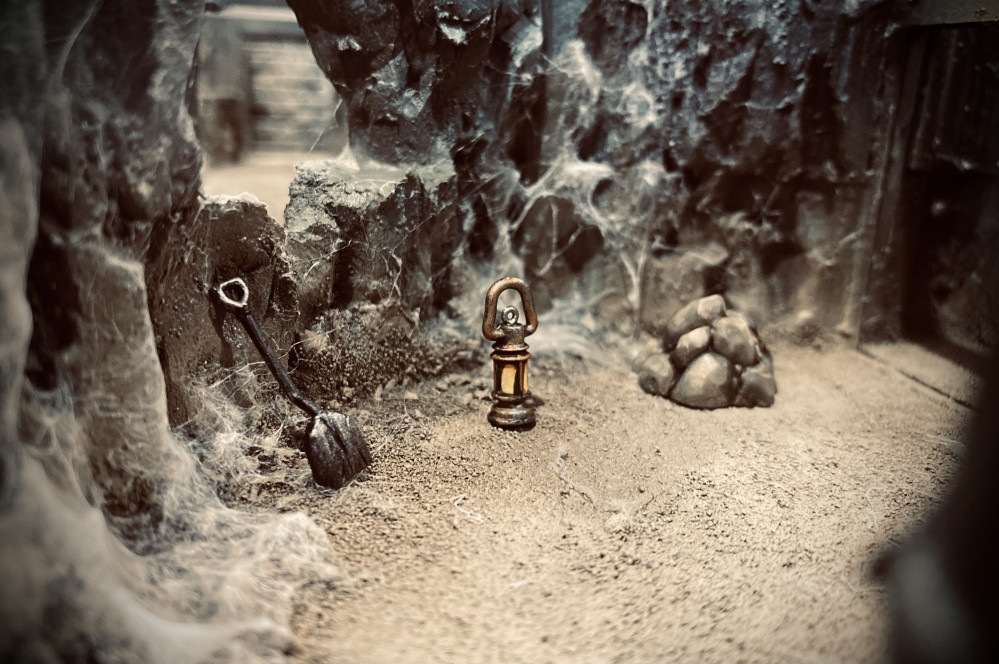
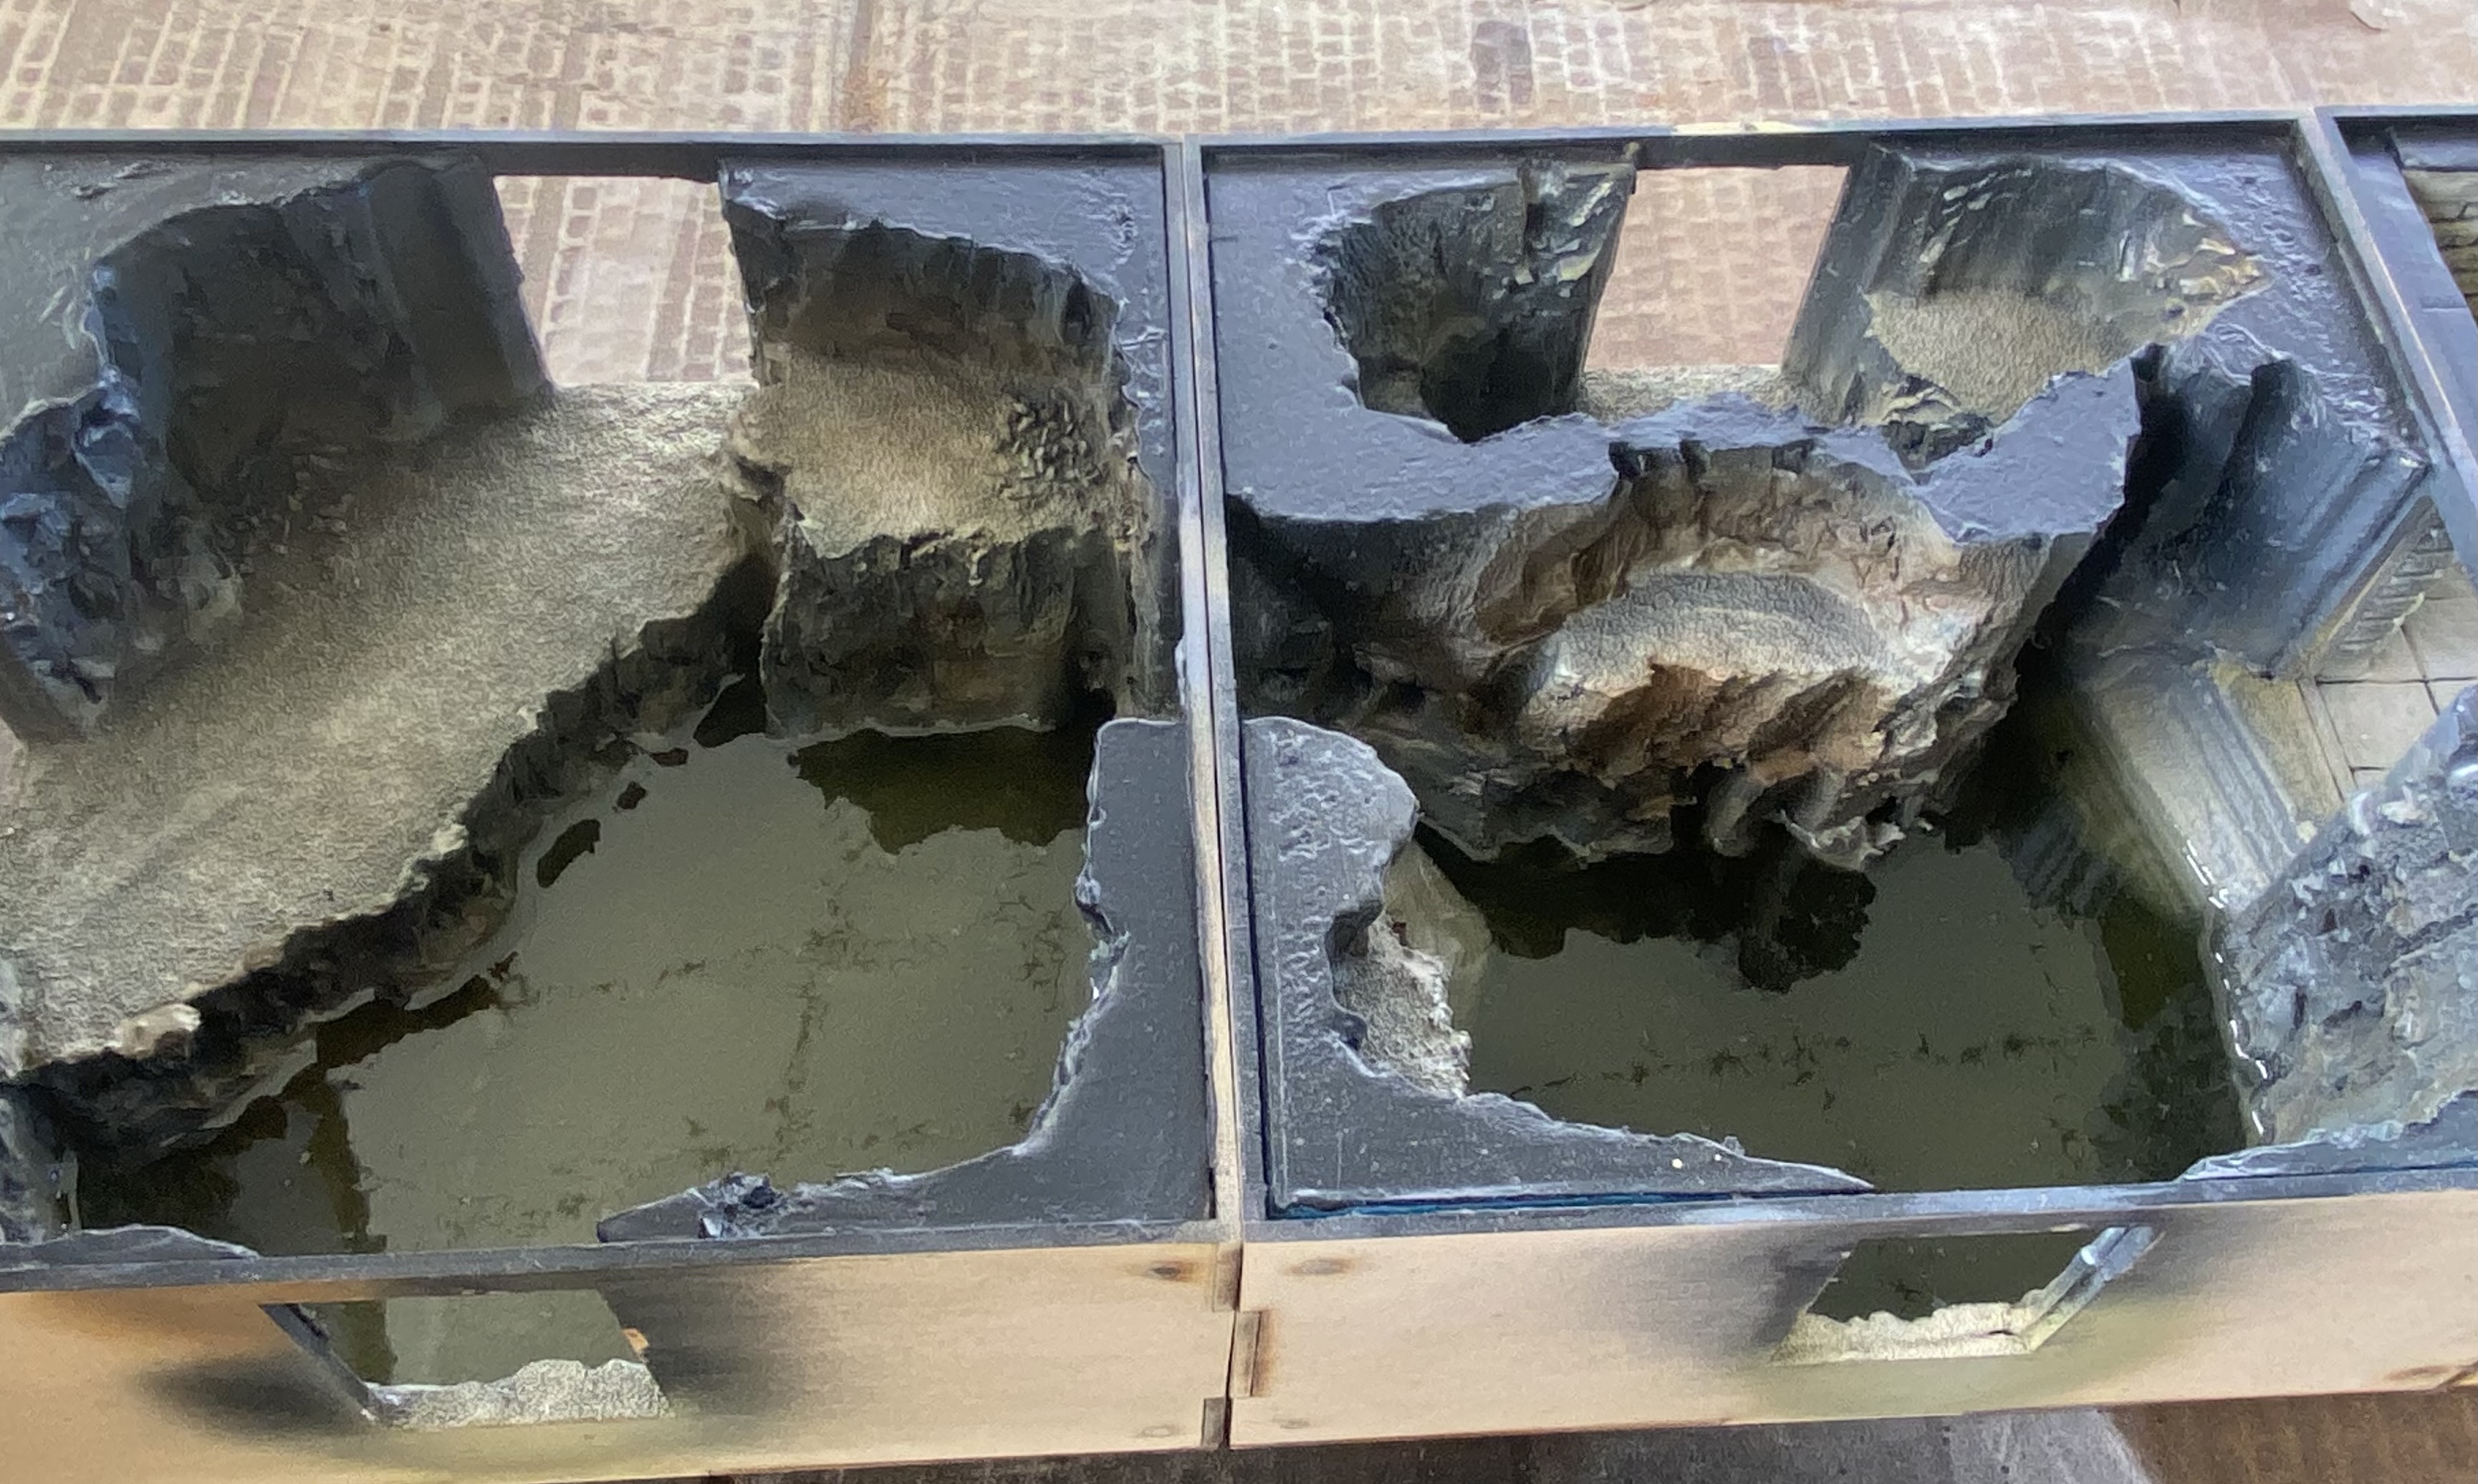
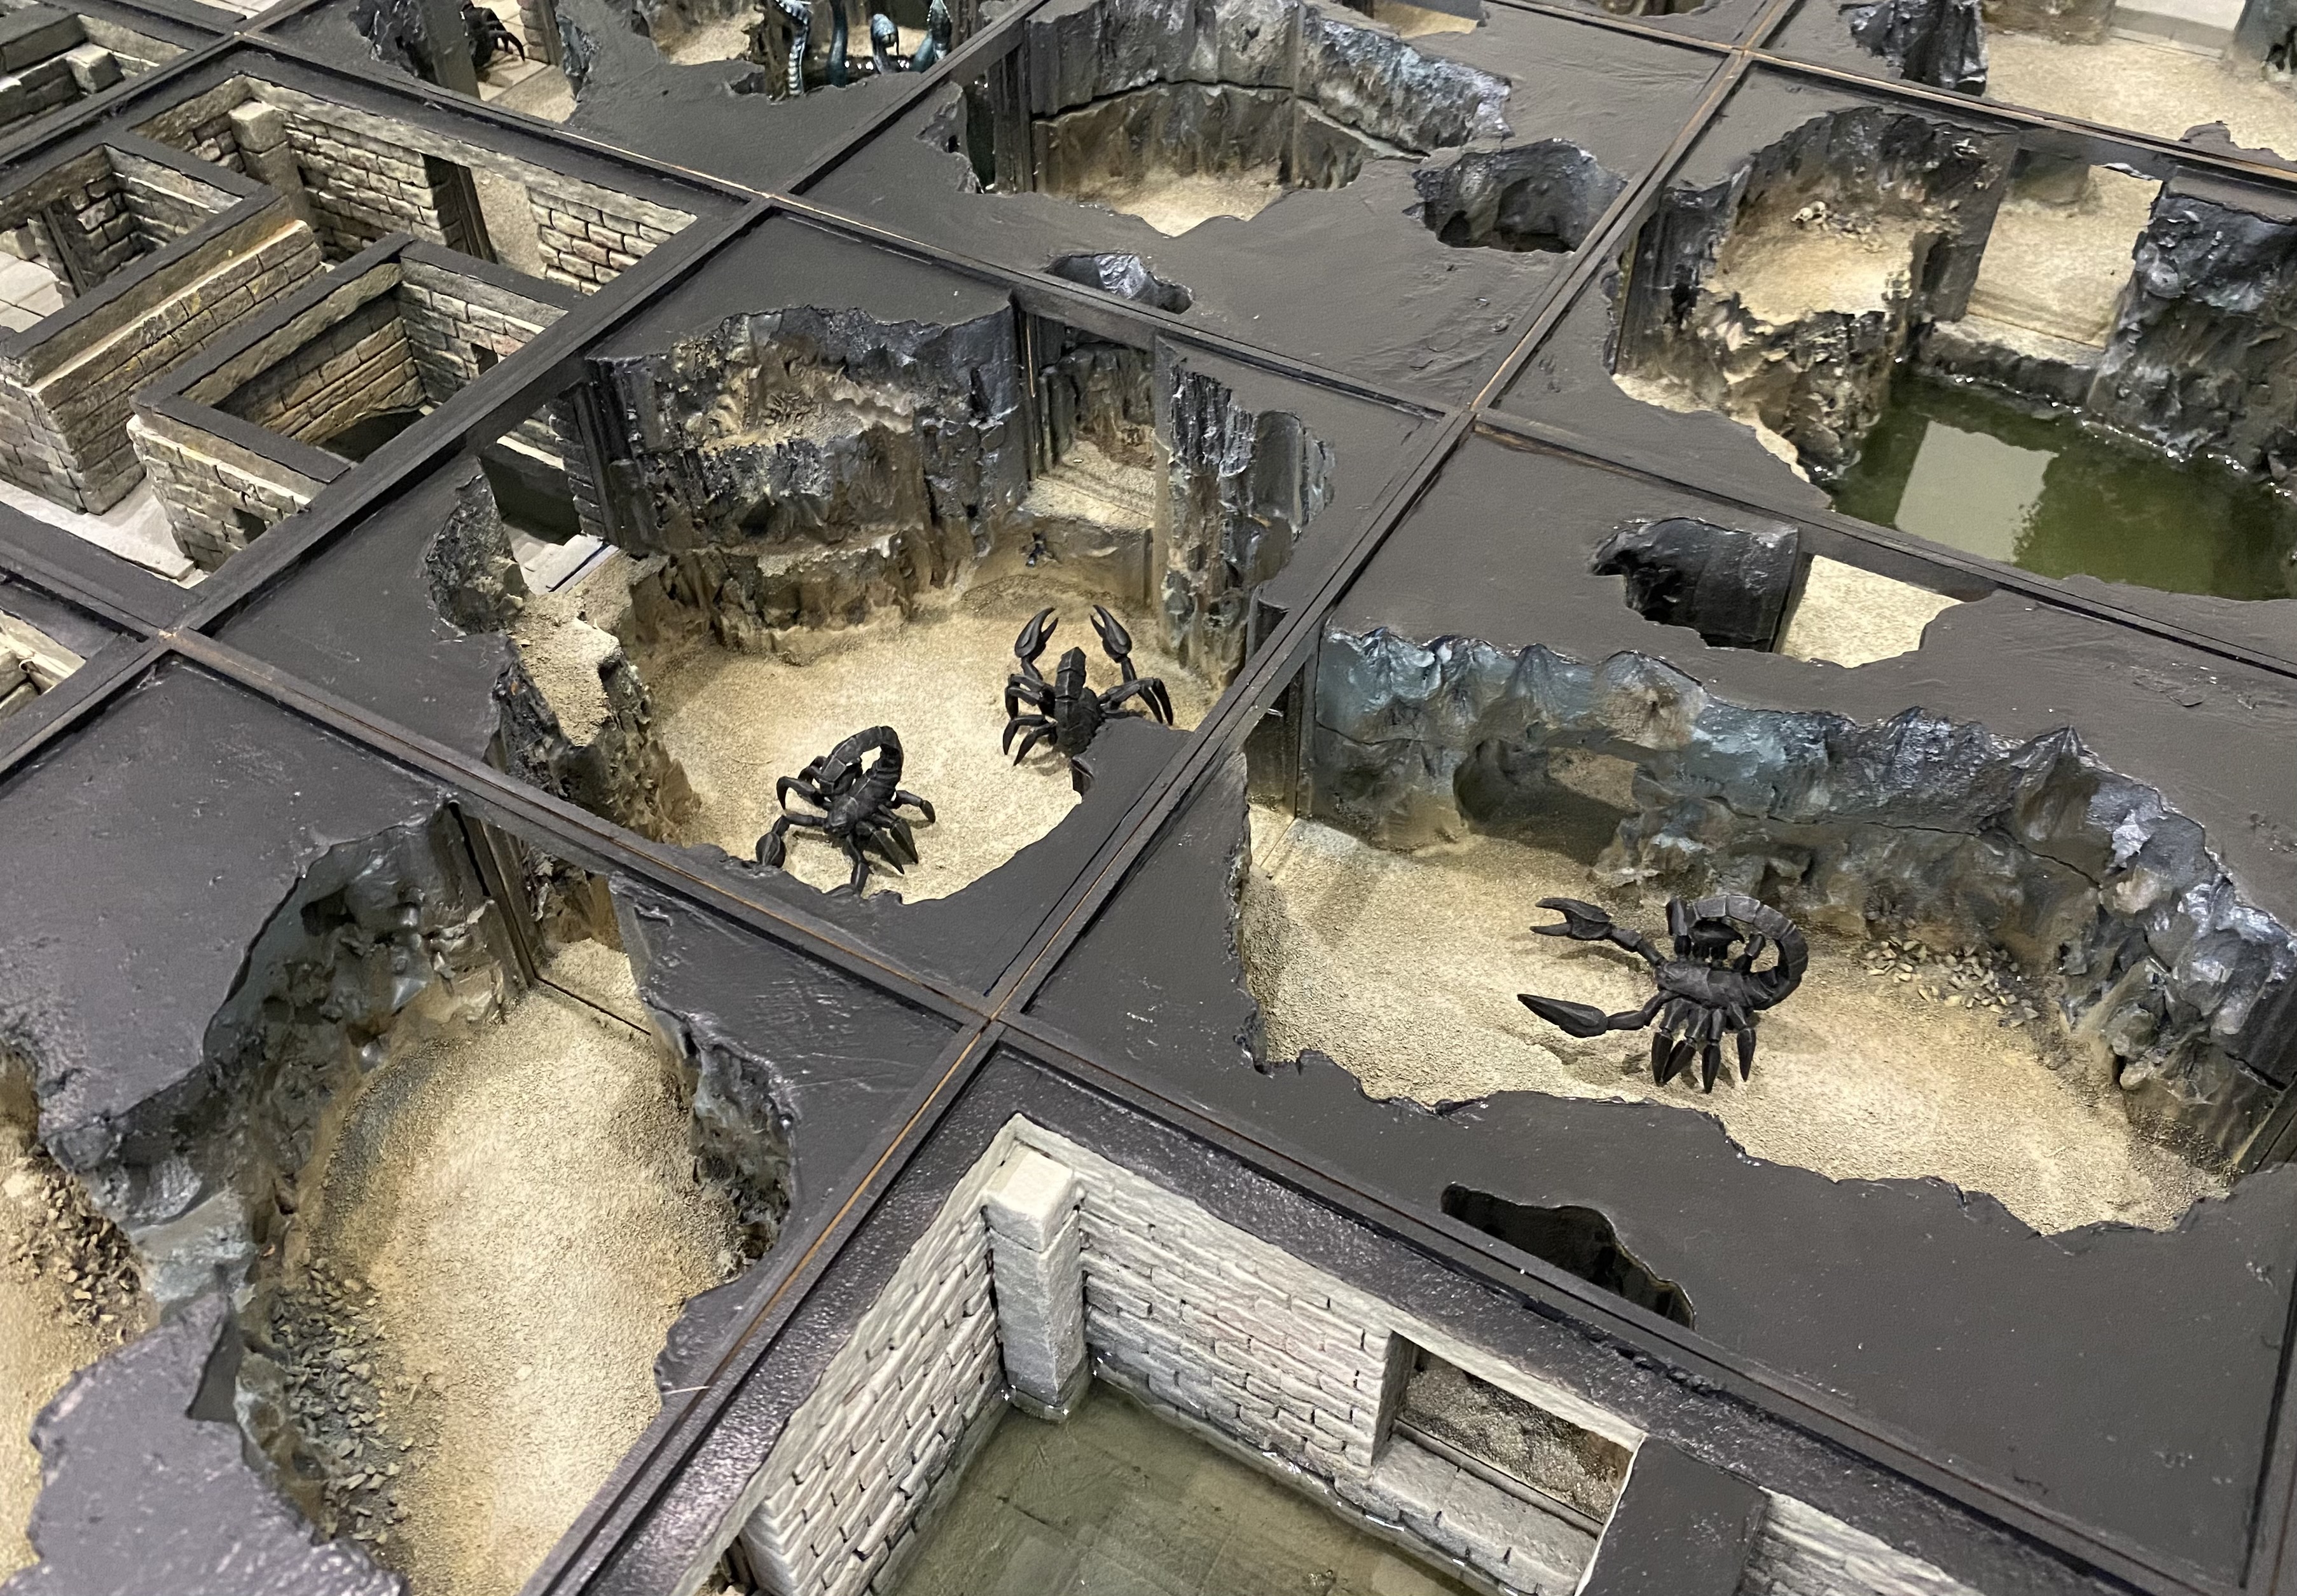
I have added some cave-style bits to my layout, just so my Spiders of Mars can creep their way into this somehow.
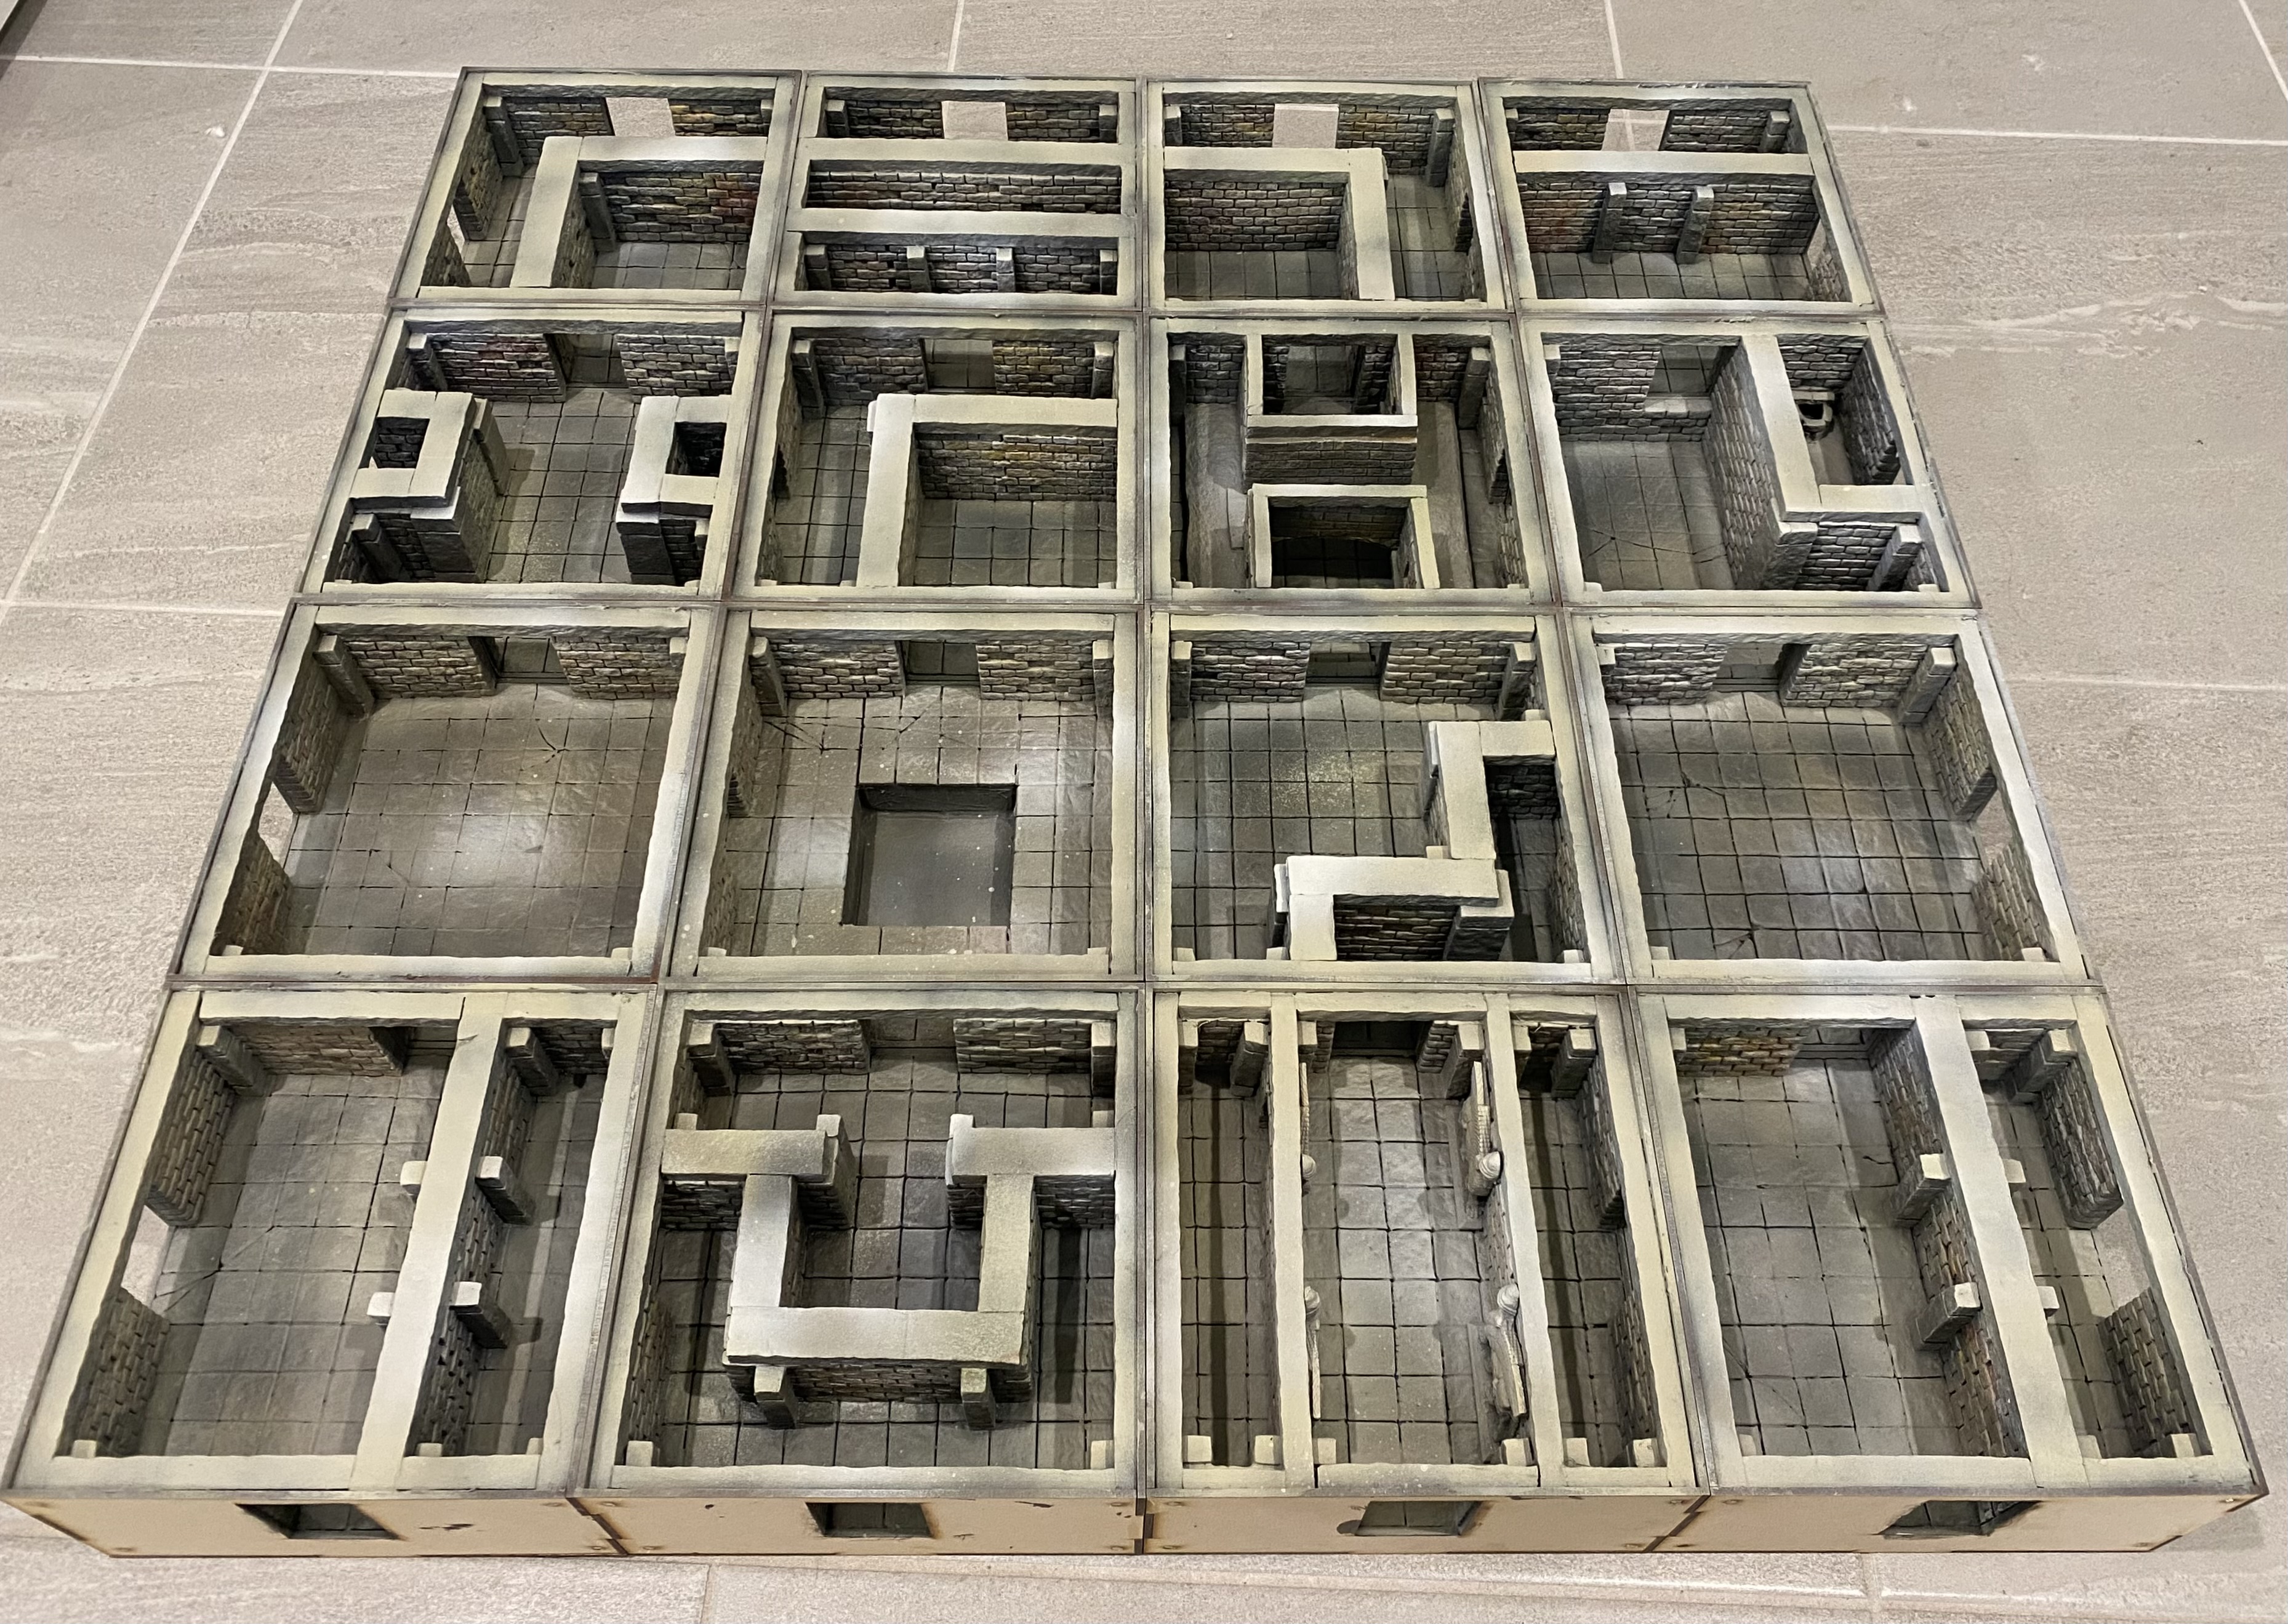
 I grabbed all the bits I have done so far and chucked them down on the floor and this was the result.
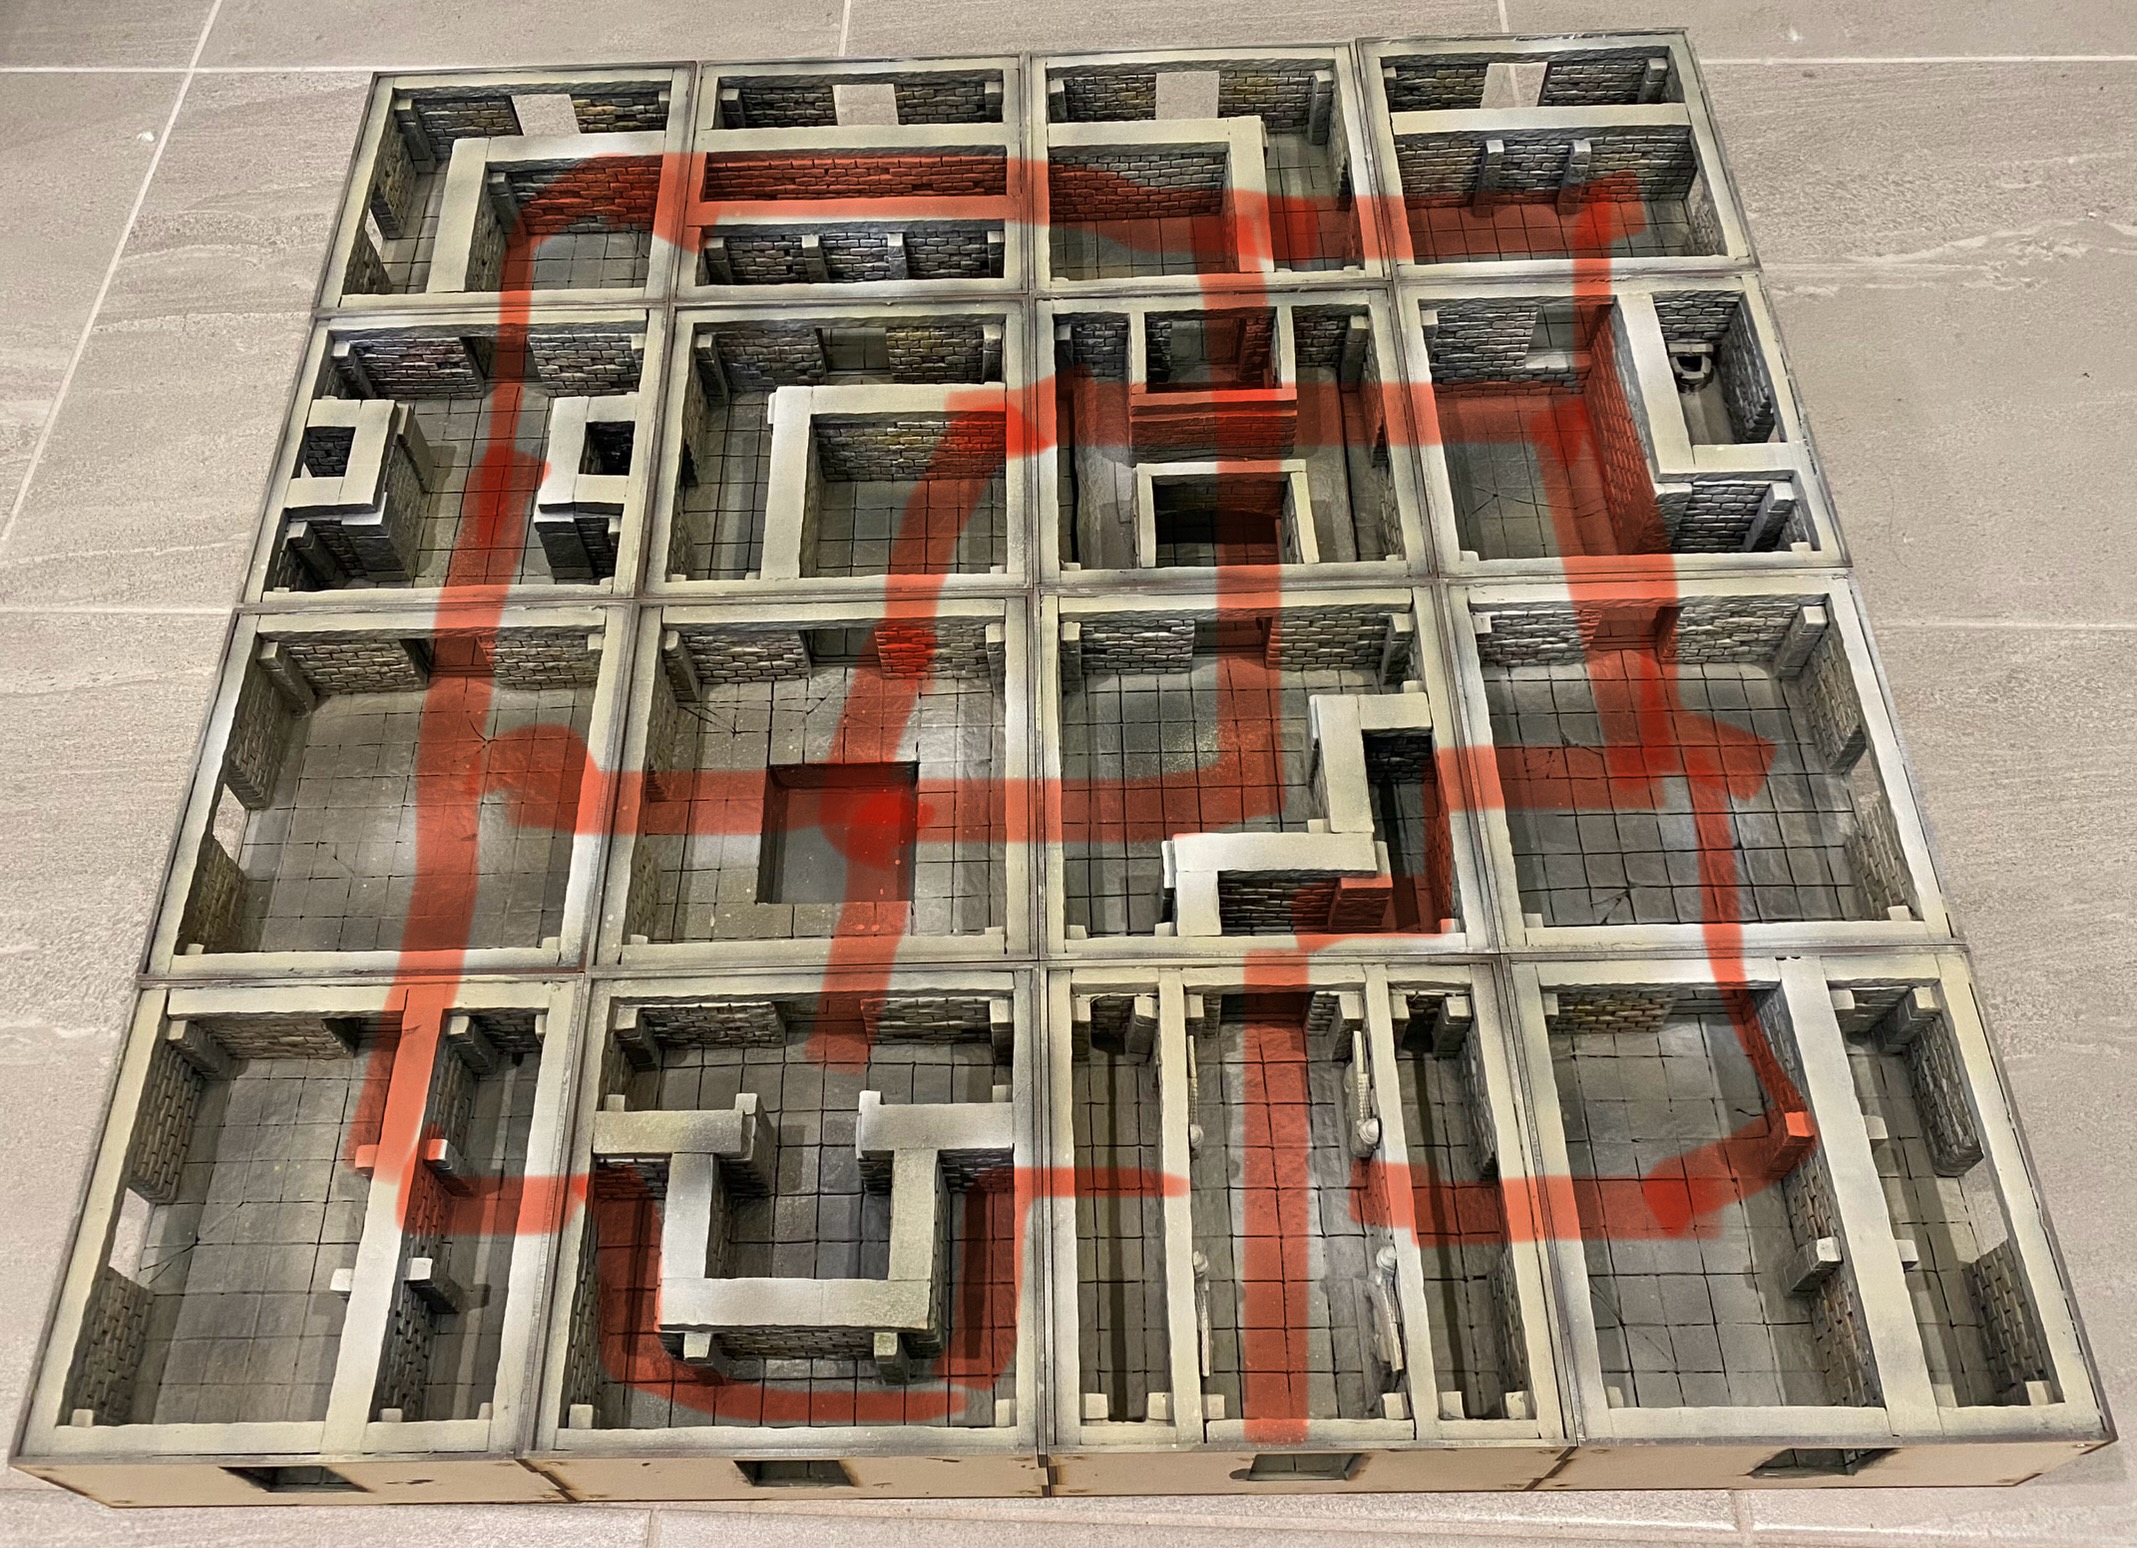
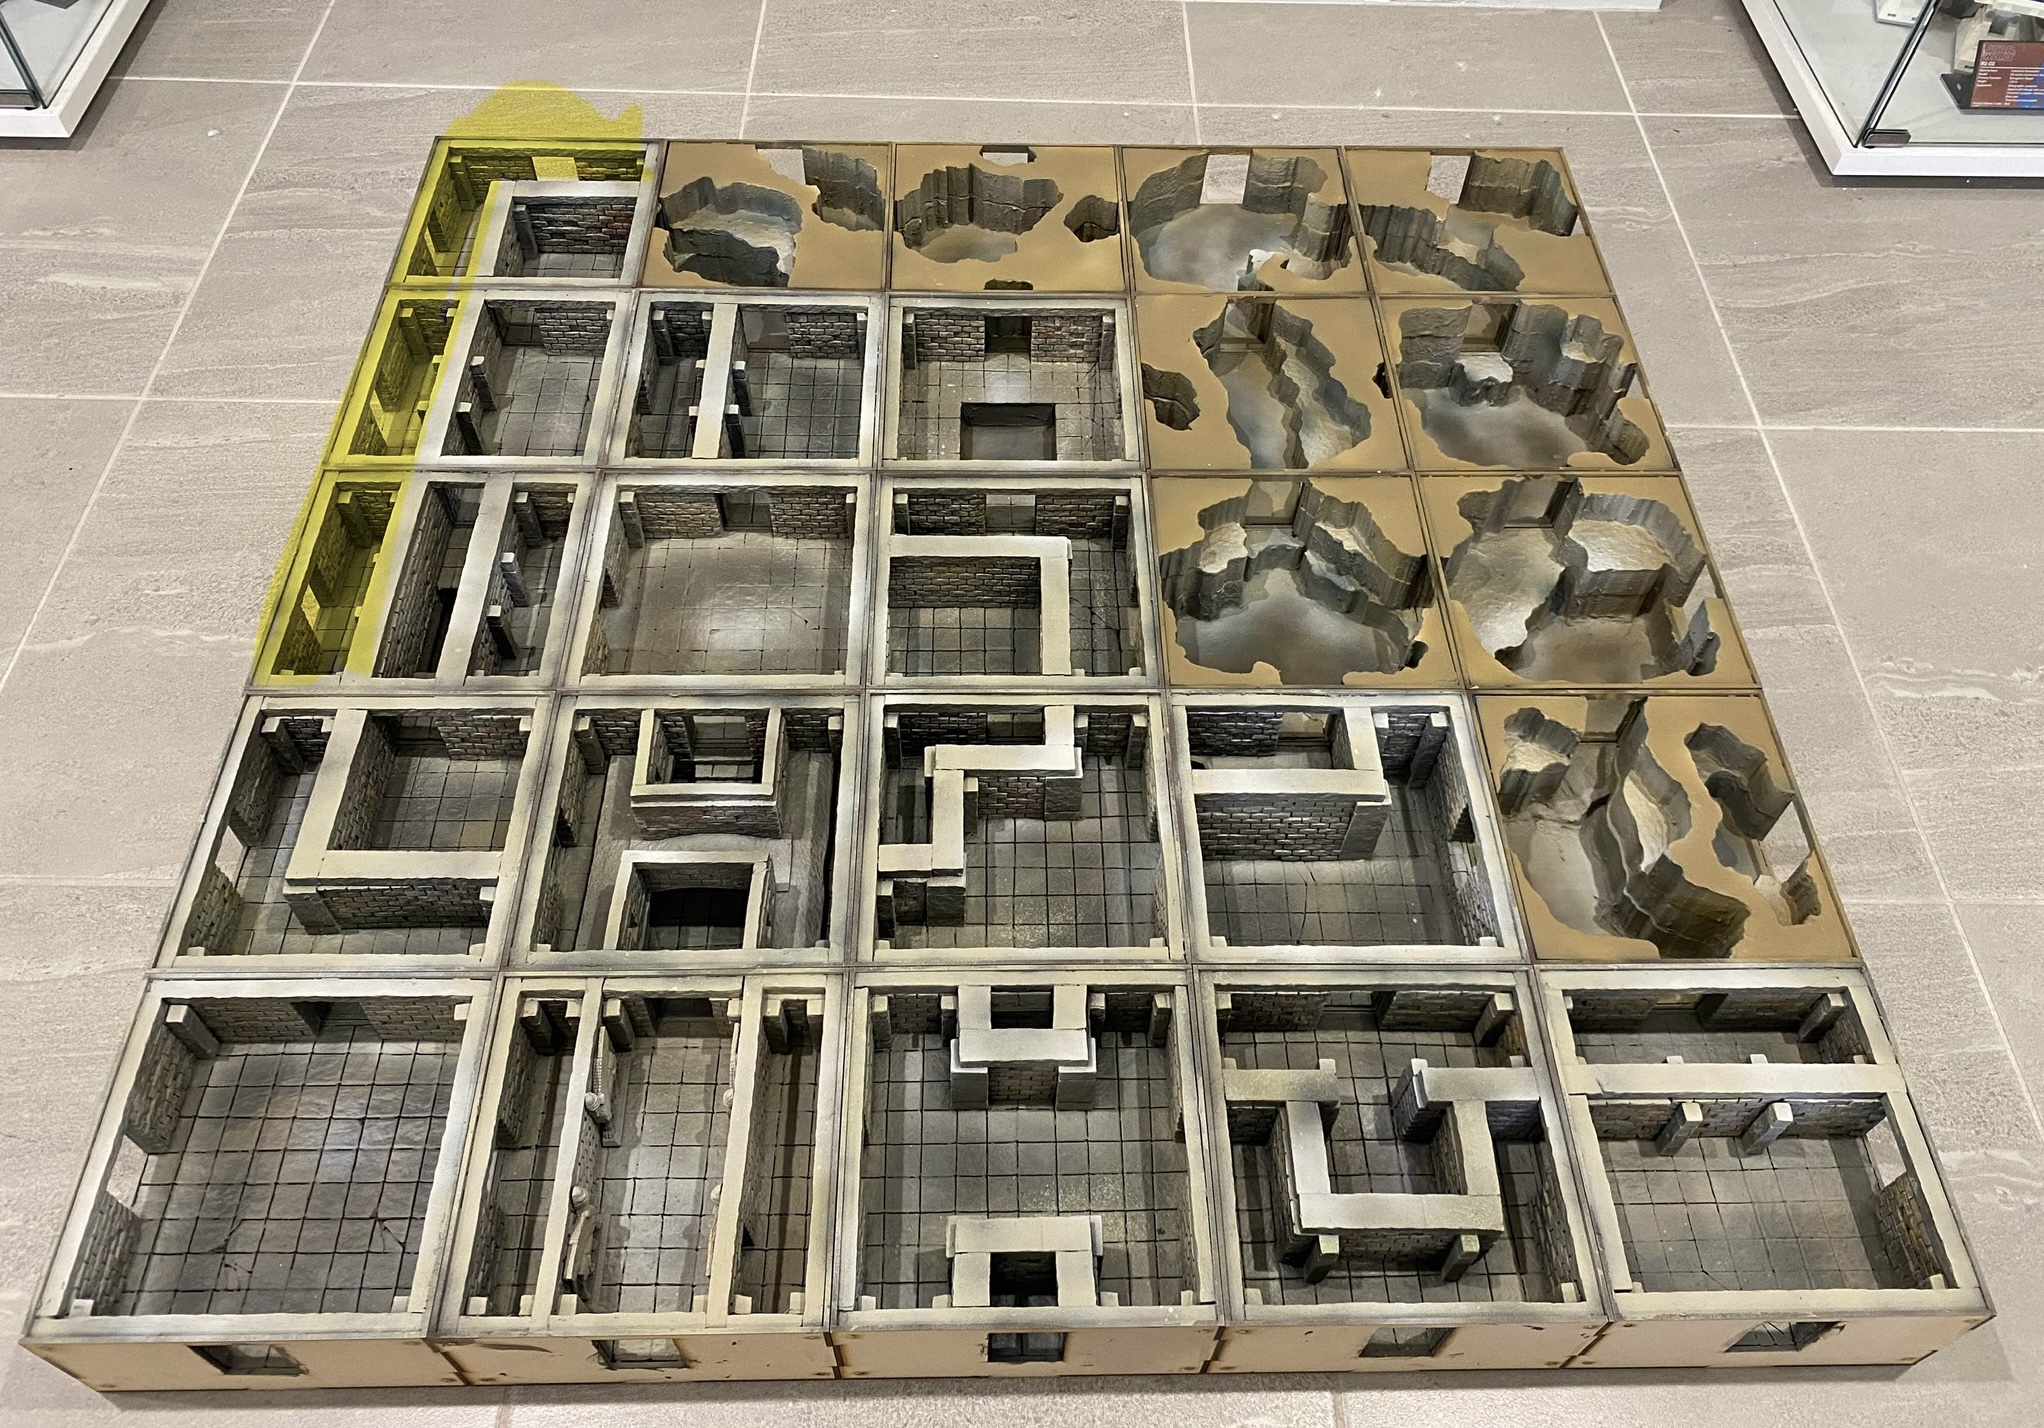 I decided to see what areas of the layout would be completely inaccessible (Highlighted in yellow). I am pretty happy with how this is turning out. The inclusion of hidden doorways and small passages under the cave areas really means that most of the board is accessible at any one time, although it may take you in different meandering routes.
 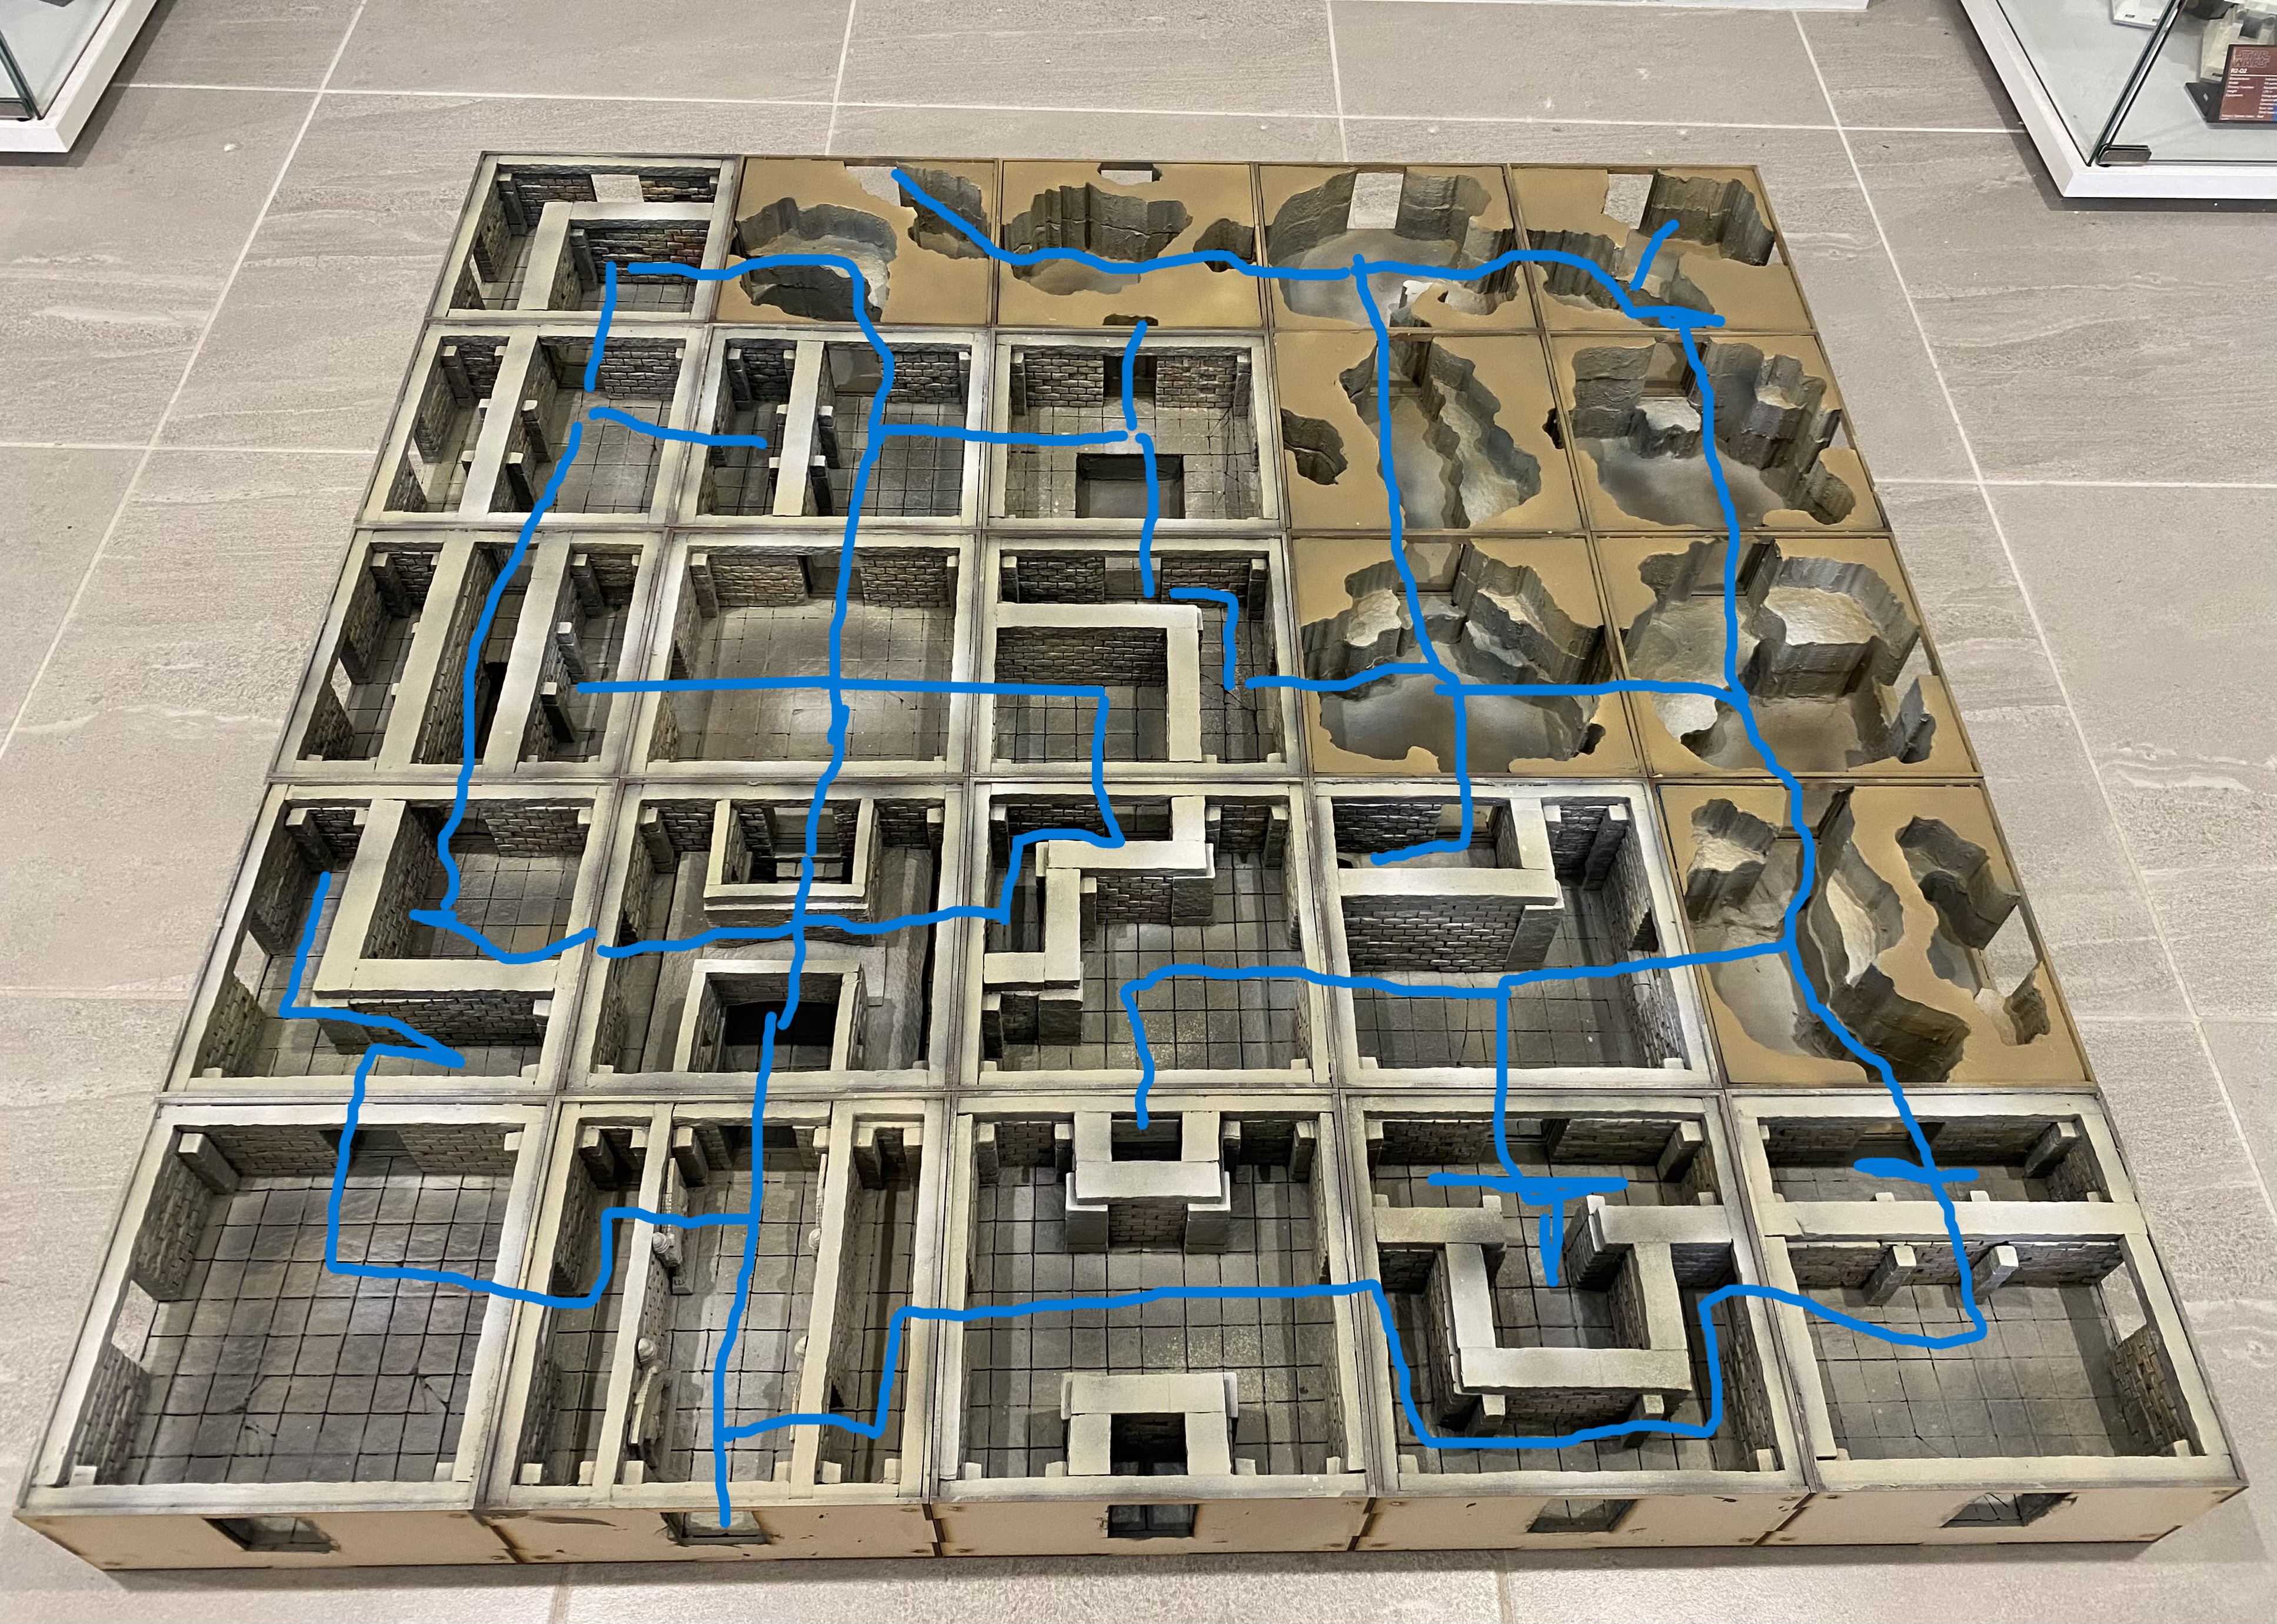 And here we have all the pathways highlighted with a blue line to show the different routes.
Tying the boxes together.
I finally got around to sorting out the ‘caves’ section of the build, just so I can incorporate this into my ‘Spiders of Mars’ scenario for our Victorian Science Fiction Campaign. Plus, they can also be used for regular dungeon crawls with the kids.
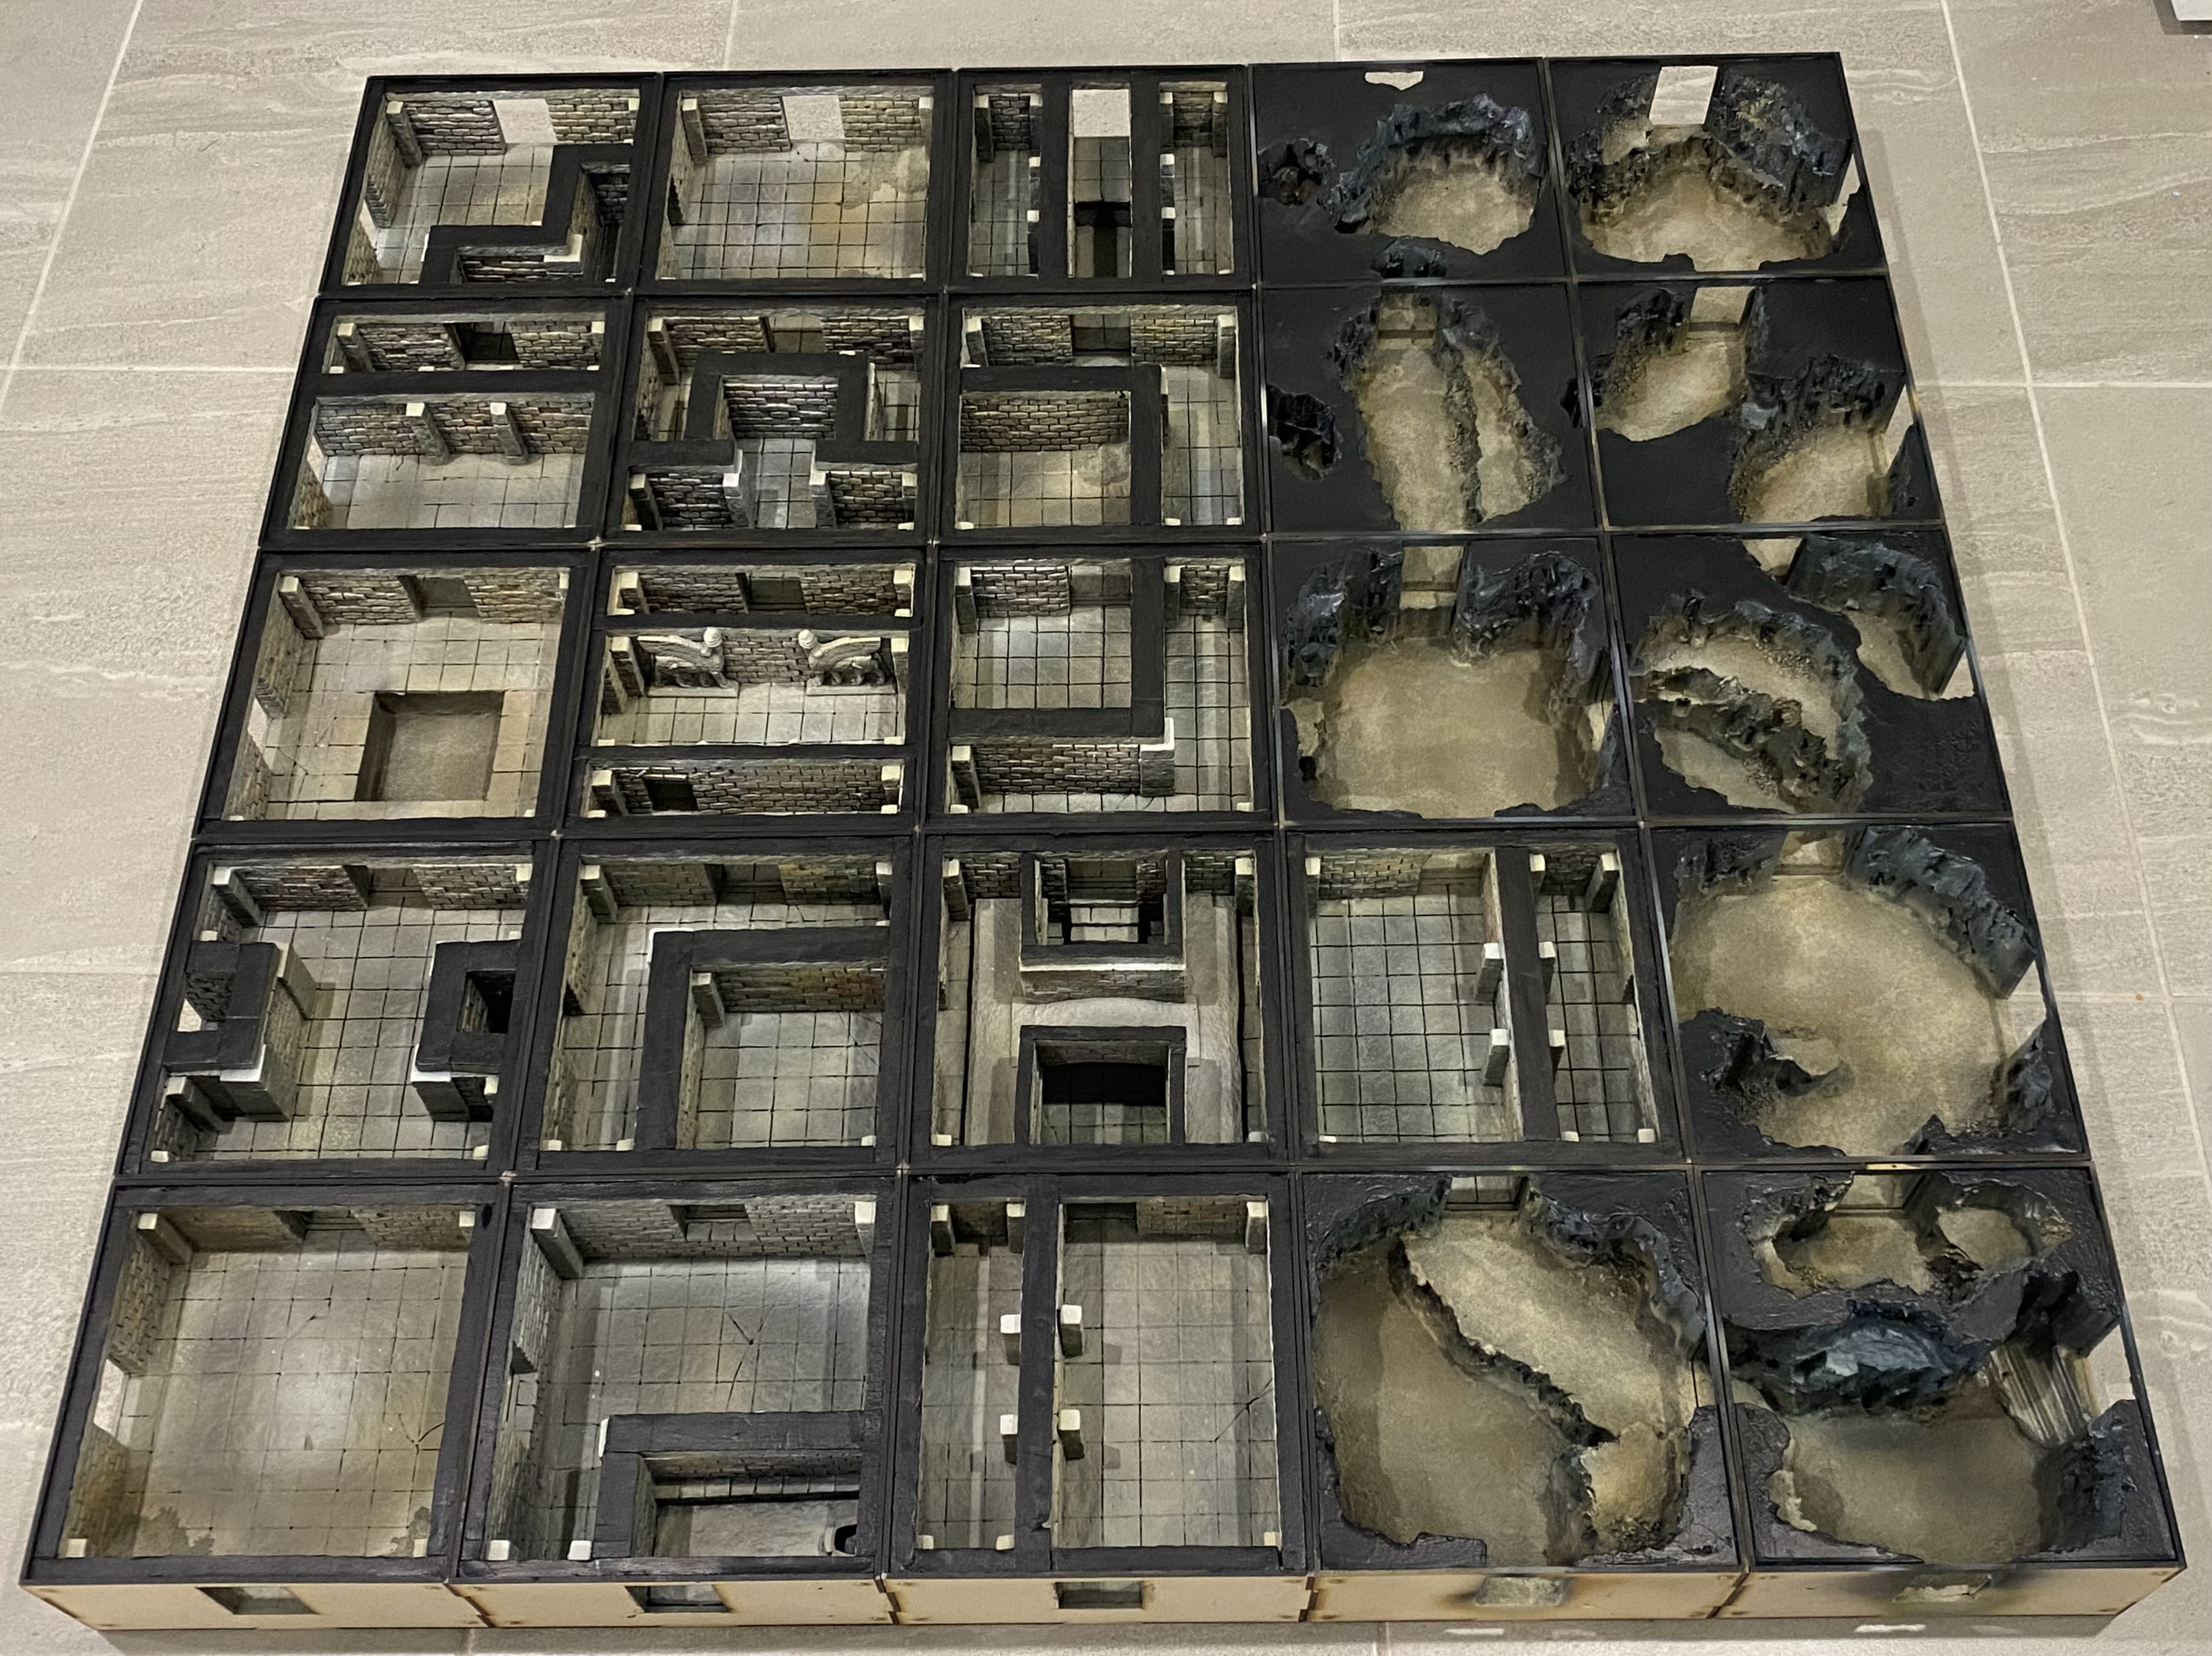
I also painted all the tops in black, tying all the sections together a little better.
I’m really glad that I went down the route of black tops because it helps the paintwork inside each section stand out just a bit more.
Whilst I had the stuff out, I took the time to take a few closer pictures so you can get an idea of how it will look on the table at about eye height.
Next up is to do some internal fittings and decorations plus some critters to occupy it and of course some adventurers.
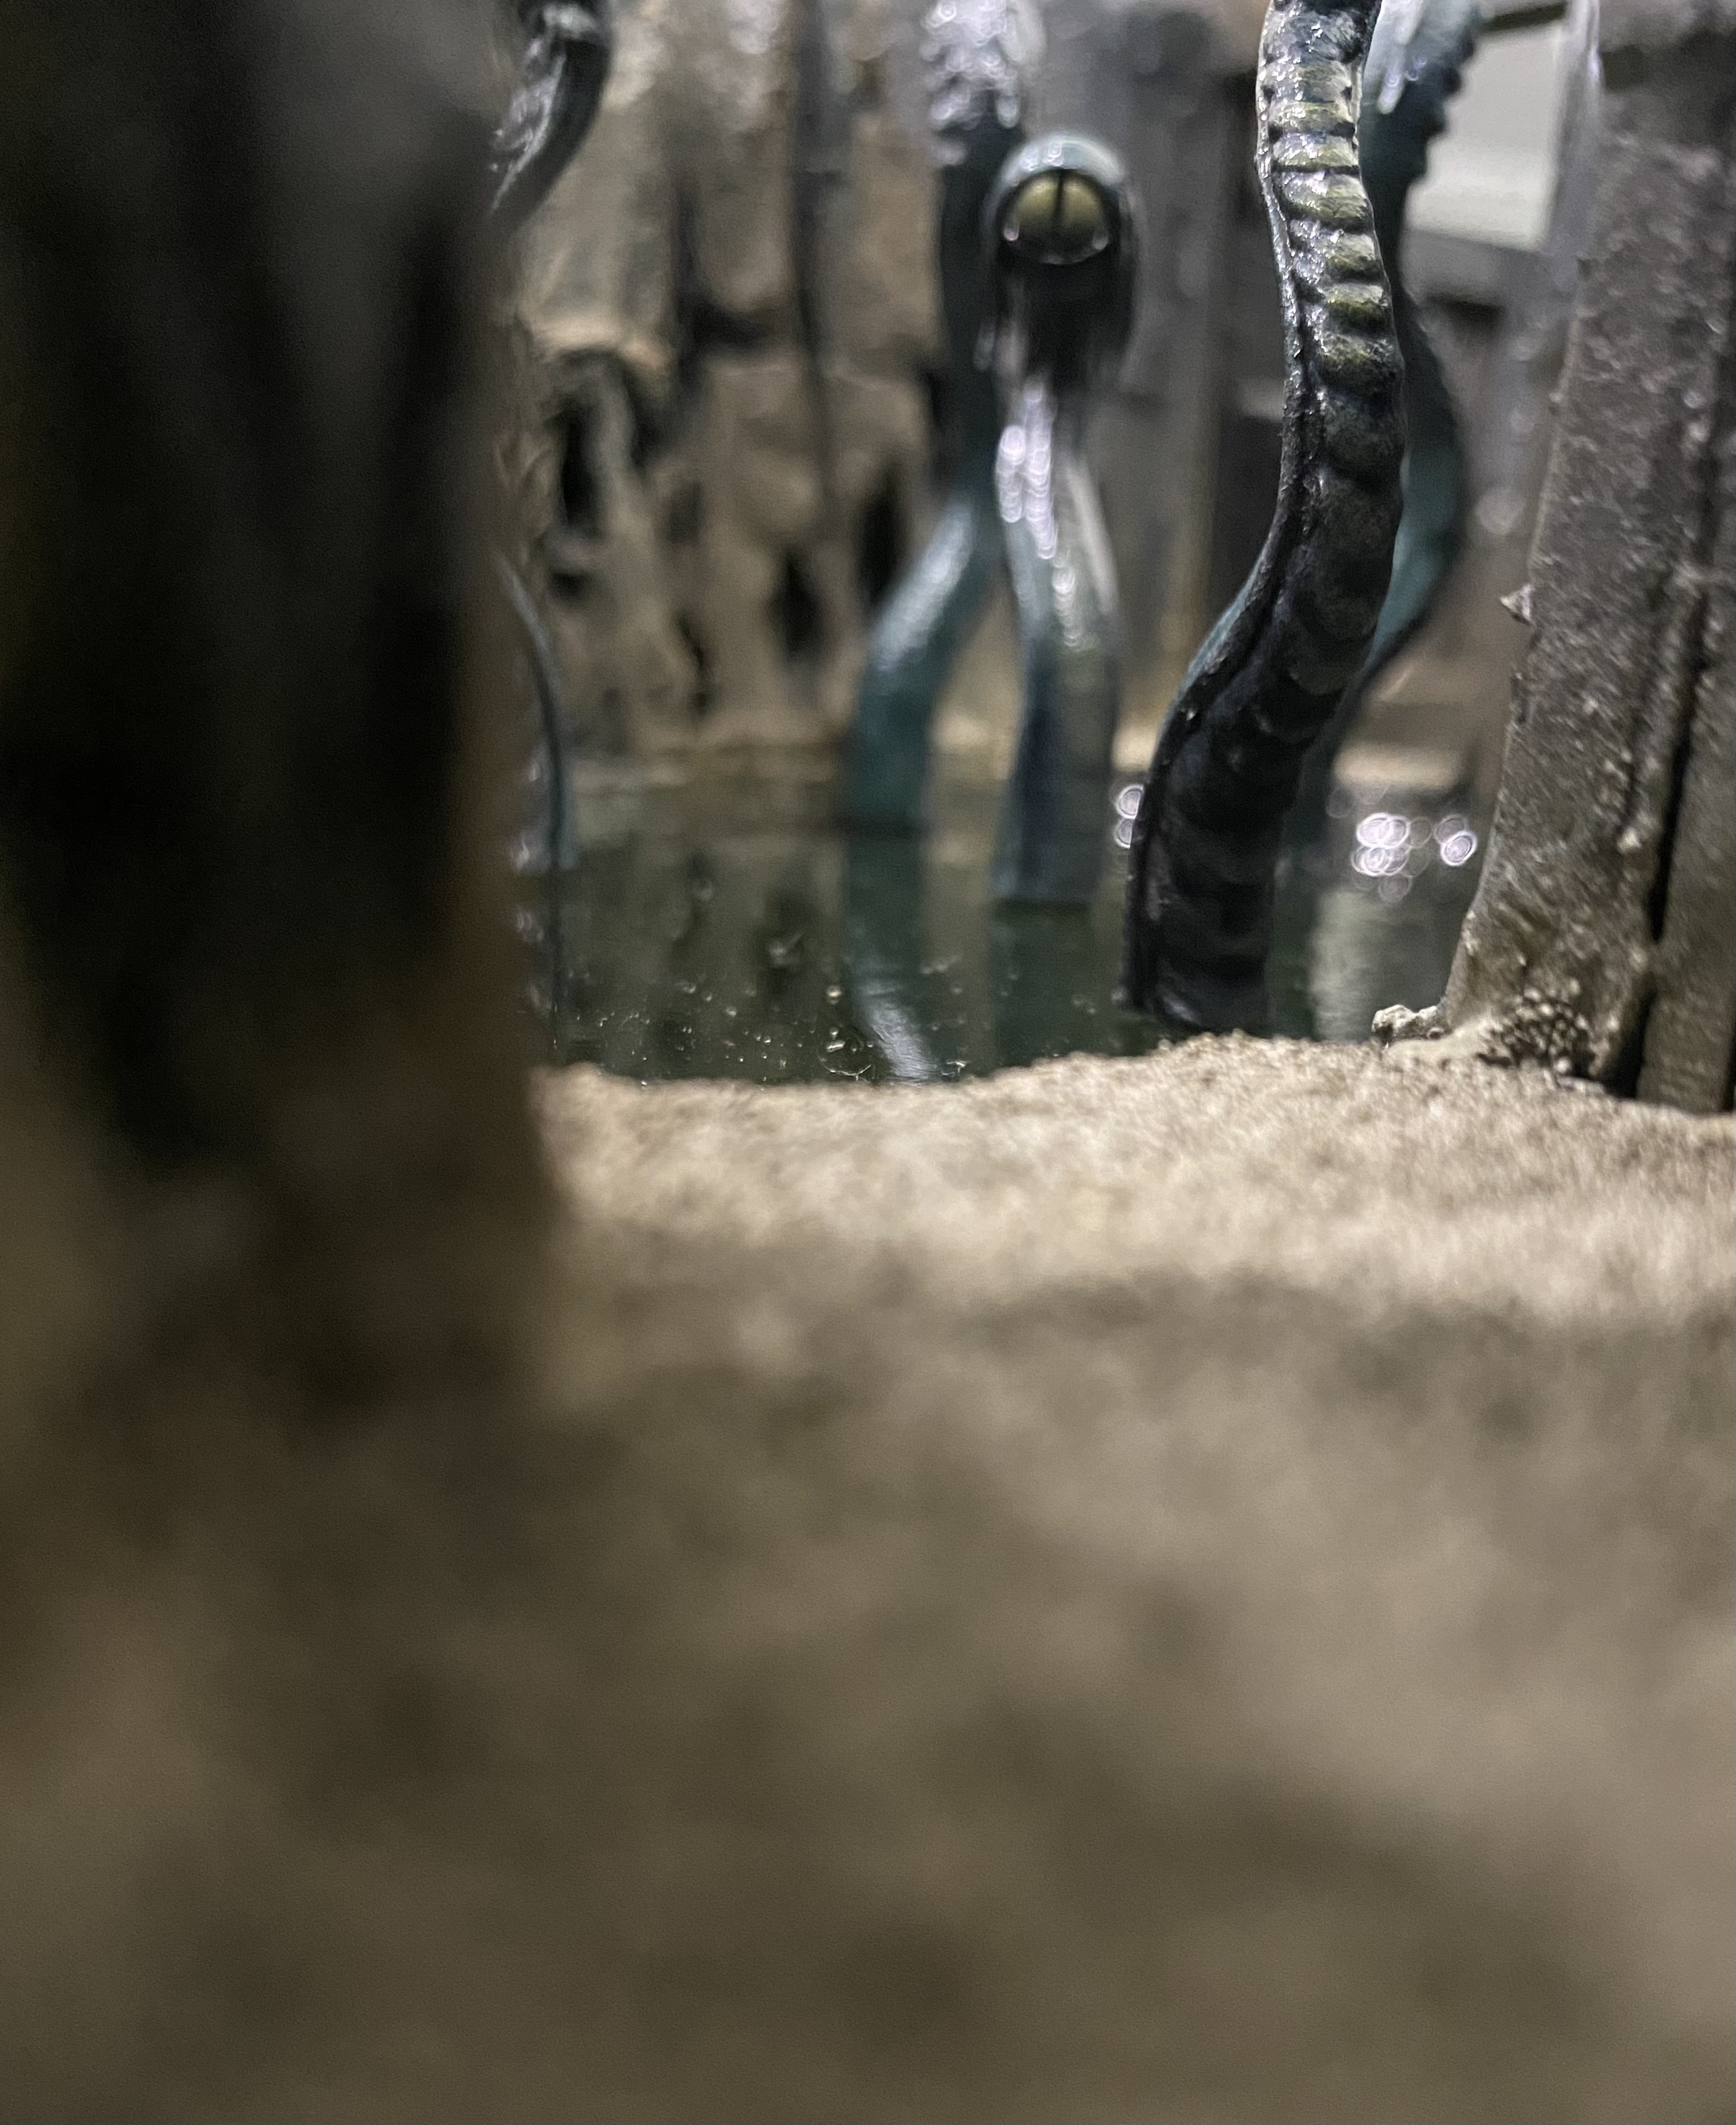
Water
I have started to add some water effects to some of the boxes using two-part resin with a little bit of Citadel Ink wash to tint the clear resin to something a bit darker.
The weird lines that you can see across the water effects are actually a reflection of the fairy lights across the ceiling of our outdoor area and not marks on the actual water surface.
Populating the Place
My apologies for not getting much done for a while, work and having to adult have been getting in the way.
I did add the next layer of resin, this time with less tinting with the intention that it would help create an illusion of depth to the water.
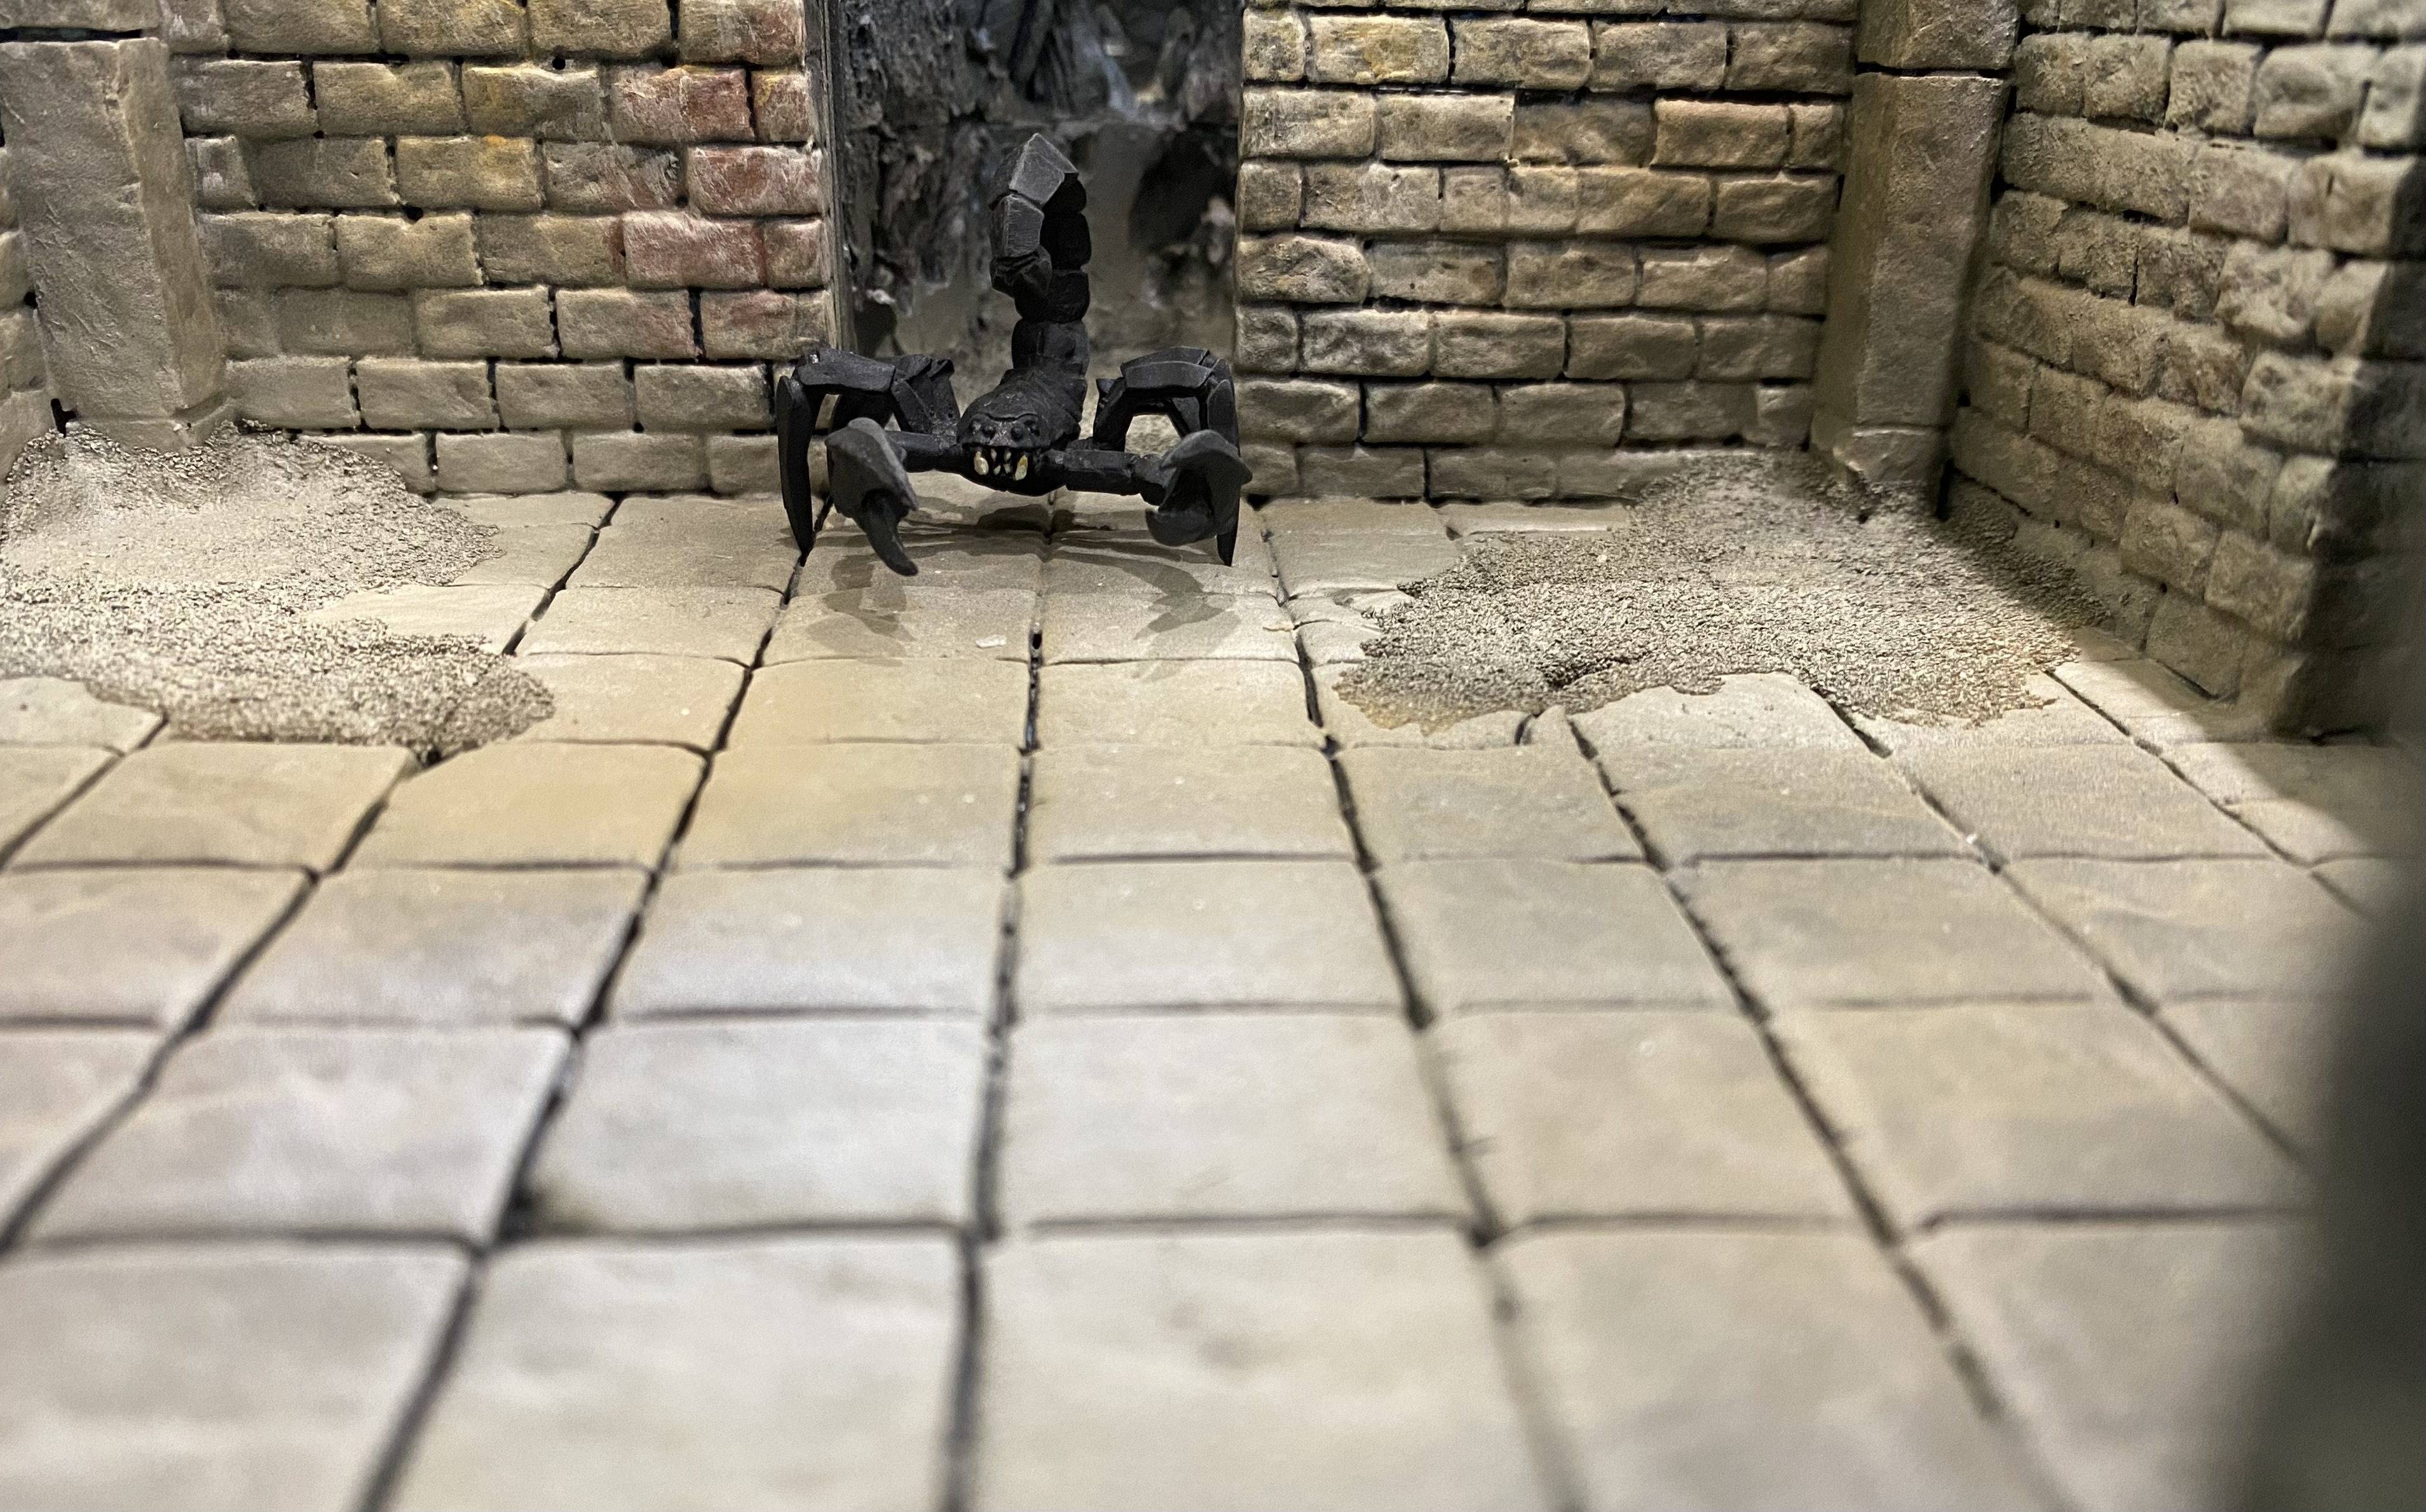
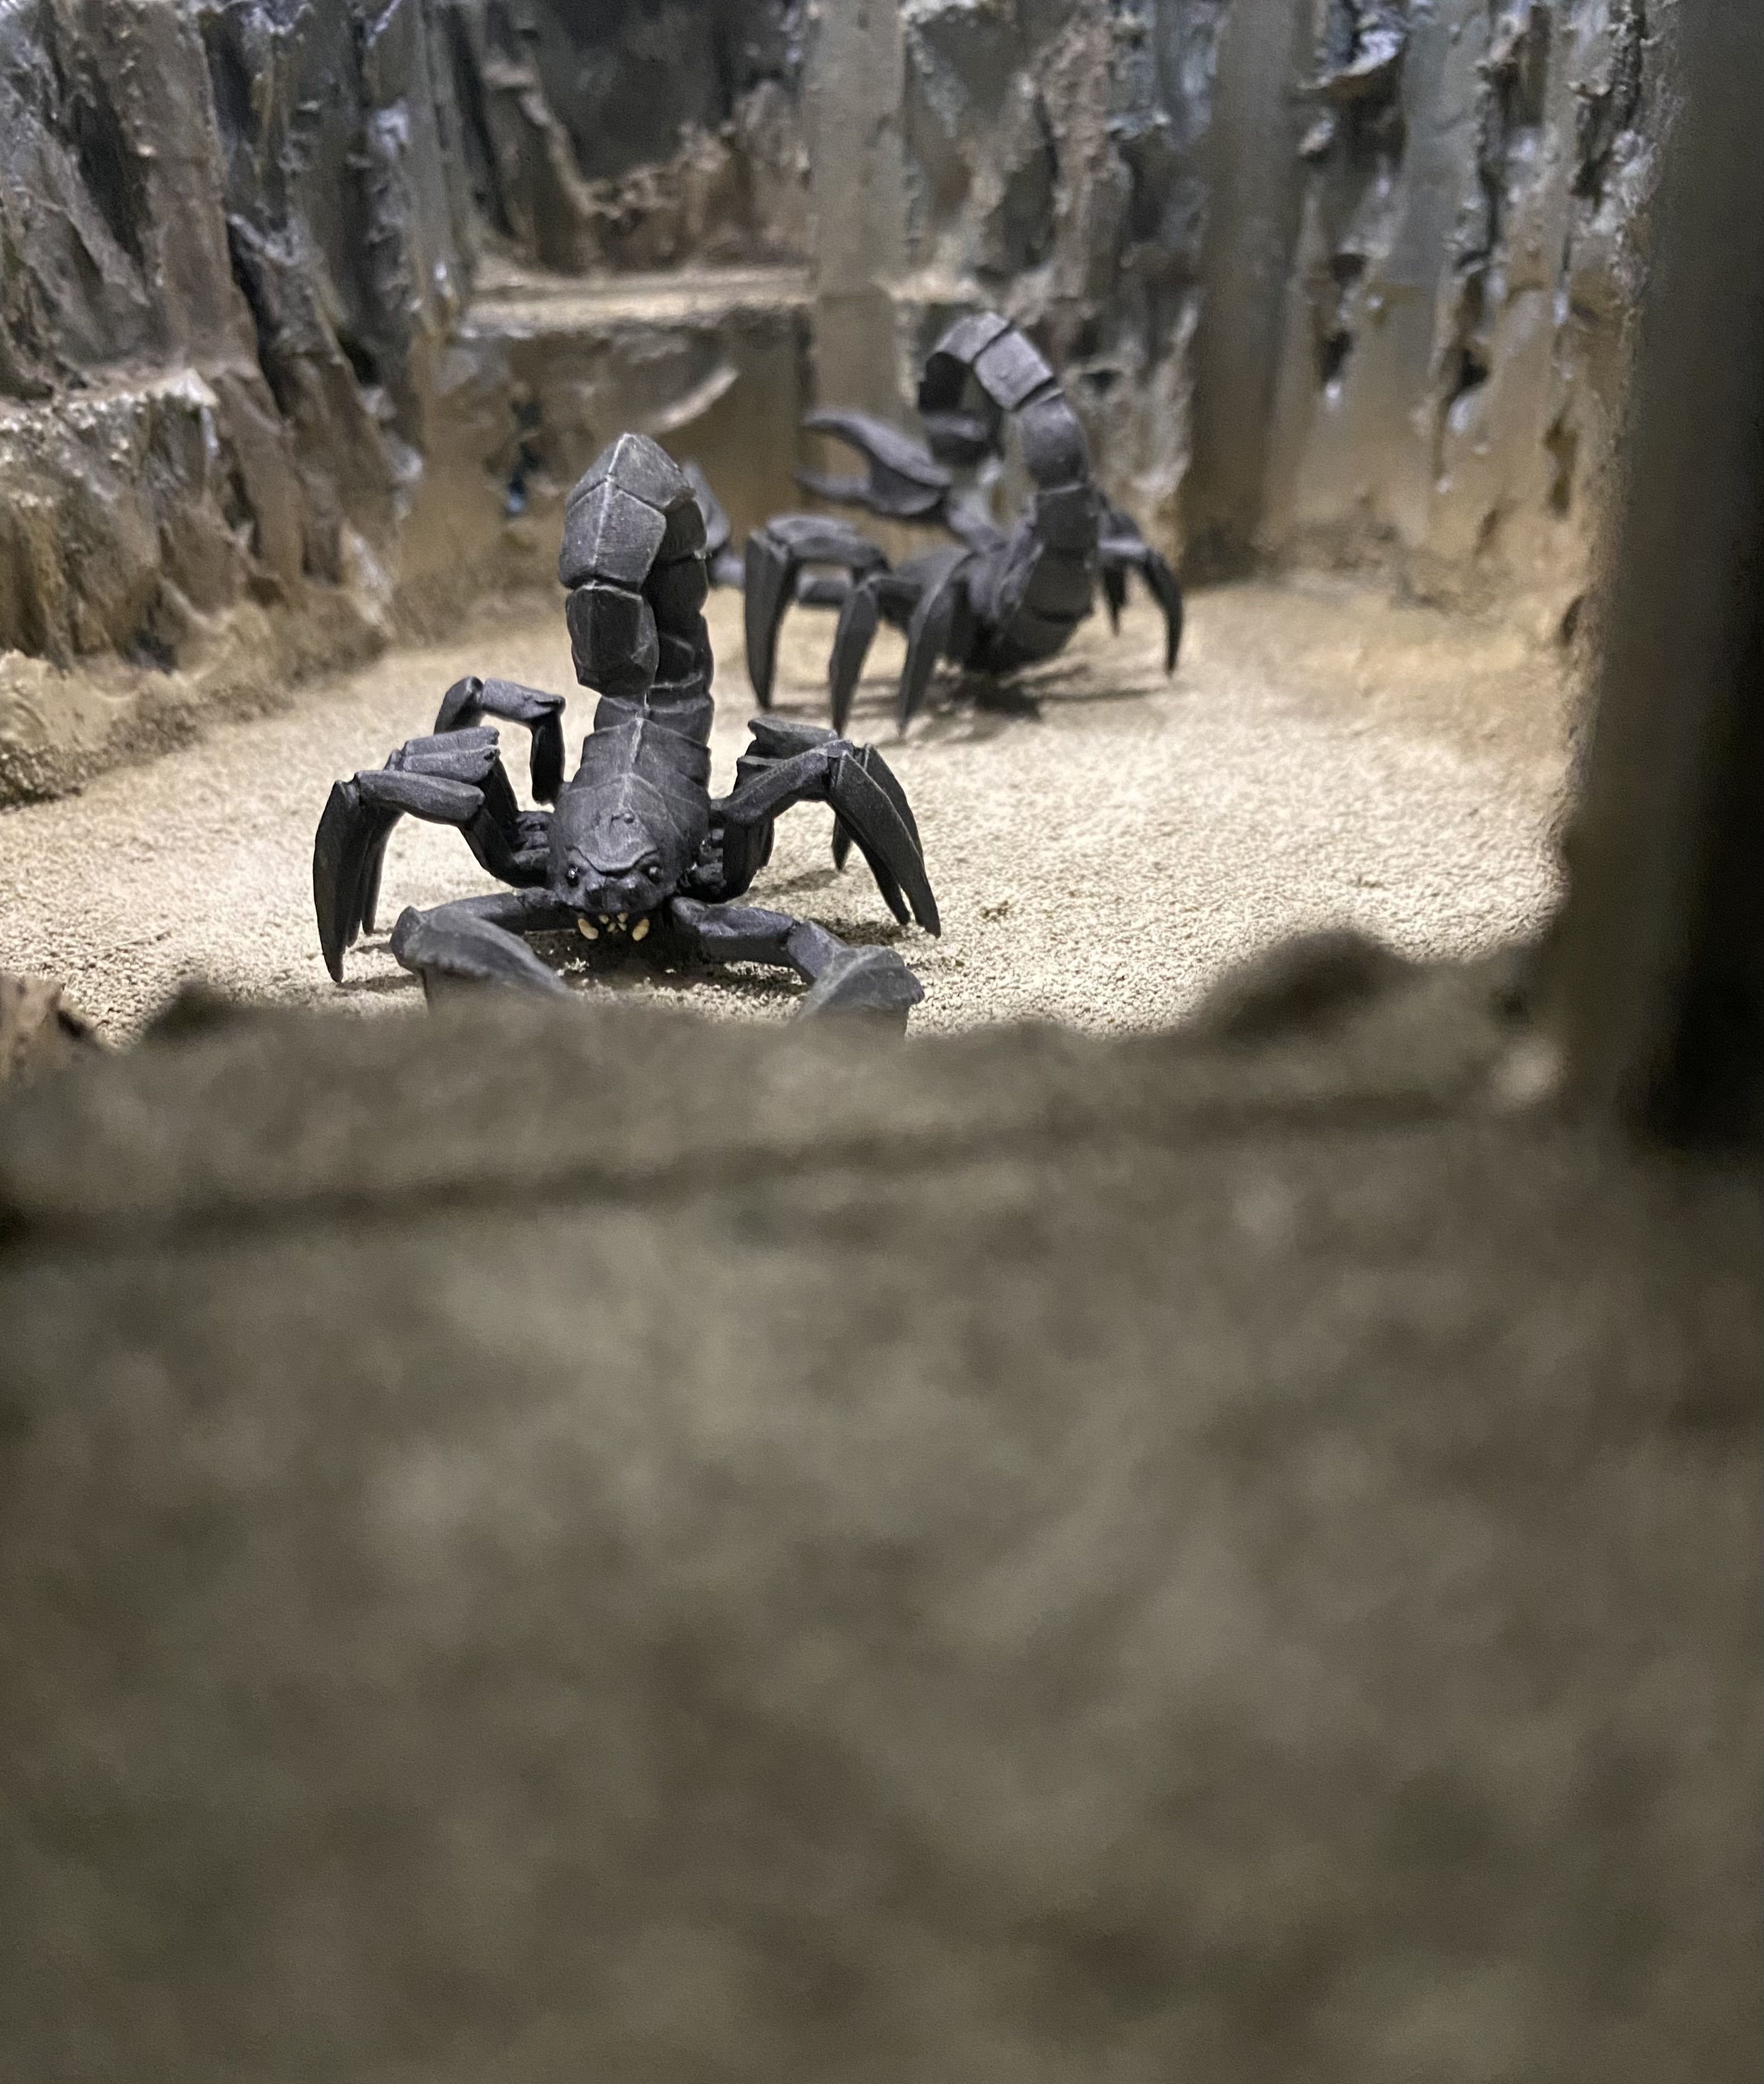
I also quickly knocked up some critters, a tentacle creature that I 3D printed and some giant scorpions that I think were from Hasslefree a long time ago.
I have plans for some more ‘Trap’ features and some internal decorations.
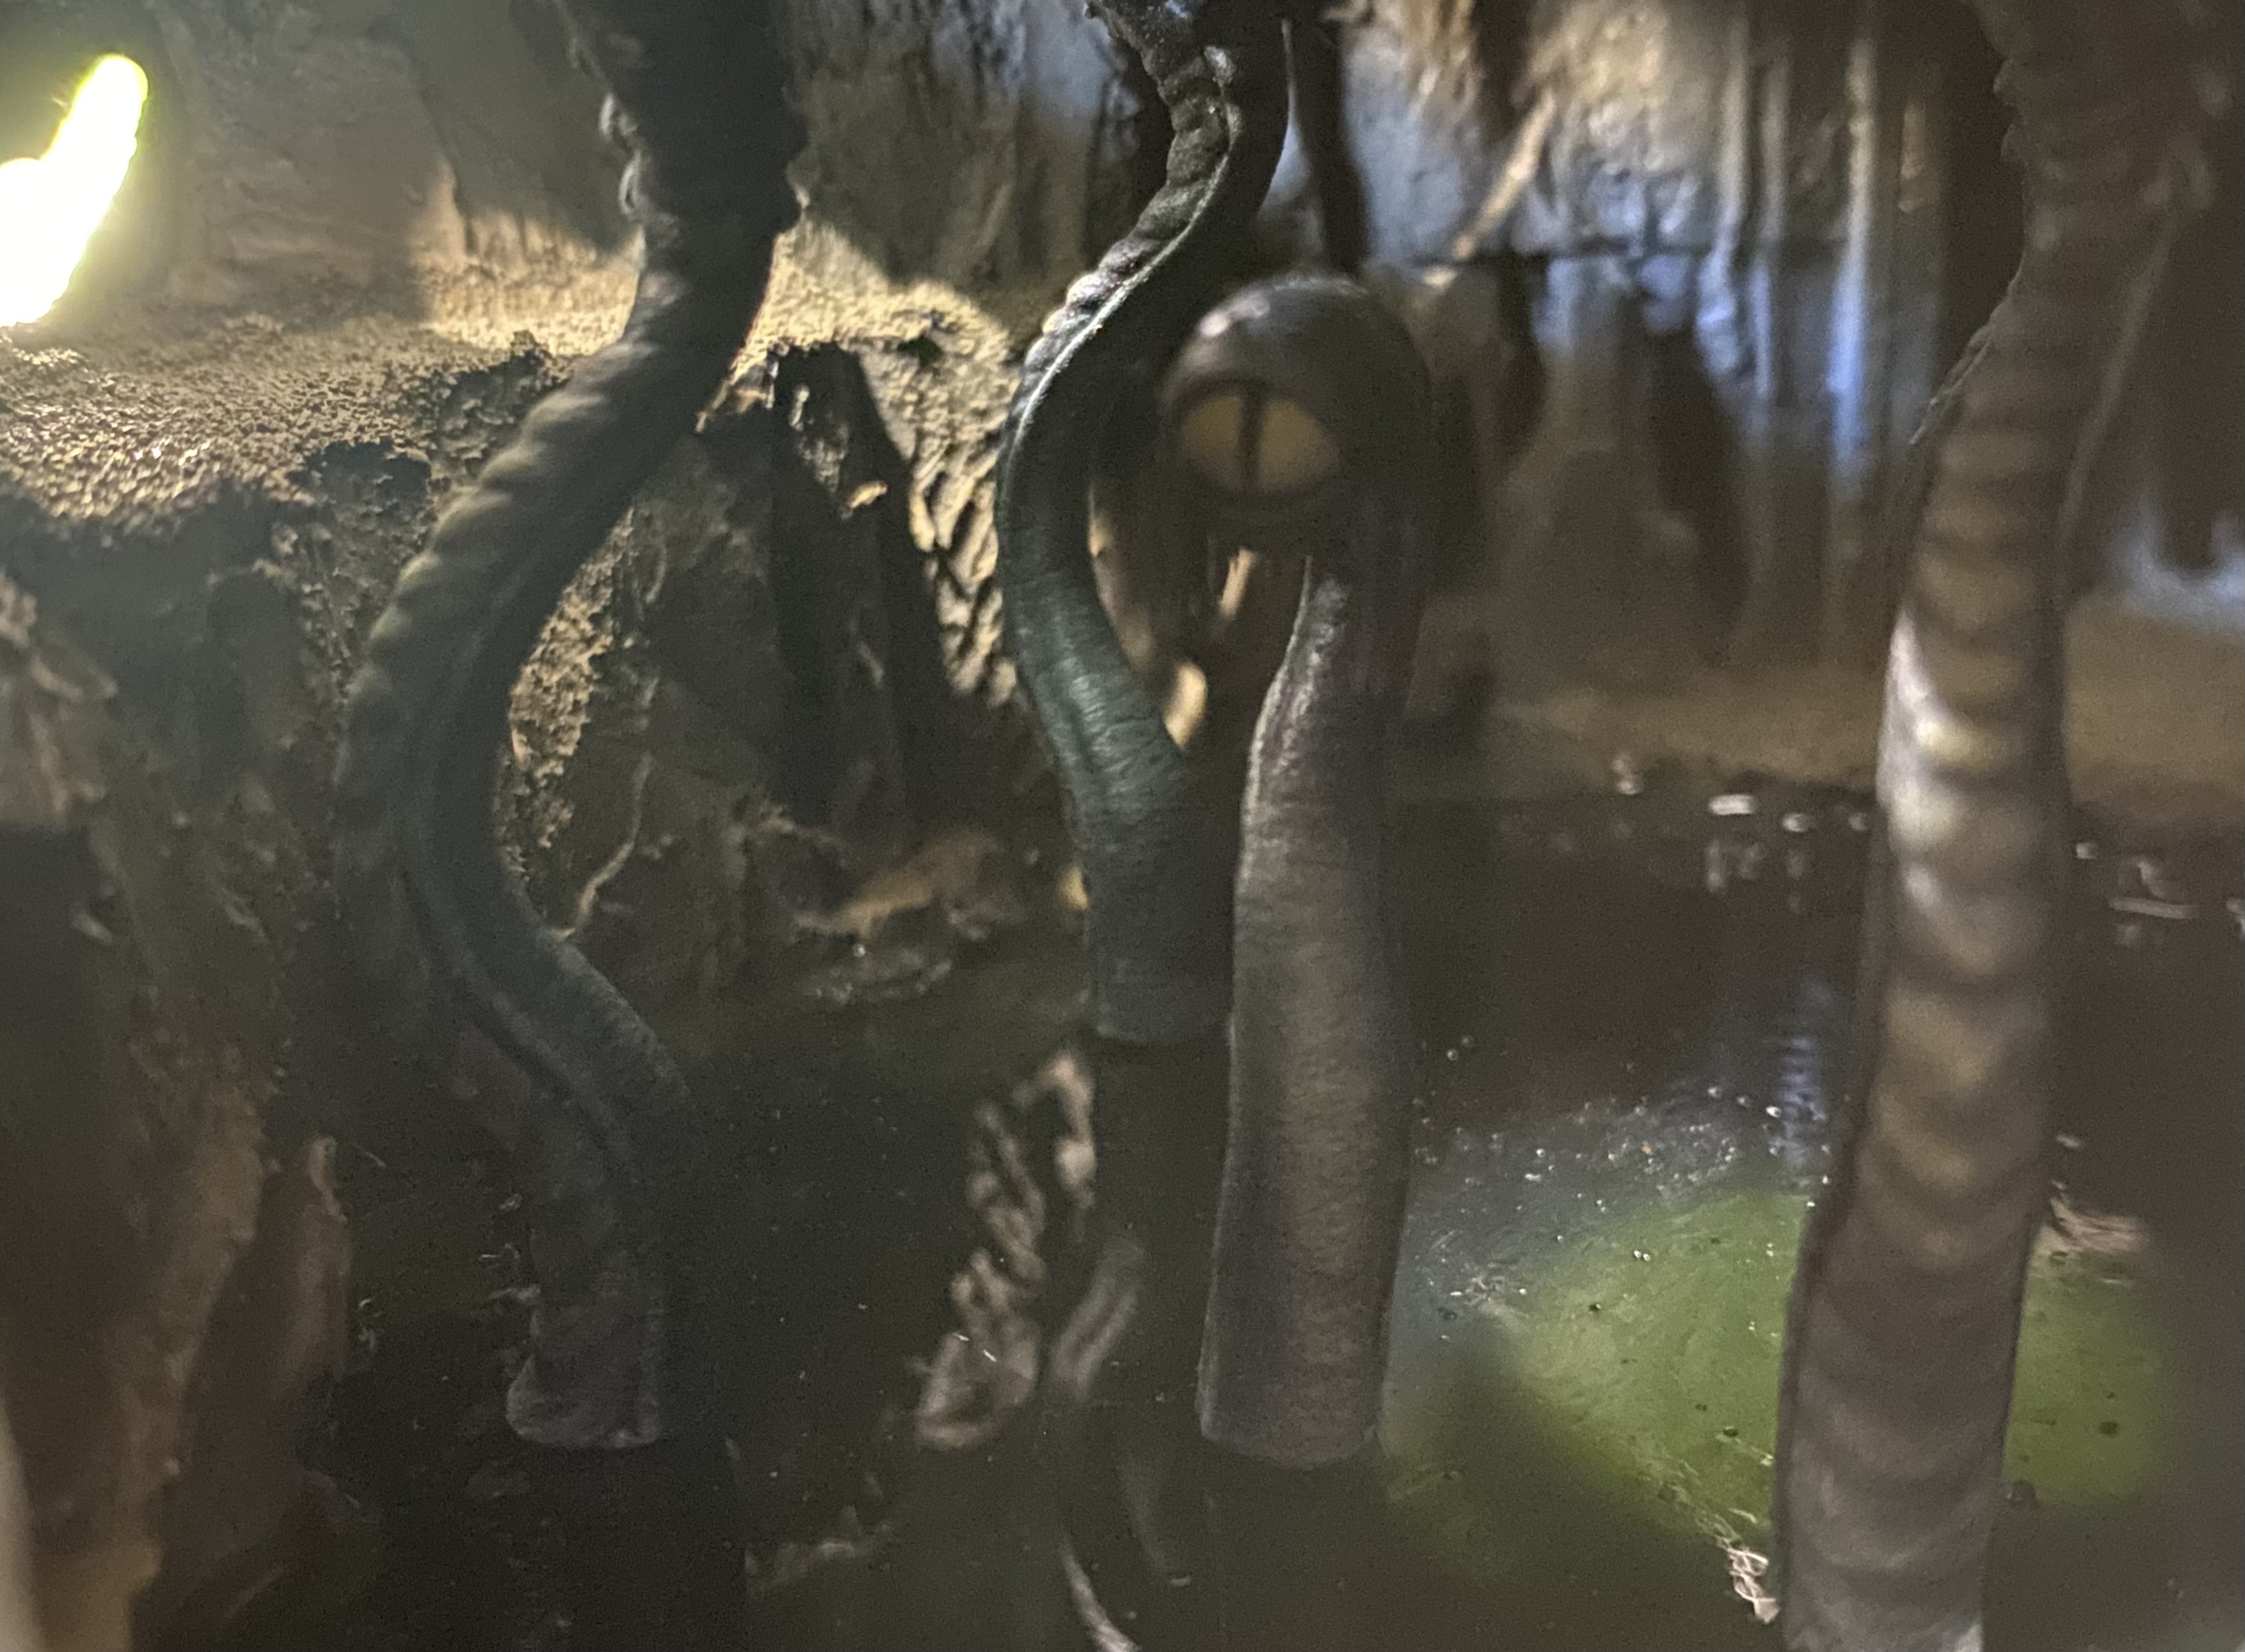
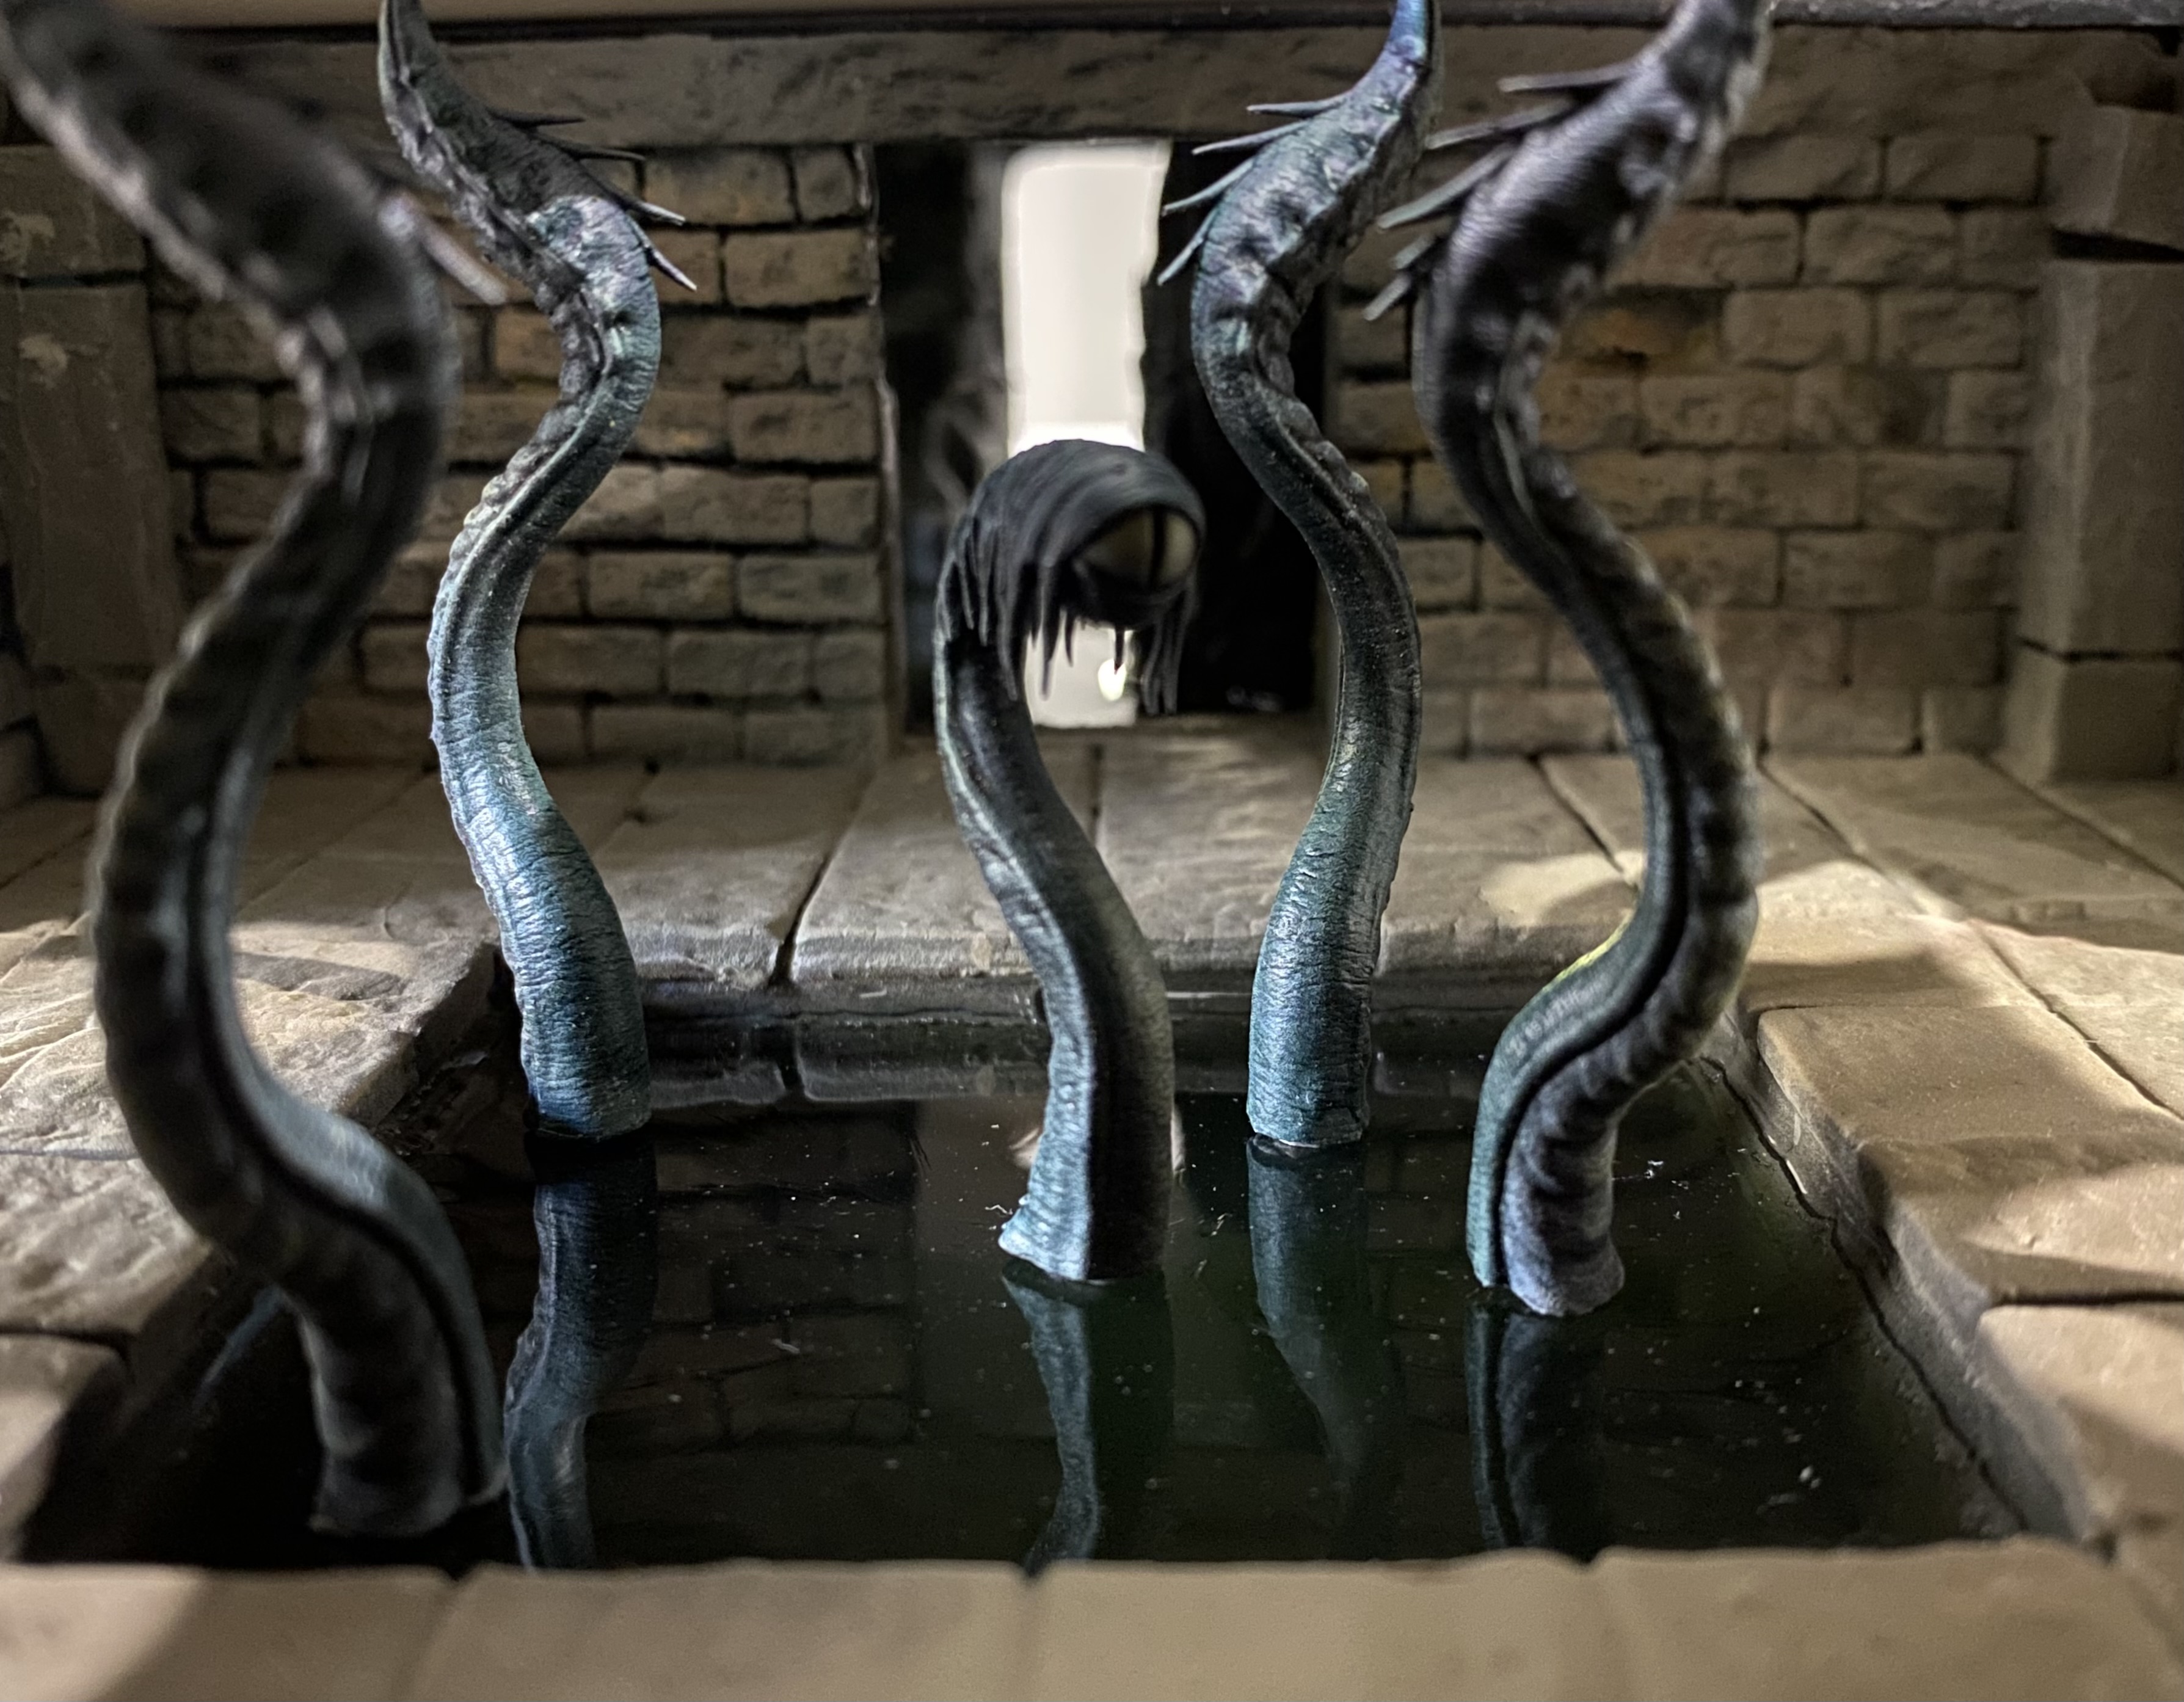
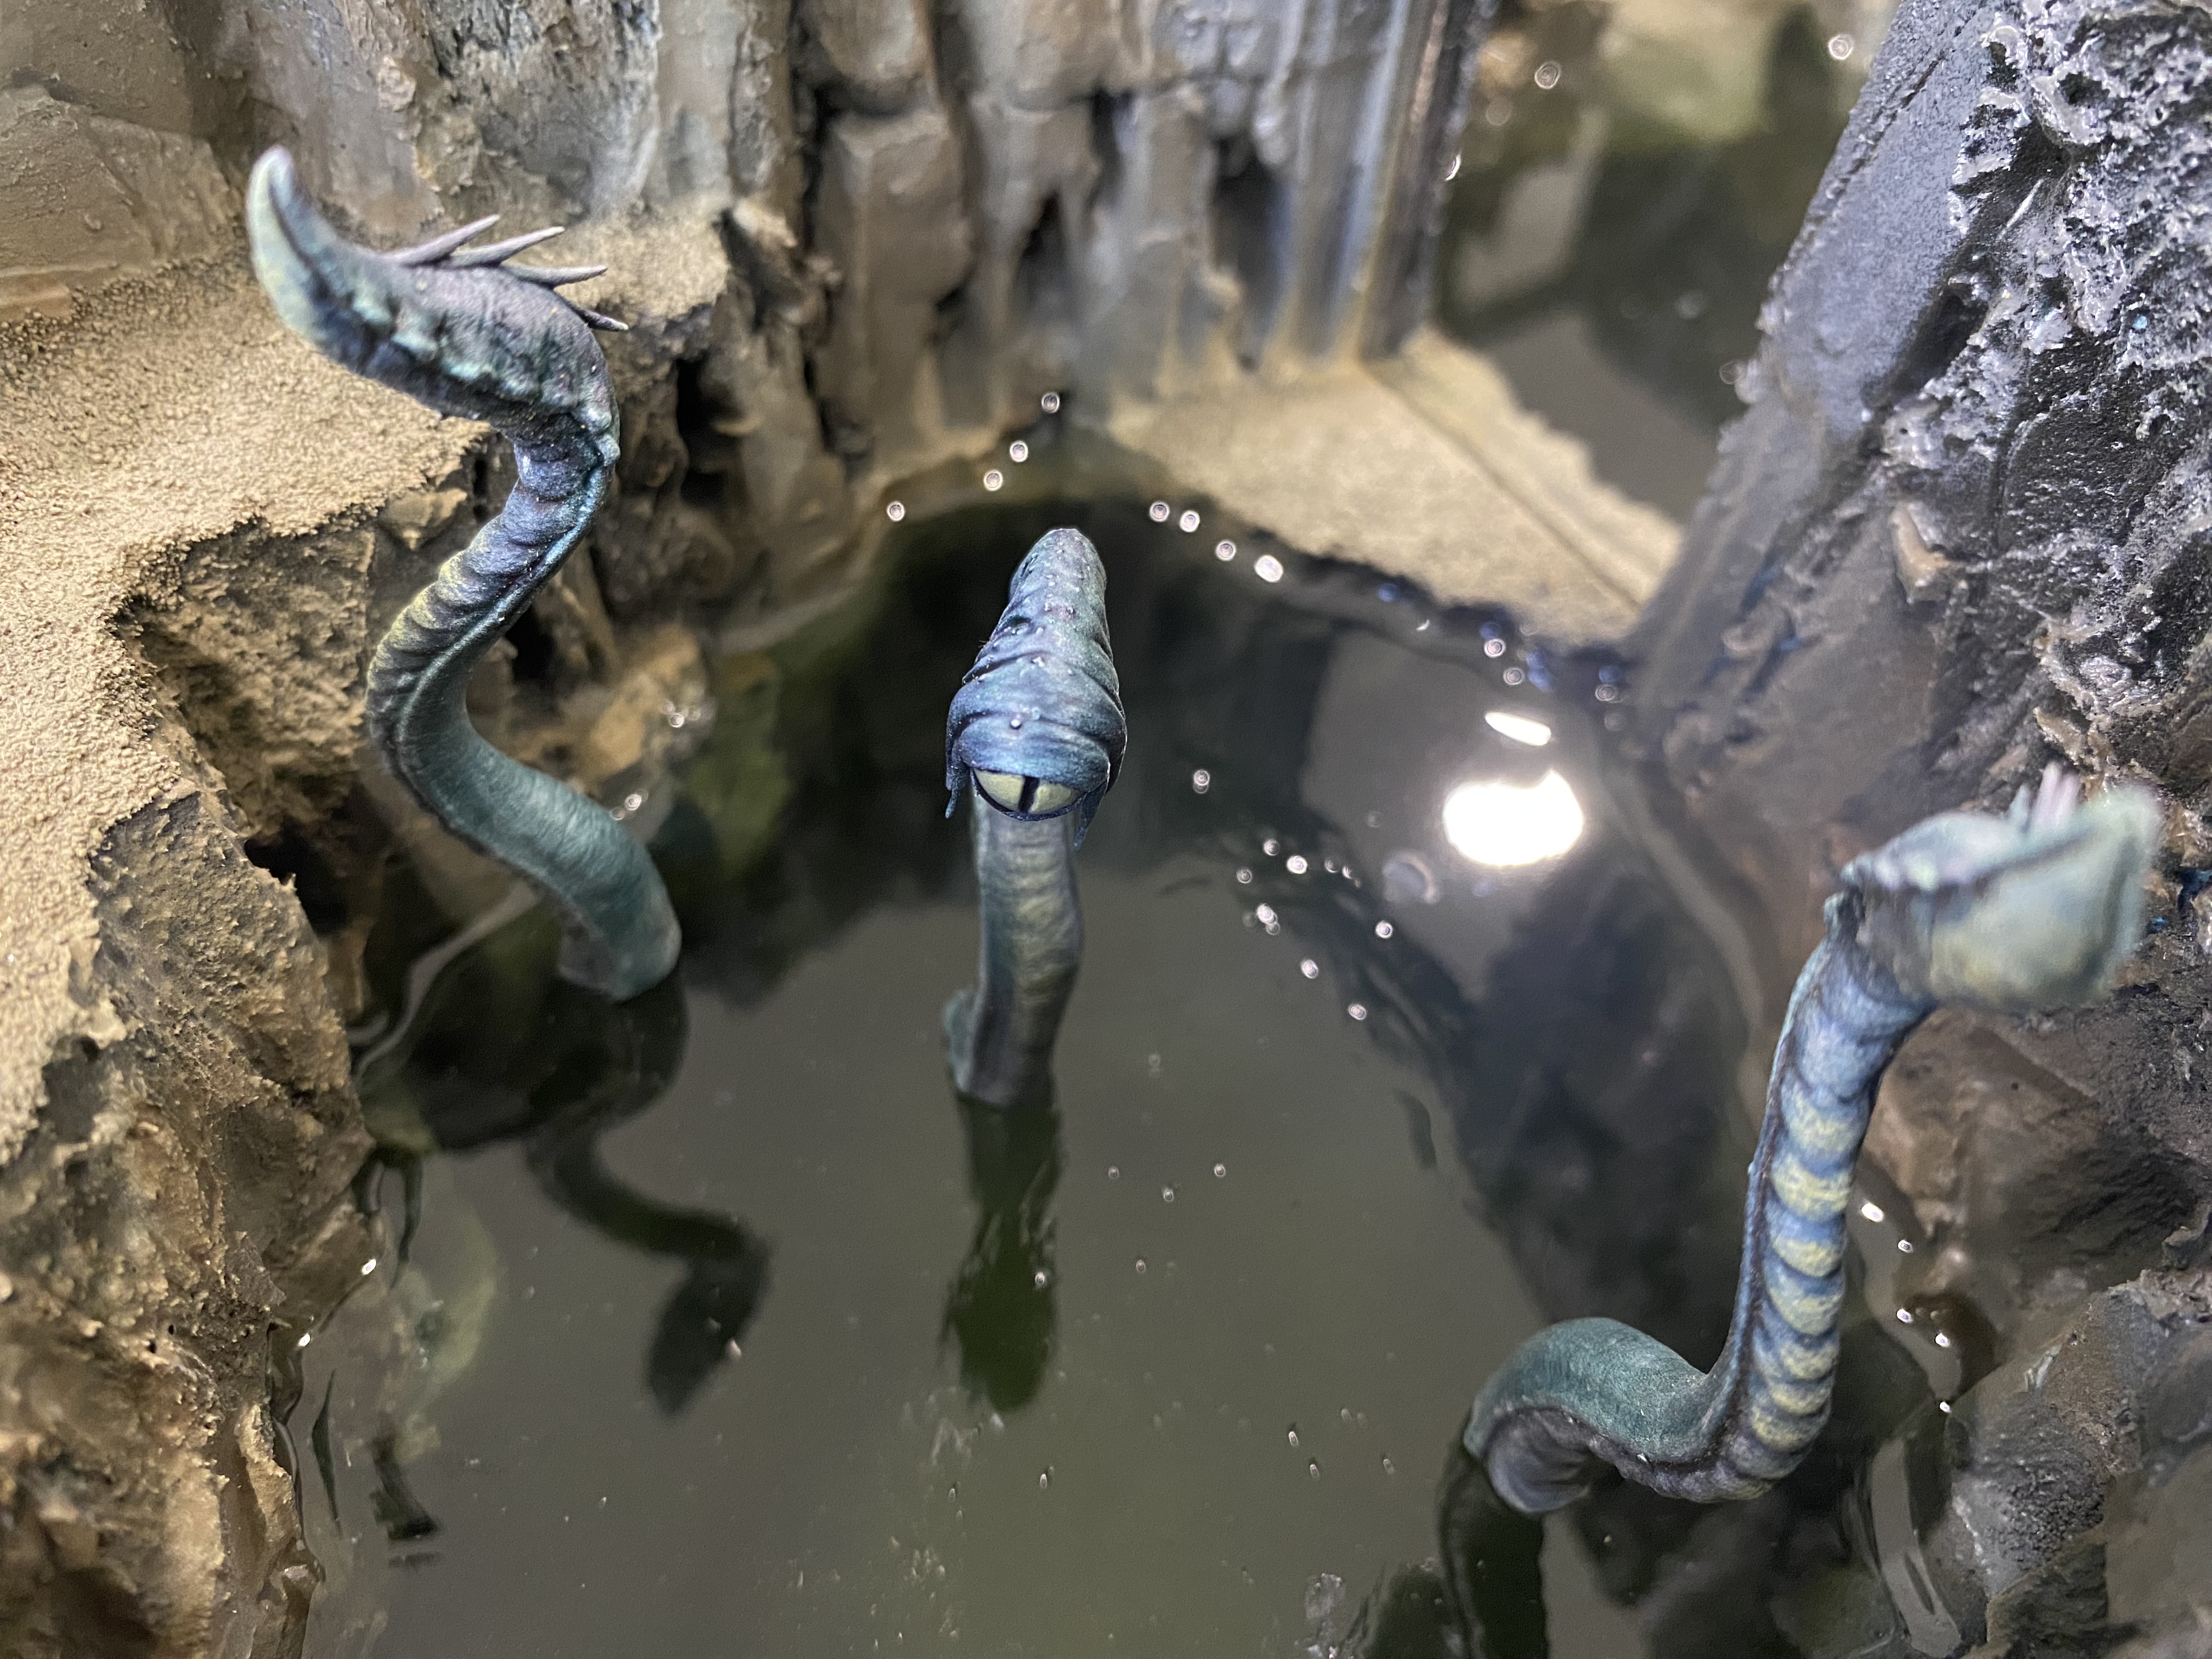
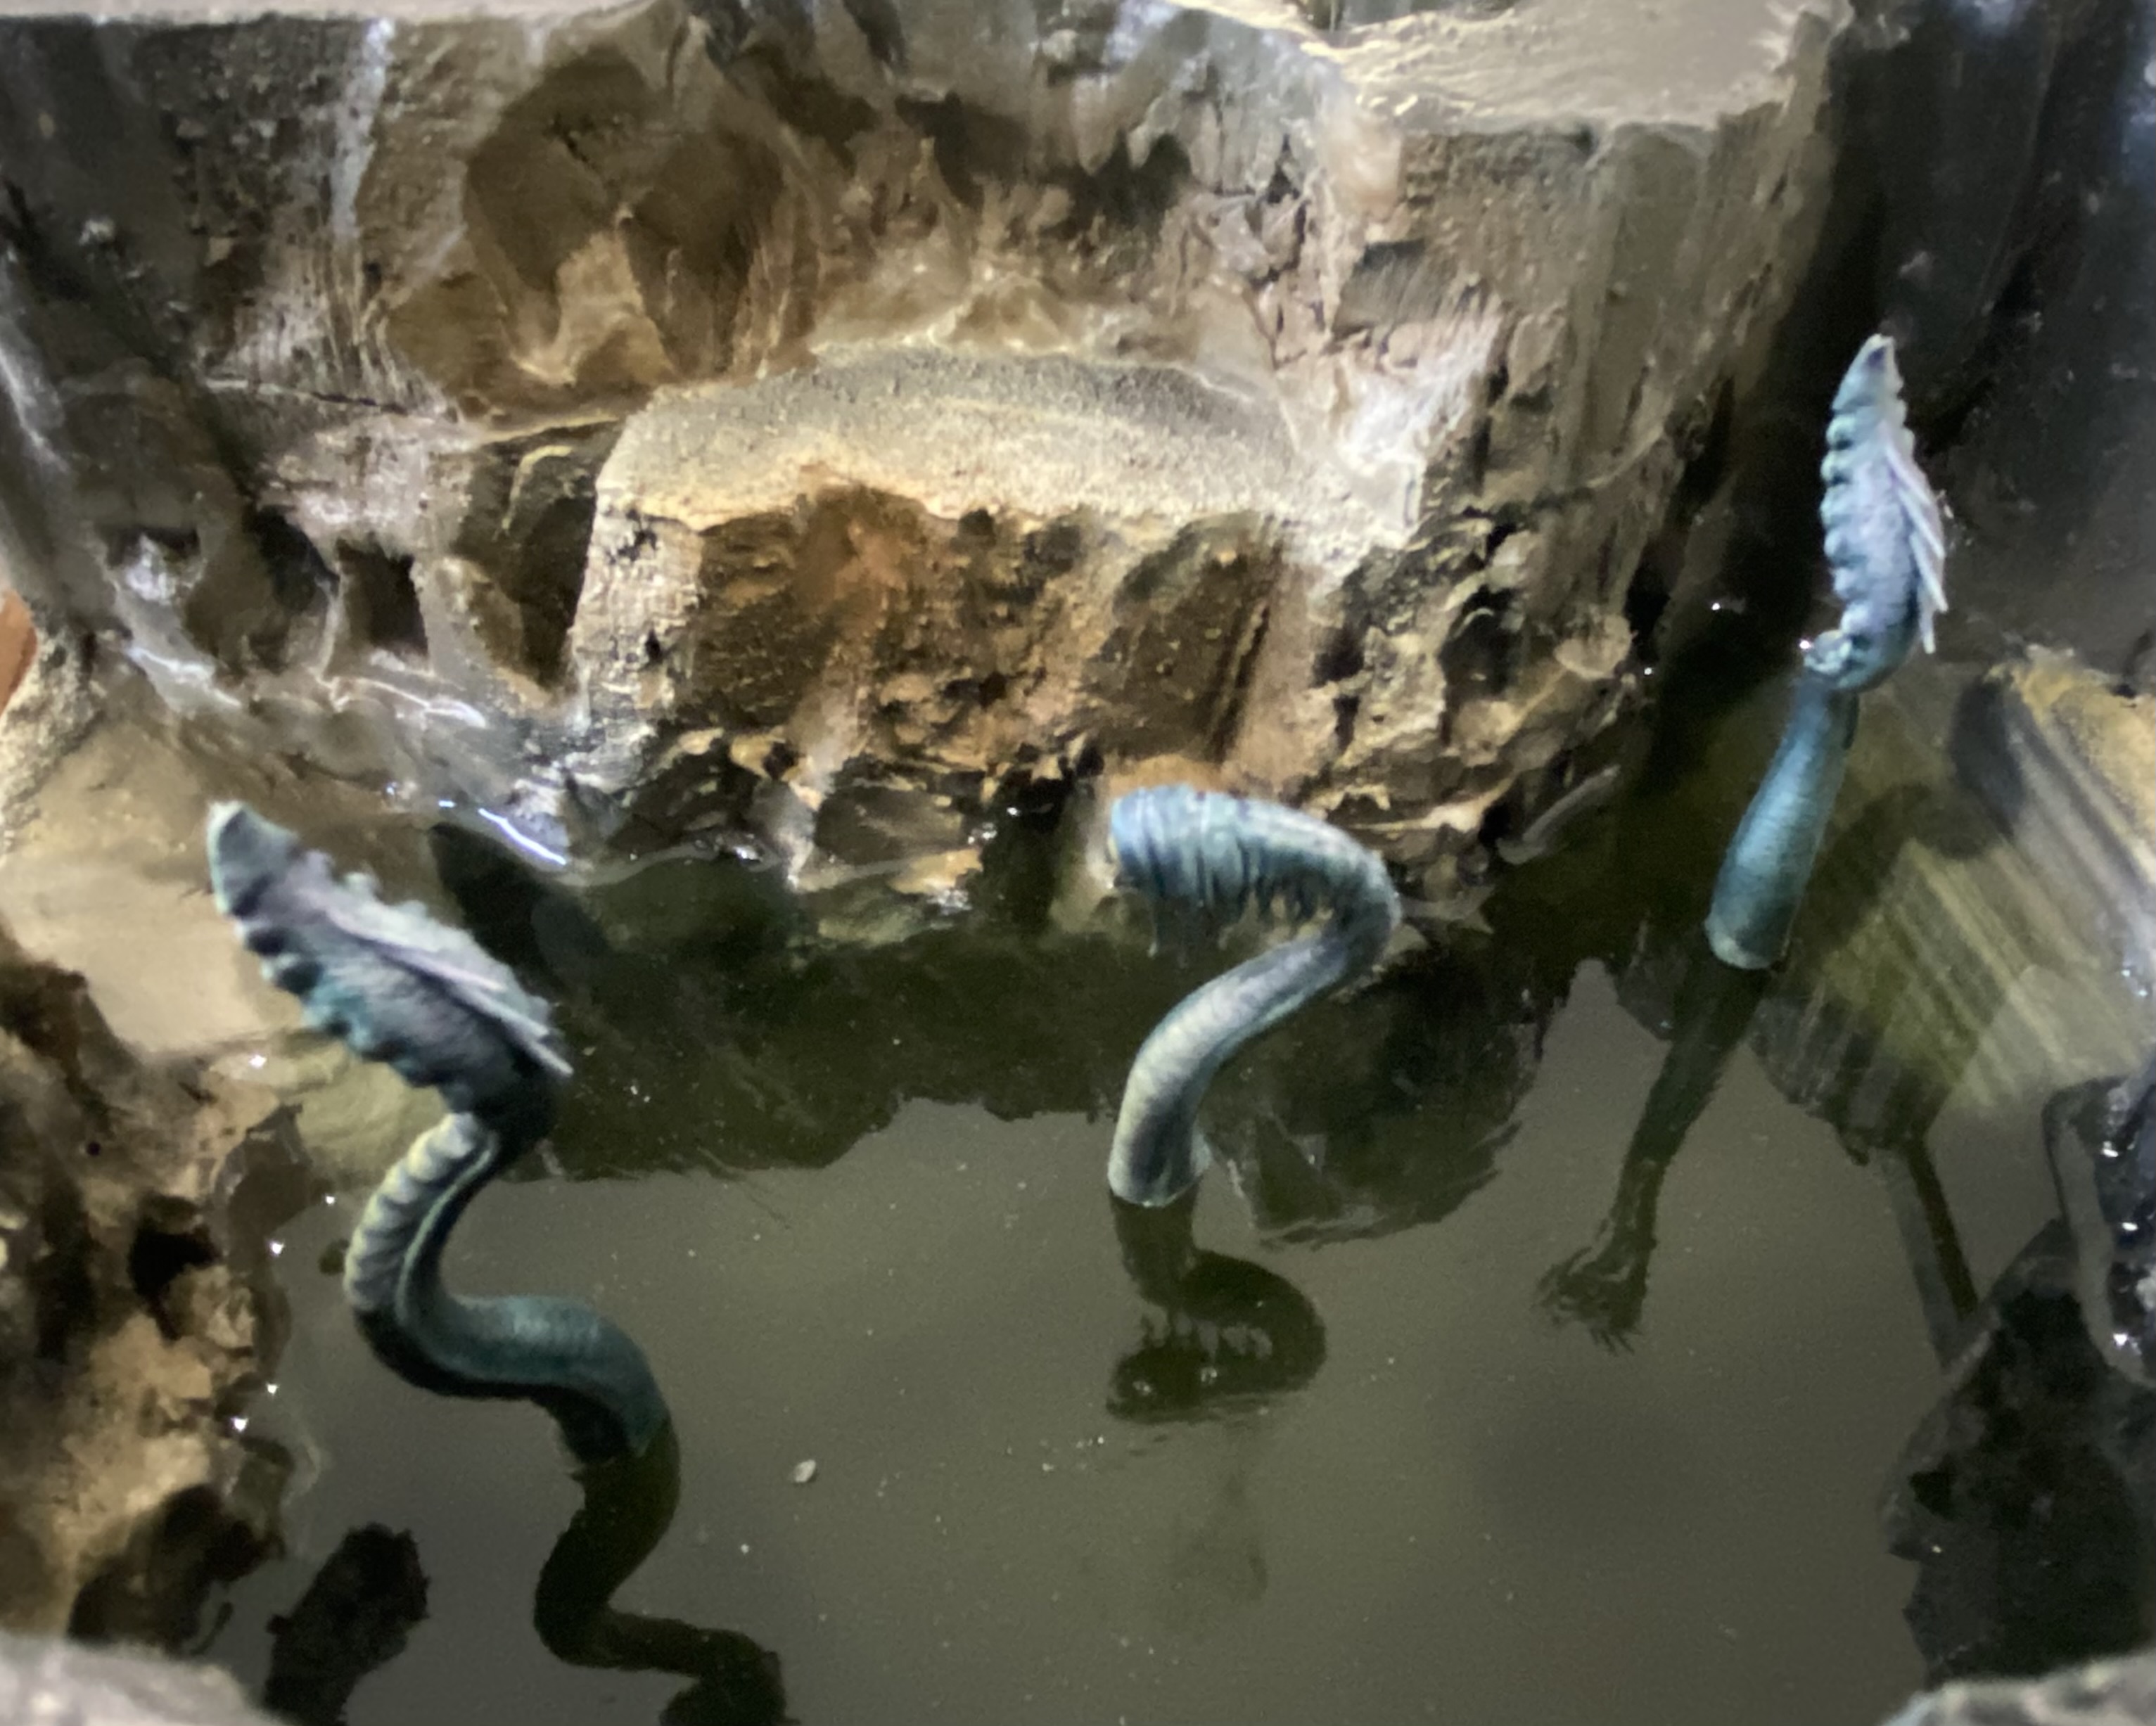
The tentacle beast was just simply undercoated black, given a white zenith highlight and ink washed with the first 3 pots I picked up. Once dry I dry brushed bits of it with orgyn camo and painted the eye with ogryn camo mixed with templar black contrast paint.
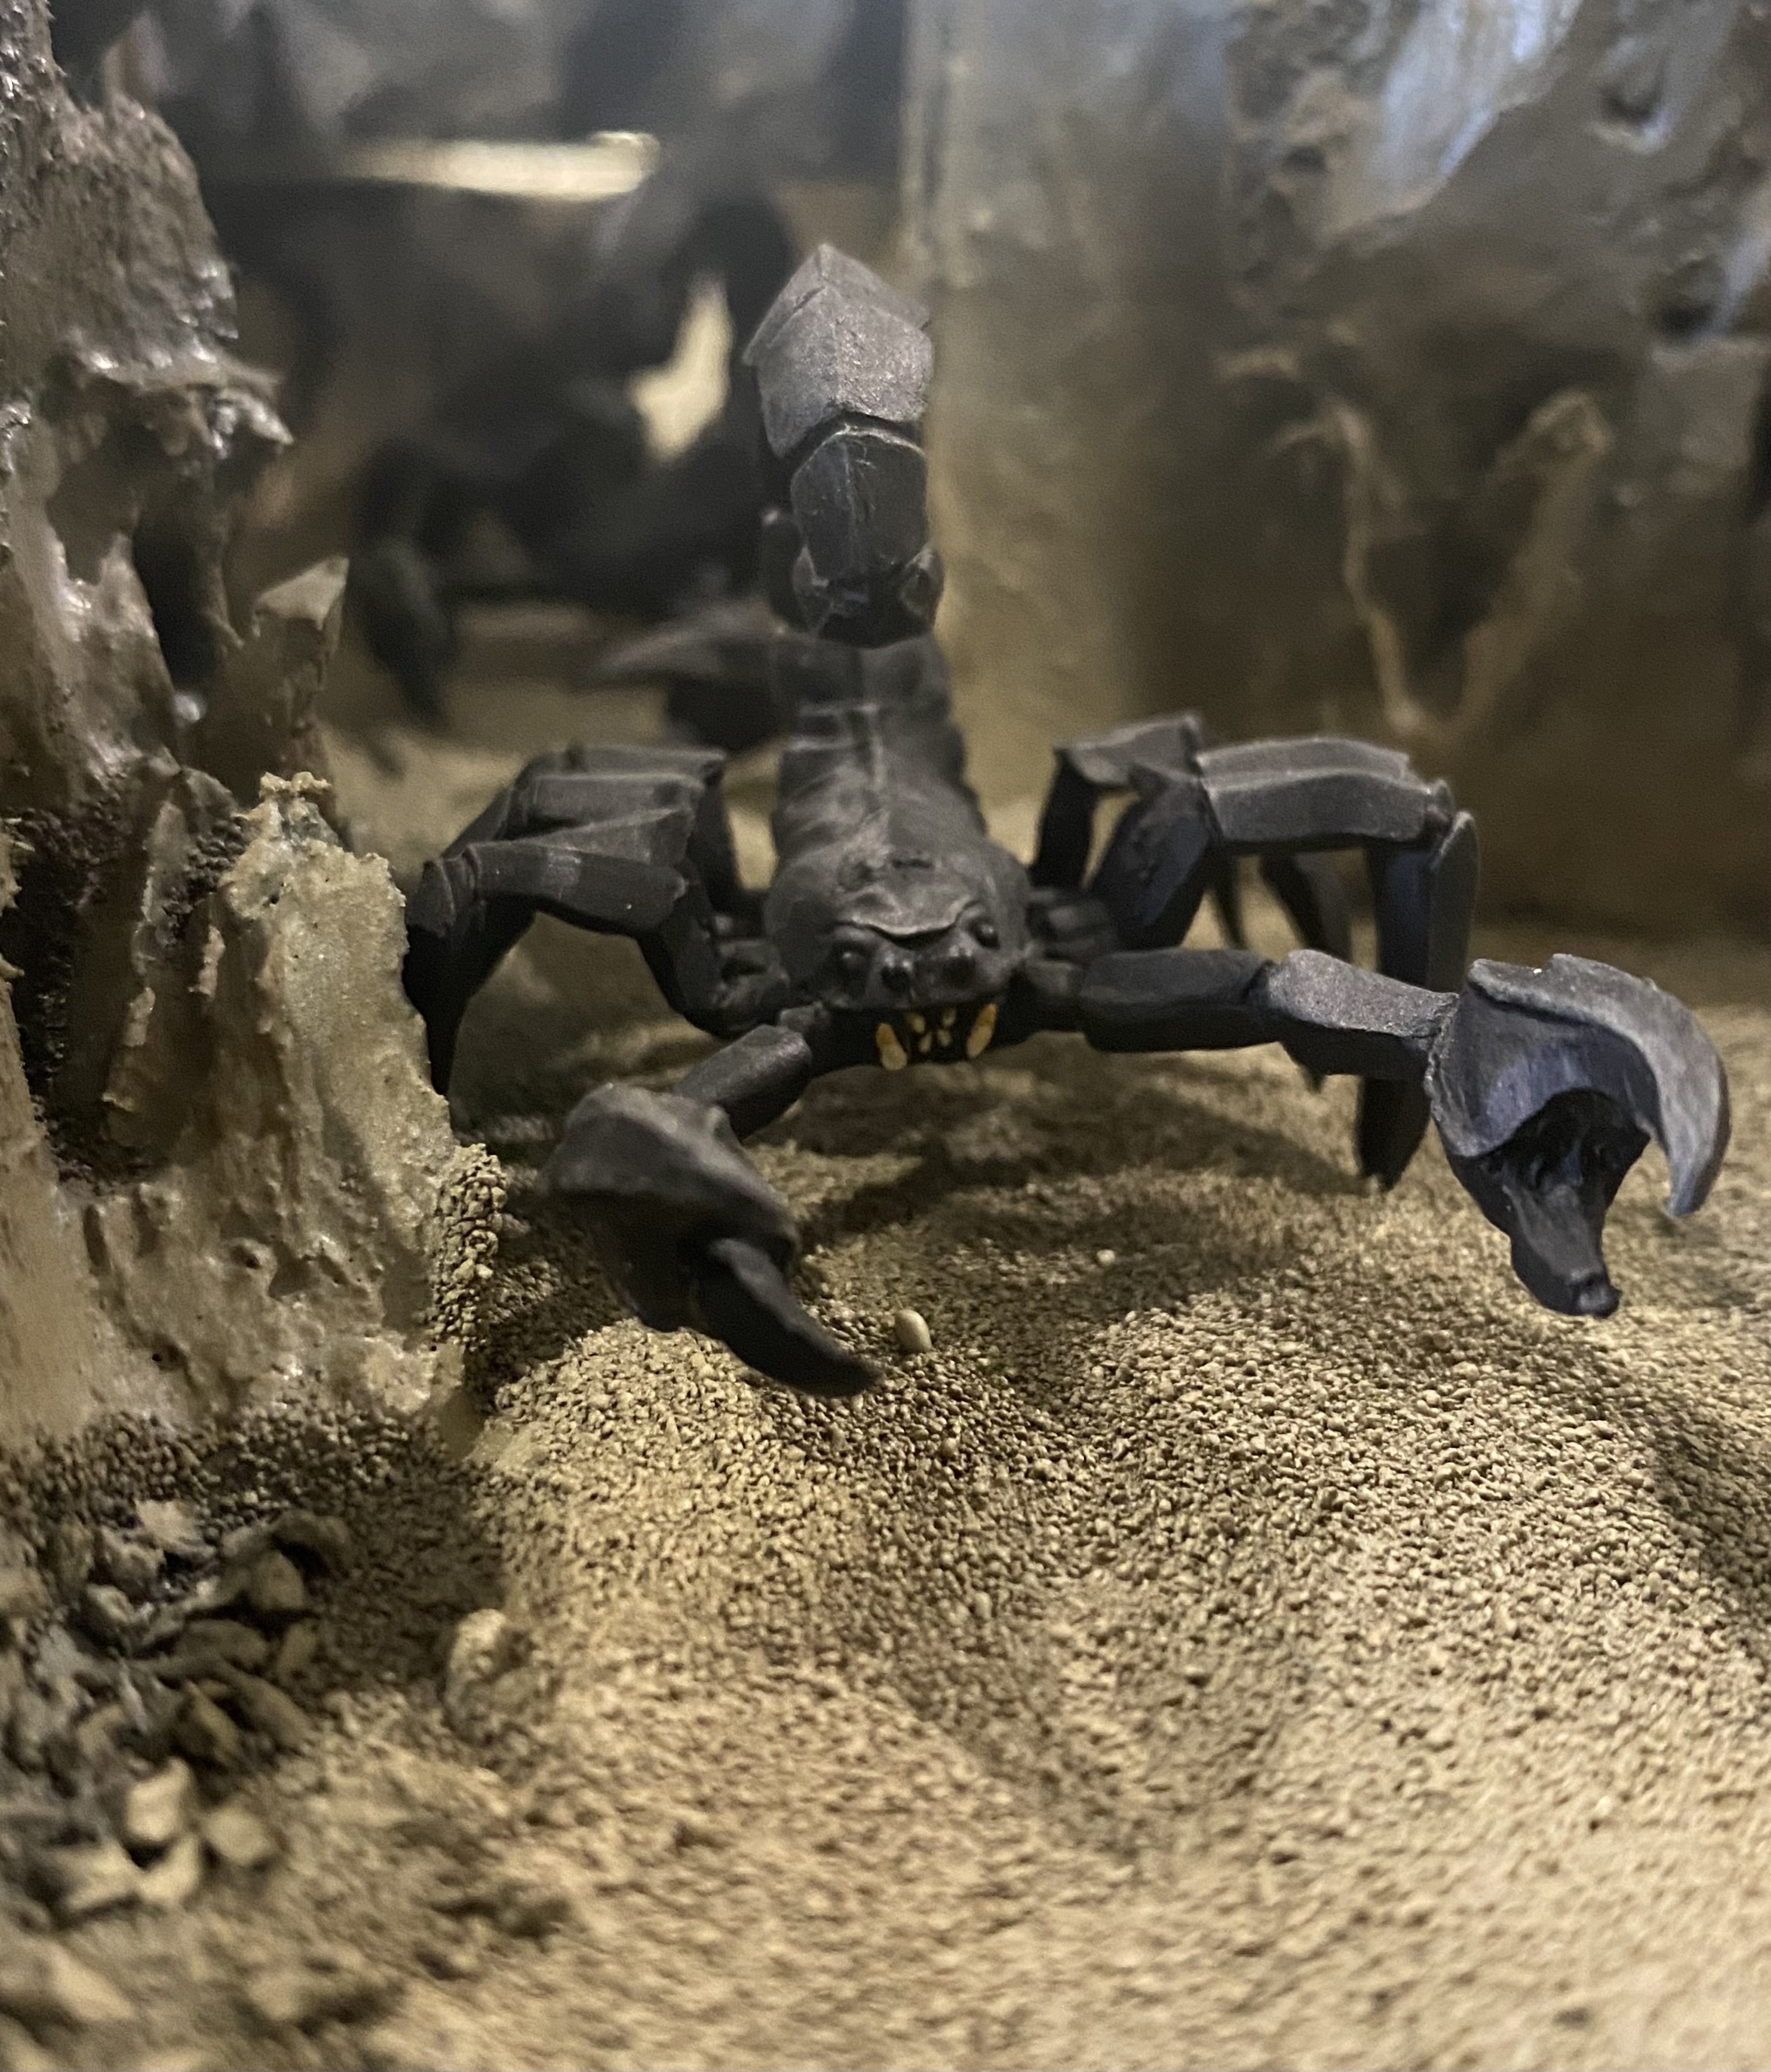
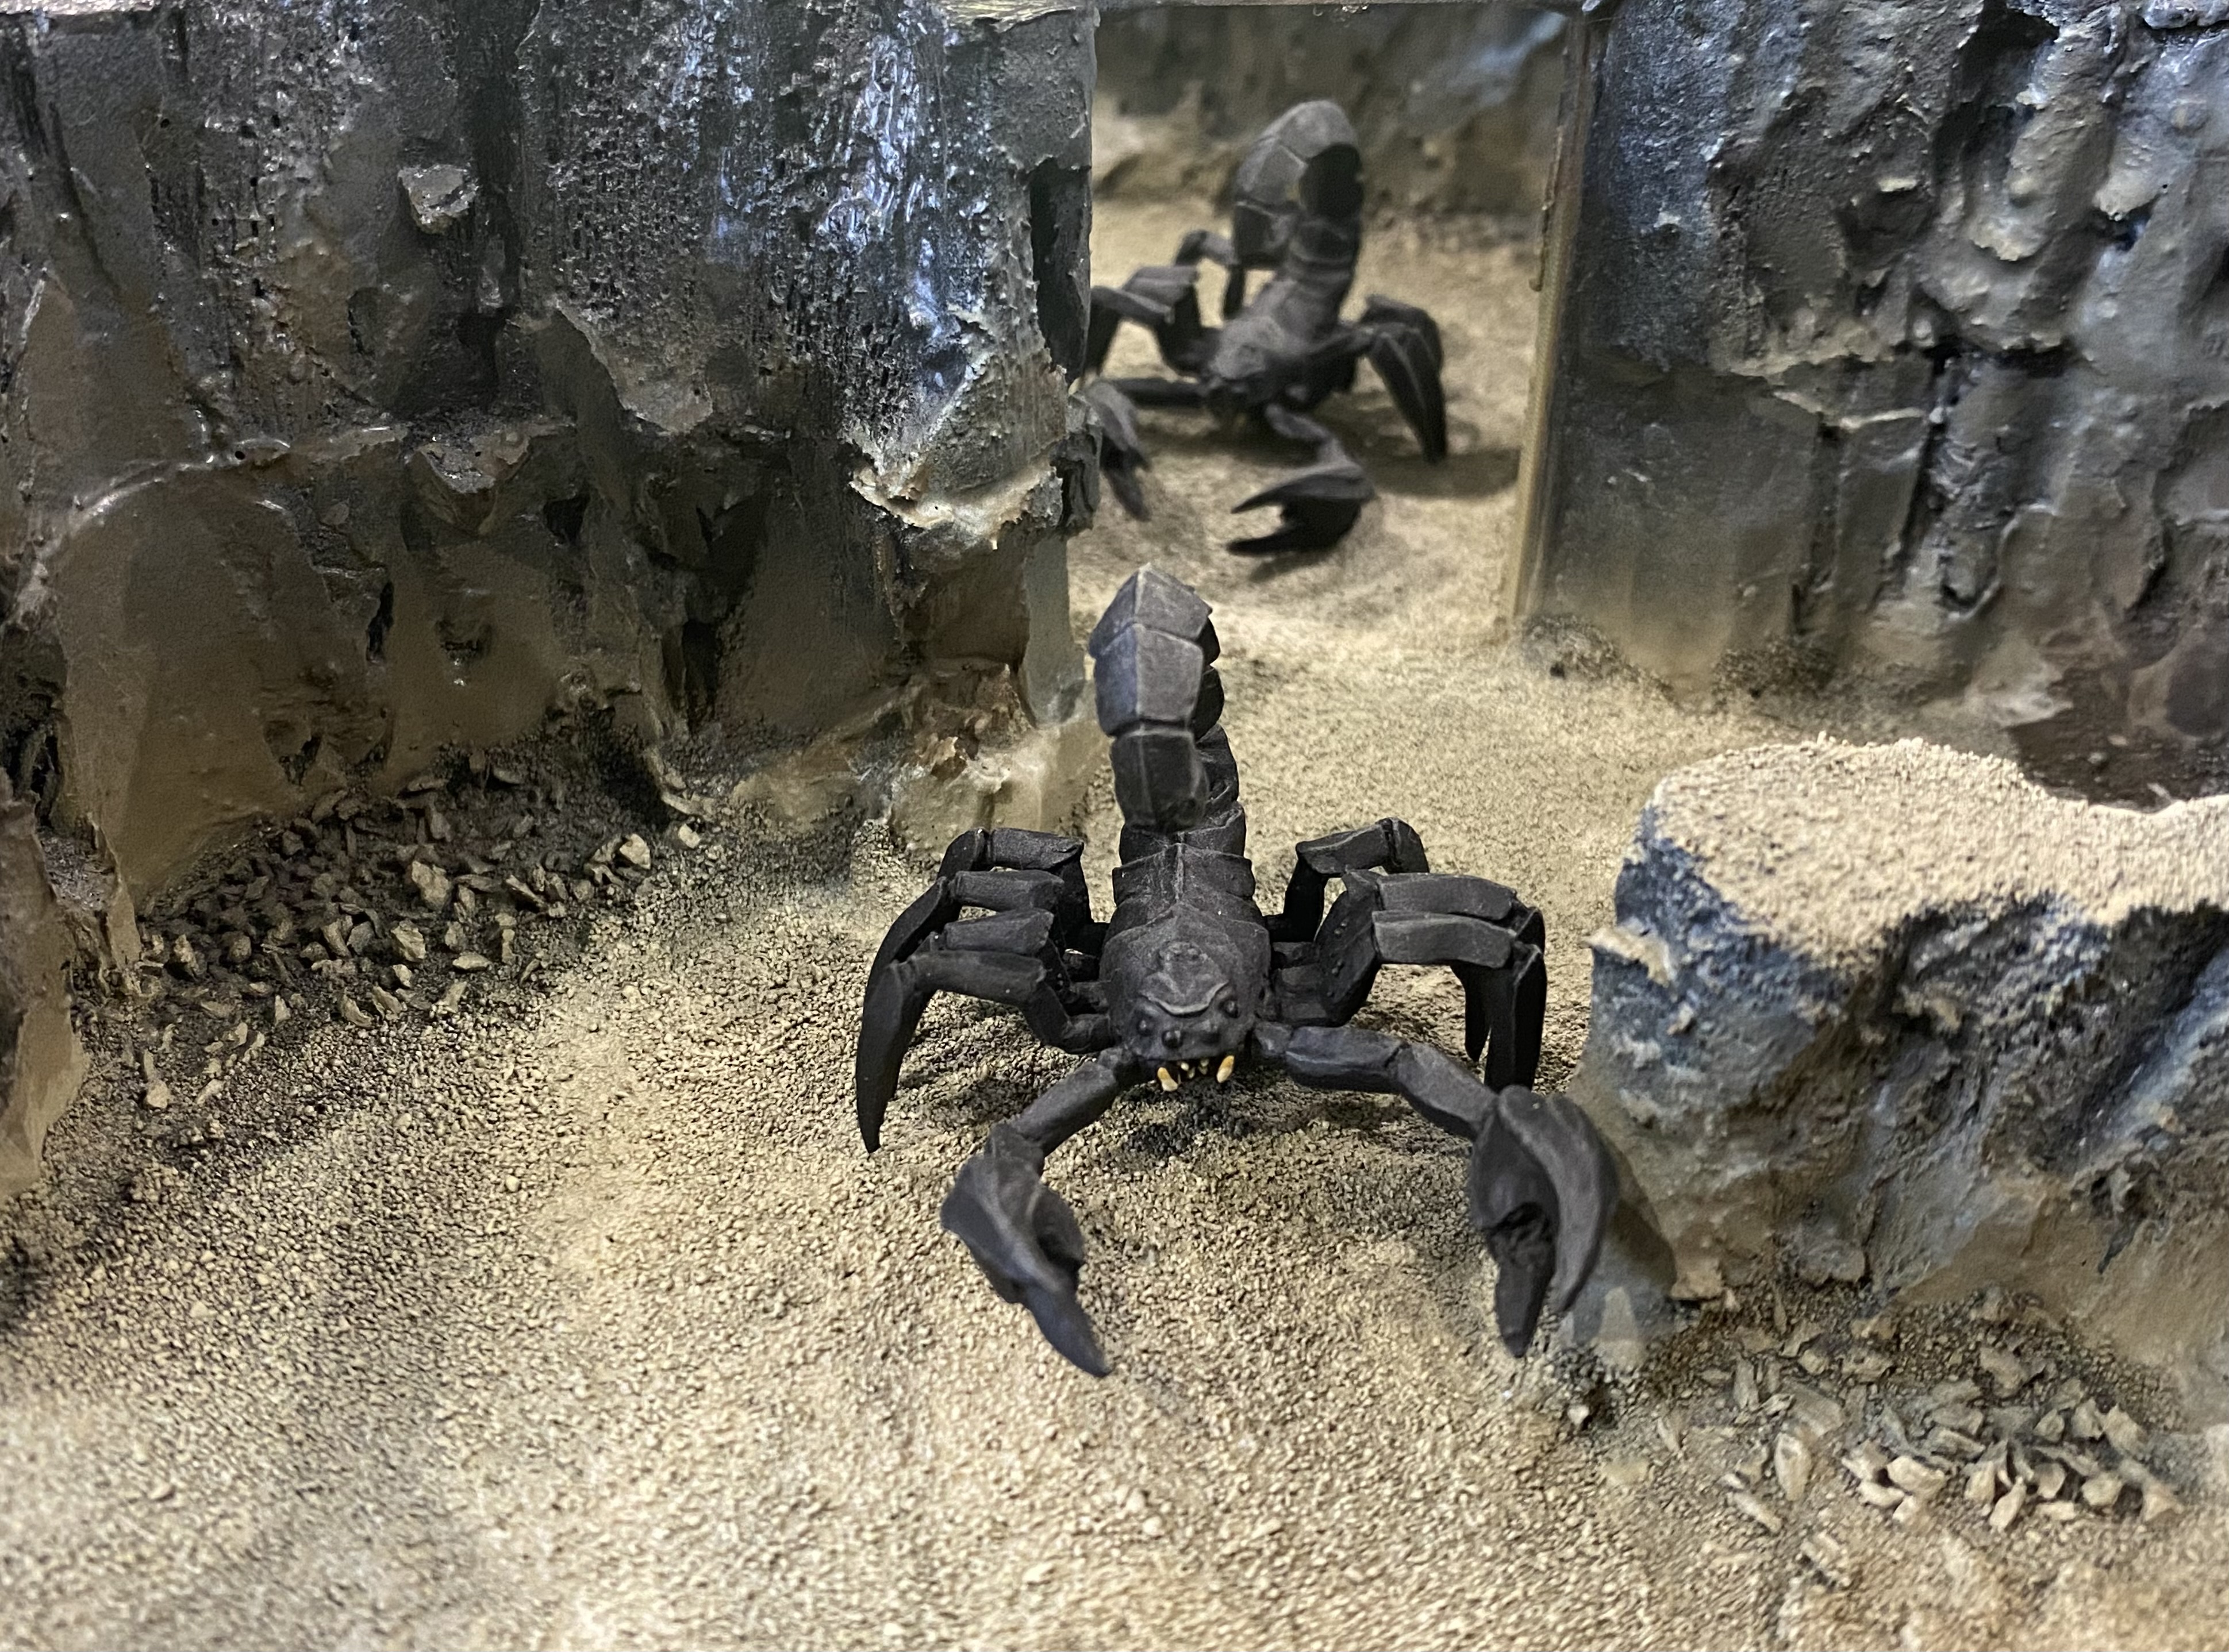
For the scorpions, a simple black undercoat drybrushed with a tan/black mix quick and nothing too fancy.
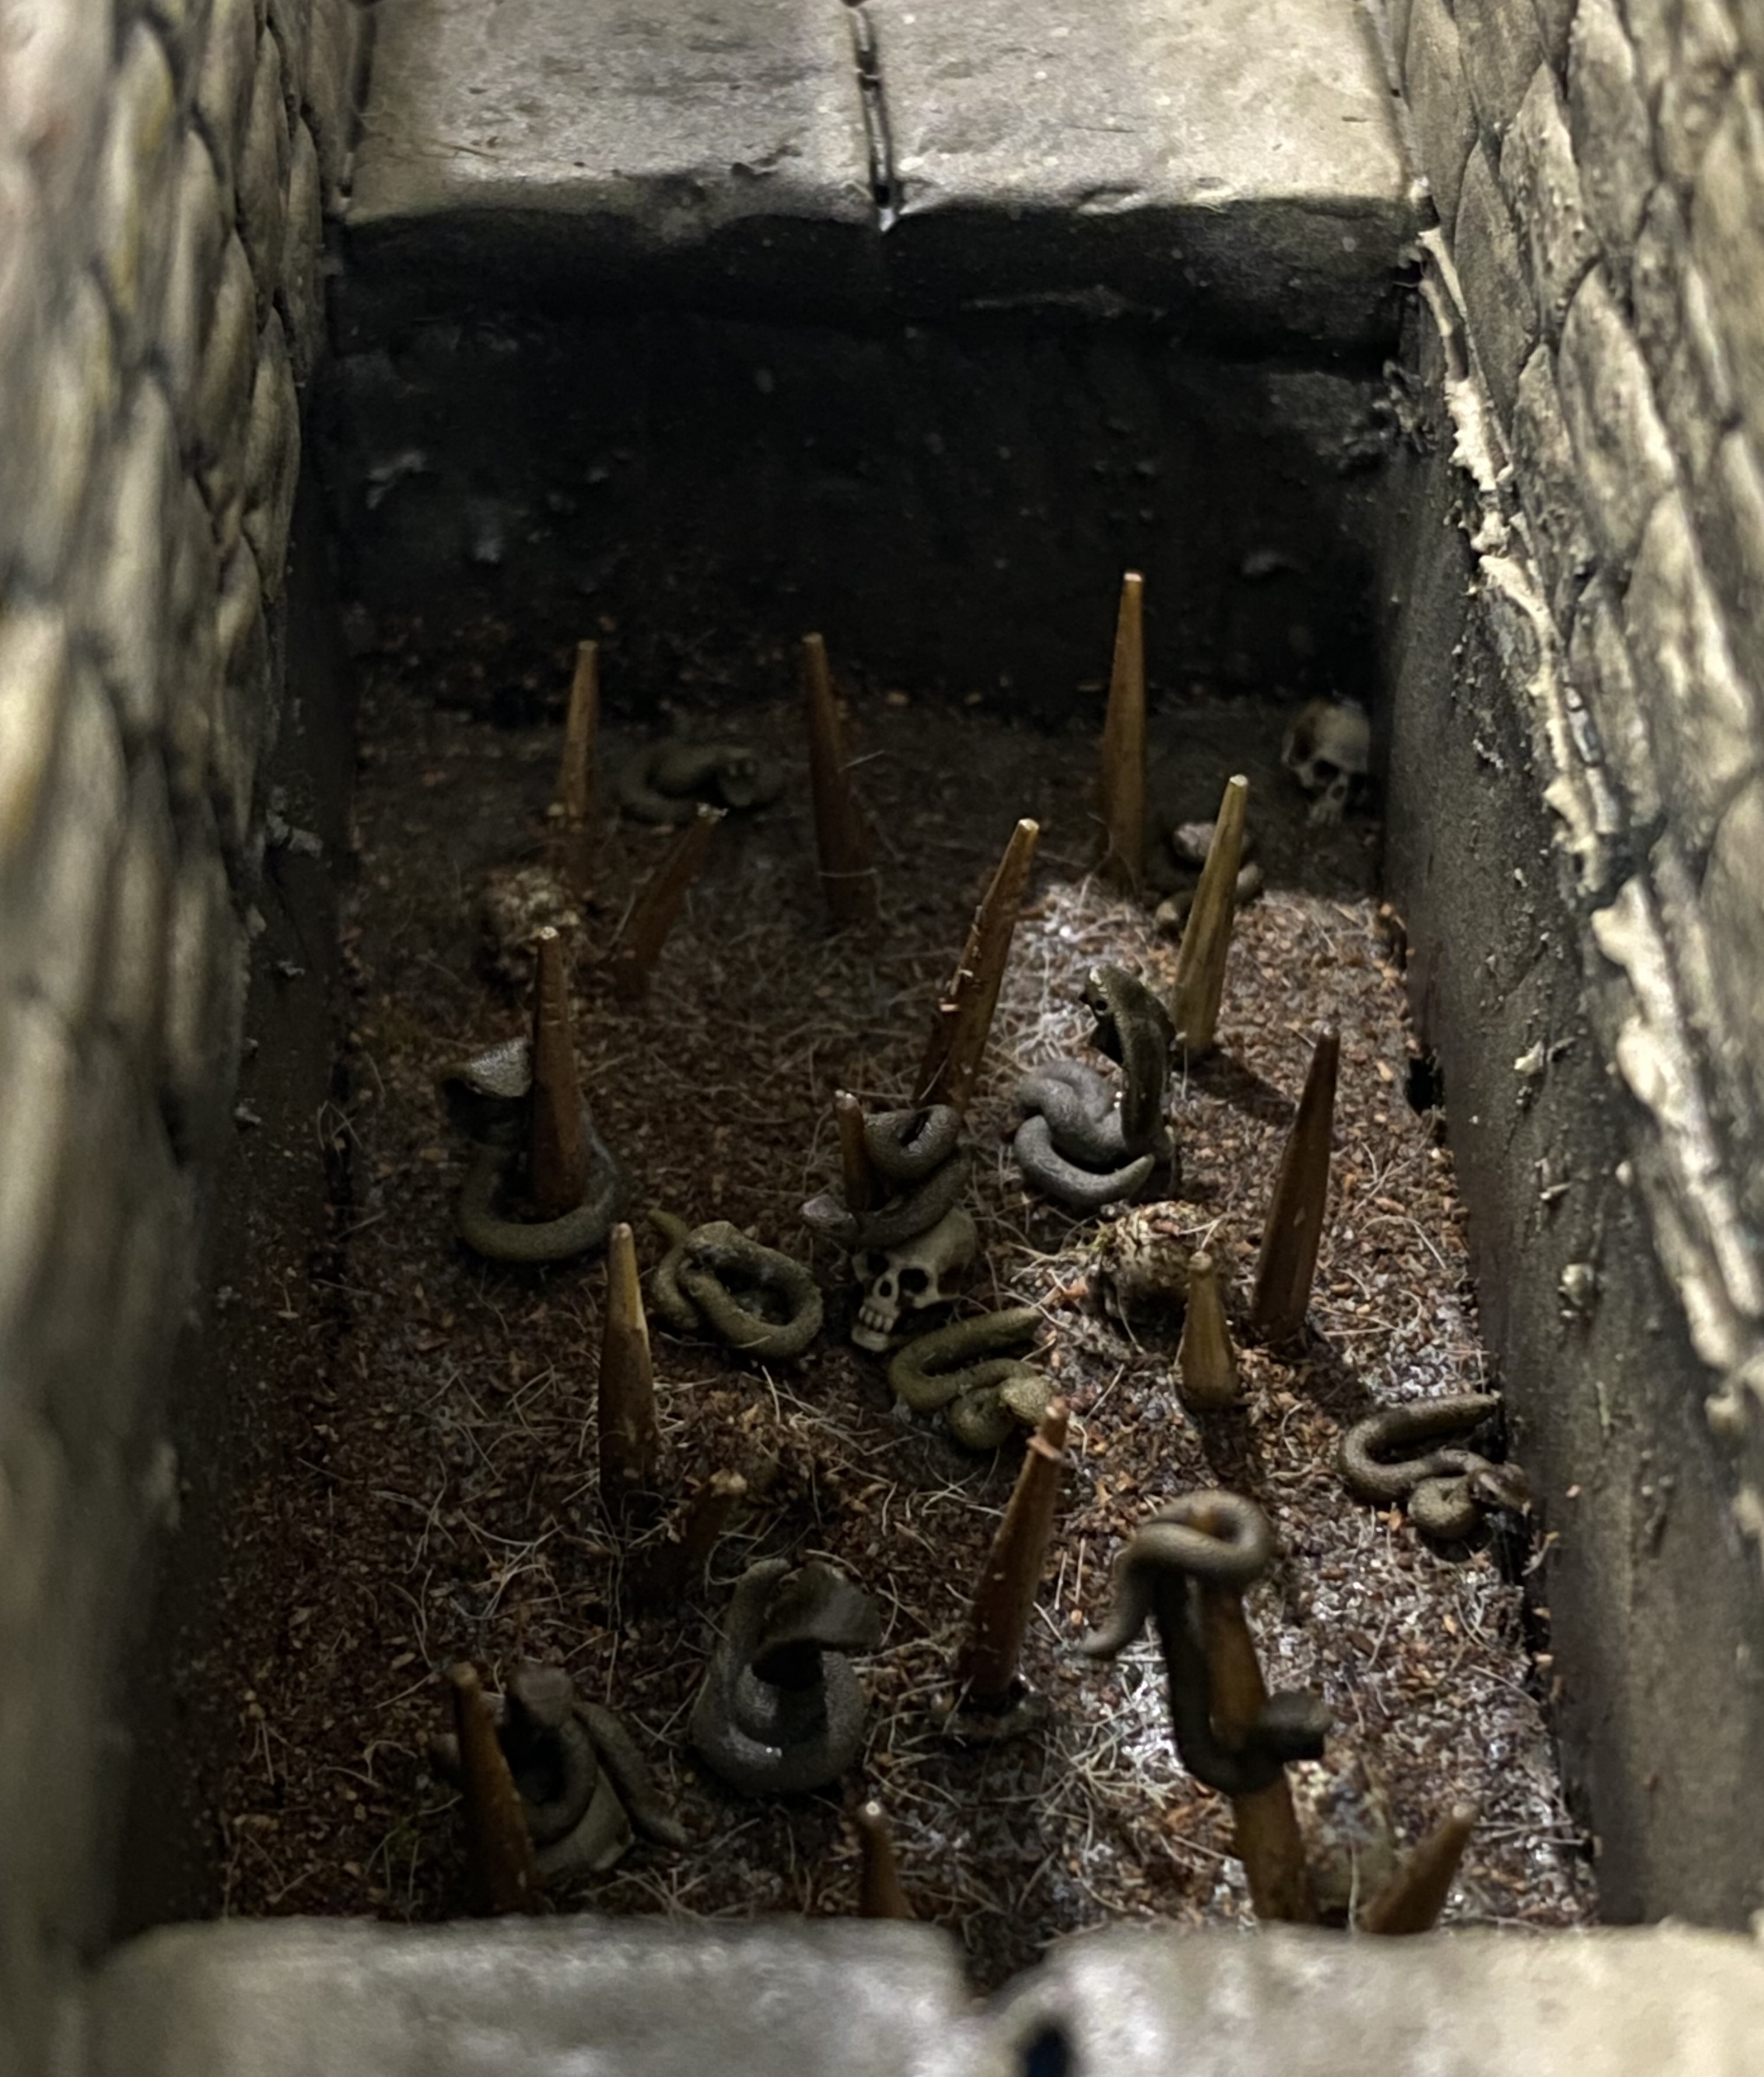
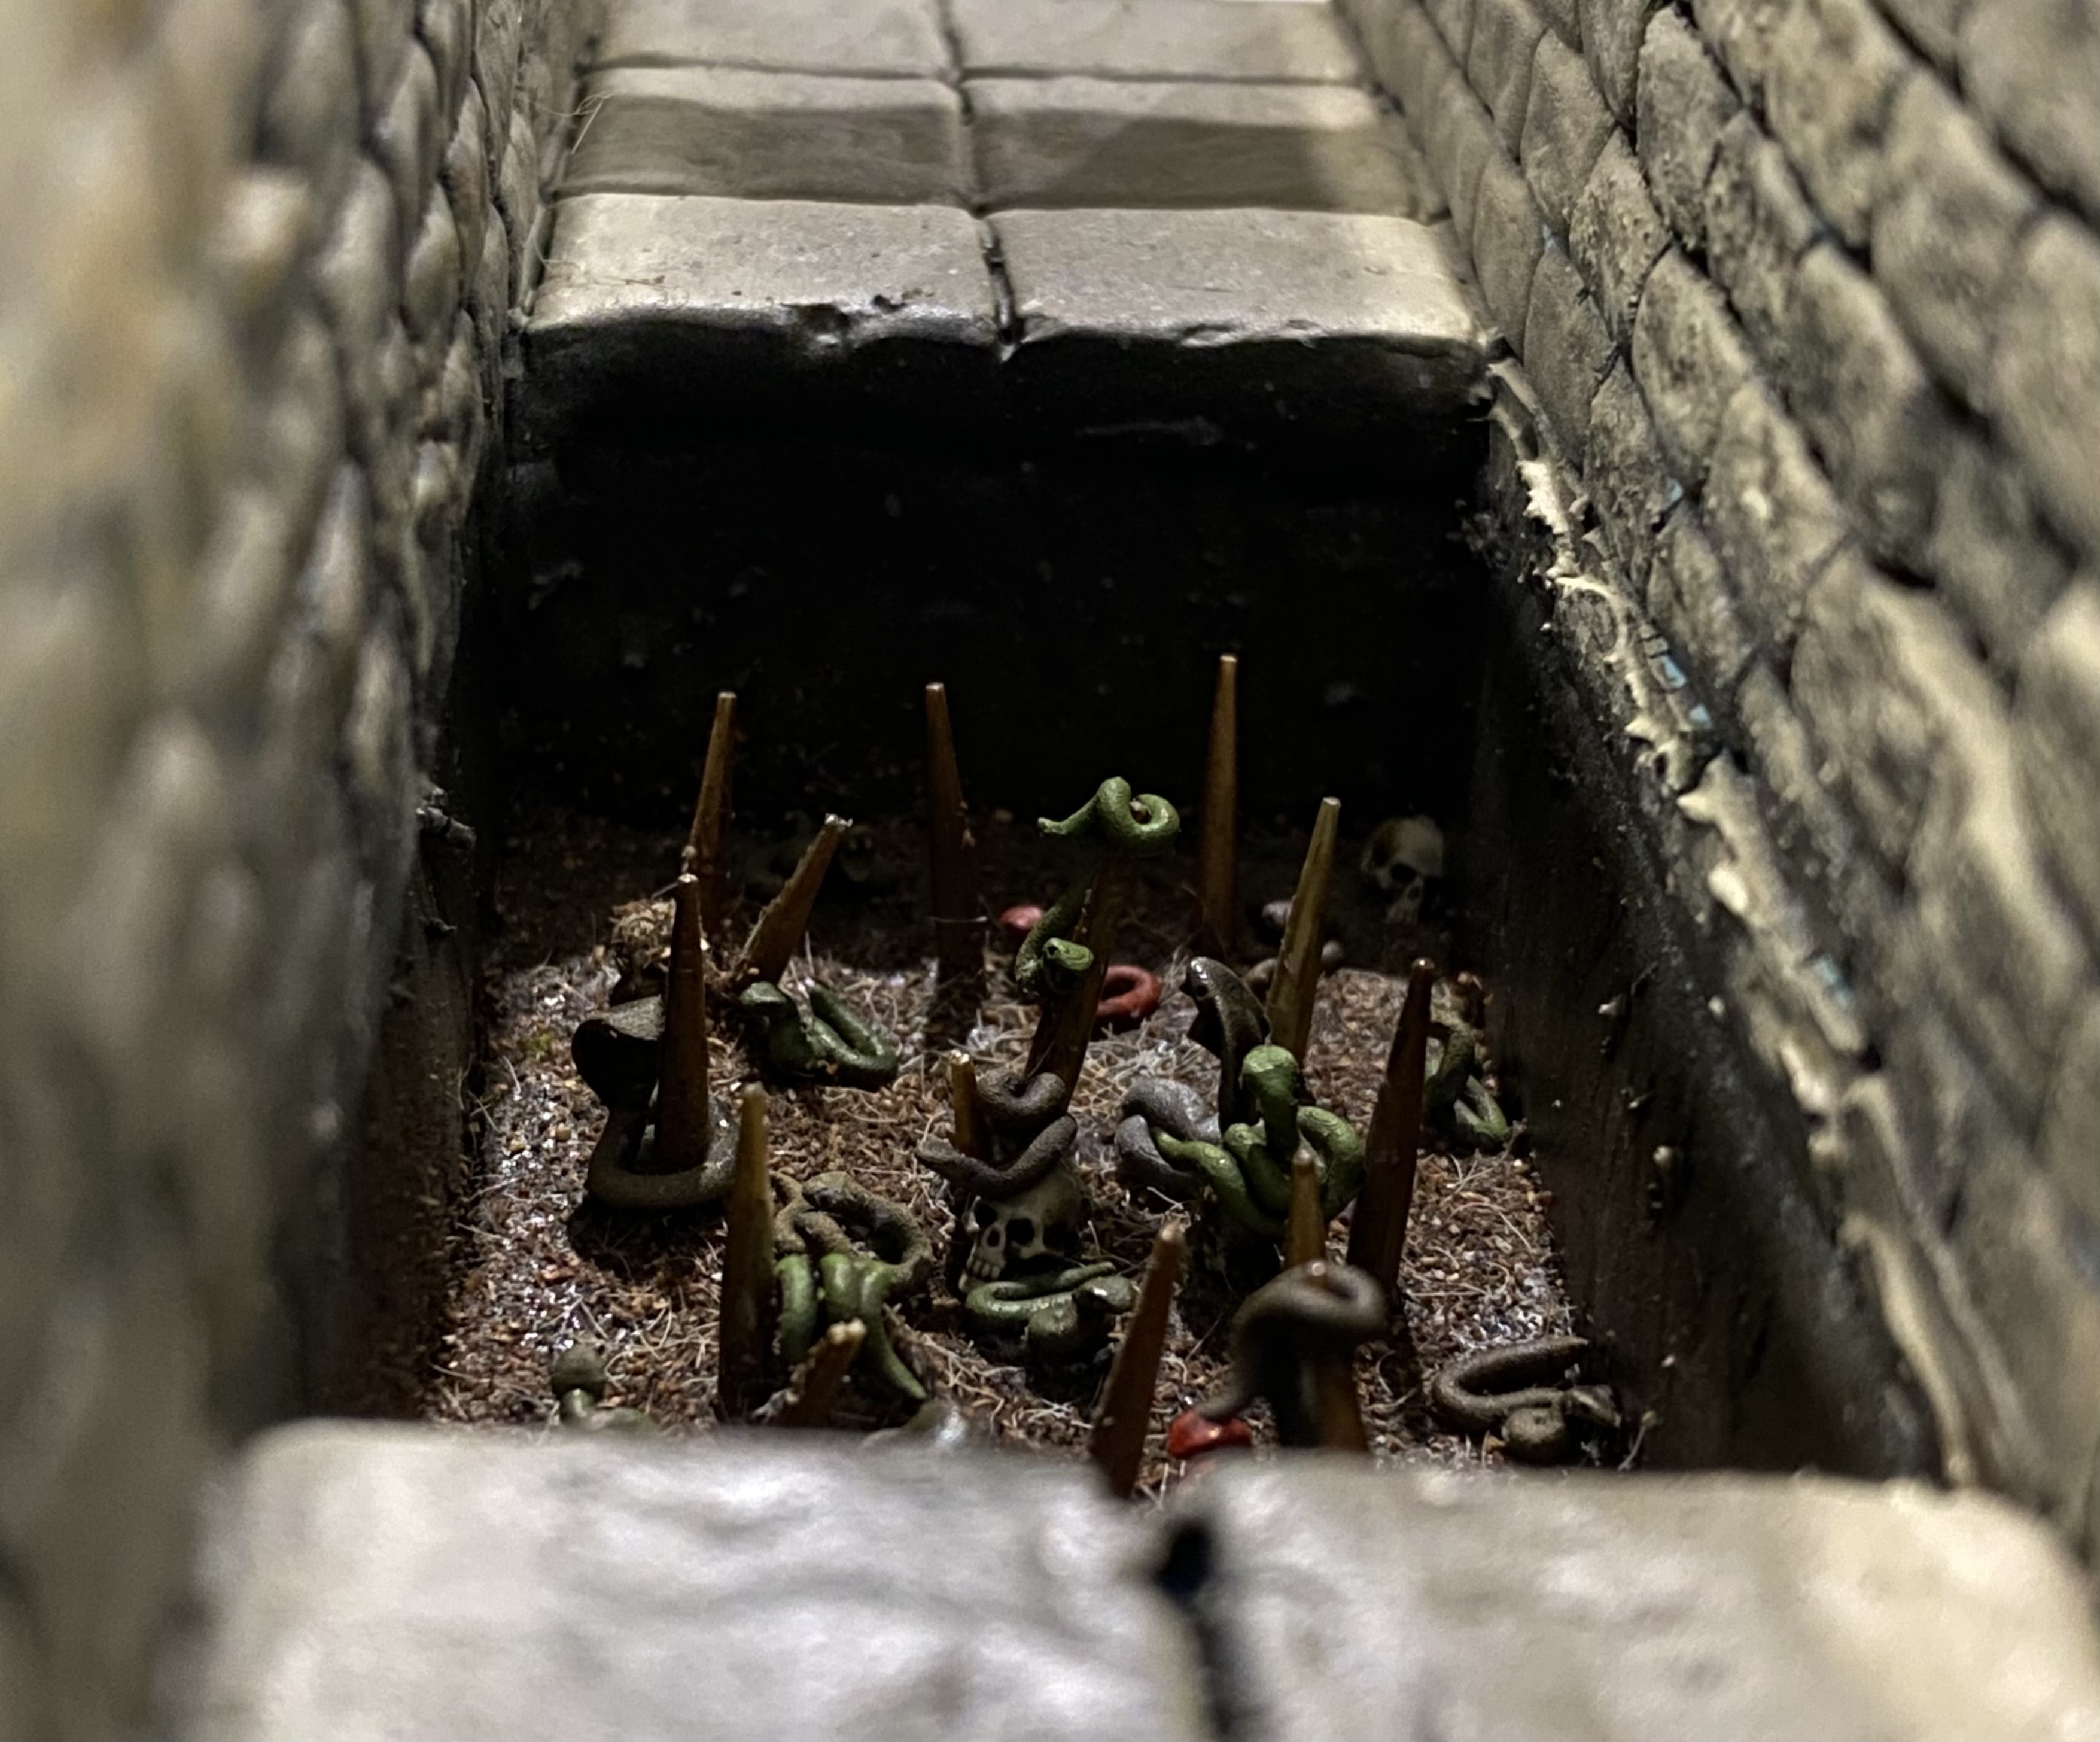
Snakes
A little pit trap made with the left-over bits from the flags I made for my Circus Maximus project. The spikes are the rest of the cocktail sticks that I used for the flags for that build.
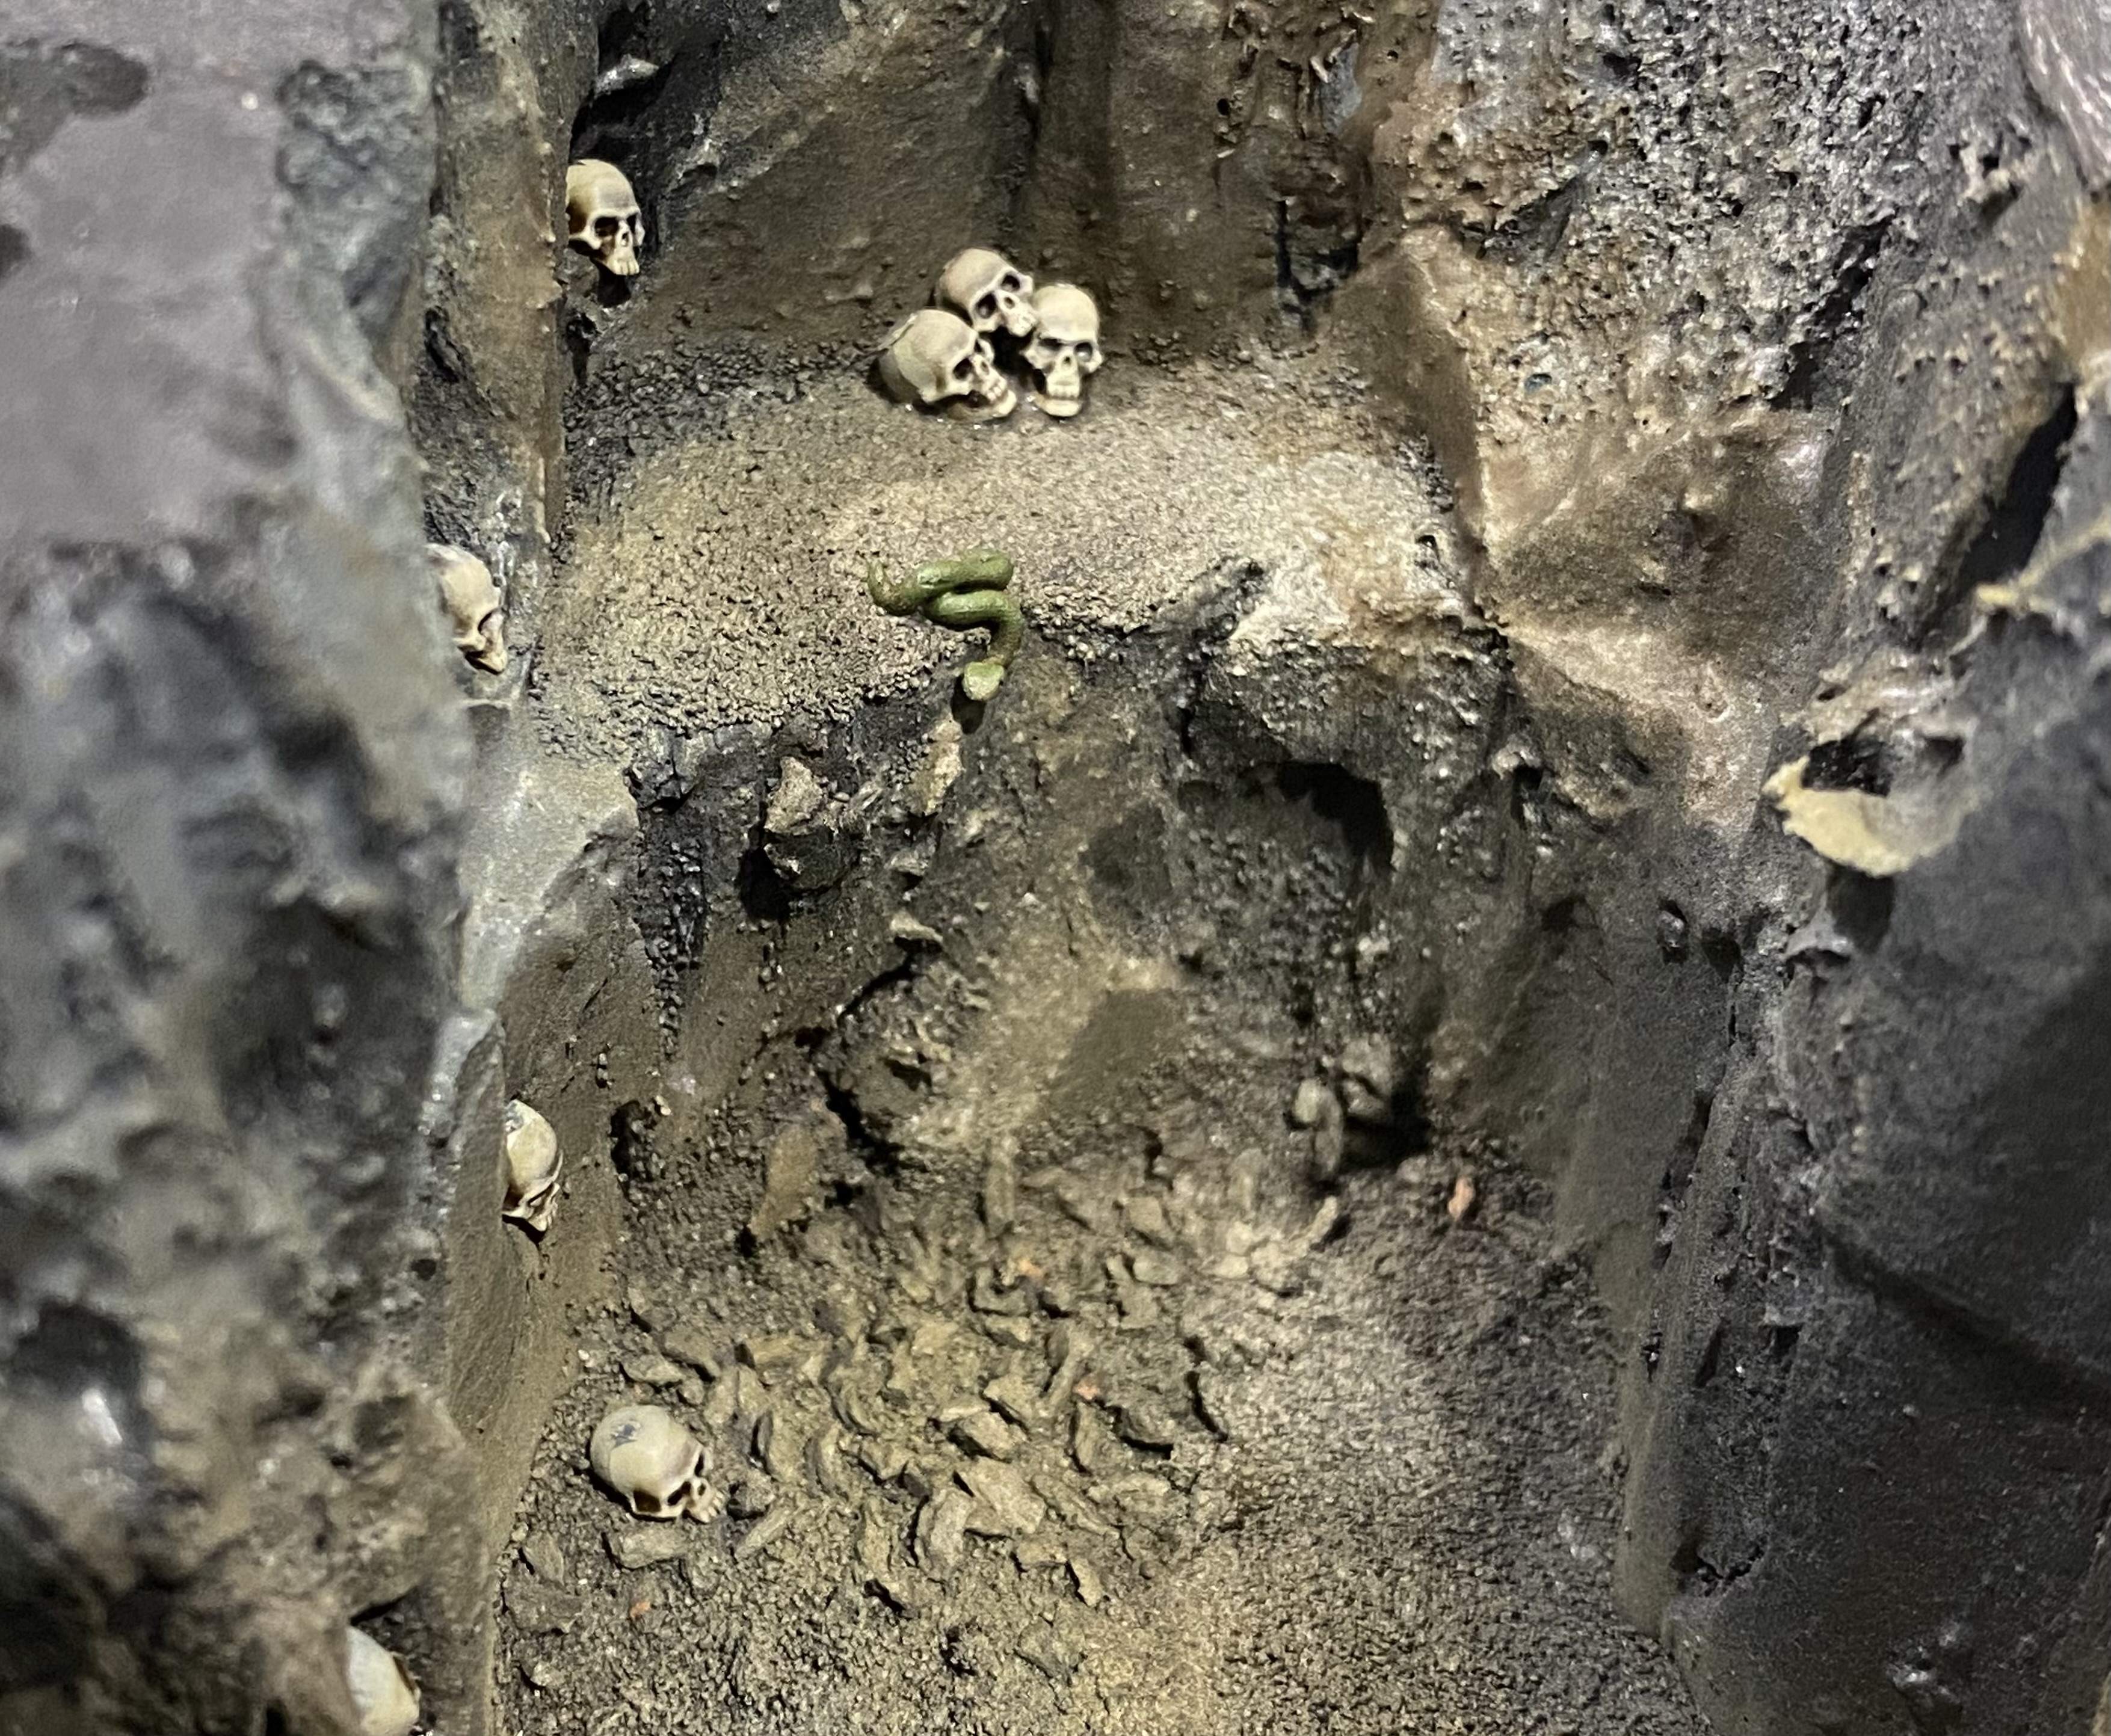
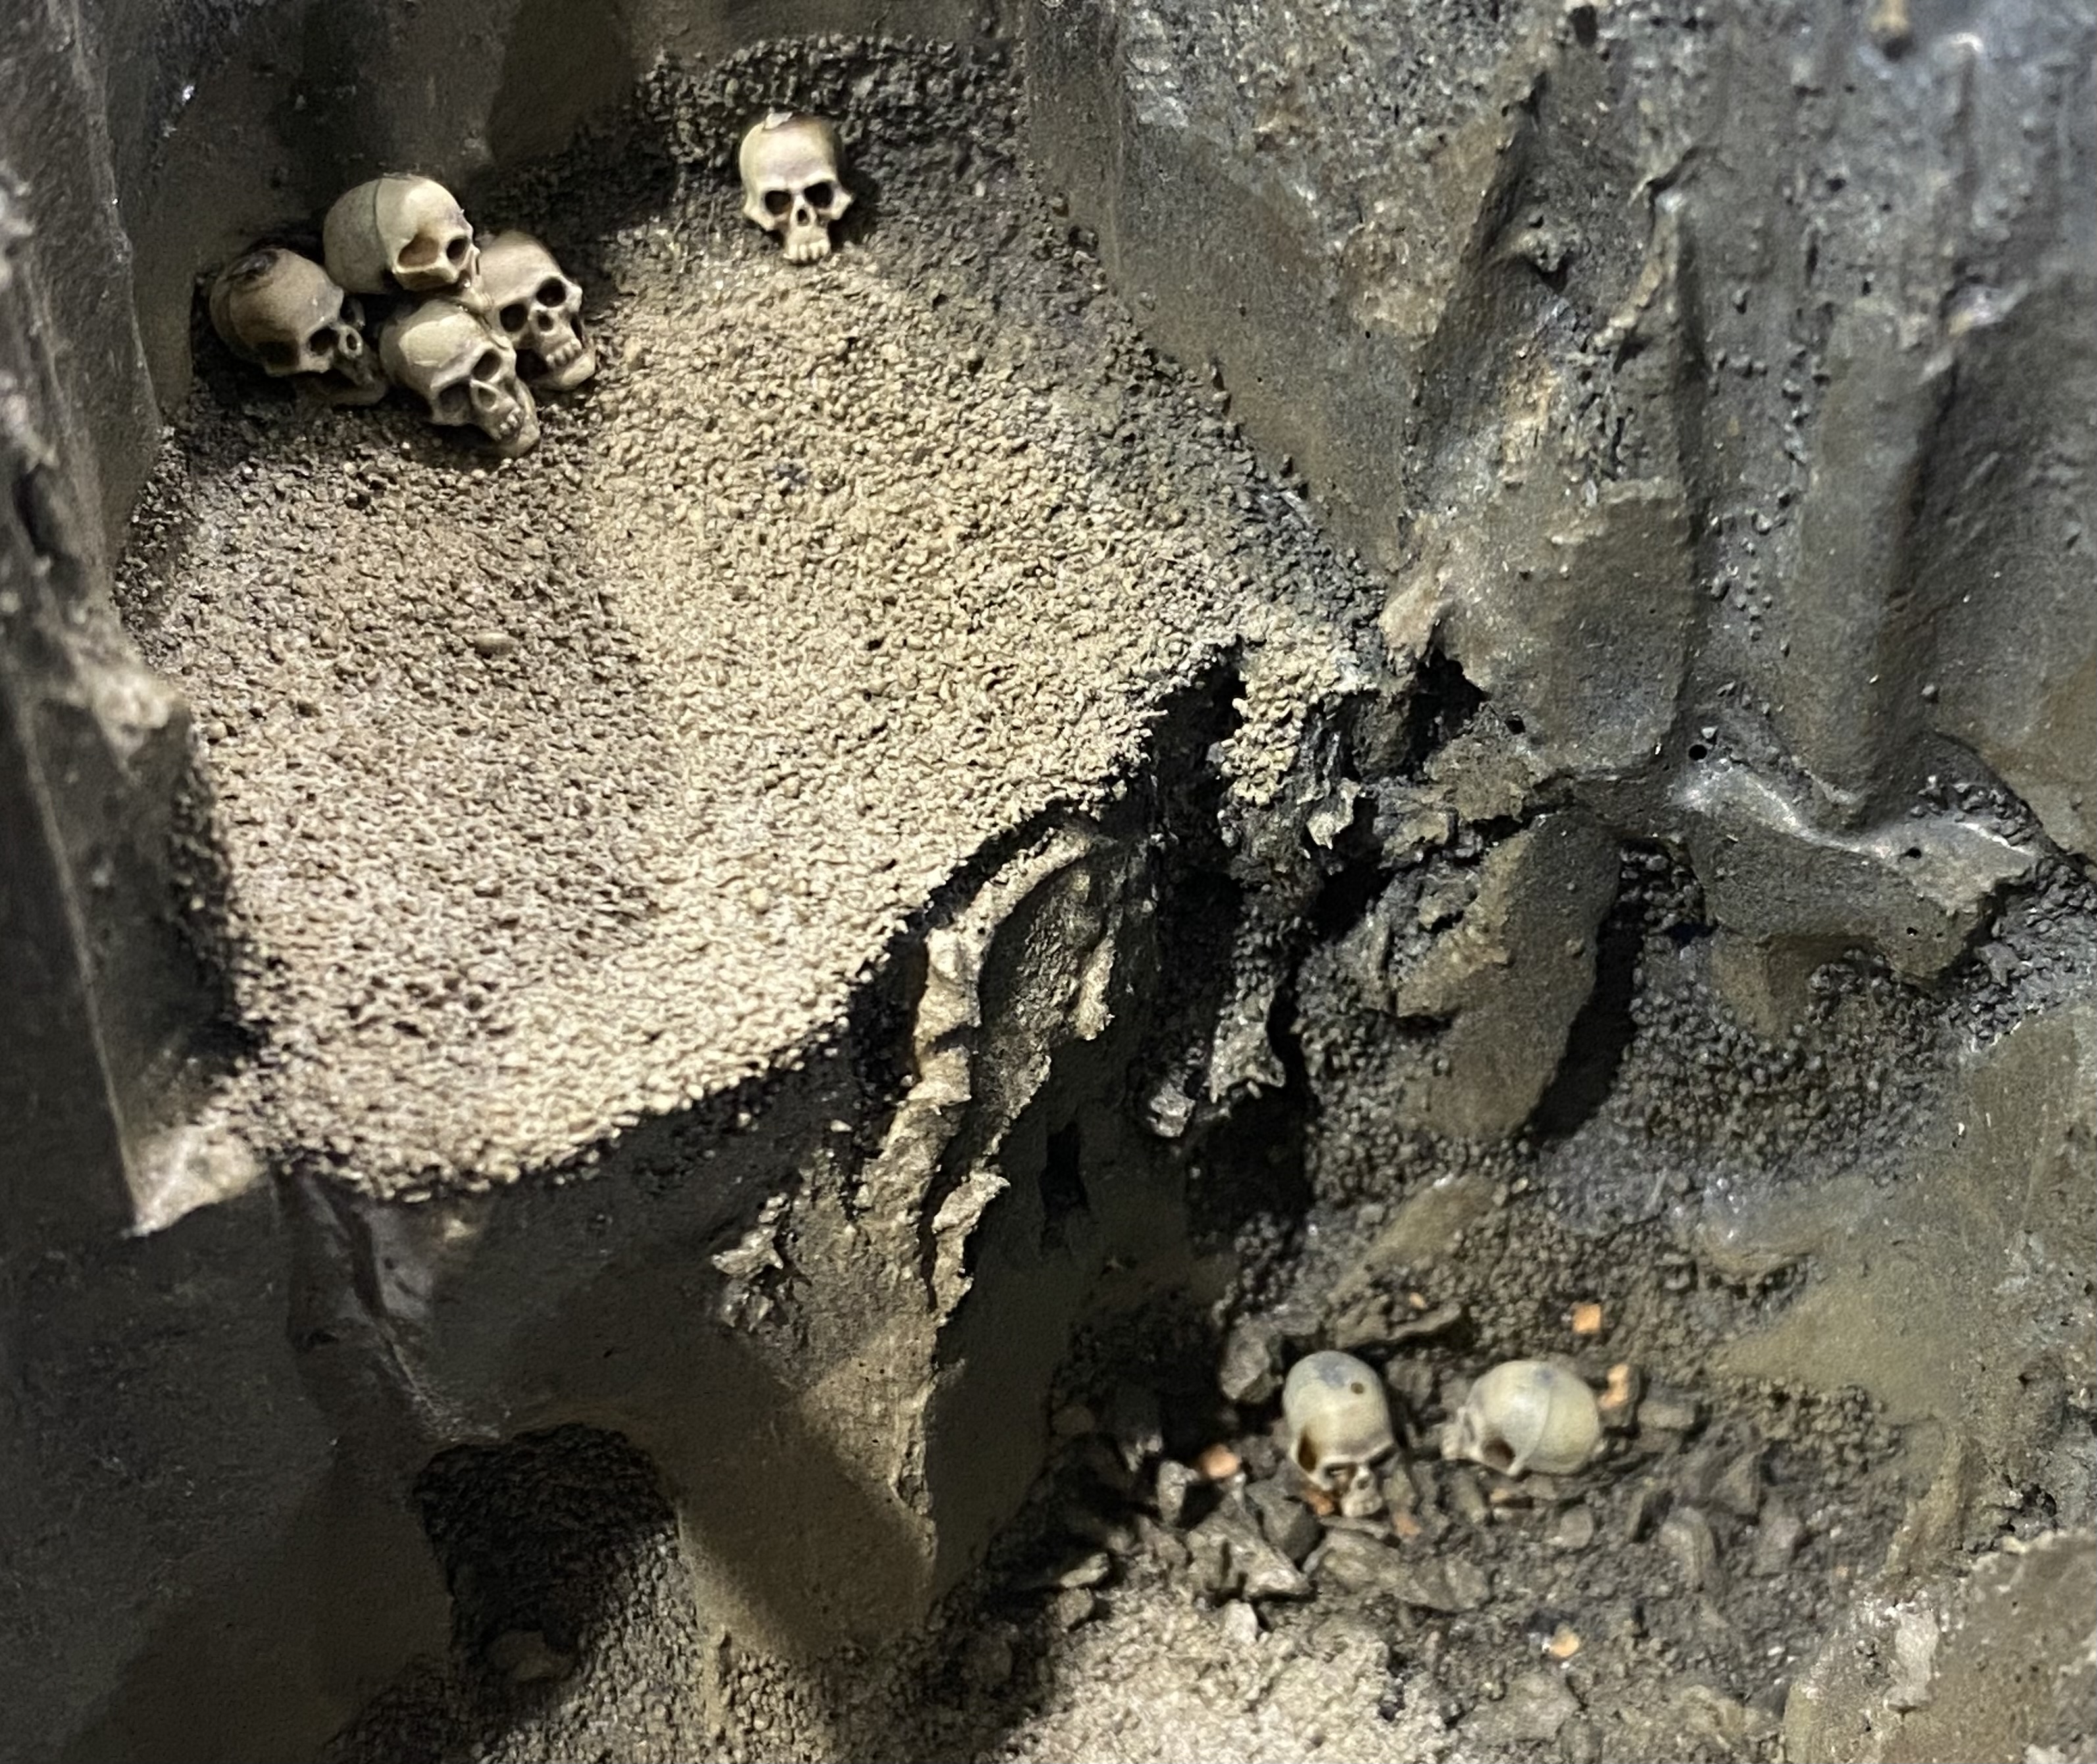
I then took some of the skulls that were left over from my Port Blacksand project and added them in amongst the bit and then in a few other places in this build.
Finally, I added lots of snakes, just because I could.
Next up I started work on what will possibly turn into a nest or lair of some sort. Not sure which way I will take this section but at the moment I am leaning towards adding cobwebs.
A little more tidying up
This morning, I sanded down the outsides of each box ready for painting and also touched up the black paint on the tops. I also gave the tentacle beast thing a coat of gloss varnish to make it look wetter.
This is the state of the build so far.


![Zenit Miniatures’ Samurai Warlords Now Live On Kickstarter [Updated]](https://images.beastsofwar.com/2026/02/samurai-warlords-launch-main-600-338.jpg)


