


![Perfect Call Of Duty-Style Miniatures? Wargames Atlantic’s Operators Review [7 Days Early Access]](https://images.beastsofwar.com/2026/02/unboxing-wargames-atlantic-operators-coverimage-225-127.jpg)


Building Foam Dungeon Tiles (EVA & Upholstery Foam)


Recommendations: 268
About the Project
Hello everyone! Since it's Dungeonalia on OnTableTop, I thought it would be a fantastic idea to delve into creating some tabletop dungeon tiles. These tiles would be perfect for enhancing games like HeroQuest and Warhammer Quest — essentially, any of those thrilling dungeon-crawling games that utilise boards or card tiles.
Related Game: Warhammer Quest
Related Genre: Fantasy
Related Contest: Dungeonalia 2023
This Project is Active
Incorporating Dungeon Furniture to Enhance Atmosphere
Having completed some tiles, it’s time to delve into furnishing to further enhance the dungeon’s ambiance, drawing inspiration from iconic games like HeroQuest and Warhammer Quest.
Fortunately, there’s a treasure trove of STL files available online for free, perfect for this purpose. A visit to Thingiverse will reveal a collection of furniture suitable for 3D printing, ideal for infusing your setup with that nostalgic, old-school charm.
Additionally, I had the good fortune of John from the OnTableTop team working on a video about these exact files. He was in the process of printing and painting these items for a vlog, so I managed to have him print an extra batch for me. Here is John’s completed vlog as well:
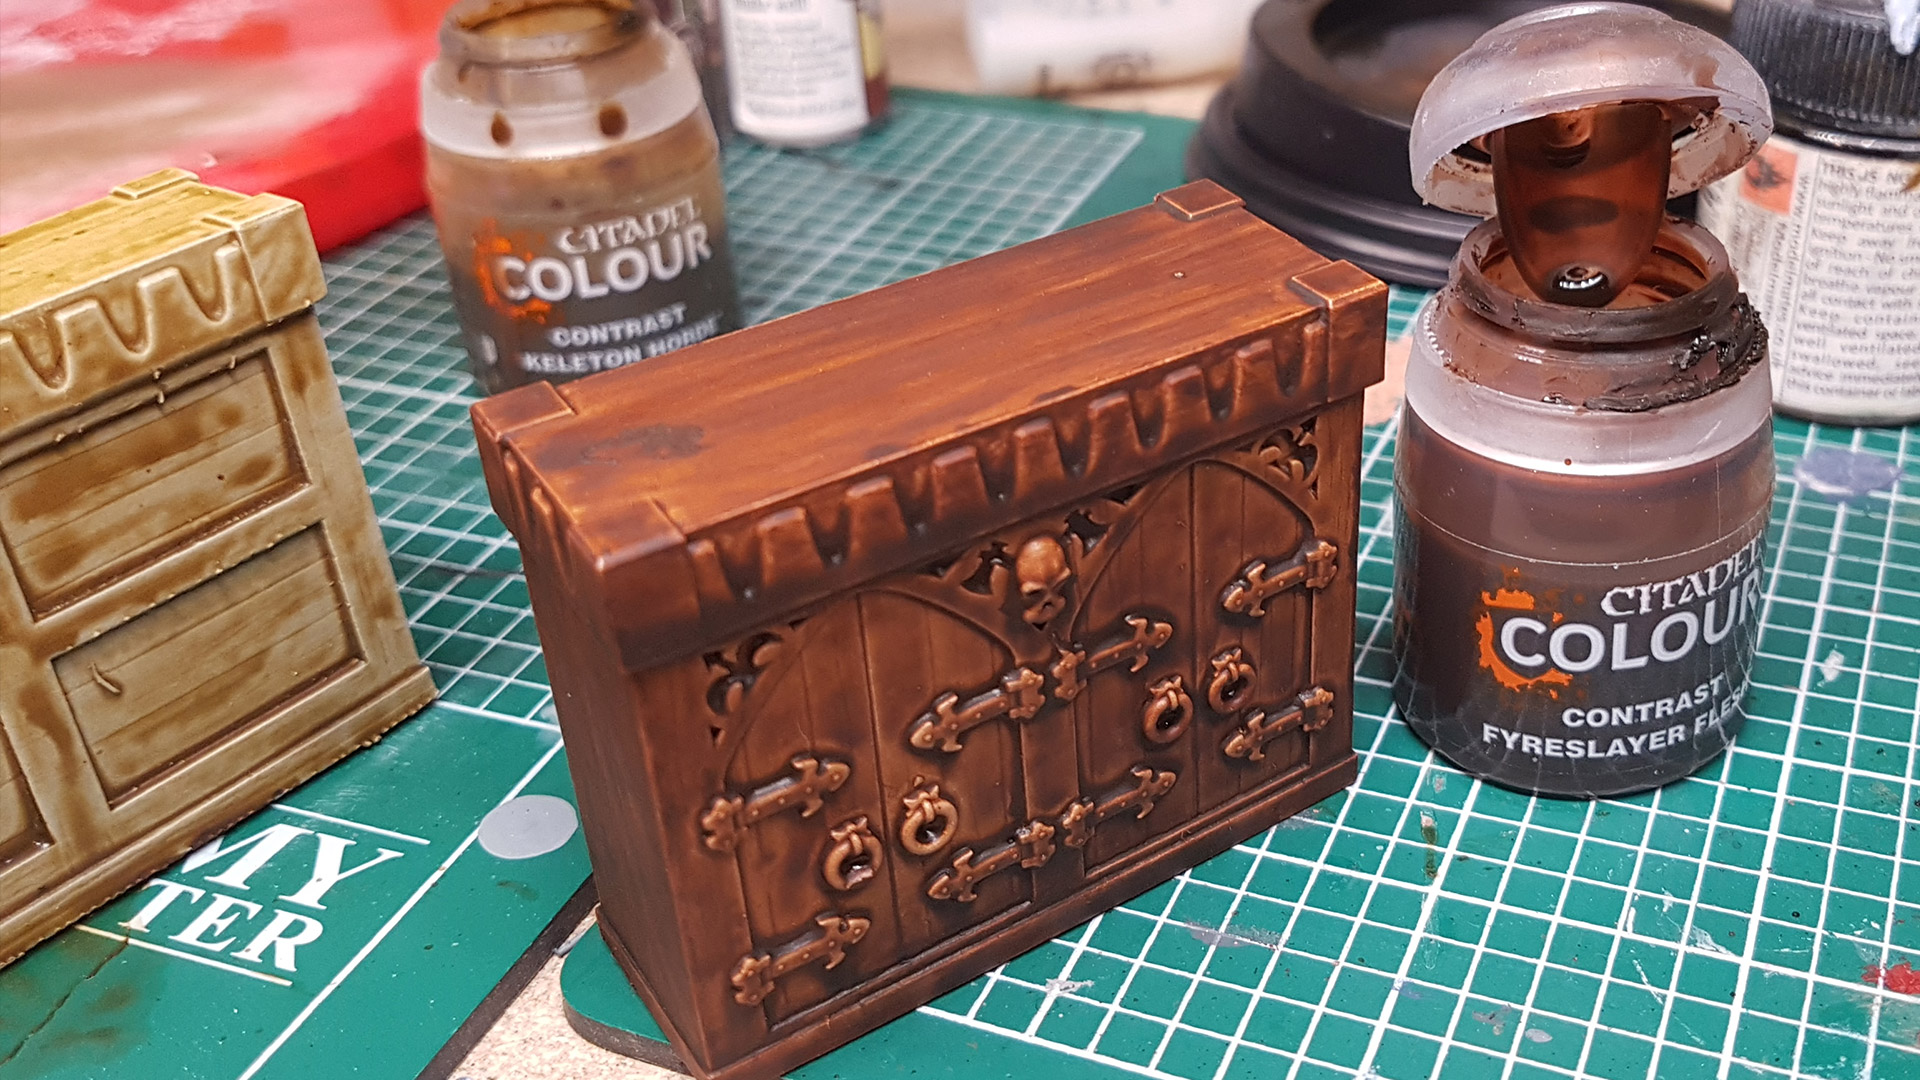
3D Printed Dungeon Furniture: Fit for a King, or in This Case, a Dungeon Master
Take a look at how free STL files can equip you with some incredibly detailed 3D printed Dungeon Furniture. I’m thoroughly enjoying painting them, preparing for an adventuring party to rummage through in search of potions, weapons, and gold.
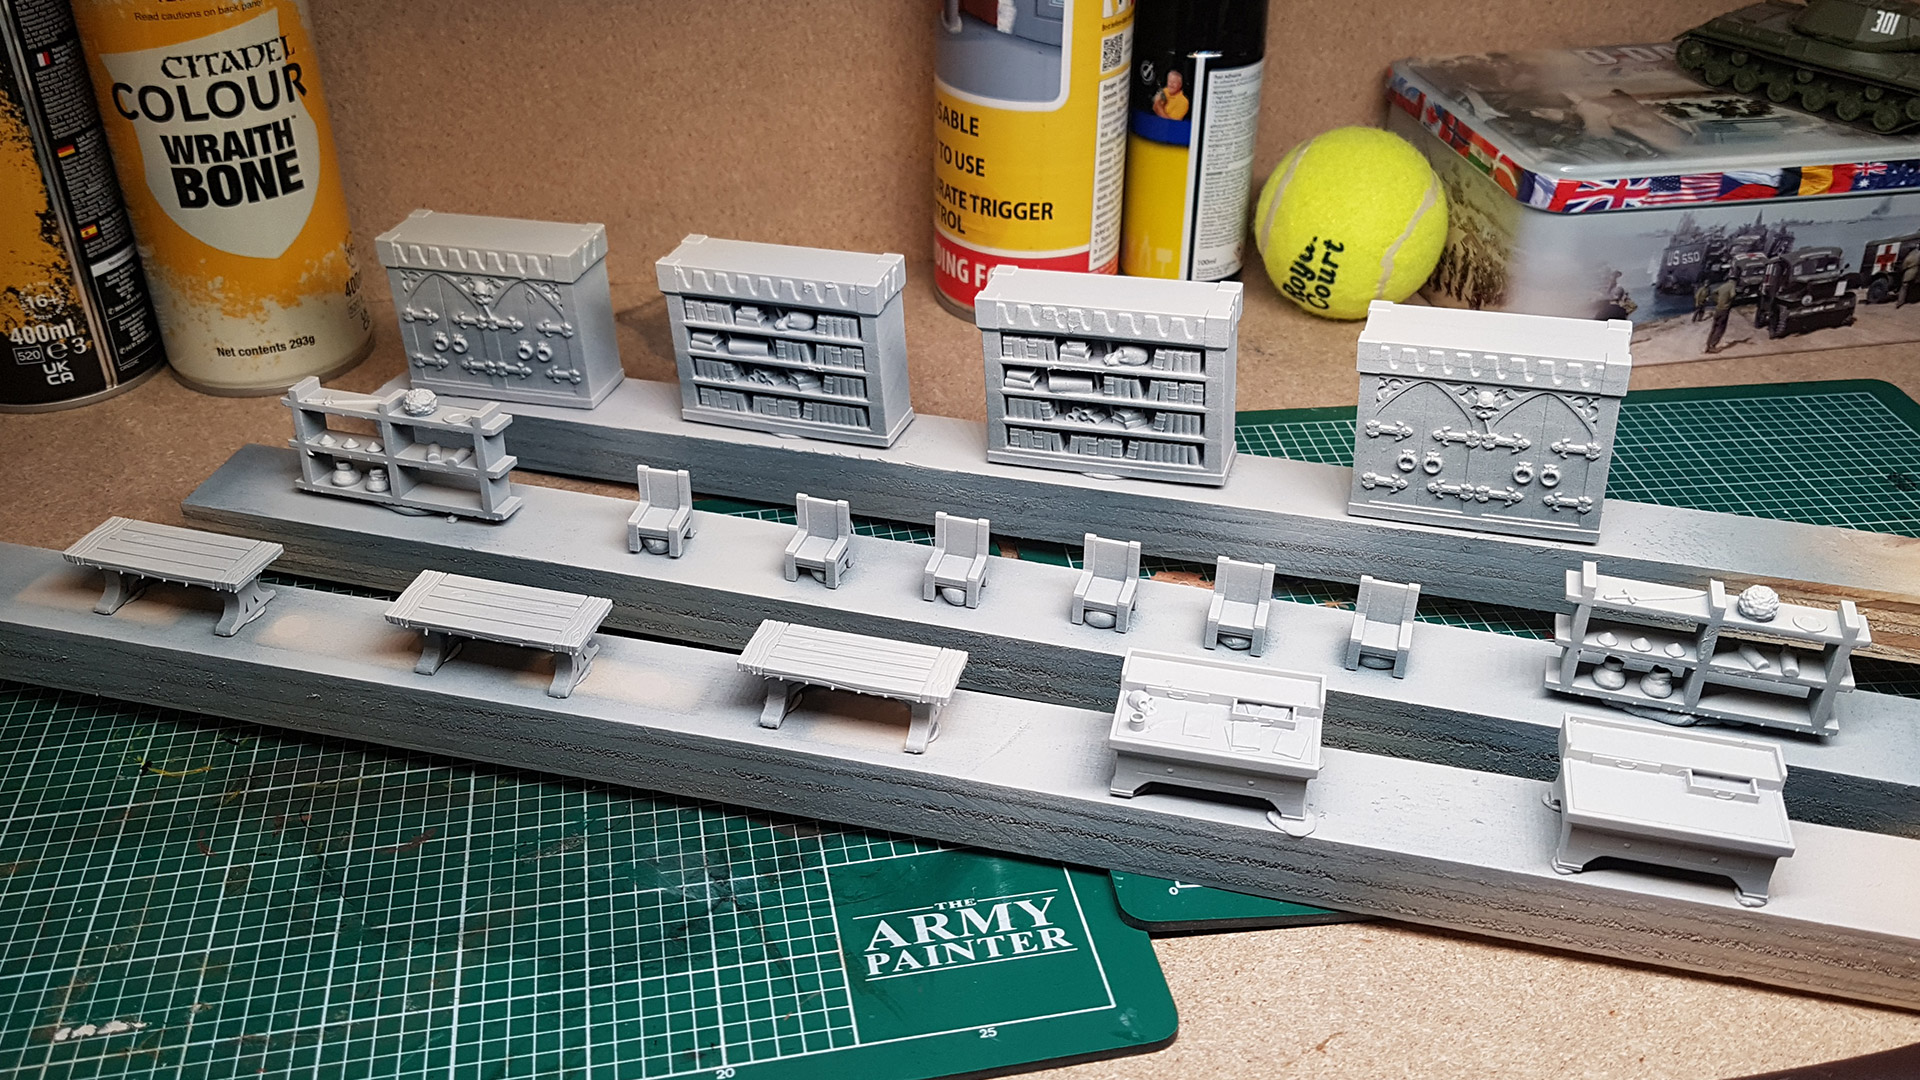
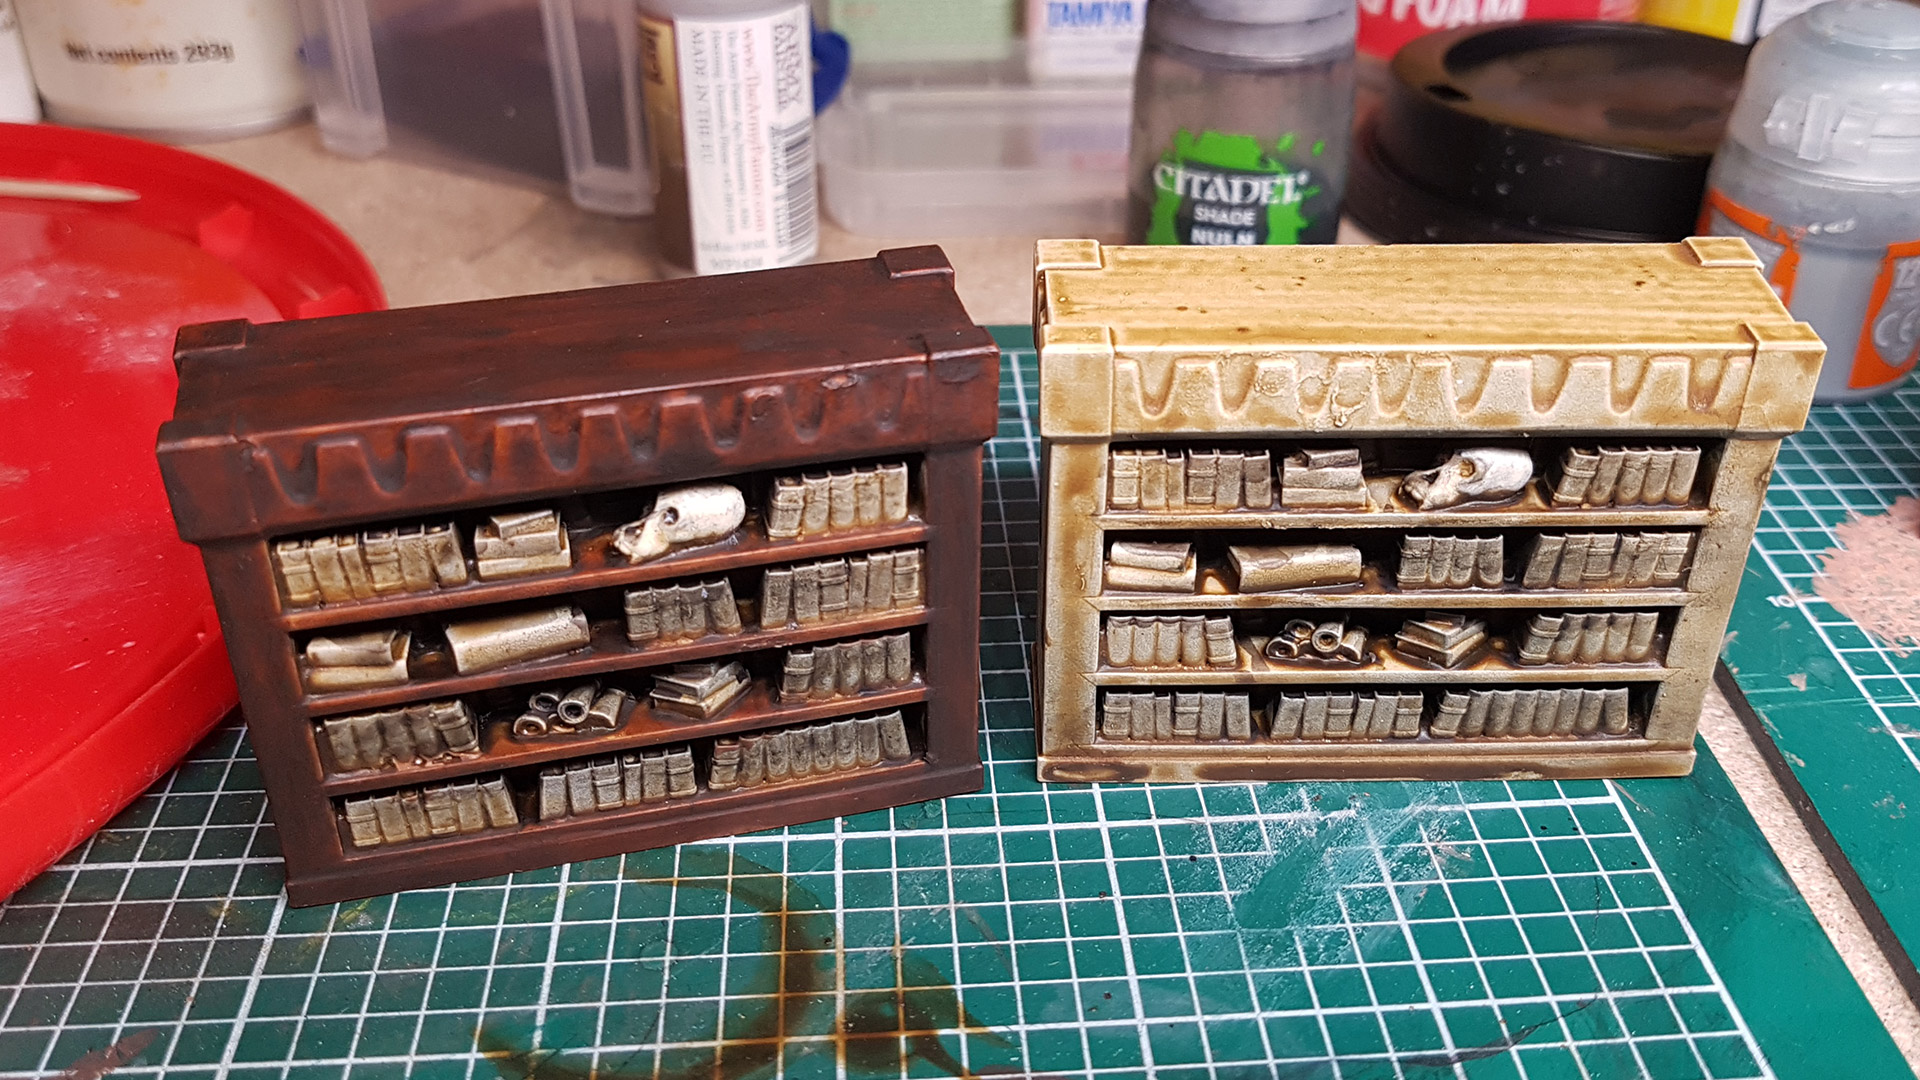
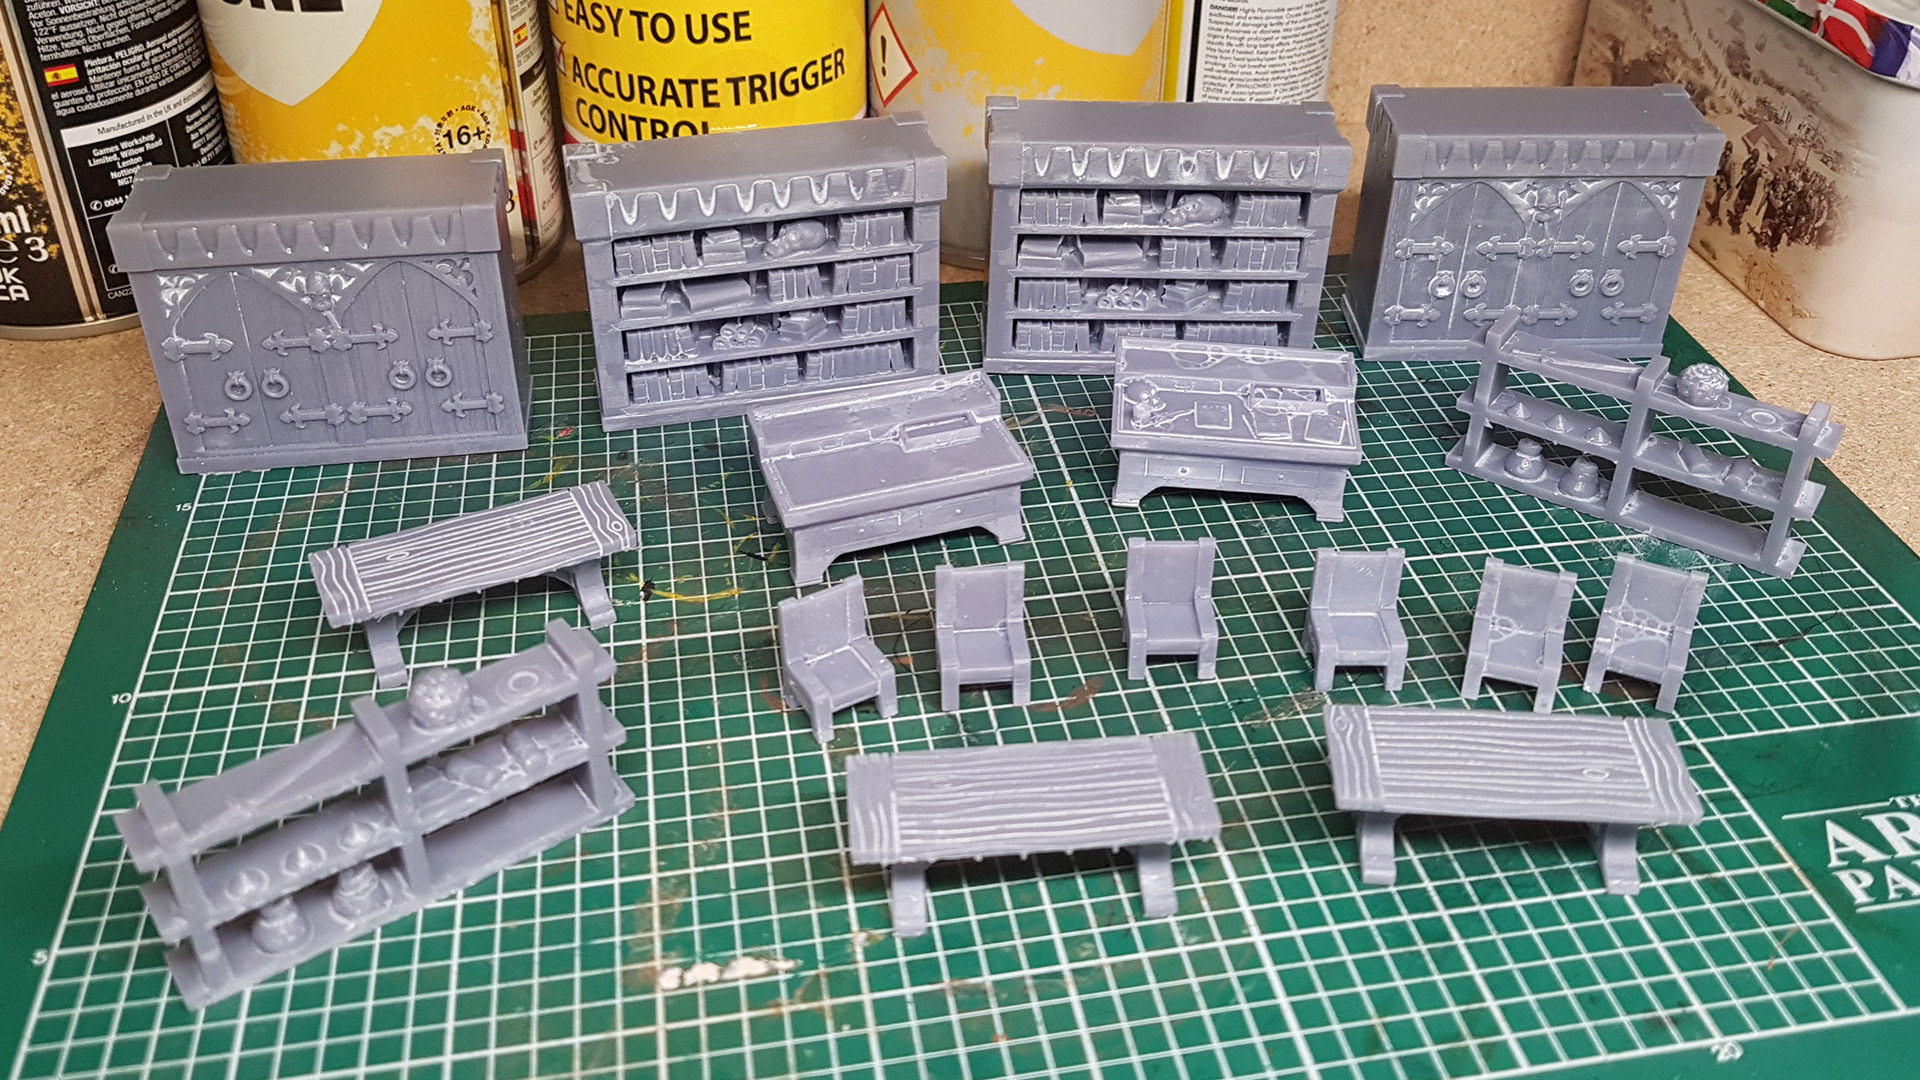 Looking Nice!
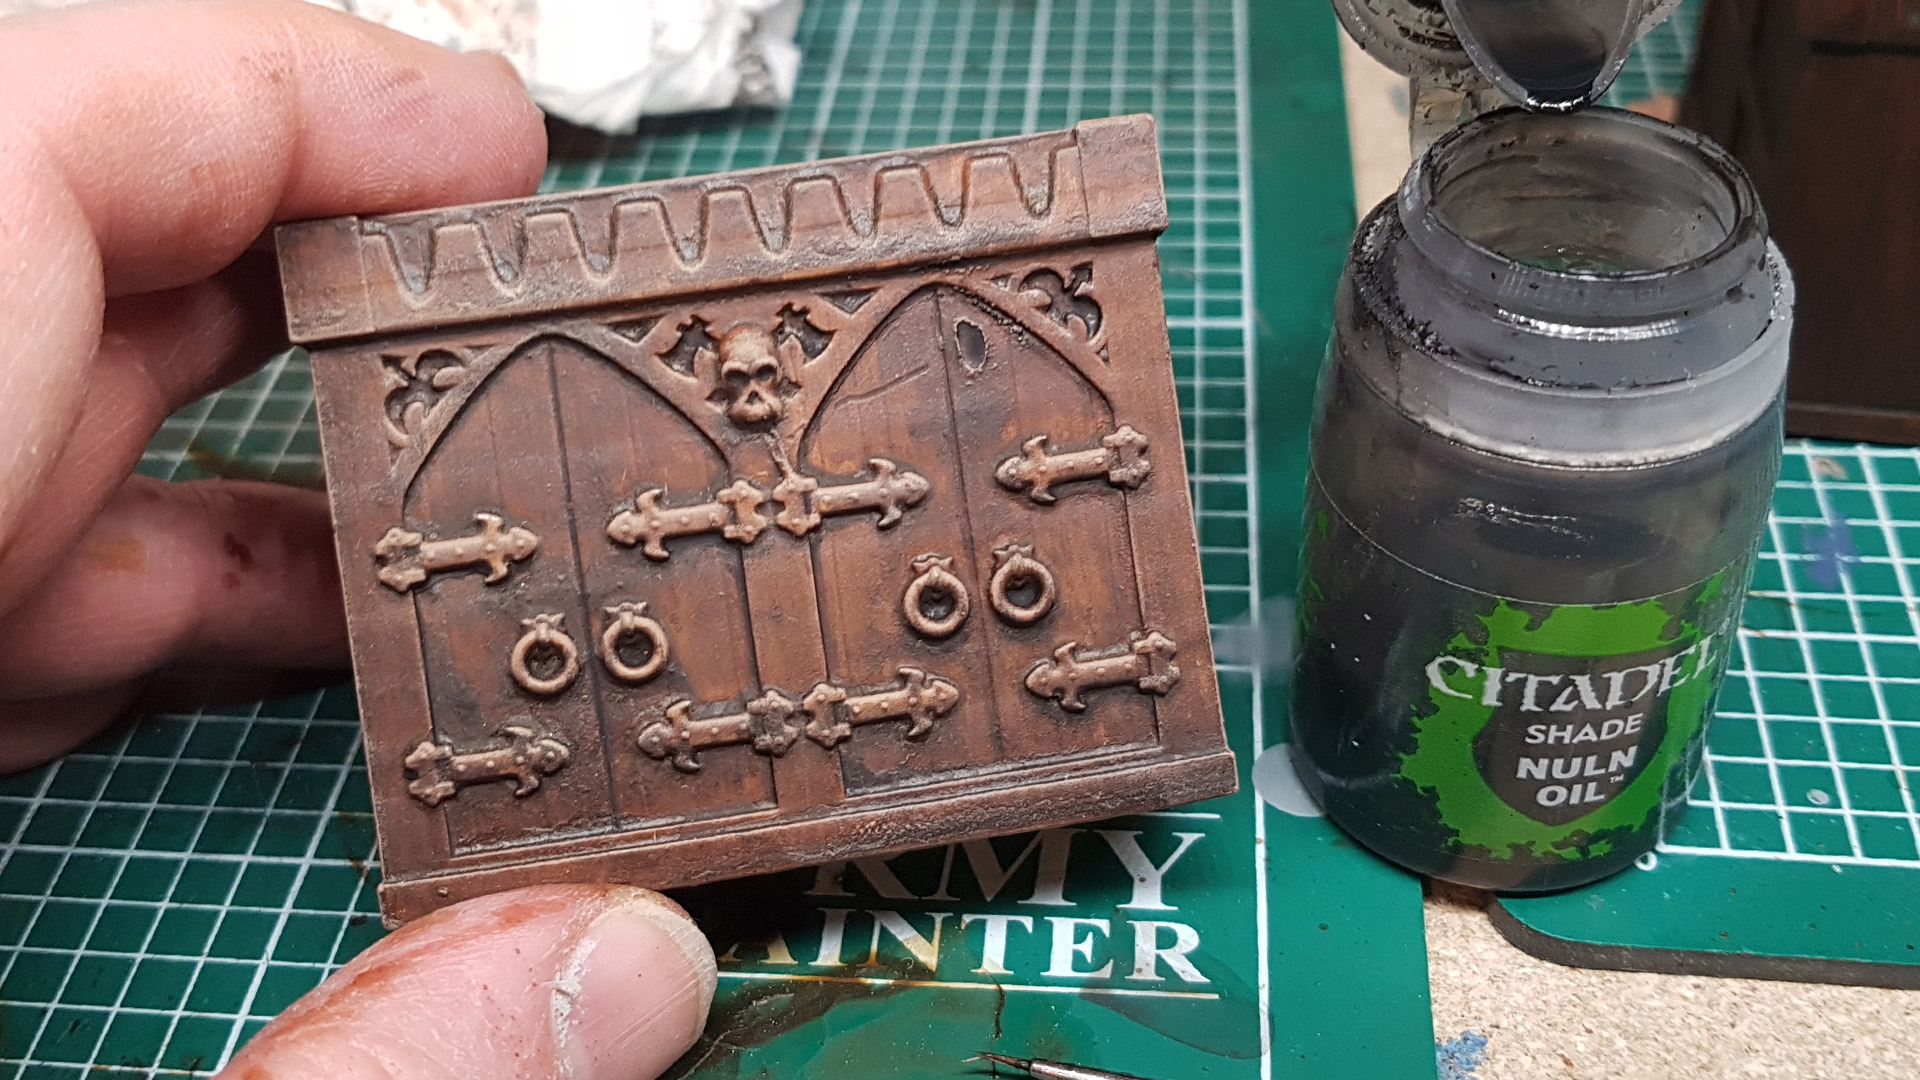
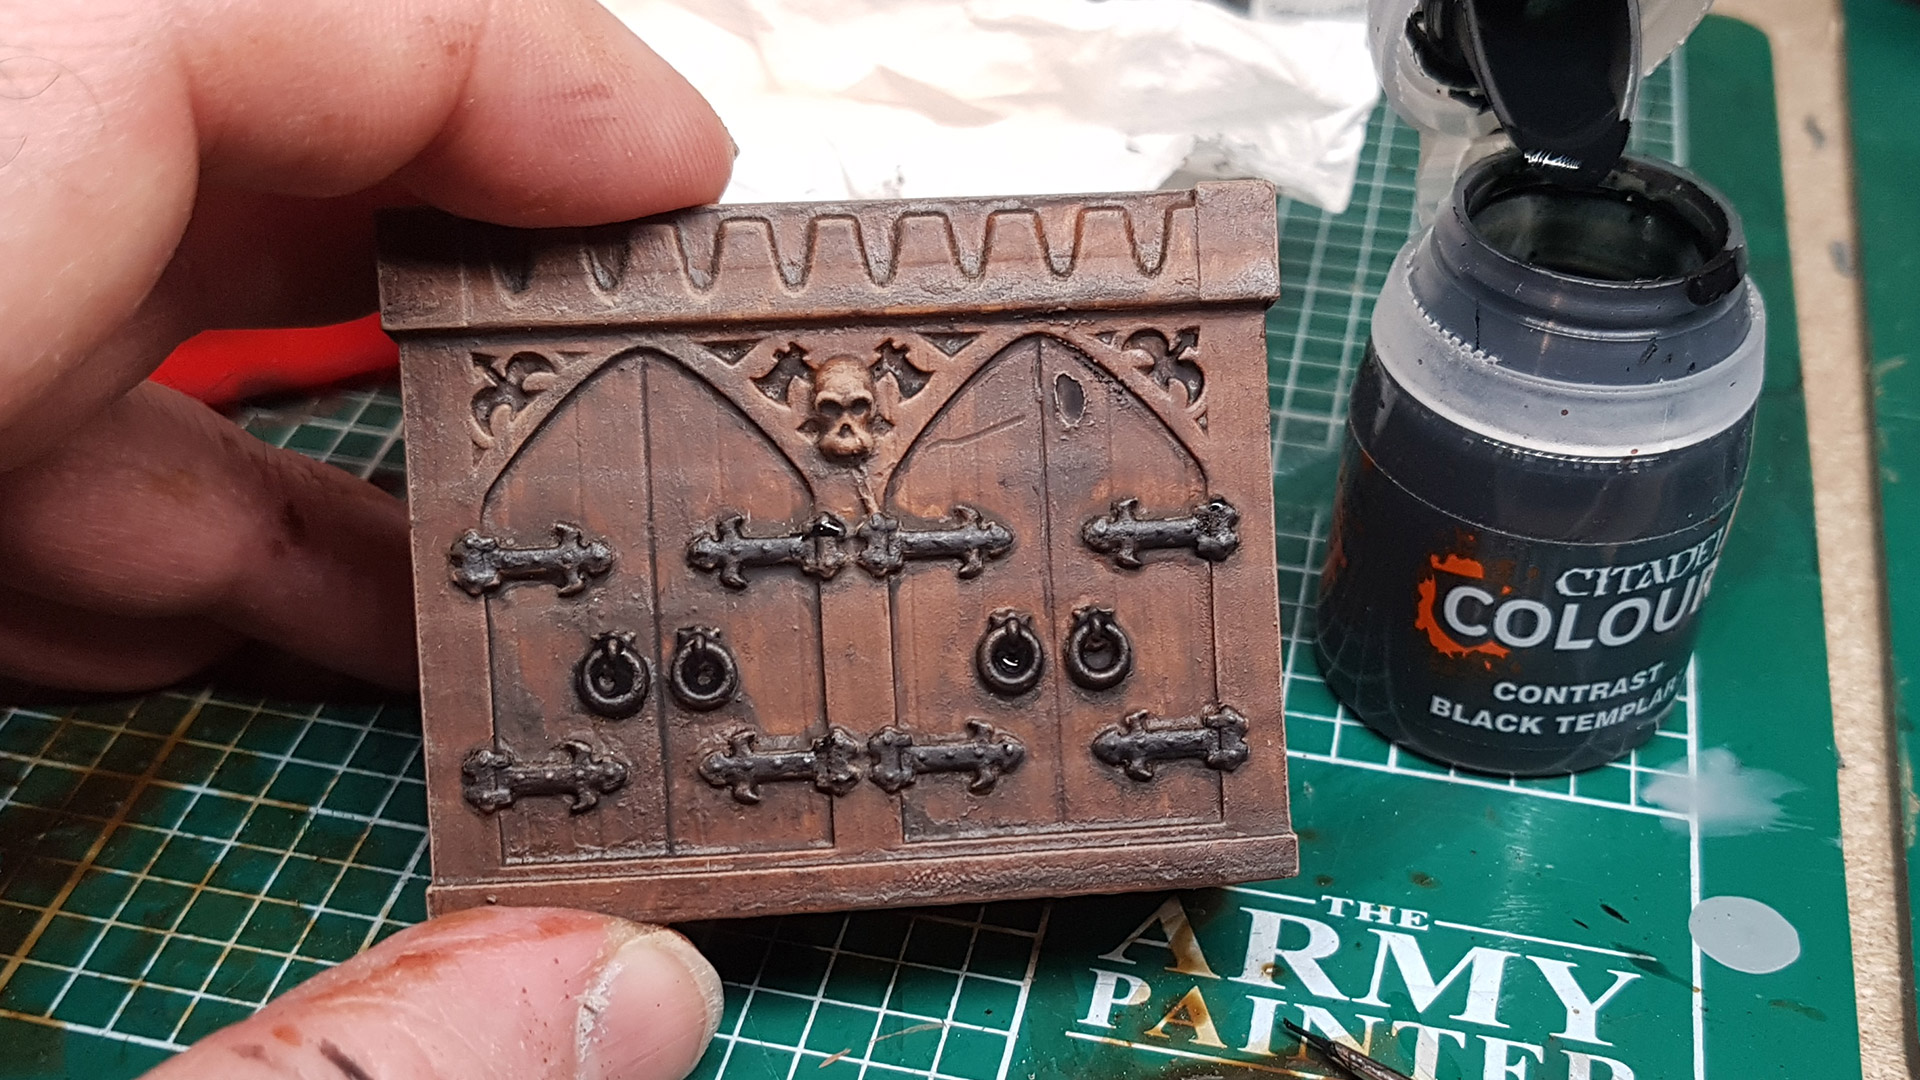
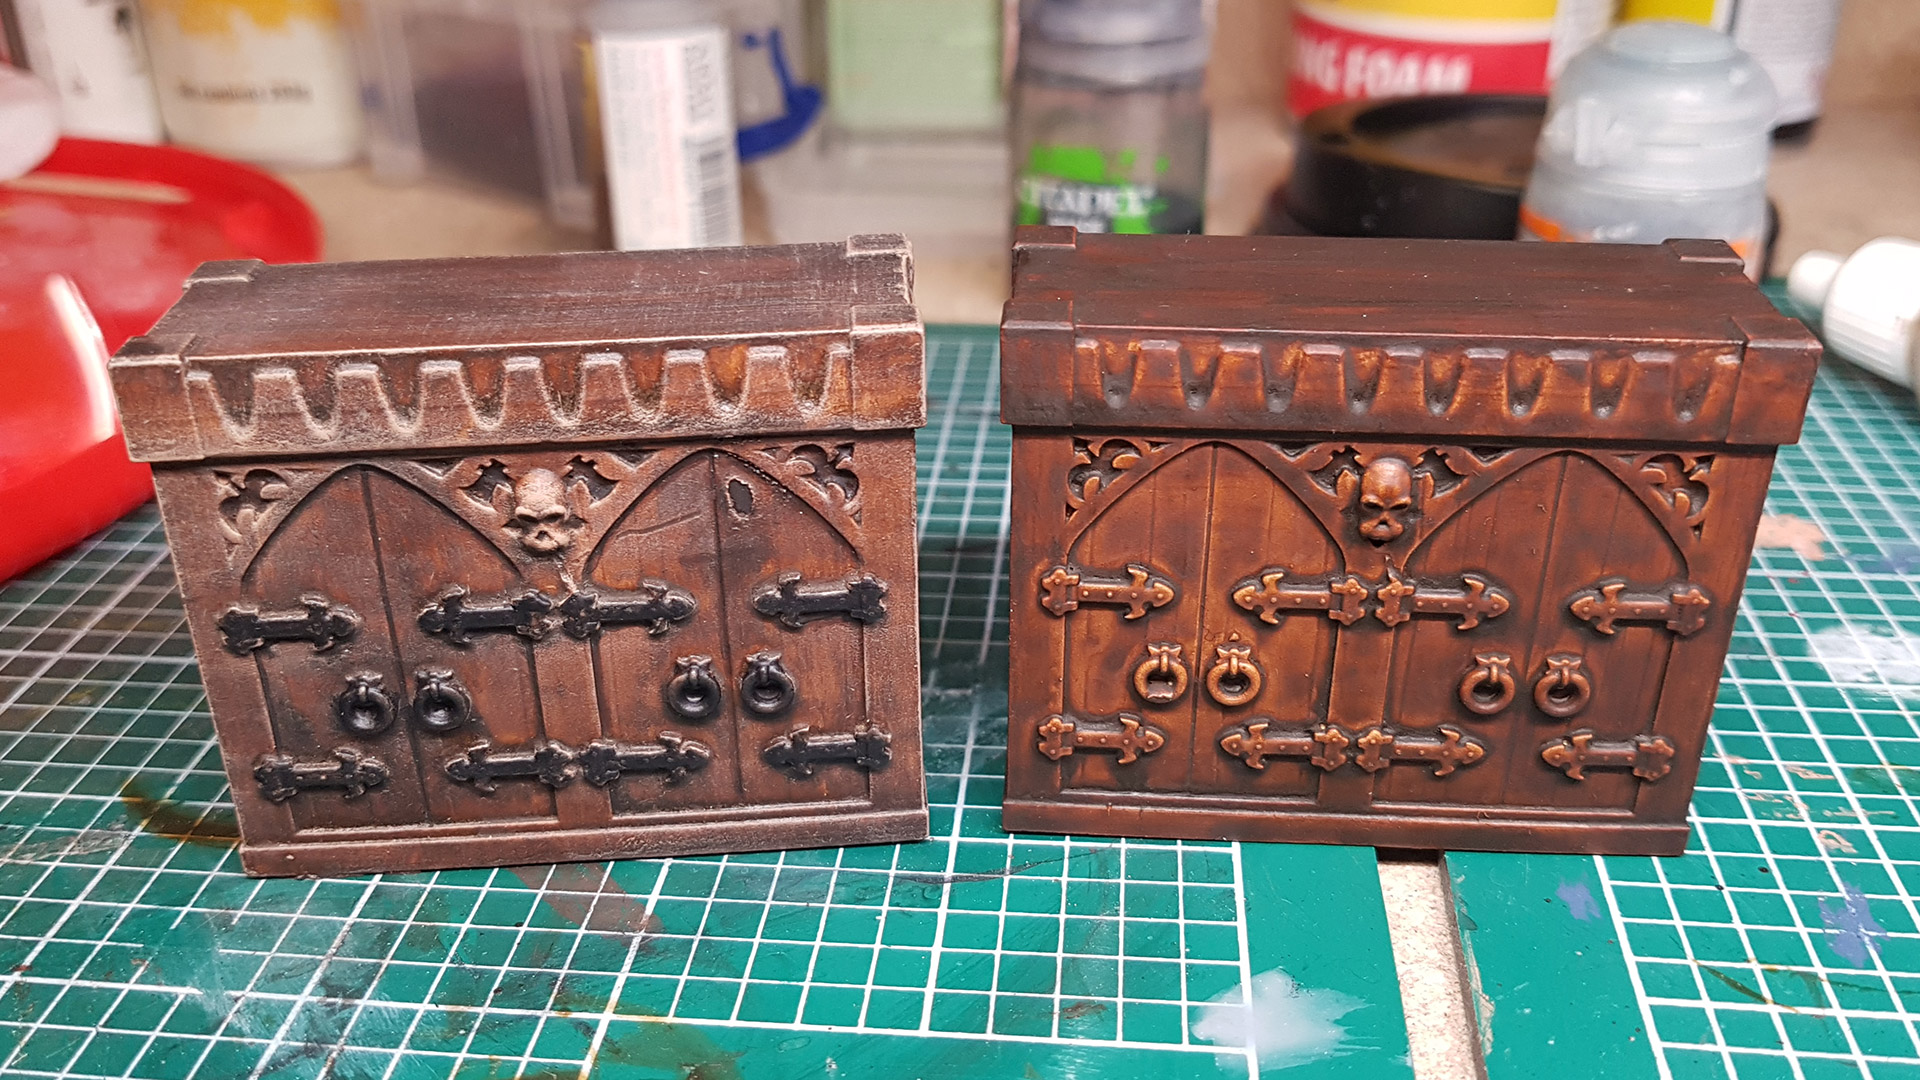
I’m at various stages of painting this set; some pieces are practically finished, while others haven’t progressed beyond priming. So I’ll just share a gallery of images to give you an idea of my painting approach.
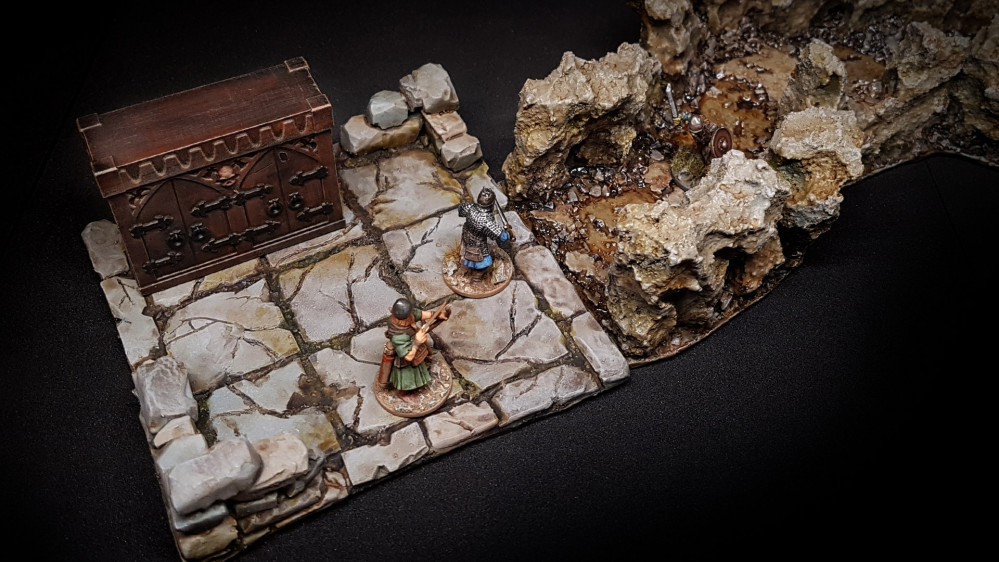
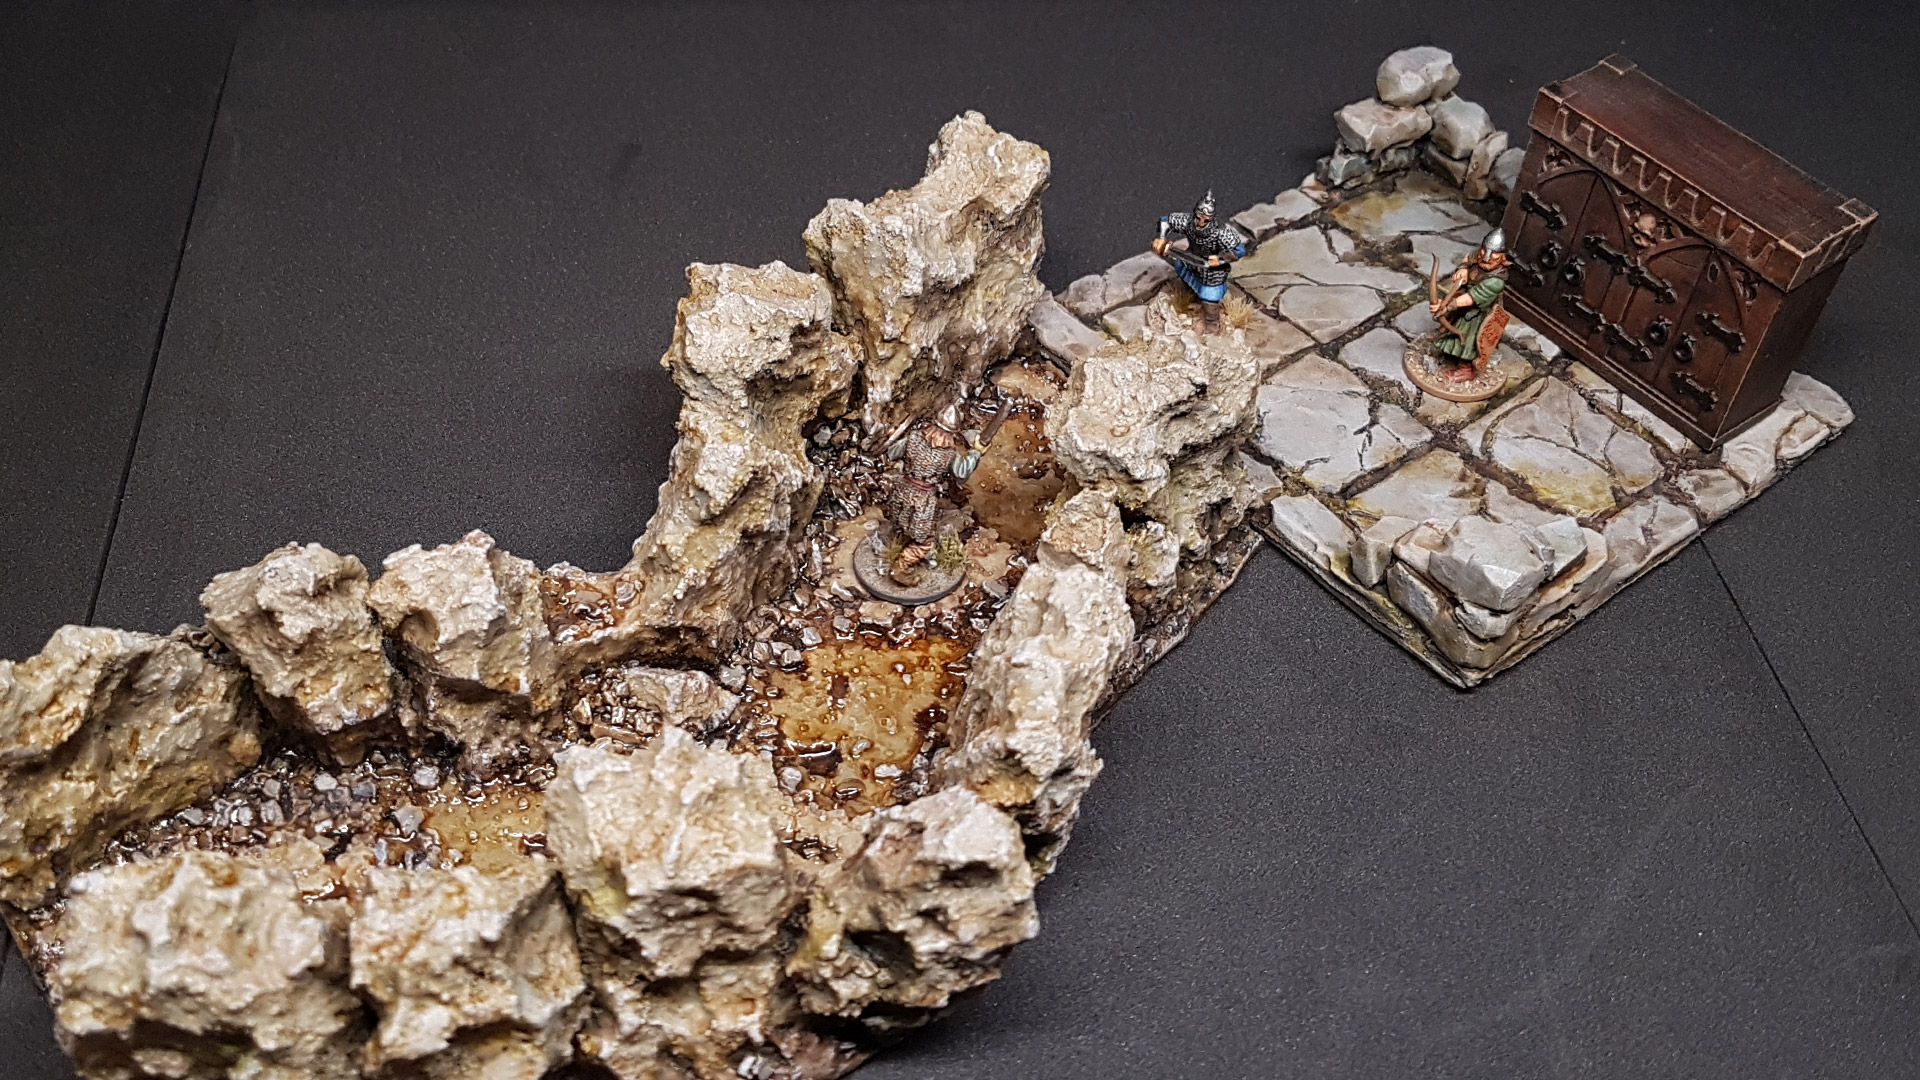
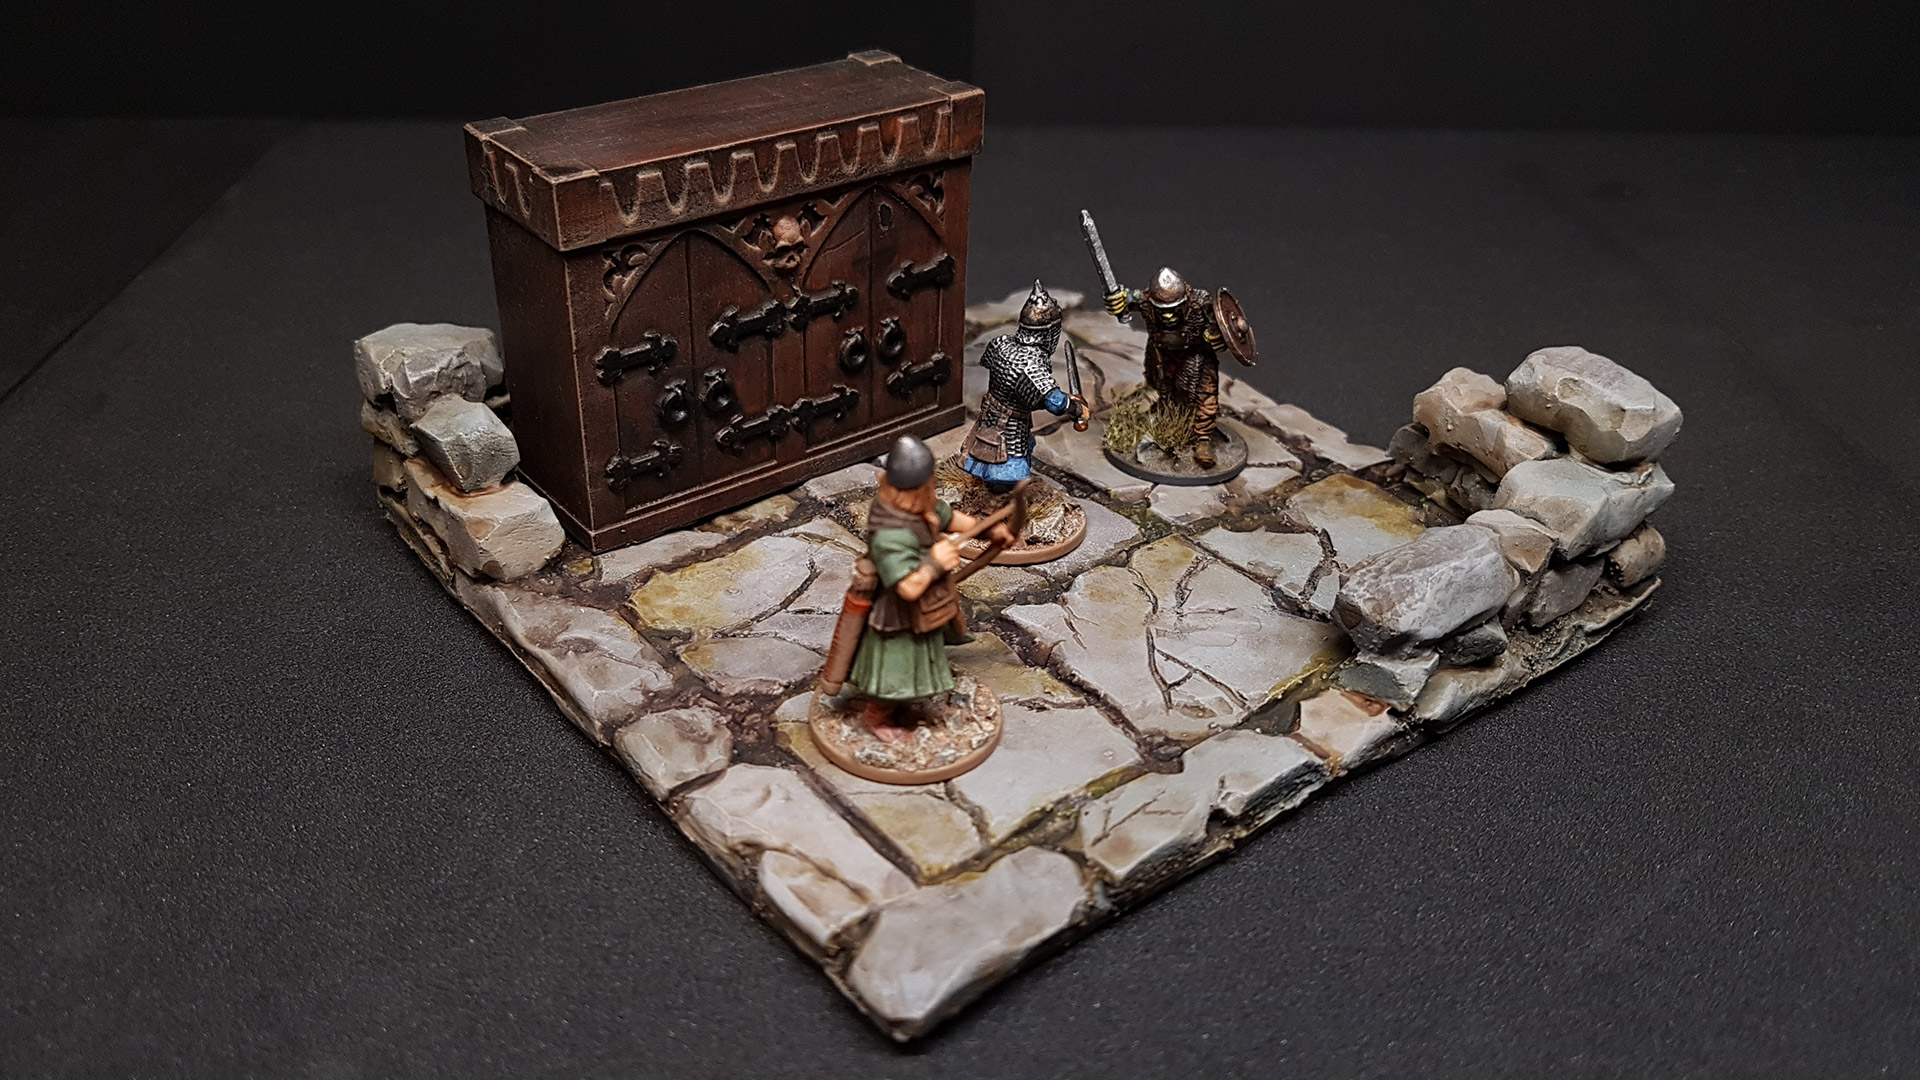
One Cavern Corridor Ready For Gaming!
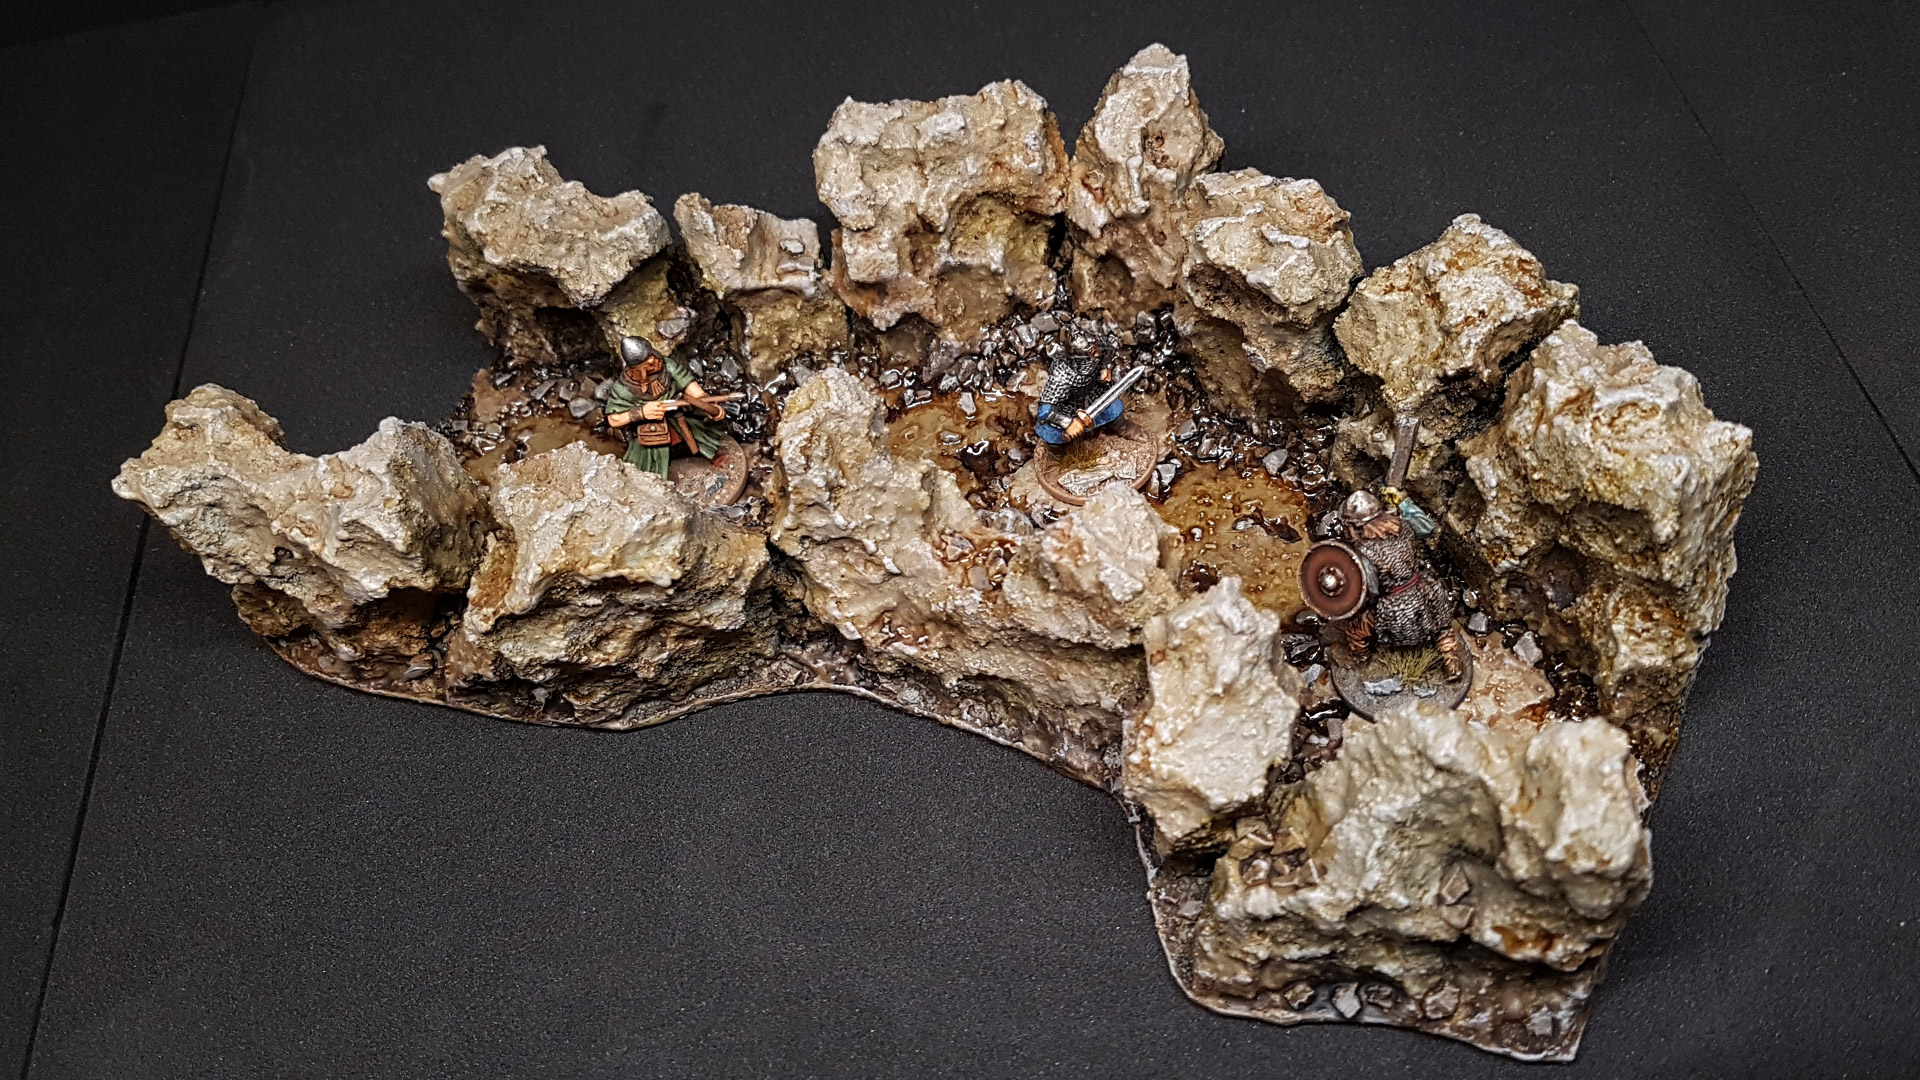
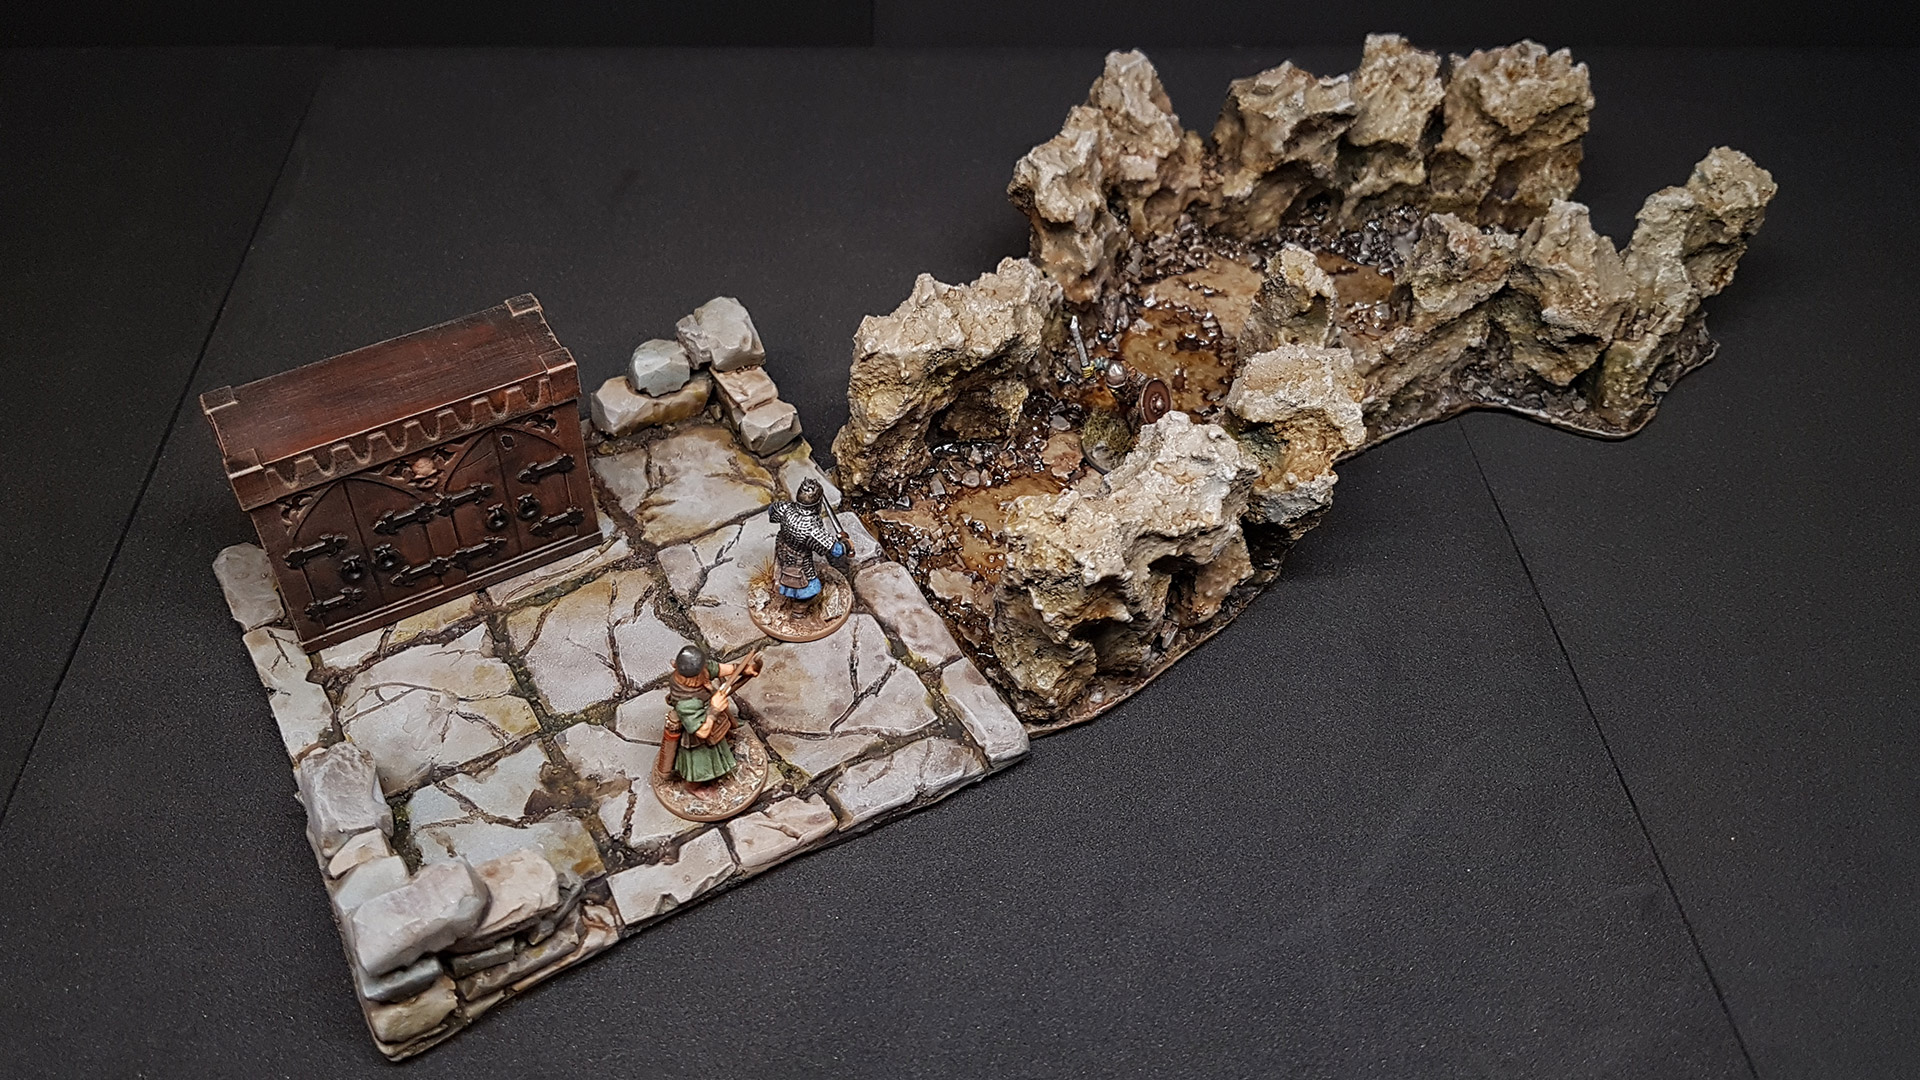
And there it is, my second style of dungeon tile and material, beckoning adventurers everywhere to come and explore its mysteries.
Let’s get a look at in use alongside the previous stone block dungeon tile, observing how they complement each other while also retaining their distinct characteristics.
Preparing the Cavern Corridor for Adventure With a Fresh Coat of Paint Part 2
Now it’s time to truly enhance the model with range of shades, capturing the essence of nature and evoking the atmosphere of a dark, damp cavern ripe for exploration.
Let's Wash It!
 Wash of Army Painter Light Tone, Diluting It With Water in Certain Areas
Washes are an excellent method for achieving varied shading on rock textures. I began with a wash of Light Tone from The Army Painter, softening its impact in certain areas by diluting it directly on the model during application.
While the wash was still wet, I incorporated a green Games Workshop contrast paint, specifically Plaguebearer Flesh, into selected areas. This was primarily around the bases of walls, within cracks, and in the depressions of the rock to simulate the presence of damp, algae, further enhancing the cavern’s dank atmosphere.
Applying the wash and contrast paint simultaneously allows for seamless blending, creating additional nuances in the shading.
To increase the shading variety on the model, I applied the Light Tone wash again in specific spots, enriching the overall depth and texture.
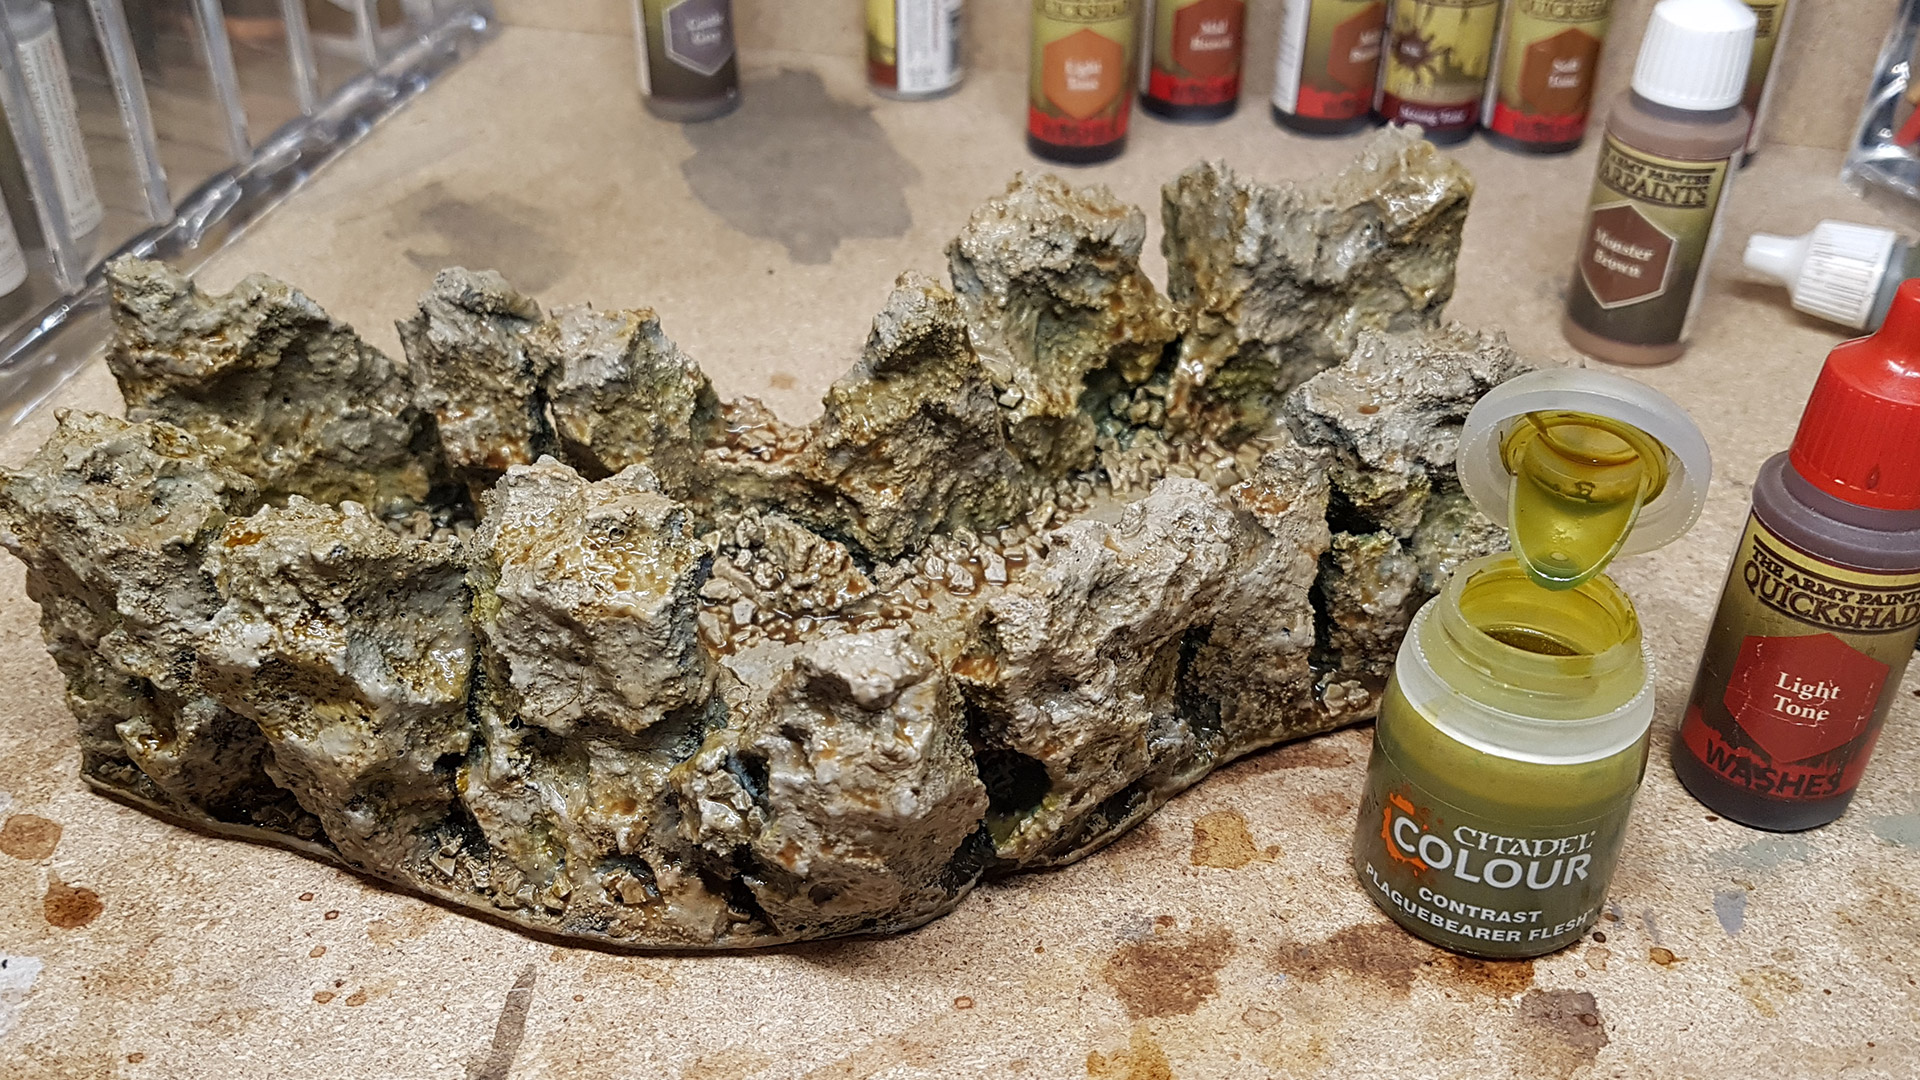 Plaguebearer Flesh Simulates the Presence of Damp Algae
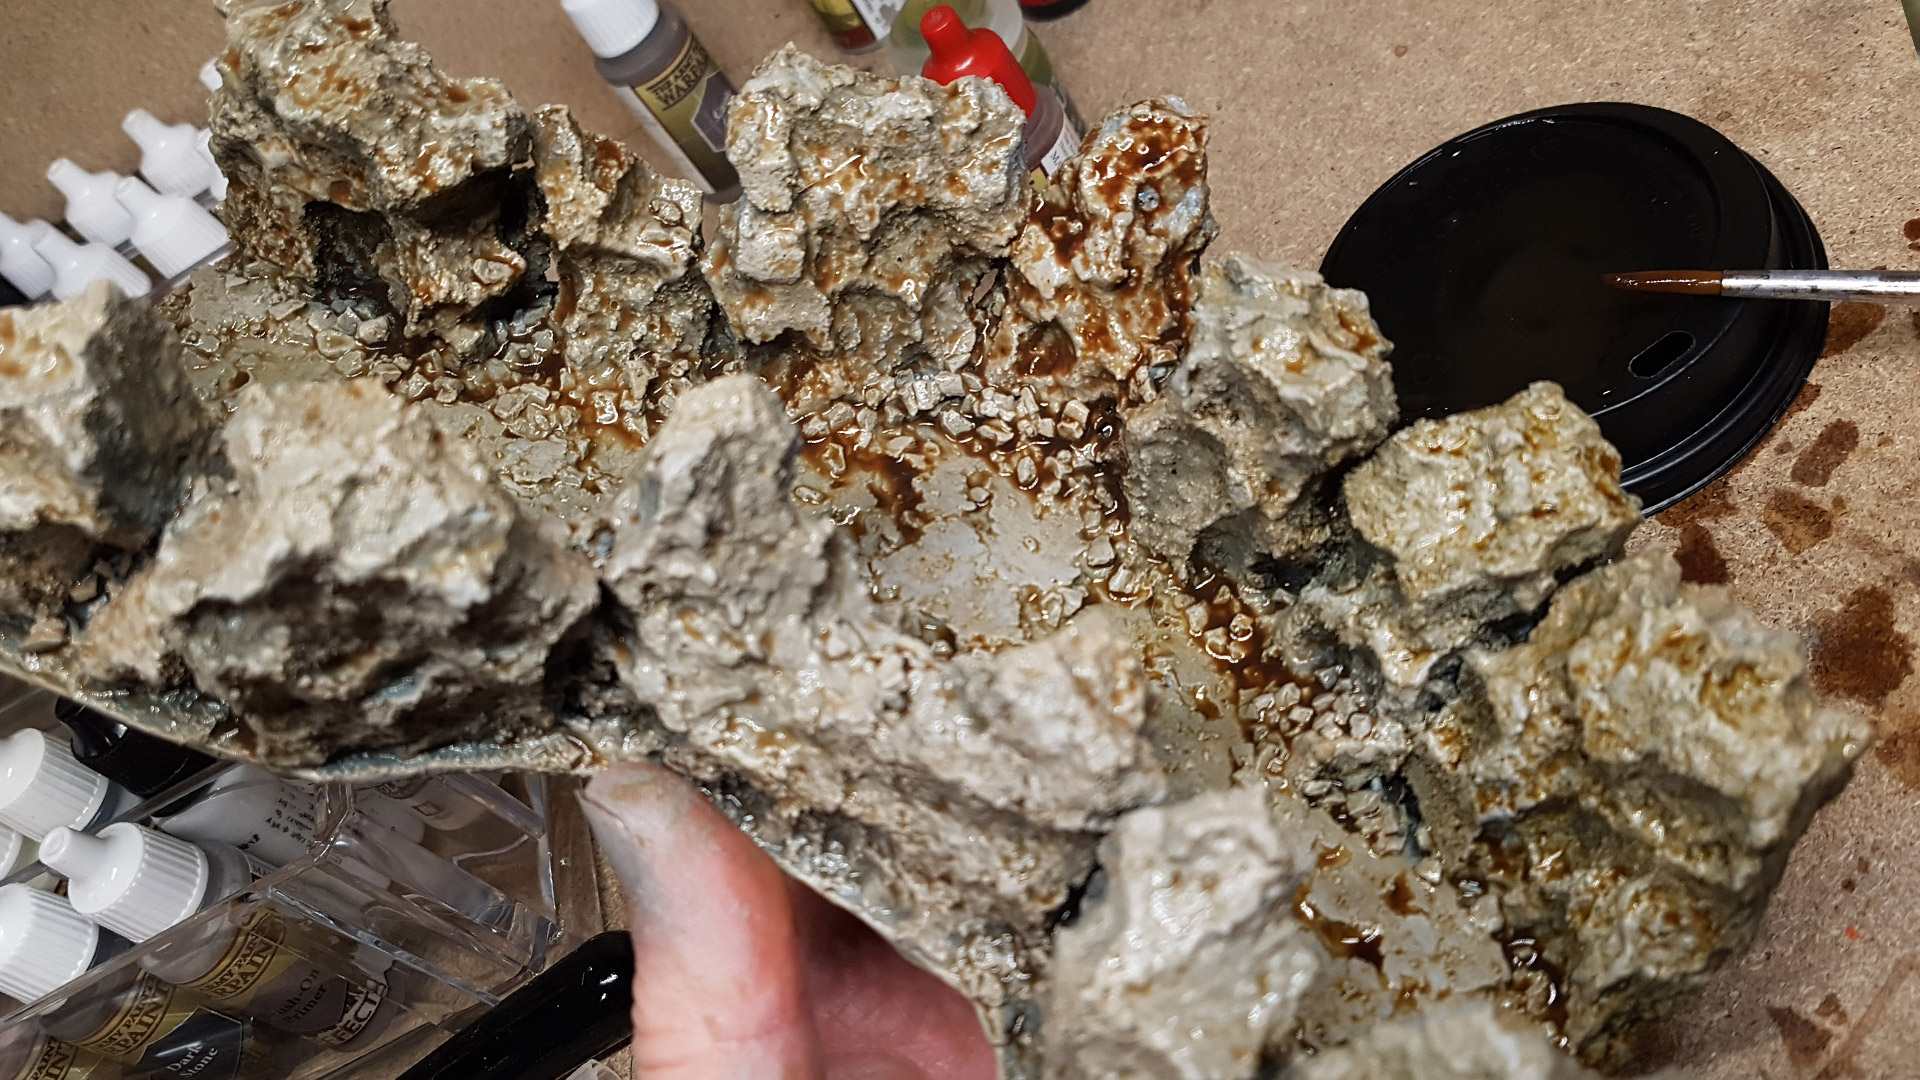
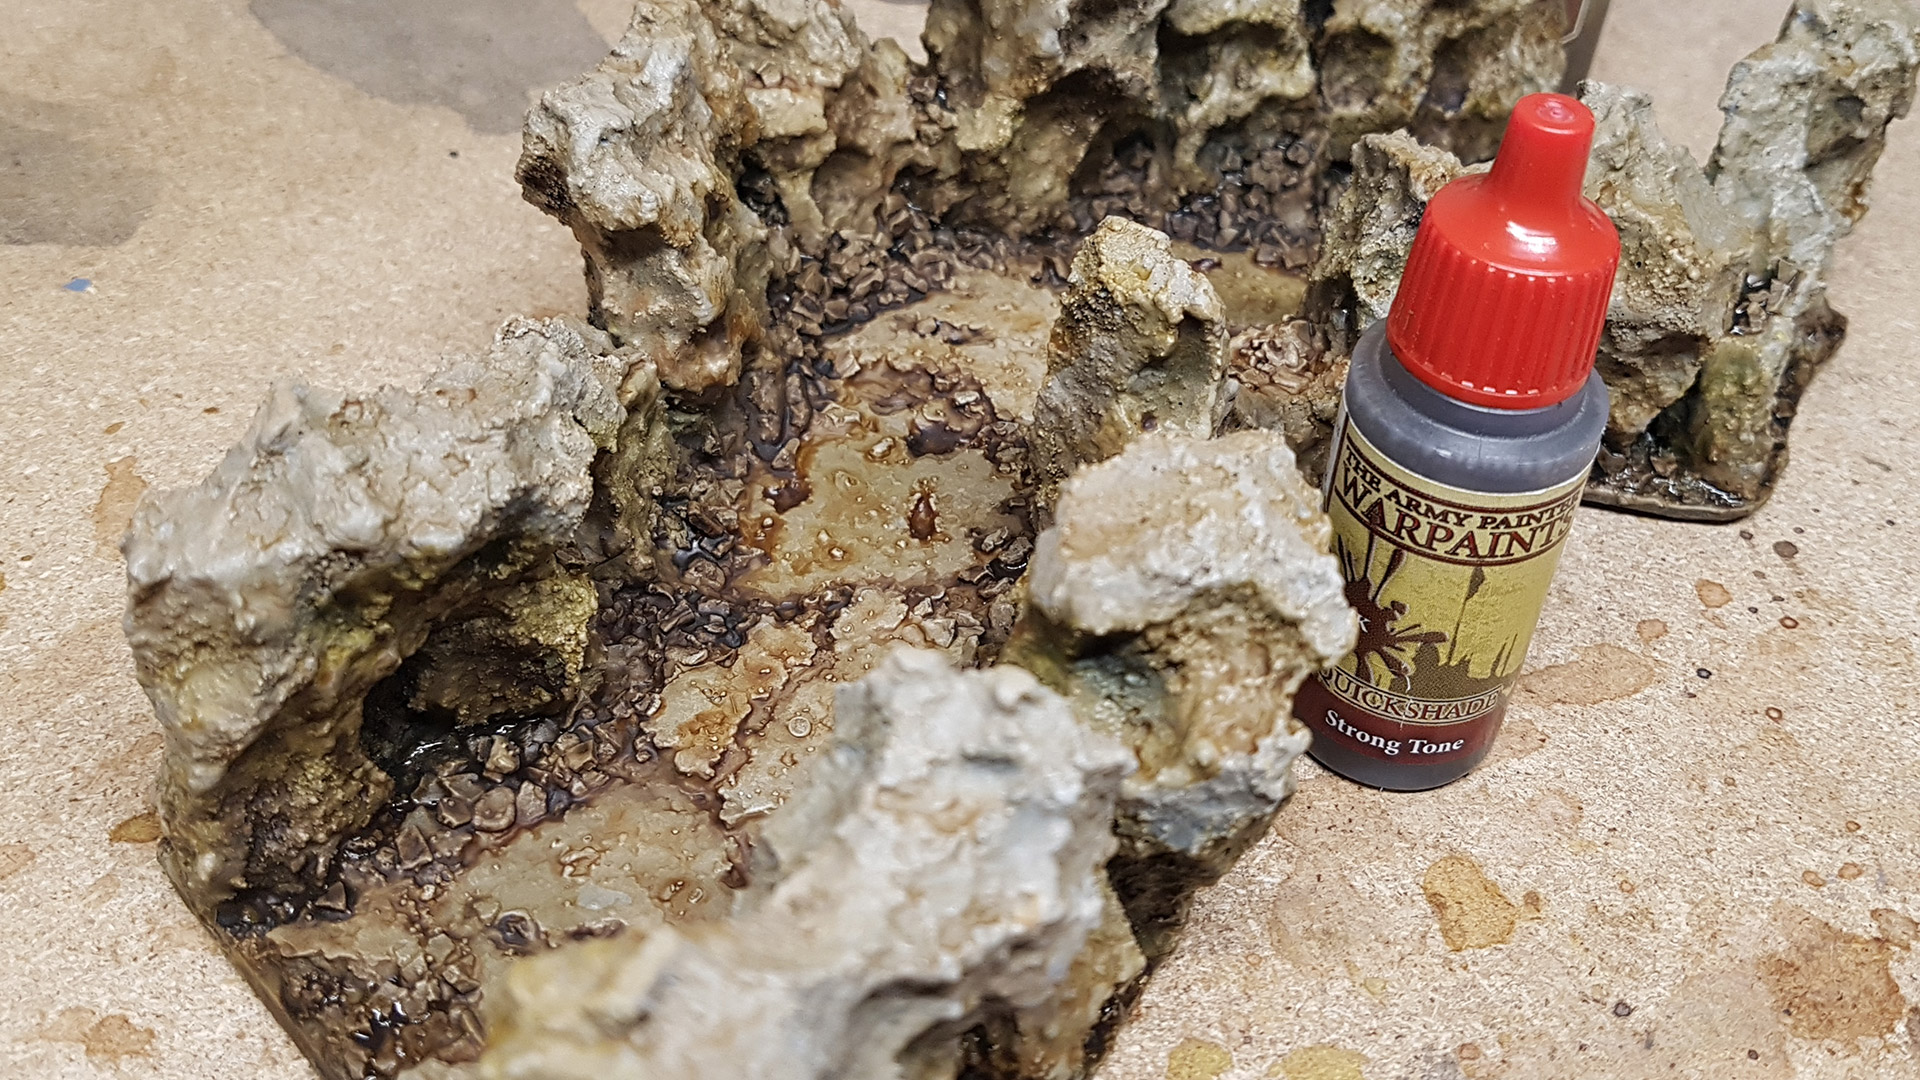
I enhanced the shading on the rock walls using Strong Tone, another wash from The Army Painter. I focused on the bases of the walls, any cracks, and areas likely to be in shadow, such as beneath overhanging rock portions and depressions in both the walls and floor.
Additionally, I applied the Strong Tone around the scattered rocks on the floor, any other piles of debris, and along the edges of the flat tile areas. This technique was used to delineate one tile from another, adding depth and definition to the overall appearance of the cavern.
In addition to applying extra wash shading, I used Light Tone once more, this time selectively over every other tile on the floor. This technique further helped to delineate one tile from another, enhancing the visual distinction and depth across the cavern floor.
 Strong Tone Applied to Scattered Rocks and Sections of the Walls
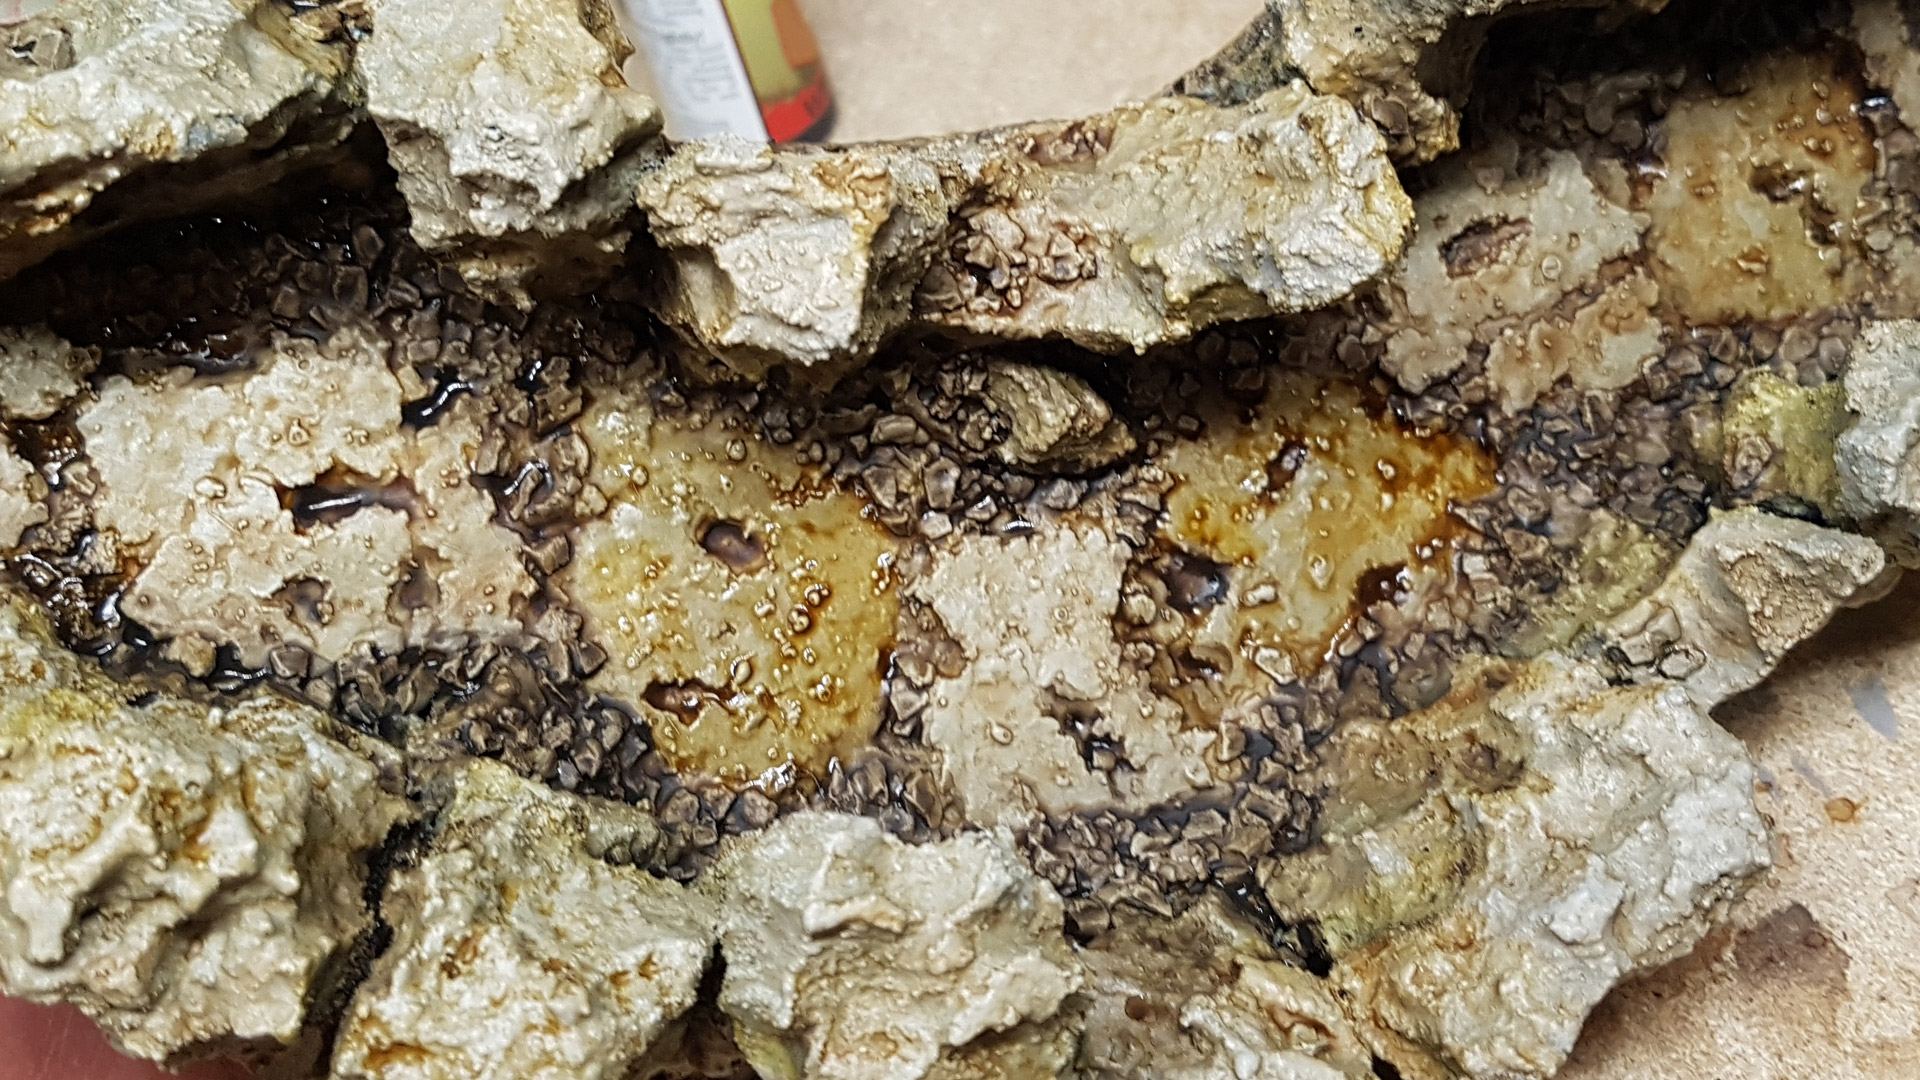 Adding Additional Wash Shading to Alternate Tiles
Returning to Painting for the Finishing Touches
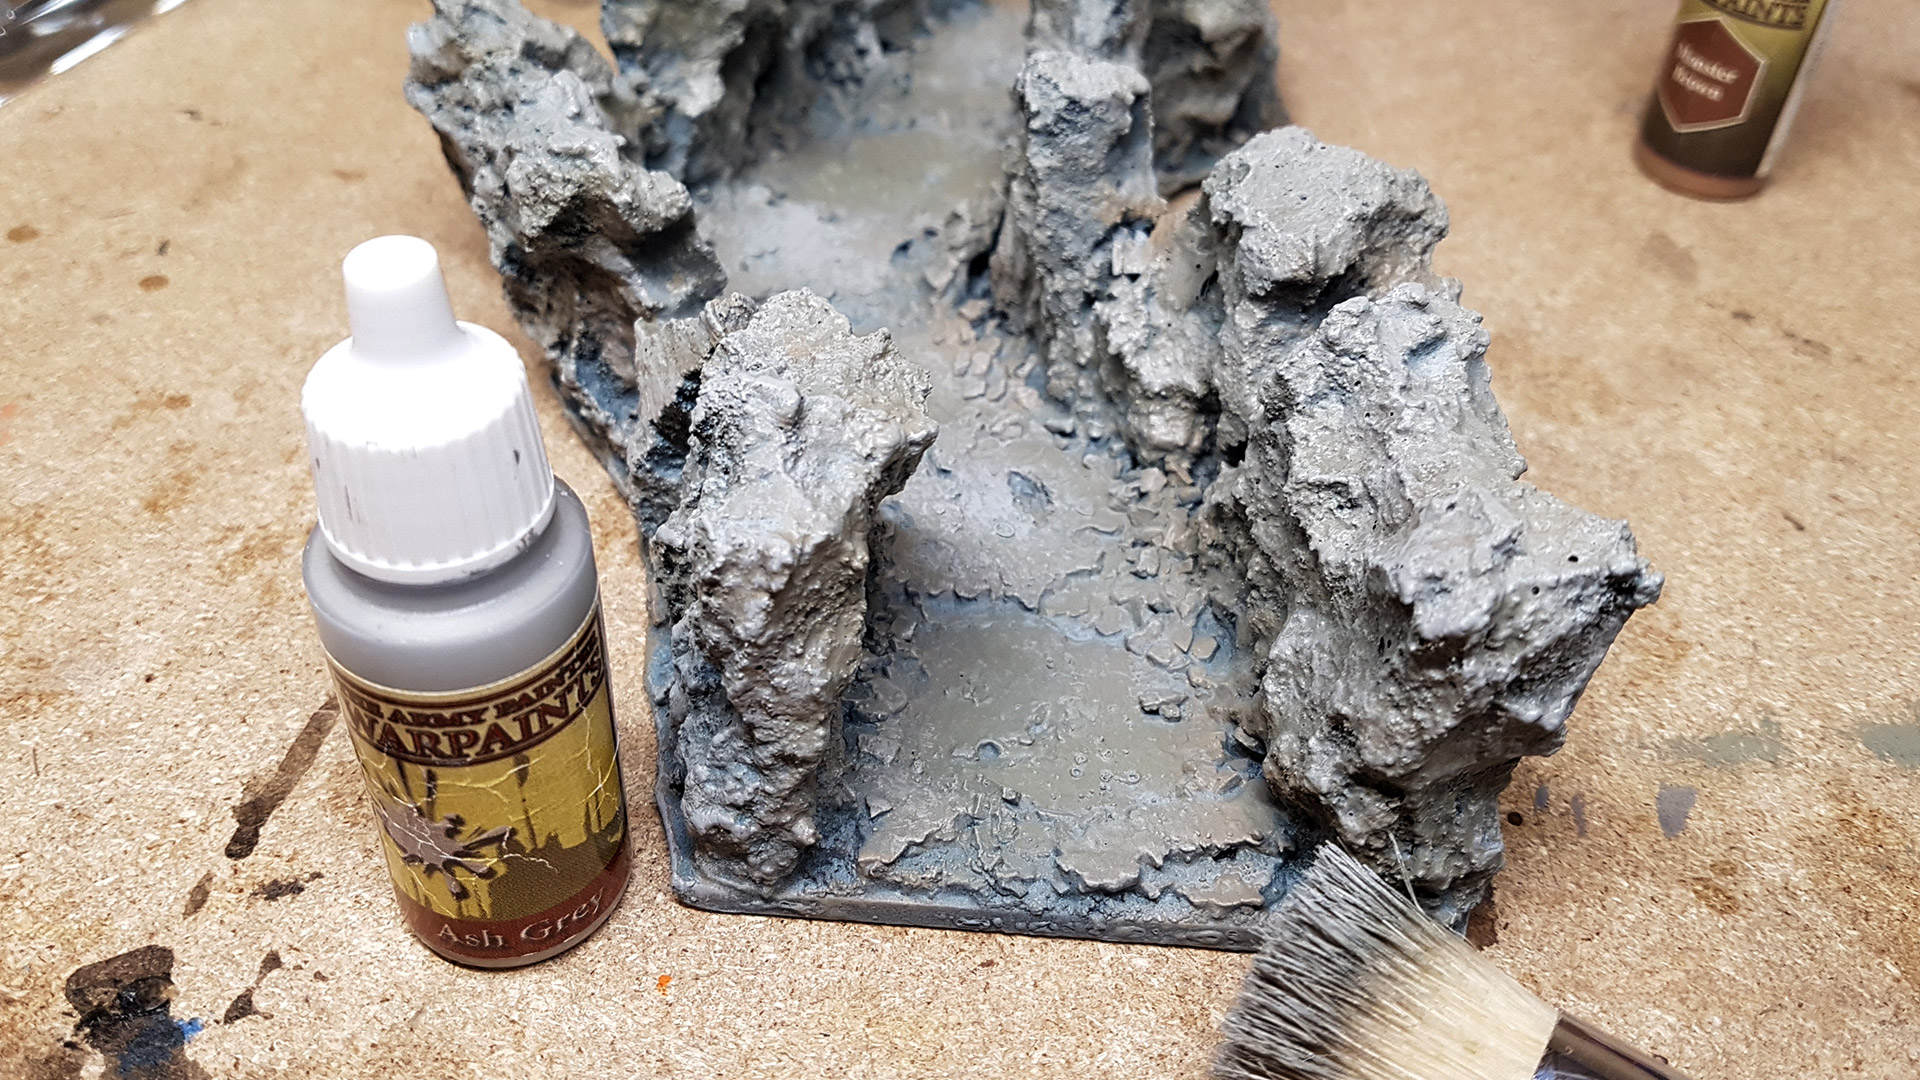
The final touches involved a comprehensive drybrush over the model to re-emphasize the highlights that had been subdued by the washes. I used Ash Grey for a subtle highlight, then added distinct splashes of colour to individual rocks using both Ash Grey and Castle Grey, paints from The Army Painter range.
Intrigued by the idea of water seeping into the cavern from the walls, I experimented with creating a water effect. I applied paper gloss varnish in drops over the scattered stones along the wall edges and in the crevices holding smaller rocks, simulating water accumulation.
Additionally, I envisaged areas of the floor and lower-level tiles as being filled with water, indicating they were at a lower elevation and thus collected water first, leaving some tiles dry as the water hadn’t reached their level yet.
For the gloss varnish, I recommend using an acrylic-based gloss varnish in future projects for quicker drying times. The paper gloss varnish, chosen out of convenience at the time, requires several days to dry thoroughly due to the solvents that need to evaporate through the gloss.
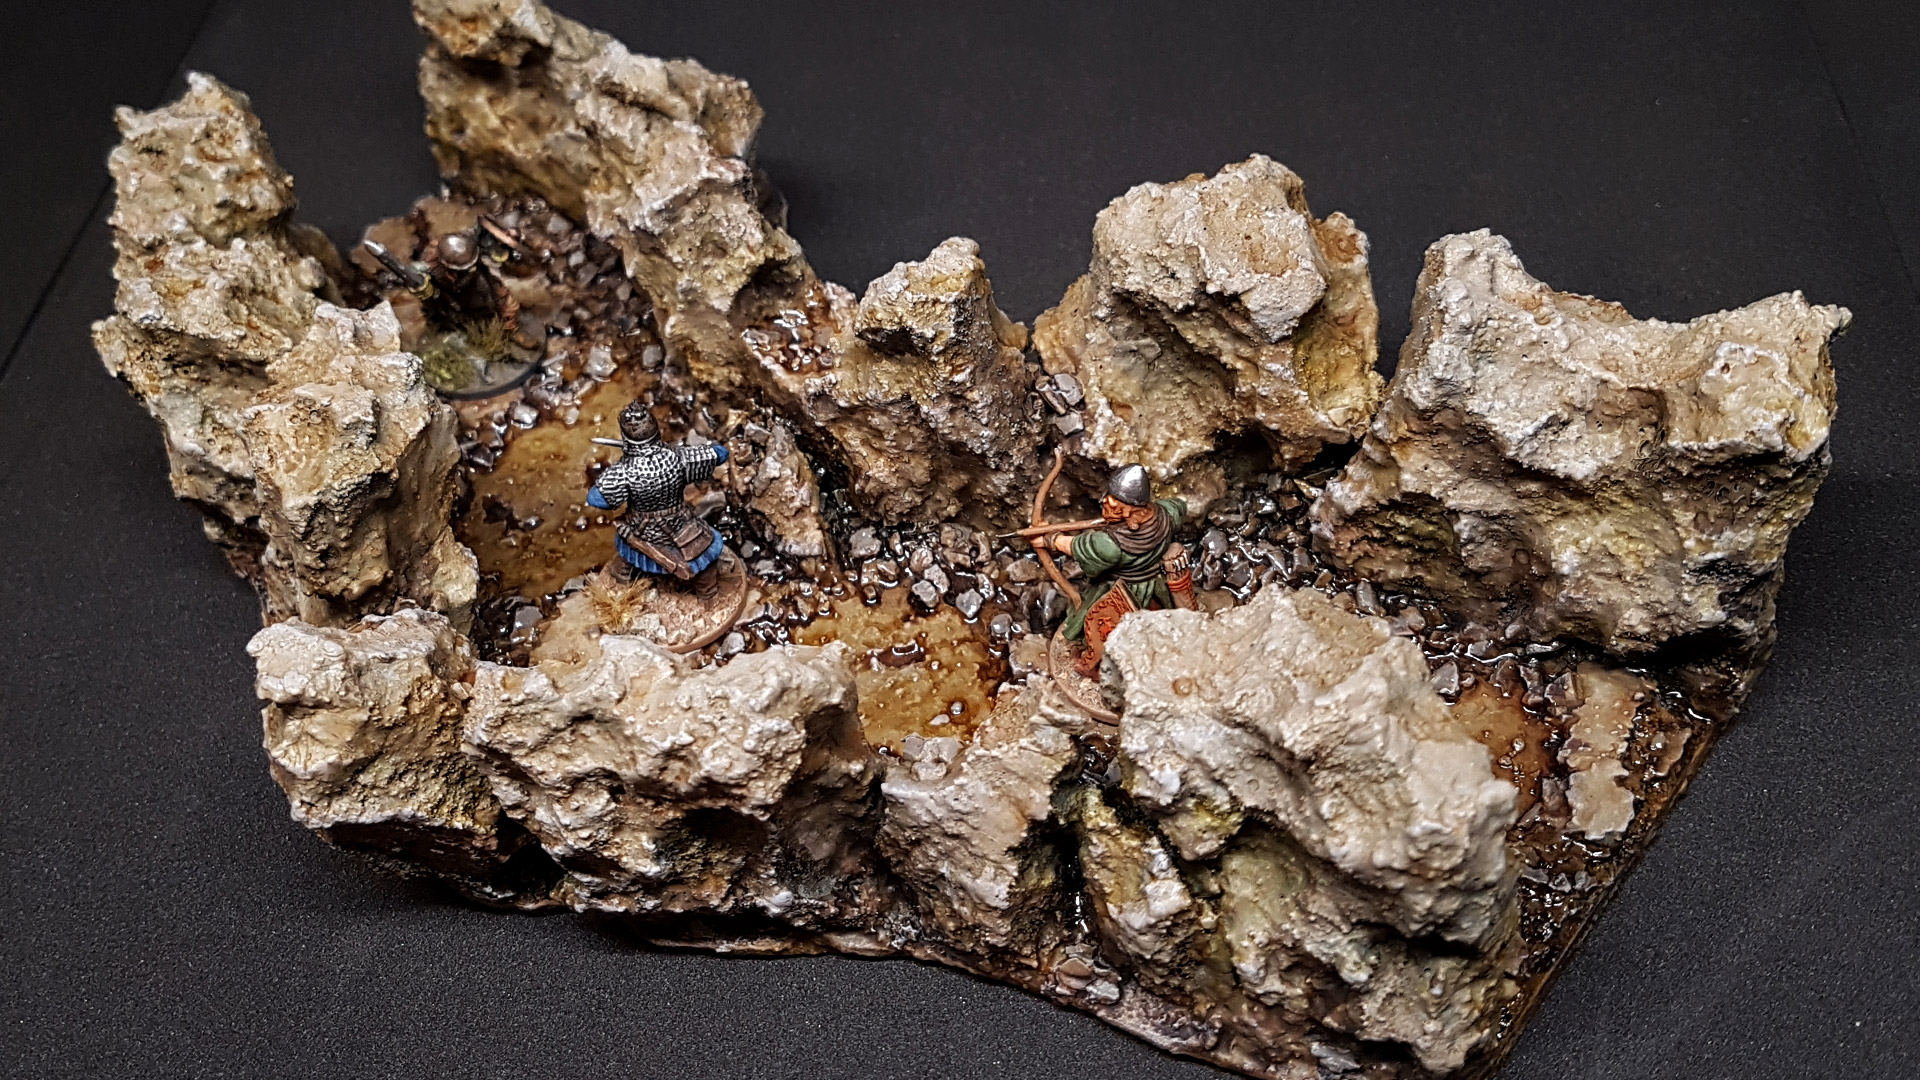
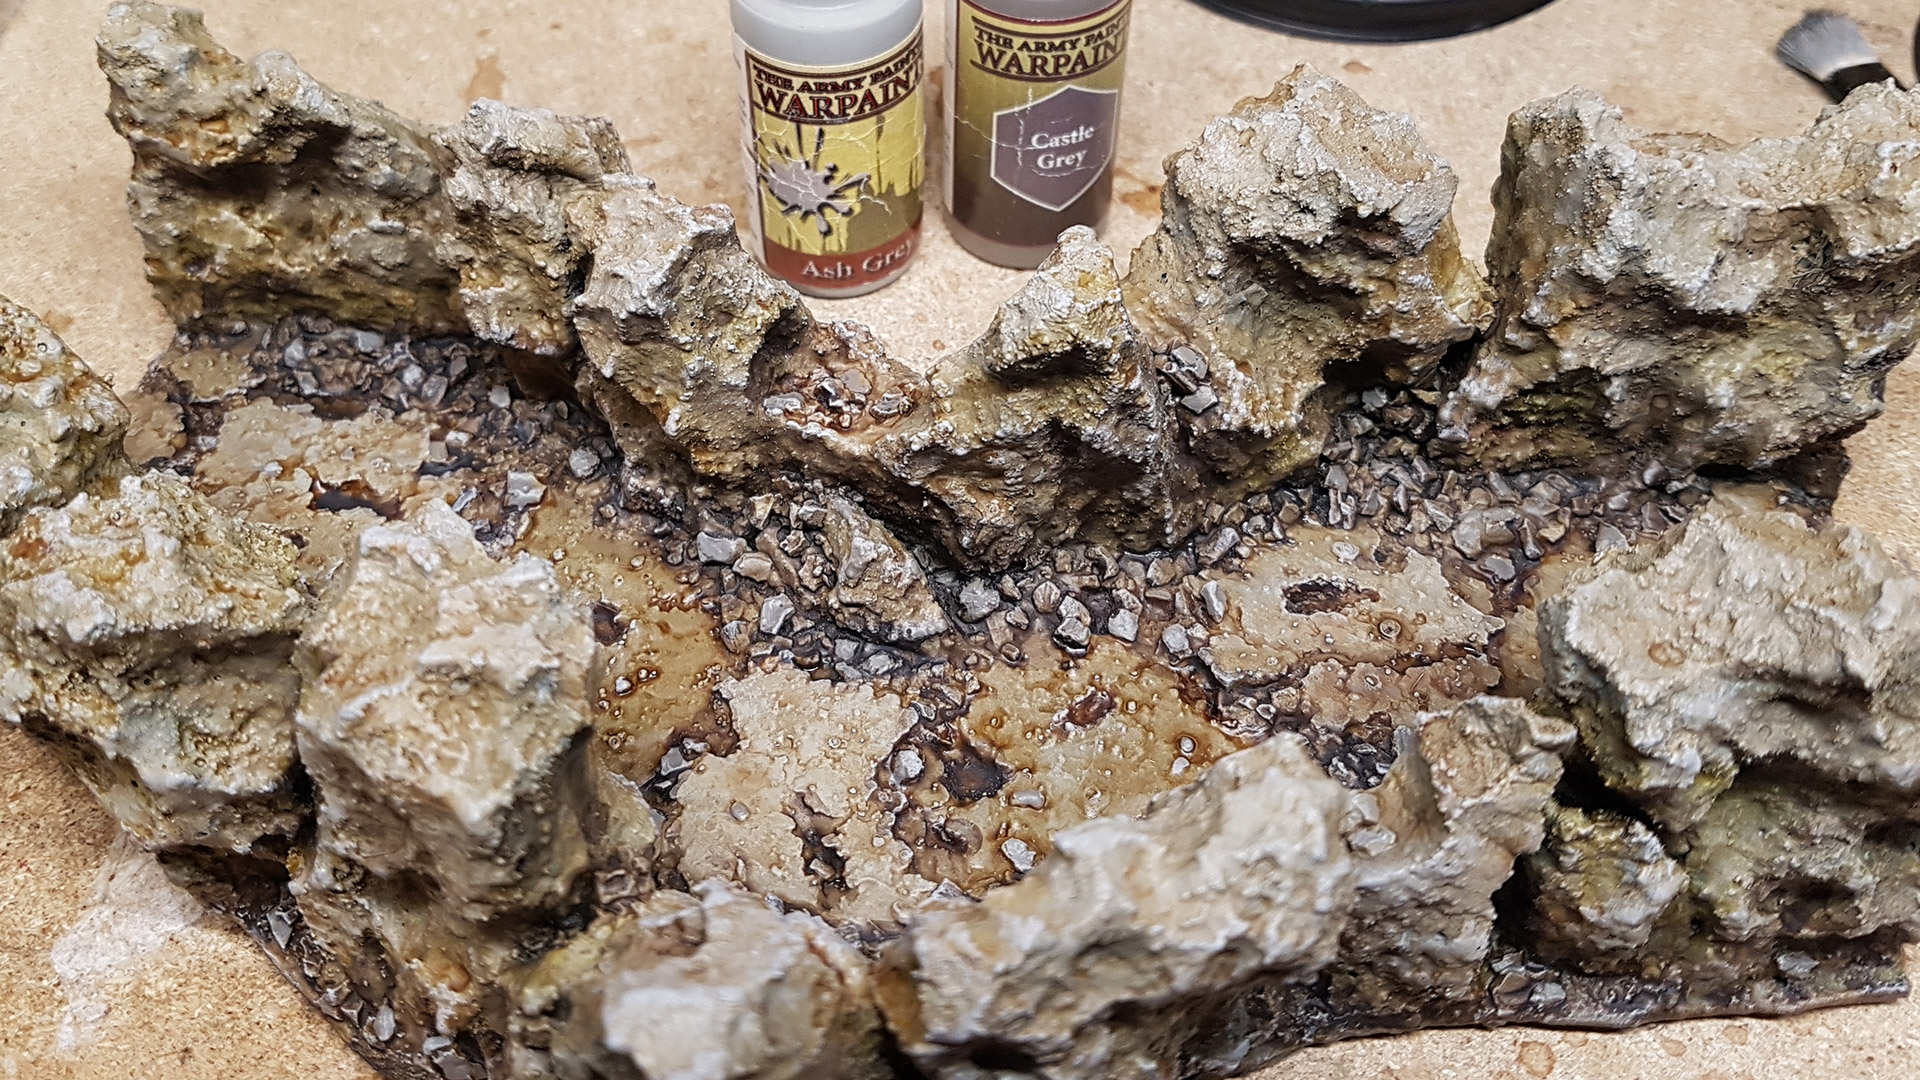 Drybrushing and Accentuating Individual Rocks with Splashes of Colour
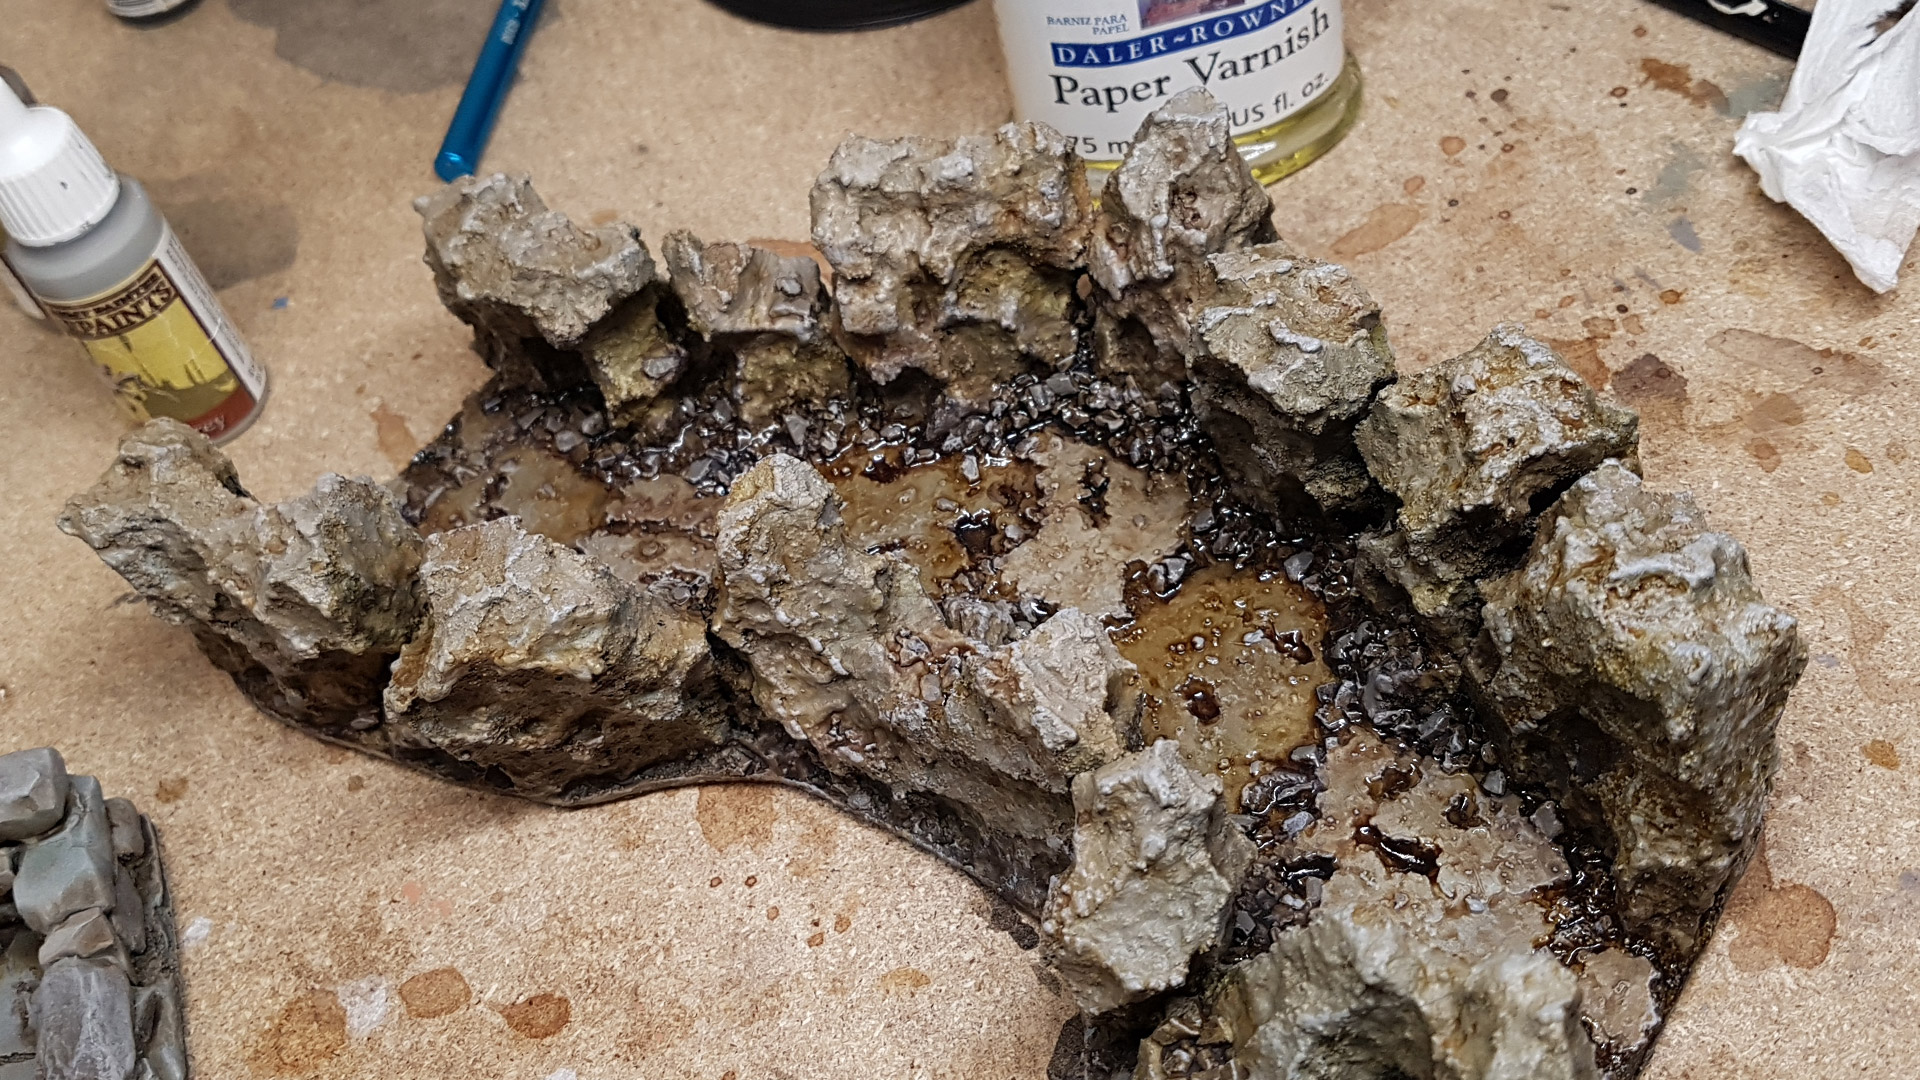 I Used Paper Gloss Varnish, but Suggest Trying Acrylic-based Gloss
Preparing the Cavern Corridor for Adventure With a Fresh Coat of Paint Part 1
To get the painting underway, the first task involved applying primer to the model. Mirroring the approach taken with the previous tile, I employed three colours to accomplish a zenithal lighting effect. This technique enhances the natural shading across the tile. I began with a comprehensive coat of black, followed by a mid-grey applied at approximately a 45-degree angle and then finished with a light grey primer, primarily targeted from directly above, to simulate natural light falling onto the model.
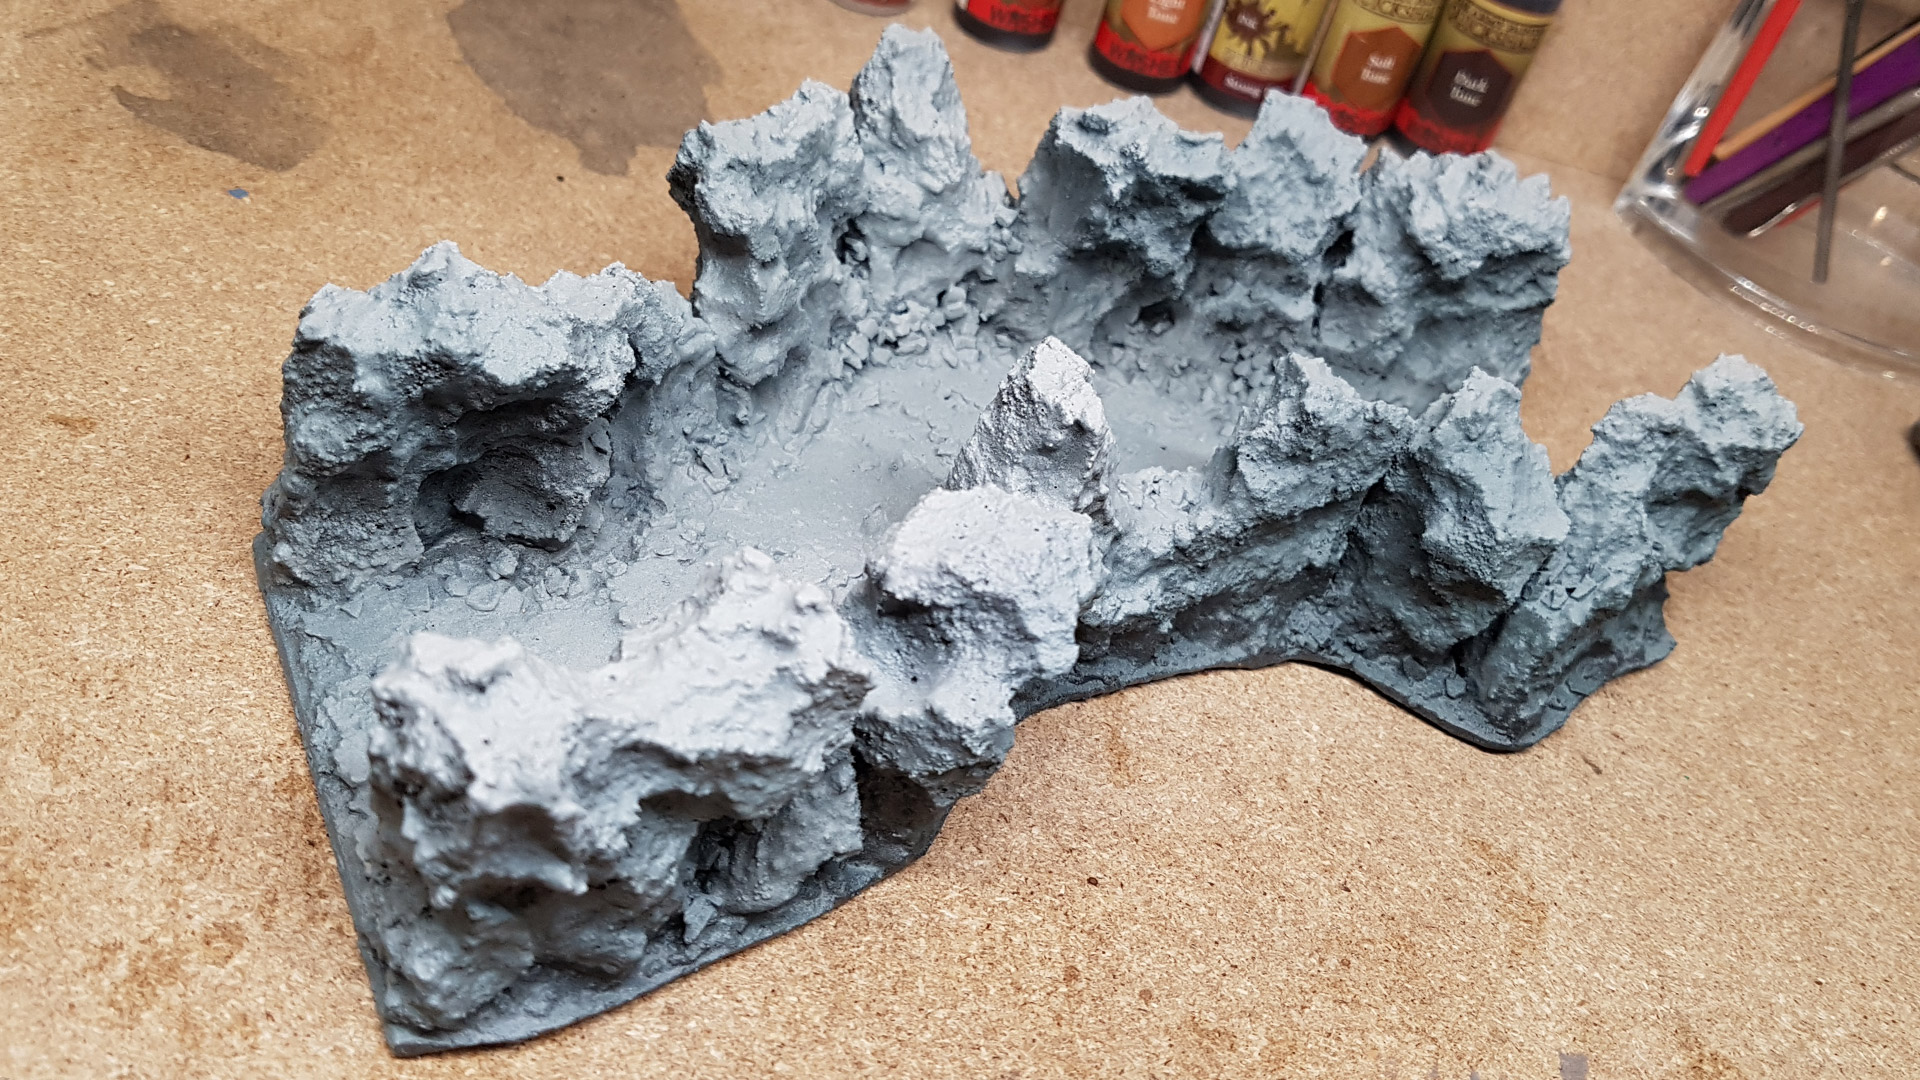 Utilizing Three Layers of Primer Spray in Varying Shades Results in This
Now It's Time To Add Some Warm Colours
Observing natural rock formations reveals that they are seldom merely plain grey; instead, they display a spectrum of colours, warm hues. To replicate this appearance and move away from a monochromatic grey palette, I heavy overbrushed and stippled with three colours.
 Colour 1: Castle Grey
With each transition to a new colour, I intentionally left patches of the previous hues visible, ensuring a diverse and rich variety of shades throughout the model.
 Colour 2: Monster Brown | Colour 3: Green Grey
Time for a Touch of Drybrushing
Next, I employed drybrushing with two colours on the dungeon tile to accentuate the highlights of the rock walls, stone floor, and all the scattered rocks. This technique makes the intricate details stand out even from three feet away when the model is placed on the gaming table.
Throughout this process, I made a point to preserve patches of the underlying hues, maintaining a diverse and rich palette of shades that contribute depth and realism to the highlights on the rocks.

With the initial painting phase complete, the next step involves applying washes.
Making A Cavern Corridor for Dungeon Delving Part 3
Over the years, I’ve used this method to create numerous rock formations. Until now, simply painting the foam surface, as the paint adhered well, even when the foam was compressed. However, foam rocks reveal a porous surface characterized by many small holes. This structure is what allows the rock to deform under pressure.
For quicker projects, leaving the rocks with their porous surface is perfectly fine; they still look impressive from a normal viewing distance. But for a more believable rock texture that withstands close examination, adding additional layers of Mod Podge is the key!
Mastering Mod Podge: Transforming Foam into Realistic Rock Textures
To elevate the appearance of foam rocks, additional layers of Mod Podge are applied, gradually filling the pores in the foam material. It’s not necessary to eliminate every single pore, as the remaining texture resembles natural, porous rock.
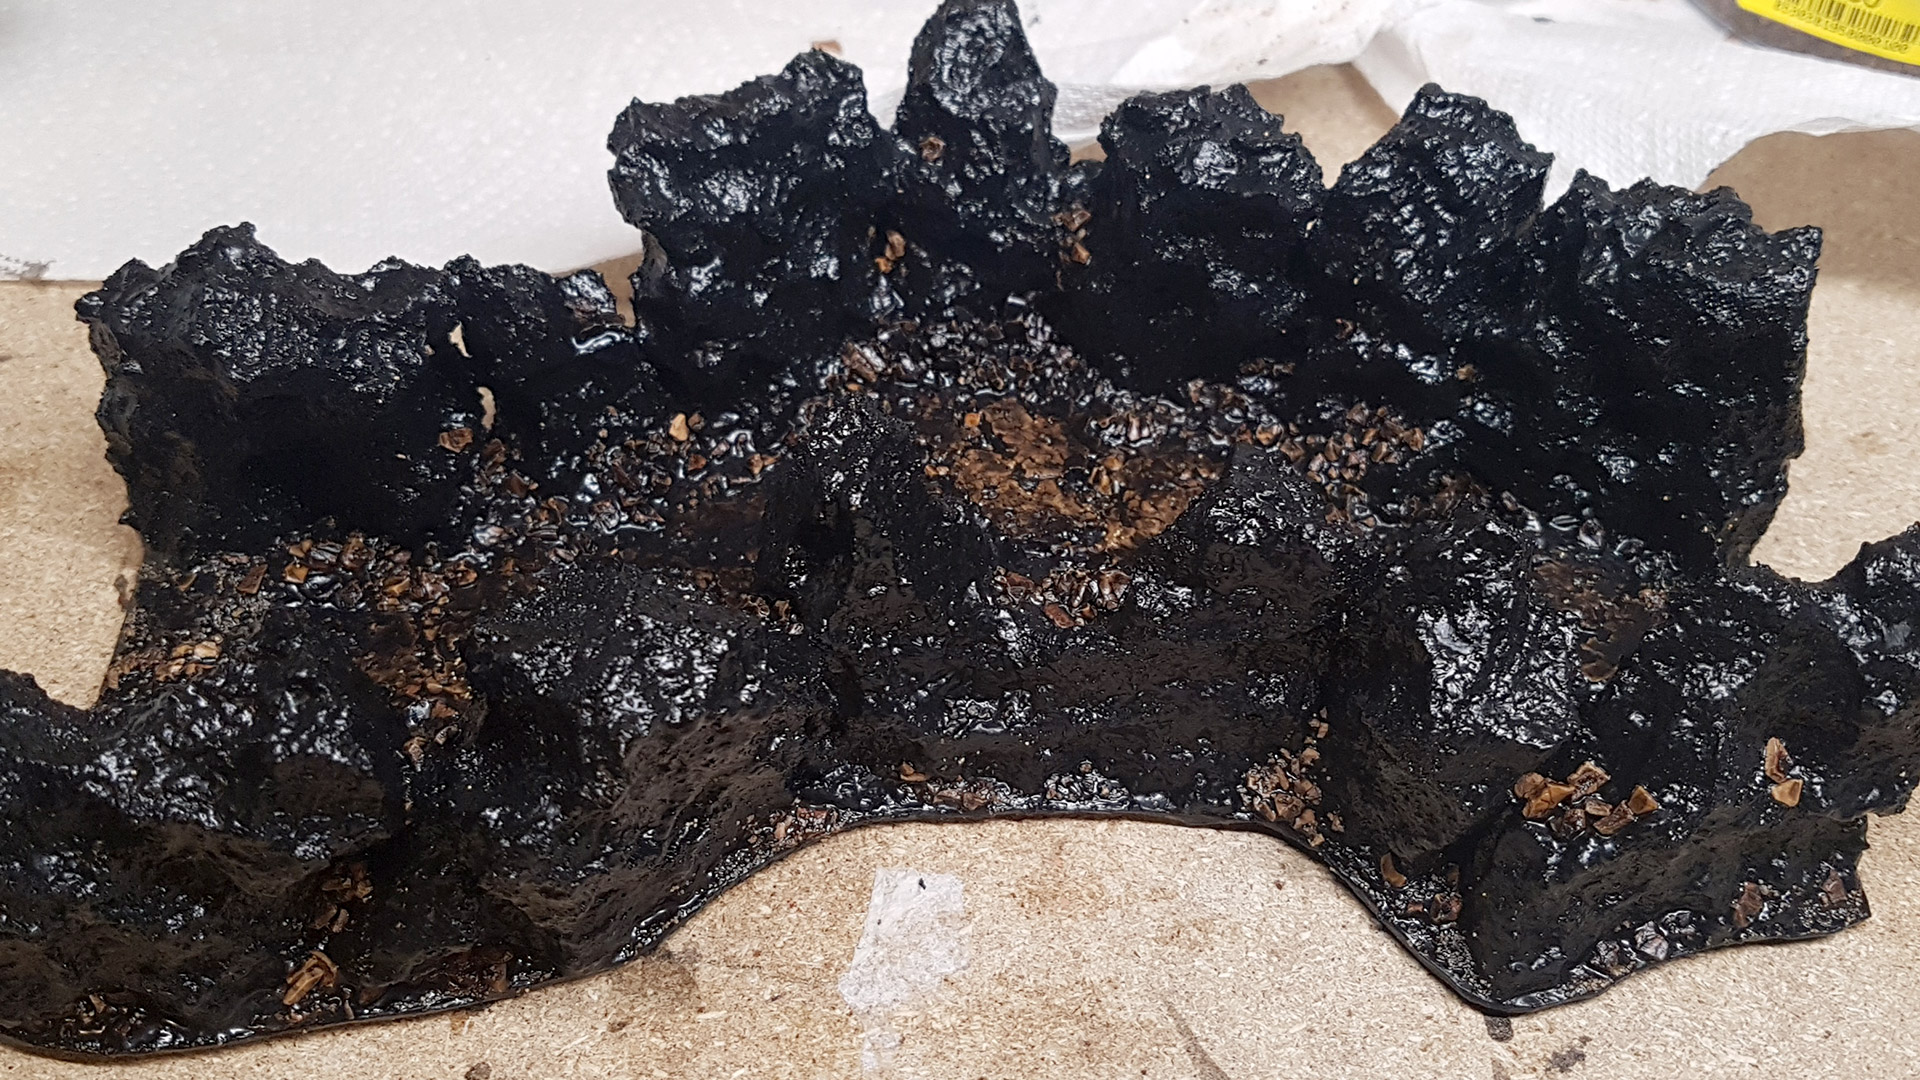
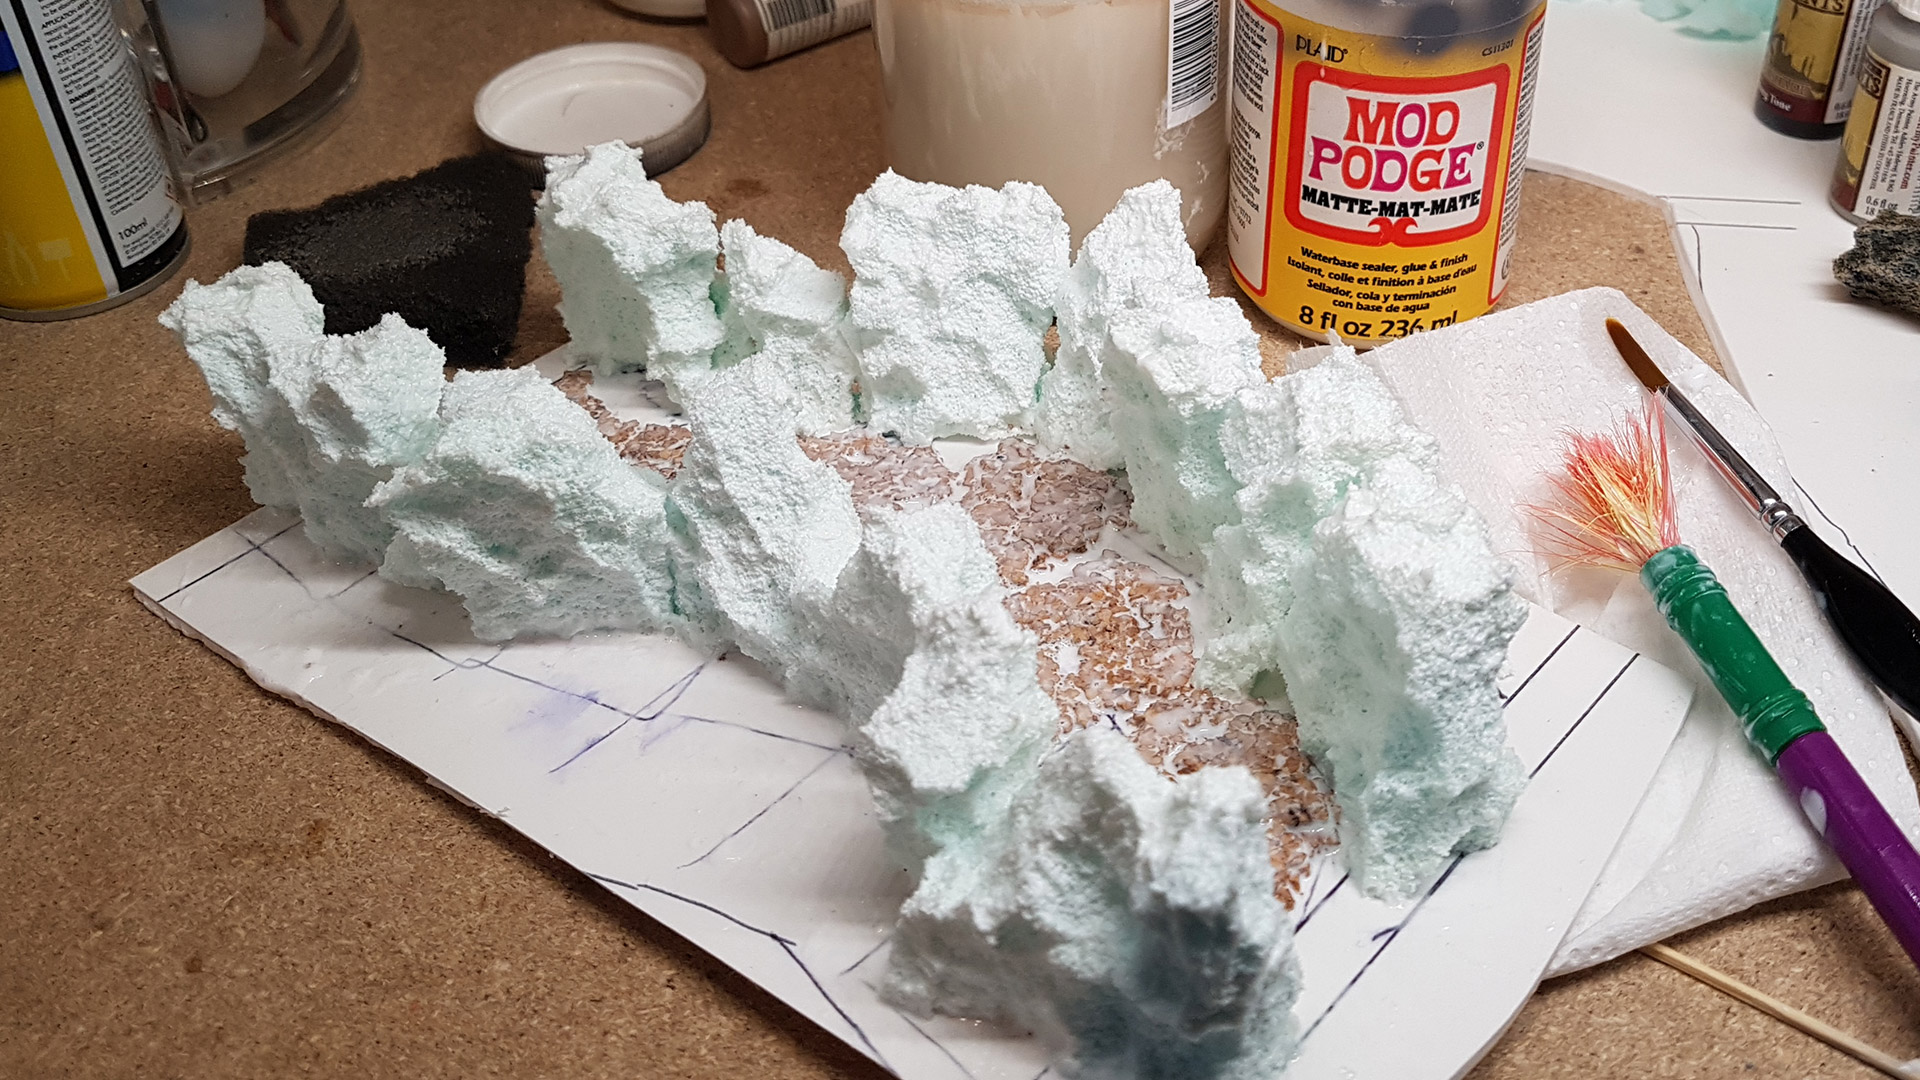
 Note: Don't Let the Mod Podge Form Into Lumps or Drips
As illustrated in the image, small bumps are visible, yet there are also smoother areas where the Mod Podge has completely masked the pores.
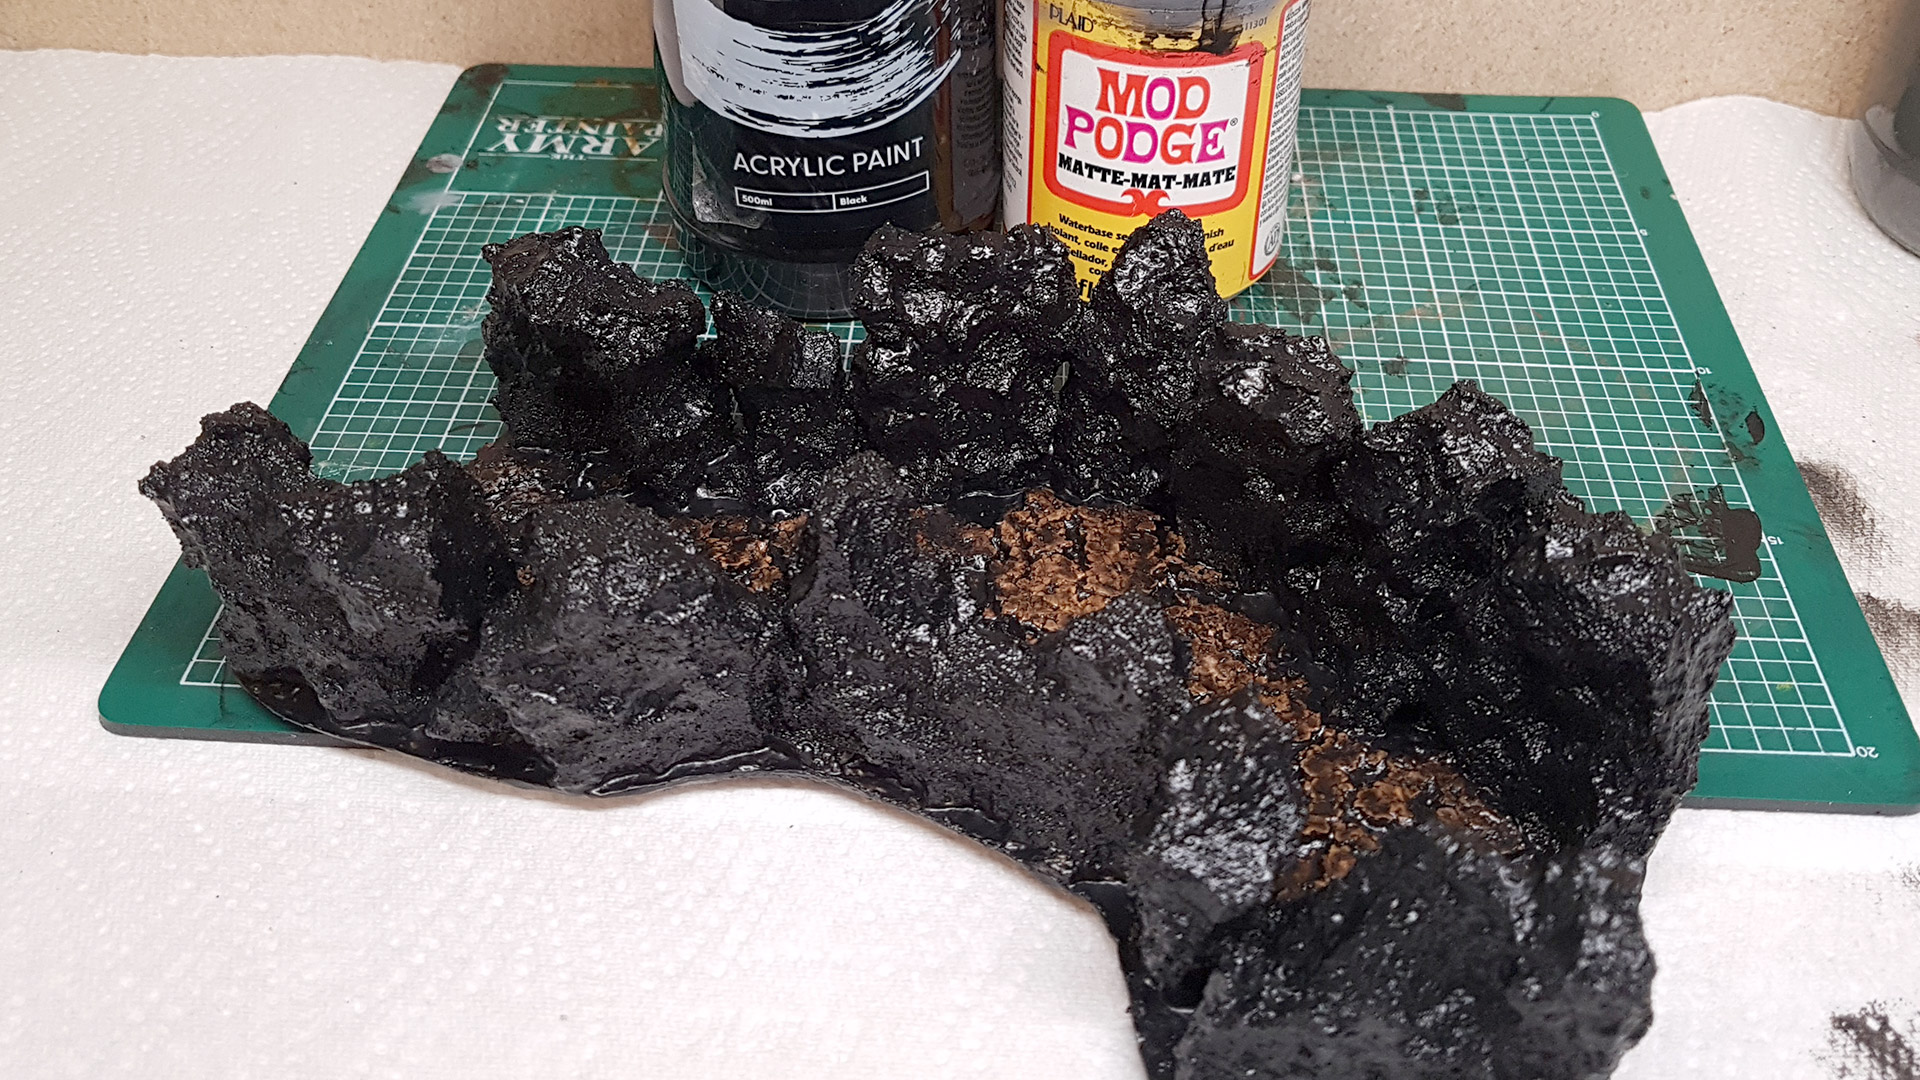
By varying the application of additional Mod Podge layers across different areas of the rocks, you can achieve diverse textures. For this Cavern Corridor project, I applied 3 to 4 coats, allowing about 15 minutes of drying time between each layer, expedited with a hairdryer.
Additionally, I combined the Mod Podge with black acrylic paint. This strategy not only adds base colour with each layer but is particularly effective for reaching those nooks and crannies where spray primer might not penetrate.
These Rocks Need More Rocks!
To complete the build process, I scattered an assortment of cork rocks around the base of the rock walls. In my mind these are the remnants of rock left behind after the cavern’s excavation, perhaps by a crew of goblins or dwarven miners. This addition not only enhances the scene’s realism but also adds a layer of storytelling to the setting.
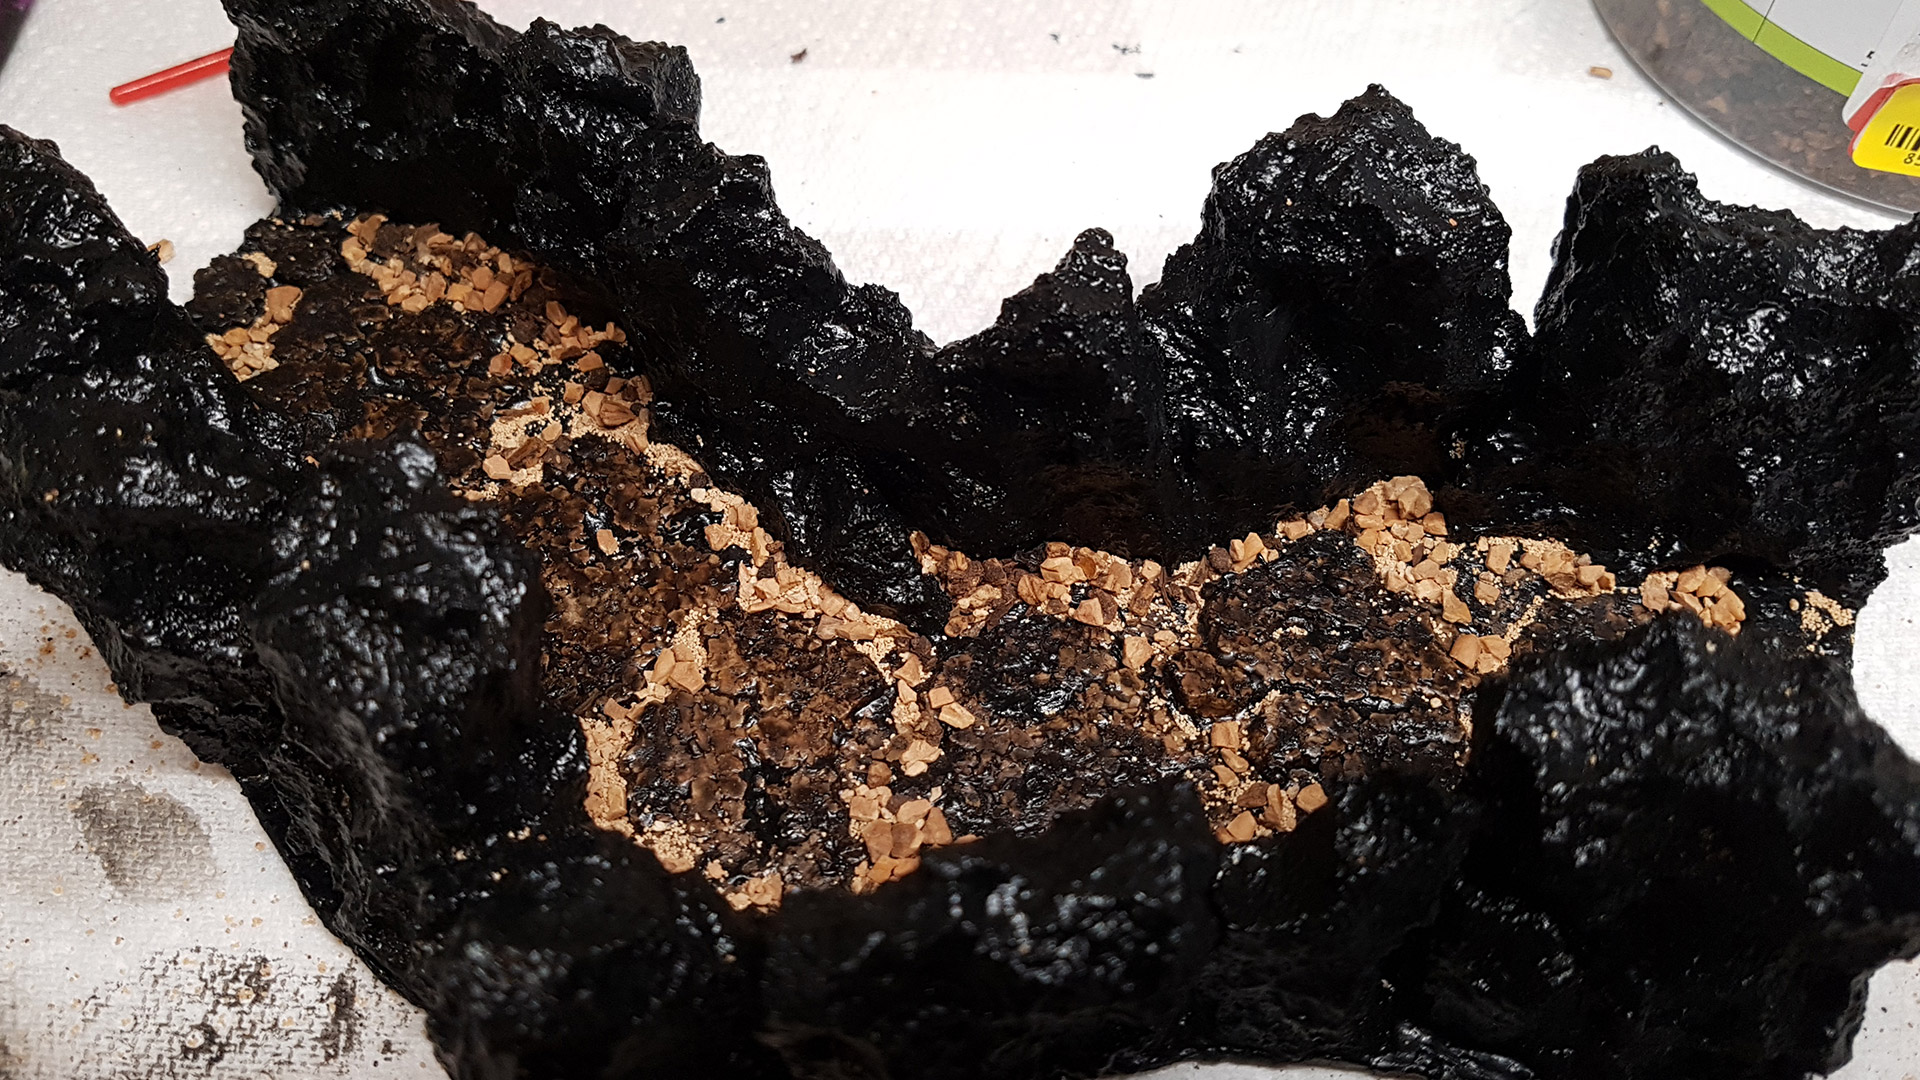
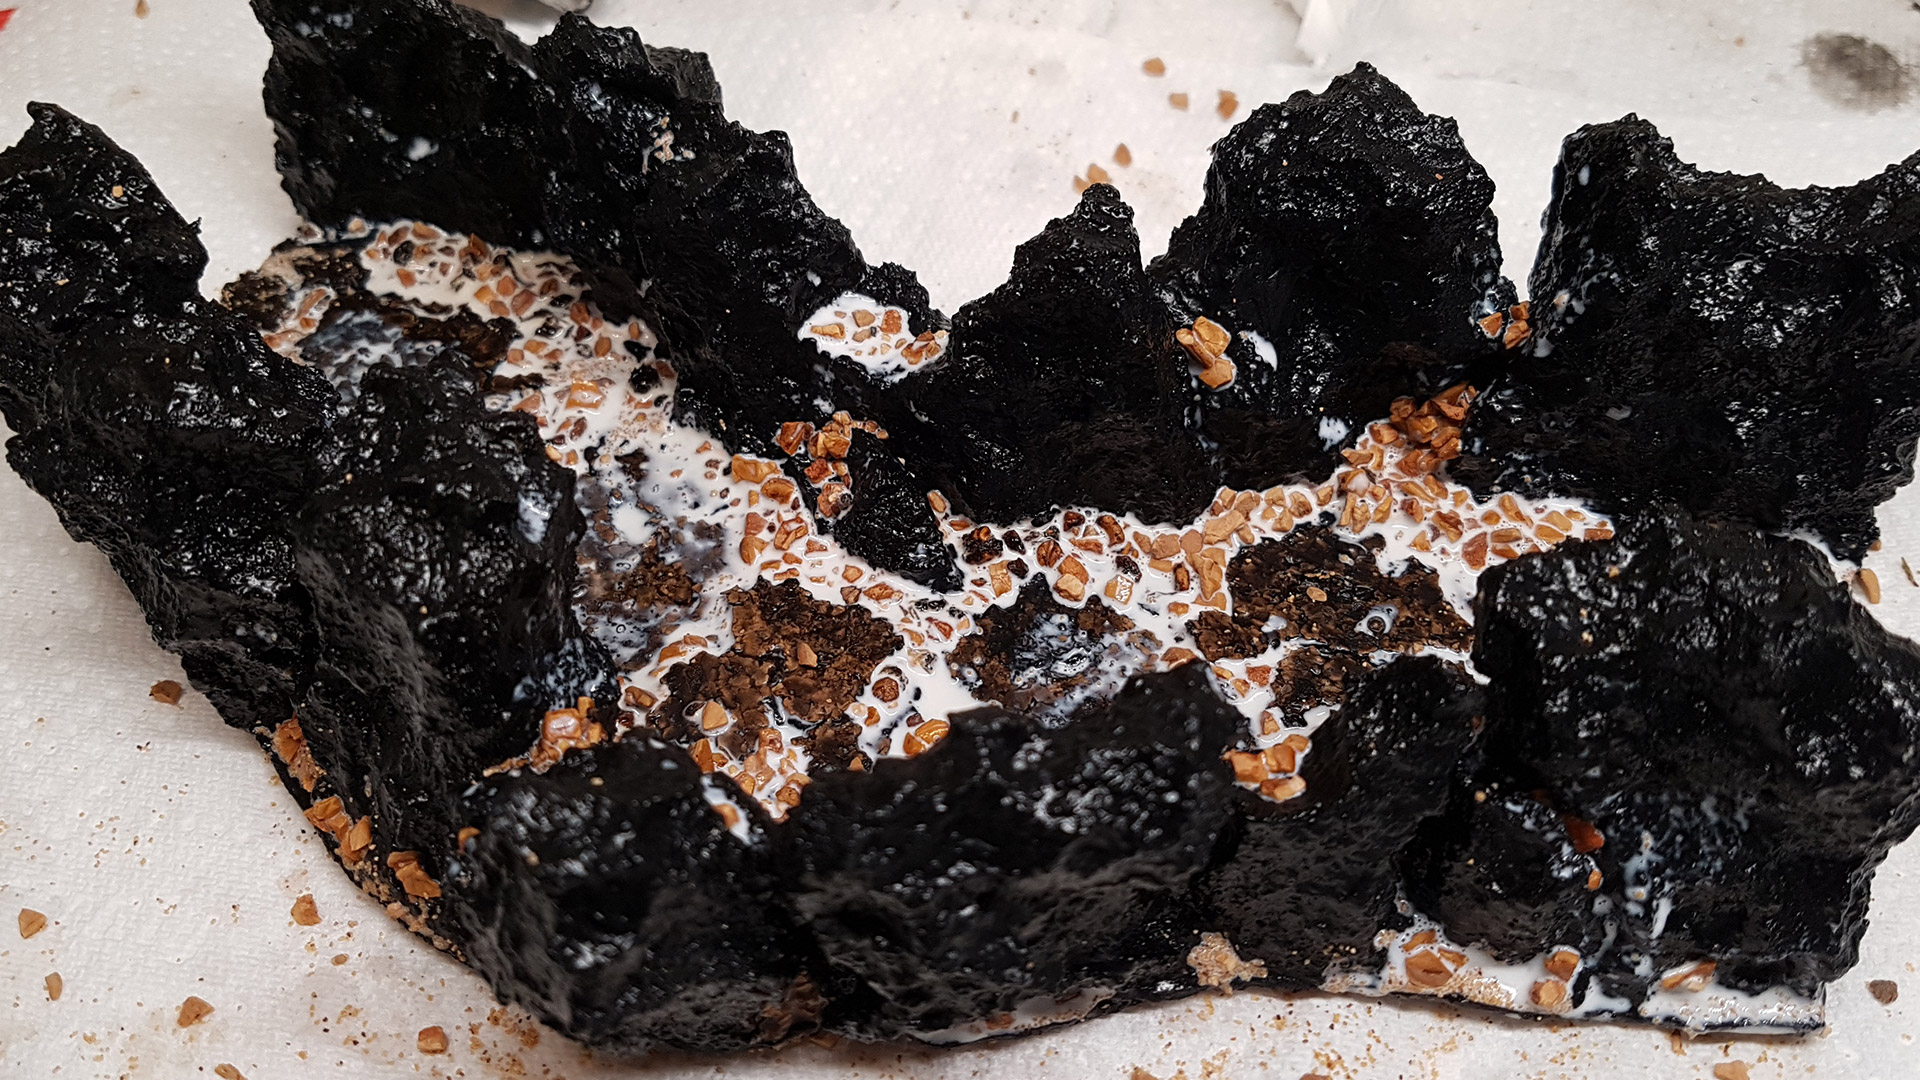
The scatter rocks were secured in position using a mixture of watered-down PVA glue with a drop of dish soap added. The dish soap helps break the water’s surface tension, allowing the mixture to penetrate deeply into all the crevices, ensuring a strong bond that unites all elements together effectively.
After everything had dried, I applied a final coat of the Mod Podge and paint mixture to add some base colour on all the newly added rocks. This step helps get paint into hard to reach parts and firmly binds all of the Cavern tile into one sturdy build.
 That's the Build Complete, Now for Painting!
Making A Cavern Corridor for Dungeon Delving Part 2
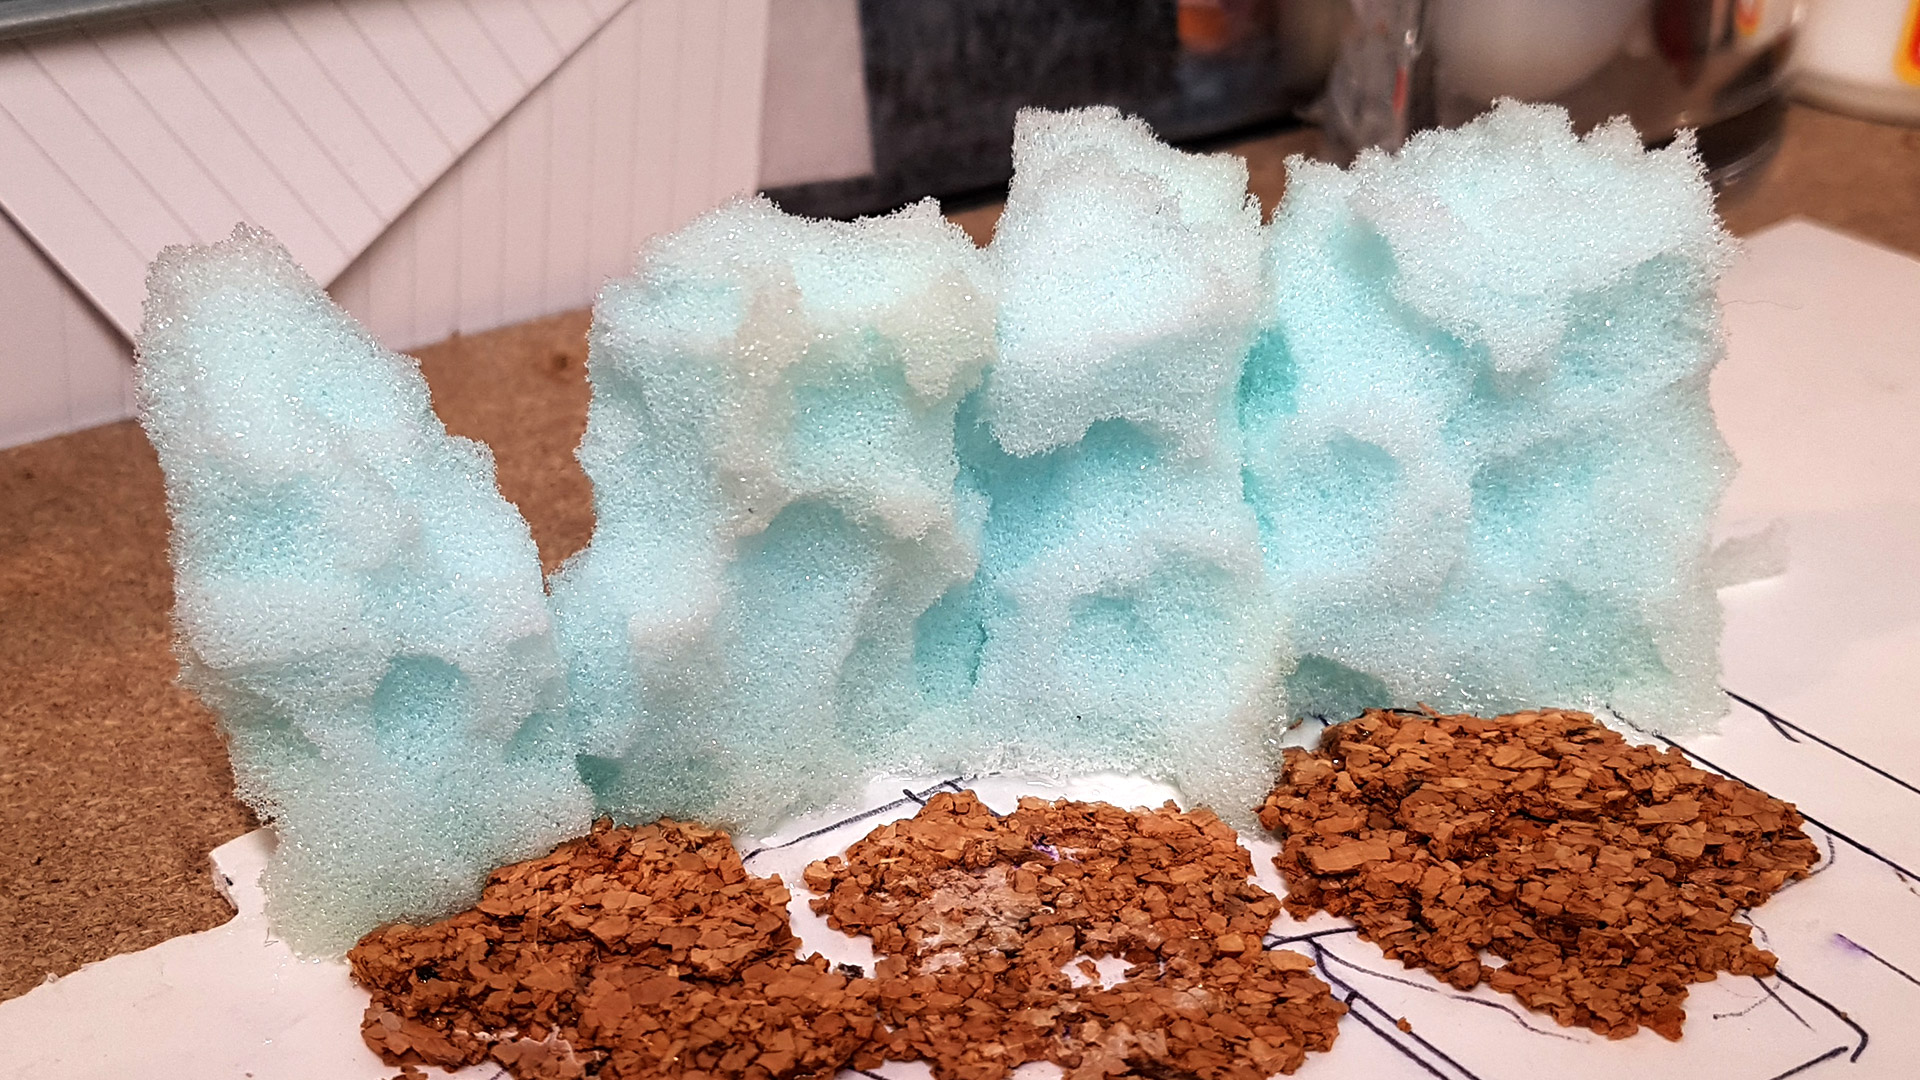
Continuing on with the Cavern Corridor I stuck down all the rocks to a Foam PVC sheet base using contact adhesive which is important as you can not use super glue as it will eat the foam.
Note, I planned out the tile by drawing a rough outline on the Foam PVC sheet and measuring the size it would be, had I constructed it in the style of previous builds.
I didn’t dwell too much on the size as I was eager to progress with the build. I’ll revisit the considerations of tile sizes in relation to each other for creating a modular dungeon later, should I decide to expand the project further.
Using Cork Sheet for Movement Tiles
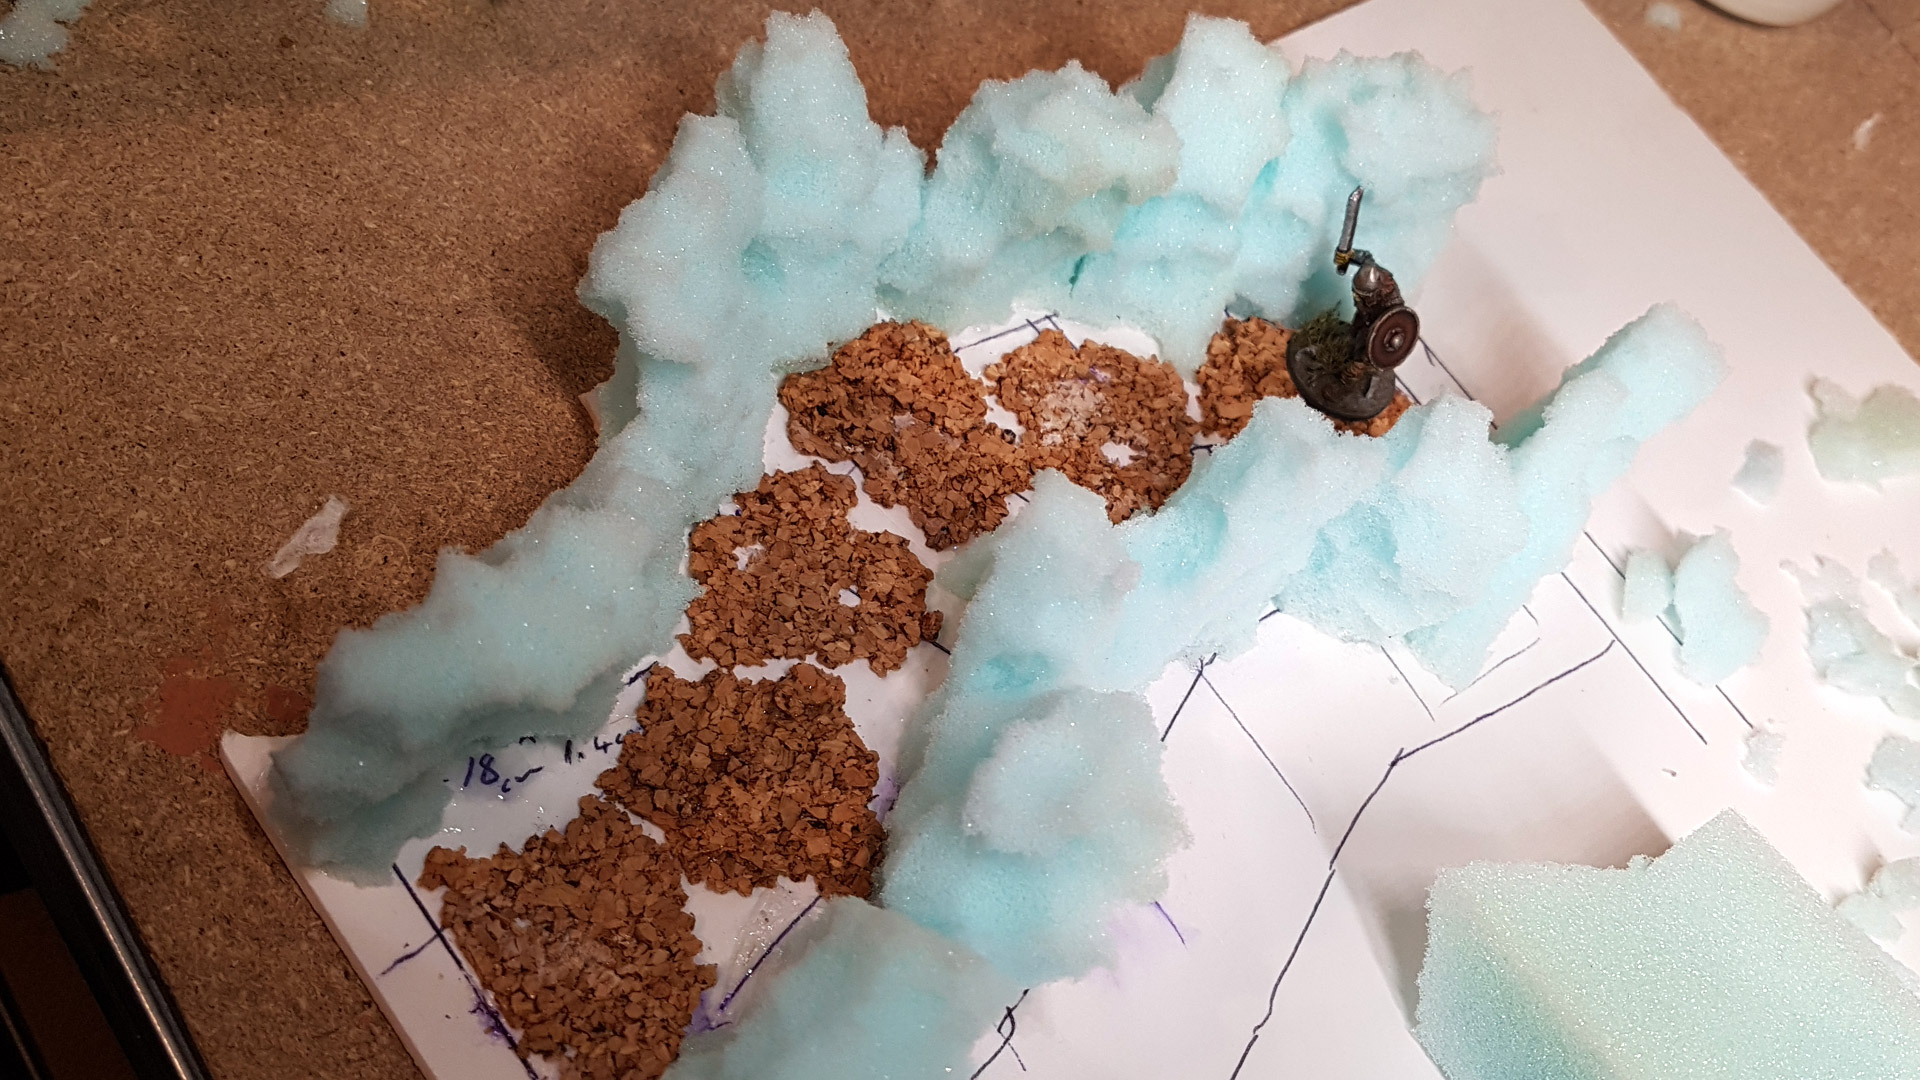
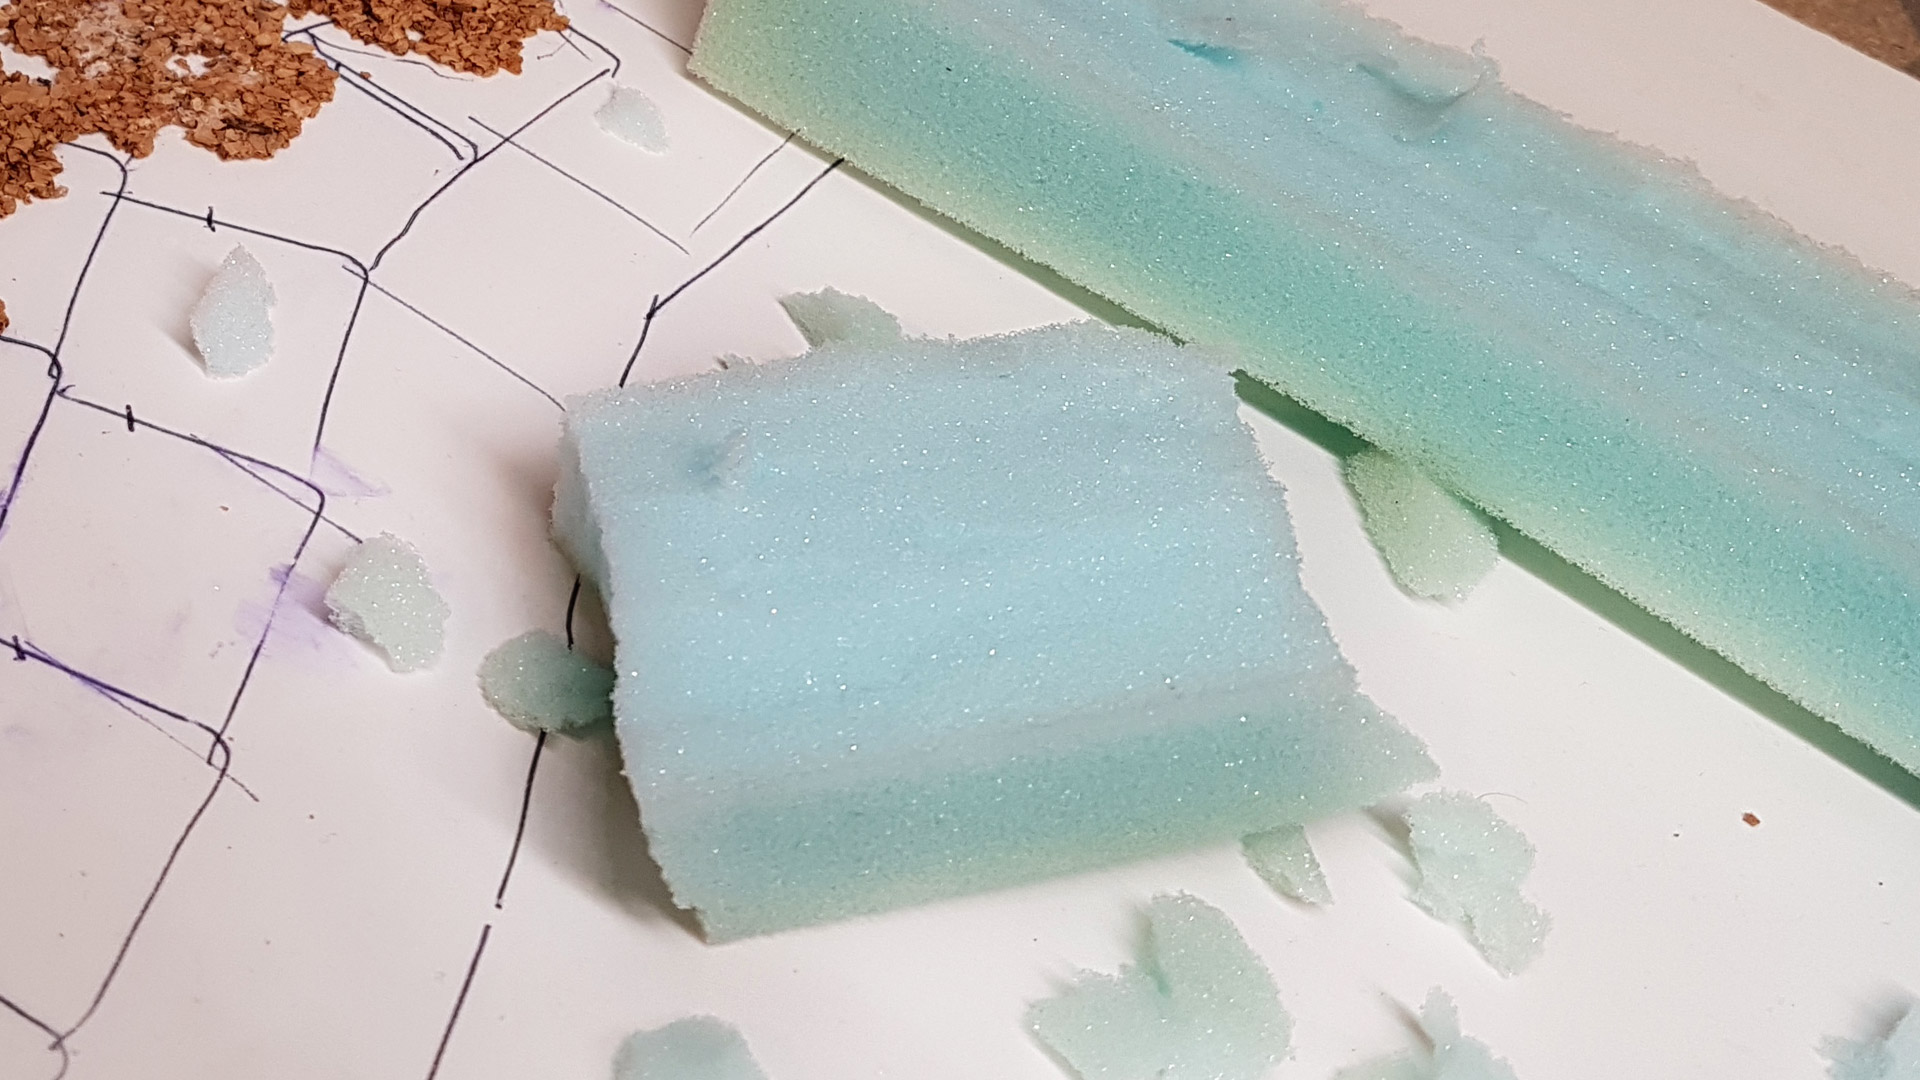
For the cavern floor, I aimed for a natural, uneven appearance, distinct from cut stone. Thus, I chose to use cork sheets, available in rolls. You simply tear a piece from the roll, then continue to rip smaller pieces off until you achieve a piece roughly the size of a 3 cm square, but with an interesting, natural shape.
To further enhance the floor’s irregularity, you can create holes in the cork or layer pieces on top of one another. This technique allows for the creation of varying elevation points across the floor, while still ensuring there are still flat areas suitable for placing miniatures.
To distinguish between movement tiles, I raised every other tile by double-layering the cork, effectively differentiating each tile’s position.
Unlike foam, you can adhere cork with super glue and even use an activator to expedite the drying process.
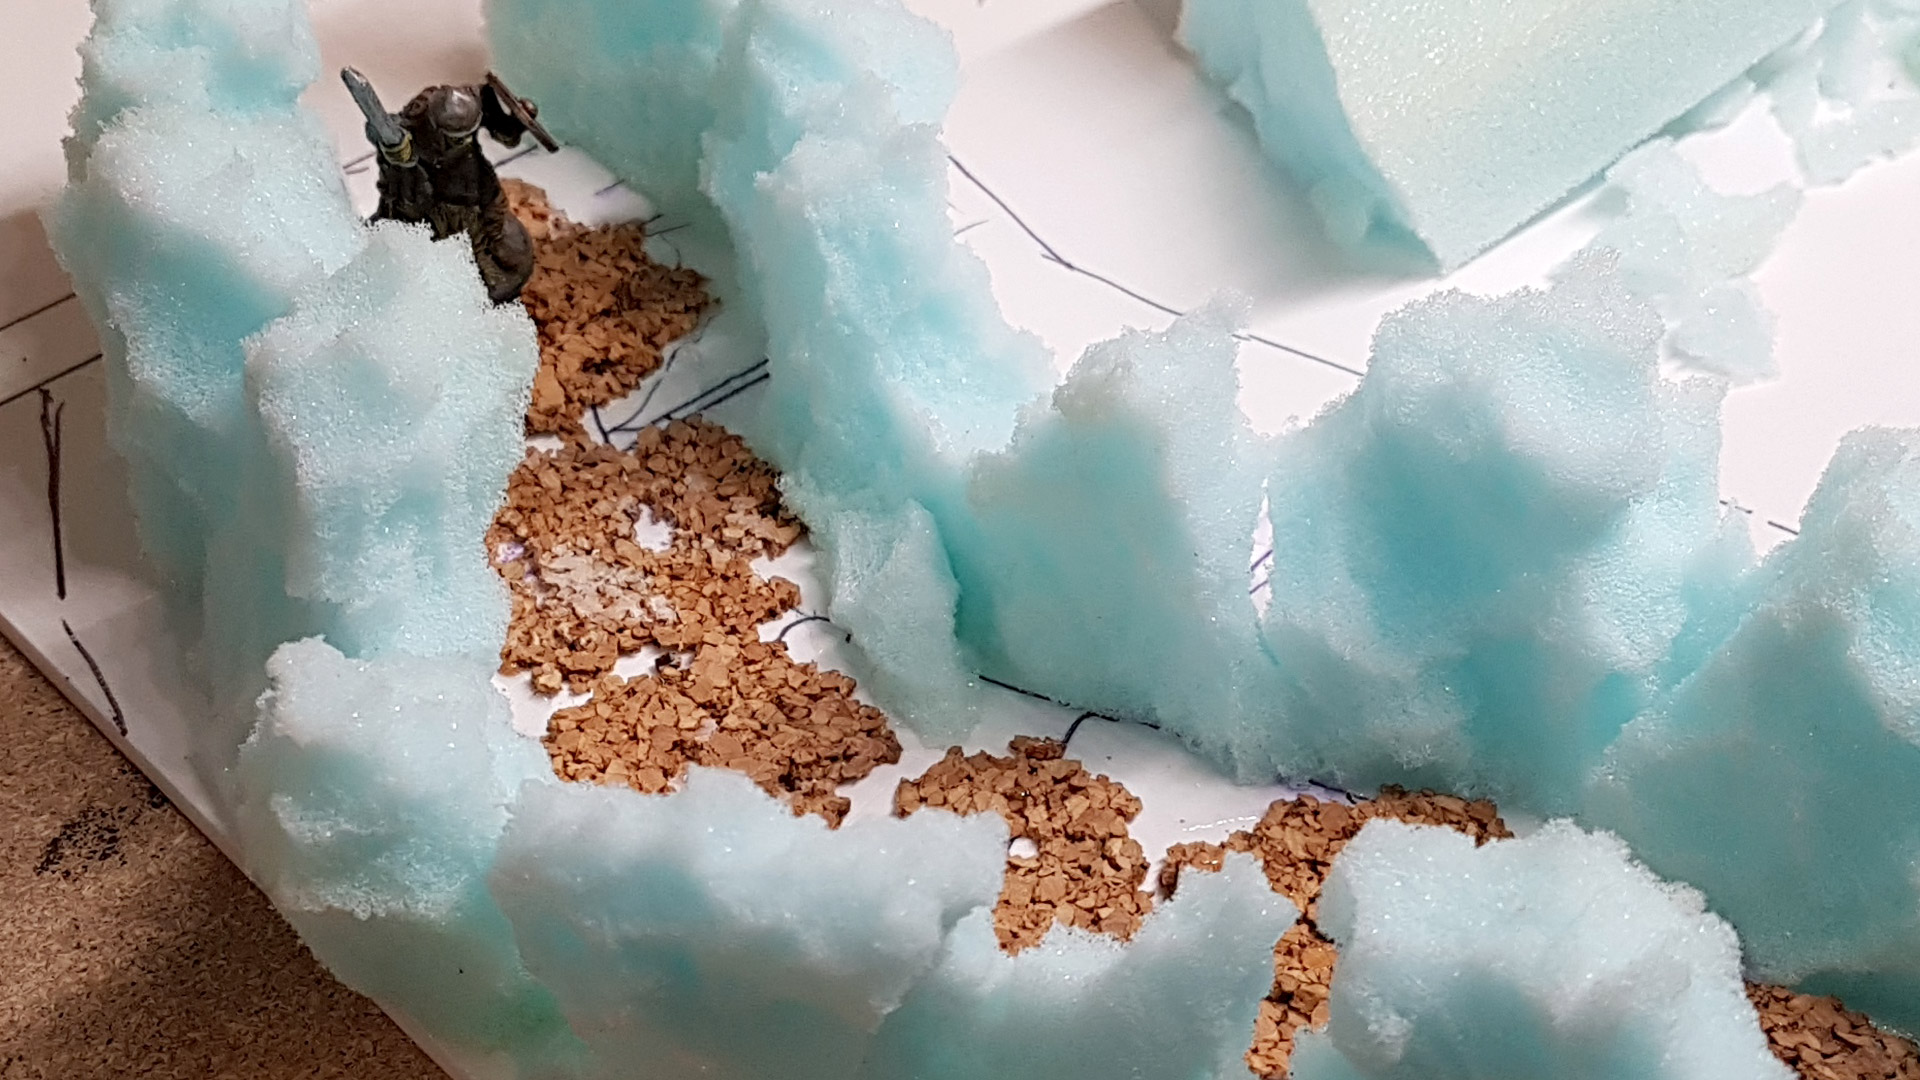 Double-layering Cork Adds an Interesting Floor Texture
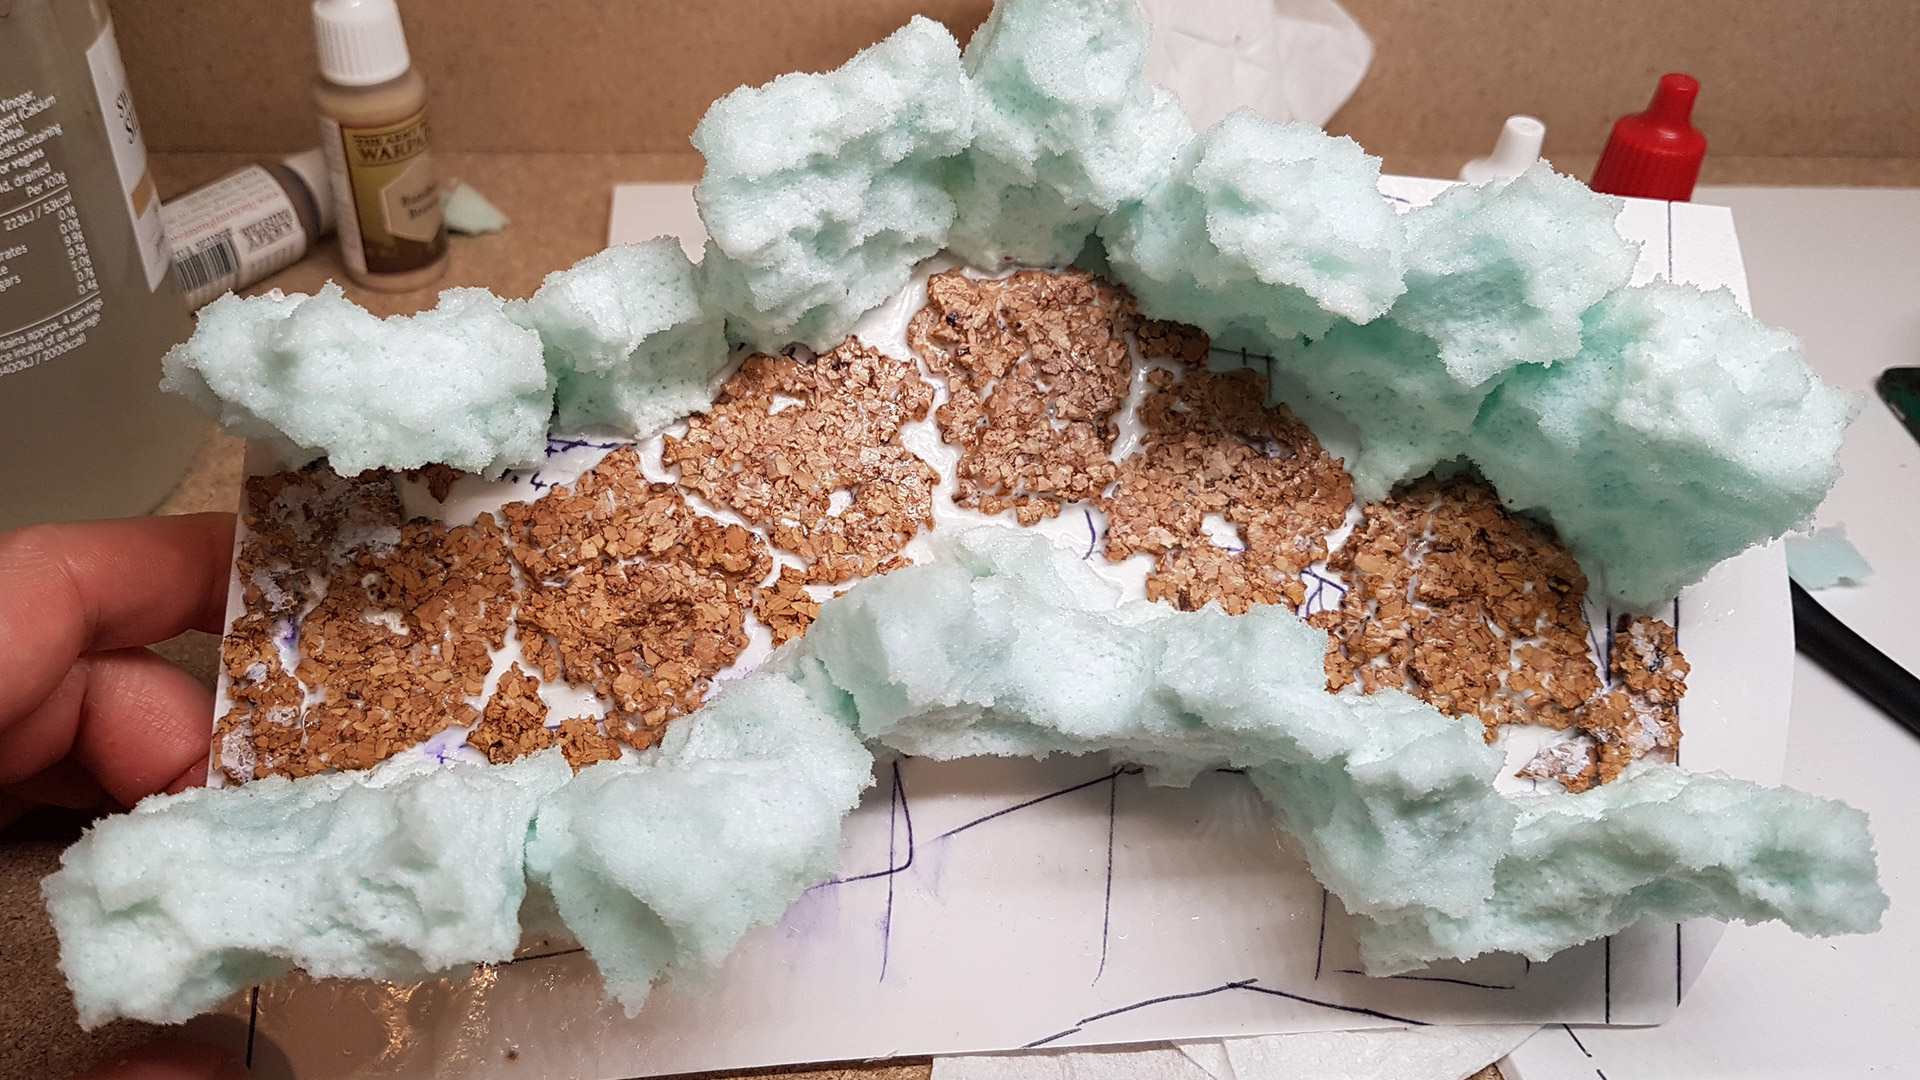 Six Tiles to Step on but It Like a Natural Formation
Mod Podge is a Magical Liquid for Hobby Projects
Once the build was complete, I coated the entire cavern corridor with Mod Podge, a magical adhesive and sealant combo known for its awesome flexibility, allowing it to bend without cracking. This flexibility is crucial, as one of the main advantages of using upholstery foam for rocks is their ability to be bent, squashed, and dropped without sustaining damage. Therefore, if you’re going to cover them with glue, it needs to be just as flexible to prevent cracking.
Now over the years, I’ve used this method to create numerous rock formations. Until now, simply painting the foam surface, as the paint adhered well, even when the foam was compressed. However, foam rocks reveal a porous surface characterized by many small holes. This structure is what allows the rock to deform under pressure.
For quicker projects, leaving the rocks with their porous surface is perfectly fine; they still look impressive from a normal viewing distance. But for a more believable rock texture that withstands close examination, adding additional layers of Mod Podge is the key!
Making A Cavern Corridor for Dungeon Delving Part 1
Having covered the fundamentals of crafting stone block rooms, I turned my attention to creating a dungeon tile in a cavern style. This design aims to mimic the appearance of a space chiseled and carved directly from solid rock, serving as a secret passageway between rooms or an unfinished corridor awaiting completion.
Lloyd's FoamStone: Where Innovation Meets Tabletop Terrain!
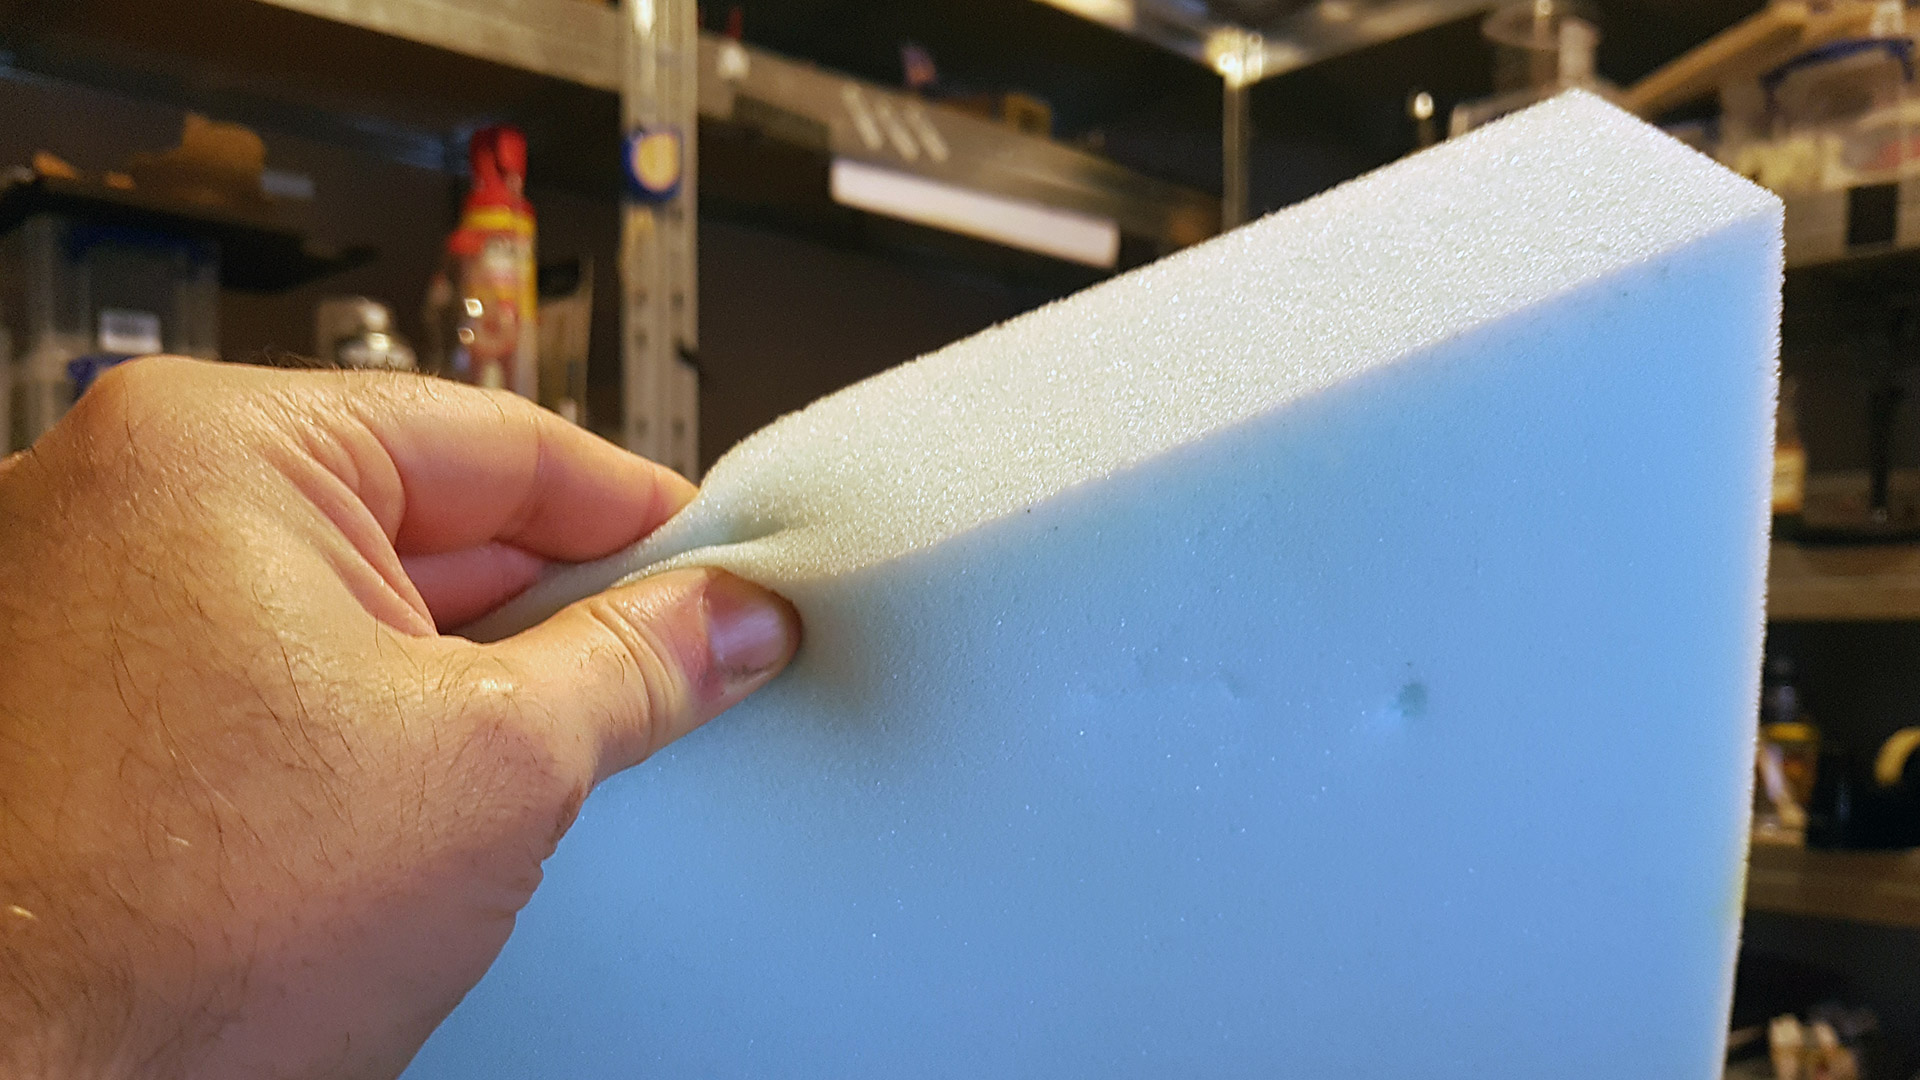
Similar to the previous room style, my goal is to create a cavern that’s not only lightweight but also outperforms resin or plastic in terms of durability. Enter the Lloyd classic FoamStone (patent pending, possibly, or maybe not—who can really say?), also known in the craft circles as upholstery foam. Which is the very best there is when you absolutely, positively need to cover every inch of a room with rock, accept no substitutes!
Upholstery foam is available in large sheets and comes in a variety of thicknesses. The type I’m using is 2 inches thick (approximately 5.08 cm). It’s very squishy and tears apart easily, qualities that constitute its secret sauce.
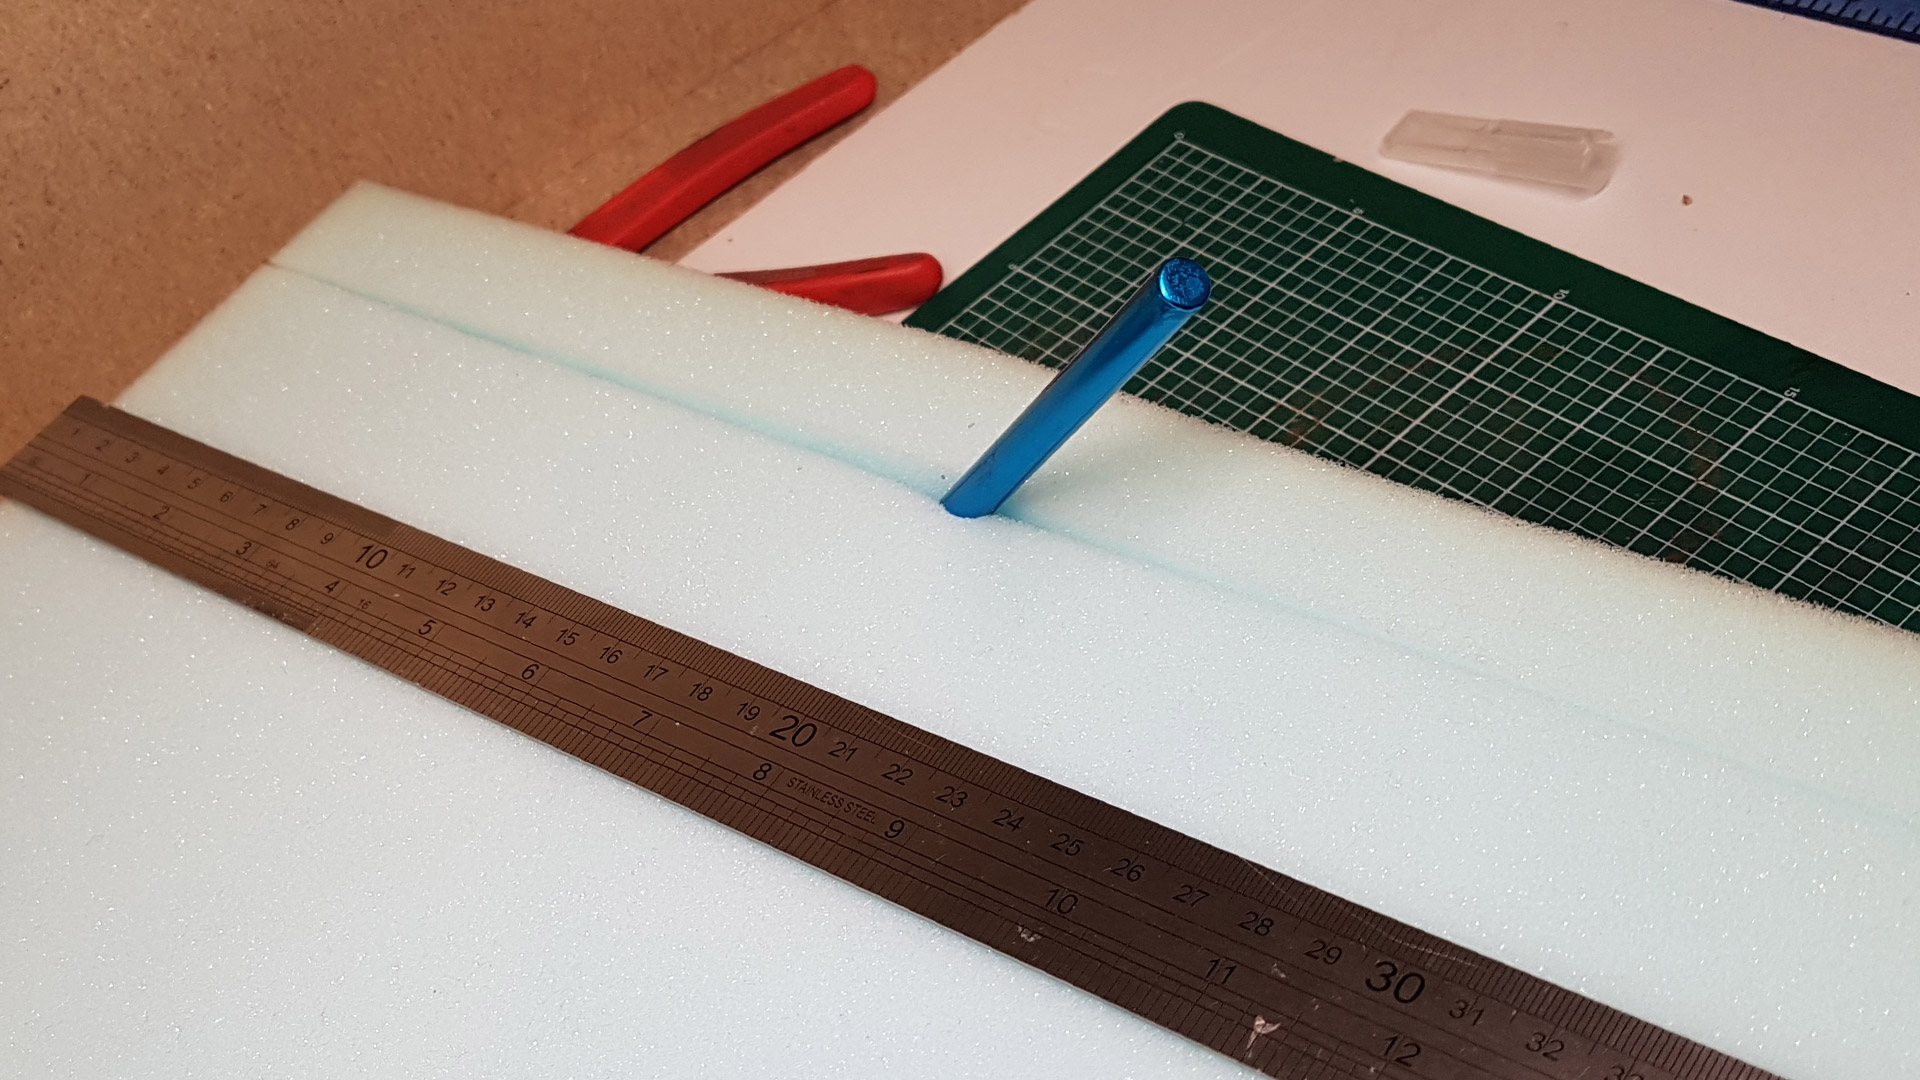
To begin, I sliced off a strip of foam the width of my steel ruler, which measures 2.8 cm wide. However, precision in width isn’t critical since the foam will be pulled apart to shape it. The key is to ensure the strip is wide enough to handle comfortably and provides ample material to create interesting shapes.
To cut the foam, simply score it with a craft knife along the ruler’s edge, gradually deepening the cut with each pass through the foam. As illustrated in the photo above, my knife is deeply embedded in it, demonstrating the technique.
Forming the Rocks or In This Case, Foaming the Rocks
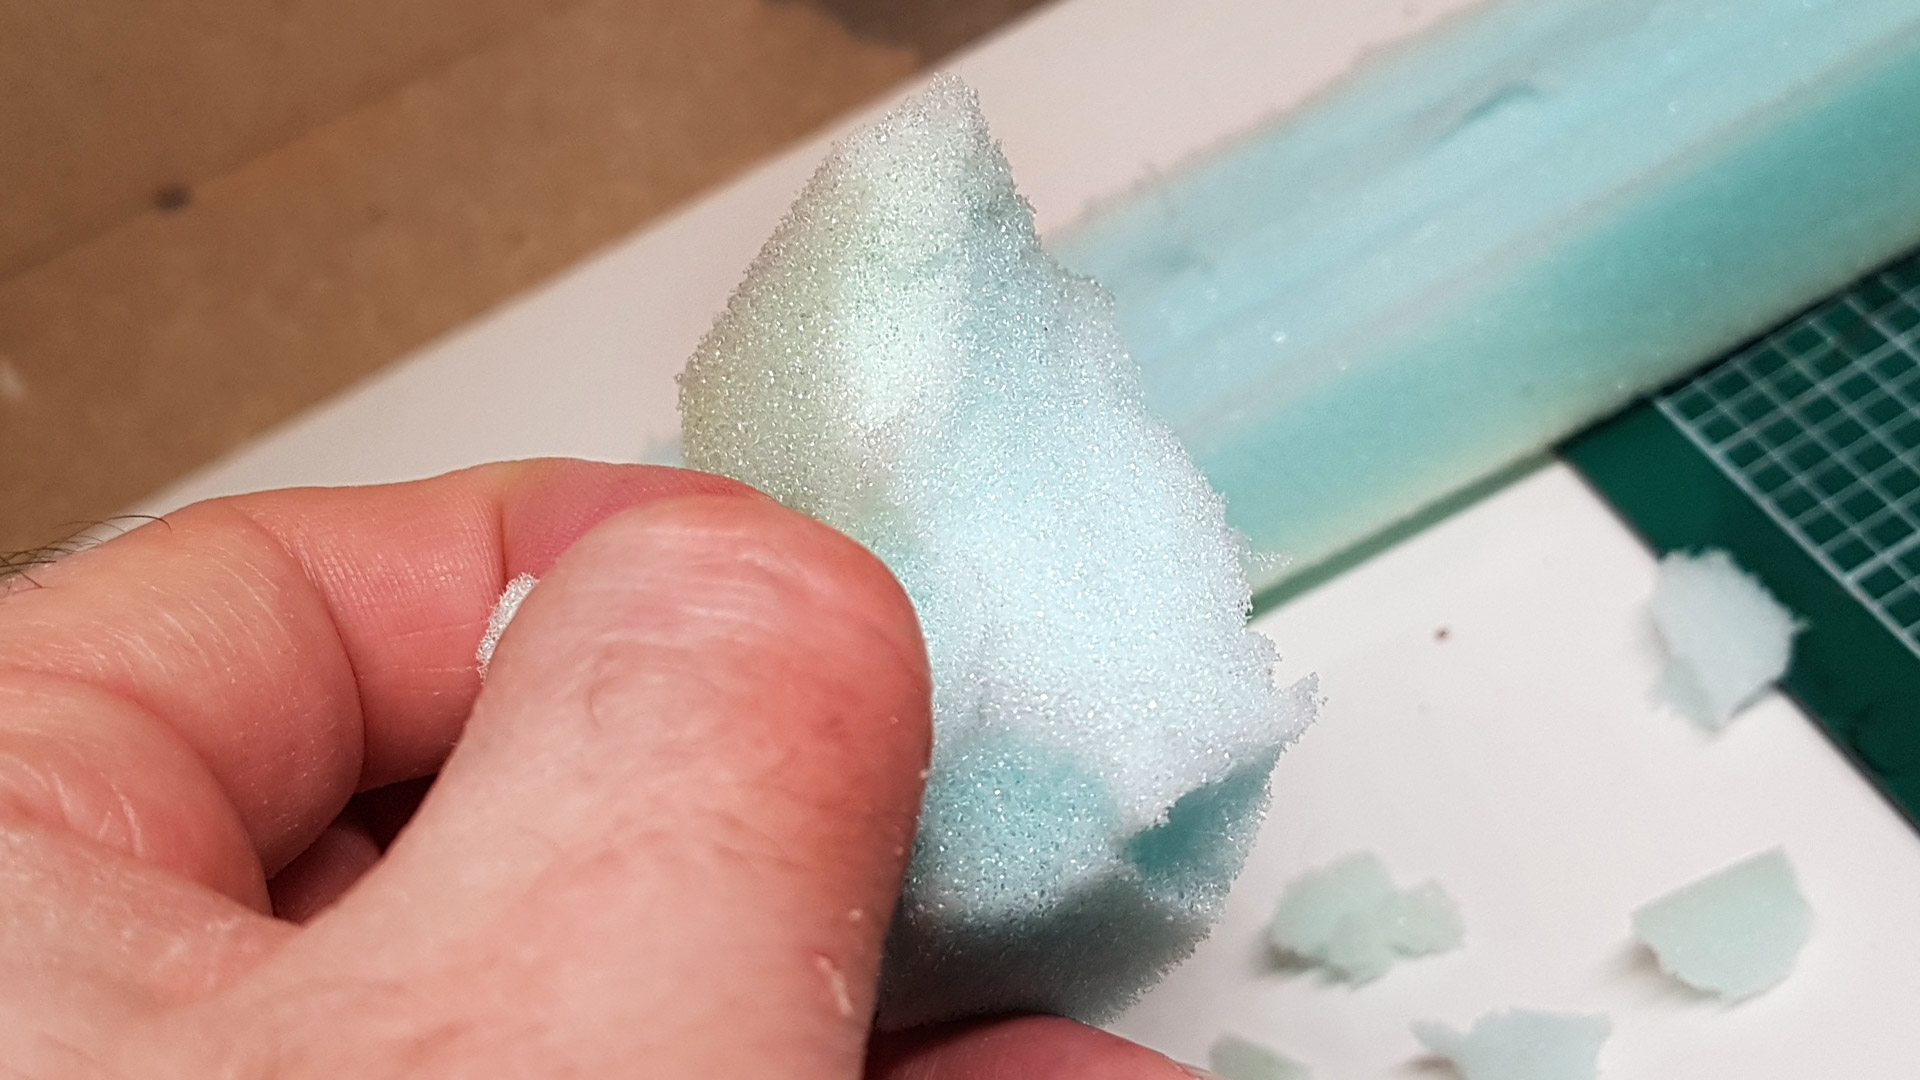
To craft each rock that constitutes the cavern walls, simply tear off a block from the foam strip. Then, selectively rip pieces away to eliminate any square edges, except for the bottom, which should remain flat for easy attachment to the base.
This method is surprisingly straightforward, with the rocks naturally taking shape as you remove pieces. Aim for variety in the contours—create indentations, protruding parts and overhangs for a more compelling rock formation. Avoid ripping off pieces in a uniform manner, as this could result in a blocky, unnatural appearance.
As you sculpt each rock, ensure variation in size and height to enhance realism. When positioned closely together, these rocks will form natural-looking crevices, mimicking cracks found in real rock formations. However, be mindful to avoid overly large gaps, which could make the rocks appear more like separate columns than a cohesive wall.
 Make Sure to Remove Any Flat Surfaces Left Over From the Shape of the Foam Sheet
One Tiled Dungeon Room Complete!

That concludes our journey through the first room. Stay tuned, as I will be detailing the build of my second dungeon tile—a cavern-style corridor—shortly. You can catch a glimpse of what’s to come in the project’s cover photo.


