


Building Foam Dungeon Tiles (EVA & Upholstery Foam)


Recommendations: 268
About the Project
Hello everyone! Since it's Dungeonalia on OnTableTop, I thought it would be a fantastic idea to delve into creating some tabletop dungeon tiles. These tiles would be perfect for enhancing games like HeroQuest and Warhammer Quest — essentially, any of those thrilling dungeon-crawling games that utilise boards or card tiles.
Related Game: Warhammer Quest
Related Genre: Fantasy
Related Contest: Dungeonalia 2023
This Project is Active
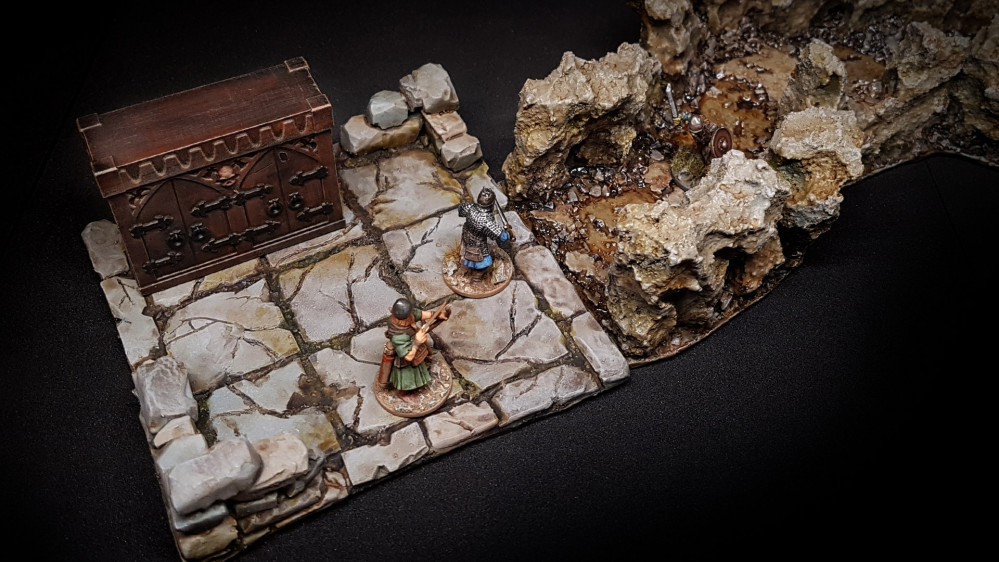
Painting a Tiled Dungeon Room
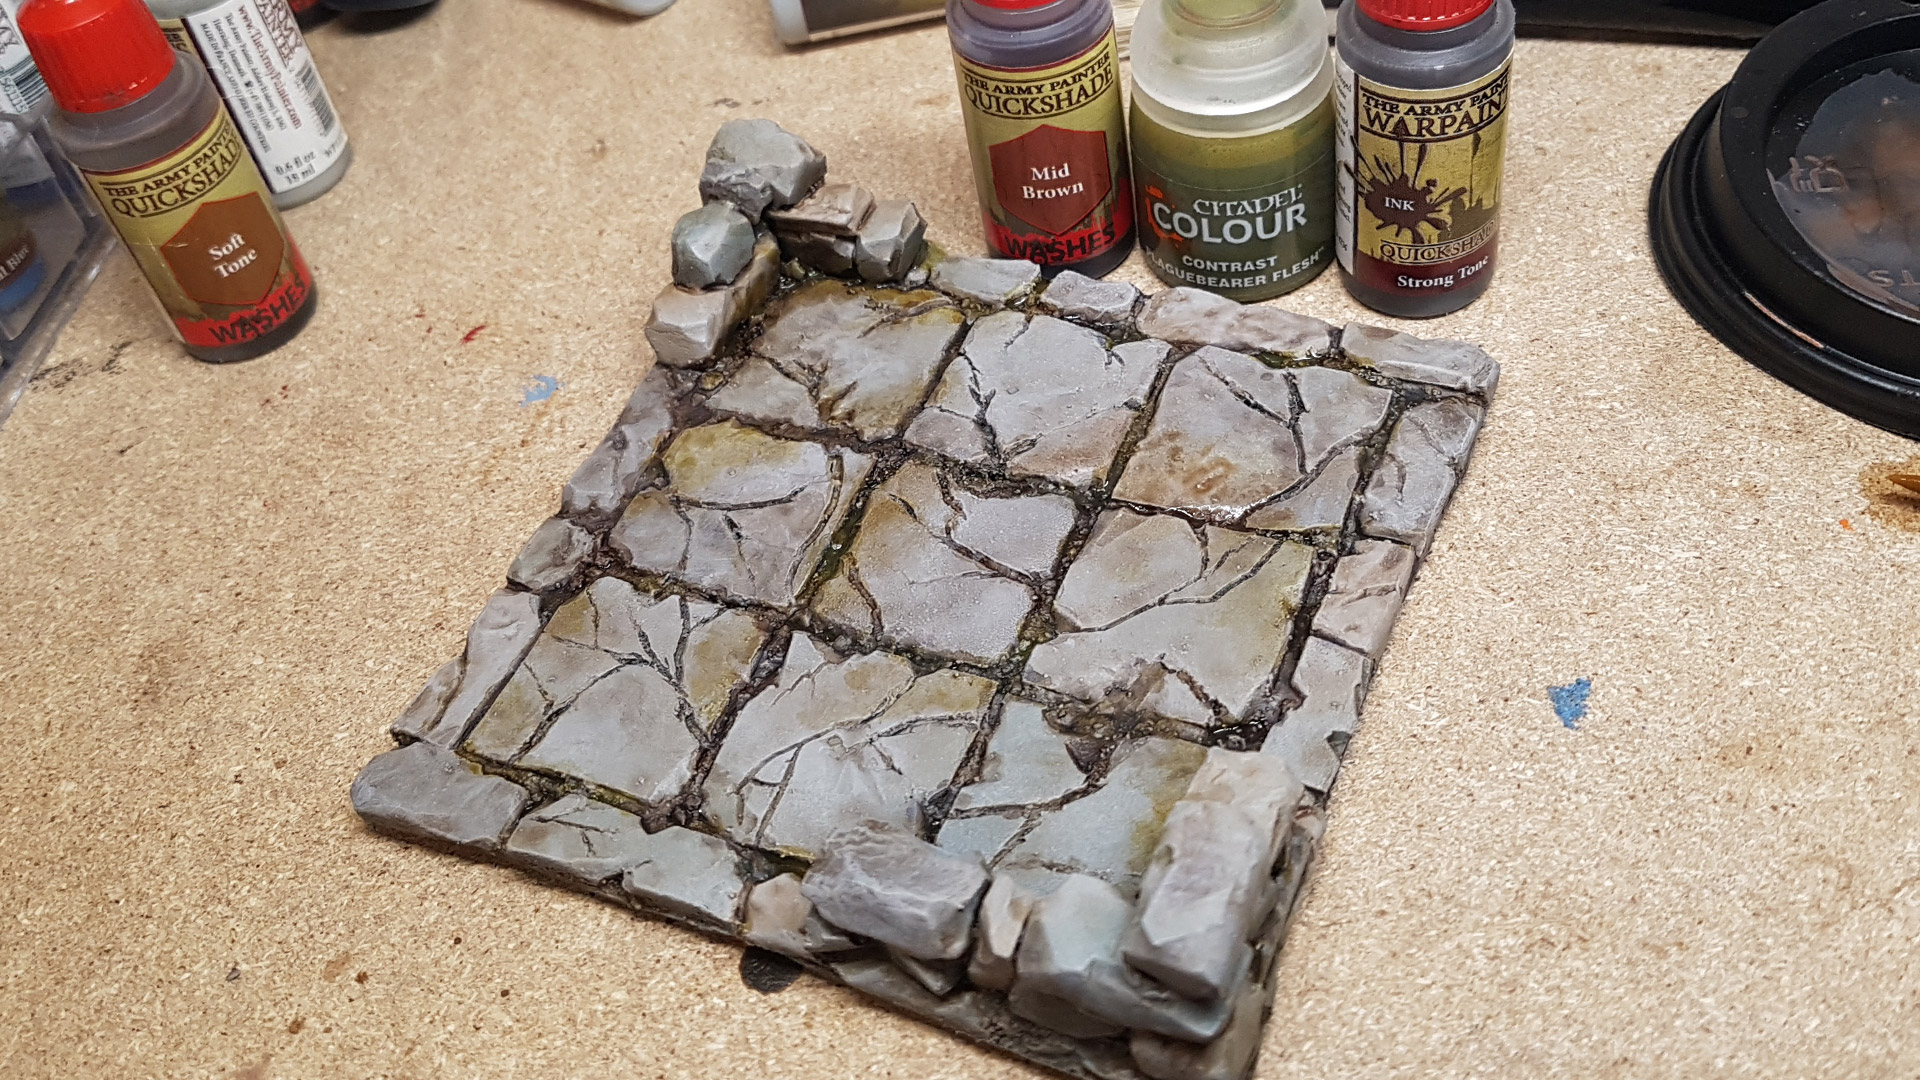
Moving on to painting, my aim was to imbue my creation with that classic fantasy dungeon aesthetic reminiscent of what you’d find in a HeroQuest board. However, for this phase, I’ll be focusing on achieving a grey stone appearance, opting not to use colored floors like red or blue just yet. I plan to explore those vibrant options in the future as I expand the set.
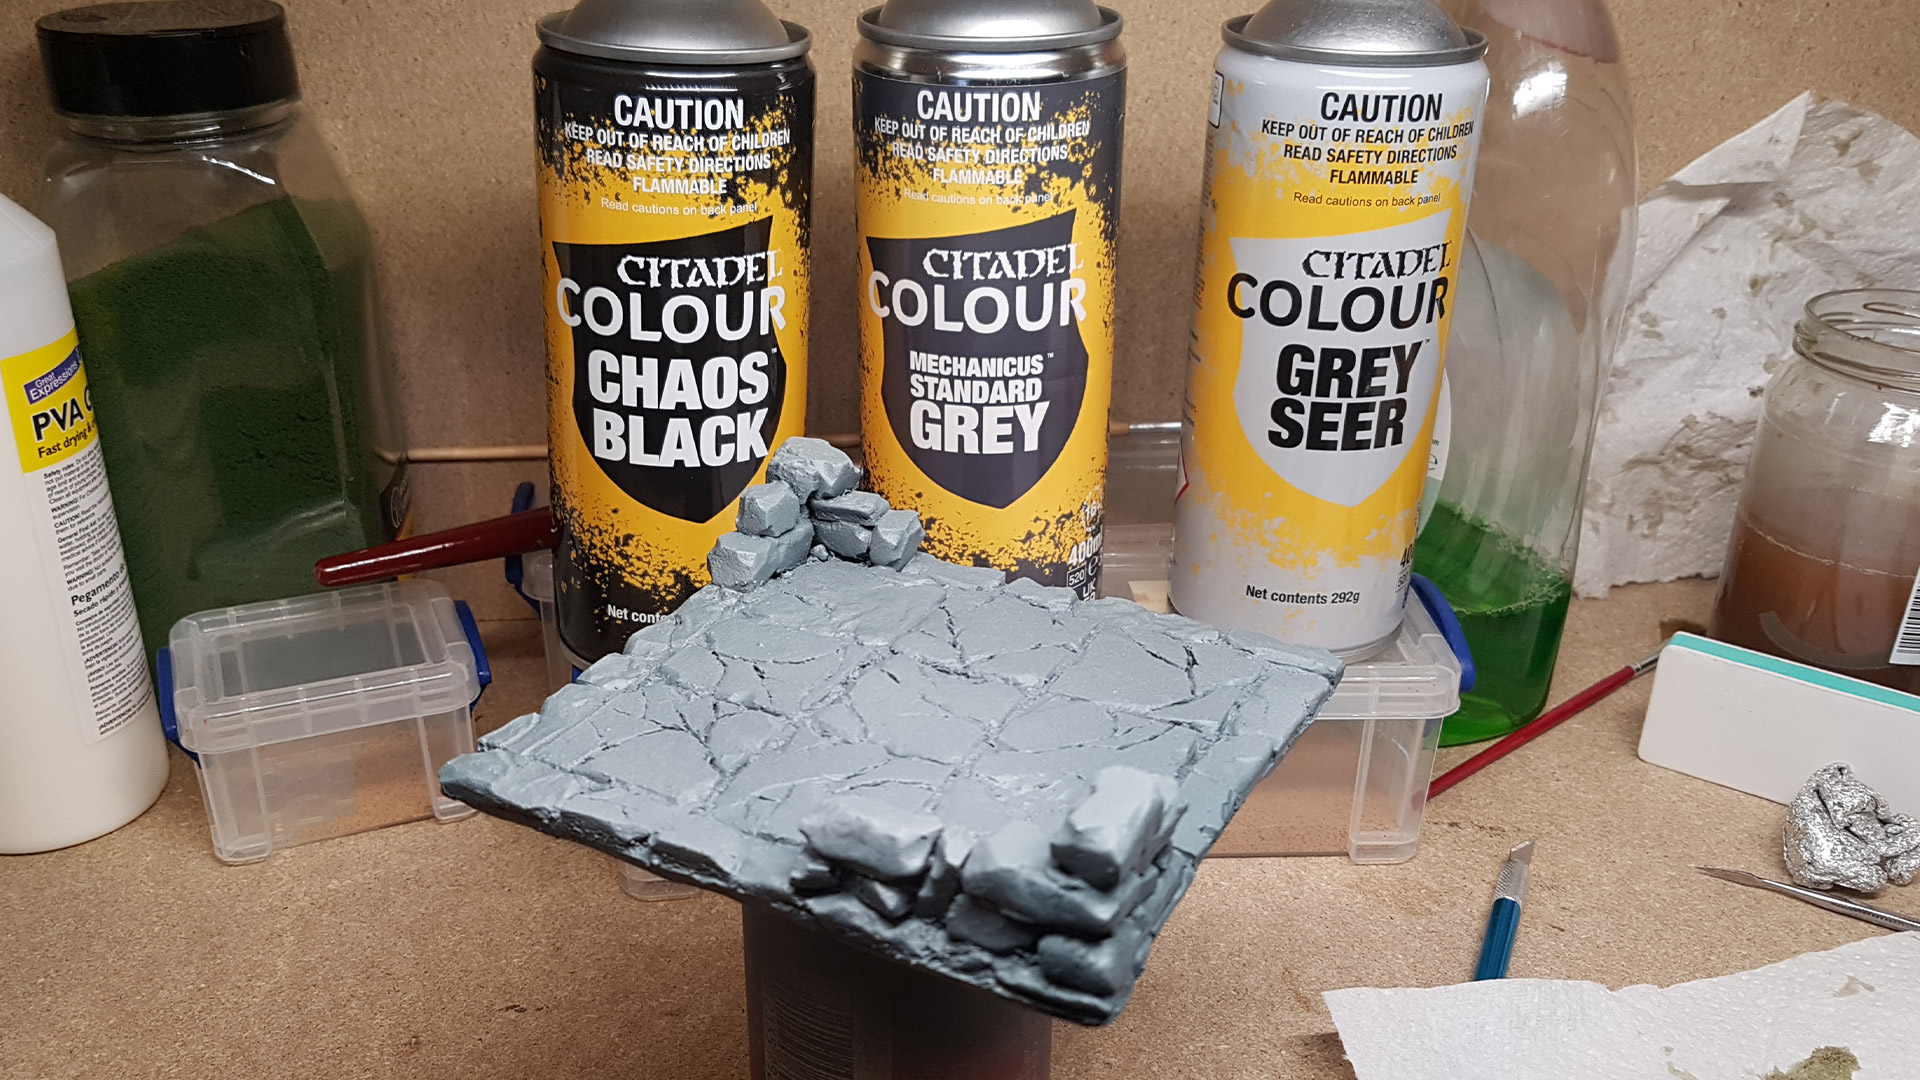
The Base Colours
I began with priming, applying three colours to achieve a zenithal lighting effect, which aids in creating natural shading on the tile. Although the tile itself is relatively flat, and this technique might not be strictly necessary, I’ve adopted it as my standard practice for priming anything, given its effectiveness in enhancing depth and detail.
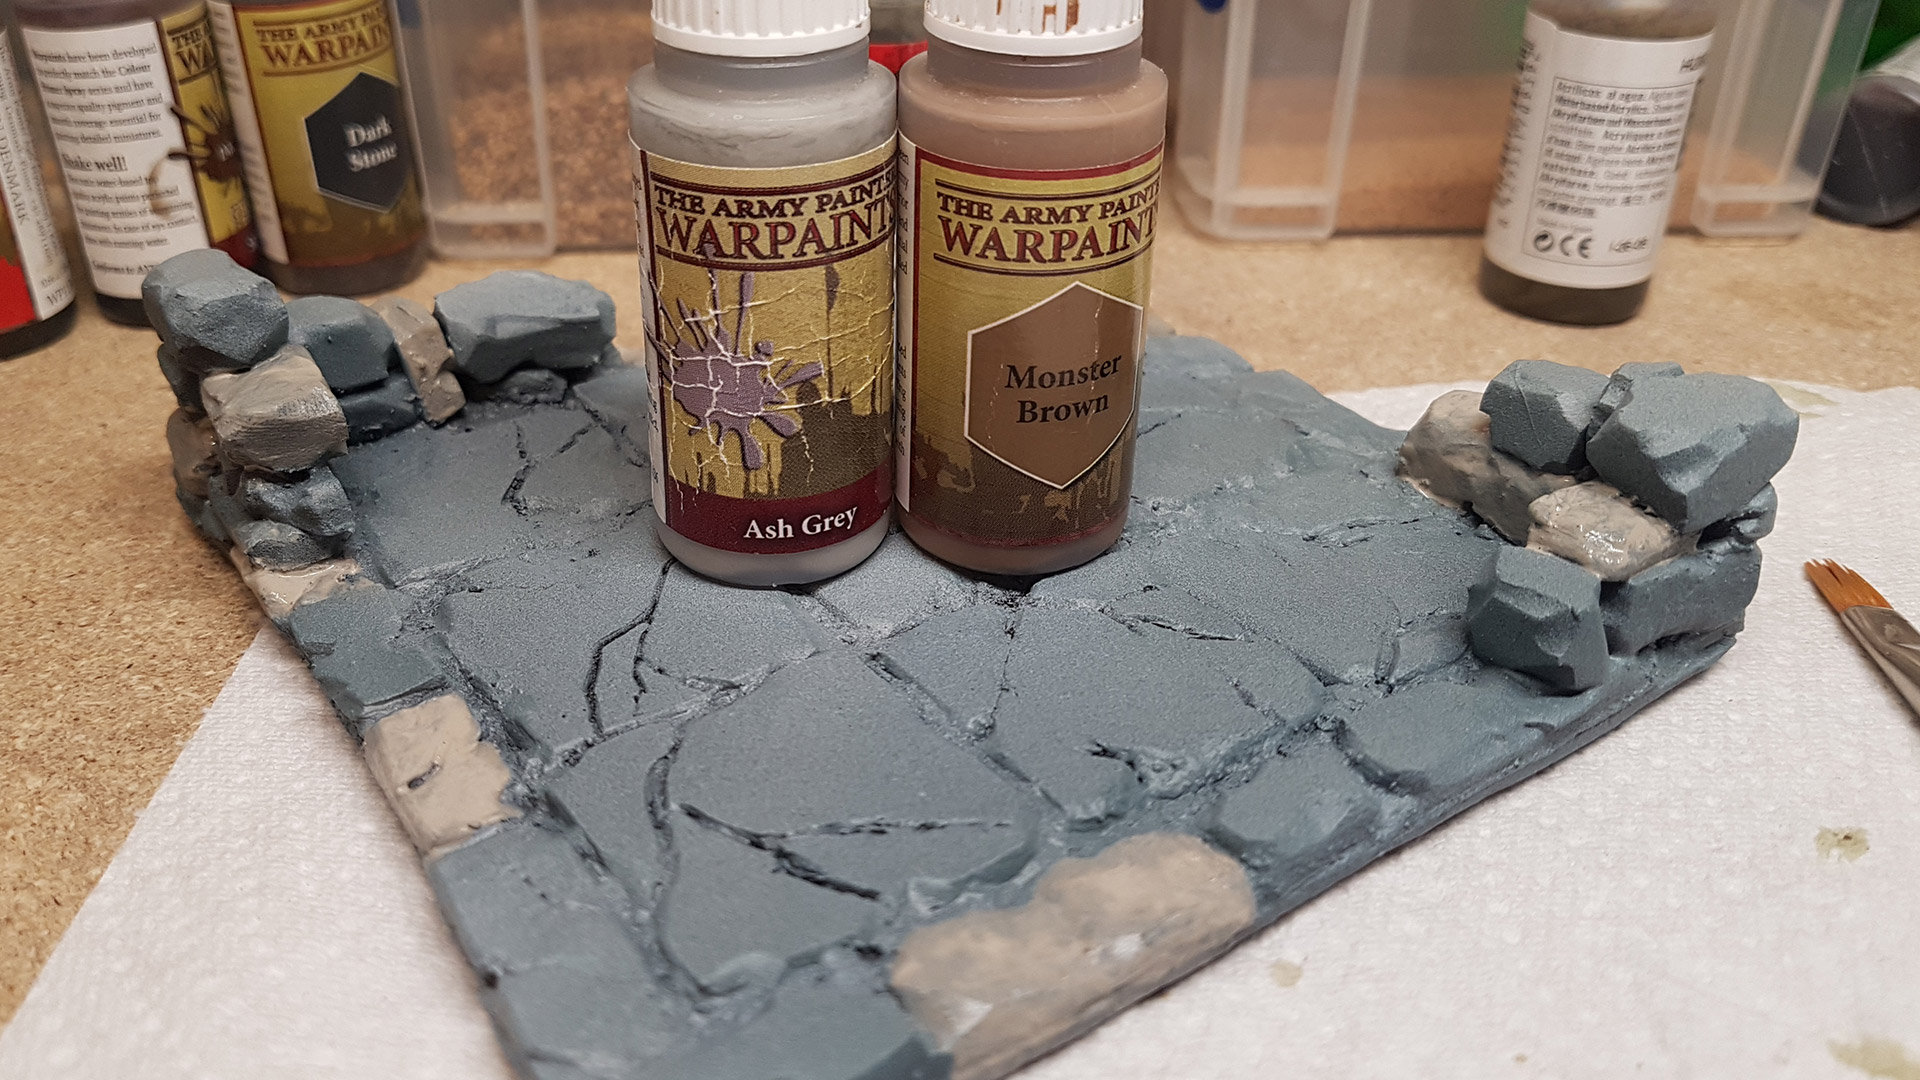
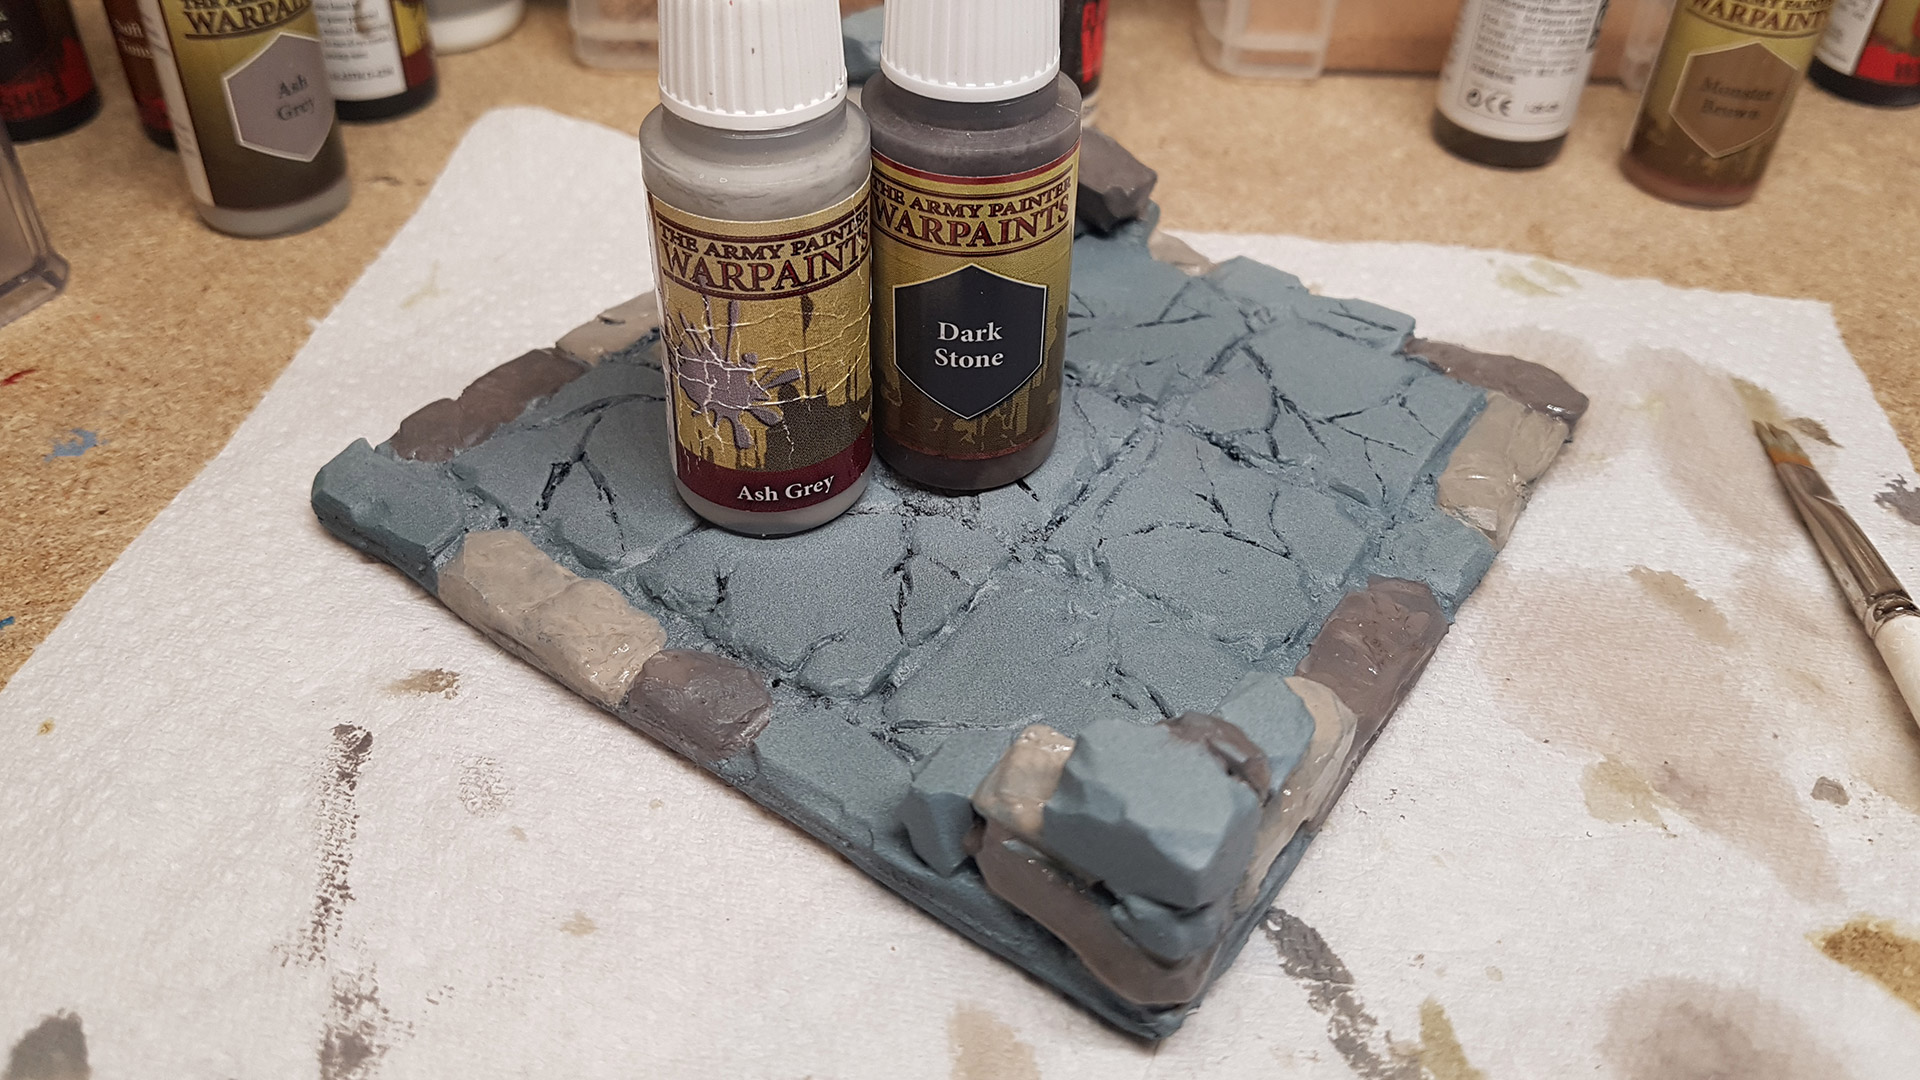
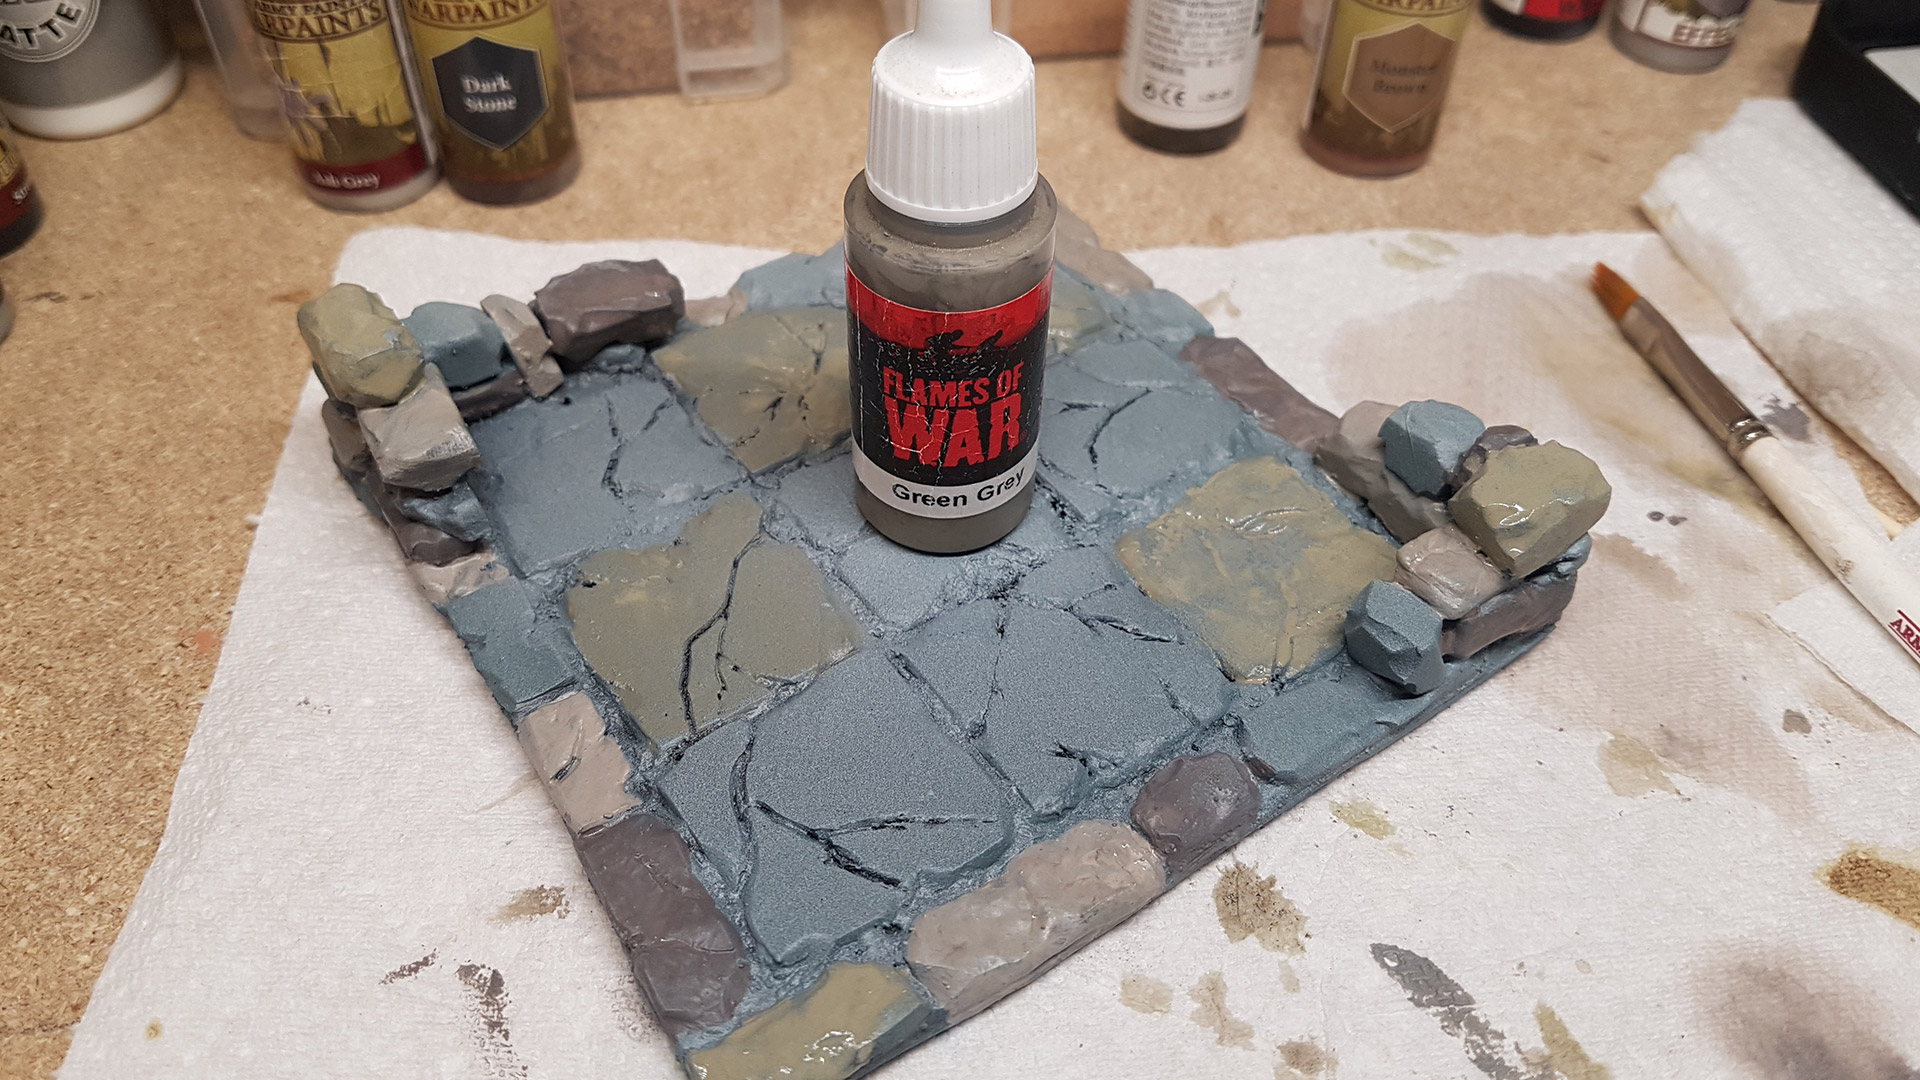
Following the primer, I proceeded to add distinct colours to individual stones, aiming to disrupt the monotony and introduce additional layers of interest and realism. After all, the natural world isn’t composed of flat, uniform colours.
You can see the colours used in the photos.

Drybrushing & Washes
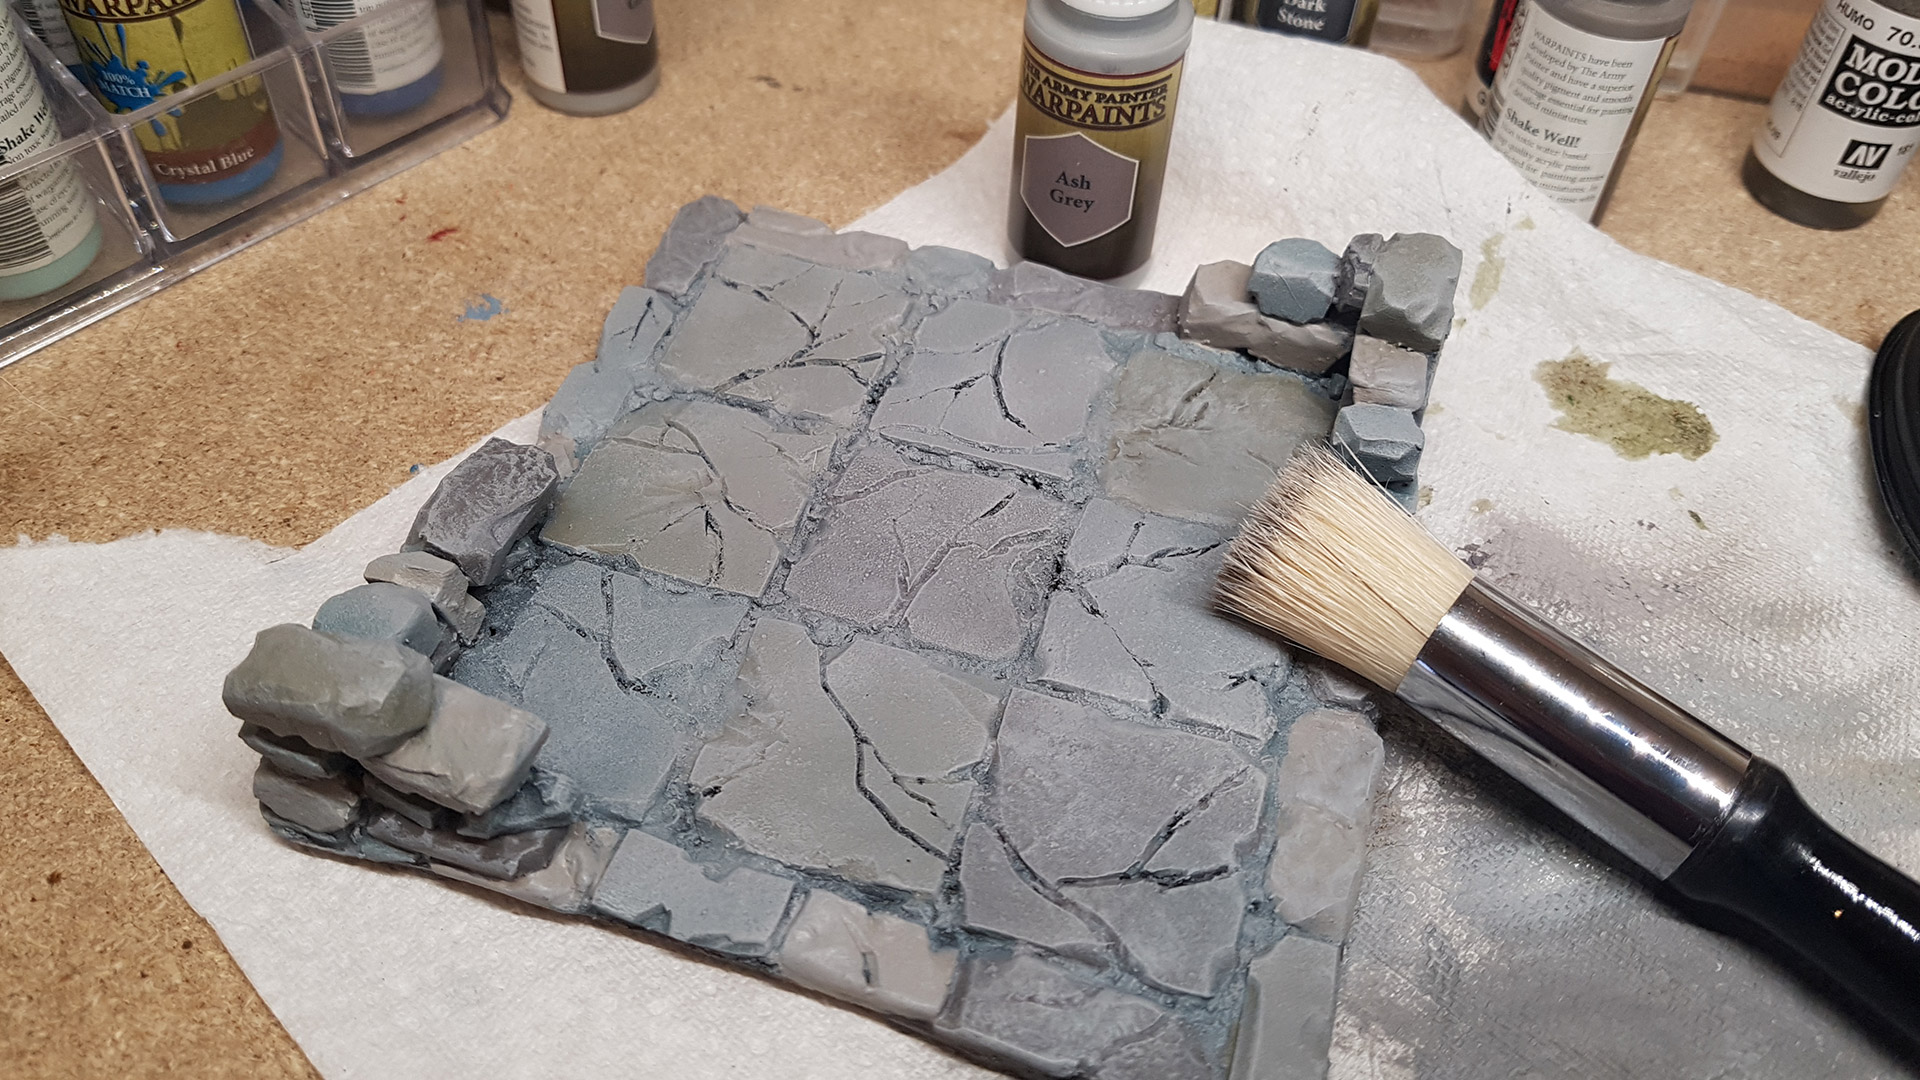
After applying the base colours, I proceeded to drybrush the entire room, a technique that helped blend the colours room back together a bit so it didn’t feel to disparate.
Then, I applied washes across the room to introduce a grimy, dark, and damp dungeon aesthetic, adding further depth to the shadows that had been somewhat diminished by the drybrushing.
Next I did a second round of drybrushing to re-highlight the tiles and walls, effectively enhancing their texture and detail. This step also conveniently masked any unwanted coffee-style stains left by the washes.
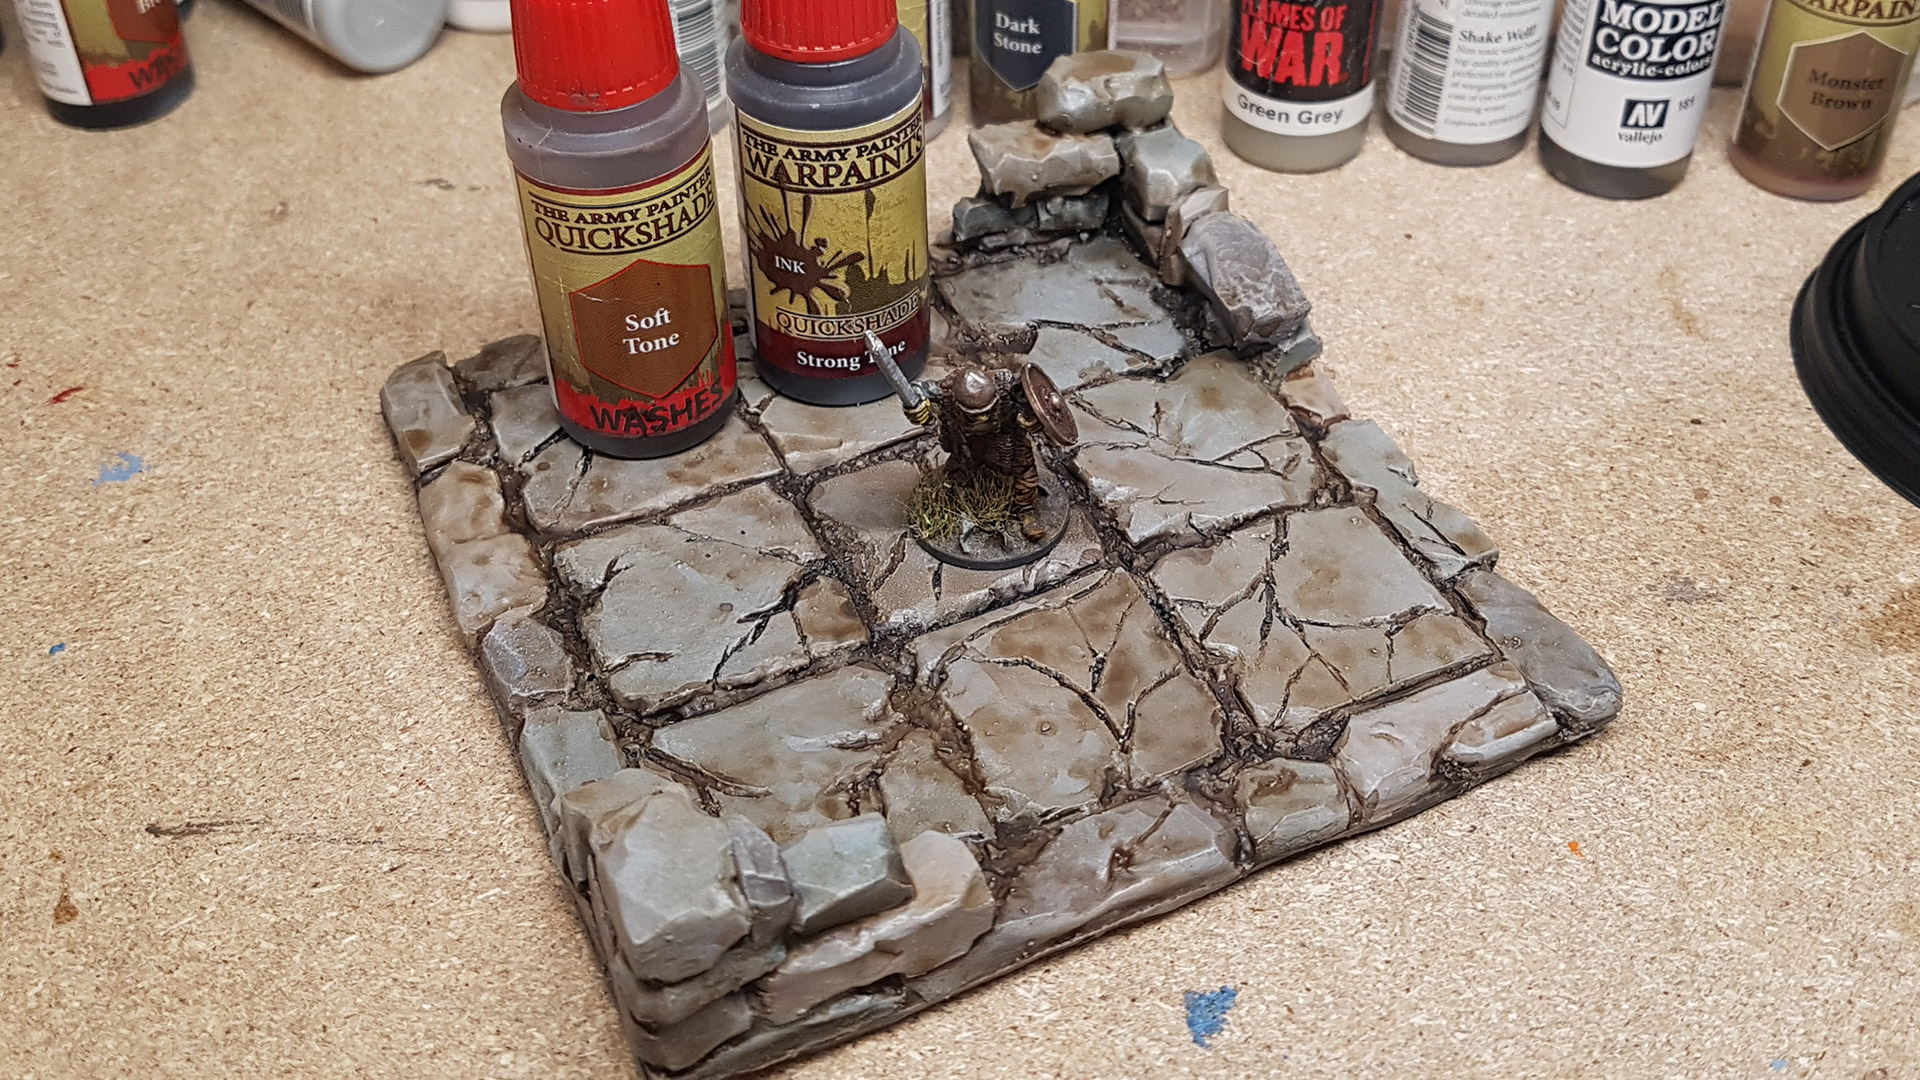
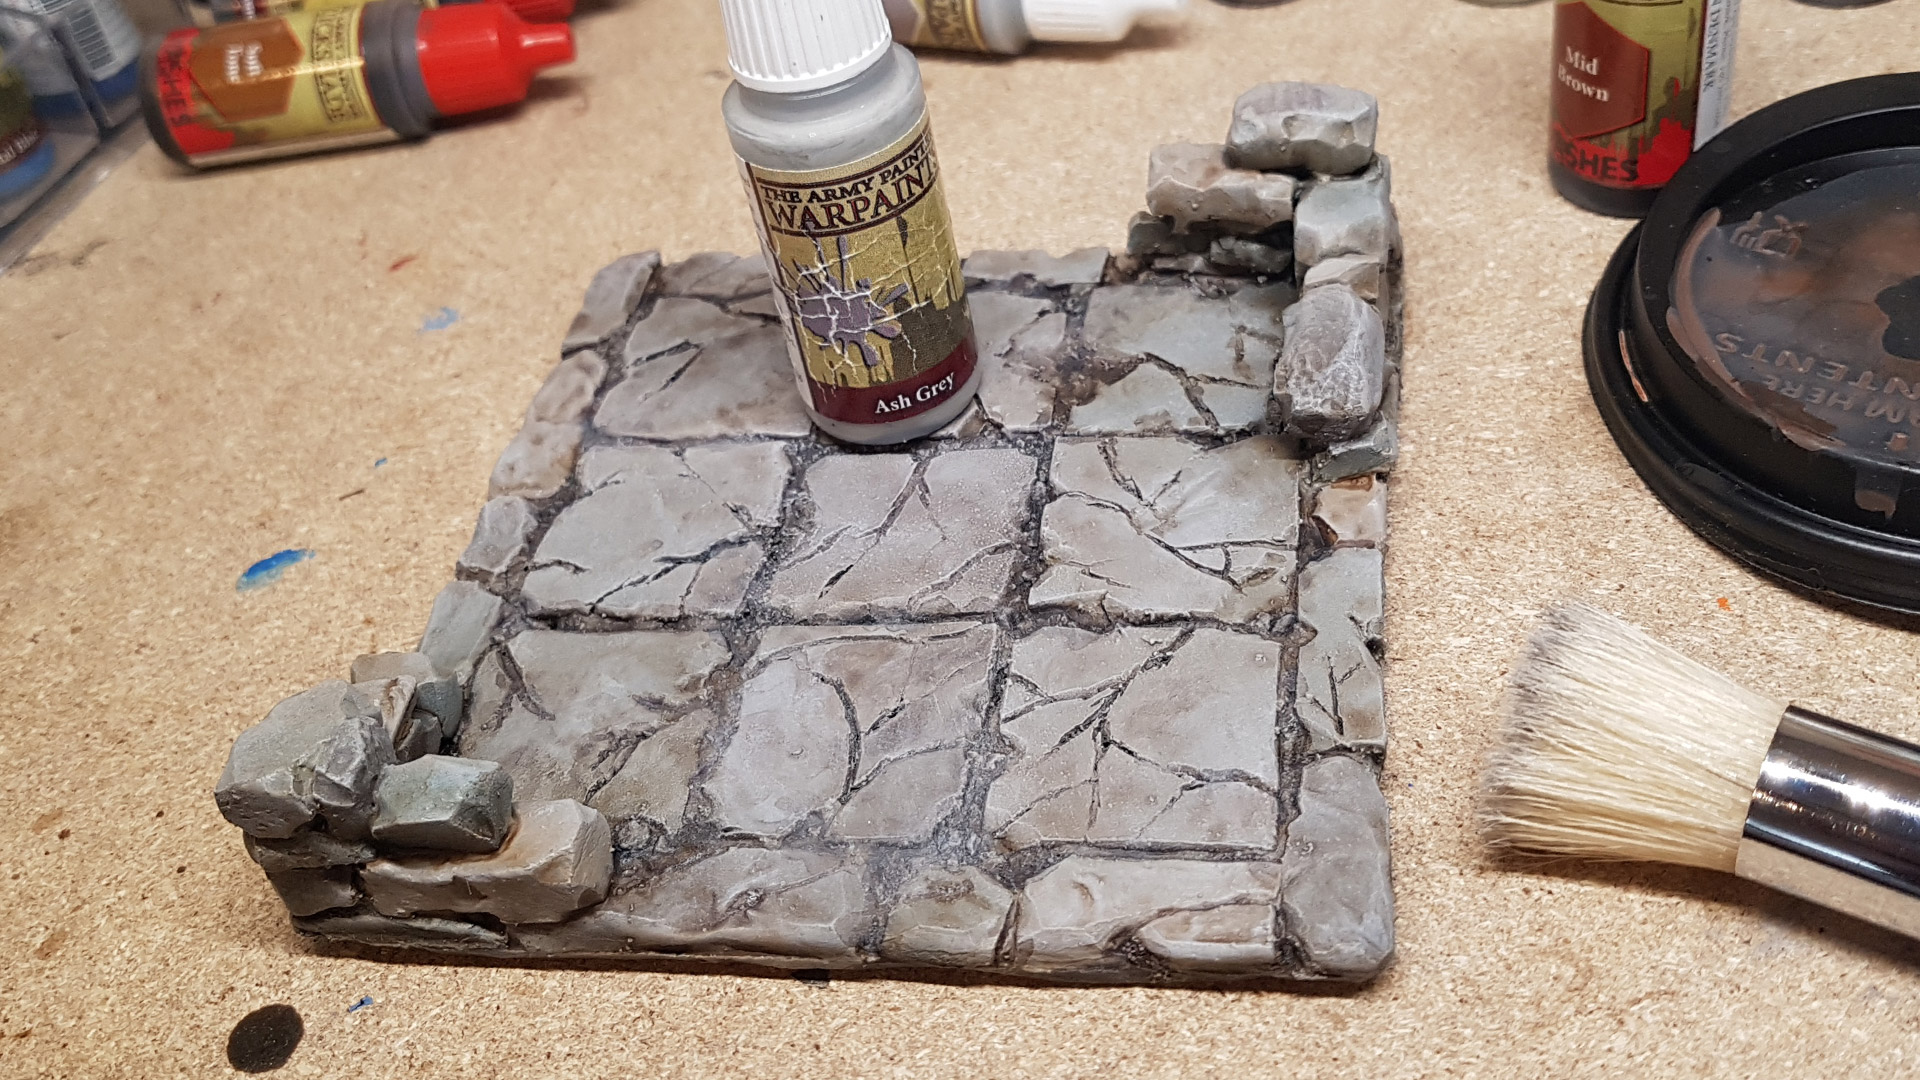
To complete the painting process, I applied a final round of washes, concentrating primarily on the crevices between the tiles and blocks to accentuate their appearance and infuse the necessary darkness and grime.
At this stage, I also incorporated a green contrast paint to simulate a damp, algae-covered look. This was applied not only in the gaps but also subtly extended to the edges of certain tiles and along the base of some wall stones, adding to the overall moist and aged atmosphere of the room.
A Bit of Matt Varnish for the Final Touch

Crafting a Tiled Dungeon Room Part 2
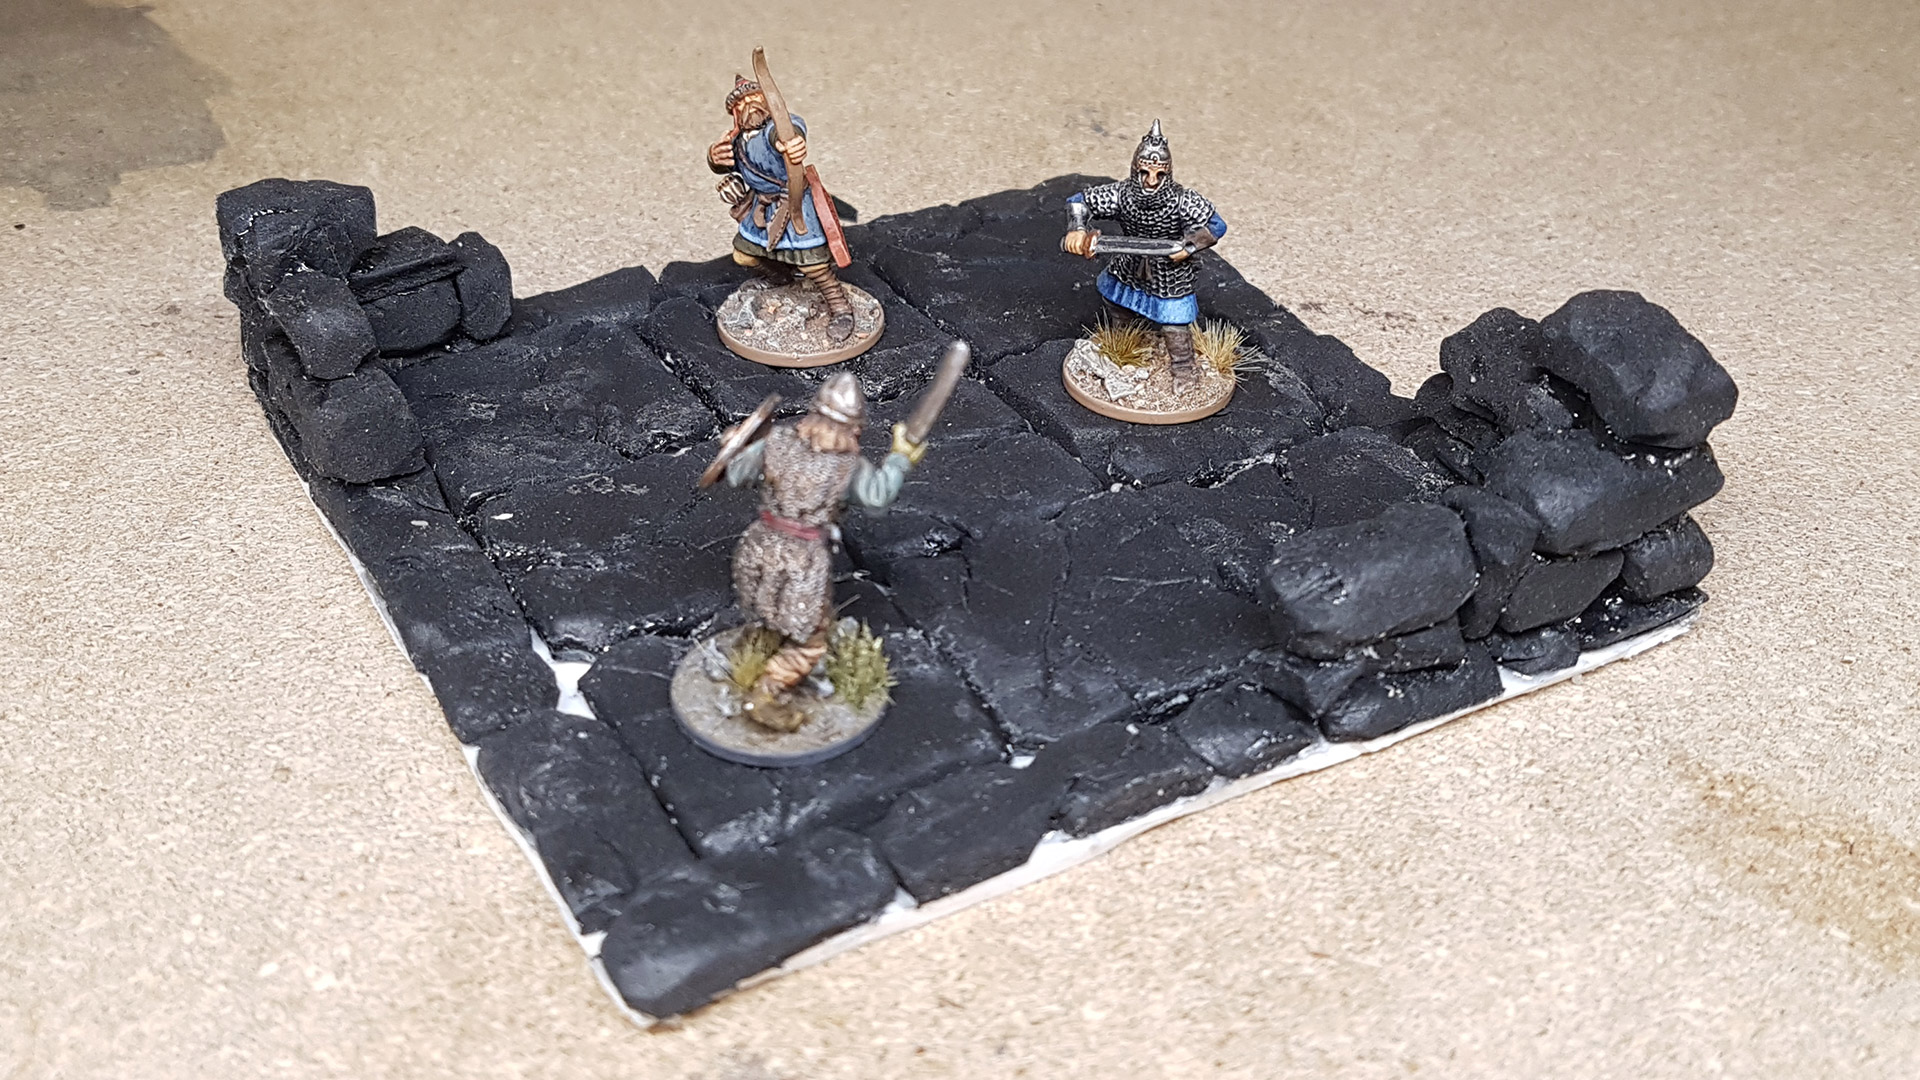
Would any dungeon truly feel complete without imposing stone walls? After all, when one imagines a party of adventurers embarking on a quest, it’s the towering stone walls that often come to mind first, right?
Building Imposing Yet Unobtrusive Walls
We all desire towering walls to set the scene, yet they often obstruct gameplay. So, why not suggest the presence of walls by strategically placing smaller sections in room corners?
This approach ensures the ambiance of enclosed walls without hindering visibility or movement of miniatures within a room. Observe how the addition of edging tiles enhances the illusion, making it appear as though complete walls surround the space.
Hmm, miniature walls bring to mind the tiny Stonehenge from “Spinal Tap” — Oh, I should definitely create one of those to incorporate into a game.
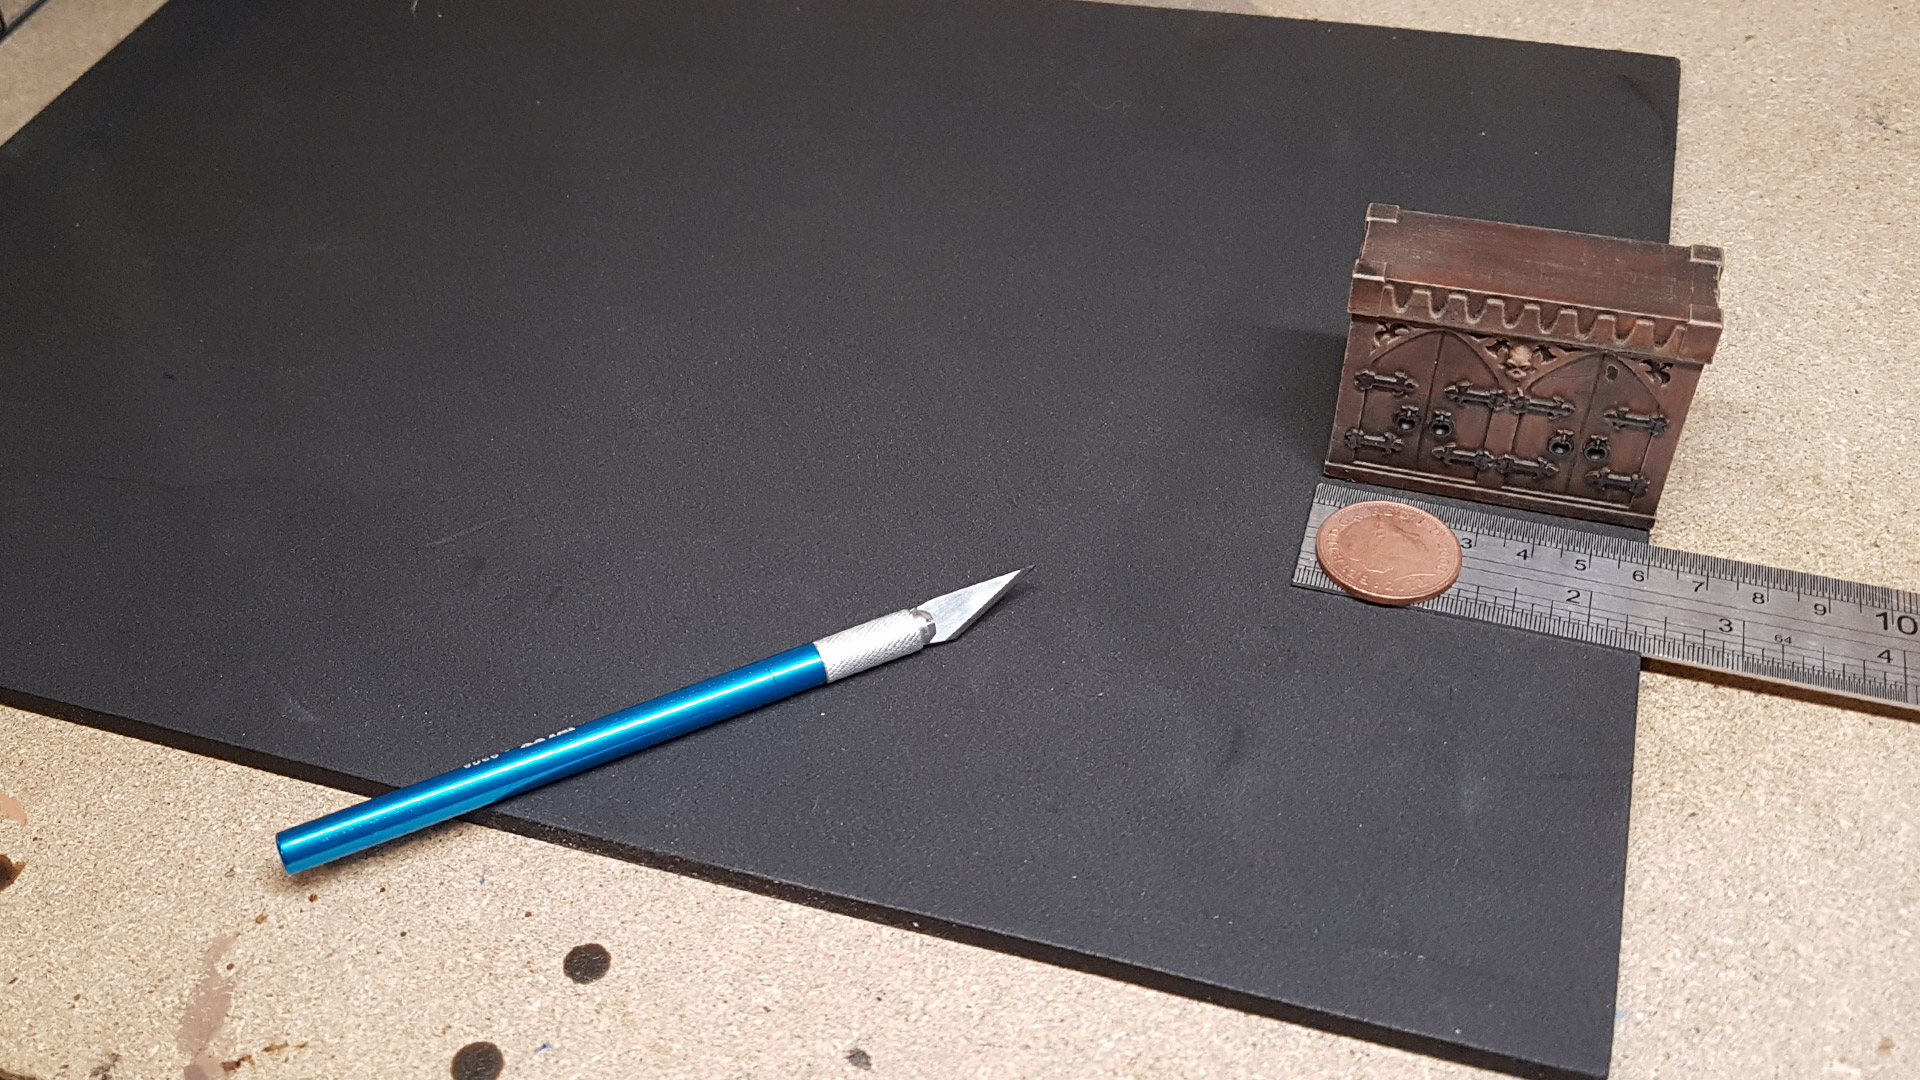
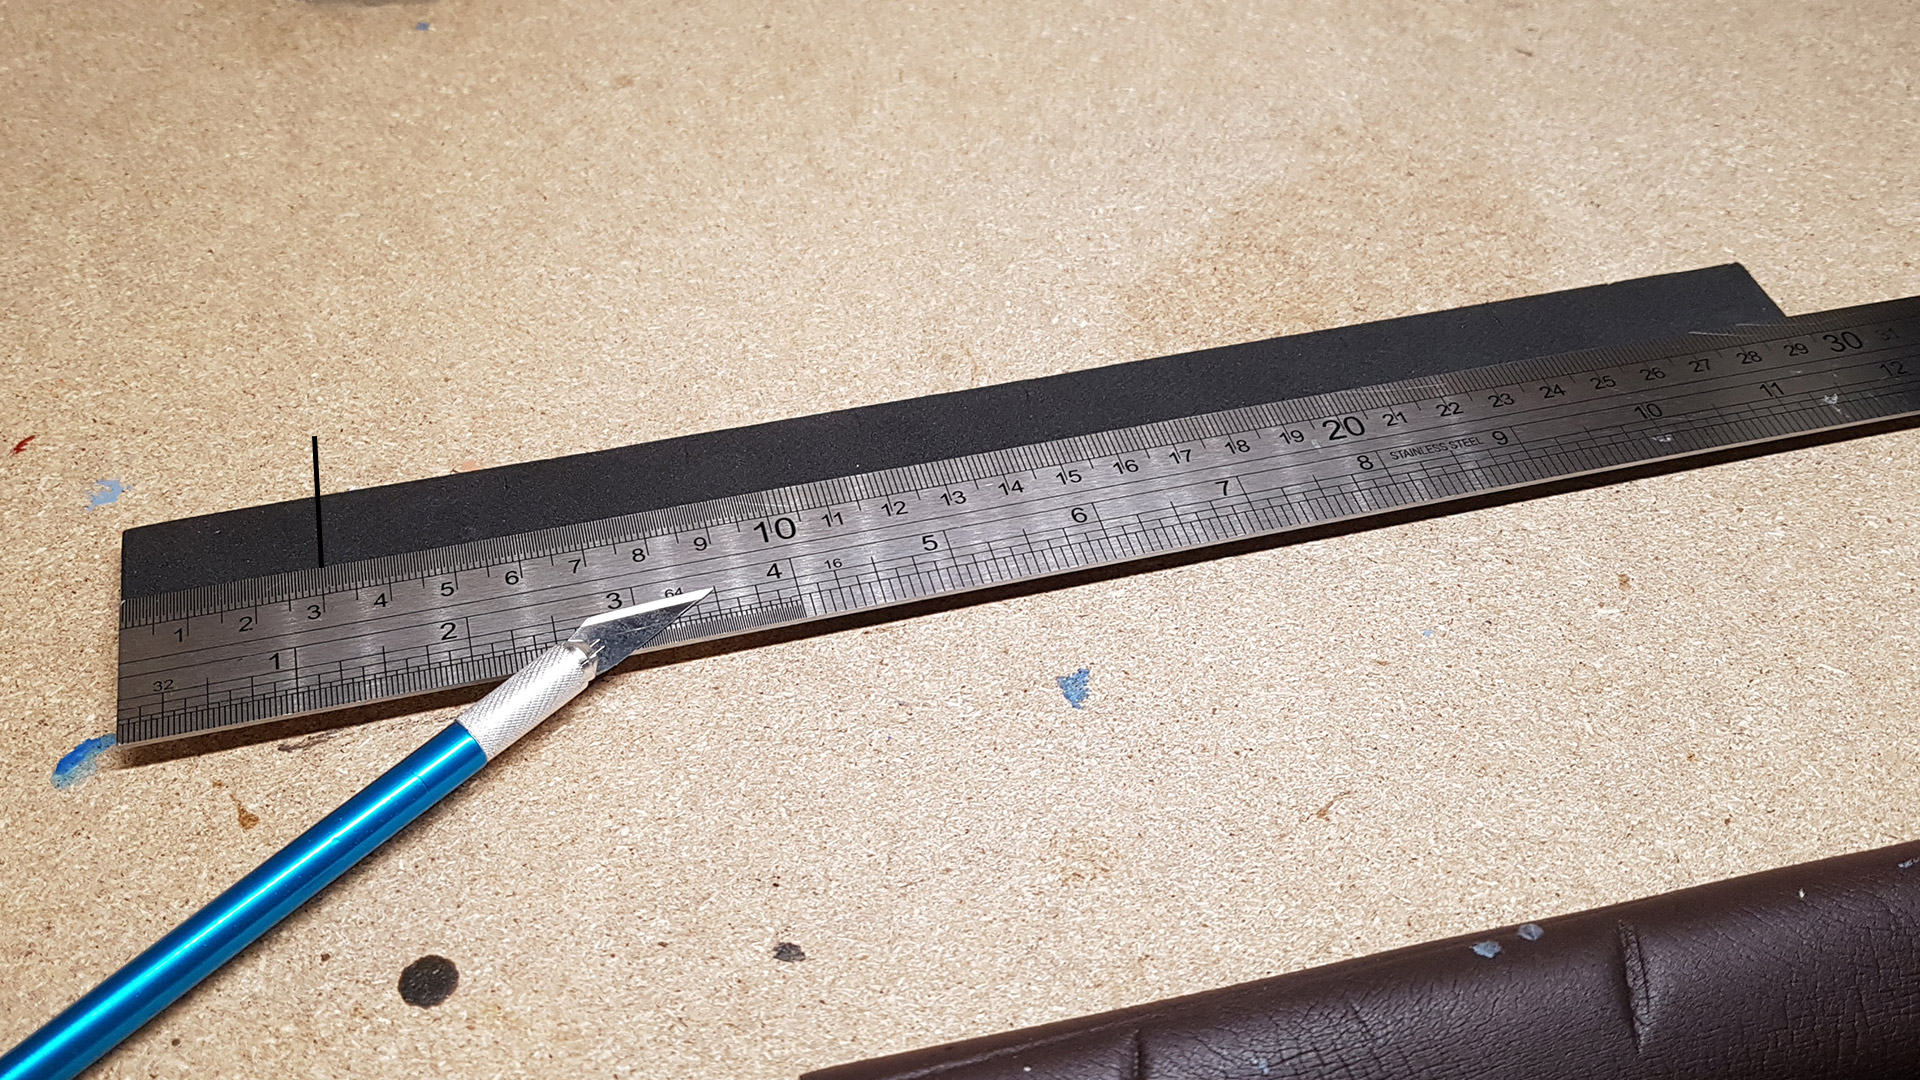
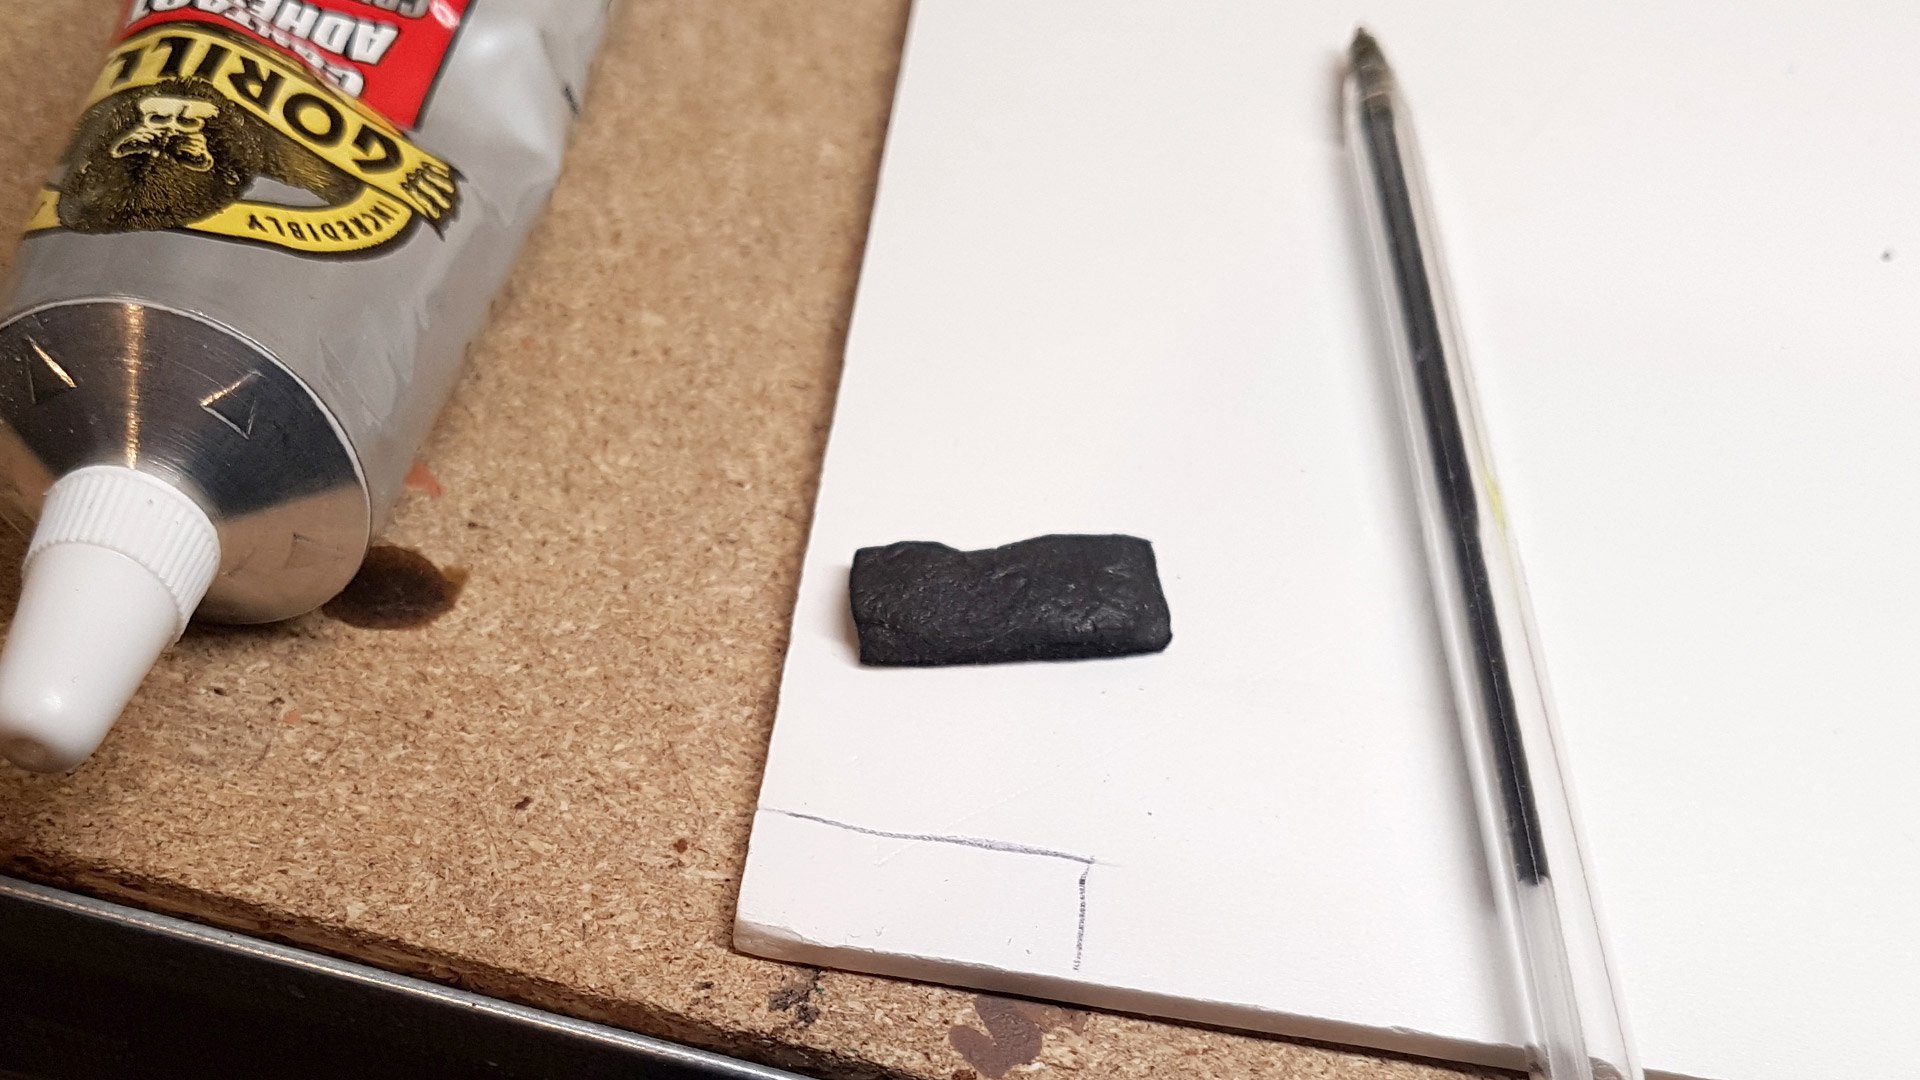
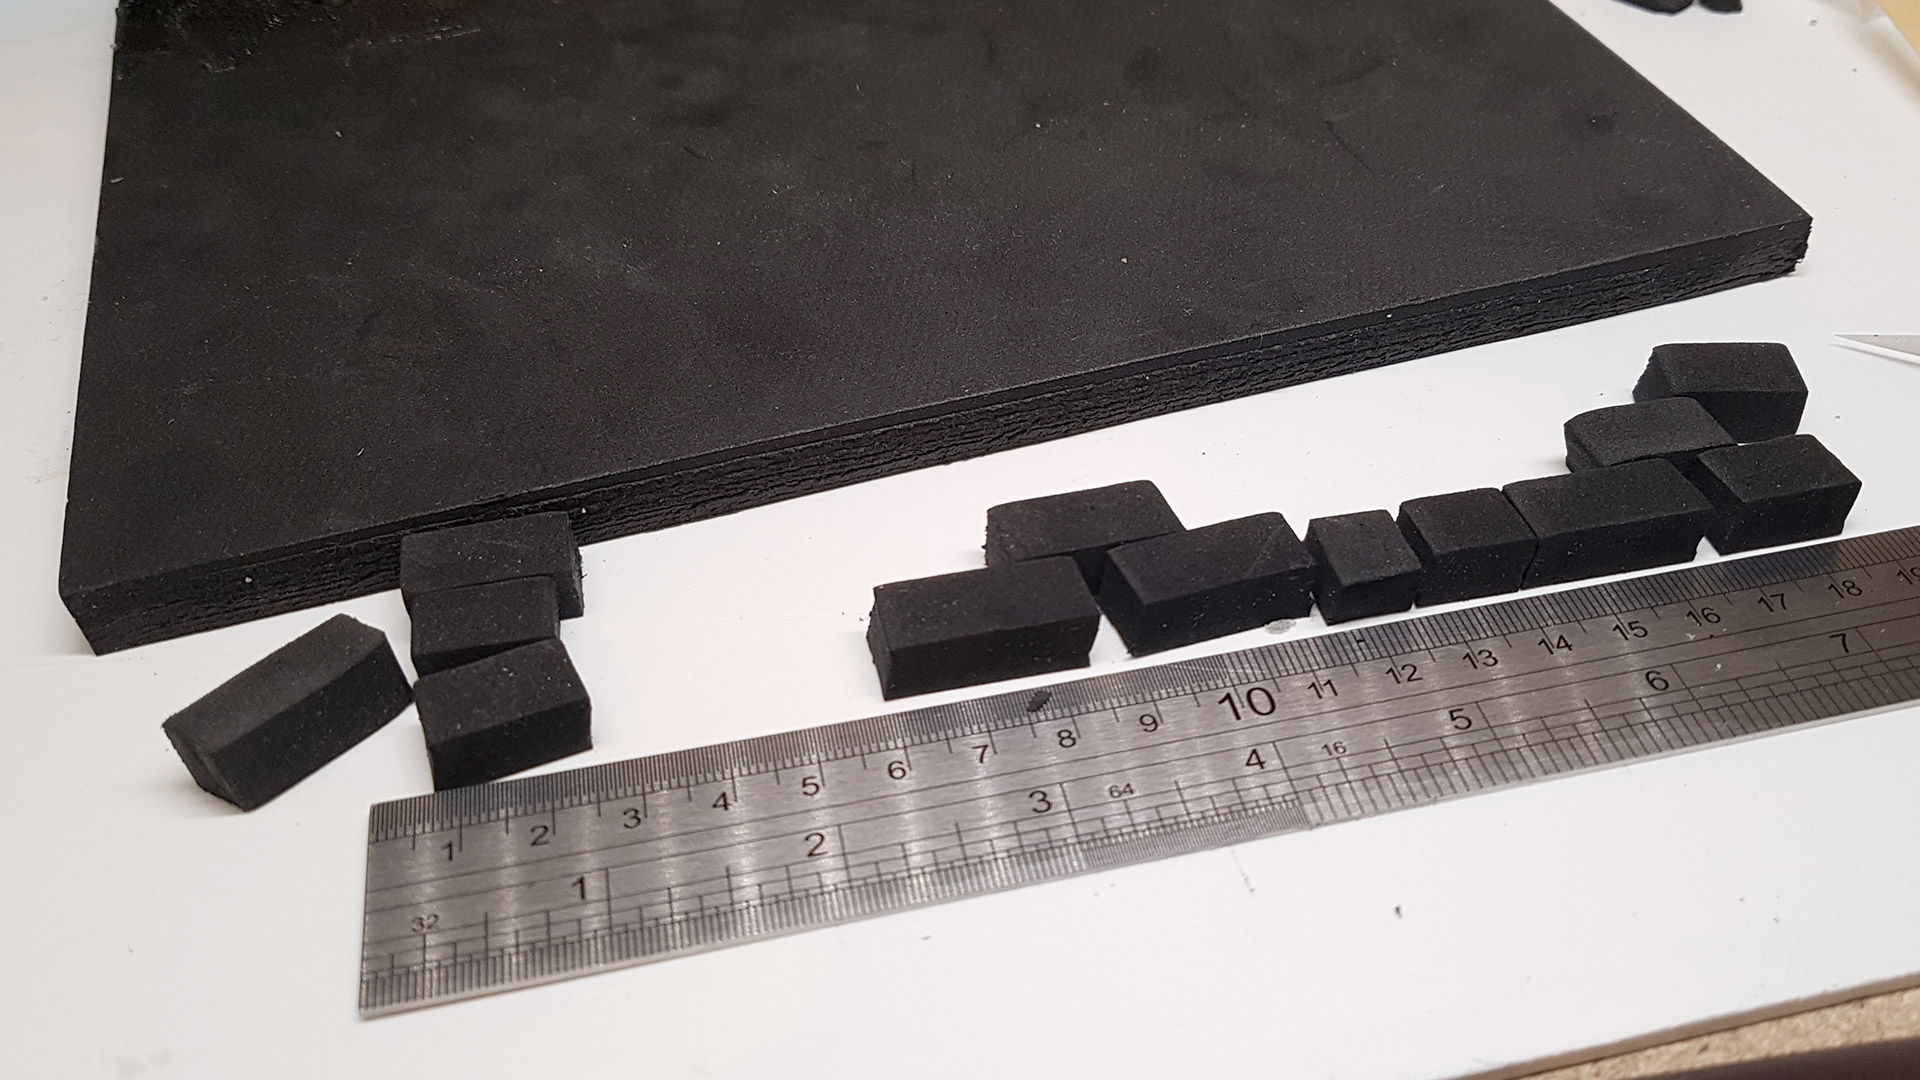 Using 1cm Thick EVA Foam for Wall Blocks
I got to work by cutting out blocks from a 1cm thick sheet of EVA foam. This provided me with a set of blocks that, when mixed with some leftover 5mm floor tiles, created a cool, haphazard look for the walls. I find this aesthetic particularly interesting and effective, especially for constructing partial walls where precision and matching are not crucial.
It was simply a matter of stacking up the blocks in the corners ensuring they overlapped in a staggered manner for added stability and visual appeal. Once again, these where glued in place with Gorilla Glue Contact Adhesive.
Cutting in a Chamfered Edge Along the Base
At this point I thought it prudent to minimize the visibility of the Foam PVC sheet base by trimming its edges into a chamfered shape. This alteration effectively reduces the side profile of the sheet, ensuring that it doesn’t distract the observer’s attention away from the meticulously constructed dungeon tile.

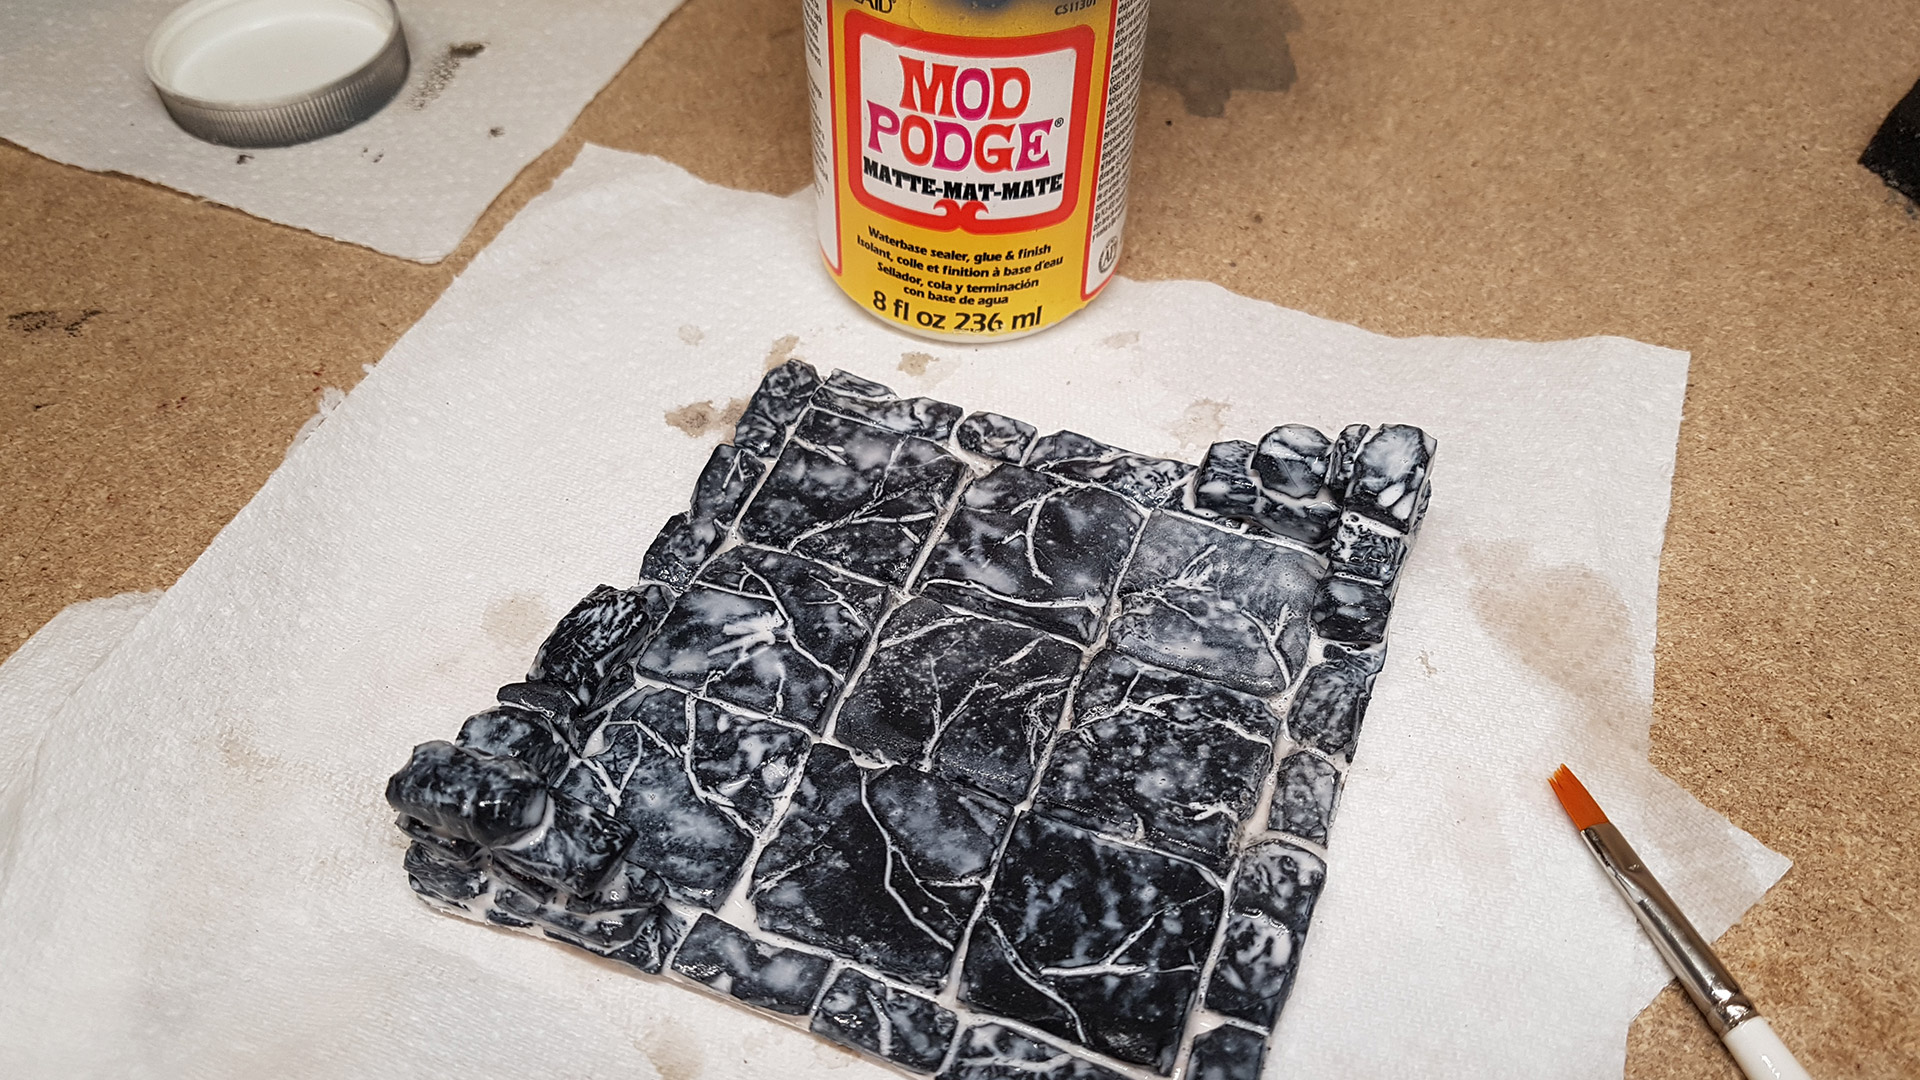
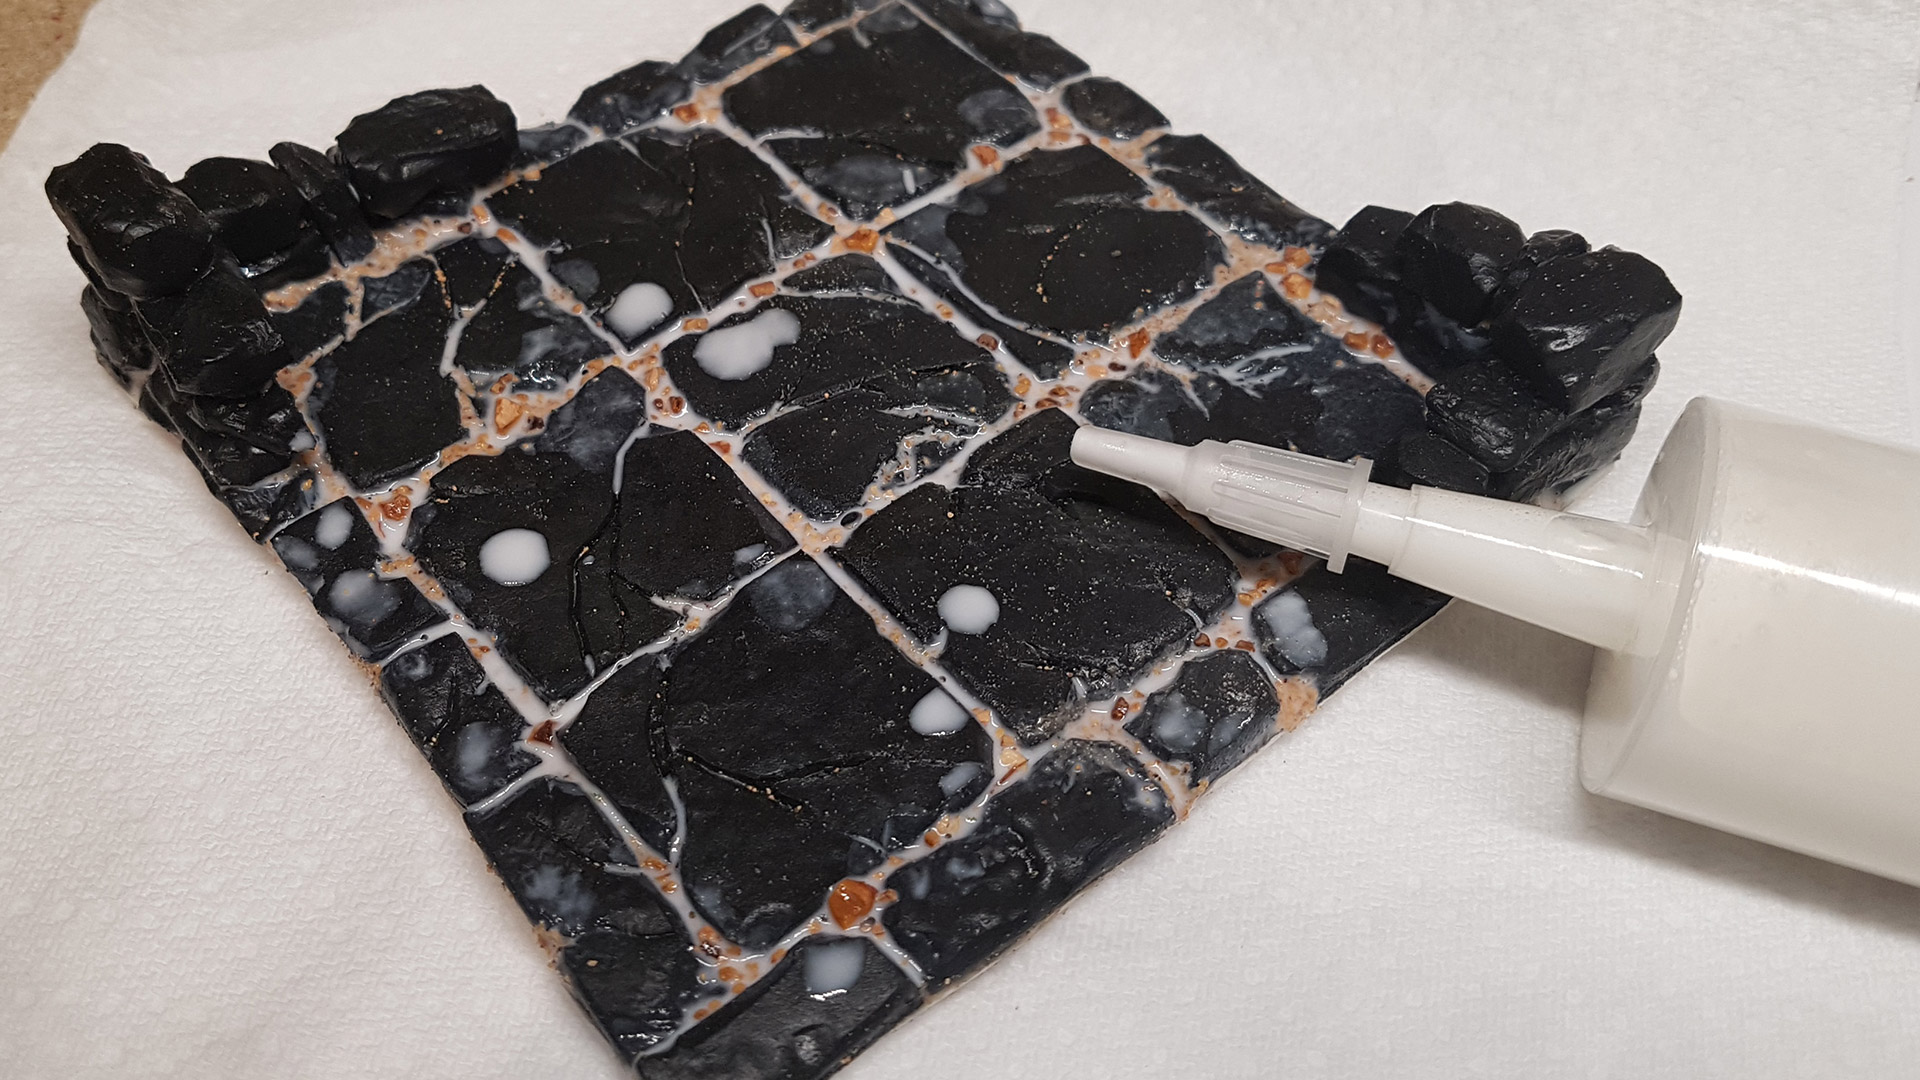
Adding Durability With Mod Podge & Filling in the Gaps
To make the tile durable and resilient for gameplay, Mod Podge is the ideal solution. It’s compatible with all the materials I’m using, and its flexibility allows the tile to maintain a slight squishiness, bending along with the EVA foam under pressure. This characteristic, combined with the lightweight nature of the materials, boosts the tile’s overall durability. Therefore, unlike resin or plastic, dropping this tile isn’t a concern; it will simply bounce.
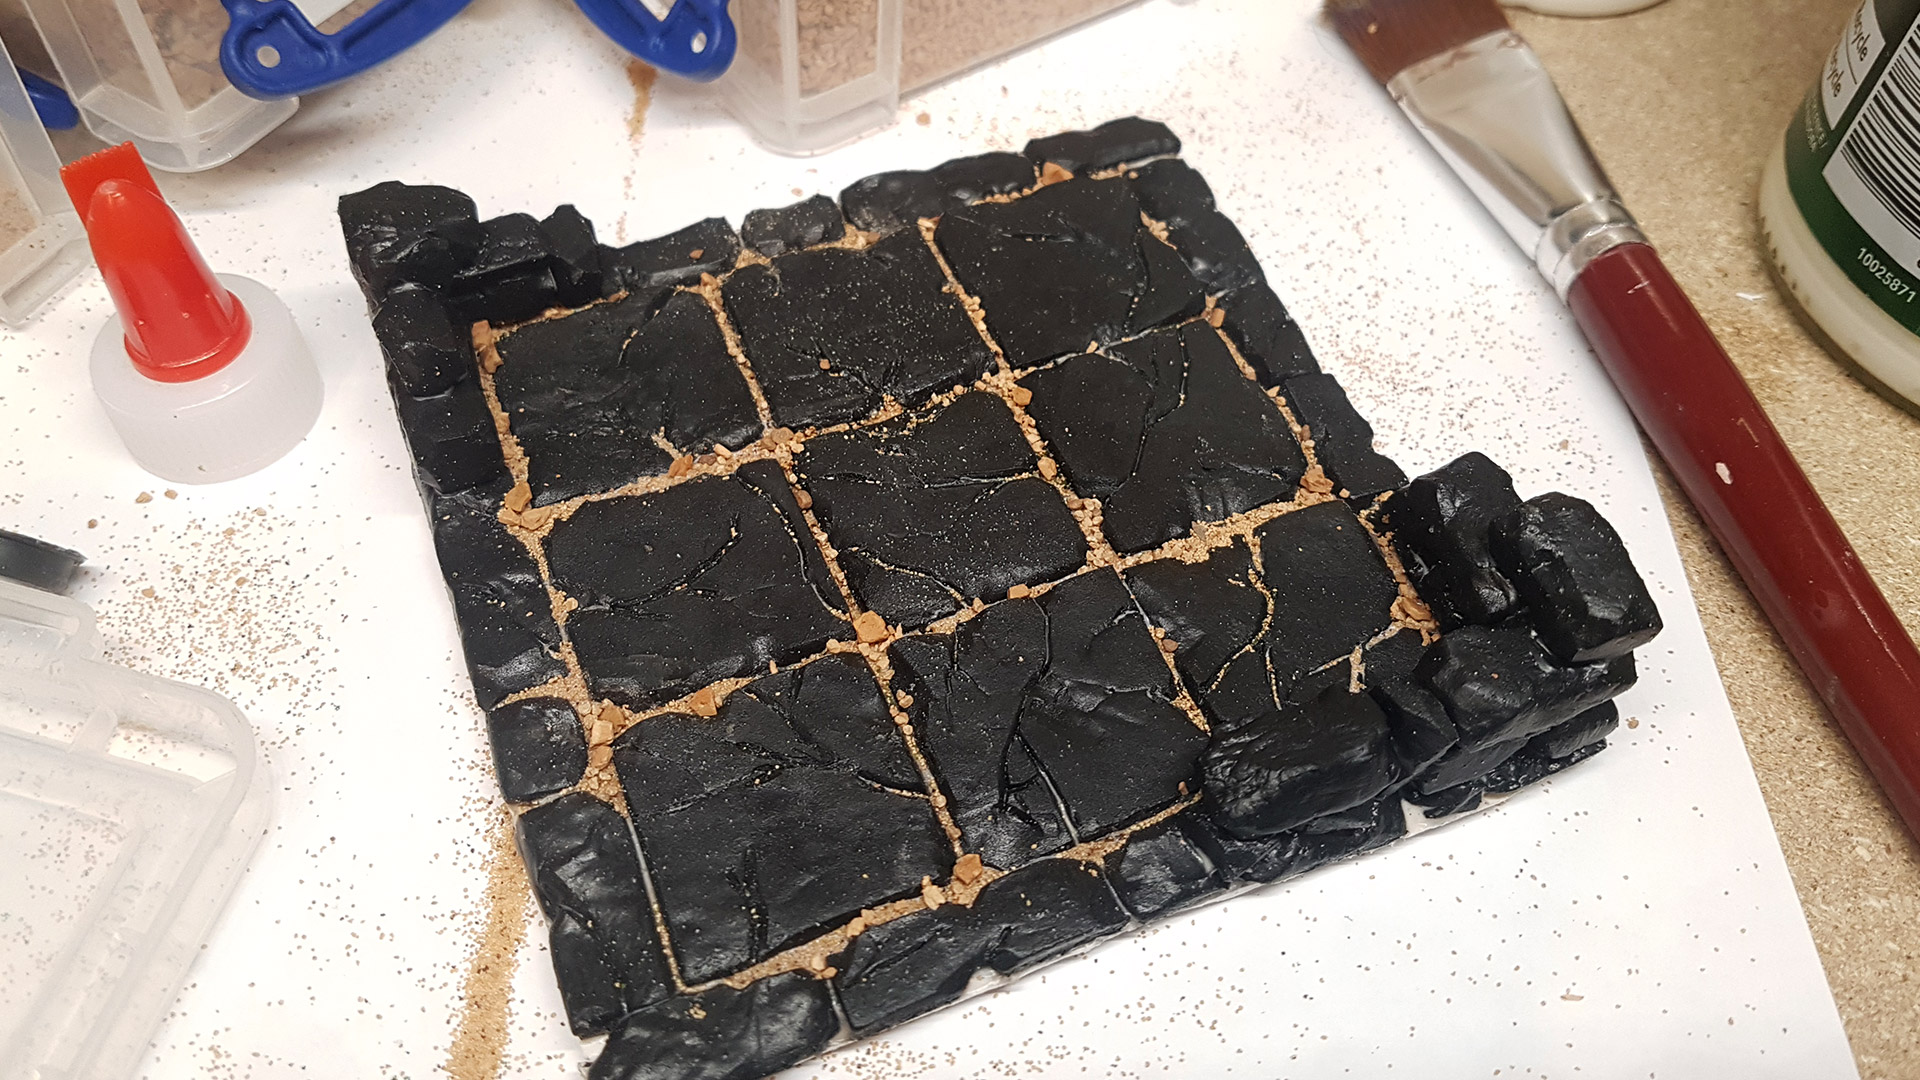
Finally, it was time to address the gaps between the tiled floor to enhance the texture. To achieve this, I opted for a variety of cork granules from Gale Force 9, securing them in place with a mixture of watered-down PVA glue and a touch of dish soap. The dish soap was added to help break the surface tension of the water, ensuring a more effective application and adhesion of the granules.
Crafting a Tiled Dungeon Room Part 1
To kick off this project, it makes practical sense to begin with the quintessential element of any fantasy dungeon: a square room, constructed from stone blocks for the walls, with large stone tiles for the flooring.
Creating this type of dungeon tile is an ideal opportunity to experiment with EVA foam, covering the fundamental techniques of constructing walls and floors, as well as exploring the basic painting of a fantasy dungeon.
Getting Started With 5mm Eva Foam & Picking a Floor Tile Size
 Cutting 3cm Square EVA Foam Floor Tiles
Before diving in, I needed to select a base floor tile size. Many dungeons utilise 1-inch squares, yet I aimed for a slightly larger scale to better accommodate larger miniatures and to provide more expansive spaces within the dungeon. This extra room is particularly useful for fitting in scenery items, like the iconic bookcases from HeroQuest. Considering this, I opted for a 3cm square size, which suits me perfectly since I’m accustomed to working with metric measurements.
I carefully measured and cut a strip from a 5mm thick sheet of EVA foam into 3cm square tiles. Then, using clippers, a craft knife, a ball of baking foil and a heat gun, I shaped and distressed each tile to achieve an authentic and worn look.

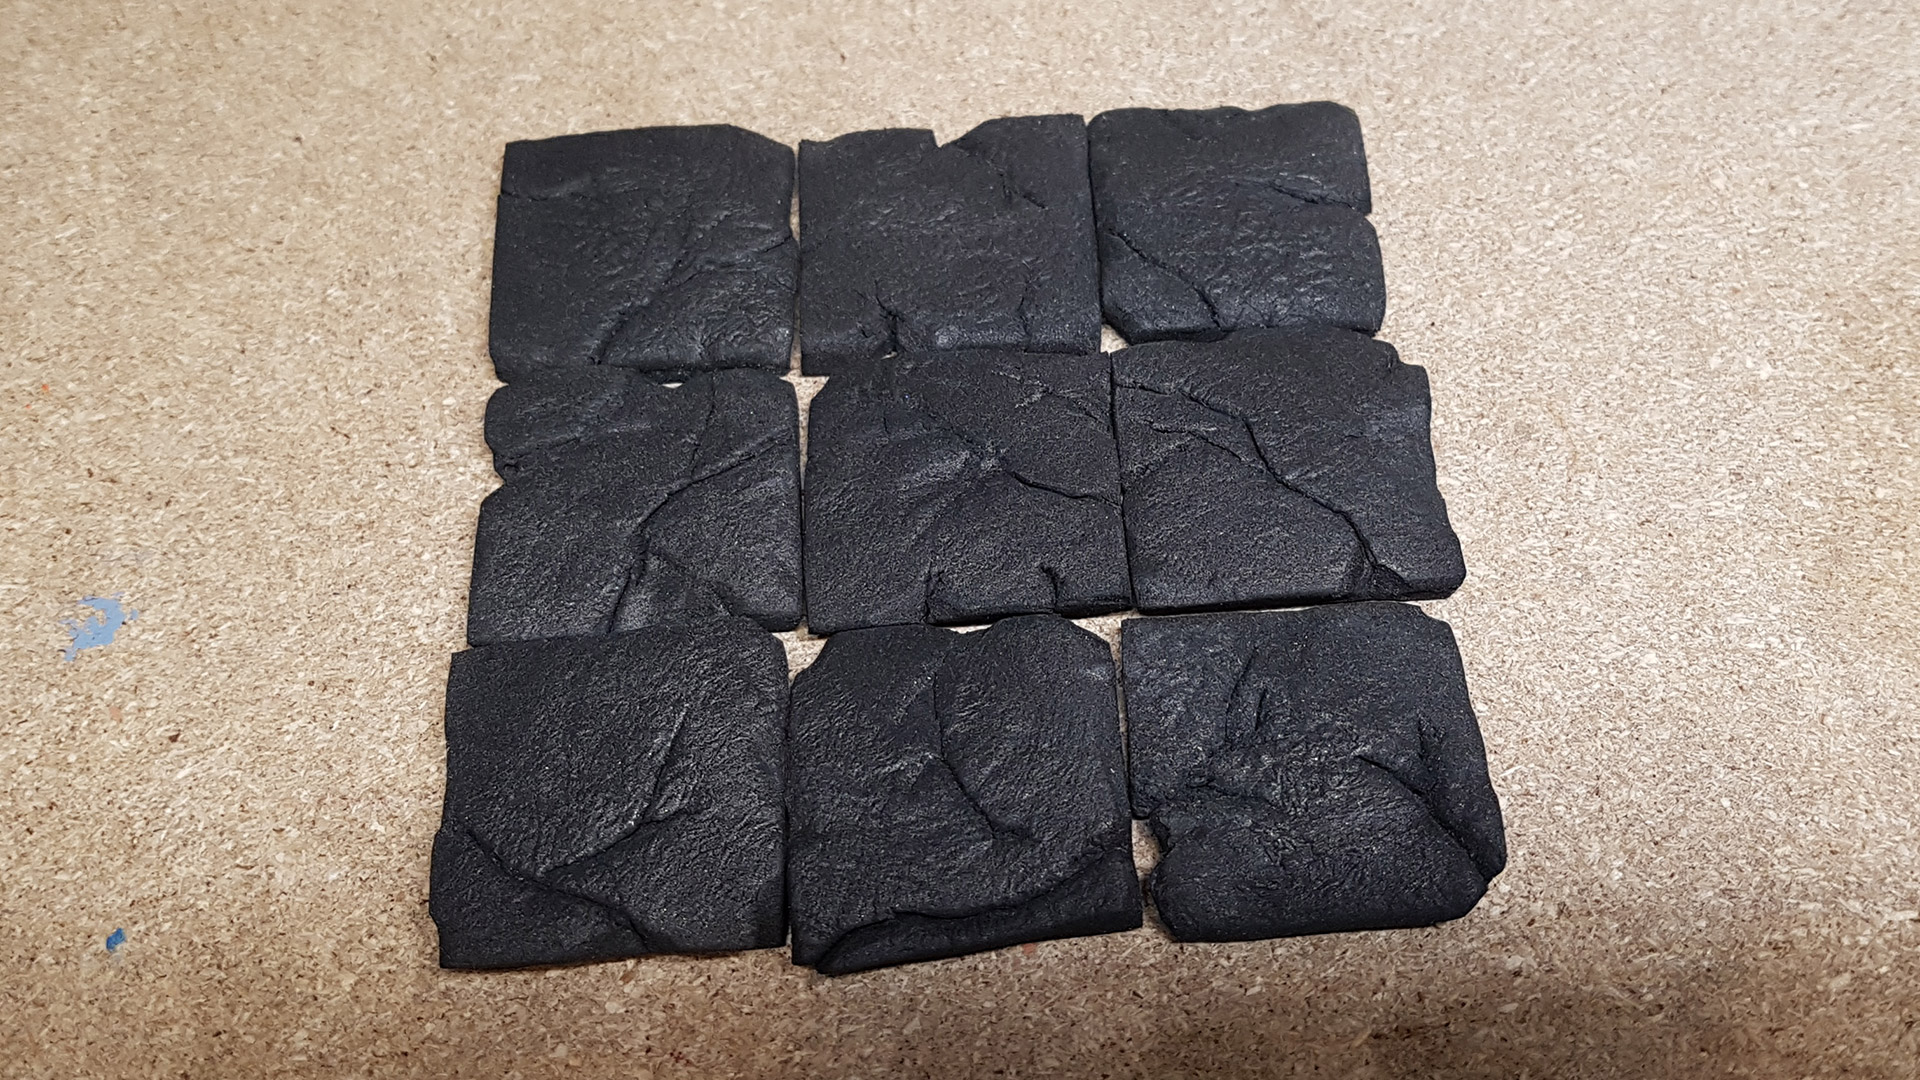 A Heat Gun Expands Cuts In Foam
EVA foam exhibits some fascinating behaviours when heated. If you make incisions into it and then apply heat, those cuts will expand, eliminating the need for painstaking efforts to create noticeable cracks. Simply cut into the foam, and the heat will do the rest, effortlessly achieving the desired effect.
Furthermore, once heated, the foam becomes malleable, allowing for the addition of textures by pressing objects into its surface. In this instance, using baking foil wrapped around a ball creates a convincing stone texture. However, it’s important to note that reheating the foam may cause the imprinted texture to fade or maybe disappear entirely.
For heating, I utilised a heat gun, as a hairdryer could not reach the necessary temperature. It’s worth noting that I operated the heat gun at its lowest setting of 50℃, indicating that a tremendous amount of heat isn’t required, which enhances safety during the process.
NOTE: It’s crucial to exercise caution: this task is not suitable for children and should be undertaken with careful supervision.
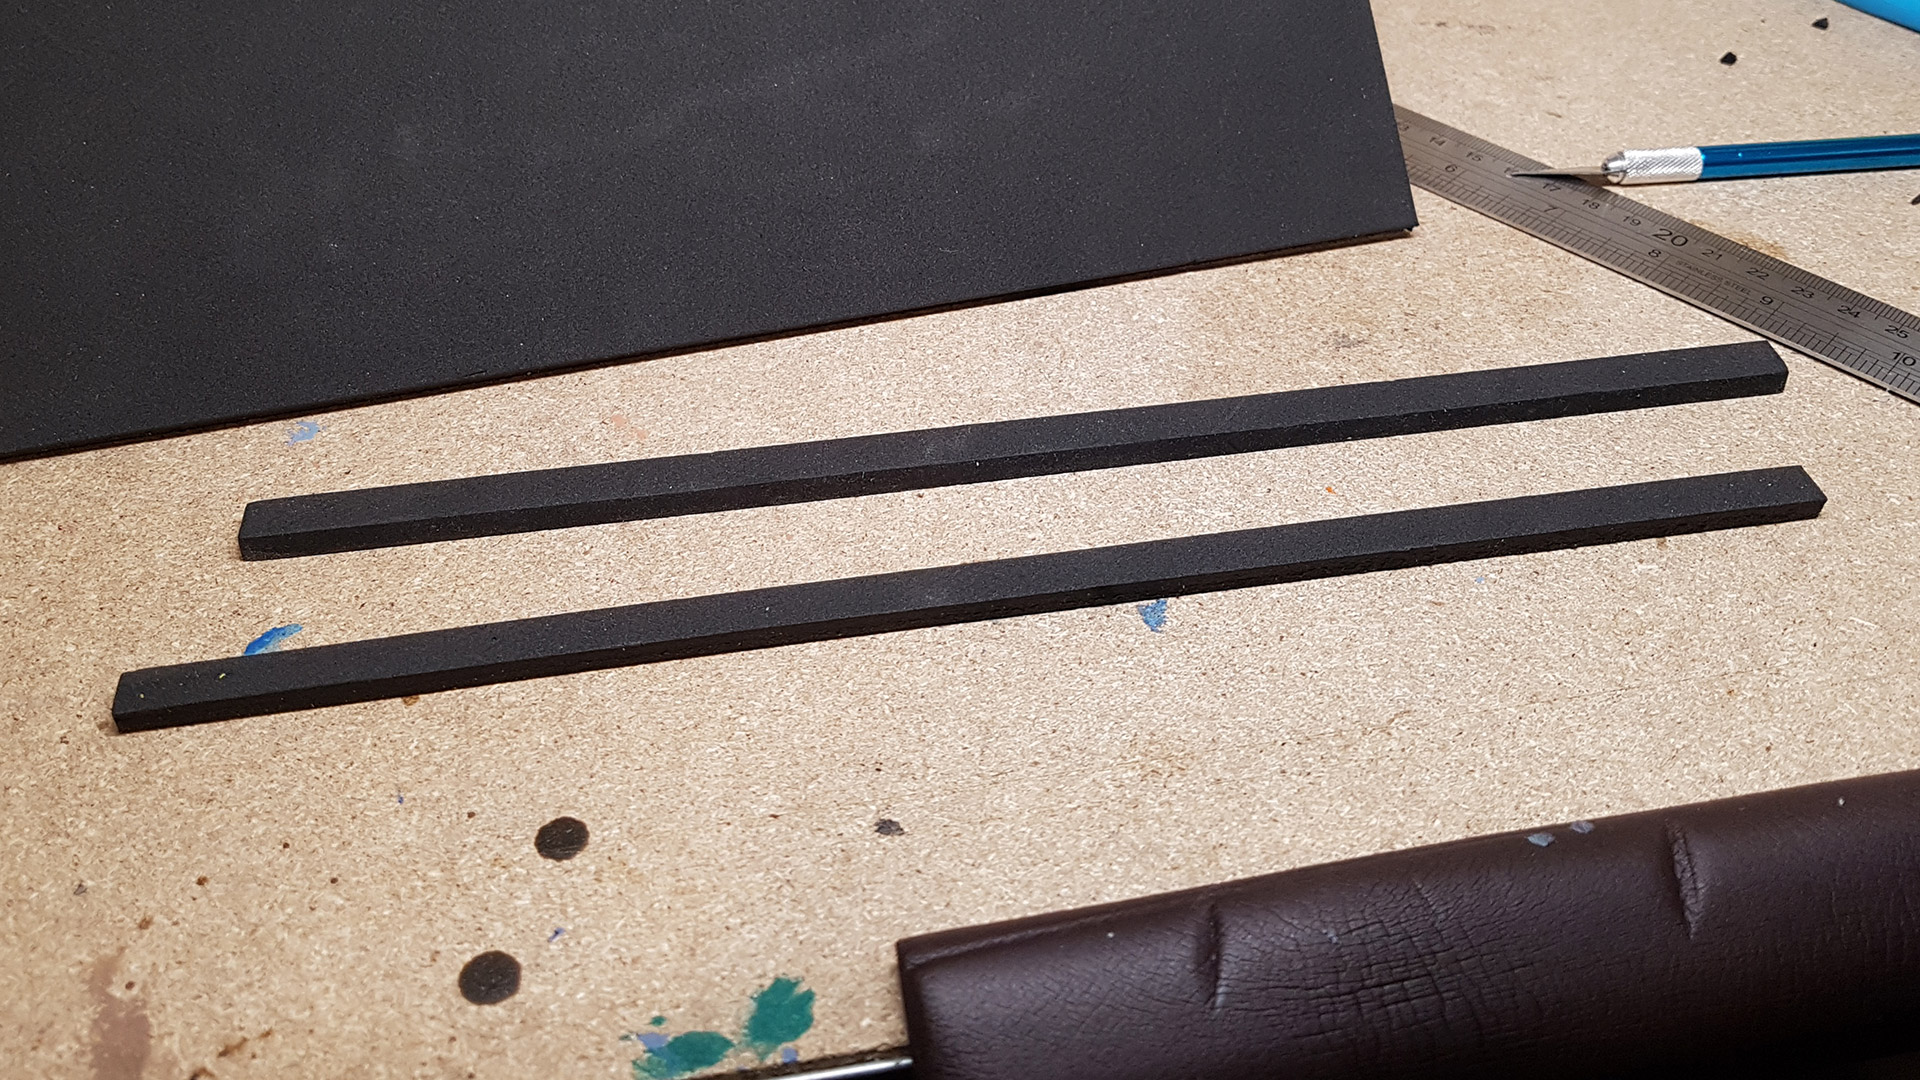
Now to Add Some Edging & Stick Down the Floor Tiles
I’ve opted for an edging around the rooms, essentially using narrower floor tiles that are 1cm wide but vary in length, again crafted from 5mm foam.
This edging will not only frame the rooms within the dungeon, enhancing the aesthetic appeal and adding an extra layer of interest, but it will also serve as the foundational layer for any walls constructed around the rooms.
I cut out some more foam strips, and made a set of edging tiles which I again shaped before sticking all the floor tiles to a sheet of Foam PVC sheet using Gorilla Glue Contact Adhesive.

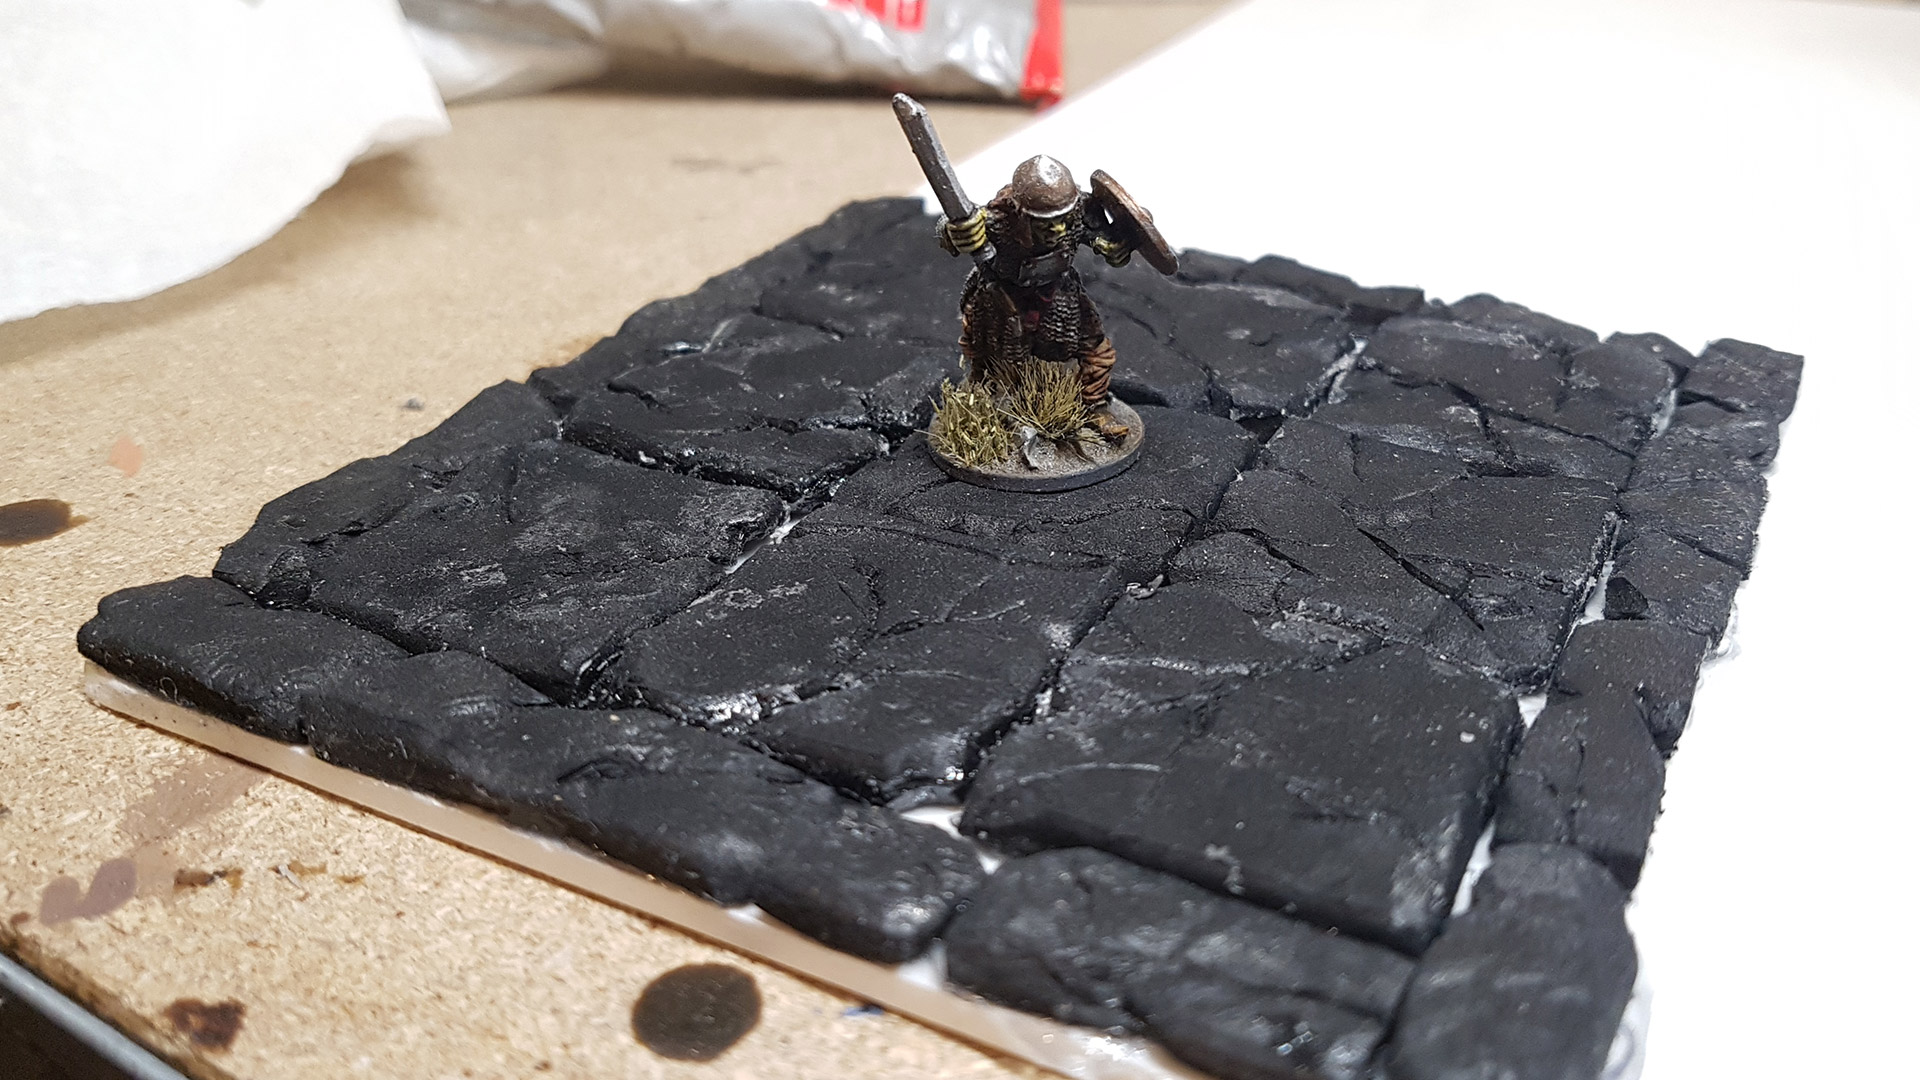 One Complete Stone Floor
What's the Plan? Build Cool Dungeon Tiles!
Hello everyone! Since it’s Dungeonalia on OnTableTop, I thought it would be a fantastic idea to delve into creating some tabletop dungeon tiles. These tiles would be perfect for enhancing games like HeroQuest and Warhammer Quest – essentially, any of those thrilling dungeon-crawling games that utilise boards or card tiles.
I plan to primarily use EVA foam and upholstery foam. The goal is to create something easy, without the need for power tools, that will not only be lightweight surpassing resin or plastic in this regard but also outshine both in terms of durability. With the aim of almost anyone being able to embark on this crafting journey and end up with high-quality, durable dungeon tiles for their gaming adventures.
For this project, I’m approaching it primarily as a prototyping phase with foam materials. My aim is to craft a couple of initial tiles to familiarise myself with the process and then I can revisit the idea in the future.
 Wanna Know How To Make These?


