


Kira’s Club Terrain – A Spring Clean Challenge


Recommendations: 96
About the Project
I run a club and have a whole pile of Terrain either minimally painted or still in it's raw plastic. This year I have decided to make my own Spring Clean Challenge to be to get as much of this as I can out of the To Do pile and onto the table.
Related Genre: General
Related Contest: Spring Clean Hobby Challenge 2024
This Project is Active
Bonus - Terrain in the Wild
By no means a “Breath of Fresh Air” contender as this is seeing them in exactly the place you would expect to see them, I none the less fulfilled one of the key goals of this project last week: getting some terrain out of the to do pile and onto the table.
Namely a table over at West Moor Gaming Club which I run on my local community centre. The L.C.A Defence Line came out for a skirmish game against my fellow club member “A”.
We played Grimdark Future Firefight, One Page Rules’ sci-fi skirmish rules: all the flavour of Warhammer 40,000 without all the crunch for a faster game which I and a few of the other members do like for a light night of dice rolling and tactical toys.
Sadly, I may disappoint the Gerrys of the world as I don’t have the photos for a full blow by blow battle report but I did capture some of the highlights which you can browse below.
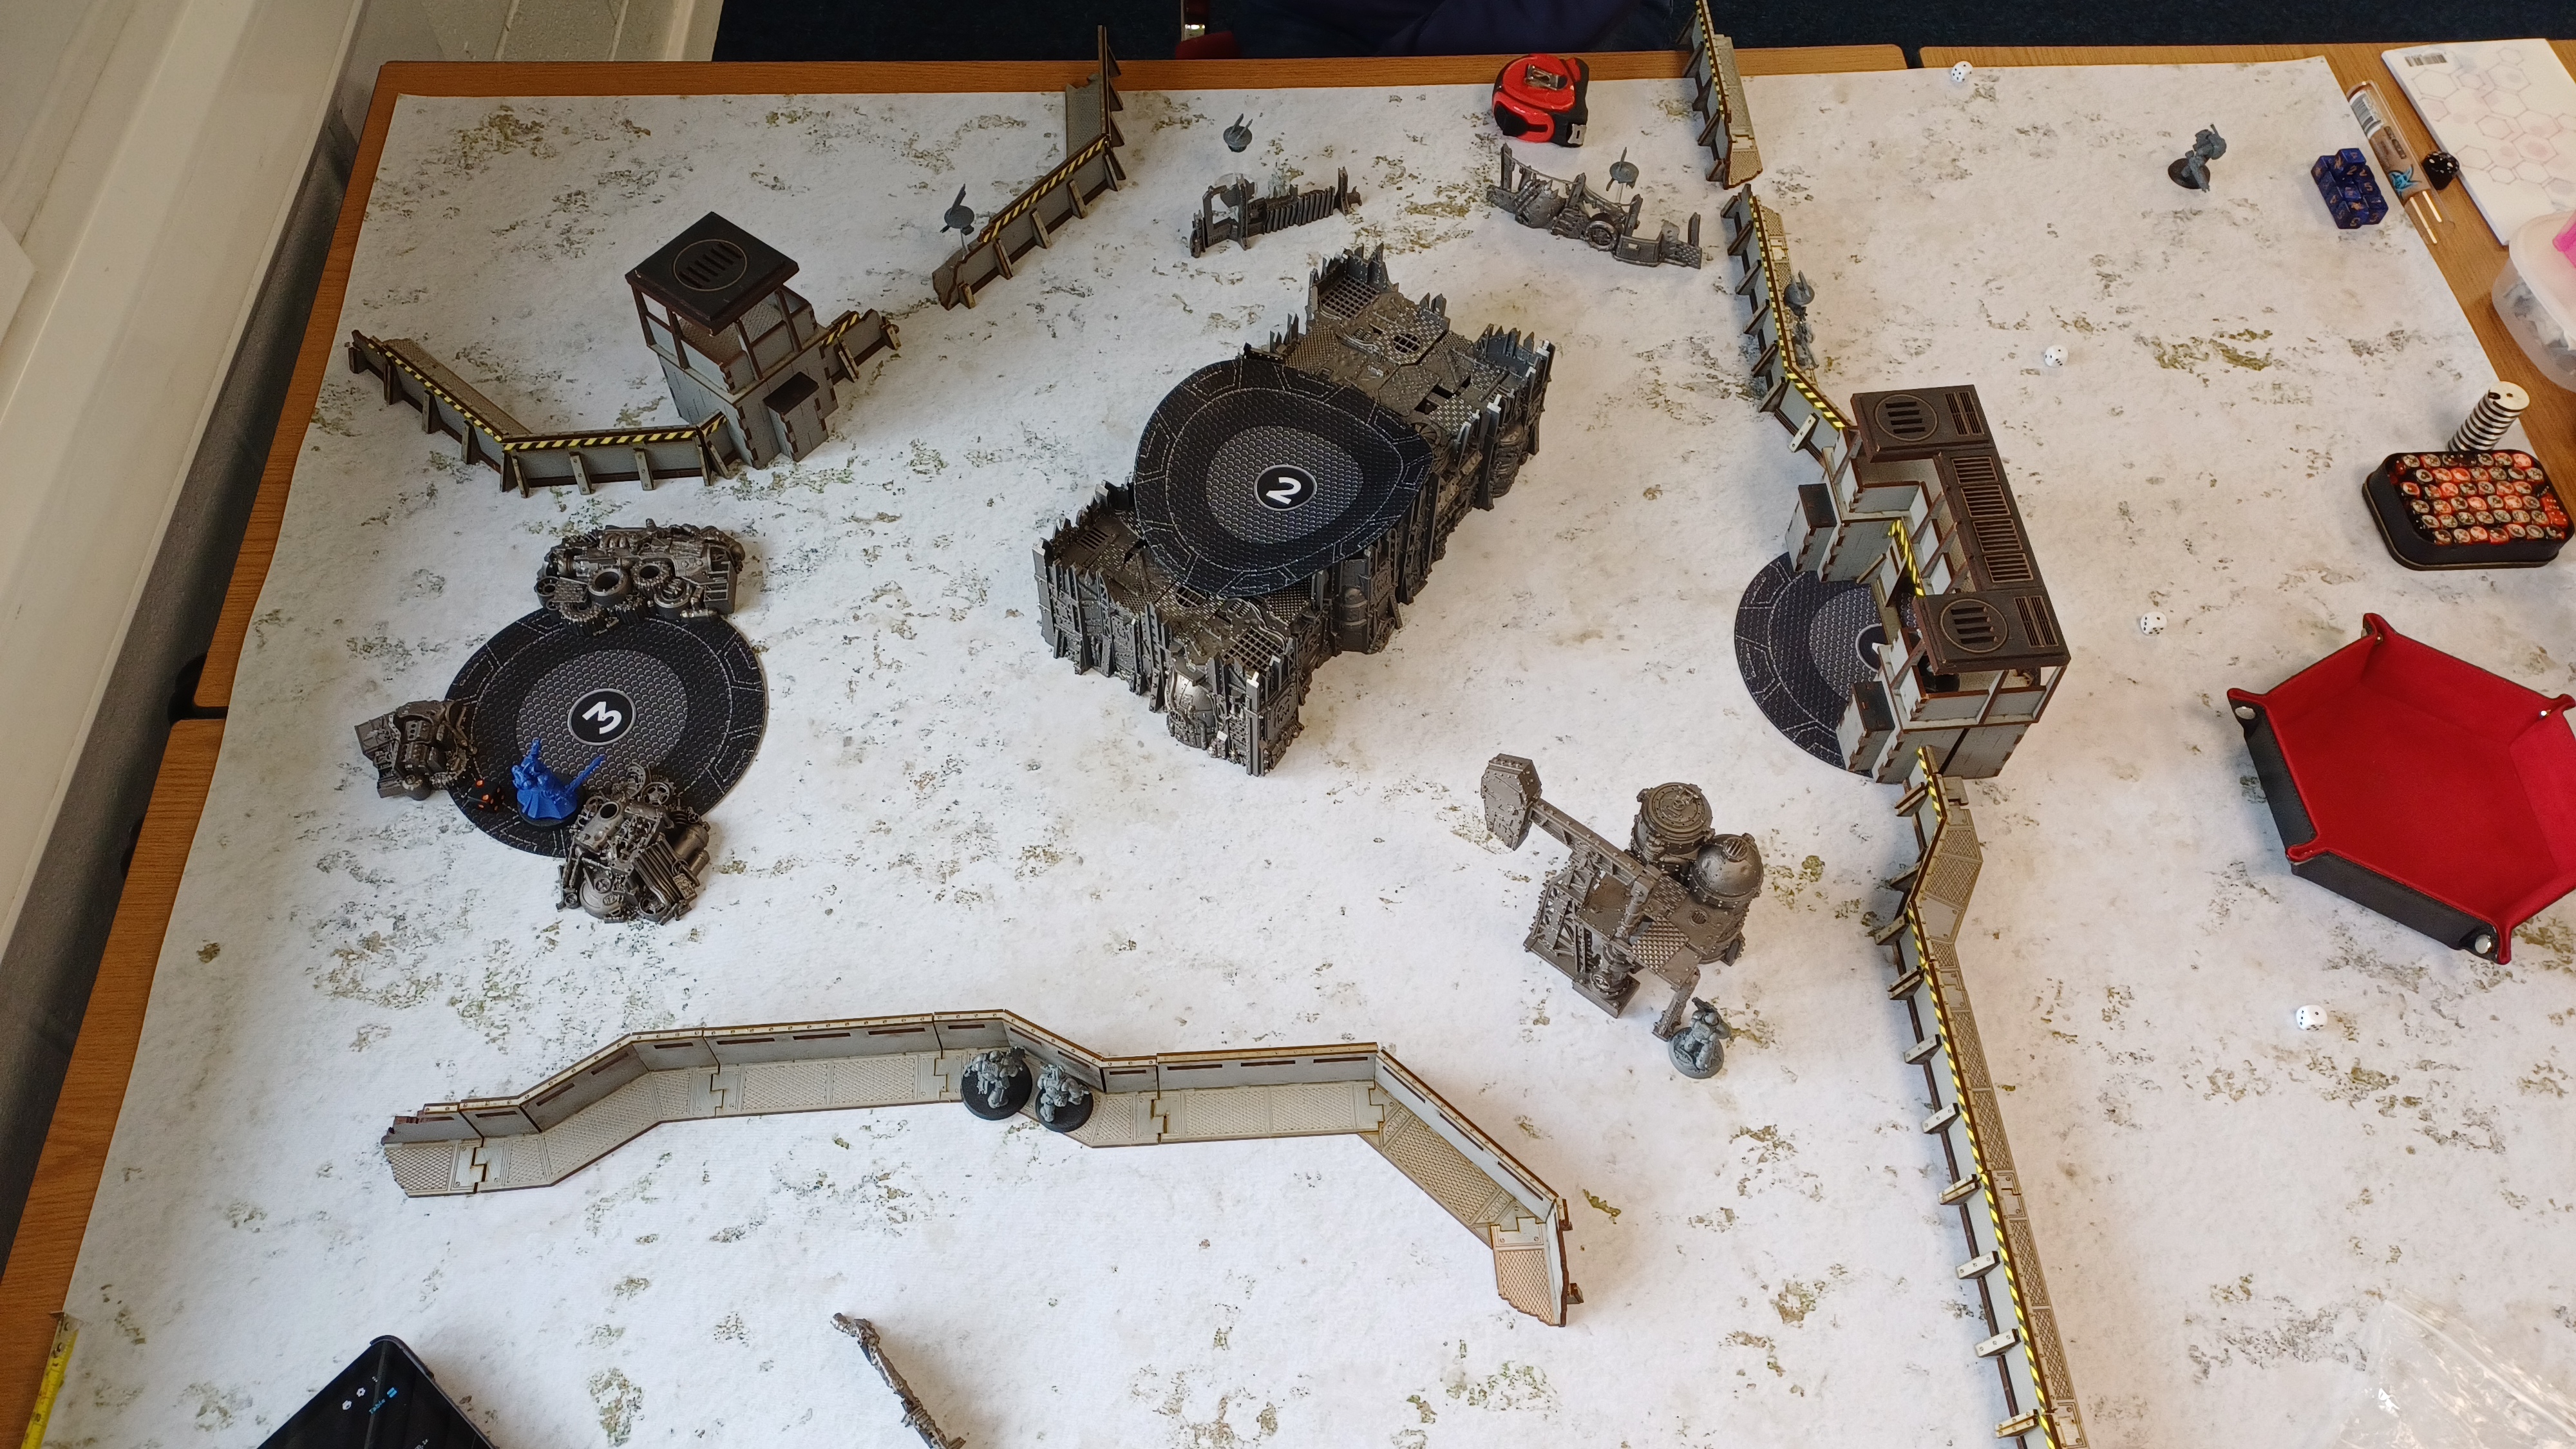 The beginning of the game, a ruined "Imperial" outpost with the remnants of some additions built by some interloping aliens who have now moved on.
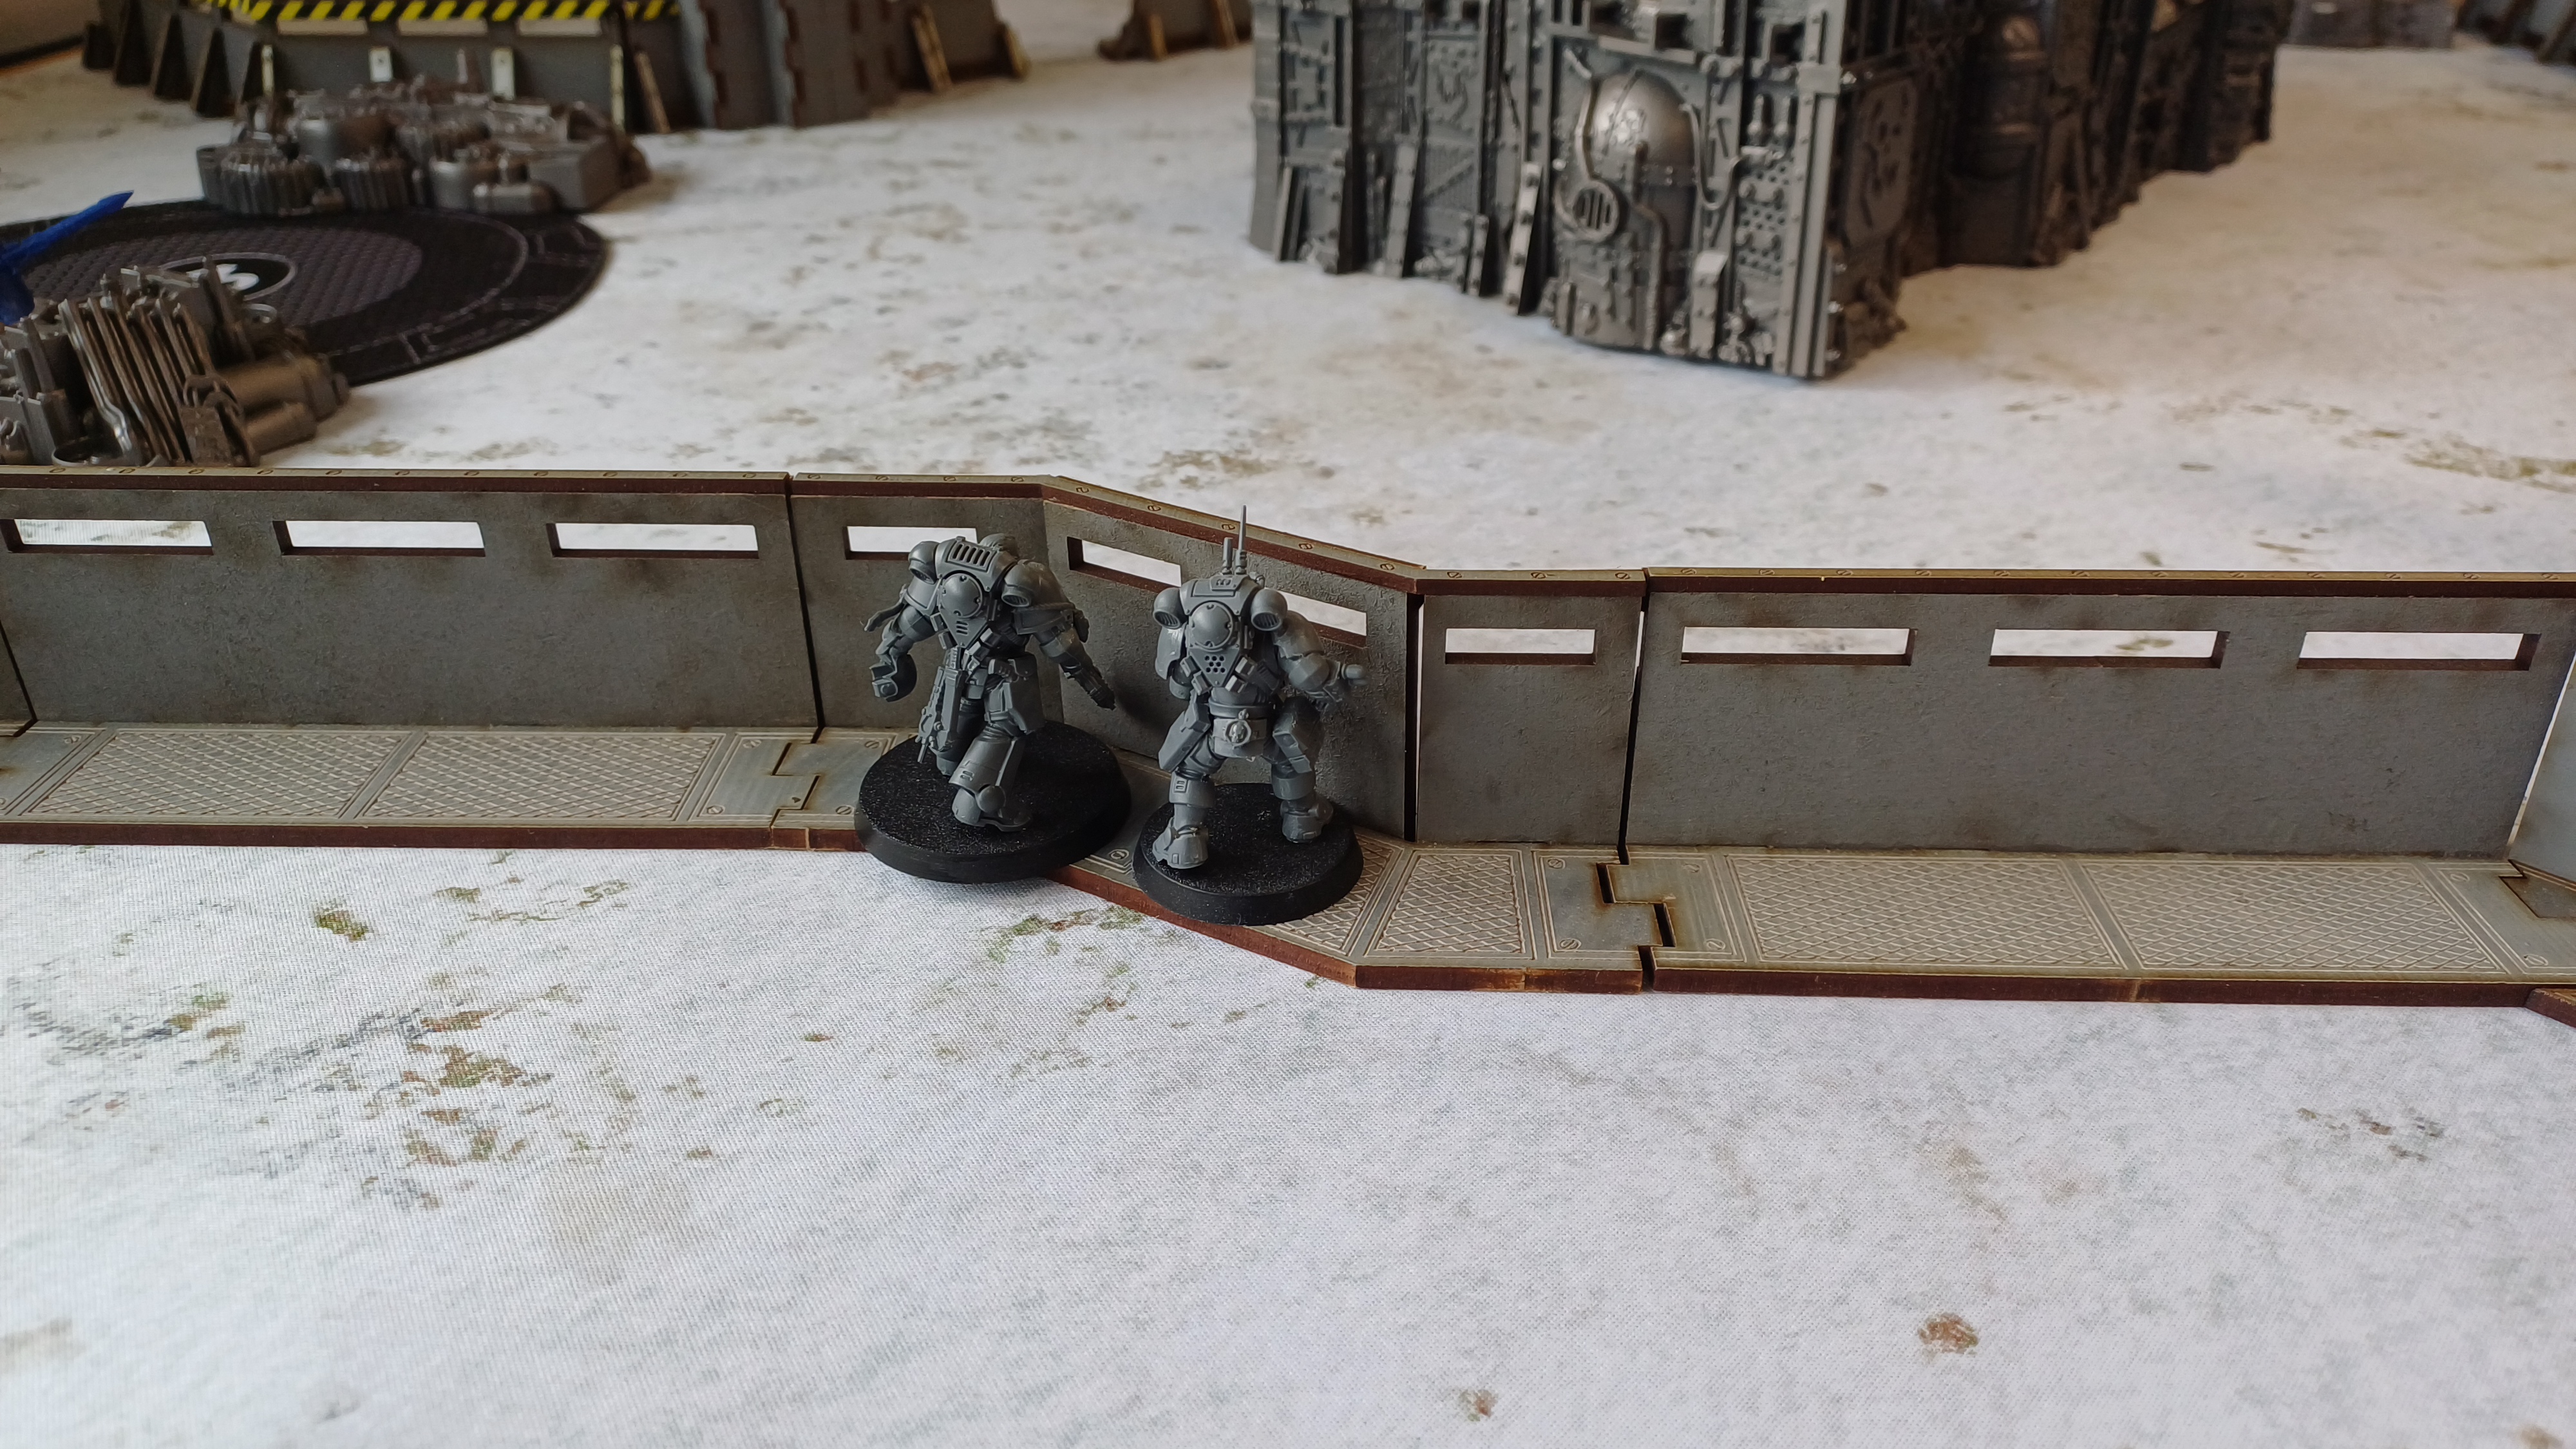 A couple of Prime Brothers ready to take back this sovereign land .
 An infiltrator with the Ambush special rule forward deploys, taking up a firing position in the Gatehouse to suppress any advancing enemies.
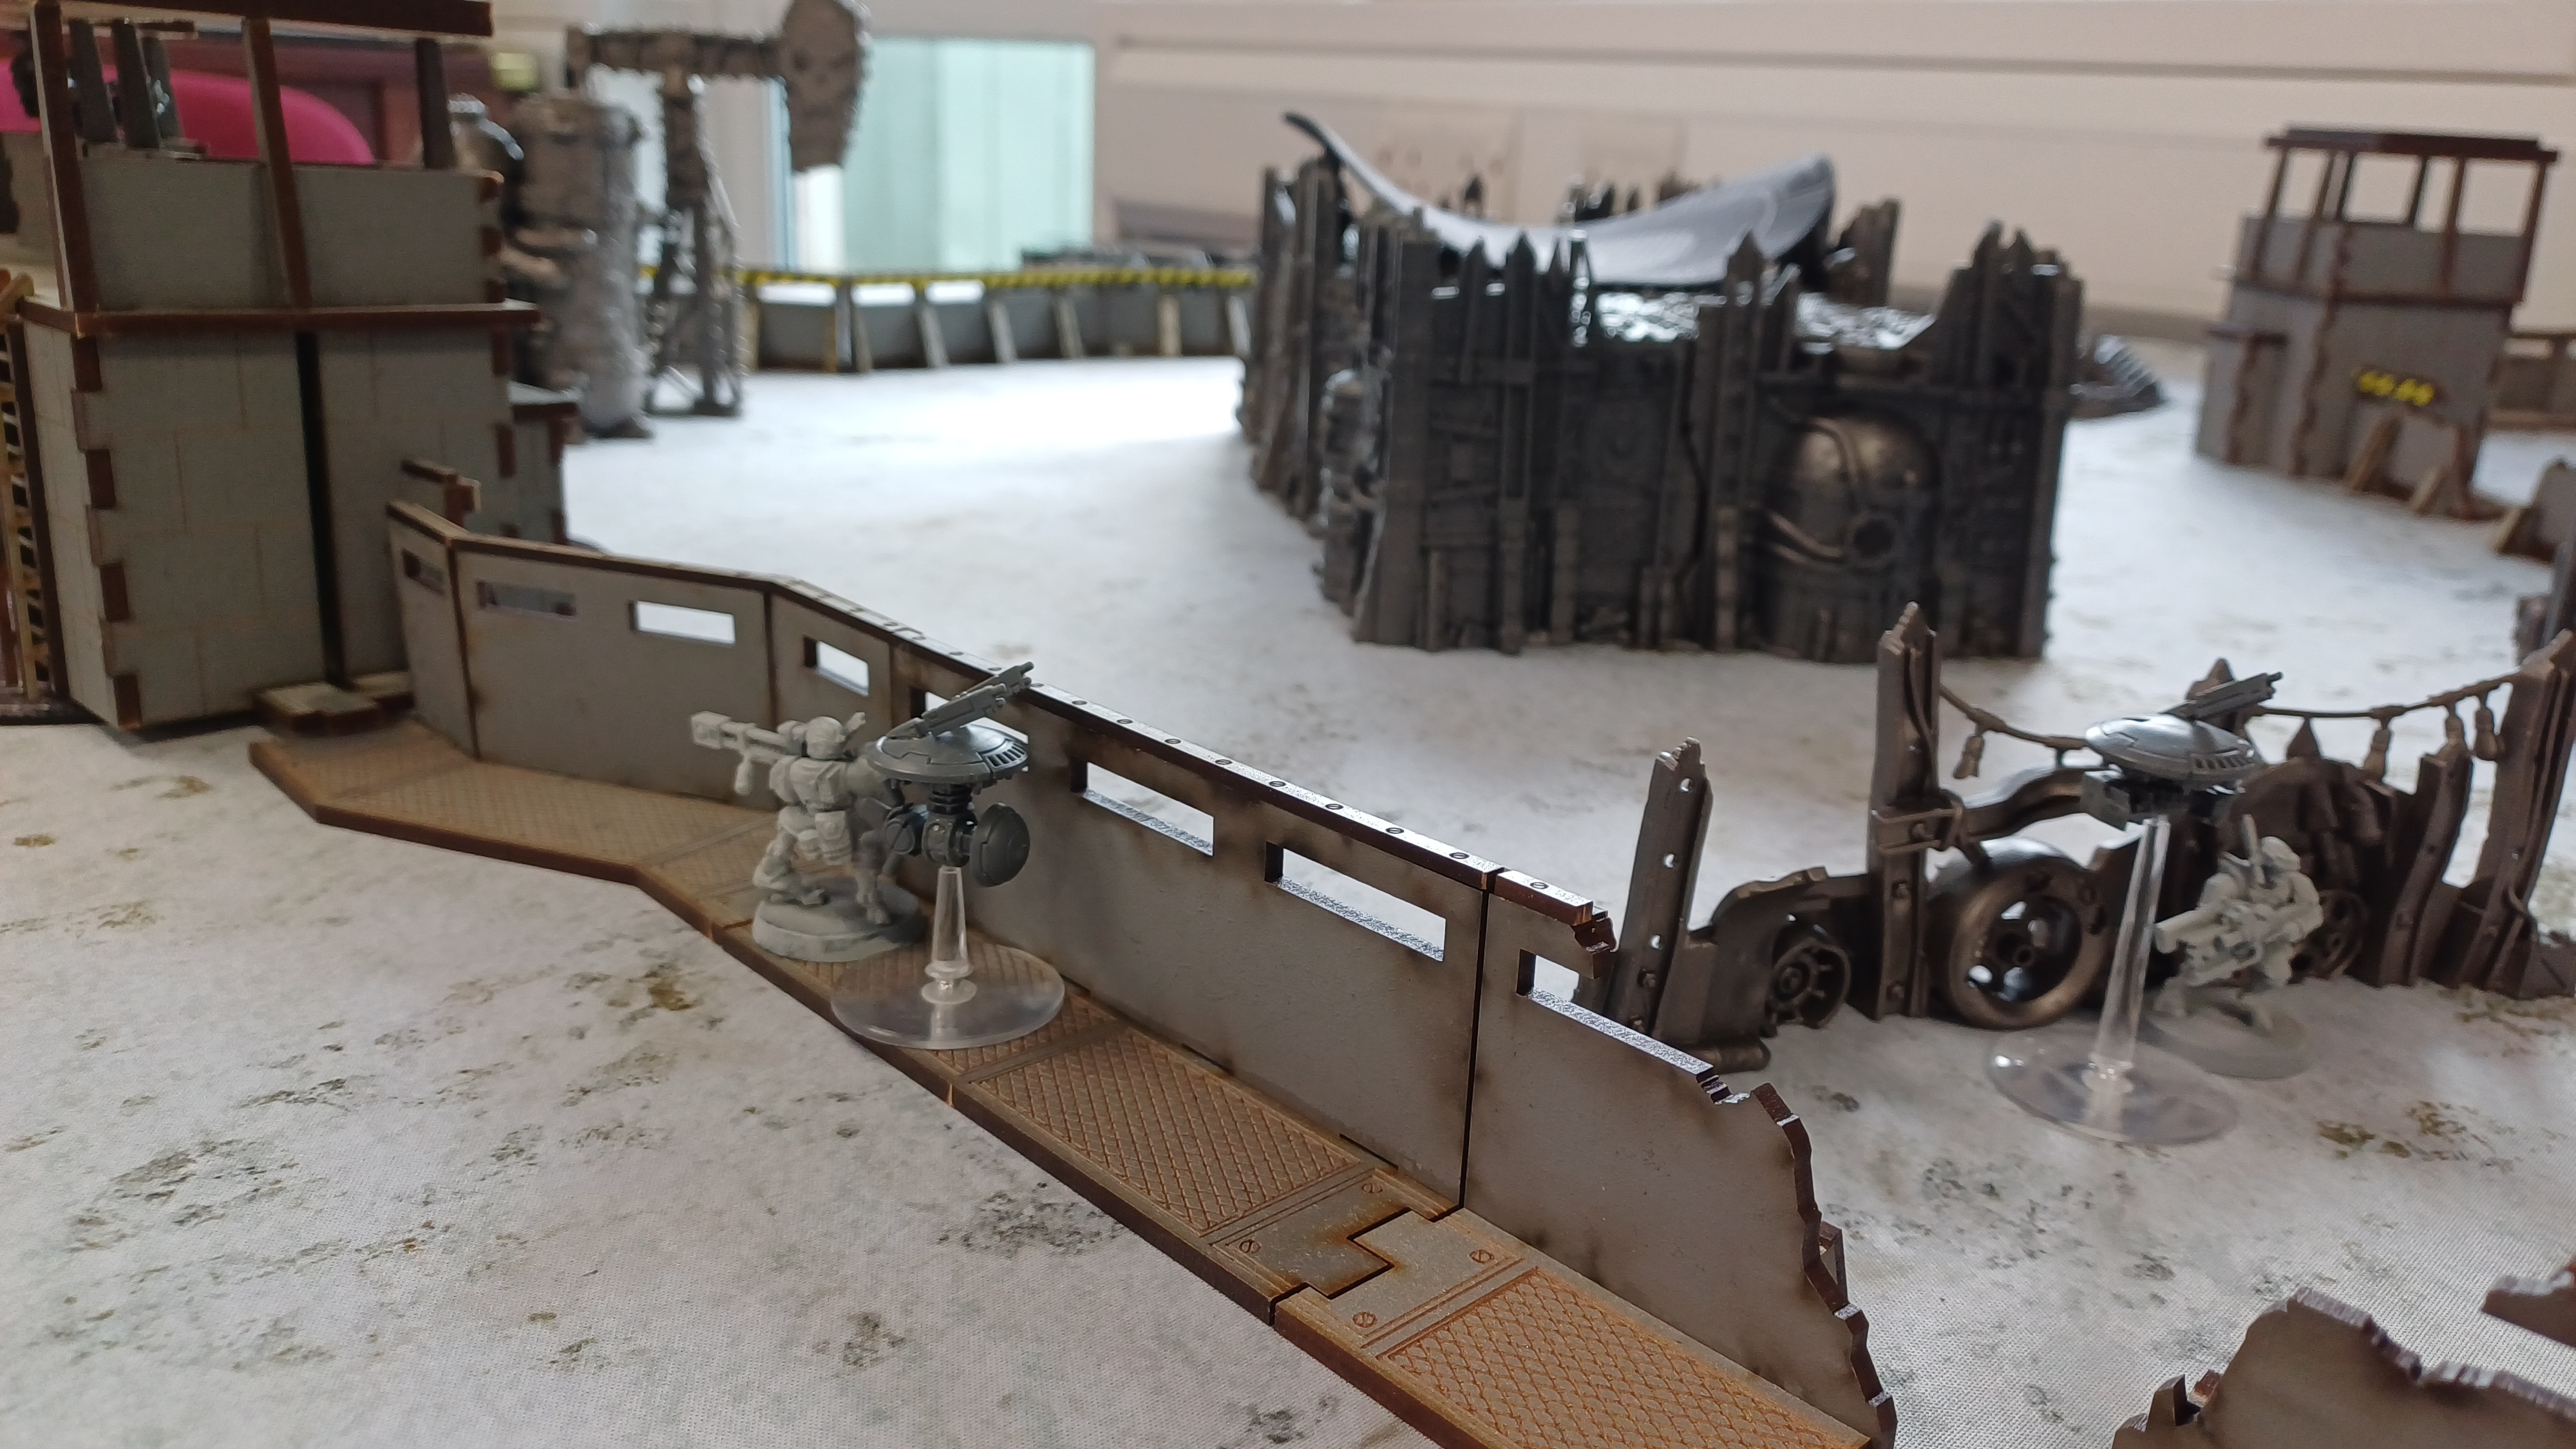 Perfidious Xenos of the DAO Union advance to invade our territory. Brothers, destroy them!
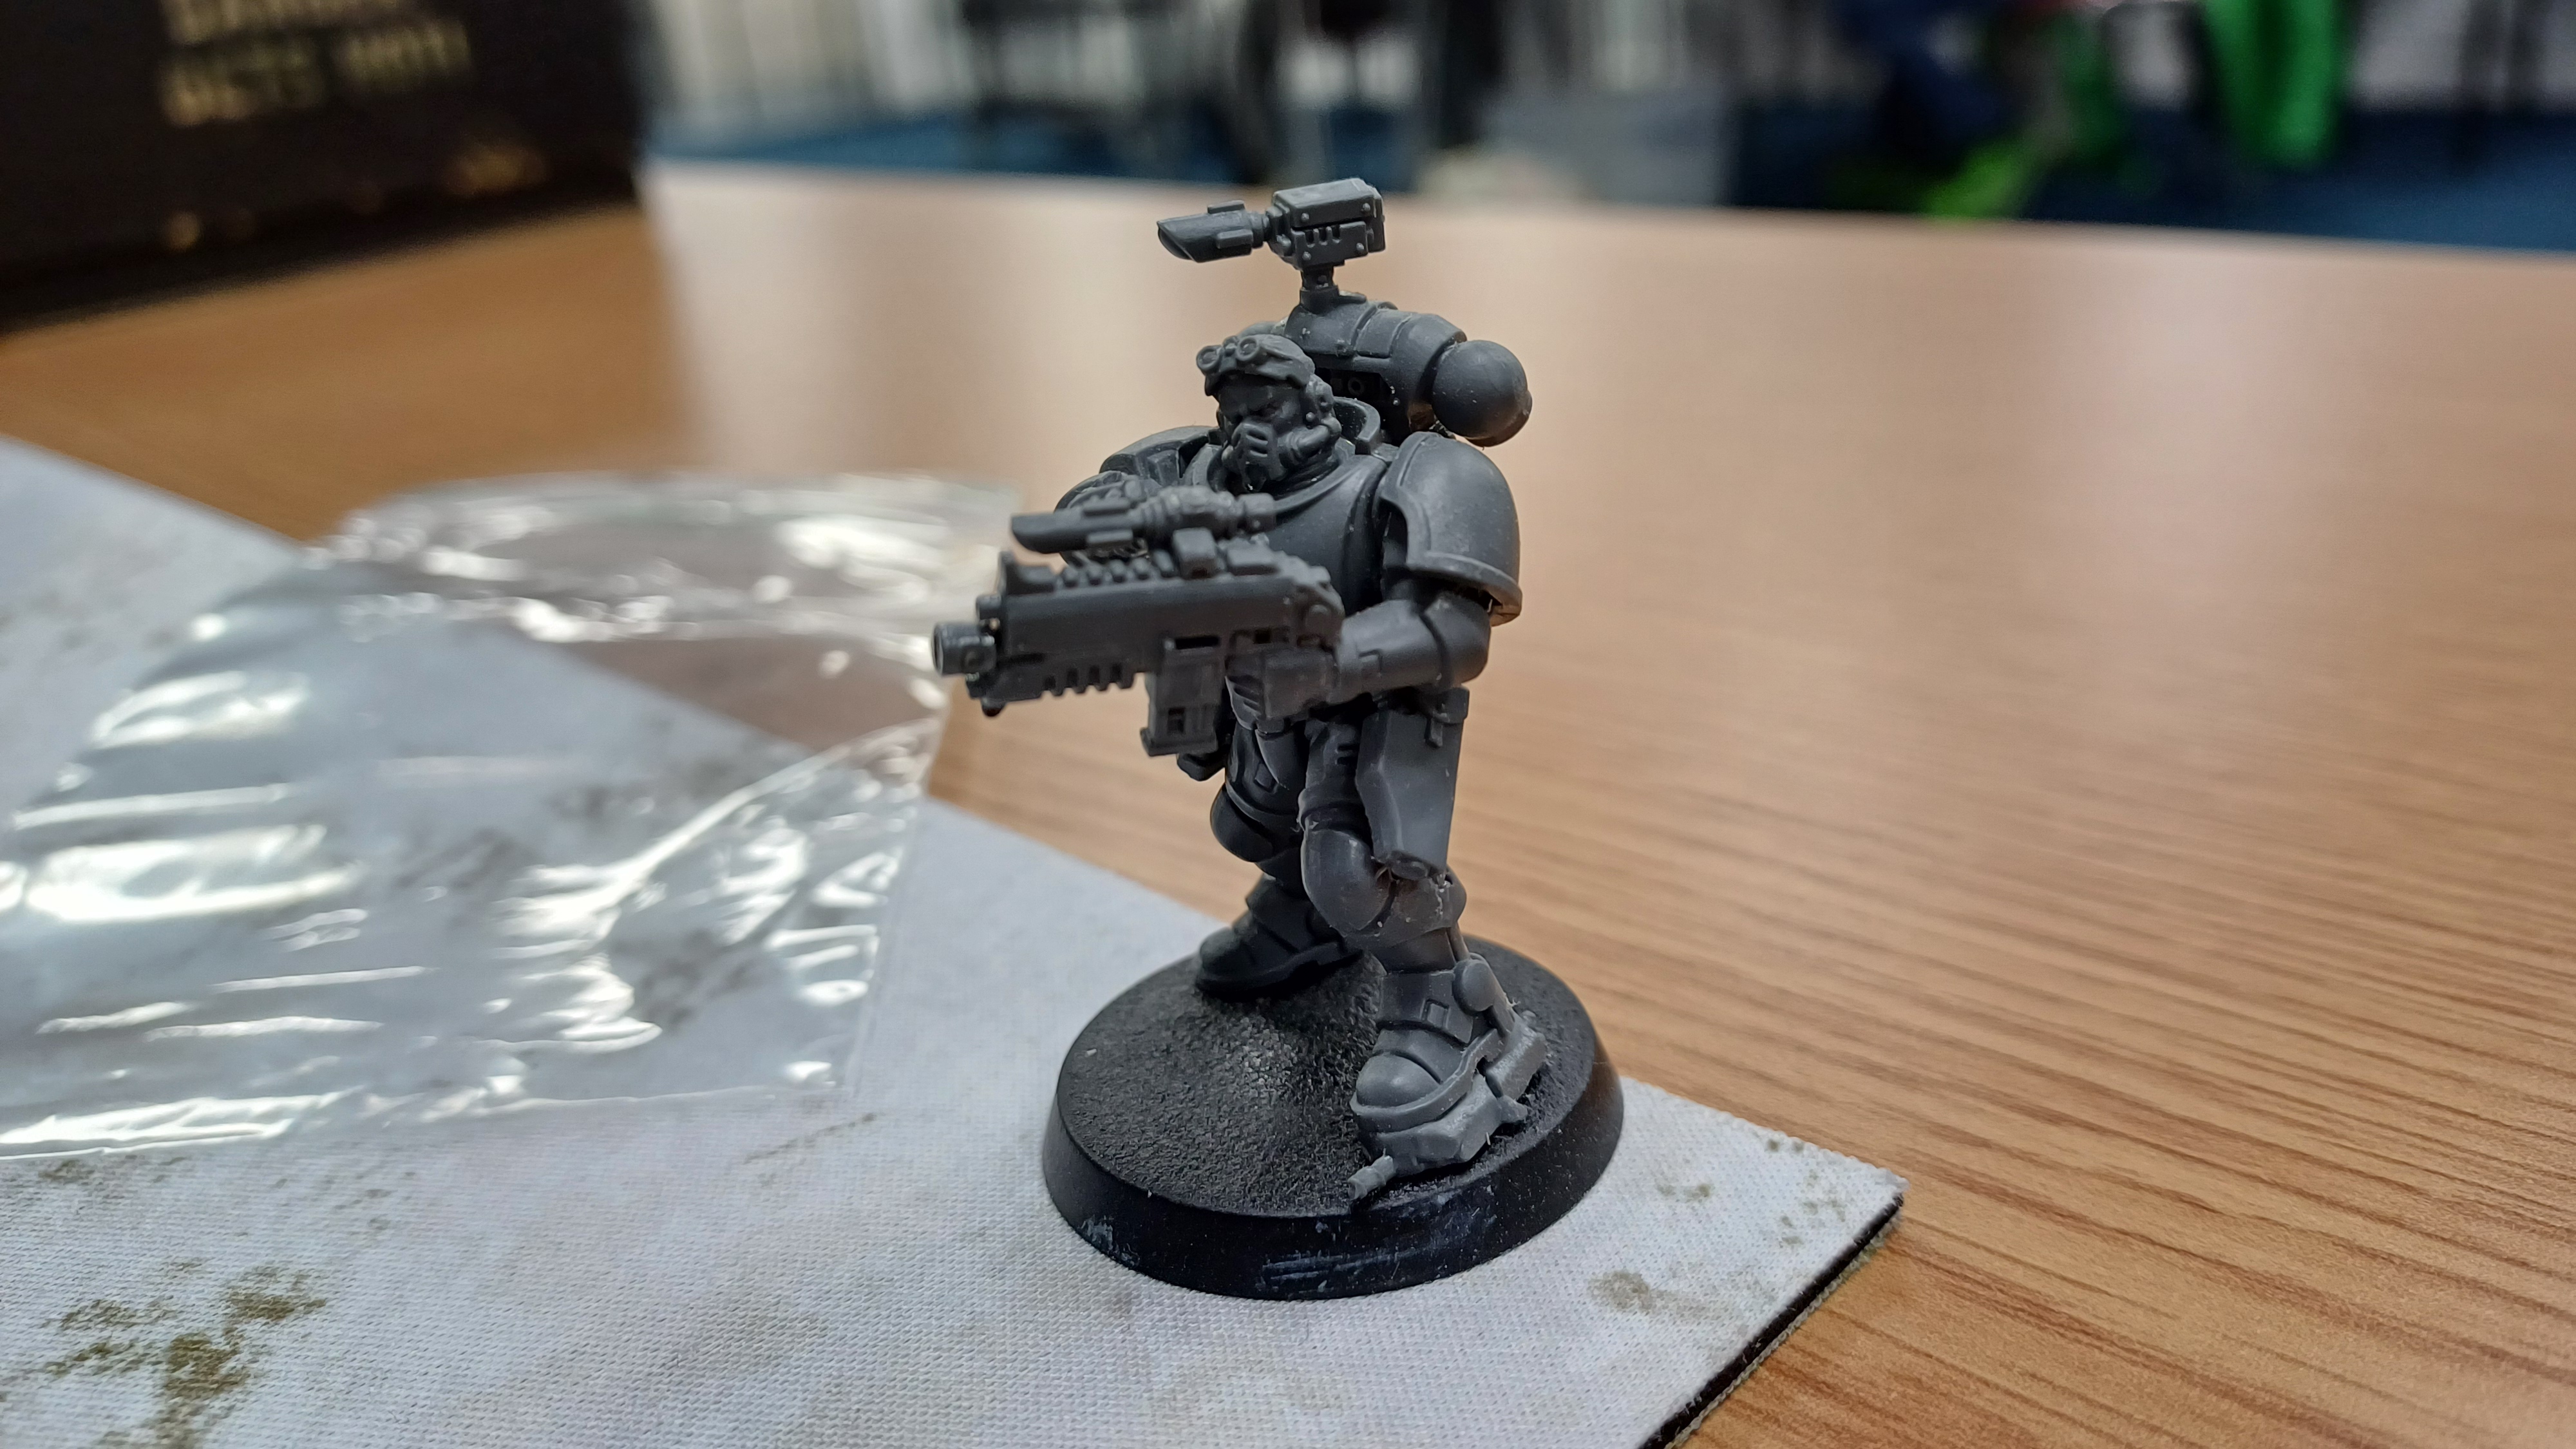 A tactical miscalculation. The forward Infiltrator is over-exposed and falls to the enemy's guns. You will be avenged! (or not as each side only takes one casualty a side and the game comes down to control of a single objective in the last turn)
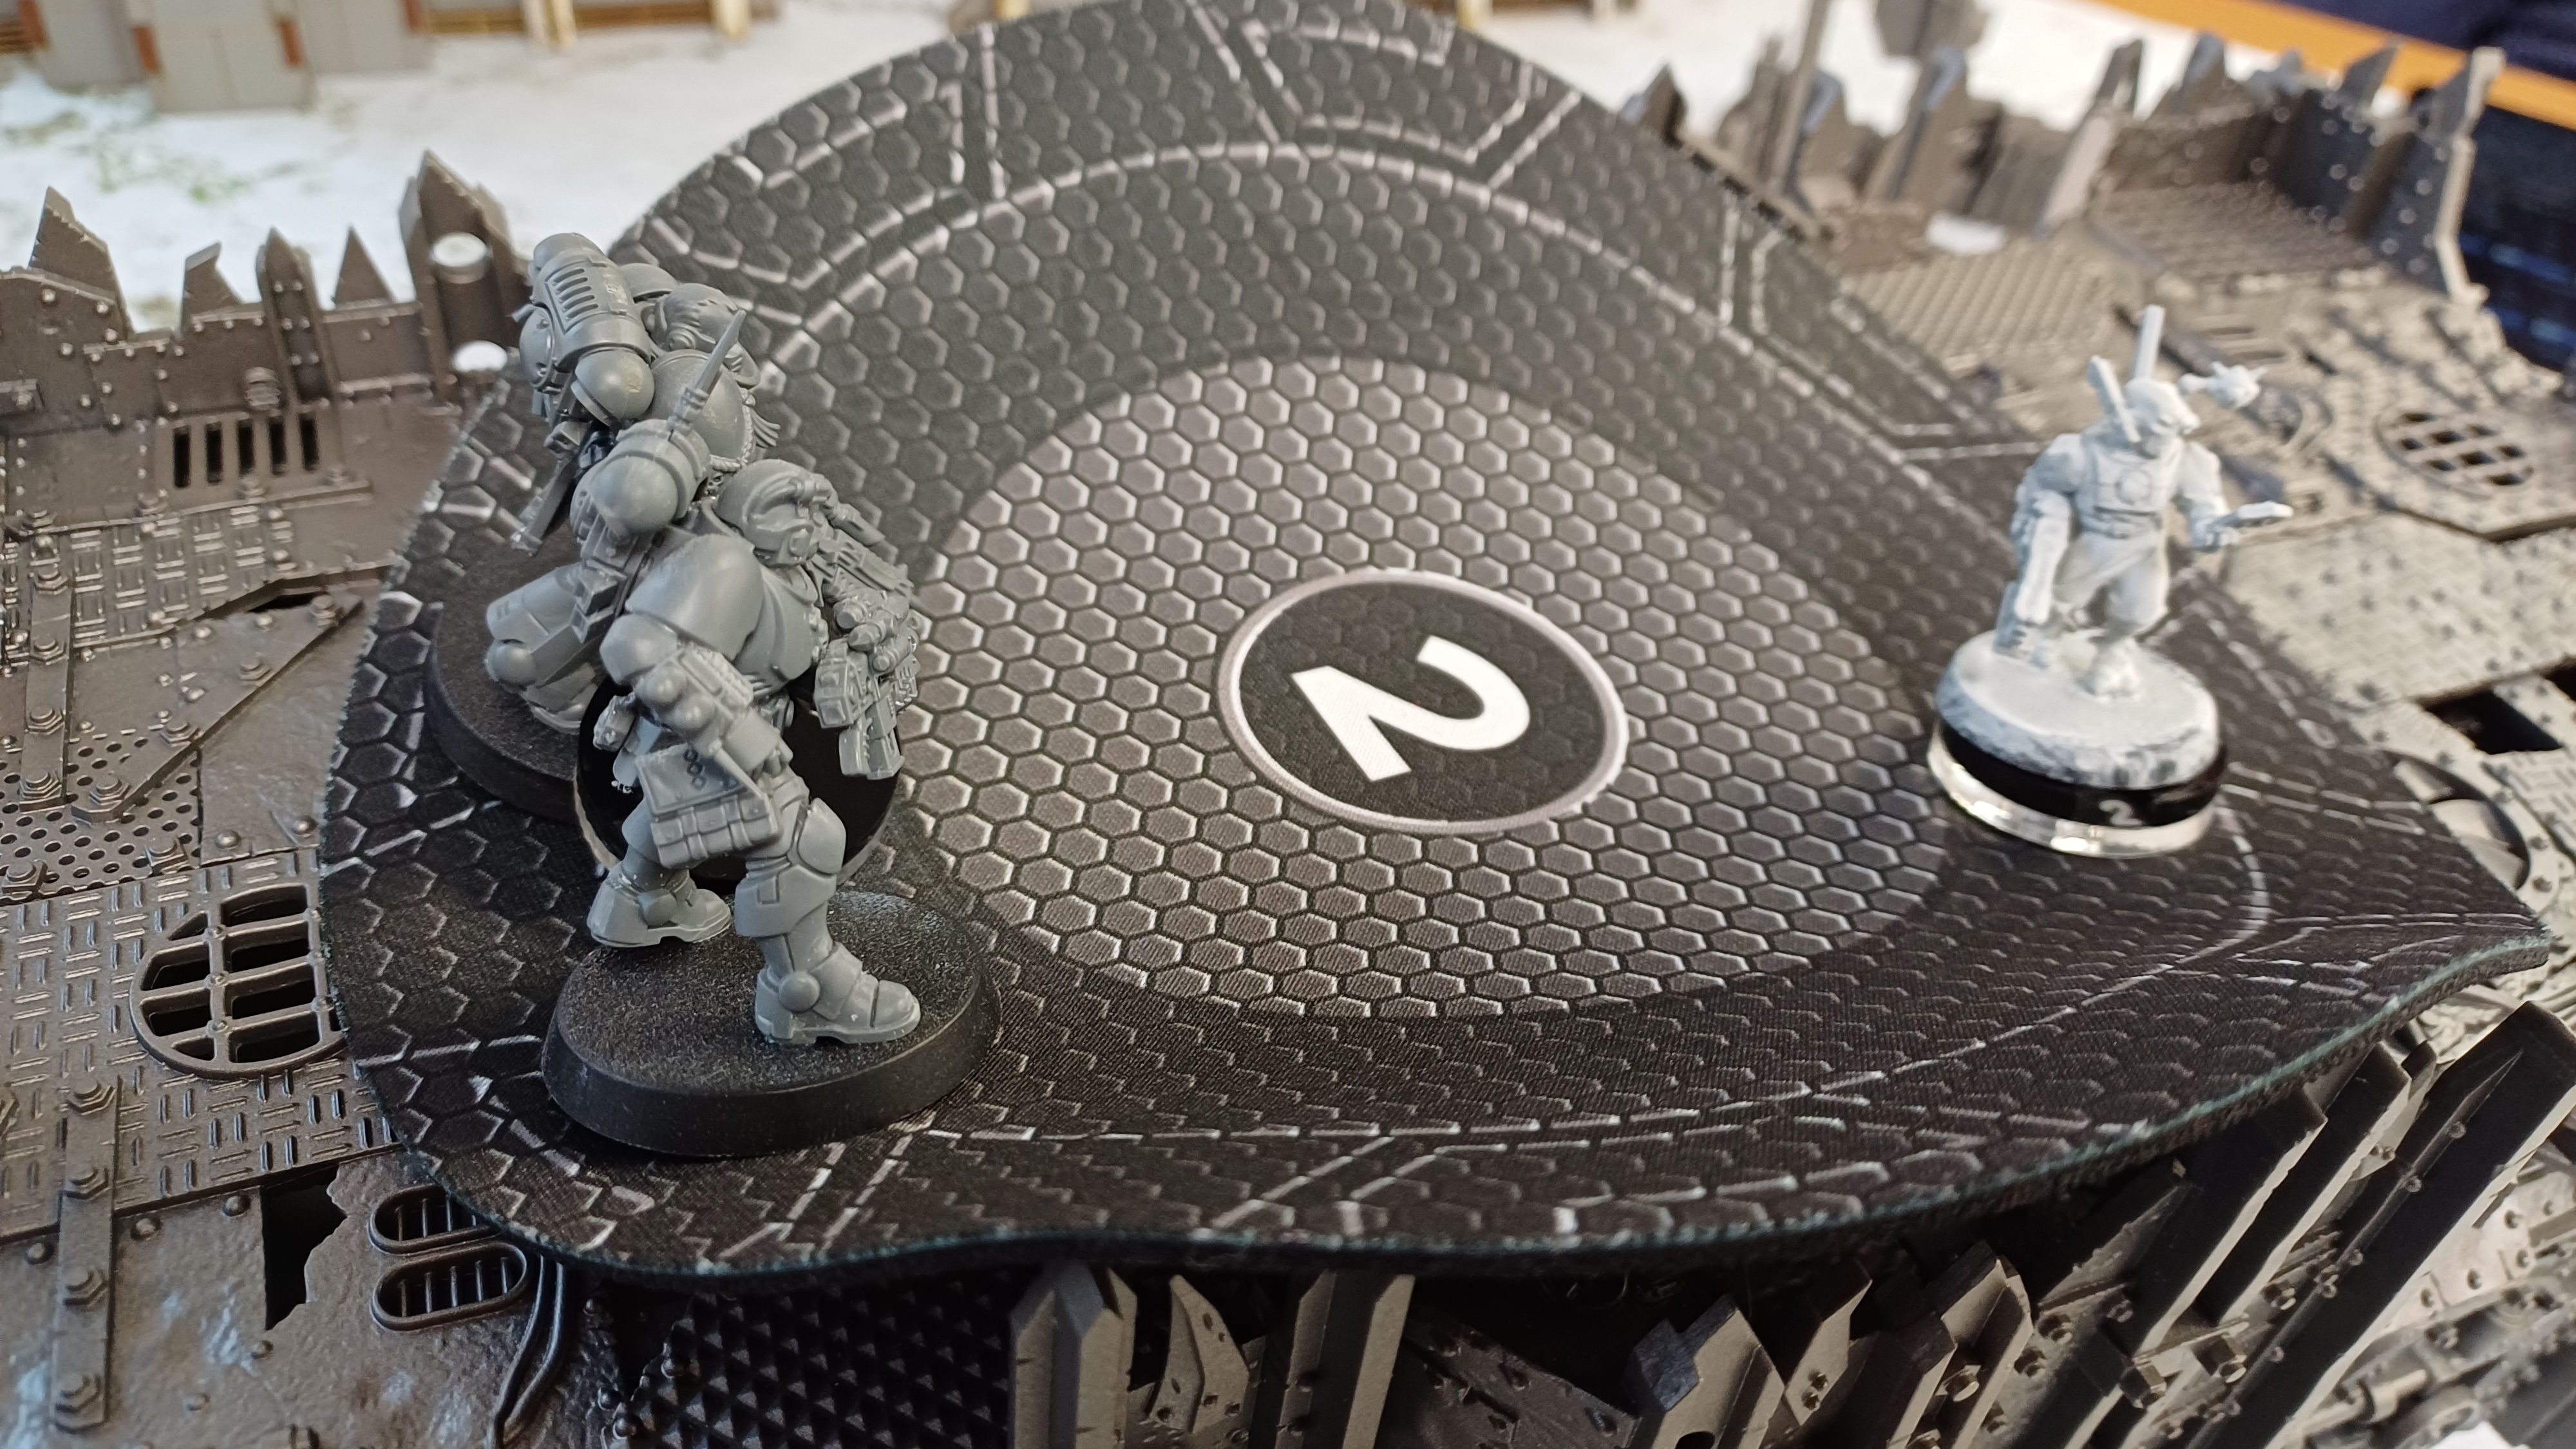 A close quarters shoot out for control of the central bastion soon breaks out.
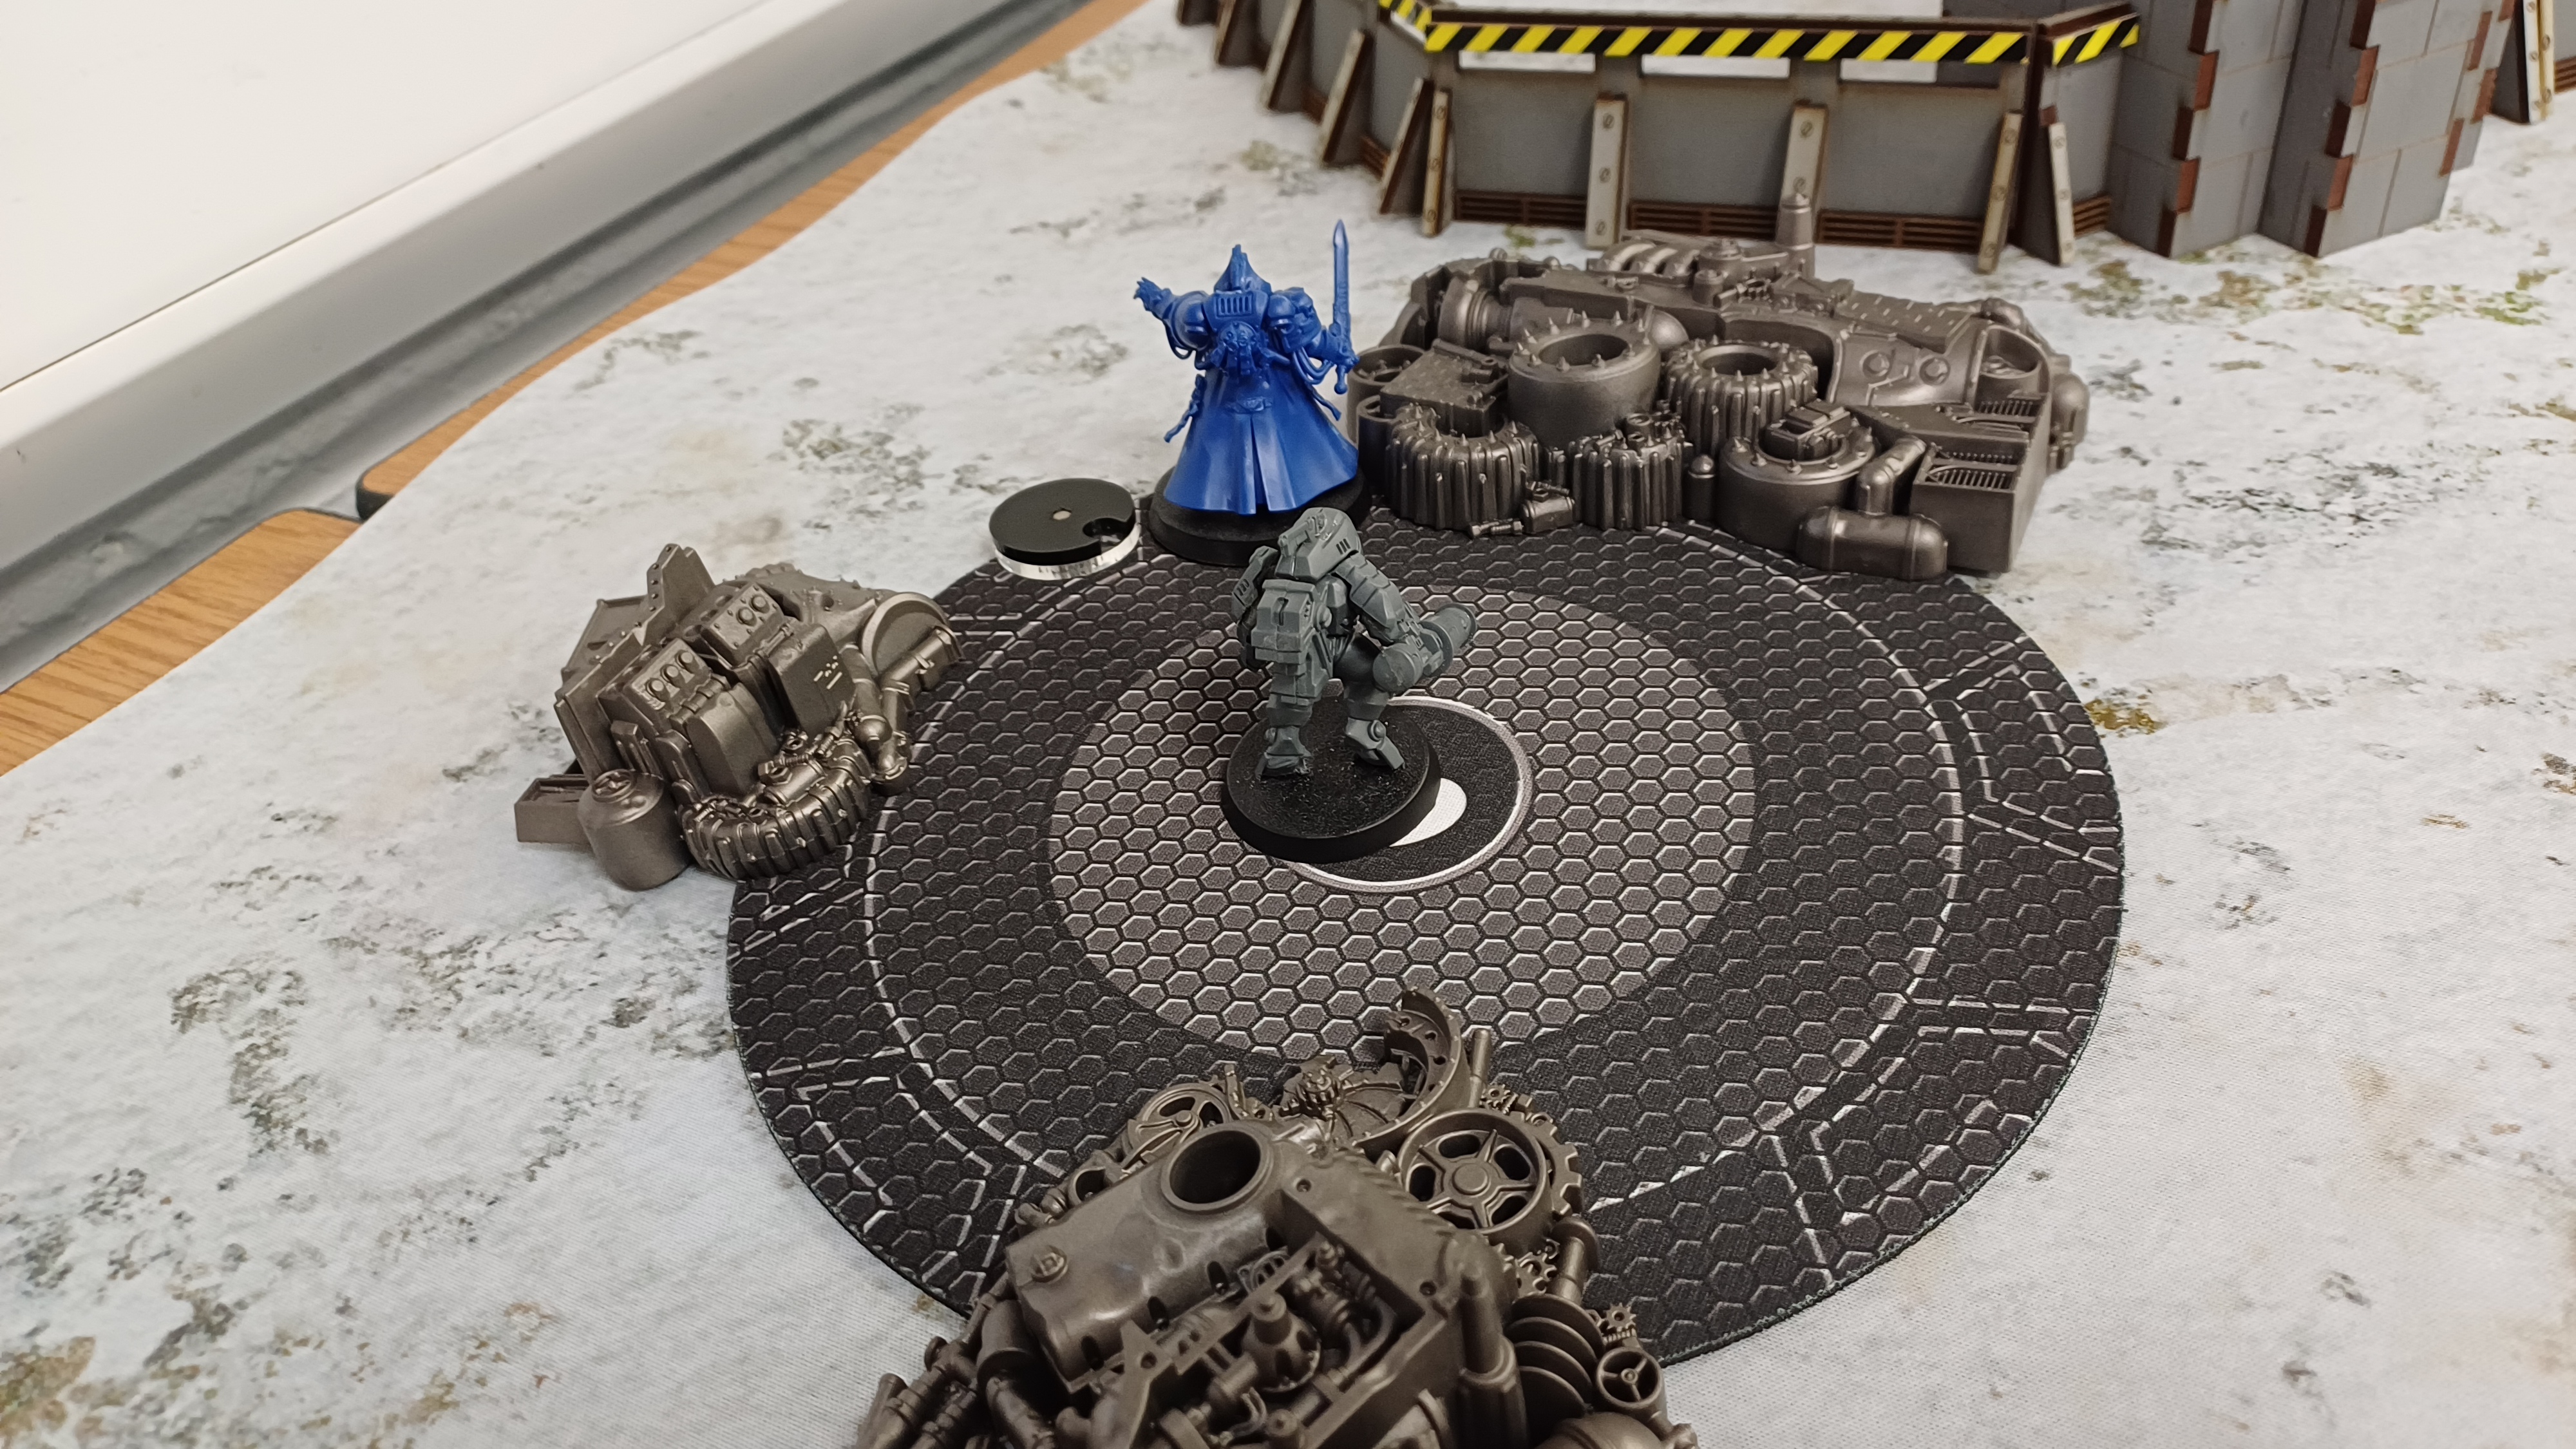 On the right flank, a duel between a Wizard and Robot breaks out. They will slug it out for three turns with neither giving enough ground for the point to be claimed.
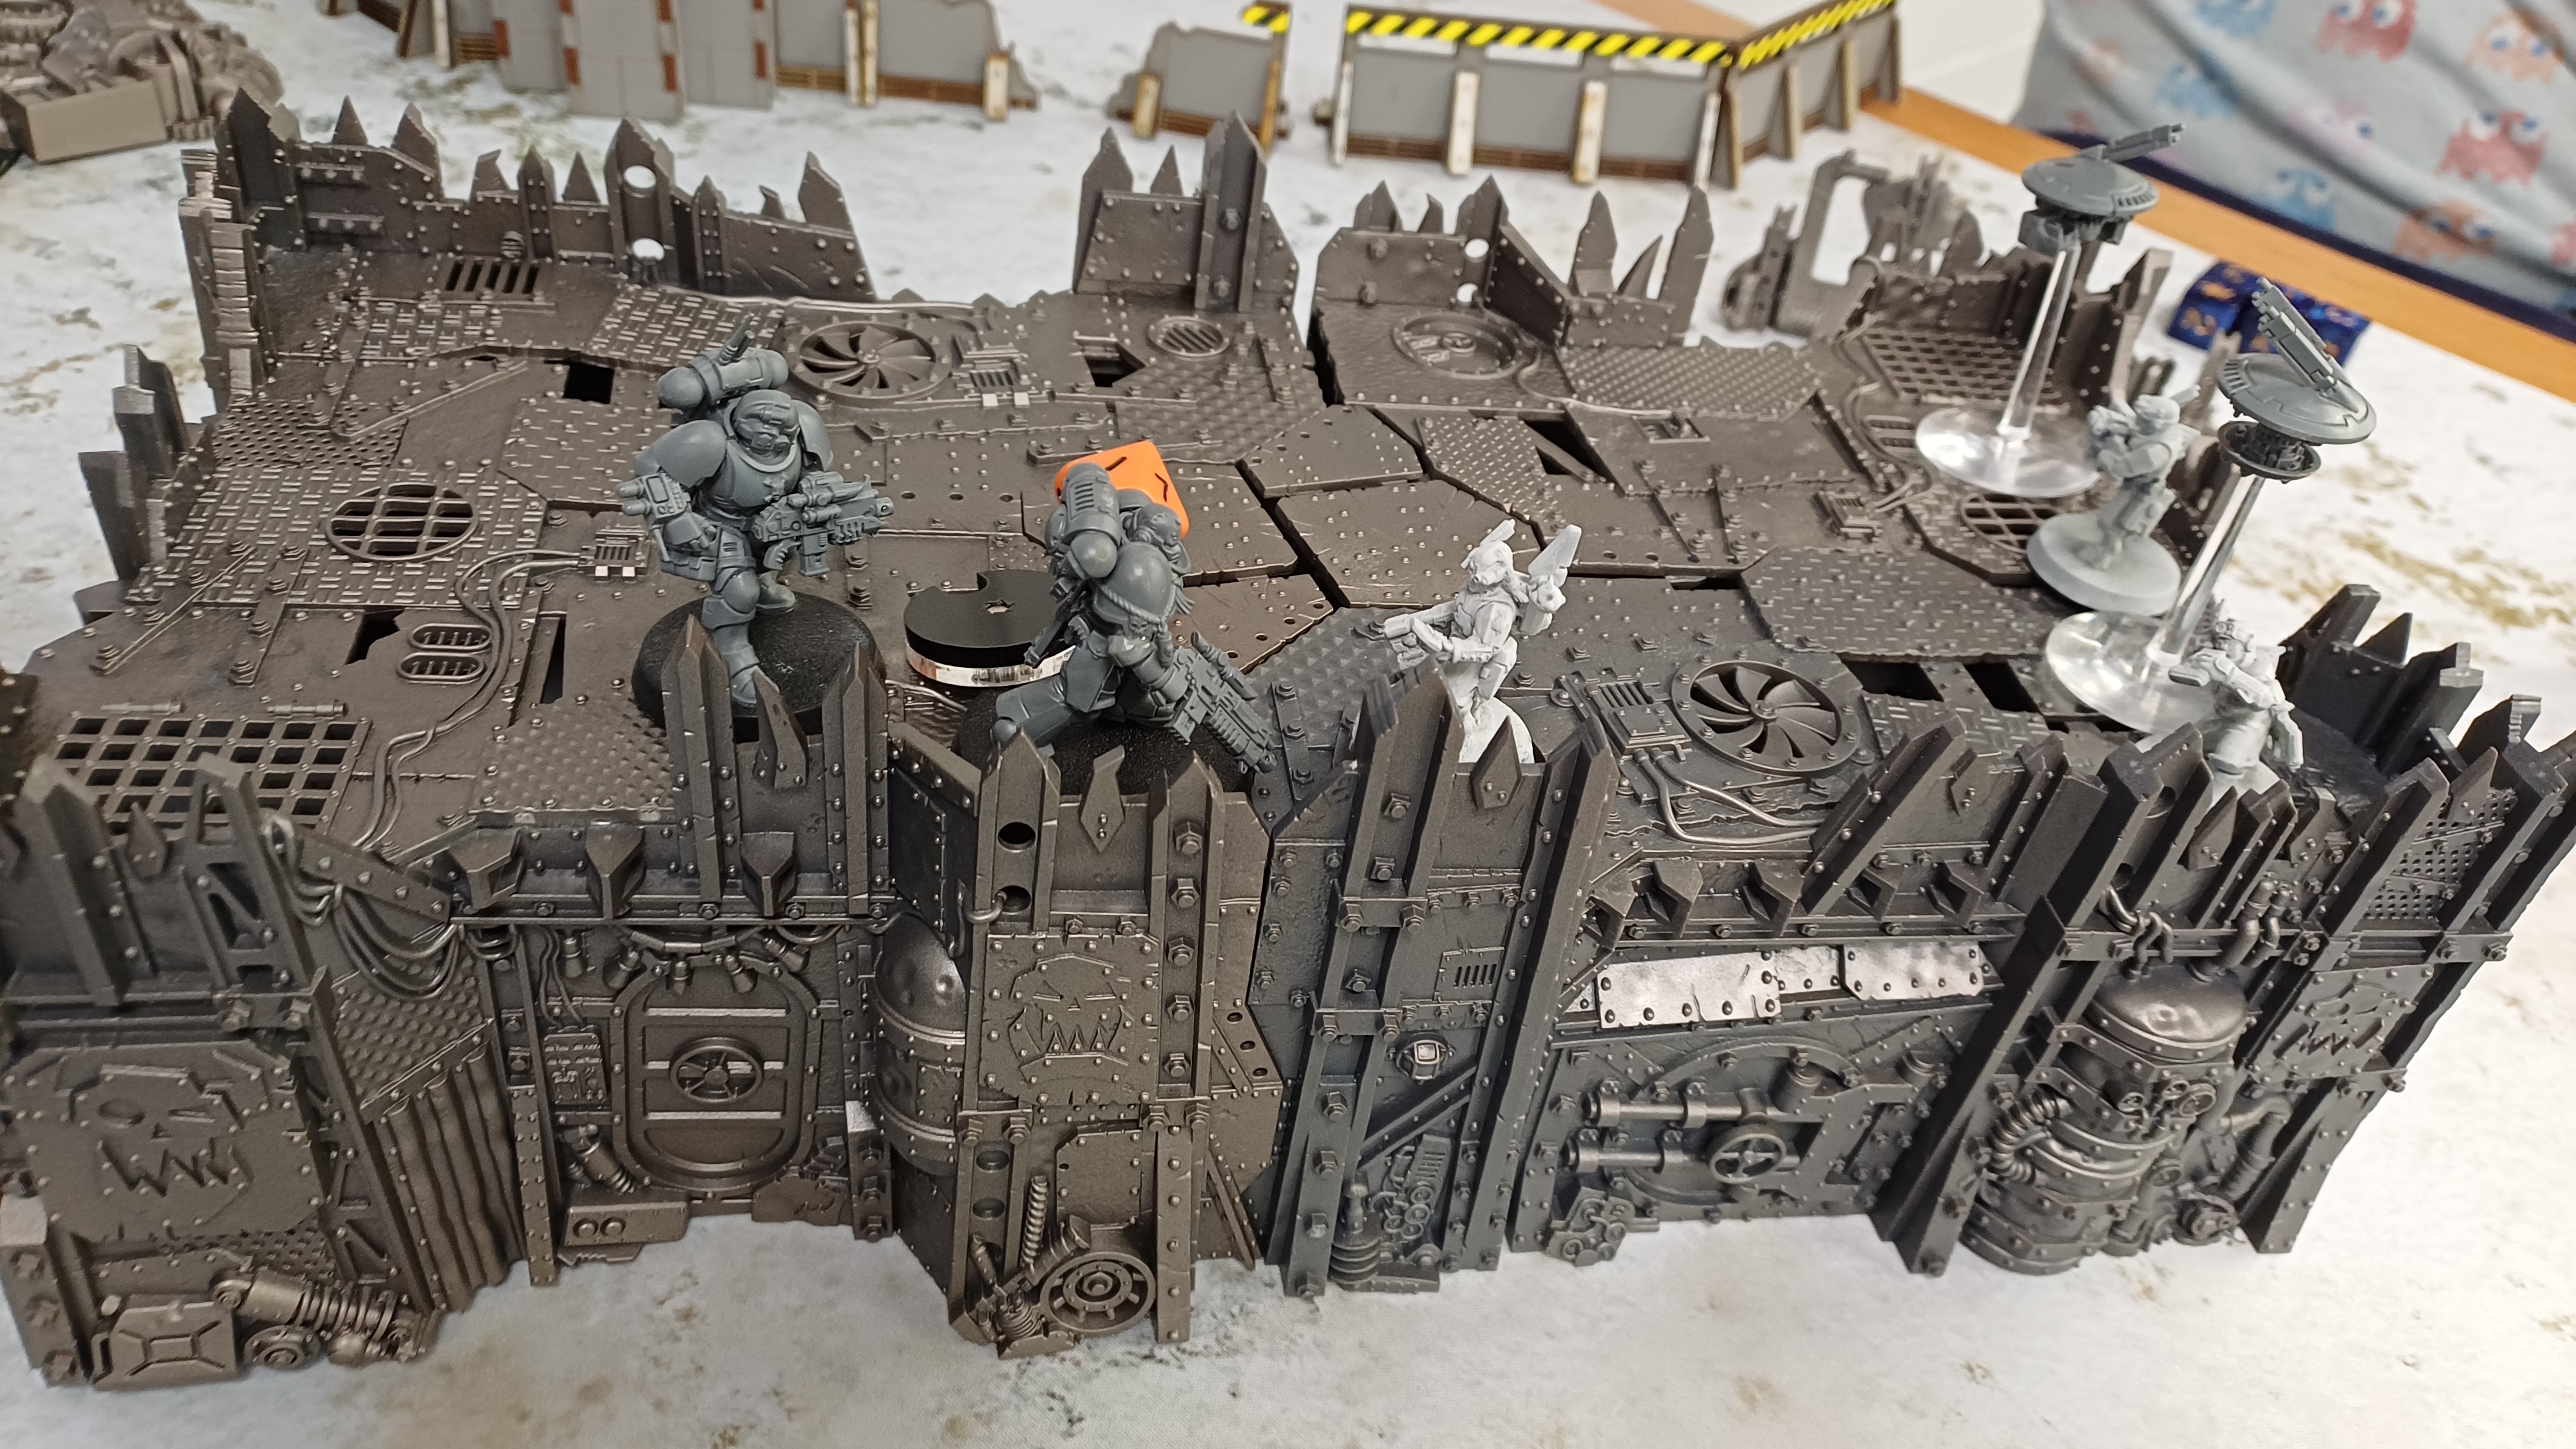 The two commanders engage at point blank range. No shot proves telling as they too will battle to a stand still this day.
Week 3 - Results (and Pledge... sort of)
Well, I did write an entry last week about the pledge for this week but it appears it never made it to the servers as it’s not around here now.
Perhaps I failed to get it submitted, perhaps the Gremlins where particularly angry or maybe Tom just hadn’t feed the hamsters on time that day.
Either way, I’m just going to write this entry on what I did last week and how it compared to what I wanted to get done. I’m channelling my inner Gerry and doing what I want because you can’t stop me.
I’m sure the power won’t go to my head.
Finishing of that 4Ground piece
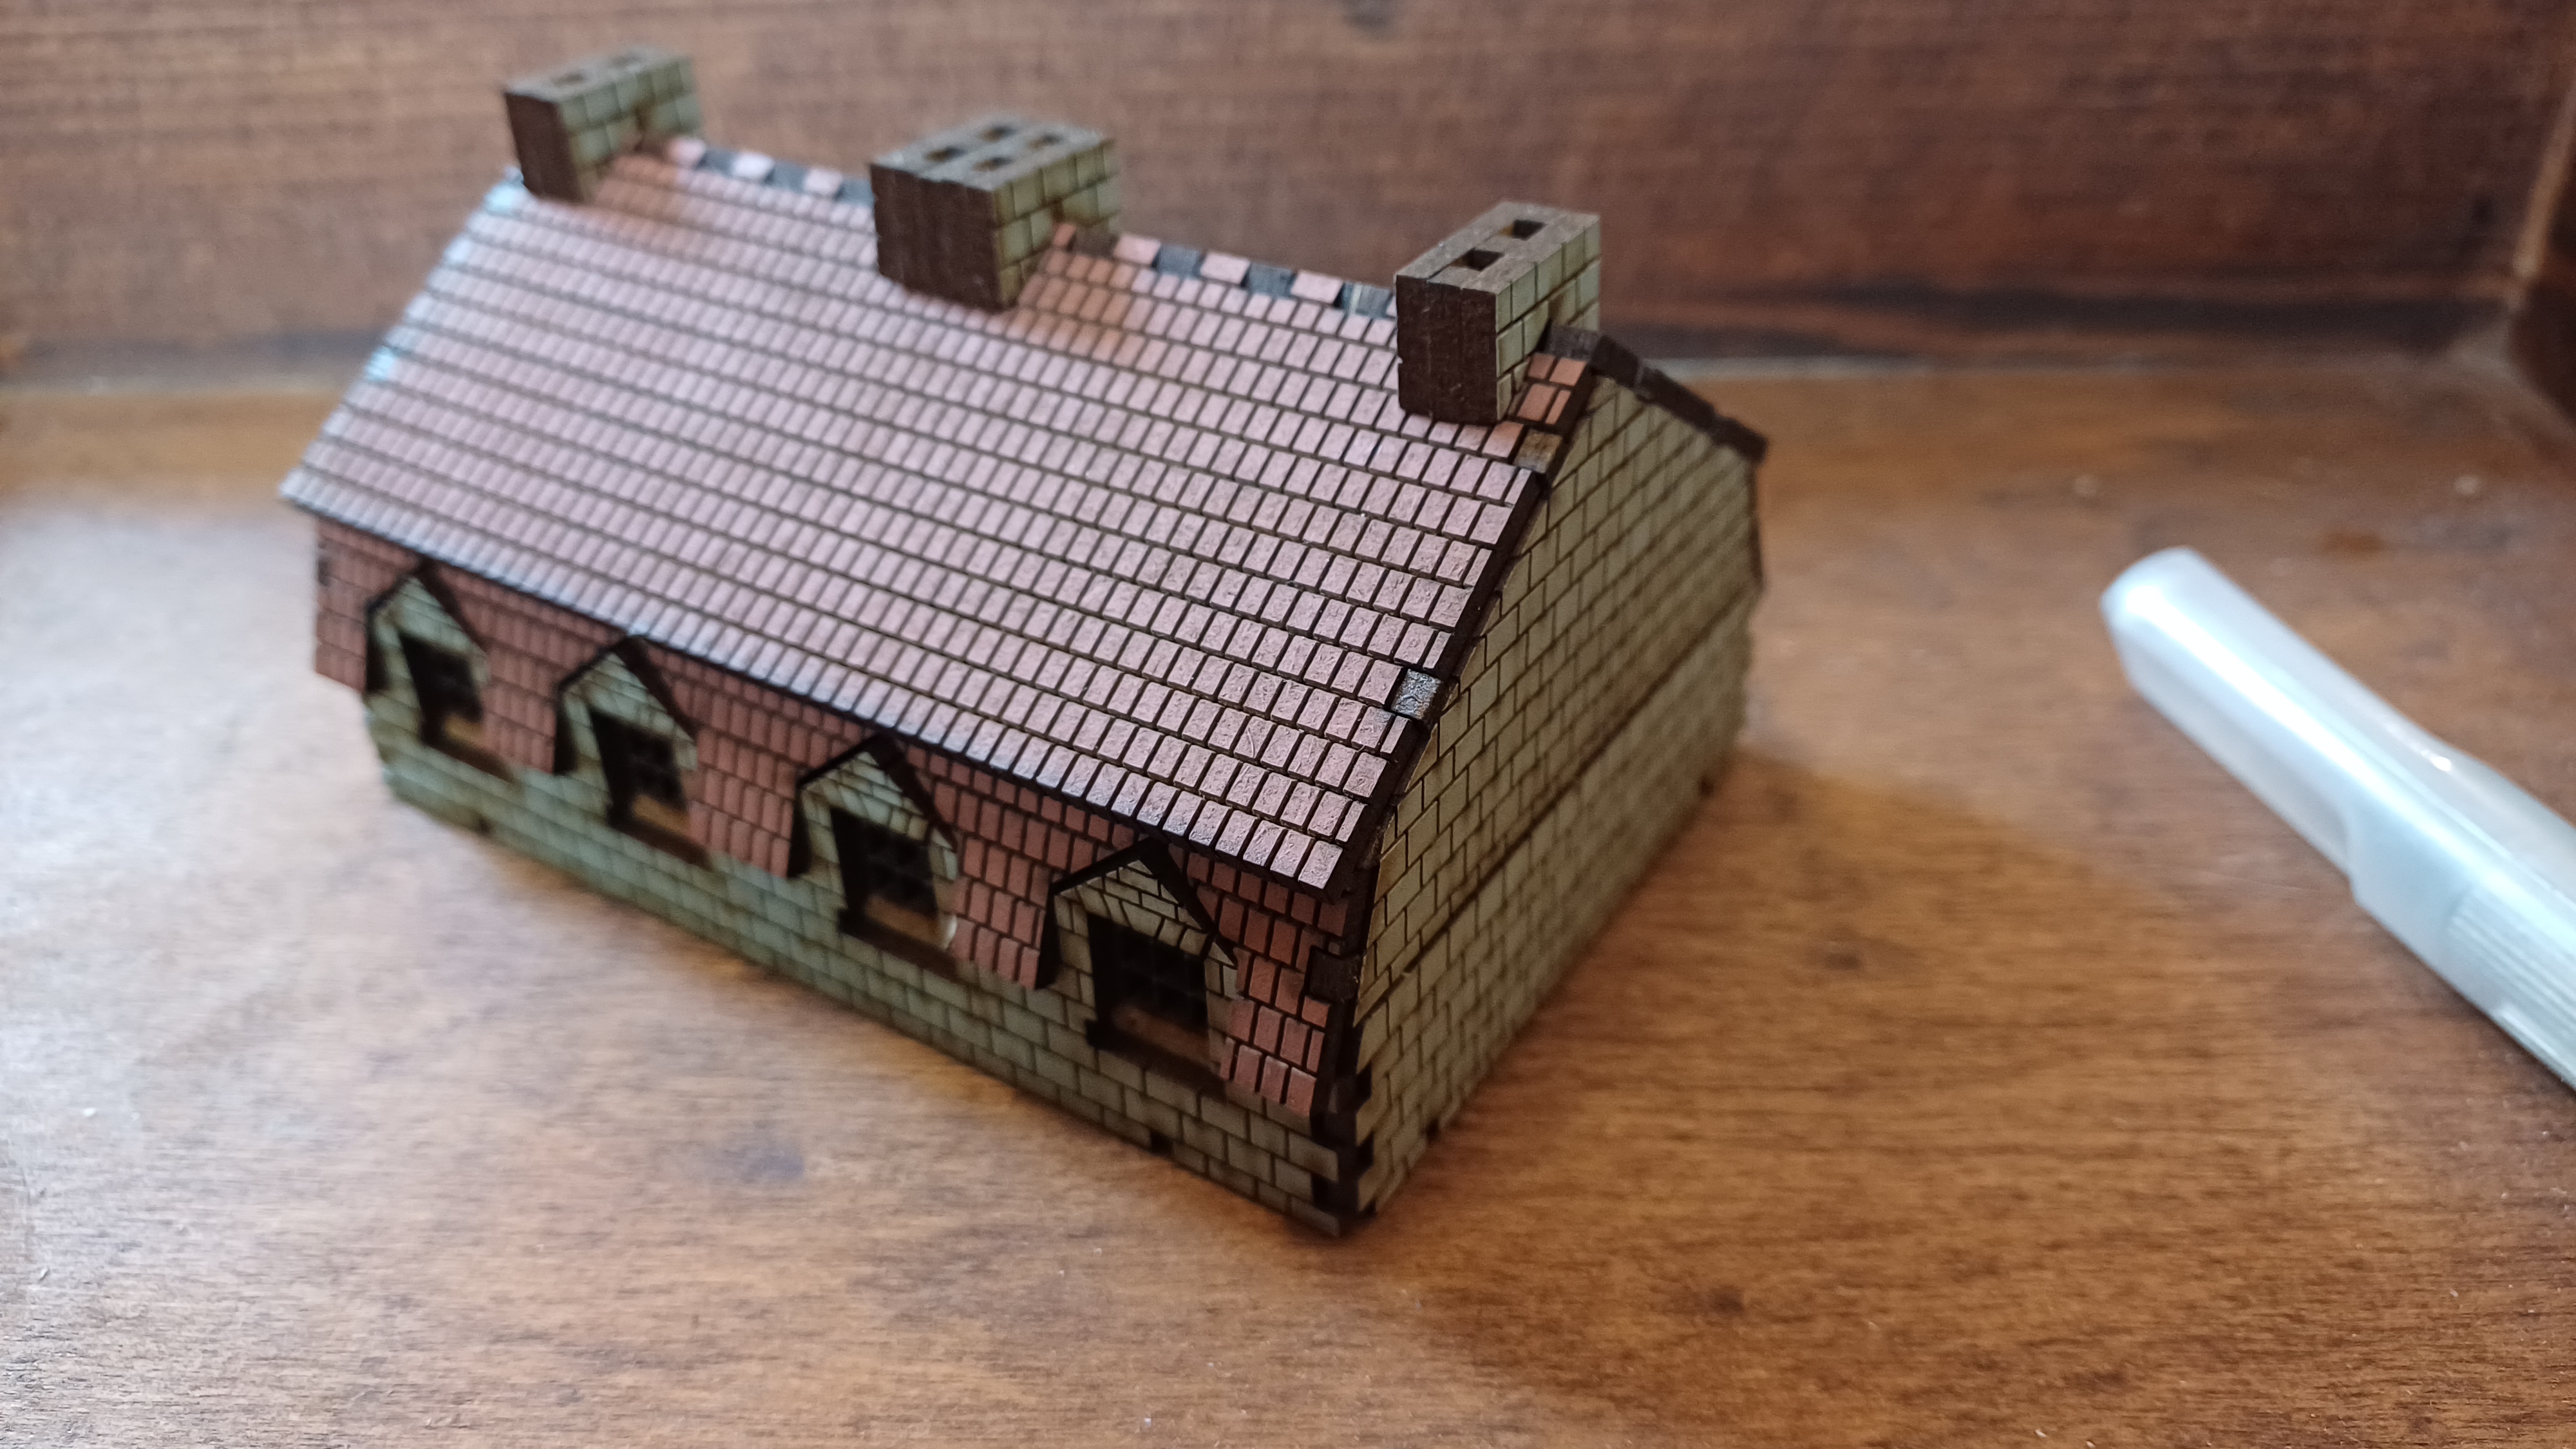
 Finally done
Ooooooh boy. This one nearly broke me… I’m not kidding.
This one was a challenge. I have mentioned before that the finer textured parts of these kits are laminated mdf with the top layer painted and then texture laser cut into the surface.
This can make some of the finer bits liable to come away if handled a bit roughly. As it turns out, for all the red brick work pieces in this set, a bit roughly equates to breathing a little too heavily in the next room over.
I spent so, so much time finding individual bricks on my cutting mat, having to reach for the glue and try and get them back onto which ever part they had fallen away from: assuming I found them at all.
Anyway, it’s done. I think I am ready for something different next week and to take a break from this sort of thing. I’ll definitely come back to these but once the frustration has worn away.
And I finally for the horses done as well
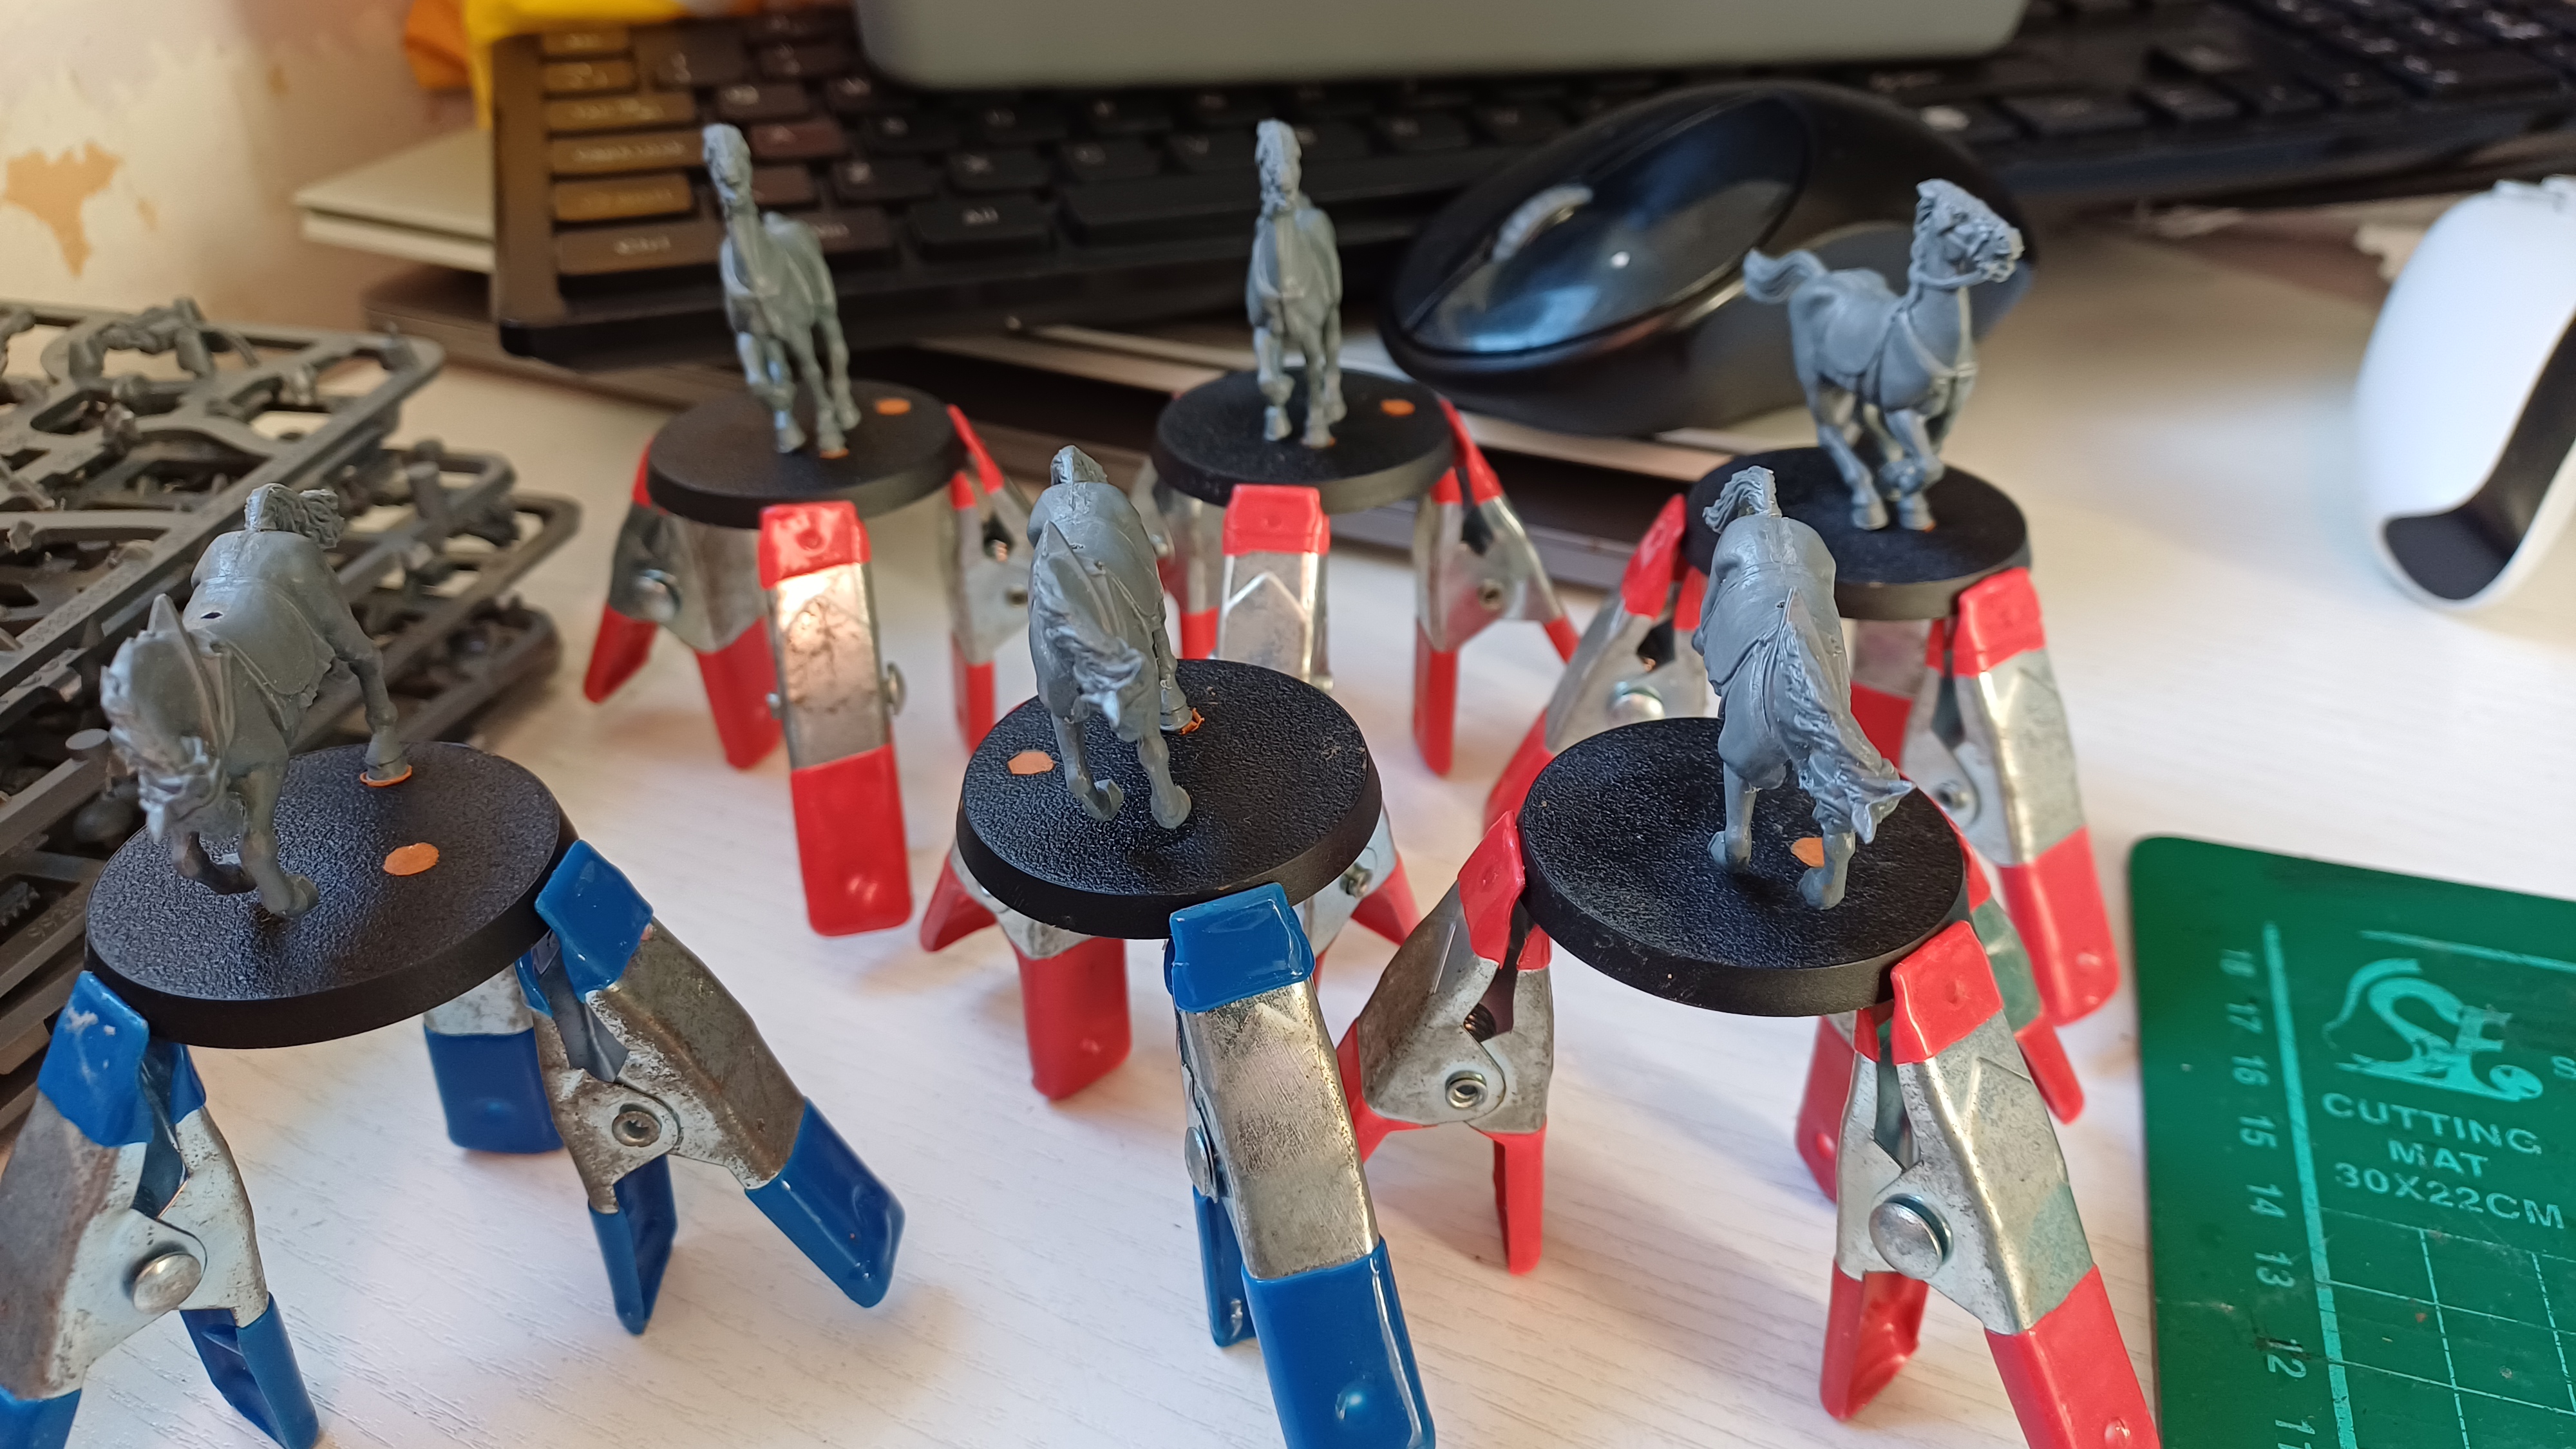
Yep, I finally made the time and space to sort these out.
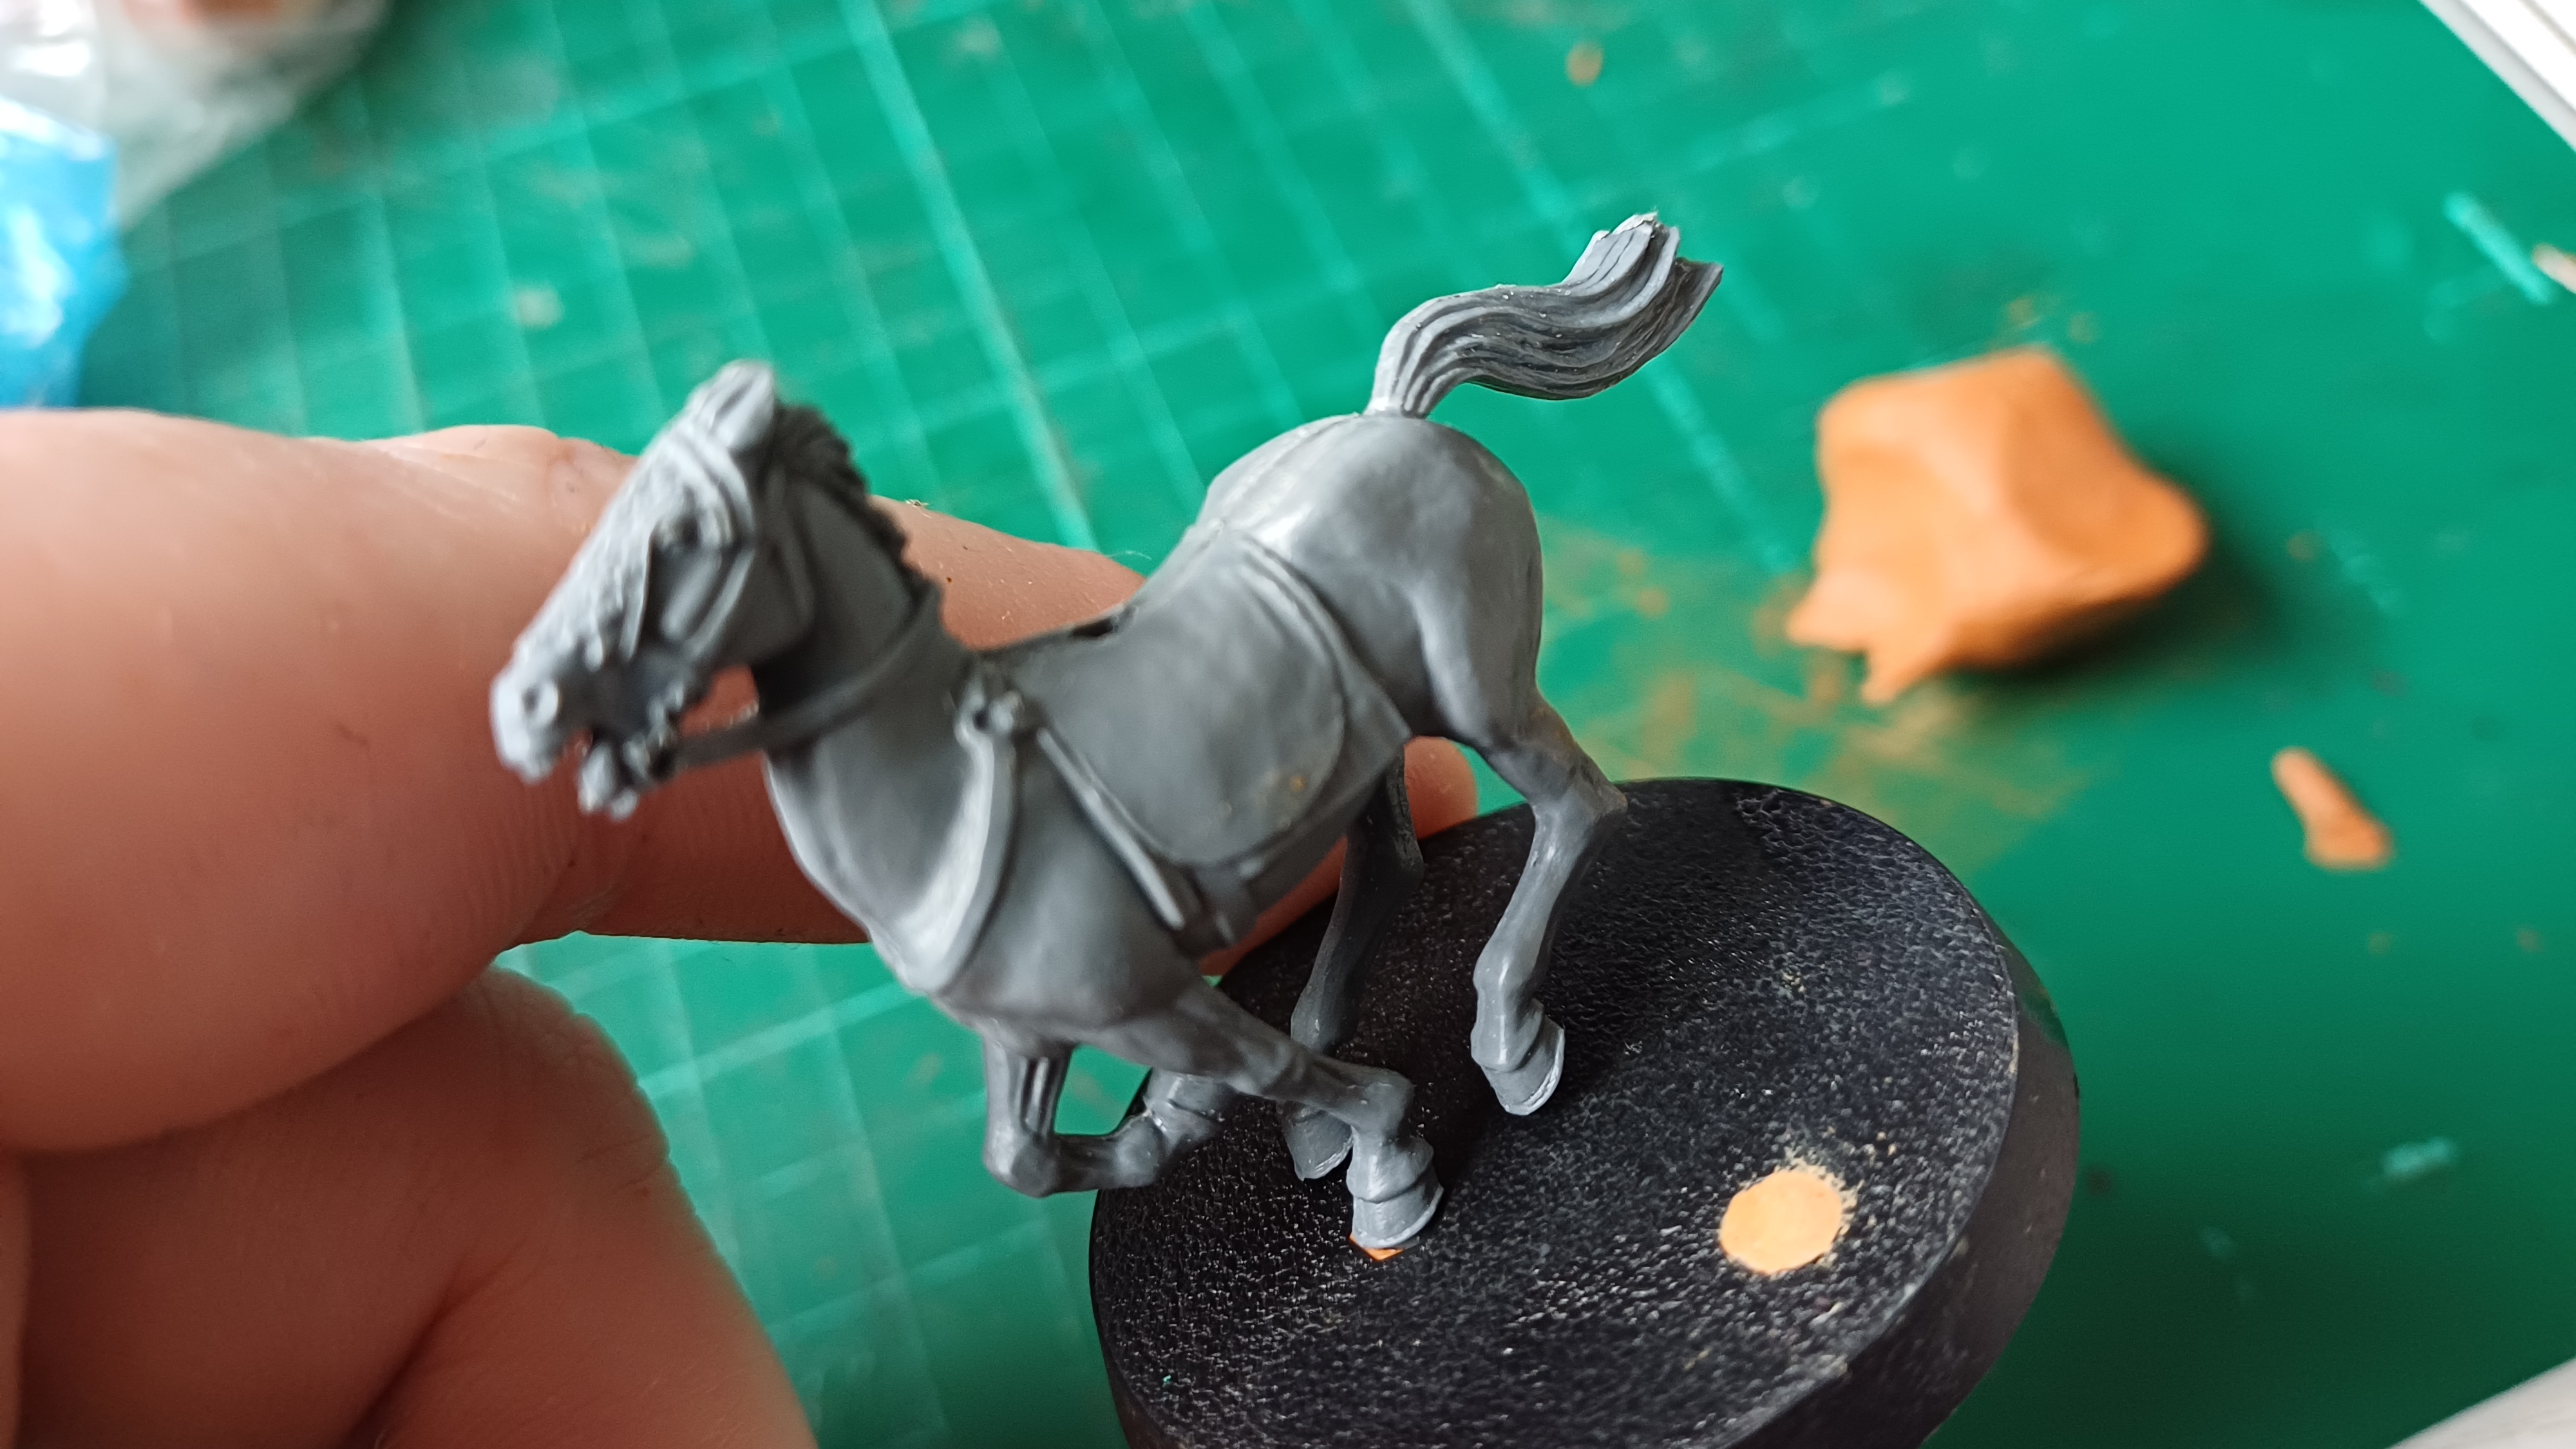
For those just joining us, I had to solve the issue of the horses in the Riders of Rohan kit from GW not fitting into the bases provided for them. The pegs on the horses hooves are just way smaller than the holes for them.#
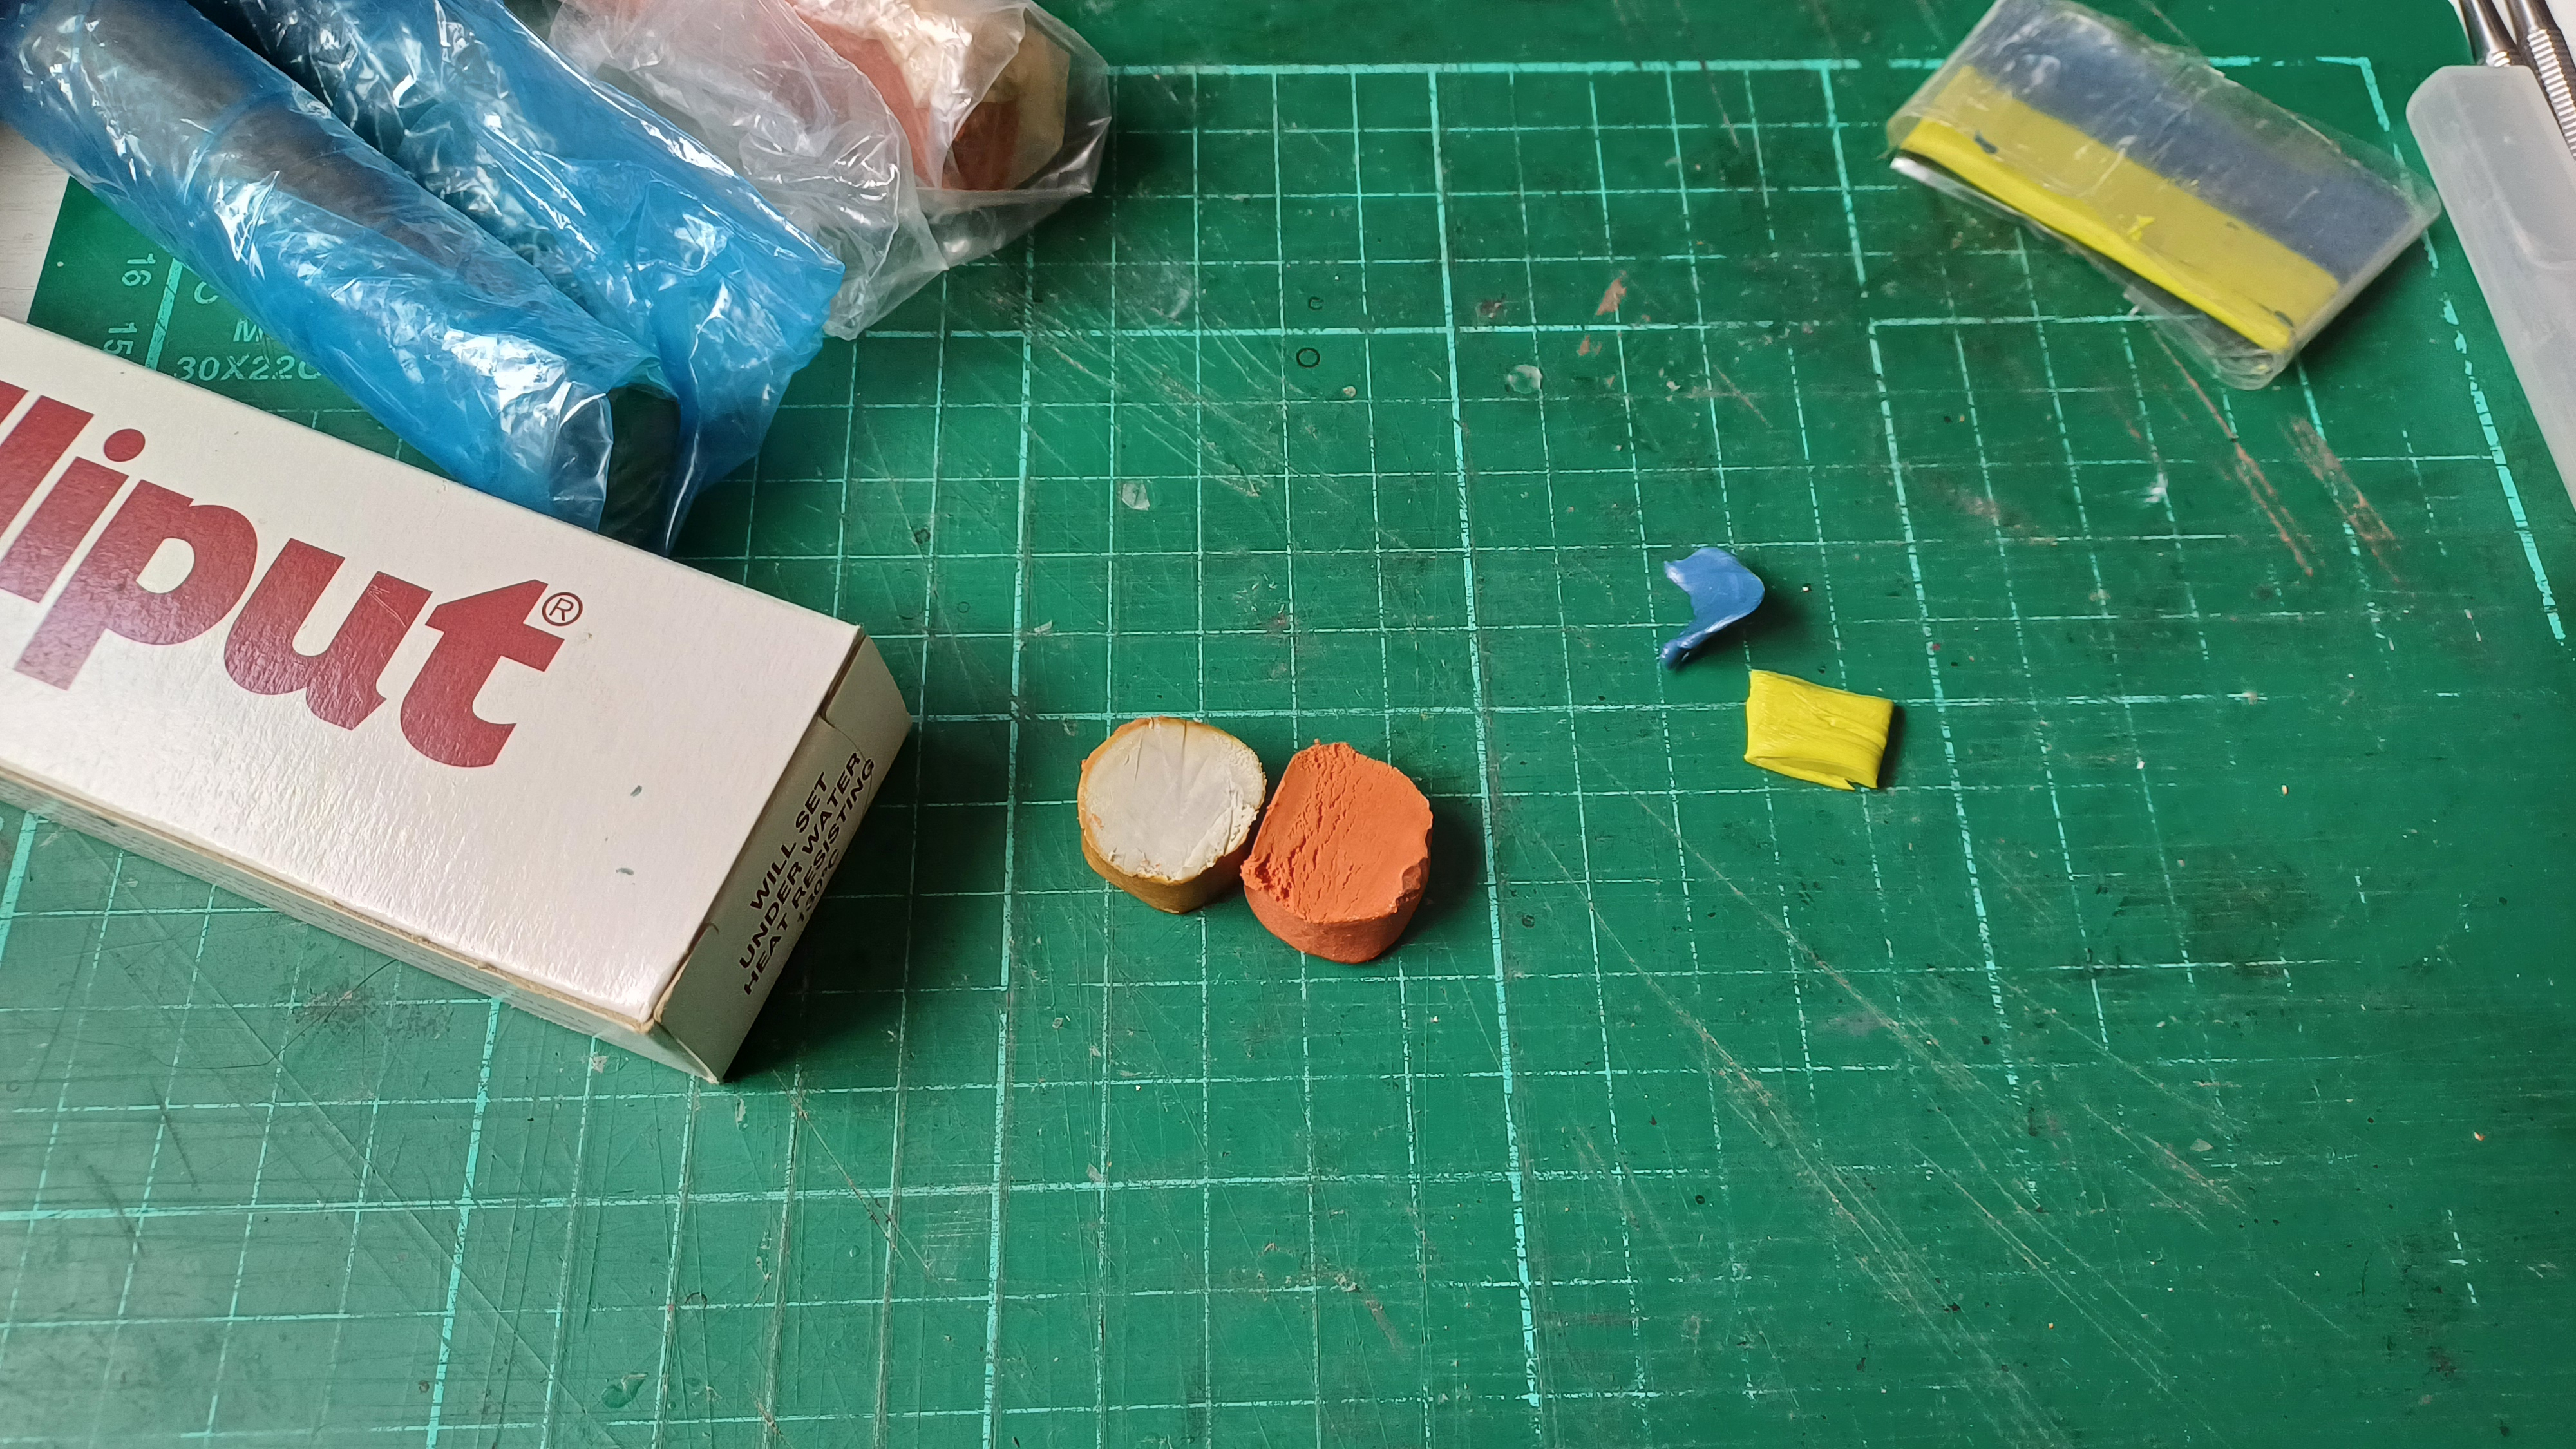
To solve this, I decided to take a mix of miliputt and green stuff for no other reason than I have heard quiet a few people more talented than me recently talking about how this gives a happy medium between the two: being softer than green stuff itself but less crumbly than just milliput.
I’m not about to start sculpting custom kitbashing or anything but hey, how often do you have an excuse to mix up two part epoxies without just throwing them in the bin when you’re done.
Not a full review but yeah: it was smoother than miliputt when it was all mixed up but not quite as stiff and dense and green stuff. Not exactly revolutionary for this application but would recommend.
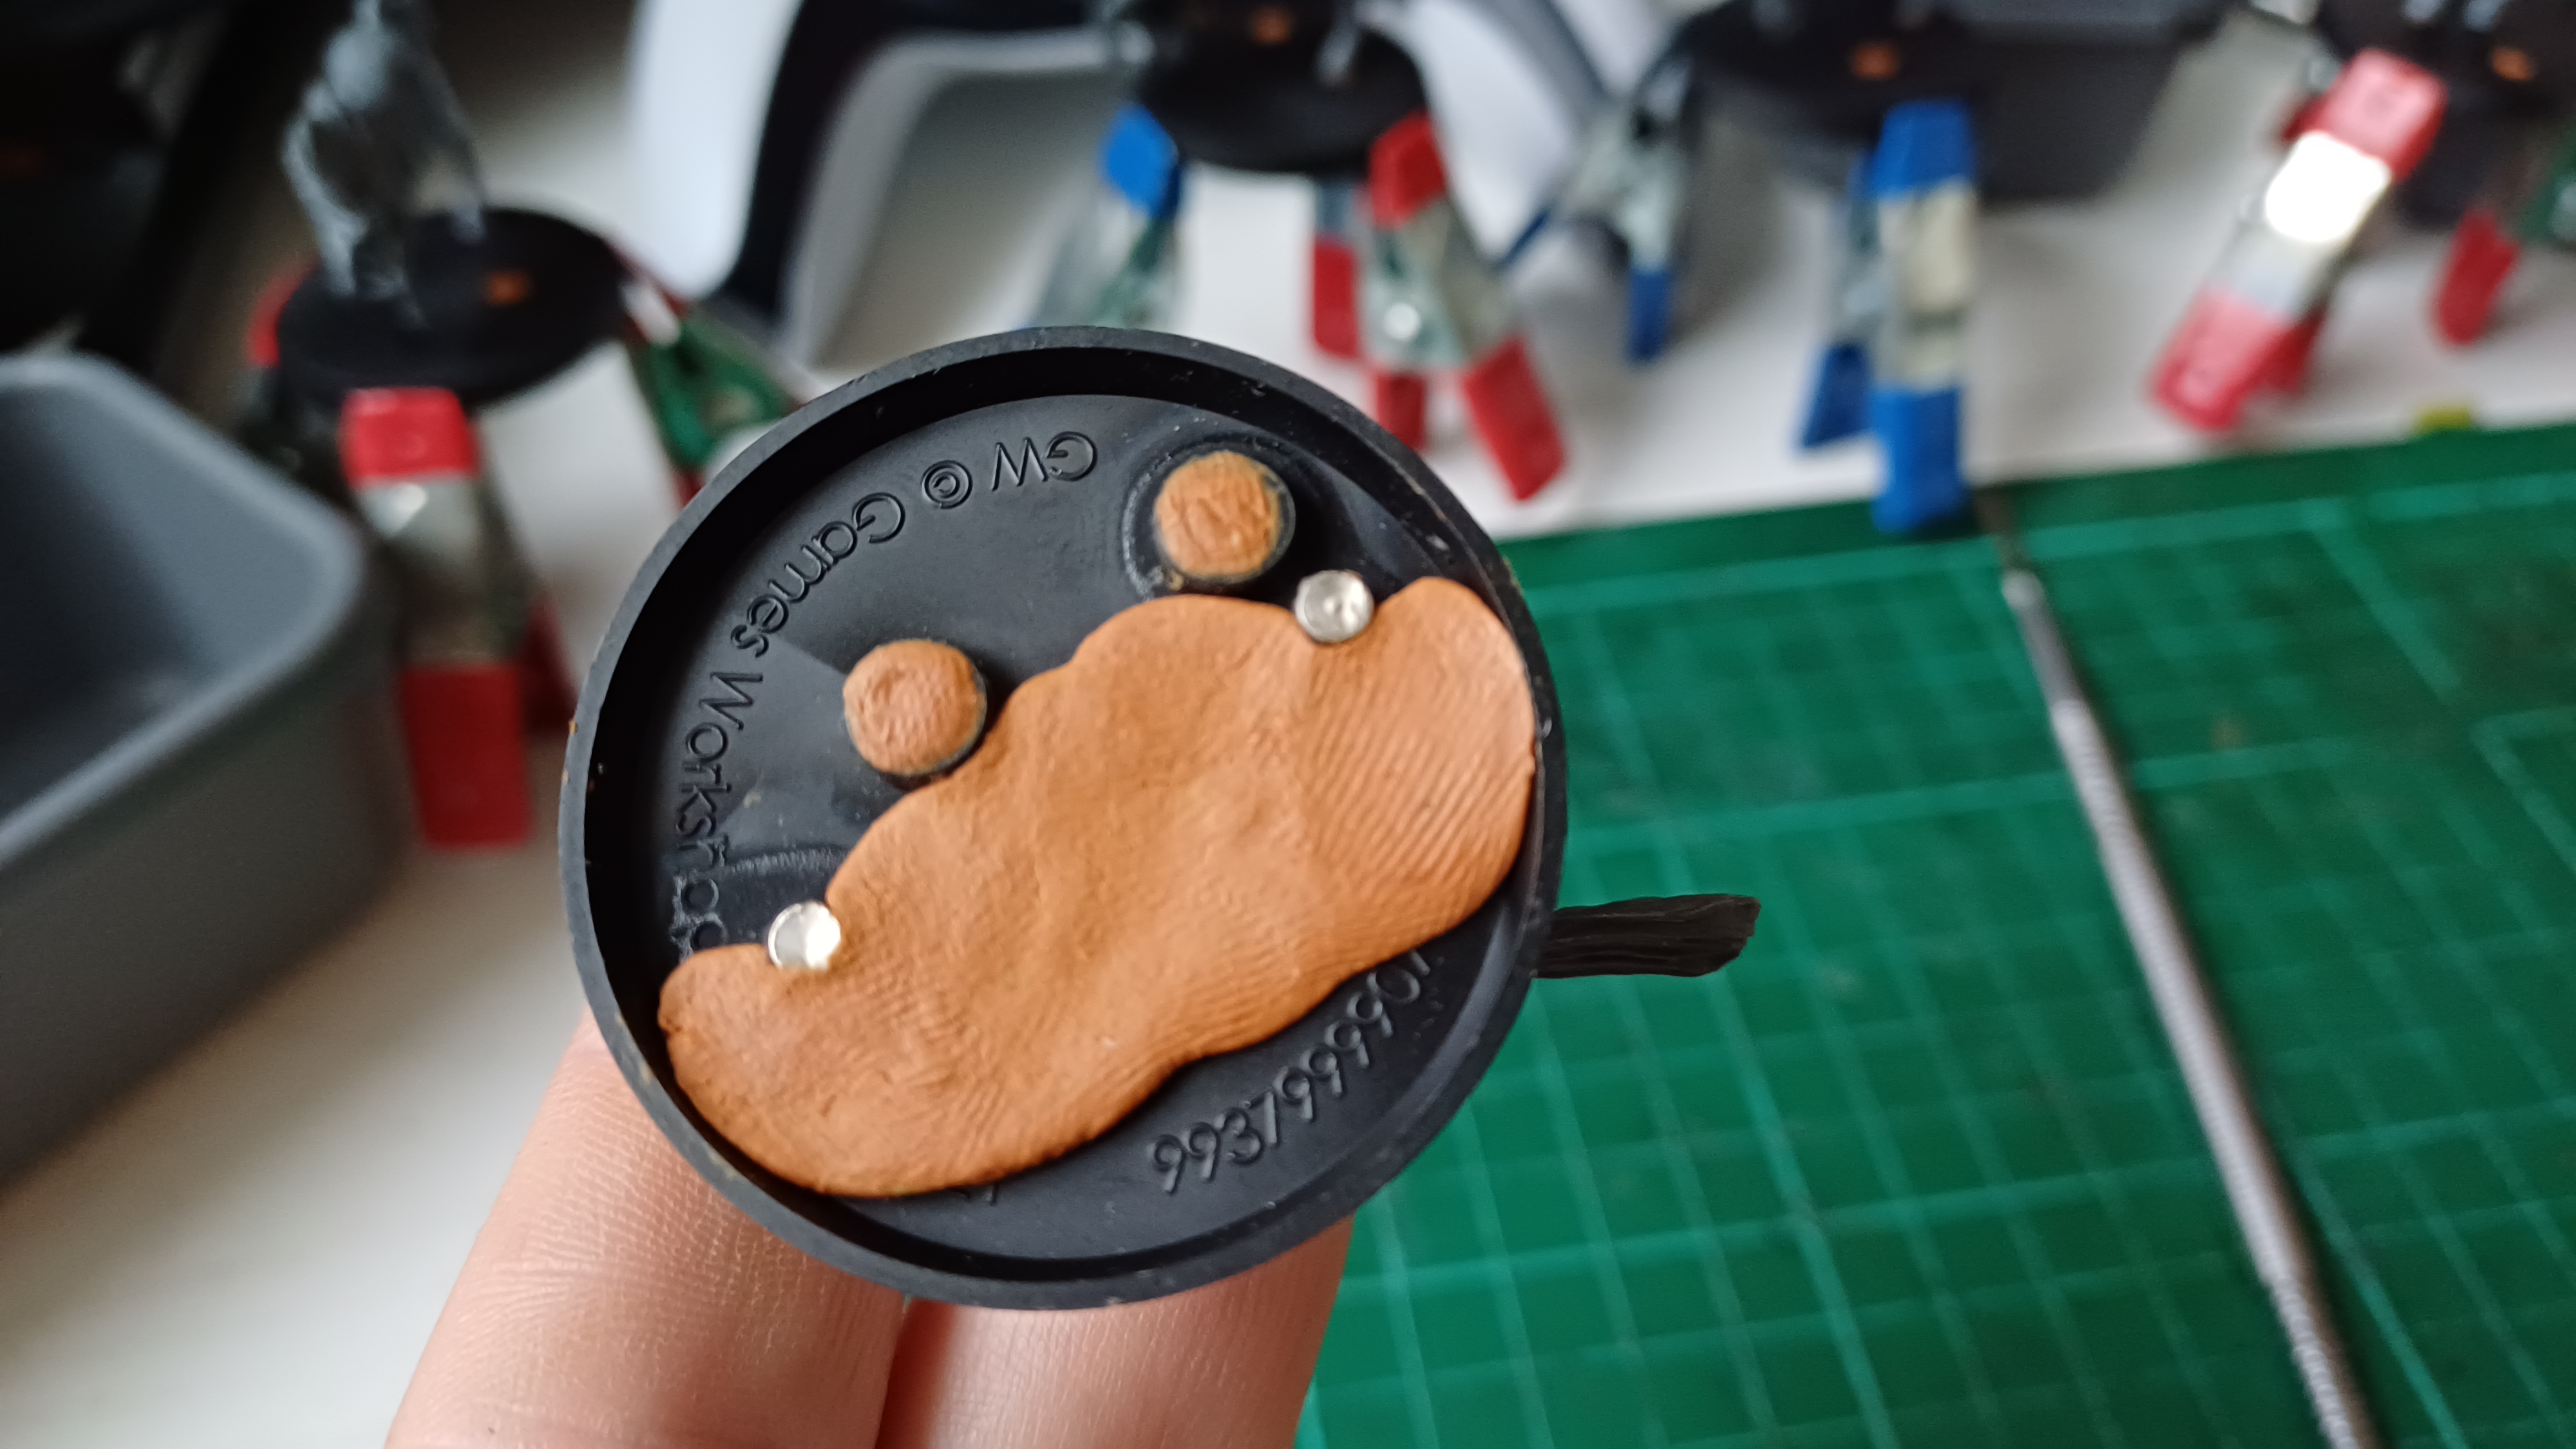
A quick walk through of the steps I took in the gallery above:
- Prepping the parts to mix up. much squishing and rolling and folding to occur.
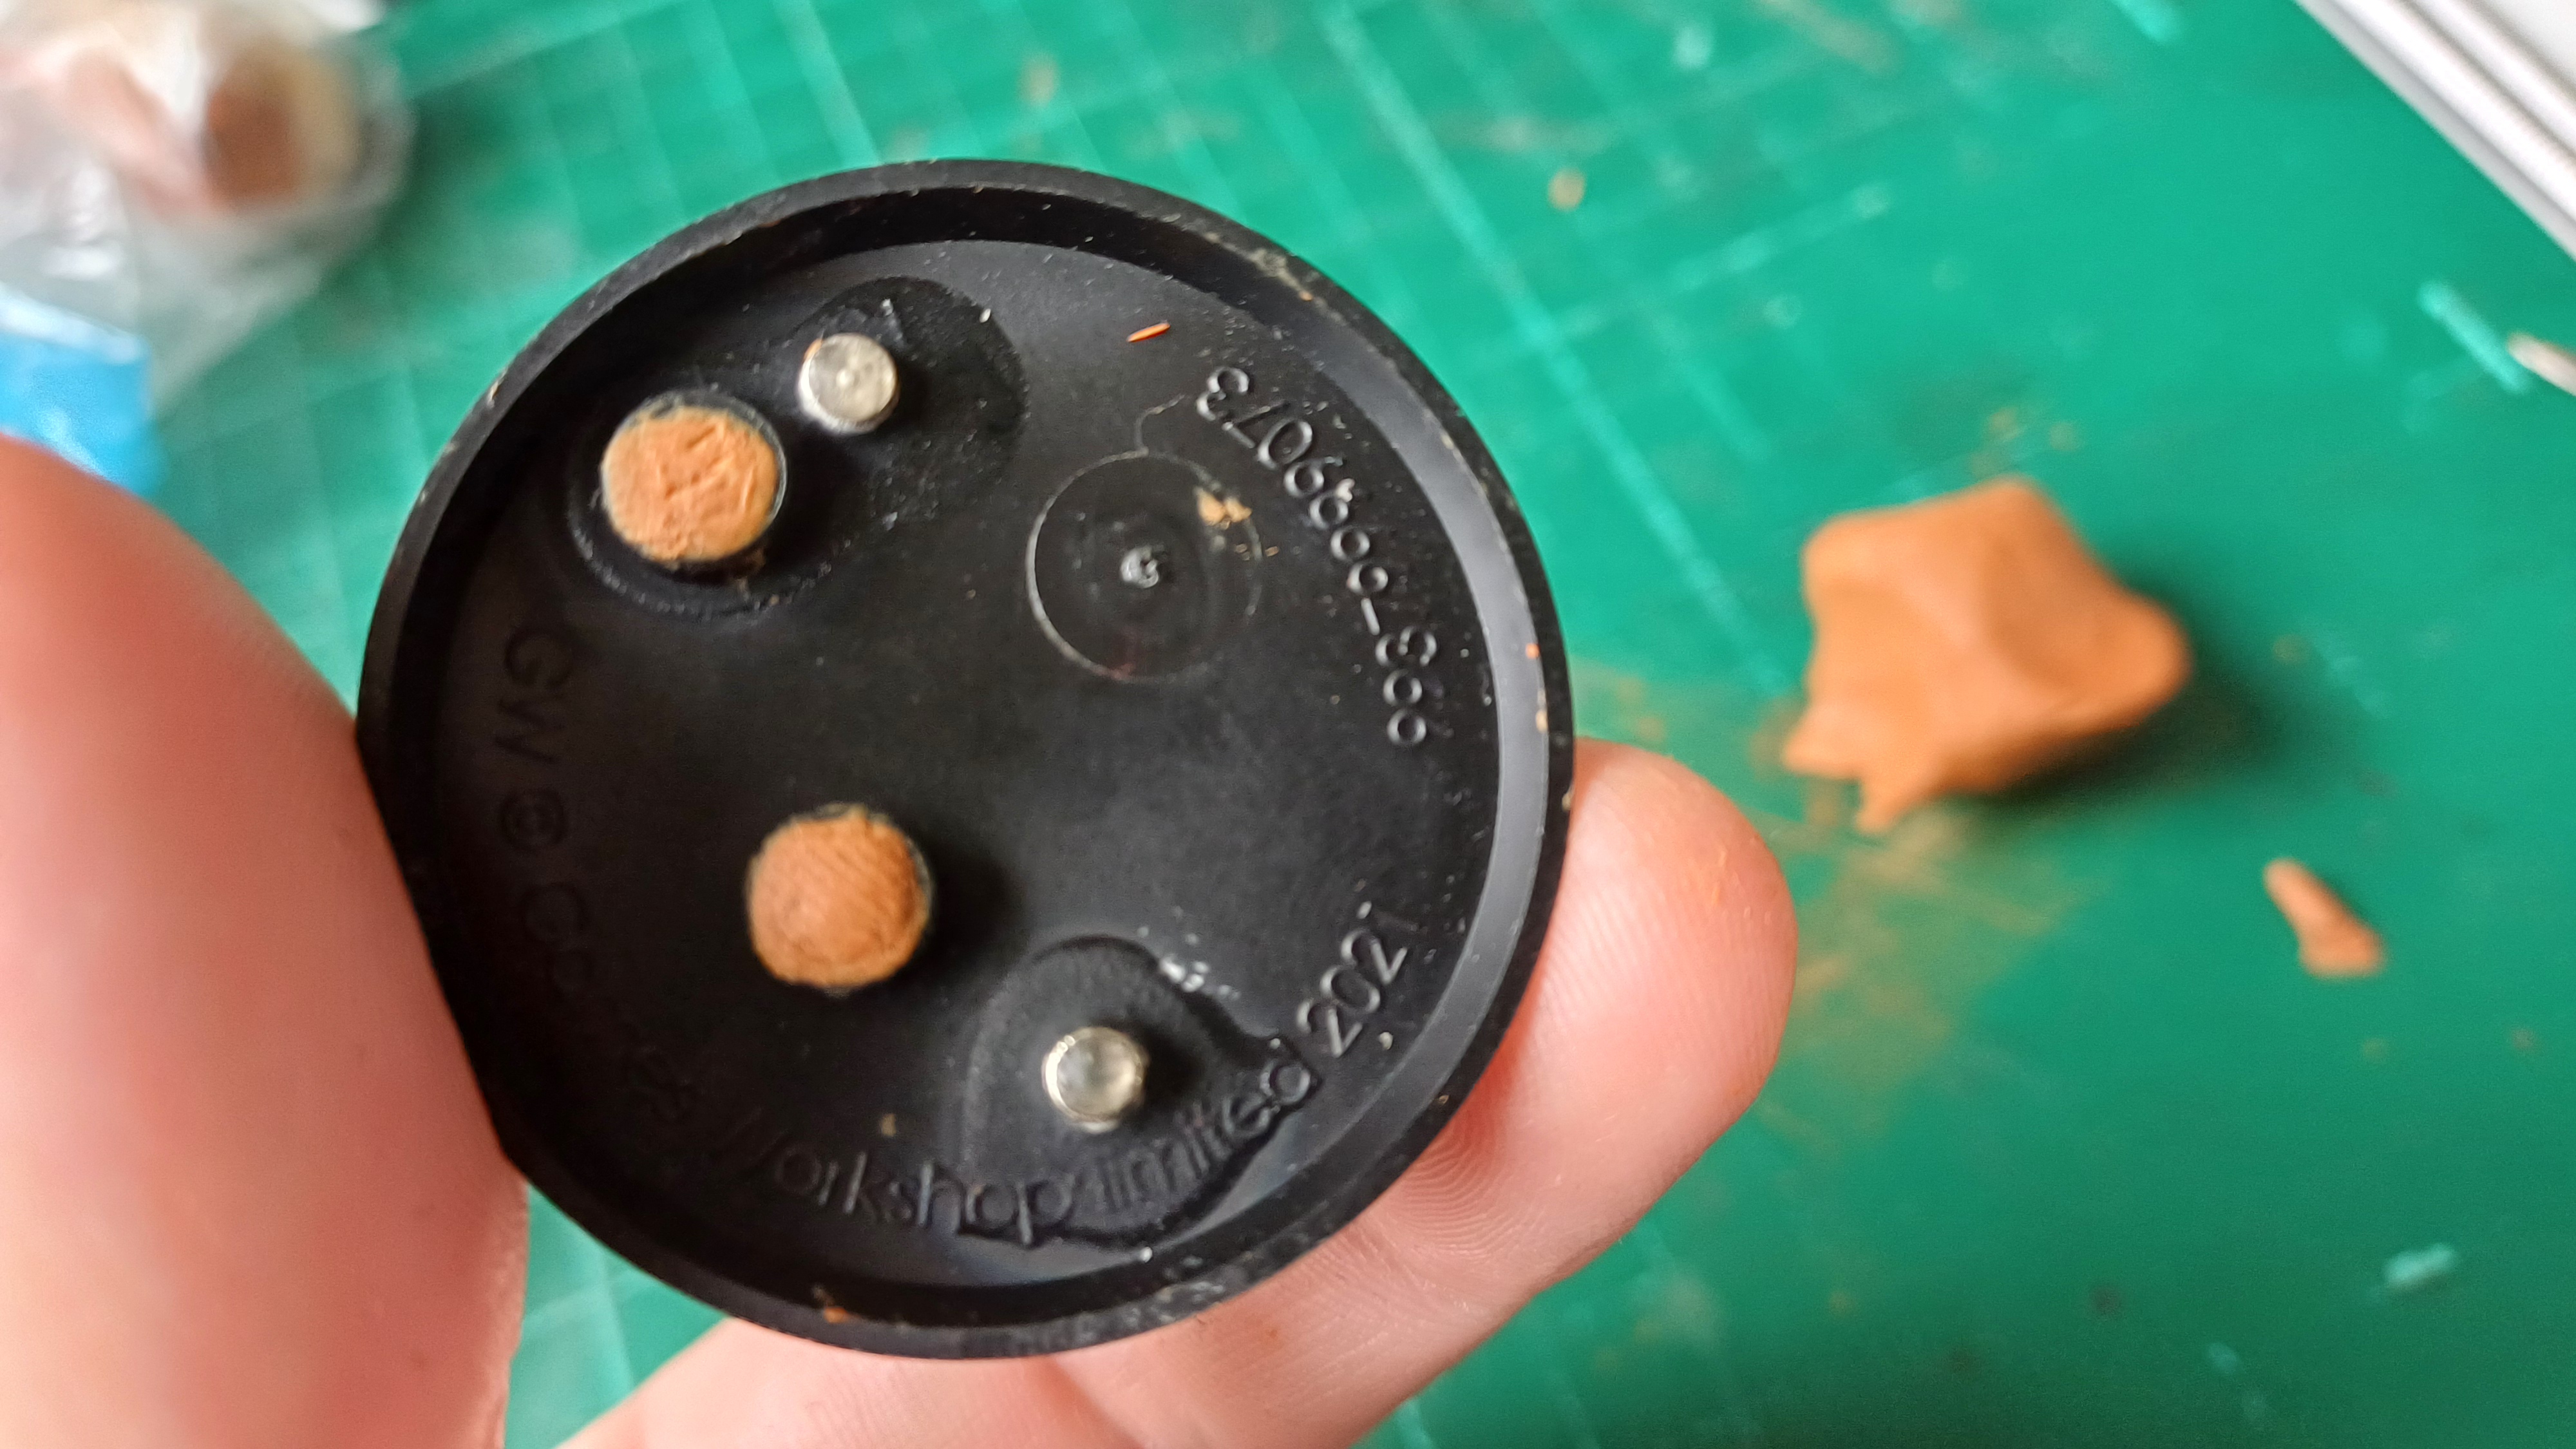
- Next I stuffed the holes in the base with a wad of the mixture…
- …before filling it over, getting the horse set into the position I wanted and clearing away an excess that squished out in the process.
- As is always the case you have to mix more than you use when doing this but I decided to go all in and use the excess to fill out the space more of the same. I simply took what was left after the more precise work, rolled it into a sausage and cut it into roughly equal parts and slapped it in there.
These modes are fairly tall once they have a rider mounted on them and given the lack of clean connection these are going to have this should help to bring the centre of gravity down a bit. - And this was all done six times. Done.
Glad to finally have these done. Now to annoy someone for a learner game of MESBG.
Next Post
The next-next post will be the Pledge for Week 04. Hopefully I’ll appease the server’s machine spirit this time and it want disappear into the void like last time.
But the next post is a bonus post. What could it be? Who knows?
Well I do but I’m going to make some dinner now and then hopefully write up that one. Or maybe you’re reading this in the future and you can go read it right now. The wonders of the internet, go you.
Week 2 - Results
Whelp, it’s Tuesday night as I write this which should give an idea of how this last week went…
Though as always: there are lessons to be learnt so let us review.
The Good...


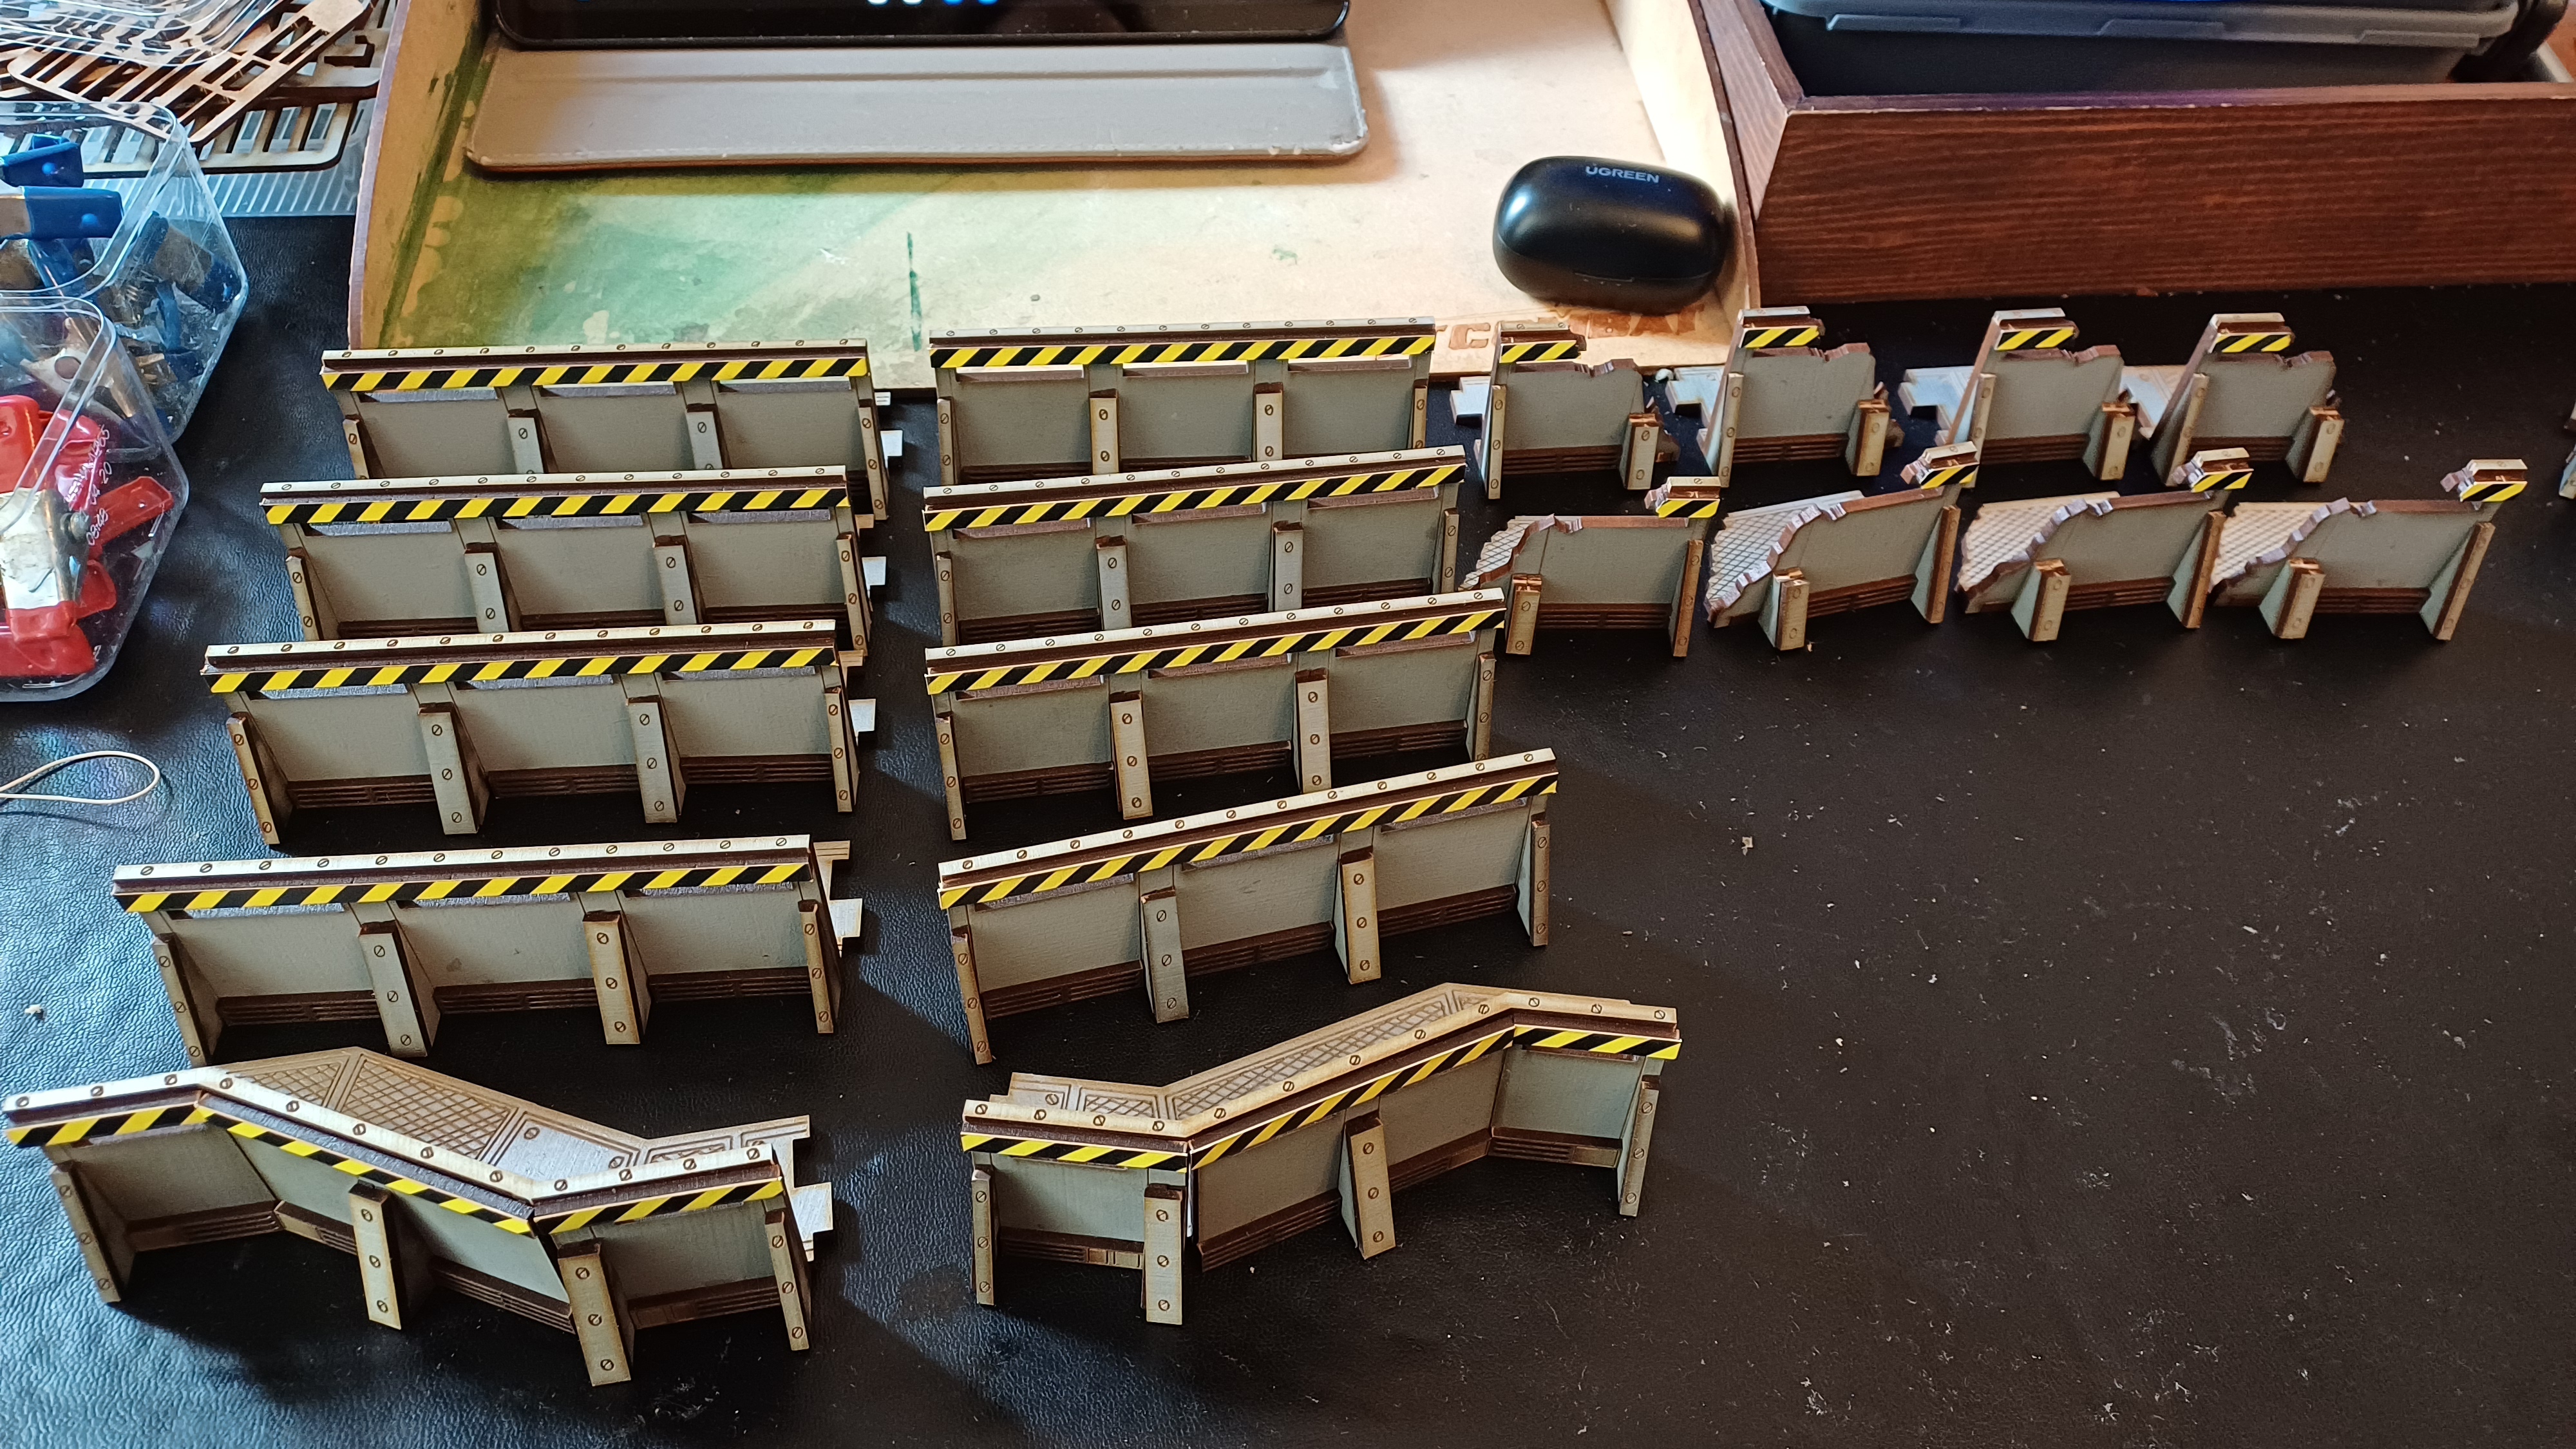
So the bit that went well was the L.C.A Defence Line. Though I only managed to get started on this properly on Saturday (more on that later) I took a leaf from my recent kit work and setup an assembly line to chew through this process.
Above are some snapshots of this process as I worked through it:
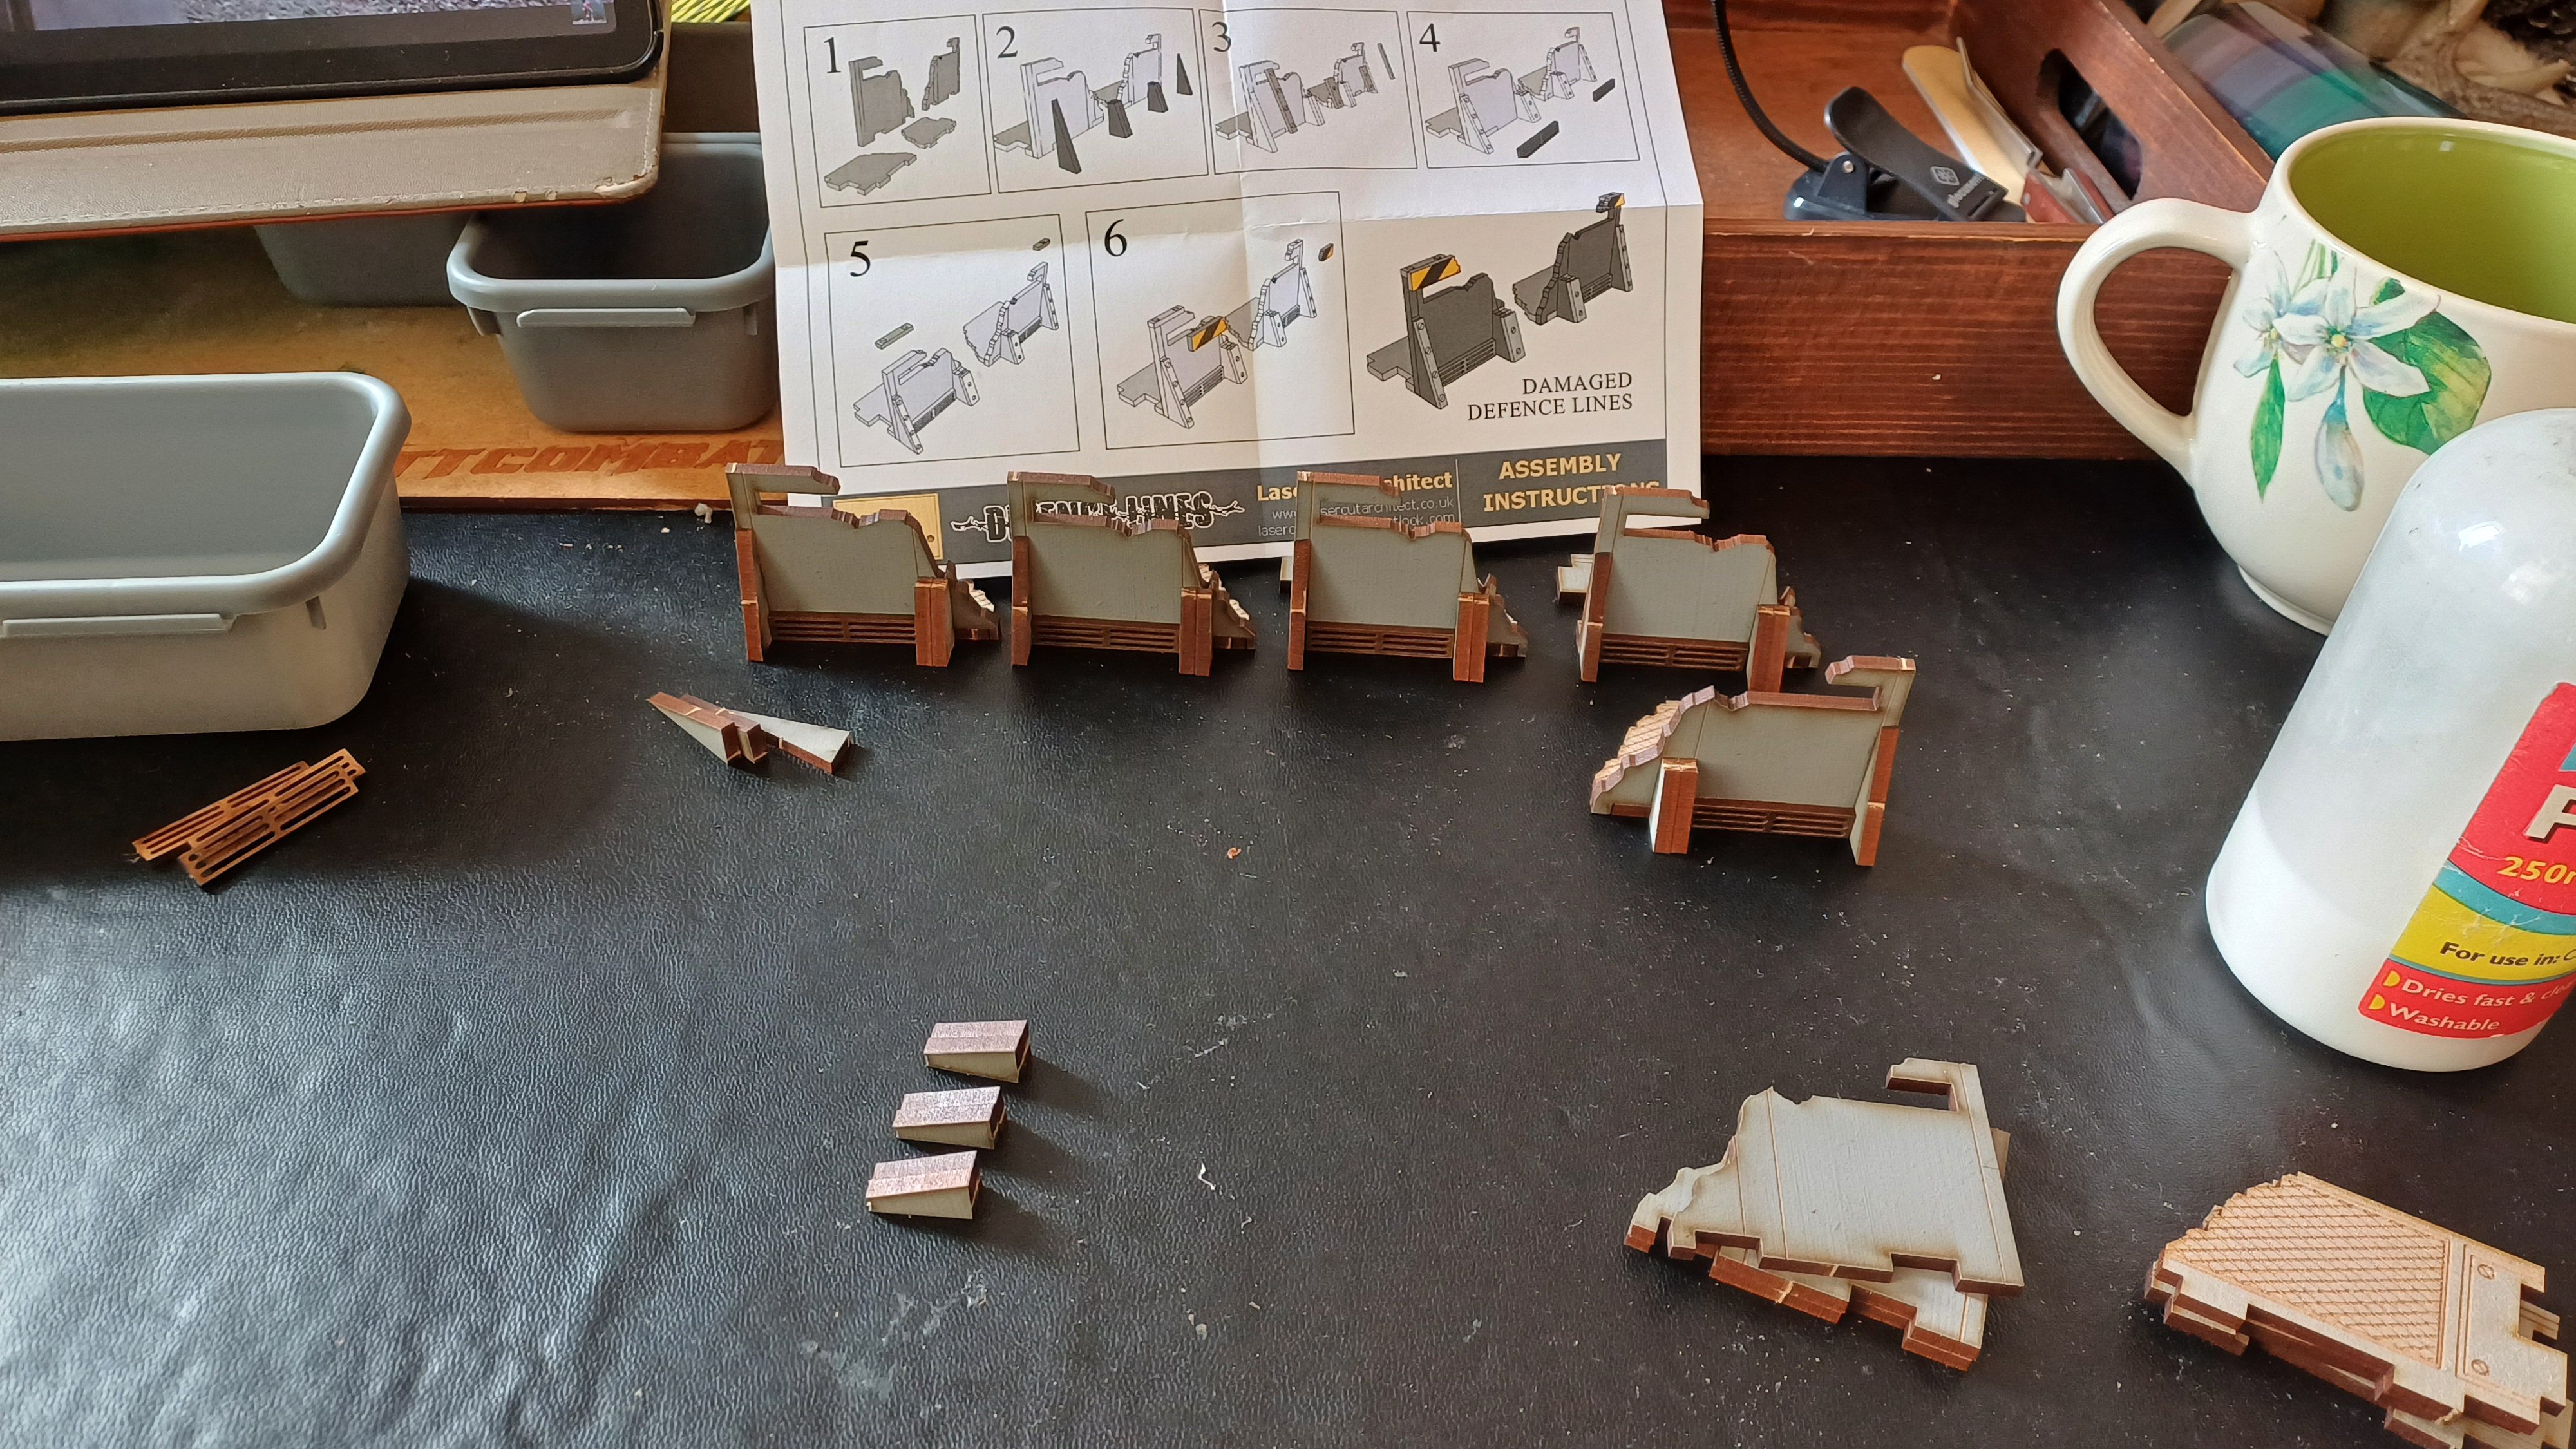
- First I plucked and cleaned ALL the pieces across the kits. This was the bit I did manage to make a start on in the week before so, rather than shift my focus from prepping the pieces to building, I just kept working through these.
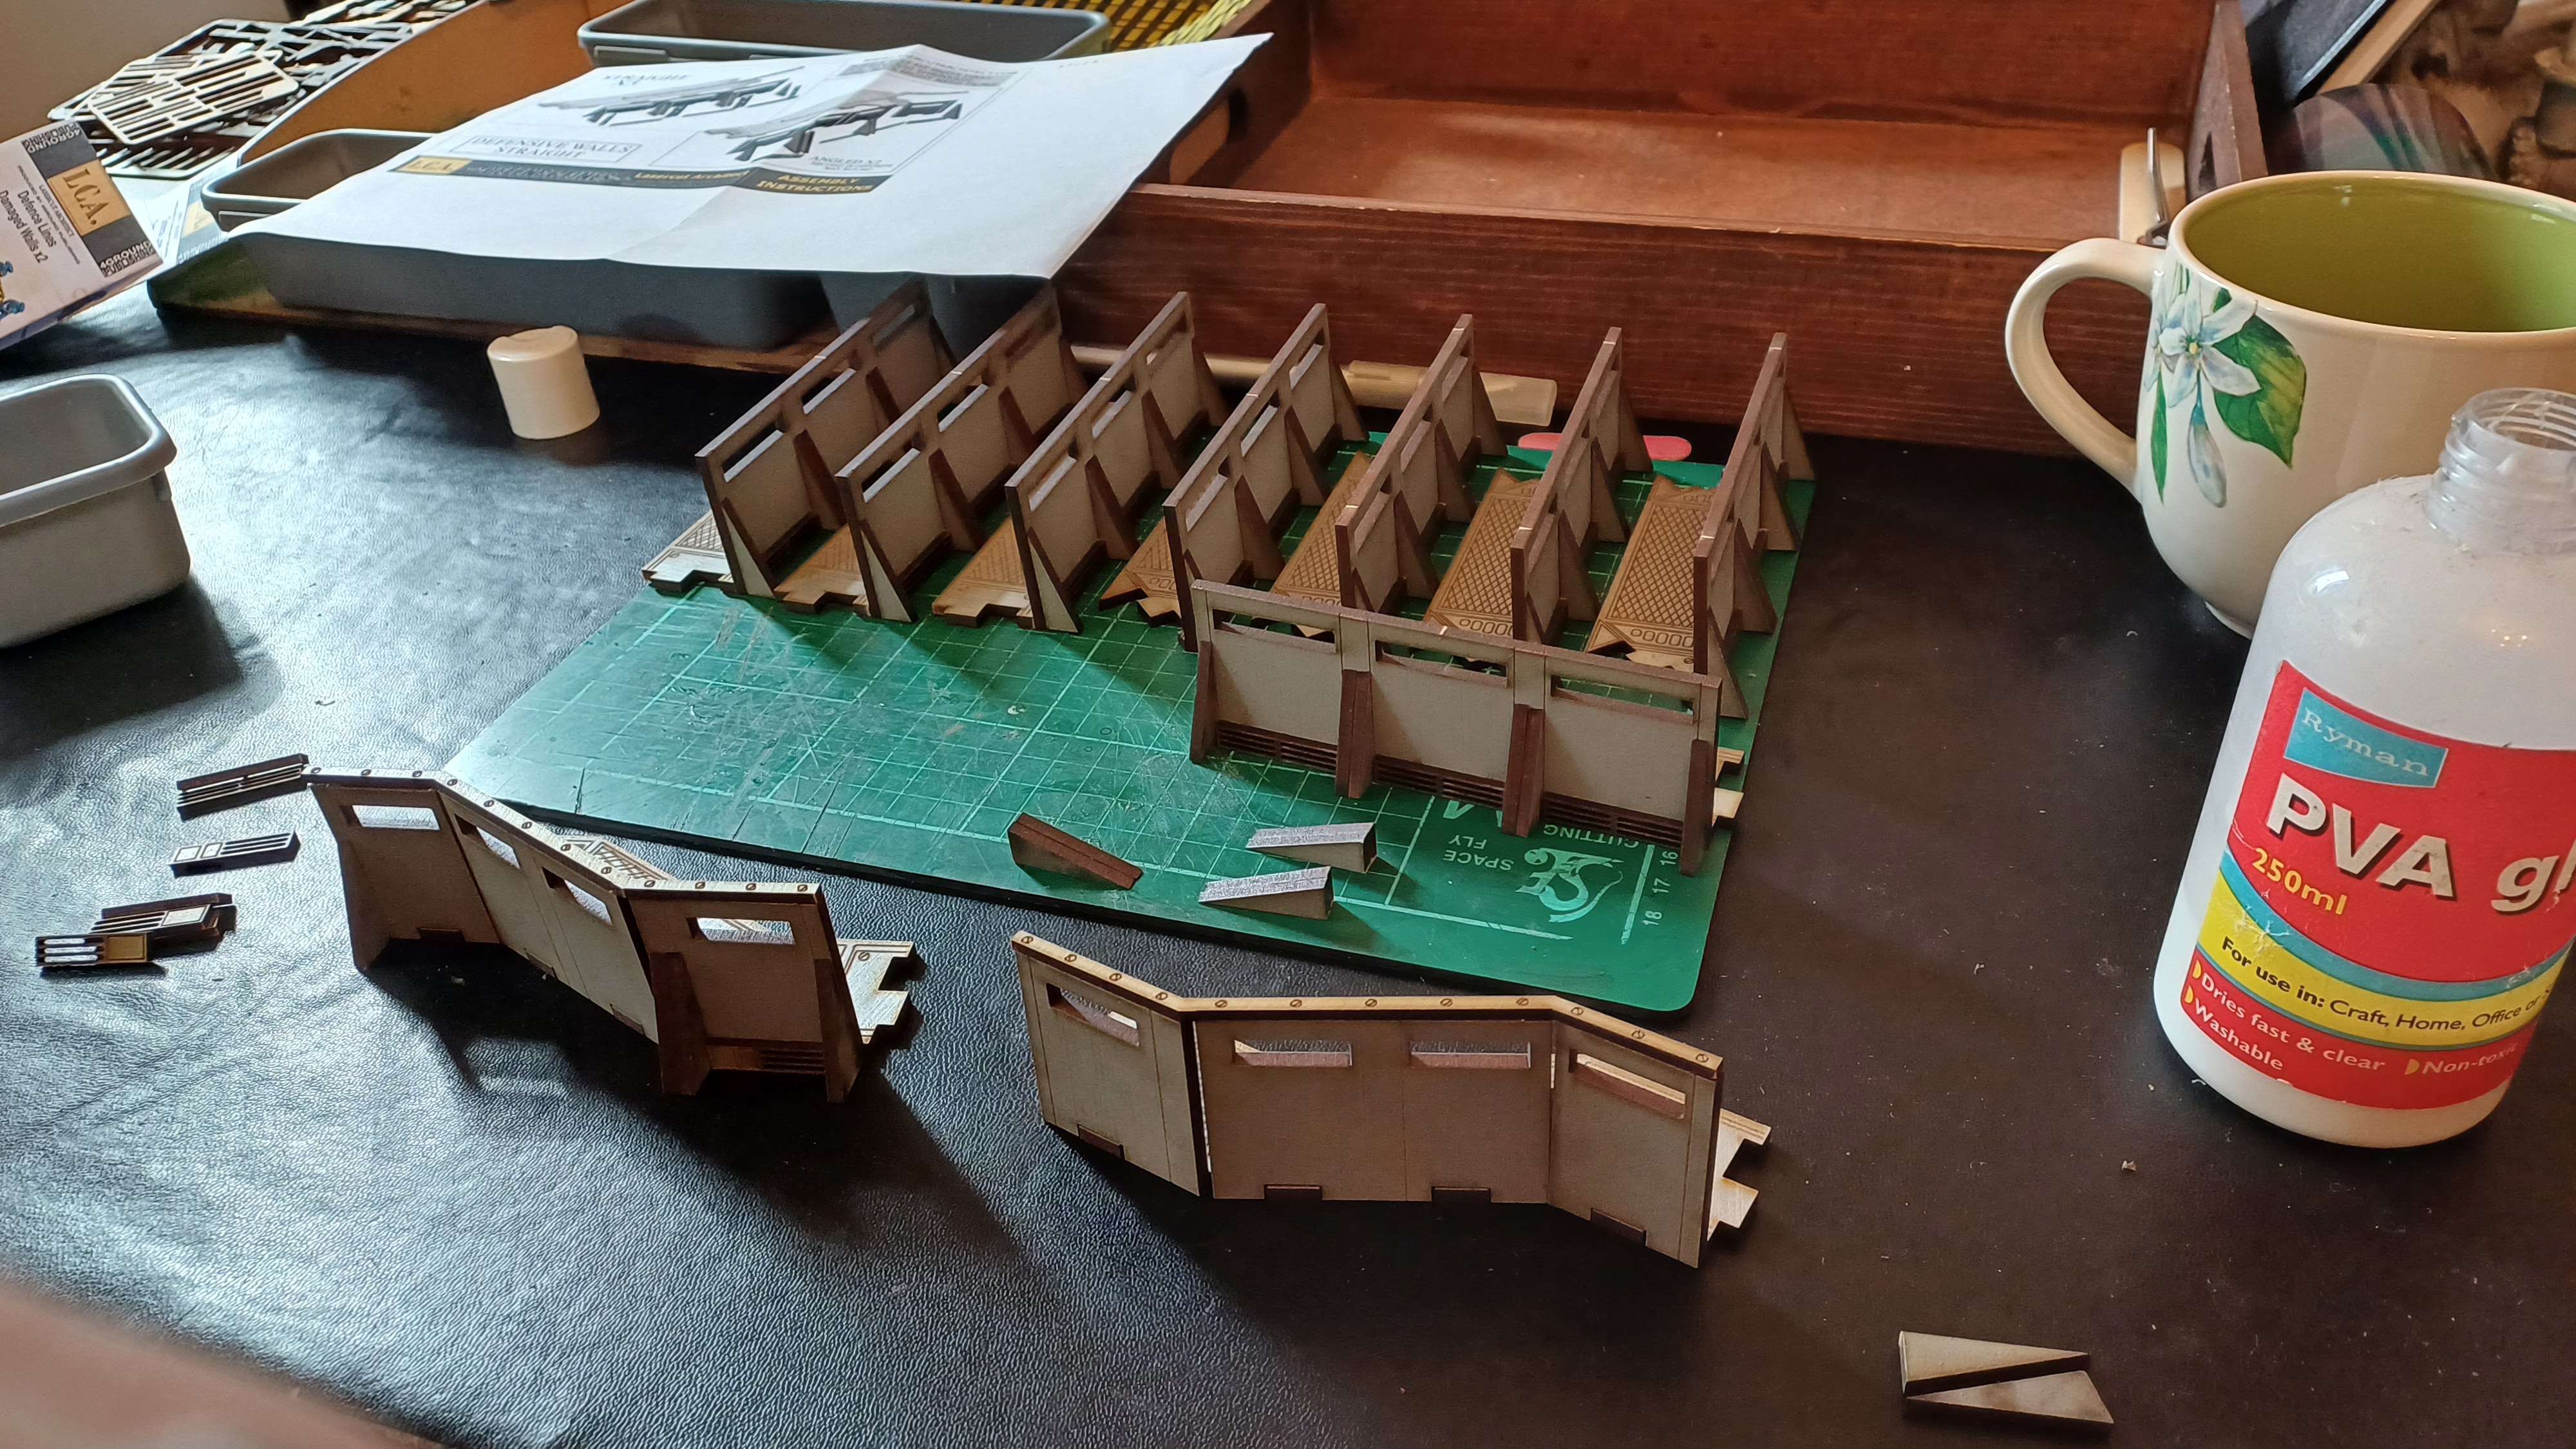
- Come Saturday I finished prepping the piece as above and made a start on the assembly itself.
First I built what I have come to think of as the structural elements of the pieces: the floor piece, the initial walls and the buttresses that help them stand. I did the larger full pieces first… - …before following on with the smaller broken end pieces.
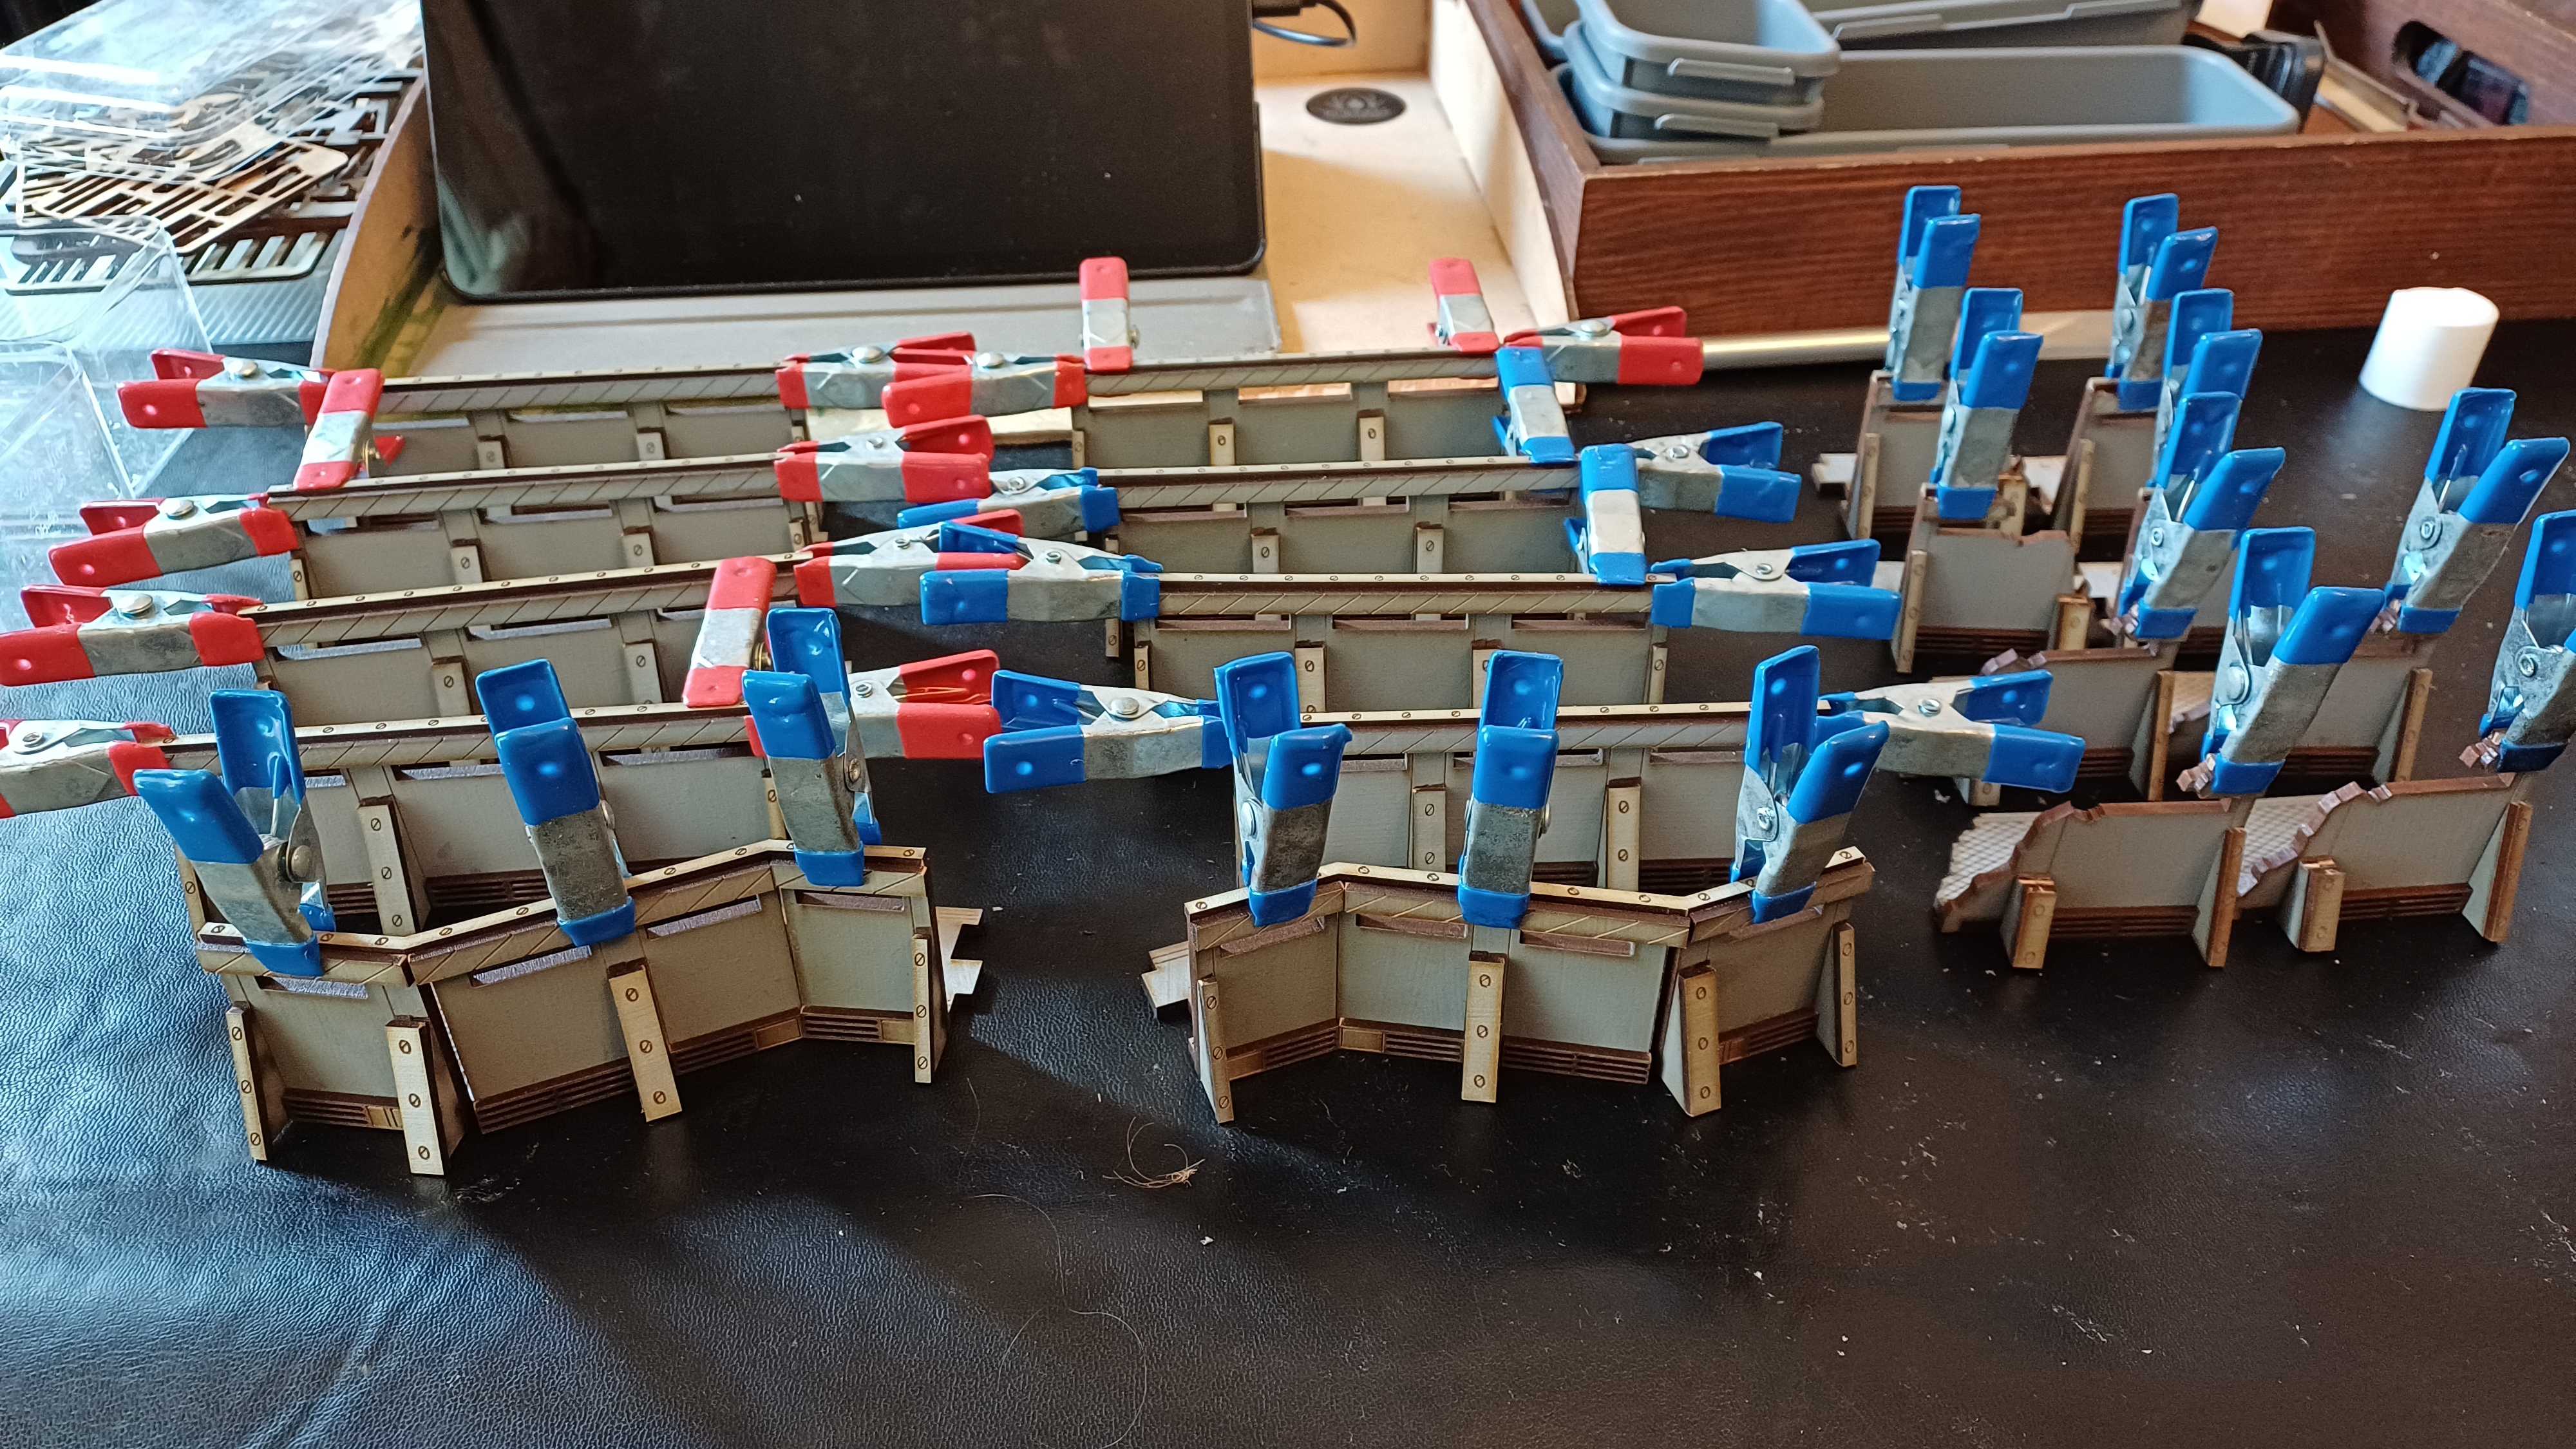
- With the structural stuff in place I began on the decorative stuff. Lots of strips with the impressions of big old screws laser cut to cover the majority of the laser cut edges.
- Next came these strips that sit above the firing slits in all the walls. They’re to be decorated later on but the relatively long and thin nature of these meant they would start curling up as they absorbed the PVA glue so this necessitated holding the, in places till everything dried in place: hence the plethora of clips.
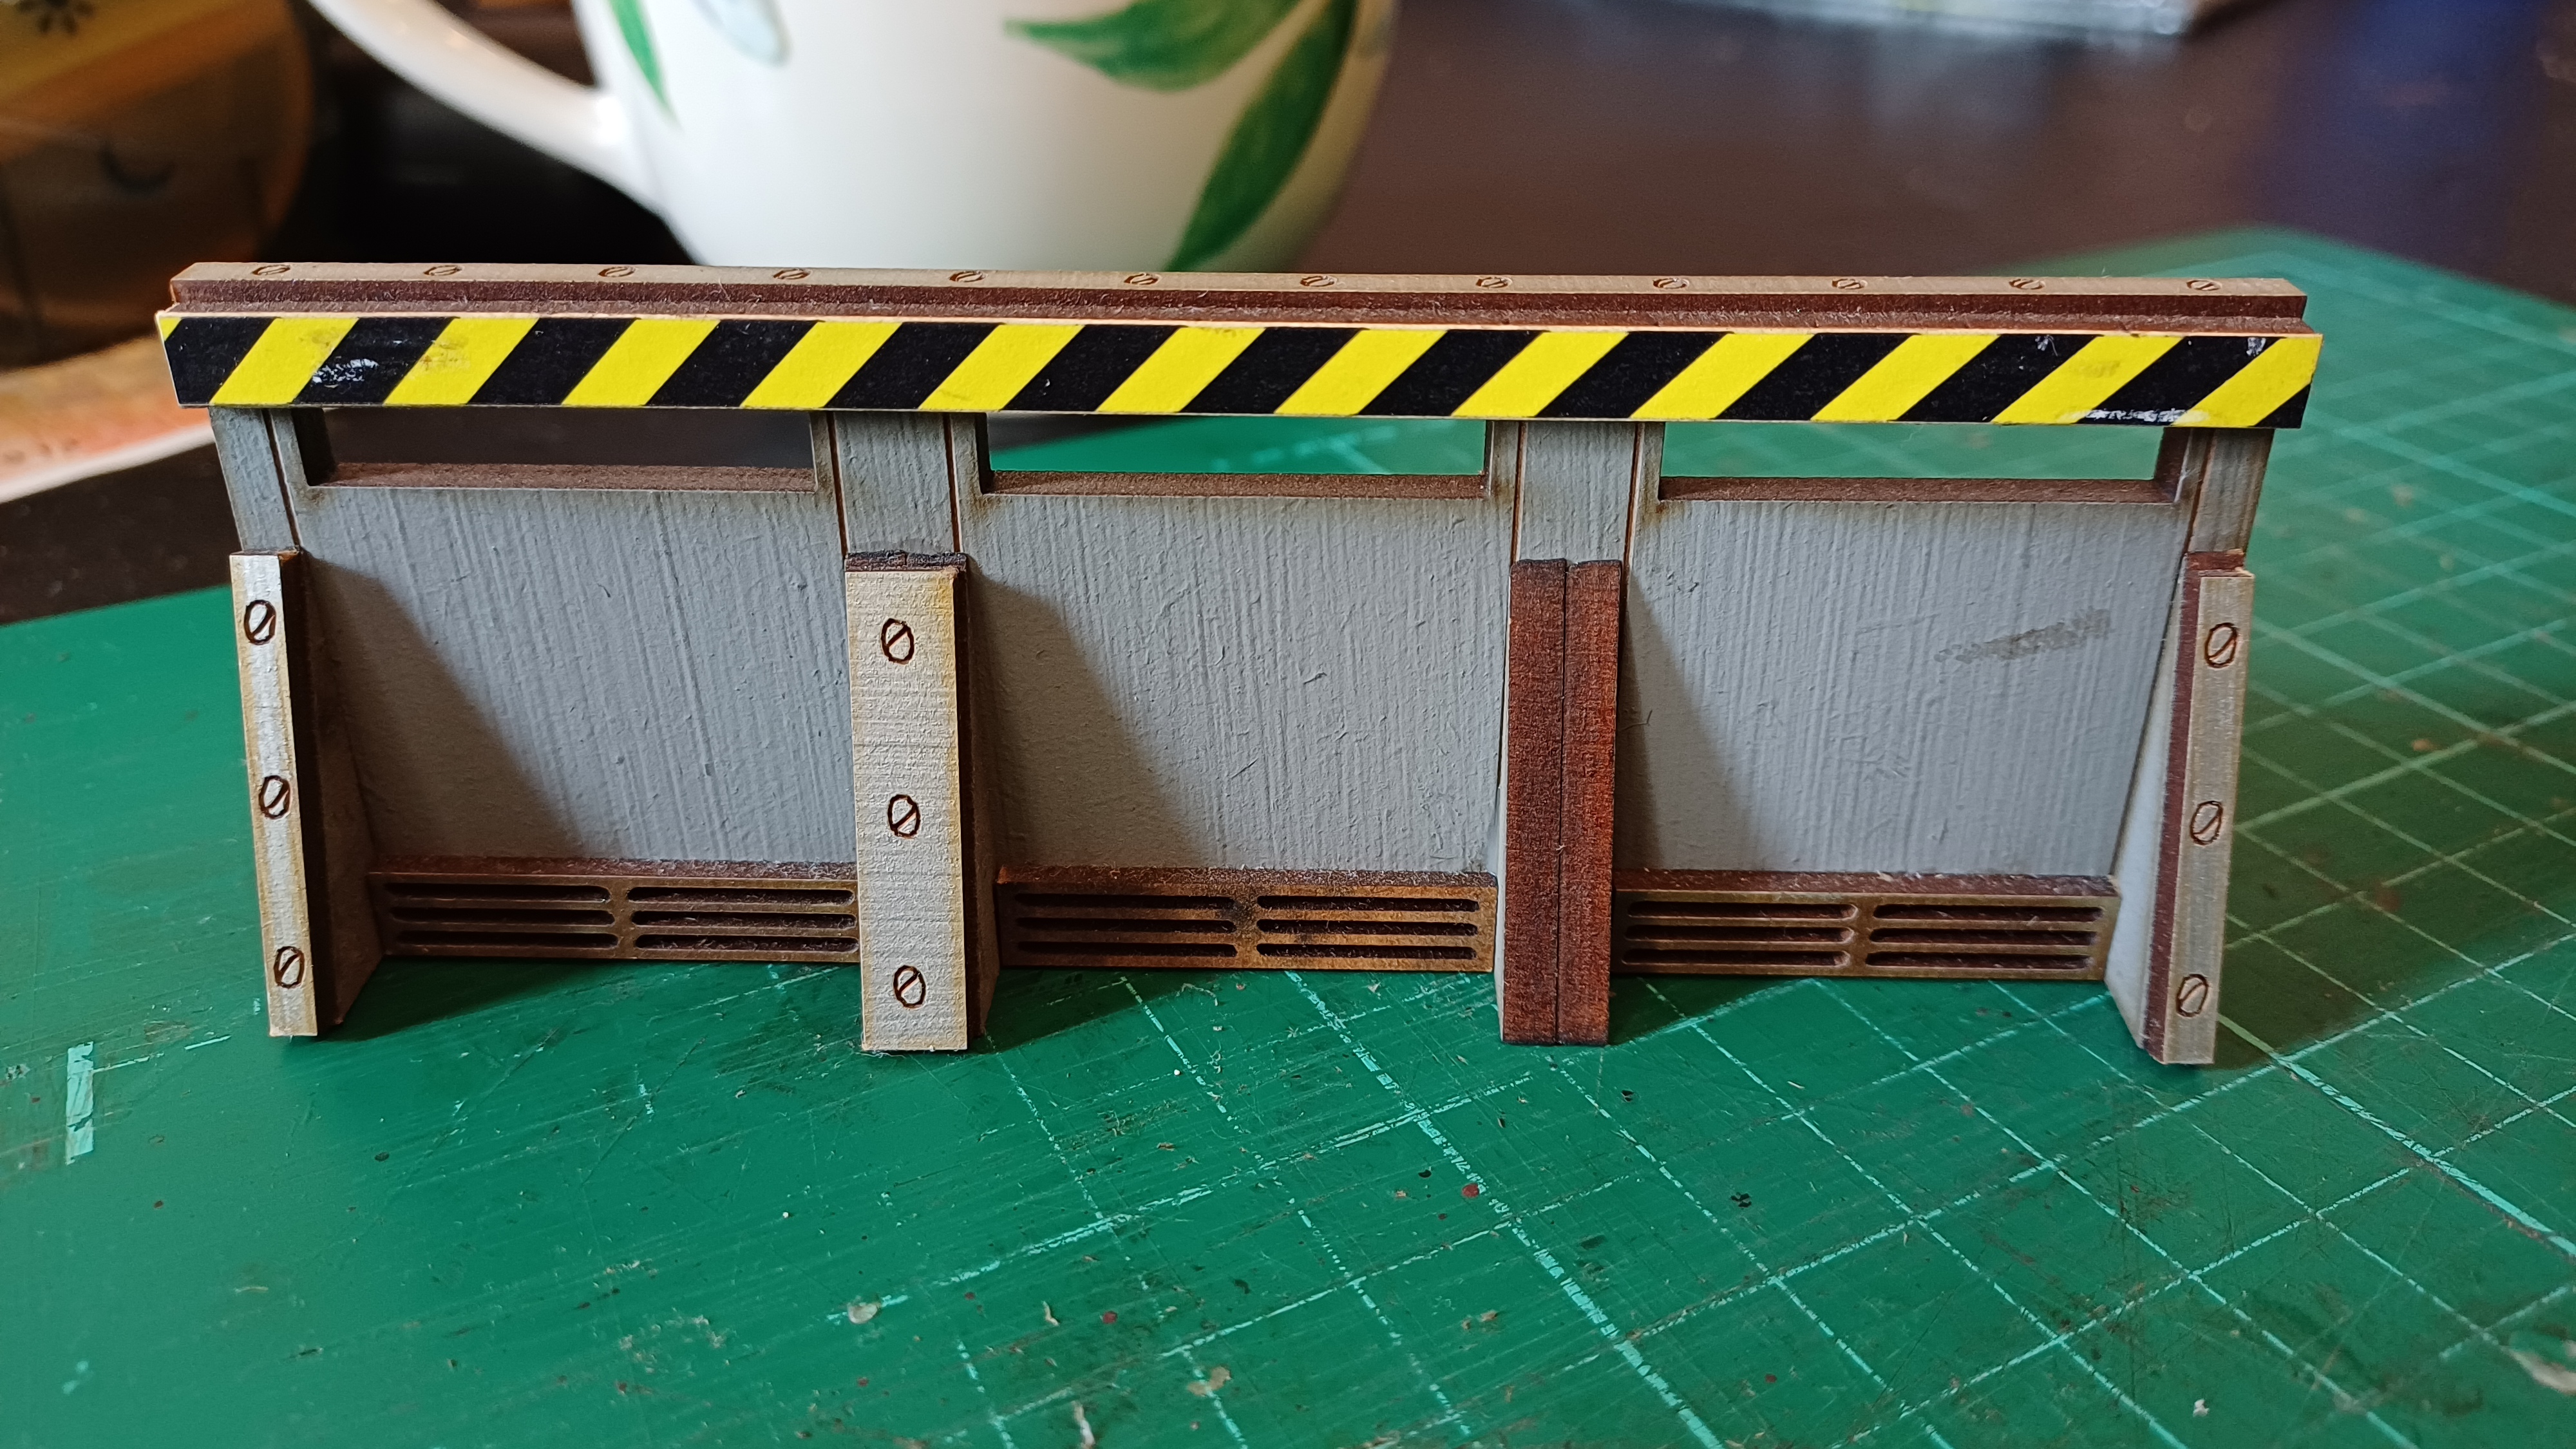
- And then came the Hazard Stripes that sit on the previous steps pieces above the firing slits. These are strips of paper cut from a patterned piece and stuck down with yet more PVA glue.
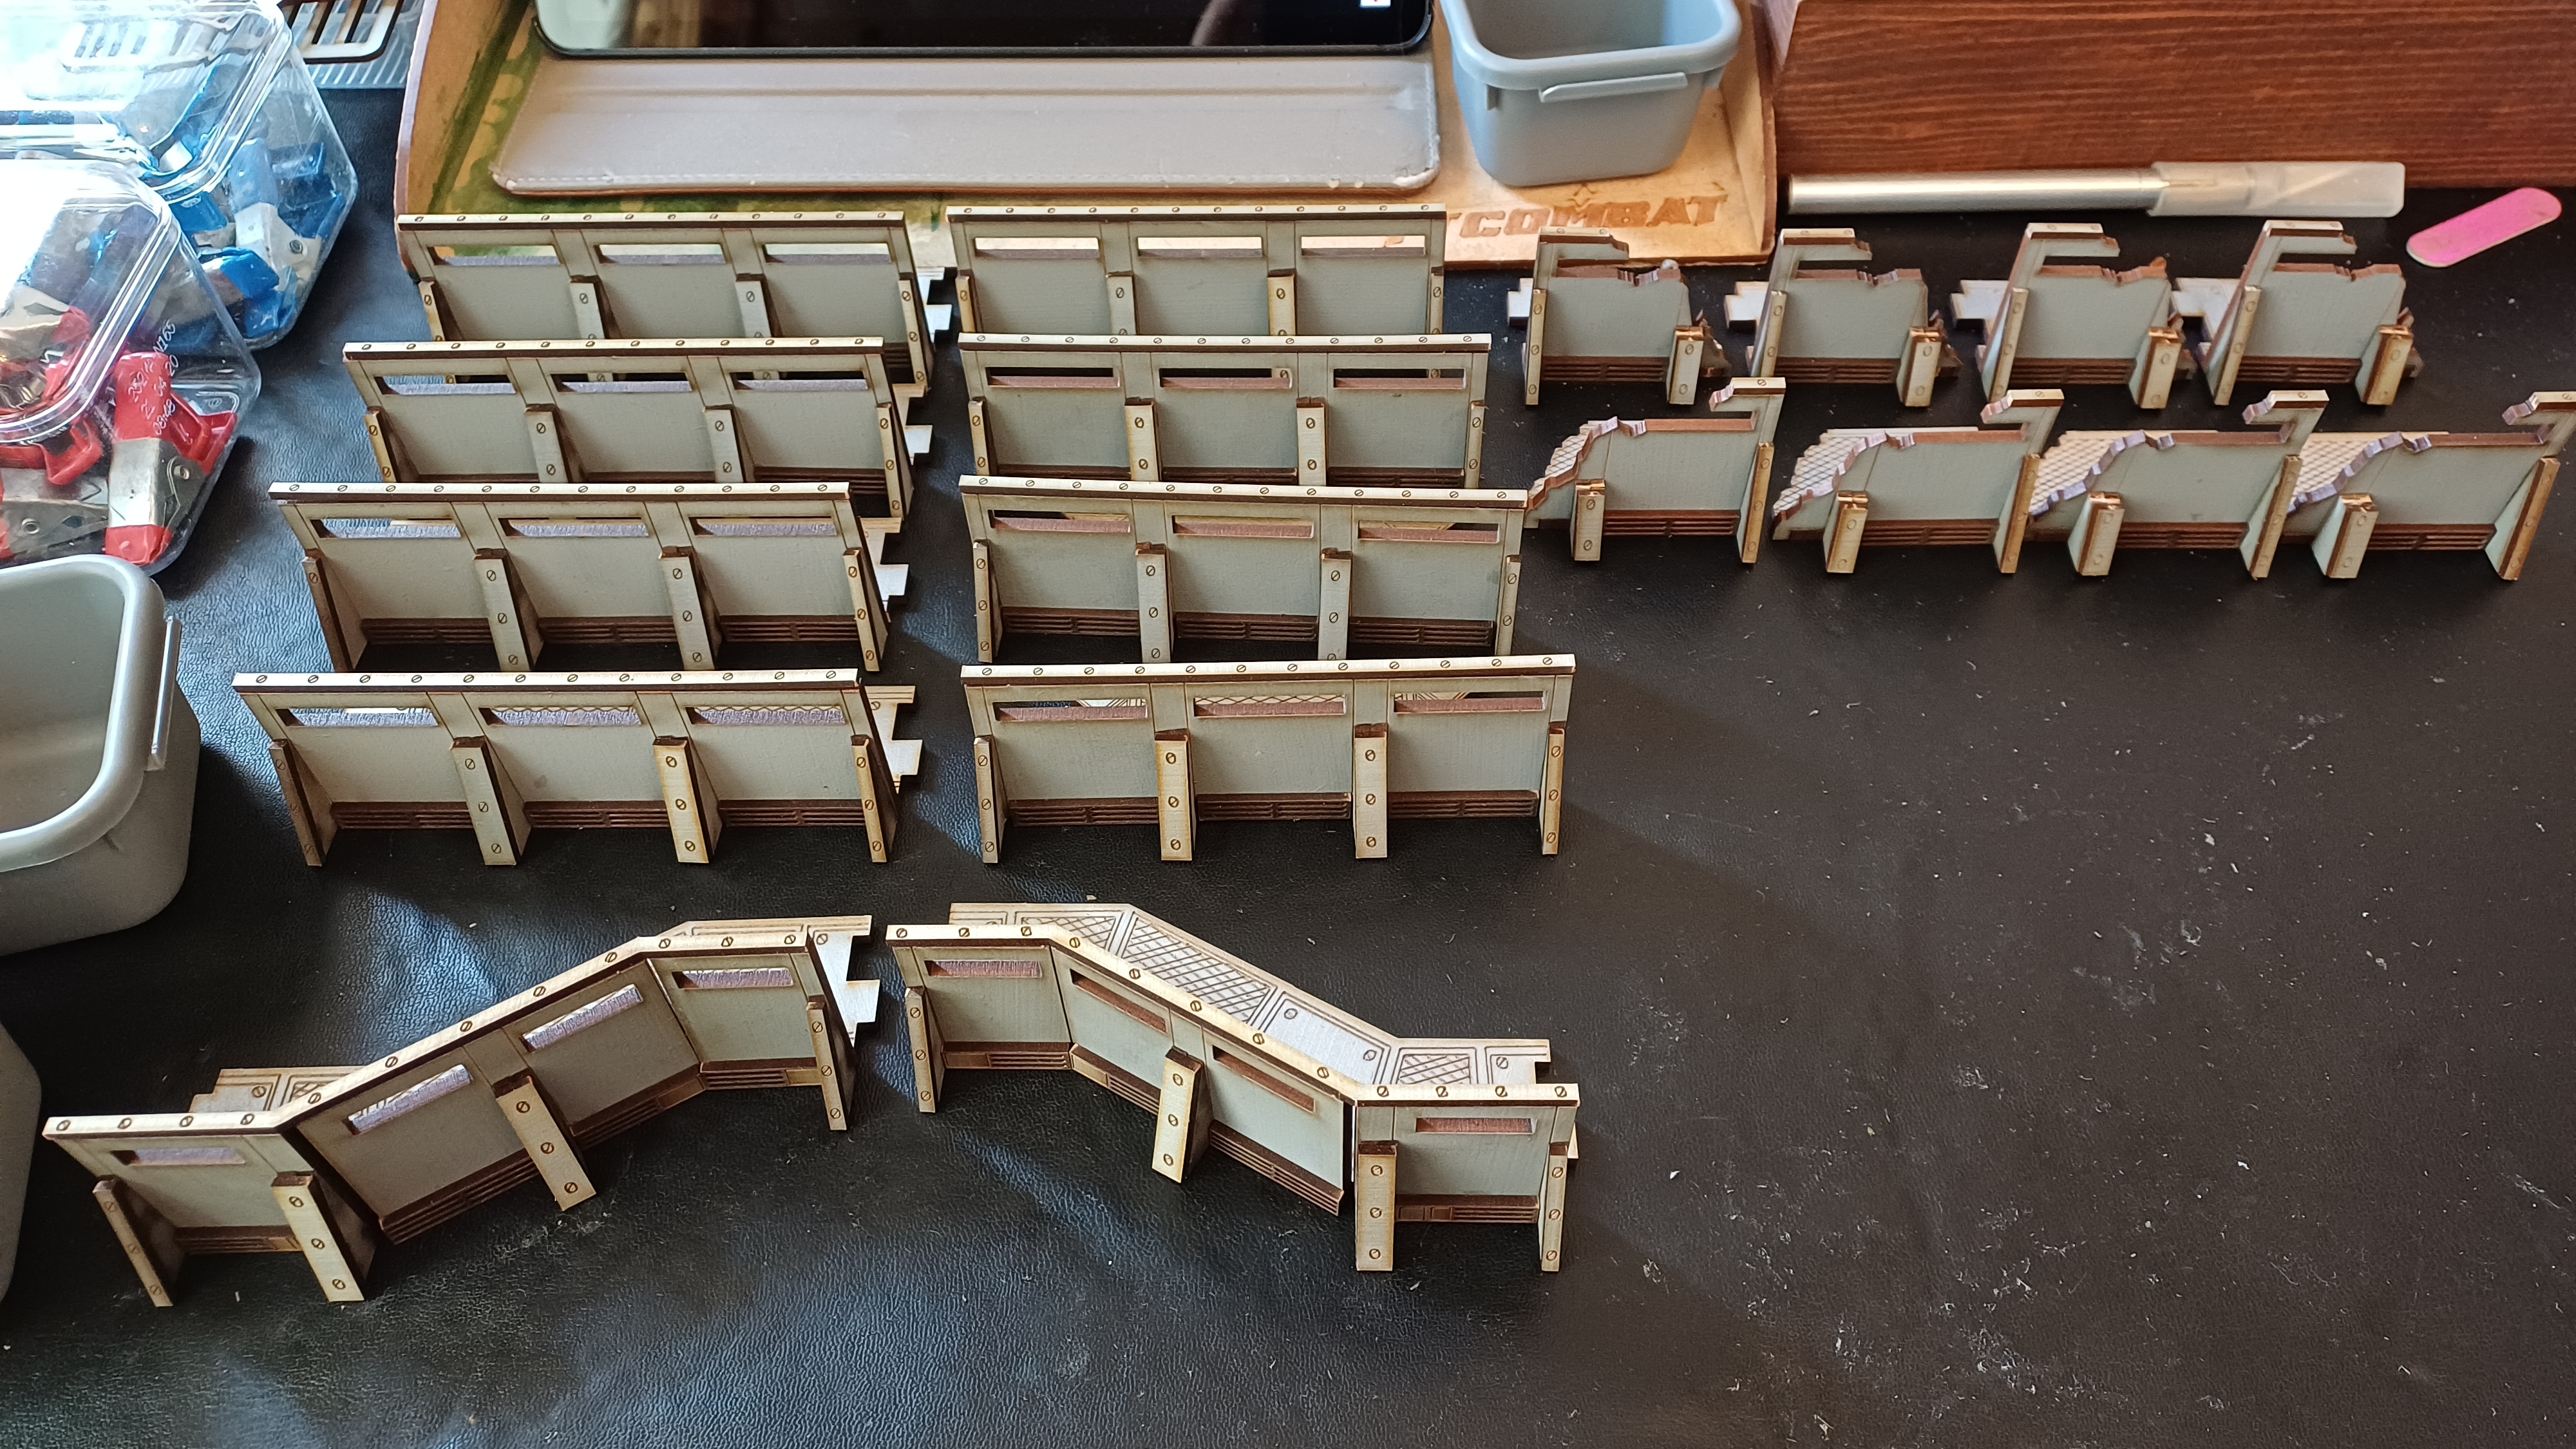
- BONUS STEP: Once upon a time, one of my existing walls lost one of it’s buttresses, never to be seen again. I didn’t have the parts to completely replace this but the new kits provided enough extra parts to replace the buttress itself if not the decoration on top of it. After dry fitting this is place I decided it looked better than it being missing completely so down it was stuck.
- And with that, everything was complete. 48 hours of gluing and drying and the new pieces where ready.
,,,and the Not So Good
 The little else that got done
As intimated above, I didn’t get nearly as much time to work on this as I had hoped.
This was for a few reasons: it’s the Easter Holidays and so the smols are off from school, work has had me putting in some extra time at the moment and I’ve started physiotherapy work the ankle I broke back at the end of December. All stuff that has taken more time that I hadn’t been expecting.
So the lesson learned is maybe chill on starting big hobby plans in the school holidays. Oh, and don’t fall down the stairs and break your ankle. Good life lessons.
It wasn’t all bad news though: I did get some progress beyond the Defence Line. I got started on the Terrace House kits I wanted to do and got the undamaged version done and some of the damaged for good measure.
Sadly, the Rohirrim remained untouched once again.
Next Post
Well it’s late, my ankle hurts from the gym and there is half a week left for the next pledge. I have some ideas around finishing up the bits and bobs that have been started and clearing the slate for a clean start next week.
I’ll be back sometime tomorrow once I have figured out what that looks like.
Week 2 - Pledge
My Pledge for Week 2: Monday 1st April 2024 – Sunday 7th April 2024
My pledge for this week is to carry on where I left off whilst adding in some more: to finish the North Western European Terrace House (Type 1) kits from 4Ground, the get those Rohan horses from last week based and to build my extensions to my L.C.A Defence Line.
Putting the horses to stable
 The Riders of Rohan's mount's to stick to their bases
If you read my Week 1 – Results post then you’ll know that I was somewhat taken aback when I found myself away last week, trying to put them together, only to discover that the pegs on the models are too small for the slots on the provided bases.
Time for some putty and a little fill in work and these should be set into the bases and done for the time being.
Continuing the 4Ground Kits
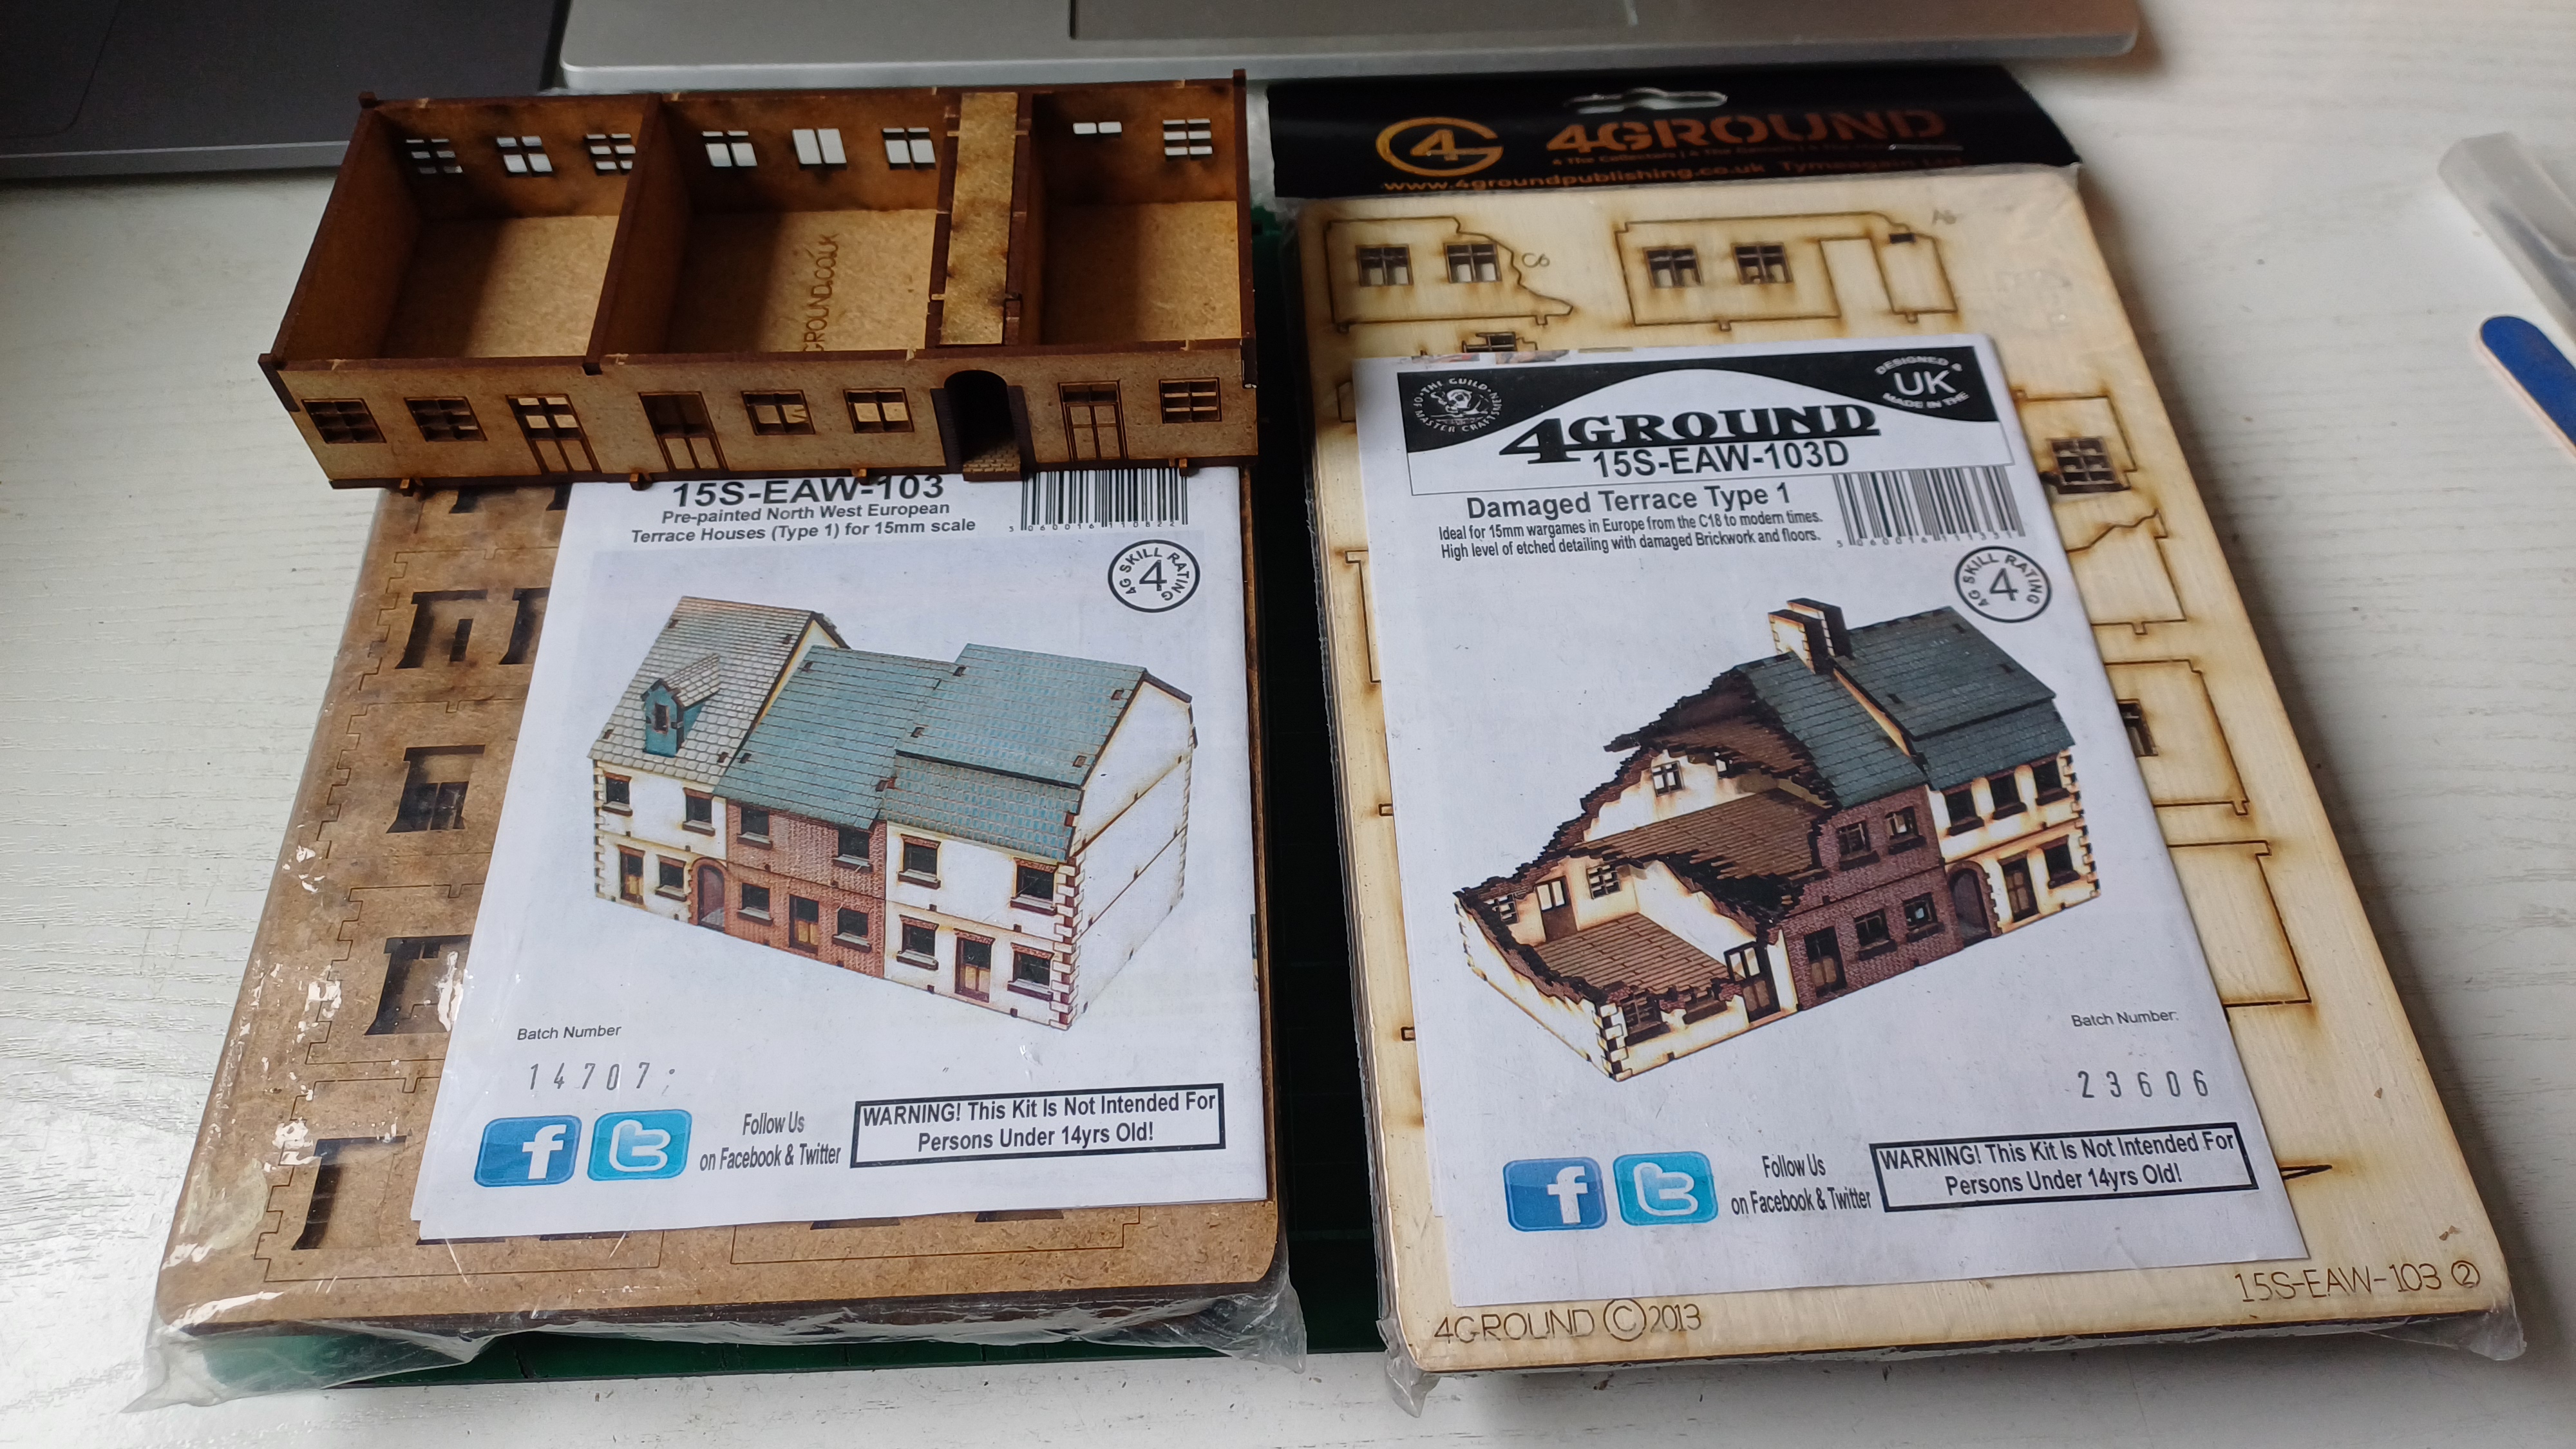 I started the set so I'll finish the set
Another set of the 15mm Terrain Kits/Railway buildings that I started on last week, I made a start on the first of it’s building and so I want to finish it over this week to join the others.
LCA Defense Lines
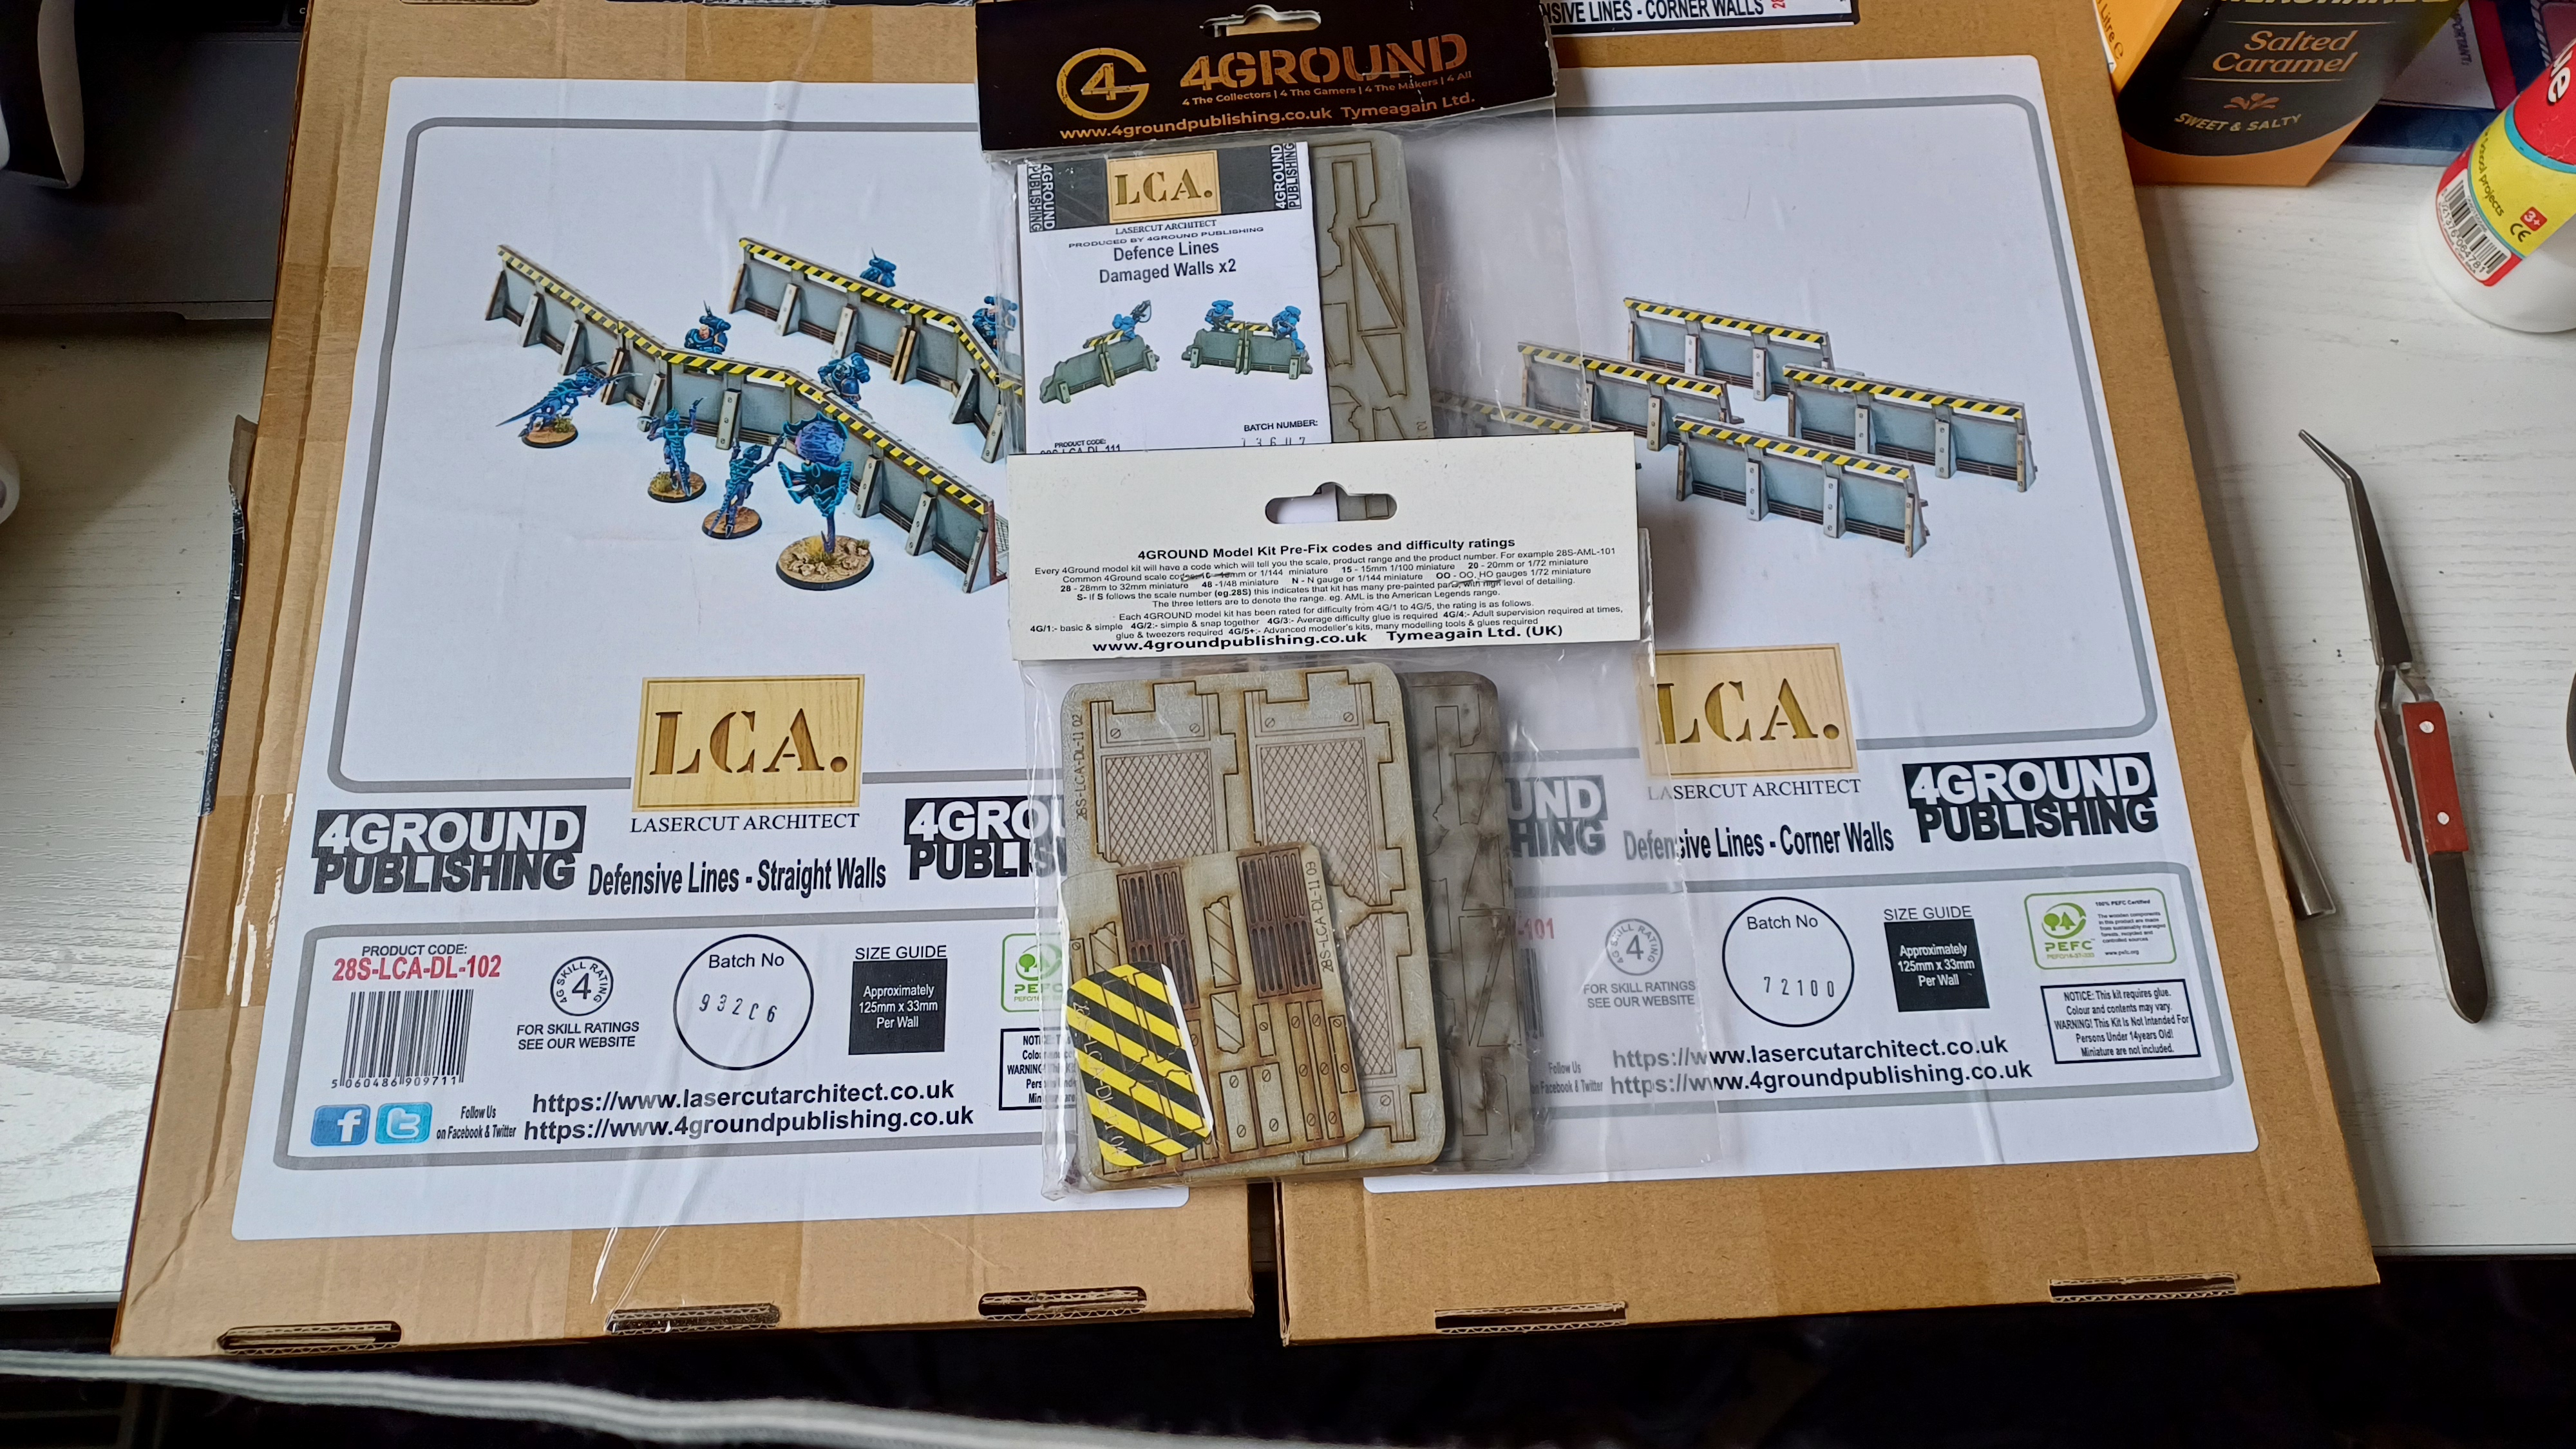 Extending the bases defences
Once upon a time I won a set of Terrain from a little known hobby website called On Table Top. Perhaps you’ve heard of it?
Jokes aside, this set from a designer known as the Laser Cut Architect was produced by 4Ground and so, when 4Ground went out of business and I was picking up kits: I also picked up some extension kits for this set at the same time.
Well, last week I dusted off the original for a game of Grimdark Future Firefight at the local: West Moor Gaming Club and I find myself inspired to get these additions built and expand the possibilities of what the set can offer us when setting up our boards.
There is a set of Corner Walls, a set of Straight Walls and couple of Broken Walls all of which I’ll be looking to get built this week.
Next Post
I’ll be back at the end of this week/the beginning of next to report how this week went and to make another pledge.
Until then.
Week 1 - Results
Time to look back and see how this week went.
In short, this was a bit of a mixed bag but having more stuff done than at the beginning of the week was always the point. I’m not of a mind to consider any progress a failure but rather to use these reflections to consider the measure of success.
Let us start with the Rohirrim Battleforce and what I have come to call the “What… what?” moment.
Rohirrim Results or "How Did This Get Past Quality Control?"
I’ll not dwell on this one too much as it was something of a sideshow to the theme of the project but I did run into one complication I haven’t been able to solve just yet worth noting: holes.
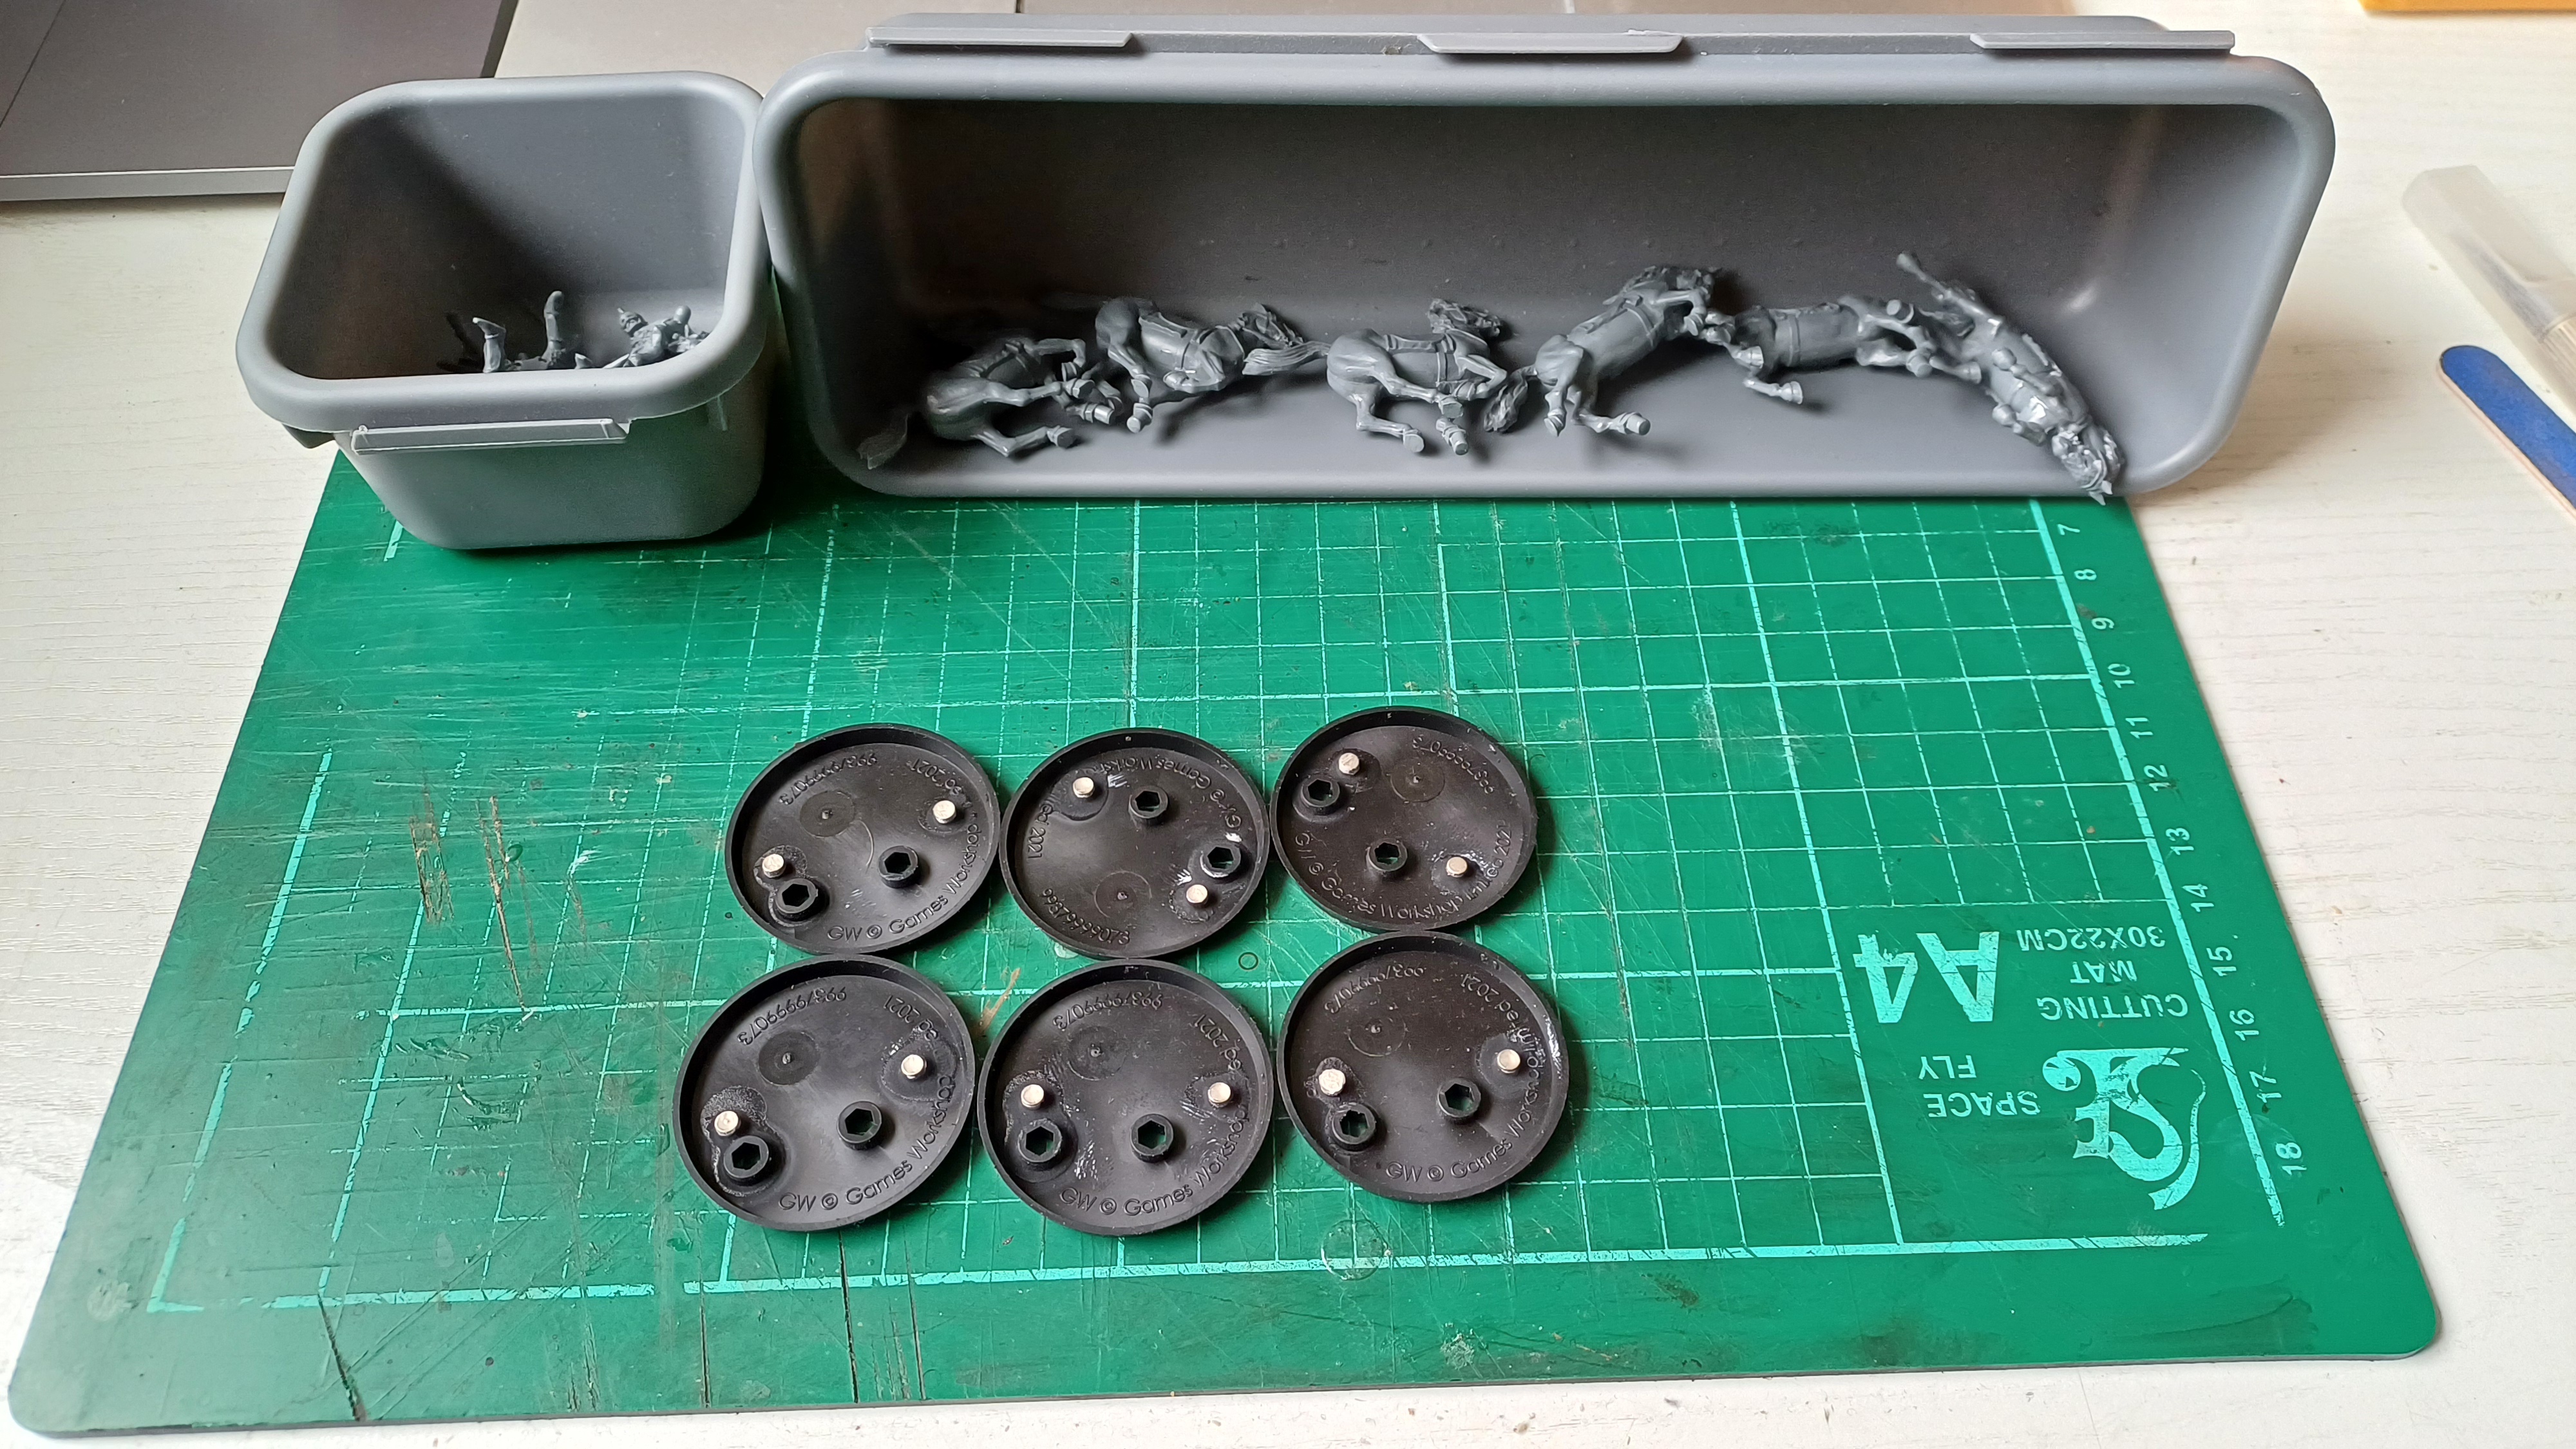
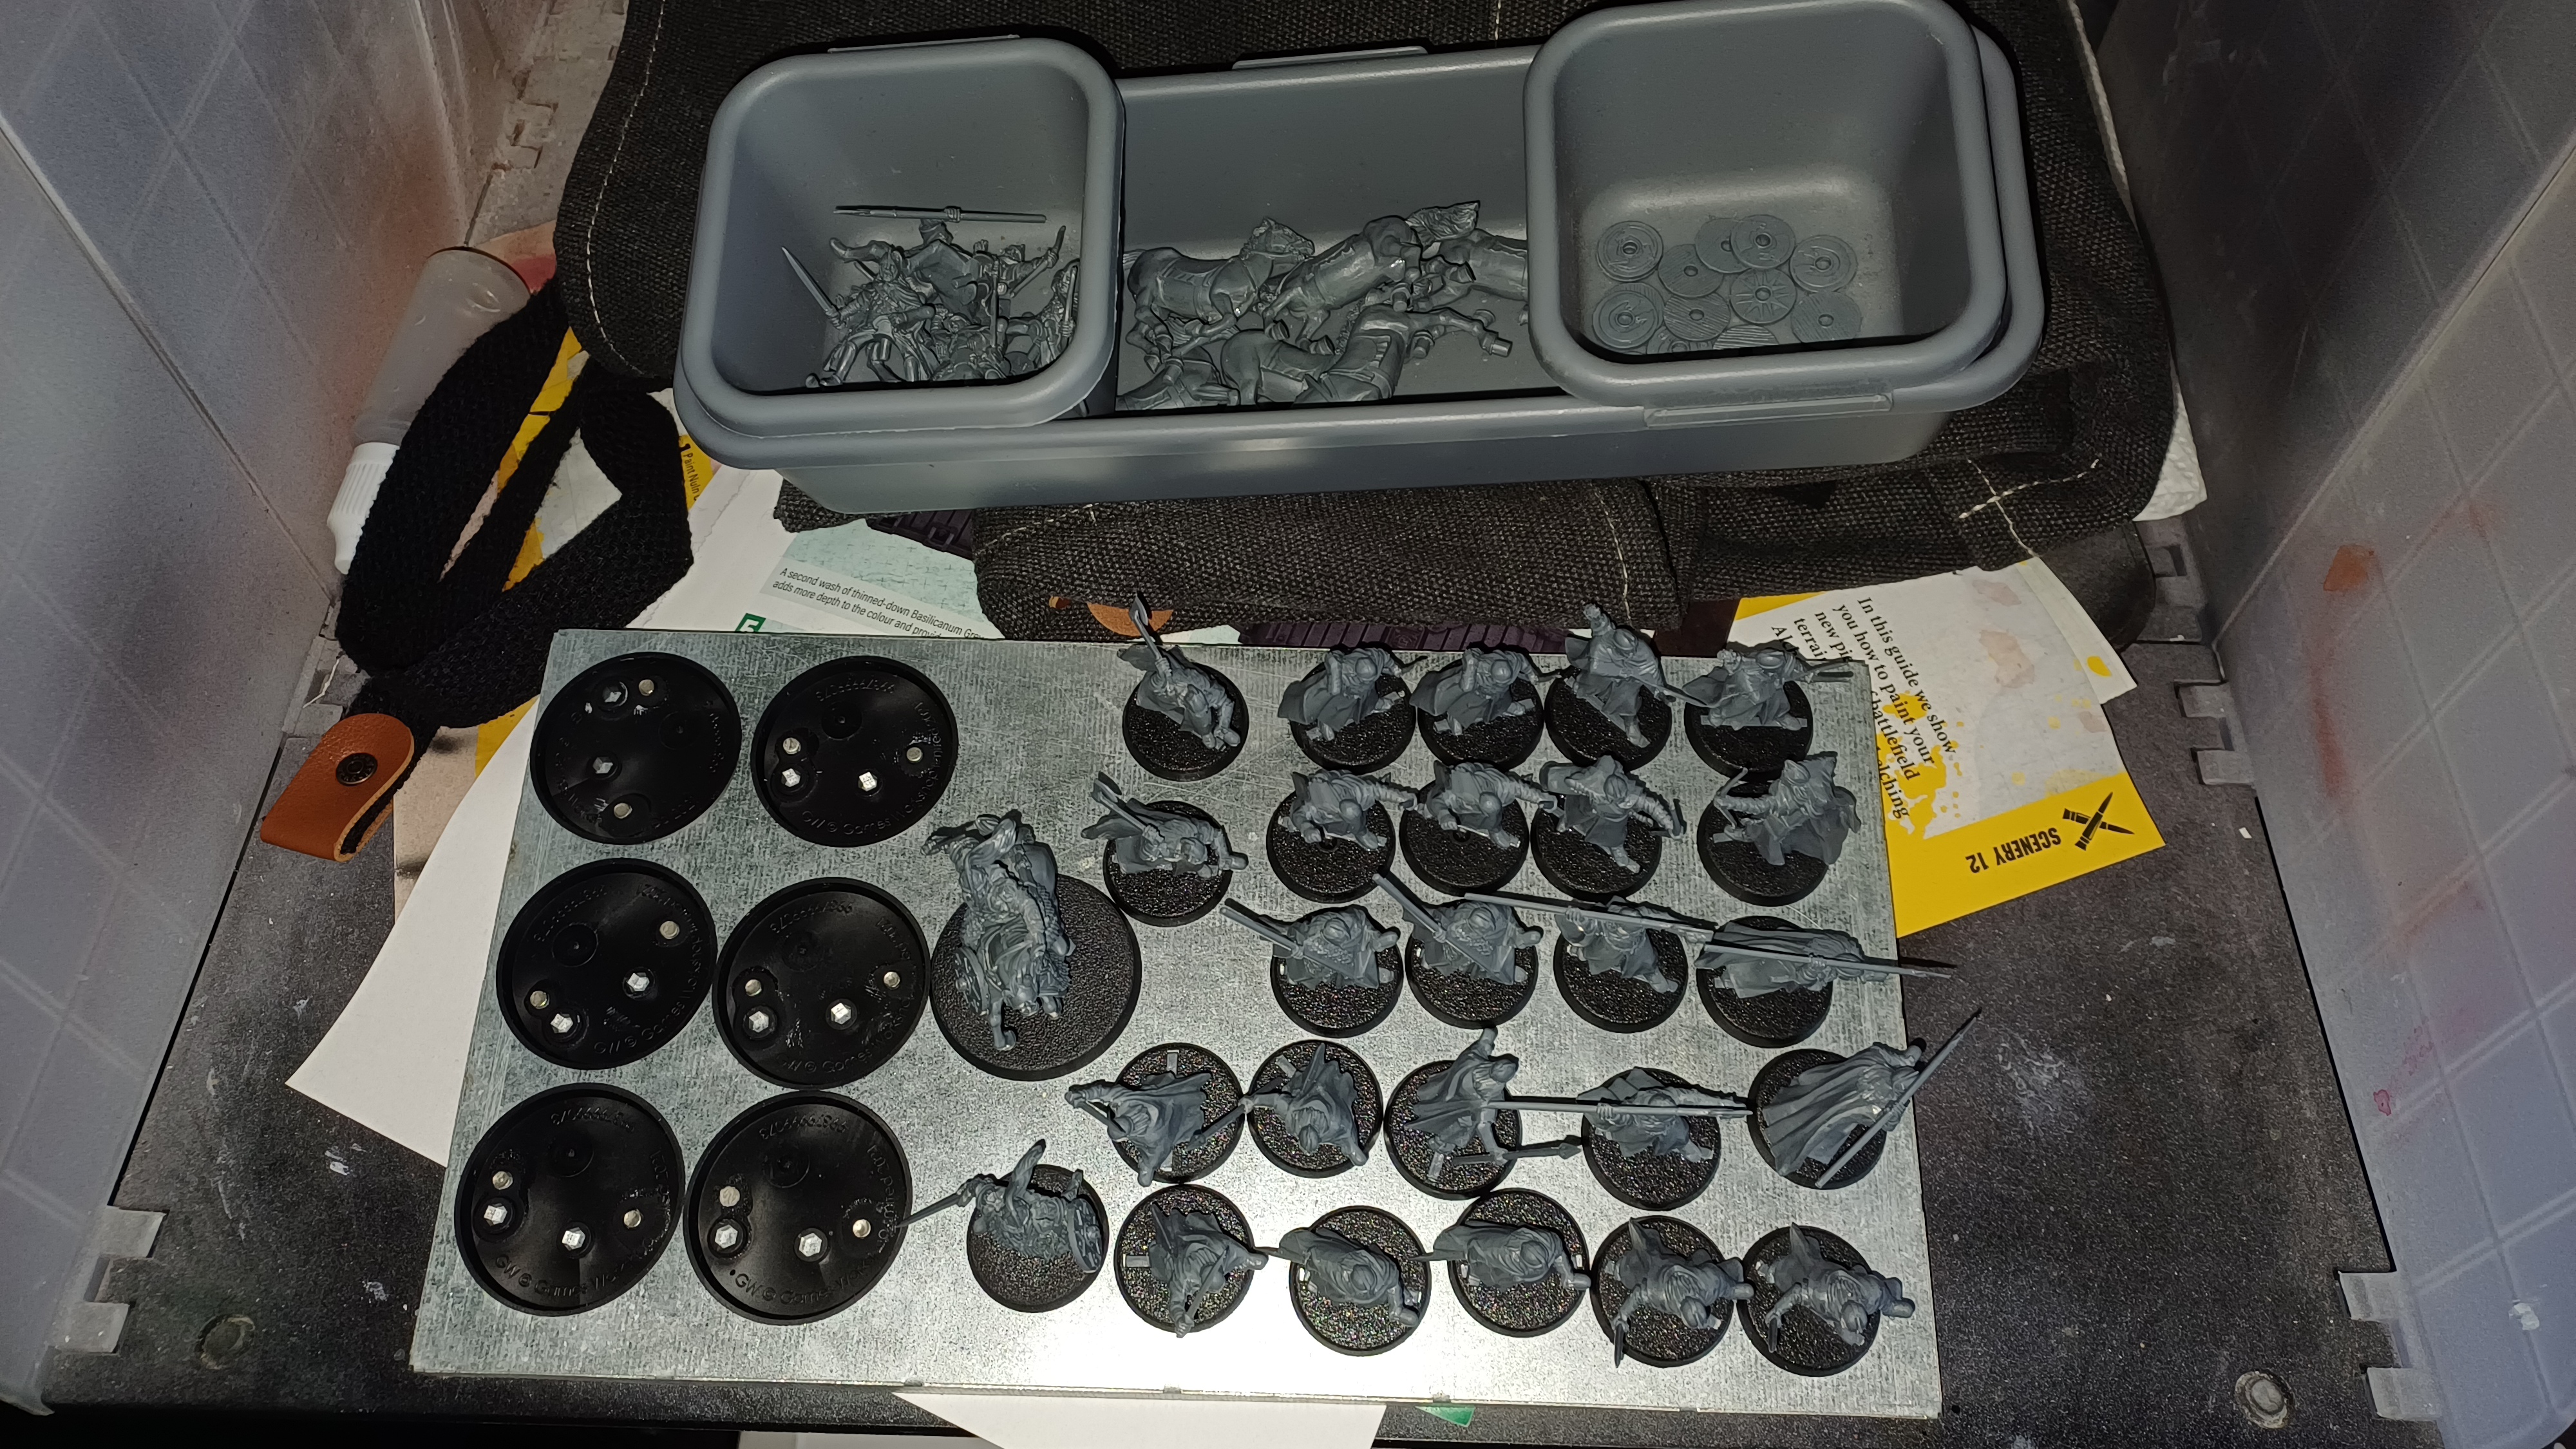
Below on the left is a snapshot of the set as it is now. I magnetised all of the bases without much fuss and got them in place for their respective models to be mounted. Down the right of the plate are the Warriors loosely grouped by weapons and next to these is Éomer (on foot in front and mounted behind). Nothing much exciting here unless you want to see these models in detail but that’s another project.
But to the left we find six magnetised bases without models and pots of horses and riders above it all.
So what went wrong?
So, if you turn your attention to the second image below, you will see a photo of the peg on the horse’s hooves to be inserted into the holes on these bases as seen through said hole. Spend a moment more looking and you may see the gap surrounding said peg even though it is inserted into said hole…
Yep, the pegs are significantly smaller than the hole intended for them to insert… This was the “Wait… what?” moment.
I have no idea why as these “cavalry” bases are the same as the one supplied for the mounted Éomer and his model fits in perfectly (in fact, the one if the image isn’t even glued in, I left it loose to pop out again and make painting it easier) but for some reason the Riders just don’t fit their supplied bases.
Sadly, I have been away much of this past week and though I packed up my old kit bag and took my hobby around with me: I did not foresee needing to fill any gaping gaps and had none of the usual go to fillers for this.
All this needs is something like some green stuff or some Milliput to get them all set in there but alas, it’ll be next week before I am back in my hobby space with access to these so finishing this job off is going to have to wait till then.

Breaking ground on the 4Ground kits
I made some decent headway on these having dedicated most of my hobby time to these over the Rohirrim above.
Though there were some ups and downs to these as I got into the zone on how best to work with these models and the 4Ground style of kits by the time I was worked through a few of them.
Things started out simply enough as I began with kit 101, a relatively simple Apartment block . I followed the instructions verbatim on this one and, though it took a fair while, it came together without much fuss.
Then I moved on to its Damaged version and the problems began to emerge.
Firstly, one of the challenges of the Damaged buildings proved to the fact that almost none of the floors of the building are a complete four side rectangle due to all the gaps where the damage occurs. This made it very difficult to put even sided pressure on the pieces as they set to keep everything together as the glue dried enough to keep everything where it needed to be.
This led to all sorts of problems with pieces popping loose when only half dried and things not quite setting in the right place or connecting surfaces tearing.
And all of this coming apart and trying to get things put back together caused all sort of damage to the facing pieces (most of these kits come down to a simple inner layer that gives the structure and an outer layer that has the coloured and textured presentation layer but the outer most of these are a thin layer on top of the mdf making it prone to pieces breaking loose and peeling away if too much pressure is applied).
All in all… this Damaged building is a bit of a mess if I look closely at it (good job its meant to be damaged already I guess) and is likely going to be at the back of any setup its used for in the future but if nothing else it taught me some important lessons.
Namely
- Sometimes, ignore the instructions: build the inner first and let it dry fully. Then the decorative outer can be applied on top of this solid base. Any additional details can wait till this is dry as well so things don’t shift when they are partially dry.
- Break sequence and work on all floors of the building in parallel, when one step of a floor is drying work on the same step of the next floor. That way, when that step for the last floor is done, the first floor is dry and ready for the next step.
- Place the “sprues” flat on a cutting mat and cut out the pieces from the back. This sandwiches any decorative layers against the matt and massively reduces bits chipping off those thin outermost layers.
- Reinforce the arches of the roof with a piece of wood. These are very thin and potentially under a lot of pressure so I used the sticks included on a lot of the “sprues” (ostensibly to help poke the other pieces out but I found using the blunt edges of my other tools equally effective so I repurposed them here).
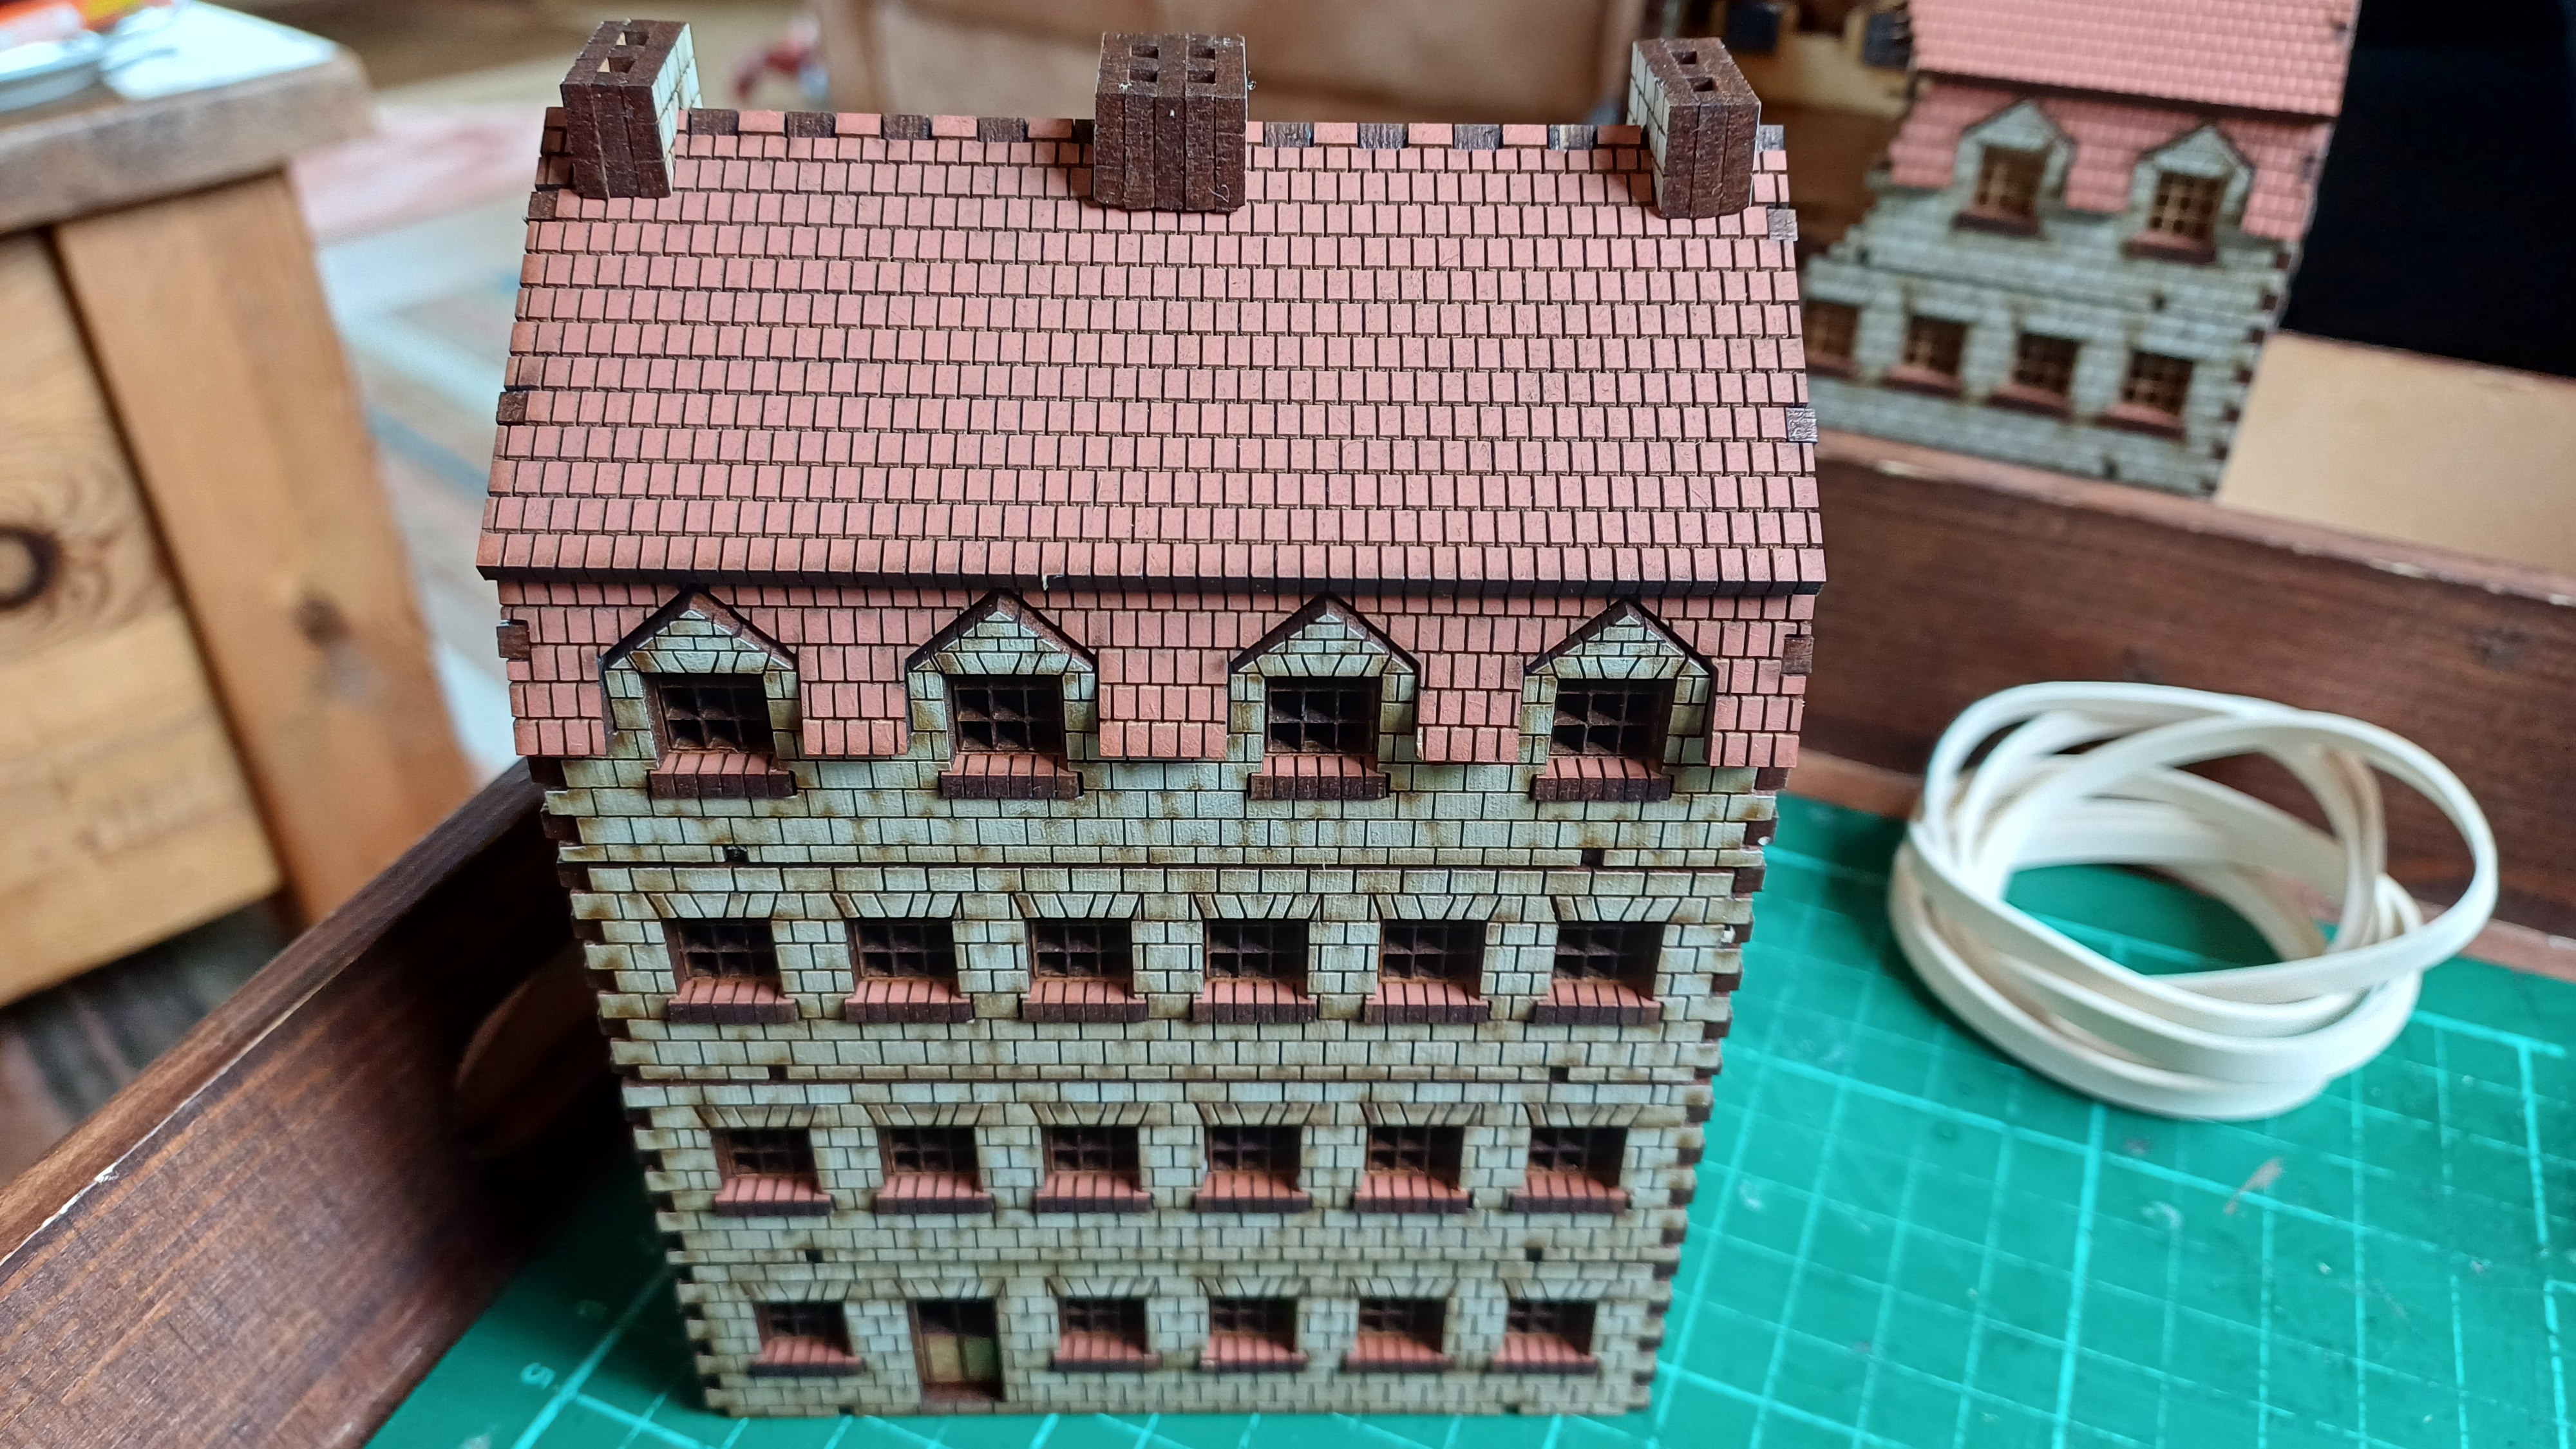
These steps were refined over the course of my third build and by the fourth, I had them down to a science. This has both made the builds themselves somewhat faster but also resulted in cleaner and better looking results. See the gallery below for a set of snapshots of working through these steps as I built the 102 North Western European Ashlar Bank/Apartments in the following steps.
- Built all the inner walls of every floor (even when the instructions began to the outer walls).
- Attach the outer walls to add the outer colour/texture
- Build the roof and reinforce it.
- Add all of the window sills/windows as the kit requires.
- A comparison of 102 and 102D which I managed to build both of in about the time took me to build 101D having got this process down,
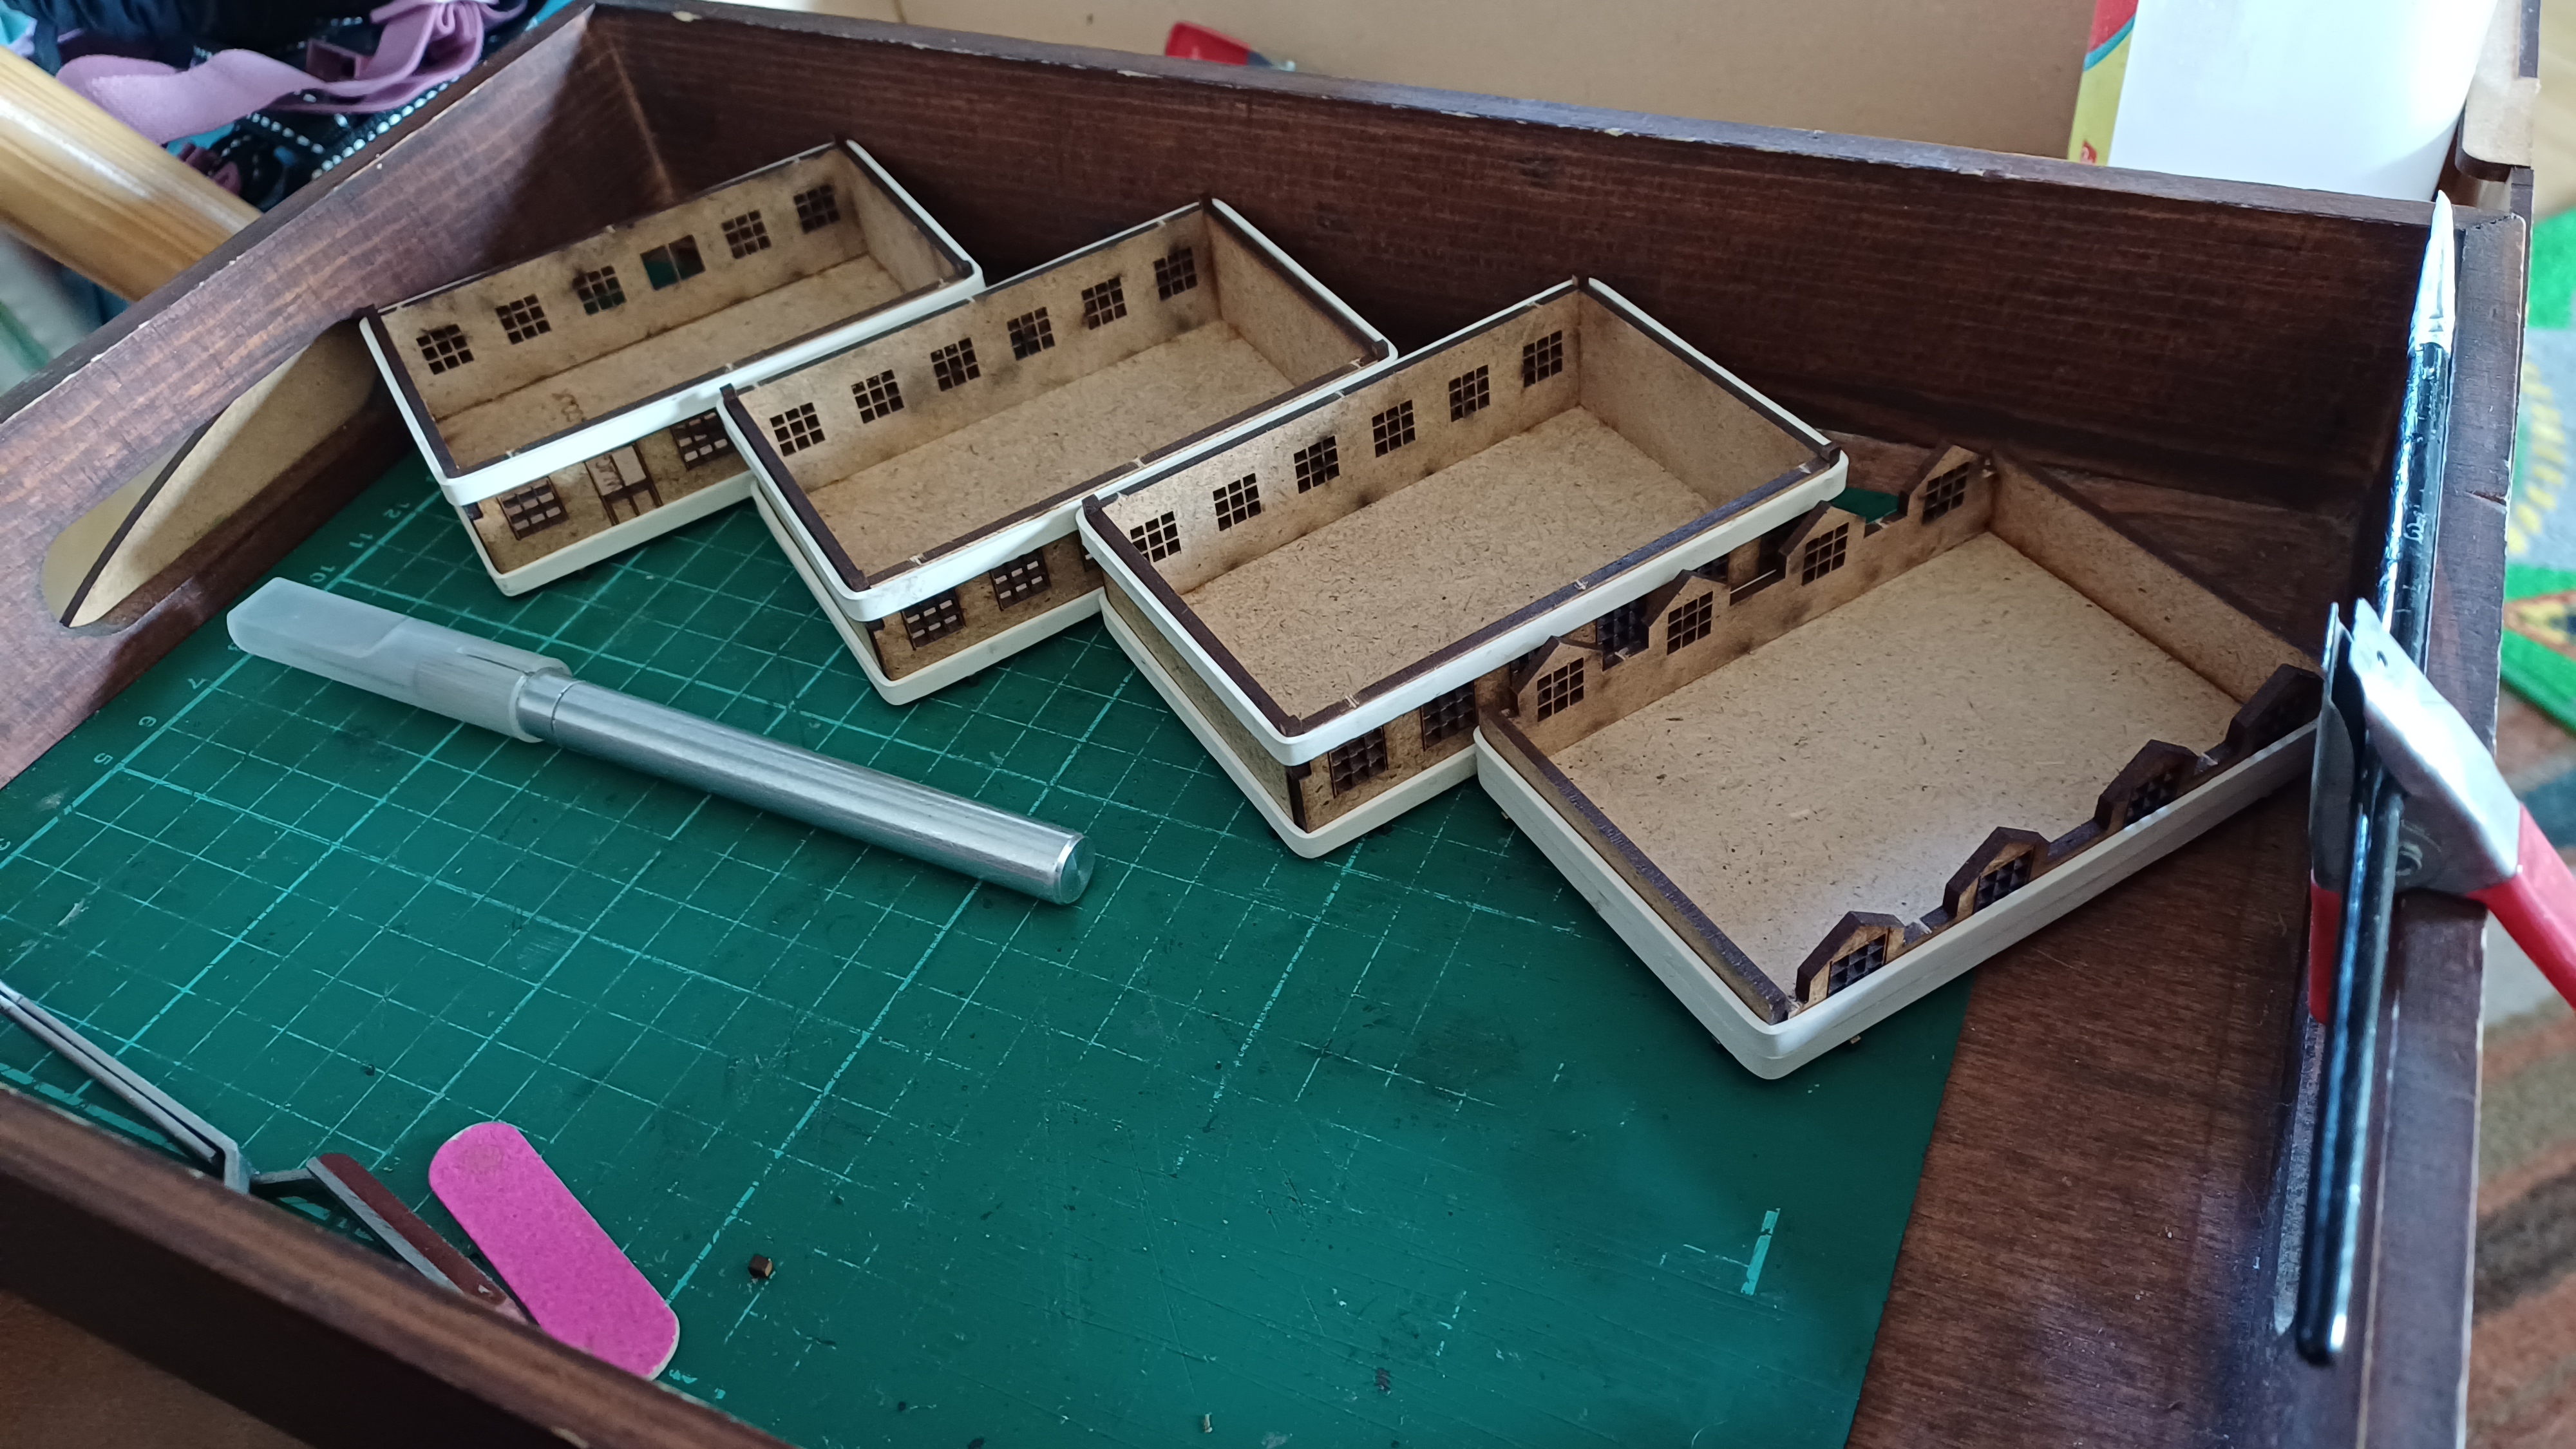
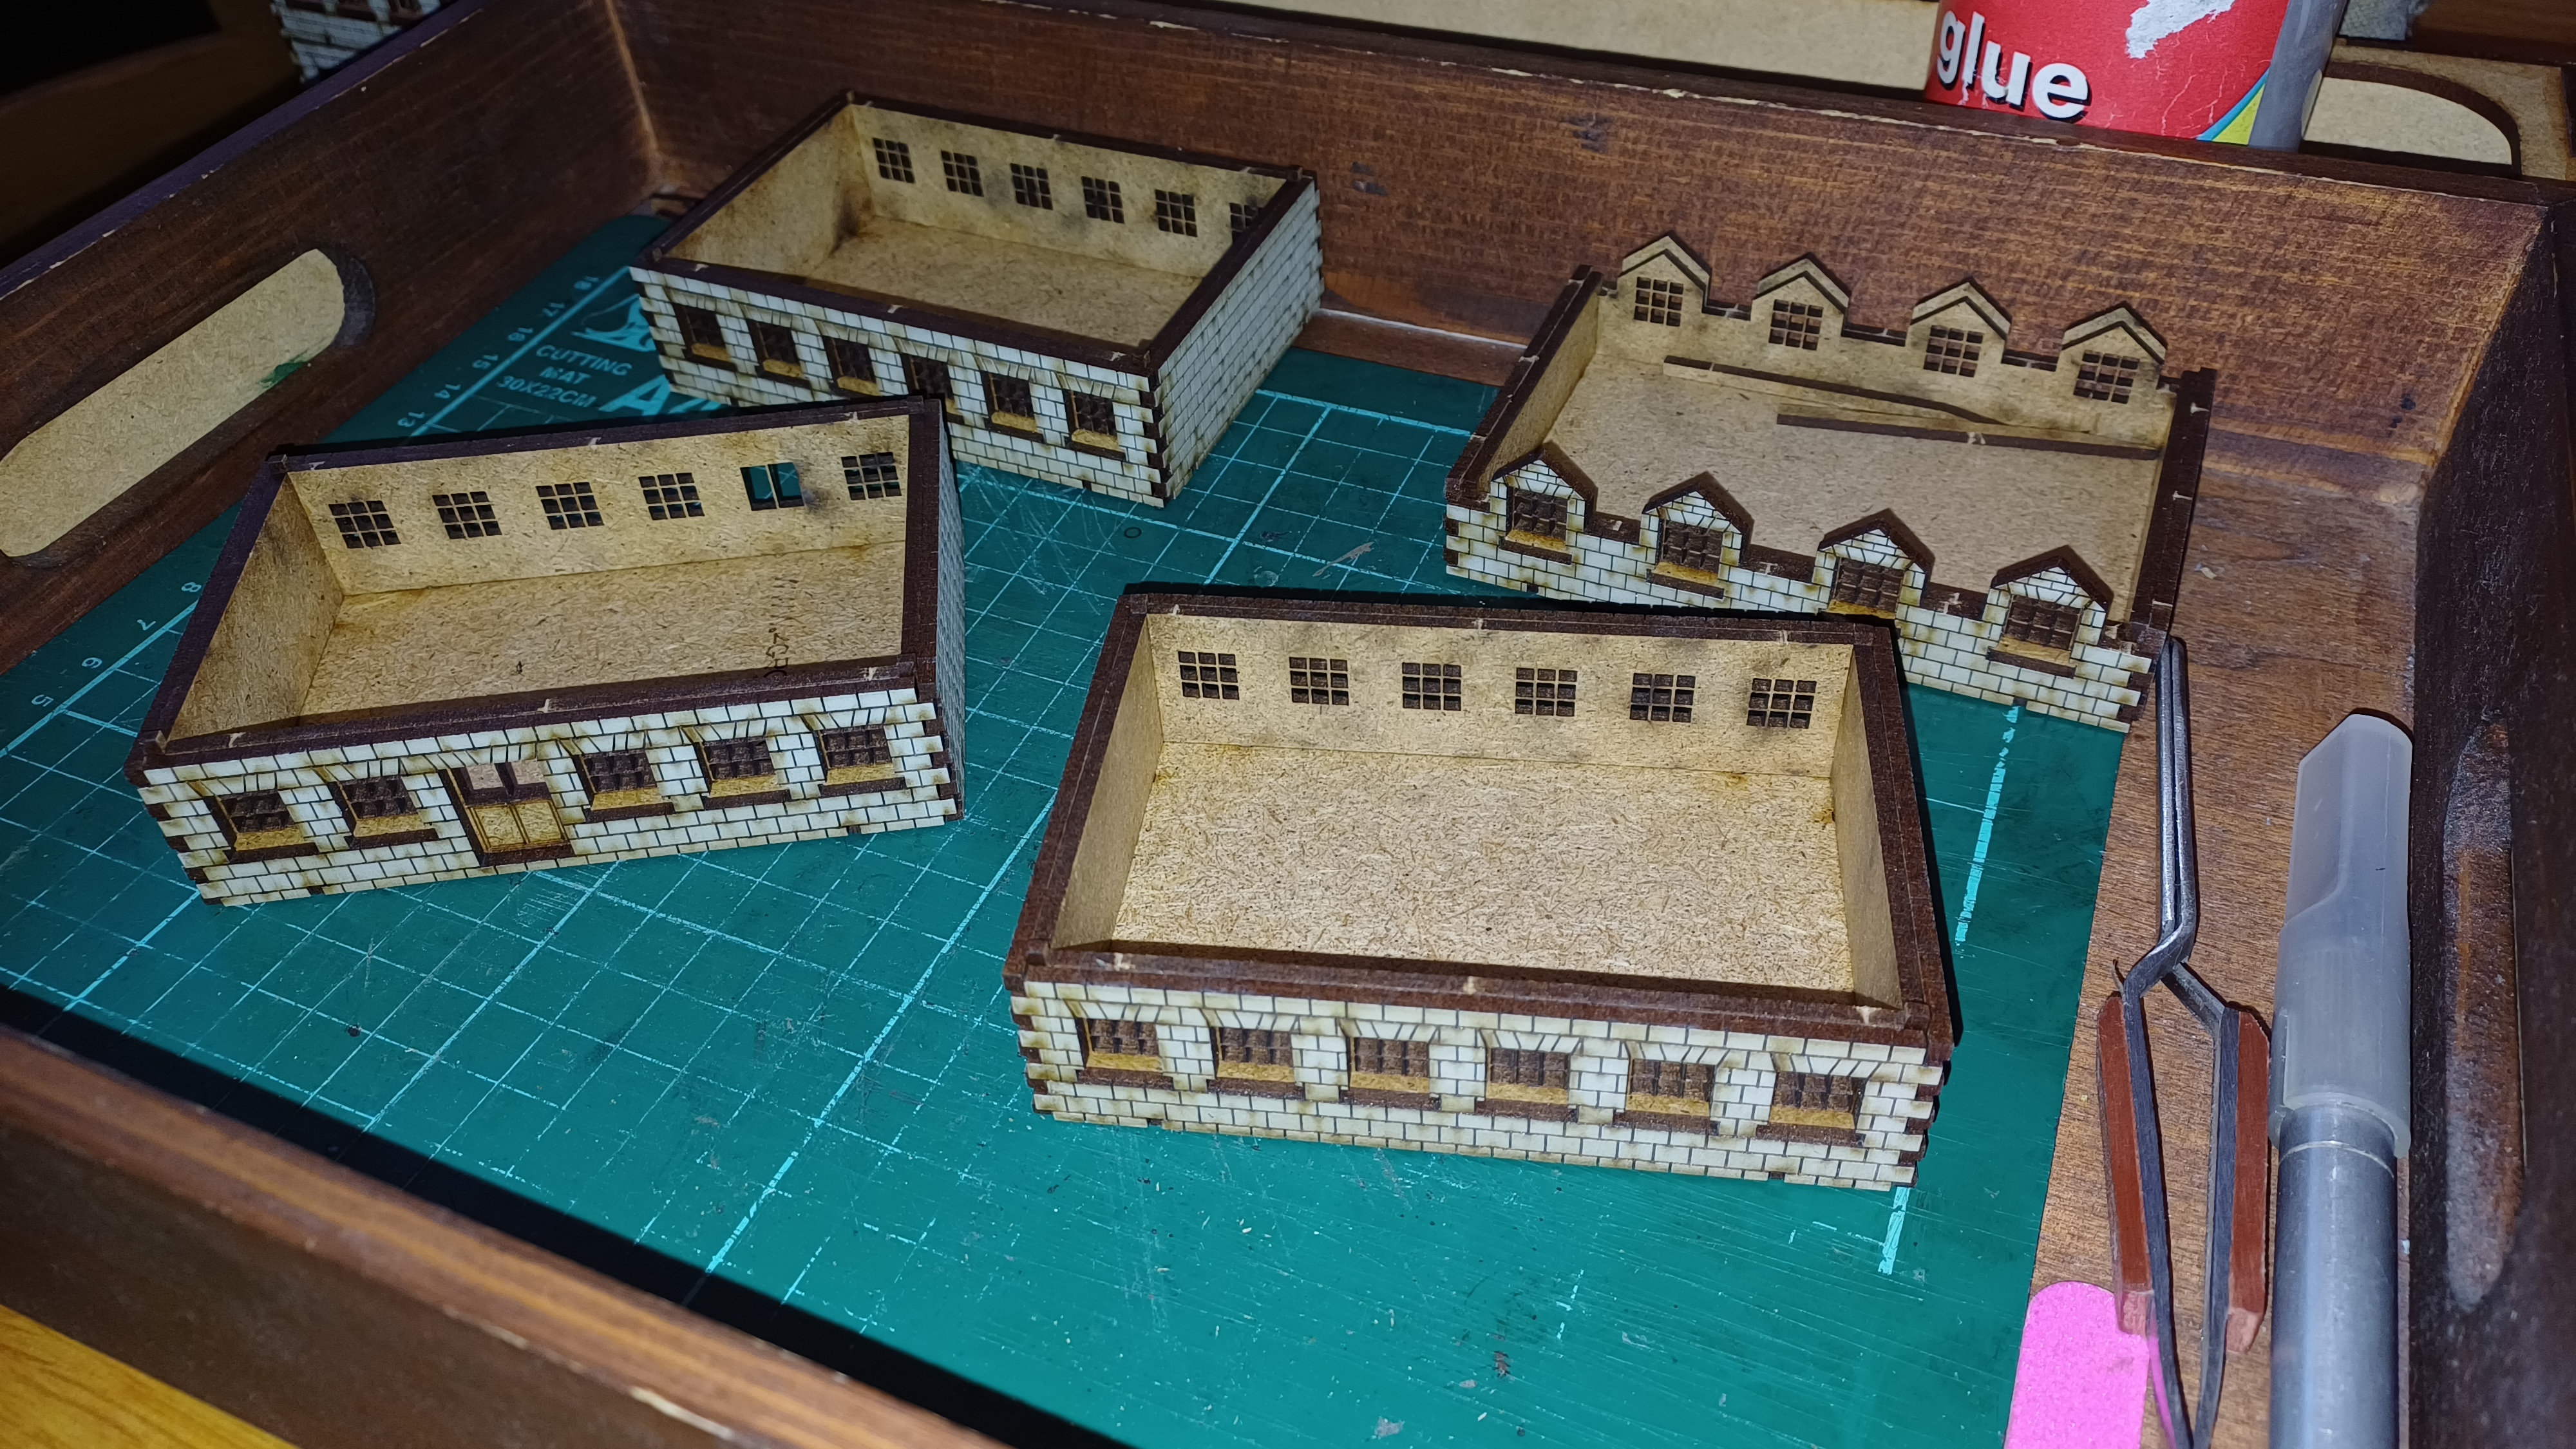

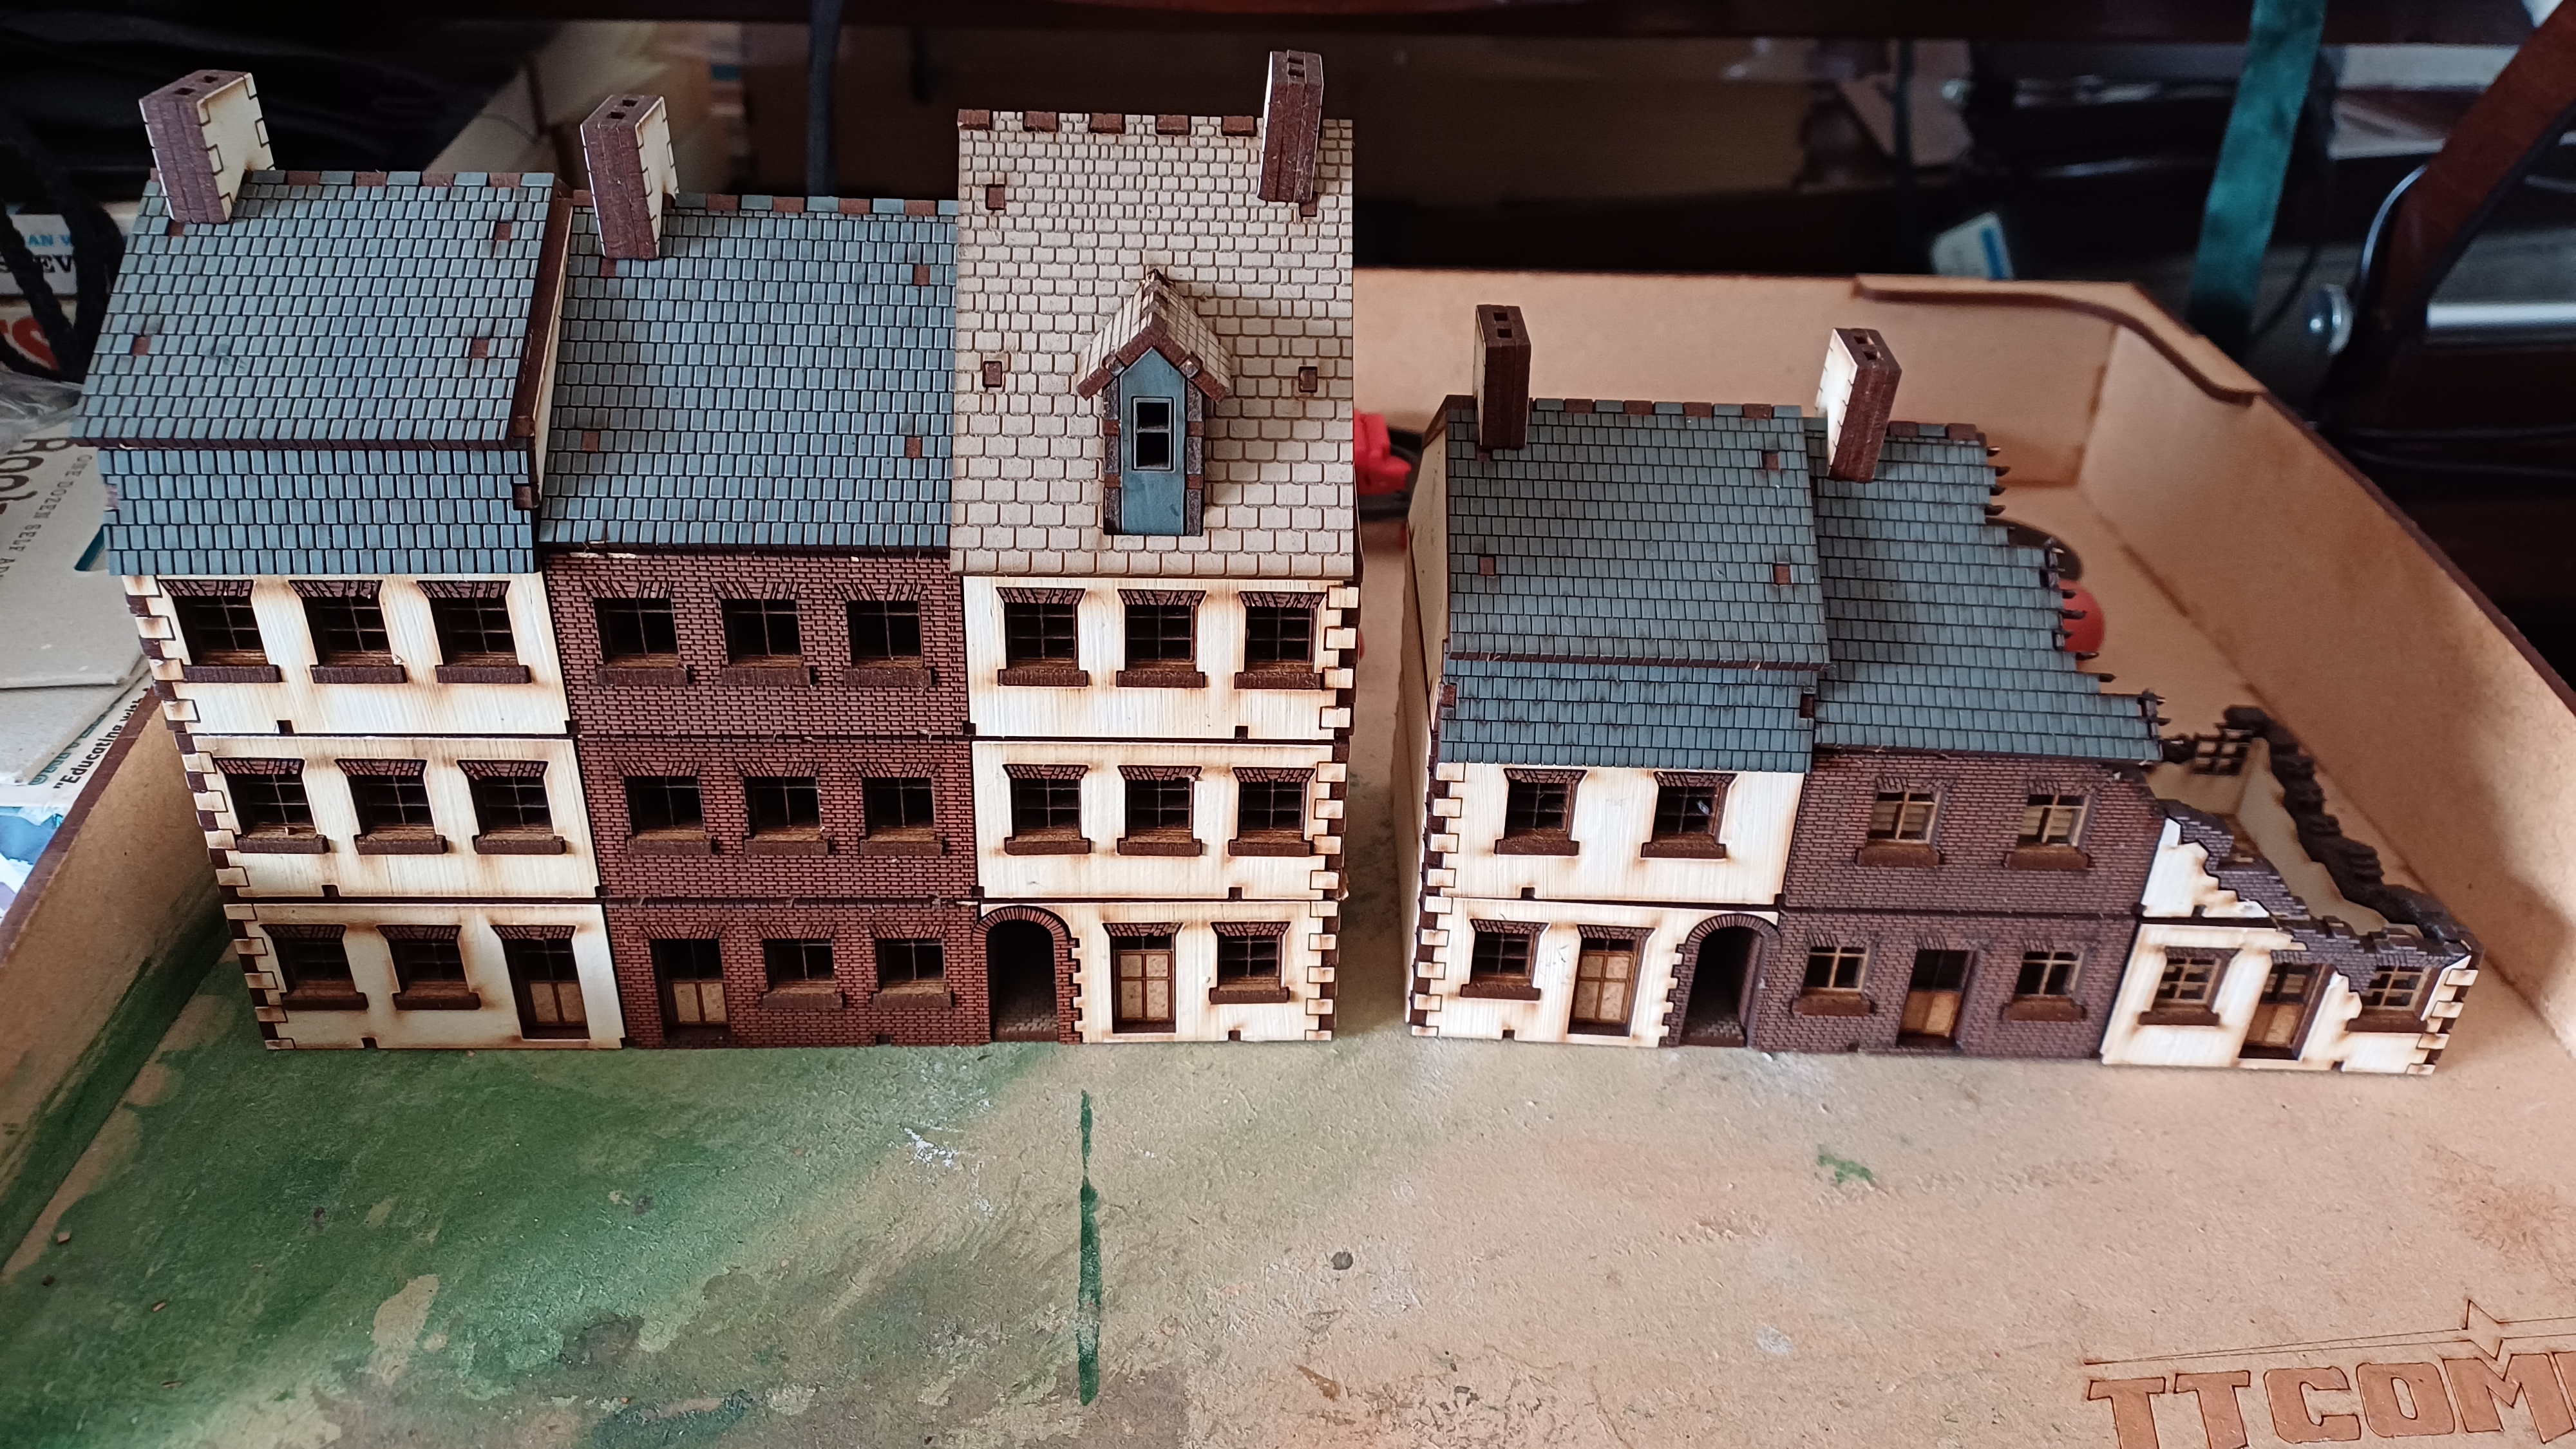
 All the buildings built in Week 1
So, four whole buildings and two add ons (one at the front and one currently in the tall red roofed building at the back).
I did make a start on the fifth building, the North Western European Terrace Houses (Type 1) but this only got as far as the inner walls of the bottom floor so I didn’t include it in the beauty shot.
Not bad for a week’s work I feel and checks of six baggies of laser cut mdf from my To Do pile and puts them into Done. A good start if I do say so and I do as it’s my project blog, along with some lessons learned to hopefully get some more done over the next coming week.
But what will I pledge for Week 2? Well…
Next Post
Next will be my pledge for Week 2. But it’s about half past eleven at night as I write this so I think I’ll have to come back tomorrow and write that one (also, I need to snap another photo or two of bits I intend to work on).
As with the Week 1 stuff, I have already decided what I will be working on and have made a start even though I hadn’t been able to find the time to blog it before now but hopefully I’ll be back tomorrow (on my lunch break if nothing exciting happens at work) to document this second pledge and show what I am working on next.


