


Collins does a Frostgrave board


Recommendations: 337
About the Project
As an entry for the terrainfest 2024 competition (and because of timing where I accidentally bought another game system) I hope to make a 3x3 board for the game of Frostgrave.
Related Game: Frostgrave
Related Company: Osprey Games
Related Genre: Fantasy
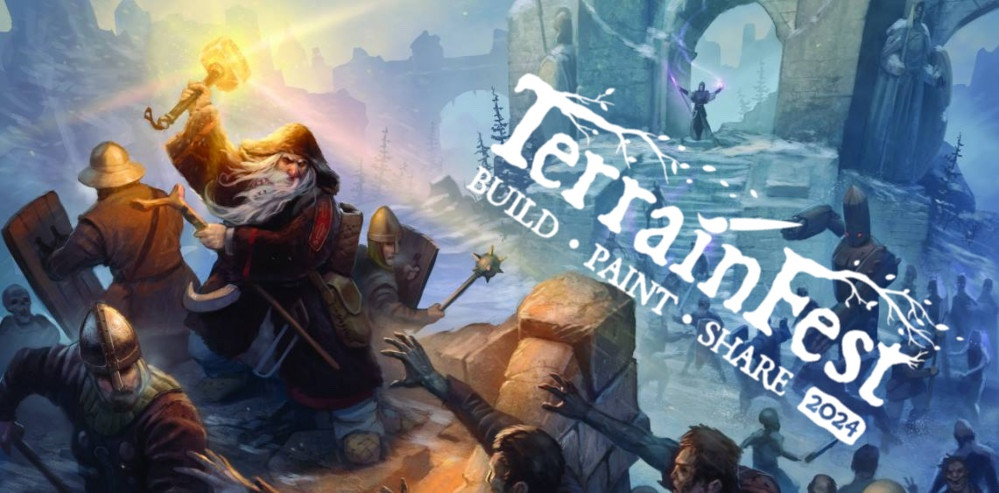
Related Contest: TerrainFest 2024
This Project is Active
roll call
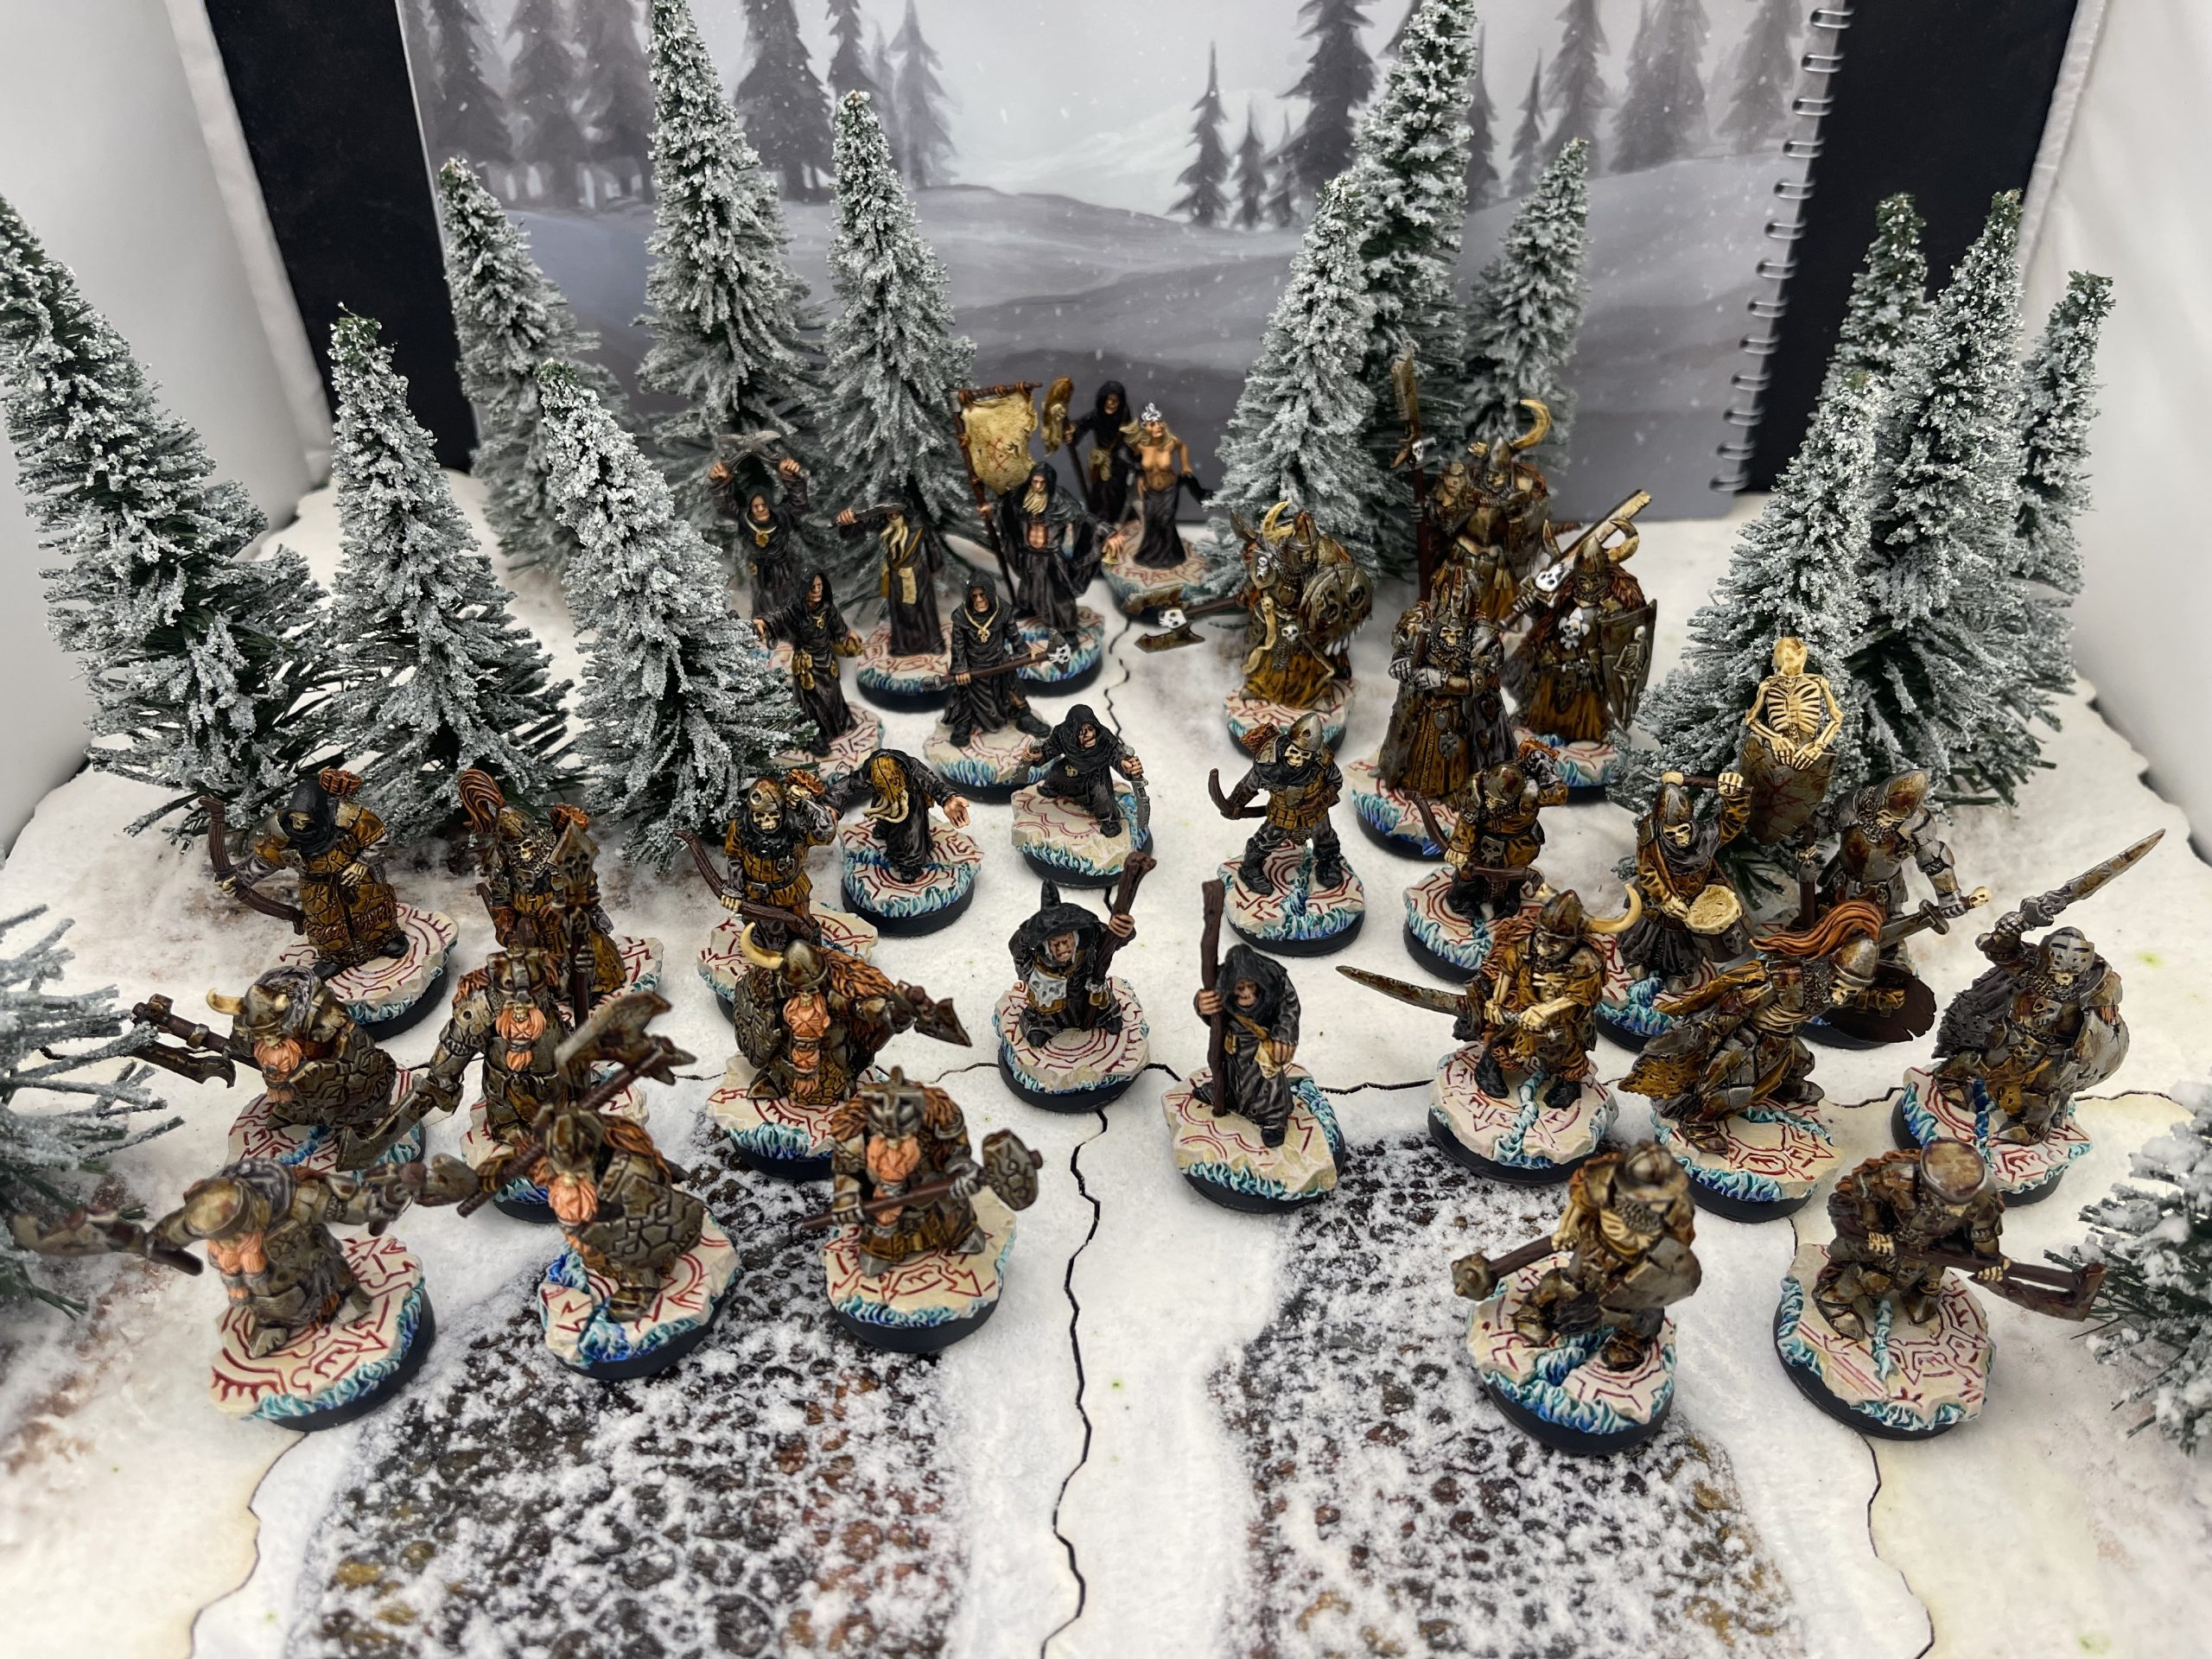
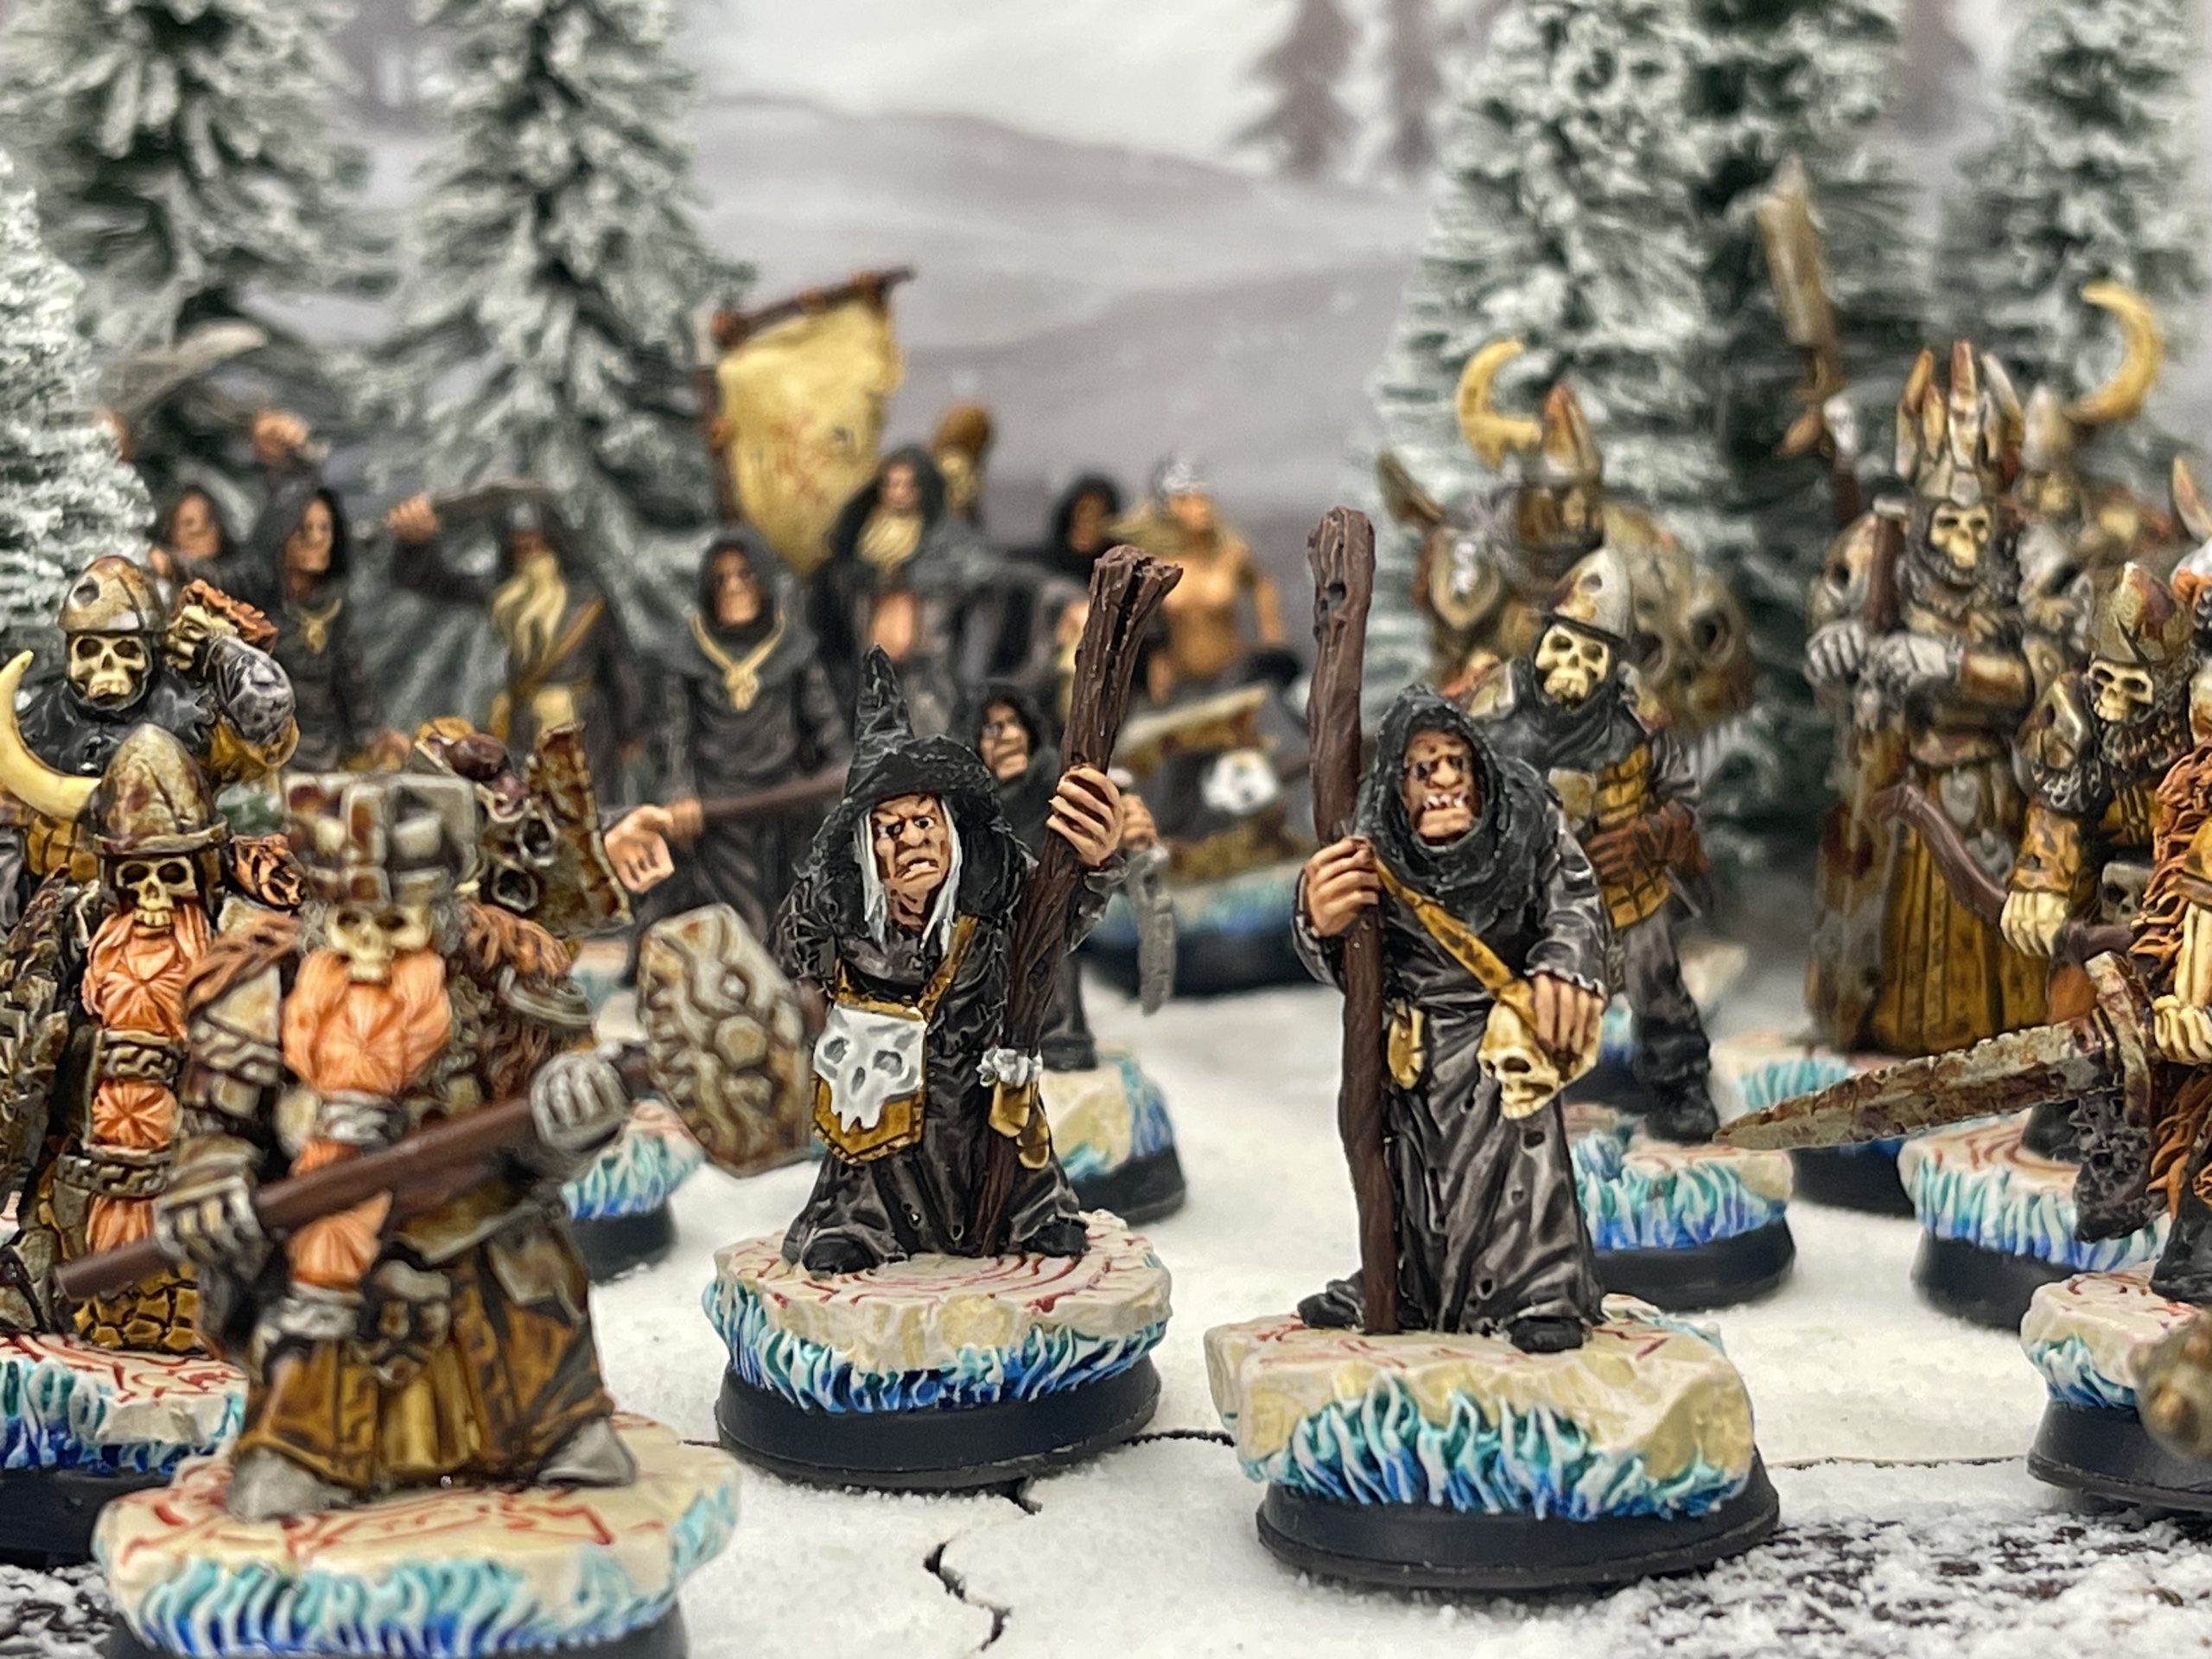
Here is the whole crew so far and what i can use them for in frostgrave
1x wizard
1x apprentice
9x cultists (thugs or thieves)
5x archers (archer or ranger)
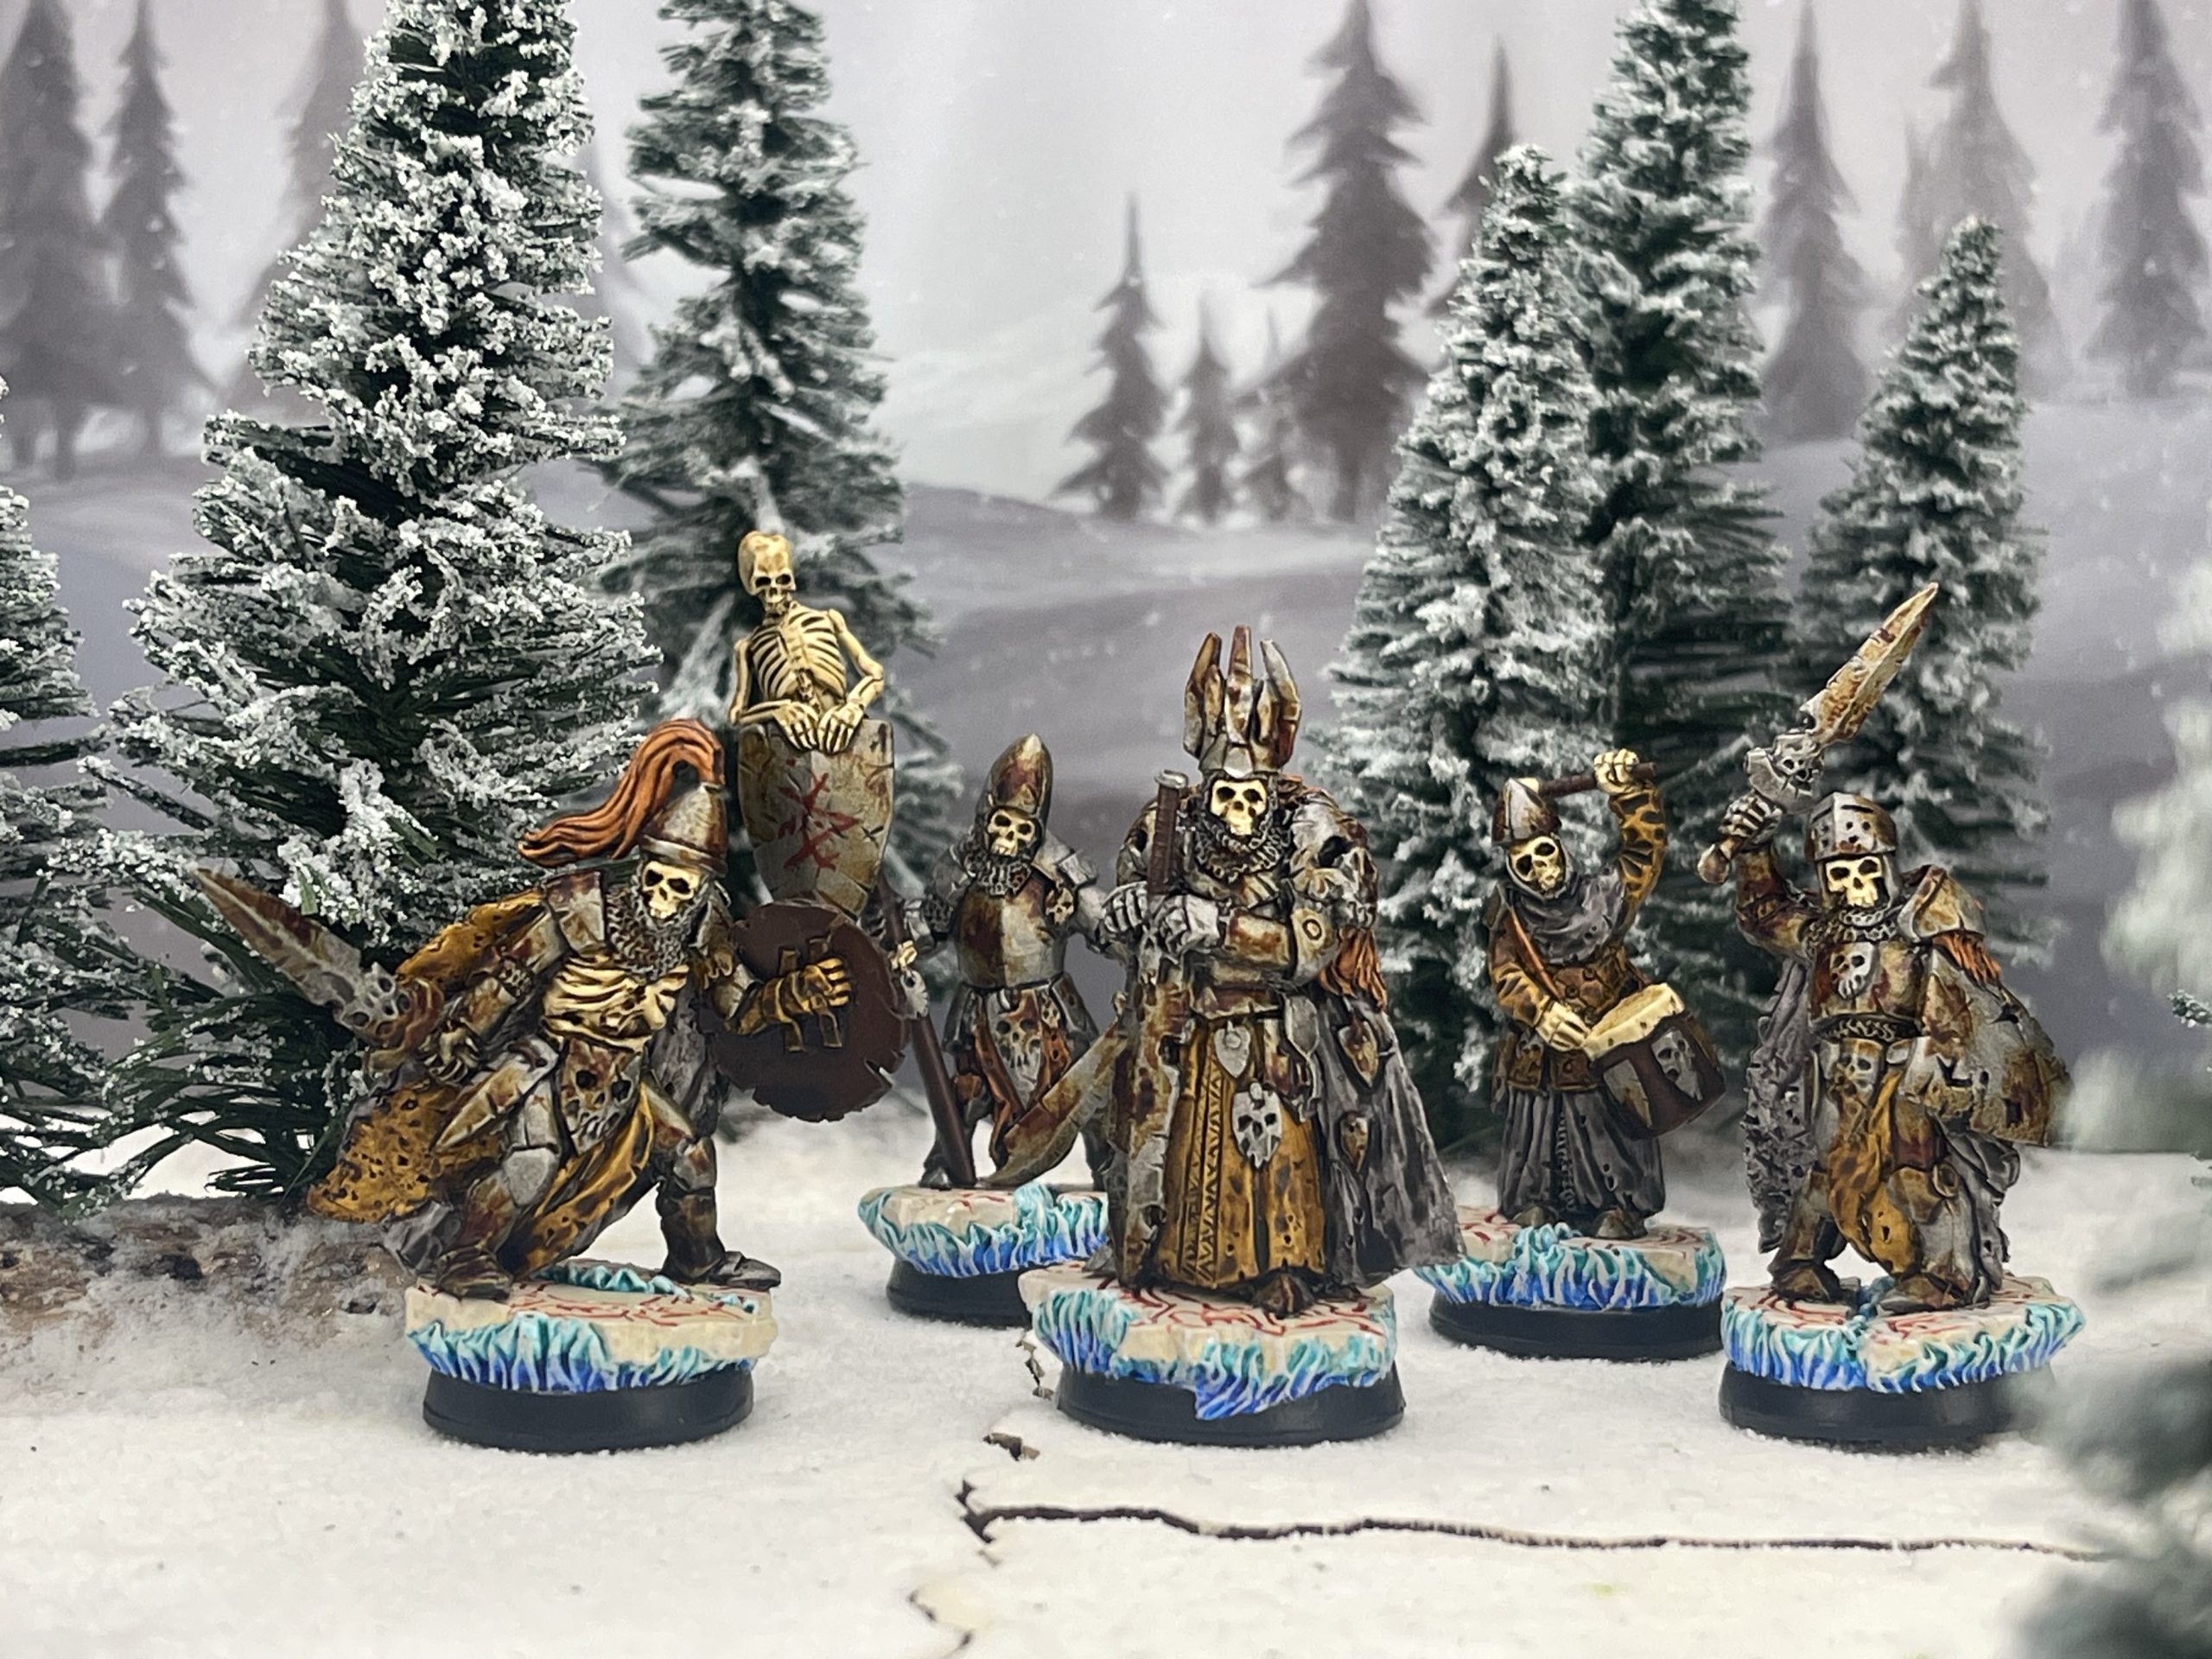
5x undead humans (infantry or men at arms)
6x undead dwarves (infantry or men at arms)
4x undead lords (knights)
1x banner bearer (infantry)
1x dummer (bard)
In our friendly games however my friends really will not mind how i use them so long as i pay the gold/points cost and everyone knows what they are beforehand
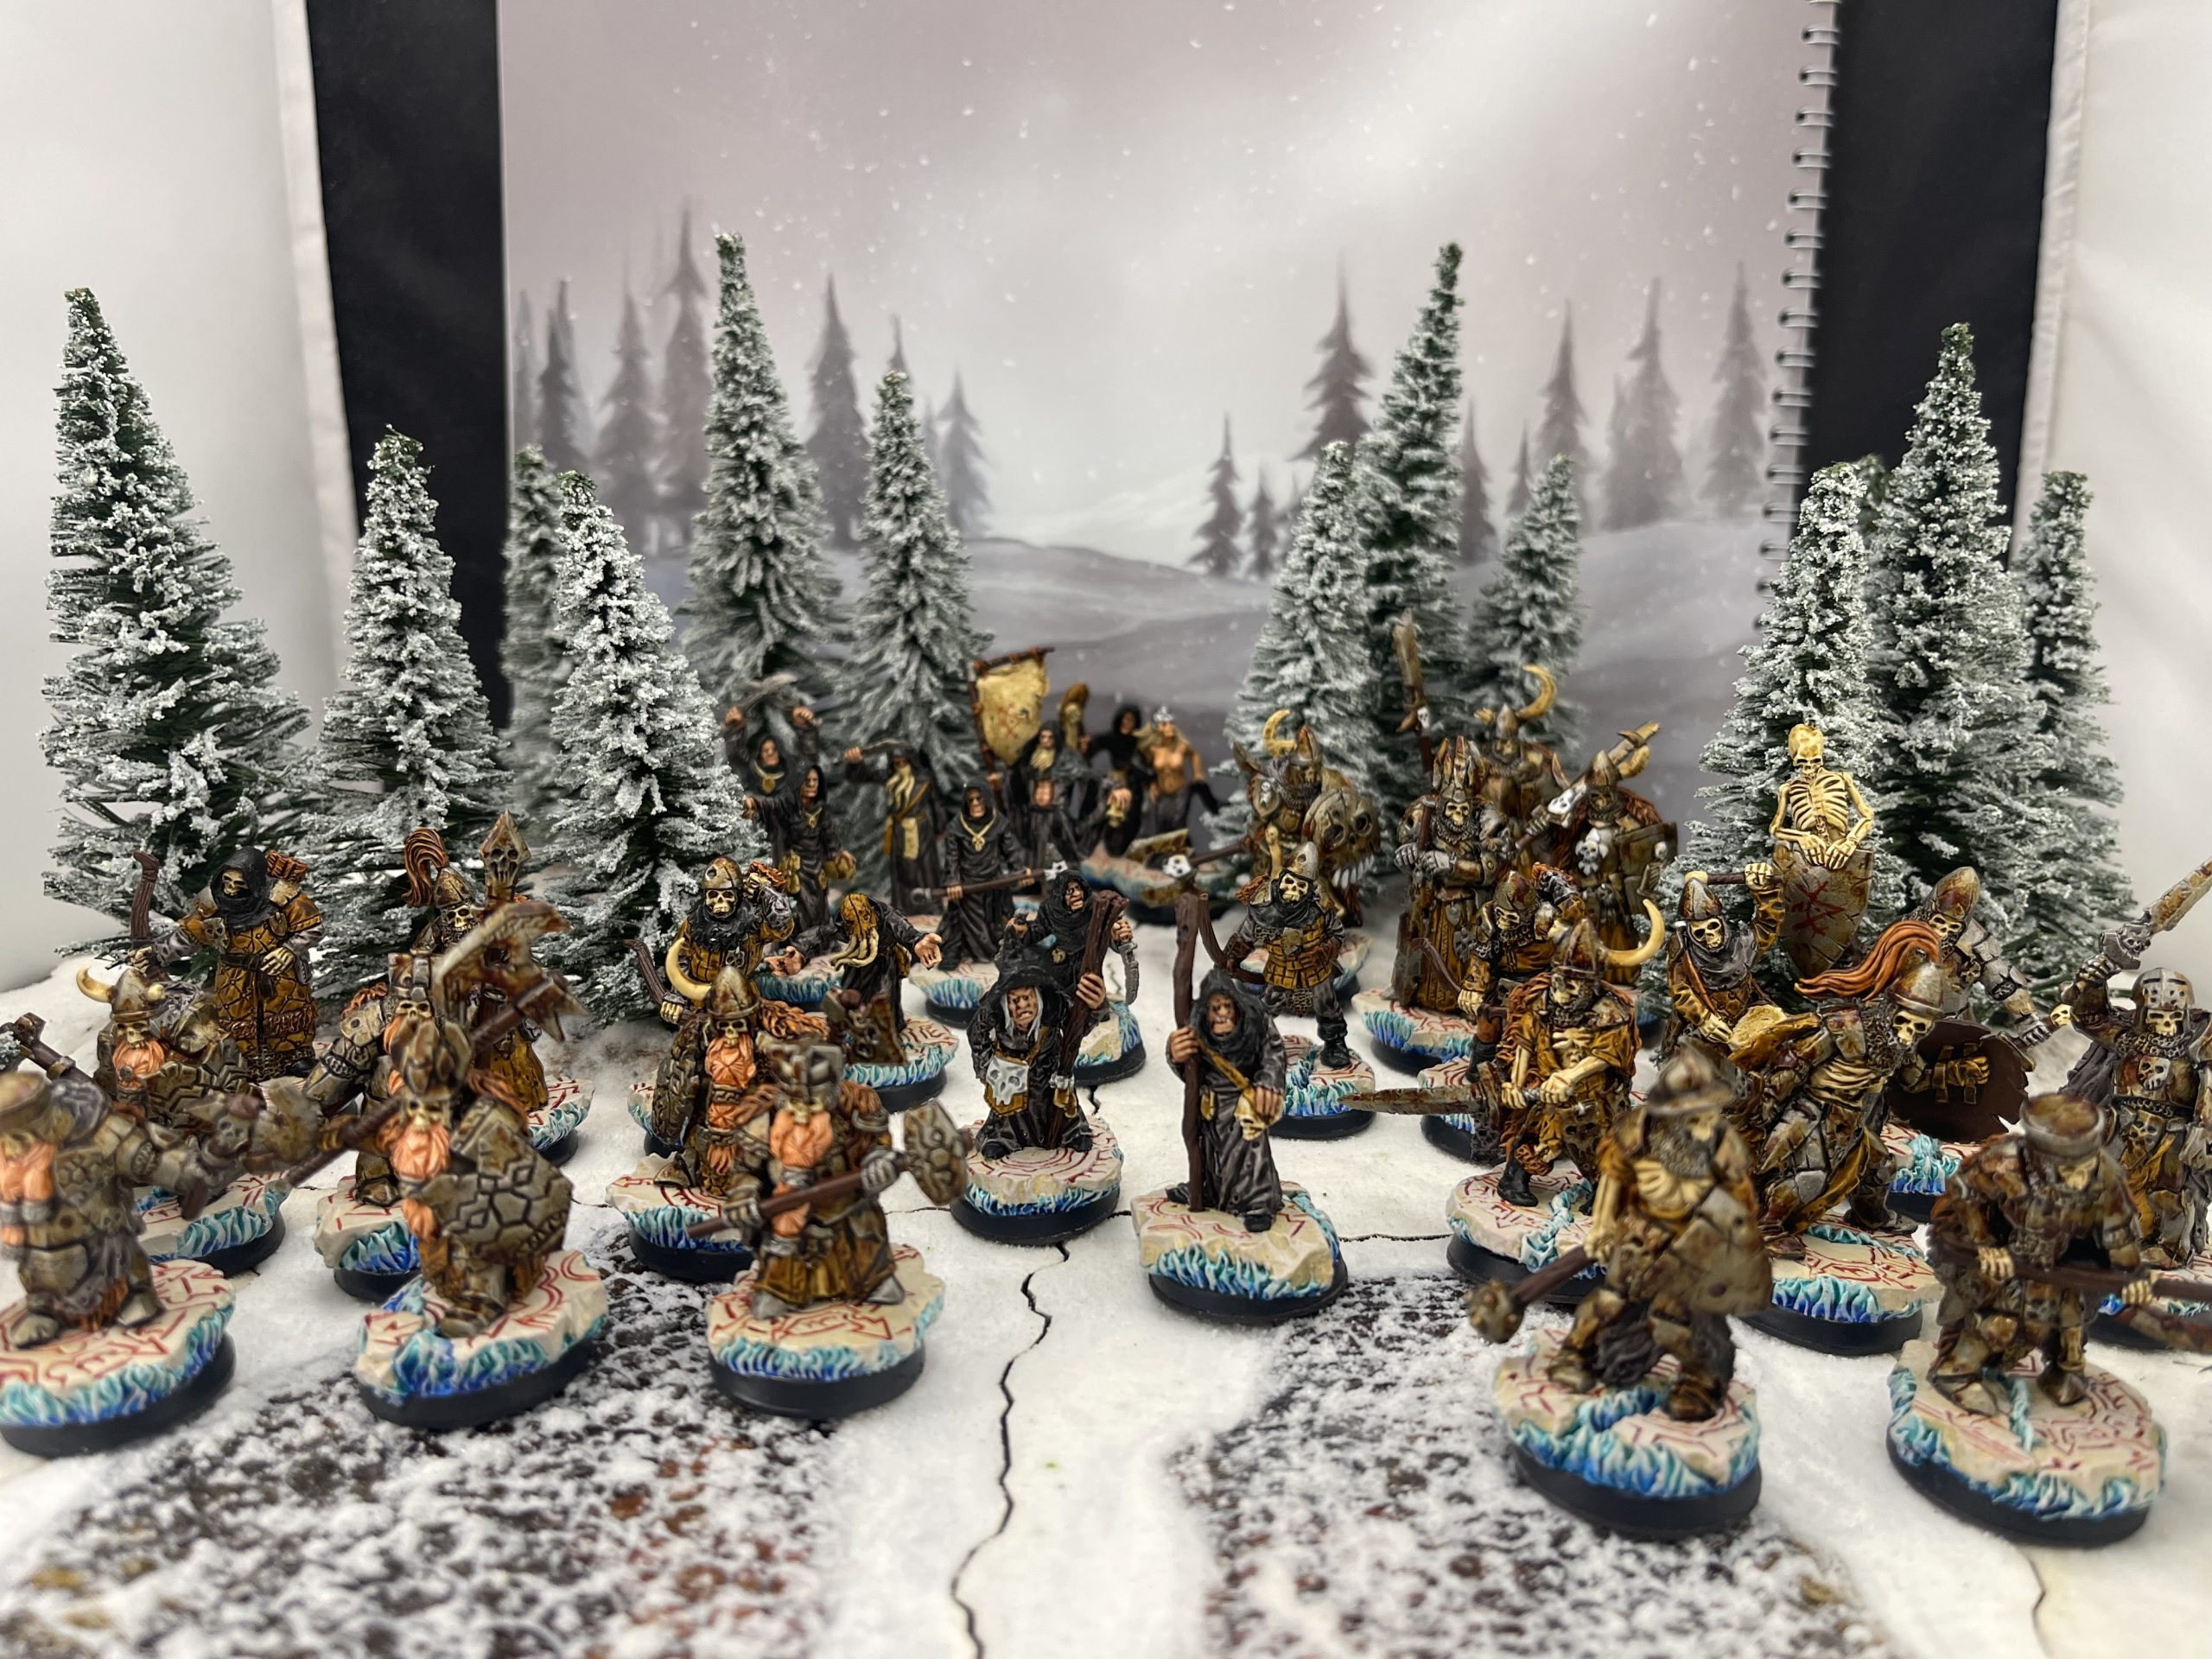
Finishing off the Bad Guys Kickstarter by Scibor
 a backup necromancer wizard and 3 more cultists with various different odd kinks...
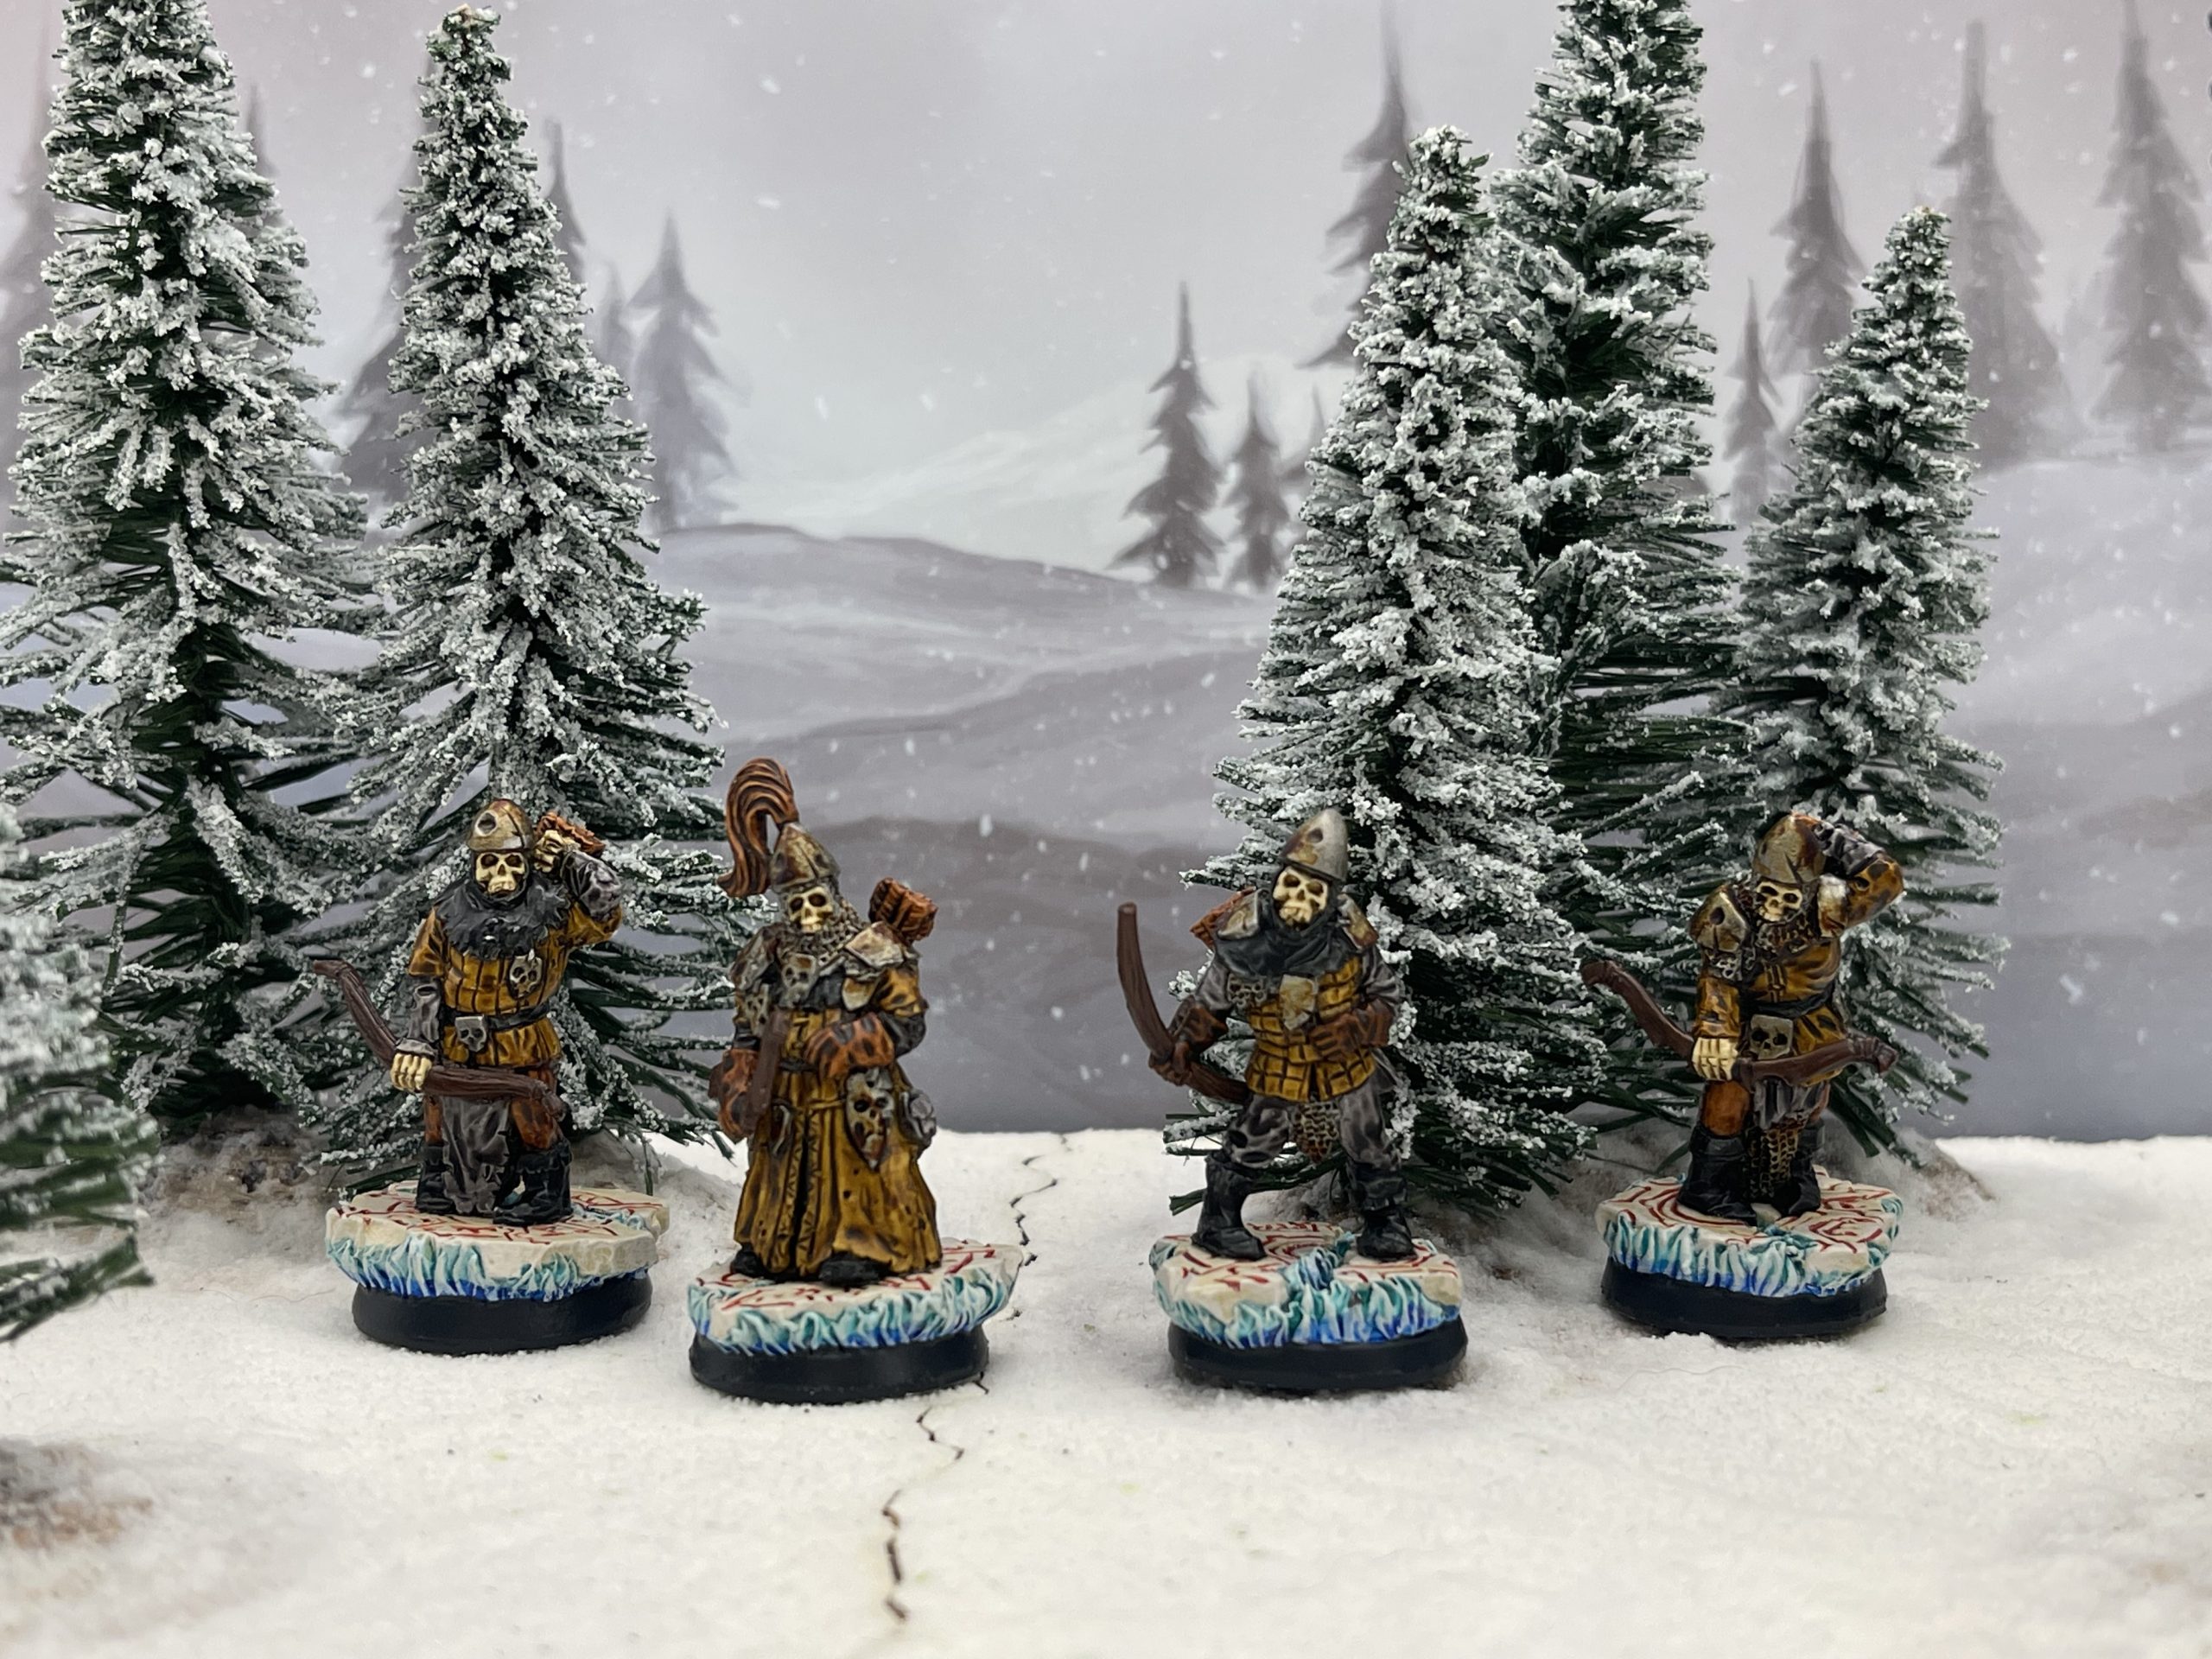 the last 4 (out of 5) archers
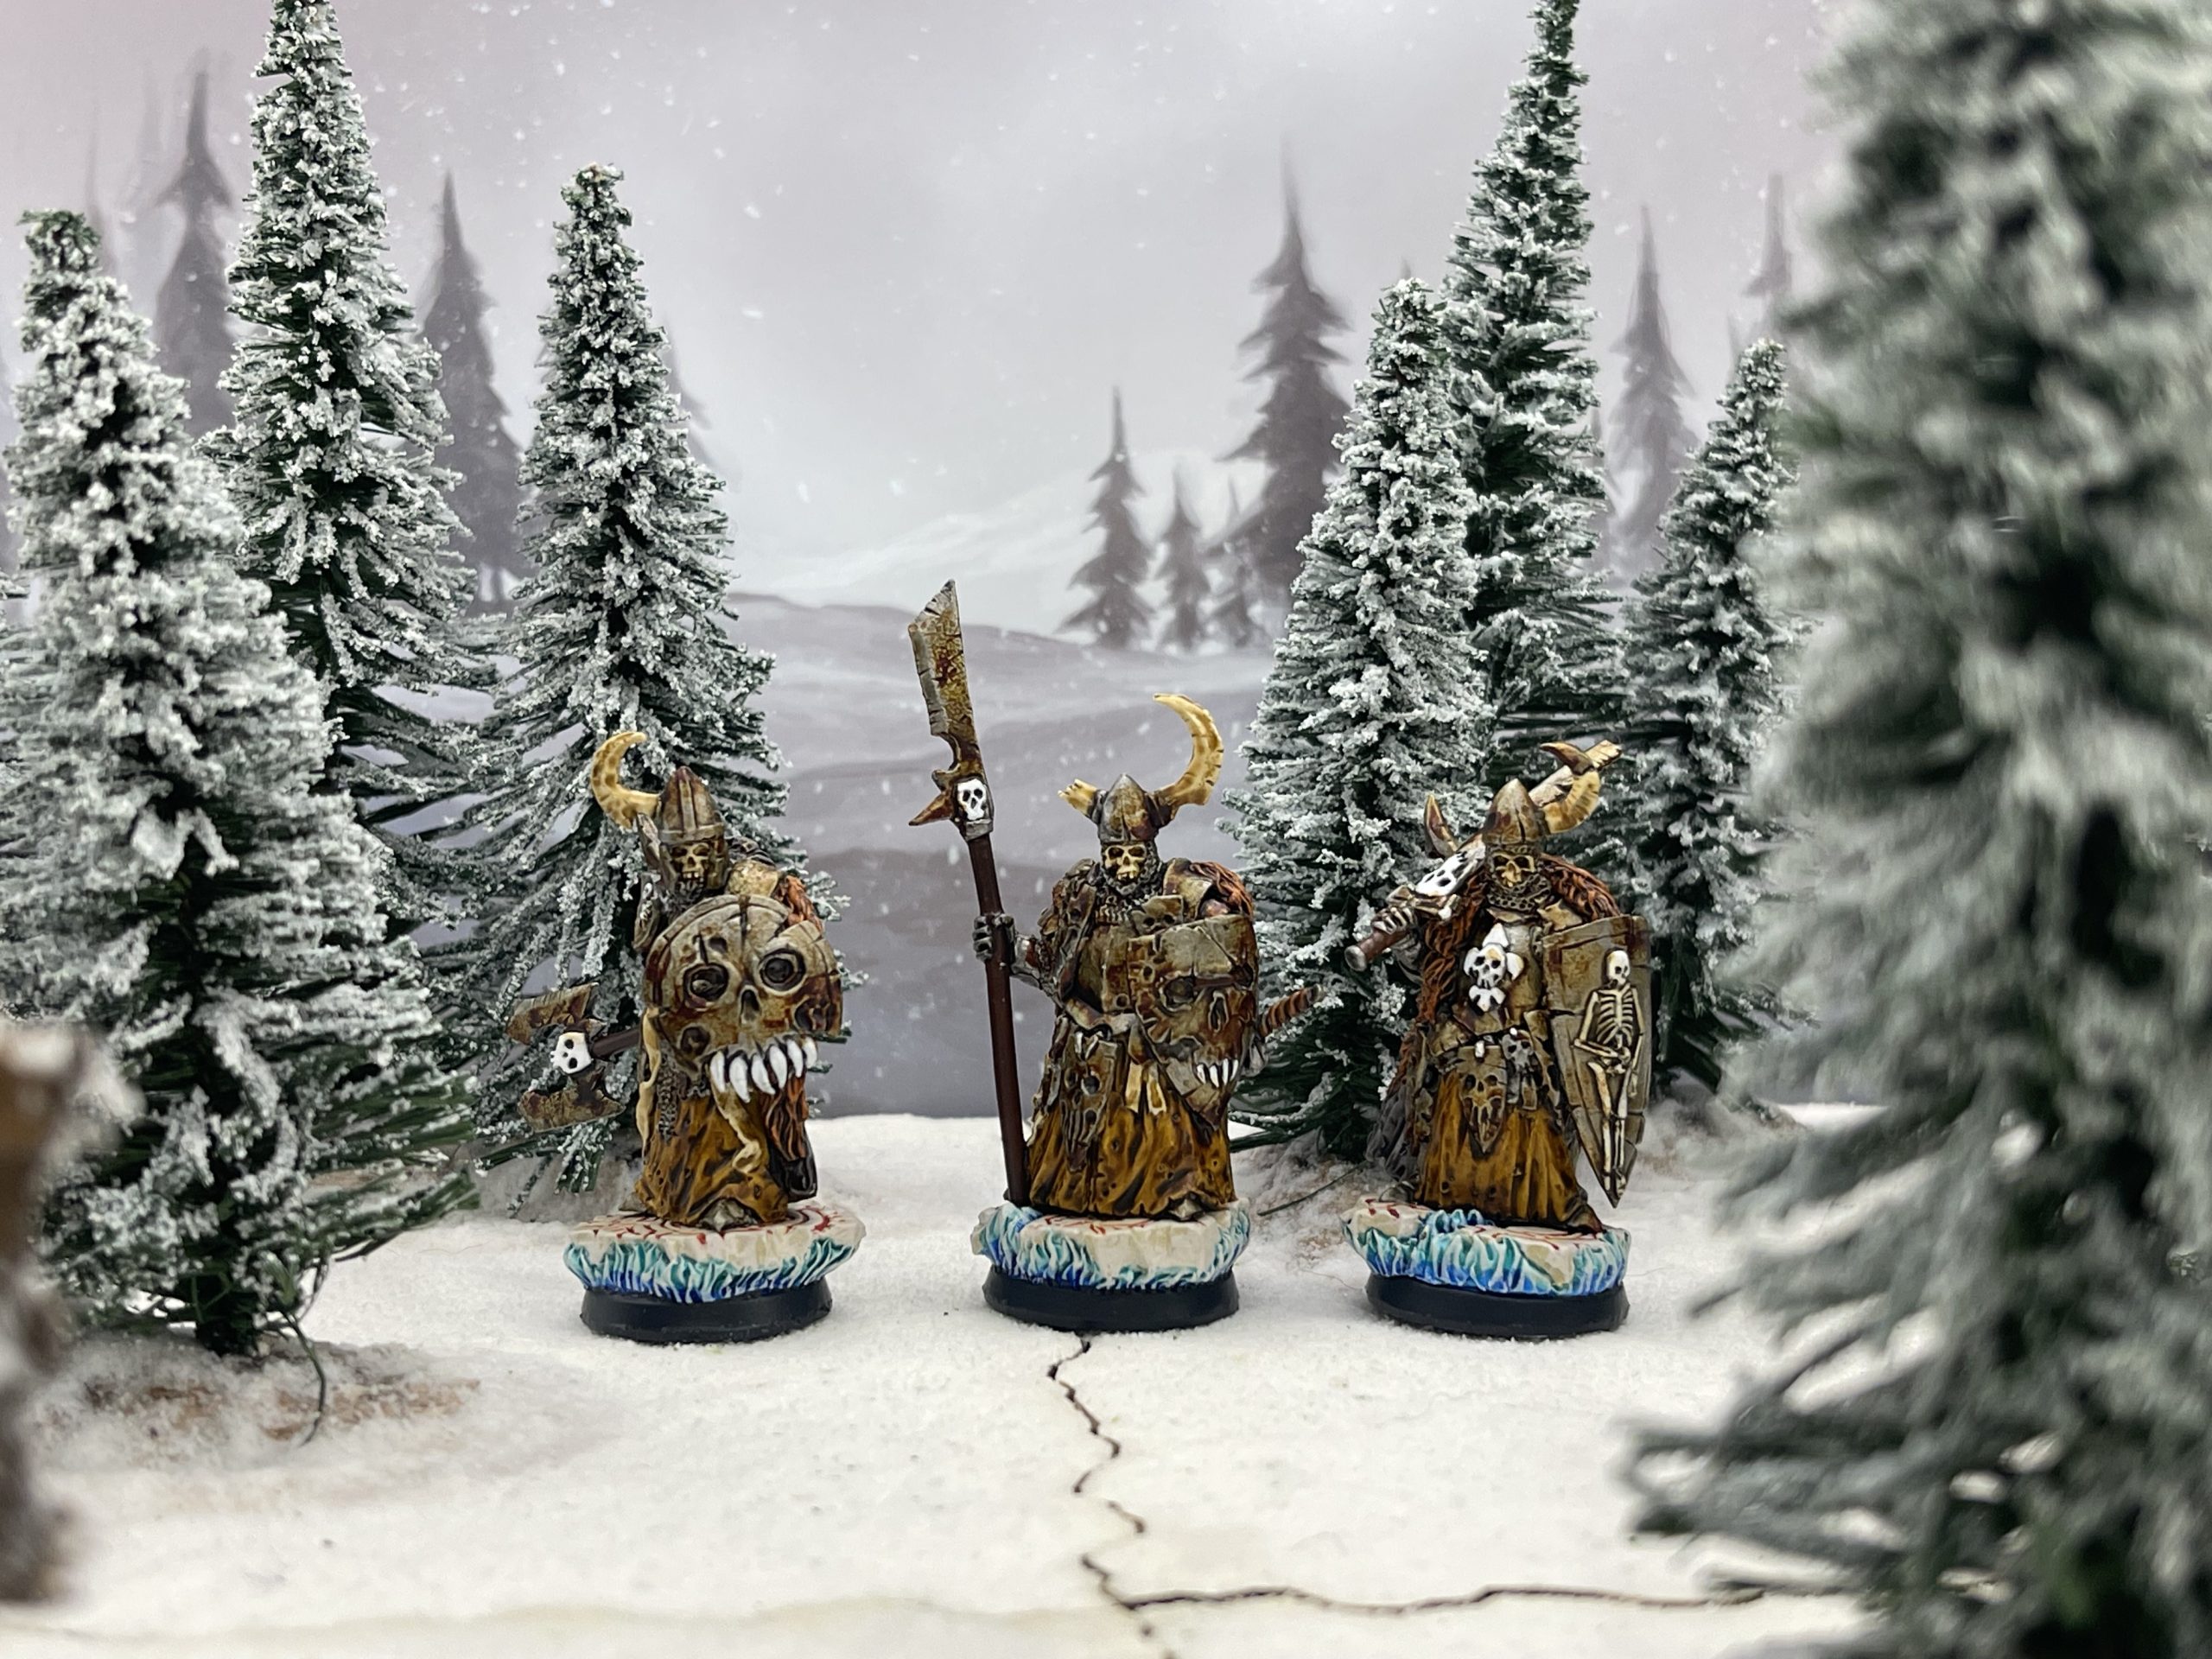 three undead lords (or knights in frostgrave)
I have finally come to the (kind of) end of the Bad Guys vol1 kickstarter from Scibor.
To play Frostgrave you only really need 10 models, i have 33 for this warband… Oops! plenty of casualty replacements.
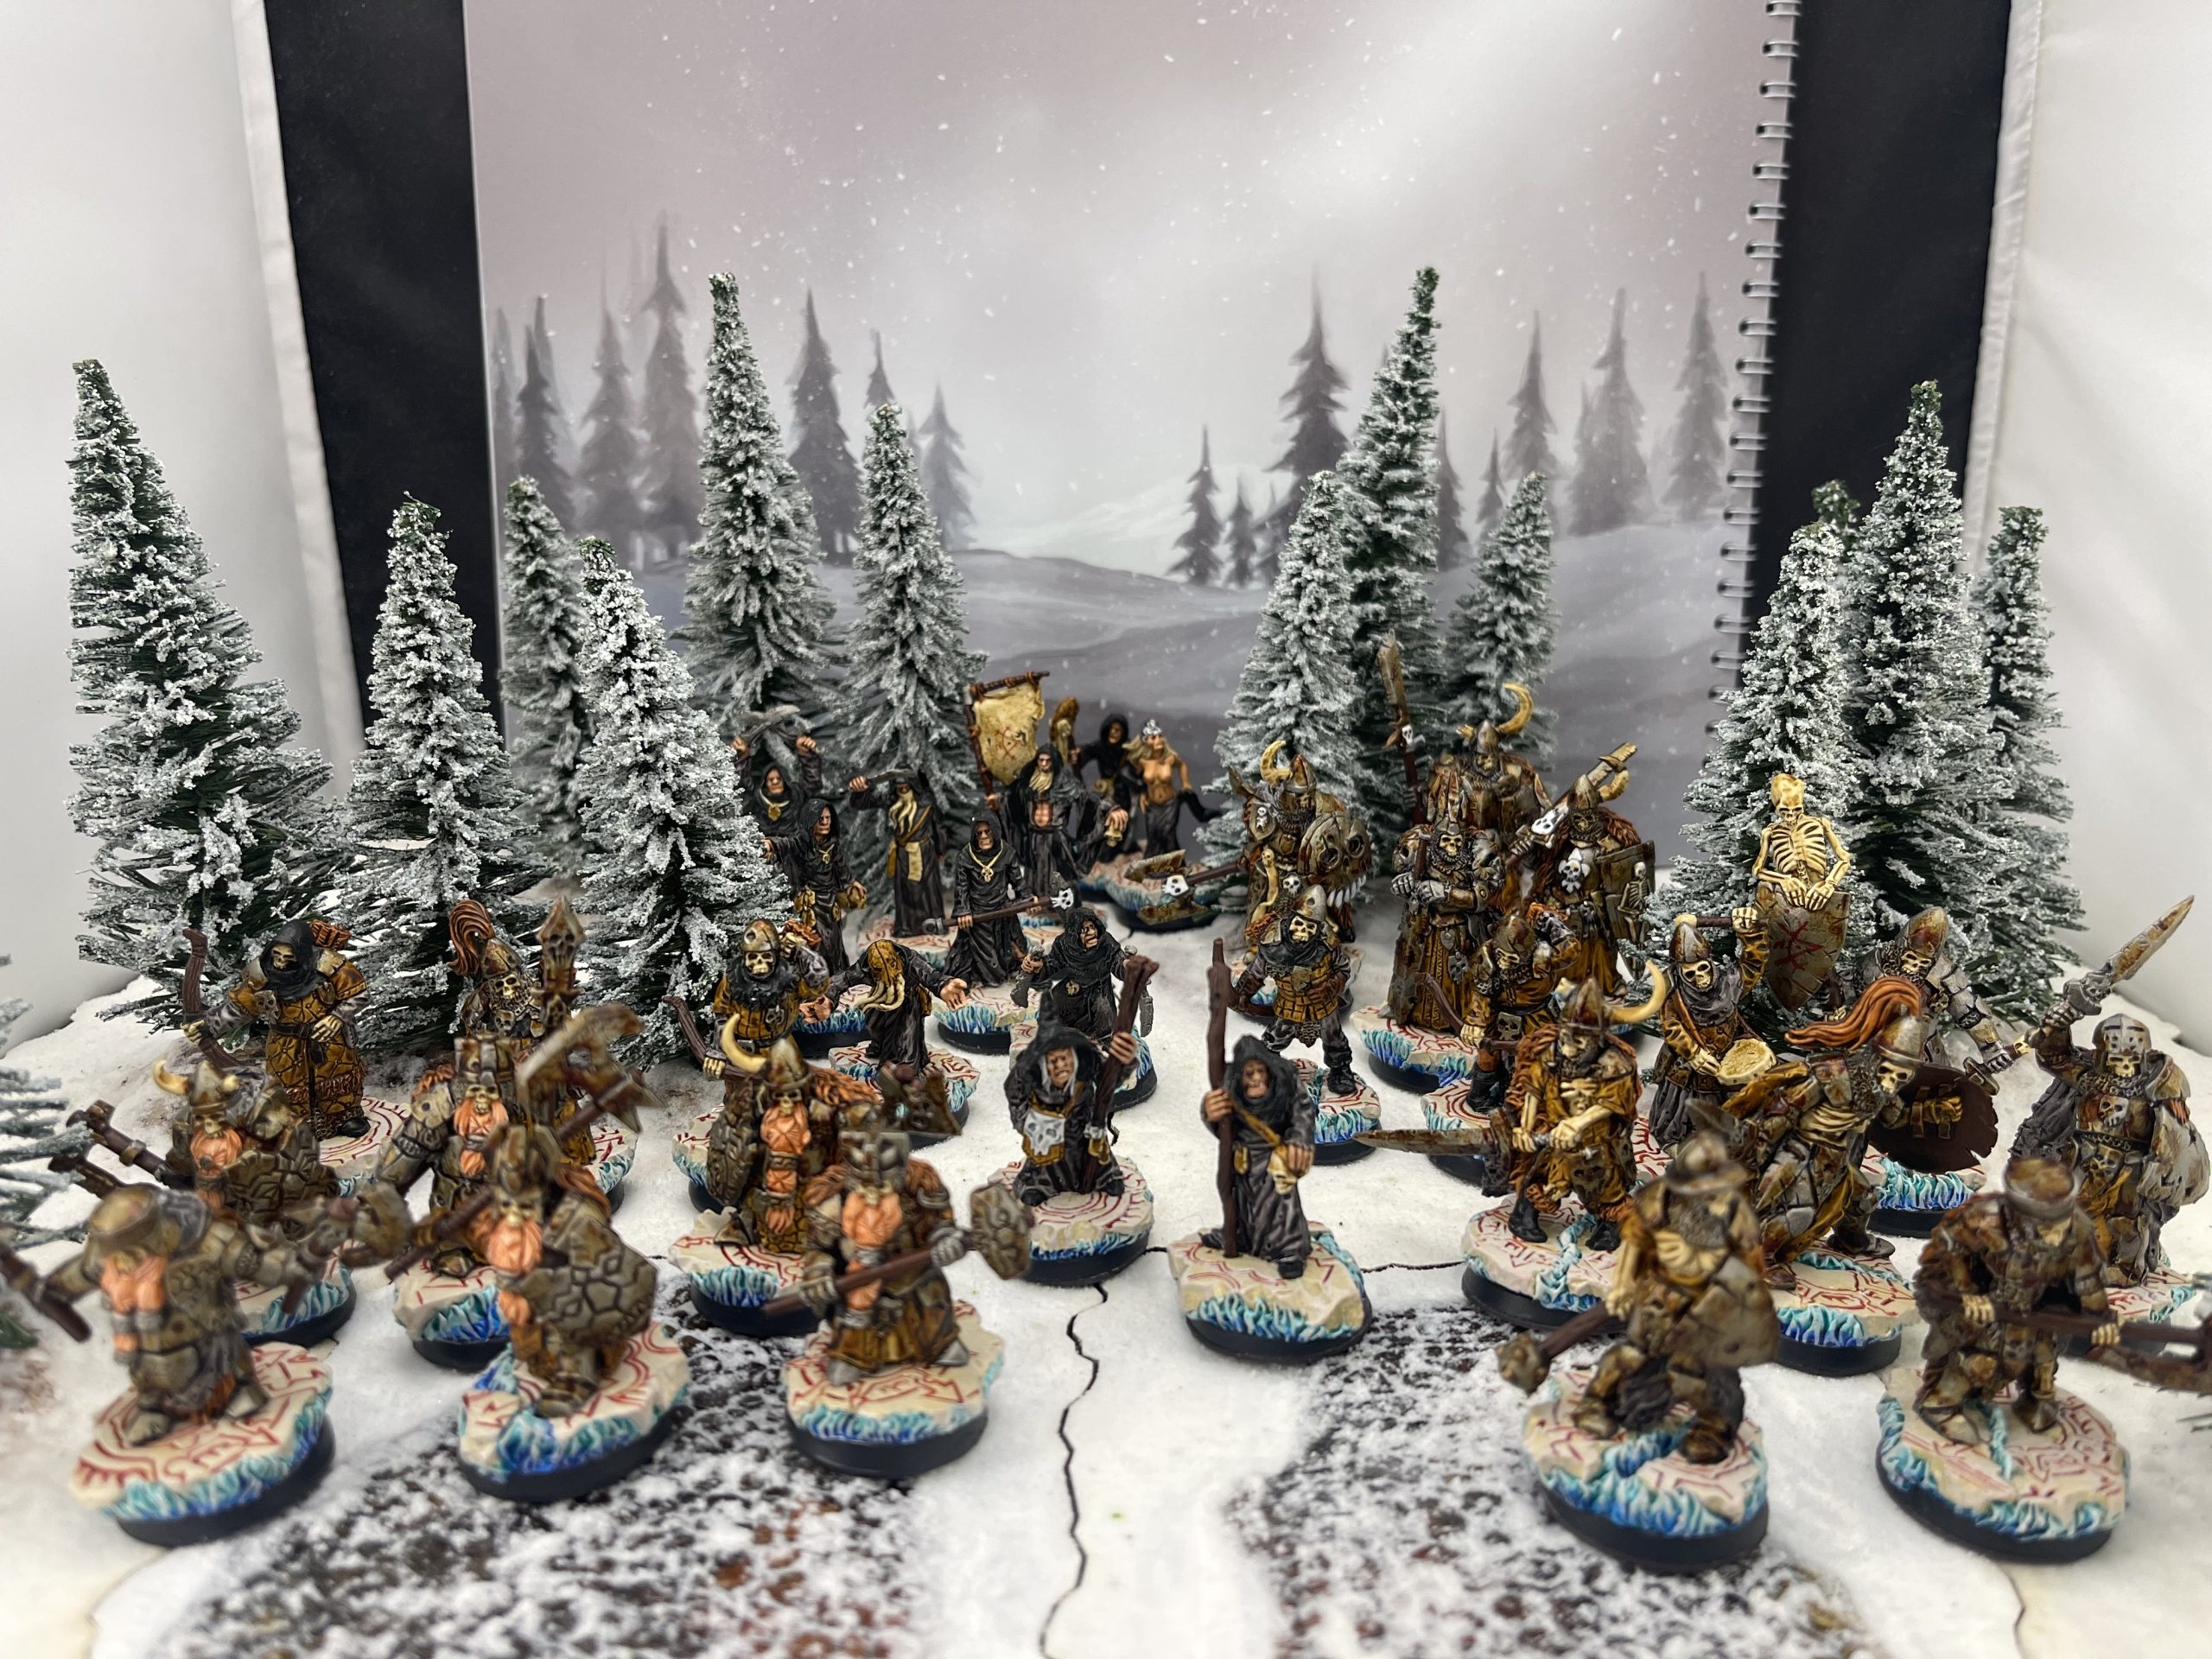
On that front, just so people are aware, i have already used the drummer in a game, proxy for a bard (lets face it, skeletons wouldn’t be good on any wind instrument and a string instrument may be a bit hard for them too!). tragically his role in the story was short lived, being killed in his first outing and then rolling terribly on the postbattle rolls. apparently the undead can die again!
Painted more bodies for the Necromancer to raise up!
I am playing in a 3 way campaign with some local friends and i have made a habbit of using ‘raise zombie’ and ‘strike dead’ as spells.
One of my friends is using dwarves as a warband, and another humans. So what i have been doing is occasionally Striking Dead! a key character or lackey and then rasing the body as a zombie.
It only felt befitting that i paint more models and switch out my warriors for some more of these ones to suite the ‘old’ look of whoever i killed.
Both parties have become mildly upset by this (in a nice jestful way) and now seem not to enjoy getting within 8″ of my wizard or apprentice, both of which are quite adept at killing stuff outright.
 the 'volunteer' humans.
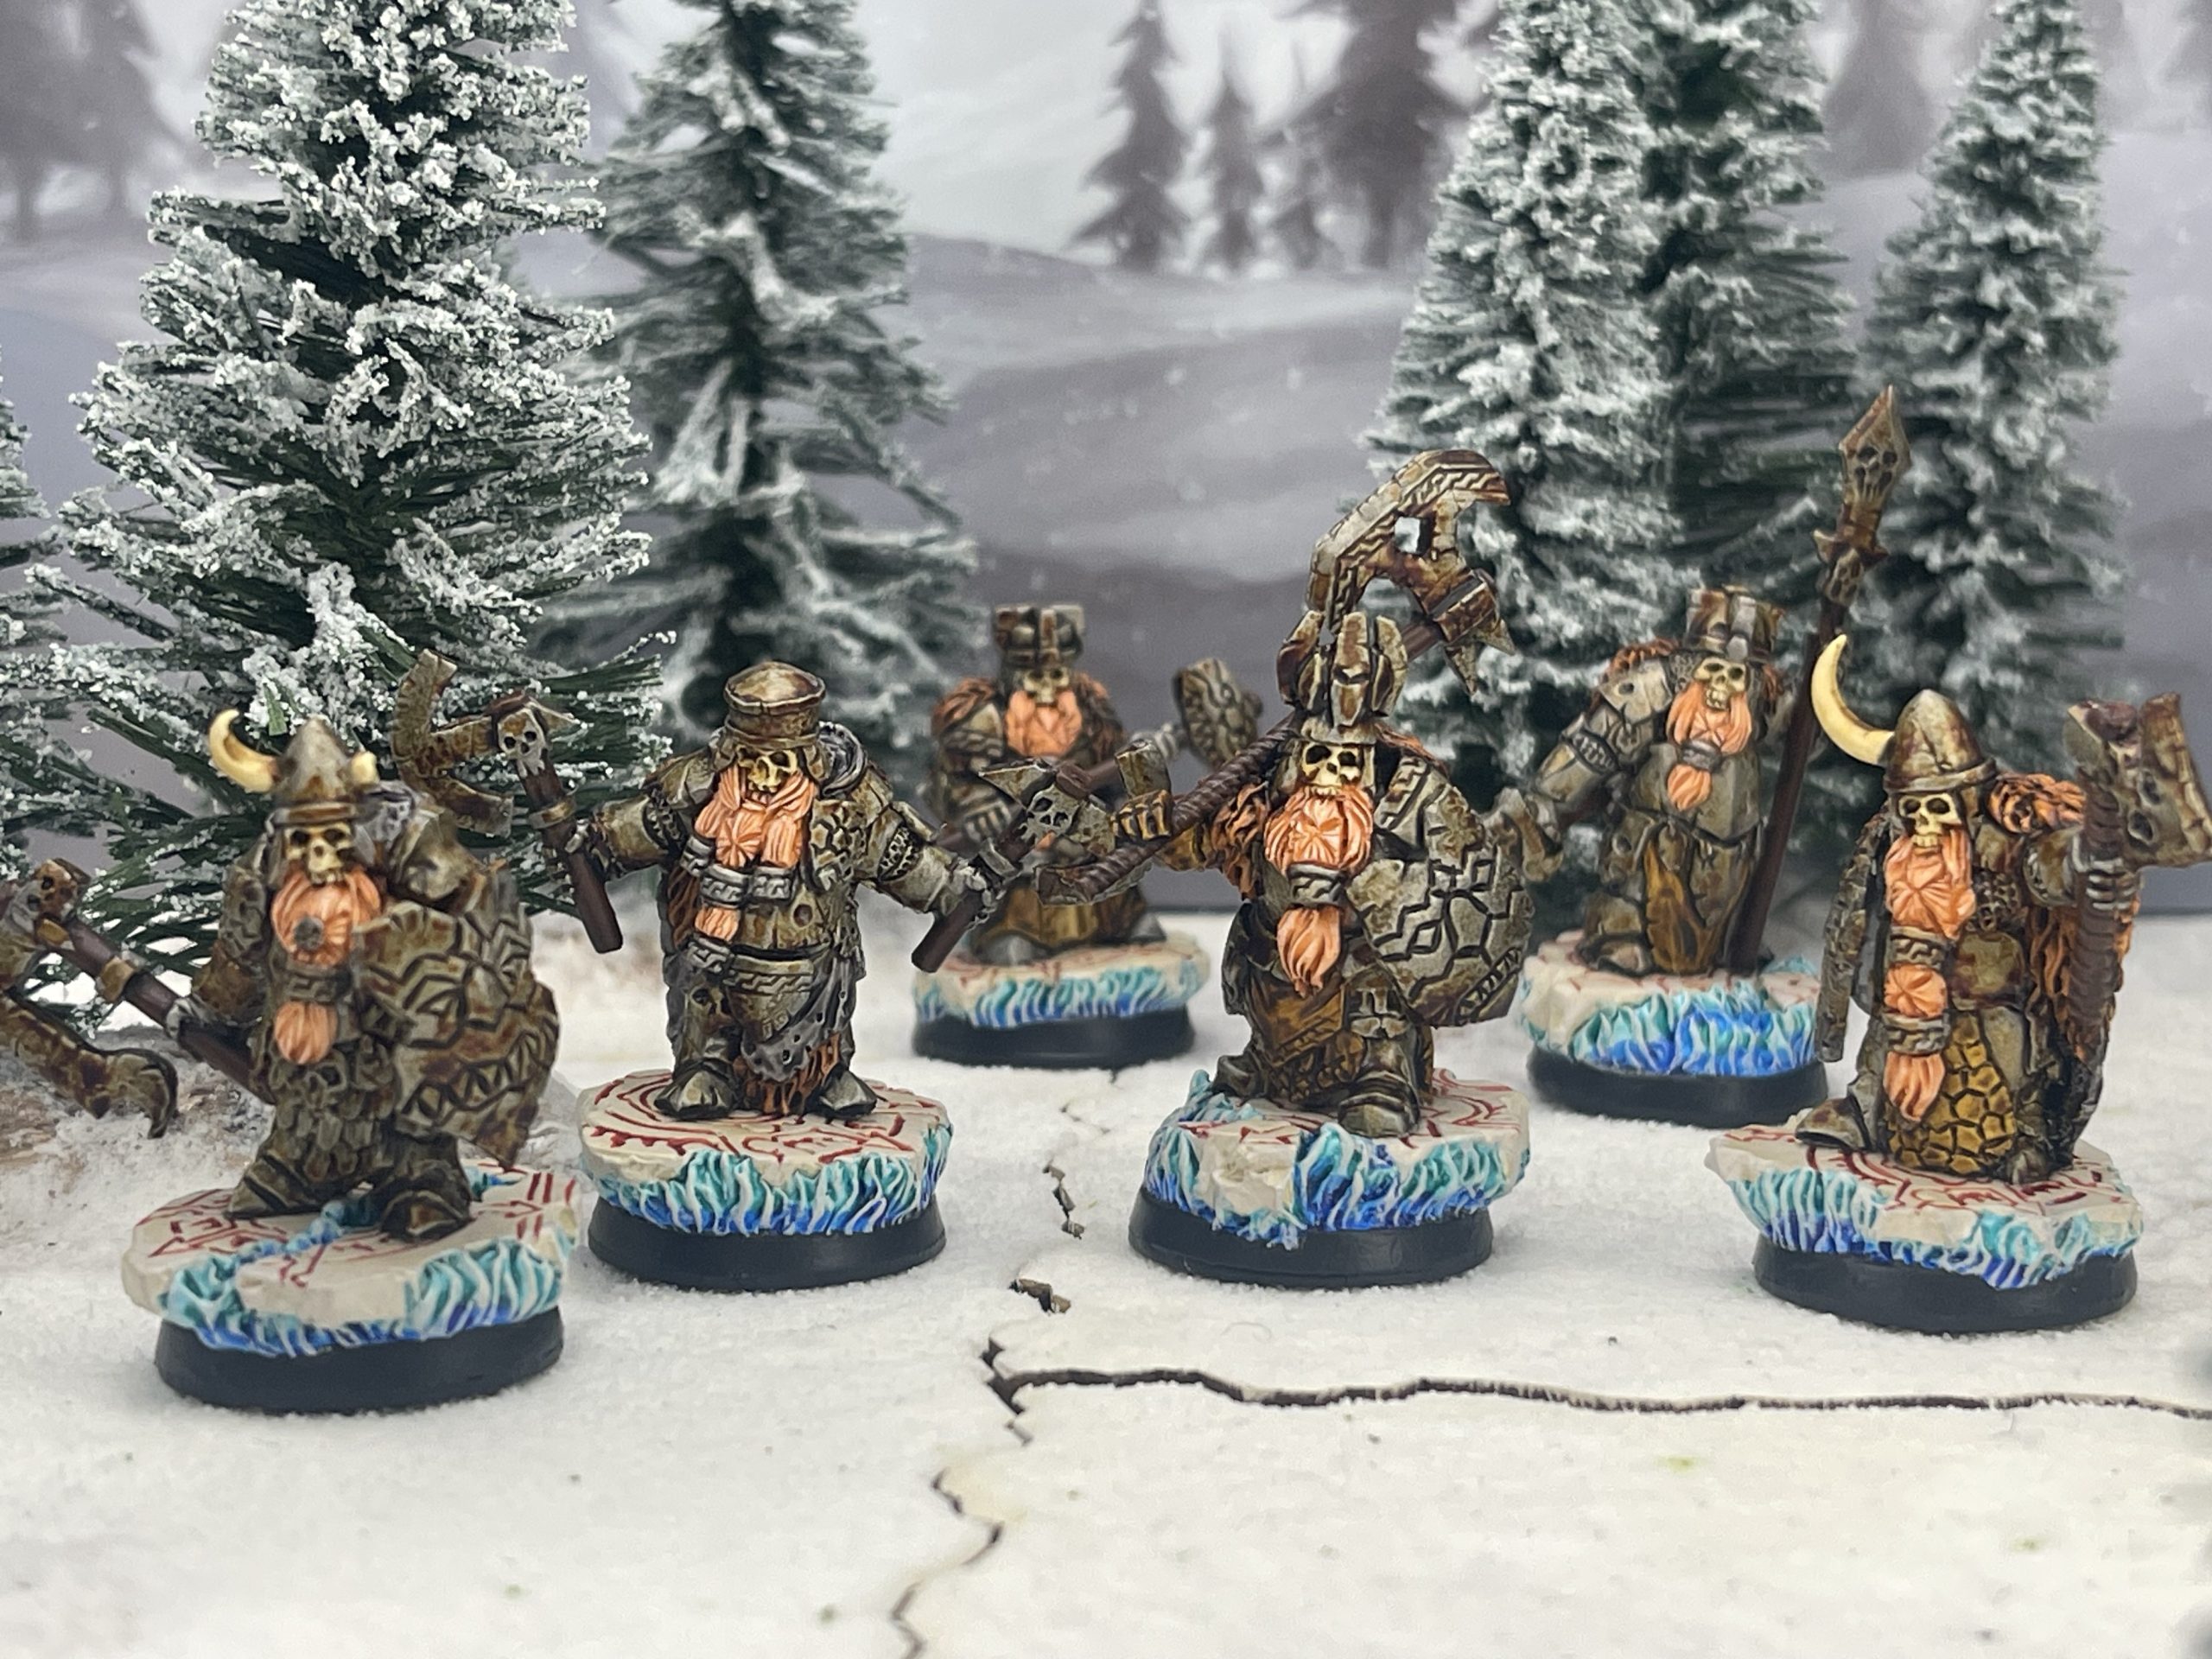 the 'volunteer' dwarves.
The board needs a warband!
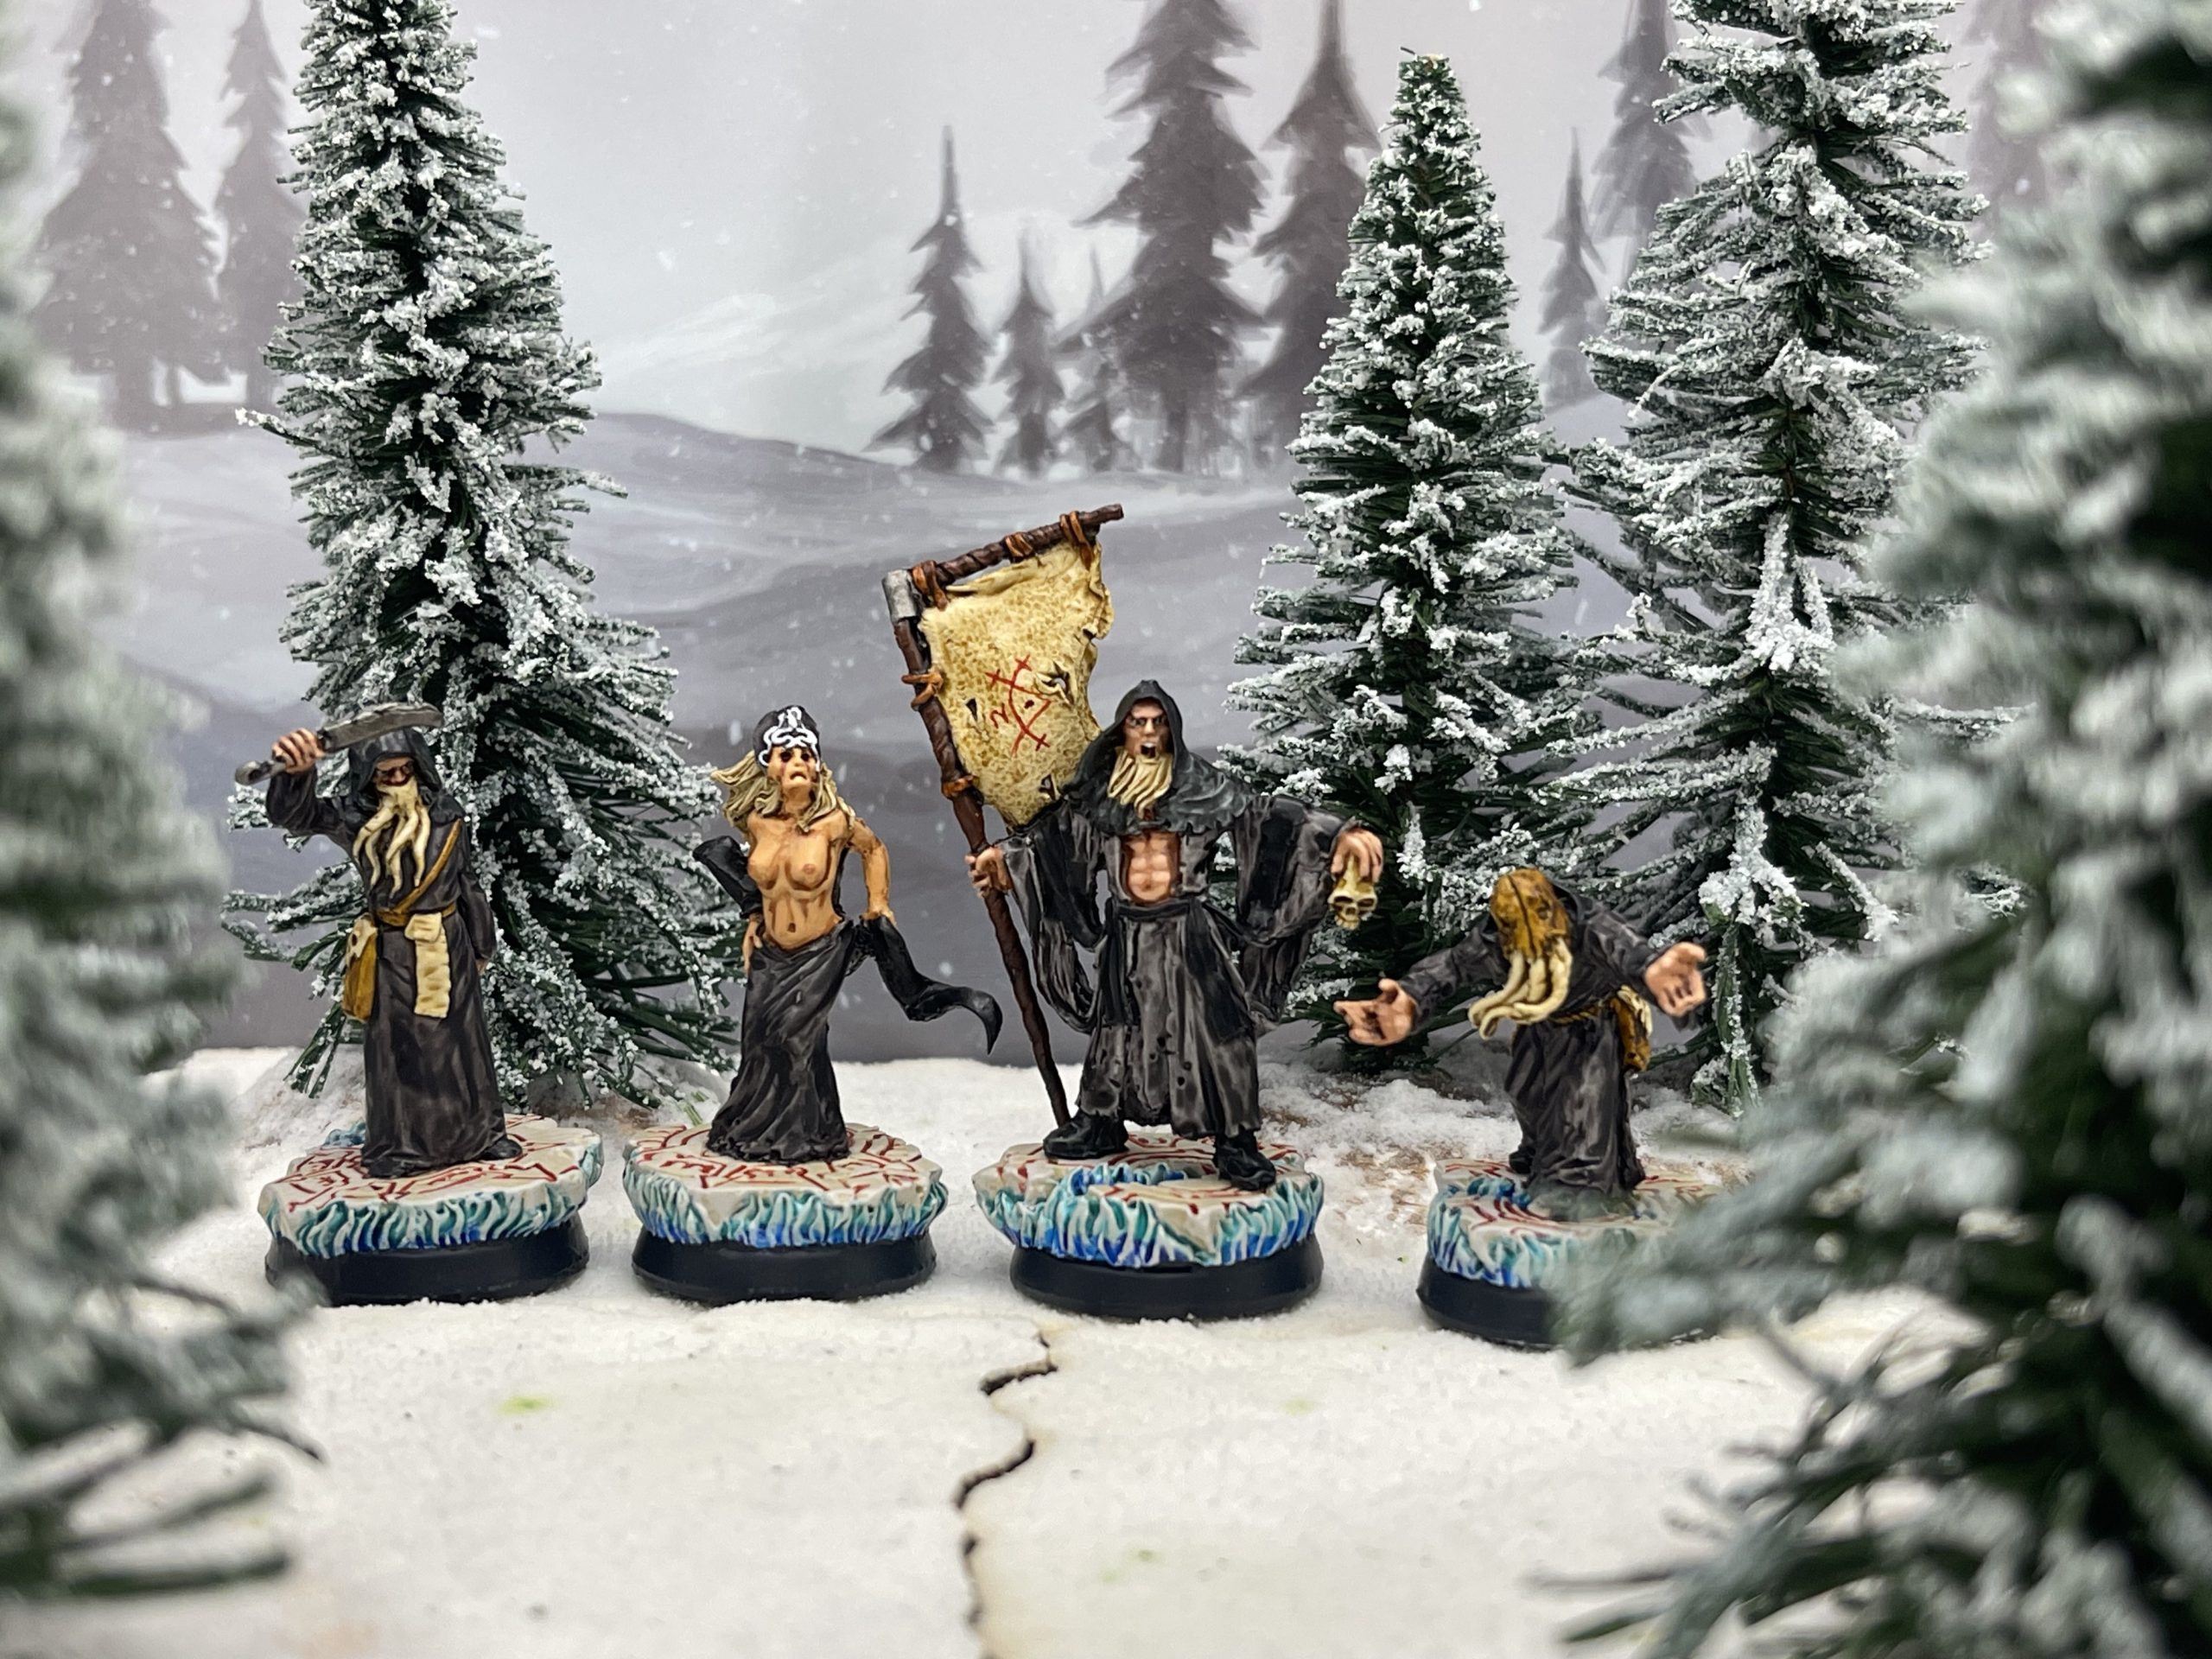
Enter stage left Scibor Minitures kickstarter campaign!
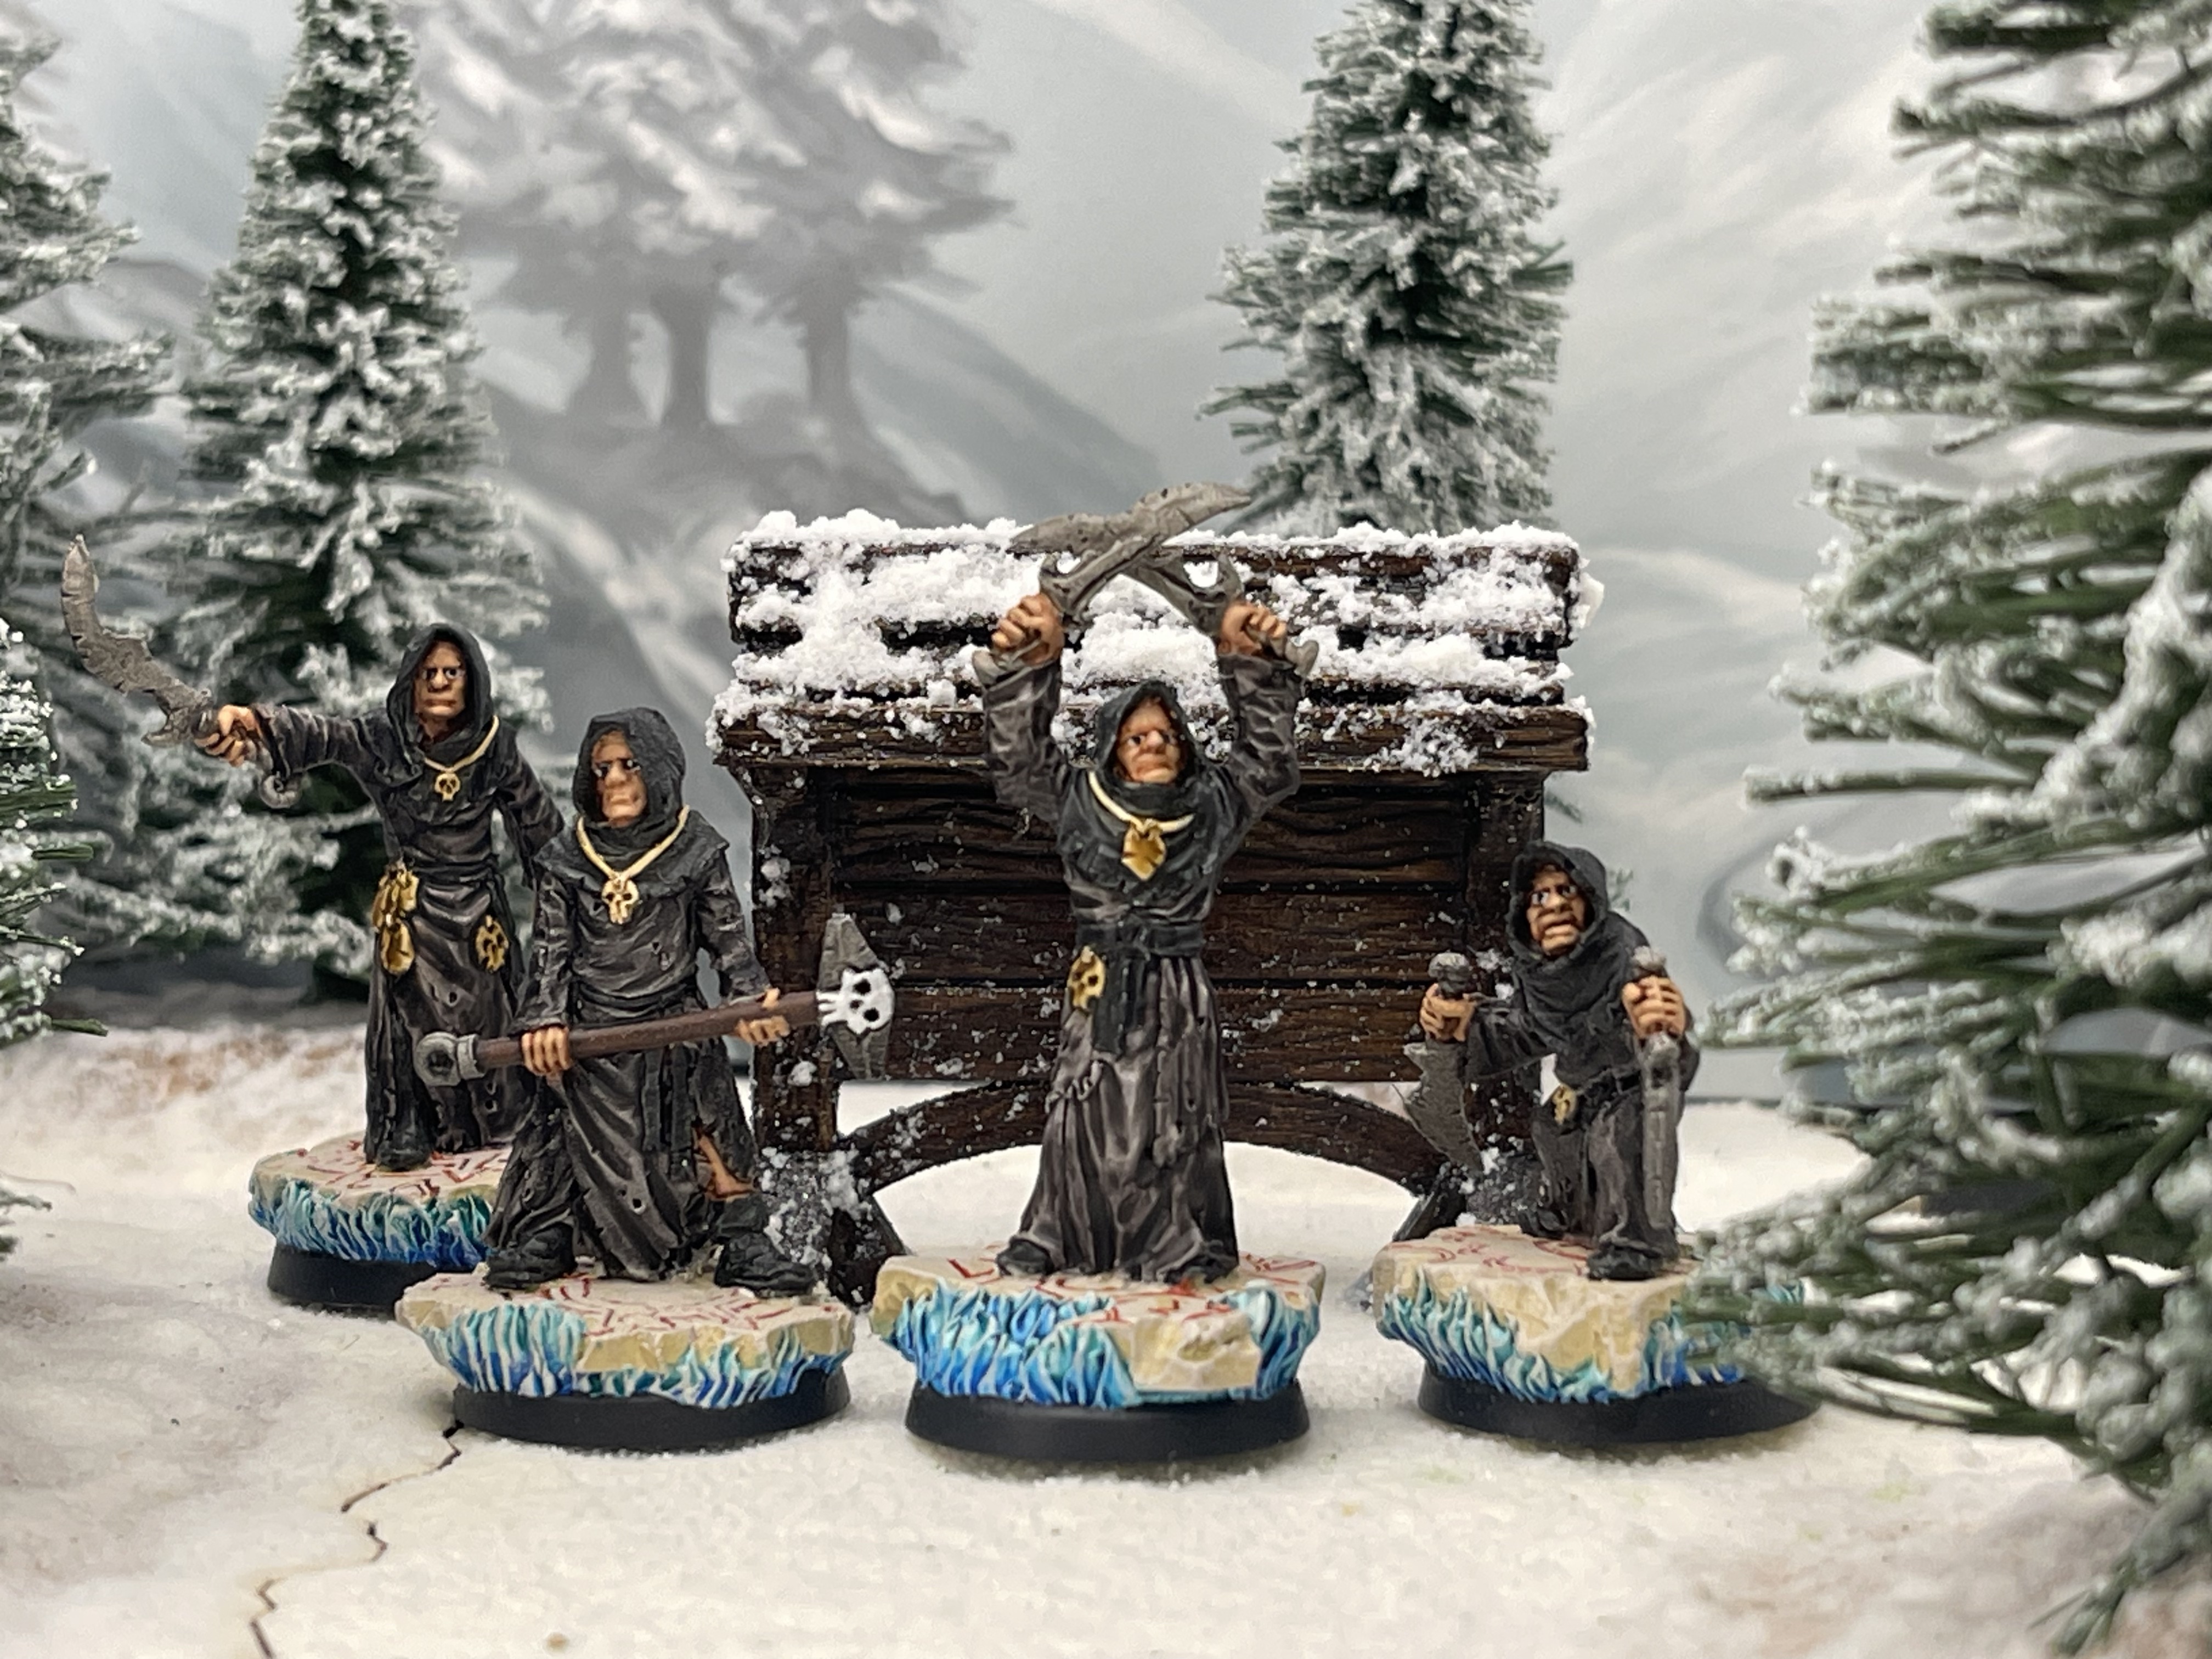 Cultists, they will fill in for thugs and thieves....after all, cultists are ten a penny and very expendable
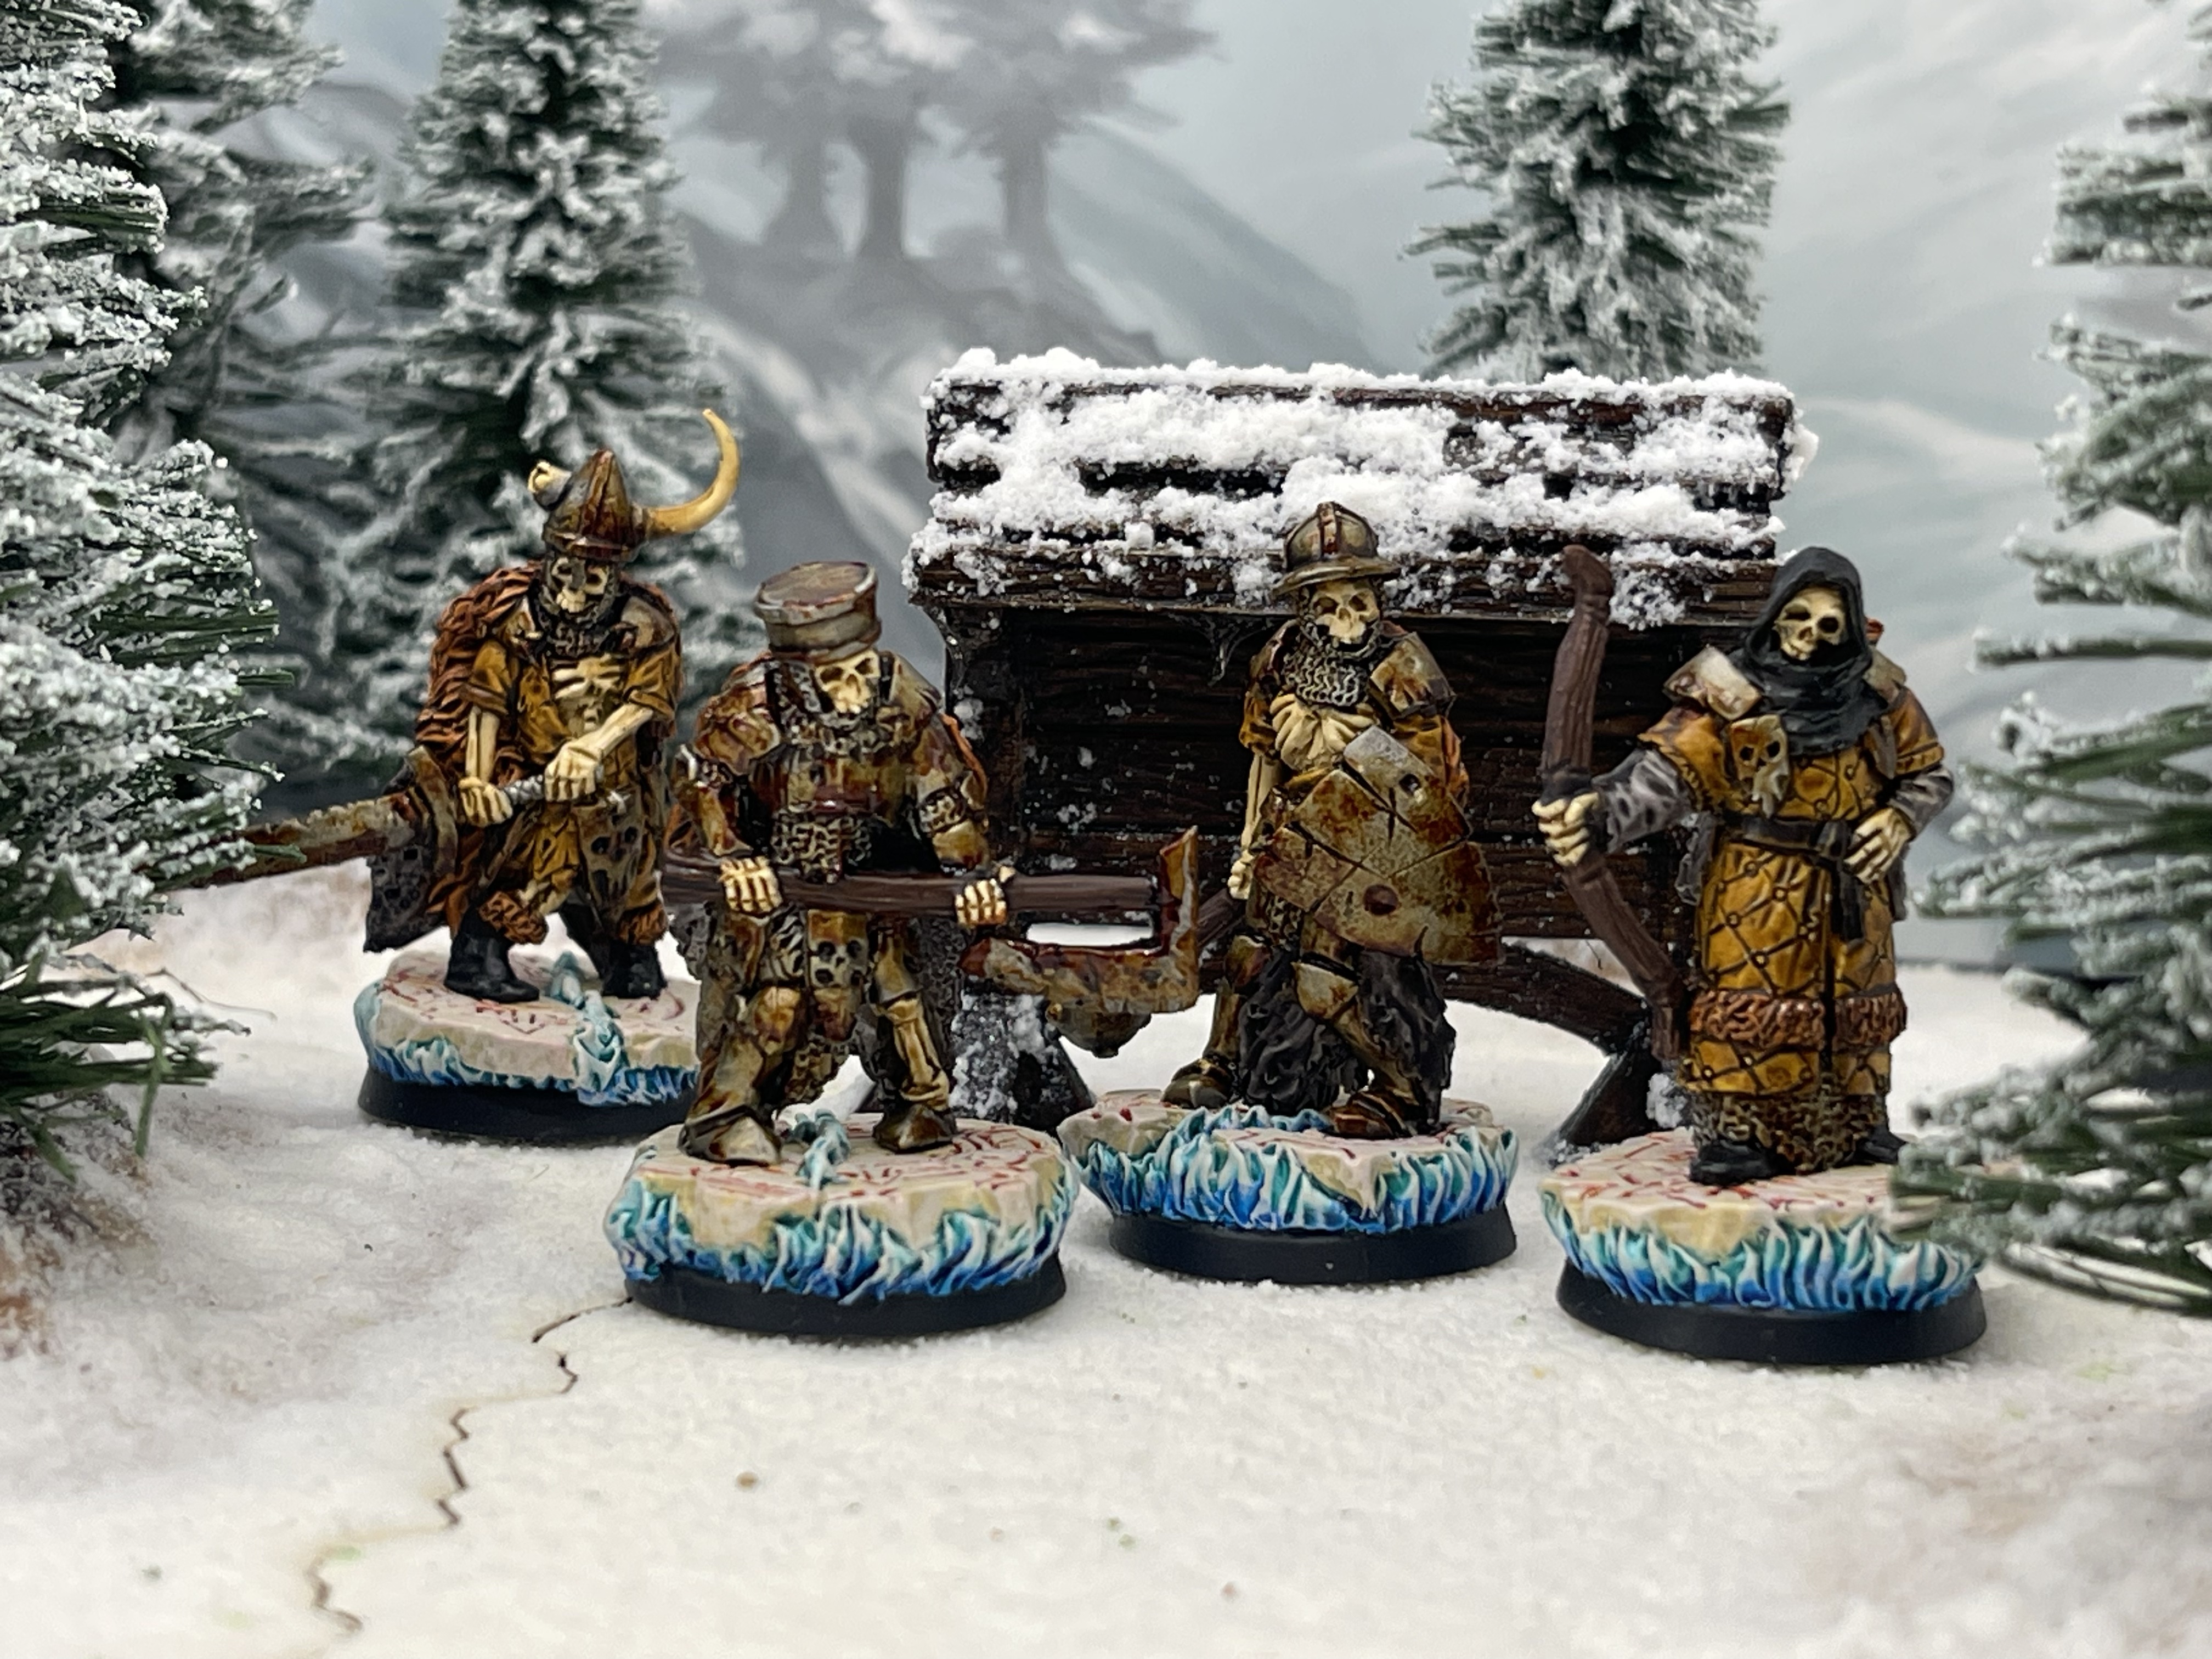 Raised dead fill the ranks of the hired specialist soldiers
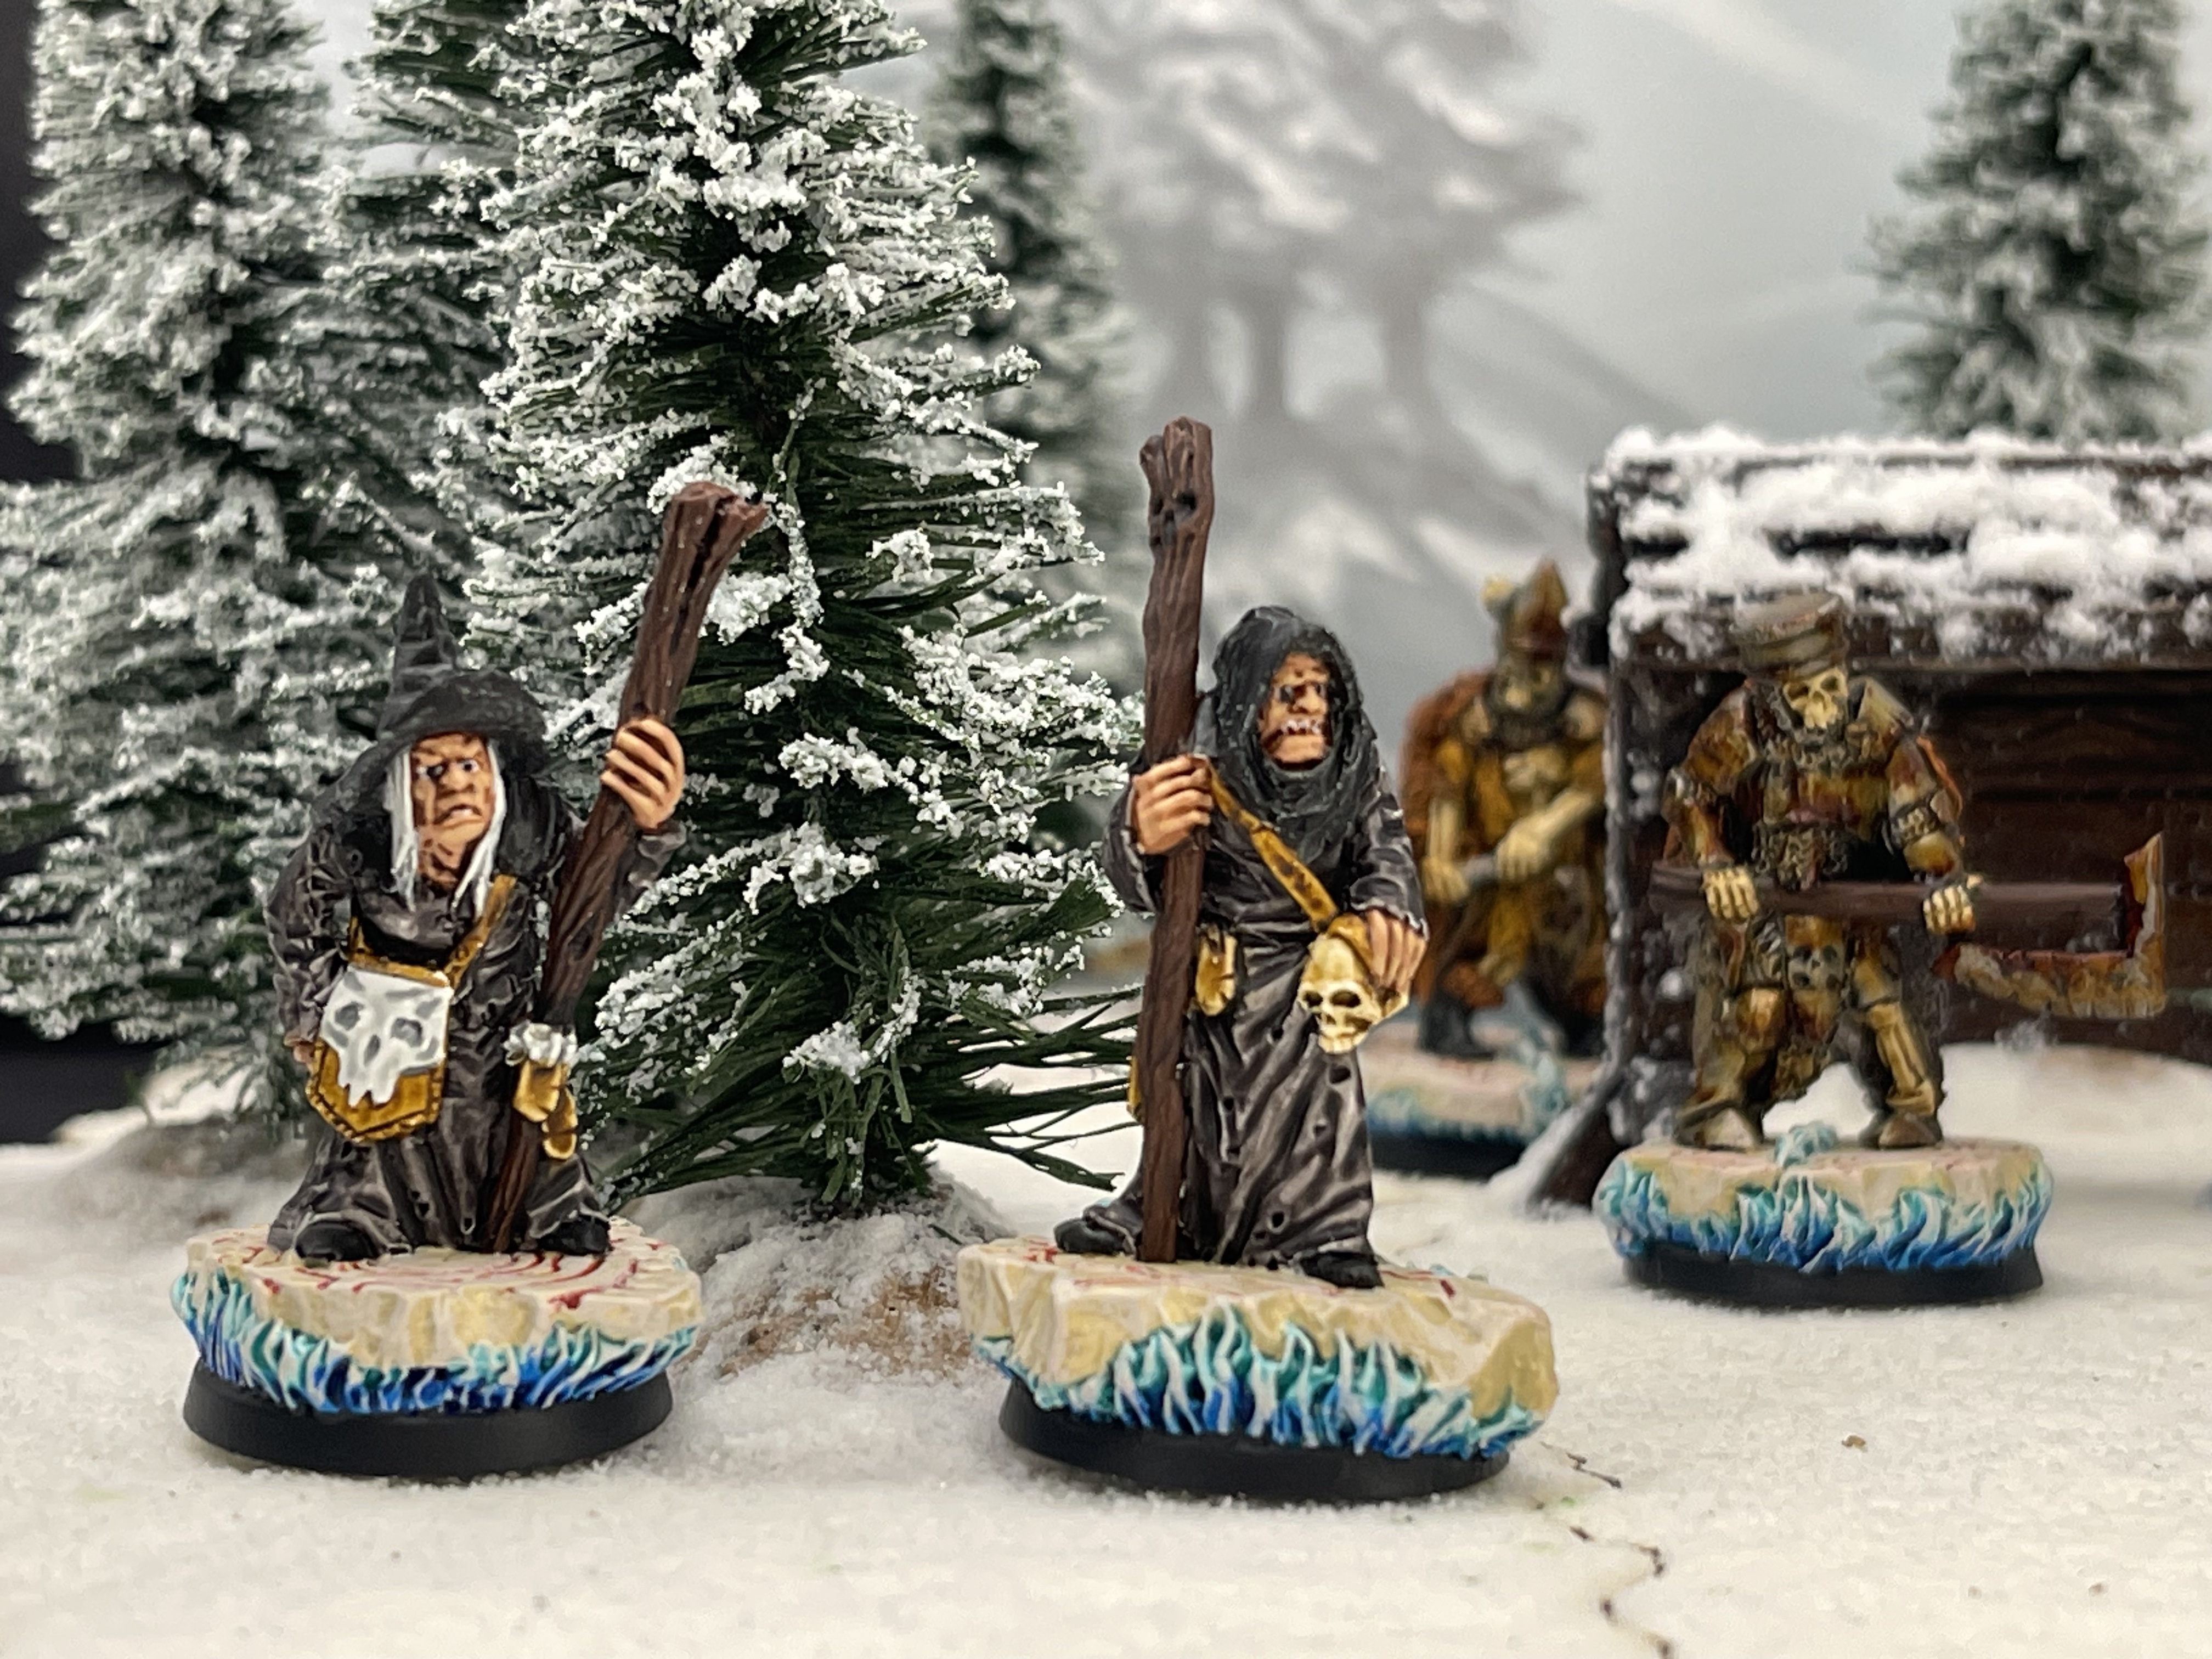 The wizard and his apprentice who also happens to be his wife
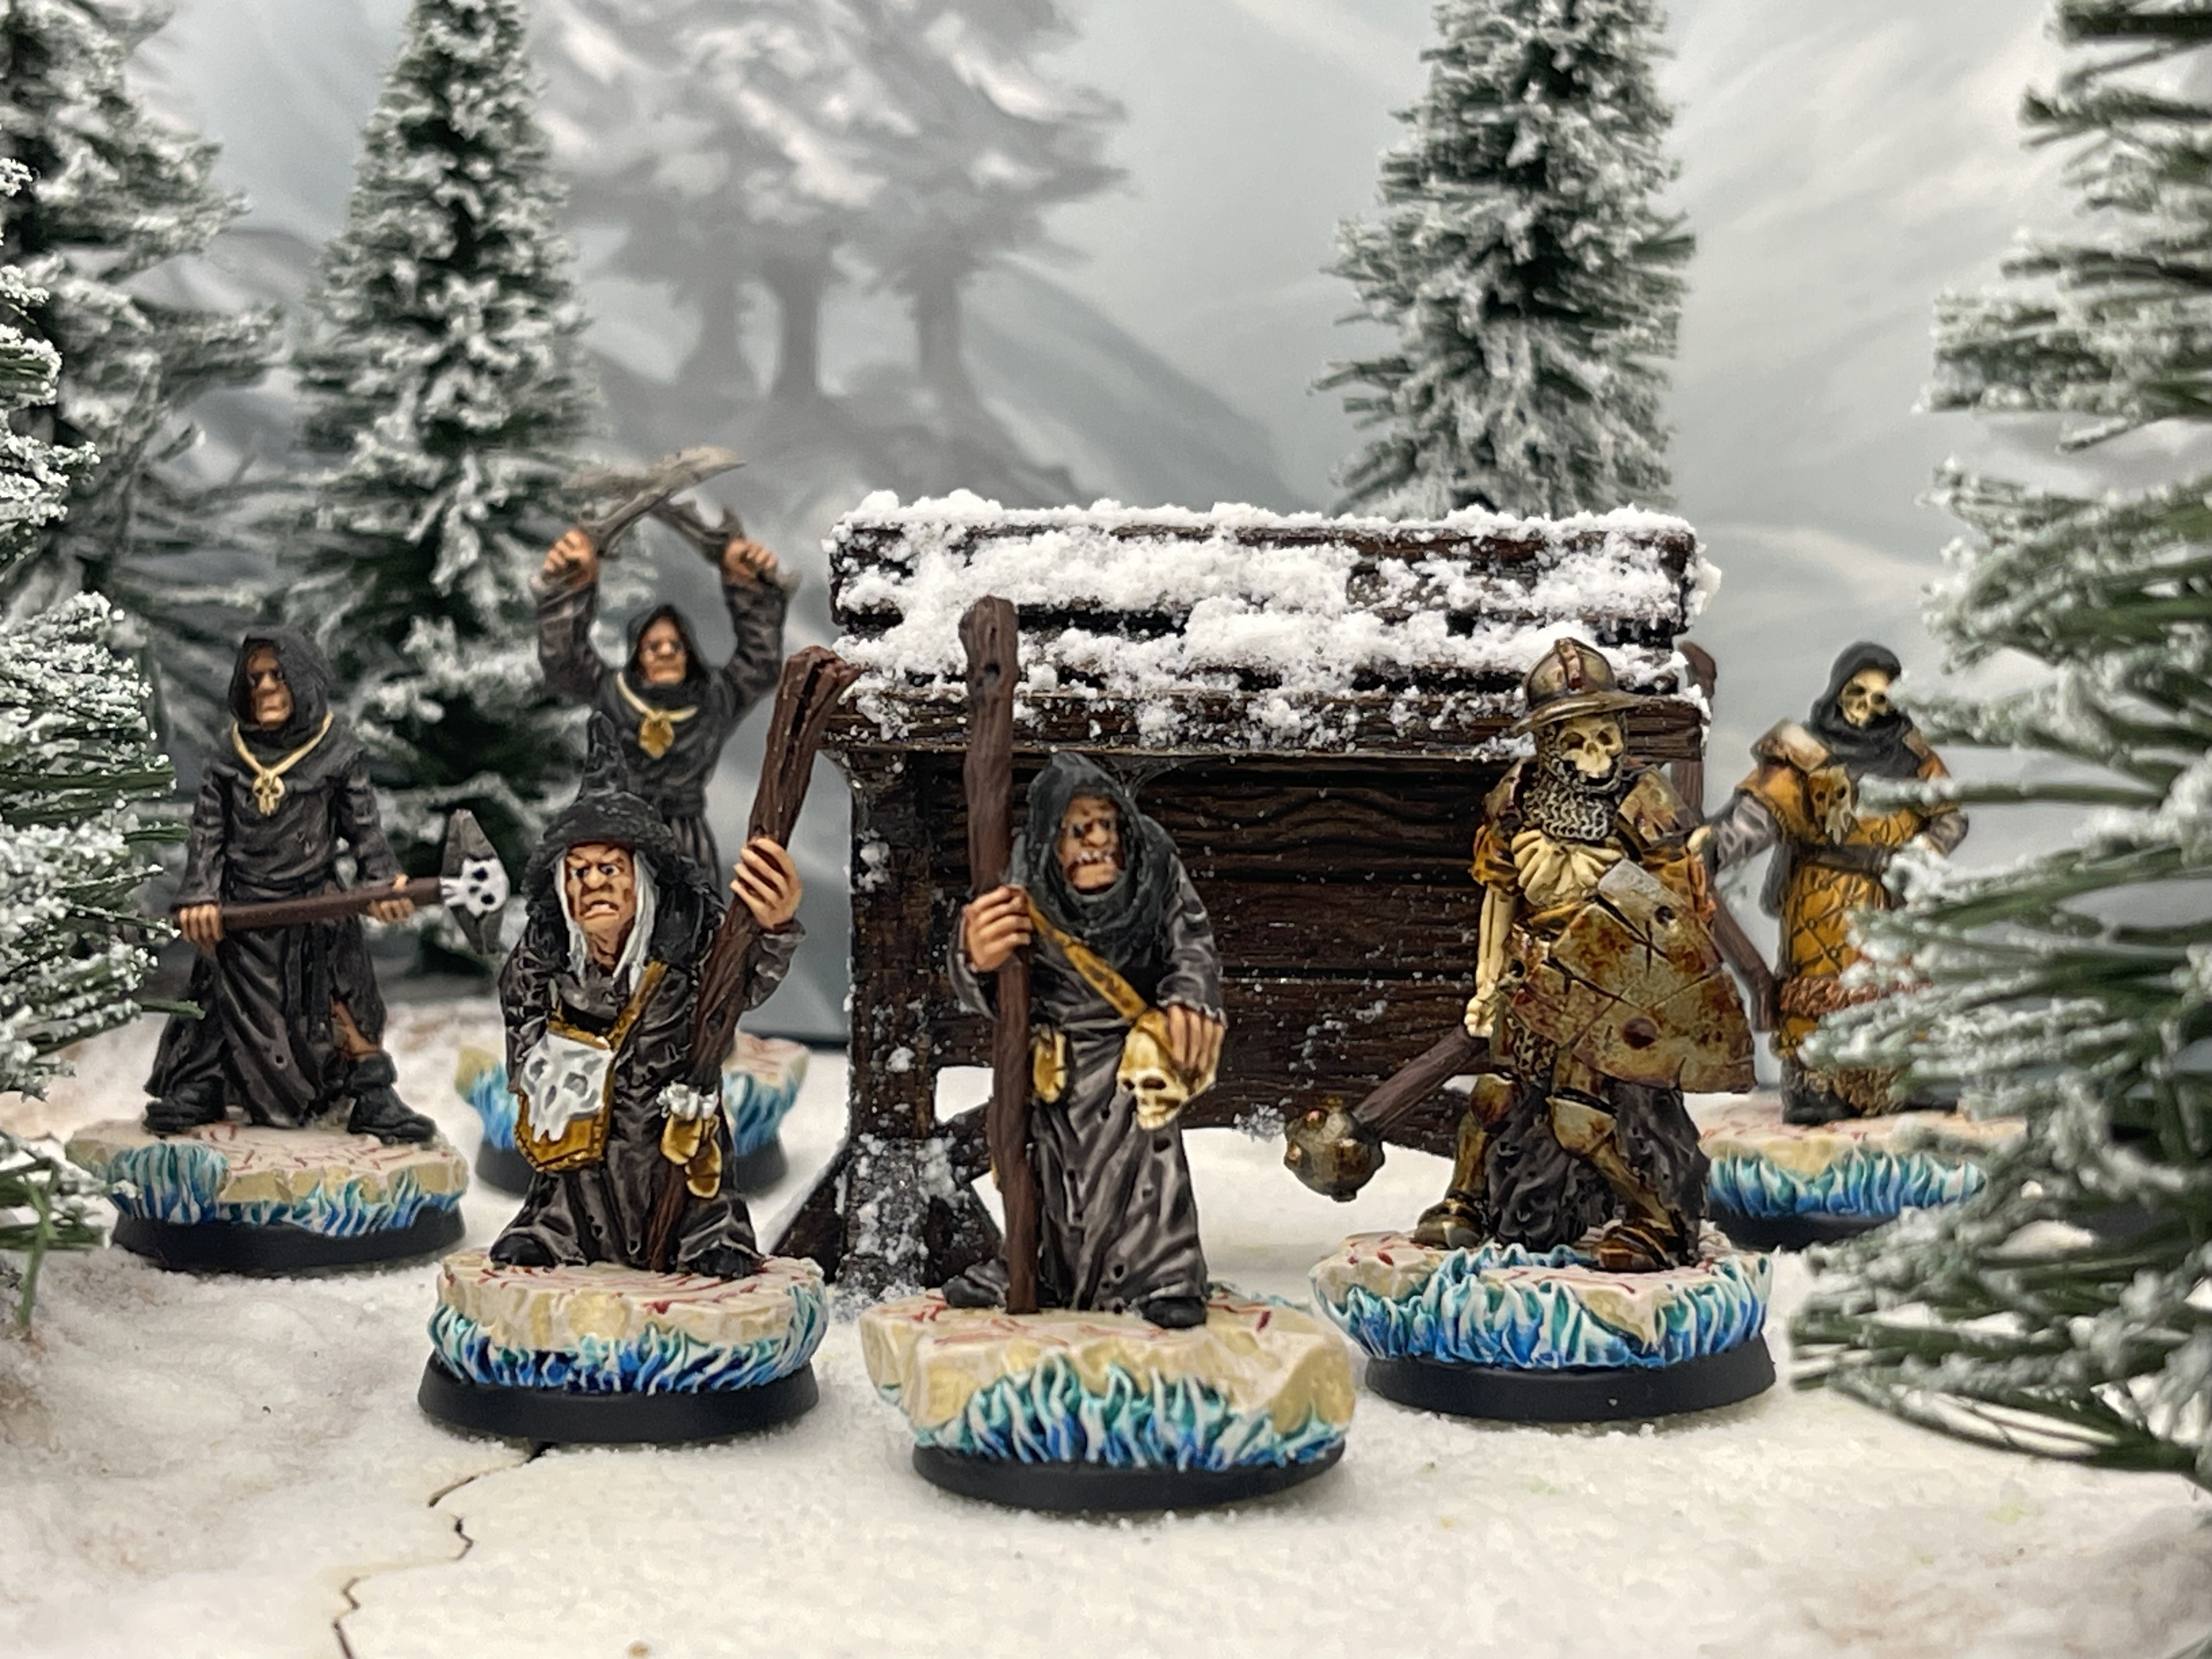 The first elements of the warband make their way through the wood
*Don’t read this if you have experienced difficulties with conception*
The theme of this necromantic warband is <as yet un-named> necromancer (wizard) and his espoused apprentice have struggled to have children of their own for years, the frustration with this and a lack of a civilised health care system in their country led to the pair turning to necromancy in the vain hope that they could bring life into the world in their own special way. Sure the body may have been donated by another but this couple see the dead they raise as their own children and care for them in their own twisted way. In order to protect their children the couple also started a cult which seems to attract numerous thugs and thieves willing to don the grey and black robes of the necromancer and act in a less than honourable manner to bring in gold, jewels, grimoires and of course fresh bodies to keep the family dream alive…
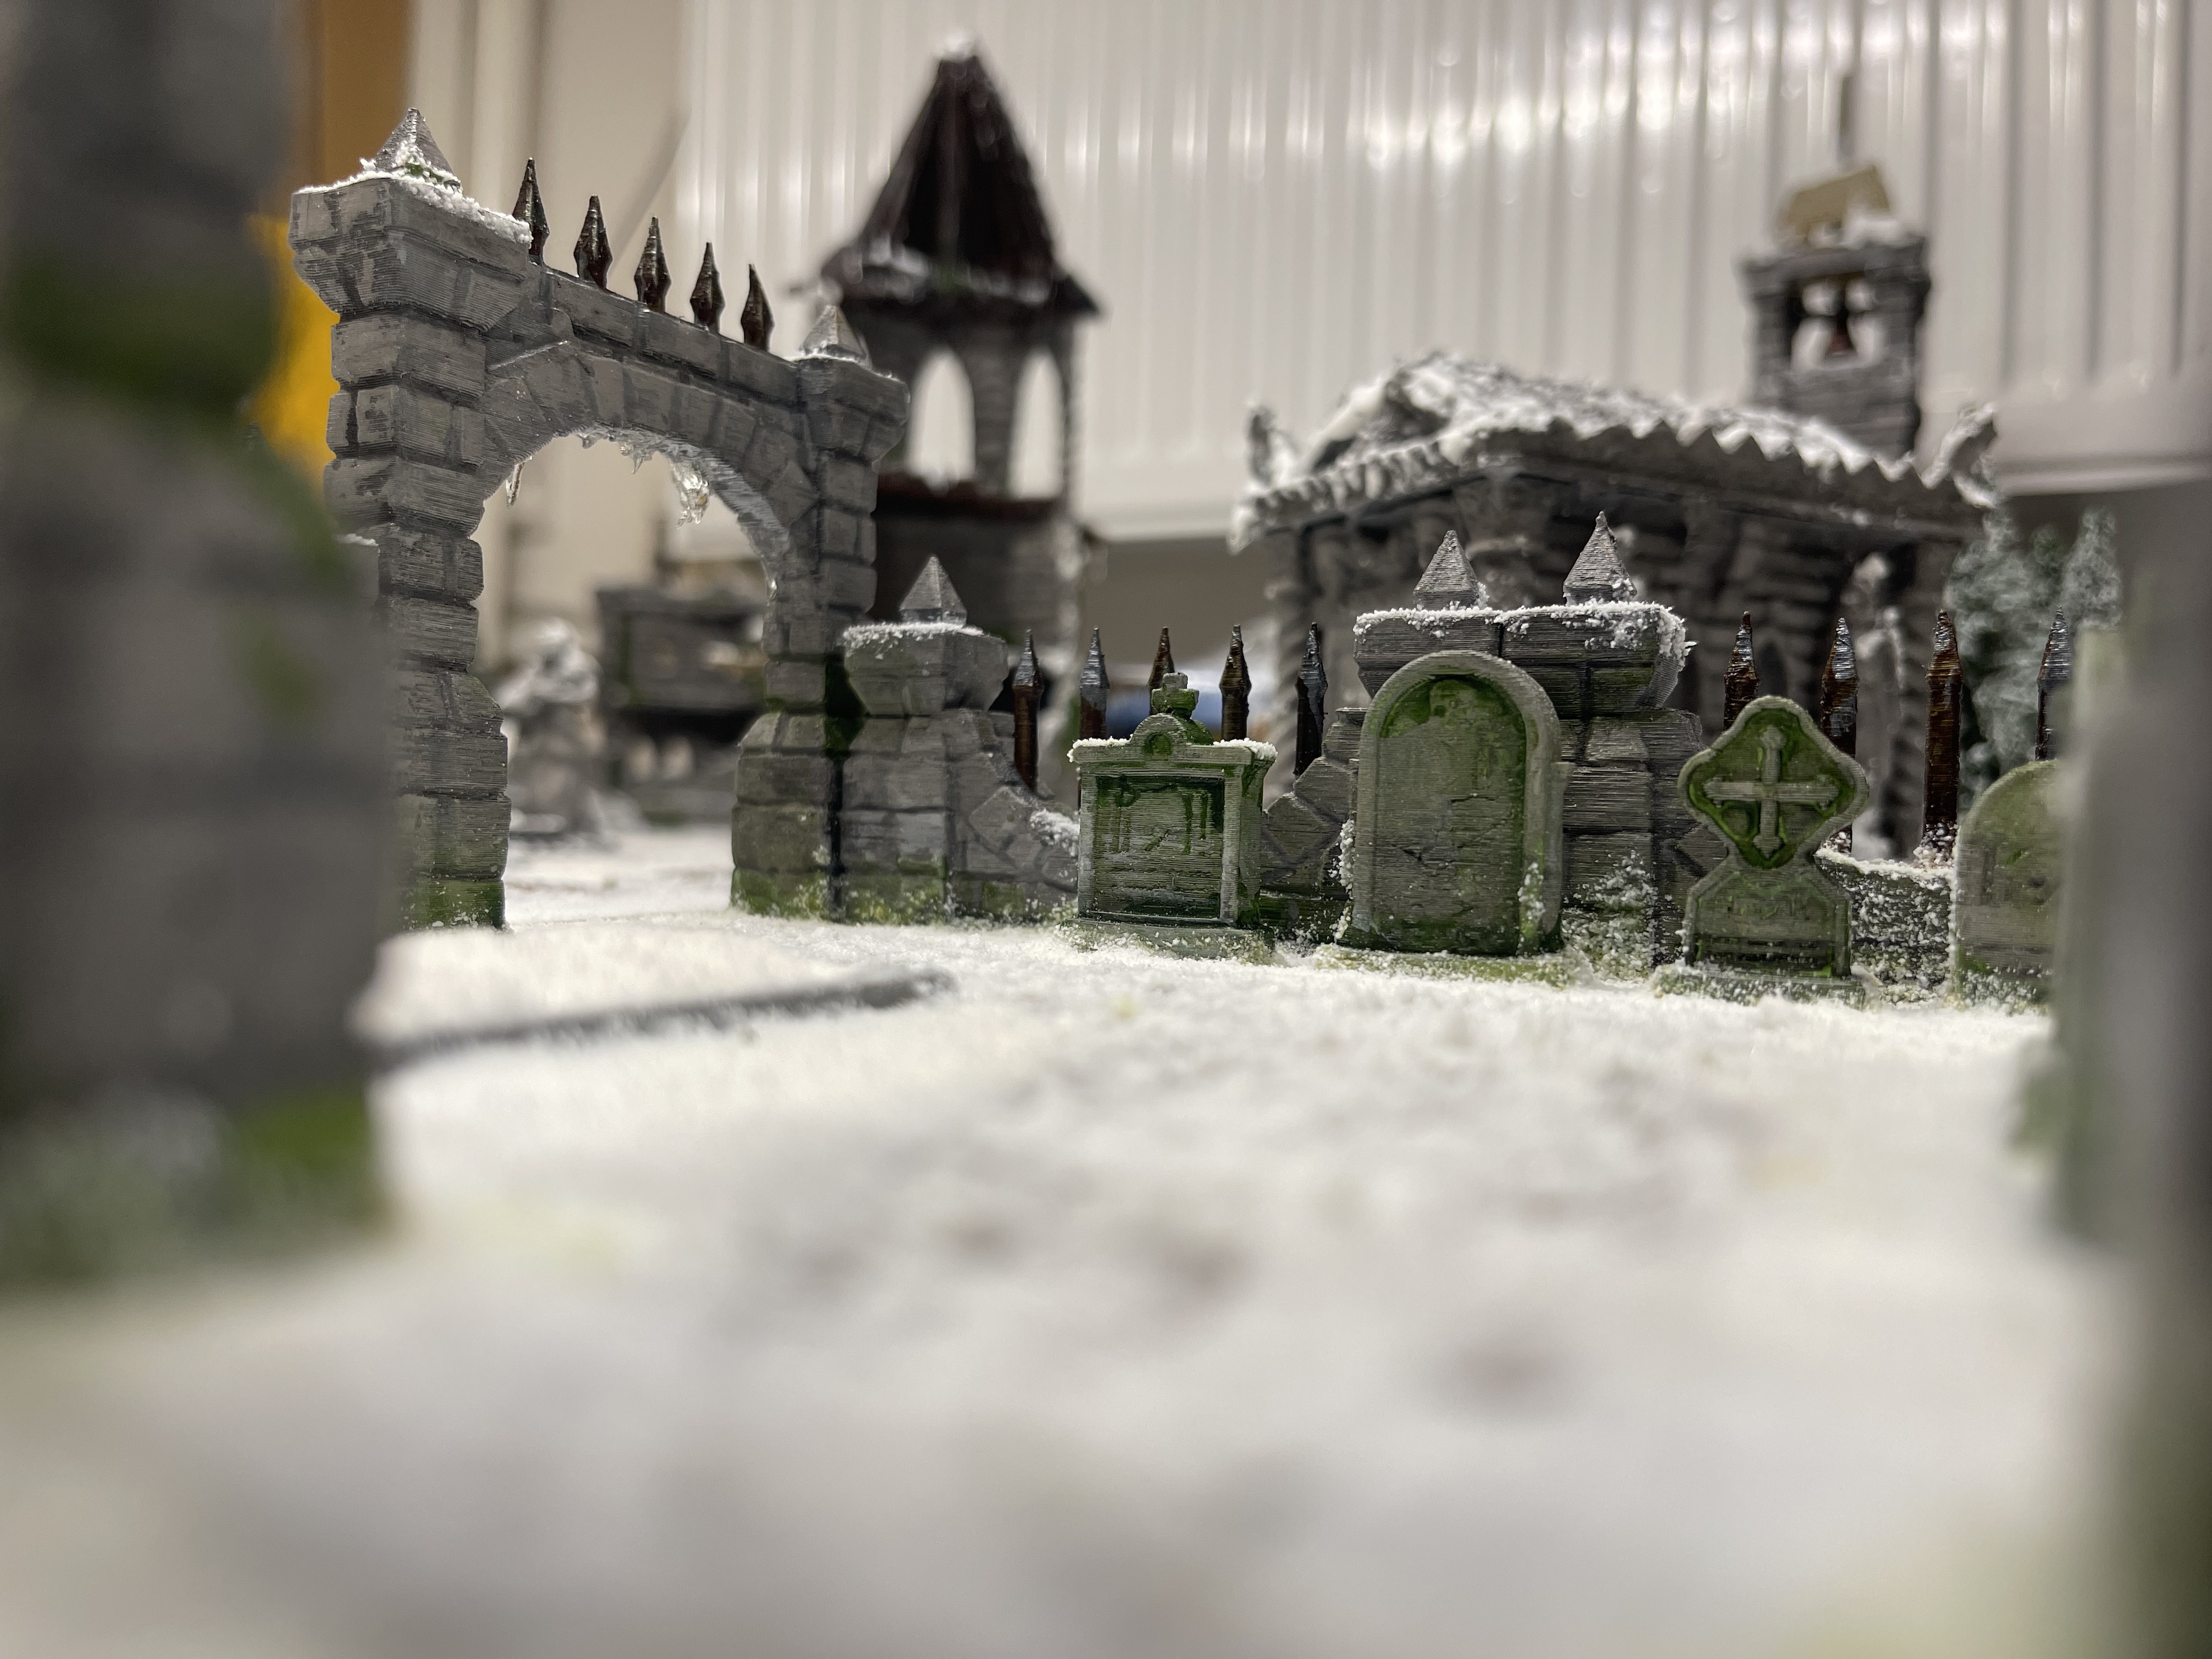
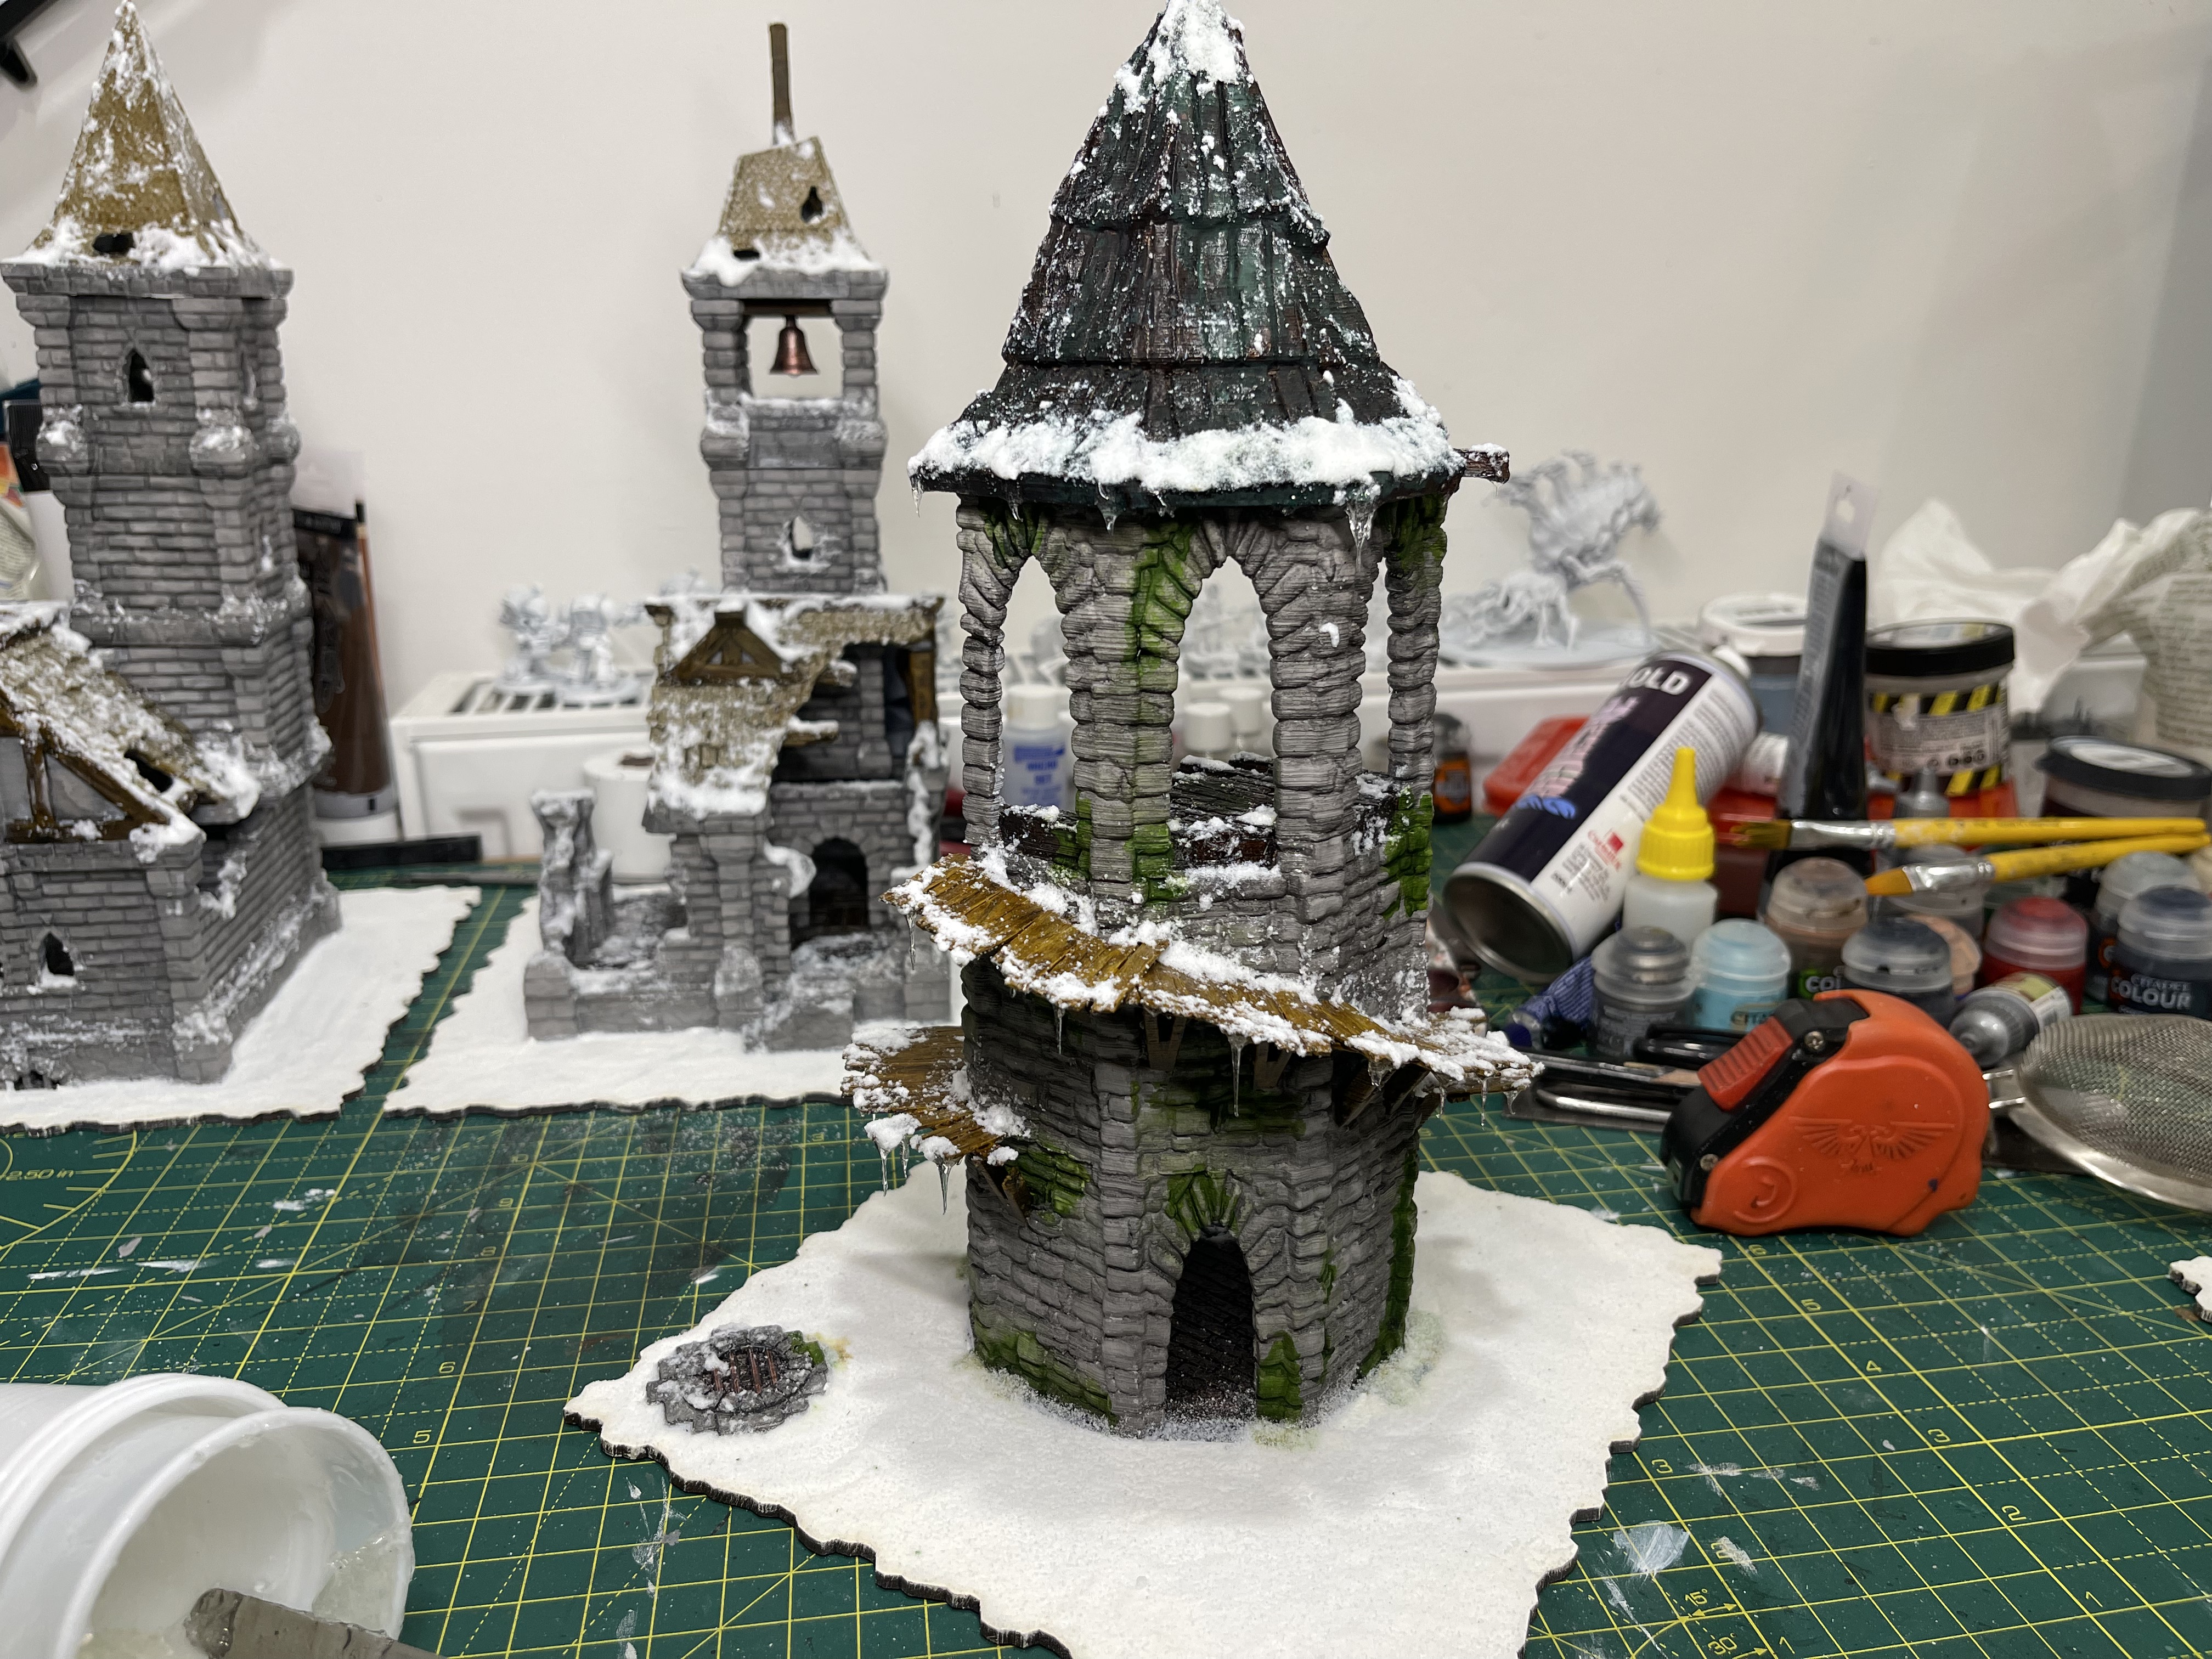
replaced the piss take hill
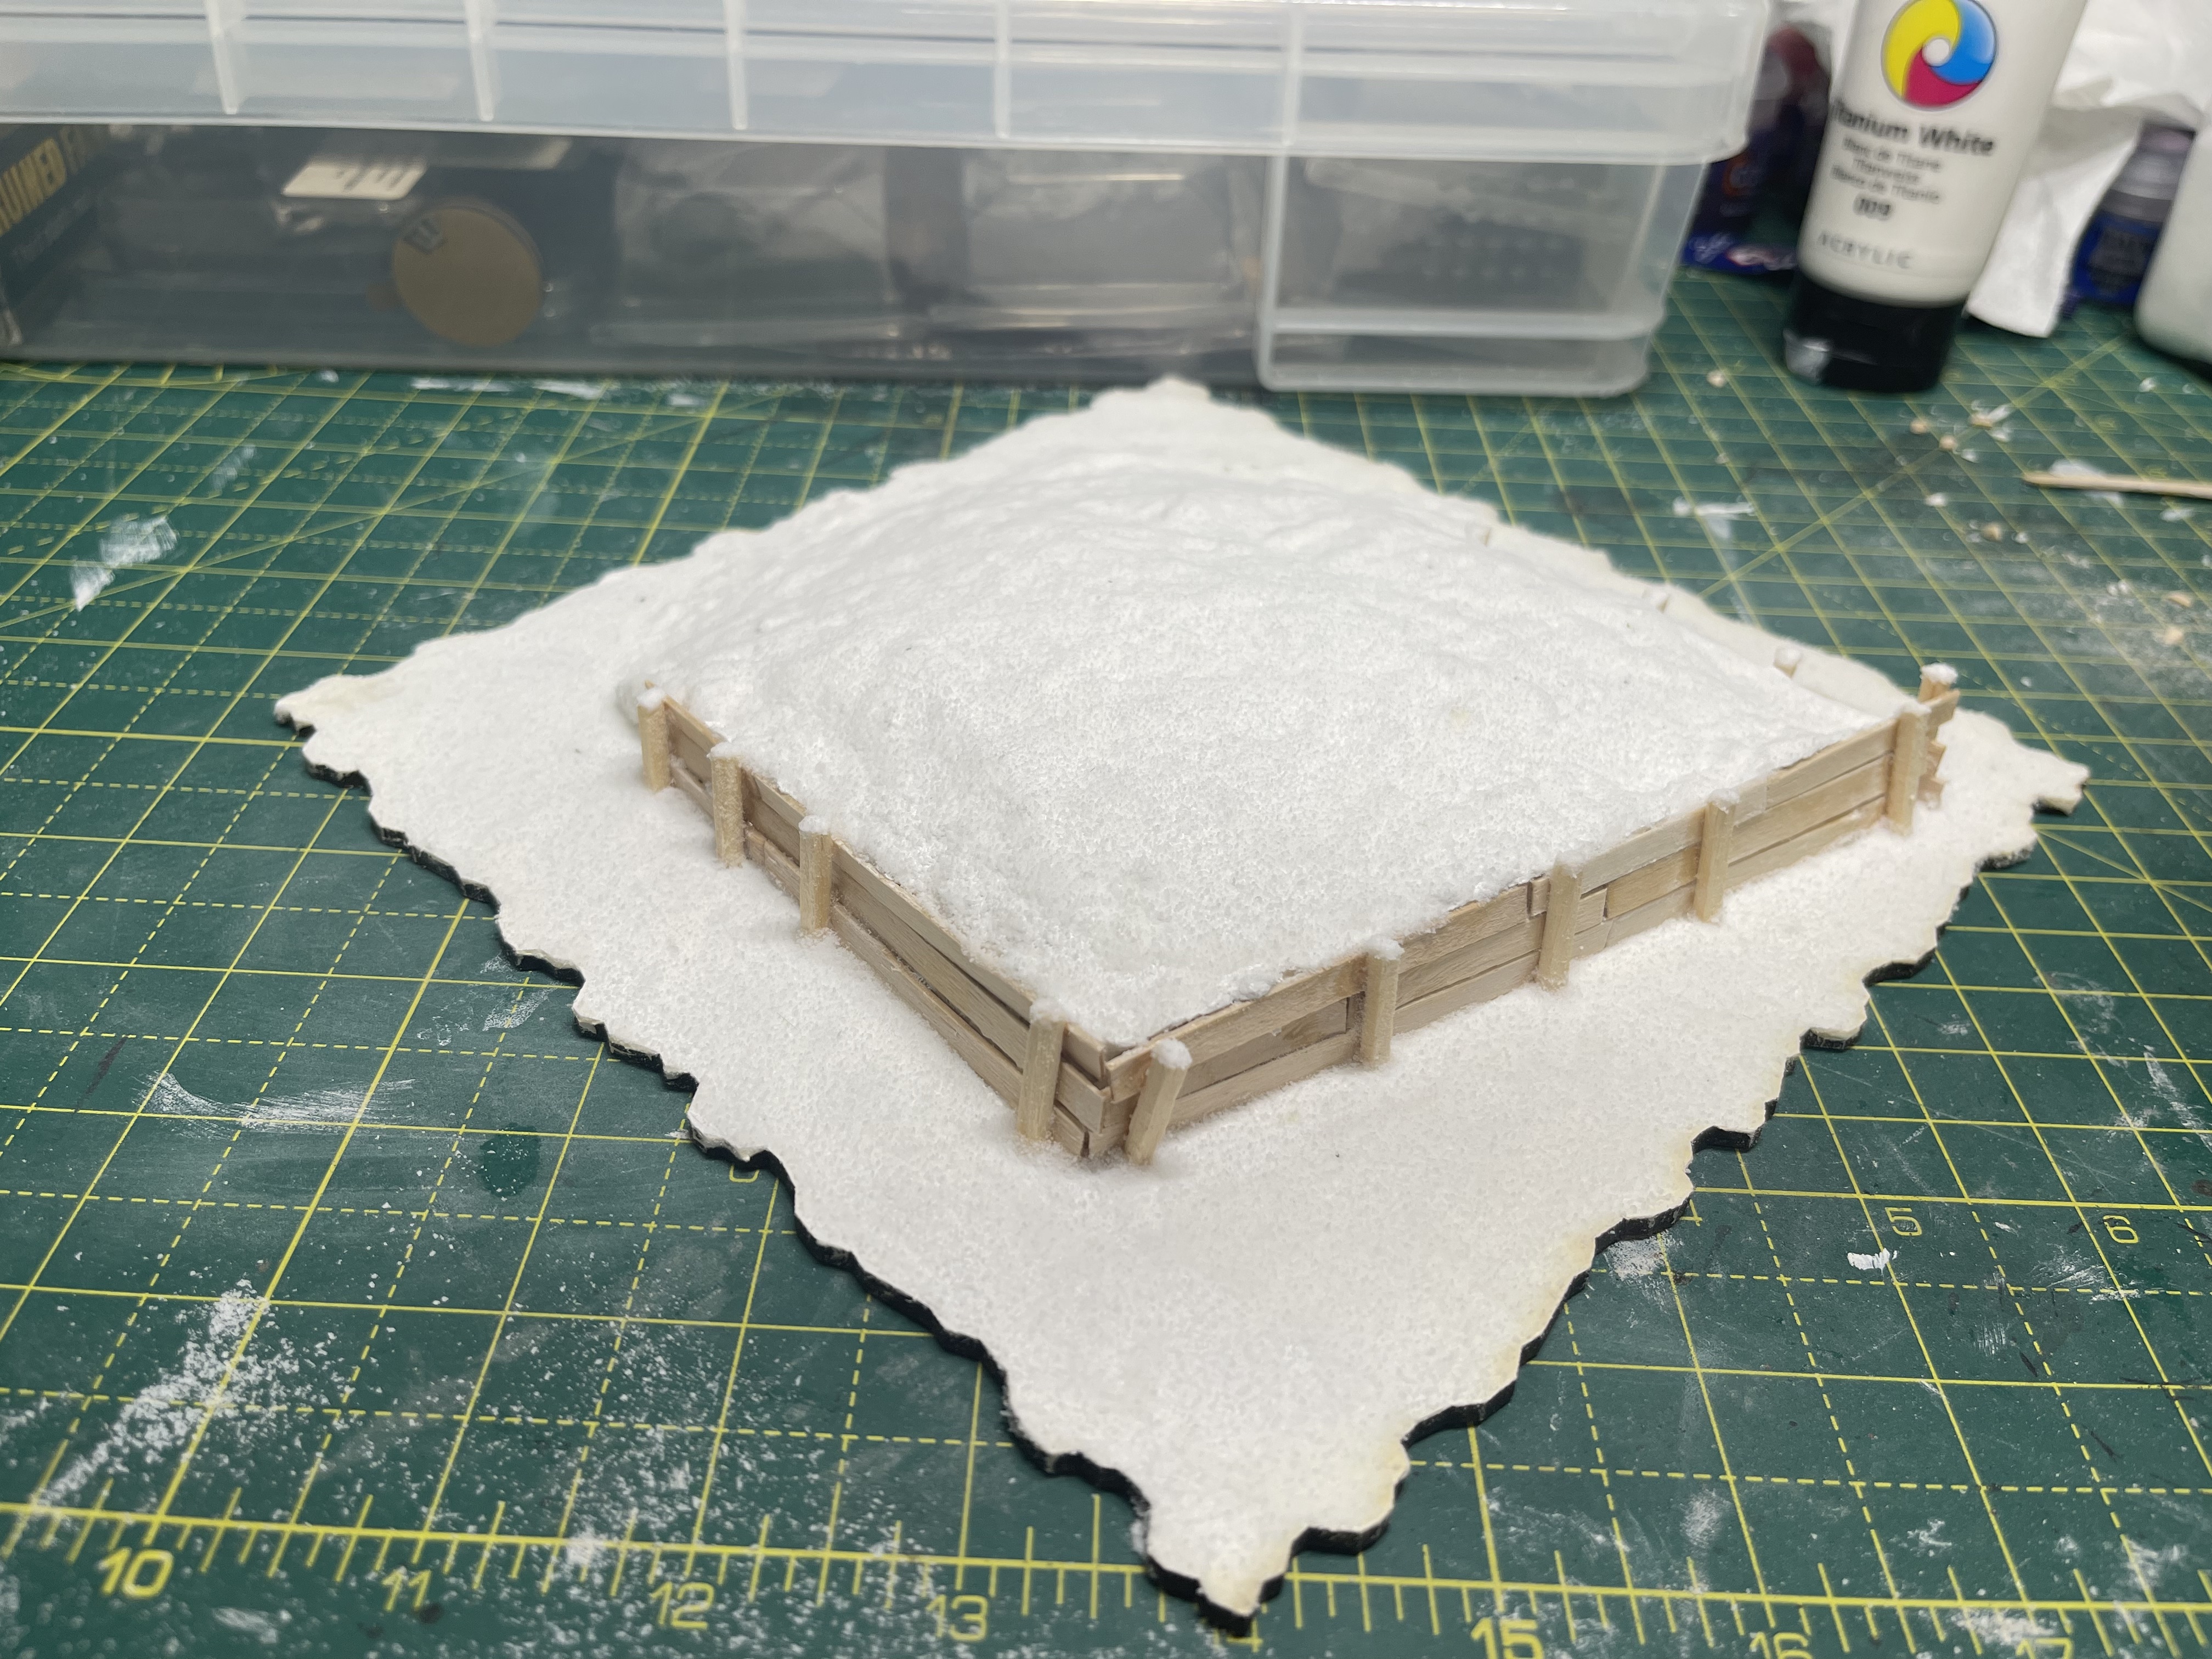
Ok so i decided i should use the last tile and i had some modelling compound left over.
simple low rise hill thats been reinforced with wooden planking. It’ll be enough to allow an archer to shoot over the walls of the cemetery without a cover save but thats it. It is also wide enough for a small ruined building to be added at a later date if i can be bothered.
slapped on a load of modelling compound and agitated into position. then i pushed in a load of coffee stirrers and let it set. once dry i removed the coffee stirrers, painted the hill white and cut up the coffee stirrers into smaller planks.
the small planks were then superglued back onto the side of the embankment and big long matches cut down to pole size and superglued down in a rough and ready fashion. i knew i wasnt going to paint the planking or stain it so i was less than careful with the superglue application.
then PVA’d the whole thing and gave a liberal sprinkling of snow flock. Done
all done and racked up ready
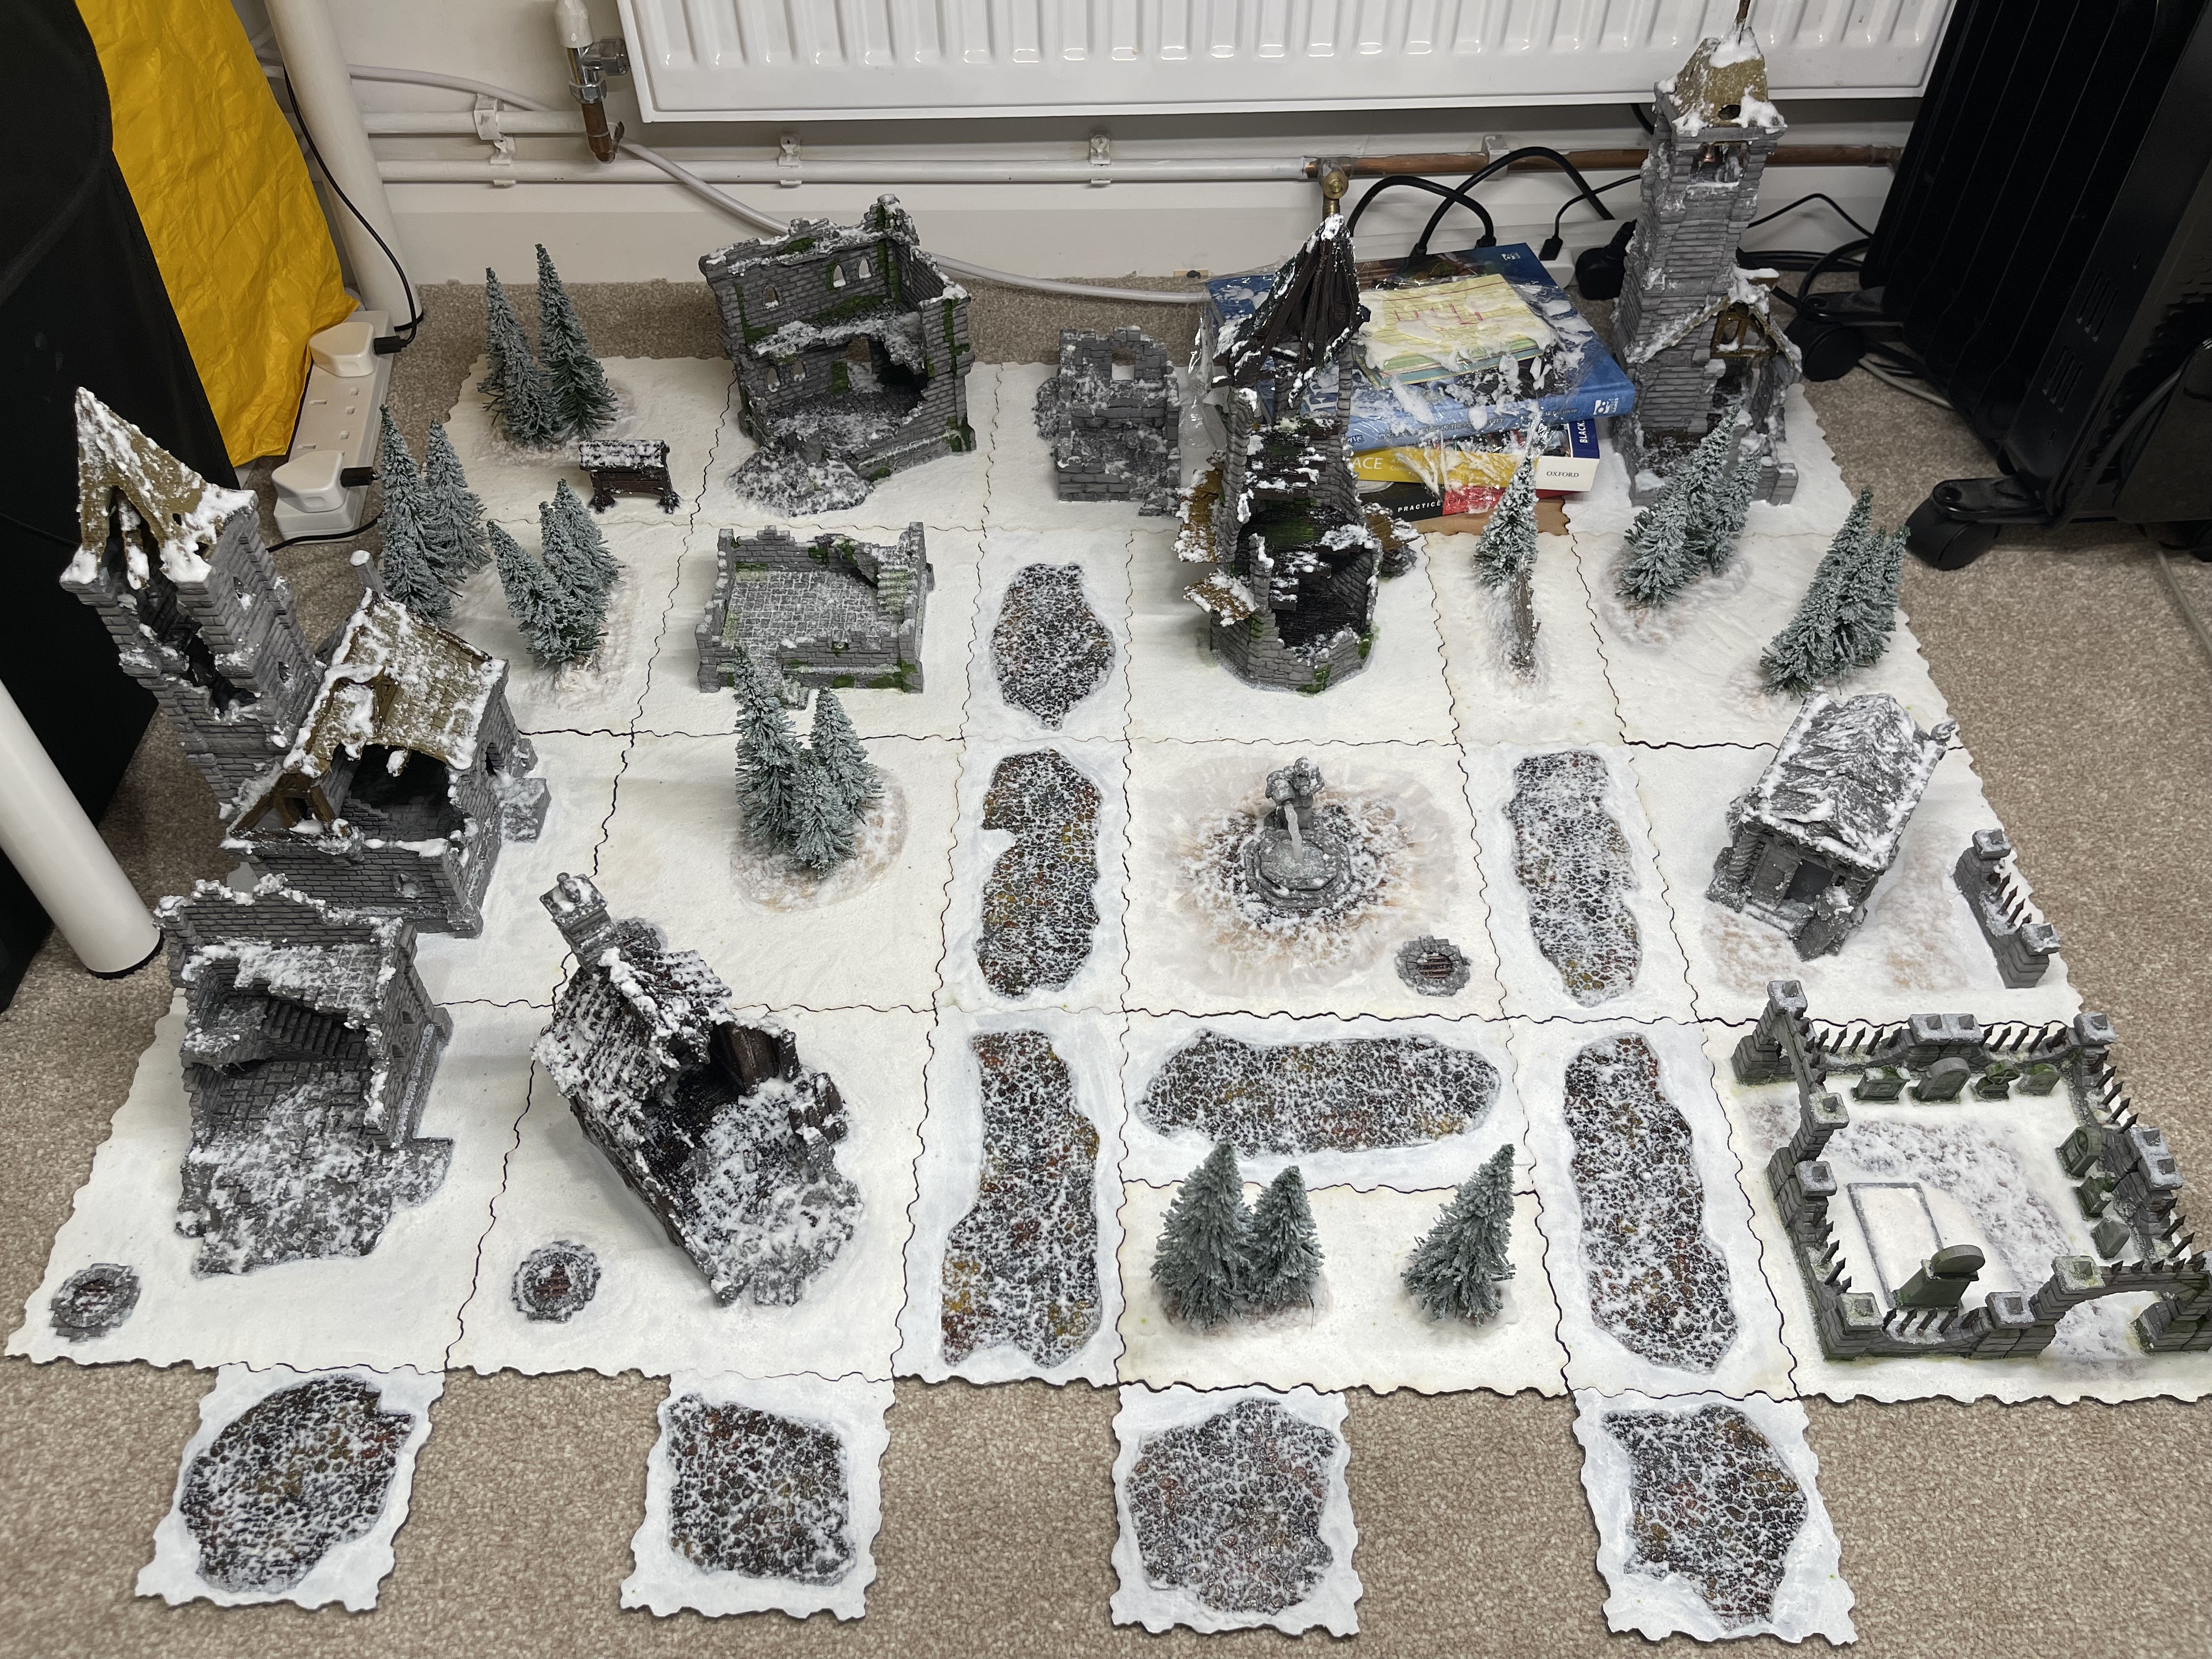
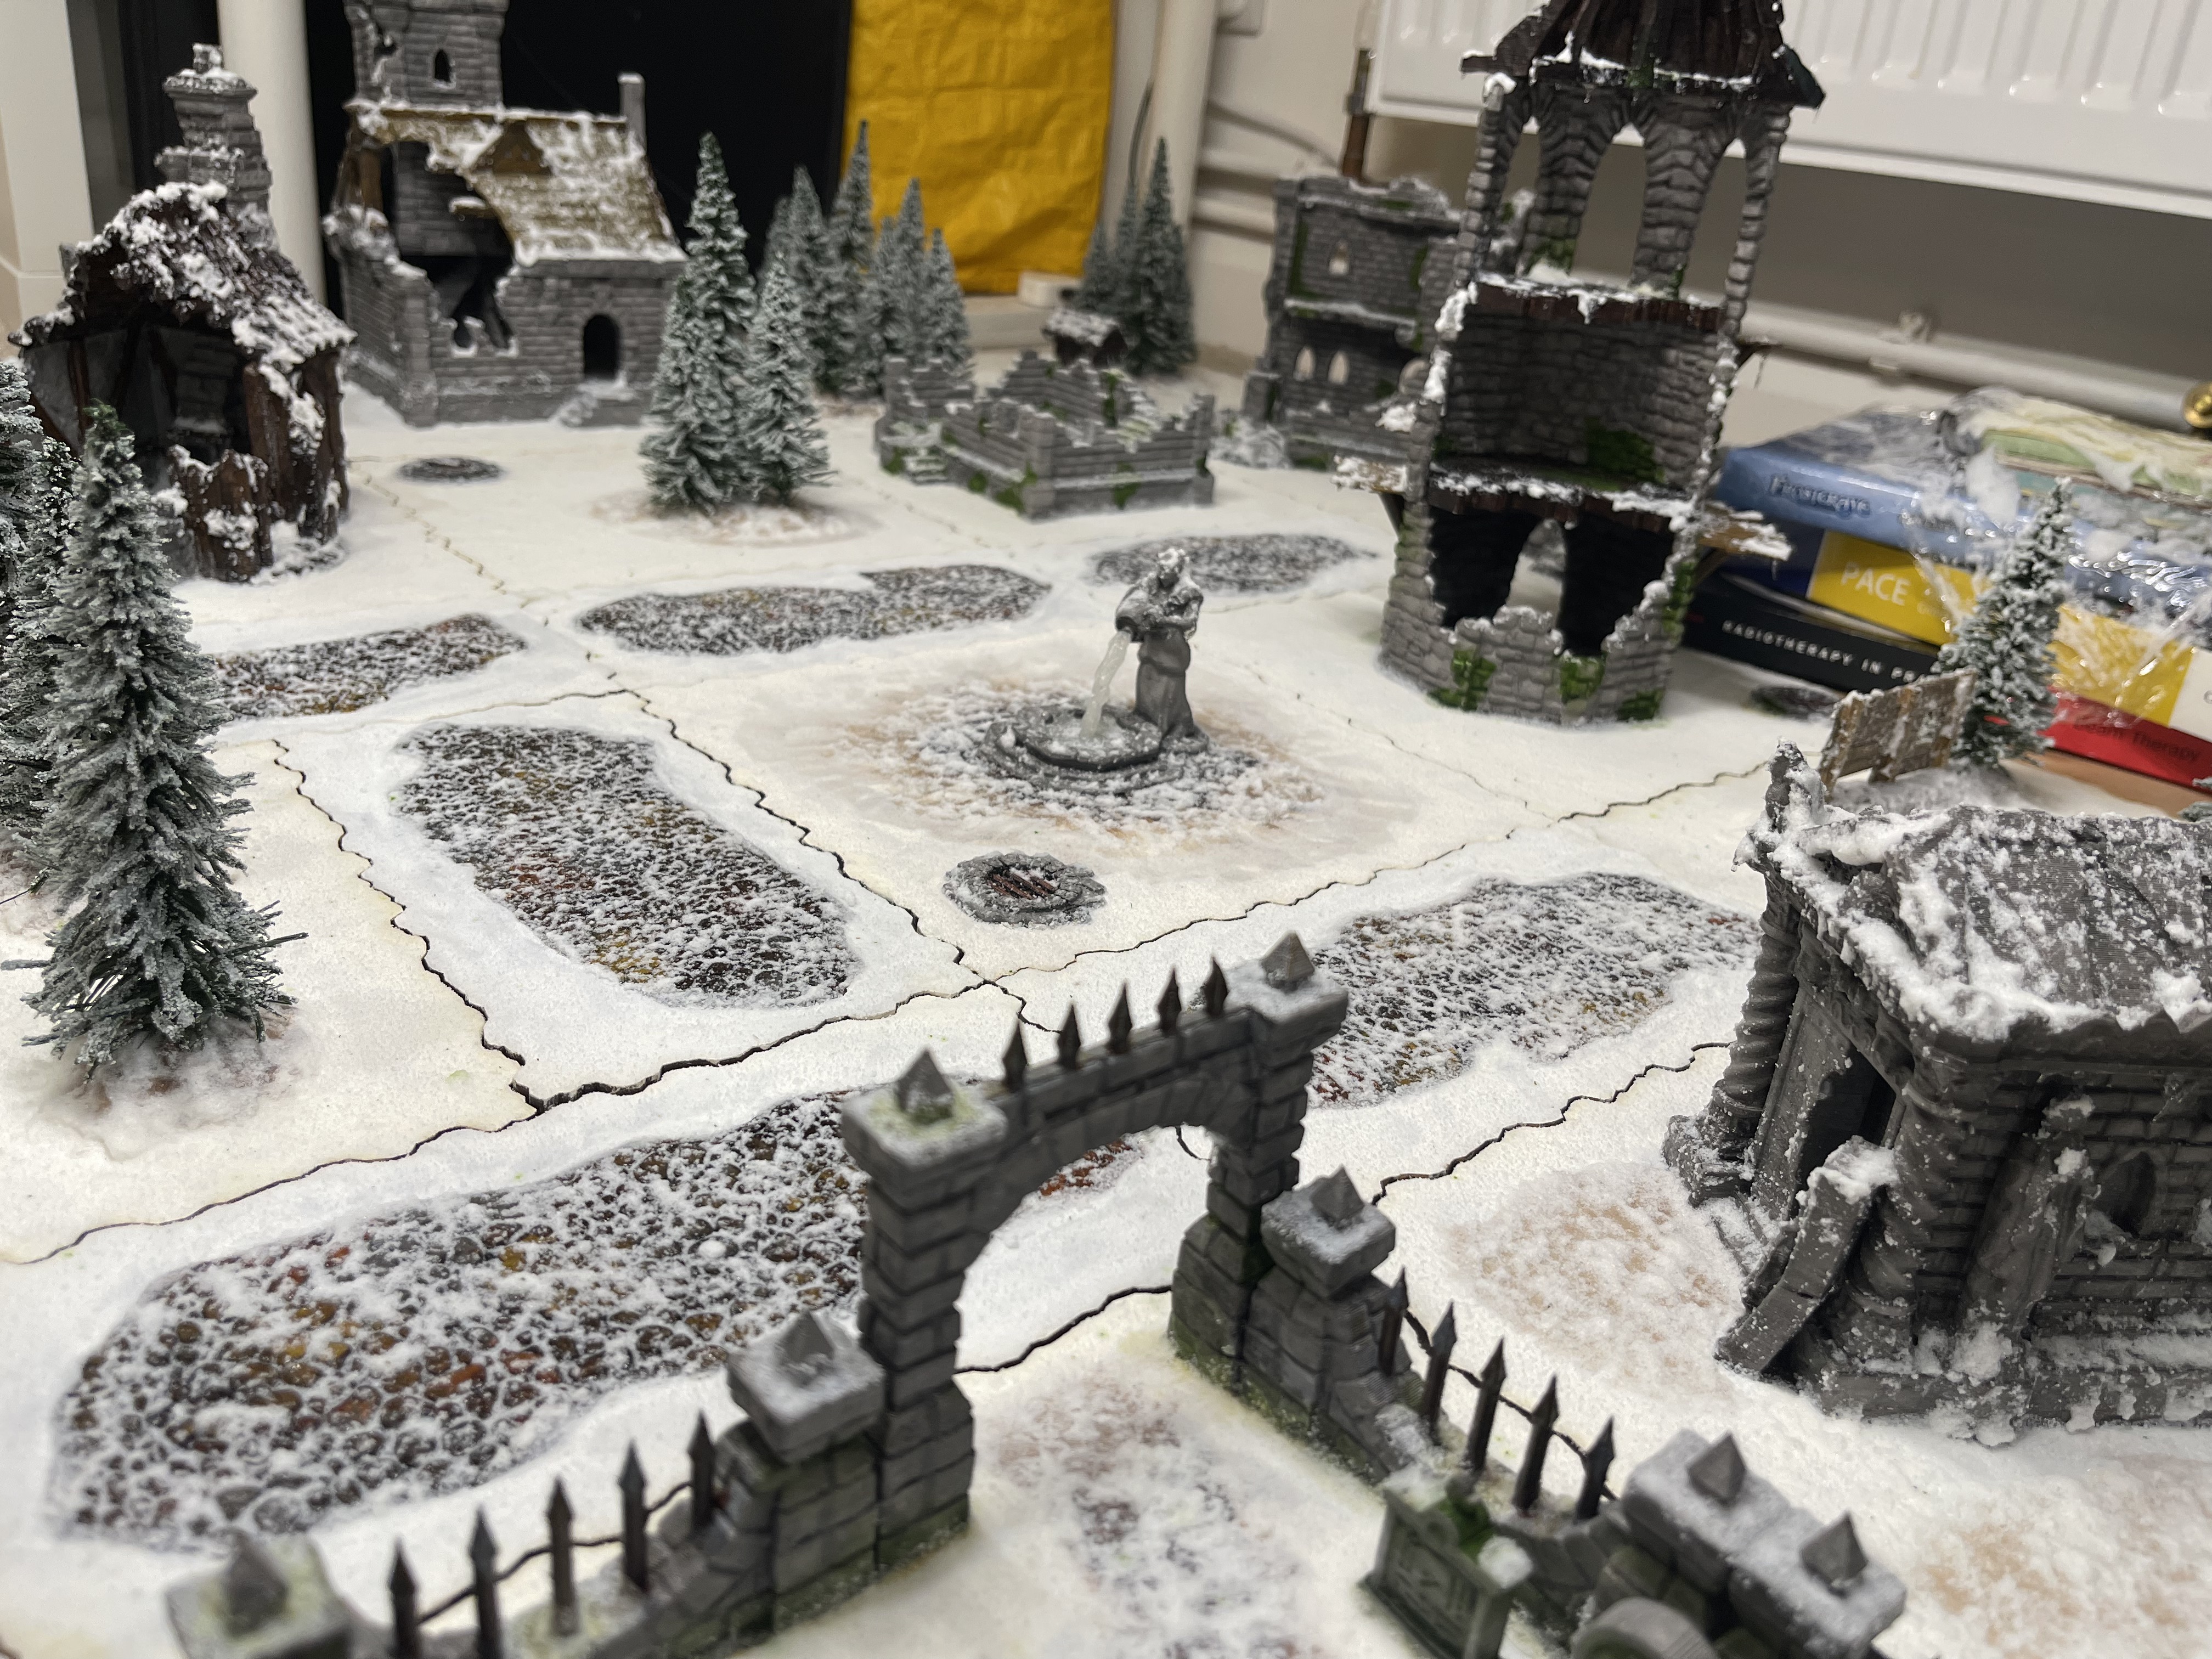
And I’m done! all including the pisstake totally legit hill are at a state that they can be played on.
What I hadn’t noticed and don’t know why its occurred is that the roads are whiter than the other boards. I have no idea why this is as exactly the same paints, flocks, glue, processes were used for all the tiles in the same way so im somewhat flummoxed.
im not gonna fix it though, this is a rough and ready gaming table which will be used for playing games and then be thrown in the garage after we’re done. its not a special bit of art… its functional and colours in the background for my models.
mission success!
now someone please make a decent suggestion to replace the 90’s hill
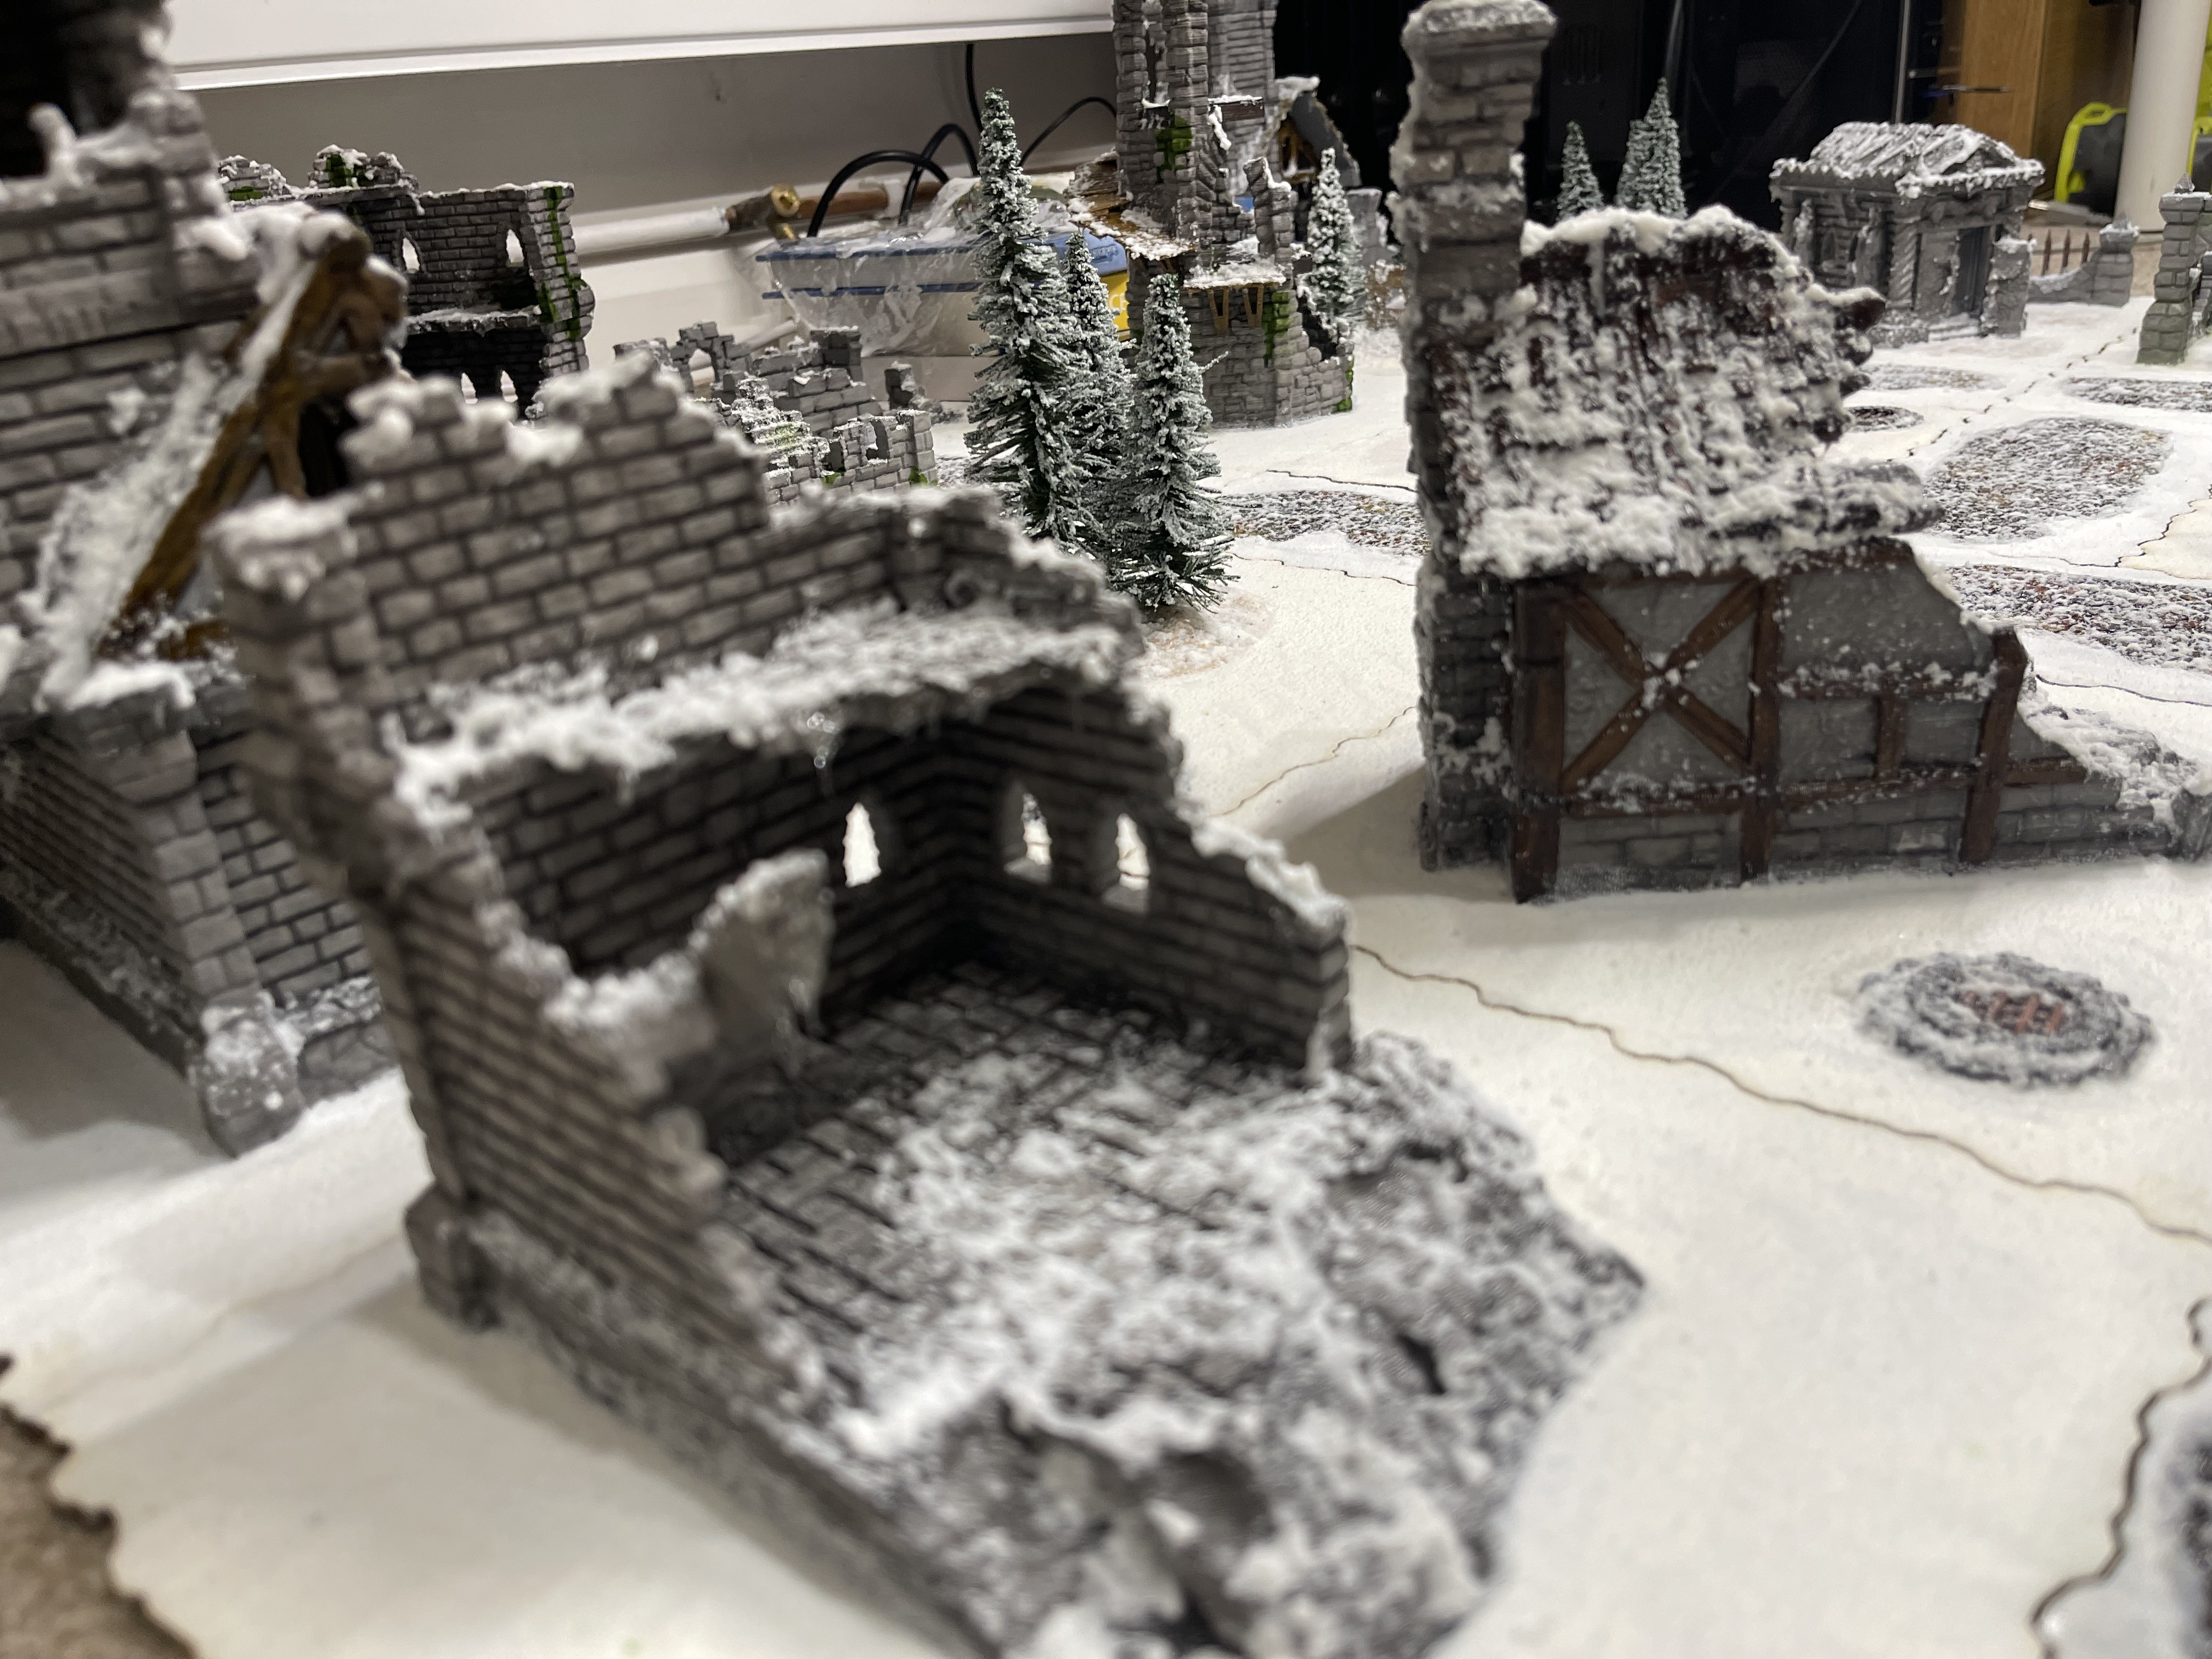
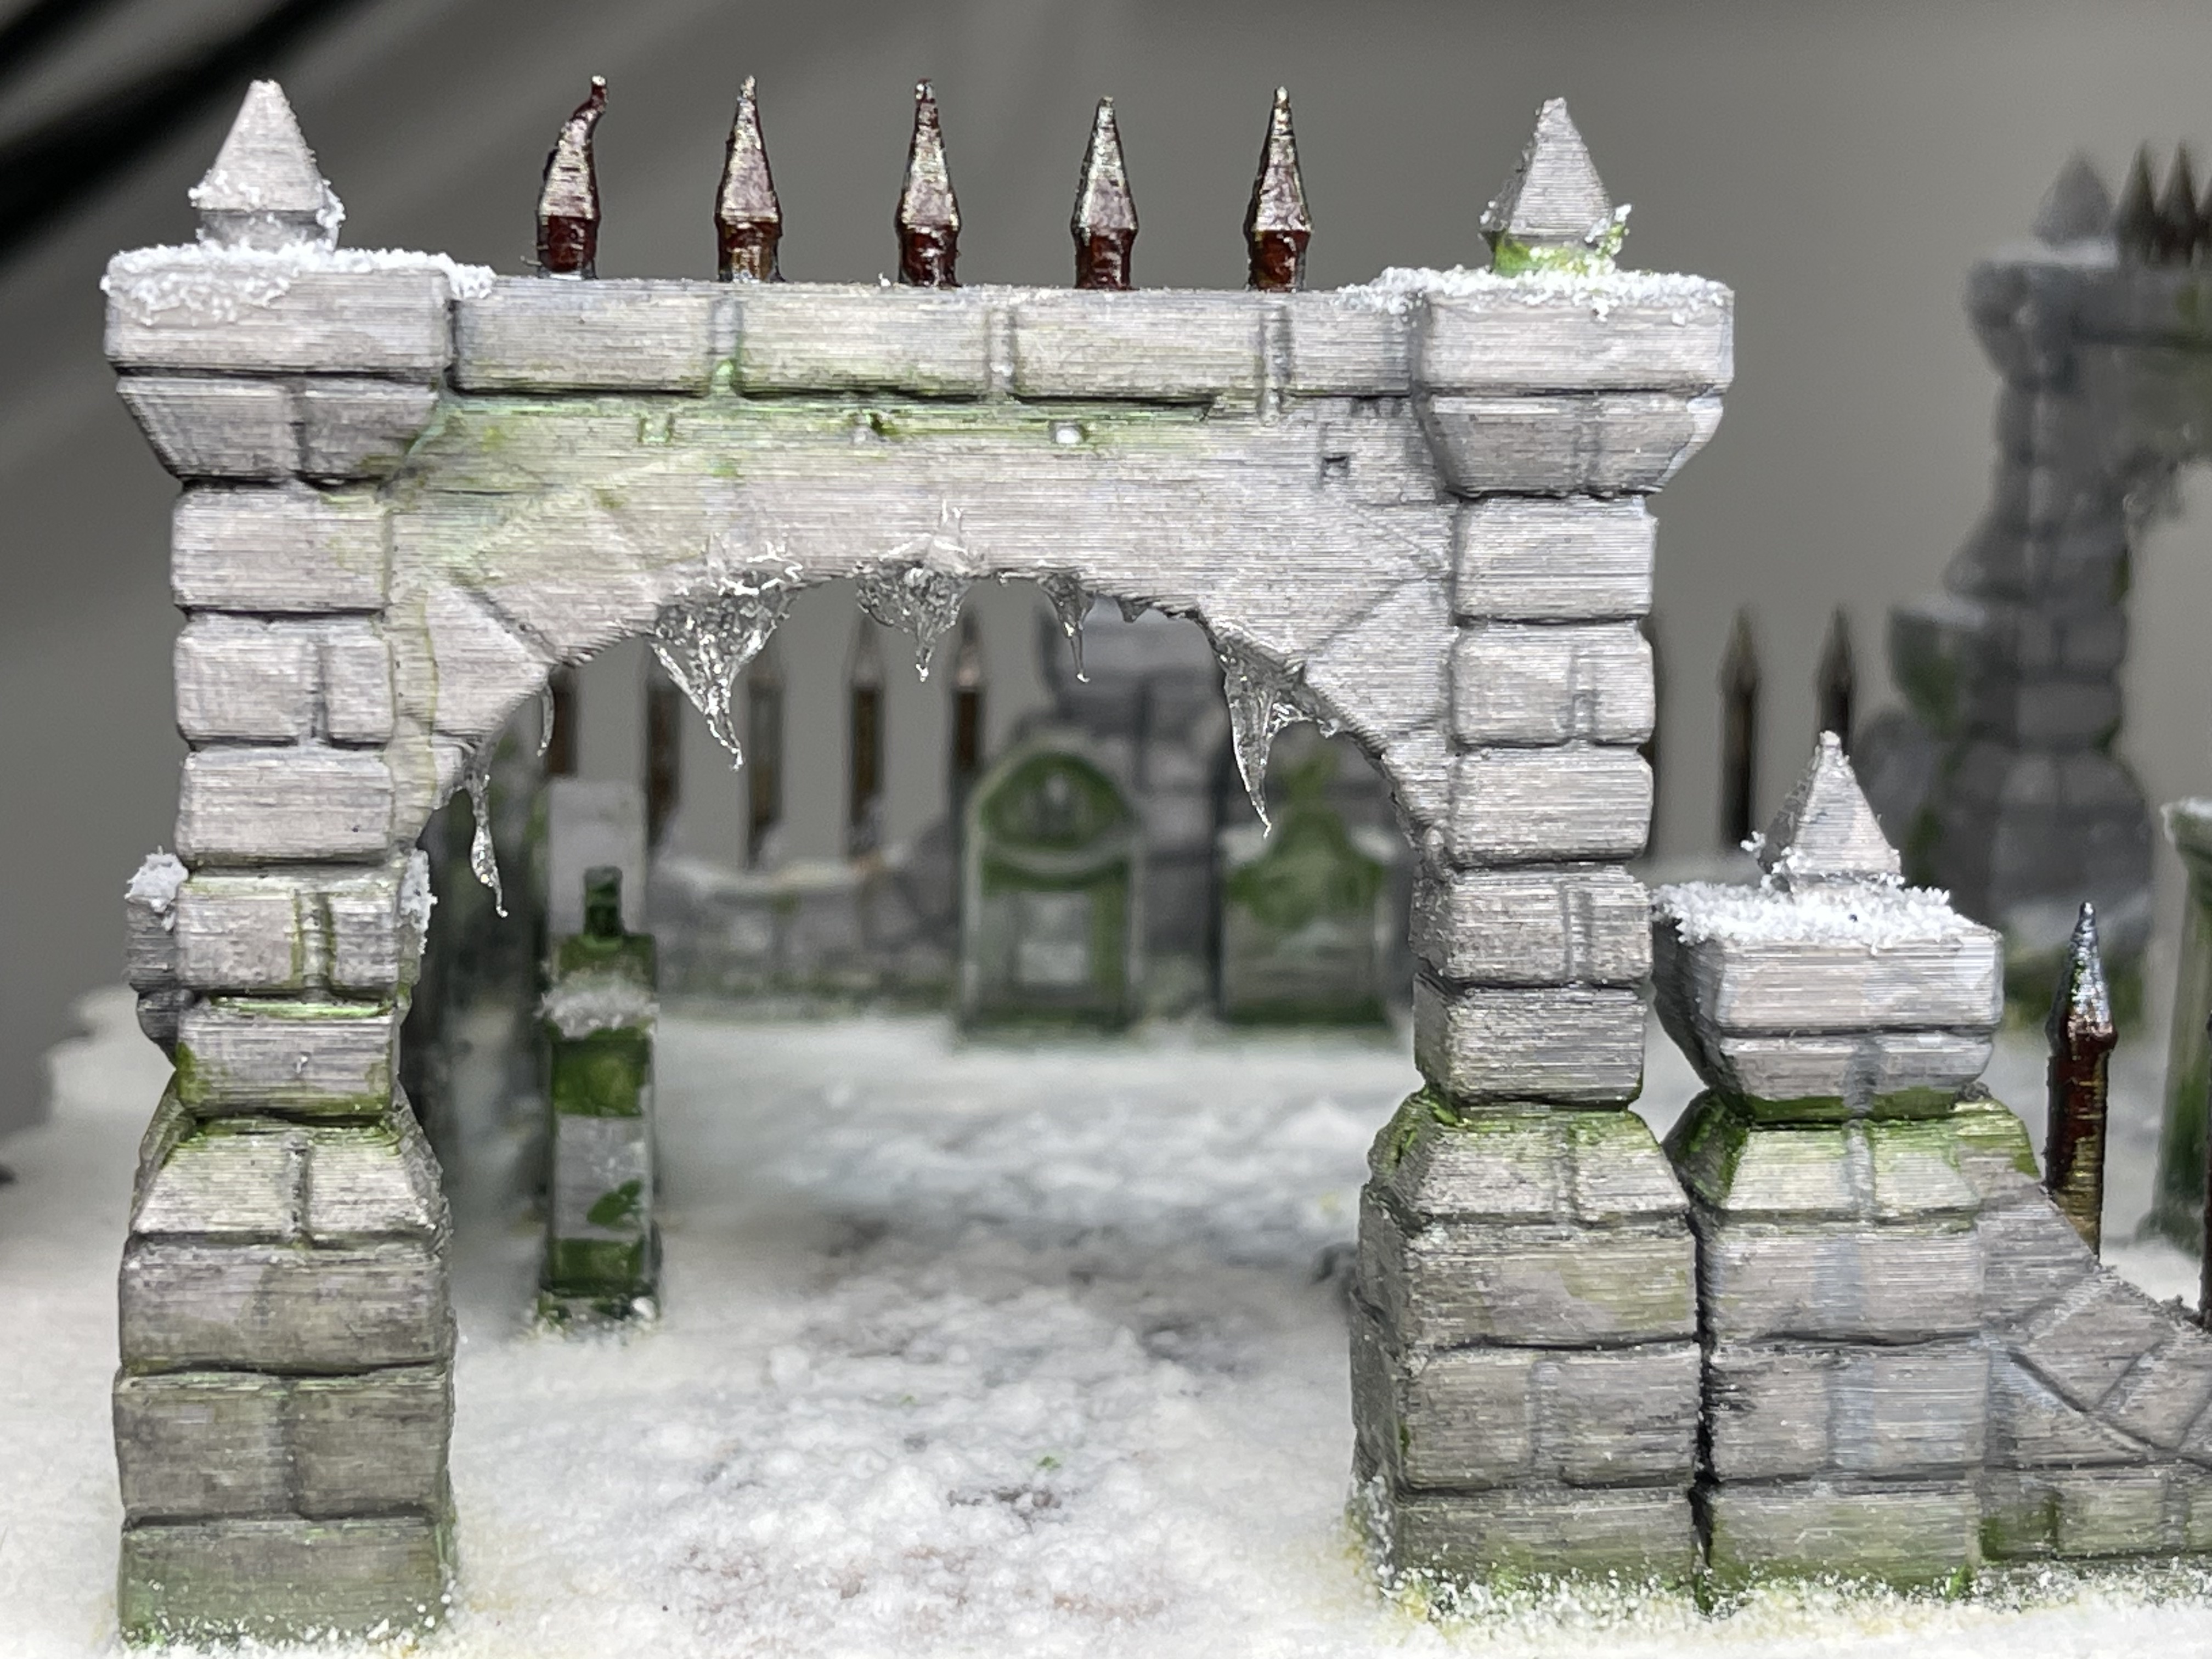
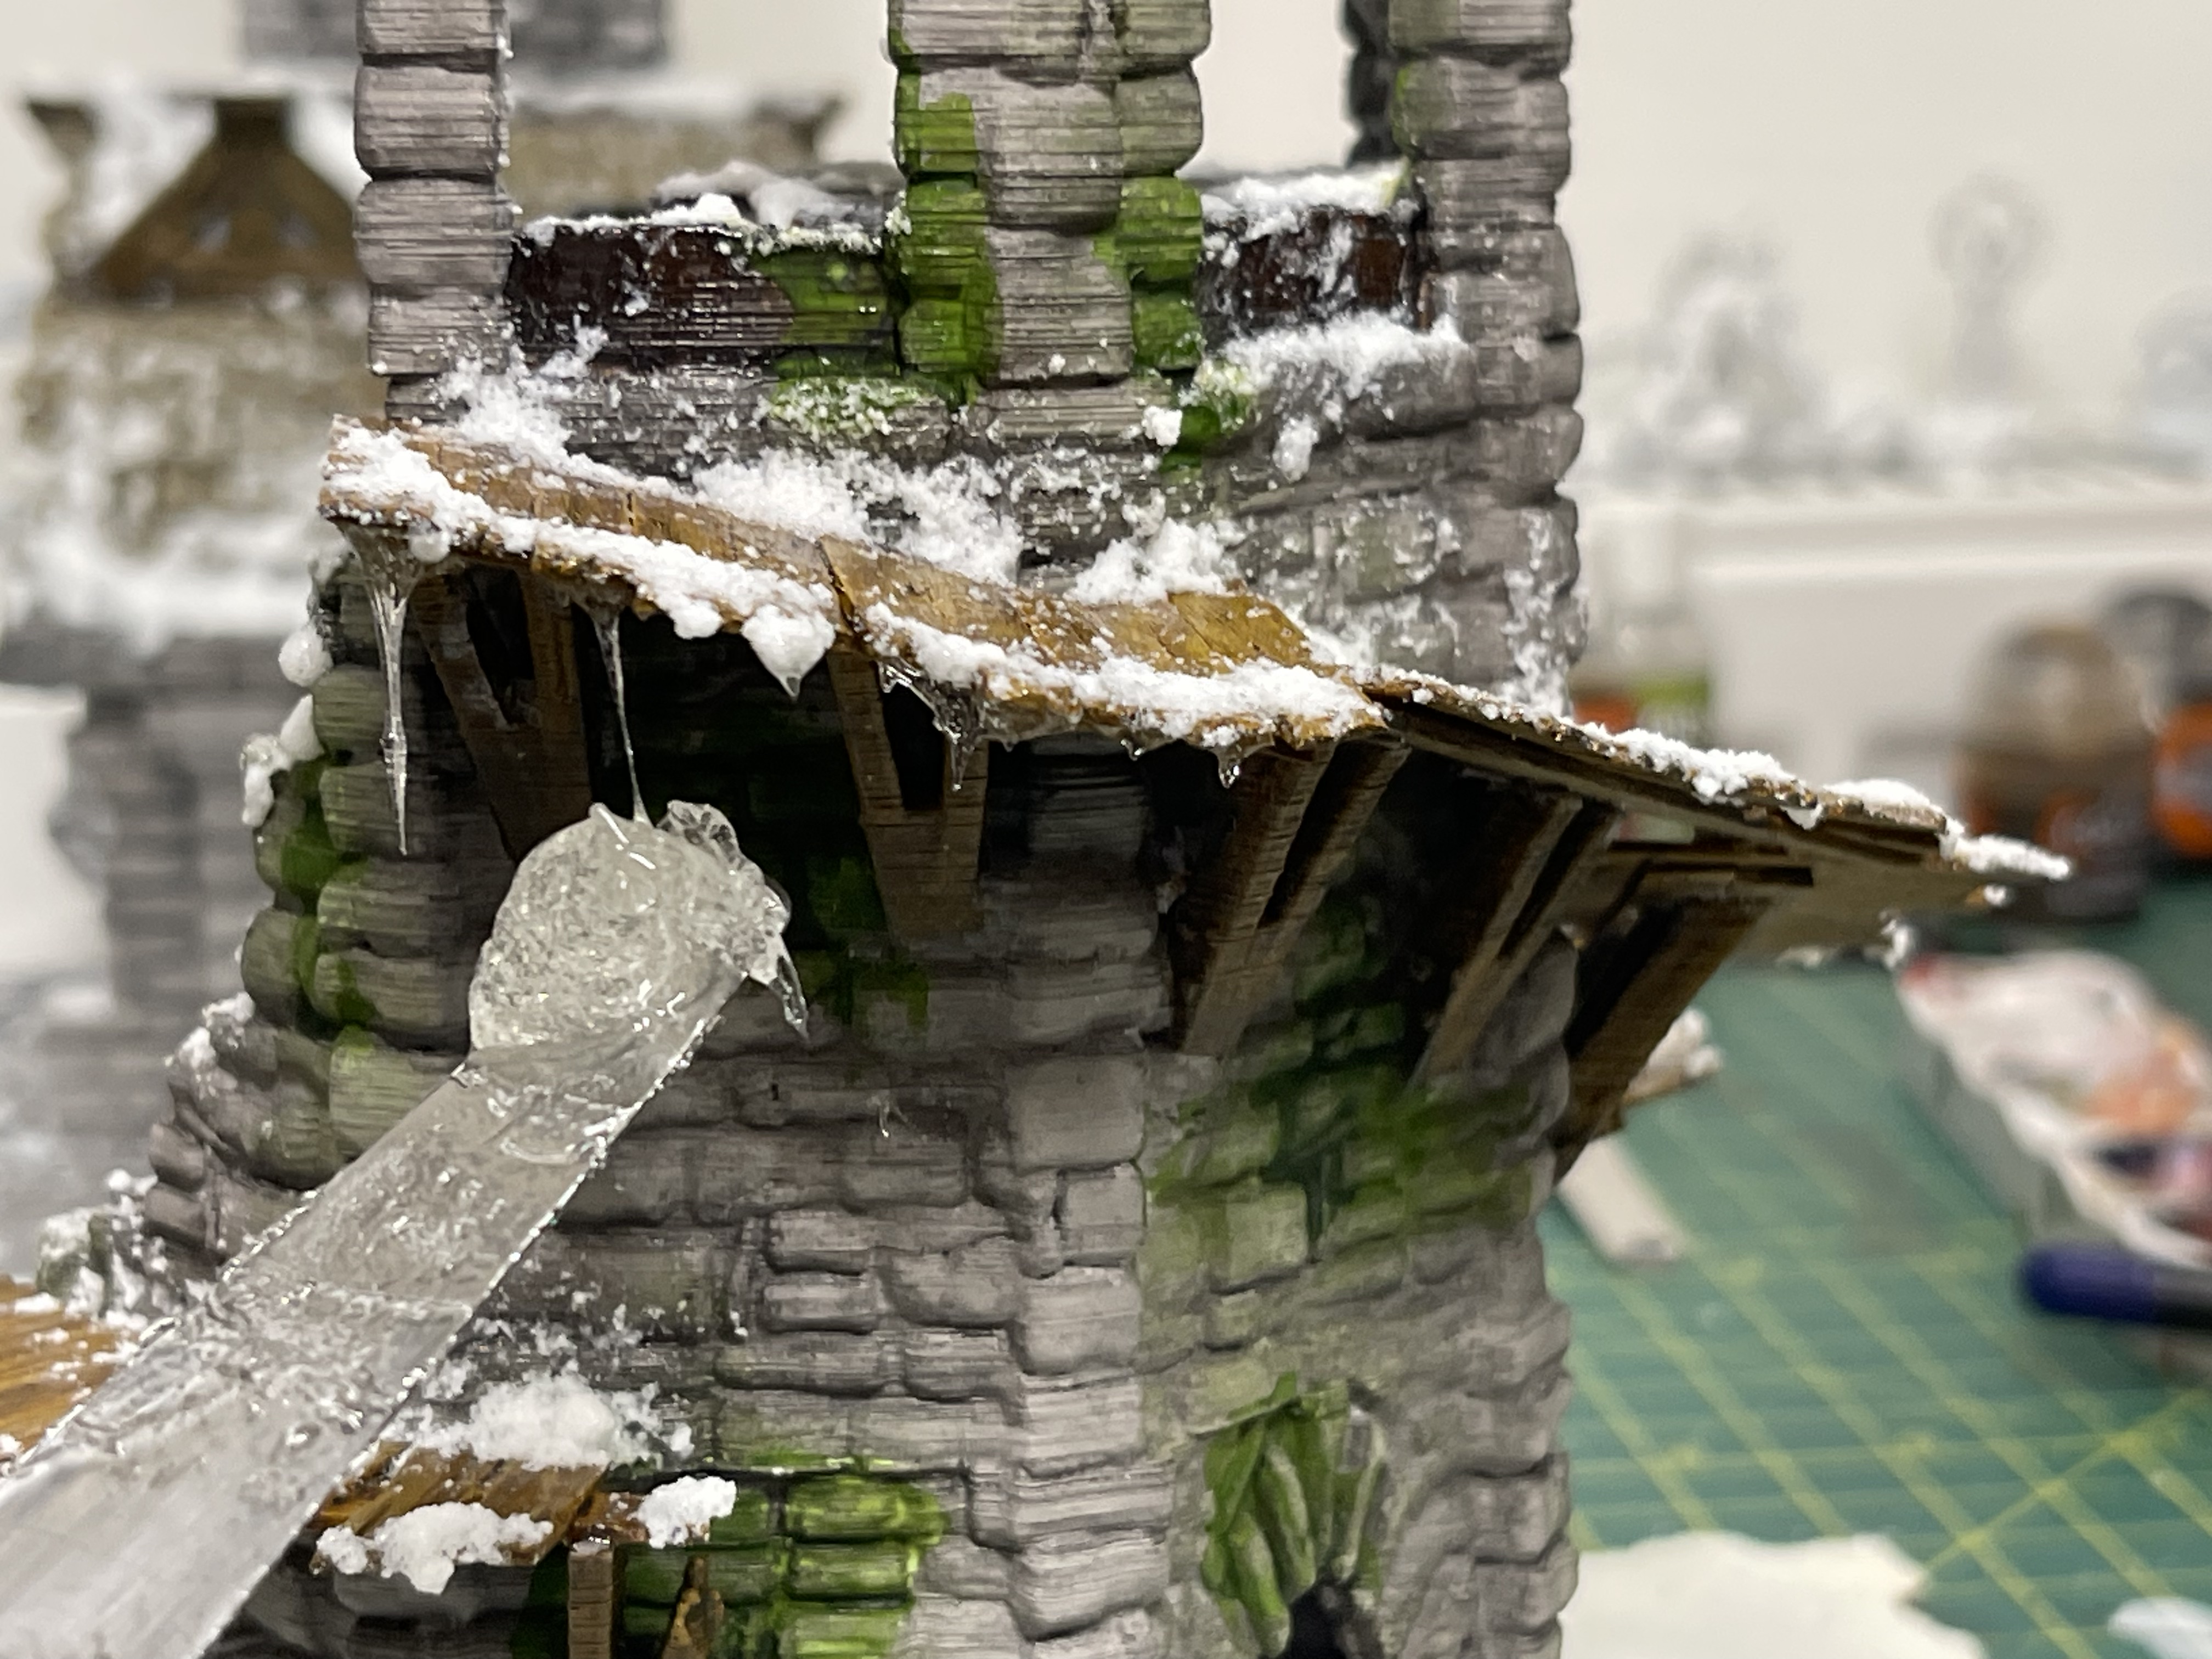
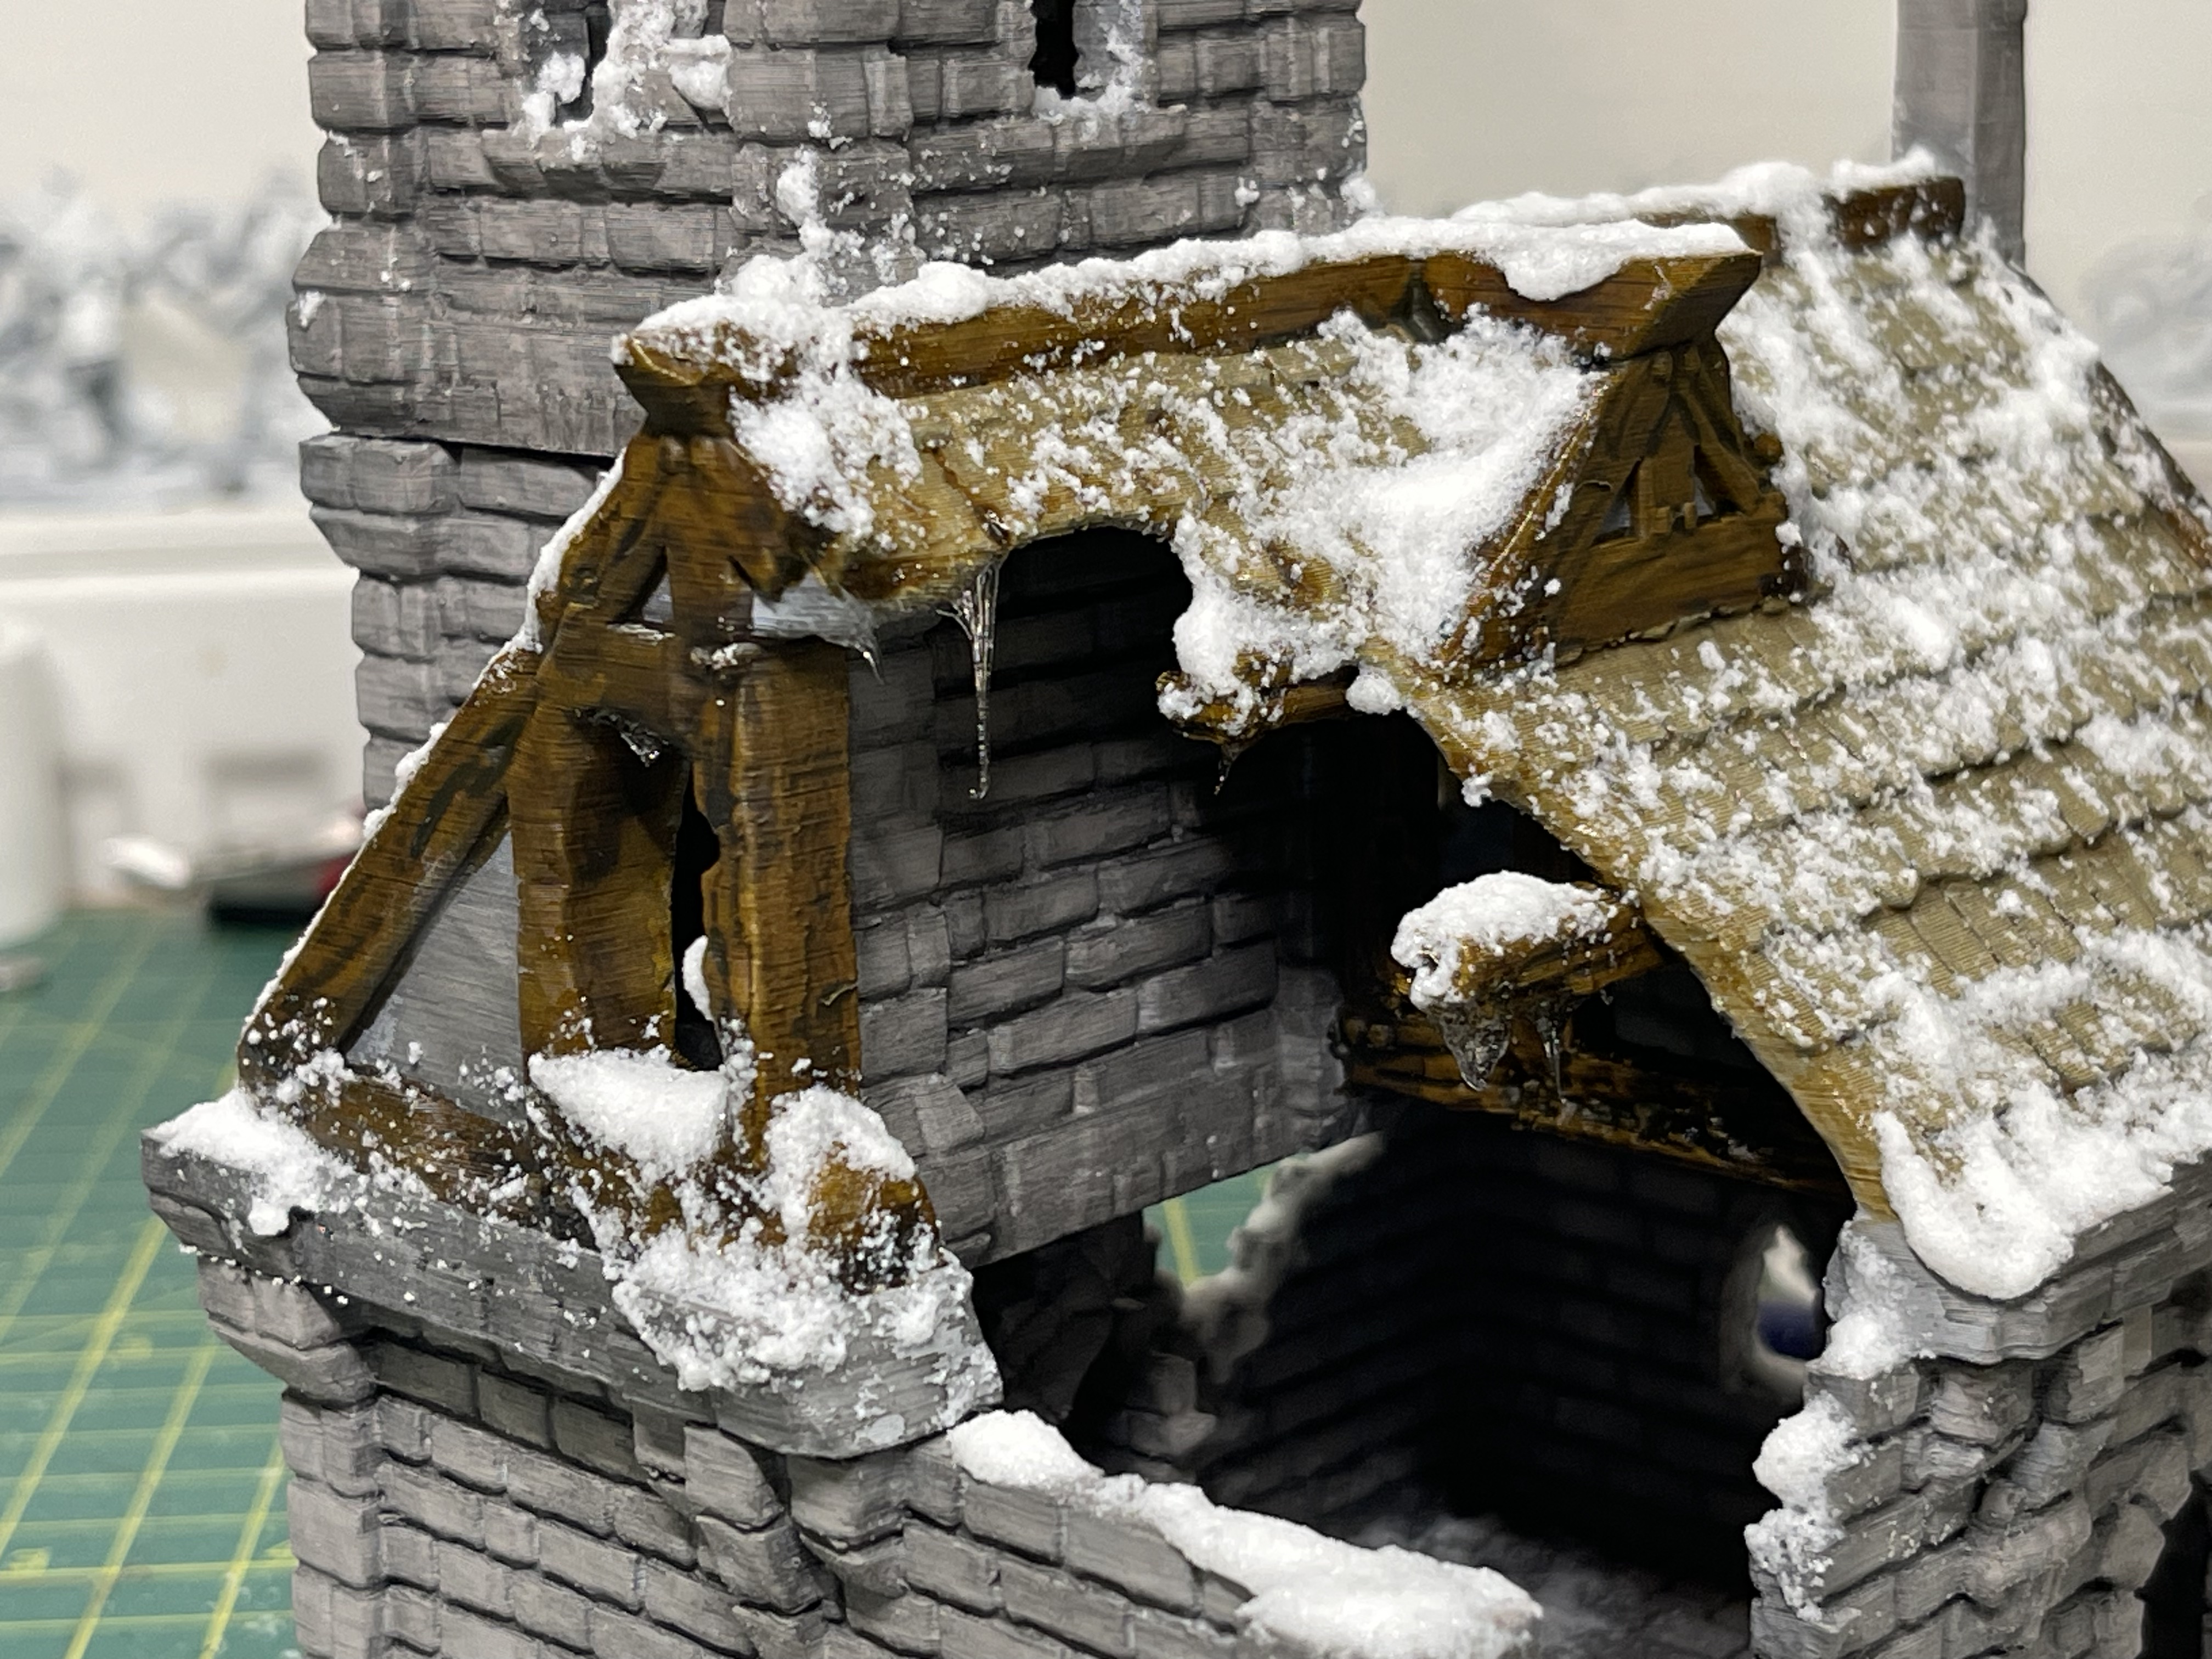
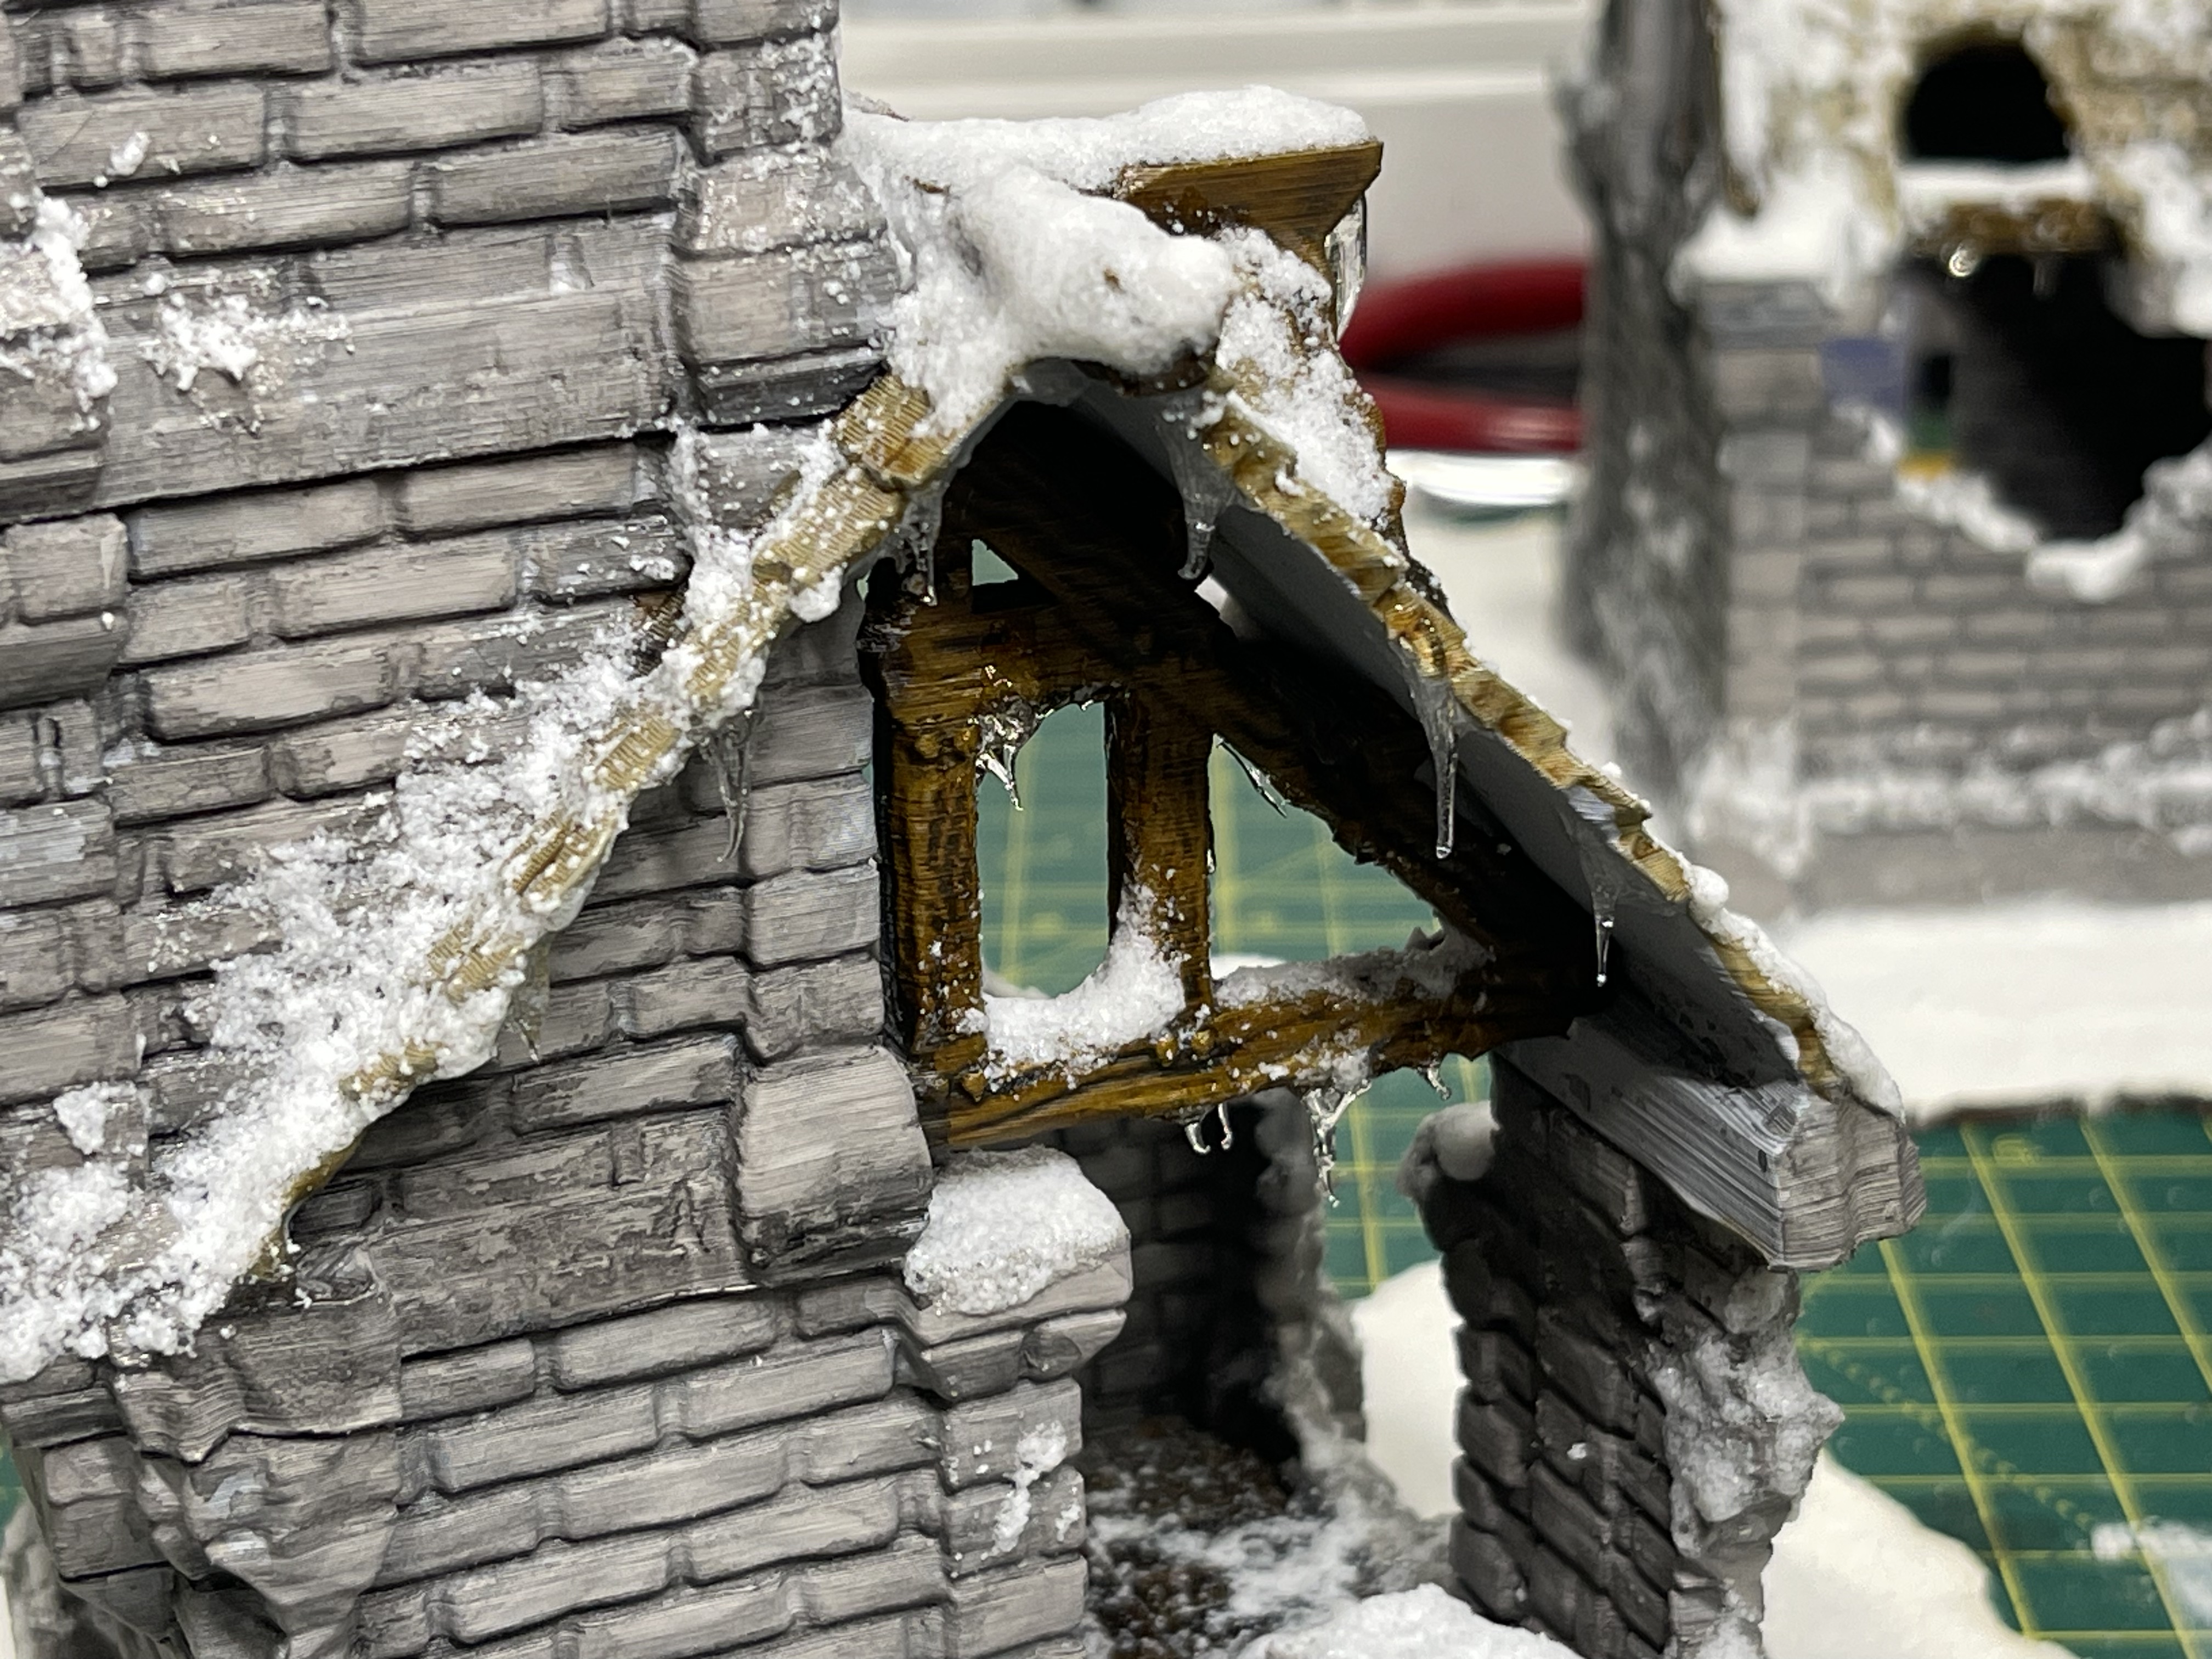
Doing Icicles...
Following the terrain tutor’s video gets results… instead of using silicone however I used ‘Clear Fix’ because I had that in the house already.
It is left overs from the stormtrooper water project in 2021. so yeah, it was dried out to heck, that meant I had to take a hacksaw to the tube to get at some uncured product. extreme measure but hey, I needed it and it would only end up in the bin otherwise.
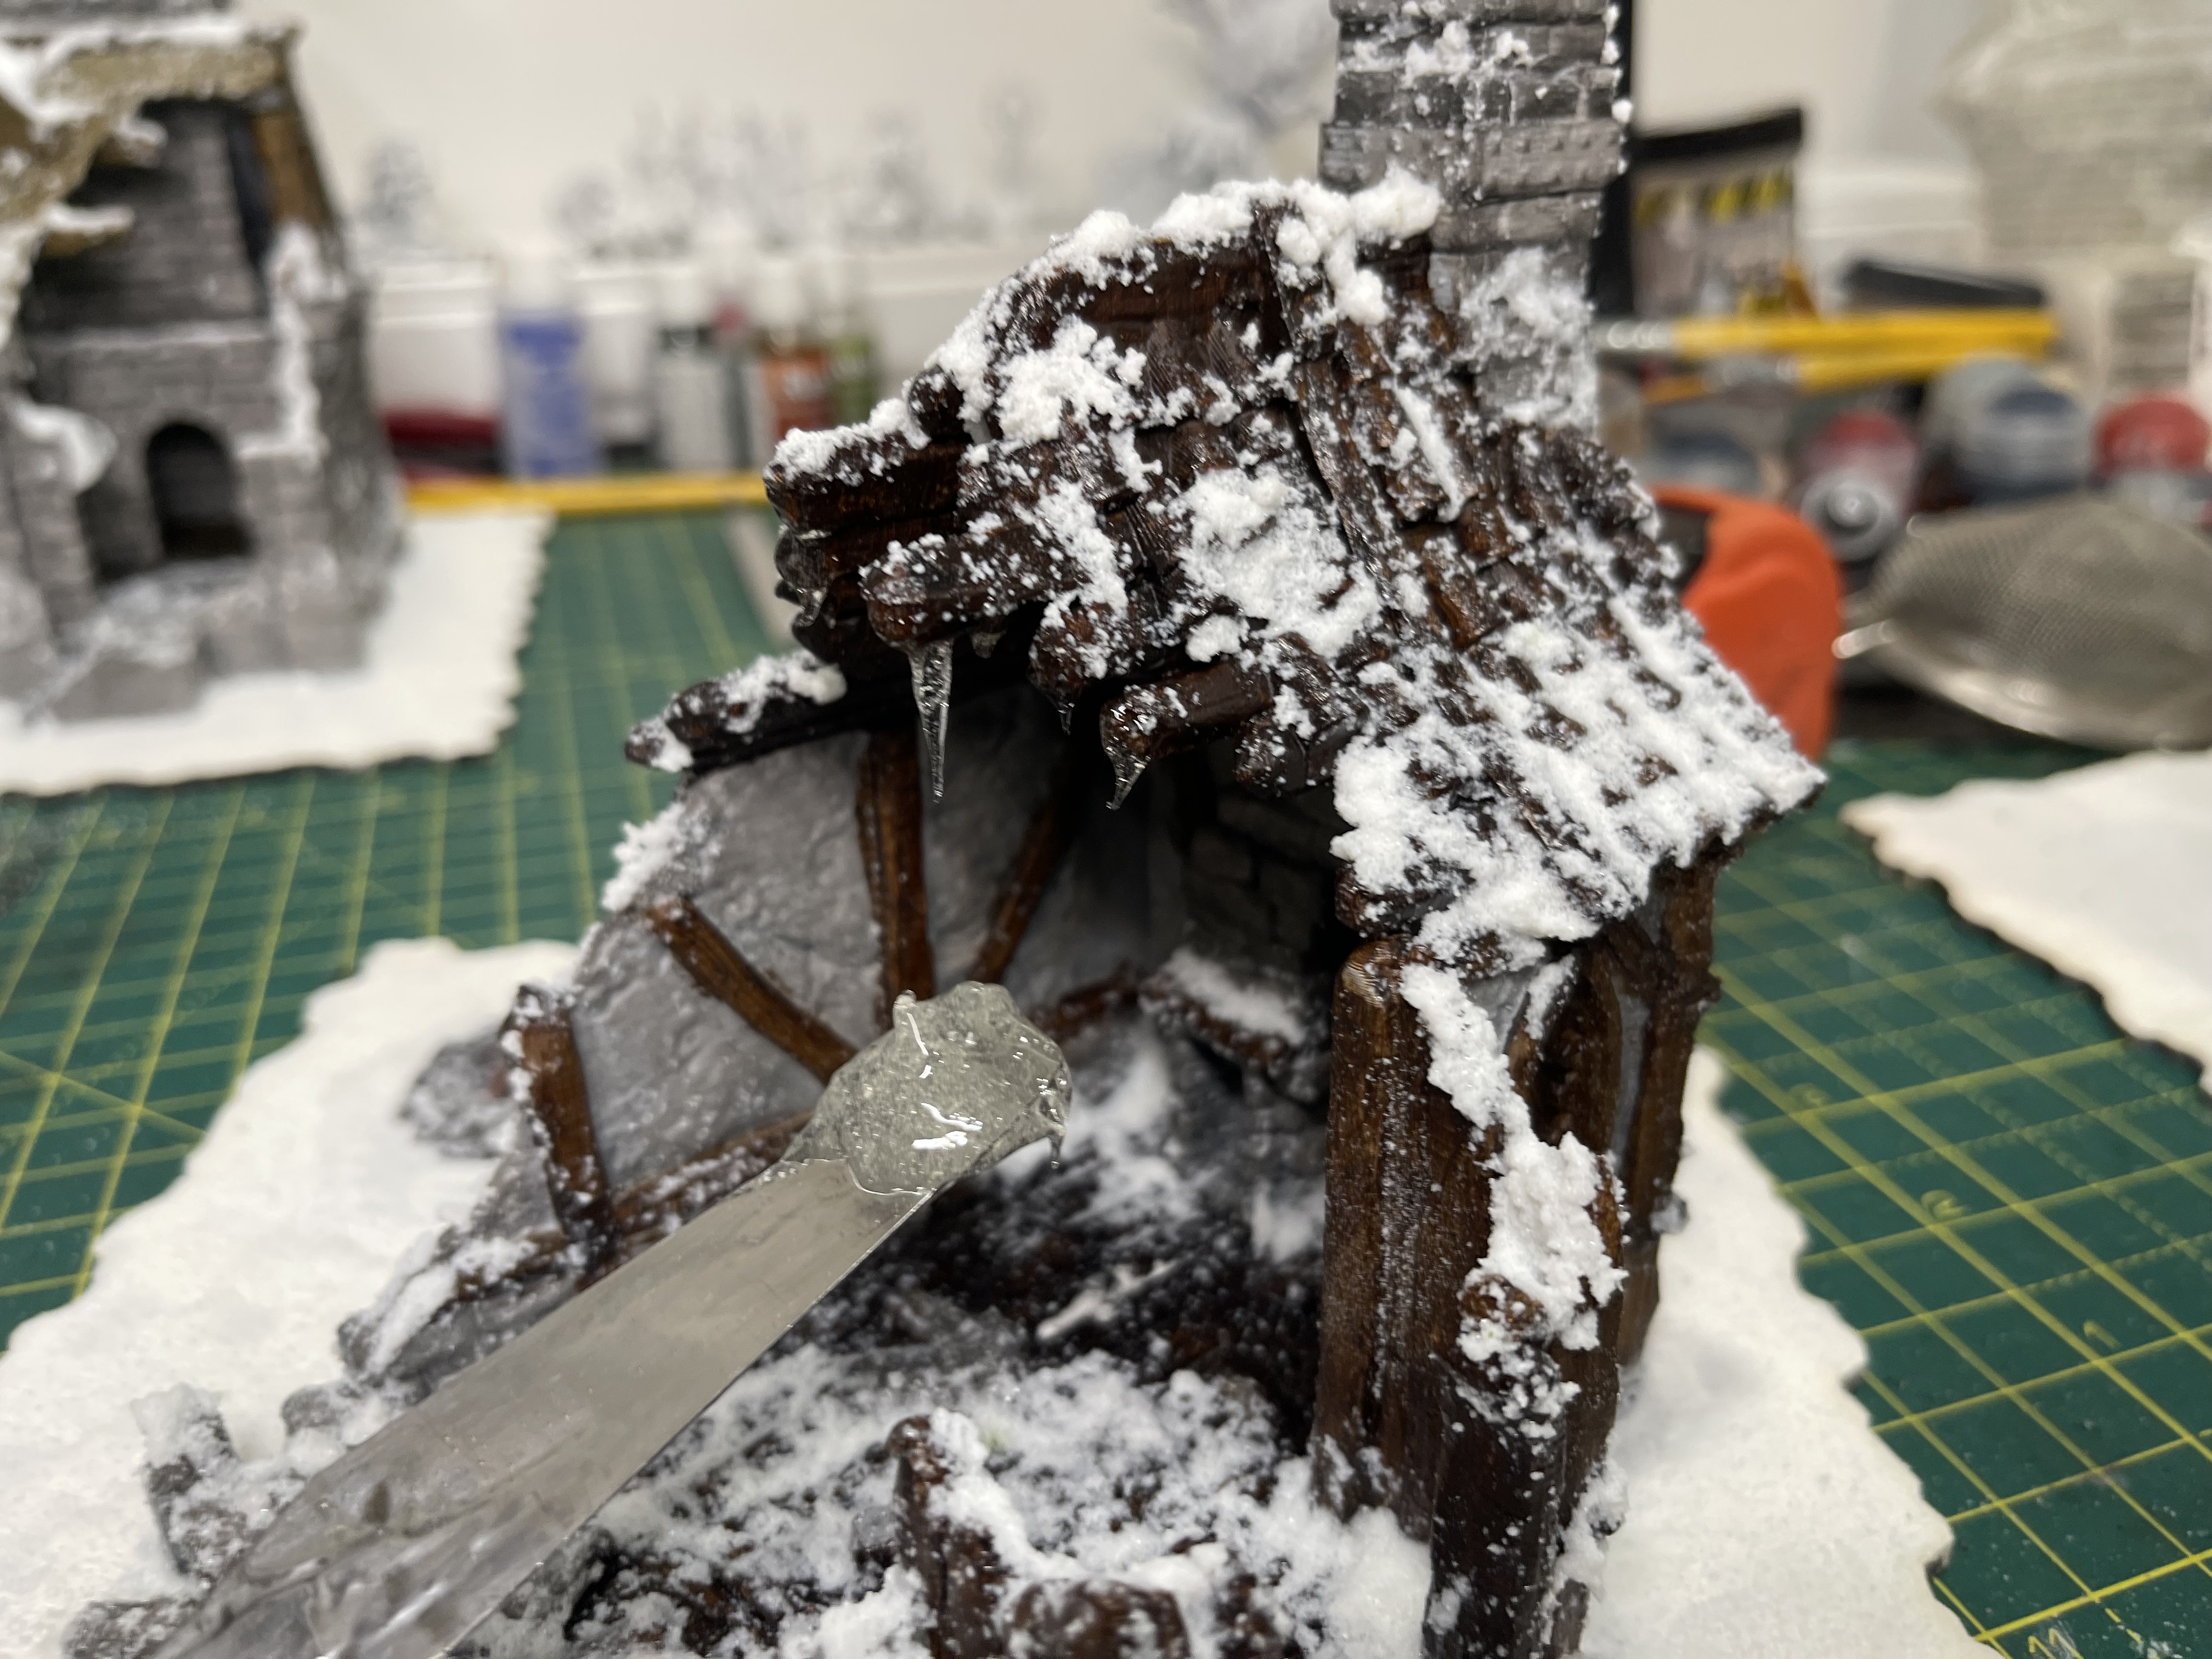 take some product on the end of a spatula and dab it to the underside of things you want ice hanging from.
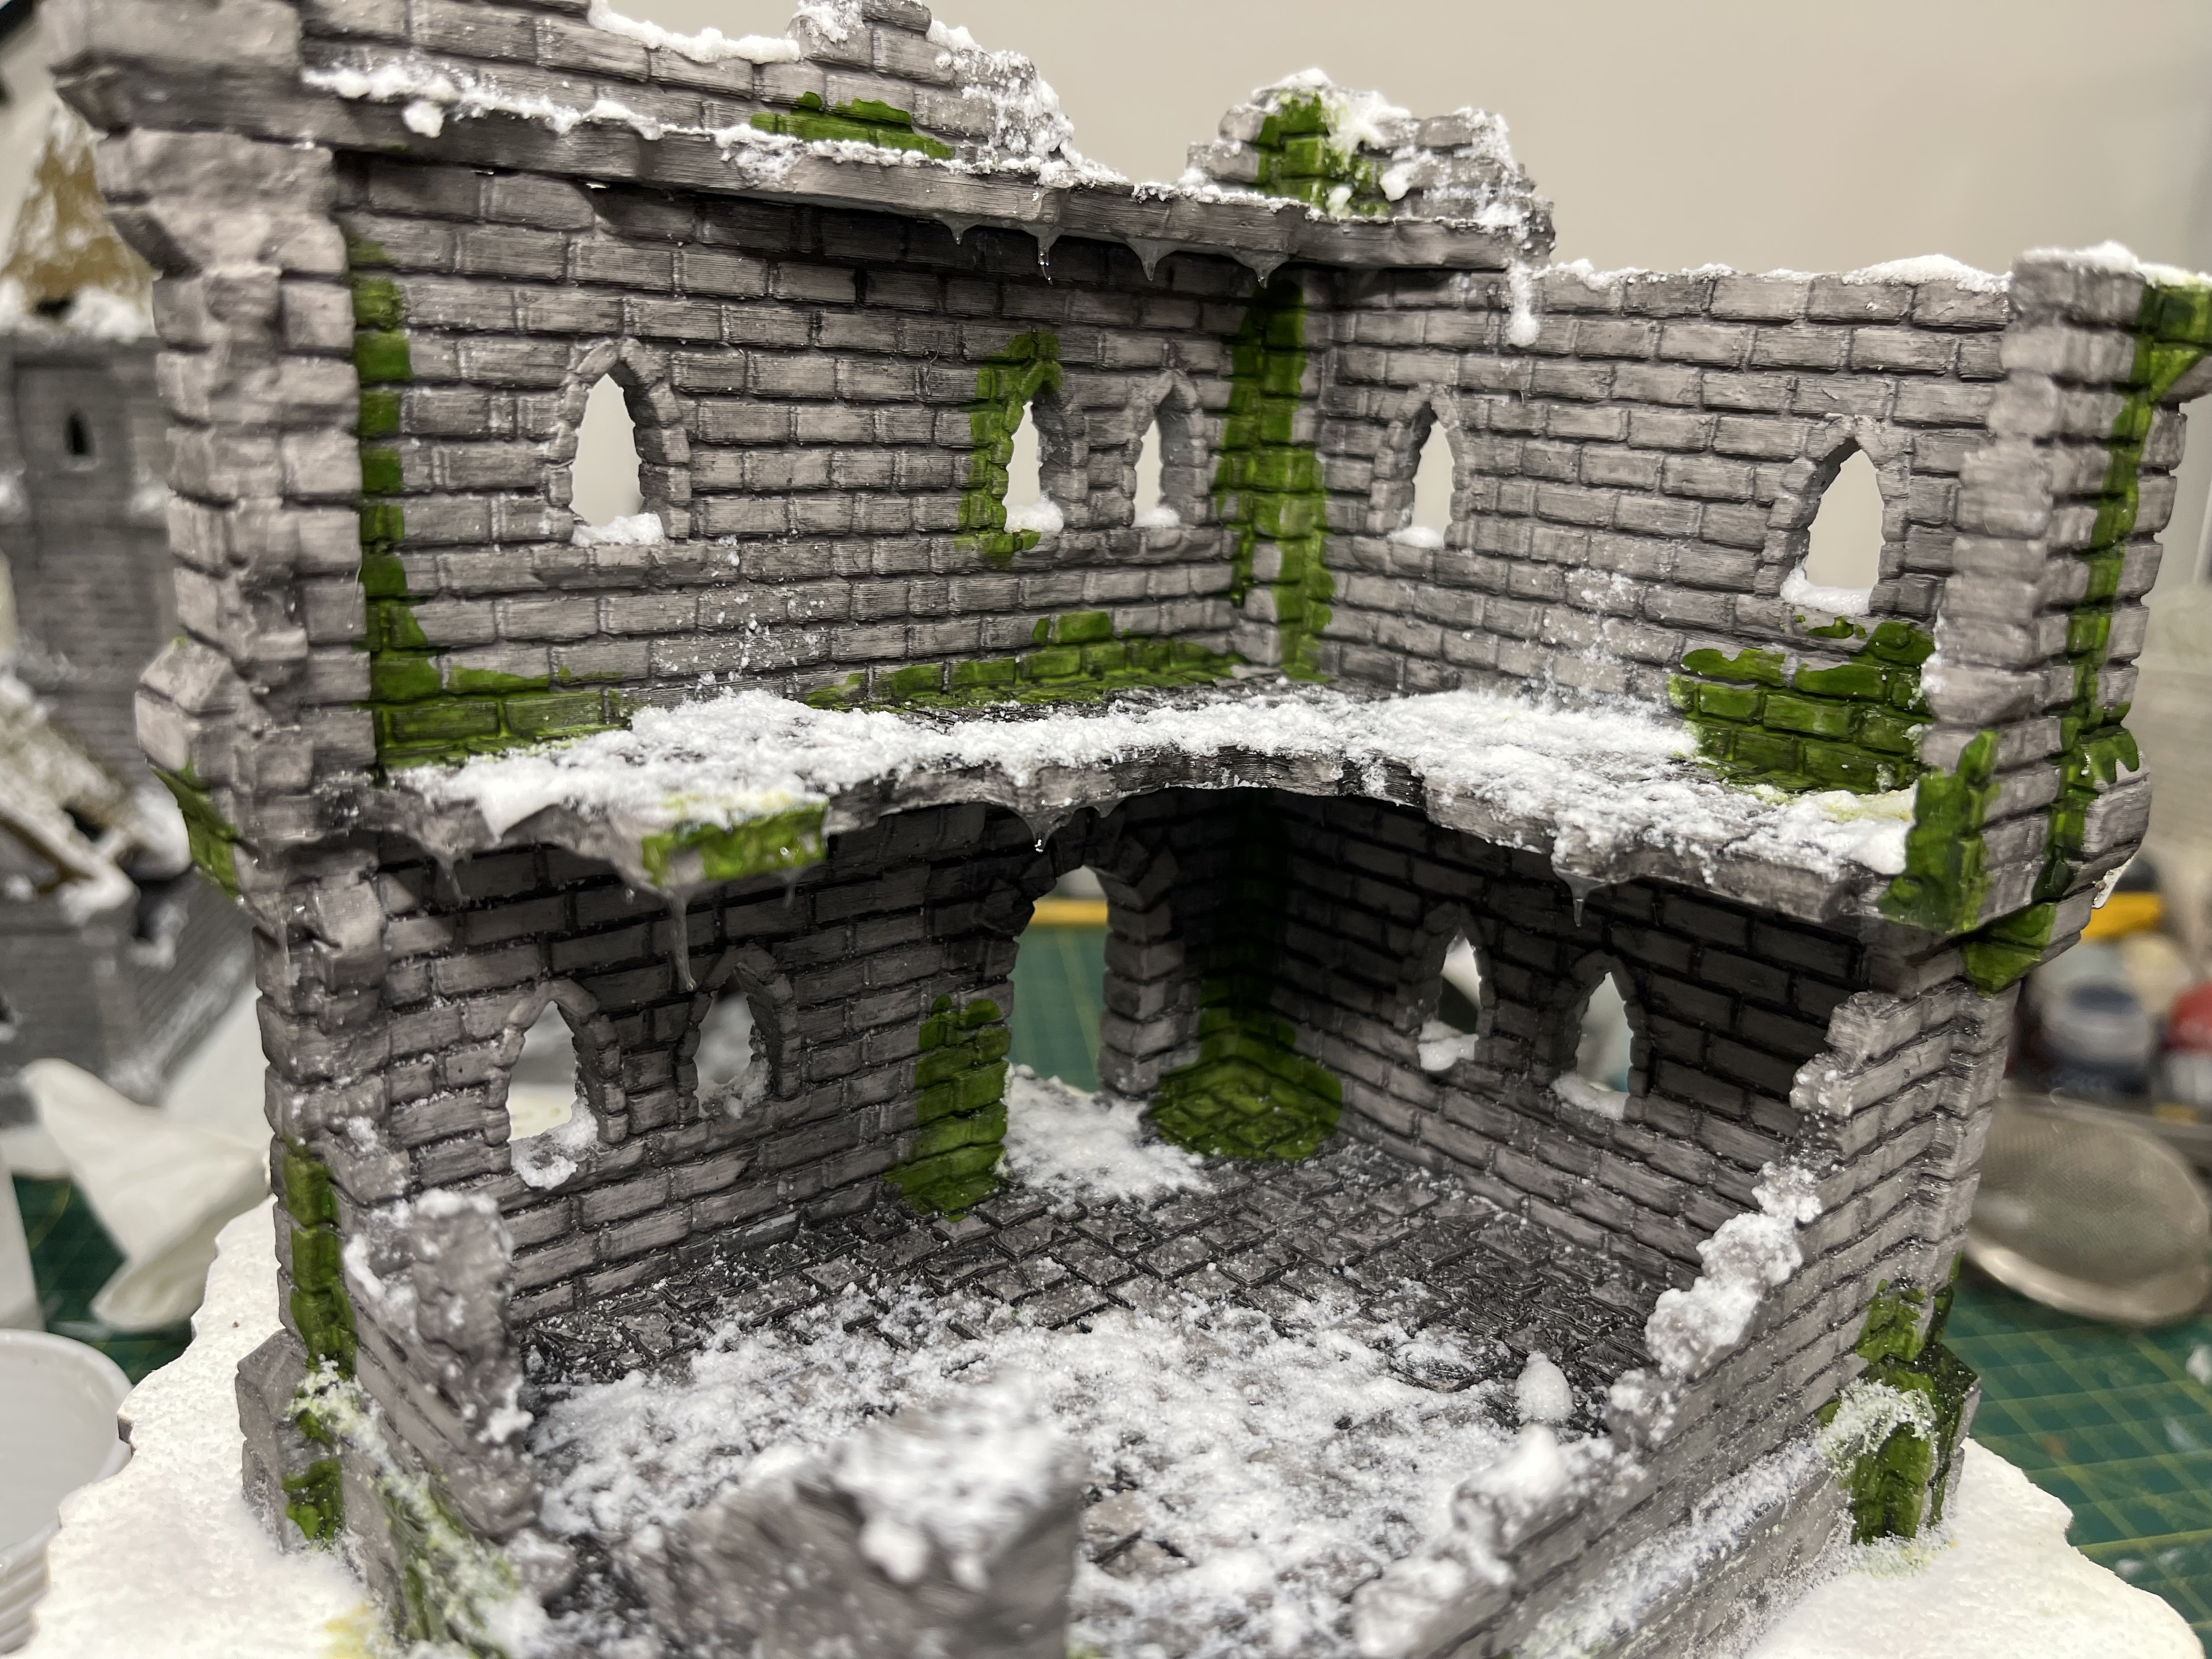

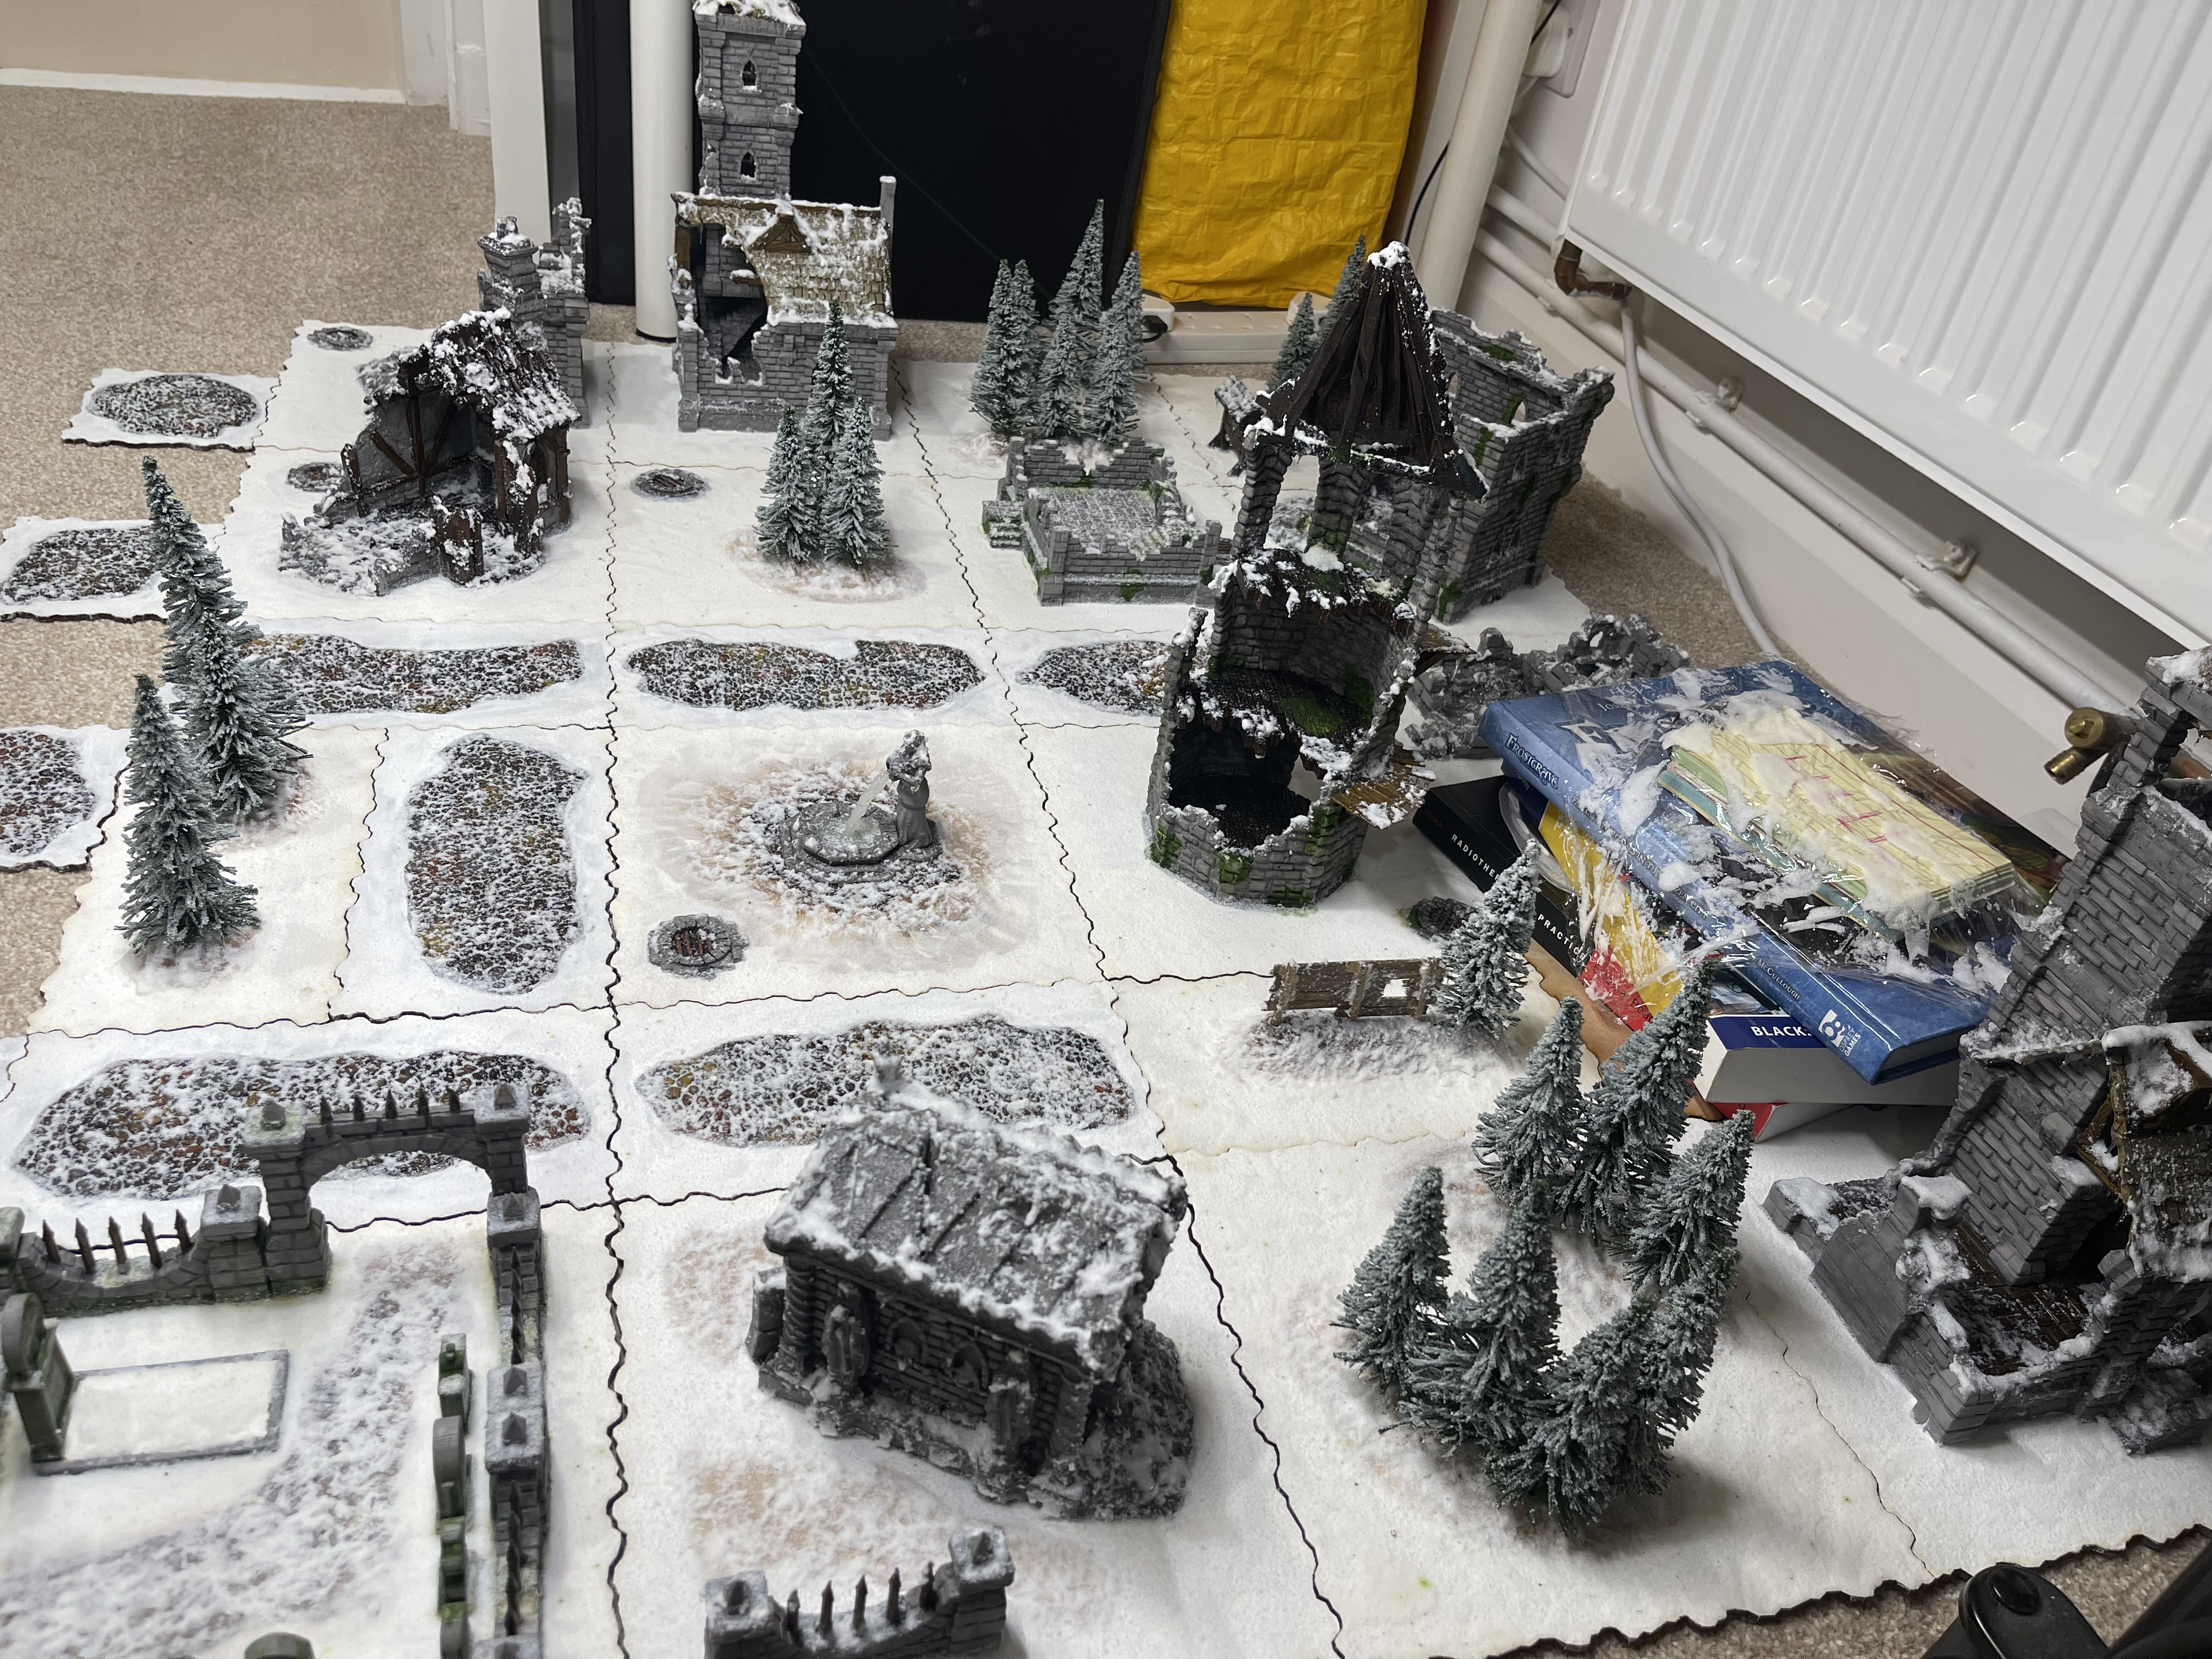
A hill
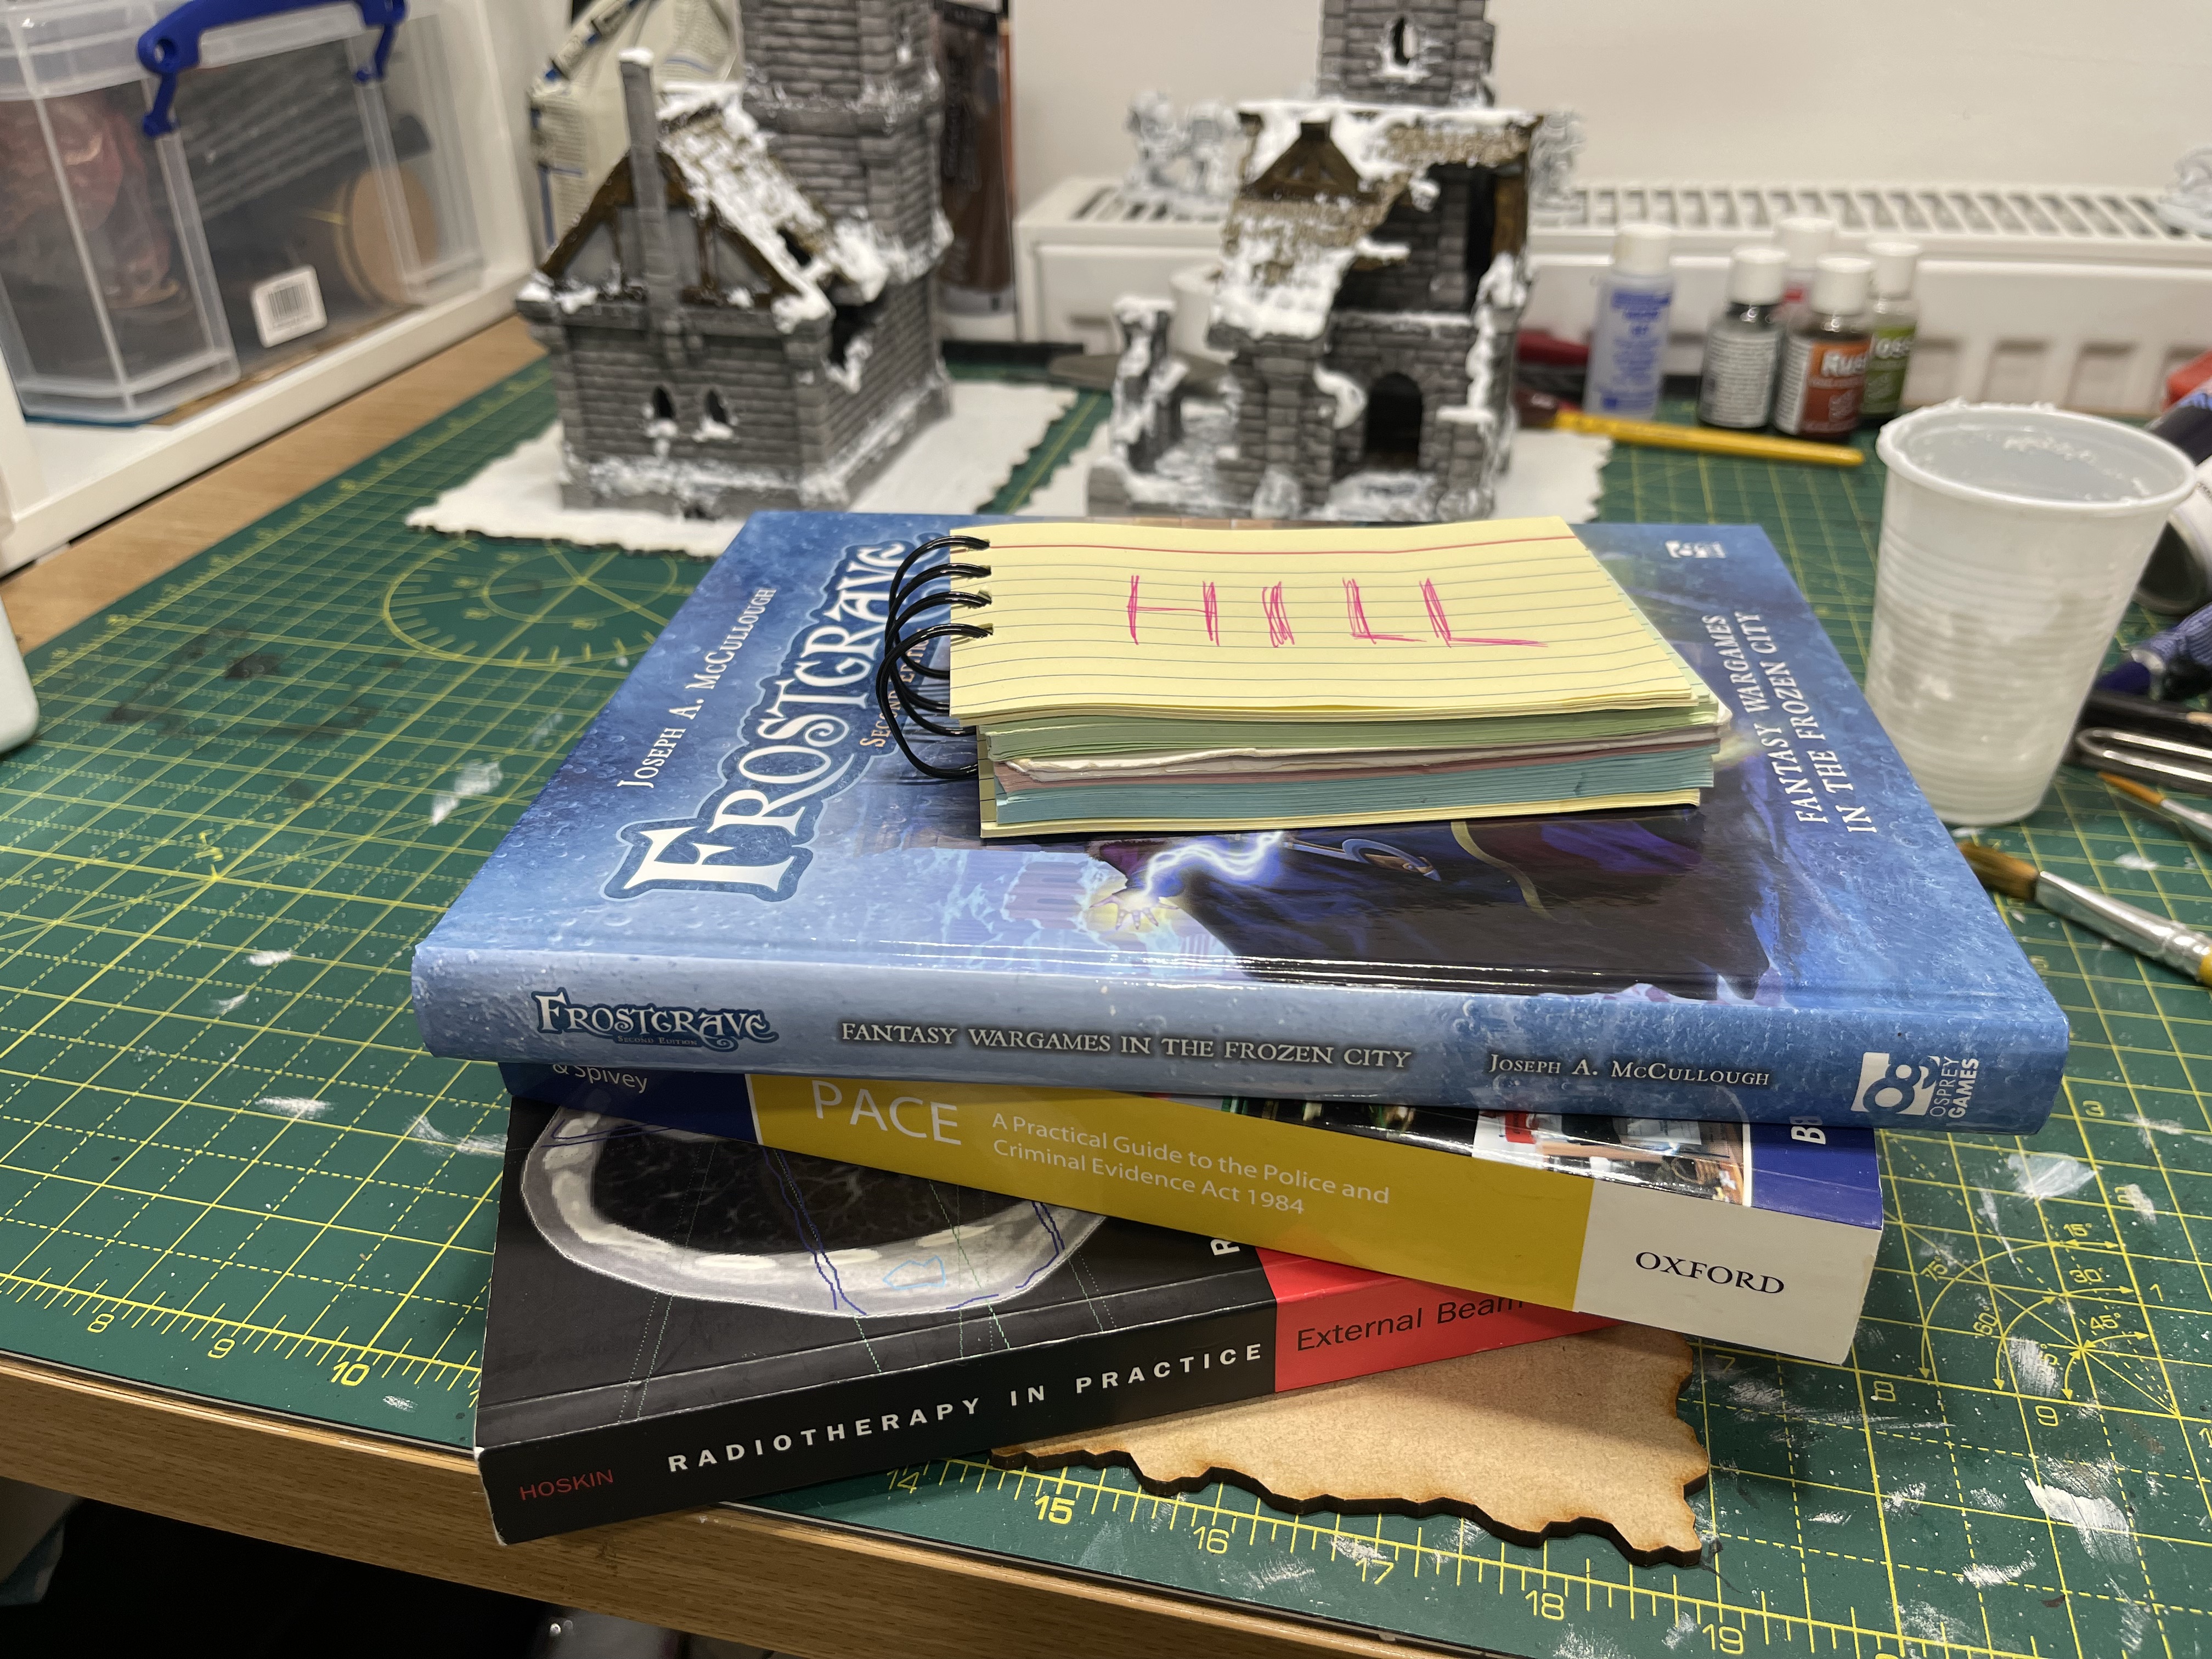
Gerry has been ‘encouraging’ people to do a hill in the 2024 terrainfest challenge.
I have delivered one… from the 80’s or 90’s high school Warhammer club.
I took a few books close at hand from a shelf and carefully arranged them into a rough pile to simulate weathered rocky outcorps.
Then I made sure to appropriately label it so it does not cause confusion in gameplay.
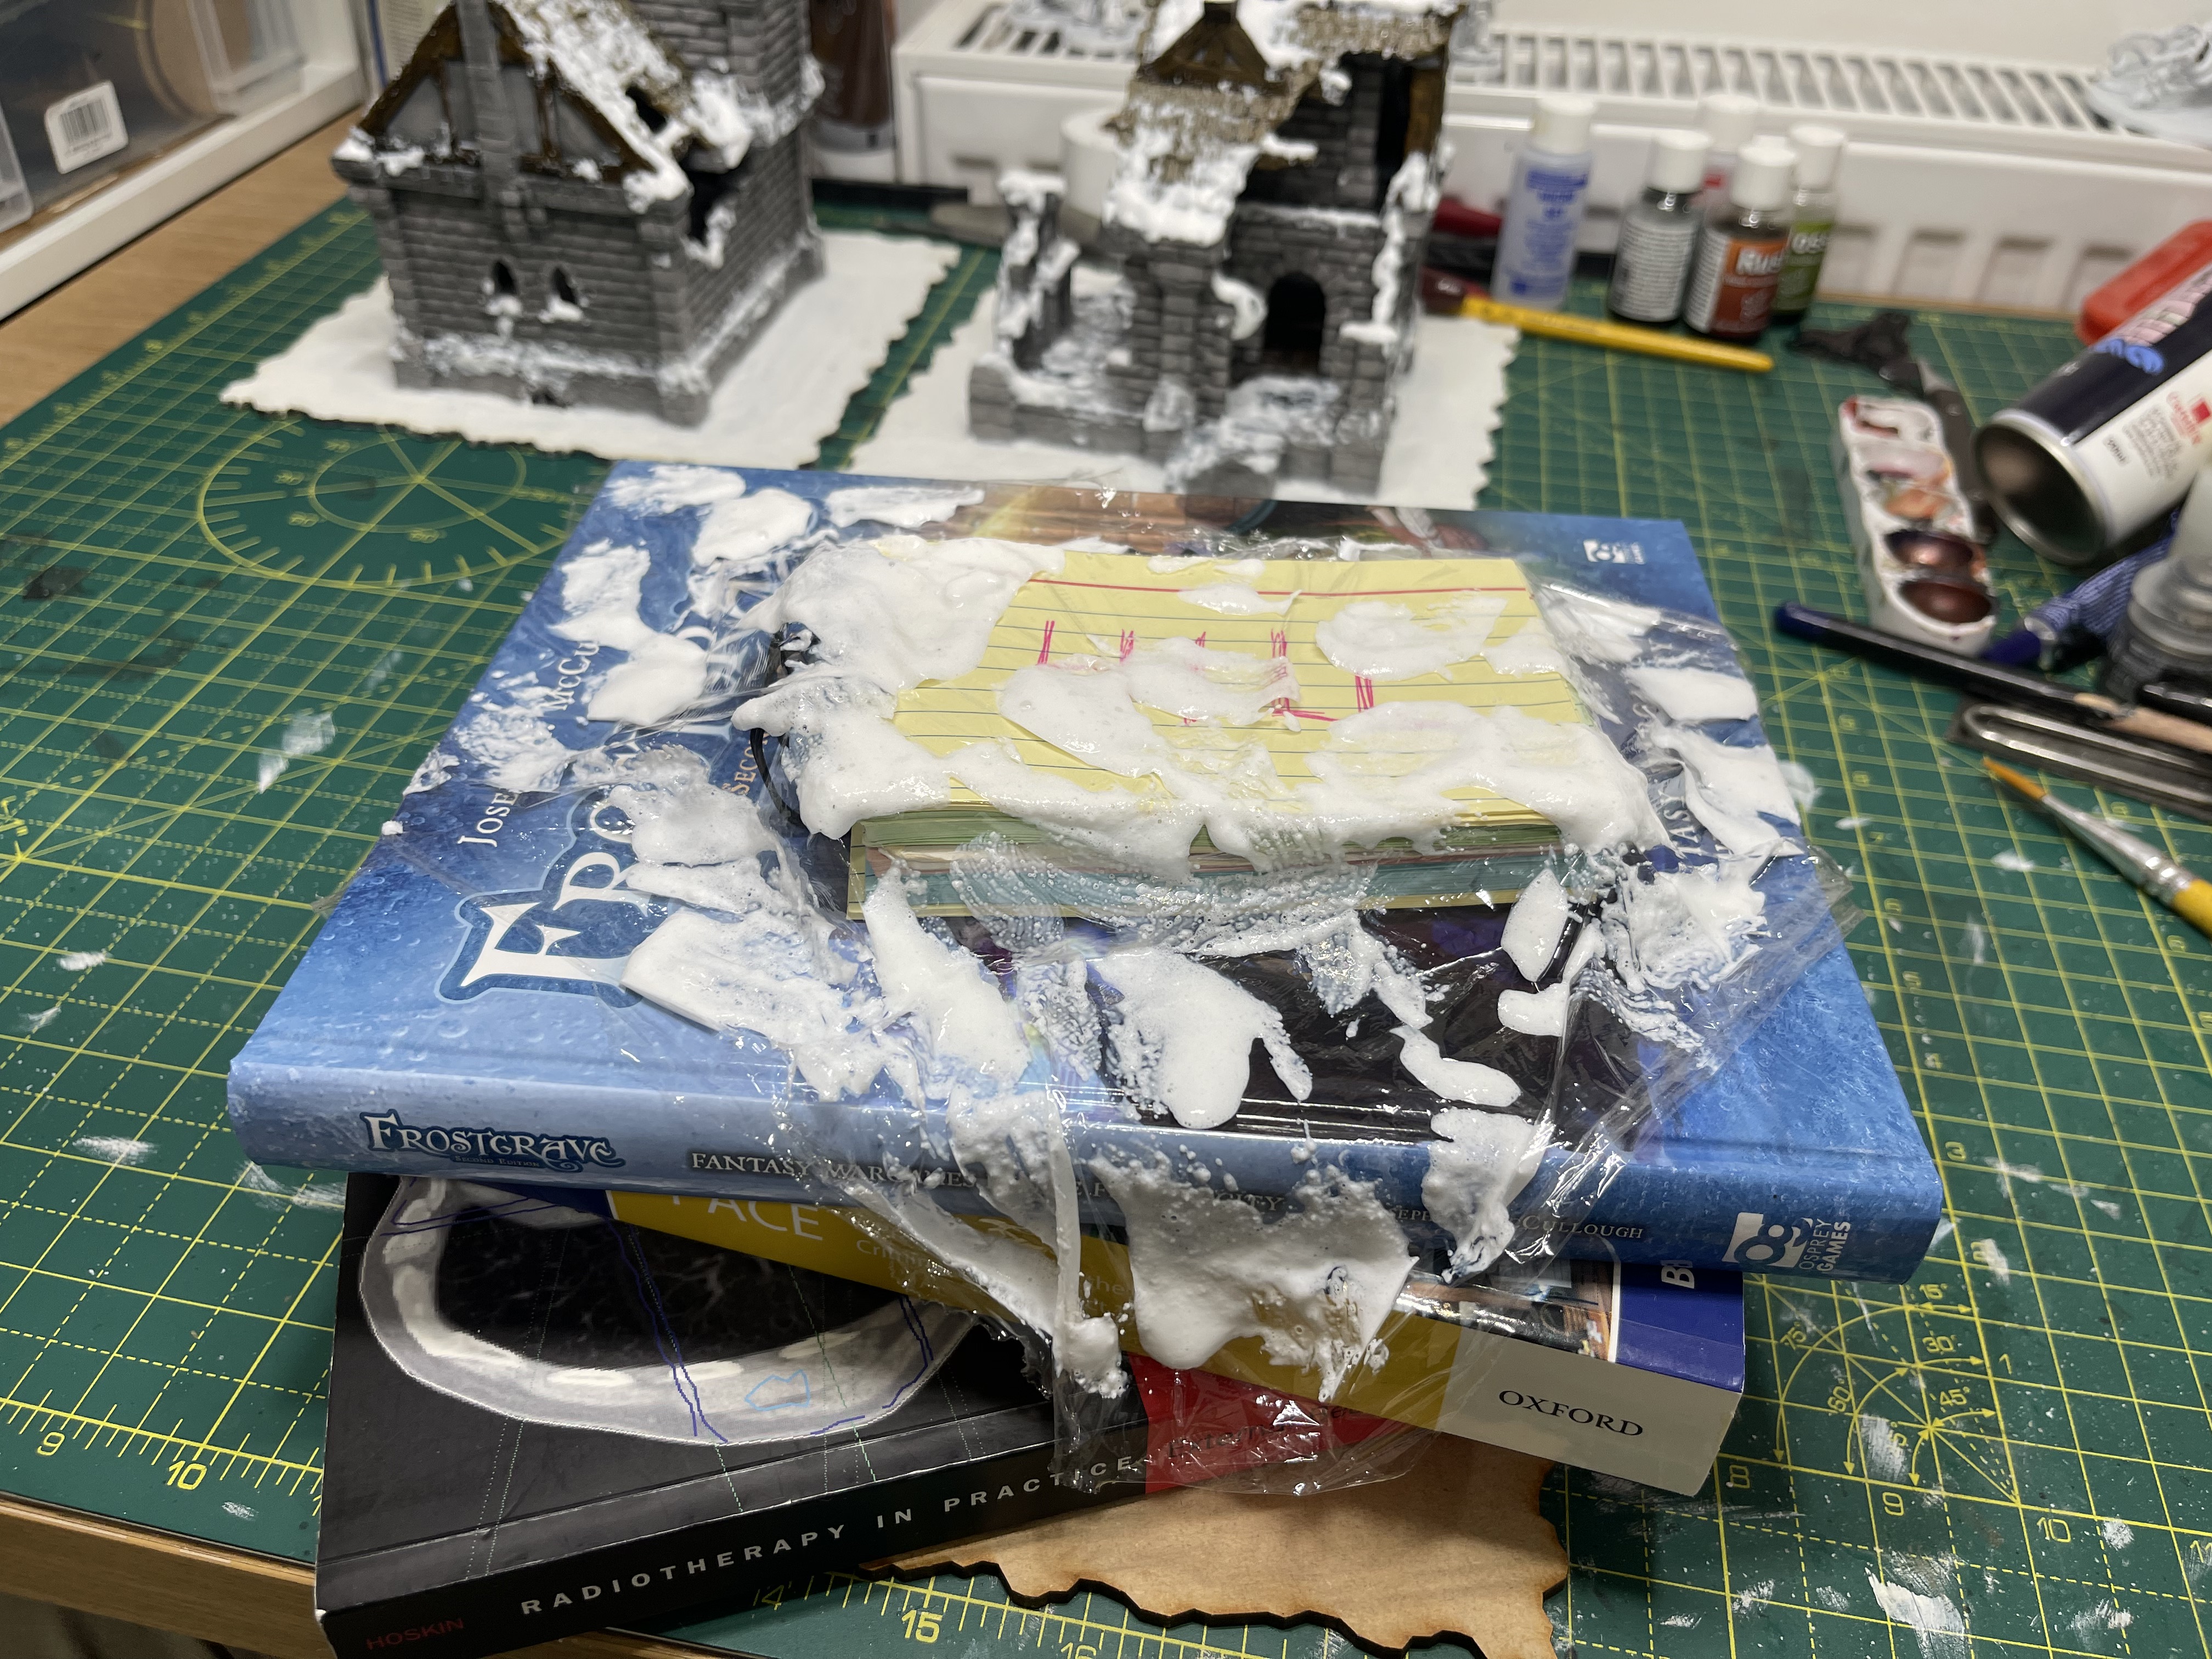
the final touches was to add snow flock just like the buildings, however, to ensure the primary function of the book is not impeded I first laid down a very thin plastic film cover. This allows for the books to be read, but also for a summer version of the table to be used, thus increasing the versatile nature of this single tile threefold! Genius!
here ends my work for 2024! see you all in 2025!


