


It’s going to be something…


Recommendations: 1226
About the Project
One day Gothic Horror, Victoriana, Steampunk and Medieval Fantasy all met up in my head. They started to fight it out which would be the subject of my project for Terrainfest 2024. Limbs flayed as the battle commenced and it was not long before they were all strewn across the floor in a tangled mess. This is my approach to this. Chuck it all in a pot, mix it up, and see what comes out.
Related Genre: Weird
Related Contest: TerrainFest 2024
This Project is Completed
The Plan.
I love making terrain.
I love making terrain way more than any other part of the hobby. Now, my terrain has spread from the games room to the garage, and I am running out of space for more.
So, I must be mindful that whatever I do for this must be as ‘usable’ as possible.
By that I mean this must cover as many systems as possible, both those I have and those I have my eye on for the future. Looking at you Guards of Traitors Toll and Trench Crusade.
Currently, I have the following themes on the ‘to-do list’
Gothic Horror both in 28mm and 55mm
Victorian Science Fiction in 28mm
Fantasy in 28mm and 32mm
Dark Grim Future in 32mm
So not only do I need to do something that I can use for any of those settings it also has to be flexible enough to scale from 28mm up to 55mm.
On top of that, I would like to incorporate my entries from Terrainfest 2023, that being my Gaslight and Port Blacksand projects or at least be compatible with them. I don’t need to incorporate all of each of those projects, but it would be nice to have the flexibility to at least use some of it.
I would also like to use mixed media with this and include Resin Prints, Filament prints, scratch building and conversions. Some electrical elements would be nice too.
However, the key thing is that this set-up is interesting to look at but also, and possibly more importantly, playable.
I will also add that the idea of the build is for skirmish-style games with, mostly, individually based figures.
Well that all sounds rather simple.
Disclaimer – Some of the buildings shown in some of the photographs were built last year, they are included in the pictures not to mislead anyone but rather so that you can see how this year’s build is tying in with last year’s build to hopefully show the layout I am doing this year is to compliment last years and to also expand on it. Last year was all about the buildings. This year the focus is on the tabletop and a few additions to help fill out the board to give a more lived-in look. The sewer system is a complete remake of my older version, and completely different.
Focusing on the plan
I figured I should probably make a start documenting stuff on here as I have a terrible habit of cracking on with stuff and forgetting to take photographs.
My miniatures games table is currently a 4′ x 6′ set up with a raised wooden area around it. On top of that, I have laid all my neoprene mats. On top of that, I have a couple of sheets of 3mm MDF so that I can still use the table as a work surface without the risk of damaging the mats beneath.
Now I do like gaming mats and think they have improved how we used to play games on a dyed green dustsheet with roads and the like marked out with felt and masking tape. However, I want to add some extra layers to the playing surface and build something to, hopefully, lift my set to another level.
This will also have to be in smaller sub-structures so it can be removed and stored away when not being used.
 Disclaimer - The buildings on the table set up in this picture were built last year. Some of my buildings laid out on my gaming table. Sure, its playable and serves its purpose, but look at how flat and sterile it is. It needs texture and contours or levels to really make it feel like the buildings and ground are supposed to be together
I could just put the buildings on the cobblestone mat I have, but to be honest, the mat I have is not the nicest and I don’t want to be hypnotised by the mind-bending effect of 6′ x 4′ of grey cobblestones staring at me in the face. You know what it’s like, in small pieces patterns look okay but once you have a large area of the same pattern it becomes a bit glaring.
There is always the option of investing in a different cobblestone mat with flagstone areas so that the cobblestone areas make up the roads, but where is the challenge in that?
 The hasty scribblings of a madman
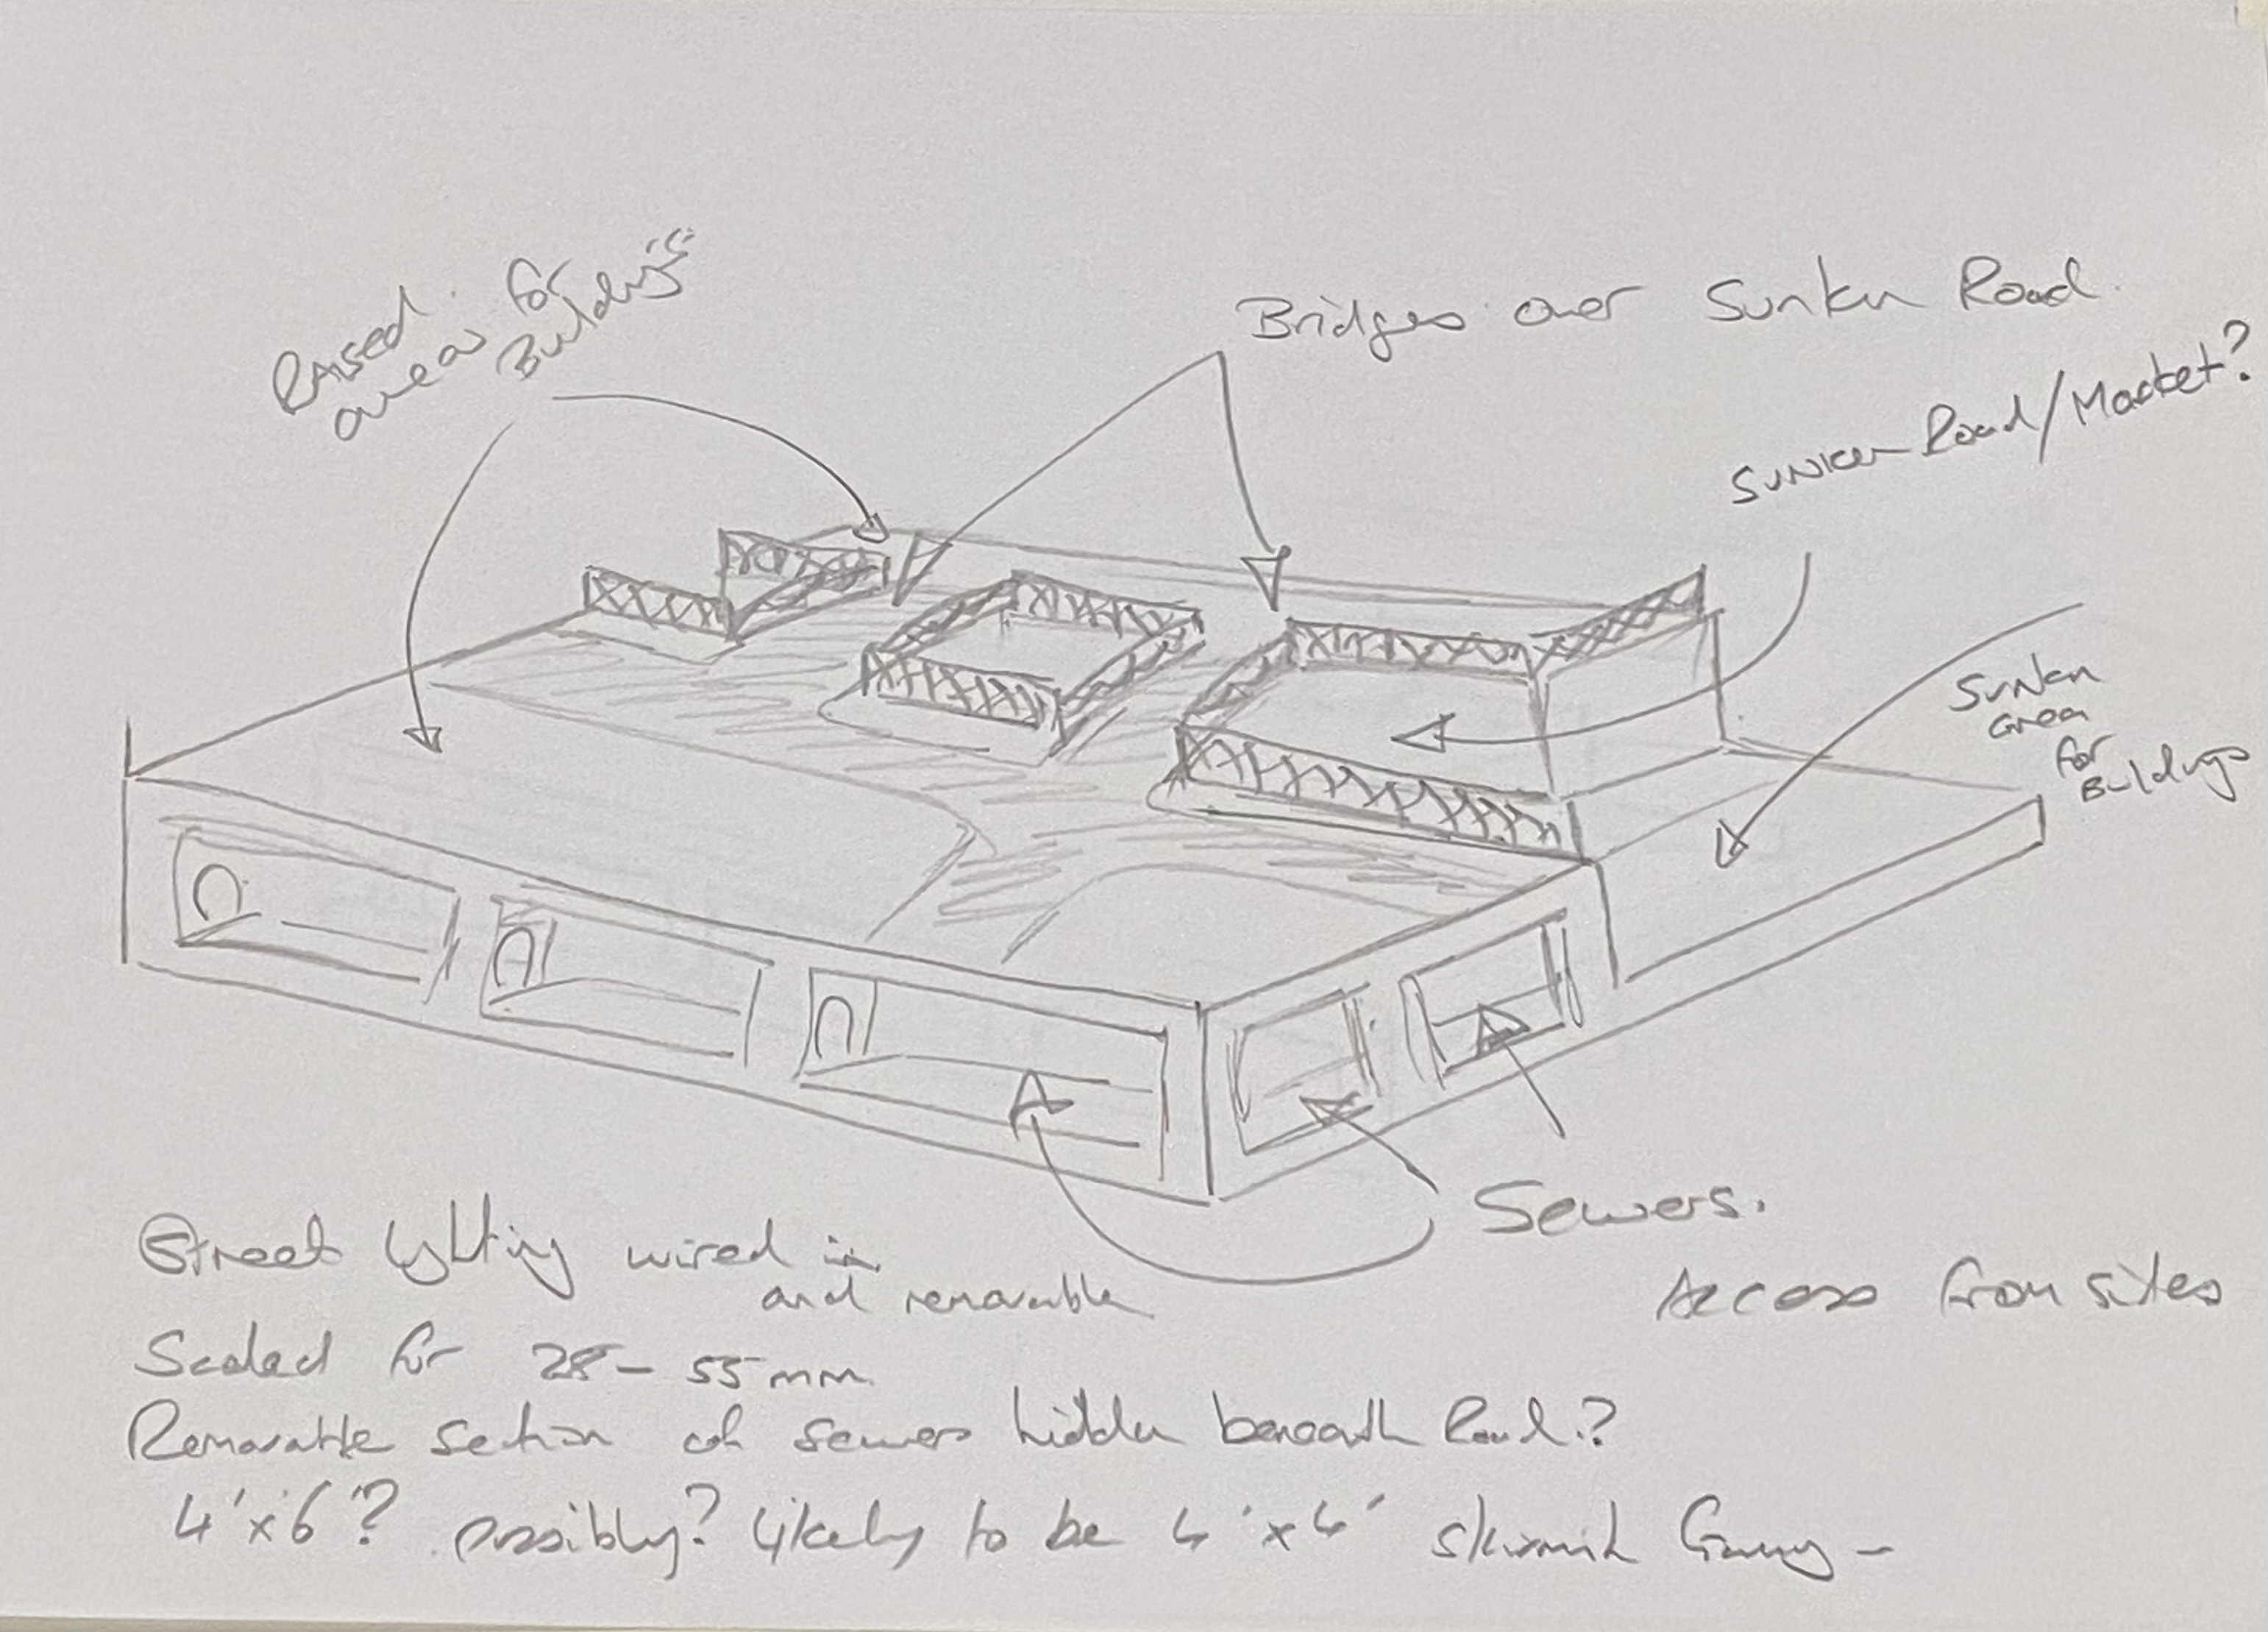
So, my rough concept at the moment is to have a sewer system running around the edge of the layout to allow for easy access, possibly with a separate sewer network that is hidden beneath the roads that can be removed and set up alongside the main table.
A sunken road possibly lined with market stalls goes from one side to the other and opens up into a larger sunken area on one side.
A couple of bridges will span the two raised areas on either side of this sunken road. Ample space will be left without cobblestones for building placement.
Lighting is to be installed but in such a way that it can be removed and replaced with different-scale street lighting so the set-up can span from 28-55mm.
Modular so it can be deconstructed easily for storage and transport.
Of course, the exact layout is subject to change and may vary from the picture.
Colour Test
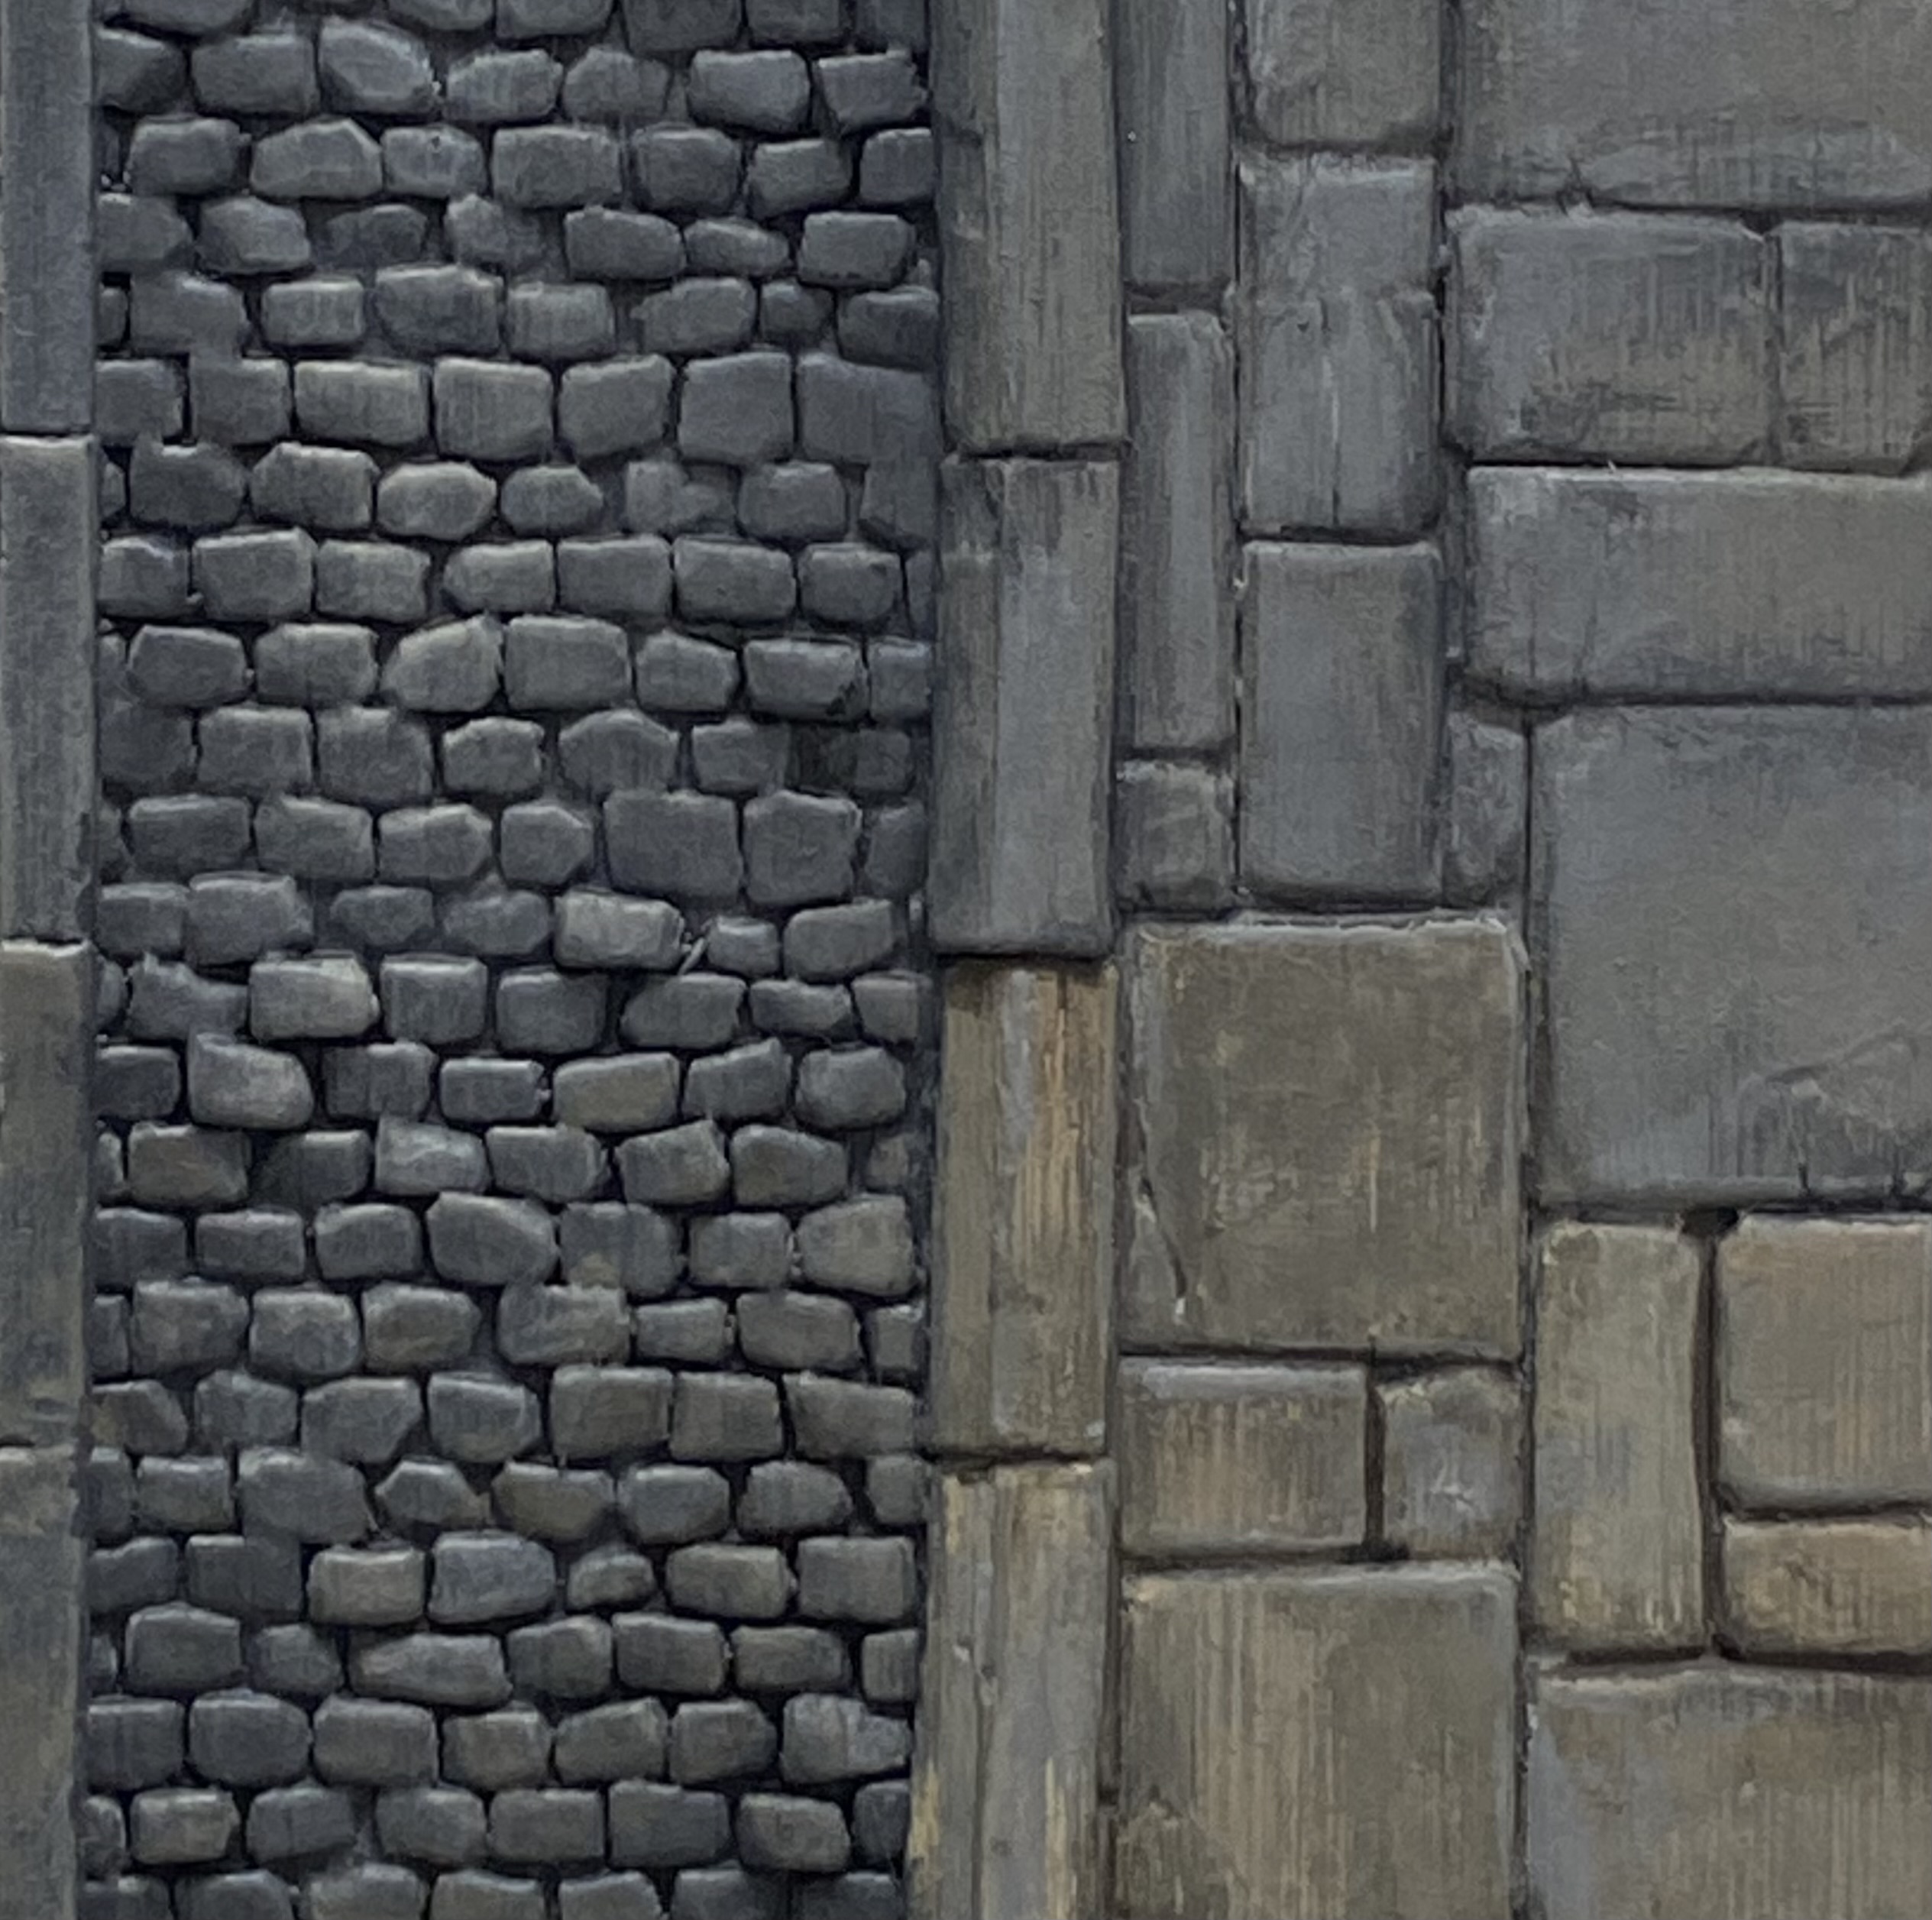
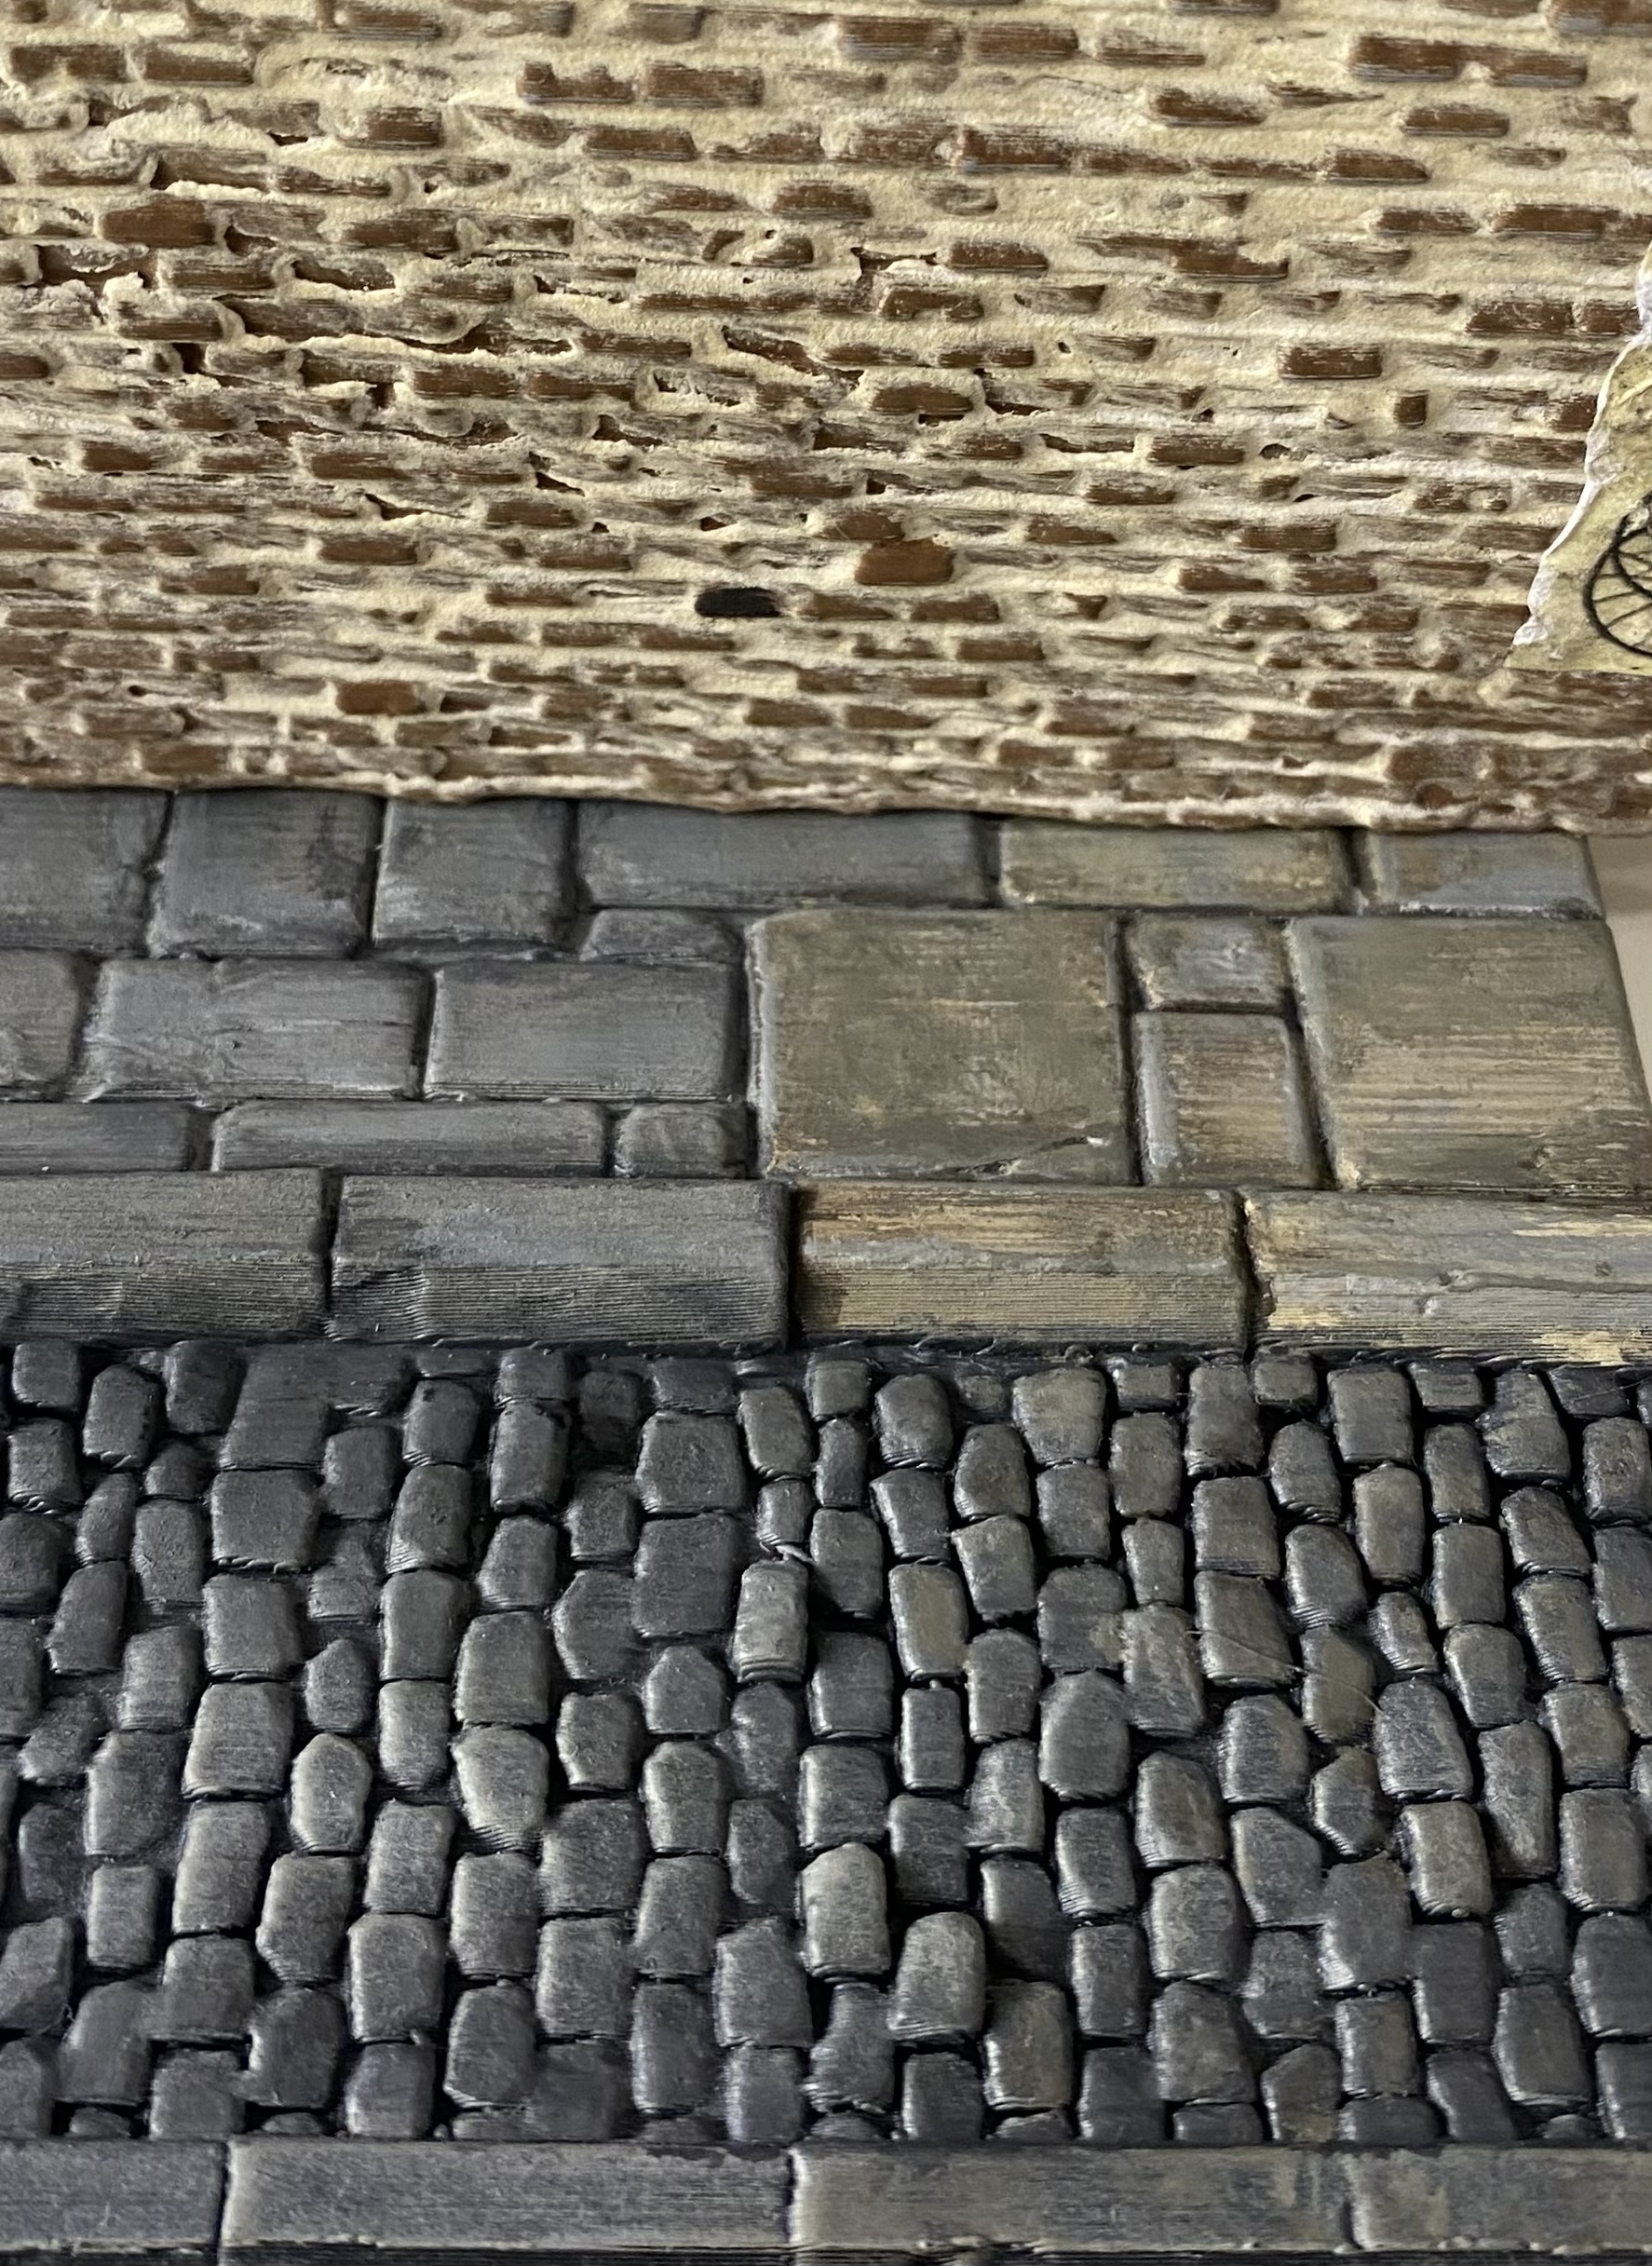
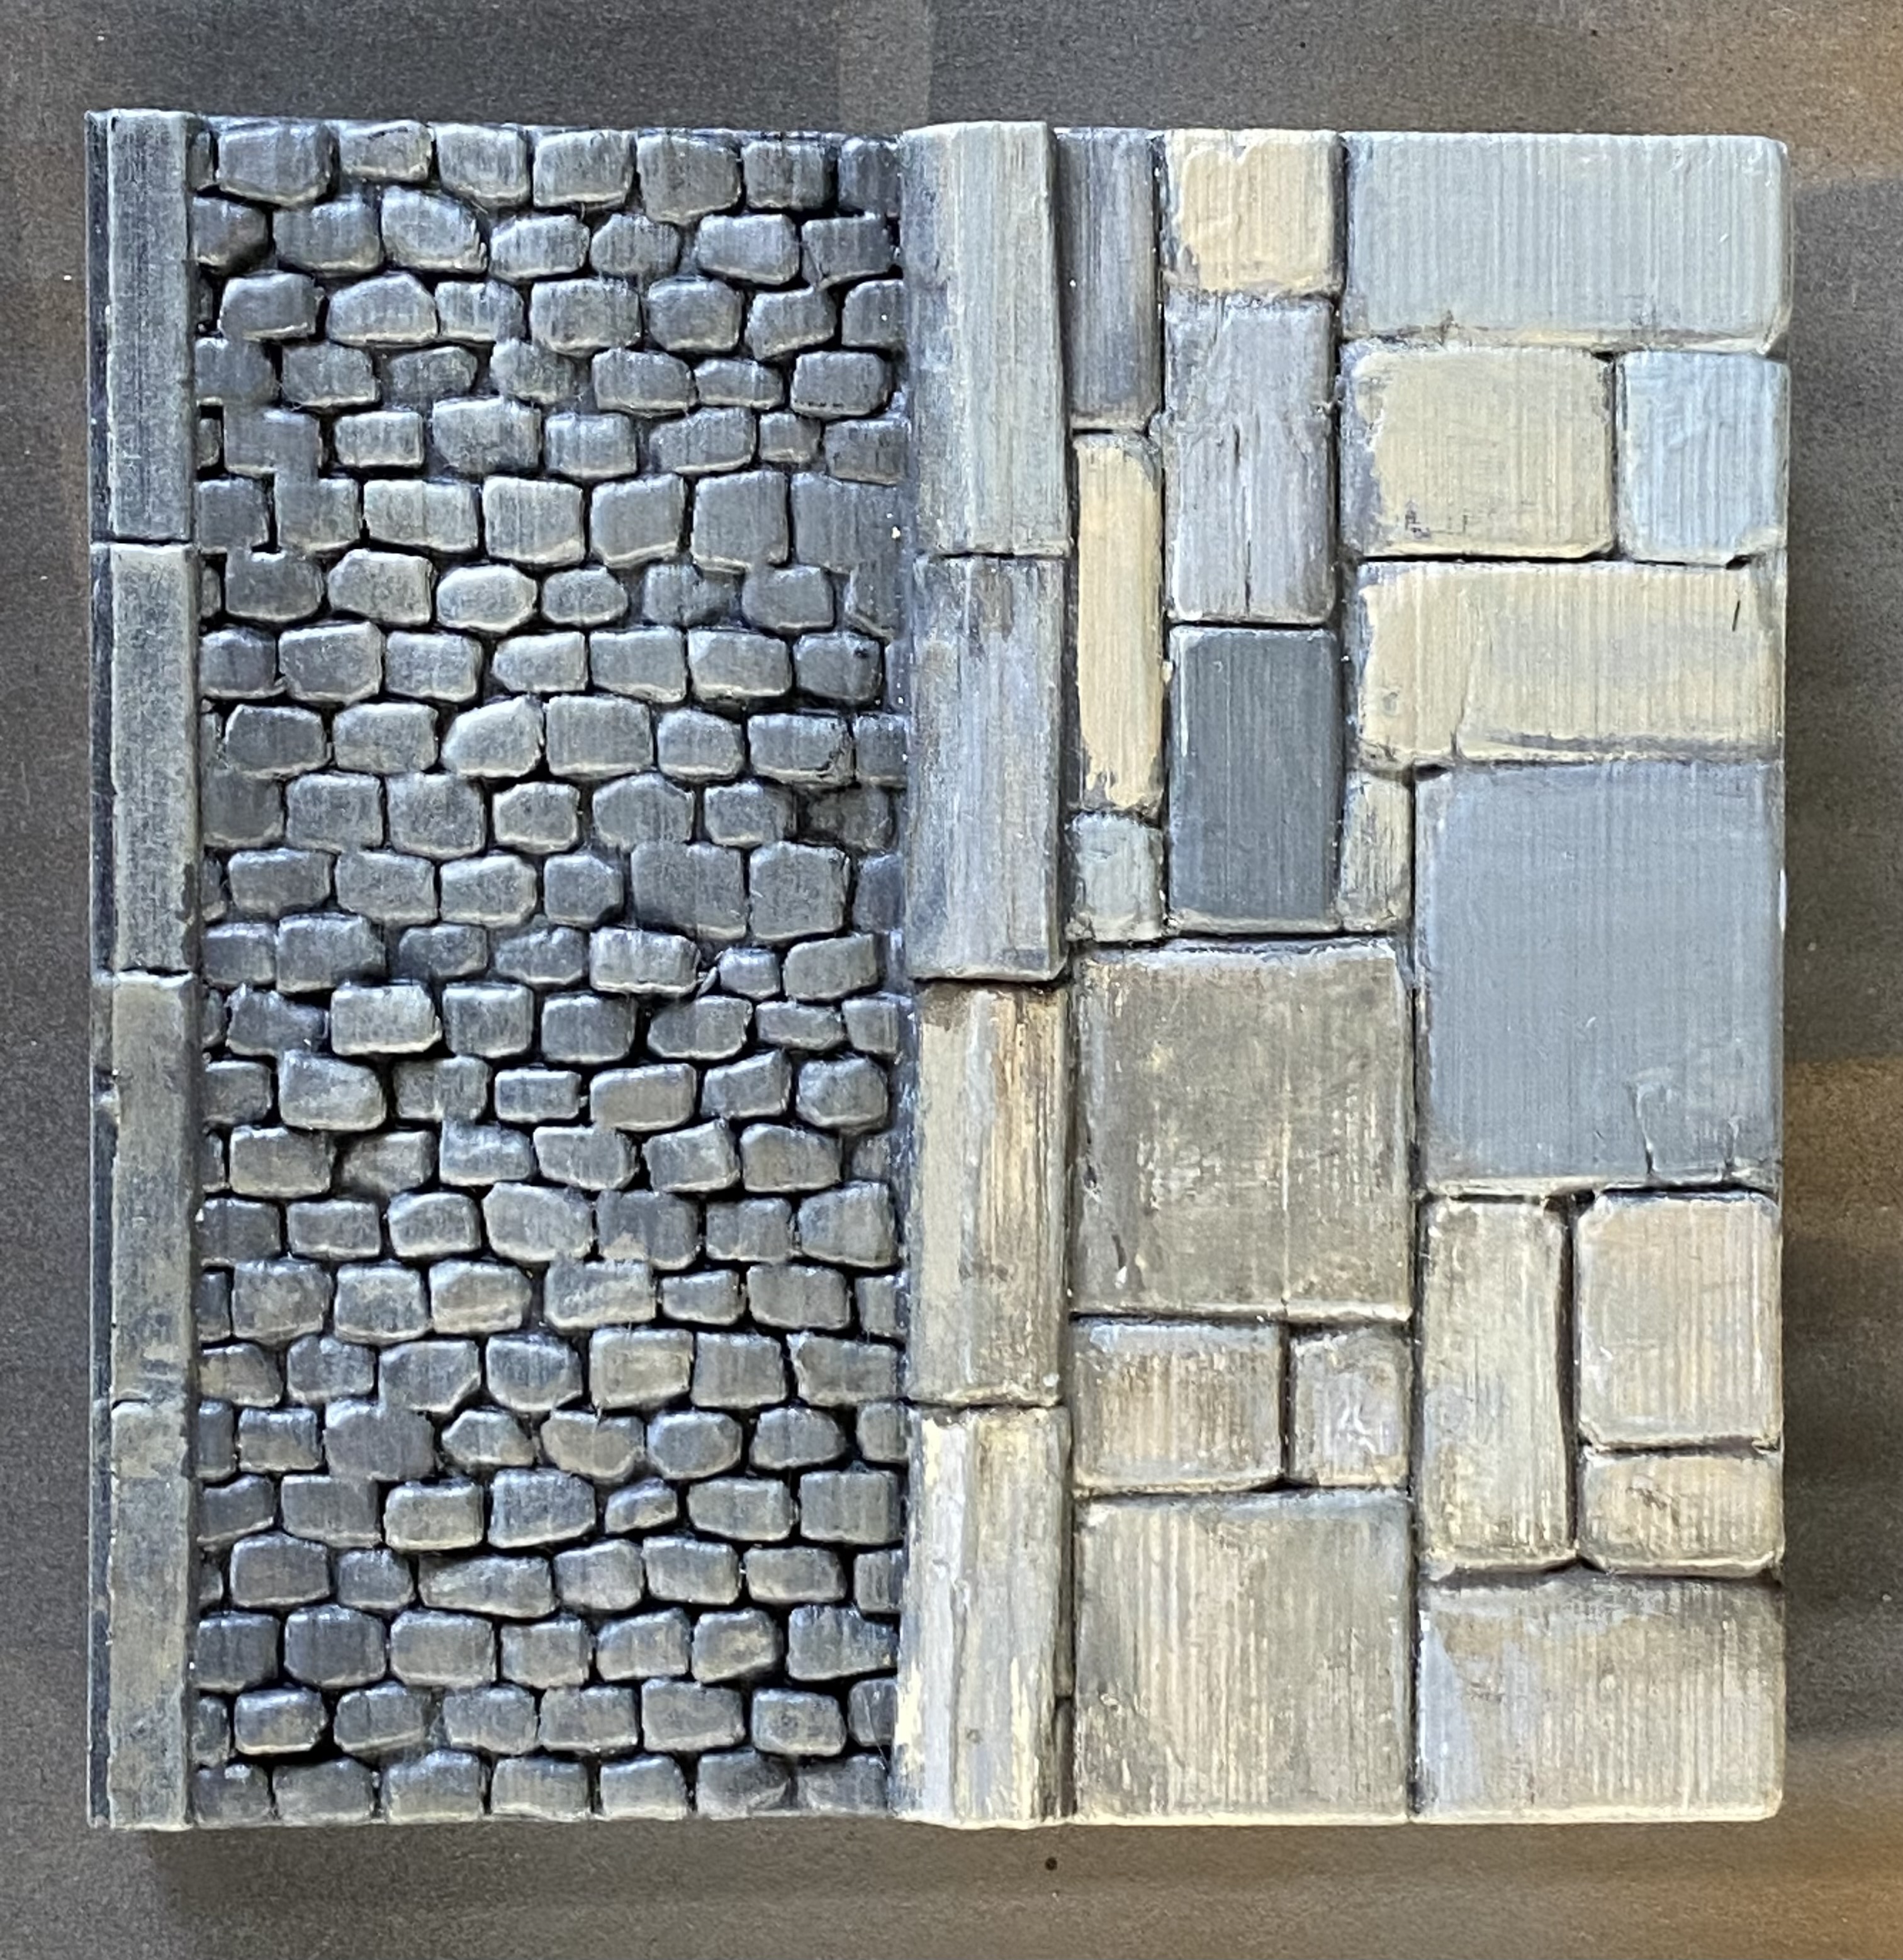
I knocked up a small sample piece from the Stormcrow range to test out some colours on. The sample has cobblestone and flagstone elements so I can see how different colours look next to each other.
Initially, I went with a grey primer and painted the cobblestones black. After that, I used a wet brush to highlight grey colours, using lighter greys on the flagstones. It didn’t look too bad, but it didn’t feel right. it looked too cold for what I was after.
I then approached it a little differently and used more browns and earthy colours to wet brush over the primer and I got a much warmer look.
I then added some simple ‘scuff marks’ to try to make it look a bit weathered.
I think I will probably use a brown primer rather than grey on the flagstone areas to help create a distinctive difference between textures whilst, hopefully, getting it to feel like the colours don’t clash with each other too much.
Thoughts?
Of course, the base terrain has to fit and feel at home with the current buildings which I plan to incorporate into the layout.
The look I am aiming for is that these streets are lived in and in constant use whilst also being able to represent something gloomier should the need arise.
I took one of my buildings and placed it on the sample board piece to see if the colours would work together,
 Floor tile next to my current building's brickwork pattern and style
Even then it was worth remembering that my buildings also have other colours on them, it’s not just about the brickwork fitting in. So, I tested out some other views of building to see if the colours I had used would work.
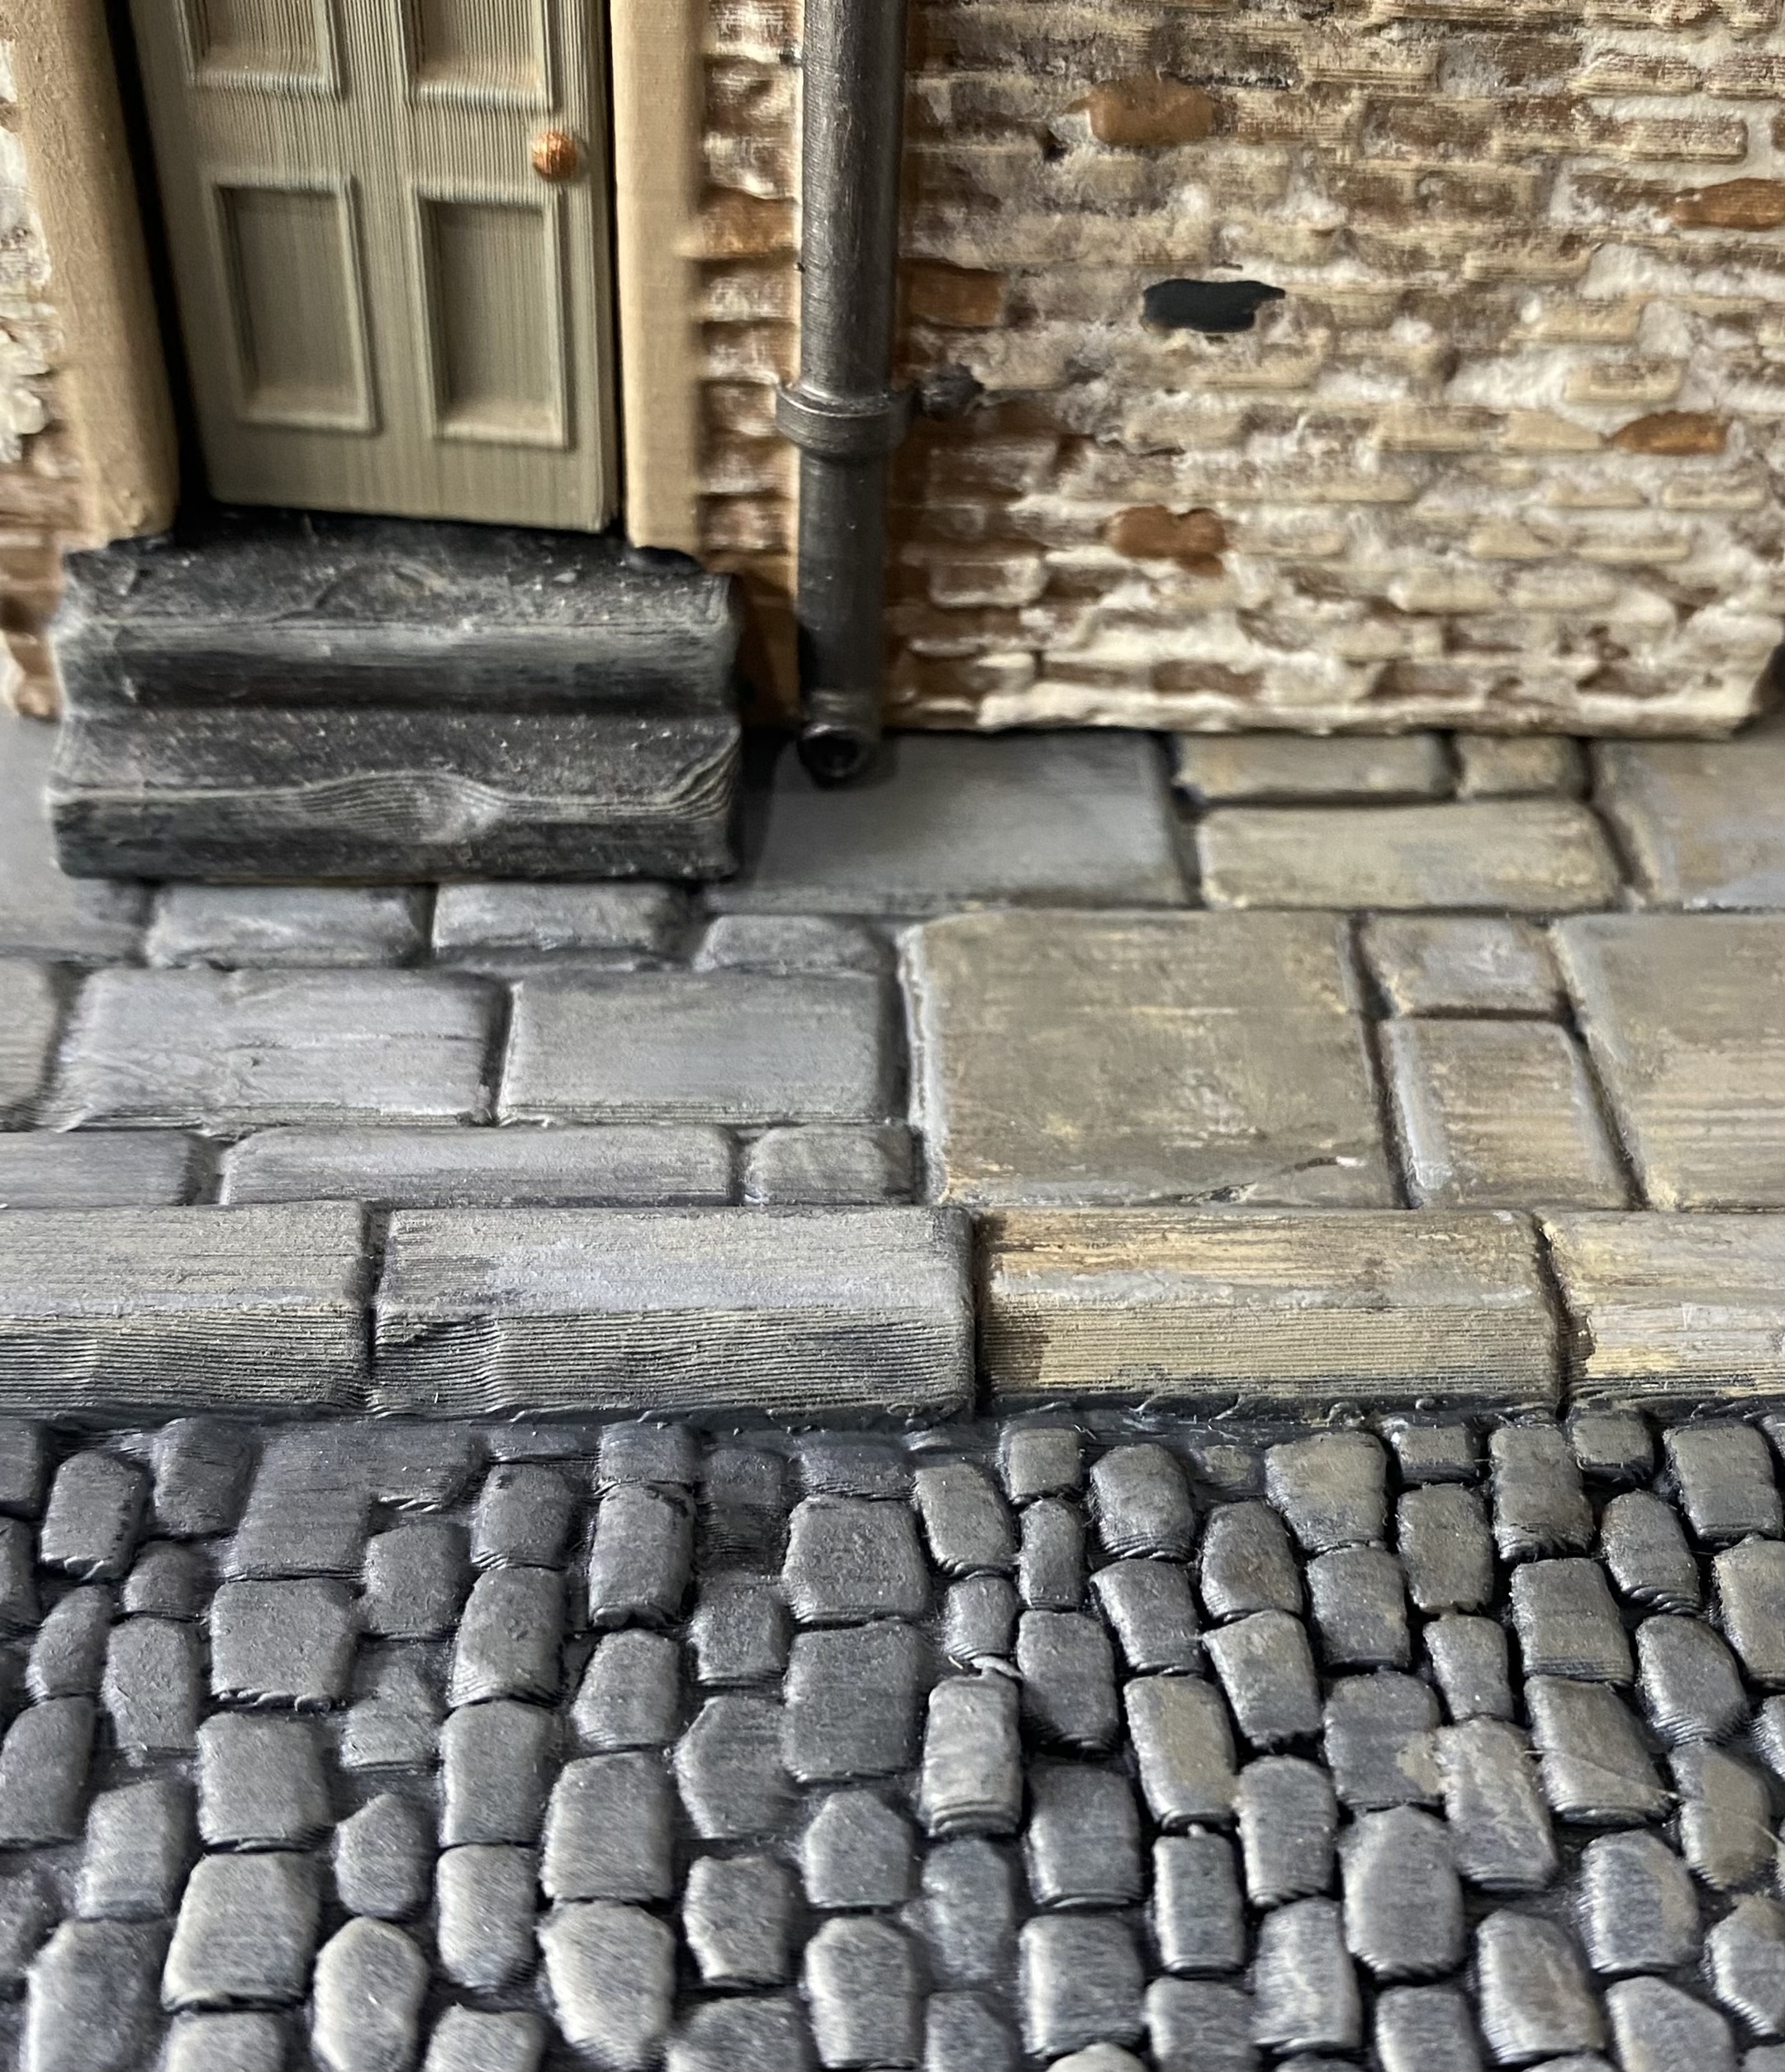 The back door against the terrain tile.
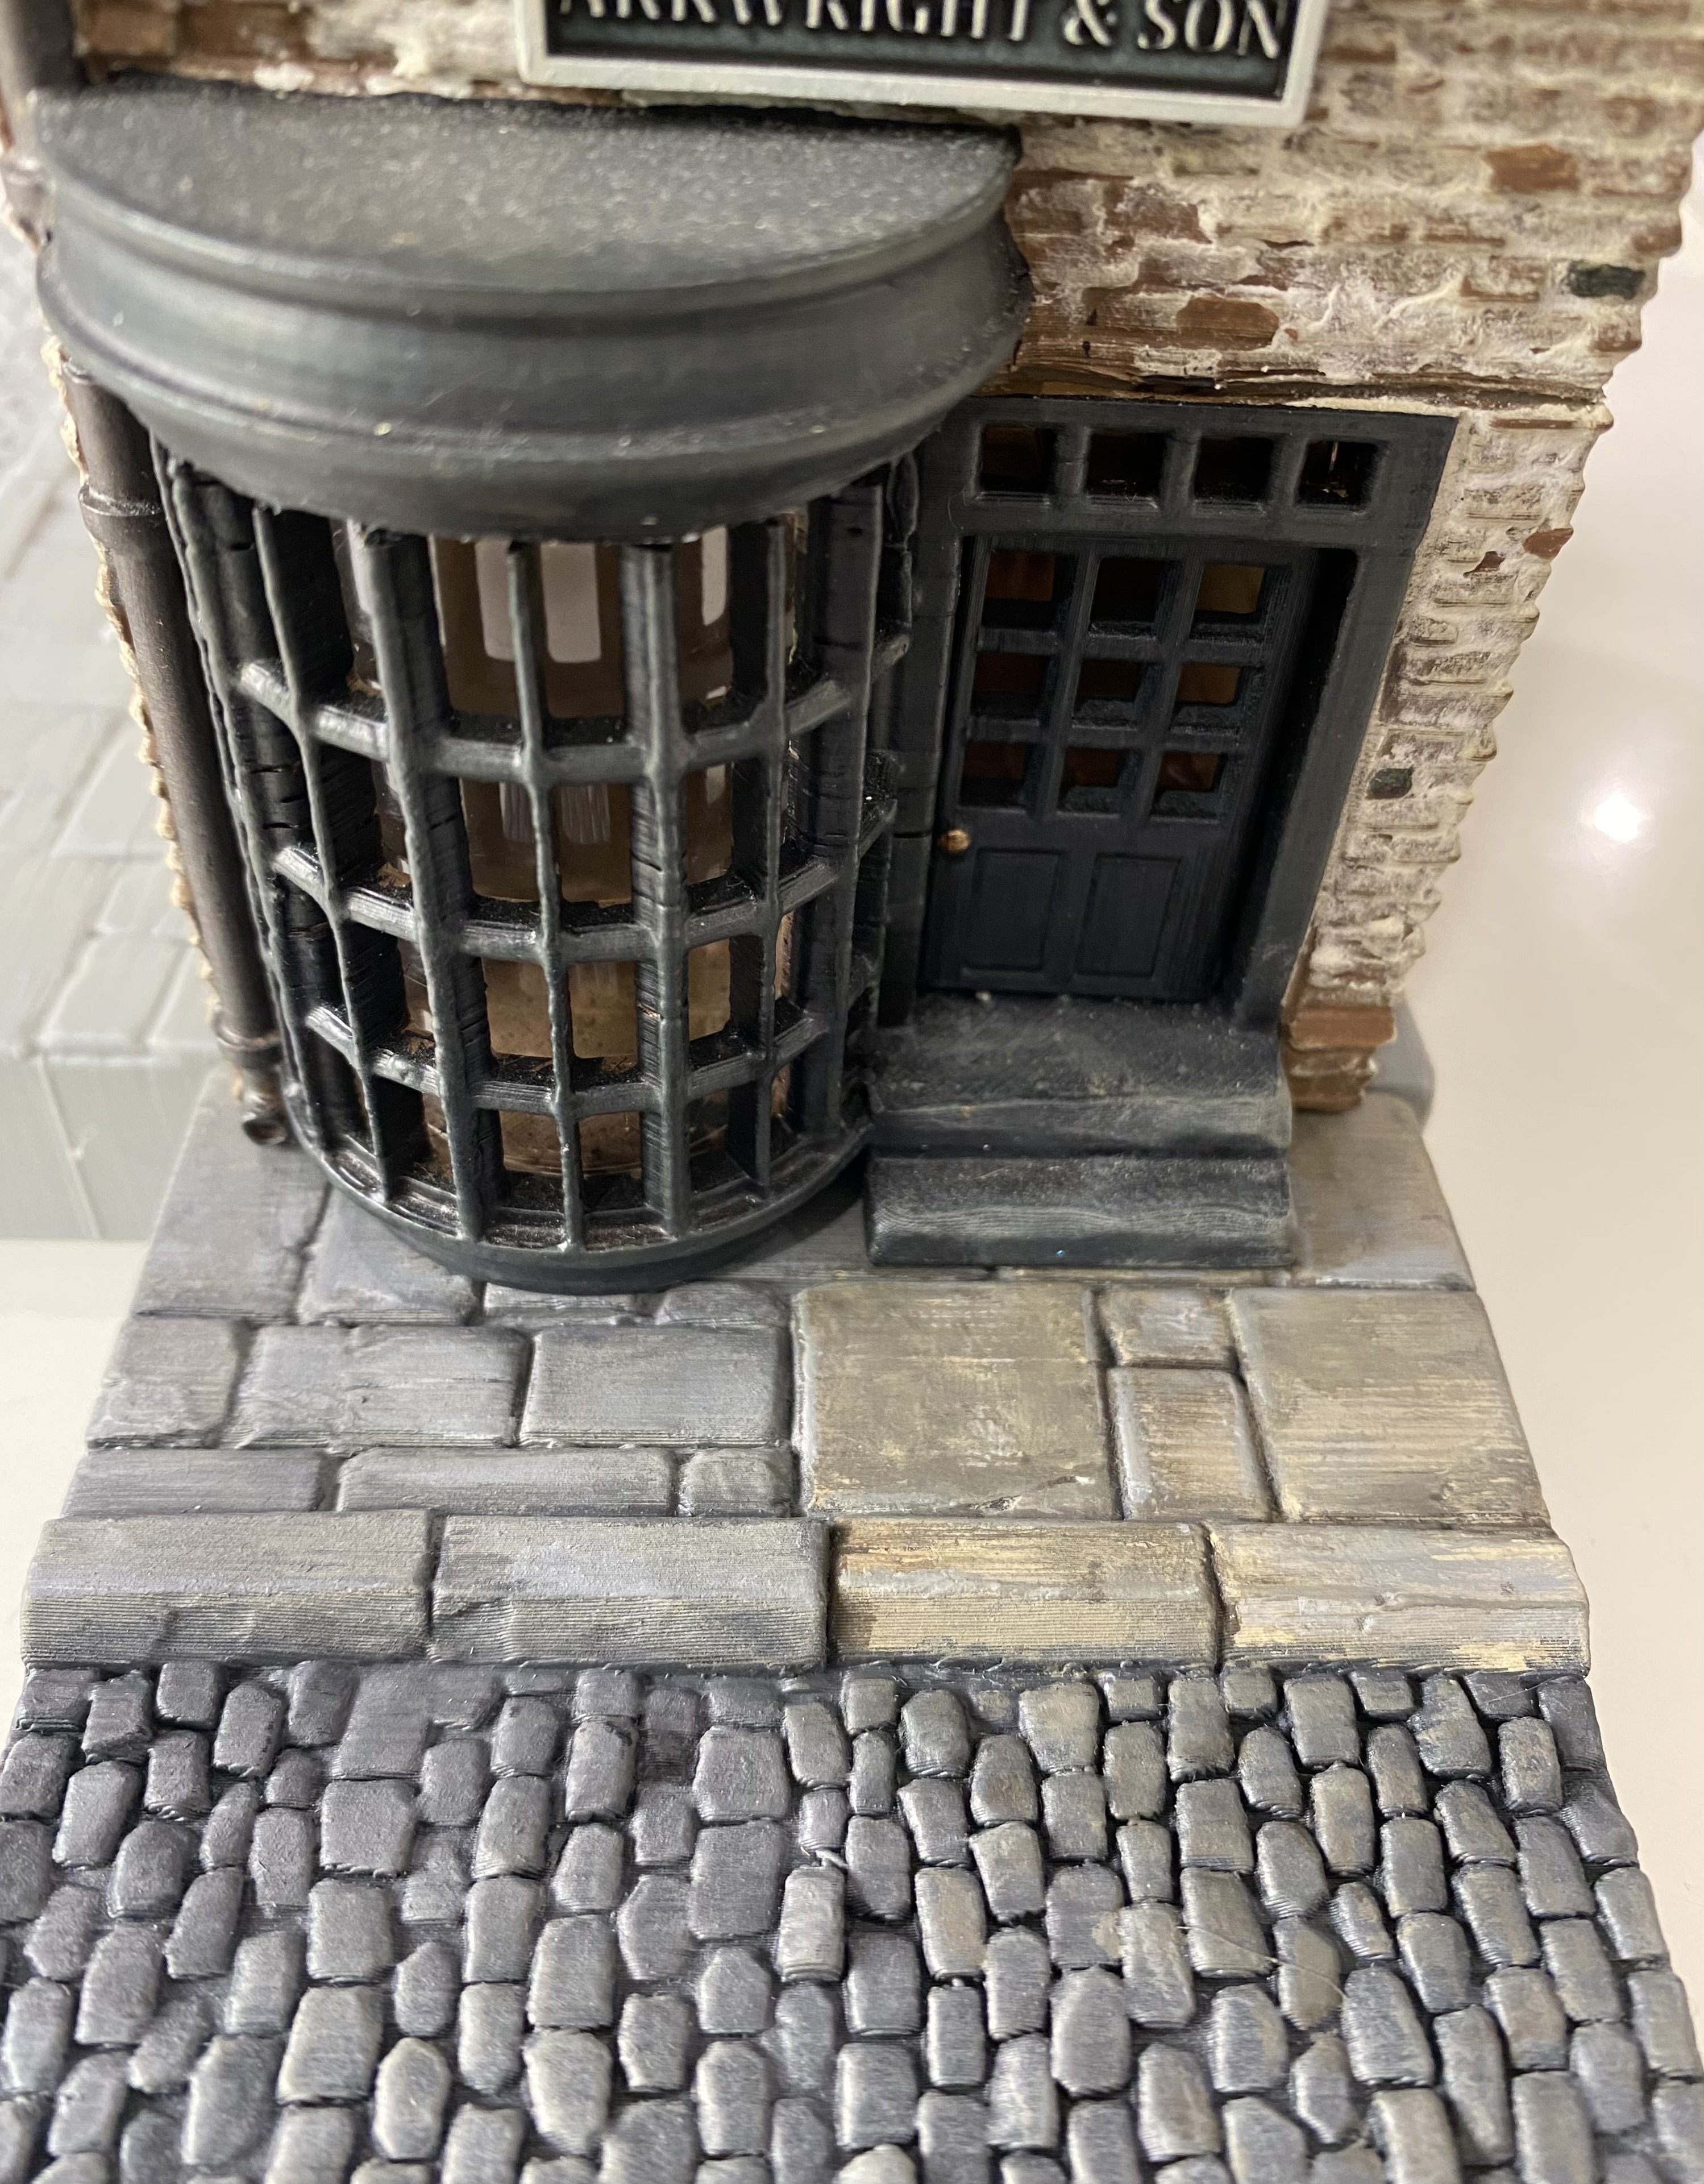 Shopfront against the terrain tile.
I also have some more ‘fancy’ buildings that have large areas of an ‘off-white’ colour on them. So, whist at it I thought I should probably put them against the floor tile too,
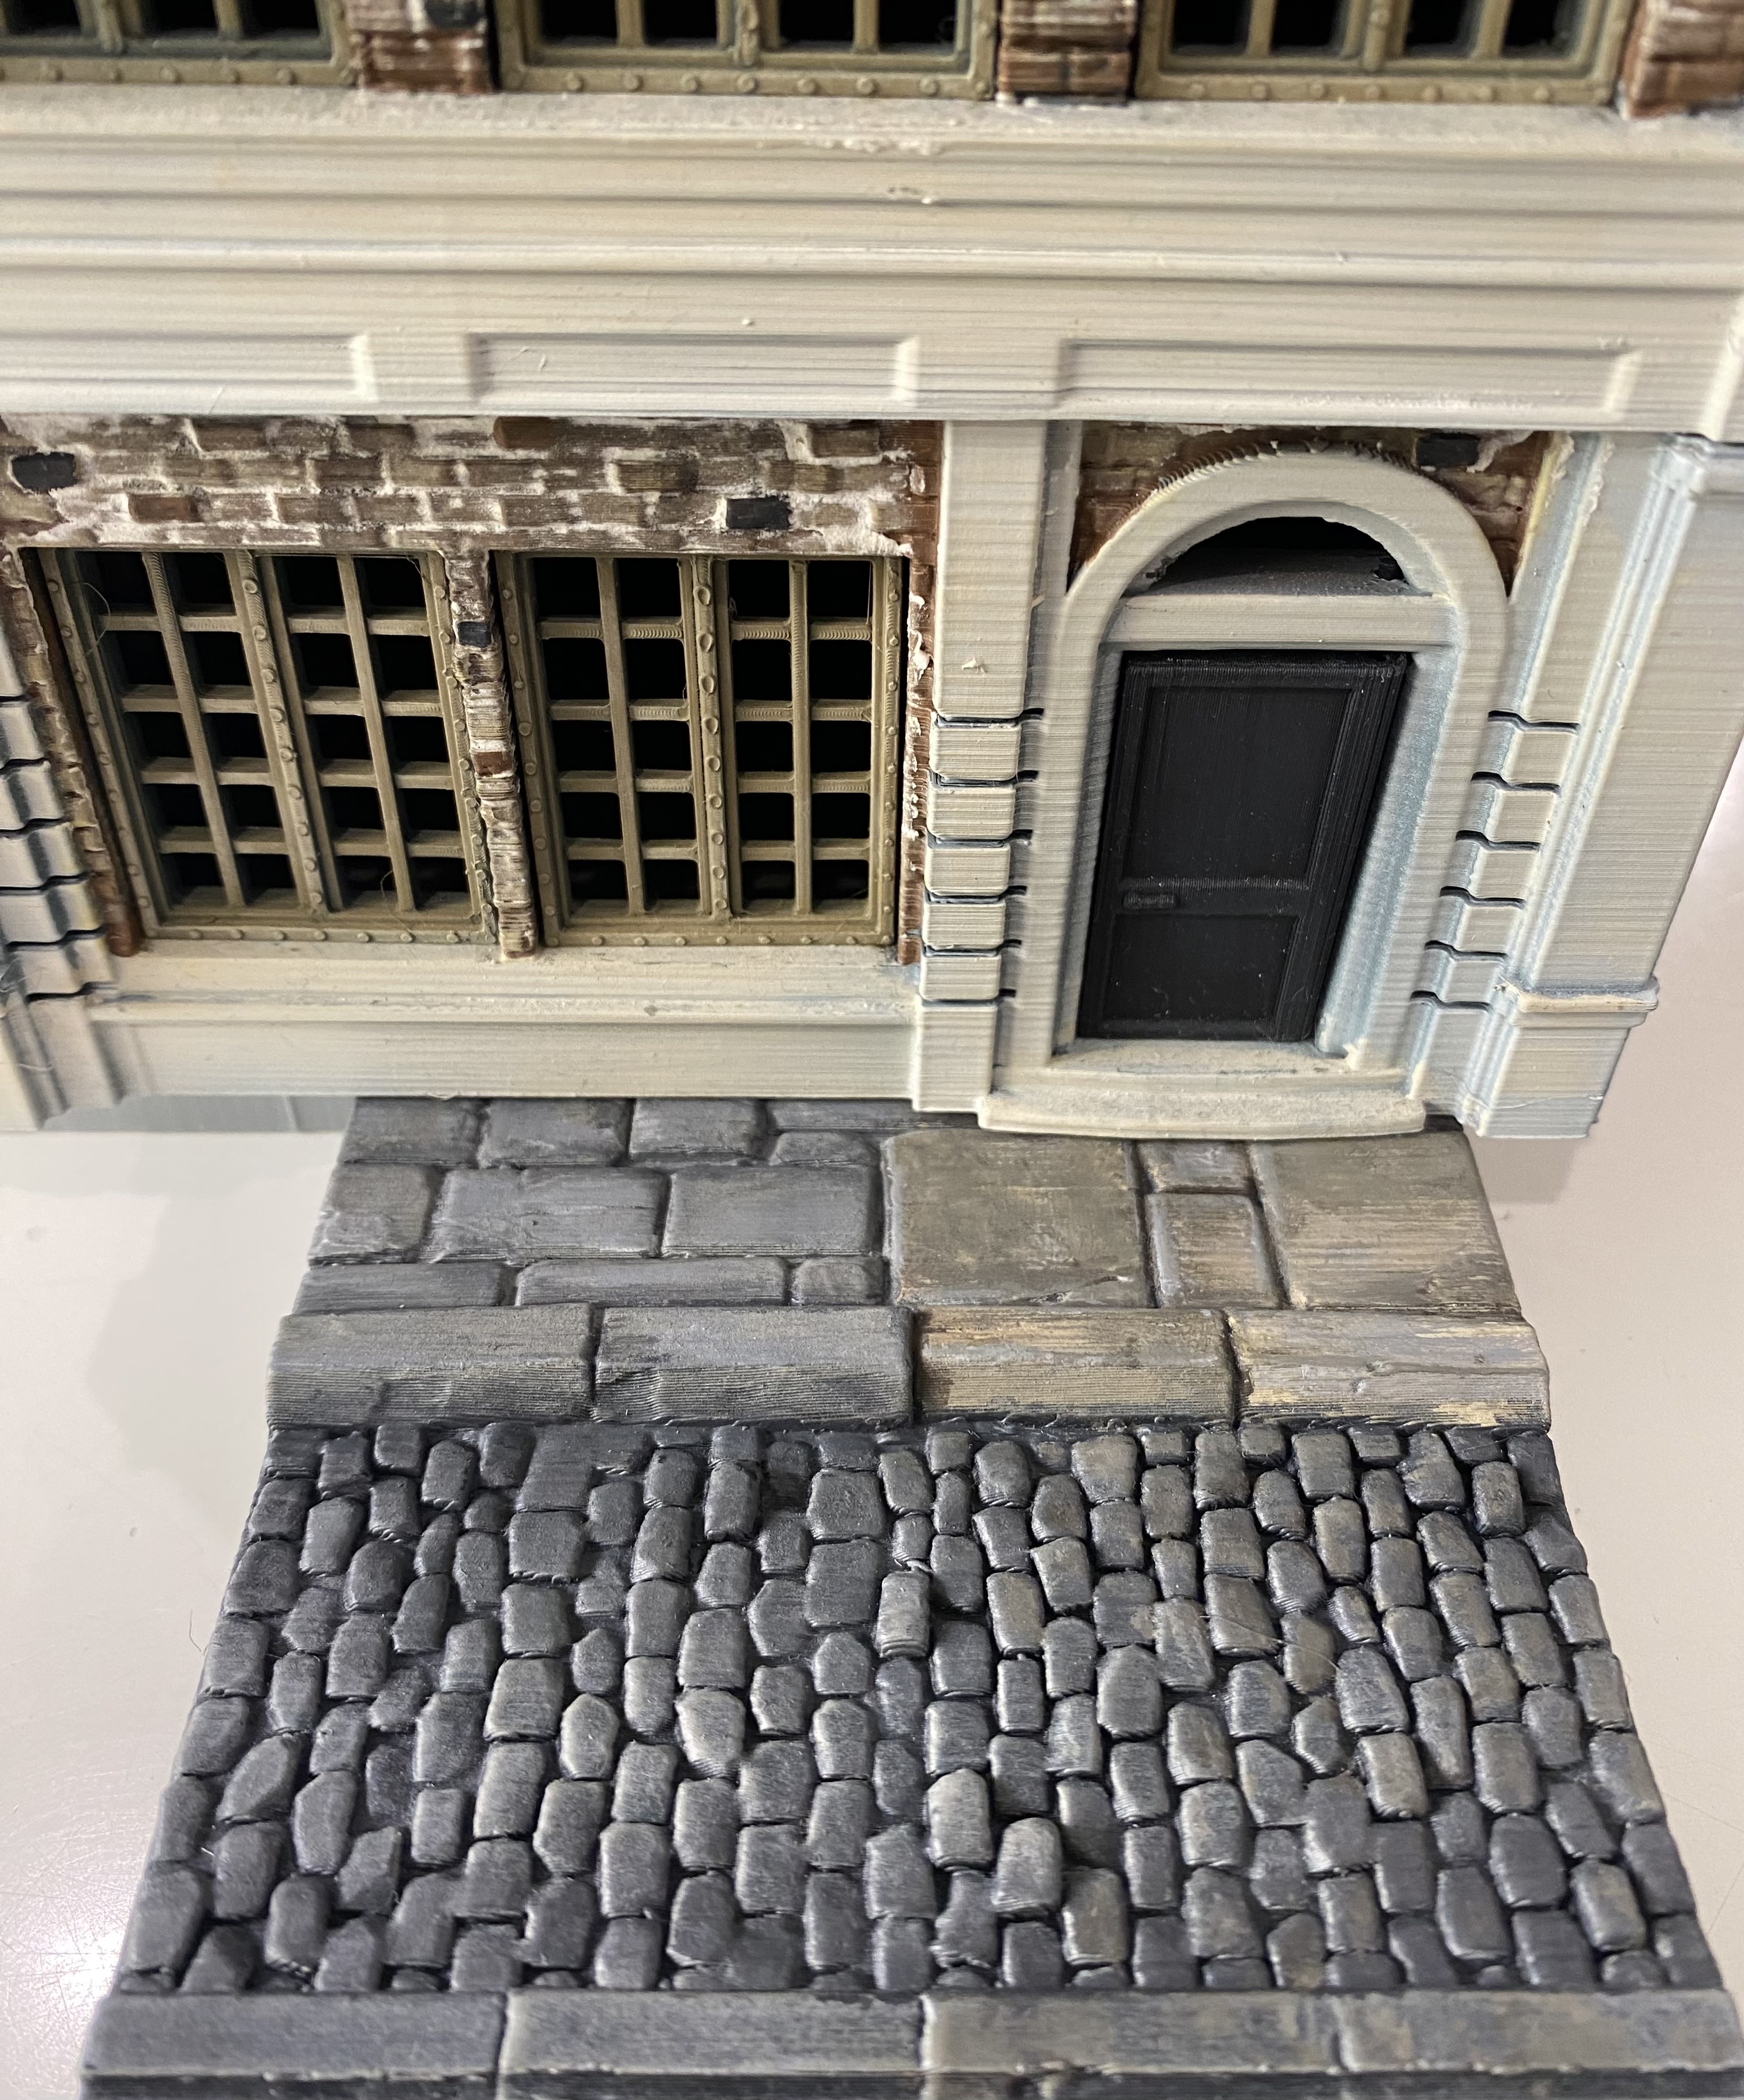 Fancy Pants white trim building.
So that is where I am currently at. Any thoughts, ideas or suggestions are very much welcome.
Cheers.
Colours
I’m still playing around with colours for the flagstones. The previous ones felt a little too yellow and green, so I’ve had another bash this time with more earthy greys.
I’m still not 100% happy with them, but I will keep working on them until I come up with something I like the look of.
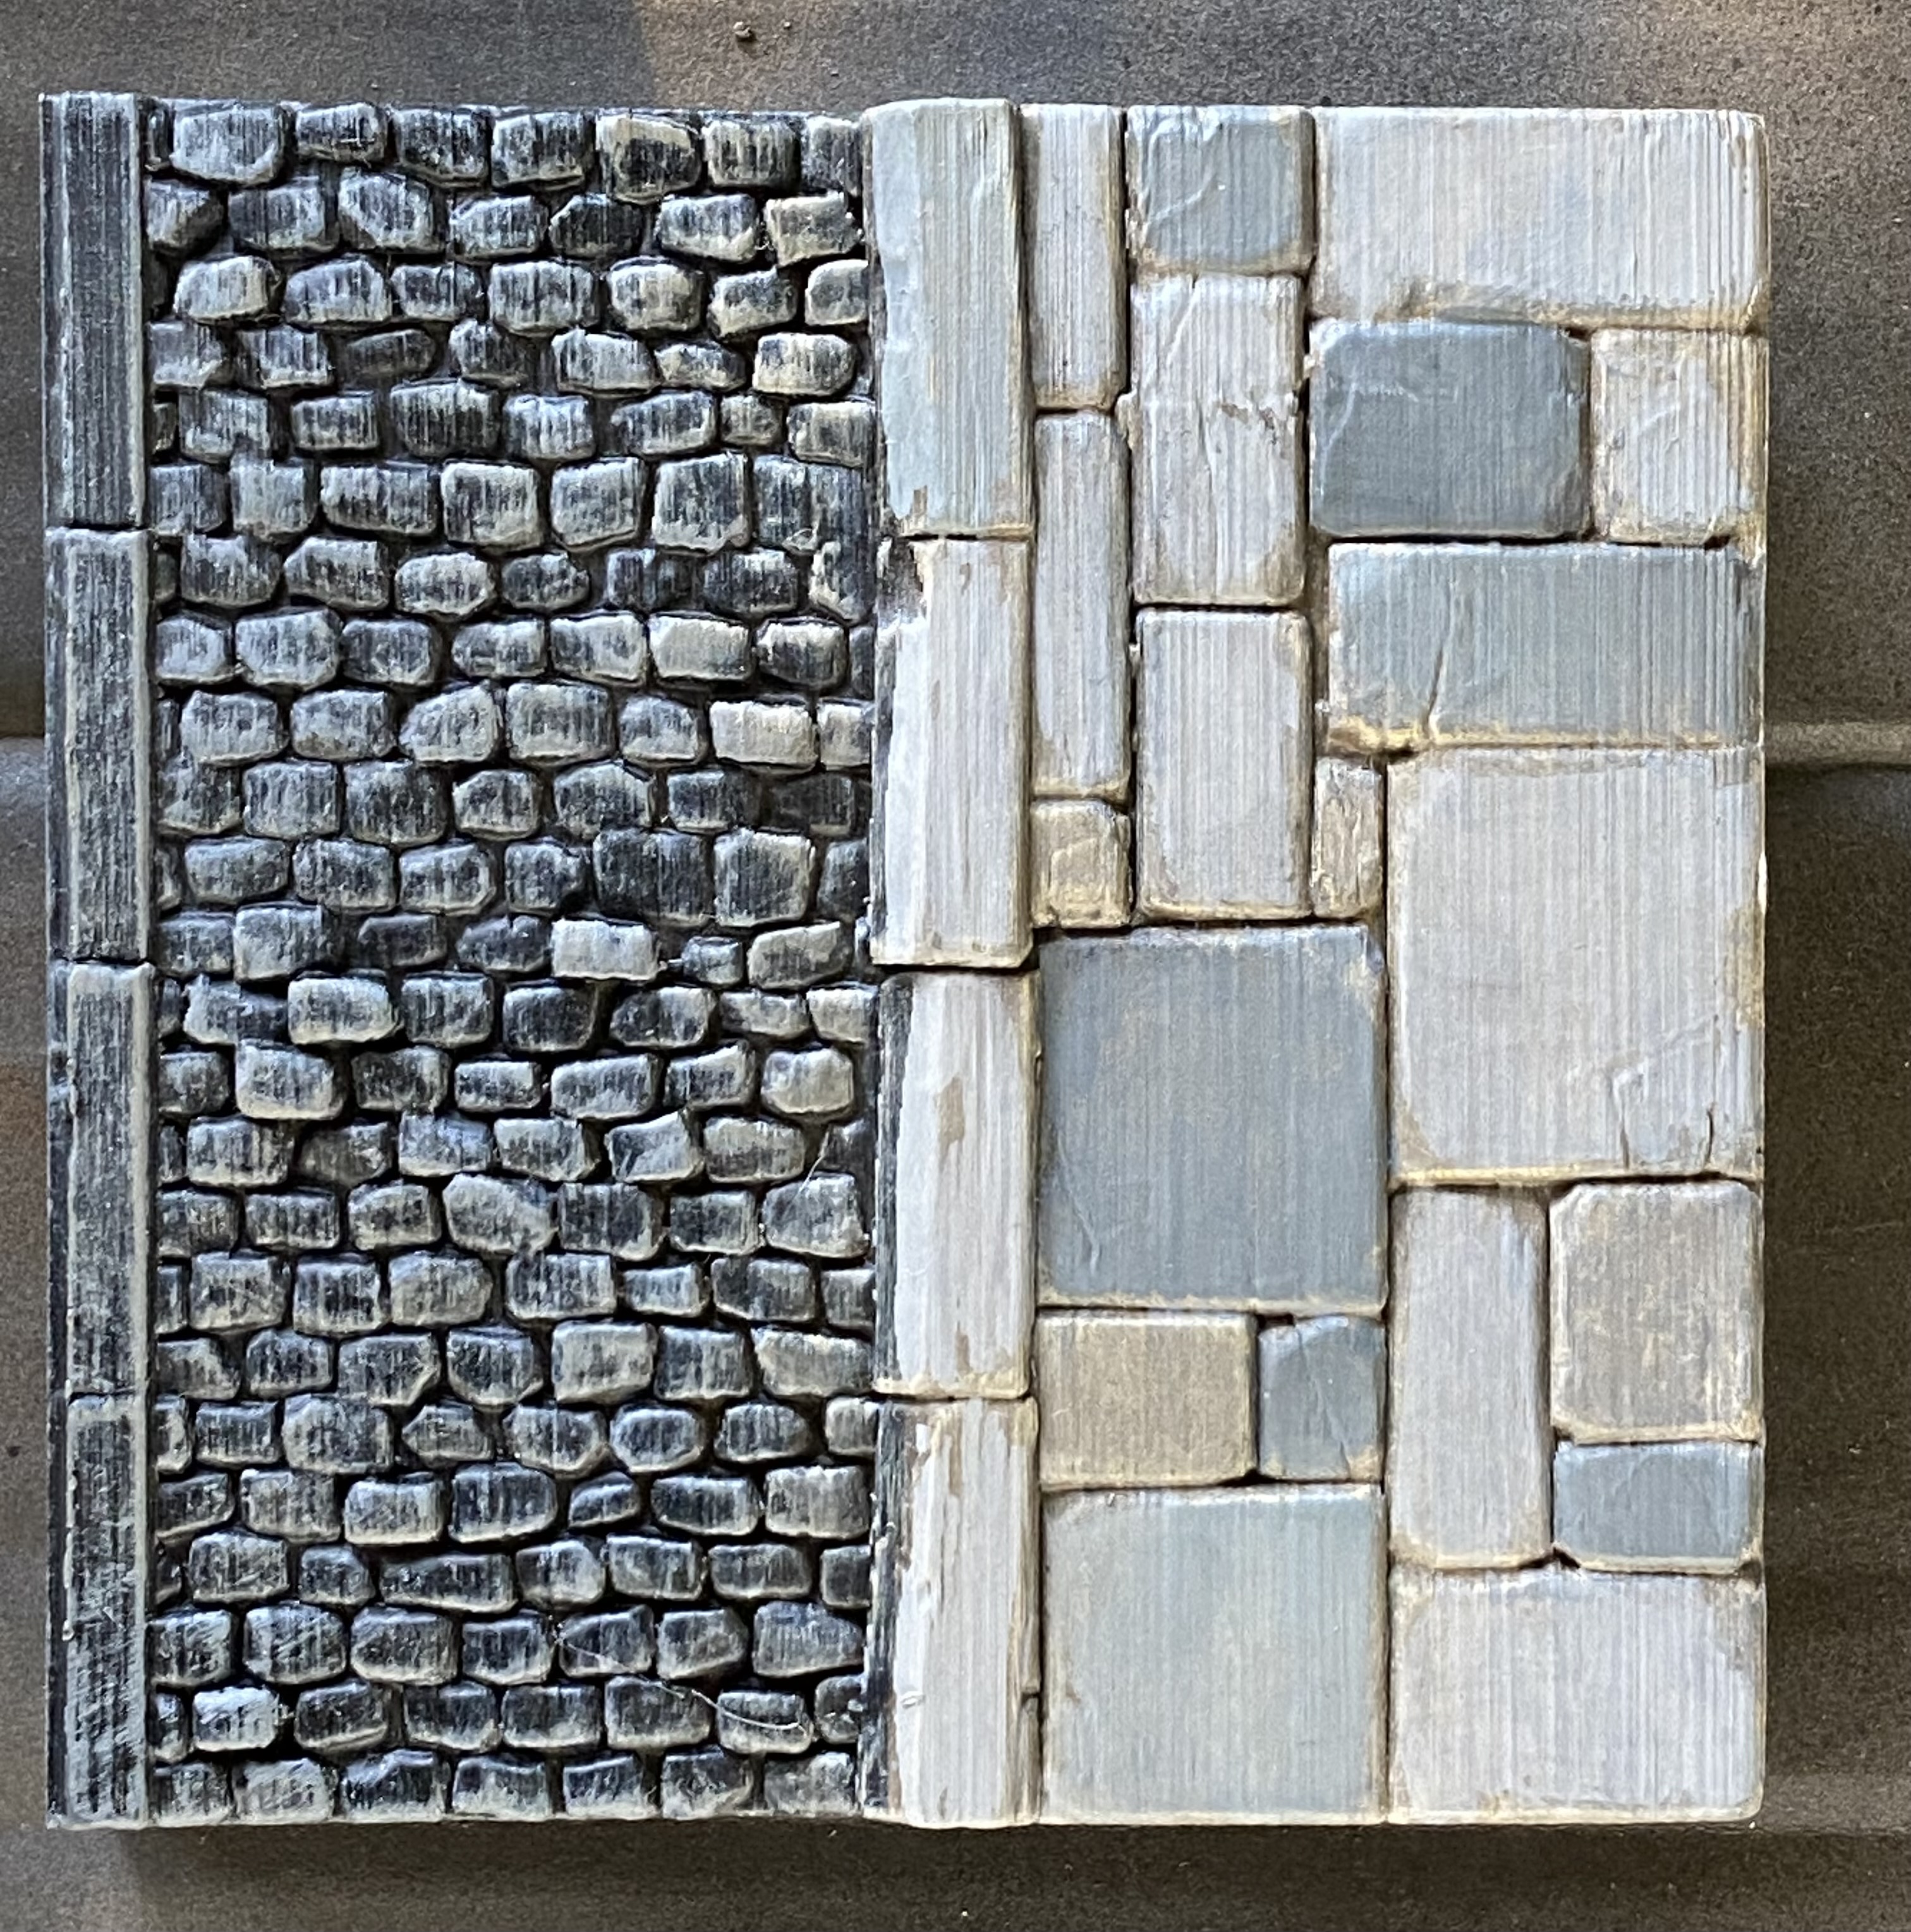
Once I am happy with how they will look I will endeavour to share my colour palette with you.
I haven’t even started on the cobblestone yet, so I need to keep in mind the colours may appear completely different depending on the colours they are next to, and of course the lighting.
Progress
Progress.
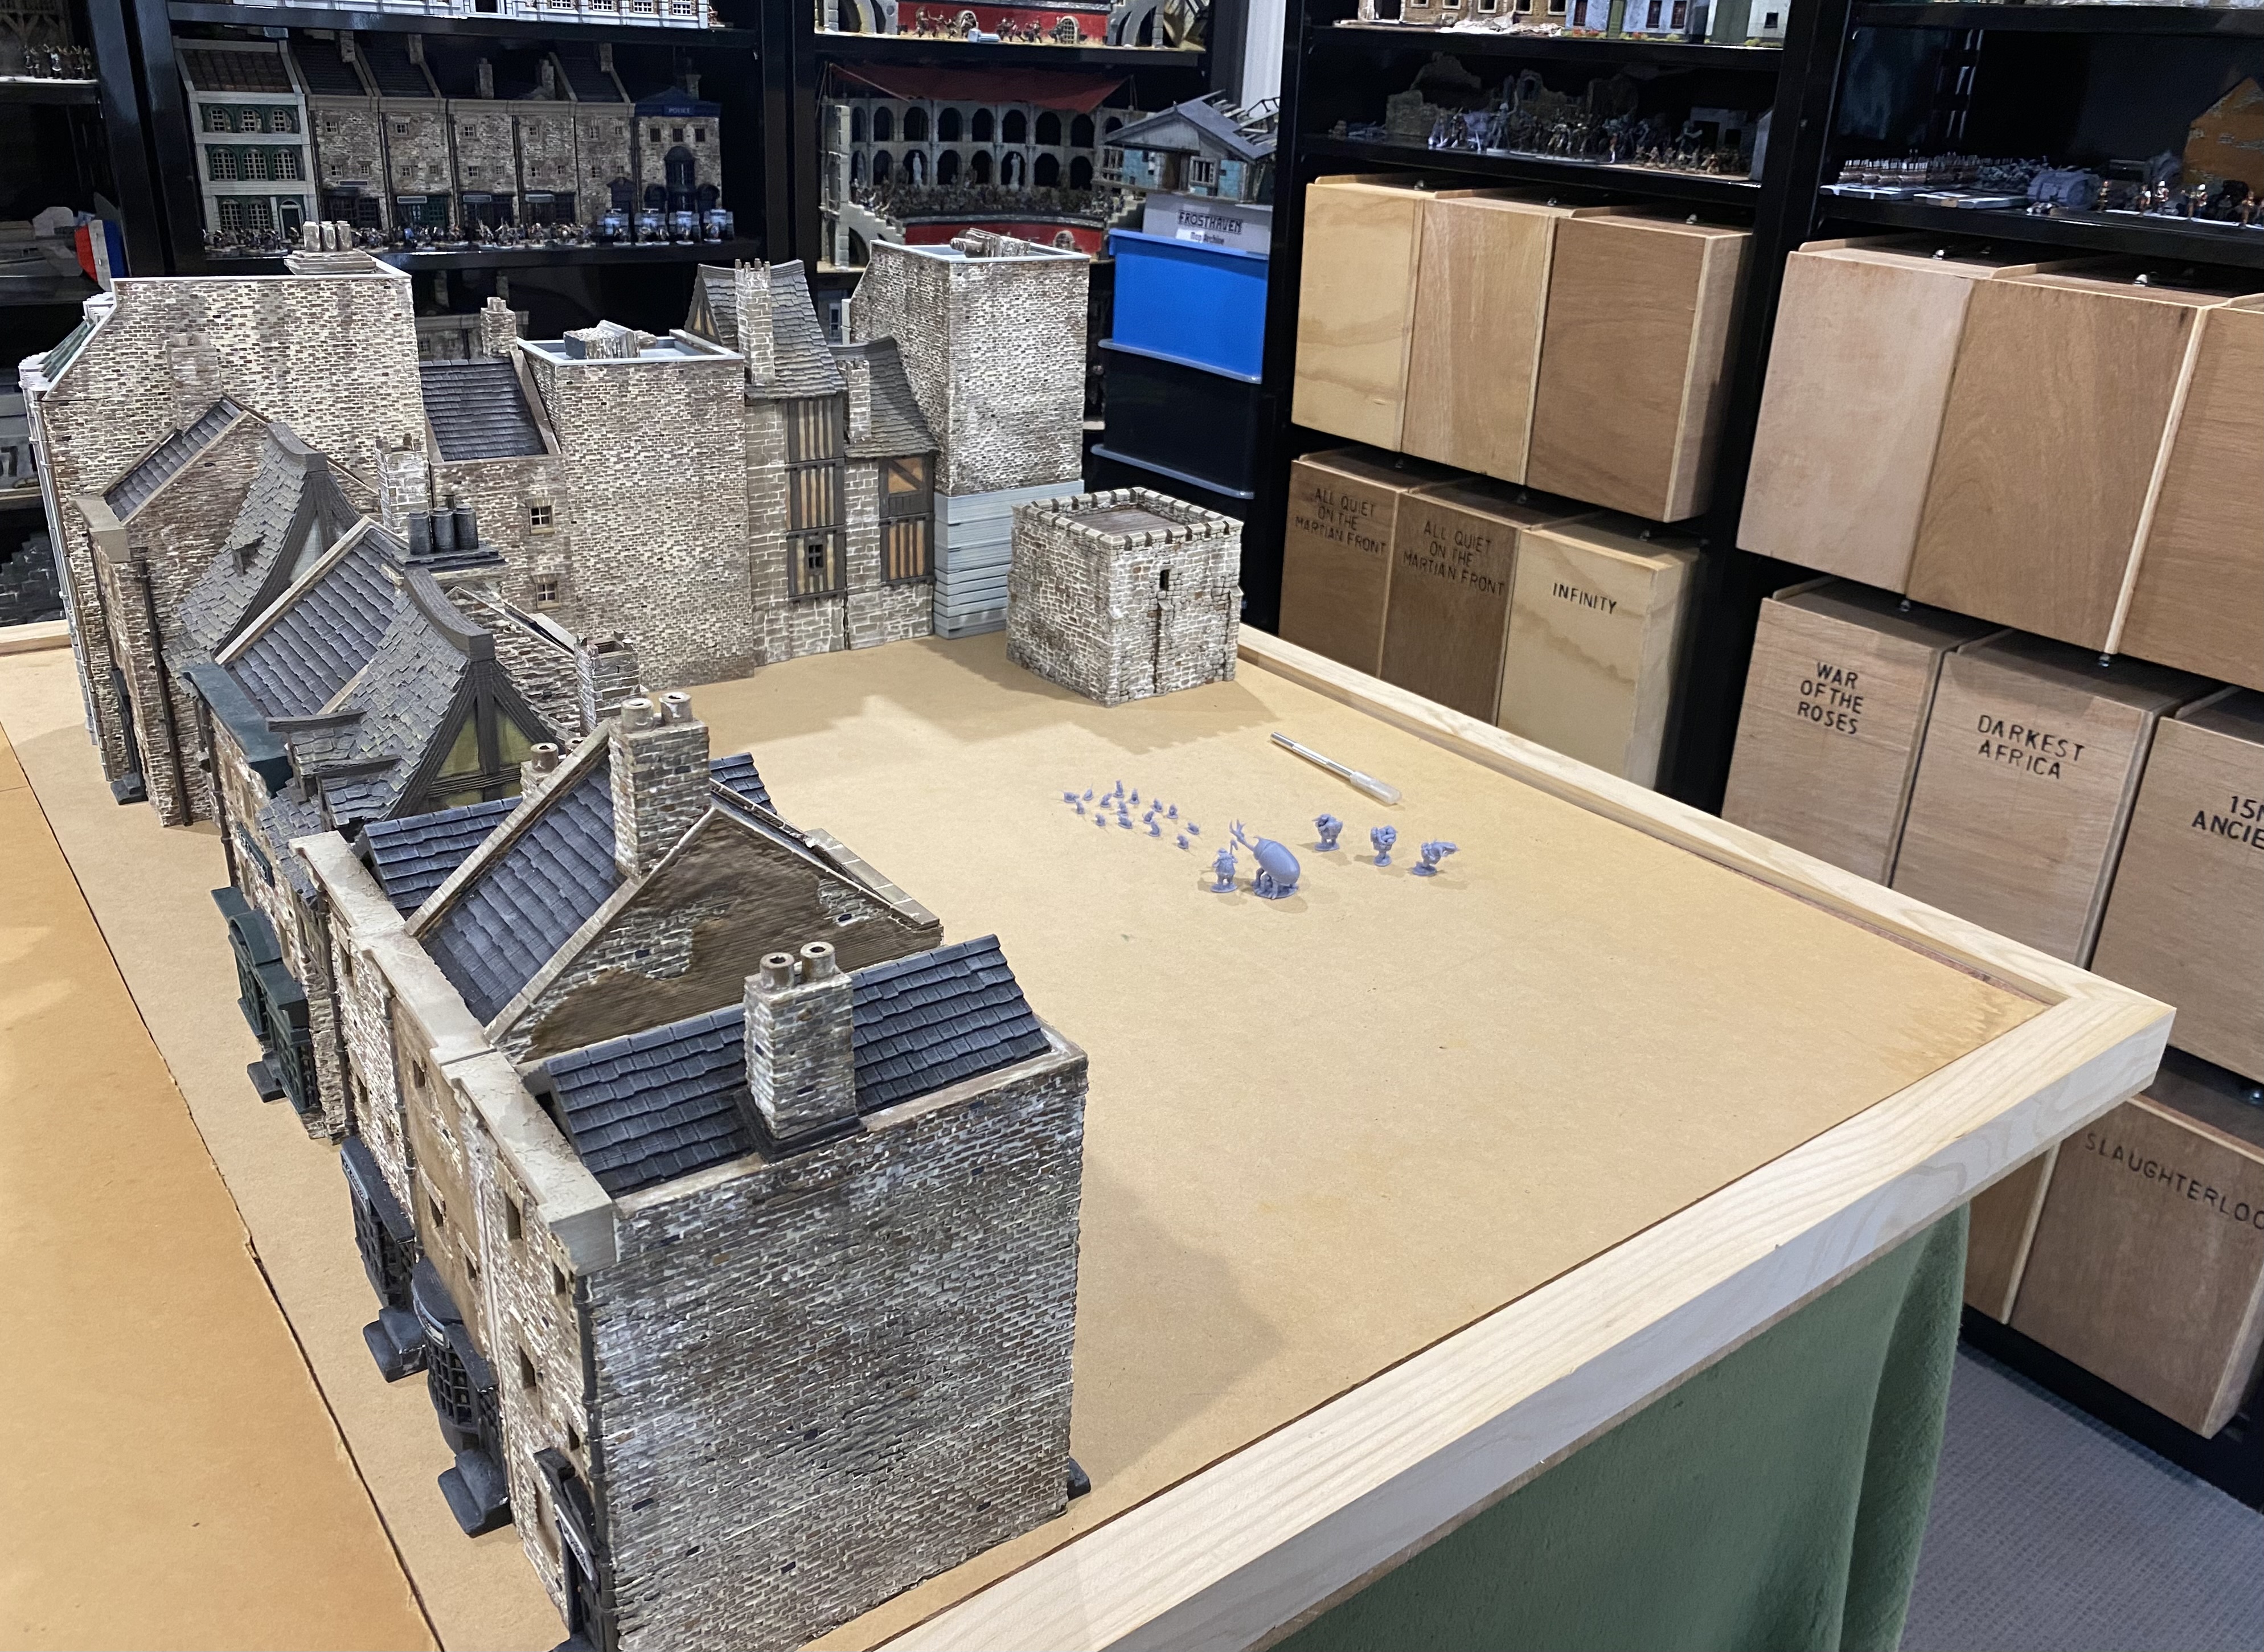
Please ignore the Ancient Roman buildings to the Right and the WW2 Carentan Buildings to the left, they are both projects that have had to be put on hold for the time being, so I have room for this project. I will get back to them possibly in the new year.
Anyway, moving forward.
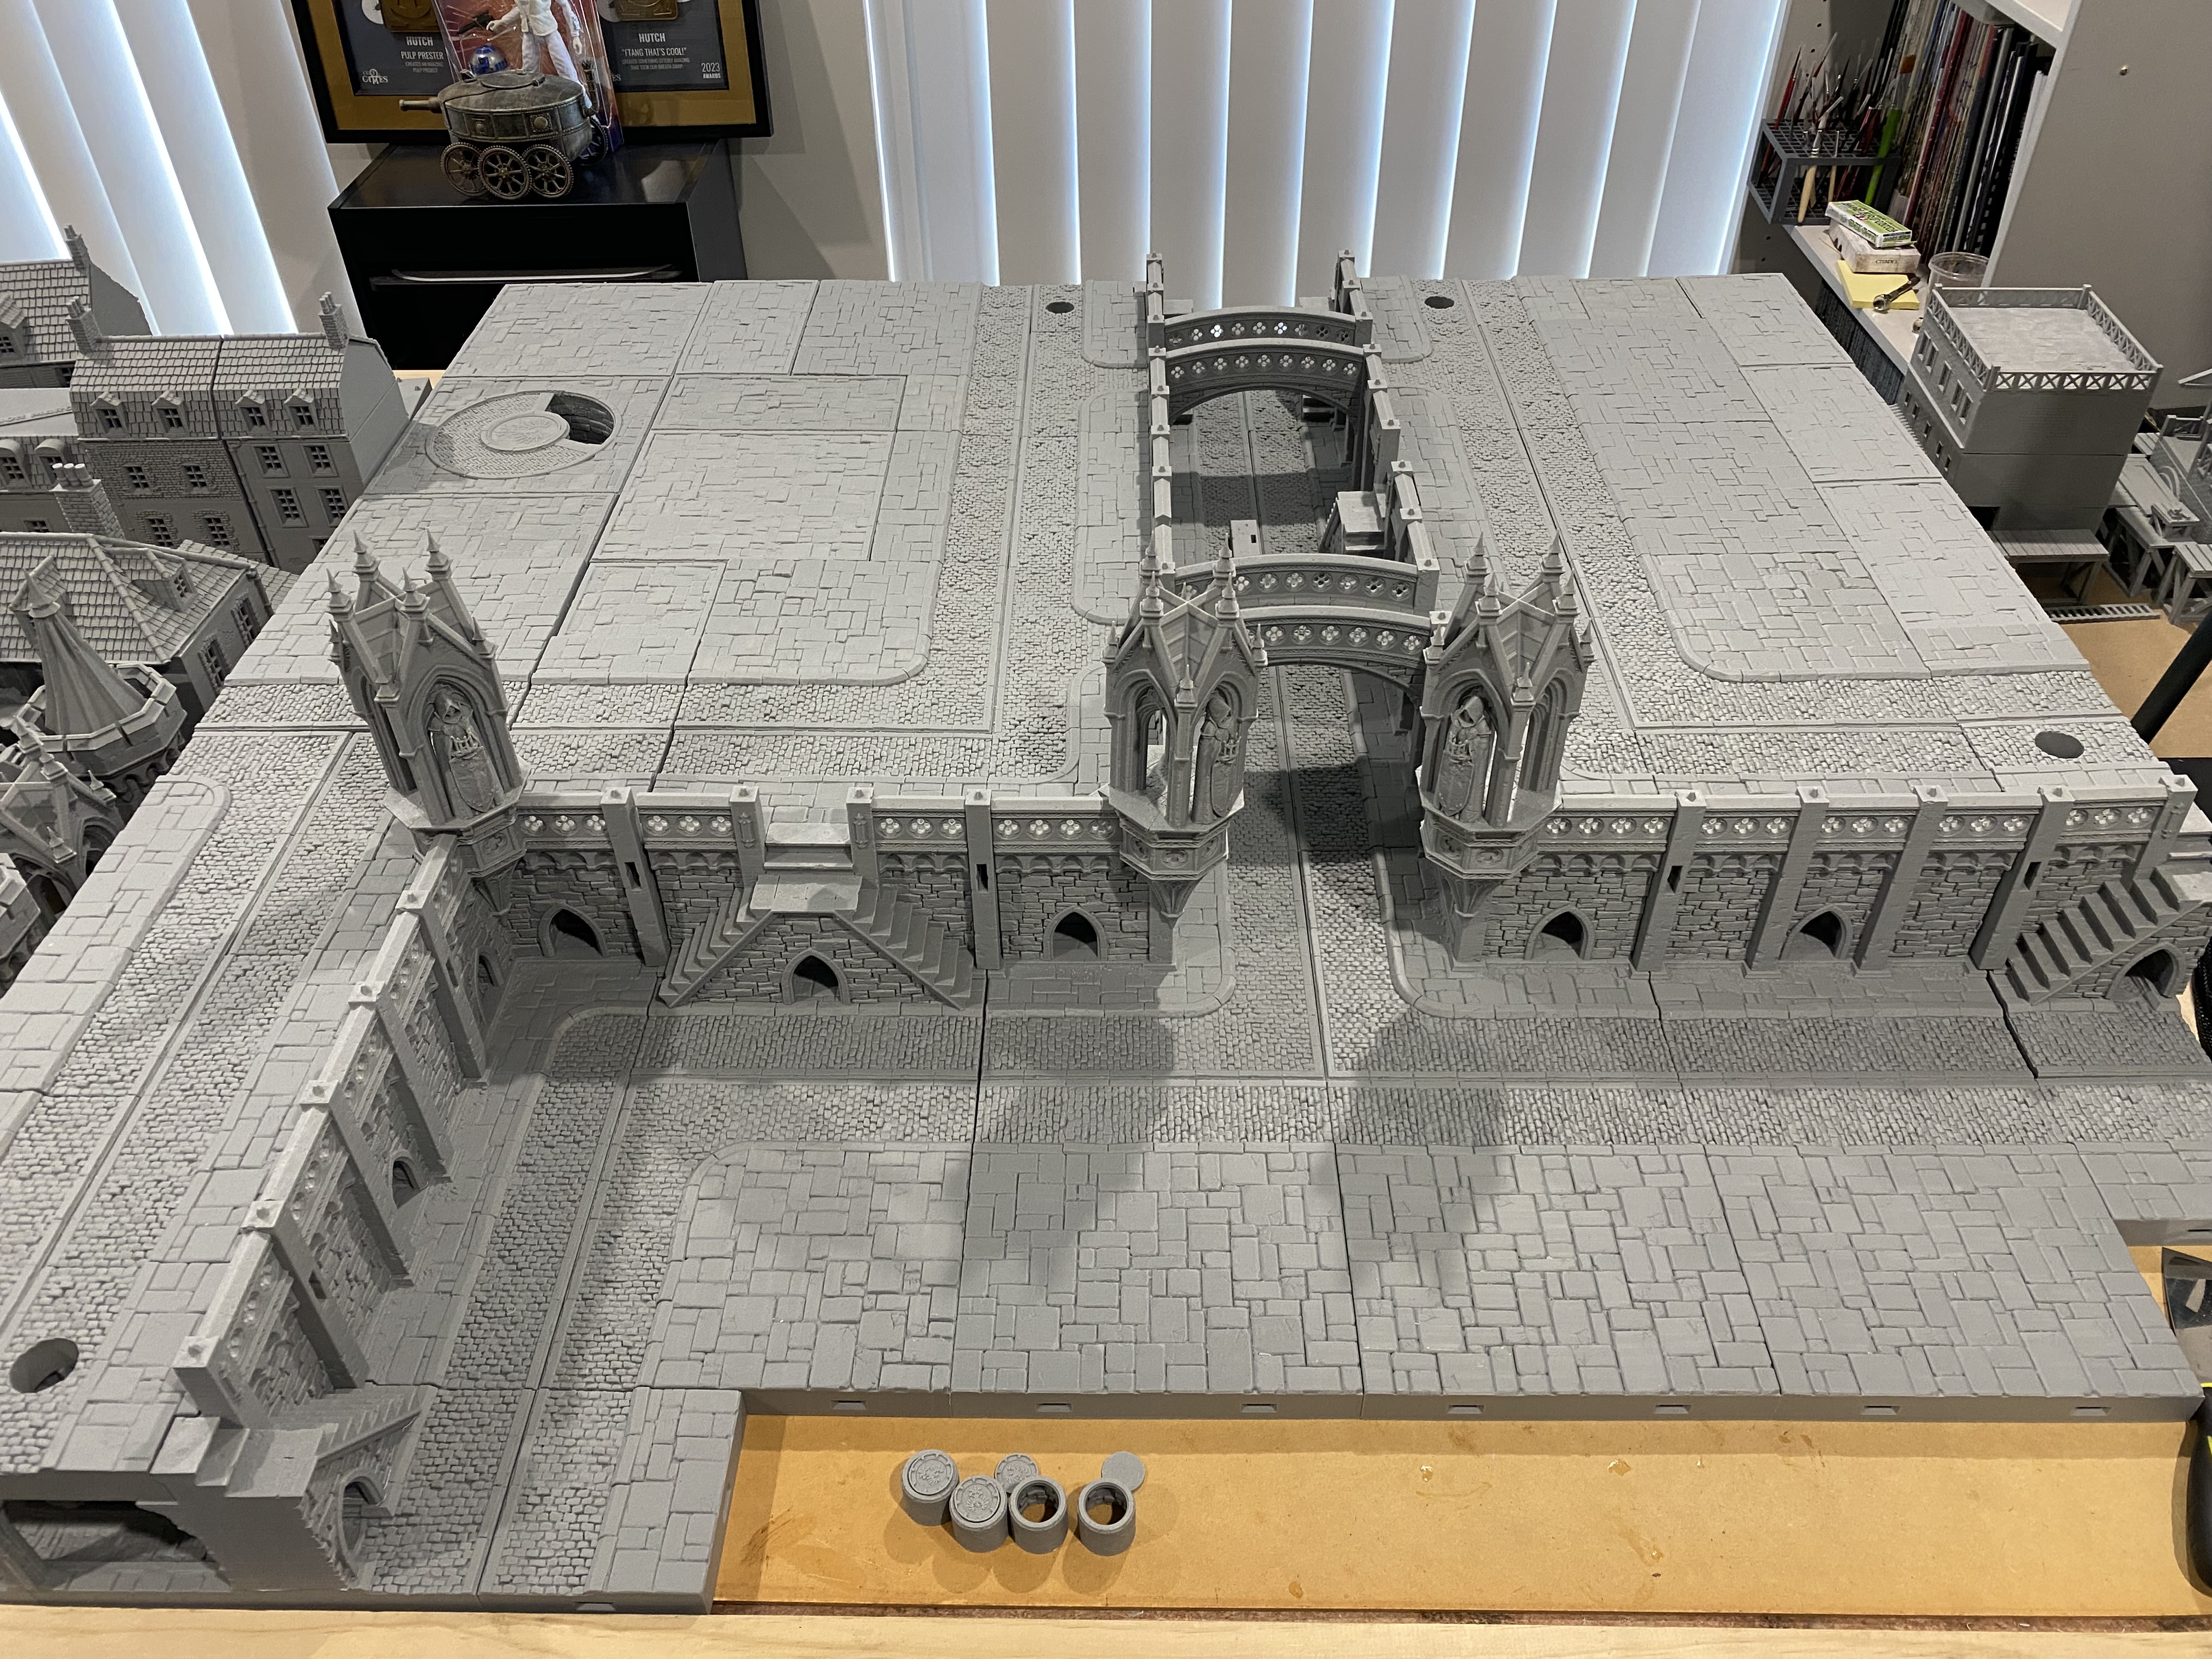
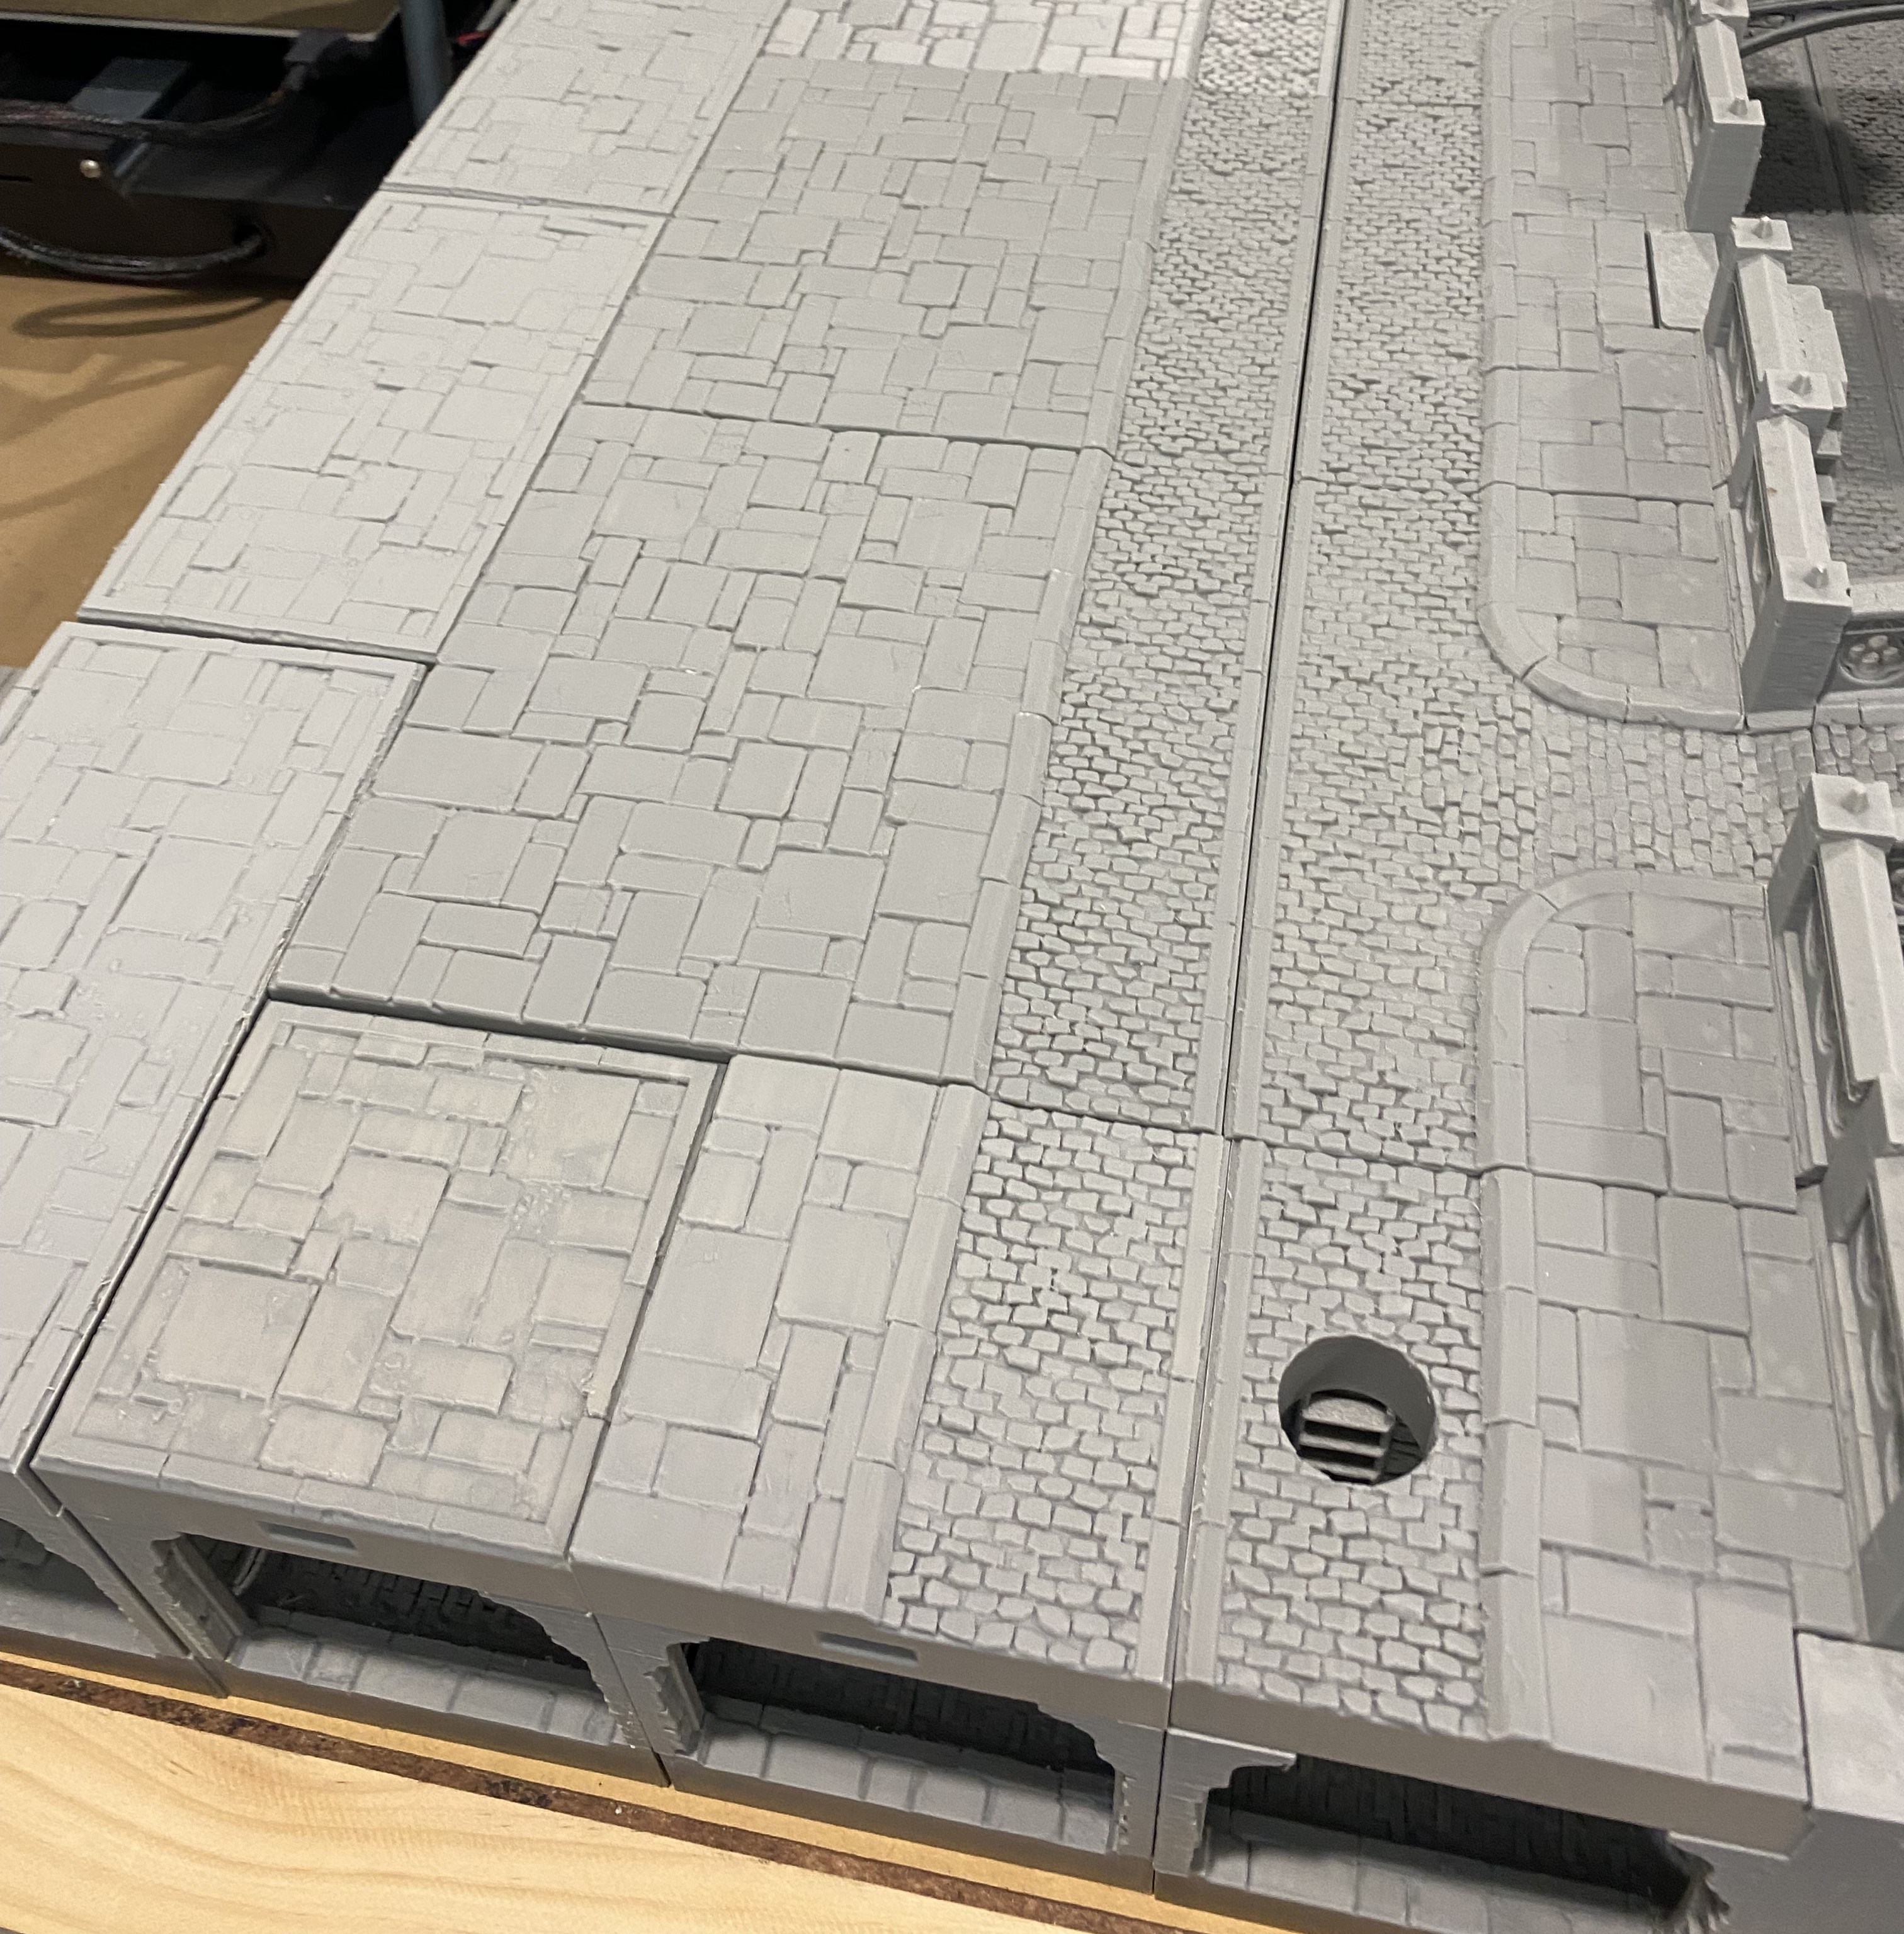
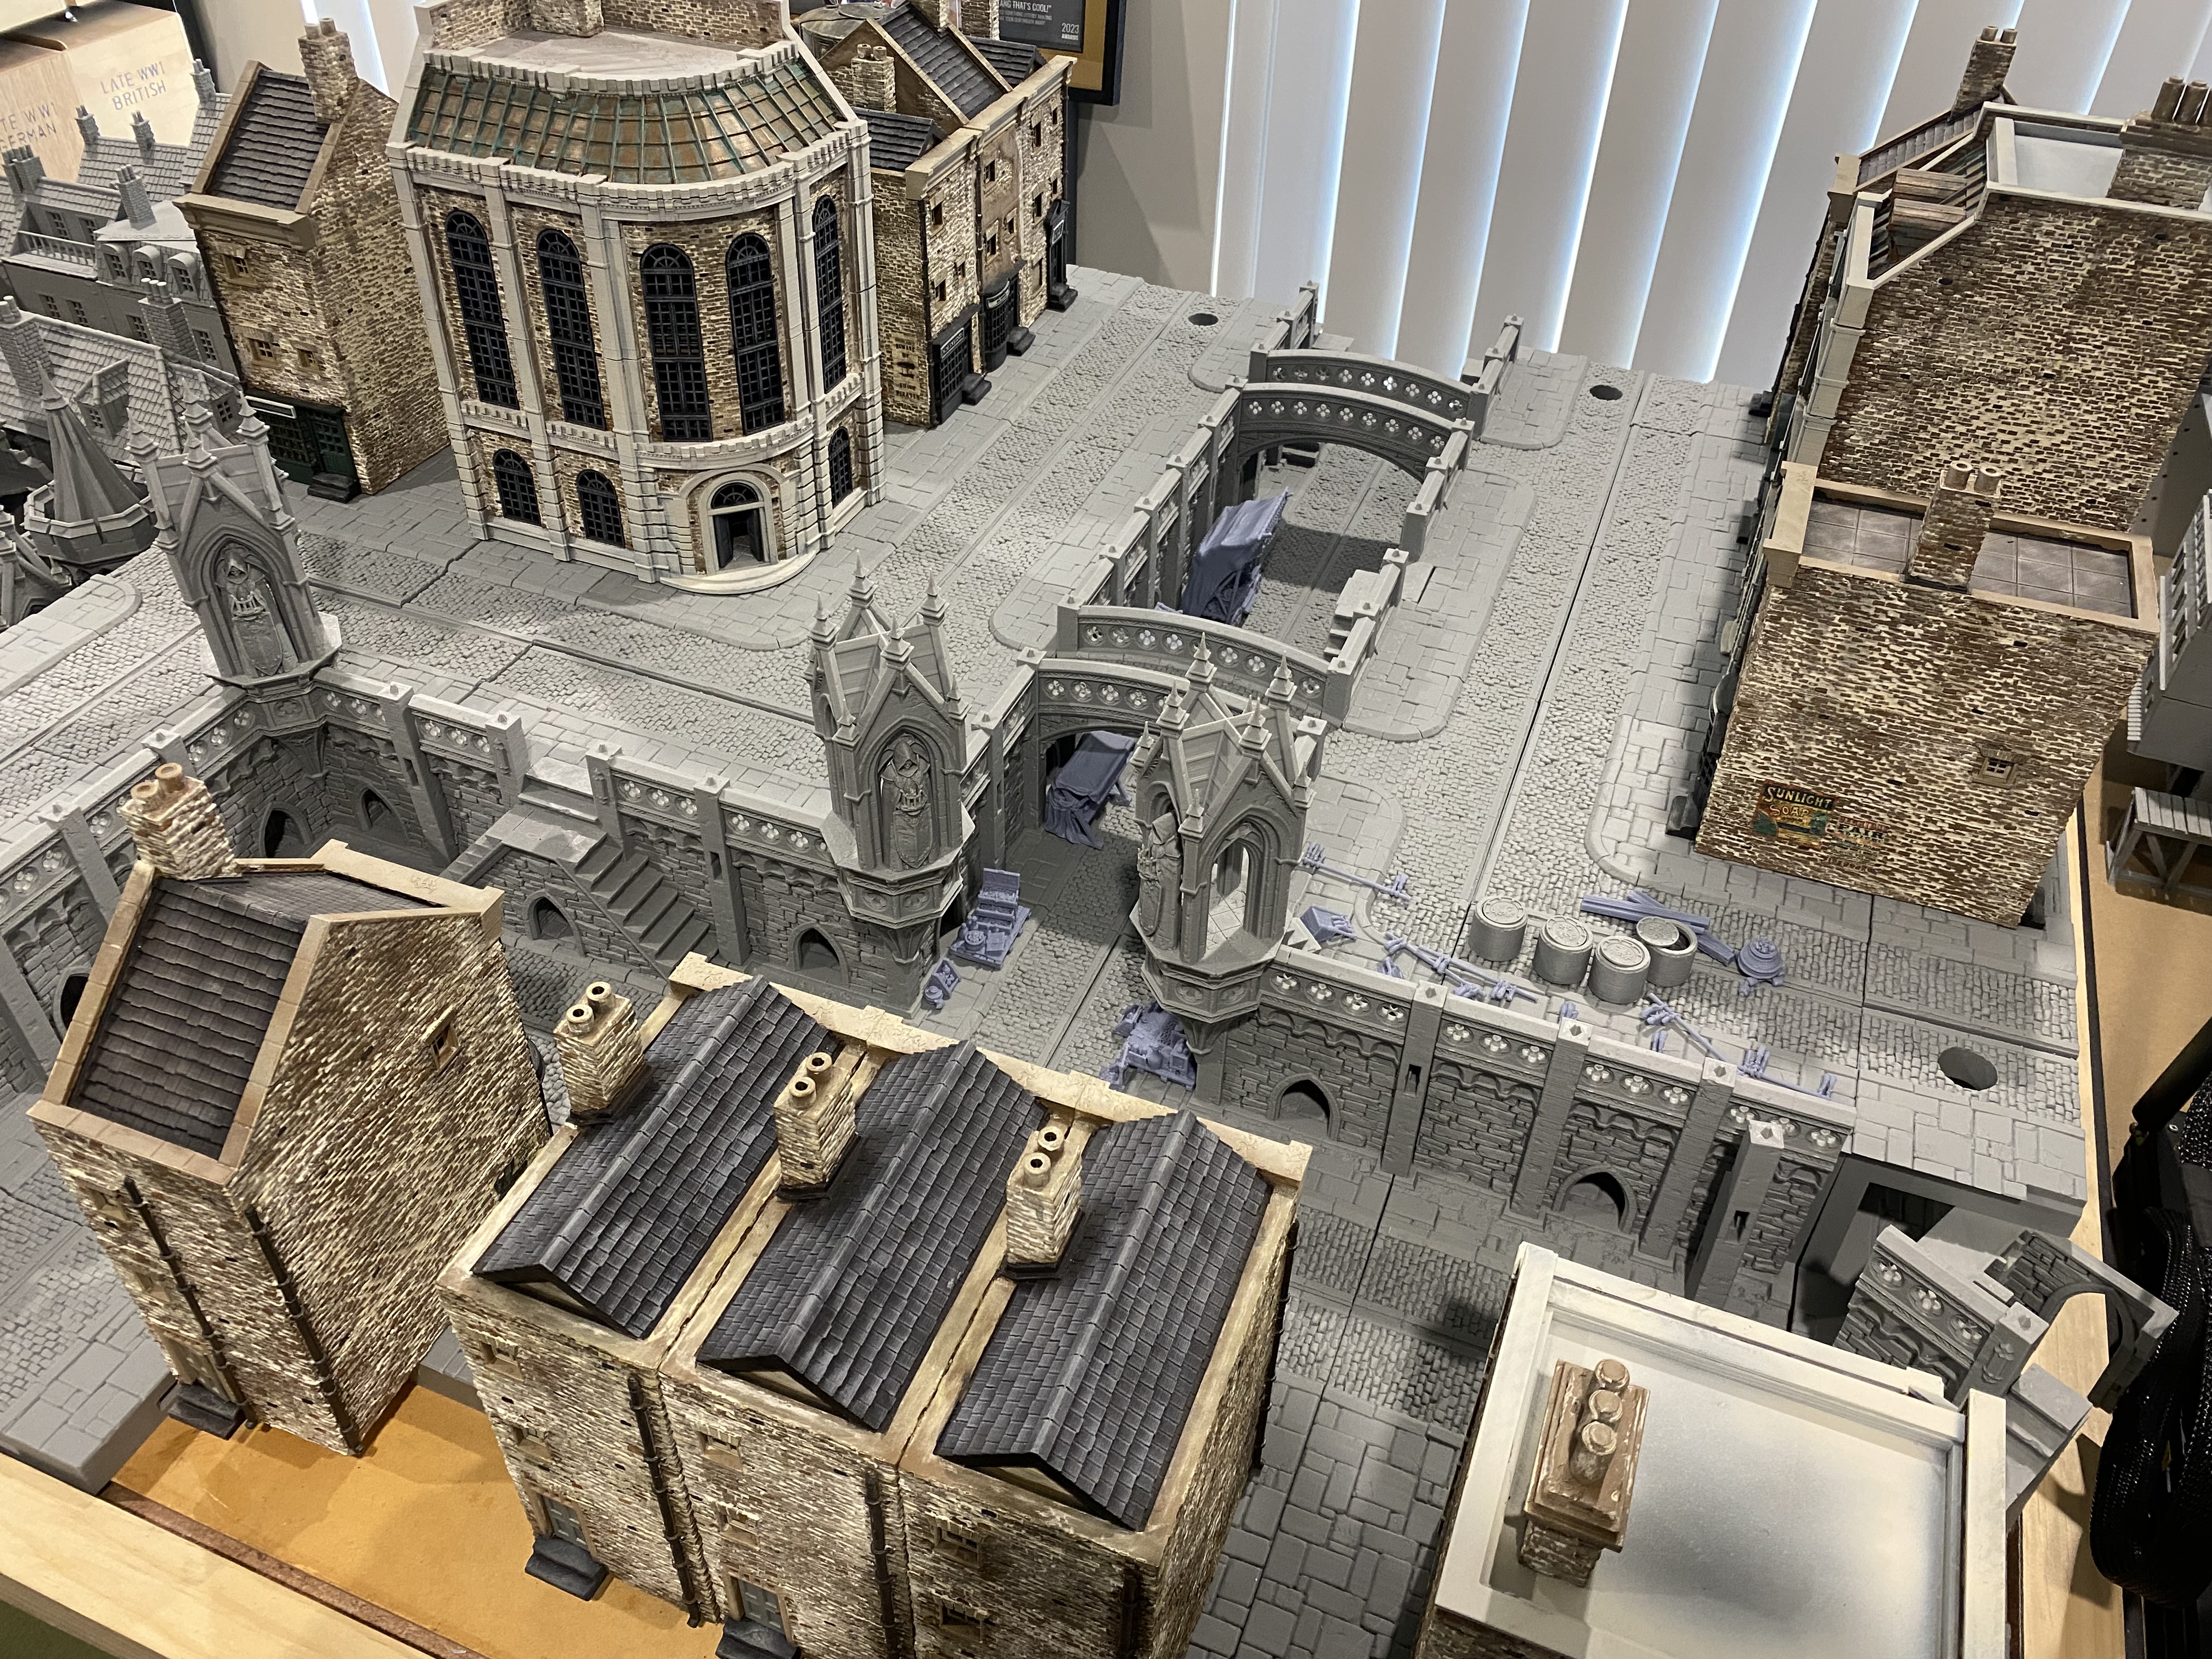
My small army of robotic helpers have all been working 24/7 churning stuff out, so I now have almost a 4′ x 4′ basic table set up. There is still a bit more to do, supports to go underneath to keep the raised areas, raised and a few more cobblestone tiles to finish off in places.
The idea is that each of the raised areas has three access points from the lower level, and access to the sewer system that will run around the edges of the board, and possibly into a removable section that can be taken out from under the main larger raised area for an extra element of gameplay.
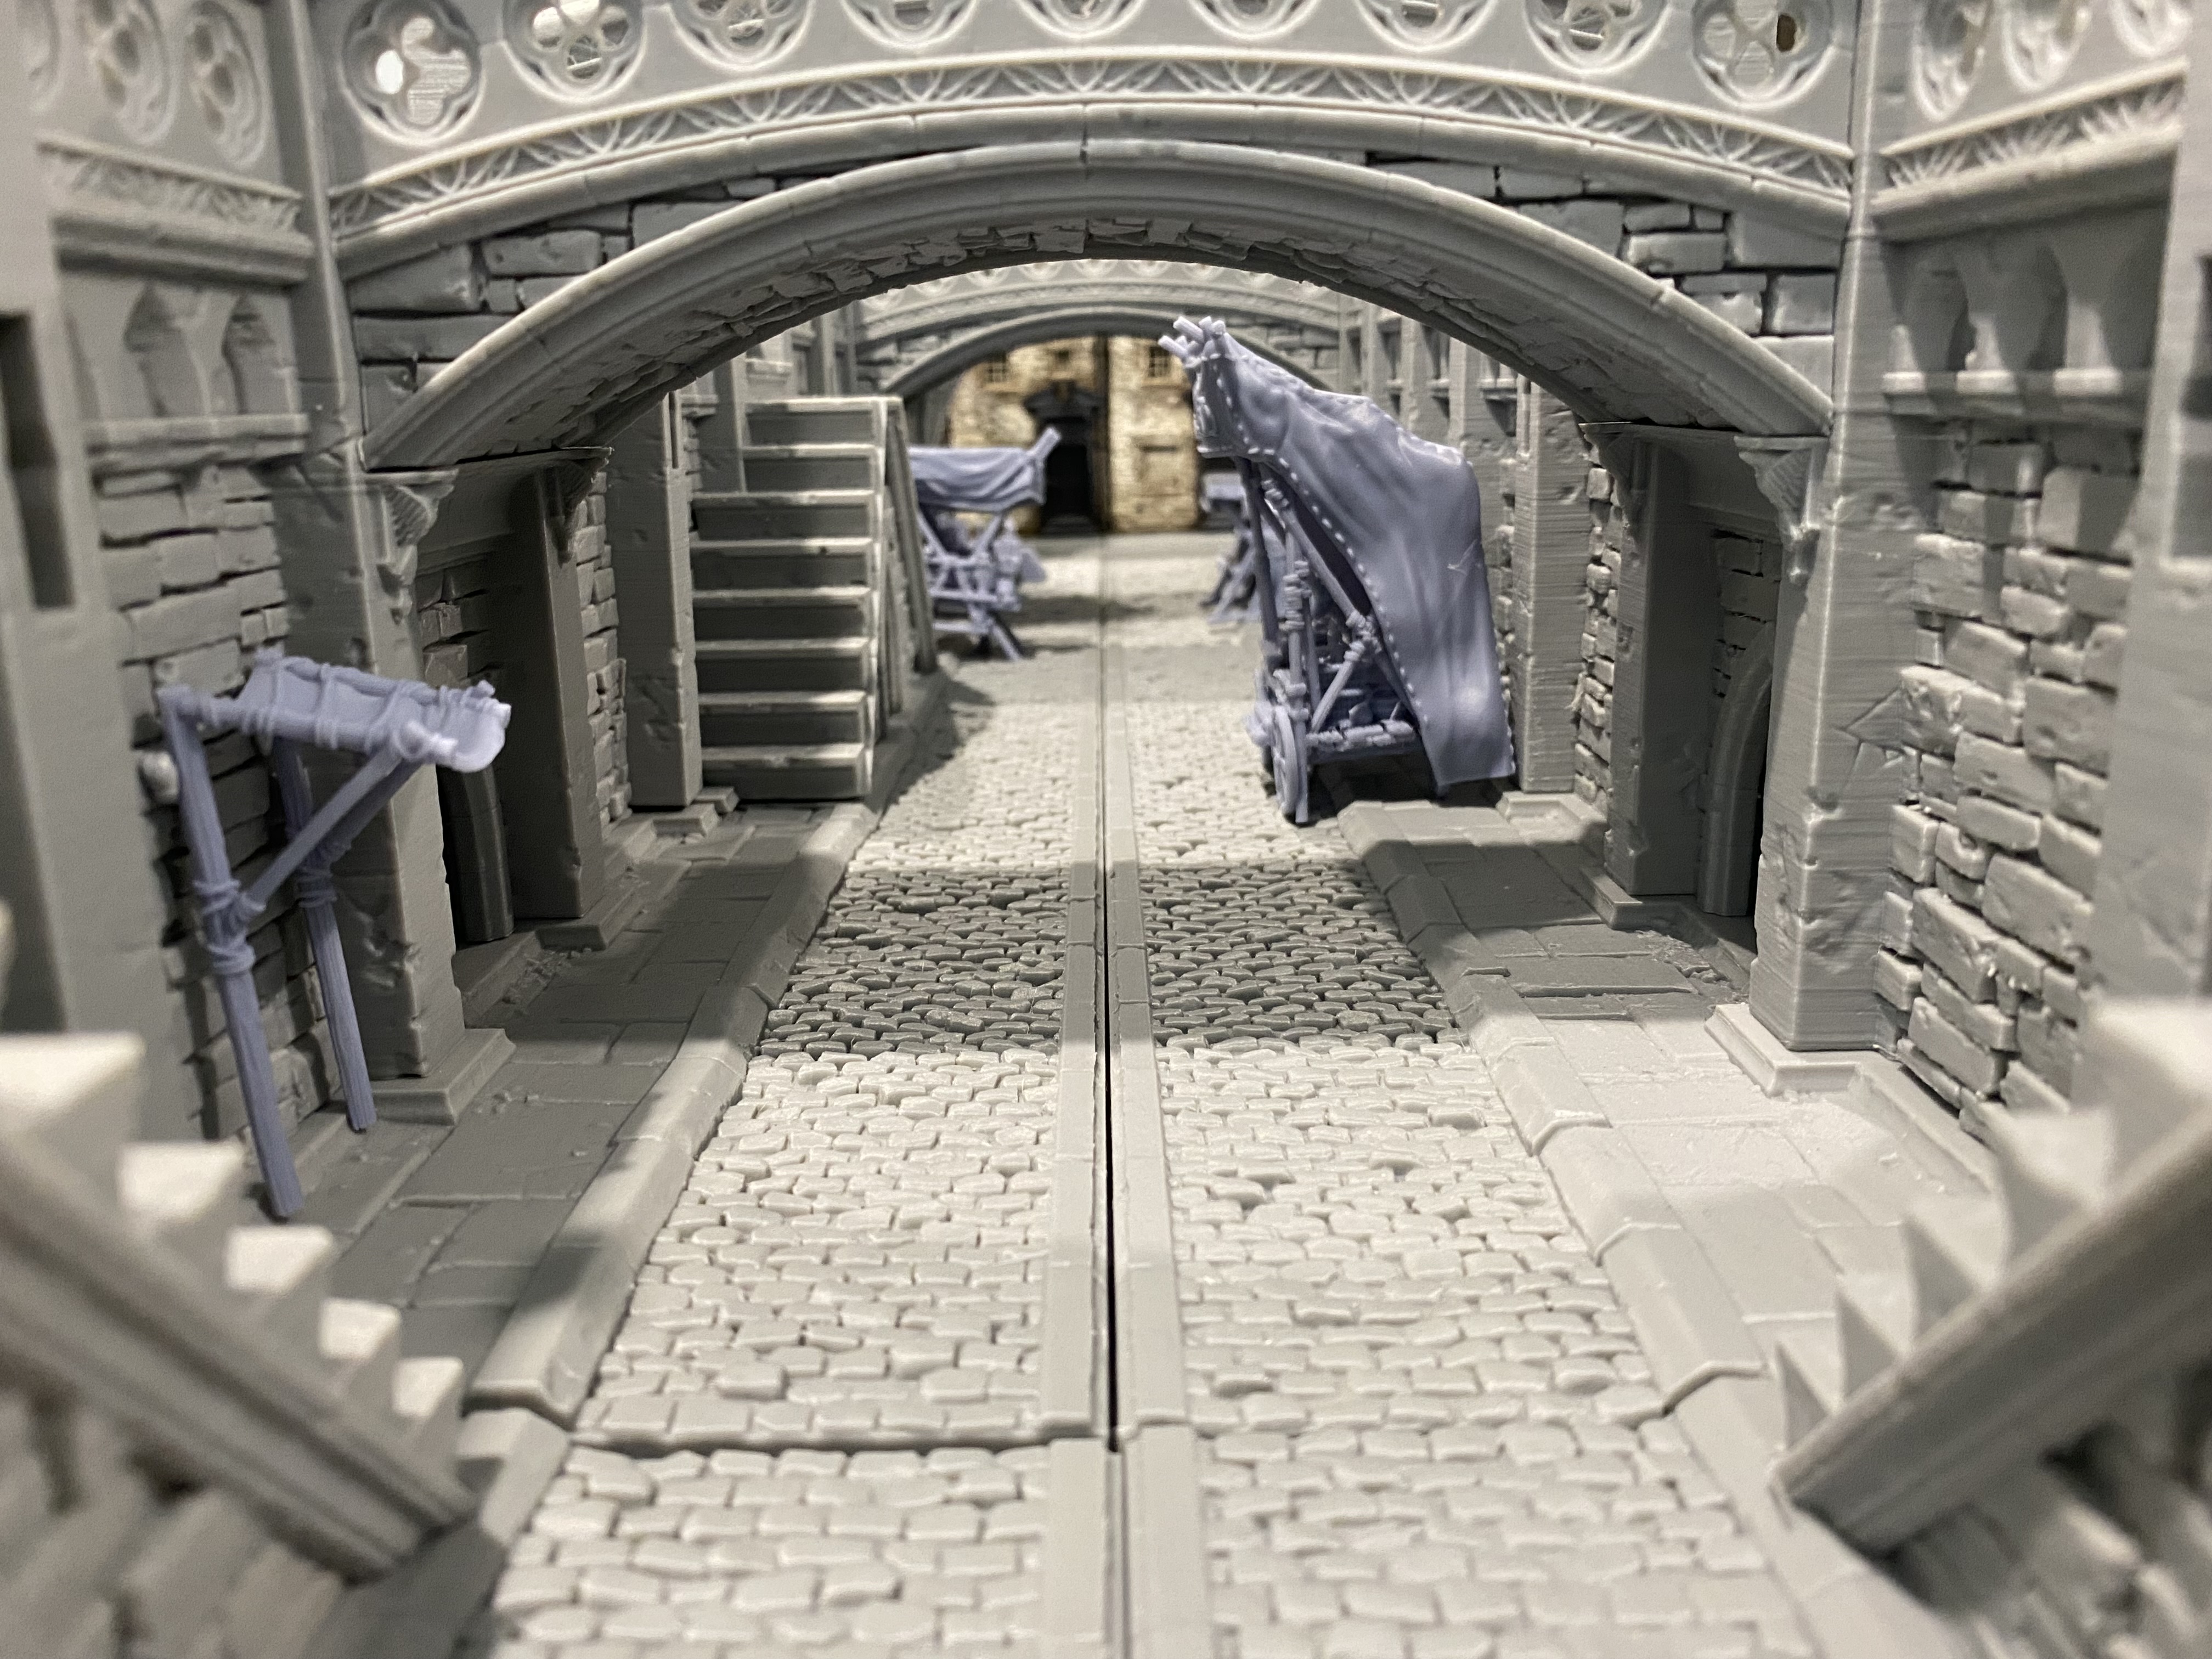
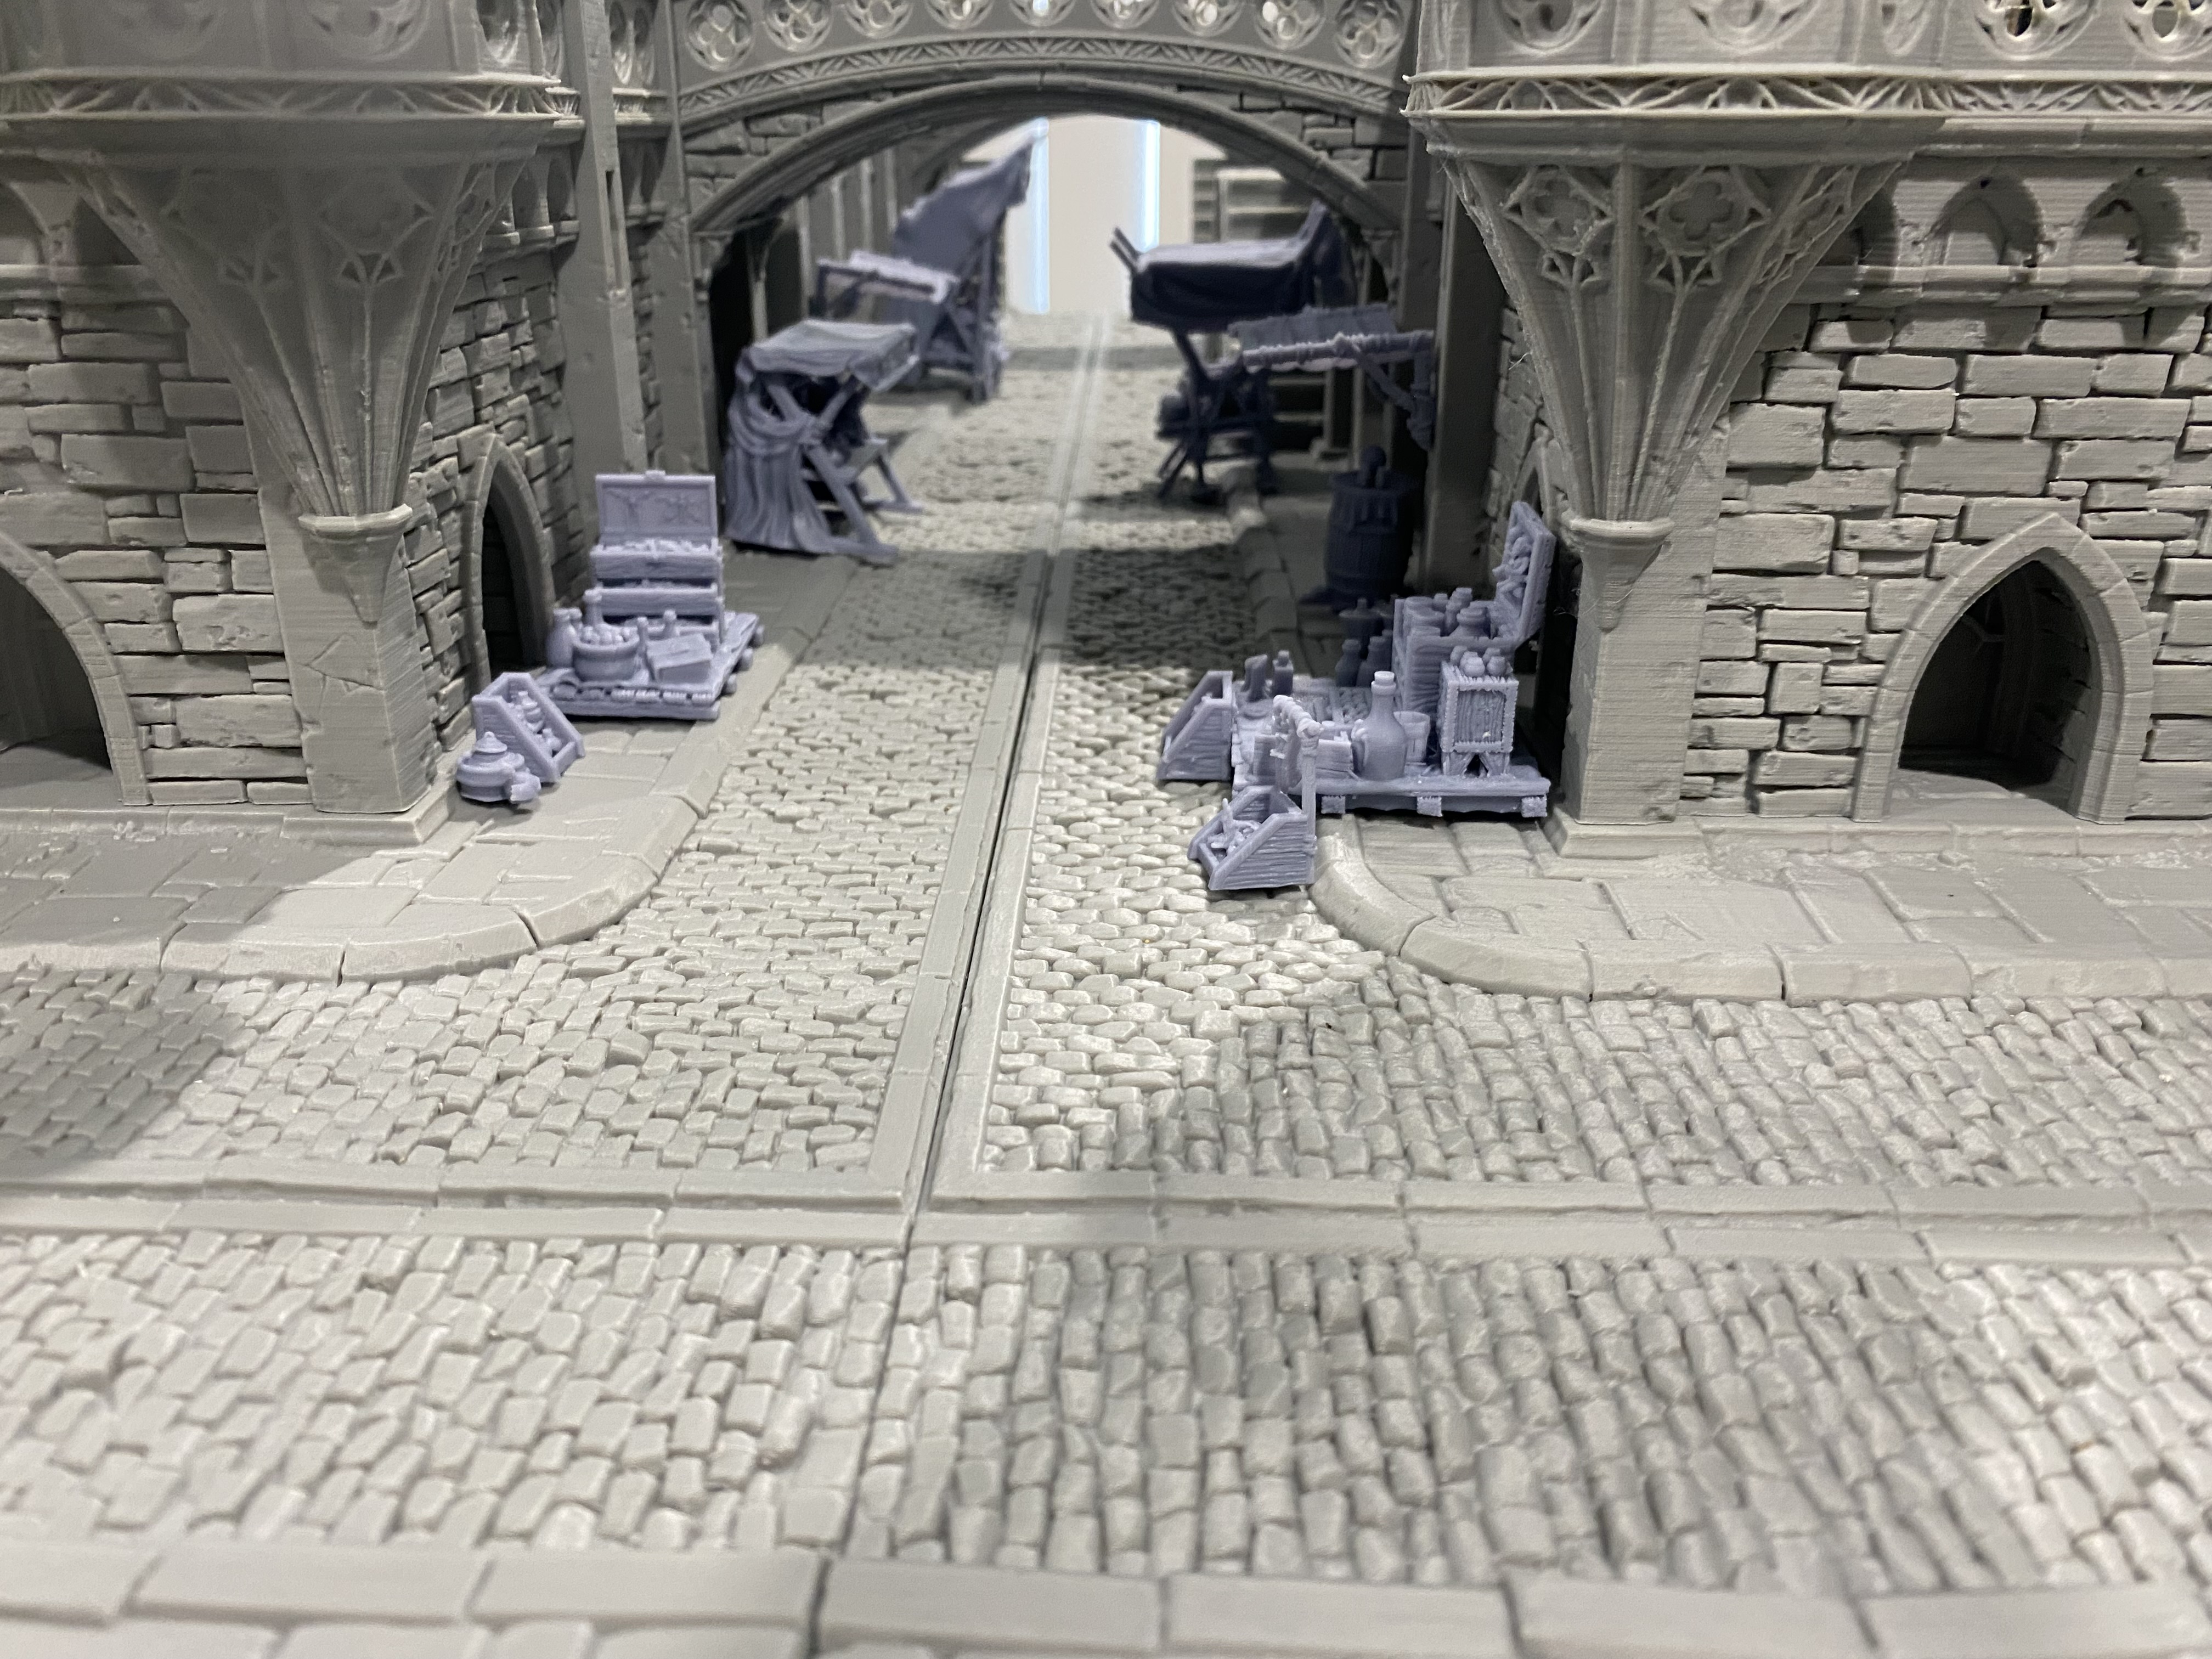
The sunken road from front to back will have market stalls along its length, some of those spilling out onto the raised areas to help add an extra element of cover during use and also to blend the market across both levels.
I have to add holes for streetlights so that I can wire them in, but I’ll do that once I can get a better idea of how things will look with the buildings on.
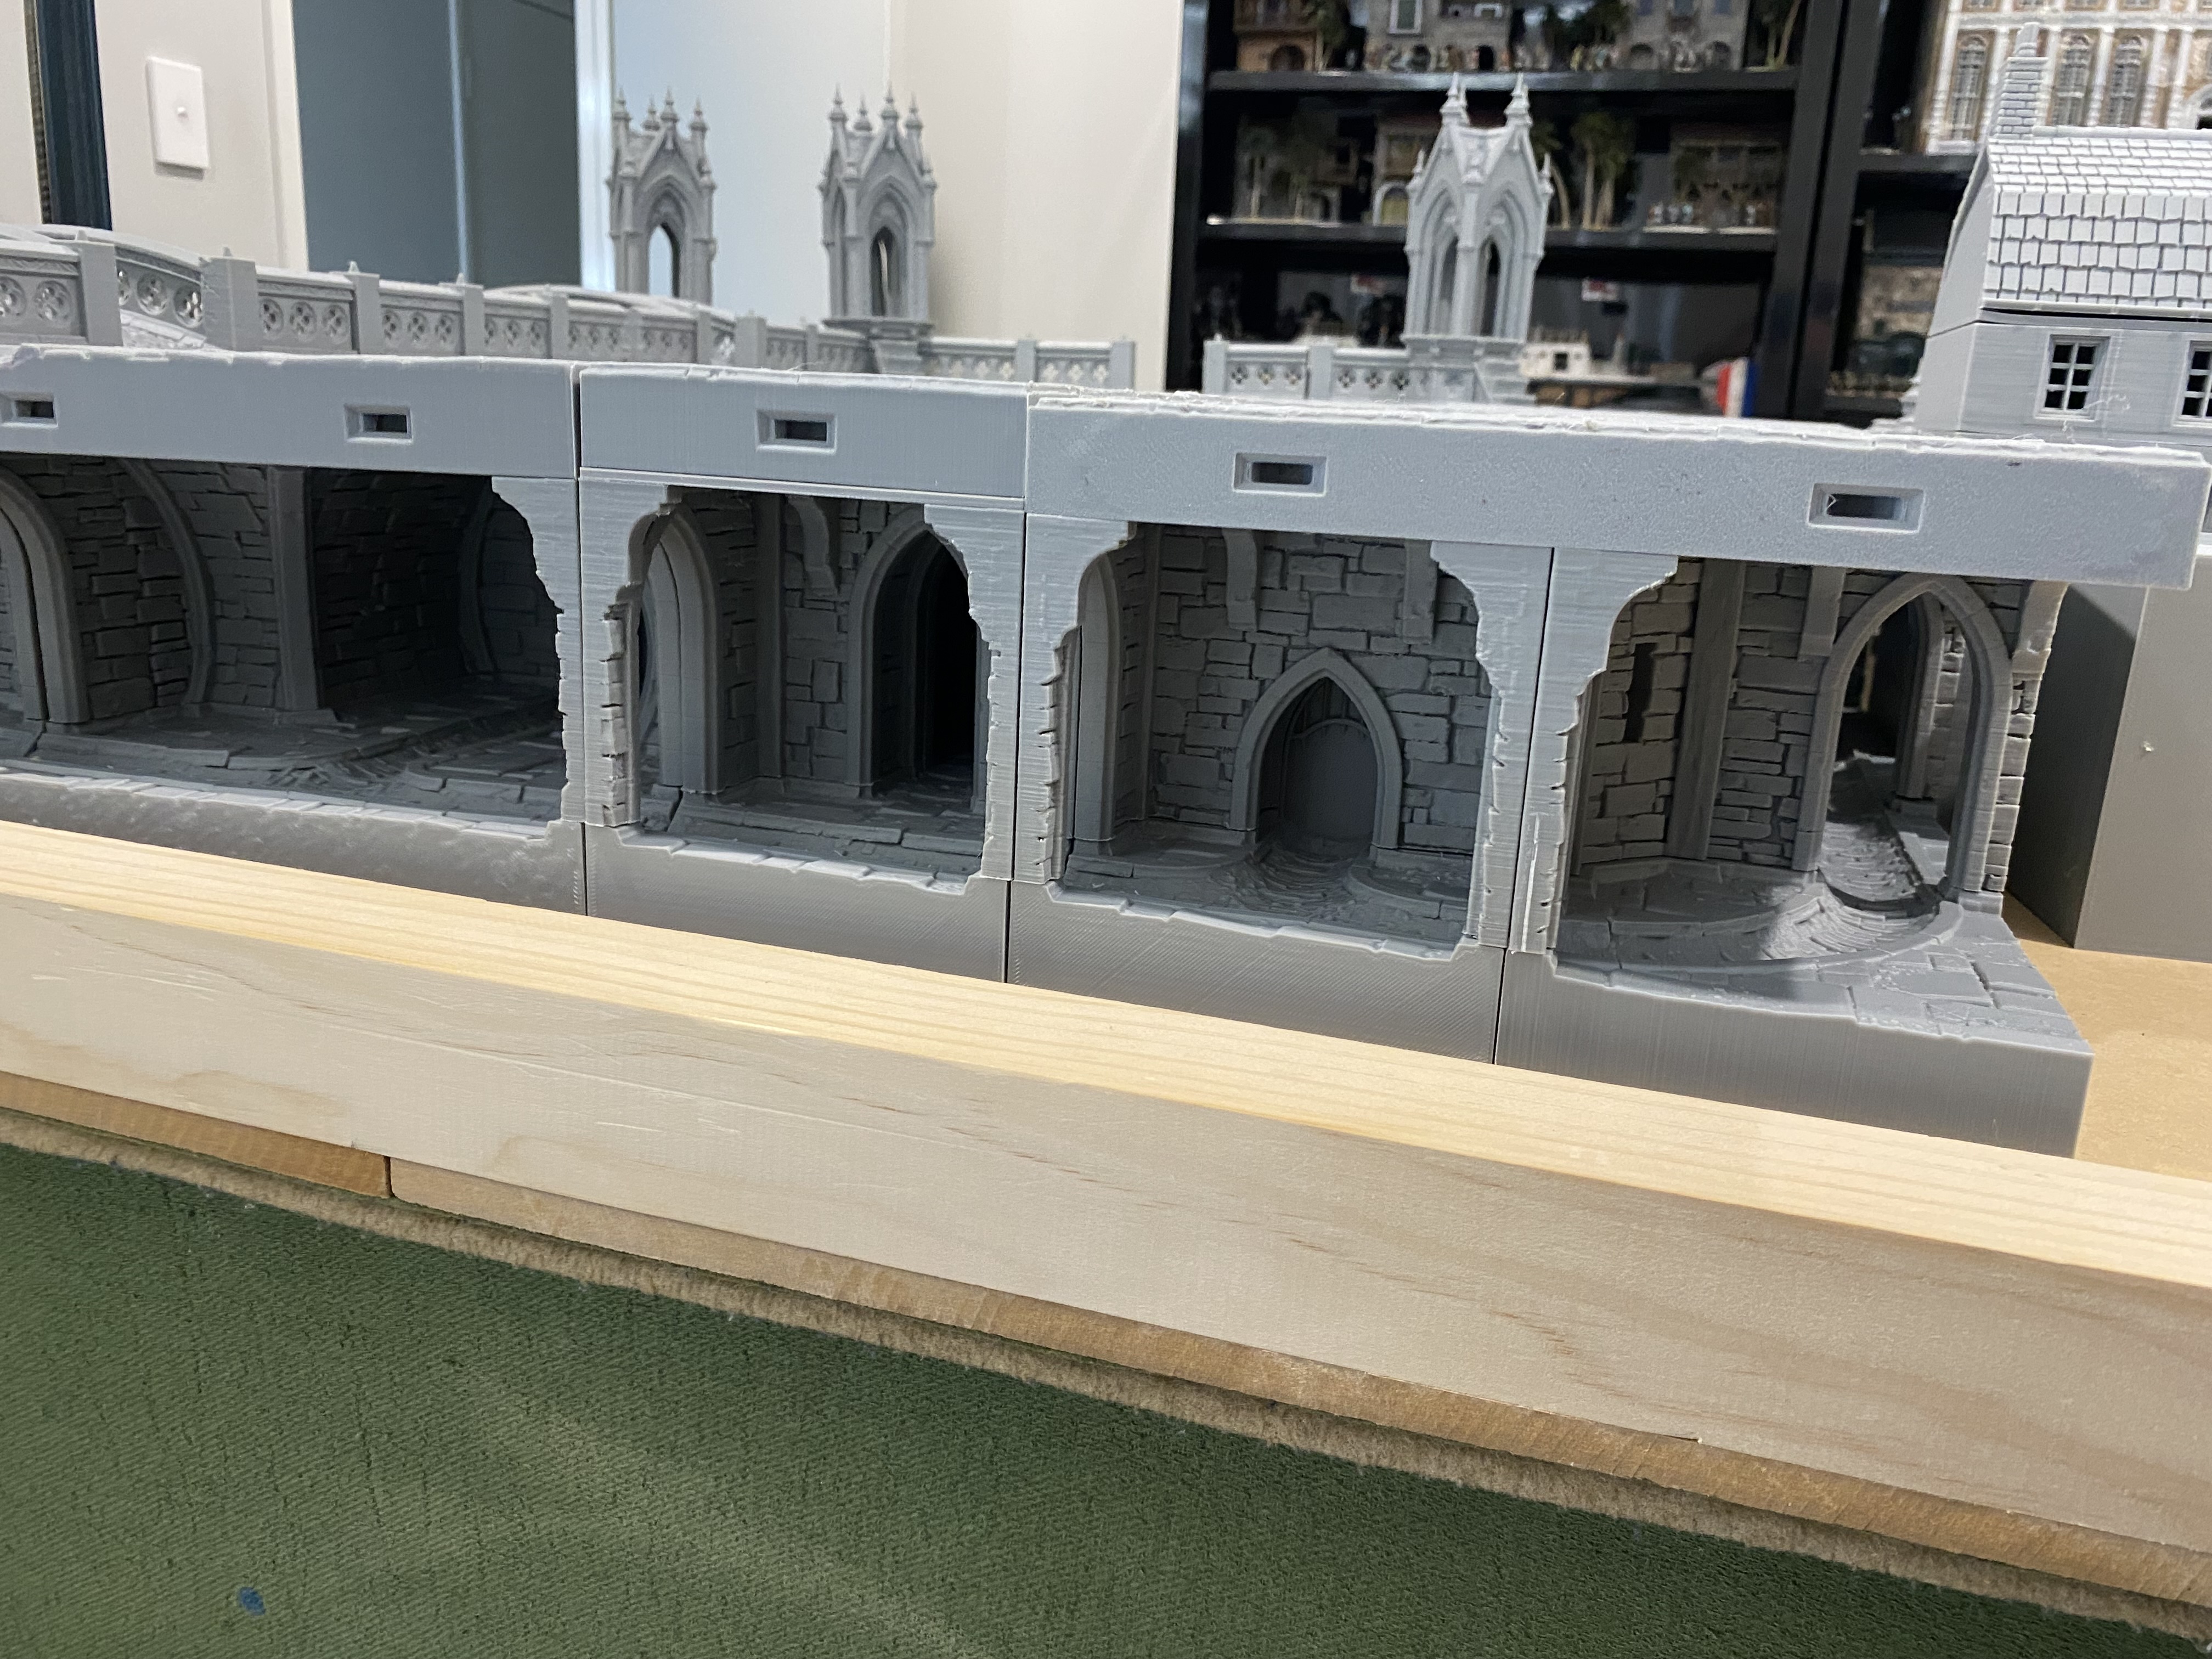
A little image of part of the sewer system that will run around the edges of the board. These will also have lighting installed in them, all being well and if time permits. It will allow players to try to sneak around the board and pop up from the manholes along the roadways.
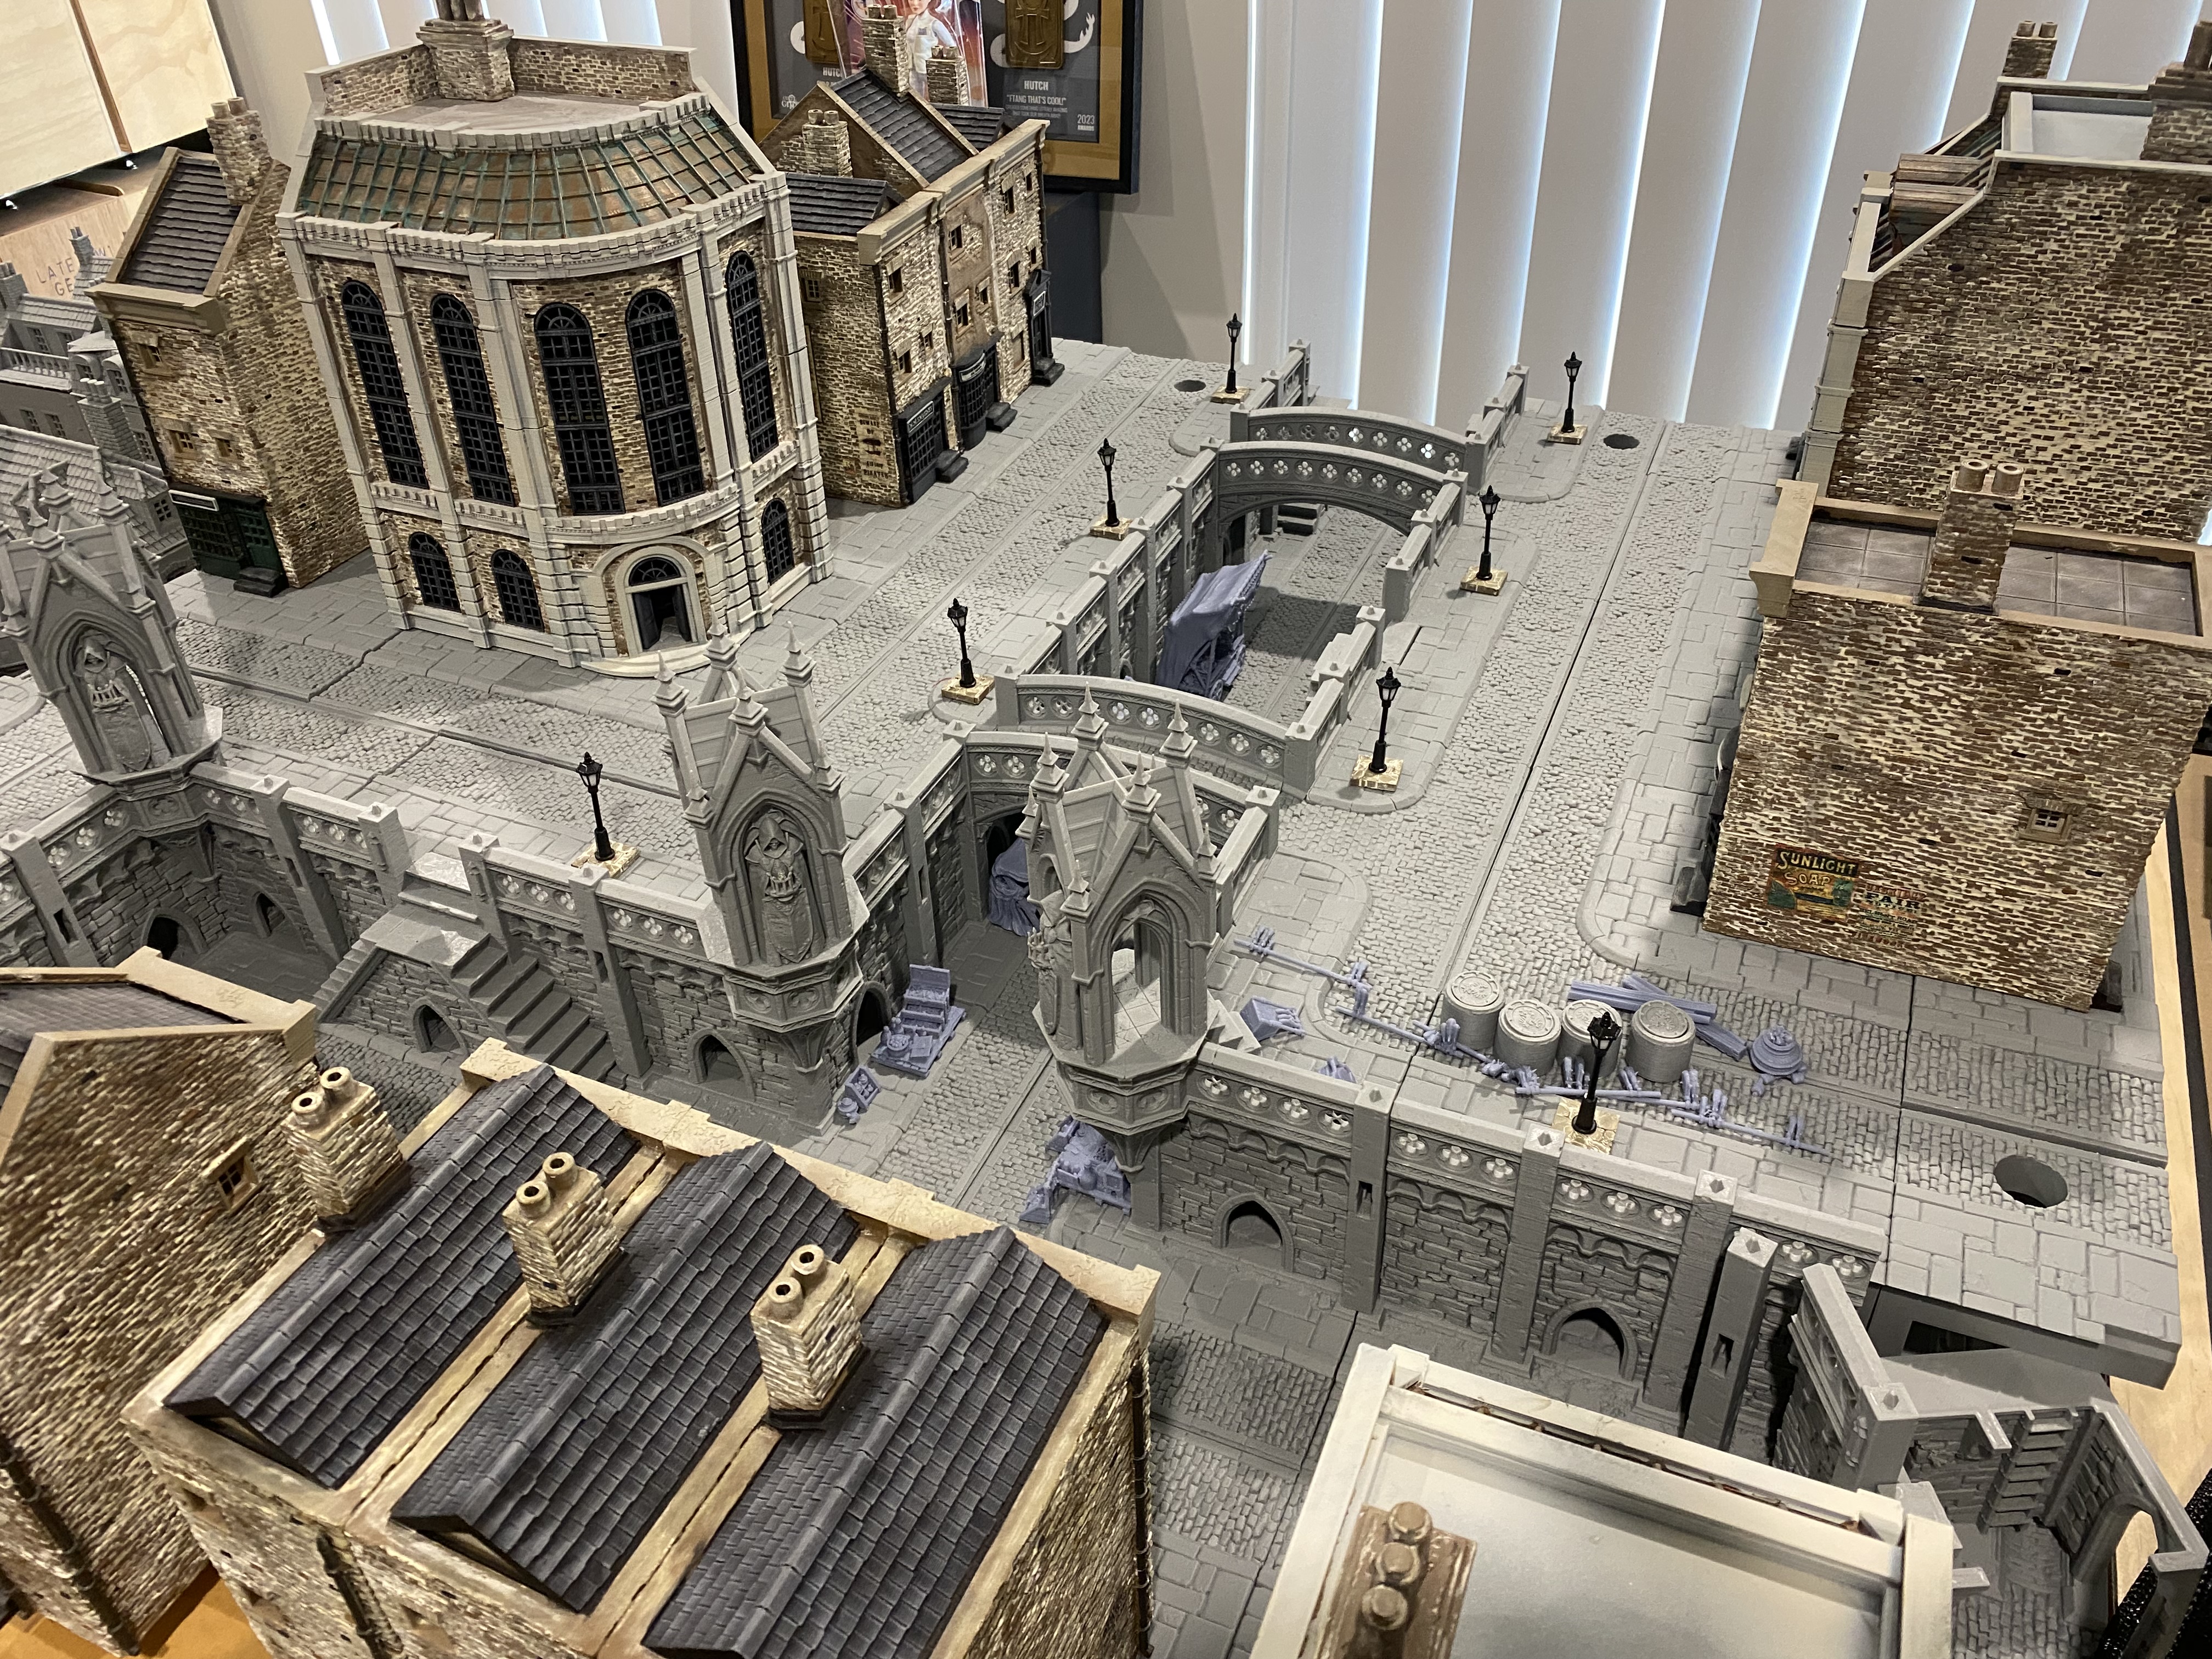
Chucking a few buildings around
I decided to plonk a few buildings around just to get a feel of how things may look. This is not the finished layout and is of course subject to change at any point. This was just a chance for me to try and visualise how things may look with my Gaslight buildings. There are a few little bits that will be replaced to give a more fantasy feel for when I replace the buildings with my Port Blacksand buildings, which I am hoping will come in useful for Guards of Traitors Toll.
 Disclaimer - The buildings on the table set up in this picture were built last year.
I printed a few different market stalls and spare canopies to get a feel for what I could make the sunken road look like. I will have to do a mixture of both Fantasy and Victorian-style market traders so that I can swap them out. I will also have to make sure everything is removable for when I want to use the board for 55mm Gothic Horror.
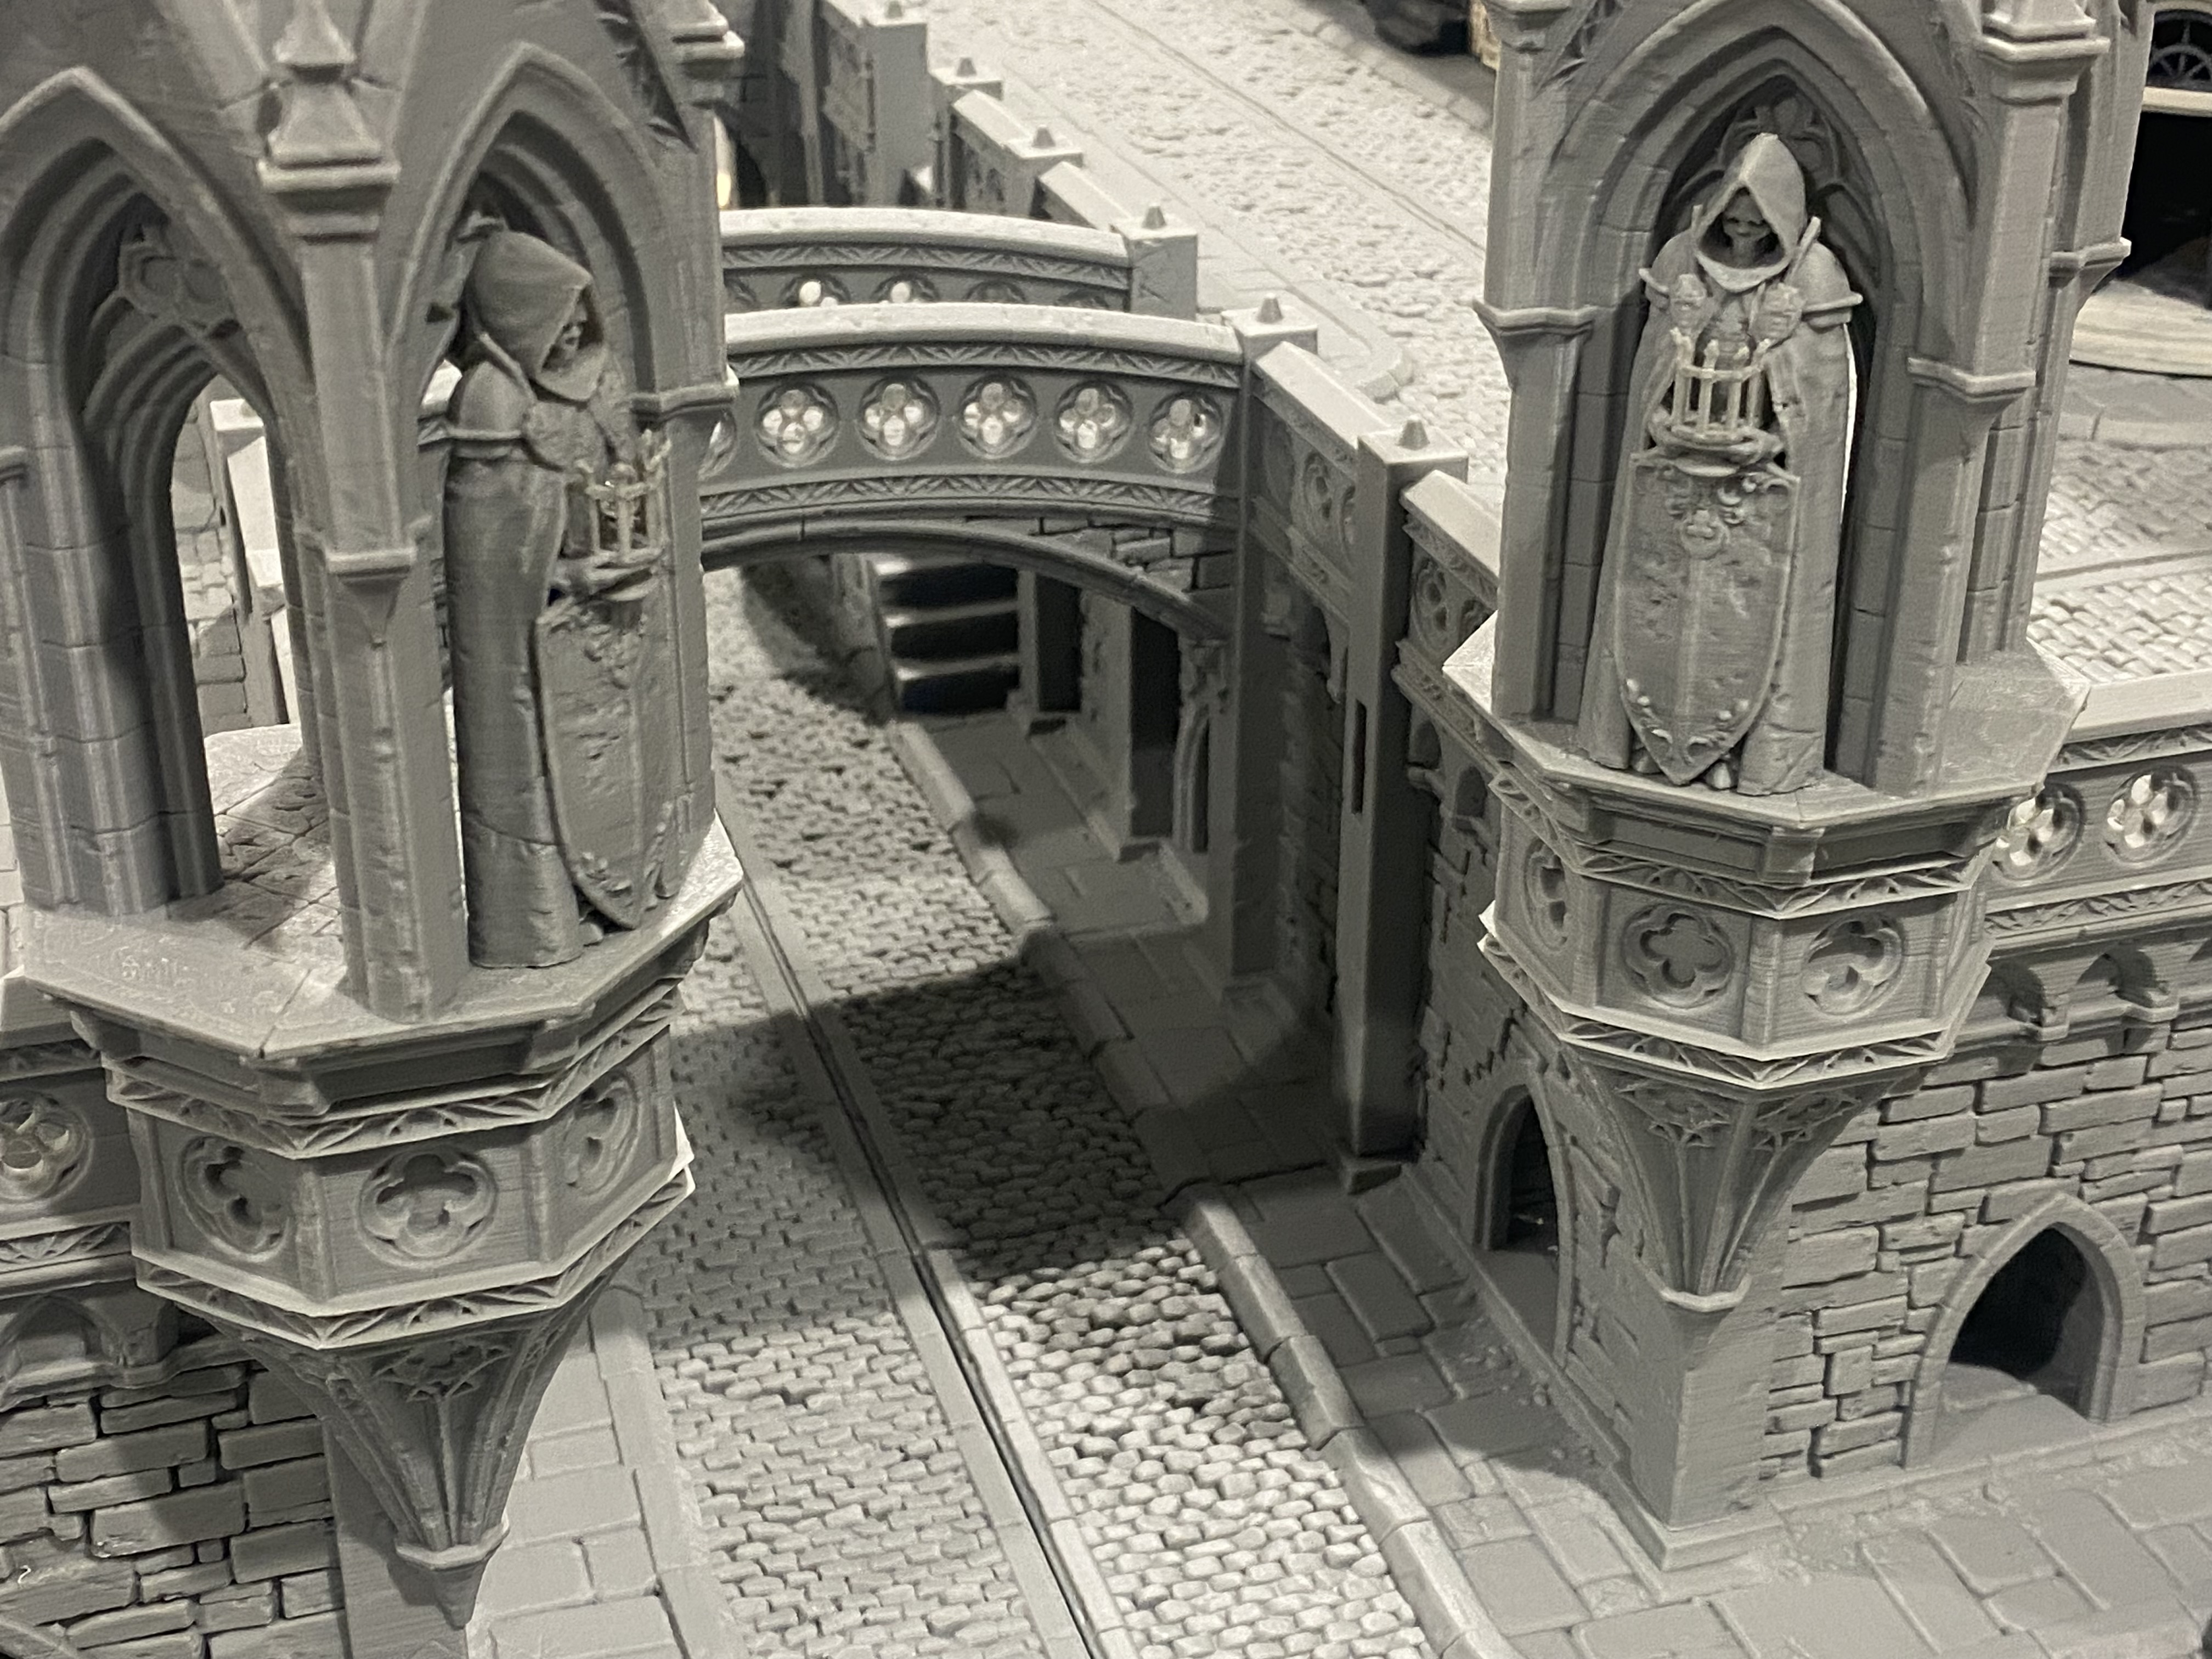
 This is where the slums area is going to go, near some steps going down into the sewer system. Thinking a mix of wooded and brick buildings here, maybe some with scaffolding holding them up.
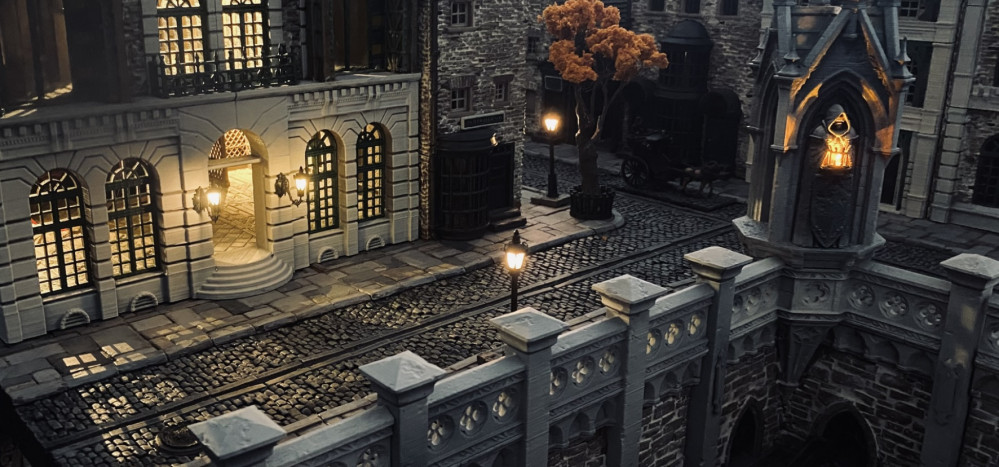
 The entrance to the market street will be overlooked by gothic statues that will be lit with flickering lights, again these are removable so that they can be swapped out with something a little less Gothic and a lot more Fantasy.
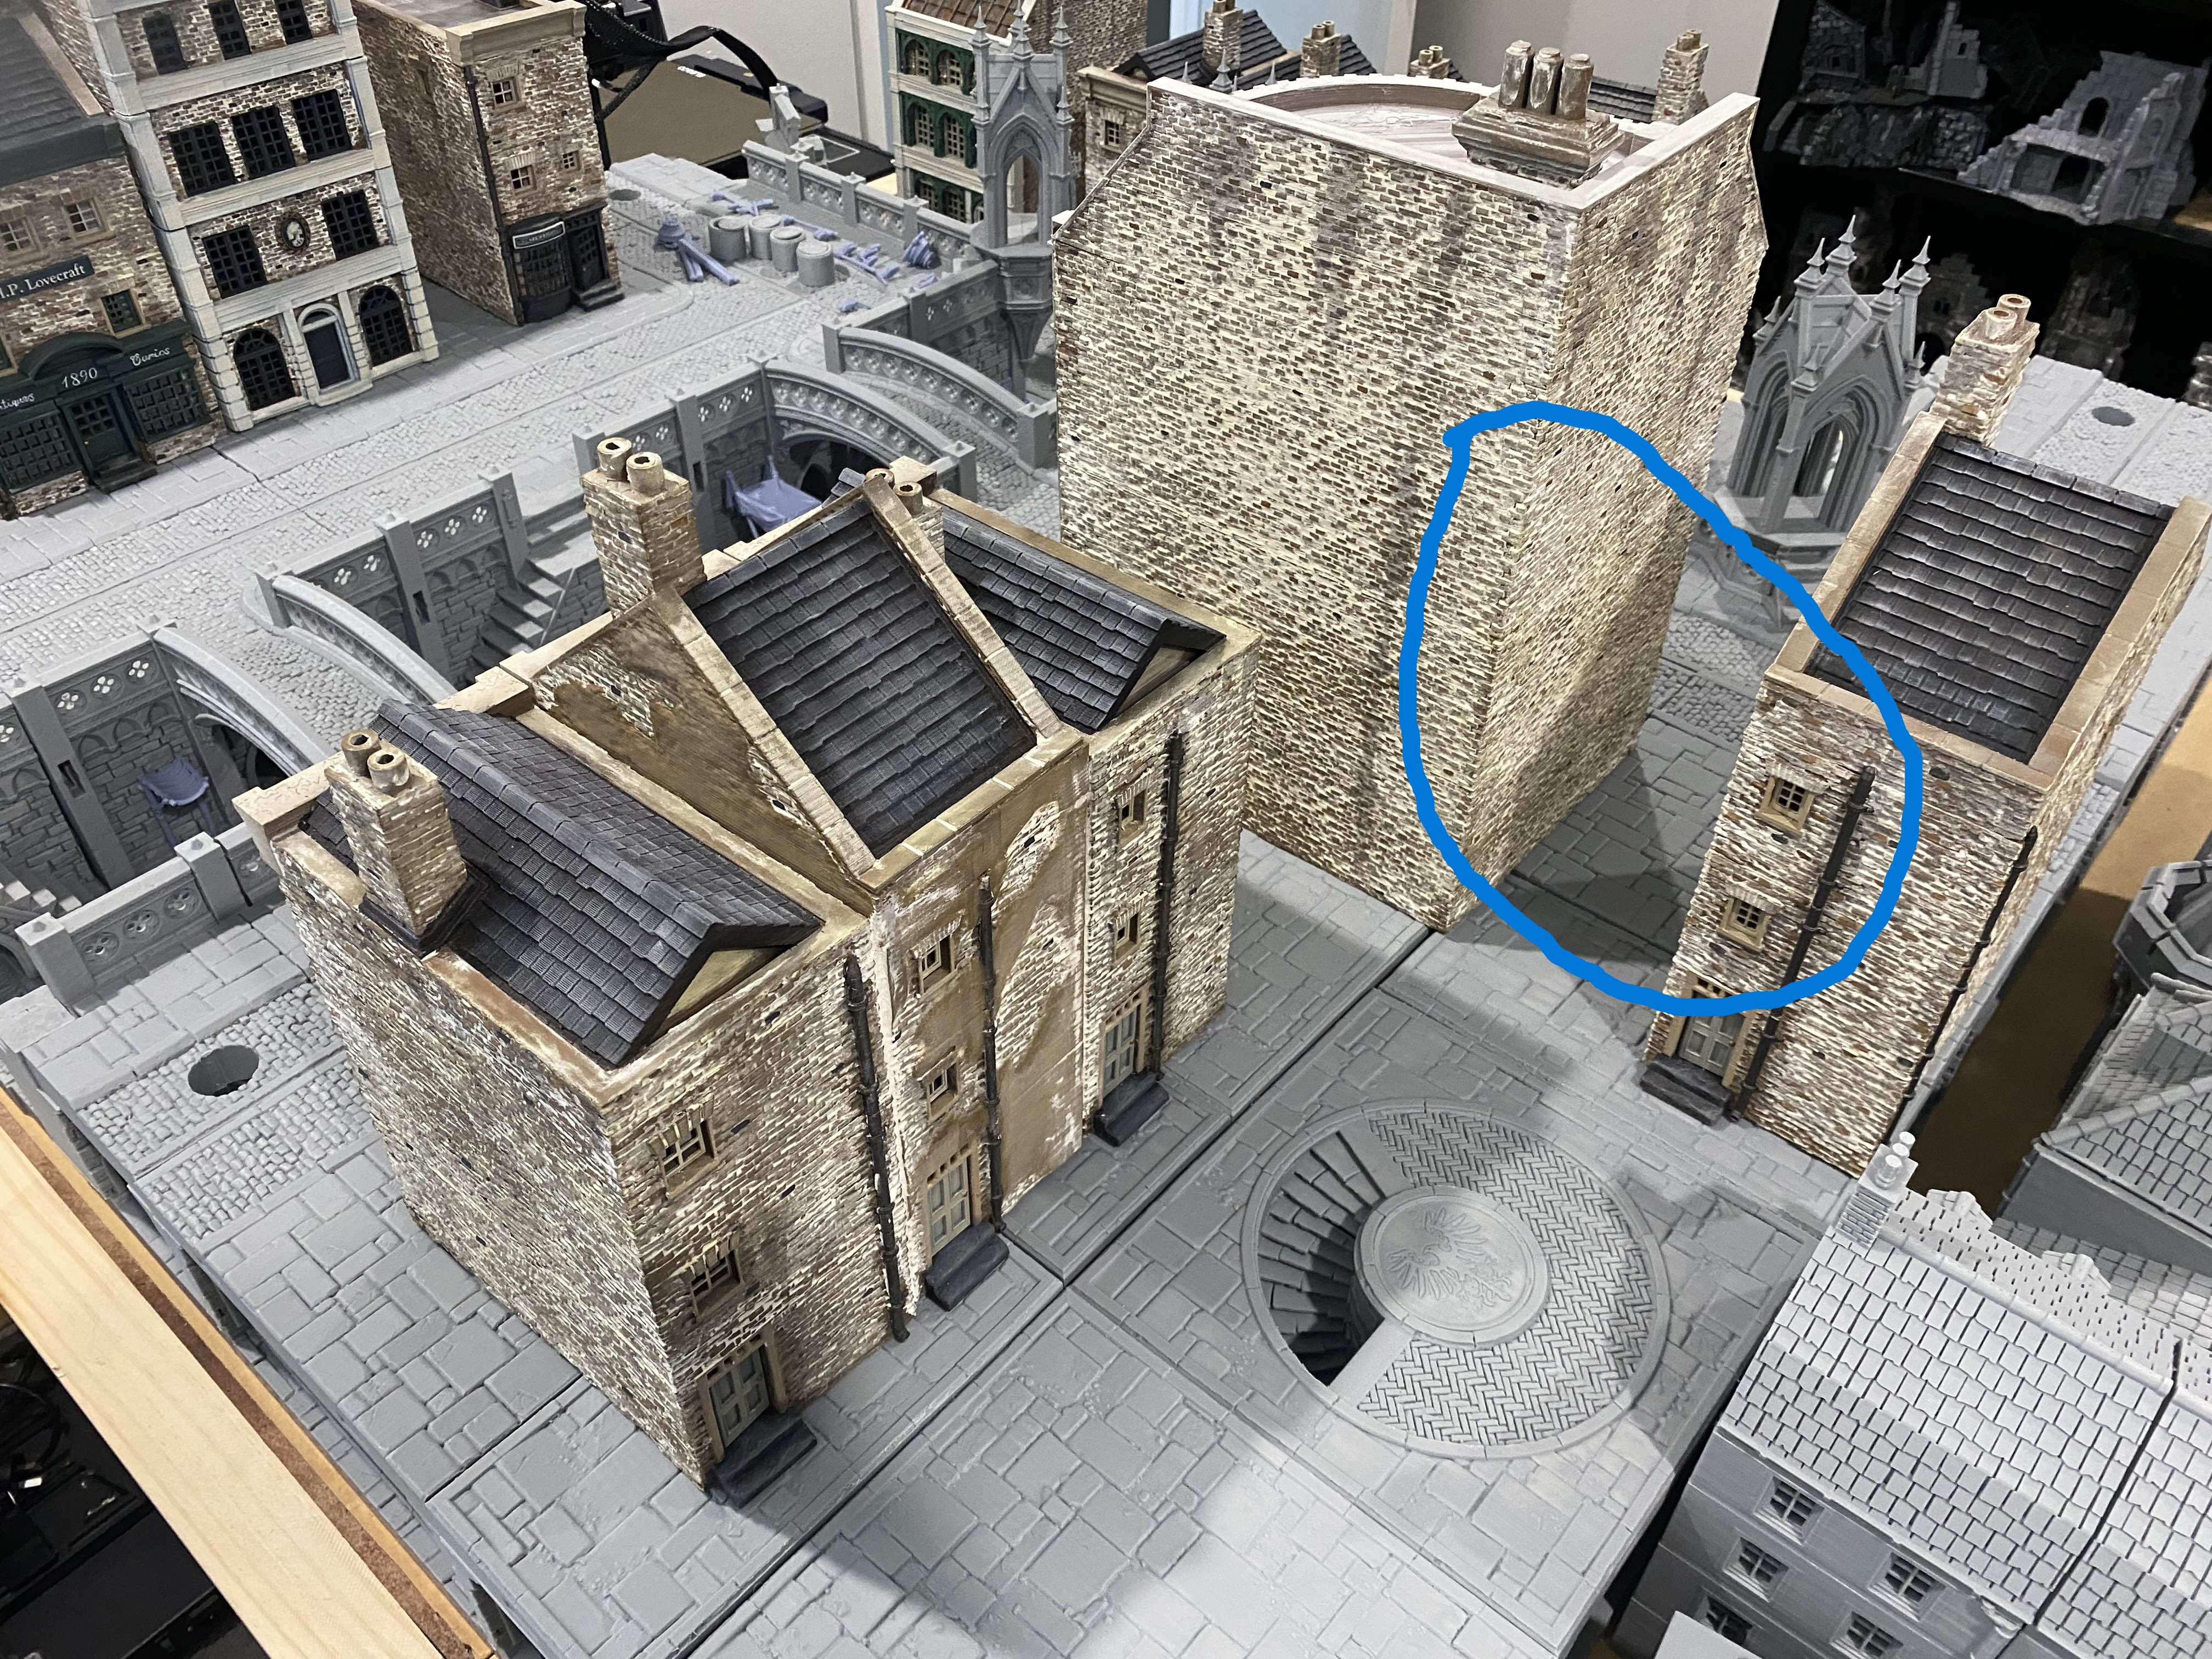
I am thinking of turning a part of the board into more of a ‘slums’ area. The place with one of the sewer access points seems ideal. I think I will scratch-build a wooden building with an arched walkway to go where the blue ringed area is and then either replace the other buildings with more wooden-looking buildings or incorporate some wooden shacks attached to the buildings.
I think adding some wooden structure will give some nice extra colour and texture and contrast against all the stonework.
 Disclaimer - The buildings on the table set up in this picture were built last year.
Colour Palette
I have gone with some of my favourite terrain colours for my colour palette.
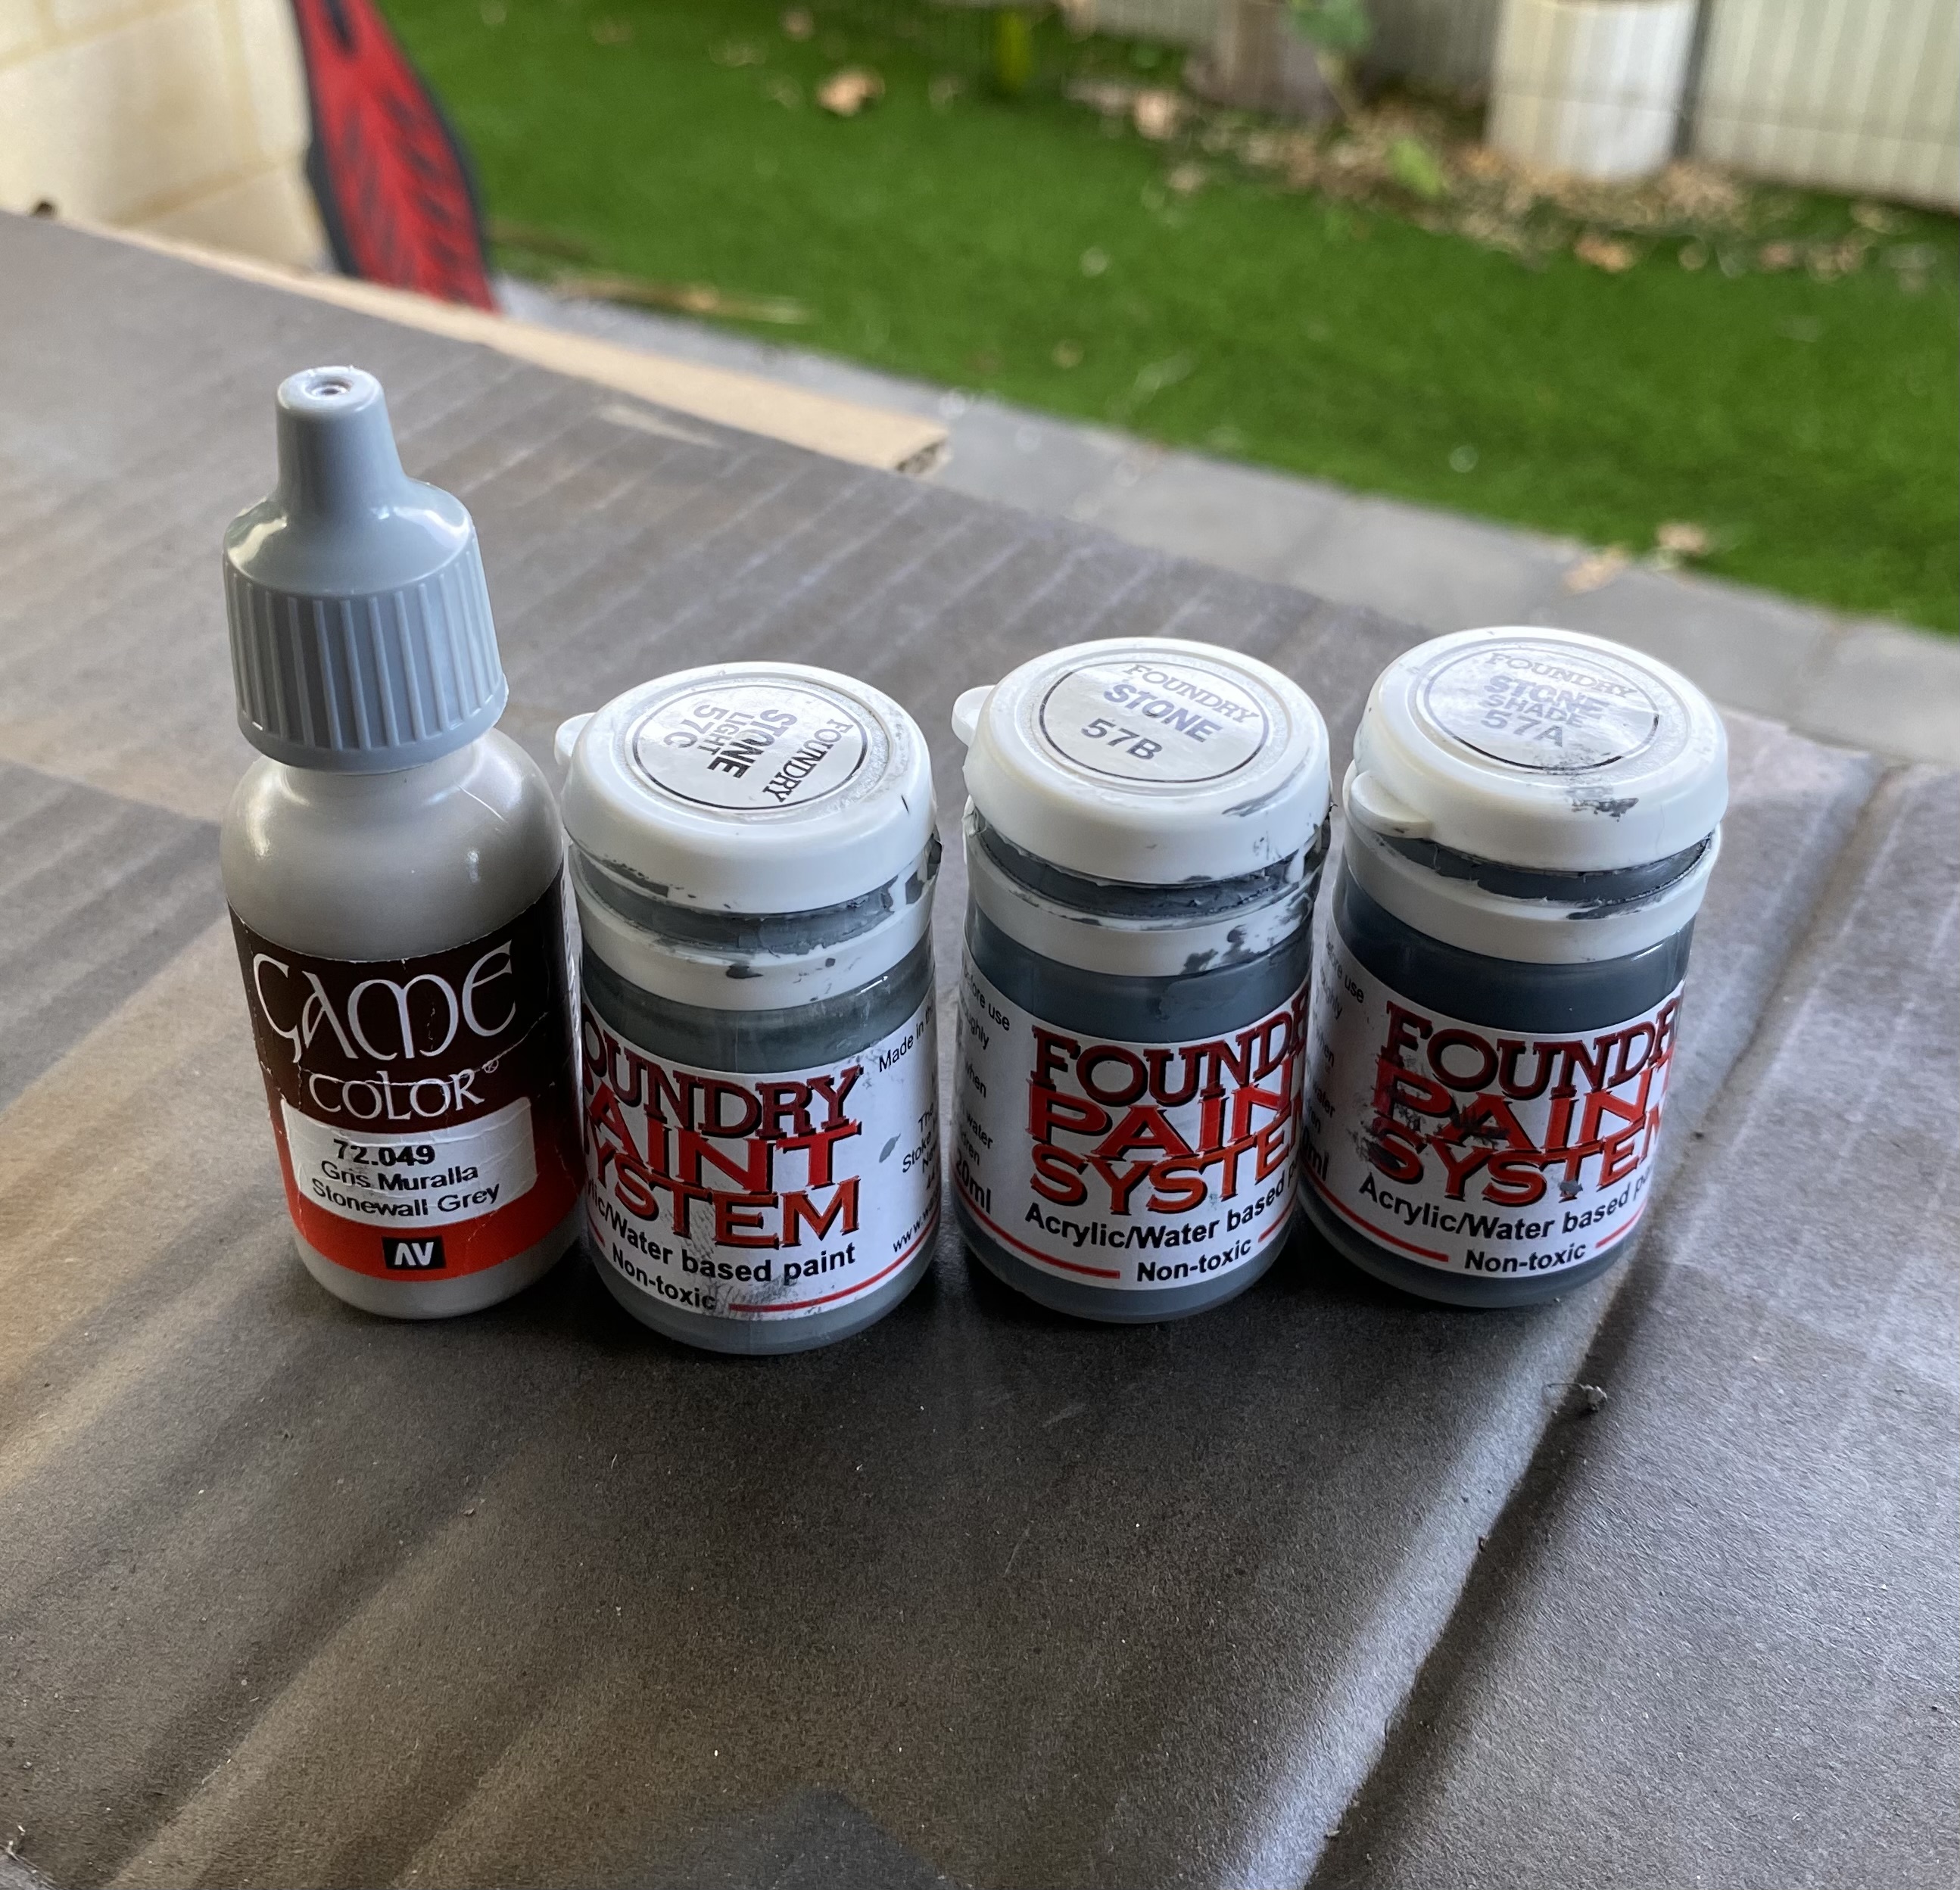
For the flagstones, I have chosen some greys from the fantastic Wargames Foundry Paint range I have been a longtime fan of the Wargames Foundry colour system and think they were probably amongst the first to tricolour palettes with each colour having a shade, mid-tone and highlight.
On top of that for my colour choices, I have gone back to my tried and tested favourite browns. I use these a lot, so I took a sample of each to the local hardware shop and had them colour match them for me. It’s a lot cheaper this way and I still have plenty left over from other projects, so money saved there too.
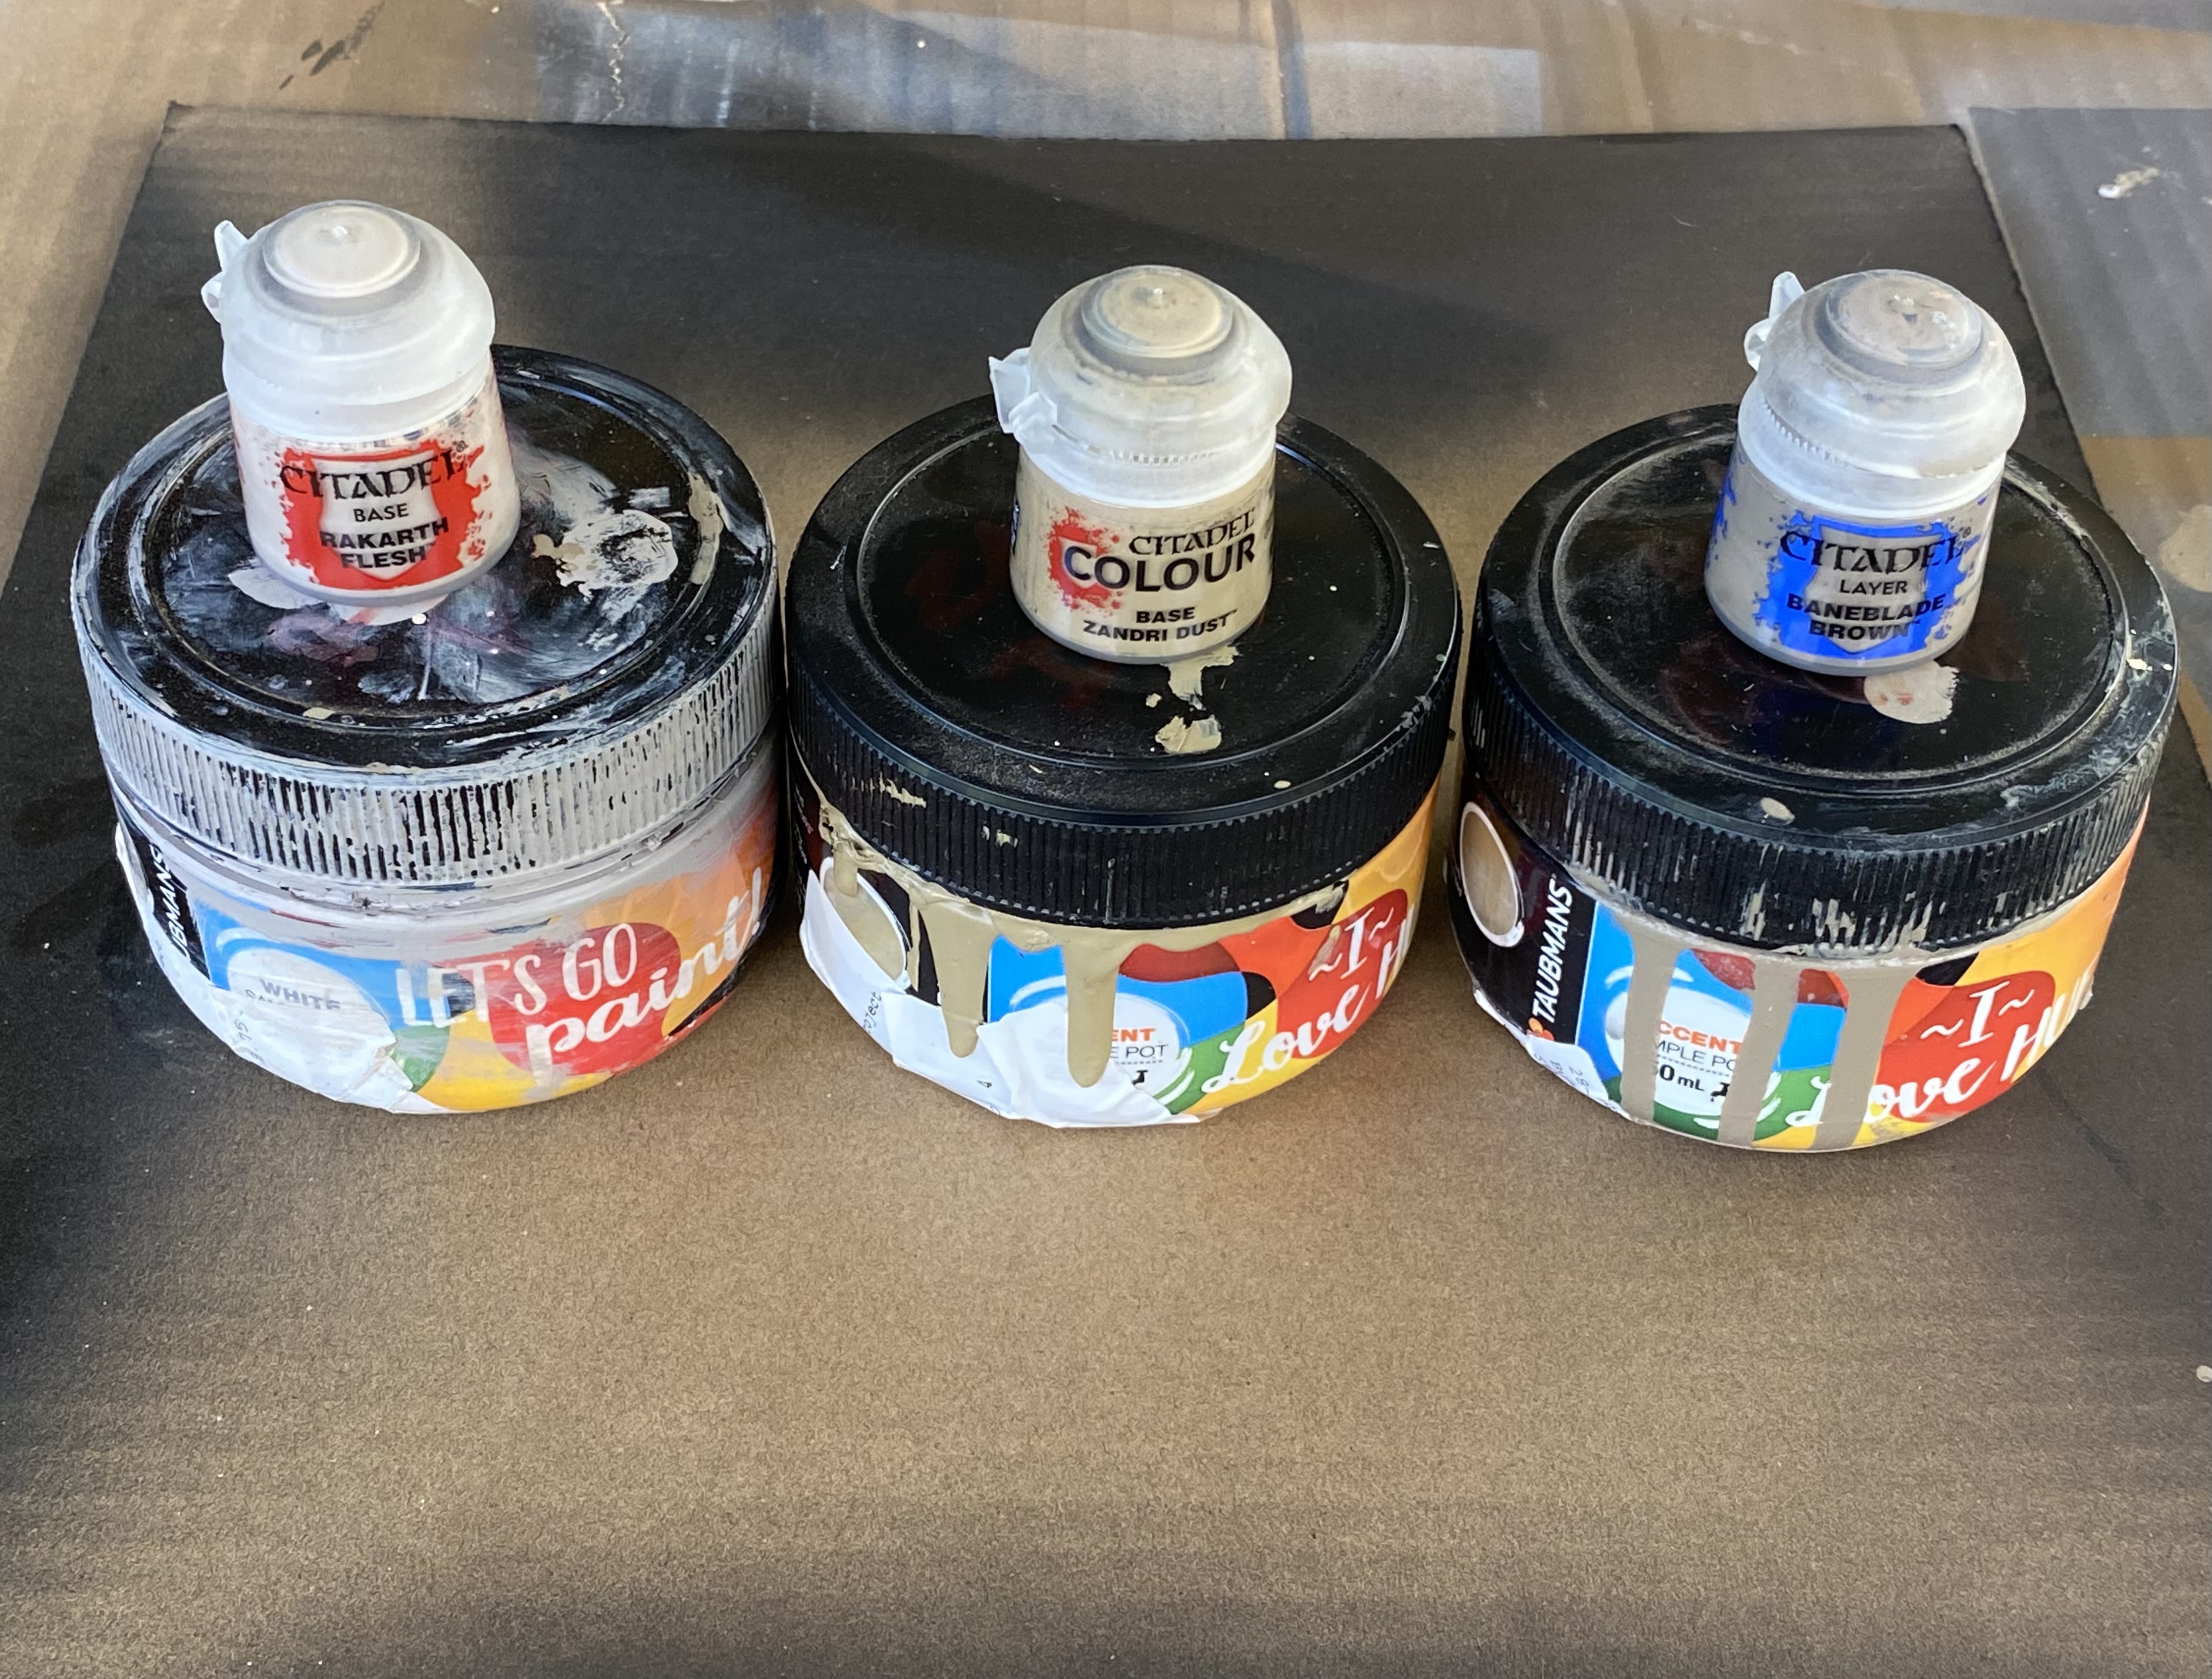
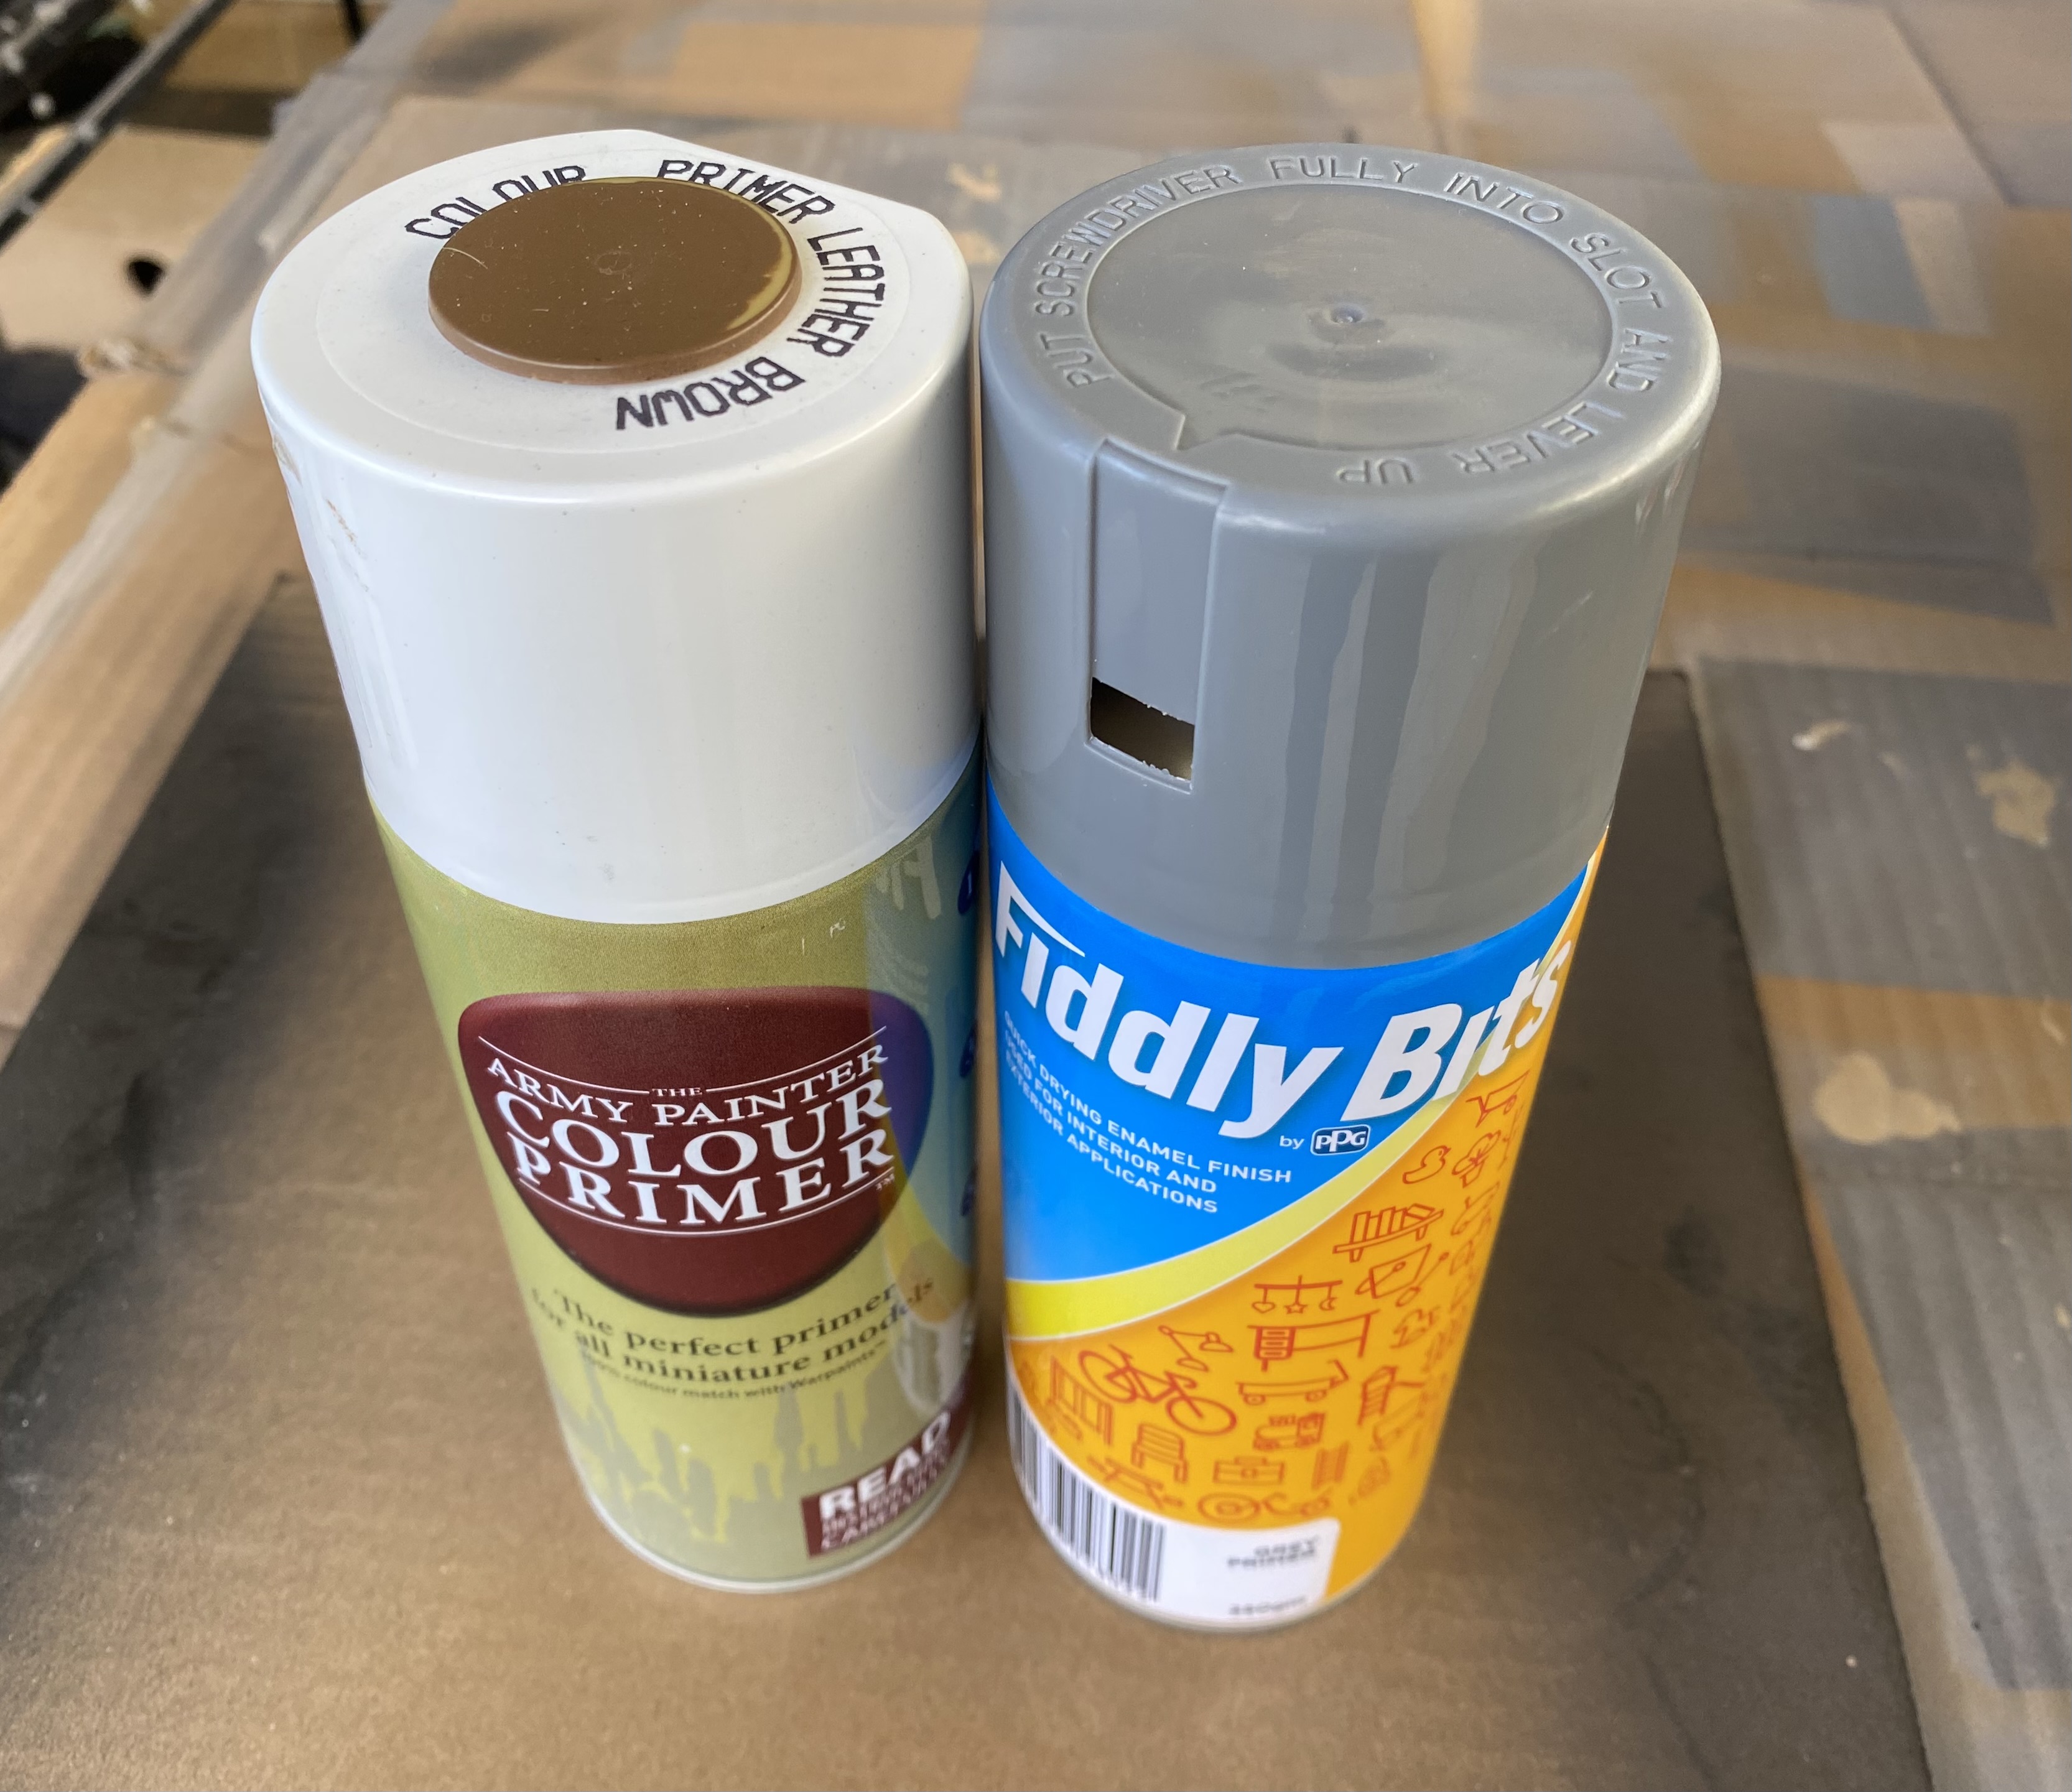
Of course, all these colours have to go on an undercoat of some sort and for this project, I will use the same undercoat as I do for all my terrain.
Cheap grey primer followed by army painter leather brown.
The grey primer serves as a base so that if I miss anything with the leather brown is not too contrasting. Leather brown is my favourite spray paint and the basic colour for all the brickwork on my buildings. More of how I do my brickwork can be found HERE
I would highly recommend getting your local hardware/paint store to mix up a pot of whatever base spray colours you use. Especially if you plan to use the method, I use to get stuff done in super quick time.
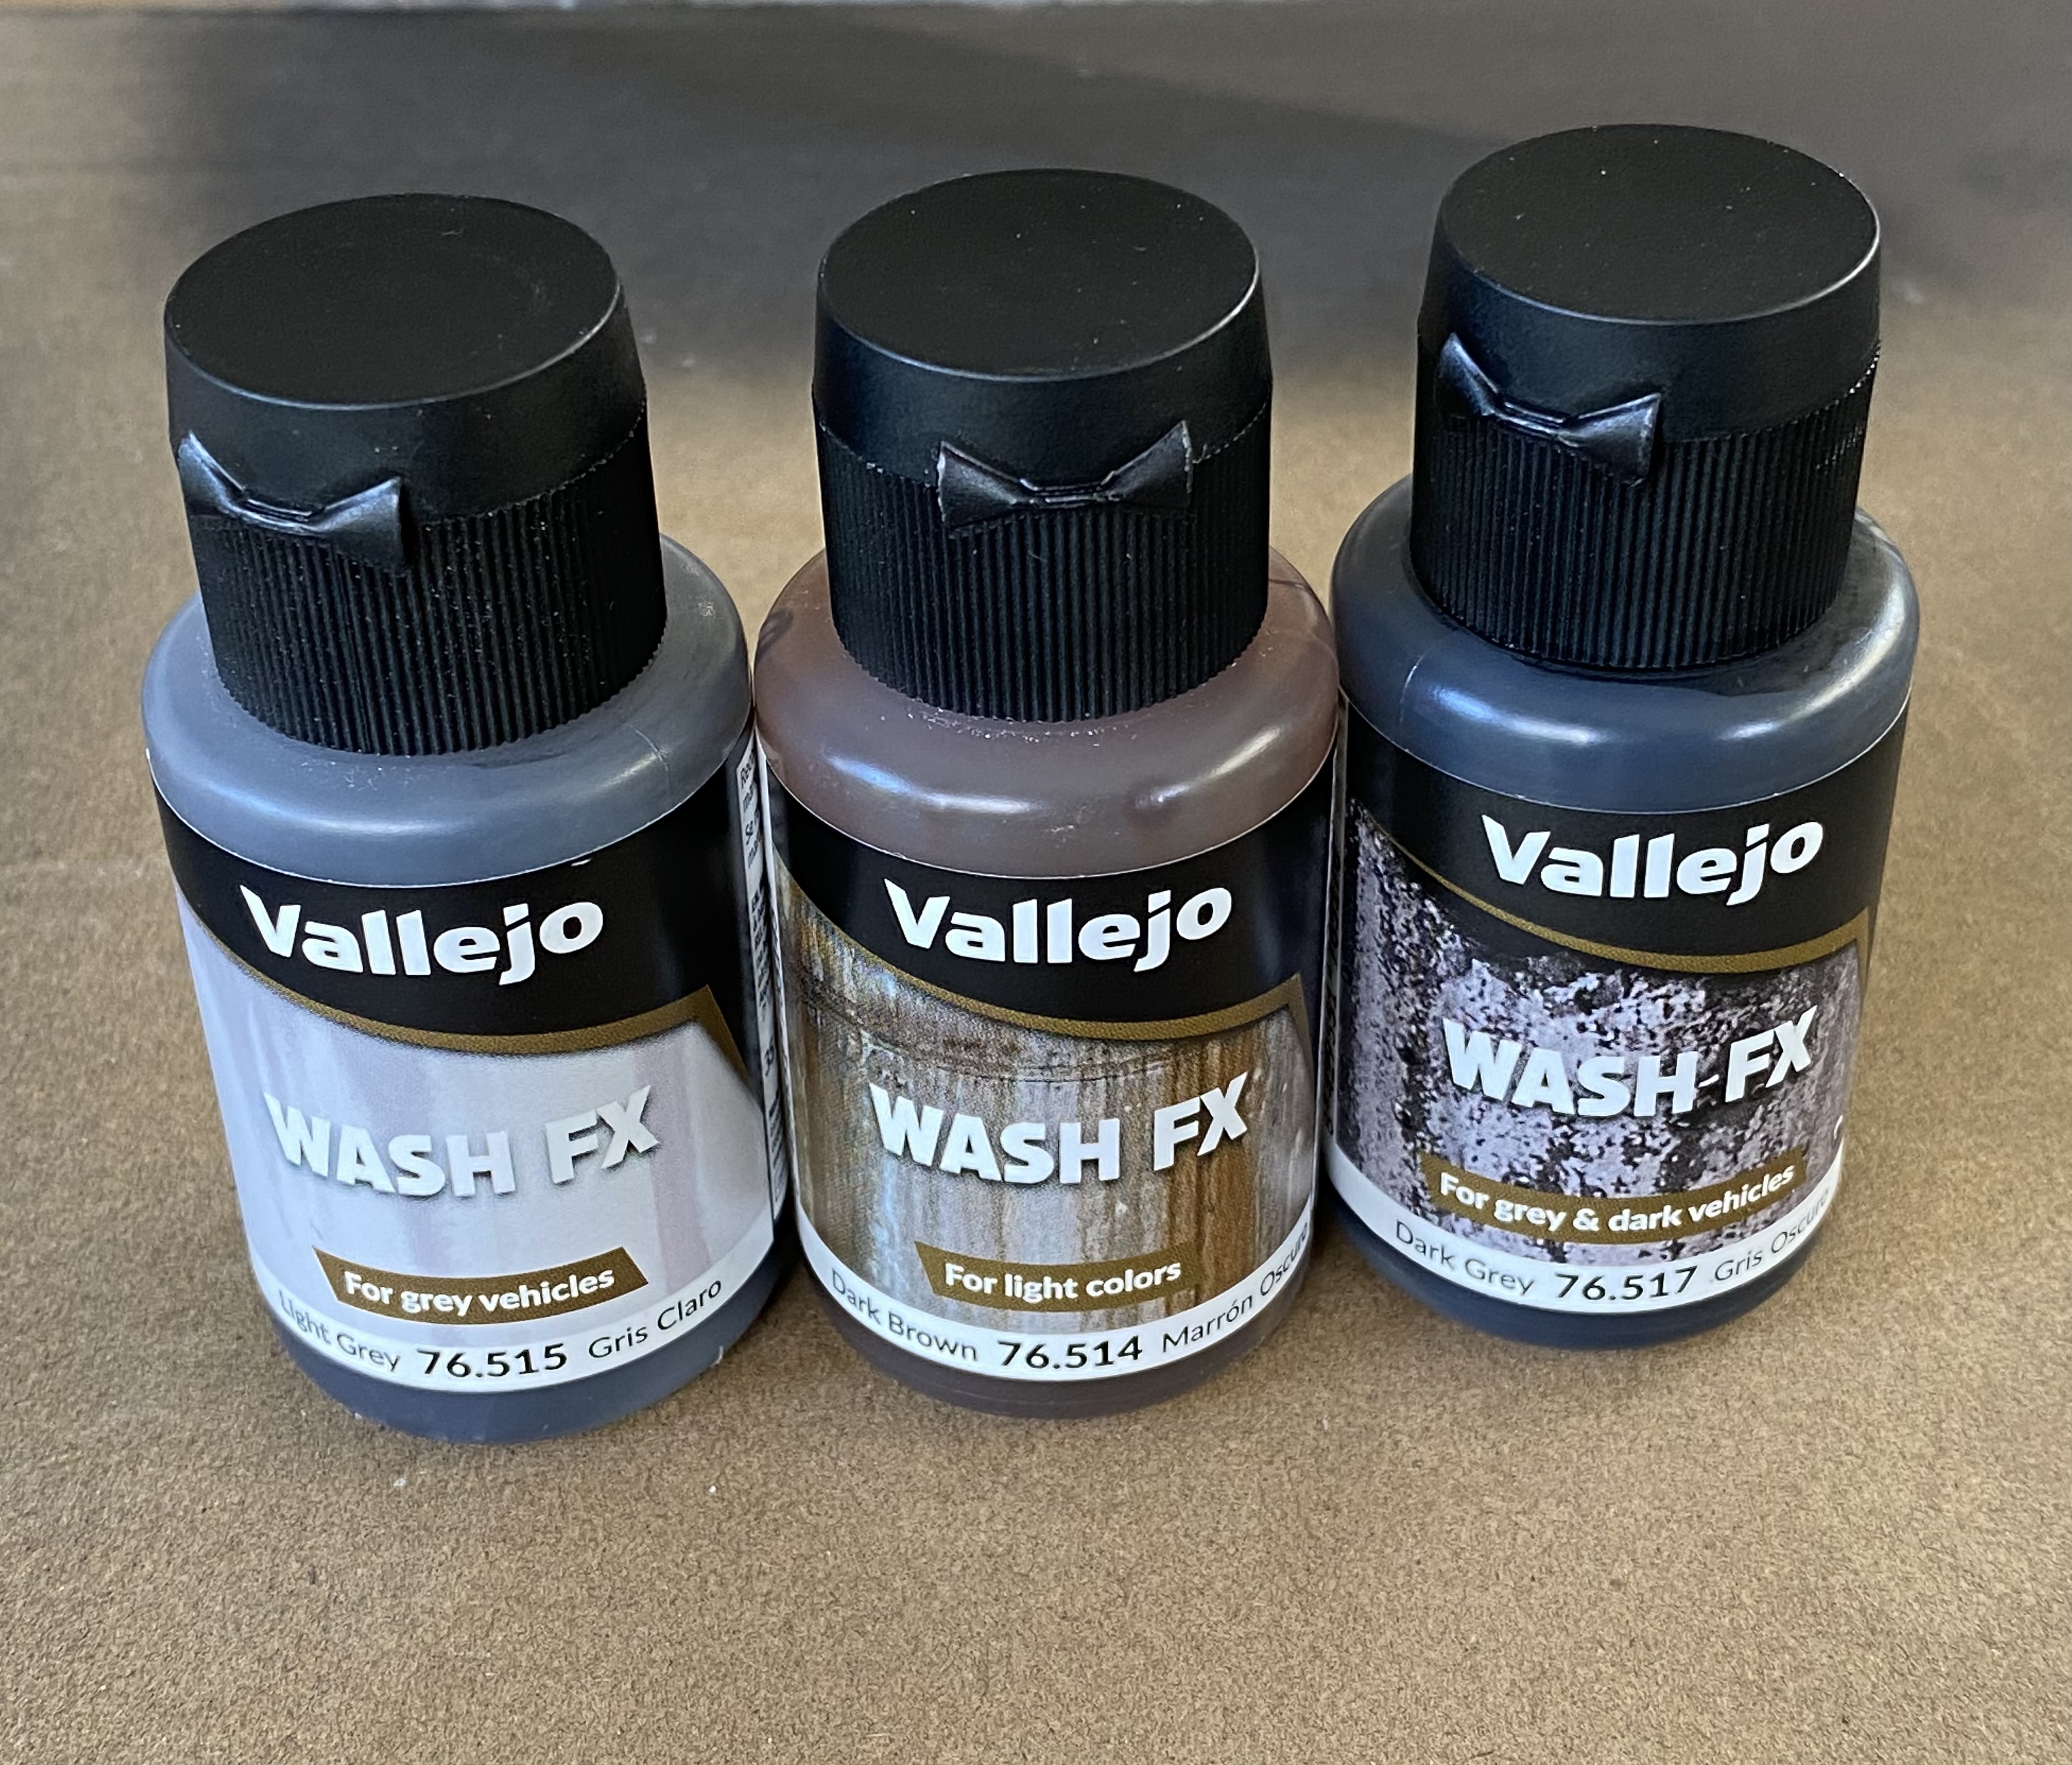
While we are talking about paint, some of these washes are also a good investment for the terrain. They are excellent for weathering. My favourite is the light grey.
There are many ways to paint terrain and mine is just one method, I am not saying or suggesting that mine is the correct or best method, but it works for me.
I start off by using rattle cans for as much of it as possible. I don’t worry too much about masking stuff off, If I do plan to block an area off, I just hold a piece of card over it and let the overspray feather the edges. For small hard-to-get areas, I go at it as much as I can with every other colour before going back in and neatening it up a bit by painting on leather brown with a brush. This is where having the local paint store knock up a batch of Leather Brown paint comes in handy.
I then use a 1″ brush from the DIY store to drybrush brickwork areas in a cream colour. It doesn’t really matter what colour you choose as most of it will get wiped off later anyway, it just goes to help create variations in colour.
After that, the brickwork gets covered in fine crack filler which is then wiped off with a wet rag. The wet rag will also remove some of the cream paint, leaving just enough behind to tint the leather brown slightly.
The final look is my interpretation of London yellow stock bricks.
Lighting Layout
I completely forgot to post these.
I set out a few streetlights to get an idea of how they will look. Obviously, the plan is to have them so that they are not on individual bases and are wired into the board in such a way that they are removable.
 Disclaimer - The buildings on the table set up in this picture were built last year.
 Disclaimer - The buildings on the table set up in this picture were built last year.
I also stuck a few little wall pieces on the board to see how I could add some different height terrain to the layout. Nothing is final placement yet. I am just trying to visualise how it will all come together.
 Disclaimer - The buildings on the table set up in this picture were built last year.


