


Custom Guard: Vision to Reality


Recommendations: 37
About the Project
For a few years now I've been designing, cobbling together and experimenting with a Custom force of 40K Imperial Guard and it's finally time to start doing something with them.
Related Game: Warhammer 40,000
Related Genre: Science Fiction
Related Contest: Spring Clean Hobby Challenge 2026
This Project is Active
Adding the Details
 We left off with our Guardsman armed and ready to go. I'll be printing them without heads the first time to get more variation.
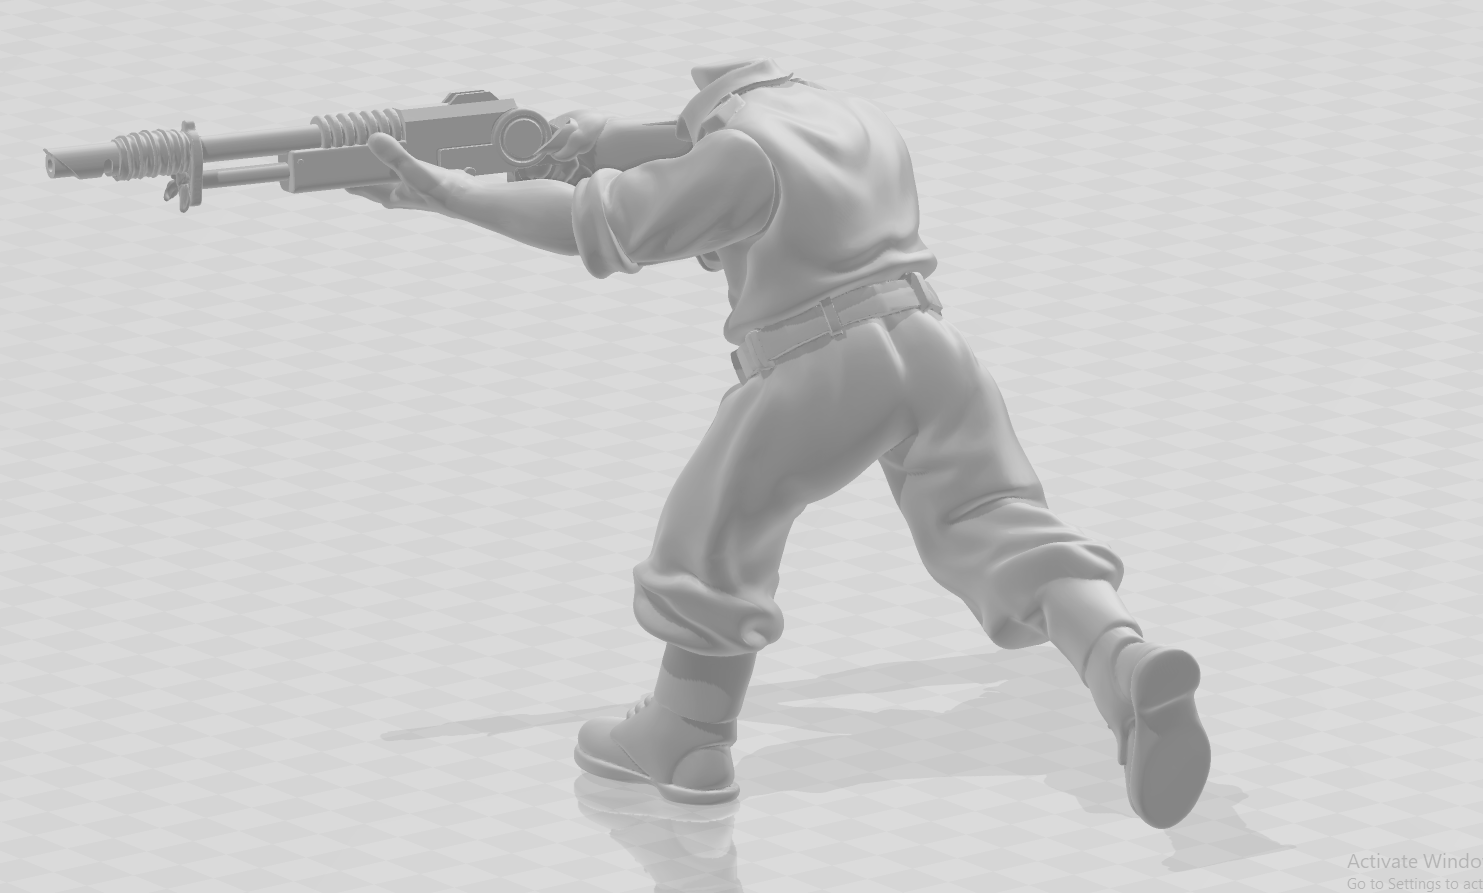 While I want them to be simple I also want them to be both noticeably 40K and plausibly equipped.
 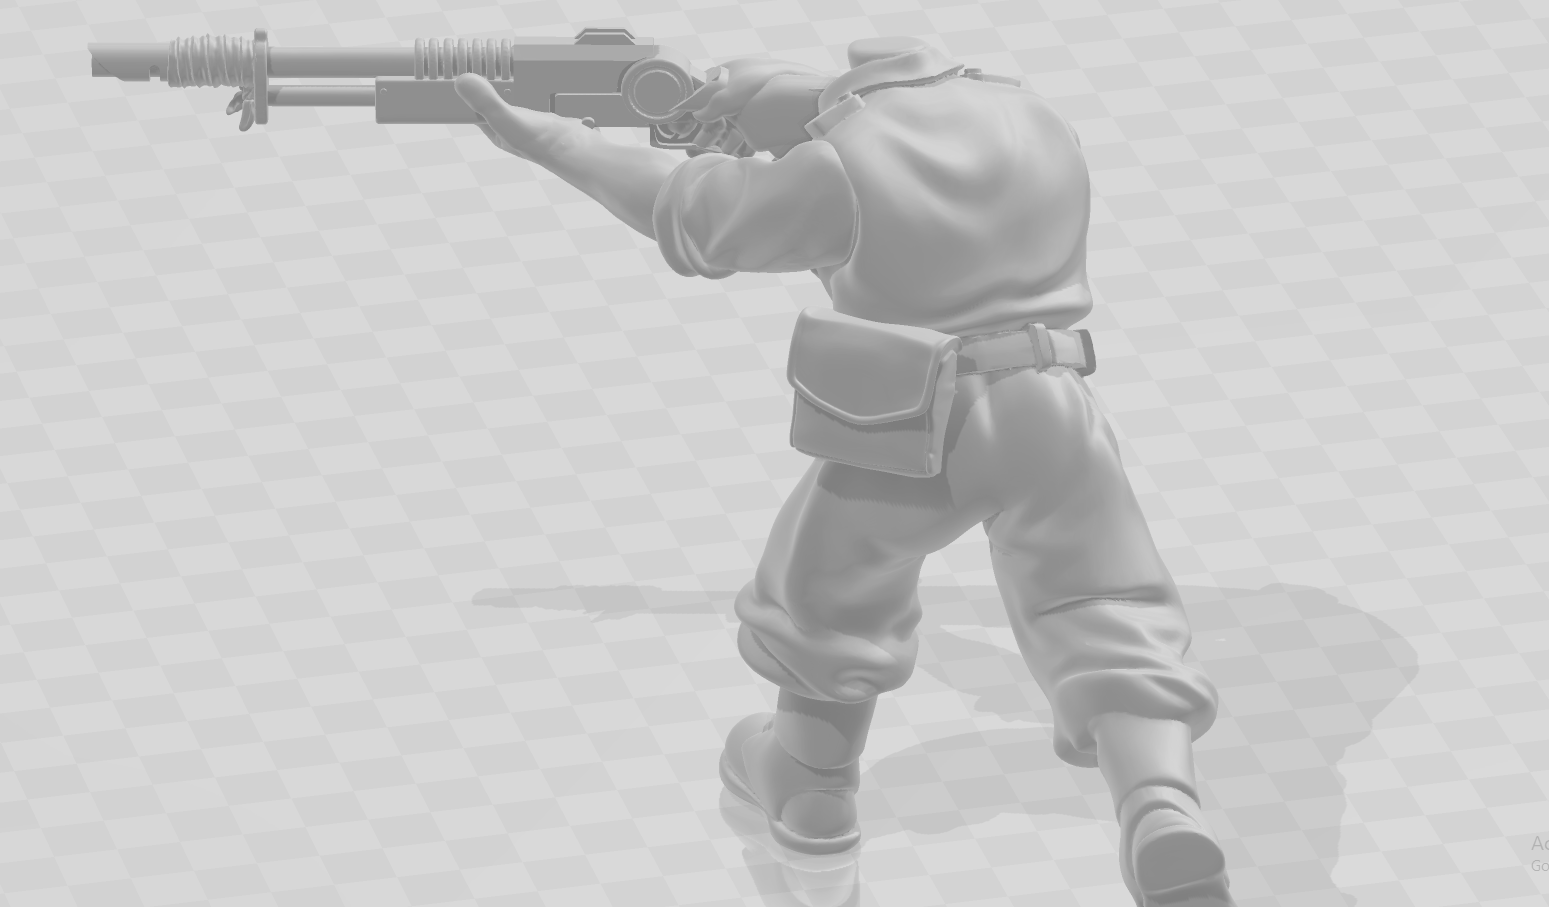 An ammo pouch on the left hip will help with the second point but it looks a little slapped on. This particular pouch is from an Ottoman set from Wargames Atlantic
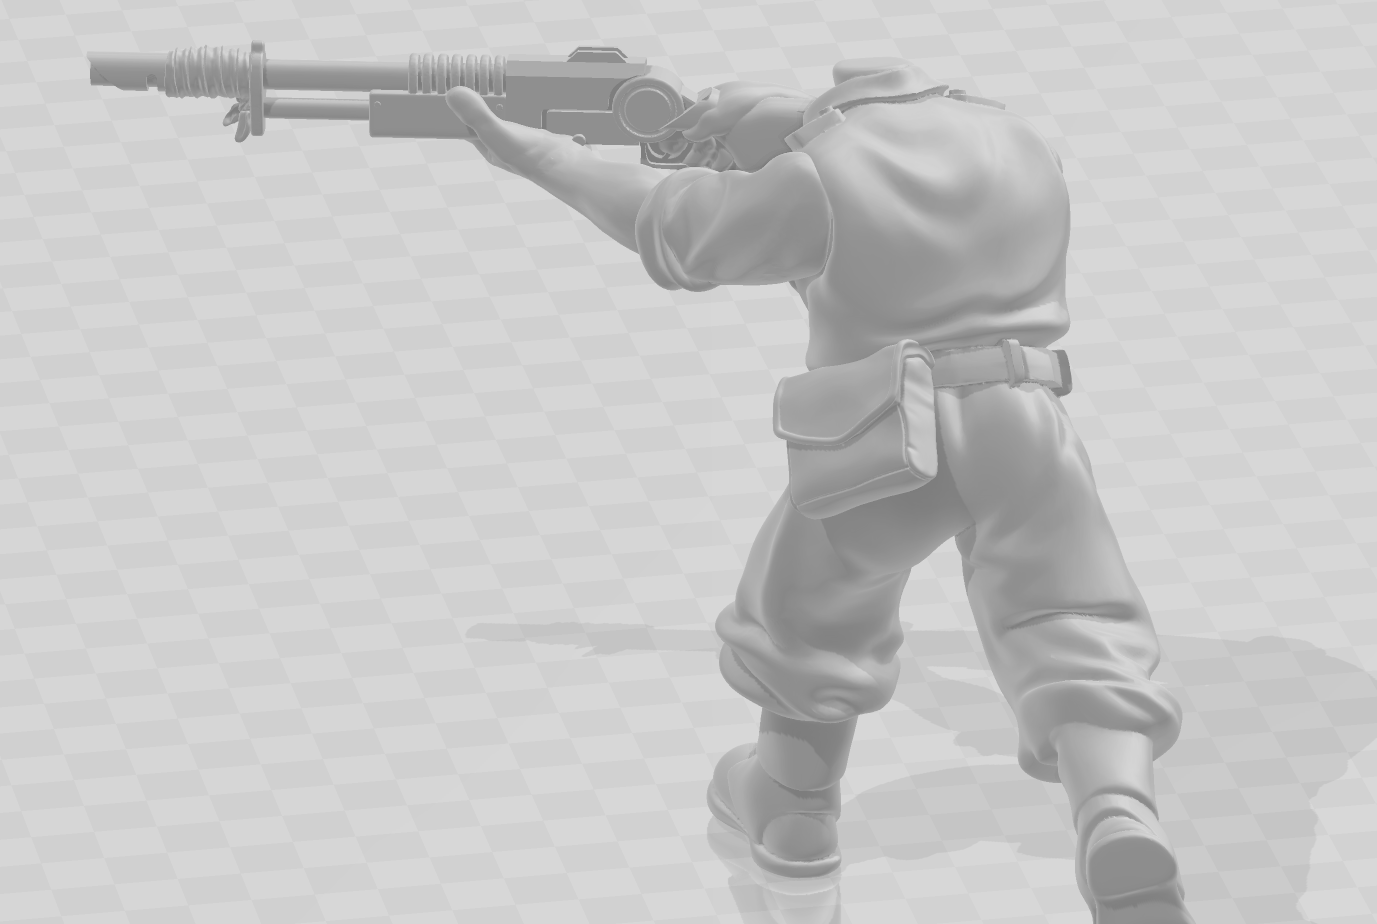 It might not seem like much but a little rotation makes it look much more natural. I went back and forth about putting an Aquilla on the pouch but I didn't want to go overboard with them
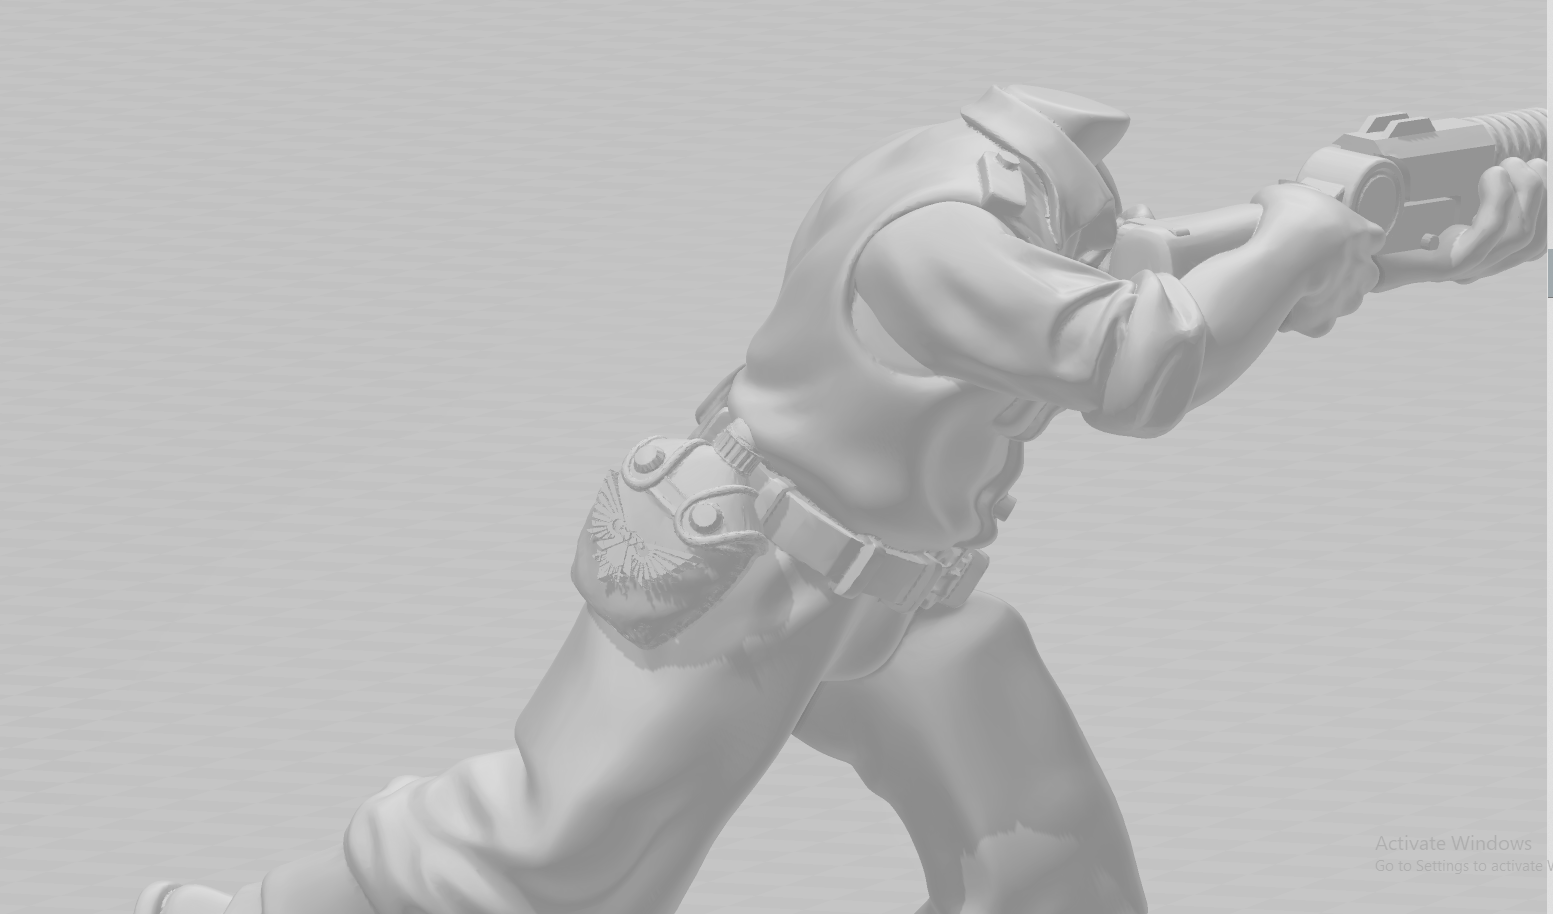 Now on the right hip I have three options. First the water bottle with Aquilla
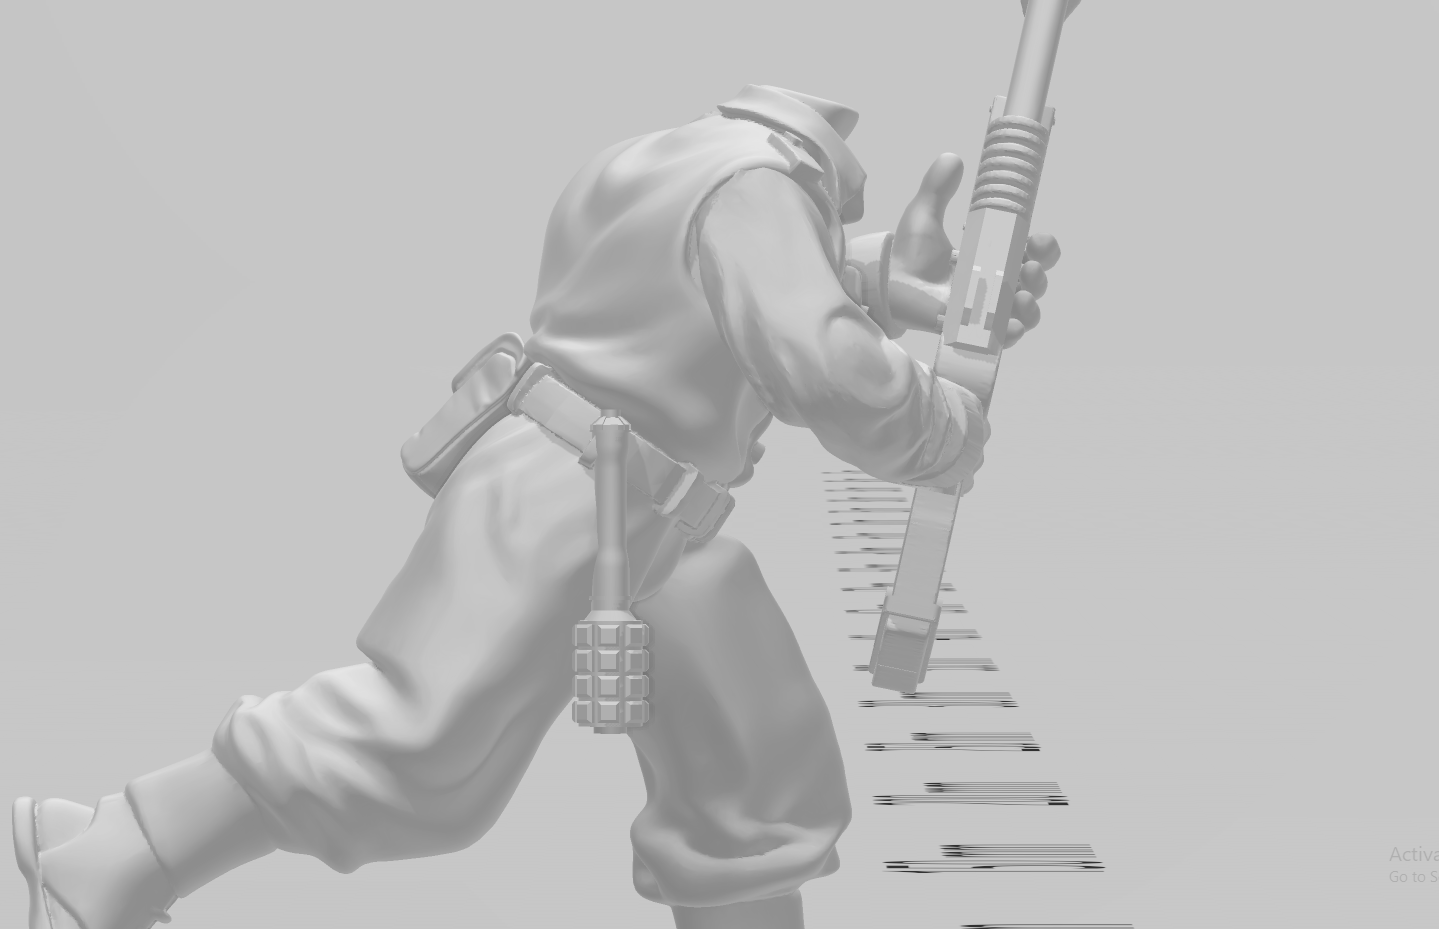 Second, some Grenades
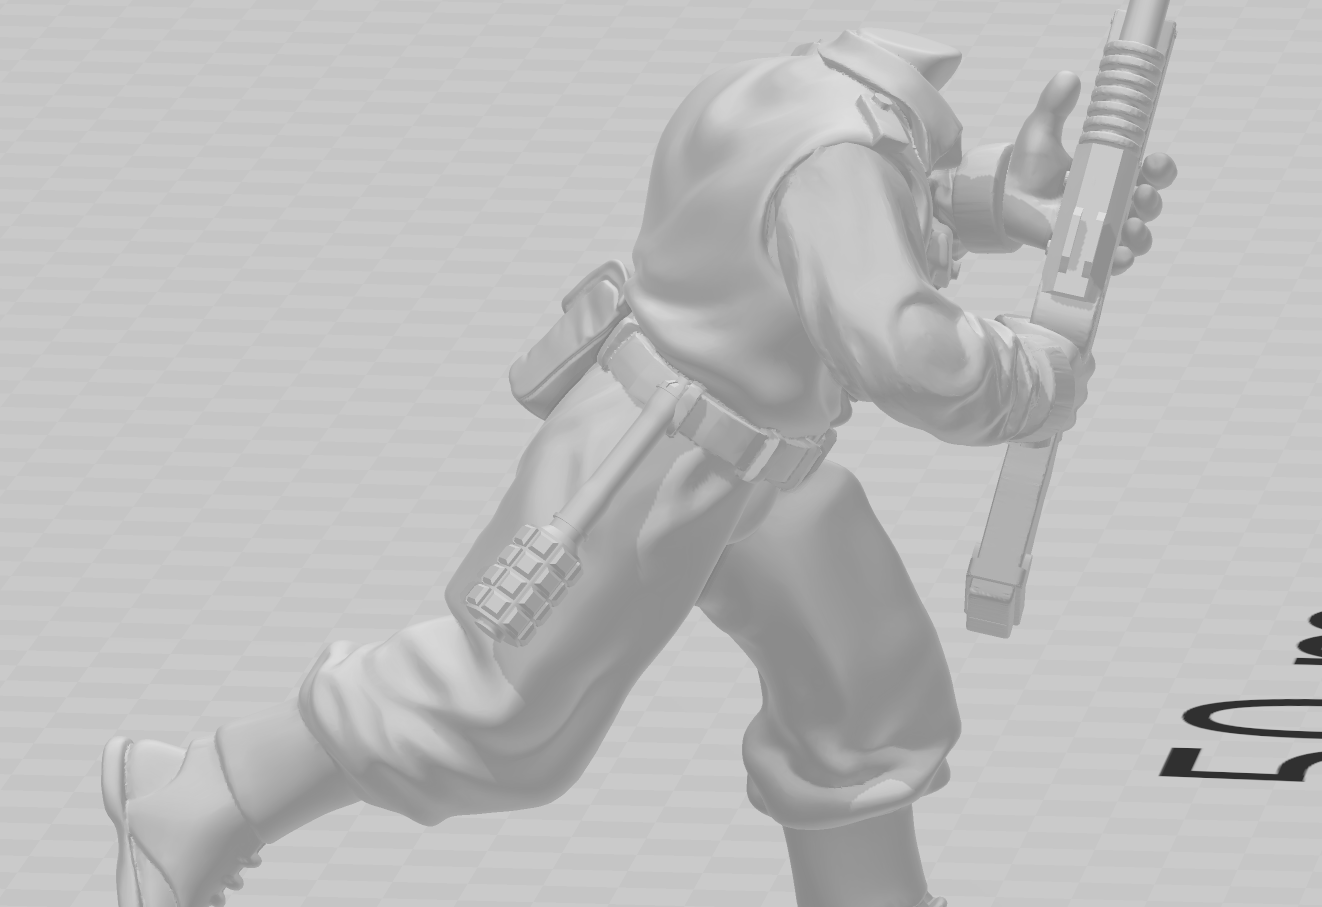 Again making sure to angle them appropriately. Not only are stick grenades cool but with the frag jacket they look less recognisable since we're used to unsleeved German ones.
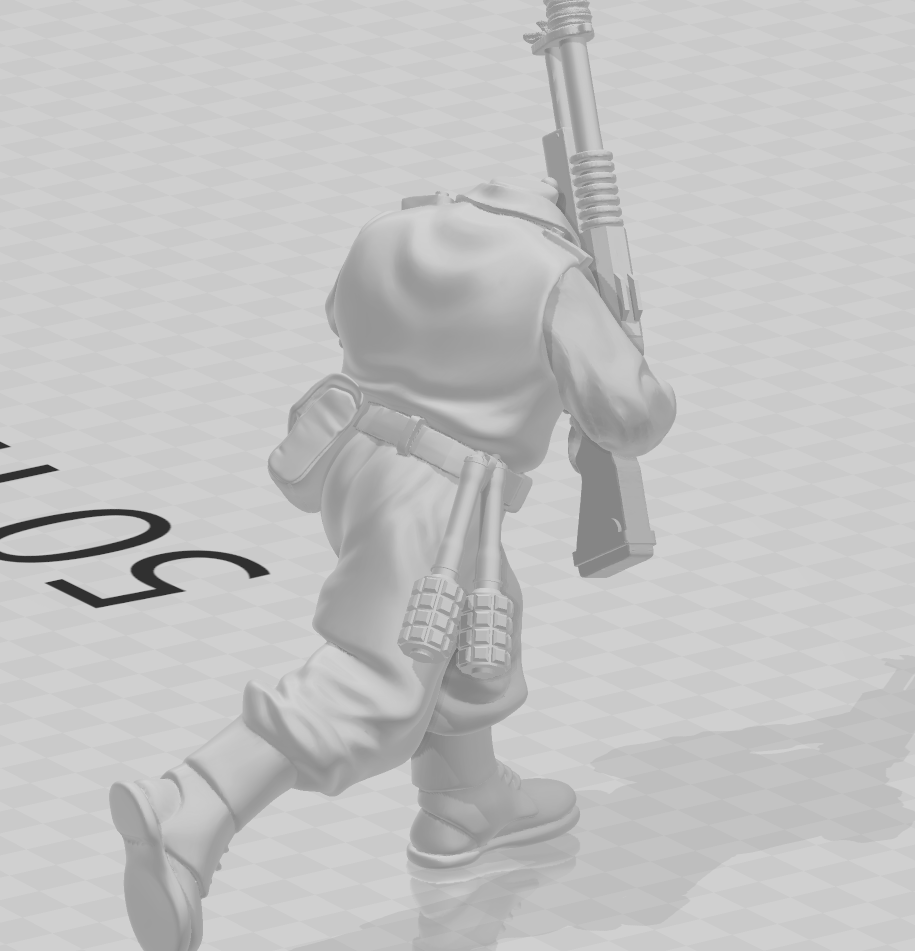 When they only have grenades I've added a second one
 Then the final option, after adding a bottle
 Then a grenade
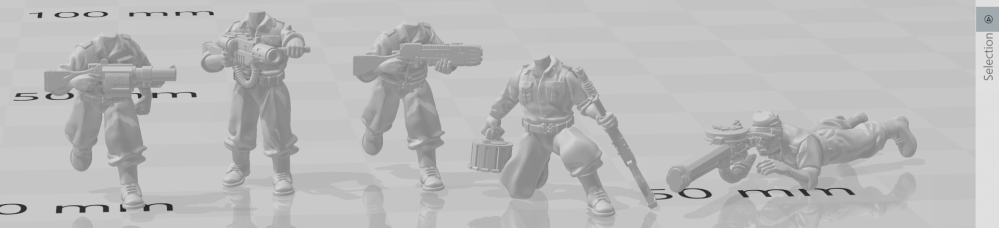
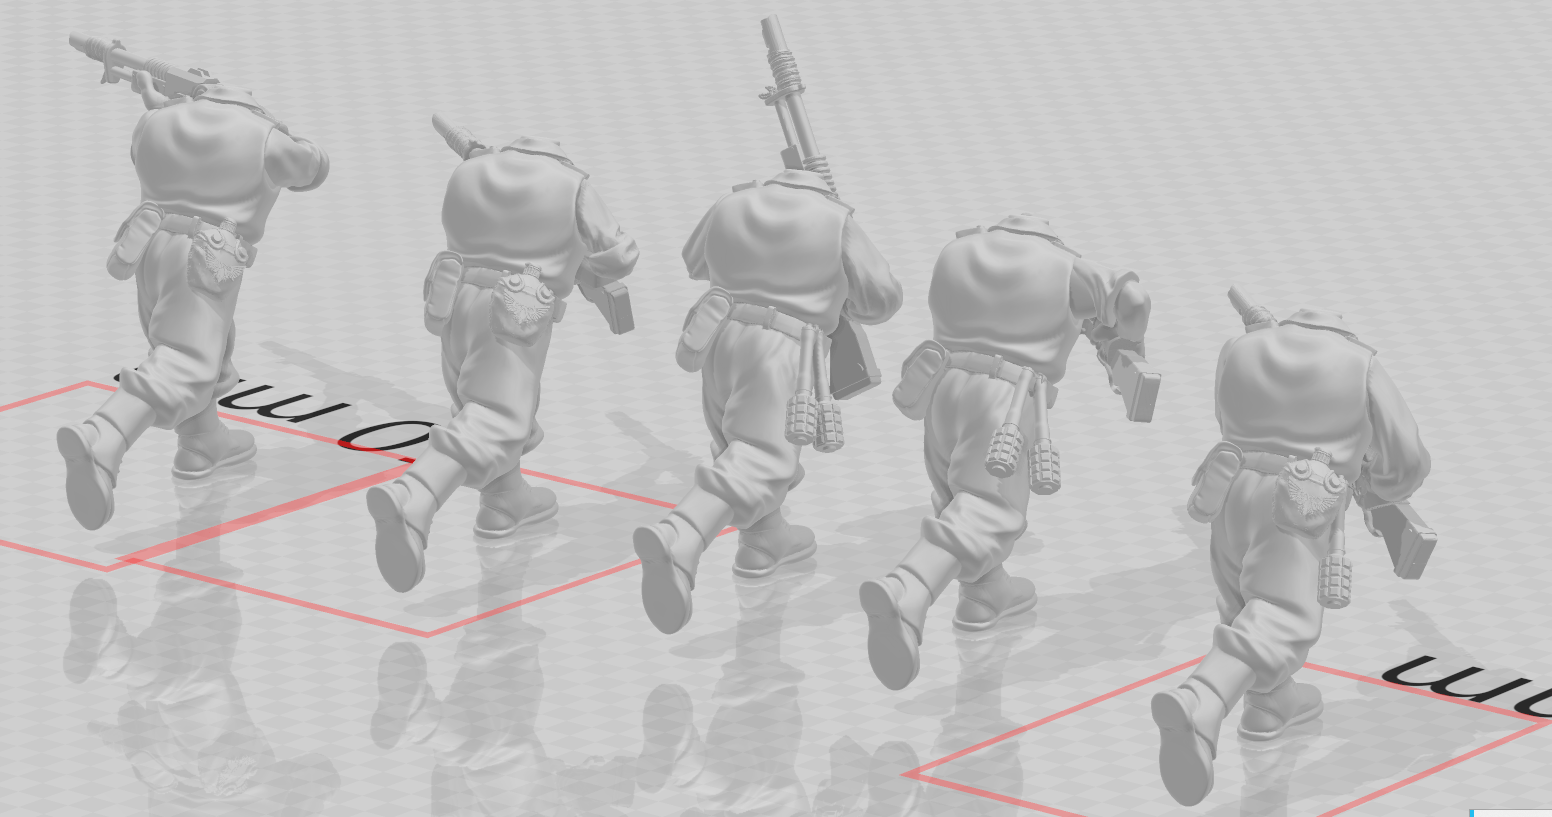 Here you can see the variations. I think they're going to be unifying but also different enough to give me the effect I'm looking for.
Still waiting on the resin to arrive but I’ve got them all supported and ready to test print. I’m going to print a plate in 15mm. I want a larger game than 40K but not too fussed with Epic or 8mm so I was thinking maybe a Flames of War/O Group style game with more figures, more vehicles but not going abstract or so big that the Lasrifles become useless.
Arming the Guardsman
 Now we have a Rifle it's time to arm the Guardsmen. For this I will be using Arms from the Irish at Jadotville kit but I also used other arms such as the ones from the US Navy kit.
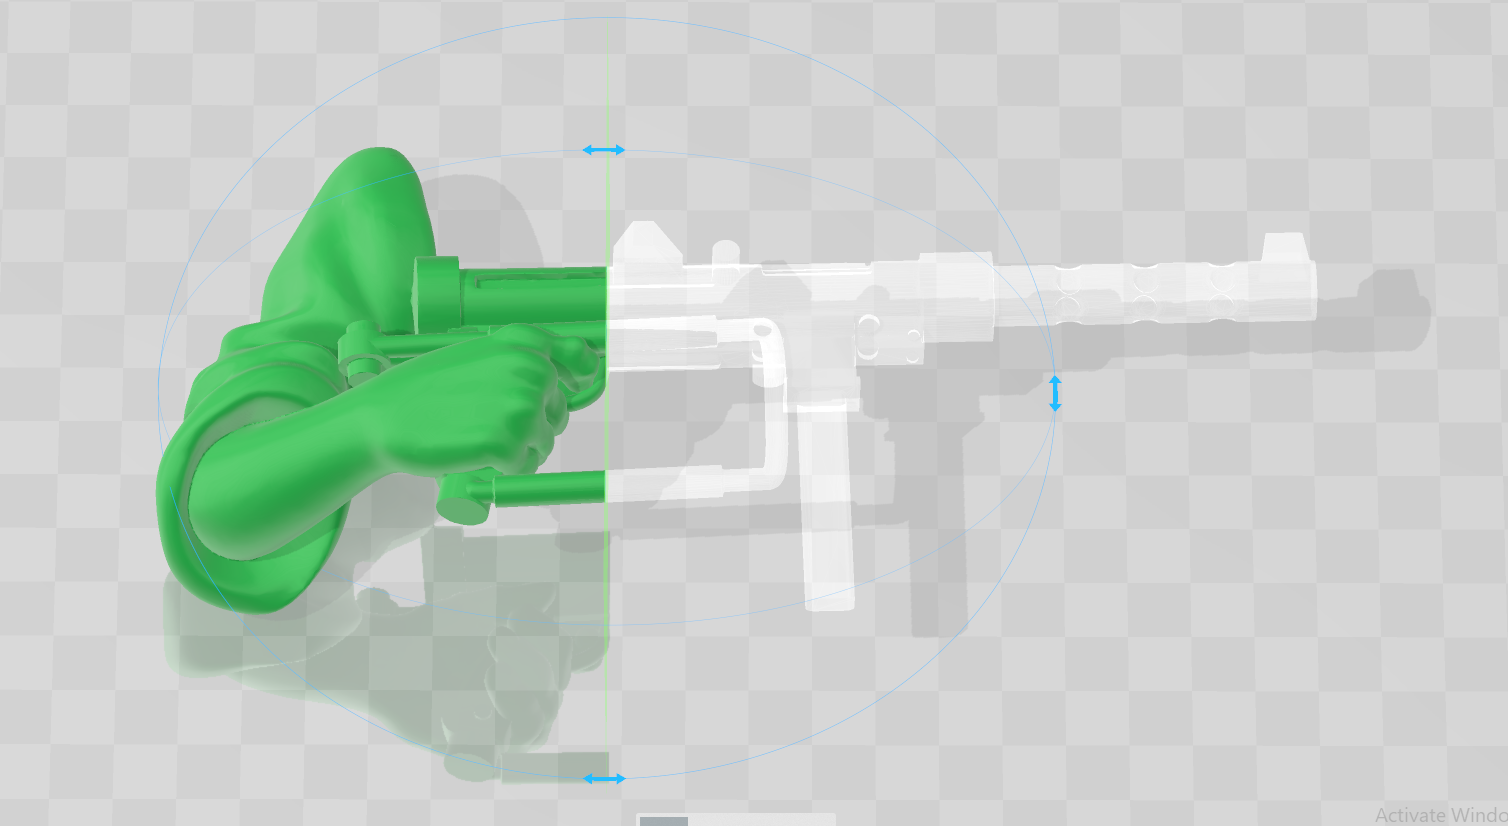 Naturally we're going to need to cut the gun away as much as we can before we merge the new rifle. The split tool is used to cut away as many large chunks as possible.
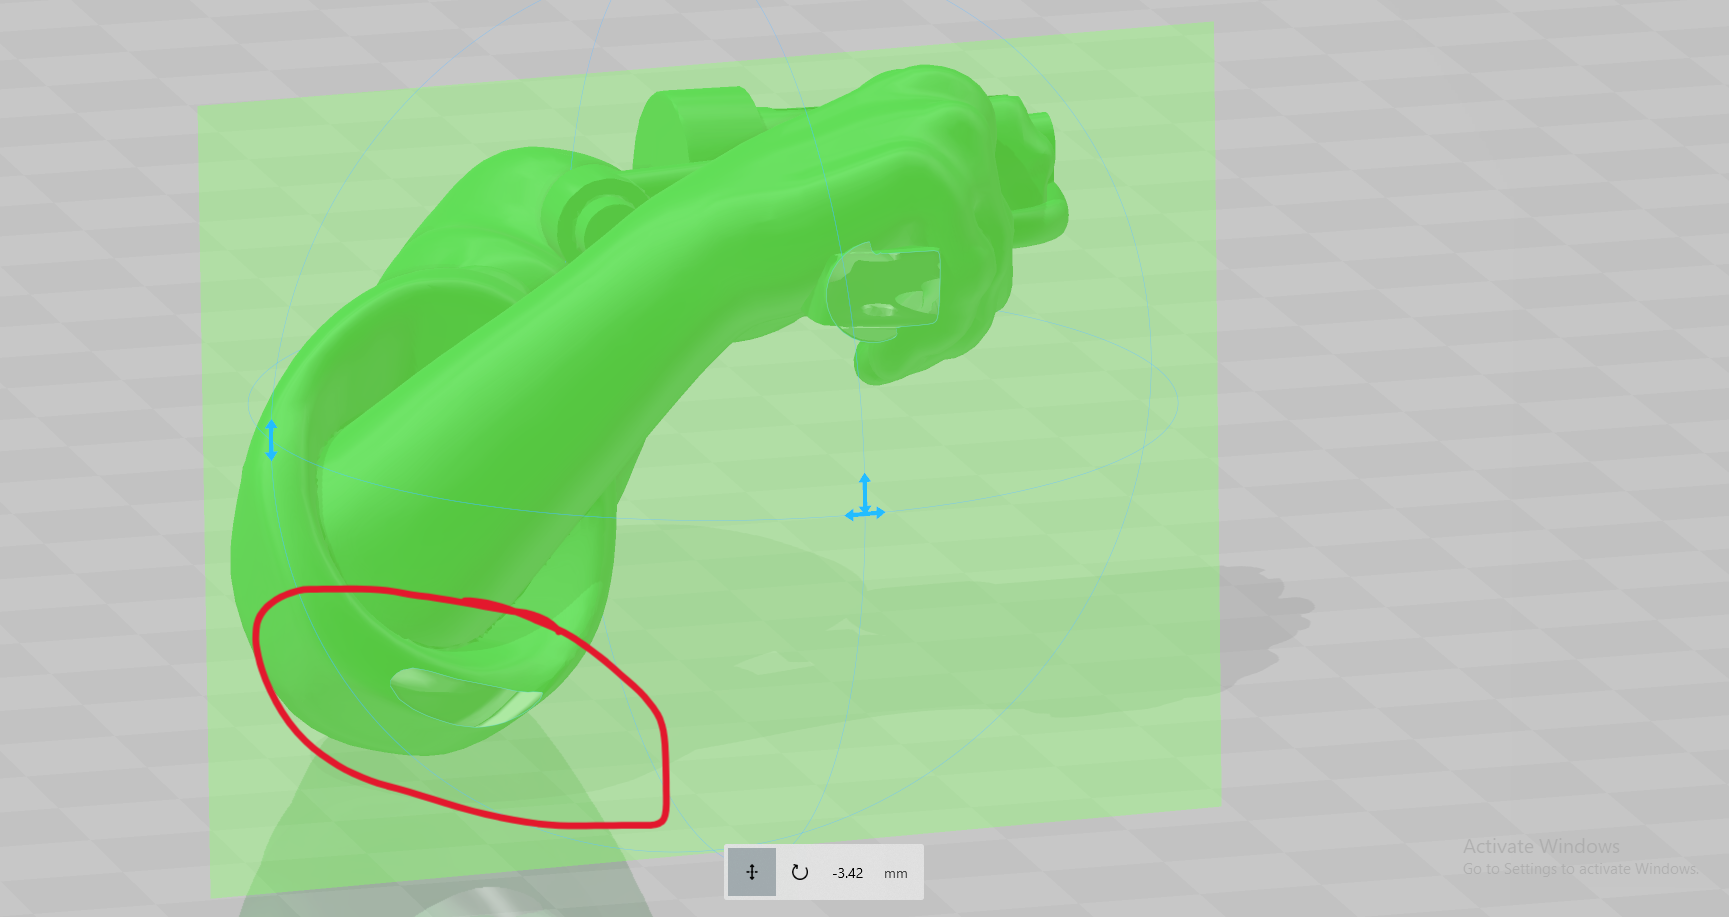 In trying to cut off the lower part of the gun we have a problem, it cuts off too much of the sleeve. We'll need our trusty cube again.
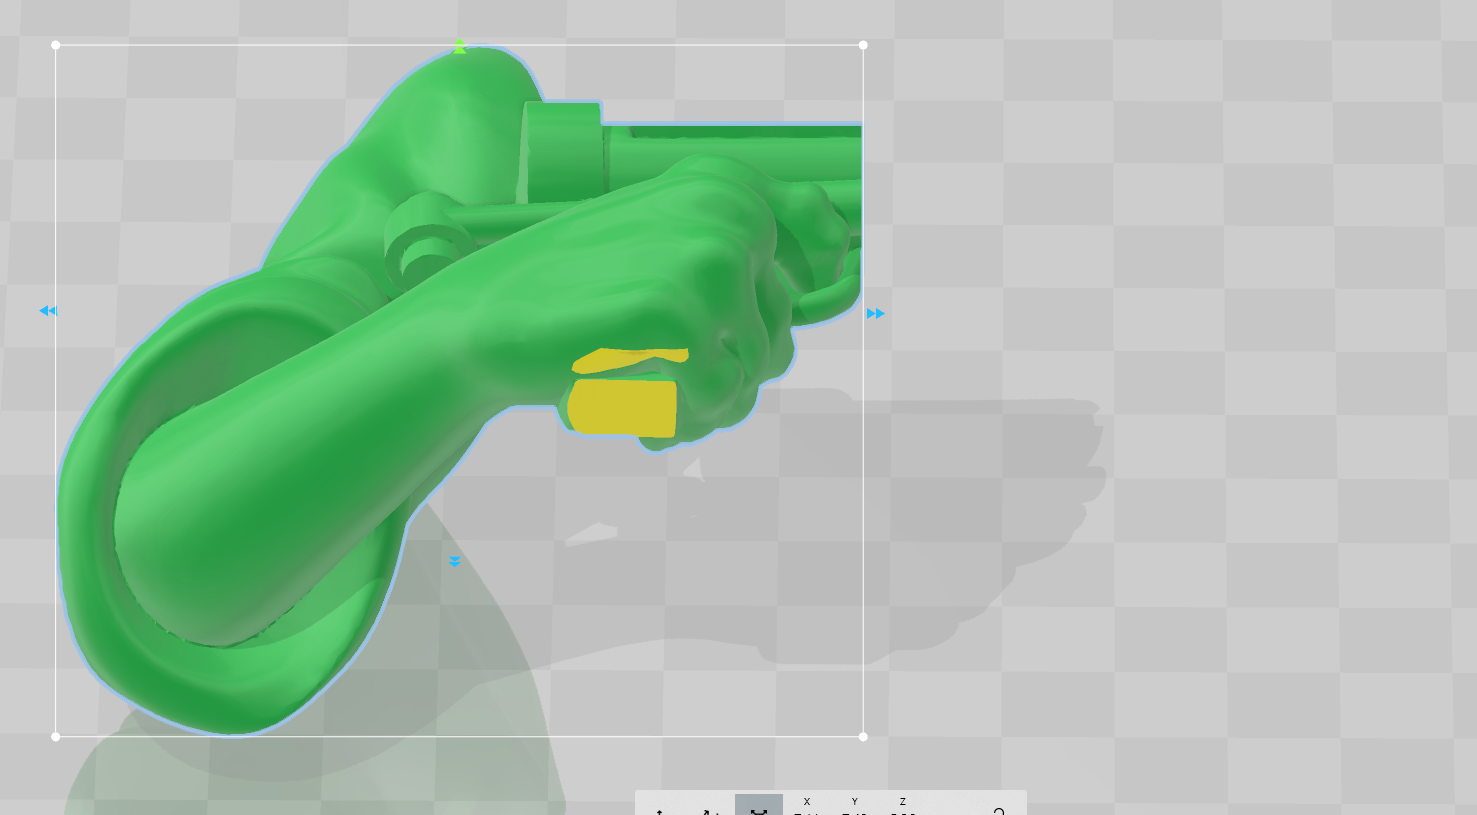 The cube gives us a much cleaner cut and preserves the arm
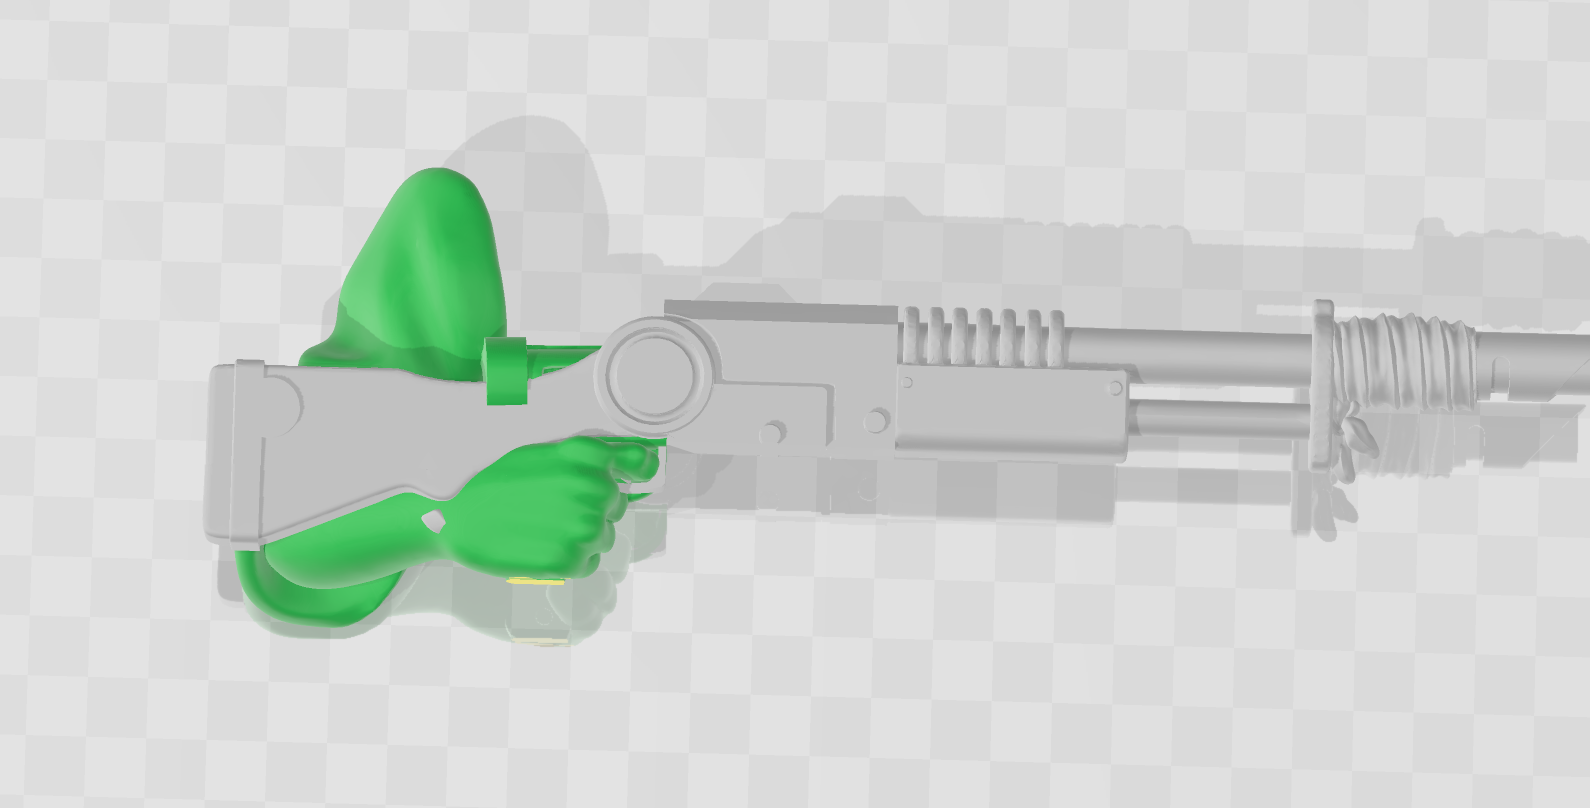 Now we can place the rifle in position and see what else we need to cut. For this pose I'm going with a casual stock over arm walking pose. We can see here that we need to remove the cylindrical part before we merge them. The rest of the original gun will be inside the rifle and merged with it we we can ignore that.
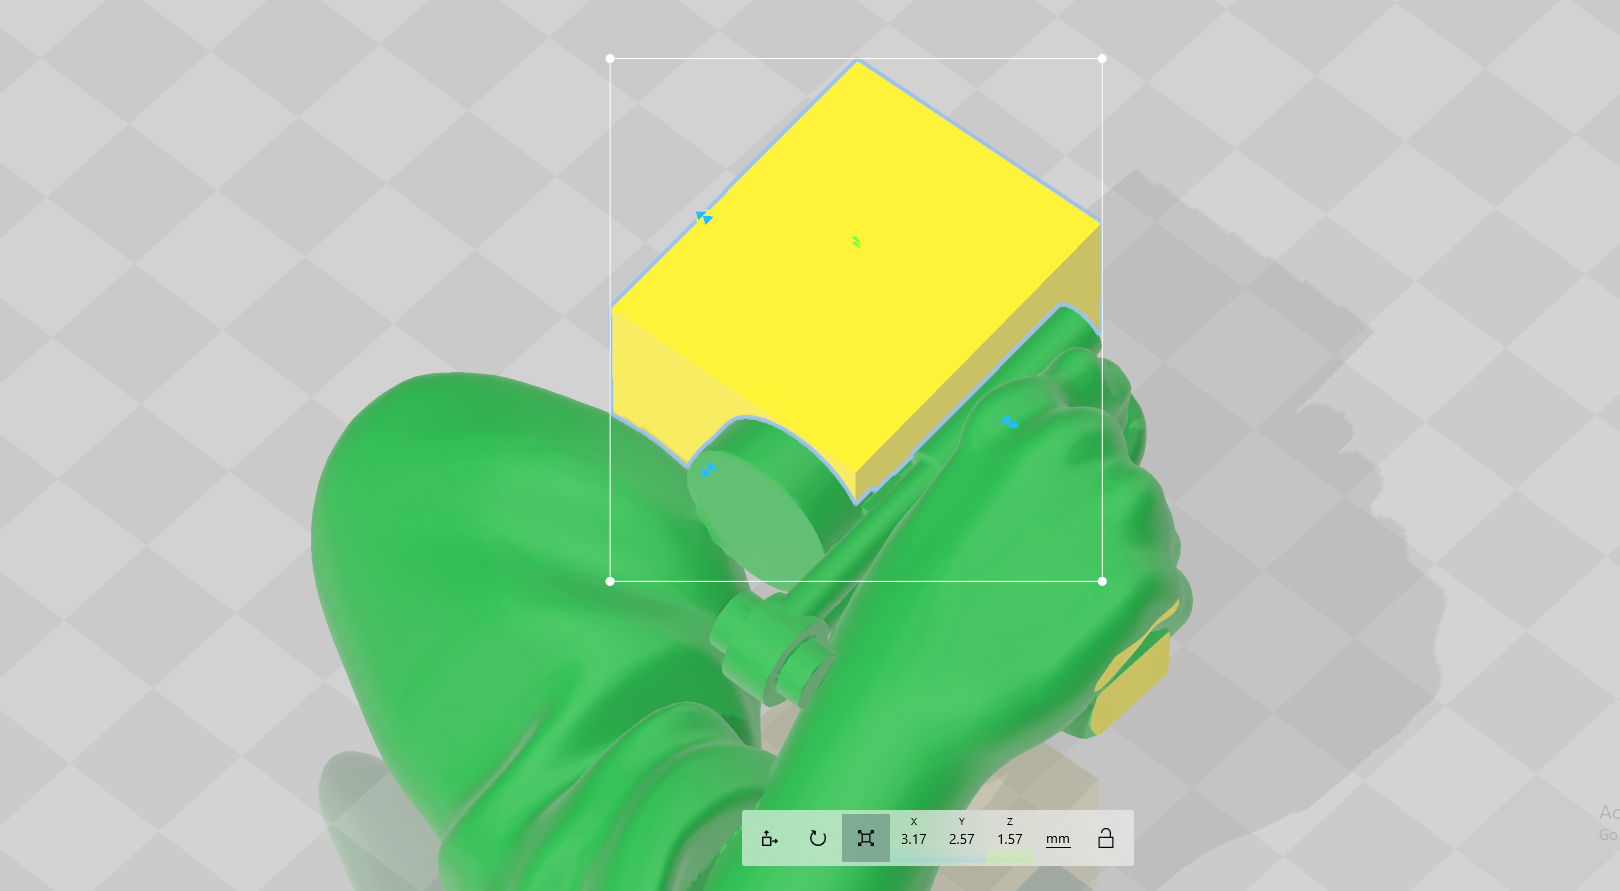 Our trusty cube has failed us. Either we can't cut out enough or we cut too much, time for a change.
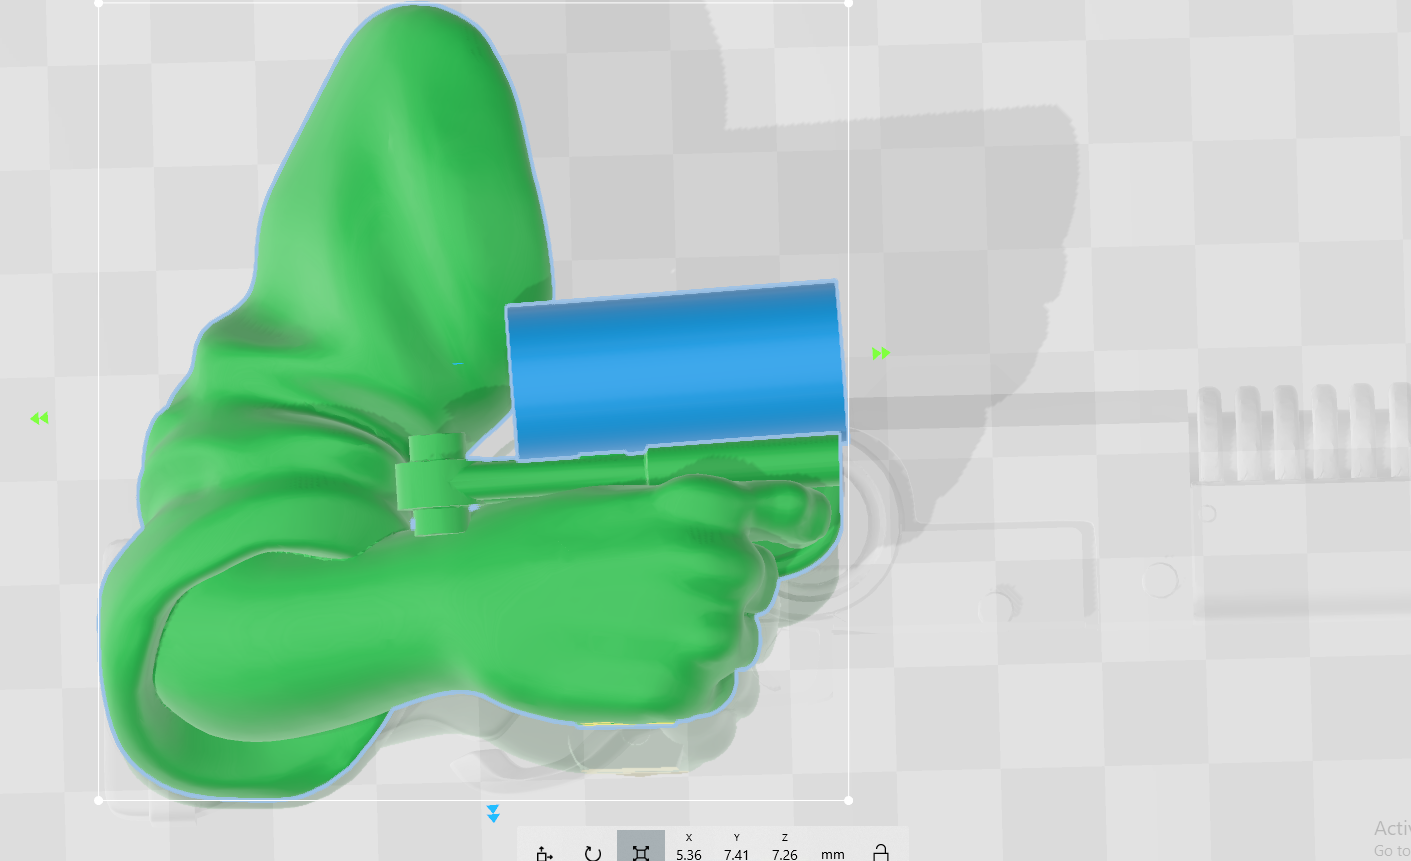 Introducing the cylinder. The same subtraction is done and we get...
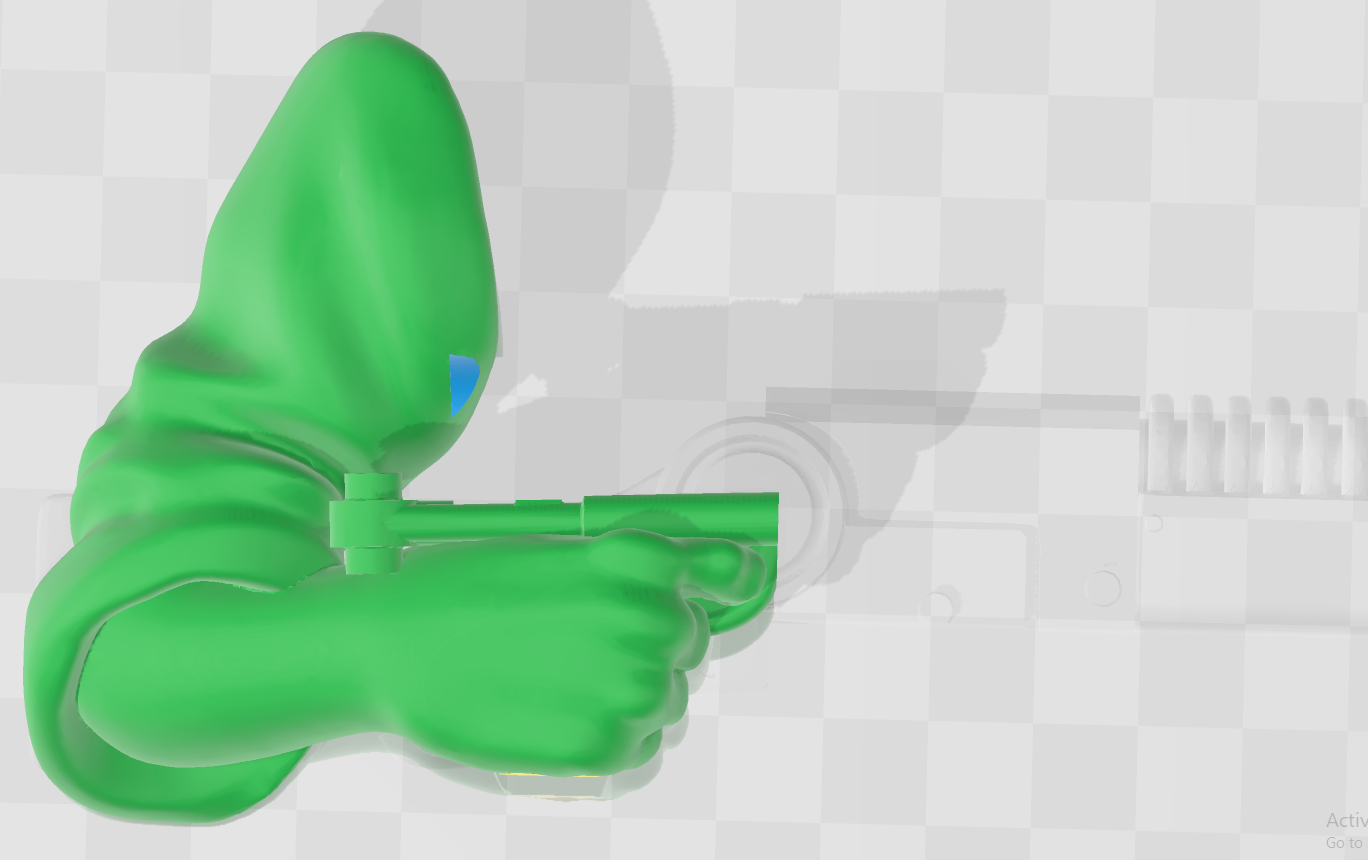 ... our arm ready for the merge. Notice the slight cut into the arm in blue, this is so tiny either it won't be noticed or will be covered up anyway.
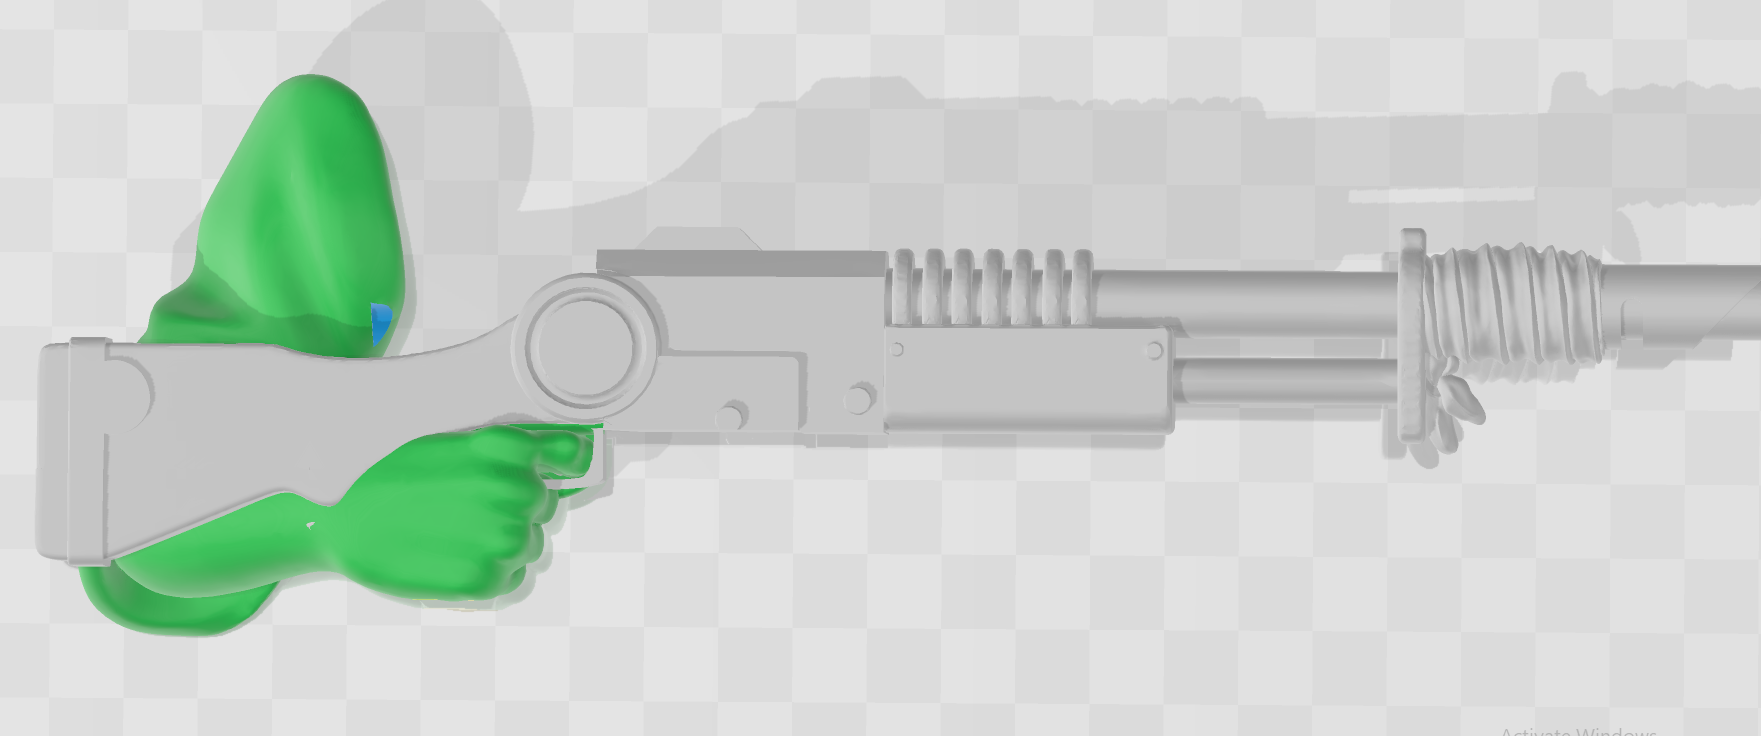 The rifle is placed in it's final position.
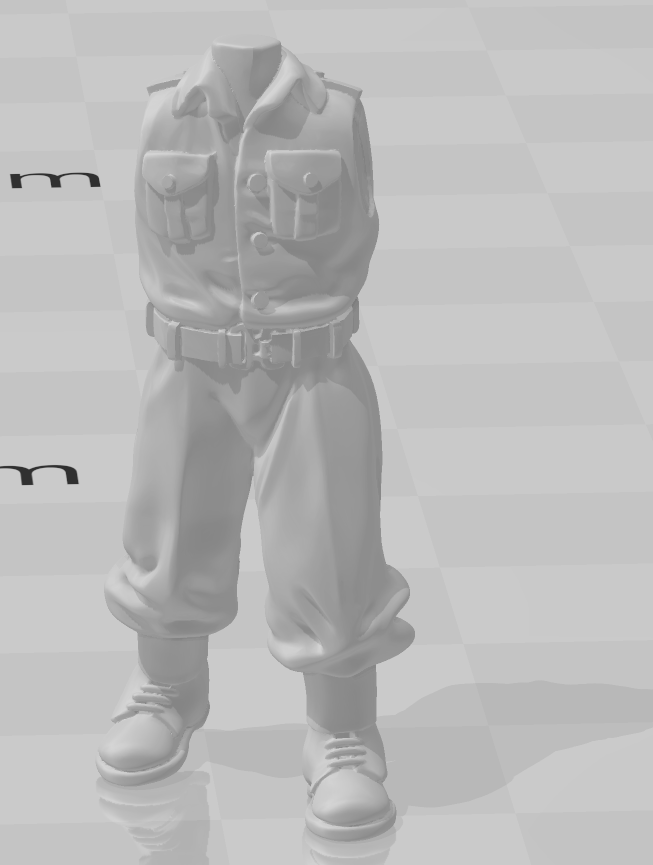 Our blank Canvas
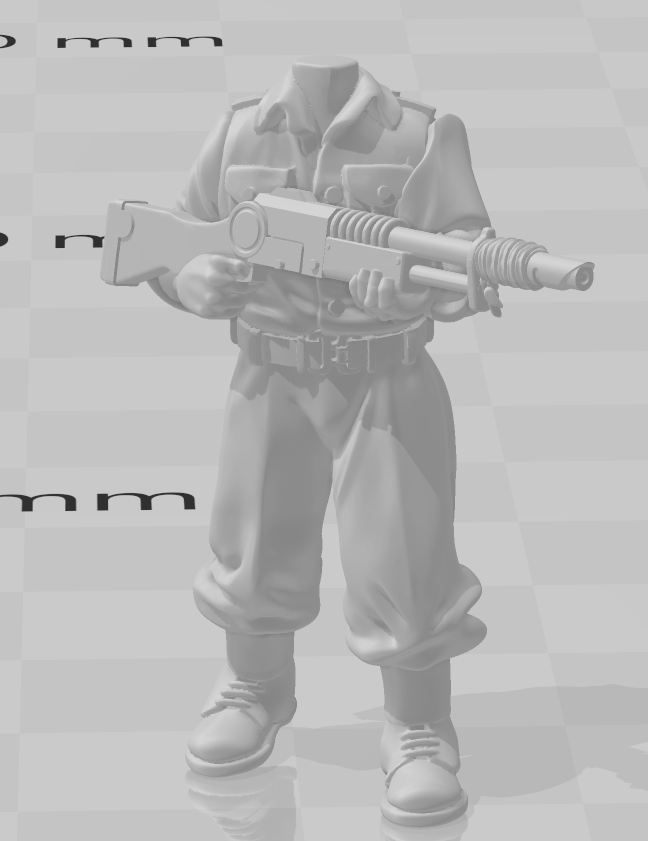 It's just a matter of lining up the arms now
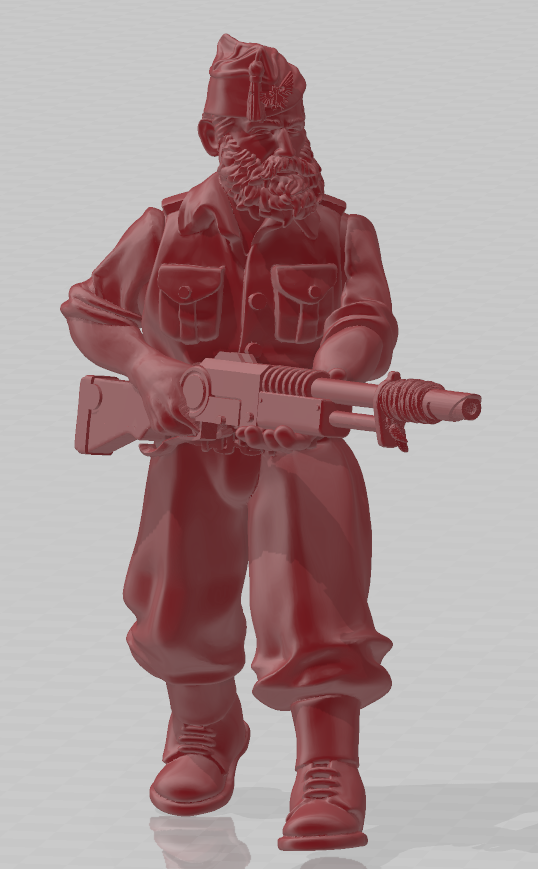 and I forgot to save the arms and it crashed but here's another example. Now we've got a body, arms and a head, everythng we need to print our minis. I have resin in the mail so in the next week or two I will print a few out.
 How to Build a Guardsman
I have limited 3D Design knowledge but I am comfortable in AutoCad, TinkerCad and 3D Builder. I chose to use 3D Builder for the entirety of this project, no need for fancy stuff like Zbrush or professional design software although I am sure they would give a better final result they simply are out of my reach to learn, time in would not be worth product out.
Anyone can use 3D Builder, it’s very easy. The hardest part is downloading it, it once was a standard part of Windows but now you need to download it individually from other sources, I will leave you to find them, they are easy and all work as far as I have seen.
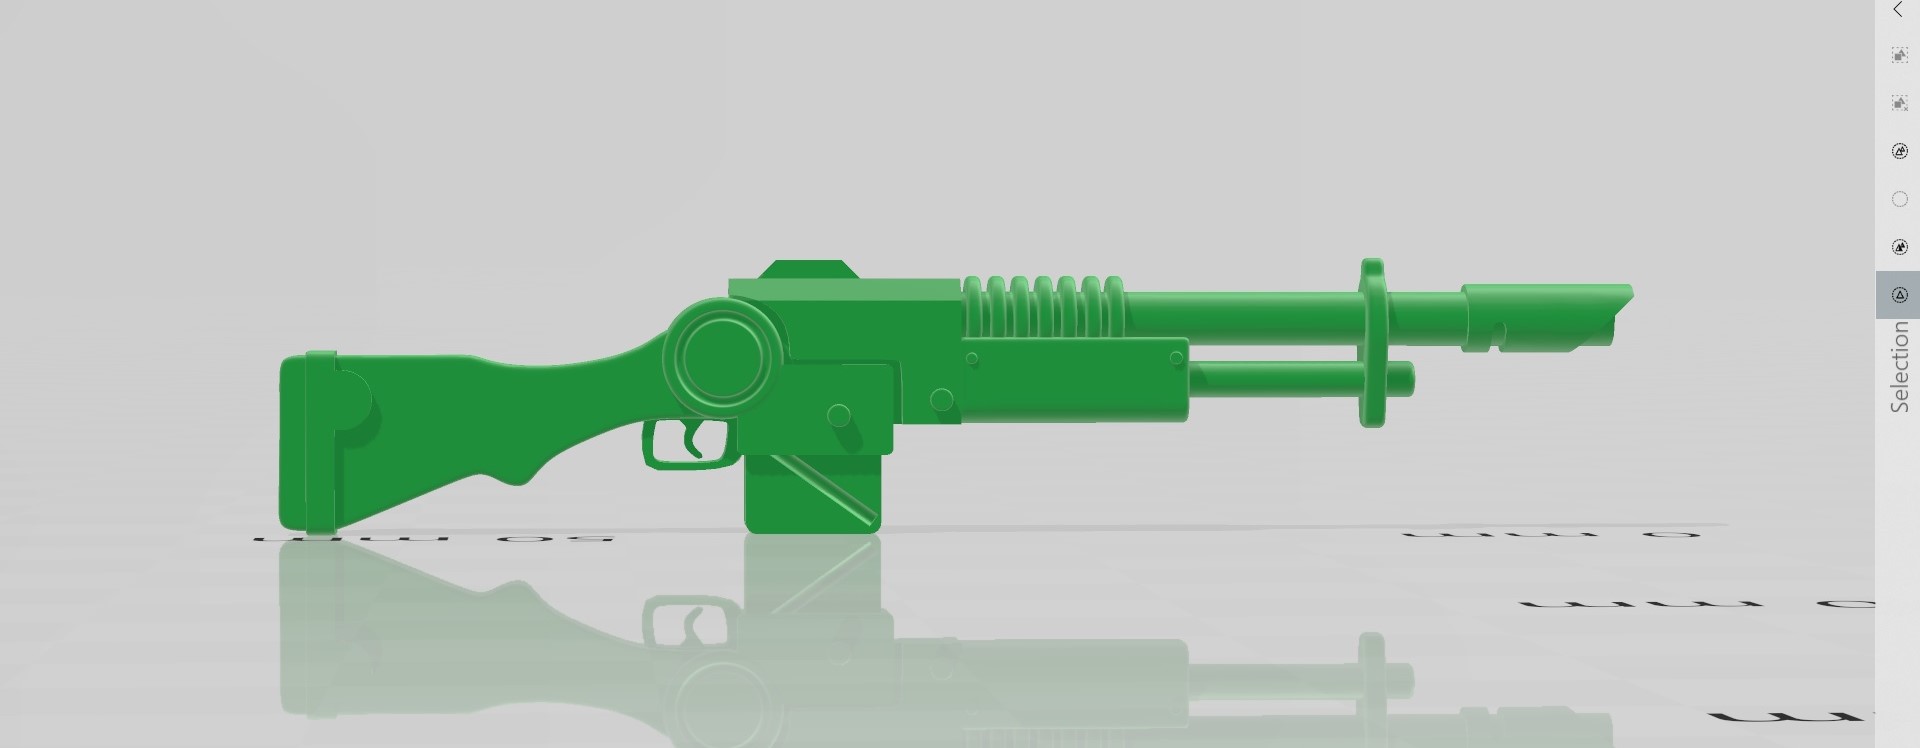 First we need a rifle to arm the men with. For this I wanted a Martini-Henry style lever. I chose a Death Korps of Krieg Rifle to use as the base. It is distinctly Sci-Fi but also very 19-20th Century bolt action rifle like. Thankfully kind people have made similar STL files available for free on sites like Cults and Thingiverse
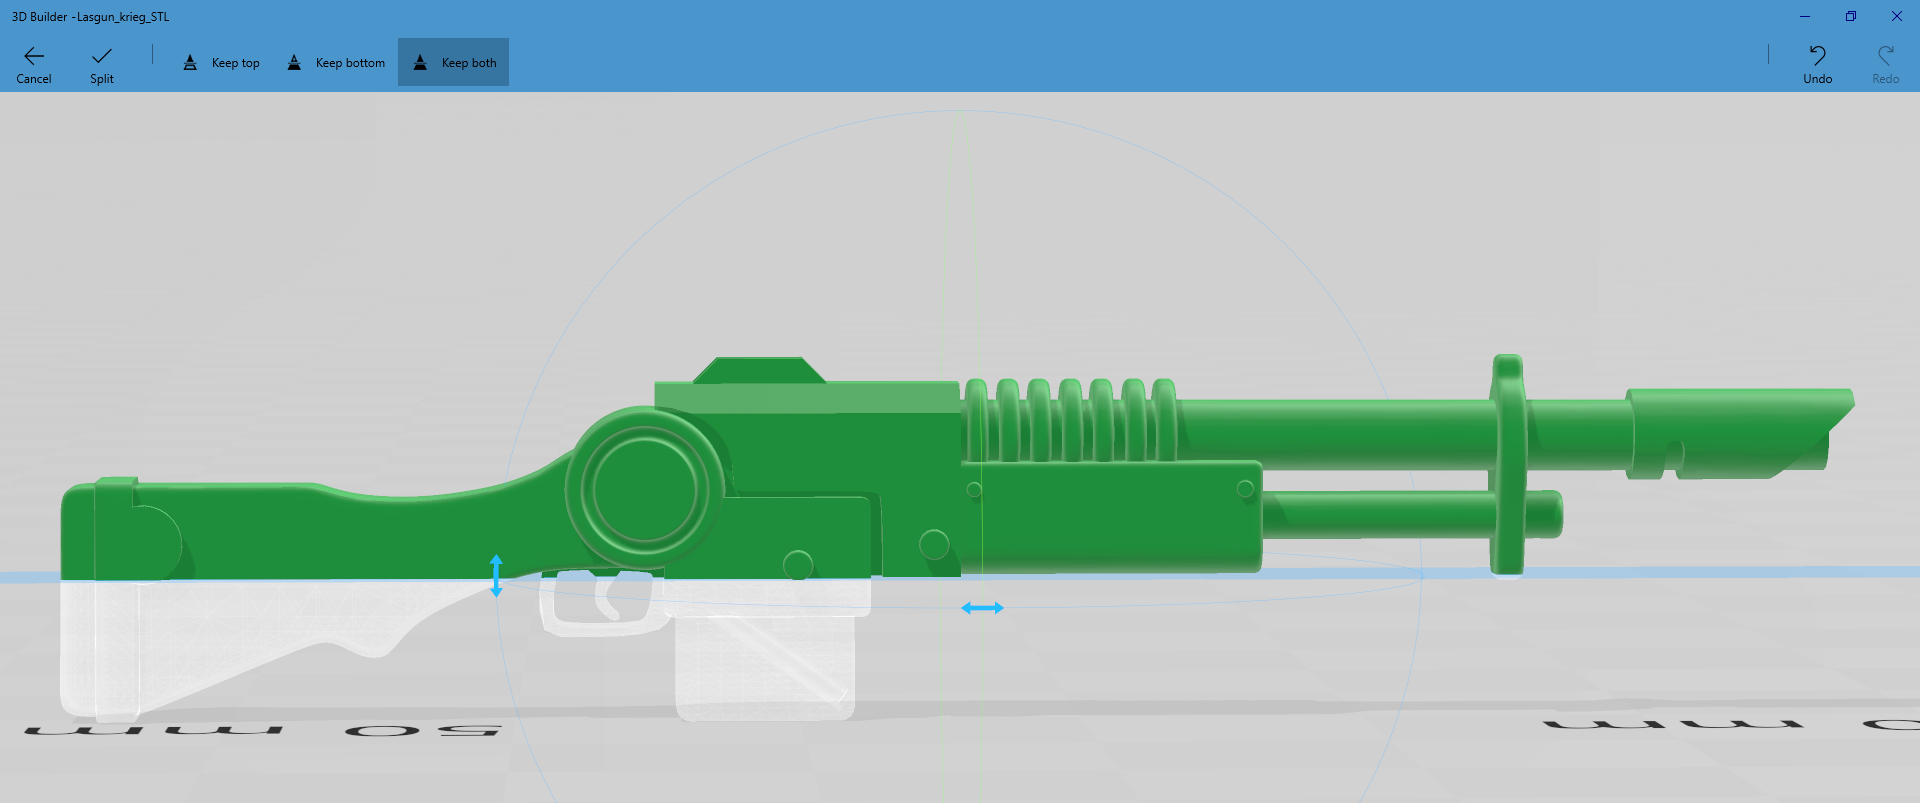 Now we need to get rid of the Magazine and add a Lever. I deliberately wanted a Martini-Henry style "snap open" lever and not a cowboy "loop lever" for fast firing. This is meant to be a civilian farm rifle produced for frontier worlds and the PDF not for combat. Again taking inspiration from the Horus Heresy Las-Locks and Gaunt's Ghost series. The issue is if we use the split feature then we lose too much of the gun's stock. So instead we need to be creative.
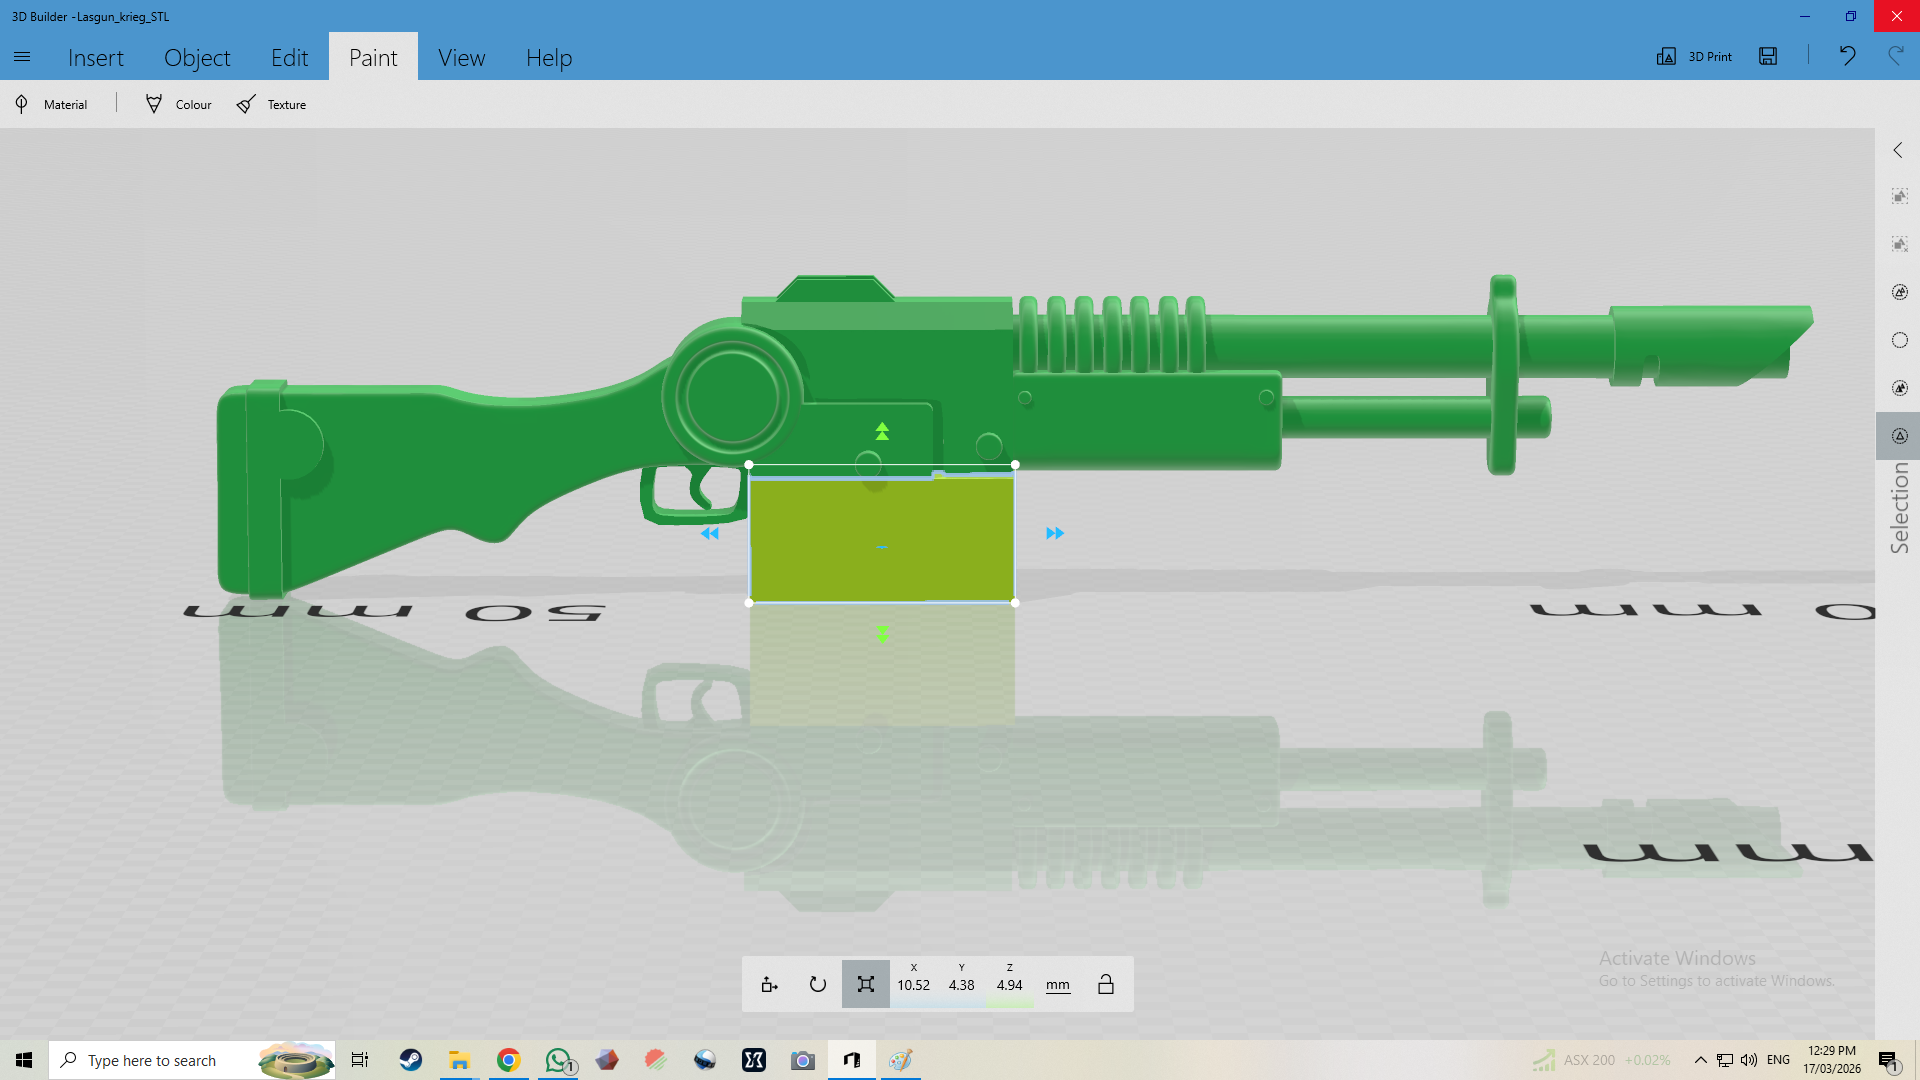 Instead we create a square and make sure that it fully covers the magazine well.
 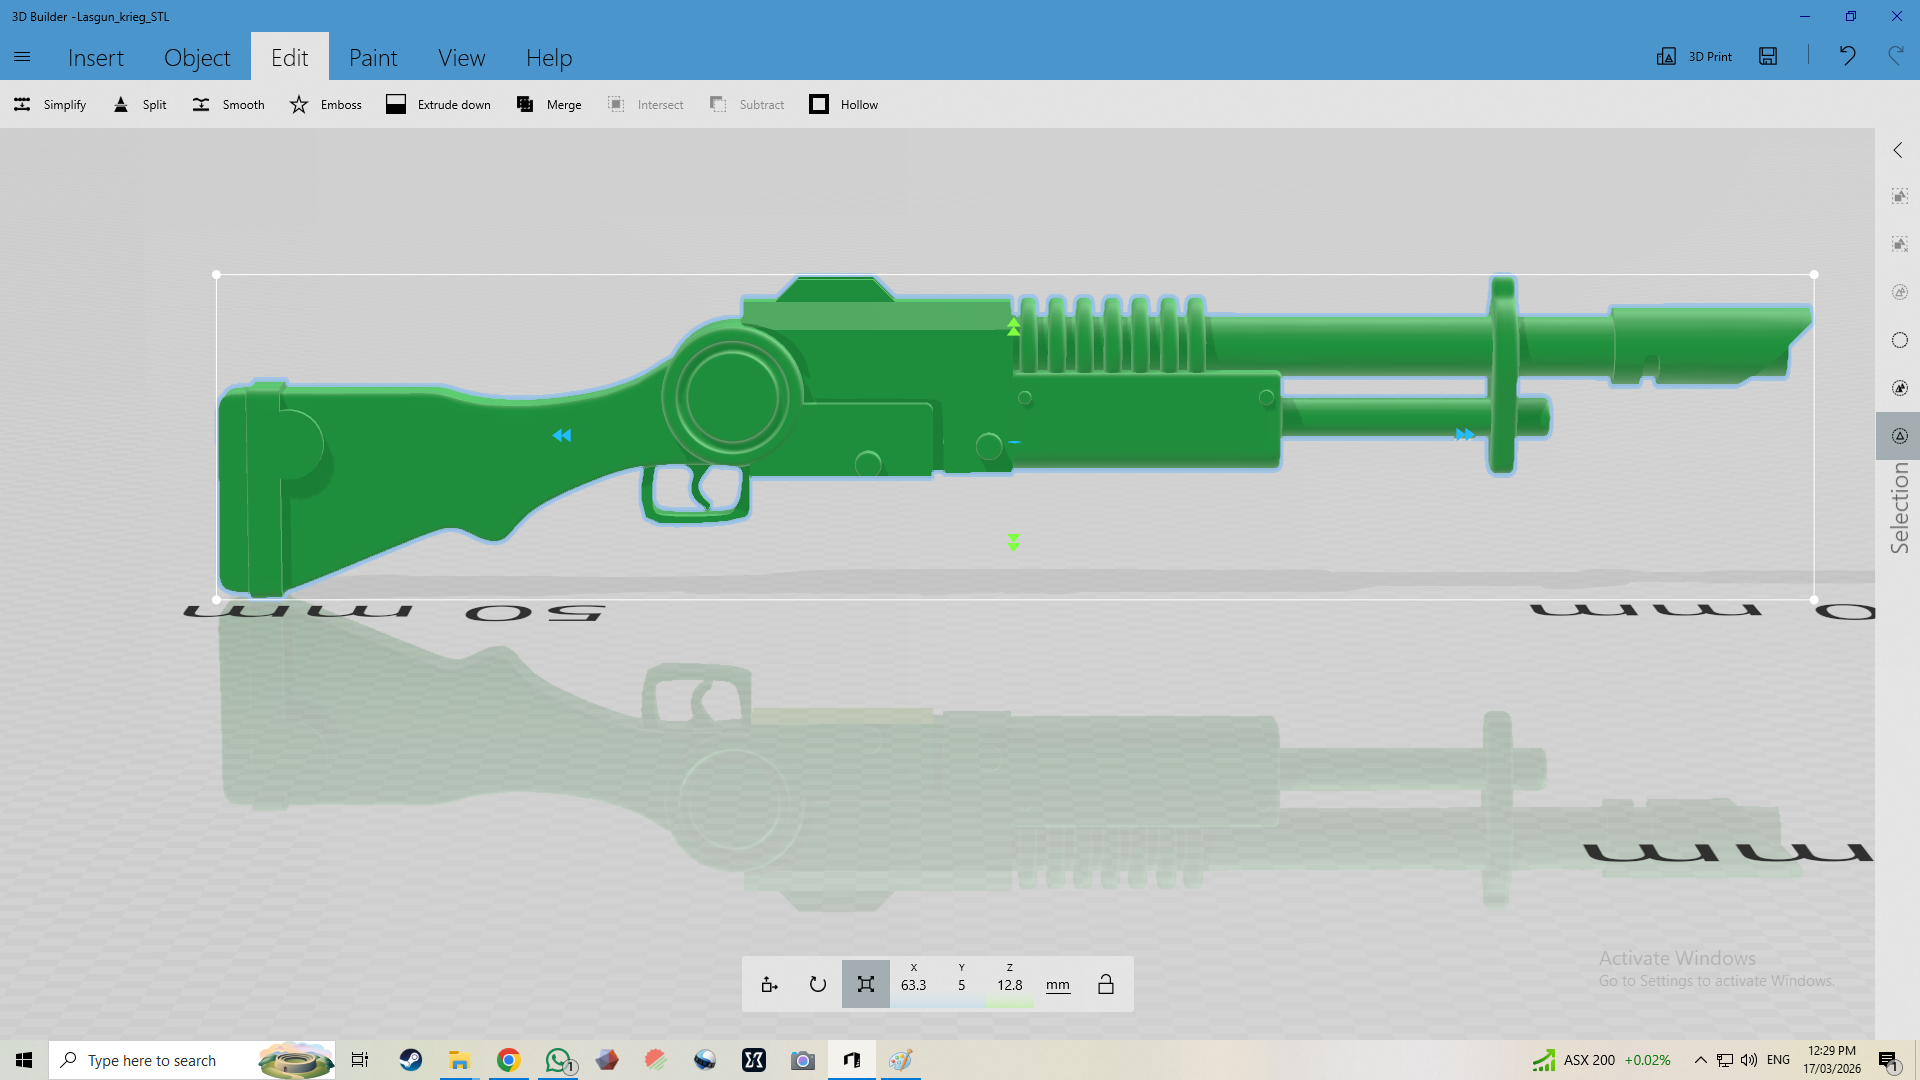 Then hit subtract. Here you can already see that it looks a lot less military and also make it look a little less Death Korps as well.
 The same process is followed for the trigger, I want the back to be open and part of a lever.
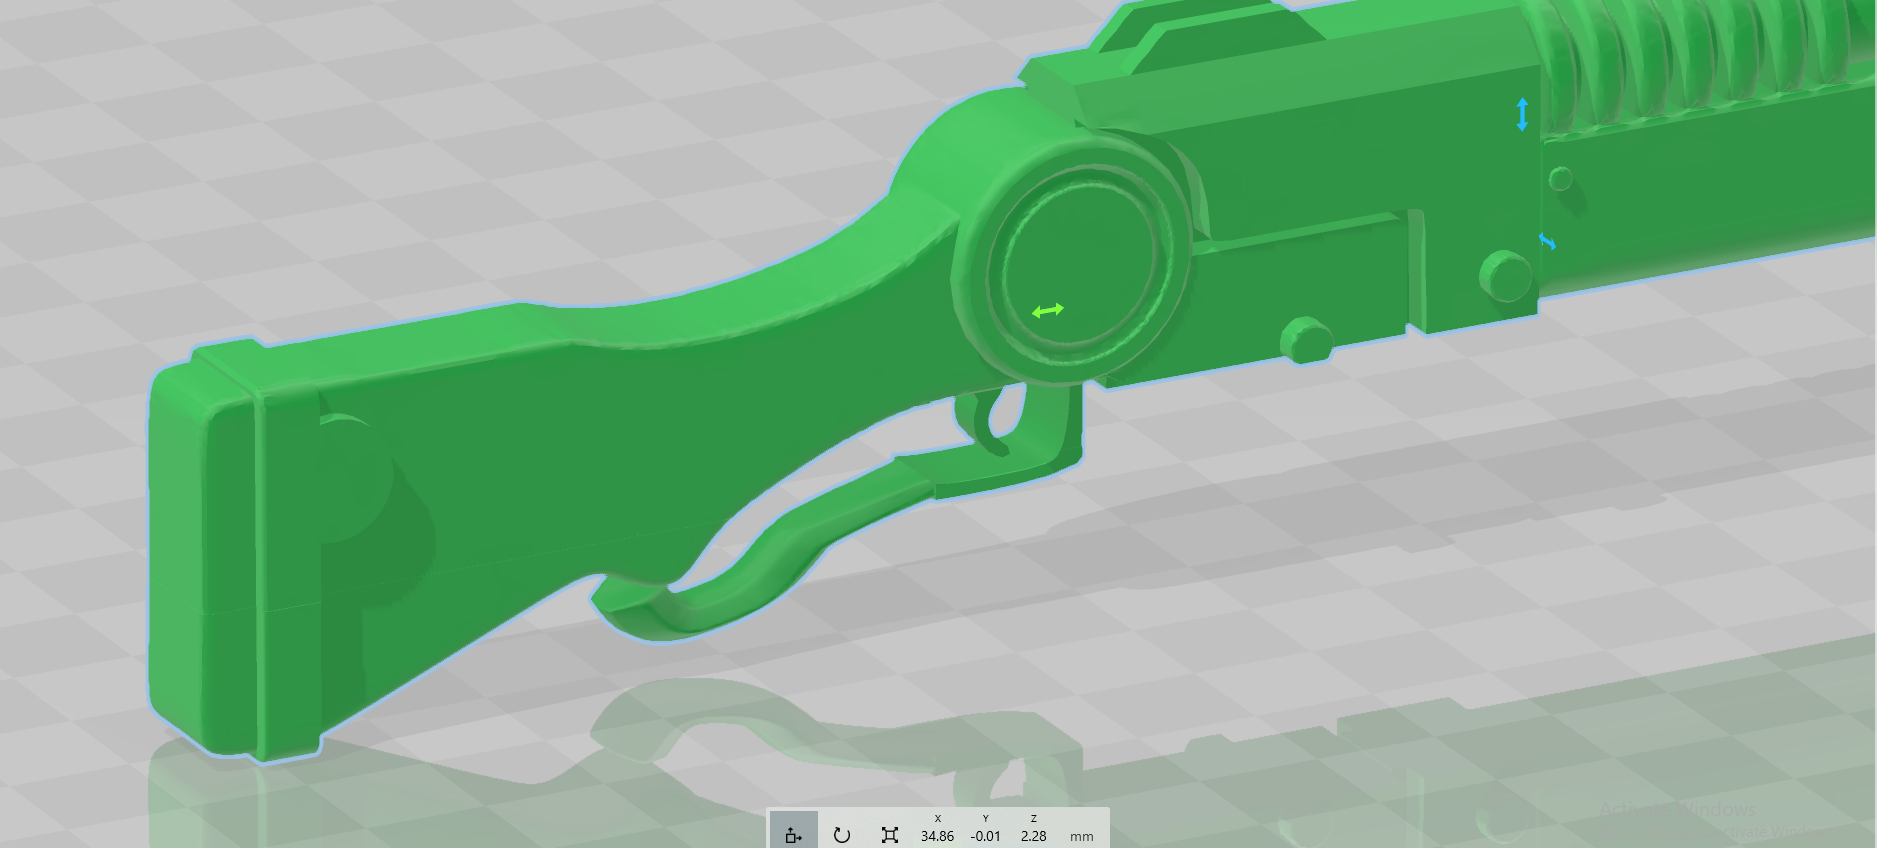 Some of this sort of stuff is me recreating things I have already done years ago. I can't find the part I used for the lever anywhere but you can easily find an appropriate thing online for free. Align the new part then merge the two pieces together. I looks a little rough but we're talking millimeters or fractions of them also all of these guns are going to have hands holding them here which will help hide parts like this. We could spend time and effort in making it perfect but just like converting minis, sometimes you can just hide the rough bits.
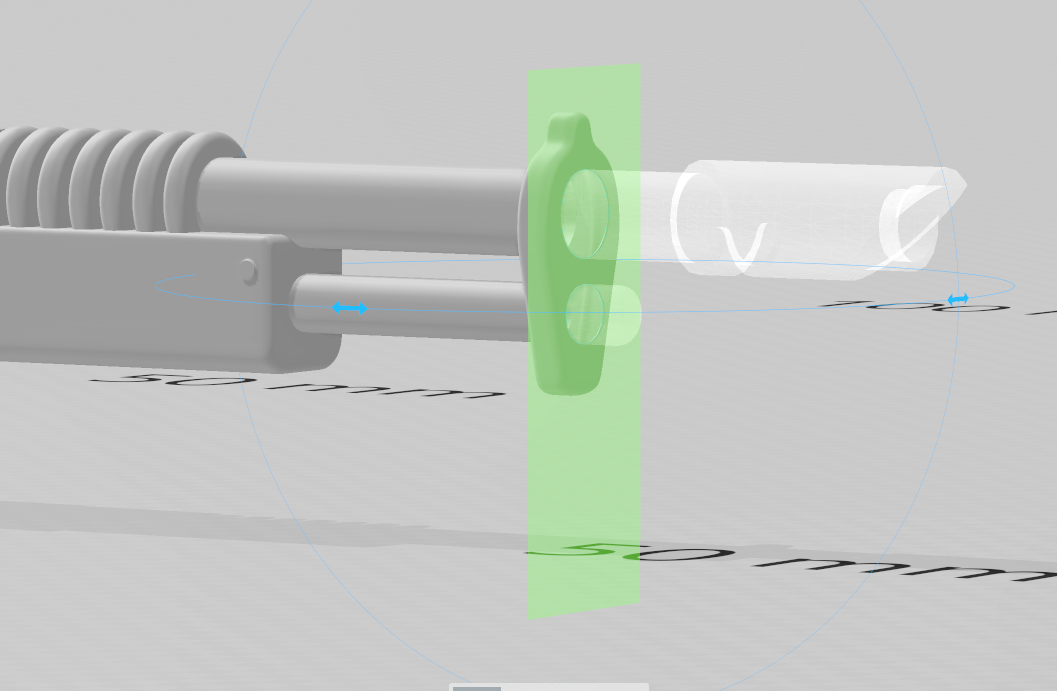 I wanted to keep the traditional Lasgun muzzle, it's so iconic but I wanted to add something to the front of the gun.
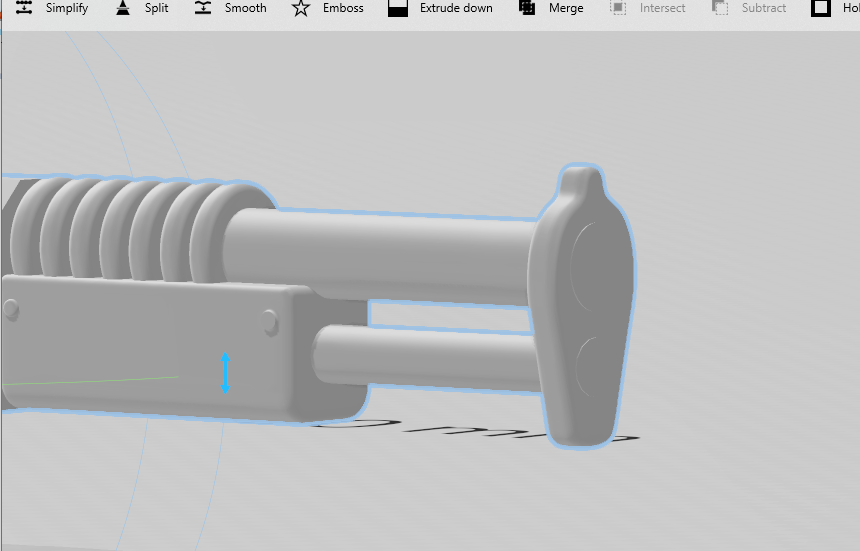 If you look closely I've left some remnants of the former barrel to be a guide for aligning the new one. It will be covered and even if it wasn't it's so tiny you'll never see it, another example of making life easier for yourself.
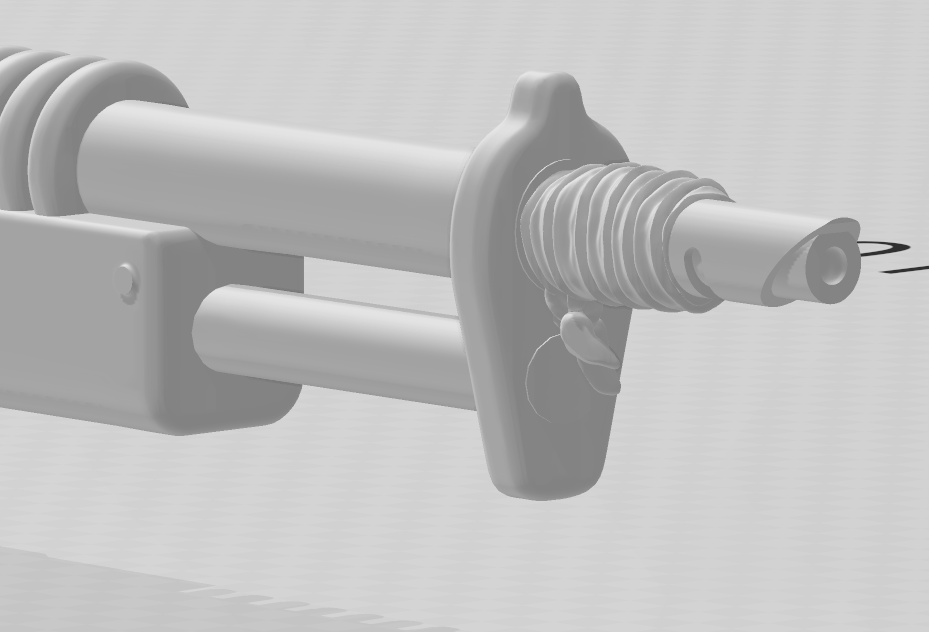 Our first problem. The Tallarn Muzzle with a cloth on it that I downloaded is too small. This happens a lot but it's easily fixed, using the scaling function we can make things bigger or smaller and test them until we find one we like.
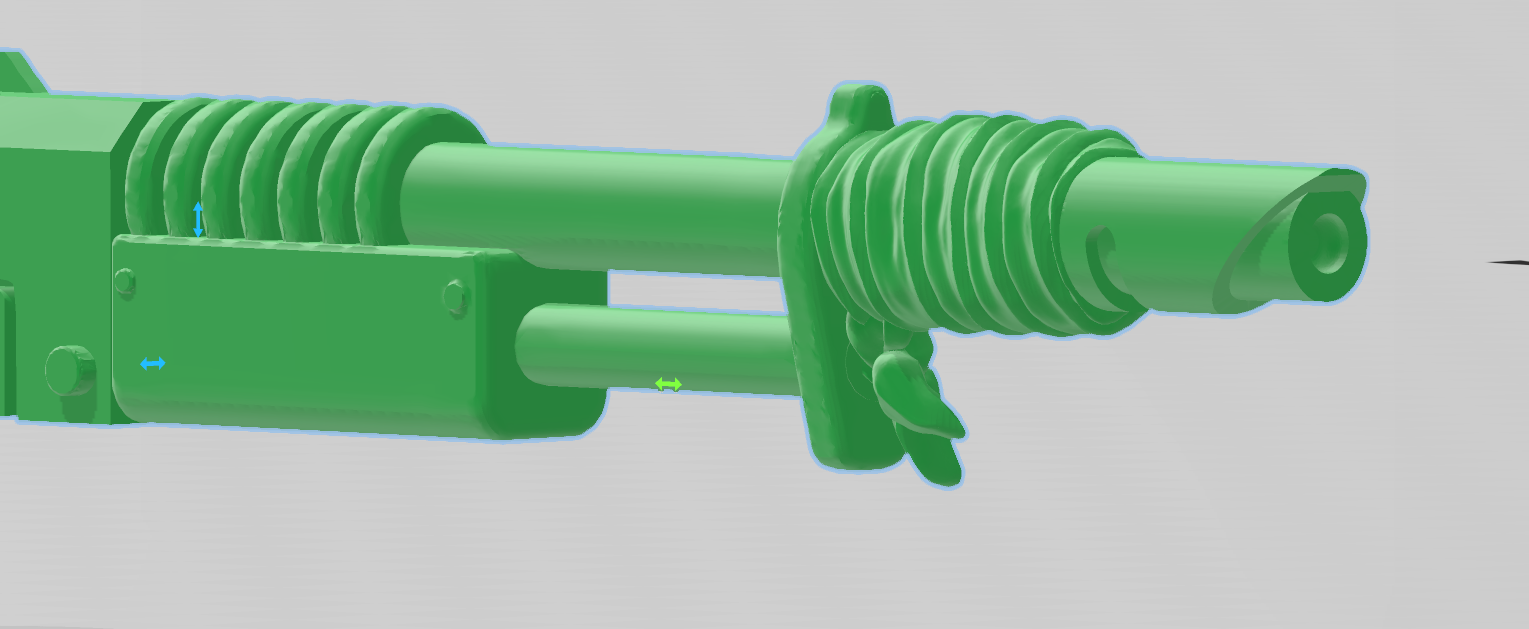 Much better. By moving the muzzle back into the gun you can line up the barrel with the circle we left there earlier. It's been years and I still haven't decided exactly what/why the cloth is. Spare bandage, useful thing to have, homemade rifle sling. I suppose the answer is the cloth is for whatever the trooper decides to use it for.
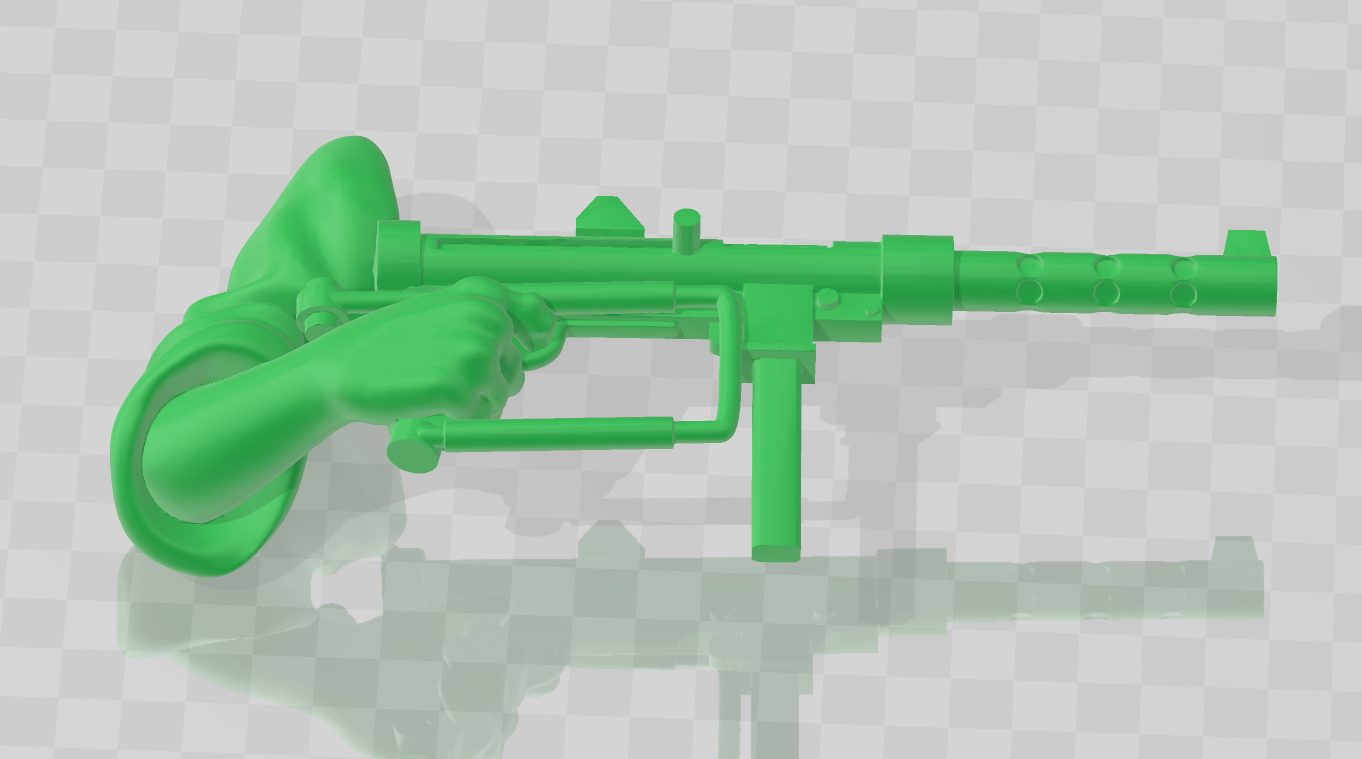
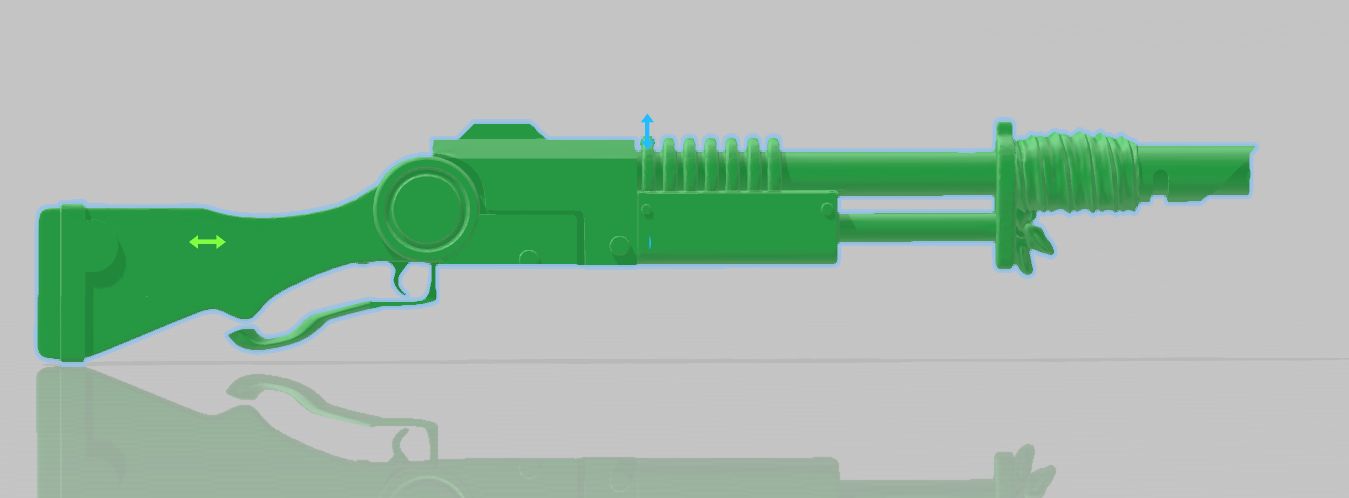 And there she is. Your very own custom Lasgun that makes your Custom Regiment look unique but also keeps them tied in to the 40K Universe. The best part is that this is super easy to do and you only have to do it once! You can picture someone firing this then snapping the lever down and up again like the Movie Zulu. This is what most appeals to me when making my own custom units, they need to fit into the universe, they need to make sense and they need to come to life, otherwise what's the point?
 The Vision
The project began a few years ago when the ‘Irish at Jadotville’ was released by Wargames Atlantic as an STL kit. I have always wanted to do a custom Imperial Guard Regiment ever since I first got into 40K more than a decade ago and these guys struck me as the perfect basis for that dream to become a reality.
I had a few main points I wanted my Guard Regiment to hit which is why it wasn’t really possible to do in miniature until the rise of 3D Printing.
-
First: They are a PDF turned Guard unit made up of Veterans or the Sons of Veterans on a newly colonised Veteran World
-
Second: Because they are PDF their weapons need to look a little off, a little cheap or purposefully not the best. Think of the units we meet in the Gaunt's Ghosts series.
-
Third: They are a Light Infantry Regiment of Farmers/Pioneers so less armour and less uniformed to a degree.
 This is the Kit that gave me the Inspiration
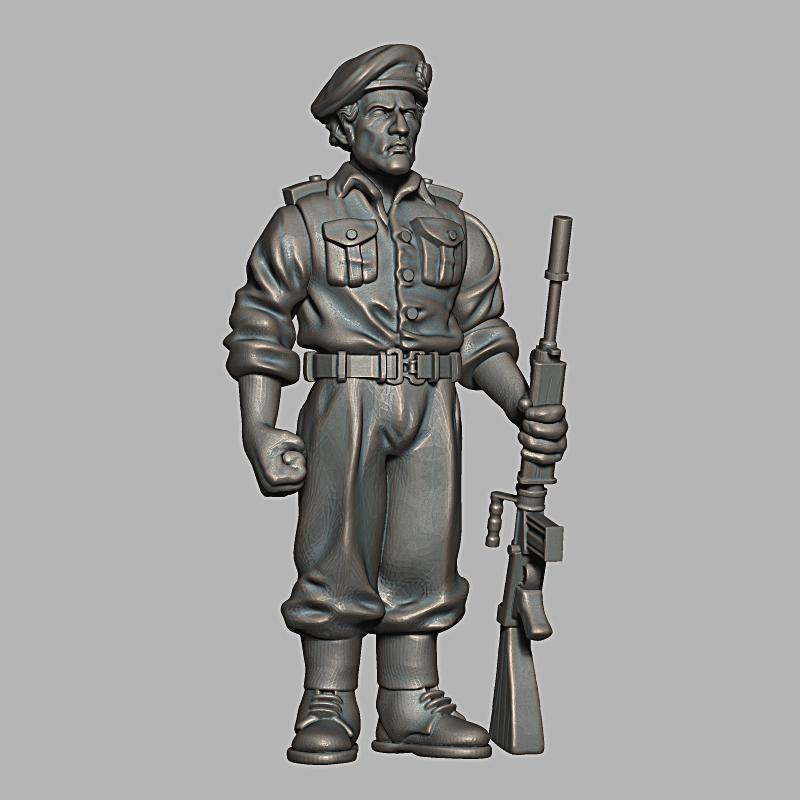 Forget the head for a moment. The Military Pants and Boots with the more Light Infantry style tucked in Shirt which is still recognisably Military with the Shoulder Straps. The option for rolled up sleeves (more on that next). The look just struck me as the canvas that I could use to make this unit.
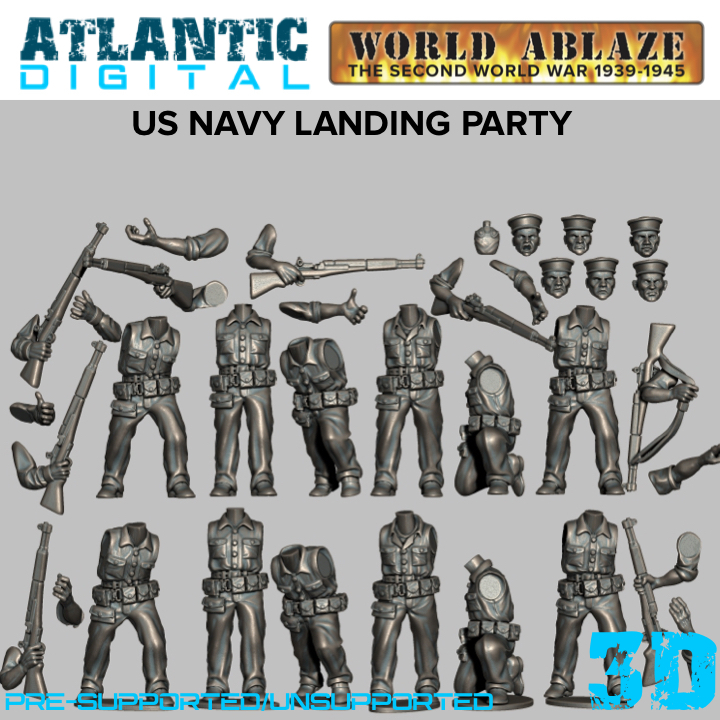 Combining it with other kits like the arms from the WWII US Naval Landing Party gave more rolled sleeves but also the option for unrolled sleeves. A lot of kits have gone into this project, one of the benefits of a Tribes subscription.
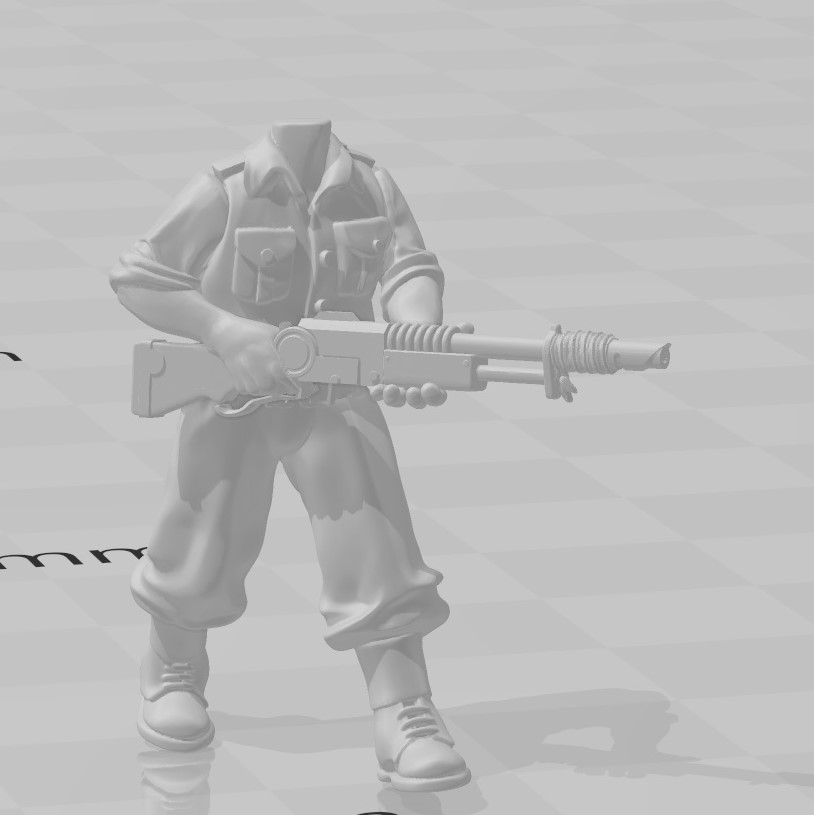 The basis for the project came to life.
 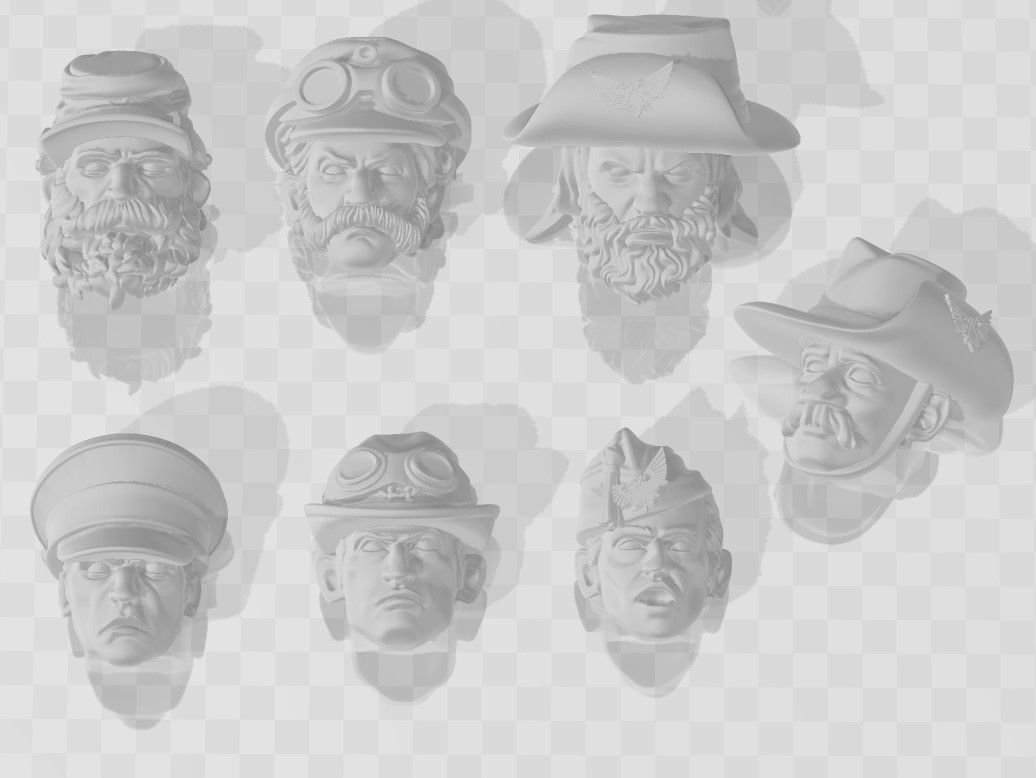 Some examples of different headwear. I wanted to keep it varied but also cohesive. Various different farming style hats or garrison military hats. There are more than this but you can see the style, a lot of them are also cut and put on different heads. The Bearded slouch hat is the head from a Dark Age Irish kit. The Side Cap in the bottom is a Spanish Nationalist head which is an example of simple things that tie it all together, I used a lot of Aquilla's to cover either national symbols or as pins to hold hats in place. Any little bit of tie in to the 40K universe will help make the force look 40K even if it is made from outside parts.
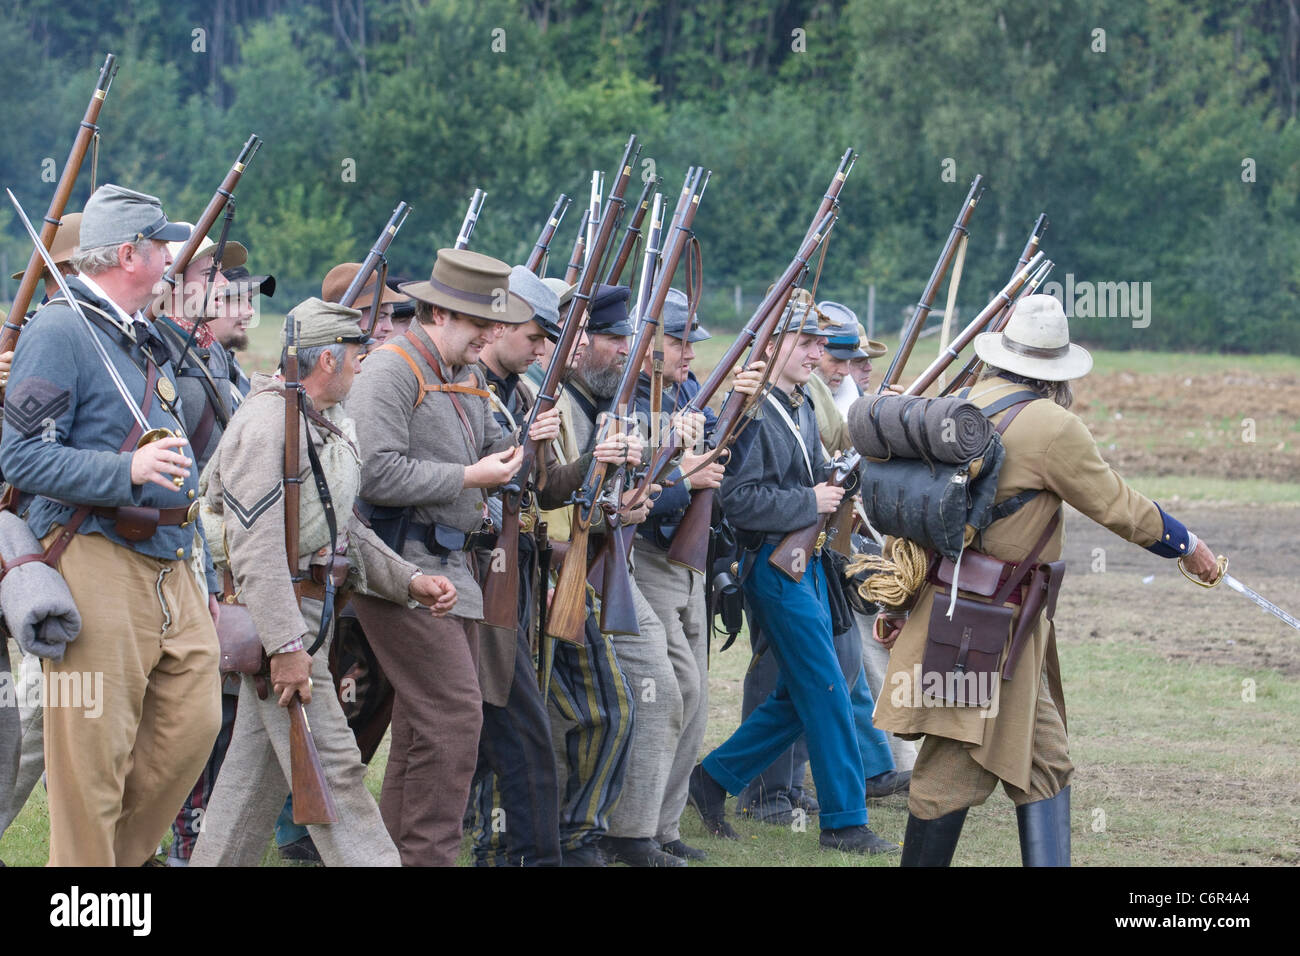
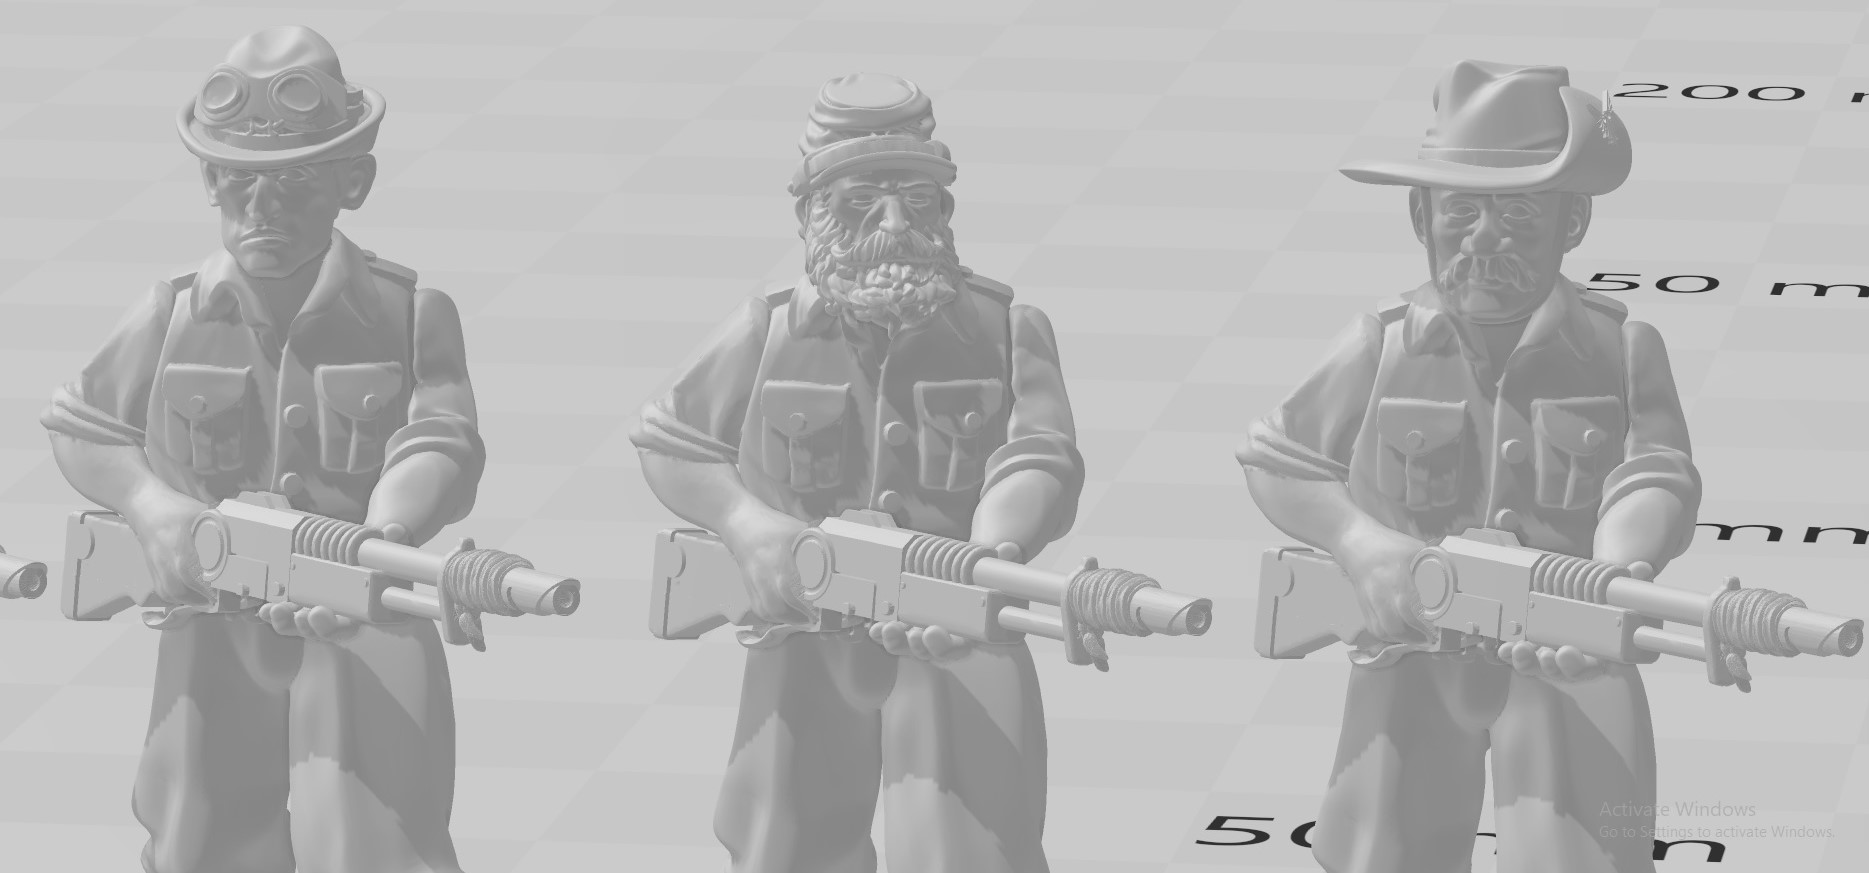 These pictures are all of the same body but you can see how the different heads add a lot of character to a squad. They're a unit but they are also a lot more individual. I envision this being a Desert/Tropical uniform (must be the Australian Influence coming through) also inspired by some of the less uniformed armies of history like the Confederates.
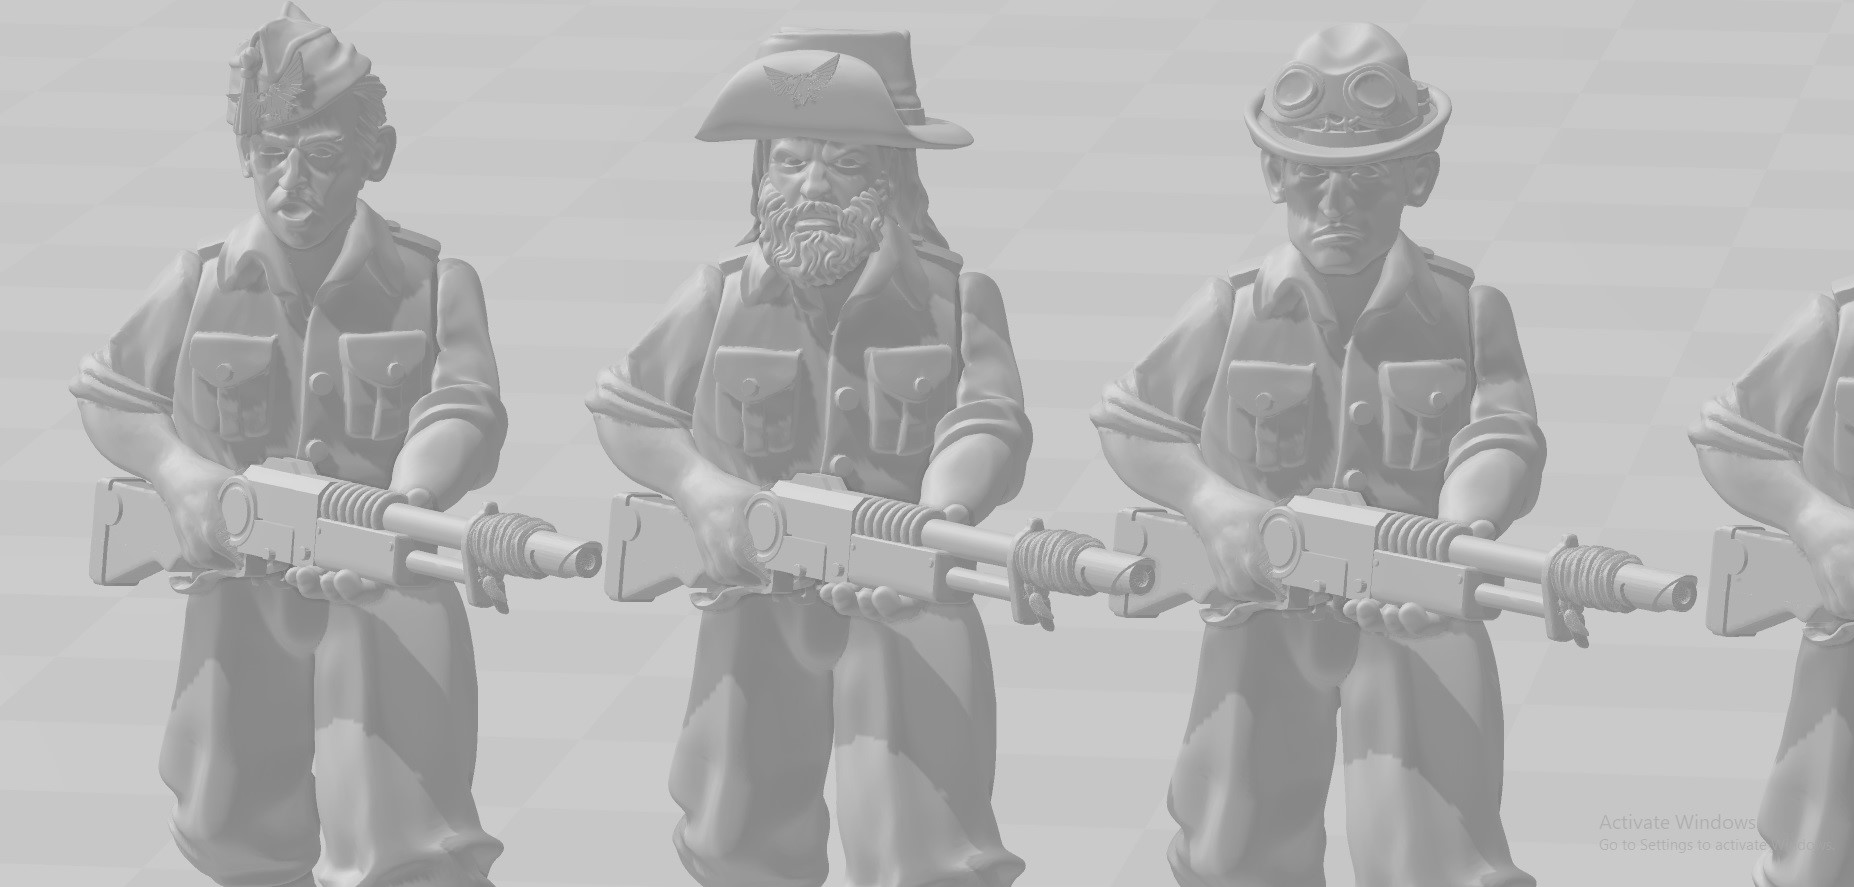
 Here you can see the kind of effect I'm going for. My troops will be in uniformed clothing but I wanted to capture that unique headwear feel


